SCHEDULES
Creating a Schedules Project
Within the designed solution, the Schedules field can be used and a request can be sent to the rest service added to the data source of the project at specified intervals at a certain time interval.
To do this, a new item must first be added to the Schedules section in the Solution Explorer panel in the project in the development interface (IDE)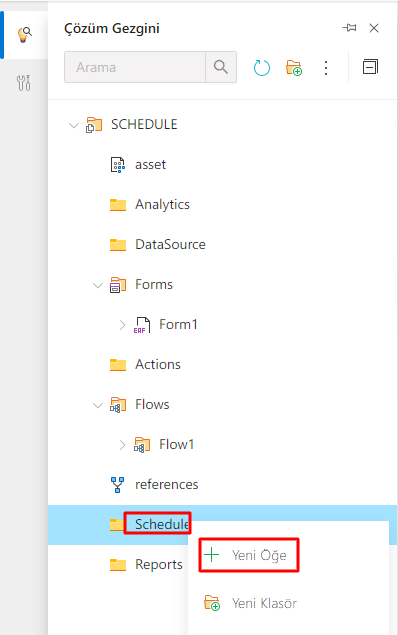 The Scheduler option is selected in the pop-up window to be opened by clicking on the New Item option and the desired plan name is written in the name section.
 The created Schedule element contains two different fields, Jobs and Calendars. The Jobs section defines the event that is desired to run and the trigger for the event, while the Calendars section must enter the desired date range for the trigger that the event defined in the Job section uses is not active.
Jobs Section and Adding New Jobs in Created Schedule
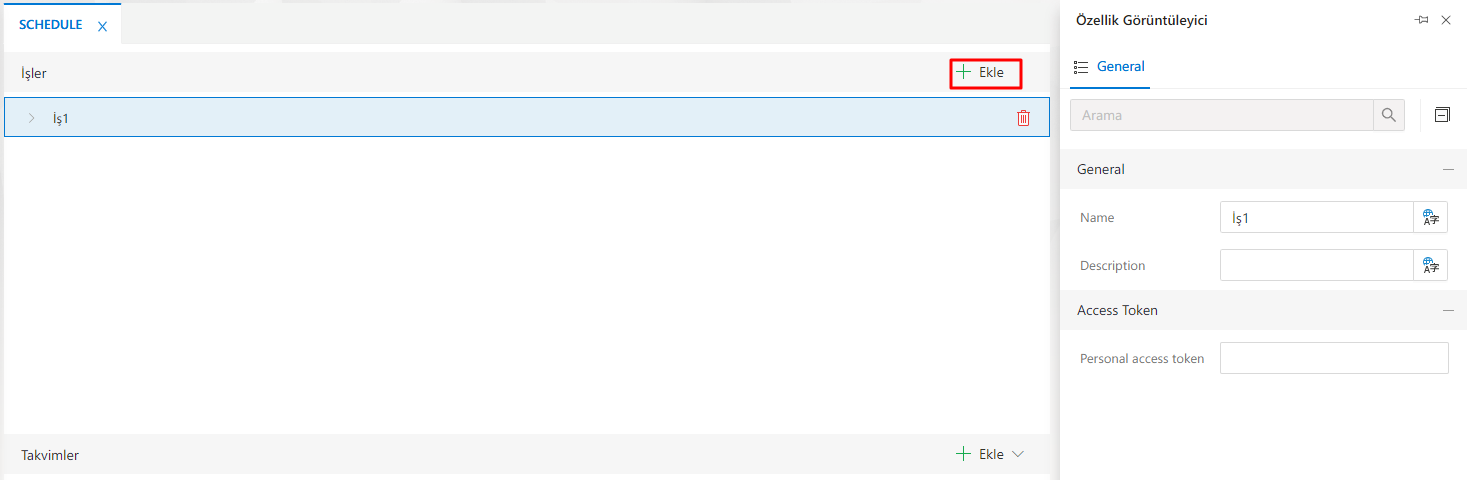
In the schedule element added to the project, new work is added by clicking the Add button on the Jobs tab.
 There are two different tabs in the added "Job", Actions and Triggers. When defining the desired work to be done in the Actions area (Action Calling Method/Action Calling RestApi/Action Initiating Flow Caller Action), the Triggers field defines the type of run of the added action (Simple trigger/Daily time interval trigger/Cron trigger).
The added business area has three fields: Name, Description, and Personal Access Key.
• Name: This is the field where the name defined for the job will be entered. Supports multi-language input.
• Description: The field such as a brief description of what task the job does. Supports multi-language input.
• Personal Access Key: This is the area where the Personal Access Key obtained from the Proxy and Personal Access Keys section in the My Account section of the web interface is written. An access key suitable for the operation to be performed will be produced and used in this area.
Note : If the personal access key is not defined, or if the key is generated with incorrect/insufficient authorization, the defined job will not work.
It is possible to define more than one job within the Jobs section. Within each new job to be created, different actions and triggers can be defined. When creating a new job, a personal access key must be defined for each job.
There are two different tabs in the added "Job", Actions and Triggers. When defining the desired work to be done in the Actions area (Action Calling Method/Action Calling RestApi/Action Initiating Flow Caller Action), the Triggers field defines the type of run of the added action (Simple trigger/Daily time interval trigger/Cron trigger).
The added business area has three fields: Name, Description, and Personal Access Key.
• Name: This is the field where the name defined for the job will be entered. Supports multi-language input.
• Description: The field such as a brief description of what task the job does. Supports multi-language input.
• Personal Access Key: This is the area where the Personal Access Key obtained from the Proxy and Personal Access Keys section in the My Account section of the web interface is written. An access key suitable for the operation to be performed will be produced and used in this area.
Note : If the personal access key is not defined, or if the key is generated with incorrect/insufficient authorization, the defined job will not work.
It is possible to define more than one job within the Jobs section. Within each new job to be created, different actions and triggers can be defined. When creating a new job, a personal access key must be defined for each job.
Add a New Action
Click the Add button on the Actions tab, select the action that is desired to run. When the button is clicked, the options of Method Caller Action, RestApi Caller Action, and Flow Start Caller Action are listed.
Method Caller Action
This action type can be used if you want to use the method written in a DLL file loaded in the Document Management section.
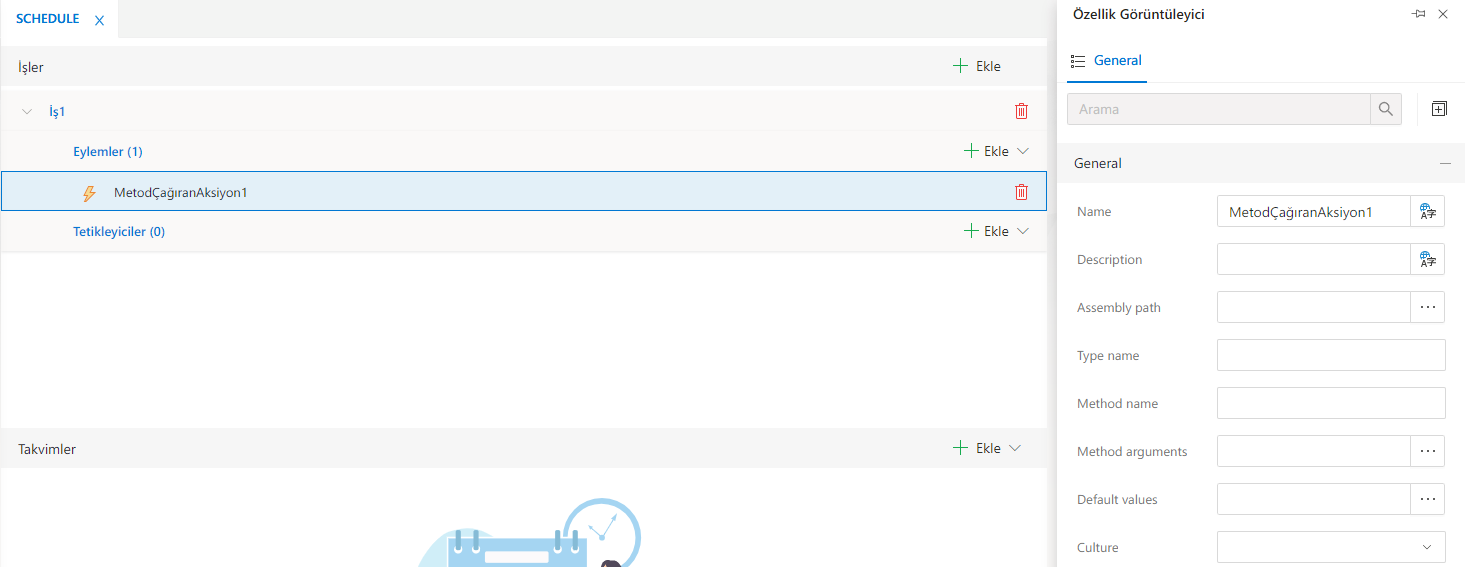 When a Method Calling Action is added to the Actions area, the fields listed in the Property Viewer section of the item are:
|AD|Requirement|
|-|-|
|Name| It is used to identify the name that is intended to be given to the action. Supports multi-language input.|
|Description| It is used to describe the description that the action makes. Supports multi-language input.|
|Assembly path| In the directory panel that opens when the field is clicked, the DLL file to be run in the action must be selected in document management.|
|Type name| The namespace and class information containing the method to be executed in the DLL file should be written by combining it with a dot pointer. For example, in the DDL file, if the namespace expression is Bimser, and the class is Synergy, then Bimser.Synergy should be written in the field.|
|Method name| The field in which the name of the method to be executed in the class is typed.|
|Method arguments | If the parameter takes values, the method information that is defined in the Method Name field is used to identify the parameters. Based on the arguments given, based on the method name field, it will be used in the corresponding overload.|
|Default values| If the ctor (constructor) parameter of the same name in the class element in the DLL file takes values, it is used to define these values.|
When a Method Calling Action is added to the Actions area, the fields listed in the Property Viewer section of the item are:
|AD|Requirement|
|-|-|
|Name| It is used to identify the name that is intended to be given to the action. Supports multi-language input.|
|Description| It is used to describe the description that the action makes. Supports multi-language input.|
|Assembly path| In the directory panel that opens when the field is clicked, the DLL file to be run in the action must be selected in document management.|
|Type name| The namespace and class information containing the method to be executed in the DLL file should be written by combining it with a dot pointer. For example, in the DDL file, if the namespace expression is Bimser, and the class is Synergy, then Bimser.Synergy should be written in the field.|
|Method name| The field in which the name of the method to be executed in the class is typed.|
|Method arguments | If the parameter takes values, the method information that is defined in the Method Name field is used to identify the parameters. Based on the arguments given, based on the method name field, it will be used in the corresponding overload.|
|Default values| If the ctor (constructor) parameter of the same name in the class element in the DLL file takes values, it is used to define these values.|
The DLL file selection operation is performed within the assembly path, the type name was written by combining the namespace and class name in the DLL file. If the method that is desired to work in the method name needs how many parameters, the appropriate methods are executed according to the parameters written in the field of method cells. It can be sent by creating parameters in the "Json Editor" with the parameter names defined in ctor (Constructor). Note 1: The default values field is not a mandatory field for the action to run, it can be used if ctor is defined in the dll and it is desired to run. Note 2: If ctor and method are present in the DLL content and parameter information is defined in the default values and method arguments fields, the entered method name is executed by overloading. ctor does not run.
Action Calling RestApi
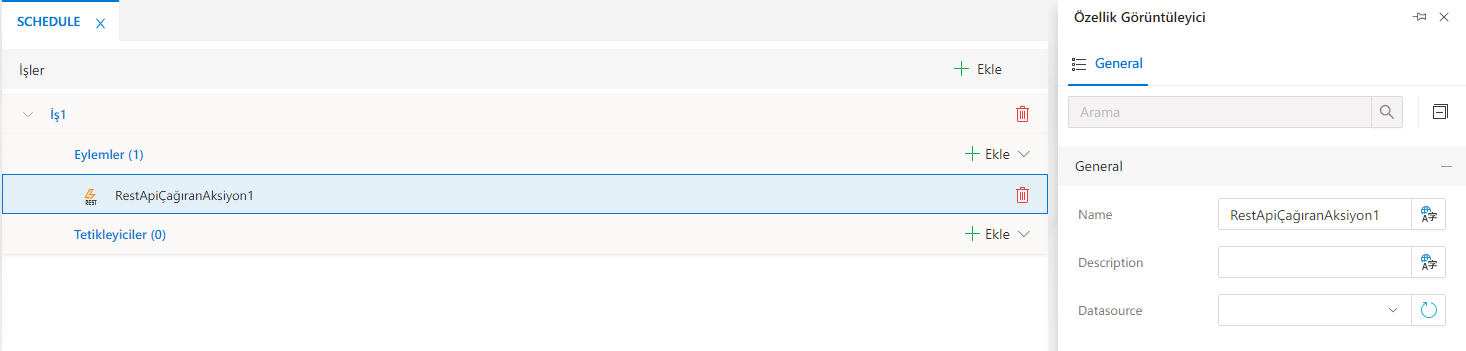 The action's property viewer panel includes the Name, Description, and Data source options.
• Name: Used to identify the name of the added action. Supports multi-language input.
• Description: Used to enter information about what the added action does. Supports multi-language input.
• Data source: This is the area where the Rest data source that the action will use while running is selected. Lists the REST Query-type items that have been added to the project's DataSource area.
The action's property viewer panel includes the Name, Description, and Data source options.
• Name: Used to identify the name of the added action. Supports multi-language input.
• Description: Used to enter information about what the added action does. Supports multi-language input.
• Data source: This is the area where the Rest data source that the action will use while running is selected. Lists the REST Query-type items that have been added to the project's DataSource area.
Initiation Flow Caller Action
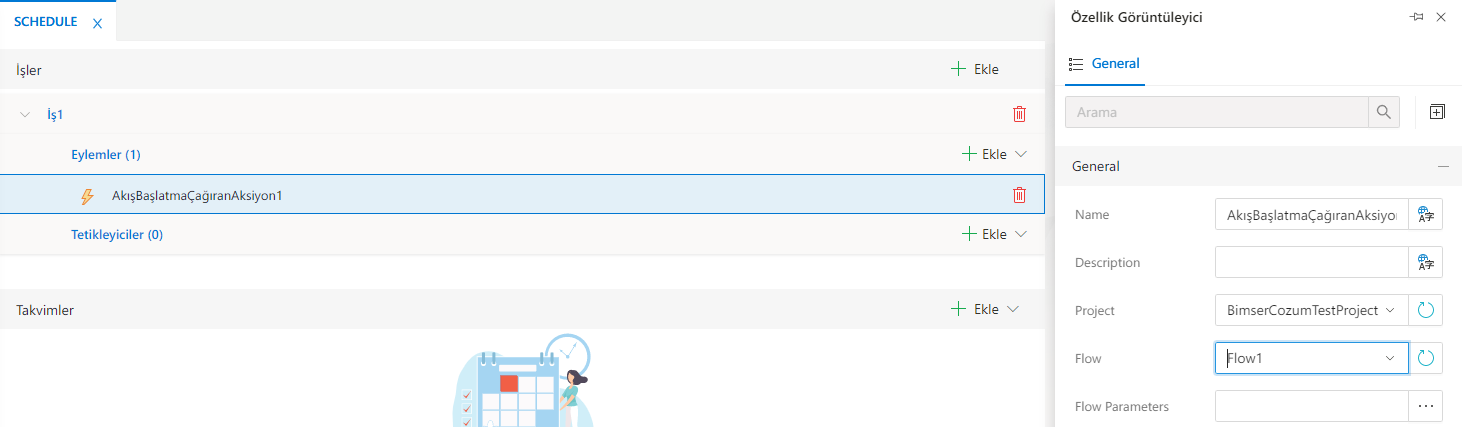 When the action option that invokes flow initialization is clicked, the item is added into the action.
• Name: Used to identify the name intended to be given to the action. Supports multi-language input.
• Description: Used to describe the description that the action makes. It supports multi-language input.
• Project: The process to be started in the system should be selected.
• Flow: Appears by selecting in the Project area. The Projects area lists the flows that are available for the selected project.
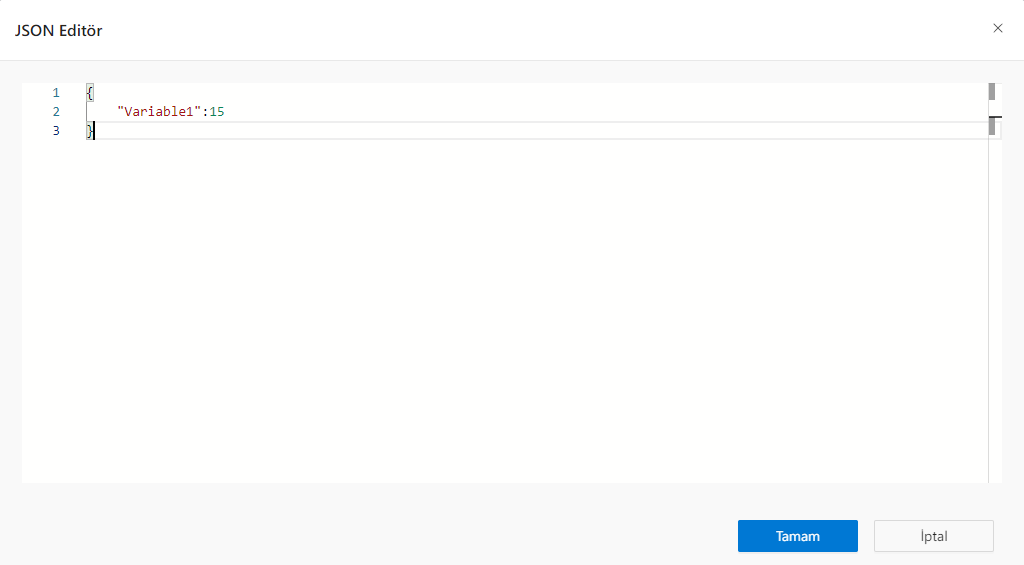
• Flow Parameters: Appears by selecting in the flow field. It is used if you want to send values to variable objects in the selected stream. When defining, variables typed in the panel must have the General option in the Property Viewer panel active.
When the action option that invokes flow initialization is clicked, the item is added into the action.
• Name: Used to identify the name intended to be given to the action. Supports multi-language input.
• Description: Used to describe the description that the action makes. It supports multi-language input.
• Project: The process to be started in the system should be selected.
• Flow: Appears by selecting in the Project area. The Projects area lists the flows that are available for the selected project.
• Flow Parameters: Appears by selecting in the flow field. It is used if you want to send values to variable objects in the selected stream. When defining, variables typed in the panel must have the General option in the Property Viewer panel active.
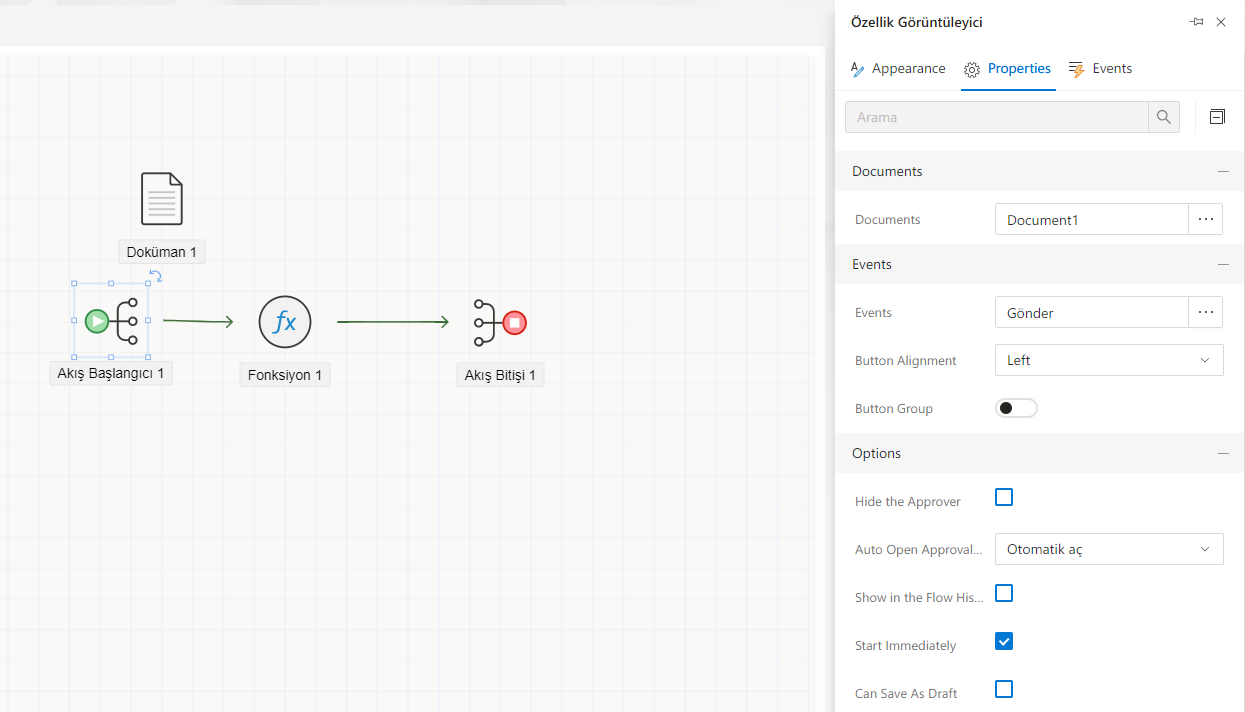
 Note: When using the Flow Start Caller action, the Document field content must be empty and the Start Immediately option must be active in the Start Flow object in the selected flow. After the Start of Flow object, the new form is created using the Create Document object and the existing form is defined.
Add a trigger
Clicking the Add button on the Triggers tab selects the work plan shape of the action defined in the job.
Simple Trigger
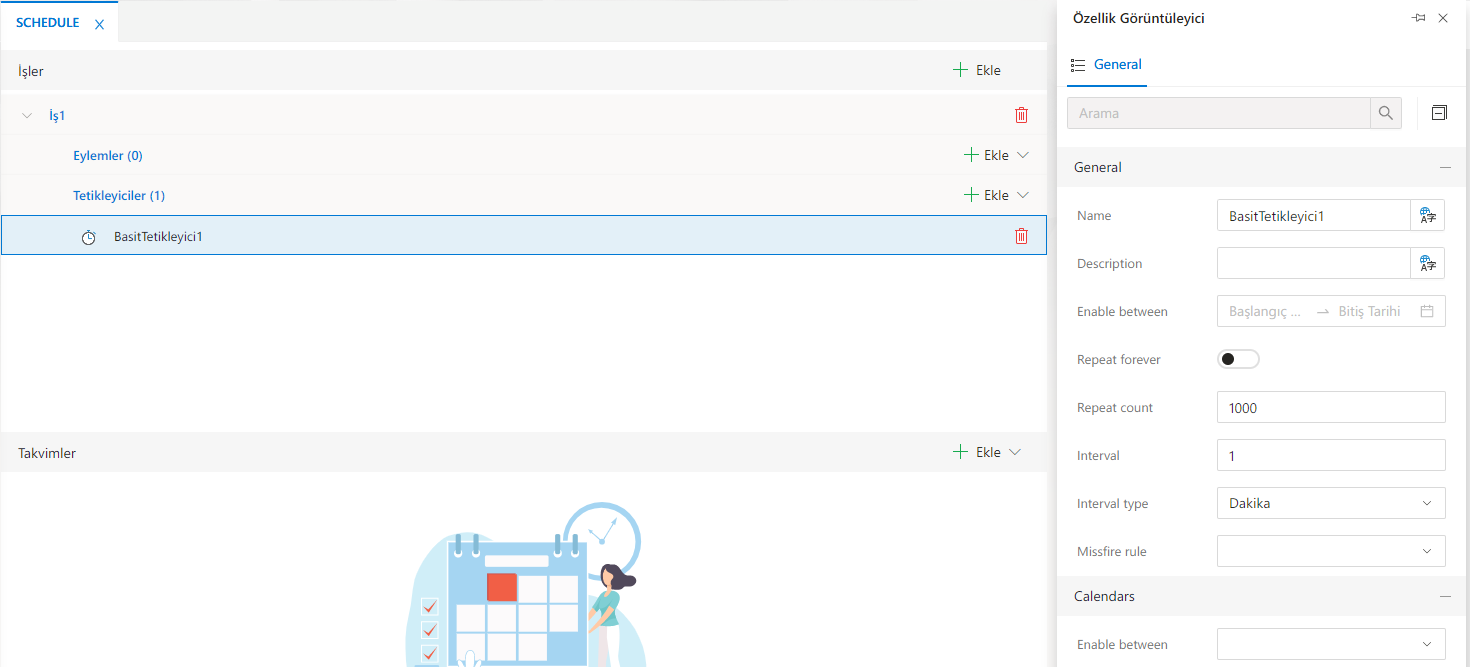
The Simple trigger element is used when a job needs to be executed exactly once at a specific time or at a specific moment and then repeated at a specific interval. For example, if the trigger is intended to be triggered only once on June 1, 2023, or at regular intervals on that day. When the trigger is added, there are two different definition fields in the Property Viewer panel, General and Calendars.
 General
|Name|Description|
|-|-|
|Name| The field in which the name defined for the trigger is changed. Supports multi-language input.|
| Description| It is the field where information about what the trigger does is entered. Supports multi-language input.|
|Enable interfer|This is the area where the time range for the trigger is scheduled to run is selected. The trigger will be active within the date range selected in the field|.
| Repeat over and over again| If it is active, the number of repetitions section is deactivated and continuous triggering occurs with reference to the Range and Interval type during the date range entered in the "Enable interval" section.|
| Number of repetitions|The value can be entered when the Repeat continuously section value is inactive. In the Enable break section, a specified number of triggers are made with reference to the range and range type in the date range entered.|
|December|This is the field where the operating interval value of the trigger is defined, the number value is entered.|
|Range type|This is the field where the operating range type of the trigger is selected. The selectable values are Minutes, Hours, Days.|
|Missfire rule|If the trigger misses the runtime for any reason, the choice of which operation to take is made.|
General
|Name|Description|
|-|-|
|Name| The field in which the name defined for the trigger is changed. Supports multi-language input.|
| Description| It is the field where information about what the trigger does is entered. Supports multi-language input.|
|Enable interfer|This is the area where the time range for the trigger is scheduled to run is selected. The trigger will be active within the date range selected in the field|.
| Repeat over and over again| If it is active, the number of repetitions section is deactivated and continuous triggering occurs with reference to the Range and Interval type during the date range entered in the "Enable interval" section.|
| Number of repetitions|The value can be entered when the Repeat continuously section value is inactive. In the Enable break section, a specified number of triggers are made with reference to the range and range type in the date range entered.|
|December|This is the field where the operating interval value of the trigger is defined, the number value is entered.|
|Range type|This is the field where the operating range type of the trigger is selected. The selectable values are Minutes, Hours, Days.|
|Missfire rule|If the trigger misses the runtime for any reason, the choice of which operation to take is made.|
Simple Non-Recurring Trigger Action Based on Missfire Rule Selection |Name|Description| |-|-| |FireNow| The job is executed immediately after discovering the missfire of the scheduler. Example scenario: You scheduled a process to run every 15 minutes using an action that invokes flow initialization. But the app was closed for 30 minutes due to maintenance. Therefore, a misfire condition occurs and the scheduler tries to recover from the state by running it as soon as possible.| |Ignore|The job is executed immediately after discovering that the scheduler is not firing (missfire).| |NextWithExistingCount| It does nothing, triggers that do not fire are not taken into account, and there is no next ignition trigger. This option is used when it is desired to completely discard the misfired trigger. Example scenario: The trigger was supposed to start an operation. There is no point in starting the process when the trigger operation is error-infested and the operation of the process is delayed by 2 hours.| |NowWithExistingCount| The job is executed immediately after discovering that the scheduler is not firing (missfire).| |NowWithRemainingCount|The job is executed immediately after the scheduler discovers a missfire.| Simple Trigger Definition with a Fixed Number of Repetitions to Execute Based on the Missfire Rule Selection |Name|Description| |-|-| |FireNow| The first non-fired misfire is run immediately. The remaining non-fired work is not taken into account. The remaining unfired triggers will continue to run at defined intervals.| |Ignore|It triggers all missed triggers as soon as possible and then returns to the normal schedule. Example scenario: Suppose a trigger that runs every hour starting at 9 A.M. and ending at 4:00 P.M. fails to trigger at 9 and 10 A.M. and is noticed at 10:15 A.M. The scheduler will immediately trigger scheduled jobs at 9 and 10 a.m. Then it will wait until 11 o'clock and return to the normal schedule.| |NextWithExistingCount| The scheduler does nothing right away. Instead, it waits for the next scheduled time and runs all triggers at scheduled intervals. In addition; The planner discards triggers that don't fire and waits for the next scheduled time. The total number of triggers will be less than the specified number. For example, at 10:15 a.m., two incorrect triggers are cornered. The scheduler waits for the next scheduled time (11:00) and triggers the remaining triggers by 4:00 PM. Effectively the misfire acts as if the misfire never happened.| |NextWithRemainingCount|The planner throws the unfiring triggers into a corner and waits for the next scheduled time. The total number of trigger runs will be less than the configured one.| |NowWithExistingCount| The trigger that does not fire first is activated immediately. The scheduler then waits for the requested interval and executes all remaining triggers. The trigger that is not currently firing will move the run time to the current time without further change.| |NowWithRemainingCount|The trigger that doesn't fire first runs immediately. The remaining unfired triggers are thrown into a corner. Unfired triggers are fired at the desired interval.|
Simple Trigger Definition with Infinite Repetitions to Execute Based on Missfire Rule Selection |Name|Description| |-|-| | FireNow| The first non-fired misfire is run immediately. The rest are not taken into account. The next triggering occurs after the defined interval. Currently, the first execution time is moved to the current time.| |Ignore|The Scheduler will immediately run all incorrectly triggered triggers and then proceed according to schedule.| | NextWithExistingCount| It does nothing, triggers that don't fire are thrown into a corner. The planner then waits for the next scheduled interval and returns to the made schedule.| |NextWithRemainingCount|It does nothing, triggers that don't fire are thrown into a corner. The planner then waits for the next scheduled interval and returns to the made schedule.| |NowWithExistingCount| The trigger, which does not fire the first, is activated immediately, the rest is cornered. The next run occurs after the requested interval. To be valid, the first execution time is moved to the current time.| |NowWithRemainingCount|The trigger that doesn't fire first is executed immediately, the rest is cornered. The next run occurs after the requested interval. To be valid, the first execution time is moved to the current time.| Calendars Enable tween: This is the field where the item content (Daily, Weekly, Monthly, Holiday, Yearly, Cron) added to the Calendars section of the Schedule plan is selected. Based on the calendar item selected in Trigger, the trigger will not work during the defined time interval in the calendar.
Daily Time Range Trigger
The daily time interval is used to exclude blocks of time from the trigger's firing schedule, using the trigger. For example, a trigger can be created that starts a job every weekday at 9:30 A.M., and a Calendar can be added in it that excludes all of the organization's holidays. General |Name|Description| |-|-| |Name|The field in which the name defined for the trigger is changed. Supports multi-language input.| | Description| It is the field where information about what the trigger does is entered. Supports multi-language input.| |Enable interfer| This is the area where the time range for the trigger is scheduled to run is selected. The trigger will be active within the selected date range in the field.| Scheduler |Name|Description| |-|-| |December| This is the field where the trigger's operating interval value is selected. The value in the field is selected as Hour:Minute:Seconds.| |Daily Start/End time | Used to determine the time interval at which the trigger runs. For example, if you want a certain action to run between 09:00 and 18:00 every day, the field should be selected as 09:00:00-18:00:00.| |Run every day| If the selection in the field is active, all of them will be detected as checked and will run, even if the days in the Run field on the selected days are unchecked. When activated, the Run on selected days field becomes unclickable.| |Number of repetitions| Based on the value entered in the field, the number of values is triggered. (In case there is no misfire)| |Run on selected days|This is the area where the days on which the trigger is desired to run are selected.| | Missfire rule| If the trigger misses the runtime for any reason, the choice of which action to take is made. The field includes the DoNothing, FireAndProceed, and Ignore options. DoNothing: All unfired triggers are thrown into a corner, the scheduler just waits for the next scheduled time. FireAndProceed: Immediately fires the first non-firing trigger and assigns the others to a corner (that is, all the non-firing triggers are combined). Then it returns to the program made. No matter how many trigger firs are missed, only one trigger is fired.Ignore: All non-firing triggers are executed immediately, then the trigger runs according to the schedule.| |Time zone| An area that determines the time zone in which the time in which the trigger will run is calculated. For example, if 09:00-18:00 is selected in the Daily Start/End time field, and UTC+03 is selected in the Time zone, and the server where the system is located is running at UTC+03, the trigger operation interval will be 09:00-18:00. However, if the time zone is UTC-03 Greenland and the server running the system is set to UTC+03, the values in the start/end time will work in the range of 15:00-03:00 UTC+03. (Istanbul time will be 15:00 and Greenland will be 09:00)|
Calendars
- Enable tween: This is the field where the item content (Daily, Weekly, Monthly, Holiday, Yearly, Cron) added to the Calendars section of the Schedule plan is selected. Based on the calendar item selected in Trigger, the trigger will not work during the defined time interval in the calendar.
Cron Trigger
If you need a recurring job start schedule based on calendar-like concepts instead of the exact specified intervals of the simple trigger, the Cron trigger is usually more useful than the simple trigger. With the Cron trigger, you can set firing schedules such as "every Friday at noon" or "every weekday and 9:30 a.m.," or even "every 5 minutes between 9:00 a.m. and 10:00 a.m. every Monday, Wednesday, and Friday throughout the month of January."
General |Name|Description| |-|-| | Name|The field in which the name defined for the trigger is changed. Supports multi-language input.| |Description| It is the field where information about what the trigger does is entered. Supports multi-language input.| | Enable interfer| This is the area where the time range for the trigger is scheduled to run is selected. The trigger will be active within the selected date range in the field.| | Expression| It is the area where the cron expression is written that will determine the way it works.| |Missfire rule| If the trigger misses the working time for any reason, the choice of which operation to perform is made. The field includes the DoNothing, FireAndProceed, and Ignore options. DoNothing: All unfired triggers are thrown into a corner, the scheduler just waits for the next scheduled time. FireAndProceed : Immediately executes the first non-firing trigger and assigns the others to one corner (that is, all the non-firing triggers are combined). Then it returns to the program made. No matter how many trigger firings are missed, only one trigger is performed. Ignore: All non-firing triggers are executed immediately, then run according to the triggered schedule.| | Time zone| An area that determines the time zone in which the time in which the trigger will run is calculated. For example, if the Expression field defines cron as 12:00 noon every day, the trigger will run at 12:00 A.M. if UTC+03 is selected in the time zone and the server where the system is located is running at UTC+03. However, if UTC-03 Greenland is selected for the time zone and the server on which the system is running is set to UTC+03, according to cron expression, the trigger will be activated when it is 12:00 noon in Greenland (UTC-03), that is, 18:00 in Istanbul.|
Some Cron Examples |Cron Text |Description| |-|-| |0 * ? |Every minute| |0/30? | Every 30 minutes| |0 0 ? * |Every hour| | 0 0 /12 ? * | Every 12 hours| |0 0 0 ?|Every day at midnight| | 0 0 6 ?| Every day at 6 a.m. | |0 0 12 ?|Every day at 12 noon | | 0 0 12 ? | MON Every Monday at 12 noon | |0 0 12 ? MON-FRI|Every weekday at 12 noon | | 0 0 12 ? SUN,SELL| Every weekend at 12 noon | |0 0 12 15 ?|Every 15th of the month at 12 noon | | 0 0 12 LW ?| Last weekday of each month at 12 noon | |0 0 12 1L ?|Last Sunday of every month at 12 noon | | 0 0 12 6L ?| Last Friday of every month at 12 noon | |0 0 12 1W ?|The closest weekday to the 1st of the month each month is at 12 noon| | 0 0 12 15W ?| The closest weekday to the 15th of the month every month is at 12 noon| |0 0 12 ? 2#1|First Monday of every month at 12 noon| | 0 0 12 ? 6#1| First Friday of every month at 12 noon| |0 0 12 ? JAN| Every day at 12 noon during the month of January | | 0 0 12 ? JAN,JUN | Every day during the month of January and June at 12 noon| |0 0 12 ? 9-12*|Every day from September to December at noon |
Calendars • Enable tween: This is the field where the item content (Daily, Weekly, Monthly, Holiday, Yearly, Cron) added to the Calendars section of the Schedule plan is selected. According to the calendar item selected in Trigger, the trigger will not work during the defined time interval in the calendar
Defining Items in the Calendars Section in the Created Schedule
If the created Schedule plan is desired to have dates that are not required to work within the desired time interval, these dates are created from the Calendars section. In the window that opens when clicking the Add button on the Calendars tab, the items that can be selected are Daily, Weekly, Monthly, Holiday, Yearly and Cron.
Daily
| Name | Description |
|---|---|
| Name | A field in which the name defined for the calendar is changed. Supports multi-language input. |
| Description | It is the field where information about what the calendar does is entered. Supports multi-language input. |
| Daily Start/End time | A field from which the time range for which the calendar is valid is selected. The value in the field is selected as Hours:Minutes:Seconds. For example, if a certain action is to be prevented from running between 09:00 and 18:00 every day, the field should be selected as 09:00:00-18:00:00. |
| Time zone | The time field in which the daily calendar item will be defined, and the time zone in which the value selected in the Daily start/end time field is calculated is determined. |
Weekly
| Name | Description |
|---|---|
| Name | A field in which the name defined for the calendar is changed. Supports multi-language input. |
| Description | It is the field where information about what the calendar does is entered. Supports multi-language input. |
| Excluded days | This is the area where selection determines which days will not work within the trigger. |
| Time zone | An area that specifies the time zone in which the calendar will be defined. |
Monthly
| Name | Description |
|---|---|
| Name | A field in which the name defined for the calendar is changed. Supports multi-language input. |
| Description | It is the field where information about what the calendar does is entered. Supports multi-language input. |
| Excluded days | A field in which a selection of listed days determines which days are not included in the calendar. |
| Time zone | The area in which the time period in which the calendar will be defined is specified. |
Holiday
| Name | Description |
|---|---|
| Name | A field in which the name defined for the calendar is changed. Supports multi-language input. |
| Description | It is the field where information about what the calendar does is entered. Supports multi-language input. |
| Excluded days | The days to be excluded are defined by the selection to be made in the field. A day can be defined in it, excluding more than one. |
| Time zone | The area in which the time period in which the calendar will be defined is specified. |
Yearly
| Name | Description |
|---|---|
| Name | A field in which the name defined for the calendar is changed. Supports multi-language input. |
| Description | It is the field where information about what the calendar does is entered. Supports multi-language input. |
| Excluded days | The days to be excluded are defined by the selection to be made in the field. A day can be defined in it except for more than one. |
| Time zone | The area in which the time period in which the calendar will be defined is specified. |
Cron
| Name | Description |
|---|---|
| Name | A field in which the name defined for the calendar is changed. Supports multi-language input. |
| Description | It is the field where information about what the calendar does is entered. Supports multi-language input. |
| Expression | This is the field where the cron expression is written that the calendar will be valid. |
| Time zone | The area in which the time period in which the calendar will be defined is specified. |