Import / Export
Project transfers between Synergy environments can be easily performed by providing the necessary arrangements during the transfer.
Export
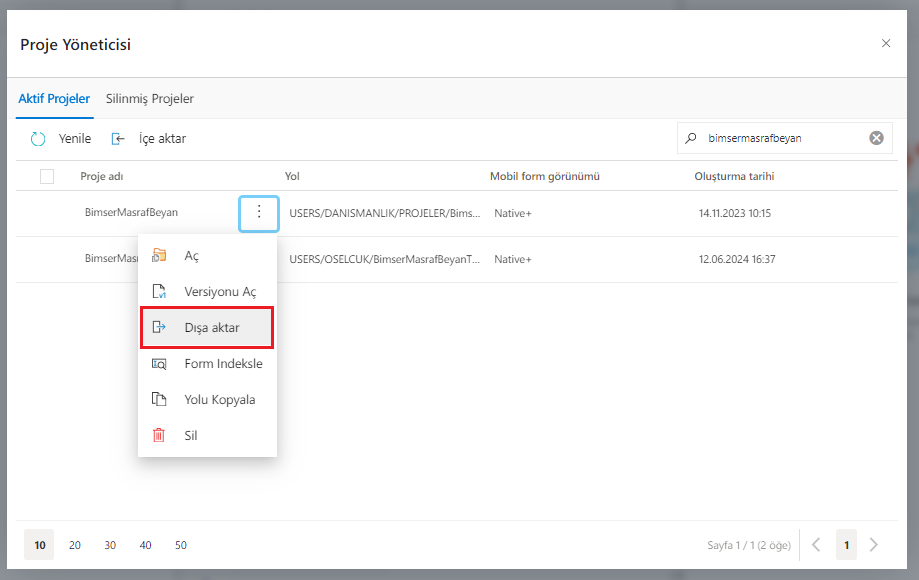
To export your project, go to the IDE screen, Open the Project Manager under the Tools menu at the top.

The project to be exported is searched and selected, the project compressed file (with tar.gz extension) is downloaded to the device by clicking the Export button.
Import
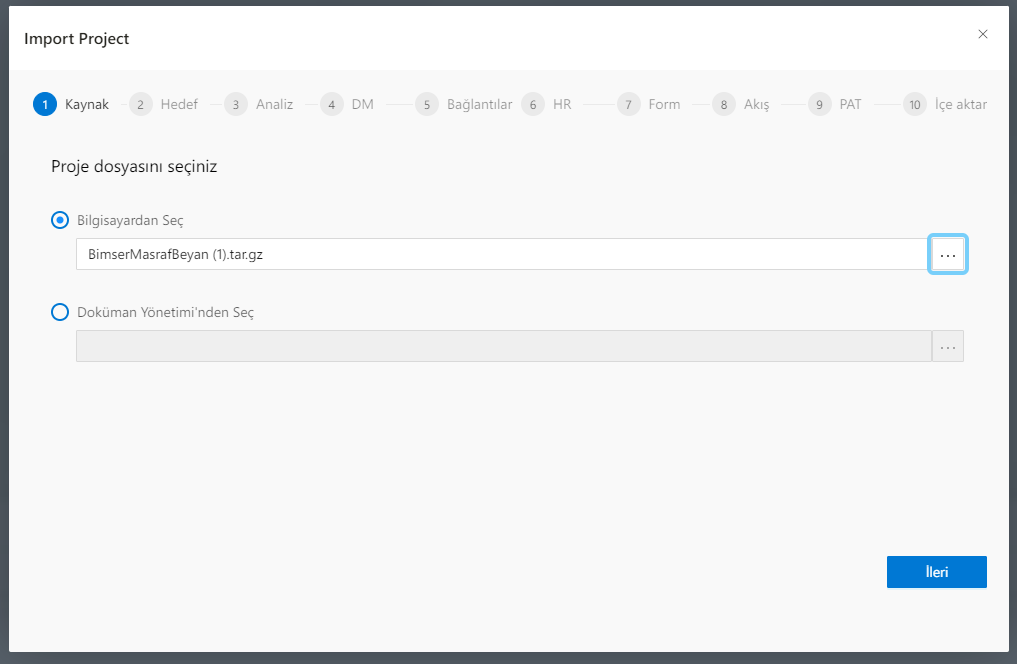
In order to move the exported project to the desired environment, go to the Project Manager in the environment to be moved and click the Import button. Then, step by step, the transfer stages of the project are followed.
1.Ad My: Project Source Selection The compressed file of the exported project with tar.gz extension is selected to be selected from the device or Document management.
2.Ad My: Target Directory Selection It proceeds according to whether the project is an existing project in the environment or a new project, if the project name selected in the source is present in the target, the overwrite the existing project option is automatically selected. If it does not exist, export as a new project is selected and the directory to save the project folder to in Document management in the target environment is selected.

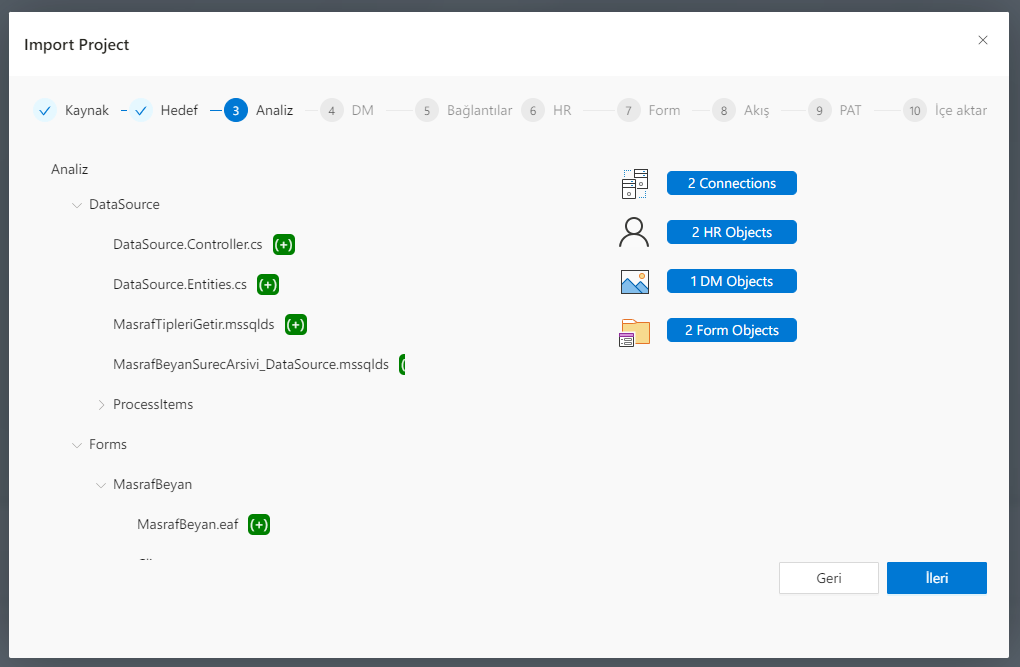
My 3.Ad: Analysis In the breakdown structure on the left, there is information about what kind of changes are made in which files of the project. On the right, the items covered by the project are listed.
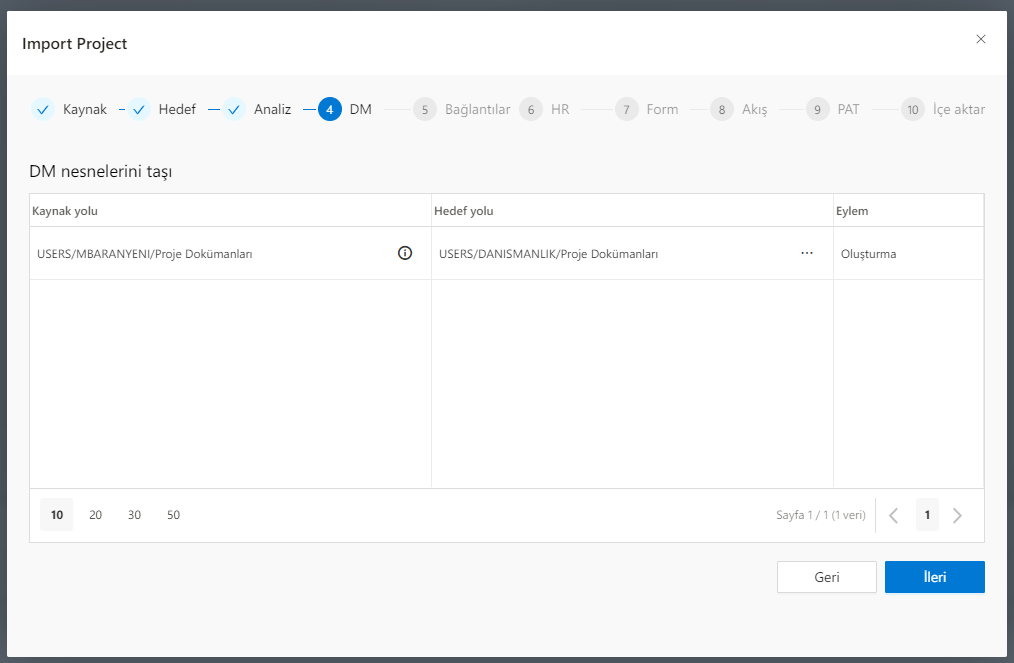
My 4.Ad: DM Directory Changes A change is made to which directory the objects hosted in the project's directory in the source environment will be kept in the target environment. By hovering over the information icon (🛈) on the right side of the directory in the source path, information about where this object is used in the project is found. For example: /Forms/ExpenseDetailForm/ExpenseDetailForm.eaf - RdExpenseDocuments This example shows the directory information of the form of ExpenseDetailForm in the project's associated document object named RdExpenseDocuments. In this way, DM directory changes are provided during transfer, making project objects compatible with the target environment.
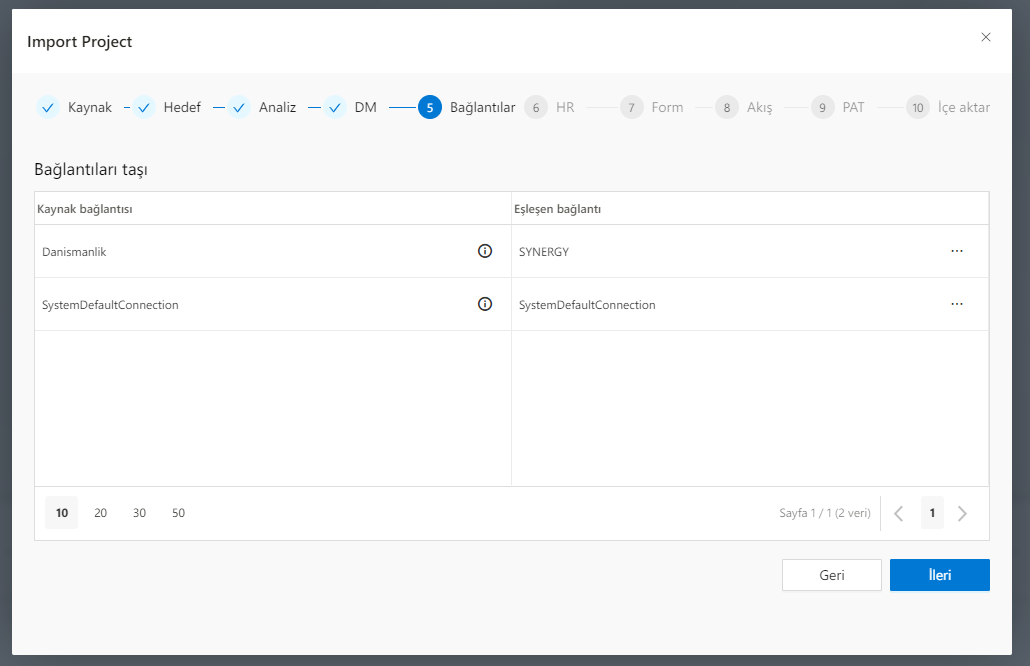
My 5.Ad: Links
What type of Connection information the queries under DataSource in the project's source environment contains, and the name of the connection source is listed under Source Connection. Hovering over the information icon (🛈) shows which queries are.
For example: /DataSource/FetchChargeTypes.mssqlds - FetchChargeTypes, /DataSource/MasrafBeyanSurecArsivi_DataSource.mssqlds - MasrafBeyanSurecArsivi_DataSource
All 2 queries in the example use the Consulting link in the Source.
Over the matching connection, it is selected with which connection source the relevant connections will be made in the target environment.
By moving the connection resources, dynamically sourced objects in projects are easily compatible in the transition from the Test environment to the Live environment.
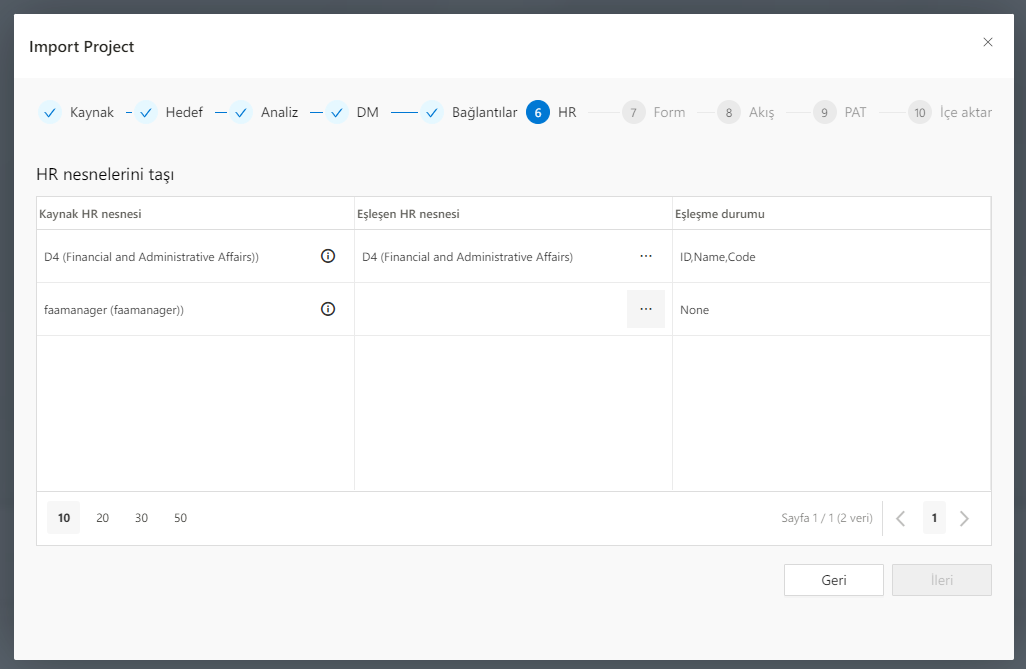
My 6.Ad: HR A match is made between the data in Human Resources of objects such as Position, Title, Department, Position Group used on the Flow side of the project in the source environment and the Human Resources data in the target environment.
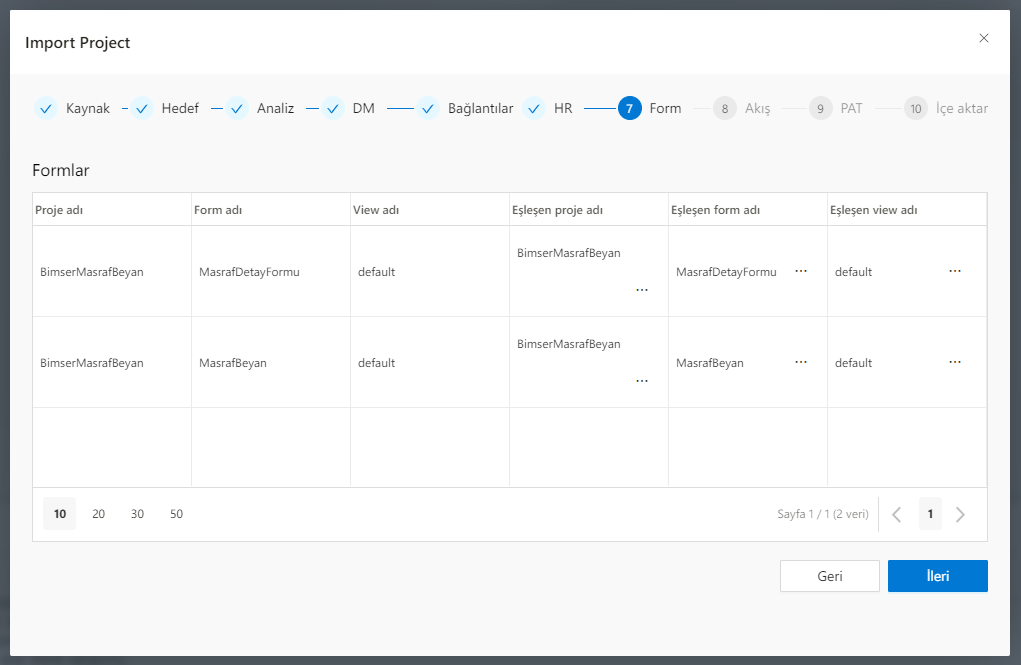
My 7.Ad: Form
Matching is provided between the Project, Forms and views in the source environment and those in the target environment.
My 8.Ad: Streaming Matching is provided between the Projects and Flows in the Source environment and those in the Target environment.
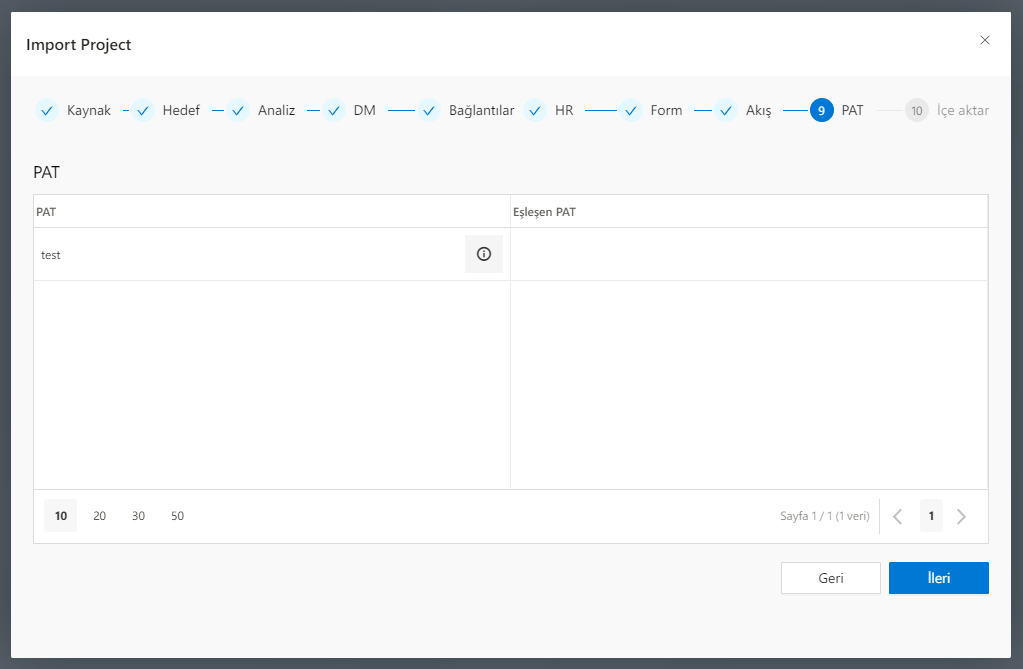
9.Ad my: PAT(Personal Access Token)
If any Job is defined in the Schedules section of the project, the equivalent of the Access key (Personal access token) defined for this job in the target environment must be specified. By hovering over the information icon (🛈) on the source pat, information about which Schedule Job is displayed appears.
For example: /Schedules/Test.sch - Work1
This is the field where the access key in the target environment is entered, rather than the access key required for the job in the example.
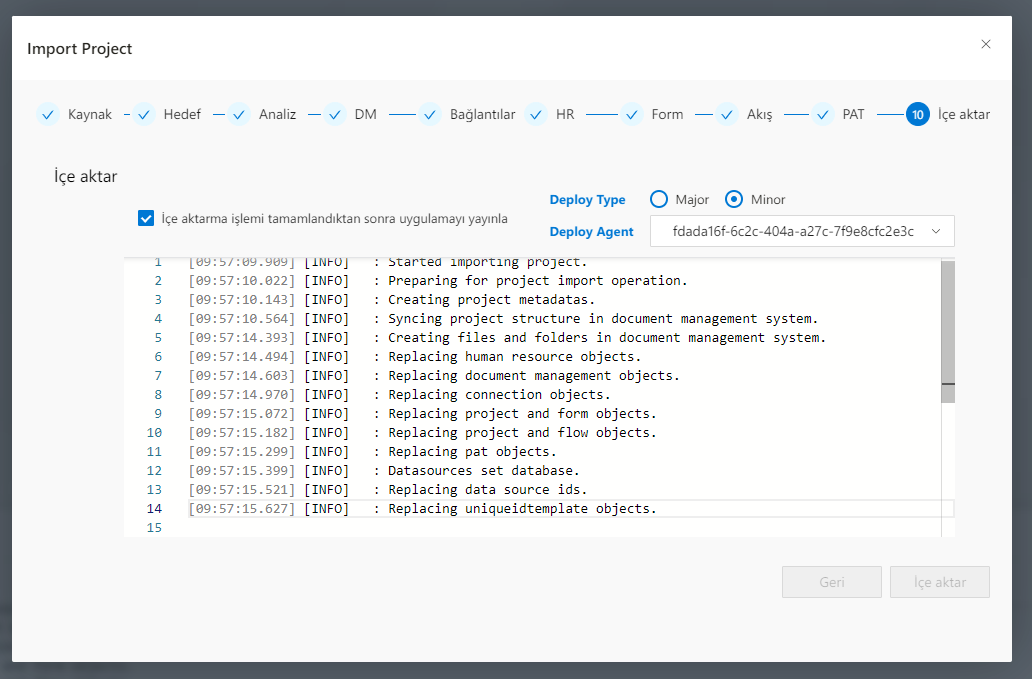
My 10.Ad im: Import In the last step, the import of the project is performed. If you want the application to be published after the transfer is made, the relevant box is checked and the version type to be published as Major or Minor is selected. By selecting the Deploy agent, click the Import button at the bottom, and then the Transfer and Publishing processes begin. The stages are shown on the Output screen.