Menü Profili Oluşturma ve Yetkilendirme
Menu Profiling and Authorization
To create a new menu profile in the system, in the Menu Manager, next to the profile section, Click on the plus button found. When the plus button is clicked, the new menu profile to be created A modal screen will open where information will be entered.
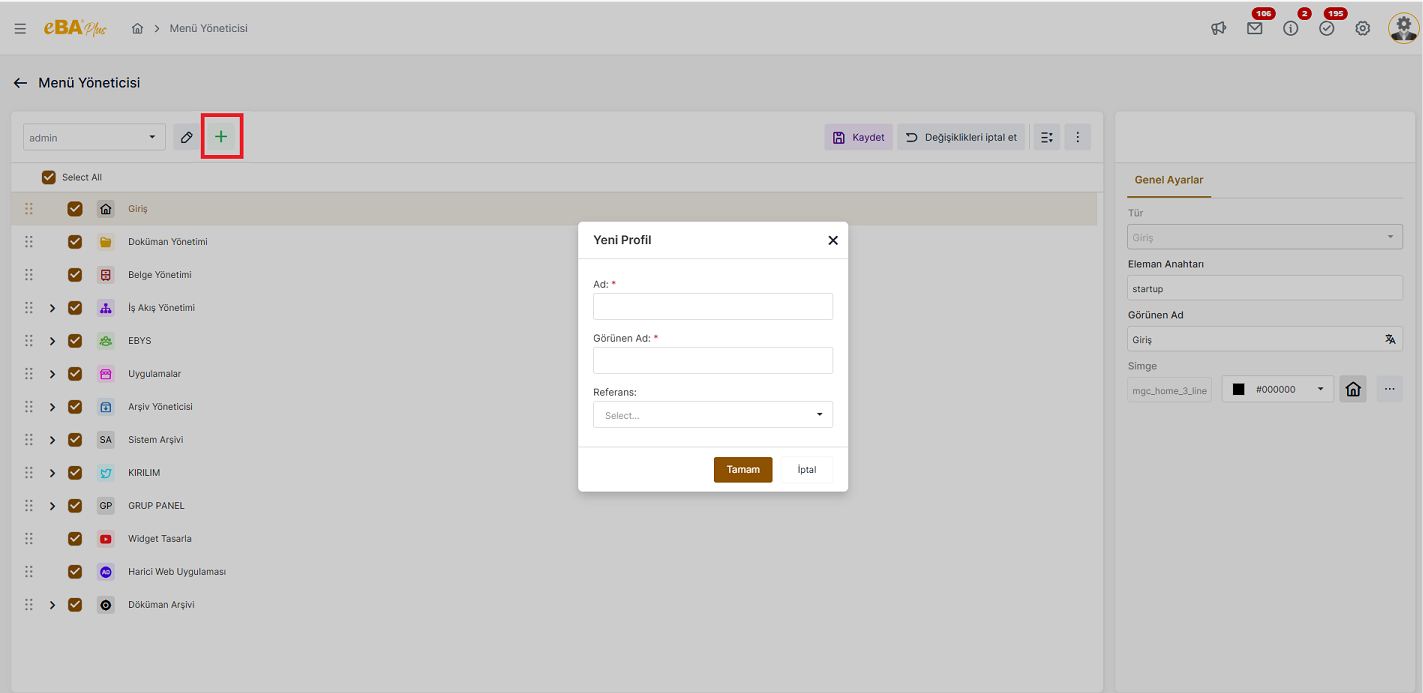
Name : In the Name field, the name information that the profile to be created will be saved in the system must be entered.
Display Name : In this field, the name that is desired to appear in the profile list of the menu profile to be created information must be entered.
Reference : In this field, profiles that have already been defined in the system are listed. This area is designed to It allows the profile to be created to be created by copying from an existing profile. Making a choice It is not mandatory.
If a profile is created without selecting from this field, all menu nodes will be unchecked in the profile, the person can choose which menu nodes should appear in that profile marks them manually.
If the new profile to be created has a structure similar to the content of a previously existing profile, To avoid re-marking the selected menu nodes in the other profile, the new profile will be It is created by copying and the person is only on the old profile, which must be done on the new profile. makes arrangements.
When the fields are filled in and the "OK " button is pressed, the new menu profile is selected in the profile list. It comes as. And the person can select the nodes that are desired to appear in that profile while this profile is selected. determines profile authorizations by marking.
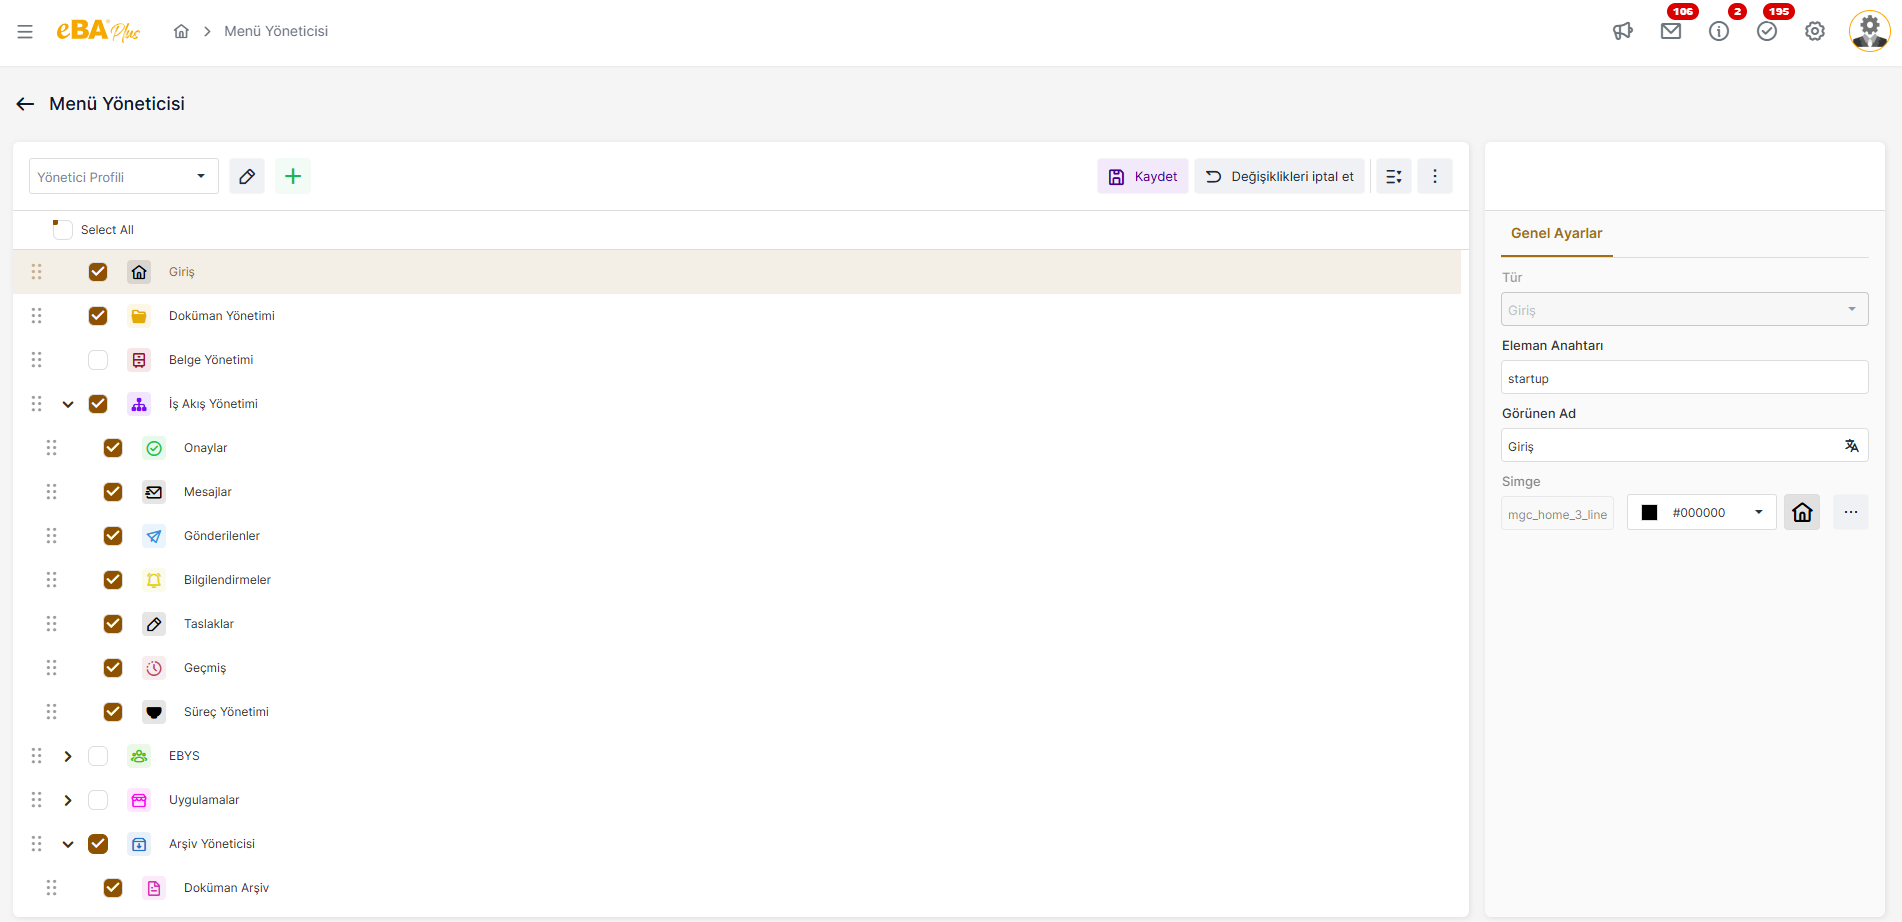
The menu tree structure is done by clicking the "Save " button after the relevant profile edits are completed. should be recorded.
After the menu profile is created, the next step is to define who will be authorized for this profile. There is a process. Menu authorization is done in the System Manager application. It is done under the title of Authentication Manager.
The created menu profile can be authorized based on person, position, title, department, group or role. For example; A menu created "Administrator Profile", "General Manager" to people with the title of If you want to be authorized, under the Authentication Manager heading, in the "Title Roles " field. is clicked. To add a new title role, click on the "Add New Title Role " button. Incoming In the window; "General Manager" is selected from the "Code " section and "Web" is selected from the "Category " section. Category When "Web" is selected from the field, Web authorizations will be listed below. From the listed powers " webApplication. [Profilename] " i.e. according to our example "webApplication.AdminProfile" authority and add it to the "Role Content " list with the right arrow button and then click the "OK " button. is clicked.
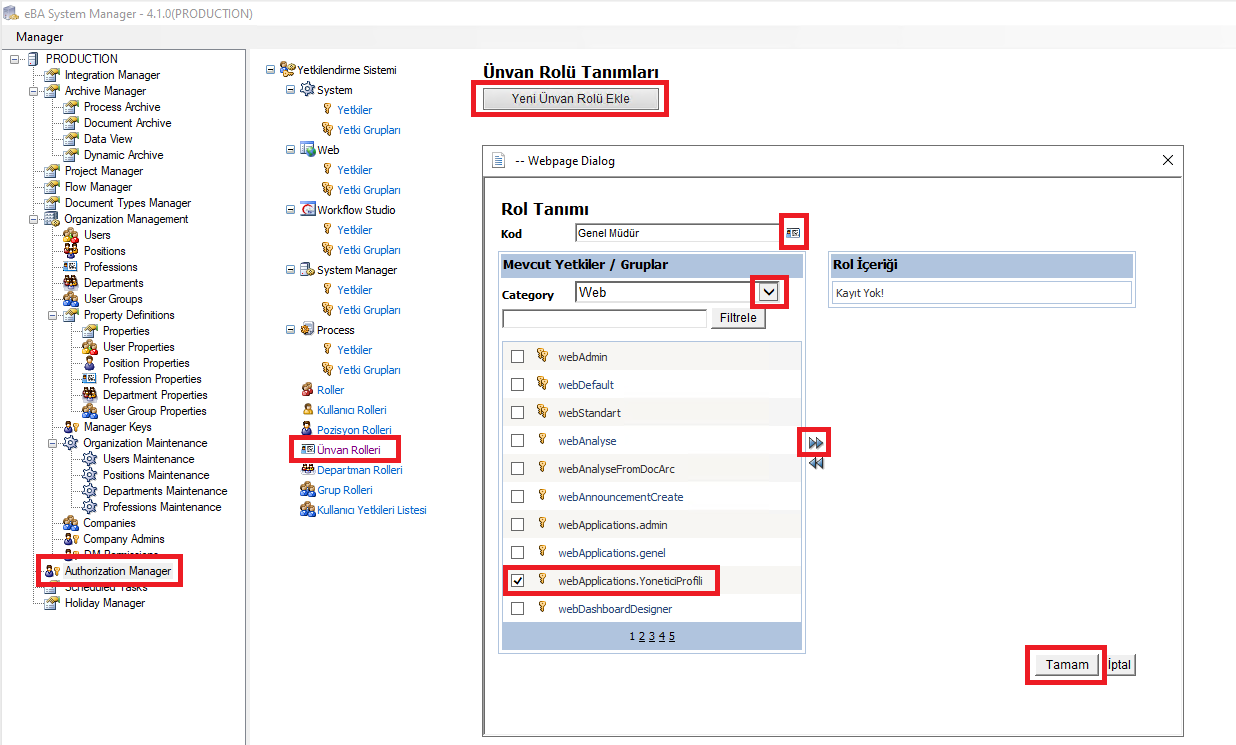
Thus, when a user with the title of "General Manager" logs in to the web interface, in the left menu, Which menu nodes are marked in the "Admin Profile" profile, only those menu nodes will be able to view and access.
Important Note : The person sees all of the authorizations defined for him/her on the system. For example; A the user has the title of "General Manager" and is included in the "Human Resources" department. This The user has the authority given both due to his title and the authority given due to his department. has powers. If a person sees a menu node in the menu that they shouldn't see Under the Authentication Manager heading, the user, position, title, department, group and role definitions should be examined, and it should be determined under which heading the person receives this authority. should be done. If a user sees a menu node that they shouldn't, they can access the review of the logic and arrangement to cover all the rules required.