Windows Setup
Installation for Windows Devices
1- Requirements
Before installing the Digital Signature application on your device, the Java library and .NET Core 3.1 mentioned below must be installed on your device.
JRE (Java Runtime Environment) Installation
You can download the JRE (Java Runtime Environment) from the link below by selecting the one that is suitable for your device type. Click to download<strong>.</strong>
After downloading Java from the link above, run the installation file from your downloads folder.
Continue by selecting the 'install' option on this screen that appears.
After the installation screen passes, your installation will be completed.
Your installation has completed successfully.
Setting System Environment Variables
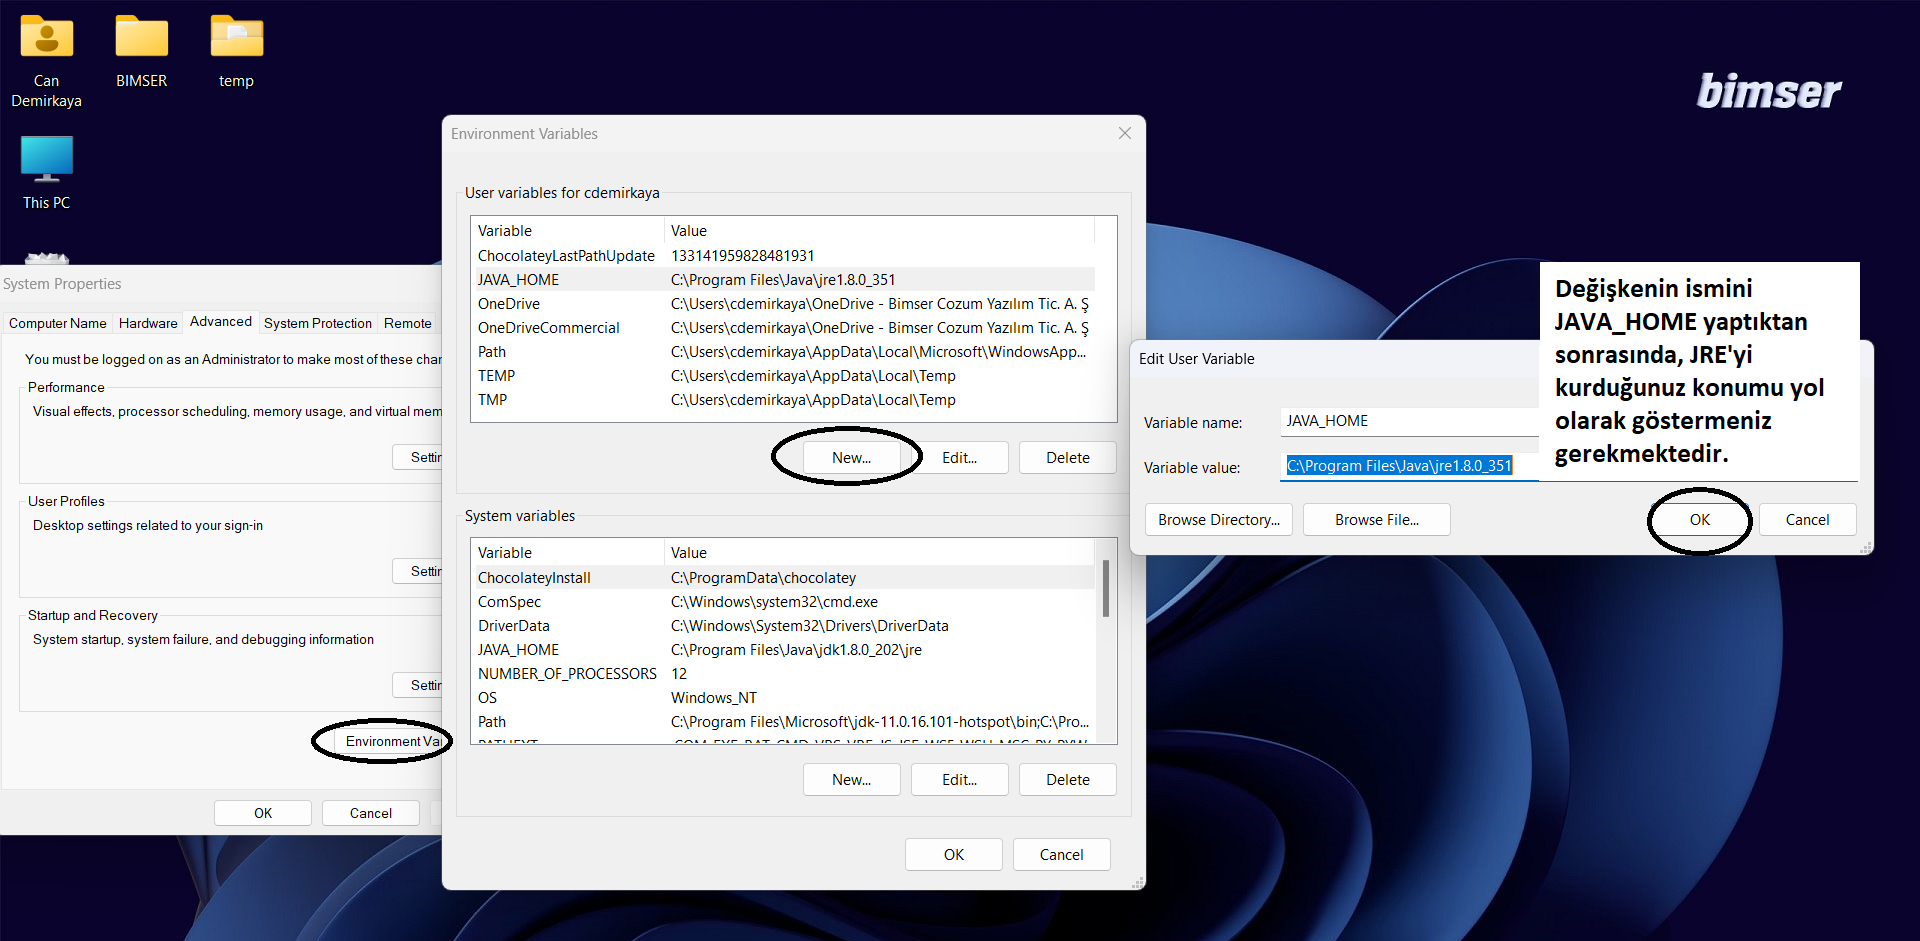
After installing the JRE, we need to add the JRE installation location as a 'JAVA_HOME' to the system environment variables. You can add it by seeing the below screenshot

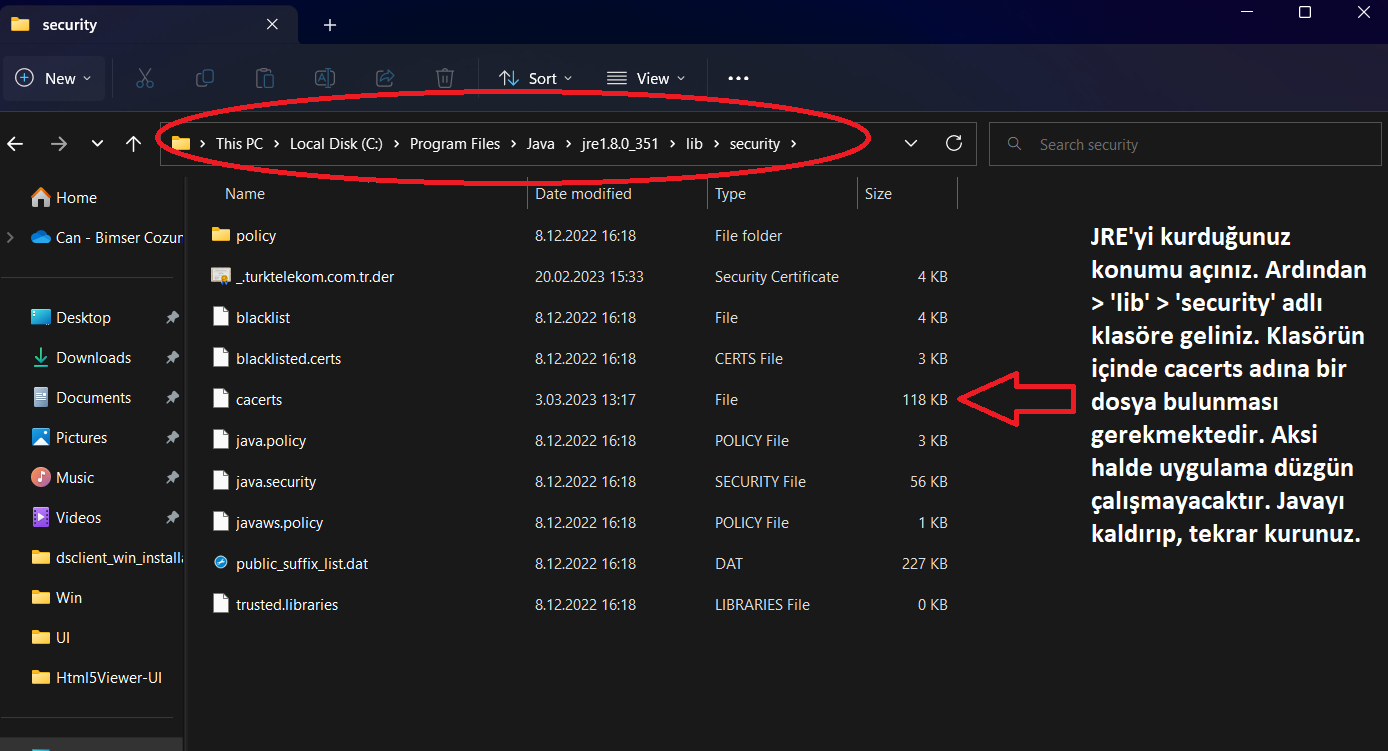
After adding, verify the step in the screenshot below to see if the JRE is installed correctly.

ASP.NET Core Runtime 3.1
You can download ASP.NET Core Runtime version 3.1 from the link below by selecting the one that is suitable for your device type. Click to download<strong>.</strong>
Download the build one here by selecting the one that is suitable for your operating system in the part marked on the right side. Then open the installation file you downloaded.
Mark the required field, press the 'Install' button and start the installation.
After the installation is complete, the installation will be completed successfully.
After performing these operations in order, you have successfully completed the installation. Close it by pressing the 'Close' button.
When using our application, we recommend that you work with ASP.NET Core Runtime 3.1. However, in the event that Core Runtime 3.1 cannot be used due to internal procedures ASP.NET, you can download and install ASP.NET Core Runtime 7.0 < href ="https://dotnet.microsoft.com/en-us/download/dotnet/7.0"```>``` <b>this link</b>.</a>
<img src="https://docsbimser.blob.core.windows.net/imagecontainer/aspnet-downloadlink1-2e33ac59-6f92-4801-8016-7cc072951334.png" alt="Bimser Solution" style={{border: '3px solid #dee0df', borderRadius:'15px', boxShadow:'3px 5px #dee0df', margin:'10px 0'}}/>
Now you can proceed to the installation of DSClient.
2- DSClient Installation
DSClient differs from .NET CORE versions. Whichever one you are working with, you need to download it.
| Download Links | ||
|---|---|---|
| DSClient Windows .NET CORE 3.1 | DSClient Windows .NET CORE 7.0 | DSClient 1.5.5 Windows .NET CORE 8.0 |
After downloading, unzip the installation file and open it and follow the steps in the screenshots.
<!--
--
>
Wait for the loading screen to complete.
You have successfully set it up. DSClient runs as a Windows Service.
3- Location of Log Files - How do I access the logs?
The application files are located in: C:\Program Files\DSClient\
Log file location is: C:\Program Files\DSClient\log
Here you can see the logs by dates. If you encounter a problem, simply share the latest, up-to-date log file with us.
4- How do I delete/uninstall DSClient from my computer?
If your operating system is in Turkish, you need to type 'Program' and select 'Add and Remove Programs'. The steps you follow are the same. You can uninstall DSClienti by following the necessary steps.
After the last press 'Uninstall', give the administrator permission that appears on the screen.
After pressing the 'Ok' button, your computer will restart. You have now successfully uninstalled DSClient.