eBAPlus Mobile Application Usage Document
eBAPlus Native Mobile application allows users to access their business processes quickly and securely via their mobile devices. and uninterrupted access. eBAPlus Native Mobile application, Android and Android with its understandable, simple and modern interface design, where user experience is prioritized. Available on IOS devices.
With the eBAPlus mobile application, users; can view the tasks assigned to them, process can examine the details and take the necessary actions. Office workflows with access from anywhere It is ensured that it can be maintained outside of the country.
This document explains the basic steps to use the eBAPlus mobile application and provides users with It has been prepared to enable easy execution of transactions within the application. Within the scope of the document, login to the application, use of the home screen, task and process tracking, notifications and basic topics such as user operations are covered.
Thanks to the mobile application, users can see that their daily transactions on the eBAPlus platform can track and manage a significant part of it practically via their mobile devices. Thus, Approval processes are accelerated, pending work is tracked more easily and user experience mobile usage scenarios.
1. Home Screen
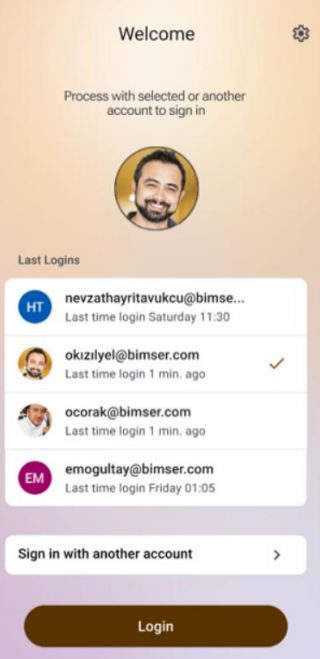
The eBAPlus Mobile application login screen design is as follows.
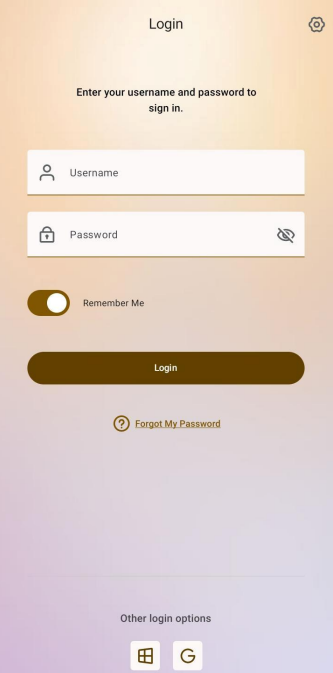
Other Login Options
eBAPlus Mobile application; Standard Input, Azure AD, Google Authentication, Multi Factor Authentication (MFA), and Custom login methods supports.
Remember Me
The user session logged in while the option is active, the session has not ended It remains open to the process and the logged in user is remembered on subsequent logins
Forgot My Password
When the option is clicked, the password is sent to the login e-mail address. Renewal link is sent.
Settings
When the settings section is clicked, the last logged in server and the selected language are marked by default. If you want to log in to a different server that was added before, click on the selected server record. The list of registered servers can be accessed by clicking on the The server to be logged in is selected from this list and the mobile application can be logged in with the relevant server information.
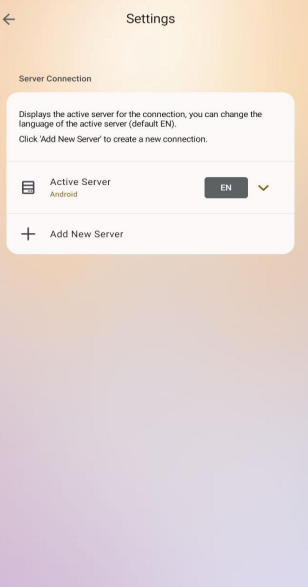
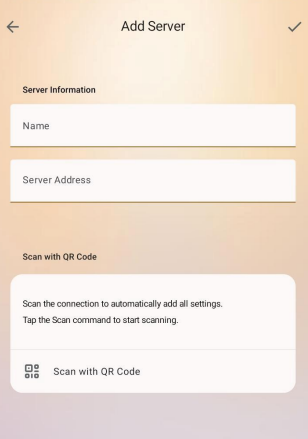
Add New Server
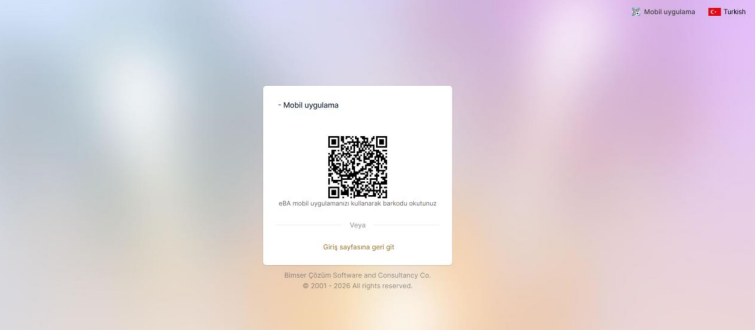
By clicking the Add New Server button, you want to access from the mobile application. It can be saved in the application by entering the name of the server and server address information, or the desired By scanning the QR code on the web interface of the server, the server address is automatically entered into the mobile application. can be brought.
When the "Remember Me" option is checked, the last 4 successfully logged in account information, Last Logged In Accounts are listed on the login screen. The person can directly access the system with a user selected from here. can log in. Or with the Sign in with another account, you can One can log in to the app with an account.
2. Home Screen
After successfully logging in to the mobile application, the user will be presented with the application home screen. will be opened.
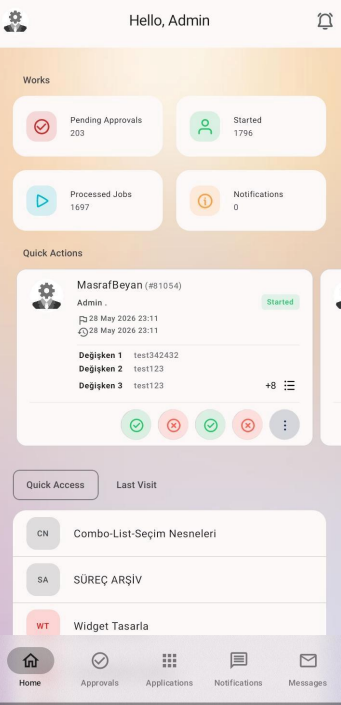
The home screen design is the same as the web interface home screen, taking into account the usage habit It is designed in design logic.
Works
Pending Approvals, Initiated (Started), Processed Jobs and Notifications boxes When clicked, the list of processes under the relevant heading is listed as a card view. These boxes Detailed filter options are available to facilitate the search in the lists that open when clicked.

Quick Actions
Expected work for the user to take action on Streams are sorted as a floating list in card view. The most The current 20 process cards are listed. If there are more processes available in user consent, the list will be by pressing the "More" icon or clicking on the Pending Approvals box, the user The list of all pending processes is accessible.
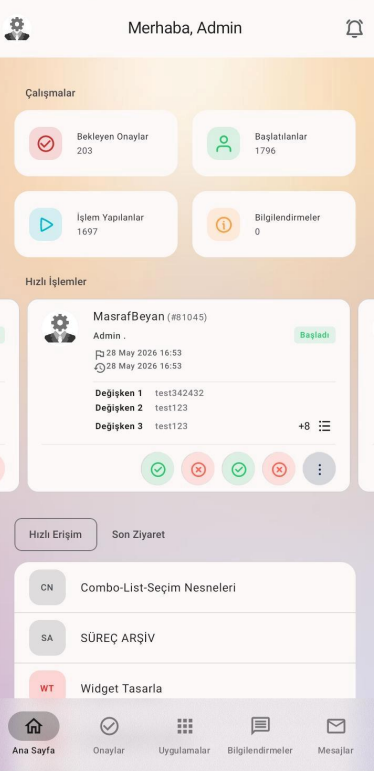
Process cards are generally designed to contain the most basic information about the process. Process The structure and process information considered in the design of the cards can be seen on a single screen, Transactions waiting for action quickly without the need to open a form. can be realized. On a process card; Name of the process, process number, who started the flow, Status Information, When the process started and Last action date information, Process in flow design If there are public variables added, these variables and their values and the action at that step of the process There are action buttons for the operations.
Quick Access
What users mark as favorites and last menu nodes without going to the "Applications" heading designed.
Last Visit
Documents that users have recently viewed are listed. Thus, recently viewed documents can be quickly accessed under this heading.
3. Announcements
Clicking on the bell icon in the upper right corner of the main screen opens the Announcements screen. On this screen Previously published active announcements are listed.

If the user has the authority to add a new announcement, the "New Announcement" button will be active. Click the New Announcement button When clicked, the announcement addition screen opens. After entering the announcement information, click By clicking the "OK" icon, you can add a new announcement.

4. Profile
When the profile section at the top left of the main screen is clicked, the The screen where the user's profile operations are performed opens. On this screen, power of attorney transactions and account There are functions where settings are performed
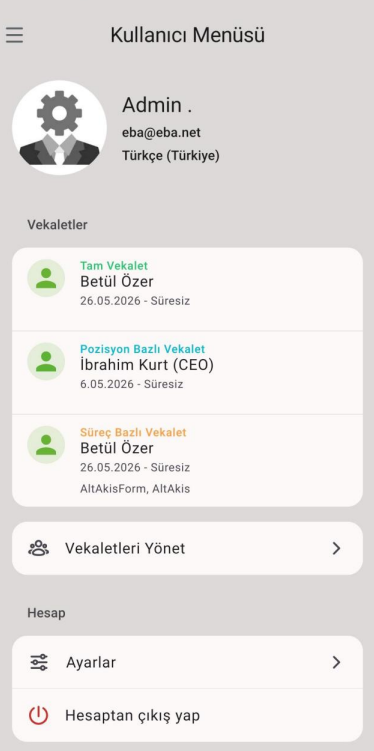
On the profile screen, under the "Proxies" heading, the proxies assigned to the user are listed. Appointed power of attorney When a power of attorney card is clicked on the list, the account of the relevant person is transferred by proxy
When you want to create a new power of attorney definition, click on the "Manage Proxies" button is clicked. When the Manage Proxies button is clicked, the user will be able to The screen where the proxies are listed opens. If the user has the authority to give power of attorney, in this field The "Add Power of Attorney" button will be visible.
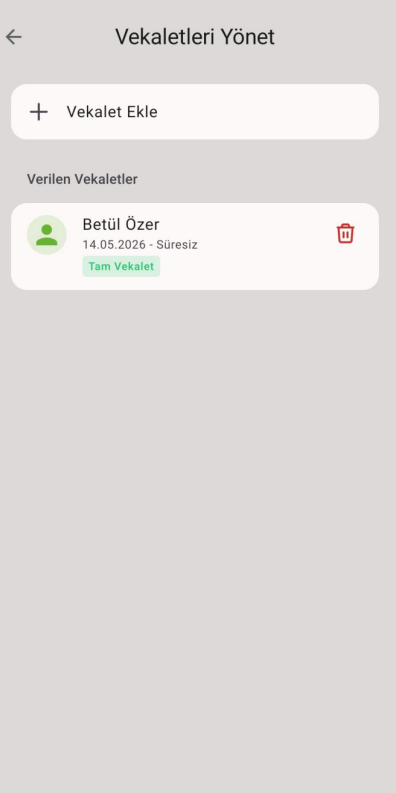
Add Power of Attorney
When the "Add Power of Attorney" button is clicked, the new power of attorney definition screen opens. Defining a power of attorney After entering the information, clicking on the OK icon in the upper right corner of the screen will see the new the definition of power of attorney is realized.

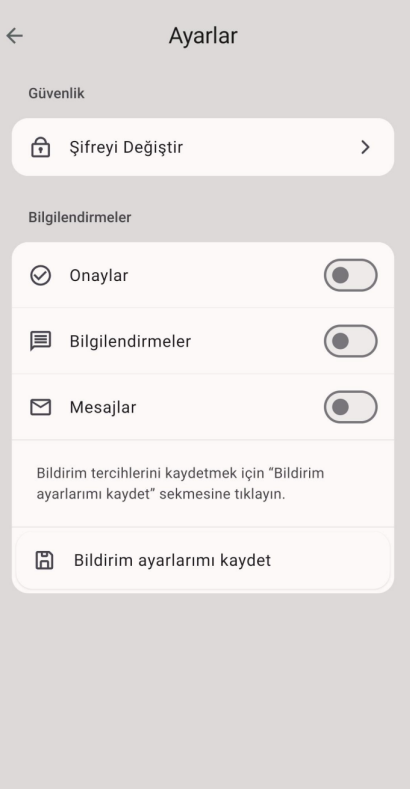
Under the Account heading on the profile screen, there is a mobile application Settings button. When the settings button is clicked, the screen where the mobile application settings will be performed opens. The user uses this You can change your password from the screen, turn notifications on and off for confirmation, information and messages.
5. Endorsements
On the Approvals screen, the pending jobs are grouped on a process basis to take action on the user It is listed as. How many jobs are expected from which process are indicated next to the process names. Right By clicking on the search icon at the top, you can quickly access the searched process.
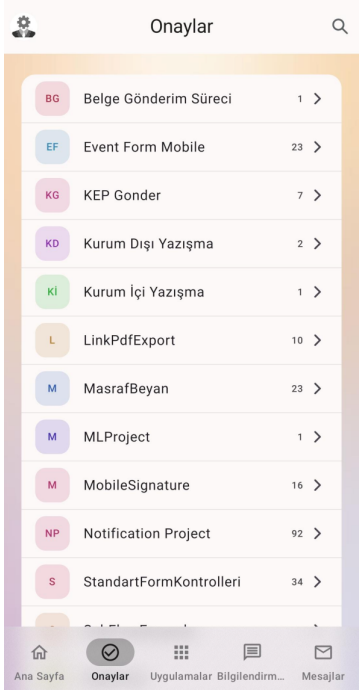
Clicking on a process card listed on the Approvals screen will show that the pending workflows for that process The screen opens. From this screen, the user can access the summary information of the processes waiting for approval and Provides access to action buttons. Processes pending approval; Today, Yesterday, This Week, Last Week, This It is shown grouped by request dates, such as Month and Older.
As long as you want to be filtered with the detailed filtering feature at the top right, the process; name, no, Quick access can be provided by entering the user who created it and the start date information.
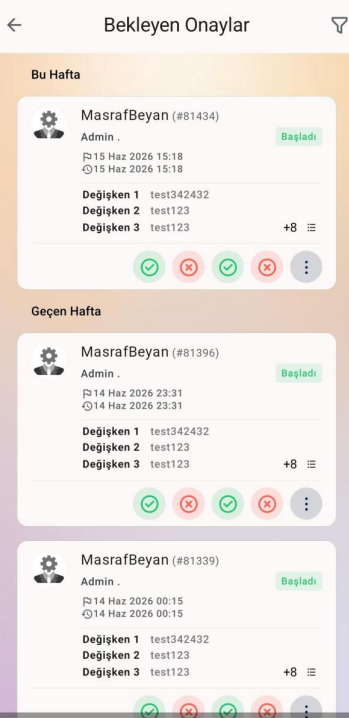
The process can be advanced with the quick action buttons on the approval card of the process to be taken action or the relevant The process form can be viewed by clicking on the confirmation card of the process.
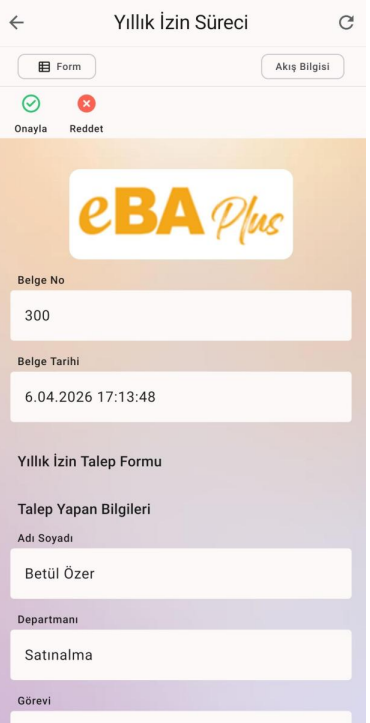
6. Form Screen
Mobile-specific components have been developed for each form object in the mobile application, and mobile Native screens are designed for use.
When a form is opened in the mobile application, the form screen in the middle, the "Form Information" button at the top left, the right at the top is the "Flow Information" button.
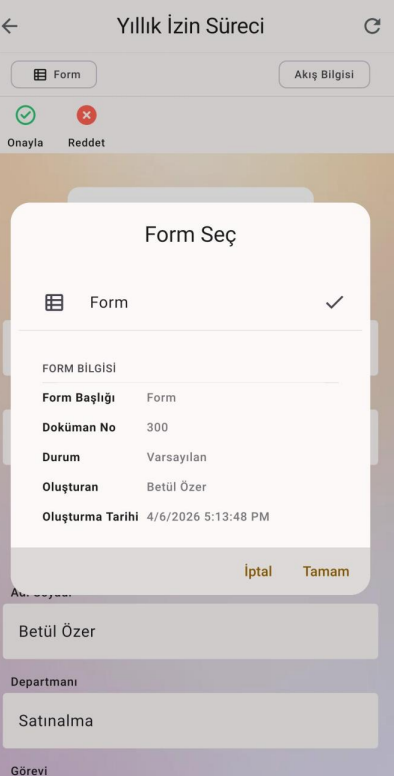
Form Information
When the "Form Information" button is clicked, the name of the form and the number of forms in the relevant step of the flow General information about the form is listed. If multiple forms are listed in this field, the user must display can select the form they want from this field.
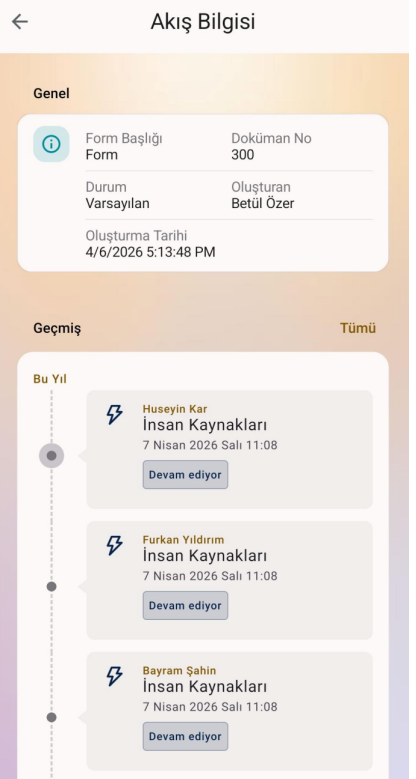
Streaming Information
When the "Flow Information" button is clicked, the screen with the flow information of that process opens. "General" General information about the process is listed under the heading. Under the heading "Past", the process has passed so far Flow steps are shown. To access the entire stream history, click "All" next to the History heading link can be clicked.
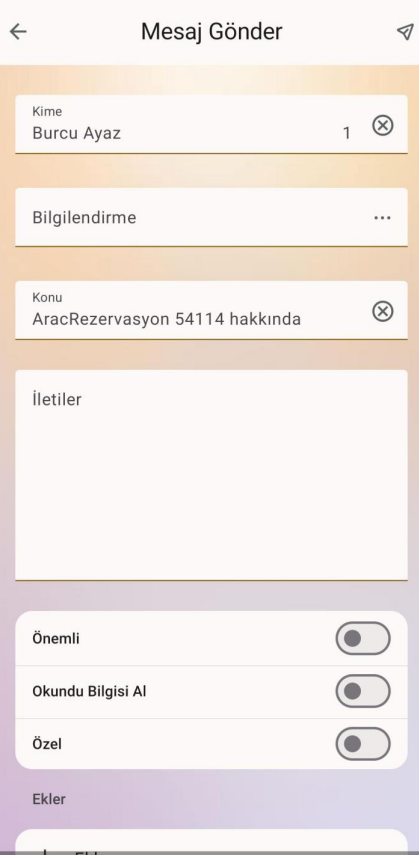
The Stream screen also has a "Messages" banner. This area displays messages written about the flow. To access the entire message list, click on the "All" link next to the Messages heading.
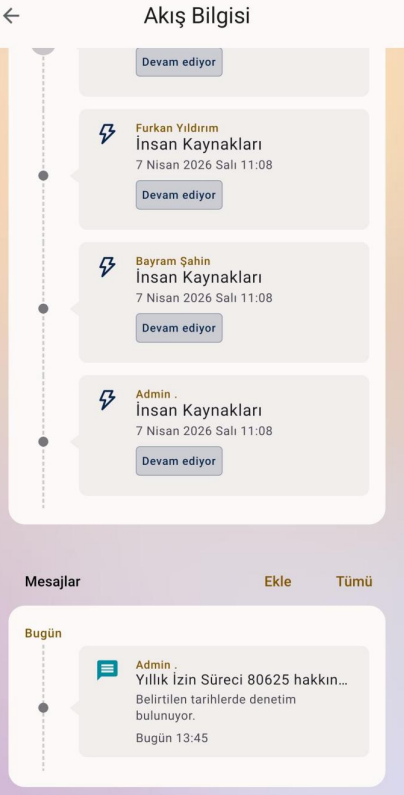
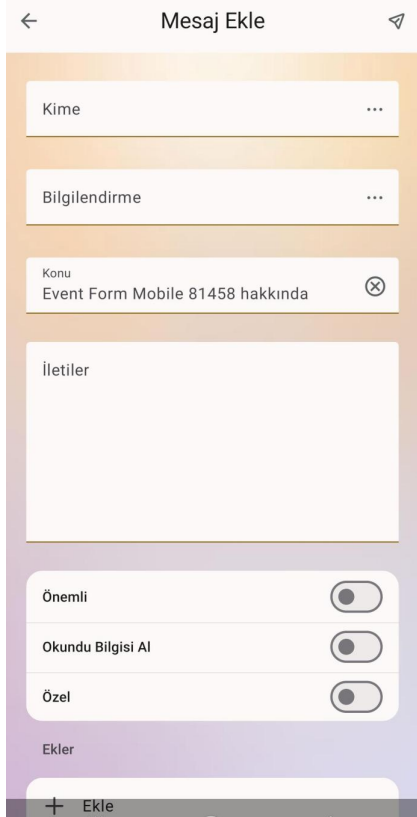
To create a new message, click on the "Add" button next to the "Messages" heading. Click the Add button Clicking opens the new message creation screen. When the new message fields are filled in, at the top right Messages can be sent to the selected person or people with the "Send" button.
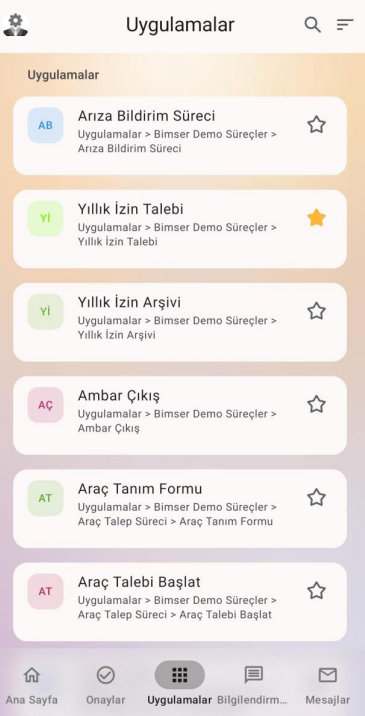
7. Applications
Under the Applications heading, the application nodes that have been added to the menu in the web interface are displayed. In the mobile application, under the title of applications for which menu nodes the person is authorized can only provide access to those menu nodes
The process names listed in the Applications heading are listed from A to Z by default. Top right With the sorting option in the corner, the order of application is revised to be the same as on the web. is done.
Quick access to the application node to be accessed with the search function on the right can be provided.
The application can be added to favorites with the star icon next to the application cards. Thus, "Quick Access" on the user's home screen without the need to search from the applications screen. Direct access to the application is provided from the area.
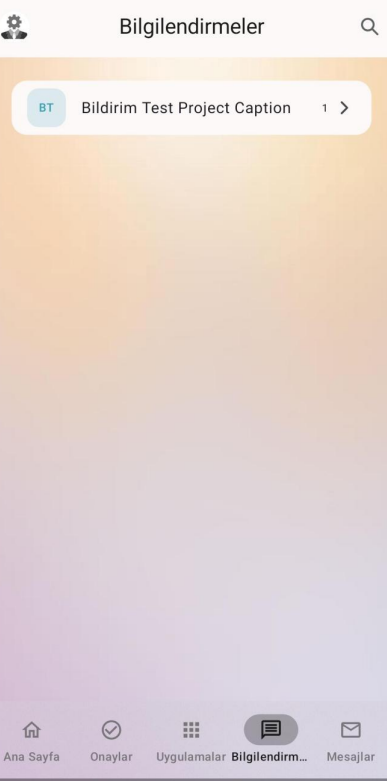
8. Information
From the Notifications heading on the screen where the information sent to the user is listed on a process basis. access is provided. Access to information details by clicking on the information card of the relevant process can be provided.
9. Messages
It is the screen where incoming and outgoing messages to the user are listed in time-based grouping
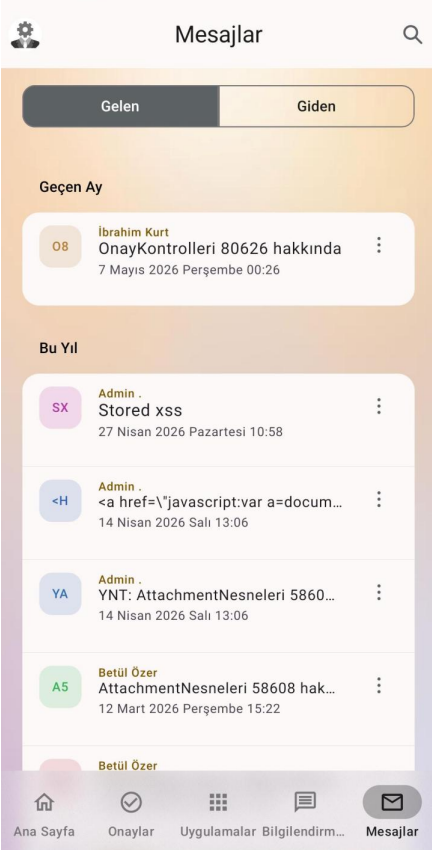
Clicking on the listed message card opens the screen displaying the message details.
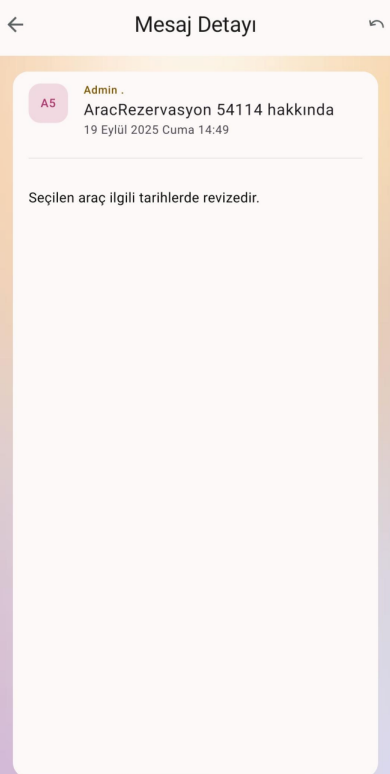
When the "Reply" button is clicked on the upper right, the message will be sent to reply to the written message. The sending screen opens. Once the message screen is filled out, click on the "Send" button located in the upper right corner. The message can be answered by clicking the button.