Add the project to the Applications menu
In order for the project to be available to end users, it must be added to the Applications list in the web interface. In order to add a new application, log in to the web interface with an authorized user and click Application Explorer from the Settings section.
A new record is added to the applications menu by clicking on the "Add" option in the Application Explorer screen opened on the Left Side.
When the Add option is clicked, the window will open on the screen where the application details will be entered.
- In the Title section, "Expense Declaration Process" is written.
- Clicking on this application from the menu selects the "2" option from the Panel Size field so that the form to be opened takes up 2/3 of the screen.
- Clicking on this application from the menu will start a new flow of the designed project in the development interface, so the "Start a Flow" option is selected from the Node Compute Type** field.
- From the Projects field, select the "ChargeStatementProcess" project created in the development interface.
- From Flows, "Flow1" is selected as the flow of the Expense Declaration Process.
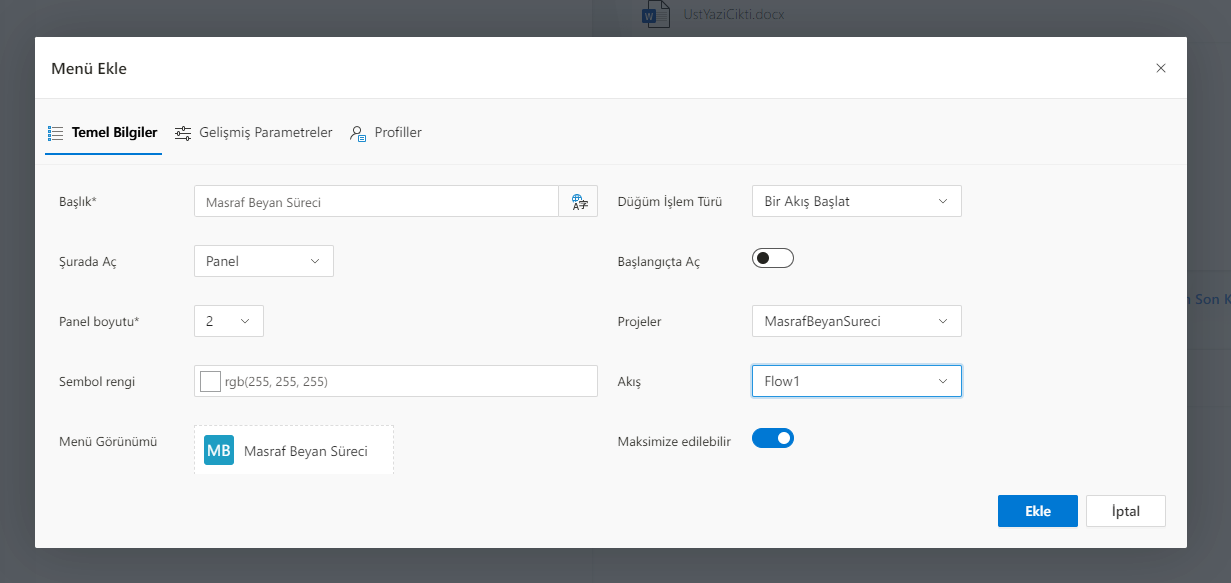
By selecting the "admin" profile again from the Profiles tab, this application node is also activated in the admin profile. After this process, the "Expense Declaration Process" application is added in the Applications menu. The edit must be saved from the Application Explorer screen.
Now, the application title named "Cost Declaration Process" can be displayed in the Applications menu by users with "admin" profile privilege and the process can be started when clicked.