Project Import / Export Operations
The following steps are followed to export the project:
- Right-click your project's title in Solution Explorer.
- Click on the "Export" option from the drop-down menu.
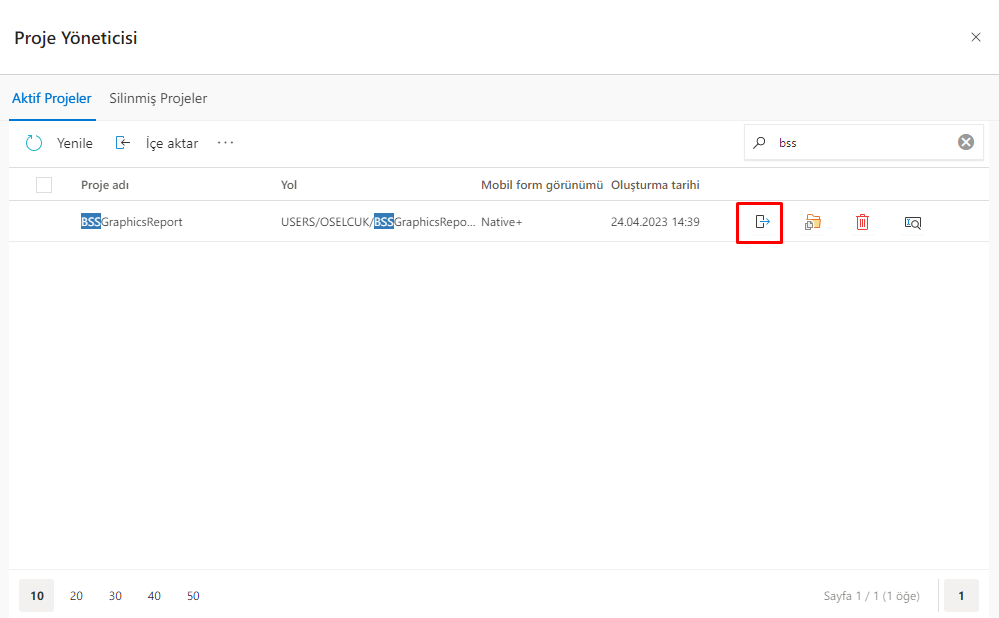
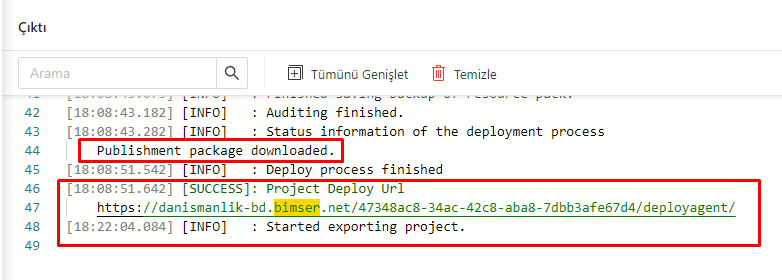
- Alternatively, the project name is searched for in the "Tools" menu. By selecting the "Export" option from the buttons next to the project you selected, the project is saved to the file located in the browser's save path.
After the project is exported, the live Synergy environment sets the file path where the project will be uploaded. Steps to follow:
- In Document Management, a file path is created where the project will be kept.
- When importing the project, click on the "File Path" option to specify the file path and select the file created on Document Management from the window that opens.
Transferring the Project to the Live Environment:
- Entering the IDE, click Tools
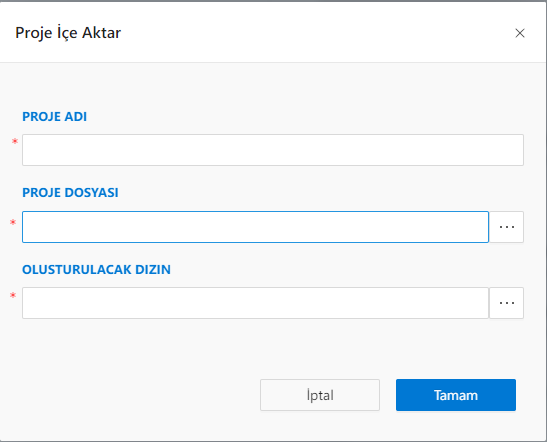
>Project Manager>Import button. - The required fields are filled in from the pop-up window.
- Click OK button and start importing the project.

Project release and Settings:
- The project opens in the IDE.
- It is run by connecting the DataSources in the project.
- The project is published.
- Security settings are made by creating Project Menu breakdowns.