eBA Workflow and Document Management System Menu Export-Import Document
1. Menu Export-Import
The structure created by adding items to the menu in the eBA application is the same breakdown structure in a different system In addition to being created again one by one manually, the menu structure designed by exporting the menu tree and importing it into the new system can be easily moved. This document will explain how to export and import.
1.1 Providing Access to the Menu Manager Preview Area Where Operations Are Performed
The menu export process can be accessed by logging into the system. Clicking the Settings icon in the top toolbar displays the panel to export from the pop-up menu that appears by clicking the Menu Manager Preview tab.
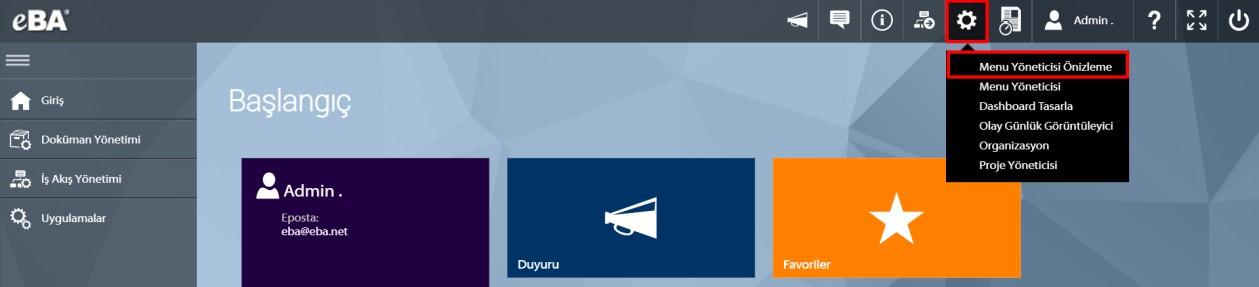
Figure 1.
The Menu Manager Preview and Menu Manager tabs in the pop-up are visible if the user being processed has been granted webMenuDesign authorization through the Authorization Manager in System Manager. If these tabs do not appear in the logged-in user, the tabs will appear when the user logs out of the system and logs in again after adding the desired role from the System Manager application to the relevant user, such as the position. For example, if the person Joe Doğru is added in the User Role field in Figure 2 and the user is given the webMenuDesigner privilege under Web Breakdown, the tabs will be visible in the Settings menu as shown in Figure 3 when the person logs in to their account.

Figure 2: Defining authorization in a user role

Figure 3: Menu Manager Appears in the User
1.2 Exporting the Menu
Clicking the Export button (Figure 4) in the panel opened by clicking the Menu Manager Preview button in the web interface opens the panel (Figure 5) where the export of the menu in the system will be performed.

Figure 4: The Export button

Figure 5: Opening the Export panel
When the panel is open, the main item breakdown in the menu should be moved to the area within the export panel by clicking the mouse and drag-and-drop. For example, in Figure 6, the contents of the Applications main menu are moved by mouse dragging to where the arrow points and looks like in Figure 7.
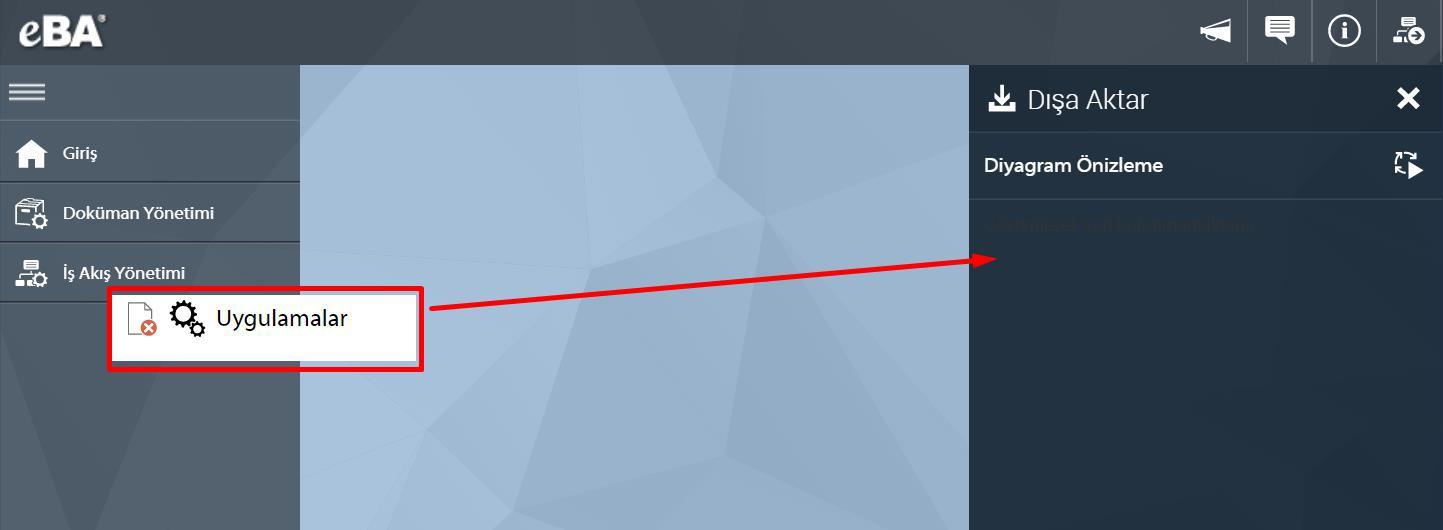
Figure 6: Dragging the Applications menu

Figure 7: View when dragging is completed
Clicking the export button next to the Diagram Preview statement (Figure 8) downloads all menu breakdowns within the field are downloaded to the user's computer (Figure 9), which is processing the .json file.

Figure 8: Starting the export process

Figure 9: Downloading the menu on the user performing the operation
All items in the menu can be exported, or if desired, the items in the main breakdown can be removed and only a certain menu group can be moved. can be done. To remove items to be exported, the delete button (Figure 10) appears next to the menu when the mouse pointer is positioned next to each menu item in the Diagram Preview area. In Figure 10, hovering over Group Panel01 with the mouse pointer shows the minus button on the item.

Figure 10: The appearance of the delete button in the menu item
Clicking the delete button next to Group Panel01 will remove the panel and the items in it from the menu list to be exported.

Figure 11: New diagram as a result of deleting elements in export
Clicking the export button next to the Diagram Preview statement (Figure 8) downloads all menu breakdowns within the field are downloaded to the user's computer (Figure 9), which is processing the .json file. The transferred file stores information about the relationship between profiles and menu items in the system. In this way, in the new system where the menu will be transferred, when the menu profiles are created with the same name as in the system from which the items are taken, there is no need to select the menu items again for the created profiles. For example, in the X Company-Test system, the Applications menu is designed and three different profiles are selected: Human Resources, IT and Legal, and which items will appear in the Applications in each profile. When a menu is exported as a .json file, it stores information about which menu profiles it will appear in the imported items. Menu to Company X-PRODUCTION system When the file is imported, if the imported system already has menu profiles named HumanResources, IT and Law; When the file is imported, the profile and menu items are matched by the system so that users with the profile defined will be able to see the menu items. There are no menu profiles during the migration process, and when they are created later, a profile-menu item pairing will be done. Note: To perform the menu profile-to-menu item mapping in the scenario described above, In both systems, the menu profile names must be created in such a way that they are the same.
1.3 Importing the Menu
Clicking the Menu Manager Preview button on the web interface opens the panel and clicking the Import button (Figure 12) opens the directory window (Figure 13) where the exported .json file will be selected for importing the menu on the system.
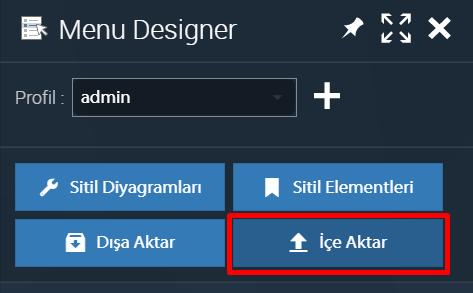
Figure 12: Starting the Import process
Figure 13: Selecting the menu json file
By selecting the file and clicking the Open button, the selected file content is listed in the Diagram Preview area.

Figure 14: Preview of Imported menu items
In the panel where the elements are listed, the button next to Diagram Preview must be clicked before the panel contents are added to the menu in the system.

Figure 15: Starting the import process
When the button is clicked, the message in Figure 16 will be displayed at the bottom of the screen.

Figure 16: Receiving the message by clicking the button in the diagram preview
The Save button in the Menu Designer (Figure 17) must be clicked to complete the process.

Figure 17: Saving the items to be imported by clicking the Save button
Upon completion of the operations, the moved menu will be visible in the new system.

Figure 18: Showing the imported menu
In a menu import, it is possible to remove unwanted menus, as in the case of a menu export. During the import process, before clicking the button in Figure 15, the menu items The diagram should be removed from Preview. The process of removing items to be imported is the process of removing each menu item in the Diagram Preview area. When hovering over the mouse pointer next to it, the delete button (Figure 19) will appear next to the menu. In Figure 19, hovering over Group Panel01 with the mouse pointer shows the minus button on the item.

Figure 19: Removing the menu before importing
Clicking the delete button next to Group Panel01 will remove the panel and the items in it from the menu list to be exported.
When the import process is complete after delisting, the menu structure will look like in Figure 20.

Figure 20: Deleted menu result after import