eBA MIS & MailServer OAuth2 Settings
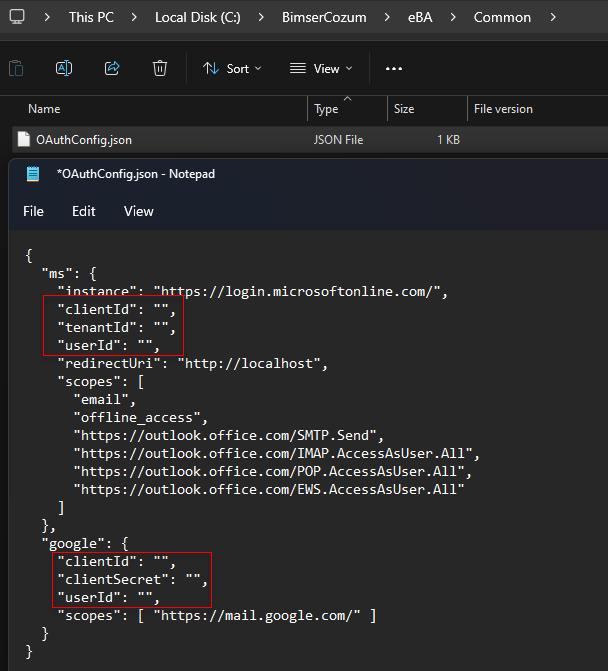
In the common folder in the directory where the eBA application is installed, the information received from the relevant provider is filled in the "OAuthConfig.json" file.
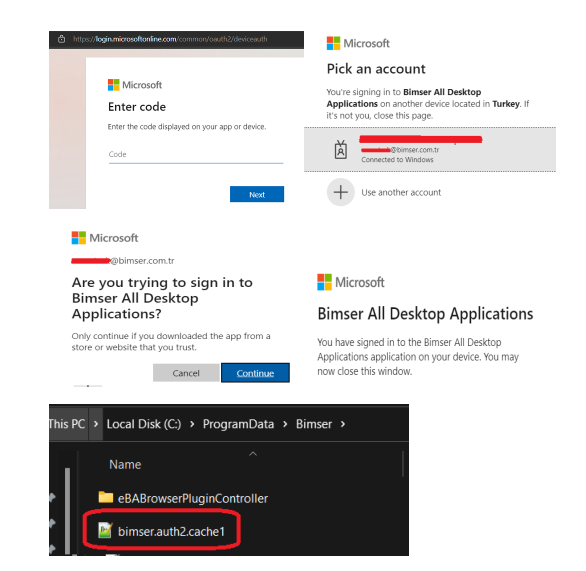
The OAuthLogin.exe application in the Common directory starts.

When OAuthLogin is opened, the provider (Google or Microsoft) used in the command prompt window is navigated with the arrow keys, selected and the verification steps are performed.
Login with Microsoft:
A message with a login url and device code will appear.

After going to the relevant url and entering the given device code, the verification steps are completed and the token transaction is performed.
"You have signed in...." message can be closed after the page is seen.
If desired, the token file can be checked with the path "C:\ProgramData\Bimser".
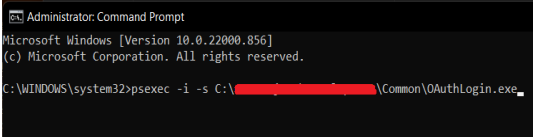
If it is run for Microsoft; After running it and getting a token, you must also log in with the System User for Schedule Tasks and also get a token.
To be able to start with the system user;
• https://learn.microsoft.com/en-us/sysinternals/downloads/psexec the PsExec tool or https://download.sysinternals.com/files/PSTools.zip and copied under "C:\Windows\System32\".
• Command prompt (cmd.exe) is opened with admin privileges, the command "psexec -i -s ......\Common\OAuthLogin.exe" is entered and the OAuthLogin application is started. (The part indicated by dots represents the place where the eba is installed)
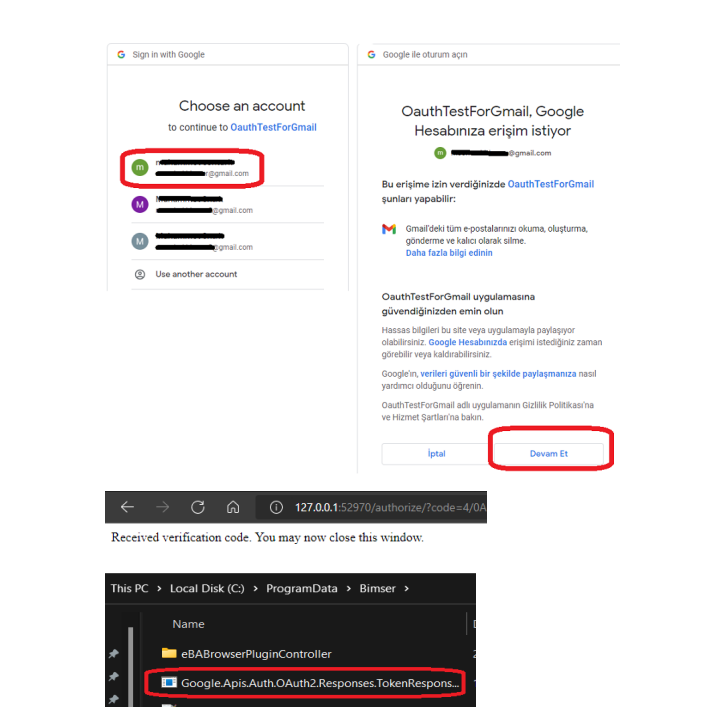
Login with Google:
An account selection and verification screen will open.
The verification steps are completed and the token purchase process is carried out.
"Received verification code...." message can be closed after the page is seen.
If desired, the token file can be checked with the path "C:\ProgramData\Bimser".
Once the token purchase is successfully completed, the OAuthLogin.exe app can be closed.
To ensure the sending of e-mails;
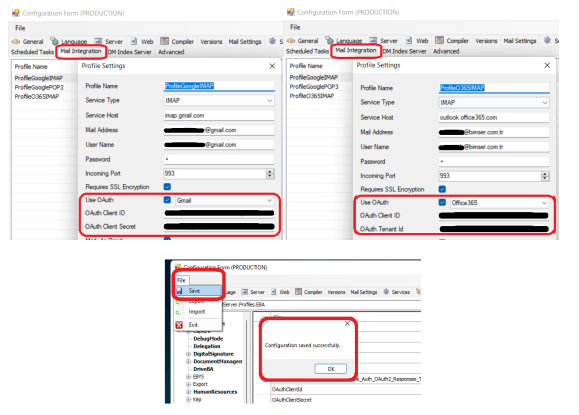
In the directory where the eBA application is installed, in the common folder "eBA Configuration Manager"
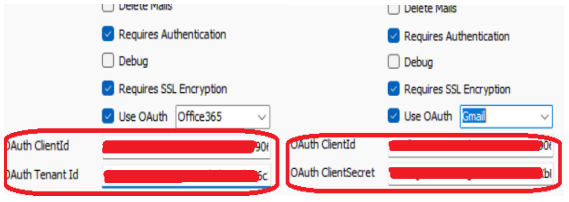
After filling in the required fields for the relevant provider in the Mail Settings tab, the UseOAuth option is activated and saved.
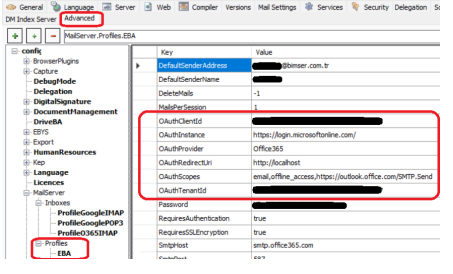
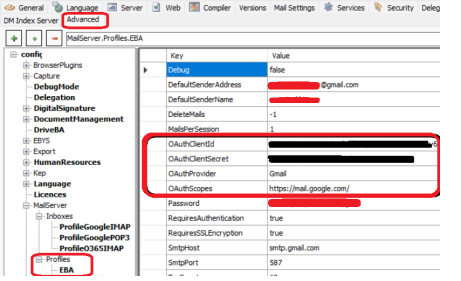
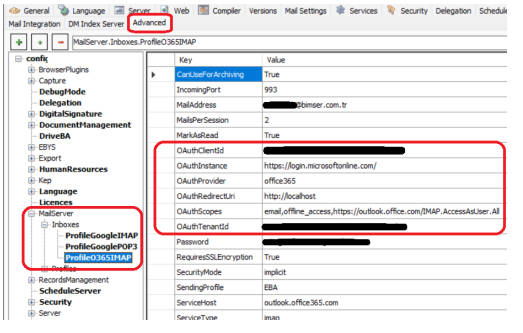
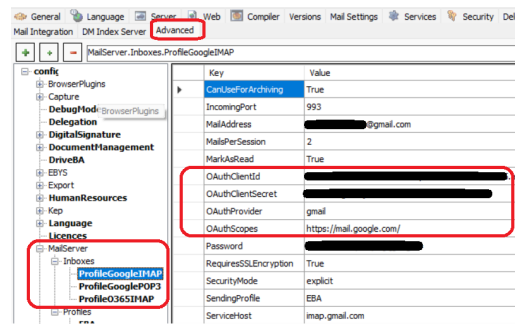
From the Advanced tab, the MailServer/Profiles/EBA key is added if it is not available, the OAuth information of the relevant provider is checked and the necessary parameters are added.
Microsoft: The ClientId, TenantId, Scopes, Instance, and RedirectUri information should be populated as follows.
Google: ClientId, ClientSecret, and Scopes information should be filled in as follows.
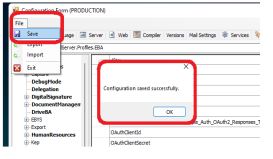
Changes made in the eBA Configuration Manager application are saved. Sending e-mails via MailServer.exe or Schedule Tasks can be tested.
For the process of reading e-mails;
The profile addition screen opens from the Mail Integration tab on eBA Configuration Manager and after the required fields are filled, the UseOAuth option is activated. The fields required by the relevant provider are filled in and the application is saved.
From the Advanced tab, the MailServer/Inboxes key is opened, the OAuth information on the relevant profile is checked and the necessary parameters are added.
Changes made in the eBA Configuration Manager application are saved. The process of reading e-mails can be tested via Schedule Tasks.