Action Management and Management Review
Information
You can quickly reach the relevant topic with the help of navigation on the right side.
Action Management and Management Review Module (v.5.26) User Help Document
Module Version: 5.26
1. INTRODUCTION:
“QDMS Action Management and Management Review Module” is the module that enables all action activities within the management systems to be followed in the QDMS system within certain rules and to follow the delayed and planned works in all modules.
2. PURPOSE:
The purpose of this help manual is to explain the working process of QDMS “Action Management” Module. The Action Management Module is used to ensure that action activities are collected under a single roof through the system and progressed in a certain standard.
3. RESPONSIBILITIES:
Personnel Authorised to Open Action, Action Team Leader, Action Team Members, Action Responsible, Action Worker, Action Closing Approver, Action Opening Approver.
4. ABBREVIATIONS:
“QDMS Quality Document Management System” Quality Document Management System
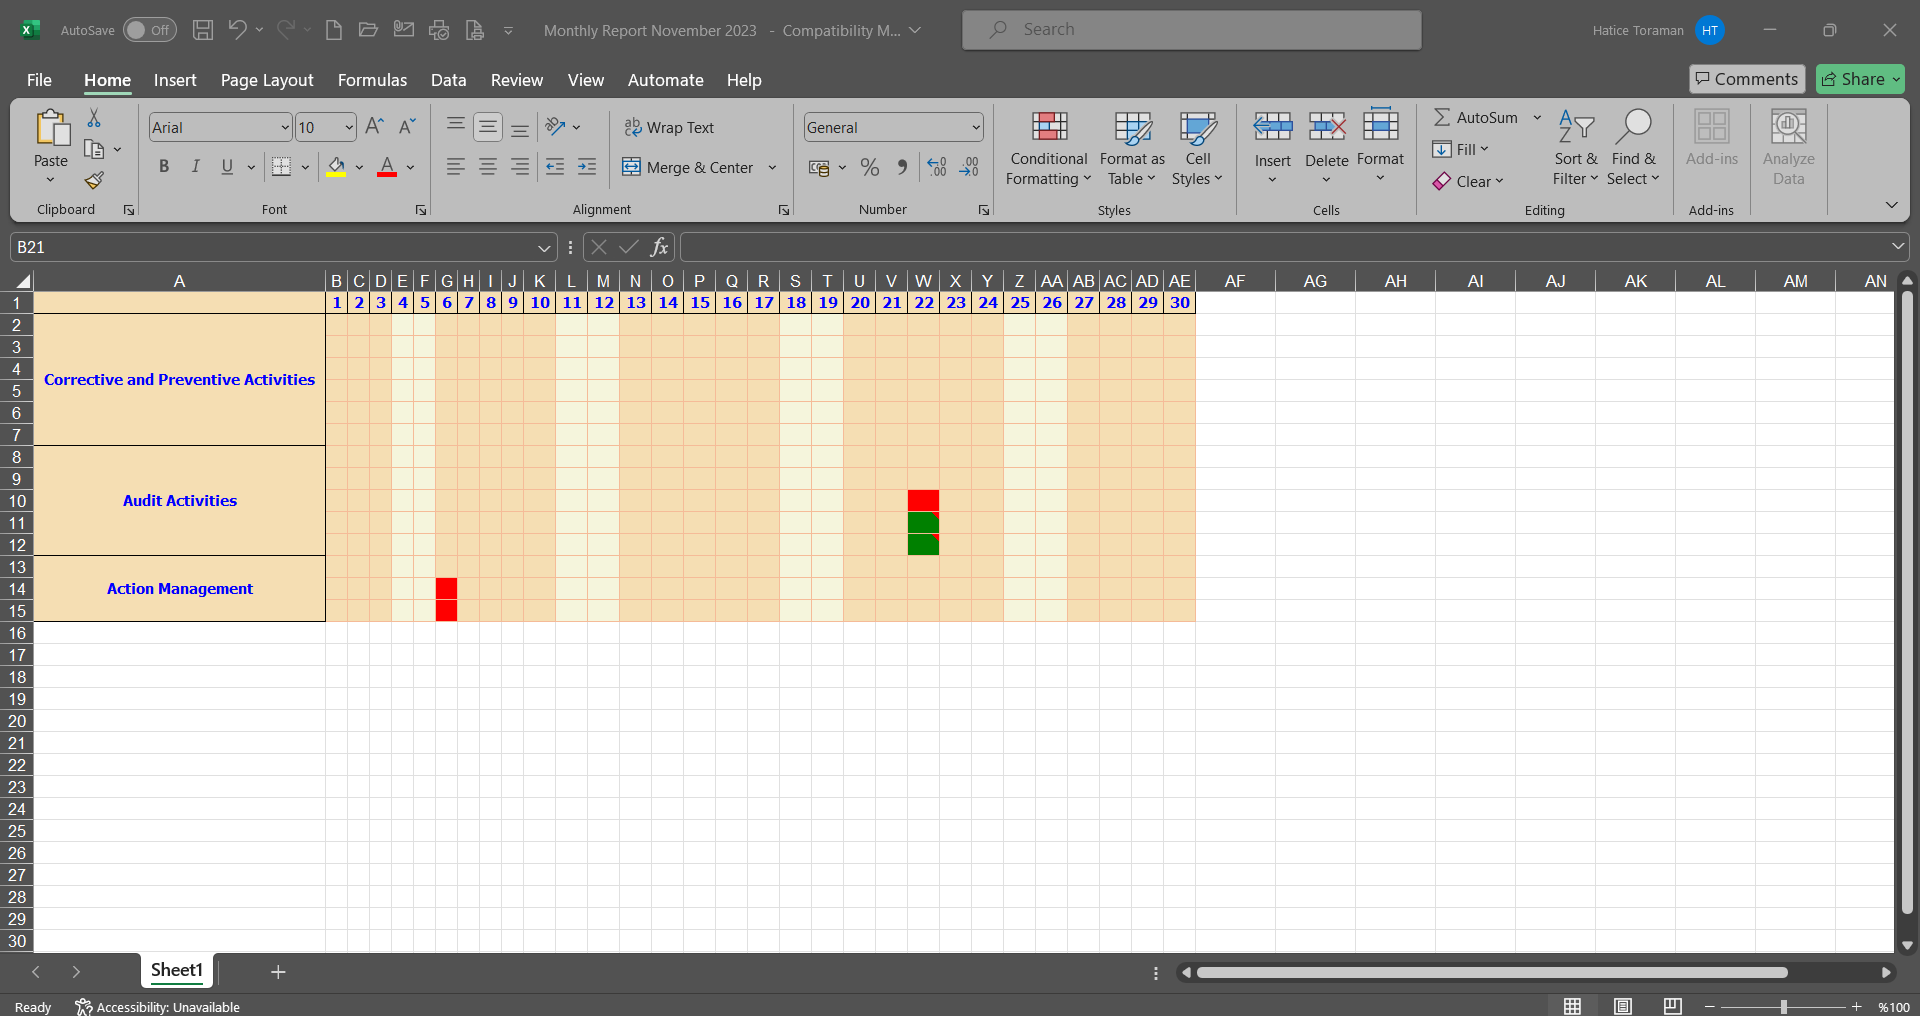
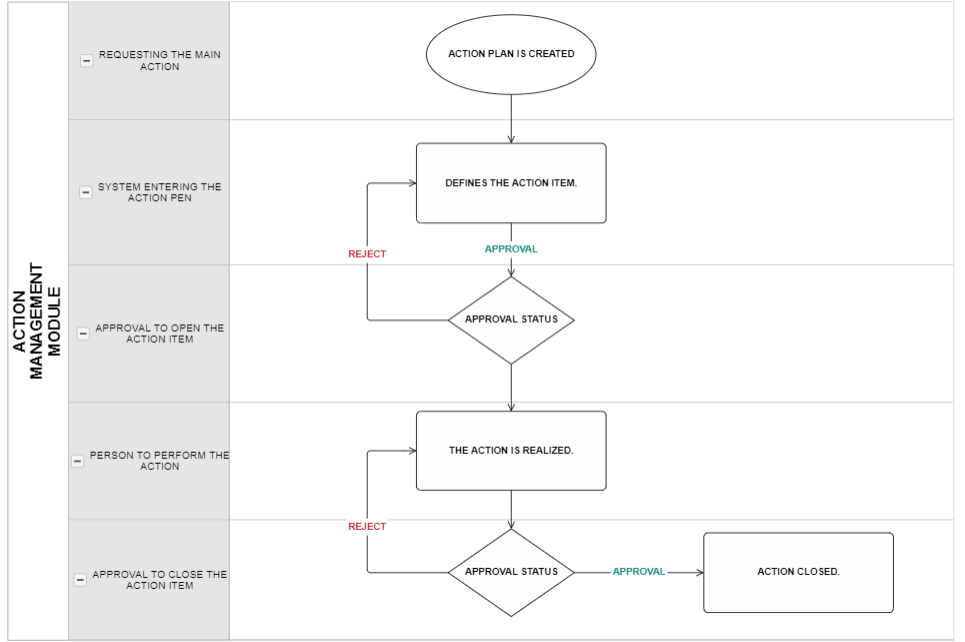
5. FLOW:
6. Action Management Module
It is the module in which the deadline, the person who will do the work, the task information is defined and the task assignment is performed and followed up. With the Action Management Module, actions can be planned in many subjects such as “Meeting, Project Plans, Tasks, Environmental Plans, Quality Plans, Risk Actions”. After a meeting, the decisions taken after the meeting can be itemised, and whoever has which duties can be planned as actions and their follow-up can be provided in detail. After the action plan is made, business plans can be made as many times as desired. The defined work plans are sent to the e-mails of the people as actions, and by clicking the link in these e-mails, users are directed directly to the place where they will complete the work. While the business plans of the actions are made, budget plans can also be made and effectiveness percentages can be defined. The actual completion percentage of the project on the basis of business plans is automatically calculated by the system. Reports can be obtained on the basis of main actions and business plans of these actions.
The adaptation of the Action Management module to the company is carried out under the “System Infrastructure Definitions / Action Management” menus. Under the “Integrated Management System / Action Management” menus, action planning / task assignment / transaction realisation operations are performed by users.
6.1.System Infrastructure Definitions/ Action
It is the part where the infrastructure of the Action Management module is created and the module infrastructure design is made where definitions are made. Data appears according to these definitions made in the entries from the Integrated Management System menu.
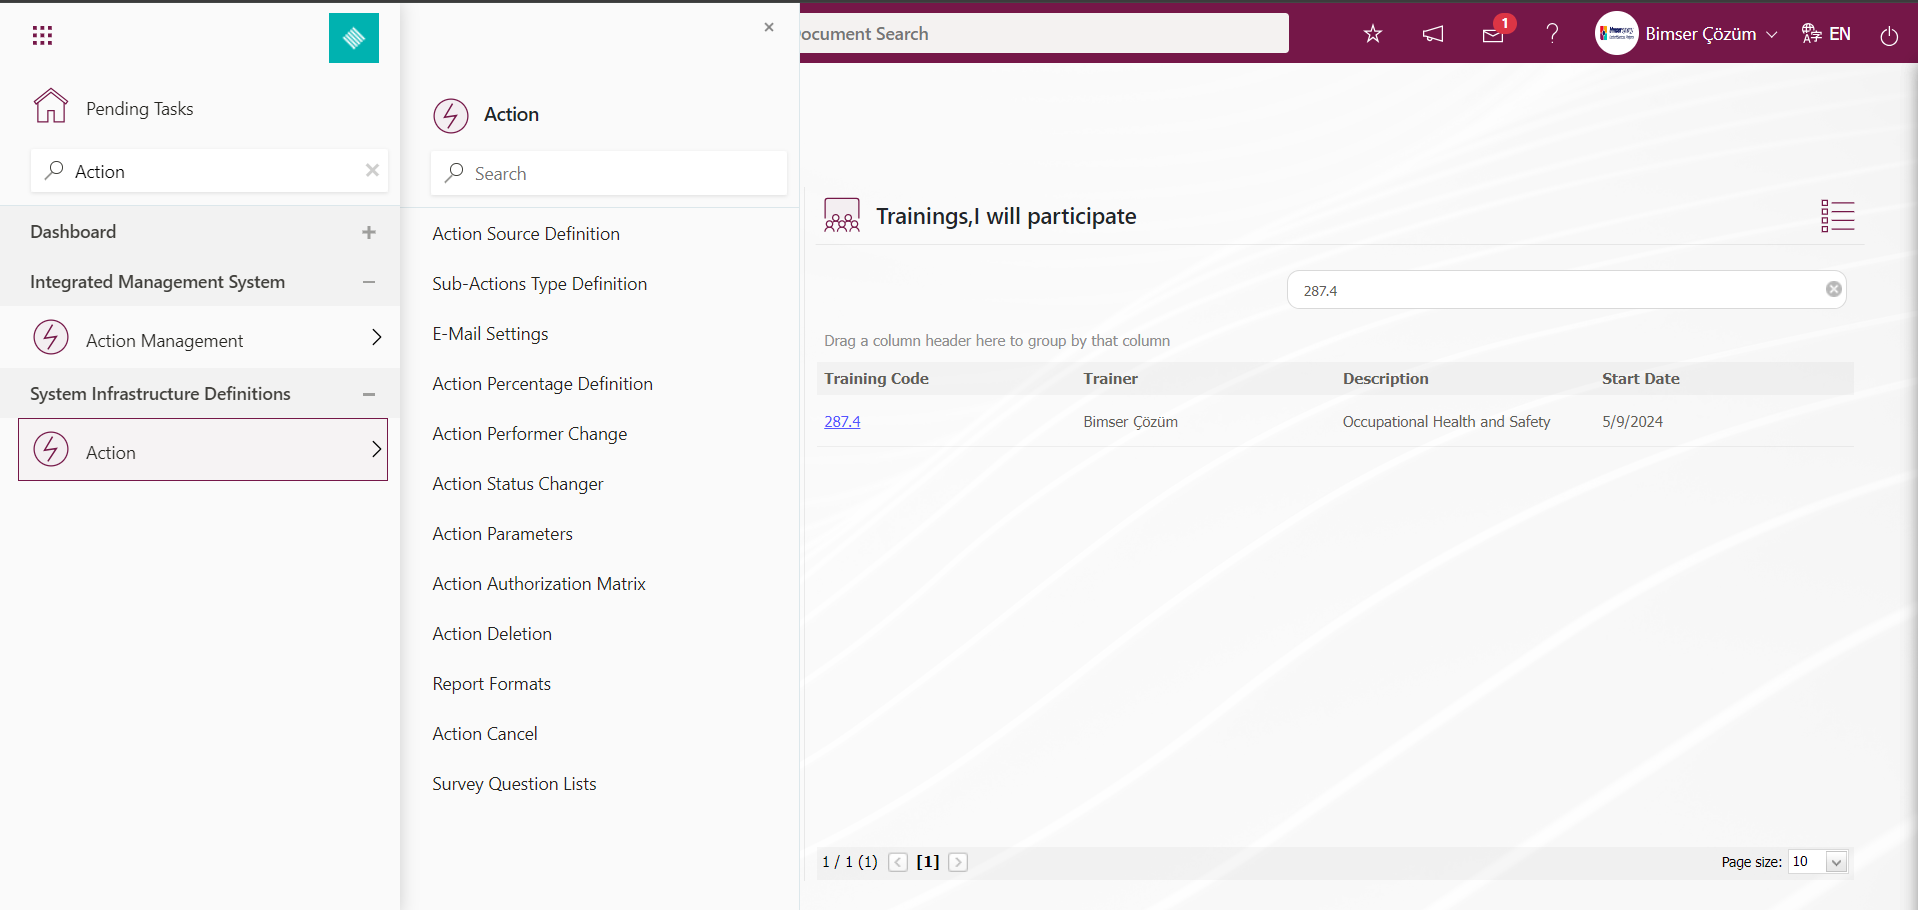
6.1.1. Action Source Identification
Menu Name: System Infrastructure Definitions/ Action/ Action Source Identification
This is the menu where the action source identification process is performed. It is defined to create action plans that may arise from needs such as a project, risk, audit, work accident, meetings, etc.
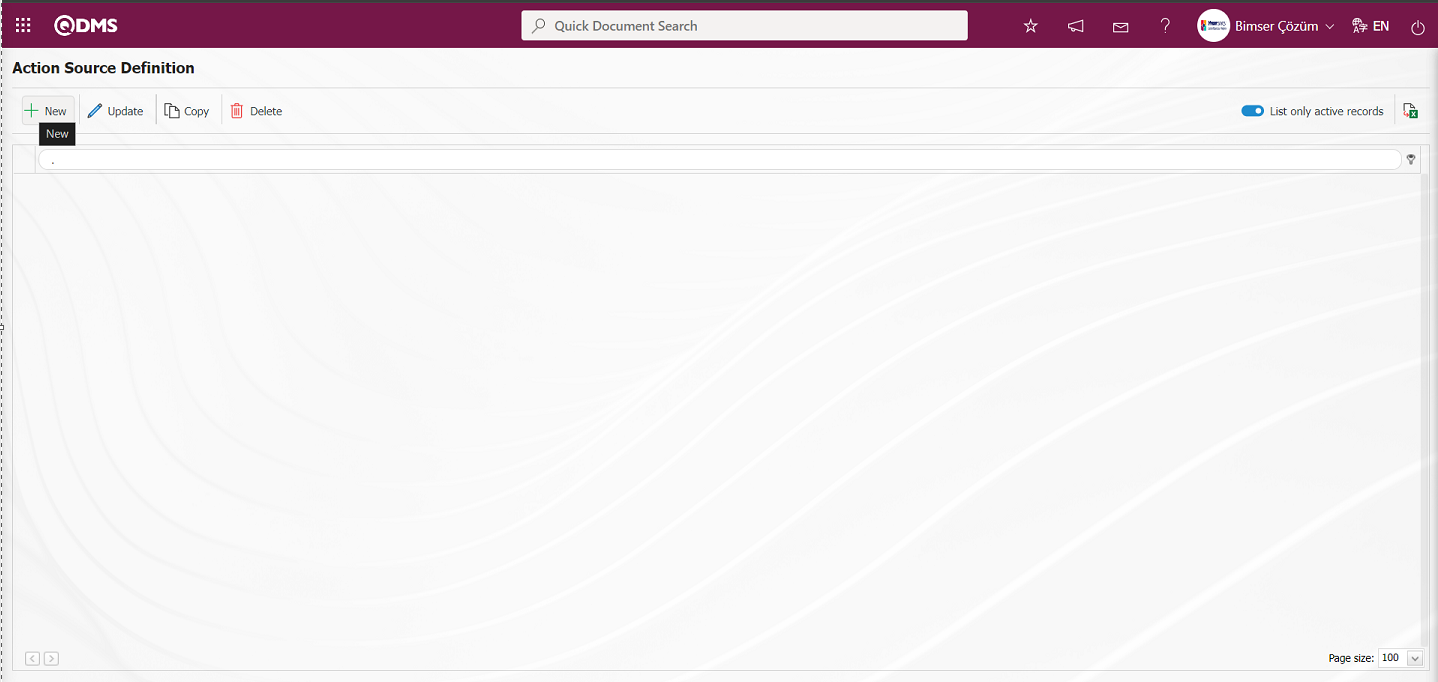
With the help of the buttons on the screen;
 : A new action source is defined.
 : Edit/change/update the action source information selected in the list.
 : Copy the action source selected in the list.
 : The action source information selected in the list is deleted
 : Data is transferred to Excel. (The report of the Action Source list in the list tab on the Action Source Identification screen is taken in Excel format).
In the Action Source definition screen, the Action Source Definition / New Record screen is displayed by clicking the button in the upper left corner of the screen.
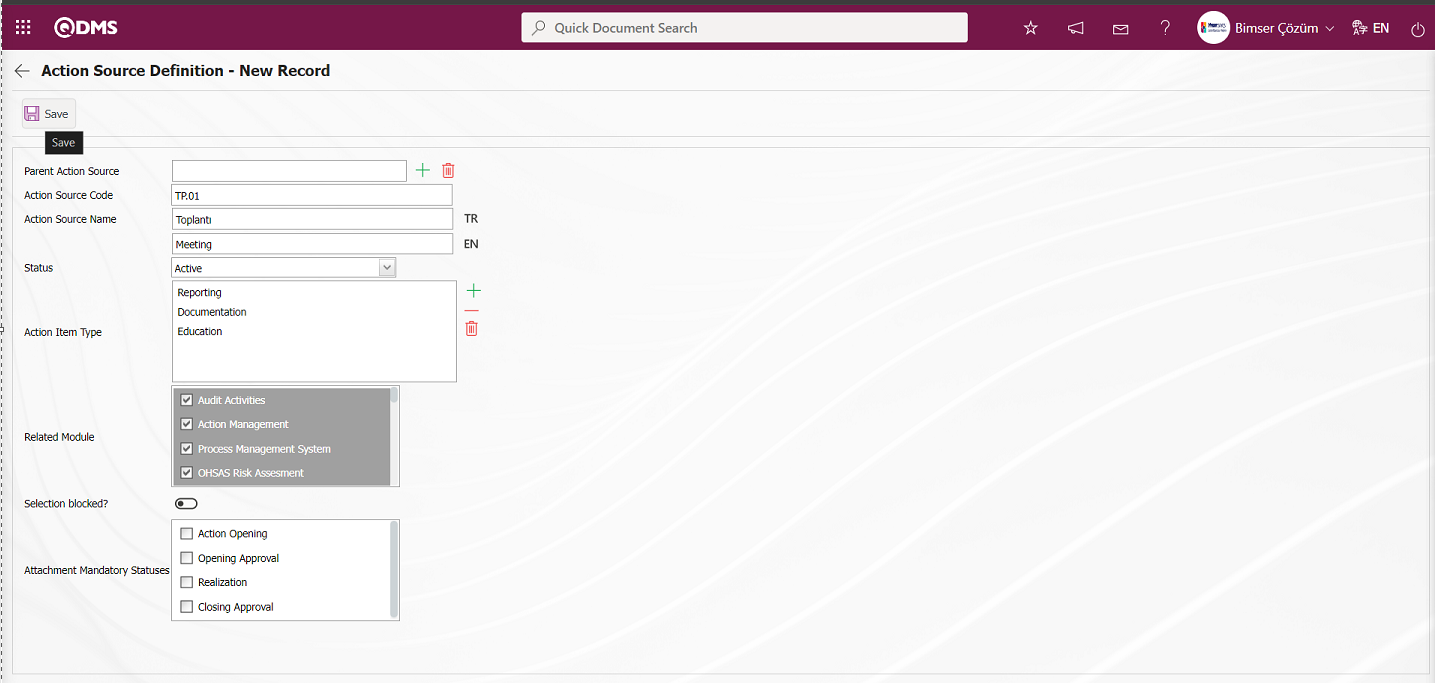
Related fields are defined on the screen that opens;
Main Action Source: If it is desired to define a new action source connected to that source under an action source defined in the system on the Action Source Identification - New Registration screen, click the  (Select) button and select the “Main Action Source” in the Action Source list defined in the system. For example; 01- OHS (main action), 01.01 - Occupational Accidents (dependent action), 01.02, OHS Risk Assessment (dependent action), etc.
Action Source Code: This is the mandatory field where the Action Source code information is defined on the Action Source Identification - New Record screen. It should be defined without using characters such as spaces and Turkish characters, so that it is not the same as the previously defined fields. For example; 001, AKS.01.
To set the Action Source tree breakdown format;
System Infrastructure Definitions/Action/Action Parameters menu is clicked. In the Action Management Module parameters listed in the Parameters screen, the parameter number 29 “Action source tree breakdown format” is selected by typing the parameter number in the parameter no field in the Filter tab on the parameters screen and searching by clicking the  (Search) button.

After selecting the “Action source tree breakdown format” parameter numbered 29 in the Action Management Module parameters, click on the  button.

In the parameters screen, the information of the tree breakdown format is written in the parameter value.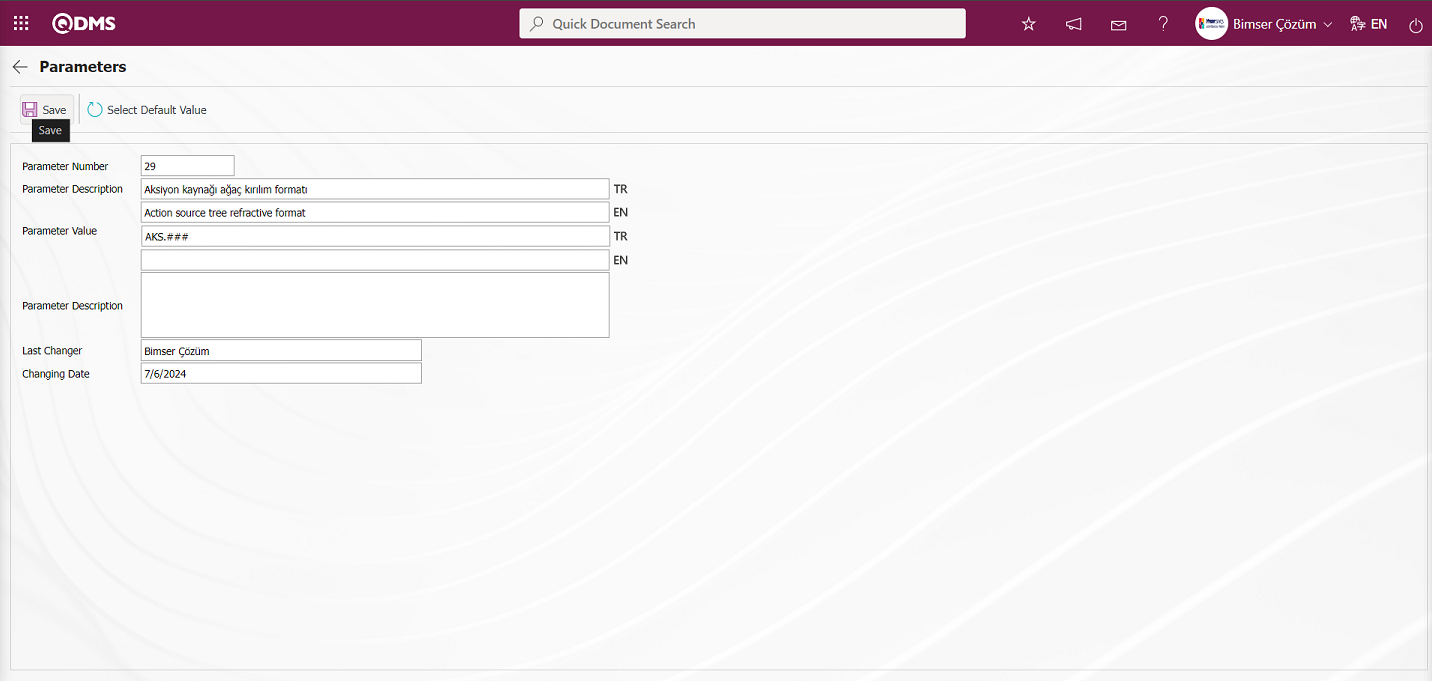
After typing the tree breakdown format information in the parameter value, the parameter record update process is performed by clicking the  button in the upper left corner of the screen. In the Action Source Identification process, the system automatically assigns the code according to the tree breakdown format according to the systemic setting made in the parameter. The system does not allow intervention in the Action Source code field. For example; AKS.001, AKS.002, AKS.003.

Defining Action Source: This is the field where the definition information of the Action Source is entered on the Action Source Definition-New Record screen. In the field with the English language equivalent icon, the English language equivalent of the Action Source definition section is written. For example; OHS, Environment, Meeting, etc.
Status: In the Action Source Identification-New Registration screen, whether the action source will be displayed on the planning screen is determined according to the “Active / Inactive” options selected from the status information field.
Action Item Type: In the Action Source Identification-New Record screen, it is the field where the action item type that the action source is associated with, if any, can be selected in the system. It is used to assign the same type of task to a certain action source. For example, if “Risk Mitigation” task, which is always the same task, is opened for the “Risk Assessment” action source, the relationship can be established by selecting it in the system.
Related Module: Action Source Identification-It is the field where the limitation of whether or not to display this Action source defined in the Modules defined in the system on the new record screen is made. On the action source selection page, it is ensured that the list is displayed according to the setting made in this field. In the Modules where the action item is created, the action source list will only display the sources that are related to the relevant Module and the sources that are not related to the Module will not be displayed.
Selection Blocked: When this action source is selected on the Action Planning-New Record screen when the check box related to the field “Selection Blocked?” is checked on the Action Source Definition-New Record screen, the system gives a warning message that this action source cannot be selected. In the definitions of Action Sources, which are generally sub-divided under the main headings, the check box related to the main headings “Should Selection be Blocked?” is marked. For example: 01-OHS (main action), 01.01 Occupational Accidents (dependent action), 01.02, OHS Risk Assessment (dependent action), etc.
After the required fields are filled in, click on the button in the upper left corner and the Action Source definition registration process is performed. The action source is in the form of a tree and can be sub-divided as many times as desired.
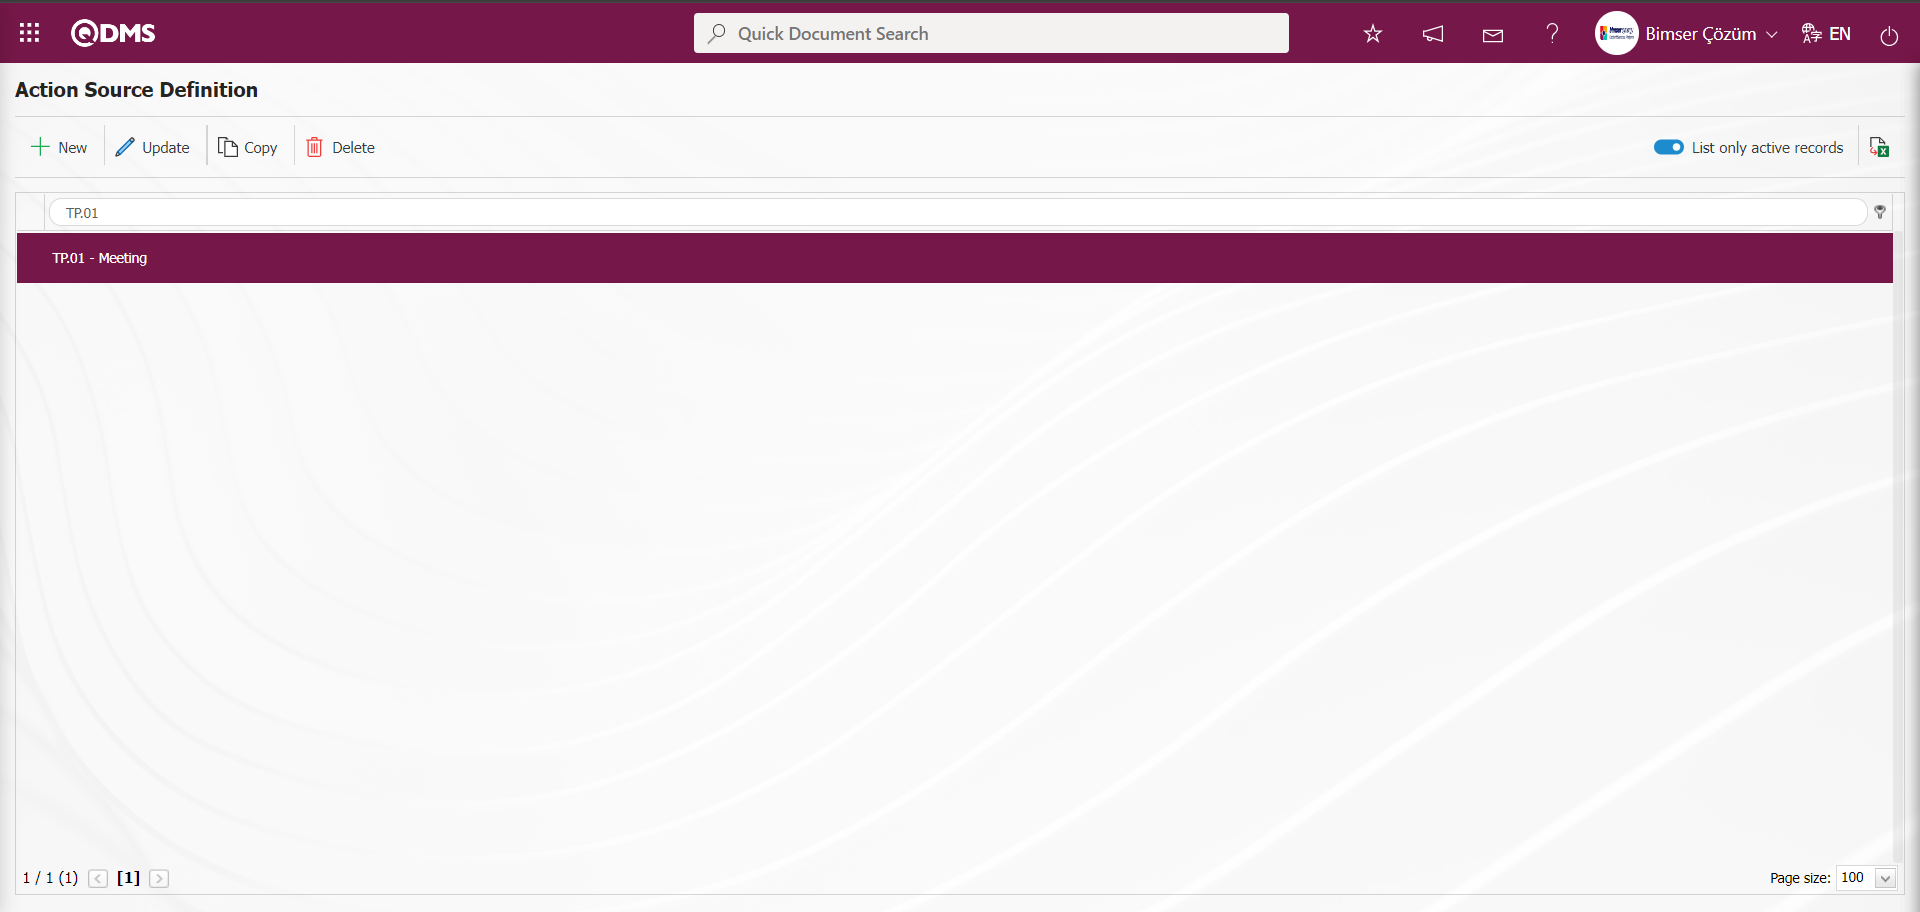
If “List Only Active Records” check box is selected, only the list of action sources whose status is Active will be displayed. If it is desired to display the action sources which are set as inactive, the “List Only Active Records” check box is unchecked.
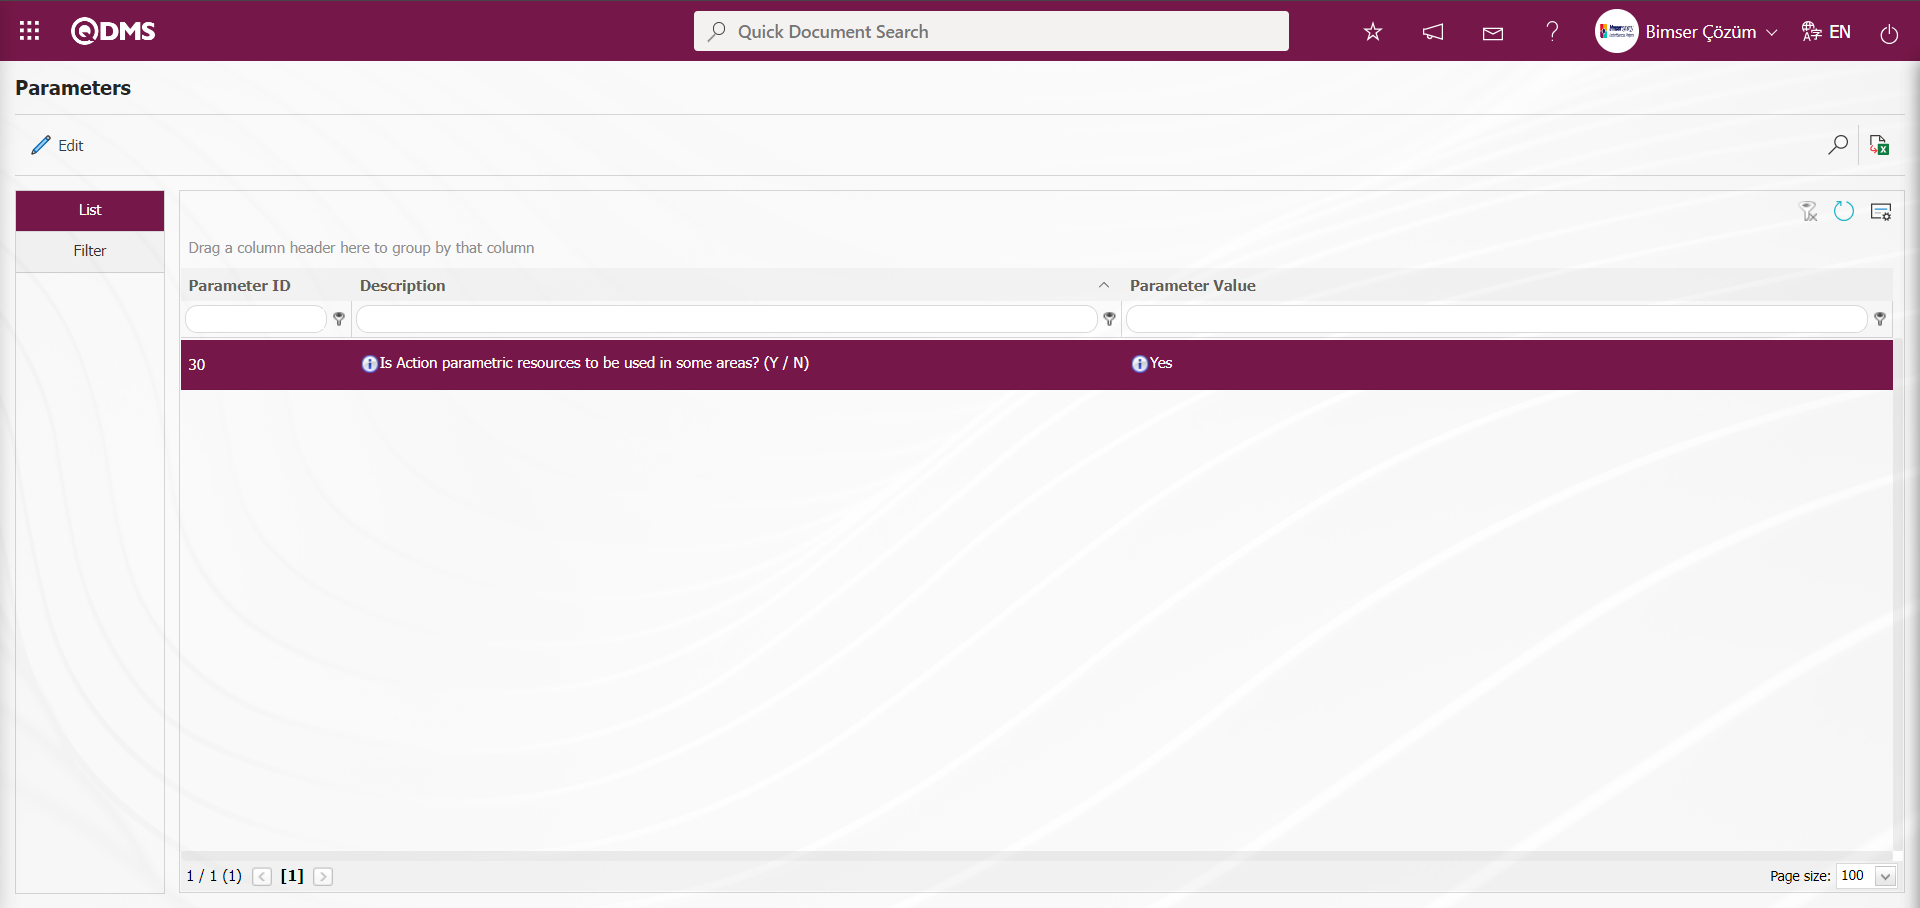
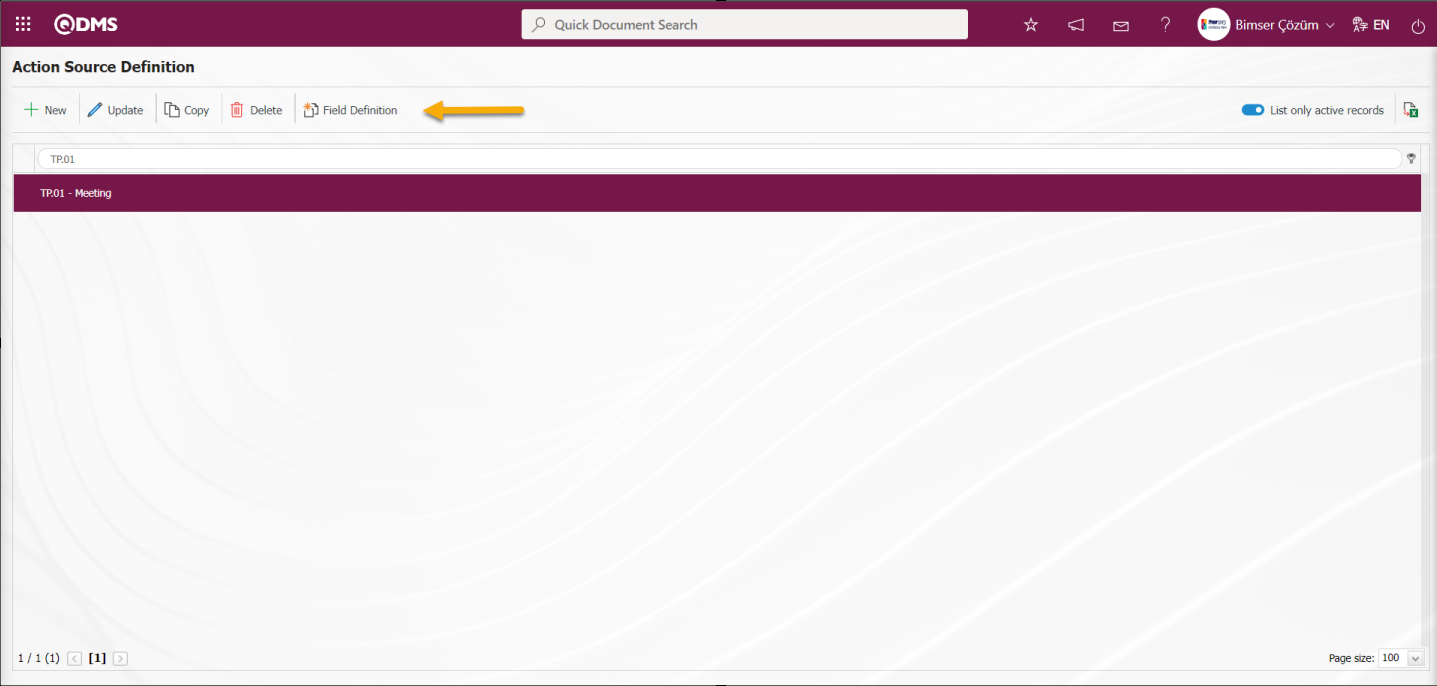
Source Based Field Definition Process: For a defined action source, extra fields that will only appear in that source can be defined. In order to define this field, firstly, the parameter number of the parameter number 30 “Will parametric field be used on the basis of action source? (Y/N)” on the Action Management module parameters screen is selected by typing the parameter number in the parameter no field on the Filter tab and searching by clicking the  (Search) button.

After selecting the parameter 30 “Will parametric field be used on the basis of action source (Y/N)” in the action management module parameters, click  button.

The parameter value of the opened parameters screen is selected as “Yes”.
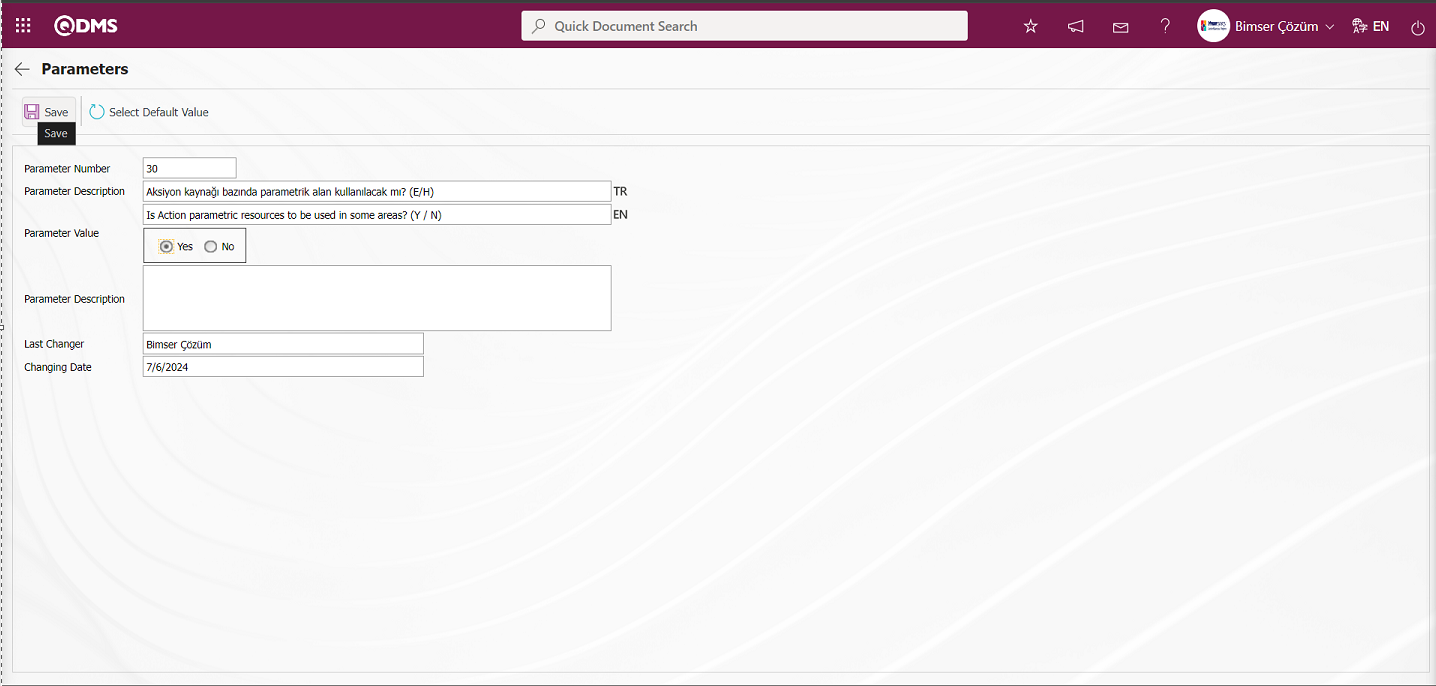 On the Parameters screen, the parameter is activated by clicking the button on the top left.
After the parameter is activated, the 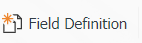 button, which is the 5th button on the Action Source Definition screen, is displayed.
For an action source defined using this button, extra fields that will appear only in that source can be defined.
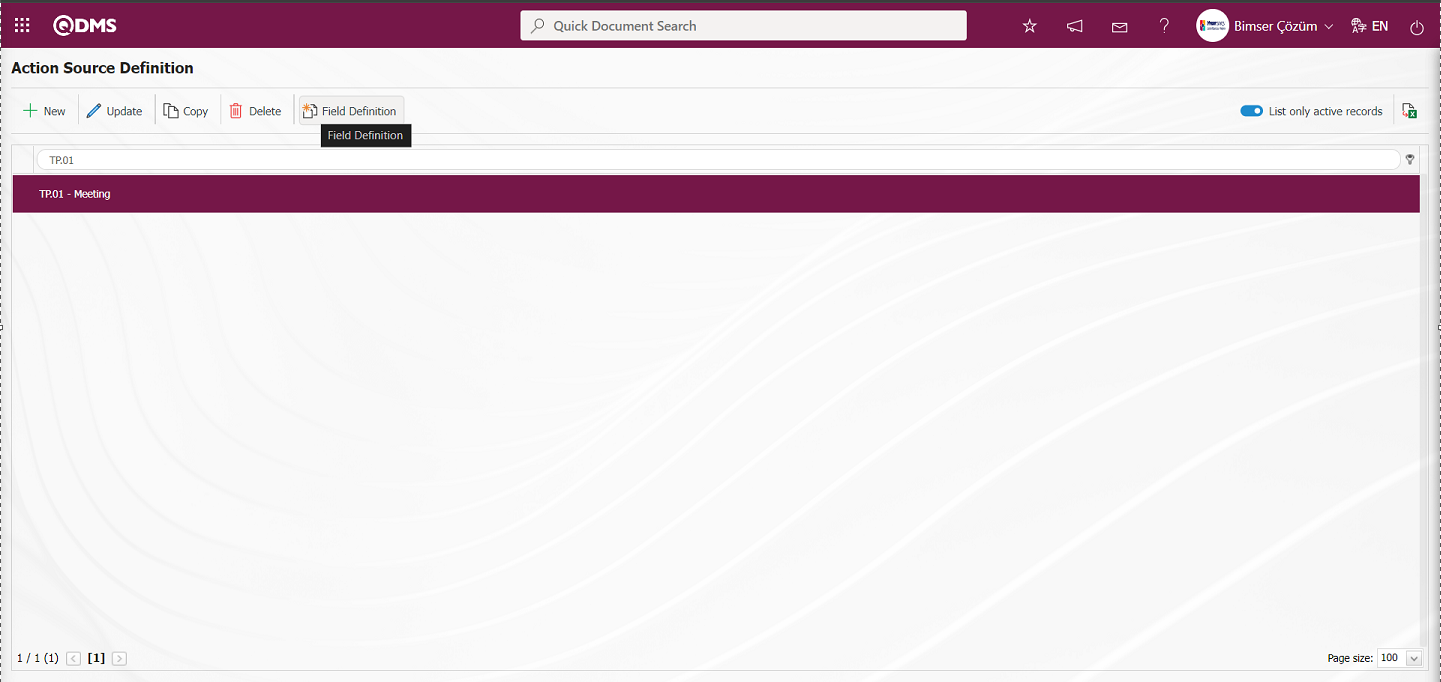
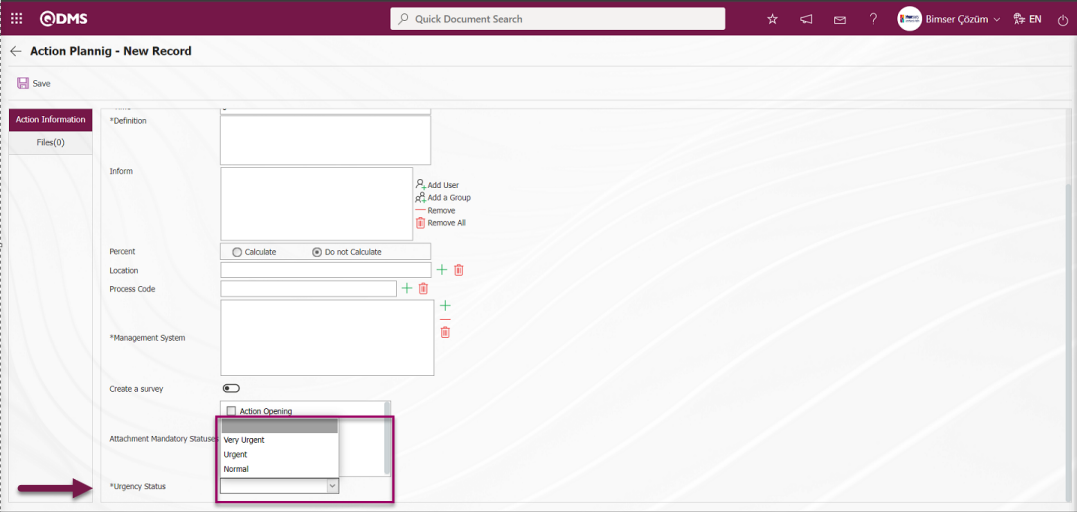
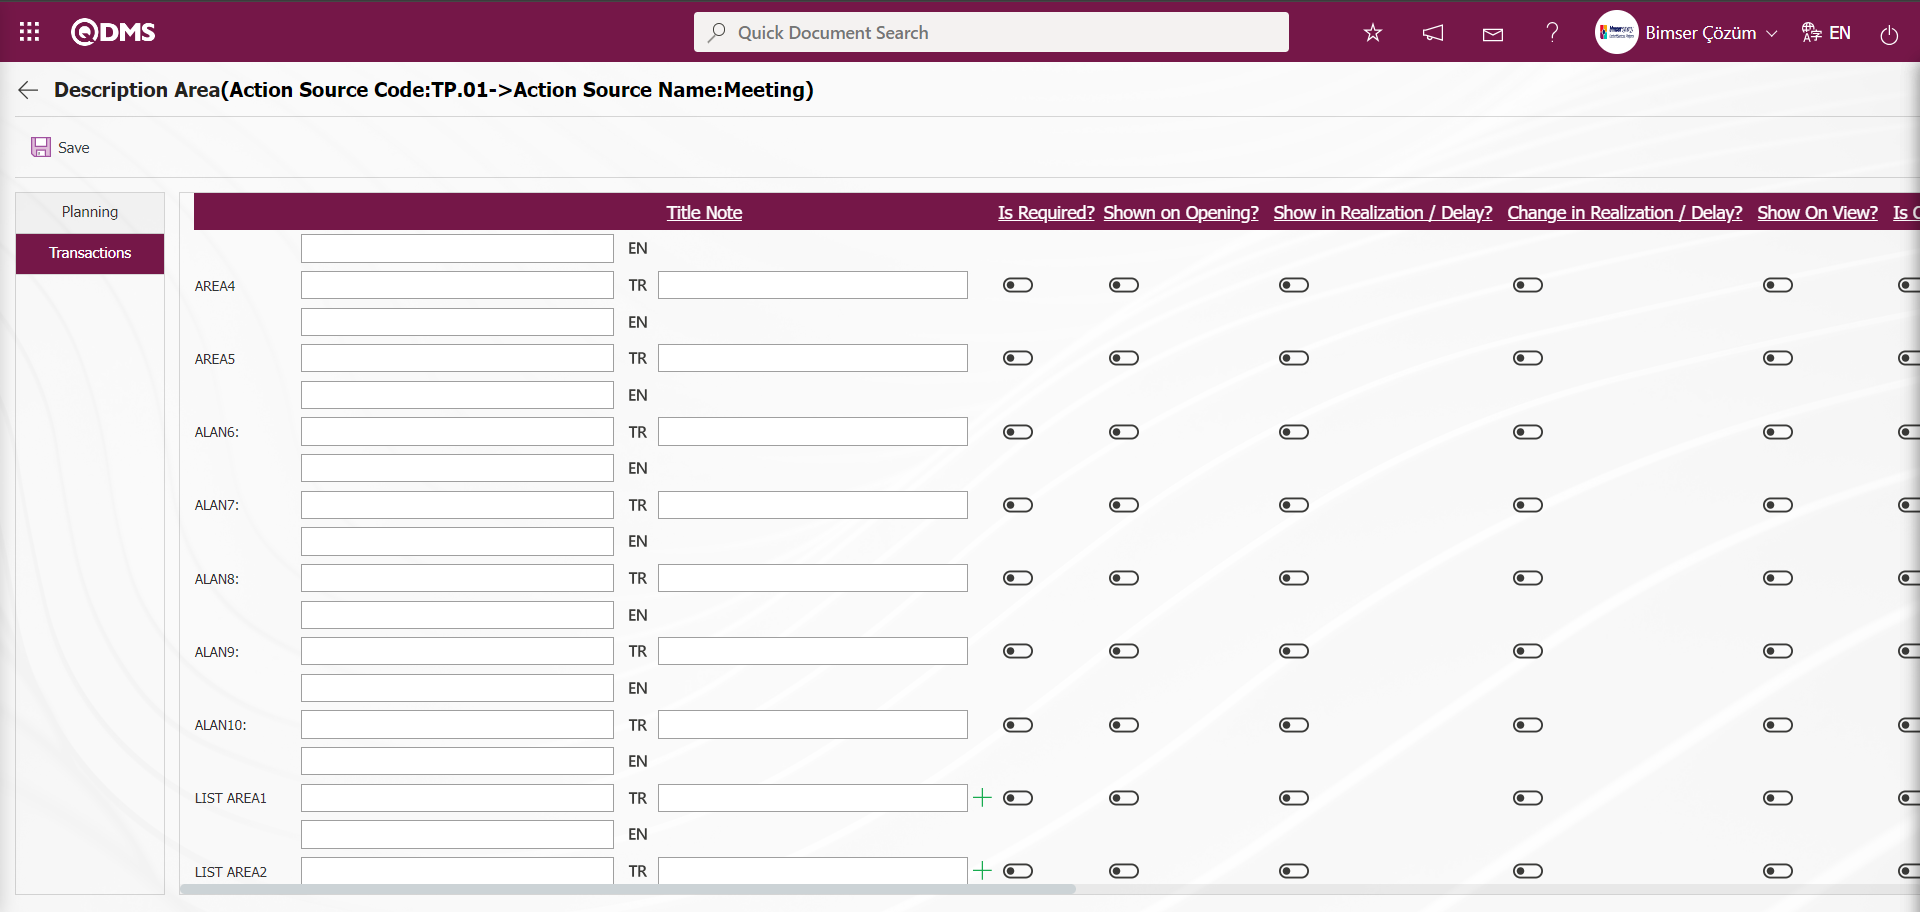
For example; it may be desired to define a field with a selection as “Urgency Status” (Very Urgent / Urgent / Normal) for the “Meeting” action source. If it is desired that this selection field will appear before the user in the Meeting source and not in other action sources, it is necessary to define a parametric field connected to the action source. For this; button is clicked to open the parametric field definition menu. In Action Planning Module, parametric field can be defined on the basis of Planning or Items. The definition part of the list type parametric field to be displayed on the planning screen is written in the “LALAN1” field.
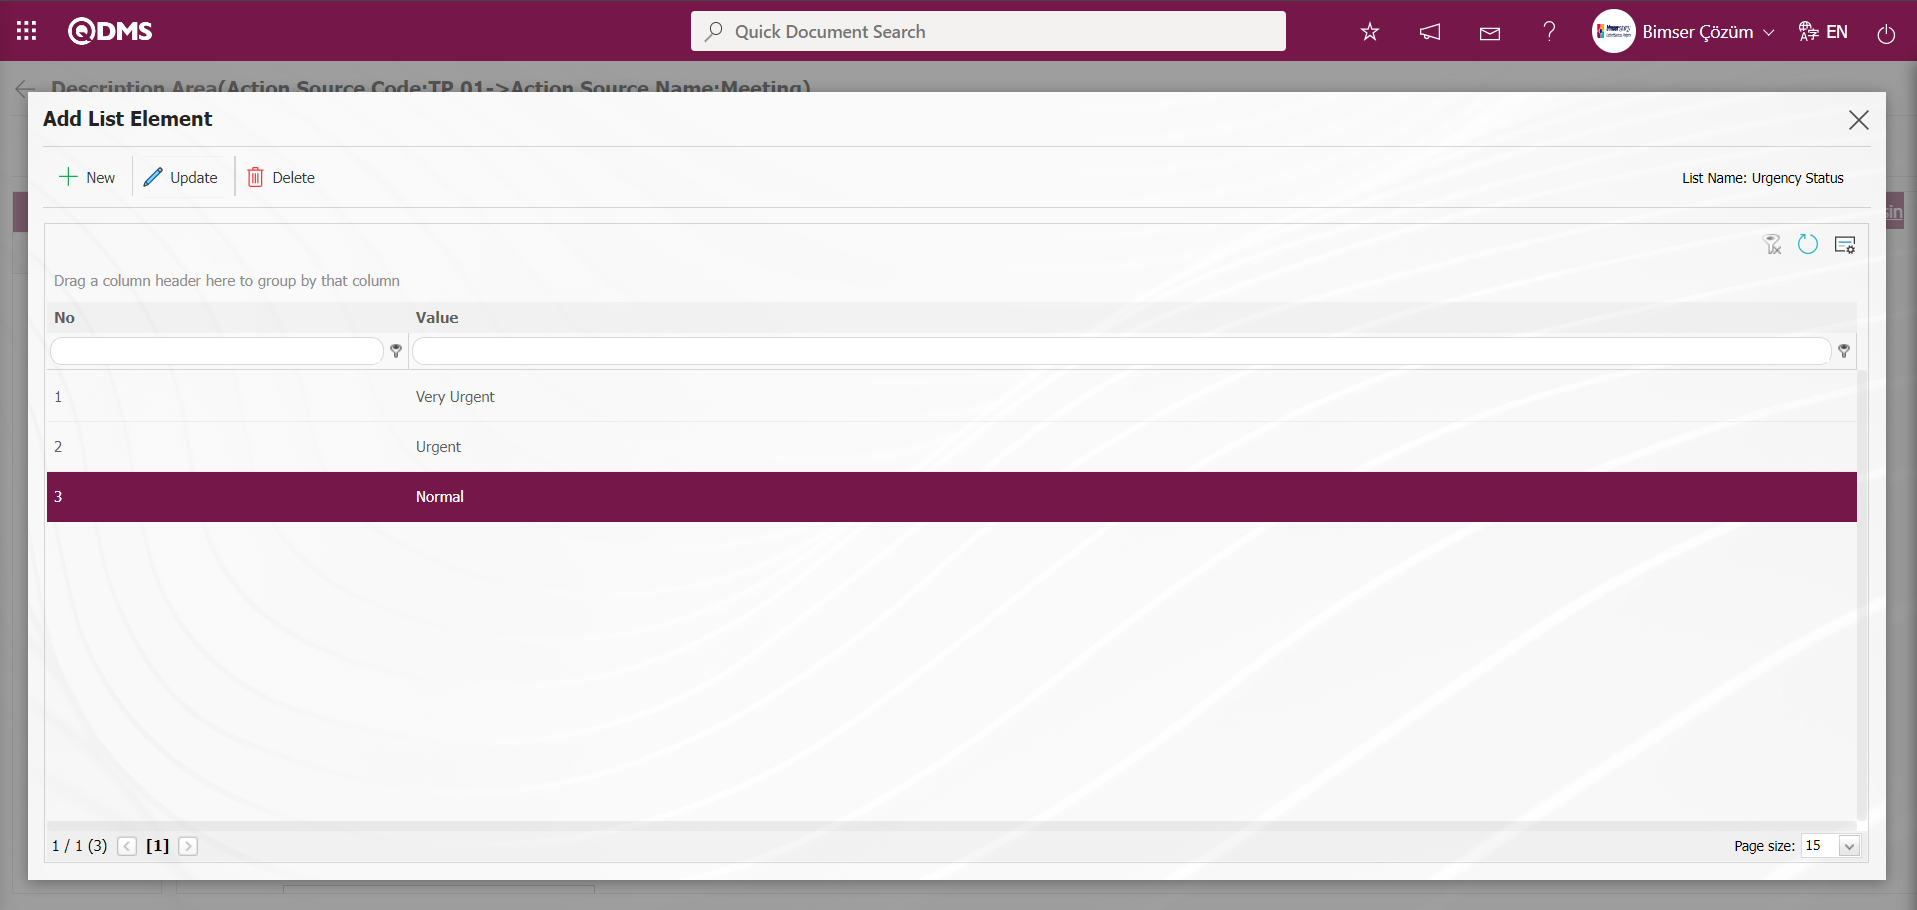
 (Add) button is clicked to open the screen for defining list elements. Add list elements screen opens
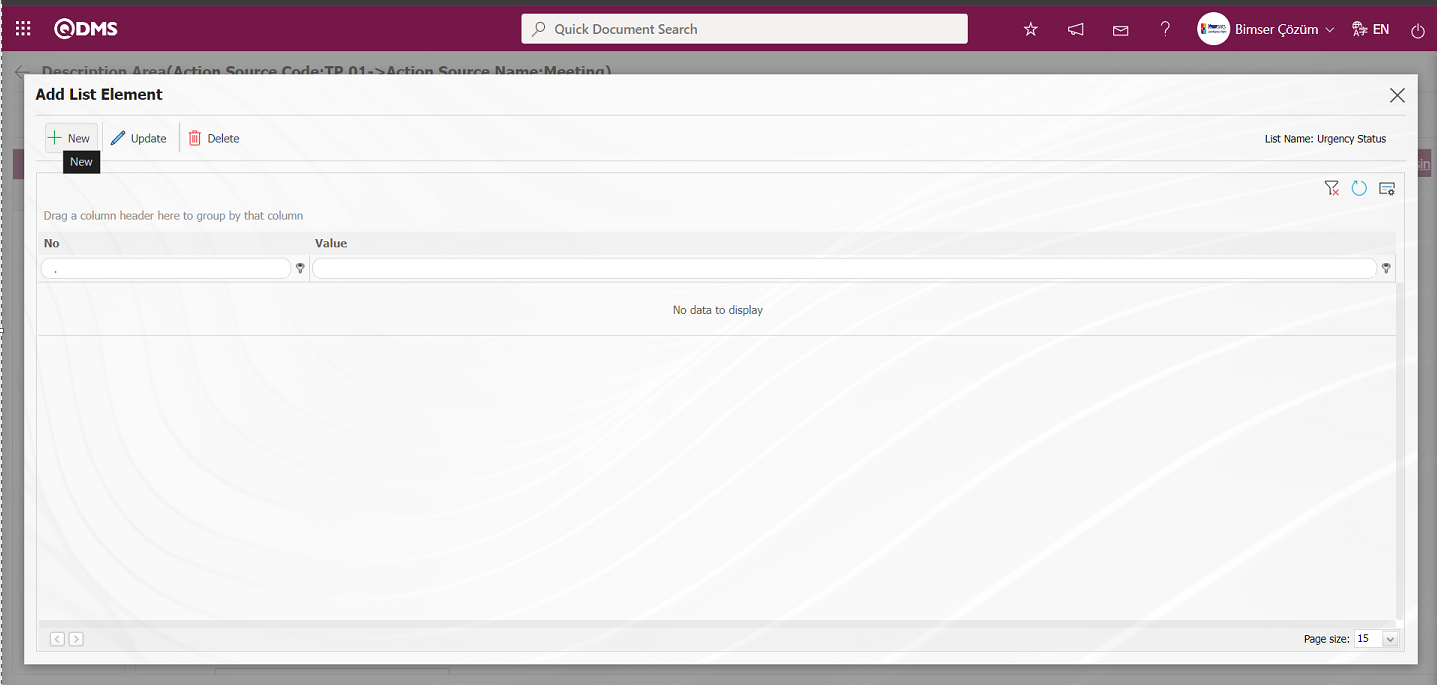
With the help of the buttons on the screen;
 : Defining a new list item is done.
 : Updating the information of the selected list item in the list is done.
 : Deleting the information of the selected list item in the list is done.
To define a list element in the Add List Element screen, click on the button at the top left corner of the screen to open the Add List Element screen.
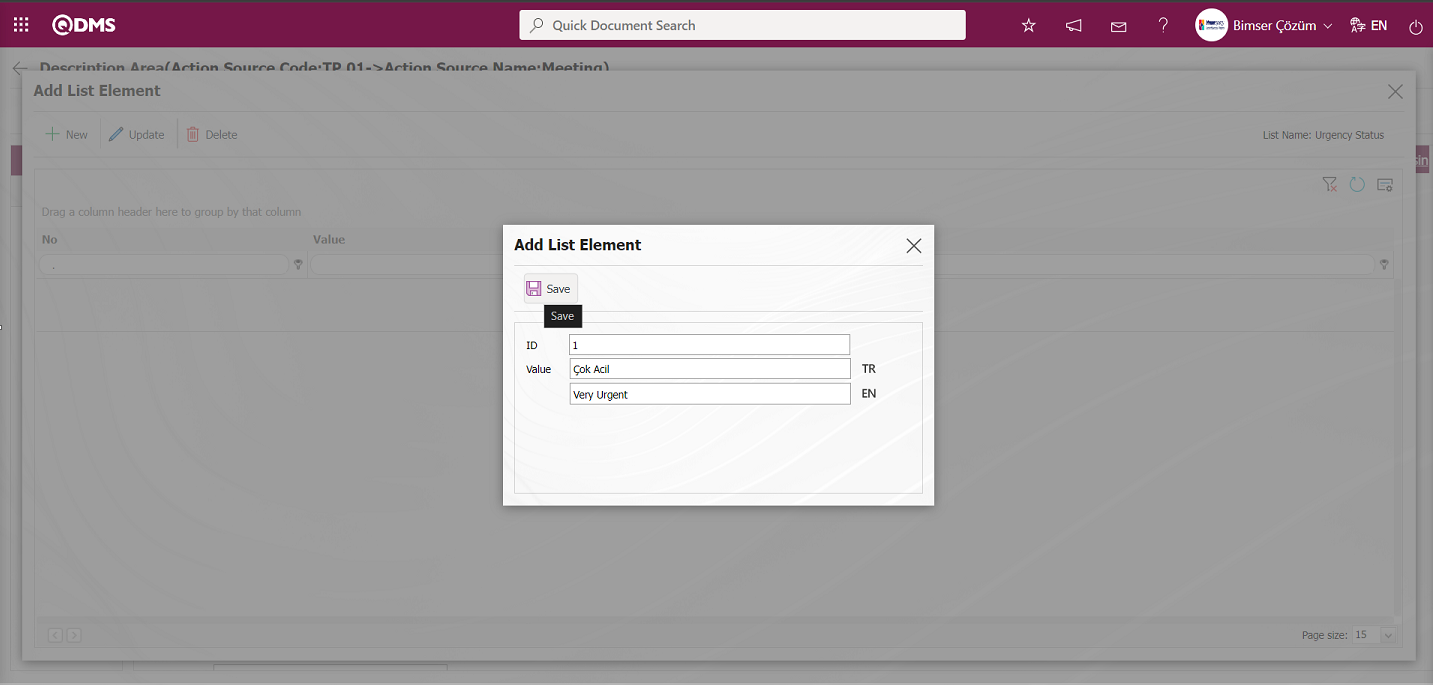
In the Add List Element screen, the “ID” and Value fields of the 1st list element are entered. After entering the necessary information in the required fields, the button in the upper left corner of the screen is clicked to register the 1st list element.
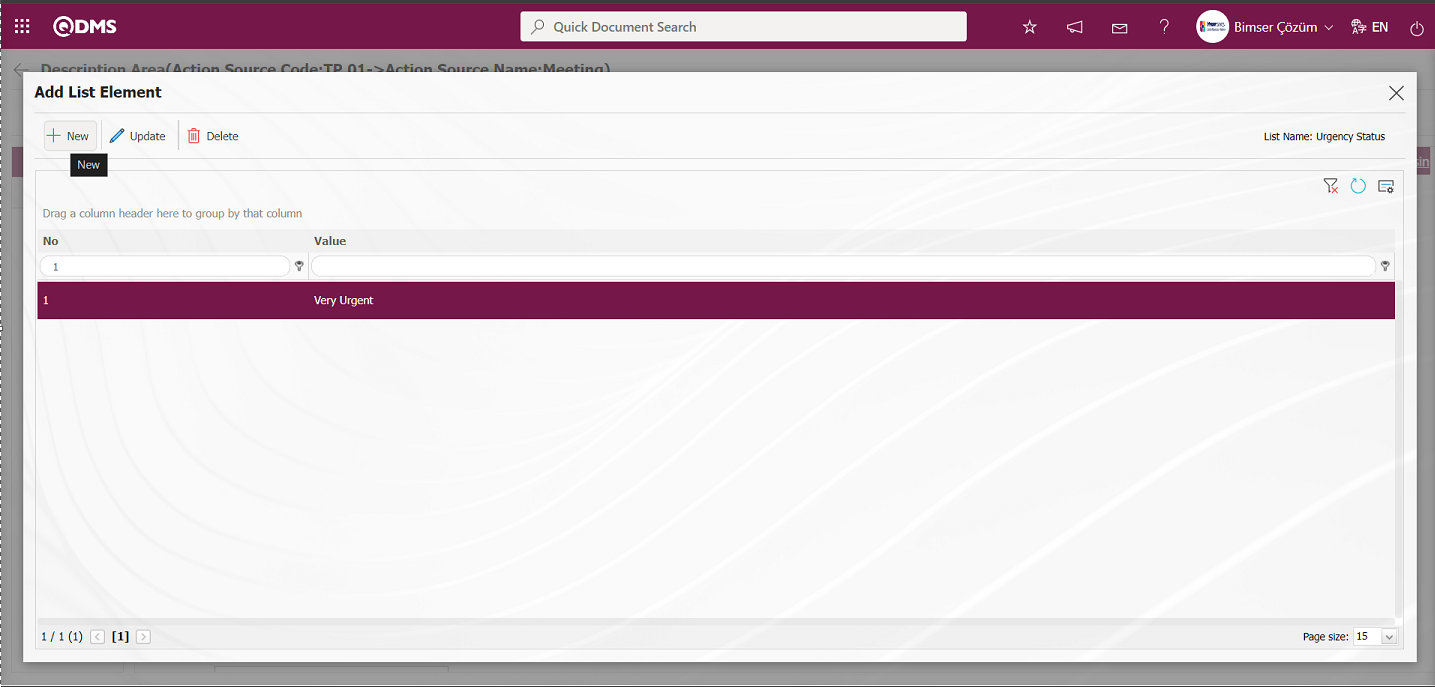
To define the 2nd list element on the Add List Element screen, click on the button on the top left corner of the screen to open the Add List Element screen.

In the Add List Element screen, the “ID” and Value fields of the 2nd list element are entered. After entering the necessary information in the required fields, the 2nd list element registration process is done by clicking the button in the upper left corner of the screen.
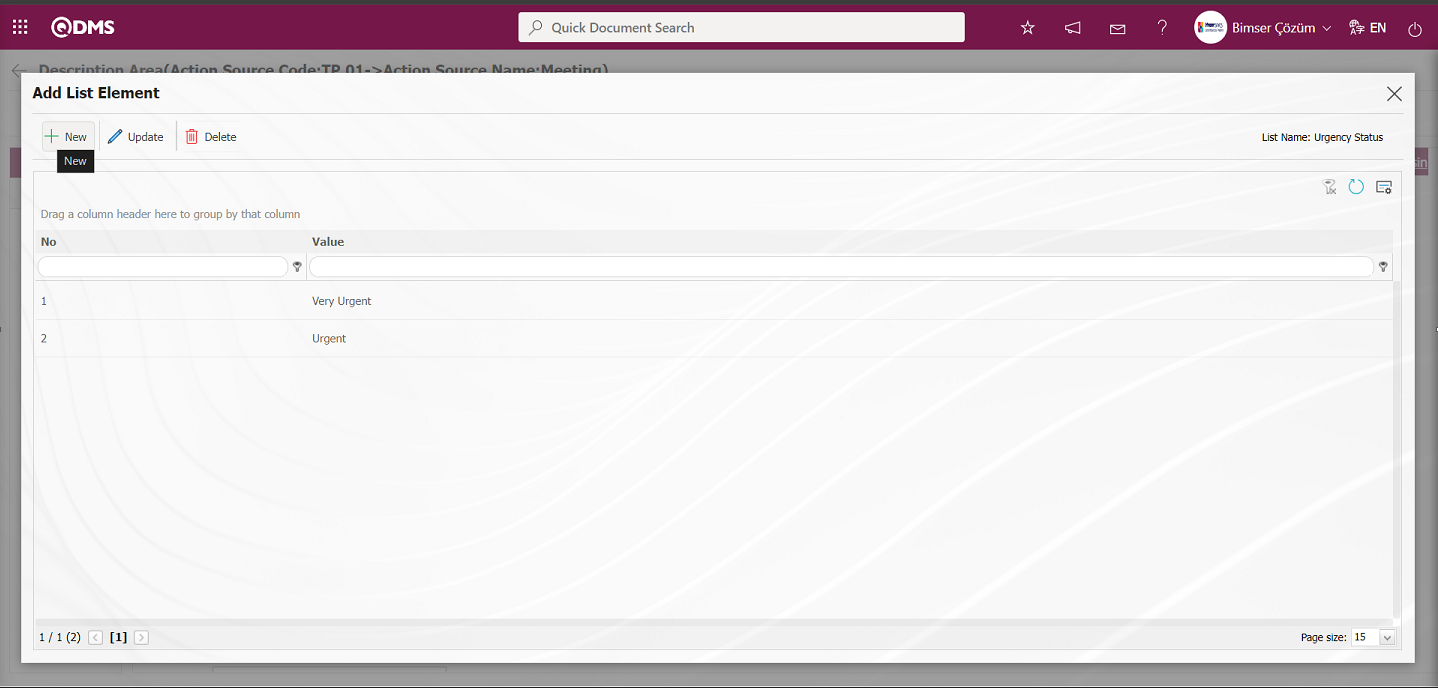
To define the 3rd list element on the Add List Element screen, click on the  button at the top left corner of the screen to open the Add List Element screen.
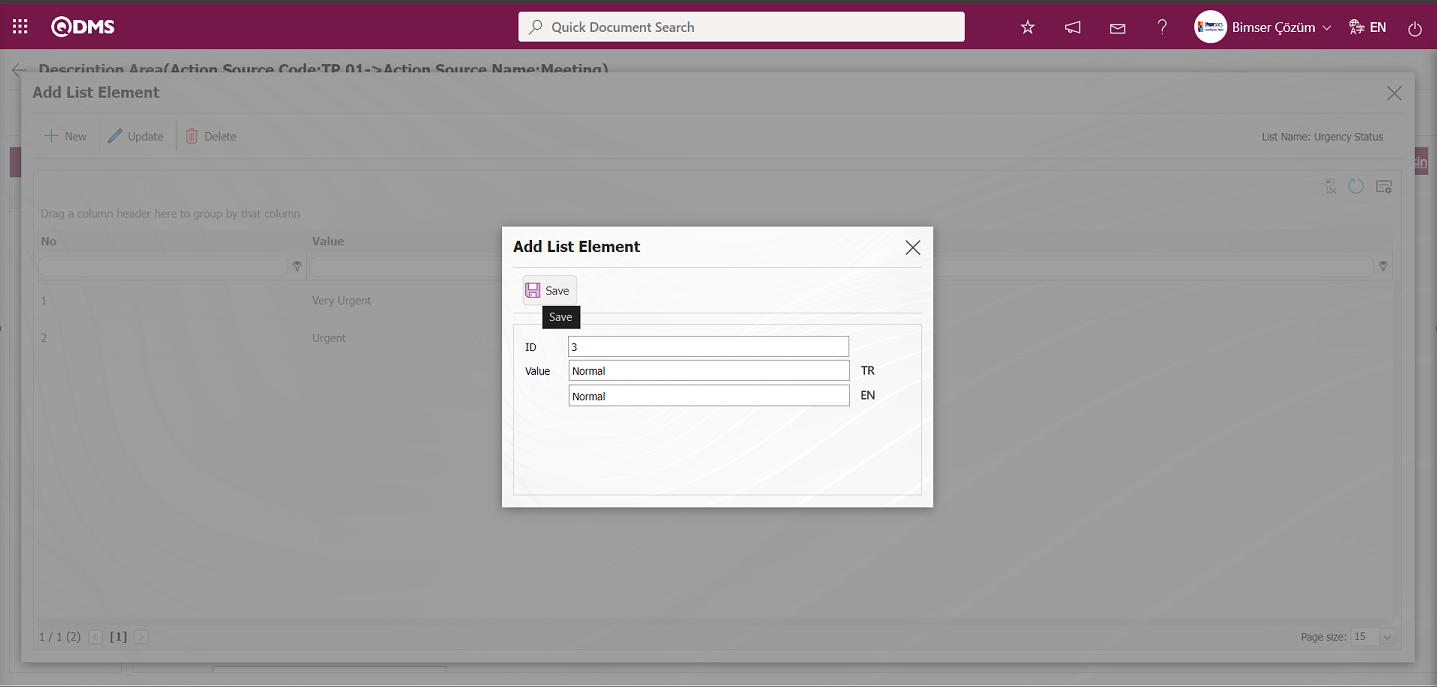
In the Add List Element screen, the “ID” and Value fields of the 3rd list element are entered. After entering the necessary information in the required fields, the 3rd list element registration process is done by clicking the  button in the upper left corner of the screen.
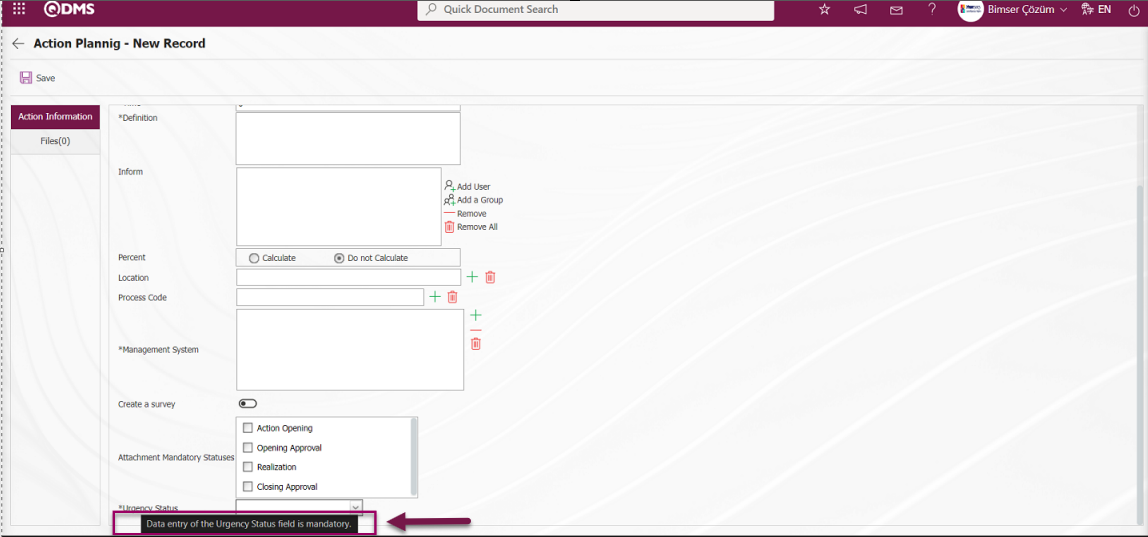
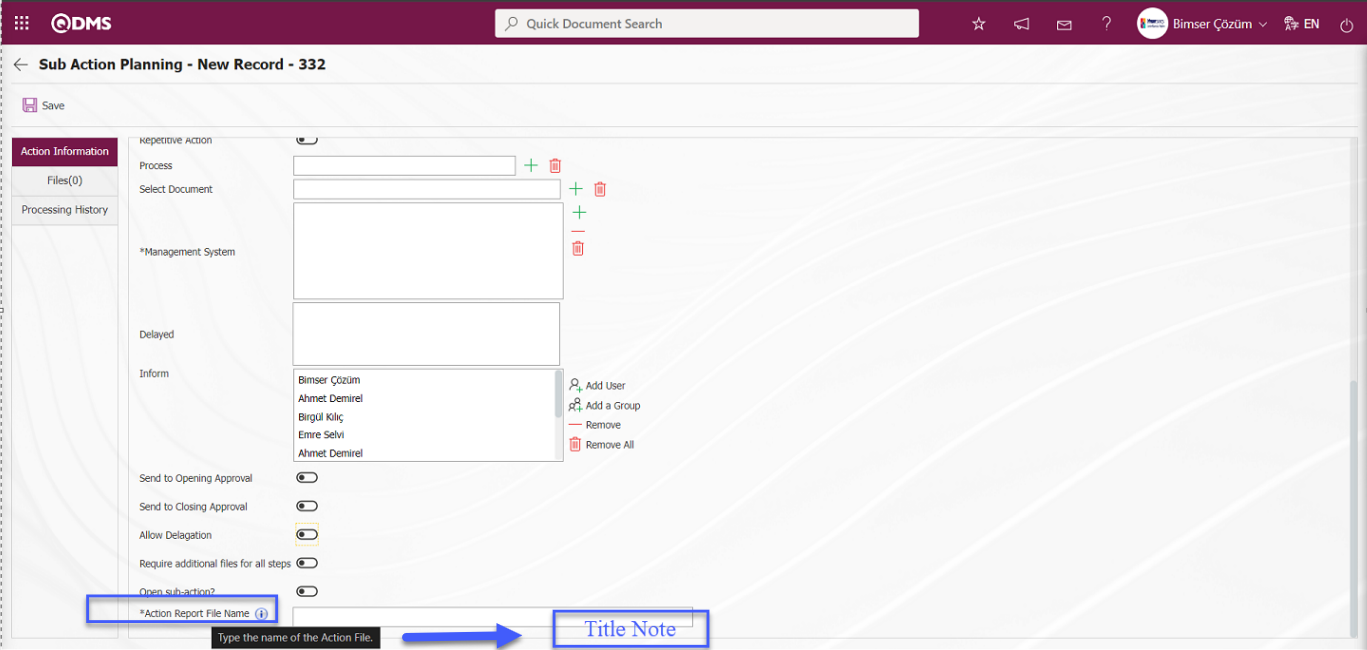
After defining the list elements of the list-type parametric field in the field definition process, the title note information of the list-type field is written and the check box related to the obligation field is marked.
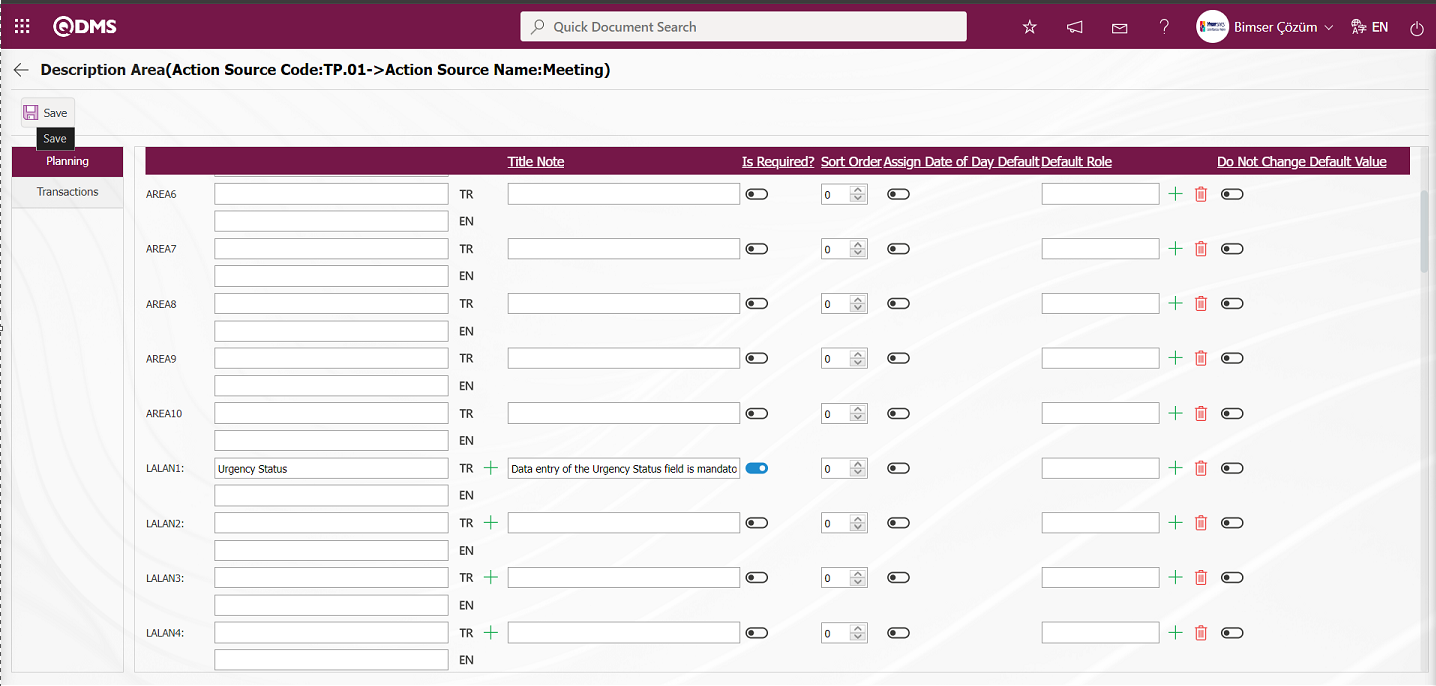
After entering the required information in the required fields, the list-type parametric field is defined by clicking the button in the upper left corner of the screen. In order to display the defined field, the Action Source selected on the Action Planning - New Record screen is selected in the Action Source list and the list-type parametric field defined depending on that source is displayed.
When the mouse hovers over the defined field, the Title Note information and that it is a mandatory field is indicated by putting a “*” sign.
In order to define a field on the planning screen, the name of the field is written as well as information such as necessity status and sequence number. Field definitions can be made on the basis of text, list, number, date, personnel and quantity.
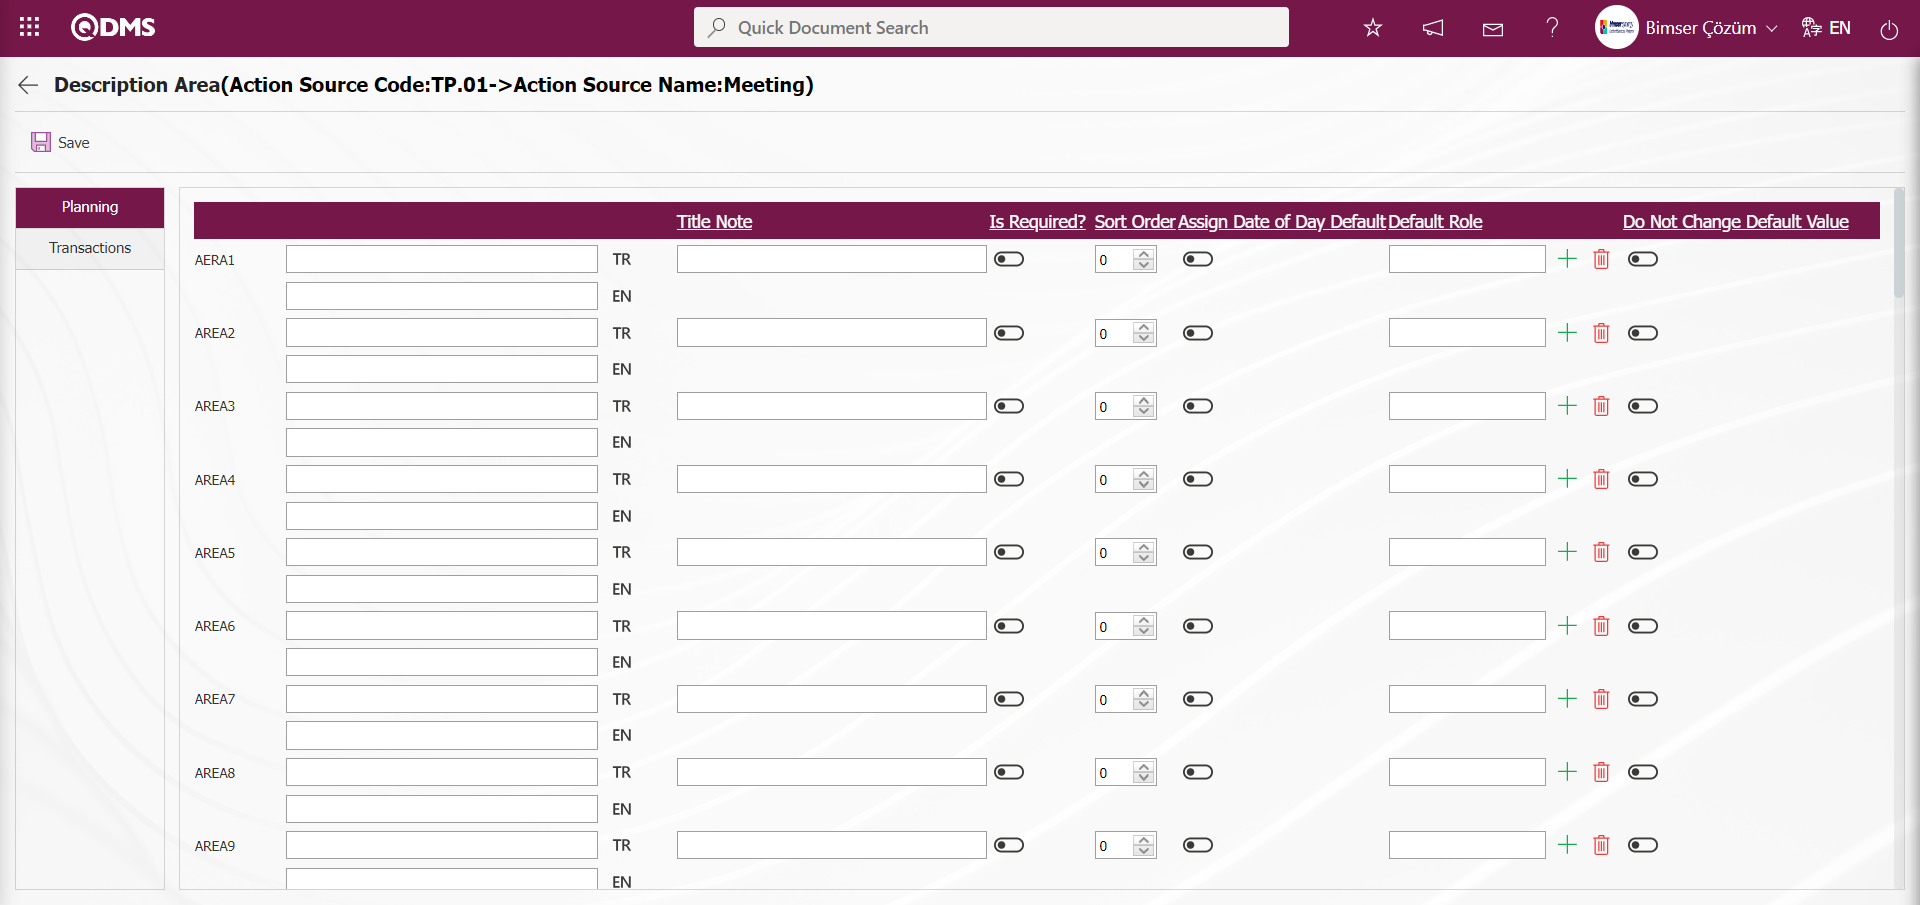
While defining the field on the basis of items, the name of the field, status of displaying in opening, status of displaying in realisation/delay, status of changing in realisation/delay, status of displaying in viewing, status of changing in approval, status of displaying in opening approval, status of displaying in closing approval, status of displaying in grid and sequence number are determined and saved. If the check box “can it be changed in approval” is ticked, the action item can be changed by approvers in opening/closing approvals. Field definitions can be made on the basis of text, list, number, date, personnel and quantity.

Action Source Copy Process: On the Action Source Identification screen, while the Action Source is selected in the list, click on the  button to open the Action Source Copy screen and copy the Action Source.
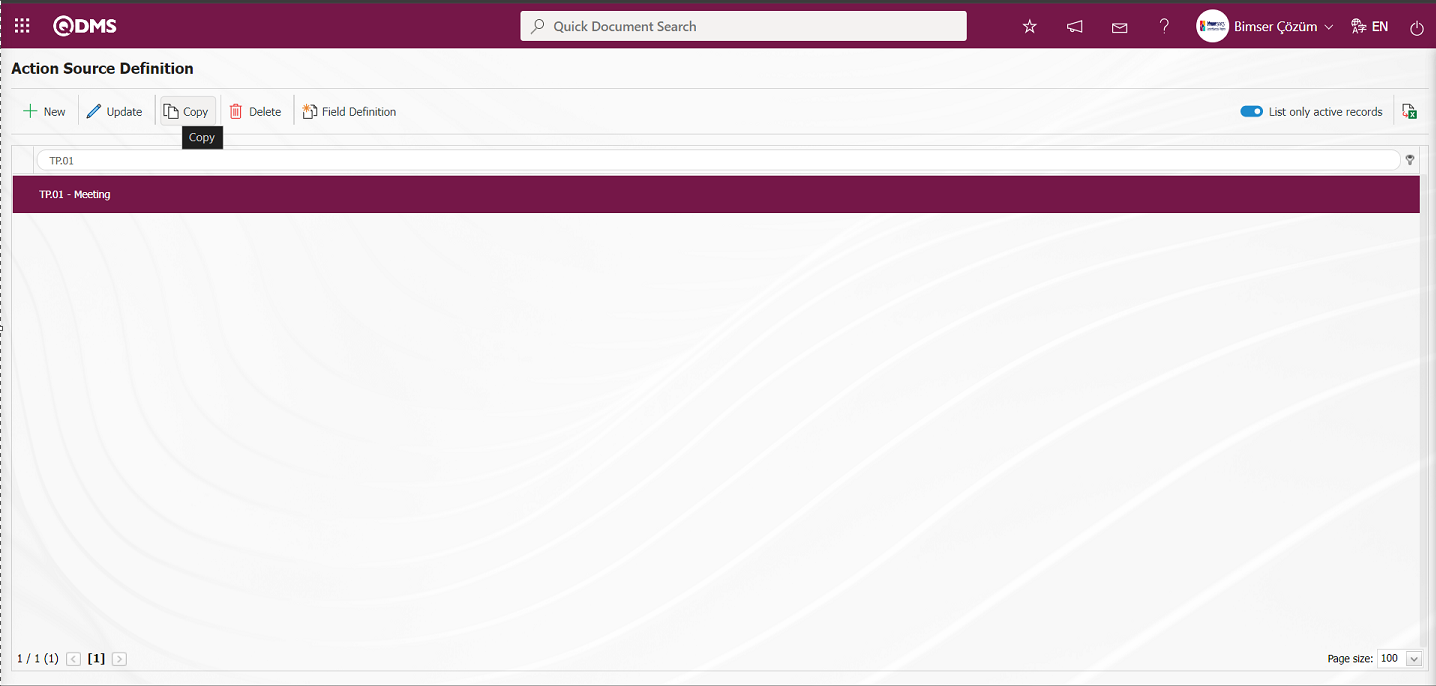 While the Action Source is selected in the Action Source Defining screen, the Action Source Defining screen is opened by clicking the button.
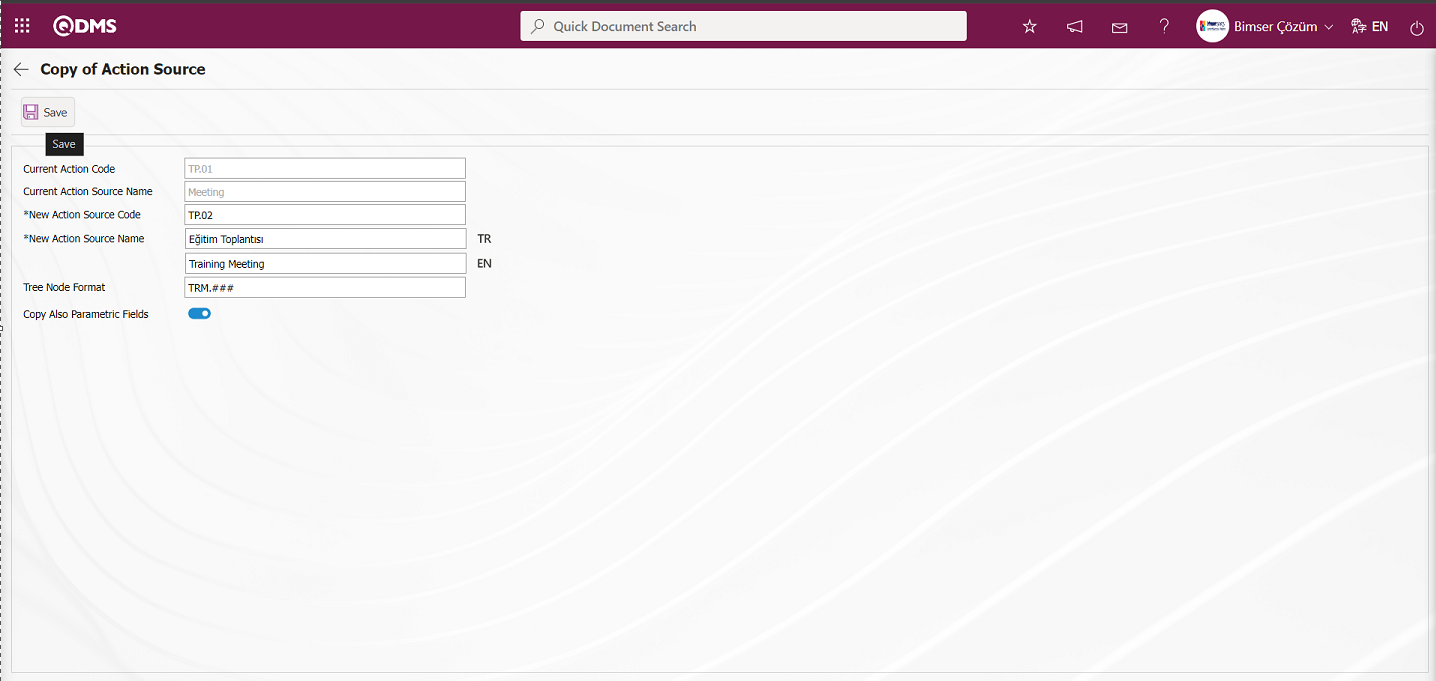
Related fields are defined on the screen that opens:
Current Action Source: It is the field where the action source code information copied in the Action Source Copy screen is given by the system, it cannot be changed.
Existing Action Source Name: It is the field where the action source name copied in the Action Source Copy screen is given by the system, it cannot be changed.
New Action Source Code: This is the field where the new action source code information of the action source copied on the Action Source Copy screen is entered.
New Action Source Name: This is the field where the new action source name of the action source copied in the Action Source Copy screen is entered. In the field where the English language equivalent icon is located, the English language equivalent of the New Action Source definition section is written.
Tree Breakdown Format: This is the field where the tree breakdown format information is entered to define how the new action source code structure will be on the Action Source Copy screen.
Copy in Parametric Fields: In the Action Source Copy screen, if there are parametric fields related to the action copied in the action source copy process, enter whether these fields will be displayed on the new source. If you want to move the parametric fields connected to the action source, tick the relevant check box.
After the required fields are filled, the copy registration process is performed by clicking the  button in the upper left corner.

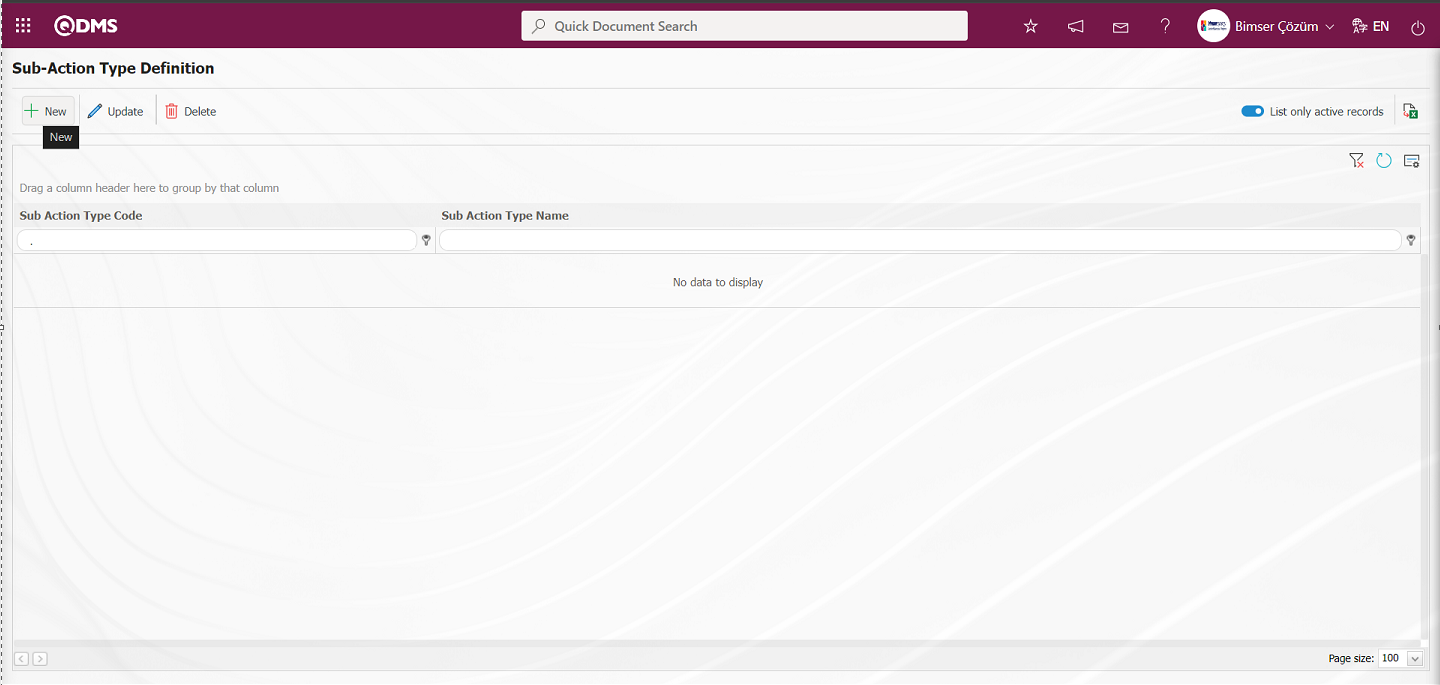
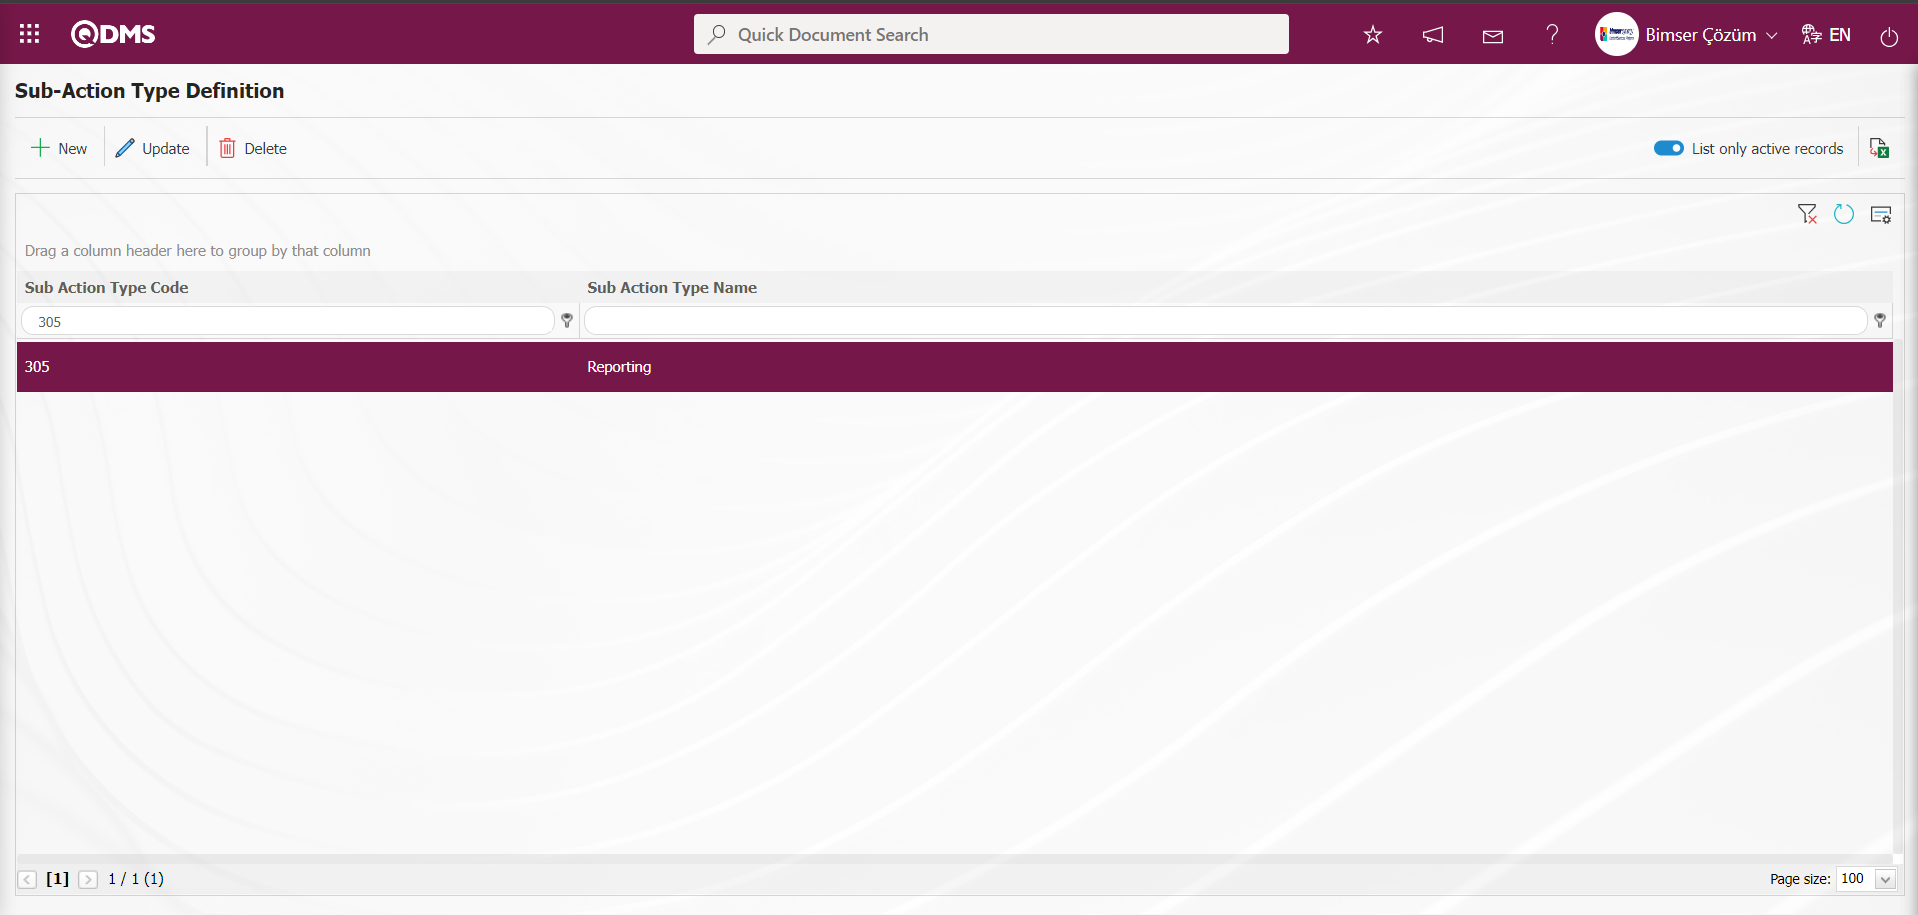
6.1.2. Action Item Type Identification
Menu Name: System Infrastructure Definitions/ Action/ Action Item Type Identification
This is the menu where the Action Item Type identification process is performed. The types of tasks to be assigned as a result of the action opened in the system are determined. It serves to categorise the tasks. For example; Various action item types such as risk assessment, improvement, training, purchasing, legal legislation follow-up, measurement, reporting, development, R&D, documentation can be defined. As many item types can be defined as desired.
With the help of the buttons on the screen;
: A new Action Type is defined.
 : Edit/change/update the action type information selected in the list.
 : The Action Type information selected in the list is deleted
: Data is transferred to Excel. (The report of the Action Type list in the list tab on the Action Type Definition screen is taken in Excel format)
 : The data remaining in the filter fields in the grid where the search criteria on the menu screens are searched are cleared.
 : The menu screen is restored to its default settings
 : User-based designing is done on the menu screen with the show-hide feature, that is, the hiding feature of the fields corresponding to the columns on the menu screens.
To add a new Action Type to the Action Type Definition screen, the Action Type Definition / New Record screen is opened by clicking the button in the upper left corner of the screen.
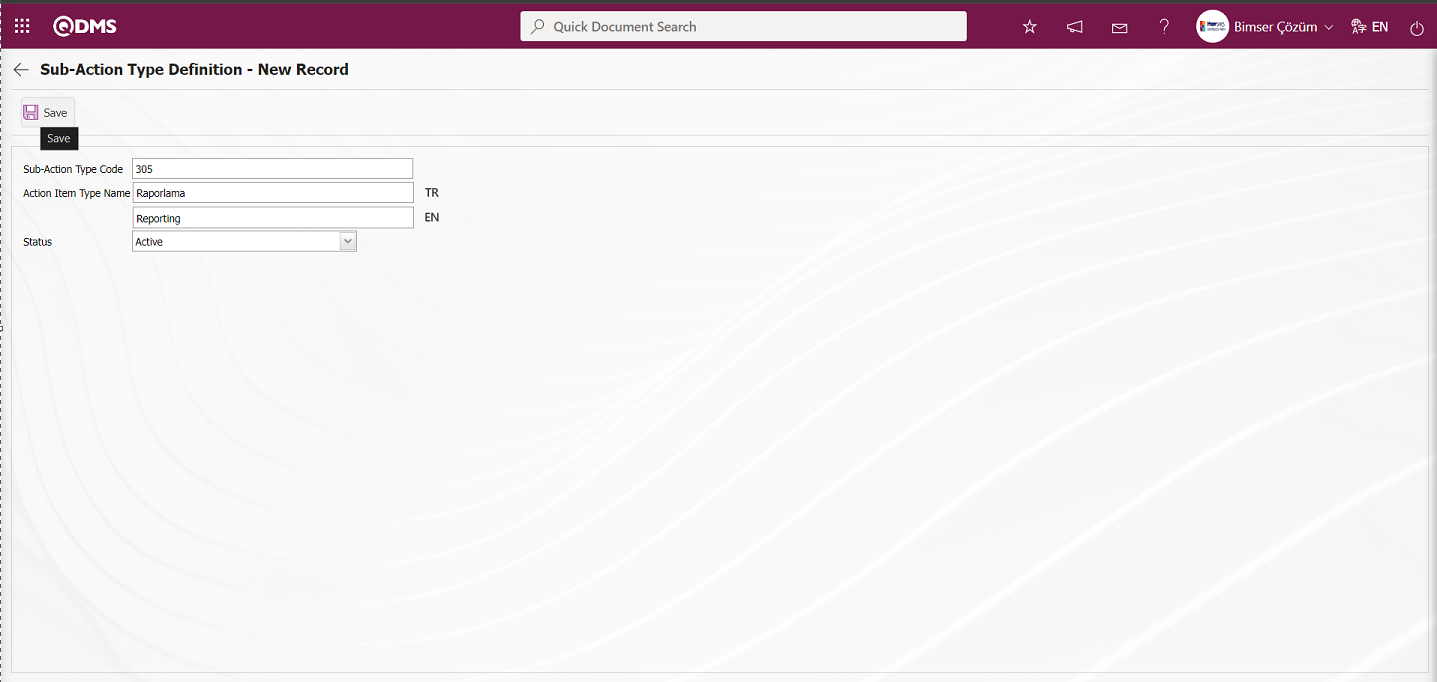
Related fields are defined on the screen that opens;
Action Item Type Code: Action Item Type Identification - This is the mandatory field where Action Item Type code information is defined on the New Record screen. It should be defined without using characters such as spaces and Turkish characters, so that it is not the same as the previously defined fields. For example. “001” , “RK”
Action Item Type Name: Action Item Type Definition - This is the mandatory field where the Action Item Type definition information is defined on the New Record screen. In the field with the English language equivalent icon, the English language equivalent of the definition part of the Action Item Type is written.
Status: It is the field where “Active” option is selected in the “Active” and “Inactive” options of the Status information on the Action Item Type Identification - New Record screen. Inactive status is a sign that Action Item Types are no longer used in the system. In order to see the Action Item Types that are not used, the relevant check box is left unchecked in the “List Only Active Records” field.
After the required fields are filled in, the Action Type definition registration process is performed by clicking the  button in the upper left corner.
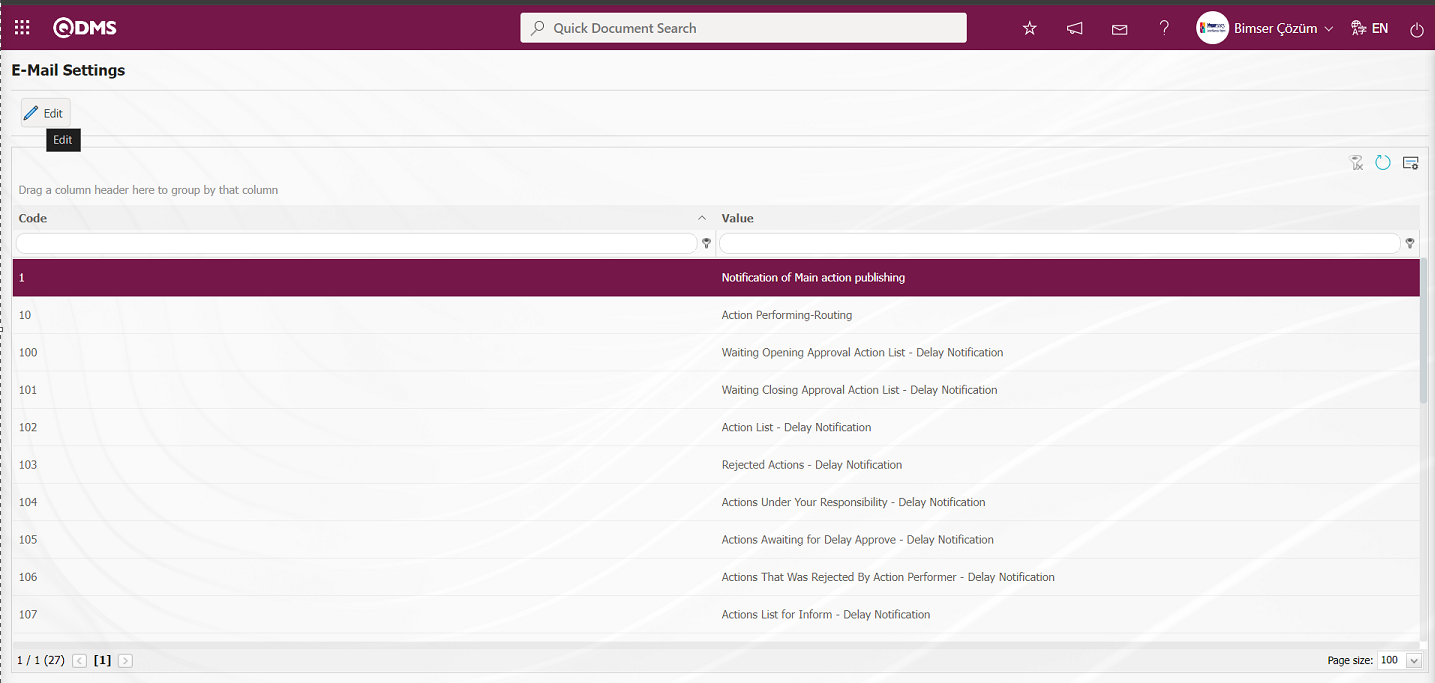
6.1.3. E-Mail Settings
Menu Name: System Infrastructure Definitions/ Action/E-Mail Settings
At which stage of the Action Management processes, it is determined to whom e-mail/message will be sent.

With the help of the buttons on the screen;
 : Editing/changing/updating is done on the value of the e-mails selected in the list.
: Clearing the data remaining in the filter fields in the grid where the search criteria search operation on the menu screens is performed
: The process of returning the menu screen to its default settings is done.
: User-based designing of the menu screen is done with the show-hide feature, that is, the hiding feature of the fields corresponding to the columns on the menu screens.
If SMS notification will be used in e-mail settings;
System Infrastructure Definitions/Bimser System Infrastructure Definitions/Configuration Settings/ Parameters menu is clicked. In the parameters of the System Infrastructure Definitions module parameters listed in the Parameters screen, the parameter number 102 “Will SMS notification be used?” is selected by typing the parameter number in the parameter no field in the Filter tab on the parameters screen and searching by clicking the (Search) button.
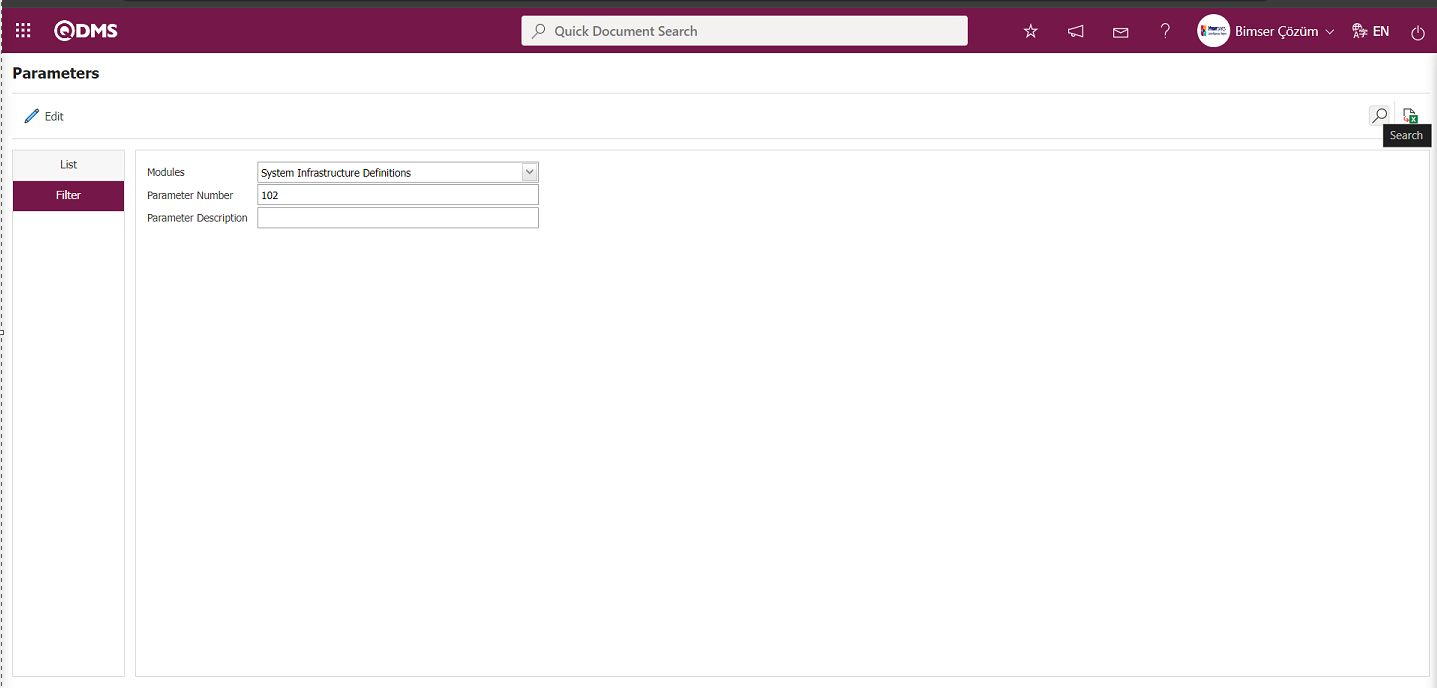
In the System Infrastructure Definitions module parameters, select parameter 102 “Will use SMS notification?” and click  button.

Select the parameter value “Yes” on the parameters screen.
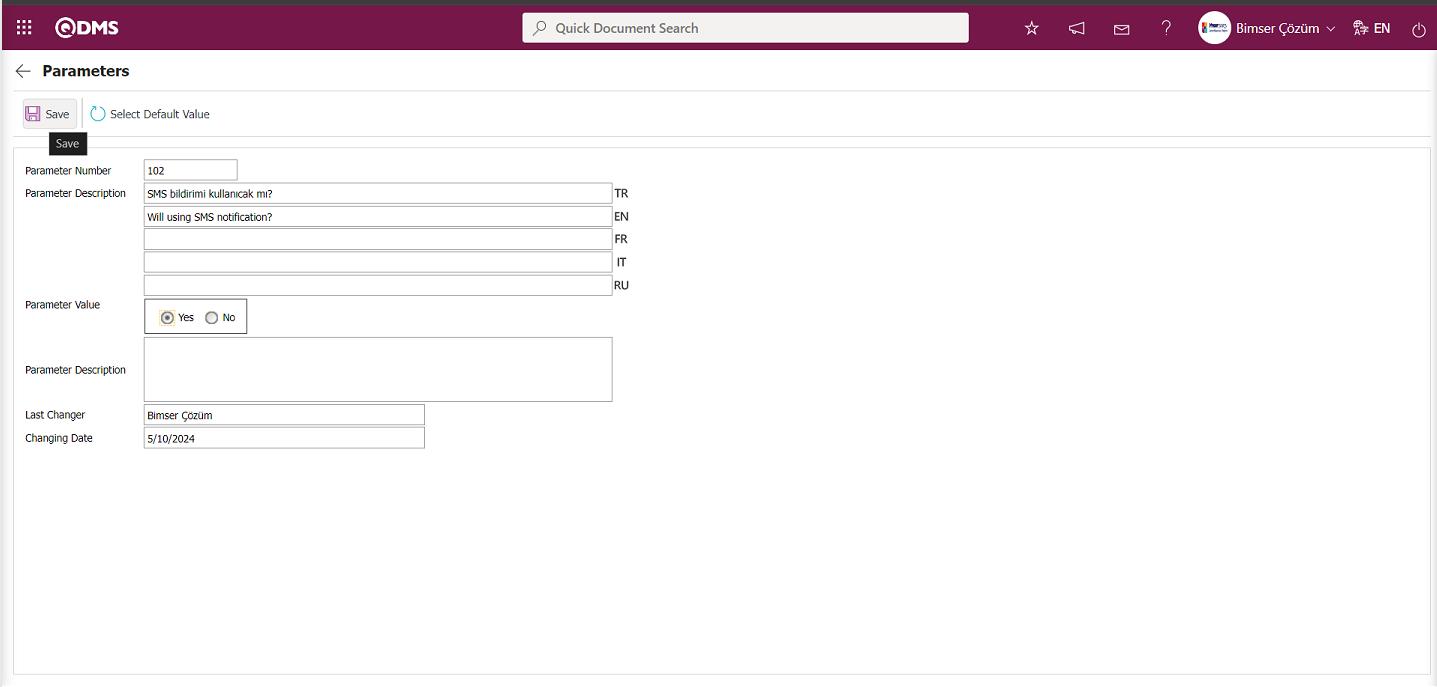
After selecting the parameter value “Yes” on the Parameters screen, the  button on the top left of the screen is clicked and the parameter is activated.

After the parameter is activated, the check box related to the “Should SMS go?” field related to the use of SMS notification is displayed on the E-Mail Settings screen. By ticking the relevant check box, SMS notification is used in E-Mail settings.
In which step e-mail/message is desired to be sent is selected and  button is clicked.
For example: Main Action Release Notification step is selected and button is clicked.
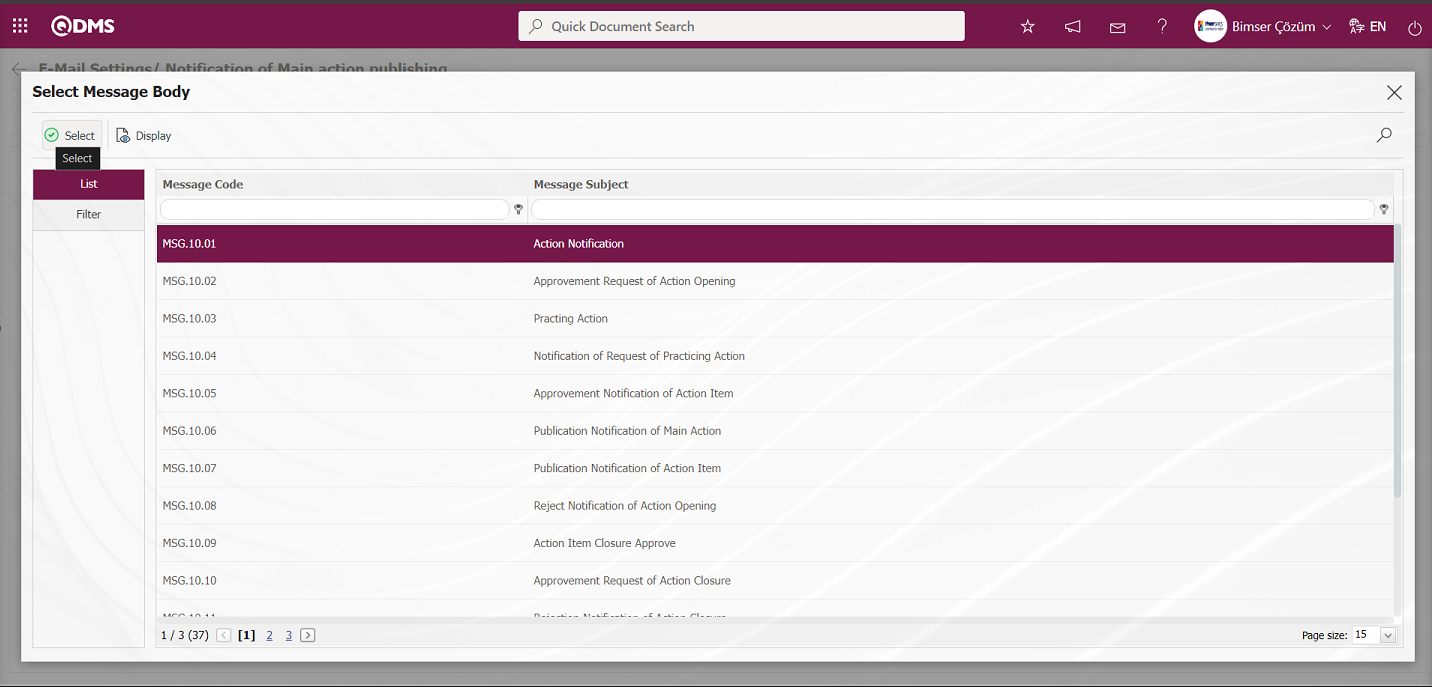
The opened E-Mail Settings / Main Action Release Notification screen is displayed. The Roles section shows the roles, that is, the people to whom my e-mail and message notification will go.
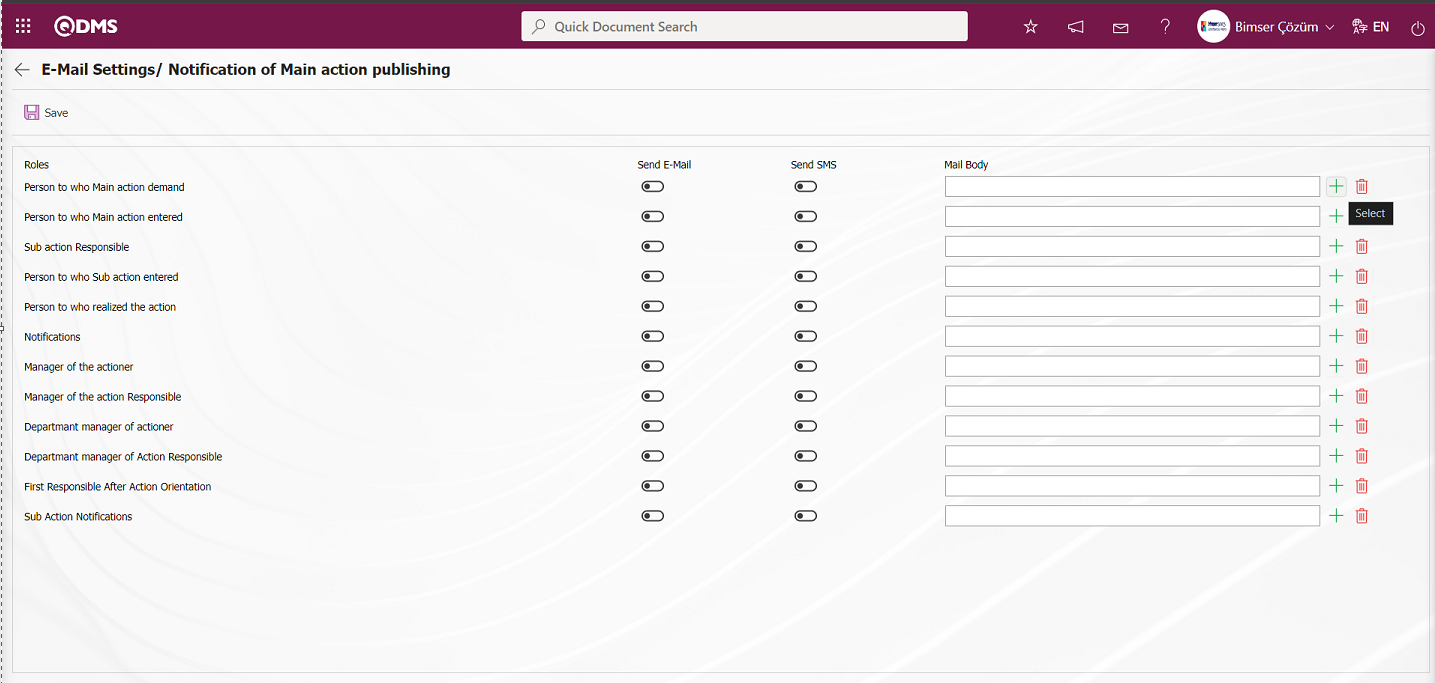
On the E-Mail Settings / Main Action Broadcast Notification screen, click  (Select) button and select the message body to be sent from the list of the message body defined in the system.

 button displays the content of the Message Body in detail.
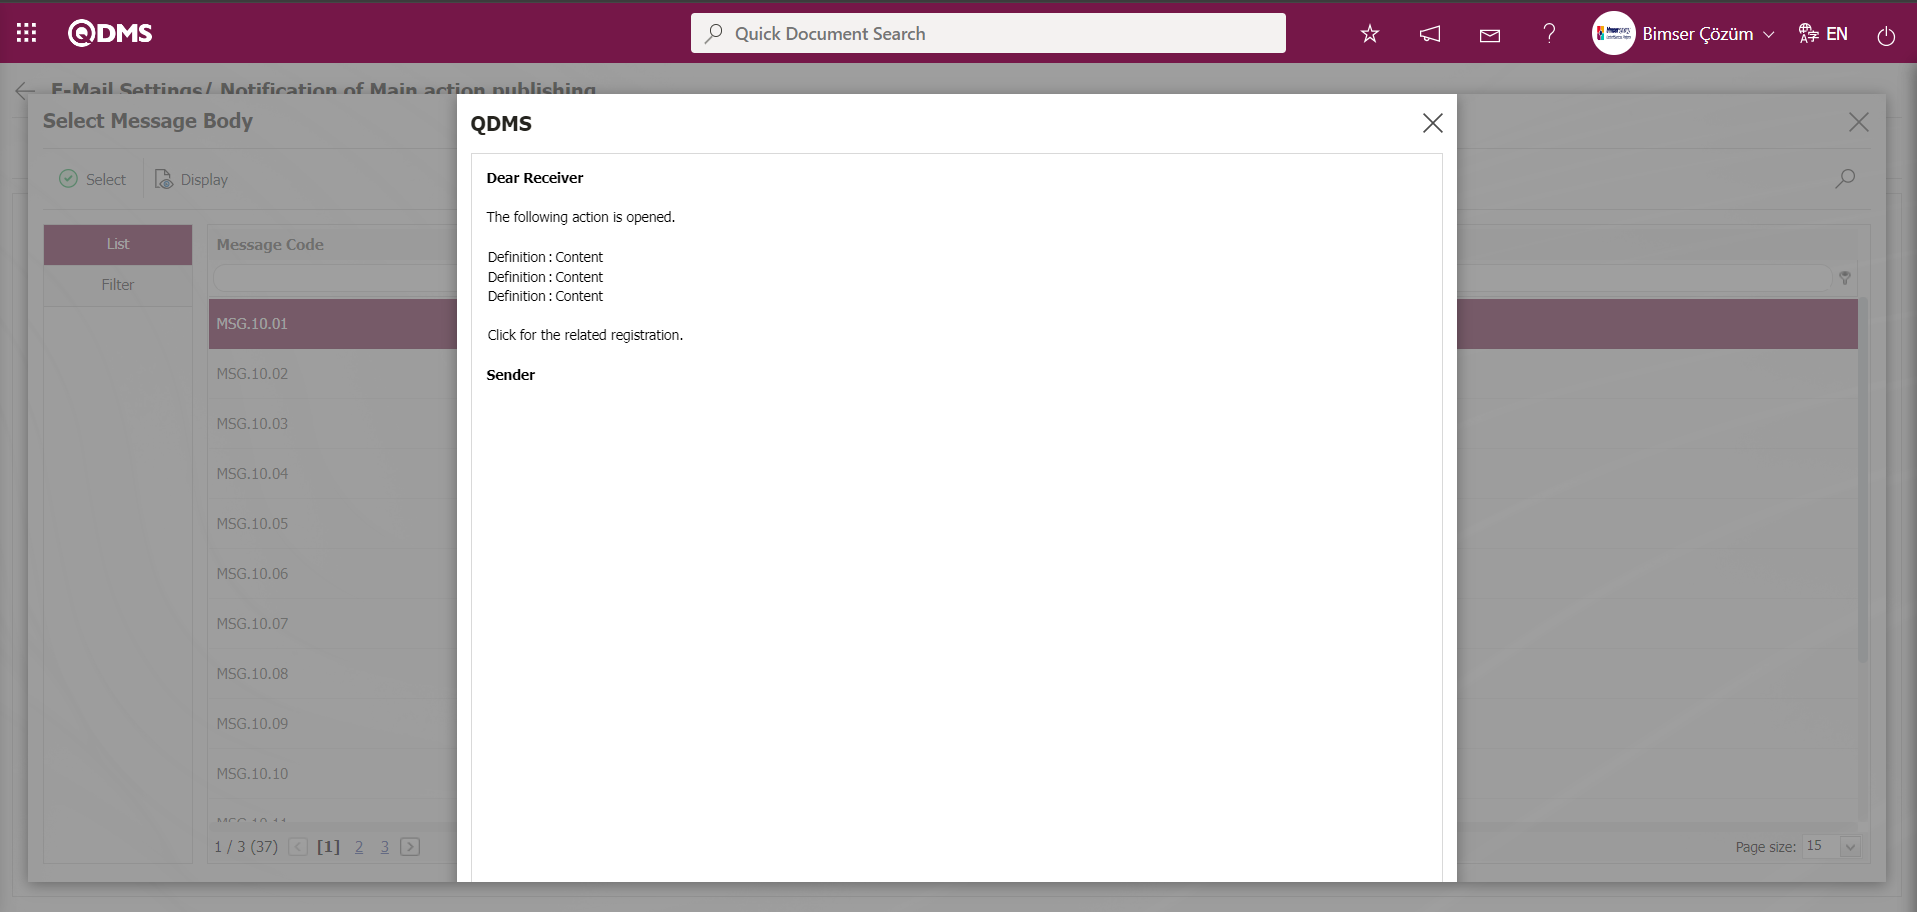
The Message Body selected in the Message Body list is selected by clicking the  button.
If you want to send an e-mail to whom you want to send an e-mail, tick the “Send E-mail” field and “Send SMS” check boxes related to that role. In order to send a message, the mobile phone number of the person defined in the role must be defined on the personnel identification screen.
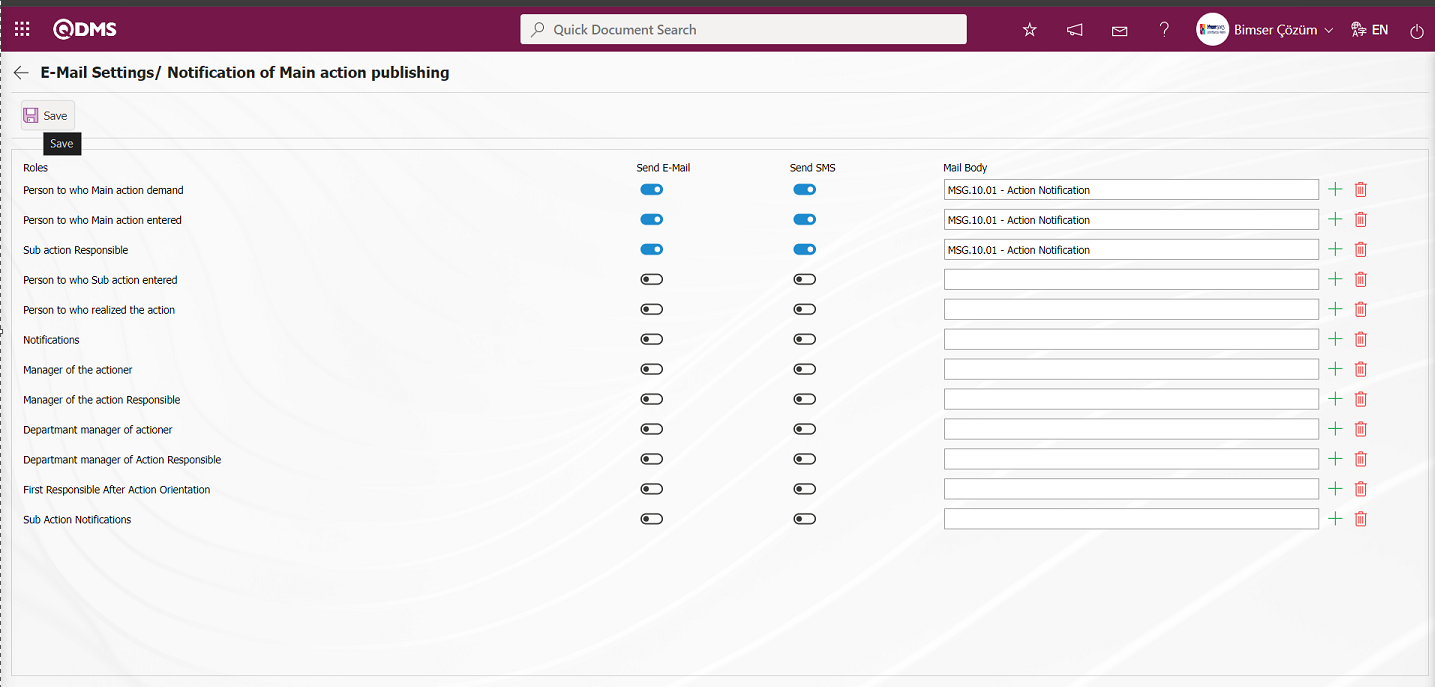
On the E-Mail Settings / Main Action Publication Notification screen, after the check boxes related to the “Should E-Mail Go” and “Should SMS Go” fields related to the roles to send e-mails are marked, the E-Mail Settings registration process is performed by clicking the  button in the upper left corner of the screen.
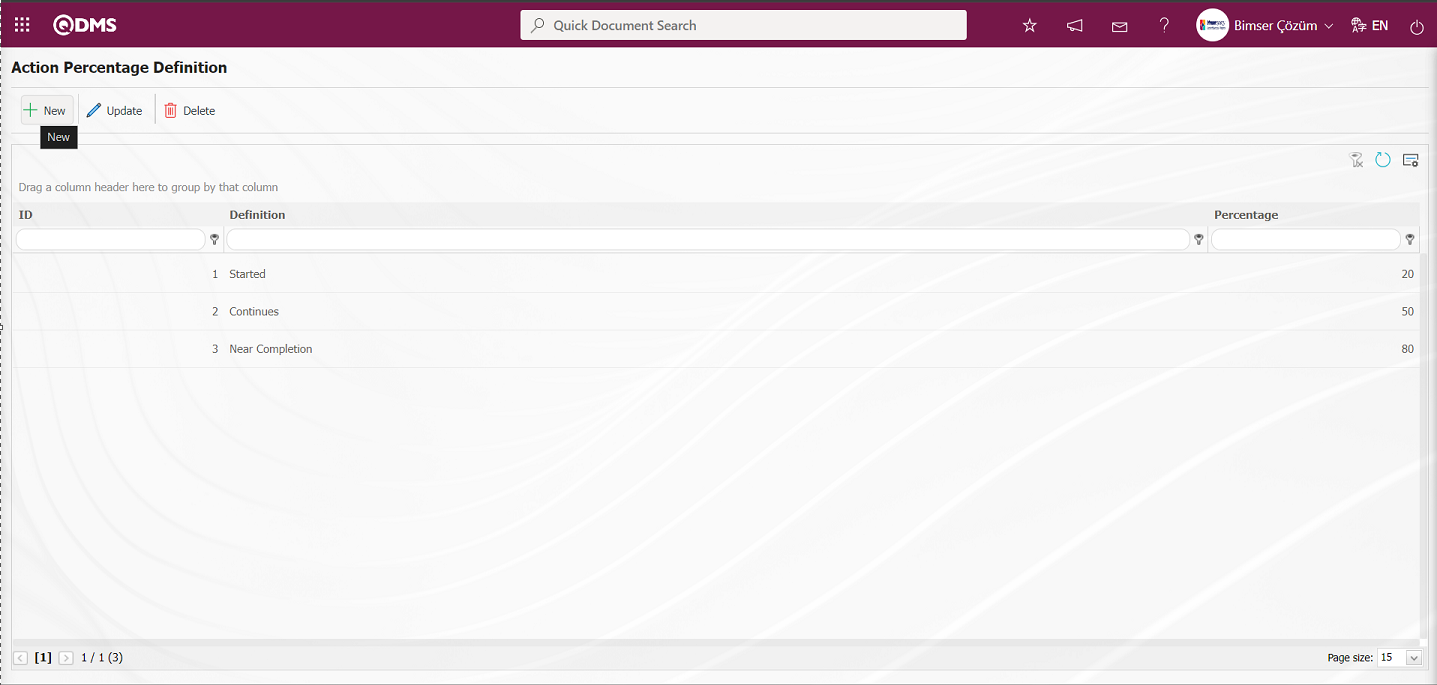
6.1.4.Action Percentage Identification
Menu Name: System Infrastructure Definitions/ Action/Action Percentage Identification
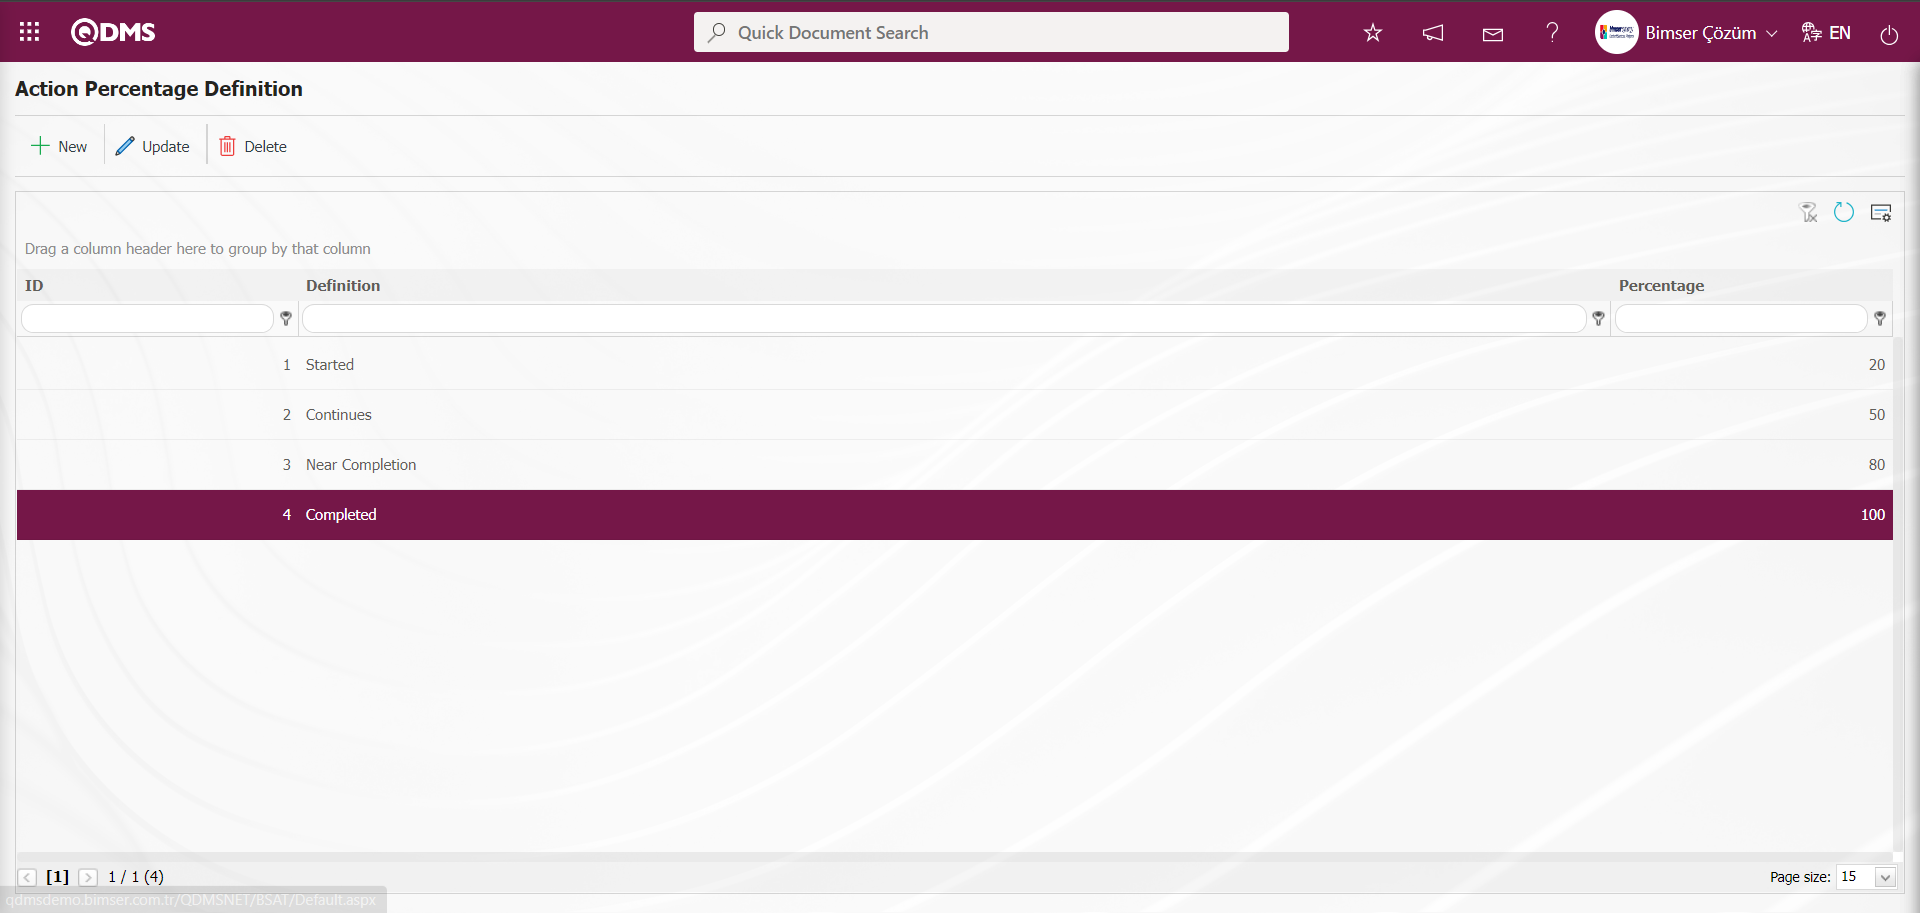
This is the menu where Action Percentage Identification is performed. With the percentage definitions made, the information about how much of the action is completed by the person who will perform the action is displayed.
With the help of the buttons on the screen;
: Define a new action percentage information.
: The action percentage information selected in the list is edited
: The action percentage information selected in the list is deleted
: The data remaining in the filter fields in the grid where the search criteria in the menu screens are searched are cleared
: The menu screen is restored to its default settings.
: User-based designing of the menu screen is done with the show-hide feature, that is, the hiding feature of the fields corresponding to the columns on the menu screens.
To define an action percentage, click on the button on the upper left corner of the screen and the Action Percentage Definition / New Record screen is displayed.
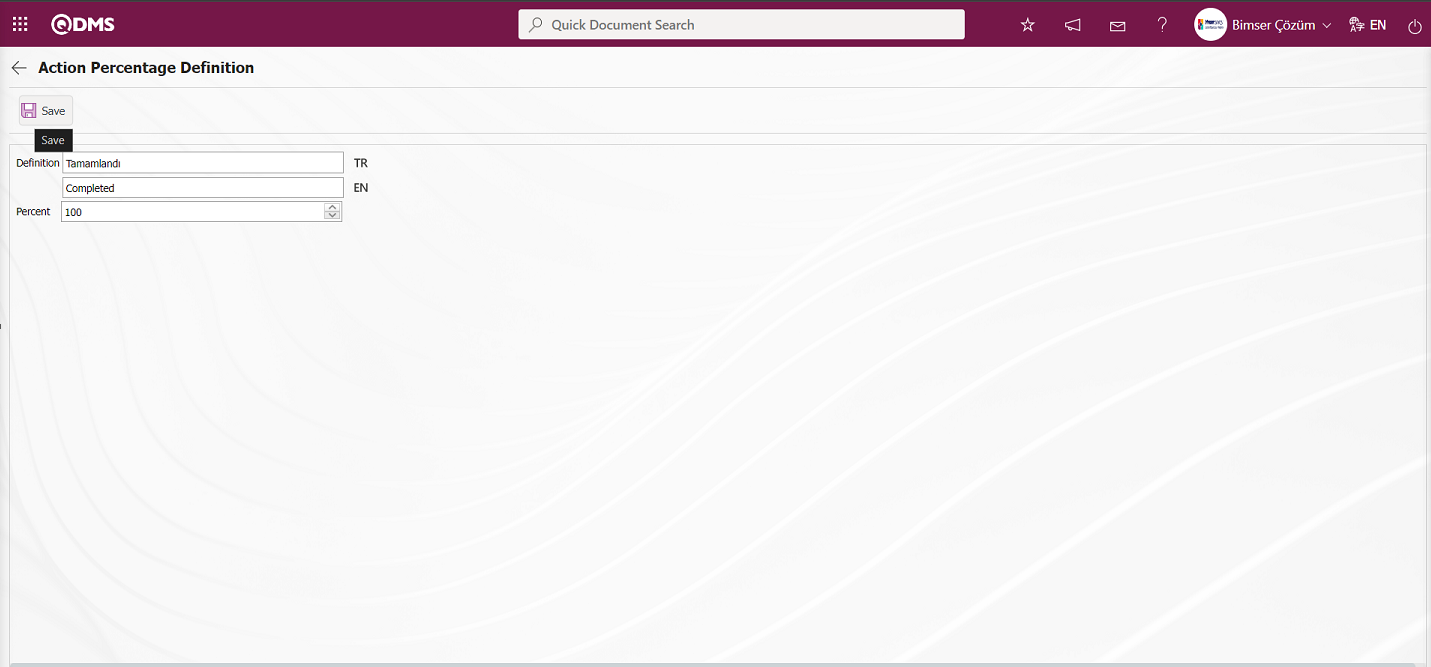
Related fields are defined on the screen that opens:
Description: In the Action Percentage Identification screen, this is the field where the percentage slice description showing the percentage of completion of the action is defined. For example; “First Quarter” (for 25%), “Half/ 2nd Quarter” (for 50%), “3rd Quarter” (for 75%), “Last Quarter/ Completed” (for 100%).
Percentage: In the Action Percentage Definition screen, this is the field where the amount of the percentage slice showing how many percent of the action is completed is defined as a percentage. For example; 25% (for First Quarter), 50% (for Half/ 2nd Quarter), 75% (for 3rd Quarter), 100% (for Last Quarter/ Completed),
After the required fields are filled in, the “Action Percentage Definition” registration process is performed by clicking the button in the upper left corner.
To use Action Percentage Definition in the system;
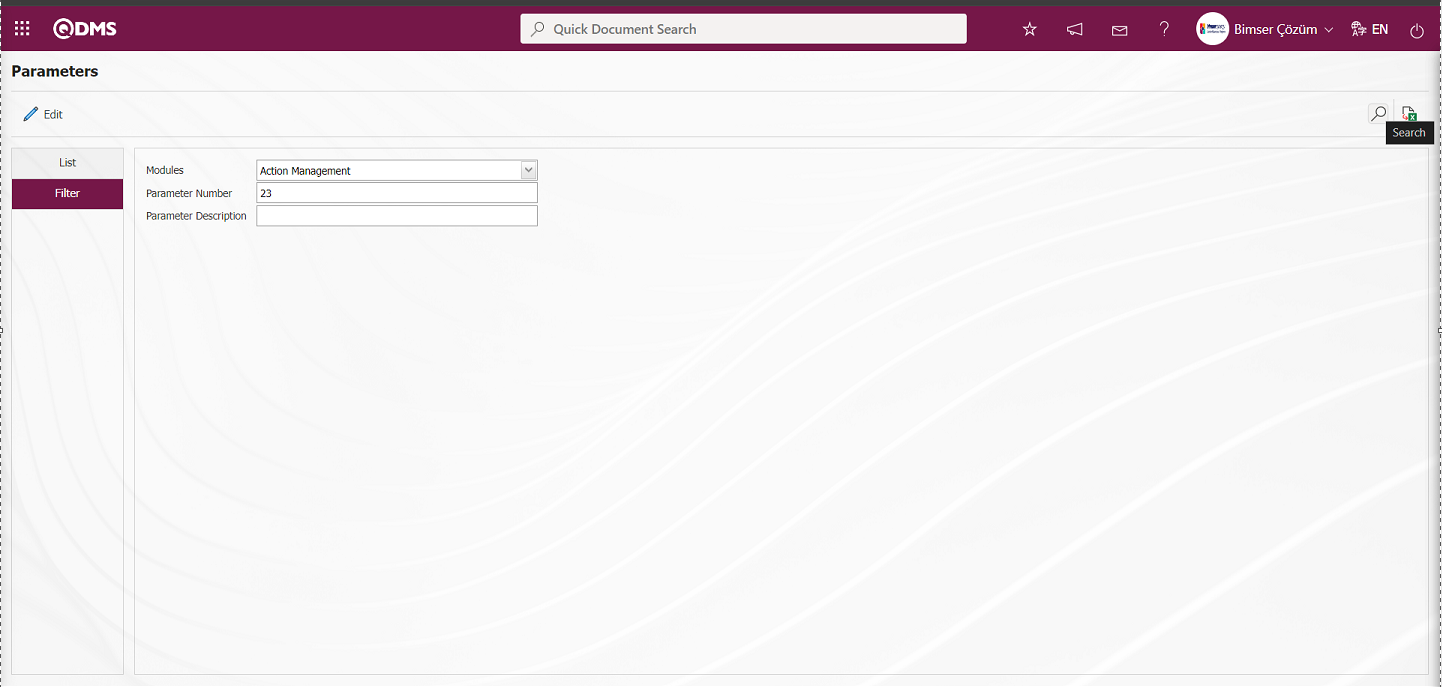
System Infrastructure Definitions/Action/Action Parameters menu is clicked. In the parameters of the Action Management Module parameters listed in the Parameters screen, the parameter number 23 “Action Percentage Should be Used from the System (Y\N)” is selected by typing the parameter number in the parameter no field in the Filter tab on the parameters screen and searching by clicking the (Search) button.
In the parameters of Action Management Module, after selecting the parameter 23 “Action Percentage Should be Used from the System (Y\N)?”, click  button.
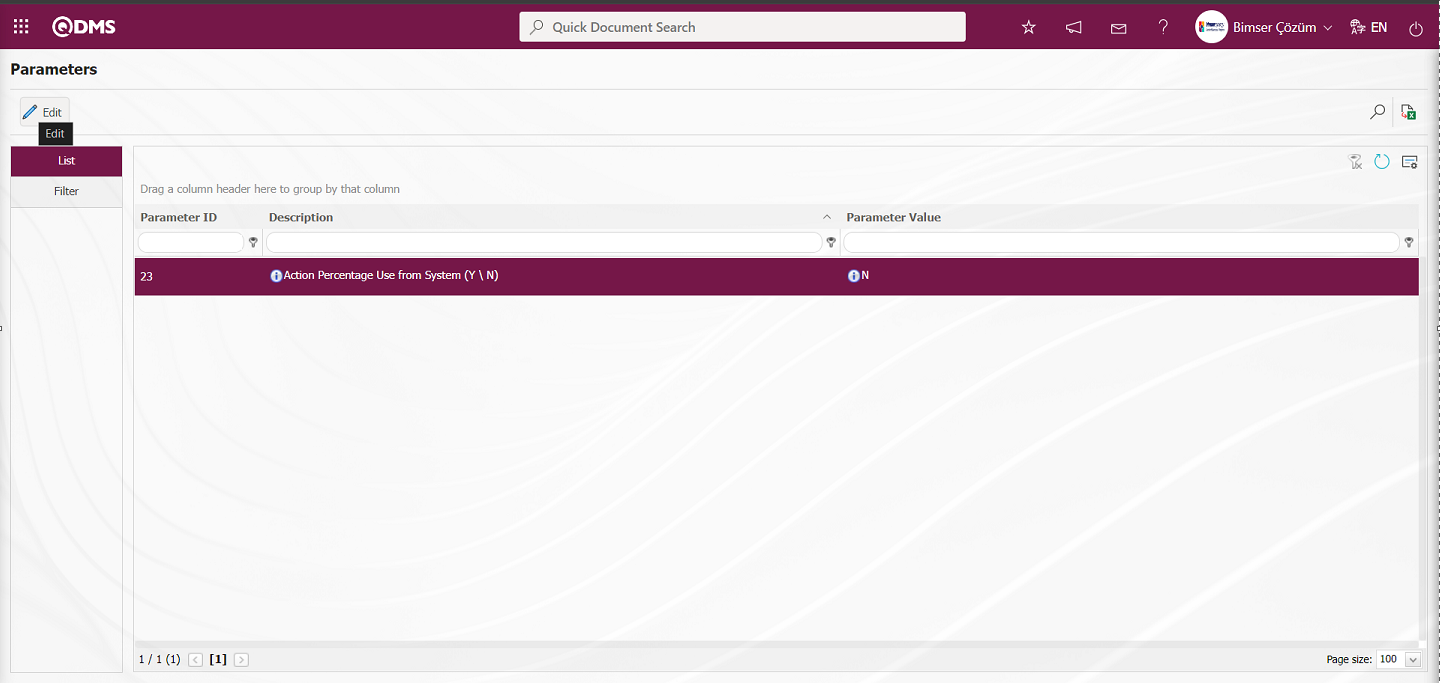
The letter “Y” value is written for the parameter value of the opened parameters screen to be accepted as “Yes”. After selecting the parameter value “Yes” on the Parameters screen, the
  button in the upper left corner is clicked and the registration process of activating the parameter is performed.

After parameter 23 “Action Percentage Should be Used from the System (Y\N)” parameter value is selected as “Yes” and the parameter is activated, an Action item in the realisation stage is selected on the Realisation/Delay screen and the Action Percentage definitions defined in the Completion Percentage field are displayed on the Action Update screen opened by clicking the  button. In order for this field to be displayed, the “Calculate” option must be selected in the Completion Percentage field while defining the Action Plan on the Action Planning - New Record screen.
On the Realisation/Delay screen, an Action item in the realisation stage is selected and the button is clicked.

In the Action Update screen, the completion percentages defined in the Completion Percentage field are displayed.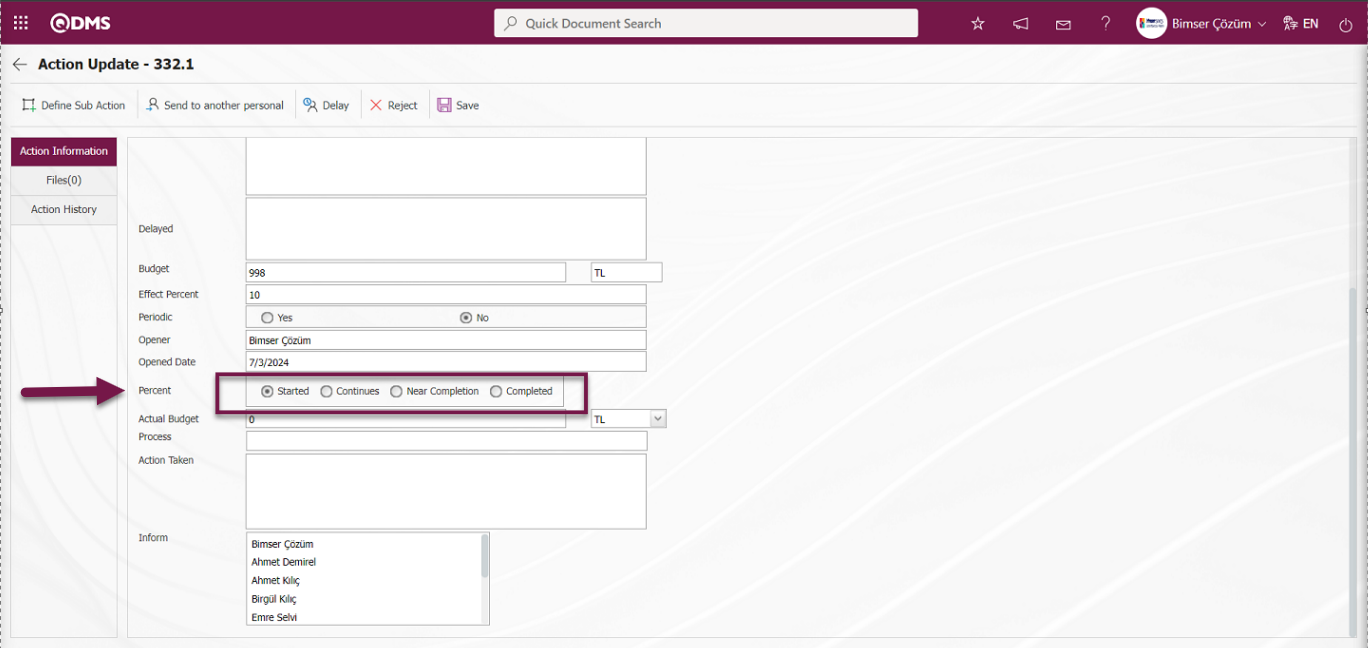
6.1.5. Action Authorisation Matrix
Menu Name: System Infrastructure Definitions/ Action/ Action Authorisation Matrix
This is the menu where role/ user group based authorisation transactions related to the use of the Action Management module are made. It is determined by which users and user groups can perform operations such as creating main action, adding action item, copying, deleting, updating, suspending.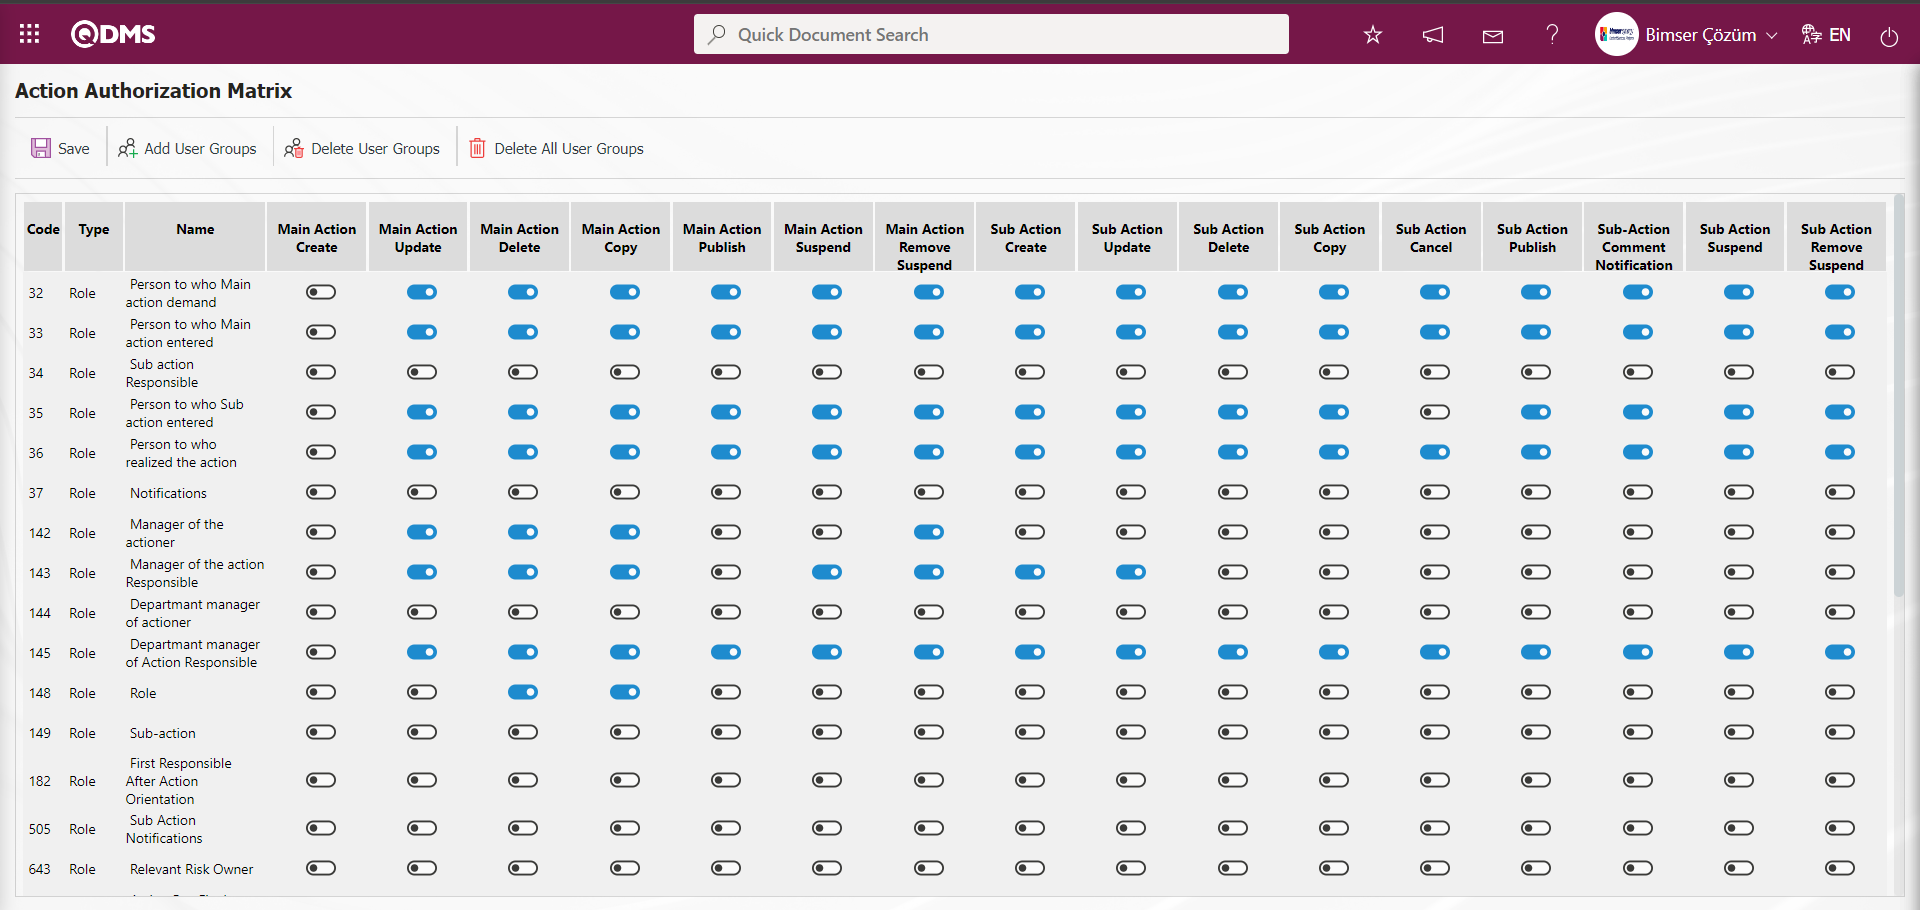
With the help of the buttons on the screen;
 : Registration is made on the Action Authorisation matrix screen
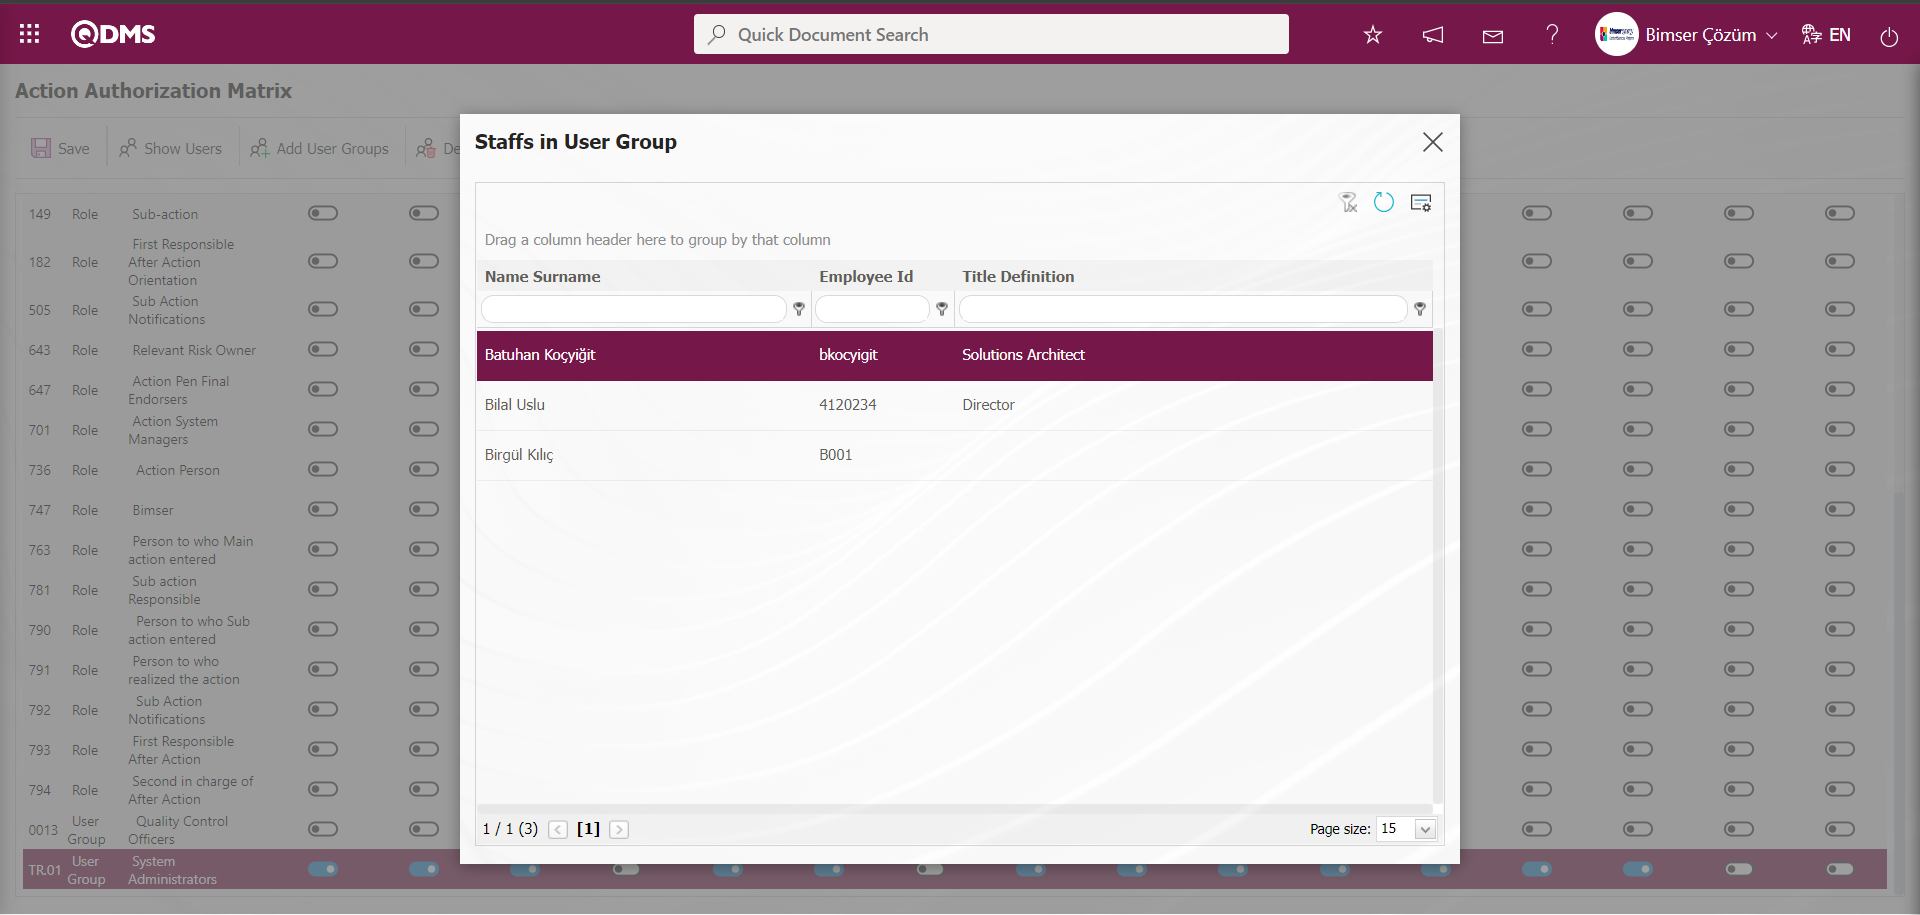
 : On the Action Authorisation Matrix screen, the list of personnel in the selected User group in the list that is authorised is displayed. It is the button displayed when the User group is selected in the list
 : On the Action Authorisation Matrix screen, the user group desired to be authorised in the user group list defined in the system is added
 : On the Action Authorisation Matrix screen, delete the selected user group in the authorised list
 : Delete all user groups authorised on the Action Authorisation Matrix screen.
Roles are defined on the Action Authorisation Matrix screen. Whichever role is desired to be authorised, the relevant authorisation check box corresponding to that role is marked and the registration process is performed with the button.
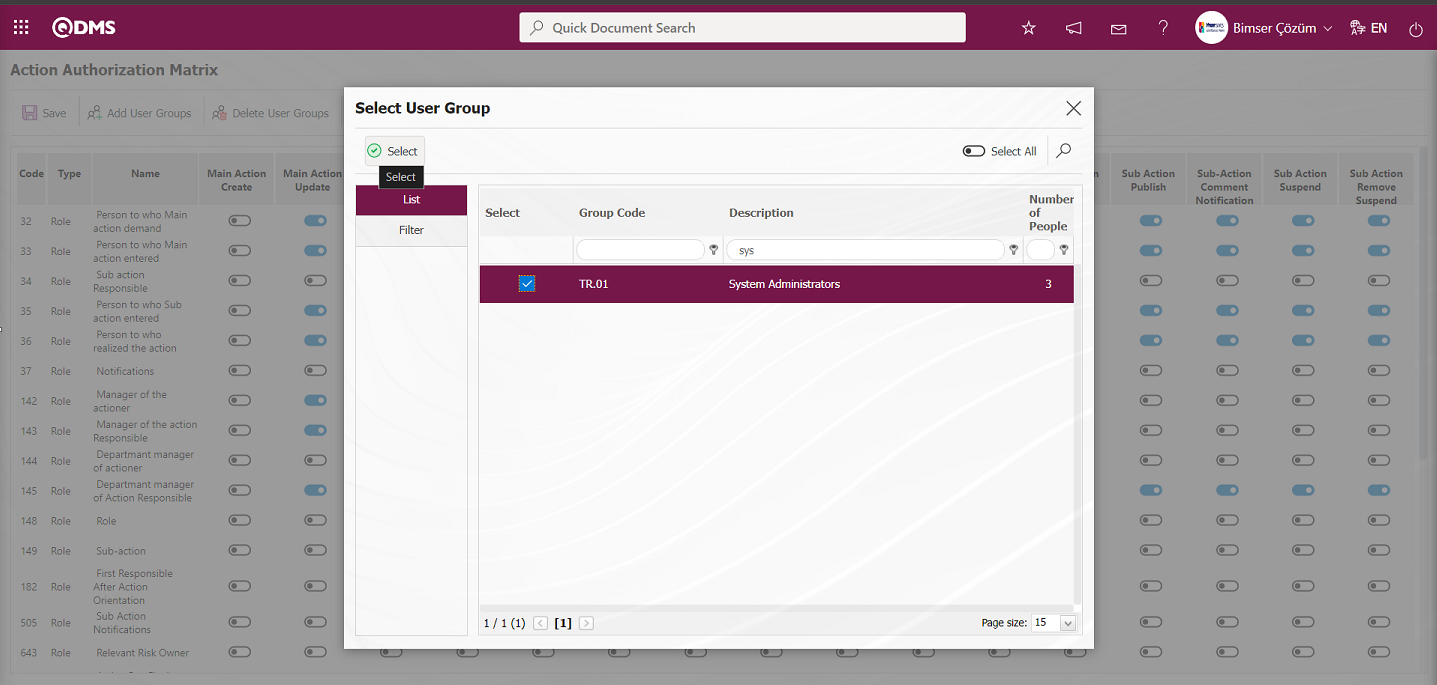
To authorise a user group on the Action Authorisation Matrix screen, click on the button. In the user group list defined in the system, select the user group to be authorised and click on the  button in the upper left corner of the screen.
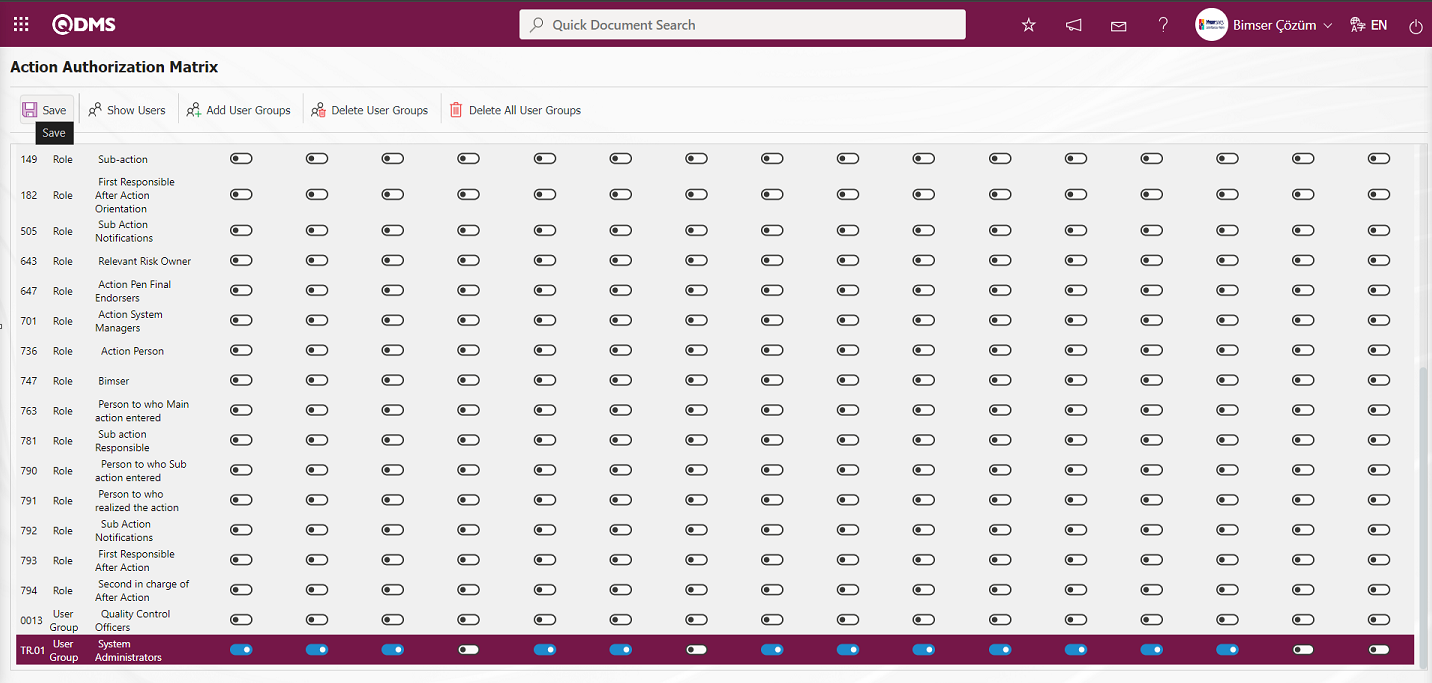
 On the action authorisation matrix screen, after the authorisation check boxes for authorisation operations in the Action Management Module for the user group are checked, the user group based authorisation registration process is performed by clicking the
 in the upper left corner of the screen.
If it is desired to remove the authorisations from the authorised user group and remove the user group from the authorisation matrix, the  button is used. With the
  button, the authorisations are removed from all authorised user groups and all user groups are deleted from the authorisation matrix.
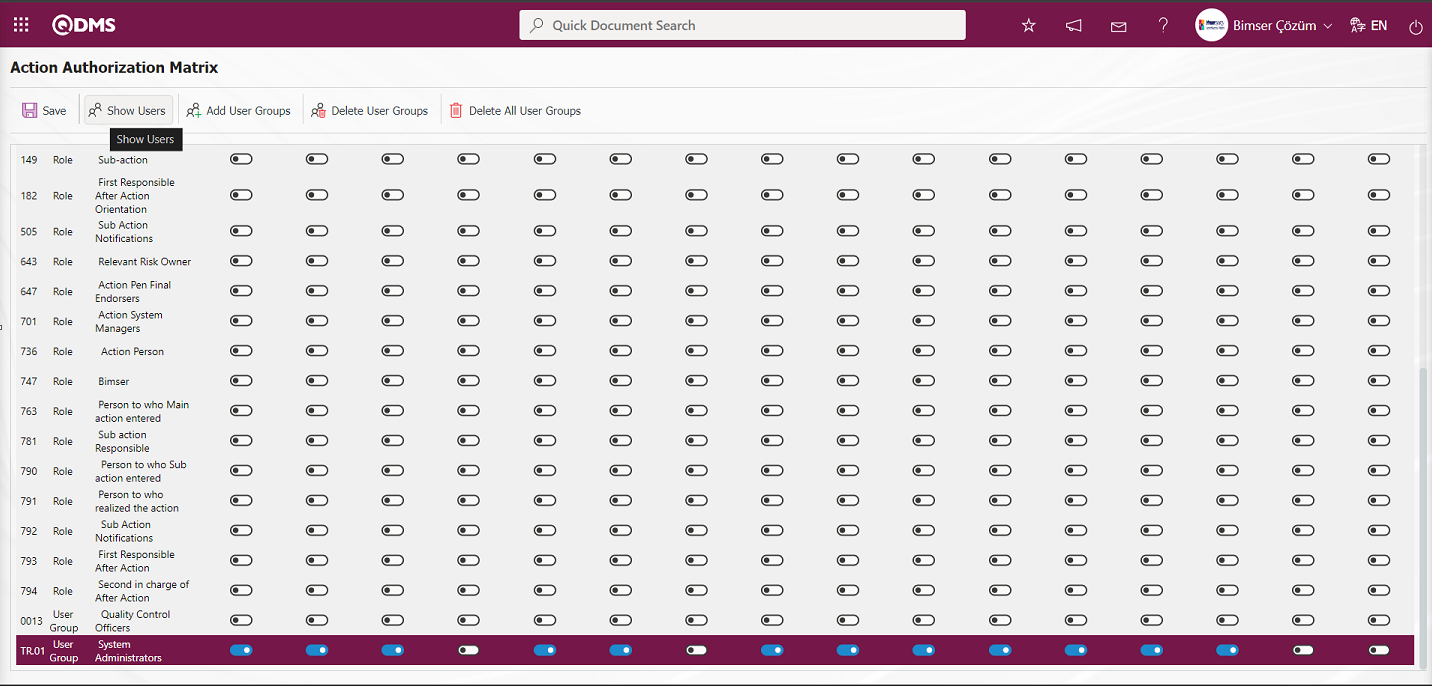
On the Action Authorisation matrix screen, the list of the personnel in the user group is displayed by clicking the button while the authorised user group is selected in the list.
6.1.6. Action Parameters
Menu Name: System Infrastructure Definitions/ Action/ Action Parameters
It is the menu where various systemic adjustments can be made according to the user's requests and needs for the Action Management module and parameters are determined accordingly. Changes made in the parameters cover all Qdms users. There are two tabs on the Parameters screen: List and Filter tabs. In the List tab, all parameters related to the Action Management Module are listed.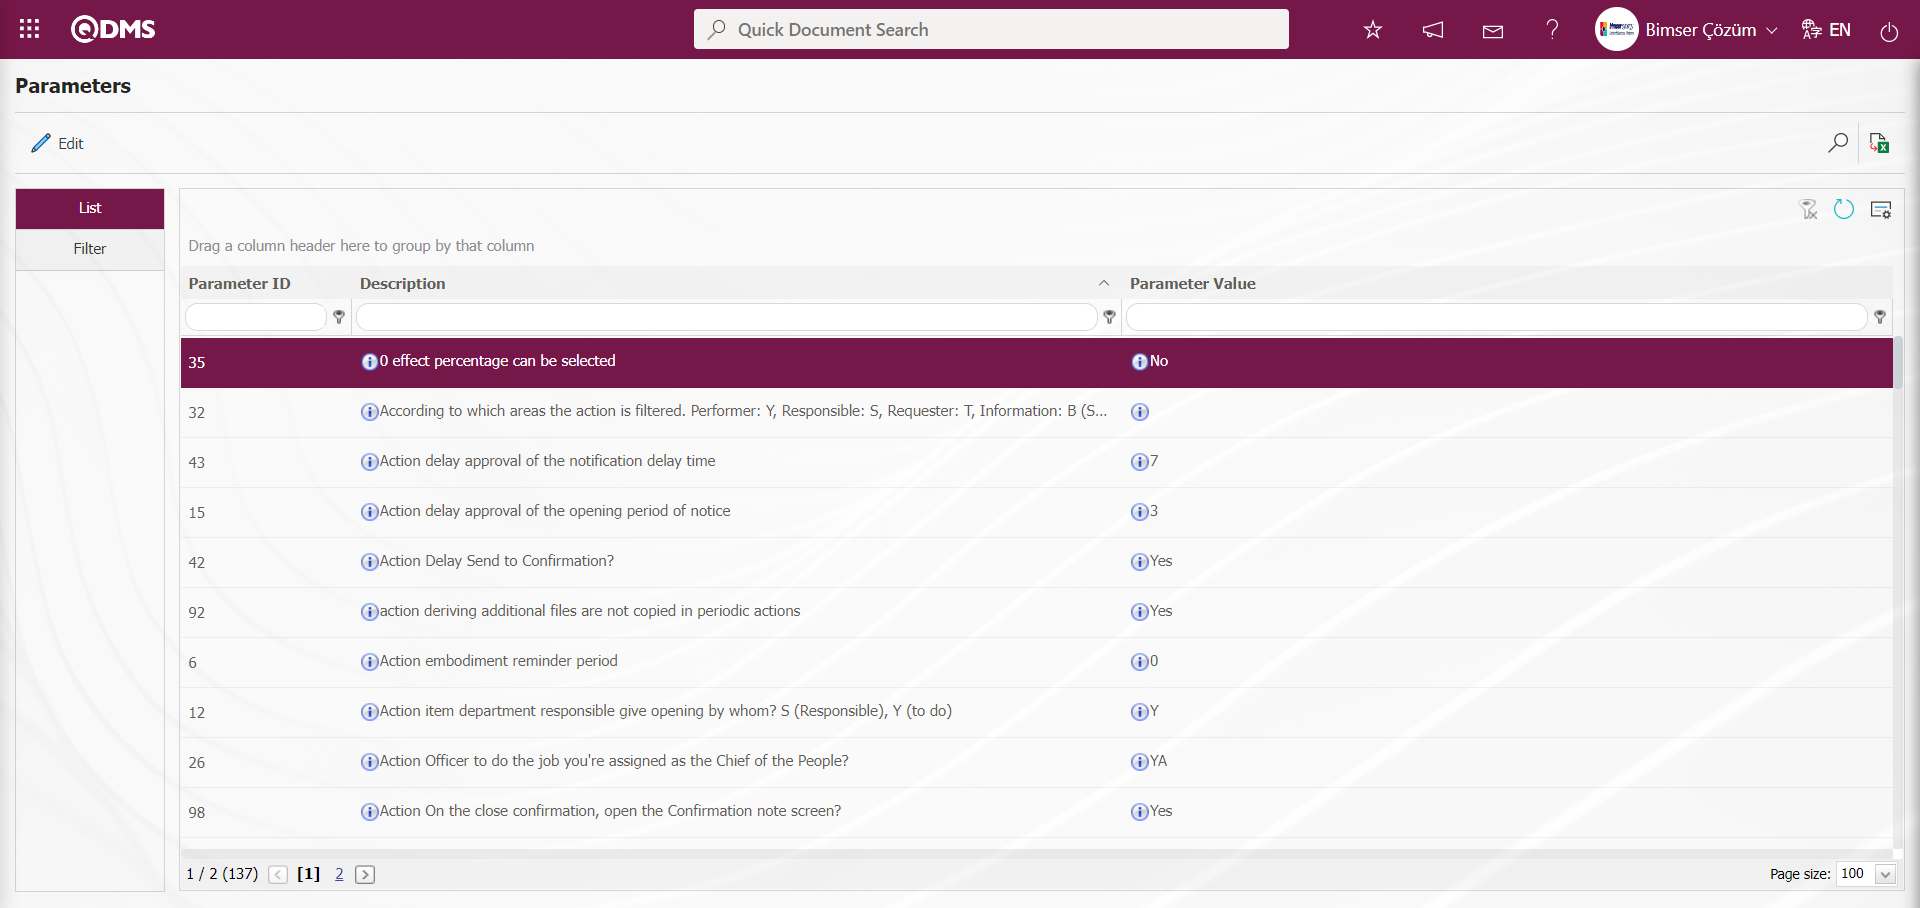
With the help of the buttons on the screen;
 : Editing/changing/updating is done on the parameter information selected in the list.
 : Records are searched by filtering
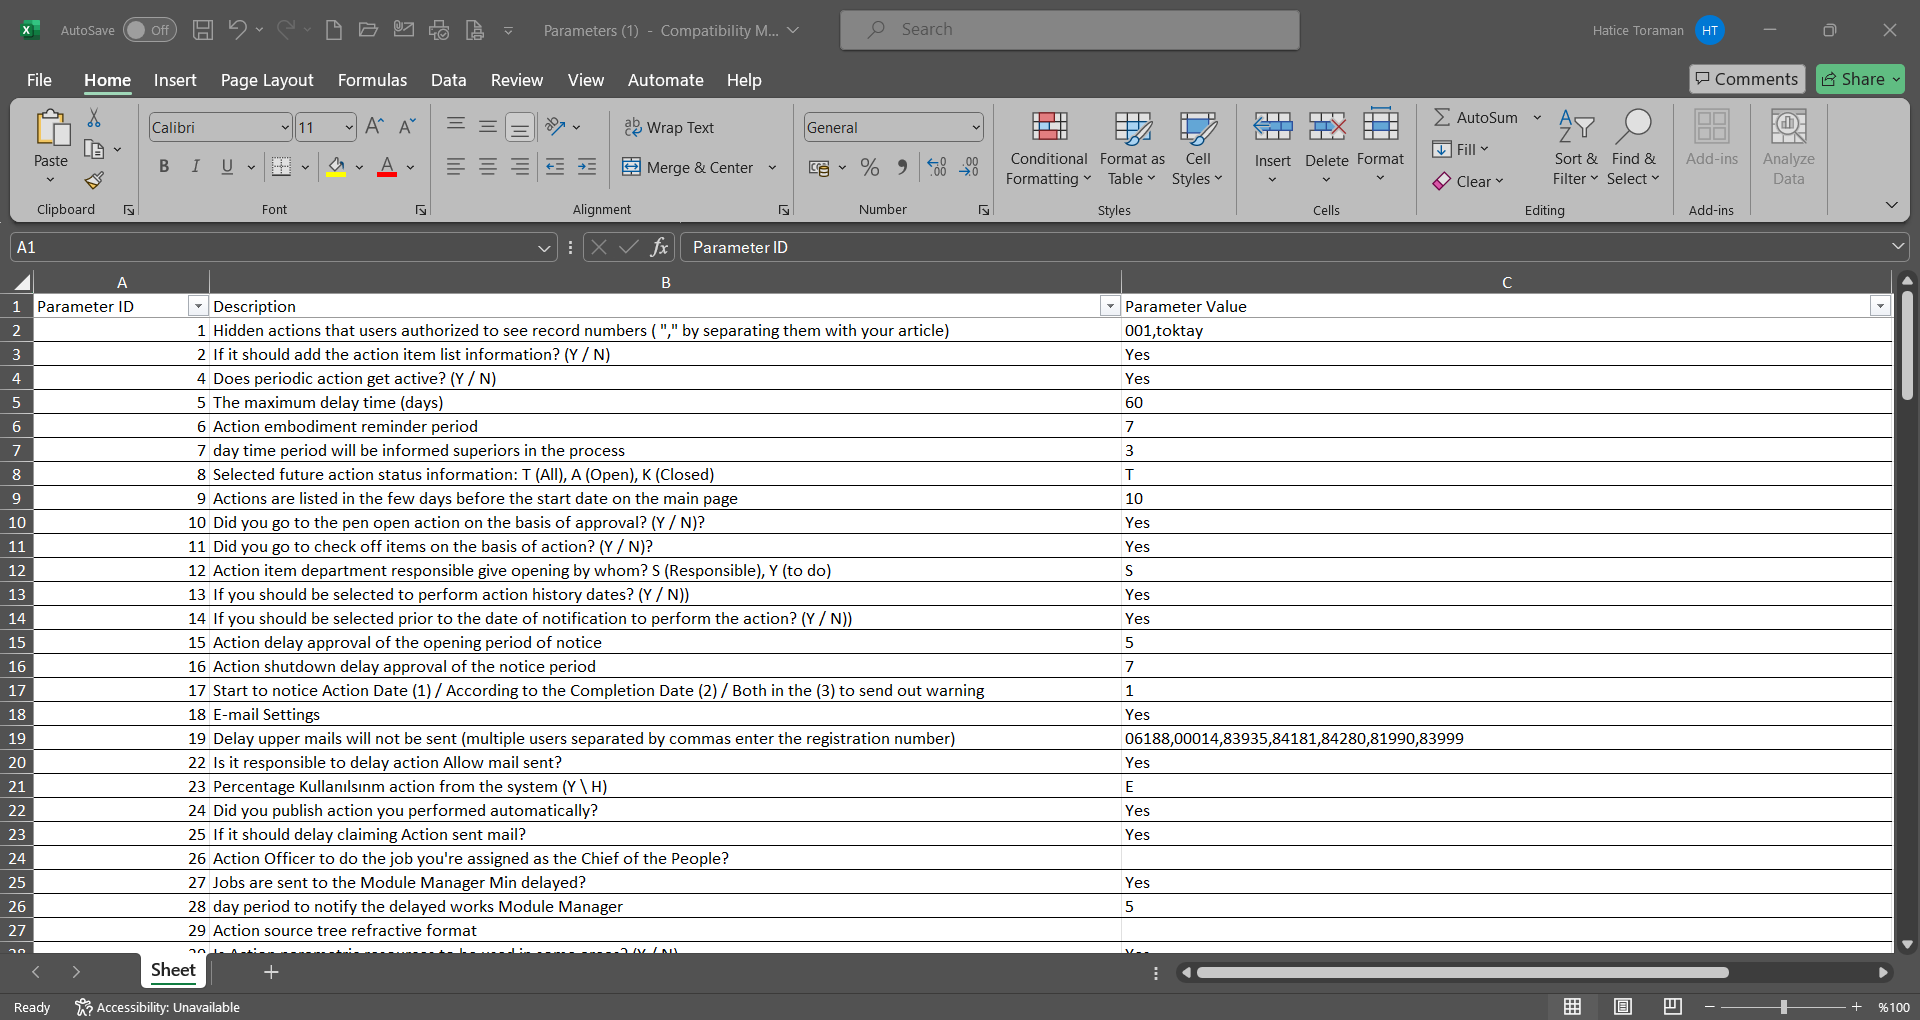
: Data is transferred to Excel. (The report of the list of Action Management Module parameters in the list tab on the Parameters screen is taken in Excel format)
: The data remaining in the filter fields in the grid where the search criteria on the menu screens are searched are cleaned
: The process of coming back to the default settings of the menu screen is done.
: User-based designing of the menu screen is done with the feature of showing and hiding the fields corresponding to the columns on the menu screens, that is, the hiding feature.
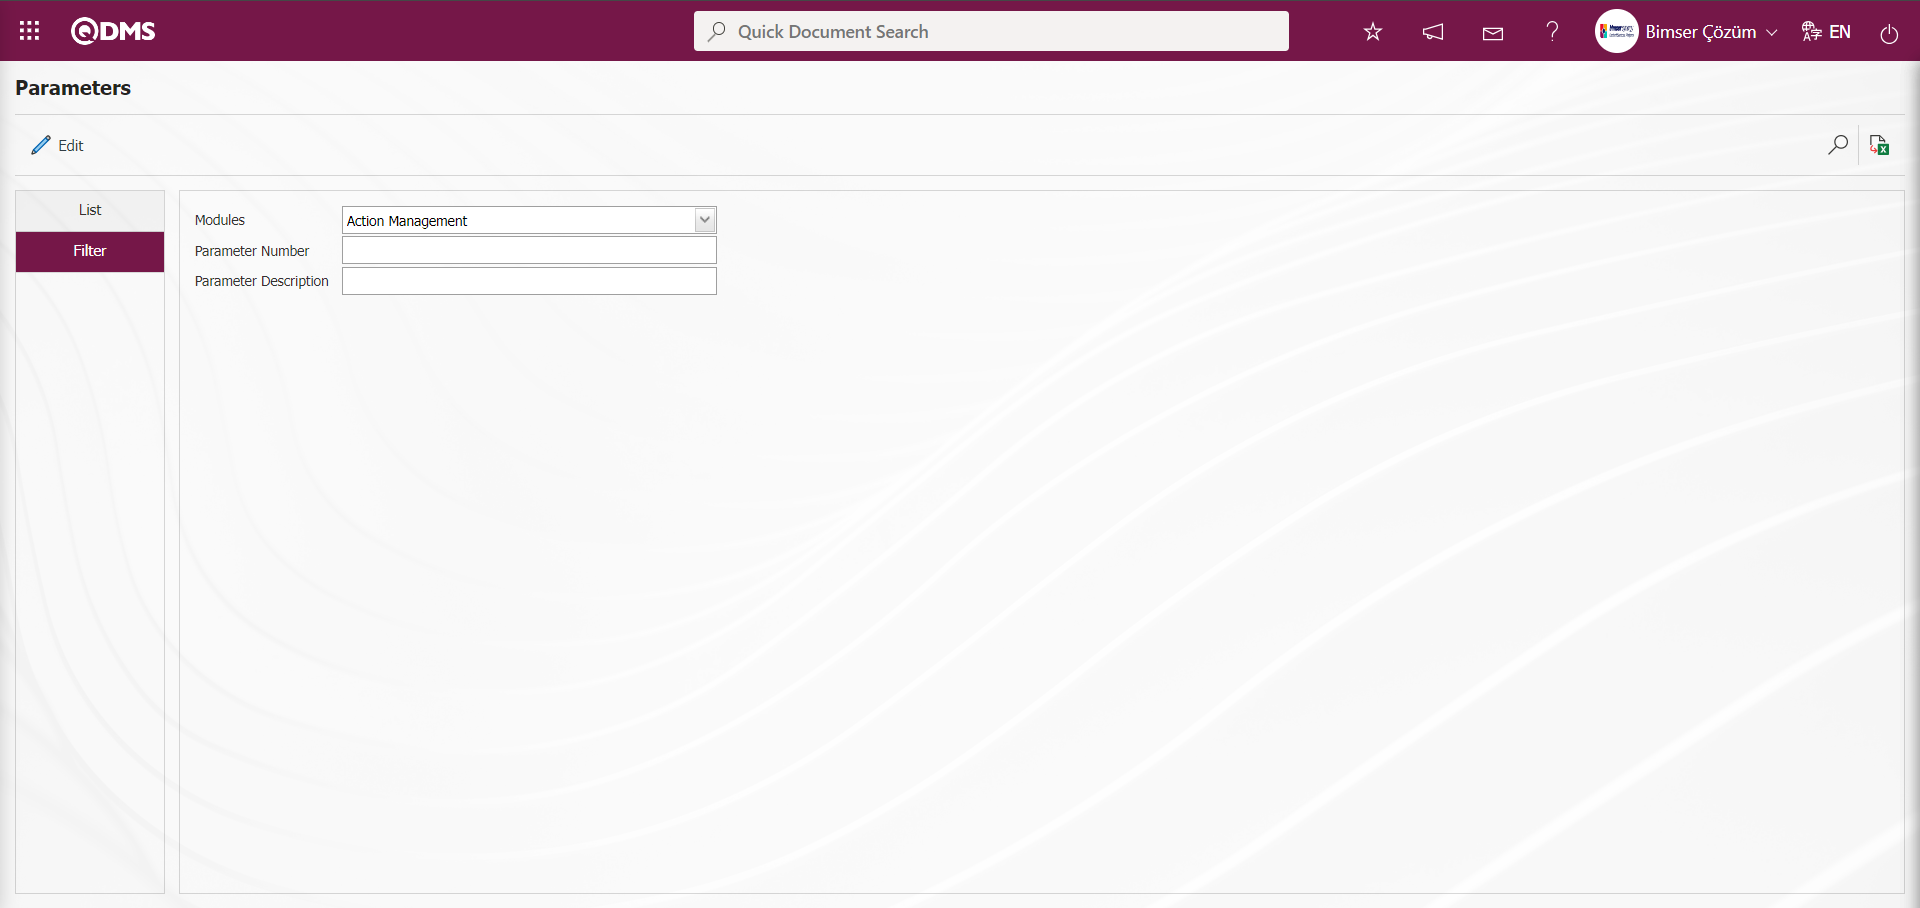
In the Filter tab on the Parameters screen, data is entered in fields such as Parameter No and Parameter Definition, and filtering operations are performed according to the search criteria by clicking the (Search) button.
If you want to make a change in a parameter, the parameter to be changed is first selected. While the parameter is selected, operations such as activating the parameter in passive state, deactivating the parameter in active state or changing the parameter value are performed.
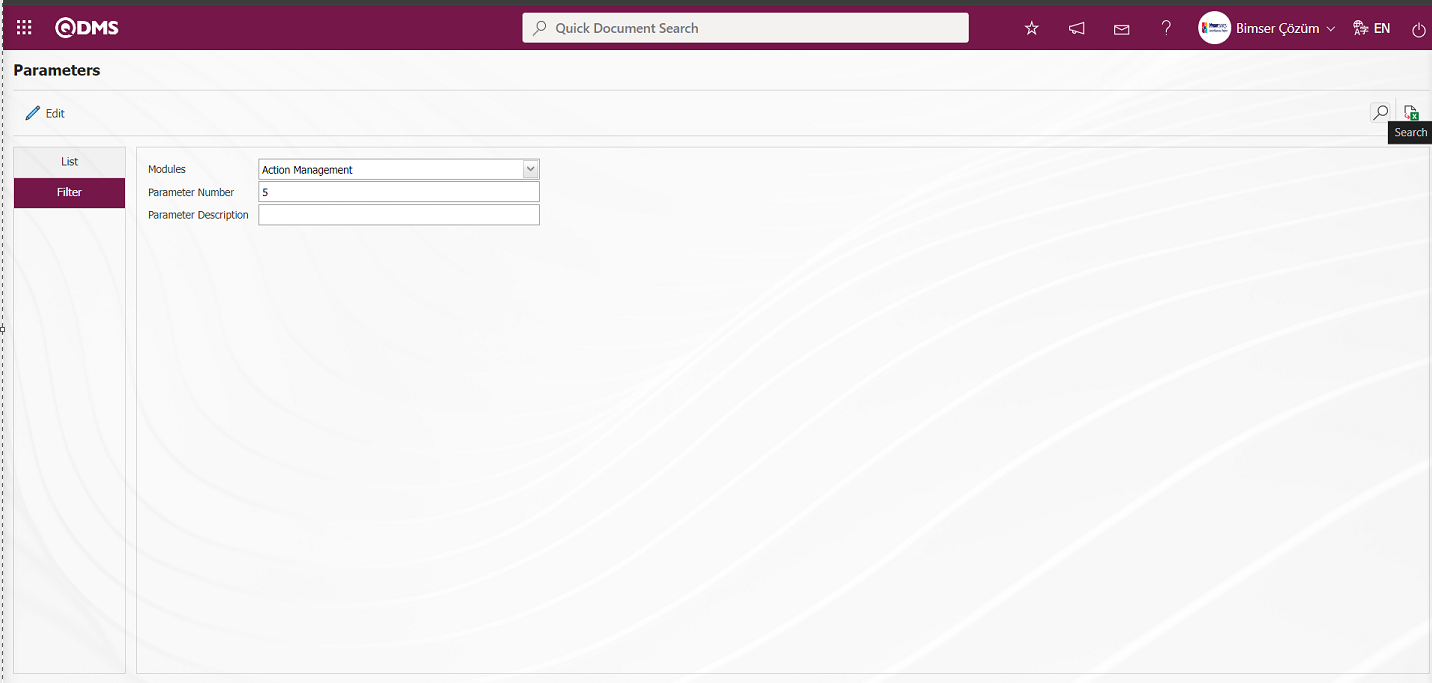
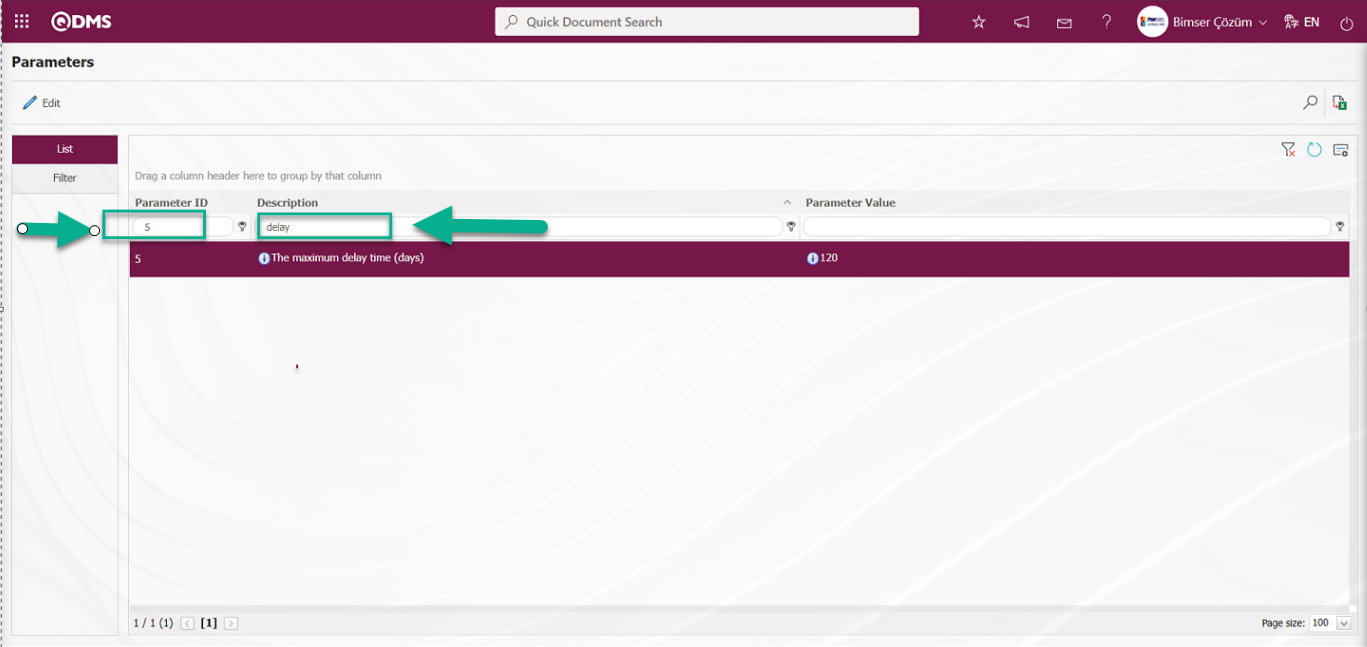
“Maximum delay time (days)” parameter numbered 5 in the Action Management Module parameters is selected by typing its number in the parameter no field in the Filter tab on the parameters screen and searching by clicking the (Search) button.
For the search operation, it is used in the fields corresponding to the columns in the grid in the list tab on the Parameters screen. If the parameter number is not known, the parameter can also be searched by typing a key word in the parameter in the Description field in the grid on the parameter list tab. Or, if the parameter number is known, the parameter number can be searched by typing the parameter number in the parameter No field in the grid.
After selecting the parameter, click on the button. In the parameters screen, enter the new value information that you want to change the parameter value.
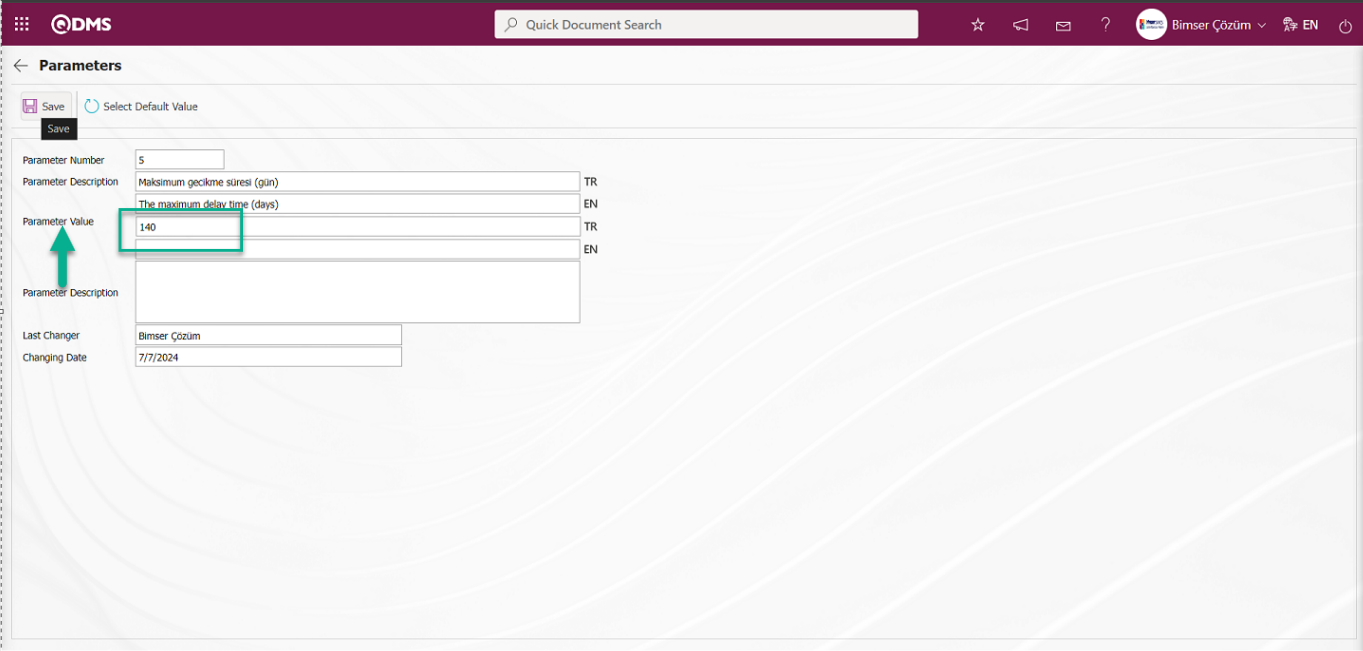
After the new value information entered in the parameter value on the Parameters screen, the parameter record update process is performed by clicking the  button in the upper left corner of the screen. According to the newly entered parameter value, the system setting that the action can be delayed for a maximum of 140 days is made.

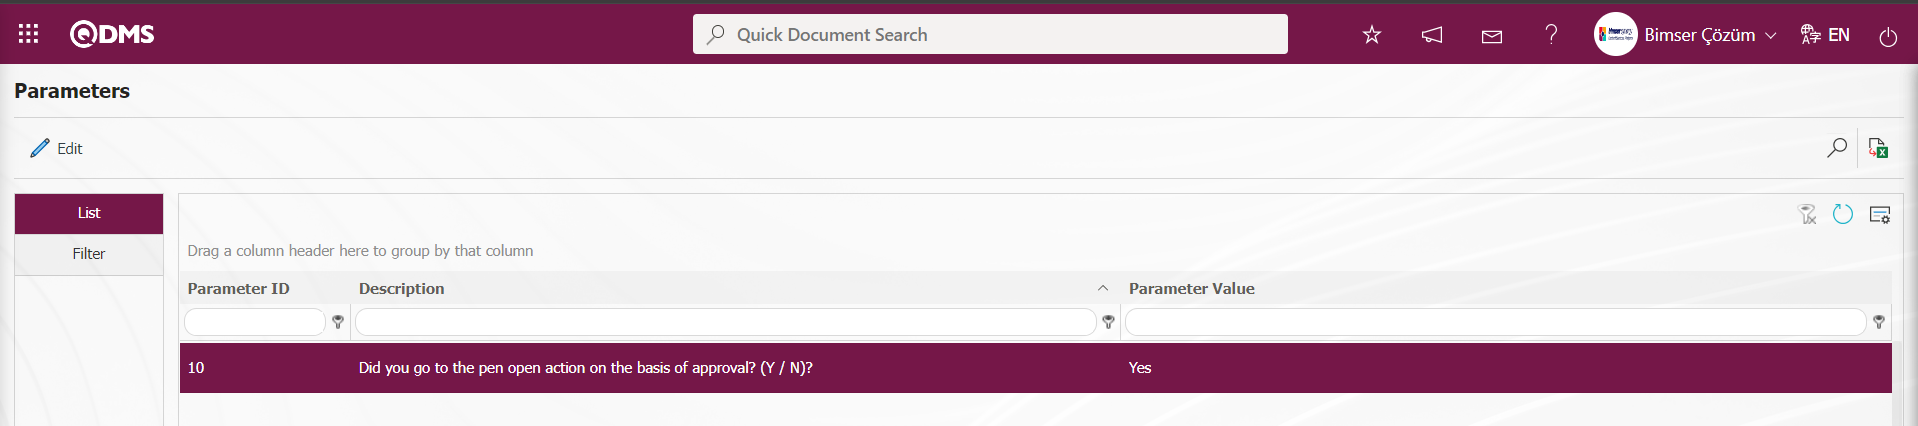
In the action parameters, the parameter number 10 “Should the action go to opening approval on item basis?(Y/N) ?” is selected by typing the parameter number in the parameter no field in the Filter tab on the parameters screen and searching by clicking the  (Search) button.

After selecting the parameter, click  button.

In the parameters screen, “Yes” check box is selected in the parameter value options.
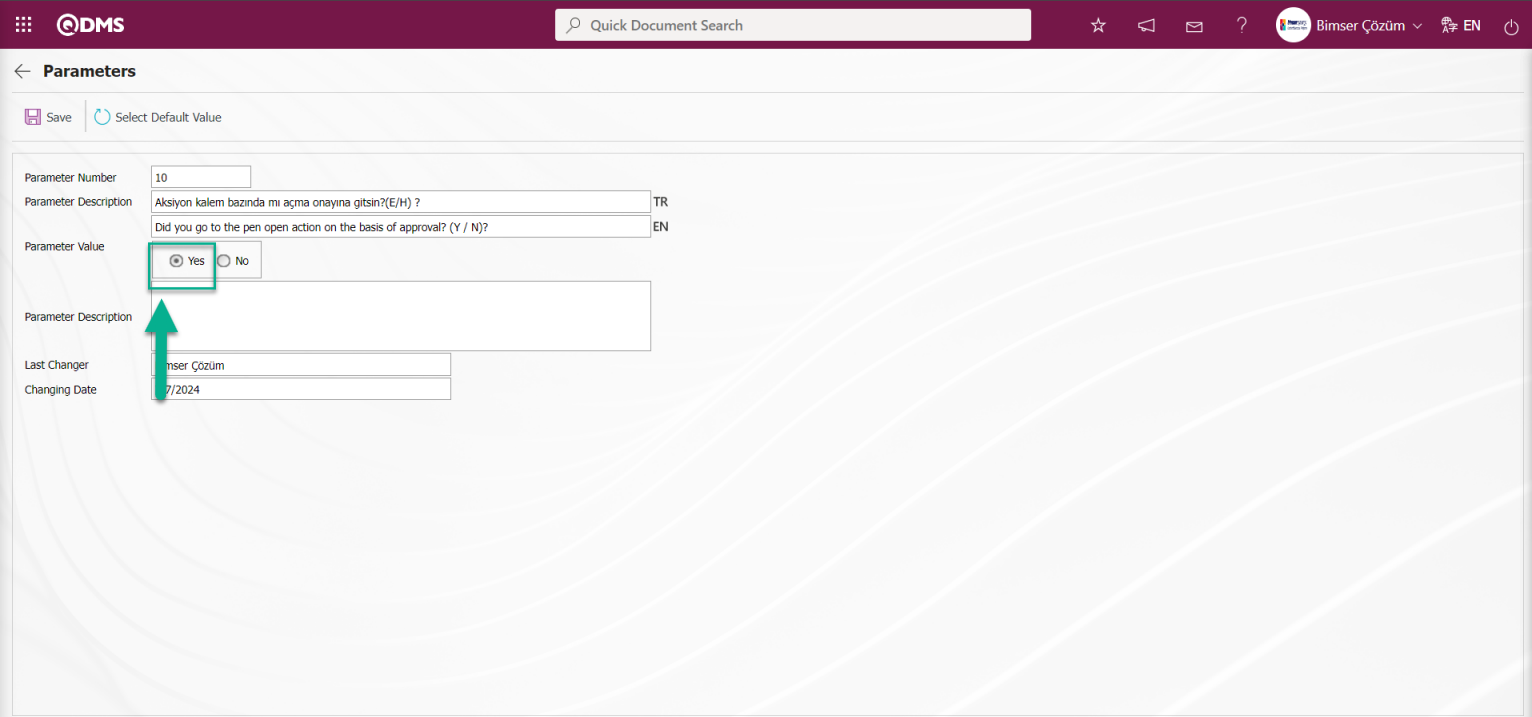
After selecting the parameter value “Yes” on the Parameters screen, the parameter activation registration process is done by clicking the button on the upper left corner of the screen.
 It is the parameter value that determines whether the actions will go to opening approval on item basis or not. When the parameter is activated, the check box related to the “Go to Opening Approval” field is displayed on the Action Item Planning - New Record screen. If the user wants, he/she can tick this check box and send the actions to opening approval on item basis.
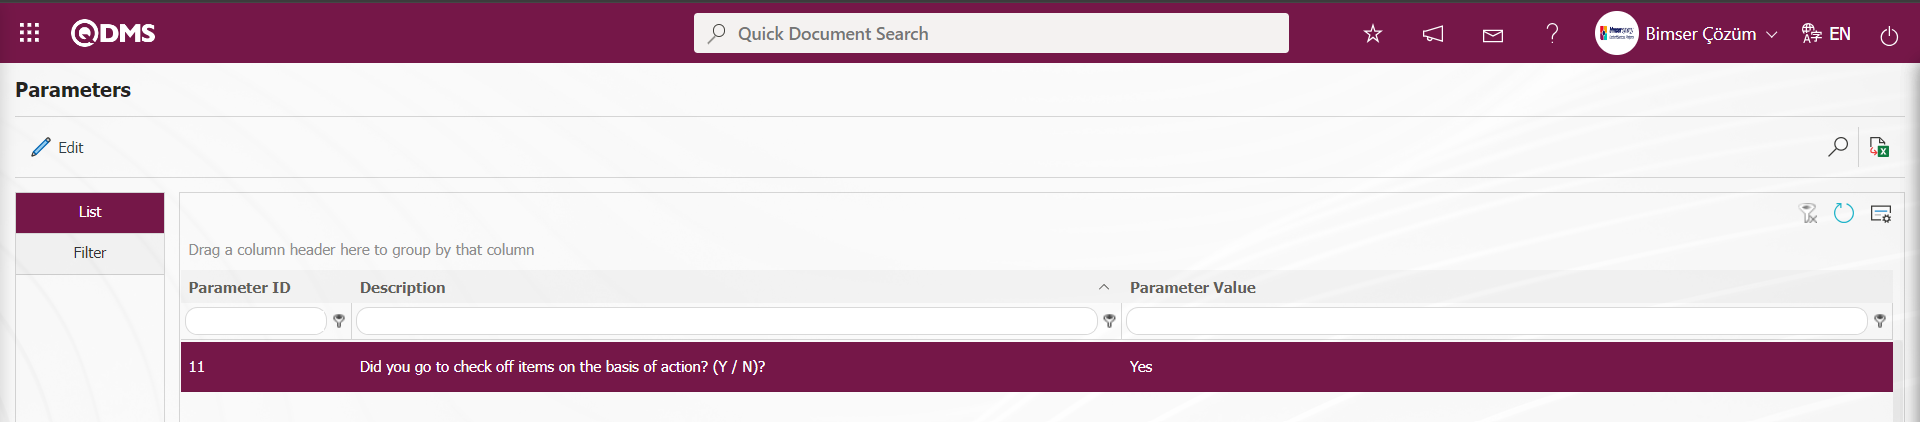
In the same way, the parameter numbered 11 “Should the action go to closure approval on item basis? (Y/N) ?” activates the parameter by performing the same operation steps.

After the parameter is activated, in order to send the actions to closure approval on item basis, the Action Item Planning - New Record screen displays the “Send to Closure Approval” check box. If the user wants, he/she can tick this check box to send the actions to closure approval on item basis.
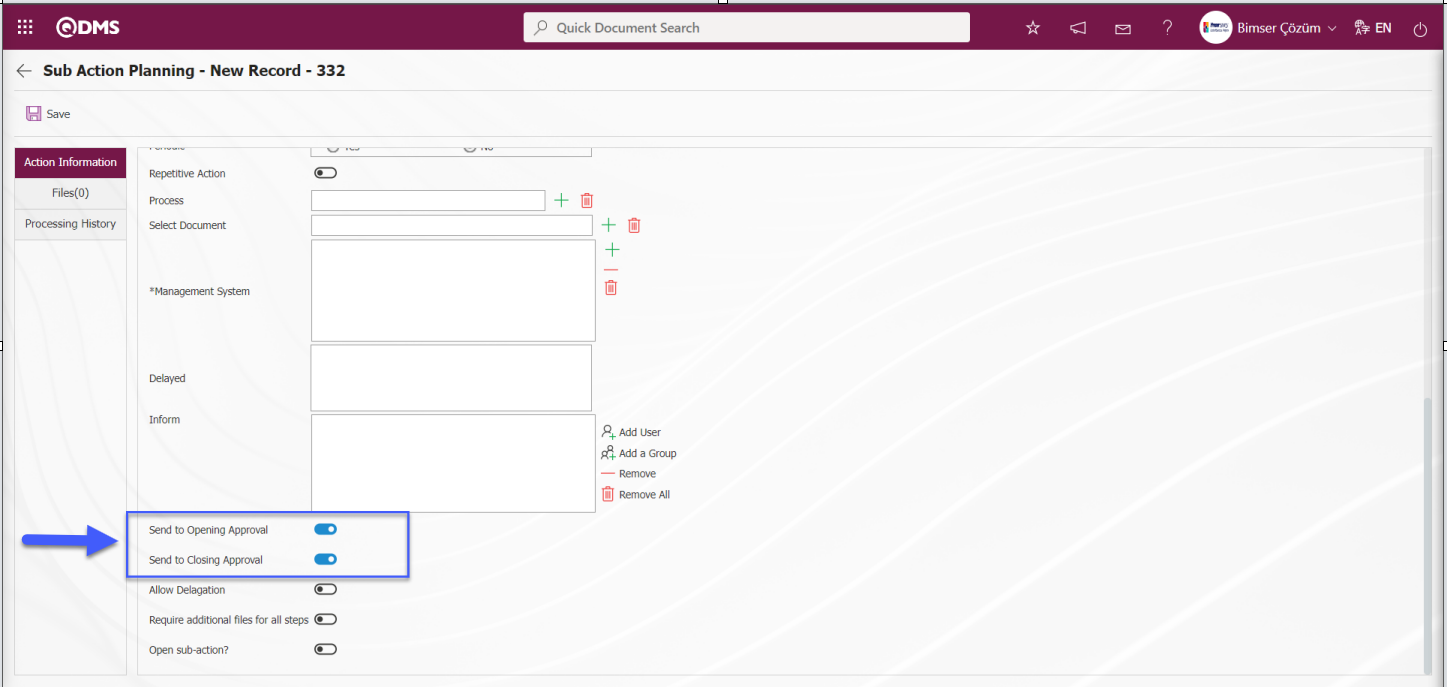
On the Action Item Planning - New Record screen, “Go to Opening Approval” and “Go to Closing Approval” fields are the fields that are displayed when the parameters are activated by selecting “Yes” for parameters 10 and 11 of the Action Management parameters.
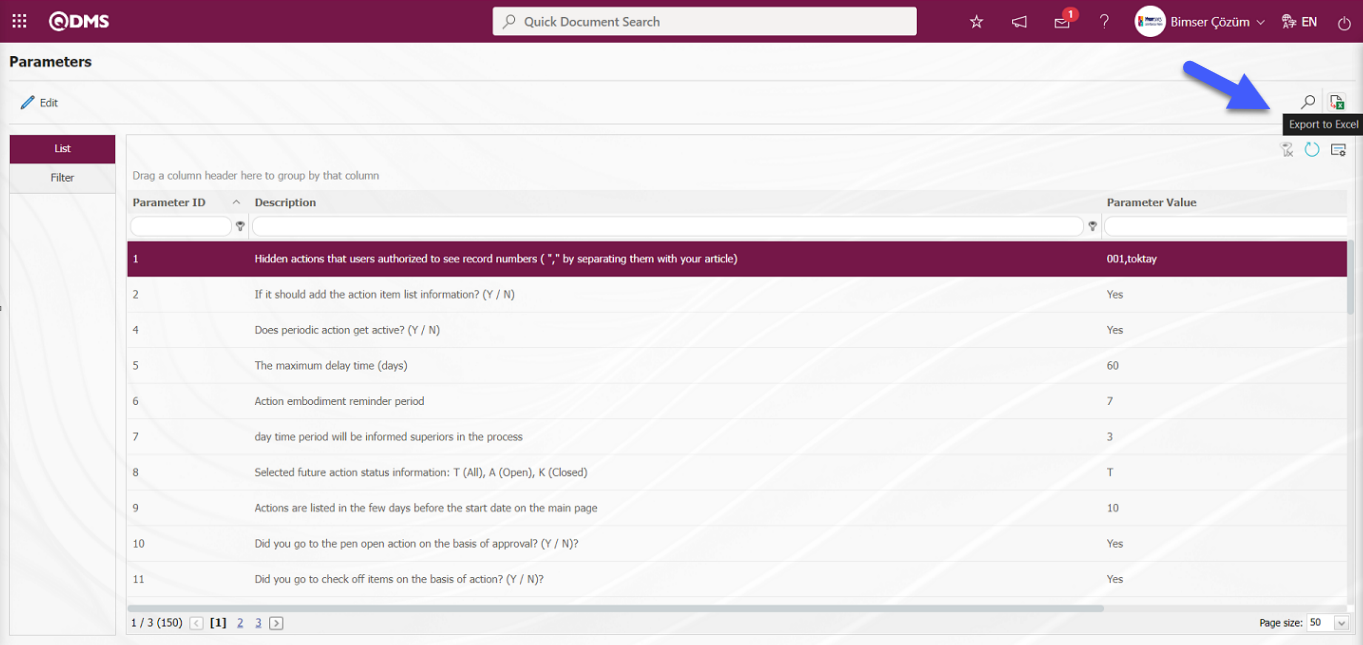
(Export to Excel) button is clicked to get the report of the list of parameters displayed in the list tab on the parameters screen in Excel format.
6.1.7.Creating a New Area
6.1.7.1. Creating a New Area for Common Use in Action
Menu Name: System Infrastructure Definitions/ BSAT/ Configuration Settings/ Language Settings
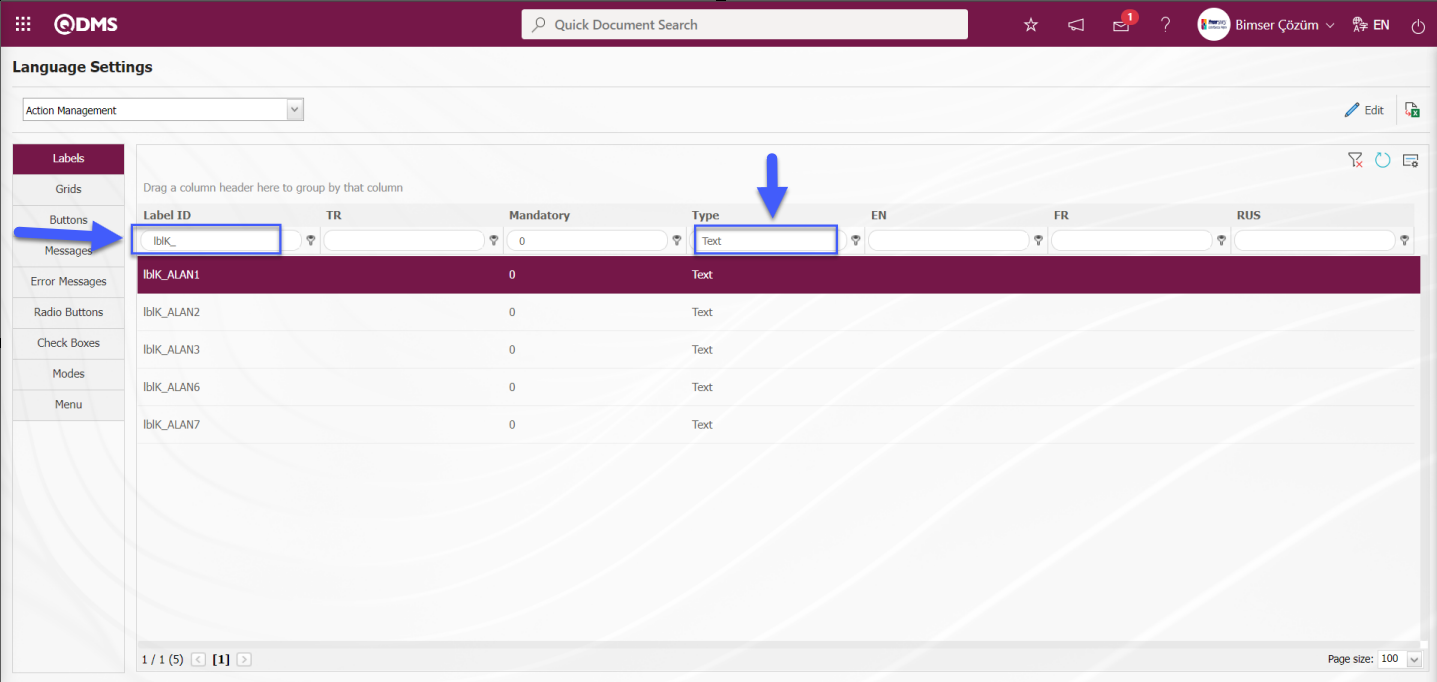
In the Action Management module, extra fields that are not in the system can be defined on the “Main Action Planning” and “Items” page. These defined fields are valid for all action module resources. System Infrastructure Definitions/Bimser System Infrastructure Definitions/ Configuration Settings/Language Settings menu is displayed. Here, “Action Management” module is selected in the drop-down module list in the modules field from the menu and the language definitions related to the Action module are displayed on the screen.
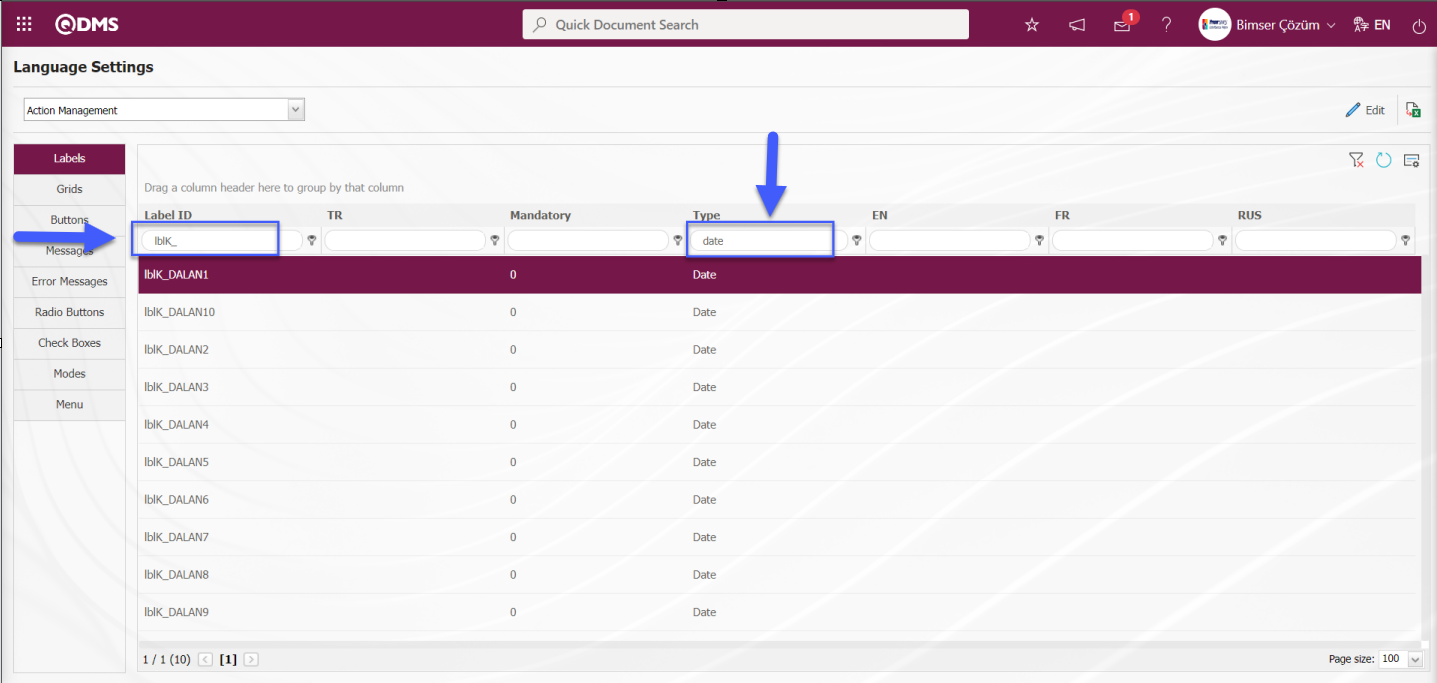
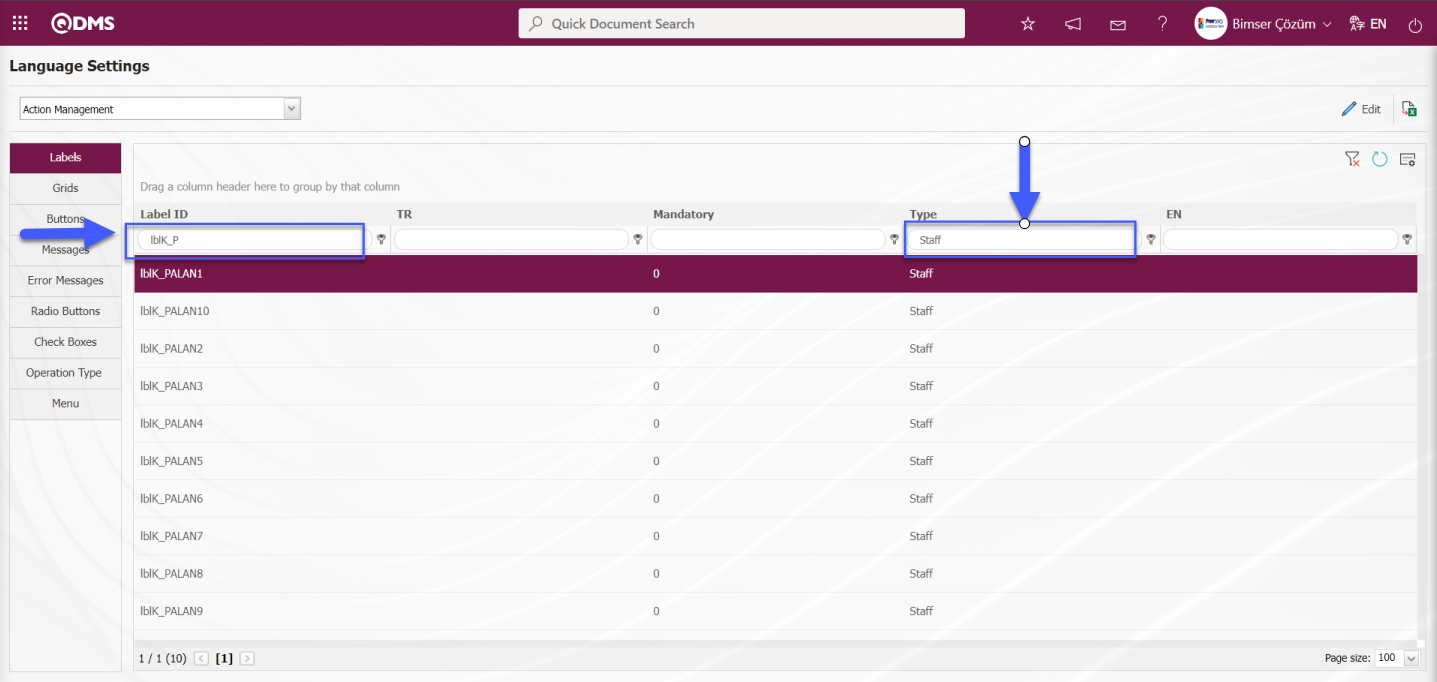
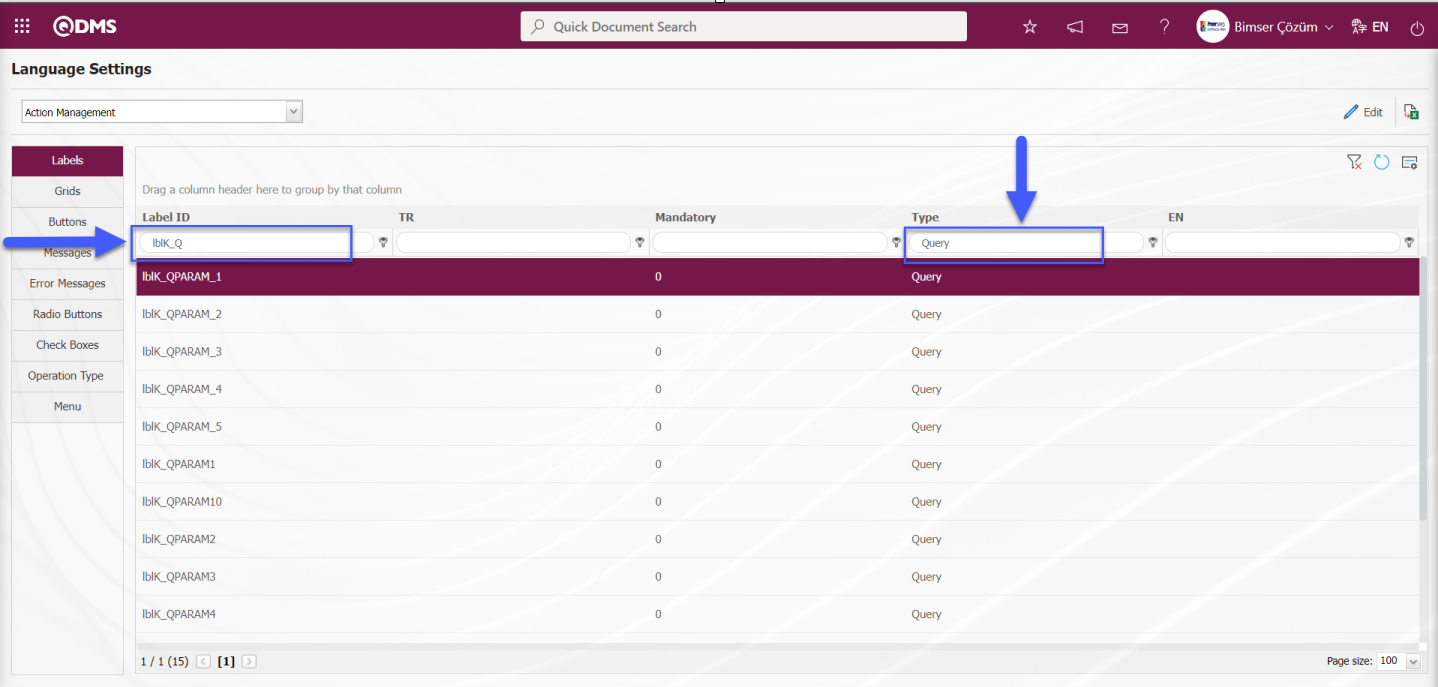
lblK-that is, those with K at the end-are used to define fields on the “Items” page and appear on this page. The short codes used are given below:
Parametric passive fields with text type;
For example: lblK_ALAN1
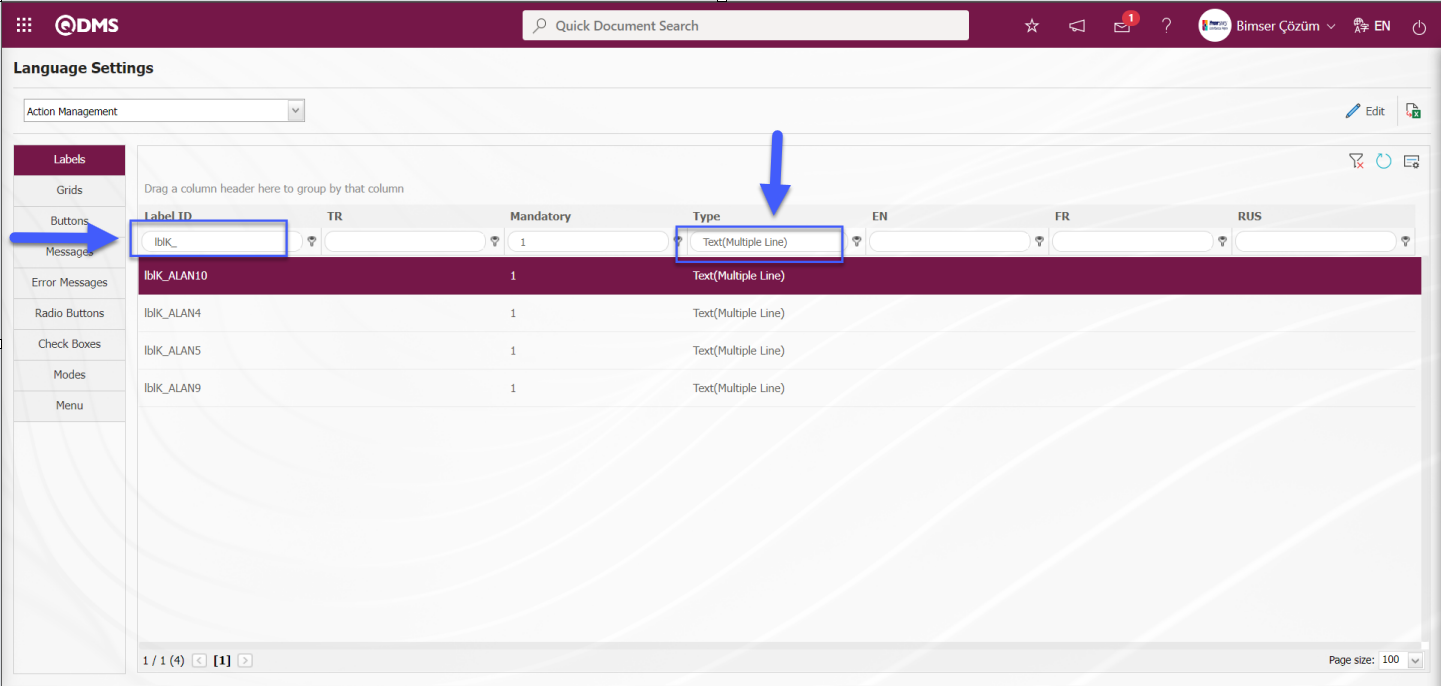
Text (Multiple Line) parametric passive fields;
For example: lblK_ALAN4
Parametric passive fields with date type;
For example: lblK_DALAN1
Parametric passive fields with list type;
For example:lblK_LALAN1

Parametric passive fields with numeric type;
For example: lblK_NALAN1

Parametric passive fields with personnel type;
For example: lblK_PALAN1
Parametric passive fields with query type;
For example: lblK_QPARAM
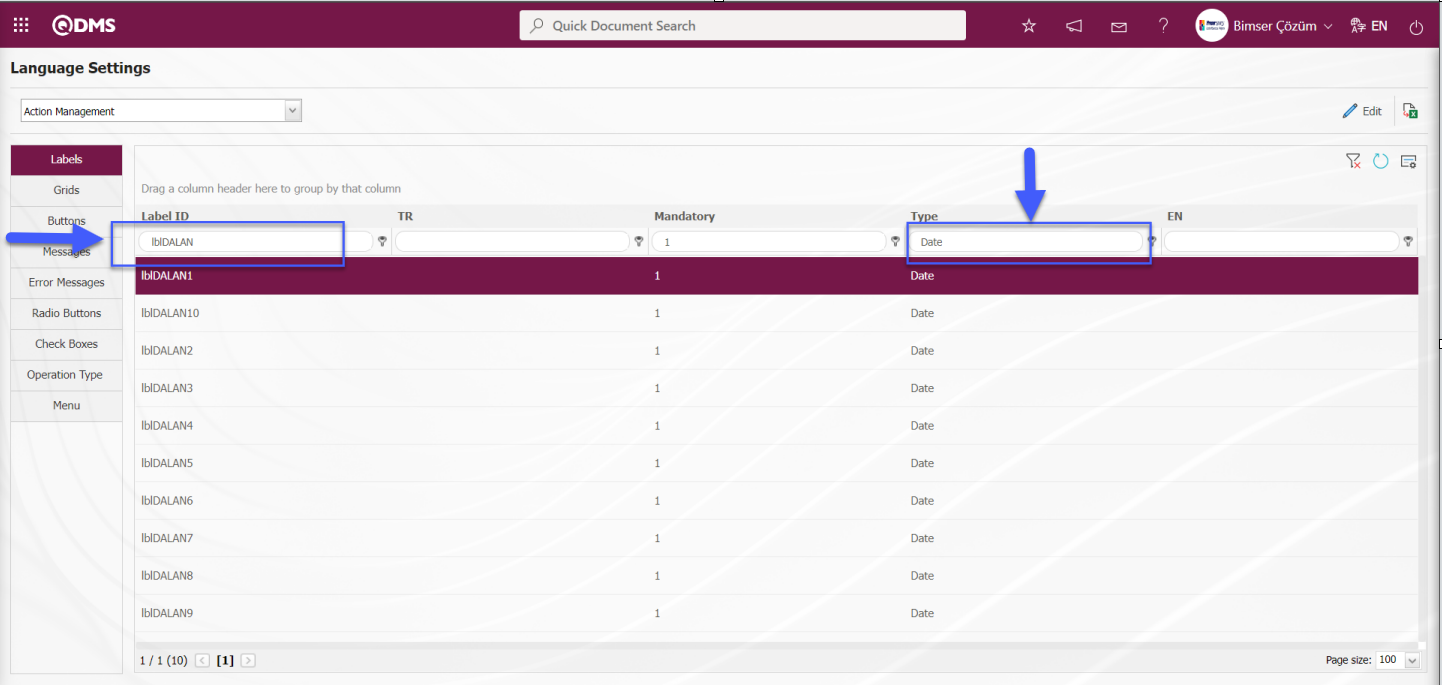
The “lblALAN” ones are used for the fields defined on the “Main Action Planning” page and appear on the “Main Action Planning” page. The short codes used are given below:
Parametric passive fields with text type;
For example: lblALAN1

Parametric passive fields with Text (Multiple Line) type;
For example: lblALAN4

Parametric passive fields with date type;
For example: lblDALAN1
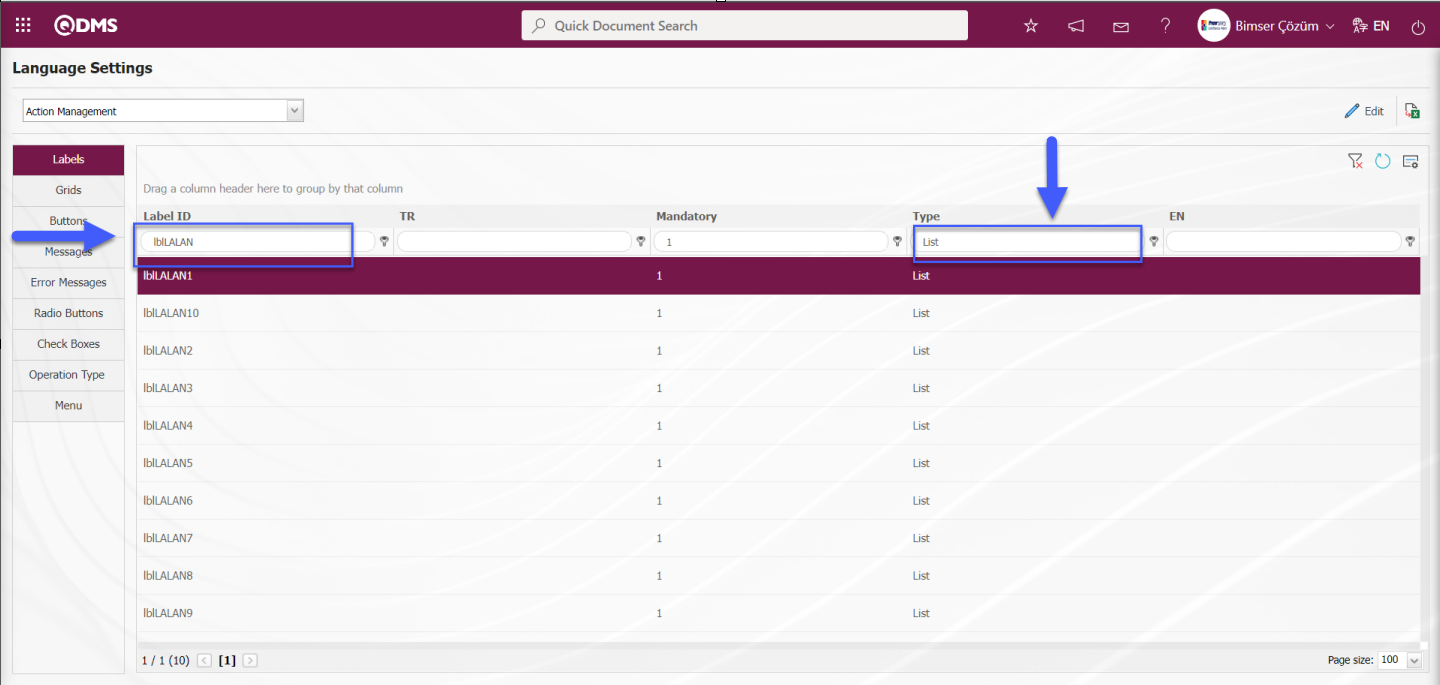
Parametric passive fields with list type;
For example: lblLALAN1
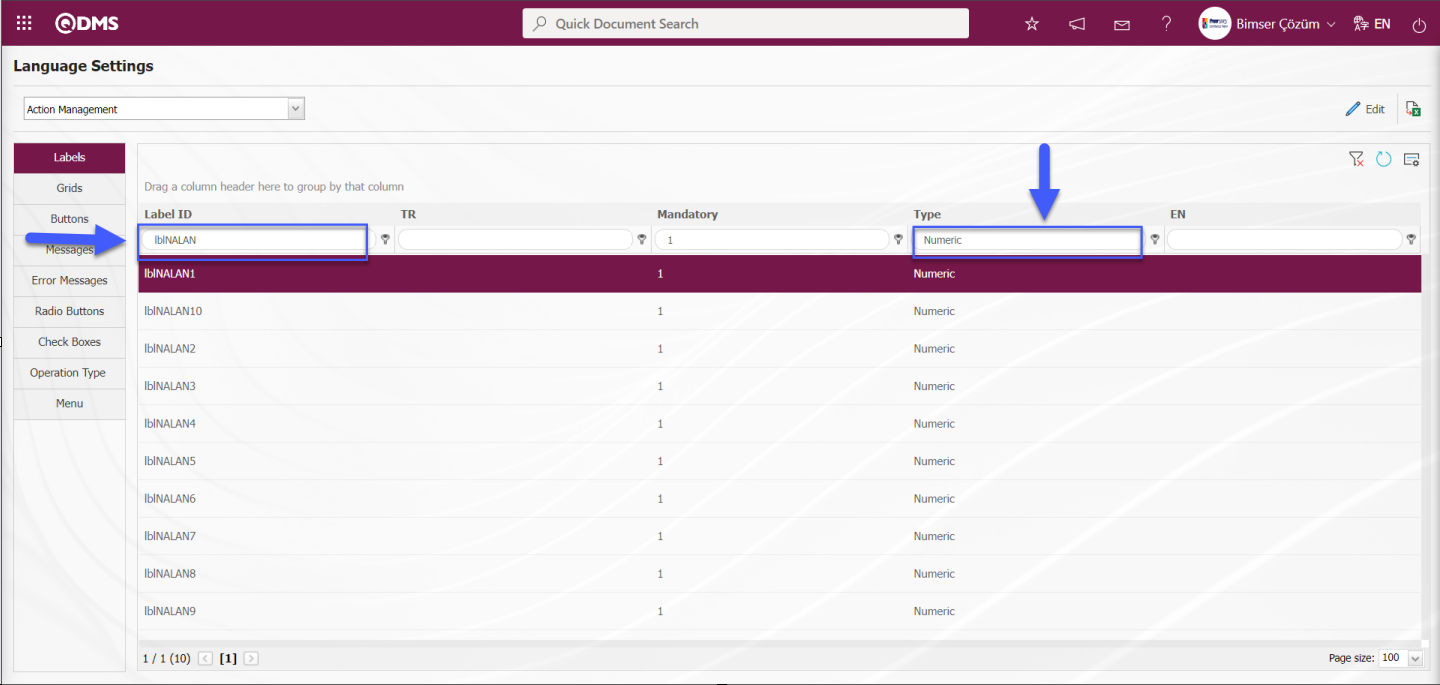
Parametric passive fields with numeric type;
For example: lblNALAN1
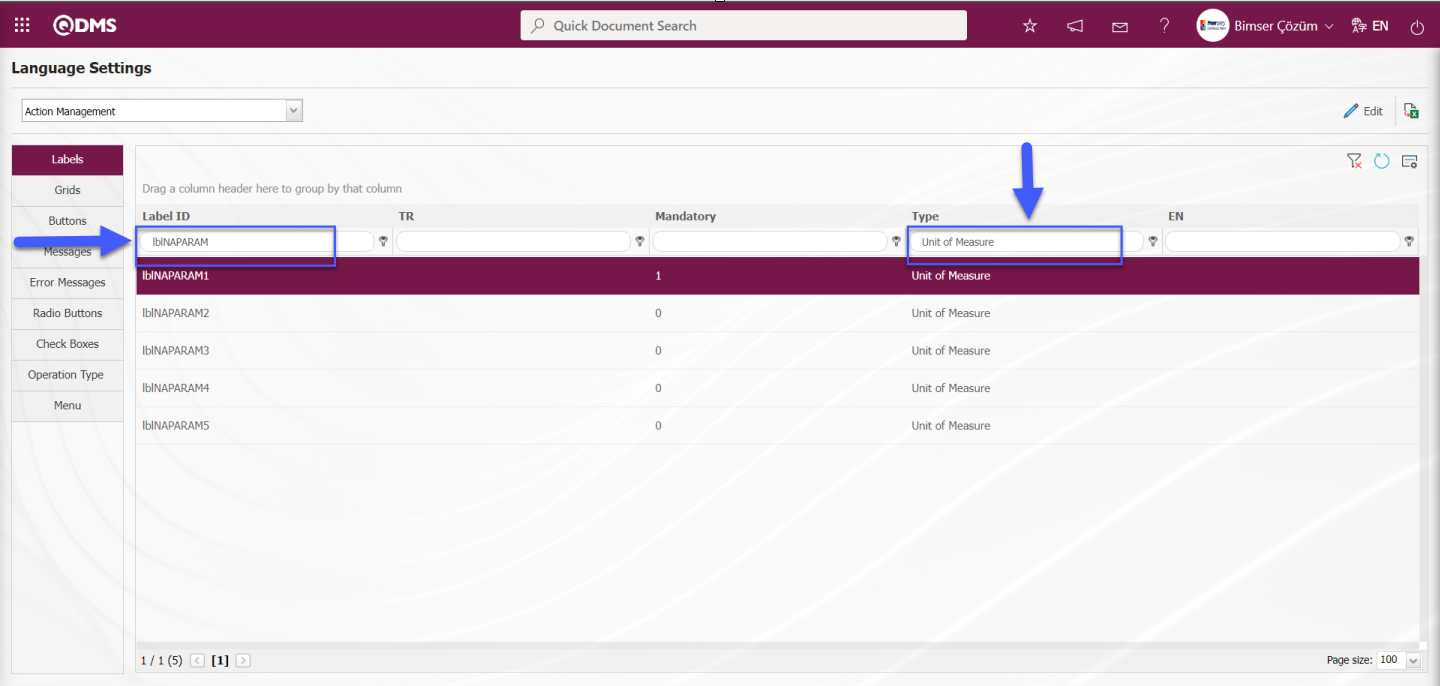
Parametric passive fields with Unit of Measure type;
For example: lblNAPARAM1
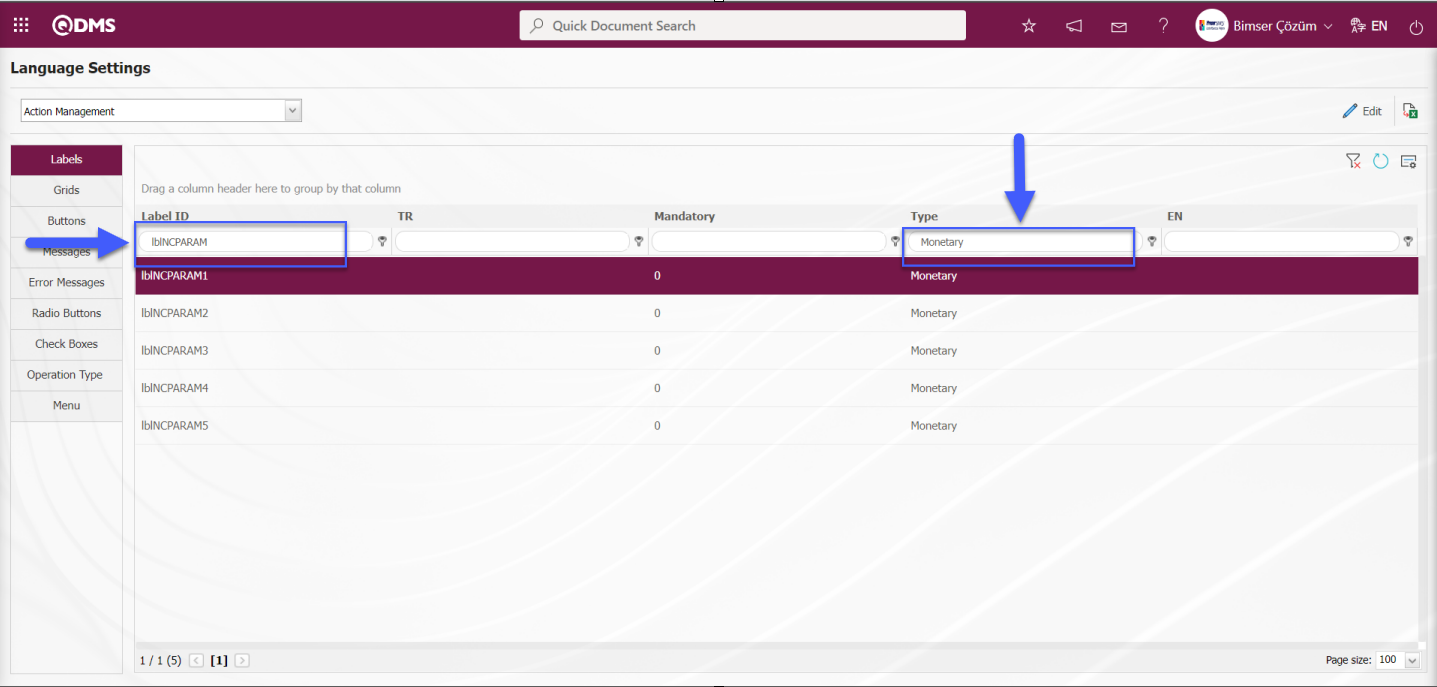
Parametric passive fields with monetary type;
For example: lblNCPARAM1
Parametric passive fields with personnel type;
For example: lblPALAN1

Parametric passive fields with query type;
For example: lblQPARAM1
 For example, a new field can be defined in the action task screen created in the action plan. For this, select the Action Management module in the module list opened by clicking the drop-down module list in the module field in the System Infrastructure Definitions/Bimser System Infrastructure Definitions/Configuration Settings/Language Settings menu. On the screen opened in the Language Settings menu, “lblK_ALAN1” is searched by typing “lblK_ALAN1” in the Name section of the grid.
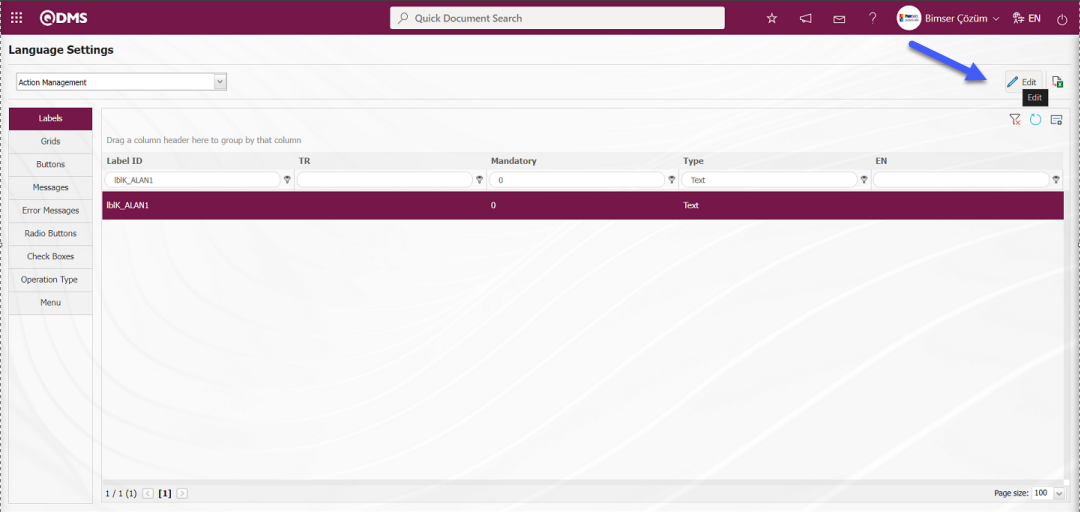
In the Language Settings screen, “lblK_ALAN1” is selected for data entry in a text field and  button is clicked. In the Language Settings screen, the field name you want to see is written in the value field.
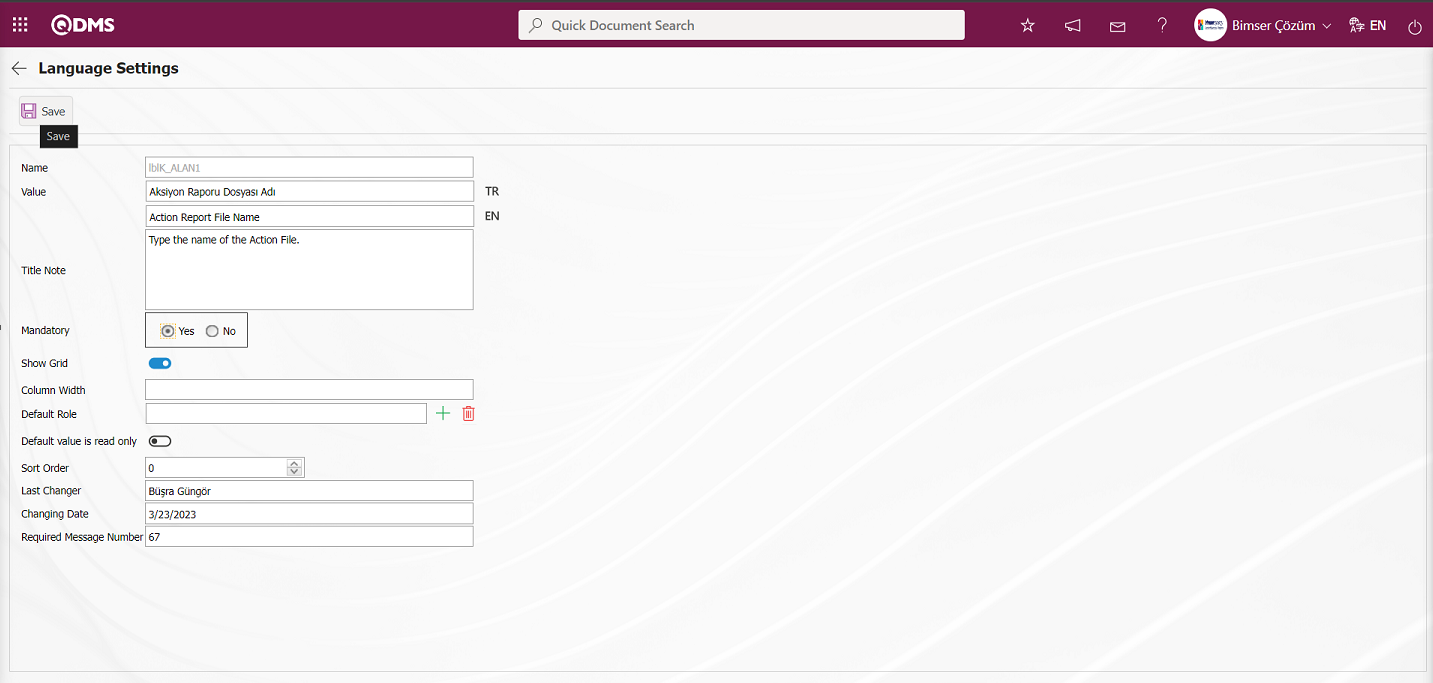
In the Language Settings screen, if desired, the Title Note information, which is the descriptive information about the field to be seen when the mouse hovers over it, the necessity of the field and whether or not it will be shown in the grid are entered. After entering the information about the required fields, the  button in the upper left corner of the screen is clicked and the field definition registration is made in the language settings.
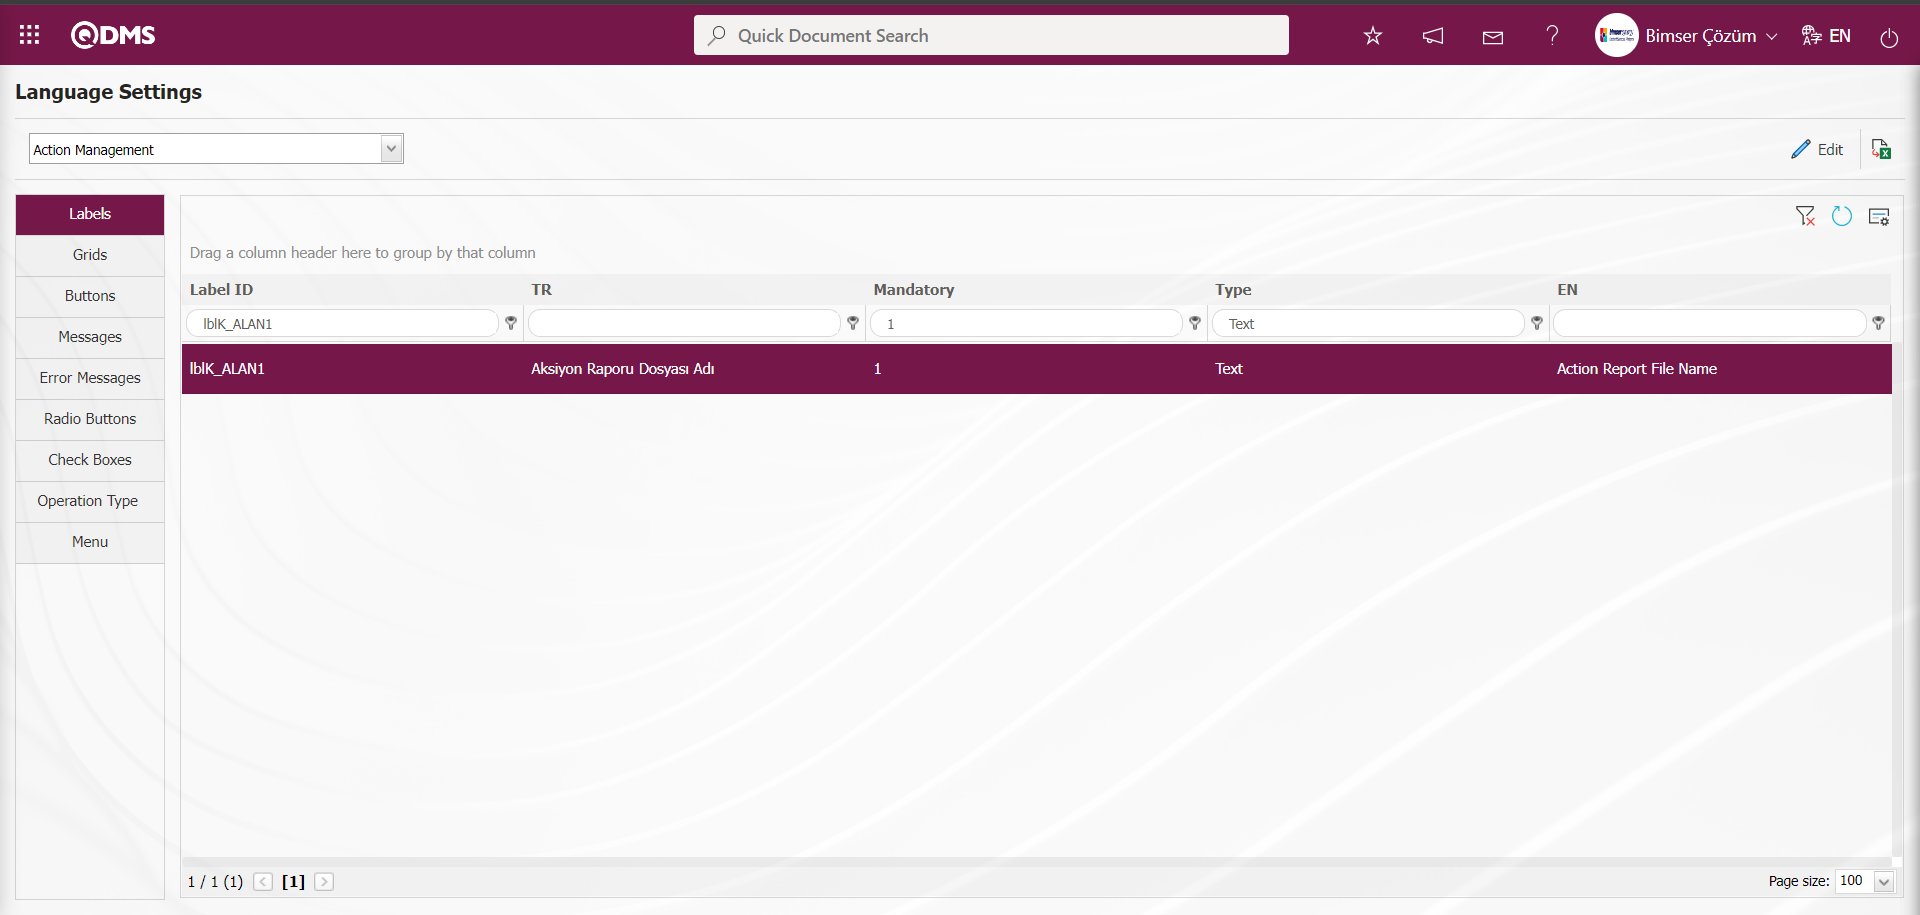
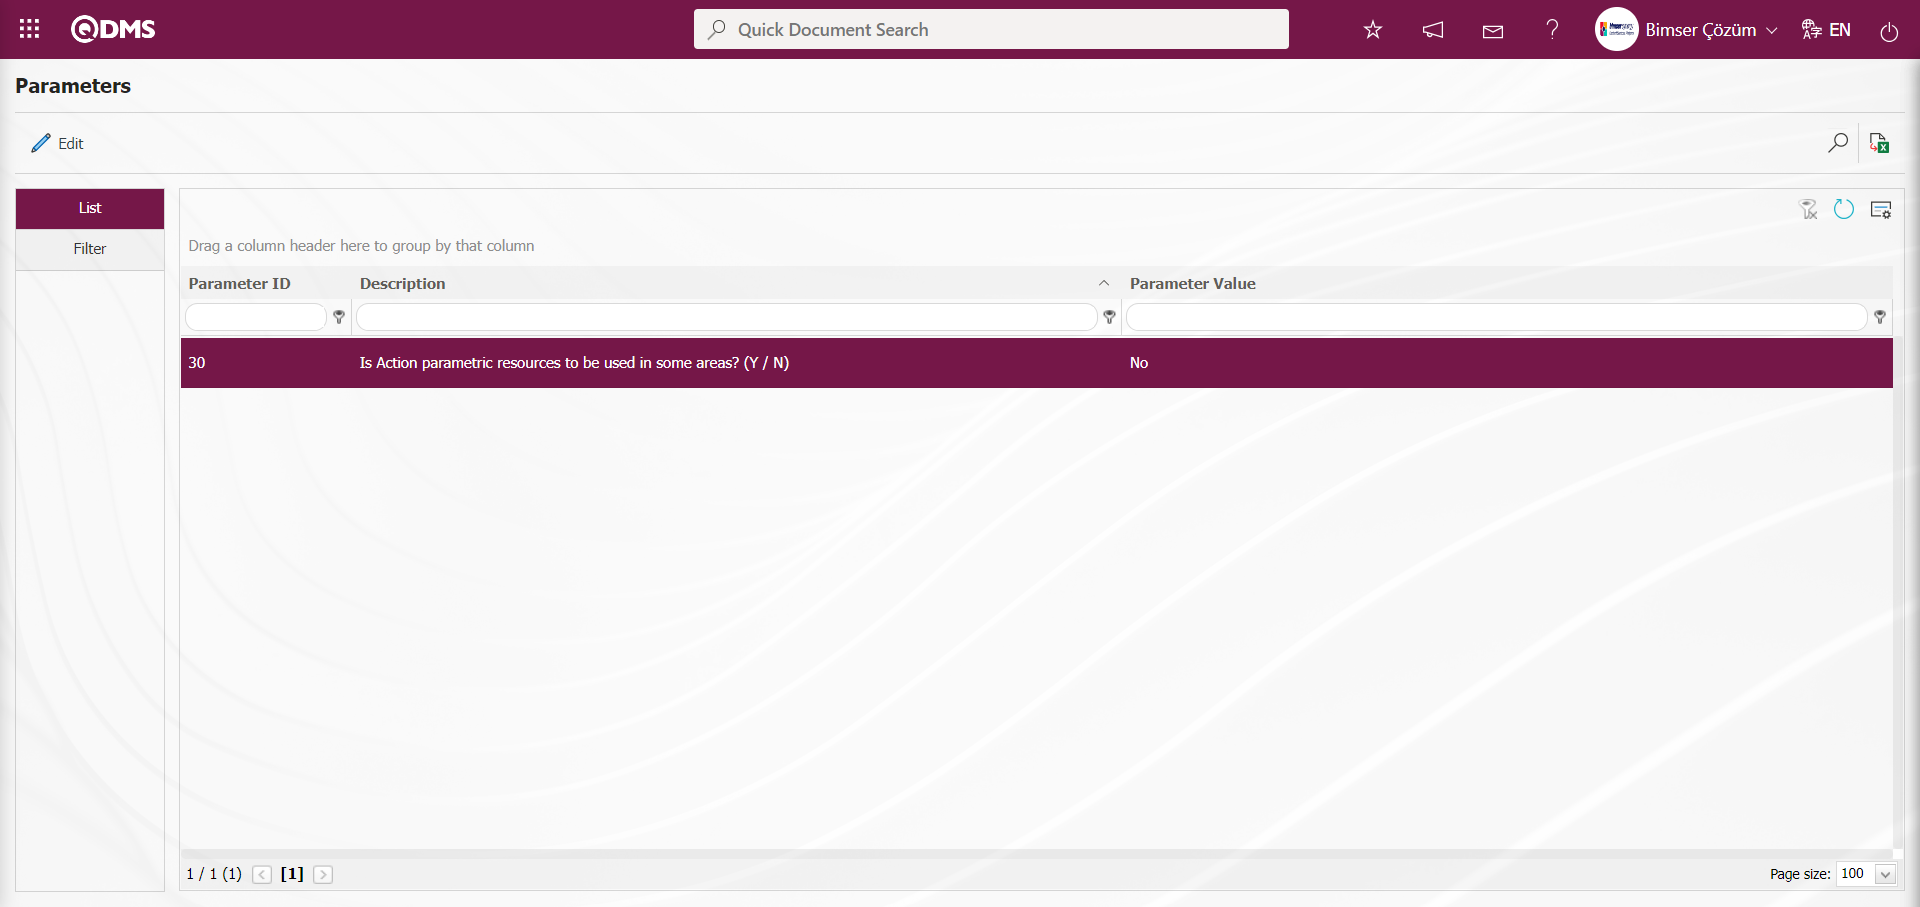
In order for the defined field to be displayed on the Action Item Planning - New record screen, the parameter value of the parameter number 30 “Will parametric field be used on the basis of action source (Y/N)?” in the Action Management Parameters must be selected as “No” and the parameter must be disabled.
The new defined field is displayed on the Action Item Planning - New record screen. When hovering over the field with the mouse, the title note information is displayed.
6.1.7.2. Creating Parametric Fields Based on Action Source
Menu Name: System Infrastructure Definitions/Action/Action Source Definition
The parameter “Will parametric field be used on the basis of action source” parameter is edited by checking the parameter number 30 from the action parameters. If the parameter is activated by selecting the parameter value as “Yes”, separate parametric fields can be defined for each action source.
 Common parameter definitions made from the Language settings selected on the planning screen are disabled and not displayed. If the parameter is disabled by selecting the parameter value as “No”, the common parameters defined in the language settings are used.

To define parametric fields on source basis, System Infrastructure Definitions/ Action Management/ Action Source Definition menu is displayed.
After the parameter is activated, the  button, which is the 5th button on the Action Source Definition screen, is displayed. For which action source a new field is required, select that source and click button. For Planning or Items operations, the relevant tab is selected and the desired field is defined and the registration process is completed.
Parametric field types to be defined on the planning screen;
Planlama sekmesinde görüntülenen pasif parametrik alan tiplerinde tanımlama yapılarak Aksiyon Planlama-Yeni Kayıt ekranında görüntülenmesi için Aksiyon Kaynağı alanında alan tanımlaması yapılan Aksiyon Kaynağının Aksiyon Kaynağı listesinde seçilmesi gerekir.Örneğin: Toplantı
Text Type Parametric Passive Fields : ALAN1...ALAN10
List Type Parametric Passive Fields: LALAN1...LALAN10
Numeric Type Parametric Passive Fields: NALAN1...NALAN10
Date Type Parametric Passive Fields: DALAN1... DALAN10
Personnel Type Parametric Passive Fields: PALAN1... PALAN10
Query Type Parametric Passive Fields: QPARAM2... QPARAM10 (Field definition should be made by getting help from Bimser Technical Support Team.)

Parametric field types to be defined on the Items screen;
Text Type Parametric Passive Fields : ALAN1...ALAN10
List Type Parametric Passive Fields: LALAN1...LALAN10
Numeric Type Parametric Passive Fields: NALAN1...NALAN10
Unit of Measure Type Parametric Passive Fields: NCALAN1... NCALAN5
Date Type Parametric Passive Fields: DALAN1... DALAN10
Personnel Type Parametric Passive Fields: PALAN1... PALAN10
Query Type Parametric Passive Fields: QPARAM2... QPARAM10 (Field definition should be done by getting help from Bimser Technical Support Team.)
All defined parametric fields can also be displayed in reports. The relevant report format is selected from the System Infrastructure Definitions / Bimser System Infrastructure Definitions / Configuration Settings / Report Formats Edit menu and downloaded to the computer with the “View” button. A new field is added to the report format and the appropriate short code as <ALANX>, <LPARAMX> is placed. The report name downloaded to the computer is restored to the system with the button from the report formats editing menu without changing the report name.
6.2.Integrated Management System / Action Management
In the Action Management module, it is the part where operations such as creating an action plan, assigning a task by creating an action item, performing the action, approving the action, delaying the action, directing the action, updating the action and viewing the reports.

6.2.1. Main Action Plan Creation/ Action Realisation/ Action Approval
Menu Name: Integrated Management System/ Action Management/ Planning
This is the section where action plan creation, action realisation and approval operations are performed.
6.2.1.1. Creating Main Action Plan
Menu Name: Integrated Management System/ Action Management/ Planning
In the Action Planning menu, main action plans are prepared in accordance with the company's action sources such as OHS, environment, quality, production, planning, information security, meeting. For example; “2020 Management Review Meeting” is a main action plan. Each decision taken as a result of the Management Review meeting is an action item. These decisions are defined as different tasks in the form of items in the main action plan, and the task assignment process is carried out according to the deadlines. In the same way, a main action plan called “OHS Action Plan” is defined and each task to be assigned to people within the scope of OHS is defined as an action item in this plan.
Planning menu is used to create main action plan. After the main actions are created with this menu, the task assignments related to the plan are performed with the items button. 
With the help of the buttons on the screen;
 : A new action plan is created.
 : The action plan selected in the list is changed.
 : It is used to copy the action plan selected in the list. (If action items are defined in the plan, Action Items are copied together)
 : The action plan selected in the list is deleted. (If action items are defined in the plan, the system gives a warning message “You need to delete the action items of the main action.”. After deleting the action items defined in the plan, the main action plan is deleted.)
 : It is used to display the action plan selected in the list
 : Define action items (tasks) for the action plan selected in the list
 : It is used to publish the action plan selected in the list
 : Performs suspension operation for the action plan selected in the list. When the action plan is suspended, the items related to the plan do not appear in pending jobs and delays.
 : Cancels the pending action plan for the action plan selected in the list and makes the action plan visible
: The list of action plans on the screen is transferred to Excel
 : The action information is updated by the Module Administrator. (This button is only visible for module administrators. You must be defined as a module administrator in the relevant Action Management module in the System Infrastructure Definitions/Bimser System Infrastructure Definitions/Configuration Settings/Administrator Identification menu.)
: Records are searched by filtering.
: The search criteria on the menu screens are used to clear the data remaining in the filter fields in the grid where the search operation is performed
: The process of returning the menu screen to its default settings is done.
: User-based designing of the menu screen is done with the show-hide feature, that is, the hiding feature of the fields corresponding to the columns on the menu screens.
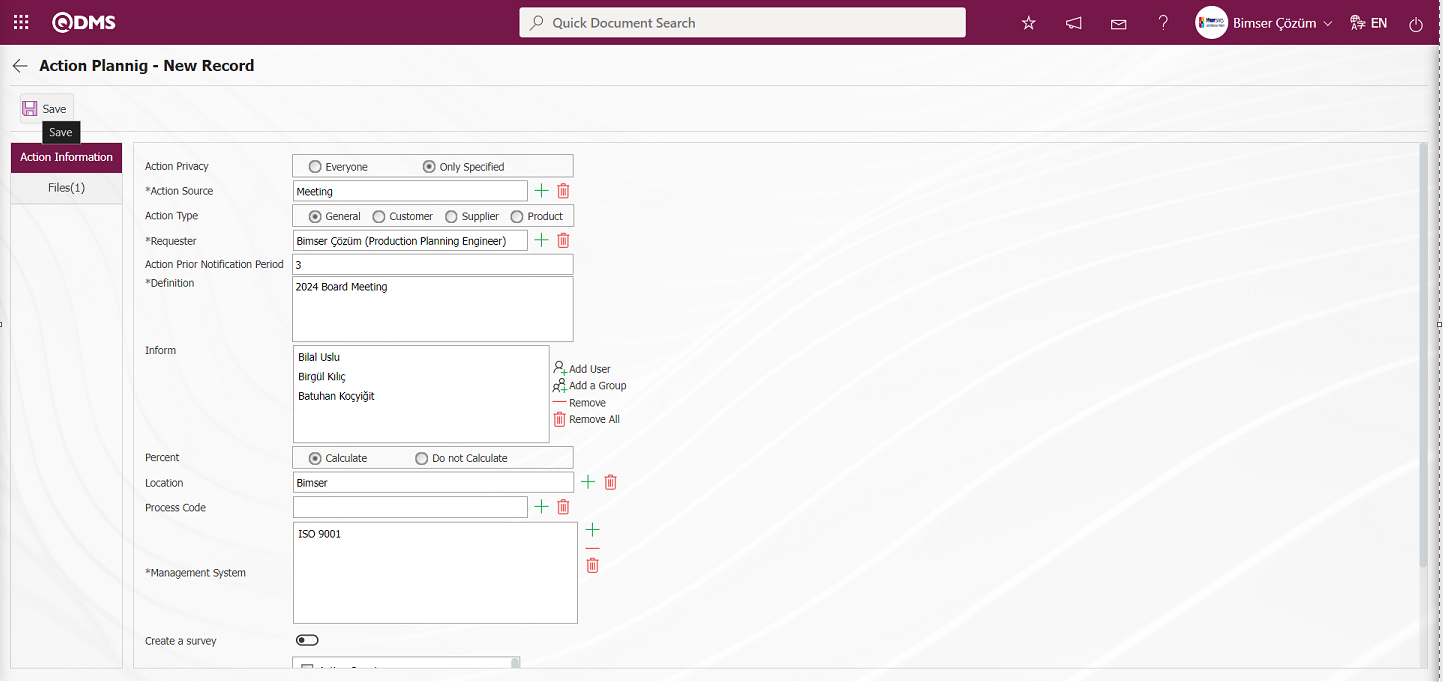
To create an Action Plan, the Action Planning / New Registration screen is displayed by clicking the button.
Action planning page consists of two tabs;
1-Action Information tab;
This is the tab where general information about the Main Action Plan is defined.
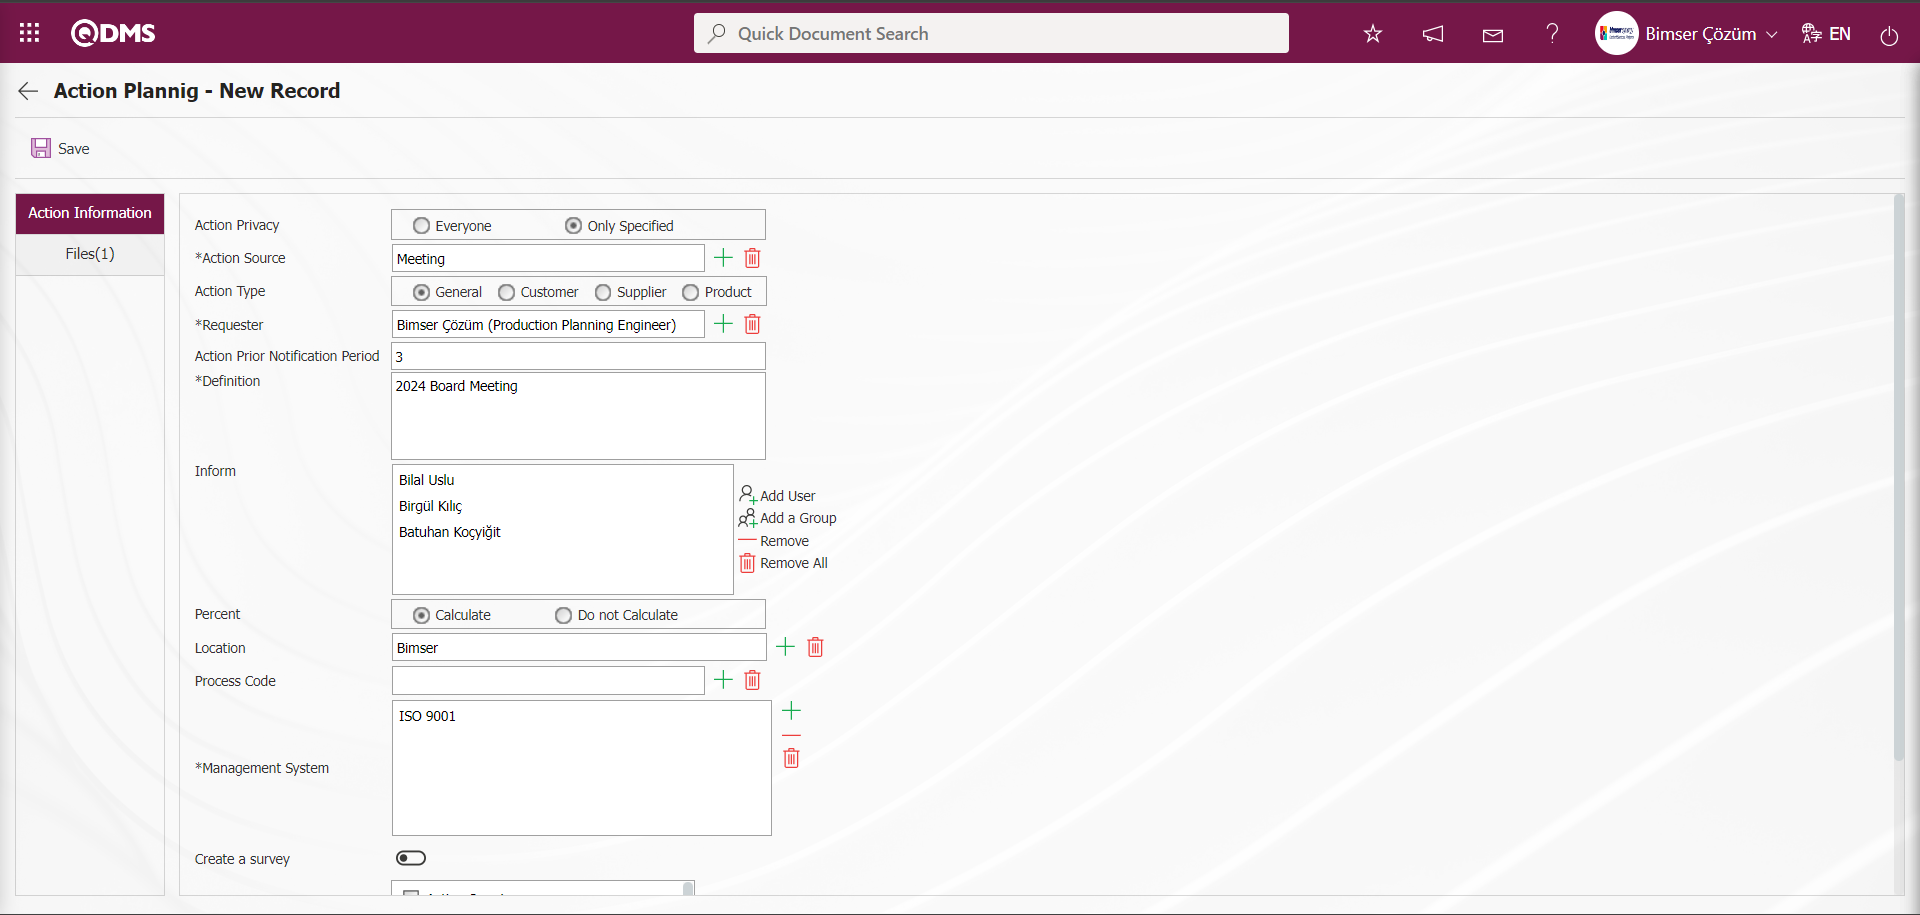
Who Can View: If you want everyone in the system to view the action plan defined on the Action Planning - New Record screen, the “Everyone” option is selected. If “Only Specified” is checked, no one can view the action except the “Requestor of the Main Action, the people in the Information, the Action Responsible and the People who will do the Action”.
Action Source: This is the field where the appropriate action source is selected from the list of action sources defined in the system, if the main action plan is created according to which action source defined in the system on the Action Planning - New Record screen. For example; Meetings, risk assessment, work accident, information security, etc. The Action Source List is defined in the System Infrastructure Definitions/Action/Action Source Definition menu.
Action Type: In the Action Planning - New Registration screen, it is the field where the relevant selection is made for the action plan type as internal, customer based, supplier based, product based.
The “General” option indicates that there is an internal action plan. In the Requester field opened below, the requester information is selected from the list of personnel defined in the system.

If it is an action plan created about the customer, select the “Customer” option. Select the relevant customer information from the customer list defined in the system in the Customer field opened under it.
If it is an action plan created about the supplier, select the “Supplier” option. In the Supplier field opened below, the relevant supplier information is selected from the list of suppliers defined in the system.
If it is an action plan created for the product, select the “Product” option. Select the relevant product information from the list of products defined in the system in the Product field opened under it.
Requester:In the Action Planning - New Record screen, it is the field where the person who requests the main action is selected from the list of personnel defined in the system.
Action Pre-Notification Period: This is the field where the Action Pre-notification period information is entered on the Action Planning - New Record screen. Action task assignments are made in the action plan with the items button. A separate task start date for each task is defined in the system. The number of days before the start date of the work, the reminder notification to the person who will do the work works according to the value defined in this field. For example; let the action start date be 20.03.2024. Let the action pre-notification period in the master plan be 3 days. According to the pre-notification period, the person who will perform the work receives a reminder notification on 17.03.2024. In the Action Management Module, the parameter 87 “Action pre-notification period cannot be changed” parameter value “Yes” is selected and the parameter is activated so that the action pre-notification period defined when planning the action is not changed.

Explanation: On the Action Planning - New Registration screen, it is the field where the explanation information about why the main action plan is made is entered. For example; 2020 Management Review Meeting, January 2020 Environmental Action Plan, 2024 Board Meeting, etc.
To be informed: Action Planning - This is the field where users or user groups to be added to the information with the action plan on the New Registration screen are added. If it is desired to inform other personnel other than the personnel who request the action plan, the action responsible, and the personnel who will perform the action, the relevant personnel / user group is selected from this field. For example; personnel to be informed such as general manager, related unit managers, senior supervisor information can be added. Thus, it is ensured that information about the subject is sent to these people via e-mail. User Group code is defined in the parameter value of the parameter 61 “User group code for default notification on main action” from the Action Management Module parameters. The defined parameter value will automatically inform the group members in the User Group within the scope of the main plan.

The parameter is activated by selecting the parameter value “Yes” for the parameter 84 “Should the requestor's supervisor be added to the notification list on the main action planning screen?” from the Action Management parameters.
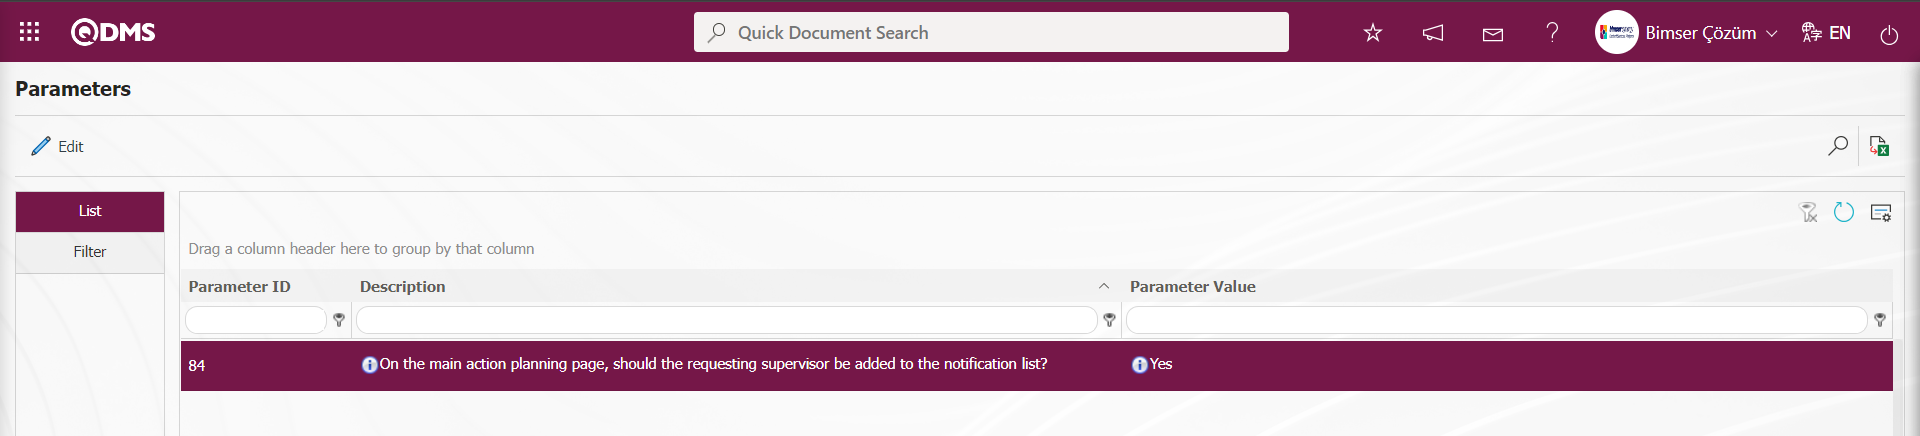
After the parameter is activated, the system automatically adds the requestor's supervisor to the list in the notification field on the main action planning screen.
The limit of the number of people to be added to the information field is determined according to the value entered in the parameter value in parameter 37 “Maximum number of information can be added” in the Action Management Module parameters.
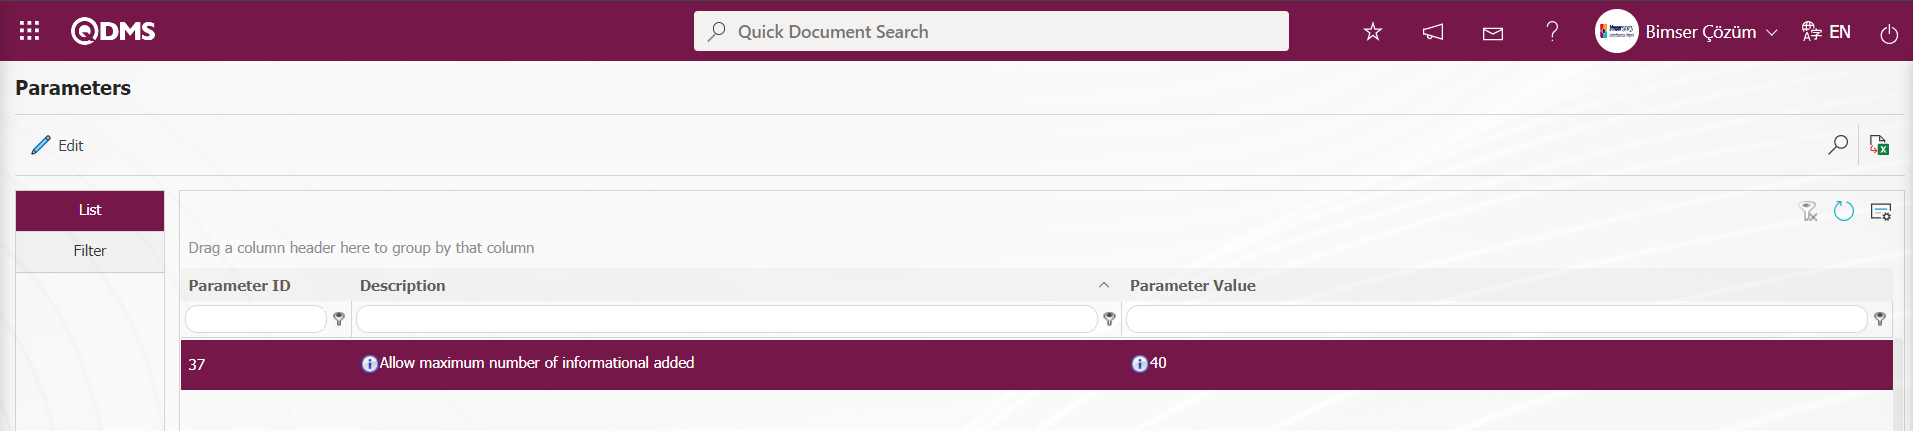
When the limit in the parameter value in the parameter value is exceeded, the system gives the warning message “The number of information limit has been exceeded!”
Completion Percentage: Action Planning - This is the field where the completion percentage of the action plan defined on the New Record screen is selected from the completion percentage options. It is used for actions that trigger each other and within a whole, such as a project. For example, a main action is planned to obtain ISO 9001 certificate. Tasks such as receiving training, preparing documentation, making application, performing audit are assigned as action items. Percentages are given to these tasks. For example, application 10%, training 15%. When the “Calculate” option is selected, the completion percentage of the planned main action information is displayed.
Workplace: It is the field where the information of which workplace the action plan defined in the Action Planning - New Record screen belongs to for workplaces with multiple locations is selected from the list of workplaces defined in the system.
Process Number: If there are processes related to the action plan defined on the Action Planning - New Record screen, it is the field where the processes defined in the system are selected from the list.
Indicator: If there are indicators that the action plan defined in the Action Planning - New Record screen is related to, it is the field to select from the list of indicators defined in the system. Indicators can be used if Ensemble Performance Management / Balance Scorecard" product is available in the company.
Management System: If there are management systems associated with the Action Planning - New Registration screen, the management system defined in the system is selected from the list.
Create Survey: If it is desired to create a questionnaire related to the action plan on the Action Planning - New Record screen, the relevant check box is ticked.
Statuses where Additional File is Mandatory: On the Action Planning - New Record screen, select the statuses for which the additional file related to the action plan is mandatory.
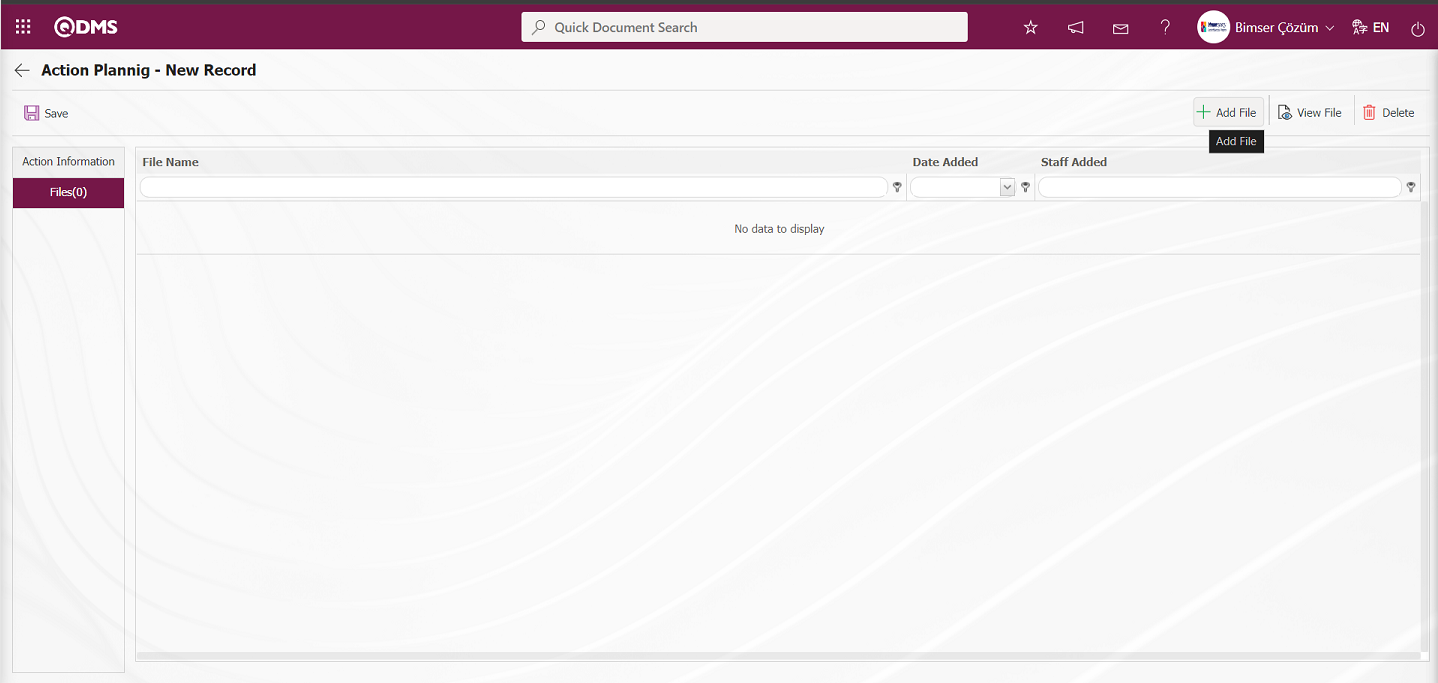
2-Additional Files tab;
It is the tab where additional documents such as pictures, meeting notes, decision minutes can be added for the created action plan.
With the help of the buttons on the screen;
 : The additional file is uploaded to the system.
 : The uploaded additional file information is displayed
 : The uploaded additional file information is deleted.
Additional file is added to the main action plan by clicking the button. Multiple additional files can be added.
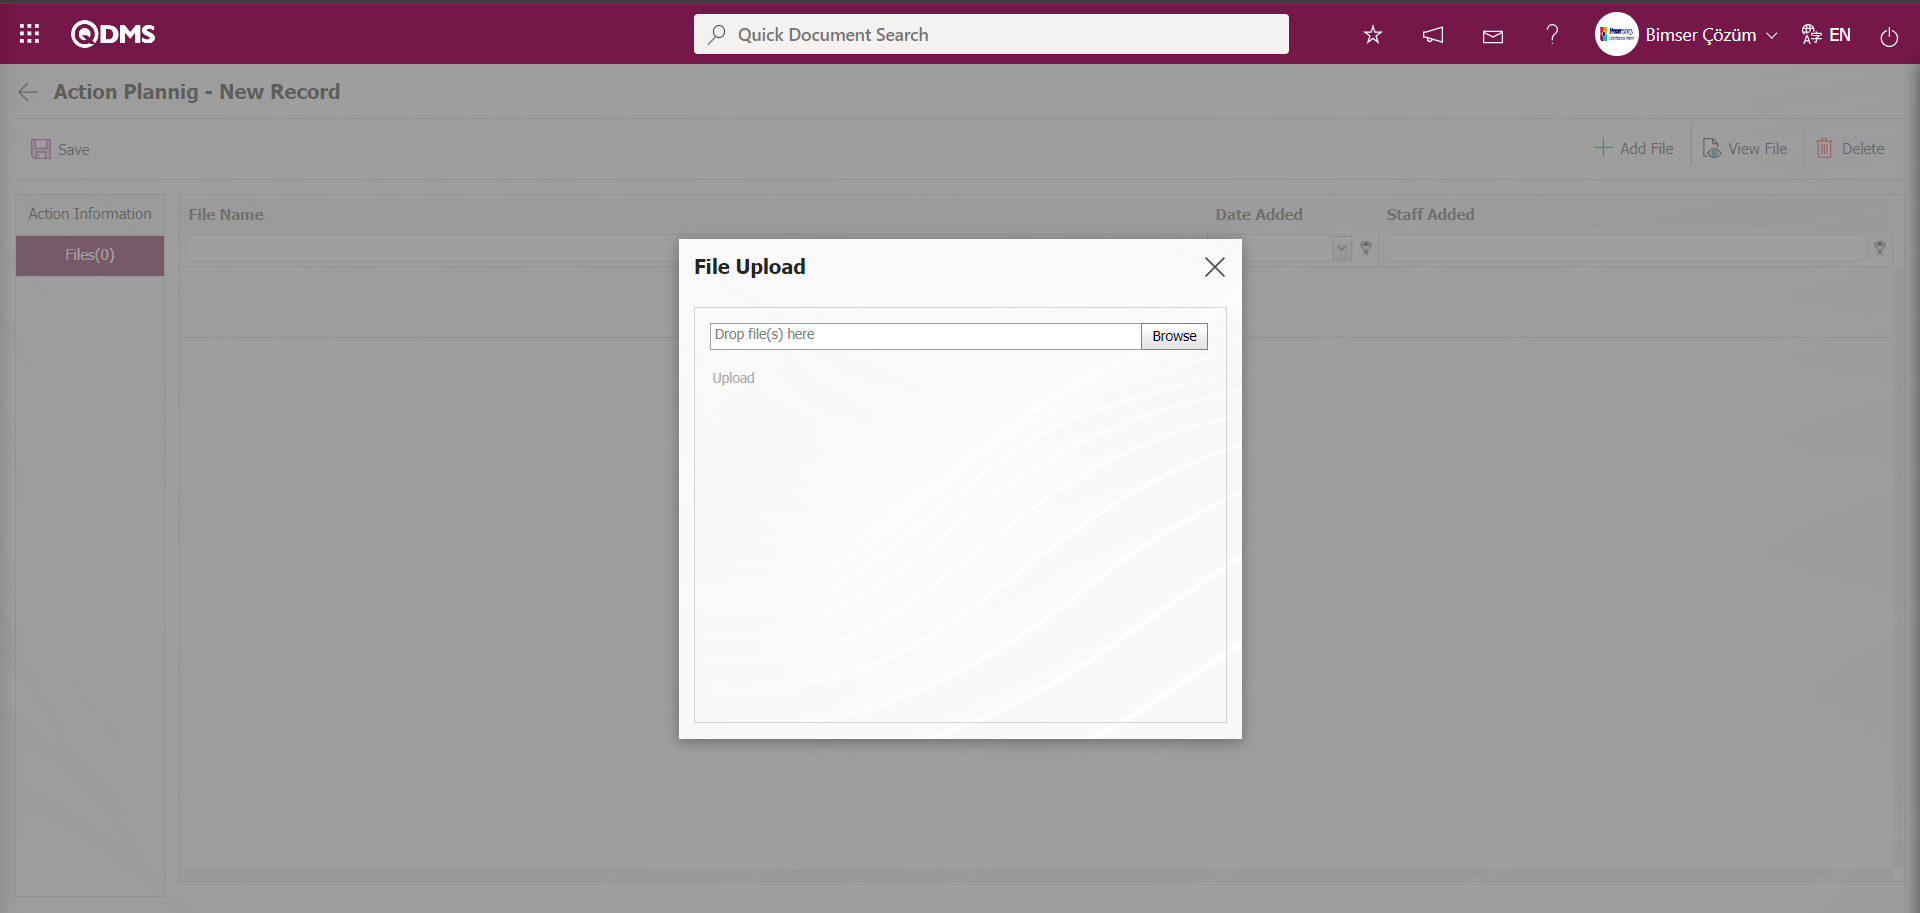
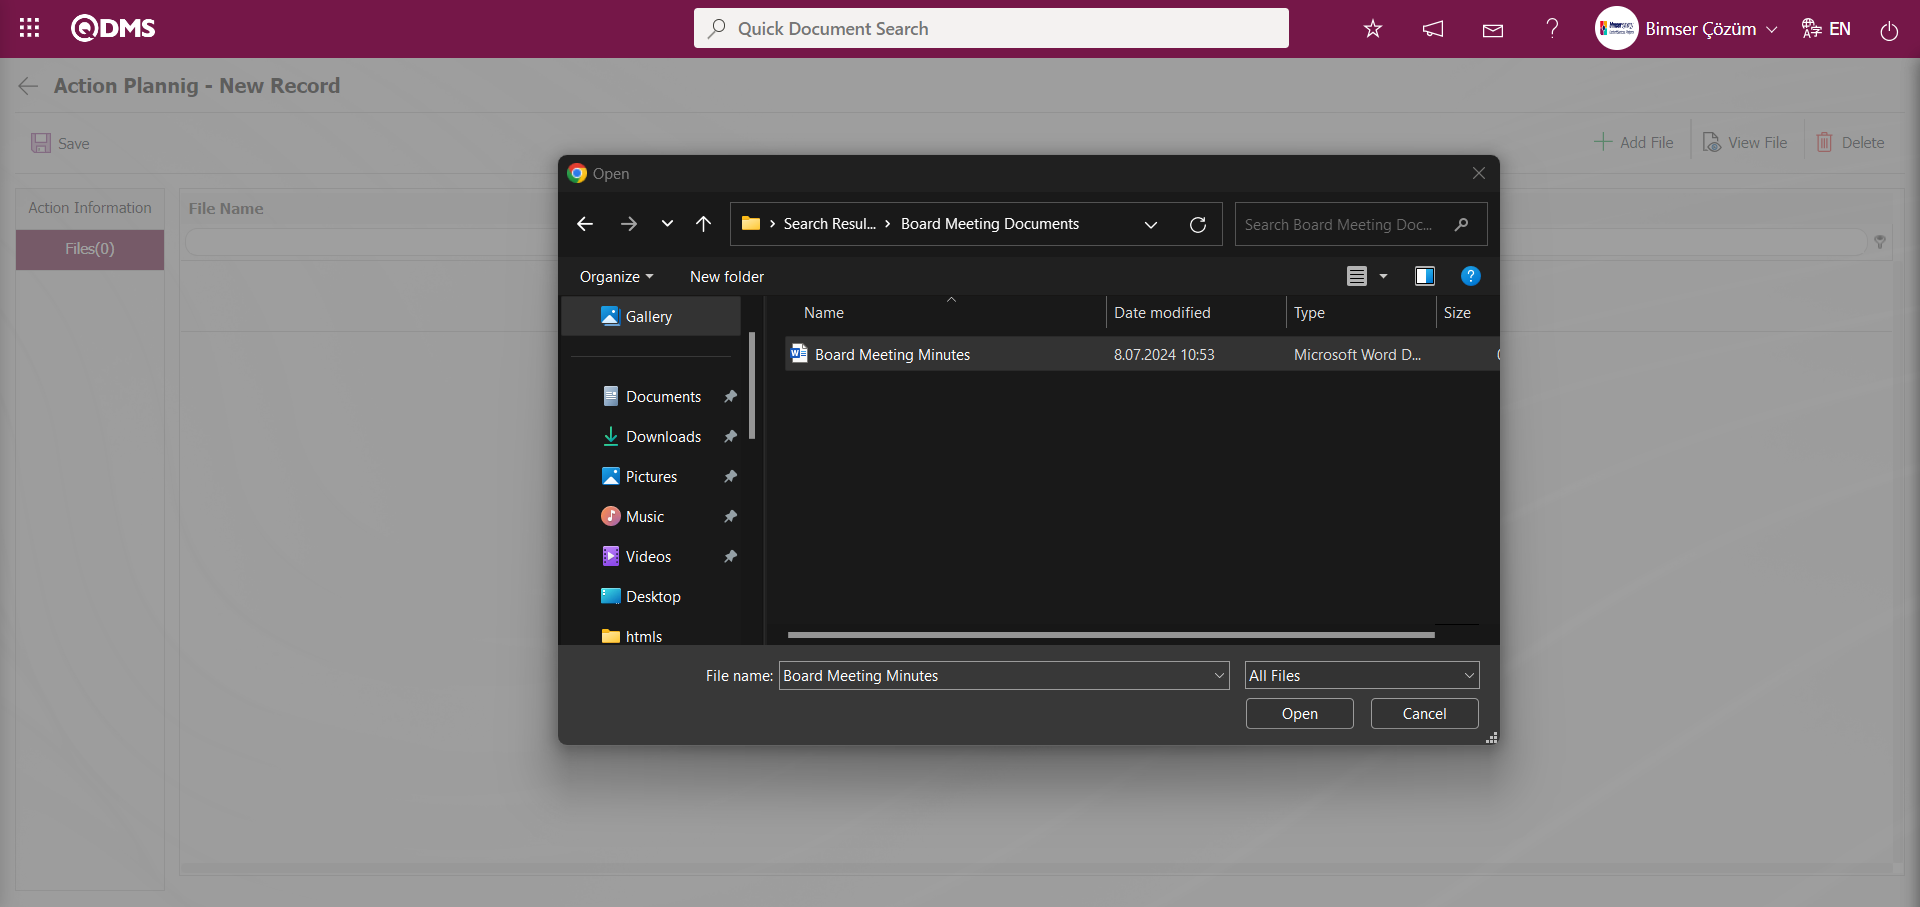
On the Add File screen, select the file on the computer by clicking the Browse button.
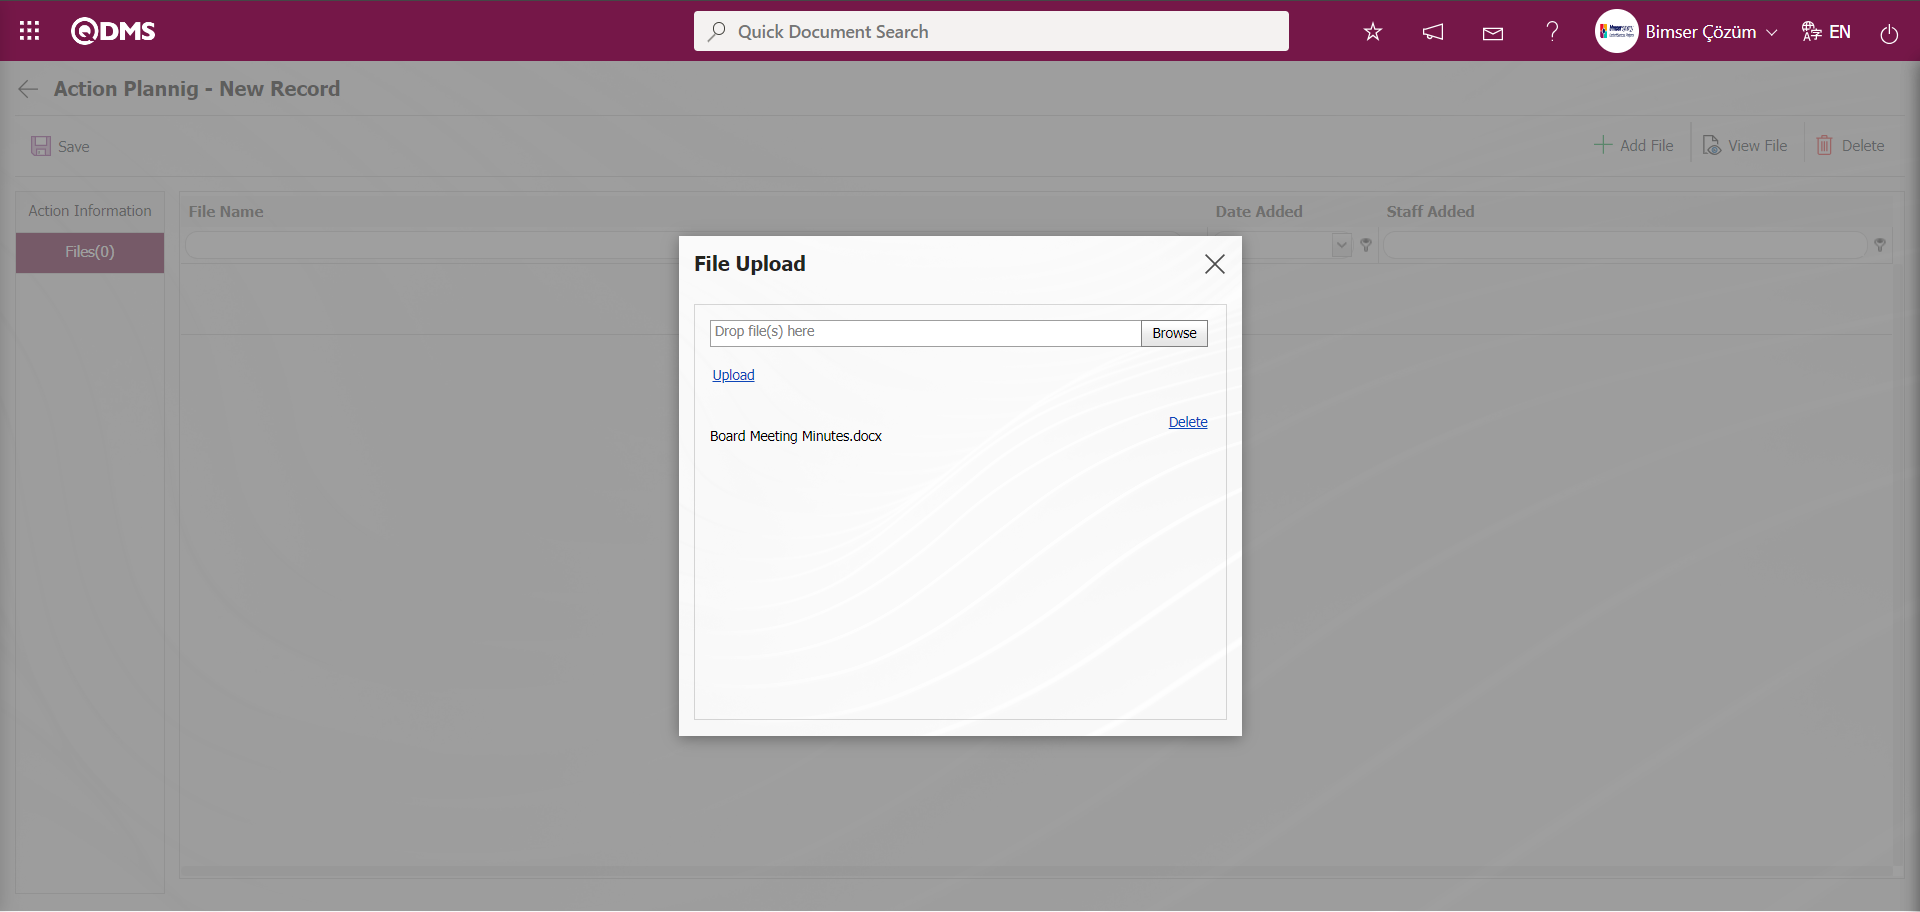
By clicking the  button on the Add File screen, the system uploads the file.
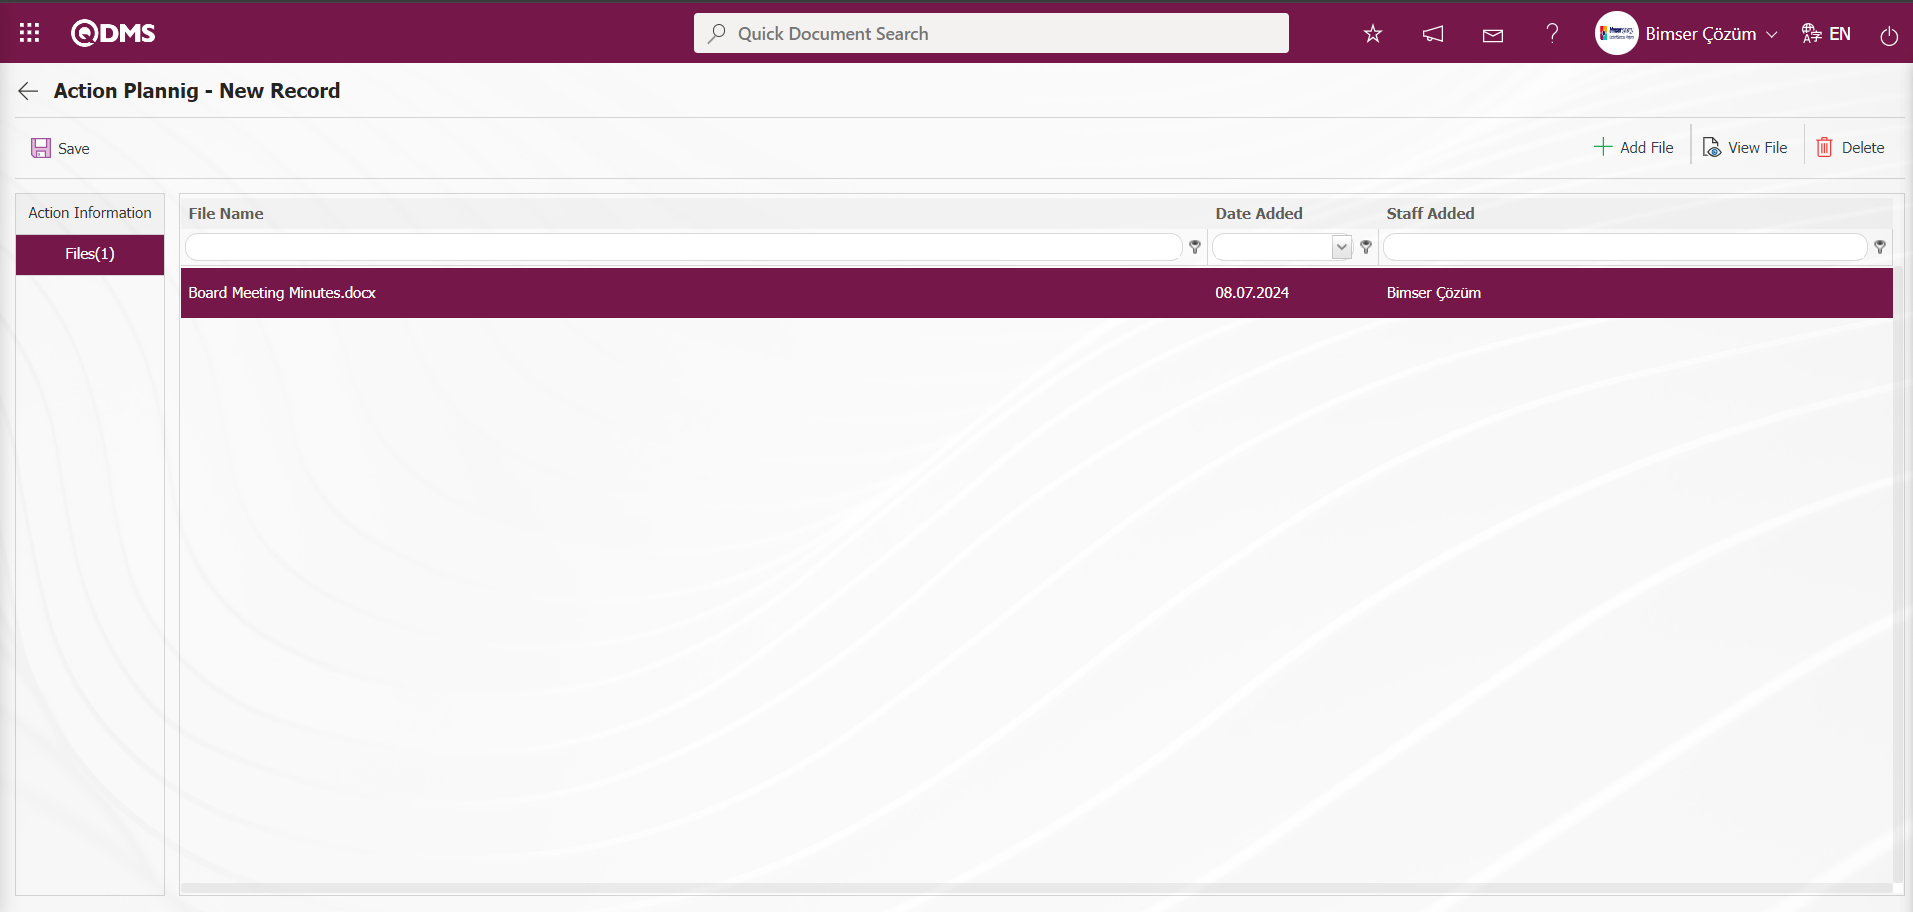
Action Information tab is clicked.
After entering the required information, the Main Action registration process is performed by clicking the  button in the left corner of the screen and it is displayed in the list.
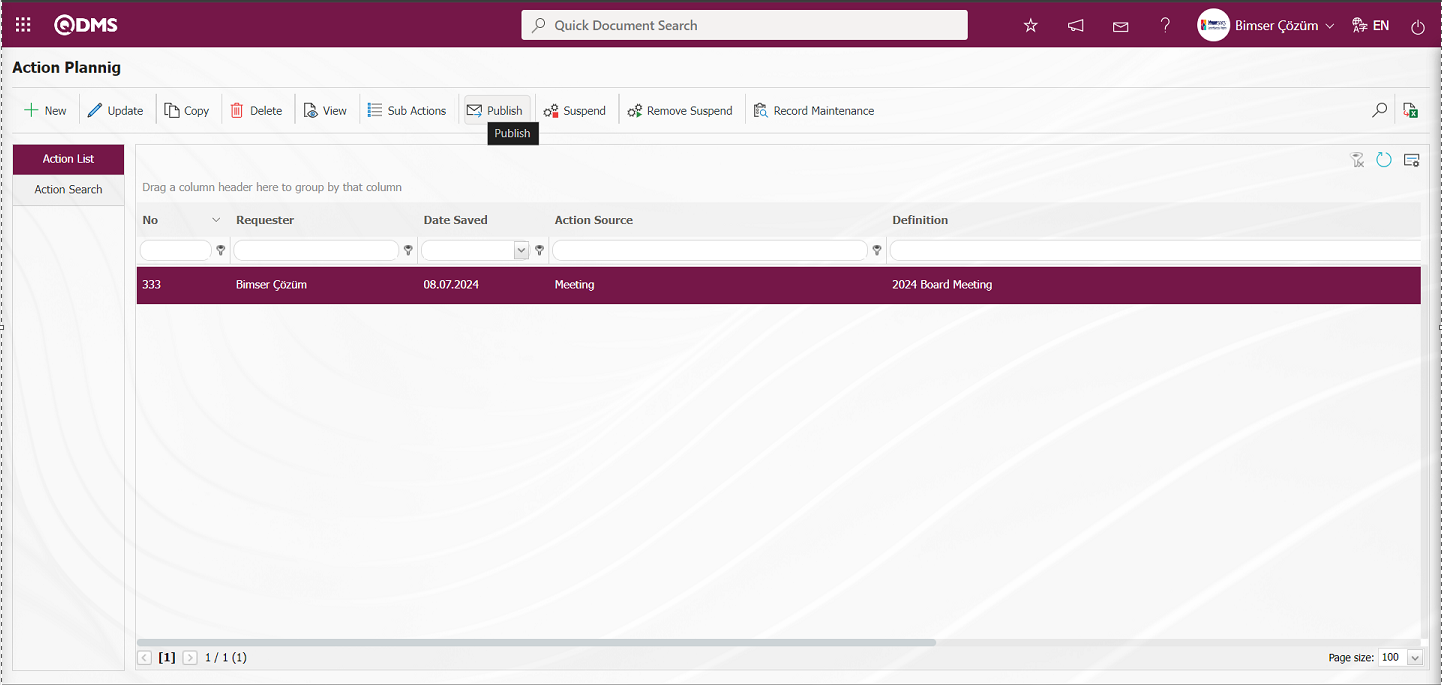
By entering this information into the system, the Main Action Plan is created as a draft.
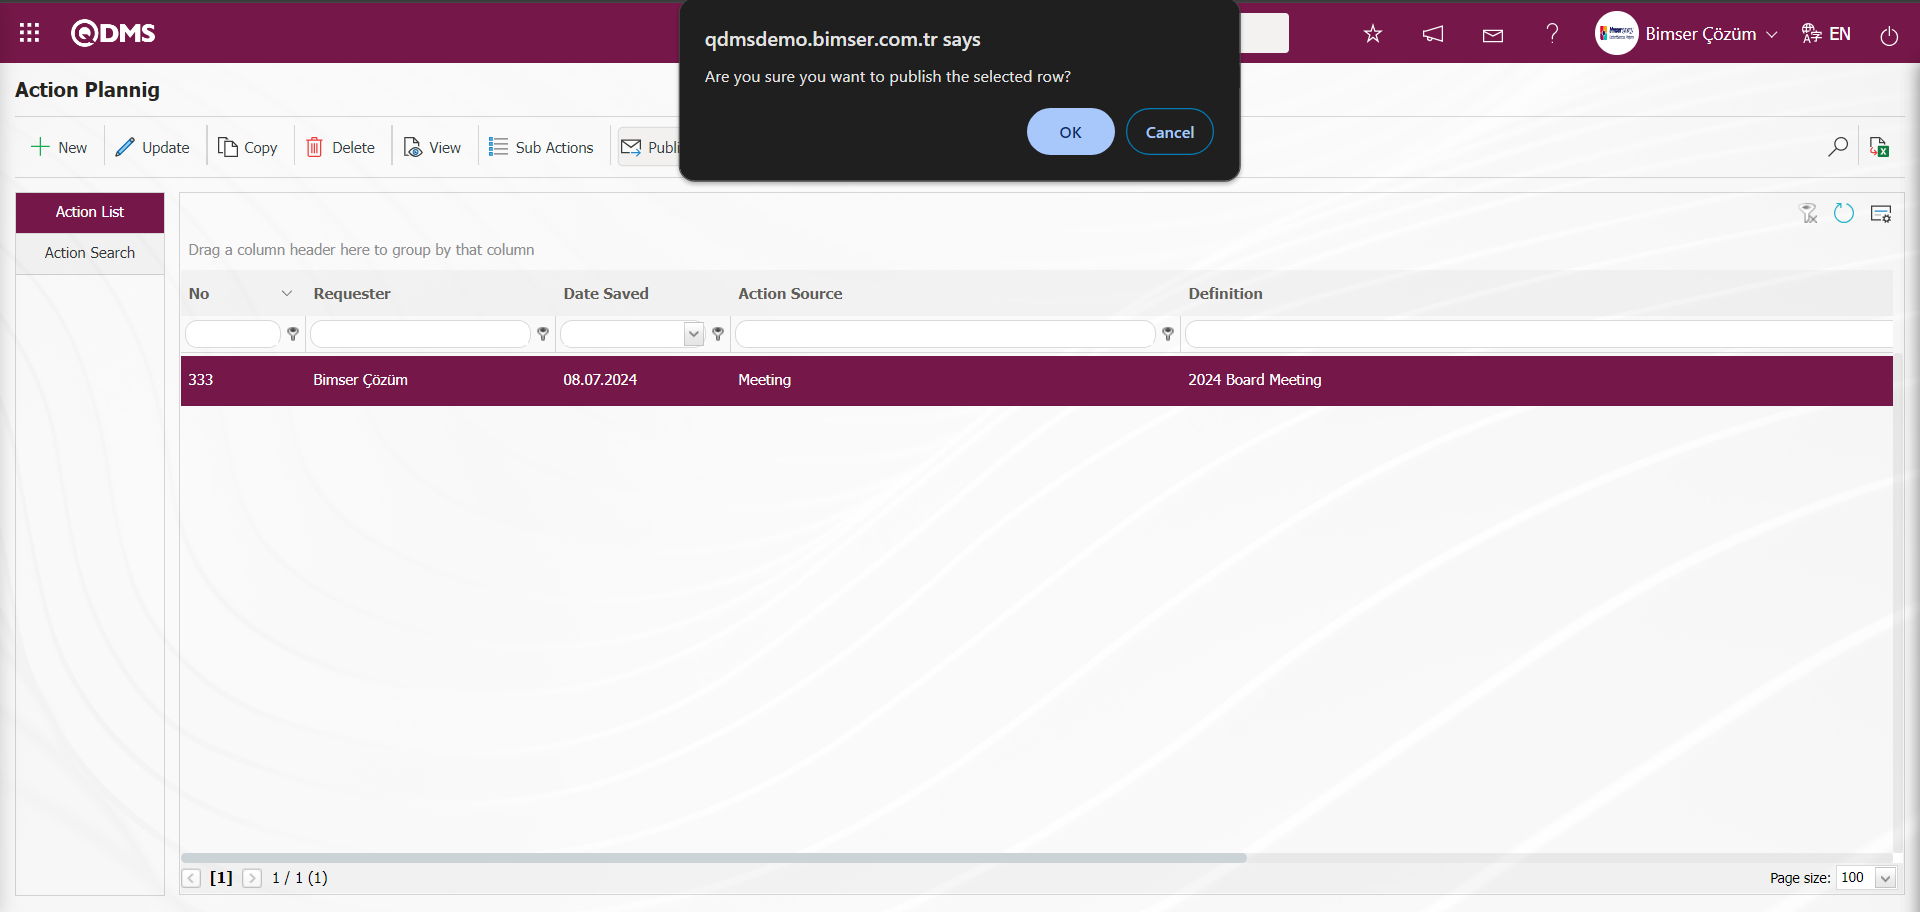
After this process, the  button is clicked. "Are you sure you want to publish the selected record? “ message, the ”OK" button is clicked and the notification mail is sent according to the people specified in the main action plan e-mail settings.
Updates can be made on this action, the update can be made according to the update authorisation given in the action authorisation matrix. File can be added, action can be displayed.
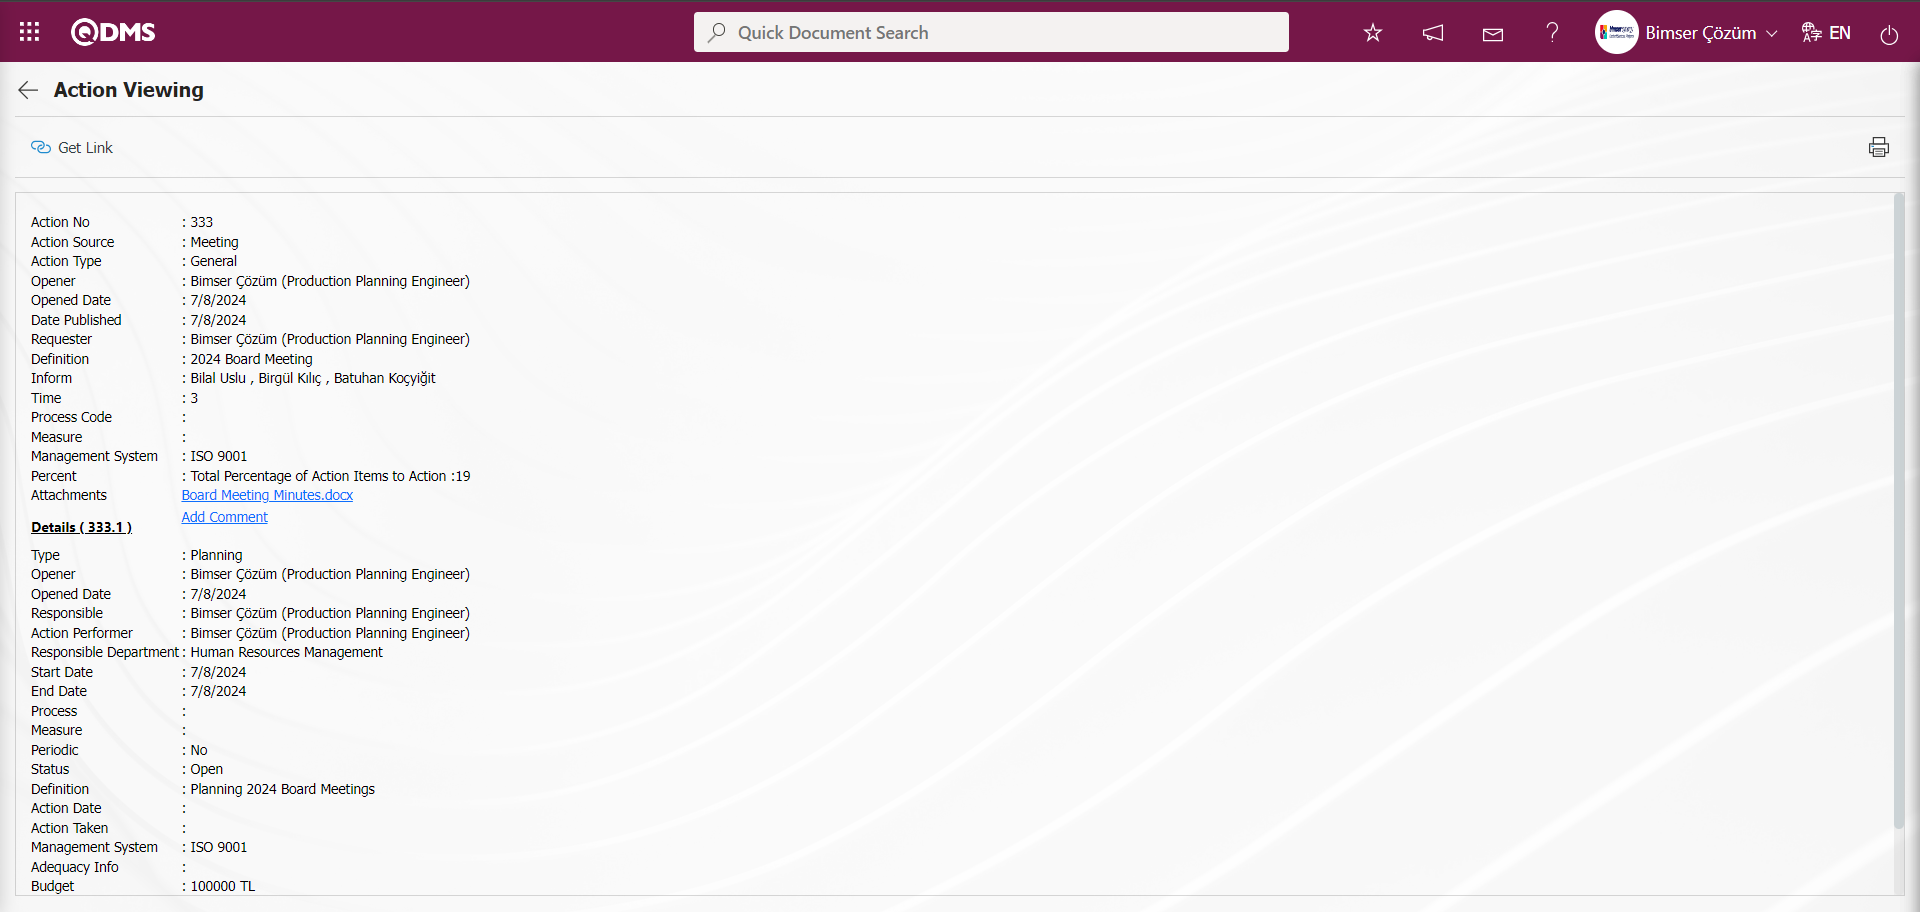
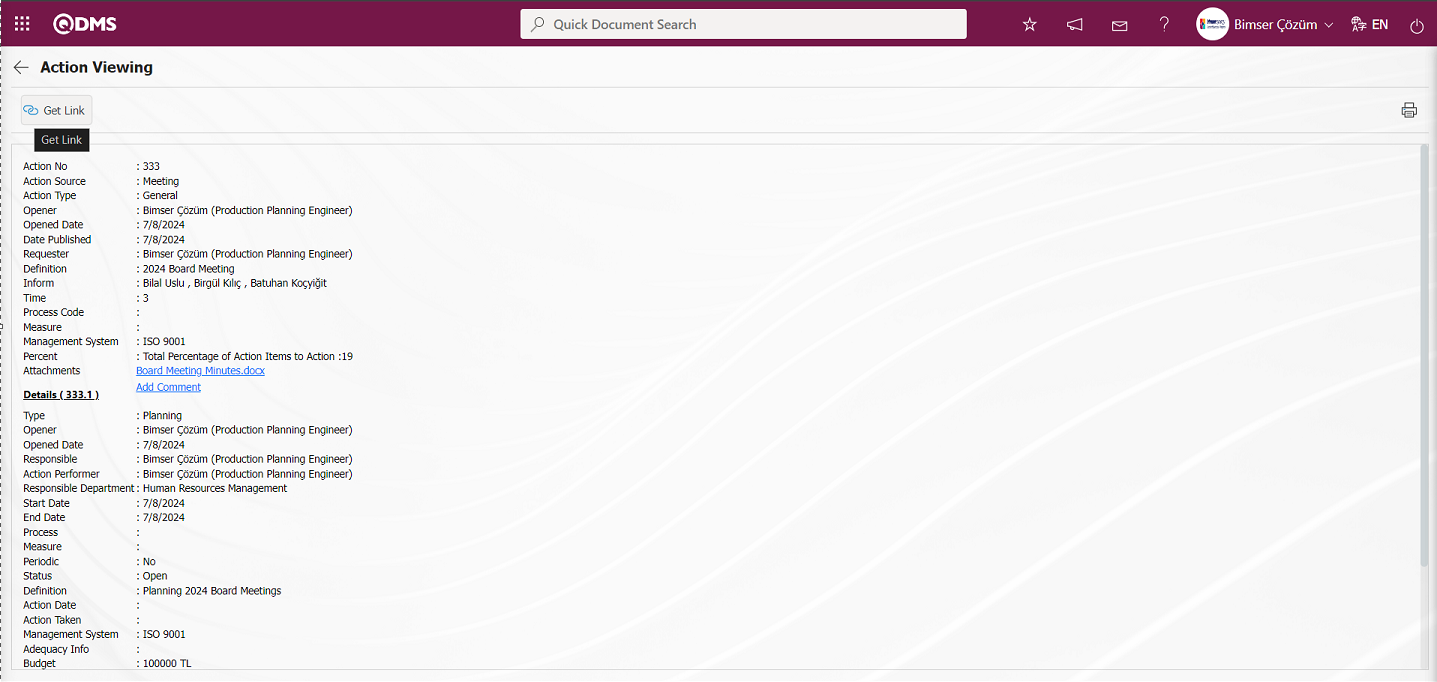
 button is clicked to display the selected Action Plan in the list.

With the help of the buttons on the screen;
 : The link to the action view page is taken.
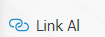
While the action is opened and displayed with the action view button, if desired, by clicking on the  link, comments can be added to the pop-up by people such as the action responsible, the person who will perform the action, etc. This feature is also valid on the action item display page. The authorisation to add a comment comes from the action authorisation matrix. In addition, the comment entered is visible to all users and is sent as e-mail to the persons specified in the e-mail settings (The persons to whom the comment will be sent as e-mail can be determined from the “Action Comment Notification” title added to the Action Module e-mail settings under System Infrastructure Definitions).
With the help of the buttons on the screen;
 : The additional file is uploaded to the system.
 : The uploaded additional file information is displayed.
 : The uploaded additional file information is deleted.
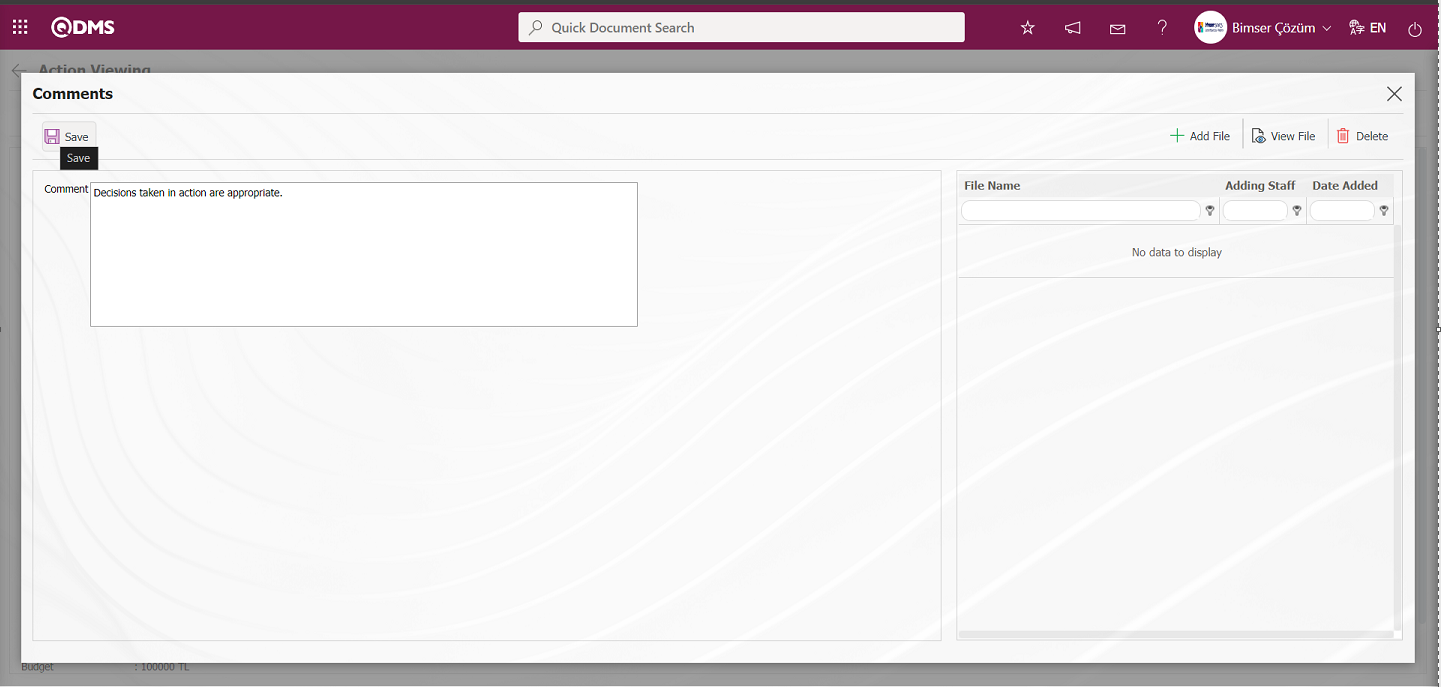
On the comments screen, the comment information is written in the comment field and the comment and additional file uploading process, if any, are performed and the comment registration process is performed by clicking the  button in the upper left corner of the screen after entering the relevant information in the required fields.
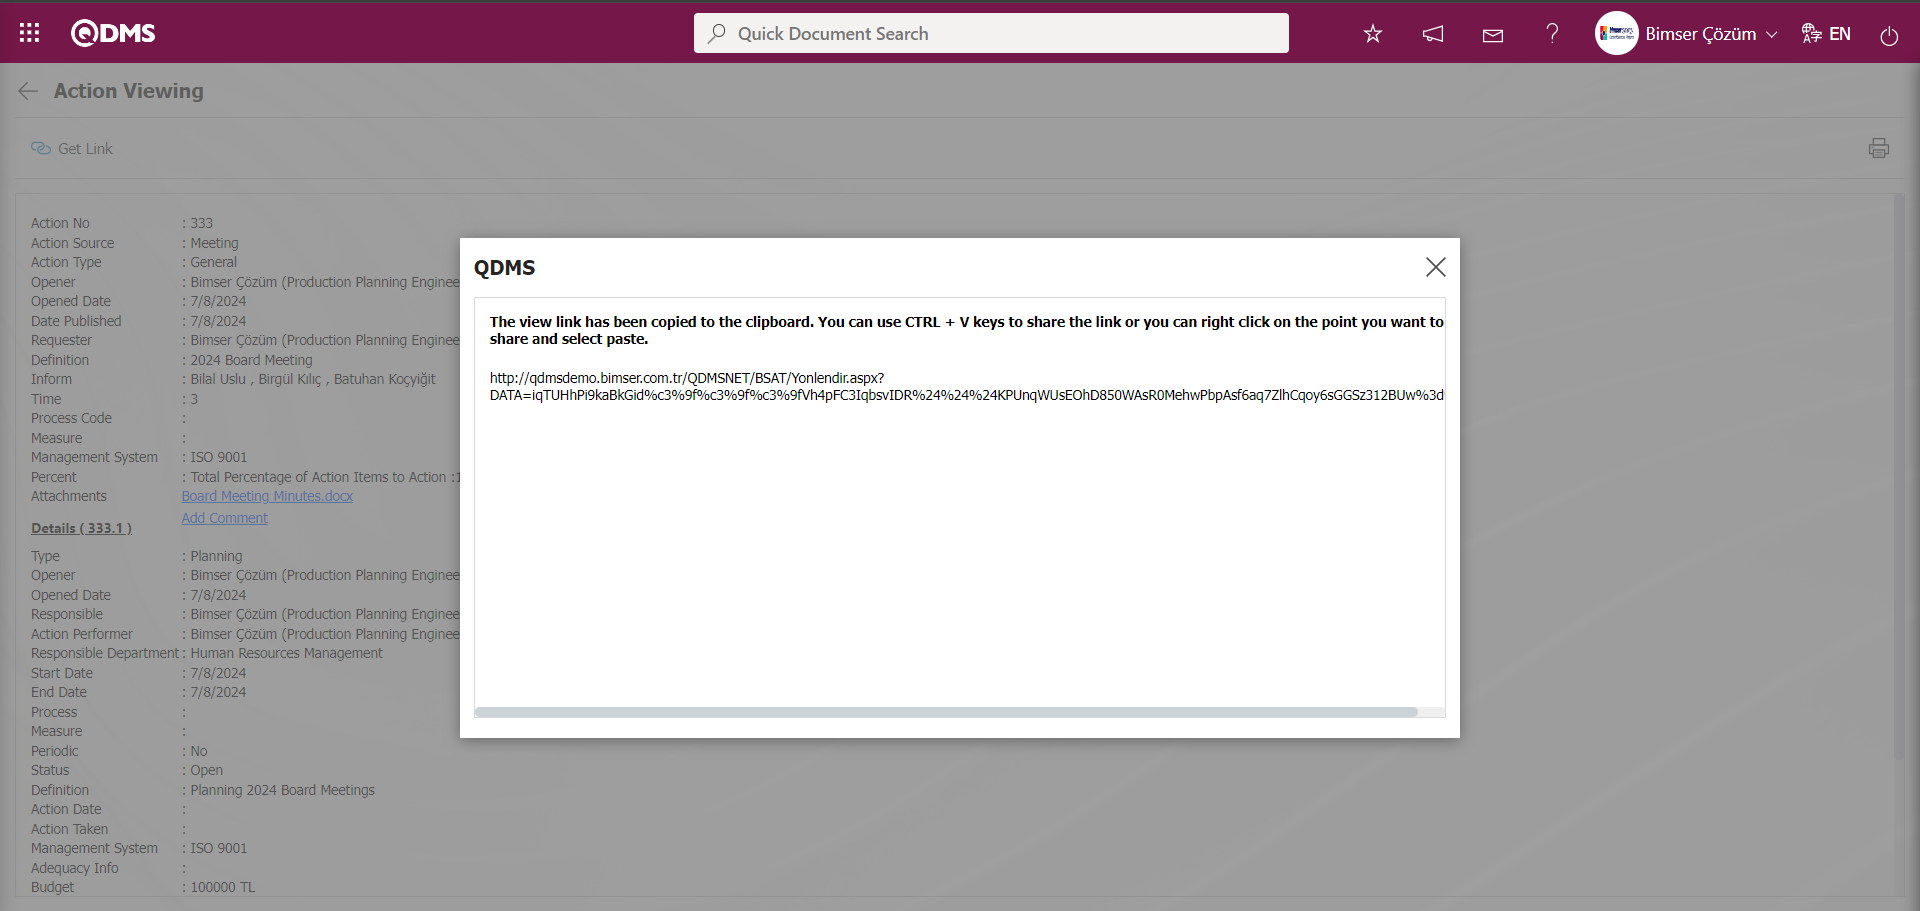
Click the  button on the Action Display screen.
The viewing link is copied to the clipboard. To share the link; “CTRL+V” shortcut keys or right click / paste method can be used to open the linked page and share it with the desired people.
6.2.1.2.Action Item Creation (Task Assignment)
Menu name: Integrated Management System/ Action Management/ Planning/ Items
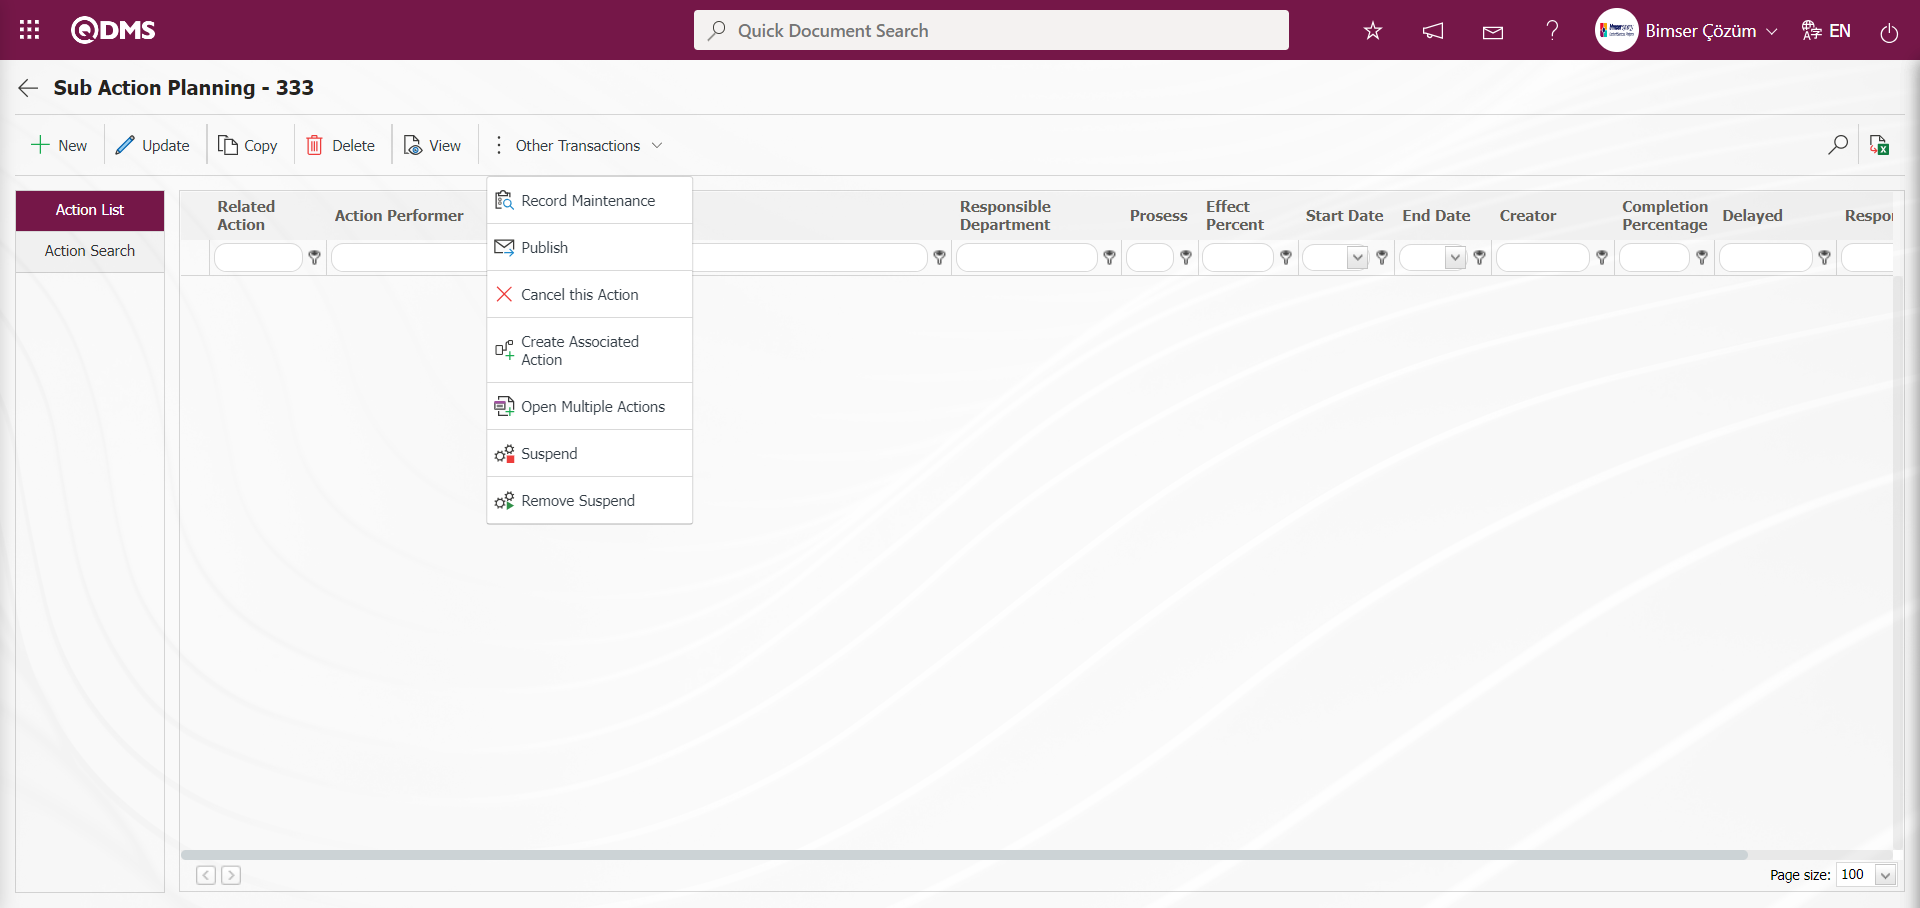
After the main action plan is created, action items related to this plan are created and task assignments are made. By selecting the relevant main action plan on the Action Planning page and clicking the  button in the upper left corner, the Action Item Planning screen is displayed.

The Action Item Planning screen is opened by clicking the button on the Action Planning screen.
With the help of the buttons on the screen;
 : Create a new action item.
 : The action item selected in the list is edited
 : The action item selected in the list is copied.
 : The action item selected in the list is deleted.
 : The action information is updated by the Module Administrator. (This button is only visible for module administrators. You must be defined as a module administrator in the relevant Action Management module in the System Infrastructure Definitions/Bimser System Infrastructure Definitions/Configuration Settings/Administrator Identification menu.)
 : The action item selected in the list is displayed
 :The action item selected in the list is published.
 : The action item selected in the list is cancelled.
 : Related action is created. It is used to create a new action related to the action item created in the action plan. The start of the newly defined action item depends on the realisation of the related action.
 : Multiple action task is created. It is used to copy an action defined in the action plan and assign it to multiple people.
 : Performs suspension operation for the action item selected in the list. When the action item is suspended, it does not appear in pending jobs and delays.
 : Cancels the suspension process for the action item selected in the list and makes the action item visible
: The action items listed on the screen are transferred to Excel
: Records can be searched by filtering.
In order to add a new Action Item to the main Action Plan, the Action Item Planning / New Registration screen is displayed by clicking the button in the upper left corner of the screen.
There are 3 tabs on the Action Item Planning screen
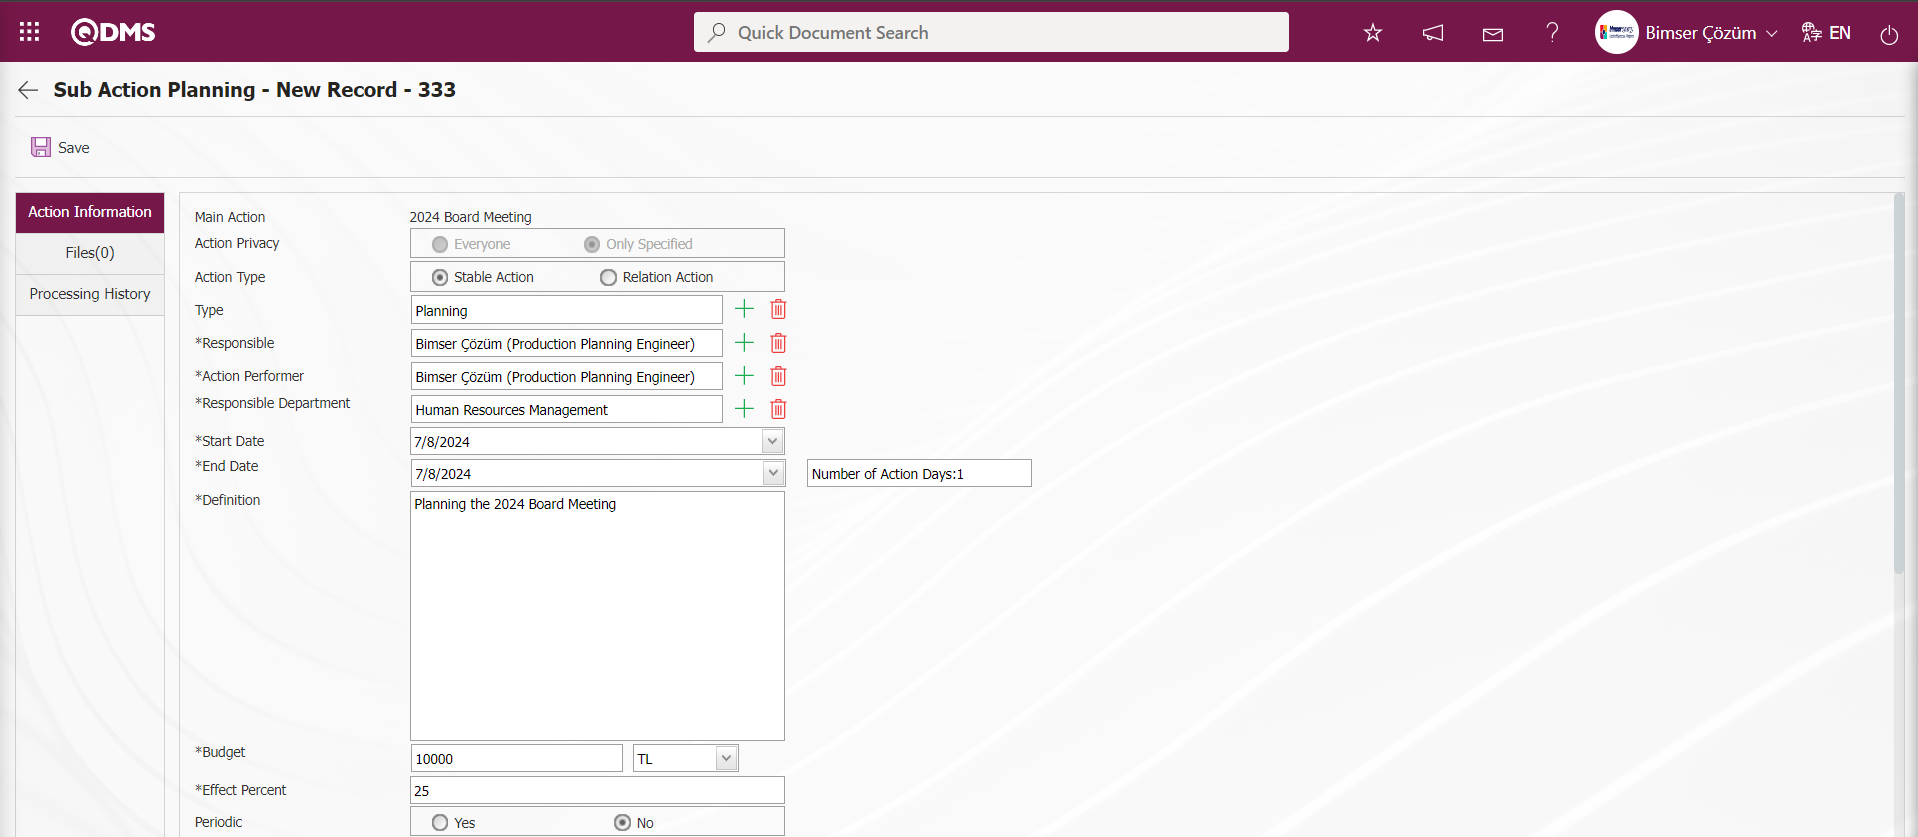
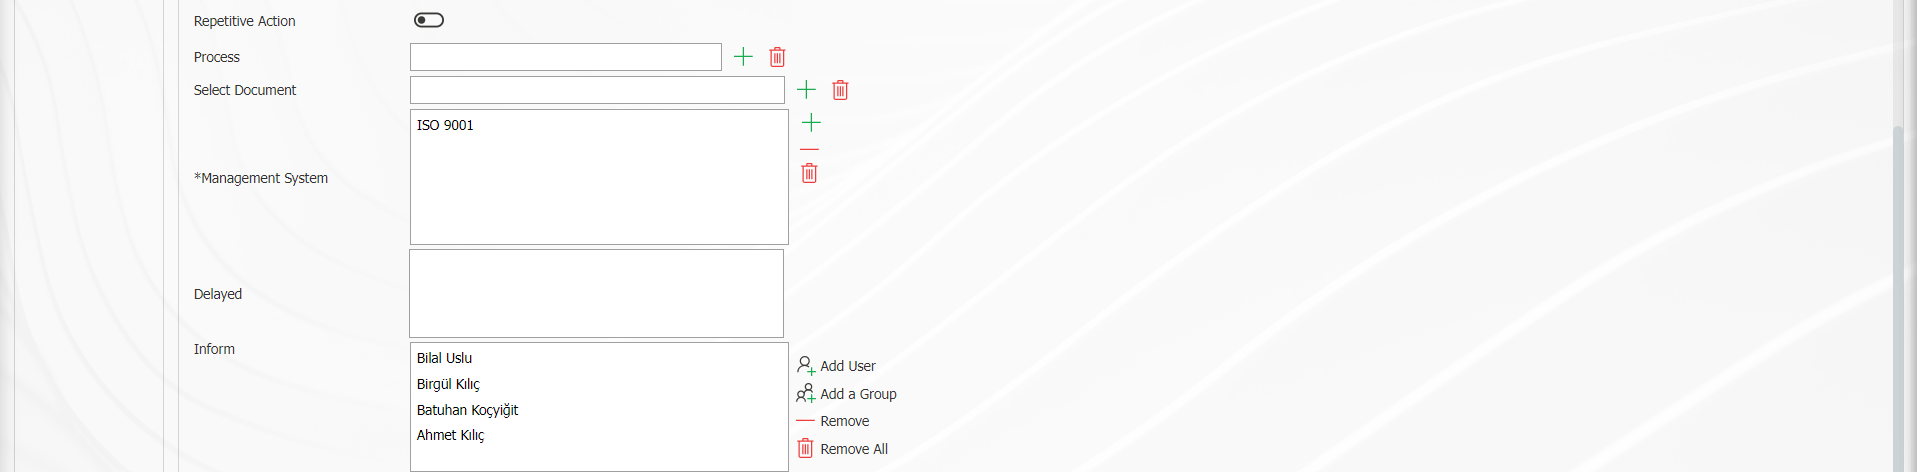
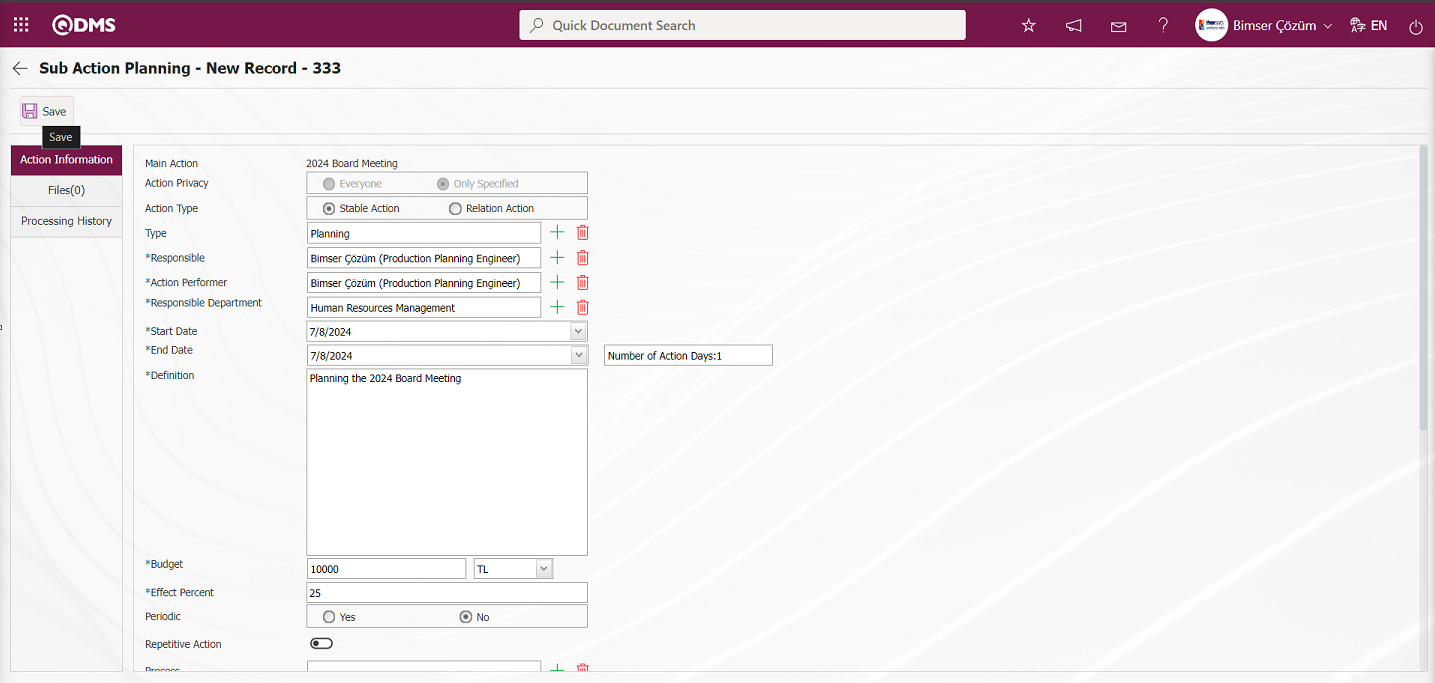
1-Action Information tab;
It is the tab where general information about the Action Item is entered.

All fields on the action item registration screen are as follows;
Main Action Plan: In the Action Item Planning - New Registration screen, if an action item is defined in which action plan, the definition of that plan is displayed.
Action Type: If the related action will be used in the Action Item Planning - New Record screen, it is the field where the selection is made in this field. For this, parameter 75 of the action management module should be activated by selecting the value of the parameter “Will associated action be used?” as “Yes”.

When “Fixed Action” is selected, action task assignment is performed which is not connected to another action in the action plan. If “Related Action” is selected, a relationship is established with another action defined in the main action plan in the system opened in the sub-field.
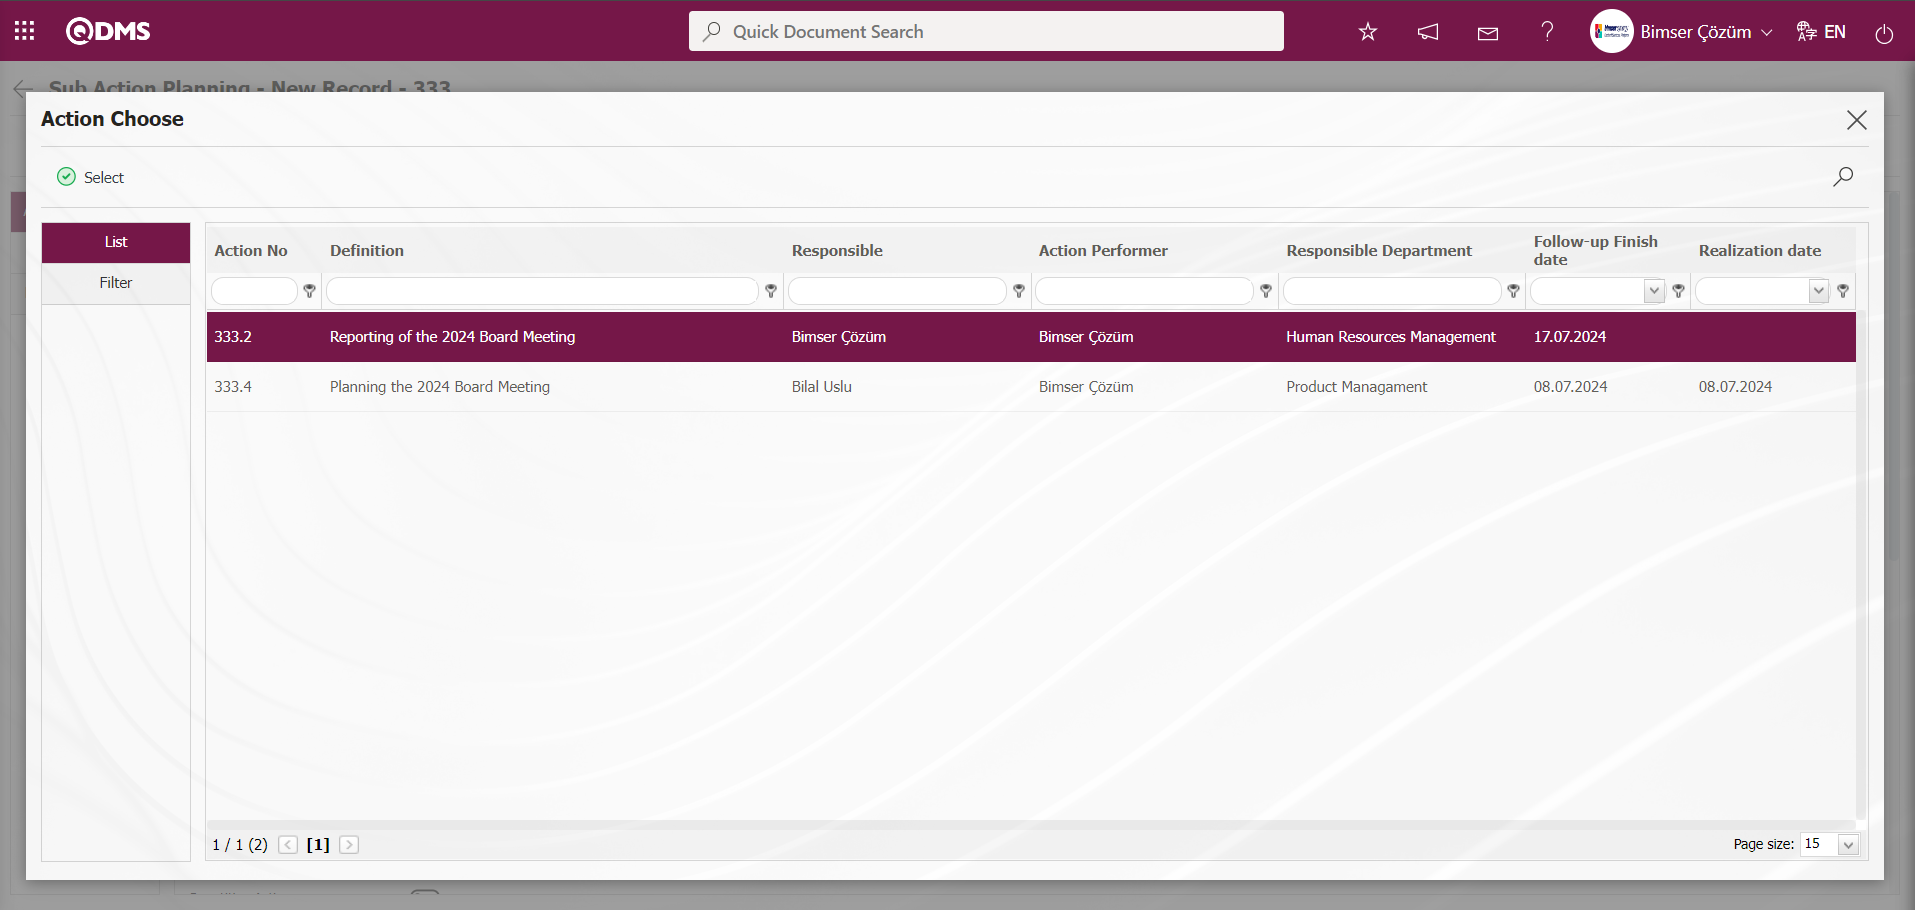
When “Related Action” is selected, periodicity, sub-action and opening approval are disabled. Related action selection is made for actions that need to progress interdependently. For example, if we say that action B should not start before action A ends, we need to select the related action. It can be associated with an open action item in the same action plan, that is, it is mandatory to select an open action under the same main action. Until the associated action item is closed, the action item you selected will be in pending status. If the Open by realisation date button is selected, when the associated action item is closed, the action you have selected switches to open status. If this button is not selected, the agent programme is activated and the action goes to open status on the selected start date. Until the action you selected is switched to open status, it will not fall into the pending jobs task.
NOTE: There is also a ![A close up of a sign
Description automatically generated]ref37 button on the Action Item Identification page. Here, actions that are not closed or cancelled, actions that are not periodic and actions for which the sub-action feature is not used can be selected.
Type: Action Item Planning - This is the field where the type of action task defined in the New Record screen is selected from the list of action types defined in the system. Action Type list is defined in the System Infrastructure Definitions/Action/Action Type Definition menu.
Responsible: It is the field where the information about under whose responsibility the action task defined in the Action Item Planning - New Record screen will be performed is selected from the list of personnel defined in the system. The action responsible is determined by selecting the supervisor of the person who will do the work, the relevant department supervisor, the person who will do the work, or the person who is responsible for the realisation of the work.
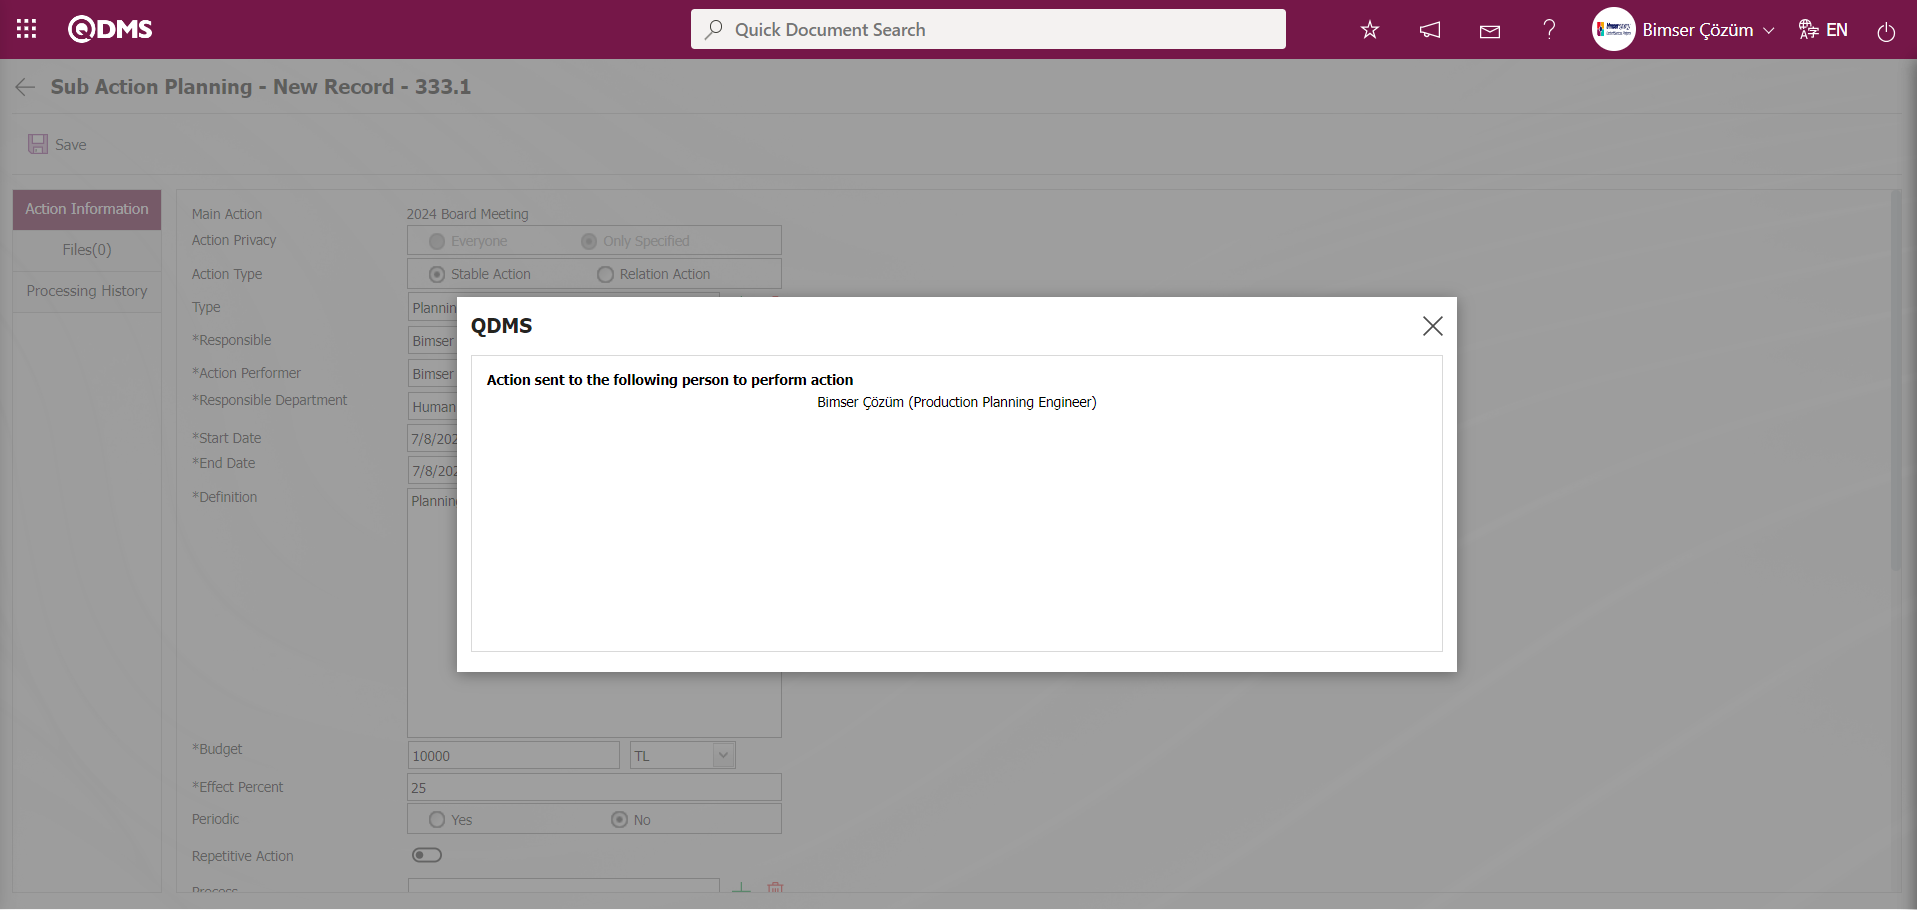
Action Person: This is the field where the person who will perform the Action task defined in the Action Item Planning - New Record screen is selected from the list of personnel defined in the system.
Responsible Department: After selecting the action responsible in the system on the Action Item Planning - New Registration screen, the department to which the action responsible is connected is automatically defined as the responsible department.
Start Date: In the Action Item Planning - New Record screen, the start date of the action task is selected in the calendar field.
End Date: In the Action Item Planning - New Record screen, the end date of the action task is selected in the calendar field.
Definition: This is the field where the action definition information to be performed on the Action Item Planning - New Record screen is entered. Whichever action task will be assigned, its definition is written.
Budget: It is the field where the planned budget information of the action task is entered on the Action Item Planning - New Record screen.
Impact Percentage: This field is displayed if “Calculate” is selected in the “Completion Percentage” field while creating the main action plan. The percentage impact rate of each action item defined in the main action plan on the main plan is defined separately. The completion rate of the main action plan is 100% and the effect of each action item in this plan on the main plan is expressed as %.
Periodicity: It is the field where the periodicity of the action item defined in the Action Item Planning - New Record screen is selected from the related options. Periodic action is defined for actions that are repeated in certain periods. If the action task is a process that is repeated in certain periods, the periodicity status is selected as “yes”. Repetition time and repetition period is determined. The system automatically reopens the action task according to the specified period. Between these periods, an information mail is sent to the relevant responsible persons within the specified pre-notification period.
Fixed value, month, quarter year, half year, full year can be selected as the repetition period. If fixed value is selected, it is necessary to define the repeat period as day, month or year.
If “Month” is selected for the repetition period, the first/last day of the month is defined on which day the action should be opened. For example; The user who wants the action to be opened on the 3rd day of each month should select “Repeat Period” as “Month”, select “first” value from the next selected list and enter “3” value in the field where the number can be entered.
If “Quarter Year” is selected for the repetition period, actions are opened according to the first and last selection and the number of days in the quarter years of that year. For example; If “Repetition Period” is selected as “Quarter Year” and the next selection is “last” and the number input field is selected as “5”, the action is opened on the 5th day from the end of March, June, September and December. 'Half year' and “full year” work with the same logic.
For the periodic action, the action responsible and the person who will do the work are defined. If the person who will do the work in the periodic action will be allowed to direct the action realisation task to another personnel, the “Periodic Directable” option is selected.
Recurring Action: Action Item Planning - This is the field where the Recurring Action is selected by ticking the check box related to the Recurring Action on the New Record screen. If the action task does not depend on a certain period, but if the action is desired to be opened on the specified dates, the “Recurring Action” check box is ticked. The action task is created at the specified date intervals.

Workplace: Action Item Planning - This is the field where the workplace to which the action task defined on the New Record screen is related is selected from the list of workplaces defined in the system.
Process: If the action task defined in the Action Item Planning - New Record screen is related to the processes defined in the system, it is the field to select from the process list.
Indicator: If the action task defined in the Action Item Planning - New Record screen is related to the indicators defined in the system, it is the field to select from the indicator list. Indicators come as defined from Ensemble product.
Select Document: If the action task defined in the Action Item Planning - New Record screen is related to the documents defined in the system, it is the field where selection is made from the document list.
Product: If the action task defined in the Action Item Planning - New Record screen is related to the products defined in the system, it is the field to select from the product list.
Management System: It is the field where the Management System information that the action item is related to (if any) on the Action Item Planning - New Record screen can be selected from the list of Management System defined in the system.
Delay Message: This is the field where the delay message information is written on the Action Item Planning - New Record screen. This delay message is published in action publishing mails.
Notified: This is the field where the users and user groups that are requested to be informed about the Action task defined in the Action Item Planning - New Record screen are selected. While users are selected from the list of Personnel defined in the system, user groups are selected from the list of User Groups defined in the system.
The User Group code is defined in the parameter value of the “Default notification user group code on the action item” parameter from the Action Management Module parameters.
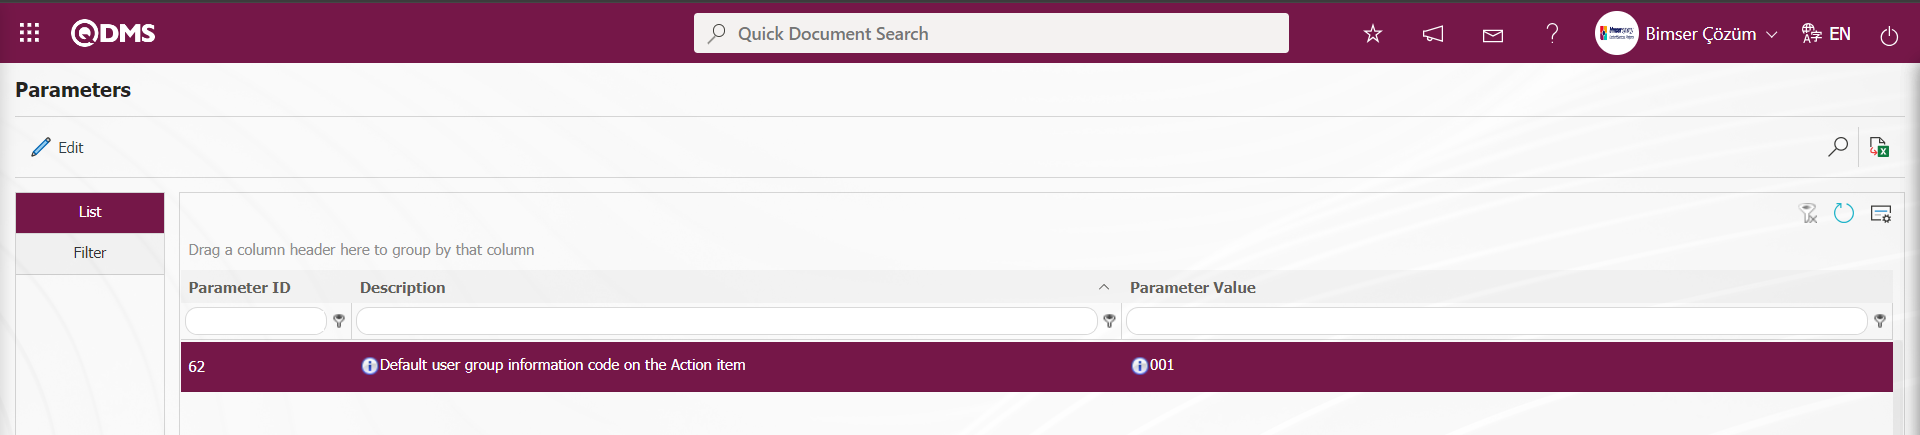
In the Action Item -New Record screen, this user group group members are automatically added by the system. It is done by activating the relevant parameters in the parameters for the process of adding the supervisor of the person who will do the action, the department responsible of the responsible department, the department responsible of the responsible person, the department responsible of the person who will do the action and the department responsible of the person who enters the action into the system.
In order to go to the opening approval on the basis of Action Item, the parameter is activated by selecting “Yes” for the value of the parameter numbered 10 “Should the action go to the opening approval on the basis of item?(Y/N) ?”
After the parameter is activated, the check box related to the “Go to Opening Approval” field of the Action Item Planning - New Registration screen is displayed. If a flow is defined in the infrastructure by ticking the relevant check box, the Action Item is sent to the opening approval on the basis of the Action Item.
In order to go to closure approval on the basis of Action Item, the parameter is activated by selecting “Yes” for the value of the parameter 11 “Should the action go to closure approval on item basis? (Y/N) ?”
After the parameter is activated, the check box related to the “Send to closure approval” field of the Action Item Planning - New Record screen is displayed. If a flow is defined in the infrastructure by ticking the relevant check box, the Action Item is sent to the closure approval on the basis of the Action Item. (For these parameters, the Flow definition process must be performed in the Flow Definition menu and the flows must be checked in the Sub-Module Definition menus).
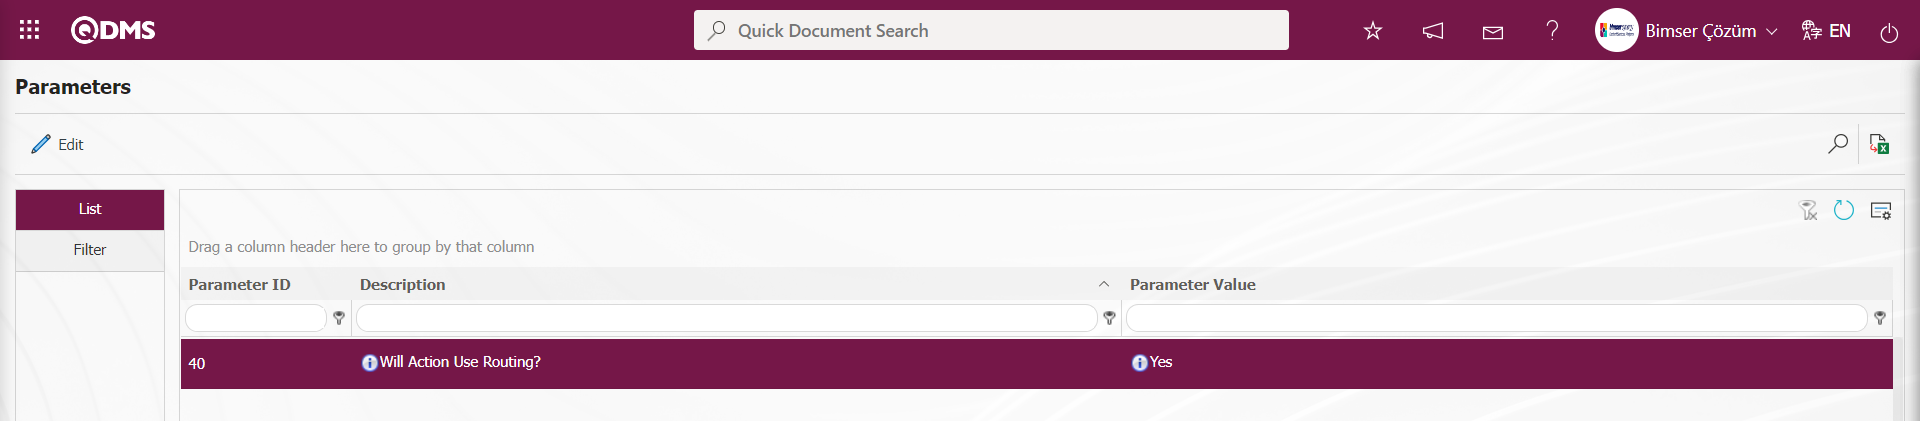
Can redirect: Action Item Planning - This is the field where the relevant check box is marked if the task of the Action defined in the New Record screen is desired to be directed to someone else by the person who will do the work. In order for this field to be displayed and the redirection process to be used, the value of the “Will redirection be used in the action” parameter numbered 40 from the action parameters must be activated by selecting “Yes”.
Should Additional File be mandatory in All Steps: If the relevant check box is checked on the Action Item Planning - New Registration screen, the Action makes the attachment file upload process mandatory at all stages. In all steps of the action, the registration process is not performed without uploading the Additional File.
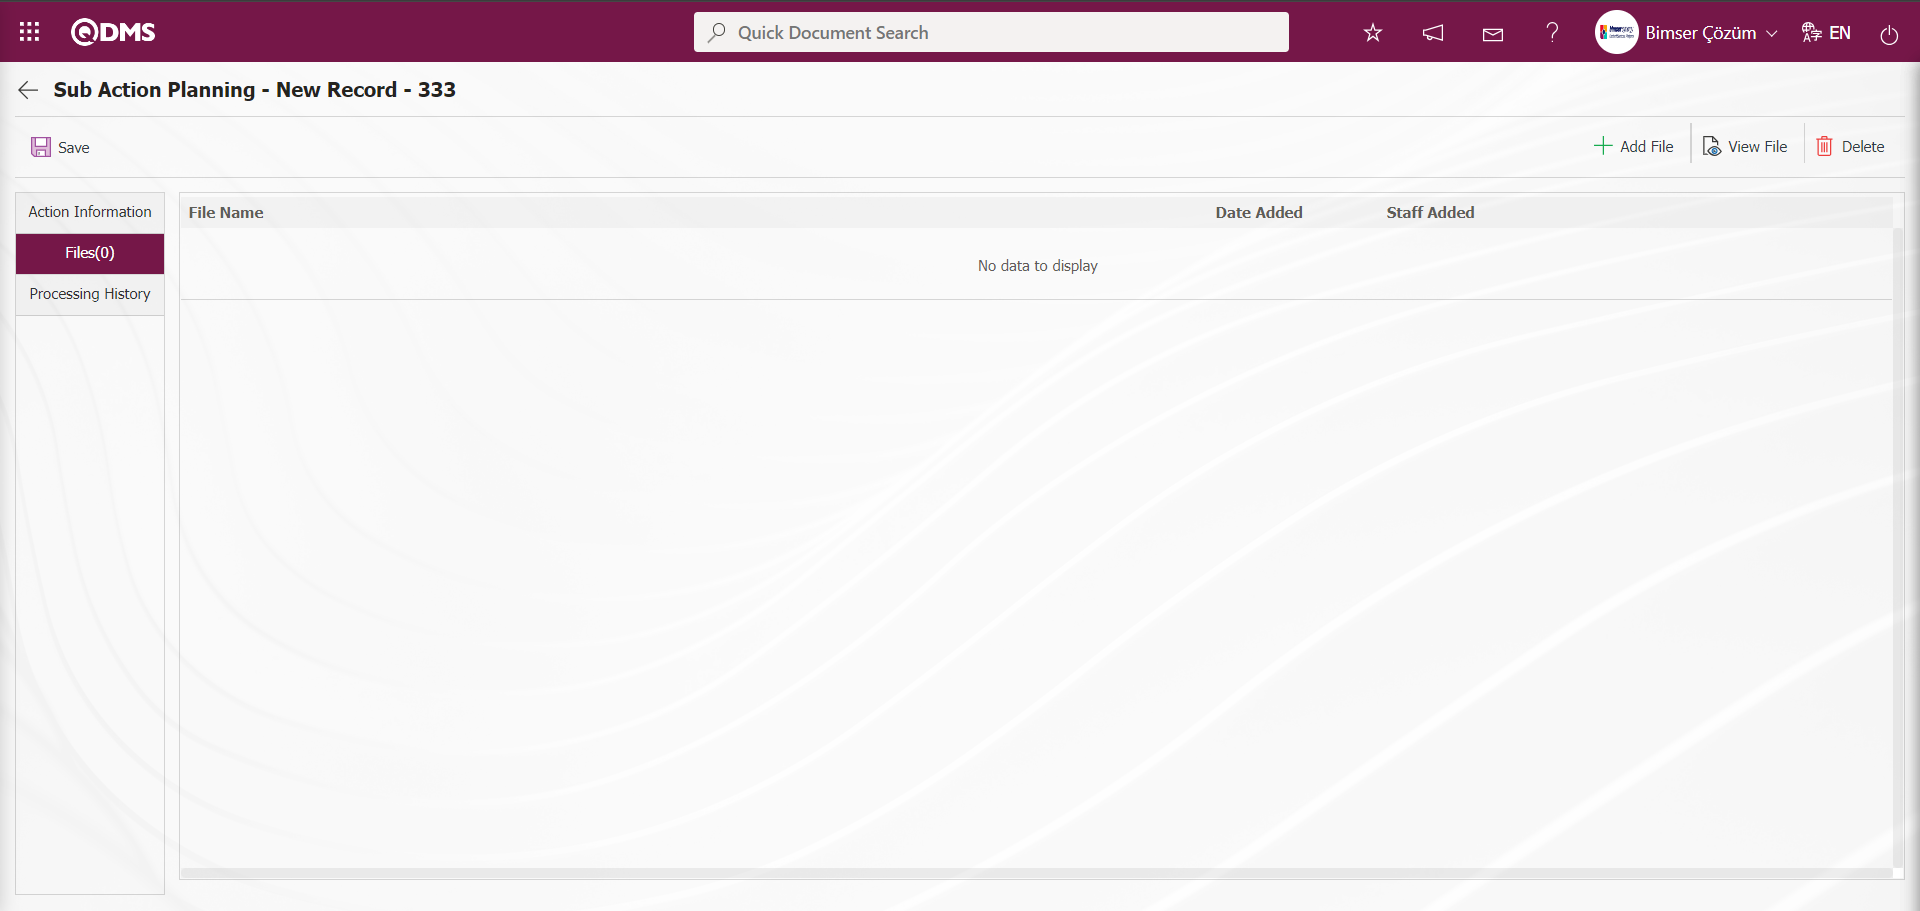
2-Additional Files tab;
It is the tab where additional documents/evidence such as photographs, drawings, meeting notes, decision minutes, etc. related to the Action Item can be added.
With the help of the buttons on the screen;
 : The additional file is uploaded to the system.
 : The uploaded additional file information is displayed.
 : The uploaded additional file information is deleted.
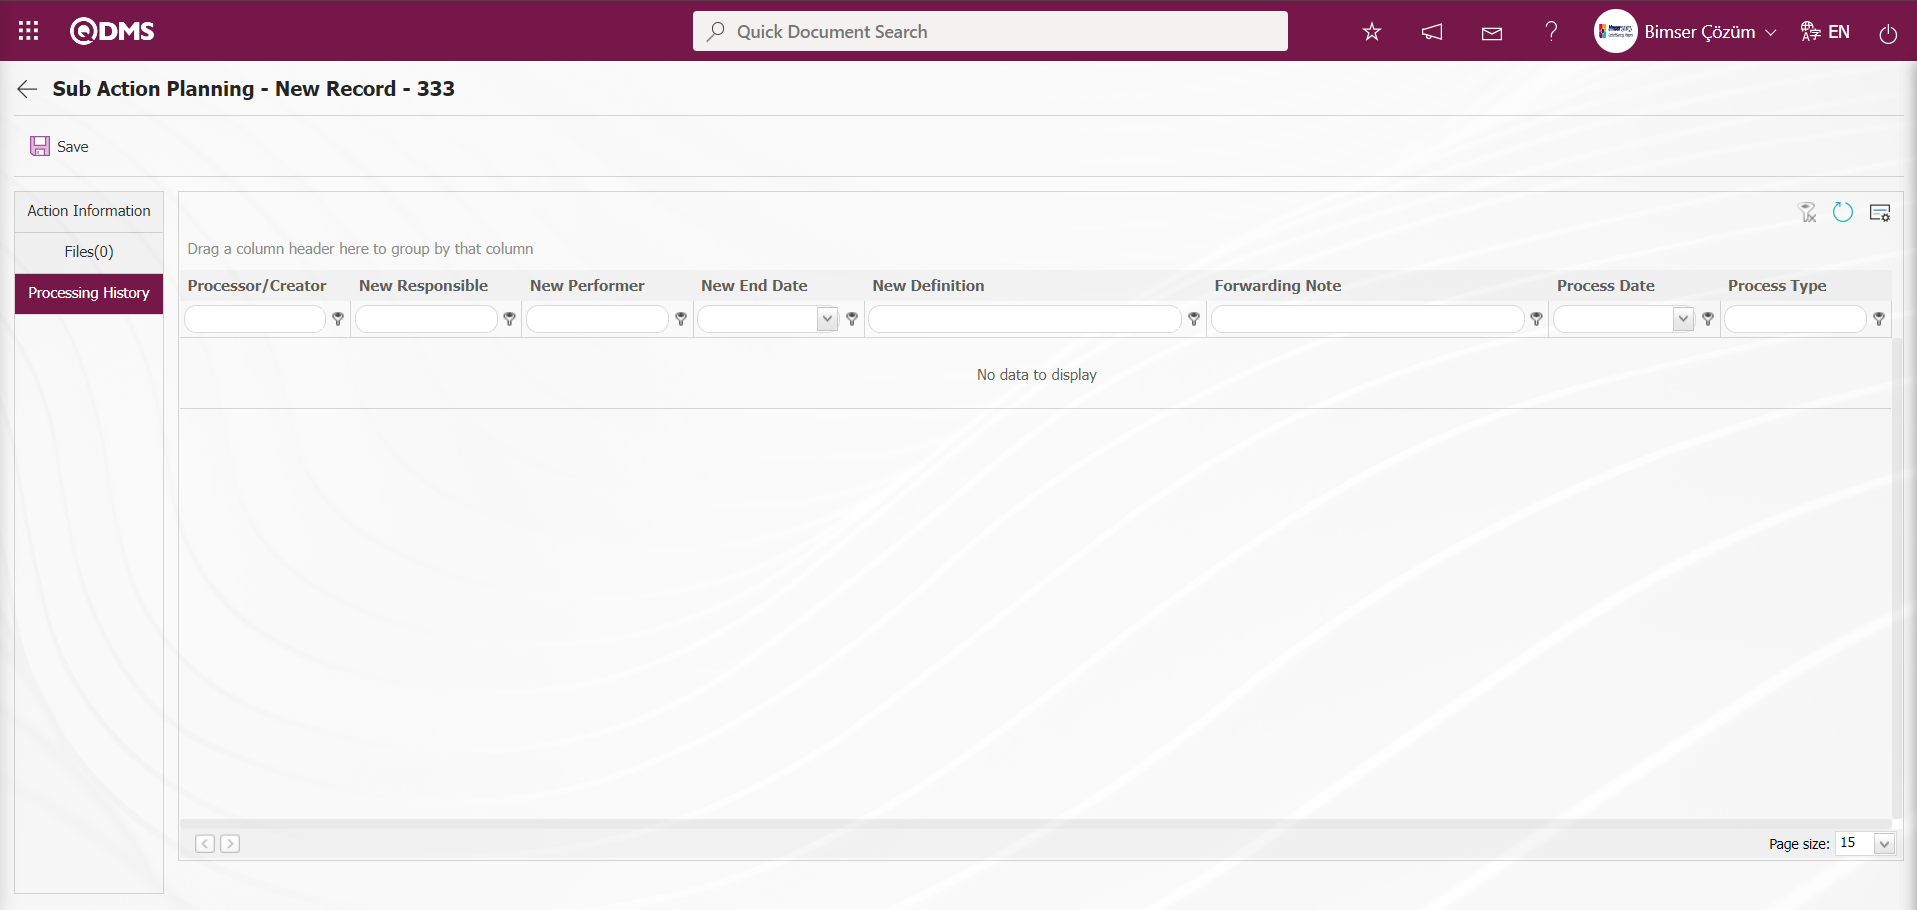
3-Routing History tab;
If the opened action realisation work is forwarded to another person by the person who will do the work, all forwarding information is displayed under the forwarding history tab.
After the necessary tabs and fields are filled in the Action Item definition phase, the registration process is performed by clicking the  button in the upper left corner of the screen.
The Action Item defined in the Action Item Planning screen is listed in the Action list tab.
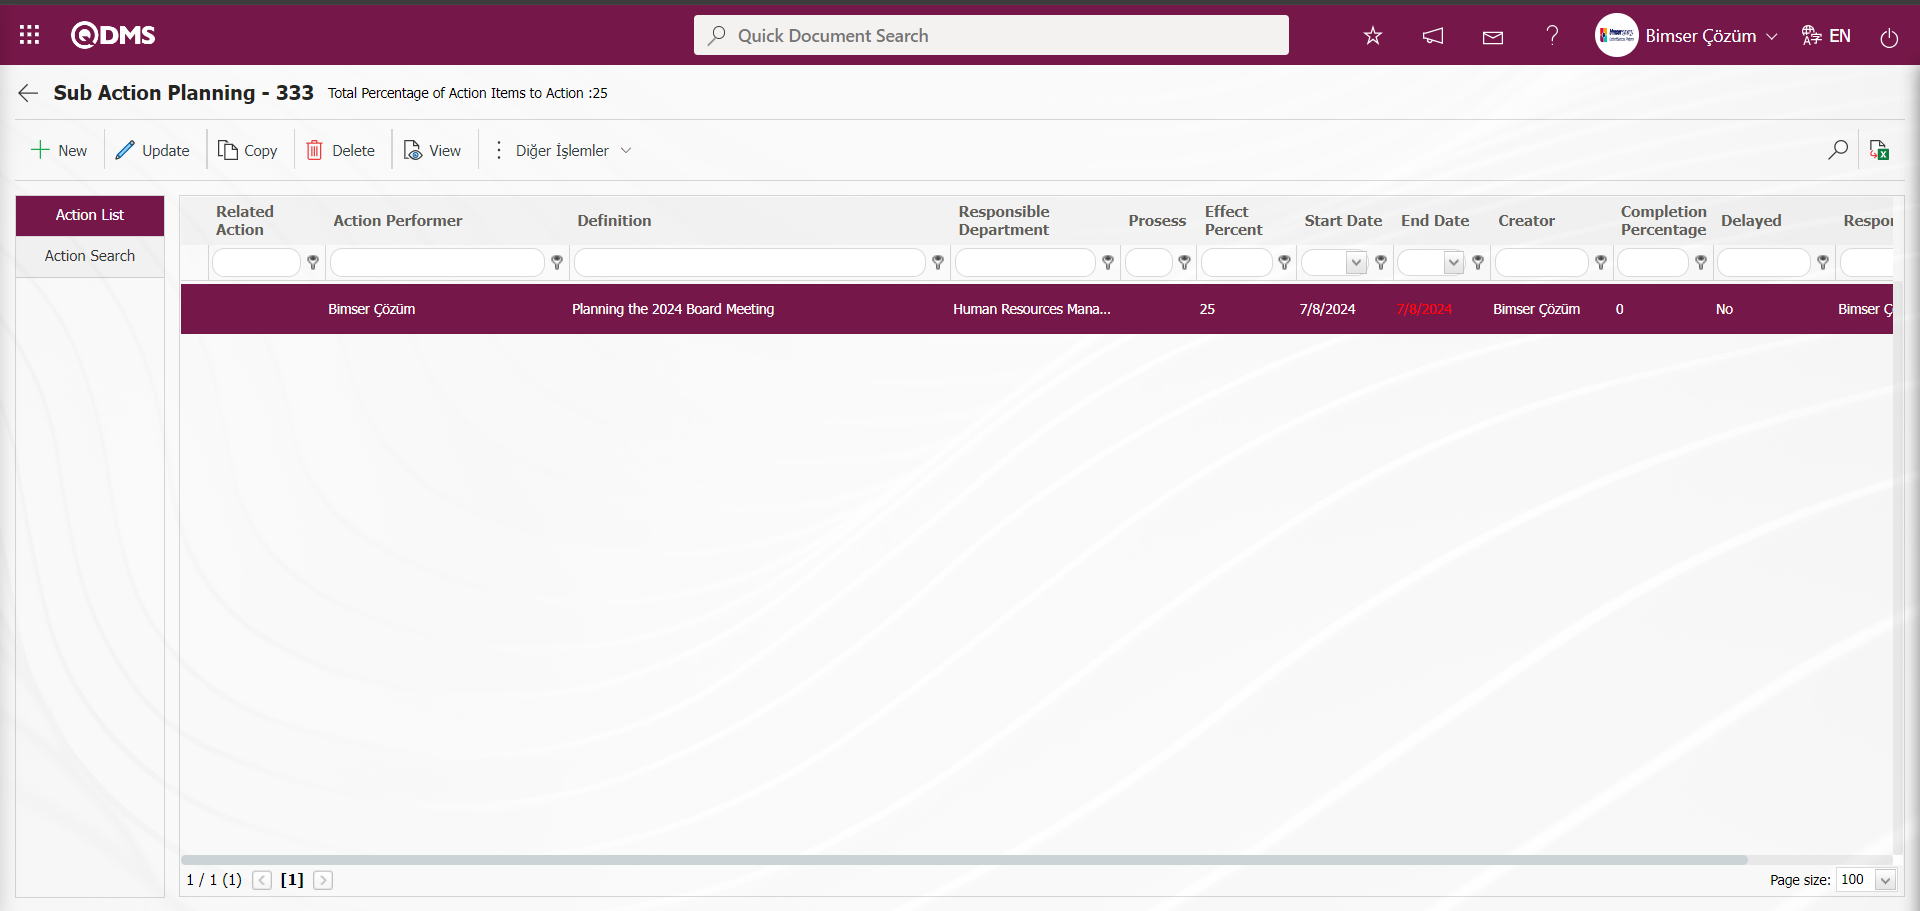
In the Action Management Module parameters, parameter 41 “Will the phase be used in actions?” is activated by selecting the parameter value “Yes”.
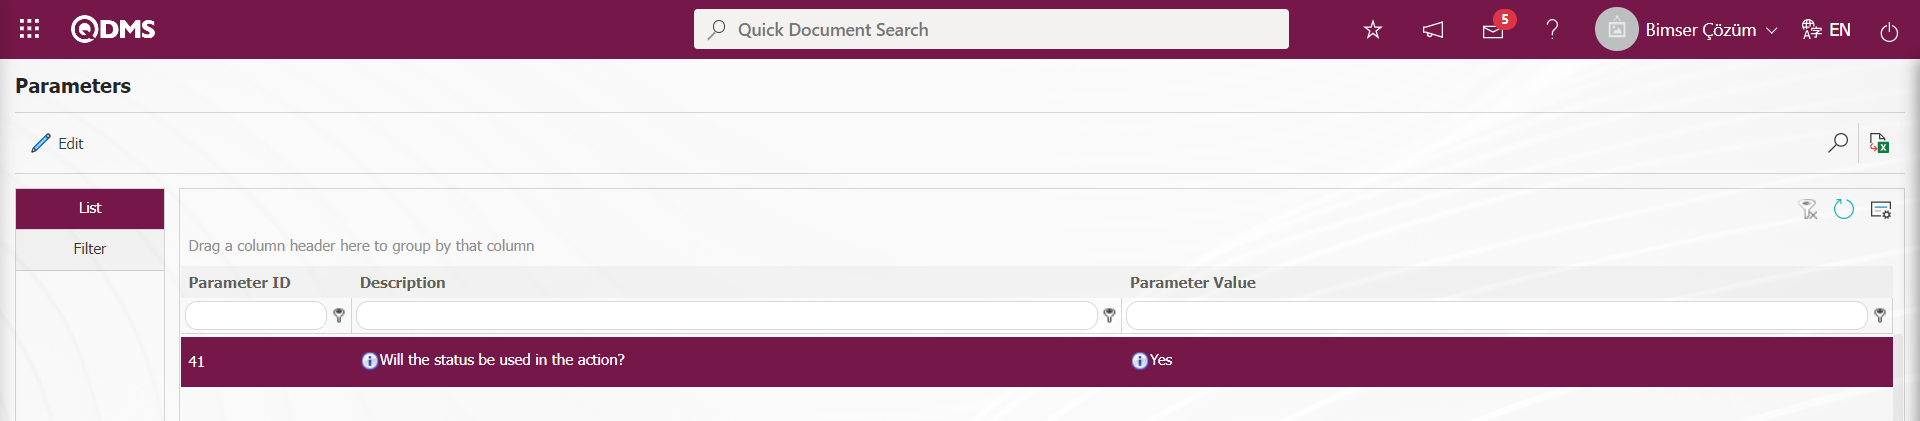 After the parameter is activated, the
  button is displayed on the Action Item Planning screen instead of the Items button on the Action Planning screen.
When the drop-down list next to this button is clicked, the operations related to the Action Item are displayed in stages. The action step is selected by clicking on the drop-down list and the screen related to that action step is opened or the action is performed.
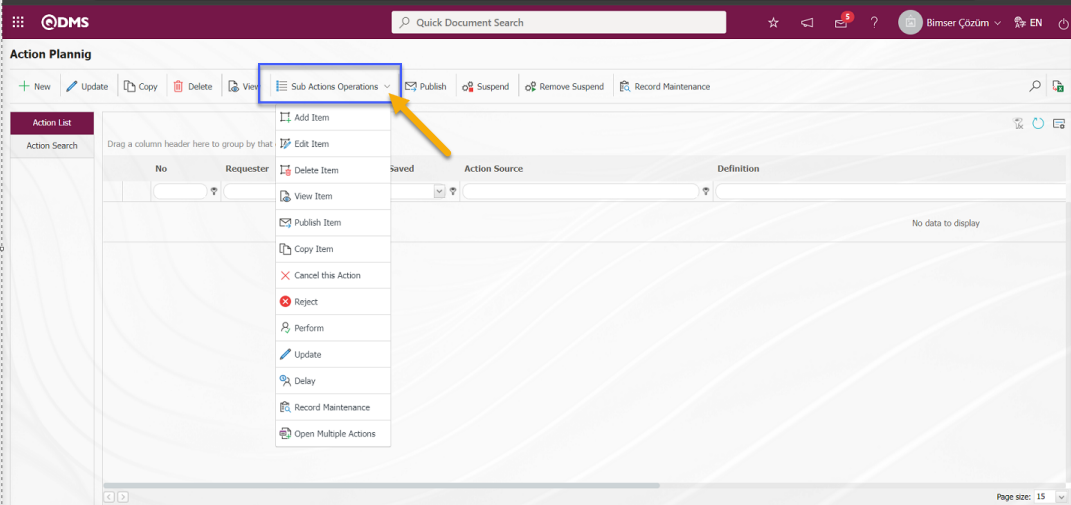
When parameter 41 “Will the stage be used in actions?” is disabled by selecting the parameter value “No”, it is displayed only as  button on the Action Planning screen.
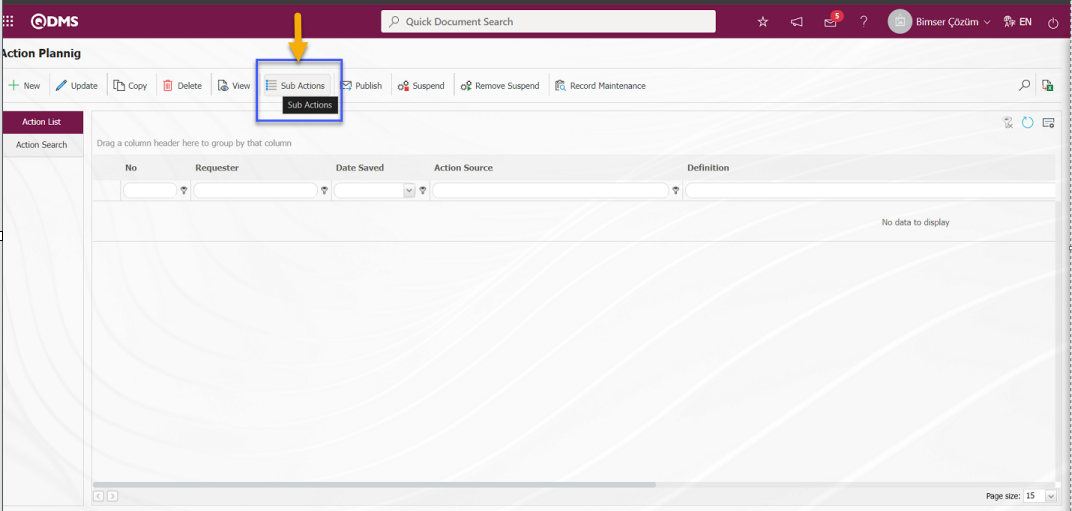
6.2.1.3.Action Task Fulfilment
Menu name: Integrated Management System/ Action Management/ Fulfilment/Delay
“Action Responsible” has a task as “Actions to be Fulfilled under your responsibility” on the page “Pending tasks”.
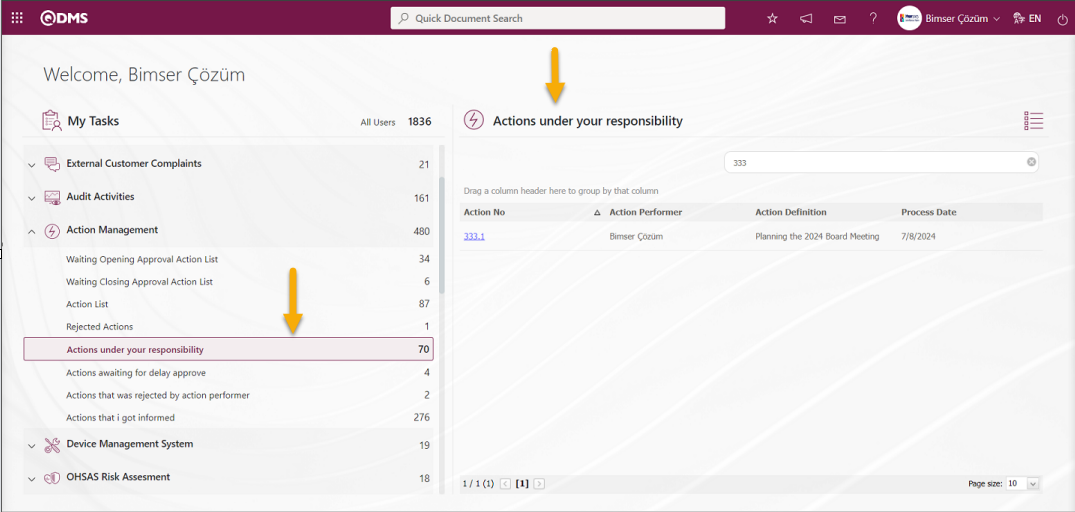
On the “My Pending Jobs” page of the “Person to Do the Job”, the “List of Actions to be Performed” will be assigned as a task.

The person who will do the work to perform the action task opens the “Actions to be performed” list. In the related action no field, click on the link to the action code. On the Action Realisation / Delay screen, “Realisation”, “Update”, “Delay”, “Rejection” and “Redirection” operations can be performed.
With the help of the buttons on the screen;
 : Action realisation operation is performed
 : Action information update operation is performed.
 : Action delay operation is performed.
 : In the task of action realisation, rejection is made by the person who will do the work
 : The task of performing the action is redirected to another person.
: Records are searched by filtering.
: Data is transferred to Excel.
: The data remaining in the filter fields in the grid where the search criteria search operation is performed on the menu screens is cleaned
: The process of returning the menu screen to the default settings is done.
: User-based designing of the menu screen is done with the show-hide feature, that is, the hiding feature of the fields corresponding to the columns on the menu screens.
The person who will perform the action, that is, the person who will do the work, clicks the and the action to be performed is displayed.

Action Information Tab: It is the tab where general information about the action is seen. In this tab, information about the action performed is entered in the “Work Performed” field. In the “Realisation Date” field, the date of the action is selected.
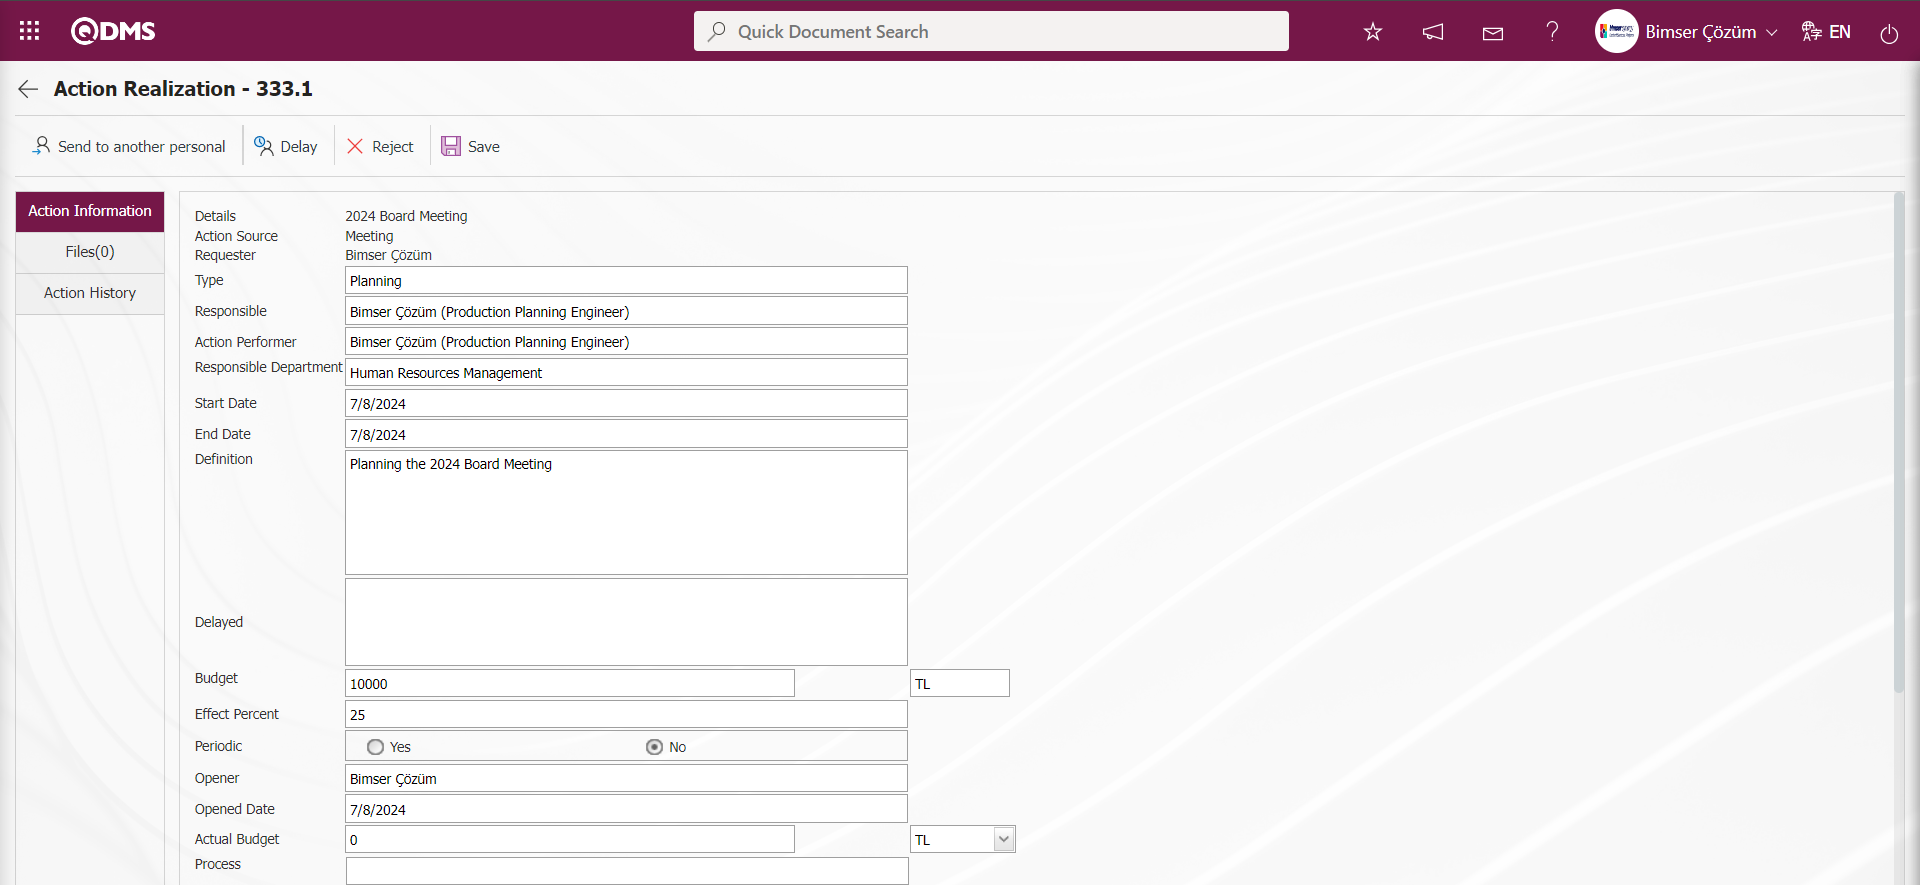

With the help of the buttons on the screen;
 : The action is directed to another person to perform the action
 : Action delay operation is performed.
 : The action is rejected by the person who will do the work in the action realisation task
 : The registration process is performed by entering the performed action information.
Additional Files Tab: It is the tab where additional files such as evidence files, pictures, minutes, if any, related to the action are uploaded or the uploaded additional files are displayed.
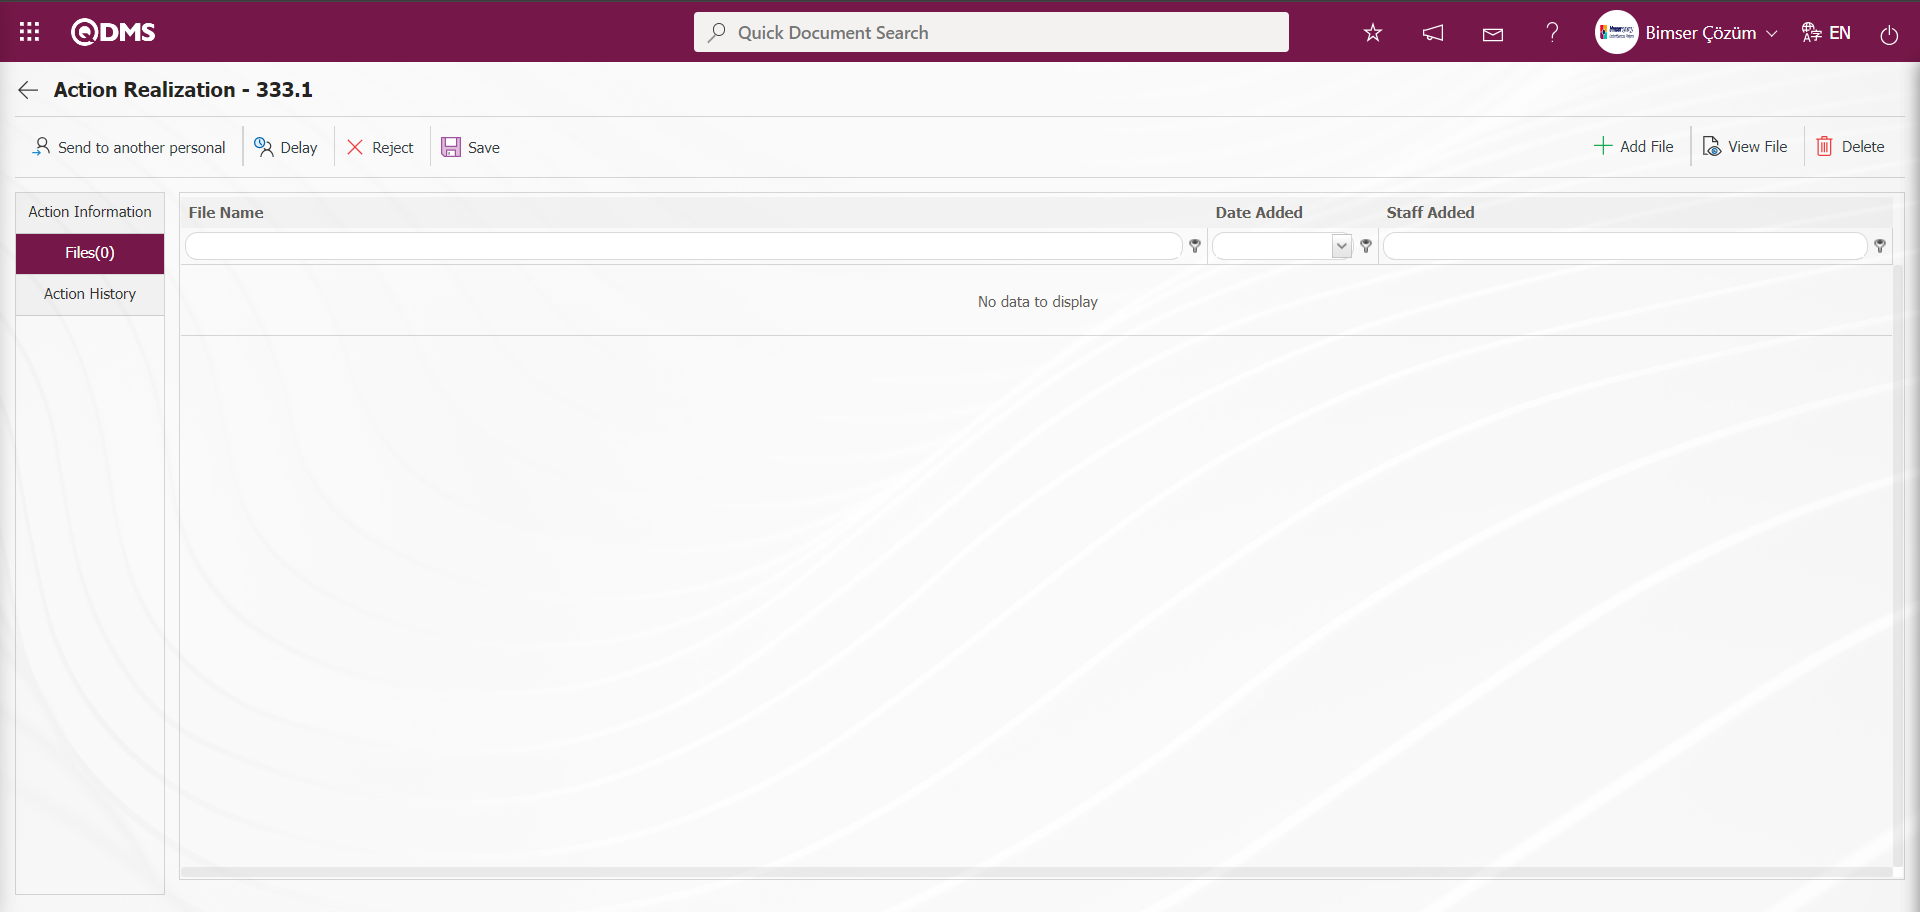
With the help of the buttons on the screen;
: The additional file is uploaded to the system.
: The uploaded additional file information is displayed.
: The uploaded additional file information is deleted.
Action History Tab: The action history of the action related to the action such as opening approval, realisation, delay, routing, closing approval, update is listed.
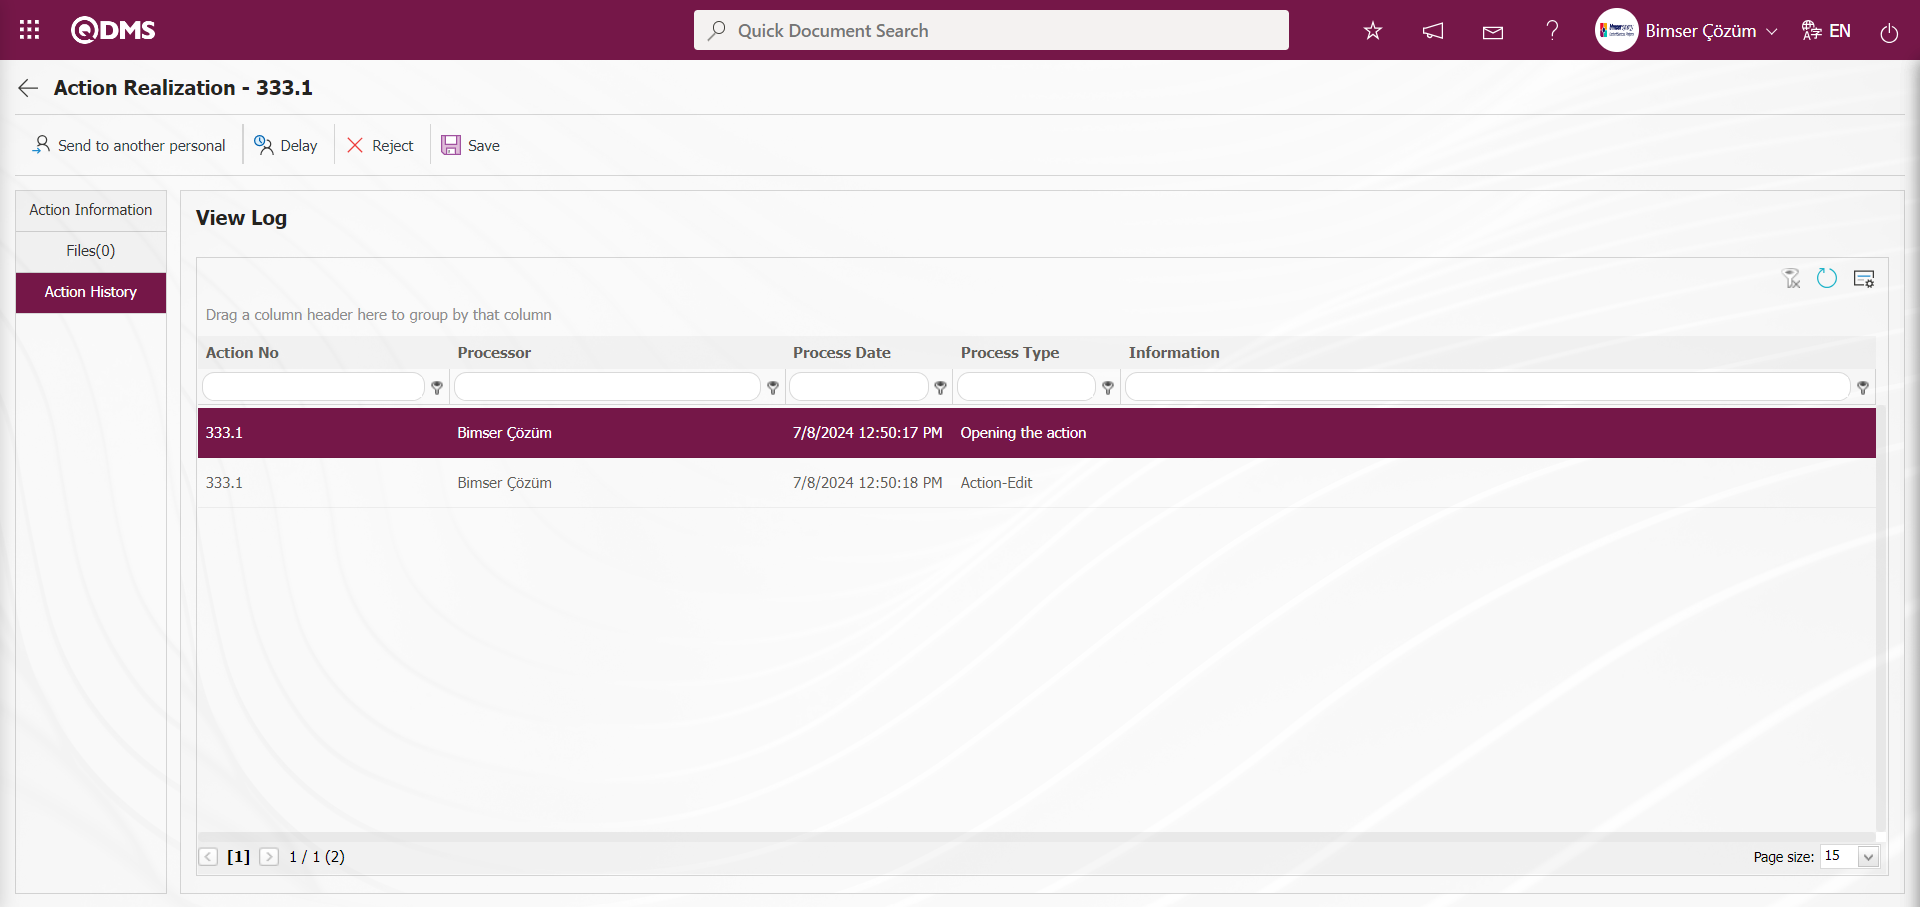
Action Information tab is clicked.
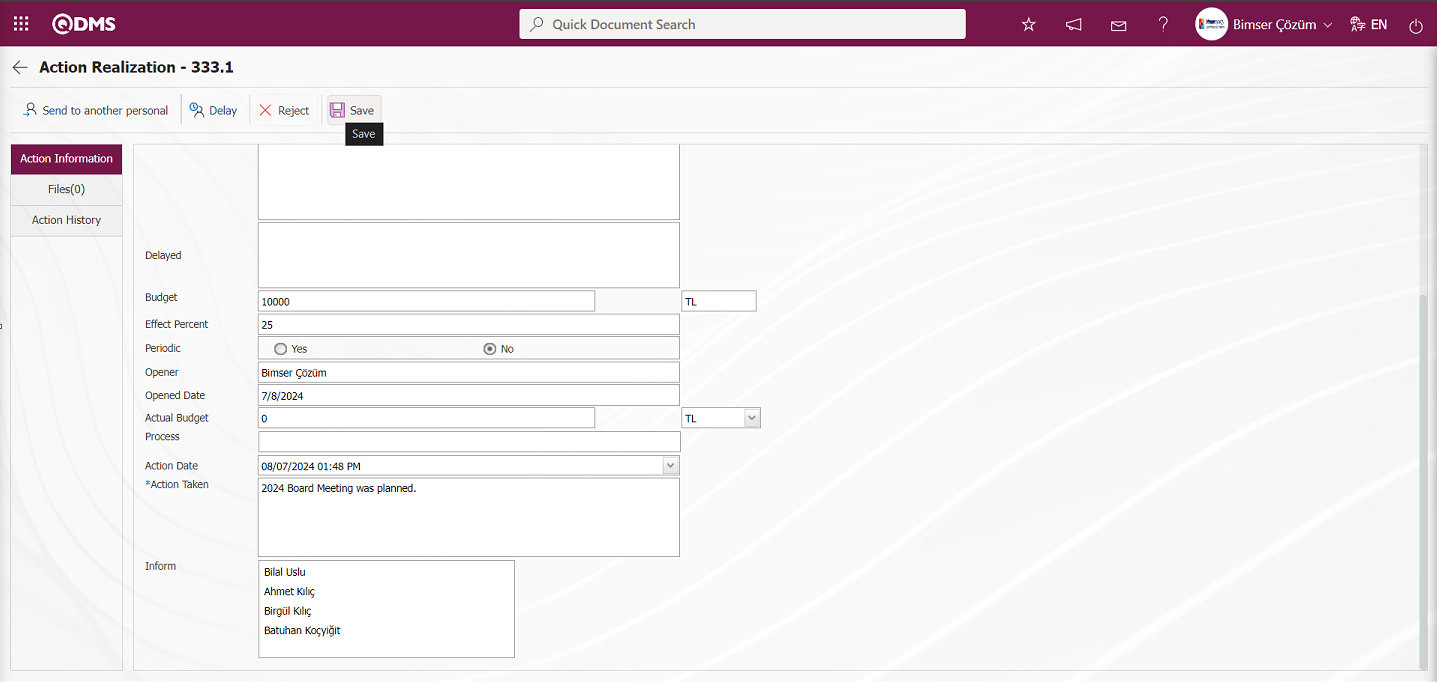
In the Action Realisation screen, information about the action performed is entered in the “Work Performed” field at the bottom of the Action Information screen. In the “Realisation Date” field, the date of the action is selected. From the “Additional File” tab, evidence files, if any, are uploaded. After entering the relevant information in the required fields, the action realisation registration process is done by clicking the  button in the upper left corner of the screen. When the action is realised, if there is an approval step, the action item goes to the closure approval, if there is no approval step, the action is automatically closed.
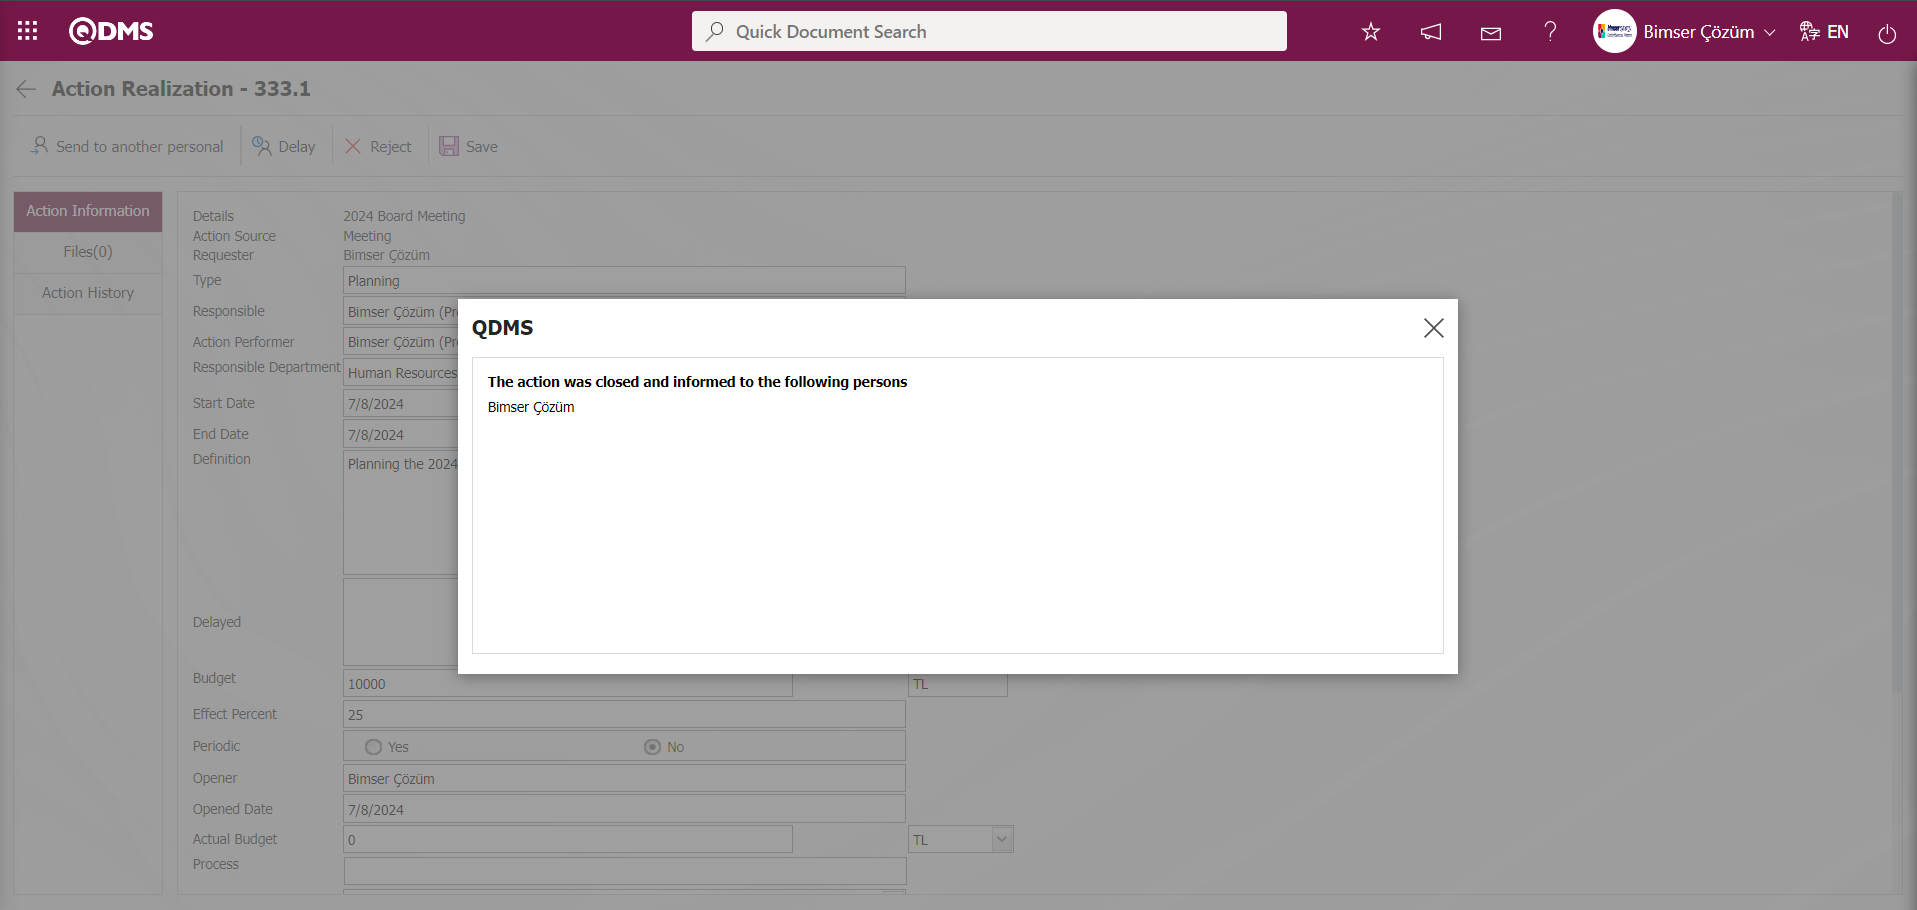
In order for the action to go to opening and closing approval, the parameter values of parameters 10 and 11 in the Action Management Parameters must be activated.
Parameter number 10;
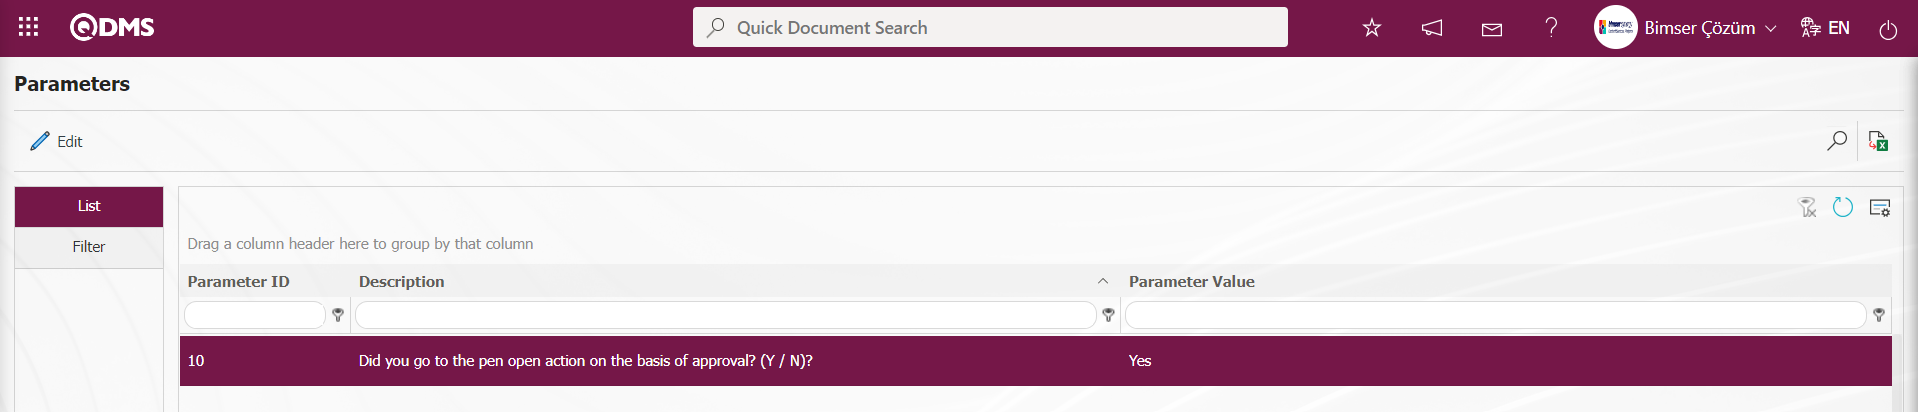
Parameter number 11;
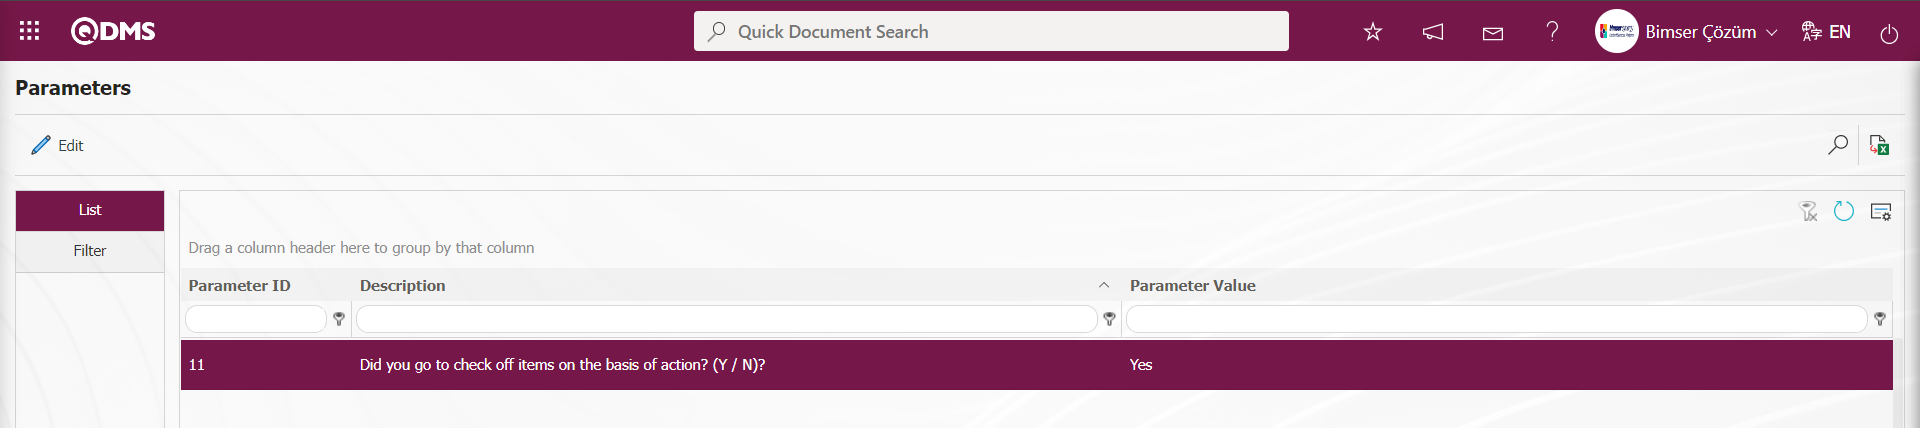
When these parameters are activated, the check boxes related to the “Go to Opening Approval” and “Go to Closing Approval” fields must be checked on the Action Planning-New Record screen.
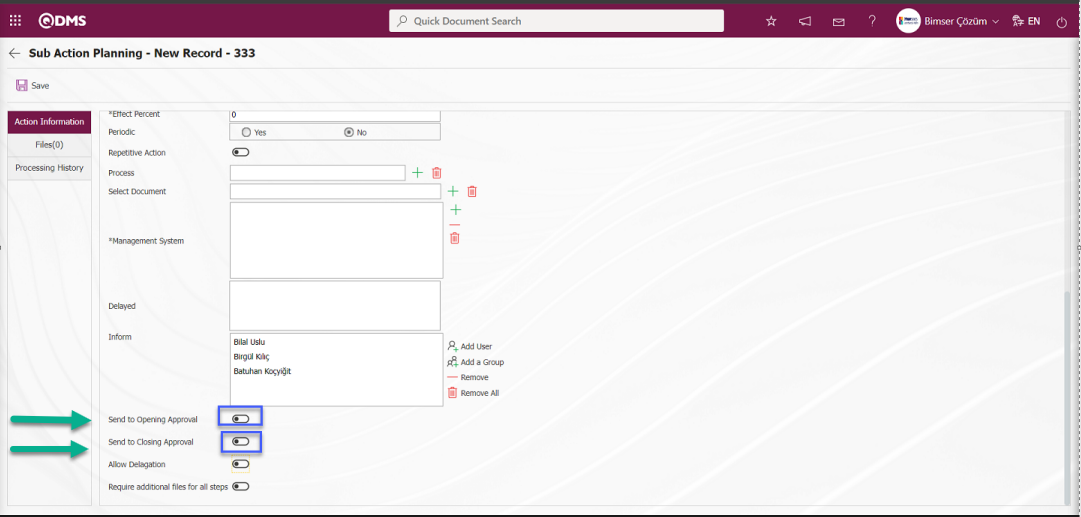
Actions sent for opening approval are processed as “Opening Approval Pending Action List” task on the “Pending Actions” page. The Action approval screen is opened by clicking the link in the Action code field in the relevant task. On the action approval screen, action approval and rejection operations are performed with the help of buttons. Reason for rejection is also mandatory in the action rejection process.
The Actions sent for closure approval are processed as “Action List Pending Closure Approval” task on the “Pending Actions” page. The Action approval screen is opened by clicking the link in the Action code field in the relevant task. On the action approval screen, the action's approval and rejection operations are performed with the help of buttons. Reason for rejection is also mandatory in the action rejection process.
6.2.1.4. Delaying Action Task
Menu name: Integrated Management System/ Action Management/ Realisation/Delay
If the action cannot be performed on the specified deadline, action delay operation is used.
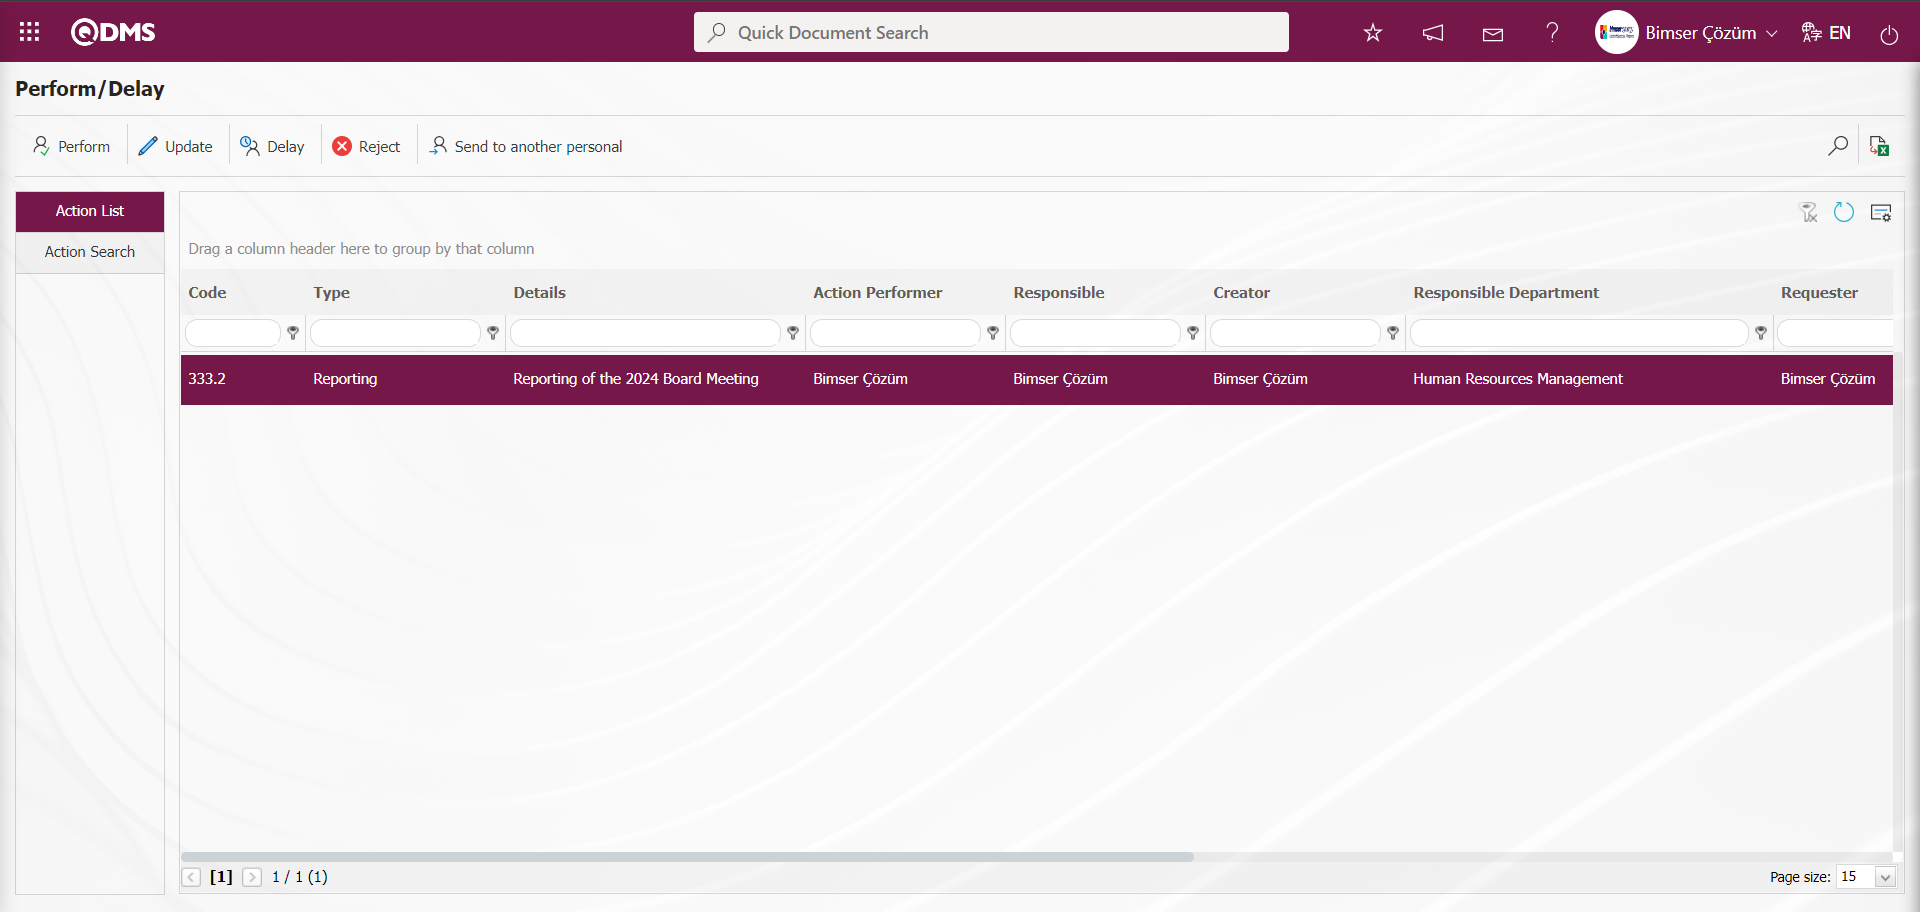
With the help of the buttons on the screen;
: Action realisation is performed
: Action information update process is performed.
: Action delay operation is performed.
: In the action realisation task, rejection operation is performed by the person who will do the work.
: The task of performing the action is directed to another person.
: Records are searched by filtering.
: Data is transferred to Excel.
: The search criteria on the menu screens are used to clean the data remaining in the filter fields in the grid where the search operation is performed.
: The menu screen is restored to its default settings.
: User-based designing of the menu screen is done with the show-hide feature, that is, the hiding feature of the fields corresponding to the columns on the menu screens.
In order to be able to delay action items in the screen opened in the Realisation/Delay menu, the parameter should be activated by selecting “Yes” for the parameter value 155 “Should delay be possible in action items?” from the Action Management Module parameters.
 After the parameter is activated, the button is displayed on the Realisation/Delay screen and the delay operation is performed on the Action Items by clicking the button.
If the delay confirmation flow is defined in Flow Identification, Action delay confirmation is sent. The parameter is activated by selecting “Yes” for parameter 42 “Action Delay Approval?” in Action Management.
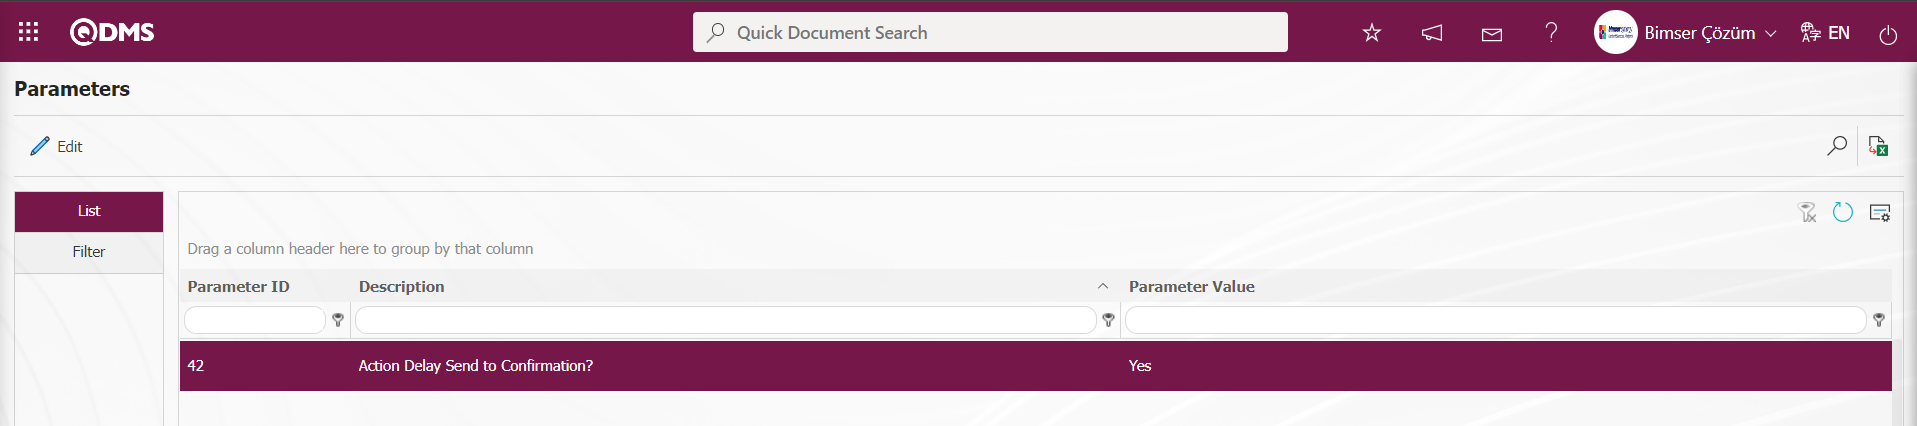
After the parameter is activated, if there is a flow defined in the Flow Definition menu, the action delay is sent for approval. The person in the approval flow approves the delay or rejects it by writing the rejection reason information.
On the “My Pending Jobs” page, click on the action code link in the action no field from the actions that fall as a task in the “List of Actions to be Performed” and open the Realisation/Delay menu.
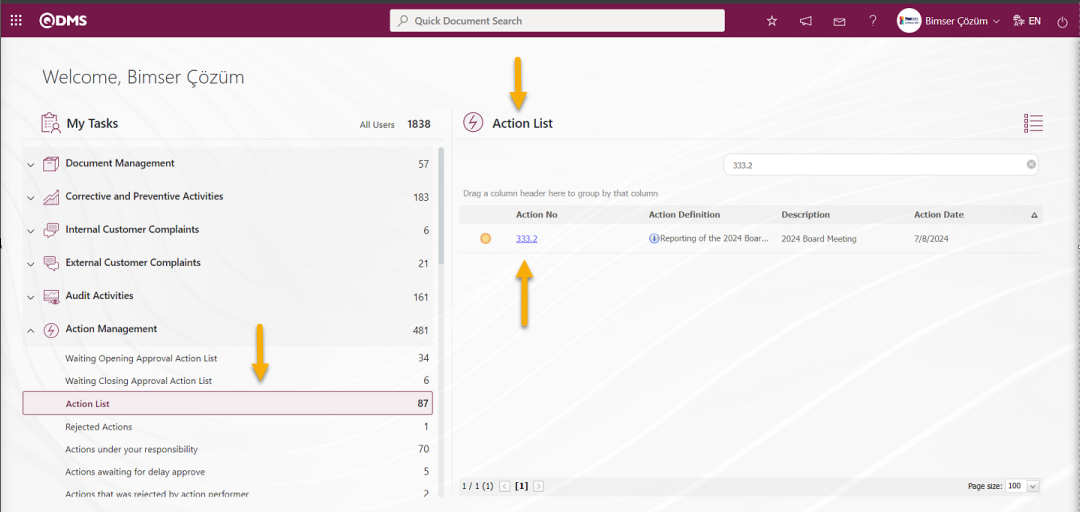
Or by clicking on Integrated Management System/Action Management/Activity Management/Actualisation/Delay menu, action is selected on the screen that opens and delay operation is performed.
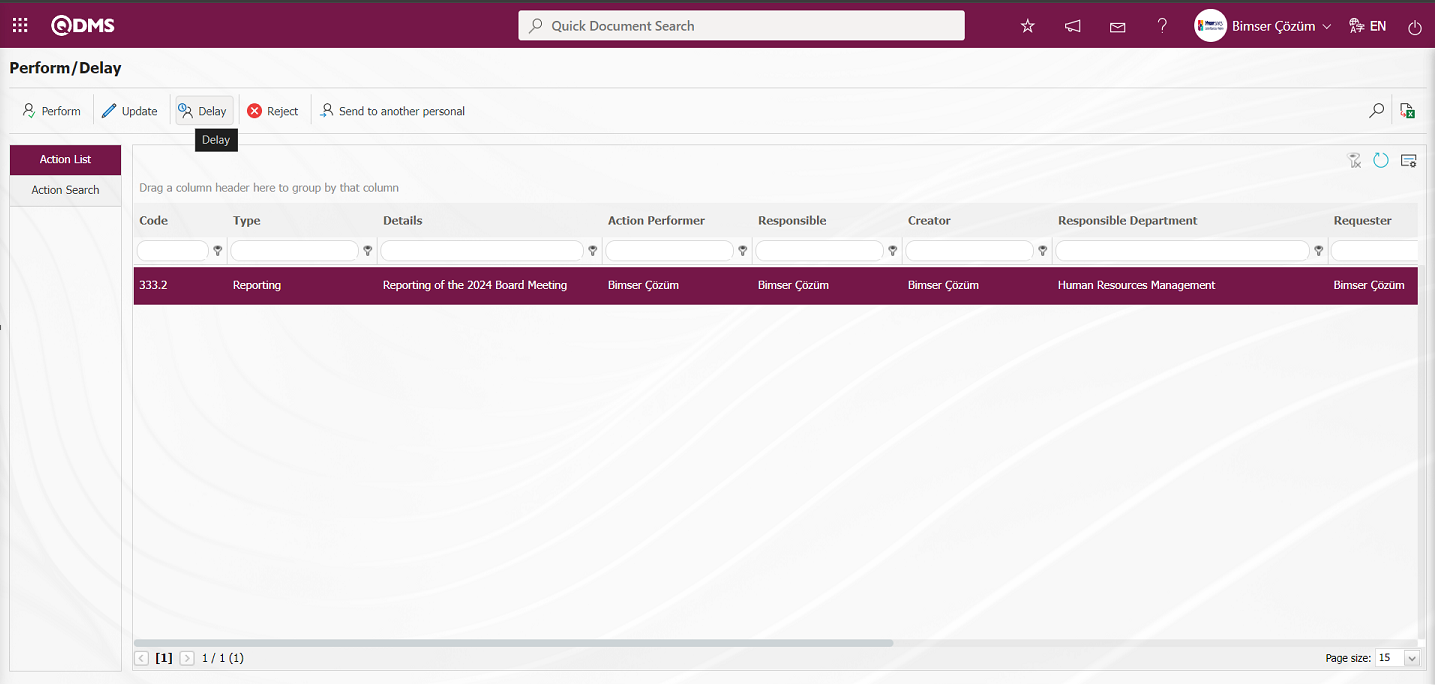
Action Information Tab: It is the tab where the revision date is selected in the calendar field opened in the “Revision End Date” field related to the delay of the action, the reason why the action is delayed is written in the “Reason for delay” field and general information is included.
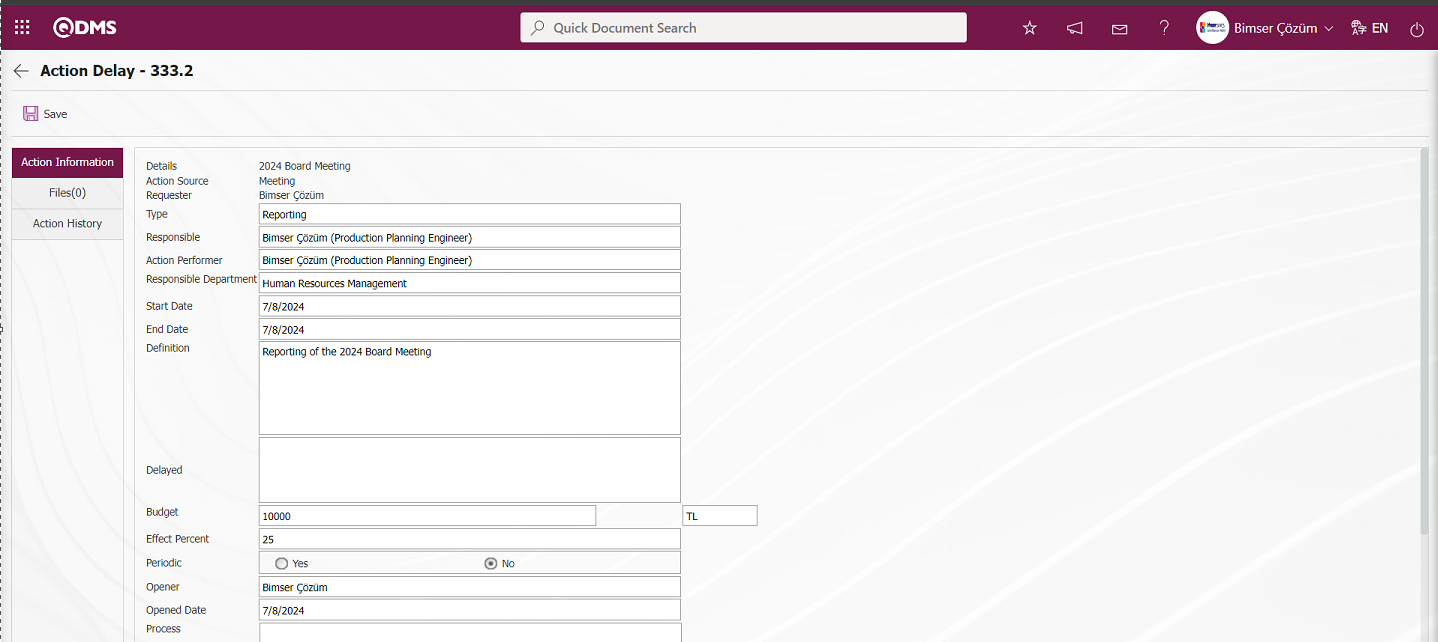

Additional Files Tab: It is the tab where additional files such as files, pictures, minutes related to the delay process on the Action Delay screen are uploaded.
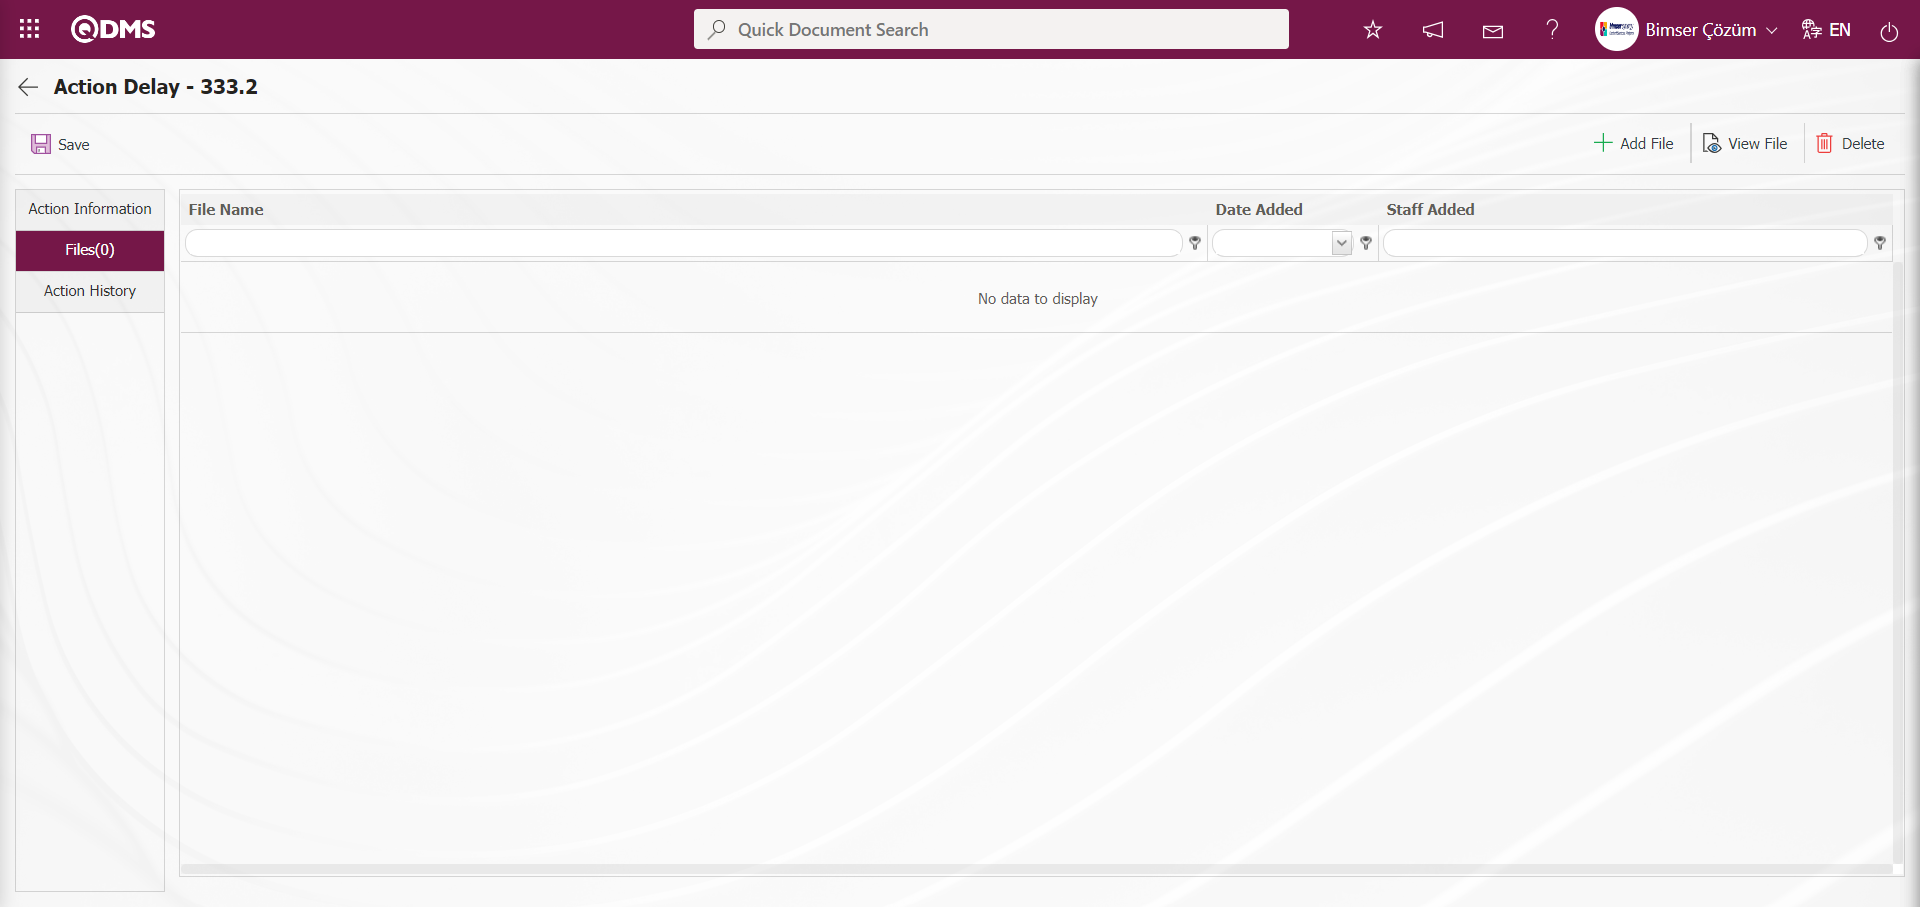
With the help of the buttons on the screen;
 : The additional file is uploaded to the system.
 : The uploaded additional file information is displayed.
 : The uploaded attachment file information is deleted.
Action History Tab: The action history of the action related to the action such as opening approval, realisation, delay, routing, closing approval, update is listed.
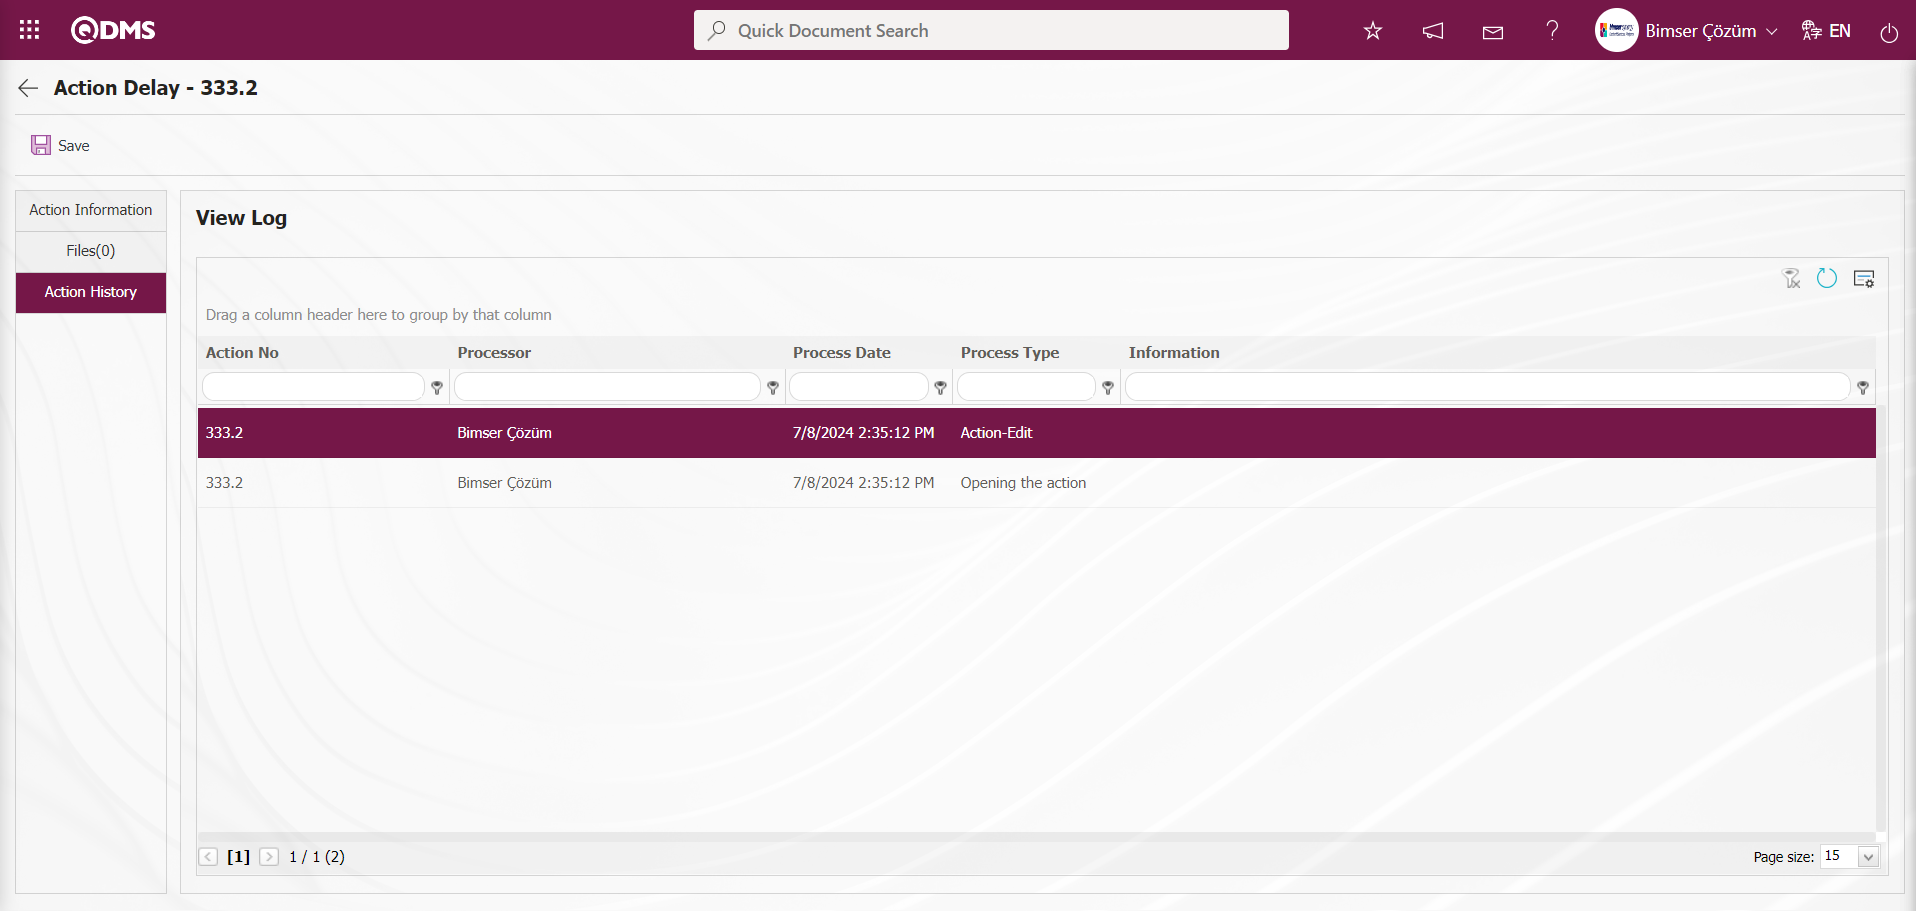
Action Information tab is clicked.
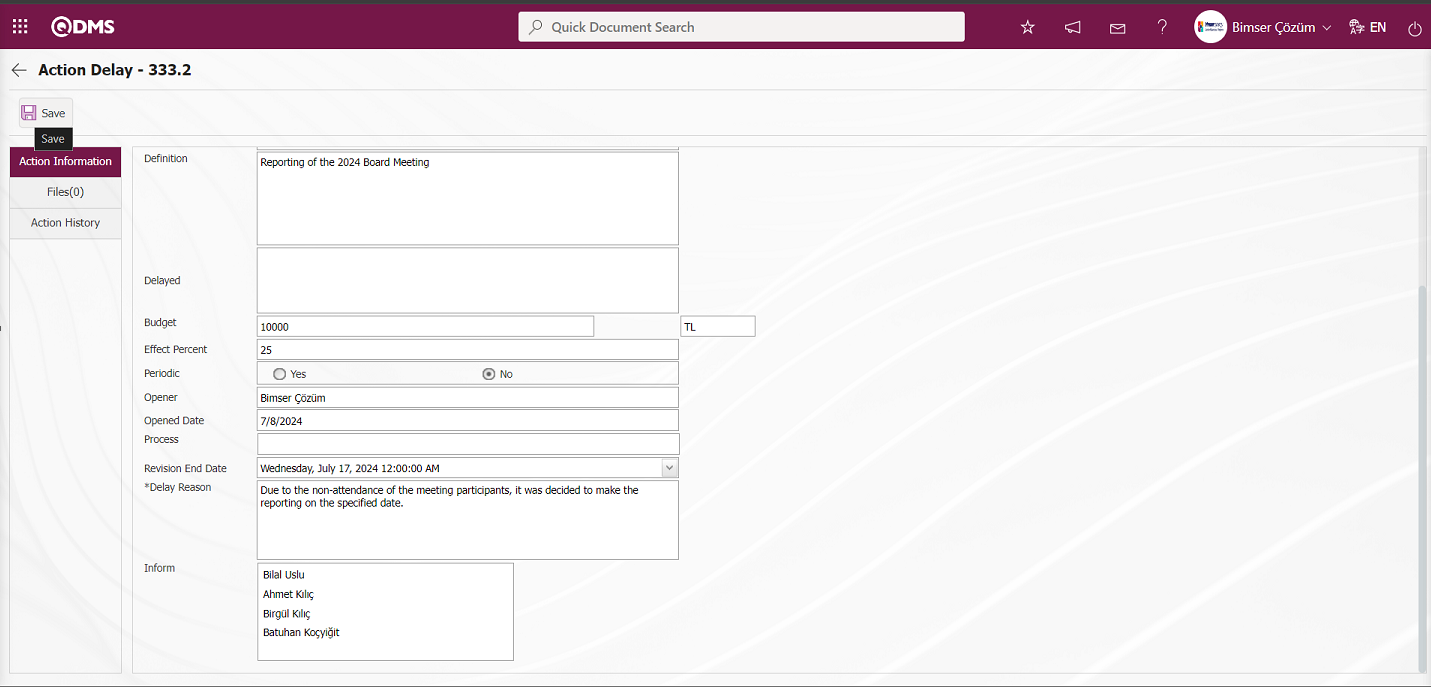
After entering the relevant information in the required fields of the Action Delay screen, click the  button in the upper left corner of the screen.
In the Action Management module parameters, parameter 42 “Action Delay Approval?” is selected as “Yes” and since the parameter is activated and the Flow is defined, the Action is submitted to the delay approval of the person in the approval. When parameter 42 is passive, the action is delayed directly without going to the action delay approval.

In the “Pending Works” of the person in approval, the “Actions Pending Delay Approval” will be assigned as a task.
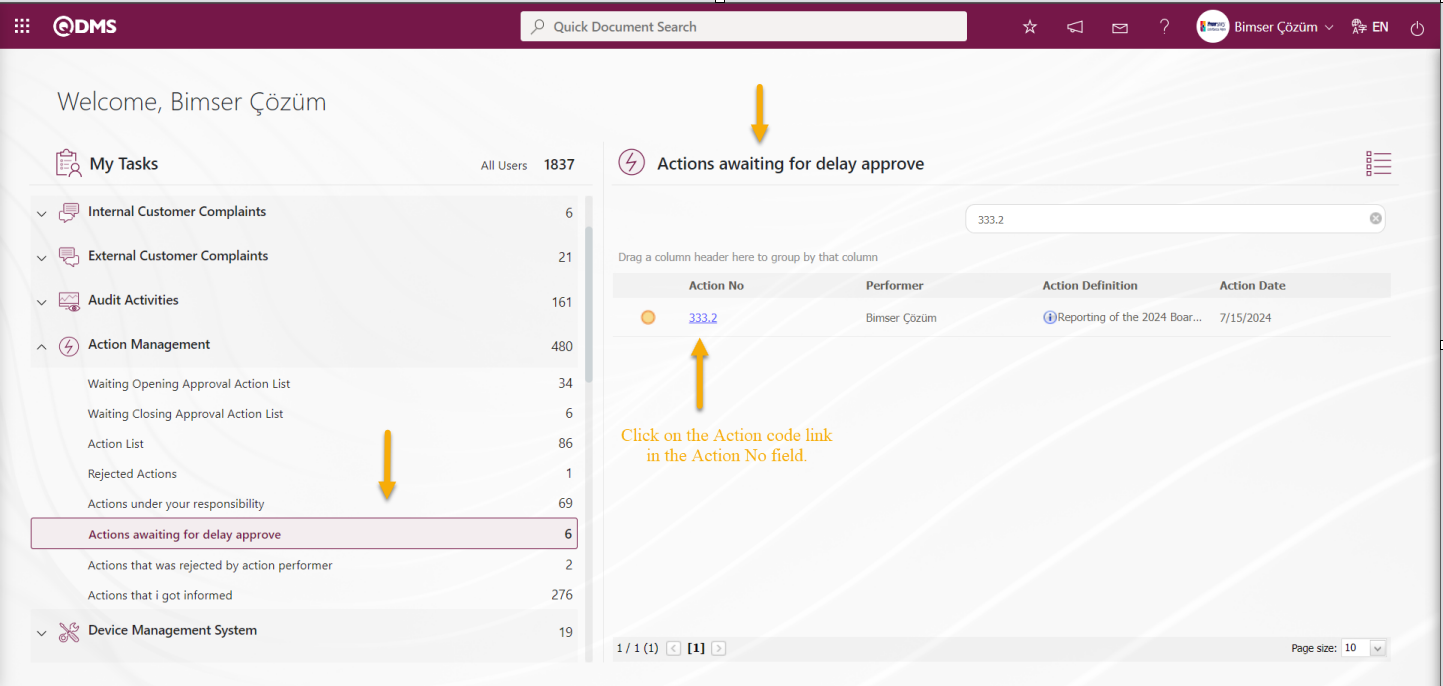
Click on the Action code link in the Action No field in the related task and the Action Approval screen opens.
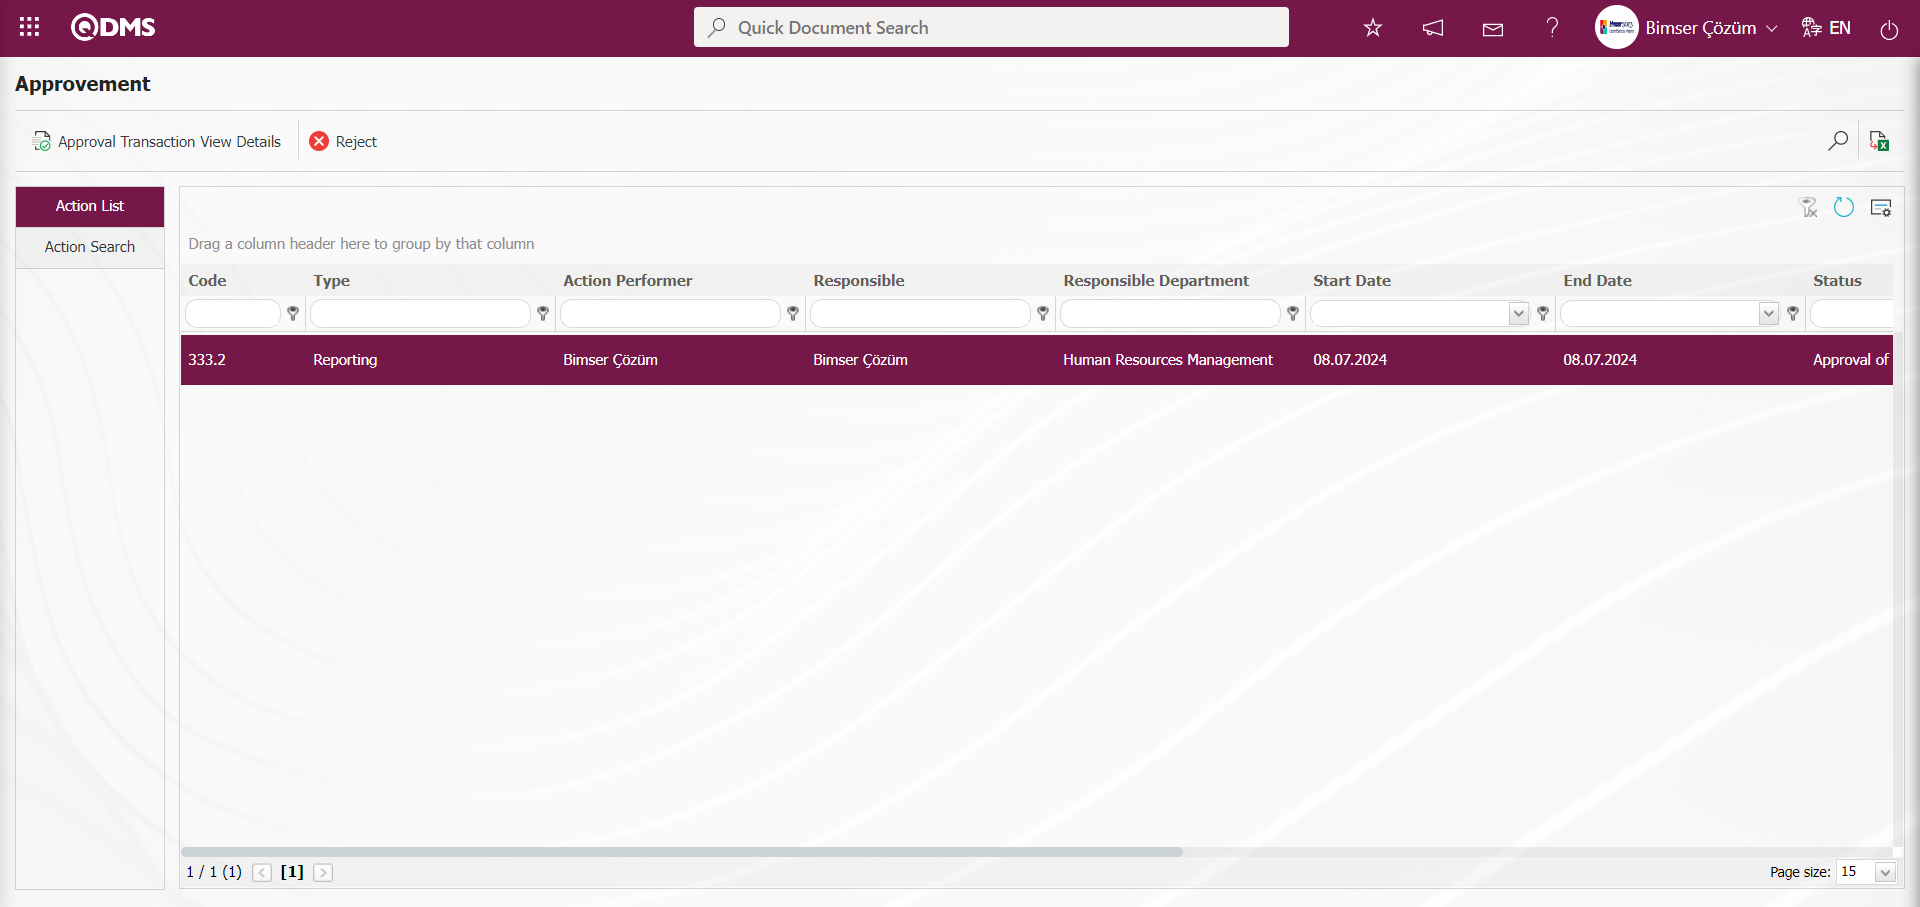
With the help of the buttons on the screen;
 :Approval Transaction Detail is displayed.
 :Action approval process is rejected.
On the Action Approval screen, in the Action list tab, select the Action for delay approval from the list and click the button.

In the Action Rejection screen, enter the Reason for Rejection field information in the Reason for Cancellation tab.
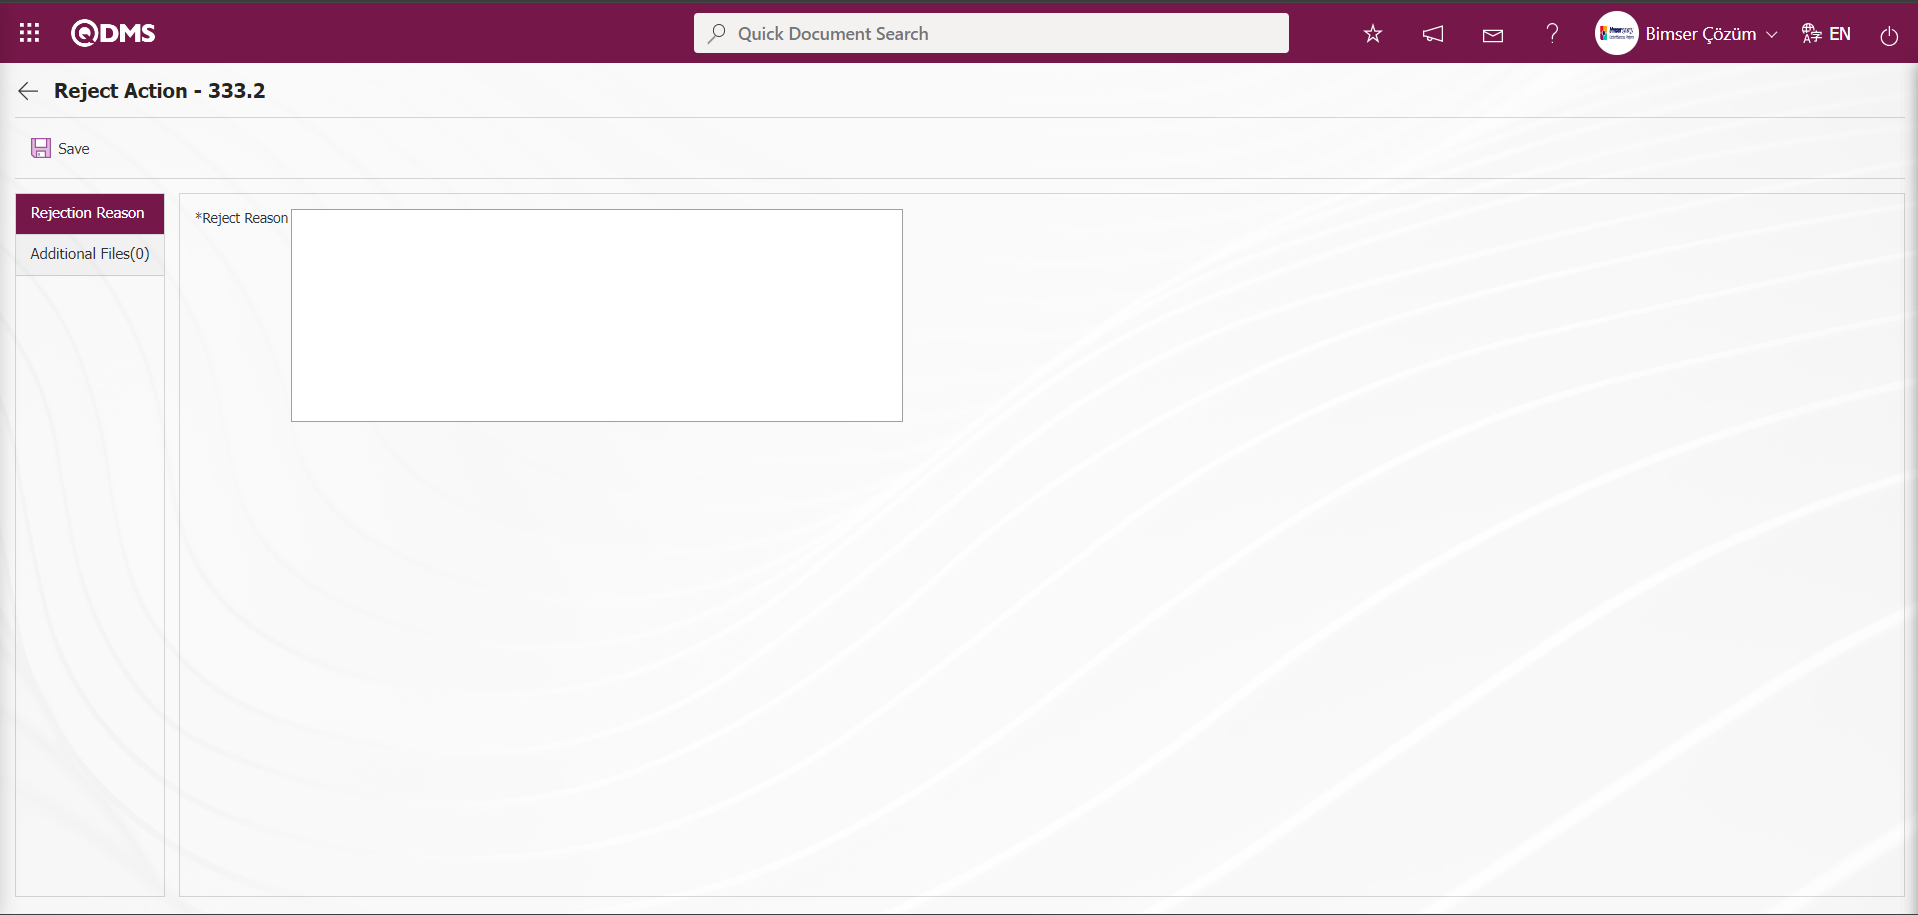
In the Additional Files tab, if there is a reason for the rejection of the action, the Additional File upload process is performed.

With the help of the buttons on the screen;
: The additional file is uploaded to the system.
: The uploaded additional file information is displayed.
: The uploaded additional file information is deleted.
In the Action Rejection screen, after entering the necessary information in the required fields, the Action Rejection registration process is done if desired by clicking the  button in the upper left corner. In the Action Approval screen, the Action to be approved is selected from the list in the Action List tab and the Action Approval screen is opened by clicking the
  button.

Action Information tab: This tab contains general information about the action.
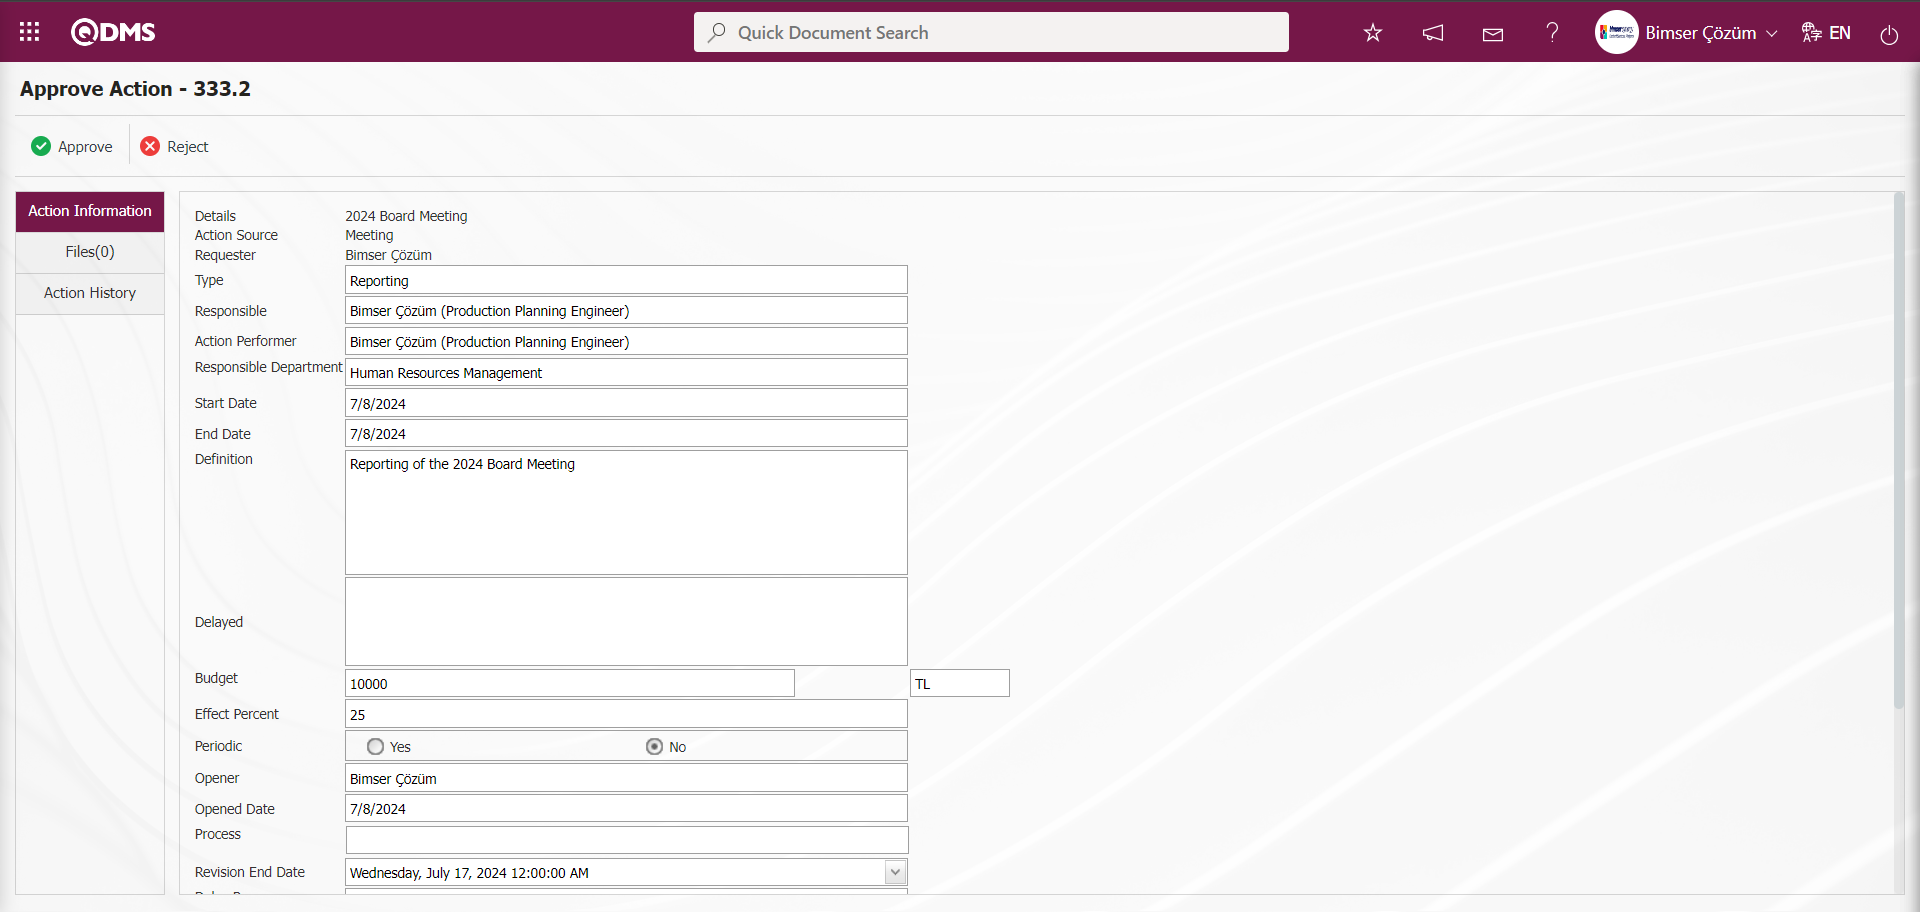
With the help of the buttons on the screen;
 : Approval of the action item delay operation is done.
: Rejecting the action item delay operation is done. In the process of rejecting the Action Item delay, the reason for rejection information is mandatory and if any, additional file uploading process related to the reason for rejection is performed.
At this stage button is clicked on the Action Approval screen.

In the Action Rejection screen, enter the Reason for Rejection field information in the Reason for Cancellation tab.
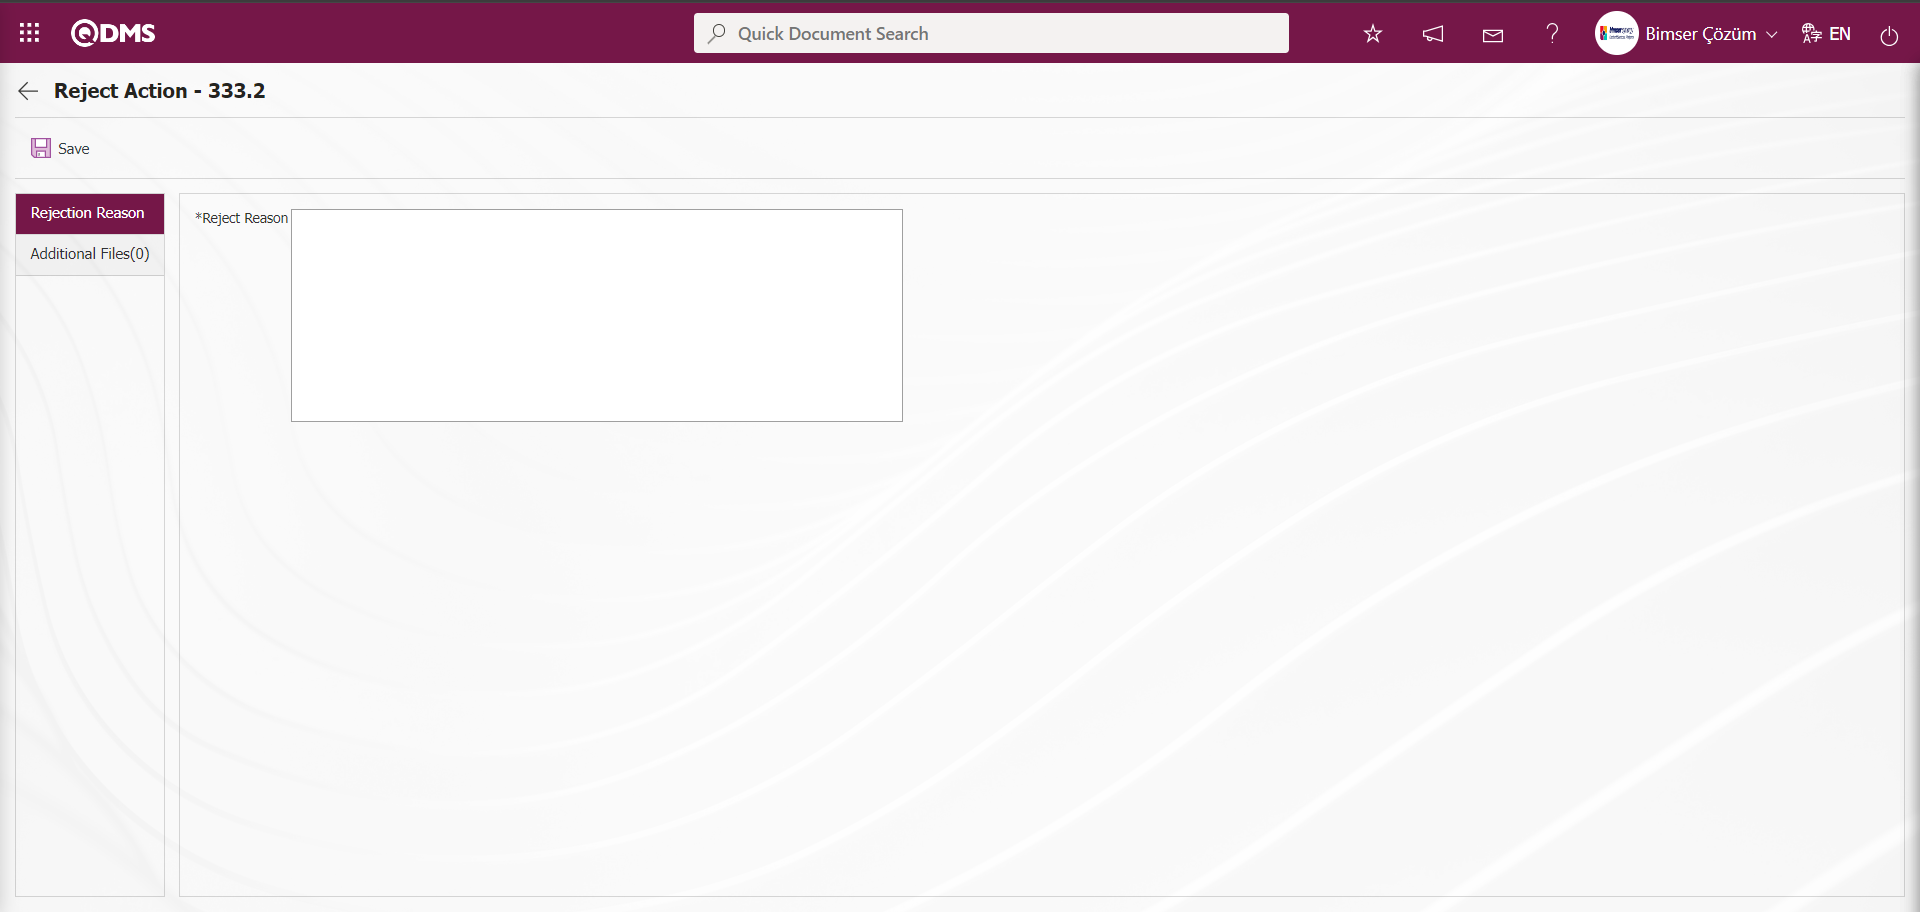
In the Additional Files tab, if there is a reason for the rejection of the action, the Additional File upload process is performed.

With the help of the buttons on the screen;
: The additional file is uploaded to the system.
: The uploaded additional file information is displayed.
: The uploaded additional file information is deleted.
In the Action Rejection screen, after entering the necessary information in the required fields, the  button in the upper left corner is clicked and the registration process for rejecting the action delay approval is made if desired.
Additional Files tab: It is the tab where additional files are uploaded with delay approval on the Action Confirmation addition screen and existing additional files are displayed.

With the help of the buttons on the screen;
: The additional file is uploaded to the system.
: The uploaded additional file information is displayed.
: The uploaded attachment file information is deleted.
In the Action History tab; The action history of the work done related to the action such as opening approval, realisation, delay, routing, closing approval, update is listed.
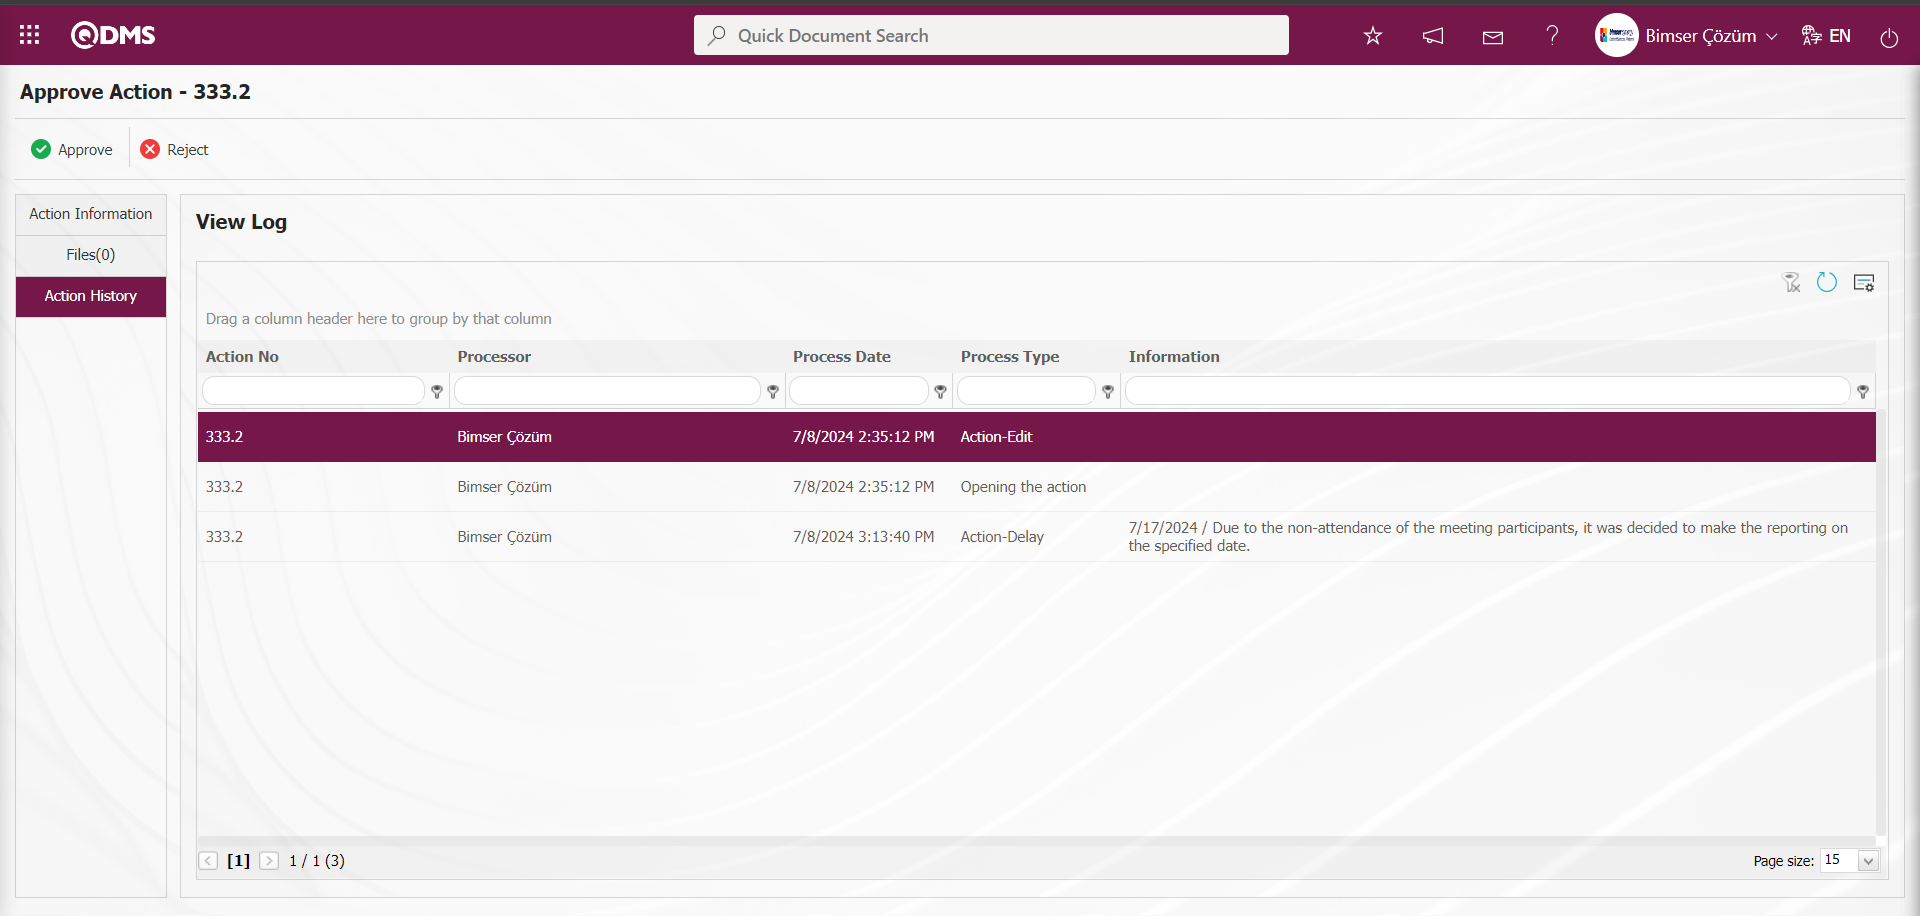
On the Action Confirmation screen, in the Action Information tab, click the button on the top left of the screen for action delay confirmation.
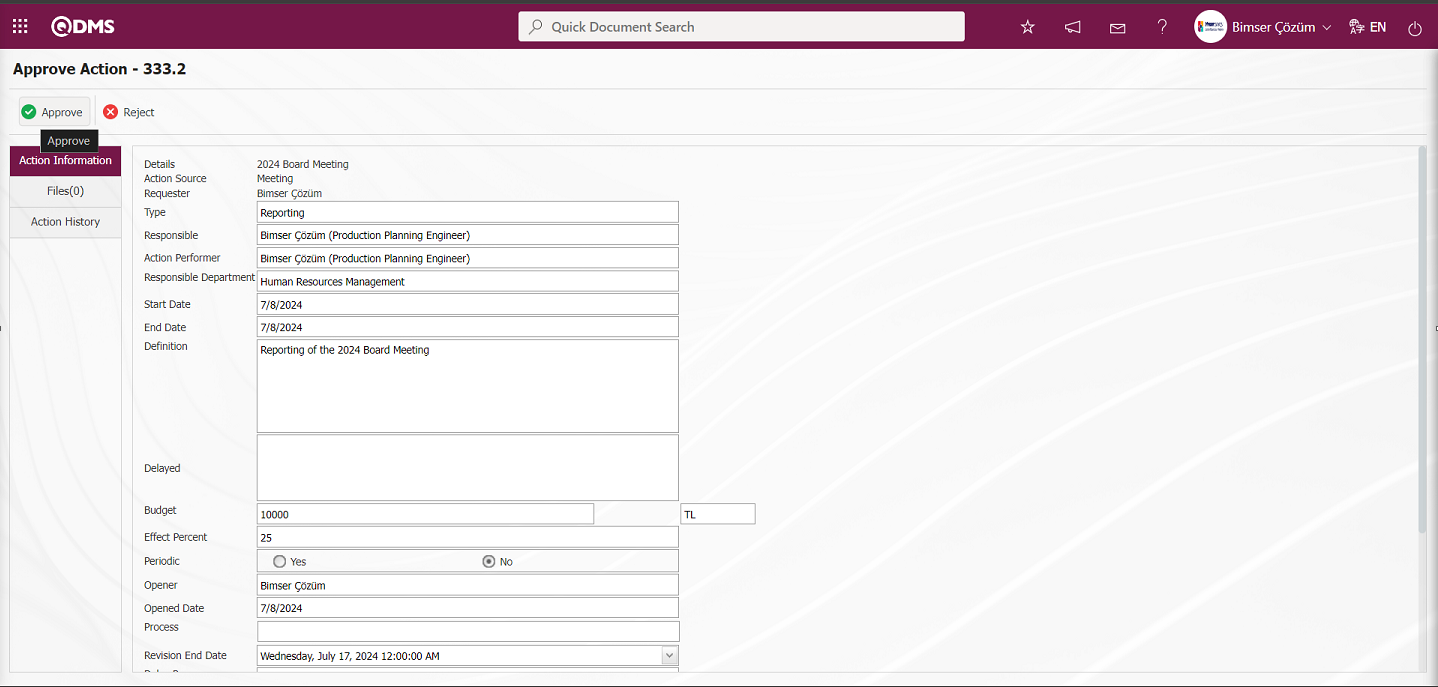
Click the “OK” button on the “Are you sure you want to perform the confirmation process?” message given by the system.

On the Action Approval screen, the Approval Note information is written and the Action is approved by clicking the  button and the Action is closed by informing the relevant persons.
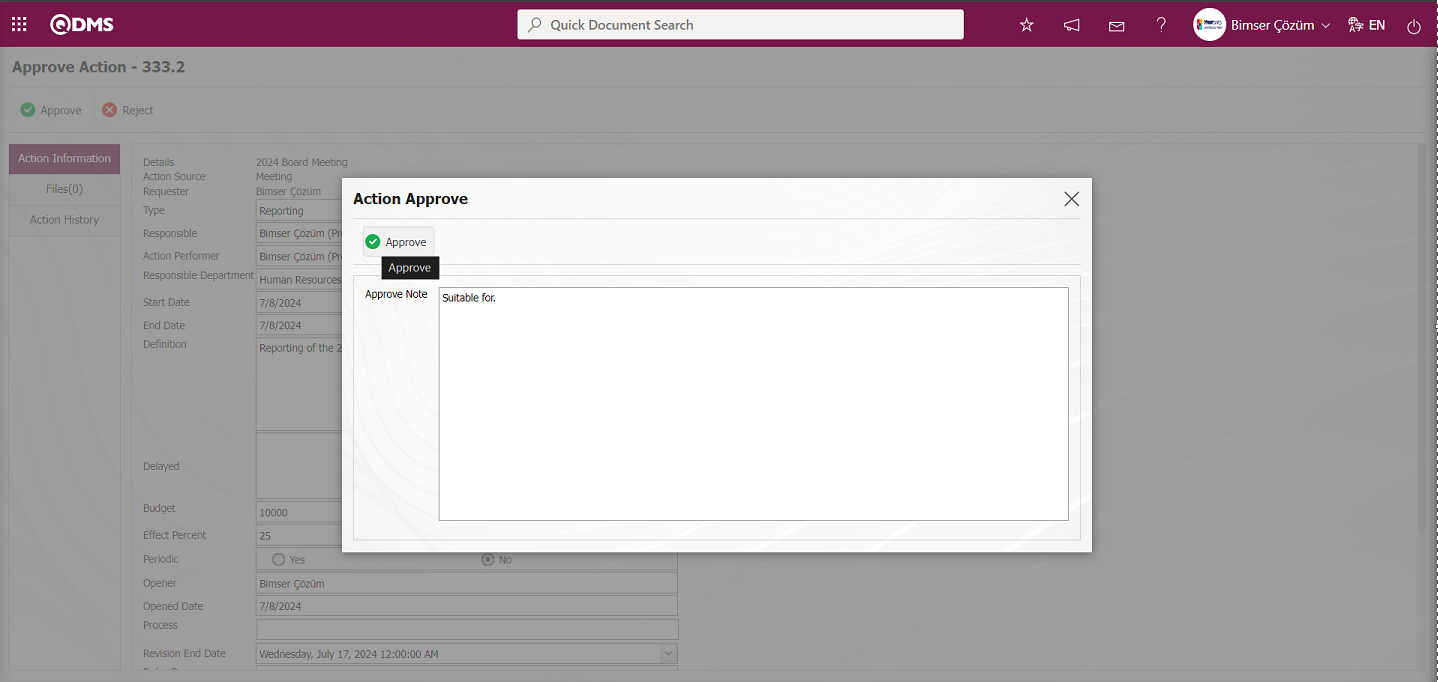
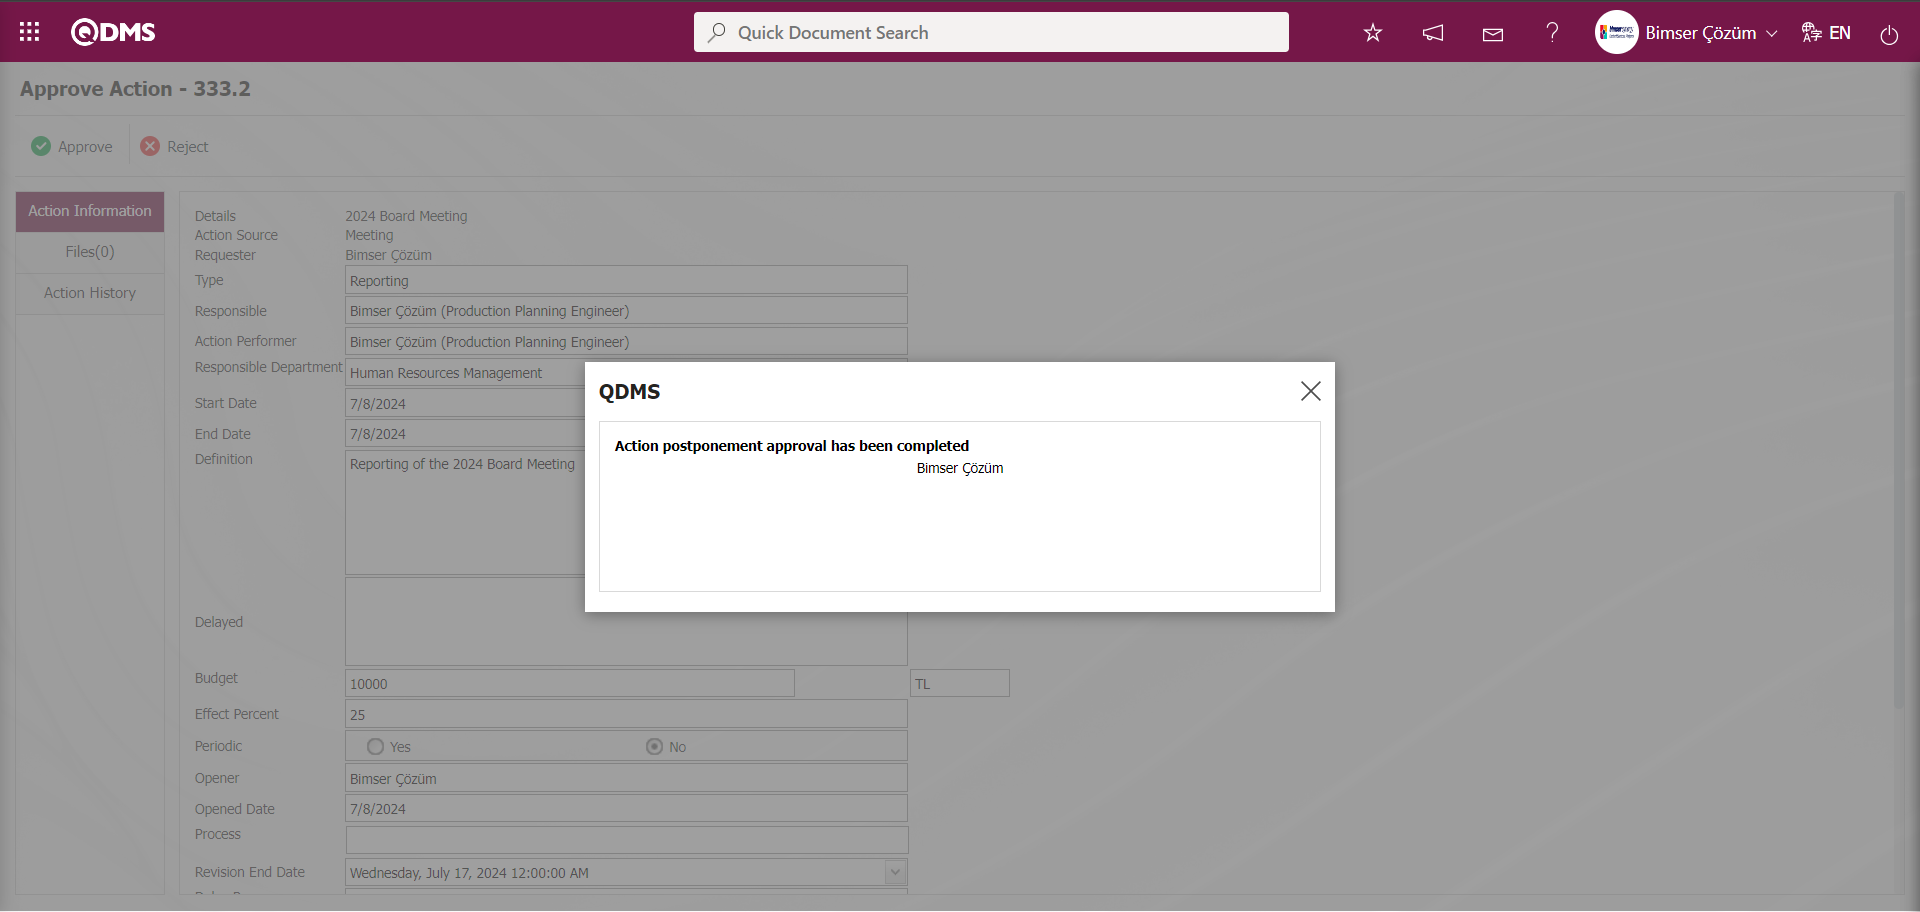
According to the value entered in the parameter value of the “Maximum Delay Number” parameter numbered 36 in the Action Management Module, the number of times the Action Item can be delayed is determined by the number defined in the parameter. When the maximum delay number is exceeded, a warning message is given by the system.

In the “Action delay approval delay notification period” parameter numbered 43 in the Action Management Module, according to the value entered in the parameter, it is determined in how many days the user who will give delay approval when the action goes to delay approval.

The parameter is activated by selecting the parameter value “Yes” in the parameter 158 “Can the revision end date be selected before the end date in the delay process?” in the Action Management Module.
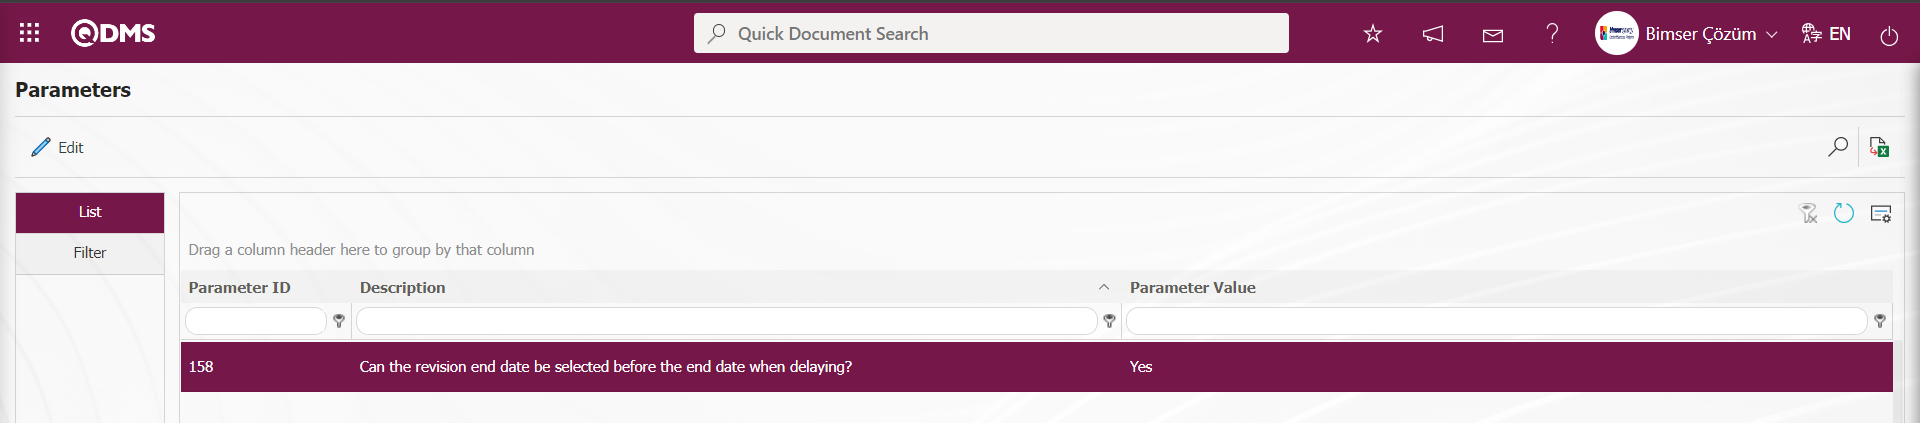
After the parameter is activated, it is enabled to select a date before the revision end date, end date in the delay process.
In the Action Management Module, in the parameter 63 “Statuses where additional files are mandatory (1=Open, 2=Actualisation, 3=Delay)”, the stages where additional files will be mandatory are determined according to the value entered in the parameter value. By entering “3” in the parameter value of Delay phase, the additional file upload process is made mandatory in the Additional files tab in the delay phase.
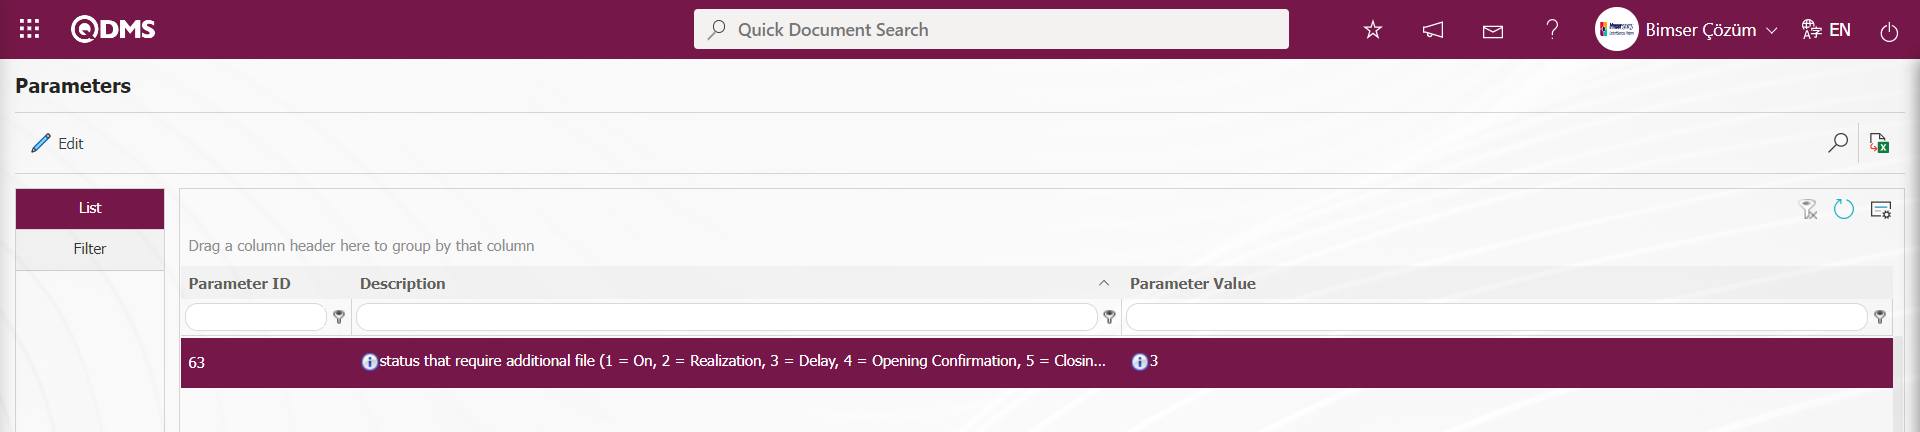
On the Action Item - Record Update screen, which is opened by selecting the Action for which the action is delayed and clicking the  button, “Since this action has been delayed before, the end date cannot be changed on this page. The end date of the action can be postponed to a later date with the Change Deadline button on the Action Realisation page.”
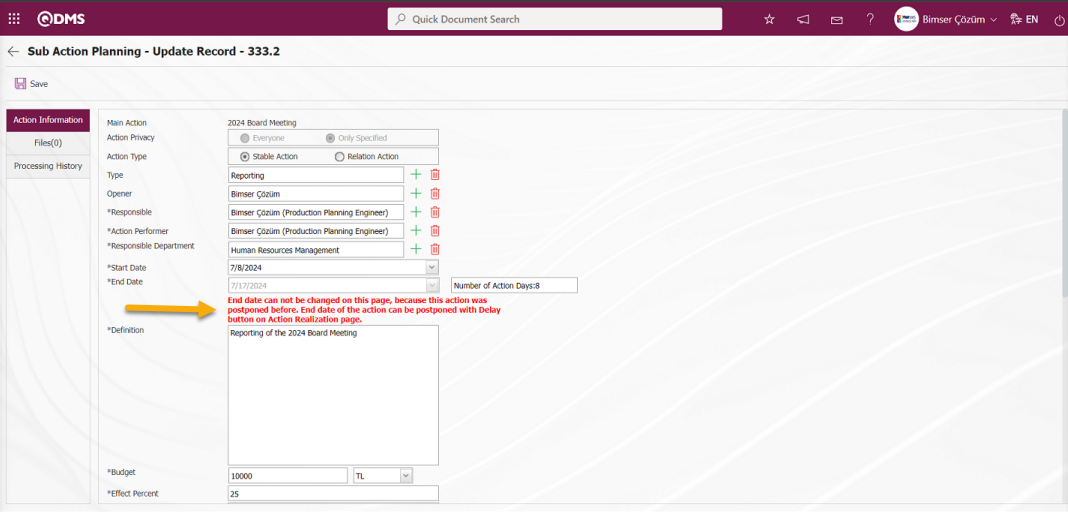
6.2.1.5.Directing the Action Task
Menu name: Integrated Management System/ Action Management/ Realisation/Delay
The person who will perform the action task can direct the action task to another personnel to perform the action task. In order to perform the action redirection process, the “Can redirect” check box must be checked on the “Action Item Planning” screen.
On the “My Pending Jobs” page, click on the action code link in the action no field from the actions that fall as a task in the “List of Actions to be Performed”, click on the action code link in the action no field, open the Realisation / Delay menu and select the action from the list in the Action list tab and perform the routing operation.
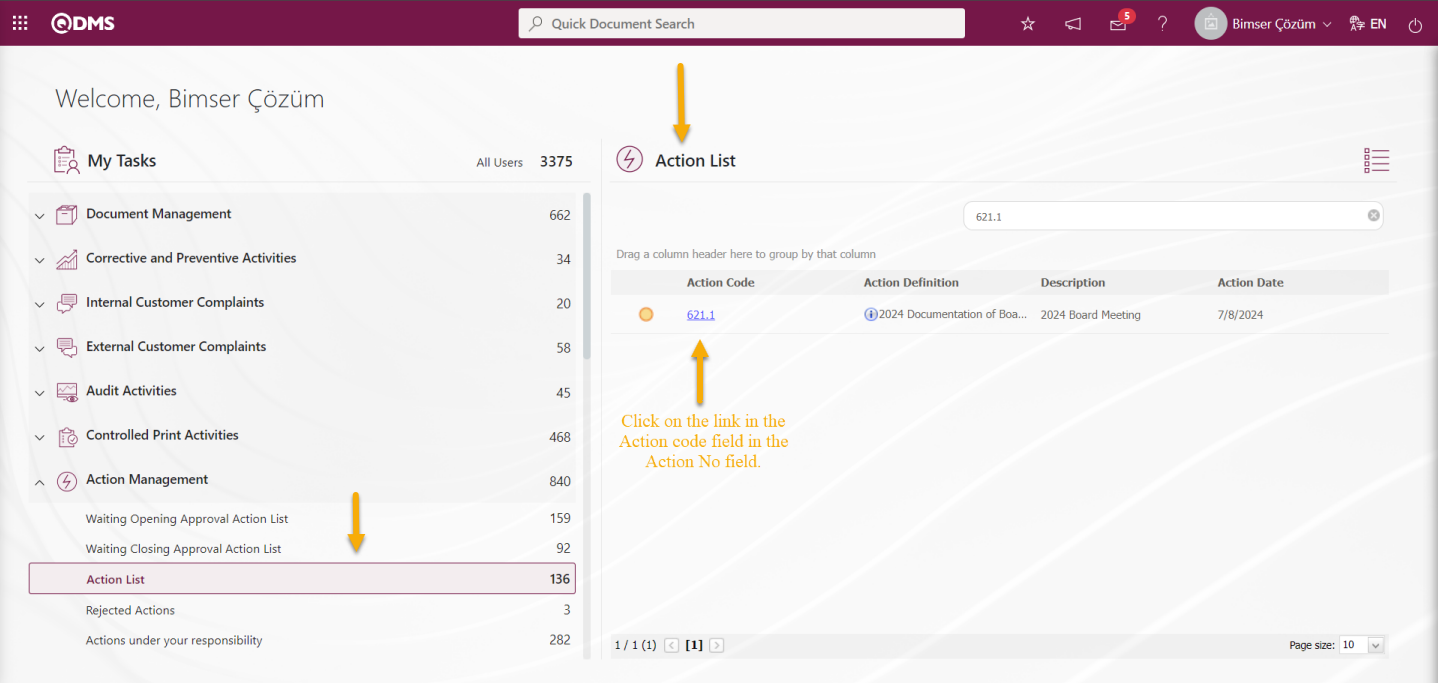
Or, by clicking on the menu of Integrated Management System/Action Management/Activity Management/Actualisation/Delay, the routing process is performed by selecting the Action in the list in the Action List tab on the screen opened.
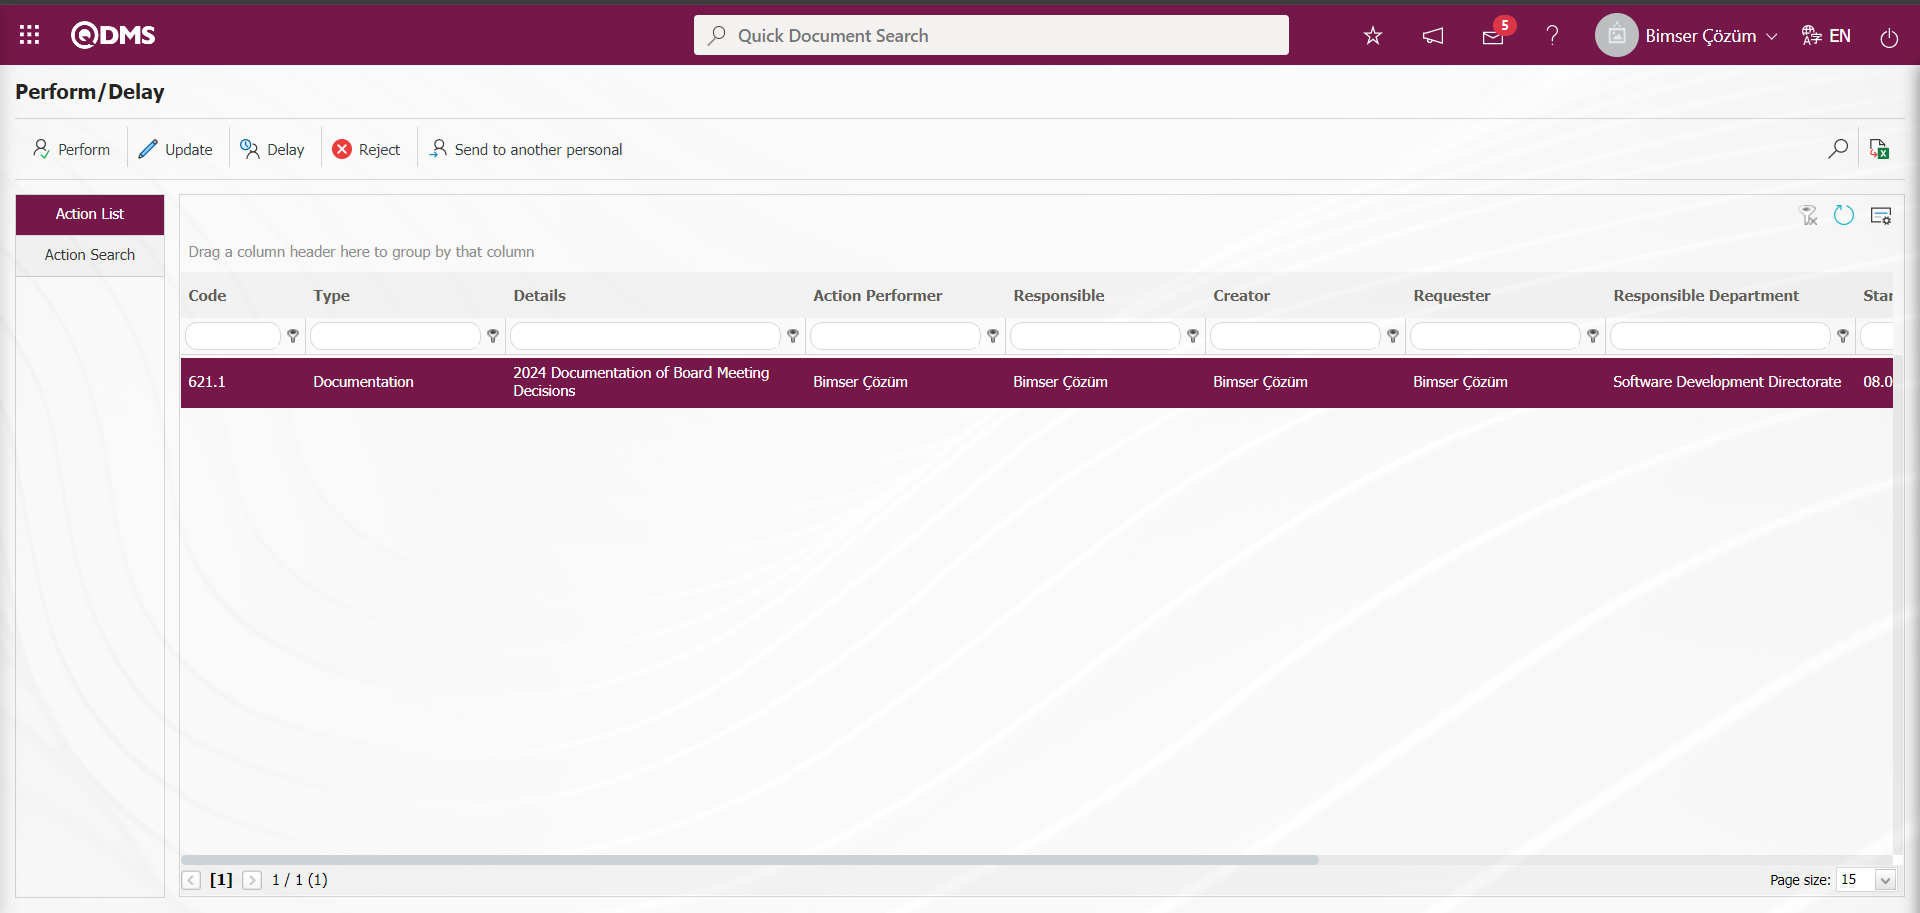
With the help of the buttons on the screen;
: Action realisation is performed
: Action information update process is performed.
: Action delay operation is performed.
: In the action realisation task, rejection operation is performed by the person who will do the work.
: The task of performing the action is directed to another person.
: Records are searched by filtering.
: Data is transferred to Excel.
: The search criteria on the menu screens are used to clean the data remaining in the filter fields in the grid where the search operation is performed.
: The menu screen is restored to its default settings.
: User-based designing of the menu screen is done with the show-hide feature, that is, the hiding feature of the fields corresponding to the columns on the menu screens.
On the Action Realisation/Delay screen, click the button while the Action is selected in the Action list.
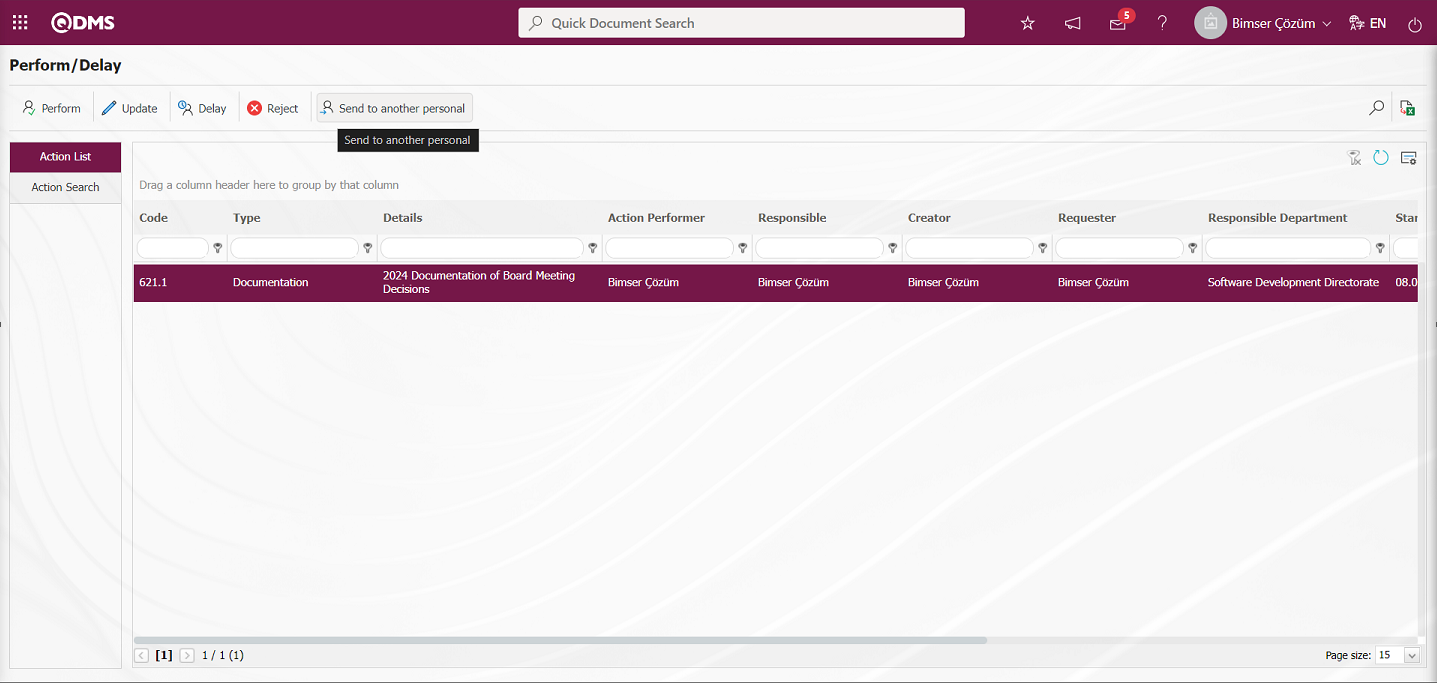
The Action Routing screen opens.
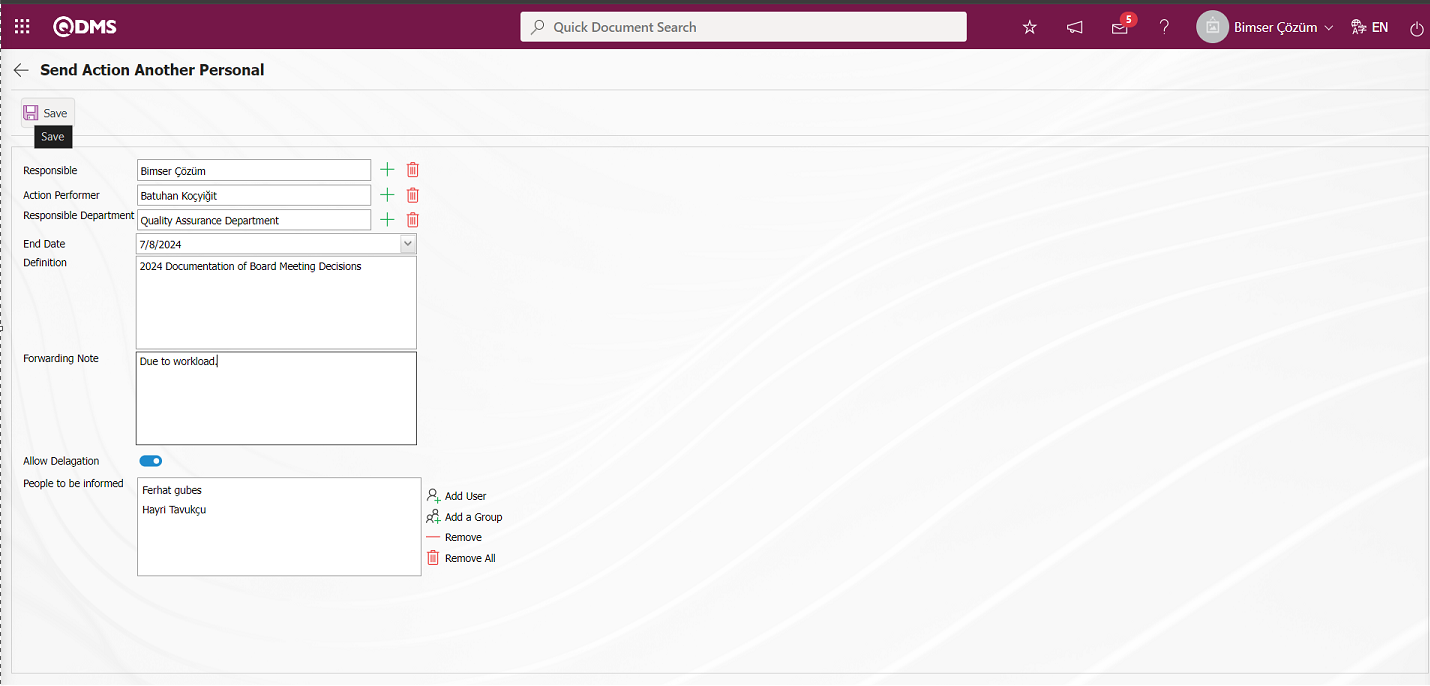
Define the relevant fields on the screen that opens
Responsible: It is the field where the responsible person information on the Action Routing screen is selected in the list of personnel defined in the system opened by clicking the (Select) button.
To Do the Work: It is the field where the person to be directed on the Action Routing screen is selected from the list of personnel defined in the system opened by clicking the (Select) button.
Responsible Department: It is the field where the responsible department information is selected from the list of departments defined in the system opened by clicking the (Select) button on the Action Routing screen.
End Date: It is the field where the end date information is selected in the drop-down Calendar field if desired on the Action Routing screen.
Definition: It is the field where the definition information of the action on the Action Routing screen is changed if desired.
Routing Note: It is the field where the reason why the action is routed is written on the Action Routing screen.
Can Redirect: If the check box related to the action can redirect field on the Action Redirection screen is checked, it is the field where the action can be redirected to another person.
To be Notified: This is the field where the users and user groups to be notified on the Action Routing screen are selected, if any. For Users, selection is made from the list of personnel defined in the system. For User Groups, selection is made from the user groups defined in the system
The person to whom the action will be directed is selected from the list of personnel defined in the system from the “To Do” field. The reason for routing information is entered. After the required fields are filled in, the Action Routing registration process is performed by clicking the  button in the upper left corner. In the message “The action has been successfully directed to the following user.” given by the system, the “OK” button is clicked.
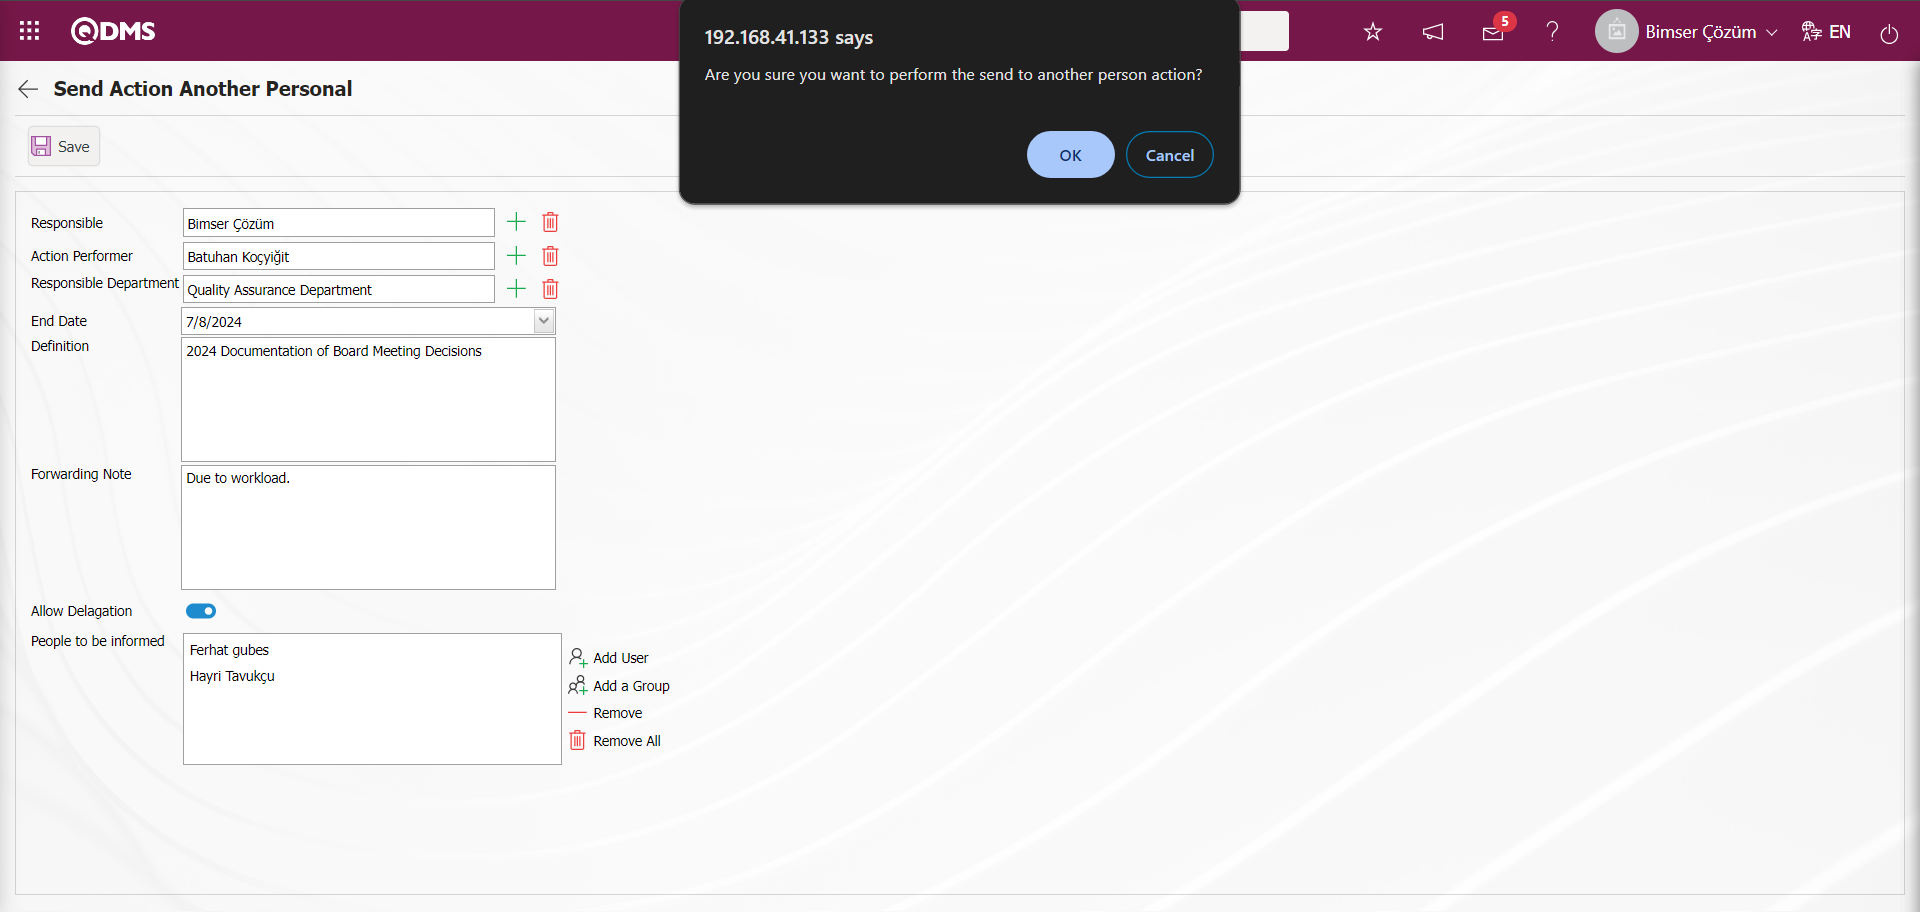
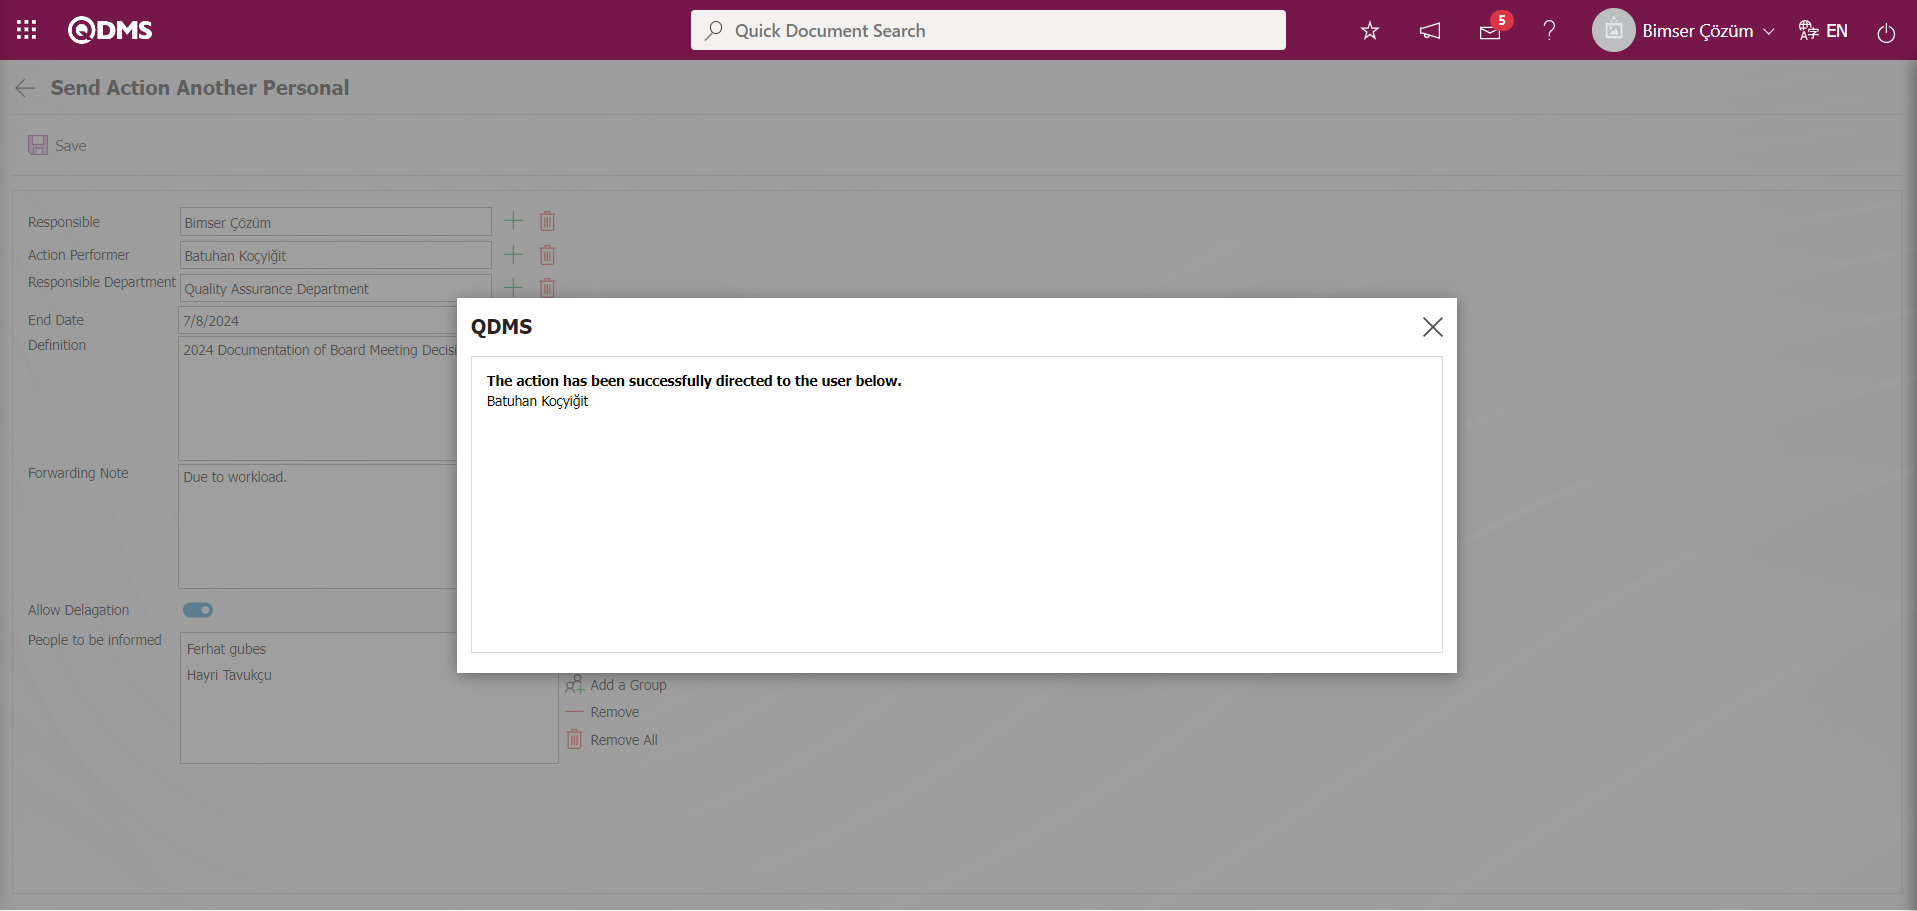
In the Action Management Module, if there is no value in the parameter value in order to be able to direct to everyone from the parameter setting 60 “Type of person that can be directed in action routing (Connected person: B Department :D Workplace :I Sub-Department :AD)”, the value “B” must be defined in the parameter value in order to direct only to the people to whom it is connected, the value “D” in order to direct to the people in the department where it is located, the value “I” in order to direct to the people in the workplace and the value “AD” in order to direct to the people in the sub-departments. For example: When the “B” value is defined in the parameter value for the connected people, the list of the people to whom the person is connected in the personnel list in the field that will make a new job on the Action Routing screen and it is ensured that the person in the list can make routing to the people in the list.
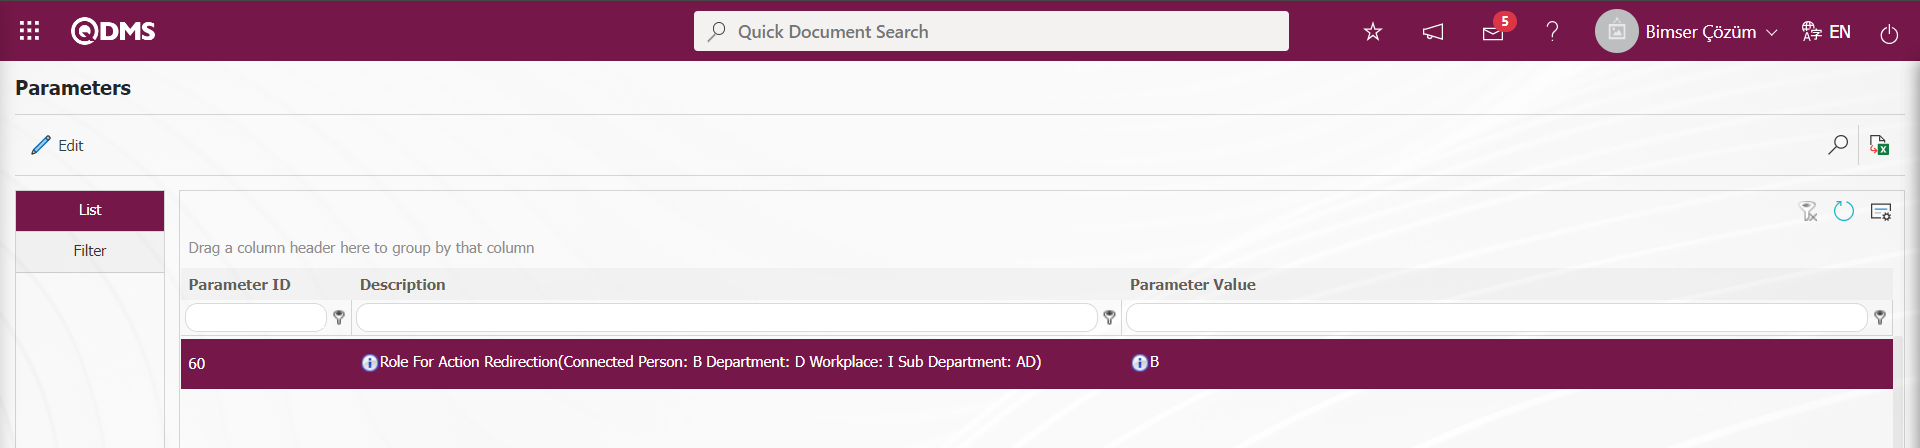
Action Management Module 114 numbered “Fields that can be changed during Action Routing S(Responsible),Y(To Do),D(Department),BT(End Date),T(Definition) (If more than one, separate with comma.)” According to the values entered in the parameter value for the fields, the fields to be changed on the Action Routing screen, that is, the fields to be entered data, are determined. For more than one field, commas are placed between the values corresponding to the fields and written in the parameter value: When S,Y values are entered in the parameter value, other fields given parameter are not allowed to be changed by the system.
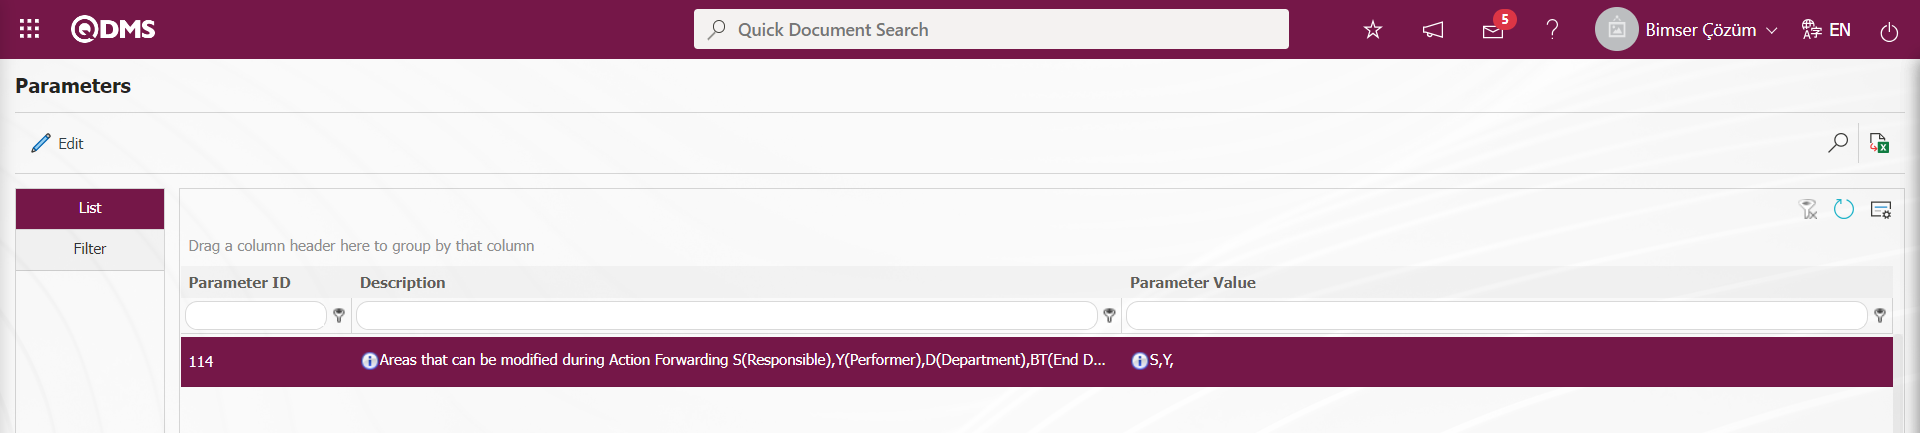
In the screenshot below, the system allows the system to make changes on these fields when the equivalent of the fields that will do the job are defined in the parameter value in the parameter.
6.2.1.6.Action Task Update
Menu name: Integrated Management System/ Action Management/ Realisation/Delay
Changes/edits/updates can be made on the action during the Action Realisation/Delay phase. On the “My Pending Jobs” page, from the actions that fall as a task in the “List of Actions to be Performed”, the action code link is clicked in the action no field, the Realisation/Delay menu is opened and the action is selected from the list in the Action list tab and the update operation is performed by selecting the action from the list.

Or, on the screen opened by clicking the Integrated Management System/Action Management/Activity Management/Actualisation/Delay menu, the update process is performed by selecting the Action in the list in the Action List tab.
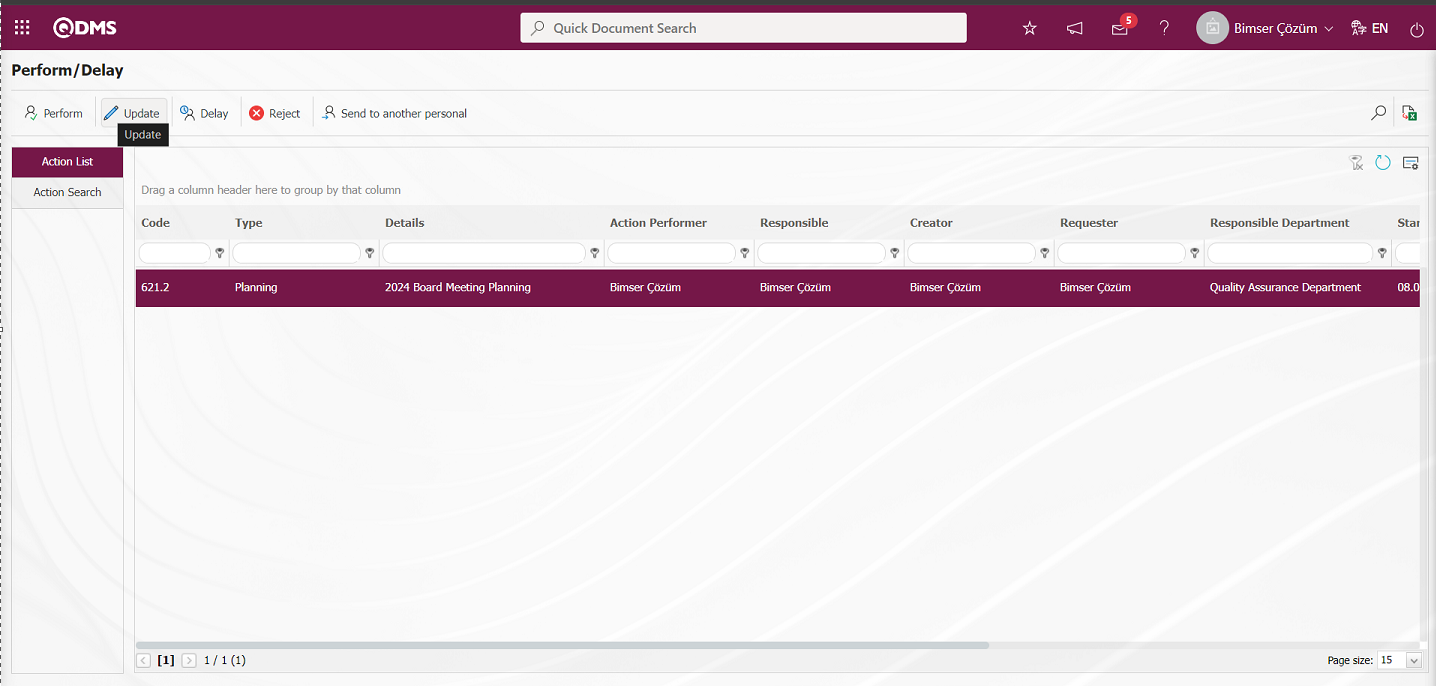
With the help of the buttons on the screen;
: Action realisation is performed
: Action information update process is performed.
: Action delay operation is performed.
: In the action realisation task, rejection operation is performed by the person who will do the work.
: The task of performing the action is directed to another person.
: Records are searched by filtering.
: Data is transferred to Excel.
: The search criteria on the menu screens are used to clean the data remaining in the filter fields in the grid where the search operation is performed.
: The menu screen is restored to its default settings.
: User-based designing of the menu screen is done with the show-hide feature, that is, the hiding feature of the fields corresponding to the columns on the menu screens.
On the Action Realisation / Delay screen, select the Action to be updated from the Action list in the Action list and click the button.
Action Information tab; If there are any parametric fields for Completion Percentage, Actual Budget and Action item in the Action Information tab on the Action Update screen, the system performs the update process by allowing the system to change these fields.
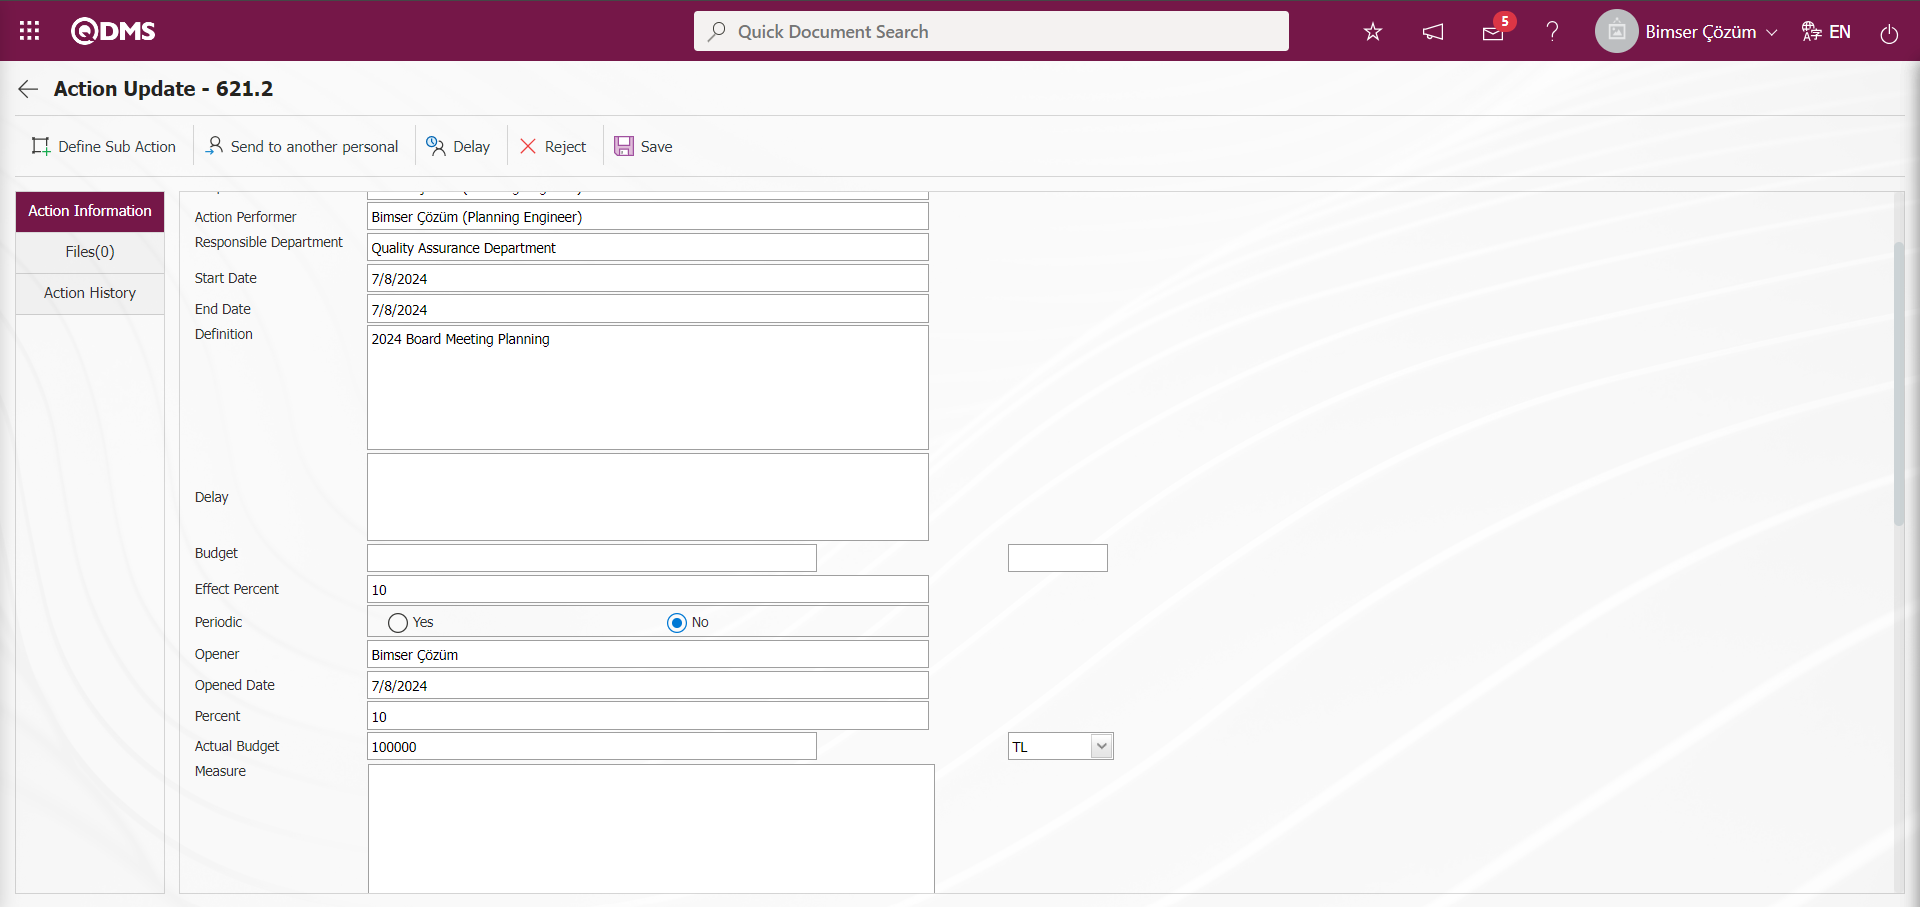
Additional Files tab; It is the tab where additional file upload operation is performed during the update process on the Action Update screen.
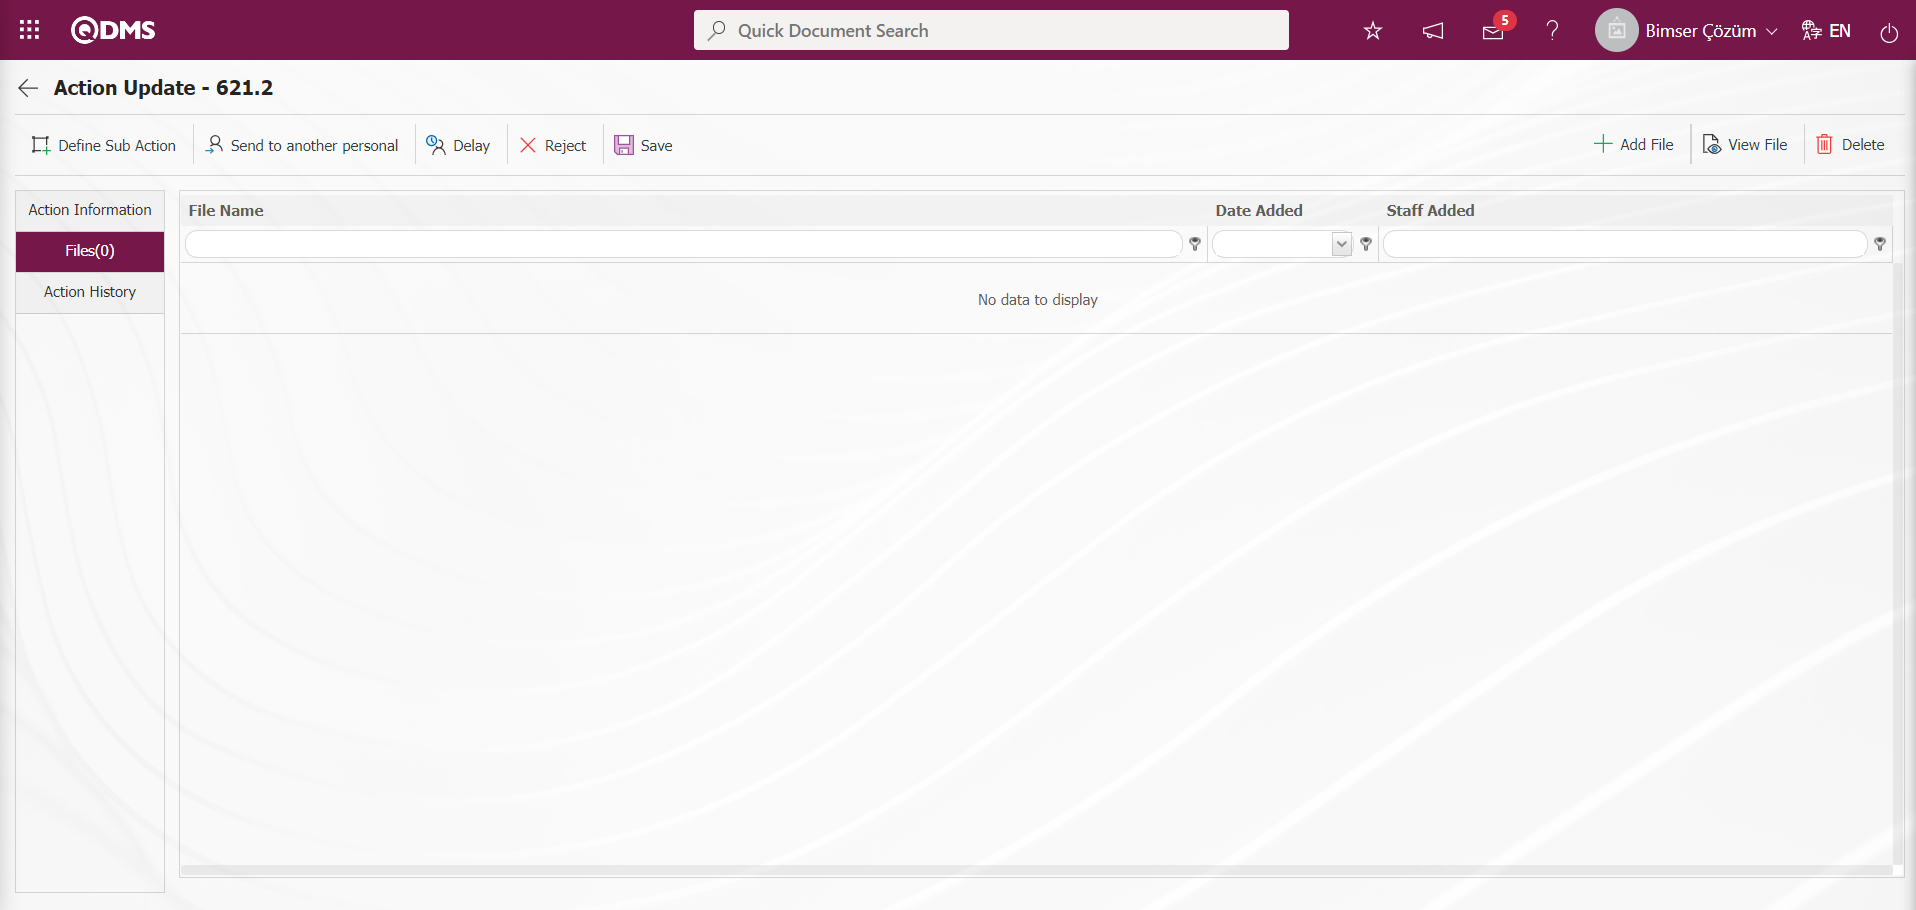
With the help of the buttons on the screen;
: The additional file is uploaded to the system.
: The uploaded additional file information is displayed.
: The uploaded attachment file information is deleted.
Action History tab; Transactions such as opening approval, realisation, delay, update routing, closure approval of the works related to the action are listed in the action history tab.
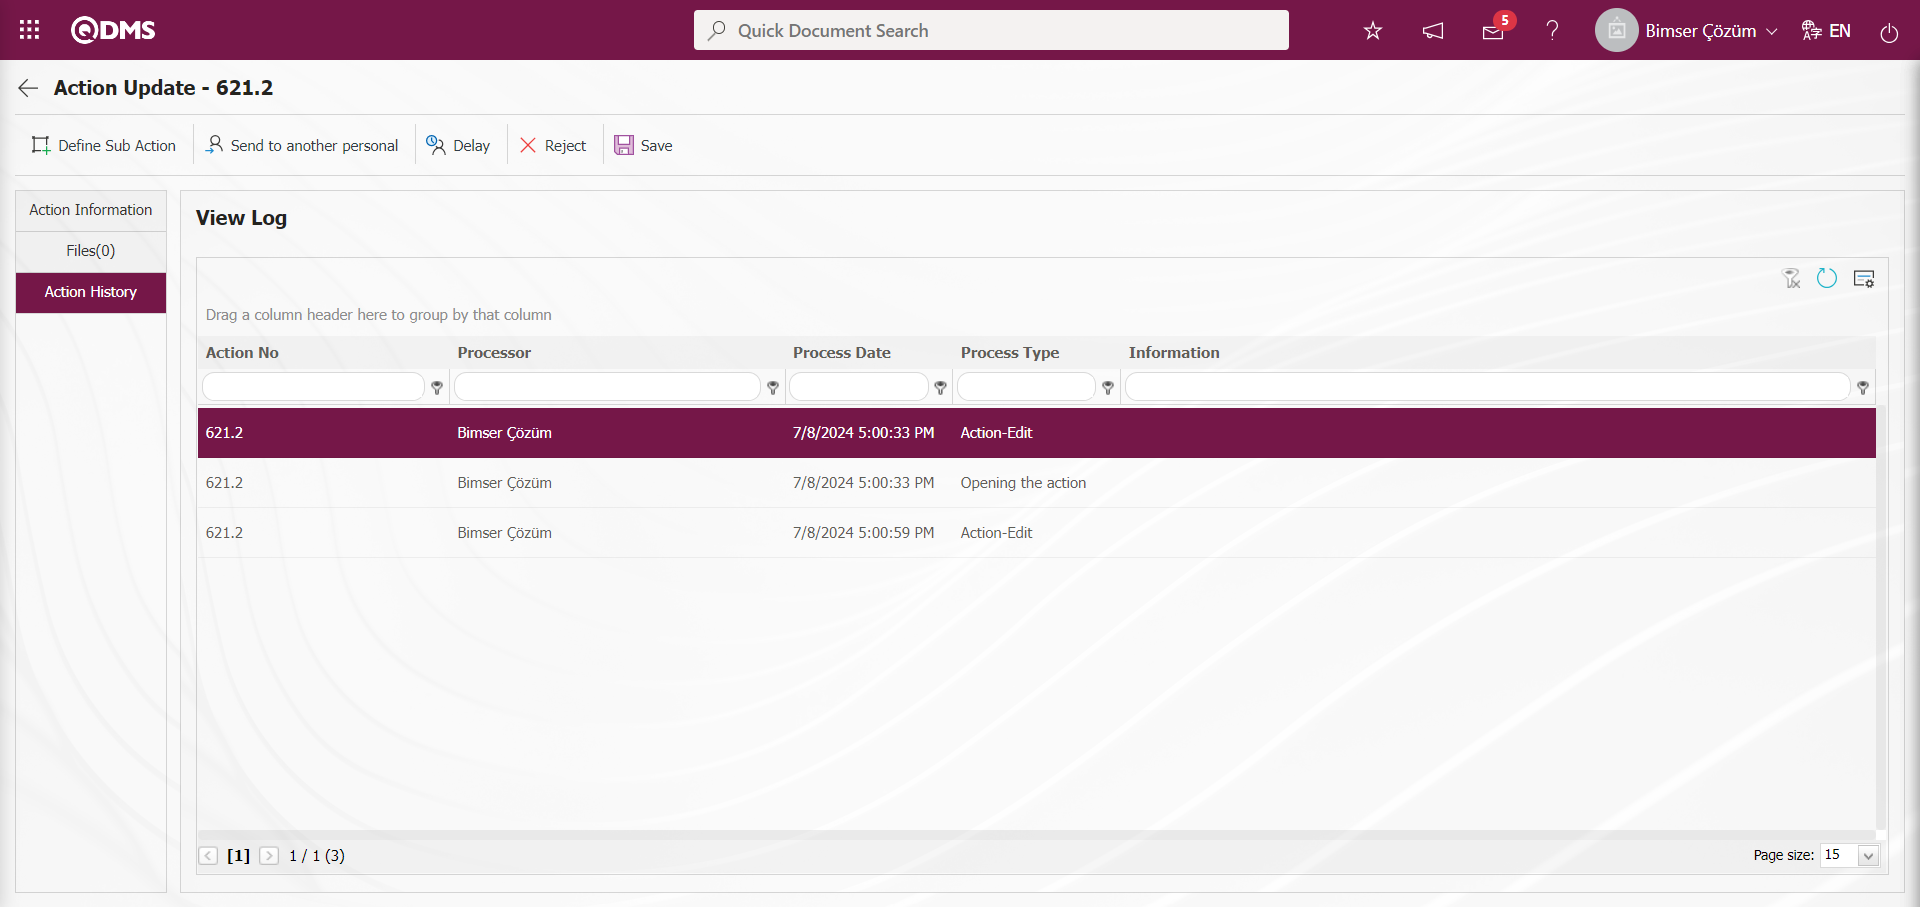
From the Action Update screen, the Action is not updated on the fields related to the relevant tabs. After the required fields are filled in, the Action Item record update process is performed by clicking the  button in the upper left corner.
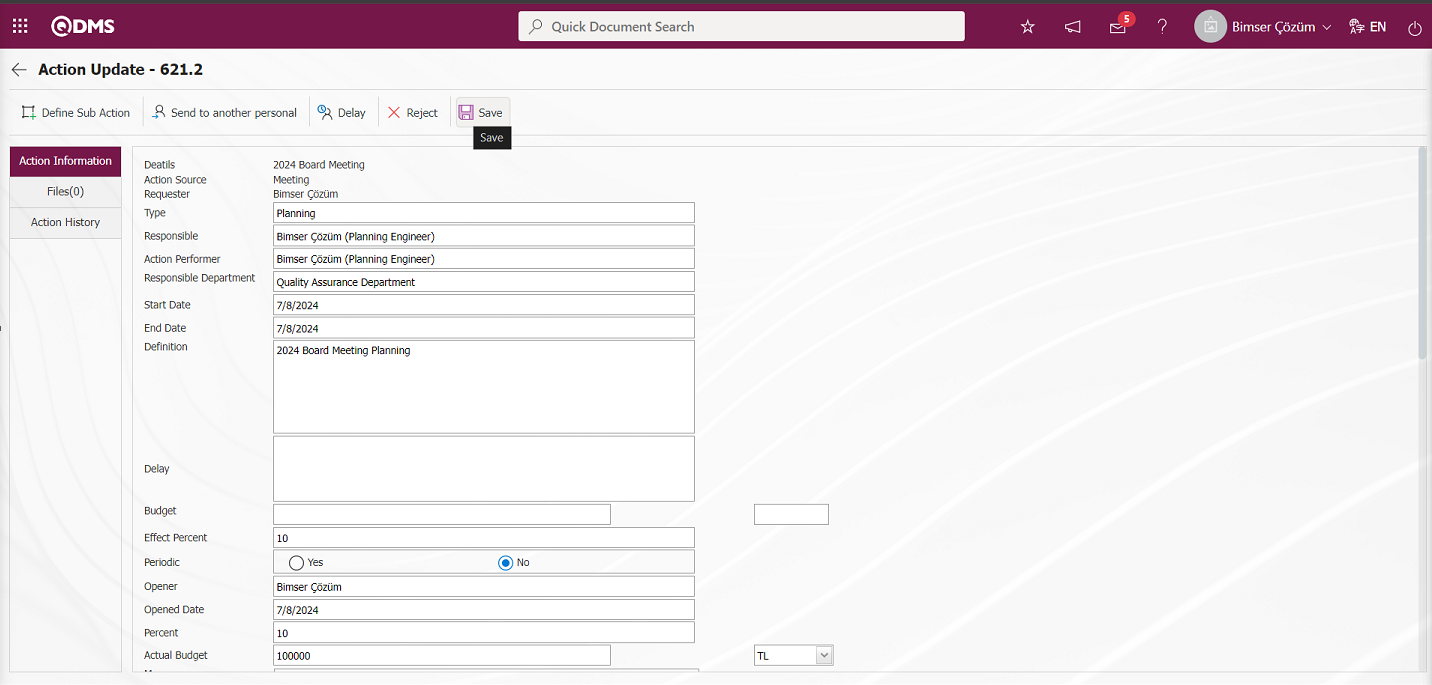

6.2.1.7. Rejection of the Action Task by the Person to Do Business
Menu name: Integrated Management System/ Action Management/ Realisation/Delay
The action execution task can be rejected by the person who will do the job. This feature is activated by selecting the parameter value “Yes” of the parameter number 46 “Can the person who will perform the action task reject it?” from the Action Management module parameters.
 After the parameter is activated, by displaying the
  button on the Action Realisation / Delay screen, it is ensured that the action realisation task is rejected by the person who will do the work.
On the “My Pending Jobs” page, click on the action code link in the action no field from the actions that fall as a task in the “List of Actions to be Performed”, click on the action code link in the action no field, open the Realisation / Delay menu, select the action from the list in the Action list tab, and perform the action realisation task to be rejected by the person who will do the job.
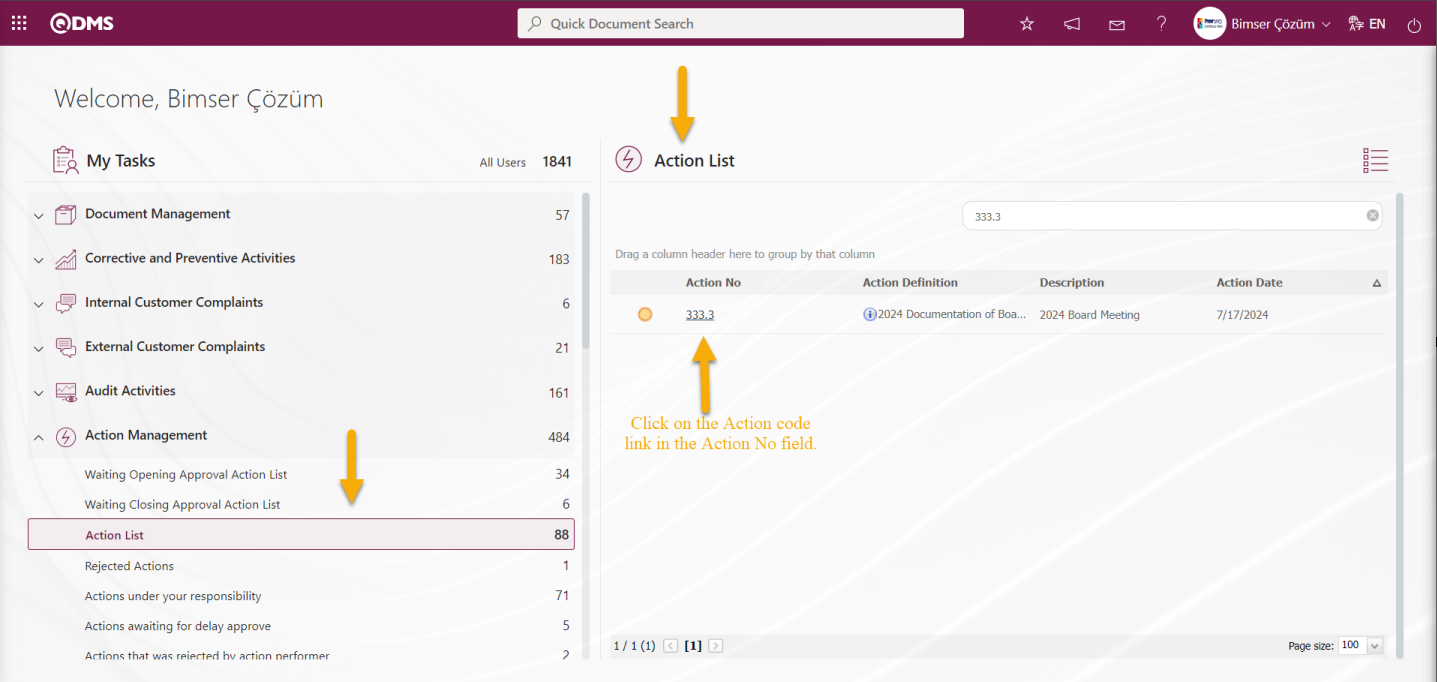
Or, on the screen opened by clicking the Integrated Management System/Action Management/Action Management/Actualisation/Delay menu, the action is selected in the Action List tab and the rejection process is carried out by the person who will do the work by selecting the Action in the list.
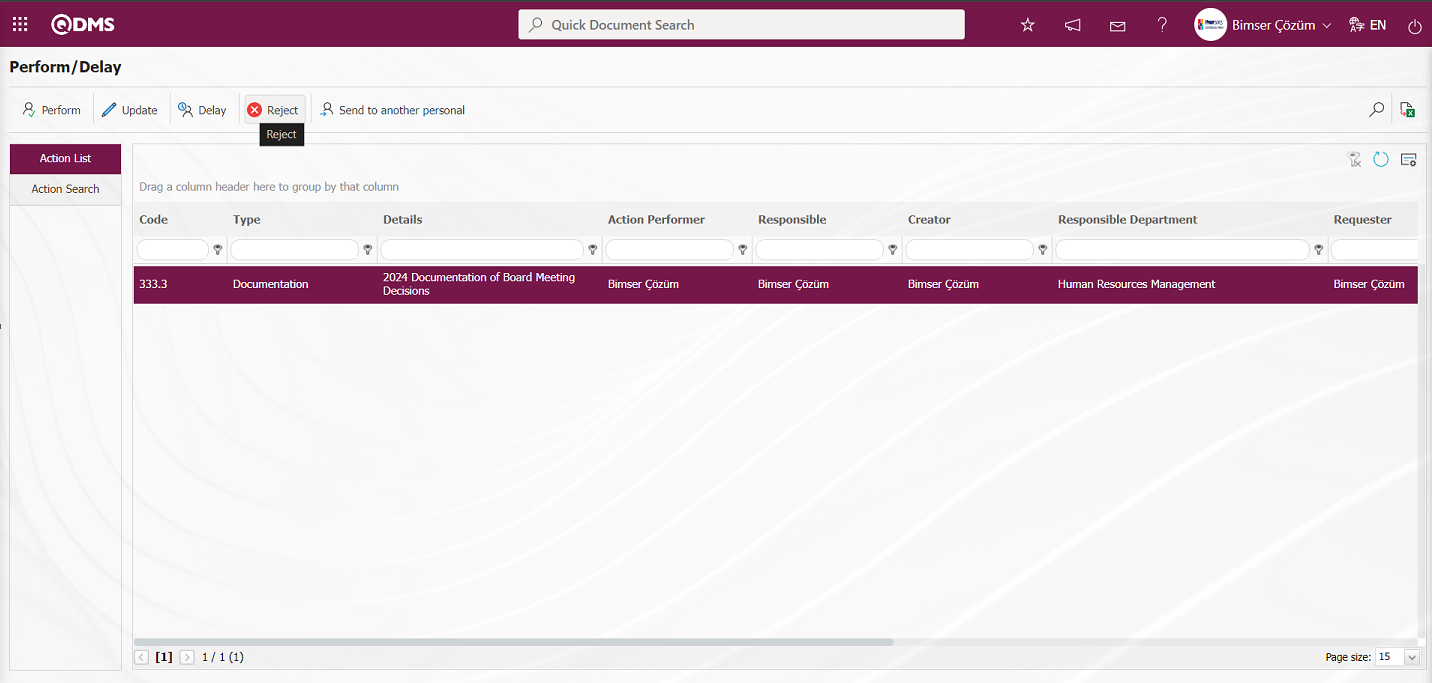
With the help of the buttons on the screen;
 : Action realisation is performed
 : Action information update process is performed.
 : Action delay operation is performed.
 : In the action realisation task, rejection operation is performed by the person who will do the work.
 : The task of performing the action is directed to another person.
 : Records are searched by filtering.
 : Data is transferred to Excel.
 : The search criteria on the menu screens are used to clean the data remaining in the filter fields in the grid where the search operation is performed.
 : The menu screen is restored to its default settings.
 : User-based designing of the menu screen is done with the show-hide feature, that is, the hiding feature of the fields corresponding to the columns on the menu screens.
Action Rejection screen is opened by clicking button while the Action is selected in the Action list on the Action Realisation/Delay screen. In the Reason for Cancellation tab of the Action Rejection screen, the Reason for Rejection of the Action is written. It is mandatory to enter the reason for rejection.

In the Additional Files tab, if there is any evidence related to the Rejection of the Action, the additional file upload process is performed.

With the help of the buttons on the screen;
 : The additional file is uploaded to the system.
 : The uploaded additional file information is displayed.
 : The uploaded attachment file information is deleted.
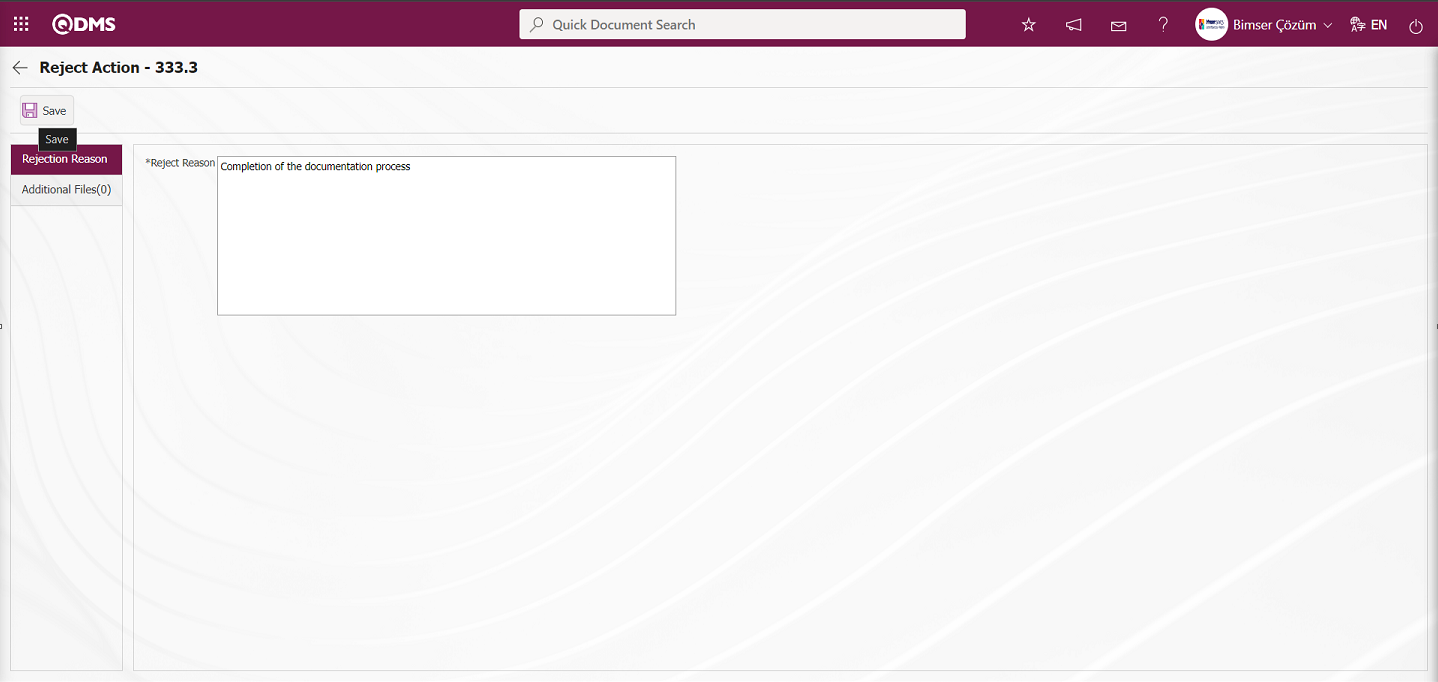
After entering the relevant information in the required fields, click the  button in the upper left corner of the screen.
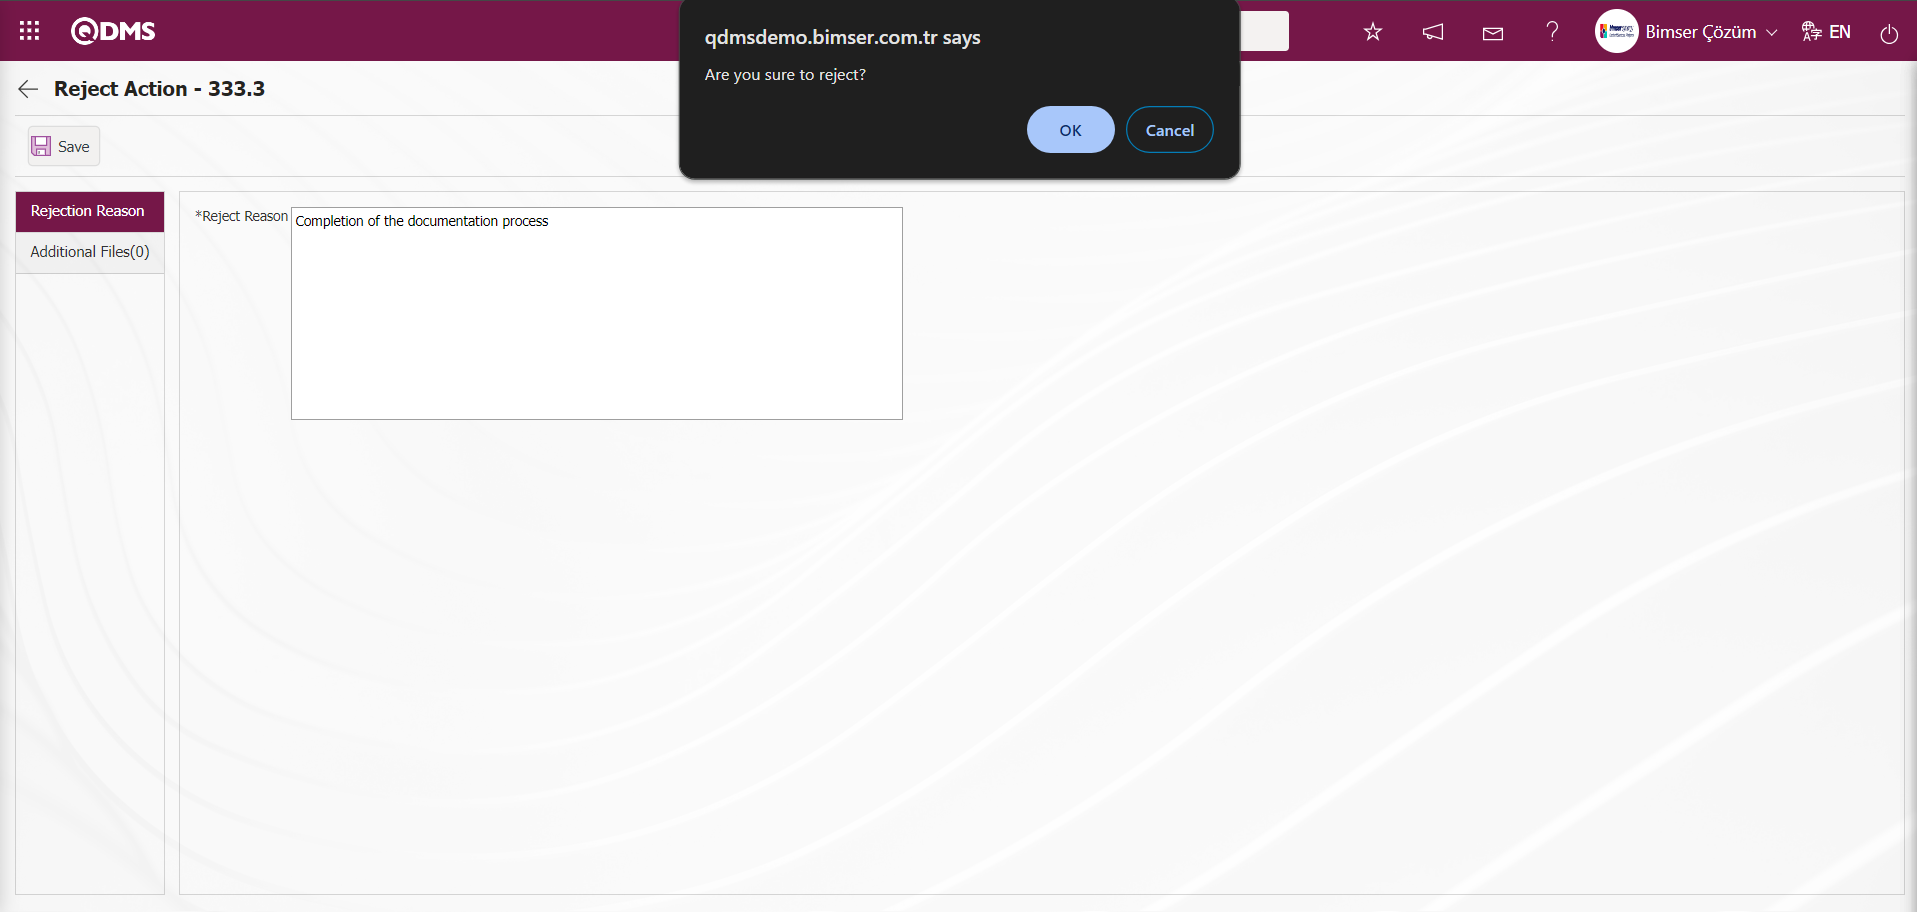
In the message “Are you sure you want to perform the rejection?” given by the system, the “OK” button is clicked. The action task rejected by the person who will do the work is forwarded to the action responsible.

On the “Pending Jobs” page of the action supervisor, “Actions Rejected by the Action Taker” is assigned as a job.

The Action View screen is opened by clicking the Action Code link in the Action No field in the related task.
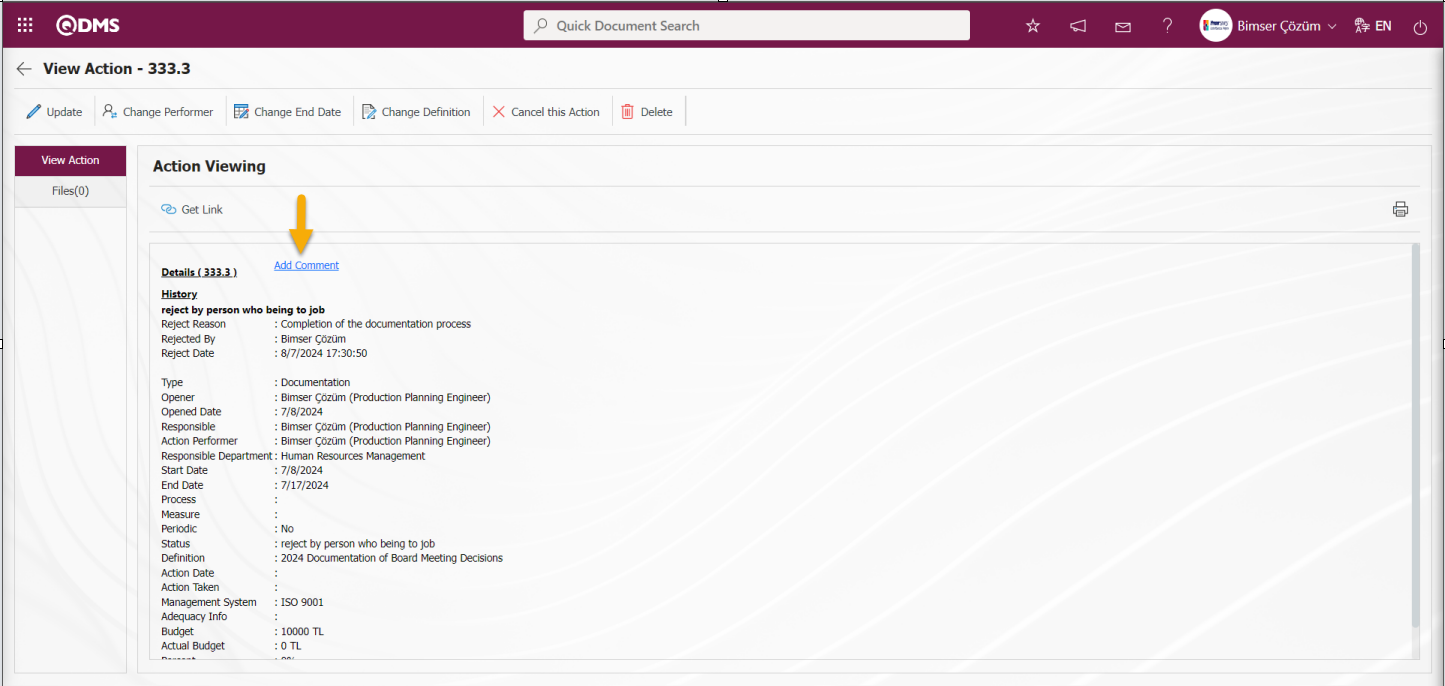
With the help of the buttons on the screen;
 : Change/edit/update the action information.
 :Changing the person who will do the work in the action is done.
 :Change the end date information in the action.
 :Changing the subject information of the action is done.
 :Cancellation of the action is done.
 :Deletion of the action is done.
The following operations can be performed by the action responsible:
Comment Addition Process;
If you are authorised to comment on the action, you can add a comment by clicking on the  link.
link.
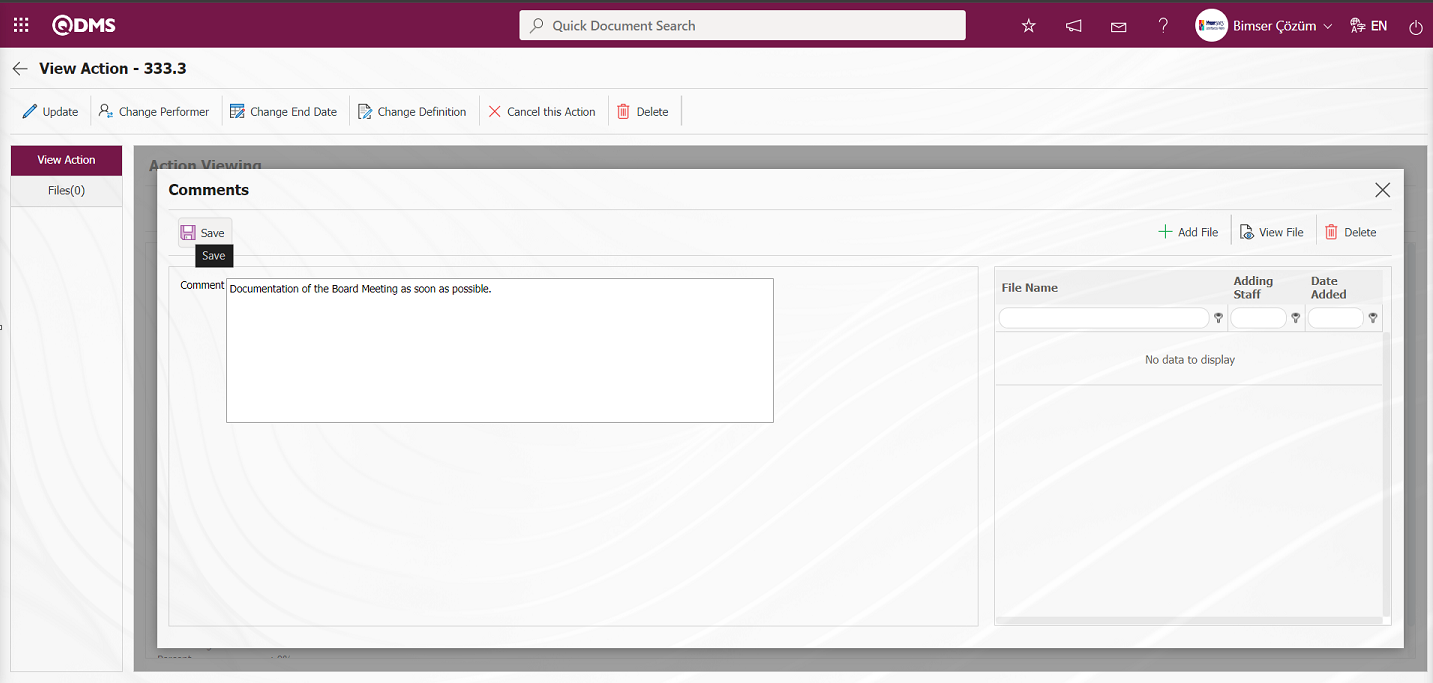
If there is an additional file related to the comment, uploading is also done. After entering the necessary information in the required fields on the comments screen, the  button in the upper left corner of the screen is clicked to add a comment and the added comment is sent to the people specified in the e-mail settings. The comment made on the action view page can be accessed.
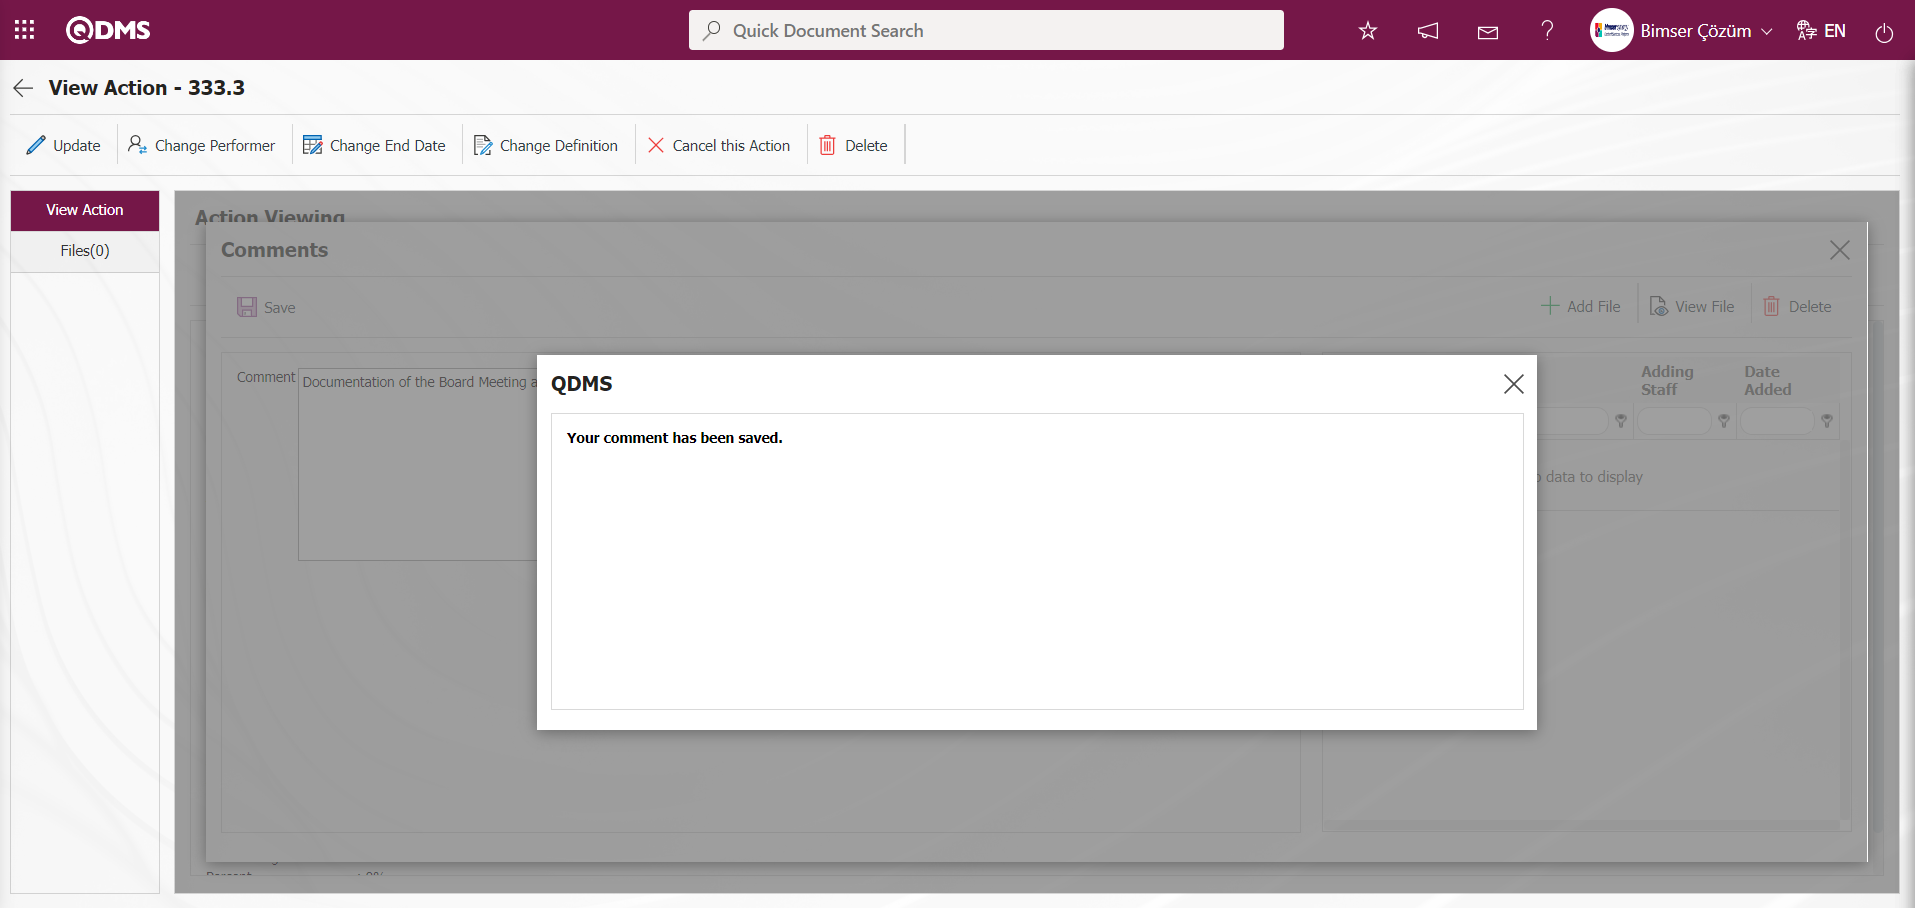
Click the  button on the Action Display screen.
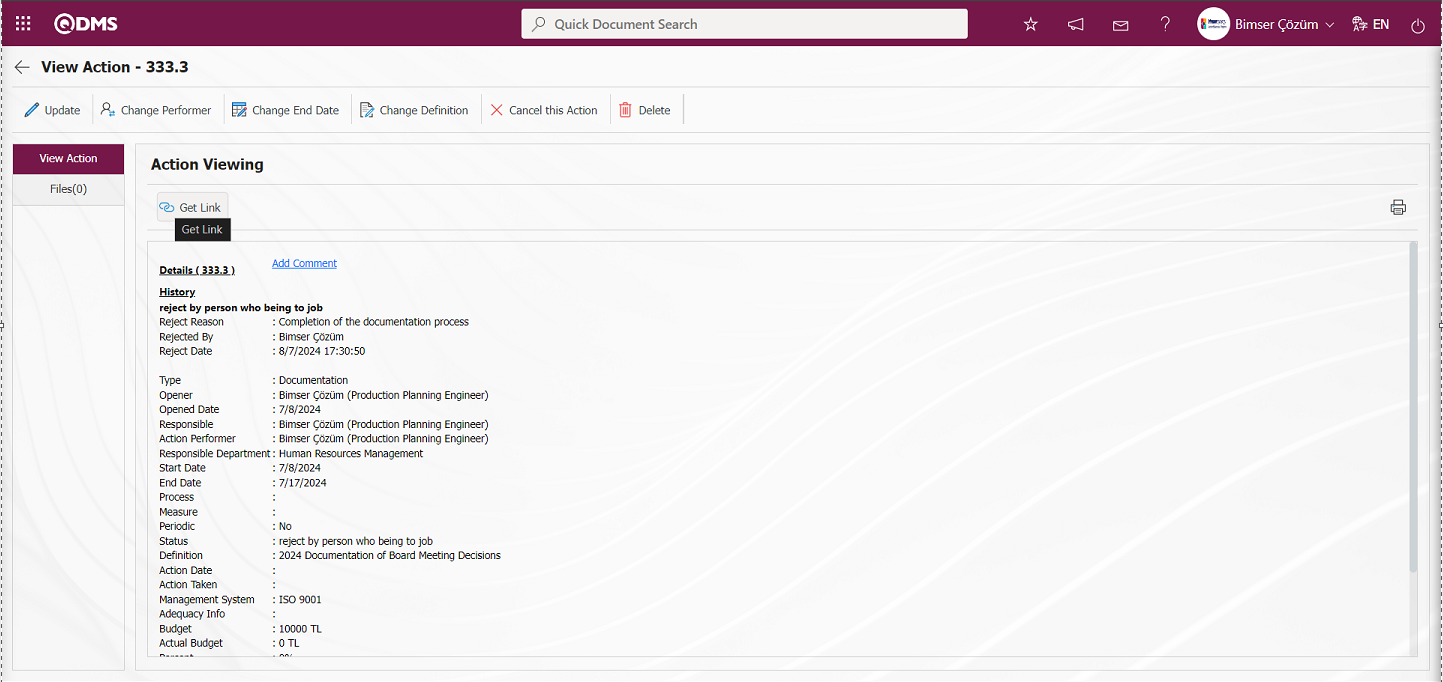
The viewing link is copied to the clipboard. To share the link; CTRL+V shortcut keys or right click /paste method can be used to open the linked page and share it with the desired people.
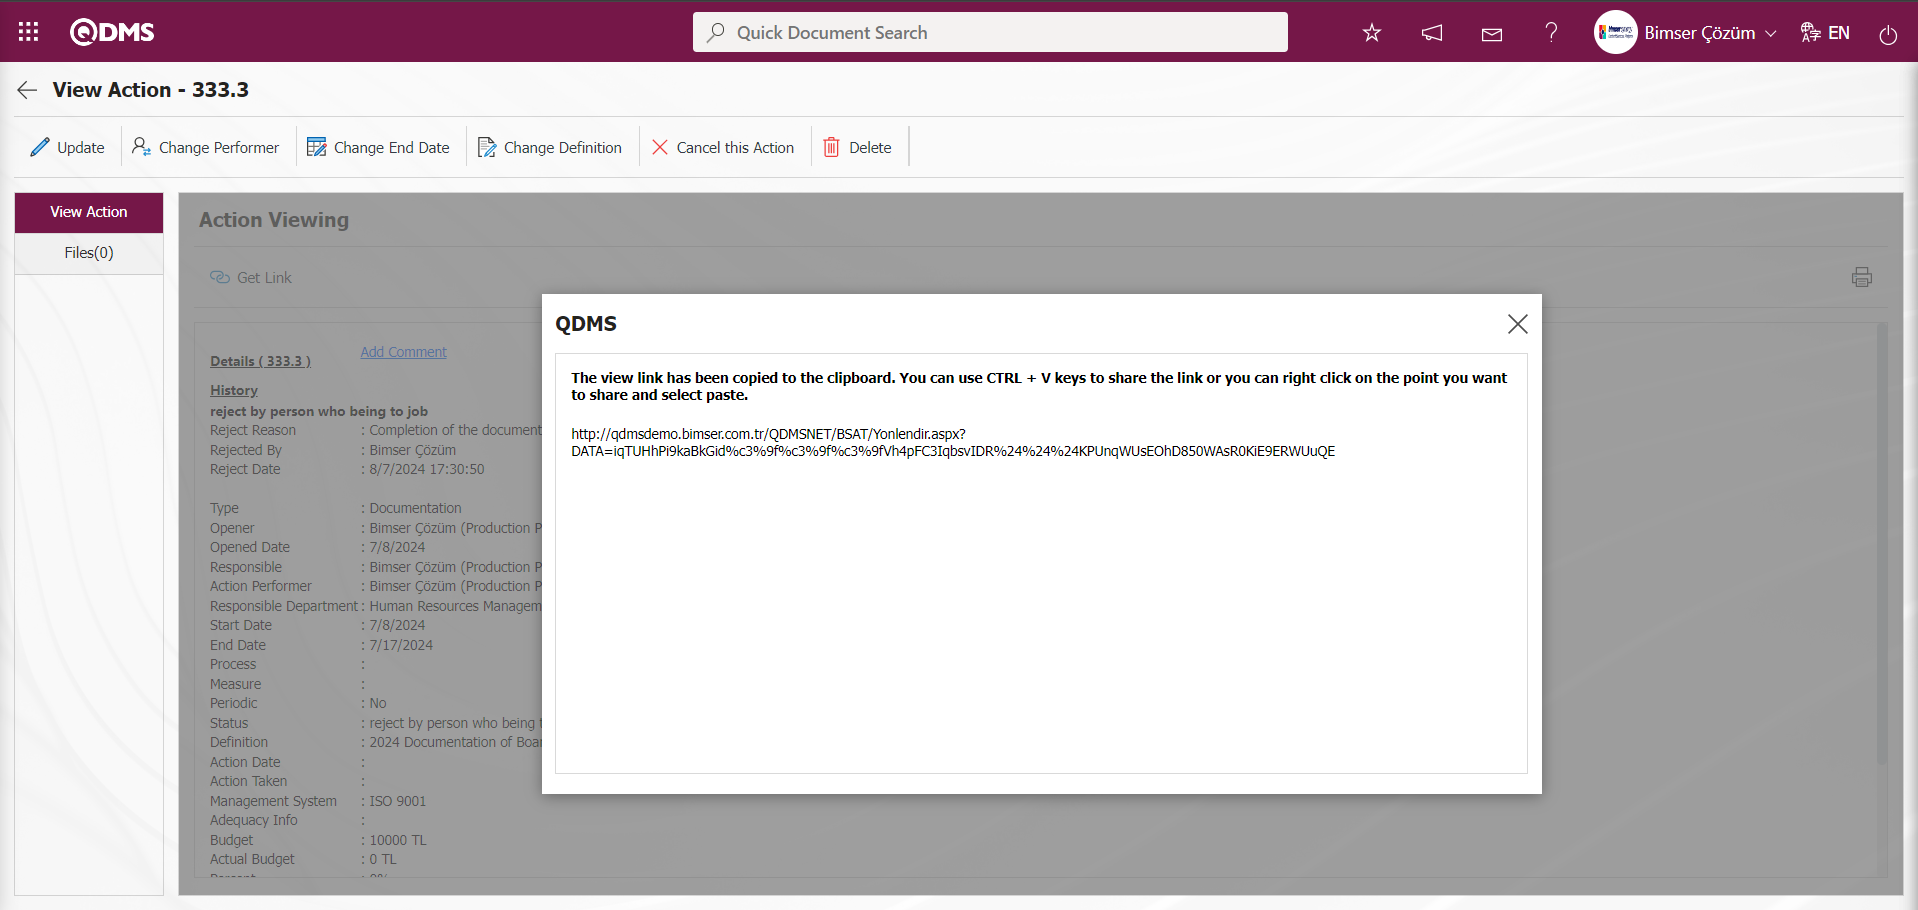
Changing the Person to Do the Work in the Action Task;
Click button on the Action Display screen. The action execution task is assigned to another user.
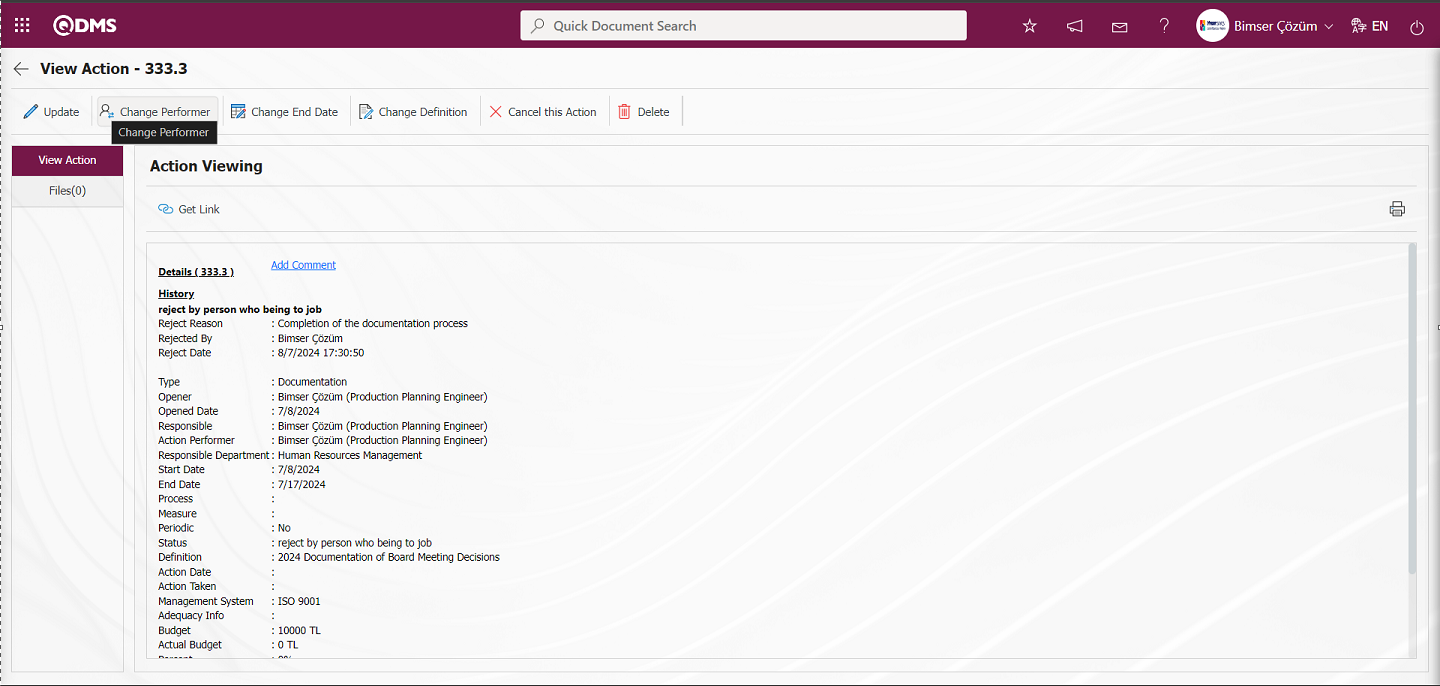
In the screen that opens, the person who will do the new job is selected in the list of personnel defined in the system by clicking the  (Select) button. If the responsible person information is desired, it is selected in the list of personnel defined in the system by clicking the (Select) button. With the Change Person to Do the Job operation, if any, description information is written.
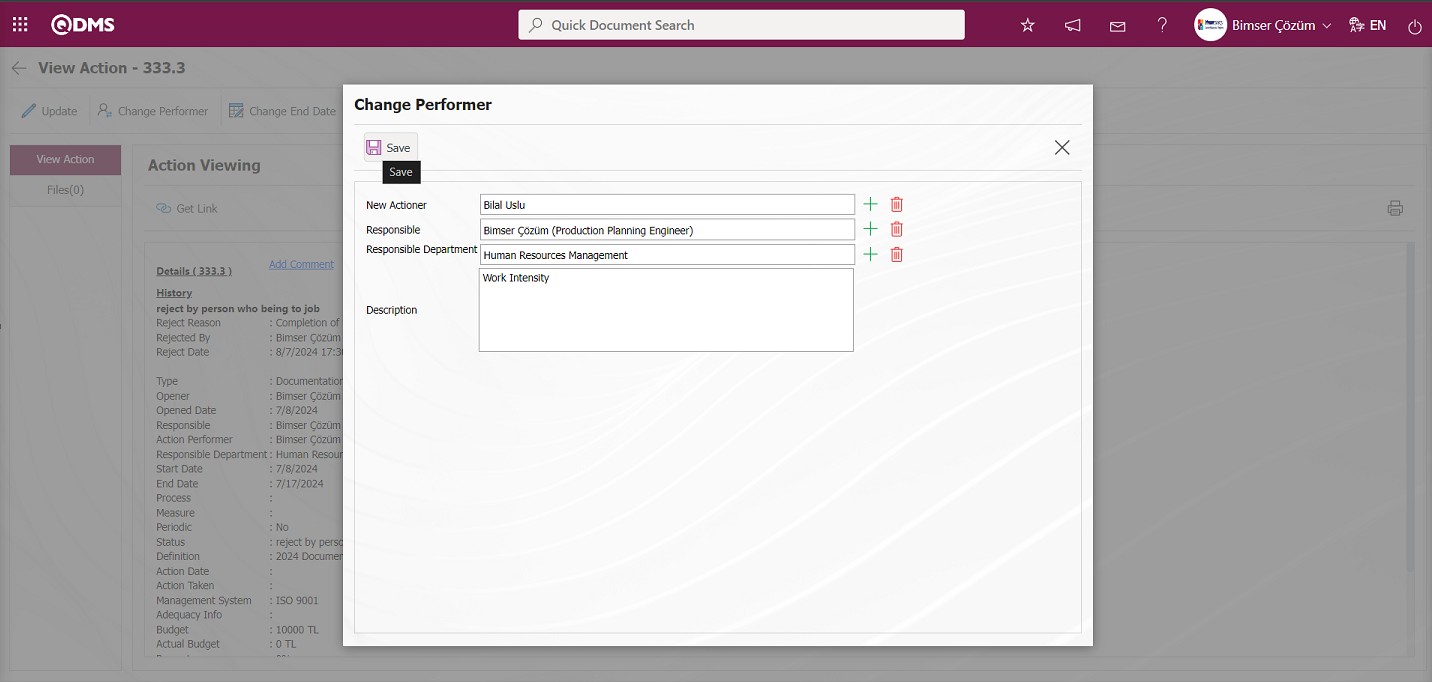
After entering the relevant information in the required fields, the  button in the upper left corner of the screen is clicked and the change the person who will do the work is registered. After the registration process, the Action is brought back to the Open status and mail distribution is made.
Changing the End Date in Action Task;
The end date of the action is revised by clicking the  button on the Action Display screen.
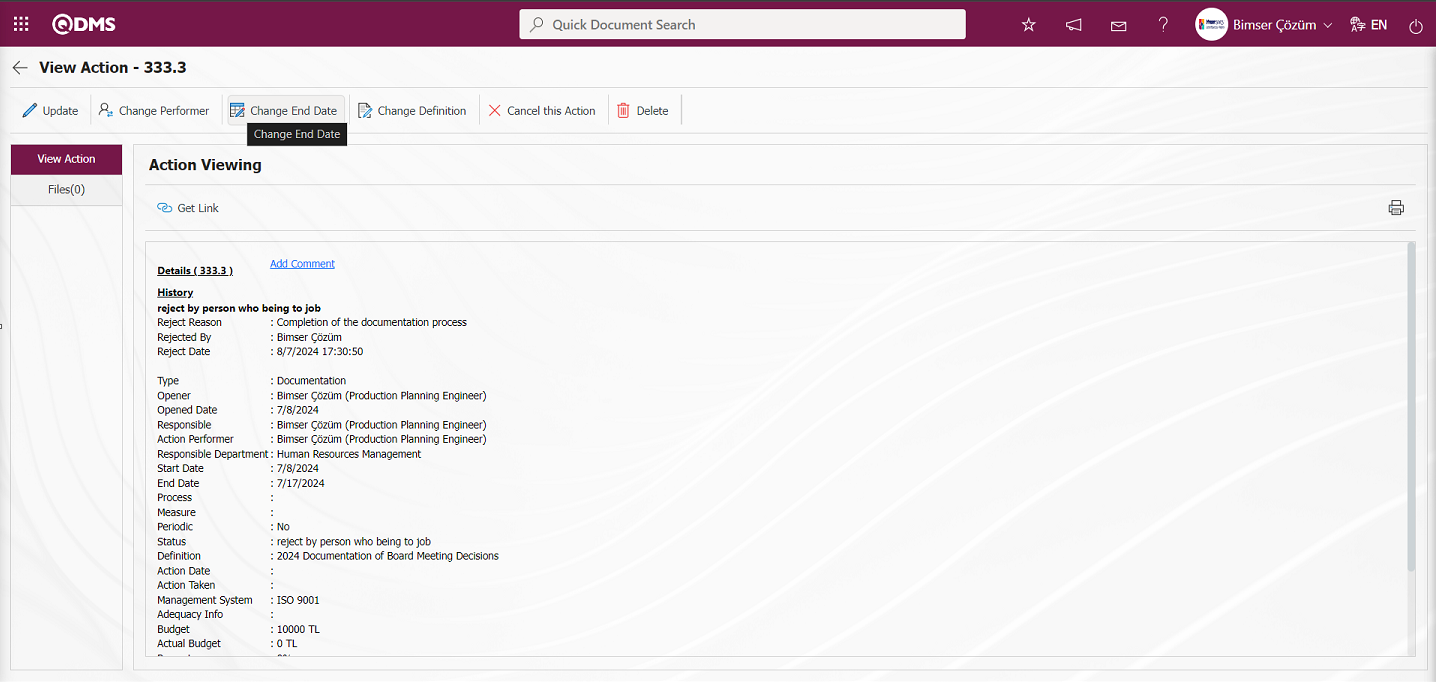
On the screen that opens in the New End Date field, select New End Date in the Calendar field that opens in the New End Date field and after entering the relevant information in the required fields, the new end date registration is made by clicking the  button in the upper left corner of the screen. The action is brought back to Open status and mail distribution is made. The revised action is reassigned as a task to the person who will do the action according to the end date.
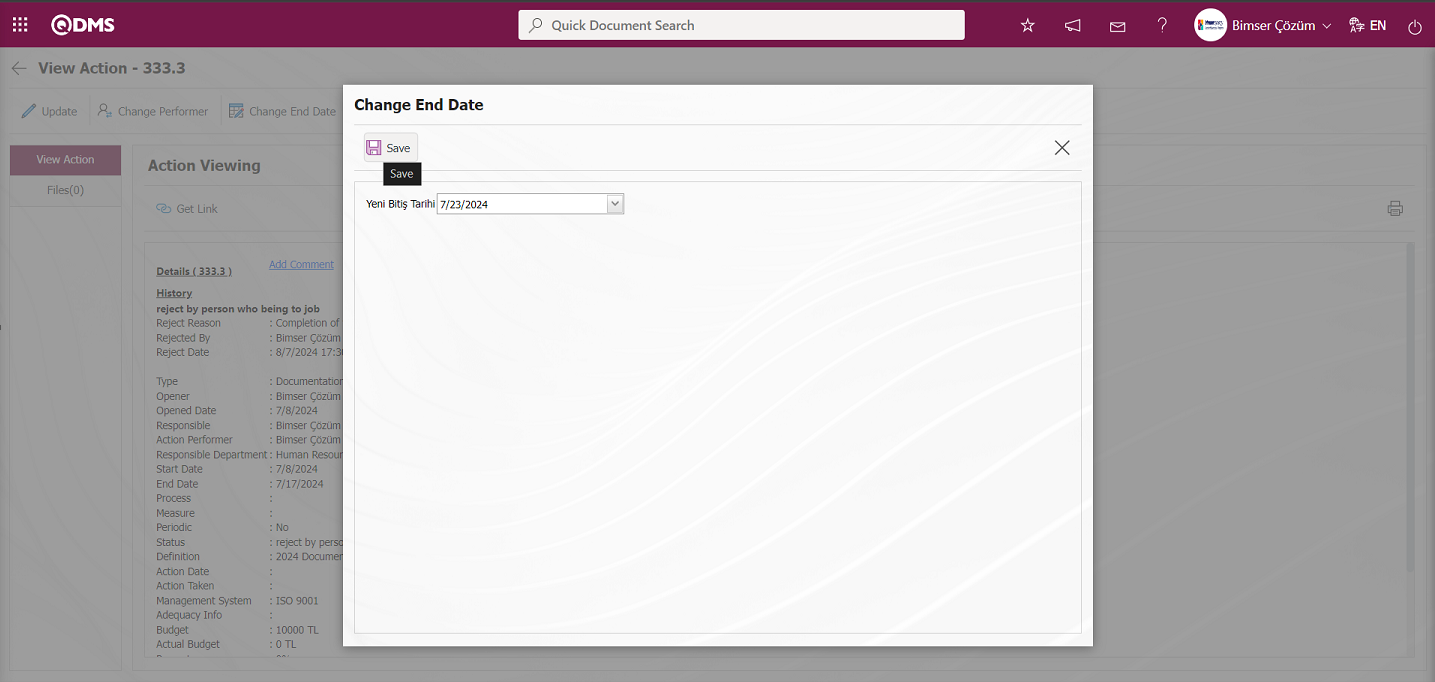
Changing the Subject of the Action Task;
The subject of the action task is changed by clicking the  button on the Action Display screen.

A new action subject is defined from the screen that opens and after entering the relevant information in the required fields, the change subject registration process is done by clicking the button in the upper left corner of the screen. After the registration process, the action is brought back to Open status and mail distribution is made.
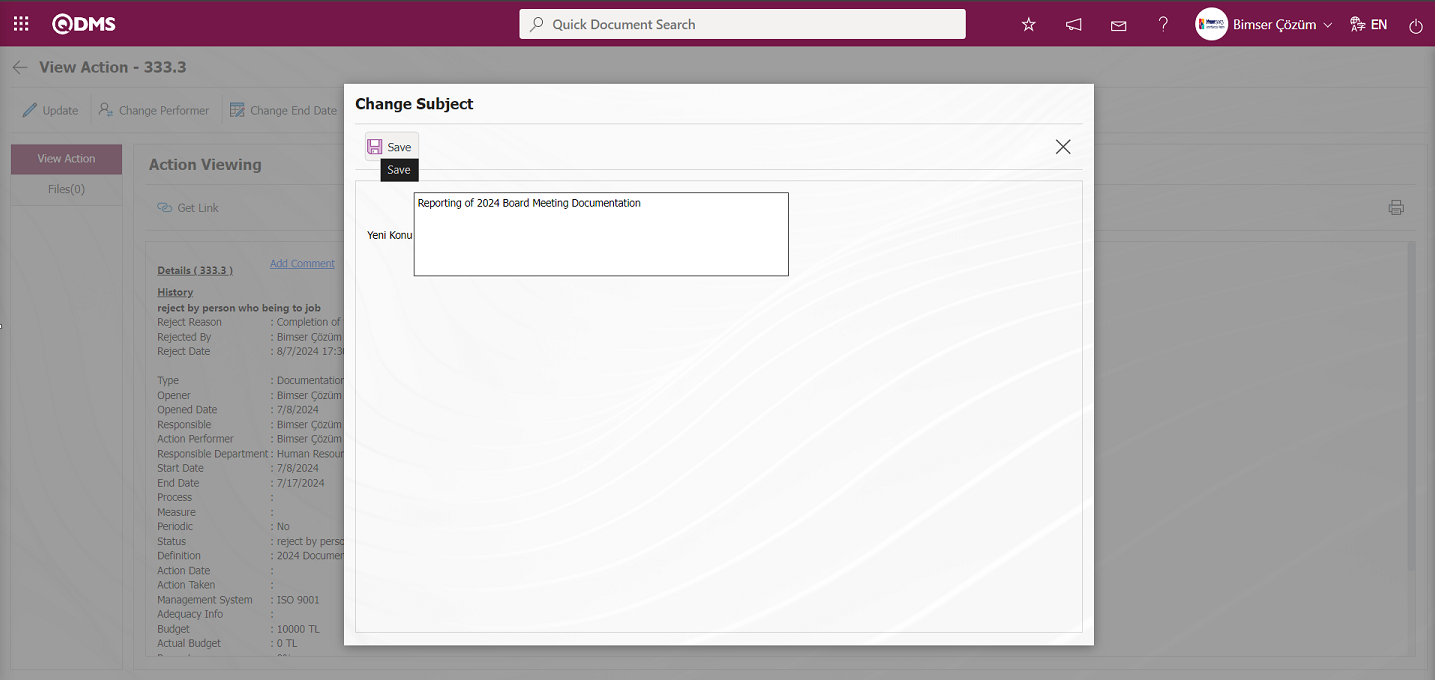
According to the new action subject defined, a task is reassigned to the person who will perform the action task.
Action Task Cancellation;
The planned action task is cancelled and removed by clicking the  button on the Action Display screen.

In the screen that opens, in the Cancellation Reason field, the reason why the action is cancelled is written.

After entering the relevant information in the required fields, the Action cancellation registration process is performed by clicking the  button in the upper left corner of the screen.
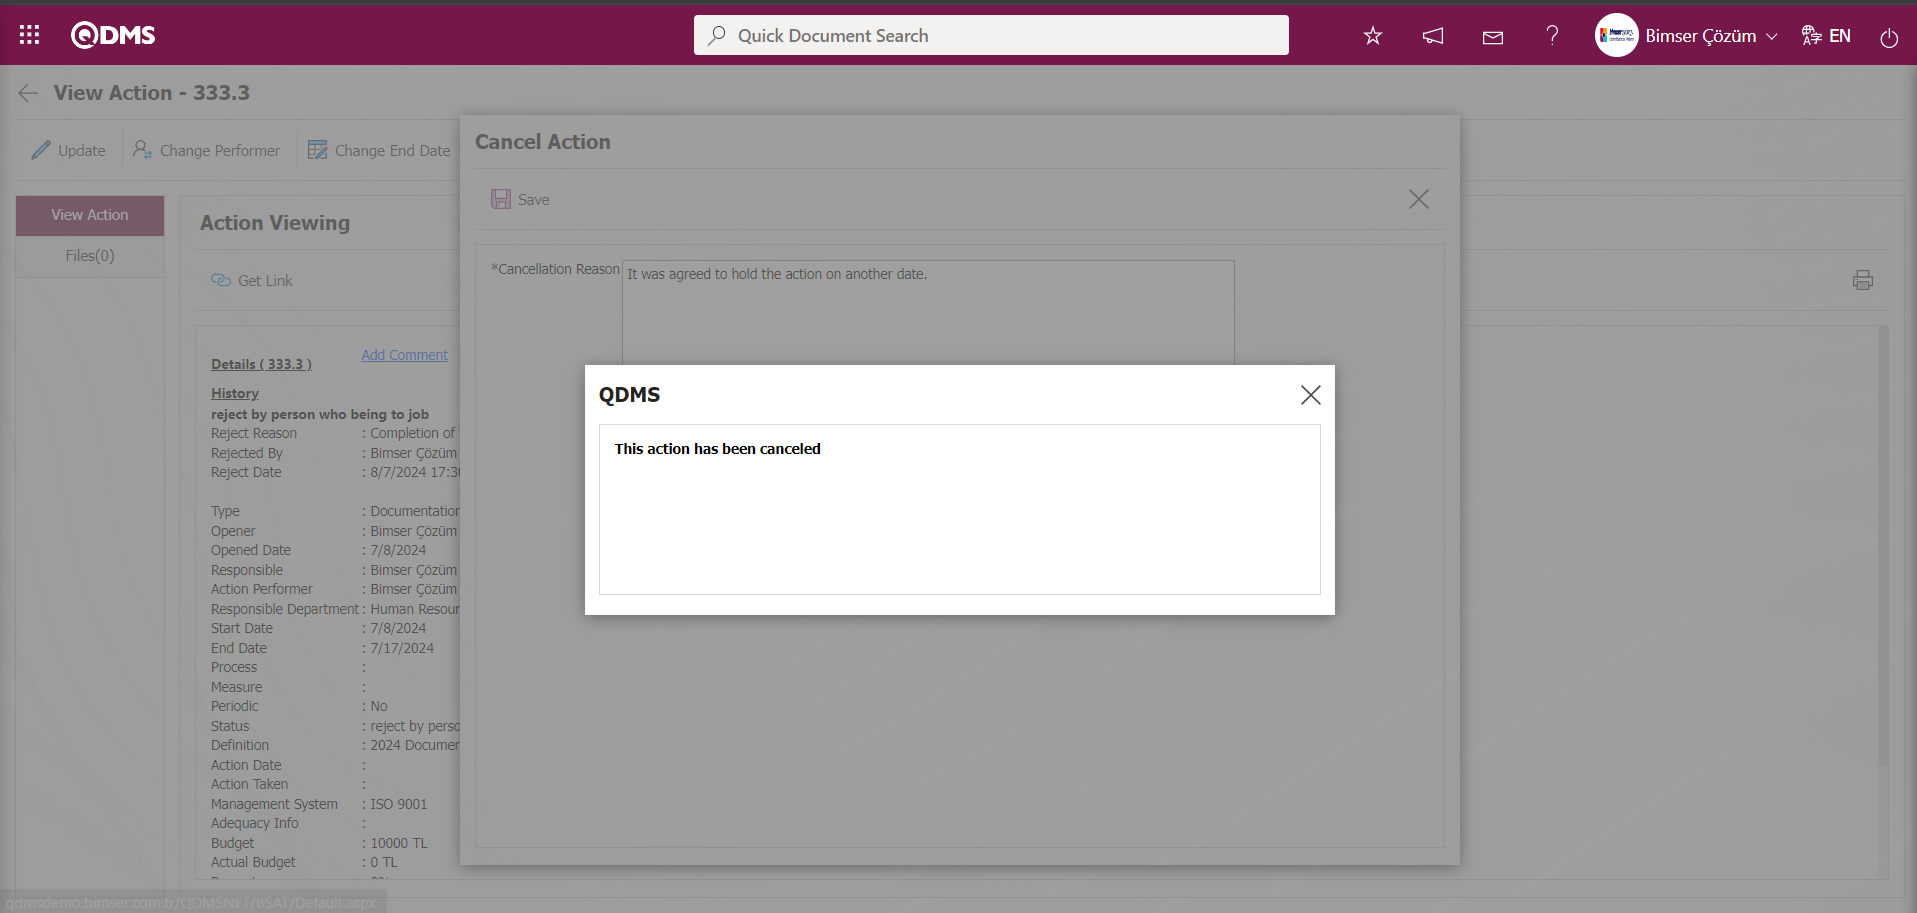
The cancelled action task is displayed in the status of “cancelled” action item.
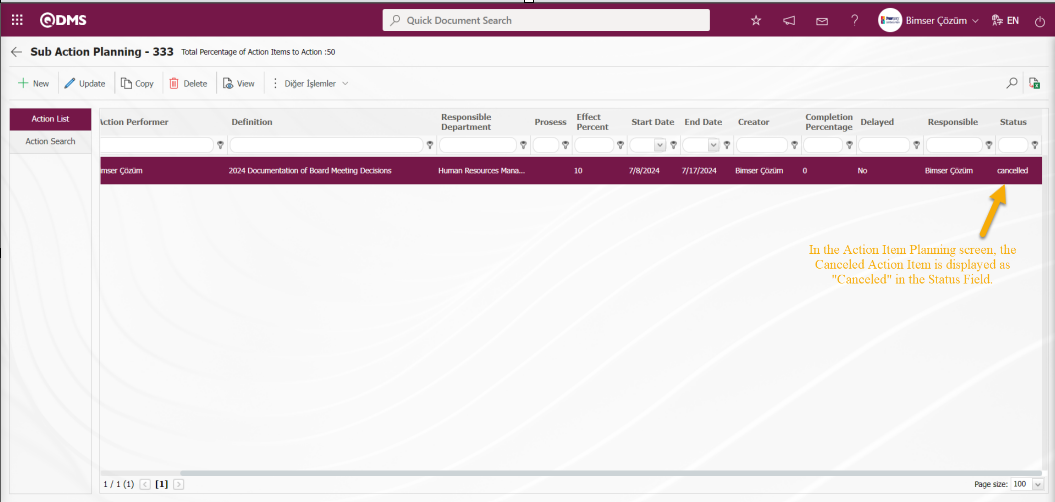
Deleting the Task of the Action;
Click the  button on the Action Display screen.

In the “Are you sure you want to delete the selected record?” message given by the system, the Action deletion is performed by clicking the “OK” button.

After action deletion, the action is completely removed from the system. Deleted action items cannot be displayed in the system.
6.2.1.8. Creating Multiple Actions
Menu name: Integrated Management System/ Action Management/ Planning/ Items
In the Action Management Module, an action task defined in the system can be assigned as a task to multiple people separately by using the multiple action feature. In order to activate this feature, the parameter 111 “Will the multiple action opening feature be used?” from the Action Management Module parameters must be activated by selecting “Yes” for the parameter value.
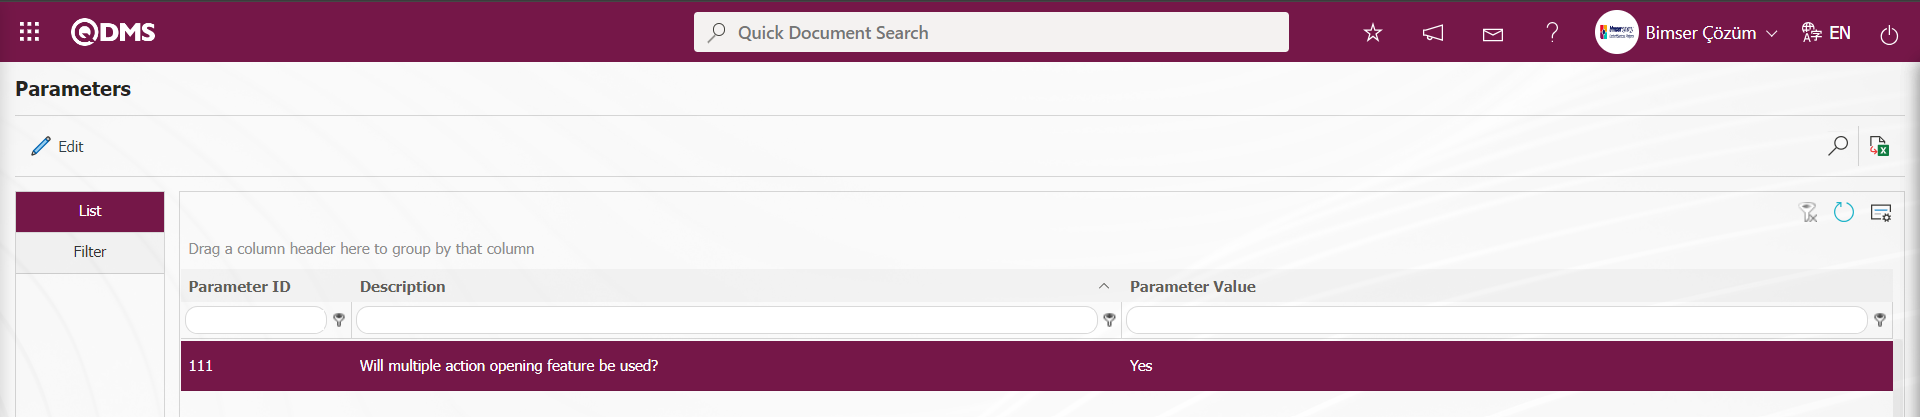
After the parameter is activated,  button is displayed on the Action Item Planning screen and multiple action feature is used. In order to assign the same action as a task to more than one person from the Action Item Planning screen, the action item to be assigned as multiple tasks is selected and the button is clicked.
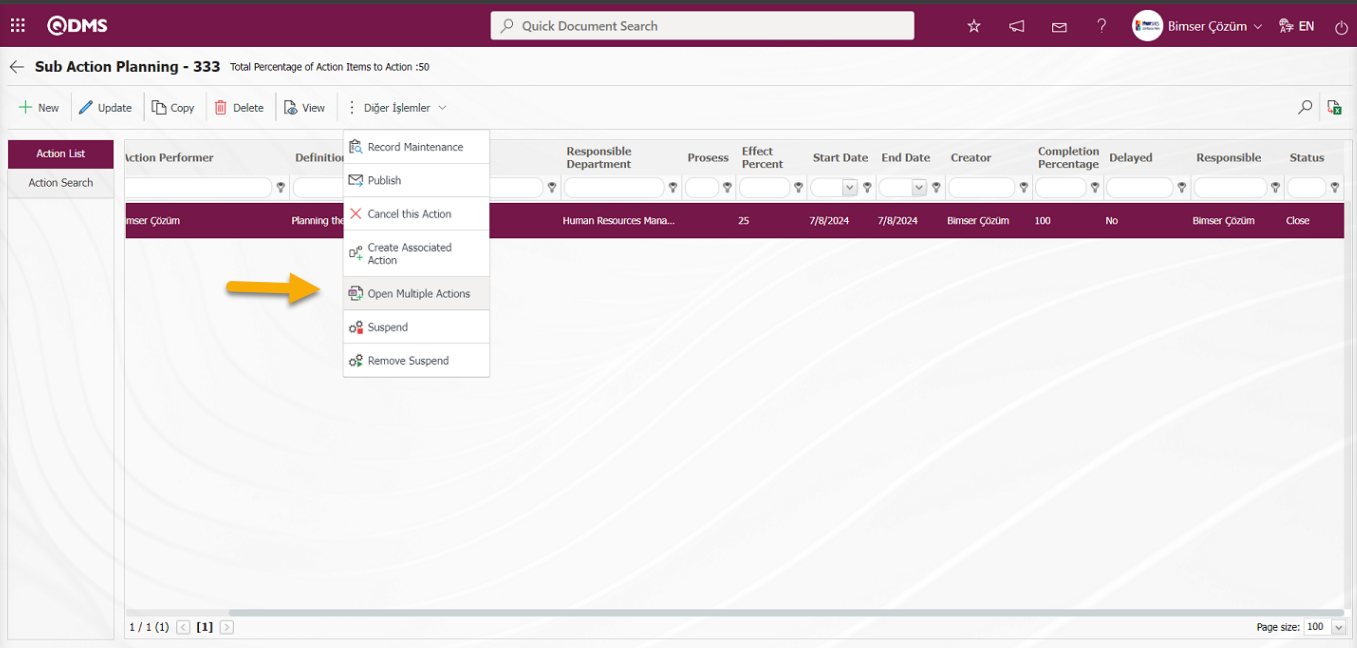
After clicking the button on the Action Item Planning screen, the Action Dissemination screen opens.
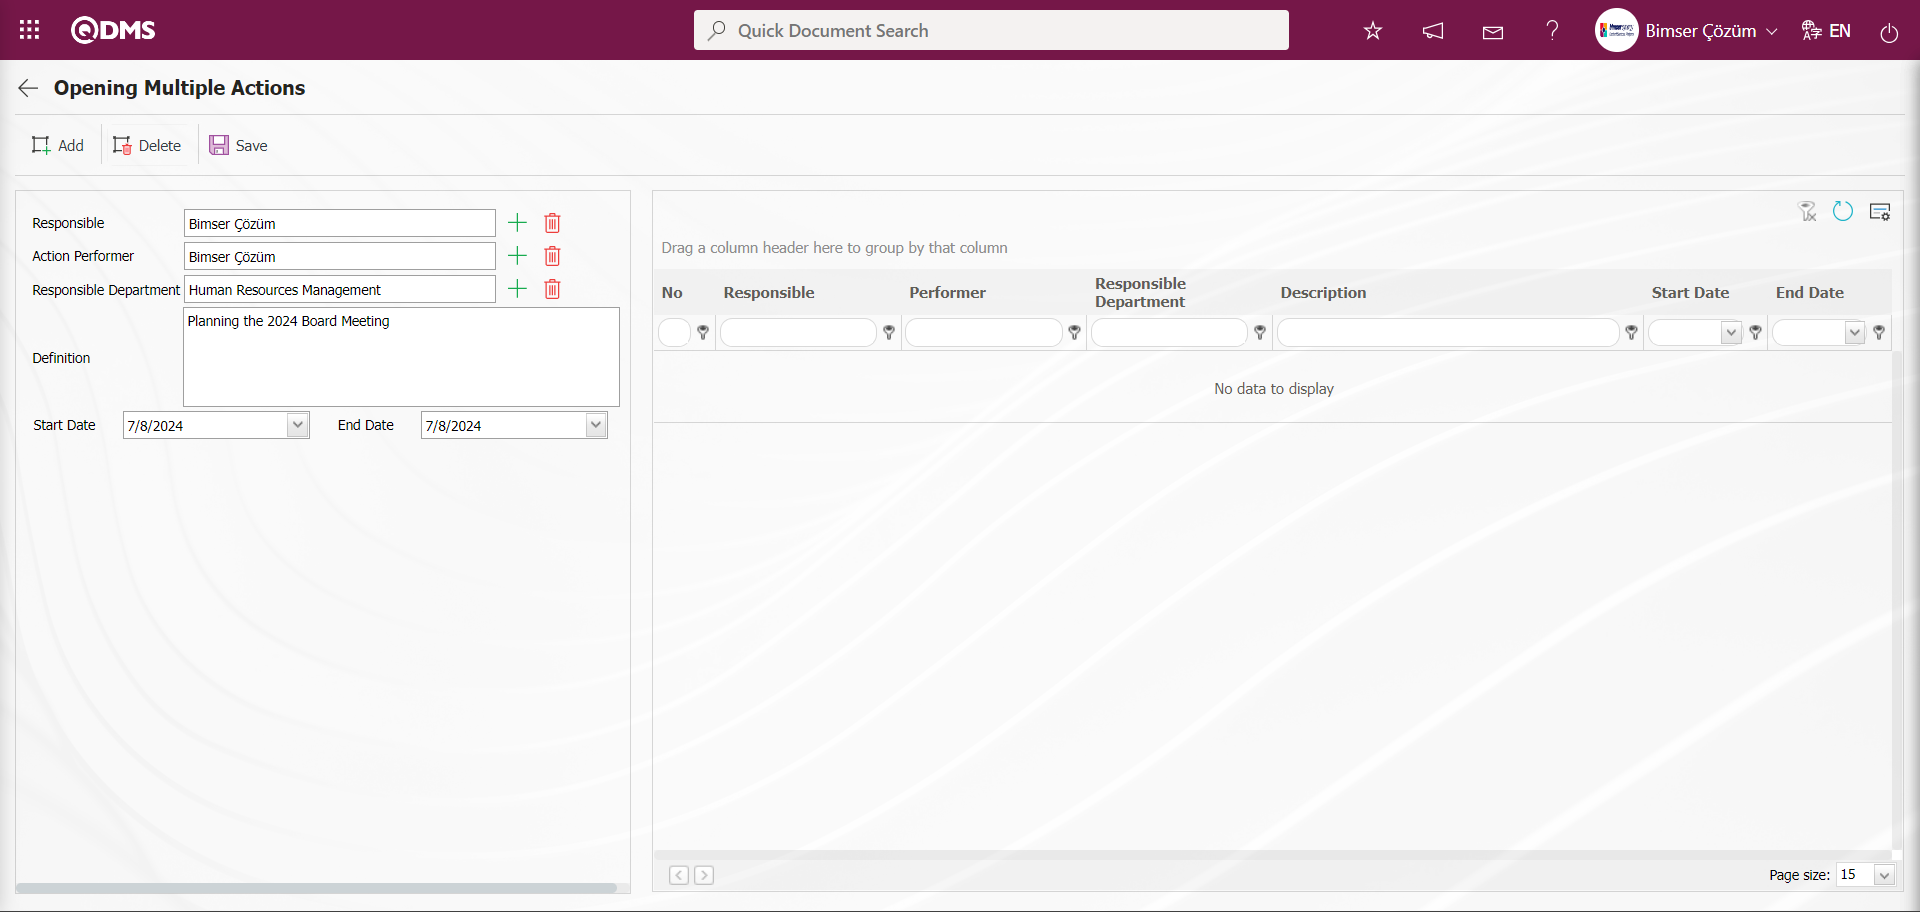
Define the relevant fields on the screen that opens
Responsible: It is the field where the responsible person information on the Action Dissemination screen is selected in the list of personnel defined in the system opened by clicking the  (Select) button.
To Do the Work : It is the field where the person who will do the work on the Action Dissemination screen is selected from the list of personnel defined in the system opened by clicking the (Select) button.
Responsible Department: It is the field where the responsible department information is selected from the system defined department list opened by clicking the (Select) button on the Action Dissemination screen.
Definition: It is the field where the definition information of the action is changed on the Action Dissemination screen.
Start Date: It is the field where the start date information is selected in the Calendar field opened by clicking the drop-down list on the Action Dissemination screen.
End Date: In the Action Dissemination screen, if desired, the End date information is selected in the Calendar field opened by clicking the drop-down list.
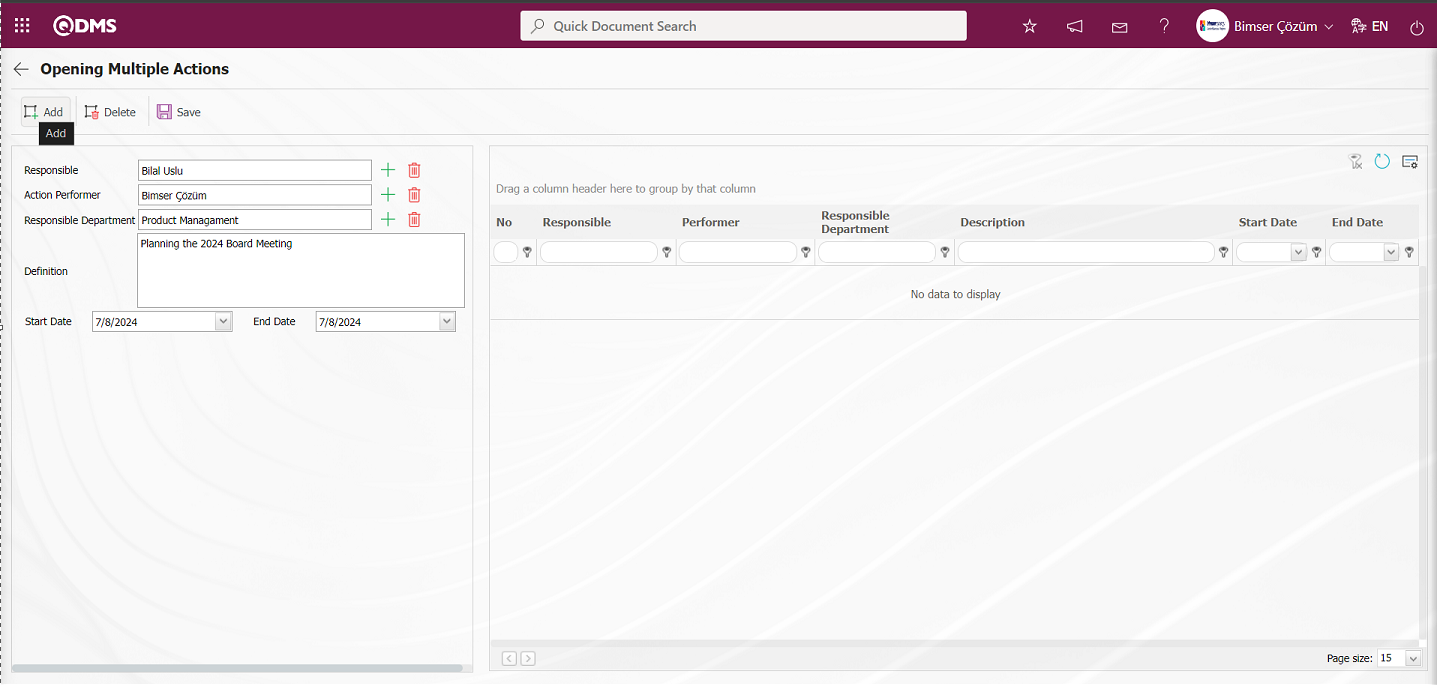
With the help of the buttons on the screen;
 : A new Action task is added with the expansion process.
 :The selected Action task information in the task list is deleted.
 : Registration is done.
On the Action Dissemination screen, the person to whom the task will be assigned is selected from the list of personnel defined in the system opened by clicking the (Select) button. If desired, “Responsible, Definition, Start and End Dates” can be changed. After entering the relevant information in the required fields on the Action Dissemination screen, the Action Task is added to the task list with the button.
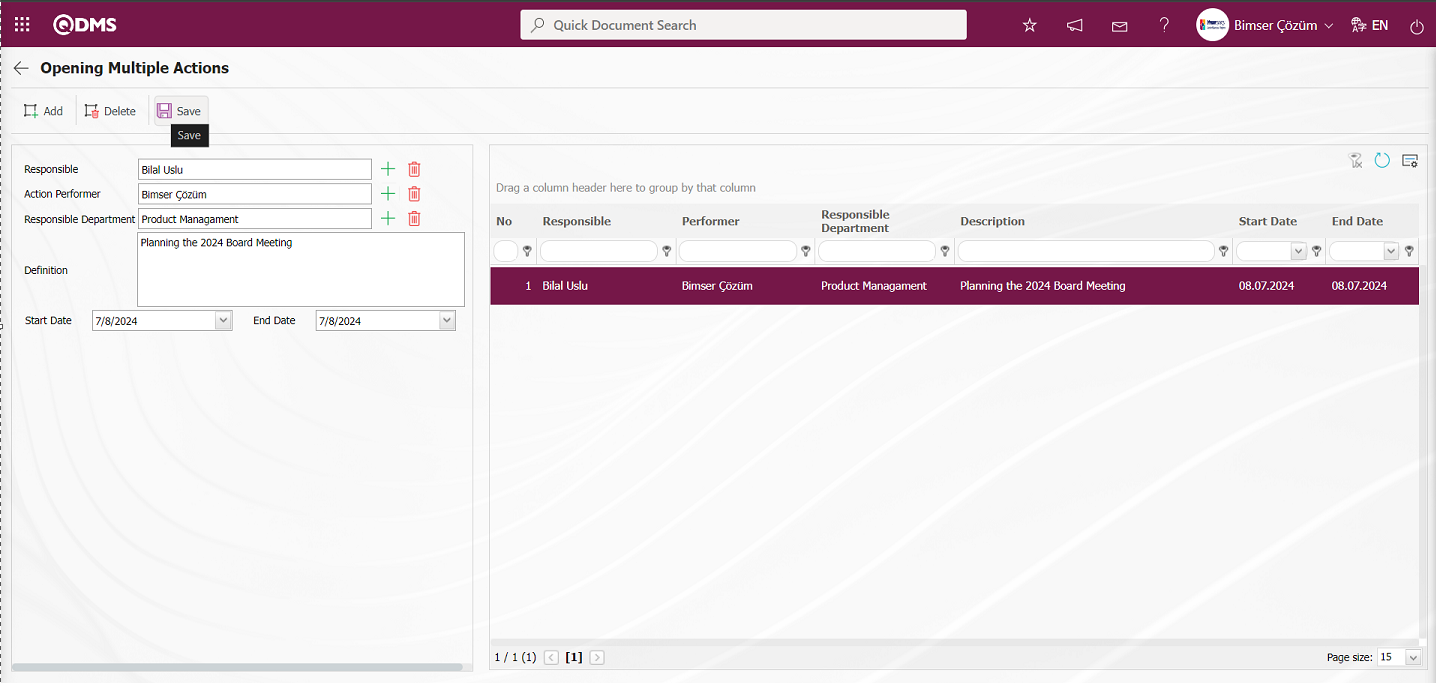
After adding a new Action task to the task list on the Action Dissemination screen, the Action Dissemination Registration process is performed by clicking the  button in the upper left corner of the screen.
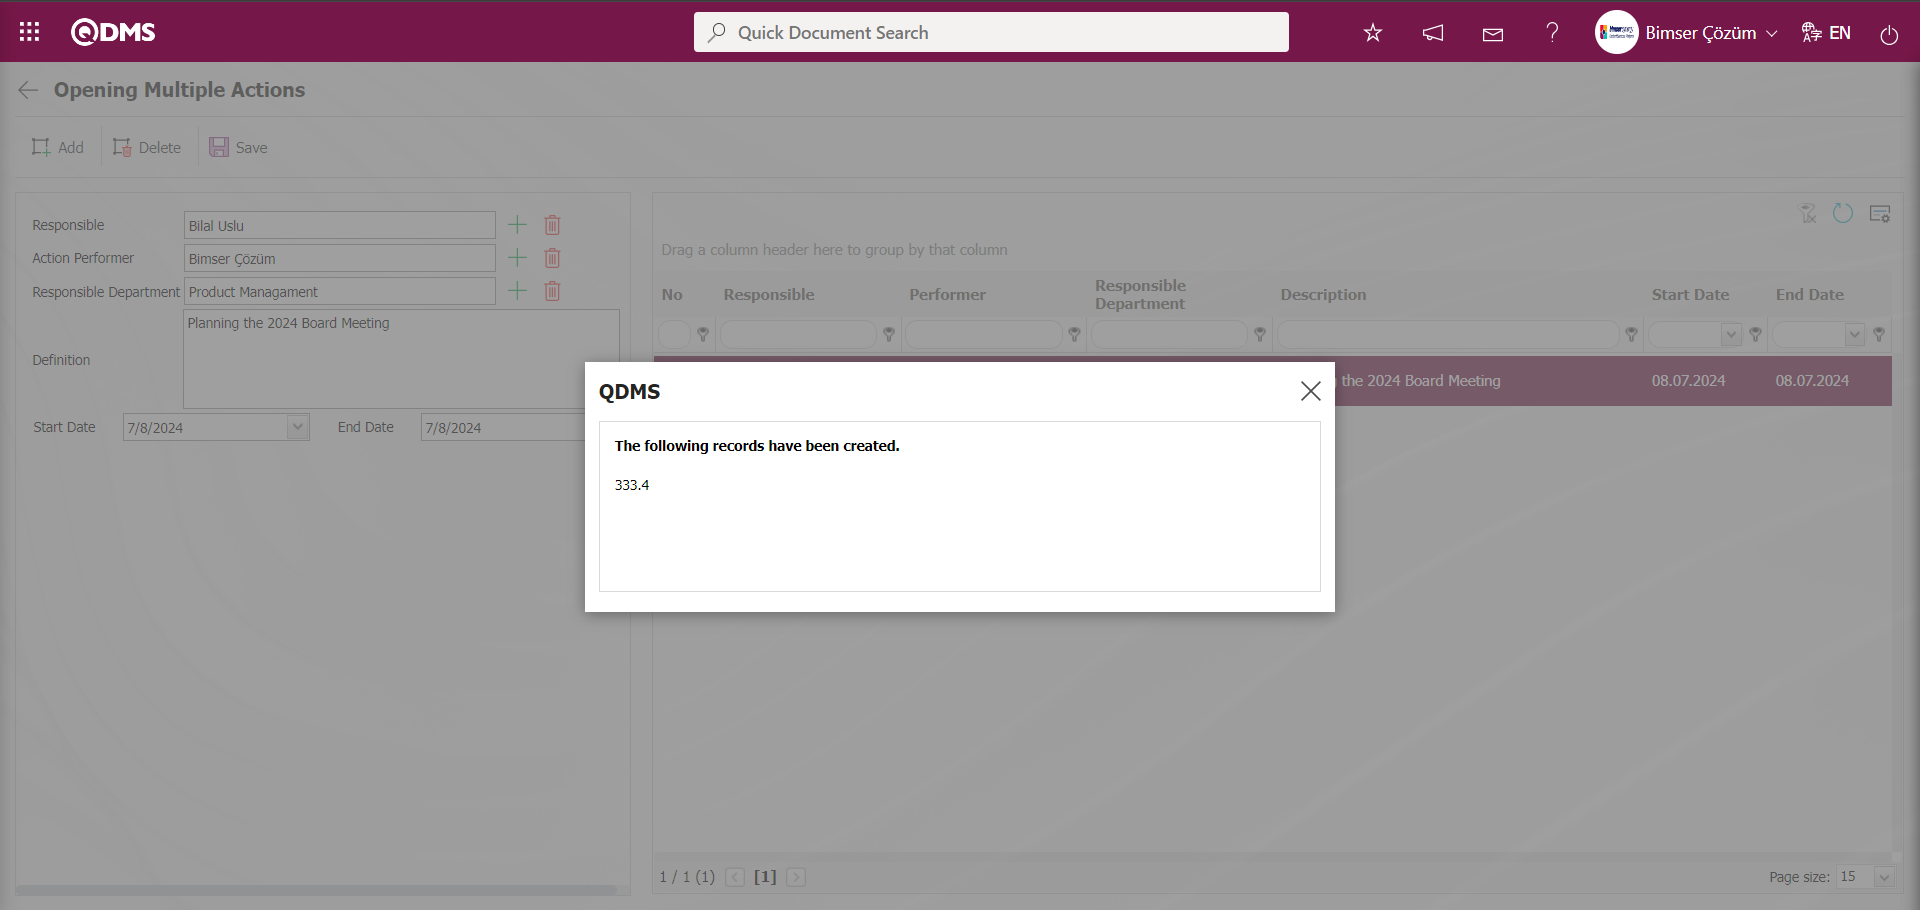
If the action task is to be distributed to how many people the action task will be distributed to, the action task assignment is performed in the system for each selected person if the registration process is completed by performing the addition process separately.
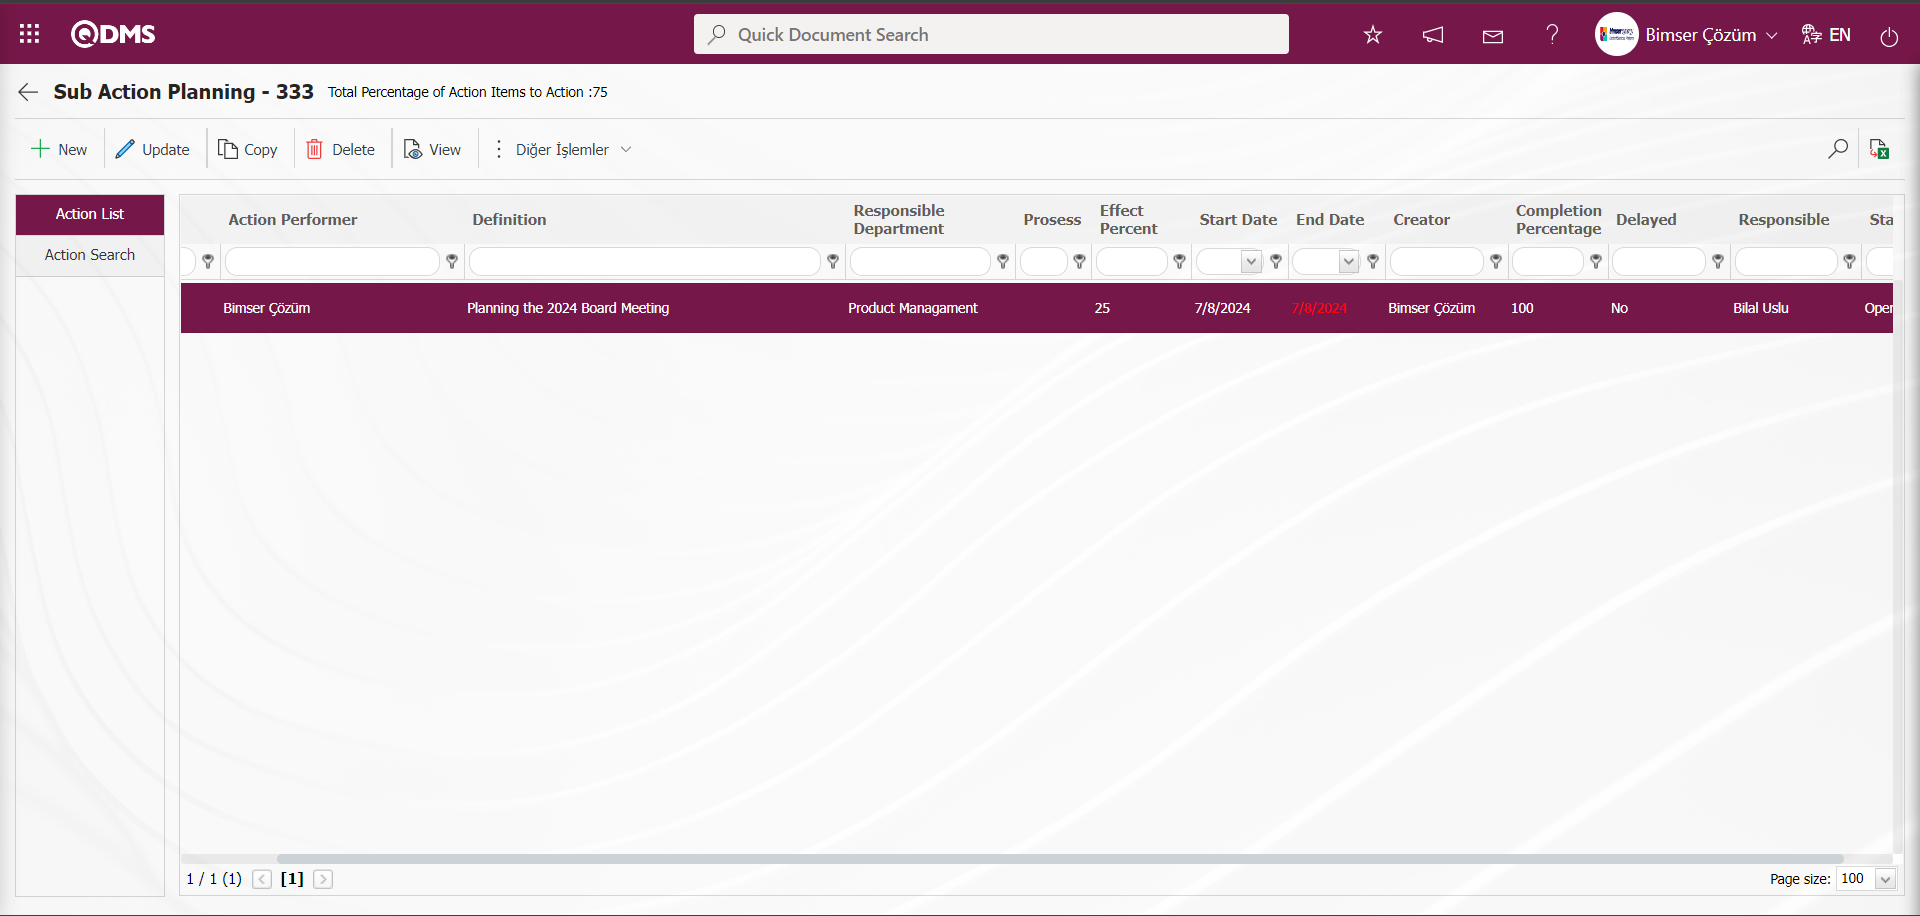
6.2.1.9.Suspending/ Unsuspending Action Plan/ Item
Menu name: Integrated Management System/ Action Management/ Planning/ Items
It is the process of temporarily removing an action plan or action item defined in the system from the system. When the action plan / item is suspended, it does not appear in pending jobs and delays.
Action Plan Suspension Process;
For Action Plan Suspension, click on Integrated Management System / Action Management / Planning menu and open Action Planning screen. In the Action Plan screen, select the Action Plan to be suspended from the list in the Action list and click the  button.
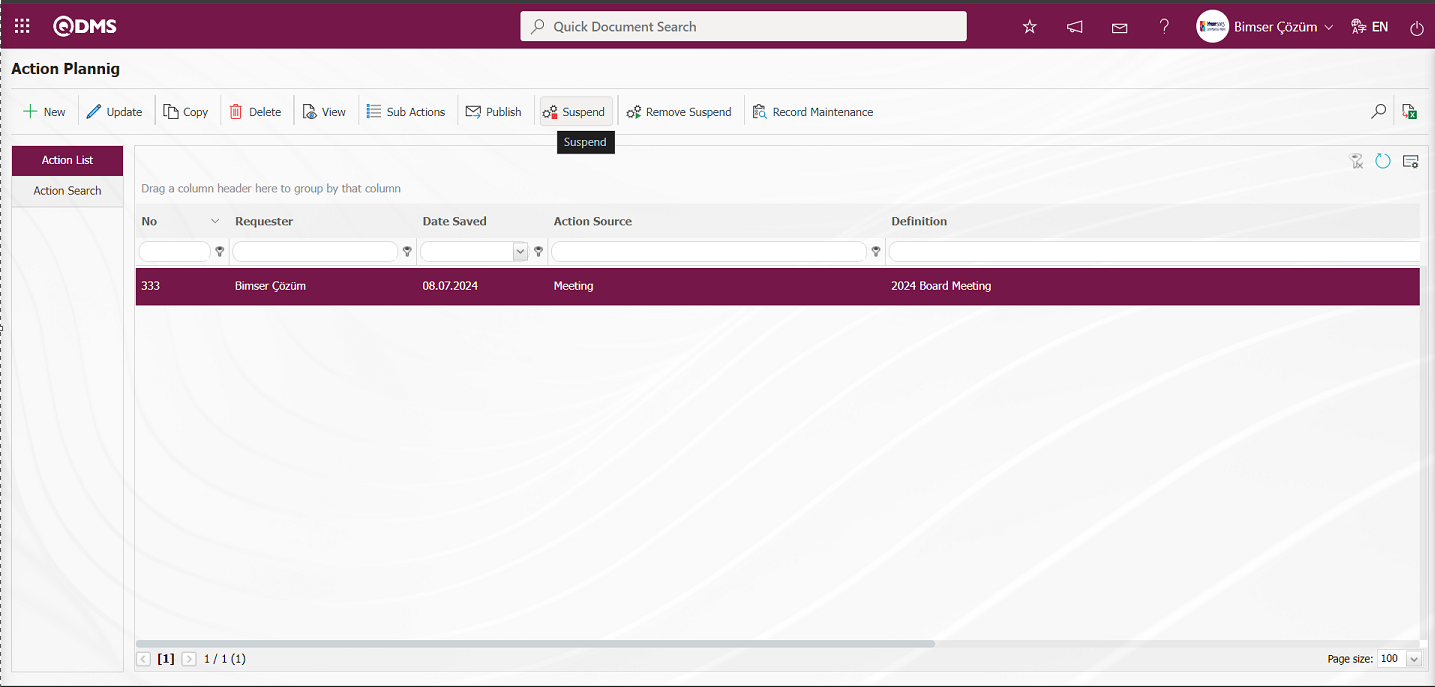
On the Suspend screen, in the Suspension Reason field of the Action Plan, the reason for the suspension is written and the  button is clicked.
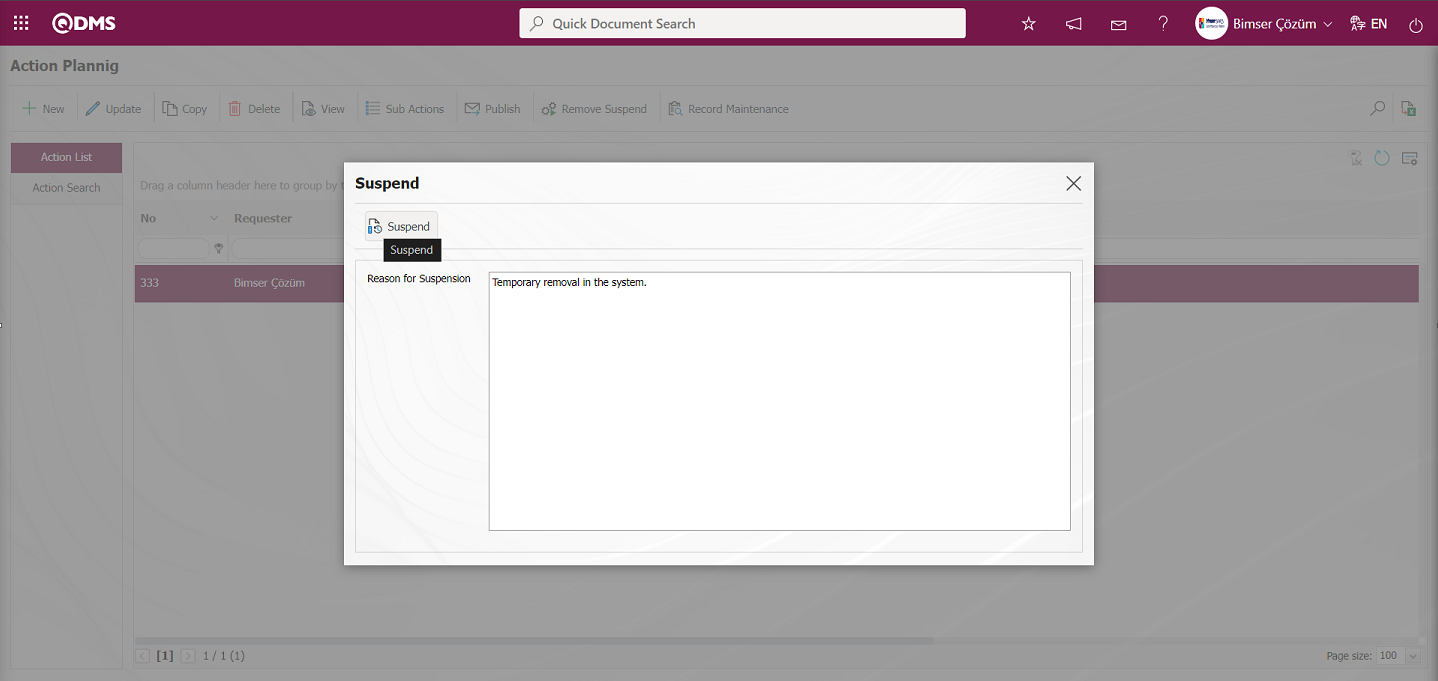
“Your registration is suspended” warning message is displayed by the system and “OK” button is clicked and the suspension process is performed.
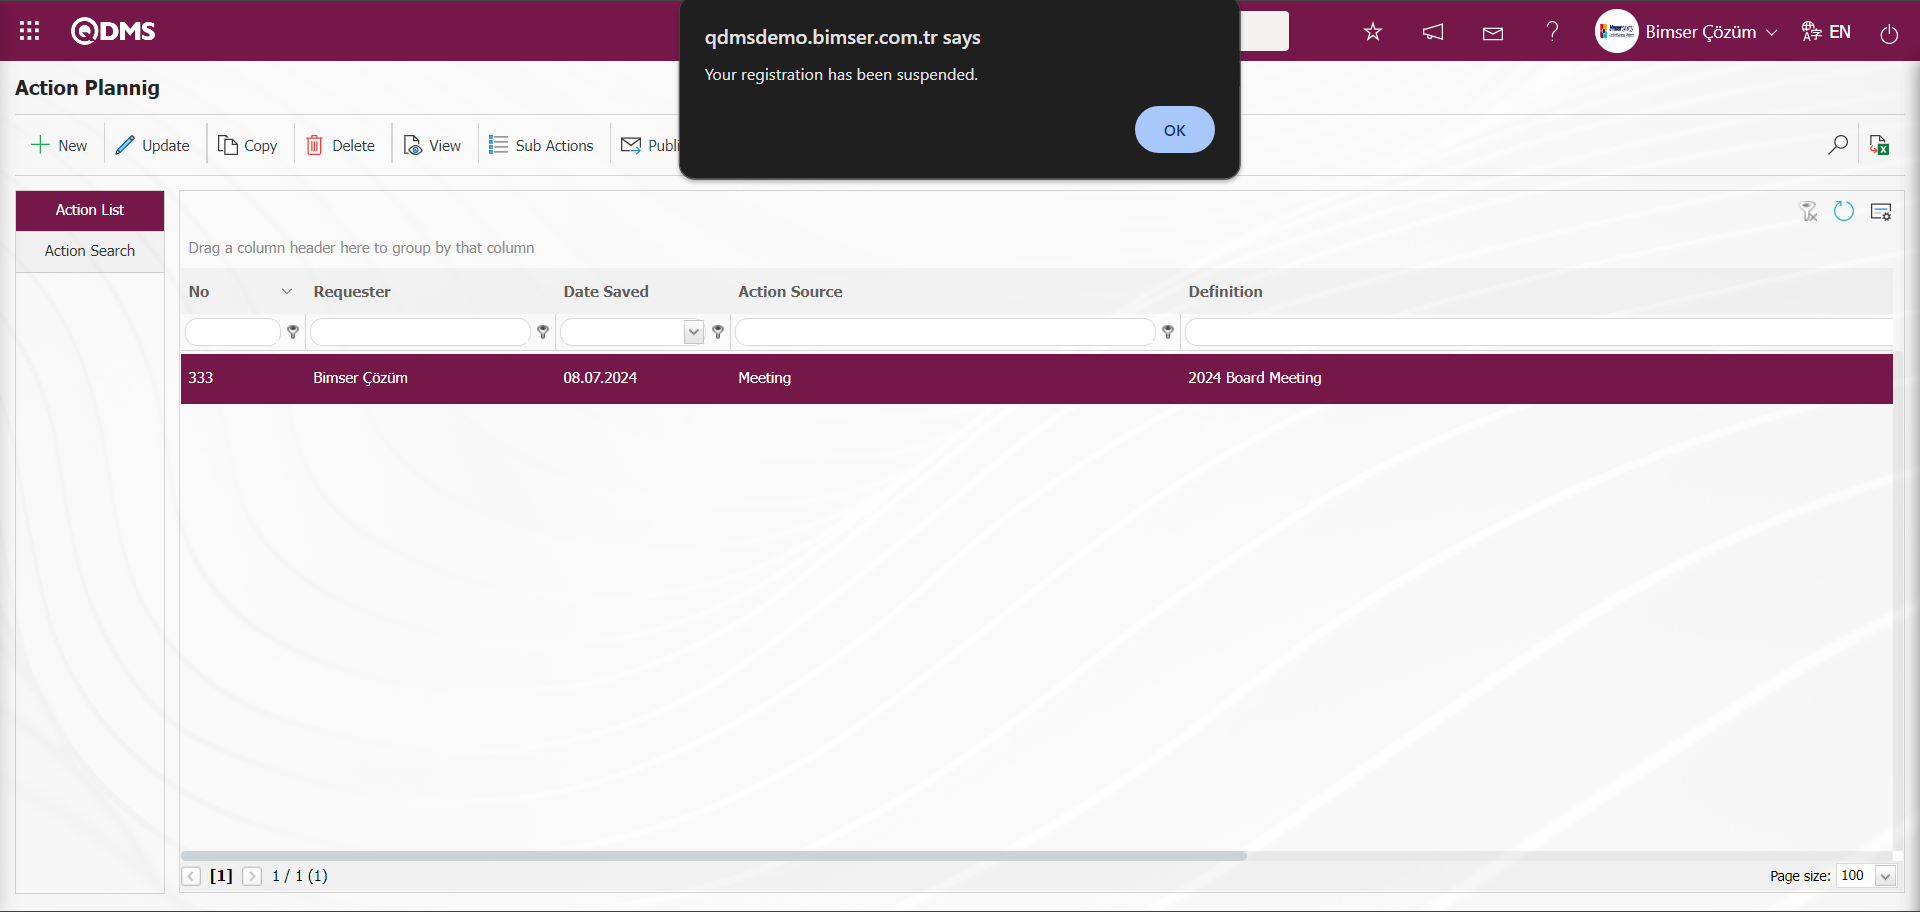
On the Action Planning screen, the status of the suspended Action plan changes to “Suspended”.
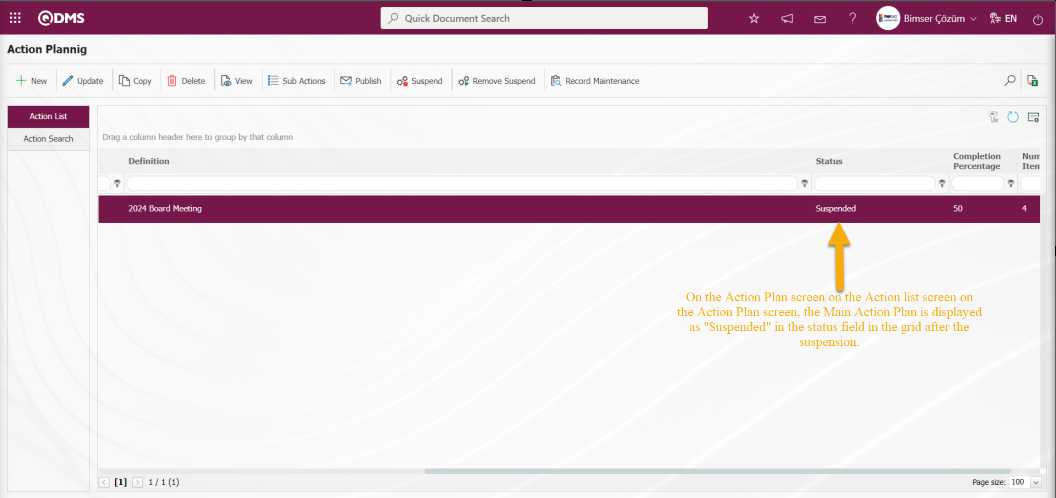
The main action plan record is not suspended when there are pending records in the approval stage or in the rejection status of the main action plan record.
Action Plan Unsuspension Process;
The suspended action plan is removed from the suspension, re-displayed in the system and processed.The main action plans whose status is suspended in the Action Search tab on the Action Planning screen are displayed by selecting the “Suspended” option in the status field in the filter search criteria fields and filtering according to the search criteria.
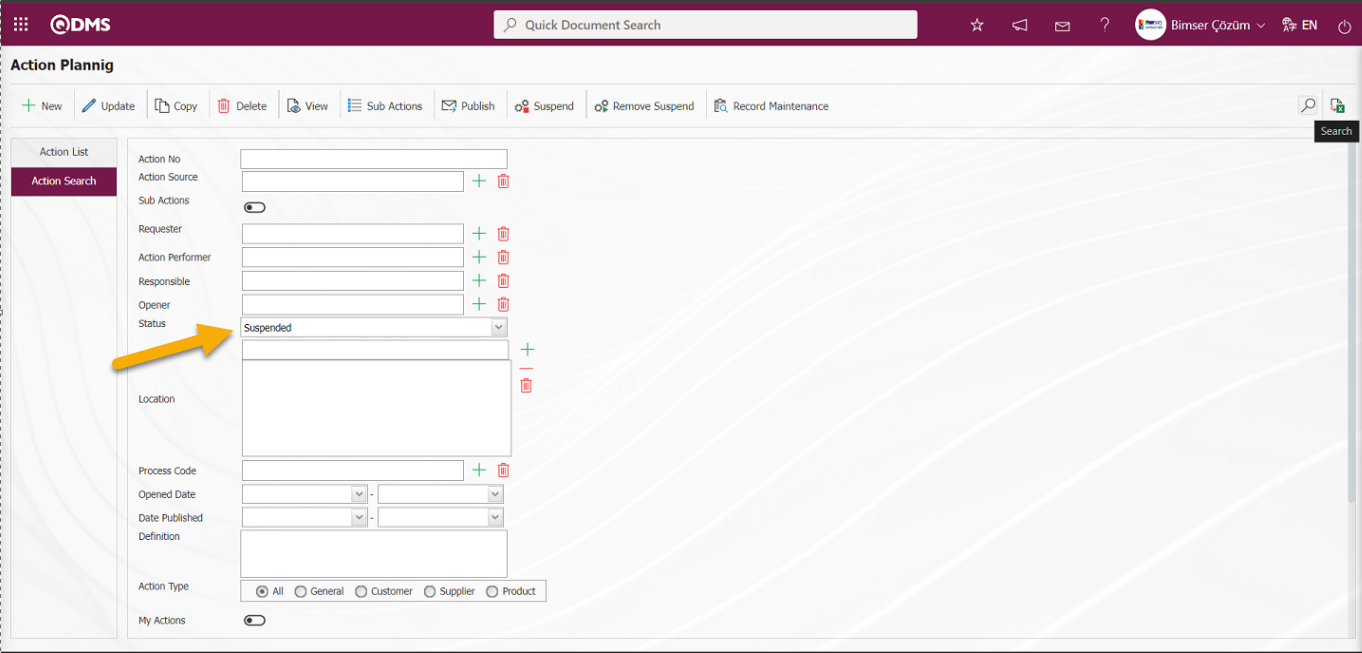
On the Action Plan screen, select the action plan to be suspended in the Action list and click on the  button.
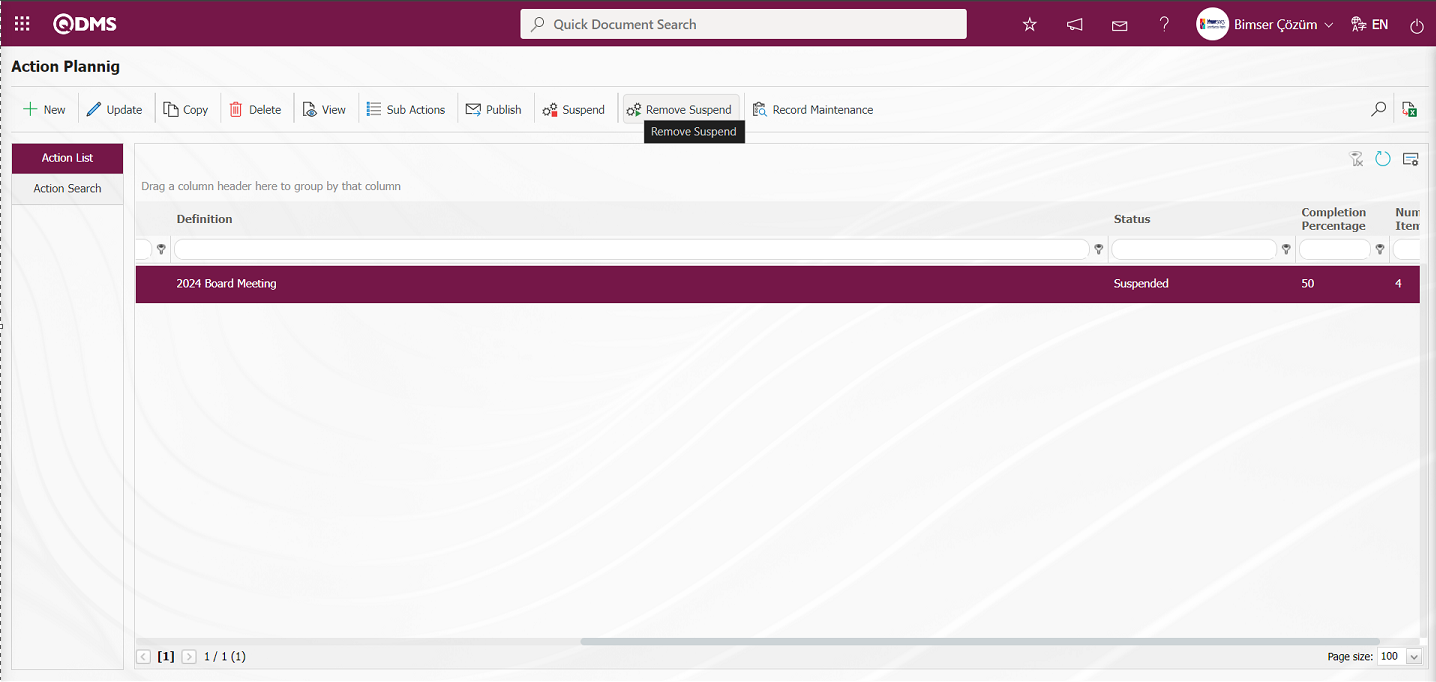
The start date of the suspension is selected. If it is desired to update the dates of periodic actions based on this date, the check box related to the relevant field is ticked.
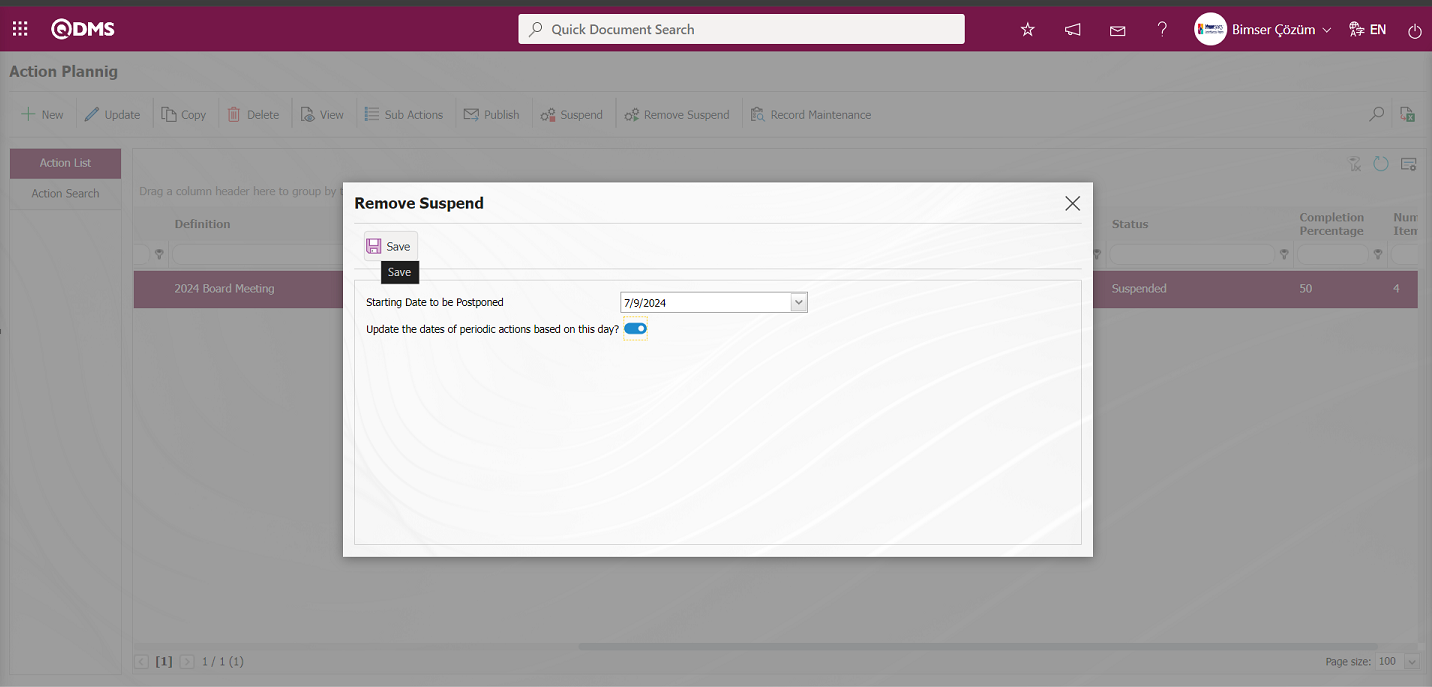 After entering the relevant information in the required fields, the
  button in the upper left corner of the screen is clicked and the unsuspend registration process is performed.
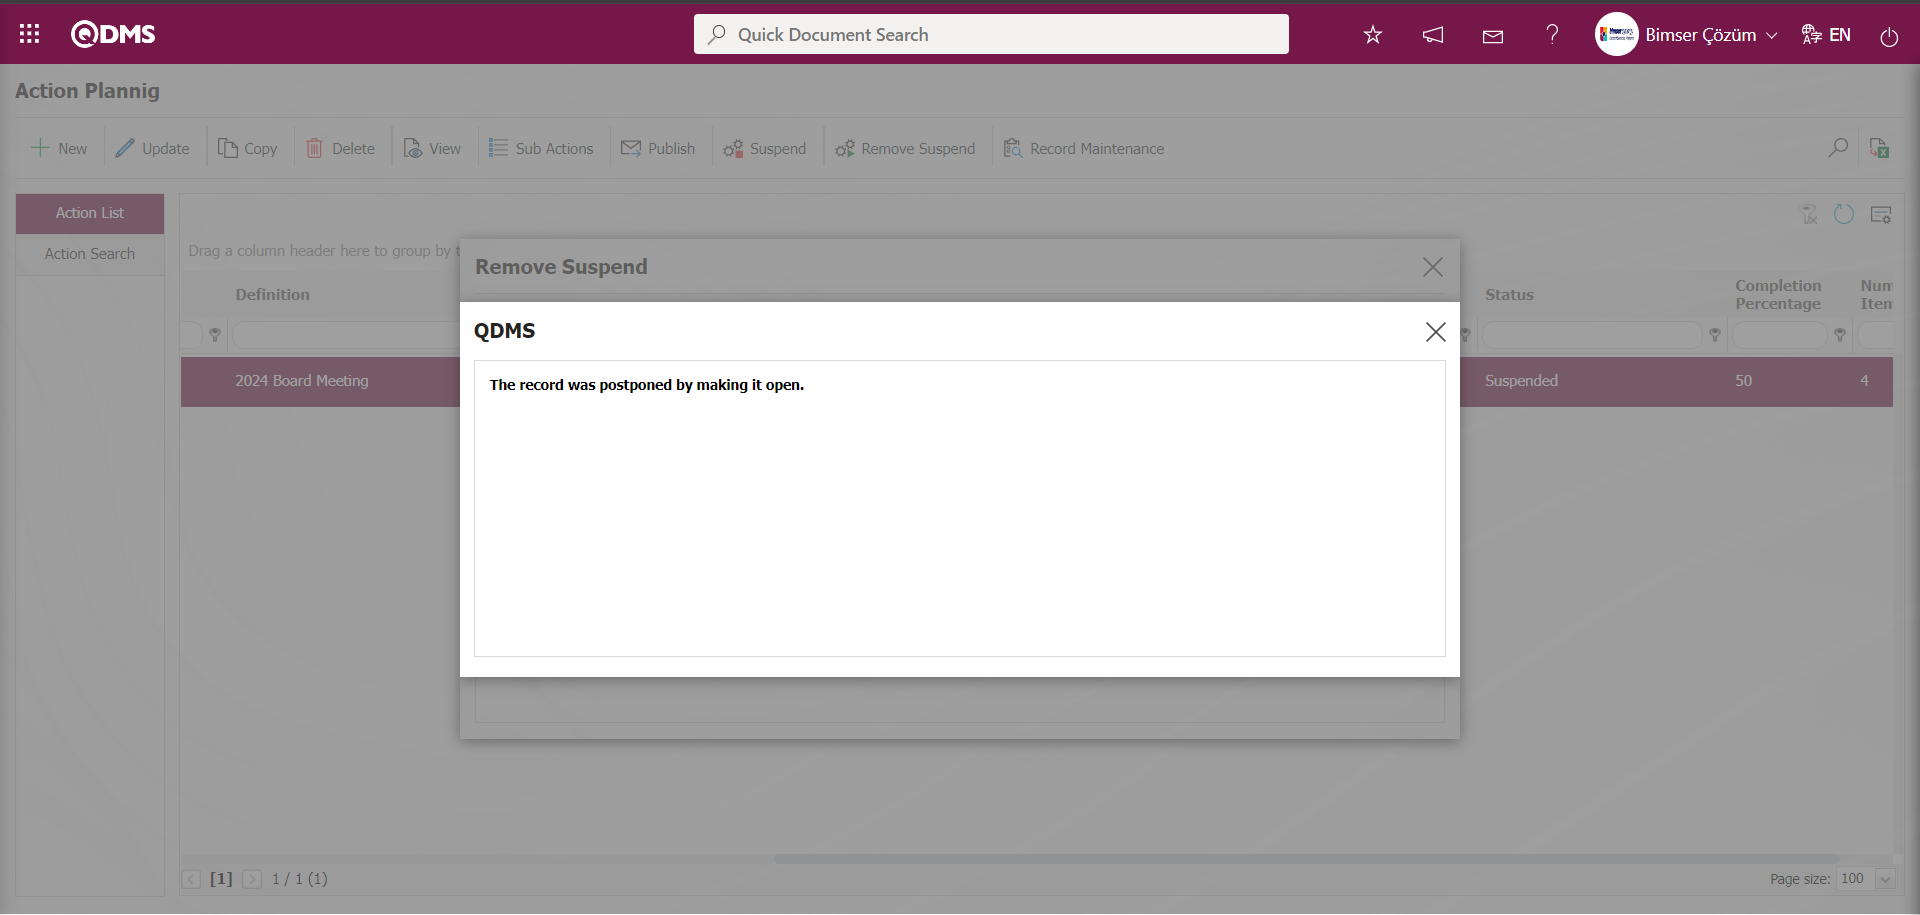
After the “Unsuspend” operation of the Main Action Plan whose status is “Suspended” on the Action Planning screen, the status of the Main Action Plan is now displayed as “Open” in the status field in the grid.
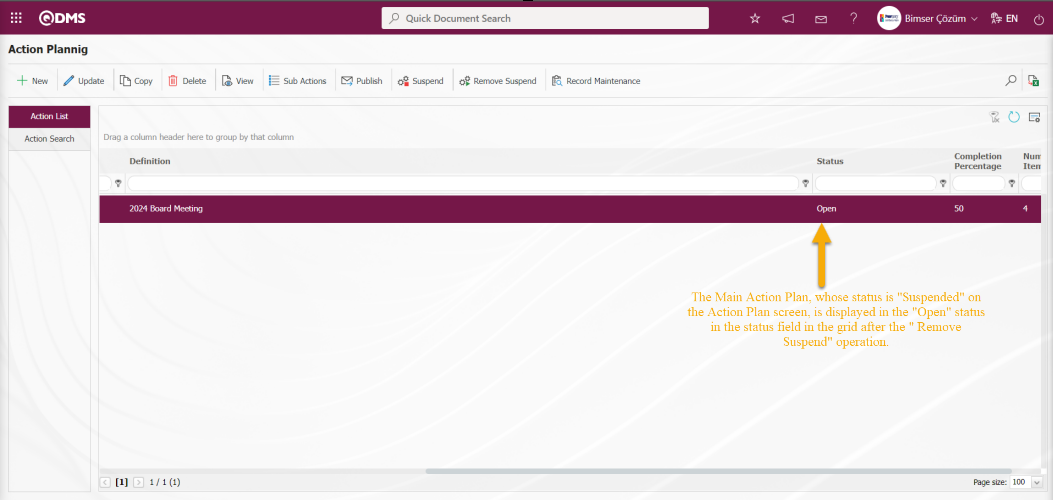
Action Item Suspension Process;
For Action Plan Suspension, the Action Item Planning screen is opened by clicking the Integrated Management System / Action Management / Planning / Items menu. In the Action Item Planning screen, select the Action Item to be suspended from the list in the Action list and click the  button.
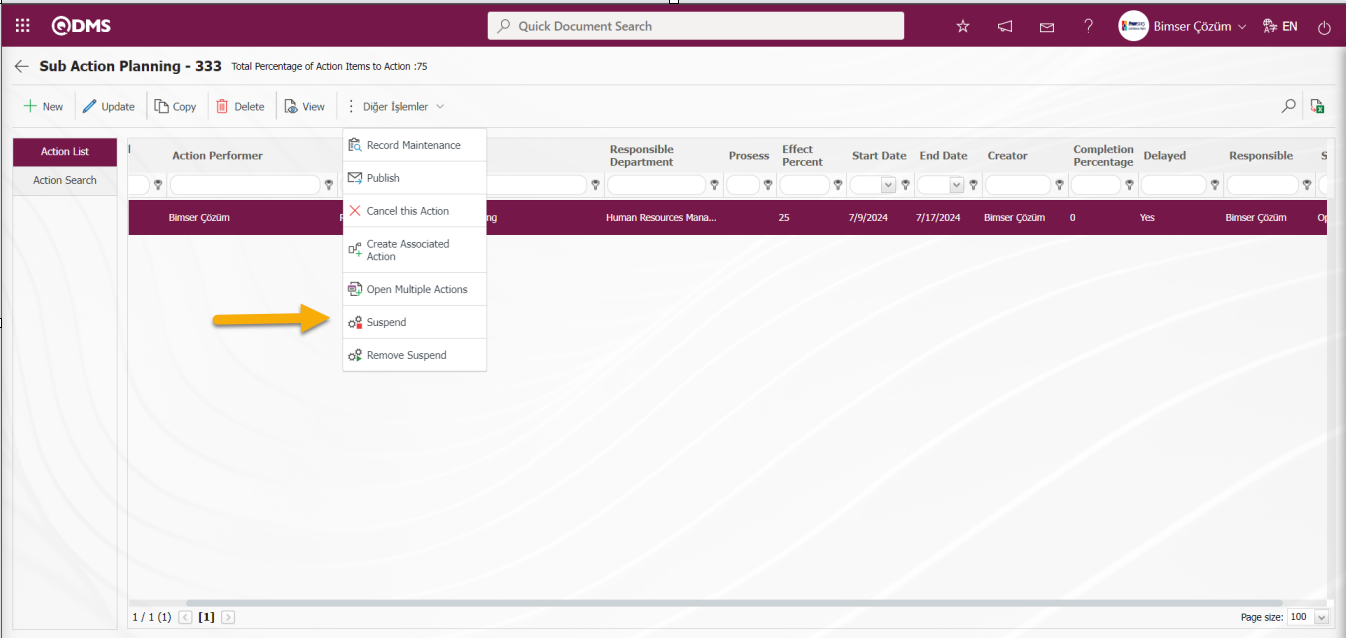
In the Suspend screen, in the Suspension Reason field of the Action Item, the reason for the suspension is written and the  button is clicked.
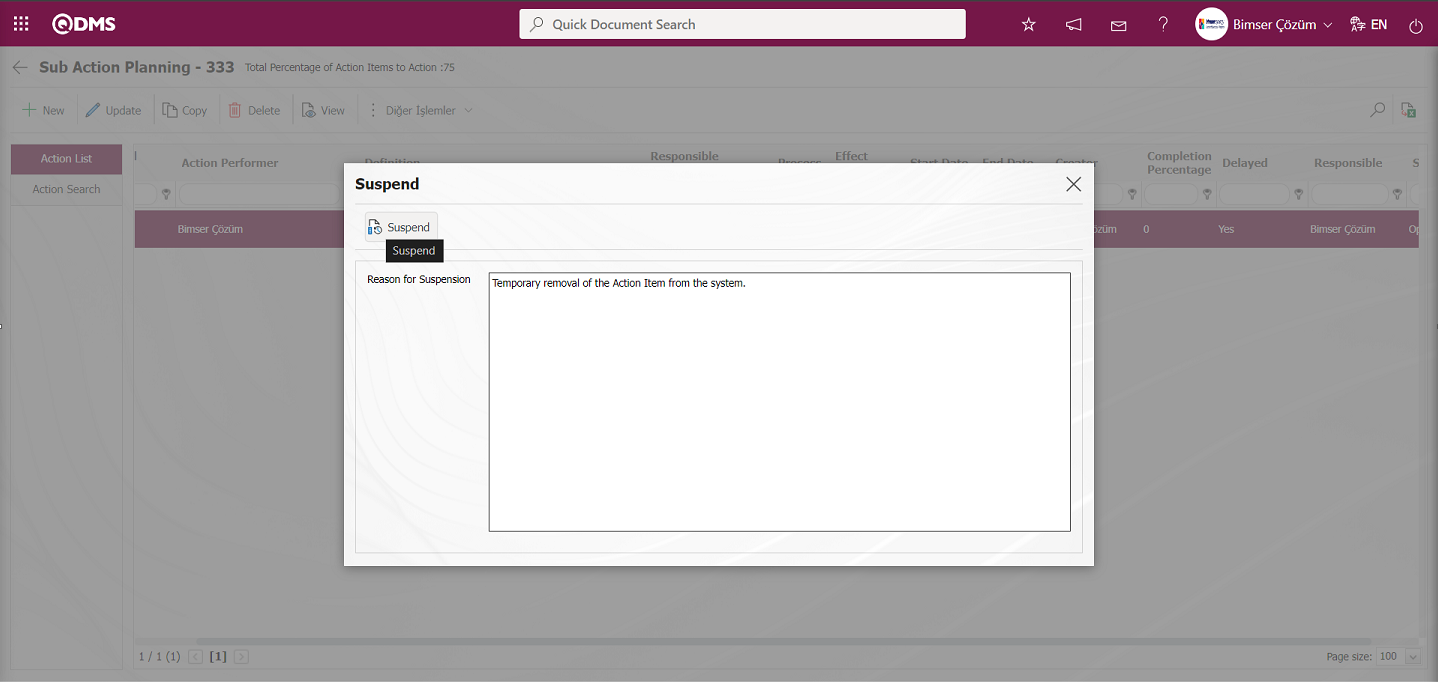
“Your registration is suspended” warning message is displayed by the system and “OK” button is clicked and the suspension process is performed.
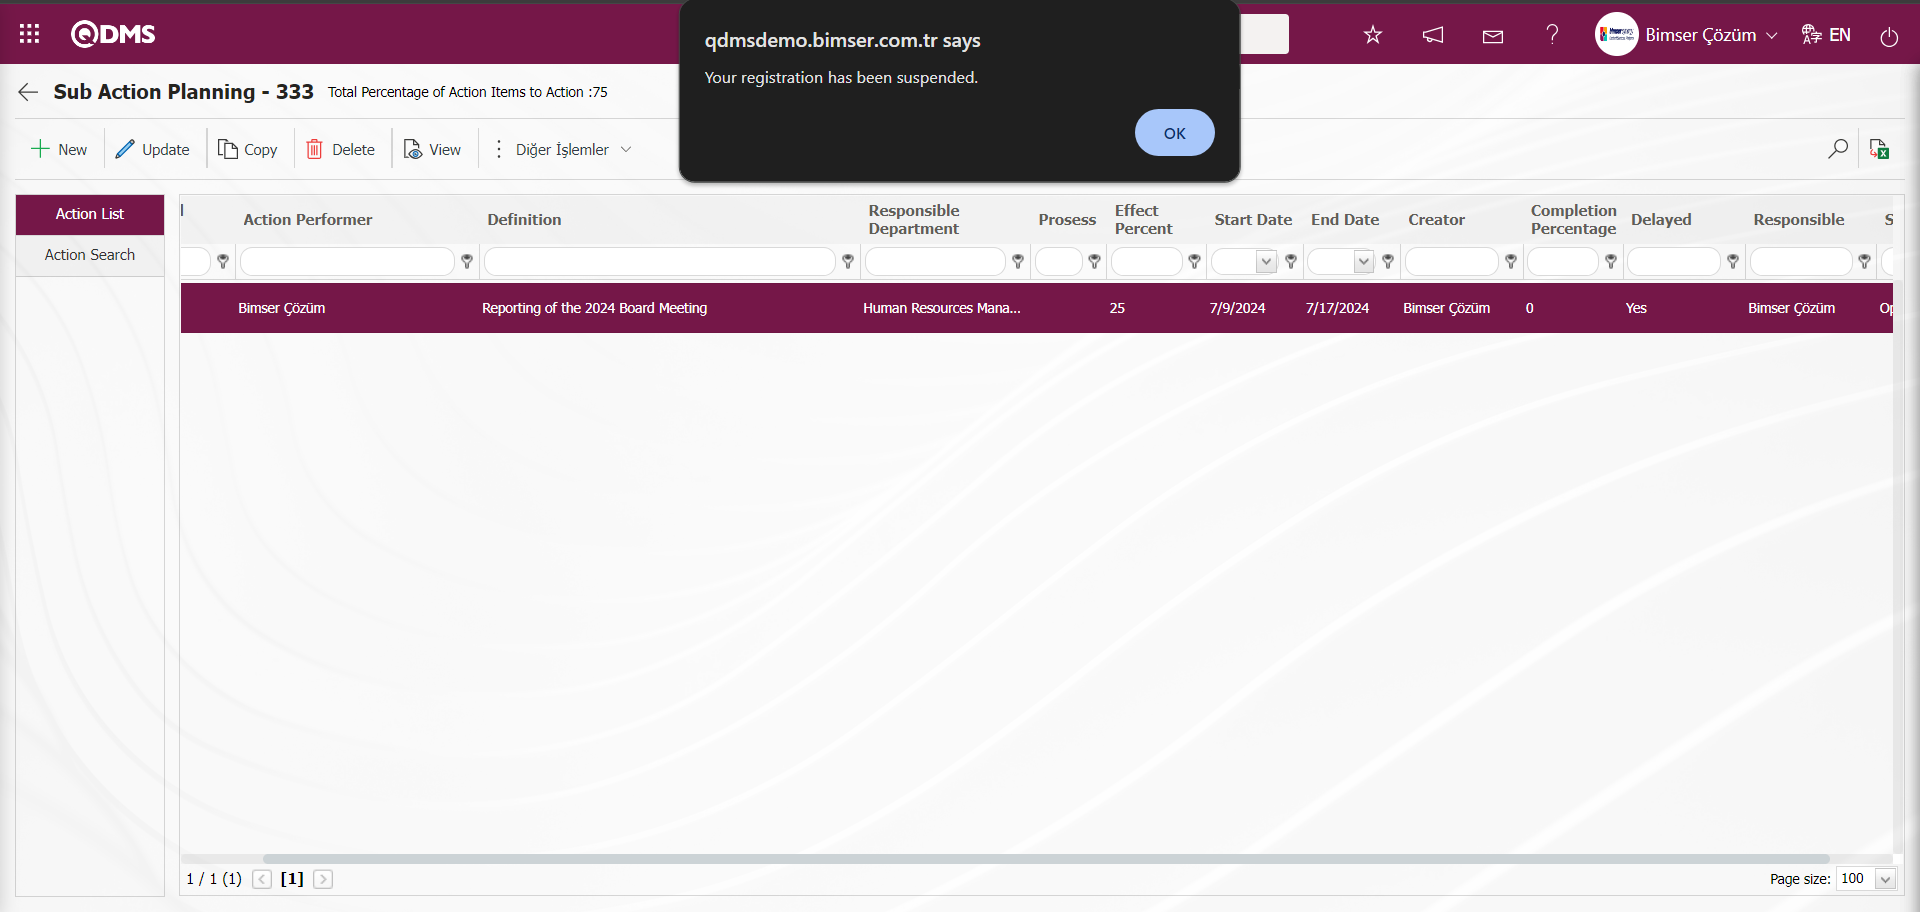
On the Action Item Planning screen, the status of the suspended Action Item changes to “Suspended” in the grid.

Action Item Suspension Process;
The suspended action item is removed from the suspension, re-displayed in the system and processed.
Action Items whose status is suspended in the Action Search tab on the Action Item Planning screen are displayed by selecting the “Suspended” option in the status field in the filter search criteria fields and filtering according to the search criteria.
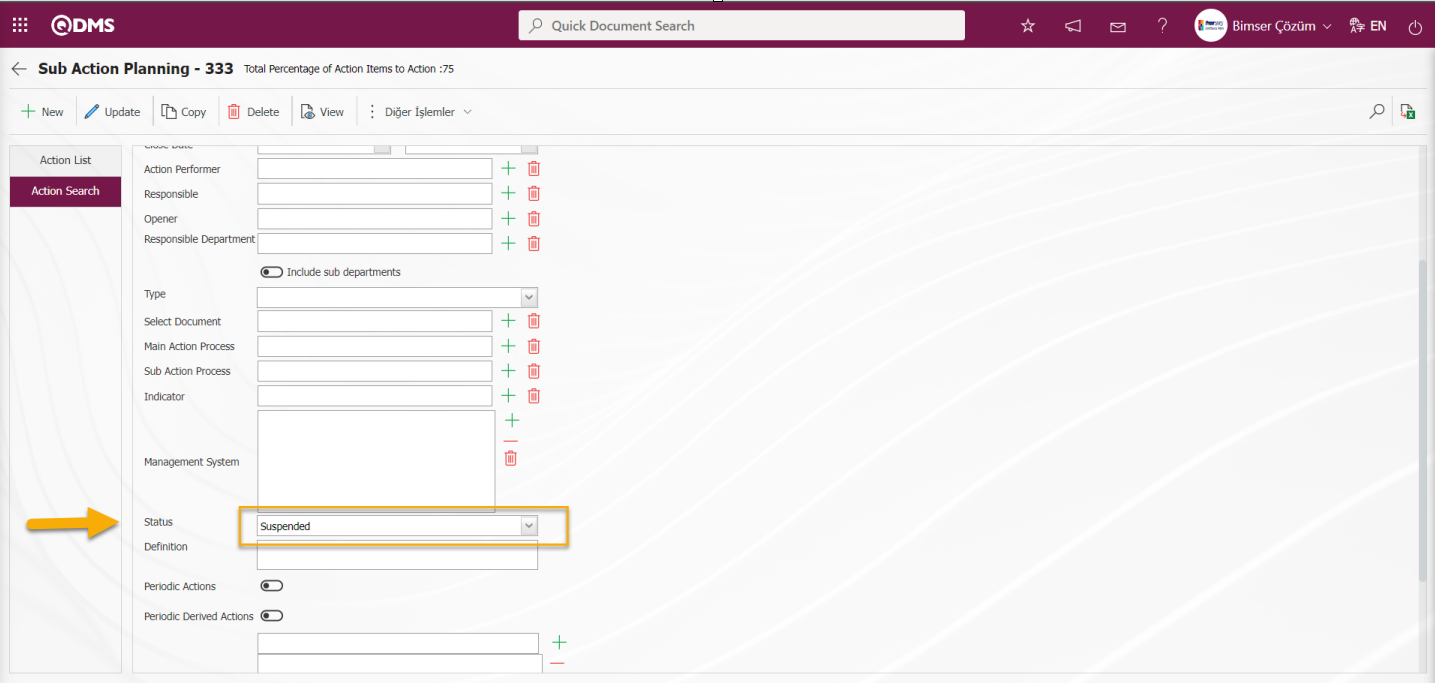
On the Action Item Planning screen, select the Action Item to be suspended in the Action list and click on the 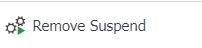 button.
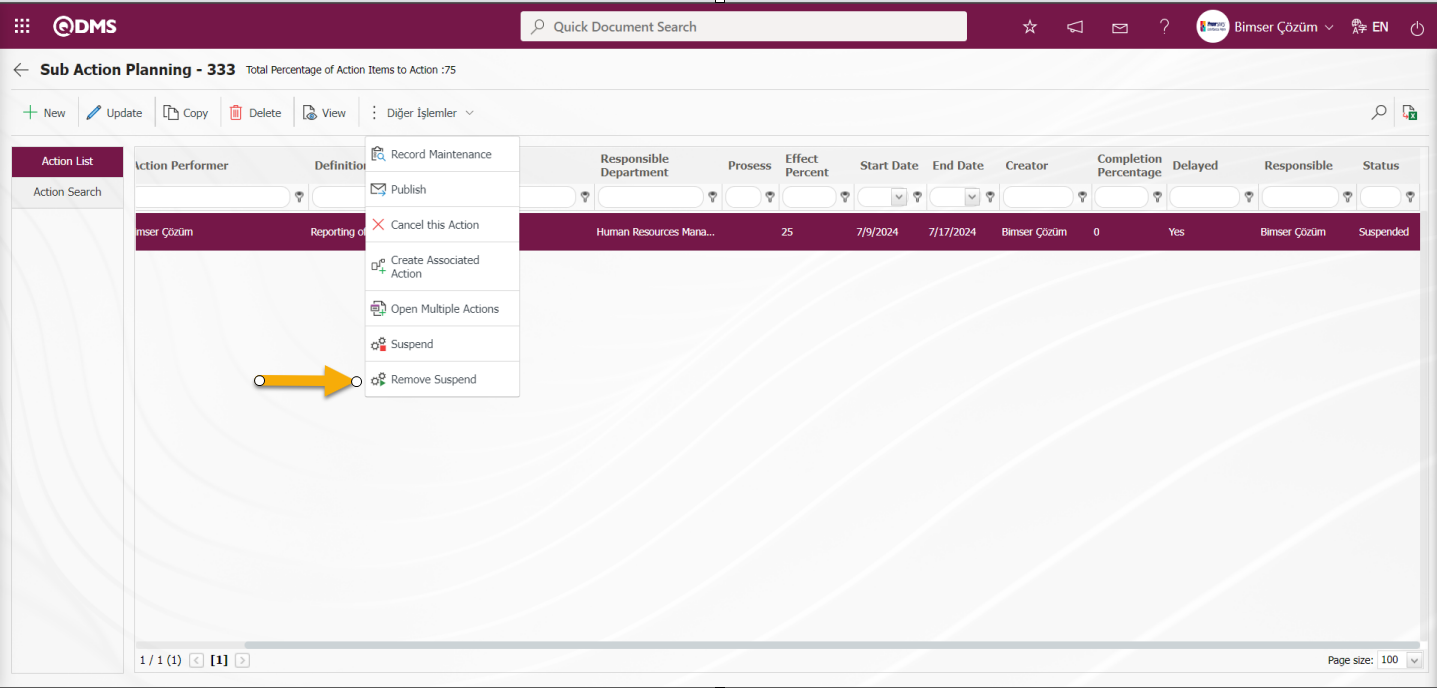
Select the start date of the hanger.
After entering the relevant information in the required fields, the  button in the upper left corner of the screen is clicked and the unsuspend registration process is performed.
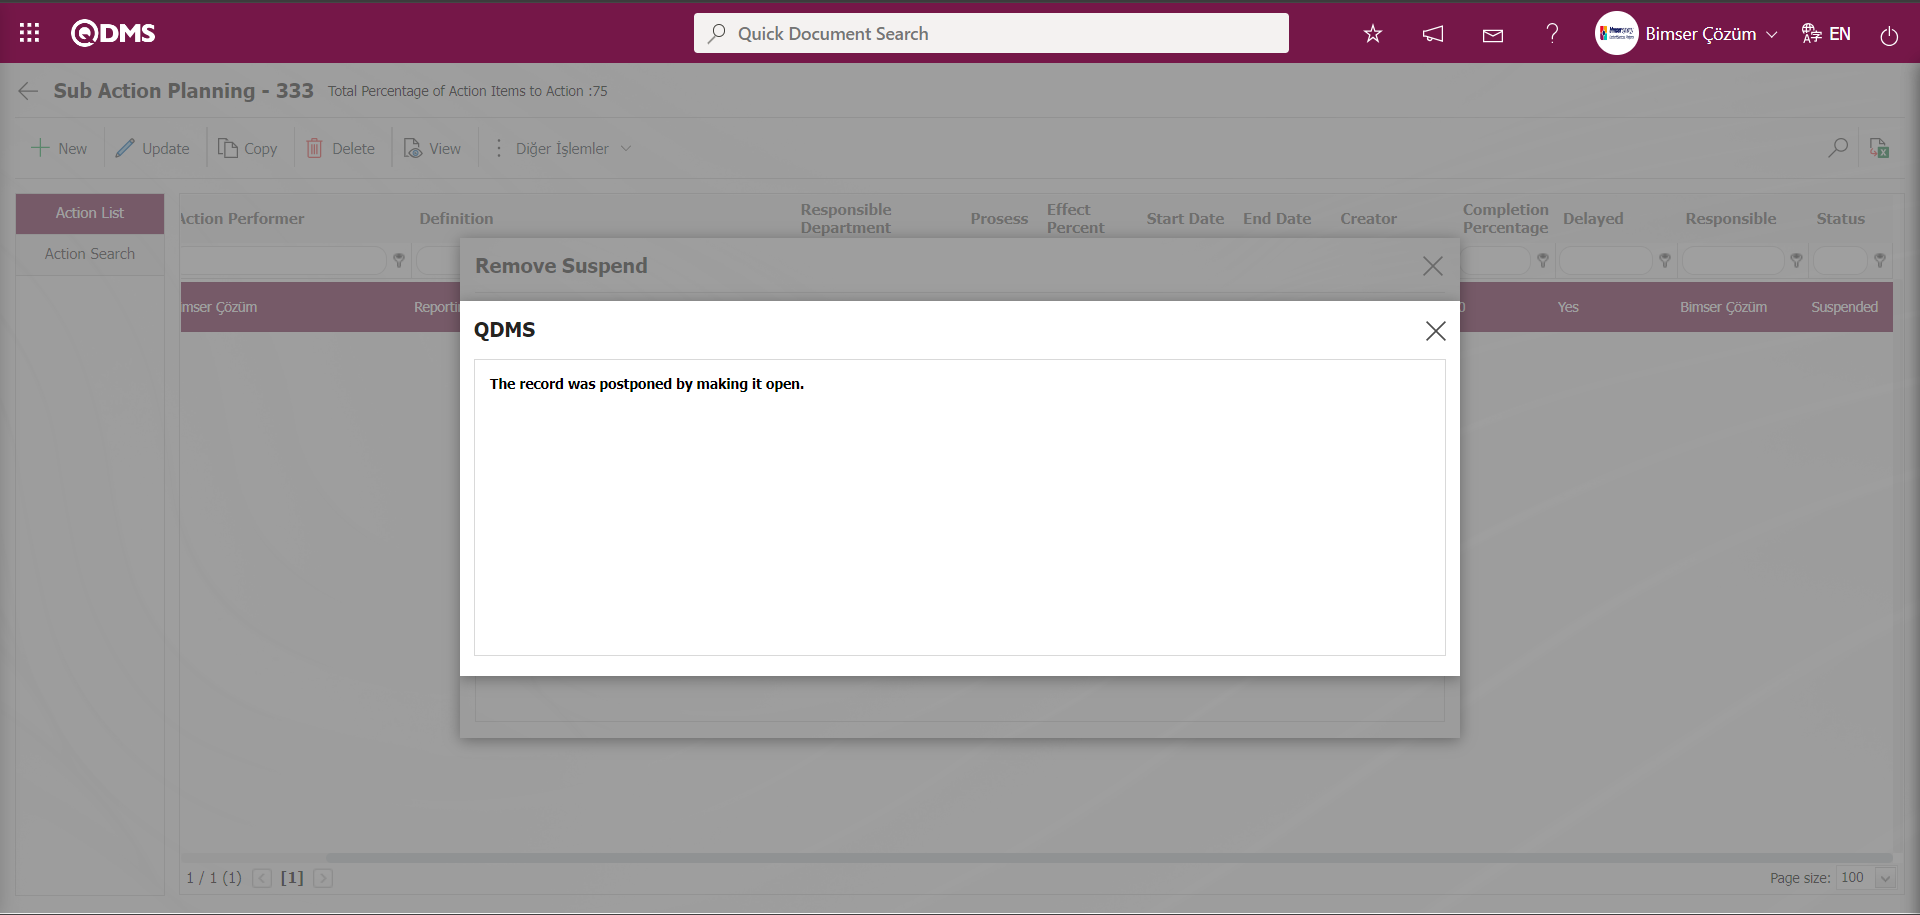
After the Action Item whose status is “Suspended” on the Action Item Planning screen is “Unsuspended”, the status of the Action Item is now displayed as “Open” in the status field in the grid.
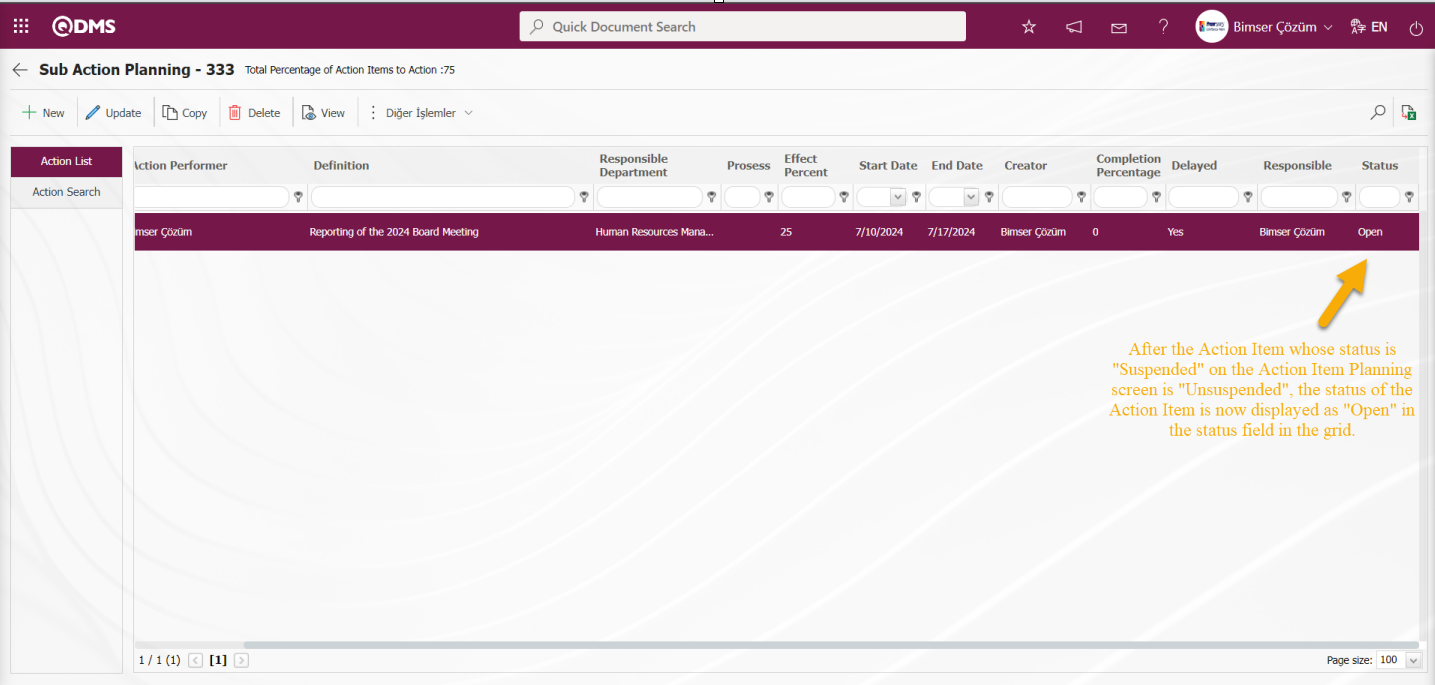
6.2.1.10. Record Maintenance
Menu name: Integrated Management System/ Action Management/ Planning/ Items
Users who are authorised to perform Record Maintenance feature operation are authorised to make all kinds of changes on the action plan or action item. Even if the action is in a closed state, all kinds of changes can be made on the record. In order to perform these operations, the user must be assigned as the module administrator of the Action Management Module in the System Infrastructure Definitions / Bimser System Infrastructure Definitions / Configuration Settings / Module Administrator menu. The  button is displayed on the screens of the users who are assigned as module administrator and they can edit the desired information on an Action record with the button.
Record Maintenance in Action Plan;
On the Action Planning screen, record maintenance is performed by clicking the button on the Main Action Plan record selected in the Action List tab. In the screen that opens, the fields to be changed are displayed and the process of making changes on these displayed fields is performed if desired.
Select the Main Action Plan in the Action List on the Action Planning screen and click the button.

In the Action Planning screen, the fields to be changed in the record maintenance process are displayed.
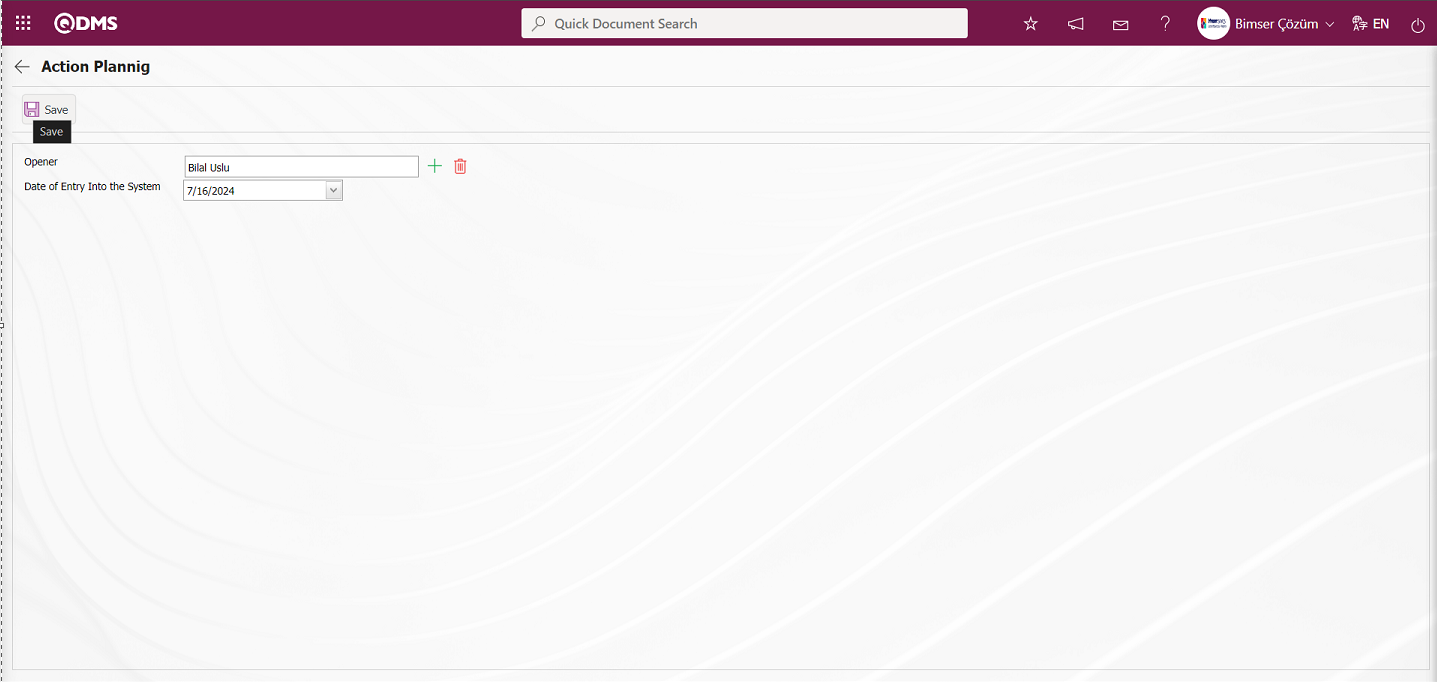
Define the relevant fields on the screen that opens;
System Entrant: In the Action Planning screen, if desired, it is the field where the system entrant information is selected in the list of personnel defined in the system opened by clicking the (Select) button.
System Entry Date: In the Action Planning screen, if desired, it is the field where the System Entry date information is selected in the Calendar field opened by clicking the drop-down list.
In the Action Planning screen, the system entry information is selected from the list of personnel defined in the system. If desired, the date of entry into the system is selected in the Calendar field opened by clicking the drop-down list. After entering the relevant information in the required fields, the Action Plan record maintenance process is performed by clicking the  button in the upper left corner of the screen.

Record Maintenance in Action Item;
On the Action Item Planning screen, record maintenance is performed by clicking the  button on the Action Item record selected in the Action List tab. In the screen that opens, the fields to be changed are displayed and the process of making changes on these displayed fields is performed if desired. On the Action Item Planning screen, the Action Item is selected in the Action List and the button is clicked.
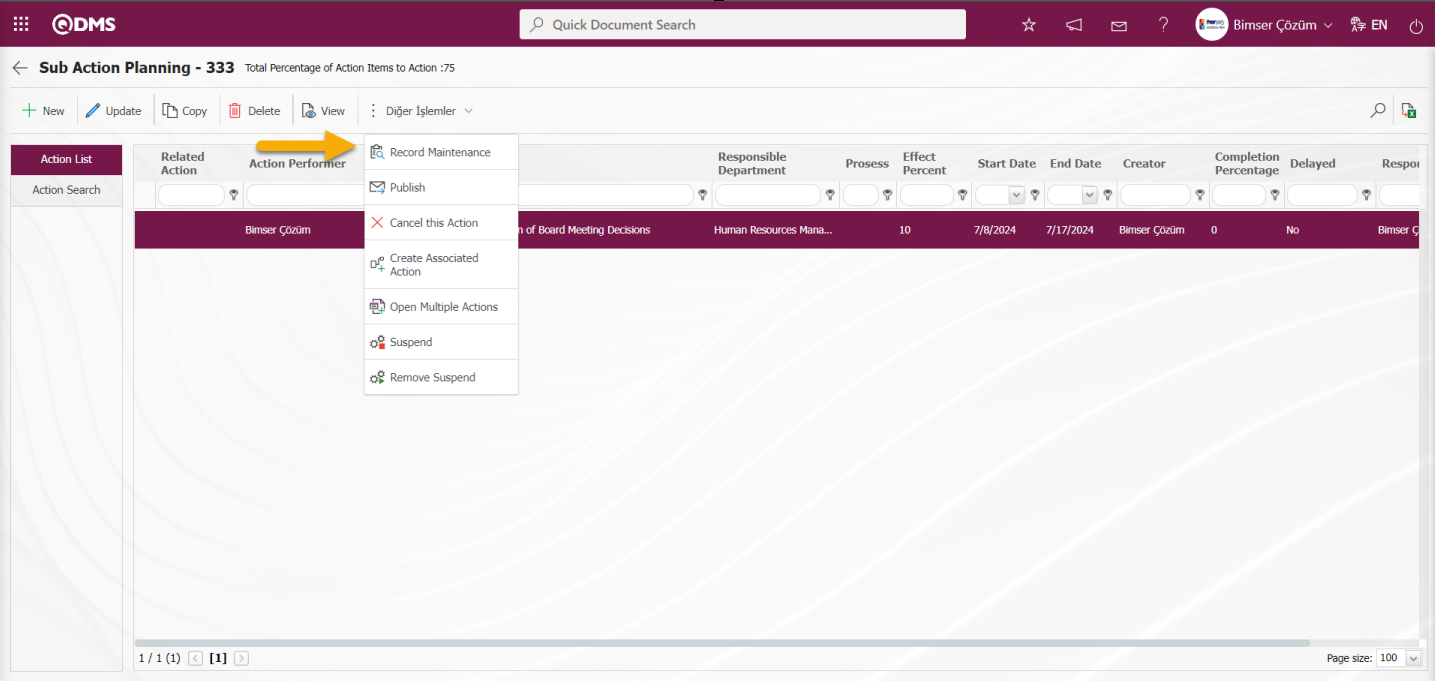
In the Action Item Planning screen, the fields to be changed in the record maintenance process are displayed.
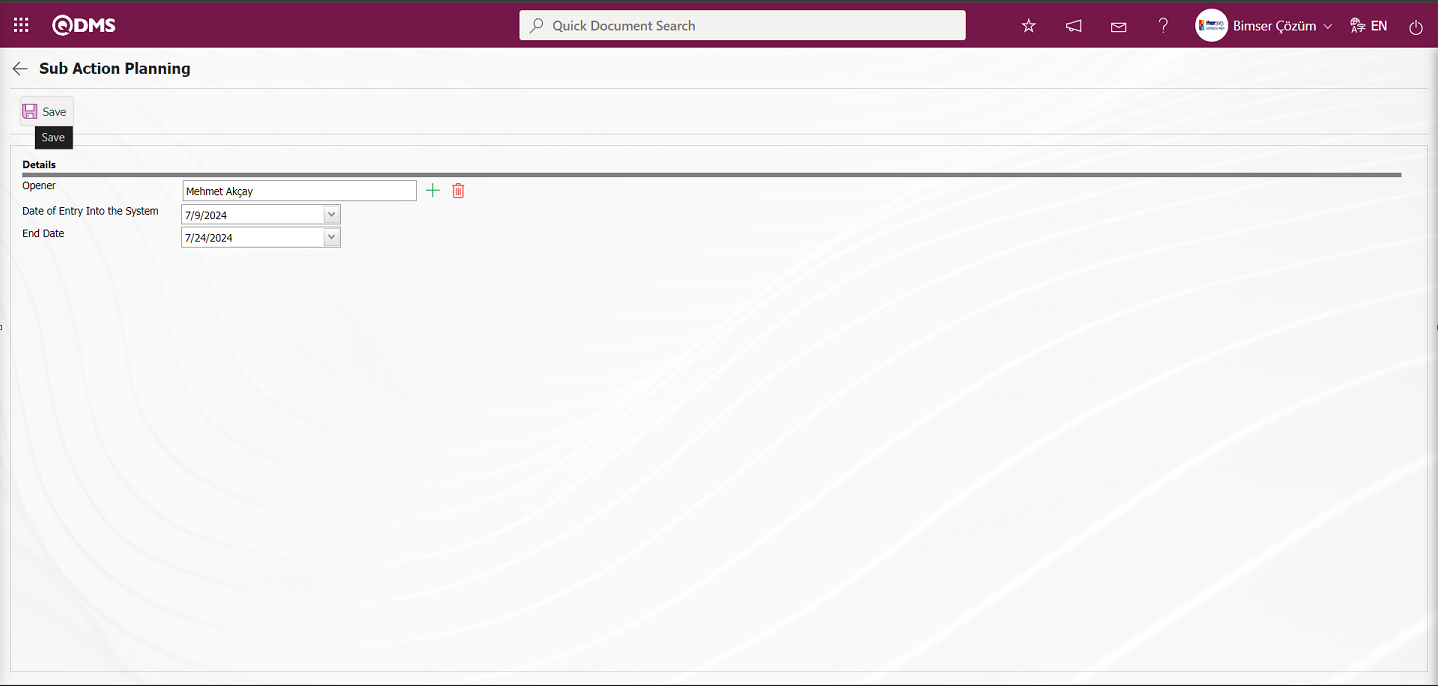
Define the relevant fields on the screen that opens
System Entrant: In the Action Item Planning screen, it is the field where the system entrant information is selected in the list of personnel defined in the system opened by clicking the (Select) button.
System Entry Date: In the Action Item Planning screen, if desired, it is the field where the system entry date information is selected in the Calendar field opened by clicking the drop-down list.
End Date: In the Action Item Planning screen, if desired, the end date information is selected in the Calendar field opened by clicking the drop-down list.
In the Action Planning screen, the system entry information is selected from the list of personnel defined in the system. If desired, the system entry and end date information is selected in the Calendar field opened by clicking the drop-down list. After entering the relevant information in the required fields, the Action Item record maintenance process is performed by clicking the button in the upper left corner of the screen.
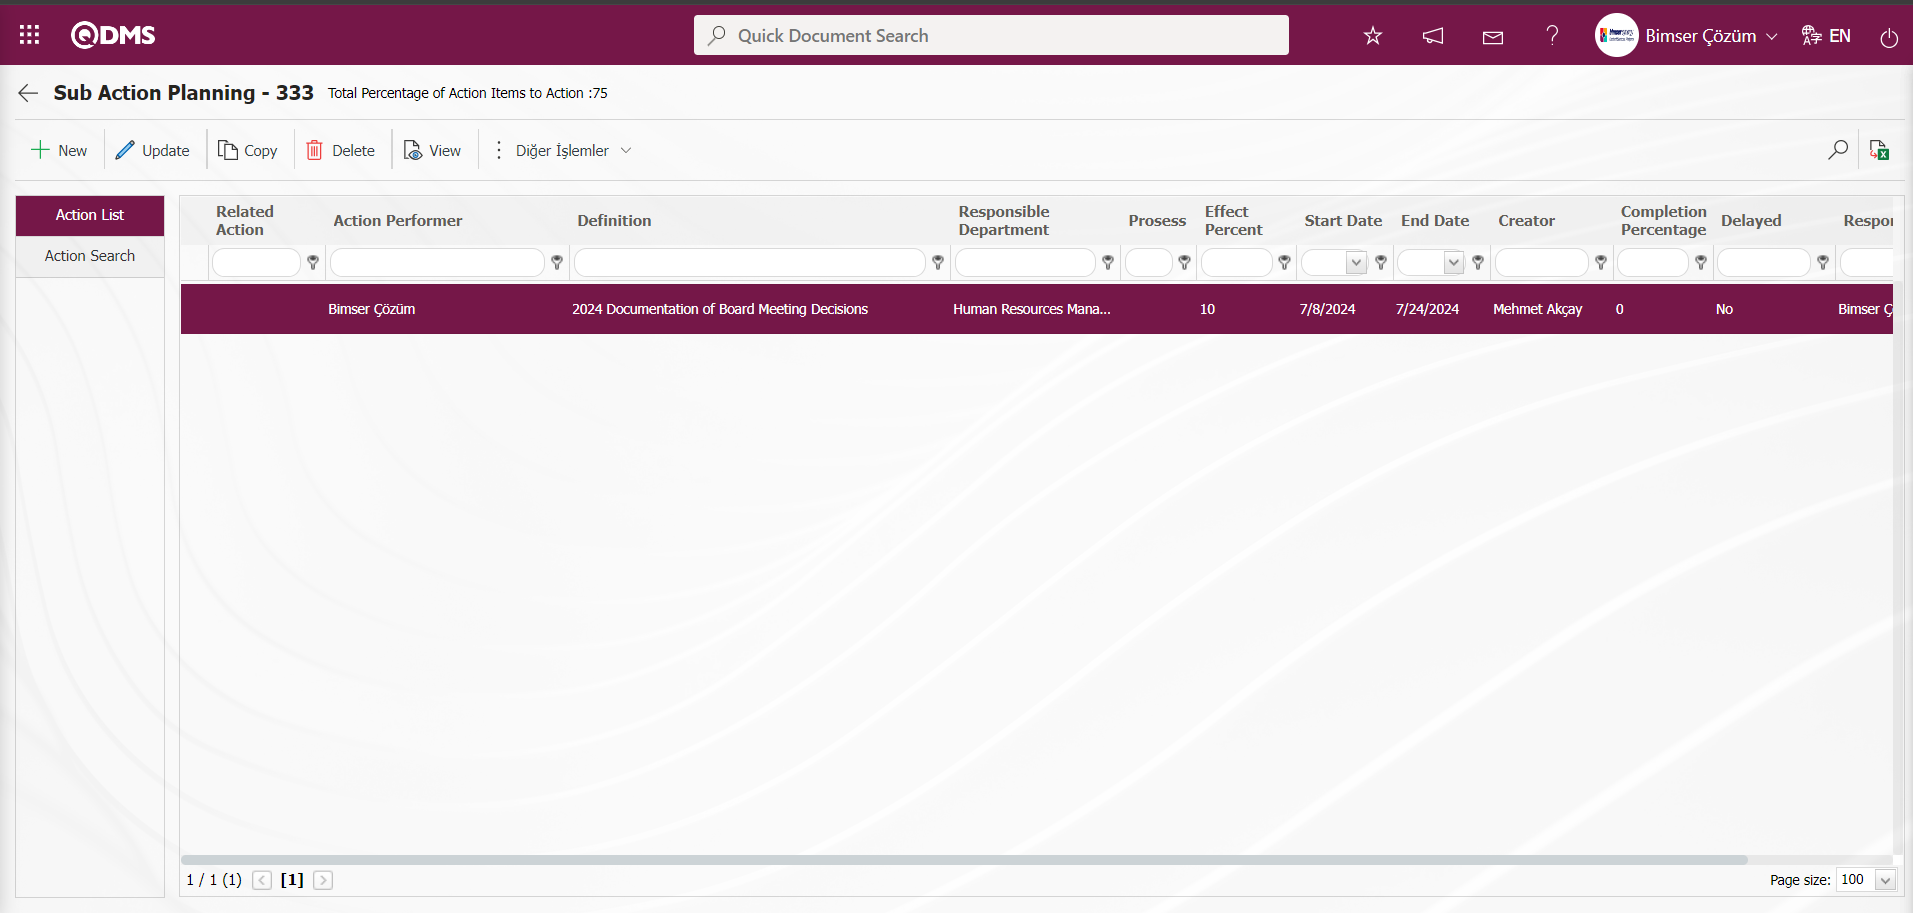
6.2.2. Action Confirmation
Menu name: Integrated Management System/ Action Management/Action Approval
This is the menu where the approval process is done in the Action Management module. Approval operations such as Opening Approval, Closing Approval and Delay Approval are performed in this menu. When the action is selected, click on the  button and the approval process detail information of the action is displayed. The Action at the approval stage can be approved as well as the Action can be rejected at the approval process stage by writing the rejection reason information by clicking the
  button.

With the help of the buttons on the screen;
: Approval Transaction Detail is displayed.
: Action approval process is rejected.
In the Action Approval screen, the action in the approval stage is selected in the Action List tab and the button is clicked.
In the Action Rejection screen, the Reason for Rejection field information in the Reason for Cancellation tab is entered.
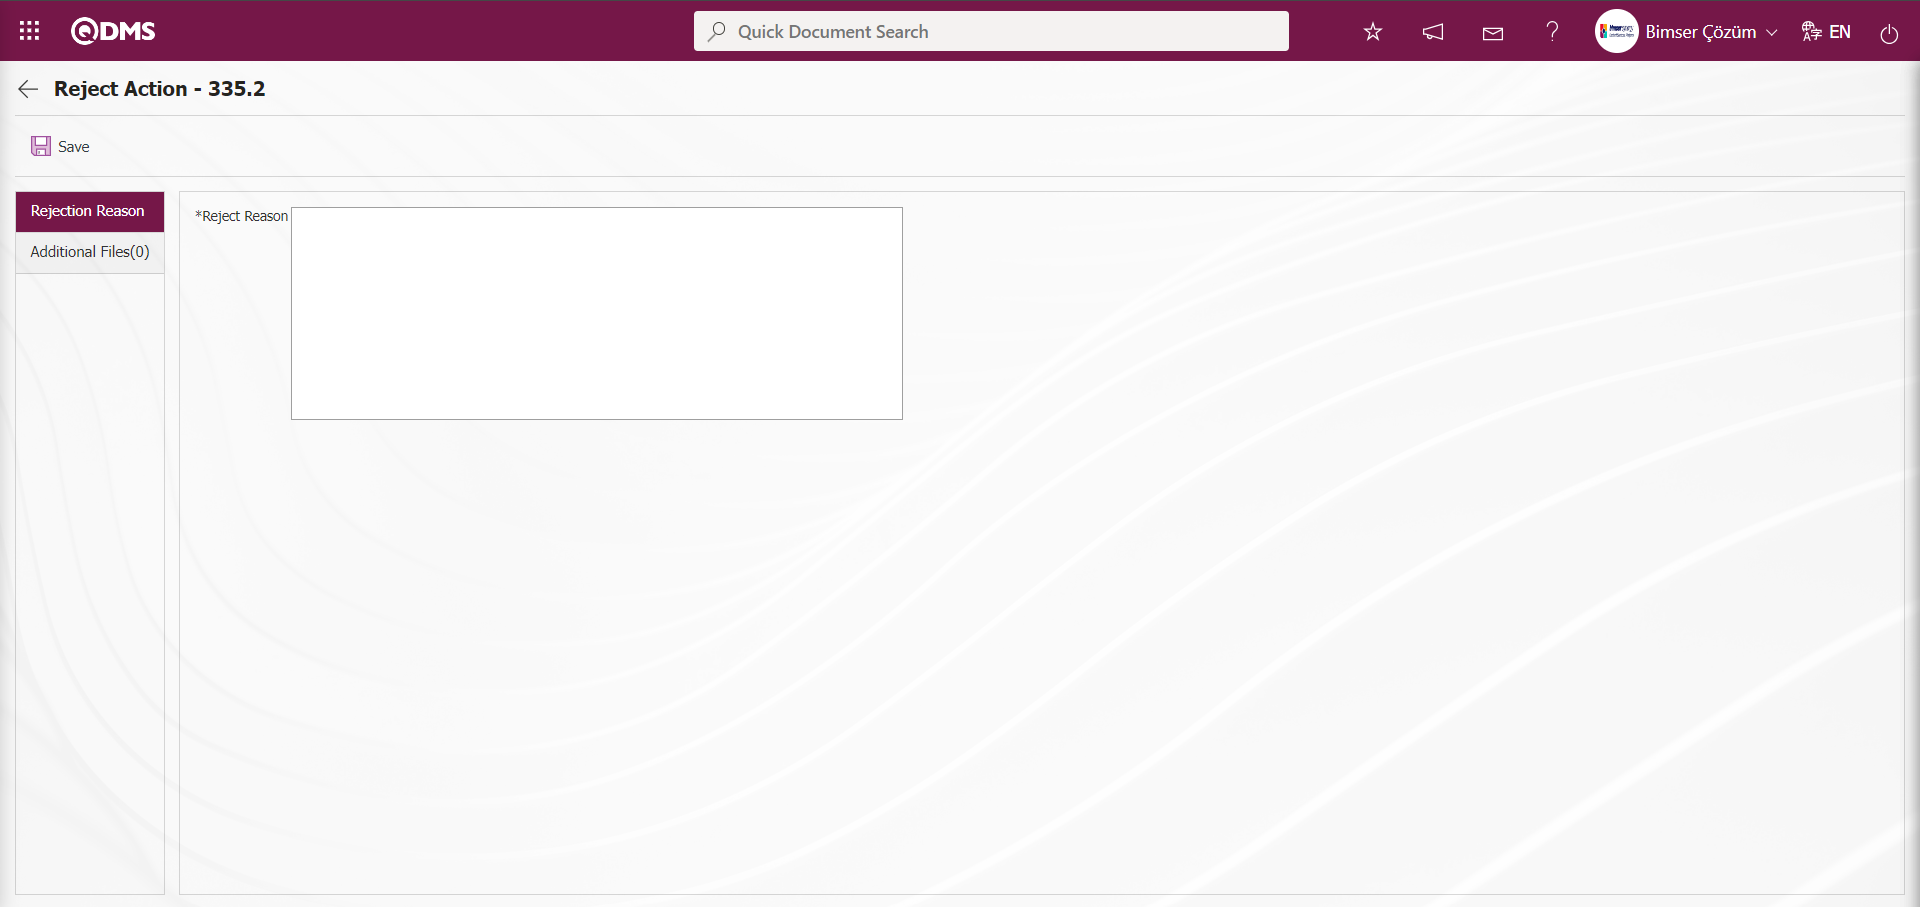
In the Additional Files tab, if there is a reason for the rejection of the action, additional file upload is made.

With the help of the buttons on the screen;
: The additional file is uploaded to the system.
: The uploaded additional file information is displayed.
: The uploaded additional file information is deleted.
After entering the relevant information in the required fields on the Action Rejection screen, the Action Rejection registration process is done if desired by clicking the  button.
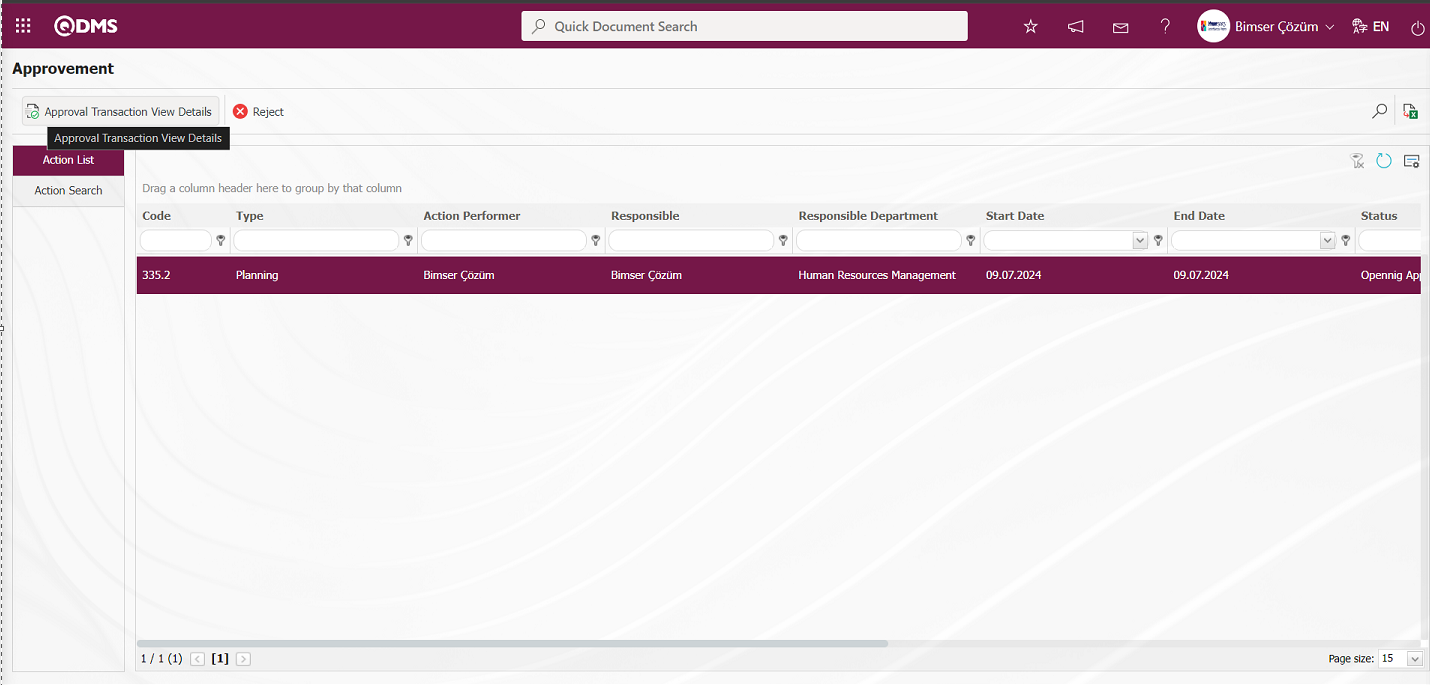
In the Action Approval screen, the Action to be approved is selected from the list in the Action list tab and the Action Approval screen is opened by clicking the  button.
![A screenshot of a computer
Description automatically generated]ref79
With the help of the buttons on the screen;
 :Action Item approval process is done.
 :Action Item rejection is done. In the Action Item rejection process, the reason for rejection information is mandatory and if any, additional file uploading process related to the reason for rejection is performed.
Action Item Planning - Record Update screen opens. On this screen, there are 3 tabs: Action Information, Additional Files and Routing History.
Action Information Tab: This tab contains general information about the action.
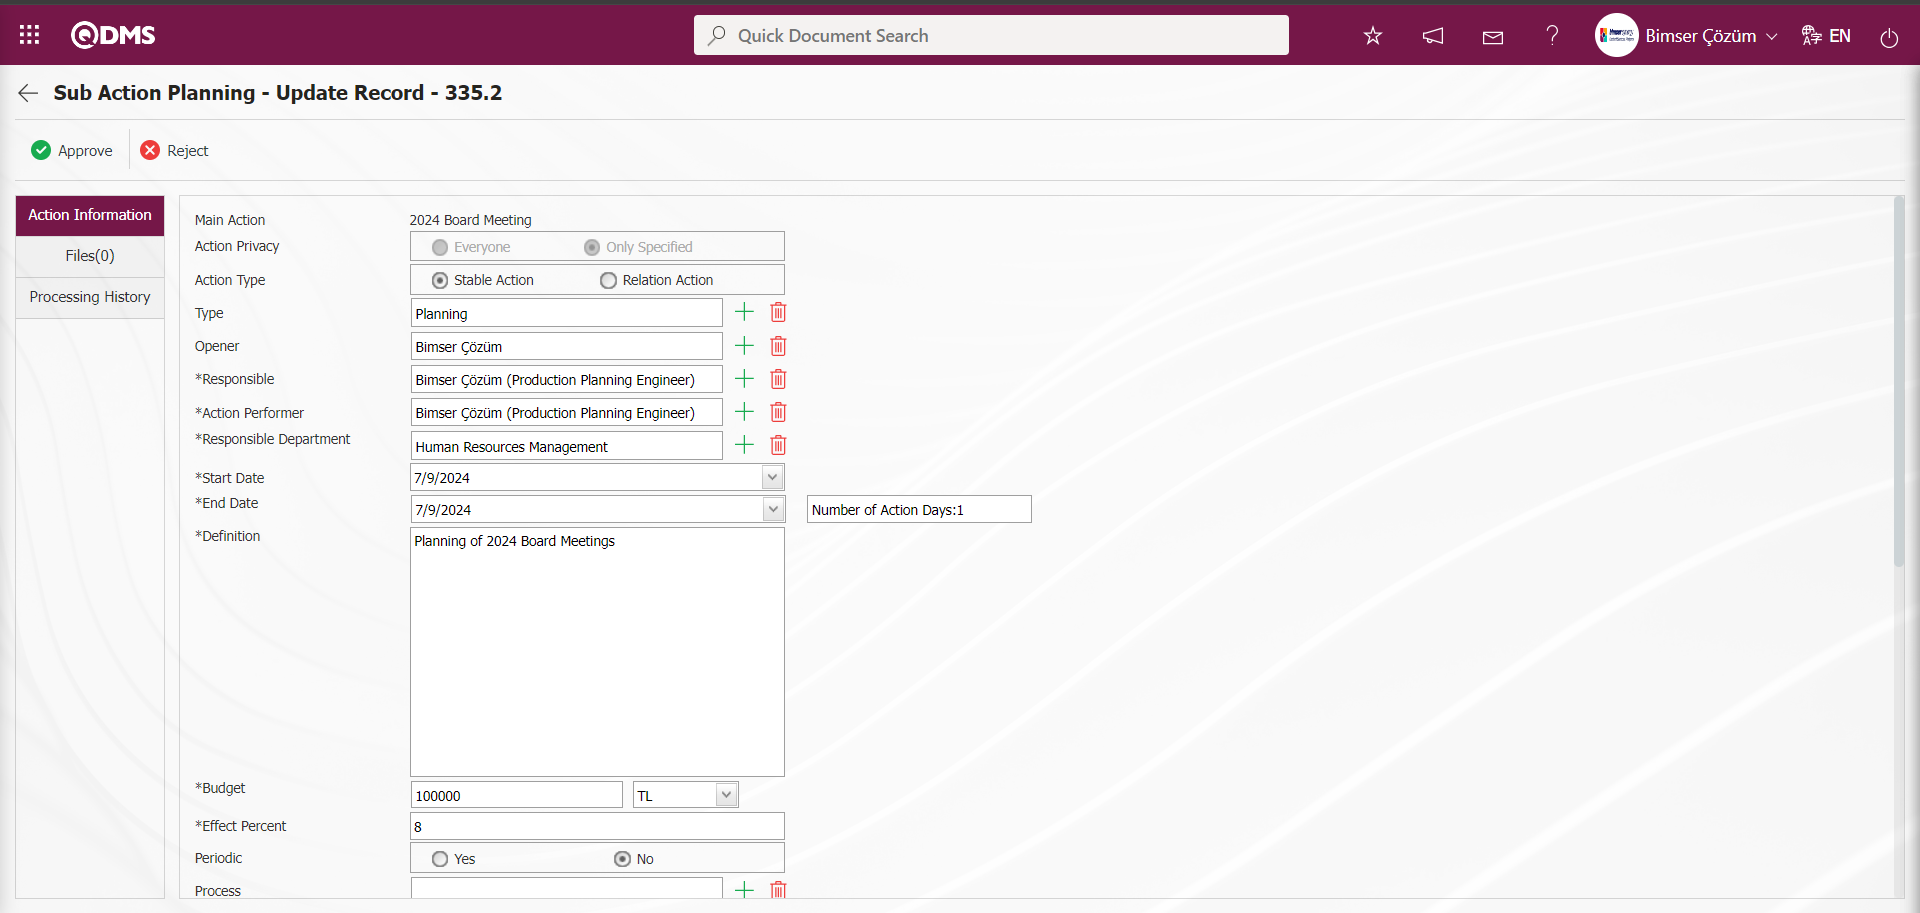
Additional Files Tab: It is the tab where additional files such as files, pictures, minutes related to the action are uploaded and the uploaded files are displayed.

With the help of the buttons on the screen;
: The additional file is uploaded to the system.
: The uploaded additional file information is displayed.
: Uploaded additional file information is deleted.
Routing History Tab: It is the tab where the routing history information about the routing process related to the action, such as routing\Opener, new responsible, new to do, is listed.
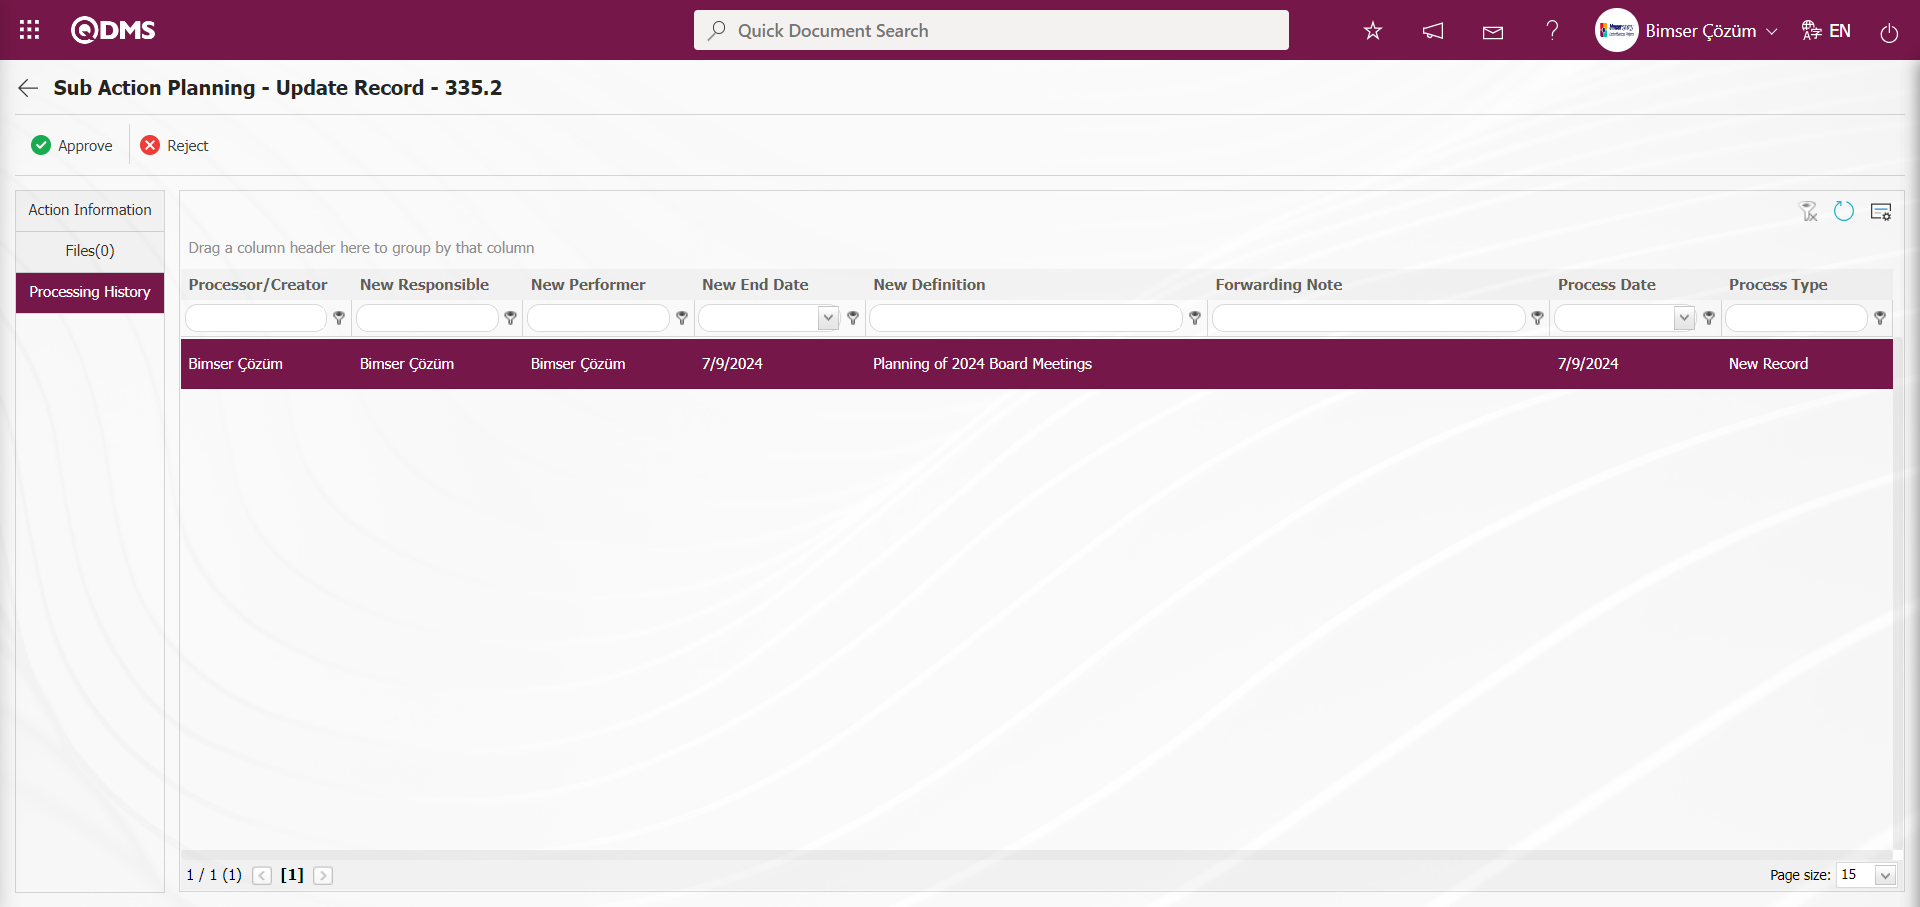
Action Item Planning - Record Update At this stage button is clicked.
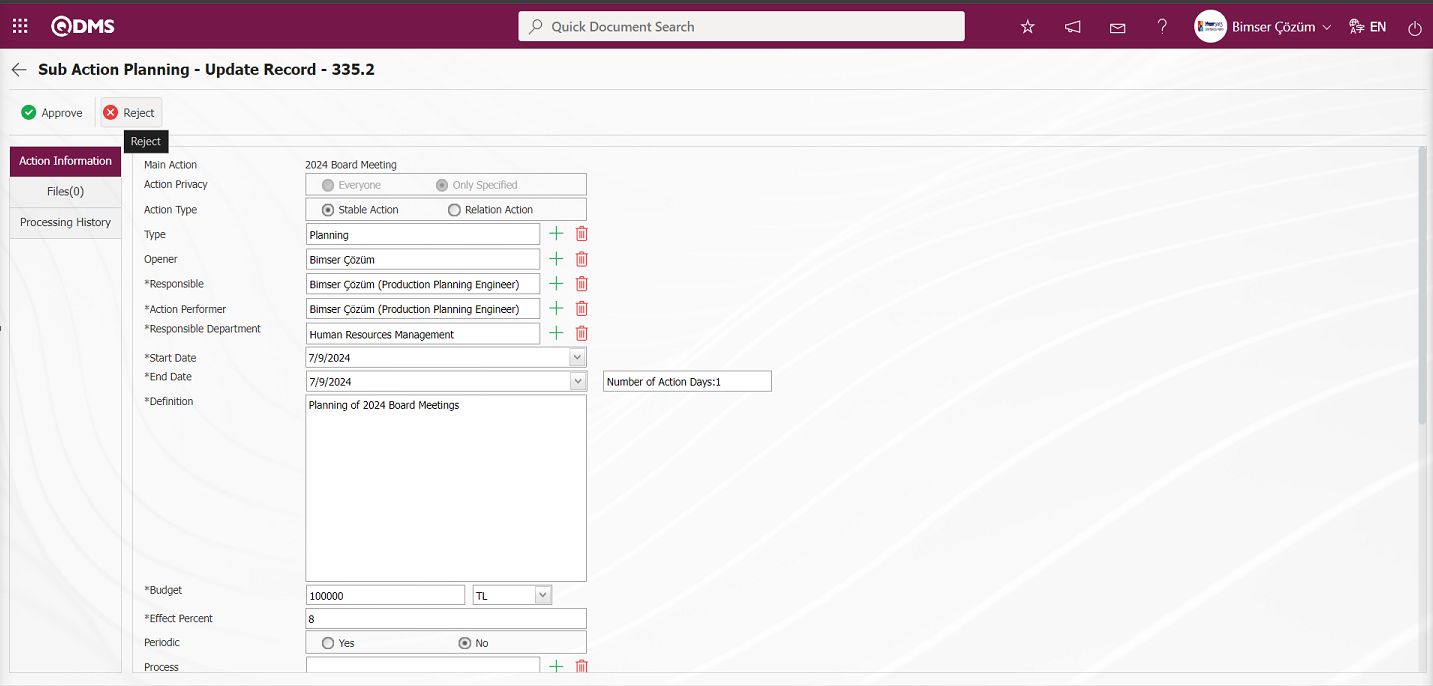
In the Action Rejection screen, enter the Reason for Rejection field information.
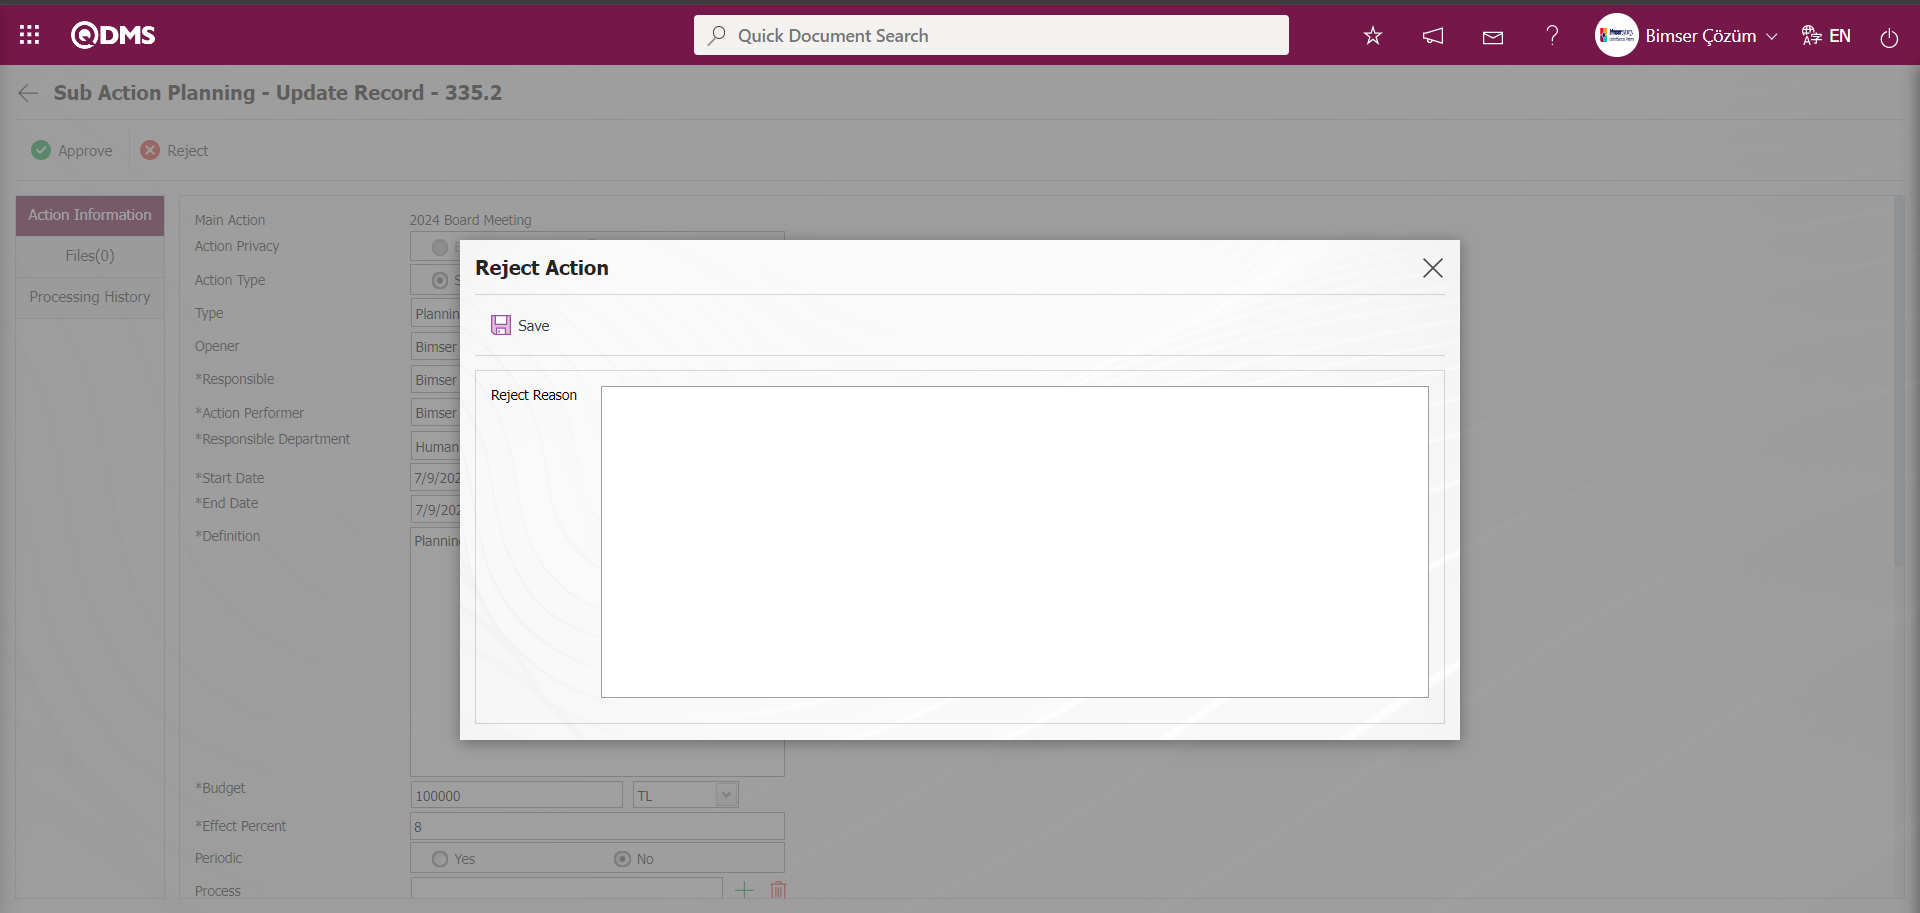
After entering the relevant information in the required fields on the Action Rejection screen, the button in the upper left corner is clicked and the Action Rejection registration process is also done at this stage if desired.
Click the  button on the Action Item Planning - Record Update screen.
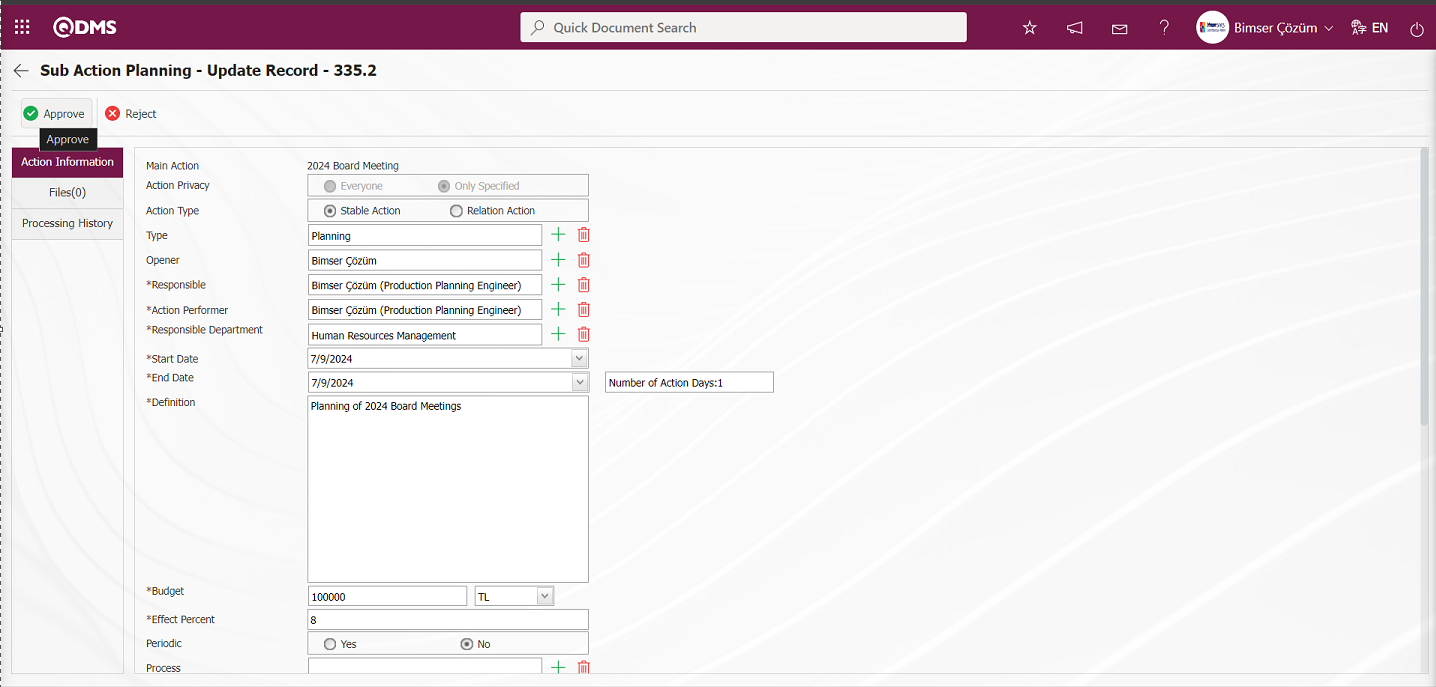
After the approval process of the opening approval of the action, the “List of Actions to be Performed” is displayed on the “My Pending Jobs” page of the person who will perform the action.
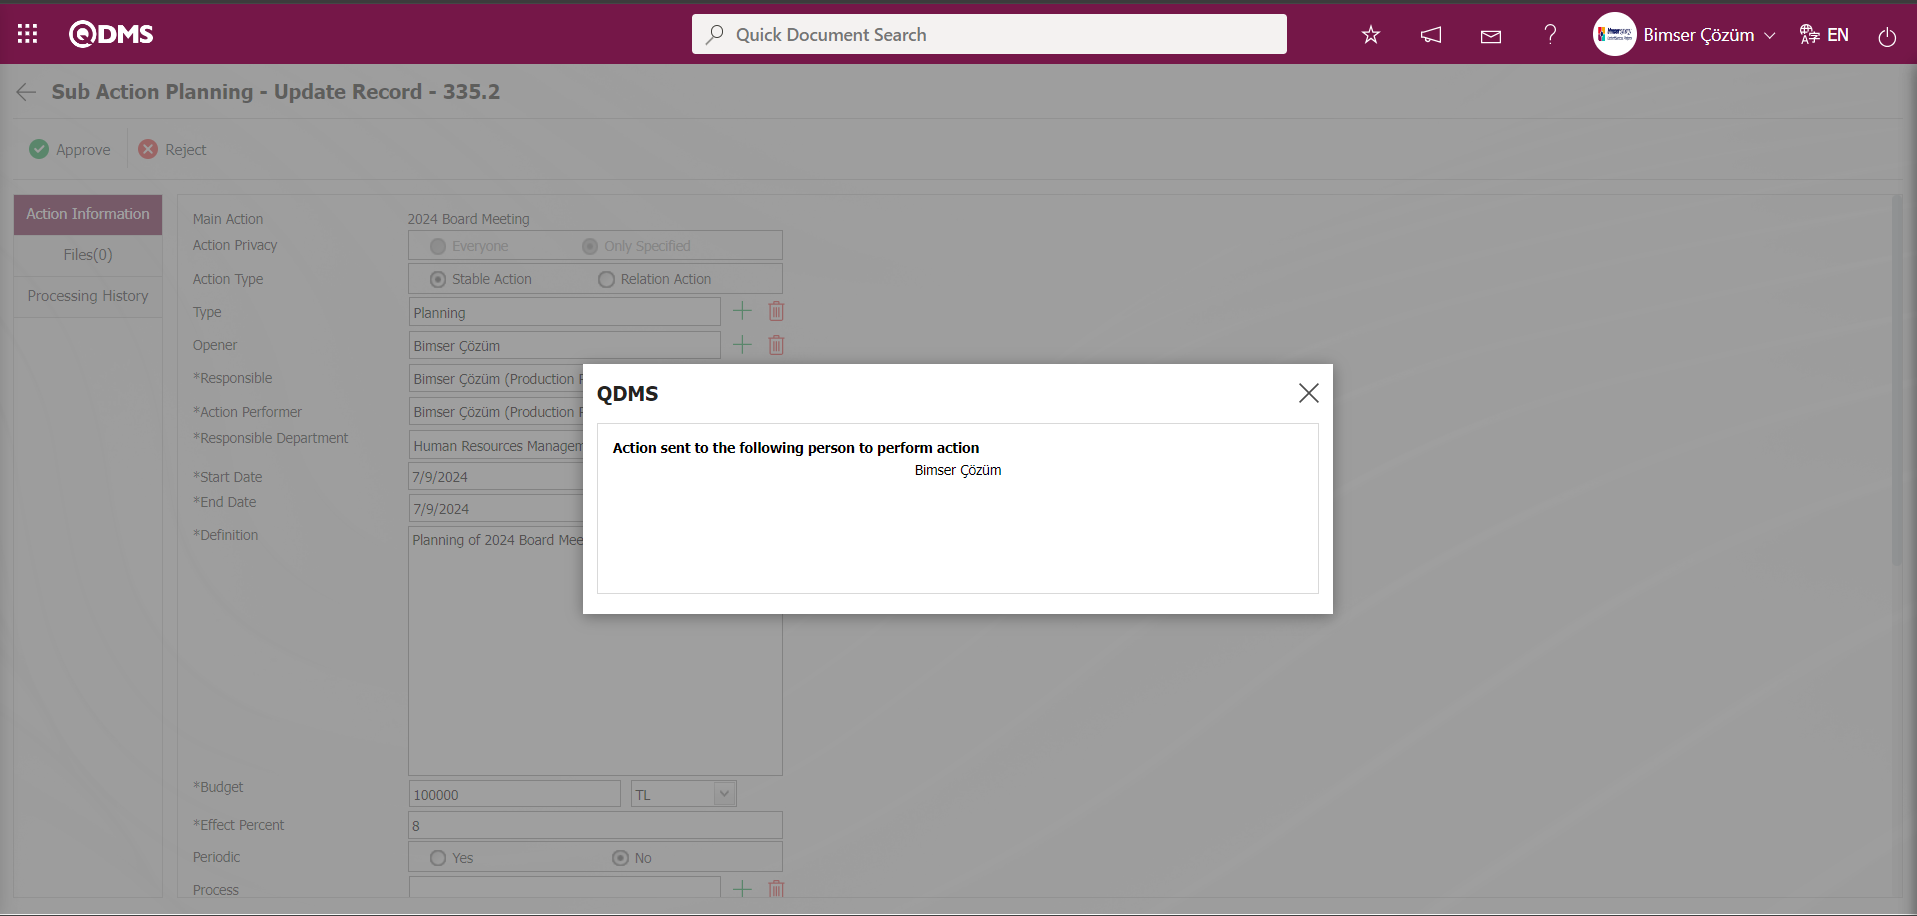
6.2.3. Reports
Menu name: Integrated Management System/ Action Management/ Reports
This is the section where all actions in the Action Management module are reported.
![A screenshot of a computer
Description automatically generated]ref34
6.2.3.1.Main Action Reports
Menu name: Integrated Management System/ Action Management/ Reports/ Main Action Reports
Main Action Reports screen is the report where all information about the main action activities are displayed in general. On the Main Action Report screen, there are two tabs: Action List and Action Search tab.
With the help of the buttons on the screen;
: Data can be transferred to Excel.
: Records can be searched by filtering.
: The search criteria on the menu screens are used to clean the data remaining in the filter fields in the grid where the search operation is performed.
: The menu screen is restored to its default settings.
: User-based designing of the menu screen is done with the show-hide feature, that is, the hiding feature of the fields corresponding to the columns on the menu screens.
In the Action Search tab on the Main Action Report screen, data entries are made in the fields in the search criteria in the Action Search tab and filtering is done by clicking the (Search) button: Action No field
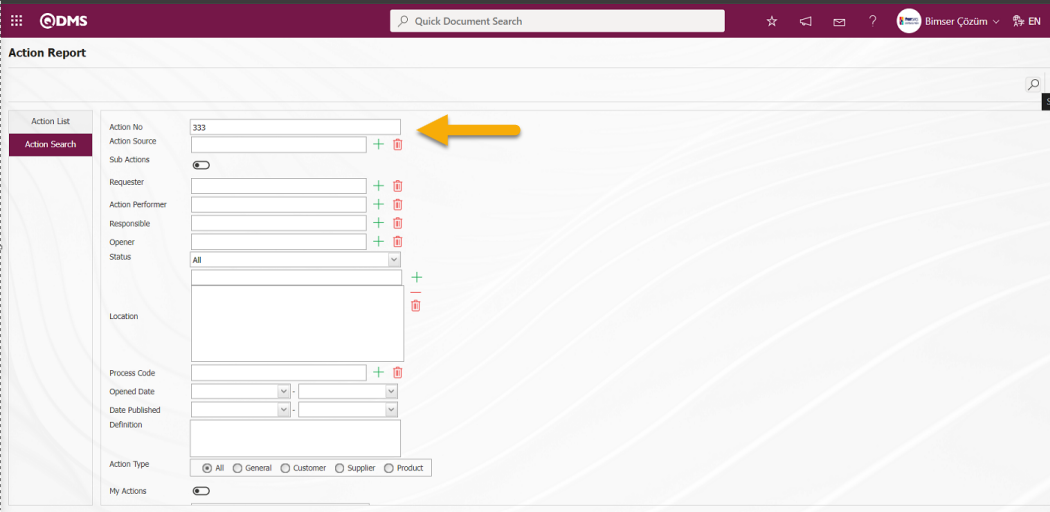
In the Action list on the Main Action Report screen, the records belonging to the desired data are listed according to the filter settings made in the Action Search tab.

On the Main Action Report screen, “Main Action Report” is displayed in excel format by clicking the (Export to Excel) button while the Main Action is selected in the list in the Action List.
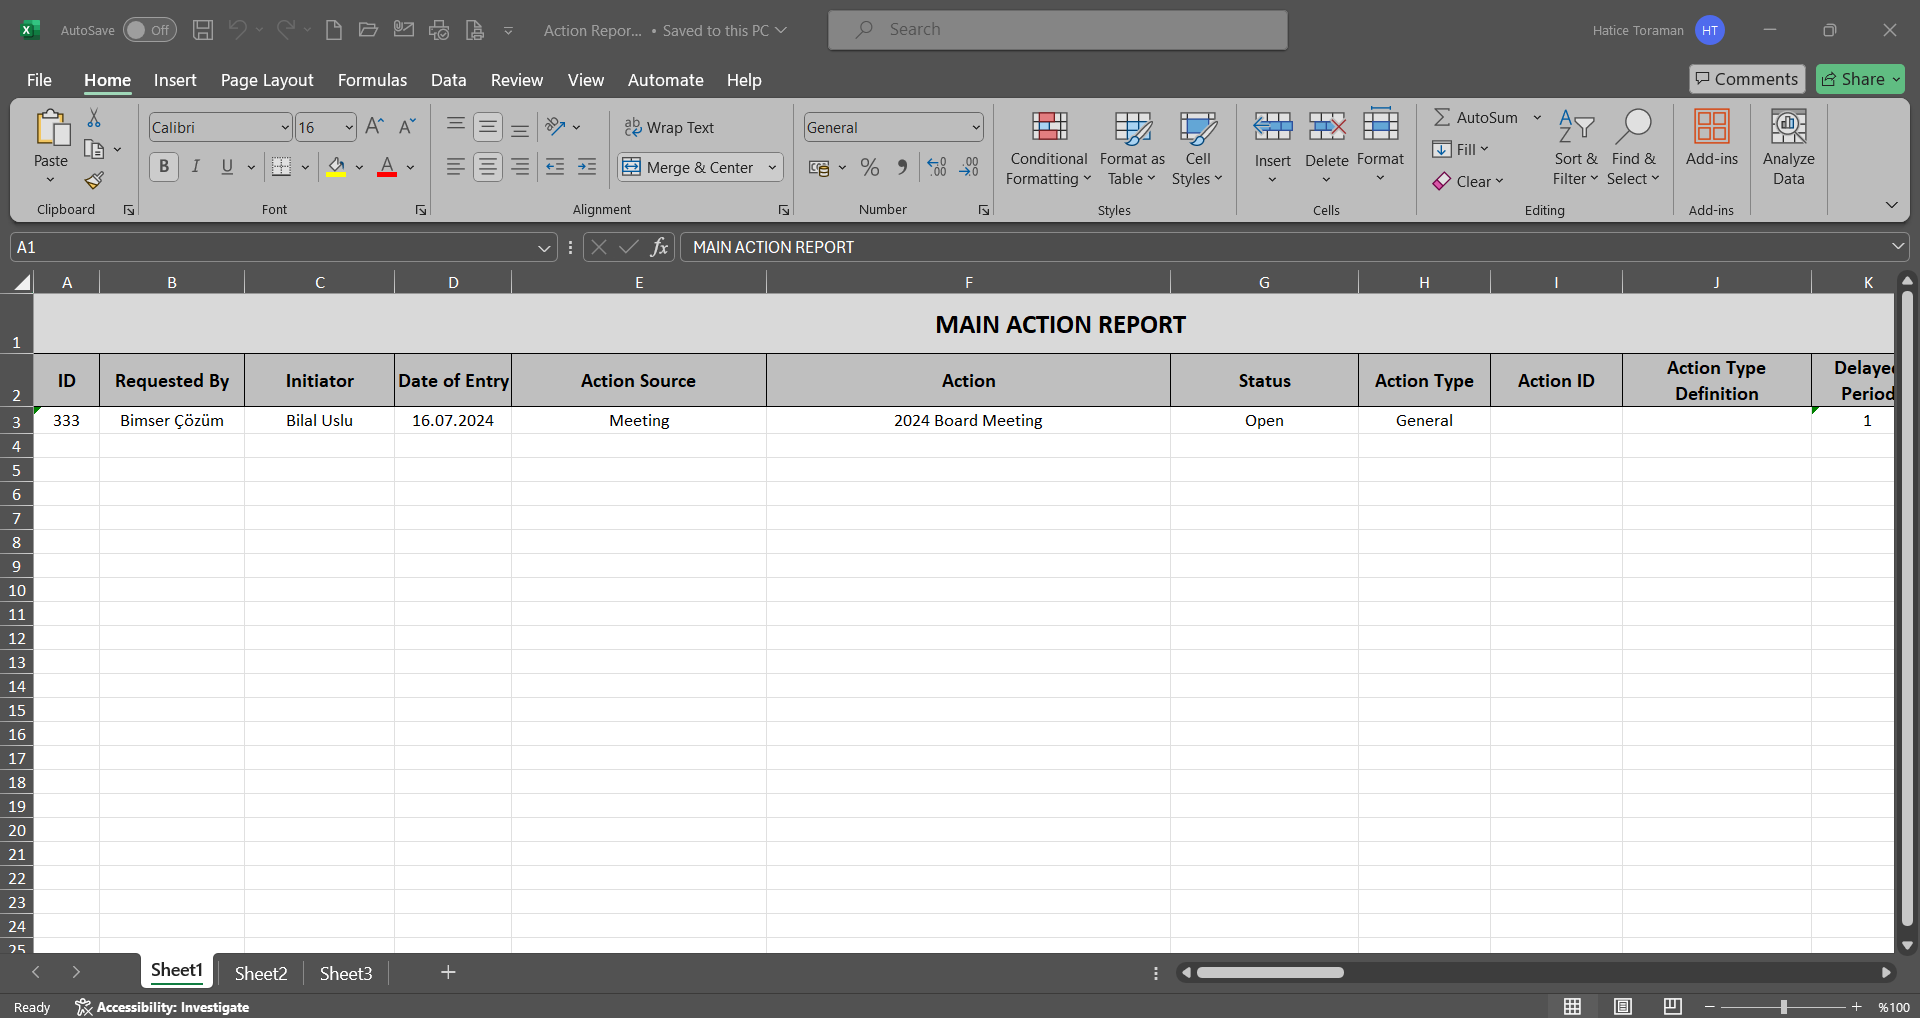
By applying the Grouping feature on the Main Action Report screen, the grouping feature is made in the grids in the Qdms system by clicking on the field with the mouse for the fields corresponding to the columns on the input screen by clicking on the field with the mouse and dragging it to the “Drag here to group the column header according to that column” field.
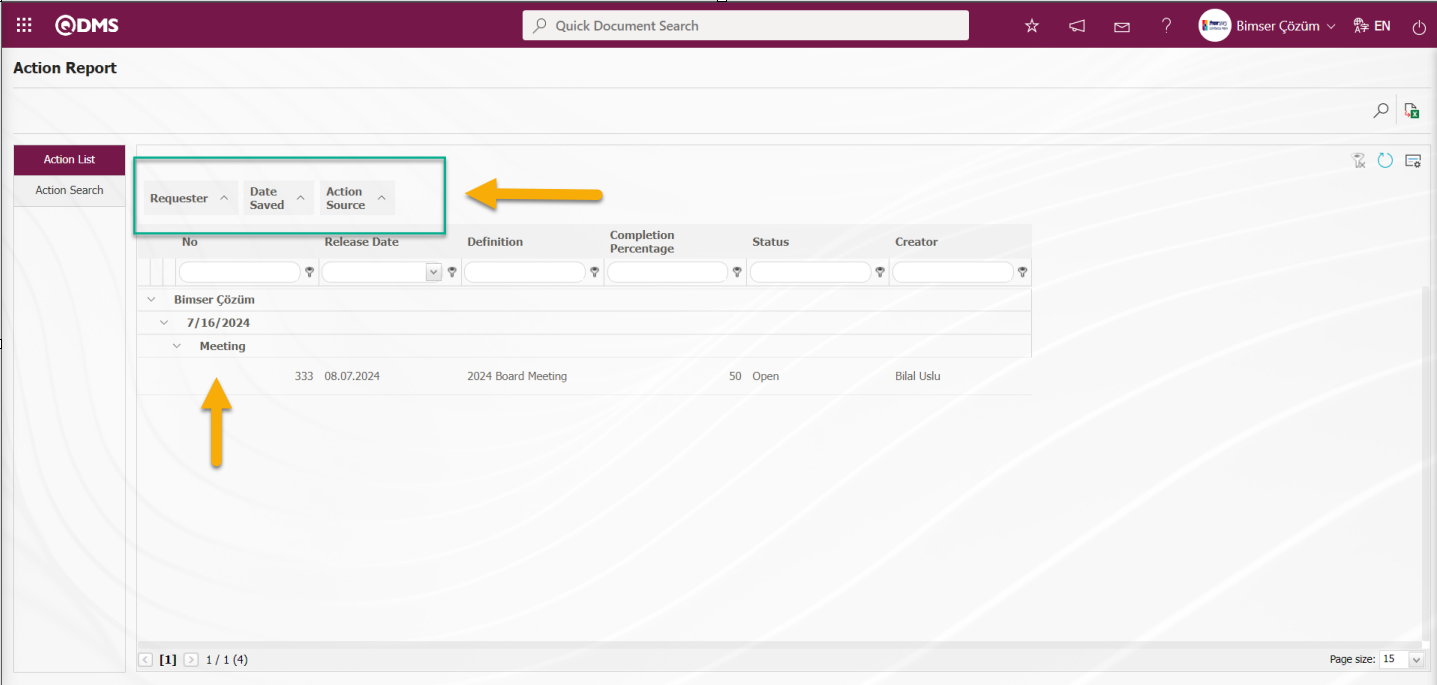
Click  “Column Selector” button on the Main Action Report screen.
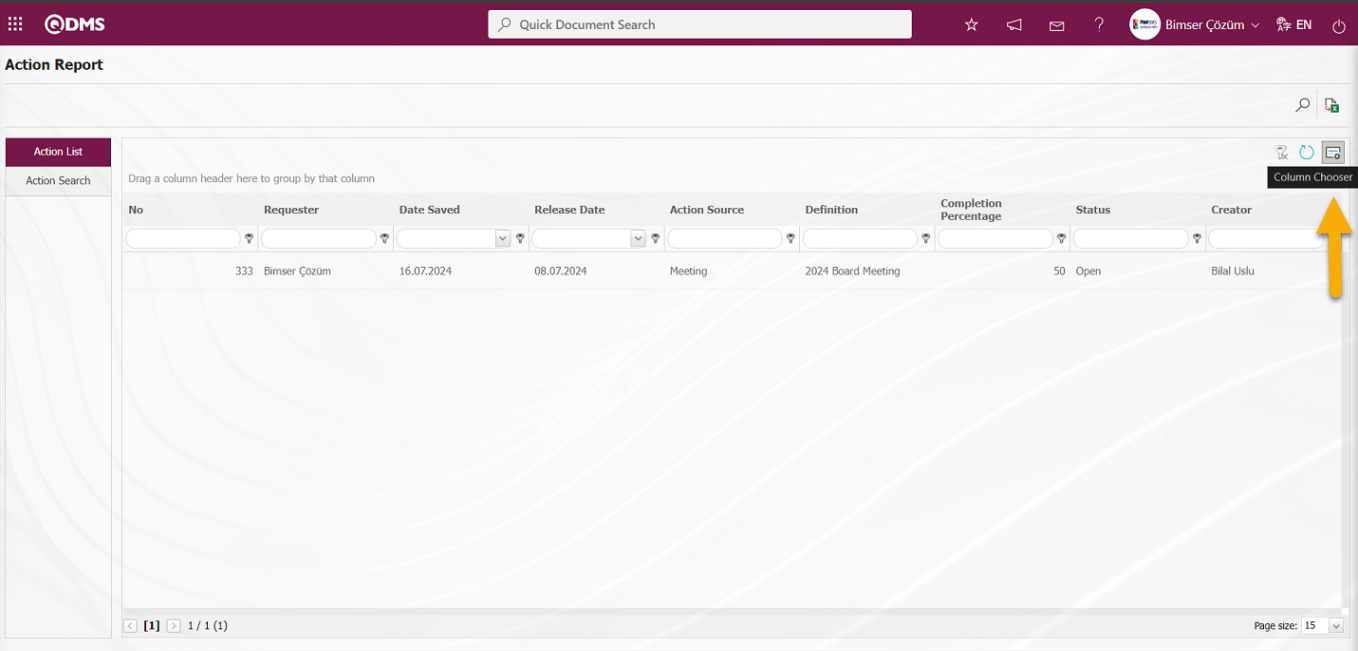
The fields that the field selector screen does not want to be displayed in the grid of the opened field selector screen are not displayed on the menu screen by adding the Field selector screen with the mouse hold-and-drag method.
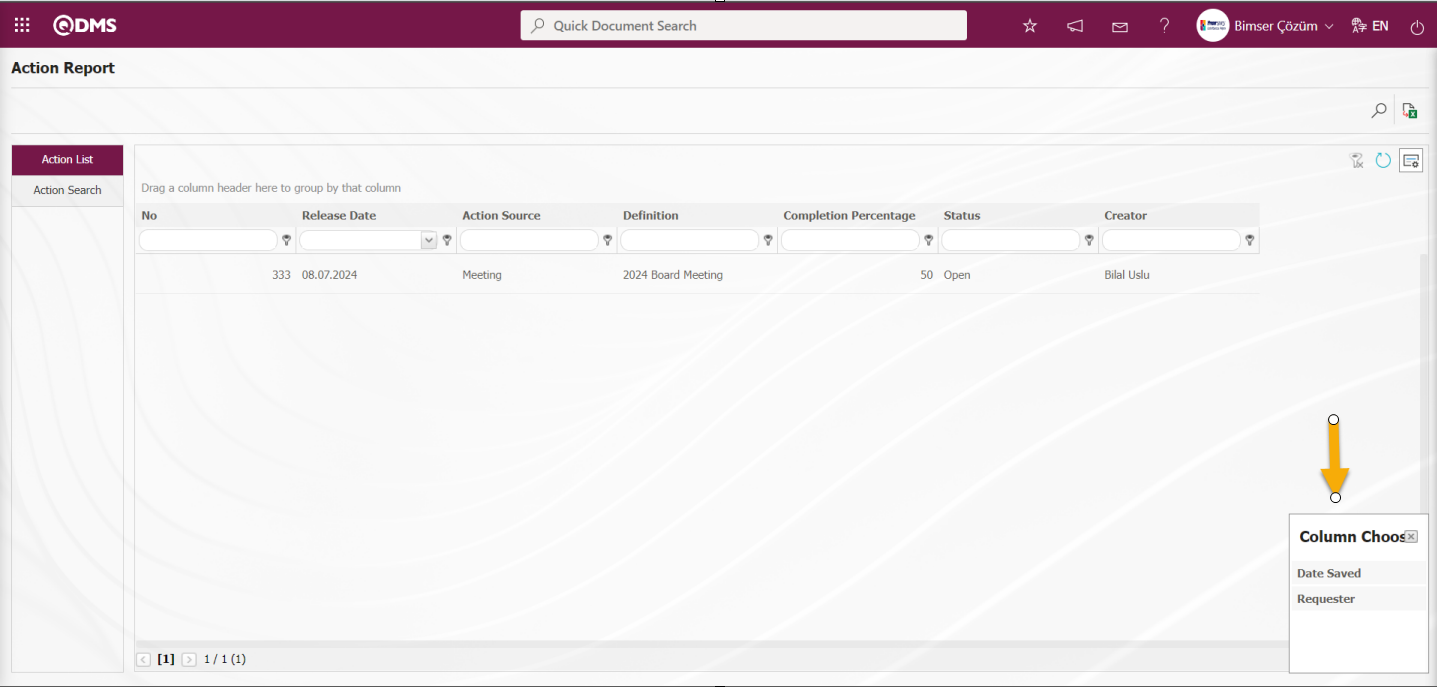
It makes the user-based design of the menu screen with the feature of showing and hiding the fields of the menu screens as desired, that is, the hiding feature.
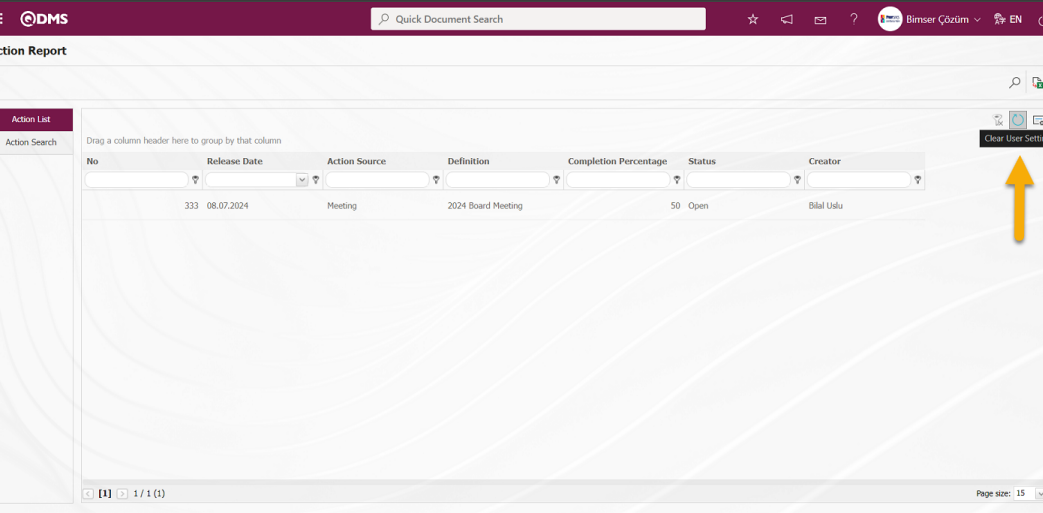
On the Main Action Report screen, click on the  (Clear User Settings) button. After clicking on the
  (Clear User Settings) button, it is ensured that the menu screen is restored to its default settings, that is, when the menu screen is used for the first time or when no configuration changes are made.

6.2.3.2.In Items Detail
Menu name: Integrated Management System/ Action Management/ Reports/ Item Details
It is the report containing the detailed information of action items. This report can be transferred as excel on the basis of “Summary Report” and “Horizontal Report”.There are two tabs on the Action Item Report screen: Action List and Action Search tab.
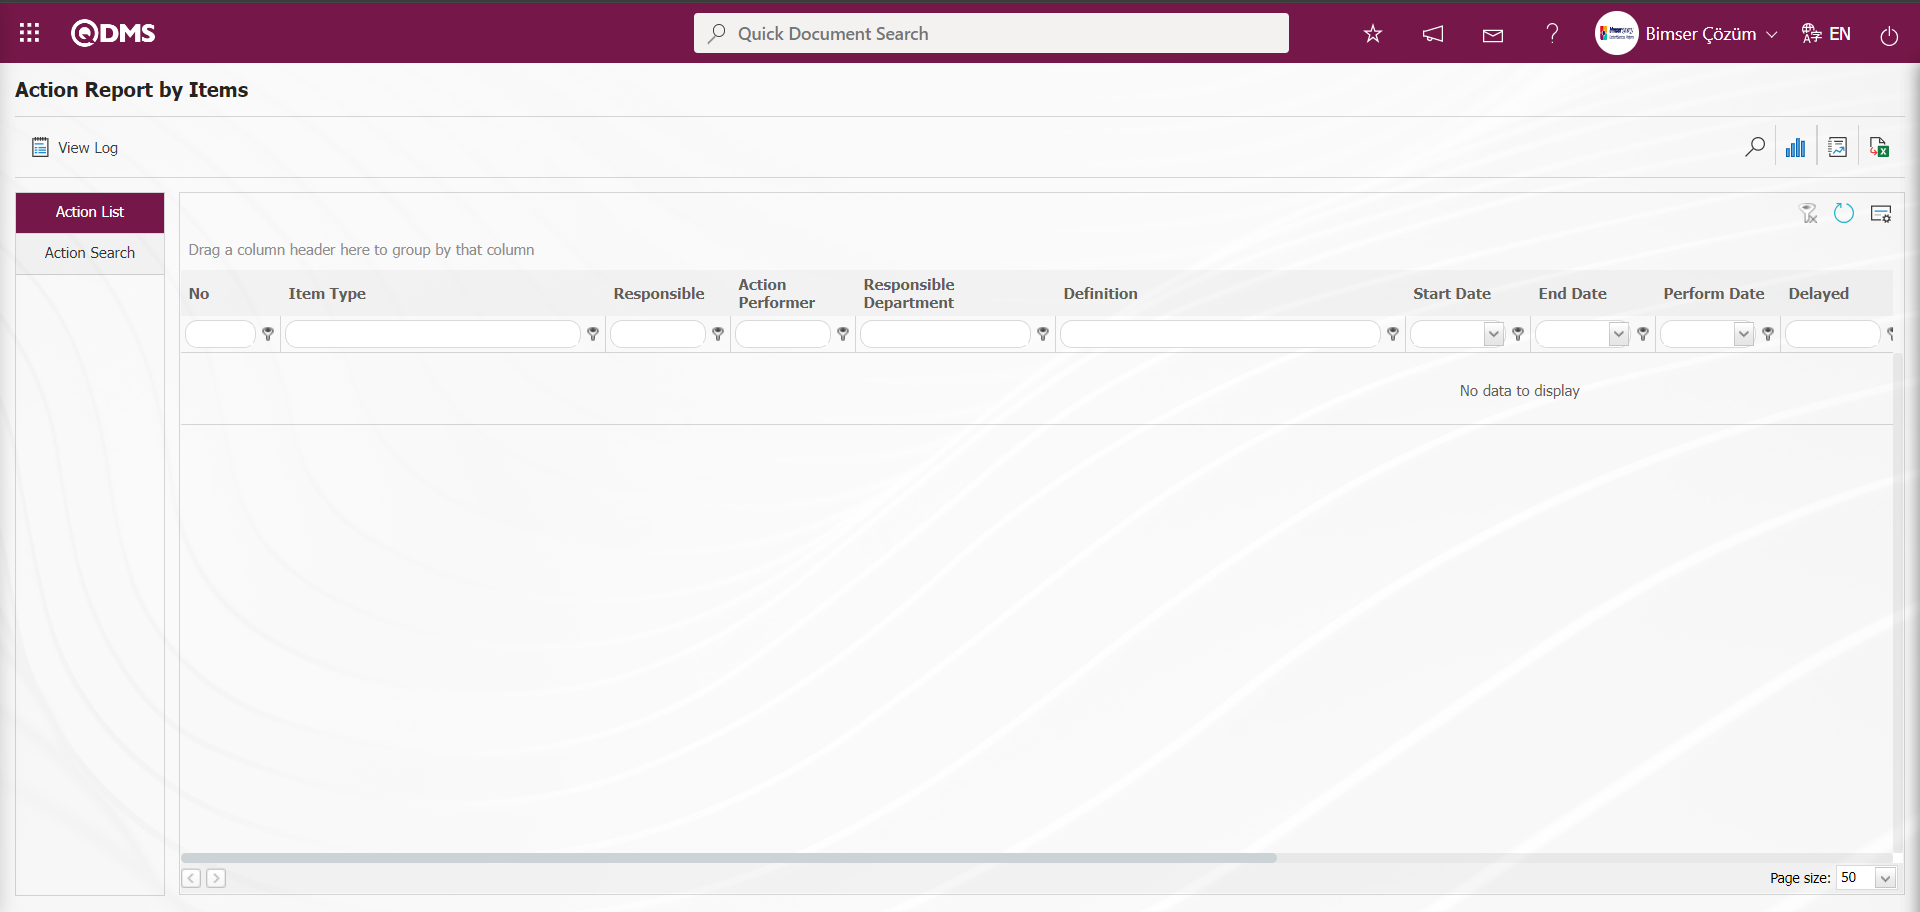
With the help of the buttons on the screen;
: Records can be searched by filtering.
: Data can be transferred to Excel.
 : Displays the action schedule report.
 : Summary Report is taken.
 : Log is displayed.
: The search criteria on the menu screens are used to clear the data remaining in the filter fields in the grid where the search operation is performed.
: The menu screen is restored to its default settings.
: User-based designing of the menu screen is done with the show-hide feature of the fields corresponding to the columns on the menu screens, that is, the hiding feature.
In the Action Item Report screen, in the Action Search tab, in the Main Action field in the search criteria in the search criteria  (Add) button is clicked and a selection is made from the Main Action list defined in the system.
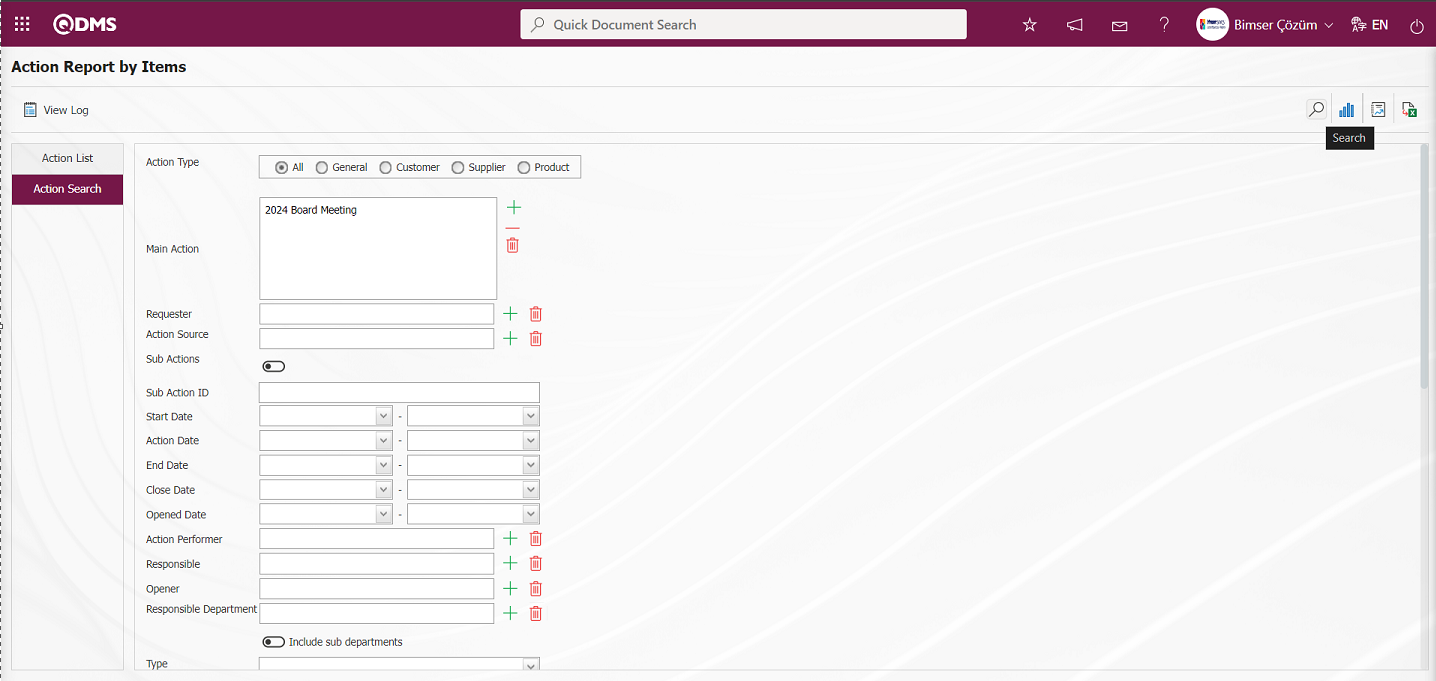
On the Action Item Report screen, in the Action list, the records belonging to the desired data are listed according to the filter settings made in the Action Search tab.
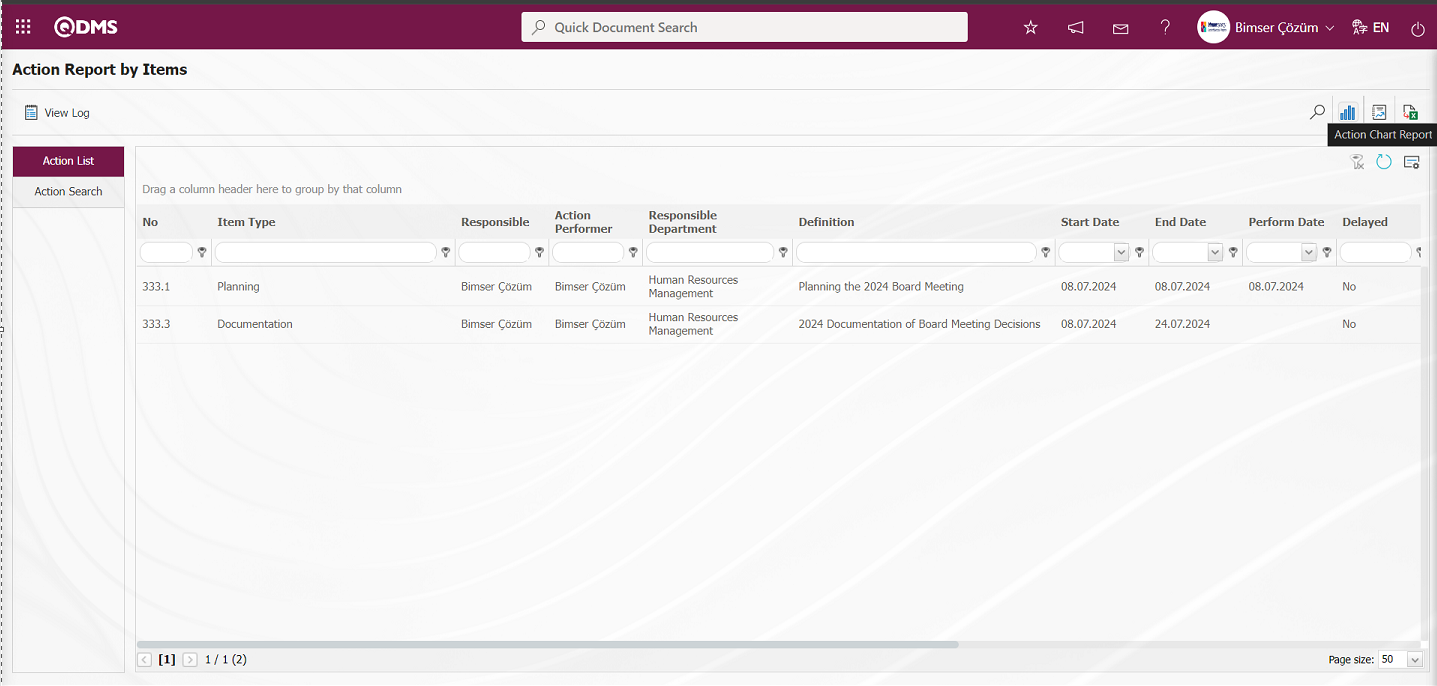
In the Action Item Report screen, “Action Schedule Report” is displayed by clicking the “Action Schedule Report” button in the Action list.
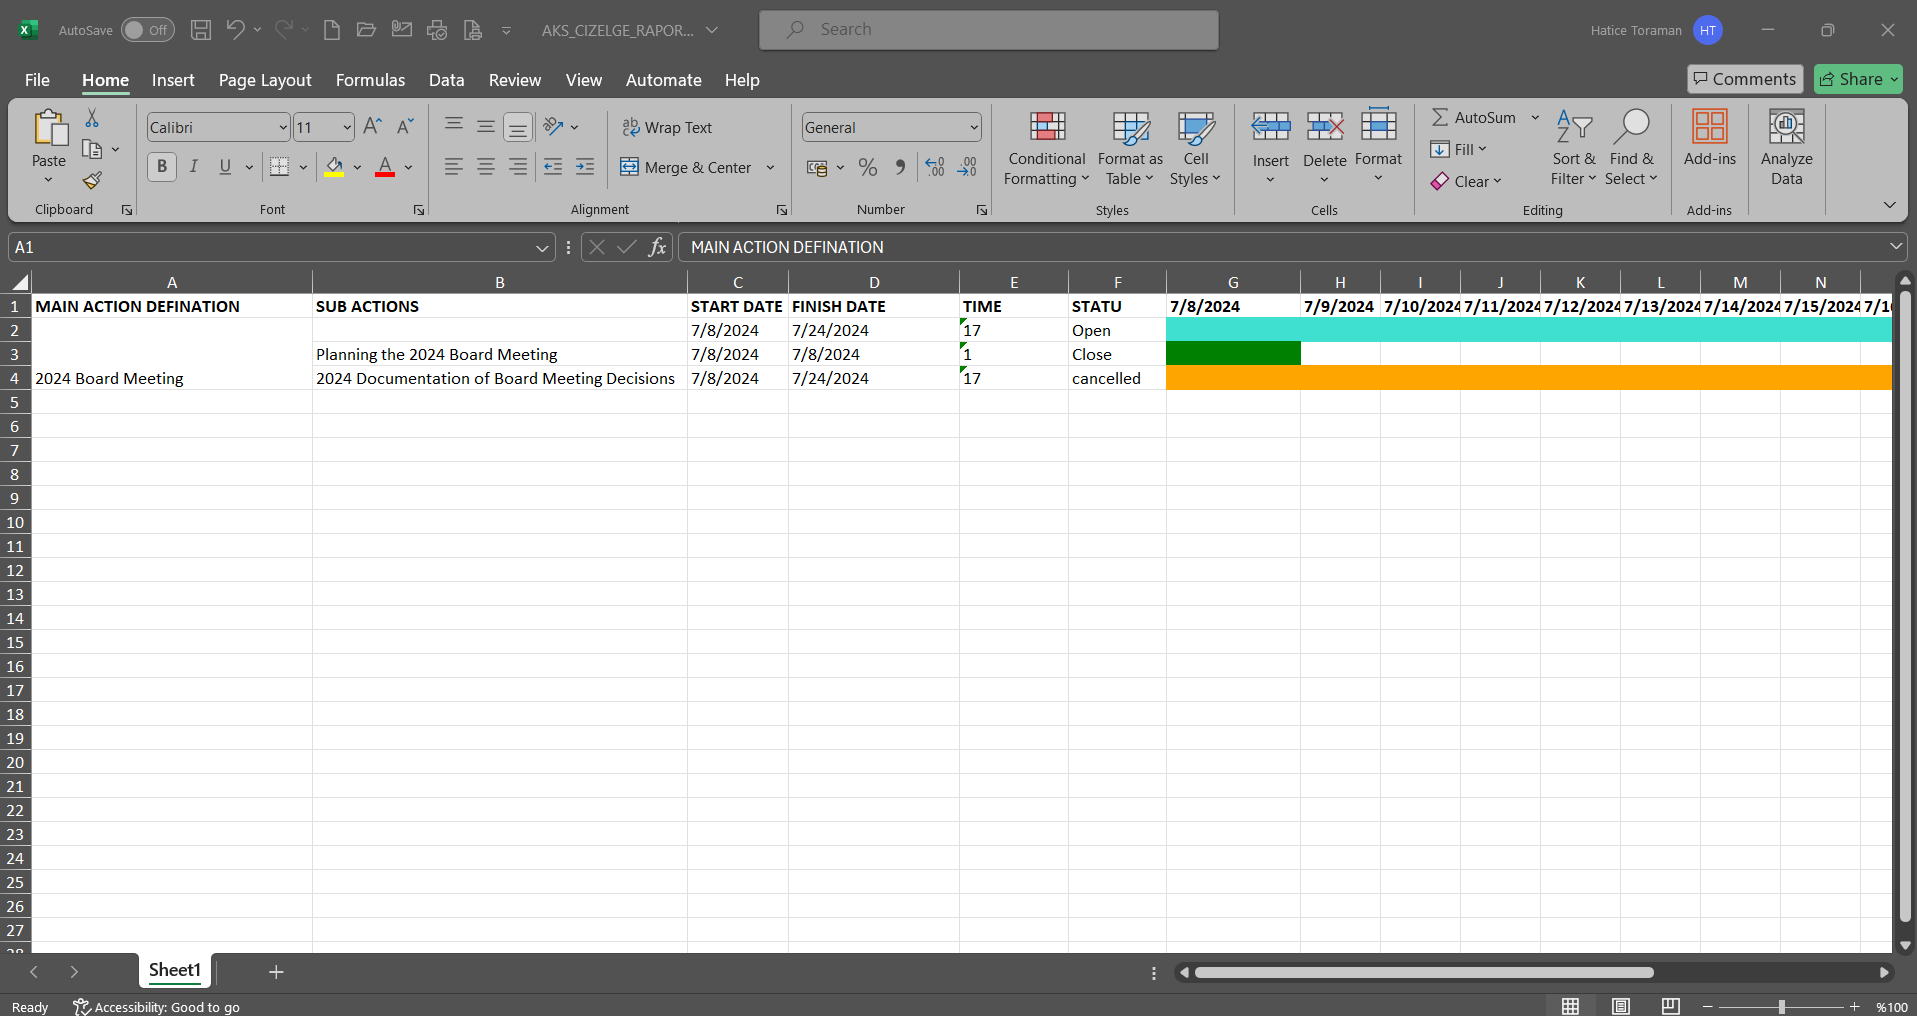
On the Action Item Report screen, click the (Summary Report) button in the Action list

“Action Summary Report” is received in Excel format.
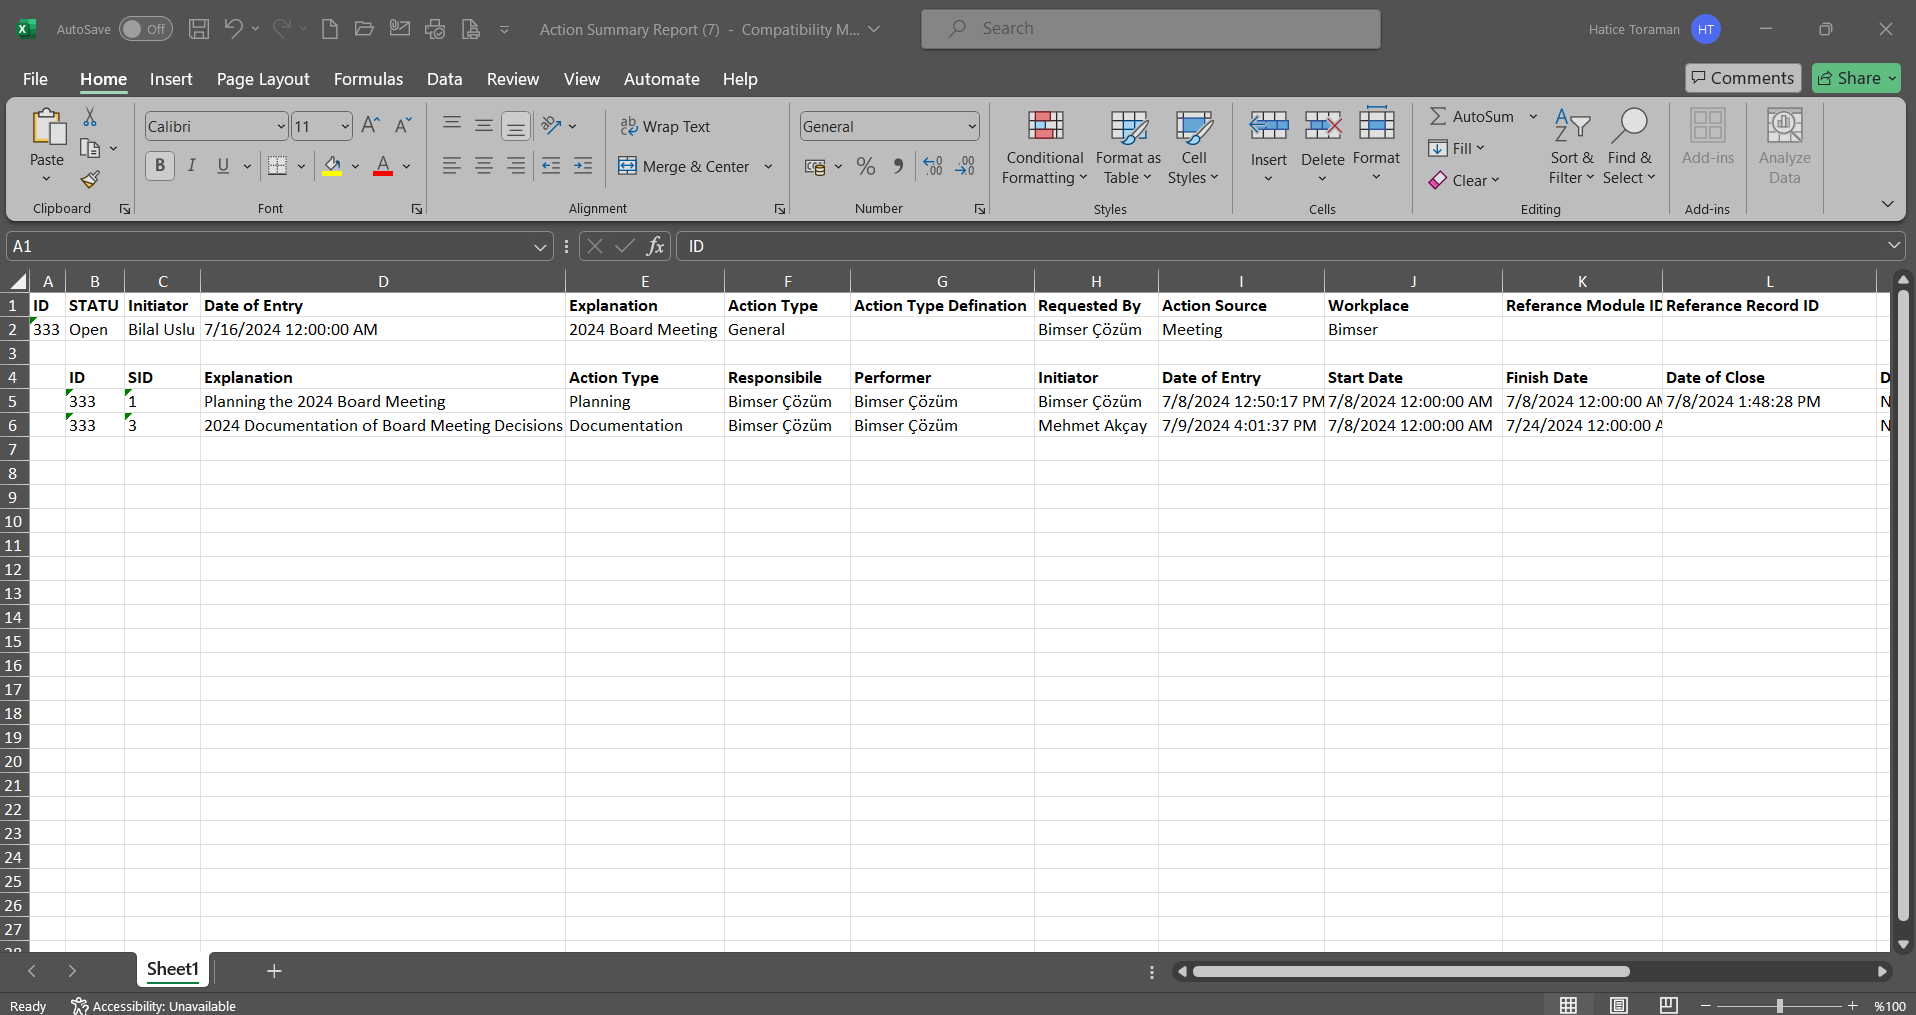
On the Action Item Report screen, click the (Export to Excel) button on the Action List tab.
 The report of the Action Item Report is received in Excel format.
On the Action Item Report screen, on the Action List tab, click the 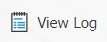 button while the Action Item is selected in the list.
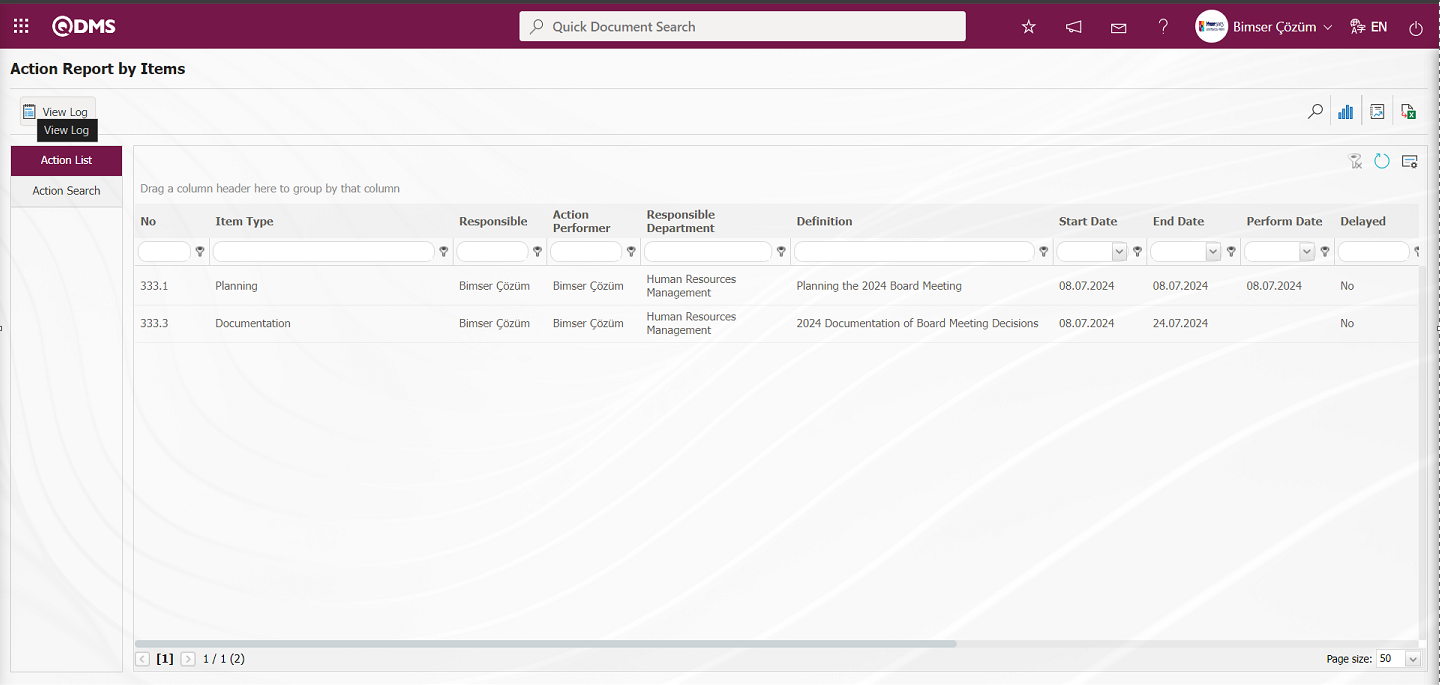
“Action Item Report” is displayed as log.
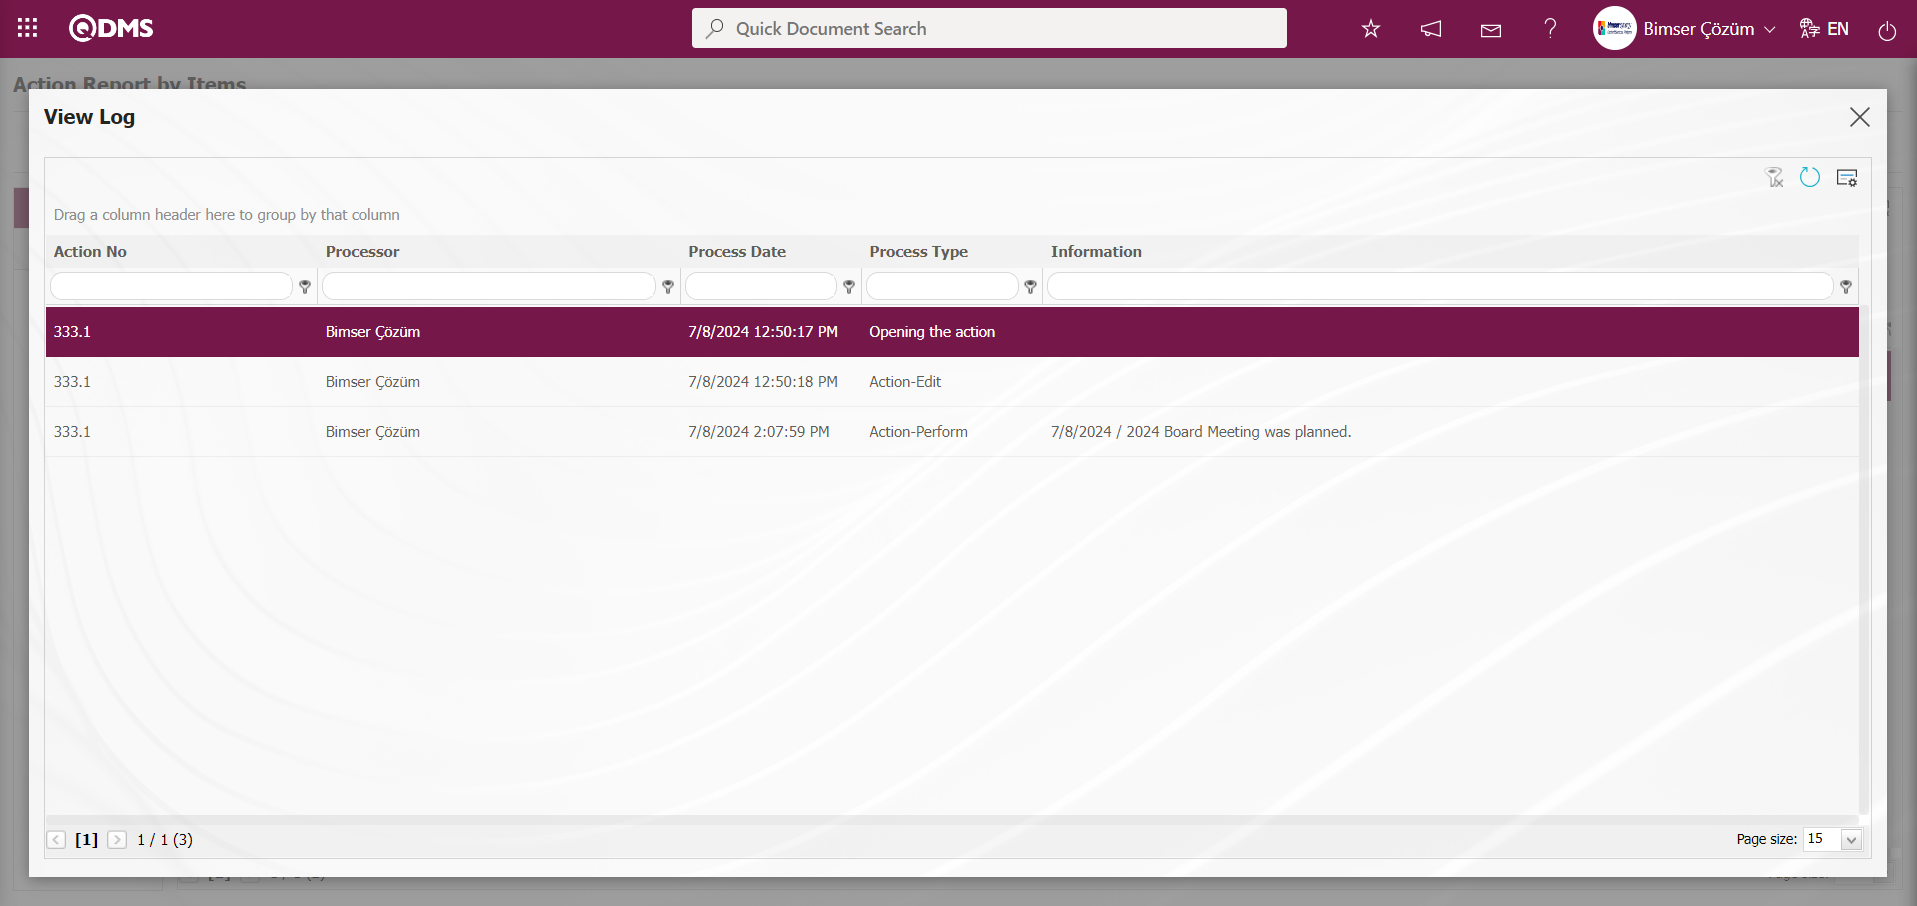
In the report displayed as log, the log records of the fields such as Action No, Transactor, Transaction Date, Transaction Type and Information are kept and displayed.
6.2.3.3. Action List Pending Approval
Menu name: Integrated Management System/ Action Management/ Reports/ Action List Pending Approval
The list of all actions waiting for approval is displayed in detail on this screen. The information about which action, who, how many days and in which status is waiting for approval is accessed. There are two tabs on the Action Waiting for Approval Report screen: Action List and Action Search tab.

With the help of the buttons on the screen;
: Data can be transferred to Excel.
: Records can be searched by filtering.
: The search criteria on the menu screens are used to clean the data remaining in the filter fields in the grid where the search operation is performed.
: The menu screen is restored to its default settings.
: User-based designing of the menu screen is done with the show-hide feature, that is, the hiding feature of the fields corresponding to the columns on the menu screens.
On the Action Pending Approval Report screen, in the Action Search tab, the Main Action number is written in the Main Action No field in the search criteria and the (Search) button is clicked.
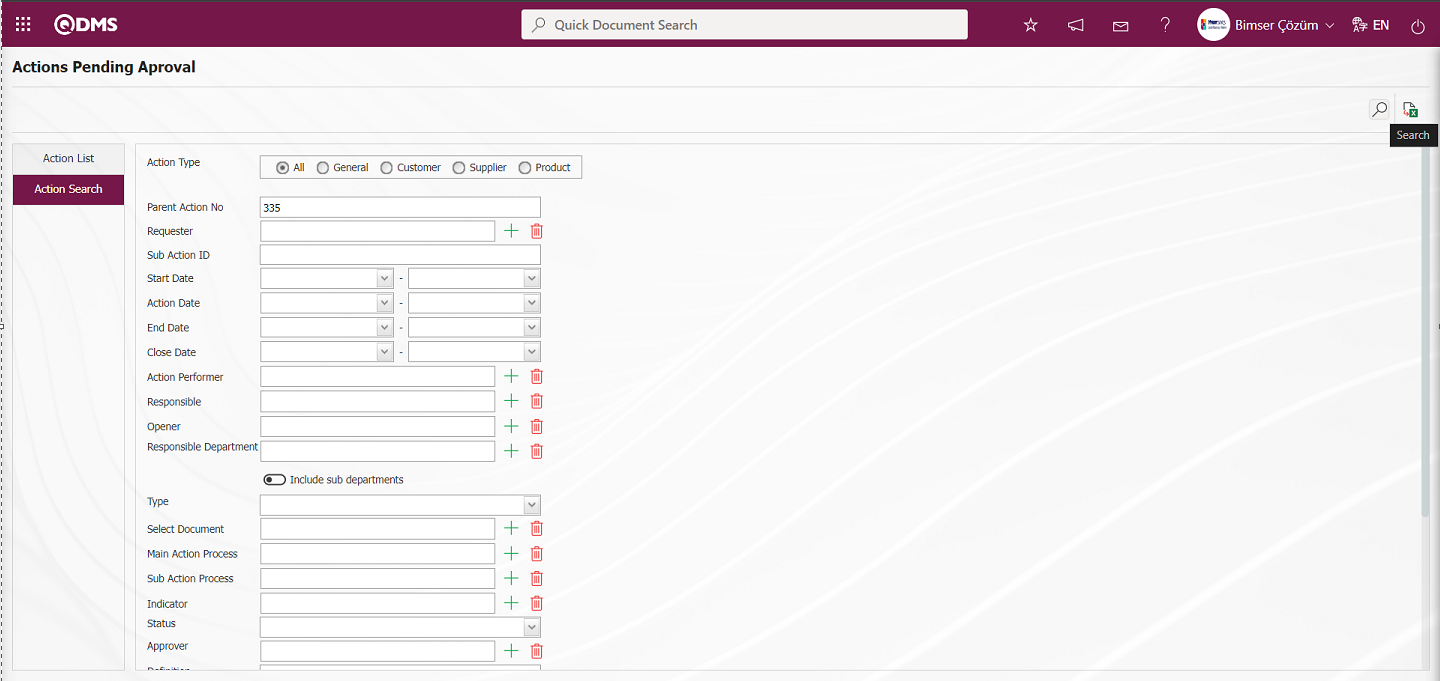
In the Action list on the Action Pending Approval Report screen, the records are listed according to the search criteria made in the Action Search tab.
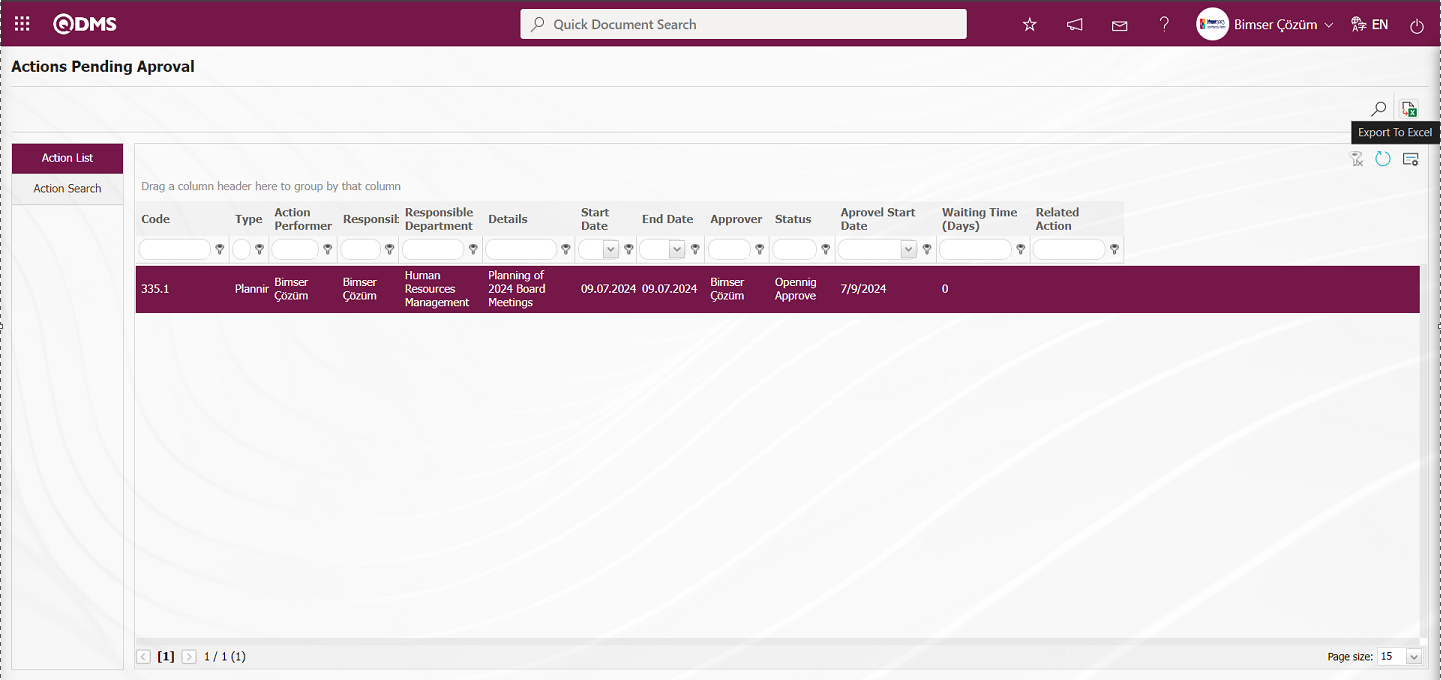
On the Action Report Pending Approval screen, “Action Report Pending Approval” is displayed in excel format by clicking the (Export to Excel) button while the Action is selected from the list in the Action List tab.

6.2.3.4. Timetable Report
Menu name: Integrated Management System/ Action Management/ Reports/ Timetable Report
It is the menu where the timesheet report is created according to the “Daily, Weekly, Monthly” data selected in the “Date Type” field in the Filter tab on the Timesheet Report screen. There are two tabs on the Timeline Report screen: Action List and Filter tab.

With the help of the buttons on the screen;
: Records can be searched by filtering.
: Data can be transferred to Excel.
In the Timeline Report screen, data entries are made in the fields in the search criteria in the Filter tab and the filtering process is performed by clicking the (Search) button. For example: In the search criteria, the “Daily” option is selected by clicking the drop-down list in the Date Type field and the Main Action Code information is written in the Main Action field.
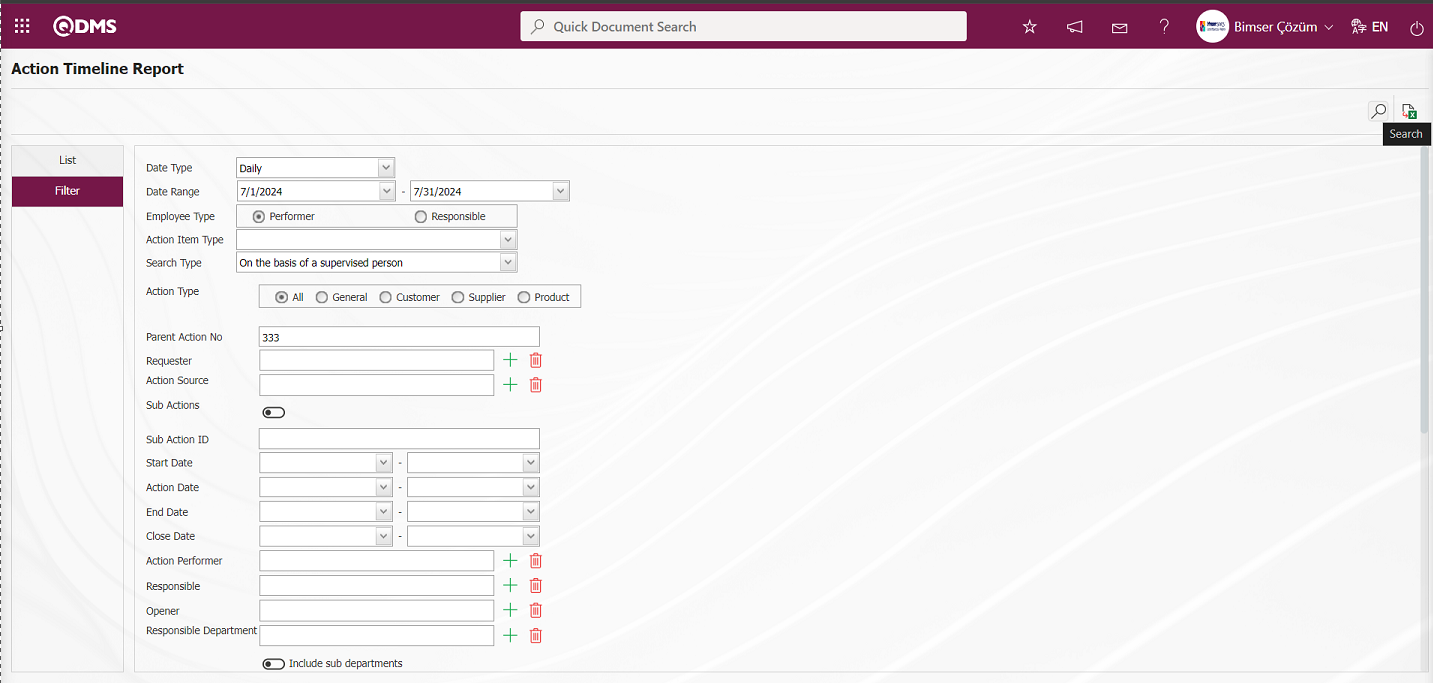
From this report, you can access the information about which actions are on which personnel between which dates on a monthly basis. The colours in the report indicate the current status of the action.
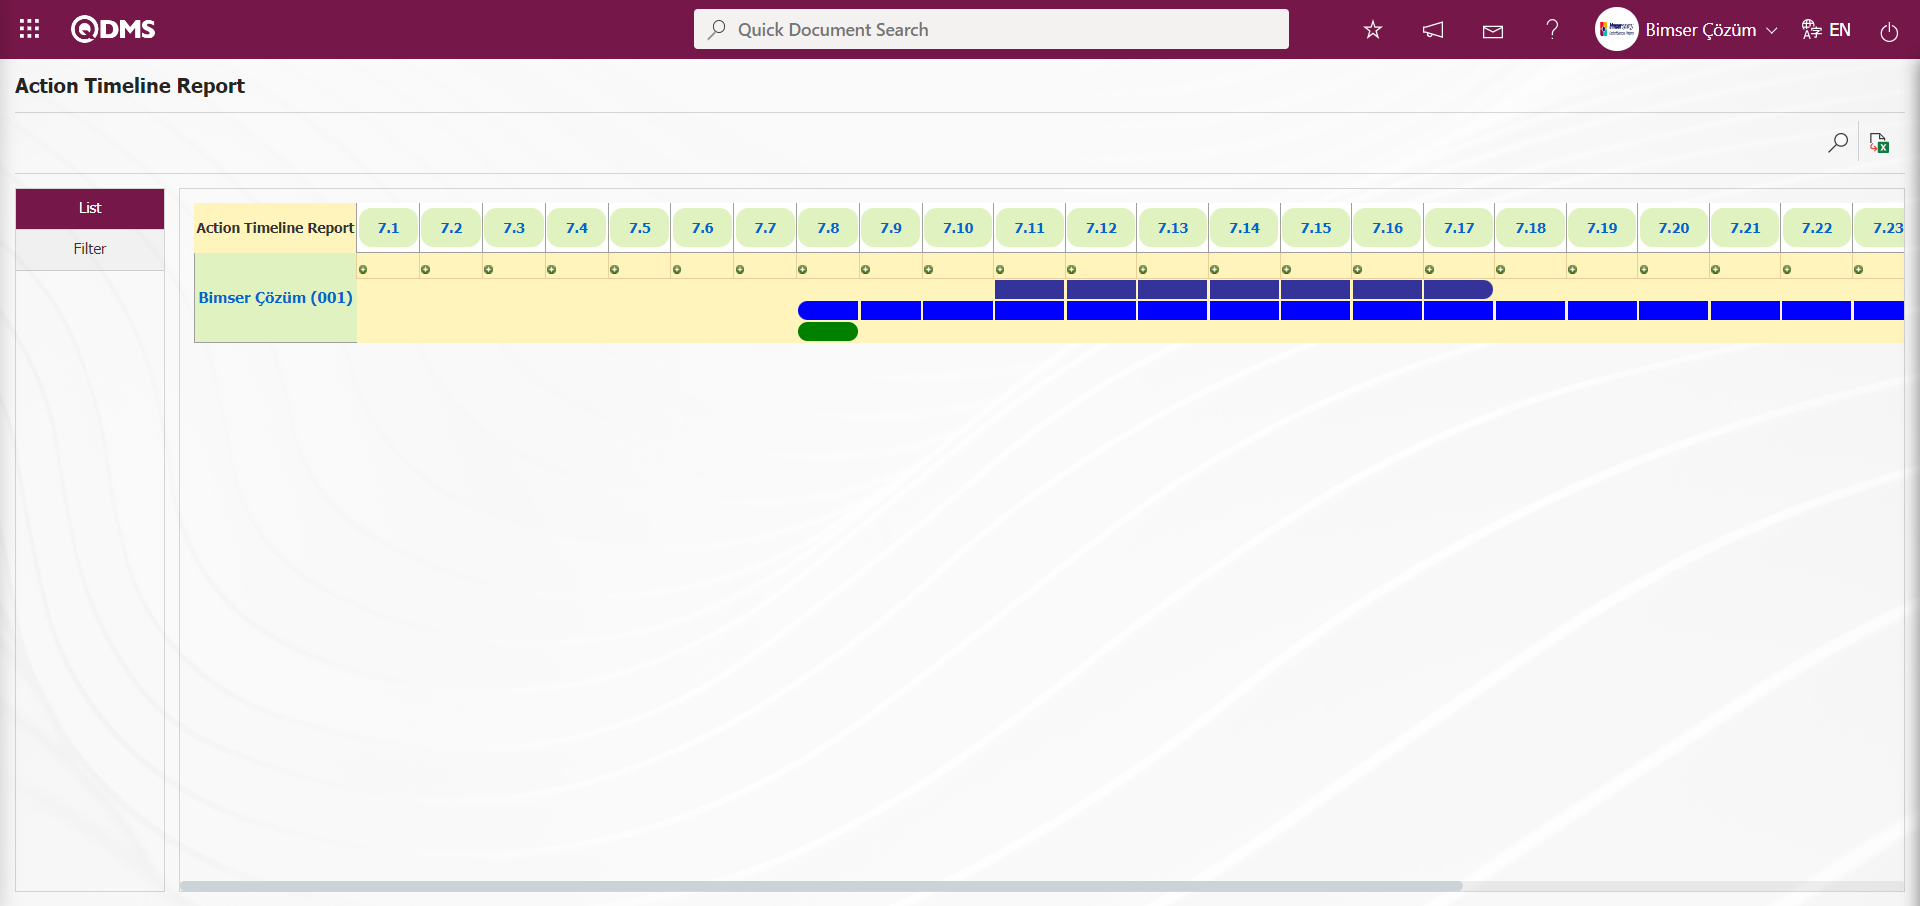
When the  sign is clicked on the List tab on the Timeline screen, the “Action Item Planning - New Registration” screen opens on this screen. In the Action Item Planning - New Registration screen, the required fields are entered and the Action Item registration process is done by clicking the
  button in the upper left corner of the screen.
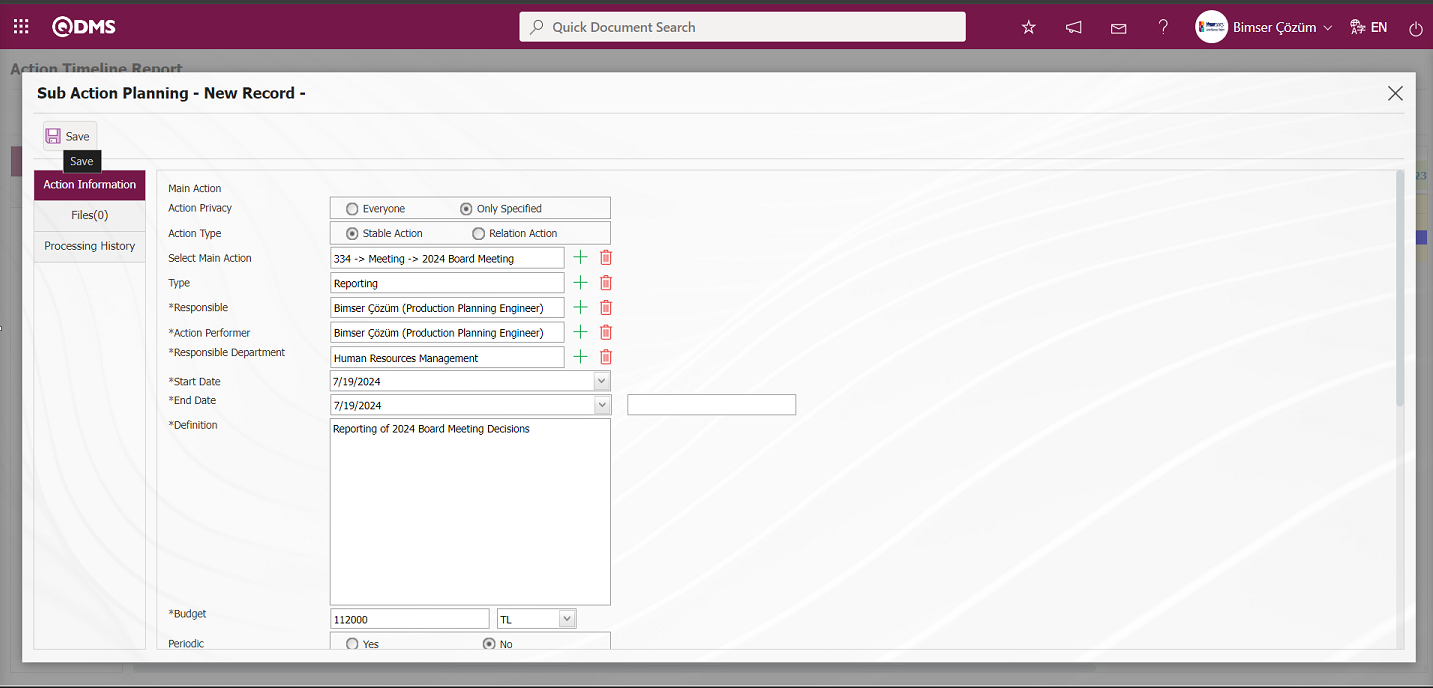
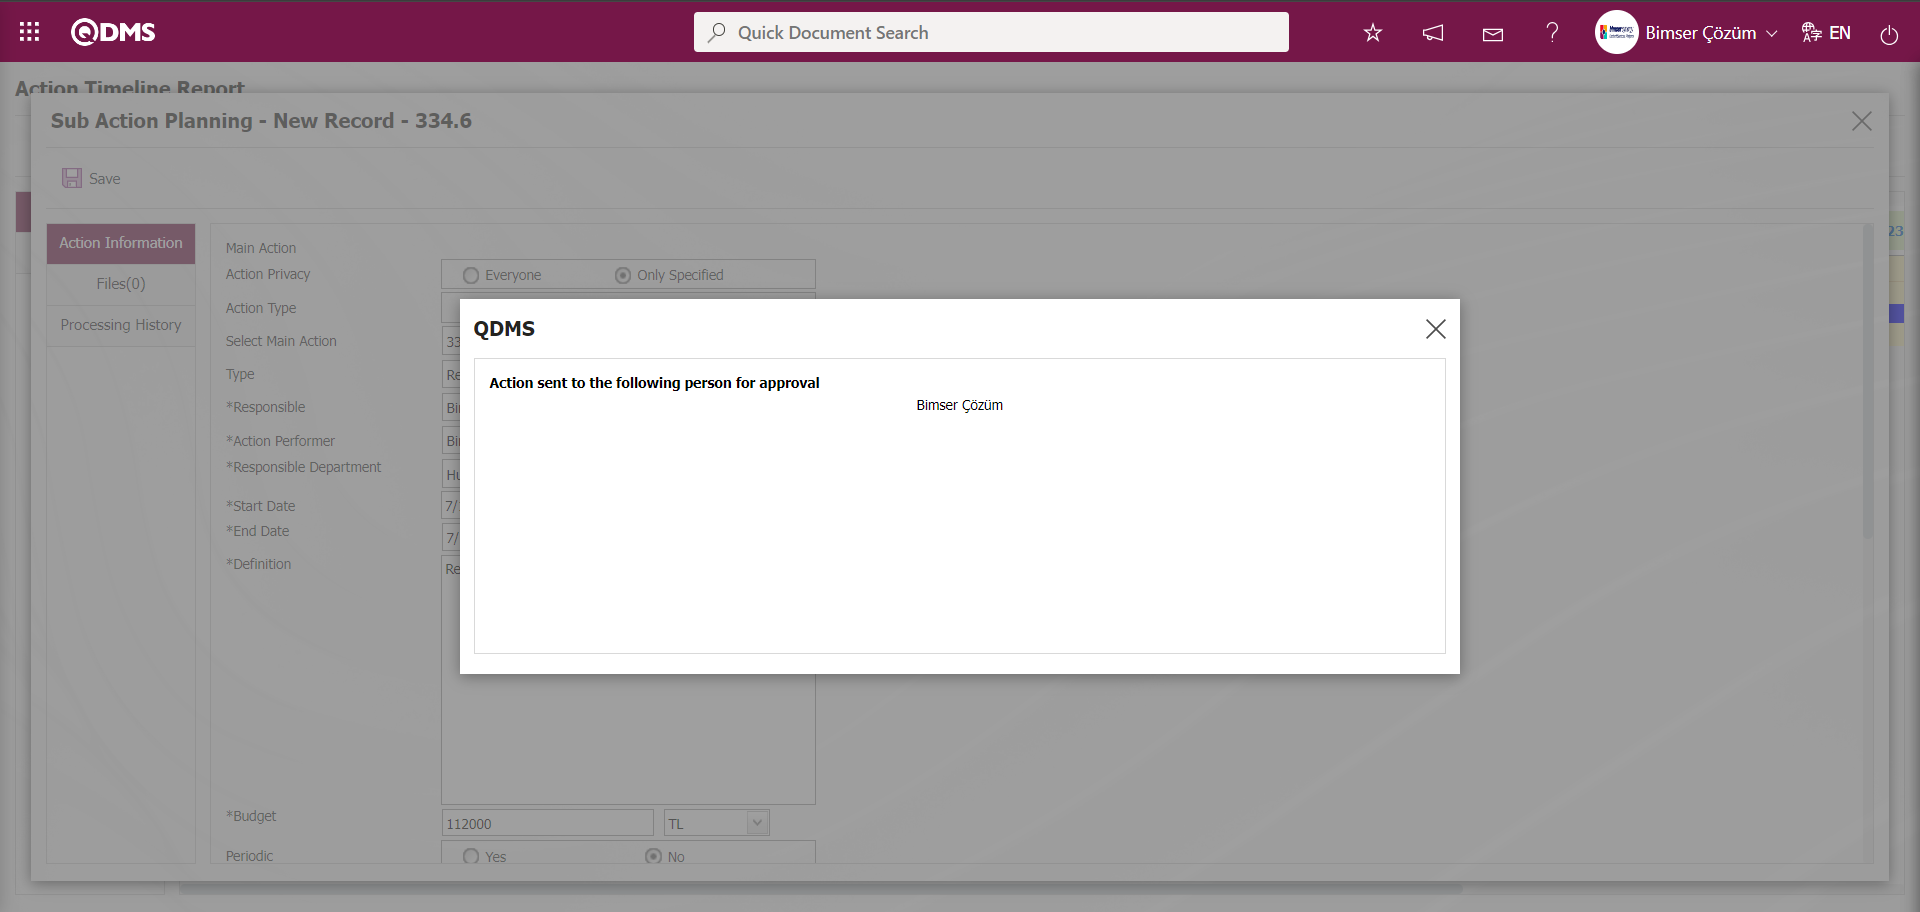
When hovering over the colours in the Timeline, the Code and Name of the Action information is displayed.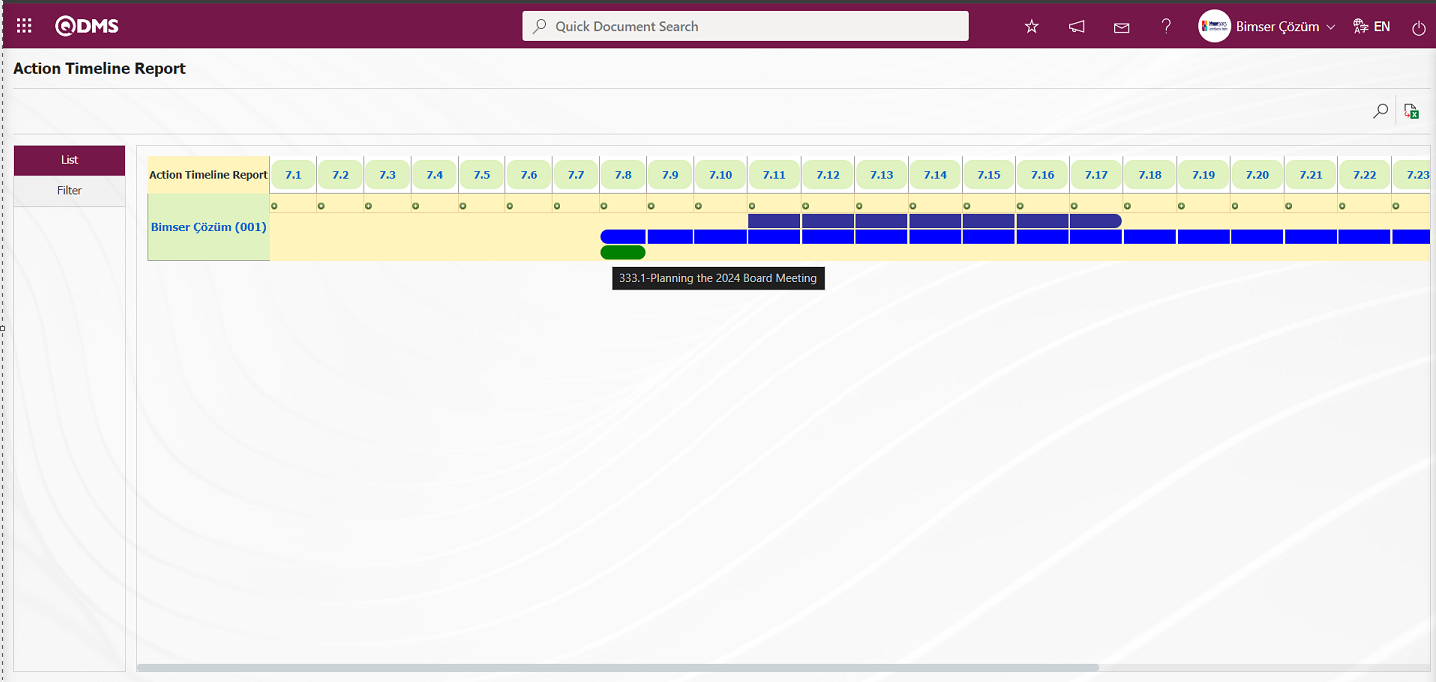
When clicked on the colours on the Timeline, the “Action Viewing” screen is displayed. In the Action Viewing screen, the link of the screen displayed on the Action Viewing screen can be taken, shared and commenting on the Action can be done.
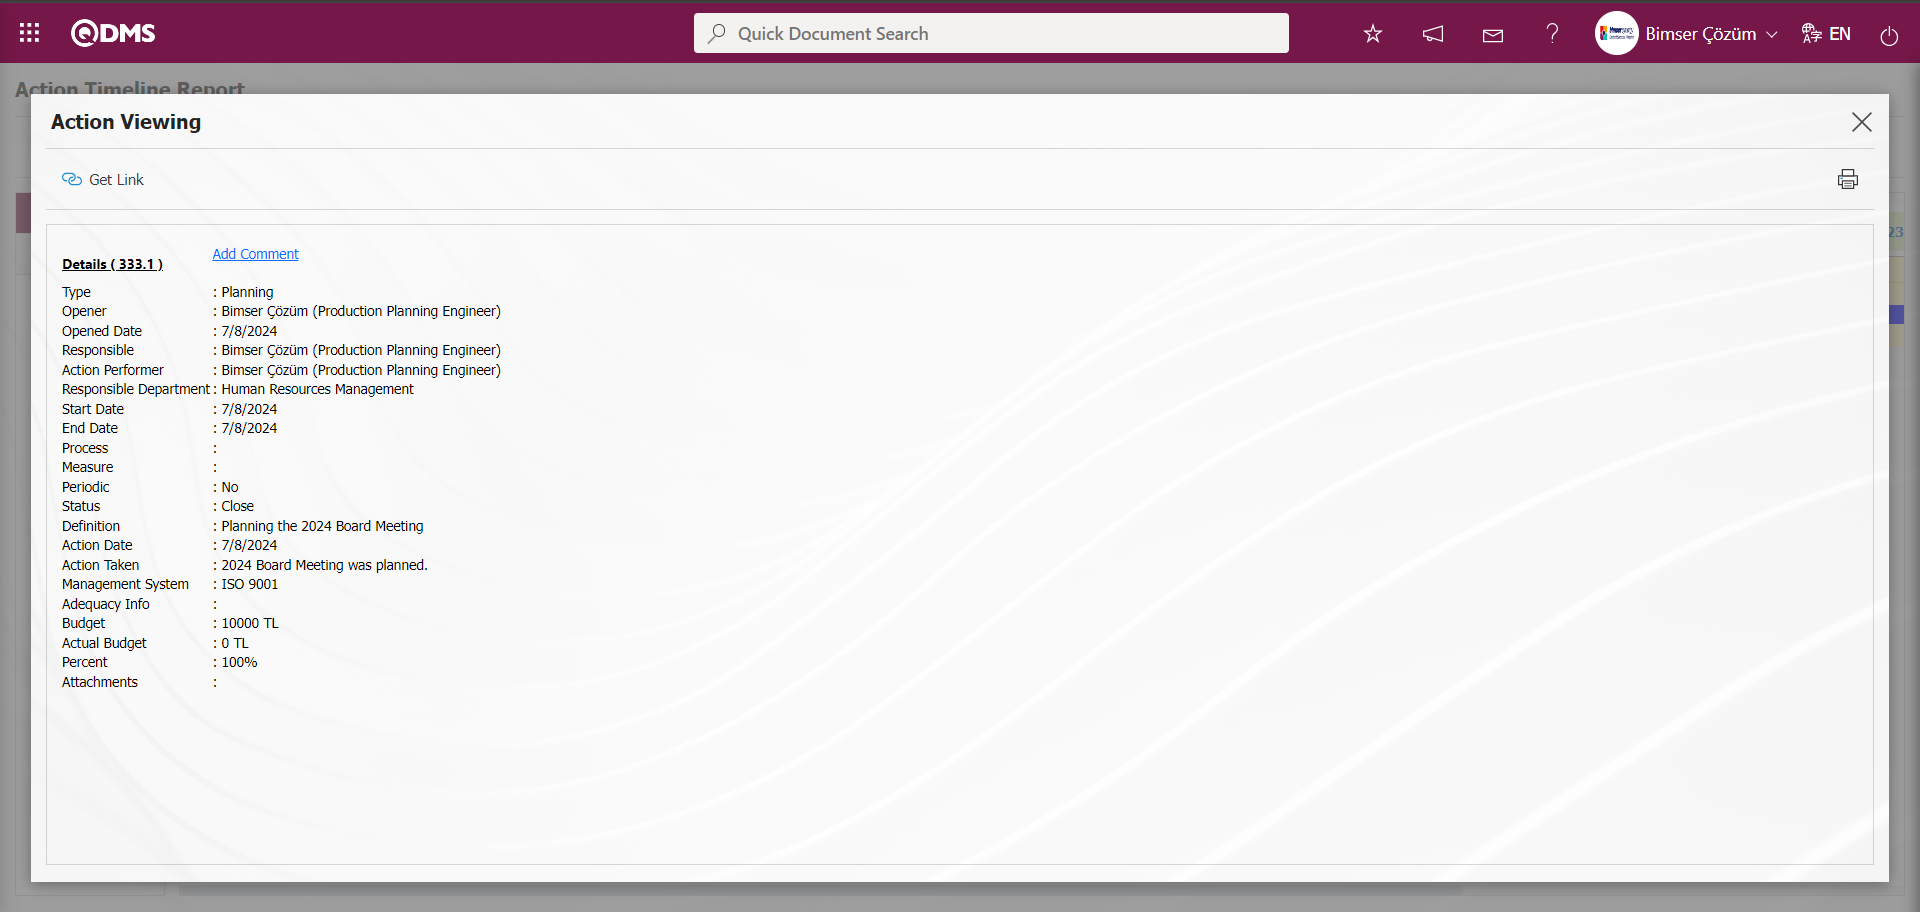
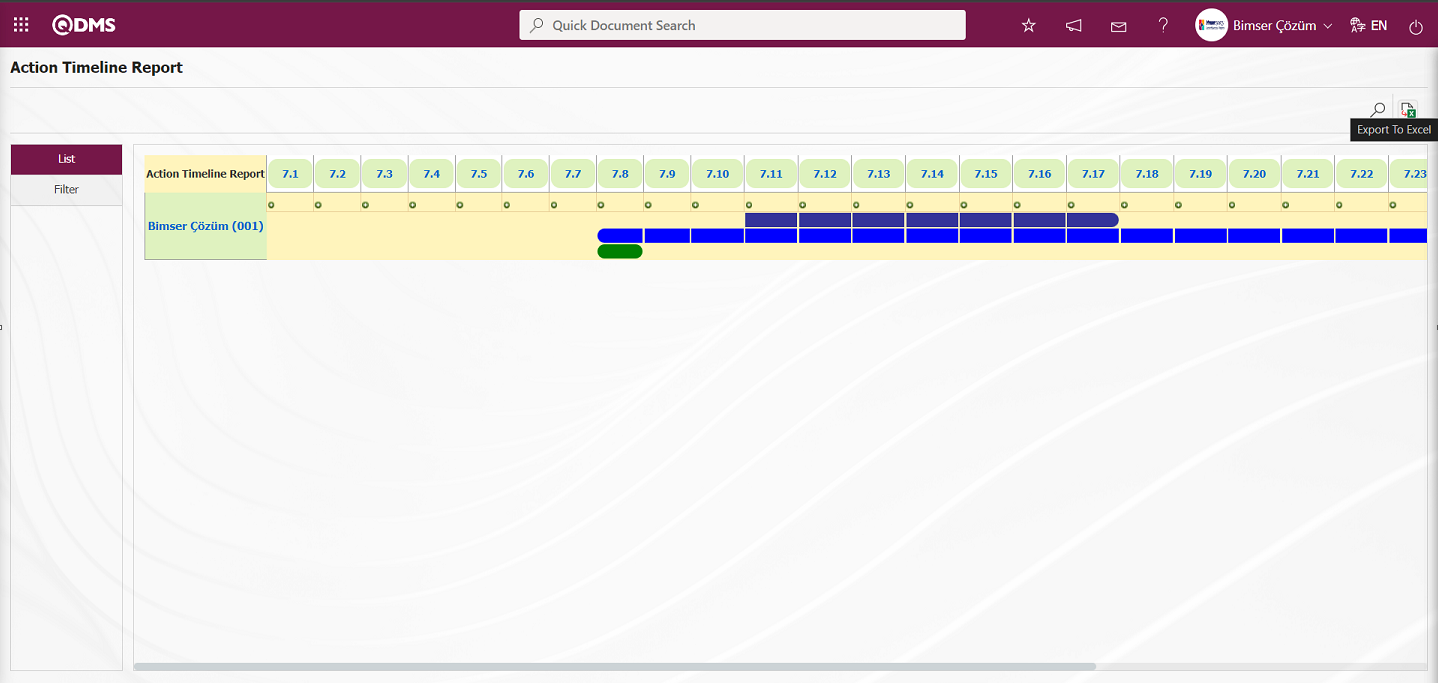
On the Timesheet Report screen, “Timesheet Report” is displayed in excel format by clicking the (Export to Excel) button on the List tab
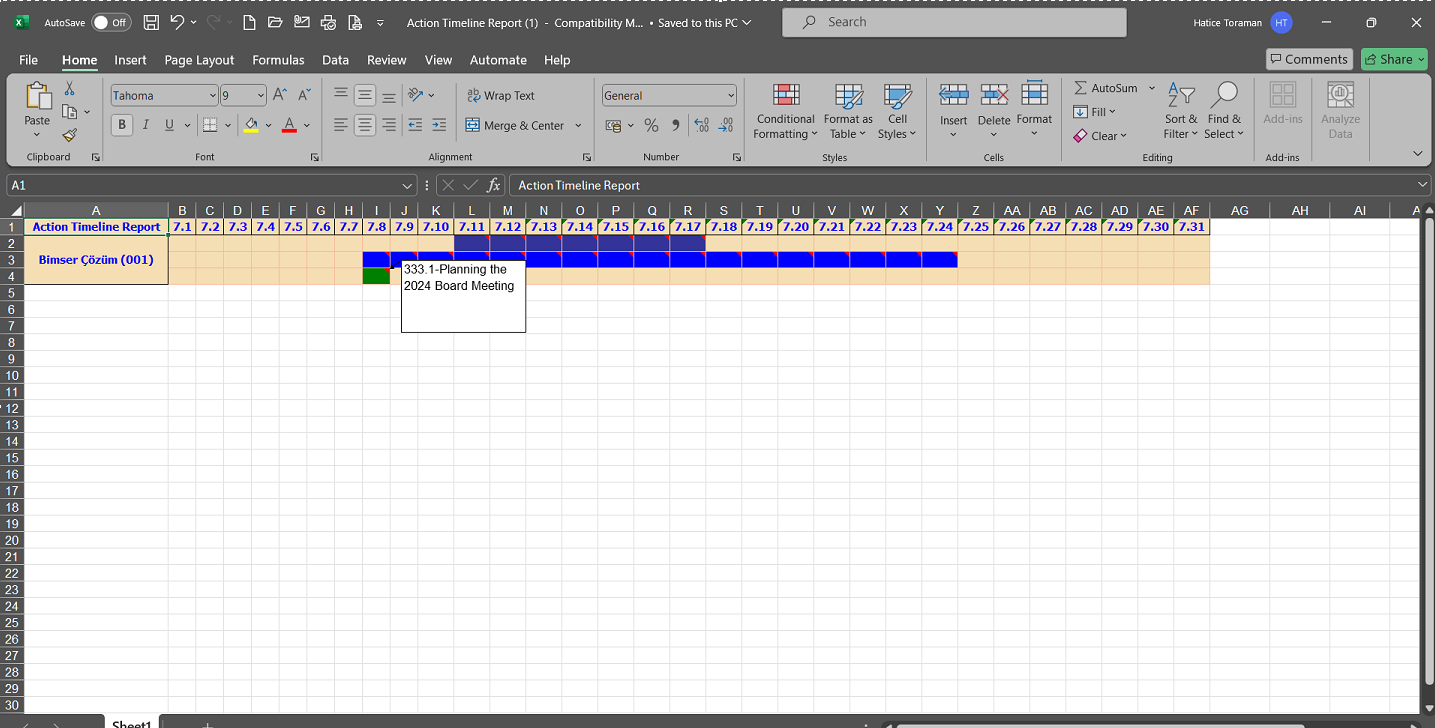
6.2.3.5. Action Delay Report
Menu name: Integrated Management System/ Action Management/ Reports/ Action Delay Report
It is the menu where the report is displayed by filtering the delayed actions according to the desired data (Action type, Main action no, Requester, work to be done, responsible, responsible department, etc.).
On the Action Delay Report screen, there are two tabs: Action List and Action Search tab.
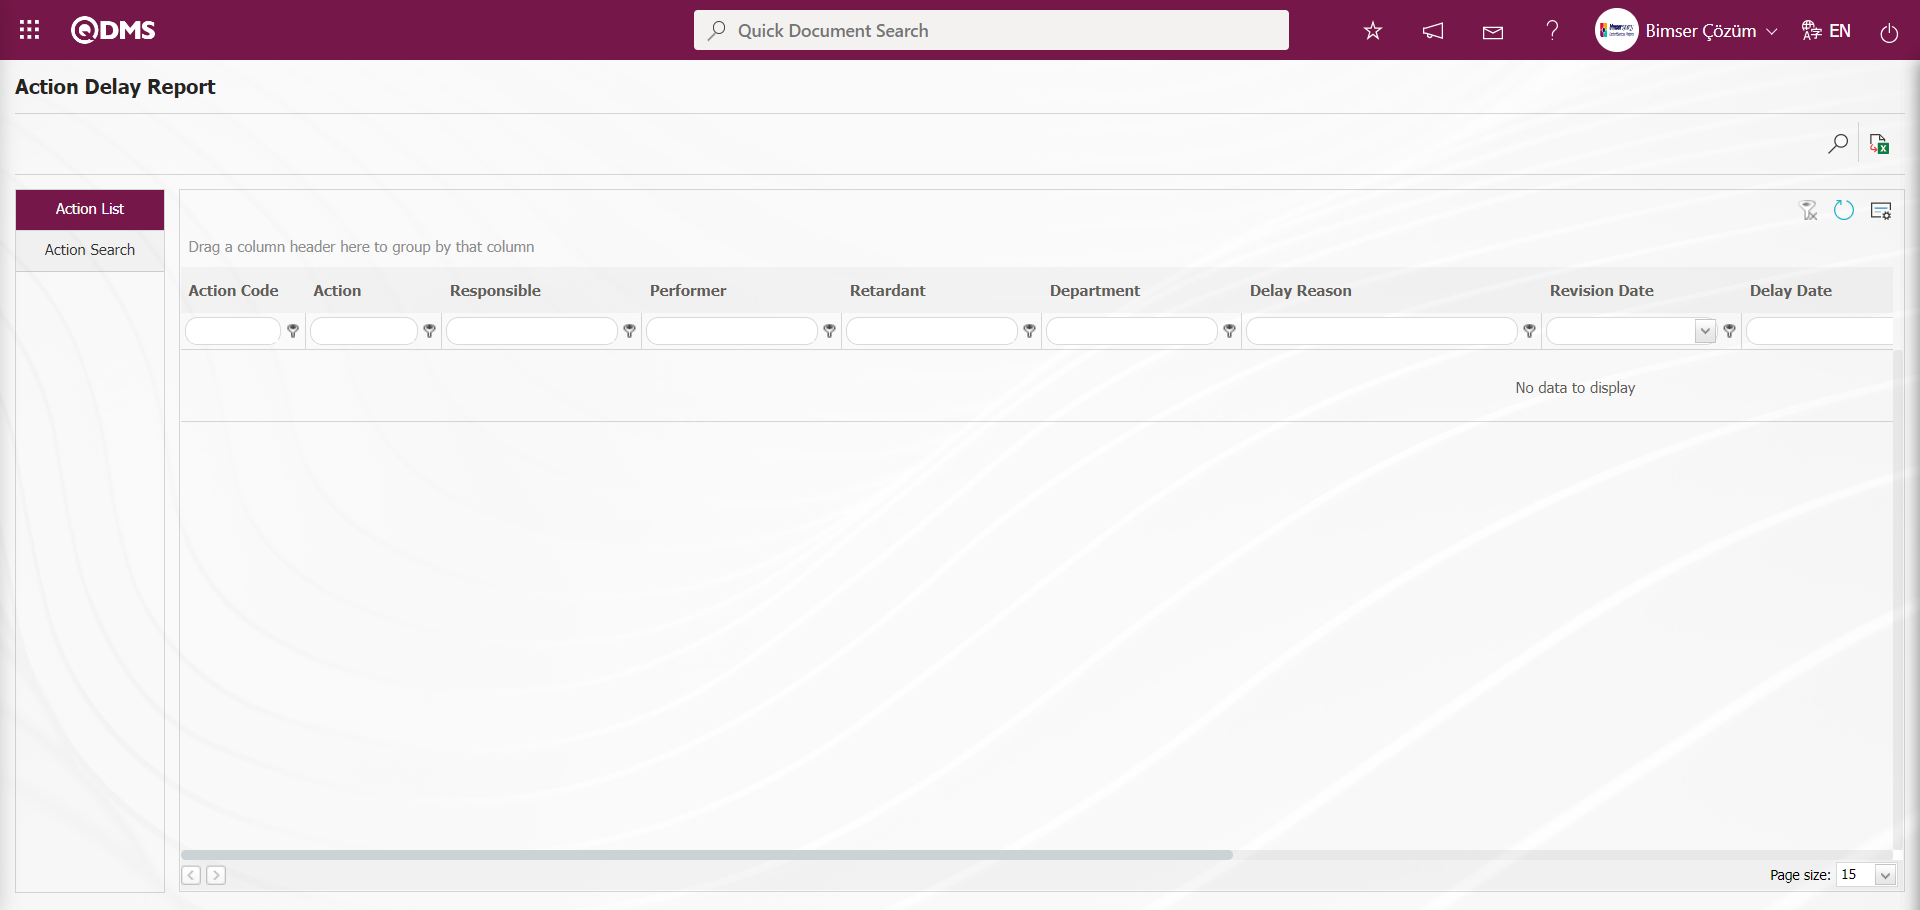
With the help of the buttons on the screen;
: Records can be searched by filtering.
: Data can be transferred to Excel.
: The search criteria on the menu screens are used to clean the data remaining in the filter fields in the grid where the search operation is performed.
: The menu screen is restored to its default settings.
: User-based designing of the menu screen is done with the show-hide feature, that is, the hiding feature of the fields corresponding to the columns on the menu screens.
In the Action Delay Report screen, in the Action Search tab, the main action number is written in the Main Action no field in the search criteria and the (Search) button is clicked.
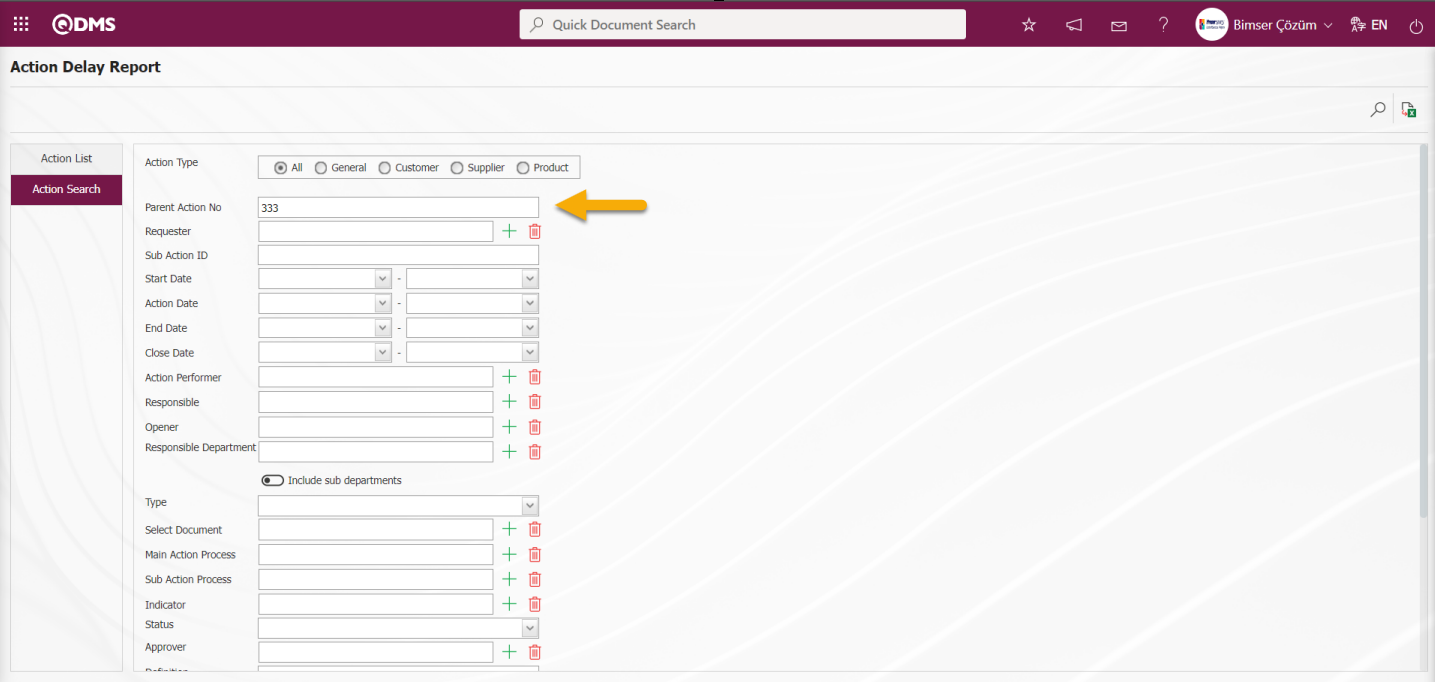
In the Action list on the Action Delay Report screen, the records are listed according to the filter settings made in the Action Search tab.
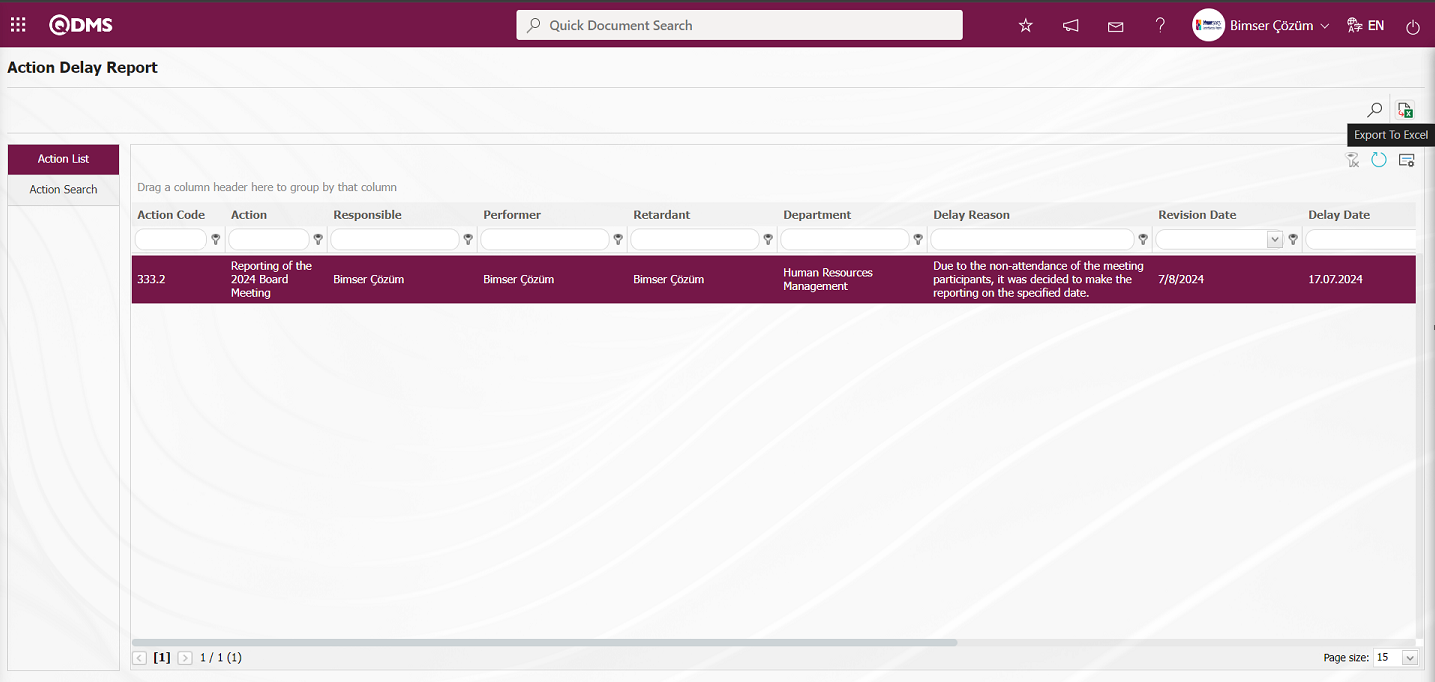
On the Action Delay Report screen, “Action Delay Report” is displayed in excel format by clicking the (Export to Excel) button on the Action list tab.
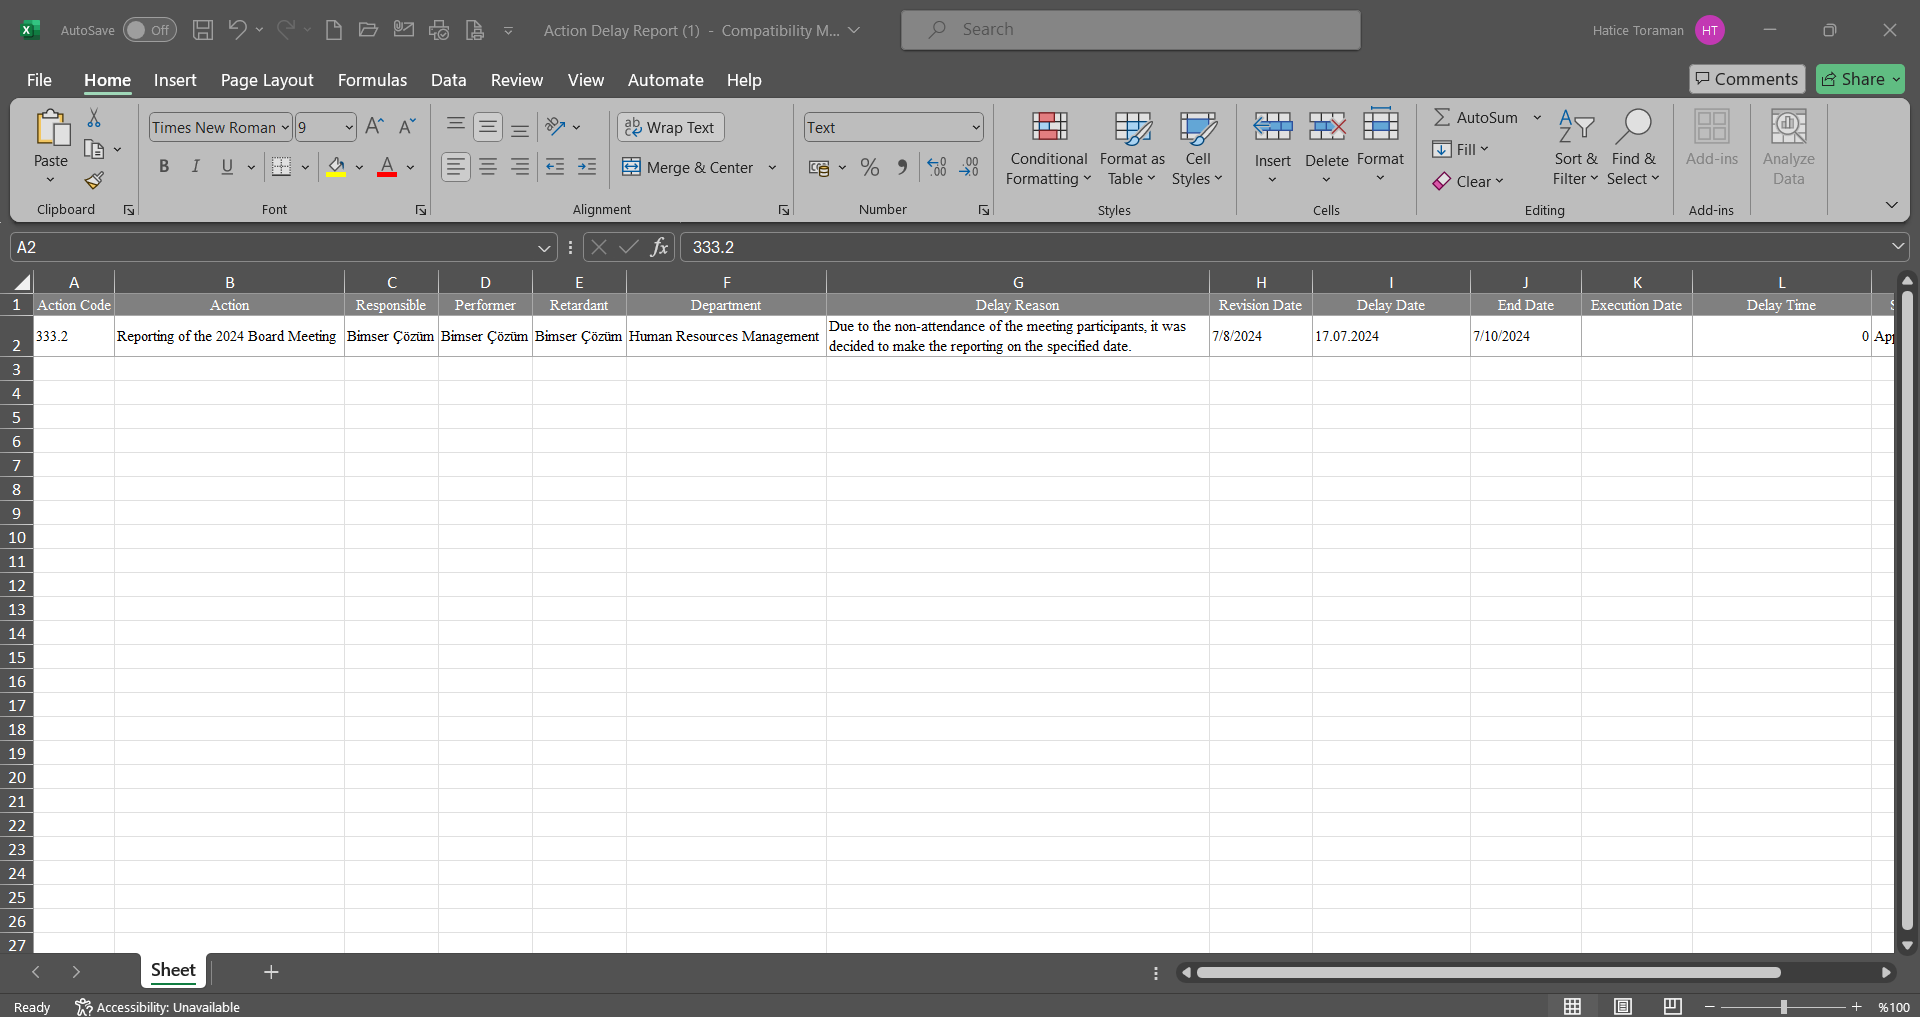
6.2.3.6. Action Graphic Report
Menu name: Integrated Management System/ Action Management/ Reports/ Action Graphic Report
It is the report where the actions are displayed graphically. According to the value selected in the “X axis” field, a graphical report can be obtained as a pie or bar graph by clicking the  button.
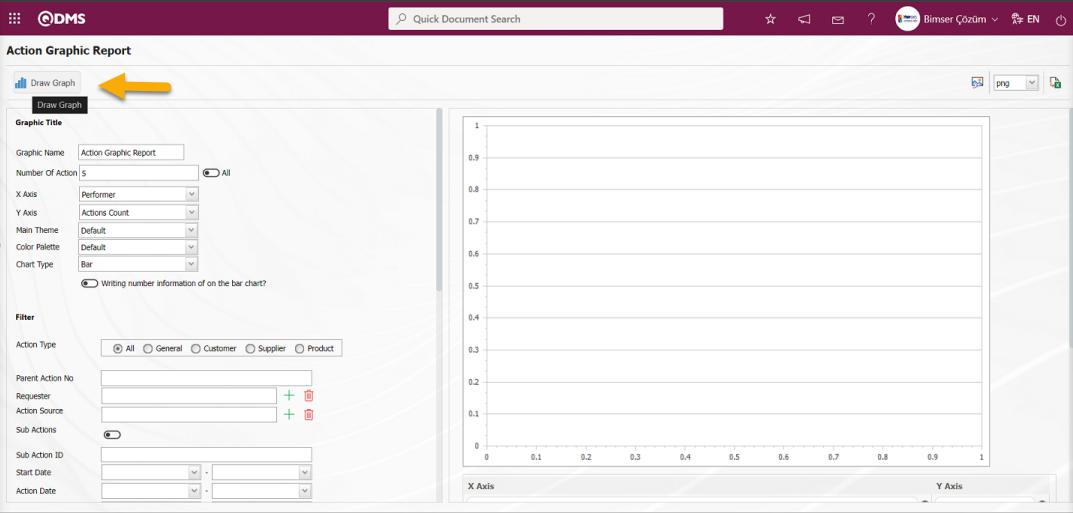
With the help of the buttons on the screen;
: Draws the graph on the screen according to the specified properties.
 : Converts the graph to the format type selected from the drop-down menu (png, jpg, bmp, xls, etc.) and transfers it to the external environment.
: Data can be exported to Excel.
On the Action Graphic Report screen, the necessary selections are made in the Graphic options section. In the Graph Type section, the desired attribute to be placed on the X and Y axis is selected. The graph can be customised from Main Theme, colour palette properties by selecting from the drop-down list options in the Main Theme, colour palette fields. In the Chart options section, the maximum range desired to be in the chart is determined in the Most field.
After the necessary selections are made in the Chart options section on the Action Chart Report screen, if desired, the Chart title is specified and the button is clicked to create a chart.
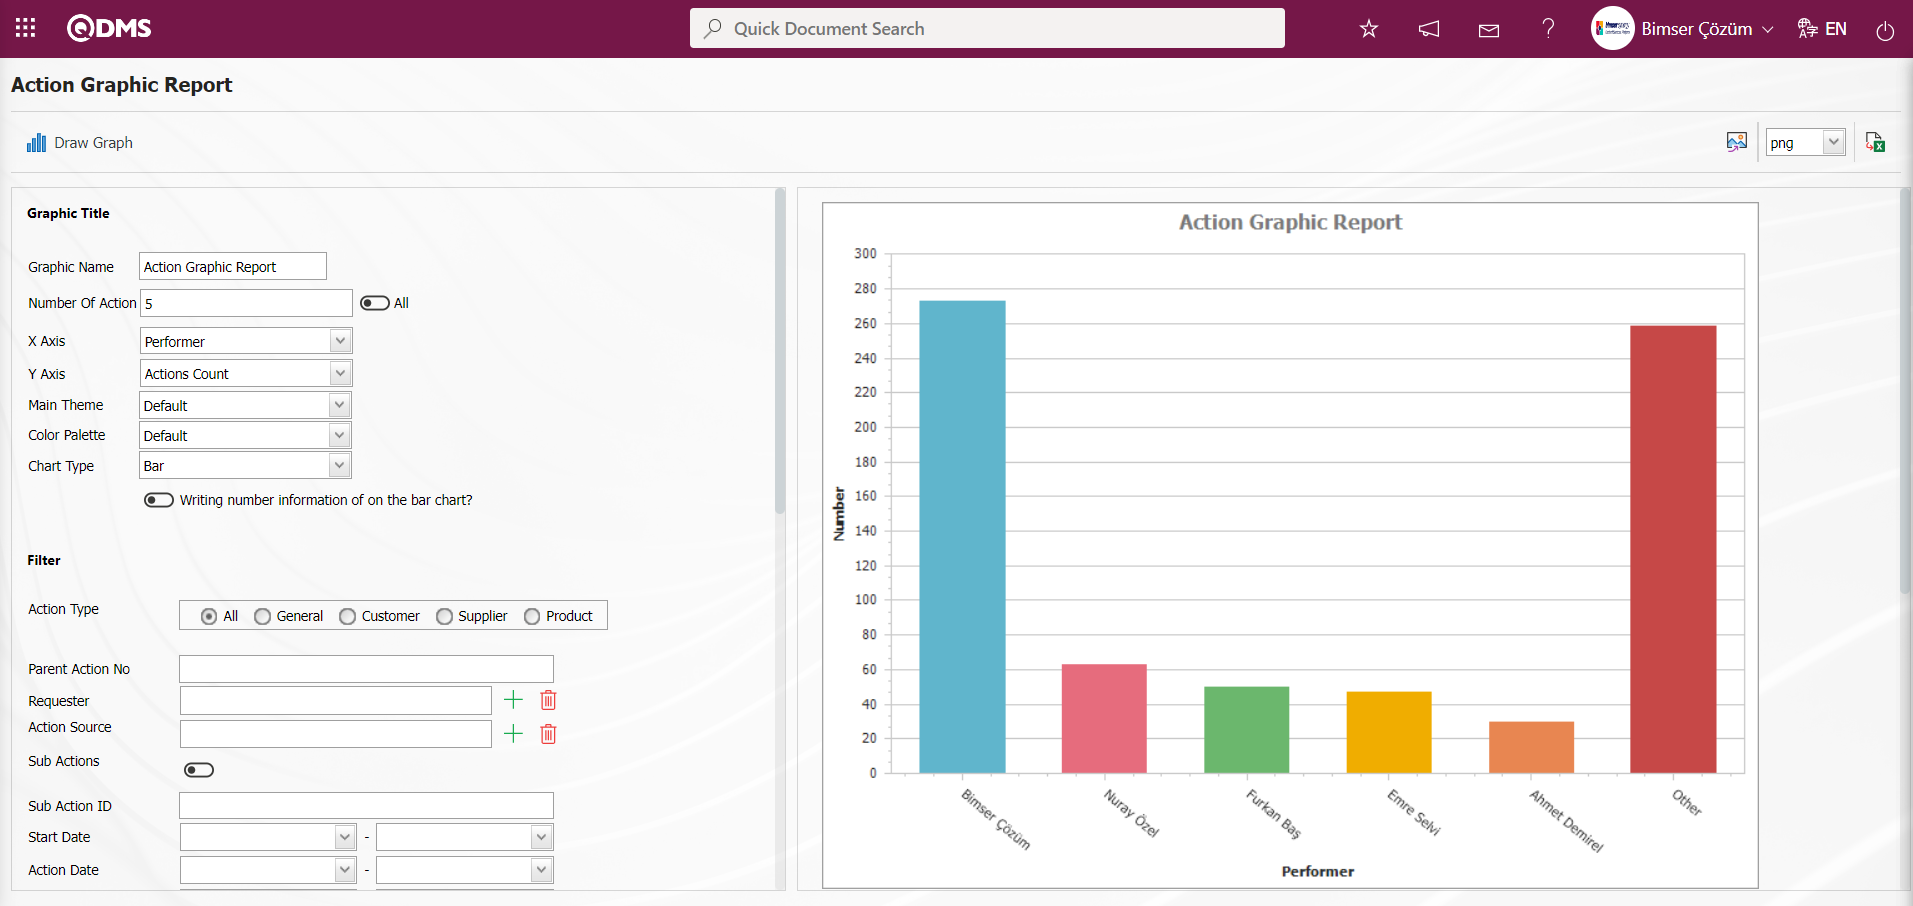
6.2.3.7. Action Approval/Rejection History
Menu name: Integrated Management System/ Action Management/ Reports/ Action Approval/Rejection History
It is the menu where you can see the rejection reason, rejection date, approver, approval rejection type (closing approval, opening approval) information and other action information for the rejected actions. On the Action Approval/Rejection History screen, there are two tabs: Action List and Action Search tab.
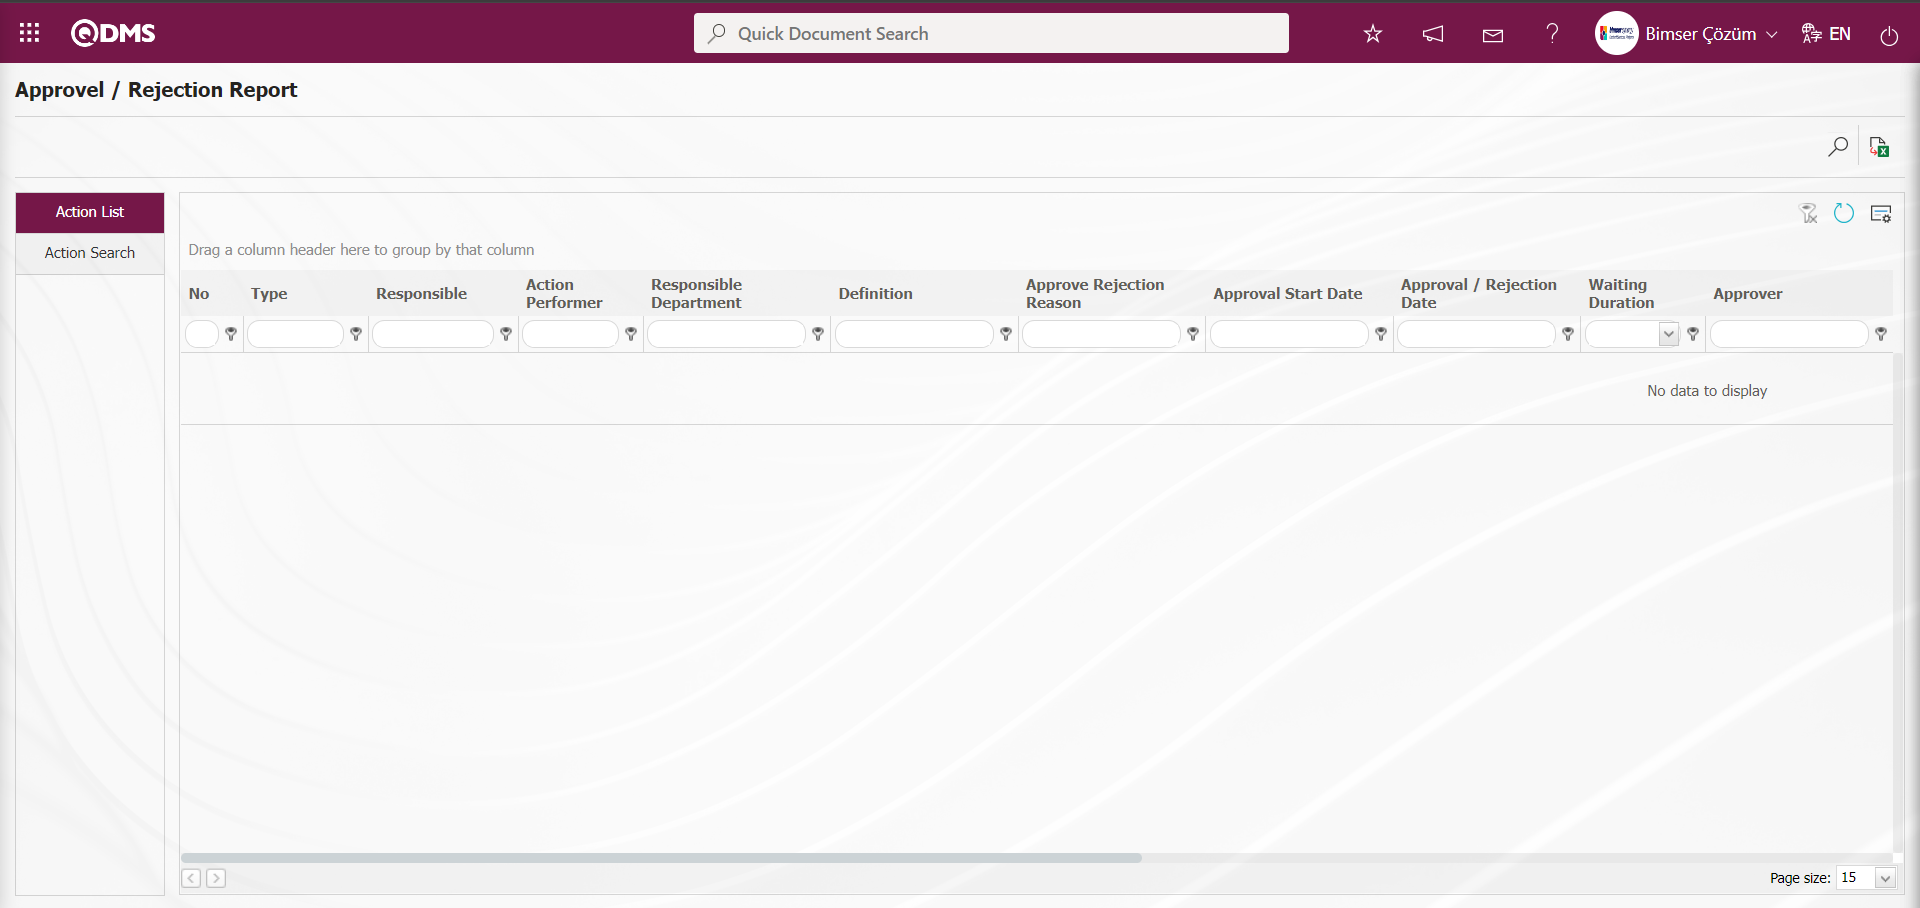
With the help of the buttons on the screen;
: Records can be searched by filtering.
: Data can be transferred to Excel.
: The search criteria on the menu screens are used to clean the data remaining in the filter fields in the grid where the search operation is performed.
: The menu screen is restored to its default settings.
: User-based designing of the menu screen is done with the show-hide feature, that is, the hiding feature of the fields corresponding to the columns on the menu screens.
In the Action Approval / Rejection History screen, data entries are made in the fields in the search criteria in the Action Search tab and filtering is done by clicking the (Search) button.
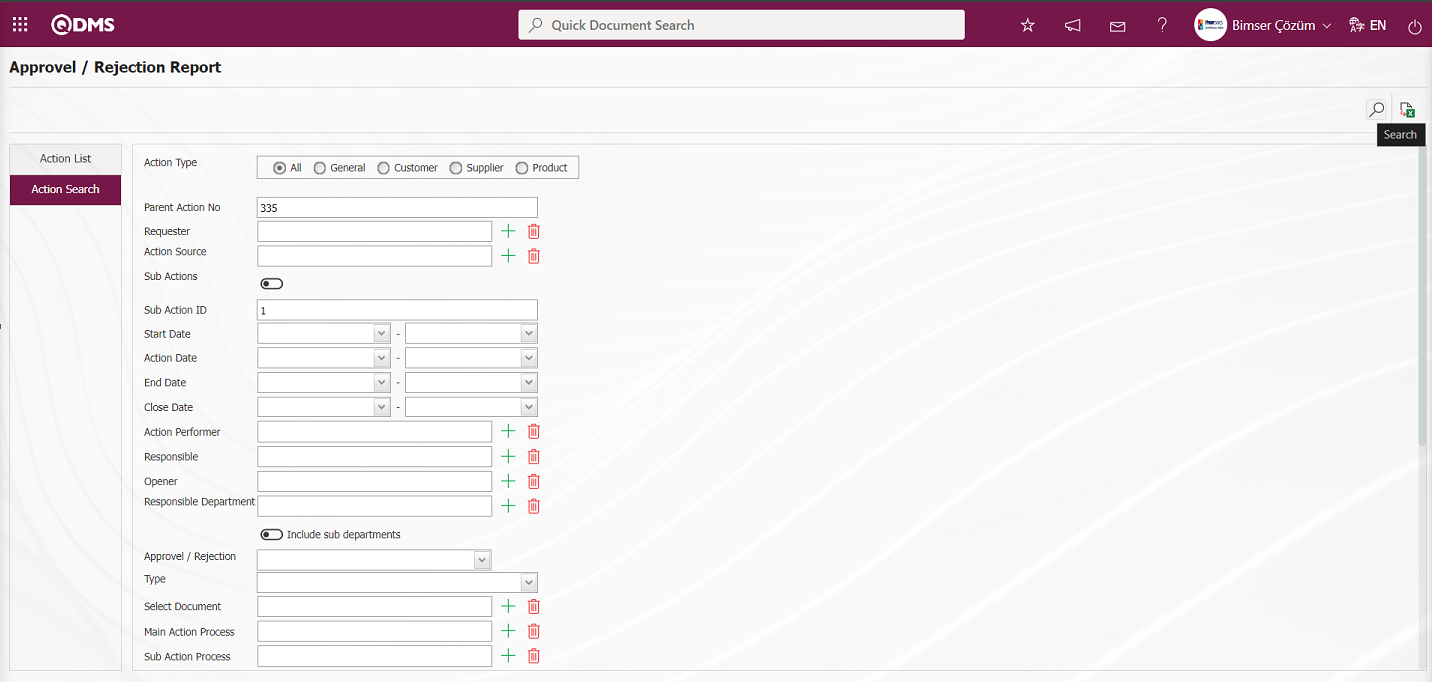
In the Action list on the Action Approval / Rejection History screen, the records belonging to the desired data are listed according to the filter settings made in the Action Search tab.
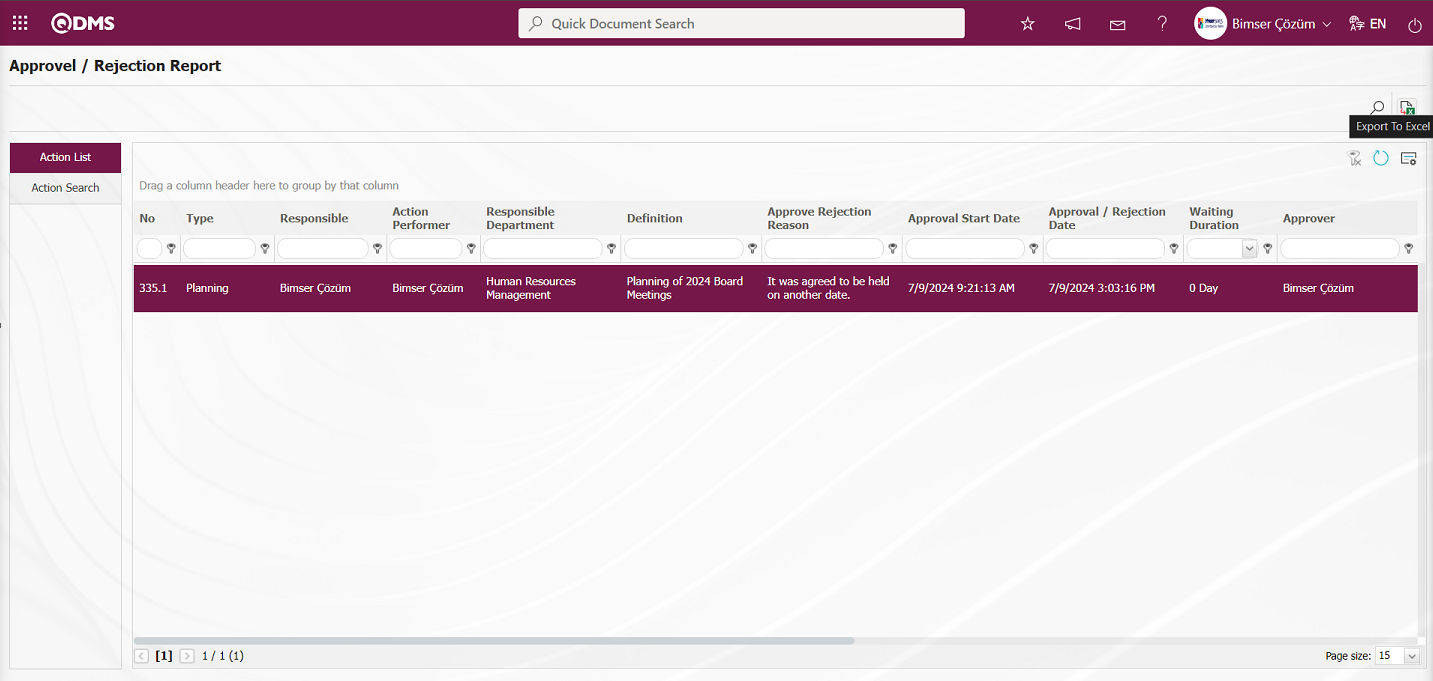
On the Action Approval/Rejection History screen, “Action Approval/Rejection History Report” is displayed in excel format by clicking the (Export to Excel) button on the Action list tab.
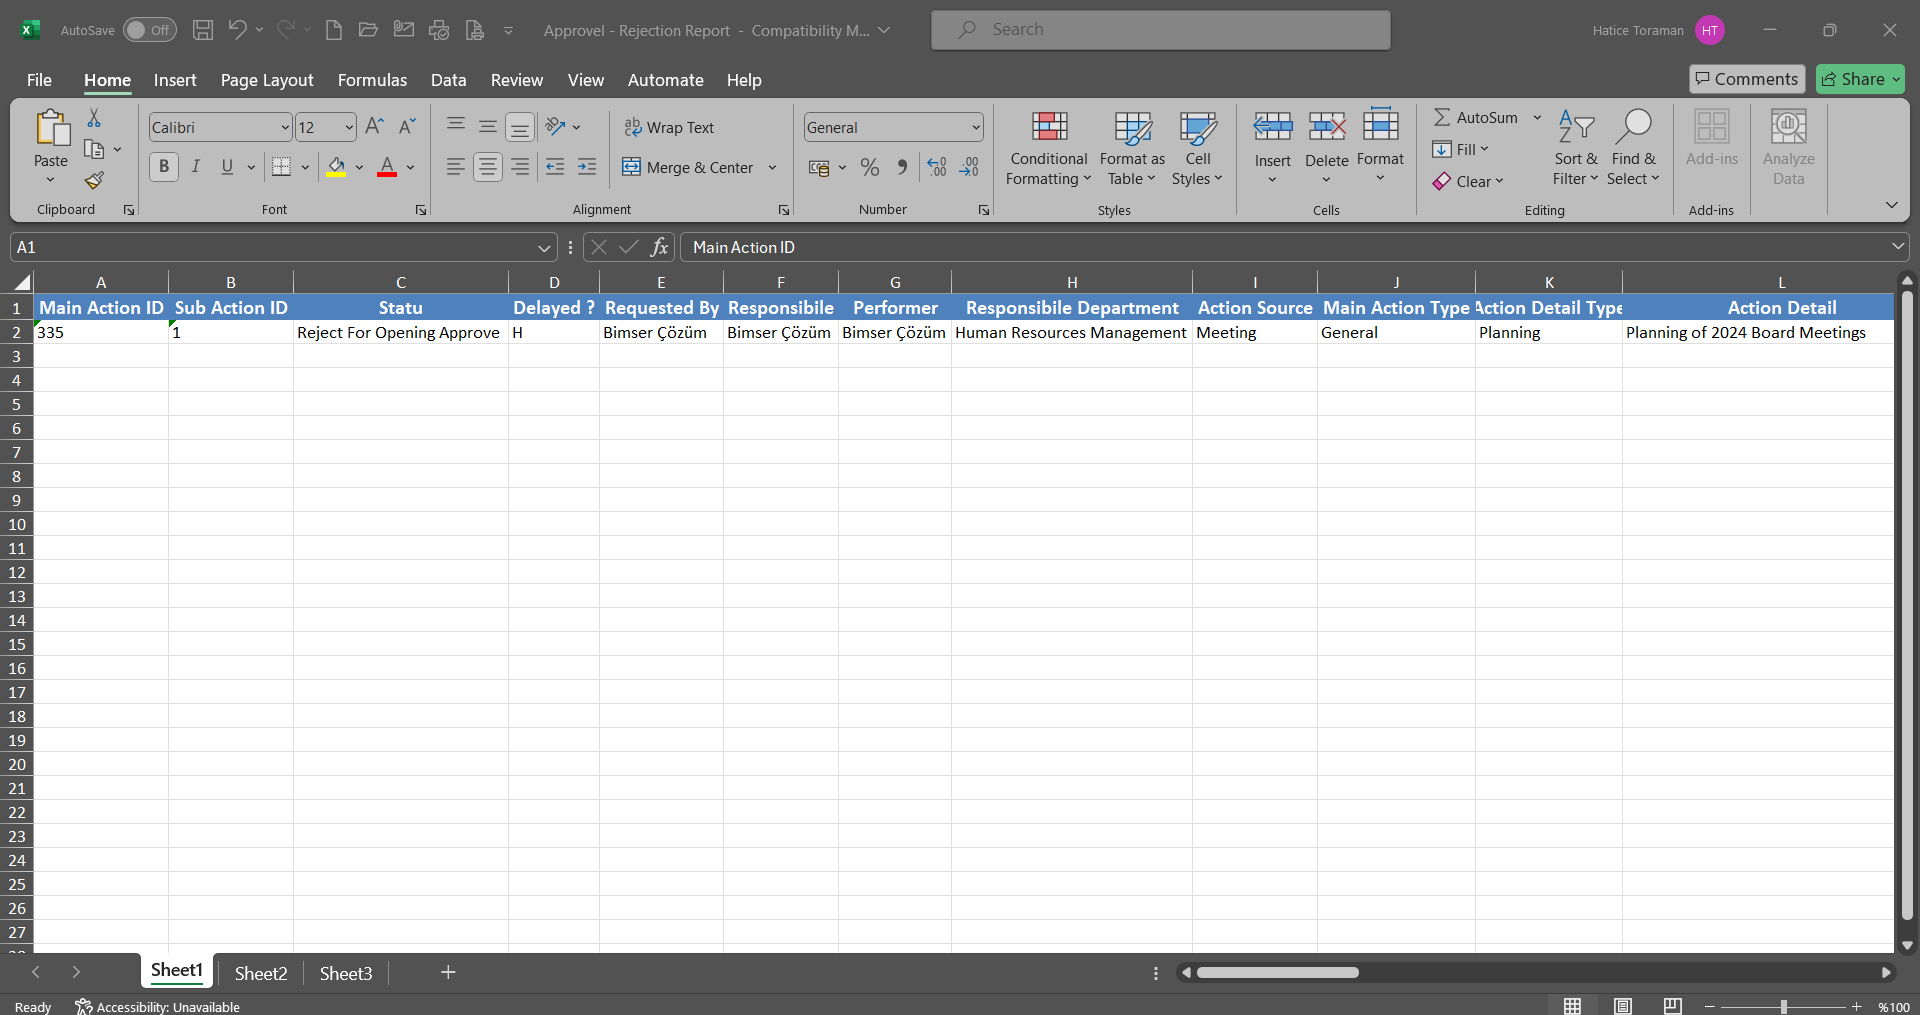
6.2.3.8. Action Status Analysis Report
Menu Name: Integrated Management System/ Action Management/ Reports/ Action Status Analysis Report
It is the menu where the graphical report showing the open / closed status of the actions according to the value selected in the “X axis” field in the Filter tab on the Action Status Analysis Report screen is displayed. In the list that opens by clicking the drop-down list on the X axis, there are Department, Doer, Workplace, Responsible, System Entry and Requestor options. It shows the status of the actions according to the option selected on the X axis. For example, it shows how many actions are open or closed in terms of number and percentage ratio in which workplace among the actions opened based on workplace.
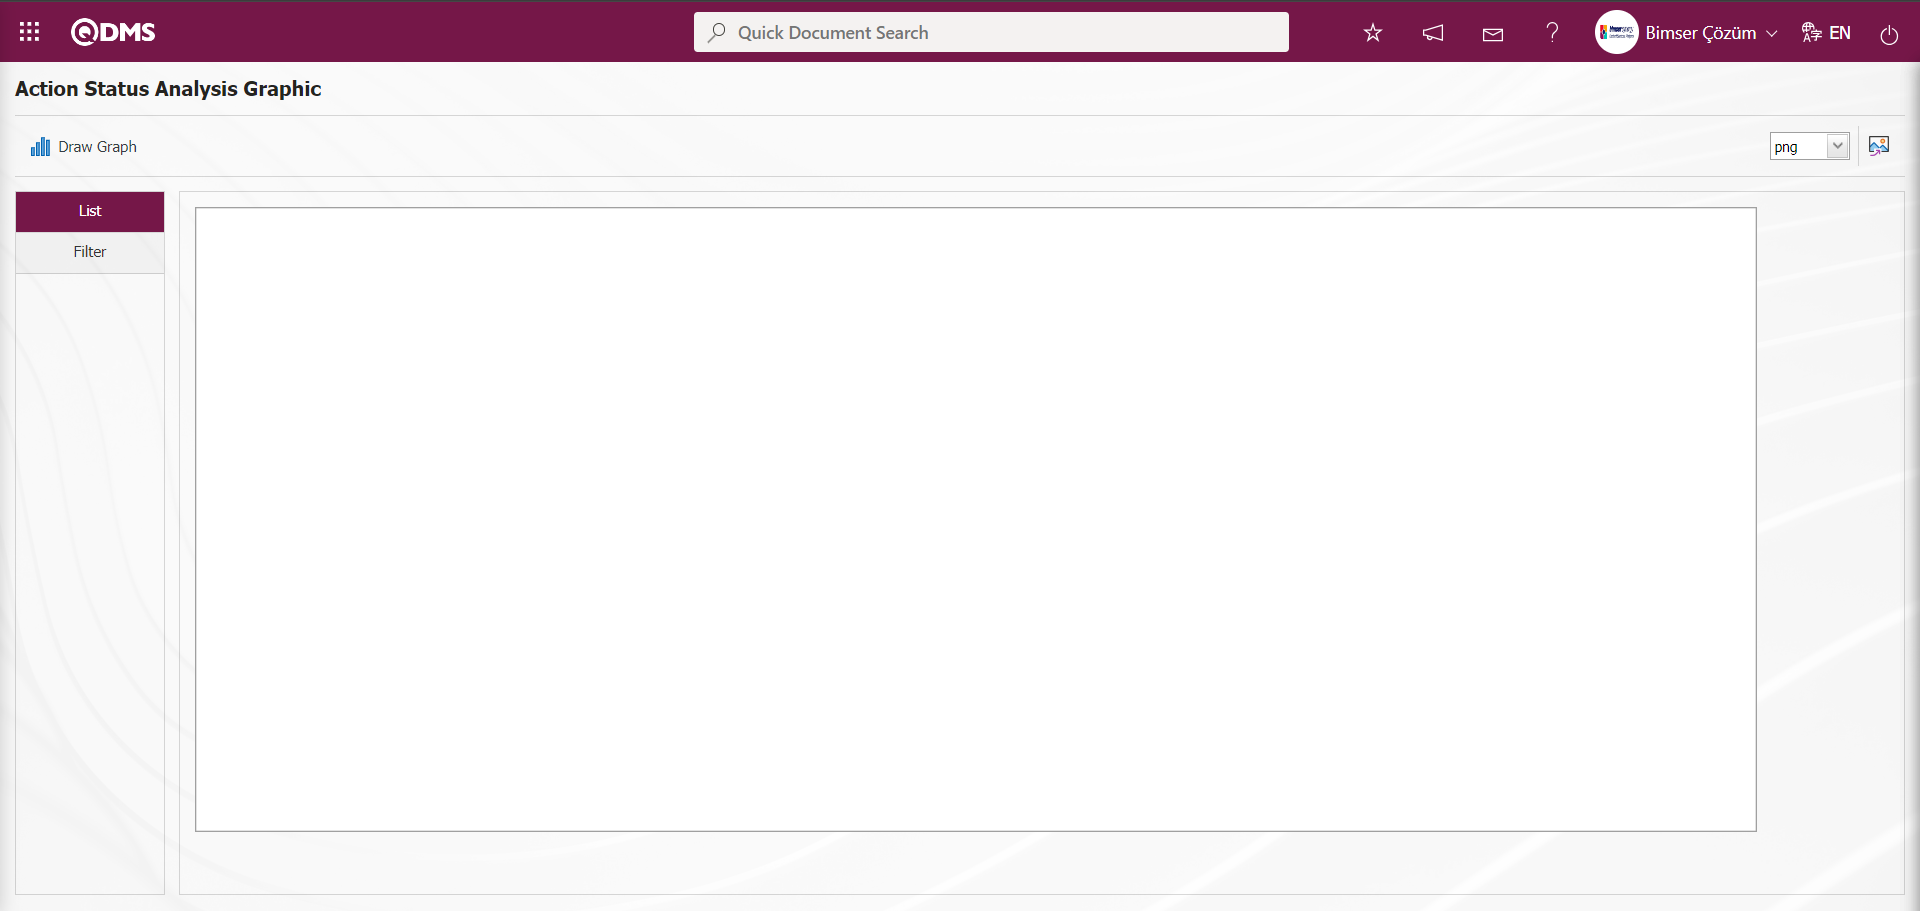
With the help of the buttons on the screen;
 : Draws the graph on the screen according to the specified properties.
: Converts the graph to the format type selected from the drop-down menu (png, jpg, bmp, xls, etc.) and transfers it to the external environment.
On the Action Status Analysis Report screen, a selection is made in the drop-down list options opened on the X axis in the filter tab. After the selection is made, data entries are made in fields such as Main theme, colour palette, Chart Width. If desired, the Graphic Name information is changed.
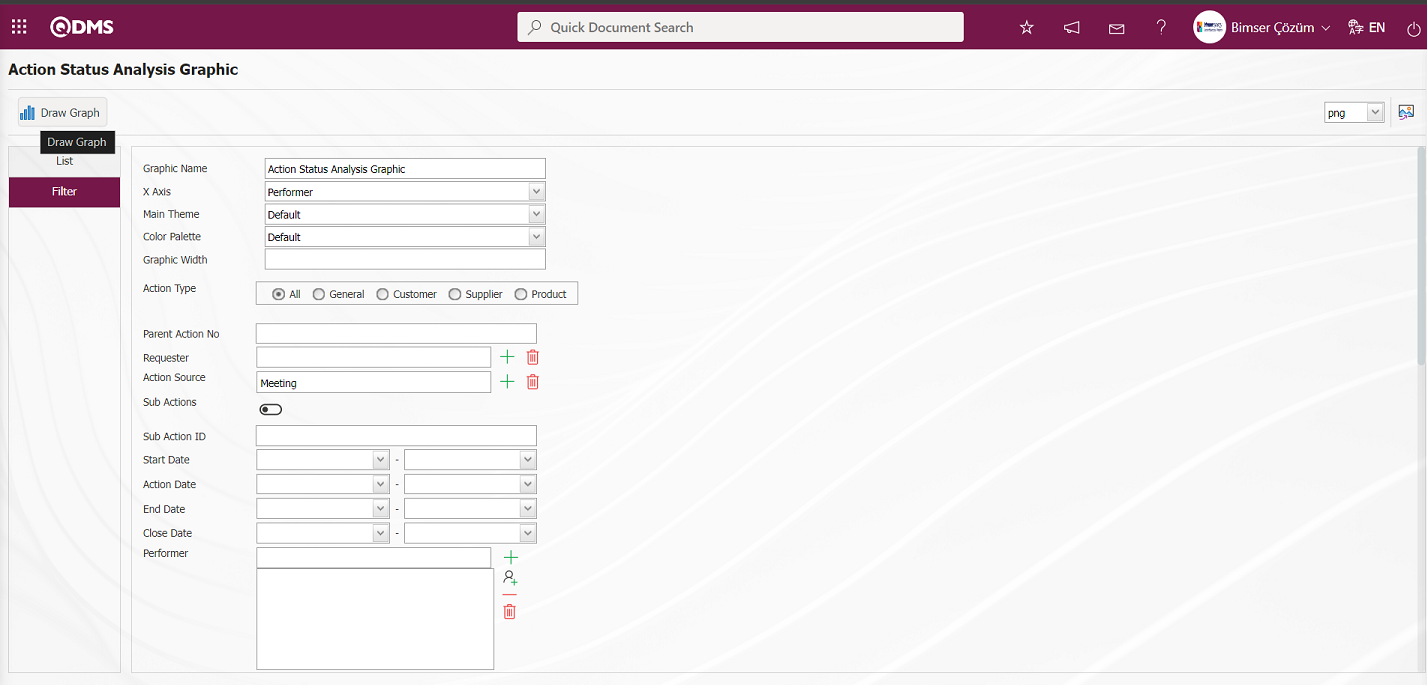
On the Action Status Analysis Report screen, “Action Status Analysis Report” is obtained by clicking the button after the necessary adjustments related to the fields in the Filter tab
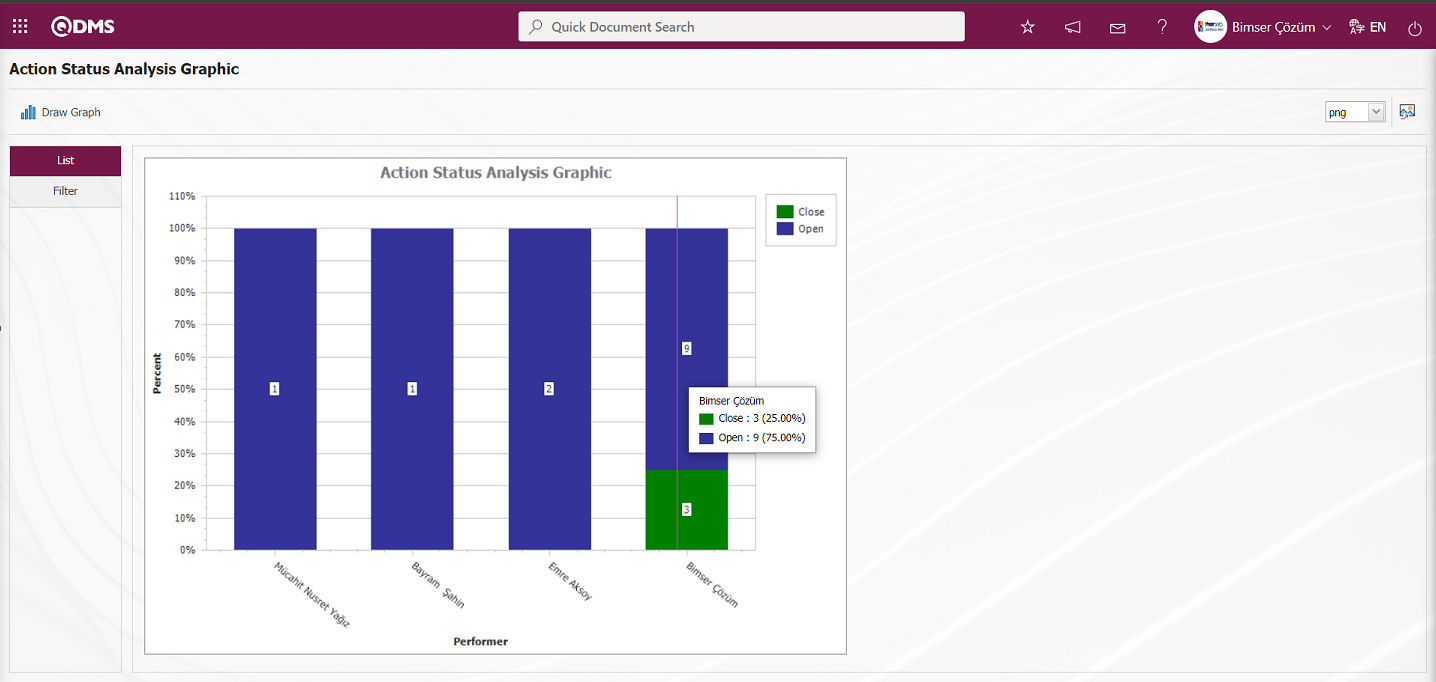
6.2.3.9. Log Report
Menu Name: Integrated Management System/ Action Management/ Reports/ Log Report
It is the menu where the report where information about the Action No, Information, Transactor, Transaction Date and Transaction Type fields of the Action Items are given. It is the report where the transaction information on action items is kept. There are two tabs on the Log Report screen: Action List and Action Search tab.

With the help of the buttons on the screen;
: Records can be searched by filtering.
: Data can be transferred to Excel.
: The search criteria on the menu screens are used to clean the data remaining in the filter fields in the grid where the search operation is performed.
: The menu screen is restored to its default settings.
: User-based designing of the menu screen is done with the show-hide feature, that is, the hiding feature of the fields corresponding to the columns on the menu screens.
In the Log Report screen, data entries are made in the fields in the search criteria in the Action Search tab and filtering is done by clicking the (Search) button.

In the Action list on the Log Report screen, reports of the desired data are displayed according to the filter settings made in the Action Search tab.
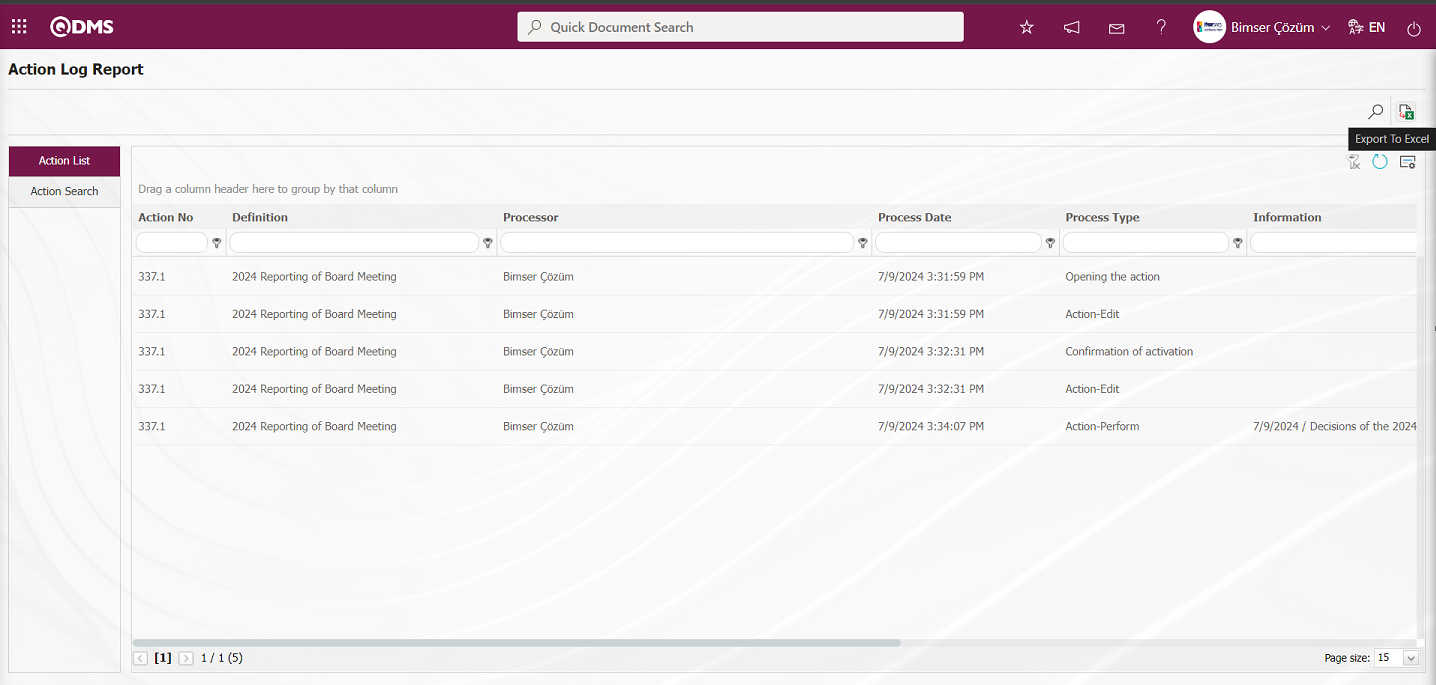
“Log Report” is displayed in excel format by clicking the (Export to Excel) button in the Action List on the Log Report screen.
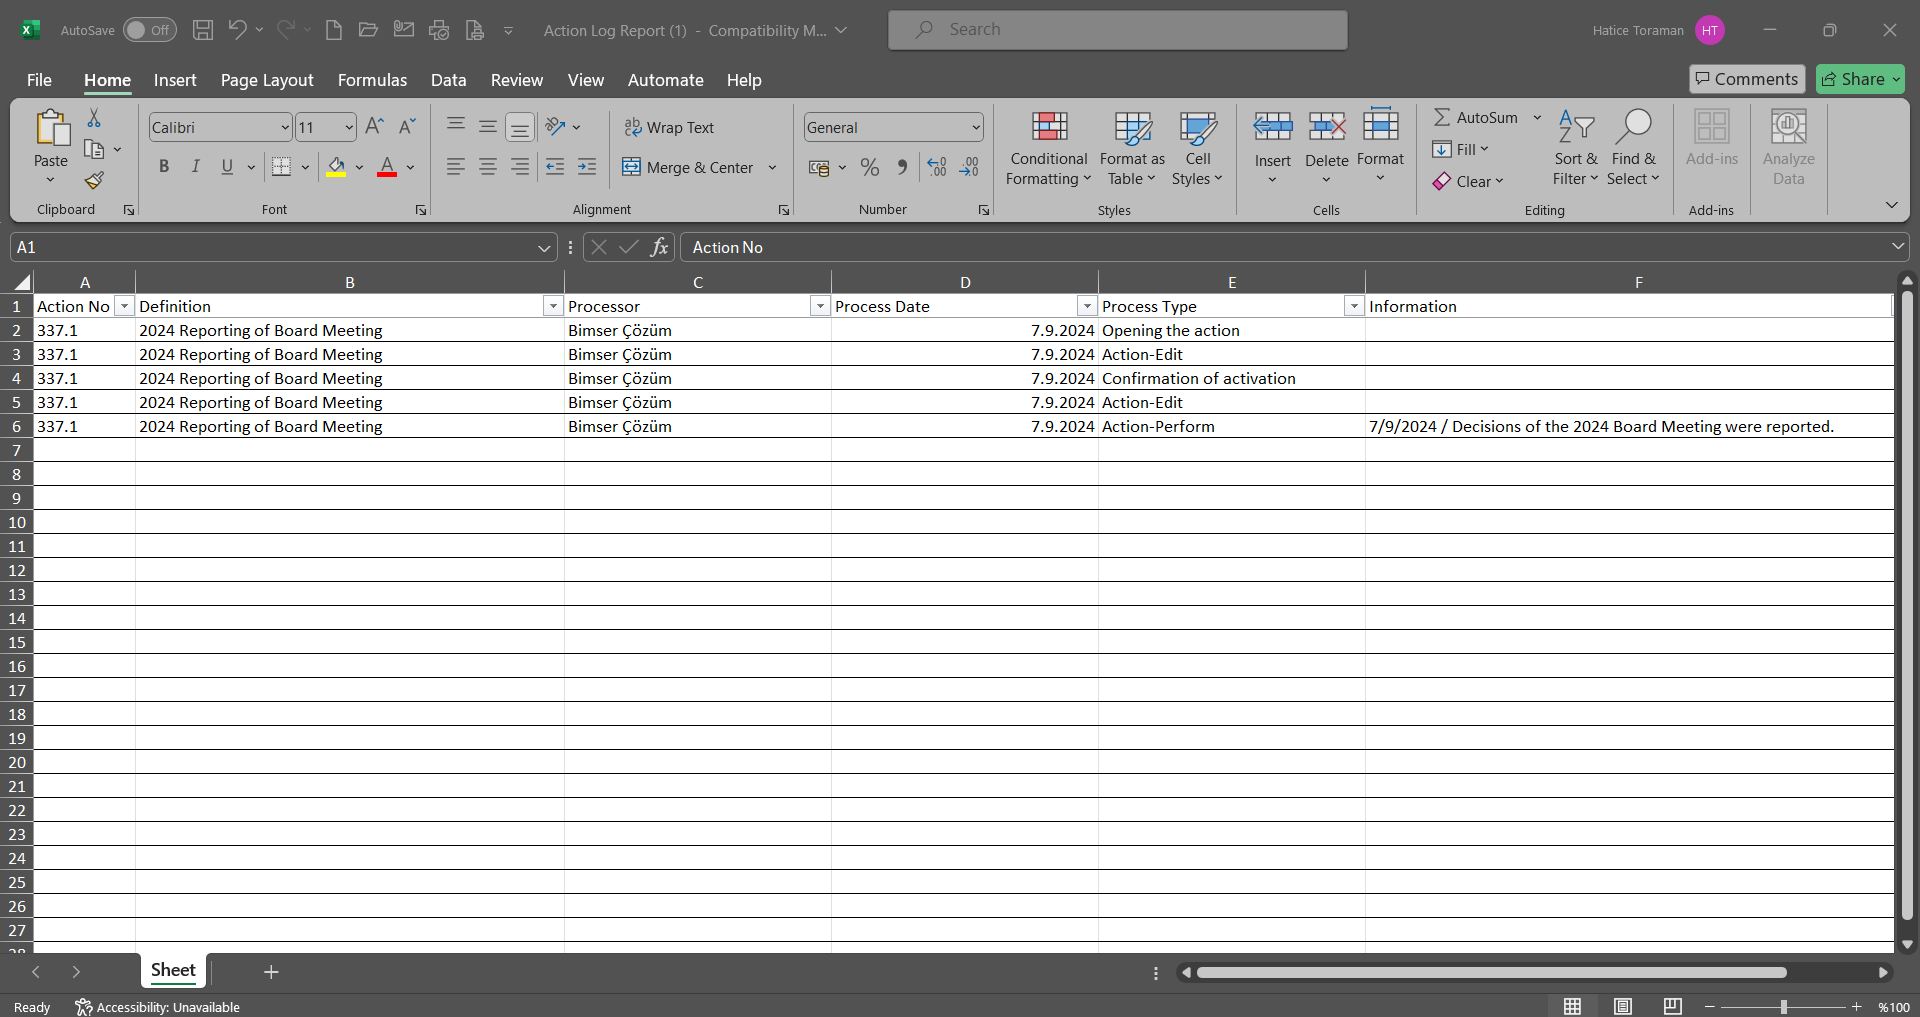
6.2.3.10. Action Time Dimensional Analysis
Menu Name: Integrated Management System/ Action Management/ Reports/Action Time Dimensional Analysis
It is a report where actions are displayed graphically in time dimension. According to the selected data related to the actions, graphs are taken on a monthly basis. According to the value selected in the “X axis” field, a graphical report can be obtained as a pie or bar chart by clicking the  button.
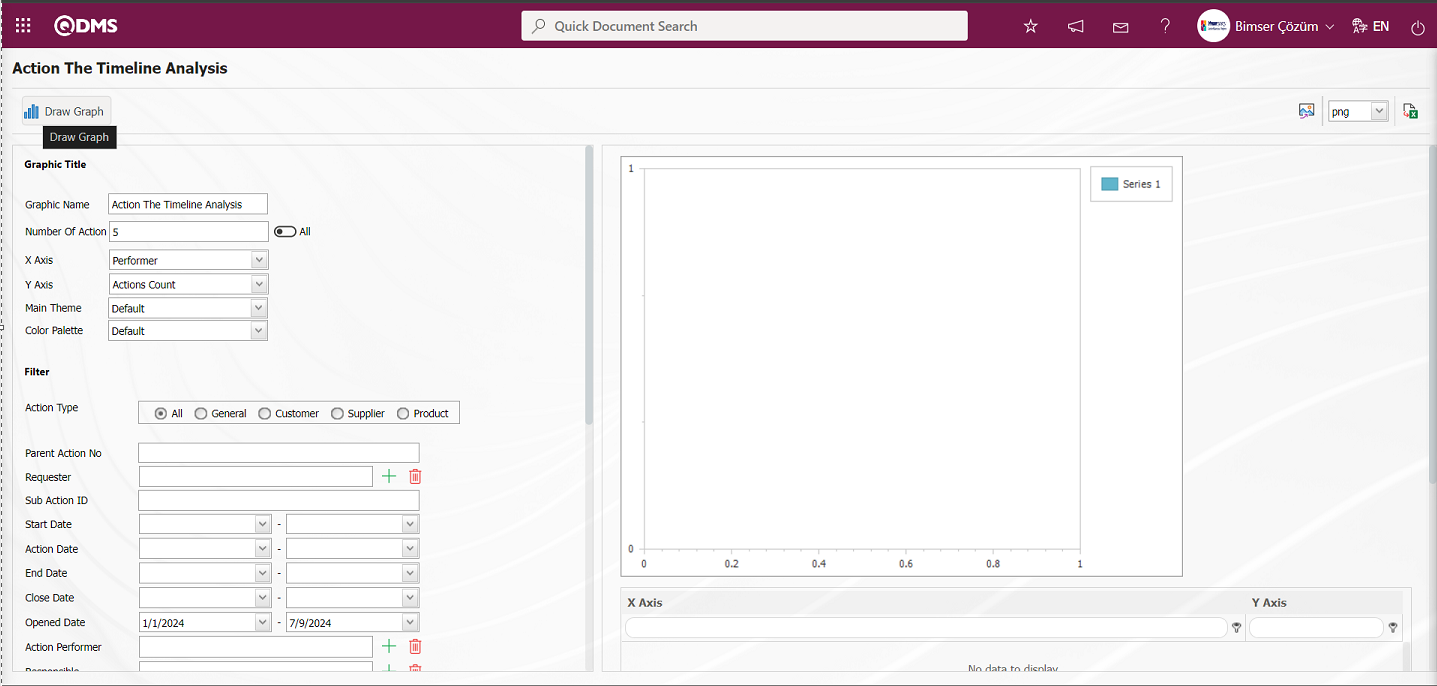
With the help of the buttons on the screen;
: Draws the graph on the screen according to the specified properties.
: Converts the graph to the format type selected from the drop-down menu (png, jpg, bmp, xls, etc.) and transfers it to the external environment.
: Data can be exported to Excel.
On the Action Time Dimensional Analysis report screen, the necessary selections are made in the Graph options section. In the Graph Type section, the desired attribute to be placed on the X and Y axis is selected. The chart can be customised from Main Theme, colour palette properties by selecting from the drop-down list options in the Main Theme, colour palette fields. In the Chart options section, the maximum range desired to be in the chart is determined in the Most field.
After the necessary selections are made in the Graph options section on the Action Time Dimensional Analysis screen, the button is clicked to create a graph by specifying the Graph title if desired.
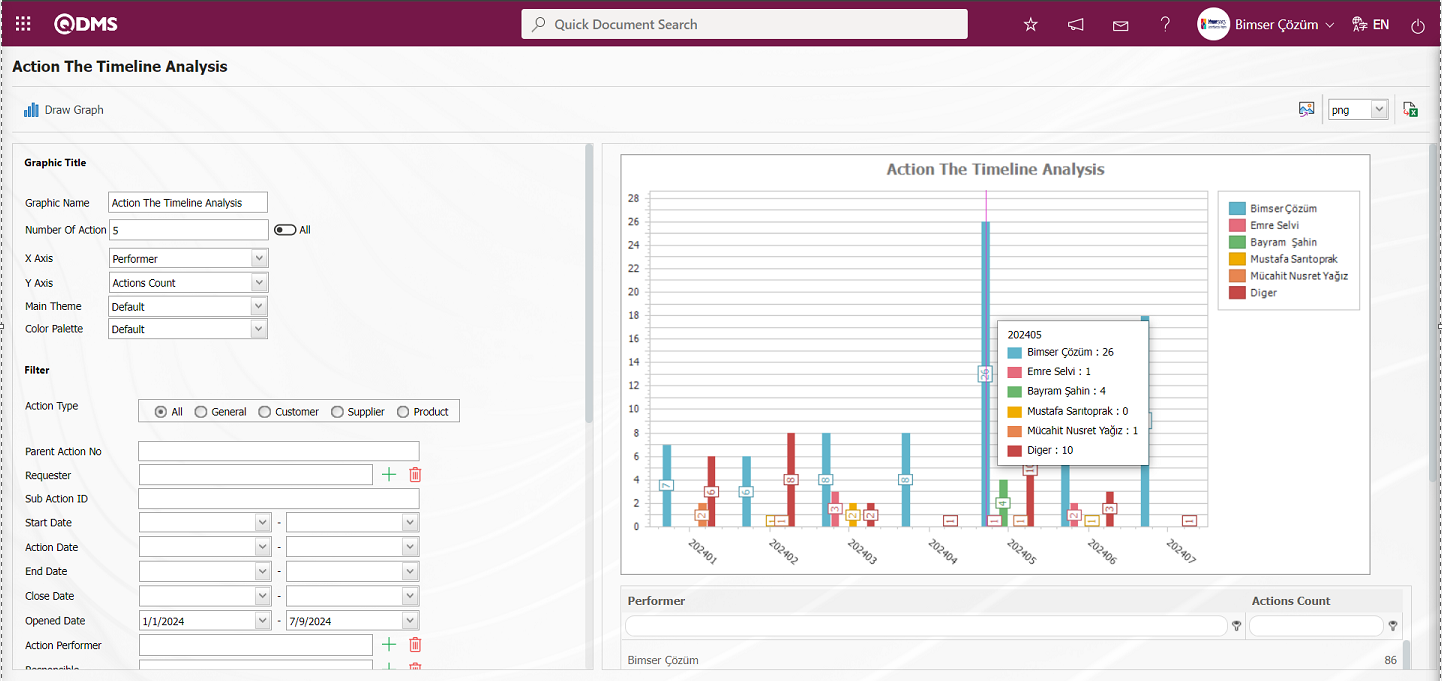
6.2.3.11. Action Comment Report
Menu Name: Integrated Management System/ Action Management/ Reports/ Action Comment Report
This is the report where the comments made to action items are displayed. In this menu, information about all action items are displayed. There are two tabs on the Main Action Report screen: Action List and Action Search tab. In order to list only the commented ones, the “Action Search” tab must be checked and the search operation must be performed by selecting the “Bring only the commented ones” option.
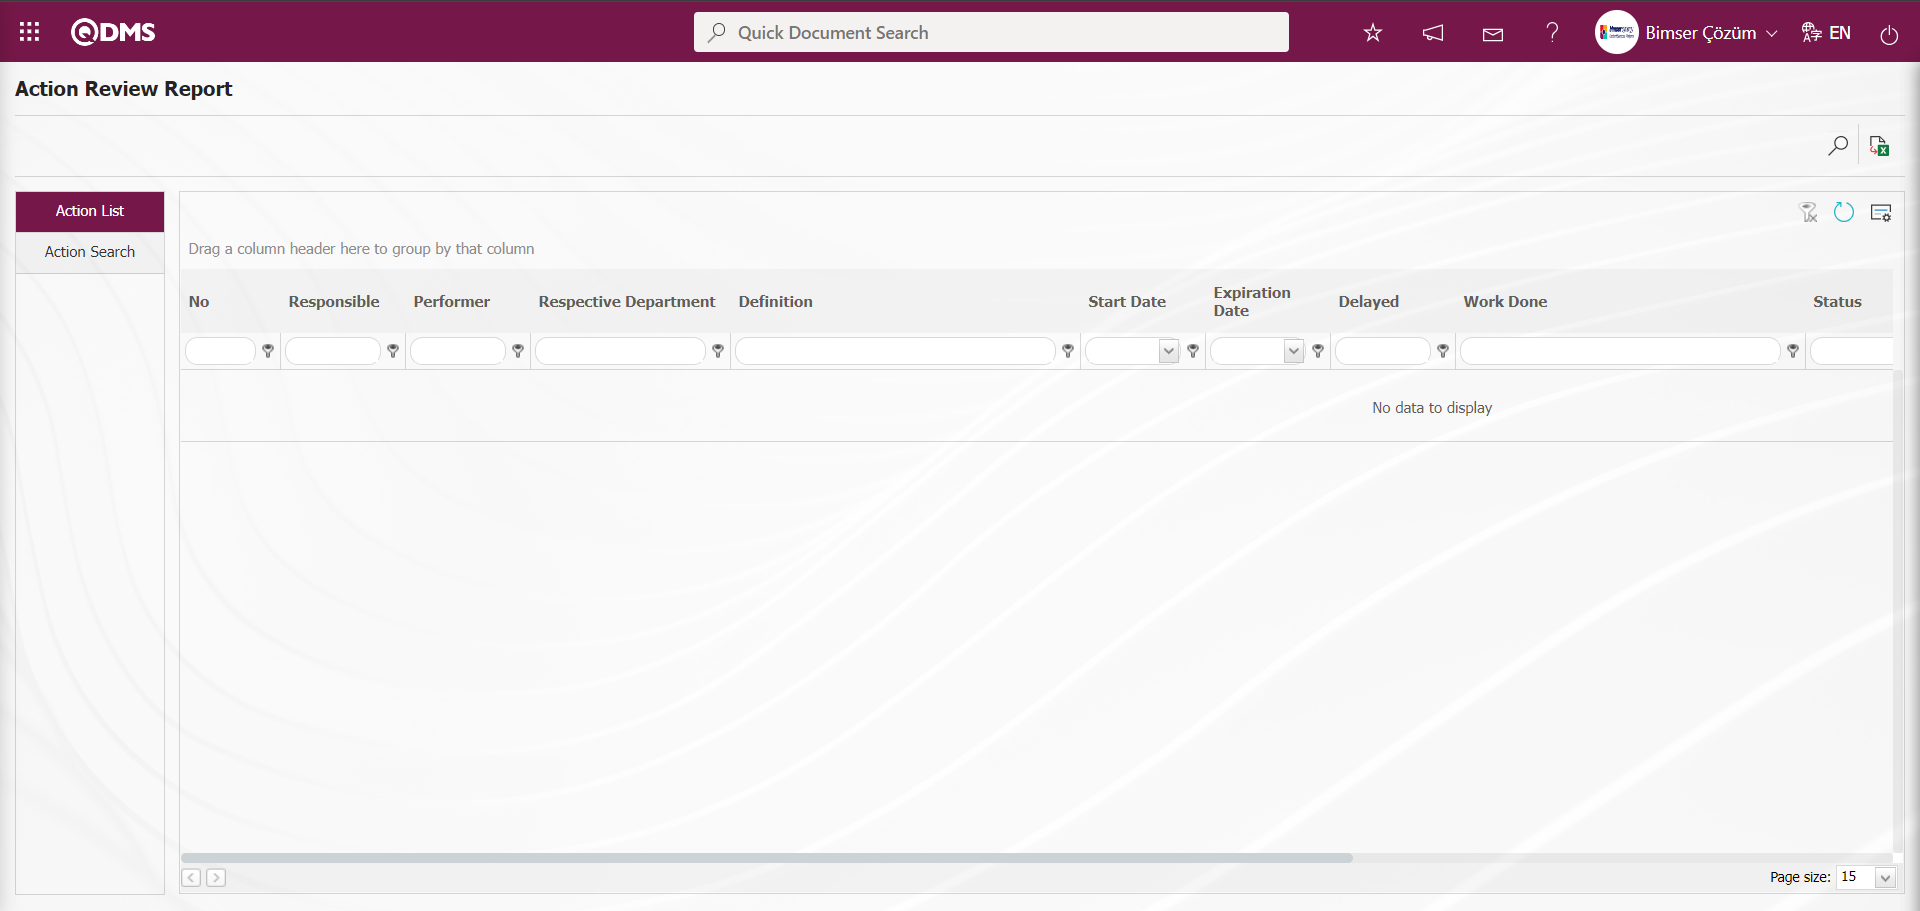
With the help of the buttons on the screen;
: Records can be searched by filtering.
: Data can be transferred to Excel.
: The search criteria on the menu screens are used to clean the data remaining in the filter fields in the grid where the search operation is performed.
: The menu screen is restored to its default settings.
: User-based designing of the menu screen is done with the show-hide feature, that is, the hiding feature of the fields corresponding to the columns on the menu screens.
On the Action Comment Report screen, data entries are made in the fields in the search criteria in the Action Search tab, the check box related to the “Bring only those who commented” field is checked and the filtering process is performed by clicking the (Search) button.
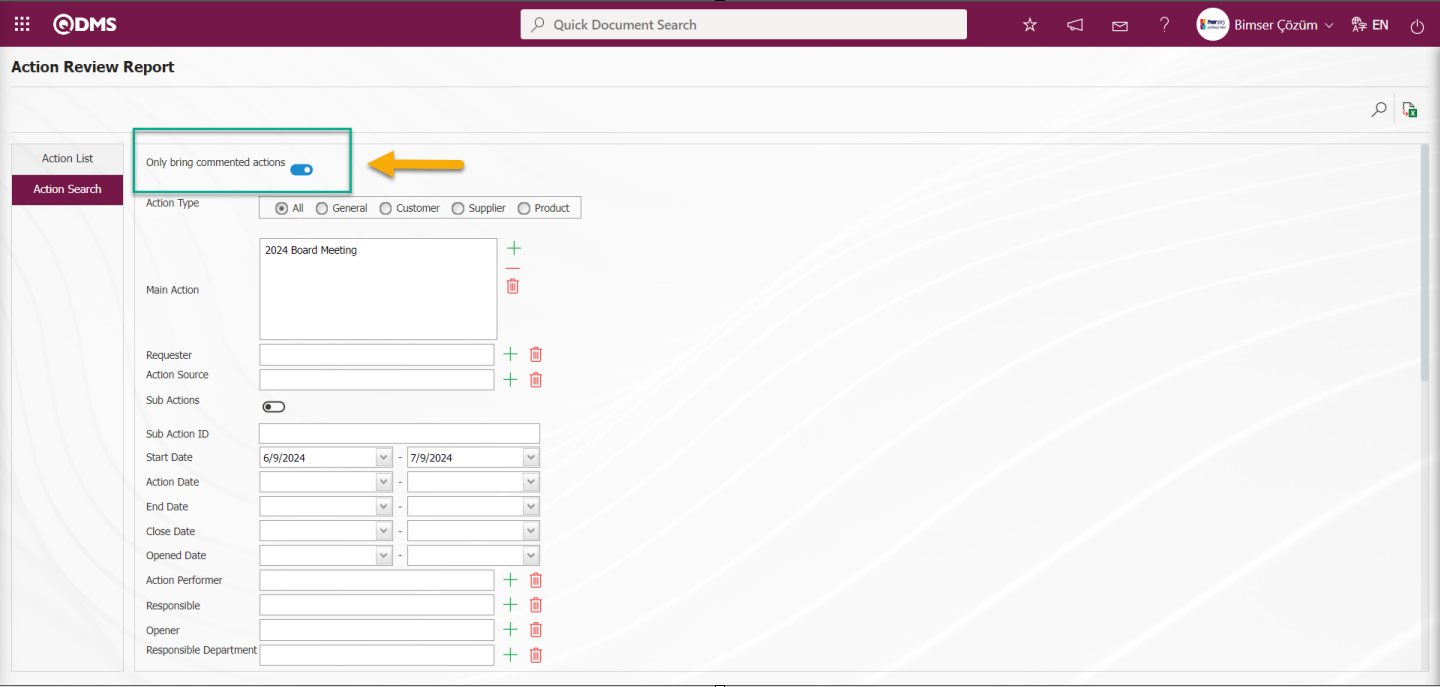
In the Action Comment Report screen, reports of the desired data are displayed according to the filter settings made in the Action Search tab in the Action list.

On the Action Comment Report screen, “Action Comment Report” is displayed in excel format by clicking the Action List (Summary Report) button.
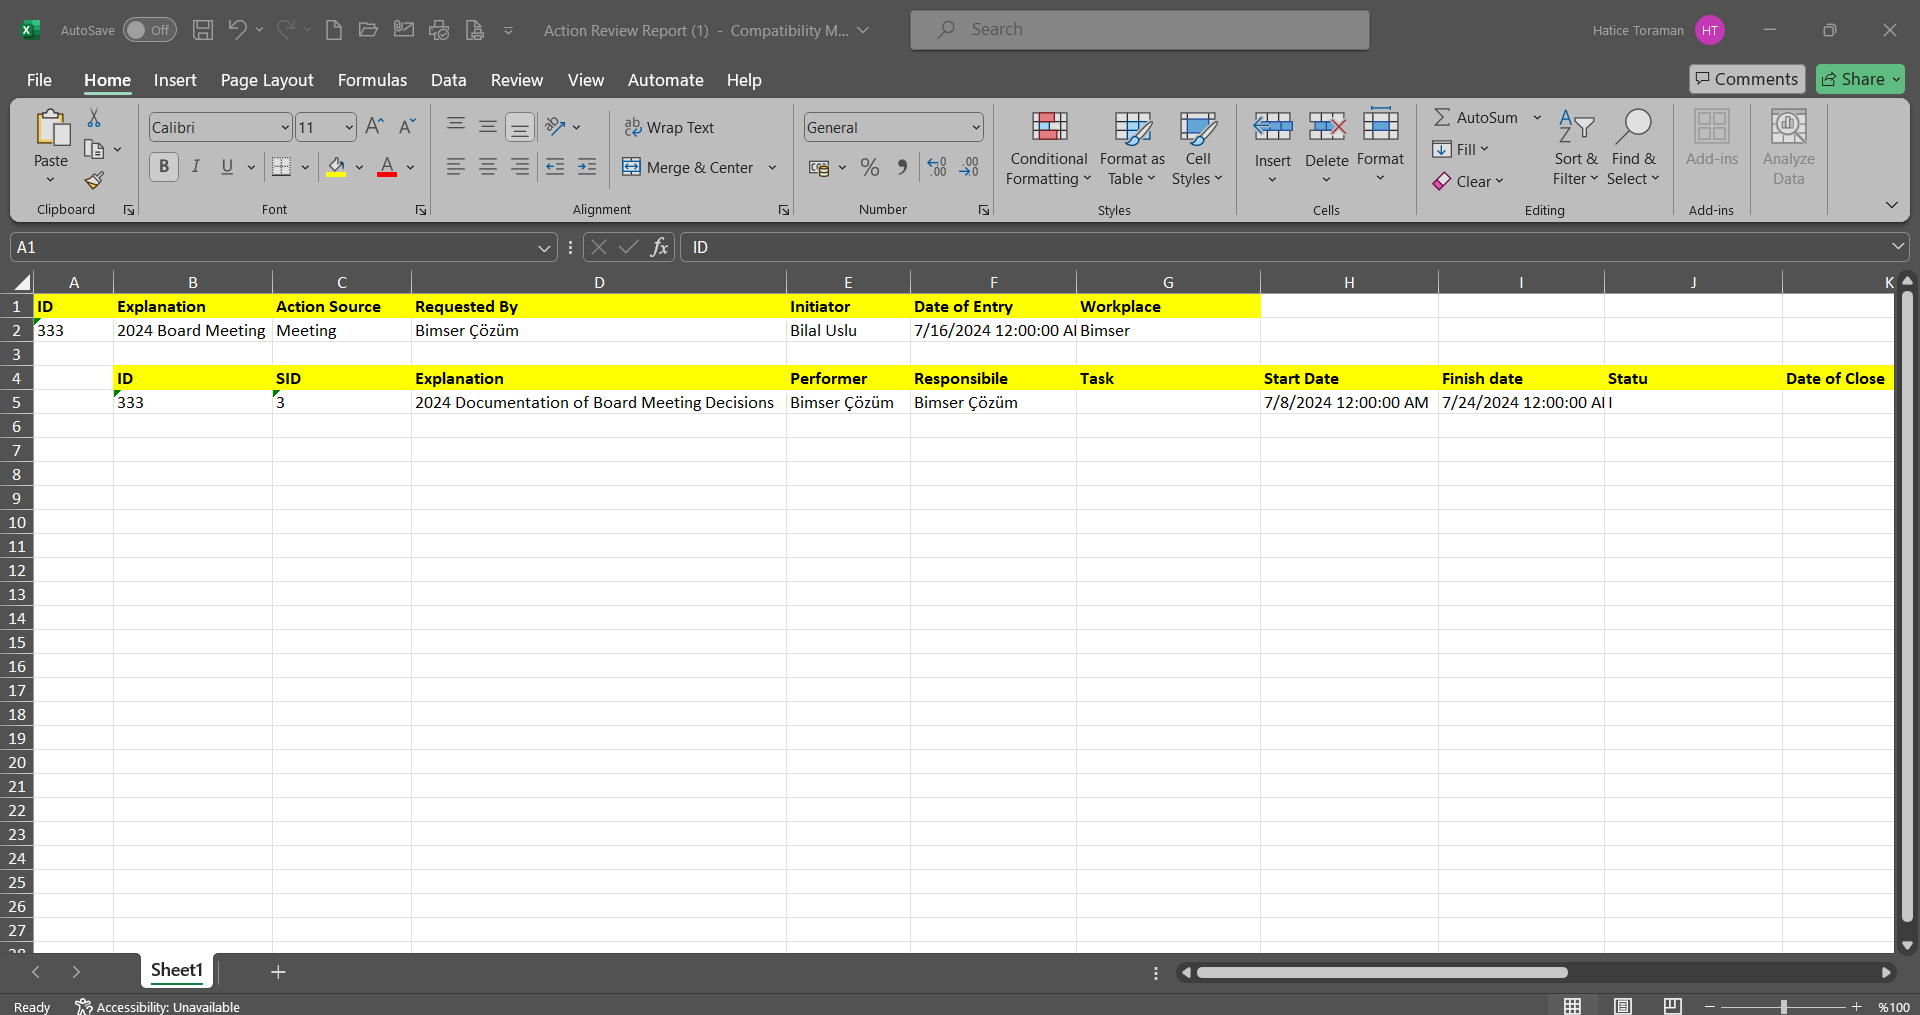
6.2.4. Action Approval - Opening Approval
Menu Name: Integrated Management System/ Action Management/ Action Approval - Opening Approval
In the Action Management module, it is the menu where the actions with “Opening Approval” status are approved or rejected. On the Action Approval - Opening Approval screen, we see two tabs, Action List and Action Search tab.

With the help of the buttons on the screen;
 : Action item approval is done.
 :Action item rejection is done.
: Records can be searched by filtering.
: Data can be transferred to Excel.
: The search criteria on the menu screens are used to clean the data remaining in the filter fields in the grid where the search operation is performed.
: The menu screen is restored to its default settings.
: User-based designing of the menu screen is done with the show-hide feature, that is, the hiding feature of the fields corresponding to the columns on the menu screens.
On the Action Confirmation - Opening Confirmation screen, data entries are made in the fields in the search criteria in the Action Search tab and filtering is done by clicking the (Search) button.
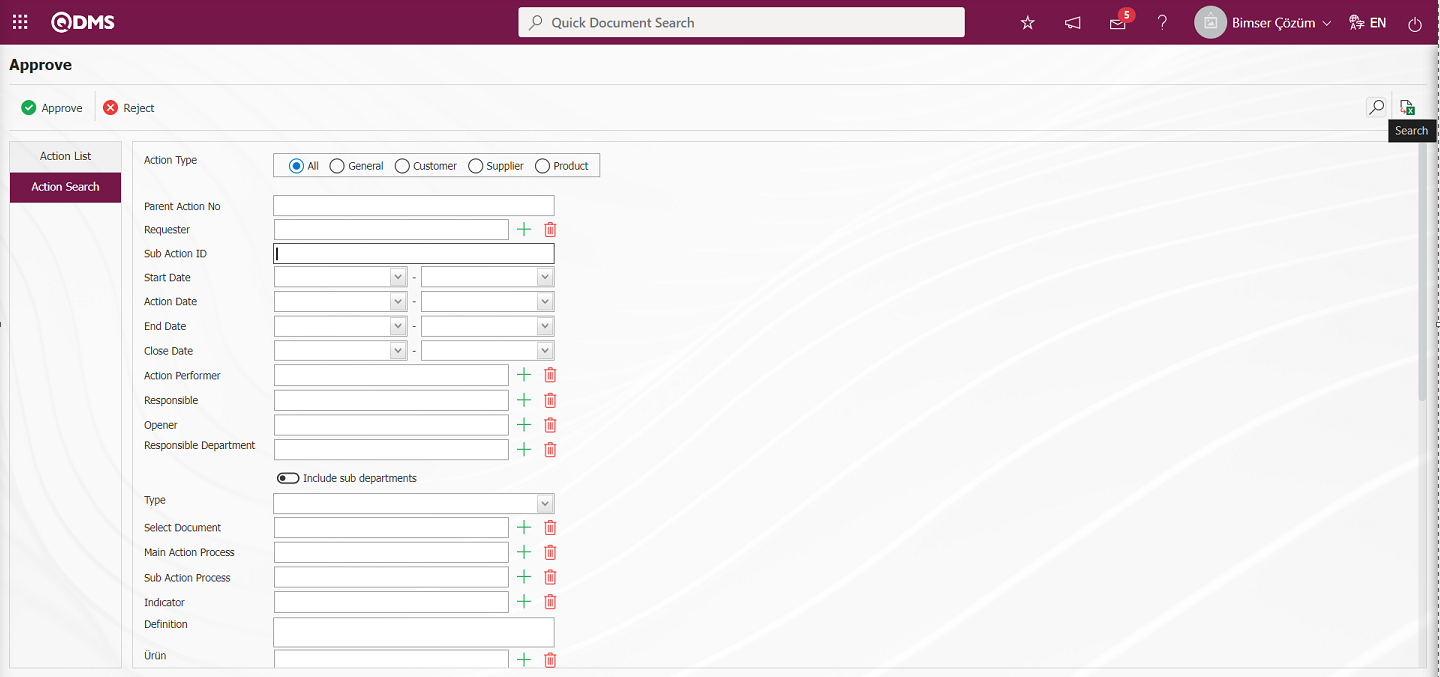
In the Action List on the Action Approval - Opening Approval screen, the Actions with the status of “Opening Approval” status of the desired data are displayed according to the filter settings made in the Action Search tab. On the Action Approval screen, click the  button while the Action with the status of “Opening Approval” status is selected on the Action List screen.
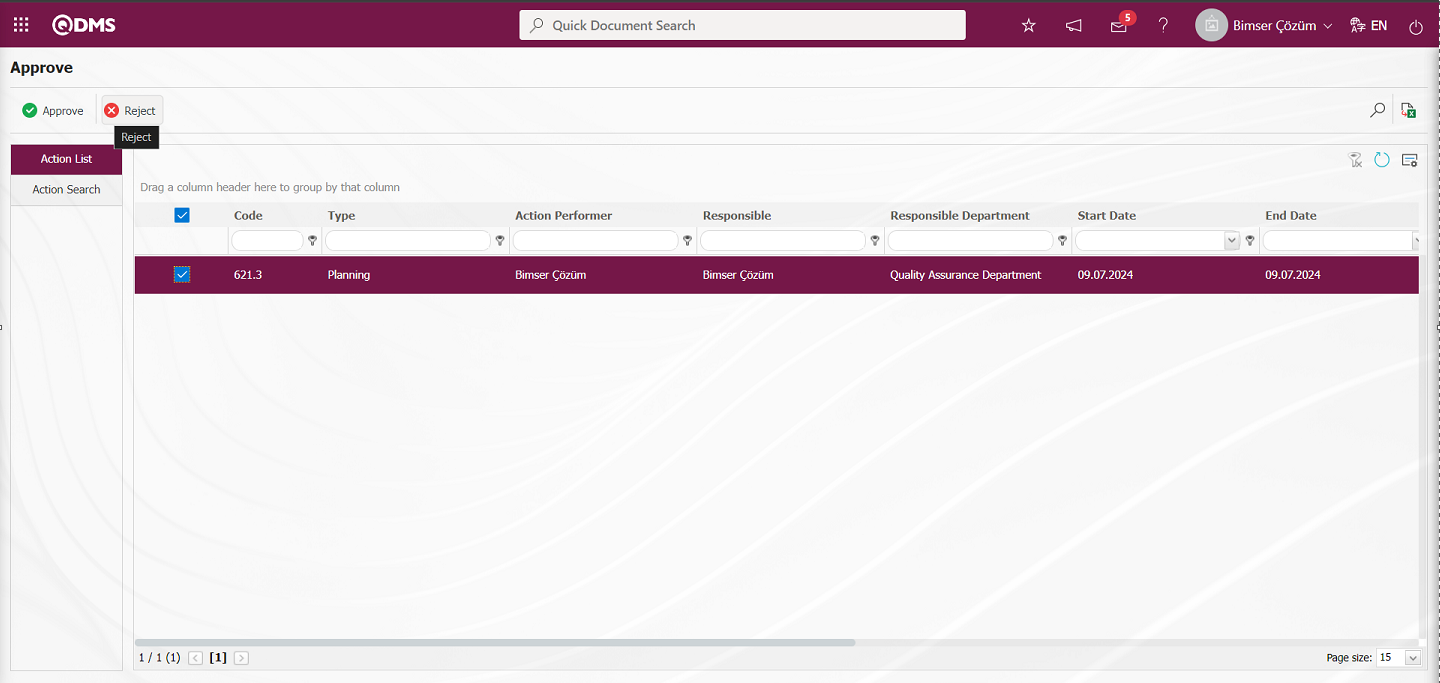 In the Action Rejection pop-up, the Reason for Rejection information is written and the Action with the status “Opening Approval” is rejected by clicking the
  button.
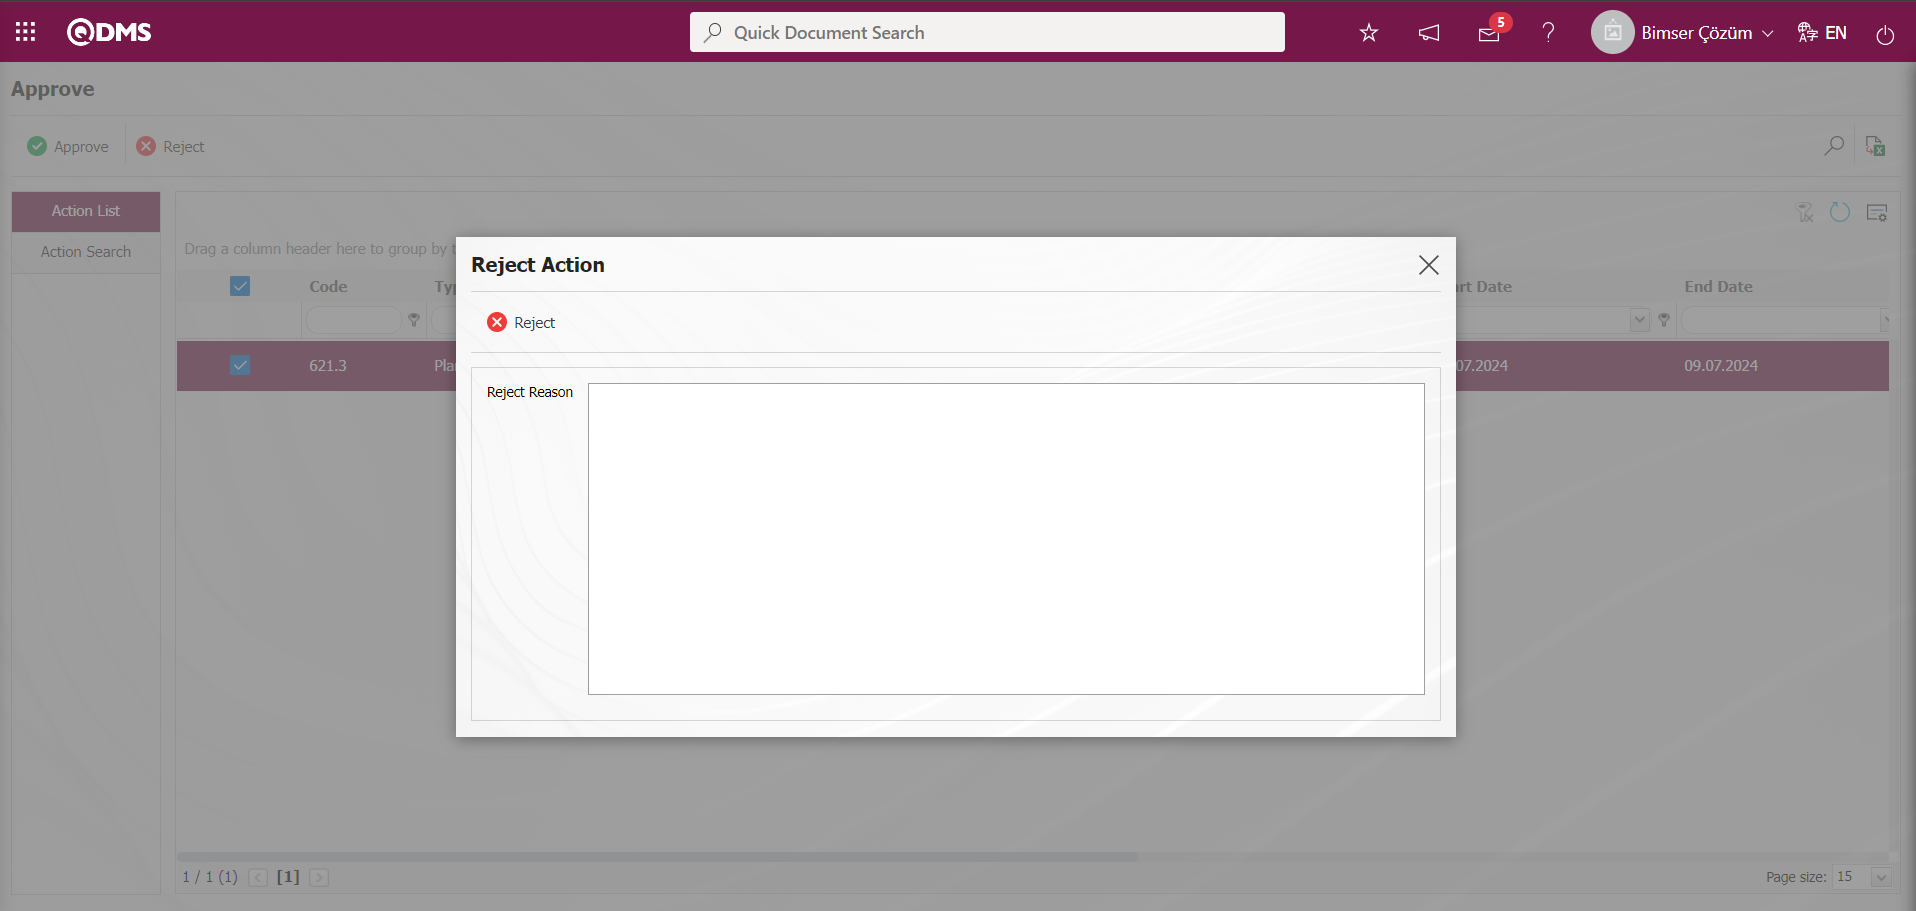
On the Action Approval screen, click the button while the Action with the status “Opening Approval” is selected from the list on the Action List screen.

In the Action Approval pop-up, the Approval Note information is written and the “Opening Approval” of the Action whose status is “Opening Approval” is approved by clicking the  button.
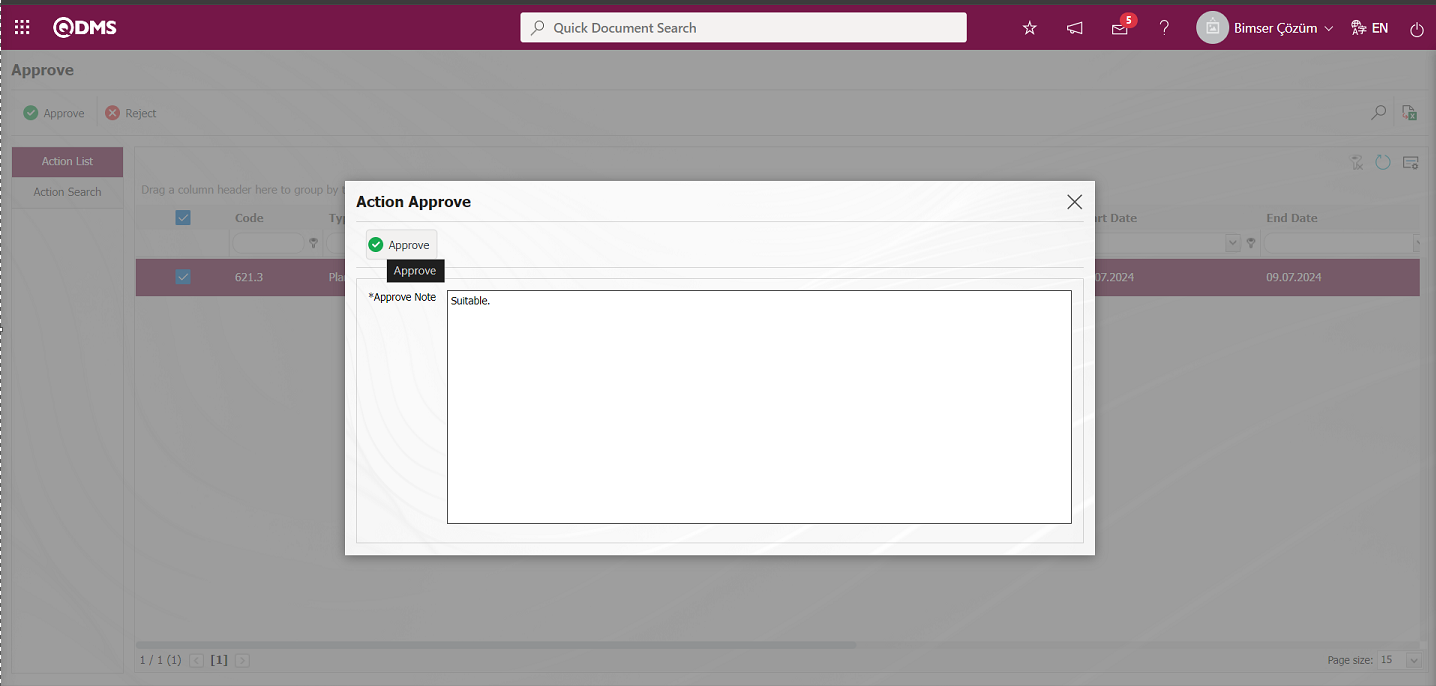
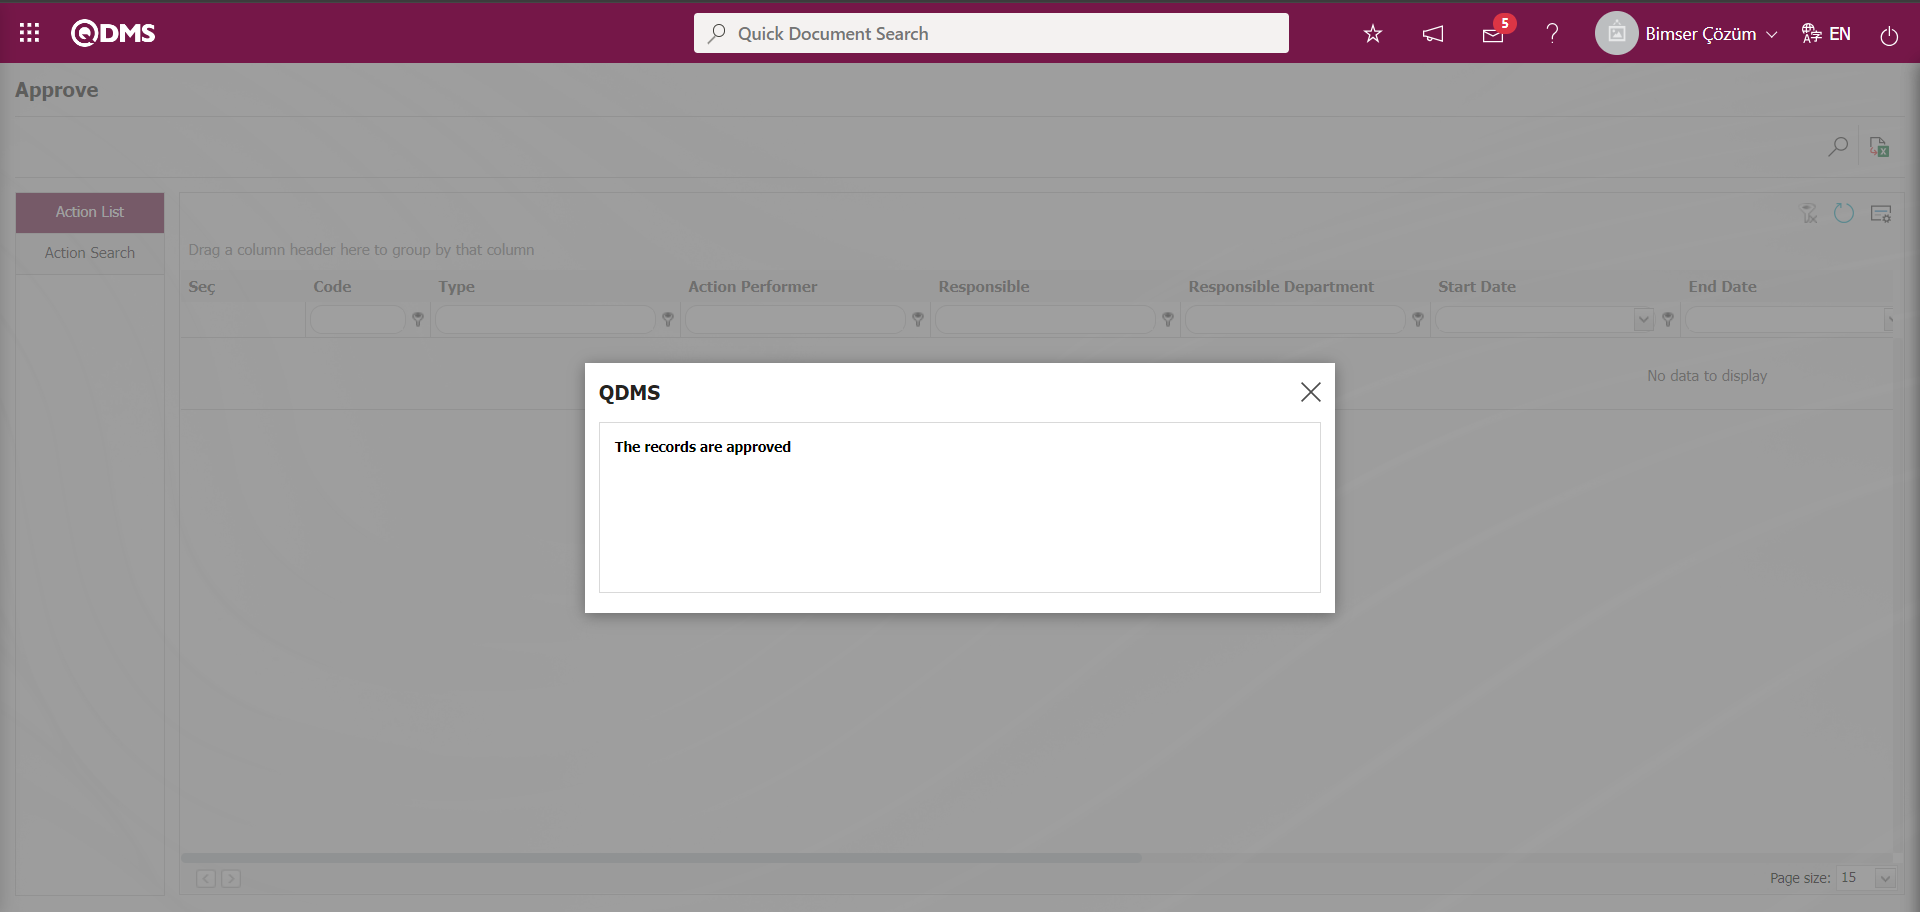
6.2.5. Action Confirmation - Closure Confirmation
Menu Name: Integrated Management System/ Action Management/ Action Approval - Closure Approval
In the Action Management module, it is the menu where the actions with the status of “Closure Approval” are approved or rejected. On the Action Approval - Closure Approval screen, we see two tabs, Action List and Action Search tab.
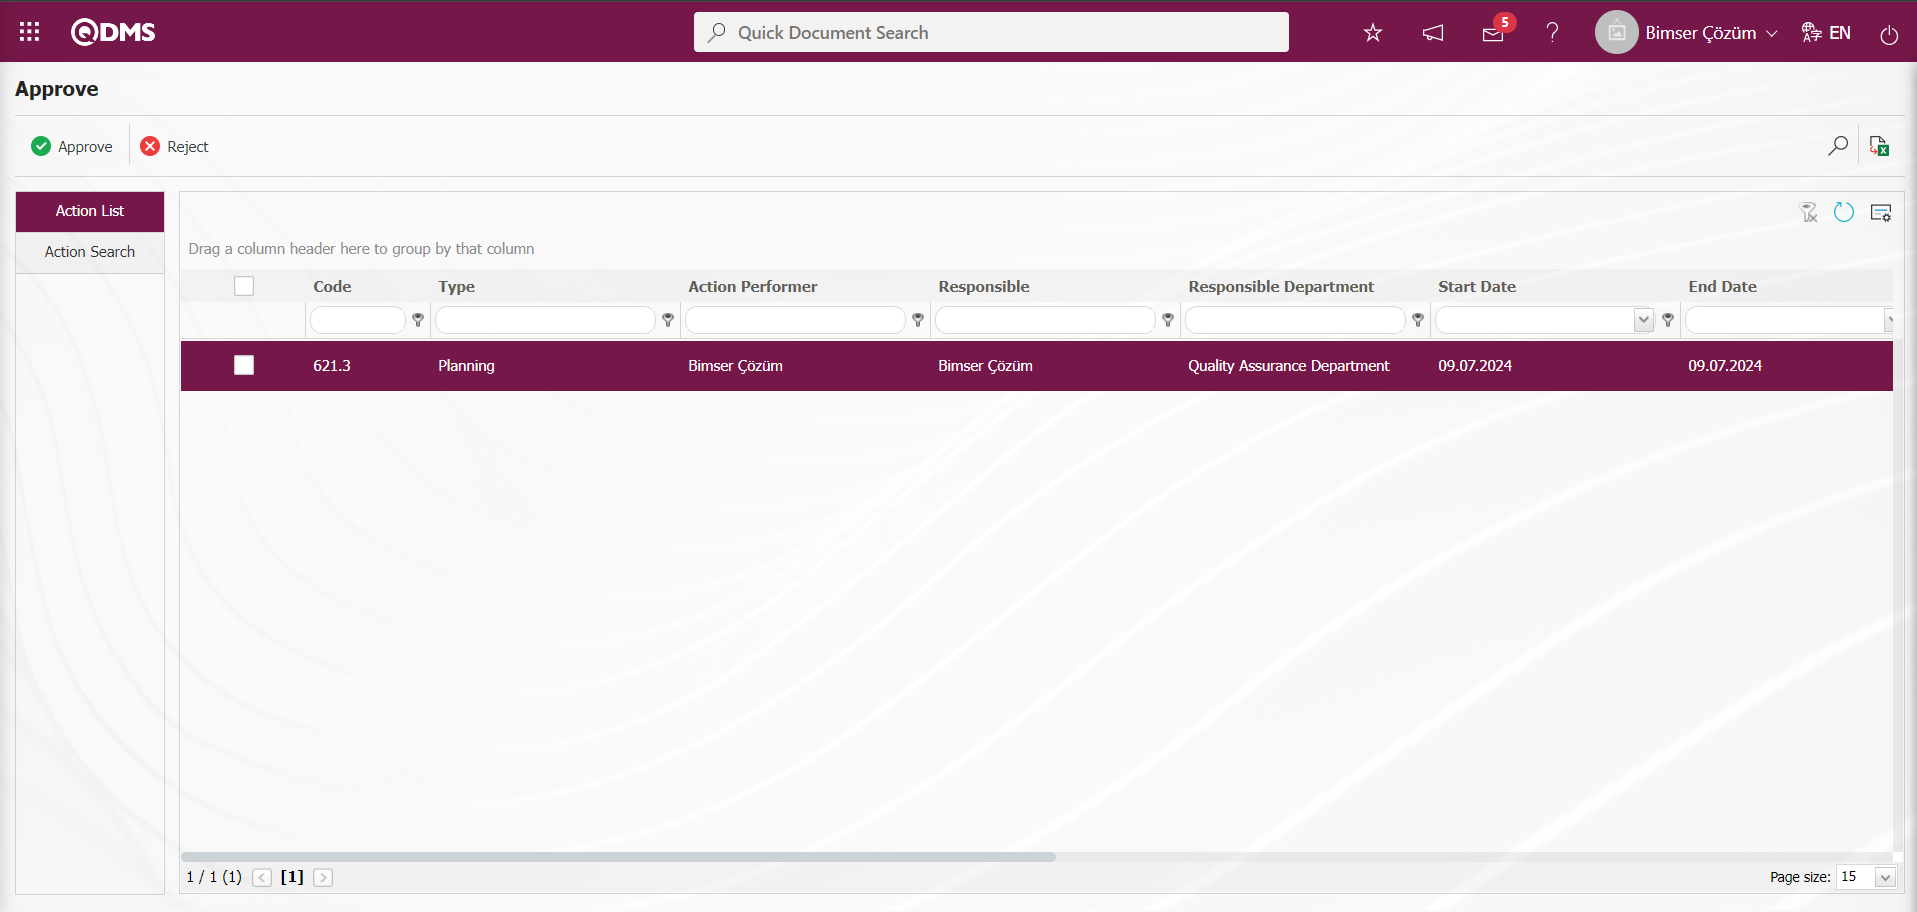
With the help of the buttons on the screen;
: Action item approval is done.
: Action item rejection is done.
 : Records can be searched by filtering.
 : Data can be transferred to Excel.
 : The search criteria on the menu screens are used to clean the data remaining in the filter fields in the grid where the search operation is performed.
 : The menu screen is restored to its default settings.
 : User-based designing of the menu screen is done with the show-hide feature, that is, the hiding feature of the fields corresponding to the columns on the menu screens.
In the Action Confirmation - Closure Confirmation screen, data entries are made in the fields in the search criteria in the Action Search tab and filtering is done by clicking the (Search) button.

On the Action Confirmation - Closure Confirmation screen, in the Action list, according to the filter settings made in the Action Search tab, the actions with the status “Closure Confirmation” status of the desired data are displayed. On the Action Confirmation screen, on the Action List screen, click the button while the action with the status “Closure Confirmation” status is selected from the list.
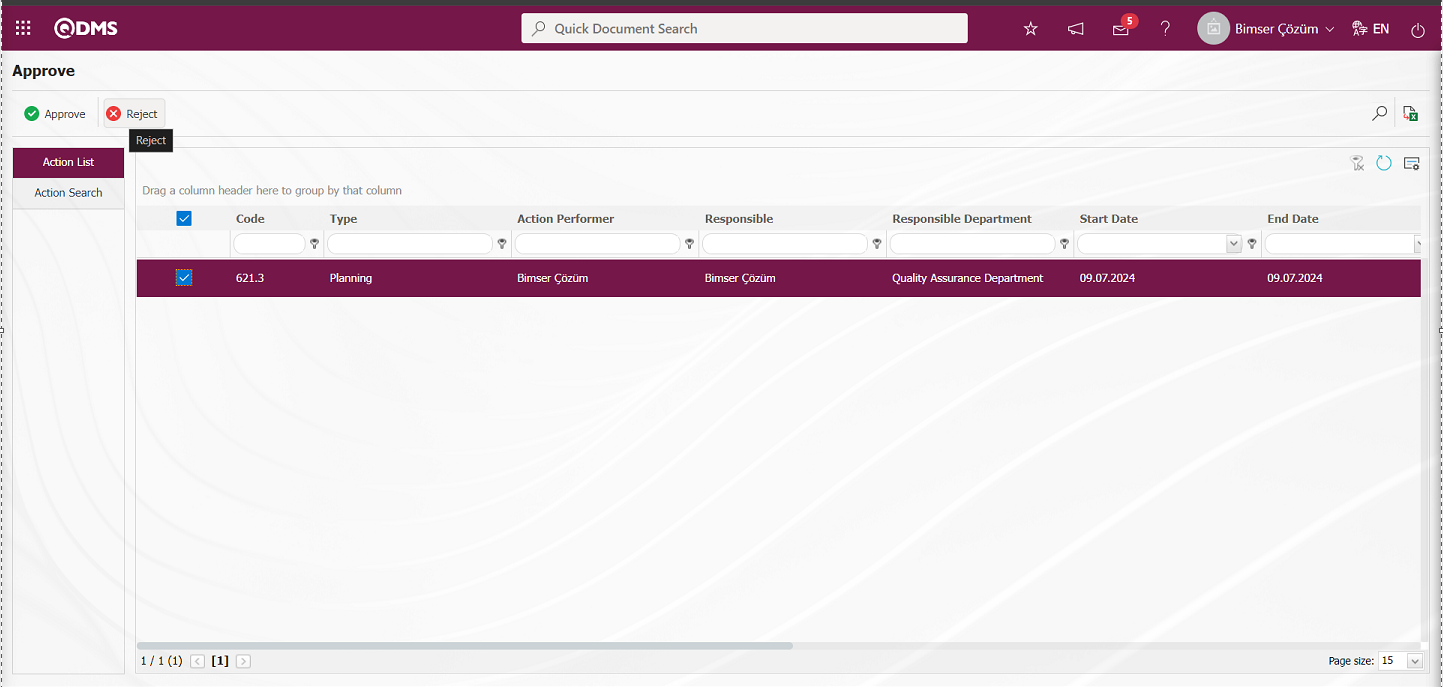
In the Action Rejection pop-up, the Reason for Rejection information is written and by clicking the button, if desired, the rejection of the Action with the status “Closure Approval” is made.
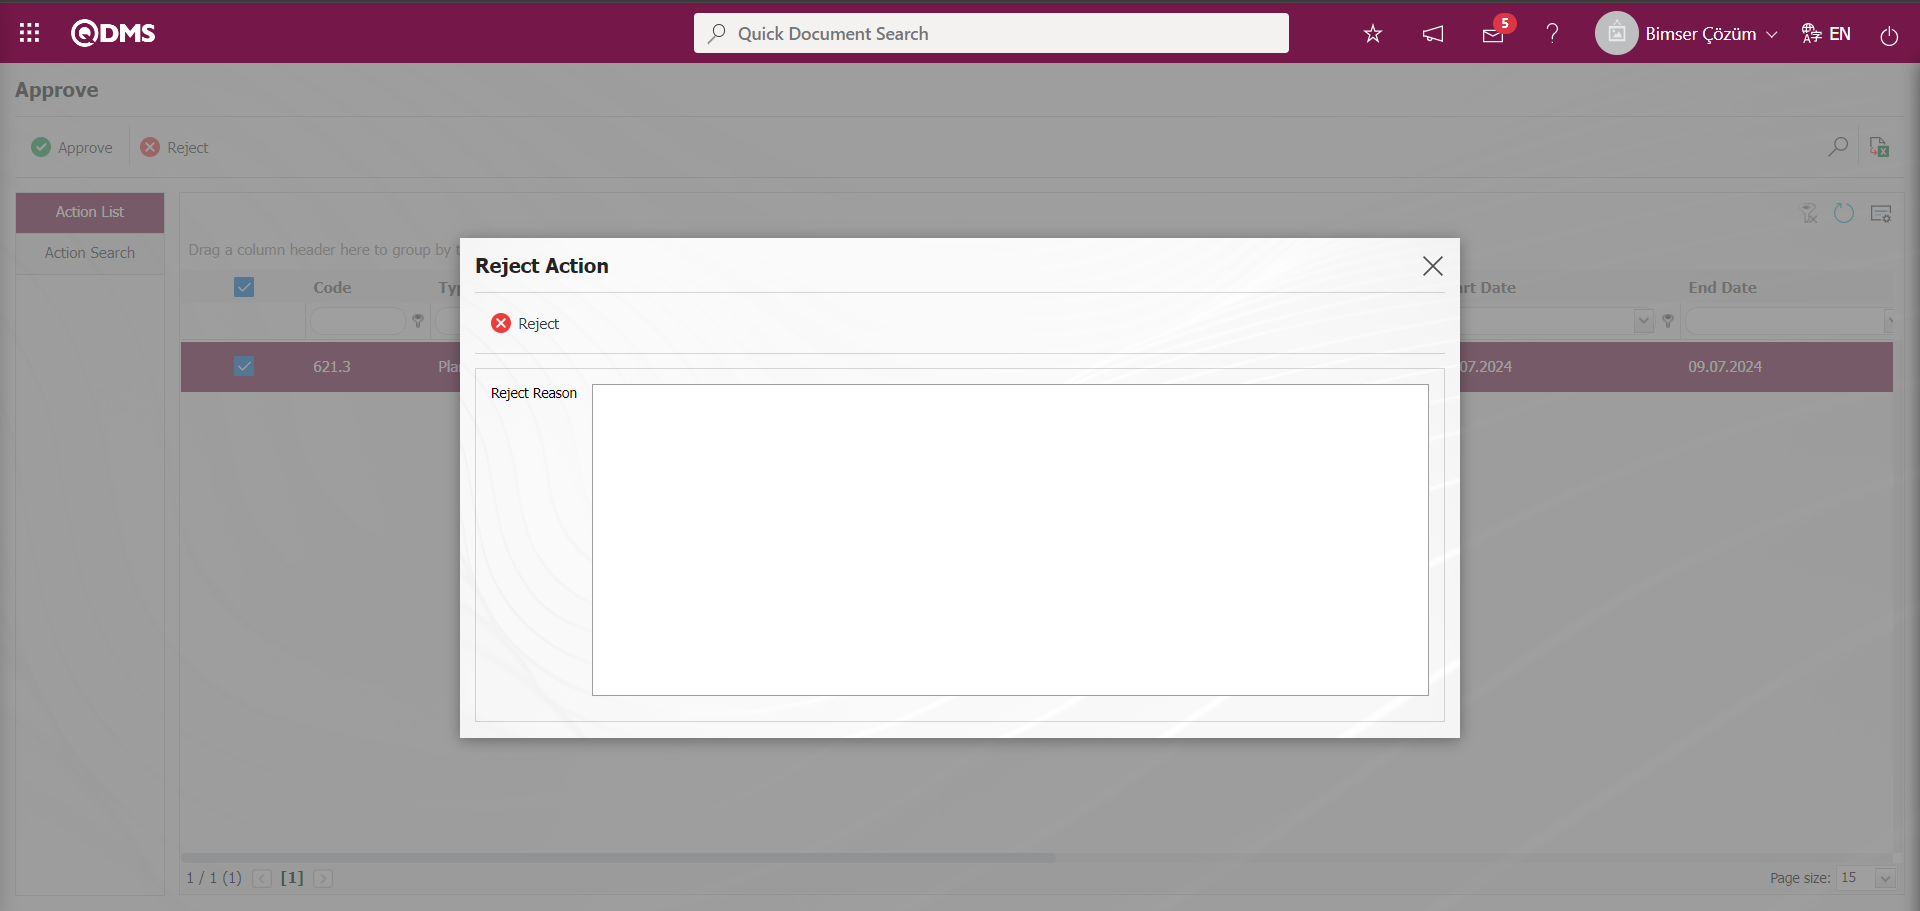
On the Action Approval screen, click the button while the Action with the status “Closure Approval” is selected from the list on the Action List screen.
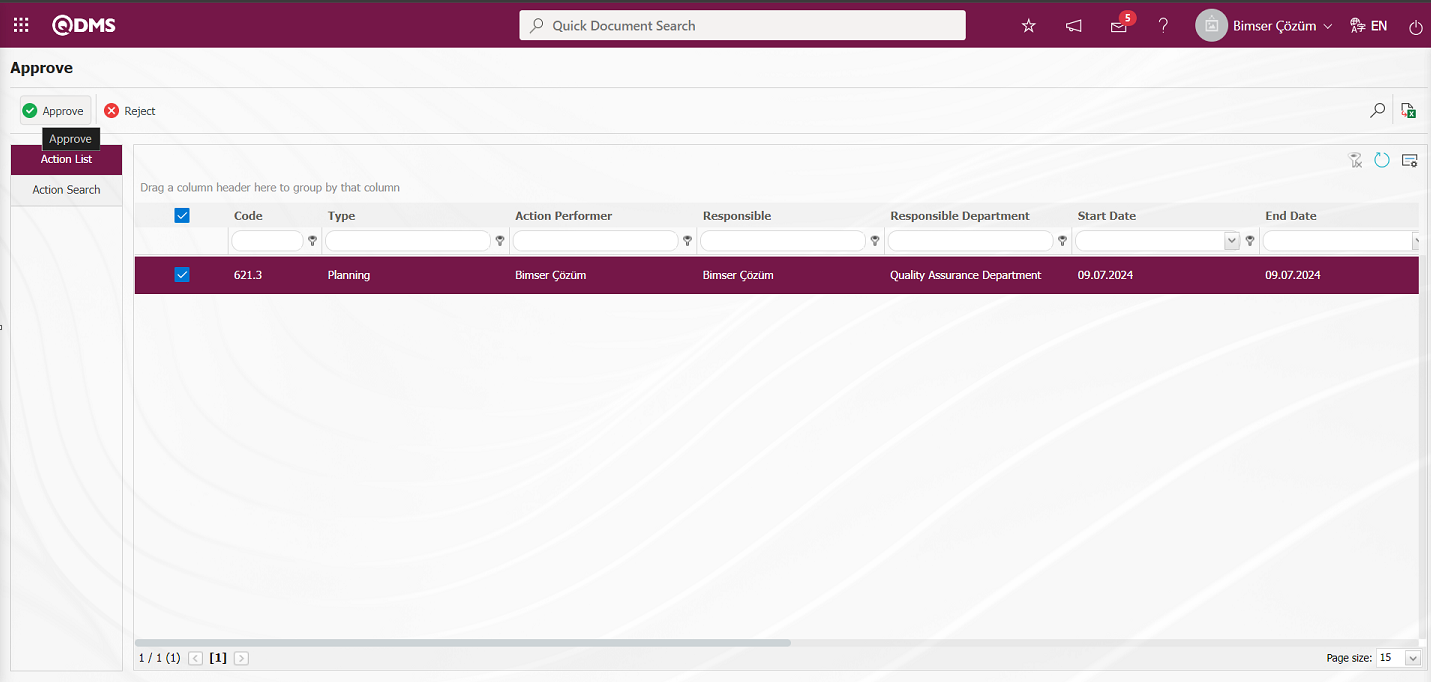
In the Action Approval pop-up, the Approval Note and qualification information is written and the closure approval approval of the Action with the status “Closure Approval” is approved by clicking the button.
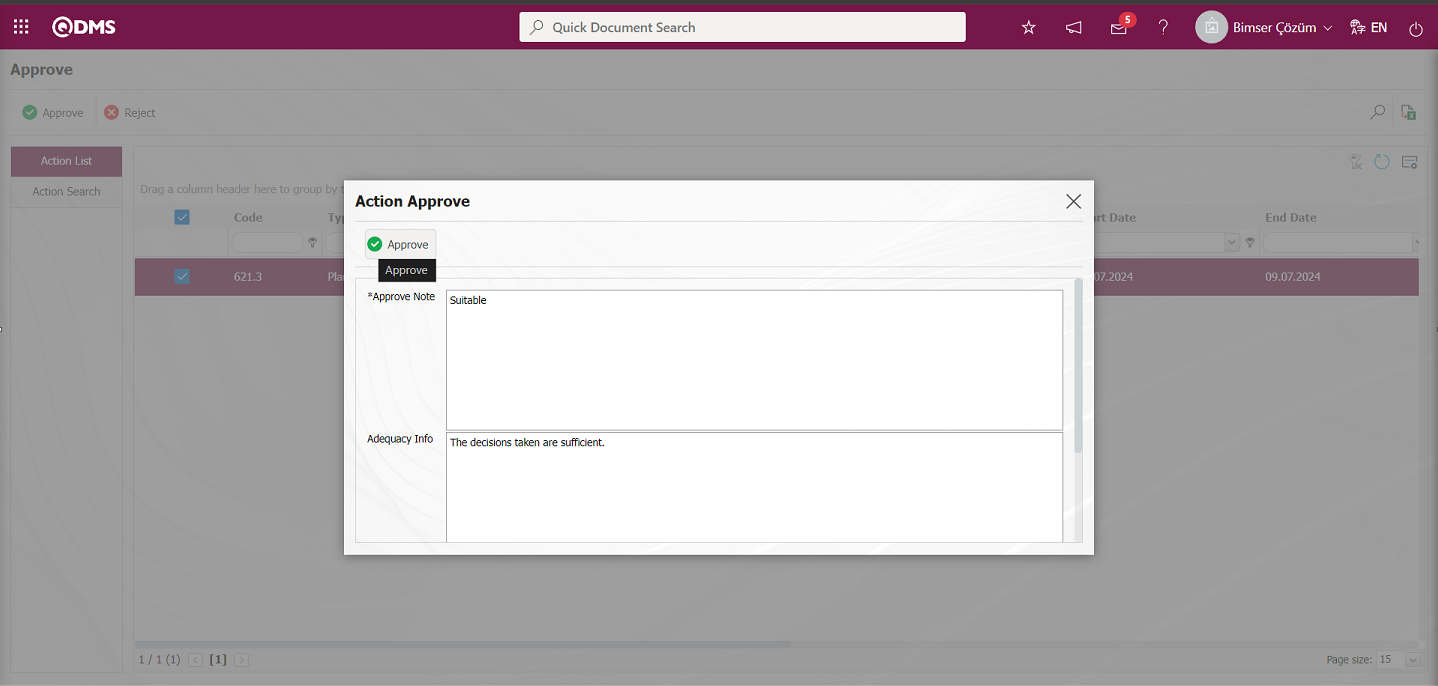
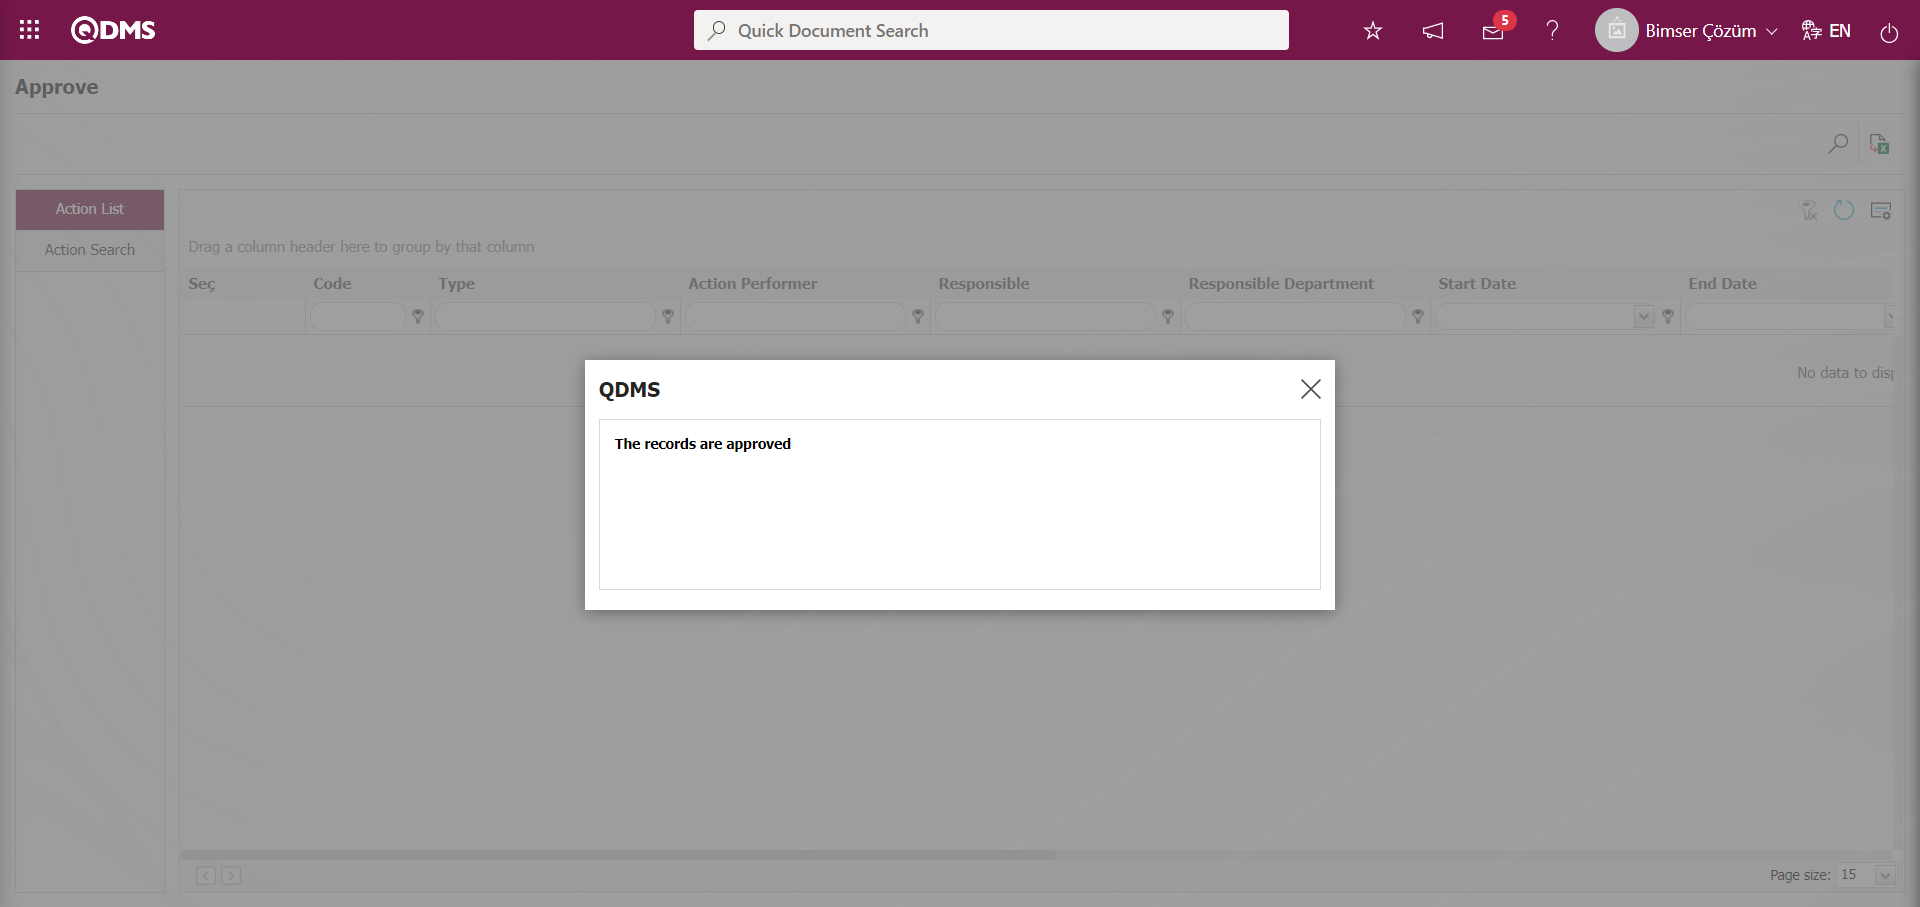
6.3. System Infrastructure Definitions/ Action (Special Operations)
6.3.1. Action Performing Modifier
Menu Name: System Infrastructure Definitions/ Action Management/ Modifier to Perform Action
It is the menu where the person who will do the action job is changed. It is used in cases such as resignation of the personnel to whom the action is assigned, change of position, or assigning the action to another user according to the business need. It is ensured that the actions assigned to the personnel are taken from that personnel and given to another personnel. In other words, the person who will perform the action is changed.

With the help of the buttons on the screen;
 : The action tasks selected in the list are assigned to the selected personnel and responsible person.
: Clearing the data remaining in the filter fields in the grid where the search criteria on the menu screens are searched.
: The menu screen is restored to its default settings.
: User-based designing of the menu screen is done with the feature of showing and hiding the fields corresponding to the columns on the menu screens, that is, the hiding feature.
: Records are searched by filtering.
On the Action Performer Modifier screen, the personnel who should perform the action work from the “To Do the Work” field and the personnel responsible for the work in the Responsible field are selected in the personnel list and the tasks on it are listed by clicking the  (Search) button.
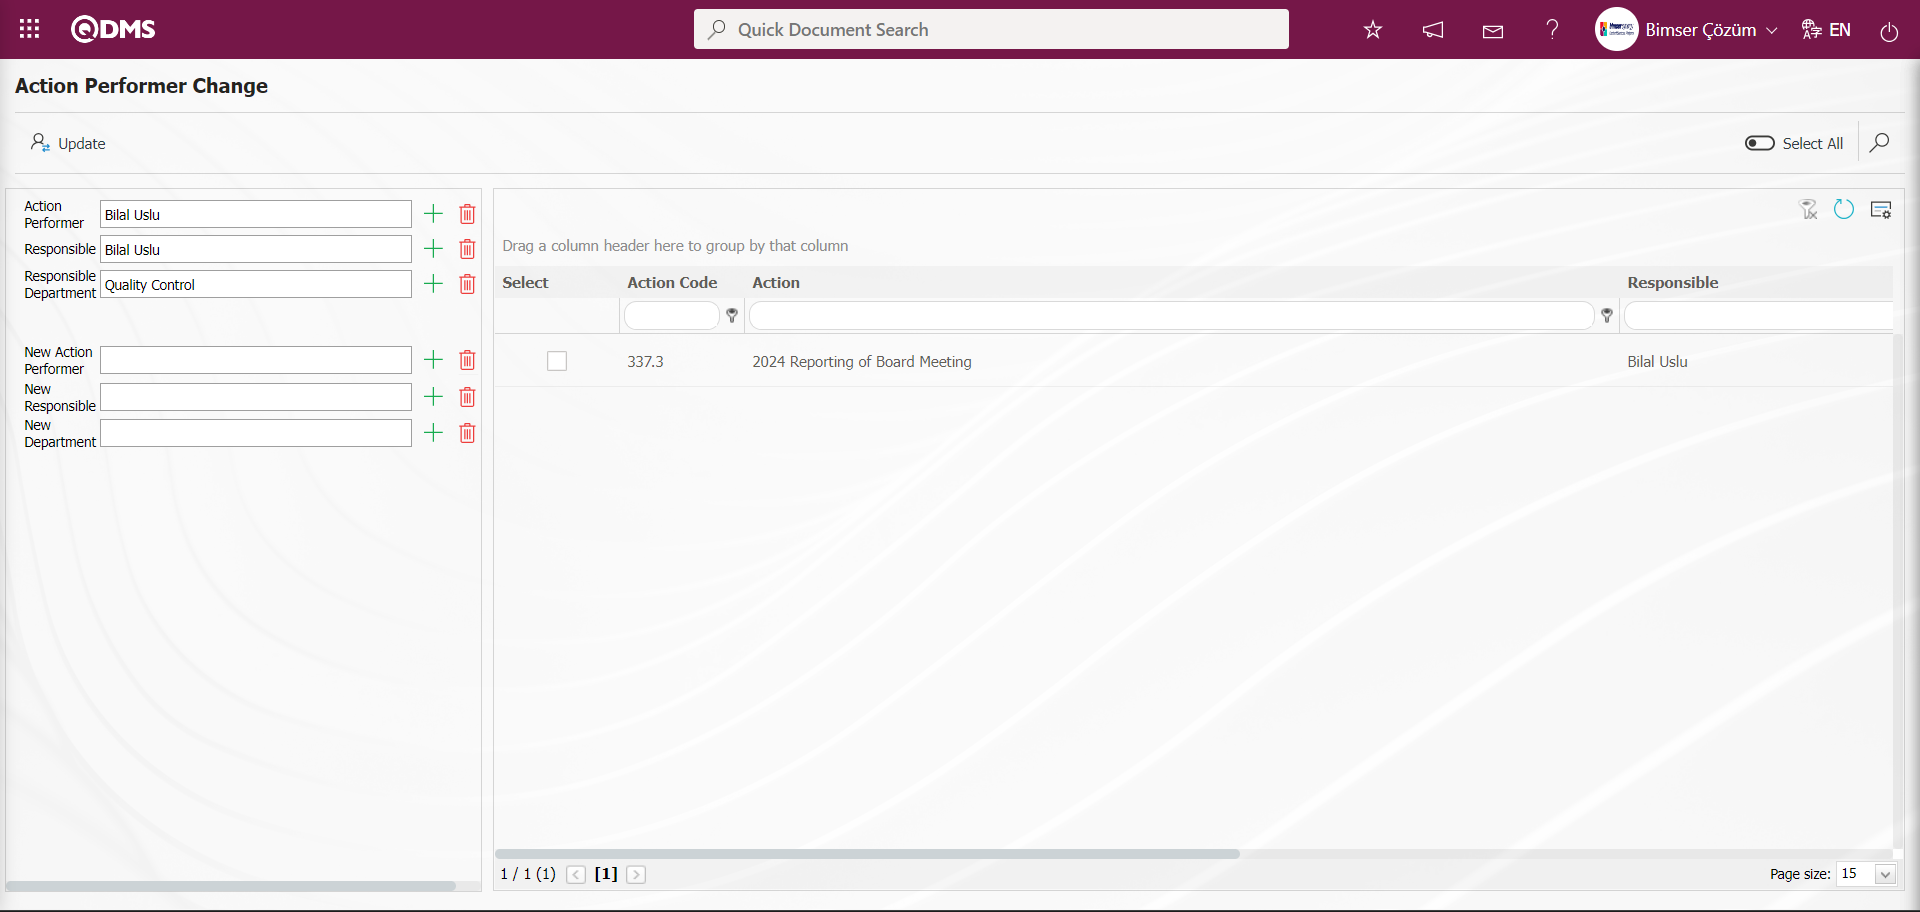
After the actions on the person who will do the work are listed, the personnel to whom the action task will be transferred and the responsible person are selected in the “New Worker” and “New Responsible” fields.

The action task to be delegated is marked and button is used to assign the action tasks to the selected personnel and responsible person.
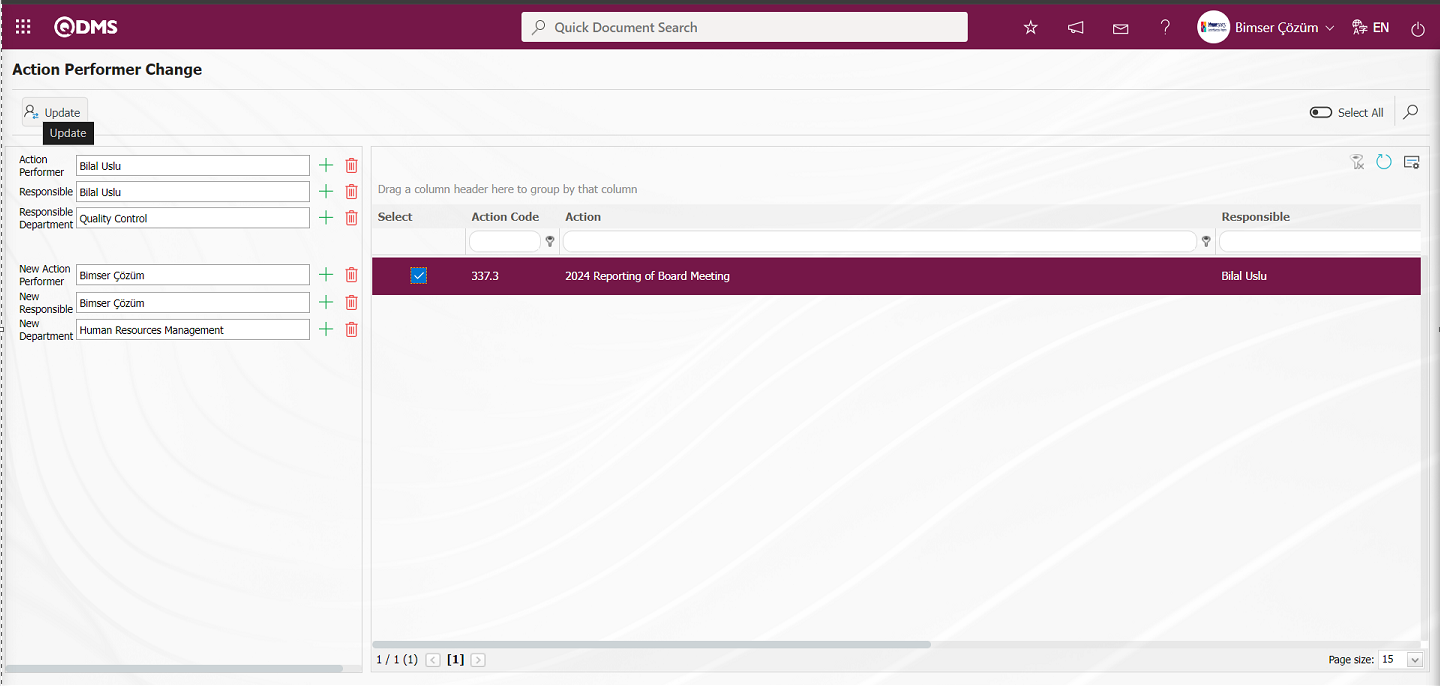
Click “OK” button in the message “The personnel who will perform the action will be changed, should the process continue?” by the system.
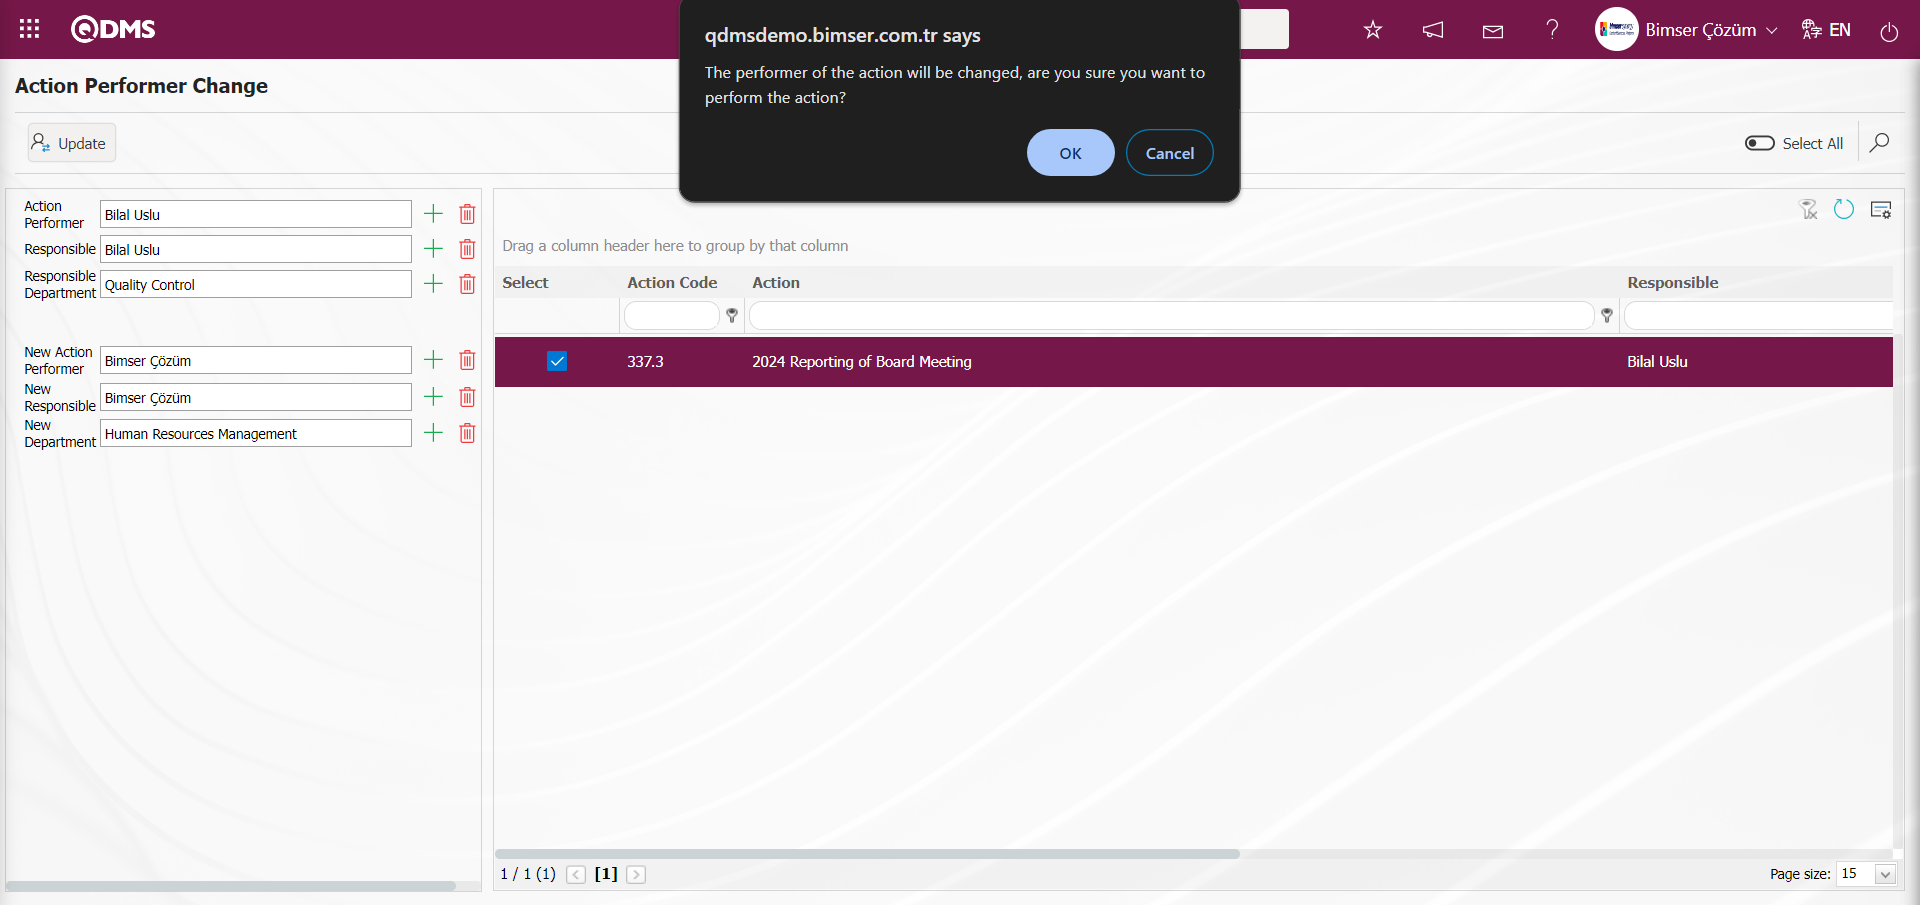
“Selected fields have been changed successfully.” By giving the message, it is indicated that the action realiser modifier operation has been performed.
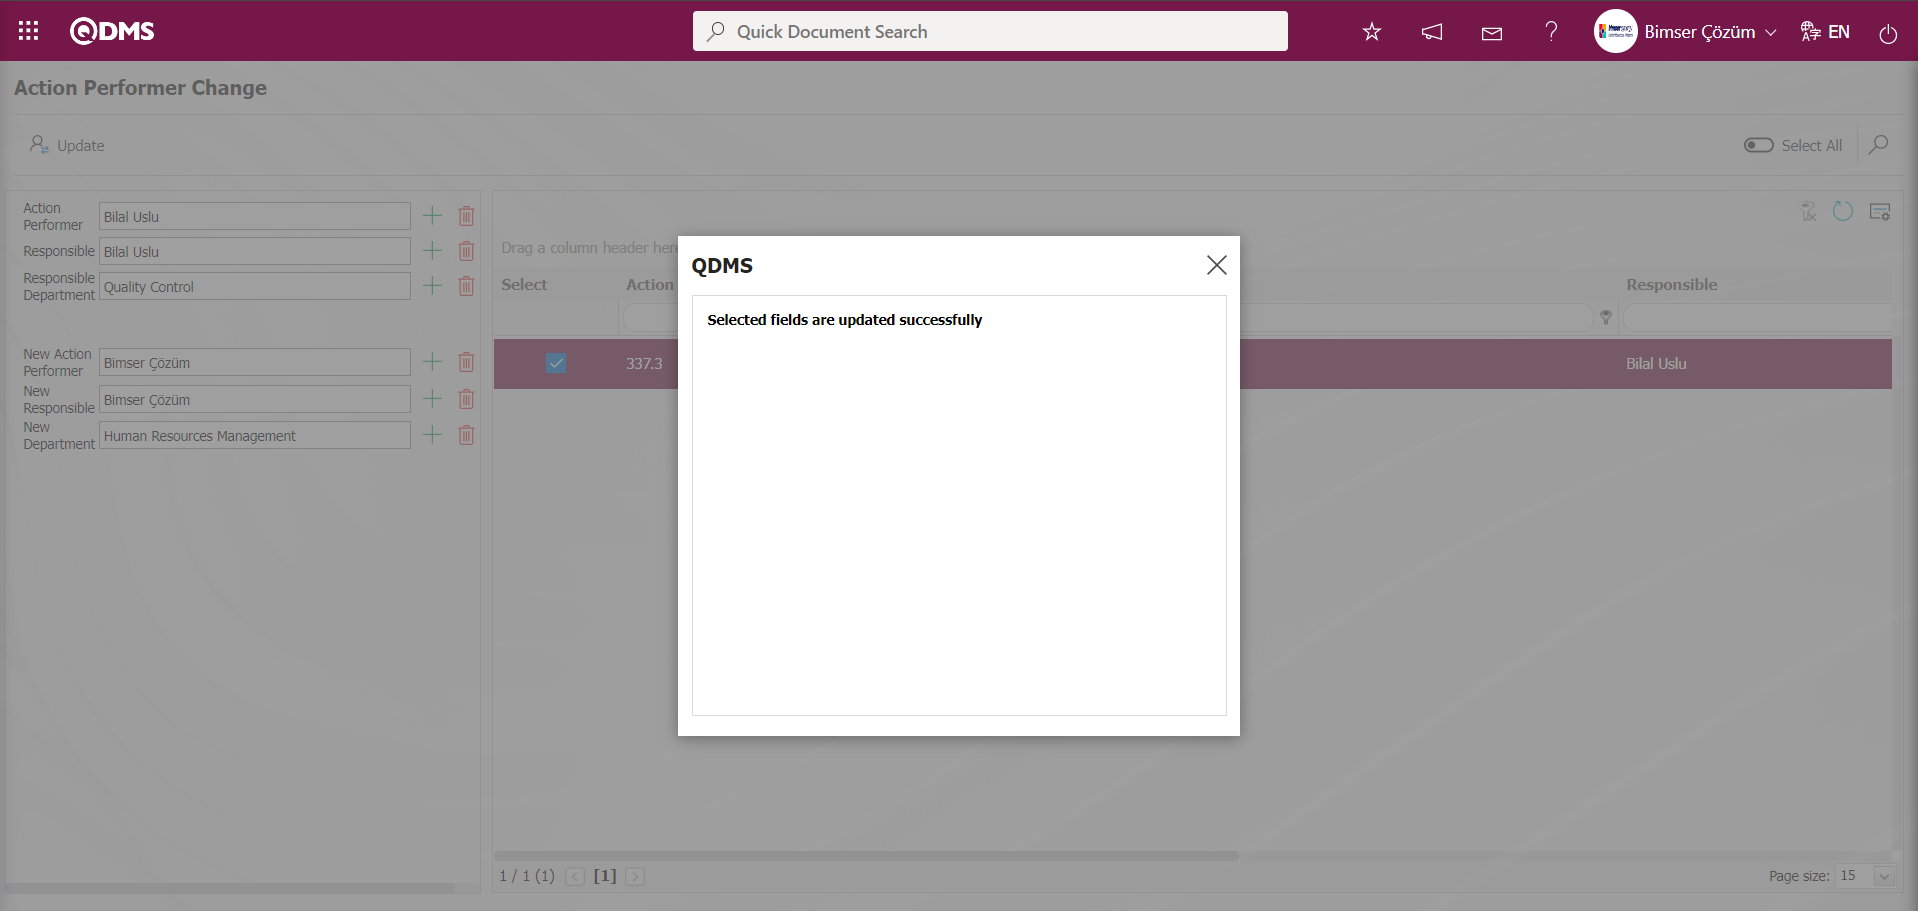
6.3.2. Action Status Modifier
Menu Name: System Infrastructure Definitions/ Action Management/ Action Status Changer
It is the menu that allows the status of closed and cancelled actions to be turned on.
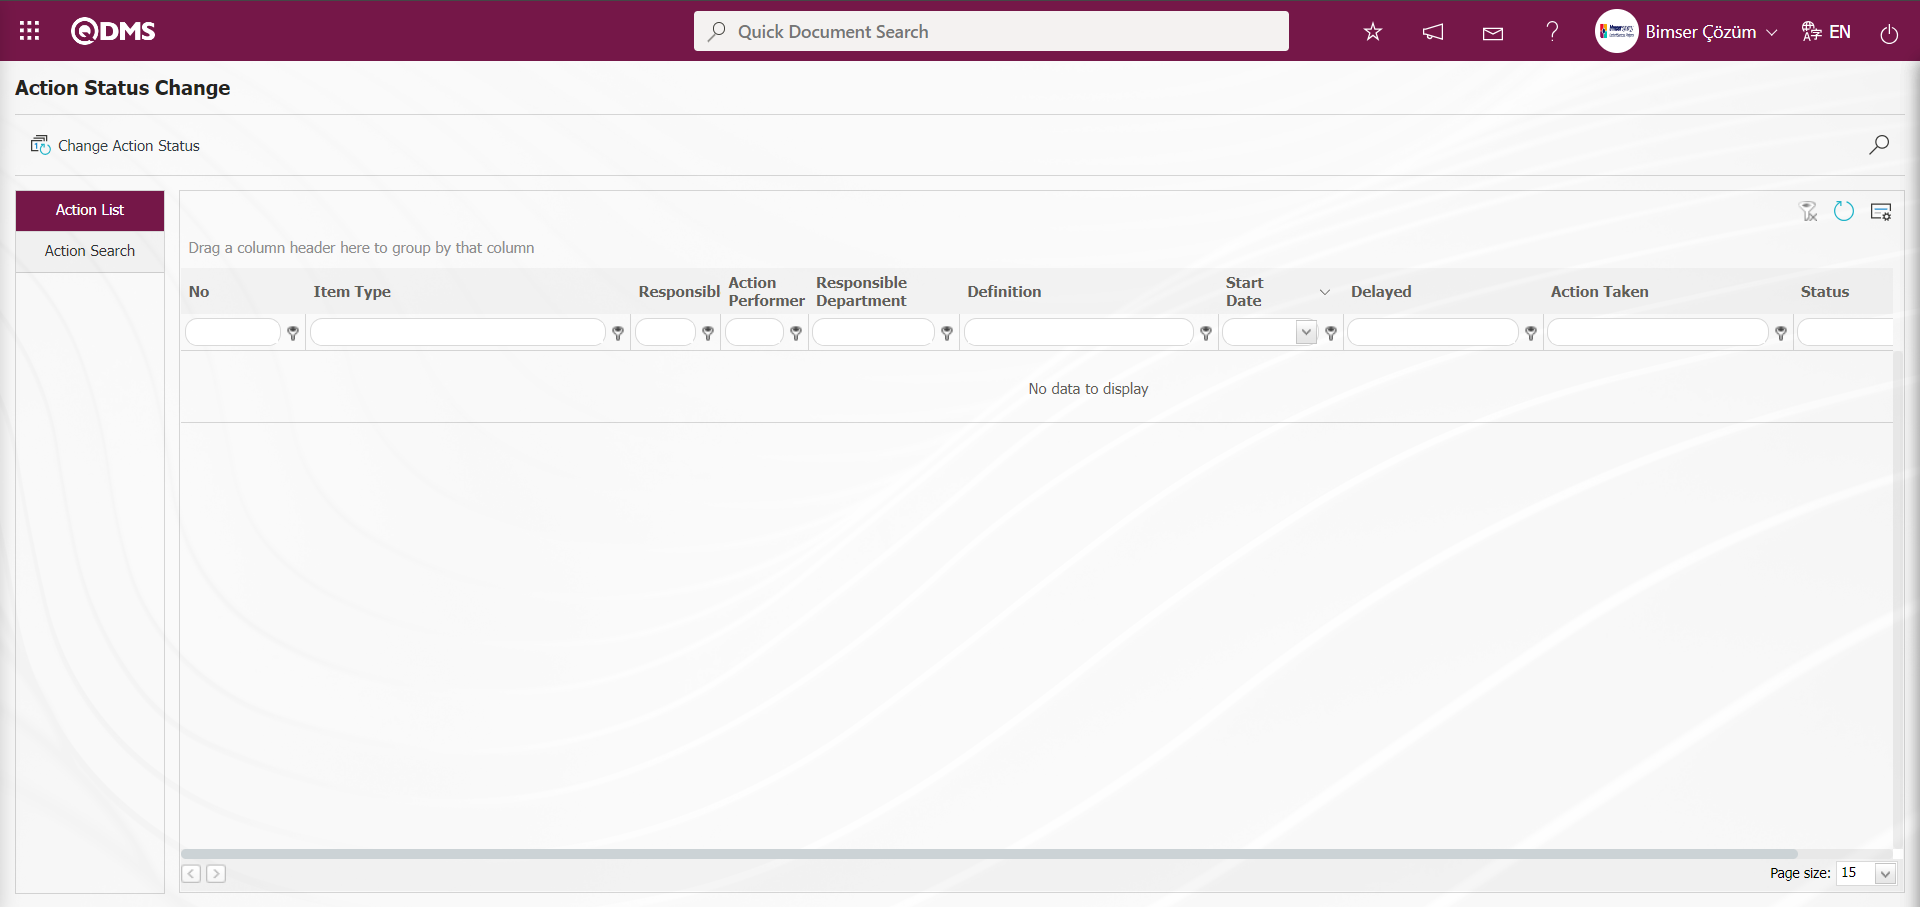
With the help of the buttons on the screen;
 : The status of the actions selected in the list, which are closed and cancelled, are turned on.
 : The search criteria on the menu screens are used to clear the data remaining in the filter fields in the grid where the search operation is performed.
 : The menu screen is restored to its default settings.
: The user-based design of the menu screen is made with the show-hide feature, that is, the hiding feature of the fields corresponding to the columns on the menu screens.
 : Records are searched by filtering.
On the Action Status Change screen, the  button is clicked while the Action with “Closed” status is selected.
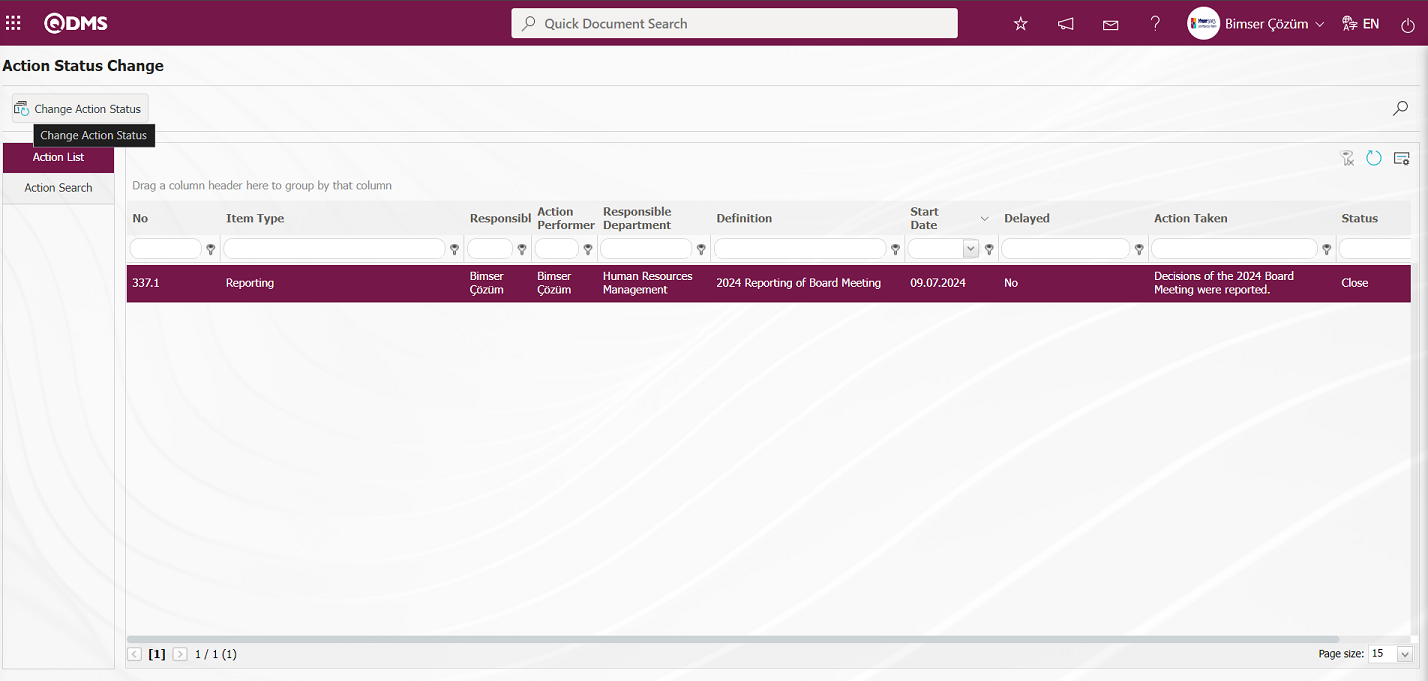
In the message “Are you sure that you want to make the action open?” given by the system, the “OK” button is clicked to make the action open.
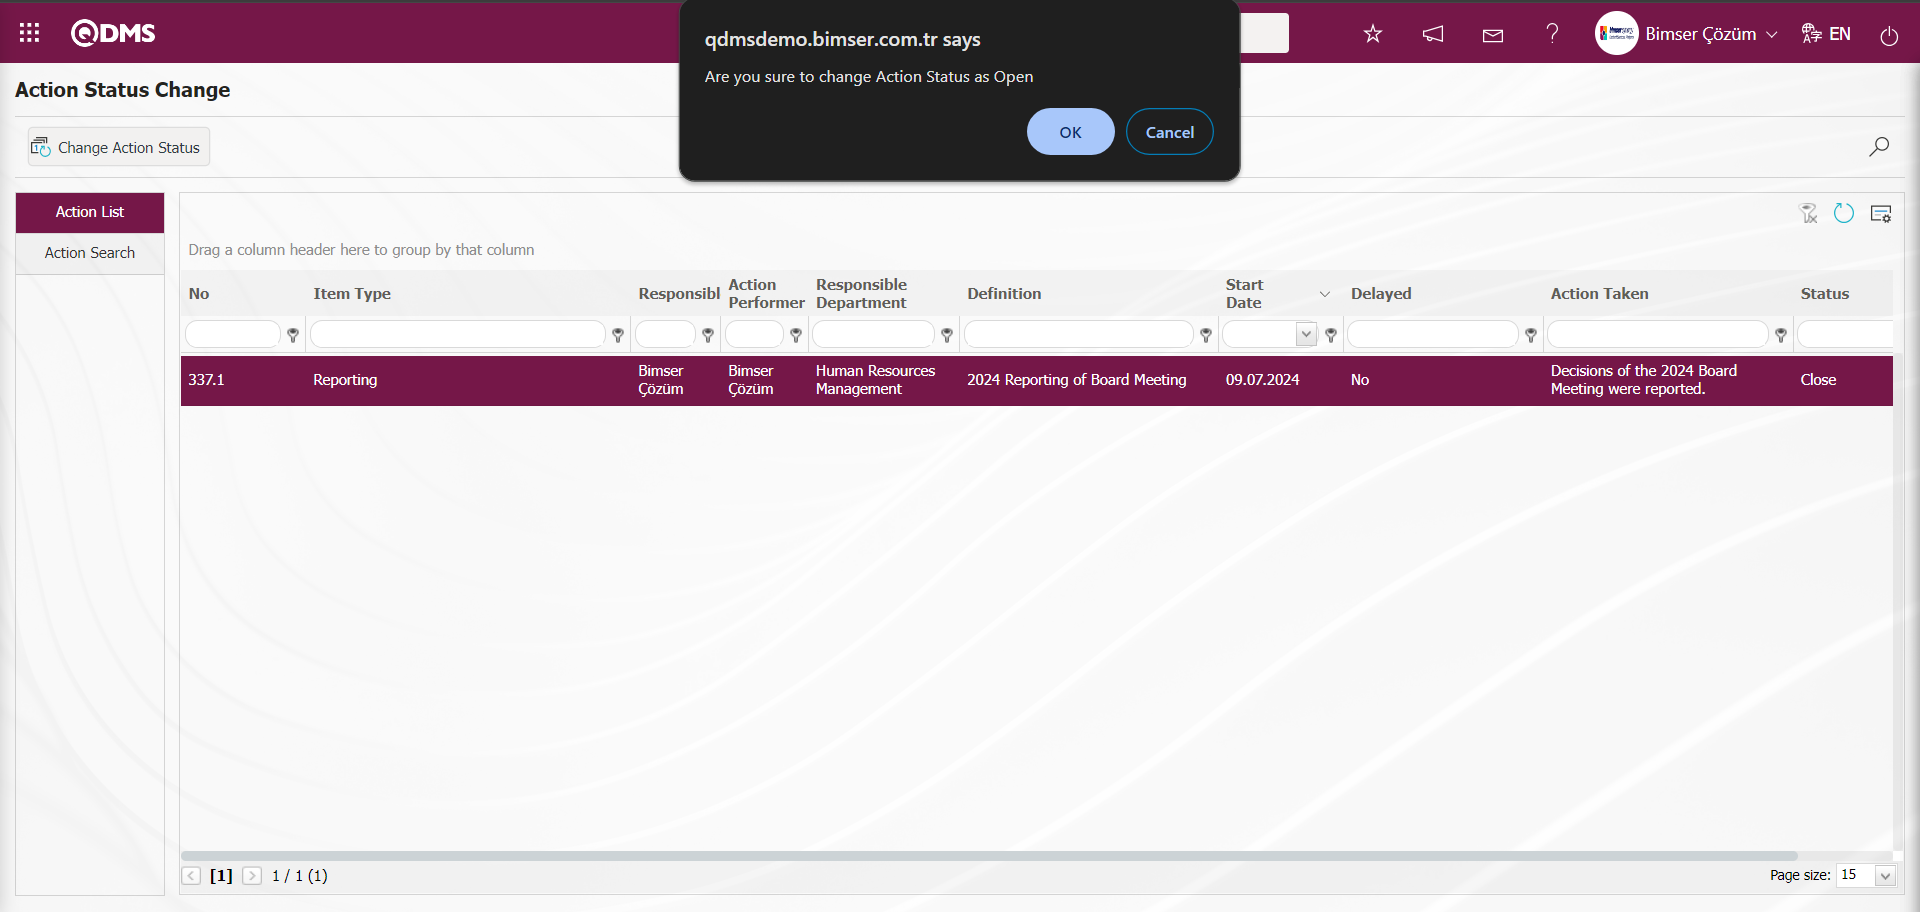
“The action has been changed to open status” by the system. It is indicated that the status of the action is changed by giving the message.
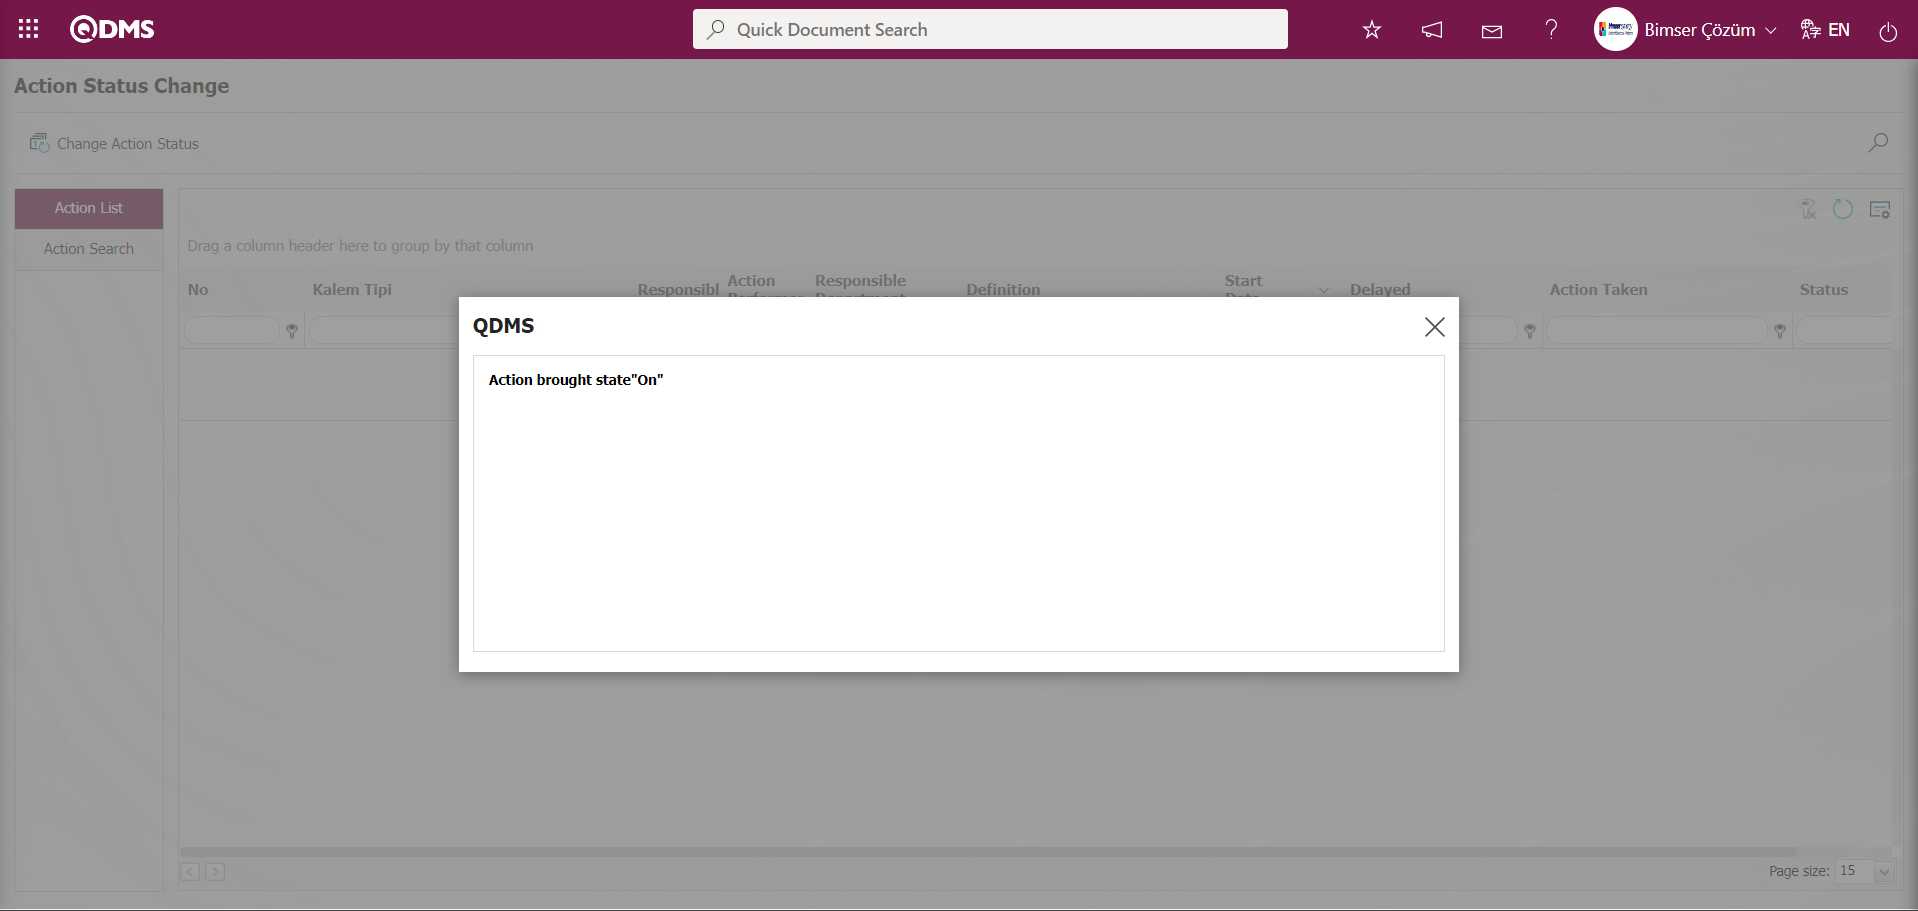
On the Action Status Change screen, the button is clicked while “Cancellation” Action is selected.
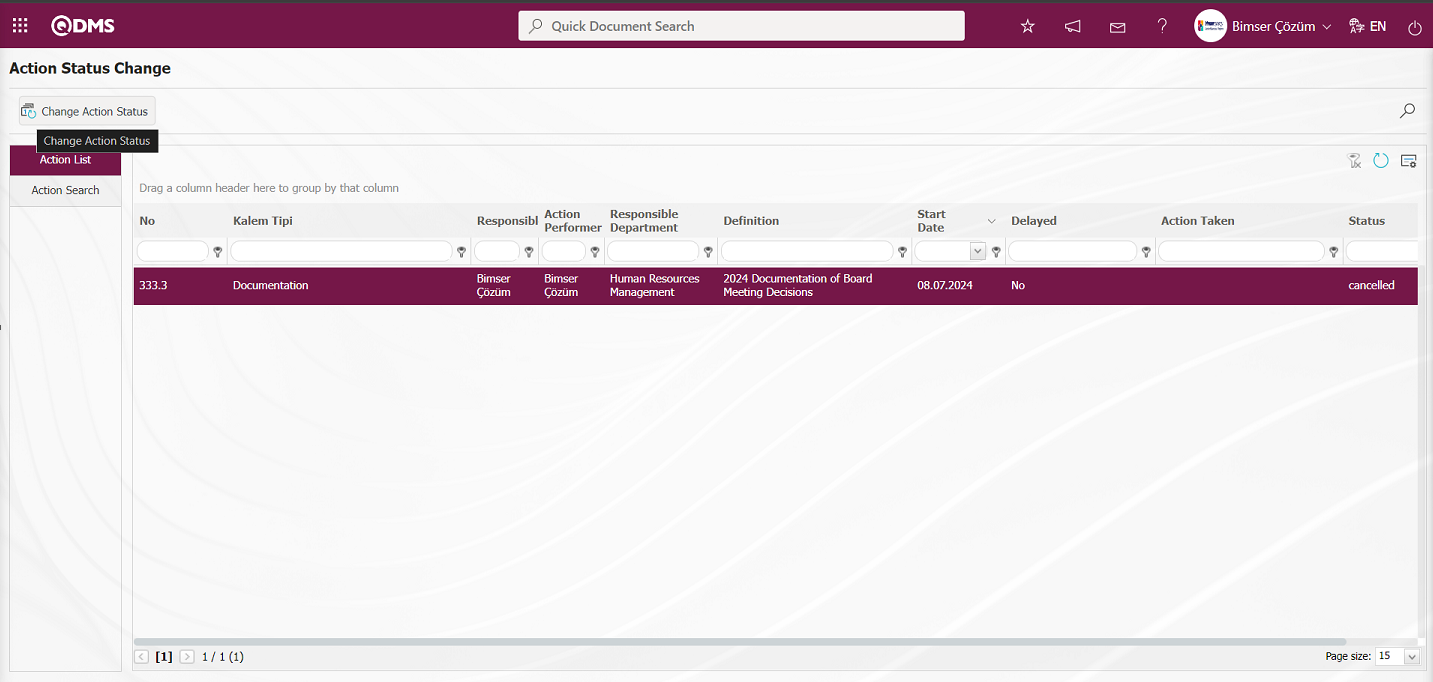
In the message “Are you sure that you want to make the action open?” given by the system, the “OK” button is clicked to make the action open.
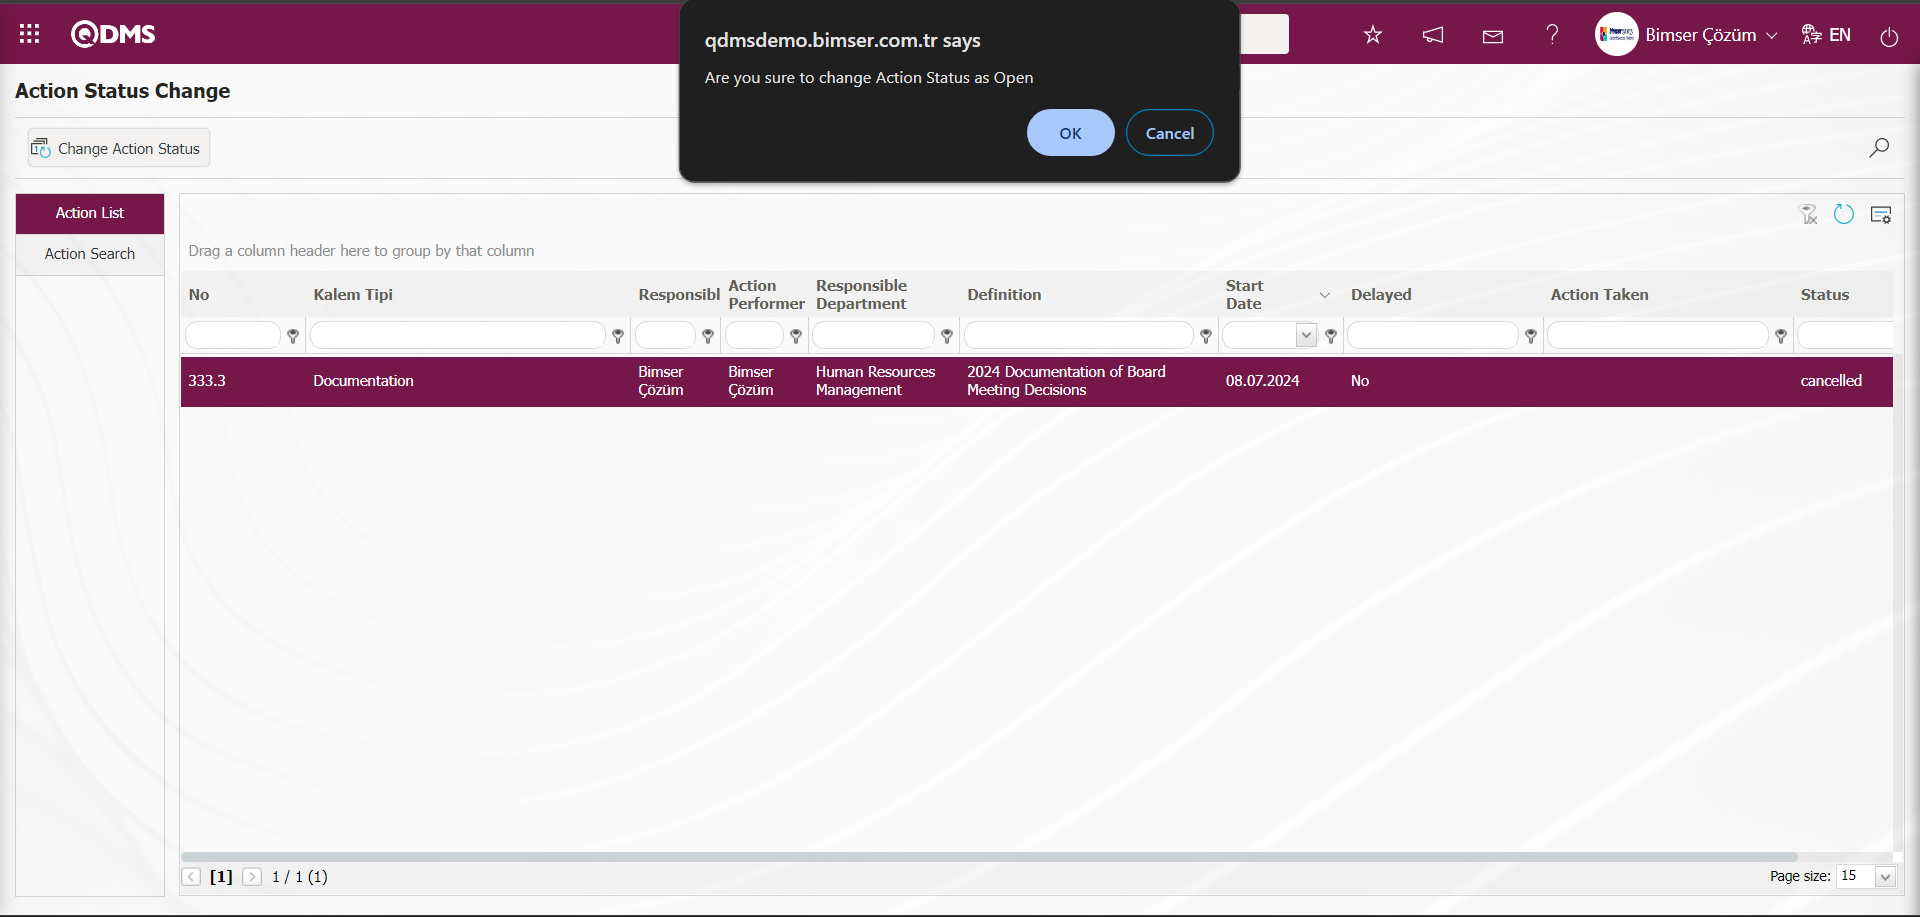
“The action has been changed to open status” by the system. It is indicated that the status of the action is changed by giving the message.

6.3.3.Action Delete
Menu Name: System Infrastructure Definitions/ Action/ Delete Action
It is the menu where the actions defined in the system are deleted collectively. The purpose of this menu is to perform the deletion of actions in bulk. On the “Bulk Delete Action” screen, two tabs are displayed: Actions List and Action Search tabs. In the Actions List tab, the Actions defined in the system are listed. In the Actions List tab, if desired, single selection can be made to delete individual actions or multiple selection can be made by clicking the  button. In the Actions List, the check box related to the “Select all” option is ticked and by clicking the button, all actions are selected in the Action List in a collective way and collective deletion is also performed by selecting all actions in the Action List. Actions that have been deleted individually and collectively are also deleted from the database and this data cannot be accessed in the system.
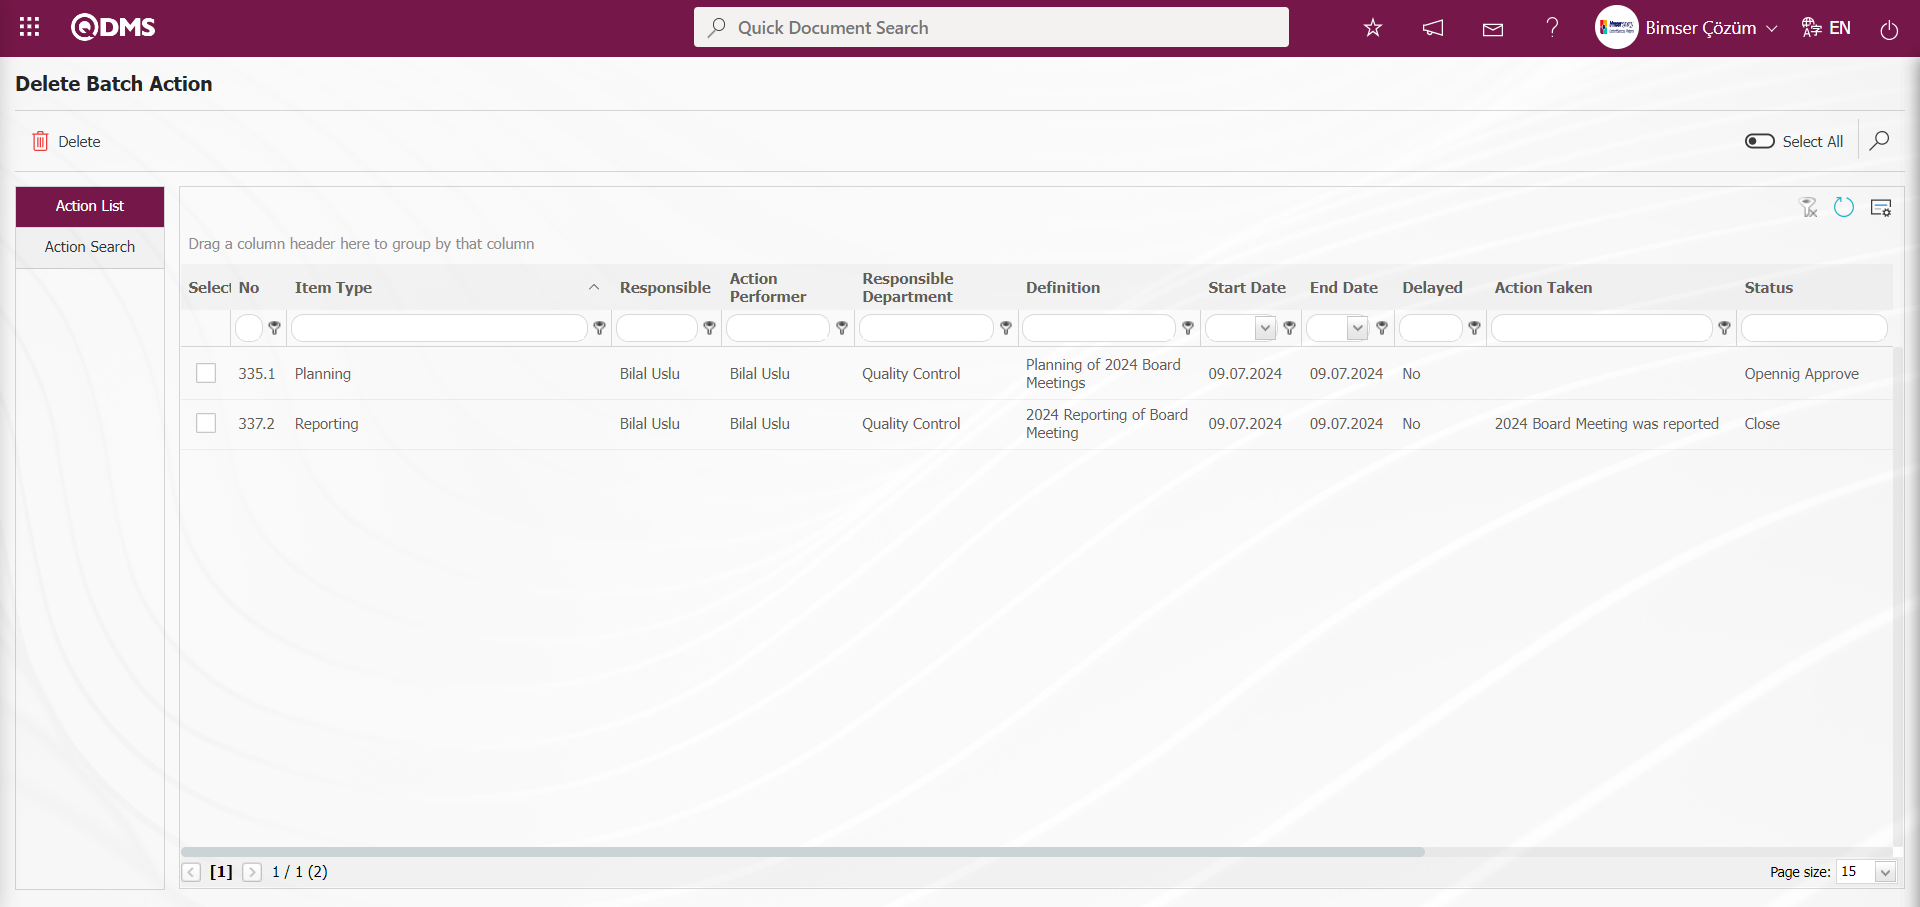
With the help of the buttons on the screen;
 : Delete the action selected in the list.
: Records are searched by filtering.
: The search criteria on the menu screens are used to clear the data remaining in the filter fields in the grid where the search operation is performed.
: The menu screen is restored to its default settings.
: User-based designing of the menu screen is done with the show-hide feature, that is, the hiding feature of the fields corresponding to the columns on the menu screens.
In the “Delete Batch Action” screen, the actions that are desired to be deleted in the Actions List tab are selected. After the actions selection process, the actions are deleted by clicking the button.
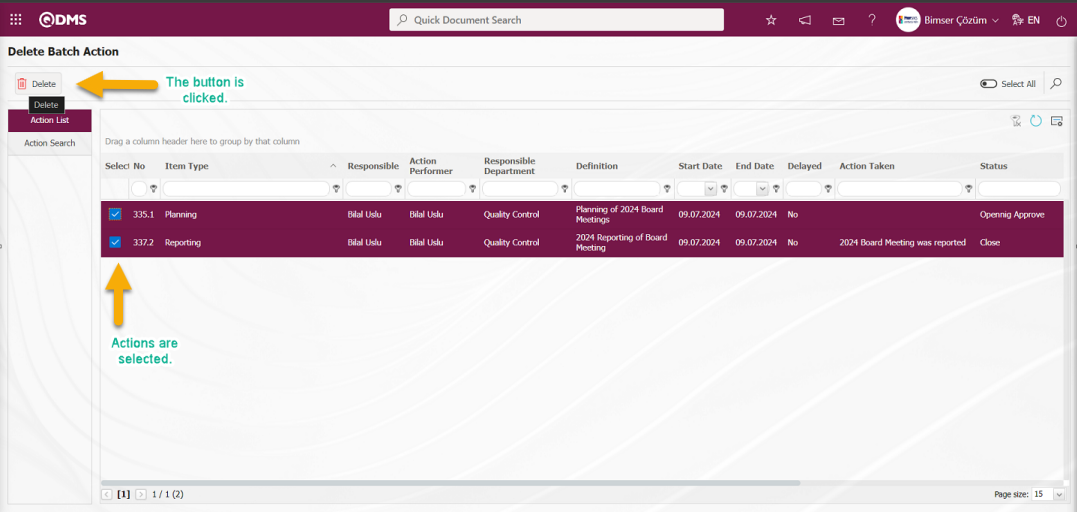
“Are you sure you want to delete the selected record?” warning message is given by the system and “OK” button is clicked.
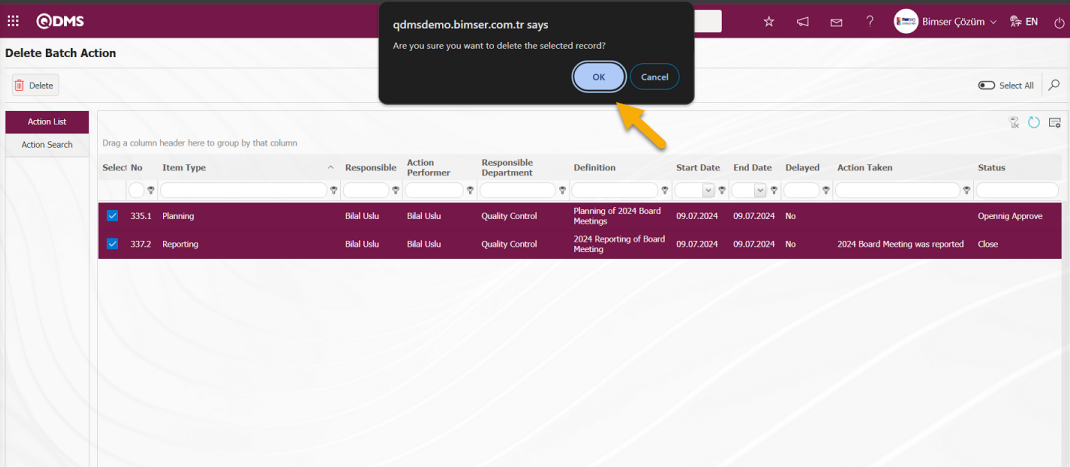
After the deletion of the action, it is seen that the actions are deleted by the system and the numbers of the deleted action are given as a warning message.
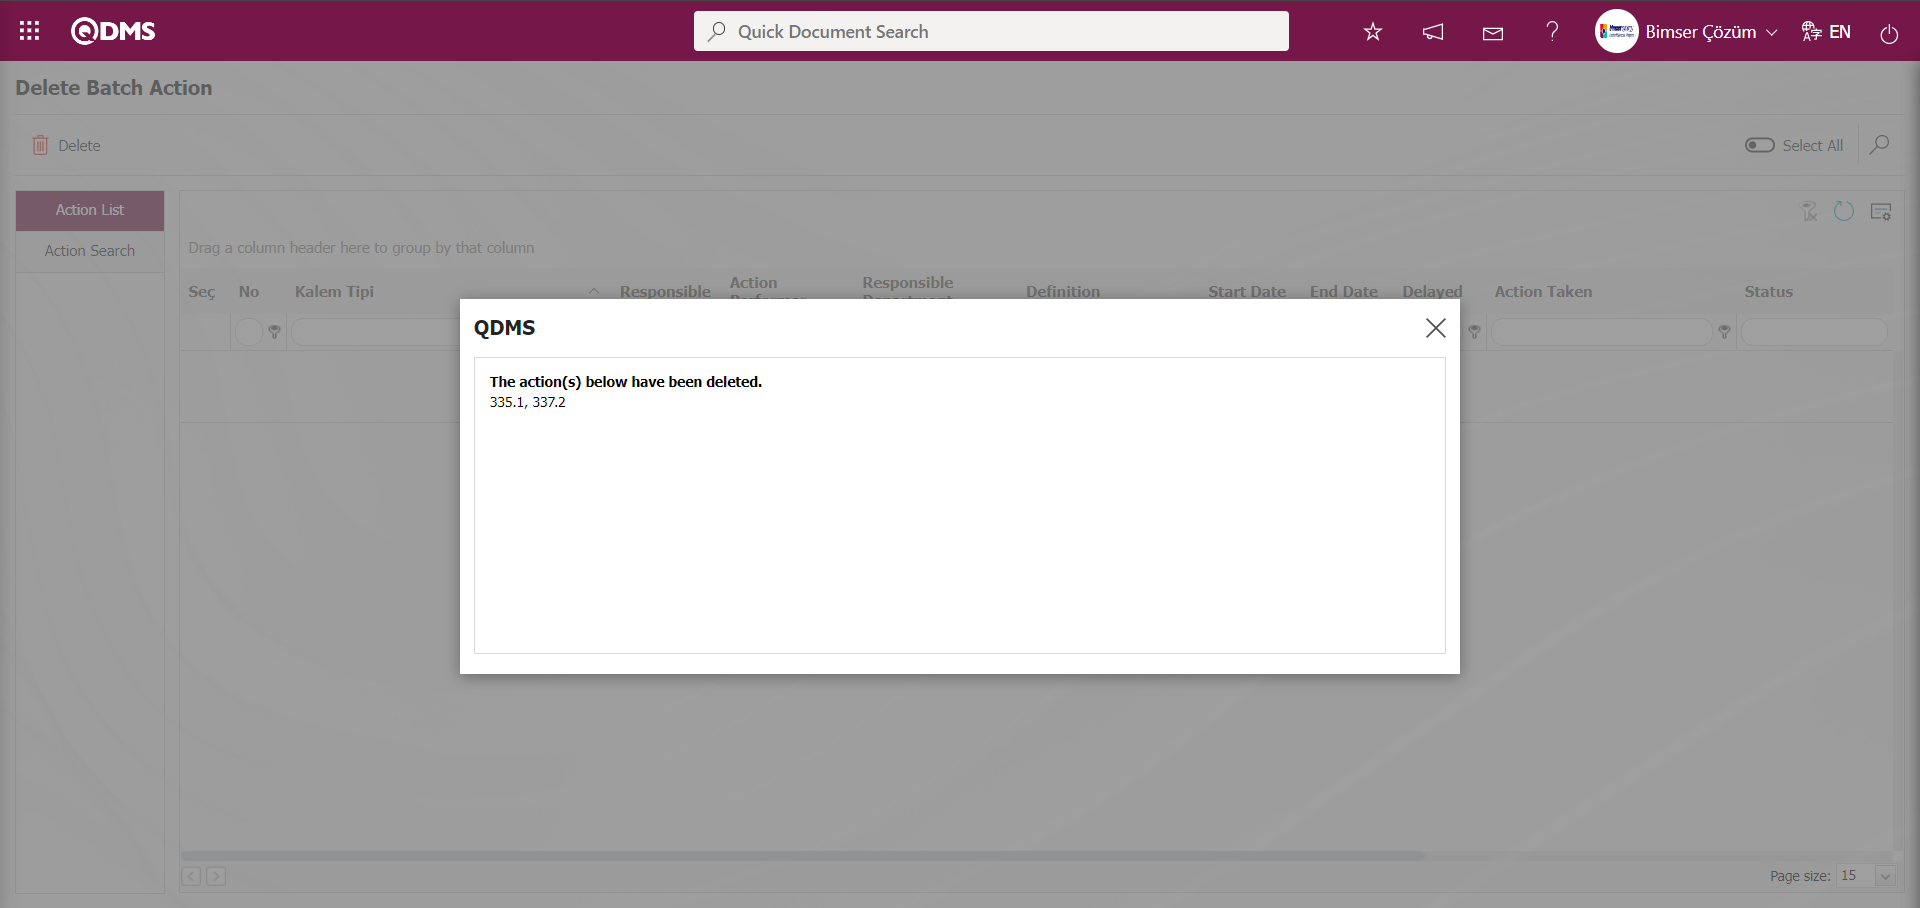
6.3.4. Report Formats
Menu Name: System Infrastructure Definitions/ Function/ Report Formats
Report Formats menu can be used to create different report formats according to Action Management methods.

With the help of the buttons on the screen;
 : Define a new report format.
 : The report format information selected in the list is updated.
 : Selected report format information is displayed in the list.
 : The report format information selected in the list can be deleted.
For this, first of all, all report formats that we will create must be defined in System Infrastructure Definitions/Bimser System Infrastructure Definitions/Configuration Settings/Report Formats Edit menu.
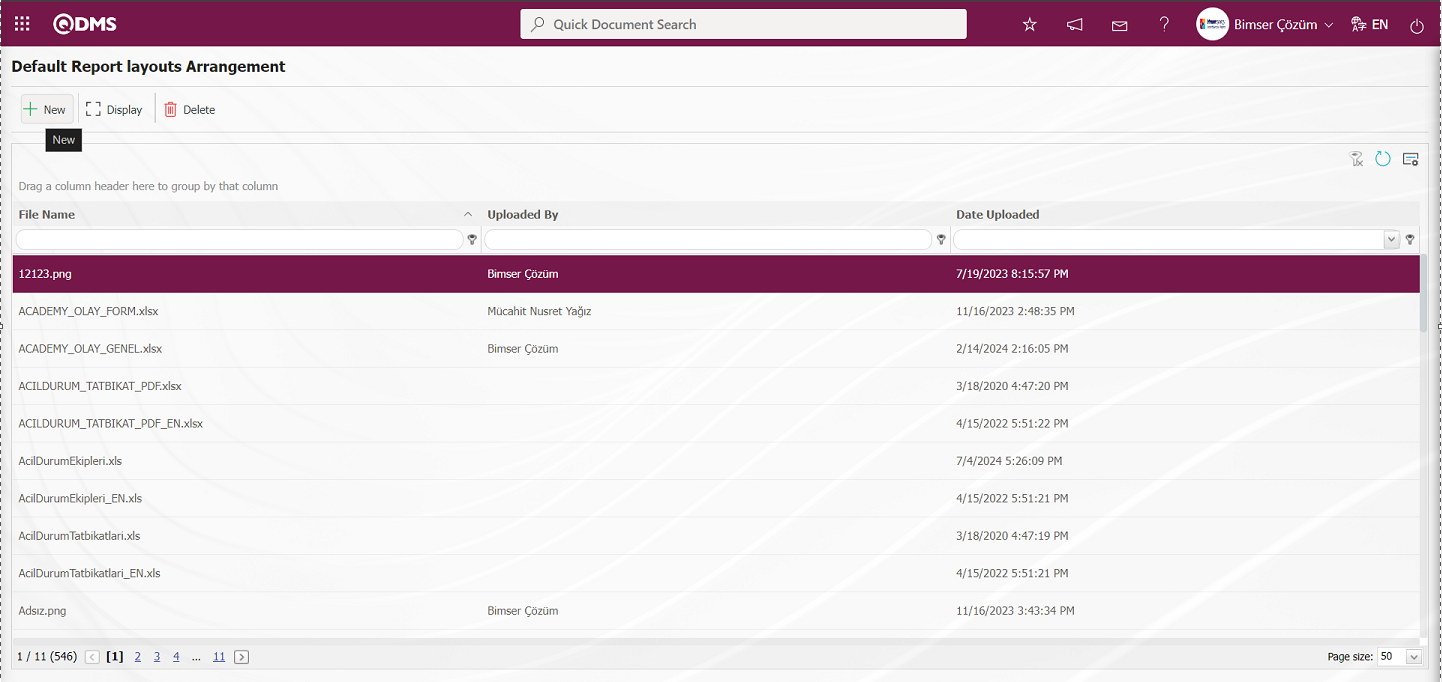
With the help of the buttons on the screen;
 :A new report format is uploaded to the system.
 :The report format selected in the list is displayed and downloaded.
 :The report format selected in the list is deleted.
: The data remaining in the filter fields in the grid where the search criteria on the menu screens are searched are cleared.
: The menu screen is restored to its default settings.
: User-based designing of the menu screen is done with the show-hide feature, that is, the hiding feature of the fields corresponding to the columns on the menu screens.
button is clicked to start the process of uploading report format to the system.
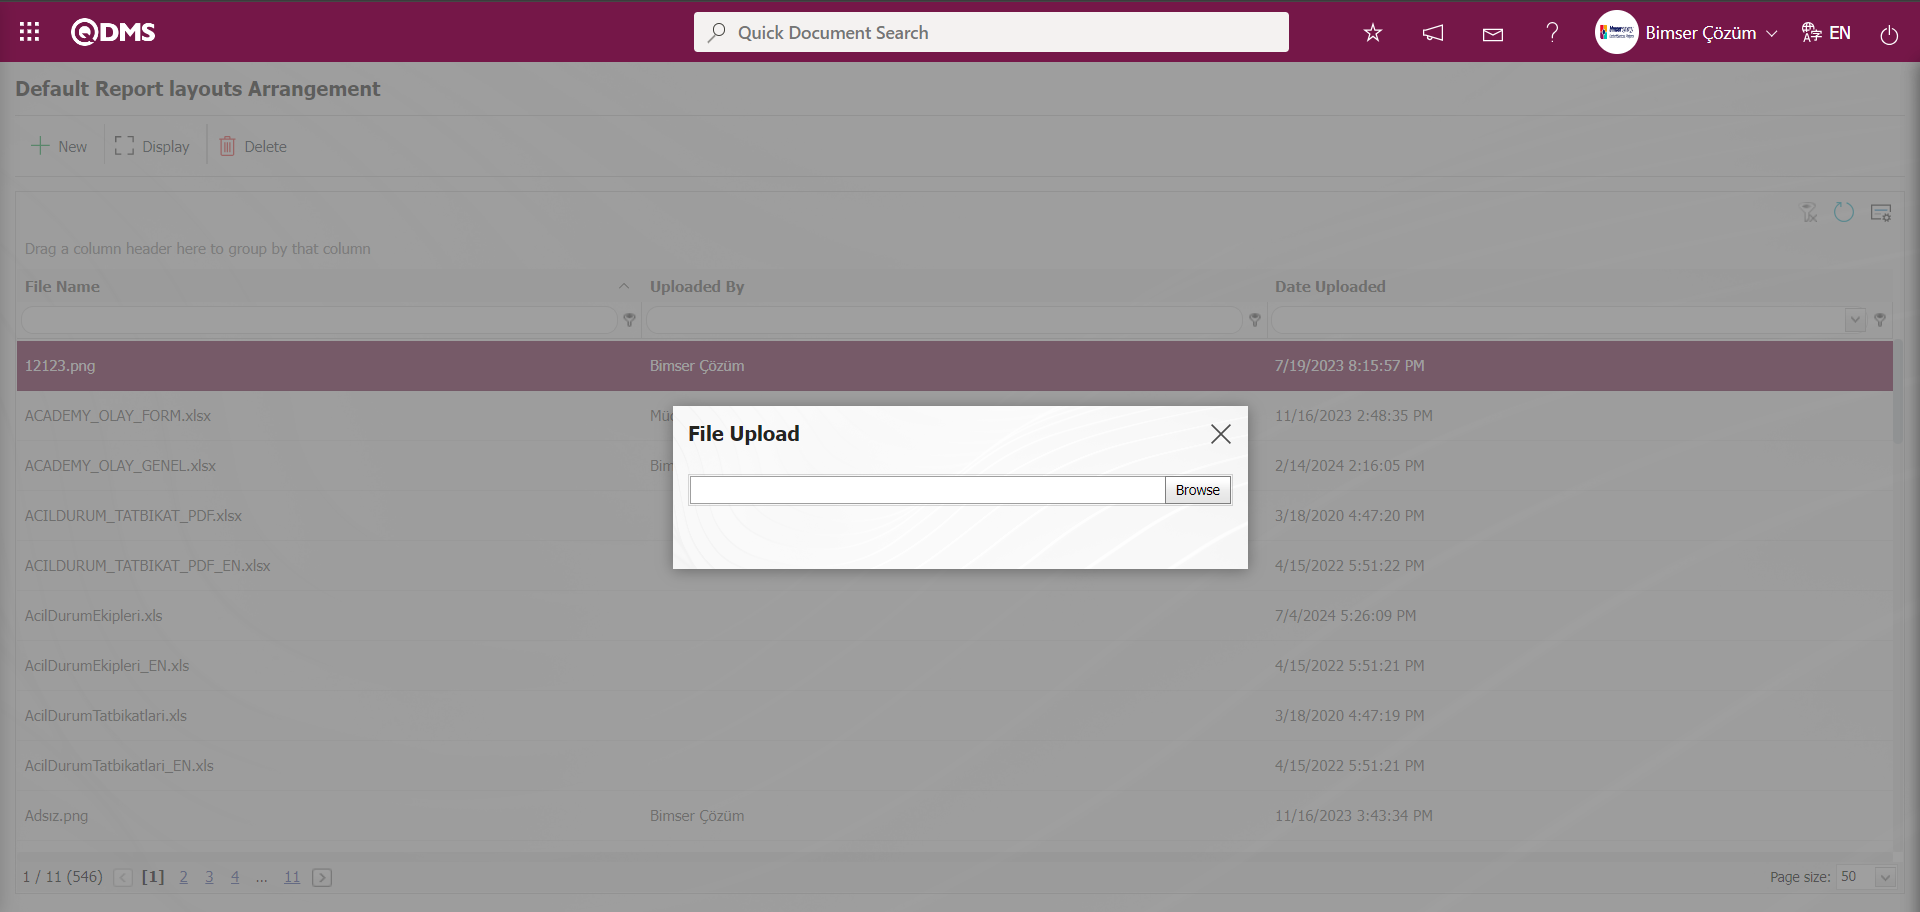
Click the Browse button on the File Upload screen.
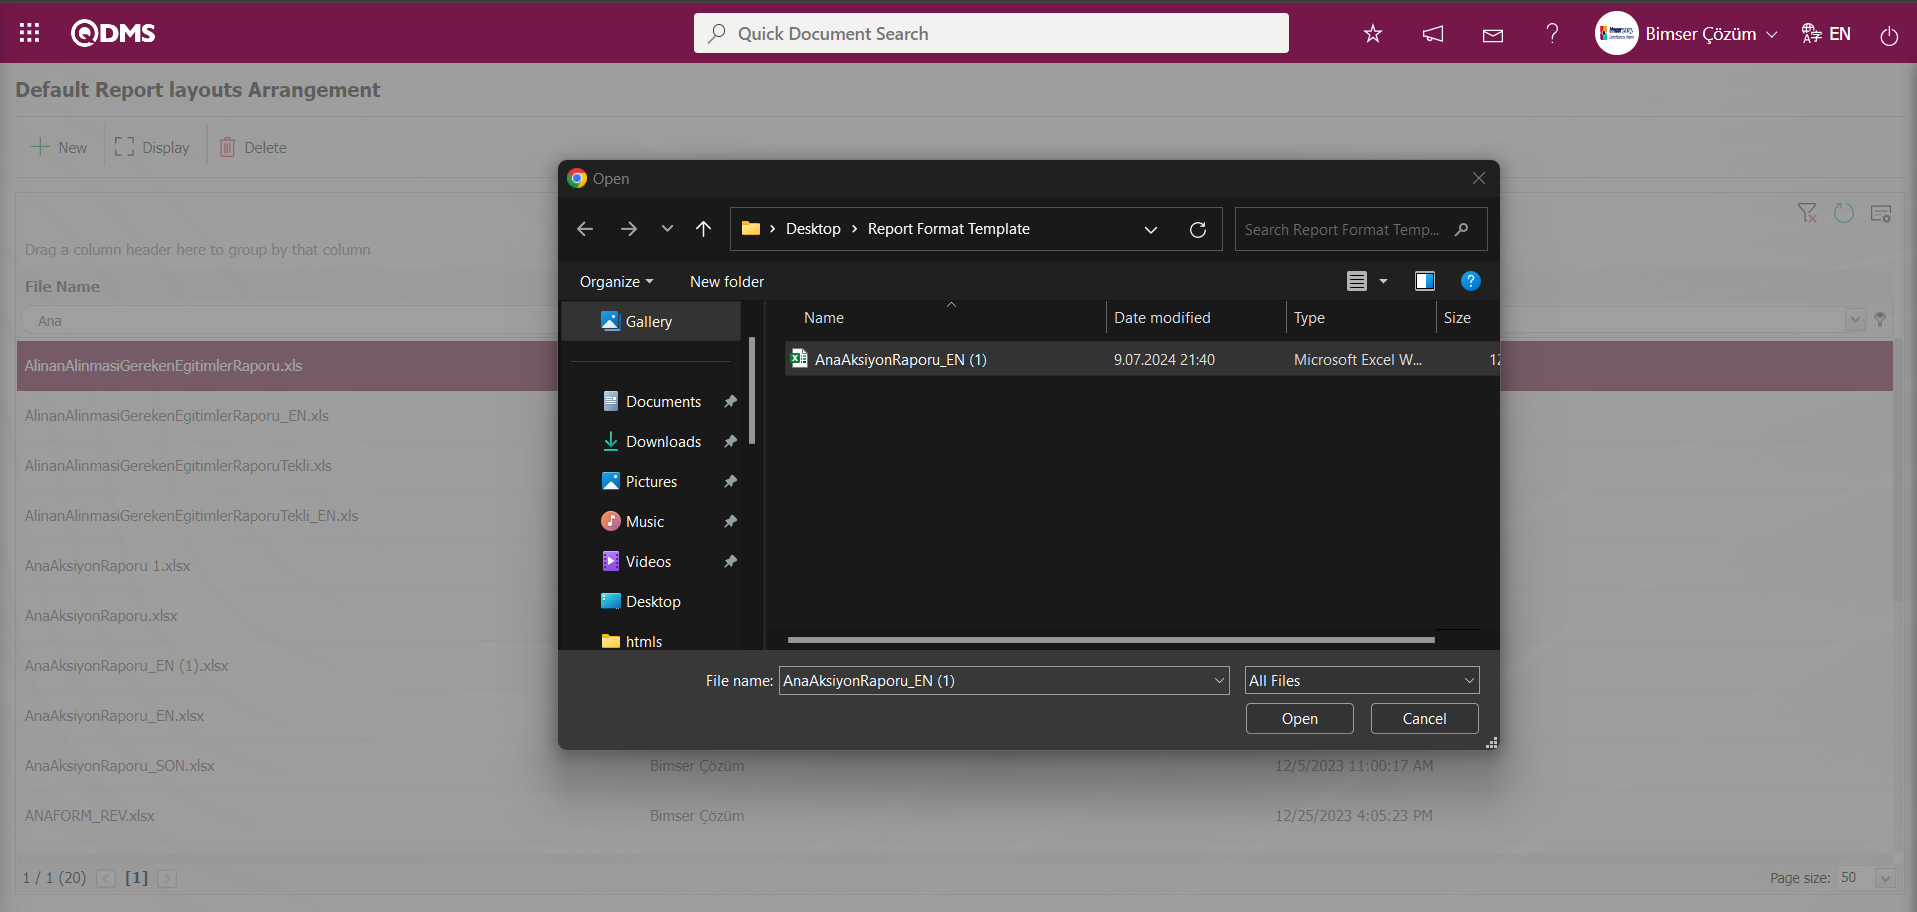
The relevant report is selected and uploaded to the Report Formats Edit menu.
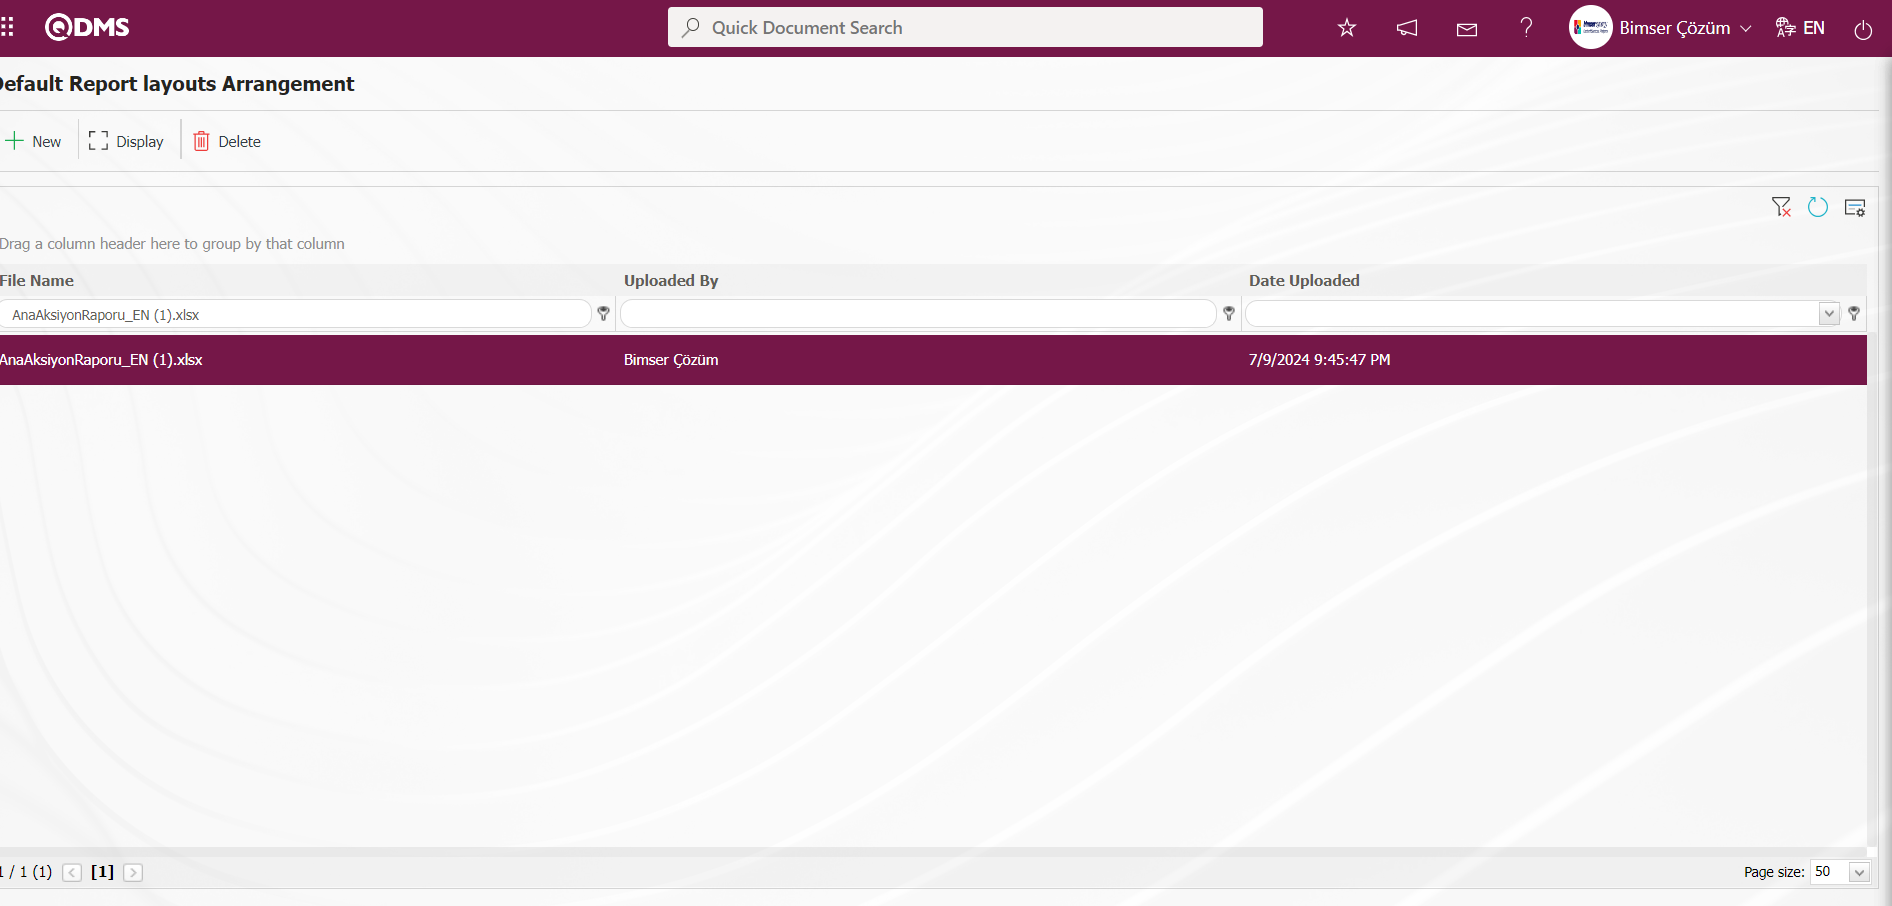
After adding the report format, the name of the report format is copied with its extension. Then, System Infrastructure Definitions/ Action/ Report Formats menu is opened. To add a new report format to the list, click the button on the top left corner of the screen.

Report format \New Record screen is displayed.
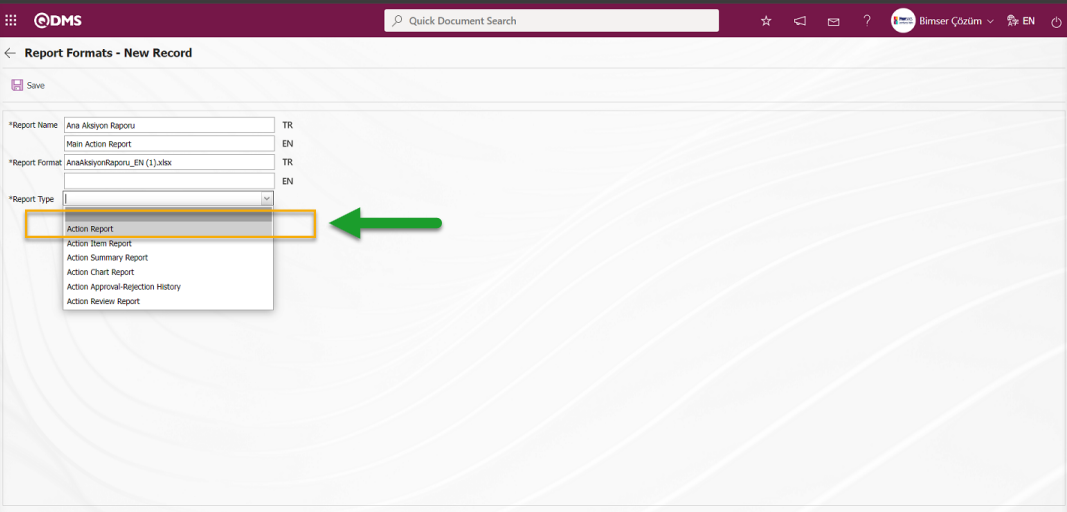
Related fields are defined on the screen that opens:
Report Definition: Report Formats - This is the field where the report definition information is entered on the New Record screen.
Report Template: On the Report Formats - New Registration screen, the name and extension of the report template is entered. (The name and extension of the report format copied with the right click / copy method in the Report Formats Edit menu is the field where it is pasted with the right click / paste method.
Report Type: On the Report Formats - New Record screen, select the report type from the system defined report list opened by clicking the drop-down list.
Report Formats - After entering the necessary information in the required fields on the New Registration screen, the Report Formats registration process is performed by clicking the  button in the upper left corner of the screen.
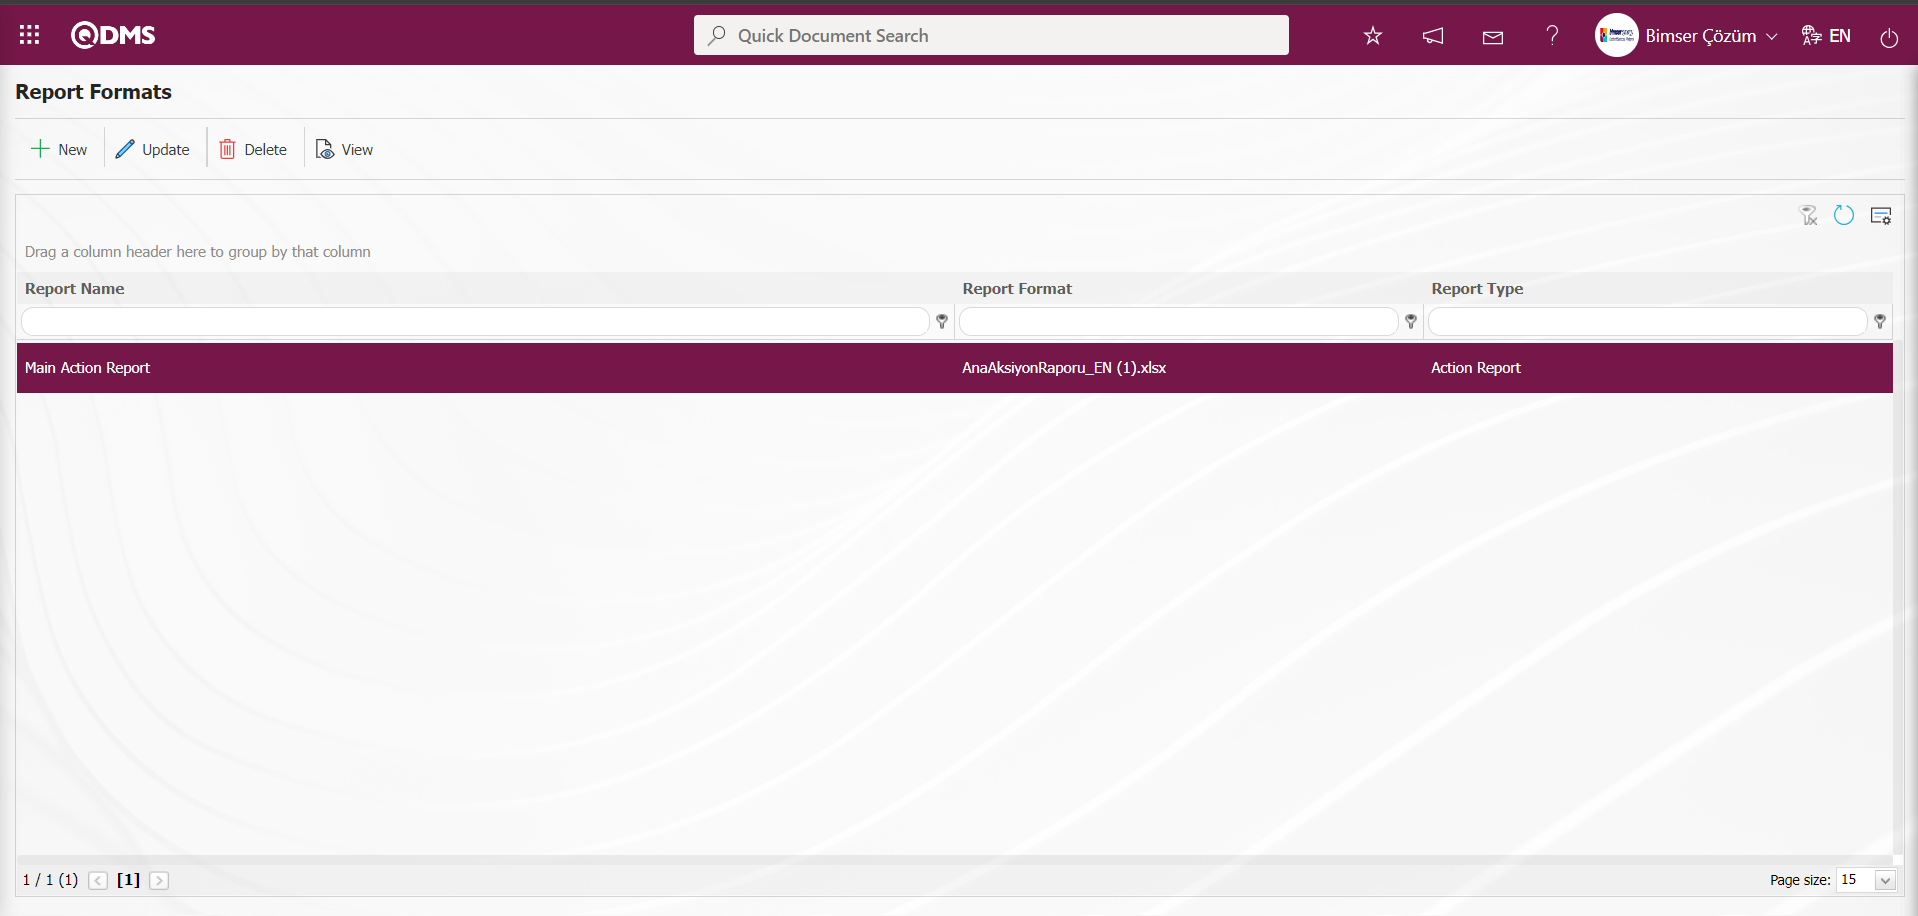
To view the defined report format, click on the Integrated Management System/Action Management/Reports/Main Action Reports menu. Click on the  (Export to Excel) button on the Main Action Report screen. (Since the Main Action Report template is selected in the Report Type field, a new format has been defined for this report.)
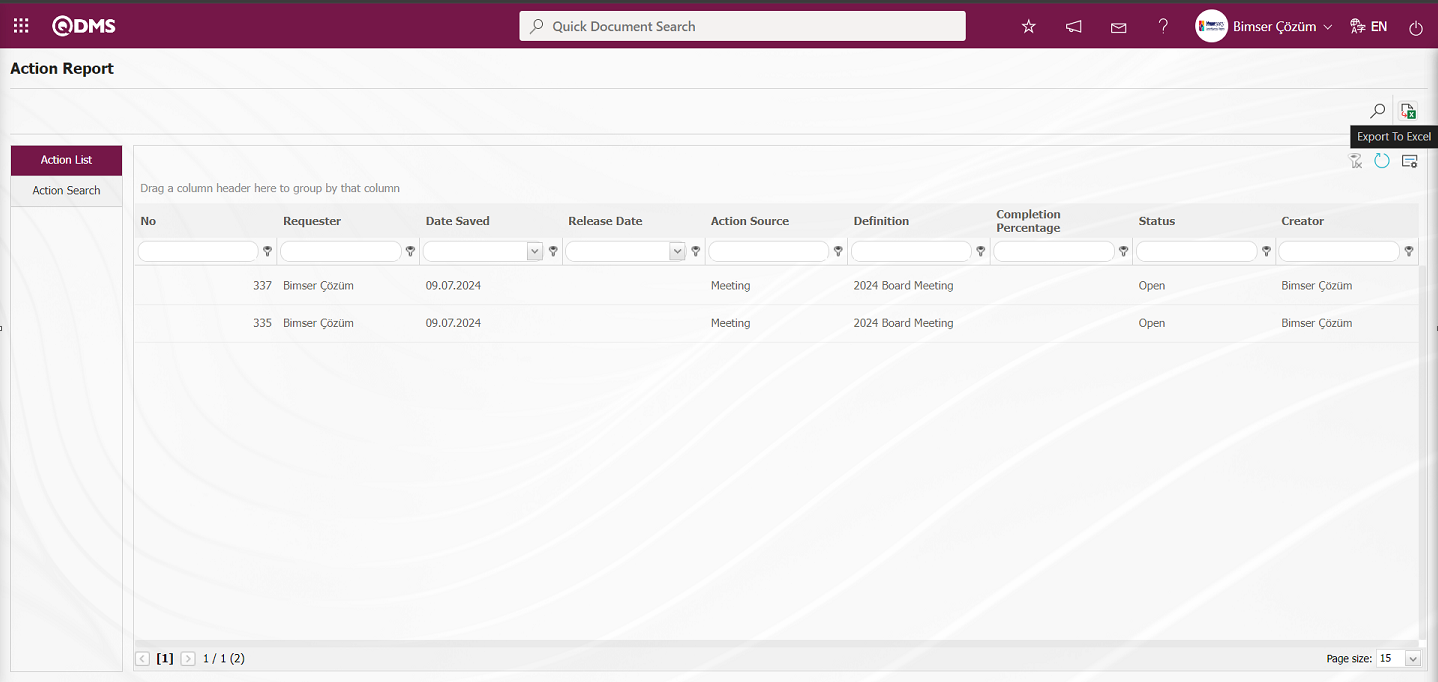
In the Select Report Format screen, select the relevant check box in the Select Format field and select the Report Format defined in the Action Report format list and click the  button.
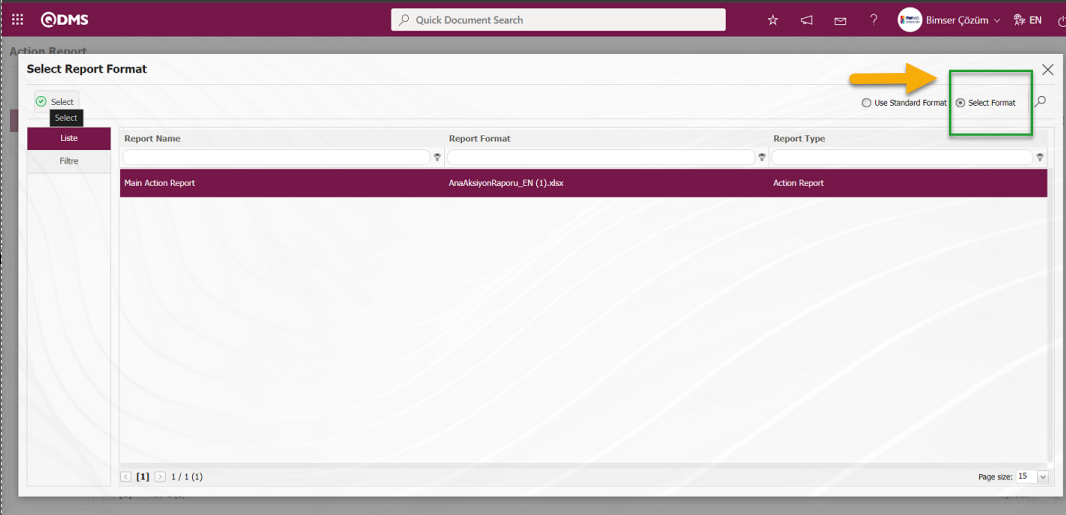
The report format defined by the system after the Format selection process is given in Excel format.
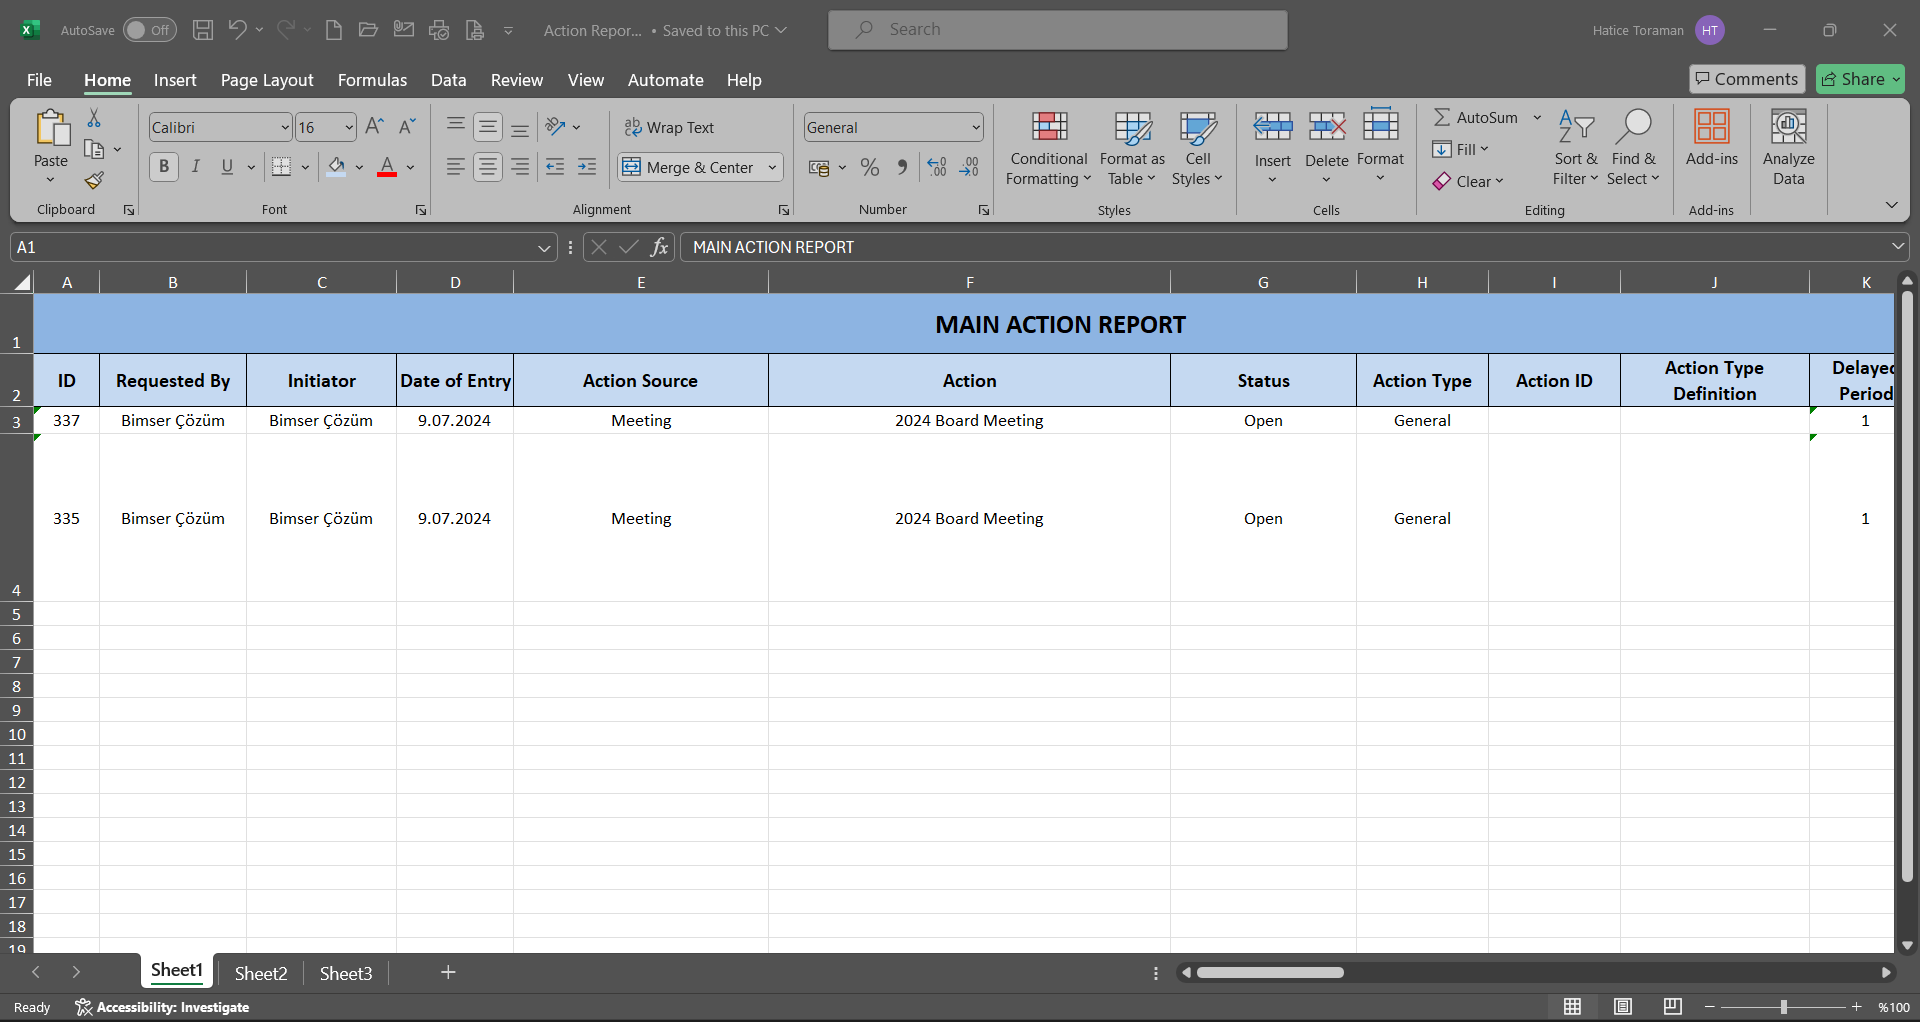
6.3.5. Cancel Action
Menu Name: System Infrastructure Definitions/ Action/ Cancel Action
It is the menu where the actions defined in the system are cancelled collectively. The purpose of this menu is to perform the cancellation of actions in bulk. On the screen that opens, two tabs are displayed: Actions List and Action Search tabs. In the Actions List tab, the actions defined in the system are listed. In the Actions List tab, if desired, actions can be cancelled individually by making a single selection or actions can be cancelled collectively by making multiple selections by clicking the  button and writing the “Reason for cancellation” information on the screen that opens. By selecting the check box related to the “Select all” option in the Actions List, all of the Actions are selected in the Action List in a collective way by selecting all of the Actions in the Action List and by clicking the button and writing the “Reason for cancellation” information on the screen that opens. The status of collectively cancelled Actions changes to “Cancelled” status. Actions that are cancelled collectively are listed by selecting the status as “Cancelled” in the Filter tab in the Action Item Report in the Action Management Module reports.
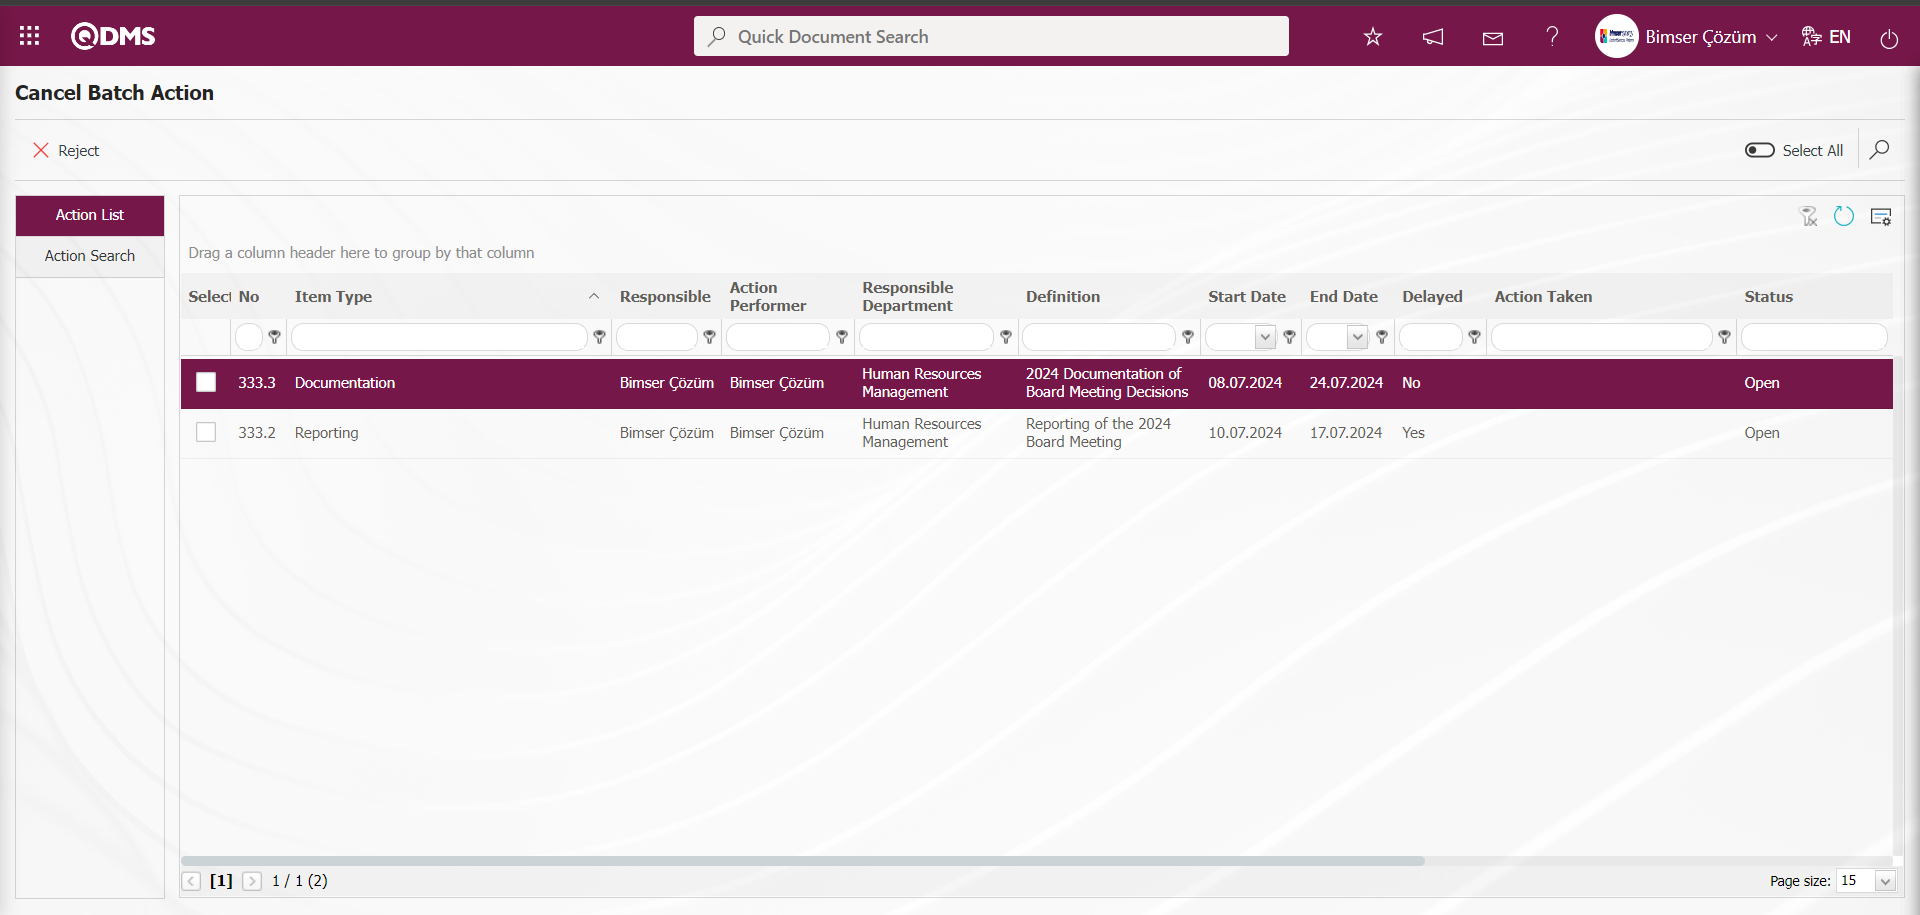
With the help of the buttons on the screen;
: The action selected in the list is rejected and cancelled.
: Records are searched by filtering.
: The search criteria on the menu screens are used to clear the data remaining in the filter fields in the grid where the search operation is performed.
: The menu screen is restored to its default settings.
: User-based designing of the menu screen is done with the show-hide feature, that is, the hiding feature of the fields corresponding to the columns on the menu screens.
In the “Collective Action Cancellation” screen, the actions to be cancelled are selected in the Actions List tab.
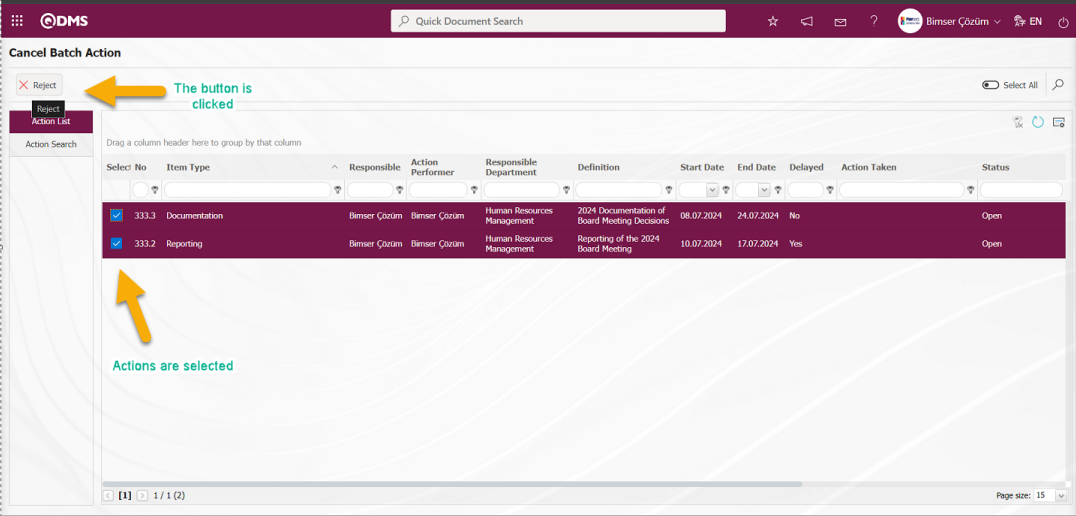
After the actions selection process, the actions are cancelled by clicking the button. “Are you sure you want to cancel the selected record?” warning message is given by the system and the “OK” button is clicked.
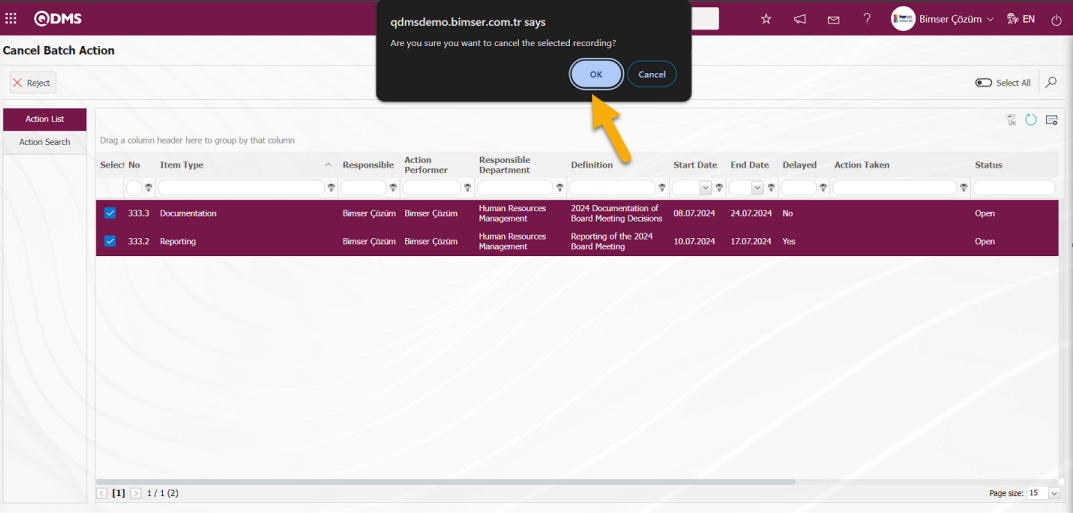
In the Action Rejection pop-up opened by clicking the  button, the Rejection reason information is entered and the collective Cancellation of the Actions is made by clicking the
  button.
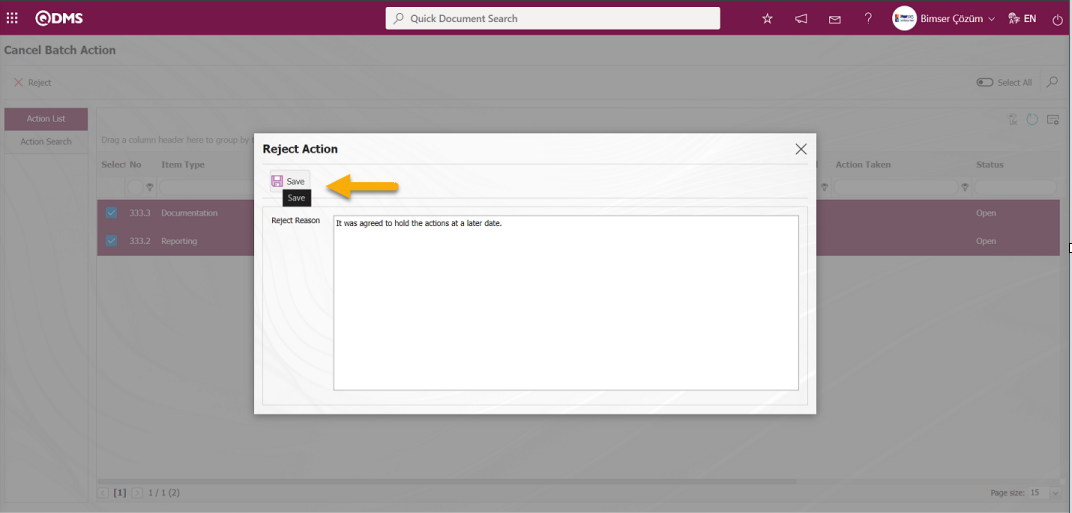
After the Cancellation of Actions in bulk, the system gives the numbers of the cancelled actions and the numbers of the cancelled actions in the form of a warning message.
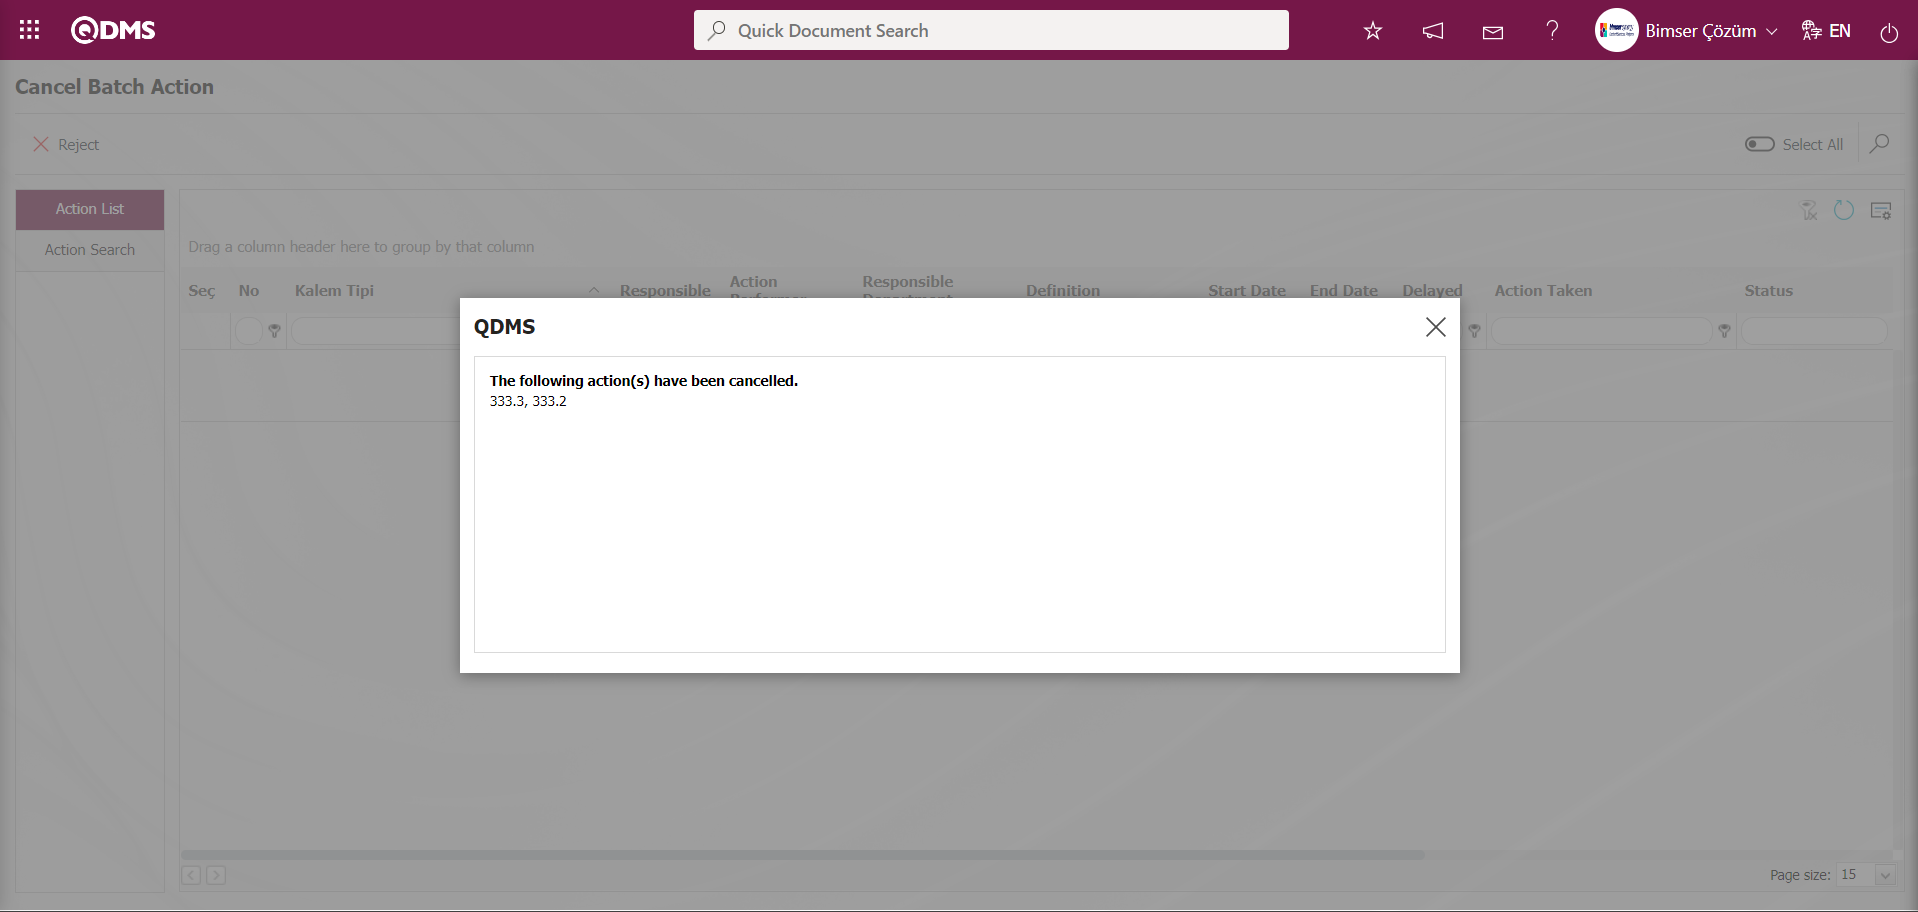
Displaying Collectively Cancelled Actions in Reports ;
Actions that are cancelled collectively in the “Cancel Action” menu in the Action Management Module are listed and reported by selecting the “Cancelled” status in the Status field in the search criteria in the Filter tab in the Action Item Report in the Action Management Module Reports. In the Action Search tab of the Action Item Report, the “Cancelled” status option is selected in the Status field in the search criteria and the (Search) button is clicked.
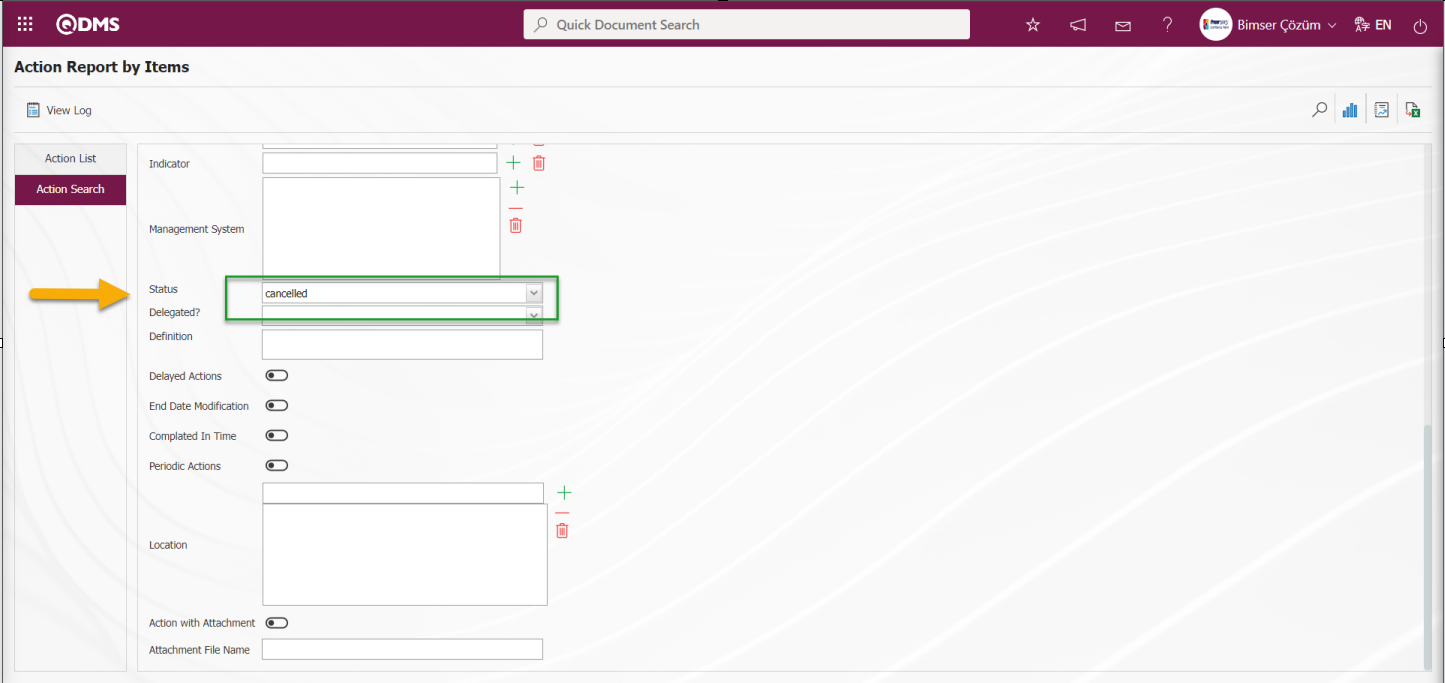
In the Action Item Report screen, the records with “Cancelled” status are listed in the Action List tab.
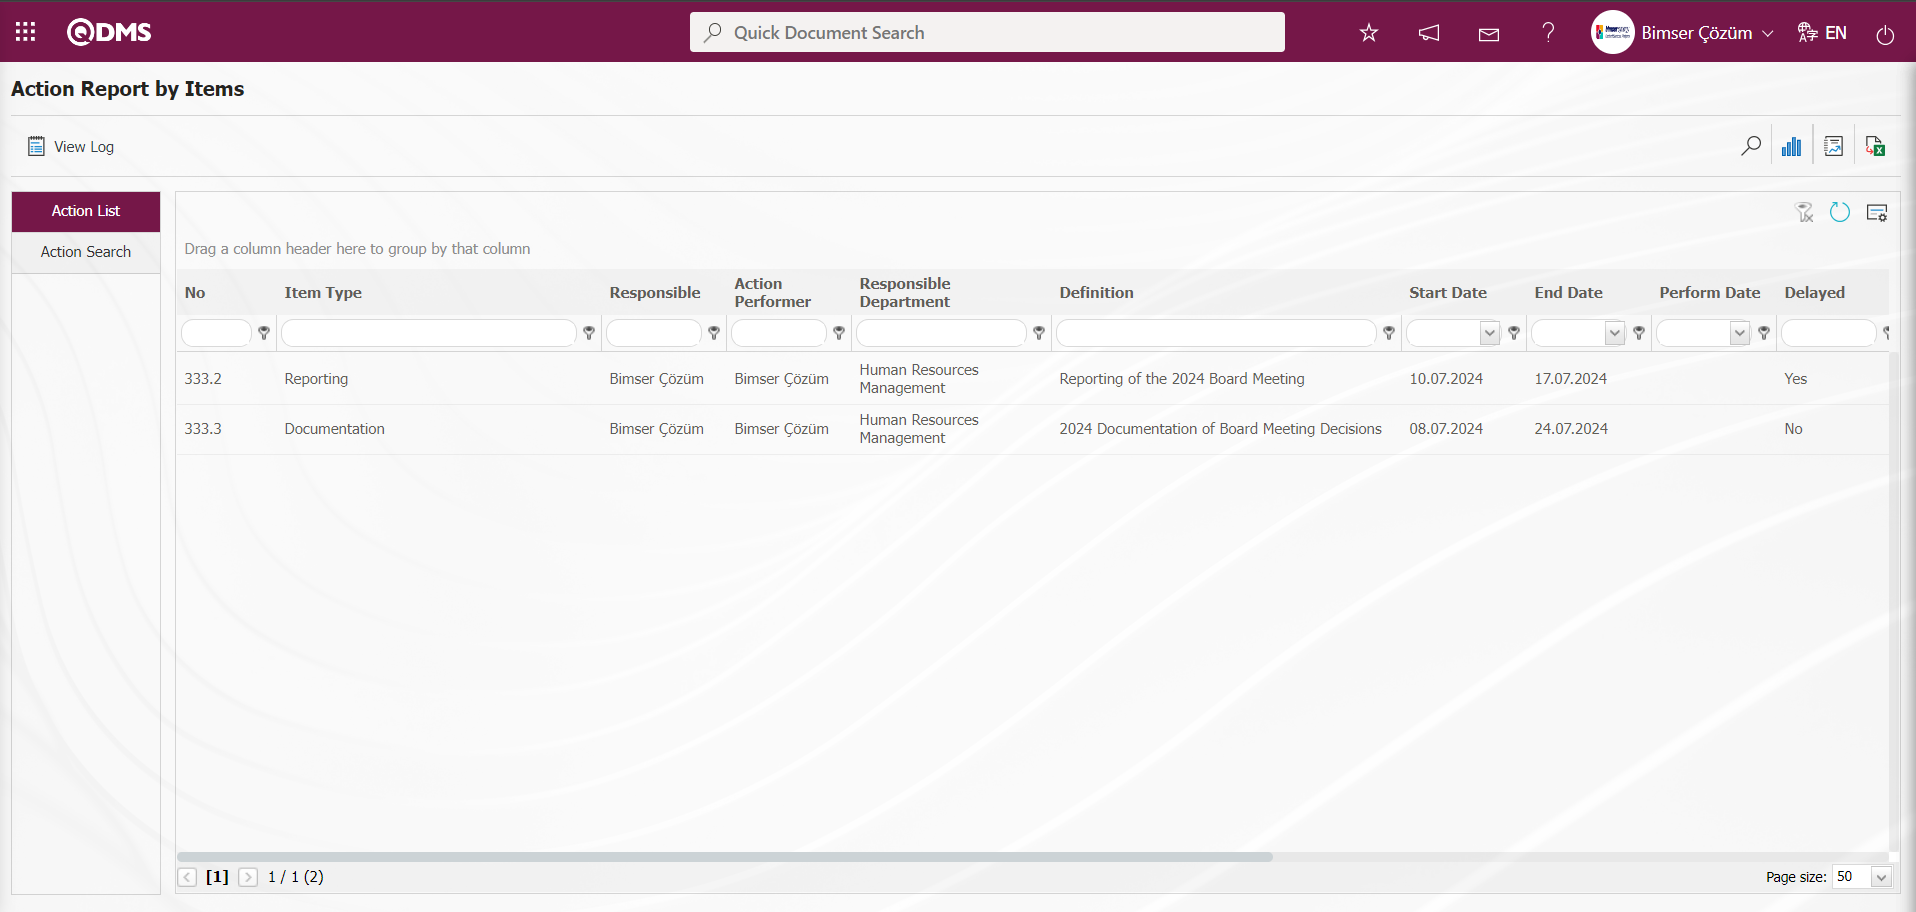
6.3.6. Survey Question Lists (Action Management)
Menu Name: System Infrastructure Definitions/ Action/ Survey Question Lists (Action Management)
For the Action Management module, where the Questionnaire Question lists menu is added to the infrastructure section of these modules, the Action Closure function is added as a function related to the questionnaire. When the Action Closure function is selected, template questionnaires are designed and saved in this menu in the system in the logic of the Supplier Evaluation module by clicking the  button at the top left. After the template questionnaires are designed, if the parameter value of the parameter 124, which is the relevant parameter of the Action Management module, is empty, the system automatically defines the questionnaire code to the parameter value.
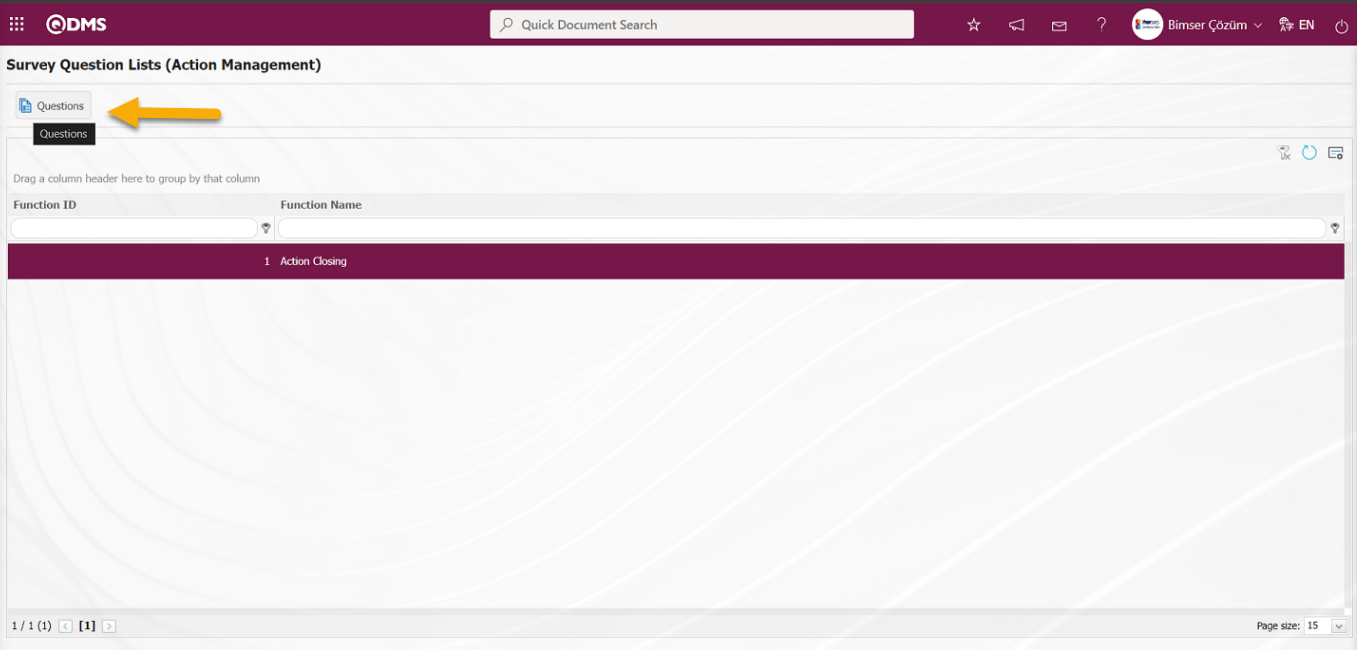
With the help of the buttons on the screen;
: Adding questions to the questionnaire to be defined.
: The data remaining in the filter fields in the grid where the search criteria on the menu screens are searched is cleared.
: The menu screen is restored to the default settings.
: User-based designing of the menu screen is done with the show-hide feature, that is, the hiding feature of the fields corresponding to the columns on the menu screens.
By clicking the button, the question addition screen for the relevant function for the Action module is displayed, such as the screen where the question addition process was performed in the structure of the Survey Operations Module, and the question addition process is performed from the question options.
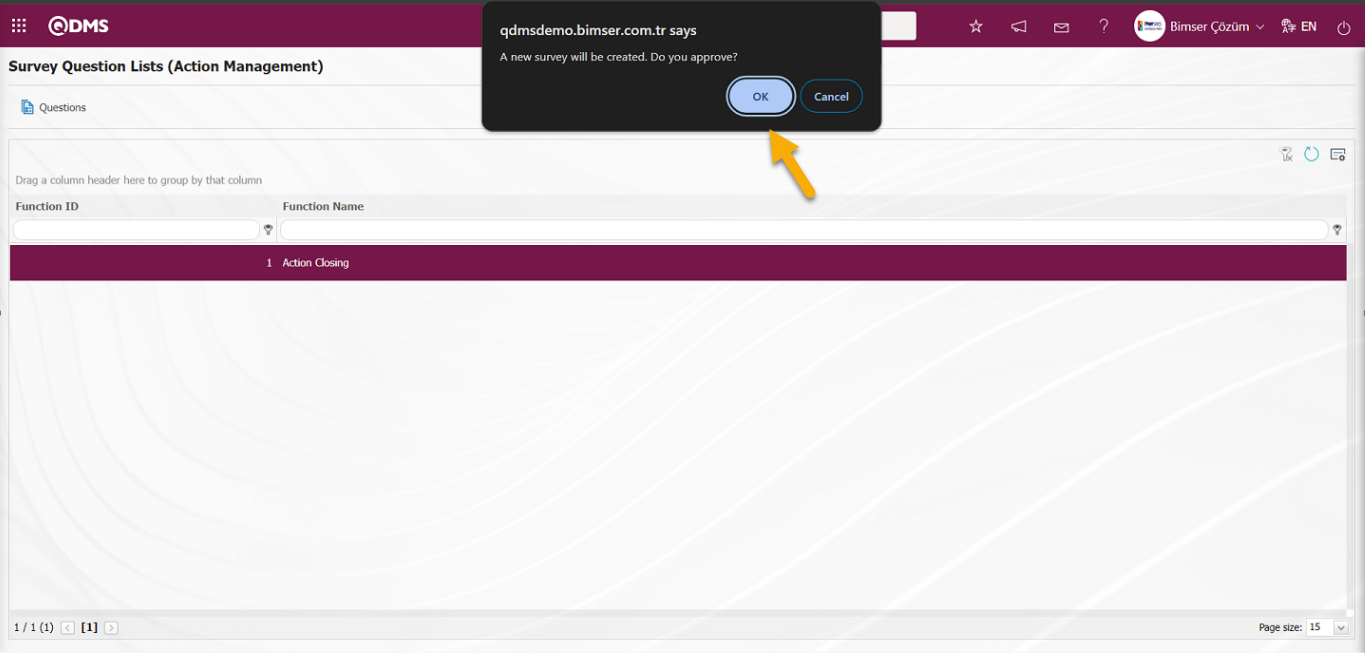
When no parameter code is defined in the parameter value of the parameter 124 “Survey template to be used” of the Action Management Parameters, the system displays the warning message “A new survey will be created. Do you approve?” warning message, the survey questions screen is displayed by clicking the “OK” button.
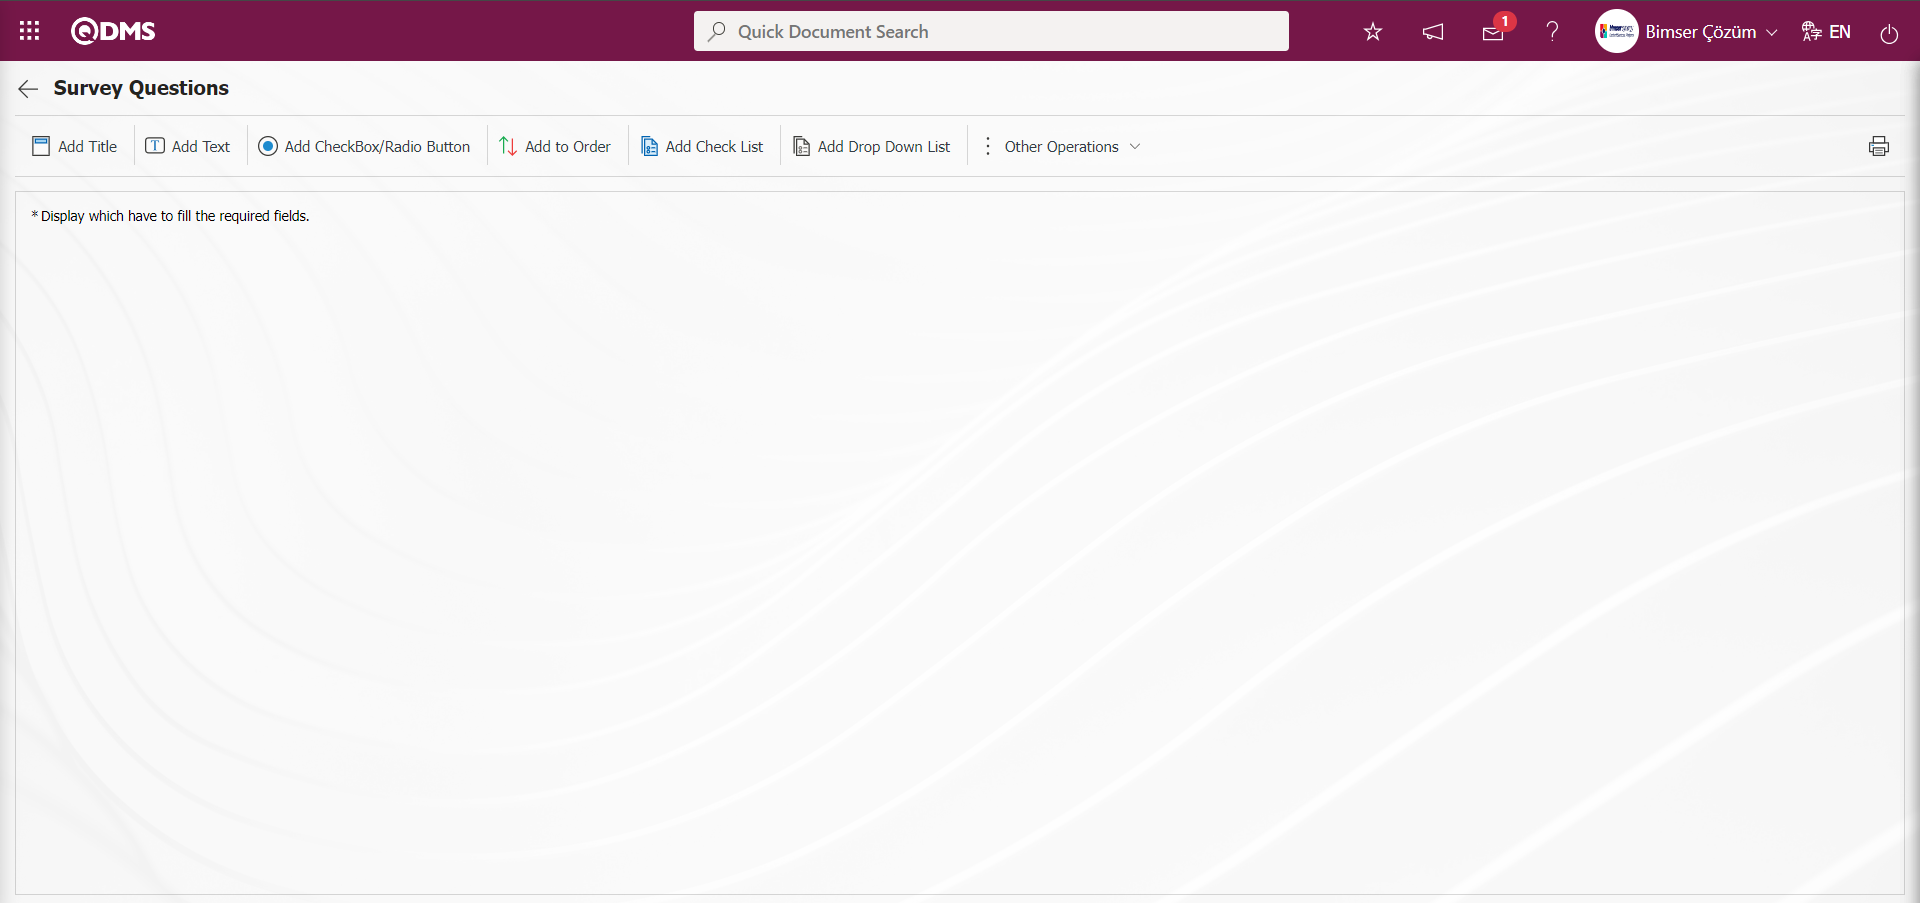
With the help of the buttons on the screen;
 : It is the button that allows you to print your questions.
 : This button is used if you want to section the questionnaire and add a title. After each title separator, the number of the defined question comes as 1.
 : It is the question type used when the people who fill out the questionnaire are asked questions that require free information.
 : It is used when the answers given are selected from the specified options.
 : It is used when all options of a question are preferred and listed in order of priority. The options are listed from more>less or less>most.
 : If there are too many options in the question to be created and they need to be selected like a check list, a multiple choice list type question can be added.
 : It is the question type to be used in case the question asked is selected as a single answer from the drop-down list.
 : This question type allows the selection of lists from the personnel, customer, department, company profile and product fields defined in Qdms.
 : It is a question type formed in the form of a matrix in which sub-questions are defined under the question text.
 :**** It is a type of question in the form of a picture matrix in which a picture is added in the question text field and a picture is added in the options.
 :** On the screen opened by clicking, the user can add a question to select a date.
 : Creates an Additional File field for adding additional files to the survey.
 :**** It is the question type that is selected from the list of question categories defined in the Question Categories screen opened in the Question Pool menu in the Survey Operations module.
Adding Sample Question options;
By clicking the button, the questionnaire is segmented and the title is added.
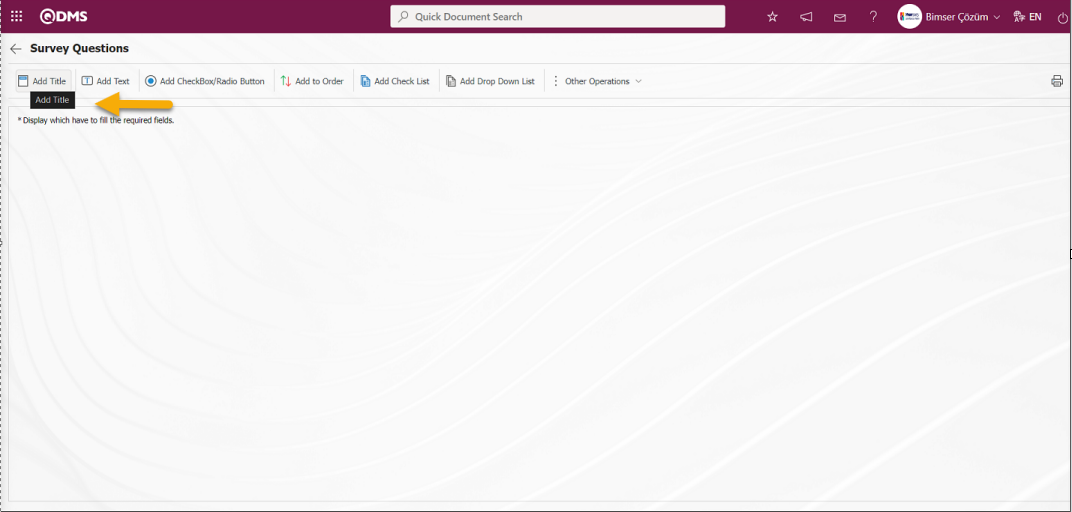
The Add Title screen opens.
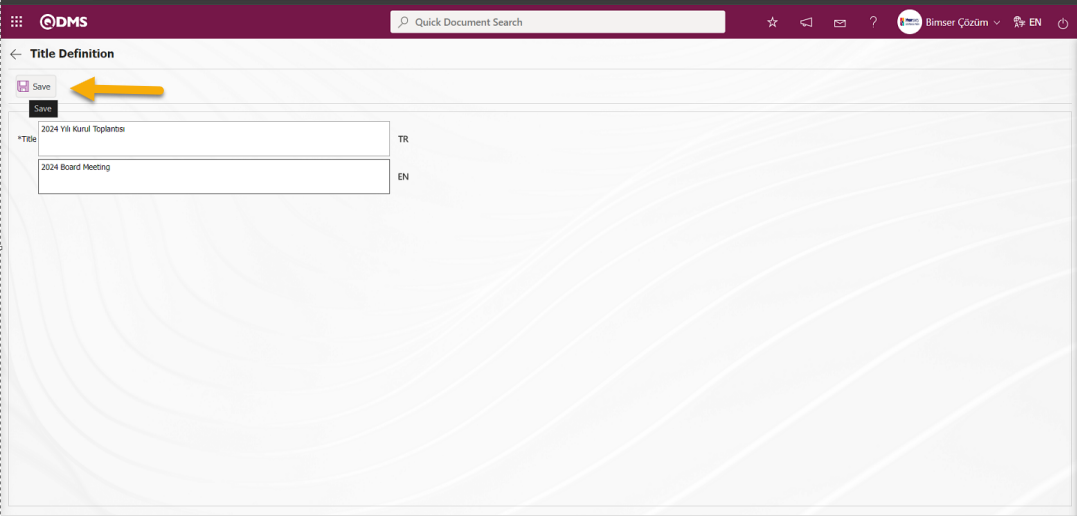
The relevant title is added to the Add title field and the registration process is performed with the  button.

Ekrandaki bulunan butonlar yardımıyla
 : The defined question information is deleted.
 : Editing and updating is done on the defined question information.
 : The defined question information is copied.
 : It is the question type used when people who fill out the questionnaire are asked questions that require free information entry. Click the button to add the Add Information Entry question type to the defined Questionnaire. Add Information Entry screen opens.
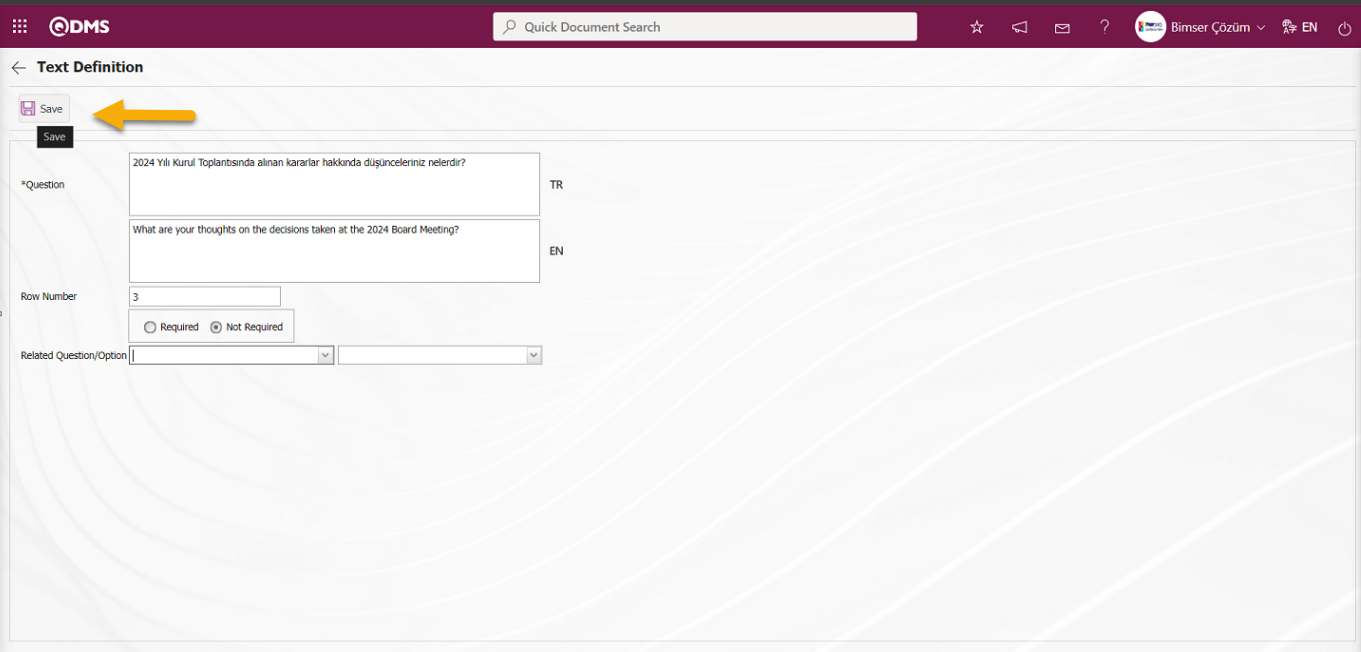
Related fields are defined on the screen that opens:
Question Text: This is the field where the question text to be asked on the Add Information Entry screen is written in the Turkish field. In case of use in other languages, the question data to be asked is entered in the field of the relevant languages.
Number of Lines: It is the field where the number of lines is entered on the Add Information Entry screen. It is used to determine the size of the text. If this field is 0 or 1, the area to be answered is seen as a single line.
It is the field where the obligation to answer the question to be asked is determined. According to whether the question has to be answered or not, the check boxes related to the relevant field are marked.
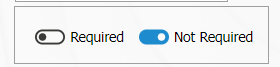
If there is an answer requirement, saving is not allowed when the question is not answered, a warning message is given.In the Add Information Entry screen, Turkish and English language equivalents are written in the Question Text field and the registration process is done by clicking the  button in the upper left corner of the screen.
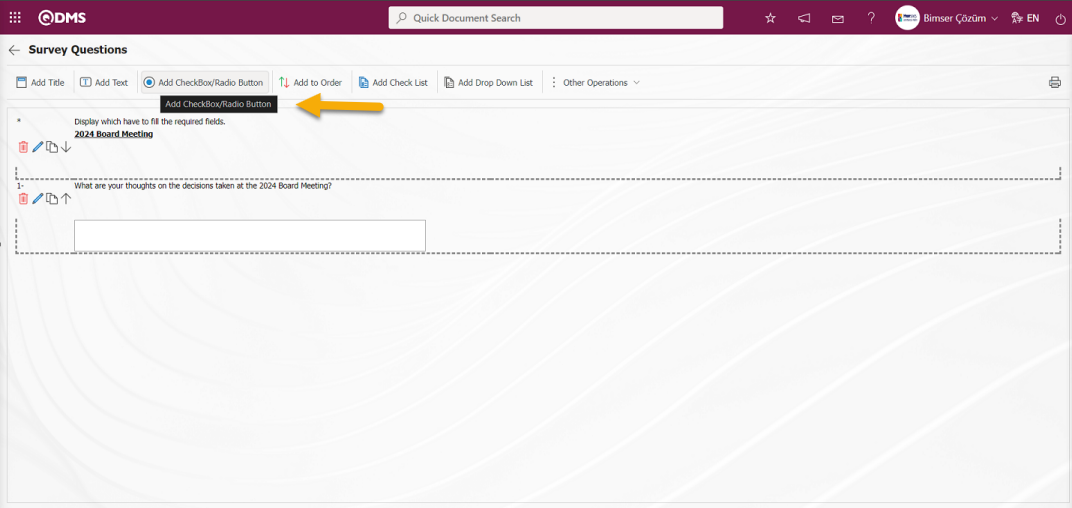
: It is the question type in which the answers given are selected from the specified options. Click the button to add the Add Option question type to the questionnaire defined in the Survey Questions screen. Add Option screen opens.
With the help of the buttons on the screen
 (Remove): On the options screen, the selected option is removed from the option list.
 (Delete All):Delete all options on the options screen.
 (Up):In the options screen, the selected option is removed upwards in the option list.
 (Down):In the options screen, the selected option is scrolled down in the option list.
 (Move):Moving the selected option on the Options screen to the Option-Score field allows editing and updating operations.
In the Option-Score field, the option and score information of the question is written and added to the Options list by clicking the  (Add Option) button.

The obligation to answer the question to be asked is determined from this field.

Selecting 1 or more than 1 of the options is determined according to the check box in this field.
The options can be displayed side by side (Single Line) or bottom by bottom (Multi-Line).
If the multi-row option is selected, a field called column number appears and the options of the question are displayed in the column as much as the specified value.
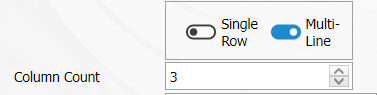
Calculation Method: In the Add Option screen, if the questionnaire is a scored questionnaire, this is the field where the method by which the points given to the options of this question will be calculated is determined. For example; A question in a survey that 10 people will answer has 4 options and each option has its own points. Assuming that the score of the first option is 5, if 10 users choose the first option, it is determined whether these scores are added together (50) or averaged (5) and included in the average score of the survey.

Weighted Score: In the Add Option screen, if the questionnaire is a scored questionnaire, it is the field where the weight of the question in the questionnaire is determined. If all questions are equally weighted, a value of 1 should be written. If it is written as 0, the survey score is not calculated.

Related Question/Option: It is the field where the question is displayed depending on the option of the defined optional question. When the option selection process of the related question and question is made and the option of this question is selected, the related question is displayed.
After filling in the required fields on the Add Option screen, the registration process is performed by clicking the  button in the upper left corner of the screen.
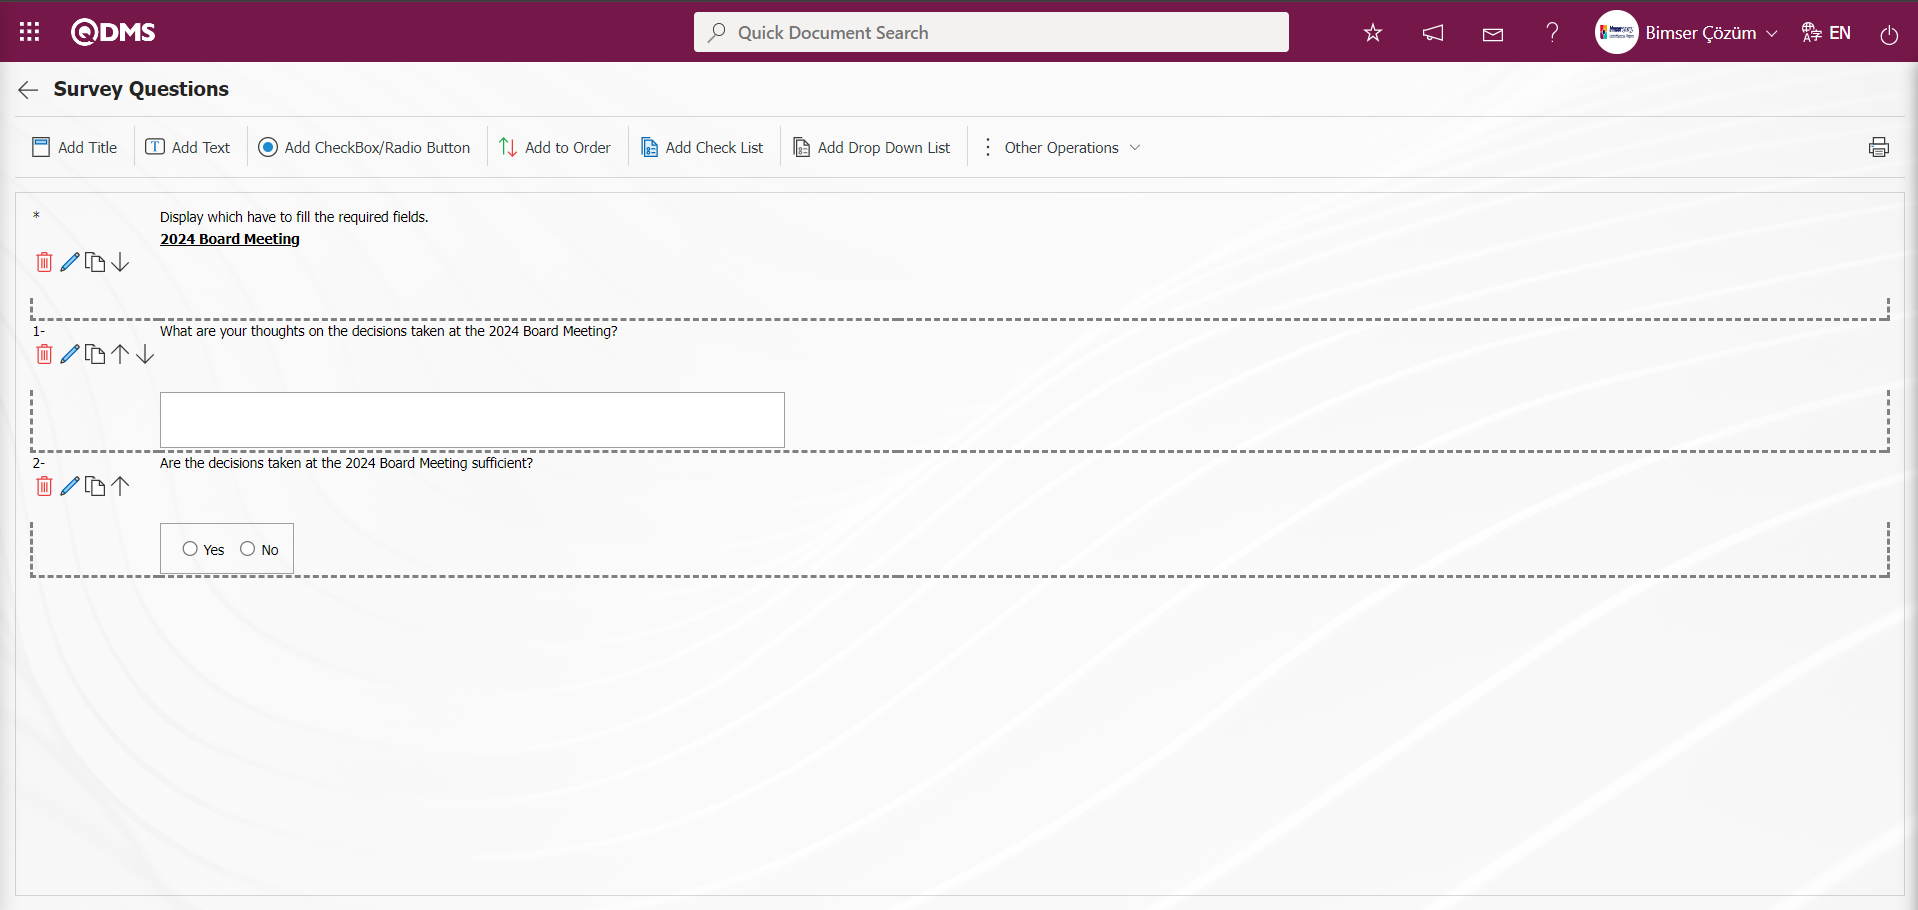
In the Survey Question Lists (Action Management) menu, the Survey Question Lists (Action Management) identification process is done by defining a few question options as an example on the Survey Questions screen opened by clicking the button while the relevant function is selected. The process of defining other question options is done in the same way as in the Question definition screen of the Survey Operations Module. On the screen that opens, Survey Operations is the same as the question definition screen.
After the question definition process is done, the system automatically defines the questionnaire code in the “Questionnaire template to be used” parameter numbered 124, which is the relevant parameter of the related module of the Questionnaire Question Lists (Action Management) menu.
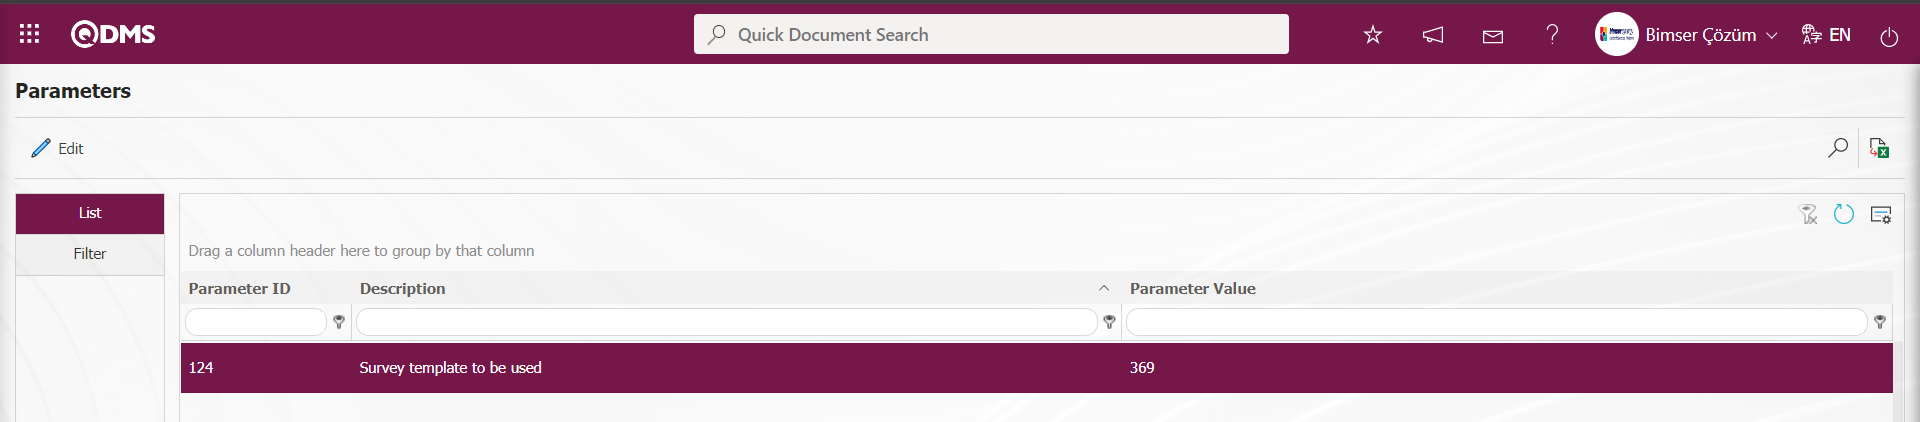
In the Survey Question Lists (Action Management) menu, after the system automatically defines the code in parameter 124 of the survey, the code of the role to which the survey will go must be defined in the Action Management parameters in parameter 126 “Role id to send survey”. Role Id number is taken from System Infrastructure Definitions/Bimser System Infrastructure Definitions/Configuration Settings/Role Identification menu.

How many days the questionnaire can be filled in after the action closure approval is given will be determined according to the value written to the parameter value in the “How many days the questionnaire can be filled in after the action closure approval is given” parameter numbered 125 in the Action Management parameters.

After the Survey Definition process and the necessary adjustments in the parameters, a new Action Plan is defined to send a survey about the Closing function. In the Action Planning screen that opens, the check box related to the “Create Survey” field must be checked.
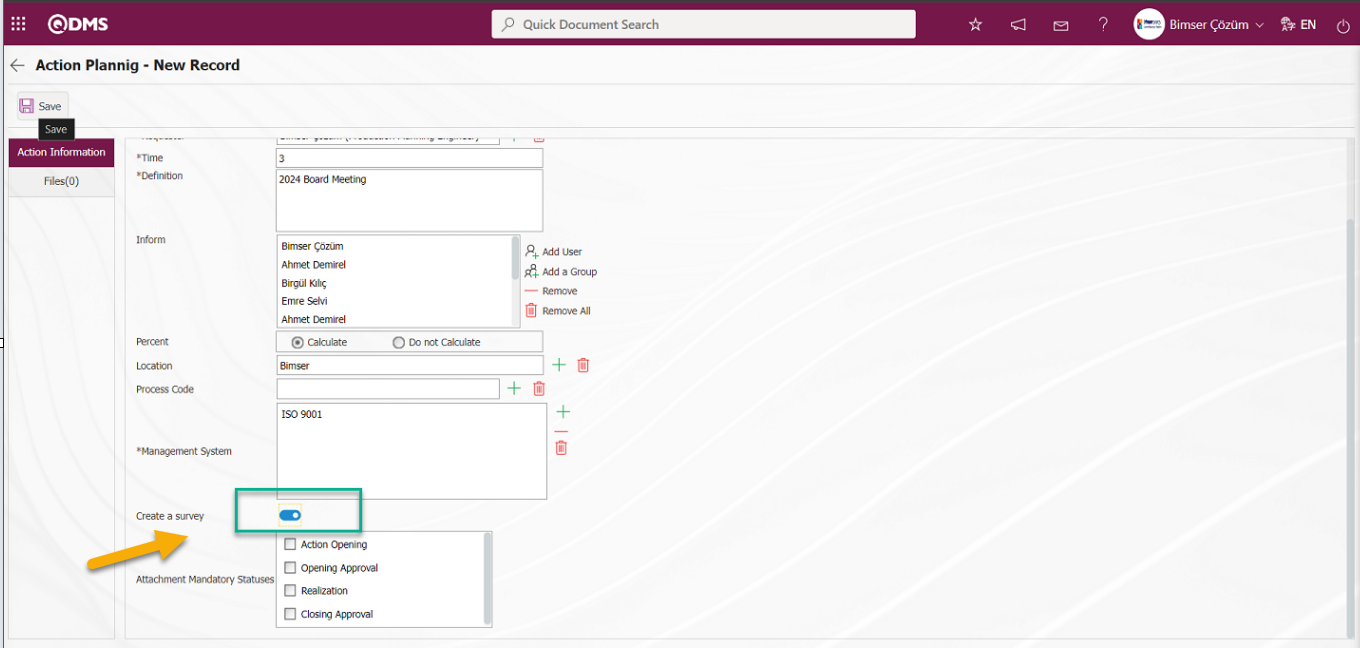
After the Action Plan definition process is done, the Action Item definition process is done on the Action Item Planning-New Record screen. If the defined Action Item has an opening approval, it is approved and the realisation process is performed by the person who will perform it. After the action is performed, if there is a closing approval, it is approved and closed. If there is no opening and closing approval, it is closed only by the person who will perform it. After the action is performed, the action is closed. In the Action Management parameters of the closed action, the role defined in parameter 126 in the Action Management parameters is assigned to the pending jobs in the Survey Operations module as “Surveys to be filled”.
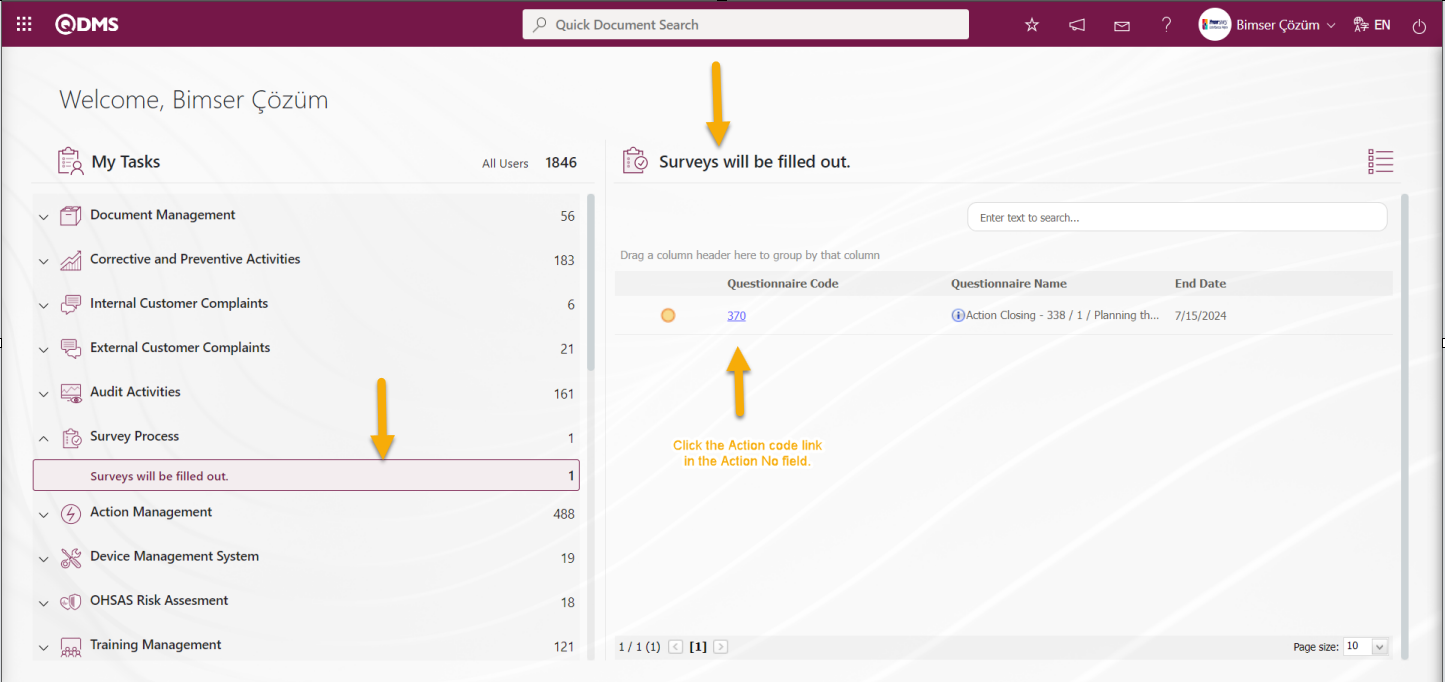
The Questionnaire Filling screen is opened by clicking the Questionnaire code link in the Questionnaire Code field in the relevant task.
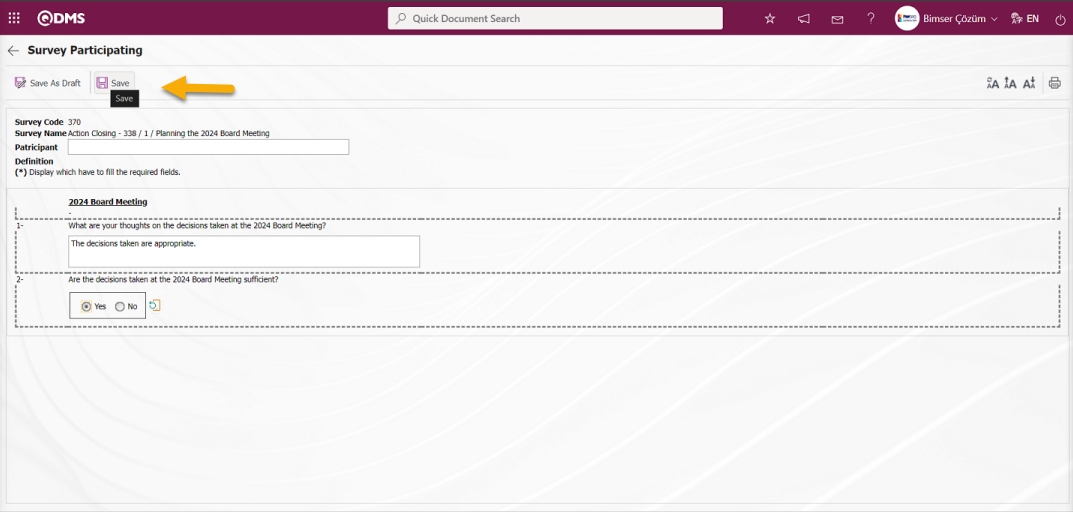
After the questionnaire filling process is done by entering the relevant information on the questionnaire questions on the questionnaire filling screen, the questionnaire filling process is performed by clicking the  button at the top left of the screen. The “OK” button is clicked on the “Your questionnaire has been successfully saved” warning message given by the system.
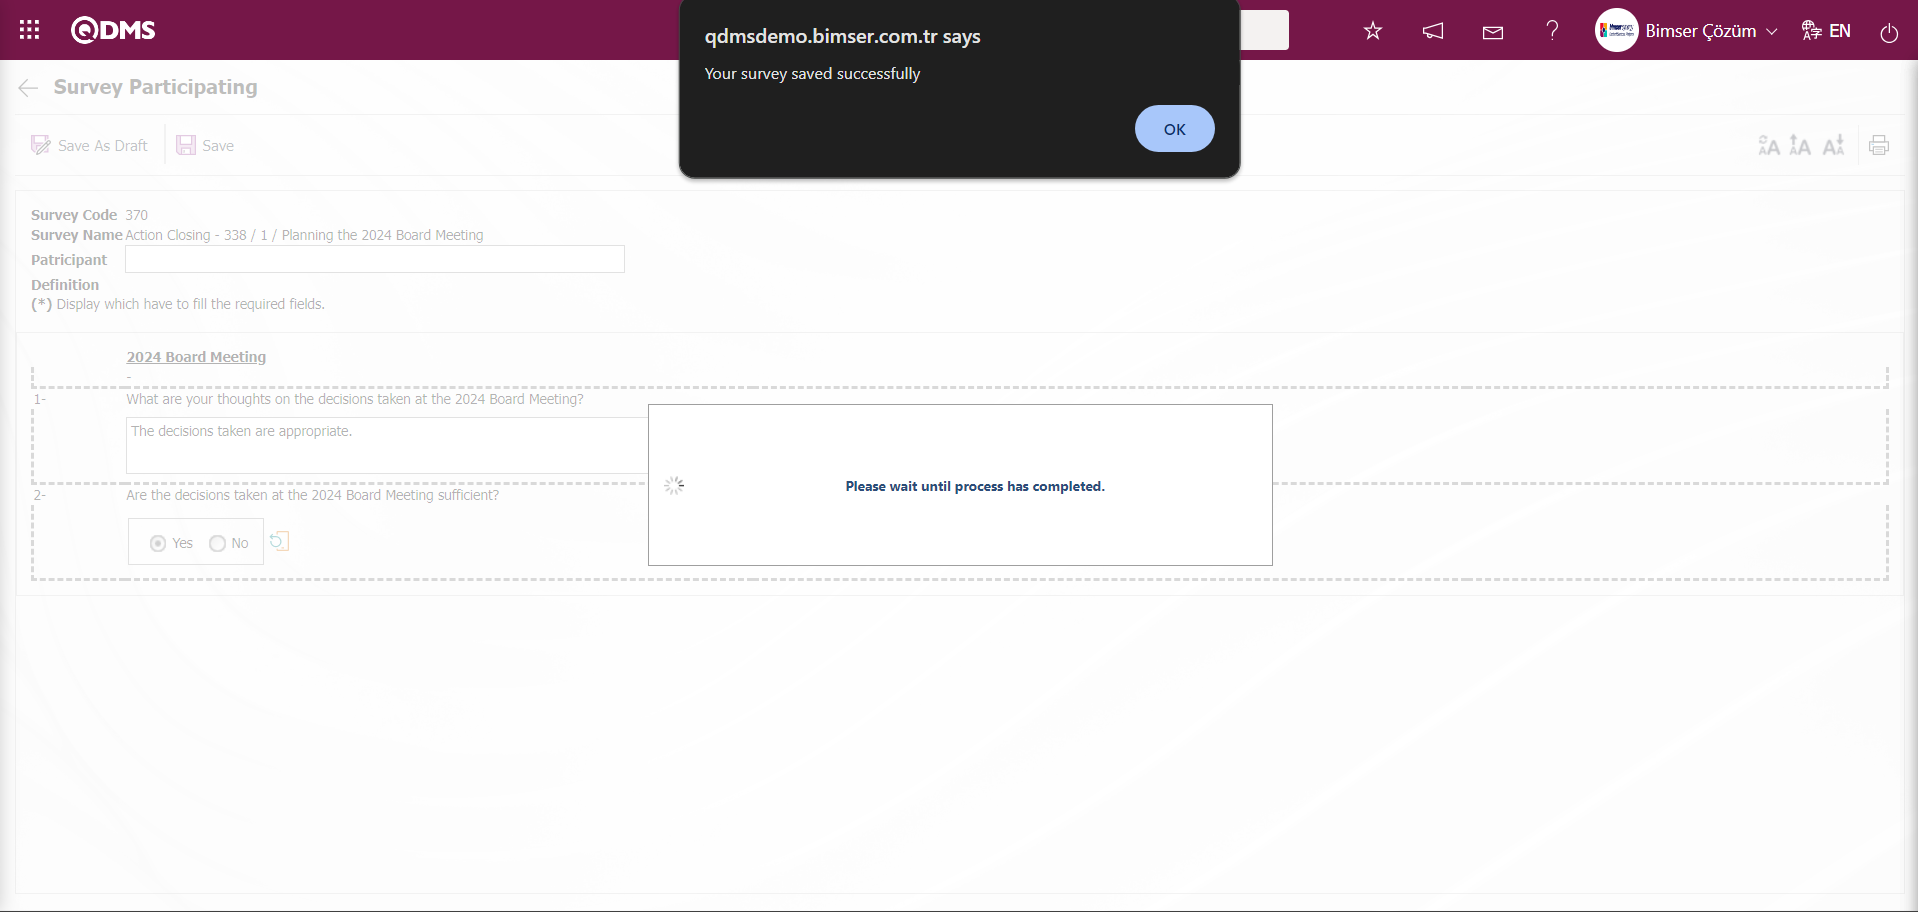
Questionnaire Question lists (Action Management) menu defined in the questionnaire and Action Management Module parameters from the Questionnaire related parameters are set and an action in the closing stage goes to the role in the parameters as a “Questionnaires to be filled” task in the Questionnaire Operations Module. In order for this task to be dropped as a job on my pending jobs page in the survey operations module, the function related to the Agent application must be run from the server.
6.4. Dashboard/Action Management
Menu Name: Dashboard/ Action Management/ Action Dashboard
It is the part of the Qdms system that allows users to view transactions, metrics, graphs and reports on a single screen. Dashboard is defined as the indicators screen, business board and table of indicators used to summarise the flow of information and / or its content and to explain a particular situation through graphs and tables. Its purpose is to present the necessary information in the shortest time, with the least interaction and thinking requirements. Dashboard feature has been introduced within the scope of Action Management Module in Qdms system. Depending on the authorisation to see the menu, this screen appears.
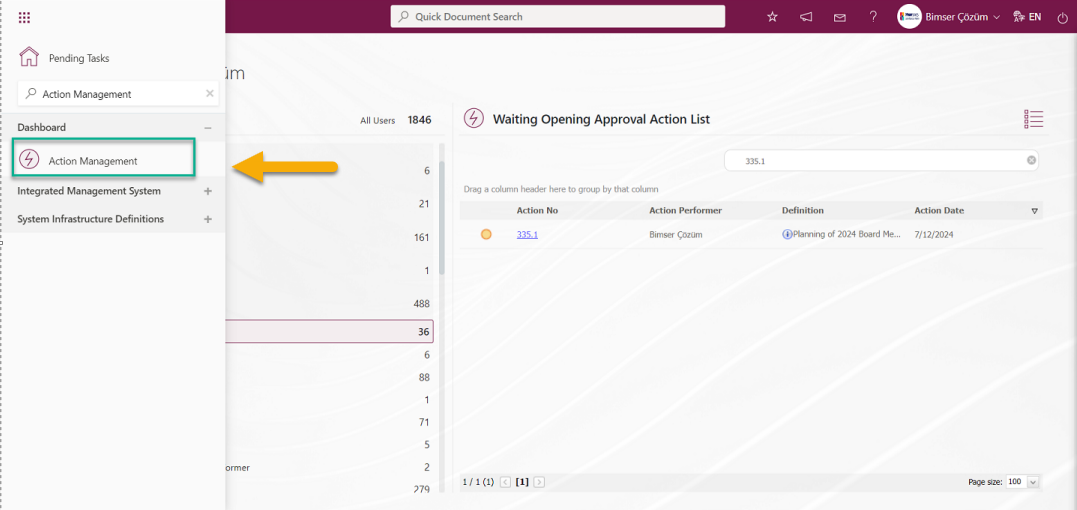
When the Dashboard menu is clicked, two tabs appear as list and filter tab.
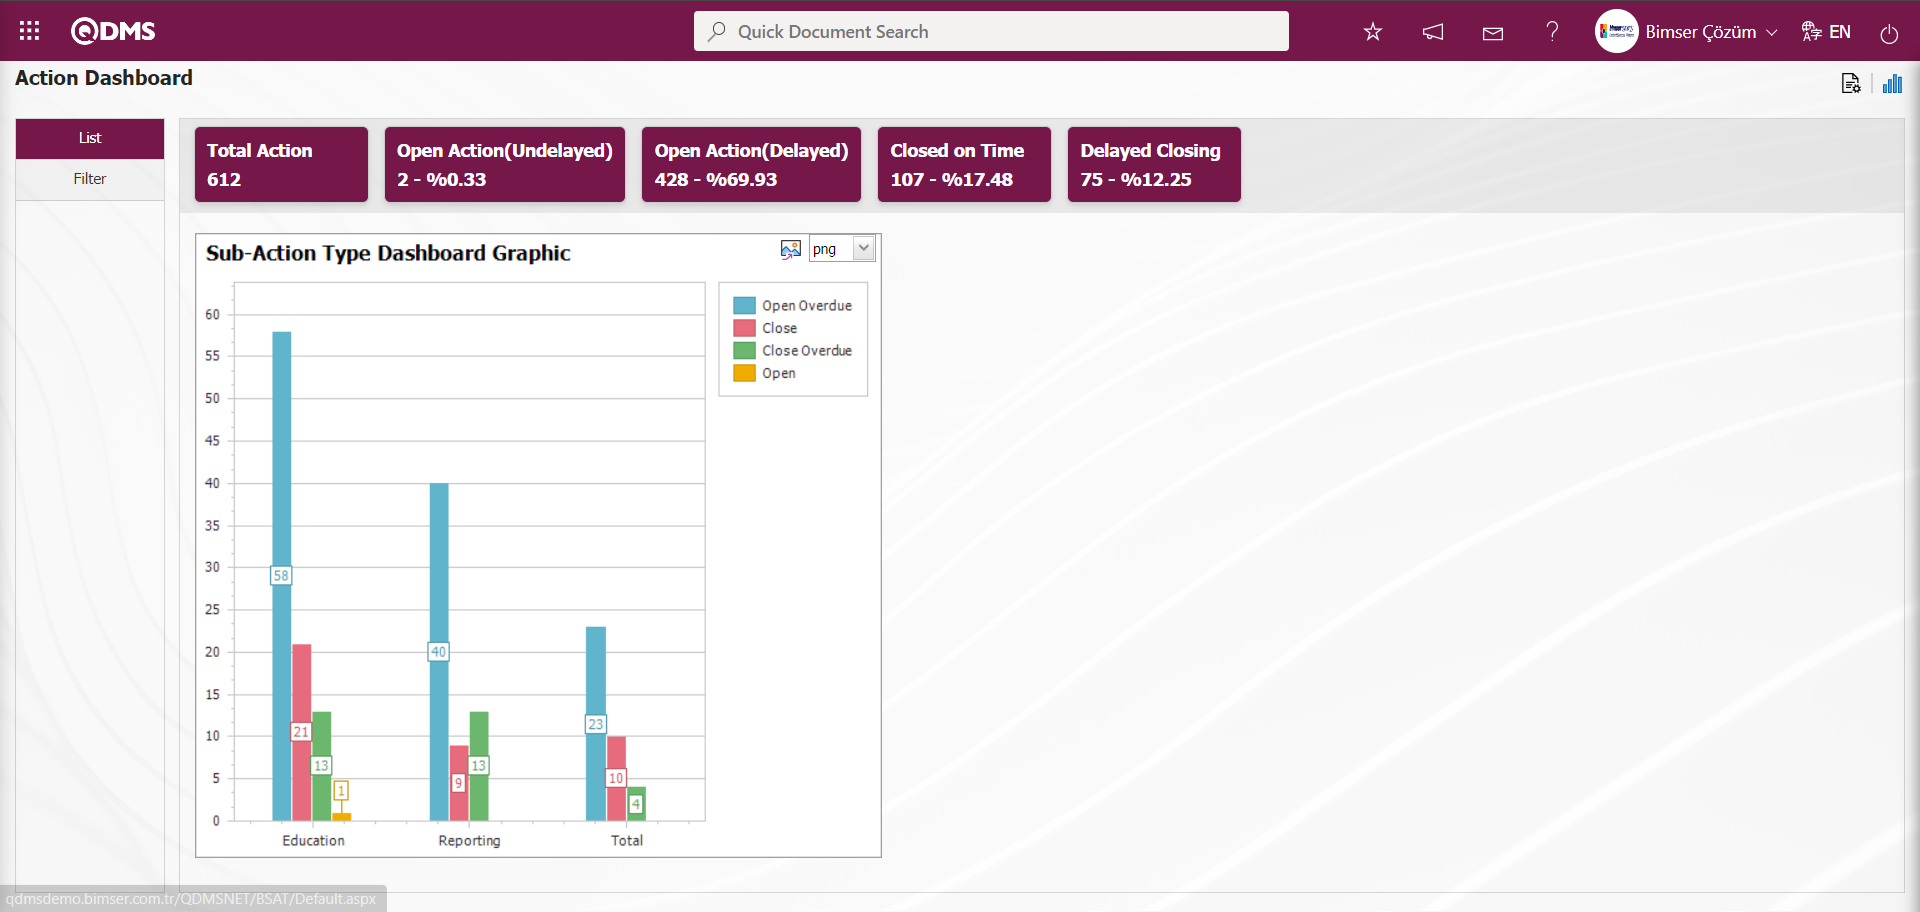
In the Filter tab, filtering is done according to the fields in the search criteria.
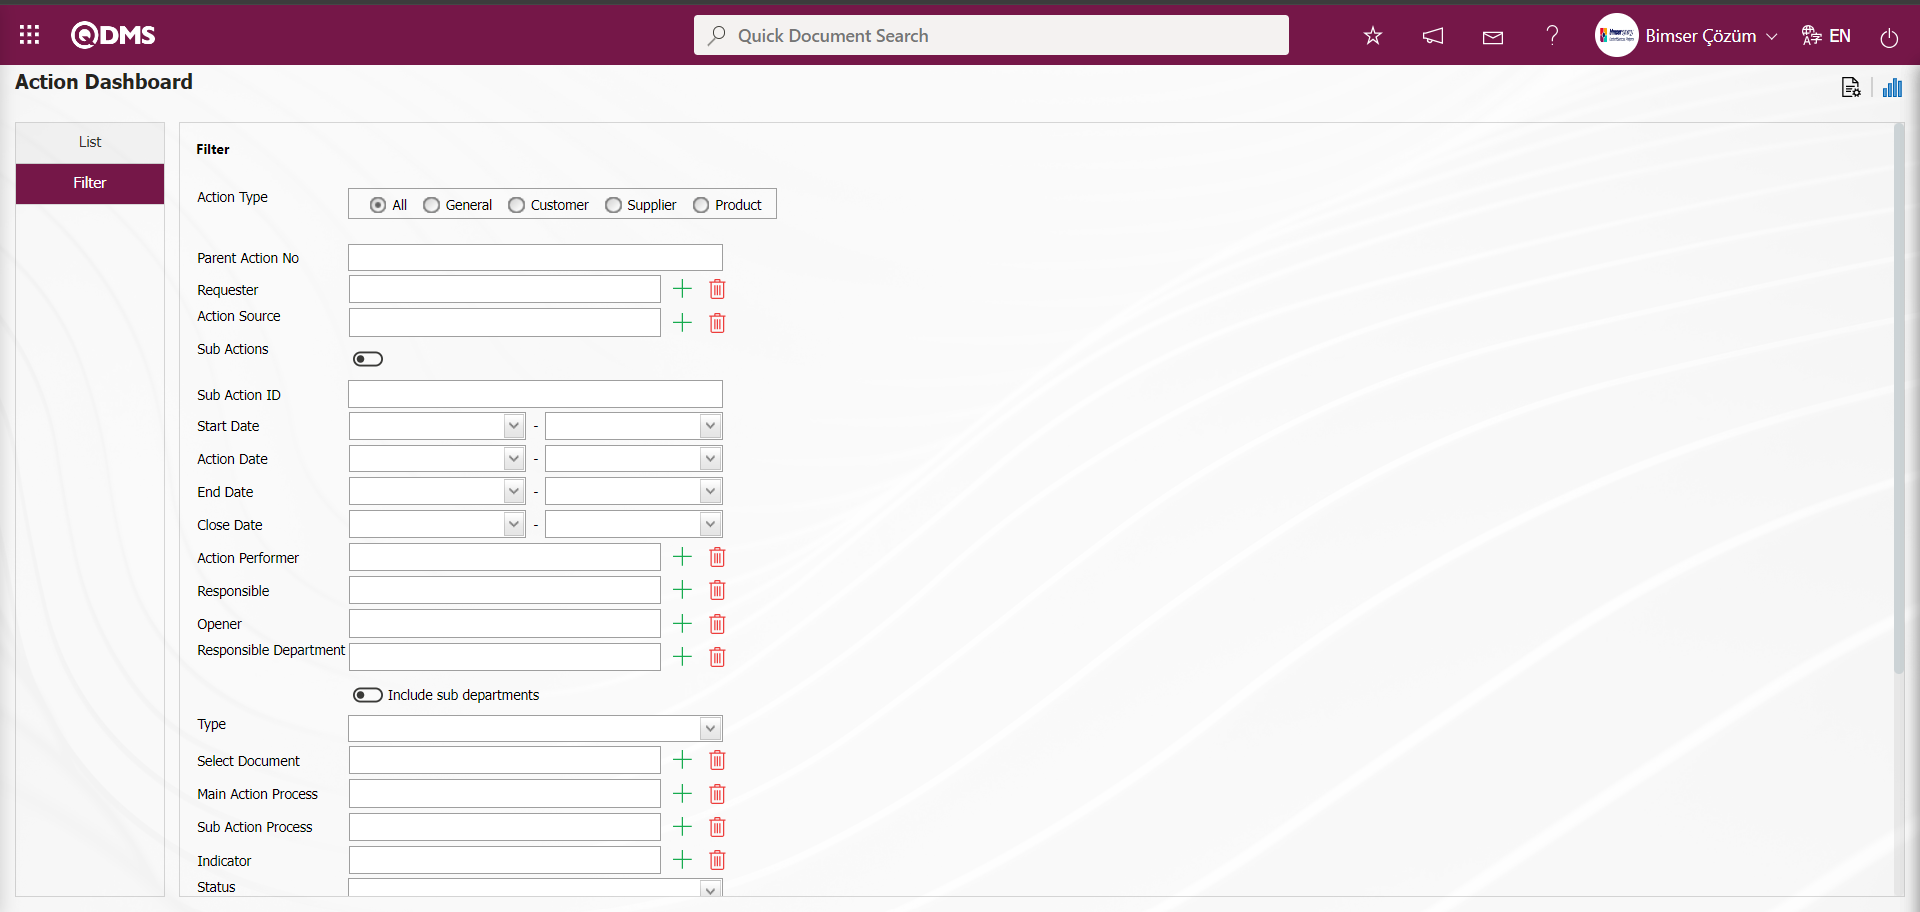
In the Action Management module, on the Action Dashboard screen, the Total Action, Open Action (Undelayed), Open Action (Delayed), Timely Closing and Delayed Closing fields are displayed as fixed fields and no editing is done on them. In these fields, the Total Action number information is given about the number of undelayed actions opened, the number of delayed actions opened, the number of delayed actions opened and the number of delayed closed actions and their percentages.
![A screenshot of a computer
Description automatically generated]ref113
On the Action Dashboard screen, graphic designing process is done with settings such as how many graphics there will be, what the name of the graphic will be, what the order of the graphics will be, which areas will be on the Z axis, Y axis, graphic length, graphic width and graphic type. In order to make these adjustments on the Action Dashboard screen, the user must be defined as Module Administrator in the Action Management Module. (Module administrator identification is made in the Action Management Module in the System Infrastructure Definitions/Bimser System Infrastructure Definitions/Configuration Settings/Administrator Identification menu).
When the user is not a Module Administrator in the Action Management Module, the button in the screenshot below is displayed on the Action Dashboard screen.

In the Action Management Module, the first button  (Graphic Settings) is displayed on the Action Dashboard screen of the user defined as module administrator. The user who is the Module Administrator makes the necessary adjustments on the Action Dashboard screen with the help of the (Graphic Settings) button. Users who are not Module Administrators can also make graphic design operations by making the necessary adjustments in the Dashboard Configuration screen in the System Infrastructure Definitions/Bimser System Infrastructure Definitions/Configuration Settings/ Dashboard Configuration/Action Management menu.

With the help of the buttons on the screen;
: Designing a new graphic on the Dashboard Configuration screen, updating and deleting the selected graphic information in the list. In order for this button to be displayed on the Action Dashboard screen, the user must be defined as a module administrator in the Action Management module.
 : Draws the graph on the screen according to the specified properties.
: Converts the graphic to the format type selected from the drop-down menu (png, jpg, bmp, xls, etc.) and exports it to the external environment.
Click on (Graphic Settings) button to design graphics in Action Management Module, update and delete selected graphic information in the list.
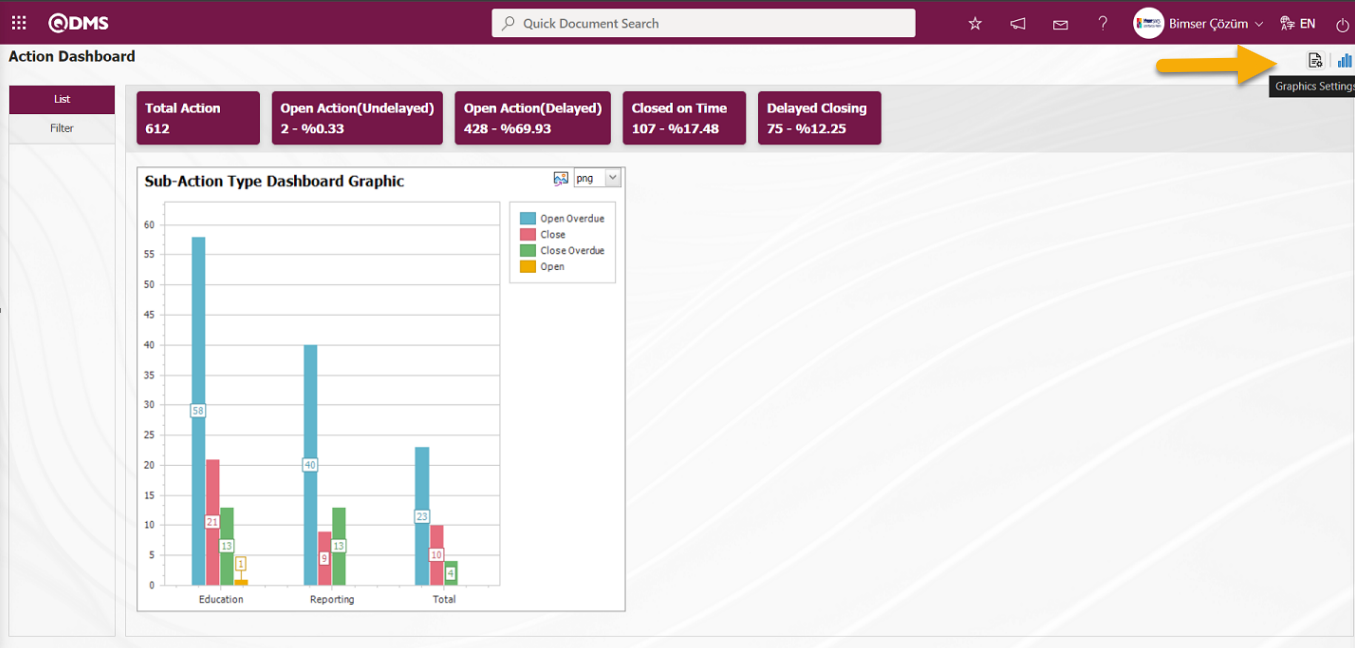
The Dashboard Configuration screen opens.
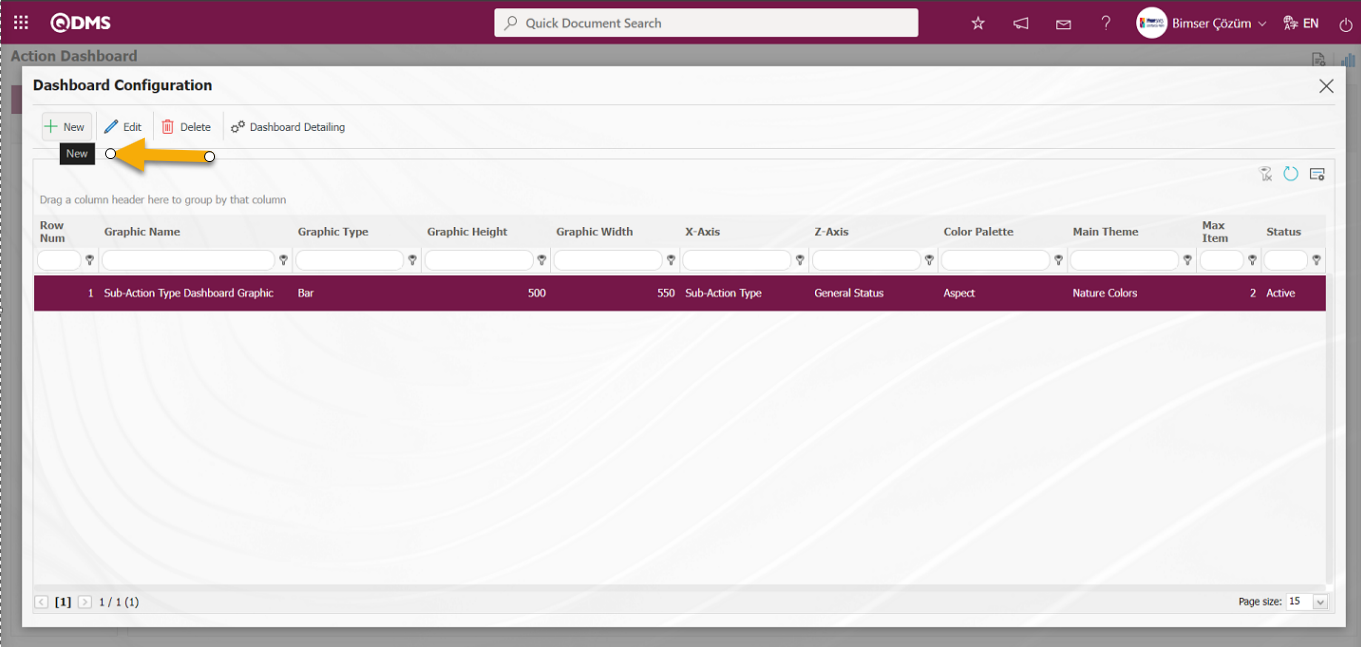
With the help of the buttons on the screen;
 : A new Dashboard is defined.
 : Correction / change / update is made on the Dashboard information selected in the list.
 : The Dashboard information selected in the list is deleted.
- : Dashboard Configuration screen is closed.
Click the button to add a new Dashboard in the Action Management Module.

Dashboard Configuration - After filling in the required fields on the New Registration screen, click the  button on the top left of the screen.
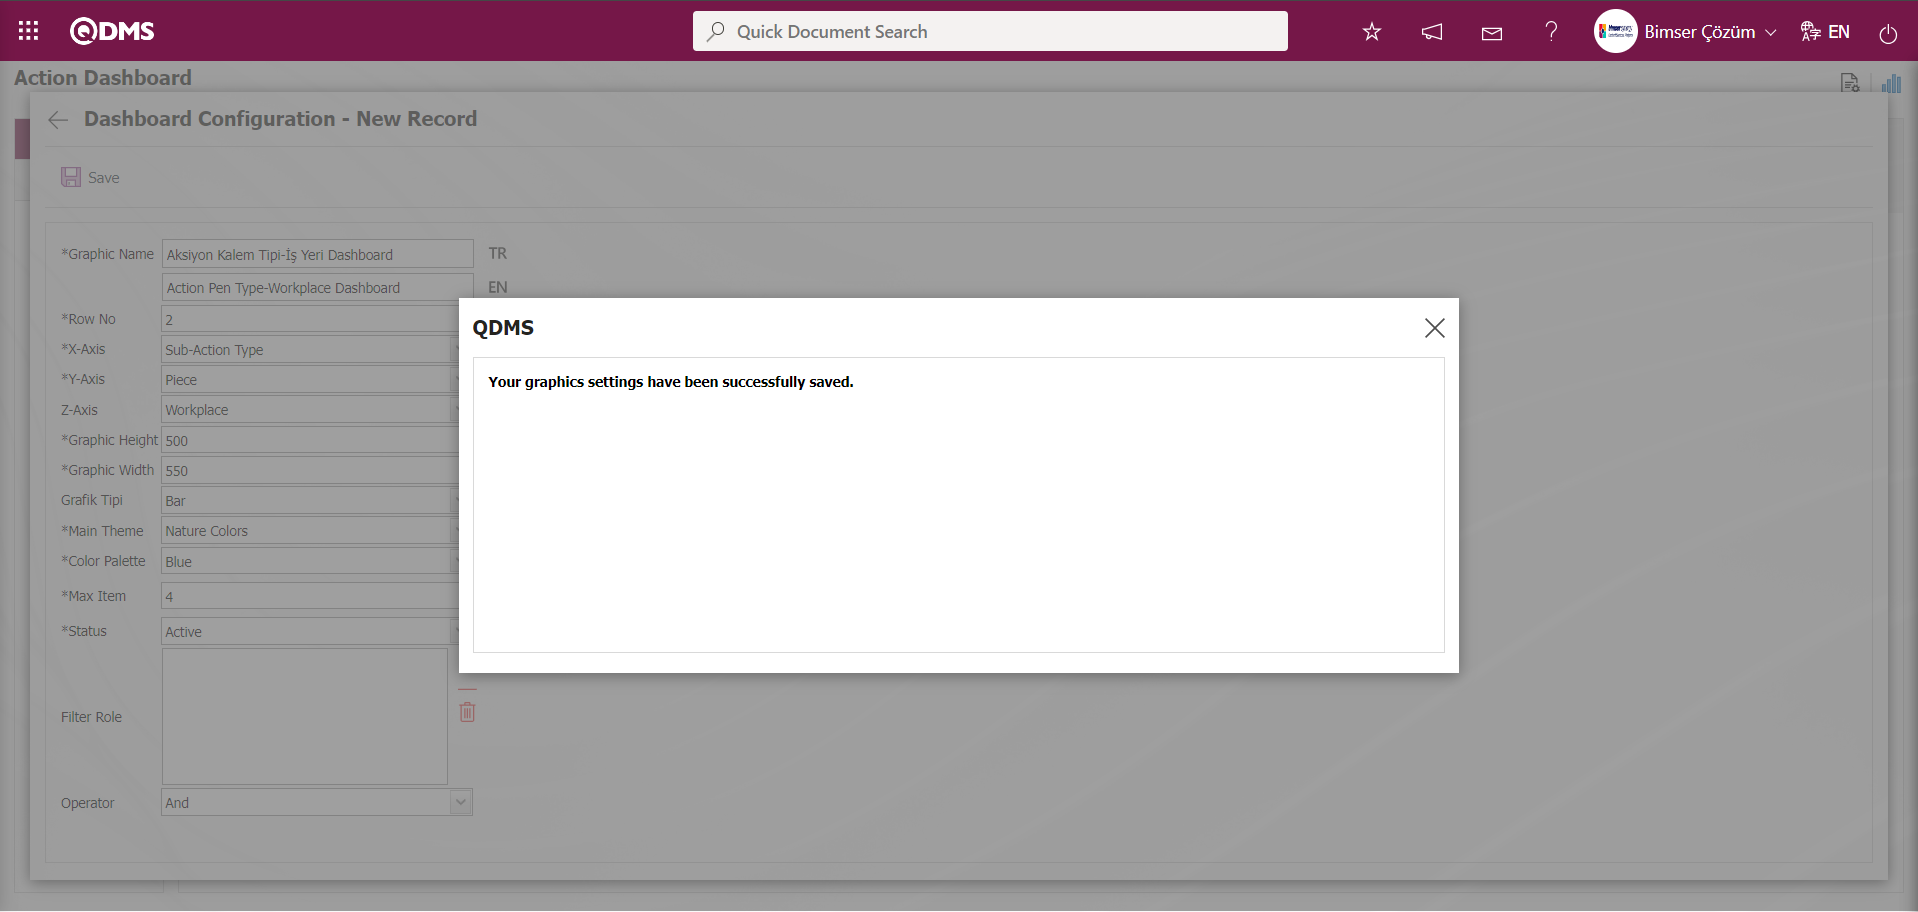
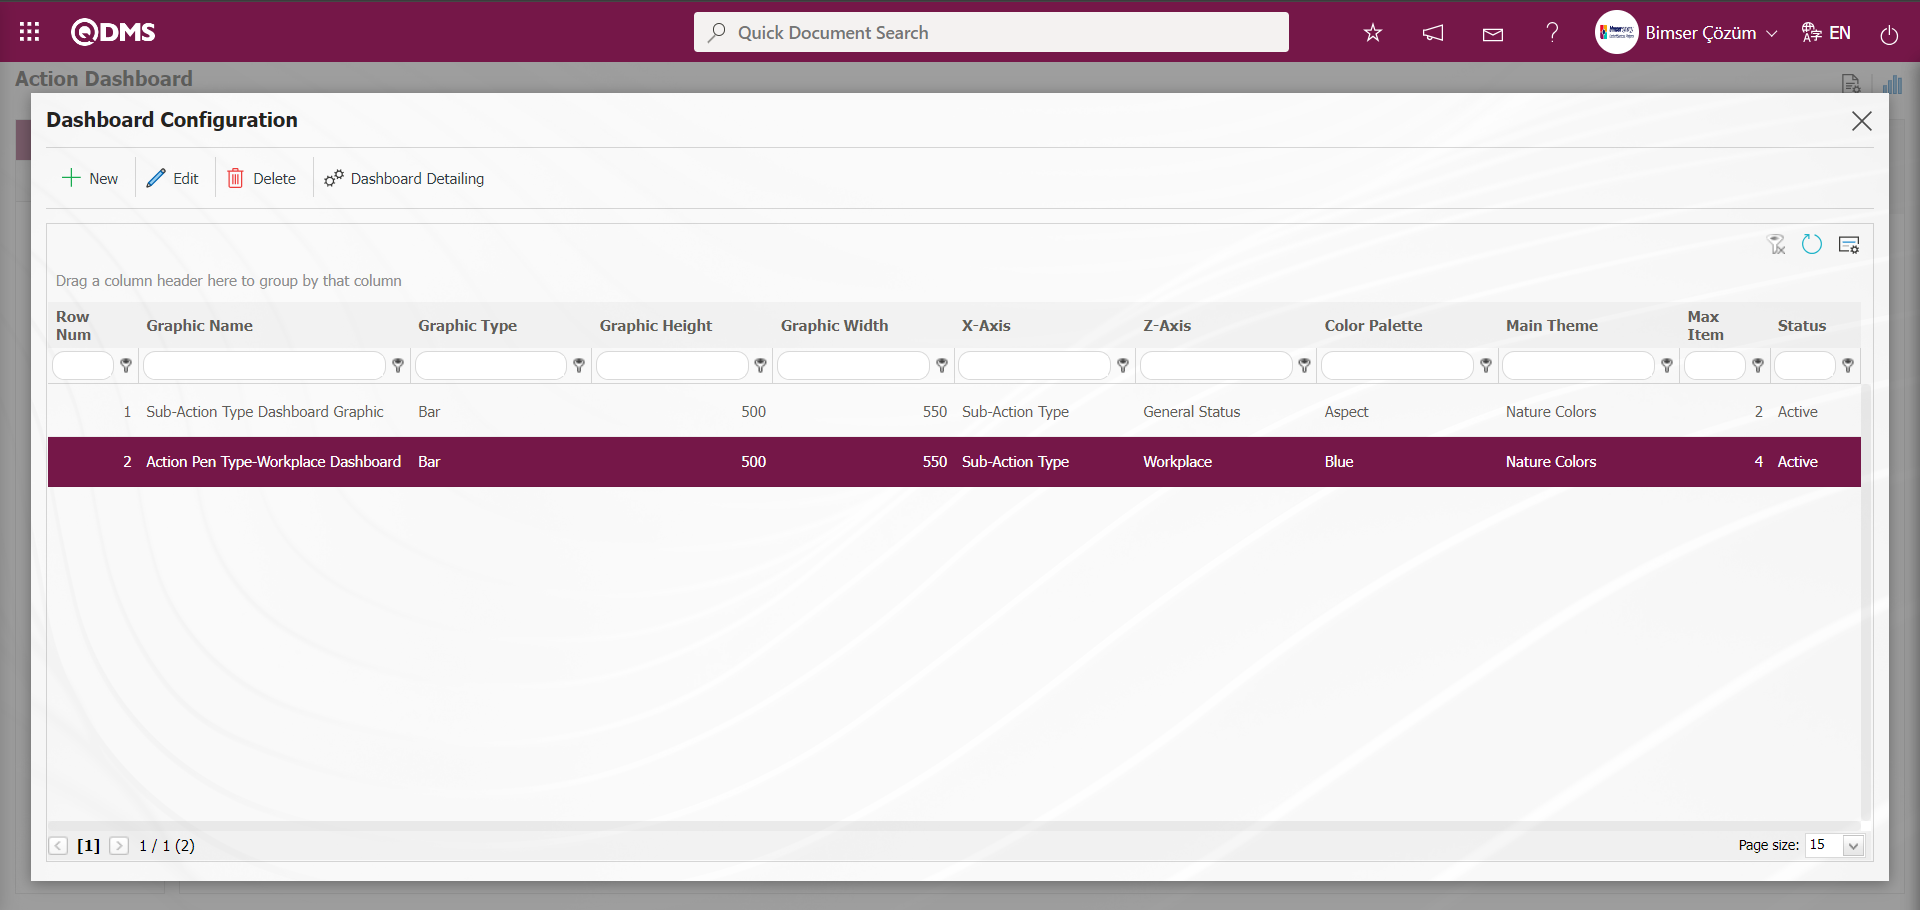
The Dashboard defined in the Action Dashboard screen is displayed.
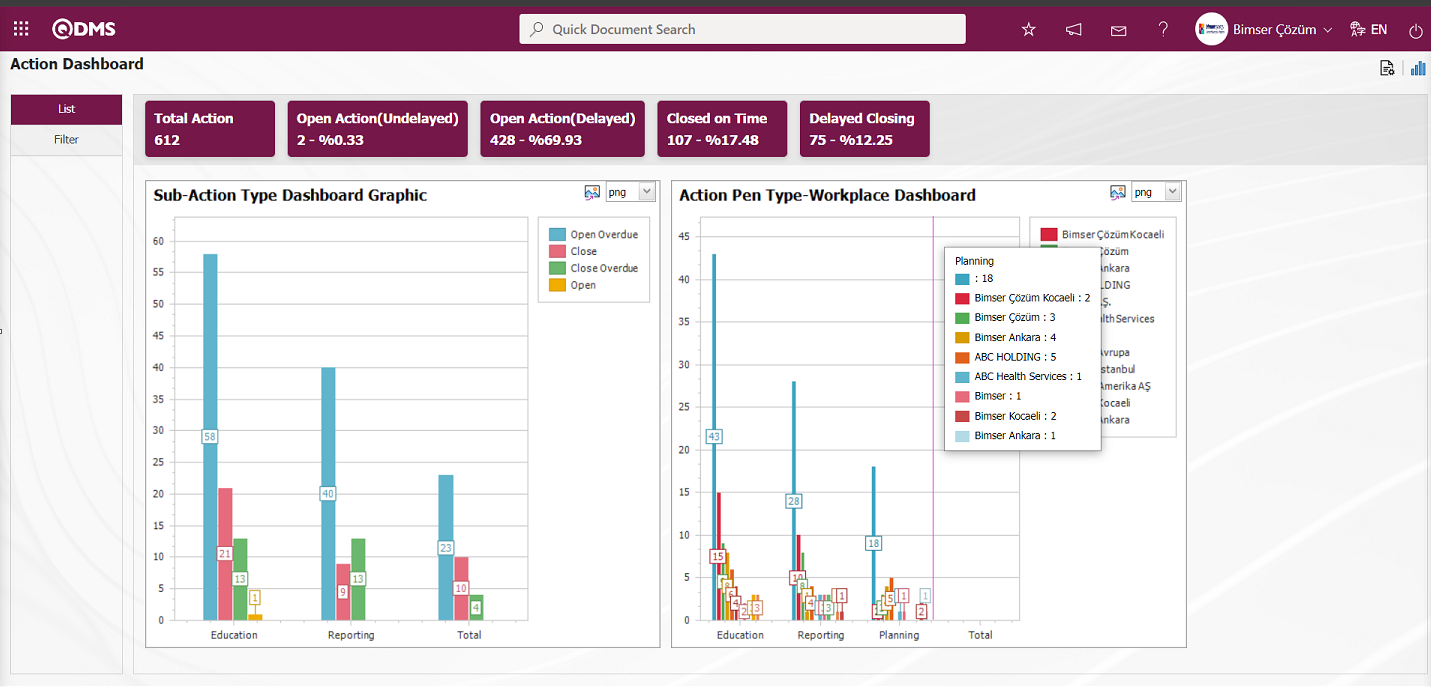
By clicking the (Export Graphic) button, the graphic can be transferred to the external environment by converting the graphic to the format type (png, jpg, bmp, xls, etc.) selected from the drop-down menu.
Graphic Length is limited in the range of min value 500 and max 1000. Graphic Width min value is limited to 550 and max value is limited to 1800 range. Graphic length and width should be selected between these values. Dashboard Configuration - If the New Record sequence number has already been used, an error message “The sequence number you have specified is in use, you must specify a sequence number that is not in use.” is given by the system during the saving phase.
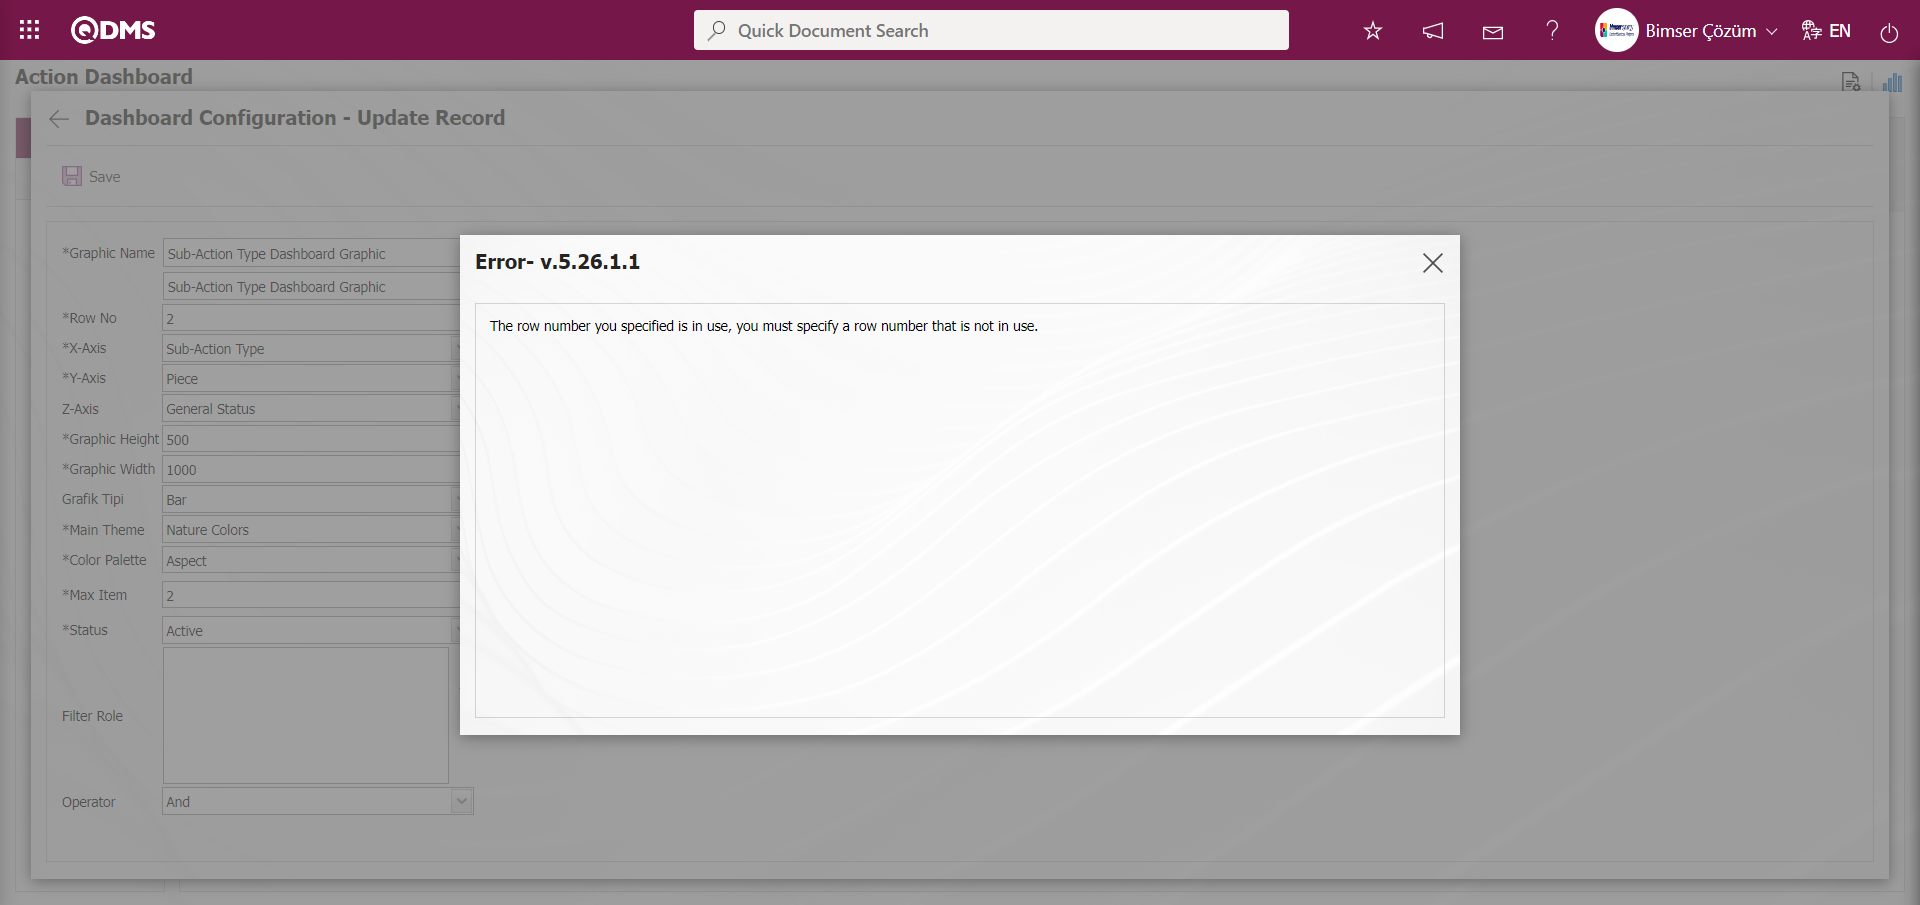
Dashboard Configuration of the graphics defined on the Graphic Settings screen - On the New Record screen, click on the drop-down list in the graphic type field and select “PieChart” in the options opened to display the graphics in this view.
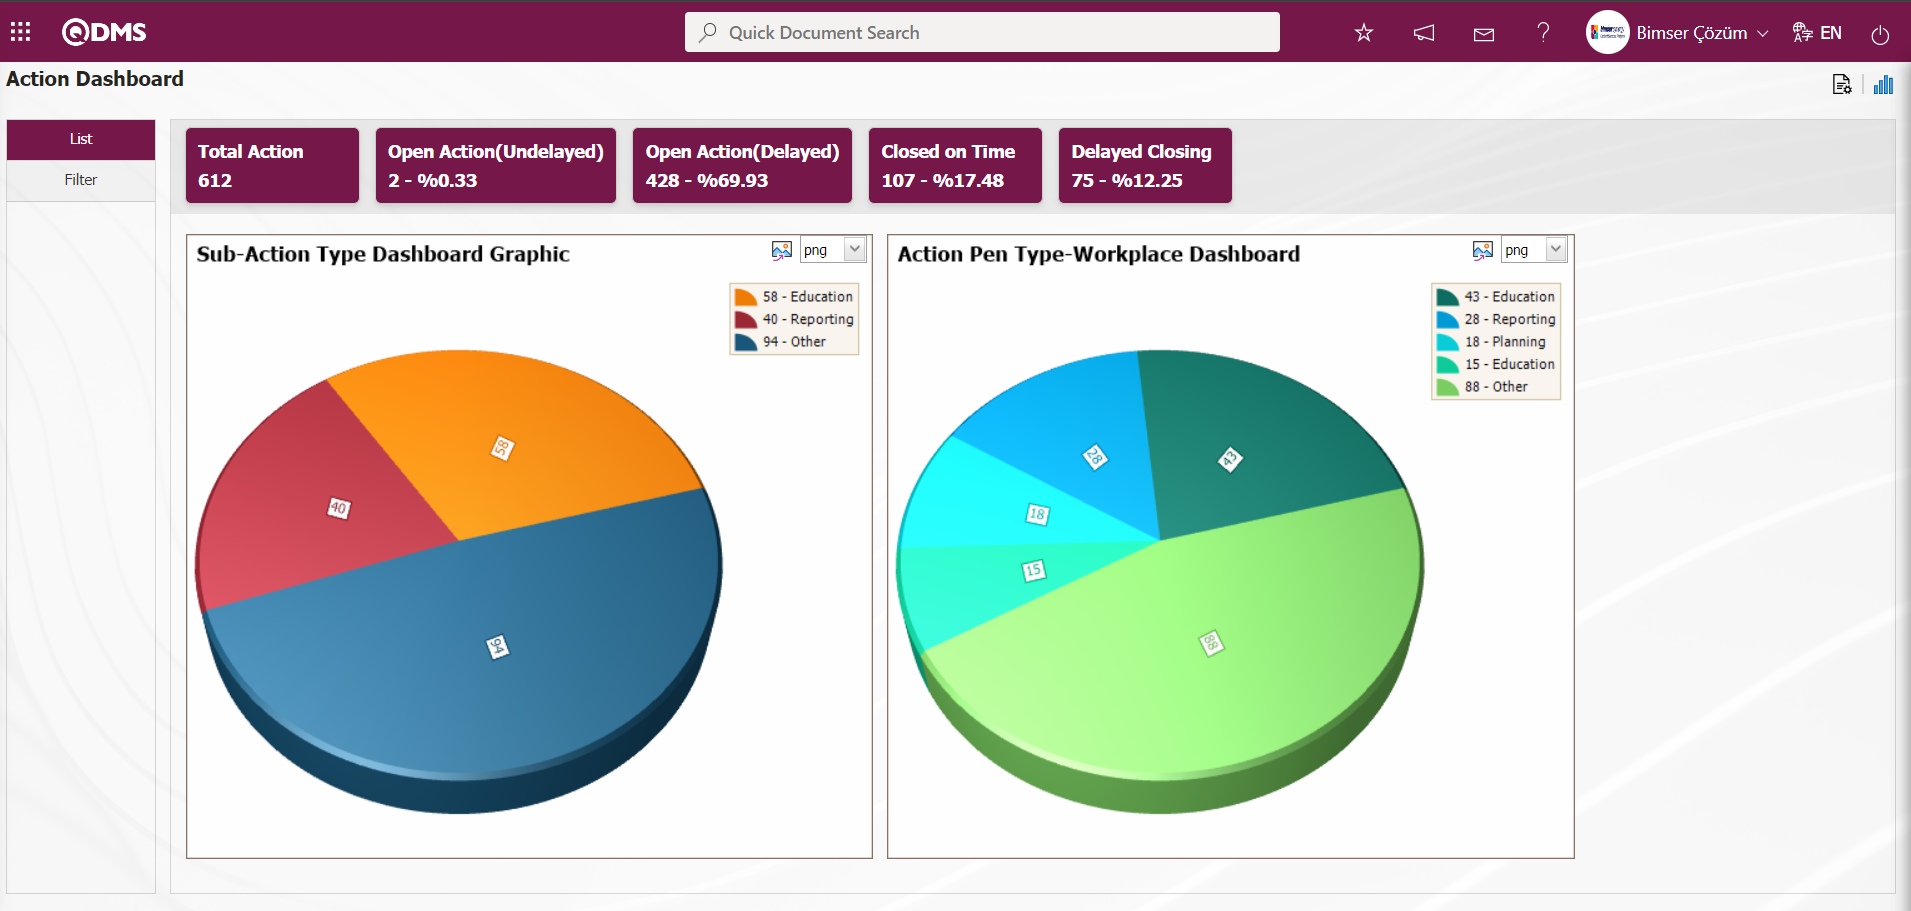
In this way, a new chart can be added on the screen opened with the Chart Settings button. Editing, updating, changing and deleting operations are performed on the added graphic information. The filtering screen for the relevant graphics in the list is defined and set as downloadable.
For users who are not Module Administrators, the Dashboard Configuration screen System Infrastructure Definitions/Bimser System Infrastructure Definitions/Configuration Settings/ Dashboard Configuration/Action Management menu can be clicked on the screen that opens by making the necessary adjustments and the graphic design process is also done.
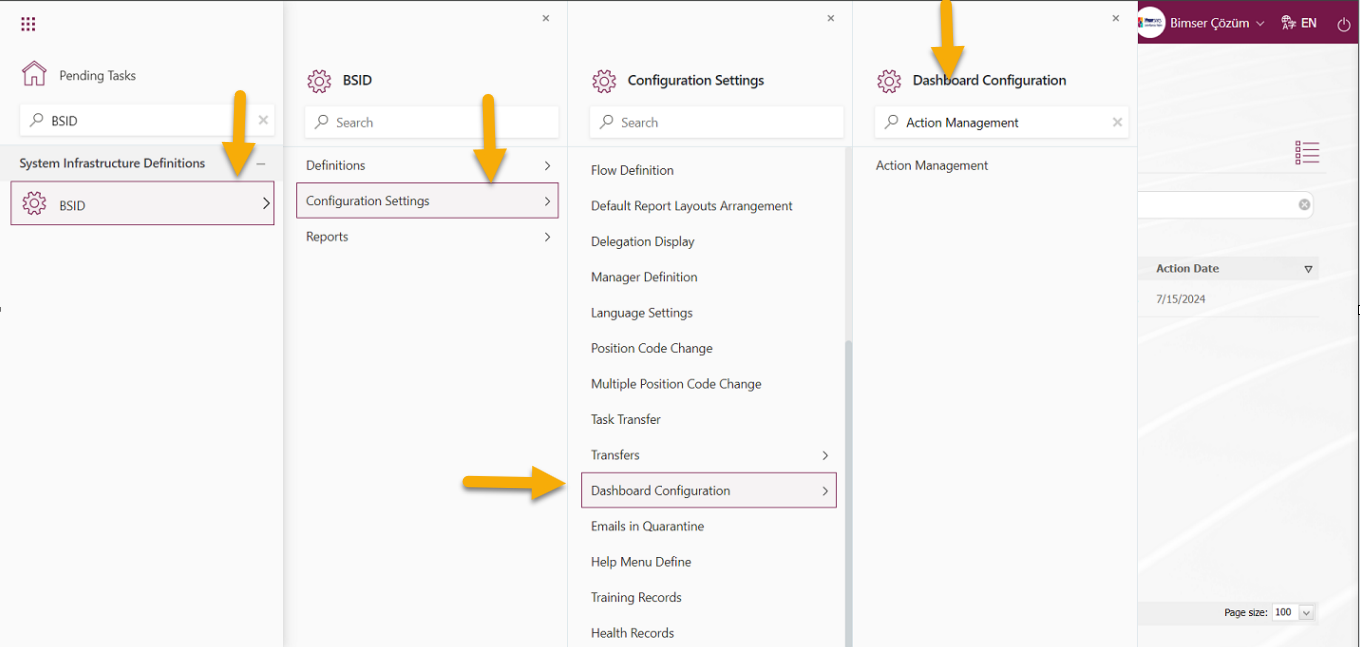
They can define a new Dashboard by using the same buttons on the Action Dashboard Configuration screen and performing the same process steps.
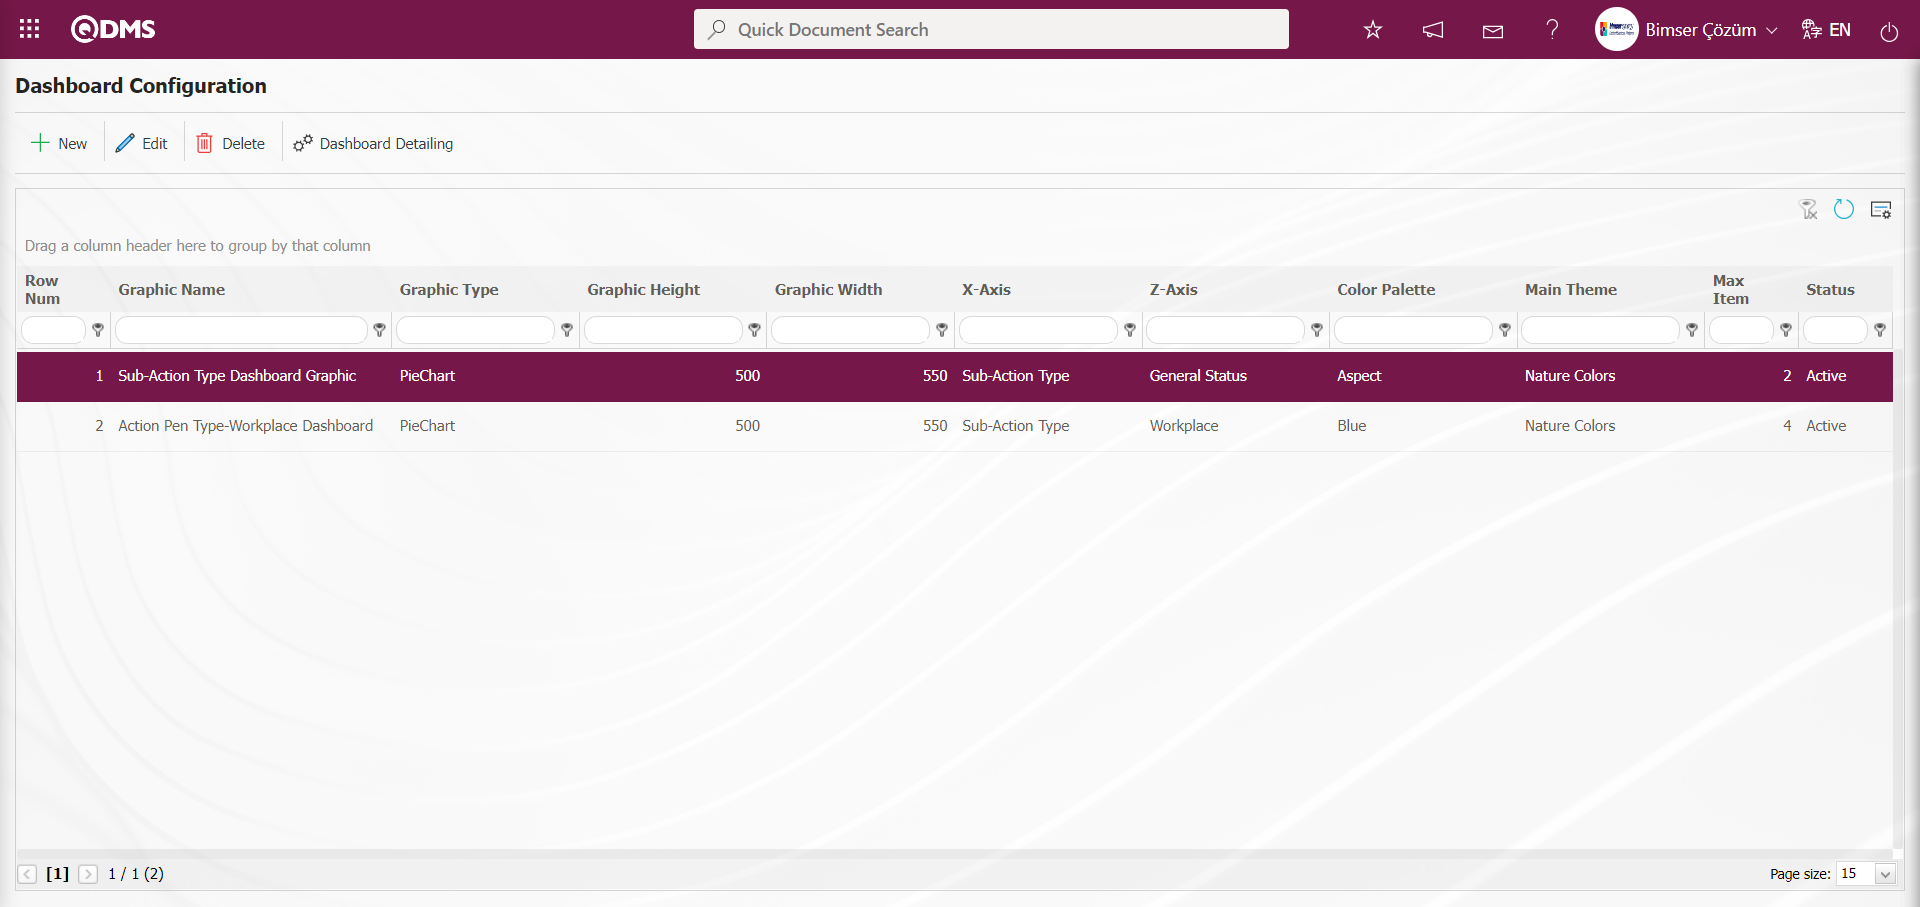
6.5. Management Review
Menu Name: Integrated Management System / Management Review
It is the module where the planned or delayed works on the basis of all modules in QDMS are monitored and reports are received.
6.5.1. Delayed Works
Menu Name: Integrated Management System/ Management Review/ Overdue Work
It is the menu where the overdue jobs report is displayed according to the selected modules or for all modules. By selecting the relevant module in the Delayed Works menu of the Management Review Module, click on the code number link in the code field in the list of overdue works listed by selecting the relevant module, the relevant overdue work of the relevant module is displayed and detailed information is accessed.
Integrated Management System / Management Review / Overdue Works / General Actions menu is clicked.
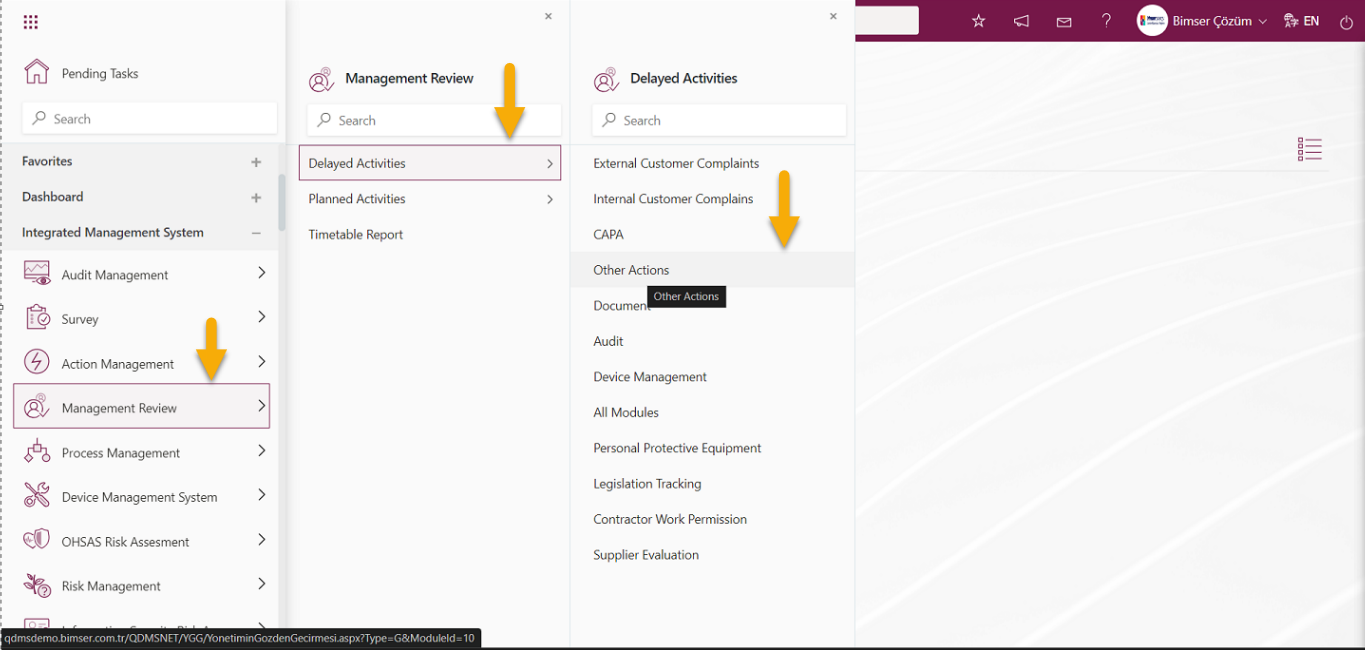
Management Review-Delayed Actions -General Actions screen opens.
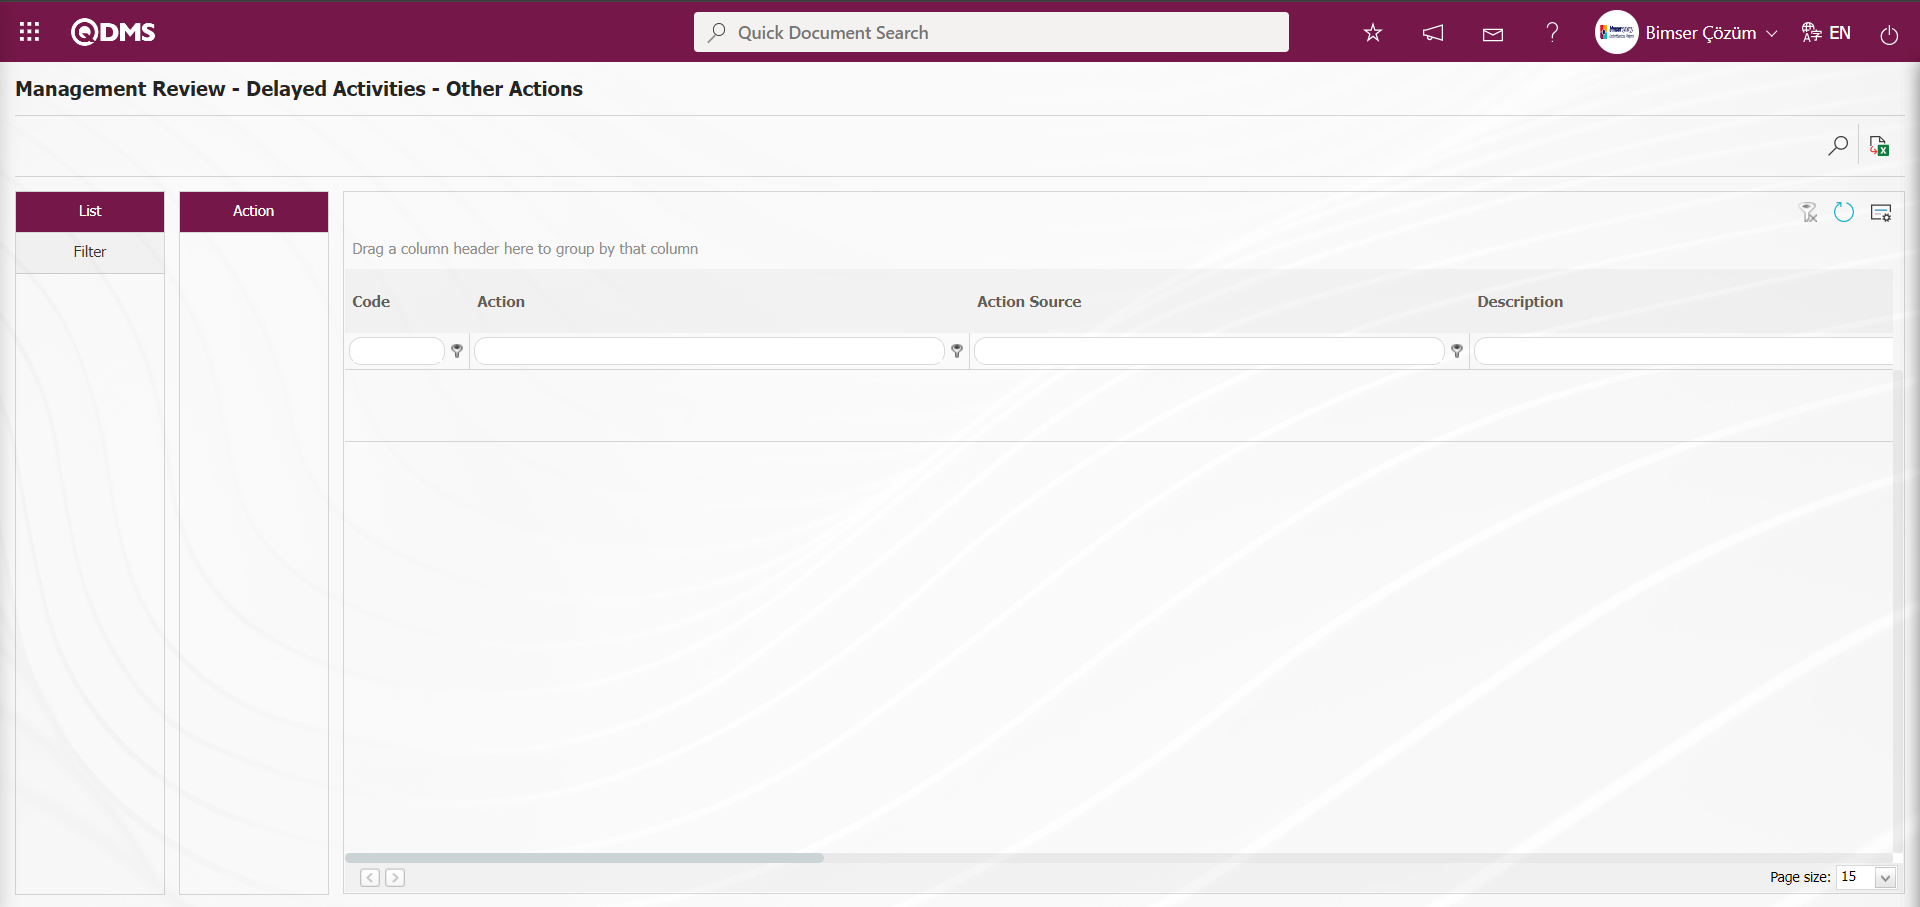
With the help of the buttons on the screen;
: Records can be searched by filtering.
: Data can be transferred to Excel.
: The search criteria on the menu screens are used to clean the data remaining in the filter fields in the grid where the search operation is performed.
: The menu screen is restored to its default settings.
: User-based design of the menu screen is done with the show-hide feature, that is, the hiding feature of the fields corresponding to the columns on the menu screens.
When no filtering is done in the filter tab, the report is obtained by clicking the (Search) button and listing all overdue works, i.e. actions, throughout the Action Management Module. In the filter tab, the report is obtained by searching according to the information of the fields such as the person who will do the work, the status of the person who will do the work, the responsible department, the planned date, the workplace and the process.
For example: In the filter tab, it is done by clicking the (Search) button to list the delayed jobs for the Action Management Module according to the “To do the job” field.
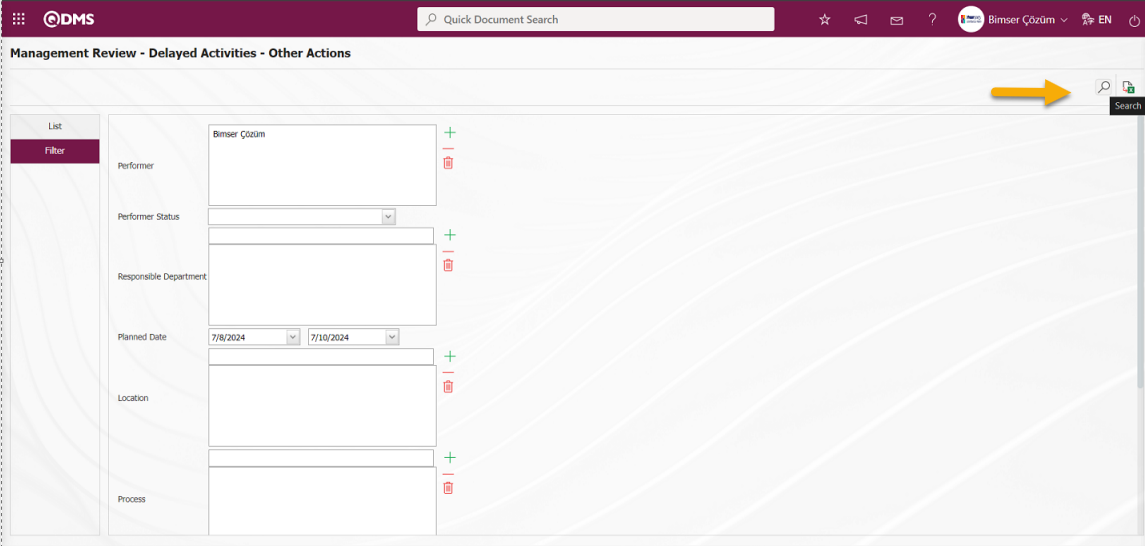
In the report obtained by selecting the personnel in the Personnel List by clicking the  (add) button in the field that will do the work from the Filter tab, the delayed works are listed according to the personnel who do the work in the Action Management Module. The code of the delayed work in which item of which plan of the action, the information about the delayed work in the Action Management Module is given in the Action field. For example, the information that the action steps such as “Action Realisation” and “Action delay approval” are delayed is given. The information about the planned processing date and delay time of the delayed jobs in the action is accessed. The general information of the action is included in the report in the fields such as the source of the action, definition, entering the system, type, responsible person. The information about the planned transaction date and delay time (days) is accessed. The action is displayed by clicking the link in the code field on the screen that opens.
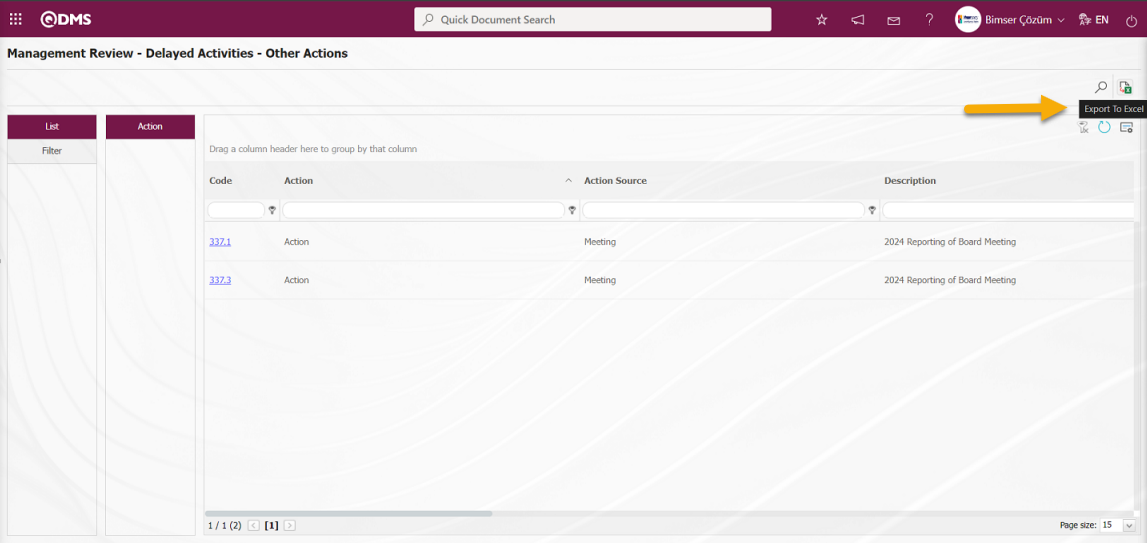
If the (Export to Excel) button is pressed, the system automatically creates a Delayed Works Report related to the Action Management Module according to the filter criterion “Will do the work” and presents it to the user in Excel format.
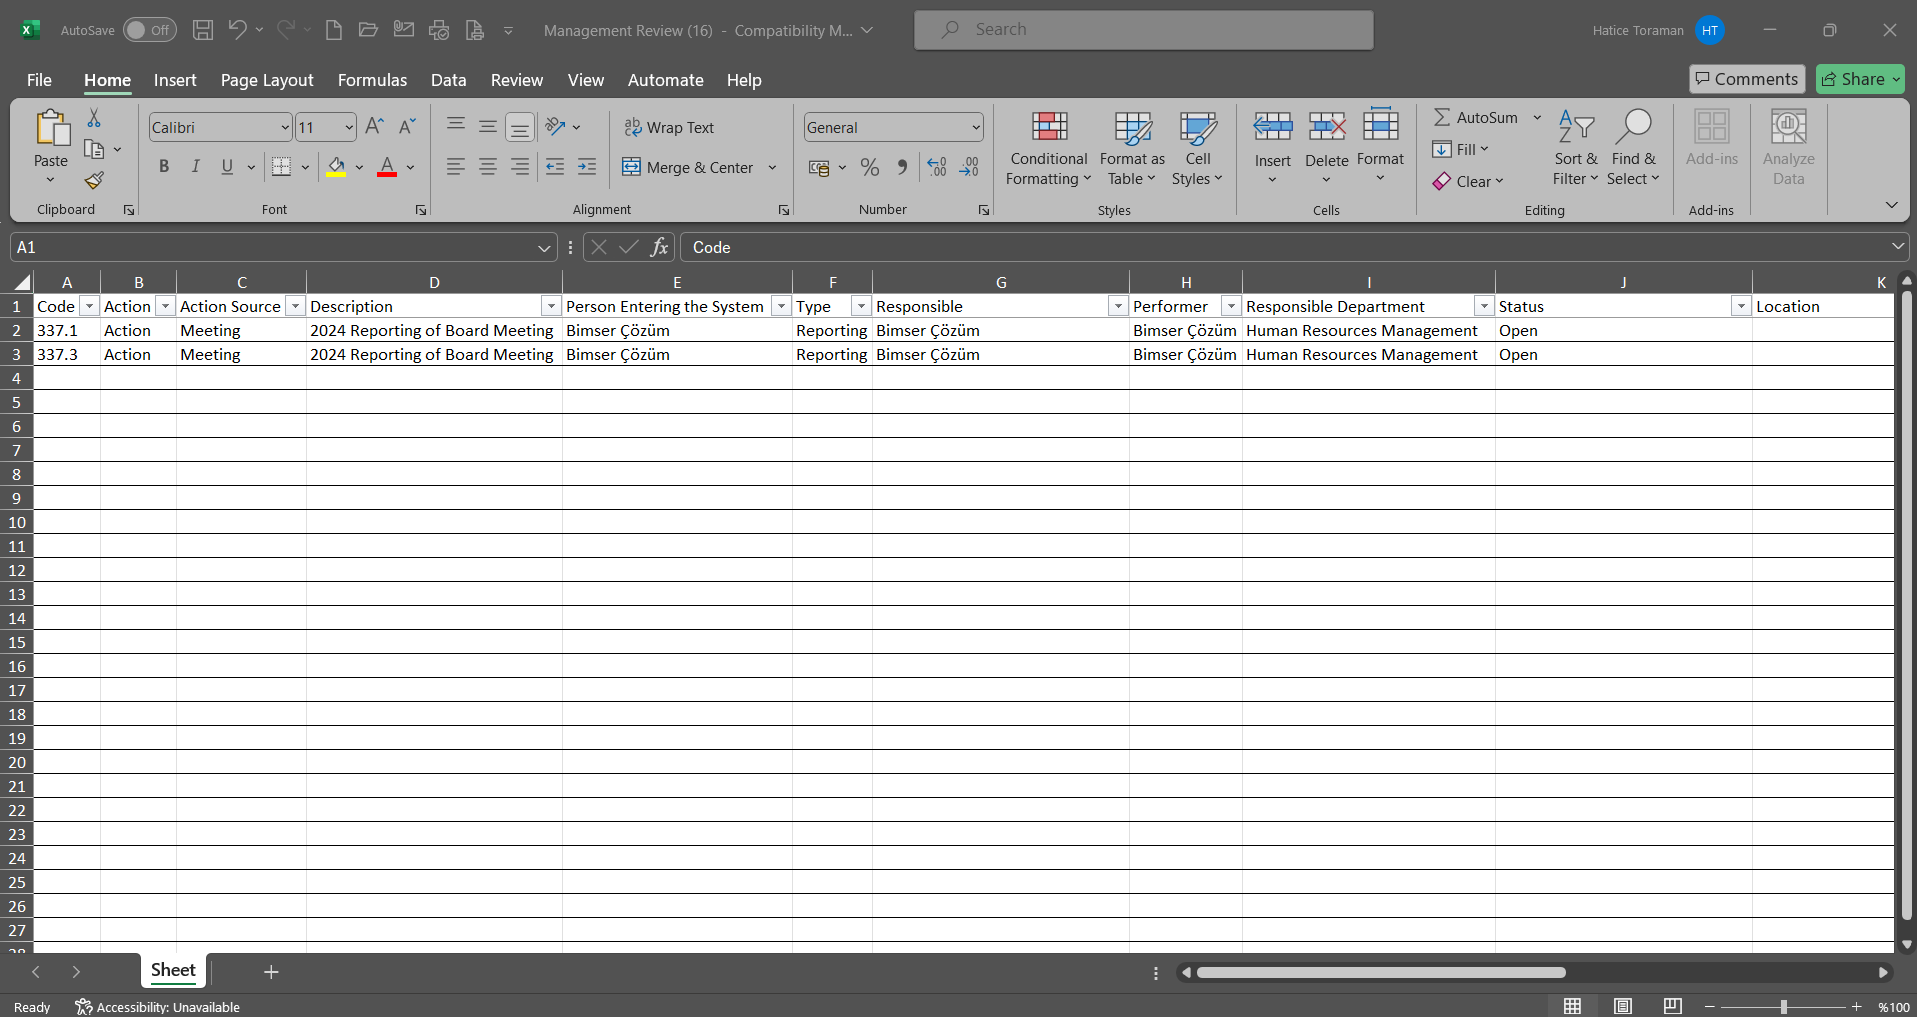
Click on the action code link in the list in the list tab on the Management Review-Delayed Works-General Actions screen.
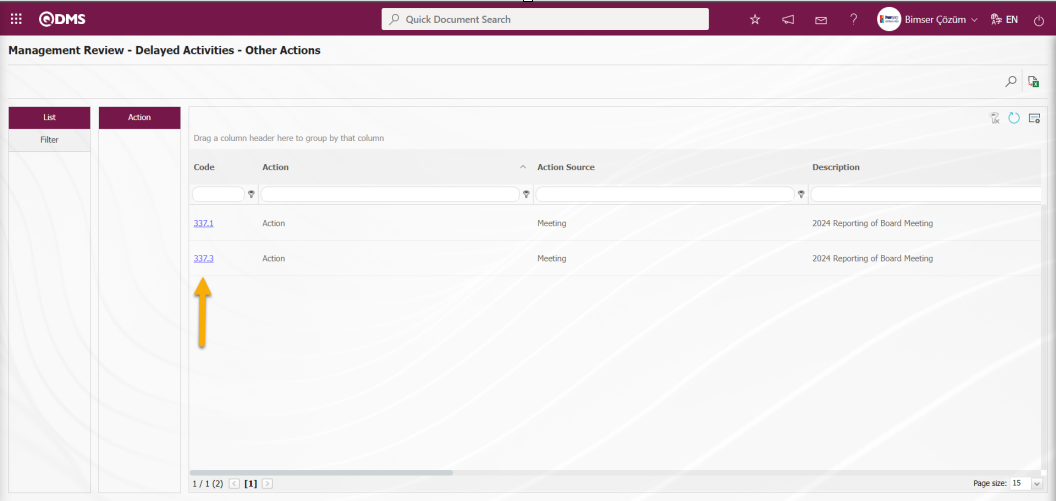
The Action Display screen is displayed and the detailed information of the action is accessed, the link of the action is taken with the  button and the comment is added with
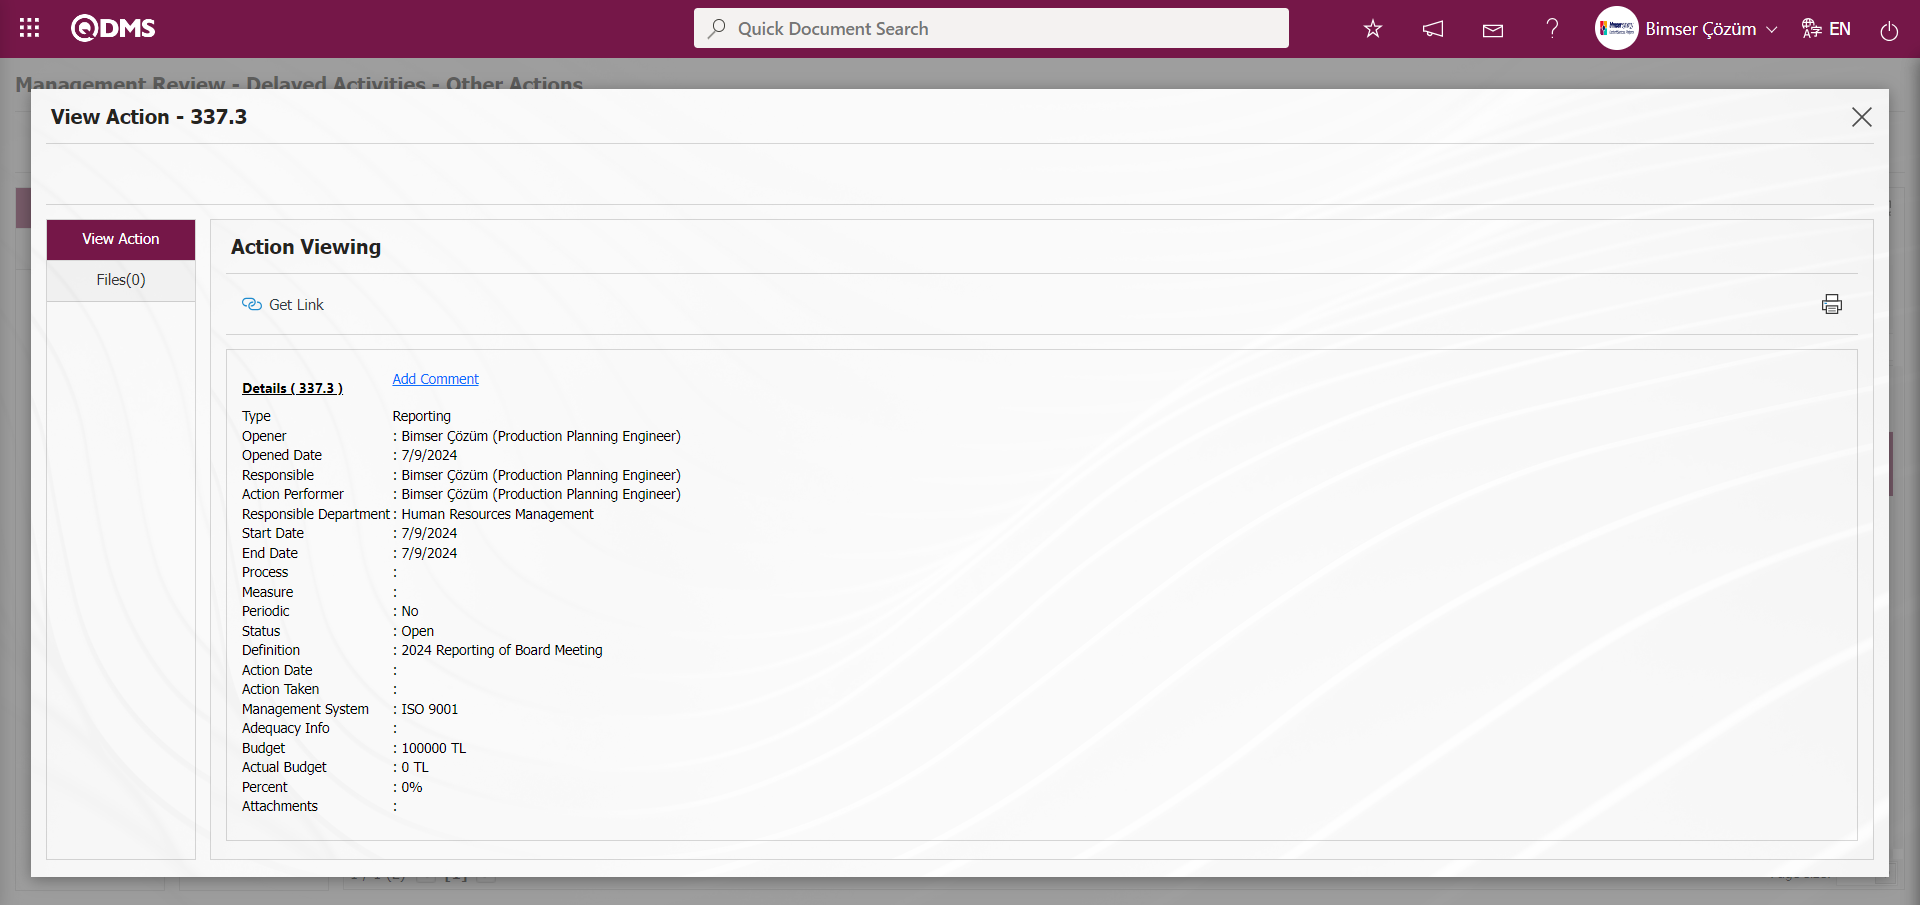
6.5.2. Planned Works
Menu Name: Integrated Management System/ Management Review/ Planned Works
It is the menu where the planned works report is displayed according to the selected modules or for all modules. In the list of planned works listed by selecting the relevant module in the Planned Works menu of the Management Review Module, the link in the code number in the code field is clicked to display the relevant planned work of the relevant module and access the detailed information.
Integrated Management System / Management Review / Planned Works / All Modules menu is clicked.
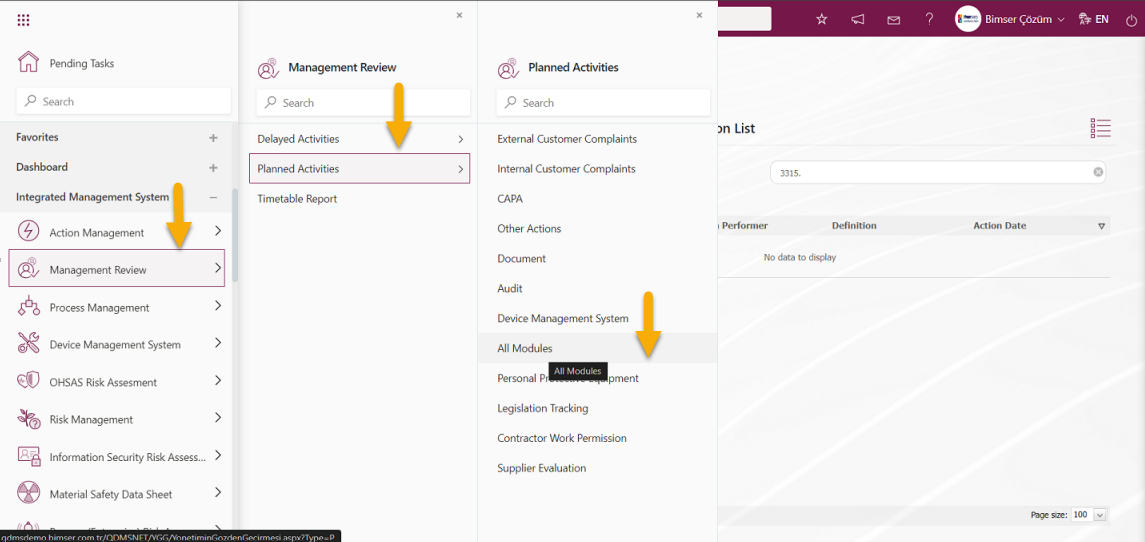
Management Review - Planned Works - All modules screen opens. According to the records listed in the list tab by searching according to the search criteria in the filter tab, the list of planned works related to the relevant module is displayed by clicking the tabs with the module names in the list tab for all modules.

With the help of the buttons on the screen;
: Records can be searched by filtering.
: Data can be transferred to Excel.
: The search criteria on the menu screens are used to clean the data remaining in the filter fields in the grid where the search operation is performed.
: The menu screen is restored to the default setting.
: User-based designing of the menu screen is done with the feature of showing and hiding the fields corresponding to the columns on the menu screens, that is, the hiding feature.
Management Review-Planned Jobs- On the All Modules screen, the planned jobs in all Modules are listed in the list tab by clicking the (Search) button on the Filter tab. If users want, they can also filter according to the fields defined in the search criteria in the Filter tab.
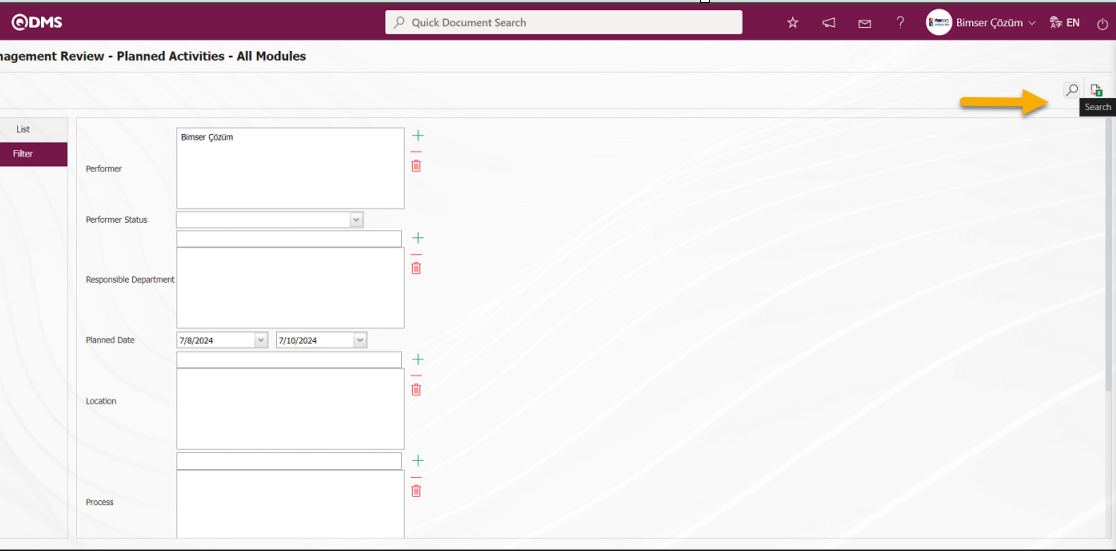
In the Management Review-Planned Jobs- All Modules screen, in the Filter tab in the Filter tab, by clicking the (add) button in the field to do the work and selecting the personnel in the Personnel List, the planned jobs are listed according to the personnel doing the work in all modules.
List of Planned Works according to the search criteria field in the Action Management Module;
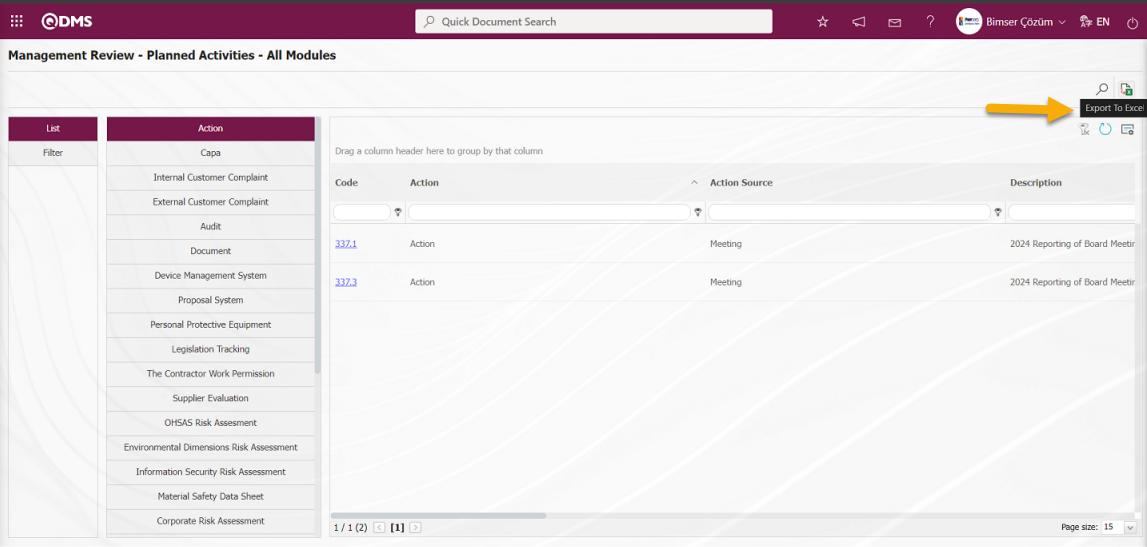
If the (Export to Excel) button is pressed, the system automatically creates a Planned Works Report related to the Action Module according to the filter criterion “Will do the work” and presents it to the user in Excel format.
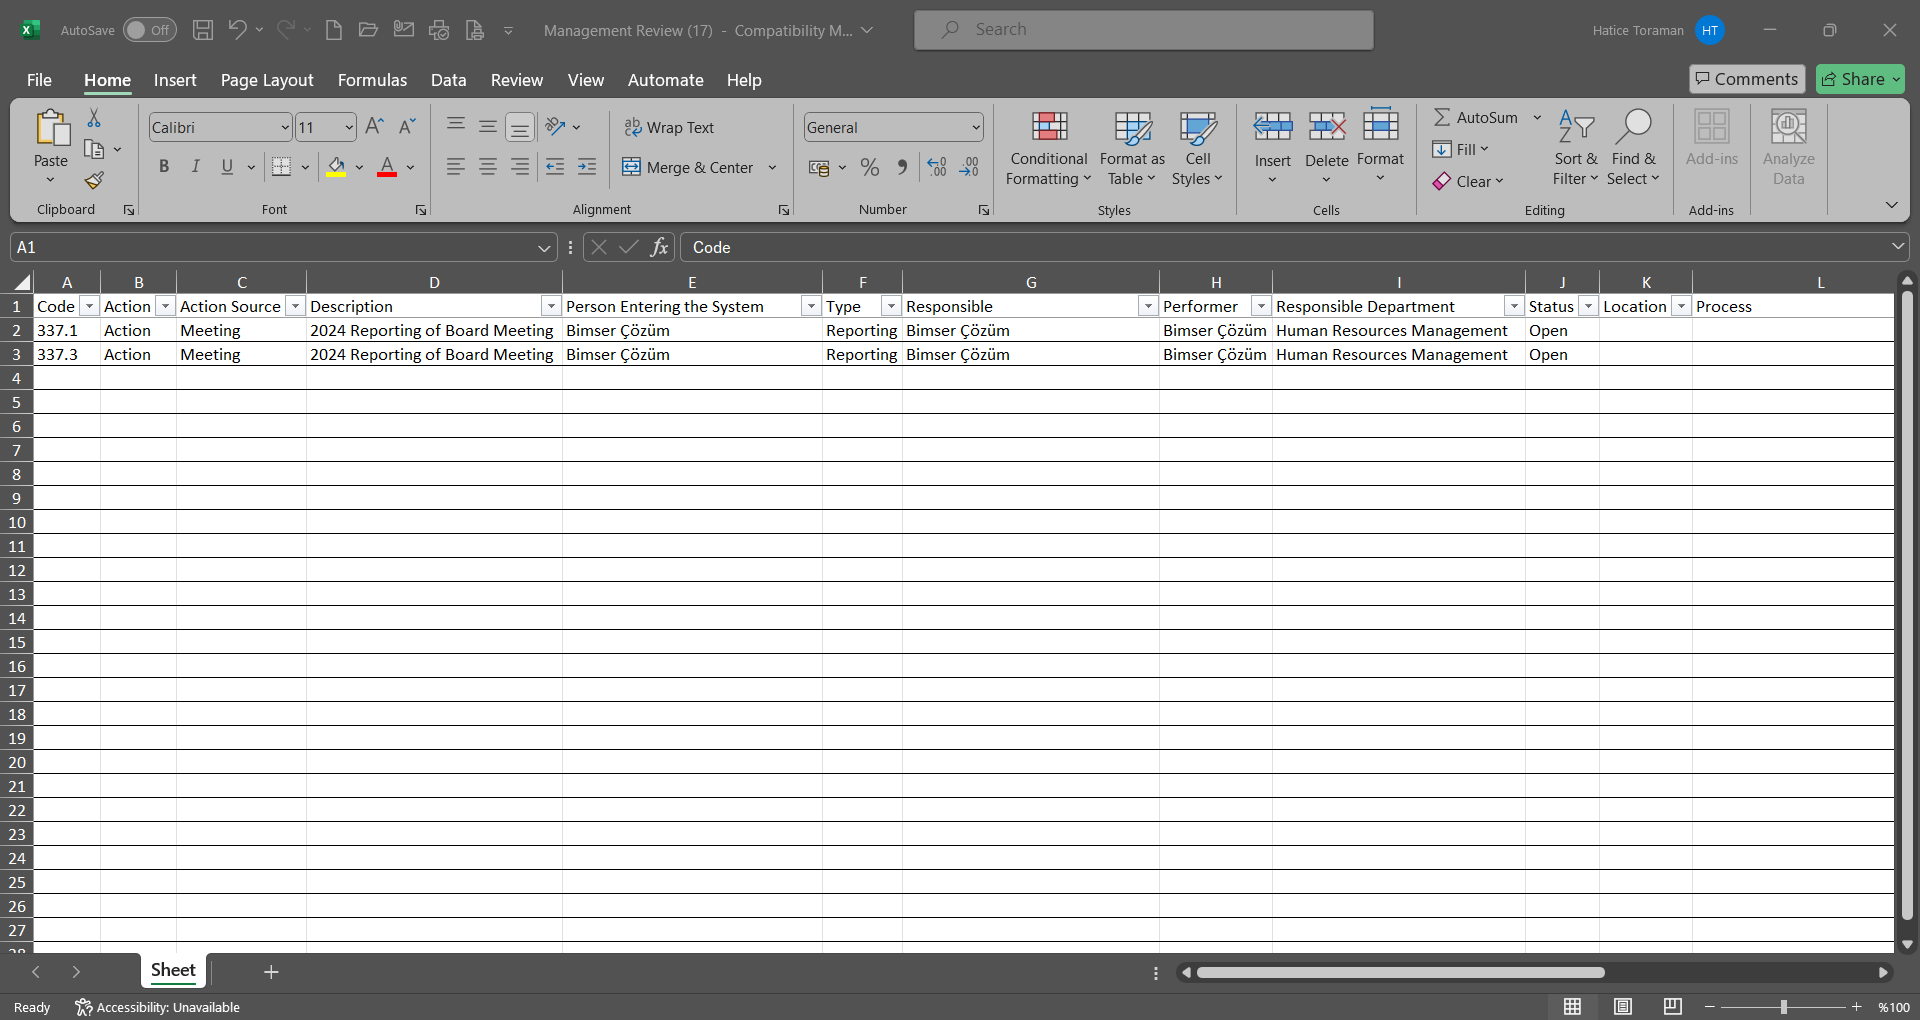
In the Management Review-Planned Works- All Modules-Action tab, click on the action code link in the list.
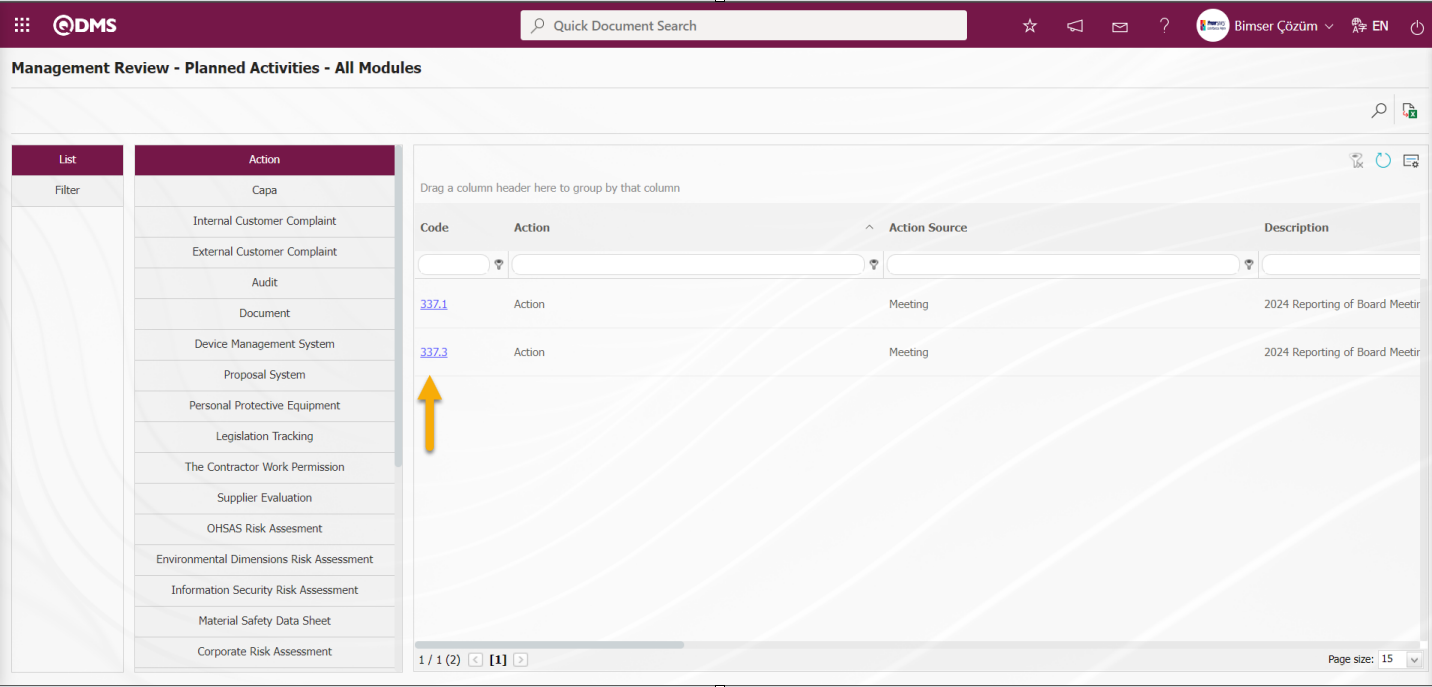
The Action Display screen is displayed and the detailed information of the action is accessed, the action link is taken with the button and the comment is added with
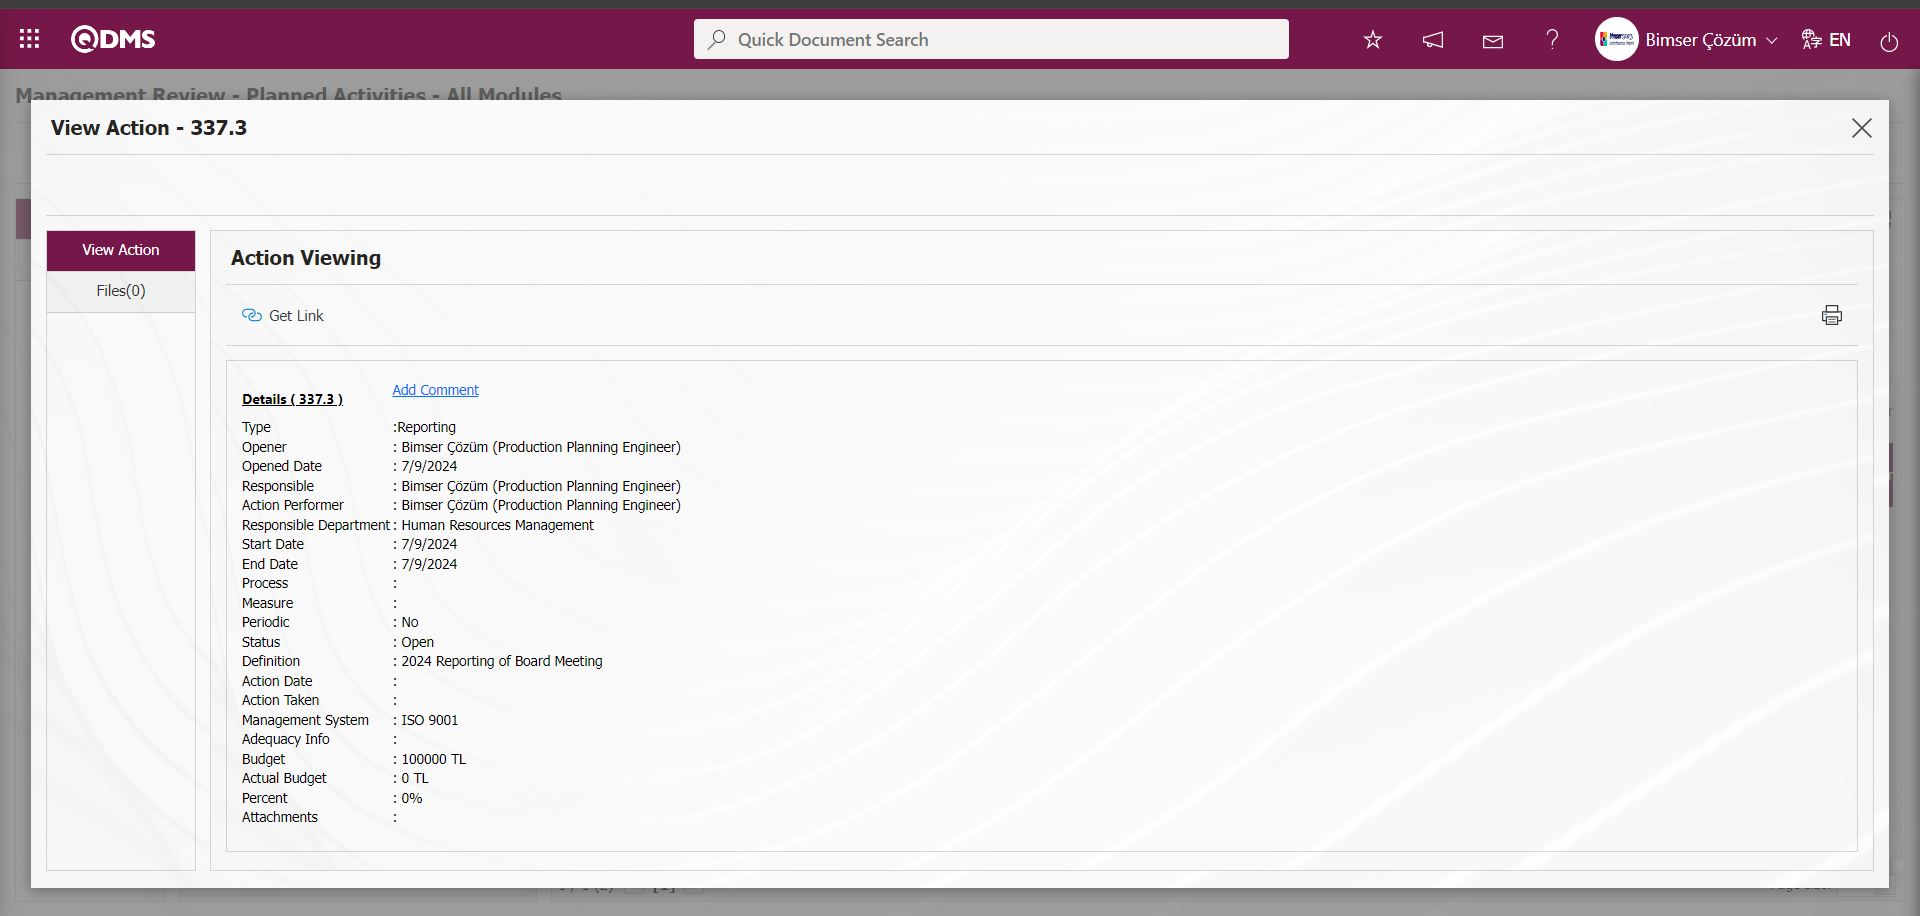
6.5.3. Timetable
Menu Name: Integrated Management System/ Management Review/ Timetable
It is the report where the timetable of the works in all modules is taken. User, process or department based reports can be obtained. In the Monthly report screen, Action list and Action Search tabs appear. In the Action Search tab, user, process and department are selected in the search type field and the report is obtained depending on these selections. By clicking the forward and backward buttons at the top, it is selected in which month the timesheet report will be received.
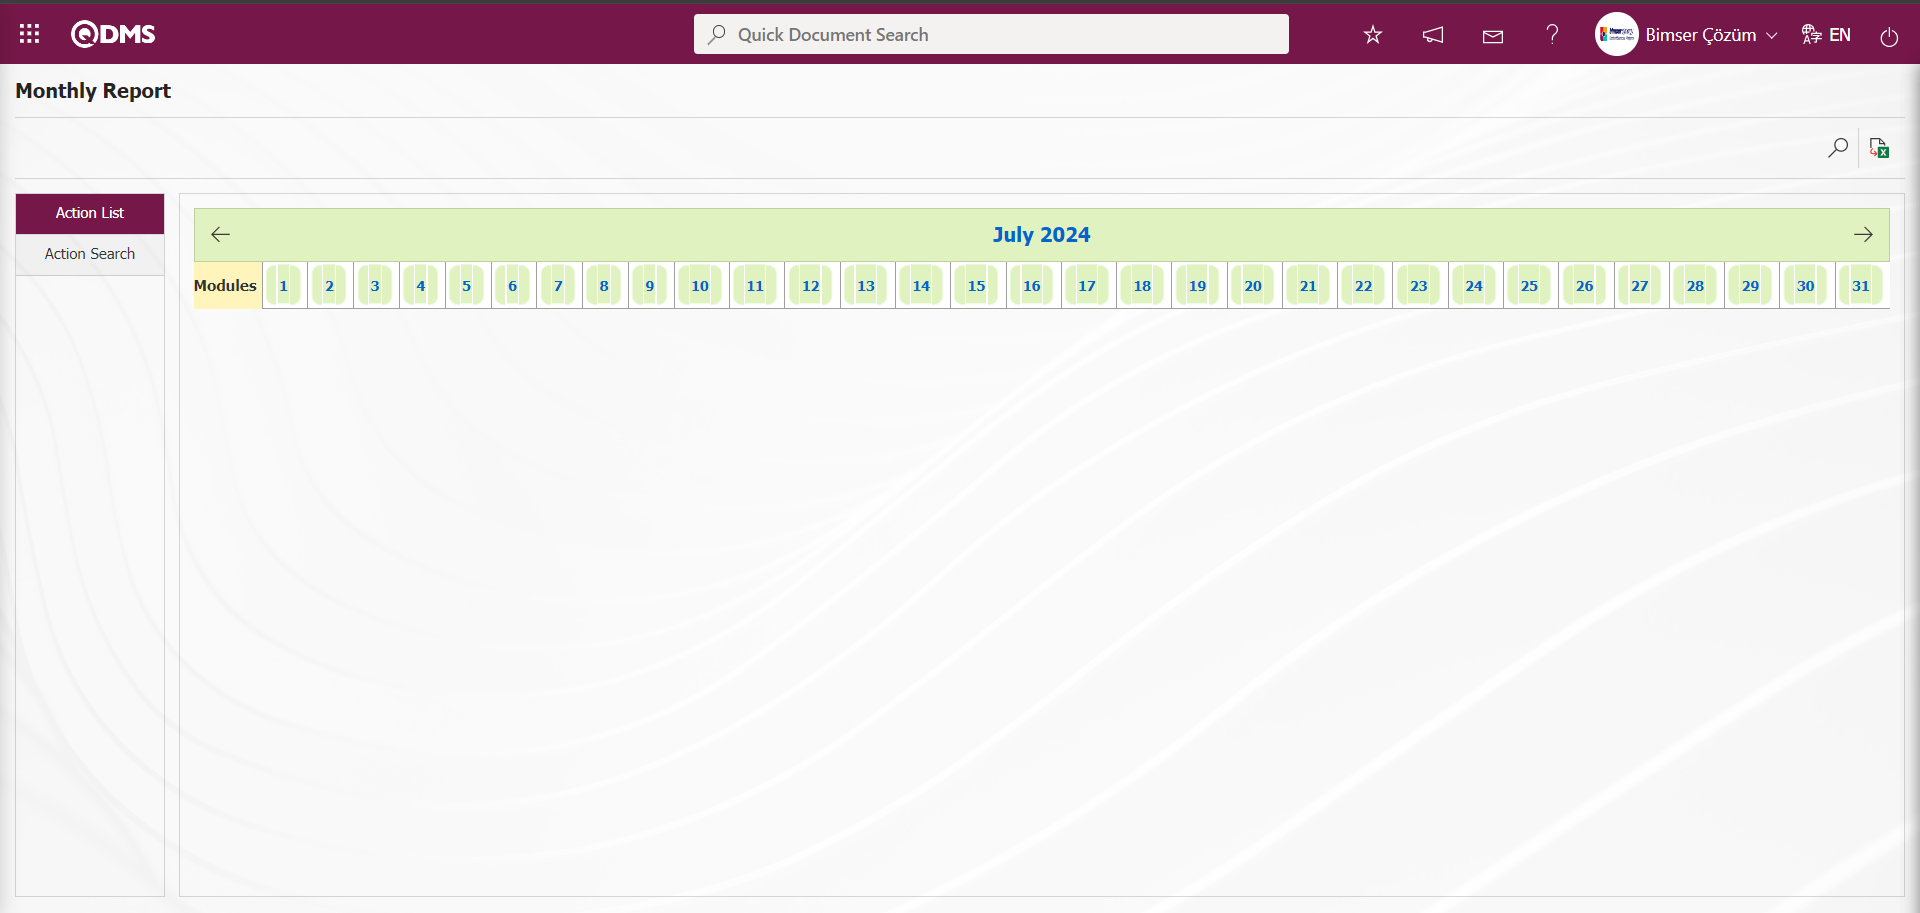
With the help of the buttons on the screen;
: Records can be searched by filtering.
: Data can be transferred to Excel.
6.5.3.1.User Based Timesheet Reporting
User based timesheet report is obtained by selecting user as Search Type in Action Search tab. After selecting the user, the user is selected from the list of personnel defined in the system by clicking the  (select) button in the field opened at the bottom. The month in which the user-based timesheet will be taken is selected from the calendar containing the months by using the forward and backward buttons and the desired report is taken in the Action List tab by clicking the (Search) button.

In the List tab, user-based timeline report information in Qdms Modules is displayed. For example, for the Action Management Module, the information of which personnel has which actions on which dates between which dates on a monthly basis can be accessed from this report. The colours in the report indicate the current status of the action. Red indicates delayed actions, blue indicates ongoing actions, green indicates realised (finished) actions.
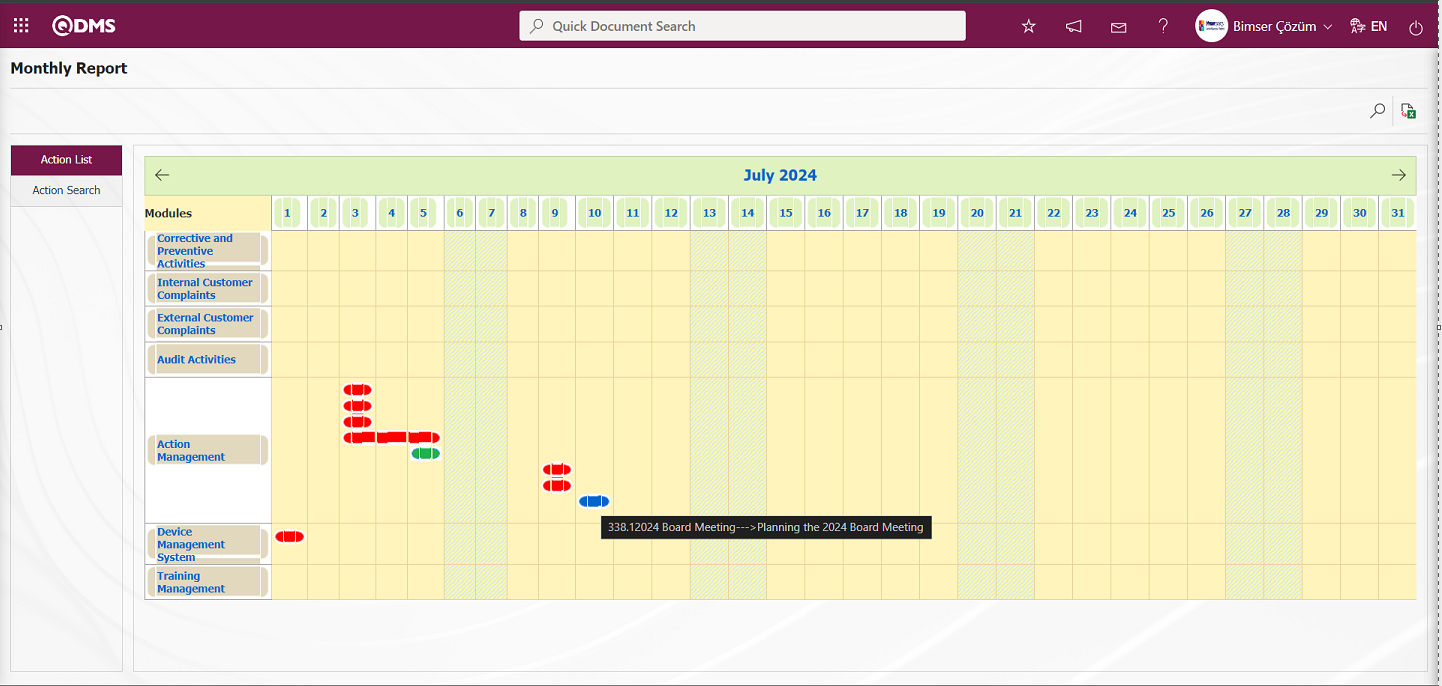
In the Monthly Report Action list tab, the user can also get a user-based time report in Excel format by clicking the (Export to Excel) button.
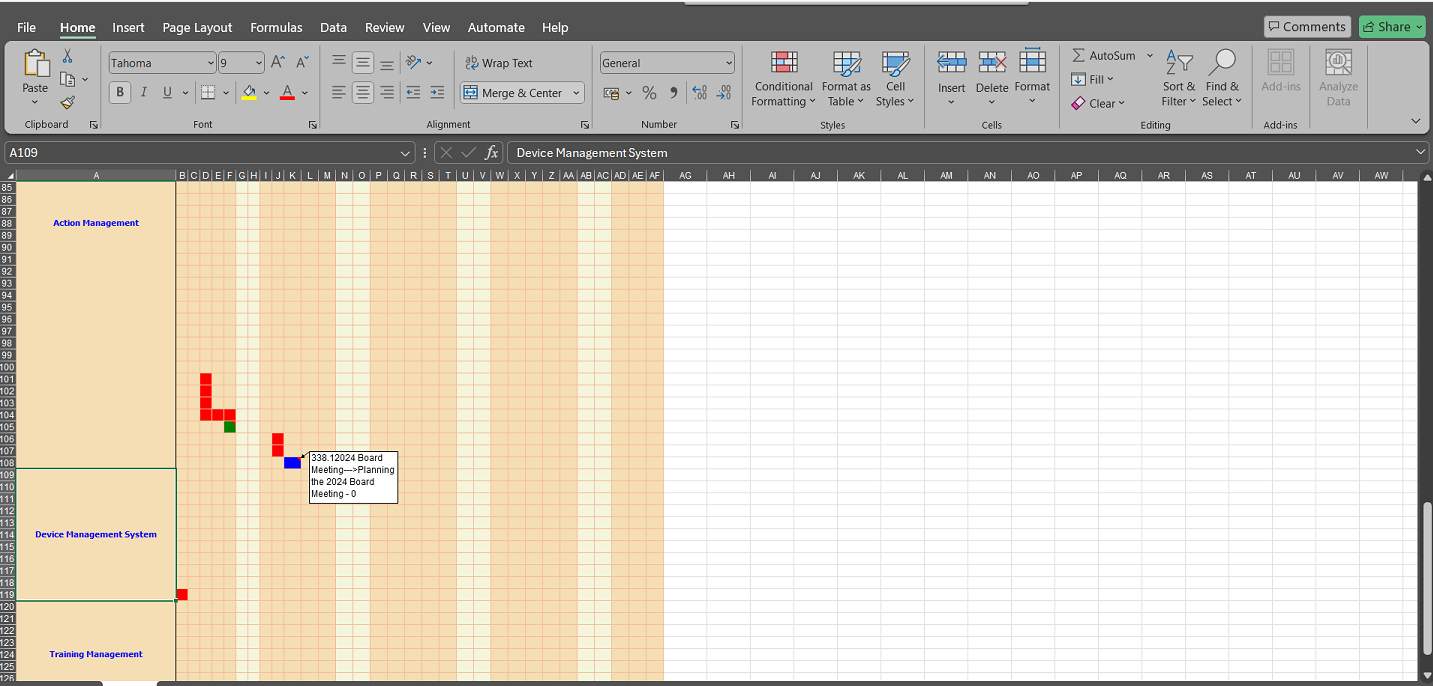
6.5.3.2. Getting Department Based Timesheet Report
In the Action Search tab, Department is selected as Search Type and Department based timesheet report is obtained. After selecting the department, click the (Select) button in the field opened at the bottom and select the department in the list of departments defined in the system. The month in which the department-based timesheet will be taken is selected from the calendar containing the months by using the forward and backward buttons and the desired report is taken in the Action List tab by clicking the (Search) button.
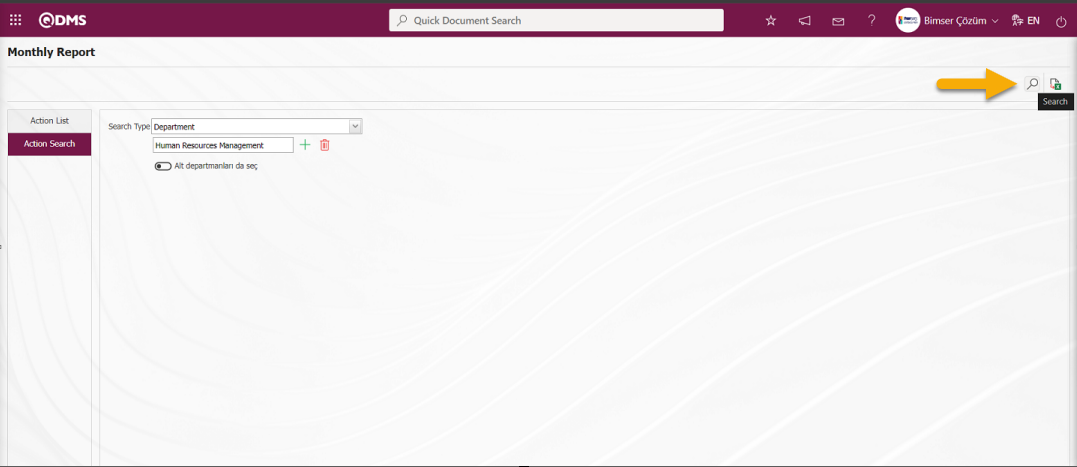
In the List tab, department-based timesheet report information in Qdms Modules is displayed.
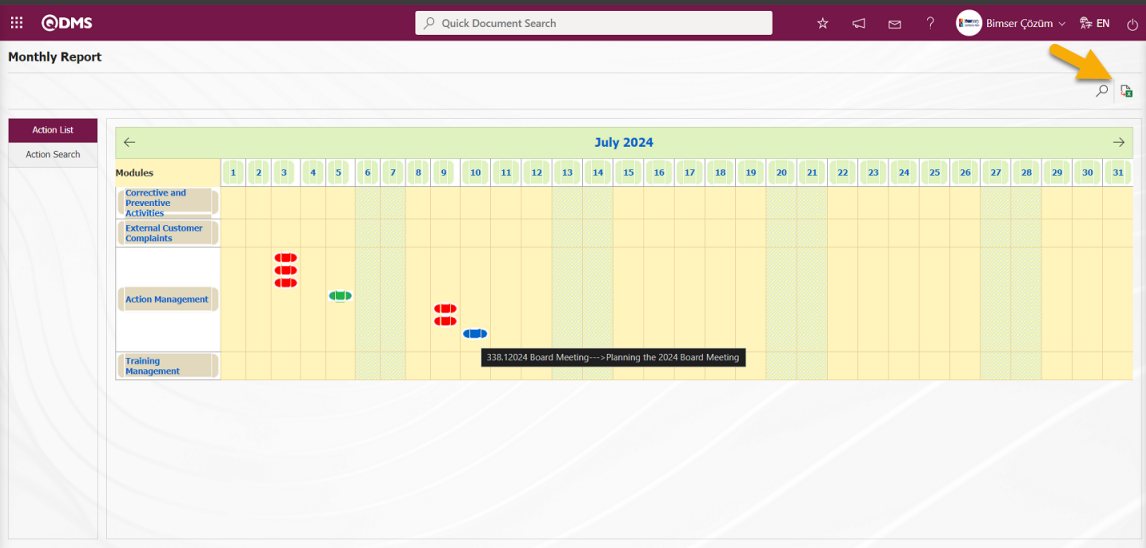
In the Monthly Report Action list tab, the user can get the department-based time-based report in Excel format by clicking the (Export to Excel) button.
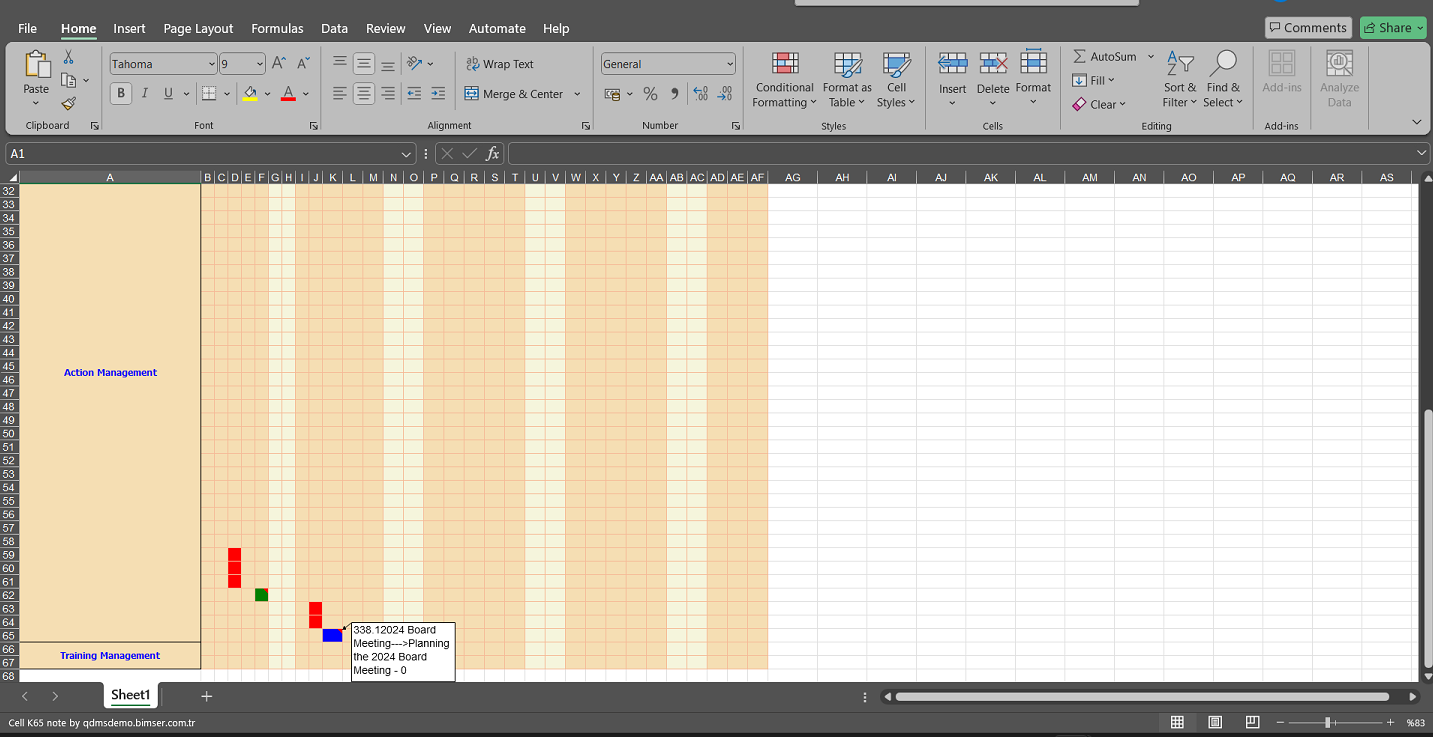
6.5.3.3. Getting Process Based Timeline Report
In the Action Search tab, Process is selected as Search Type and Process based timeline report is obtained. After selecting the process, the process is selected in the process list defined in the system by clicking the  (Select) button in the field opened at the bottom. The month in which the process based timeline will be taken is selected from the calendar containing the months by using the forward and backward buttons and the desired report is taken in the Action List tab by clicking the (Search) button.
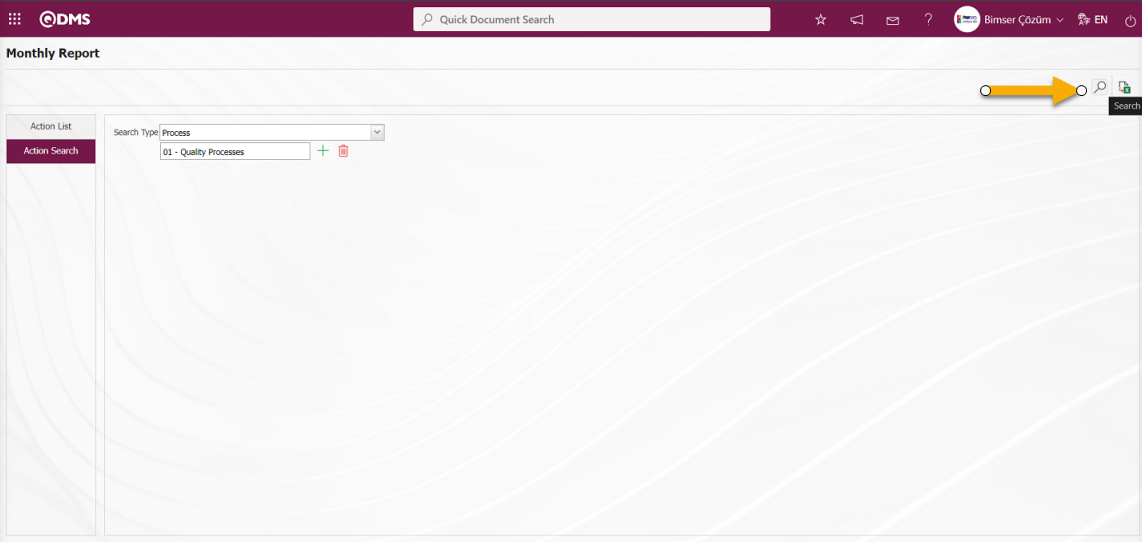
In the List tab, process based timesheet report information in Qdms Modules is displayed.
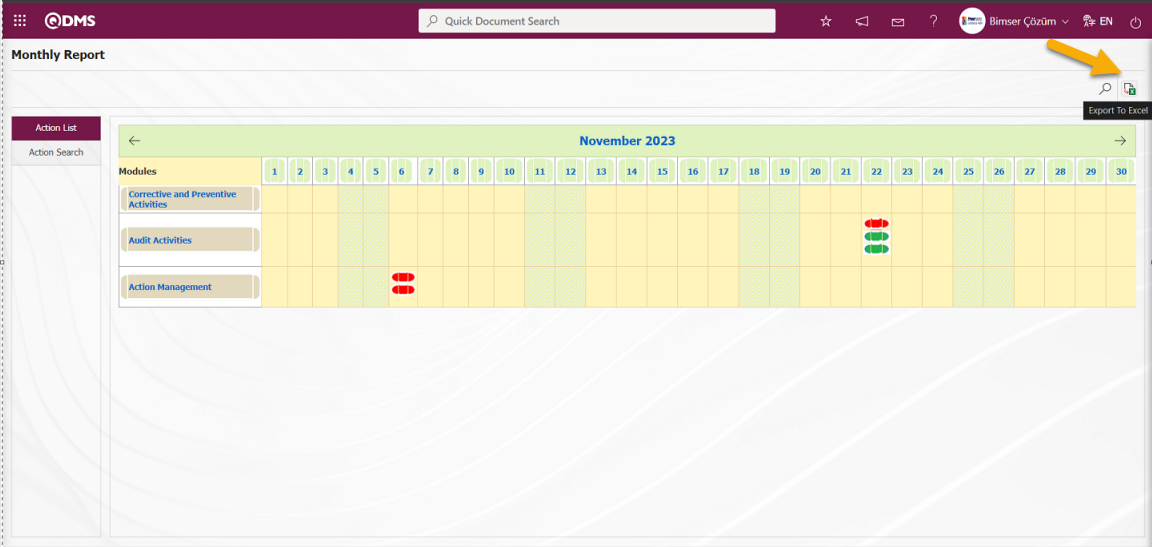
In the Monthly Report Action list tab, the user can also get the Process Based Time Schedule report in Excel format with the (Export to Excel) button.