Document Management
Information
You can quickly reach the relevant topic with the help of navigation on the right side.
Document Management Module (v.5.26) User Help Document
Module Version: 5.26
1. INTRODUCTION:
“QDMS Document Management Module” is a module where management systems documentation is prepared, revised, approval processes are carried out, documents are published, document reports can be obtained and all documentation is archived.
2. PURPOSE:
The purpose of this help manual is to explain the working process of the “Document Management” module. Starting from the definitions and parameters in the system infrastructure definitions, this help manual describes in detail the processes of “Folder Definition, Document Preparation, Revision, Cancellation”, where the basics of documentation are created, with application examples. The “Reports” received from the system related to documentation and the “System Infrastructure Definitions” section that will help users in the application are also explained through examples.
3. RESPONSIBILITIES:
QDMS Document Module Managers, Responsible for Documents, All Employees
4. ABBREVIATIONS:
QDMS Quality Document Management System “Quality Document Management System”
5. WORK FLOW:
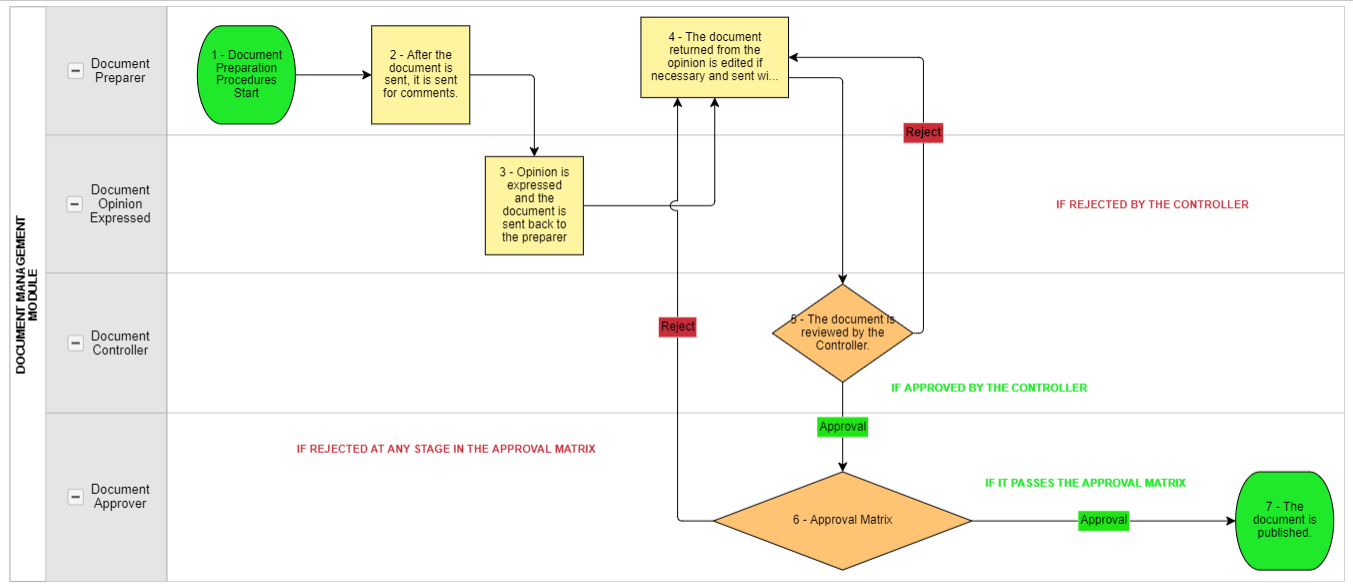
6. Document Management Module
The document management module is a module that provides the document management process in accordance with the standards. It ensures that the management systems documentation is prepared, controlled, approved, revised, published, distributed to the relevant personnel electronically, reported, archived and all documentation is archived and the cancellation process is carried out through the approval process on the QDMS system. It allows personnel to access and act on documents within the scope of the folders/documents they are authorized for. QDMS for fast, easy and reliable document management;Güvenli doküman kontrolü ve hızlı onay mekanizması
- Documents that can be associated with each other
- Quick search with easily sorted and indexed documents
- Controlled access to documents with authorization feature
- Automatic publishing of documents and easy tracking of read documents
- Management of printed documents
- Notification by e-mail during approval, control, revision and publishing stages
- Automatically generate document master list by the system
- Providing standardization in documents by using templates
- Dynamically link documents to products, processes and management systems
- Follow-up of quality records filled and archived manually
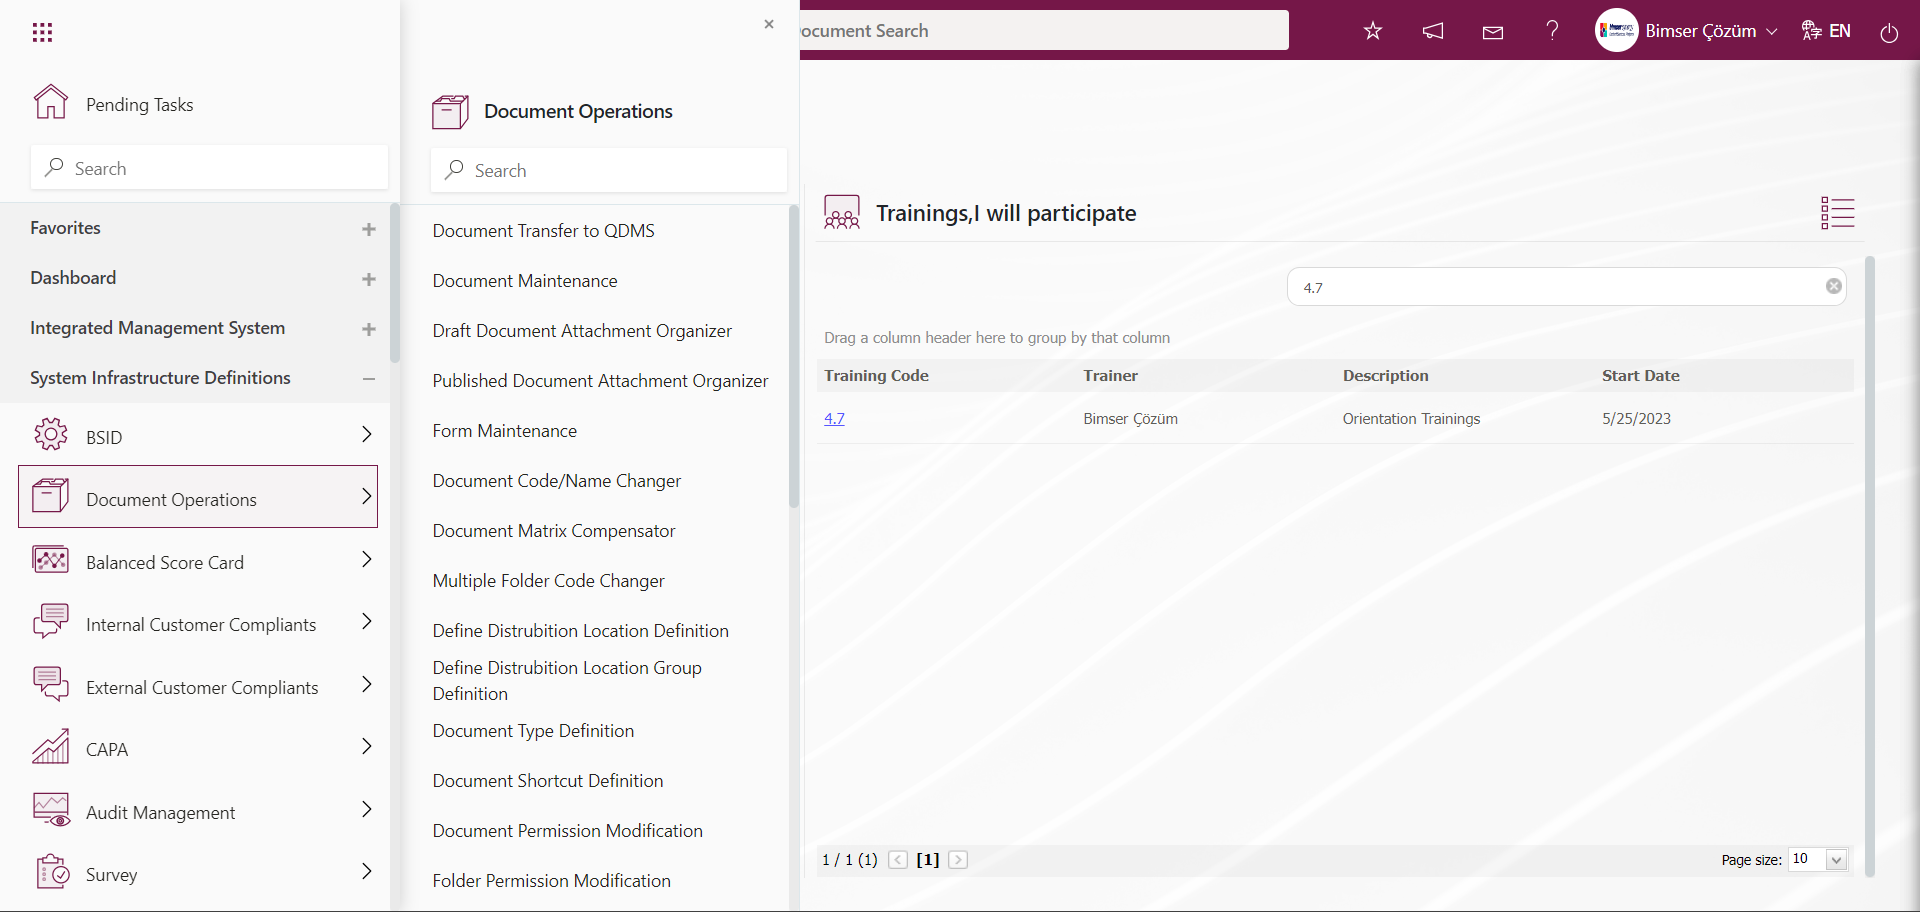
6.1. System Infrastructure Definitions/ Document Operations
This is the part where infrastructure definitions are defined in the Document Operations Module. Before starting in the Document Operations module, the document types in the infrastructure must be defined. In addition, the process of defining the distribution groups that provide the classification of the documents to be distributed as controlled copies, the distribution points, which are the physical distribution points, and the distribution places, which are the distribution points, must be done at the first stage.
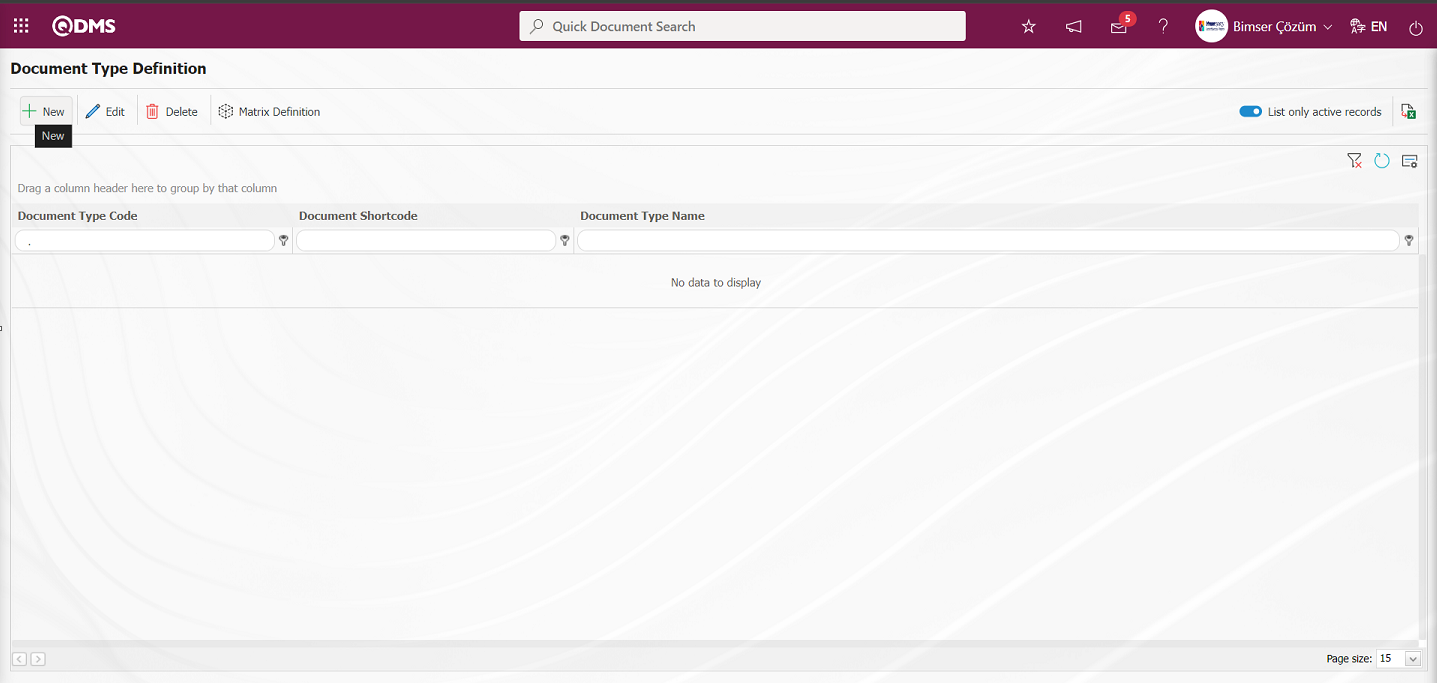
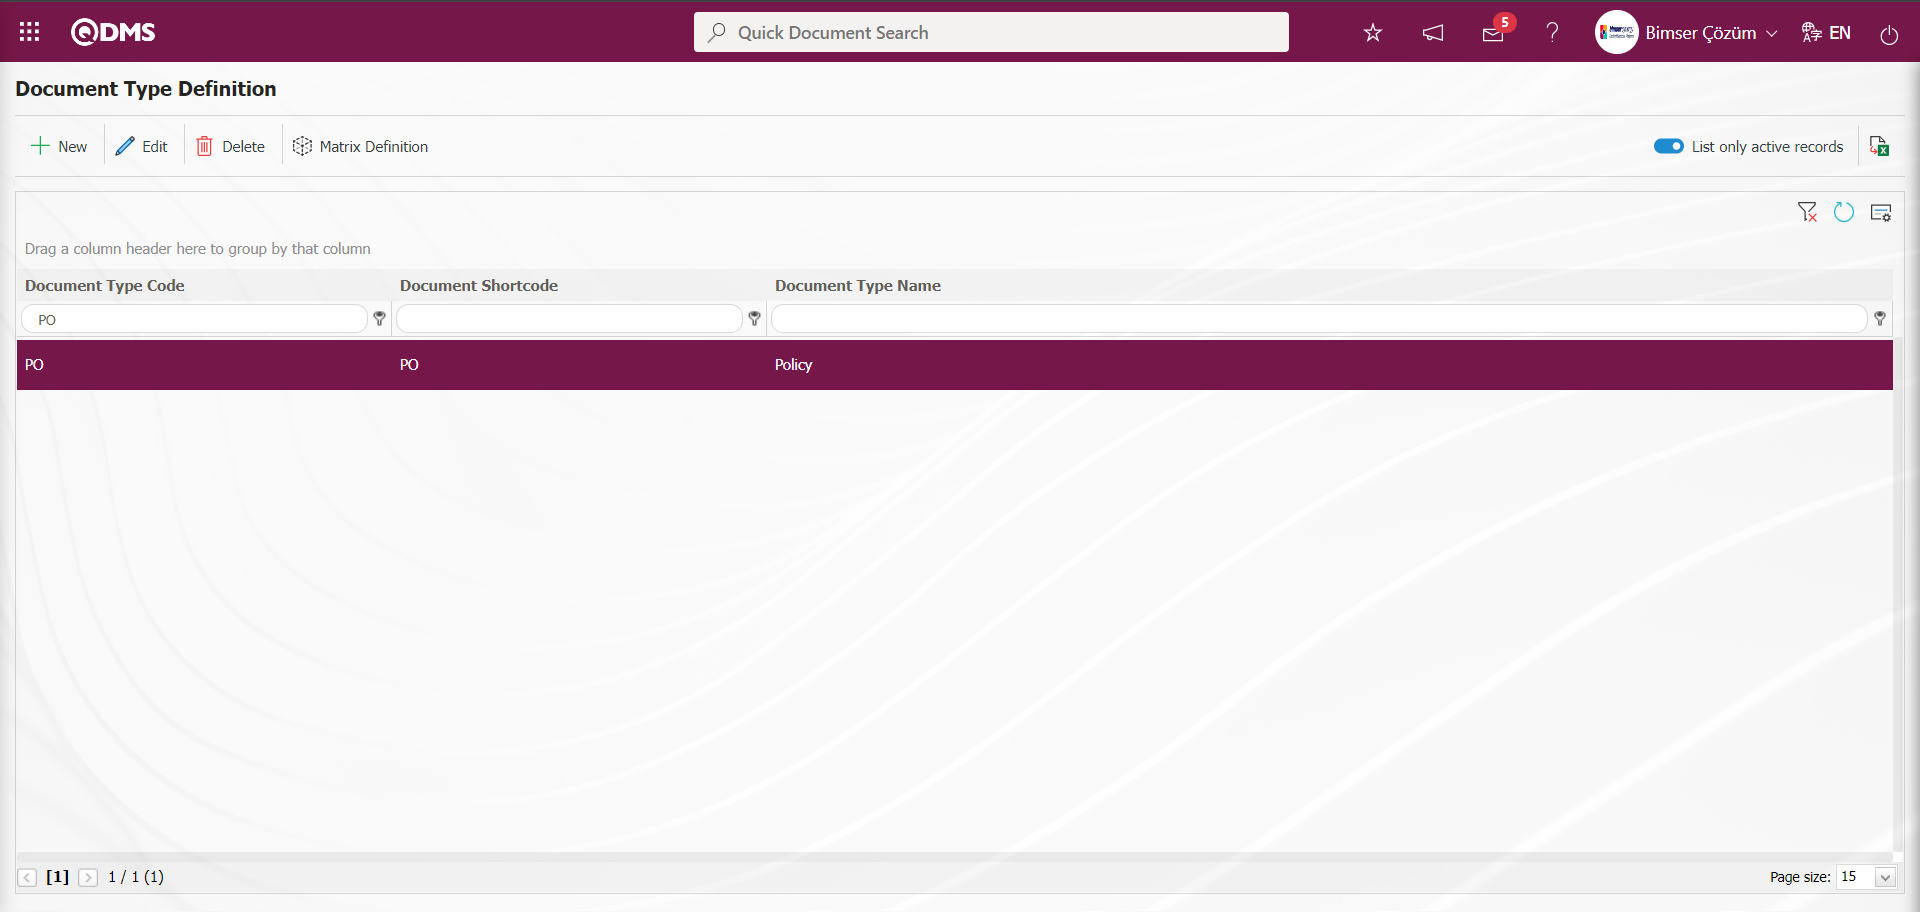
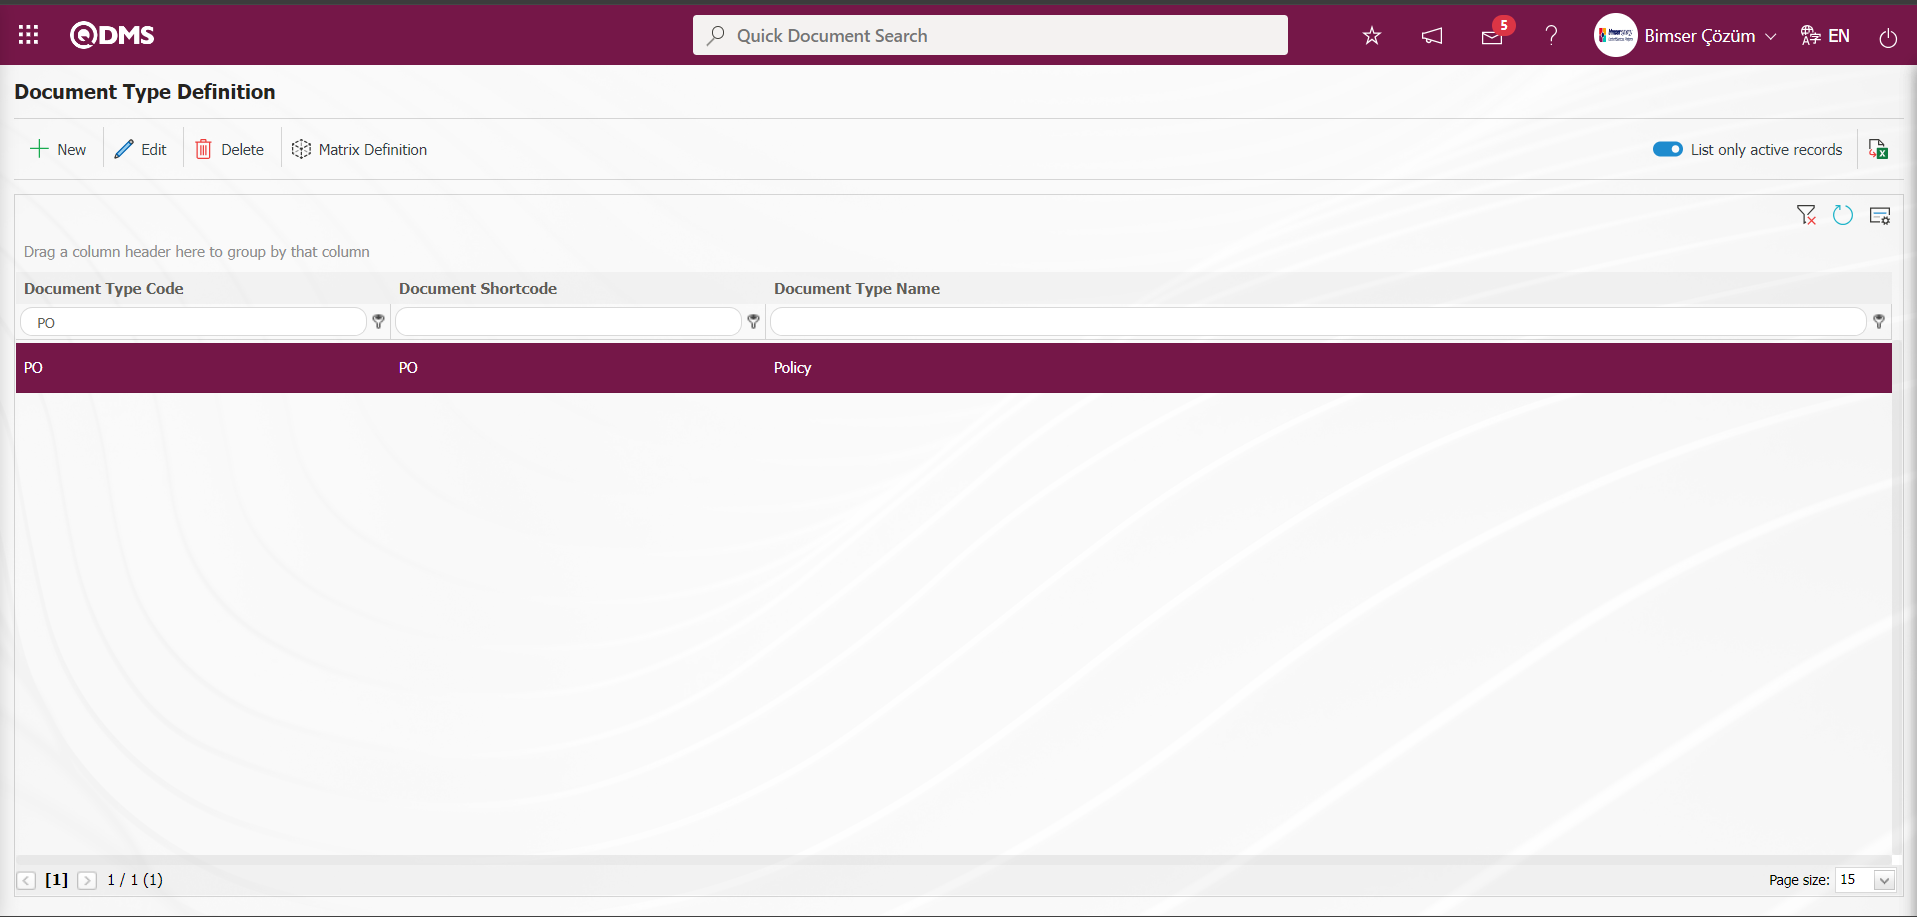
6.1.1.Document Type Definition
Menu Name: System Infrastructure Definitions/ Document Operations/Document Type Definition
This is the menu where document types are defined. It is used in determining folder types, determining what type of document is prepared in the document preparation process and reporting.
Örneğin;
HD- Handbook,,
PO- Policy,
PR- Process,
WL- Workflow,
PR- Procedure,
IN- Instructions,
FR- Form,
LS- List,
CN- Contract,
DYO- Document types such as Outsourced document etc. can be used.
With the help of the buttons on the screen;
 : Defining a new document type is done.
 : Update the document type information selected in the list.
 : Delete the document type information selected in the list.
 : The Matrix Definition screen is opened and matrix definition is made on the basis of document type.
 : Records are filtered and searched.
 : Data is transferred to Excel.
 : The search criteria on the menu screens are used to clear the data remaining in the filter fields in the grid where the search operation is performed.
 : The menu screen is restored to its default settings.
 : User-based designing of the menu screen is done with the show-hide feature, that is, the hiding feature of the fields corresponding to the columns on the menu screens.
 : If the relevant check box is checked, only the records of document types with active status will be listed.
To add a new document type to the Document Type Definition screen, click the button at the top left corner of the screen to open the Document Type Definition/ New Record screen.
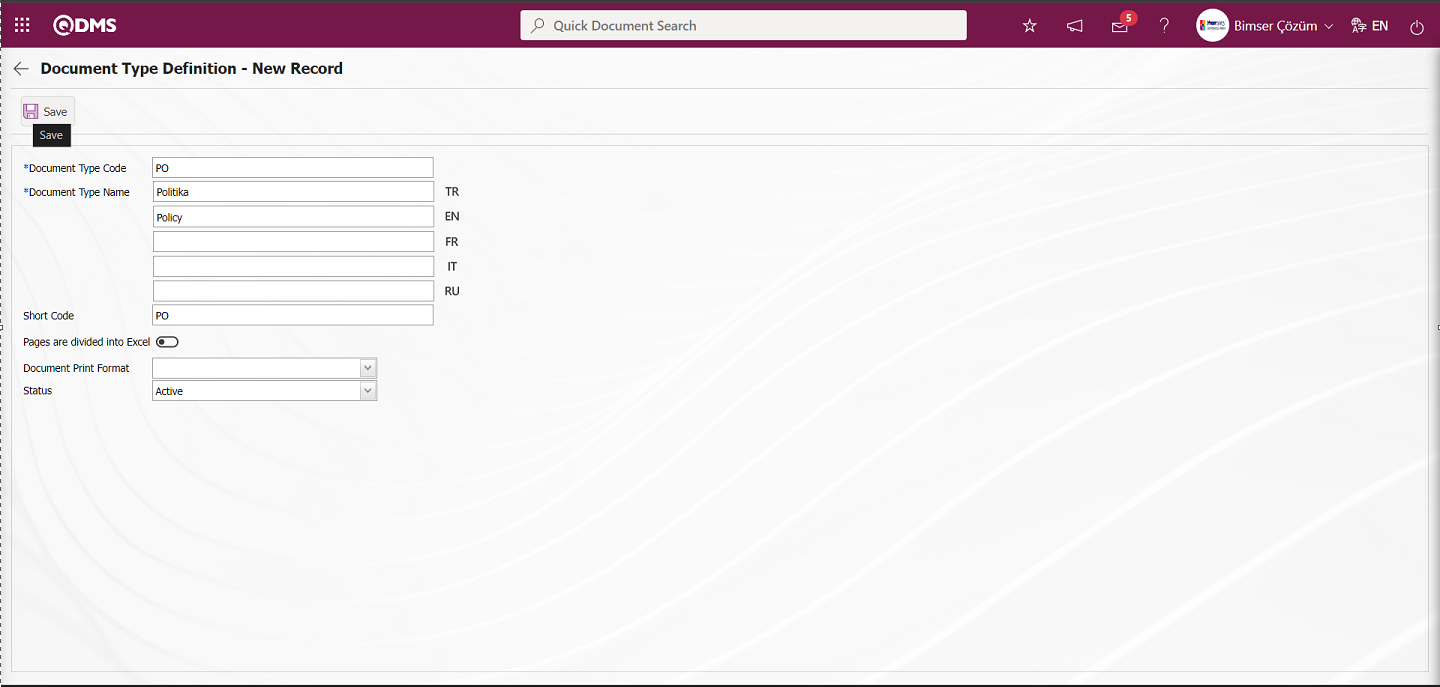
Related fields are defined on the screen that opens;
Document Type Code: This is the field where the code of the document types defined within the company on the Document Type Definition - New Record screen is written. For example; PR for Procedure and PO for Policy are defined.
Document Type Name: On the Document Type Definition - New Record screen, the description information of the document type is written. For example; Procedure, Policy. If other language options will be used, the language equivalent of the relevant document type is written in the fields with the relevant flag.
Short Code: This field is filled in if the short code of the document type, which is determined in the document code structure on the Document Type Definition - New Record screen, is to be used automatically in the document code structure used when preparing documents on the system. For example, if it is desired to use the short code P0 for Policy in the automatic template for defining folders in document operations, the code [TIP] is used. Thus, it automatically brings the “PO” code to the place where [TIP] appears in the code template section for the new document created in the system. When the document type “Policy” is selected in the automatic code template defined on the Folder Definition - New Record screen, the code defined in the short code field in the [TIP] section comes. When the short code is not defined, the code information in the code field of the document type comes in the [TIP] field.In the New Document screen where the document preparation process is performed, the document codes are automatically ordered as B-2024-PO.001, B-2024-PO.002, B-2024-PO.003 according to the counter value.
Pages are divided into Excel: Document Type Definition - This feature is used when the relevant document type on the New Record screen is excel. It is determined whether all pages will be displayed as a single page when converting Excel to PDF during printing or reading. If the relevant check box is not selected, it compresses all the pages in the excel worksheet into a single page when converting to PDF. If the relevant check box is selected, it converts all pages in the excel worksheet into individual pages when converting to PDF.
Document Print Format: On the Document Type Definition - New Record screen, if it is desired to use the document print format (ready-made header/ footer section in the document preparation template) predefined in the system for the relevant document type, the relevant format is selected. The list of Document Print Format definitions comes as defined in the System Infrastructure Definitions/ Document Activities/Document Print Format Definitions menu.
Status: On the Document Type Definition - New Record screen, the active or inactive status of the relevant document type is determined.
On the Document Type Definition - New Record screen, after entering the relevant information in the required fields, the document type registration process is performed by clicking the  button in the upper left corner of the screen.
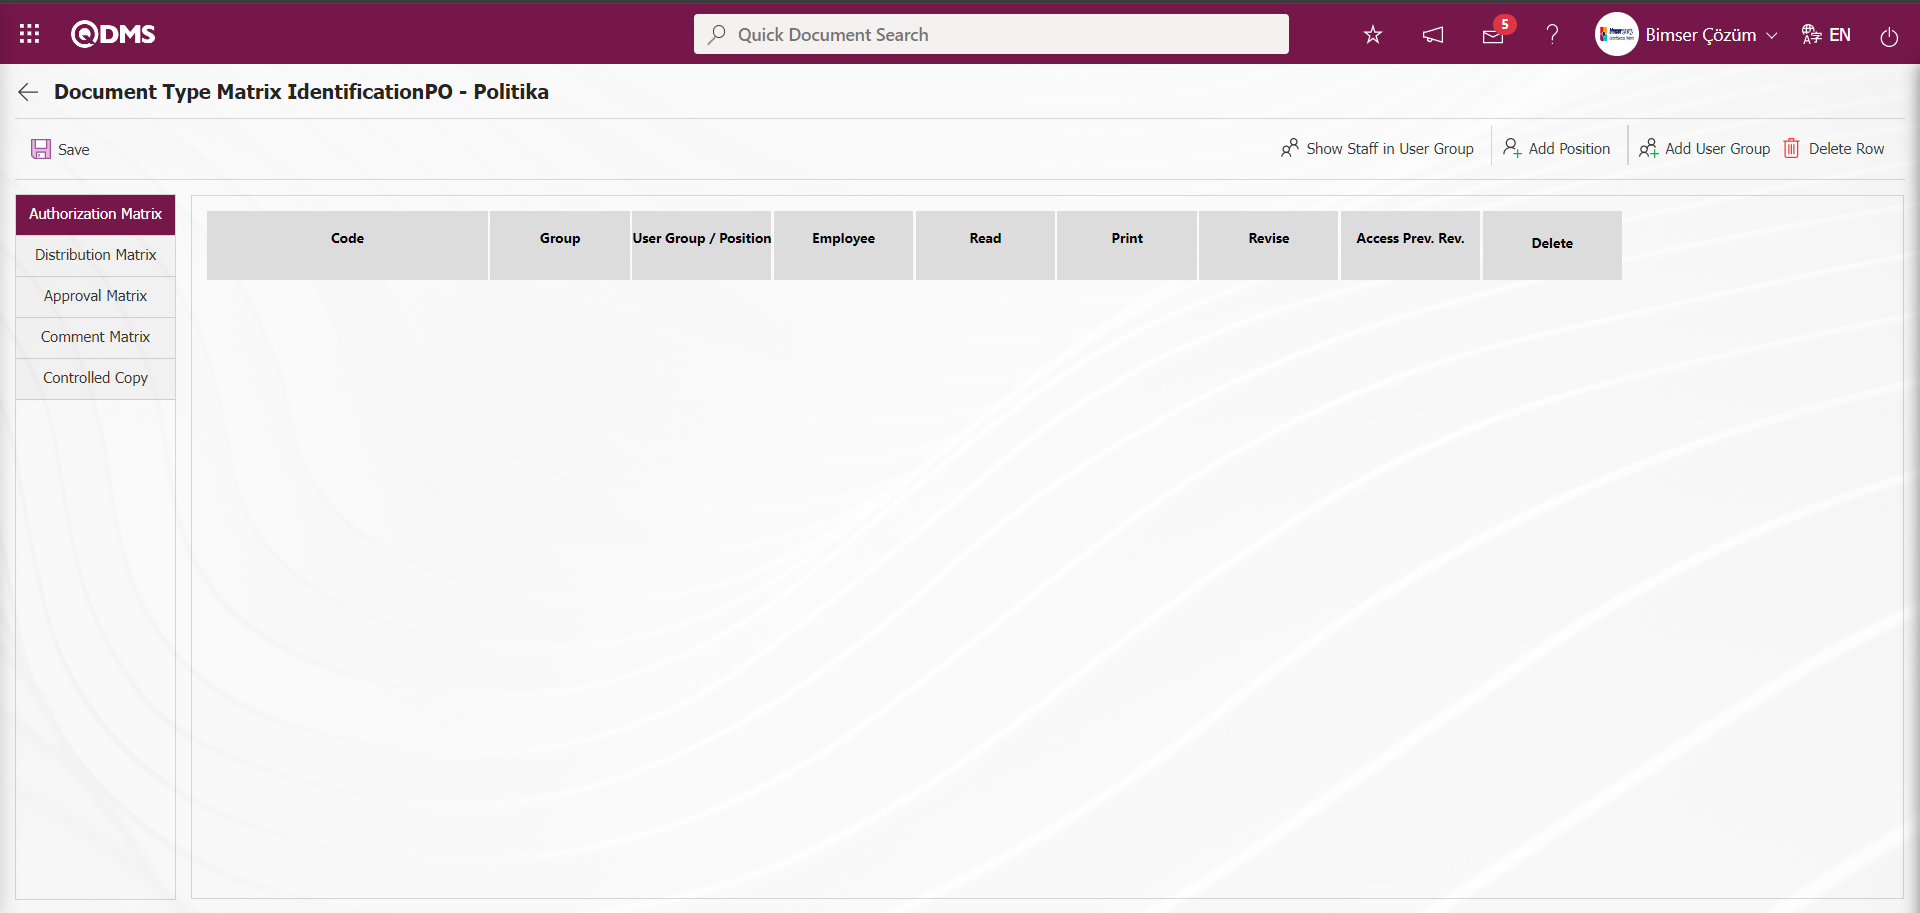
Click the button while the Document Type is selected on the Document Type Definition screen.

In the Matrix Identification screen, authorization, distribution, approval, opinion matrices and controlled copy distribution locations are determined for the relevant document type.
 For example; If it is desired to have a user/user group with defined authorization matrix, distribution matrix or approval matrices for documents with document type Policy, the relevant selections are made from this menu. Matrix definition operations are performed from the folder definition menu or document preparation operations for documents that will differ even if the document type is the same.
To perform Matrix Identification, select the relevant document type and click on the  button. On the screen that opens, authorization, distribution, approval, opinion, controlled copy matrices are defined.
Authority Matrix
It is the tab where it is determined which user or user groups will have the authority to read, print, prepare/revise, see old revisions and cancel the documents to which the document type is connected.
Authorization in the Document Authorization Matrix;
Read: Authorization to view and read documents for documents related to document type
Print: Authorization to download the document to the computer and print the document for documents based on the document type
Revise: Authorization to prepare a new document and revise an existing document in documents related to Document Type
Access Prev. Rev.: Authorization to view the documents that have been revised in the documents related to the document type if they have old revisions
Delete: Authorization to cancel documents for documents related to Document Type
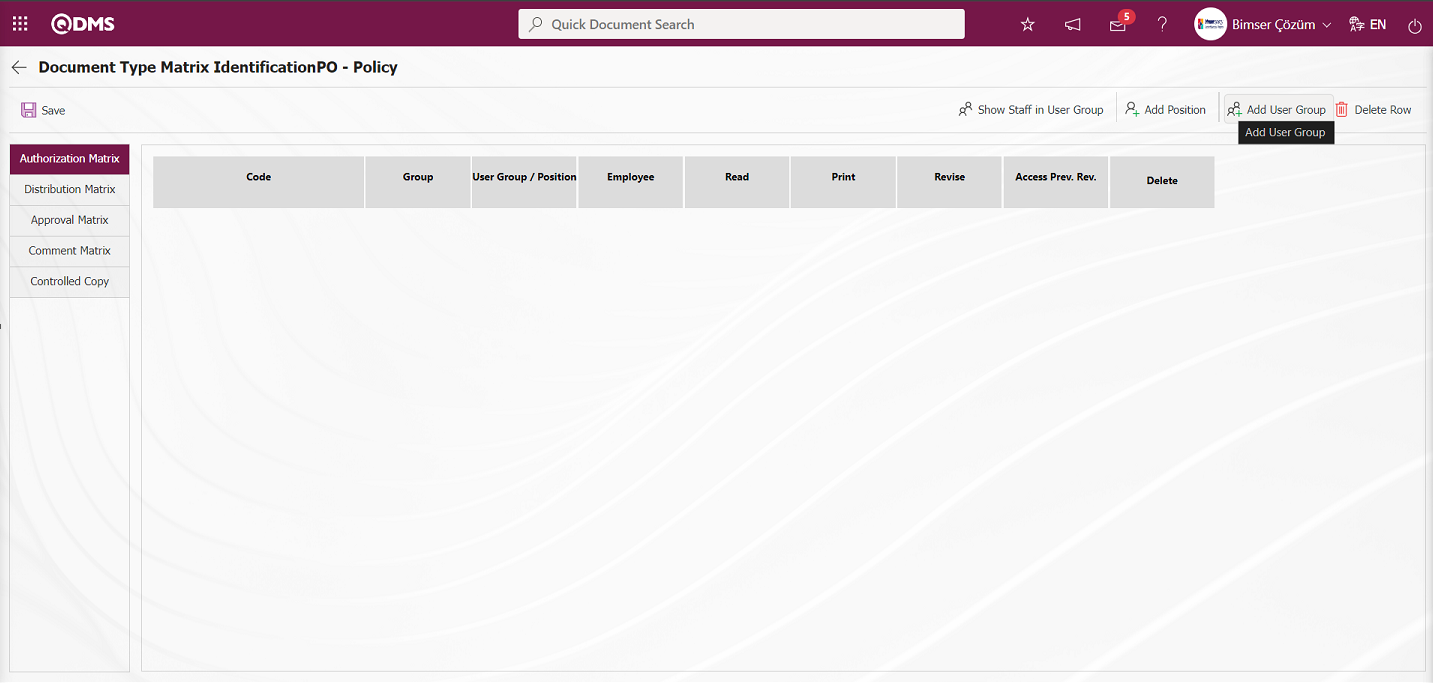
With the help of the buttons on the screen;
 : Shows the personnel in the selected user group.
 : Position is added to the list.
 : Adding user group from the user group defined in the system to the authorization matrix
 : Delete the selected row in the authorization matrix.
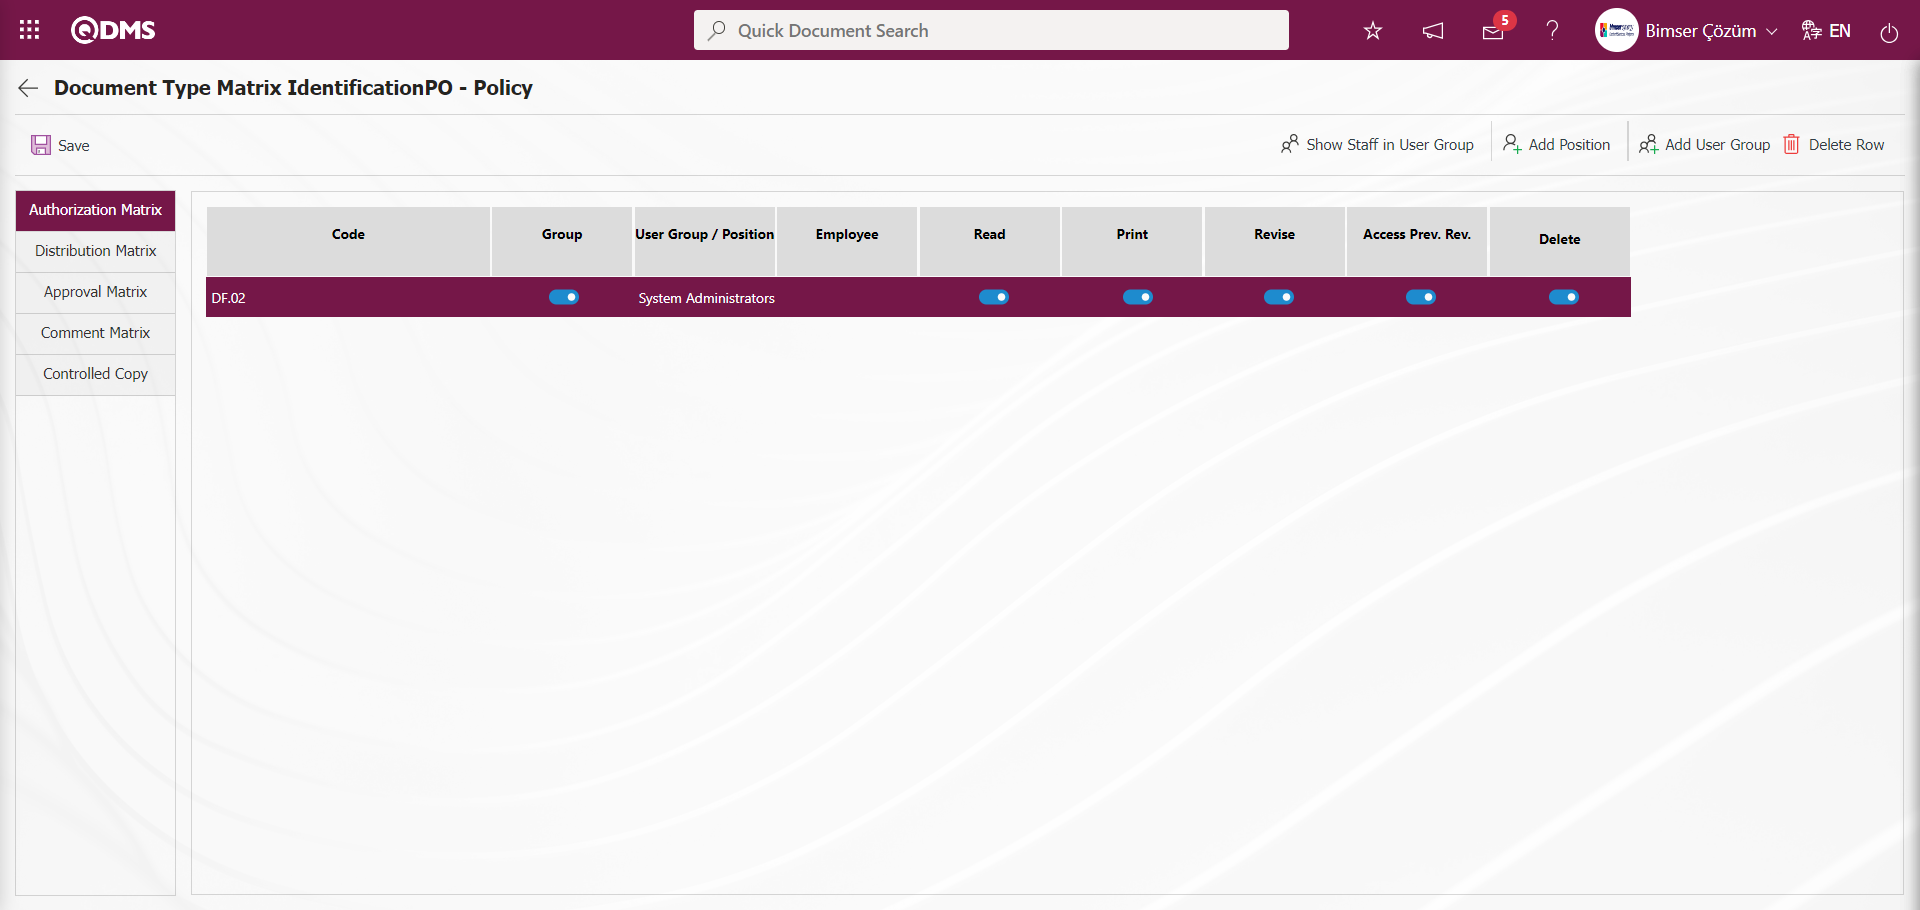
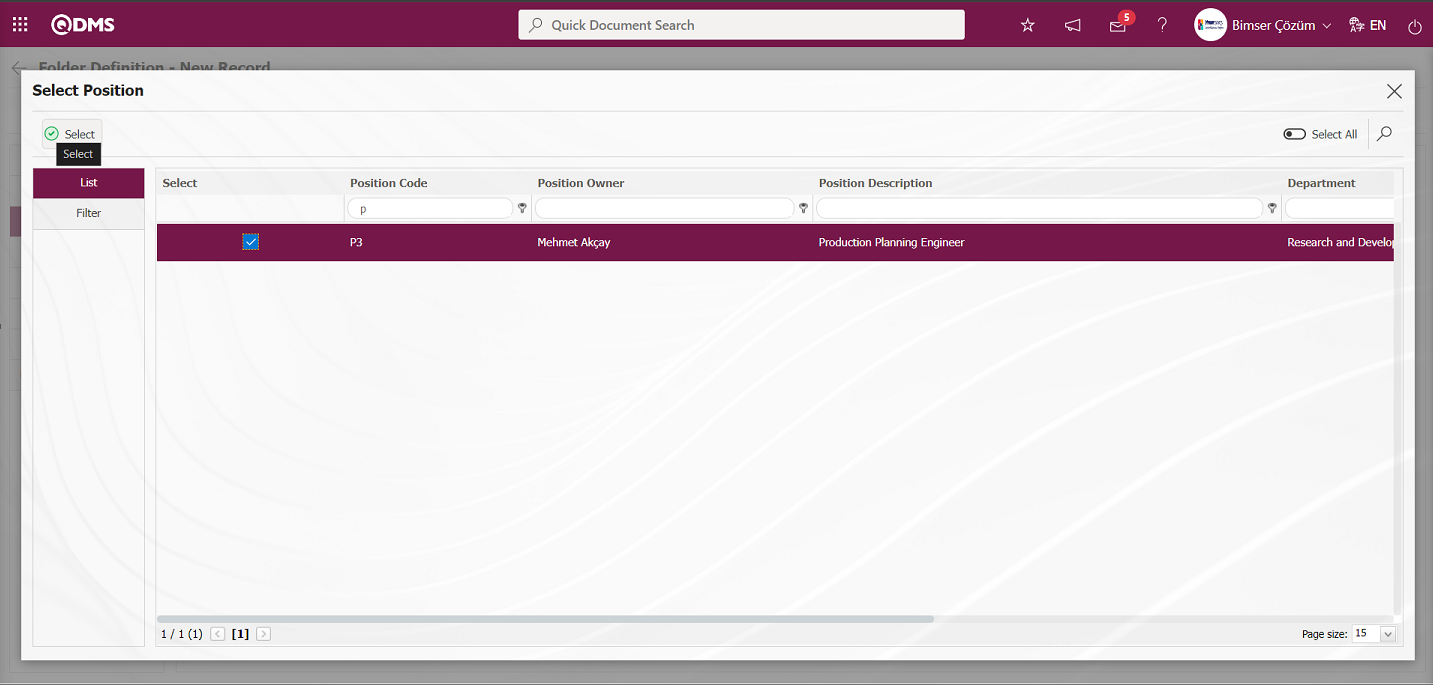
Click the / buttons to assign authorization matrix for documents related to Document Type. In the User Group/ Position list defined in the system, a selection is made for the users to be authorized. Which authorizations are desired to be given are marked.
 By clicking the button, the user group to be authorized from the user group list defined in the system is selected and added to the authorization matrix by clicking the
  button.
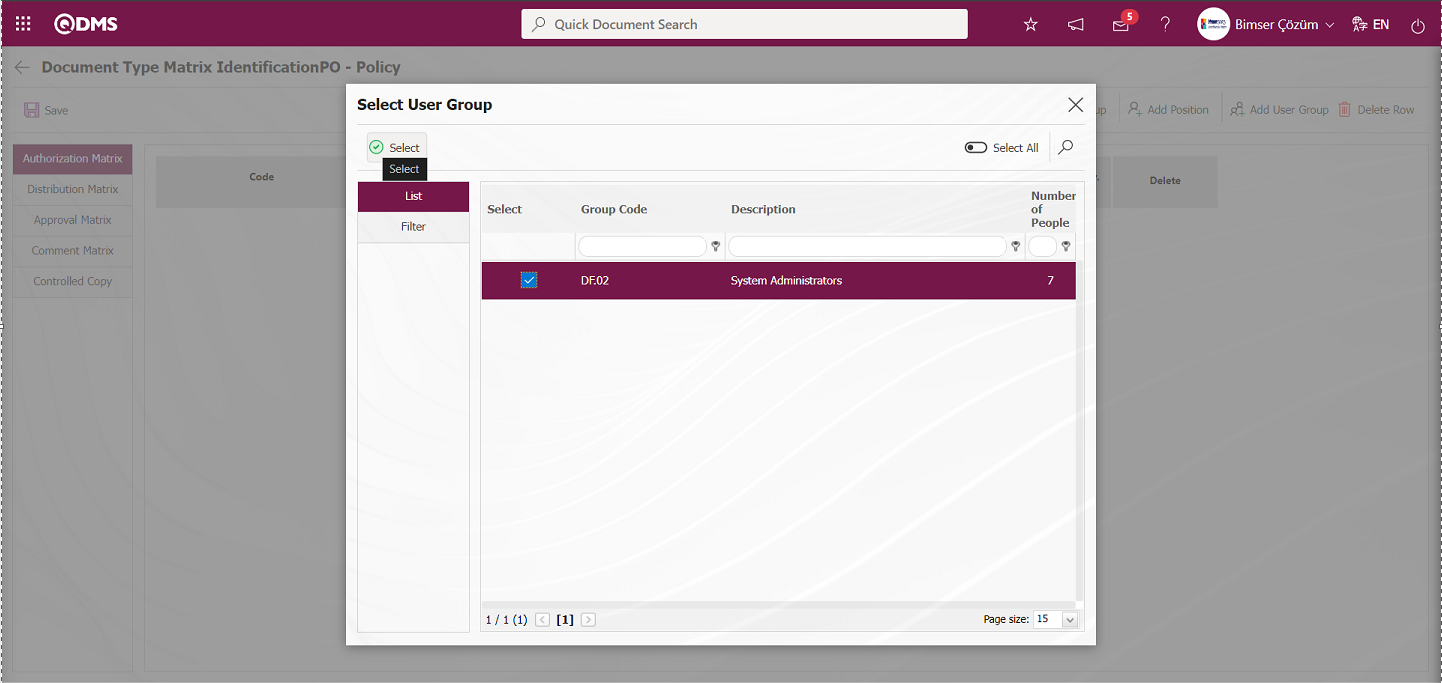
After the process of adding a User Group to the Authorization Matrix, the authorization process is done by checking the relevant check boxes. Reading authorization is checked by default for users and user groups.
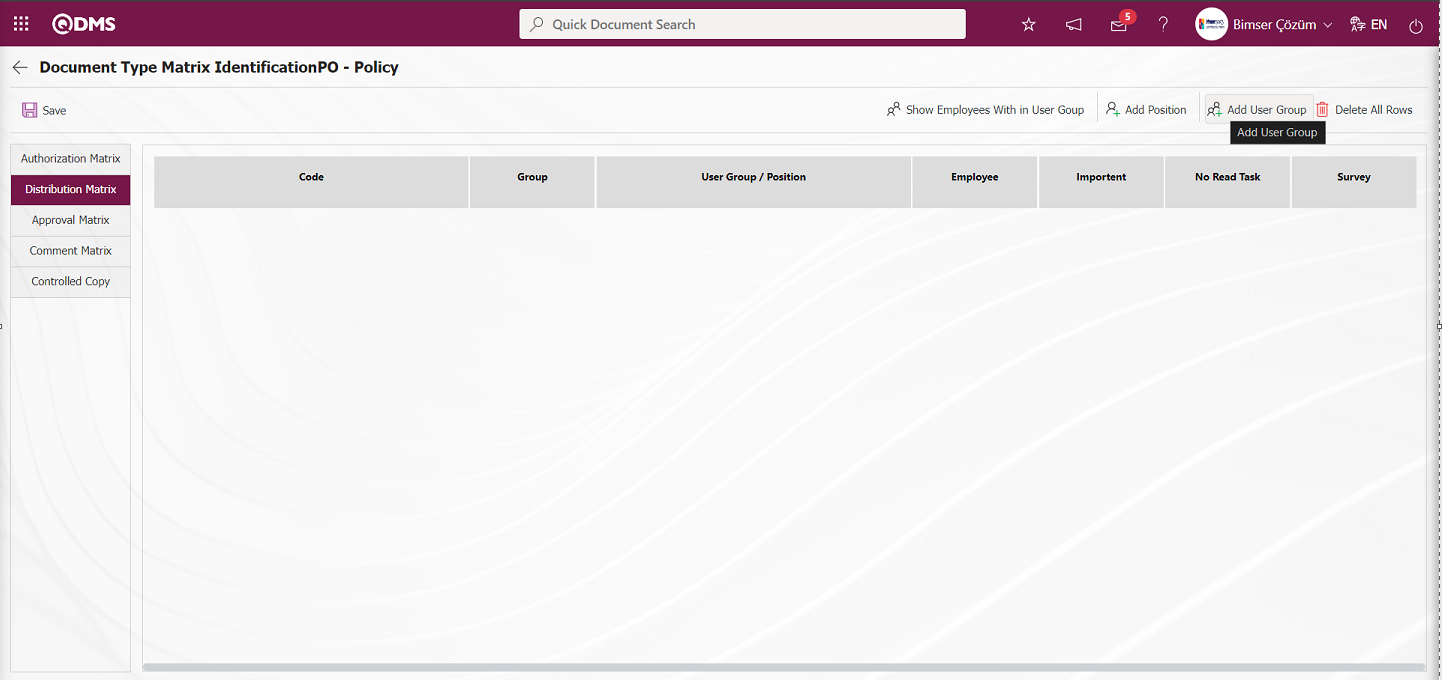
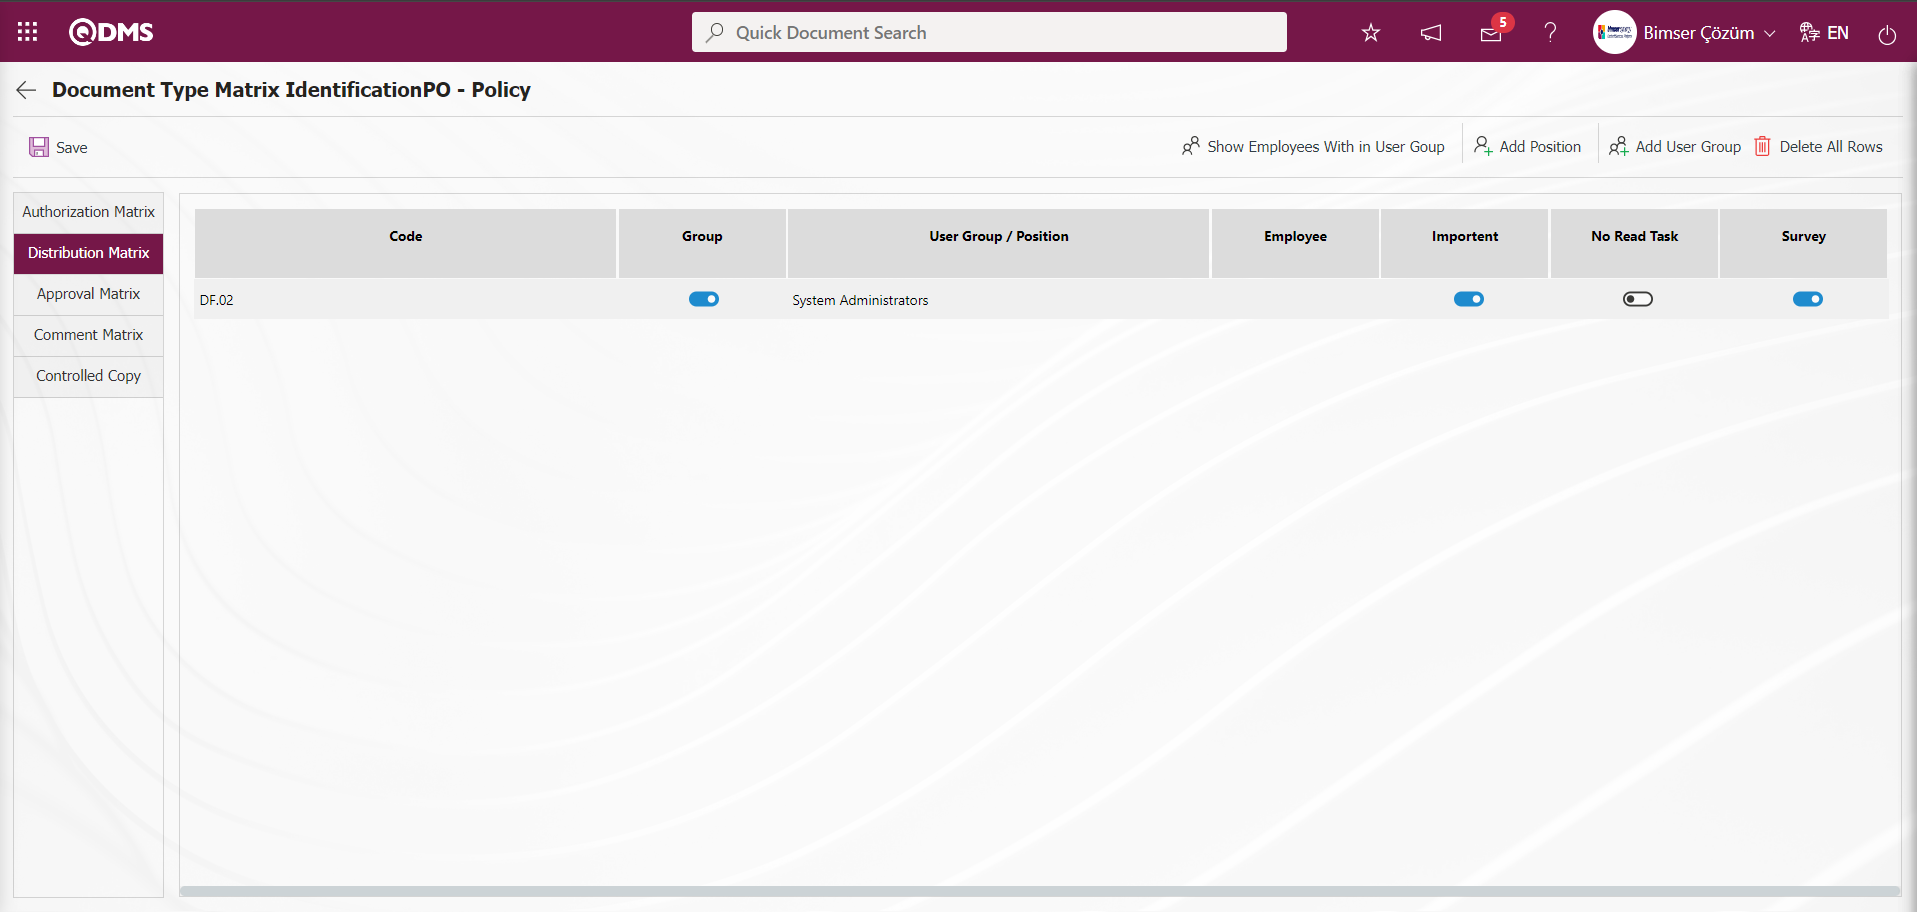
Distribution Matrix
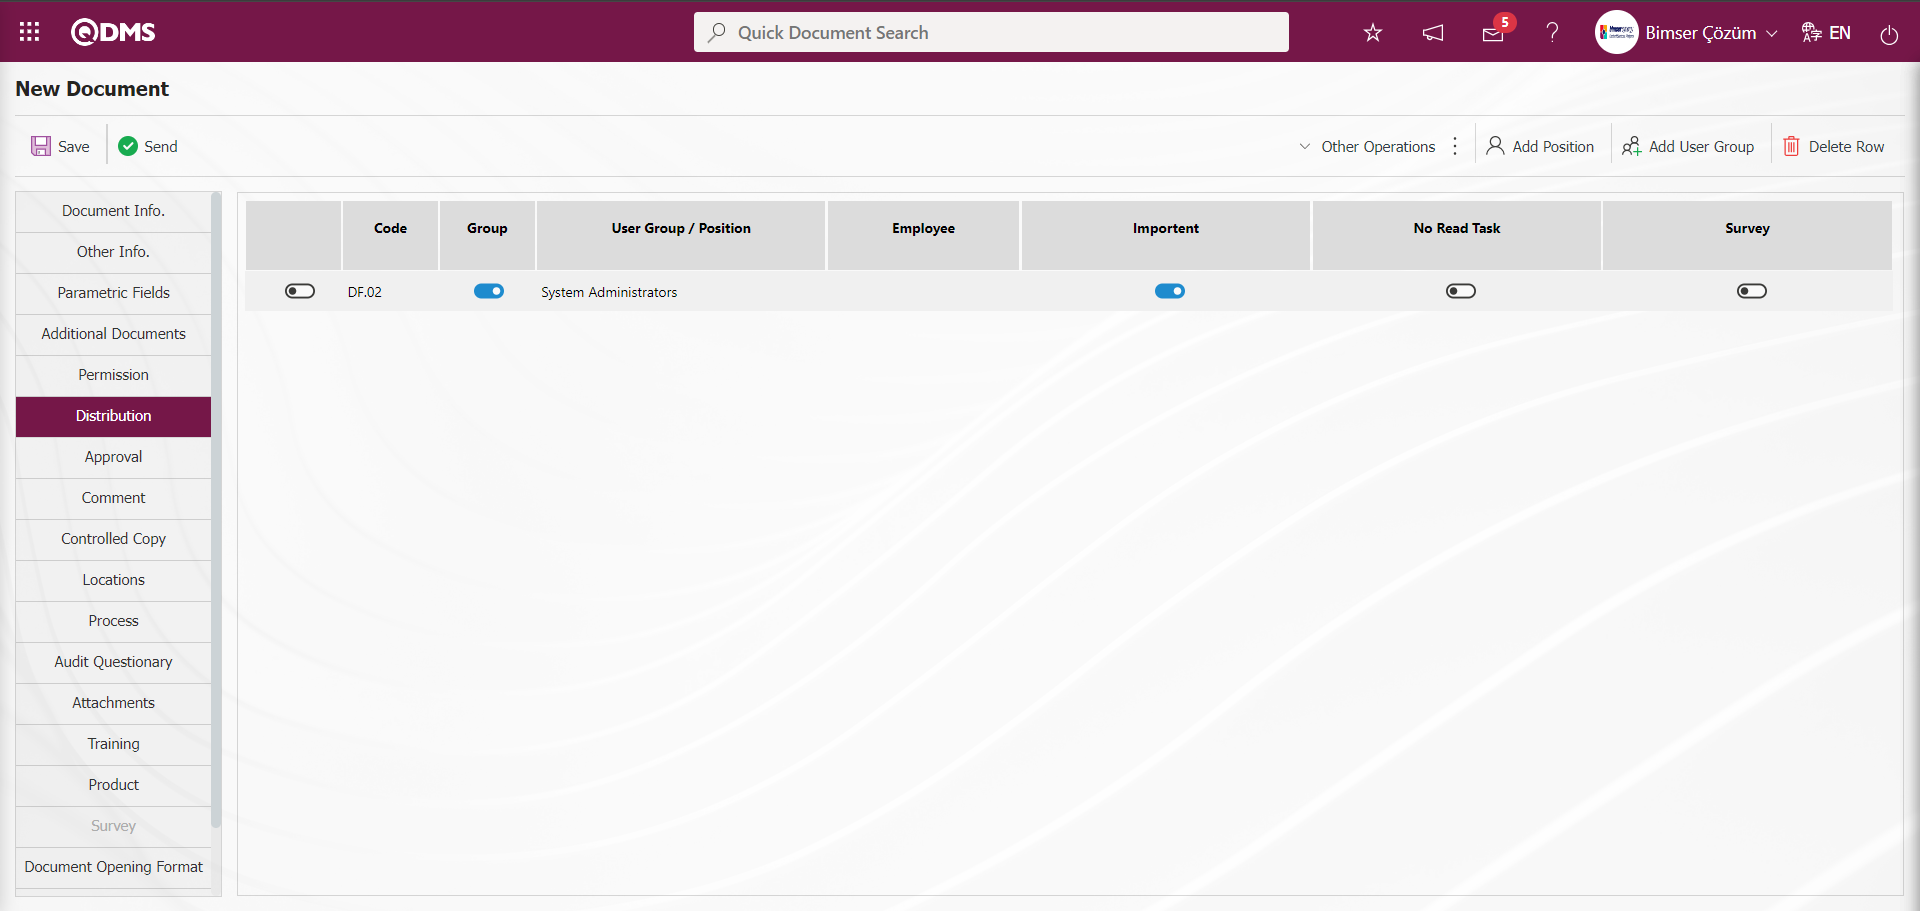
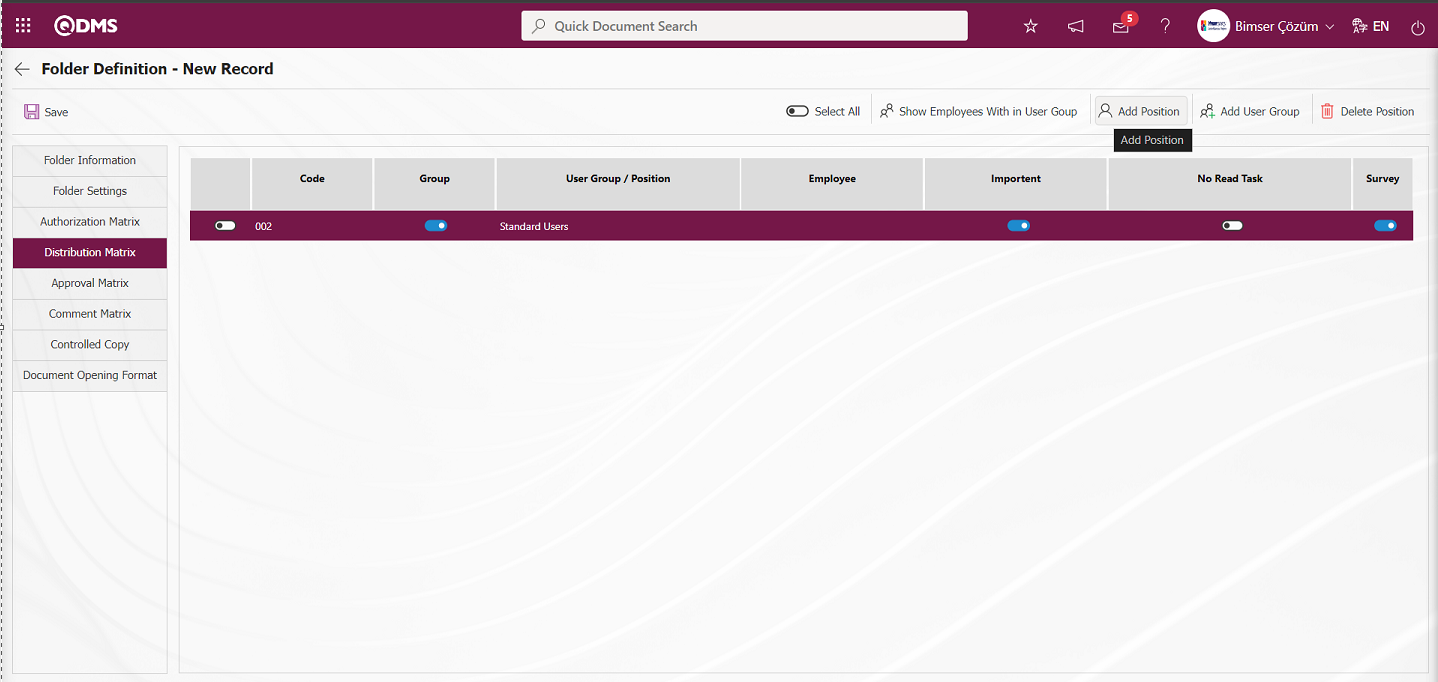
This tab determines which users or user groups will be assigned to read the documents to which the document type is linked.
Important: For the documents related to the document type, the check box related to important is checked. Documents with an important check box marked will be assigned as a “List of Important Documents to Read” job on the user's My Pending Jobs page. If the relevant check box is not checked in the documents related to the document type, the user will be assigned as the “List of Documents to be Read” job on the My Pending Jobs page. The parameter value of the parameter 273 “Will the Important Document function be used in the distribution matrix?” in the Document Management Module parameters is activated by selecting “Yes”.

After the parameter is activated, the “Important” field is displayed in the Distribution Matrix tab and this feature is used in the document management module.
No Read Task: If the reading task is not requested for documents related to the document type, the relevant check box is checked. The parameter value of the parameter 274 “Will the Dont Create Read Task function be used in the distribution matrix?” is selected as “Yes” in the Document Management parameters and the parameter is activated.
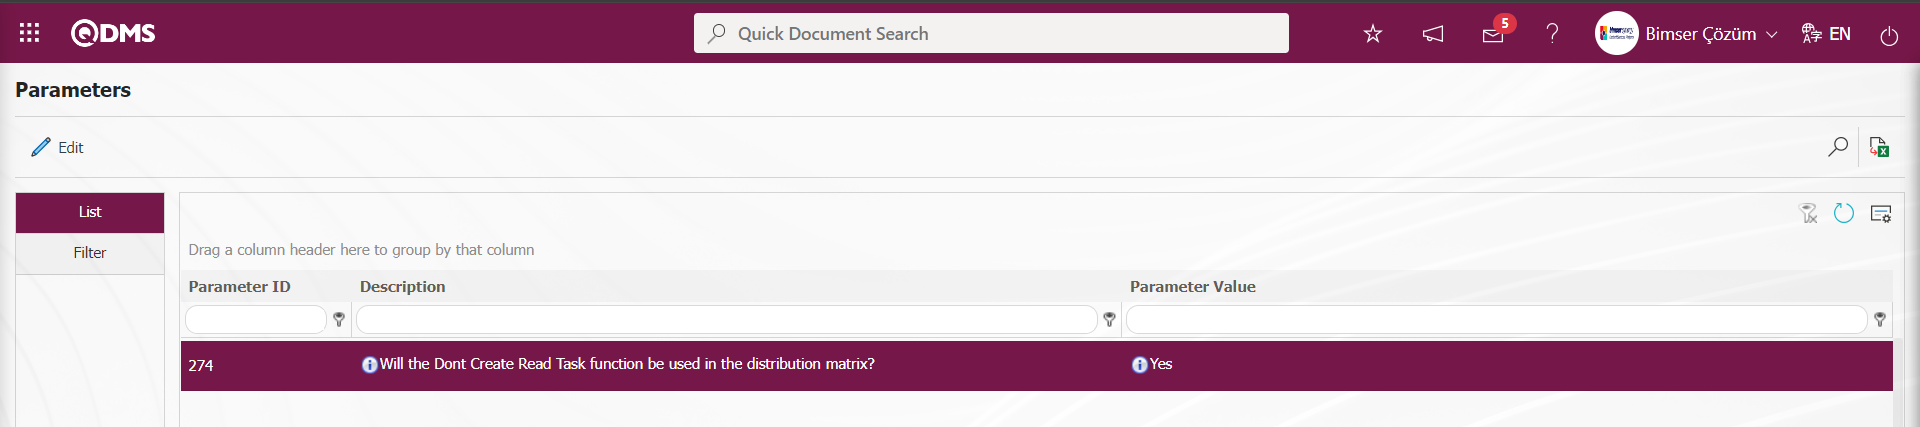
After the parameter is activated, the "No Read Task”field is displayed in the distribution matrix tab.
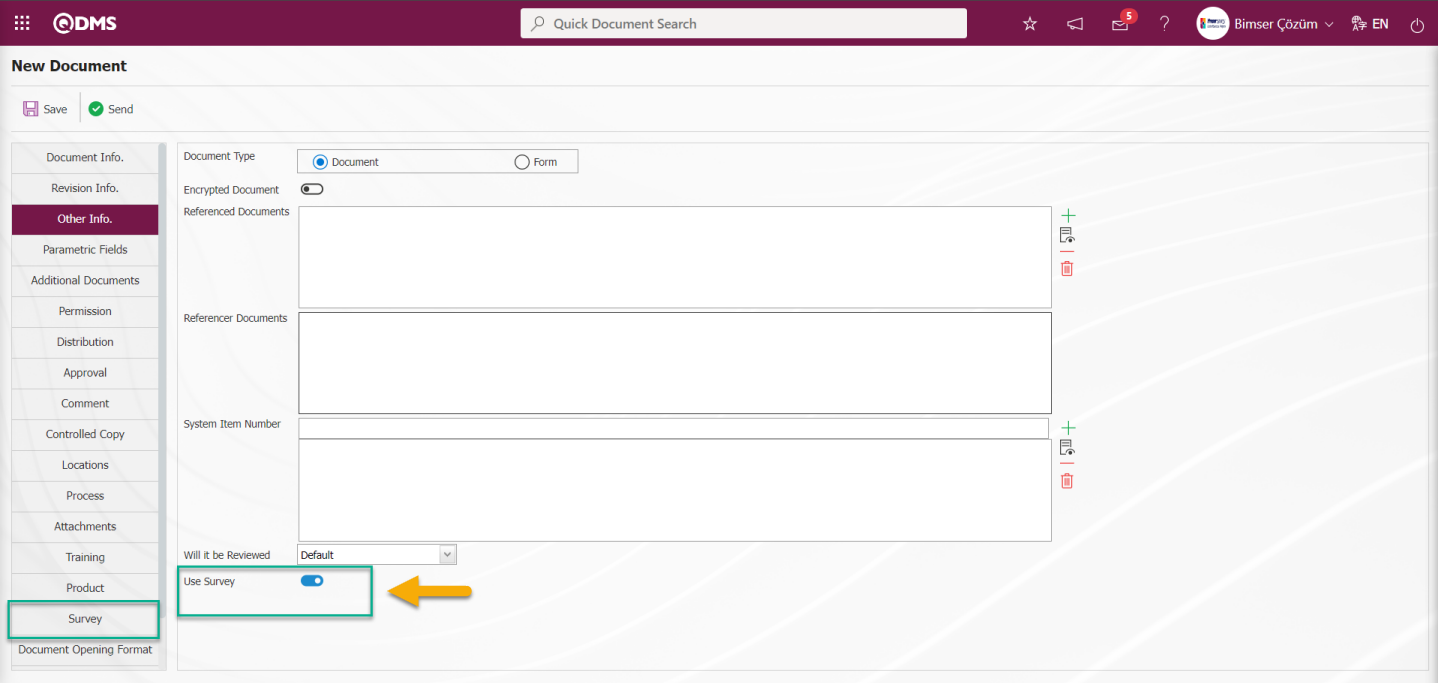
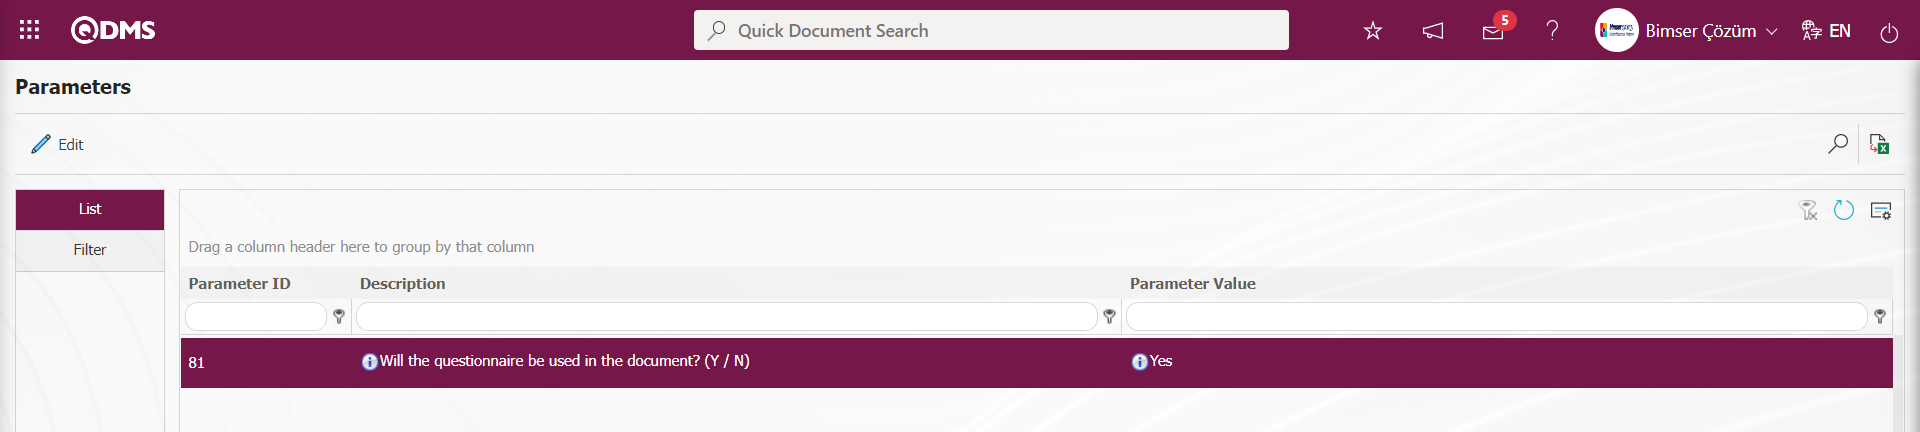
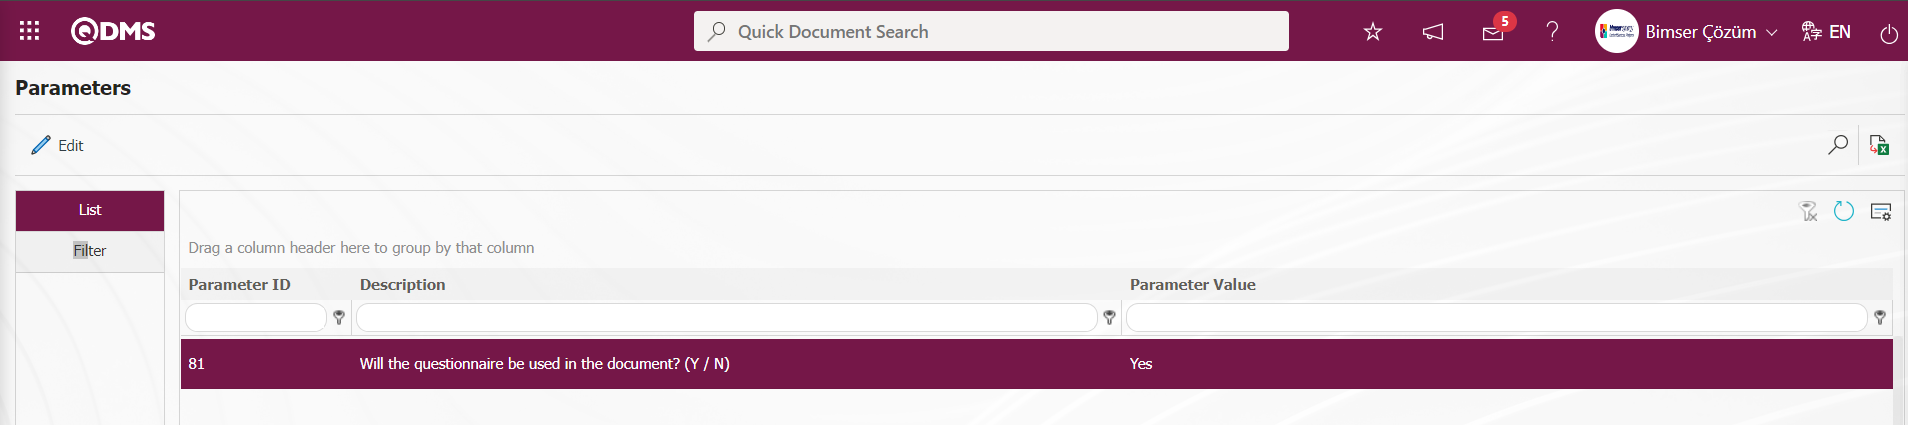
Survey: If the questionnaire will be used for documents related to the document type, the relevant check box is checked. The parameter value of parameter 81 “Will the questionnaire be used in the document? (Y/ N)” is activated by selecting “Yes”.

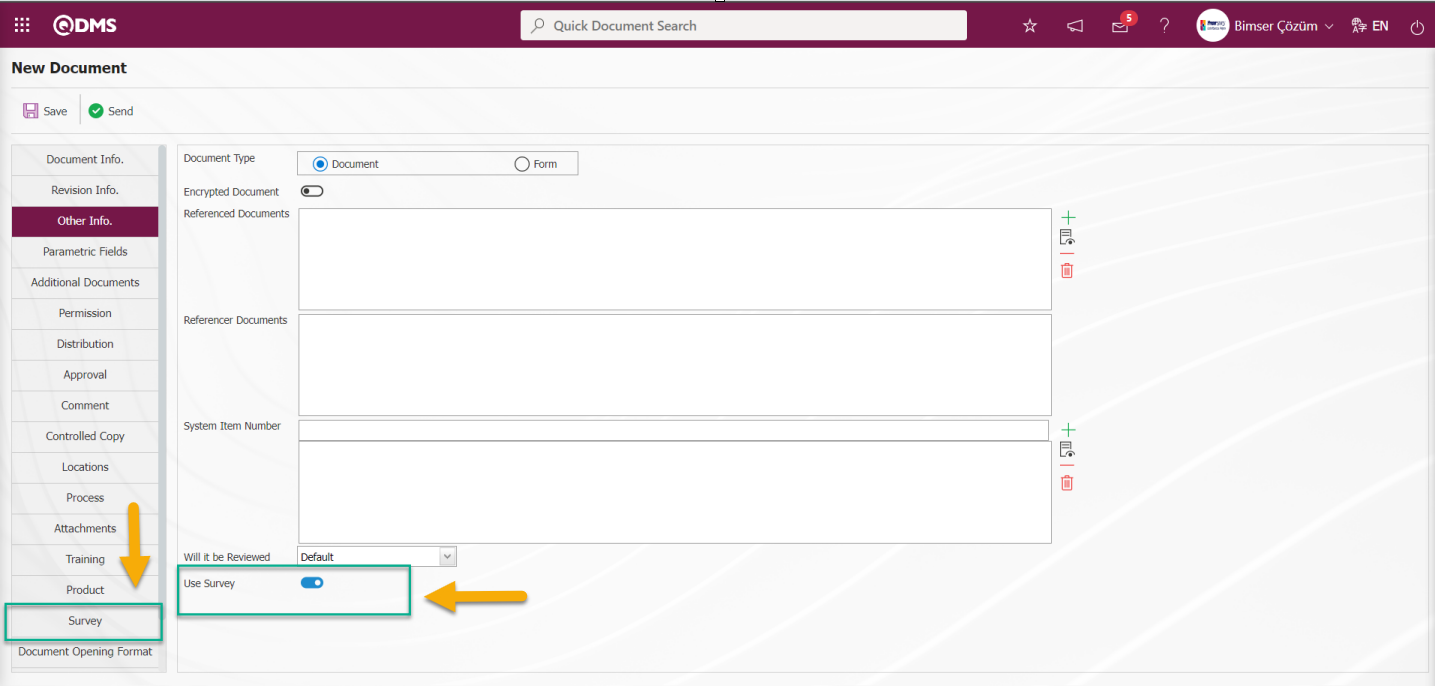
After the parameter is activated, the check box related to the “Use Survey” field is checked in the Other Information tab on the New Document screen in the document related to the document type. After the check box related to the “Use Survey” field is checked, the survey tab is activated to define the survey questions.
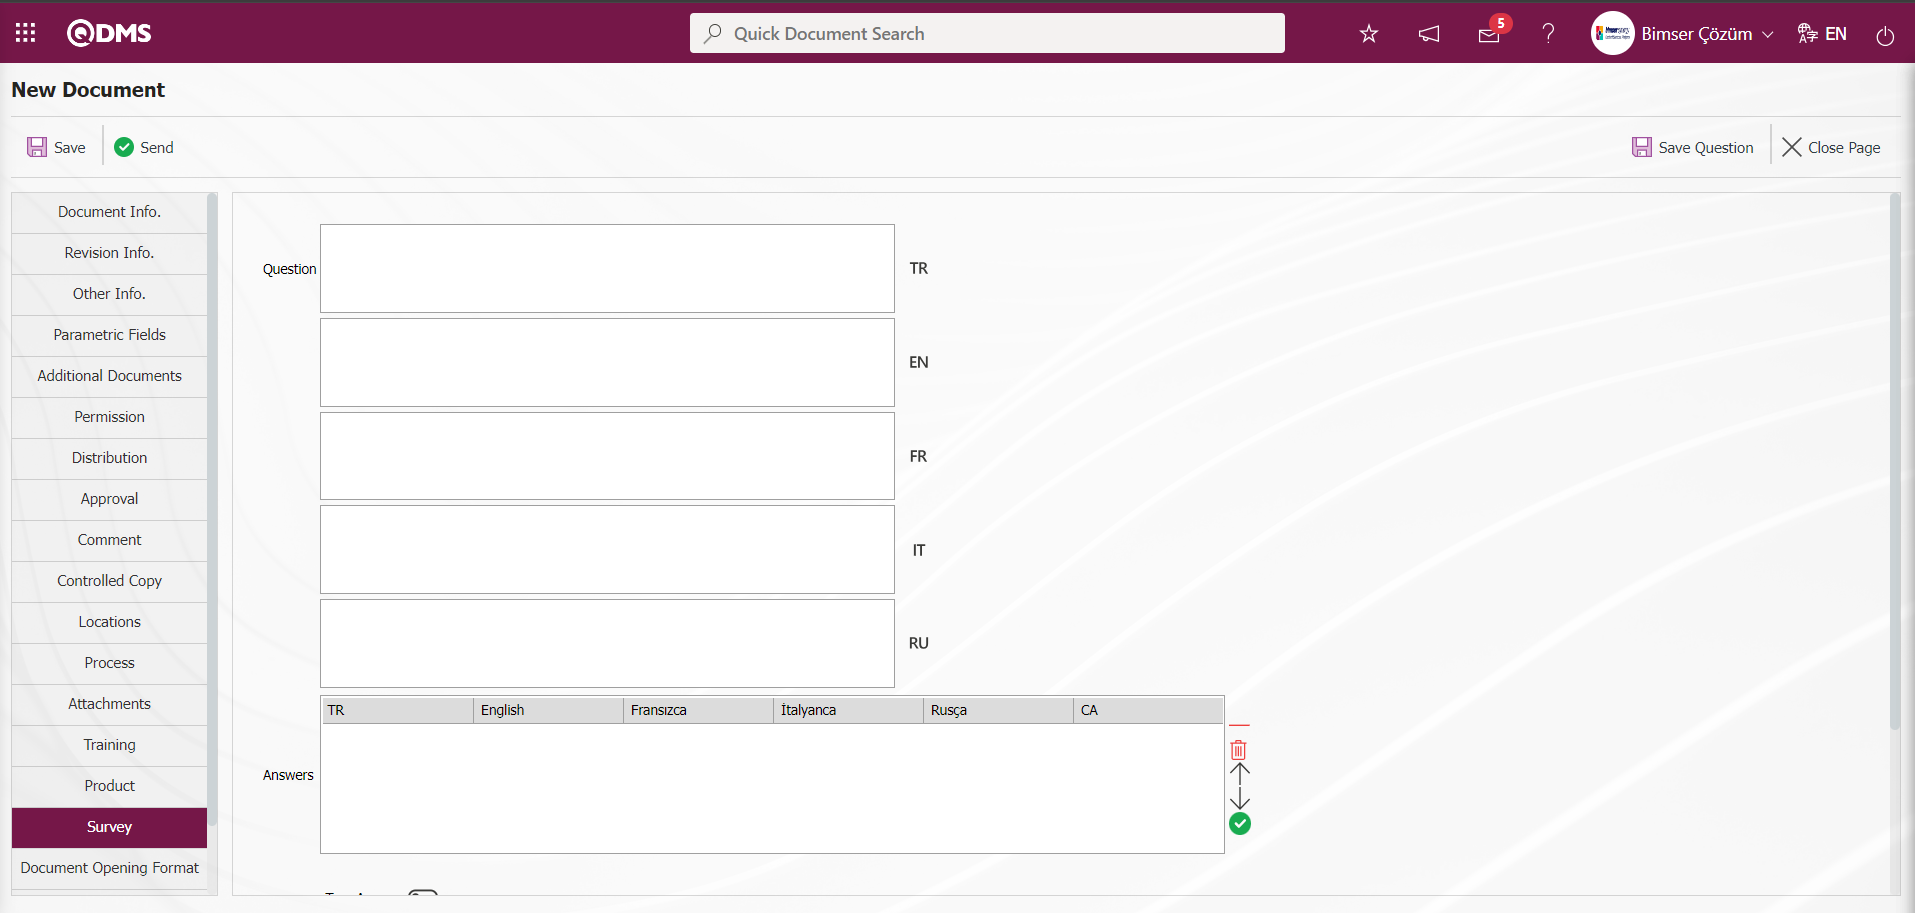
The Question definition screen is displayed by clicking the Survey tab.
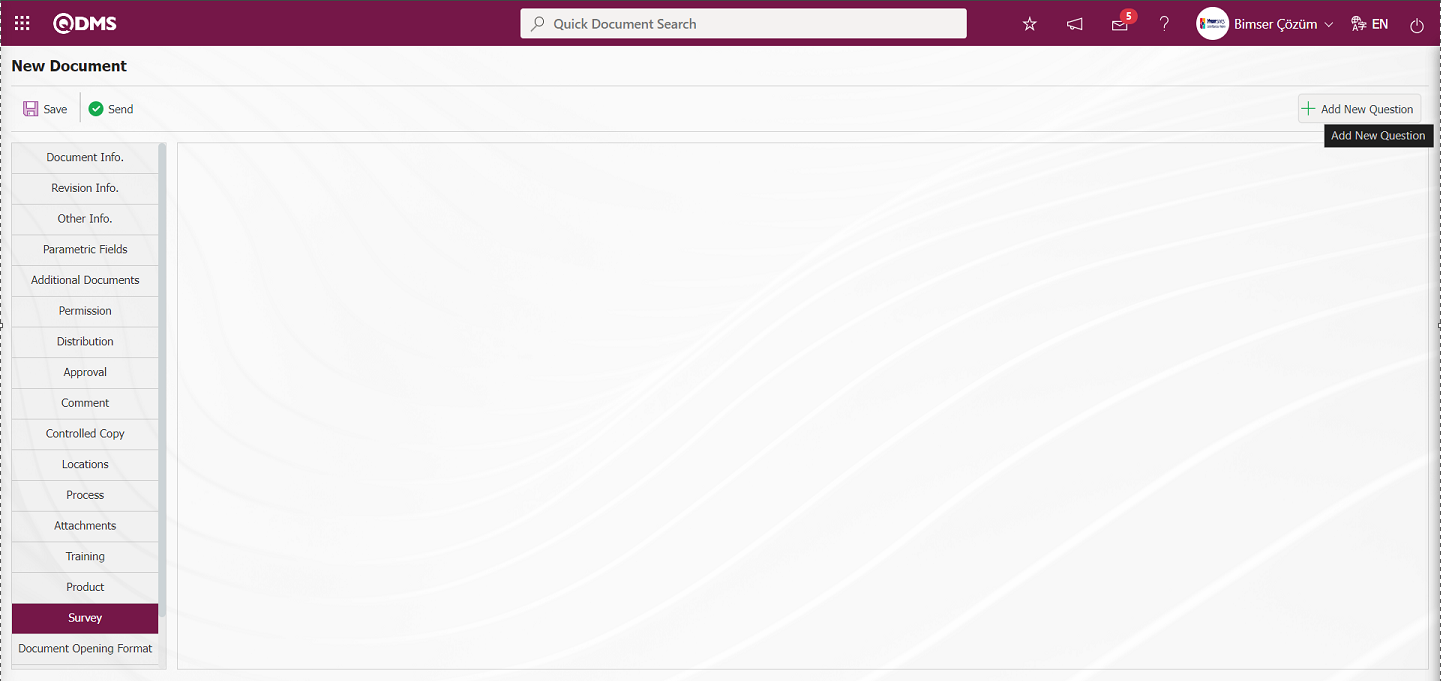
By clicking the  button on the Survey tab, the Survey identification process is done by defining the questions related to the Survey.
If the check box related to the “Survey” field from the user/ User Groups added in the distribution matrix tab in the document where the Survey Definition process is performed, the survey is sent.
With the help of the buttons on the screen;
 : Shows the personnel in the selected user group.
 : Add position to the list.
 : User group is added to the list
 : Deletes the distribution in the position/user group selected in the list.
Click  /
/  buttons to assign to the distribution matrix in the document based on the Document Type. From the User Group/ Position list defined in the system, a selection is made for the users to be added to the distribution matrix.
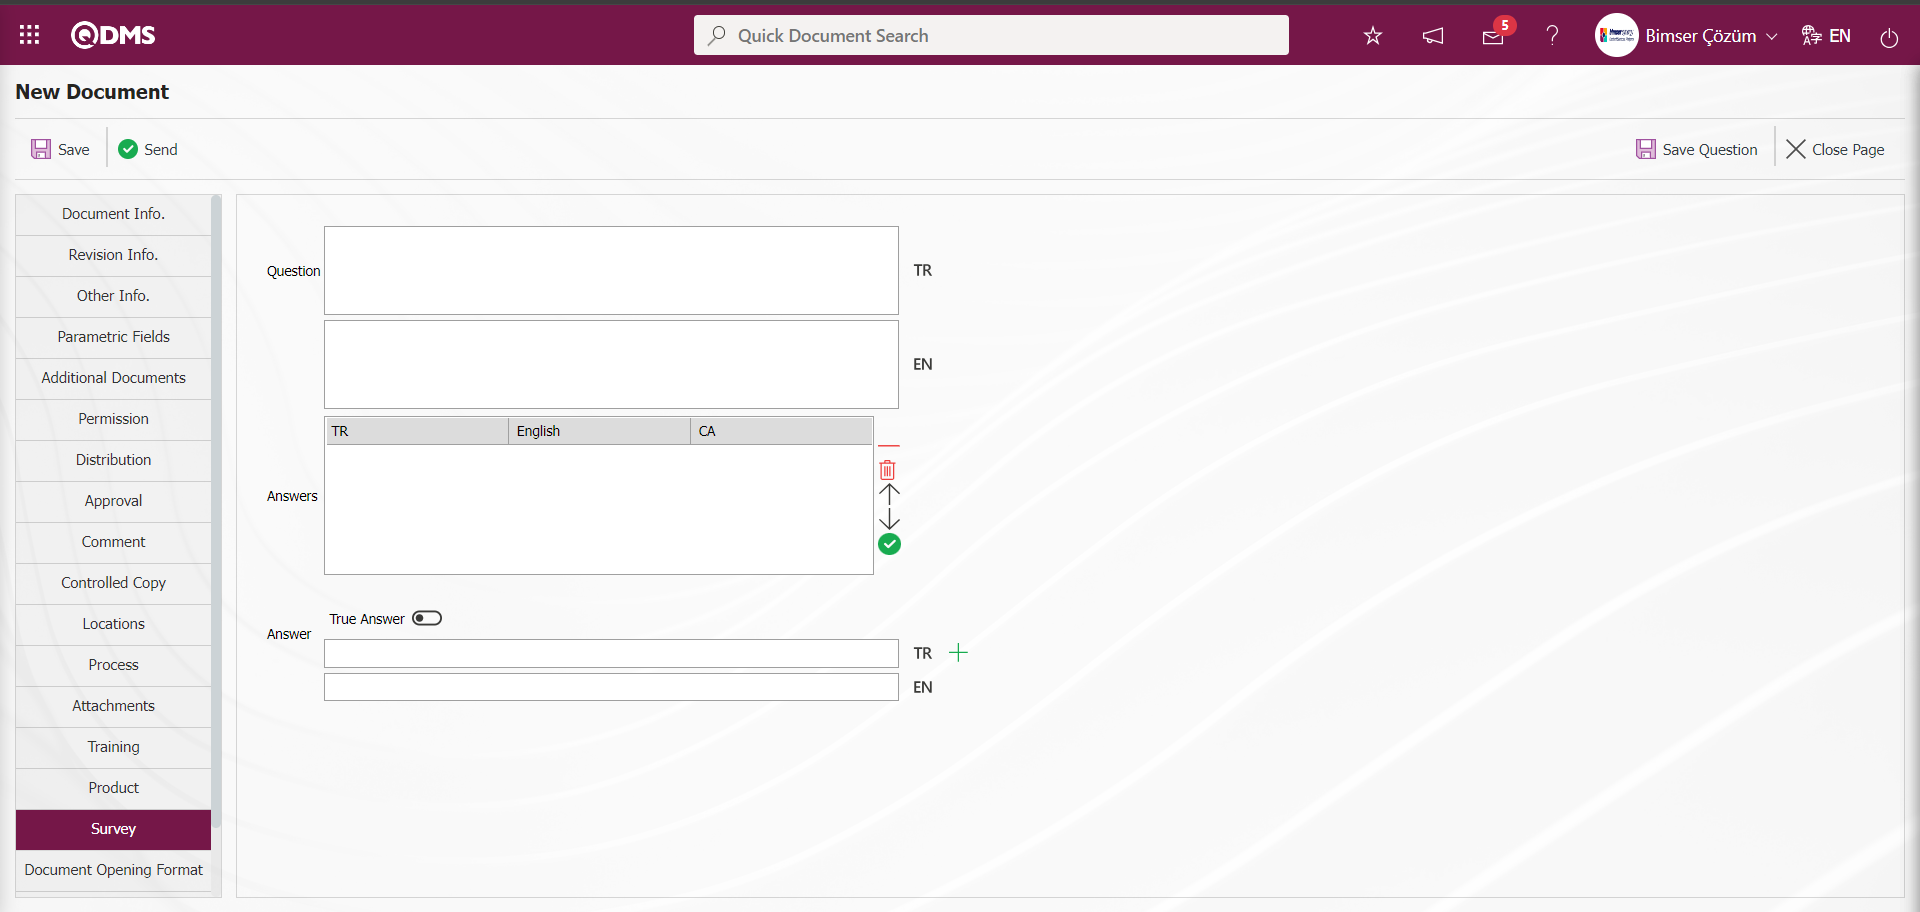
On the Document Types Matrix Identification screen, click the button on the Distribution Matrix tab.
From the user group list defined in the system, the user group that will be assigned to read the distribution matrix is selected and added to the distribution matrix by clicking the  button.

After adding a user group to the distribution matrix, the relevant check boxes are checked in the relevant fields to determine whether they will use features such as important documents and surveys.
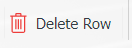
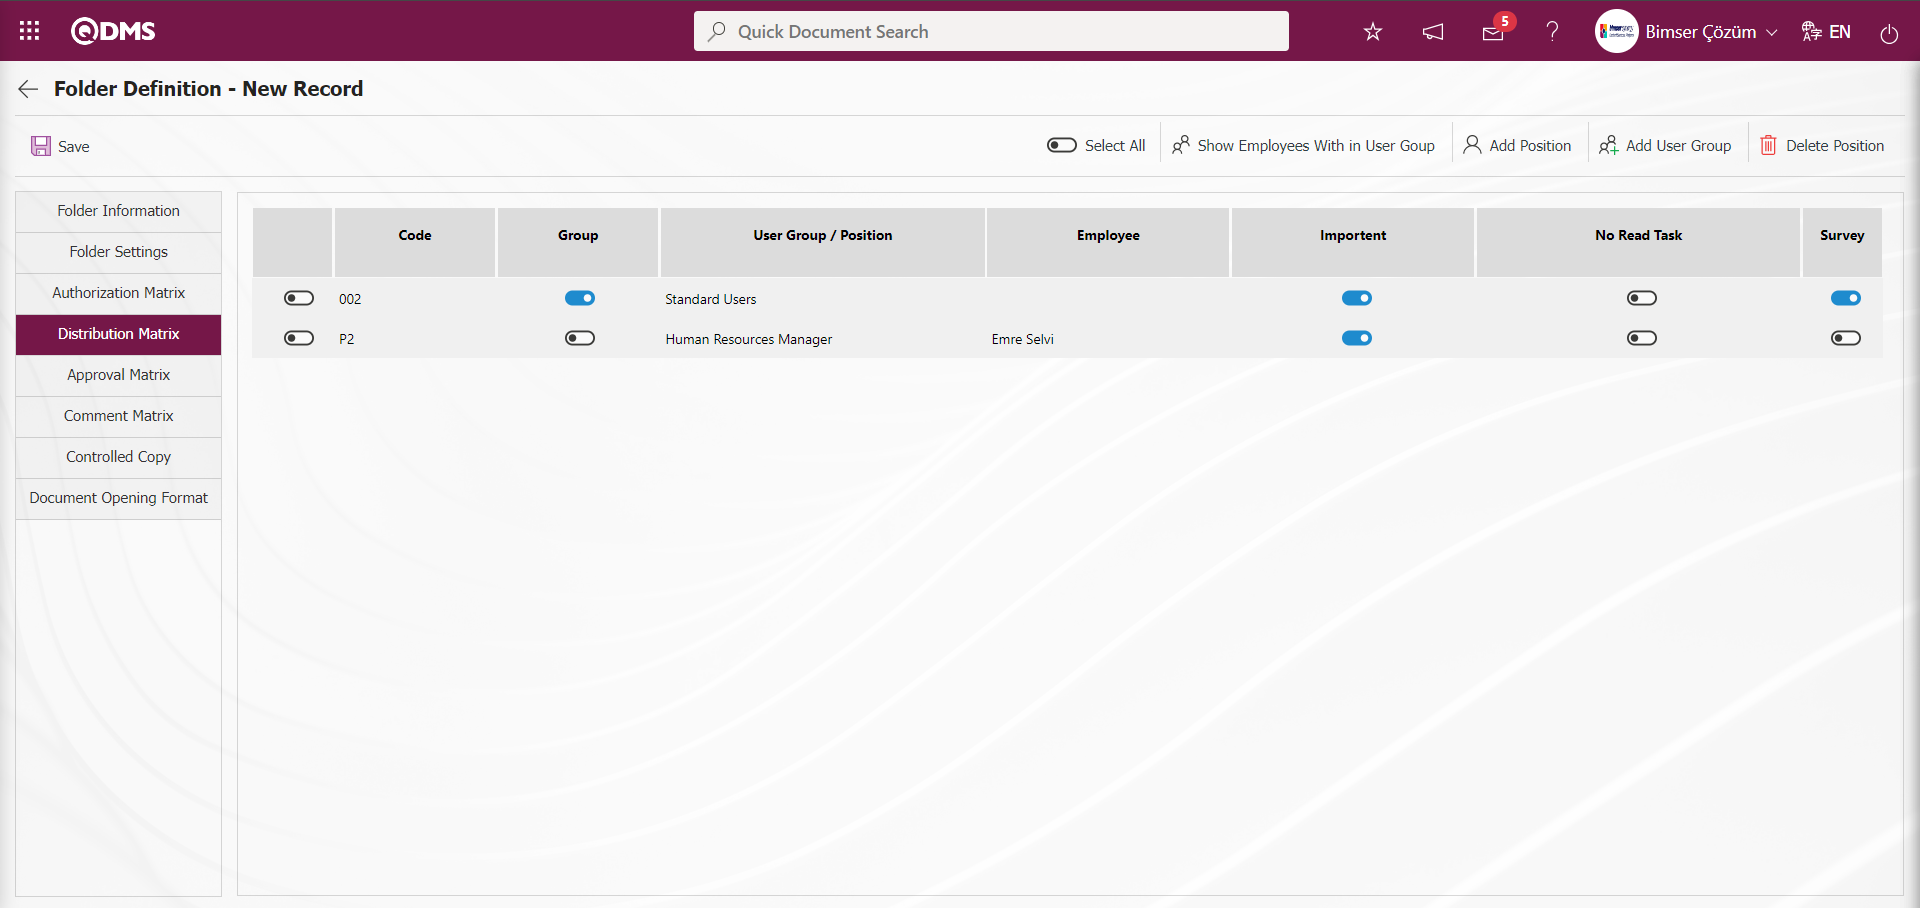
Approval Matrix tab;
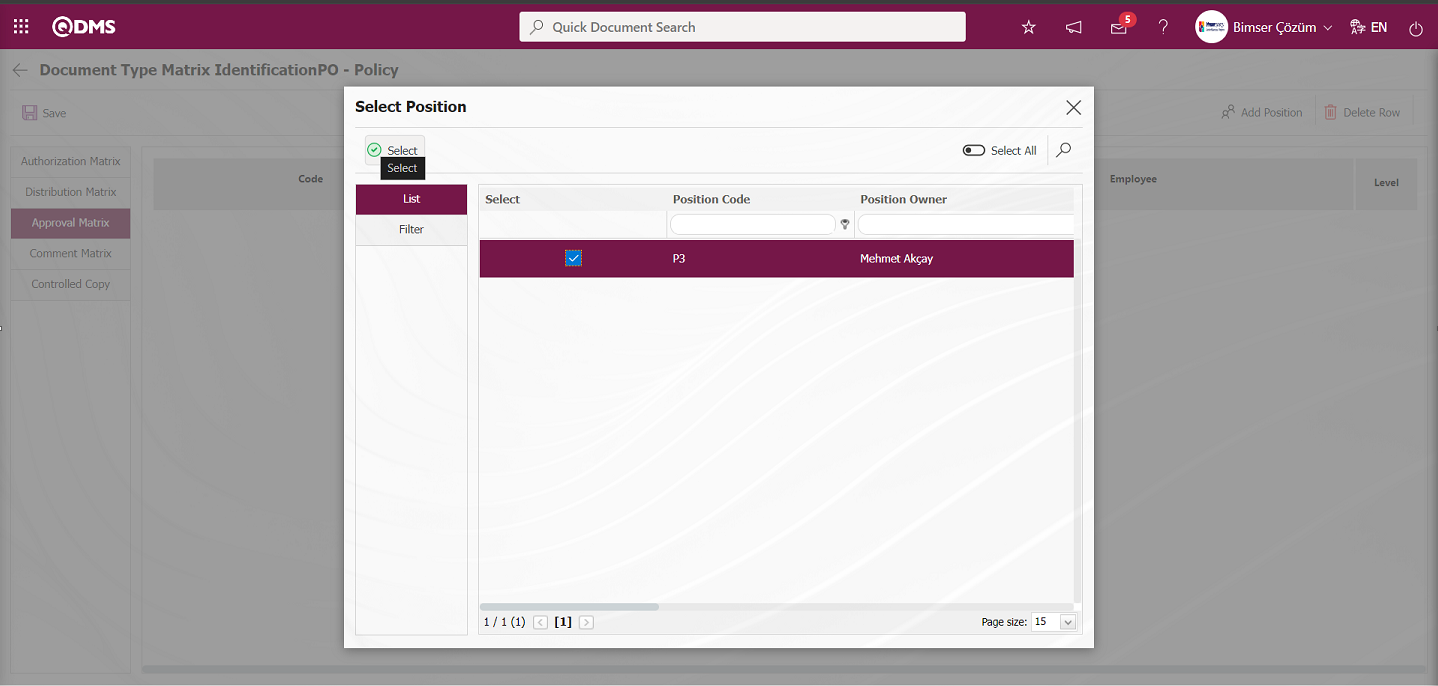
It is the tab where the documents to which the document type is connected will be approved by whom and the approval levels are determined. The level part in the approval matrix in the document connected to the Document Type works with the reverse logic. If the value written in the level section in the approval process is “0” zero, the approver at level 0 is the last approver.
1. In the document linked to the document type in the image, the value in the level section in the approval process is “0” and since it is the last approver, the document goes for approval only to the person in the position of the last approver.

2. In the approval process in the document connected to the document type in the image, it goes to the approval from back to front. First, the approver at the “1” level approves the document connected to the document type. Finally, the approver at the “0” level performs the approval process of the document connected to the document type.
3. In the document type in the image, the approval process in the linked document is defined as parallel approval. In parallel approval process, there are approvers at the same level and approval process is done without a certain order. After the approval process of all approvers is finished, the approval process in the document connected to the document type is finished. Any approver at level “0” performs the approval process without the need for sequencing.
4. In the approval process in the document depending on the document type in the image, it goes to the approval from the reverse to the beginning. After the approval process of the approvers at level 1 is done without any sorting from the approvers at level 1, the approval process is done to the person in the “0” level position, who is the last approver.

With the help of the buttons on the screen;
 : Adds a position to the list.
 : Deletes the selected line in the list.
Click on the button to assign the approvers desired to be in the approval matrix in the document based on the Document Type. From the position list defined in the system, a selection is made for the users to be added to the approval matrix.
On the Document Types Matrix Identification screen, click the  button on the Approval matrix tab and select the approver to be added in the Position List defined in the system and click the
  button to add the approver.
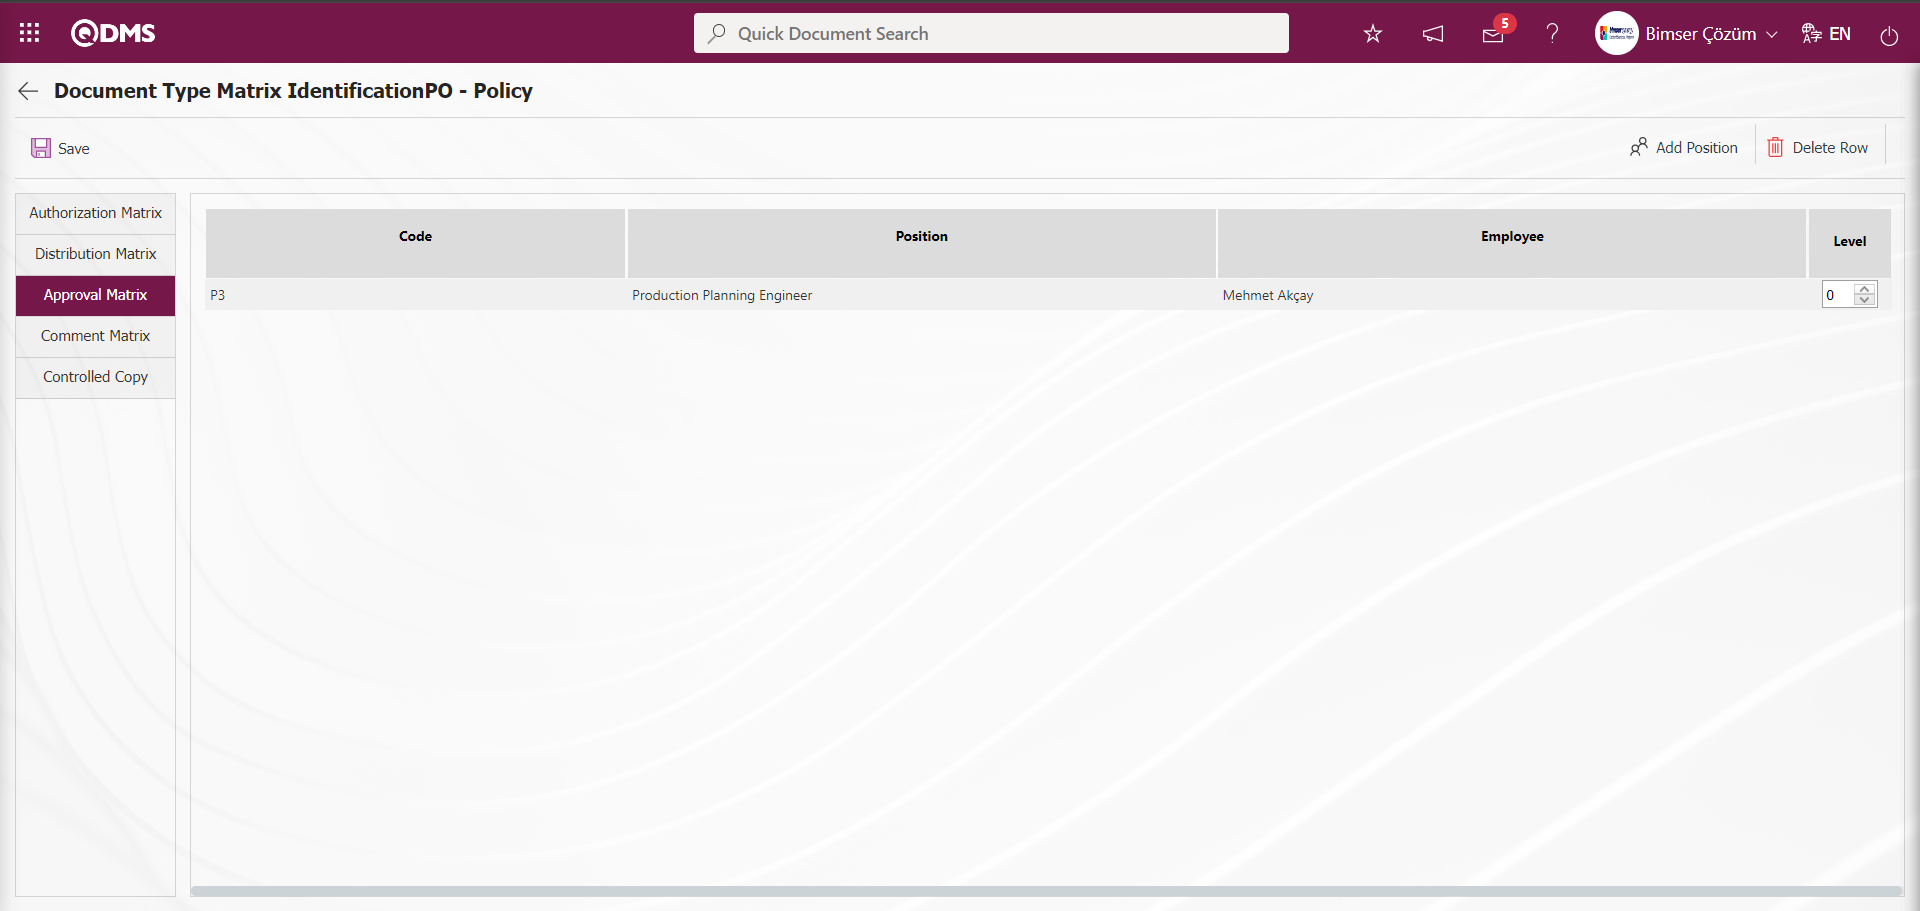
Comment Matrix tab;
It is the tab where it is determined to which user or user groups the documents related to the document type will go to the opinion.
With the help of the buttons on the screen;
 : Add position to the list.
 : Deletes the selected position in the list.
 : Deletes the personnel in all positions added in the Comment matrix.
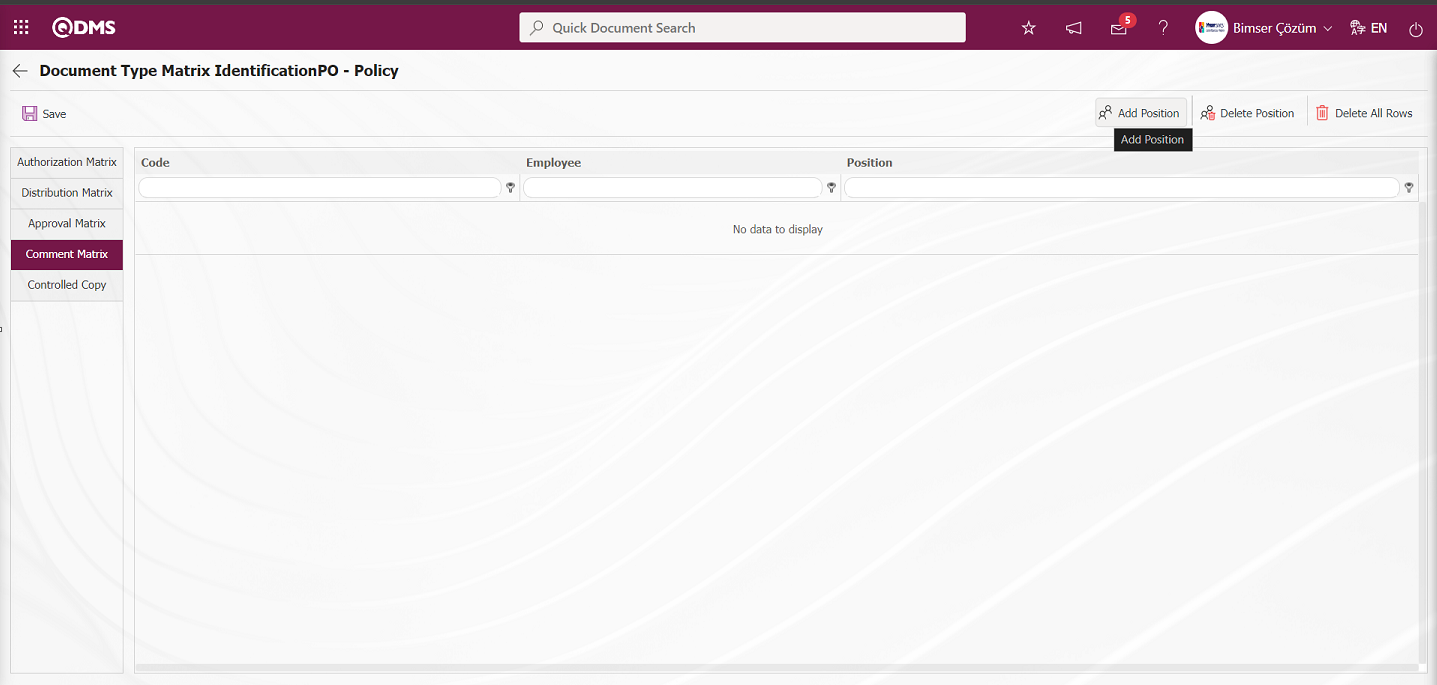
On the Comment Matrix tab of the Document Types Matrix Identification screen, click on the button to add a commentator.
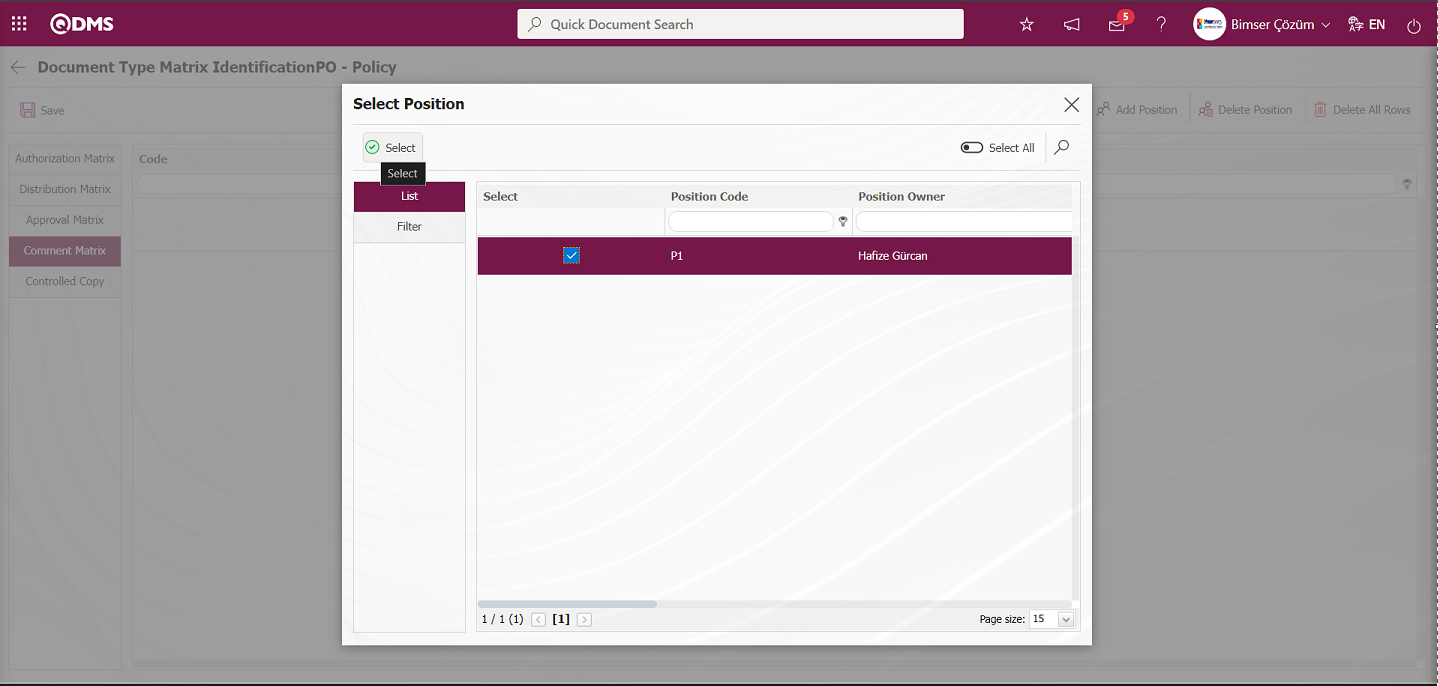
Select the relevant position in the list of positions defined in the system and click the 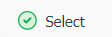 button to add an interviewer to the comment matrix.
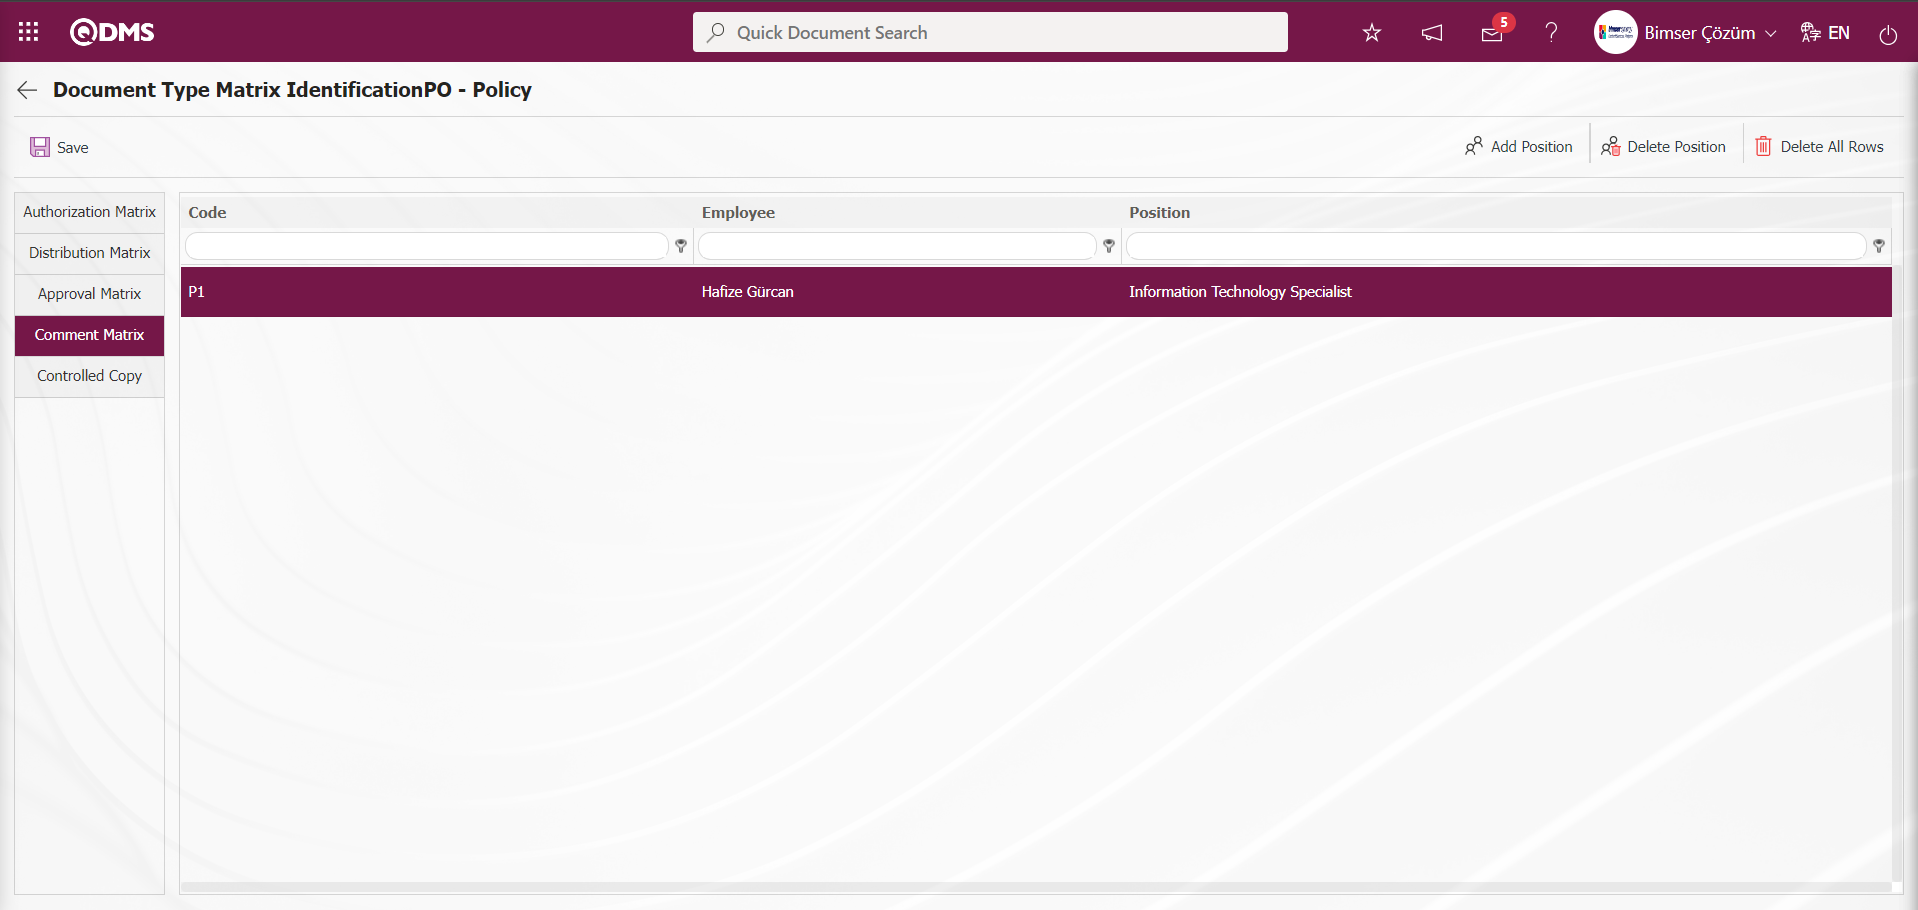
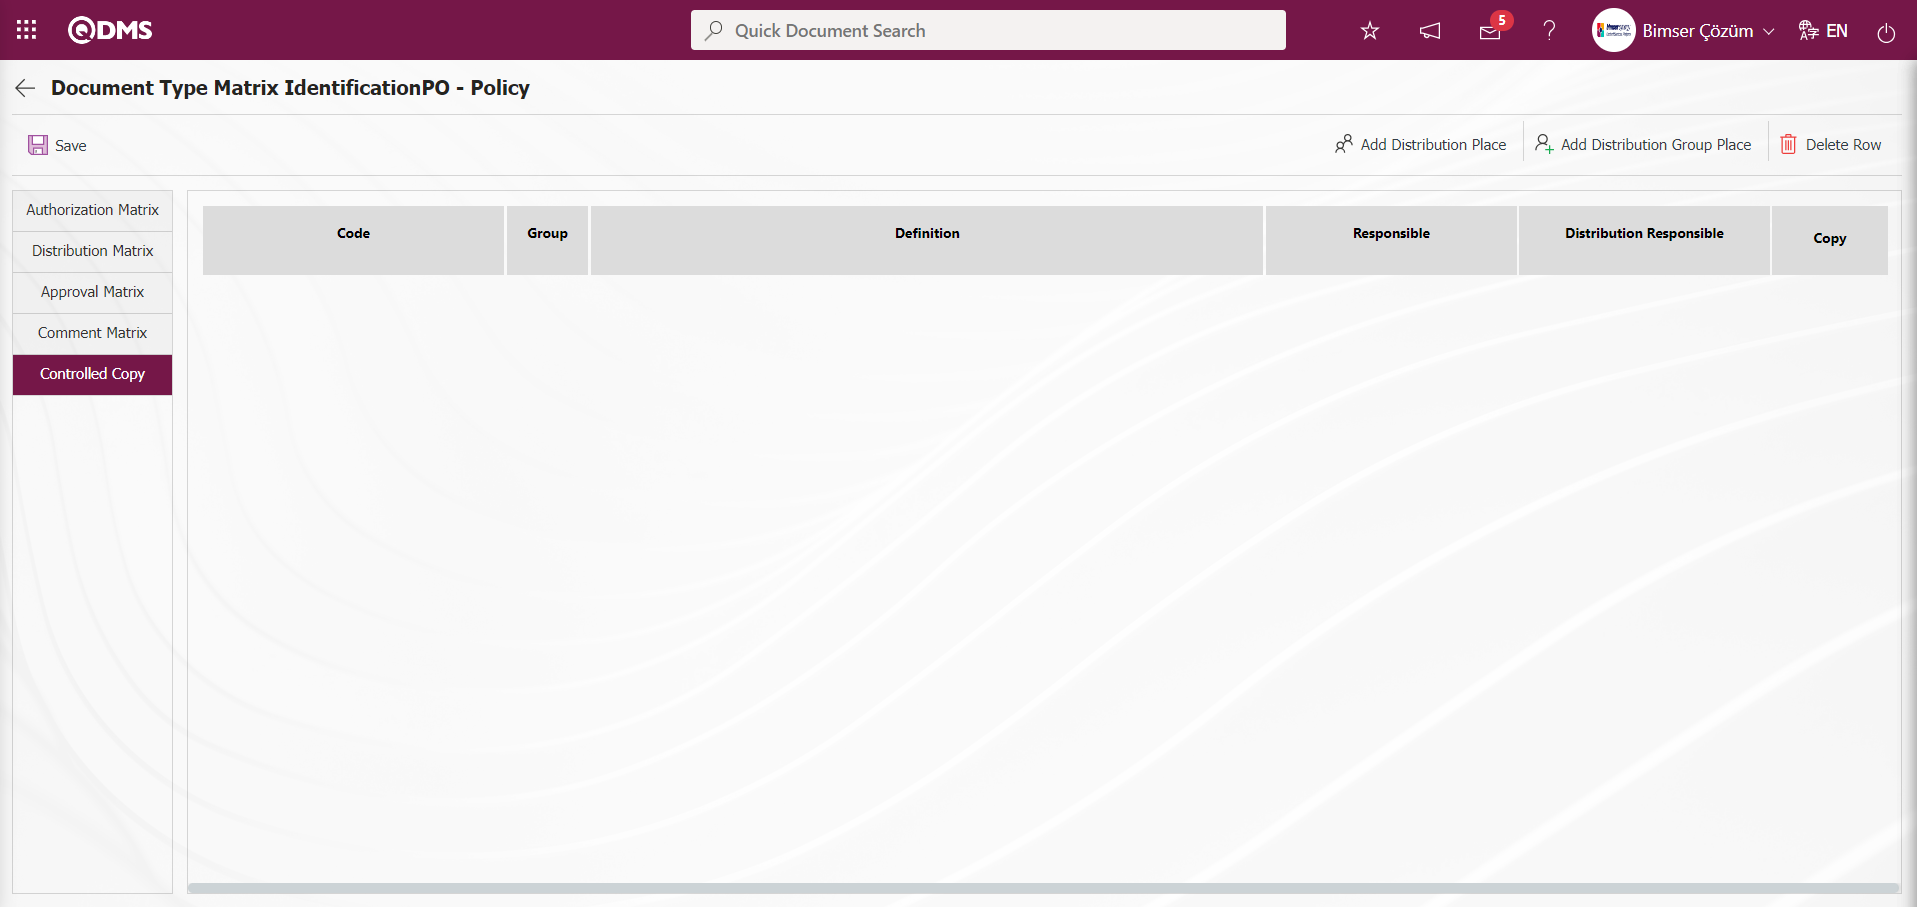
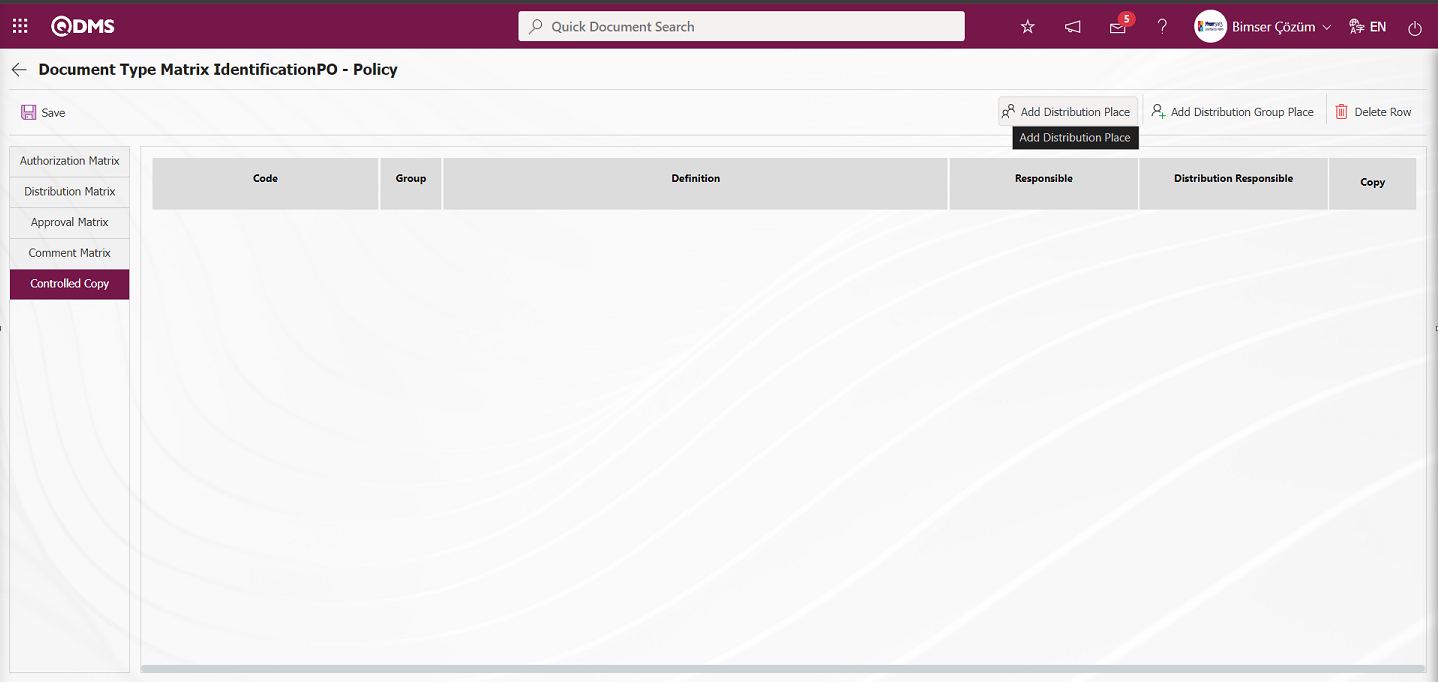
Controlled Copy Tab;
This tab determines to which distribution location or distribution location group the documents to which the document type is linked will be distributed as controlled copies.
With the help of the buttons on the screen;
 : Add distribution location to the list.
 : Distribution place group is added to the list.
 : The selected line in the list is deleted.
Click the  /
/  buttons to assign the physical distribution places desired to be in the controlled copy tab depending on the Document Type. From the list of distribution locations/distribution groups defined in the system, a selection is made for the distribution locations to be added to the controlled copy tab.
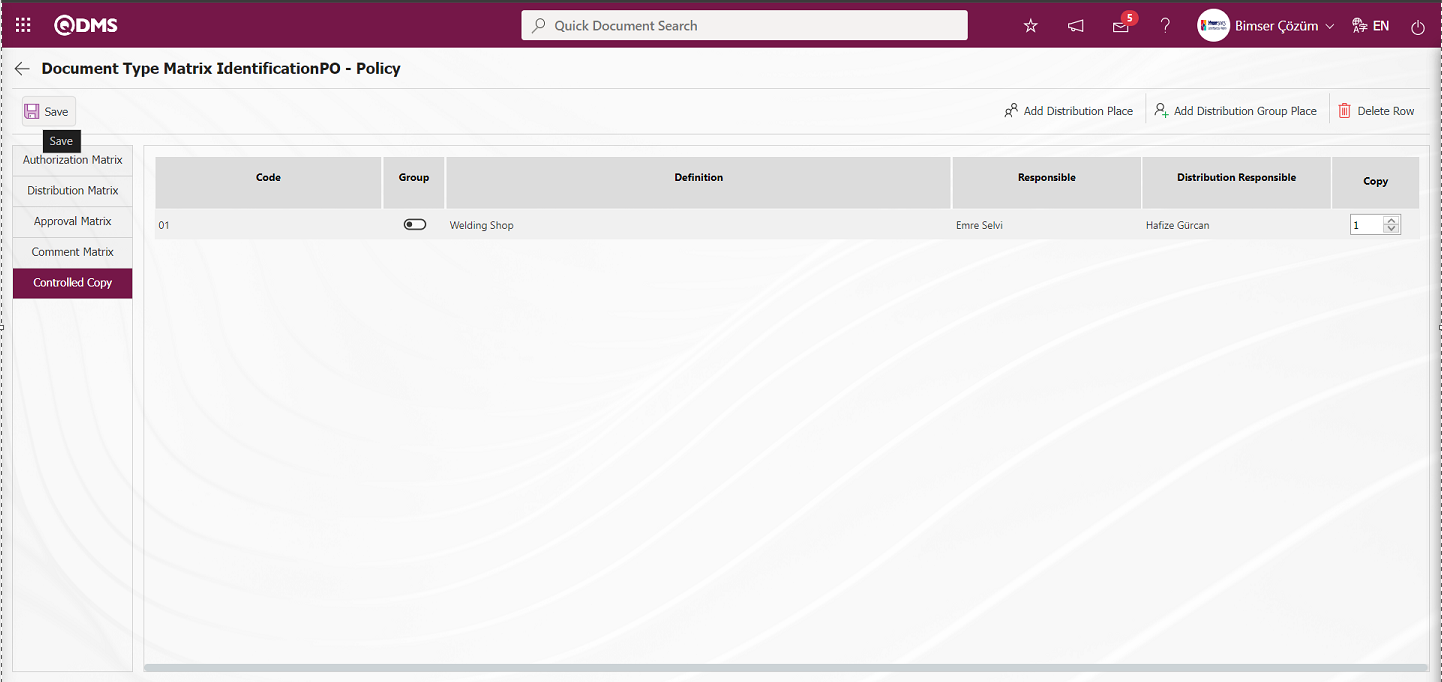
On the Document Types Matrix Identification screen, click the button for the documents related to the Document type in the Control Copy tab.
In the controlled copy tab, select the distribution location to be added in the distribution location list and click the  button to add it.
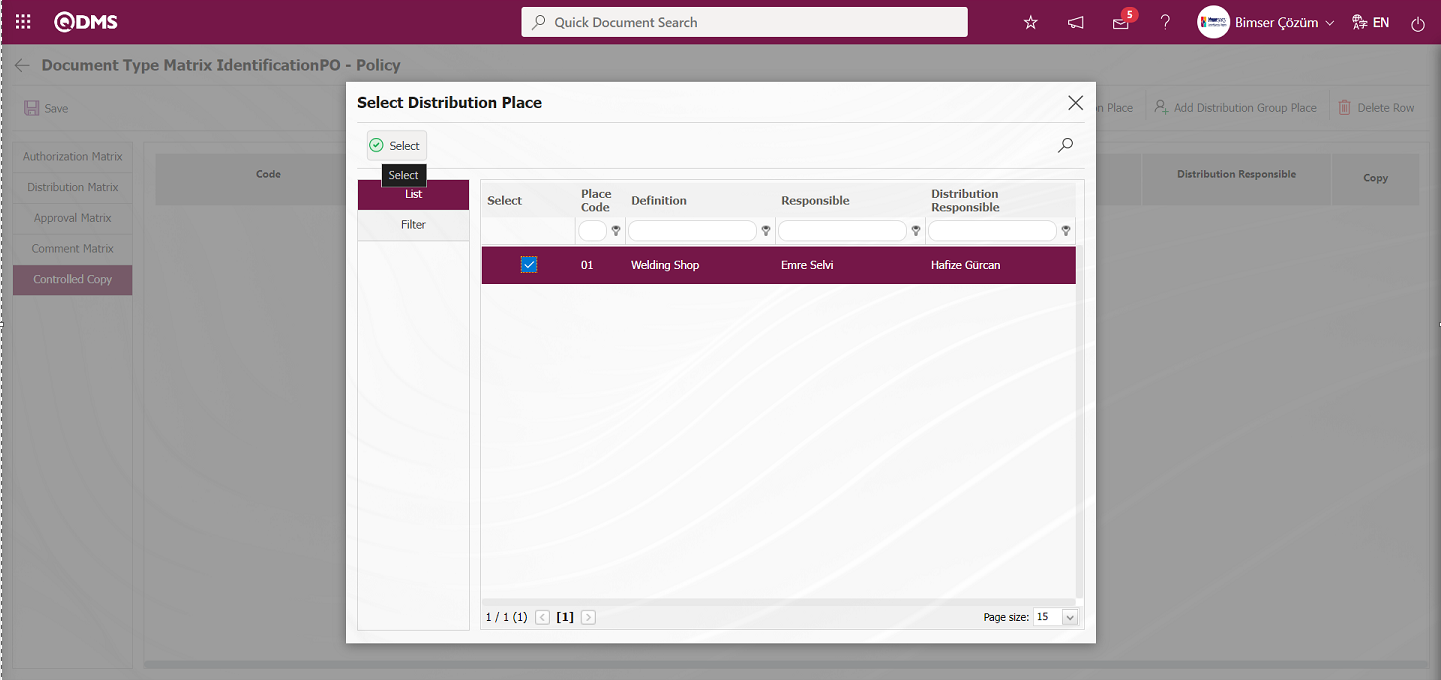
After performing the steps in the relevant tabs for the documents related to the document type, the matrix definition process related to the document type is performed by clicking the  button in the upper left corner of the screen.
After Defining Matrix depending on document type, click on Integrated Management System/Document Activities/Document Creation menu.
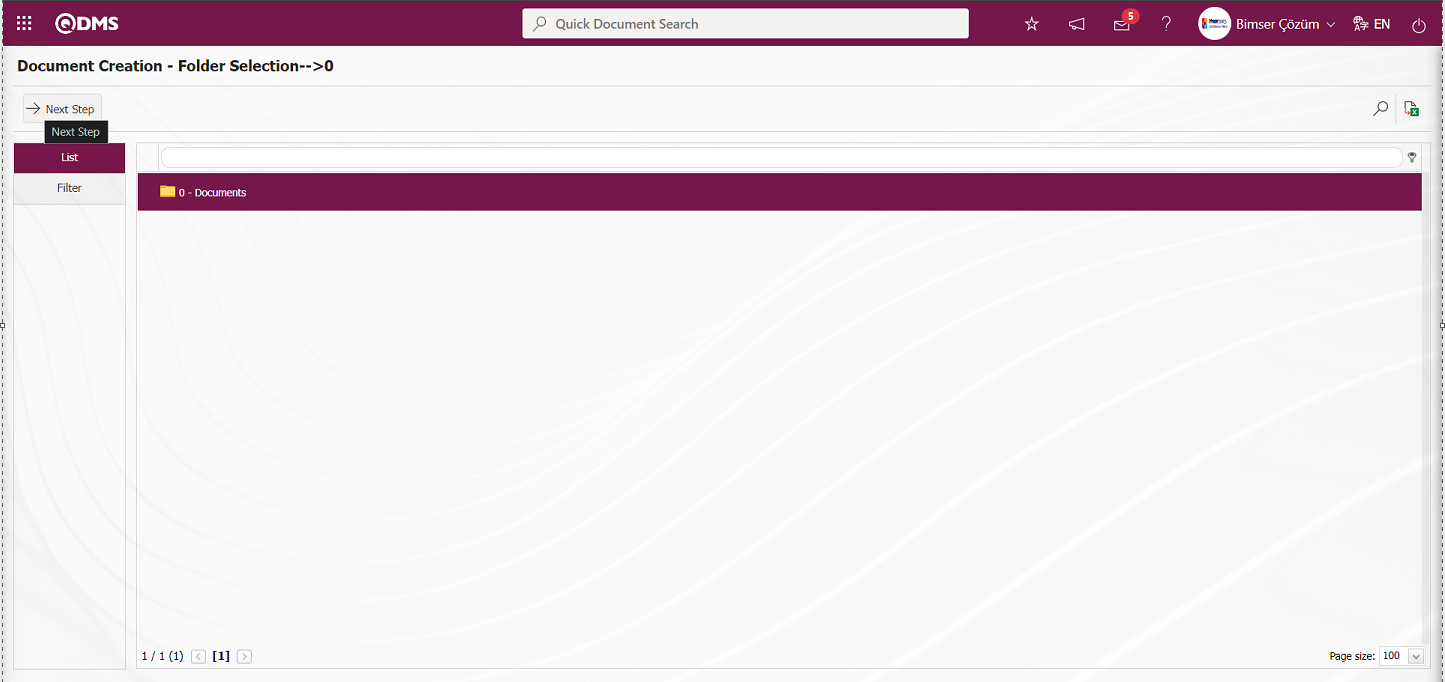
In the Document Preparation - Folder Selection screen, select the folder where the document will be prepared and click the Next button. On the New Document screen, select the type of document for which matrix definition is made from the Document Type field.
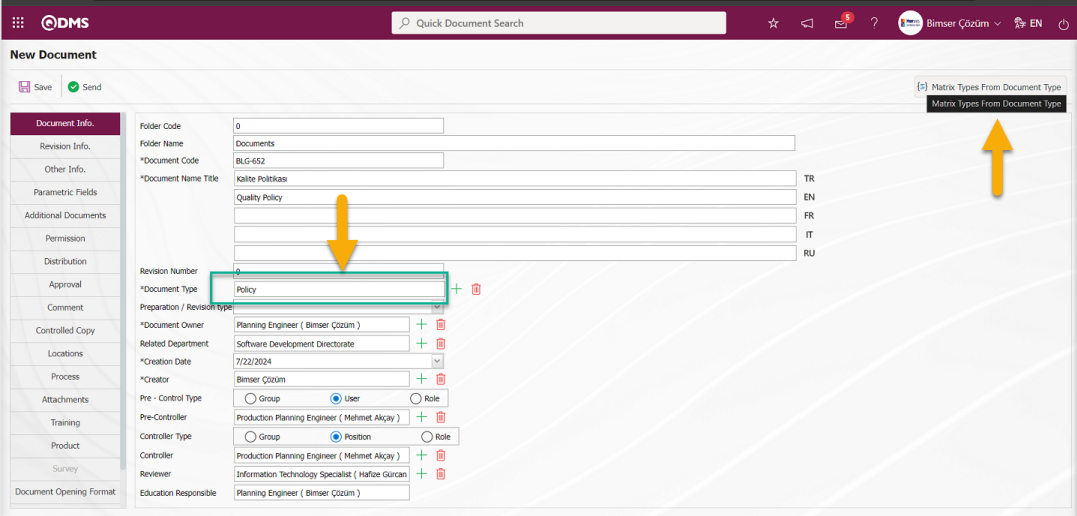
In the Document Type field, click on the  button after the selection of the document type for which matrix definition is made.
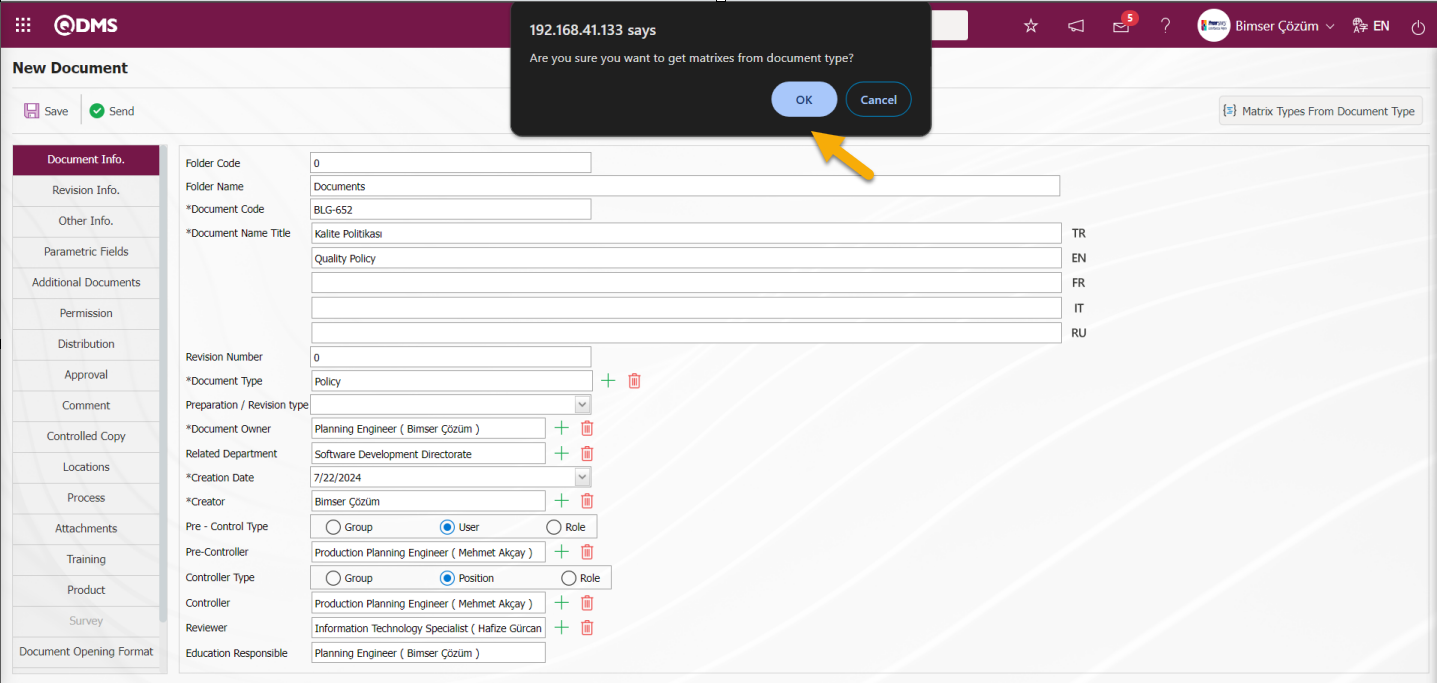
n the message “Are you sure you want to get matrixes from document type?” given by the system, the matrices of the document are defined according to the matrix definition in the defined document type by clicking the “OK” button. Authorization Matrix Document Type Authorization and authorizations come according to the user/ user groups in the matrix defined for the policy.
In other matrices, user/user groups and positions are added to the relevant tabs in the same way as in document type matrix definition. In order to perform this process, the definition of document type matrices with the button in the document type definition menu is performed. On the New Document screen, which is the Document Preparation screen, the document type for which the matrix definition process is performed is selected and the matrix definition process is performed for the linked document in the document type by clicking the  button.
6.1.2. Define Distribution Location
Menu Name: System Infrastructure Definitions/ Document Operations/ Define Distribution Location
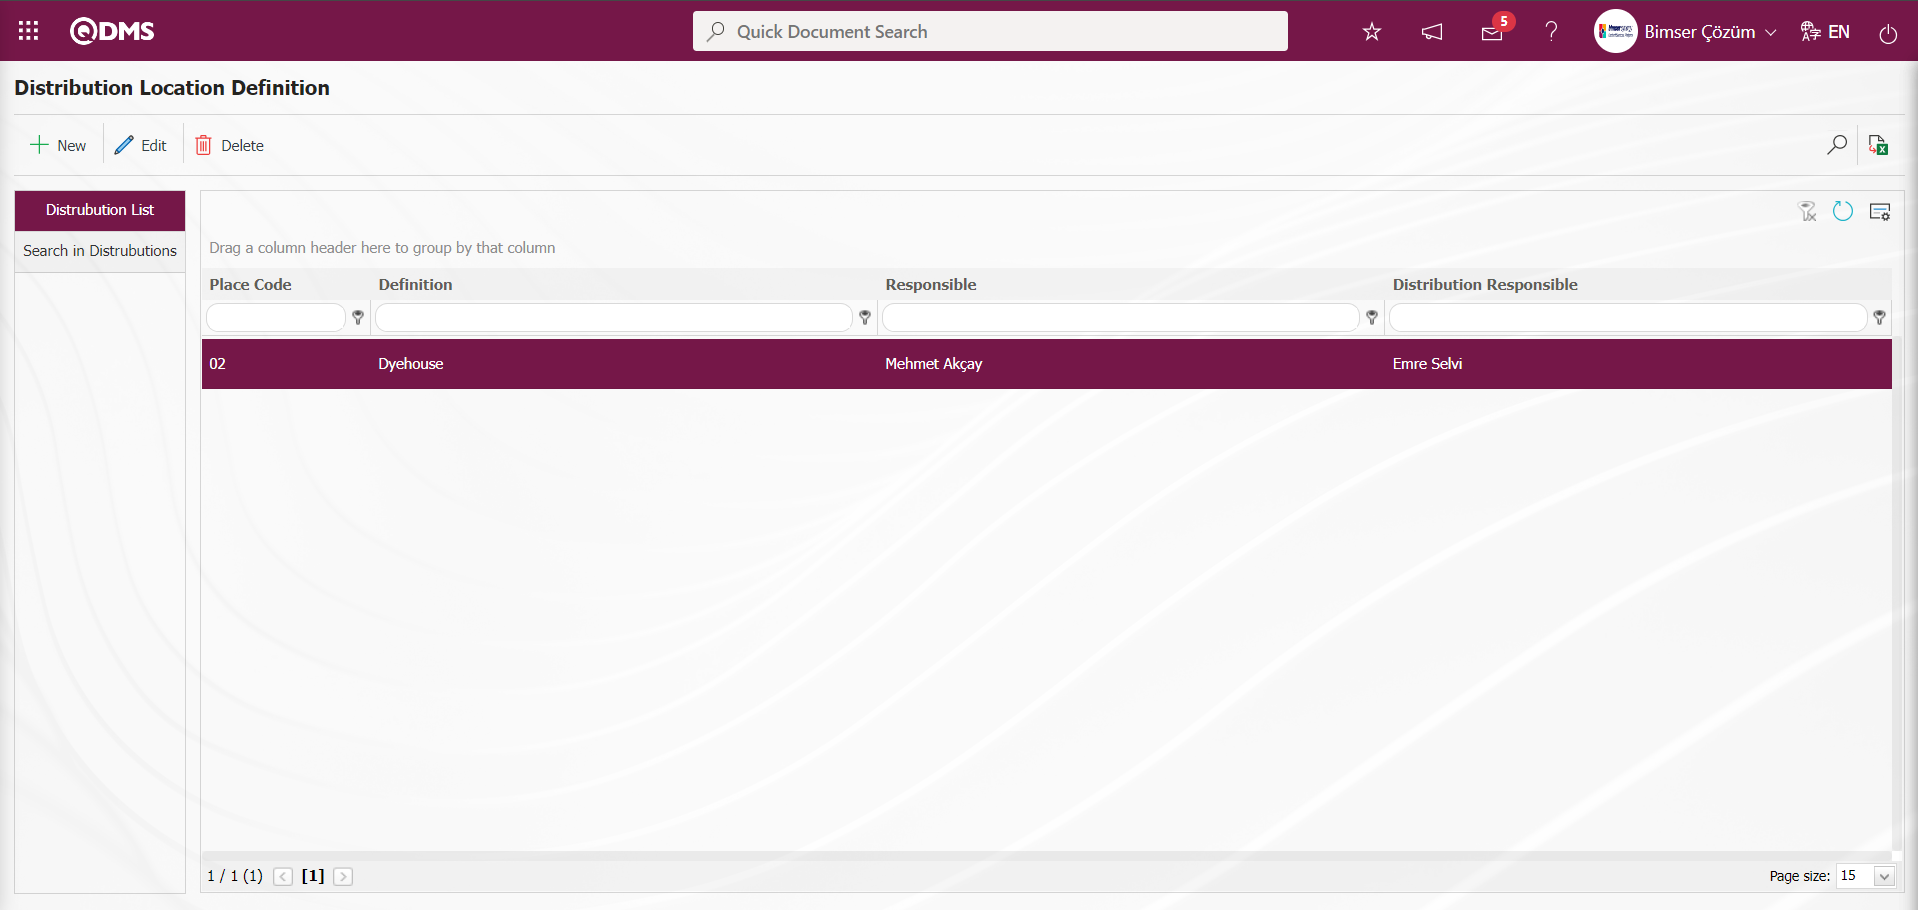
The physical distribution points of the documents to be distributed as Controlled Copies are defined in this menu. The purpose of this process is to ensure that the published documents are distributed in the system in a controlled manner.

With the help of the buttons on the screen;
: Defining a new distribution location is done.
: Edit/change/update the selected distribution location information in the list.
: Delete the distribution location information selected in the list.
 : Records are filtered and searched.
 : Data is transferred to Excel.
 : The search criteria on the menu screens are used to clean the data remaining in the filter fields in the grid where the search operation is performed.
 : The menu screen is restored to its default settings.
: User-based designing of the menu screen is done with the show-hide feature, that is, the hiding feature of the fields corresponding to the columns on the menu screens.
To add a new distribution location on the Distribution Location Identification screen, click the button on the upper left corner of the screen to open the Distribution Location Identification/ New Record screen.
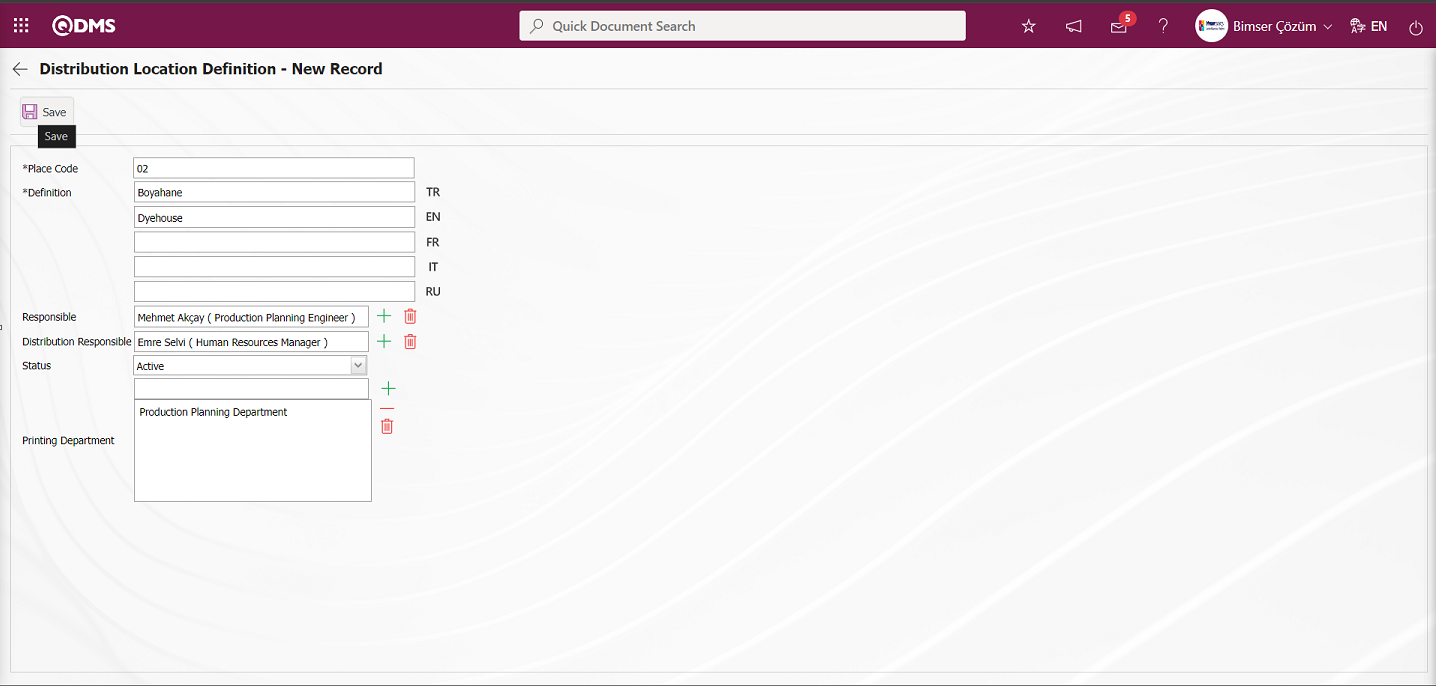
Related fields are defined on the screen that opens:
Place Code: Distribution Location Definition - This is the field where the distribution place code information defined in the New Record screen is written. It should be defined without using characters such as spaces and Turkish characters so that it is not the same as the previously defined fields. Ex. '001' , 'RK'
Definition: Distribution Location Definition - This is the field where the name of the distribution location defined on the New Record screen is written. The language equivalent of the description field of the defined distribution location is written in the sections with the relevant flags.
Responsible: This is the field where the responsible person of the distribution location defined on the Distribution Location Definition - New Record screen is selected from the list of personnel defined in the system opened by clicking the  (Select) button. Document controlled copy distribution will be done under whose responsibility is determined in this field.
Distribution Responsible: It is the field where the responsible person of the distribution location defined on the Distribution Location Definition - New Record screen is selected from the list of personnel defined in the system opened by clicking the (Select) button. The person responsible for physically distributing the document to the distribution locations is determined.
Status: It is the field where the distribution location defined on the Distribution Location Definition - New Record screen is selected in active and inactive options. The status of the defined distribution location is selected as “Active”.
Printing Department: Distribution Location Definition - This is the field where the departments to which the documents will be physically distributed on the New Record screen are determined. The printing departments are selected in the Department list opened by clicking the  (Add) button in the printing department field.
“Status” information is selected as ‘active’. In the “Printing Department” field, the departments to which the documents will be physically distributed are selected from the department list. After entering the relevant information in the required fields, the registration process of defining the distribution location is done by clicking the  button in the upper left corner of the screen.
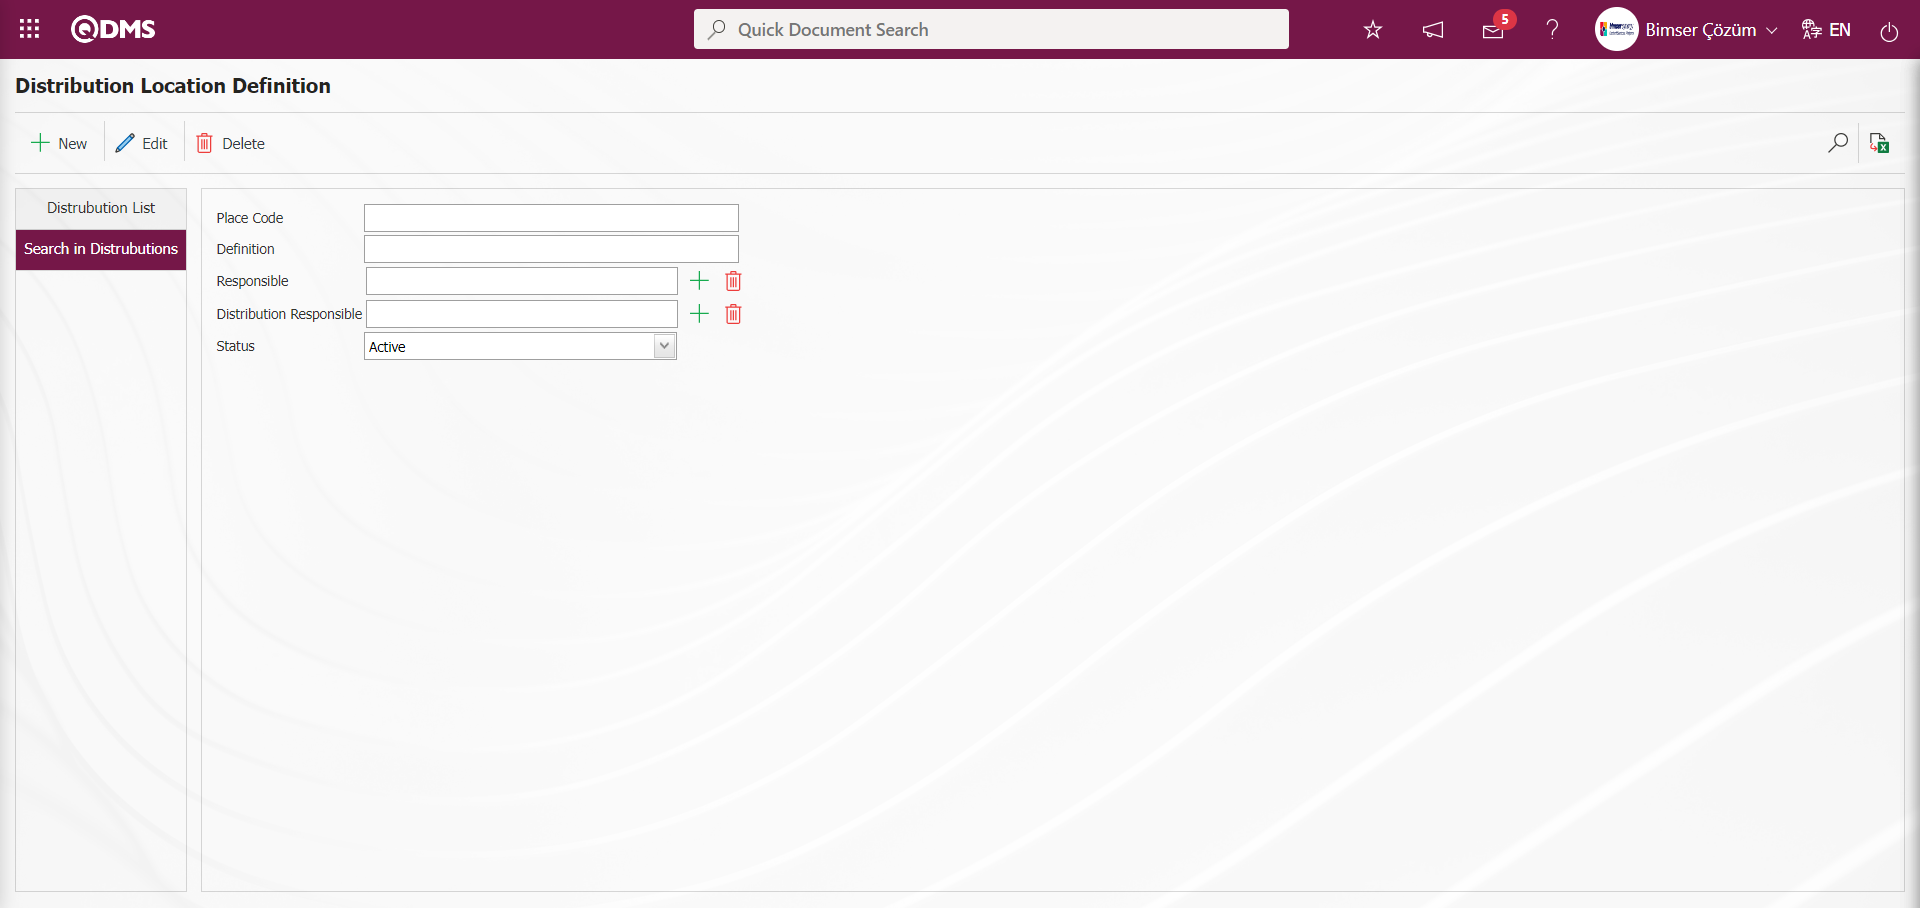
In the Distribution Location Search tab on the Distribution Location Identification screen, data is entered in the fields with search criteria such as Place Code, Responsible, Description, Distribution Responsible and Status, and filtering is done according to the search criteria by clicking the  (Search) button.
6.1.3. Define Distrubition Location Group
Menu Name: System Infrastructure Definitions/ Document Operations/ Define Distrubition Location Group
It is the menu that allows the distribution points defined in the Distribution Point Definition menu to be classified by commonizing them. Thus, when making controlled copy distribution, distribution points belonging to the same point can be selected collectively.
With the help of the buttons on the screen;
: Defining a new distribution place group is done.
: Changes/updates/edits are made on the selected distribution place group information in the list.
: The selected distribution place group information in the list is deleted.
To add a new distribution place group to the Distribution Place Groups Identification screen, click the button on the upper left corner of the screen to open the Distribution Place Groups Identification/ New Record screen.
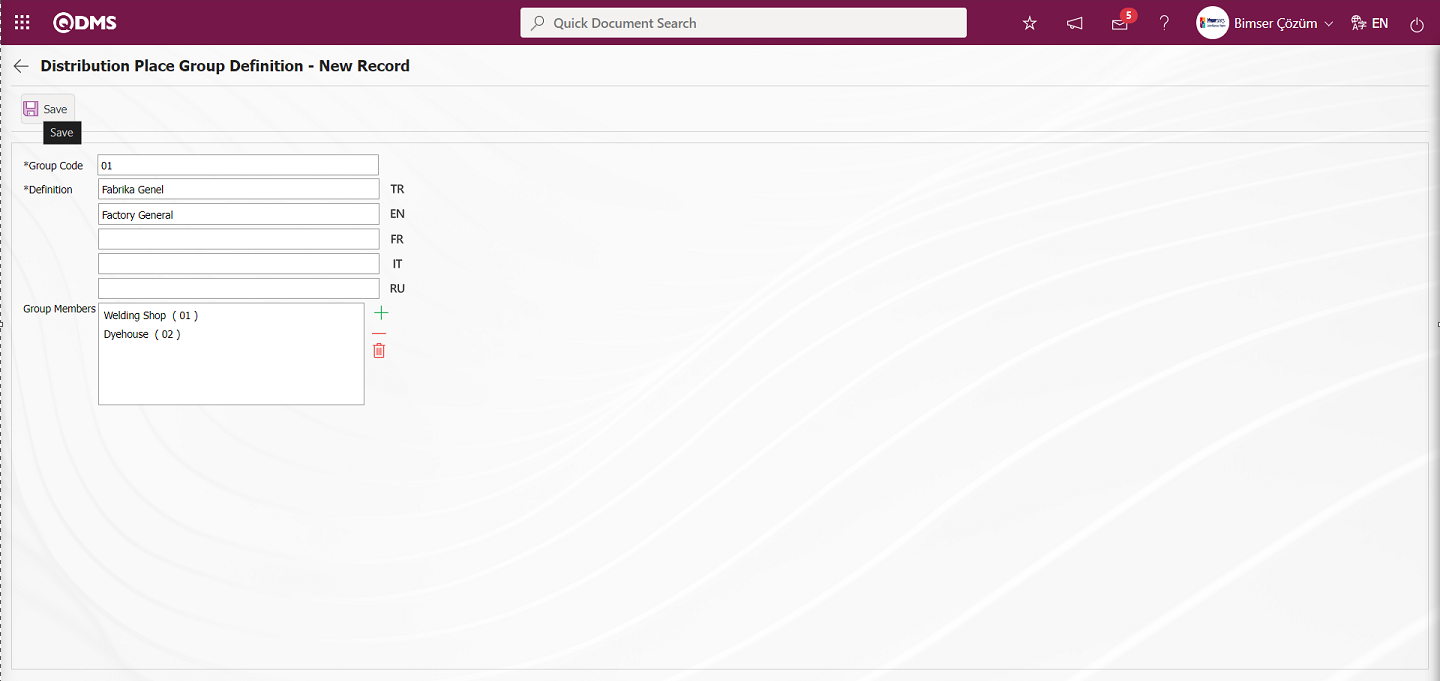
Related fields are defined on the screen that opens:
Group Code: Distribution Place Group Definition - This is the field where the code information of the distribution place group defined on the New Record screen is written. It should be defined without using characters such as spaces and Turkish characters, so that it is not the same as the previously defined fields. Ex. '001' , 'RK'
Definition: Distribution Place Group Definition - This is the field where the name of the distribution place group defined on the New Record screen is written.
Group Members: Distribution Place Group Definition - New Record is the field where the selection is made from the distribution place list defined in the system opened by clicking the  (Add) button on the New Record screen.
After entering the relevant information in the required fields, click on the  button in the upper left corner of the screen to register the definition of Distribution Place Groups.
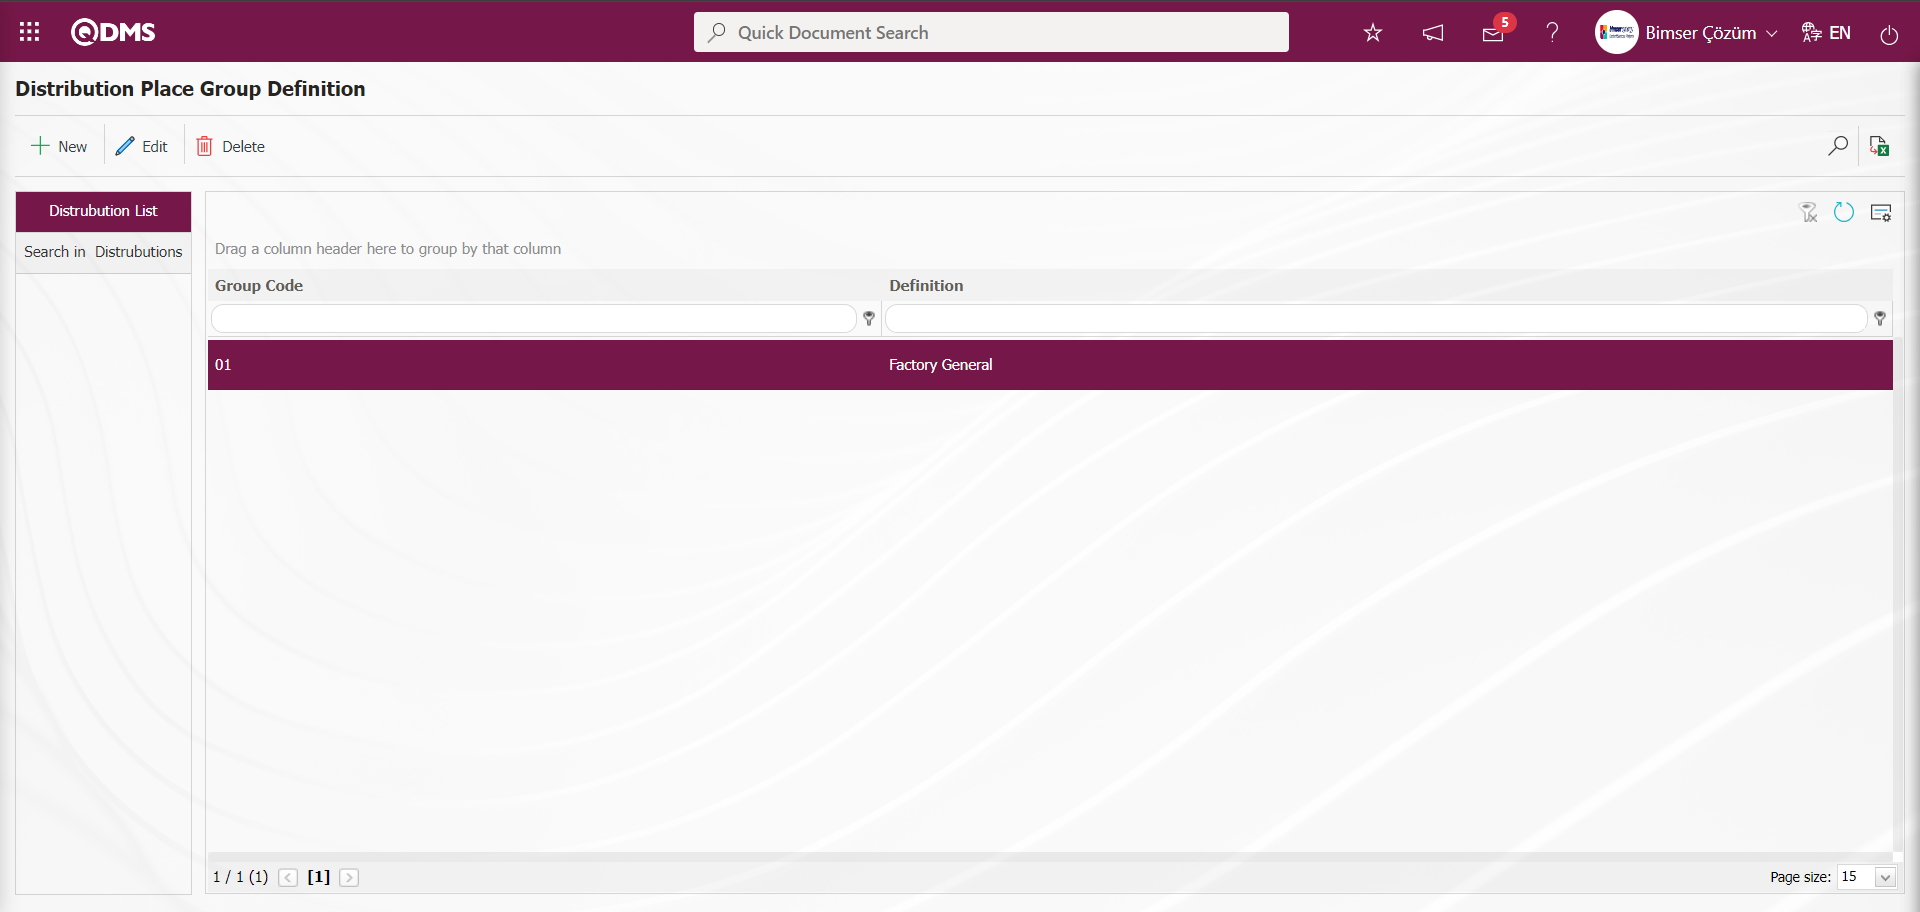
In the Distribution Place Group Search tab on the Distribution Place Group Definition** screen, data is entered in the fields with search criteria such as Group Code and Description, and filtering is done according to the search criteria by clicking the (Search) button.

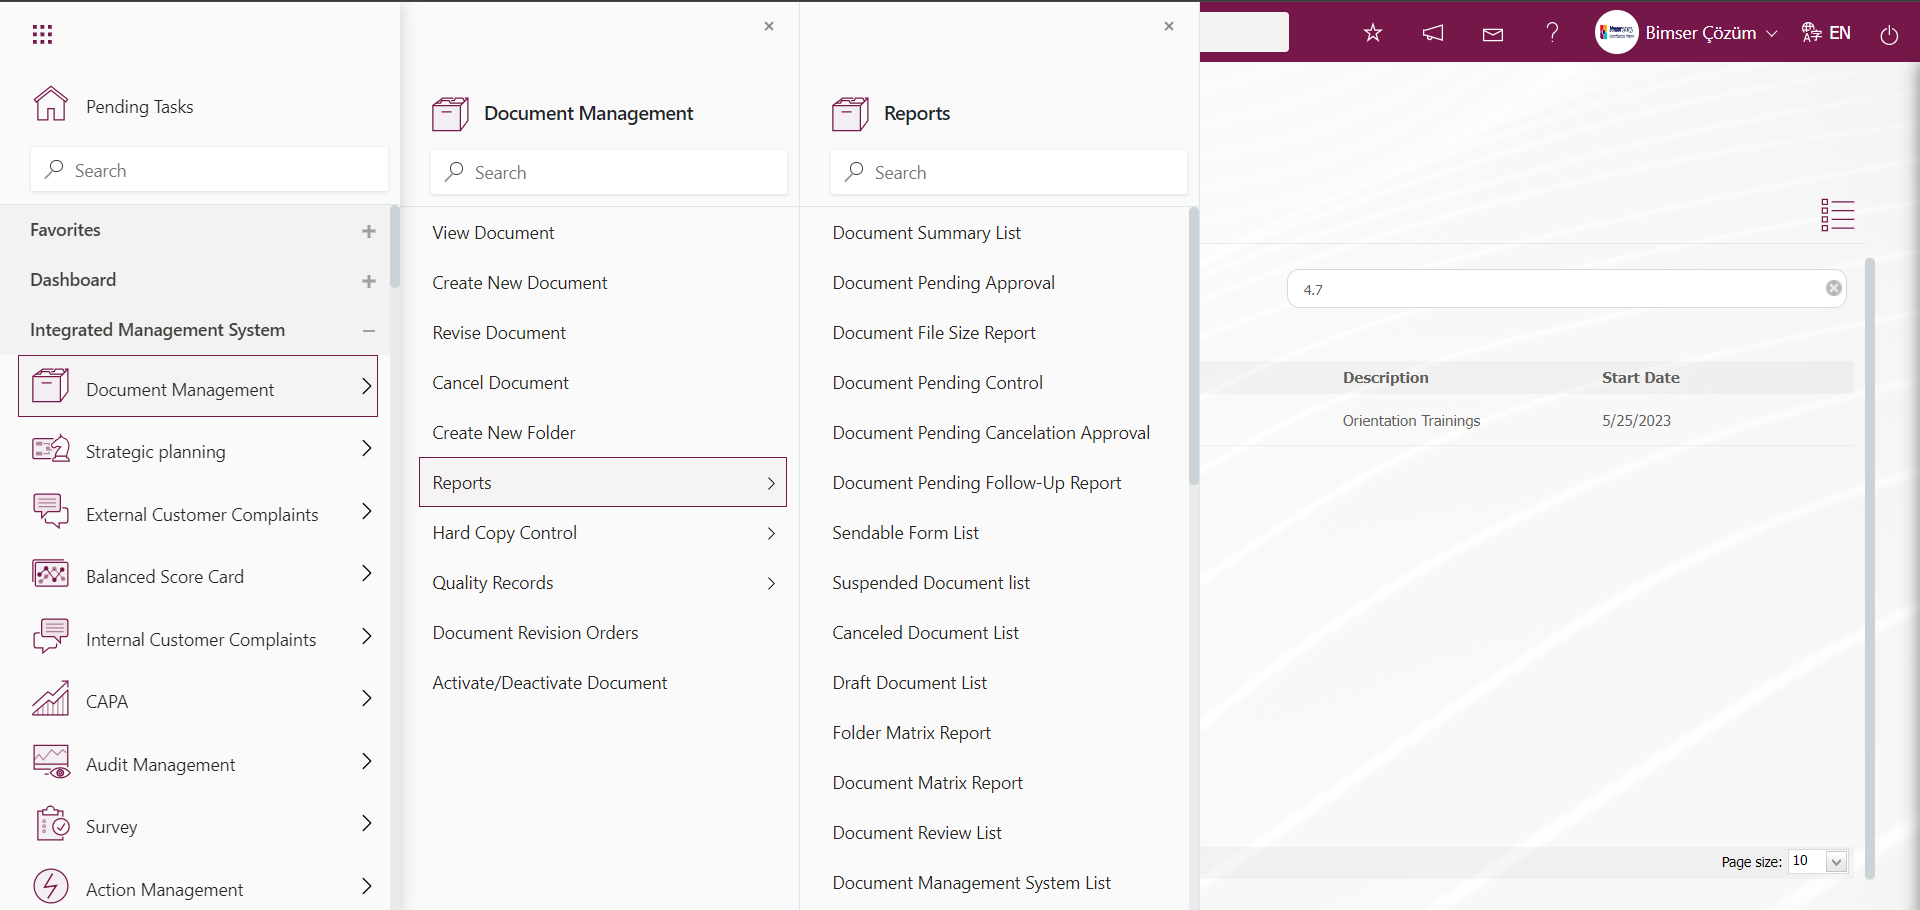
6.2. Integrated Management System/ Document Management
The functioning of all menus in this section within the scope of the Document Management Module, all document processes are managed, tracked and reported. Preparing a new document, sending the prepared document to the opinion matrix if it is assigned in the opinion matrix, checking if there is a controller, after approval to the approver in the approval matrix, the processes of reading the people in the distribution matrix continue. It includes the revision process in the document and the display of the old revisions of a document that has been revised, the document cancellation process, a document active and passive operations. In addition, the process of defining the folders where the documents will be managed is done.
6.2.1. Folder Definition
Menu Name: Integrated Management System/ Document Management/ Create New Folder
This is the menu where the folders where documents will be managed in the Qdms system are created and organized. In the folder definition screen, the folder tree structure must first be decided. Folder tree structure is created according to the organizational structure, processes, document types, management systems, departments or the structure that the company deems appropriate. In the folder definition screen, besides the folder definition process, you can edit the information of the selected folder, copy the selected folder, change the selected folder code, move the selected folder under another folder and define parametric fields related to the selected folder.
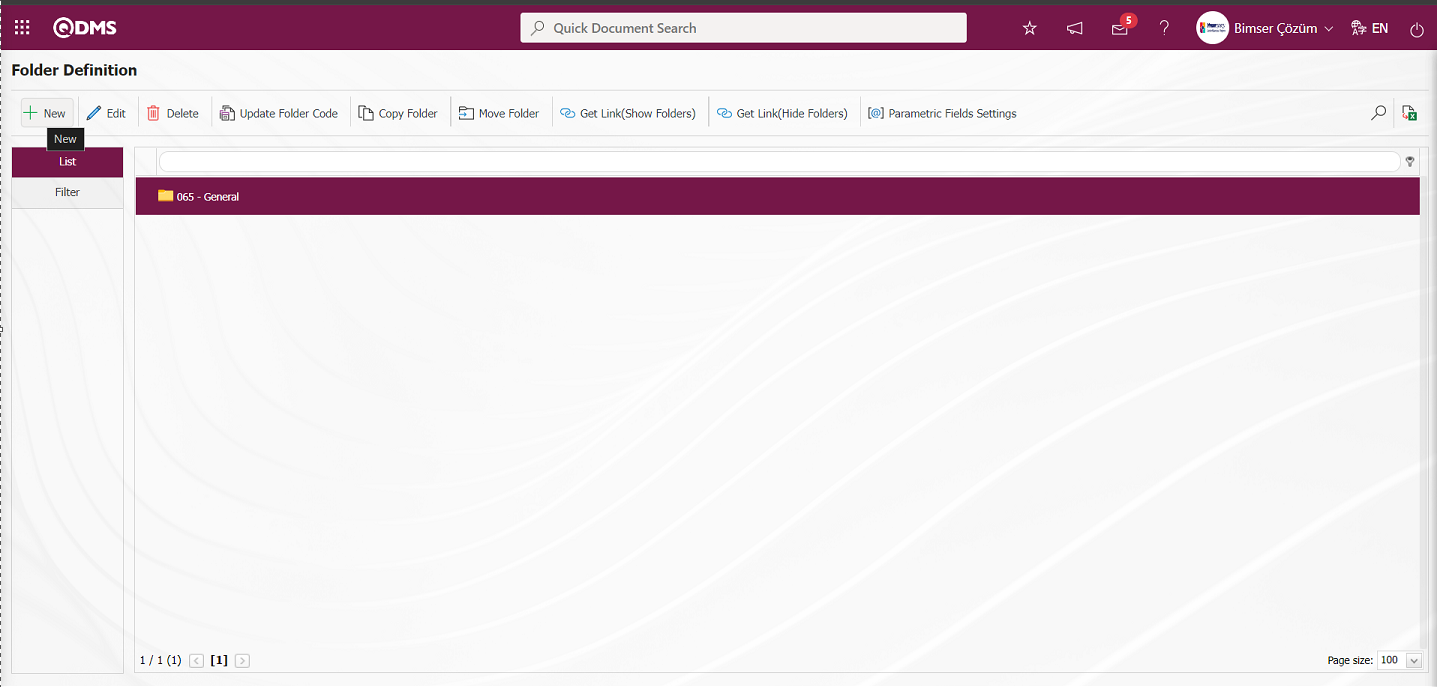
With the help of the buttons on the screen;
 : Defining a new folder is done.
 : Information about the selected folder can be edited.
 : The code of the selected folder is changed.
 : The selected folder is copied with its subfolders.
 : The selected folder is moved under another folder.
 : The link of the folder selected in the folder definition screen is copied. In the document view screen, the folder whose link is taken is listed with its subfolders and documents to be displayed in the folder tree structure.
 : Copying the link of the selected folder on the folder definition screen is done. It is ensured that the subfolders and documents, if any, of the linked folder are listed so that the folder tree structure is hidden on the document view screen.
 : The selected folder is deleted.
 : Parametric field definition is done on folder basis. It is a field displayed depending on the parameter. The parameter value of parameter 109 “Will the Parametric Field be Used in the Folder Base?” from Document Management Module parameters is activated by selecting “Yes”.

After the parameter is activated, the button is displayed on the Folder Definition screen. Defining parametric type fields such as text, text (Multiple Line), list on folder basis is done.
To define a new folder on the Folder Definition screen, click on the  button on the upper left corner of the screen to open the Folder Definition/New Record screen. The folder structure of the company can be defined in the system in the desired detail in the form of tree breakdown.
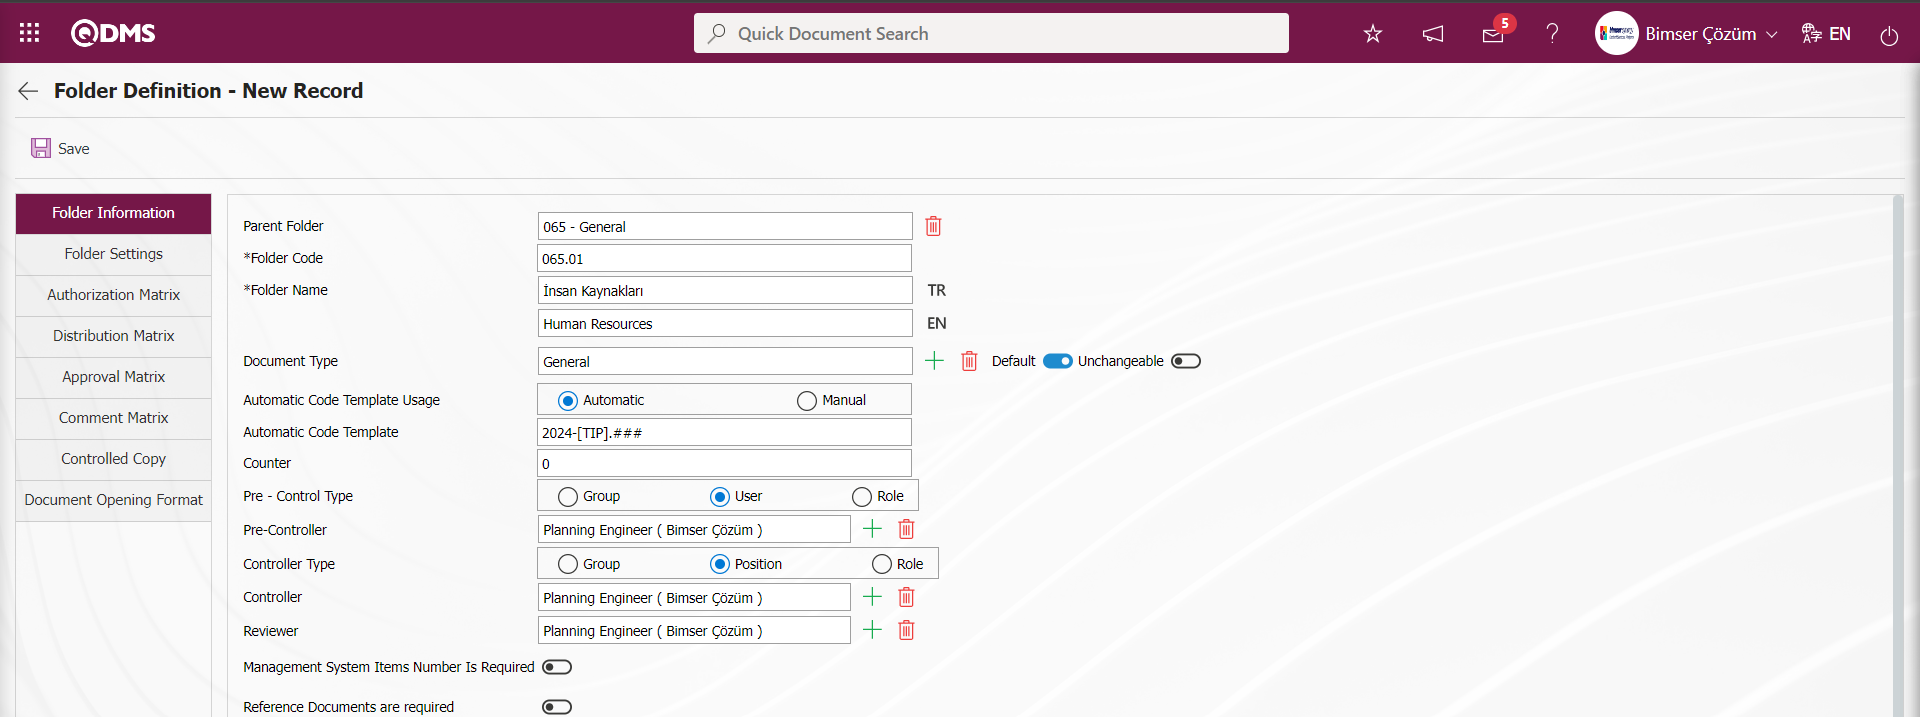

Folder Information tab;
It is the tab where information about the general structure such as the folder to which the defined folder is connected, group code, name, information about the document types of the documents to be prepared in it, automatic code template and counter information are defined.
In the Folder Information tab, the following information on the screen is defined;
Parent Folder: Folder Definition - New Record is the field where a sub-folder is created connected to the parent folder in the Folder Information tab on the New Record screen. When a sub-folder connected to the parent folder is not defined, the folder information is deleted by clicking the  button on the right side of the field. In the defined folder, a sub-folder connected to the “General” parent folder is defined.
Folder Code: In Folder Definition - New Record screen, in Folder information tab
is the field where the code information of the defined folder is written.
Folder Name: This is the field where the name of the folder defined in the Folder Information tab on the Folder Definition - New Record screen is written.
Document Type: This is the field where the folder document type information defined in the Folder Information tab on the Folder Definition - New Record screen is selected in the list of document types defined in the system that opens by clicking the  (Select) button. The Document Types List comes defined in the System Infrastructure Definitions/Document Activities/Document Type Definition menu. In the Document Type field, if it is desired that the document type selected in the folder type is always defined for the documents to be prepared in the folder, the check box related to the “Default” option is checked.

When the cehck box related to the “Unchangeable” option is checked in the Document Type field, the document type other than the selected document type cannot be selected when adding documents to the selected folder.

Auto Code Template Usage: This is the field where the selection is made in the options for using the automatic code template in the Folder Information tab on the Folder Definition - New Record screen. When the “Automatic” option is selected in the Automatic Code Template Usage field, the document code comes automatically according to the code template defined in the automatic code template field defined in the Folder Definition - New Record screen during the document preparation phase and does not allow the system to intervene in the code field.

When the “Manual” option is selected in the Auto Code Template Usage field, the document code comes automatically according to the code template defined in the Auto Code Template field defined on the Folder Definition-New Record screen during the document preparation phase and the system allows intervention in the code field.

Automatic Code Template: This is the field where the information on how the document code structure will be defined, which will ensure that the code structure of the documents to be defined in the folder will come automatically in the Folder Information tab on the Folder Definition - New Record screen.

According to the example made in the “Automatic Code Template” field in the table above, the first code information symbolizes the year “2024”, the [TIP] code brings the code information of the document type. The #'s symbolize how many digits there will be a number range. The counter indicates the number of #'s to start from.
If there is short code information in the procedure document type, it comes to the [TIP] field. When there is no short code information, the code information of the document type comes automatically in the [TIP] field. According to the code information of the procedure “PR” and the counter value “0”, the system assigns the codes in the Document Code field on the New Document screen opened by clicking the Integrated Management System/Document Management System/Document Operations/Document Preparation menu as follows. 2024-PR.001, 2024-PR.002, 2024-PR.003
Counter: This is the field where the number from which the document code will start if the document automatic code template will be used in the Folder information tab on the Folder Definition - New Record screen. If the counter value is set to 0, the added documents will continue to increase as 1, 2, 3... according to the code template. In folder definition, this counter is defined as “0”. However, after transferring documents to the folder by batch transfer, the counter is started from the total number of documents added to the folder. For example, if 20 documents are added to the folder with bulk transfer, the relevant folder is selected from the folder definition screen and the counter in the folder information screen is changed to “20” and saved. Thus, the document code will be given as “21” by the system for the newly prepared document.
Pre- Control Type: It is a field that is displayed depending on the parameters in the Folder information tab on the Folder Definition - New Record screen. If it is desired to go to preflight before going to control after the document is prepared, the parameter value of the parameter 76.numbered “Do you use Preflight on the document?” from the Document Management parameters should be selected as “Yes” and the parameter should be activated.

Displaying the options as Pre-Control type is provided by activating the relevant parameters.
To select a group as Pre-Control Type;
In the Document Management Parameters, the parameter value of parameter 296 “Will Pre-Control Group be used in the documents?” is selected as “Yes” and the parameter is “Active”.

After the parameter is activated, the Group option is displayed in the Pre-Control Type field. In the Pre-Control Group field displayed in the documents to be prepared in the folder, click the  (Select) button and select the user group that will perform pre-control in the user group list defined in the system. The selected user group provides the structure and content control of the document.

To select User as the Pre- Control Type;

When the user is selected as the Pre-Control type, the position to perform pre-control is selected in the system-defined Position list that opens by clicking the (Select) button in the Pre-Controller field displayed. The person in the selected position ensures that the document is checked for structure and content. The document prepared in the pre-control phase is sent to the relevant users in the department of the person who prepared it, the supervisor of the person who prepared it, or a user who has information about the document. In the control phase, the prepared document is usually forwarded to quality system managers for structure and content control.
To select Role as the Pre-Control Type;

When Role is selected as the Pre-Control type, the Role that will perform pre-control is selected in the list of Roles defined in the system that opens by clicking the (Select) button in the Pre-Control Role field. The Role option in the pre-control type field is a field that is displayed depending on the parameter. The parameter value of parameter 298 “Will roles be used in pre-control phase (Y/ N)?” in Document Management parameters is activated by selecting “Yes”.
After the parameter is activated, the role option is displayed in the relevant field in the Pre-Control Type options. The selection process is made as User type for the folder defined in the Pre-Control Type field.
Pre- Controls: On the Folder Definition - New Record screen, click the (Select) button for the folder to be defined in the Folder Information tab and select the position to be pre-checked in the position list defined in the system. In the documents prepared in the defined folder, the person in the position will examine the documents in terms of structure and content at the pre-control stage.
Controller Type: This is the field where the options of the document control type are selected in the Folder information tab on the Folder Definition - New Record screen.
To select Group as Control Type;
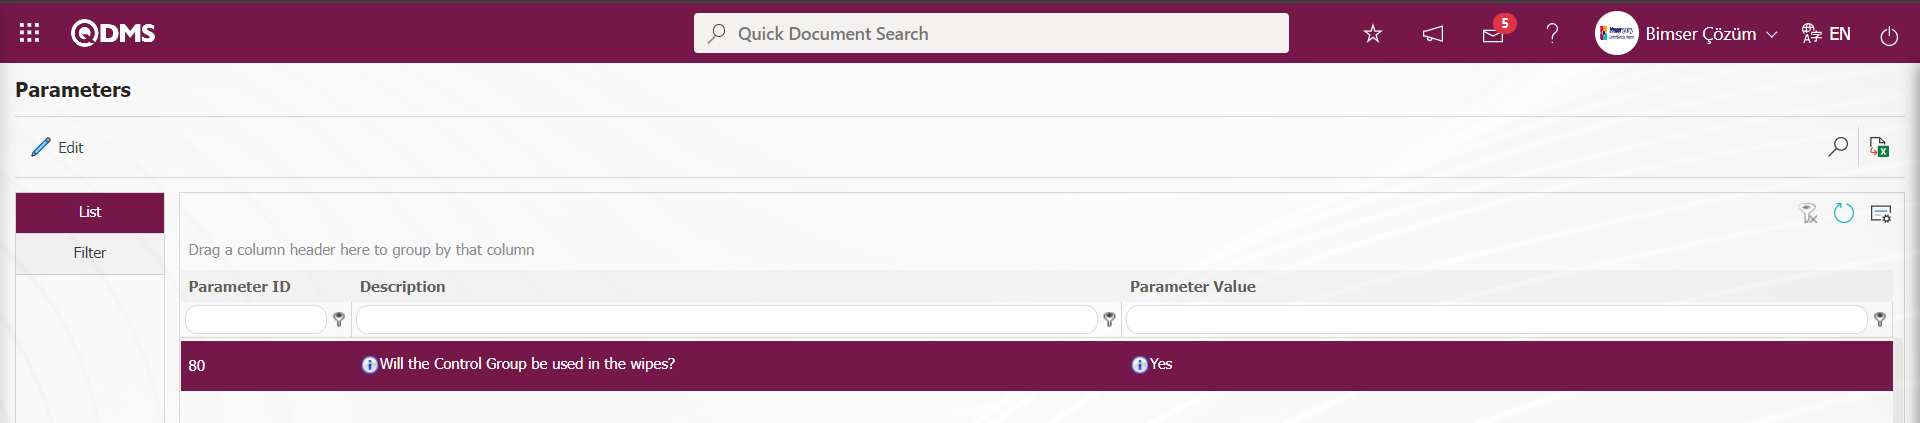
 When Group is selected as the control type, the User Group that will control the document before approval is selected in the User Group list defined in the system that opens by clicking the (Select) button in the Control Group field displayed. As well as controlling the document in terms of structure and content, it has the authority to make changes on all tabs in the document preparation phase. In group control, the control of one person in the group is sufficient. When one person checks, the document will be in approval status. It is the field displayed depending on the parameter. The parameter is activated by selecting “Yes” for parameter 80 “Will the Control Group be used in the wipes?” in Document Management parameters.
 After the parameter is activated, the Group option is displayed in the Control Type field and a selection is made to send the prepared document to a group for control before approval.
To select User as the Control Type;

When User is selected as the control type, the position that will control the document before approval is selected in the position list defined in the system opened by clicking the (Select) button in the User field displayed. As well as controlling the document in terms of structure and content, it has the authority to make changes on all tabs in the document preparation phase.
Control To select Role as Control Type;

When Role is selected as the control type, the Role that will control the document before approval is selected in the list of Roles defined in the system that opens by clicking the (Select) button in the Control Role field displayed. As well as controlling the document in terms of structure and content, it has the authority to make changes on all tabs in the document preparation phase. It is the field displayed depending on the parameter. The parameter is activated by selecting “Yes” for “Will roles be used in control phase (Y/ N)?” parameter numbered 180 in Document Management parameters. After the parameter is activated, the Role option is displayed in the Control Type field and a selection is made to send the prepared document to a role control before approval.
Controller: This is the field where the position that will control the documents to be prepared in the folder defined in the folder defined in the folder information tab on the Folder Definition - New Record screen** is selected from the list of positions defined in the system that opens by clicking the  (Select) button.
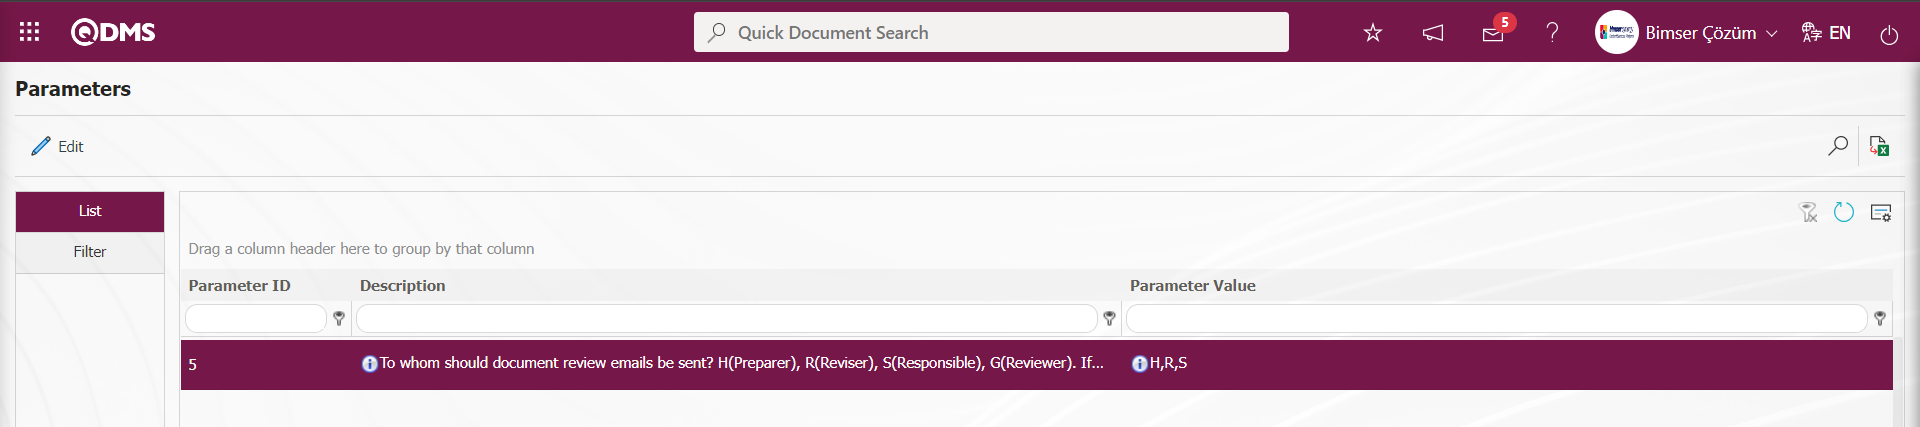
Reviewer: This is the field where it is determined who will review the documents in the Folder Information tab on the Folder Definition - New Record screen. Review Period is determined from the Folder Settings tab on the Folder Definition screen or from the review period field when preparing a new document. If this field is left blank, in Document Management parameters number 5 “To whom should document review emails be sent? H(Preparer), R(Reviser), S(Responsible), G(Reviewer). If more than one, separate them with commas.”, reviews are sent to the value selected in the parameter value.
Management System Items Number Is Required: If the check box is checked in the Folder Information tab on the Folder Definition - New Record screen, when a new document is prepared or an existing document is revised, it must be associated with the standard item number of the document.
Reference Documents are required: If the check box is checked in the Folder information tab on the Folder Definition - New Record screen, when a new document is prepared or an existing document is revised, the document must be referenced by associating it with another document defined in the system.
Permission Matrix Cannot Be Changed: If the check box is checked in the Folder Information tab on the Folder Definition - New Record screen, the authorization matrix defined in the folder cannot be changed while preparing a new document or revising an existing document. In the Folder Authorization Matrix screen, “Reading, Preparing/ Revising, Seeing Old Revisions, Printing, Canceling, Defining Subfolder” authorizations are defined as they are defined in document preparation/ revision and cannot be changed.
Distribution Matrix cannot be changed: If the check box is checked in the Folder information tab on the Folder Definition - New Record screen, the distribution matrix defined in the folder cannot be changed while preparing a new document or revising an existing document. The information about to whom the document will be distributed and to whom the reading tasks will be assigned is defined on the Folder Distribution Matrix screen, as it is defined in document preparation/ revision and cannot be changed.
Approval Matrix Cannot Be Changed: The approval matrix defined in the folder cannot be changed when preparing a new document or revising an existing document in the Folder Information tab on the Folder Definition - New Record screen. The information about who will approve the document on the Folder Approval Matrix screen is defined as it is defined in the document preparation/revision process and cannot be changed.
Controlled Copy Matrix cannot be changed: The controlled copy matrix defined in the folder cannot be changed while preparing a new document or revising an existing document in the Folder Information tab on the Folder Definition - New Record screen. In the Folder Controlled Copy Matrix screen, the information about which distribution places the document will be distributed as a controlled copy is defined in the same way as it is defined in document preparation/ revision and cannot be changed.
Controller Cannot Changed: The controller defined in the folder cannot be changed while preparing a new document or revising an existing document in the Folder Information tab on the Folder Definition - New Record screen. The information about who will control the document in the control person field is defined in the document preparation/revision process and cannot be changed.
Pre-Controller Cannot Changed: The pre-controller defined in the folder cannot be changed while preparing a new document or revising an existing document on the Folder Definition - New Record Folder Information tab screen. The information about who will pre-check the document in the Pre-Checker field is defined as it is defined in the document preparation/ revision and cannot be changed.
Comment Matrix Cannot Be Changed: The opinion matrix defined in the folder cannot be changed when preparing a new document or revising an existing document on the Folder Definition - New Record Folder Information tab screen. No matter how the opinion information of the document is defined on the Folder Opinion Matrix screen, it is defined in the document preparation/revision process and cannot be changed.
Status: This is the field where the active and inactive status of the folder defined in the Folder Definition - New Record Folder Information tab screen is determined. It shows whether the relevant folder will be displayed on the folder tree screen.
Cancel Distribution Matrix Can Be Change: Folder Definition - New Record If the check box is checked on the Folder Information tab, the distribution matrix defined in the folder can be changed when canceling an existing document. Thus, the information of the canceled document will be sent to the users who are defined in the distribution matrix.
Folder Settings tab;
Detailed settings related to folder attributes are made. It is the tab where special settings such as whether the folder will be a form folder, which document template will be used for the folder, whether there will be a training supervisor and approver role, whether the last approver will also be the publisher, review period, document revision matrix assignment types are applied.
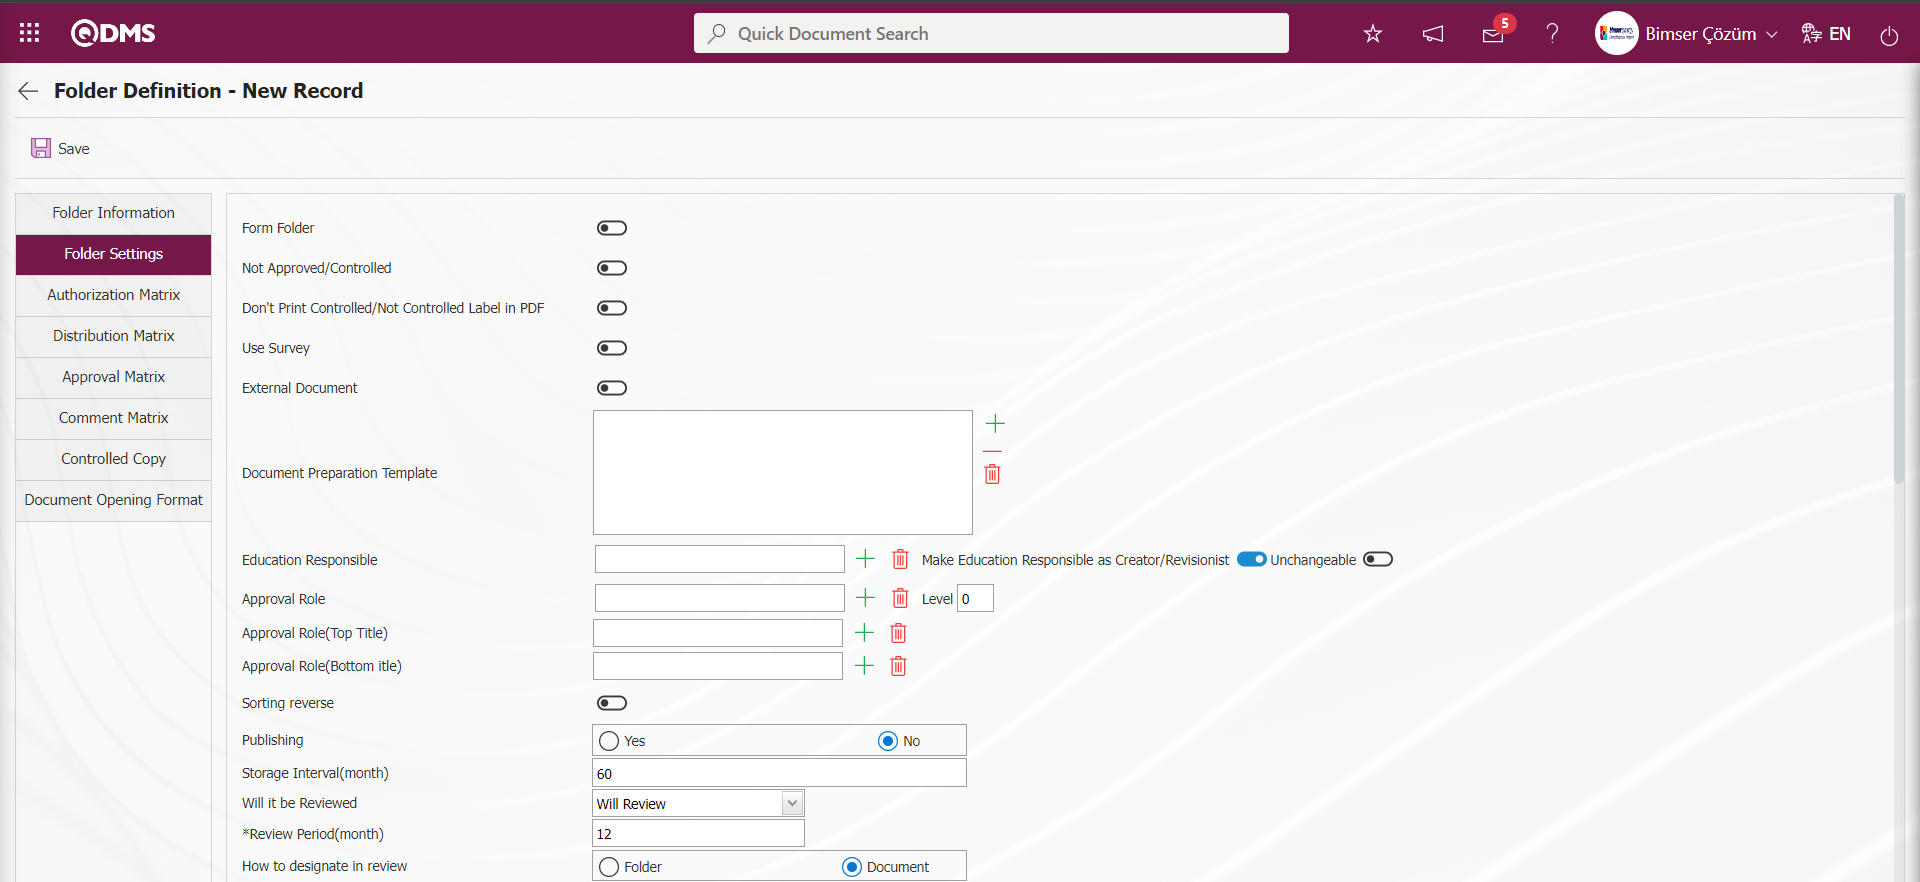


The folder settings tab defines the following information on the screen;
Form folder: In the Folder Settings tab of the Folder Definition-New Record screen, if only form documents will be assigned to this folder, check the check box related to the Form folder. If this check box is checked, the relevant forms in the form folder will also be used in quality registration processes.
Not Approved/Controlled: If the check box related to this option is checked in the Folder Settings tab on the Folder Definition-New Record screen, the control/approval process in document management for this folder is disabled. Documents are published as soon as they are saved without control/approval. Outsourced documents such as reports, standards, regulations, training presentations, measurement results can be defined to such folders.
Don't Print Controlled/Not Controlled Label in PDF: If the check box related to this option is checked in the Folder Settings tab on the Folder Definition-New Record screen, the Controlled/Not Controlled Label is not displayed in PDF documents during document viewing or printing.
Use Survey: If this option is selected in the Folder Settings tab on the Folder Definition-New Record screen , after the document prepared in this folder is published, a survey can be sent to the users in the distribution matrix related to the document. For this, the parameter 81 of the Document Parameters, “Will the questionnaire be used in the document? (Y/ N)” should be activated as “Yes”.
 After the parameter is activated, the survey tab is activated on the document preparation/revision screen and when the survey tab is clicked, the survey question can be added in the desired format.
External Document: It is a field that is displayed depending on the parameter in the Folder Settings tab on the Folder Definition-New Record screen.322 “Using External Link in Document Preparation?” parameter value is activated by selecting “Yes”.

When the parameter is activated, when a new folder is defined or a folder is updated in Integrated Management System/Document Activities/Folder Definition, the External Document option related field and the check box related to this field are displayed in the Folder settings tab. When the check box related to External Document is checked, when document preparation is done in this folder, there is an external document option in the document tab on the document preparation screen. When the check box related to this External document option is checked, the Add file button is removed. The link to be displayed is written in the Document File Upload (Turkish) field, which is the language text field. When the document is published, the document is viewed by going to the relevant link.
Document Preparation Template: This field is used to specify which one or which of the document preparation templates previously uploaded to Qdms as templates in the Folder Settings tab on the Folder Definition-New Record screen can be used when preparing documents depending on this folder. This feature is used to say “use this template” in documents to be prepared depending on the folder.
Education Responsible: In the Folder Settings tab on the Folder Definition-New Record screen, if it is planned to provide training for the documents connected to the folders, it is the field where the information about who will provide training for the document prepared in the Training Responsible field is defined. One of the positions defined in the system can be selected as the training officer. If the check box related to “Make Education Responsible as Creator/Revisionist” is checked, it is ensured that whoever prepares/revises the document is assigned as the education responsible. If the check box related to “Unchangeable” is checked, it is prevented to change the training responsible information defined in the folder during document preparation/revision processes.
Approver Role: In the Folder Settings tab on the Folder Definition-New Record screen, if the document approval process will be linked to certain roles in the system, the “Approver Role” section is used. The roles defined in the system are the Supervisor of the Preparer/ Reviser and the Department Supervisor of the Preparer/ Reviser. New roles can be defined by Bimser technical personnel according to the needs in the company. Select the appropriate approval start role from these roles. In the “Level” box, enter the information about how many higher level approvals will be upgraded from the selected role.
Approval Role(Top Title): In the Folder Settings tab on the Folder Defining-New Record screen, if the approving role is selected in the folder, this is the field where the setting that shows up to which title this approval process will last. Select the title from the list. When it reaches the selected title, the approval flow stops.
Approval Role(Bottom itle): In the Folder Settings tab on the Folder Defining-New Record screen, if the approver role is selected in the folder, this is the field where the setting showing at which title this approval process will start is made. Select the title from the list. The approval flow starts at the selected title.
Sorting reverse: On the Folder Settings tab in the Folder Settings tab on the Folder Definition-New Record screen, if it is desired to reverse the flow in the Approving Role selection (from the last approver to the first approver), the relevant check box is checked.
Publishing: After the approval flow in the Folder Settings tab on the Folder Definition-New Record screen, if the documents are published from a single source in the company, the publishing is activated and the documents are published by the 0th approver.
Storage Interval(month): In the Folder Settings tab on the Folder Definition-New Record screen, it is the field where the information about the storage period of the documents in the folder is written on a month basis.
Will it be Reviewed: This is the field where it is determined whether the documents in the folder will be reviewed in the Folder Settings tab on the Folder Definition-New Record screen.
Review Period(month): In the Folder Settings tab on the Folder Definition-New Record screen, this is the field where the review period will be determined.
How to designate in review: This is the field where the folder or document options are selected as the review assignment type in the Folder Settings tab on the Folder Definition-New Record screen. When the review assignment type is selected as Folder, the review period written in the review Period (Month) field in the Folder Settings tab is based on the review period.

When the review assignment type document is selected, the review period written in the review Period (Month) field in the Other Information tab on the New Document screen opened in the Document Preparation phase is taken as the basis.

Hard Copy Printing Reason: This field is selected if the Controlled Copy feature will be used in the Folder Settings tab on the Folder Identification-New Record screen. When it is desired to receive a document from the system as a controlled copy, it is the field where it is set whether the reason for receiving a controlled copy is mandatory in the system. “Company Parameter, Mandatory, Not Mandatory” options are selected. “Company Parameter” specifies the obligation status defined according to parameter 133 of the document parameters. The parameter is activated by selecting the parameter value ‘Yes’ of parameter 133 ‘Why Do I Need to Print on a Controlled Copy Print Page (Y/ N)’ of the Document Management Module parameters.**

On the Controlled Copy Printing Page, it is ensured that controlled copy printing is not performed before the printing reason is written.
Read Confirmation; This is the field where it is determined whether the document reading confirmation will be taken from the people in the distribution approval after the documents to be prepared in this folder defined in the Folder Settings tab on the Folder Definition-New Record screen are published. “Company Parameter, Receive Read Confirmation, Read Not Receive Confirmation” options are selected. “Company Parameter” specifies the status defined according to parameter 106 of the document parameters. The parameter is activated by selecting the parameter value “Yes” in the parameter “Have you been approved to read Document?”.
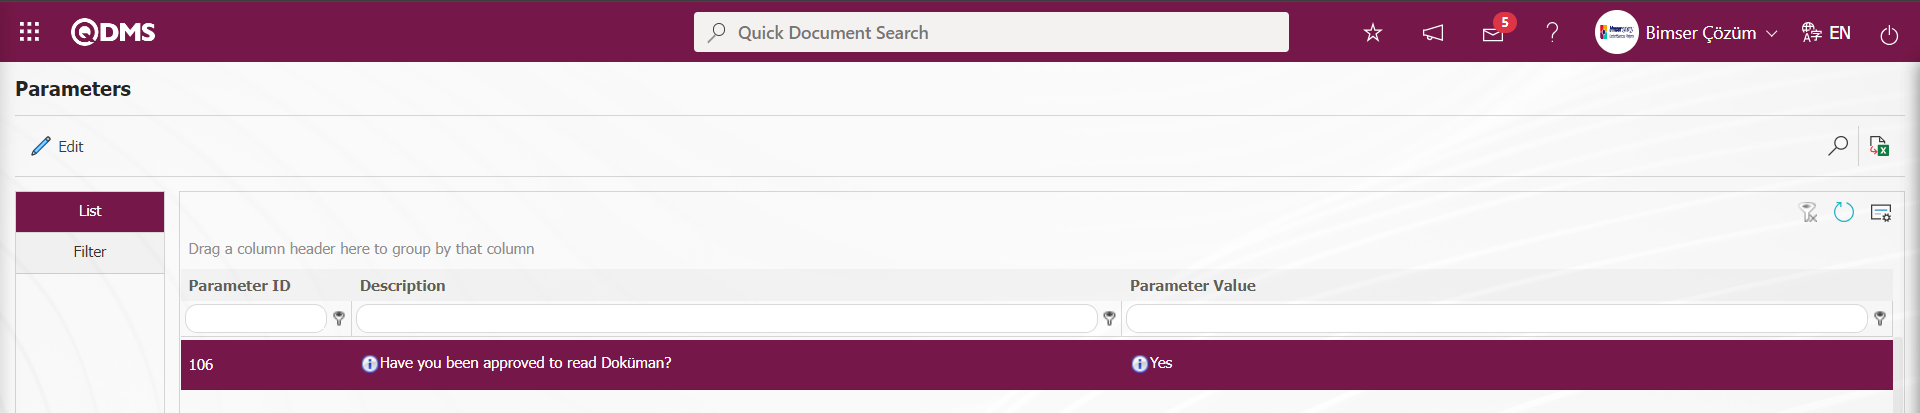
“Company Parameter” specifies the status defined according to parameter 106 of the document parameters. After the parameter is activated, the users who are assigned in the distribution matrix of the documents defined in the folder are displayed the “I have read the document. I accept.” field that they have read the document on the document view screens opened by clicking the “List of Documents to be Read” and “List of Important Documents to be Read” tasks in my Pending Jobs. Relevant users can click on this field and make the document become read status.
Revision Number Change: On the Folder Settings tab on the Folder Definition-New Record screen, select the “automatic” option if the revision number in the document revision process is desired to be given automatically by the system in the form of 1-2-3, etc. automatically. If the revision number is desired to be given manually by the user, the “manual” option is selected.
Is Attachments Move In Revision? In the Folder Settings tab on the Folder Definition-New Record screen, when a document in the folder is revised, if there are additional files belonging to the revised main document, this is the field where it is determined whether these additional files will be moved to the final version of the document with the new revision. “Company Parameter, Move, Do Not Move” options are selected. “Company Parameter” indicates the status defined according to parameter 135 of the document parameters. The parameter is activated by selecting the parameter value ‘Yes’ of the parameter ‘Do additional files move to the new revision during revision (Y/ N)?’ in the Document Management Module parameters.
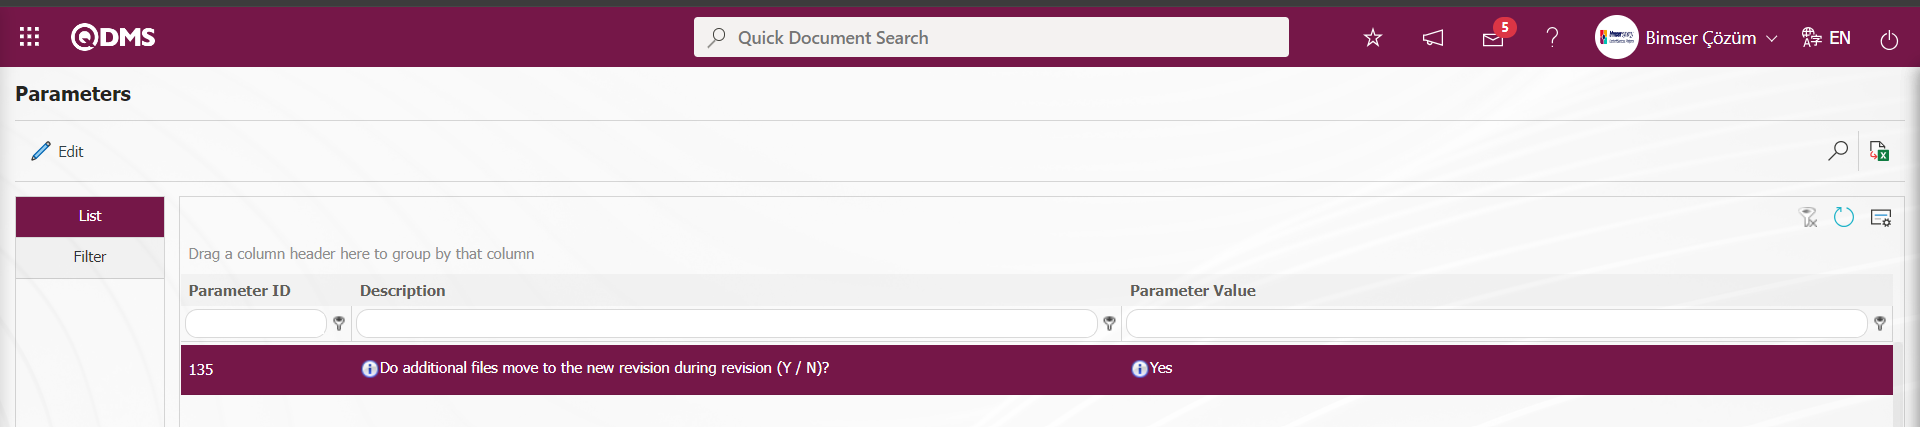
After the parameter is activated, when the revision process is performed in the main document, if there are additional files belonging to the main document, it is ensured that these additional files are moved to the final version of the document with the new revision.
Mandatory Control: In the Folder Settings tab on the Folder Definition-New Record screen, if you want the control step to be mandatory in the document management process and if you want the documents to go to the control process before the approval process, check the relevant check box.
Mandatory Process Matrix: In the Folder Settings tab on the Folder Definition-New Record screen, if you want the document prepared in the document management process to be associated with the process/processes in the system, and if you want the document to be linked to a process, the relevant check box is checked. In order to do this, the parameter value of the “Use Process Tab” parameter number 41 of the Document Management parameters is selected as “Yes” and the parameter is activated and the process tab is displayed.

When the check box related to the Mandatory Process Matrix field is checked after it is displayed in the process tab, the process addition process is made mandatory in the process tab.
Document Print Format: This is the field where the format in which the document will be prepared is determined when a document is to be prepared in the folder in the Folder Settings tab on the Folder Definition-New Record screen. The document print format (footer/ header content) defined in the System Infrastructure Definitions/Document Activities/Document Print Format Definition menu is selected and the document is prepared according to the desired format.
Mandatory Language: If it is desired to use the documents in other languages in the Folder Settings tab on the Folder Defining-New Record screen, select which language options will be mandatory from the language options that appear on the screen and determine which personnel/ User Group defined in the system for the mandatory language option will perform the language translation task. If the language translation will be done by a user, the selection is made in the list of personnel defined in the system opened by clicking the  (Select) button or if the language translation will be done by a User group, the selection is made in the User Group list defined in the system opened by clicking the (Select) button.
The positions, at least one must be in approval matrix: In the Folder Settings tab on the Folder Definition-New Record screen, this is the area where the approval position, which must be mandatory for the documents prepared in the relevant folder, is selected in the system-defined Position List opened by clicking the (Add) button. When the document is prepared in the system, if this approver determined by the preparing personnel is deleted, it is not forwarded to the approval process by the system, the system gives a warning that there is no mandatory approver in the approver position.
The positions, one of them must be in control: For the documents prepared in the relevant folder in the Folder Settings tab on the Folder Definition-New Record screen, the controller position that must be mandatory for the documents prepared in the relevant folder is defined in the system that opens by clicking the (Add) button.This is the field where the selection is made in the Position List. When the document is prepared in the system, if this controller determined by the preparing personnel is deleted, it is not transmitted to the control process by the system, the system gives a warning that there is no mandatory controller in the controller position.
Document Preparation Request Group: In the Folder Settings tab on the Folder Definition-New Record screen, if the system wants to make a document preparation request on this folder by users who are not authorized to prepare documents, parameters 62, 229, 270 and 271 from the document parameters are activated.
62 numaralı Parametre;
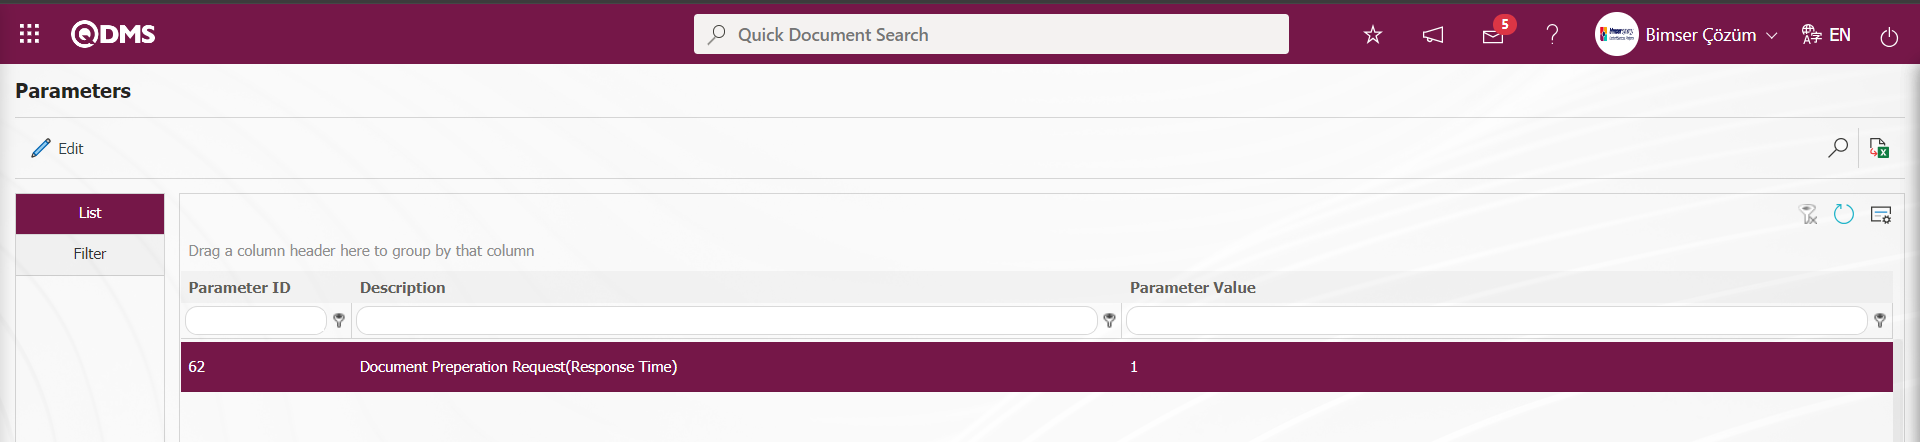
In the parameter value, the response time to the Document Preparation Request is written as a numerical value on a day basis.
229 numaralı Parametre;

By selecting the parameter value “Yes”, the Make Document Preparation Request function is activated.
270 numaralı Parametre;

It is the parameter to which the Document Preparation Requests are sent in the Document Module. In the parameter, the parameter value is written as :K value for User and :Y Value for Administrator.
271 numaralı Parametre;
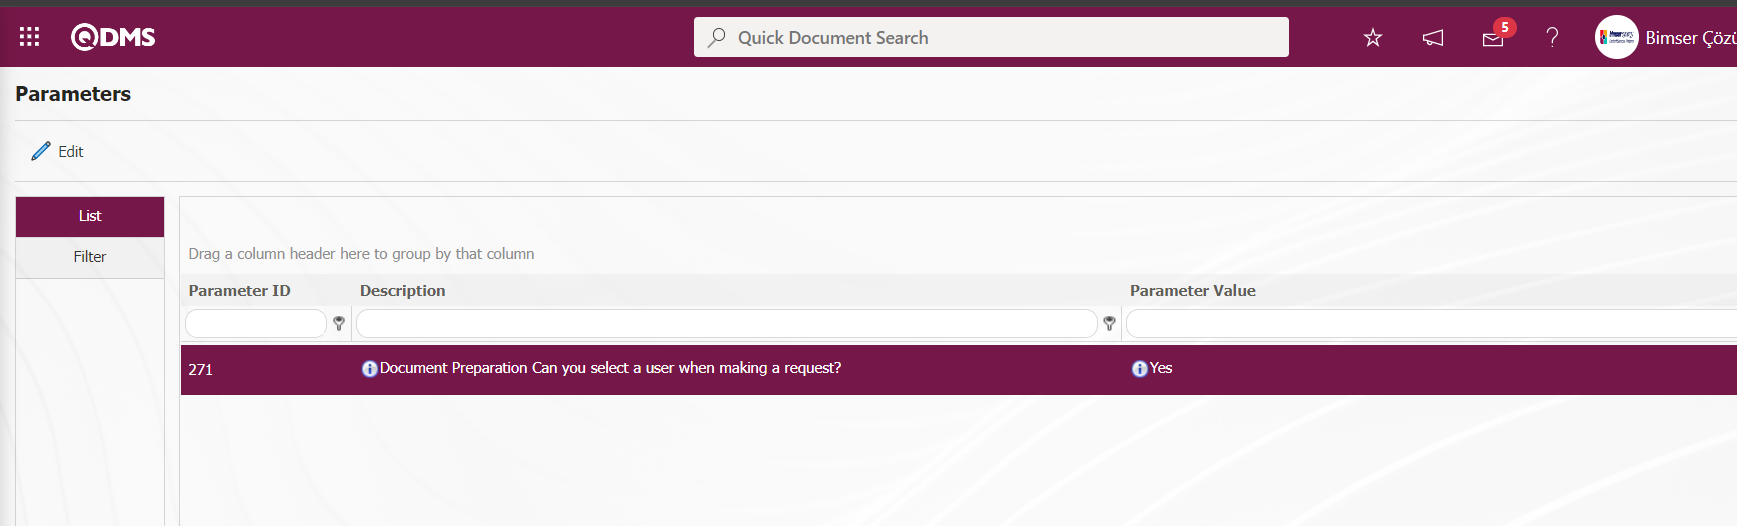
It is the parameter where the user is selected or not selected when making a Document Preparation Request. Within the scope of this folder, if you want to evaluate the document preparation requests by which user group, click the (Select) button and select that user group in the User Group list defined in the system.
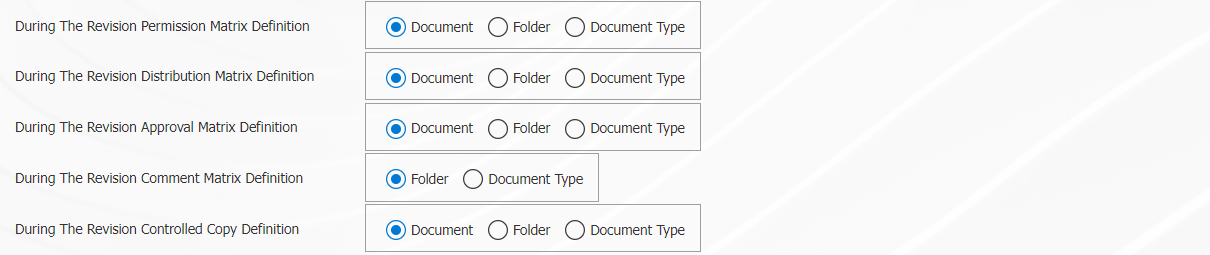
How to Assign Authority/ Distribution/ Approval/ Comment/ Controlled Copy Matrix in Revision: In the Folder Settings tab on the Folder Definition-New Record screen, while revising a document in the folder, it is the settings where it is determined whether the “Authorization, Distribution, Approval, Comment Matrices and Controlled Copy Assignment Type” will be made from the existing document, from the relevant folder to which the document belongs, or from the document type.
Use Print: This is the field where it is set whether to use printing or not in the Folder Settings tab on the Folder Definition-New Record screen.
Will there be repeated registration control when printing?: In the Folder Settings tab on the Folder Defining-New Record screen, the feature of printing in controlled/uncontrolled copies for the document in the folder can be used to keep the information of the documents printed on the printer in the system and display it on the received print. If there are repetitive records in the system while printing, it is possible to set whether the system will check these records or not from this field.
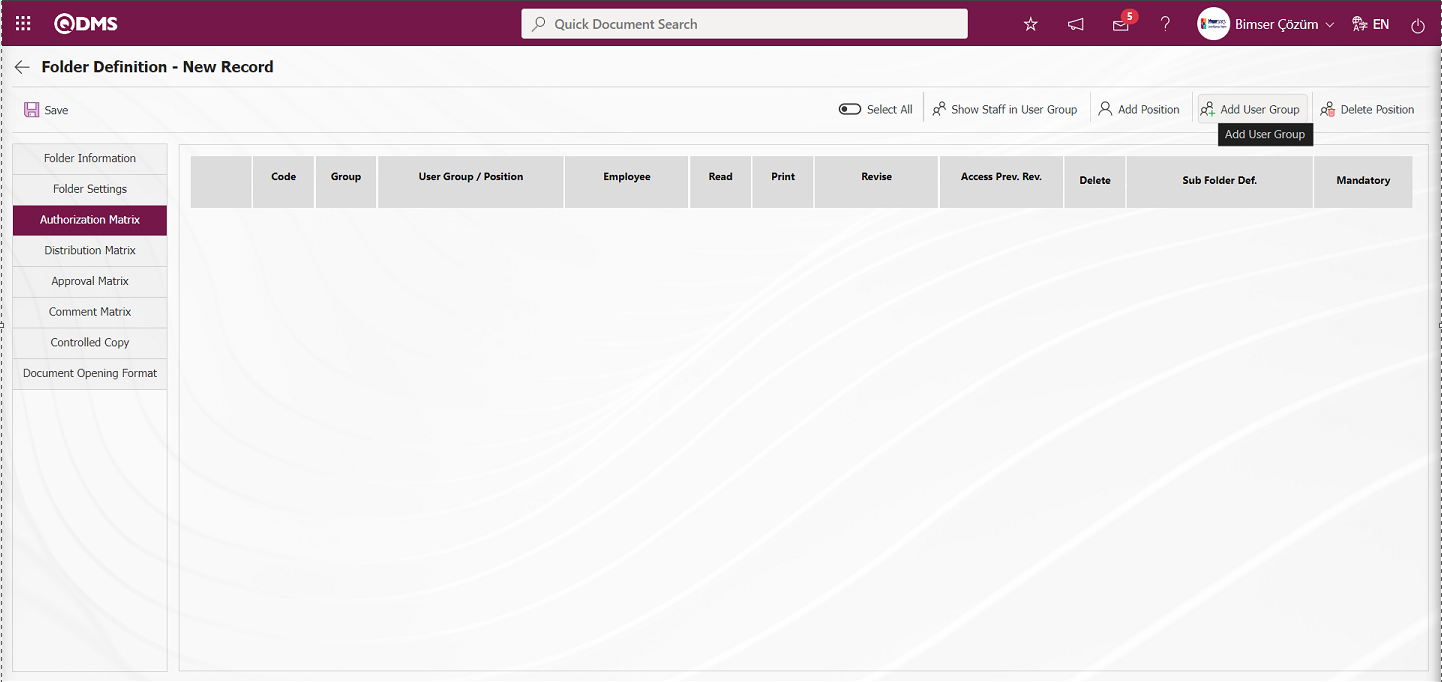
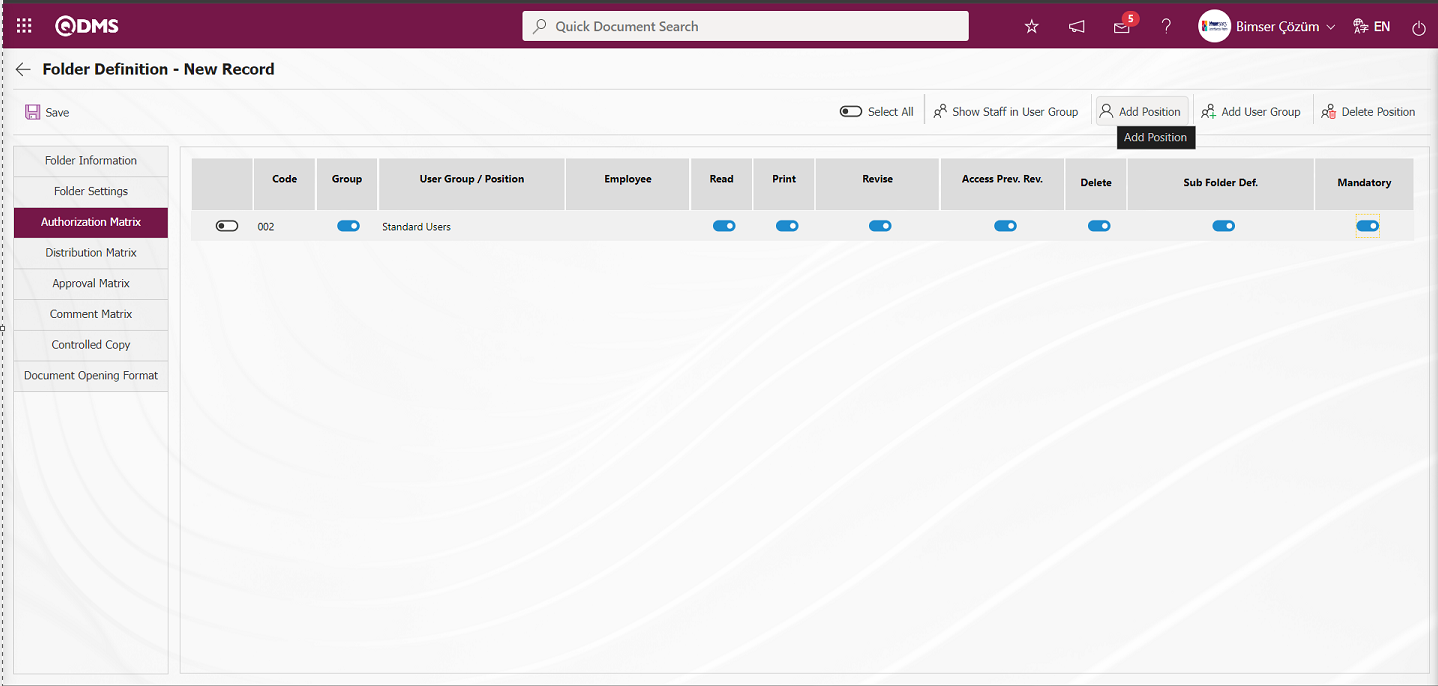
In the Authorization Matrix tab;
It is the tab where it is possible to determine which positions or user groups will have “reading, printing, preparation/revision, seeing old revisions, making a cancellation request, defining a subfolder” authorizations on the documents in the folder. When granting authorizations for the folder, it is important to give the right authorizations to the right user groups or the right positions.
With the specified authorizations, the following authorizations are given within the scope of all documents in the folder;
- Which users can see/read the documents,
- Which users can download and print documents,
- Which users can prepare documents in this folder and revise the existing document in the folder,
- Which users can see the old revision of documents,
- Which users can cancel documents,
- Which users can define other folders under the folder,
- Which users must necessarily be in the authorization matrix.
With the help of the buttons on the screen;
 : Shows the personnel in the selected user group.
 : Add position to the list.
 : User group is added to the list.
 : Delete the selected row in the authorization matrix.
: Deletes the authorizations in the selected position/ user group in the list.
Click / buttons to assign authorization matrix to the folder. In the User Group/ Position list defined in the system, a selection is made for the users to be authorized. Which authorizations are desired to be given are marked.
On the Folder Identification screen, click the button on the Authorization matrix tab and add the User Group to be authorized in the authorization matrix in the User Group list defined in the system.

In the User group list opened, the User group selection process is made and the user group is added by clicking the  button in the upper left corner of the screen.

After adding a user group, the user group based authorization process is performed in the authorization matrix by marking the check boxes related to the authorizations to be granted in the Authorization matrix tab. Reading authorization in the authorization matrix is checked by the system by default.

On the Folder Identification-New Record screen, click the  button on the Authorization Matrix tab to add a position to the list.
The selection process is done by clicking the relevant position button in the Position List.
After the position selection process, the authorization process related to the relevant position is performed.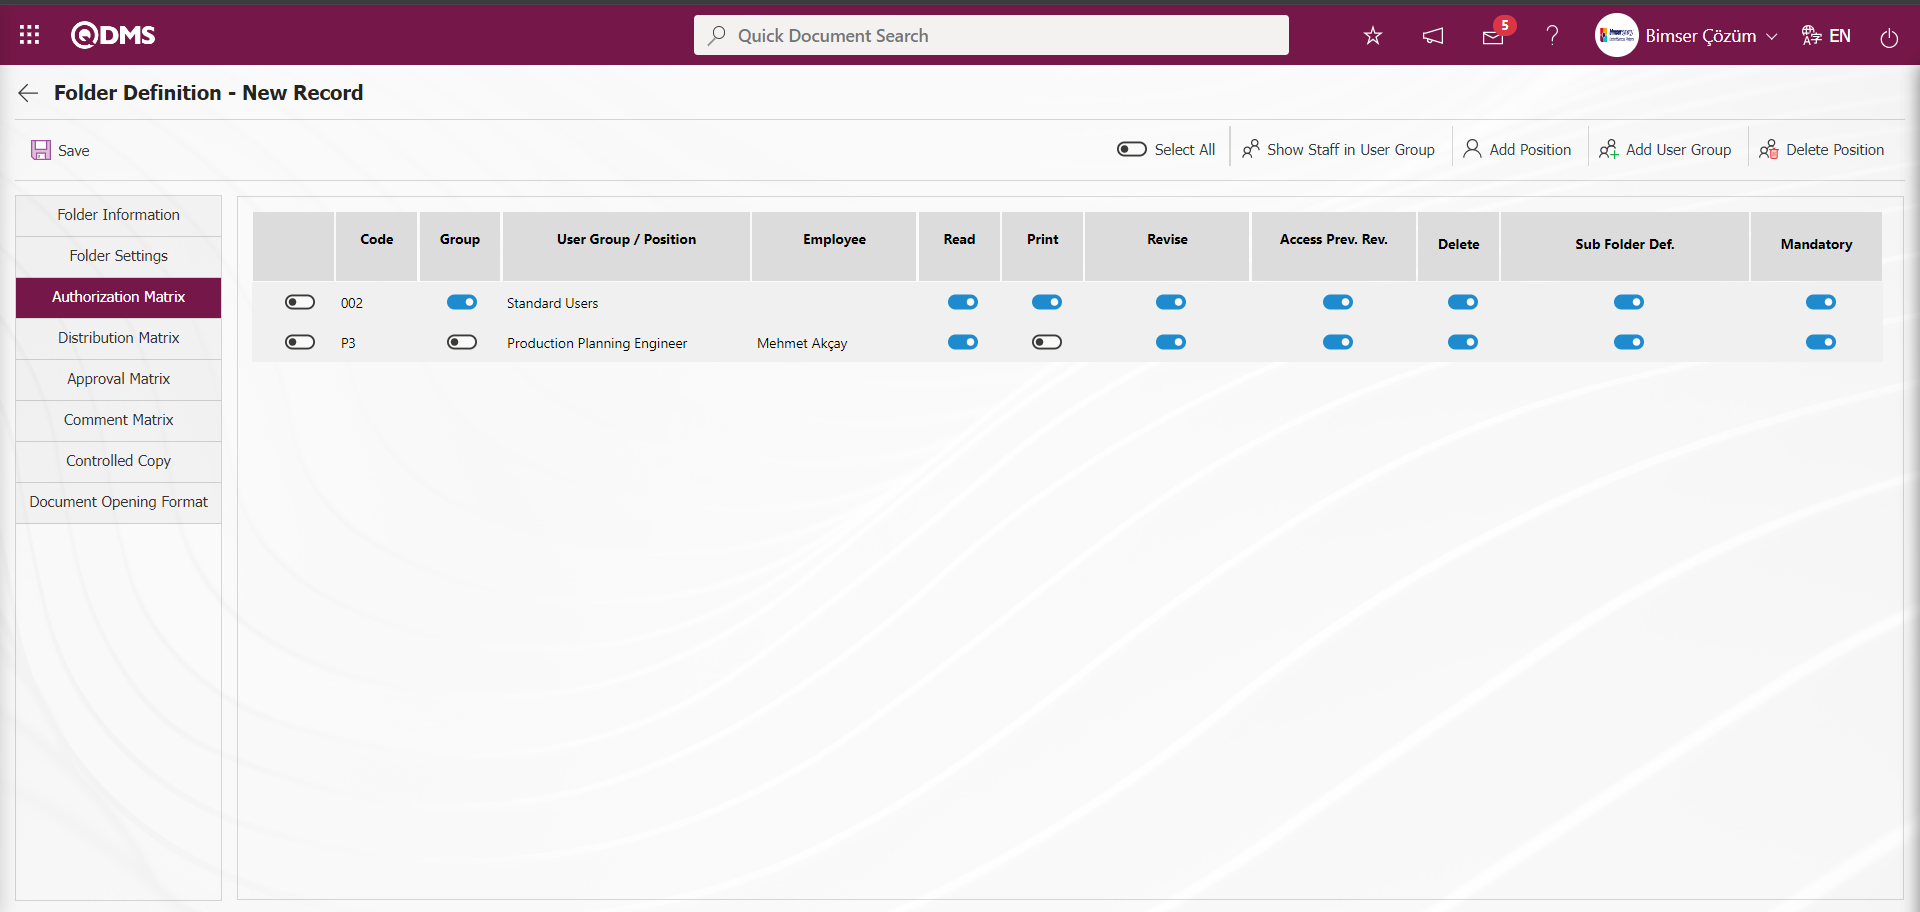
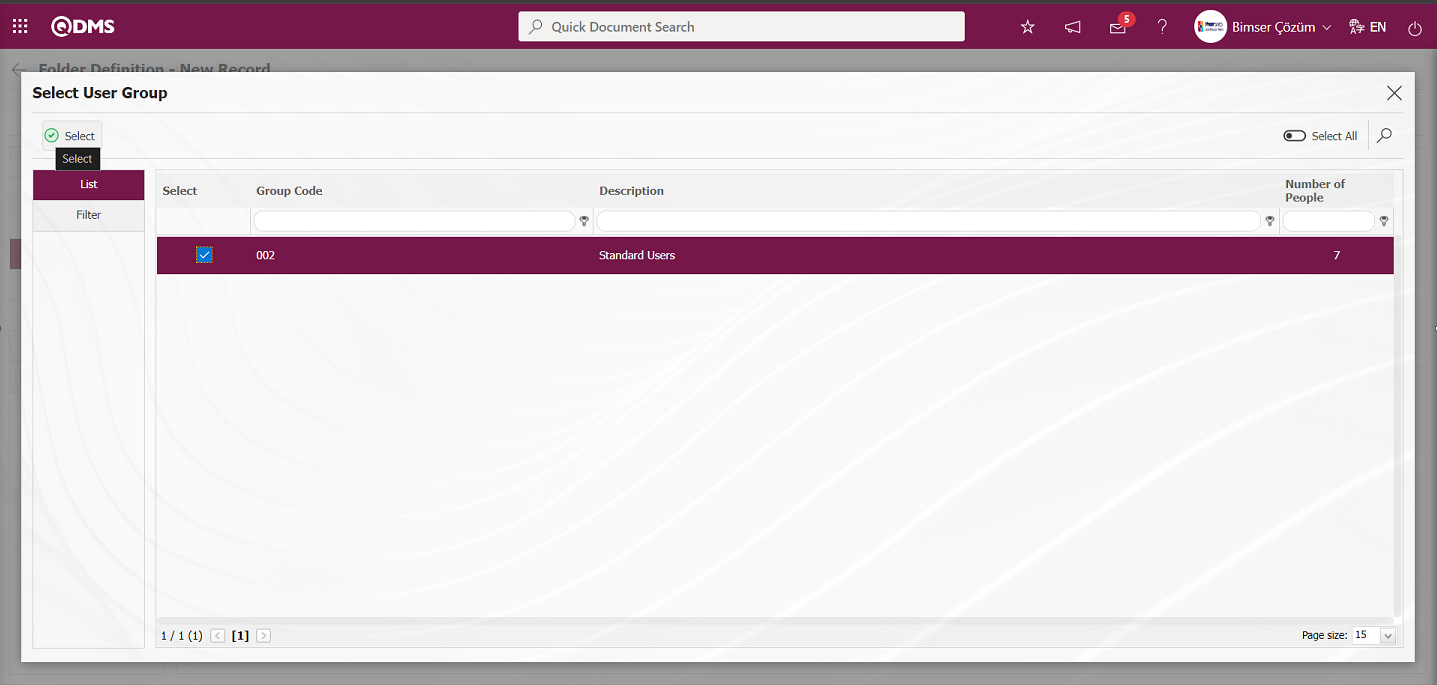
Distribution Matrix tab;
It is the tab where it is determined to which users/user groups the documents prepared in the folder will be distributed after they are published and to whom they will be assigned as reading tasks. When the documents are published, a document reading notification is sent to the personnel who distribute the document and these people to whom the documents are distributed are obliged to read the documents.
By determining the correct users/user groups in the Distribution Matrix tab, it is ensured that the documents are distributed to the correct users. Thus, distribution mails and reading tasks are prevented from going to users who are not related to the published document. When the document is published, the “Required Reading Document List” task falls on the My Pending Jobs page of the group or people specified here.
If the documents linked to the folder are more important for some users/user groups, the check box with the “Important” field is checked. The position/user groups for which the check box related to the Important field is checked will be assigned the task "Required Reading Important Document List” on the My Pending Jobs page. Important field is a field that is displayed depending on the parameter. The parameter value of the parameter 273 “Will the Important Document function be used in the distribution matrix?” in the Document Management Module parameters is activated by selecting “Yes”.

After the parameter is activated, the “Important” field is displayed in the Distribution Matrix tab.
The document is prevented by the system from falling as a task to user groups or individuals marked as “No Read Task”. In the distribution matrix, the “Do not drop a reading task” field is a field that is displayed depending on the parameter. The parameter is activated by selecting the parameter value “Yes” for the parameter 274 “Will the Dont Create Read Task function be used in the distribution matrix?” in the Document Management parameters.

After the parameter is activated, the “No Read Task” field is displayed in the distribution matrix tab.
At the same time, if the survey feature is used in the document, the check box related to the Survey field is checked in the distribution matrix for the users/ user groups that are desired to send a survey. The Survey field in the Distribution Matrix is a field that is displayed depending on the parameter. The parameter value of the parameter 81 “Will the questionnaire be used in the document? (Y/ N)” in the Document Management Module parameters is activated by selecting “Yes”. After the parameter is activated, the Survey field is displayed in the Distribution Matrix tab.
In the other information tab in the documents in the folder, the check box related to “Use Survey” is checked. The survey tab where the survey questions will be defined is activated.
The Question definition screen is displayed by clicking the Survey tab.

In the Survey tab, click on the  button and define the questions related to the Survey.
If the check box related to the “Survey” field from the user/ User Groups added in the distribution matrix tab in the document where the Survey Definition process is performed, the survey is sent.
With the help of the buttons on the screen;
 : Shows the personnel in the selected user group.
 : Add position to the list.
 : User group is added to the list
 : Deletes the distribution in the selected position/user group in the list.
Click / buttons to assign distribution matrix to the folder. From the User Group/ Position list defined in the system, a selection is made for the users to be added to the distribution.
On the Distribution Matrix tab on the Folder Definition - New Record screen, click the button to add a user group to the distribution matrix.
In the User Group list opened, User Group selection is made and User Group is added to the distribution matrix by clicking the button.
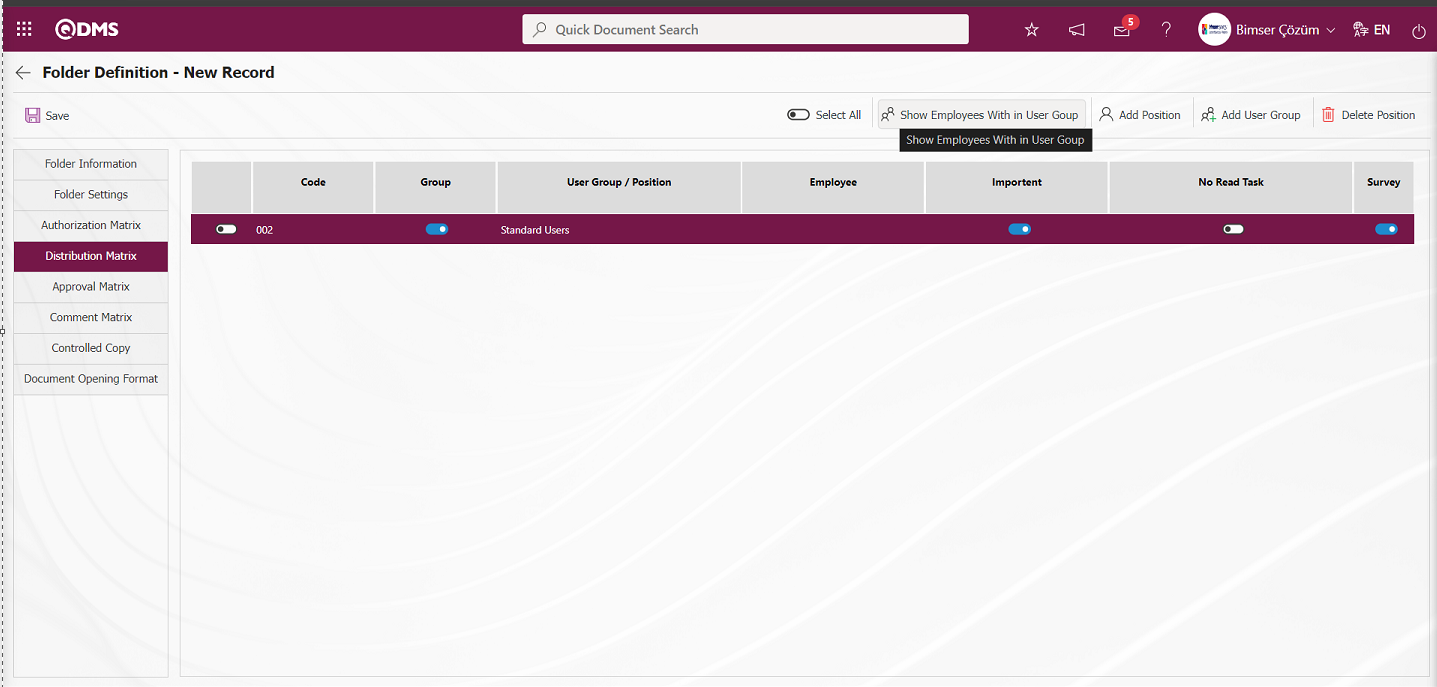
Folder Definition - On the Distribution Matrix screen on the New Record screen, the list of group members in the user group is displayed by clicking the button.
On the Distribution Matrix tab on the Folder Definition - New Record screen, click the  button to add a position to the distribution matrix.
The relevant position is selected from the Position List and the position is added to the distribution matrix by clicking the button in the upper left corner of the screen.

Approval Matrix tab;
It is the tab where the positions and approval order of the documents in the folder are determined in the preparation, revision and cancellation processes. Positions are added to the Approval Matrix and the level of the added positions is determined. If there is more than one approver, the last approver must be at level 0. Level 0 must belong to a single and final approver, other levels may have more than one approver. The position at level 0 refers to the top level in the hierarchy. For documents to be prepared in a folder, the level part of the approval matrix works with reverse logic.
If the value written in the level section in the approval process is “0” zero, the approver at level 0 is the last approver.
In the document in the 1st image, the value in the level section in the approval process is “0” and since it is the last approver, the document goes for approval only to the person in the position of the last approver.

2. In the document in the image, the approval process goes from back to front. First, the approver at level “1” approves the document. Finally, the approver at level “0” performs the approval process of the document.

3. In the document in the image, the approval process is defined as parallel approval. In parallel approval process, there are approvers at the same level and approval process is done without a certain order. After the approval process of all approvers is finished, the approval process in the document ends. Any approver at level “0” does the approval process without the need for a sequence.
4. In the document in the image, the approval process goes from the reverse to the beginning. After the approval process of the approvers at level 1 is done without any sorting from the approvers at level 1, the approval process is done to the person in the position at level “0”, who is the last approver.

Note: If the “Approver Role” in the folder settings tab is to be used in the system, no action is taken in the approval matrix, the approval process works according to the approver role flow.
With the help of the buttons on the screen;
 : Adds a position to the list.
 : Delete the selected position in the list.
Click on the button to assign the approvers desired to be in the approval matrix in the folder. From the position list defined in the system, a selection is made for the users to be added to the approval matrix.
On the Approval matrix tab on the Folder Identification-New Record screen, click the( ) button to add approvers to the approval matrix.

After the approver selection process in the position list, the approver is added by clicking the button in the upper left corner of the screen.
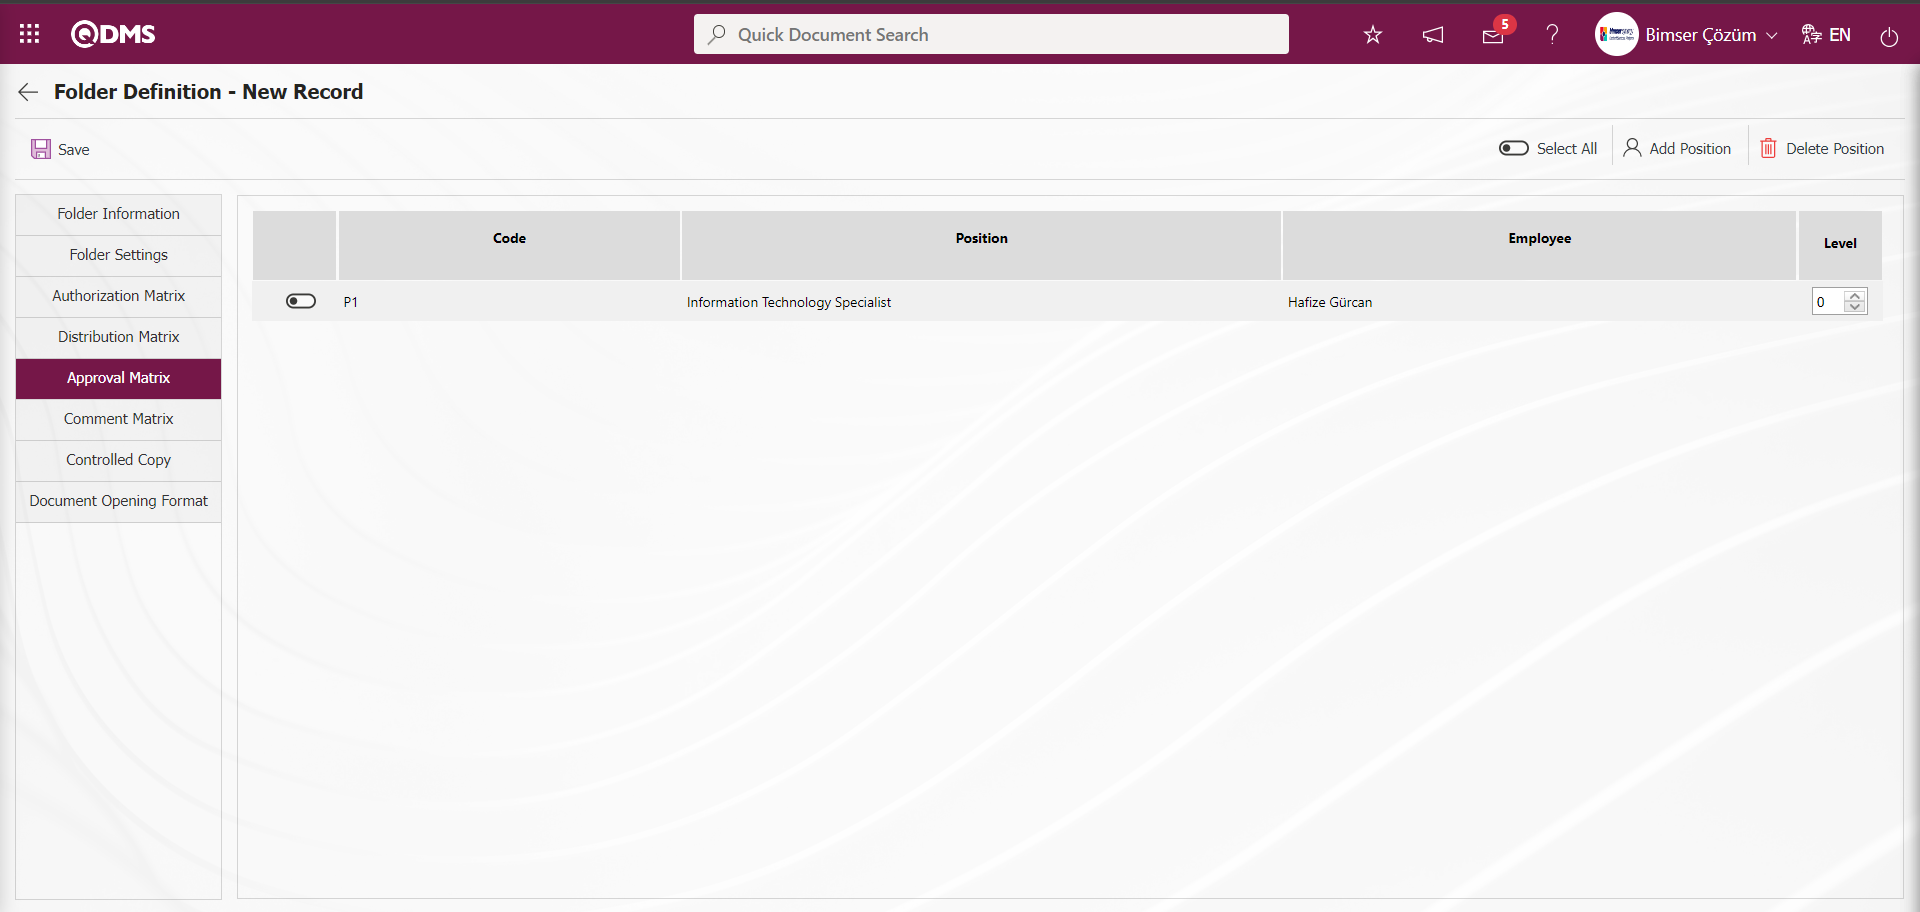
In the Comment Matrix tab;
It is the tab where it is determined whether the documents created in the folder will be sent to certain people for opinion before being sent to the control/ approval process. If Comment receiving/ giving operations will not be used in the document management process, the parameter value of the 38th “Use Opinion Tab” parameter in the Document Management parameters is selected as “No” and the parameter is disabled. When the parameter is disabled, the Comment matrix tab is not displayed in the folder and the documents in the folder.

The comment matrix is completely optional. If it is desired to get an opinion from a certain position about the document before all documents in the folder are sent for control/approval and if these opinionators are the same for all documents, the position is added to the Comment Matrix tab. This process in the folder covers all documents in the folder. Comment Matrix tab can also be selected on a document-specific basis. For this purpose, the opinion matrix can be selected by the preparer in document preparation/revision processes to obtain opinions from the right users about the document. In this case, it is sufficient to leave the comment matrix tab in the folder blank.
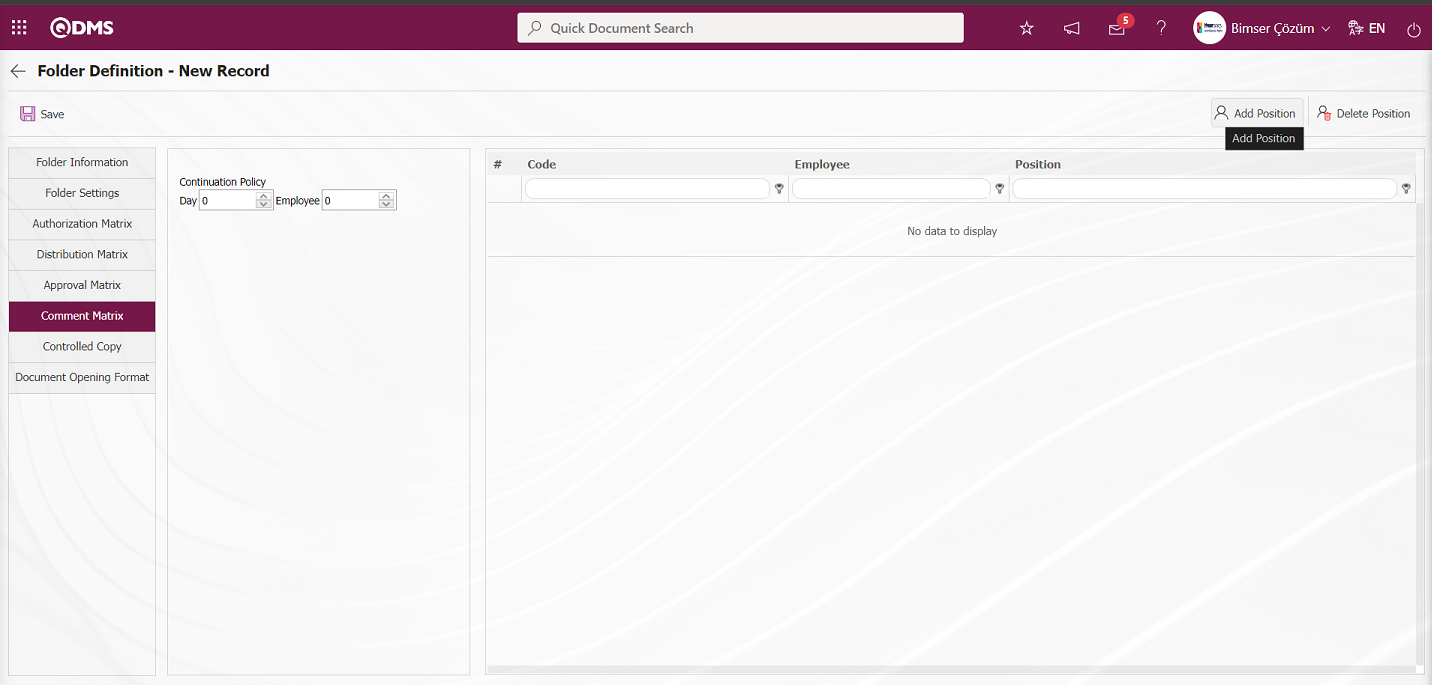
With the help of the buttons on the screen;
 : Adds position to the list.
 : Delete the selected Comment position in the list.
Click on the button to assign the interviewers desired to be in the Comment matrix in the folder. From the list of positions defined in the system, selection is made for the users to be added to the Comment matrix.
On the Folder Definition-New Record screen, on the Comment matrix tab, click the button to add a commenter to the Comment matrix.
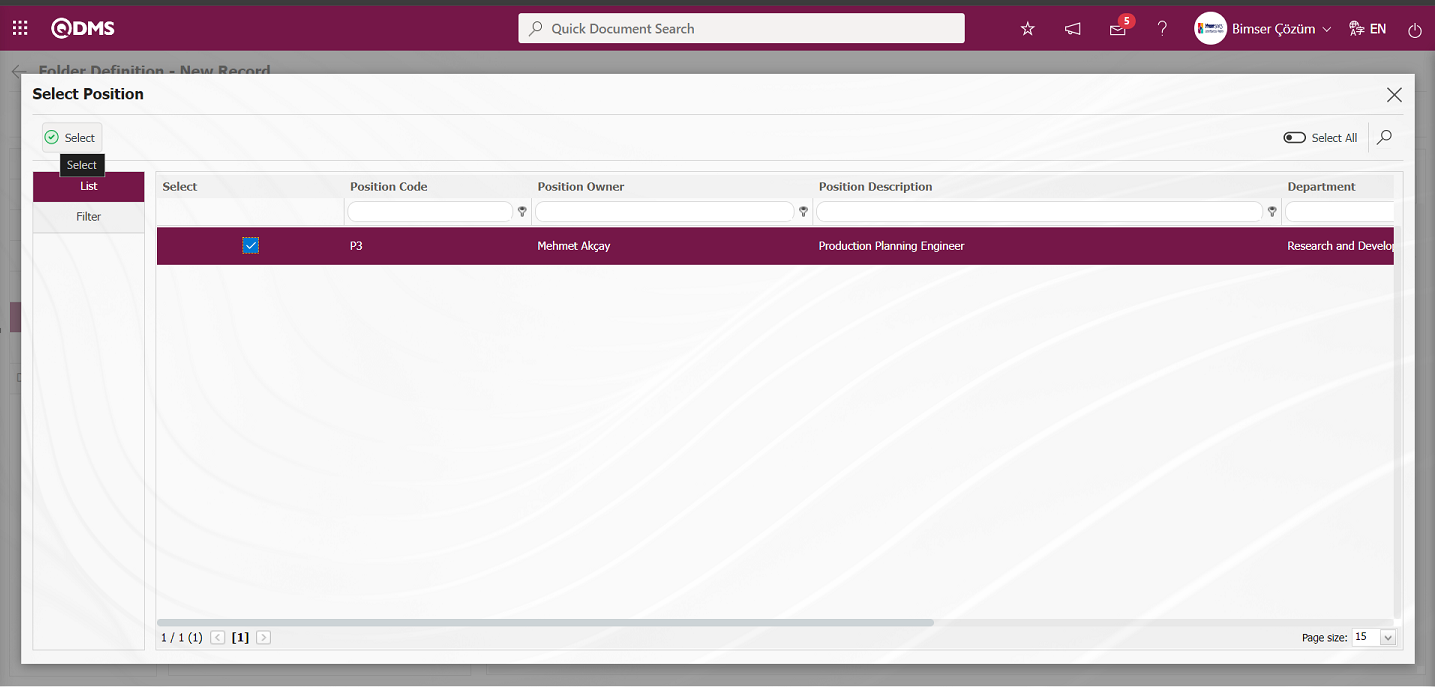
After the Commentator selection process in the Position list, the Commentator is added to the Comment matrix by clicking the button in the upper left corner of the screen.
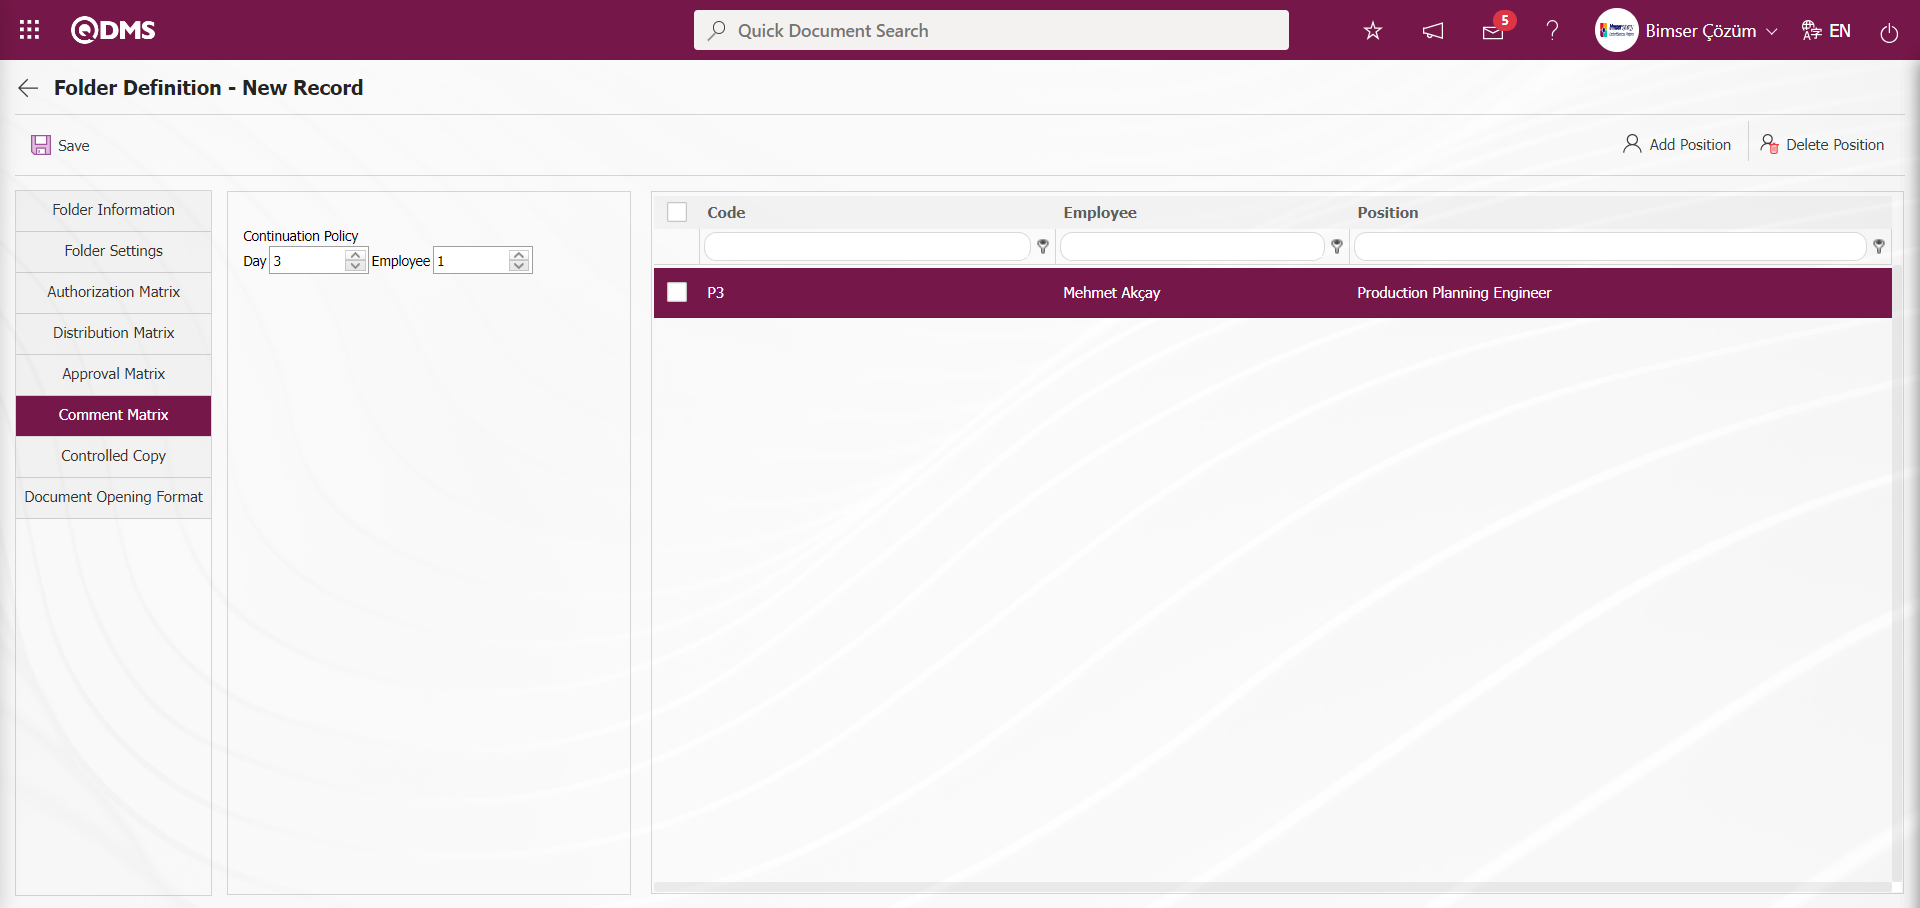
Continuation Policy:
In the Comment matrix, there are Day and person fields in the Attendance policy field. In the Day field, the opinion of 1 person must be received in the Person field within 3 days. Within 3 days, when the commentator gives an opinion, the documents in the folder go to the person who prepared them as “Documents After Comment Request”. Opinion is optional. As long as the reviewer does not give an opinion in the continuation policy field, it is ensured to wait for the 3 days period written in the day field to expire.
Control Copy tab;
It is the tab where the places where the documents created in the folder will be physically distributed as controlled copies are selected from the list of distribution locations defined in the system infrastructure. If physical distribution of documents as controlled copies will not be made in the document management process, the “Use Controlled Copy Tab” parameter 39 in the Document Management parameters is marked as “No”.

The Controlled copy tab is completely optional. Distribution locations are added if all documents in the folder have the same physical distribution location. This operation in the folder covers all documents in the folder. The Controlled Copy tab can also be selected on a document specific basis. For this, physical distribution locations can be selected in the controlled copy tab by the preparer during document preparation/revision processes, and the document can be distributed to the correct physical distribution locations related to the document. In this case, it is sufficient to leave the controlled copy tab in the folder blank.
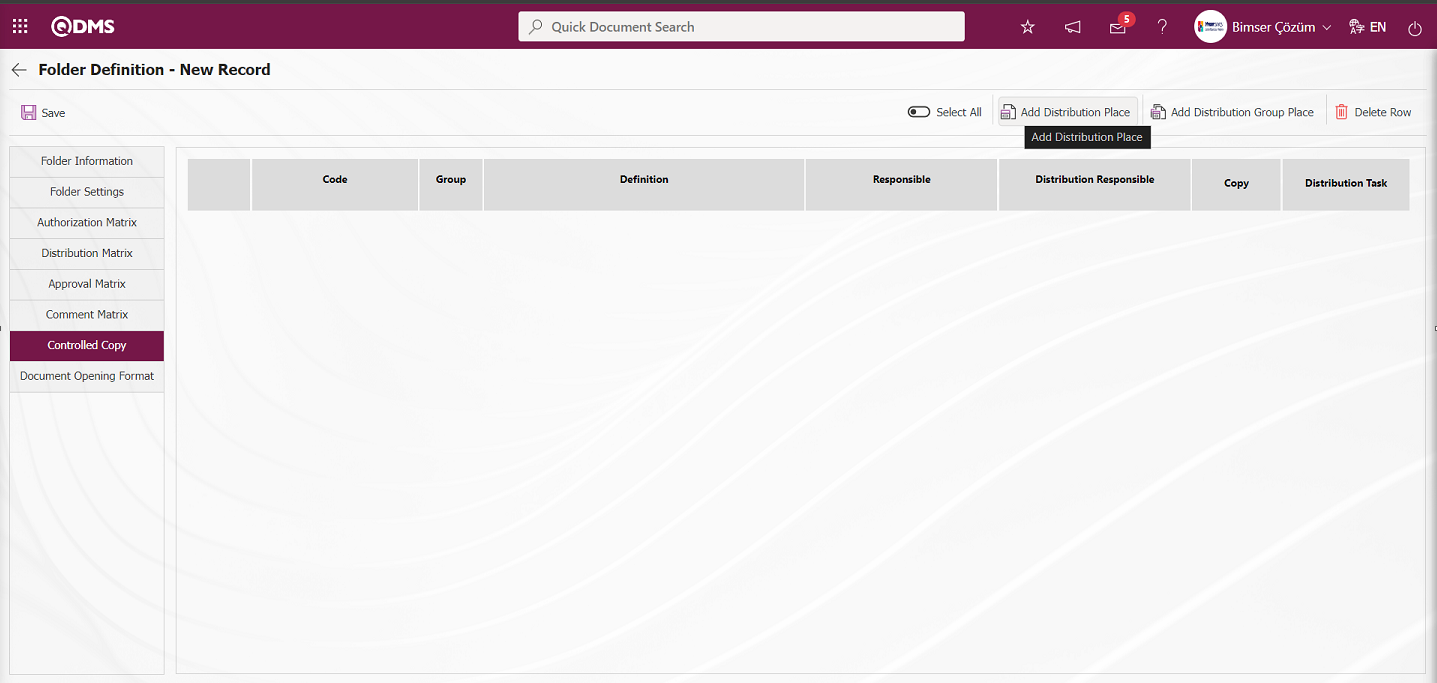
With the help of the buttons on the screen;
 : Distribution location is added to the list.
 :Add Distribution location group to the list.
 : Delete the selected row in the list.
Click  / buttons to assign the physical distribution locations that are desired to be in the controlled copy tab in the folder. From the list of distribution locations/distribution groups defined in the system, a selection is made for the distribution locations to be added to the controlled copy tab.
On the Folder Definition-New Record screen, click the button to add a distribution location to the Controlled Copy tab.

In the Distribution Location list, the Distribution Location to be added is selected in the Control Copy tab and the Distribution Location is added by clicking the button in the upper left corner of the screen.
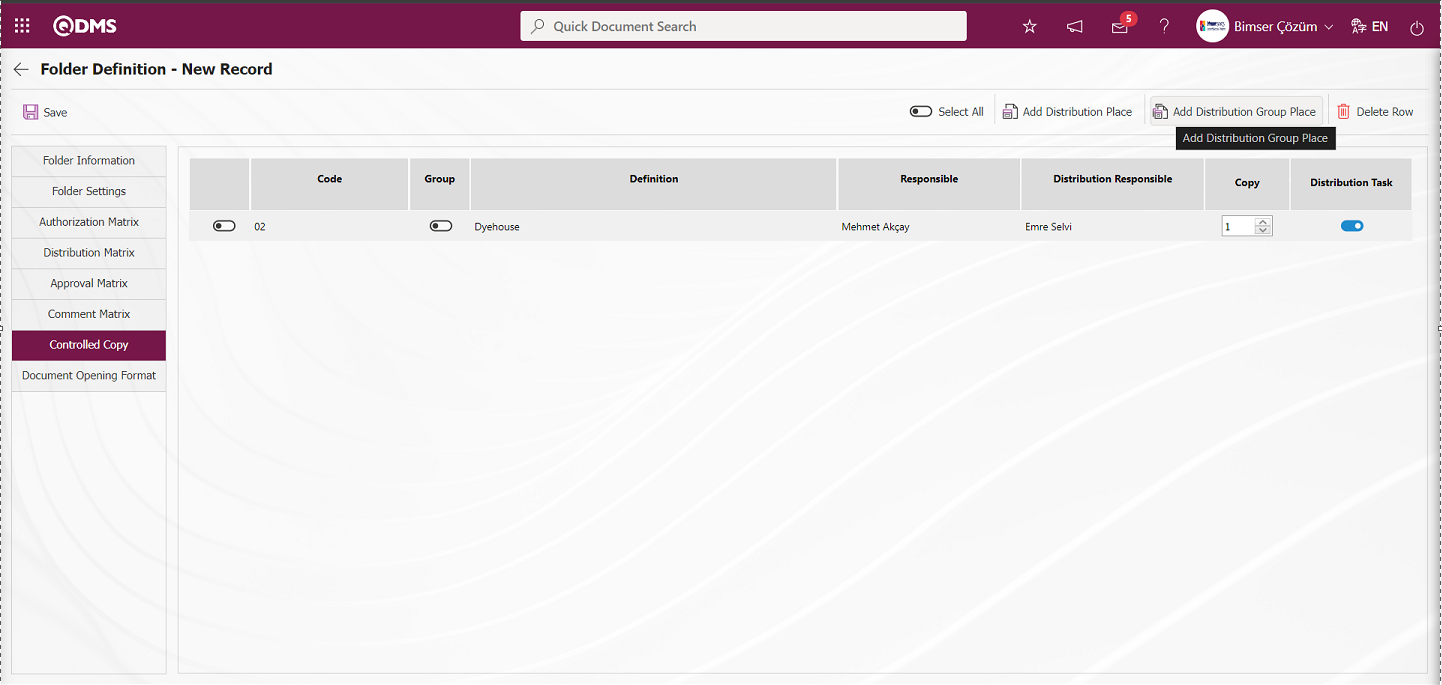
On the Folder Definition-New Record screen, click the  button to add a Distribution Location group on the Controlled Copy tab.
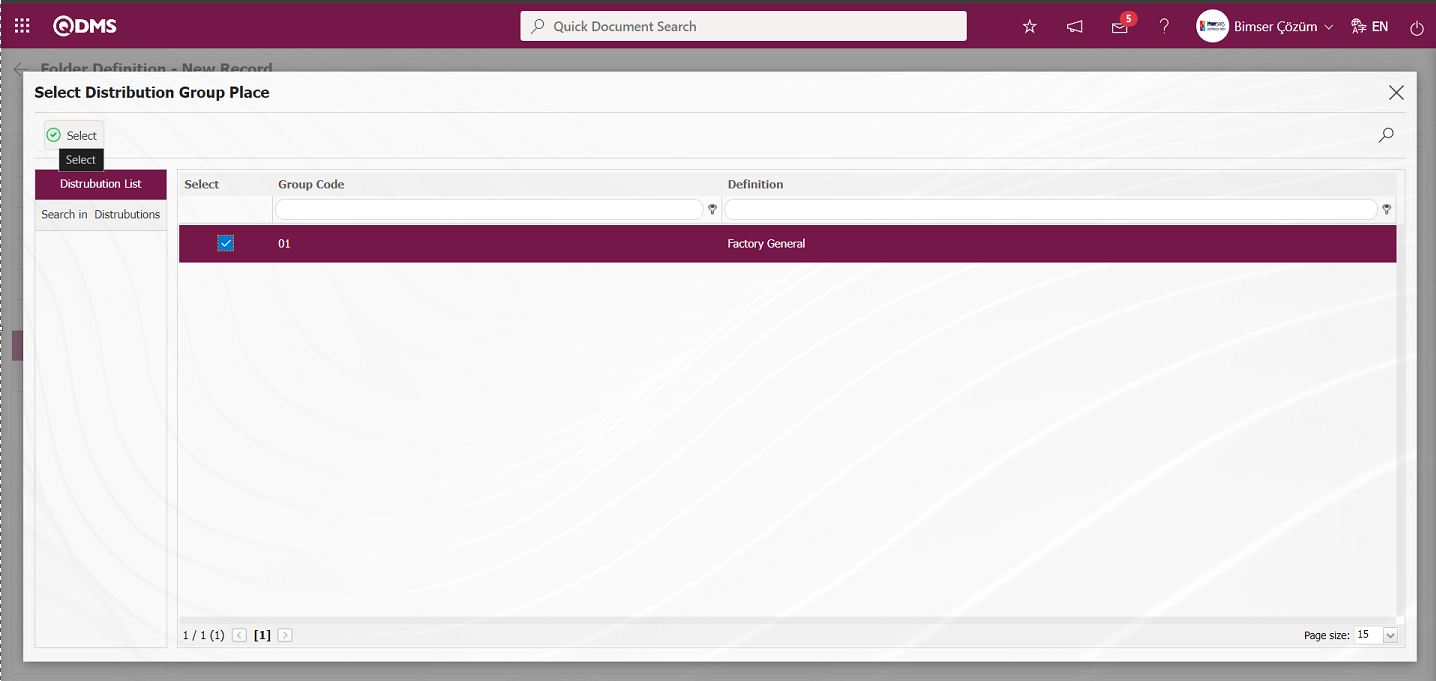
In the Distribution Location Group list opened, the Distribution Location Group to be added is selected in the Control Copy tab and the Distribution Location Group is added by clicking the button in the upper left corner of the screen.

Document View Format tab
This is the tab where the formats of the documents to be prepared in the folder are determined during viewing, printing, controlled copy printing, viewing during review and approval. “Company Parameter, Use PDF, Original, Document Viewer” options are selected.
On the Document Opening Format tab, the viewing, printing, controlled copy printing, viewing in view and approval formats of documents are determined.
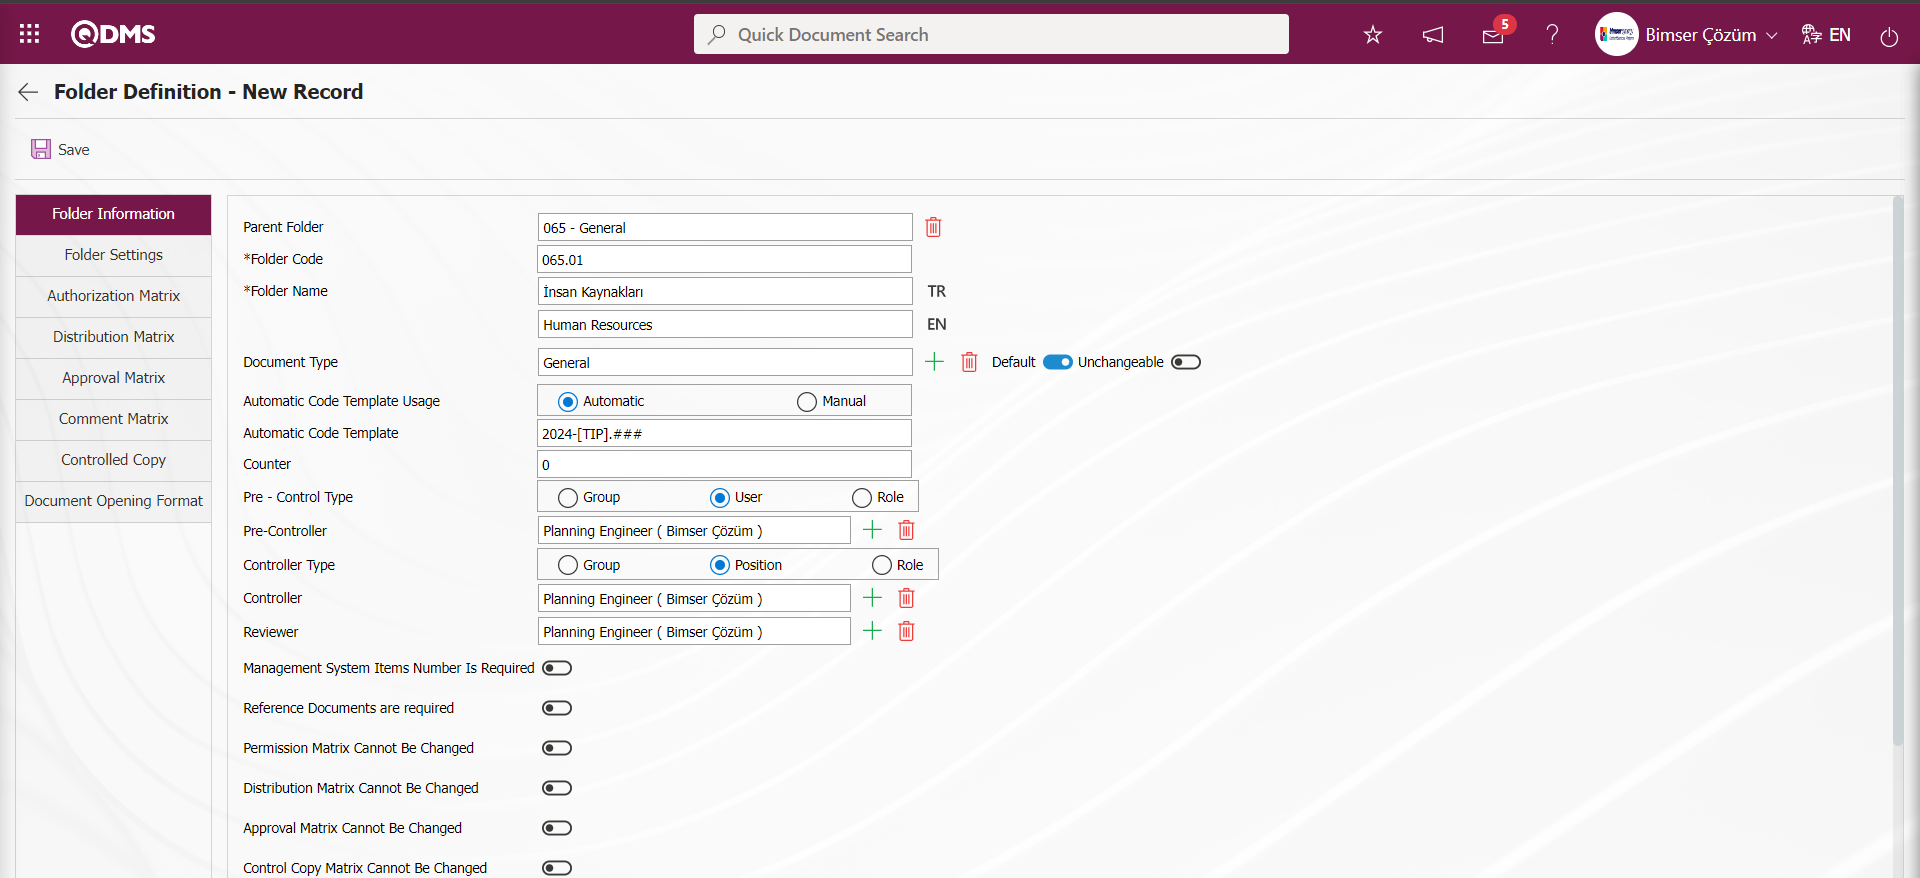

After typing the required information in the required fields on the Folder definition - New Record screen, the Folder definition registration process is done by clicking the  button in the upper left corner of the screen.
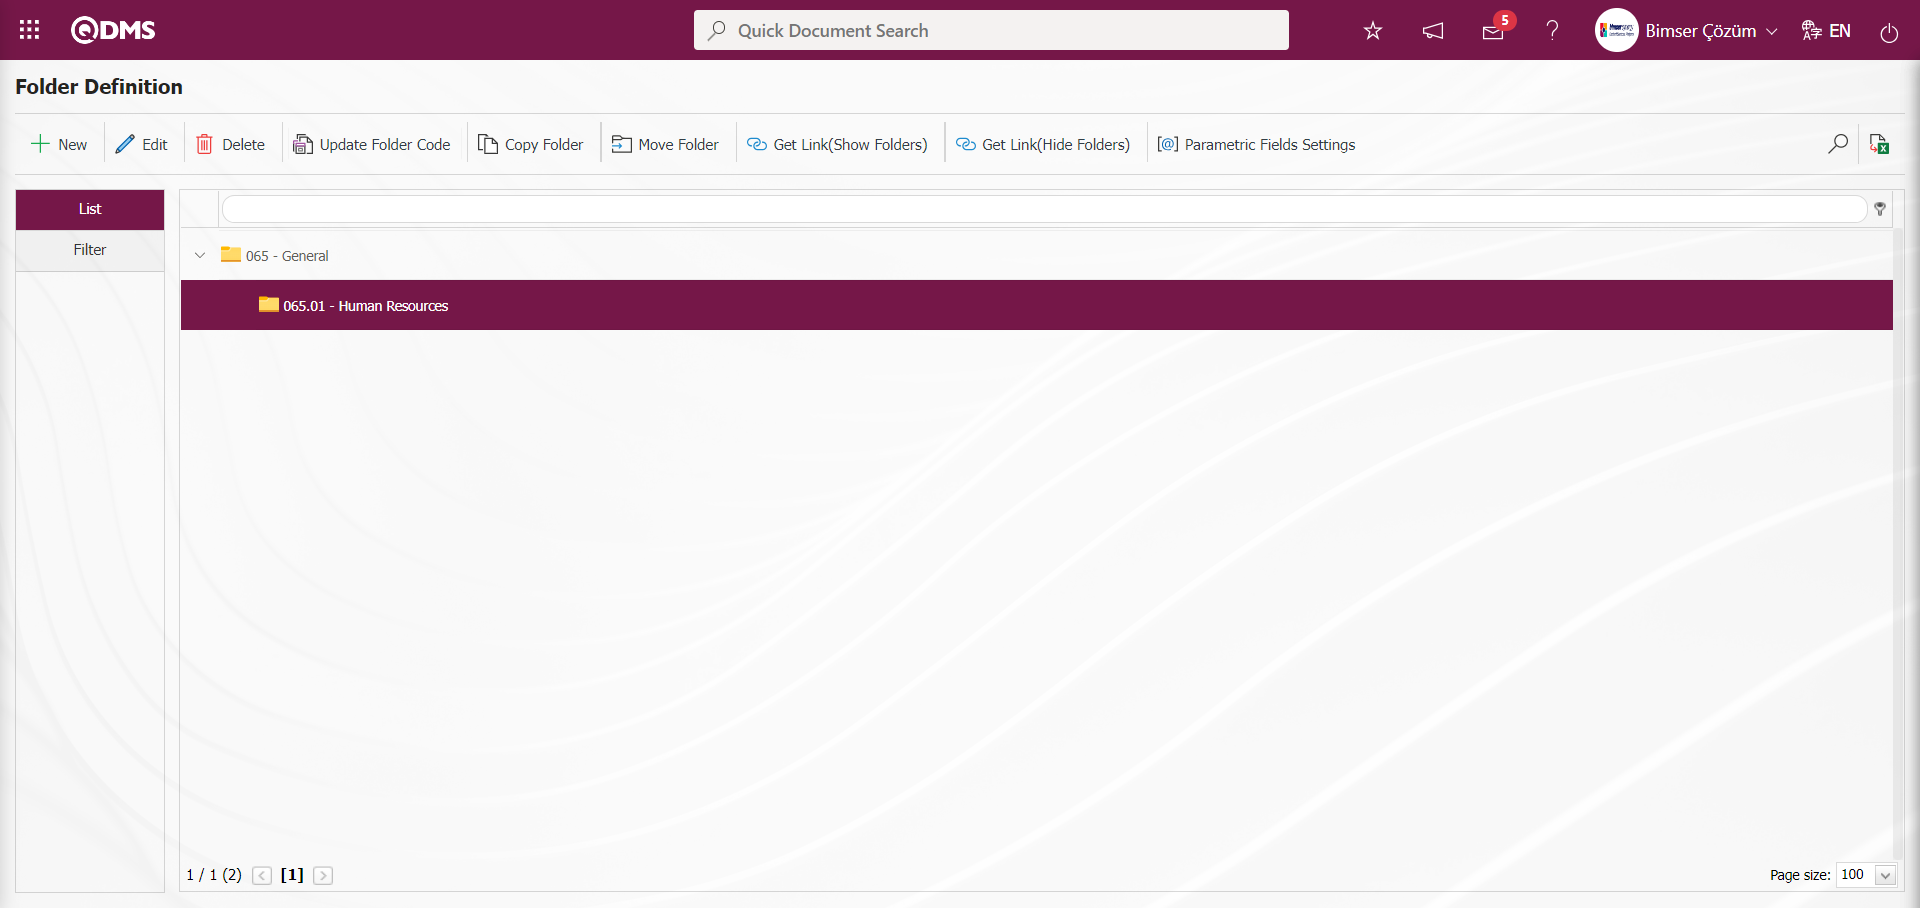 Defining the subfolders of the folder where the folder is defined is also done.
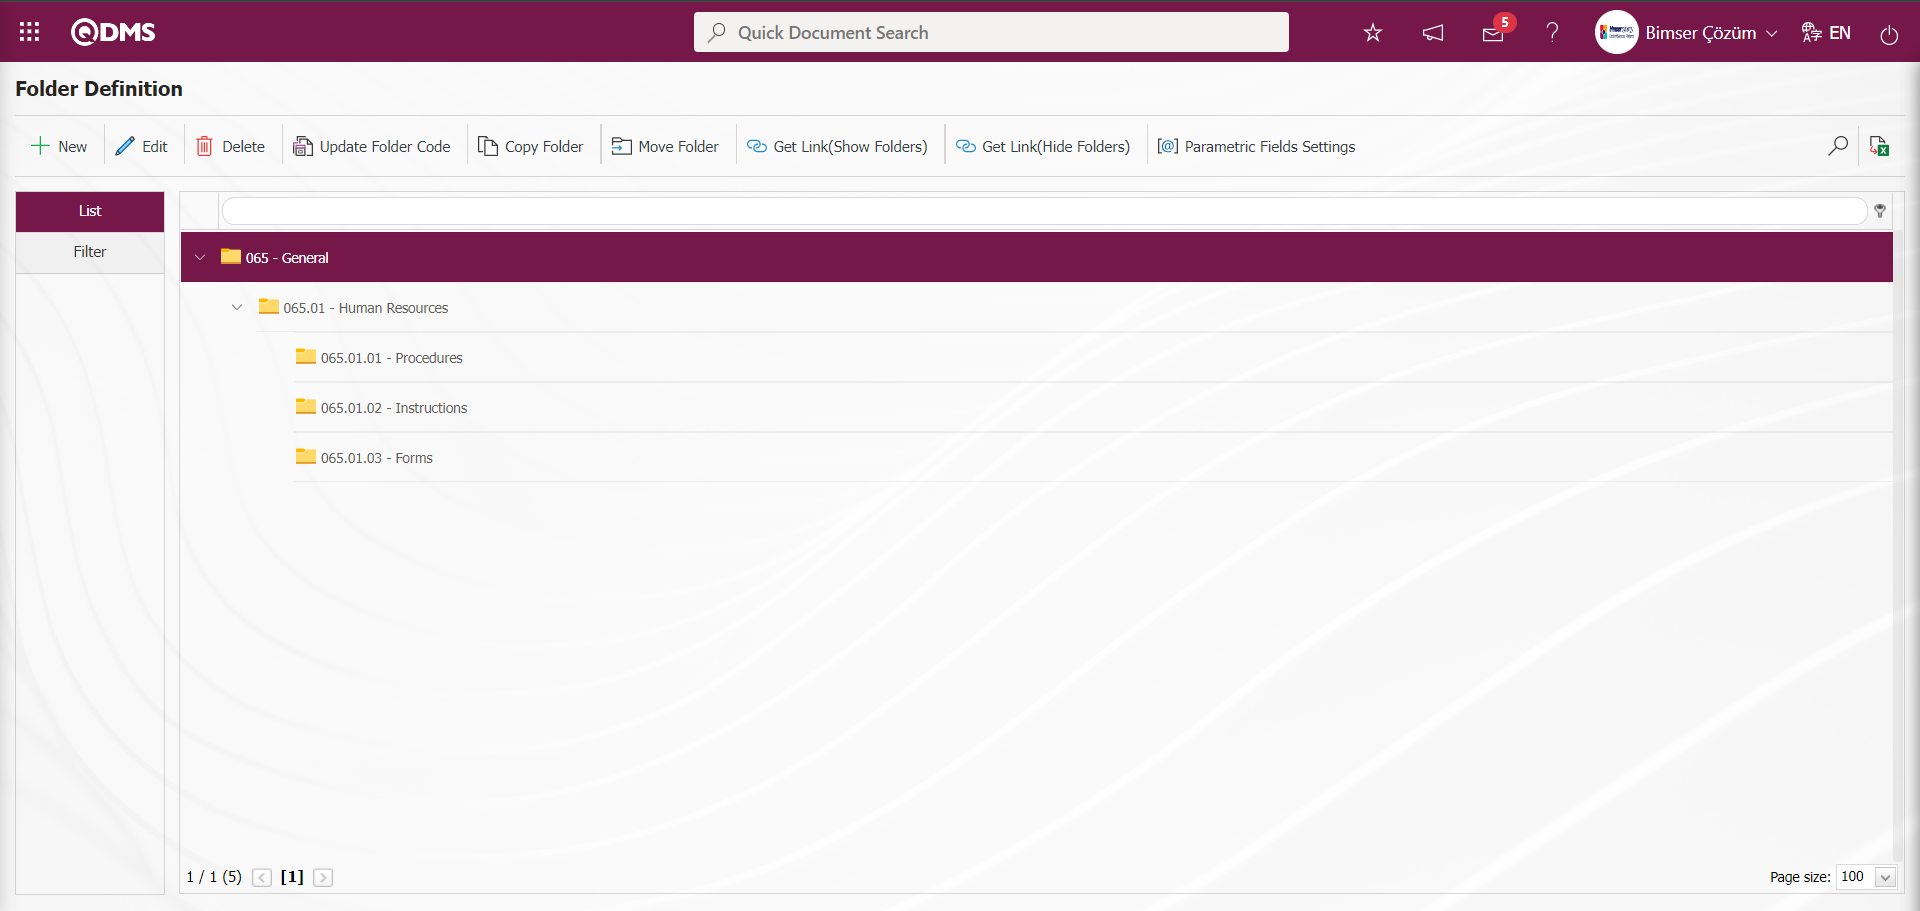
In the folder definition process, the folder tree structure is designed according to the department structure of the company.
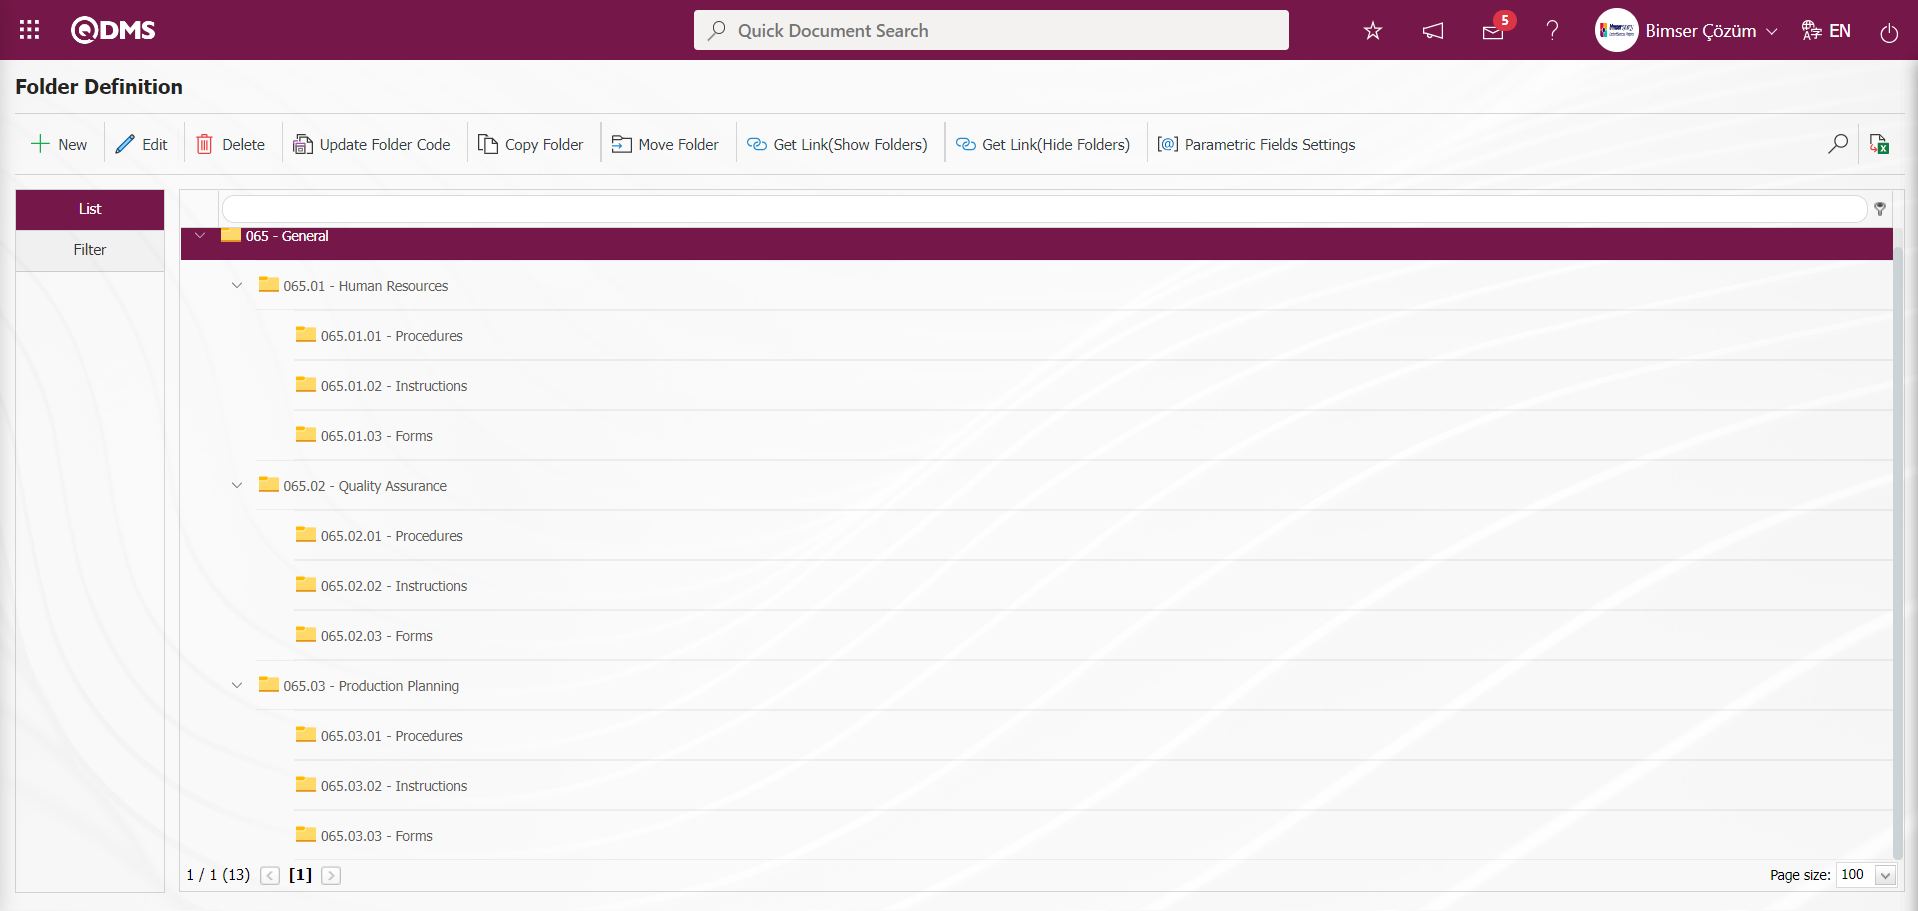
6.2.1.1.Folder Information Update Process
Folder information can be changed/updated/edited on the Folder Definition screen. For updating the folder information, first select the folder whose folder information will be changed. While the folder whose folder information will be changed is selected, the  button is clicked to change the folder information. On the Folder Definition screen, select the folder whose folder information will be changed.

While the folder is selected on the Folder Definition screen, click on the button to open the Folder Update screen. On the screen that opens, editing and updating operations are performed on the relevant fields. Fields such as folder name, document type, document code template, controller information, authorization/ distribution/ approval matrices are edited according to the new folder structure.
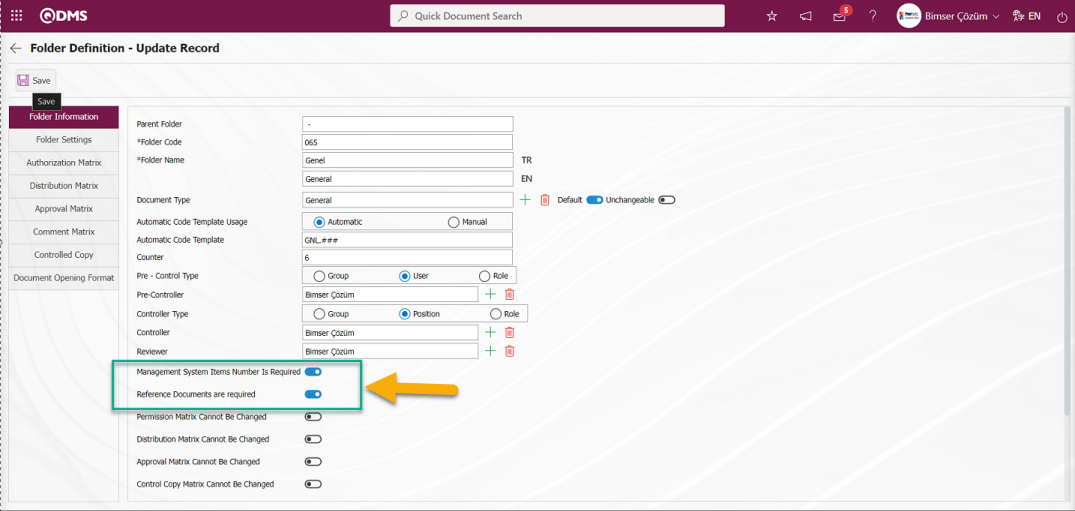
After editing the required fields on the Folder Definition - Record Update screen, the folder record update process is performed by clicking the  button in the upper left corner of the screen.
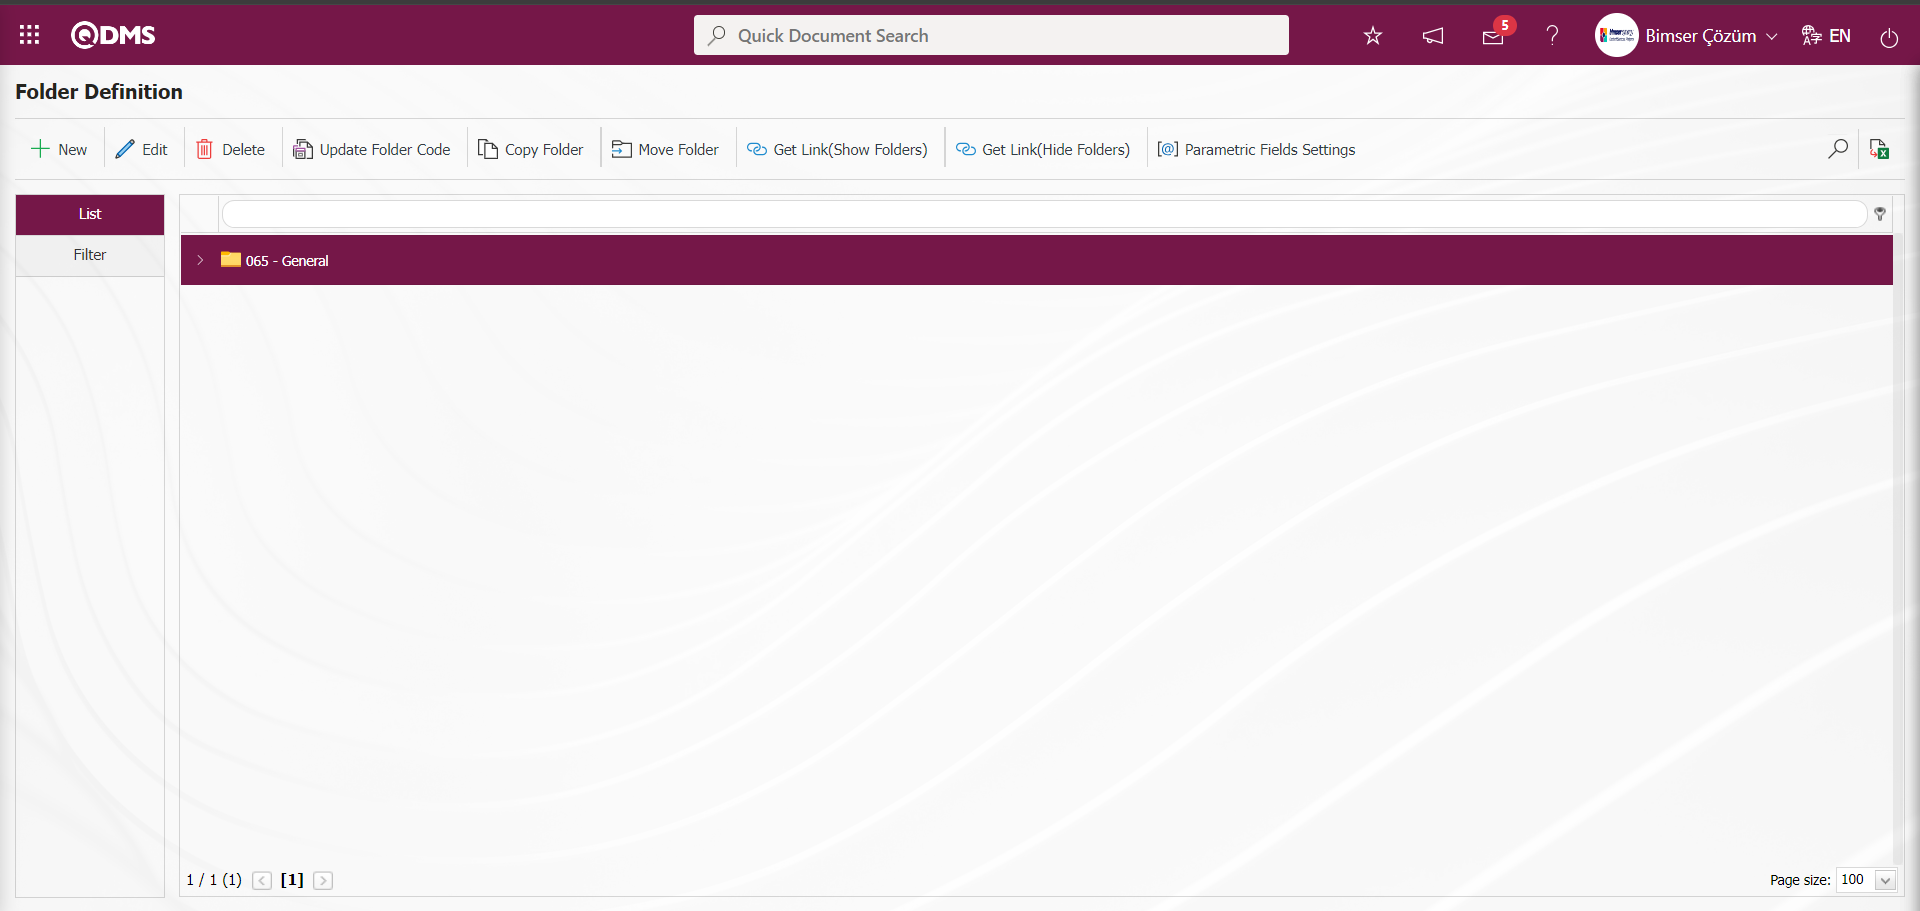
6.2.1.2.Folder Code Change
Folder code change operation is done on the Folder Definition screen. For changing the folder code, first select the folder whose folder code will be changed. While the folder code to be changed is selected, the folder code change operation is performed by clicking the  button. On the Folder Definition screen, select the folder whose folder code will be changed.
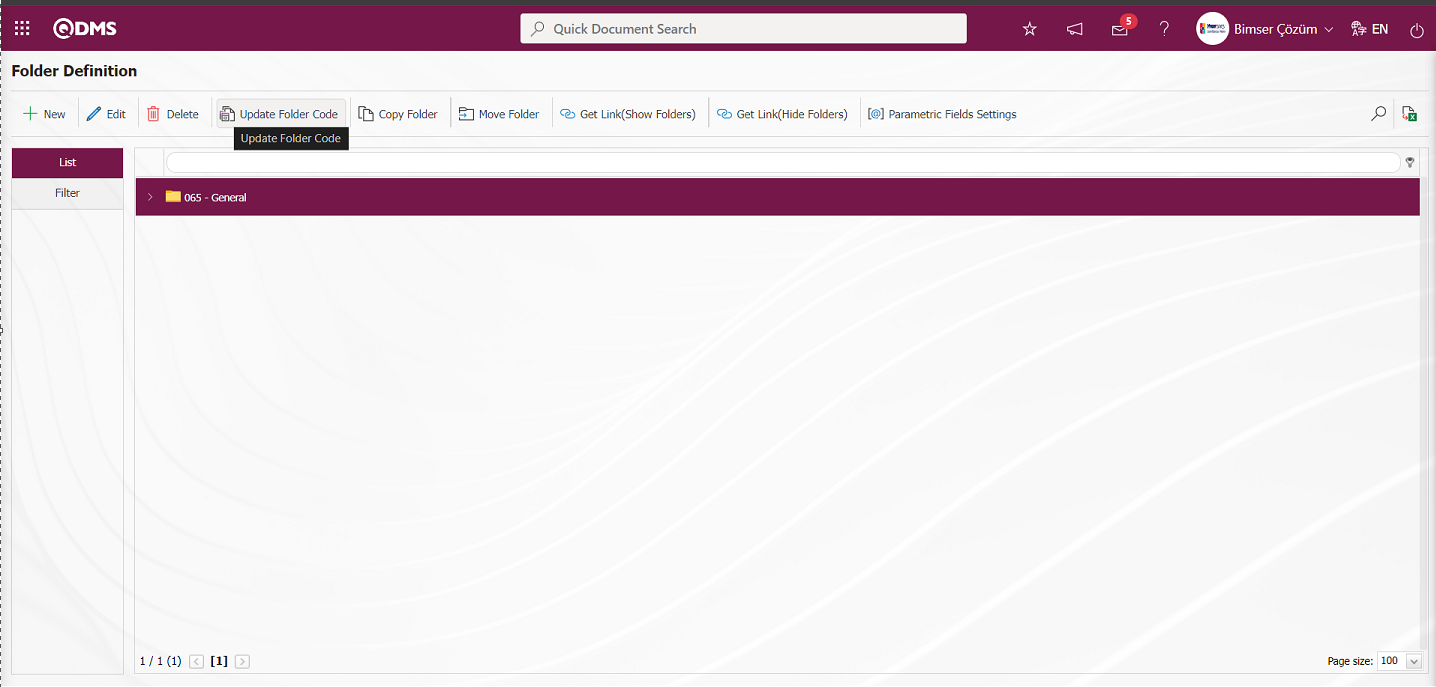
While the folder is selected on the Folder Definition screen, click on the button to open the Folder Code Update screen.
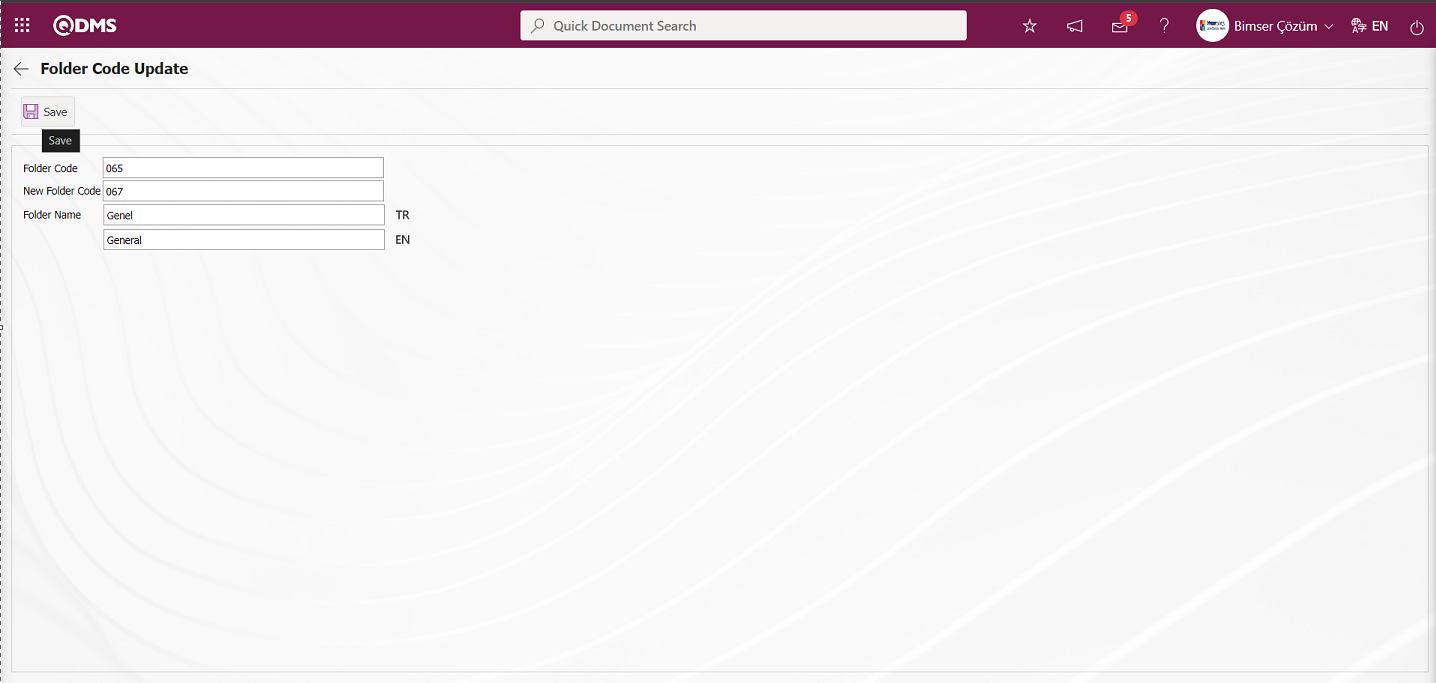
Related fields are defined on the screen that opens:
Group Code: This is the field where the code information of the folder is given by the system on the Folder Code Update screen.
New Folder Code: This is the field where the new code information to be given to the folder on the Folder Code Update screen is written.
Folder Name: This is the field where the name of the folder is given by the system on the Folder Code Update screen. If desired, users can make changes in this field and give a new name to the folder.
On the Folder Code Update screen, in the new folder code field, the code information of the folder that was changed is written. If desired, changes are made in the Folder name field. After the changes are made on the required fields, the button on the upper left corner of the screen is clicked and the folder code change registration process is done.
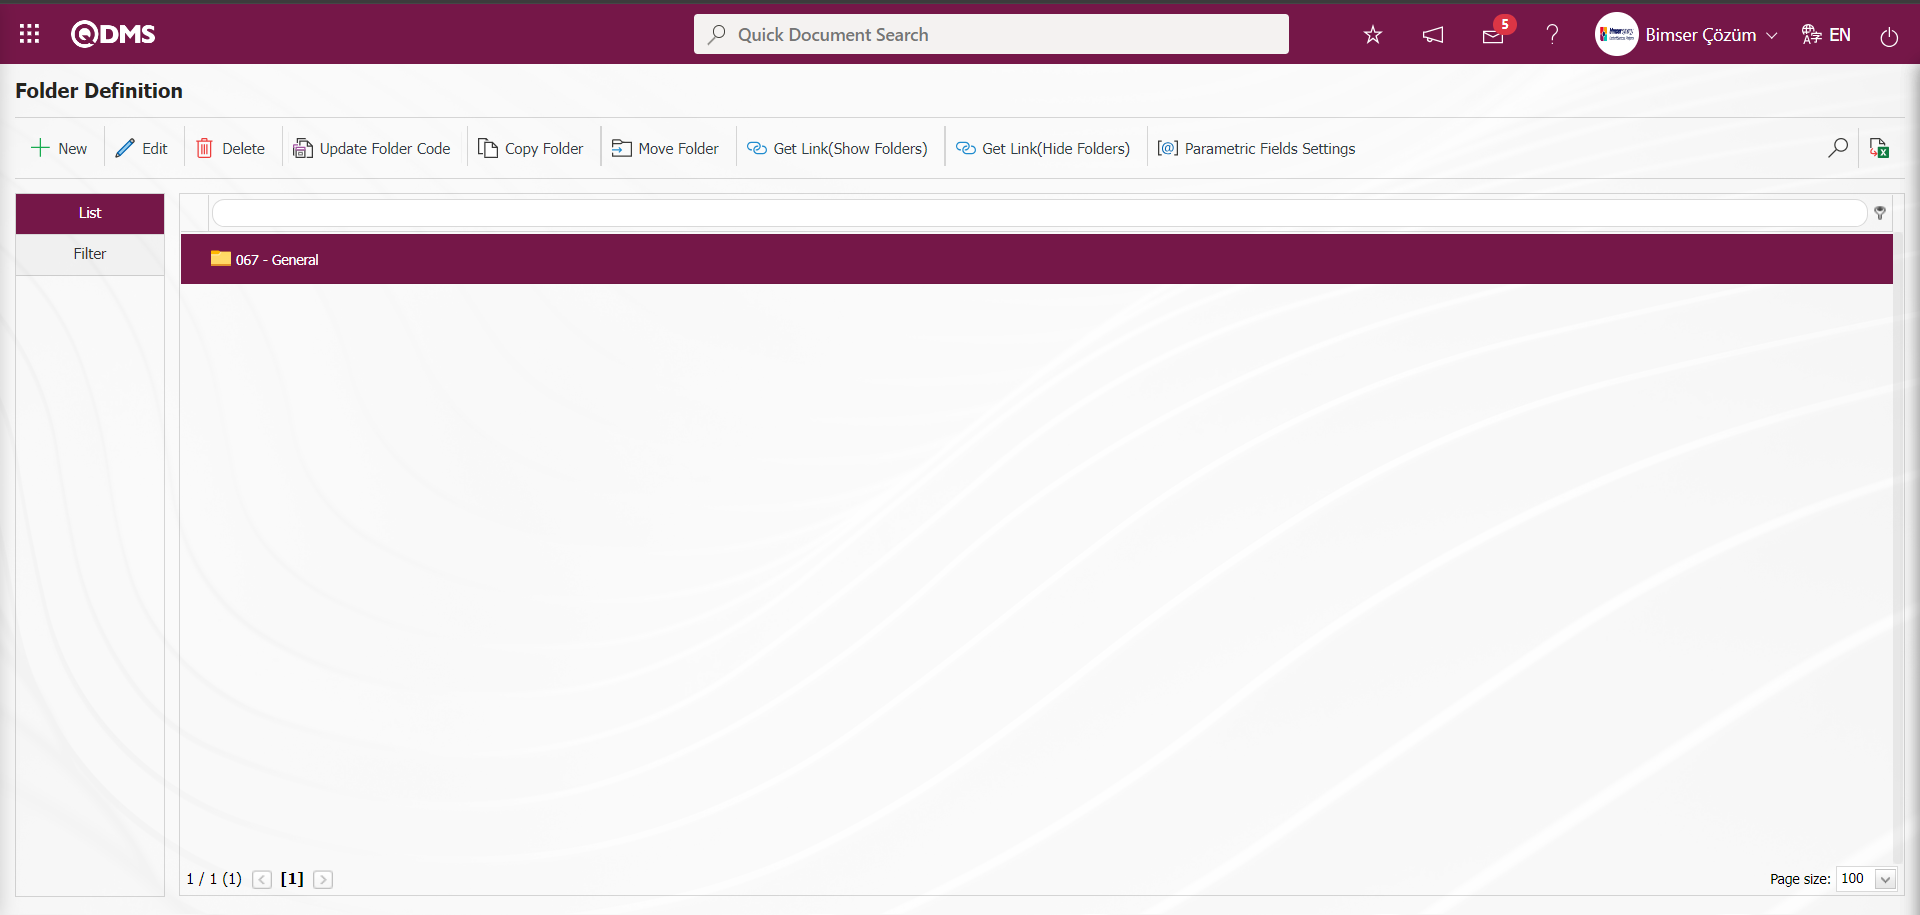
6.2.1.3.Folder Copy Process
If you want to create a new folder by using the folder information selected in the Folder Definition screen, you need to copy the folder. For folder copy operation, first select the folder to be copied. While the folder to be copied is selected, the folder copy operation is performed by clicking the 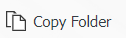 button. It is used to avoid redefining the folder with the same information. If the folder to be copied has subfolders, the subfolders are copied along with the main folder during the copying process. On the Folder Definition screen, the folder to be copied is selected.
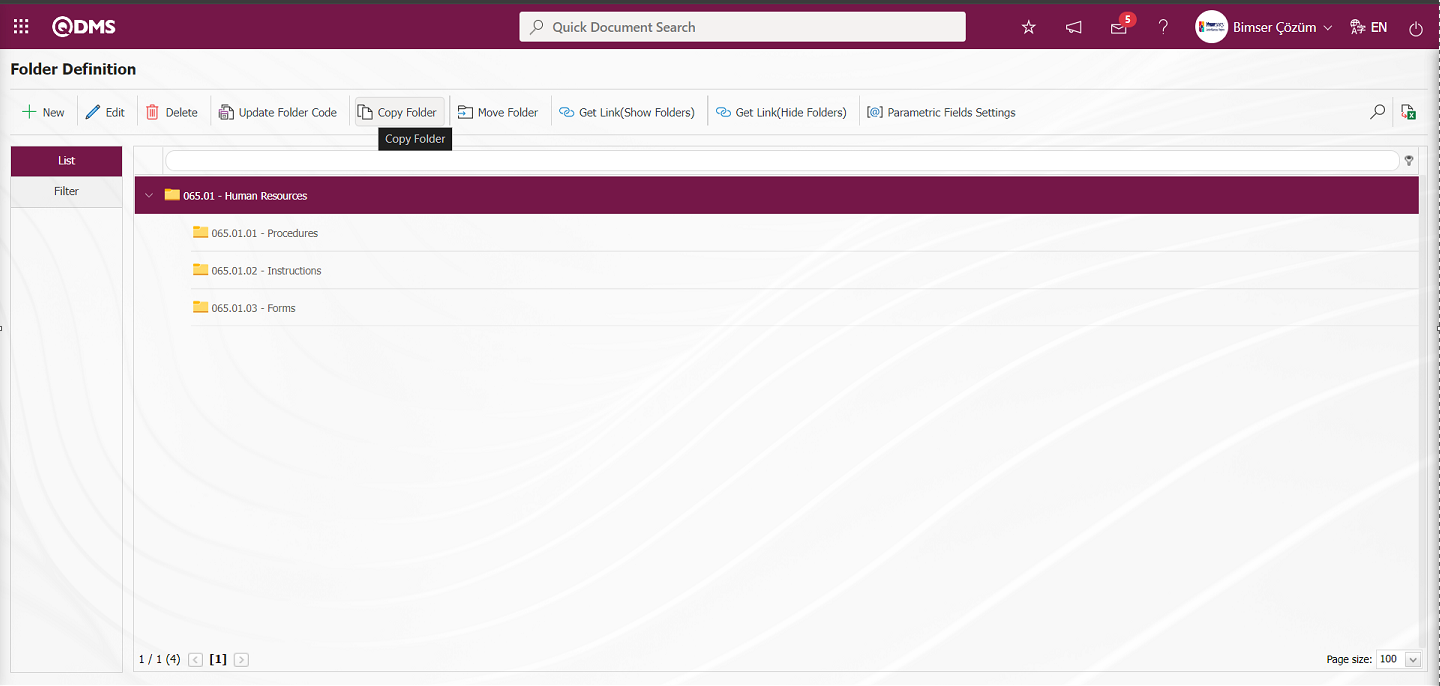
While the folder is selected in the Folder Defination screen, click on the button to open the Folder Copy screen
Related fields are defined on the screen that opens:
Group Code: This is the field where the code information of the folder copied by the system on the Folder Copy screen is given.
Folder Code to Copy: This is the field where the code information of the folder to be copied from the Folder Copy screen is written.
Add New Code to the Beginning of Subfolder: If you want to add the new code from the Folder Copy screen to the beginning of the subfolders, the relevant check box is checked.
On the Folder Copy screen, the code information of the folder to be copied is written. After entering the relevant information in the required fields, the folder copy registration process is done by clicking the  button in the upper left corner of the screen.
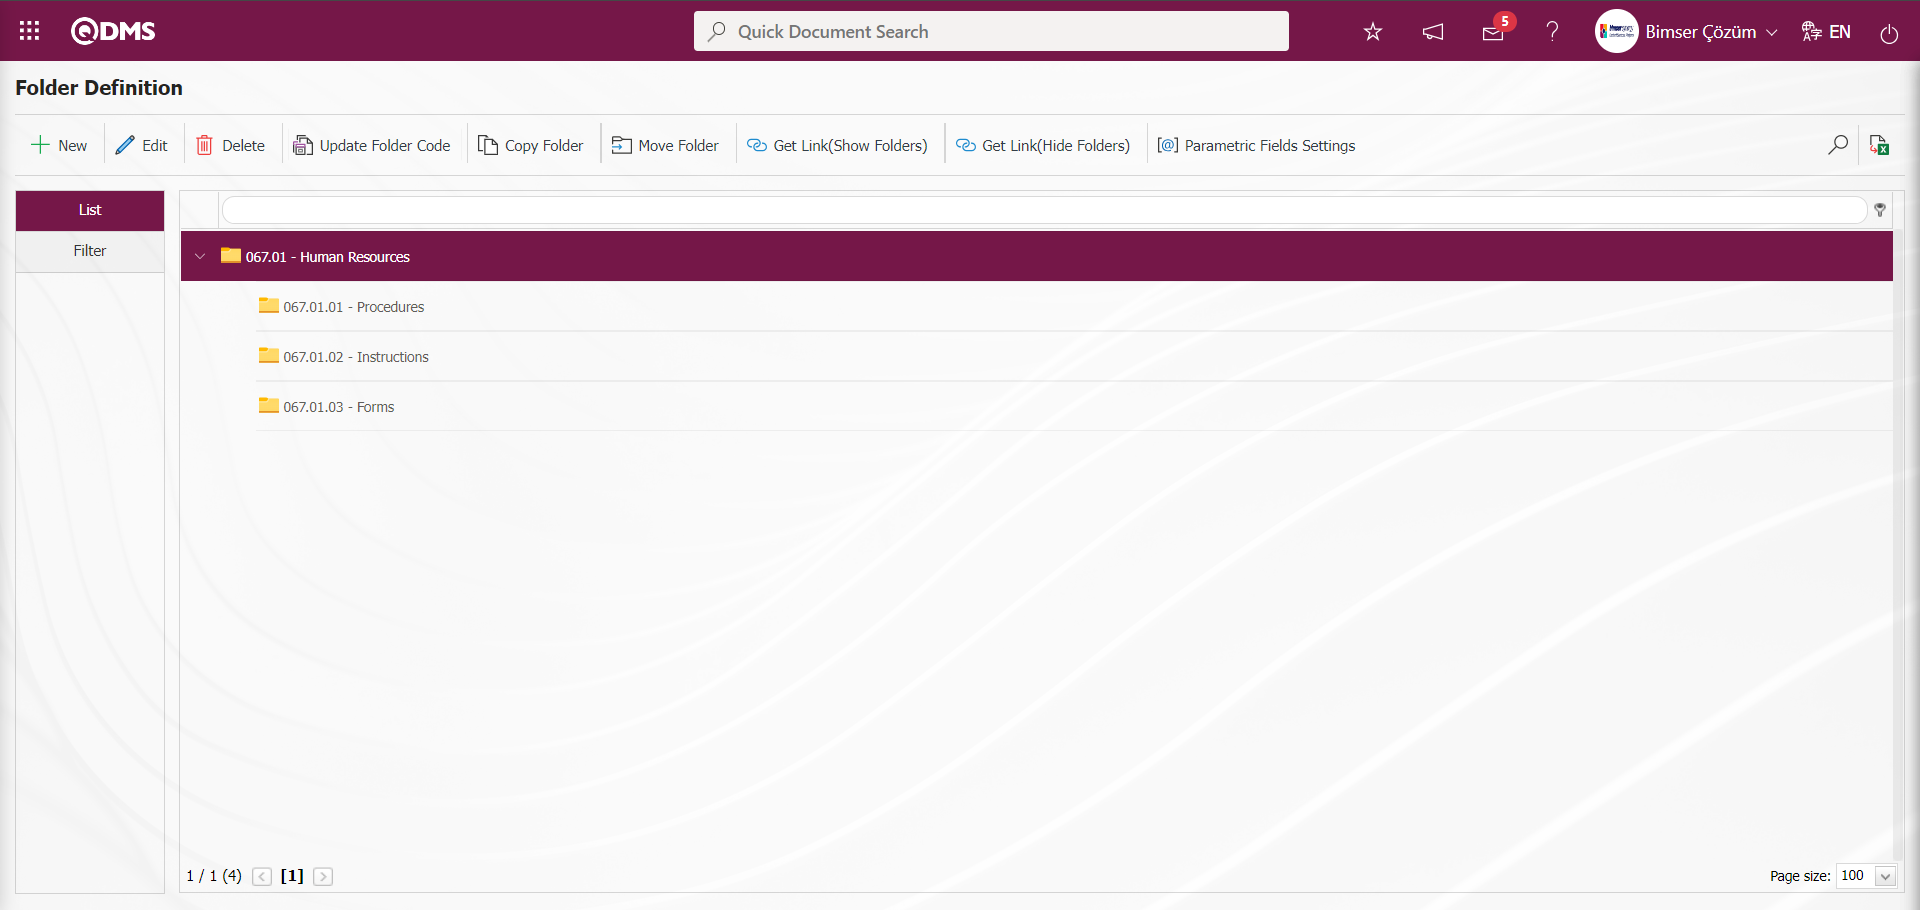
6.2.1.4.Move Folder Operation
A folder selected in the Folder Definition screen is moved under another folder.
For Folder Move operation, first select the folder to be moved. While the folder to be moved is selected, click on the 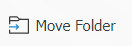 button and do not move the folder. On the Folder Definition screen, select the folder to be moved.

While the folder is selected in the Folder Definition screen, the Folder Move screen is opened by clicking the button.
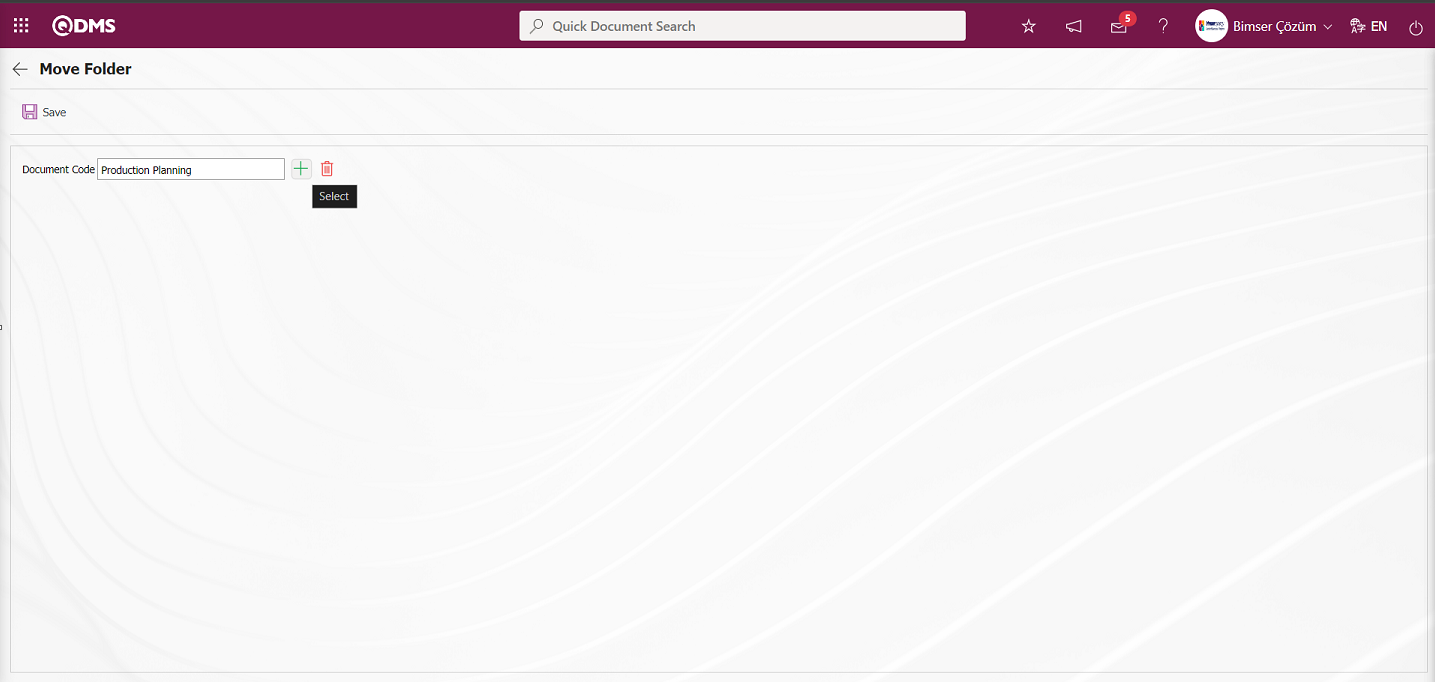
In the Folder Move screen, click (Select) button in the folder code field.
Select the folder under which the selected folder will be moved from the Document Folder list and click the  button.

After selecting the folder to which the selected folder will be moved on the Folder Move screen, the folder move registration process is done by clicking the button in the upper left corner of the screen.
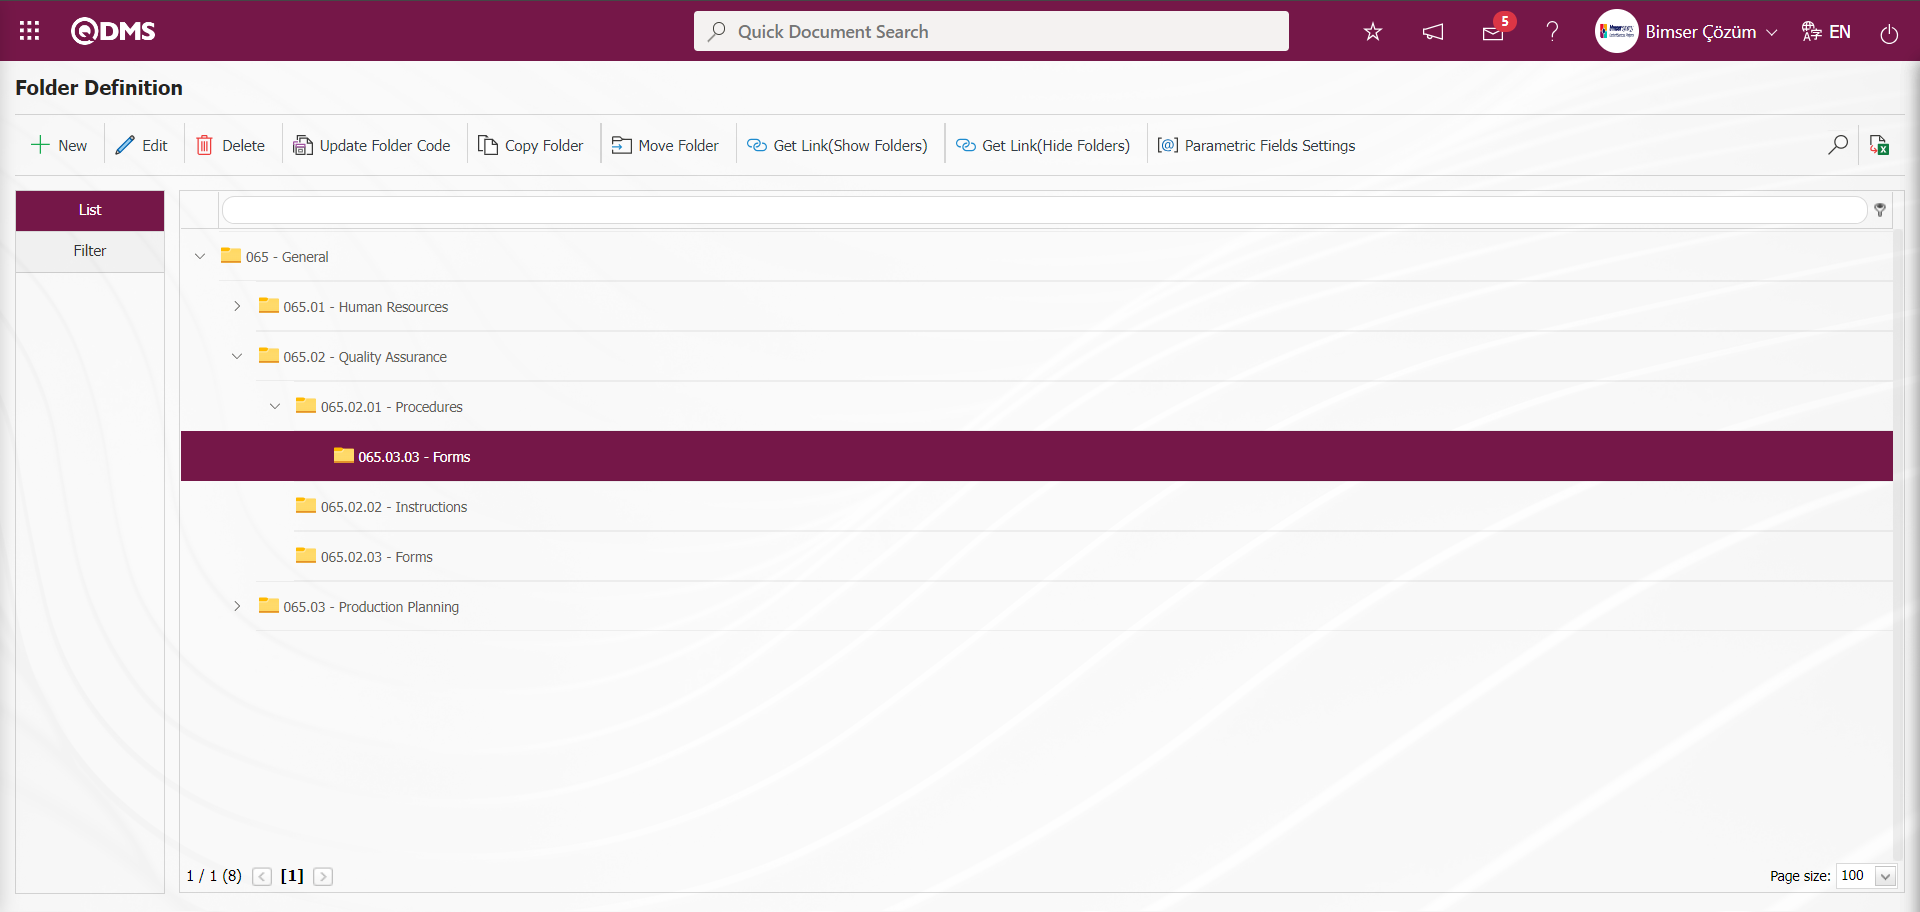
6.2.1.5.Link AL(Show Folders) Operation
On the Folder Identification screen, the link of the selected folder is copied. While the folder is selected, button is clicked and the link copied to the clipboard is shared with the relevant users by Ctrl+V (shortcut keys) or right click/paste method. By clicking the link right click/paste method, the document view screen is displayed on the screen opened. On the Document Viewing screen, the folder whose link is taken is listed with its subfolders and documents to be displayed in the folder tree structure.
On the Folder Identification screen, select the Folder for Folder Link Import. While the folder is selected, click the button.
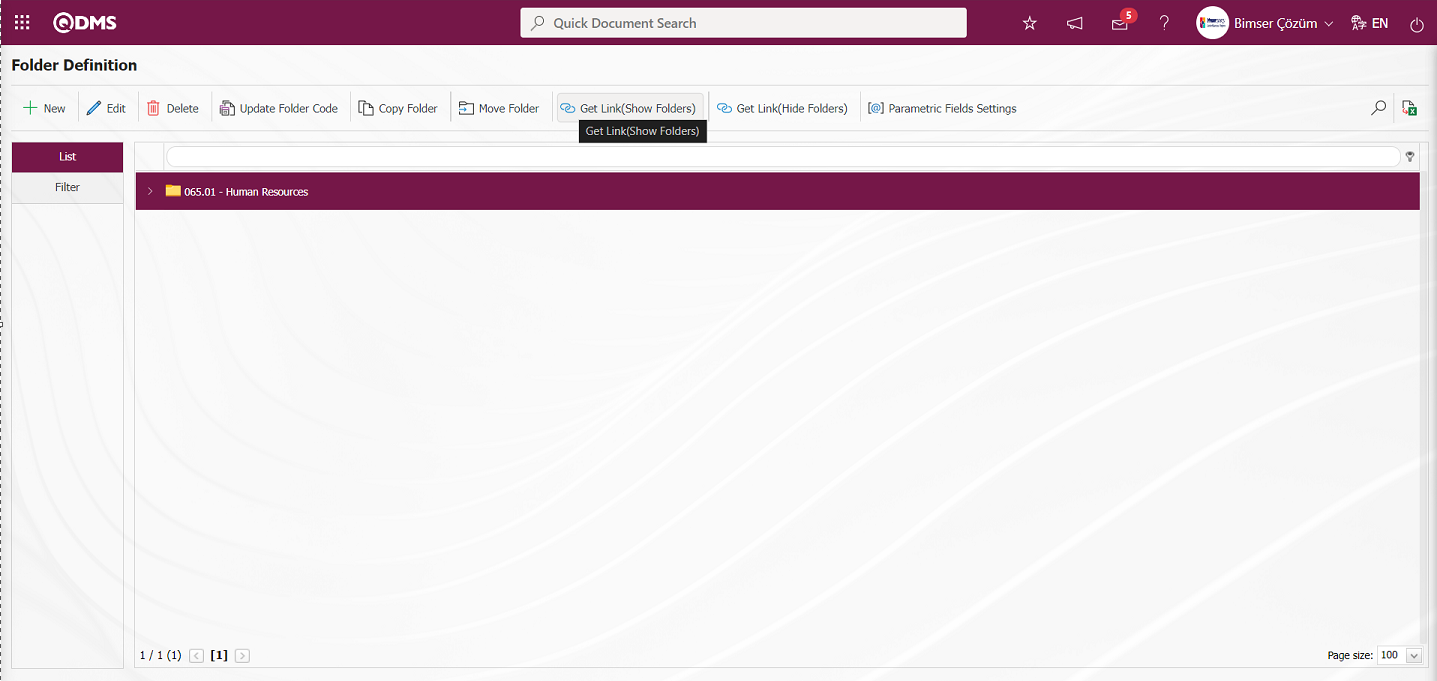
The system says "The bixer link has been copied to the clipboard. You can use the 'Ctrl+V' keys or right-click and say 'paste' to link from wherever you want".
A new tab is opened on the right and the link of the selected folder is clicked with the right click/ paste method. In the document view screen, the selected folder and subfolders of the folders and folders in the folder tree structure, documents are listed. Users can share links of folders in this way.
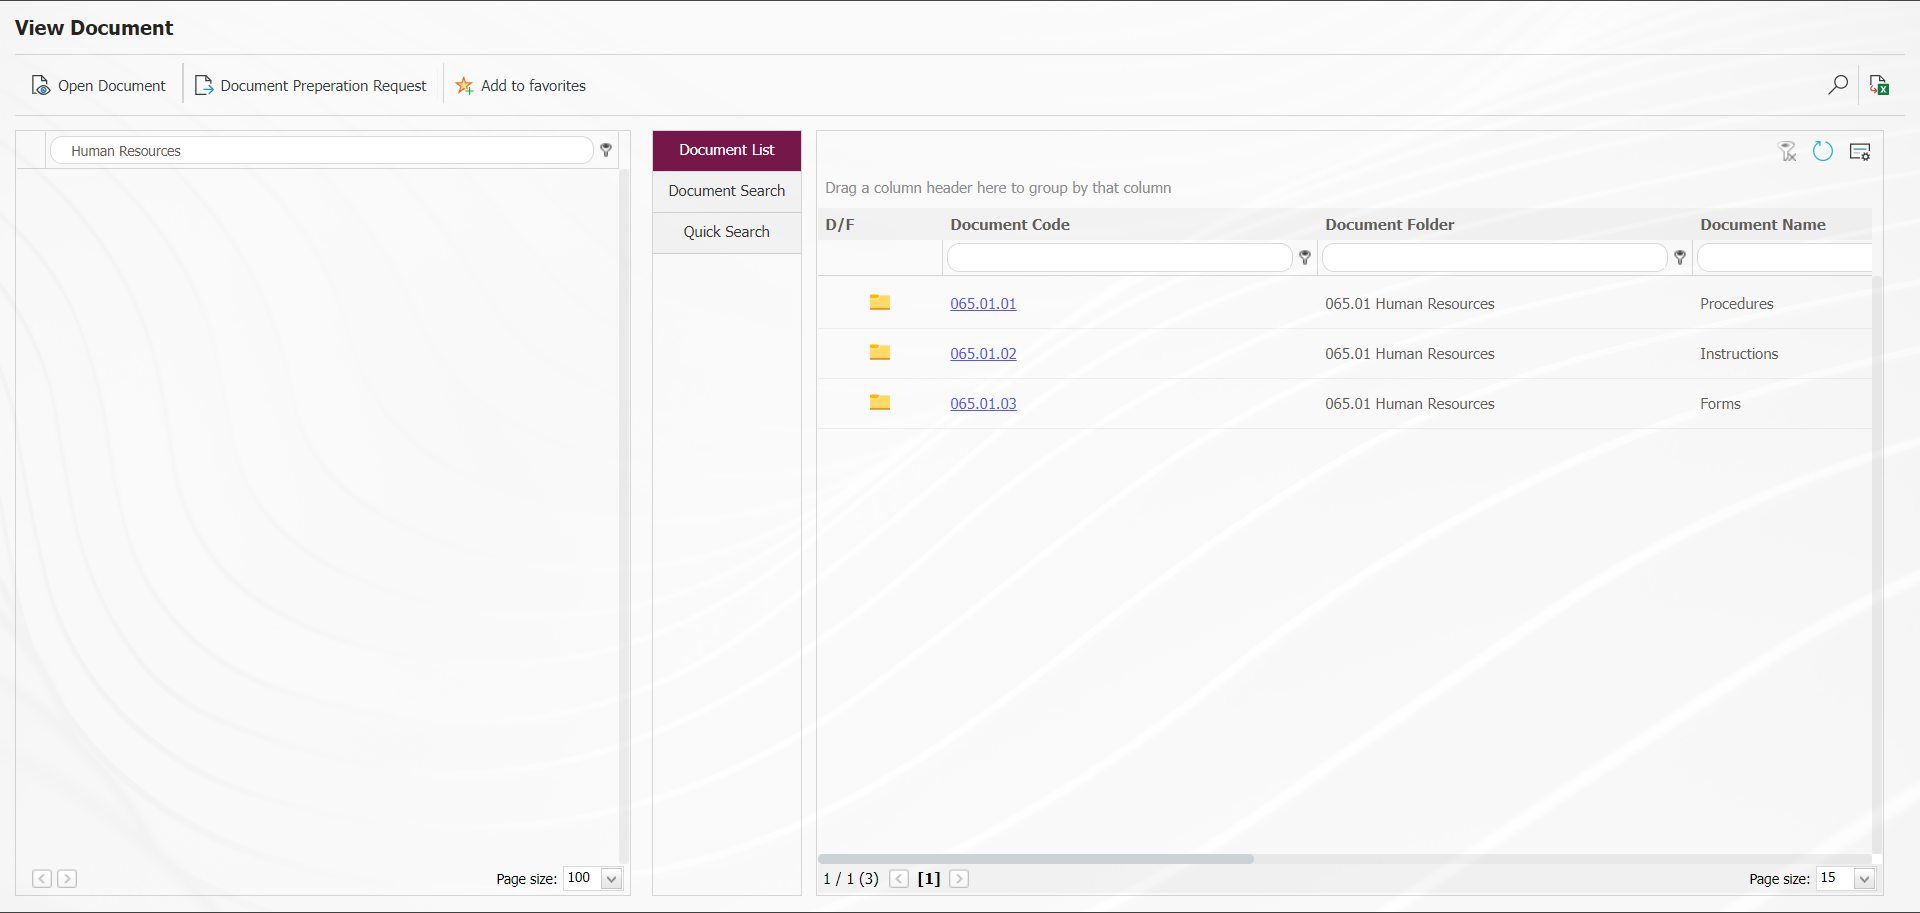
6.2.1.6.Link AL(Hide Folders) Operation
On the Folder Identification screen, the link of the selected folder is copied. While the folder is selected, button is clicked and the clipboard copied link is shared with the relevant users by Ctrl+V (shortcut keys) or right click/paste method. By clicking on the link right click/paste method, the document view screen is displayed on the screen opened. On the Document Viewing screen, the folder tree structure is hidden and the subfolders and documents of the linked folder are listed, if any.
On the Folder Identification screen, select the Folder for Folder Link Import. While the folder is selected, click the button.
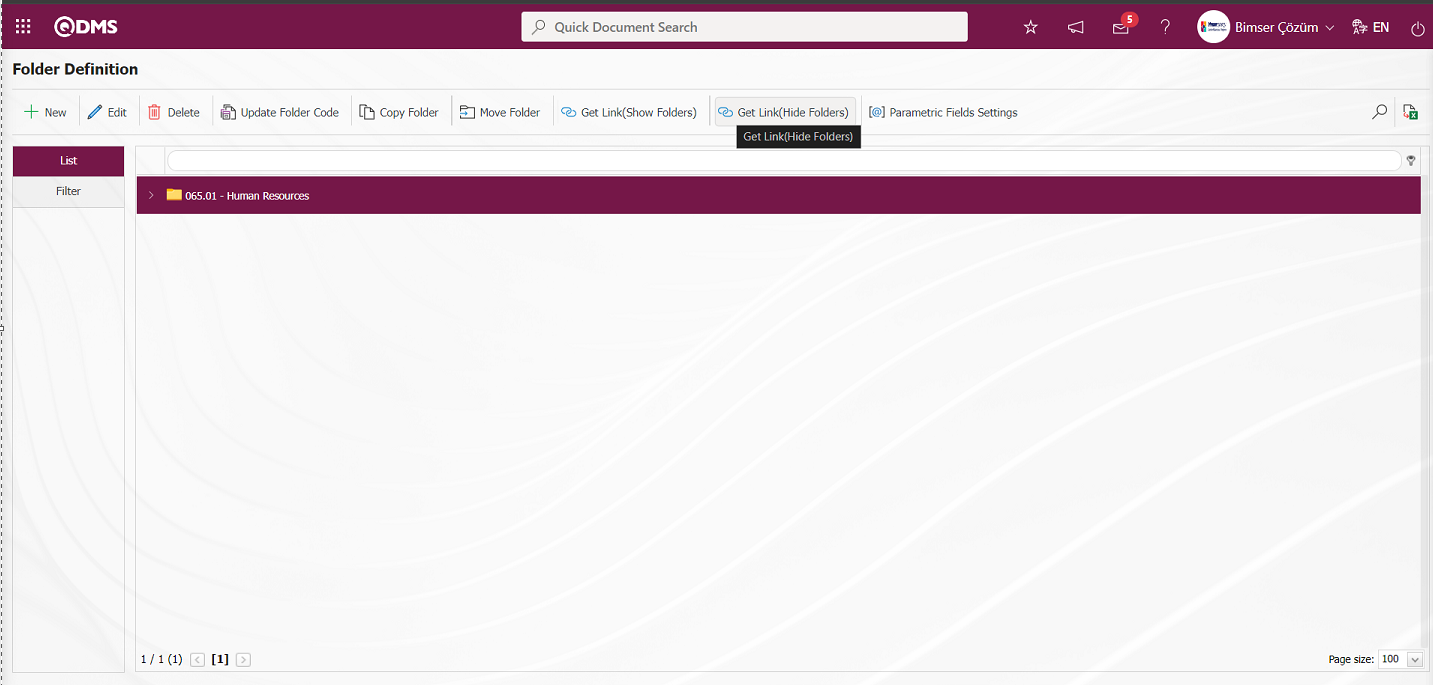
The system says "The bixer link has been copied to the clipboard. You can use the 'Ctrl+V' keys or right-click and say 'paste' to link from wherever you want".
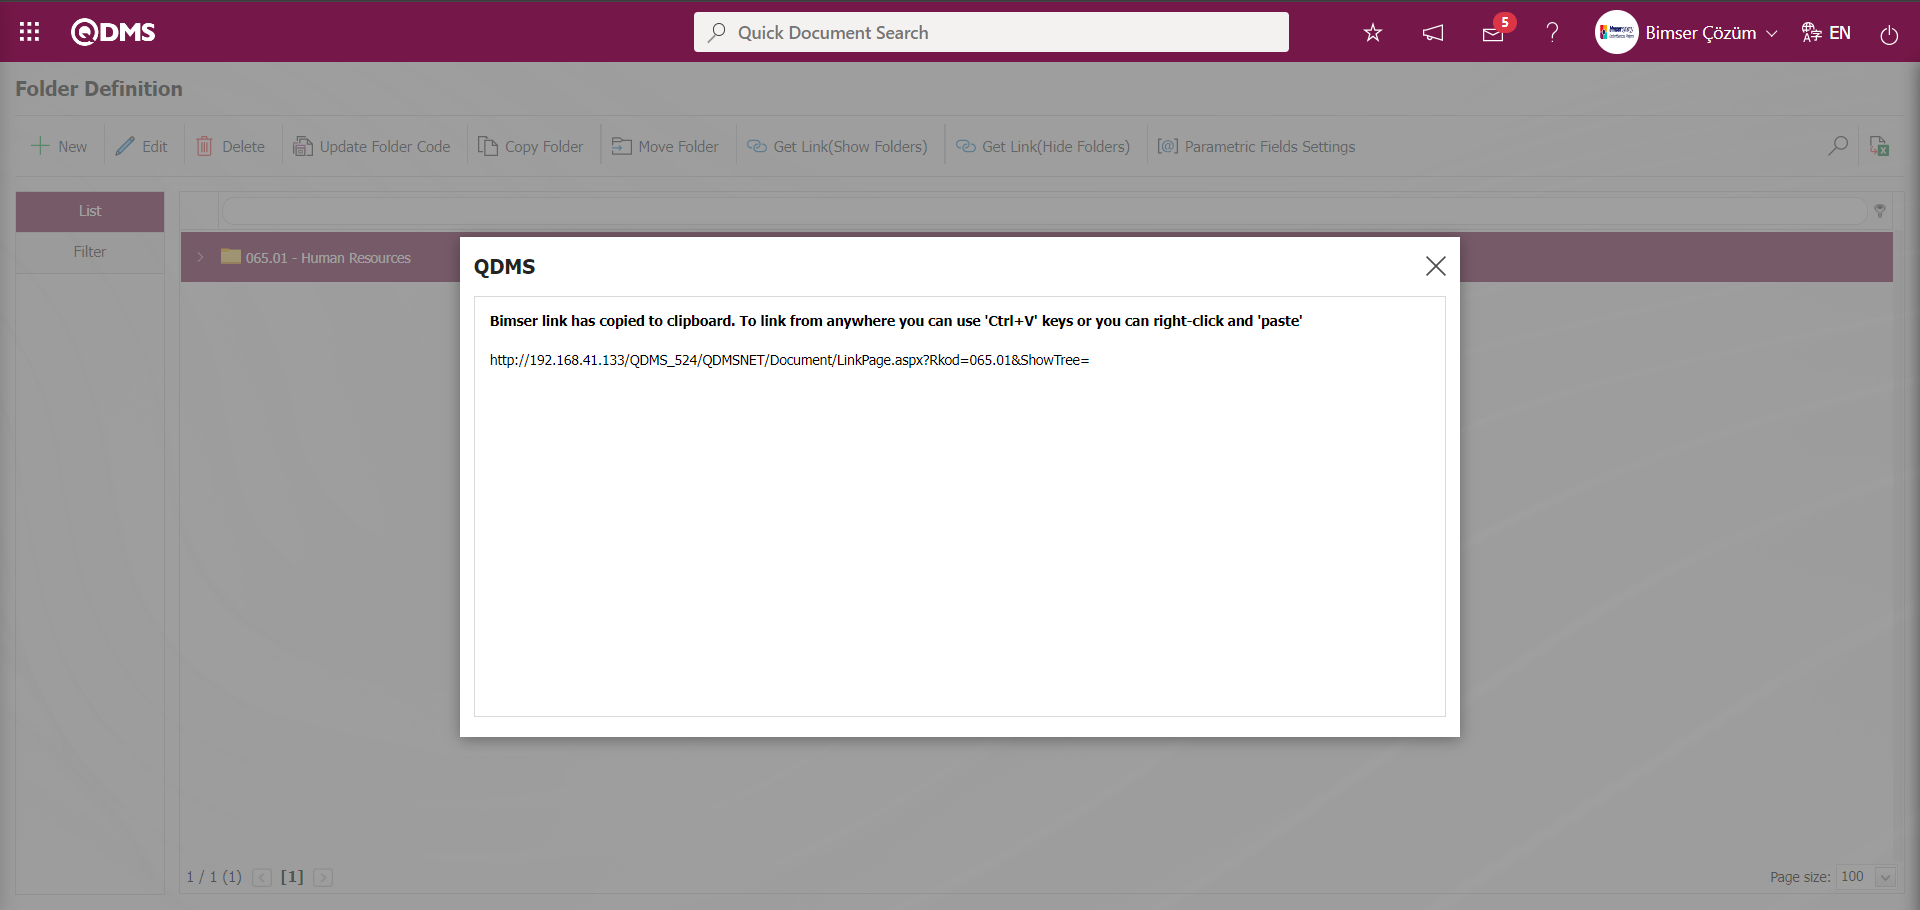
New tab is opened on the right and the link of the selected folder is clicked with the right click/paste method. In the document view screen, the folder tree structure is hidden and the subfolders and documents of the selected folder and folders are listed. Users can share links of folders in this way.
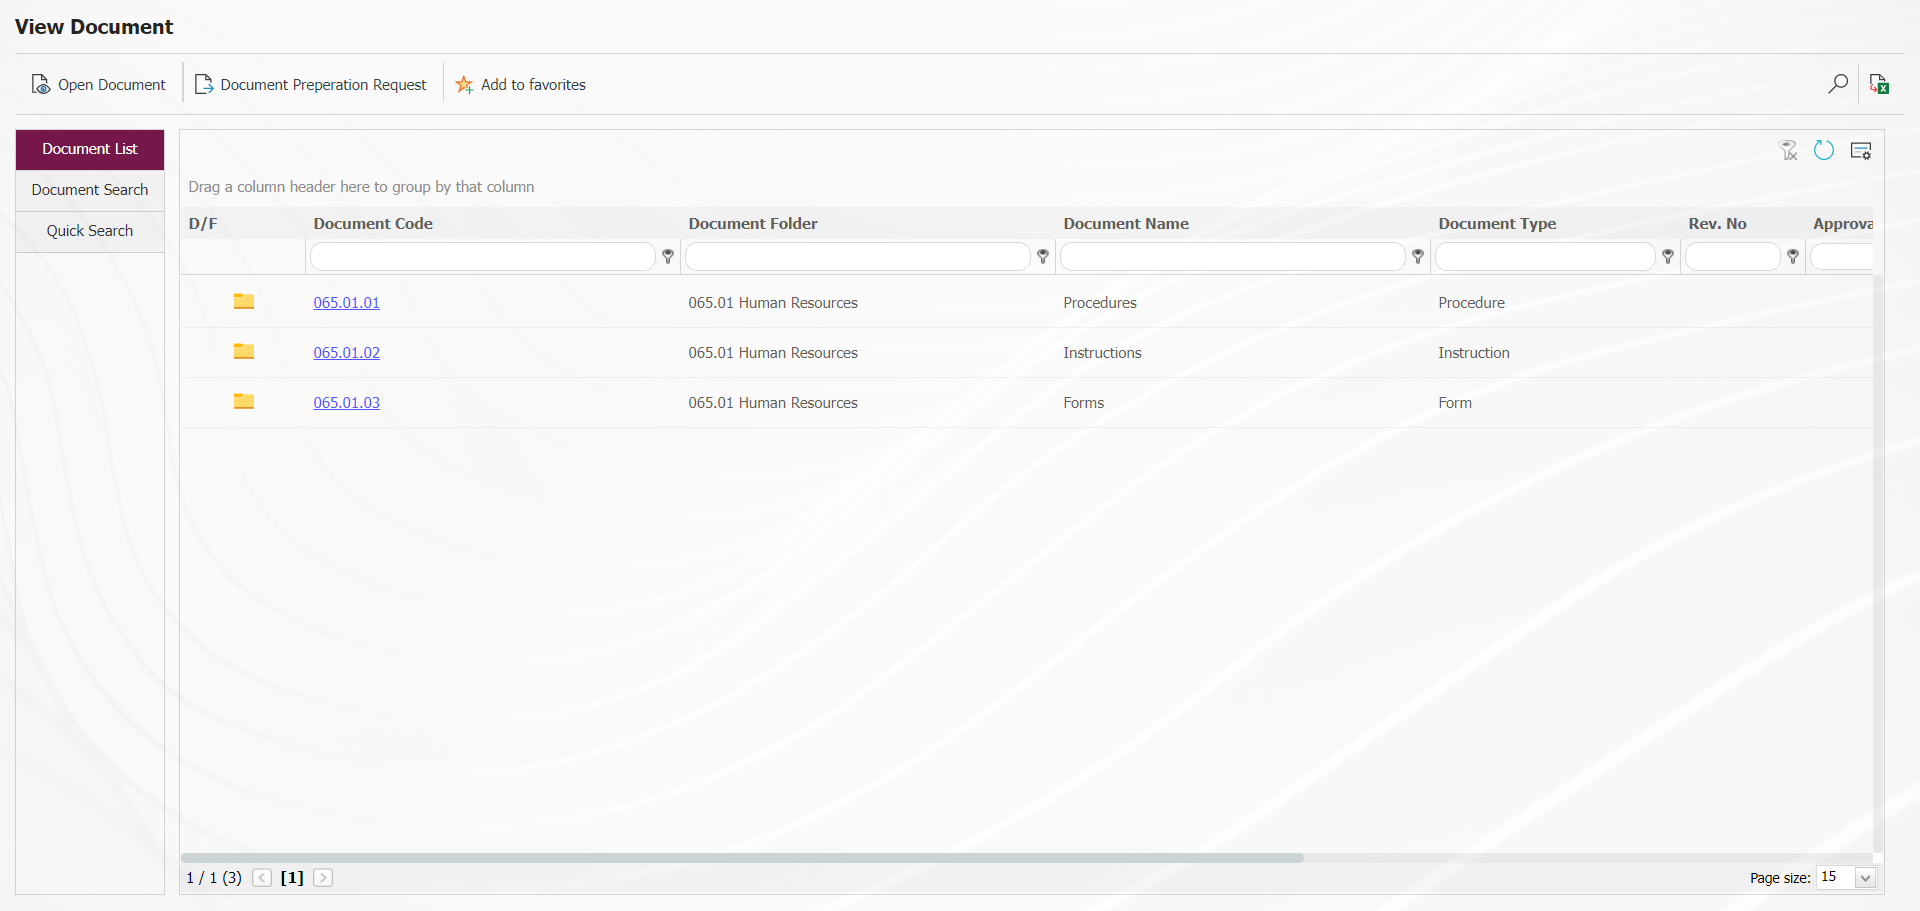
6.2.1.7.Folder Deletion Process
Delete the selected folder on the Folder Definition screen. While the folder is selected, the folder is deleted by clicking the  button.
On the Folder Definition screen, select the Folder to be deleted. While the folder is selected, click the button.
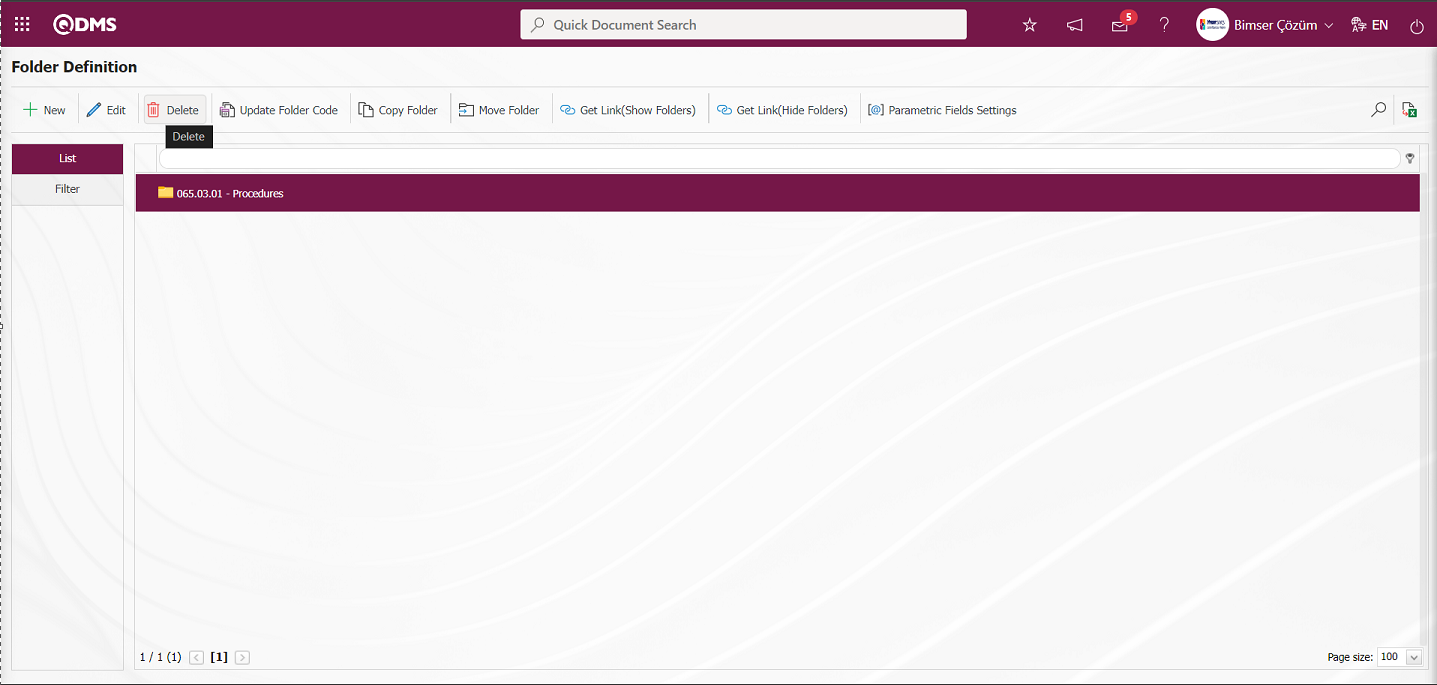
When the system asks "Are you sure you want to delete the selected line?", click on the "OK" button to delete the folder.
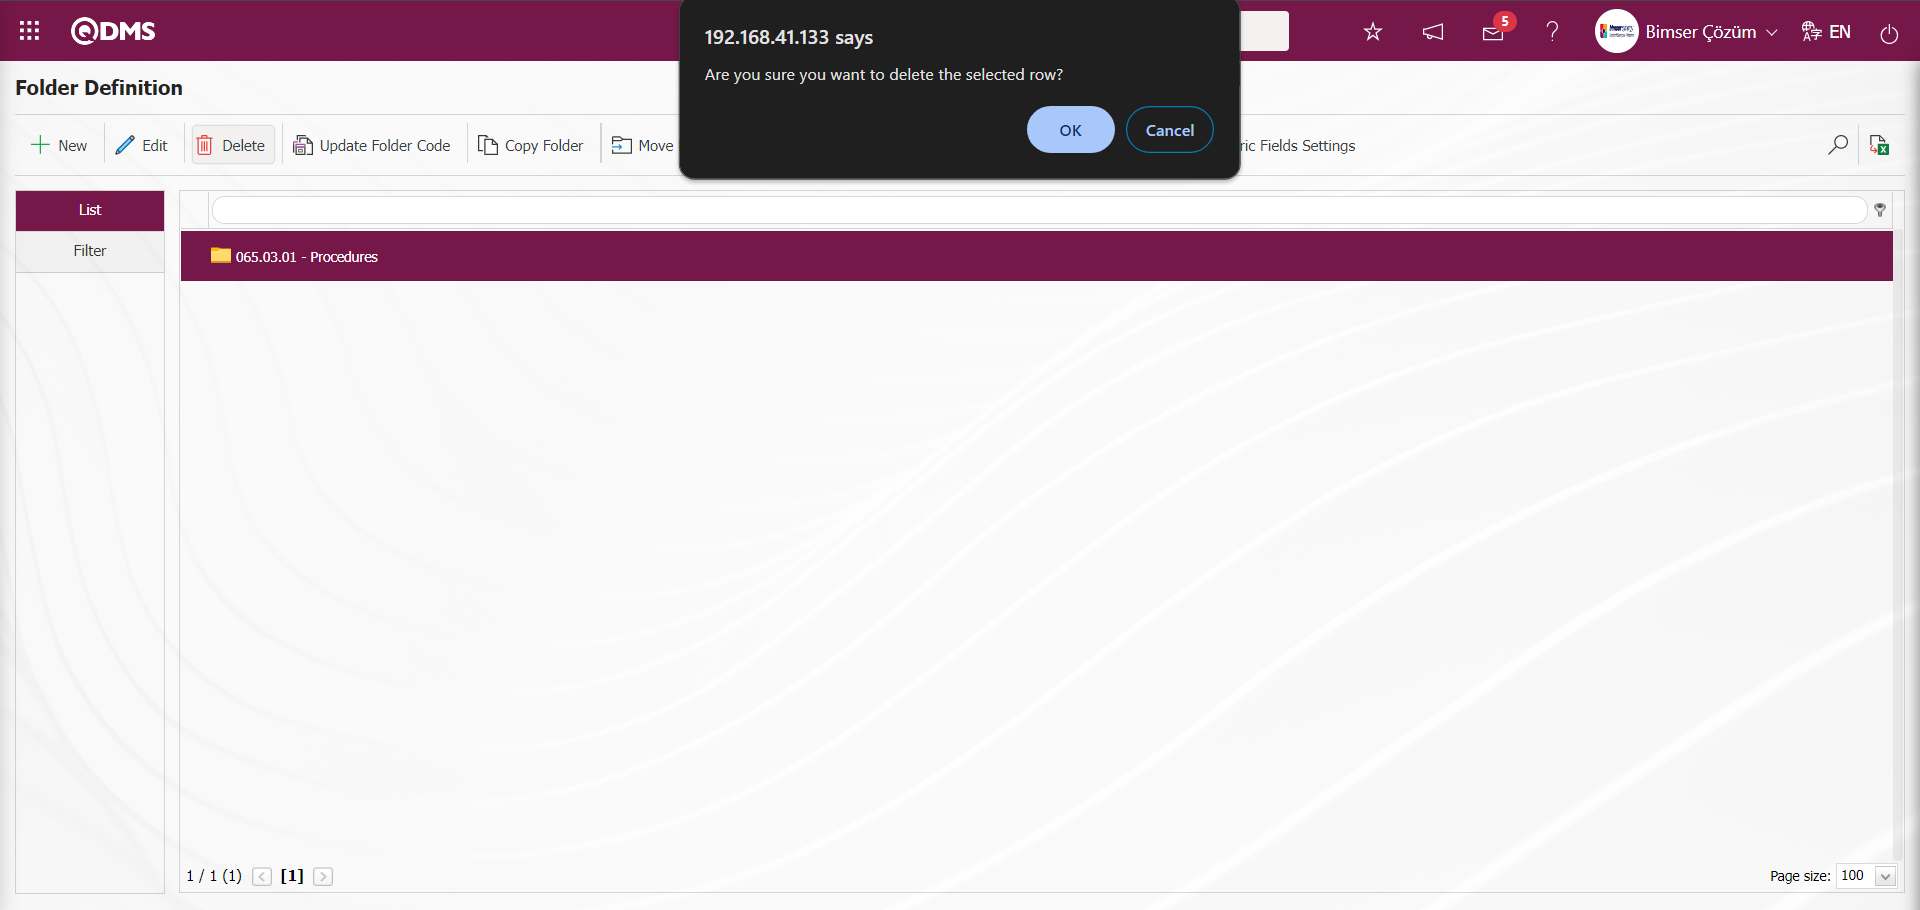
6.2.1.8.Parametric Field Definition
If there are special fields to be defined on folder basis, parametric field definition feature is used.

For example, for the documents in the selected "General" folder, if it is desired to open a folder-specific field in the form of a list as "Conformity to Standard (Conform/ Not Conform)", a folder-based parametric field is defined. In order to activate this feature, the parameter value of the parameter 109 "Will a Folder Based Parametric Field be Used?" in the Document Management Module parameters is activated by selecting "Yes".
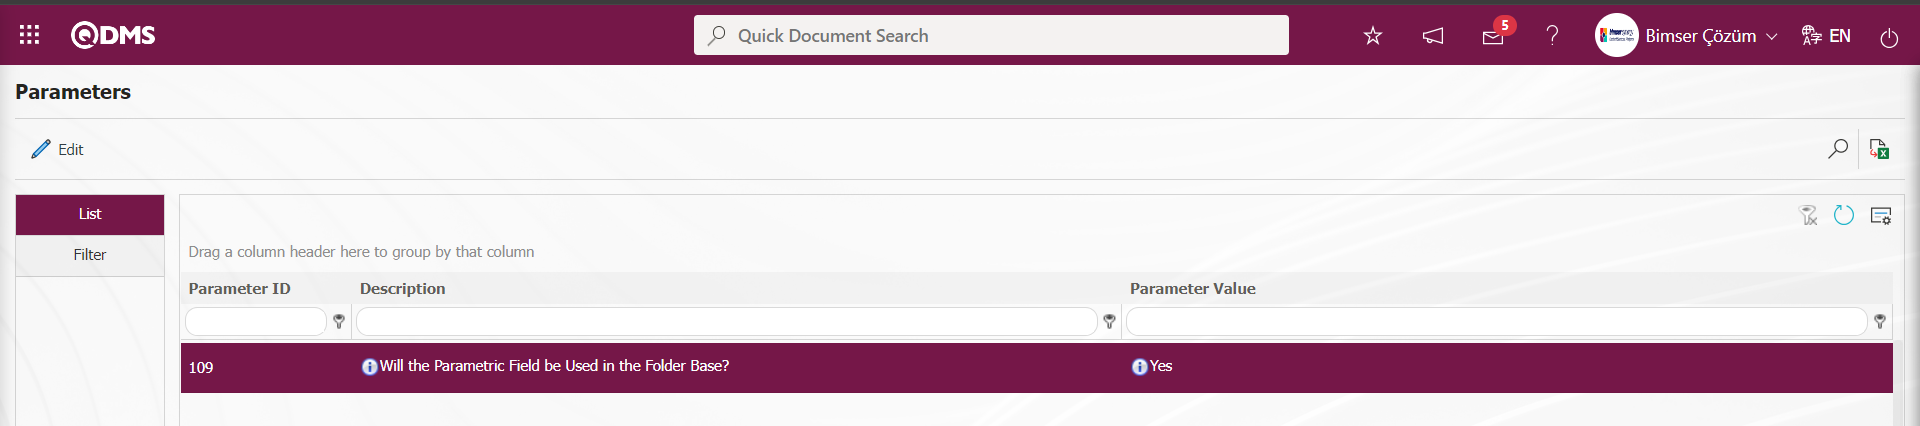
After the parameter is activated, the folder-based parametric field definition process is performed by displaying the  button of the Folder Definition screen.
Parametric fields can be defined for the selected folder with the button on the Folder Definition screen. After selecting the folder, click on the button. On the screen that opens, the type of parametric field to be created for the folder (text, date, list, etc.) is selected and the name of the field is written with the  button.
 button completes the parametric field creation process.
Operation to define a list type parametric field;
To define a list type parametric field, select the folder where the parametric field will be defined. While the folder is selected, click button.
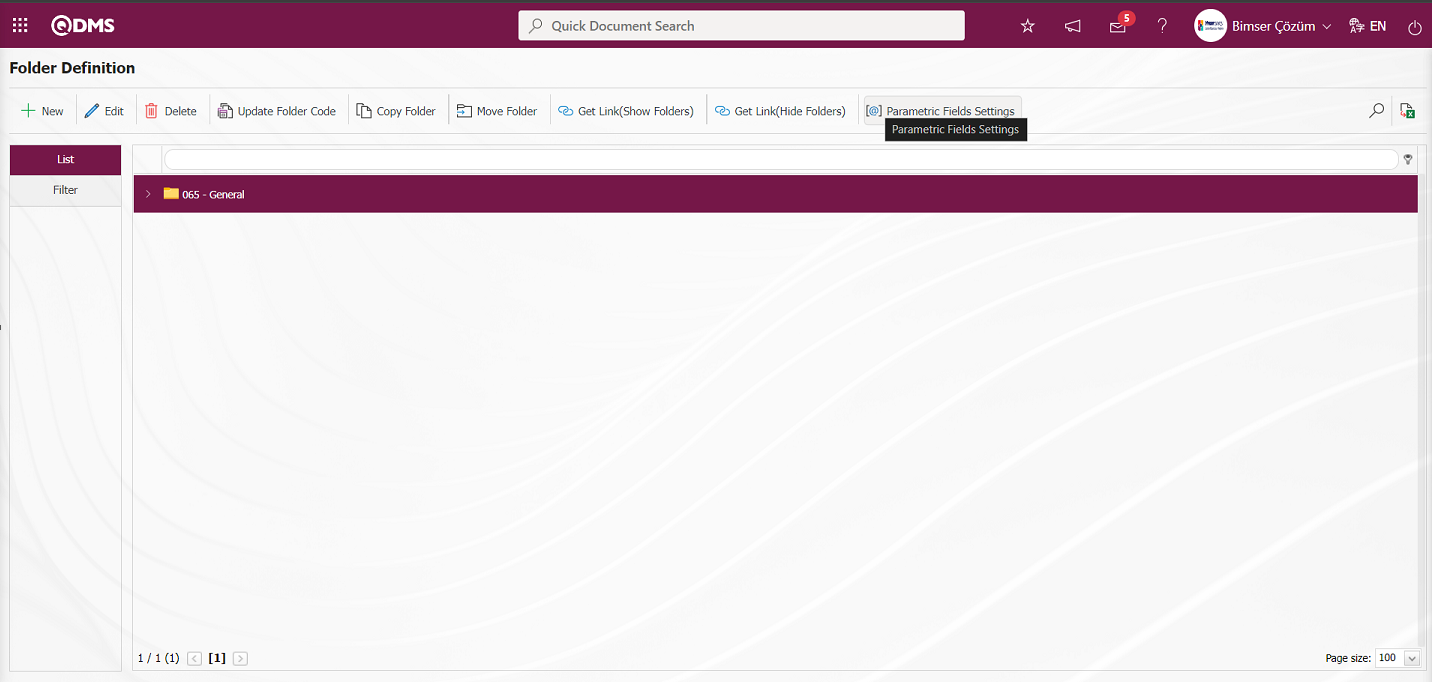
In the Parametric Field Editing screen, "List" is entered in the Type field in the grid to list the list type parametric passive fields.
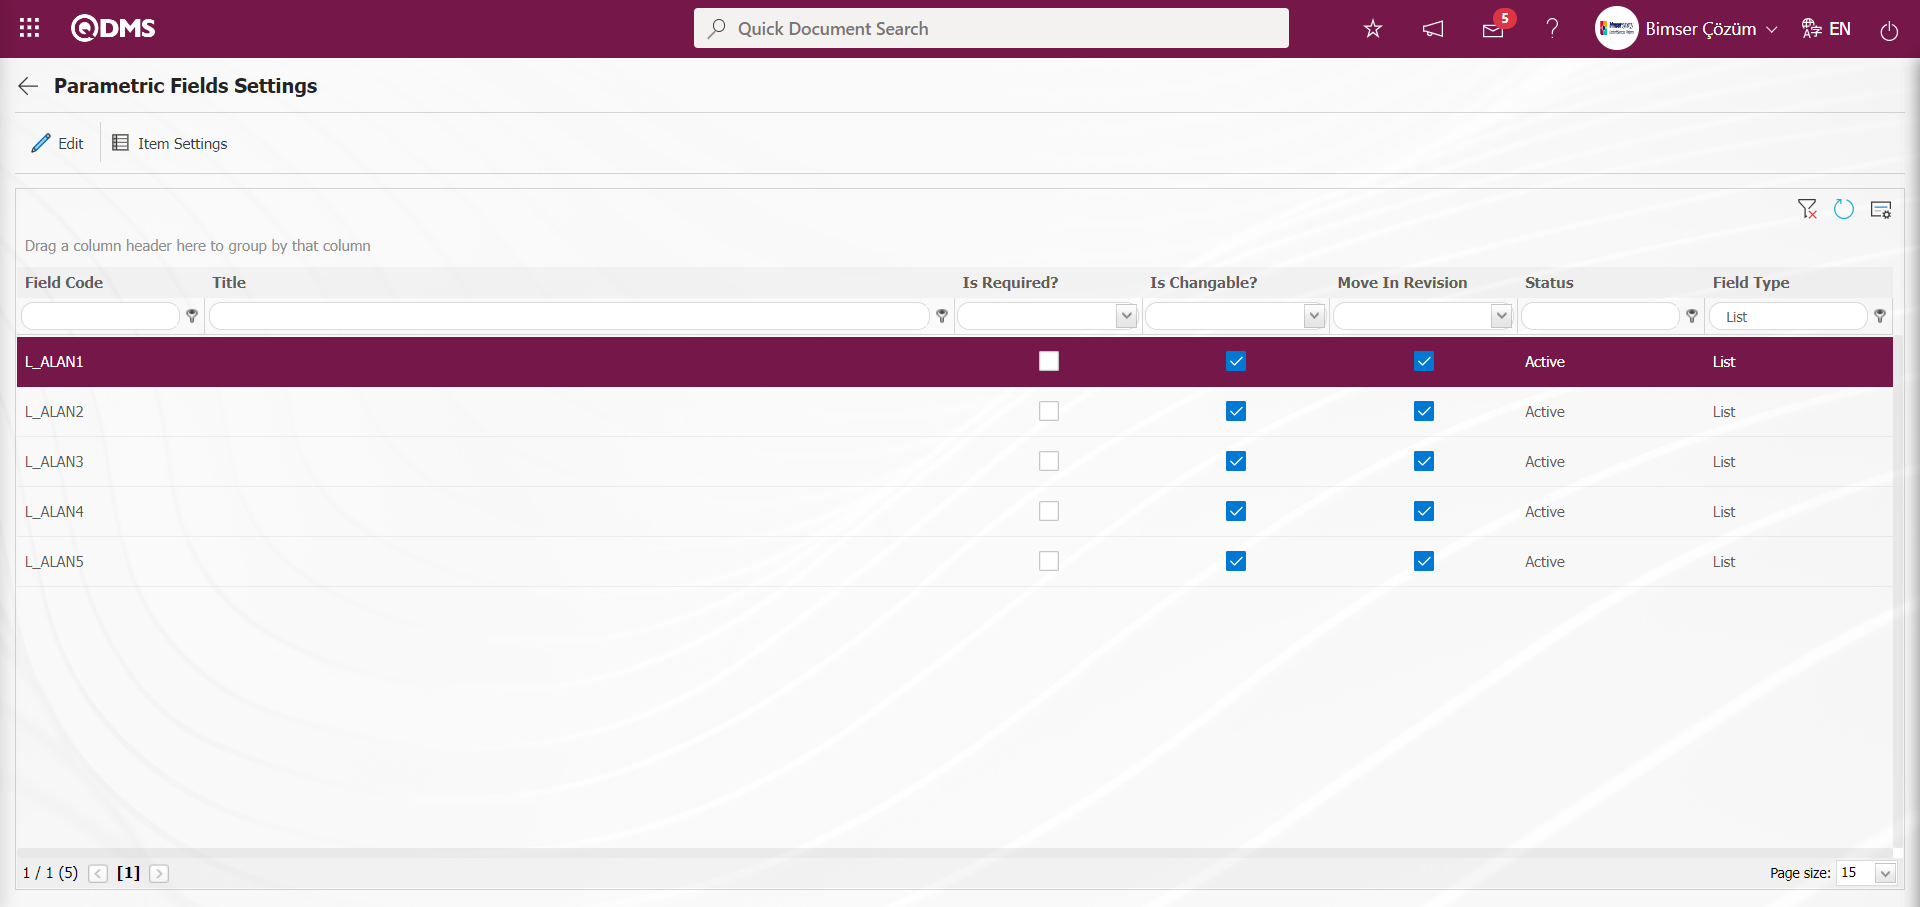
After the list-type parametric fields are listed, select the list-type field "L_ALAN1" to be defined and click the  button.
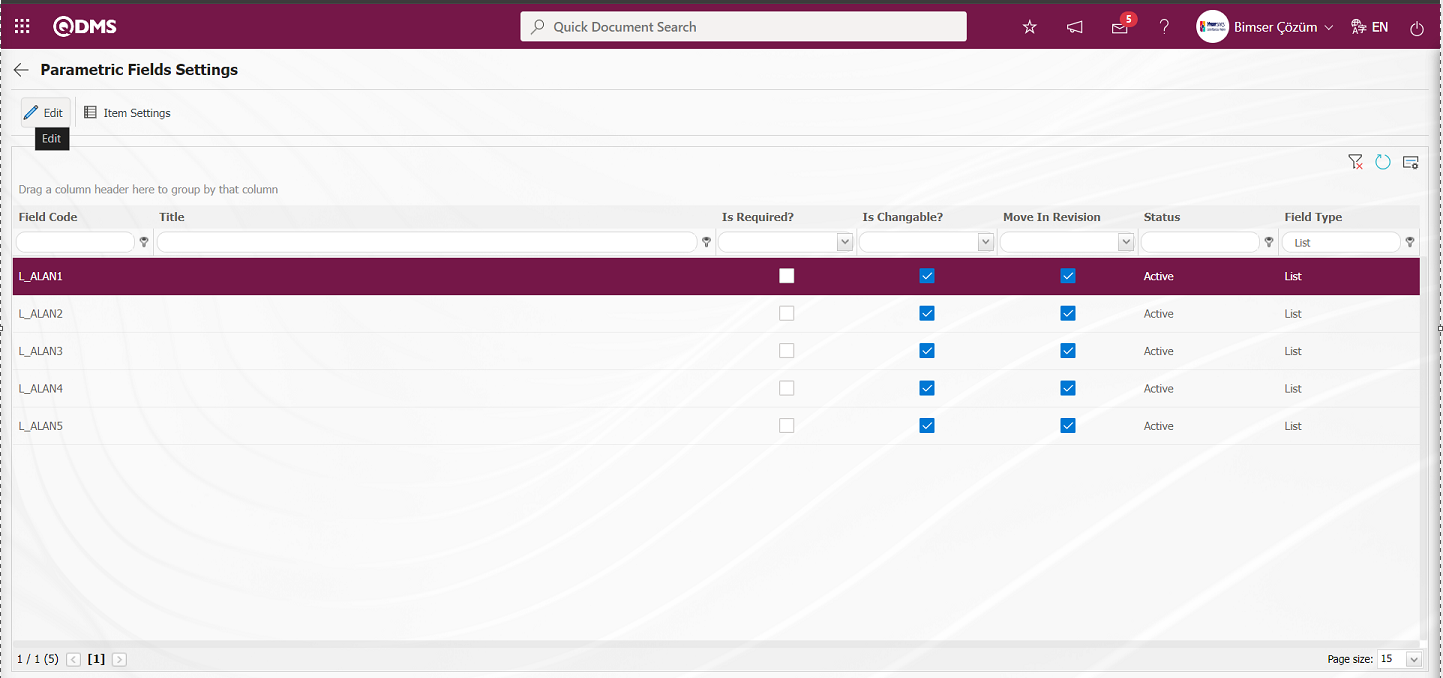
In the Edit Parametric Fields screen, the fields such as Title information of the list type field, Title Note, whether the field will be mandatory or not are entered.
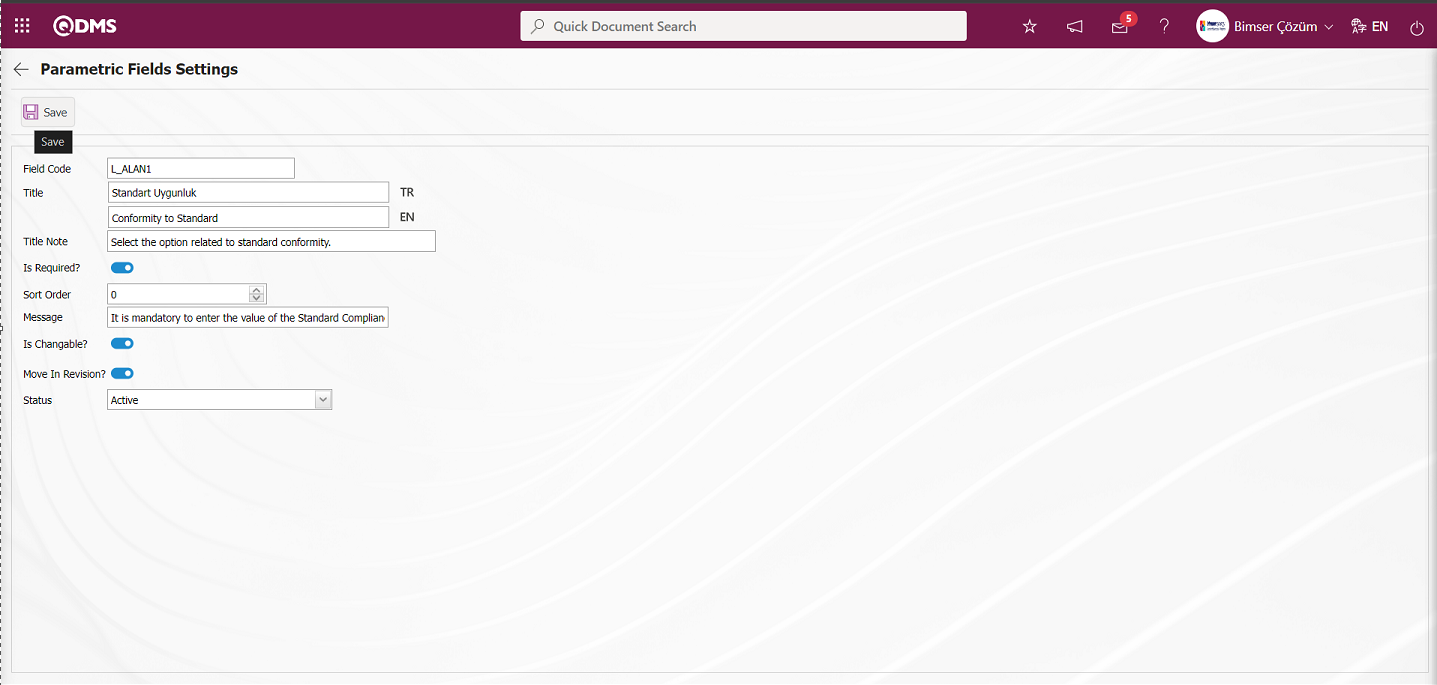
After entering the relevant information in the required fields on the Parametric Field Editing screen, the definition of the list-type parametric field is made by clicking the button in the upper left corner of the screen. After defining the list type parametric field, the list elements of the parametric field must be defined.
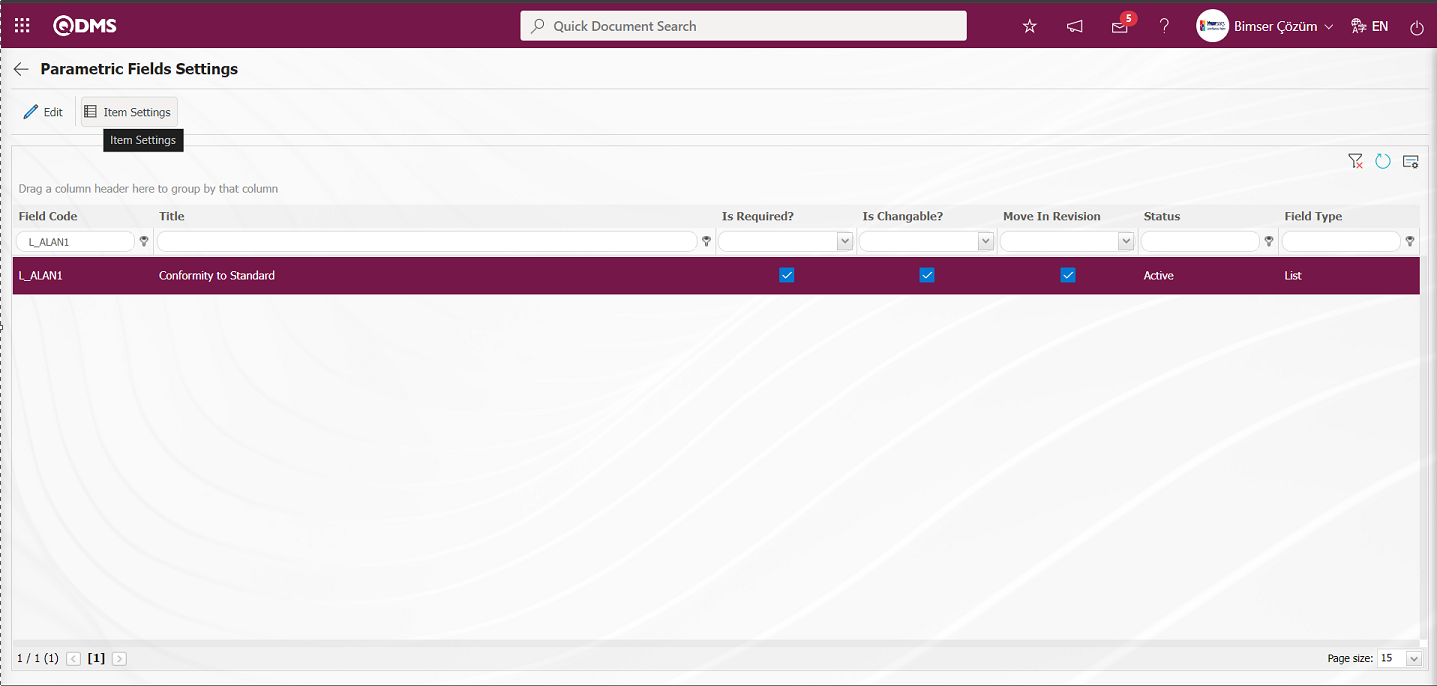
For the definition of the list element, the Values screen is displayed by clicking the  button while the list-type parametric field is selected.
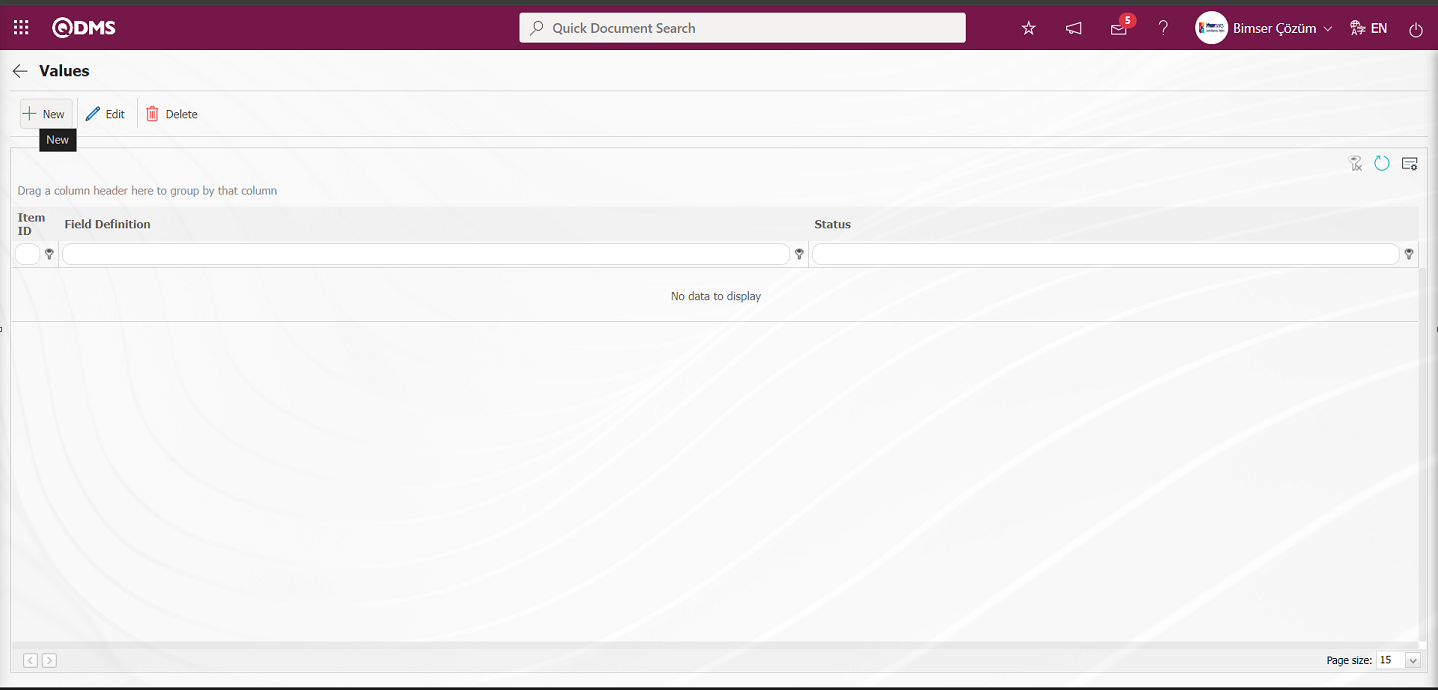
With the help of the buttons on the screen;
 : Define a new value.
 :Update operation is performed on the selected value information in the list.
 : Deletes the selected value information in the list
On the Values screen, by clicking the  button, a new value is defined and the 1st list element of the list-type parametric field is defined.
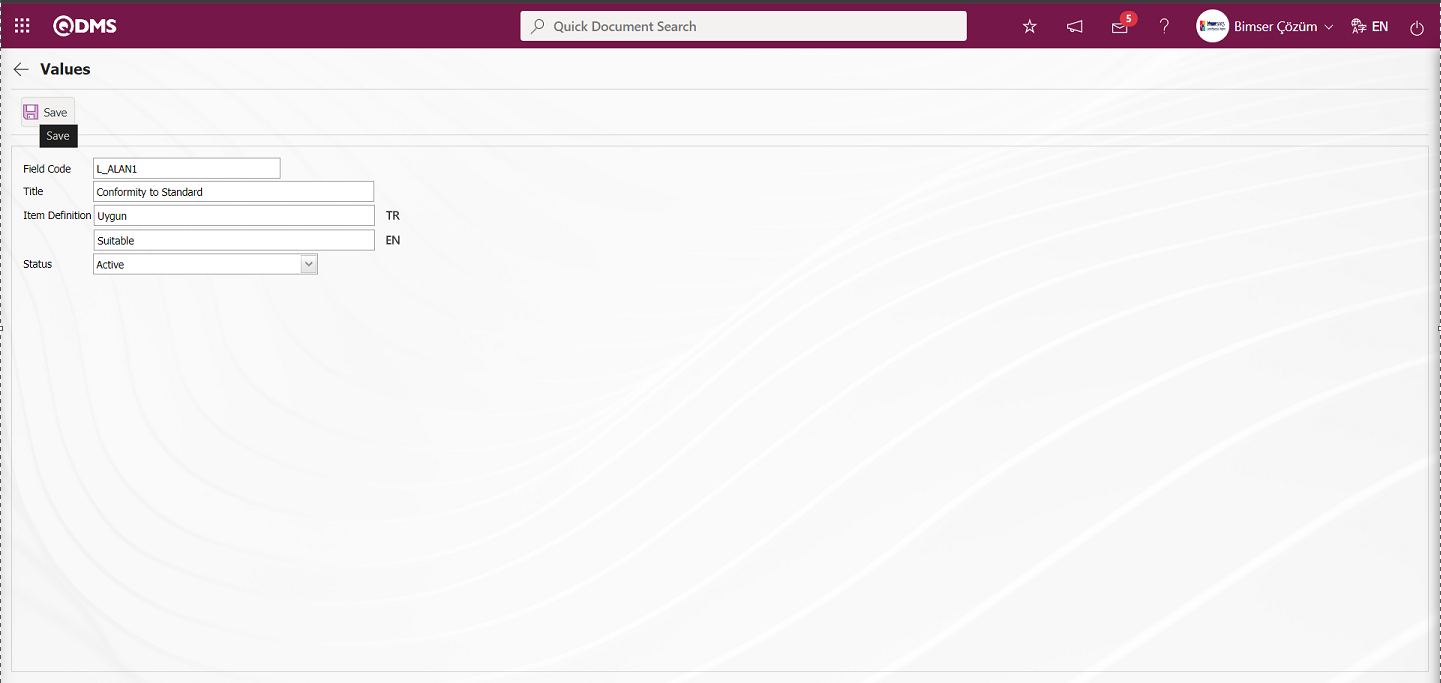
In the Values screen, the definition information of the 1st list element is written in the Definition field and after entering the relevant information in the required fields, the value definition registration process is done by clicking the  button in the upper left corner of the screen.
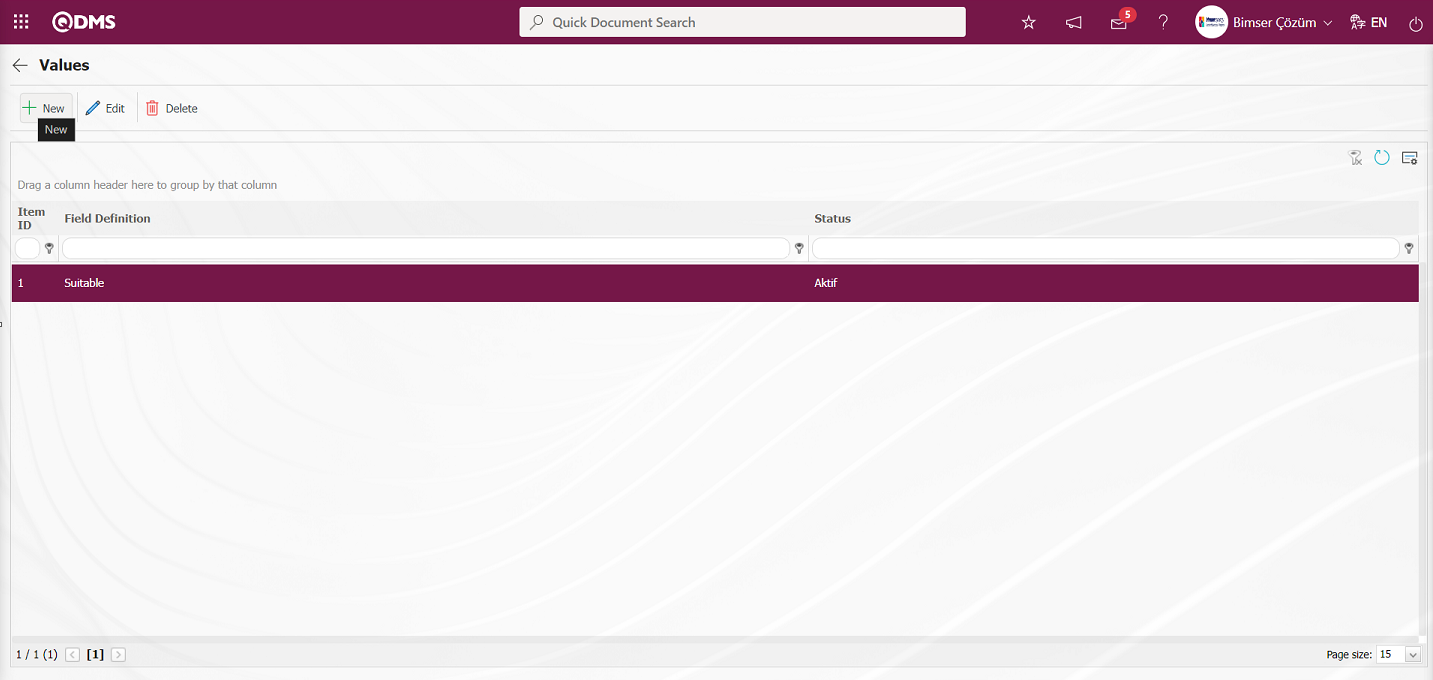
In the values screen, by clicking the button, a new value is defined and the 2nd list element of the list type parametric field is defined.

In the Values screen, the definition information of the 2nd list element is written in the Definition field and after entering the relevant information in the required fields, the value definition registration process is done by clicking the button in the upper left corner of the screen.
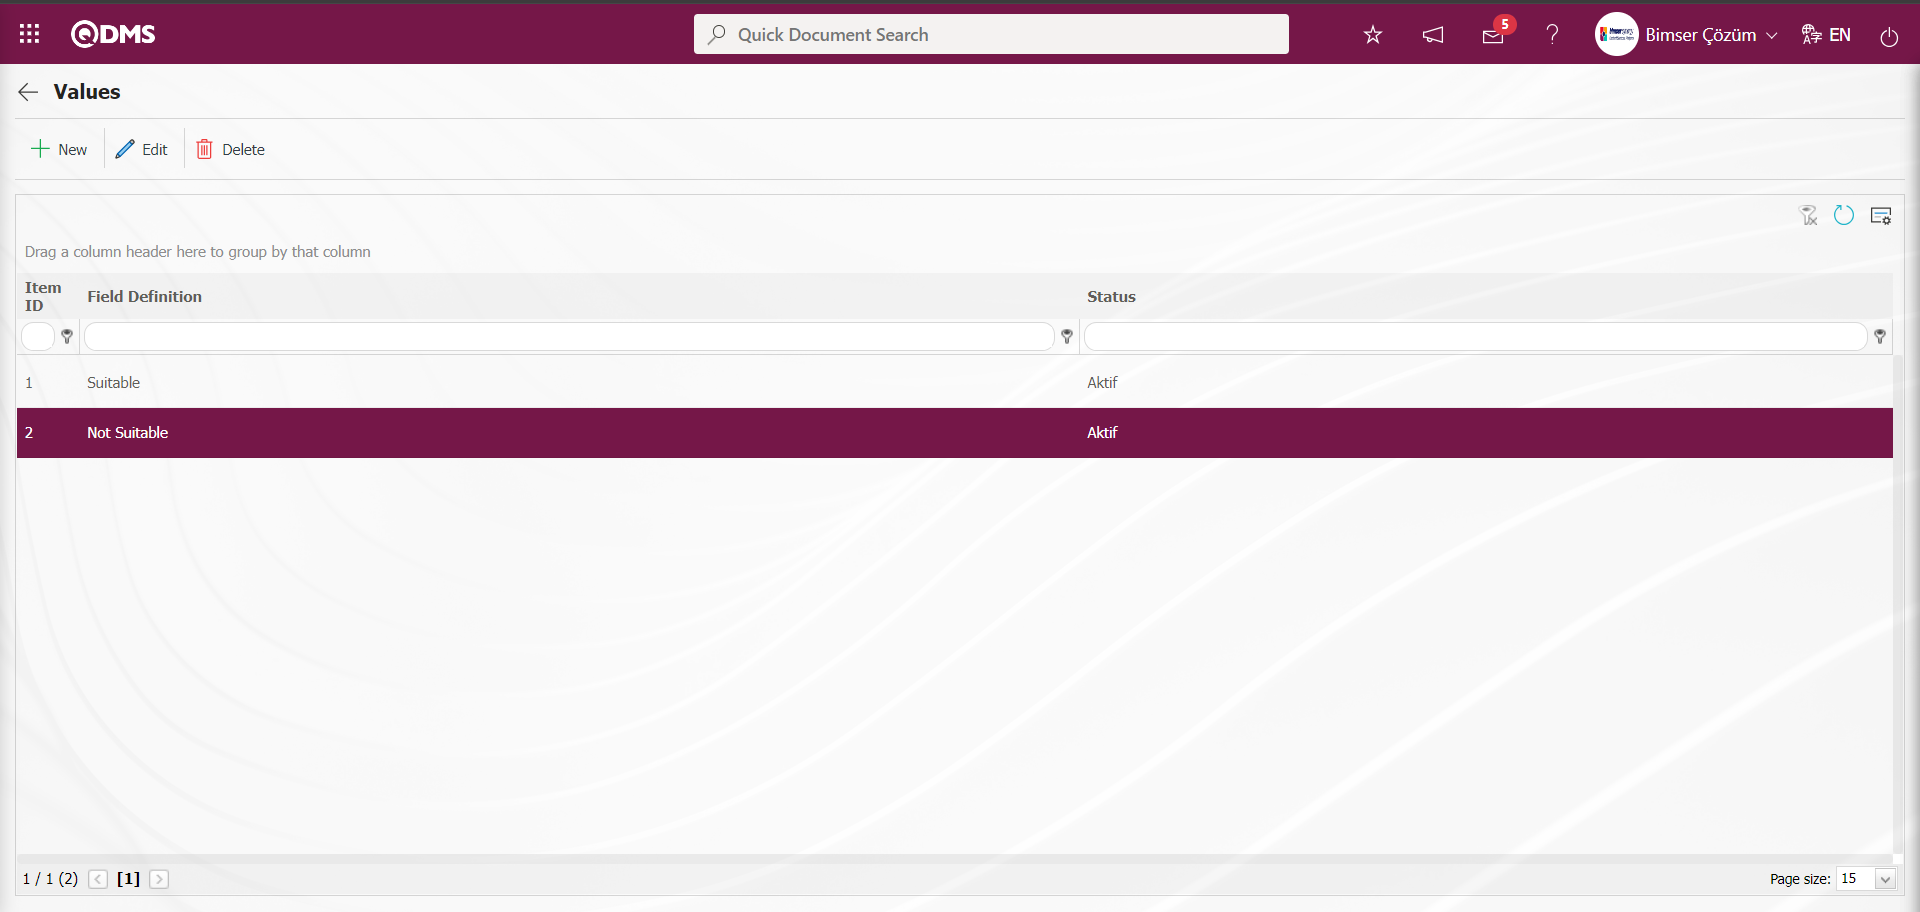
After defining the list type parametric field, click on Integrated Management System/Document Operations/Document Preparation screen. In the Document Preparation-Select Folder screen, the folder where the parametric field is defined is selected and the 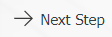 button is clicked.
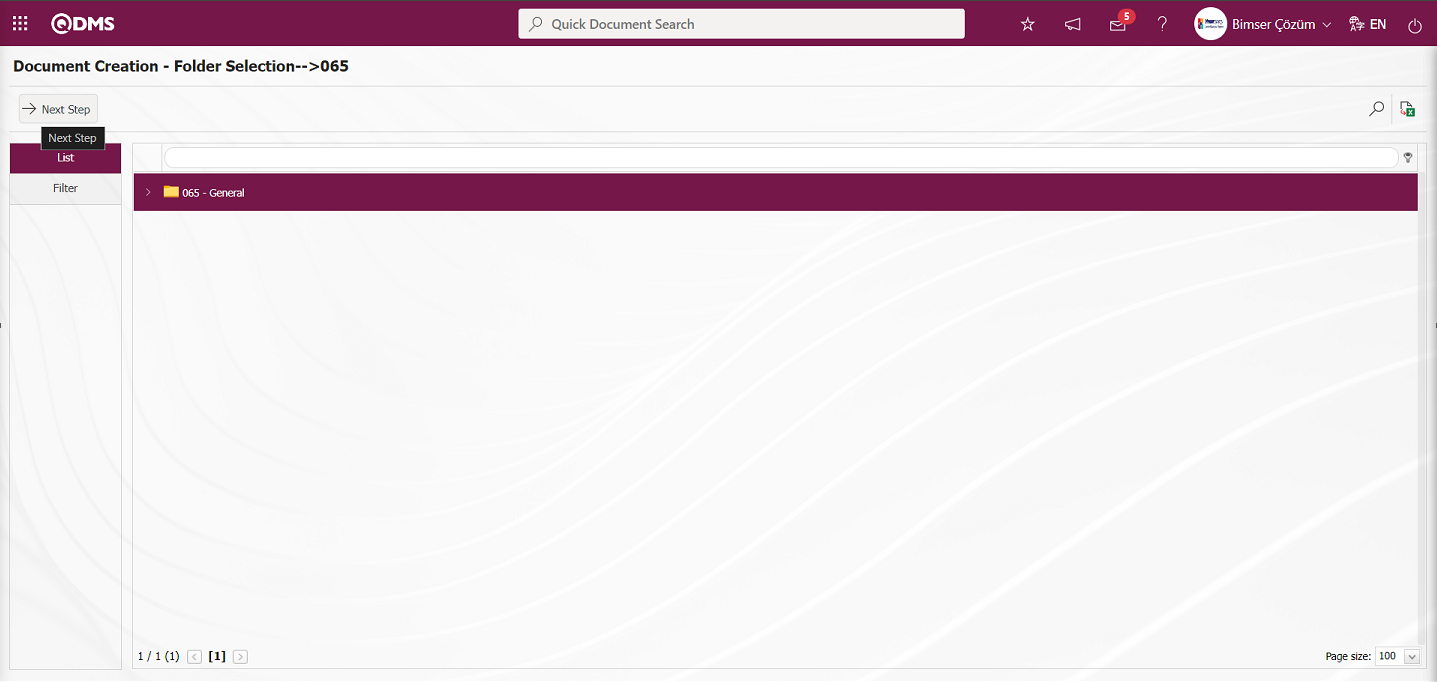
On the New Document screen, the list type parametric field defined in the Parametric Fields tab is displayed. By clicking the drop-down list in the parametric field, the drop-down list list elements are displayed.
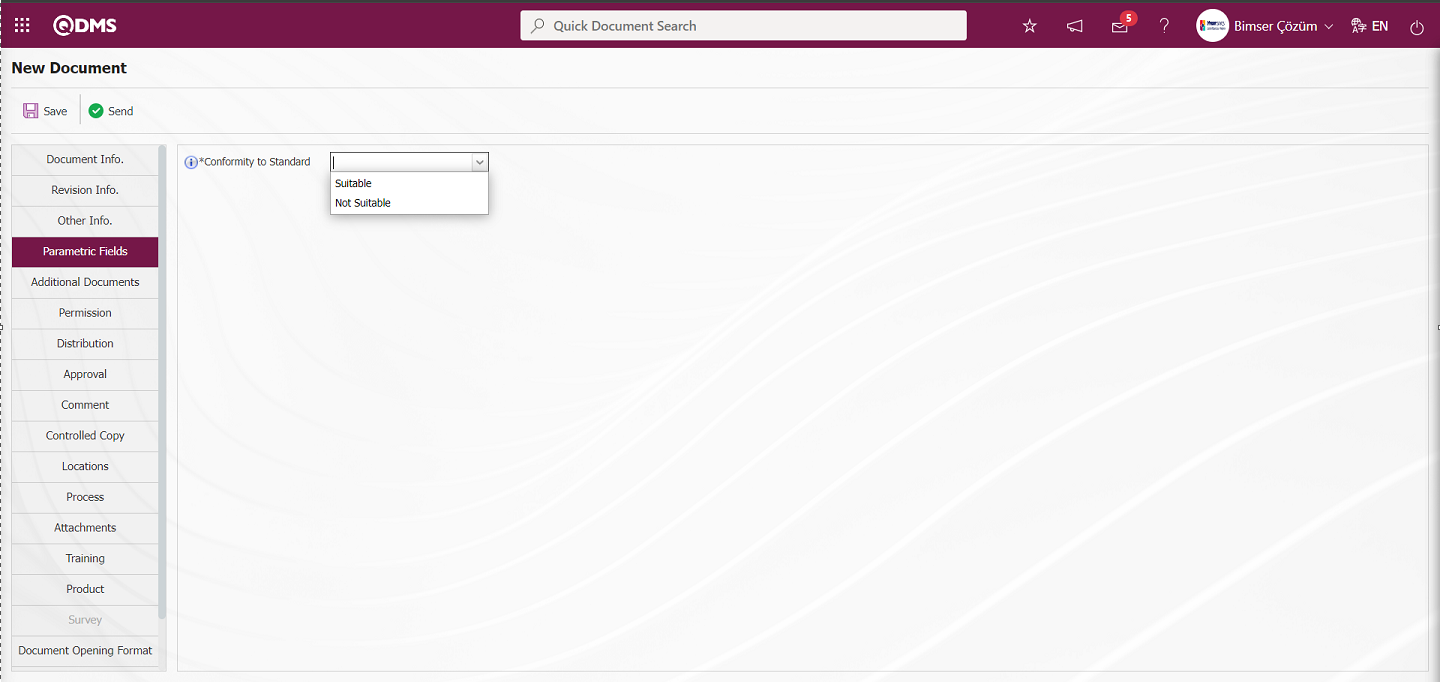
It is seen that the list-type field is a mandatory field and the title note is displayed when the mouse hovers over it.
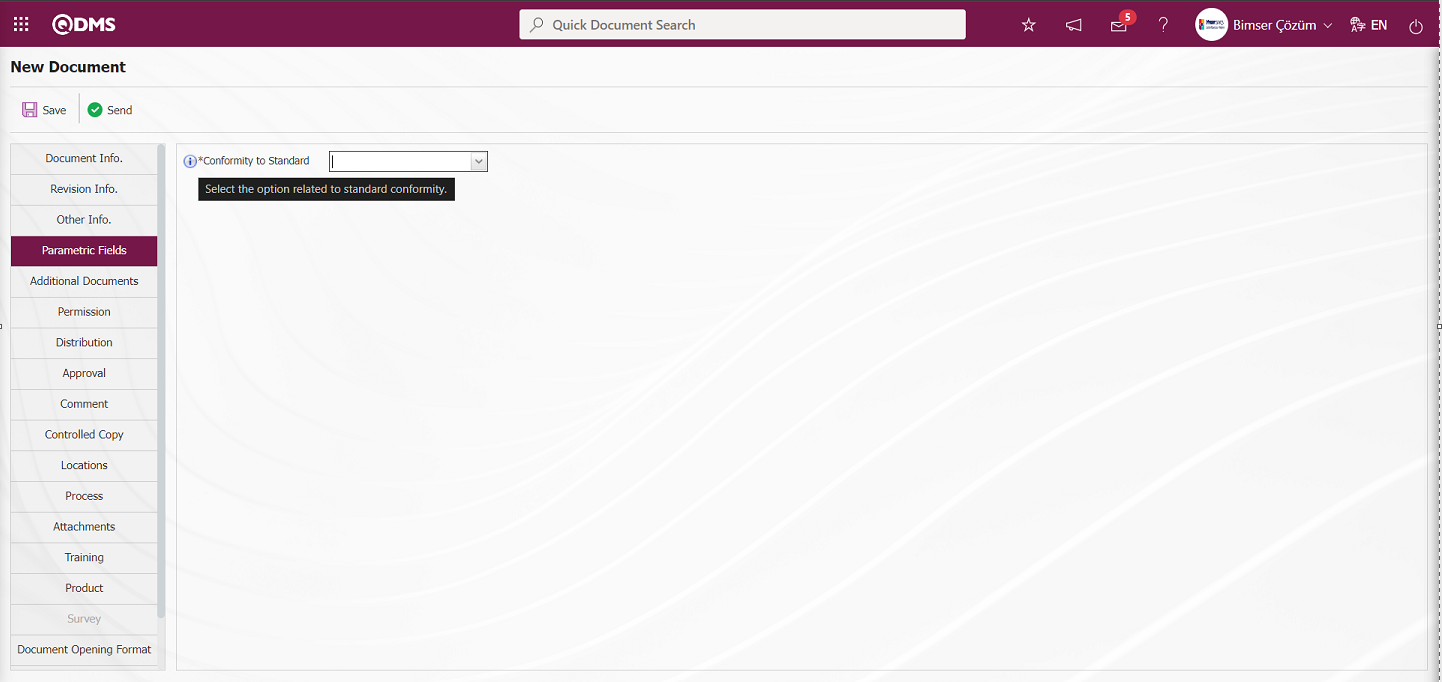
After entering the necessary information in the required fields on the new document screen, when the  button is clicked, an obligation message is displayed when the data entry of the defined list-type parametric field is not made.
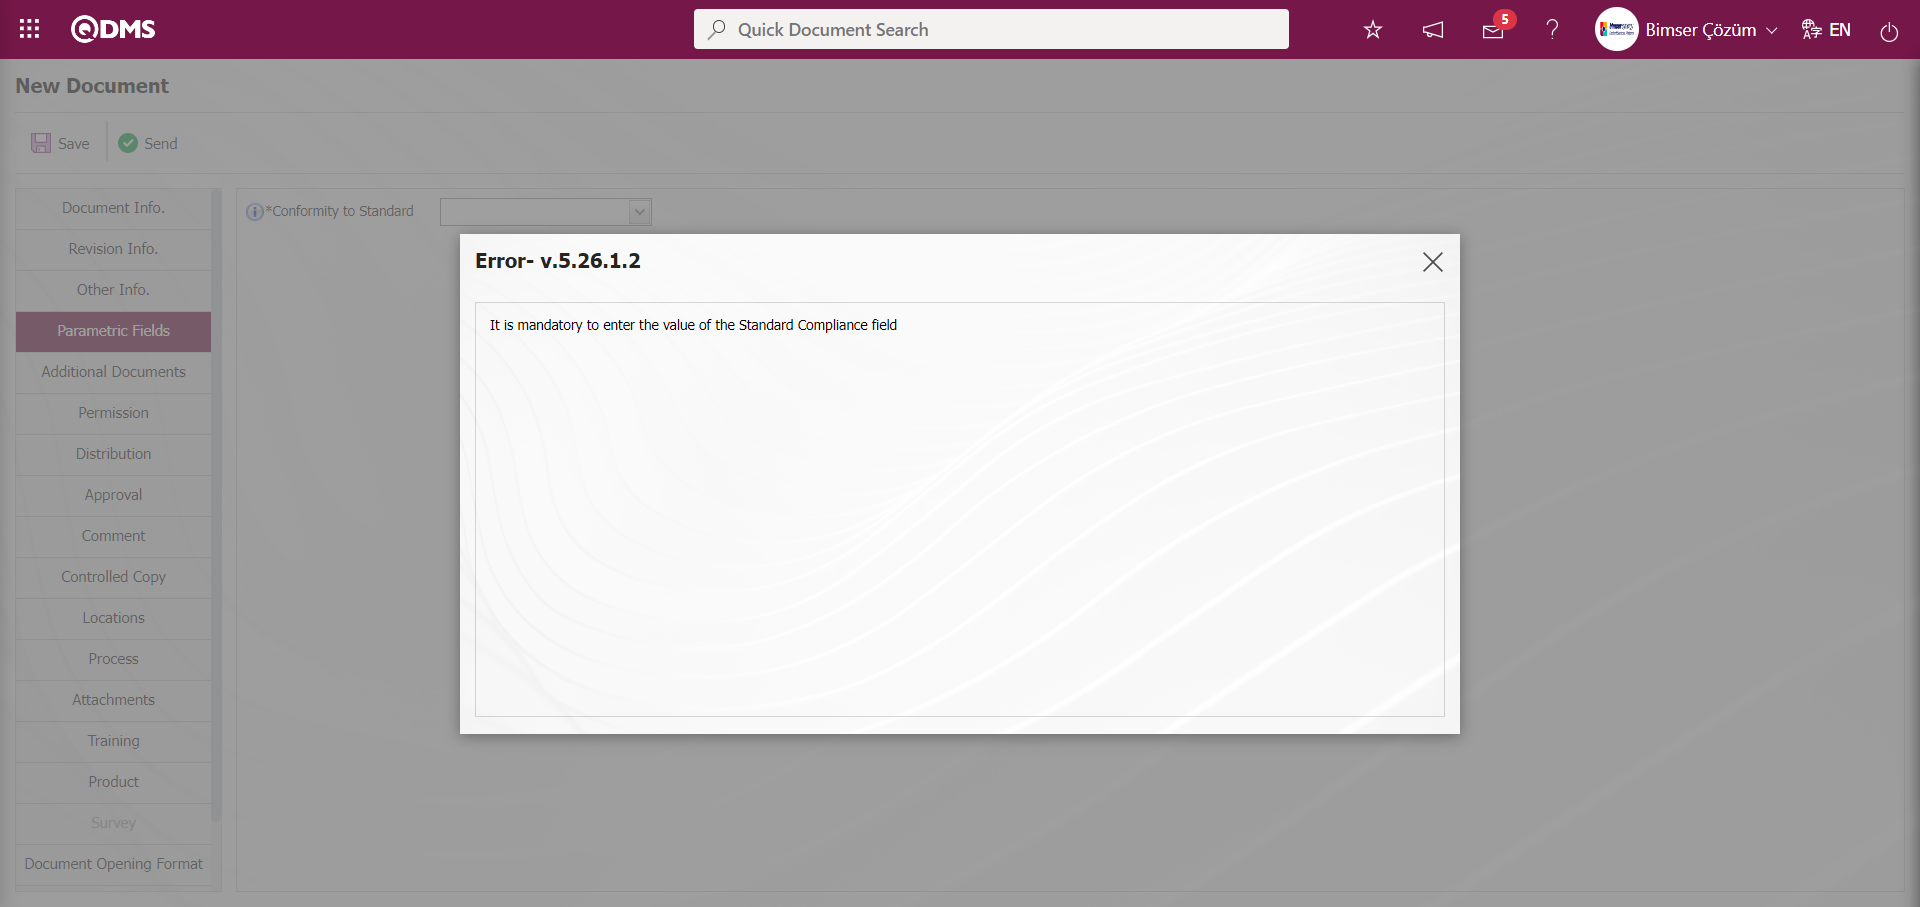
6.2.2.Document Preparation Template
Document preparation templates used by the company to prepare documents within the scope of management systems can be used in QDMS. The information such as “document code, document name, date of preparation, revision no, revision date, date of first publication, preparer, checker, approver” in the footer/ header section of the Document Preparation template can be provided automatically to the template from the information entered while preparing the document in QDMS. For this, the company document preparation template must be marked with QDMS Document Short Codes.
The short codes used to create a document preparation template in the Document Management Module are given in the table below. In short, it can also be called Document abbreviation table. These short codes are used when creating a document preparation template. For example; <DOC_KODU> document abbreviation will be used in the information entry of the Document Code field. The document abbreviation <DOC_ADI> will be used for the information entry of the document name field. In the template, the relevant document abbreviations are placed in whichever field's information entry will be used, and the footer and header sections are created. The company's document preparation template is created in the system and the company realizes the process of preparing a document in a standard structure by ensuring that this template is used when preparing a new document.
Stages of preparing a Document with Document Template:
1-Document Preparation or Document system transfer process and document template system upload process is done.
2-Click the Other Information tab on the New Document screen opened in the Document Transfer to System menu or the Document Preparation menu in the system upload process of the Document Template. In the Other Information tab, the type of document we will upload to the system is determined by checking the relevant check box in the Document and Form options. Since the document we will upload to the system is a document preparation template, select Document Type Form. Since the Document preparation template is a template from the Form usage options, the check box related to the Document template is checked.

3-Document Preparation After transferring the template to the system, click on Integrated Management System/Document Operations/Folder Identification screen. In the Folder Definition menu, the Folder to be made for the introduction of the document preparation template is selected and the  button is clicked.
4- Click Folder Settings tab on the Folder Definition-Record Update screen. For defining the Document Preparation Template in the folder, first select the Document Preparation Template field in the Folder Settings tab. Document Preparation Template field is used to specify which one or which of the document preparation templates previously uploaded to Qdms as templates can be used when preparing documents depending on this folder. This feature is used to say “use this template” in documents to be prepared depending on the folder. In the Document Preparation Template field, select the document preparation template transferred to the system in the Document Template list opened by clicking the  (Add) button.
5- In the Integrated Management System/ Document Operations/ Document Preparation menu, a new document is prepared by selecting the folder where the adjustment process related to the document template is made.
6- In the Document Preparation process, document preparation is done in an approved or unapproved way. In the folder where the settings related to the Document Template are made, a document preparation process related to the template is made by disabling the approval and control stages by checking the check box with the “Without Approval/ Without Control” field. If it is desired to prepare a document with approval and control stages, this field is not marked in the folder and the document is published by performing the approval and control stages during the document preparation phase.
7-After the document preparation phase is over, the template adapted version of the document is displayed by selecting the folder containing the document prepared by clicking on the Integrated Management System/ Document Operations/ Document View menu or by typing the document code in the quick search option and it is seen that the abbreviations with document tags work.
In case there is no document preparation template belonging to the company, a document preparation template structure can be prepared in a standard way by taking the company's Procedures or Instructions documents, emptying the information in the content and applying the procedures in the template preparation of the lower and upper title parts. The purpose of using the document preparation template when preparing documents is to ensure that the document we prepare is formed in a standard structure. The example shows a Document preparation template. The abbreviations in the Document abbreviation table are used in this Document preparation template.
For transferring the Document Preparation Template to the system without approval/control, click on System Infrastructure Definitions/Document Operations/Document Transfer to System menu.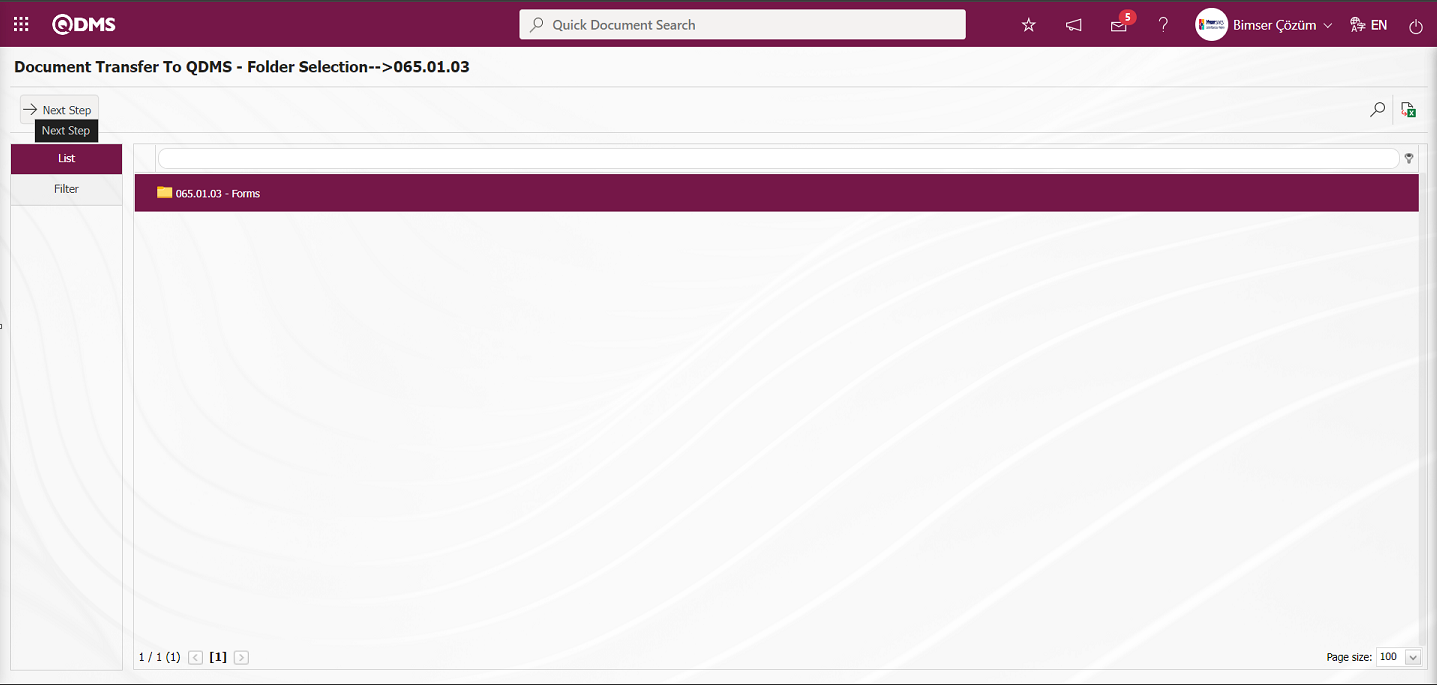
In the Document Transfer to System - Folder Selection screen, the Folder where the upload processing of the Document Preparation Template will be done is selected and the  button is clicked. In the Document Transfer to System screen, the necessary information is written in the required fields in the Document Information tab. Detailed information such as document name, preparation date of the document is entered.

Other Information tab is clicked. In the Other Information tab, the type of the document we will upload to the system is determined by checking the relevant check box in the Document and Form options. Since the document we will upload to the system is a template, the document type is selected as Form. Since the Document preparation template is a template from the Form usage options, the check box related to the Document template is checked.
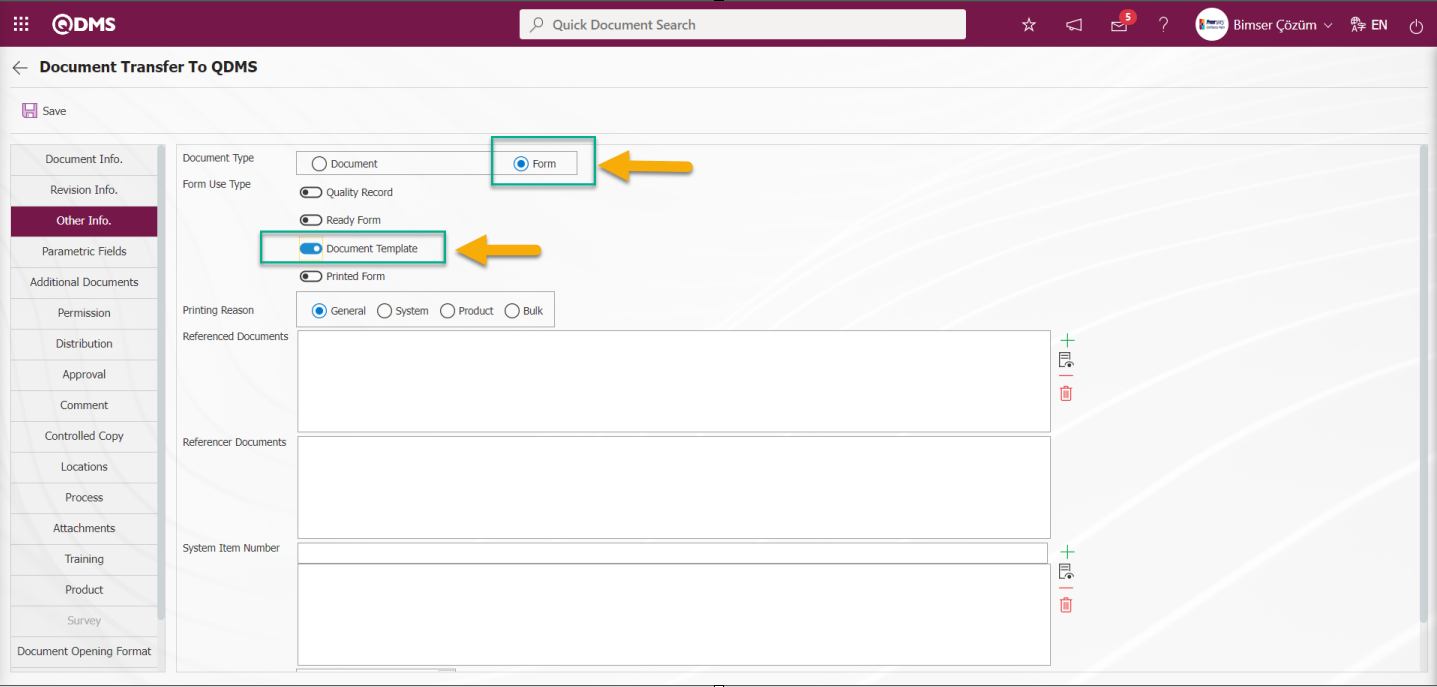
After specifying that the document preparation template is a document template, click on the Document tab. In the Document File Upload (Turkish) field of the Document Transfer to the System Document Tab, click the  (Add File) button and upload the Turkish language file of the Document Preparation Template to the system.
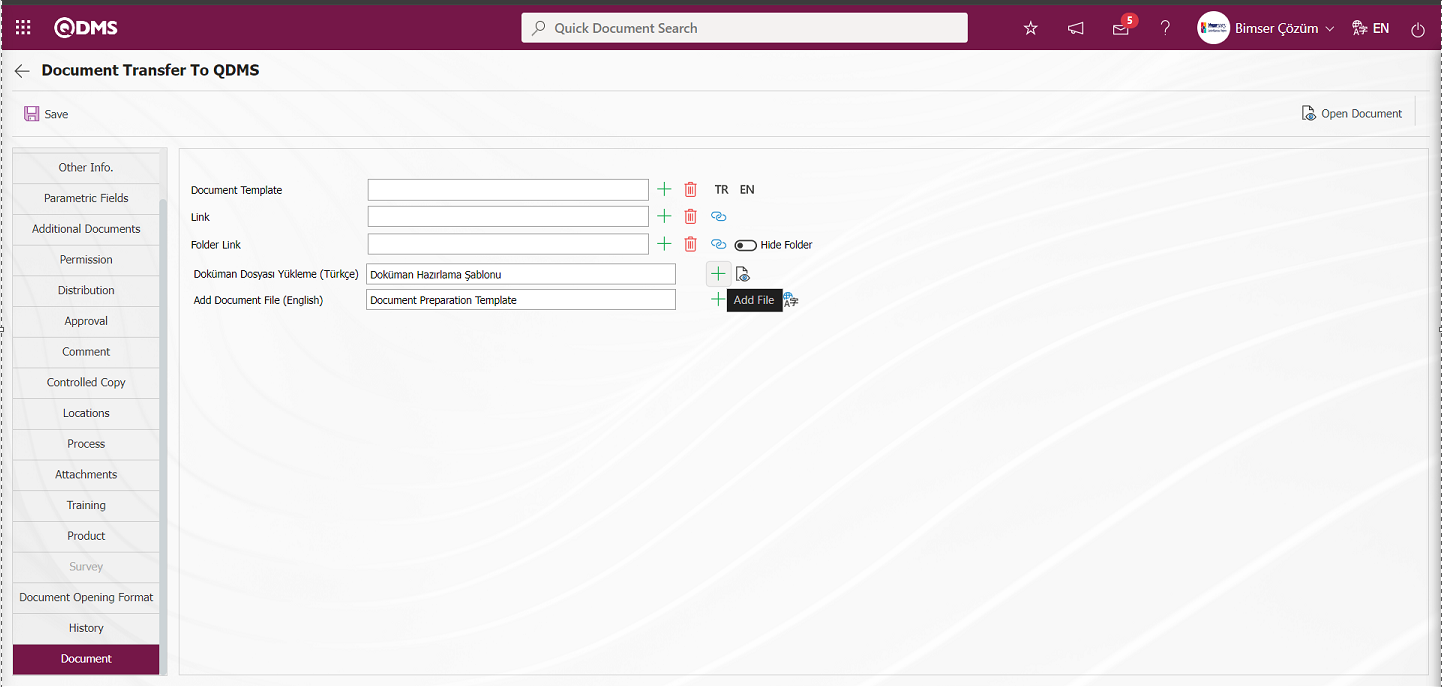
Click the Browse button on the Upload File screen.

Select the Turkish language file of the Document Preparation Template to be uploaded.
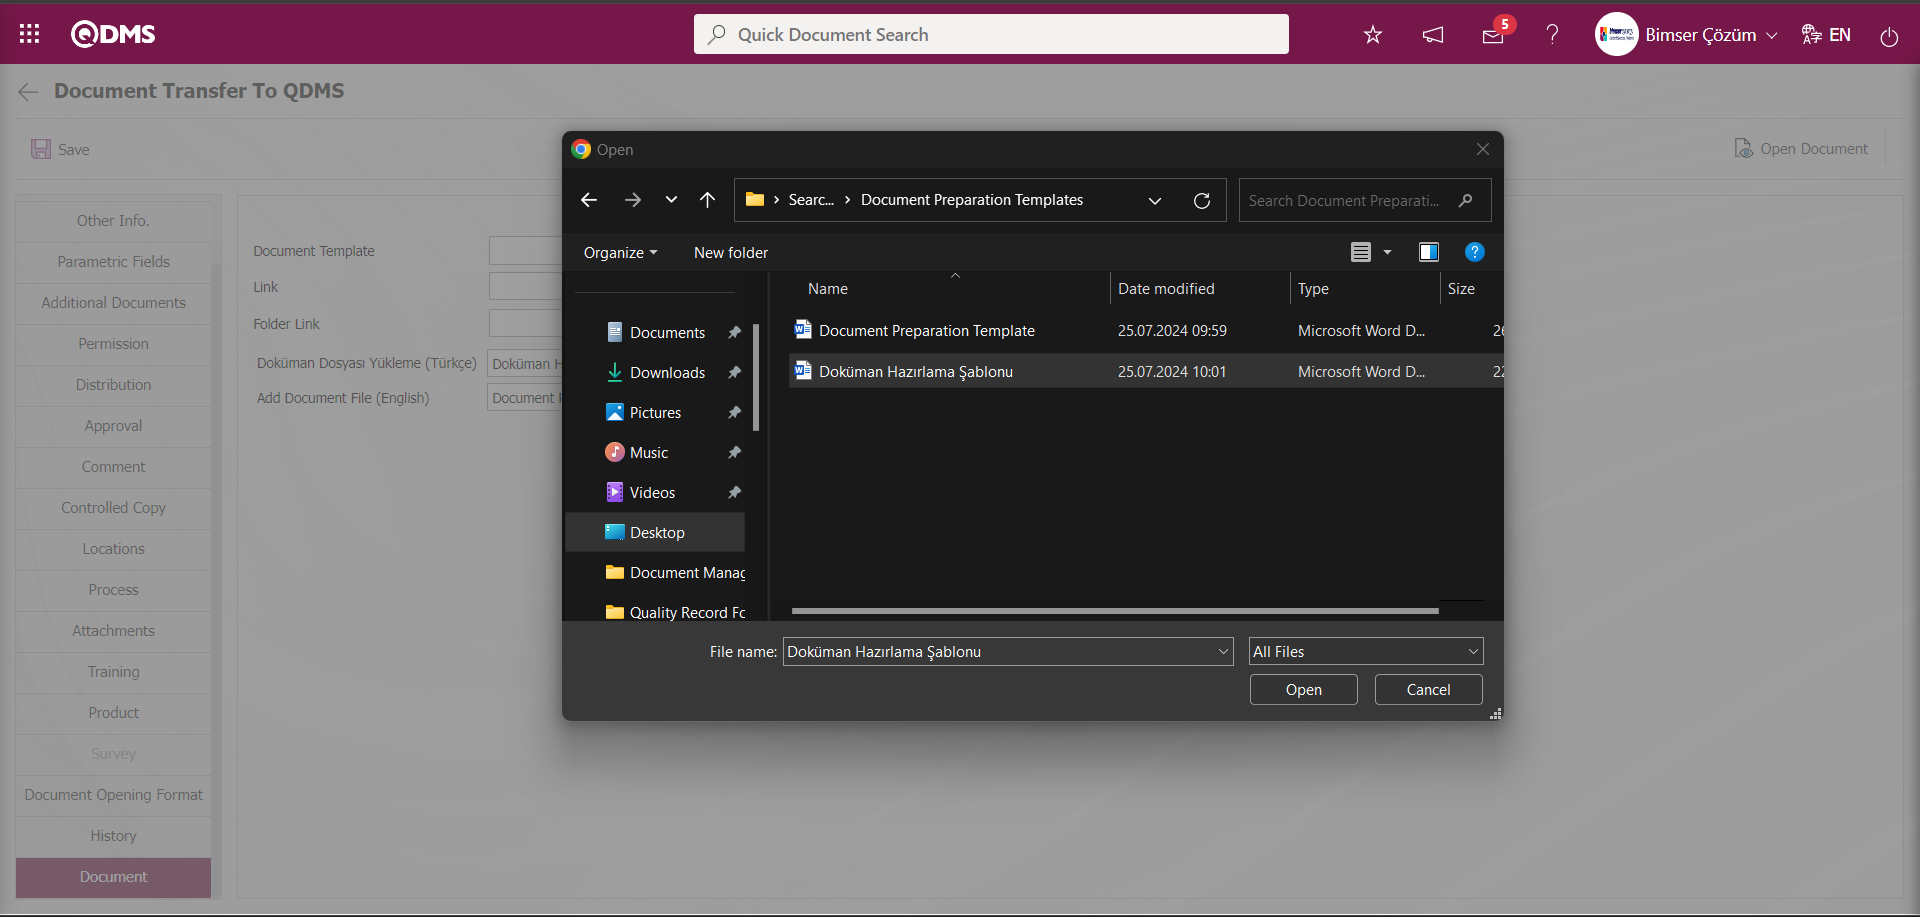
After uploading the Turkish language file of the Document Preparation template in the Document tab, the system displays the message “File Transferred Successfully”.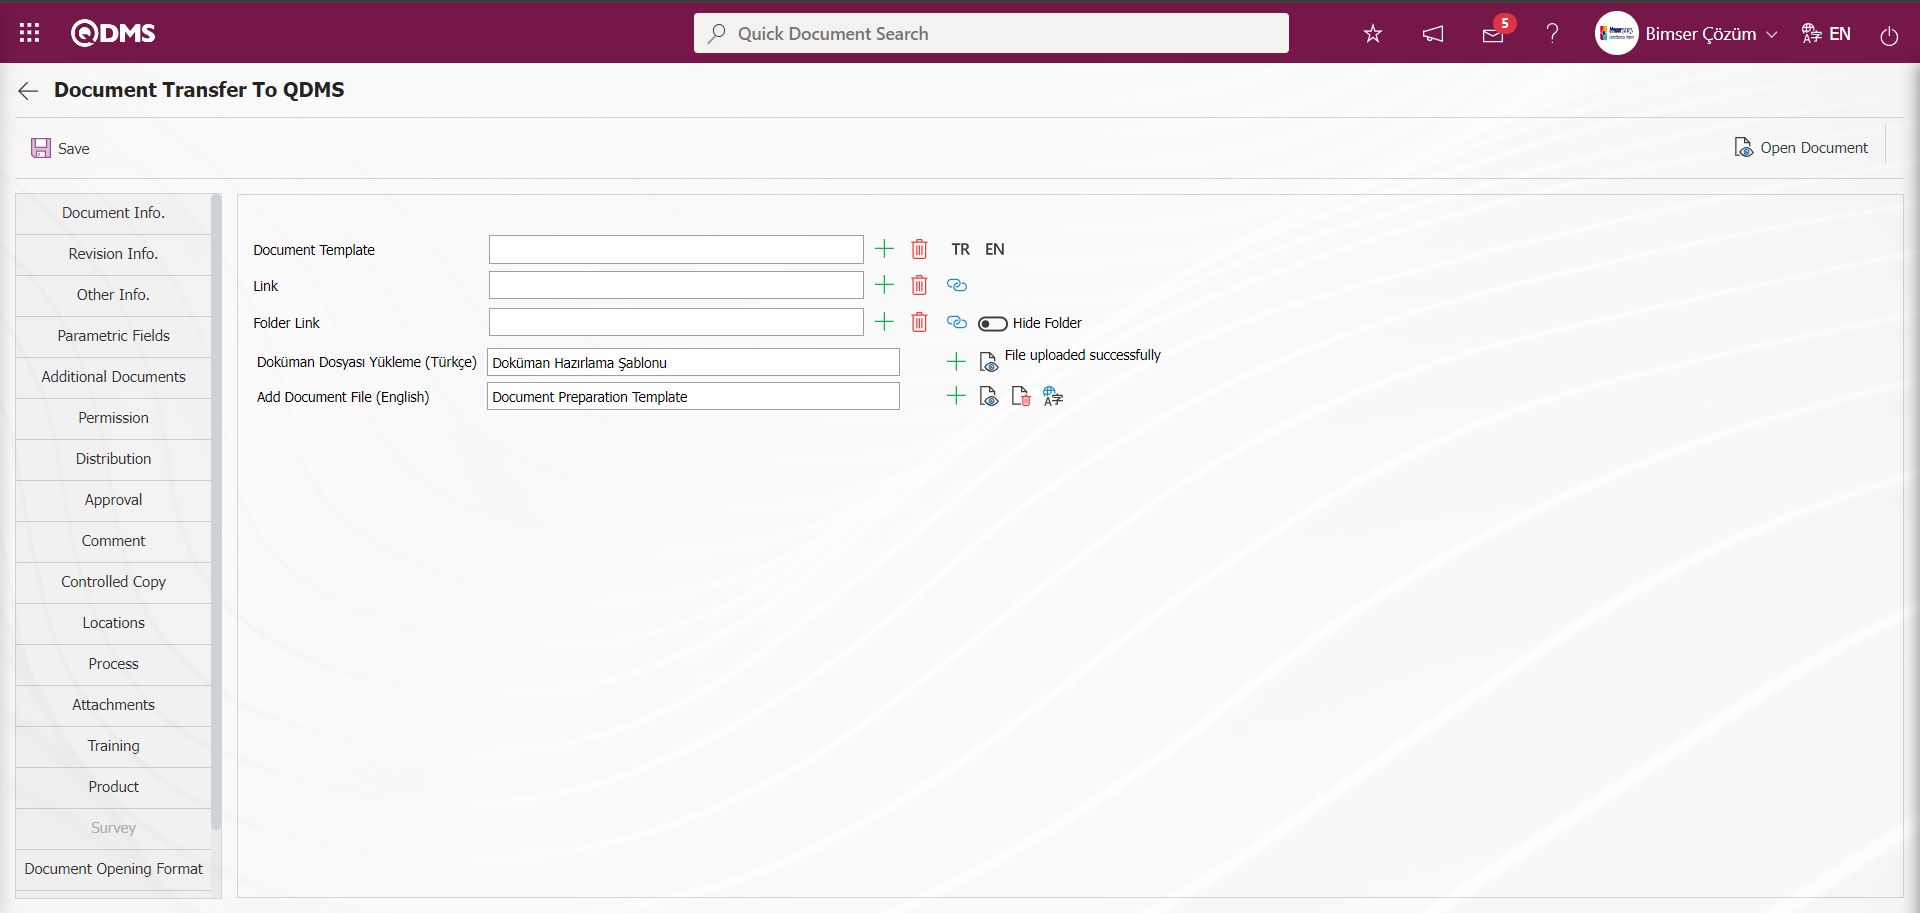
After the uploading process of the Turkish language file of the Document Preparation Template, the same steps are followed and the uploading process of the English language file of the Document Preparation Template is done in the Add Document File (English) field.
The English language file of the Document Preparation Template is uploaded to the system by clicking the  (Add File) button in the Add Document File (English) field in the Document Tab.
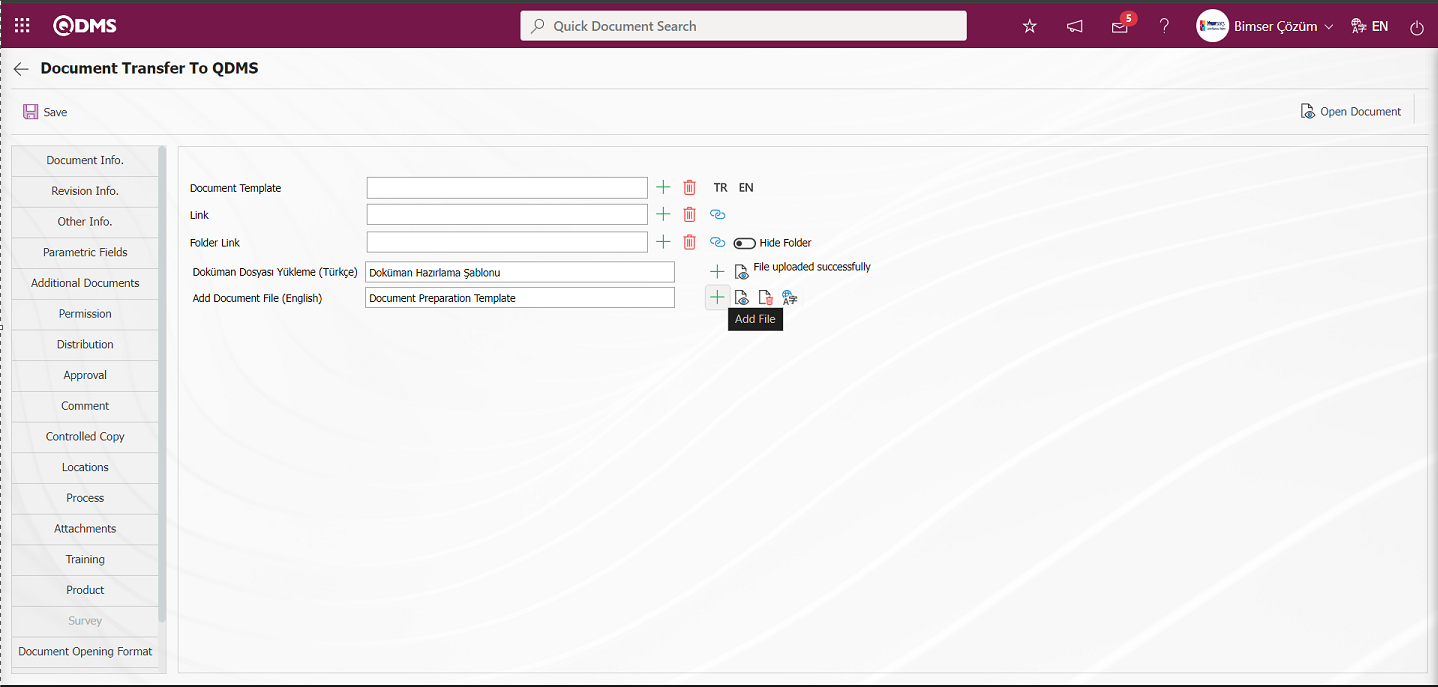
Click the Browse button on the Upload File screen.
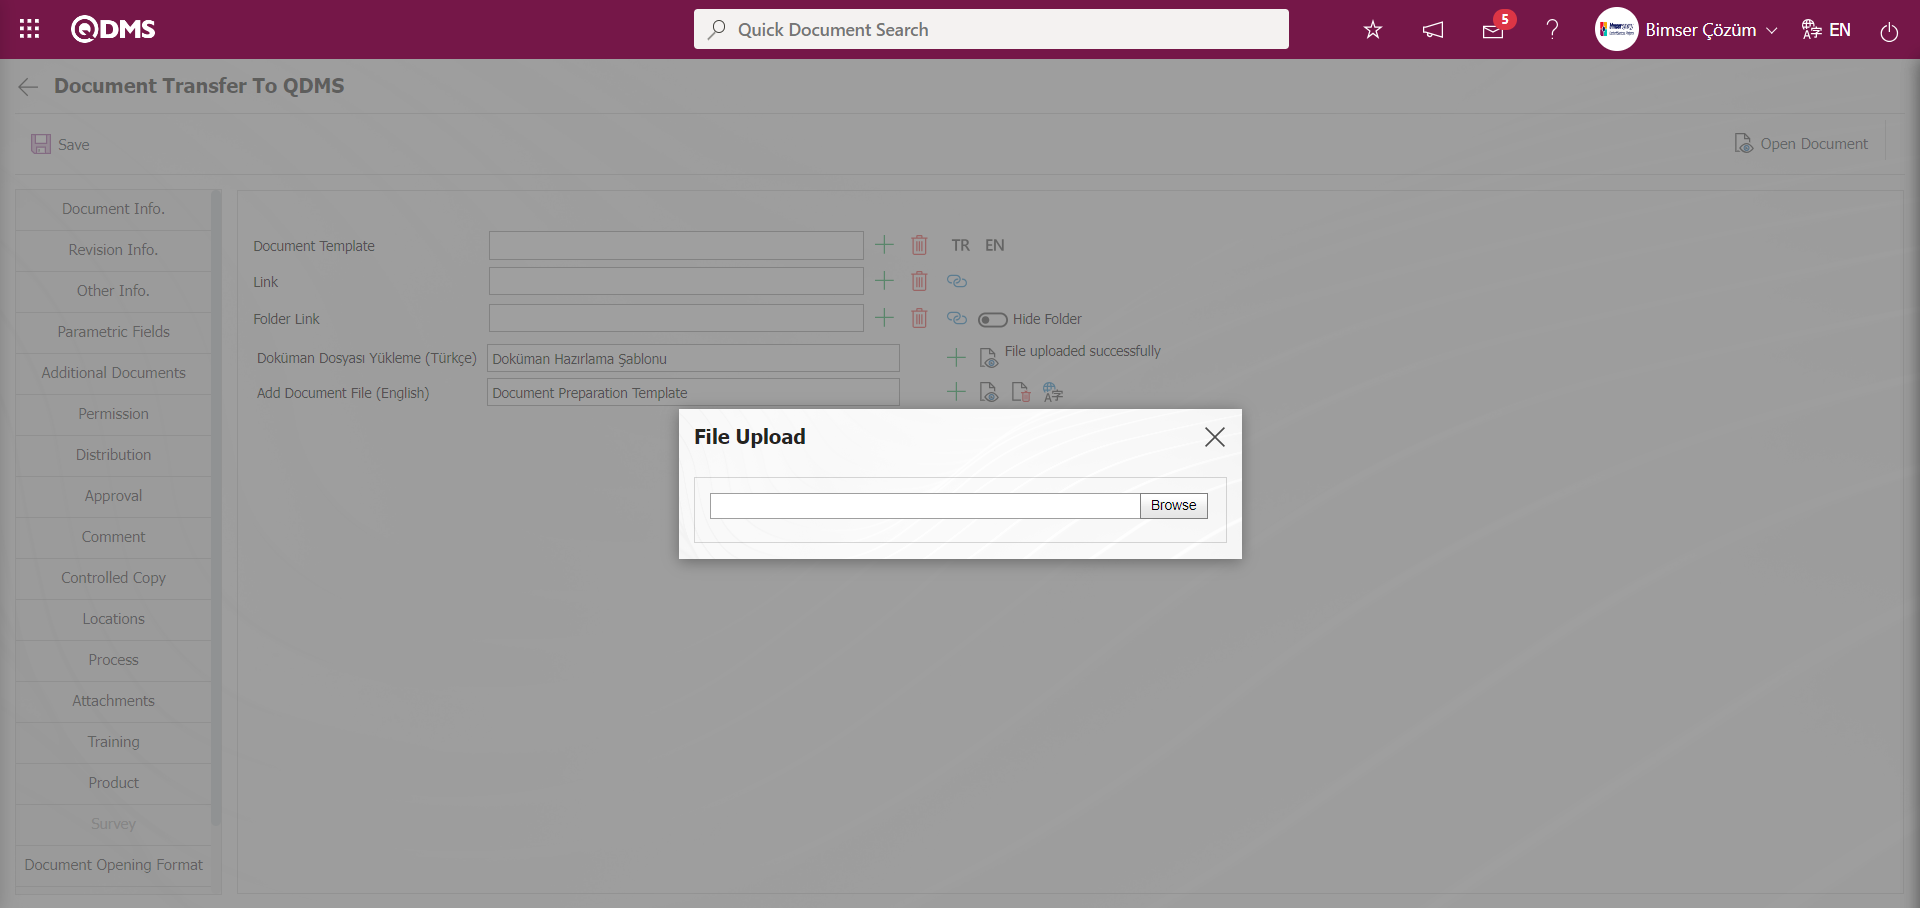
Select the English language file of the Document Preparation Template to be uploaded.
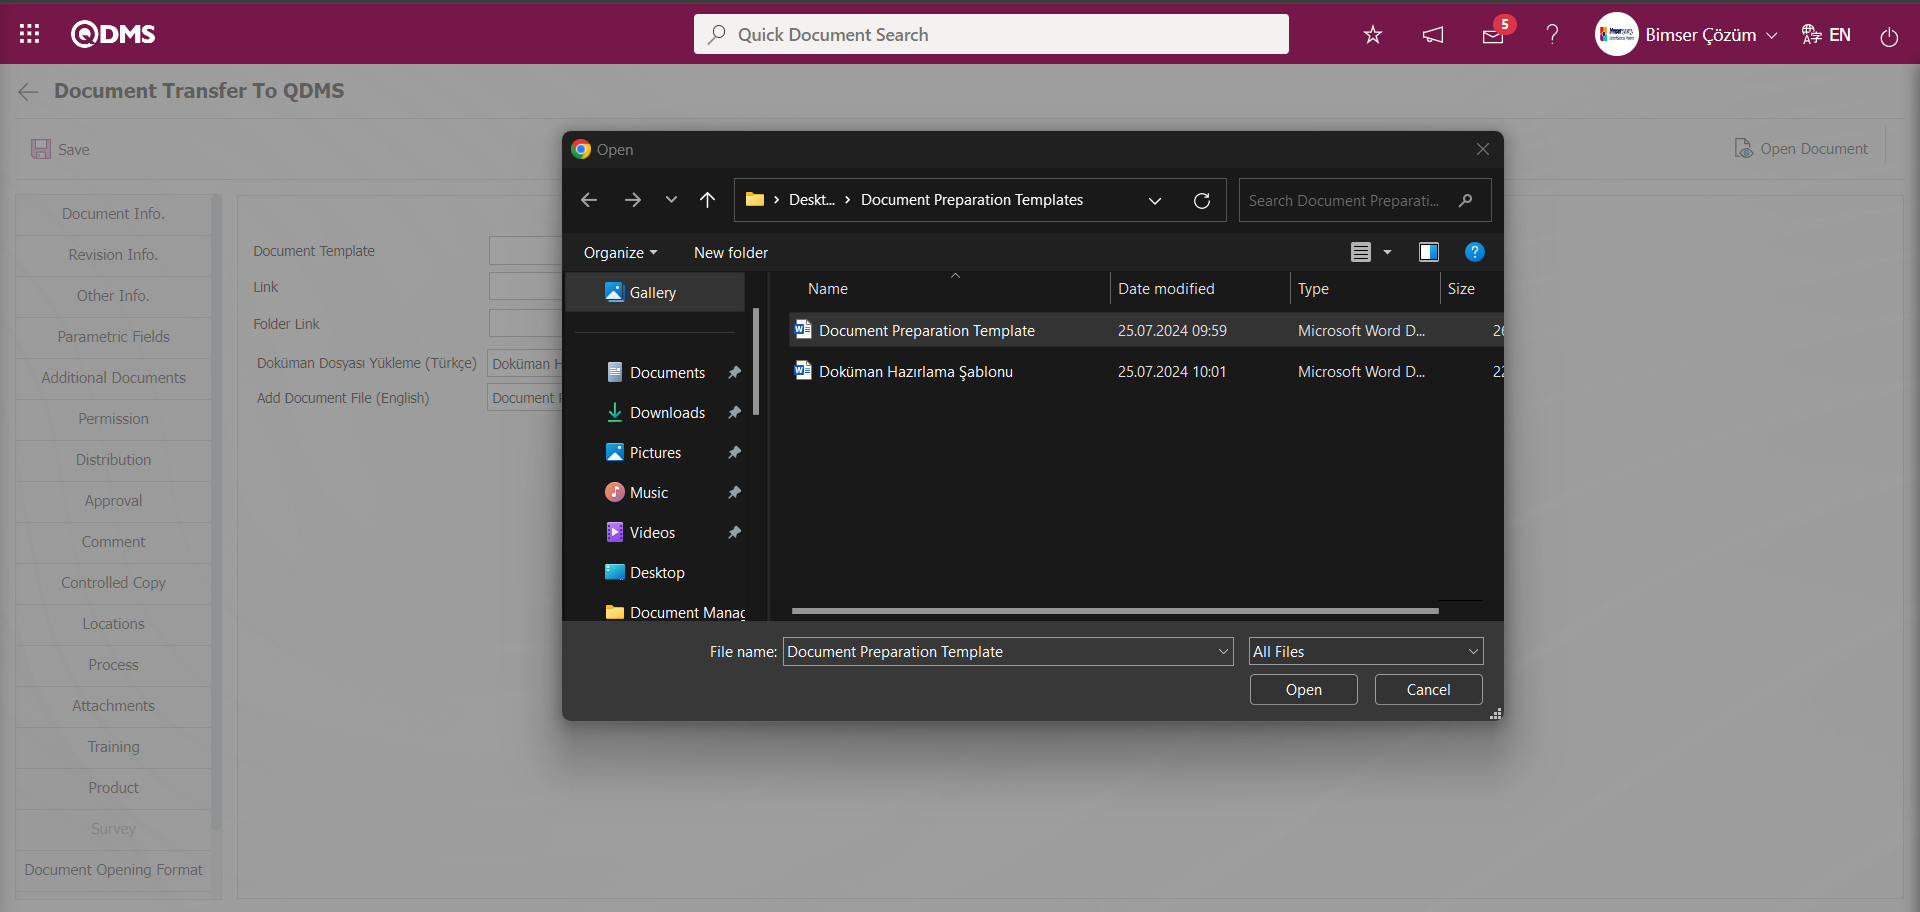
After the upload of the English language file of the Document Preparation template in the Document tab, the system displays the message “File Transferred Successfully”.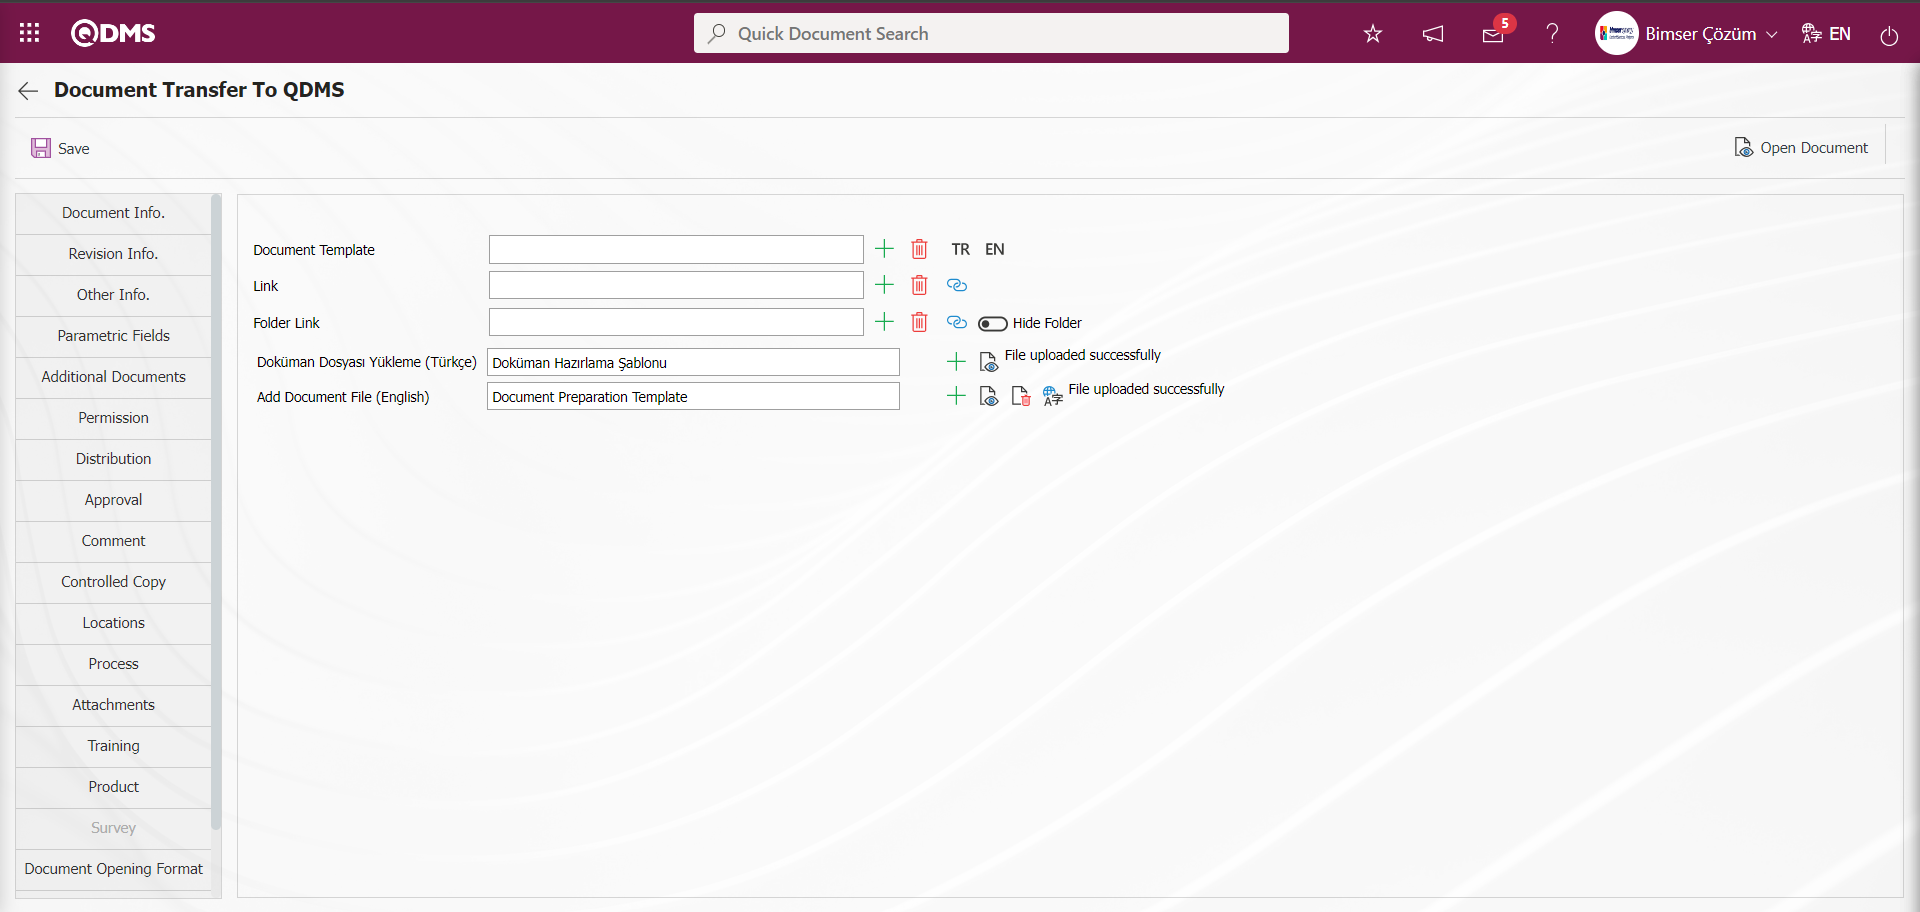
After uploading the Document Preparation Template in the Document Information tab on the Document Transfer to System screen, the uploading of the Document Preparation Template to the system is done by clicking the  button in the upper left corner of the screen.
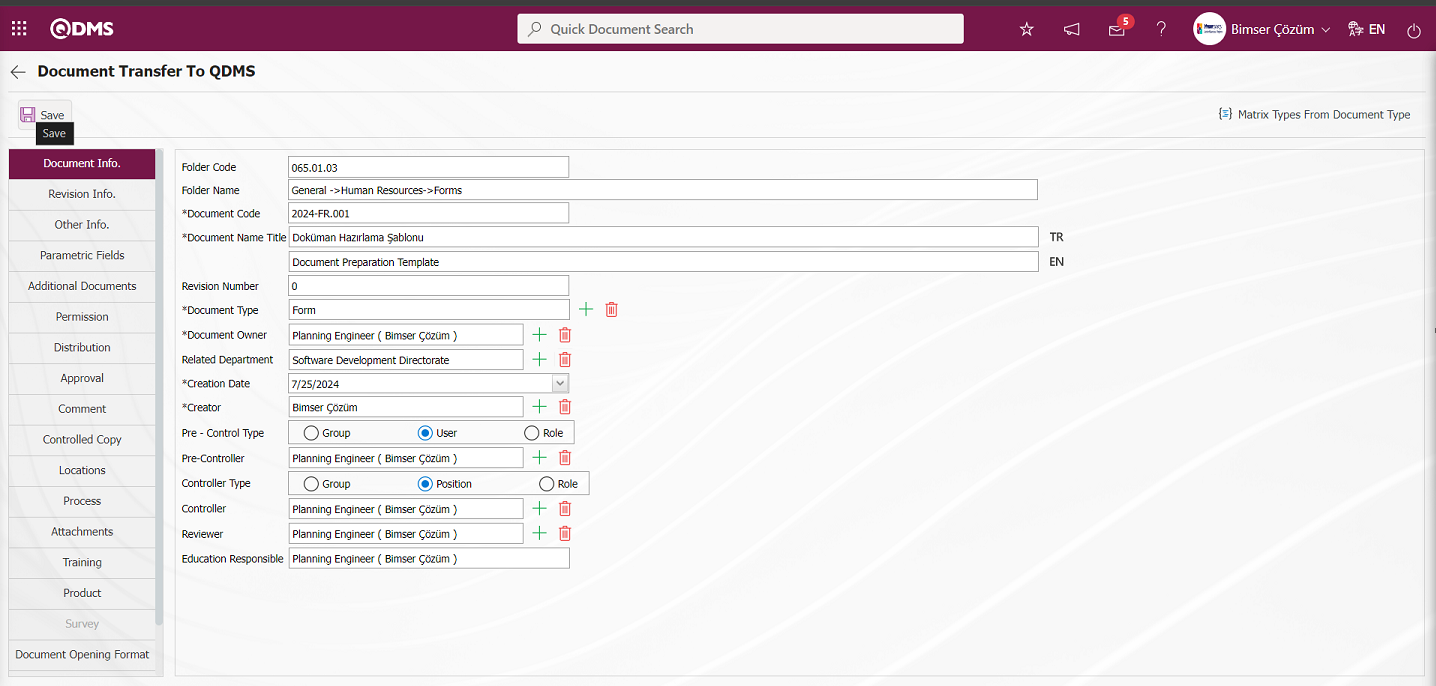
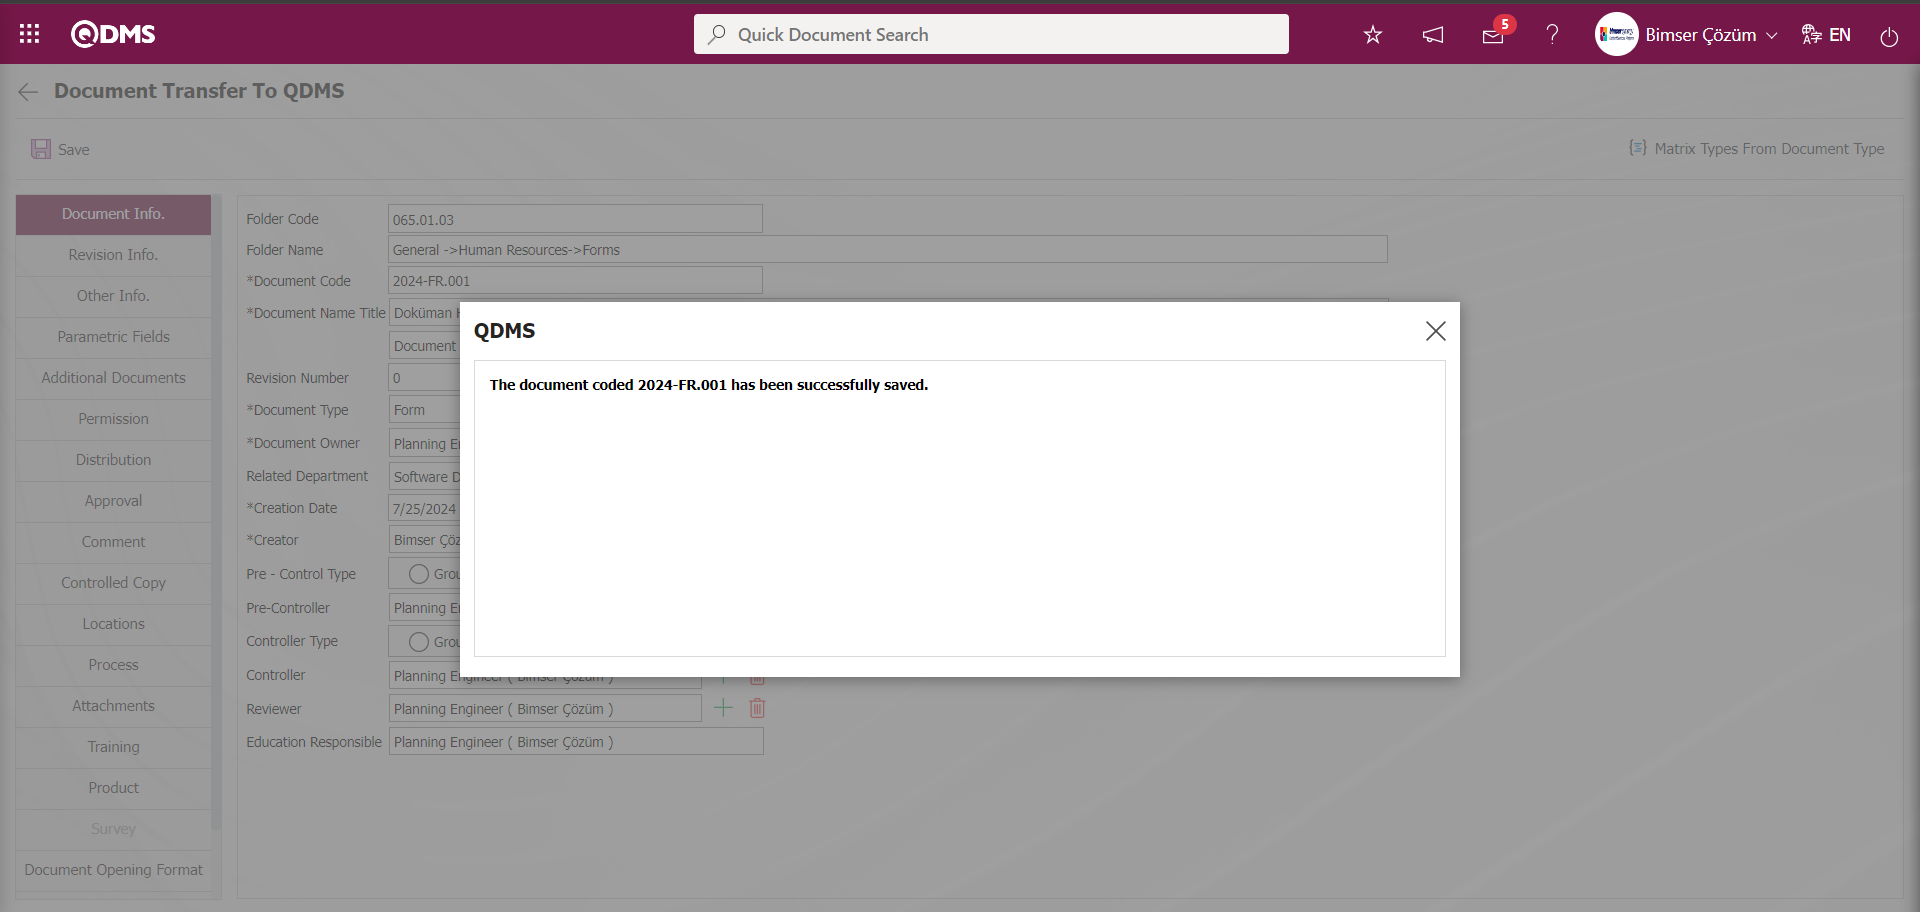
Click on Integrated Management System/Document Operations/Folder Definition menu. Select the folder where the document will be prepared with the document template and click the button.
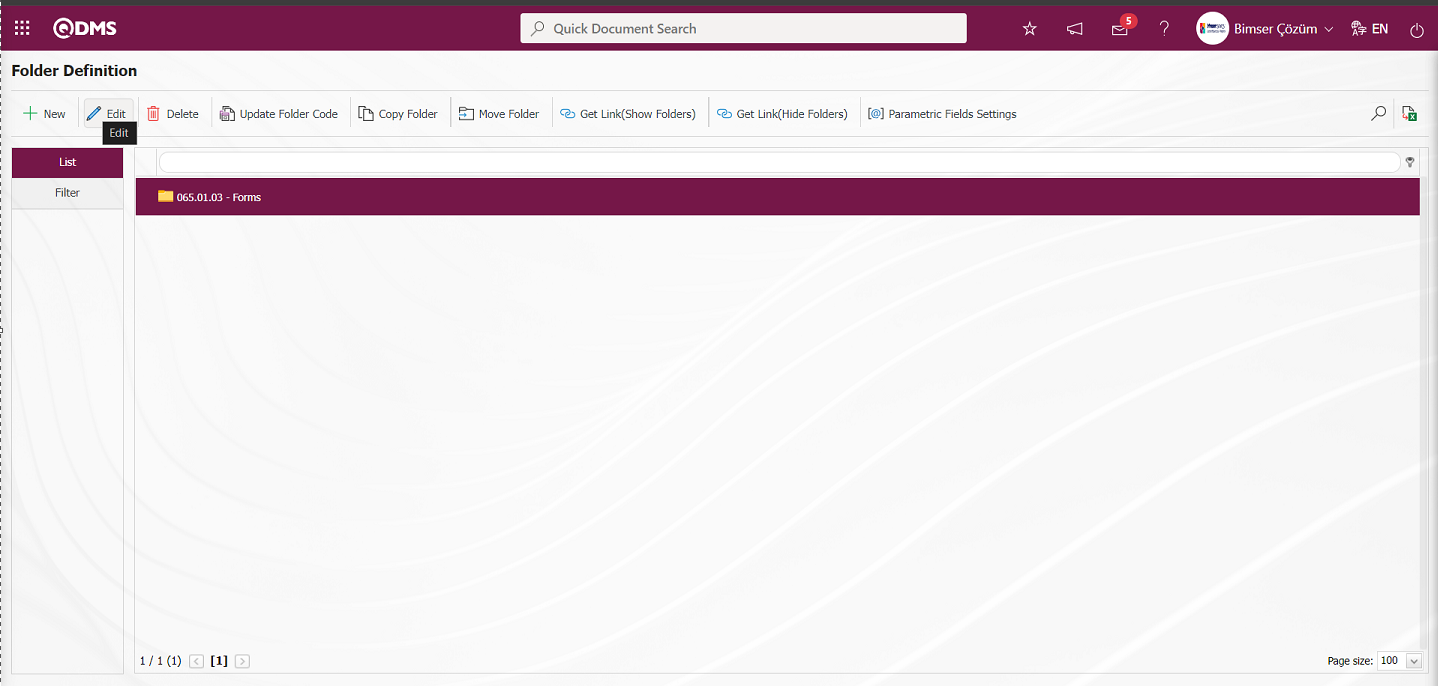
In the Folder Defining-Record Update screen, a document is prepared in this folder without approval and control phase by checking the check box related to the “Unapproved/ Uncontrolled” field in the Folder Settings tab.
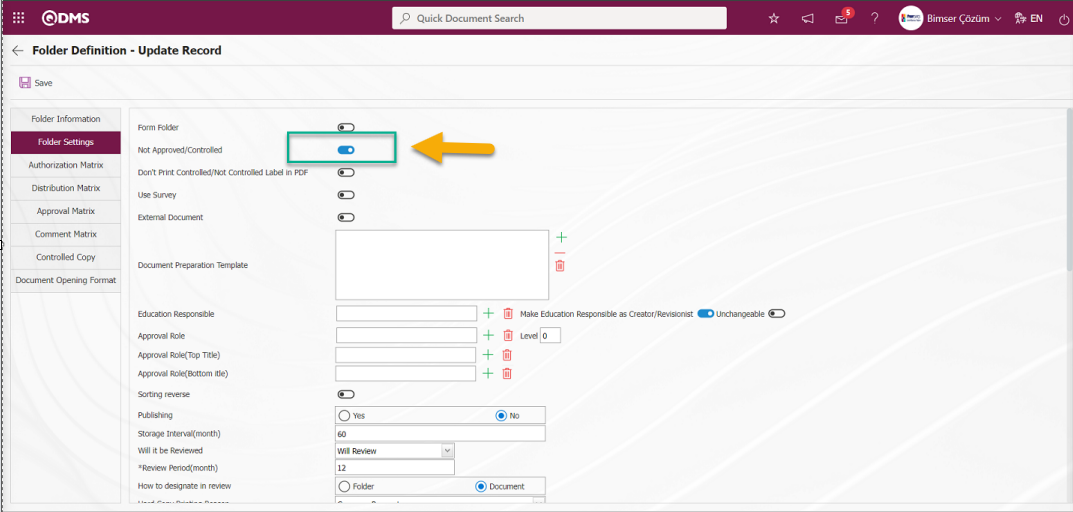
After the documents in the folder are prepared and published without approval and control, the Document Preparation Template field is used to define the Document Preparation Template in the folder. The Document Preparation Template field is used to specify which of the document preparation templates previously uploaded to Qdms as templates can be used when preparing documents depending on this folder. This feature is used to say “use this template” for documents to be prepared based on the folder. Click the (Add) button in the Document Preparation Template field
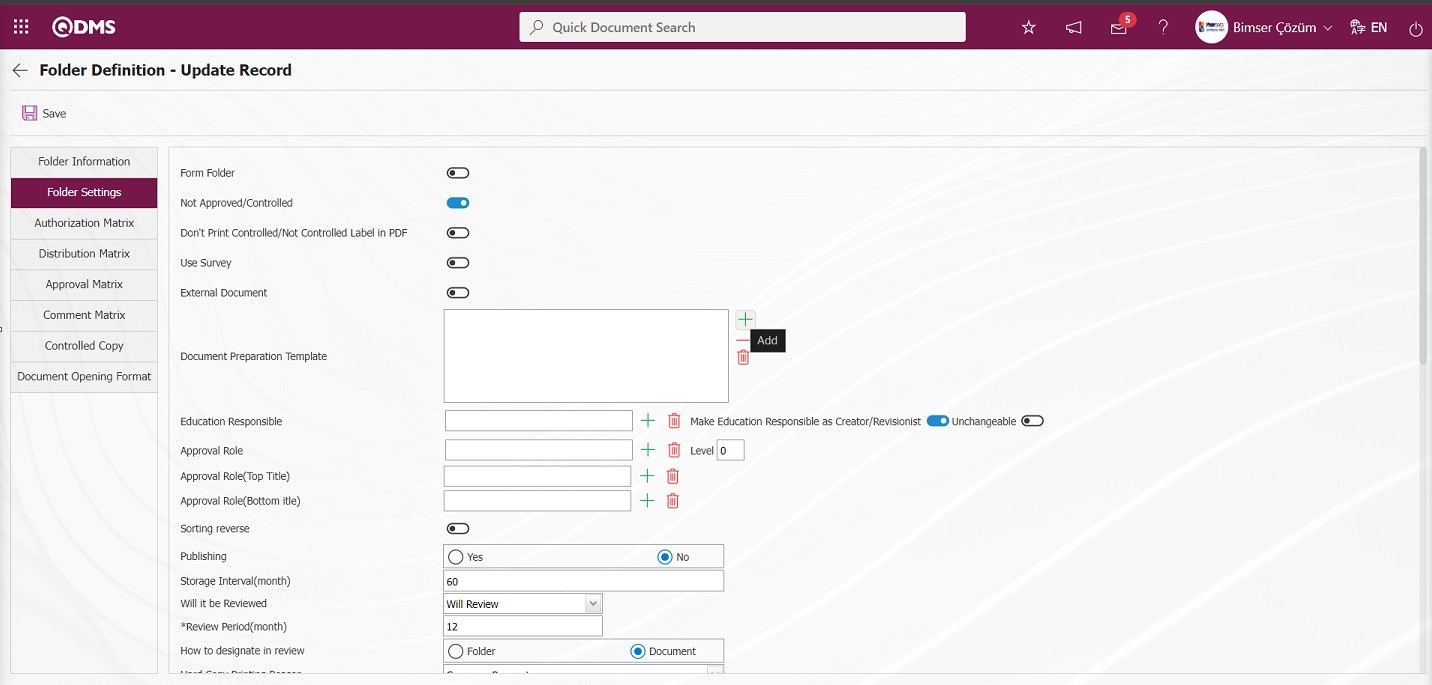
In the Document List, the Document Preparation Template to be used in the folder is selected by clicking the  button.
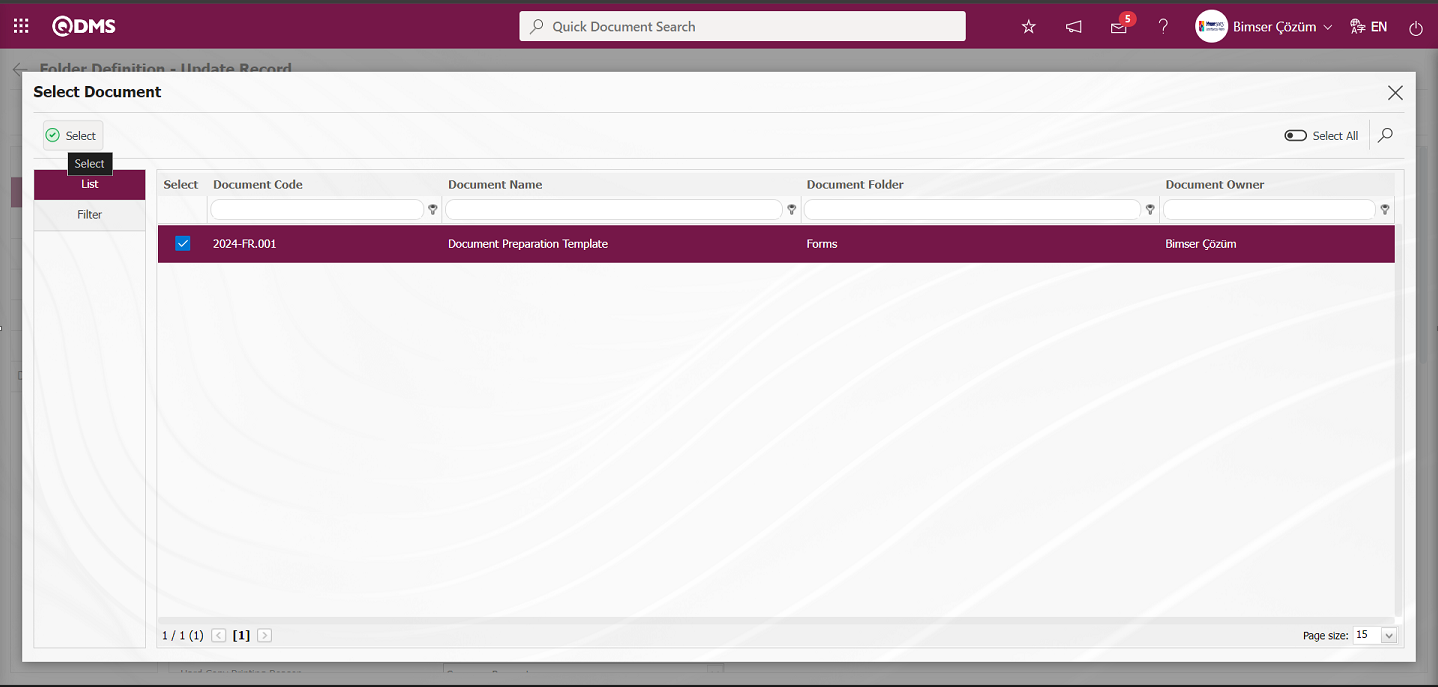
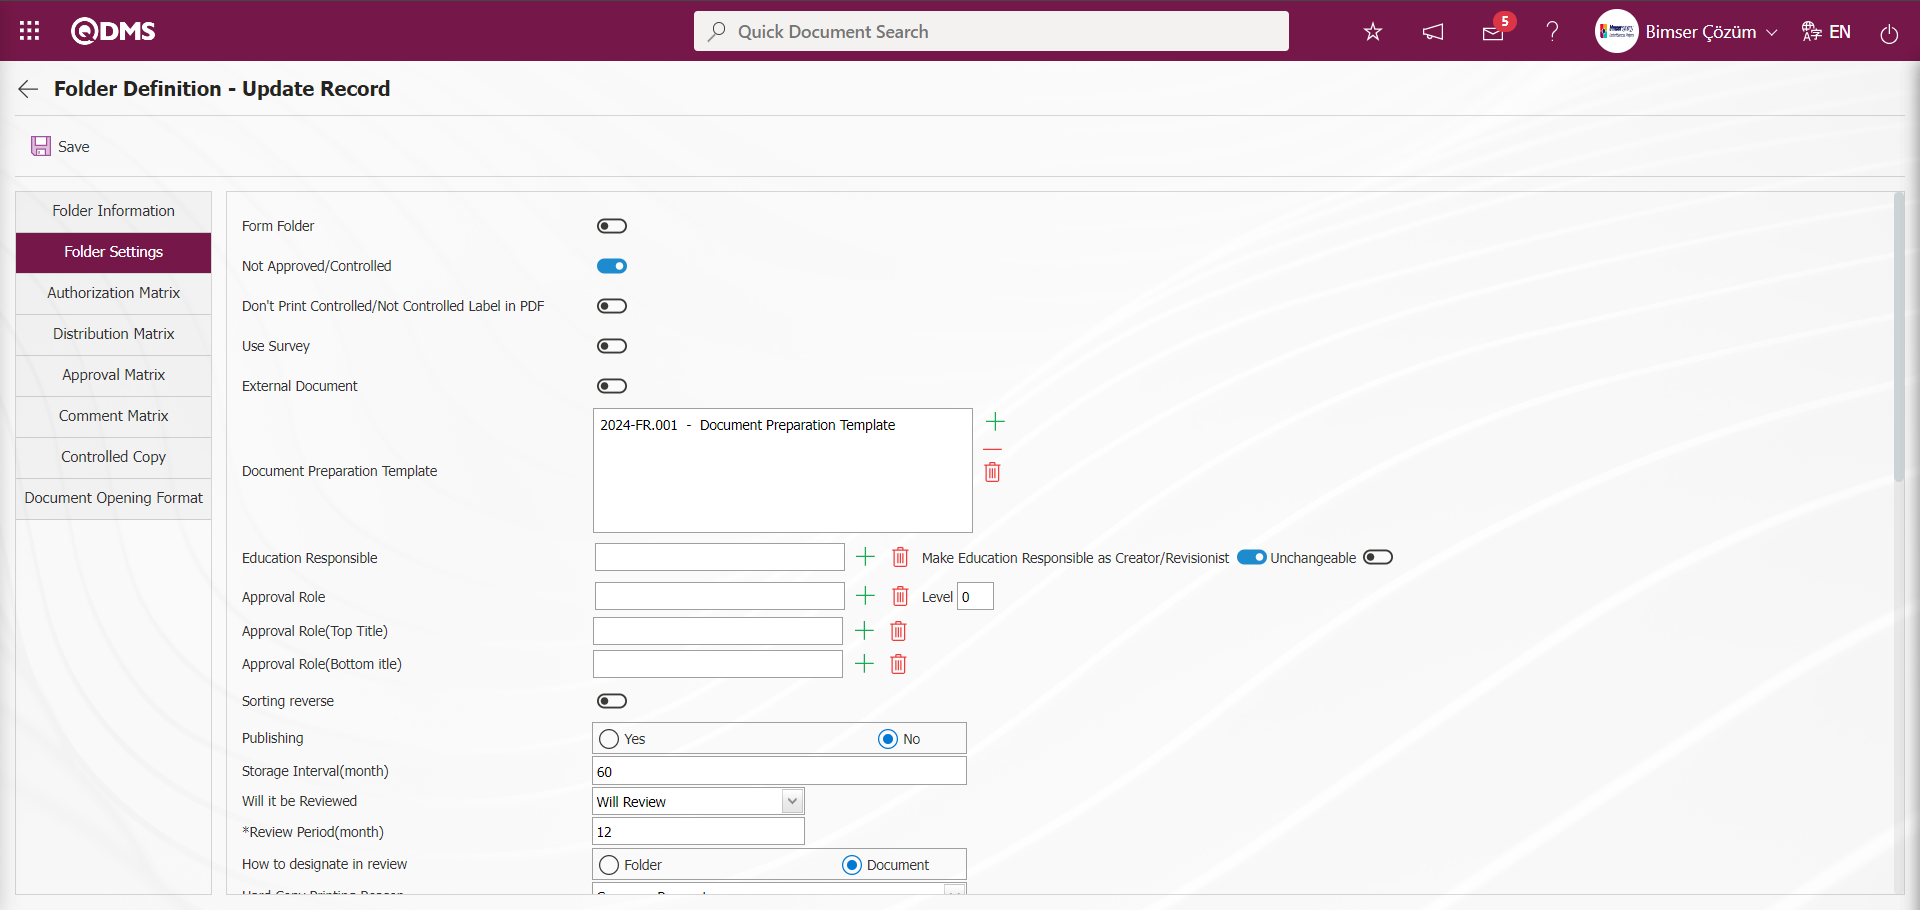
By going to the Folder Settings tab and adding the relevant Document Preparation Template in the Document Preparation Template field, the Document Preparation Template was associated with the Folder by clicking the  button.
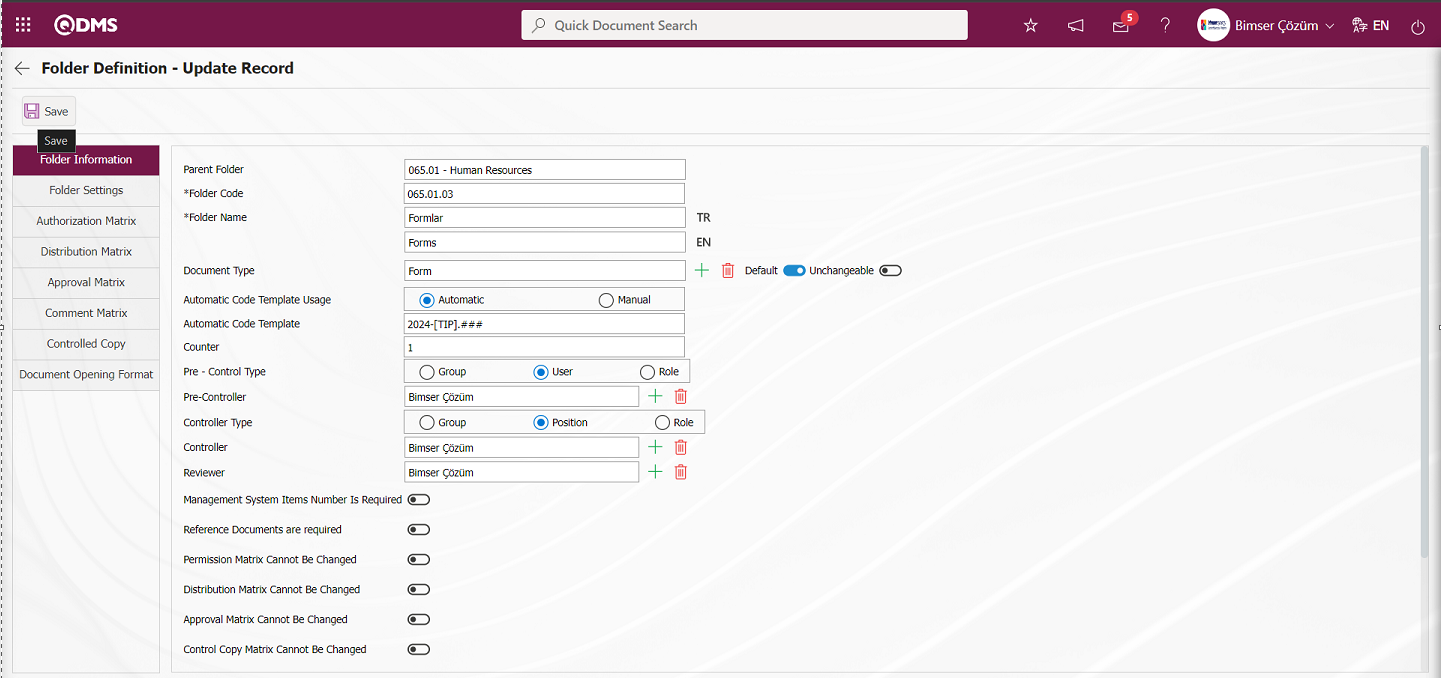
After associating the Document Preparation template in the relevant folder, Document Preparation is done by using the Template in the relevant folder. Click on Integrated Management System/Document Operations/Document Preparation menu. Select the folder that is associated with the Document Preparation - Folder Selection Document Preparation Template and click  button.

In the New Document screen, the document detail information prepared in the Document Information tab is written.
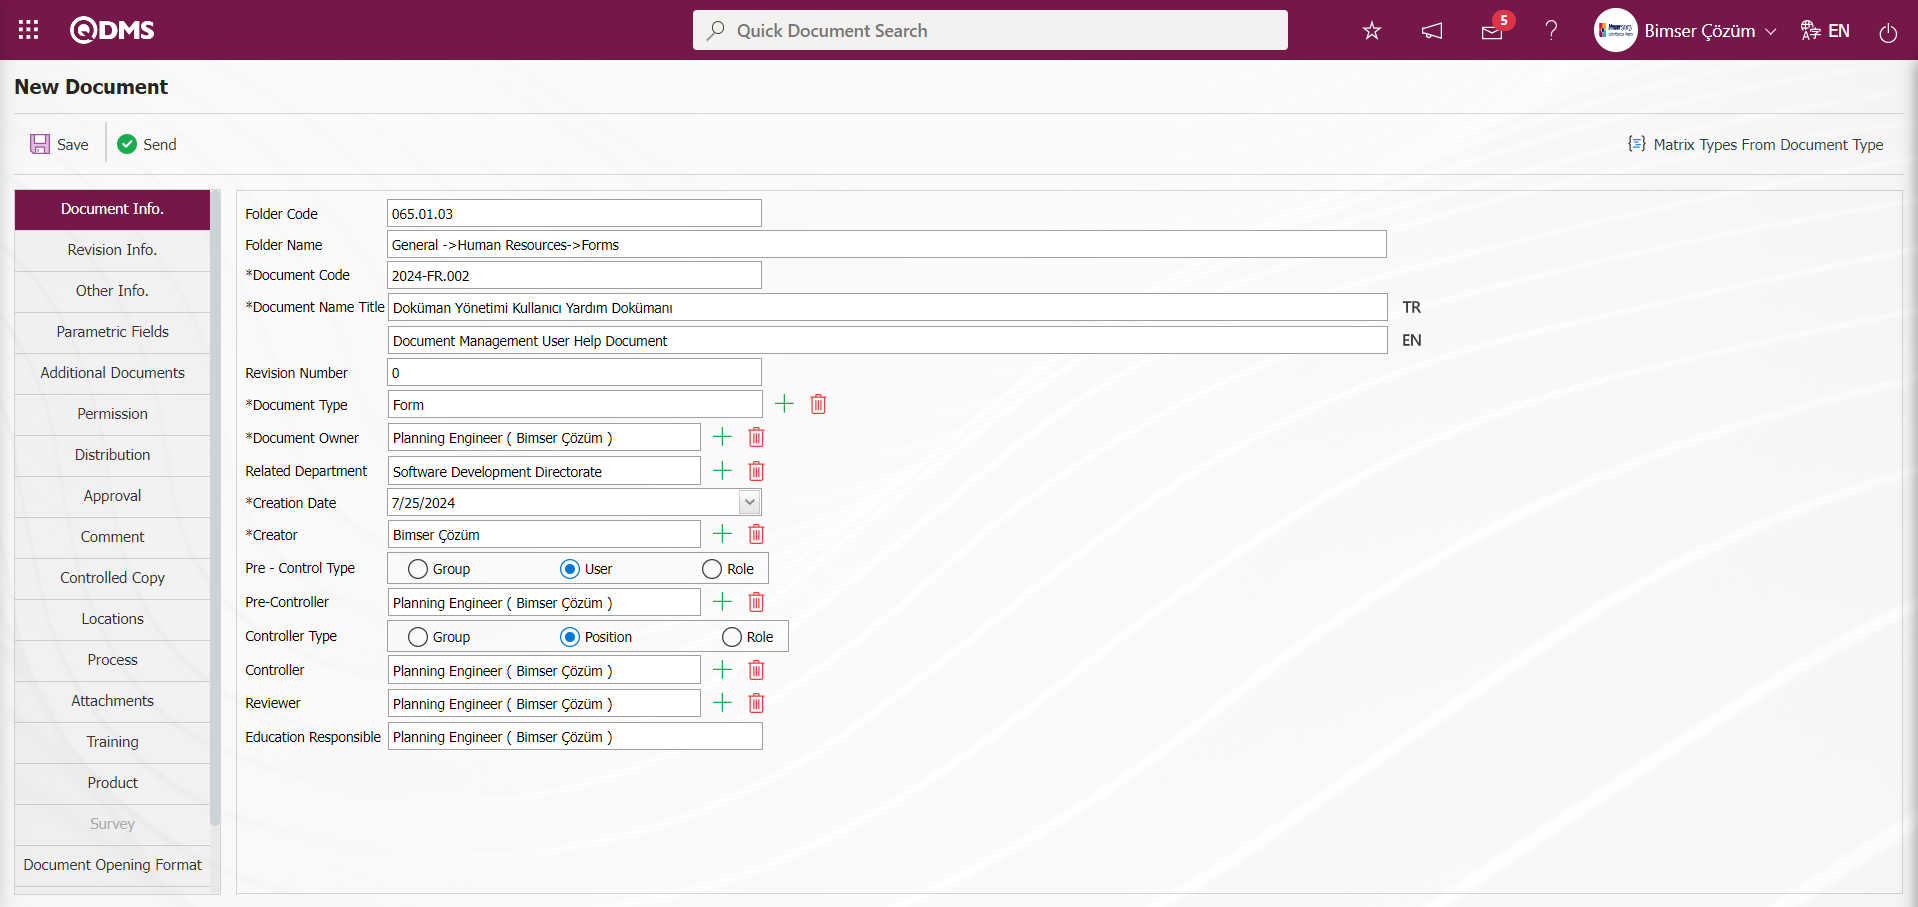
After entering the required information in the Document Information tab on the New Document screen, click on the Document tab.
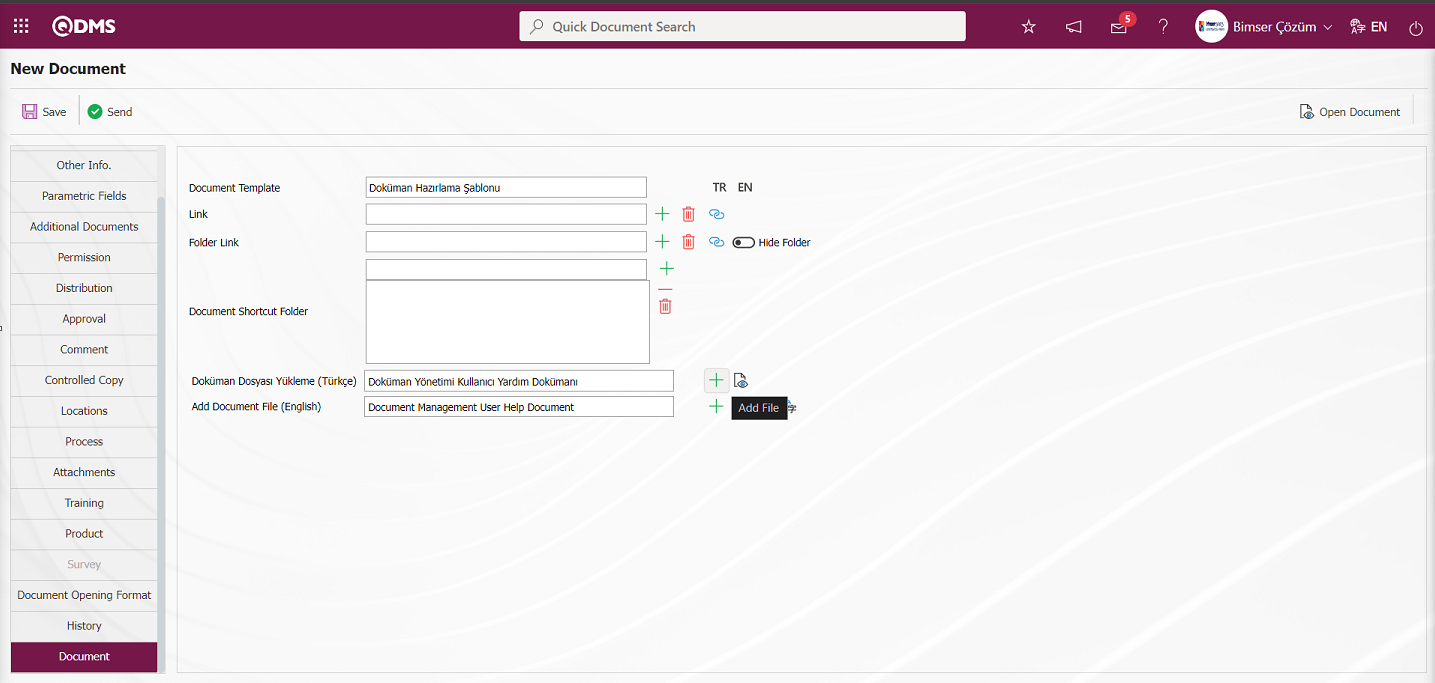
On the New Document screen, the Turkish Language file of the document is uploaded to the system by clicking the  (Add File) button in the Document File Upload (Turkish) field on the Document tab.
On the Add File screen, click Browse to select the file to be uploaded to the system.

The system will give the message “The file has been successfully transferred” indicating that the file has been uploaded.
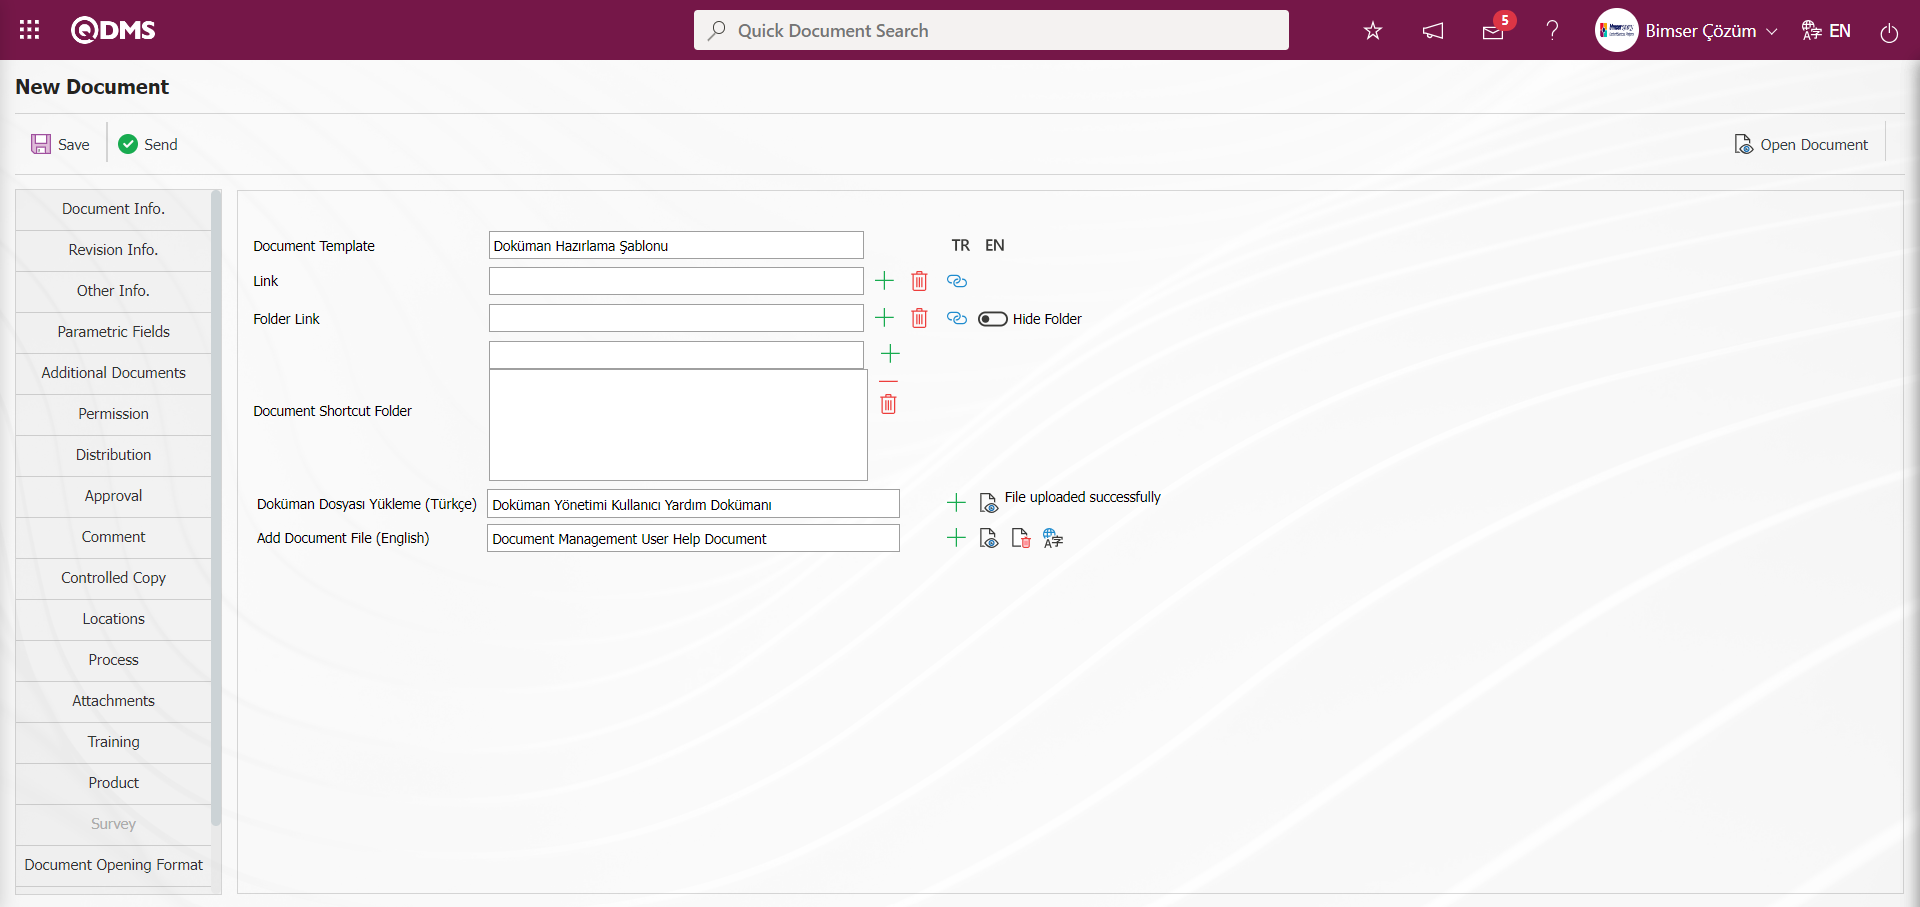
On the New Document screen, the English Language file of the document is uploaded to the system by clicking the  (Add File) button in the Add Document File (English) field on the Document tab.
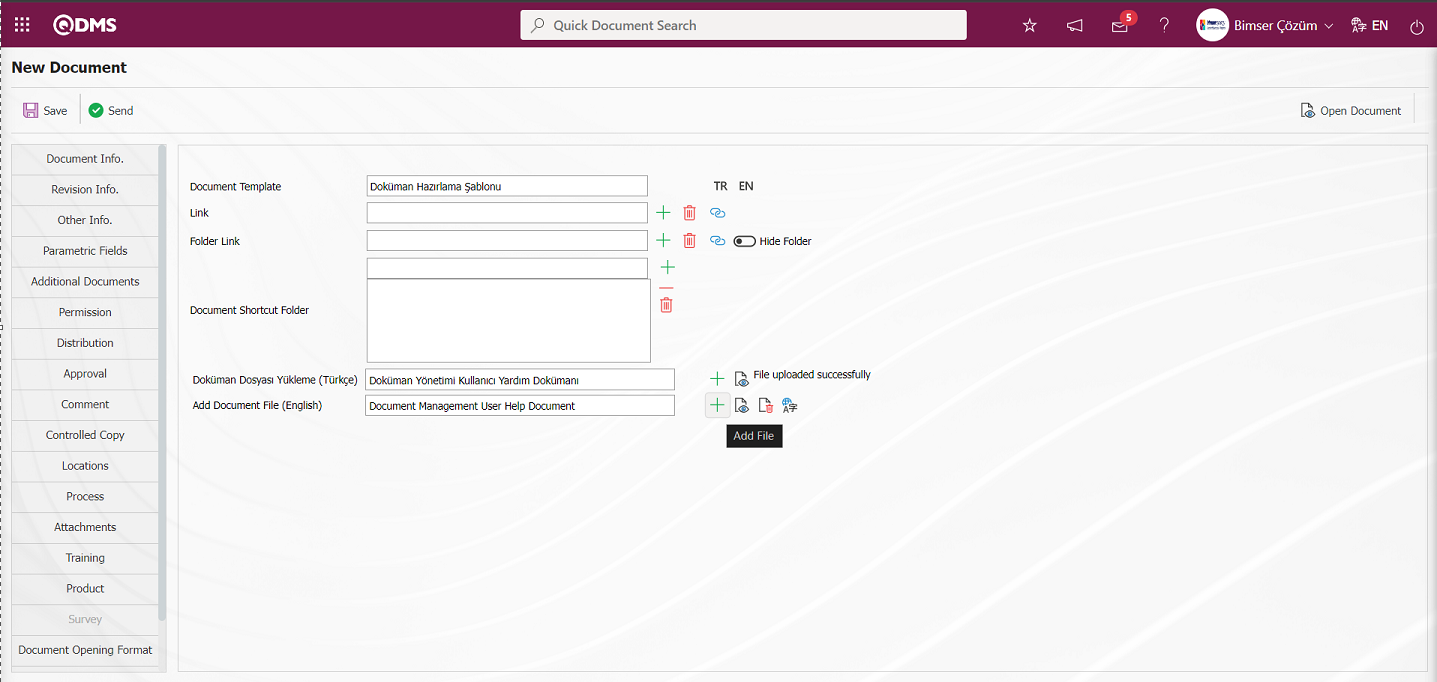
Click Browse on the Add File screen.

On the screen that opens, the English language file to be uploaded to the system is selected.

The system gives the message “The file has been successfully transferred” to indicate that the file has been uploaded.
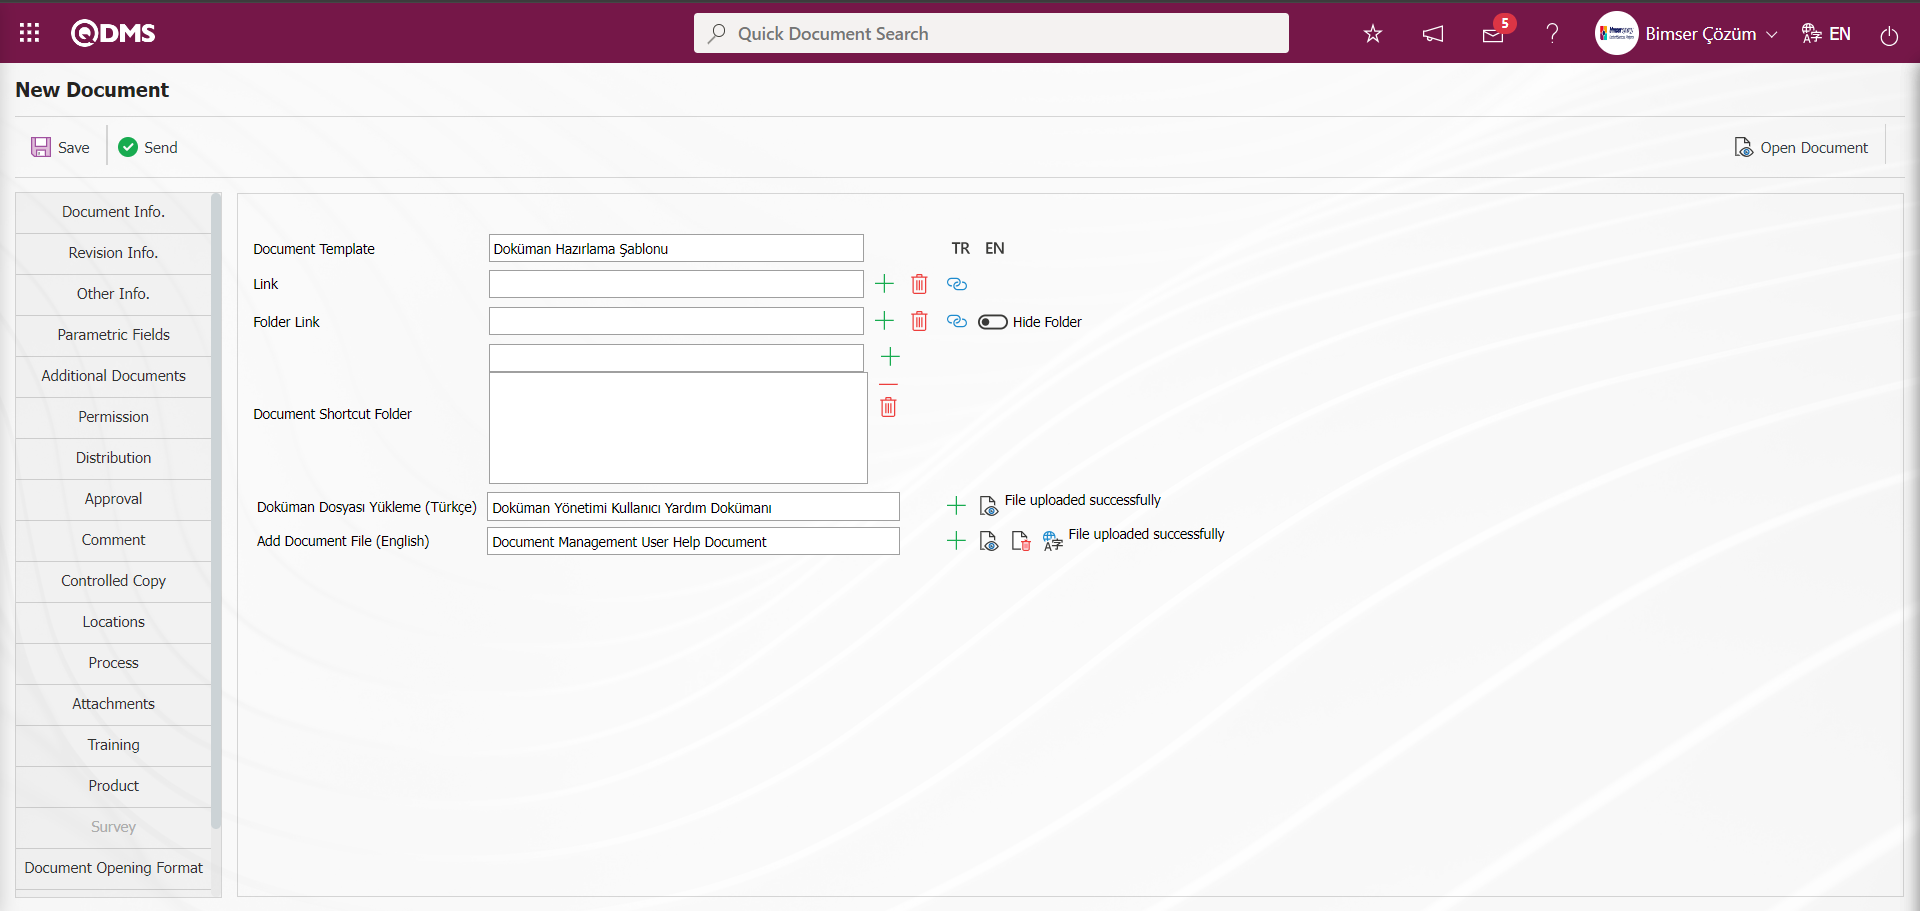
Click on the Document Information tab and after entering the information in the relevant fields, click on the  button.

Click the “OK” button on the “Are you sure you want to send?” message given by the system.
“The document has been published and made available for use.” Message is given.
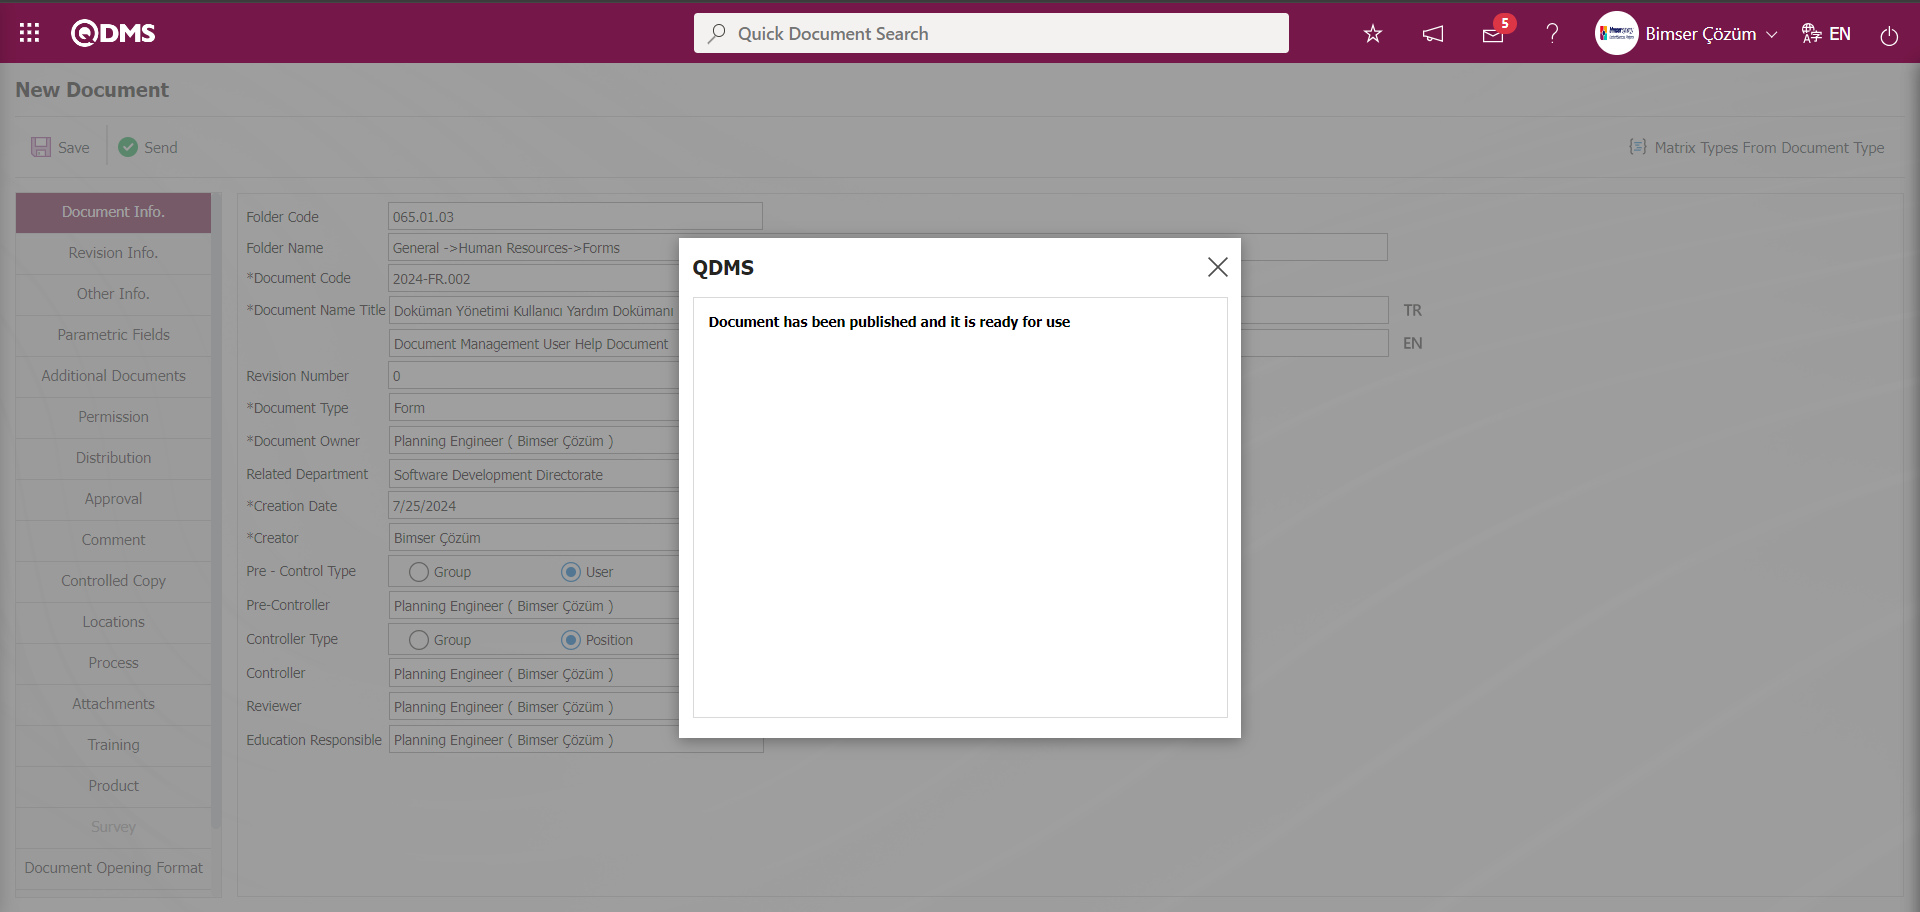
After the document is published and made available for use, users in the Distribution matrix are assigned the “Important Document List to Read” job in their Pending jobs.
Click on the document link in the Document Code field in the relevant task. On the Document View screen, it is seen that the Document Shortcodes (Tags) are working in the document edited with the Document Preparation Template.
Header information;
Footer information;
6.2.3.Document Transfer
There are 3 methods of document transfer in Document Management in QDMS system.
Document Preparation: The document is transferred to the system in a controlled and approved manner. The document is transferred to the system in an approved way by performing the steps in the Integrated Management System/ Document Operations/ Document Preparation menus.
Document Transfer to the System: It is a way to transfer the document to the system without the need for control or approval. It is used to transfer previously approved documents such as document preparation templates to the system one by one. The transfer process is performed by following the System Infrastructure Definitions/ Document Operations/ Document Transfer to System menus.
Batch Transfer: It is a method used to transfer the documents of the company to the system in bulk during the first transition to QDMS. After the entire folder tree structure for the company is created in QDMS, the bulk transfer process is performed. For bulk transfer, it is a recommended method to upload the document templates used in the company's documents to the system by marking them to be used in the system. For this, the “DocumentBodyReplacement” program can be obtained from Bimser technical staff/consultant and the replacement process can be performed. Documents are transferred to the system collectively using the Bulk Document Transfer Program. For this, a program shared by the consultant/support is needed (QDMS.CDSA).
There are preliminary preparations to be made by the company before running the program in this given file. These are
The entire folder structure must be extracted in the folder tree.
Depending on the folder structure, the Preparers, Approvers and Authorization-Distribution matrices must be specific.
It is recommended to mark document templates with short codes (DocumentBodyReplacement)
After the first two items are complete, you can proceed to the bulk transfer steps.
Batch Document Transfer Steps;
Open the Master List given in the Batch Transfer file (DokSablonv5) and fill it appropriately. Document Code, Document Name, Revision number, Preparation Date are written.
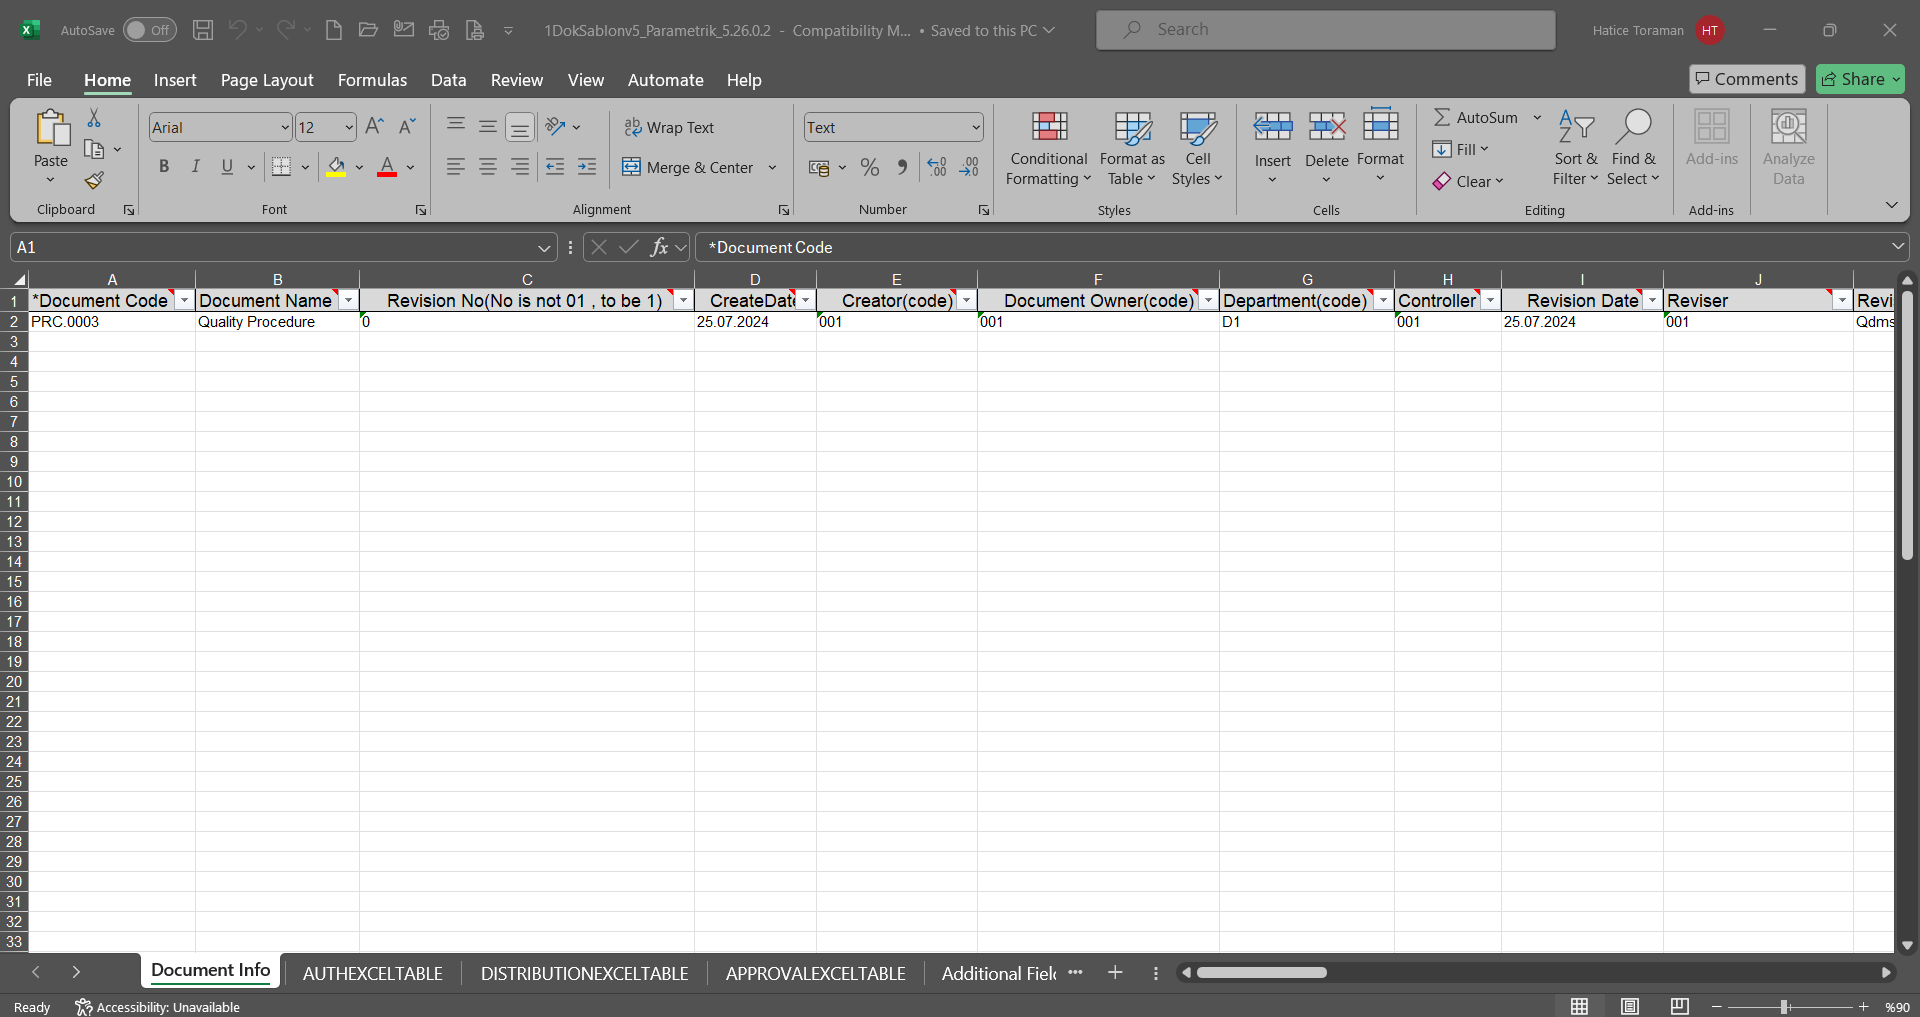
- The registration number of the preparer defined in QDMS is written. Responsible Person indicates who is the owner of the document such as the preparer, department responsible, process responsible. In the responsible person section, the registration number of the person who is responsible for the document defined in QDMS is written. (The registration number information of the preparer is obtained from the System Infrastructure Definitions/BSID/Definitions/Personnel Definition menu).
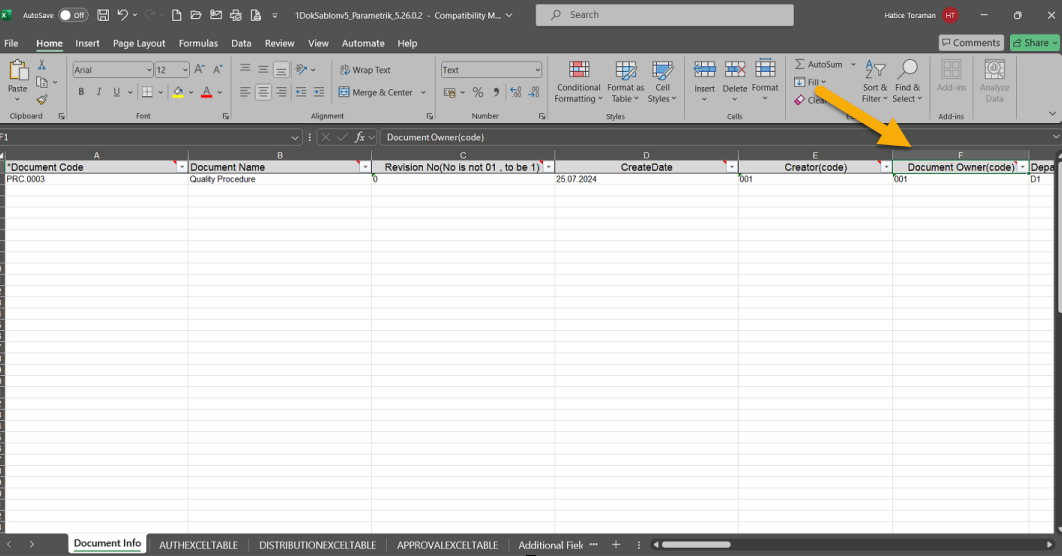
- In the Responsible Department field, the code of the department to which the document belongs is written, and whatever the department code of the person who prepared it is, that code is defined. (Department Code information is obtained from the System Infrastructure Definitions/BSID/Definitions/Department Identification menu).
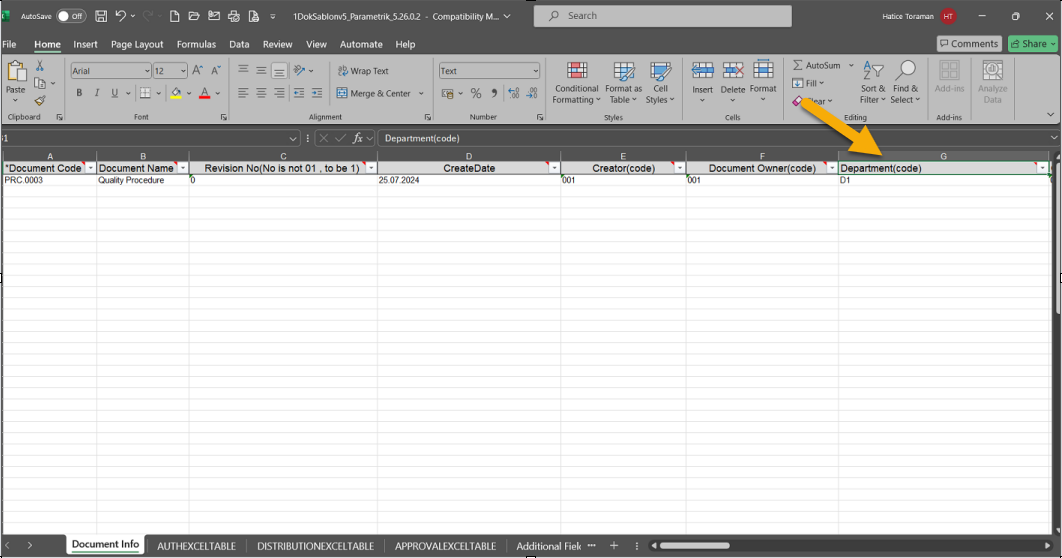
- The registration number of the document controller is written in the controller section, if there is no controller, it is left blank. (The registration number information of the controller is obtained from the System Infrastructure Definitions/ BSID/ Definitions/ Personnel Identification menu).
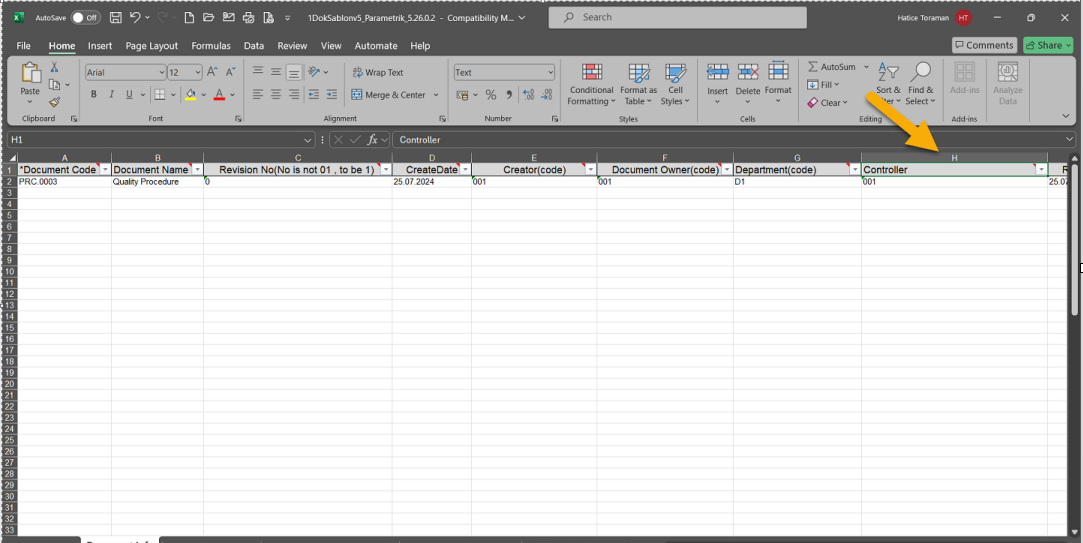
- The revision number and the registration number of the person who made the revision are written in the revision date and the person who made the revision. If the document is a new document, the document preparation date and the registration number of the person who prepared the document are defined in these fields. In the reason for revision section; last revision realization information can be defined or “transition to QDMS” can be written due to QDMS document transfer.
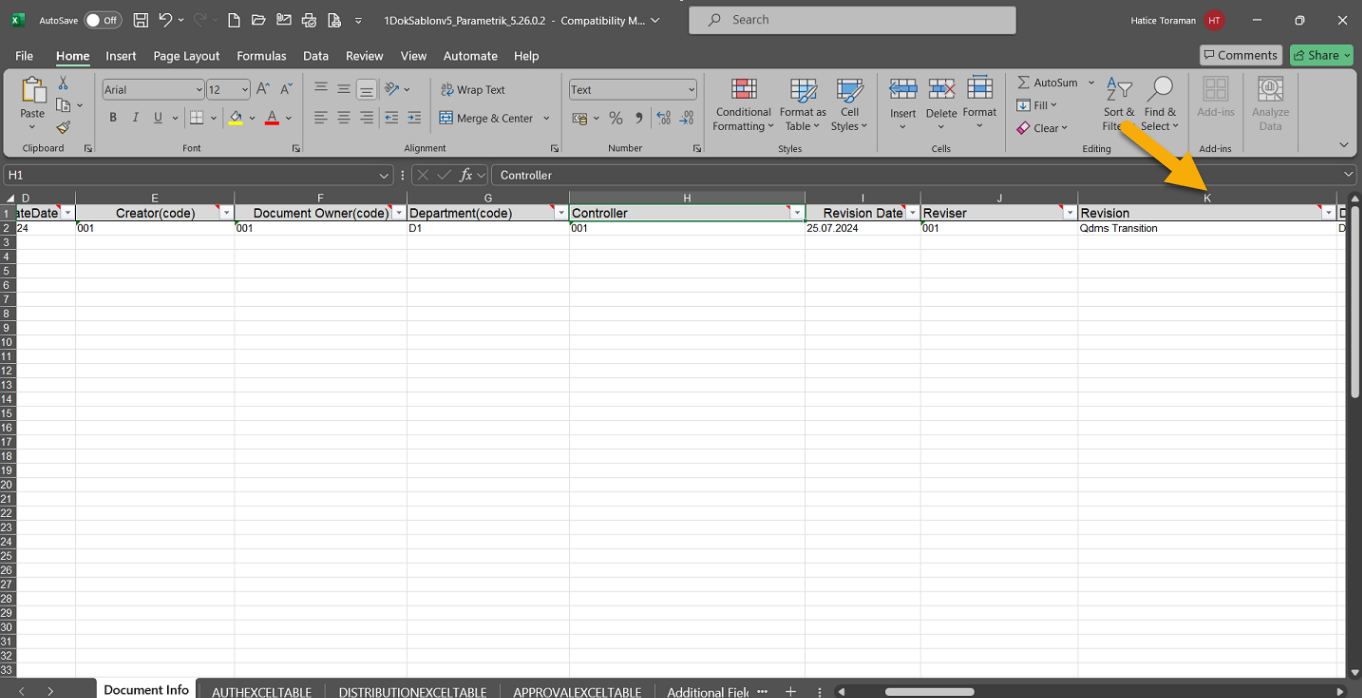
- In the Document/Form column, F option is defined if the document is a form and D option is defined if the document is other.
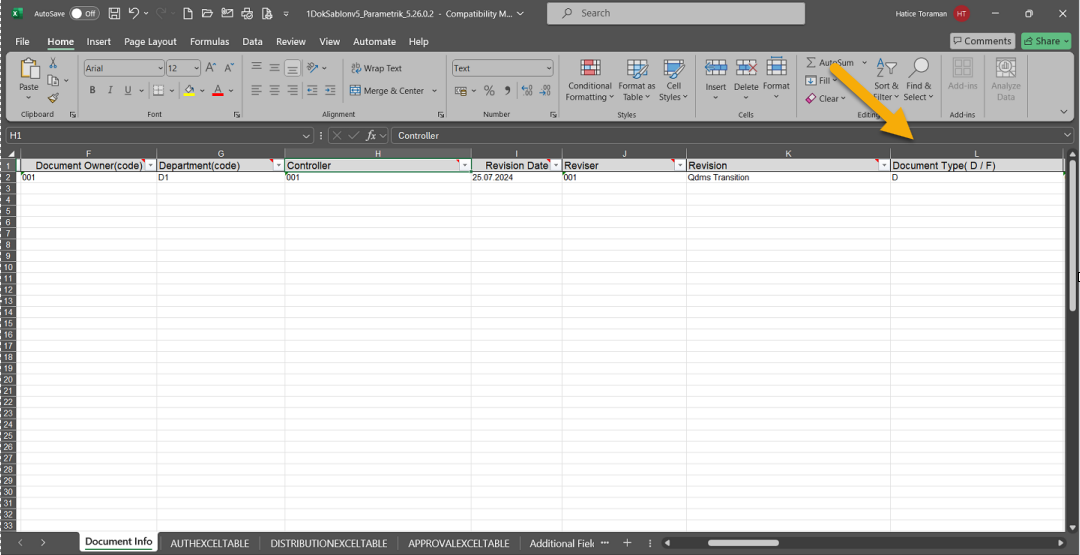
Resmin boyutu küçük, resmin boyutu arttırılabilir.
- In the Document Type field, the codes corresponding to the document types previously defined in the System Infrastructure Definitions/ Document Operations/ Document Type menu should be introduced. (For example; Procedure document type code: PR or Instruction document type code: 03)
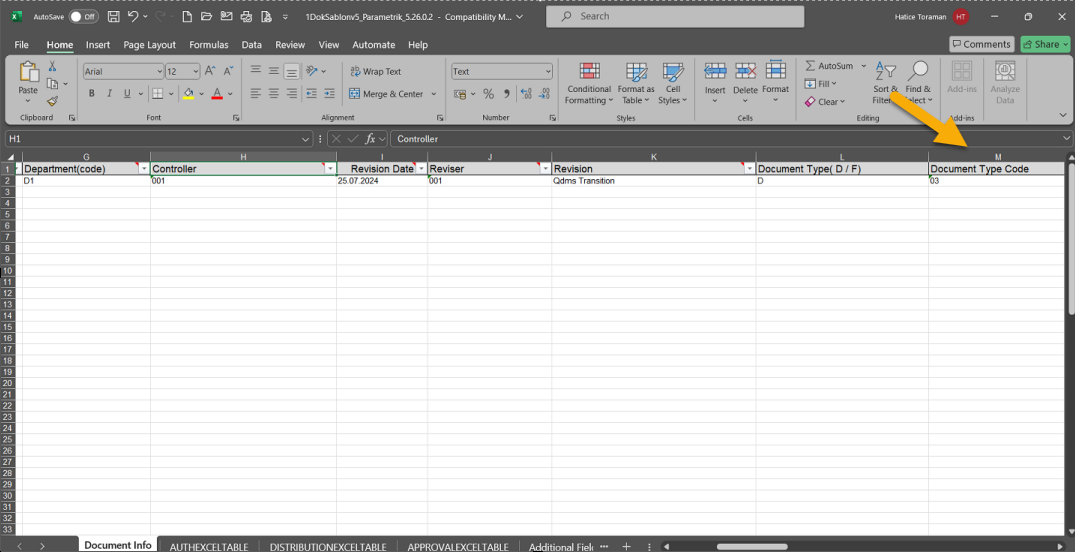
- In the Group Code field; if the documents to be transferred belong to different folders, the code of the folder to which the document will be transferred is defined. (Folder Code information is obtained from the Integrated Management System/Document Operations/Folder Definition menu)
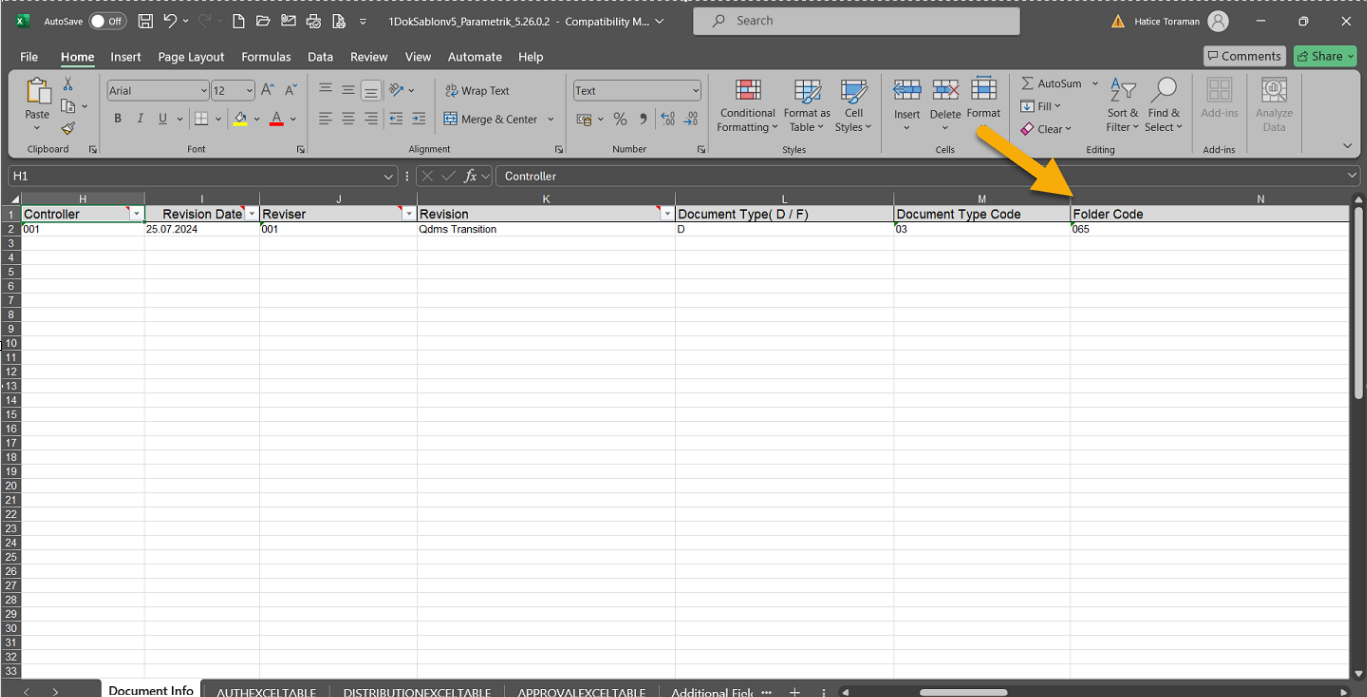
- After all information is defined, the Transfer Template is saved.
- Documents to be transferred are collected in a folder. There is a point to be considered at this time; after writing the document codes in the Master List, these codes must be given as names to the documents. In other words, the document code and the document names in the transfer folder must be the same.
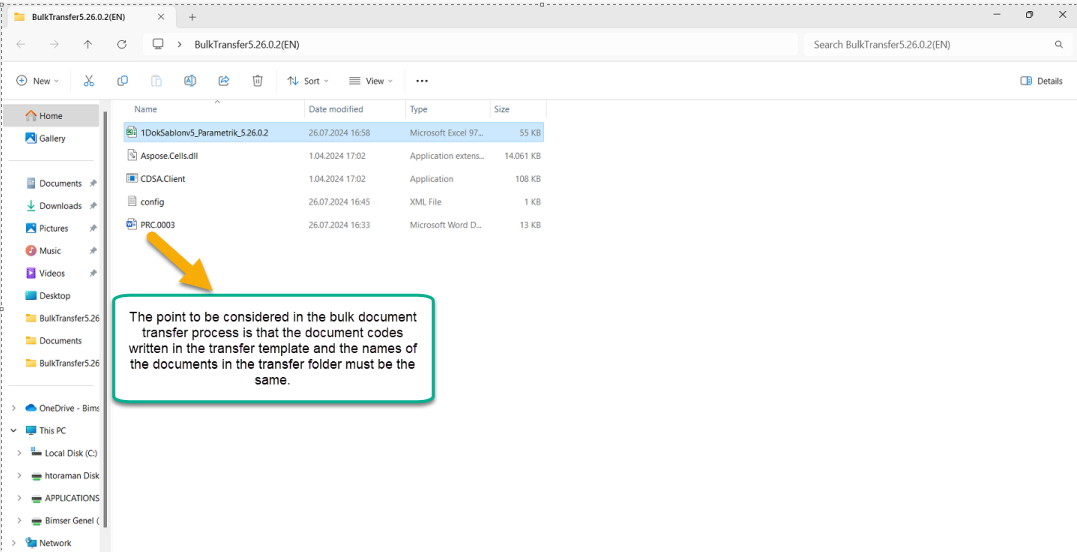
- Document Transfer List (Master List) must be moved to the created transfer folder. The documents to be transferred and the transfer template list must be in the same folder.
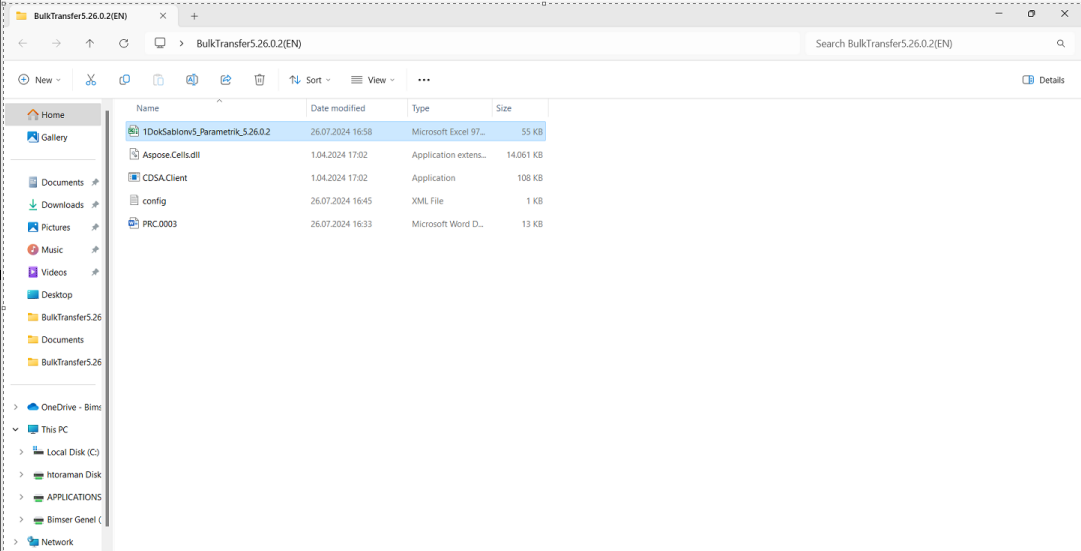
- Open the Config file in the Batch Document Transfer Program folder by saying edit. Copy and paste the part of the company QDMS address up to QDMSNET to the address in the Config file. This program is made to recognize the company QDMS.
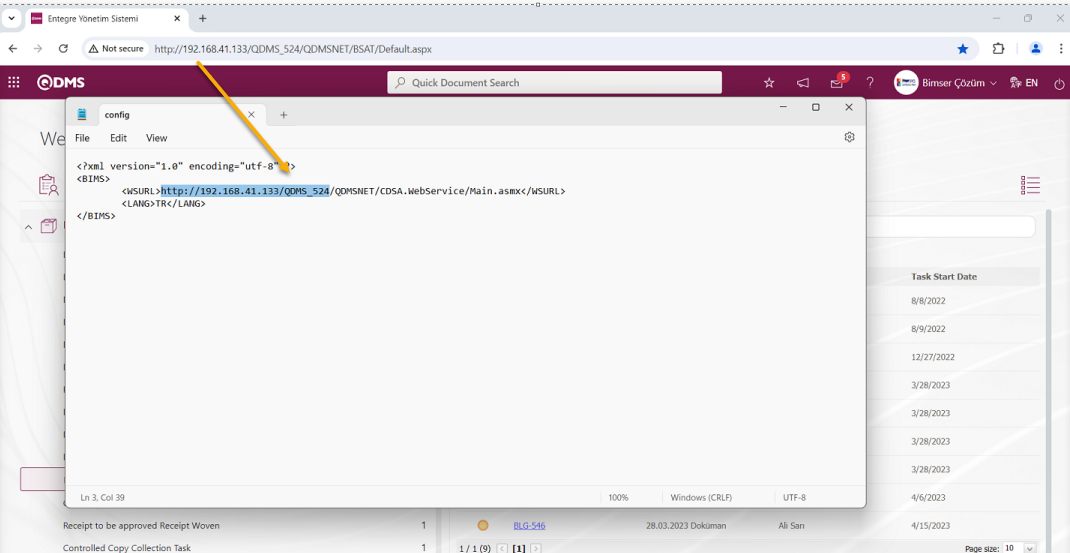
- After the company address is introduced, QDMS.Client program is run.
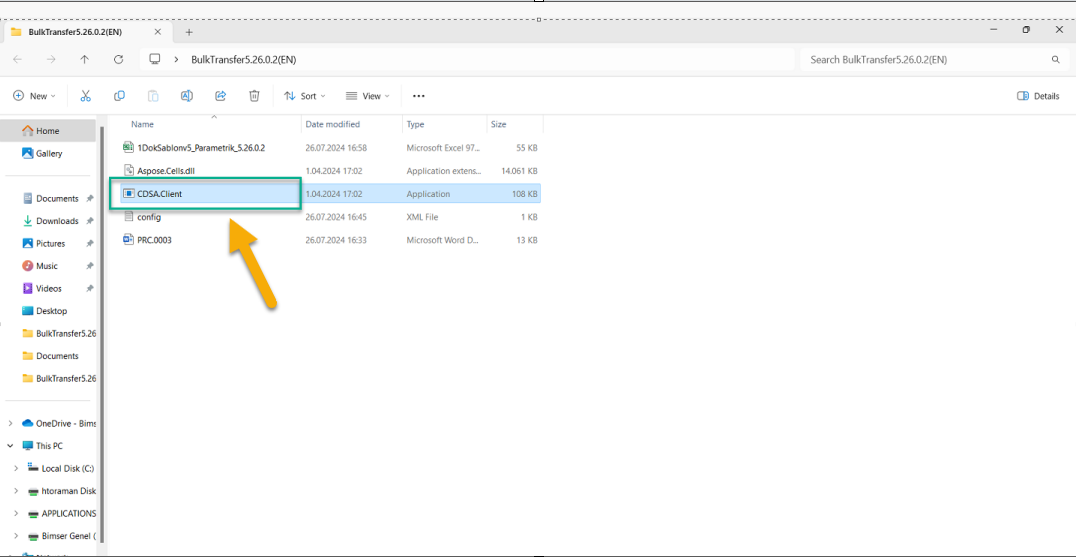
- If the user name and password information of QDMS.Client program is not defined in System Infrastructure Definitions/BSID/Configuration Settings/Service Login Information Definition menu, it is defined. If it is defined, the defined User Name and password information is retrieved.
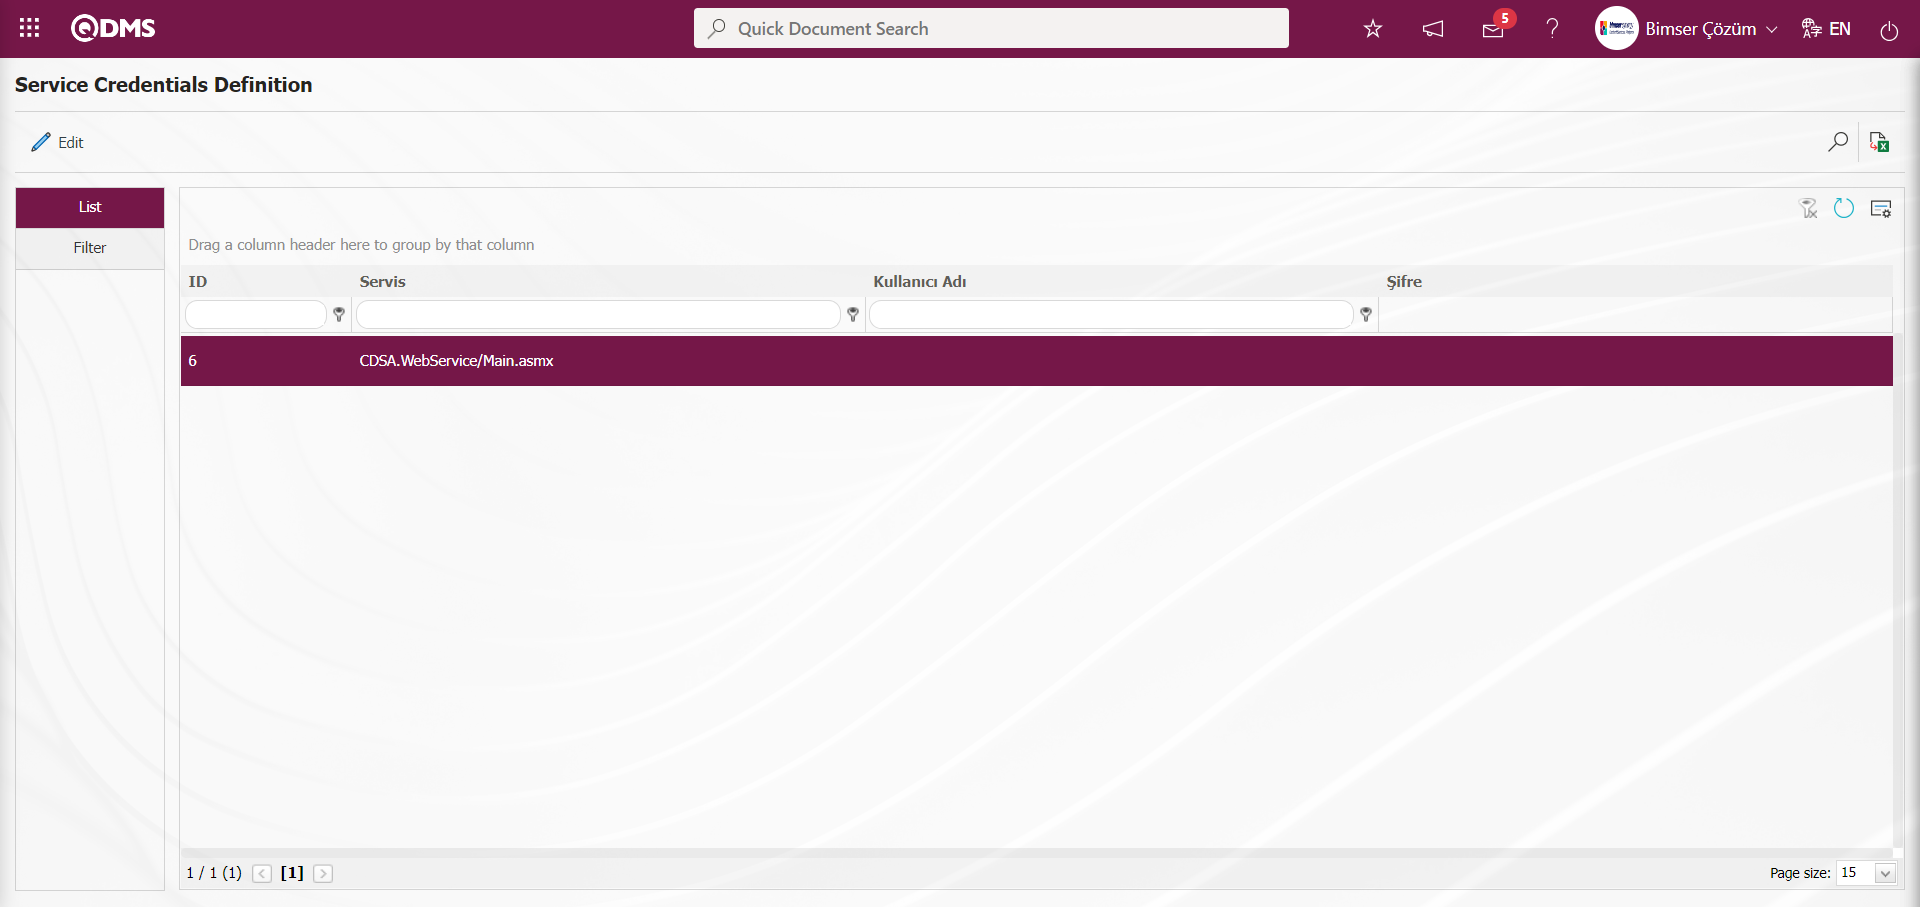
To define user name and password information for QDMS.Client program, click button while the program is selected.
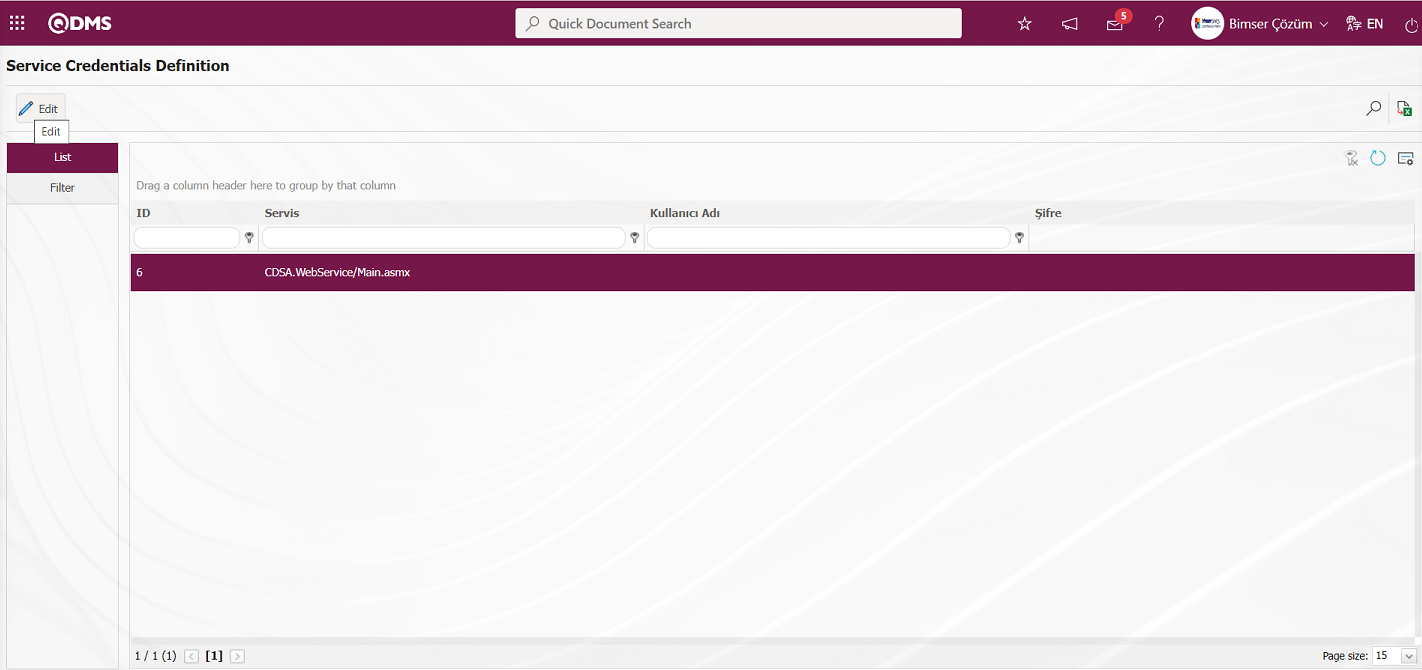
The Service Entry Information Identification screen opens.

By typing the username and password information and clicking the  button in the upper left corner of the screen, the service login information identification registration process is done.
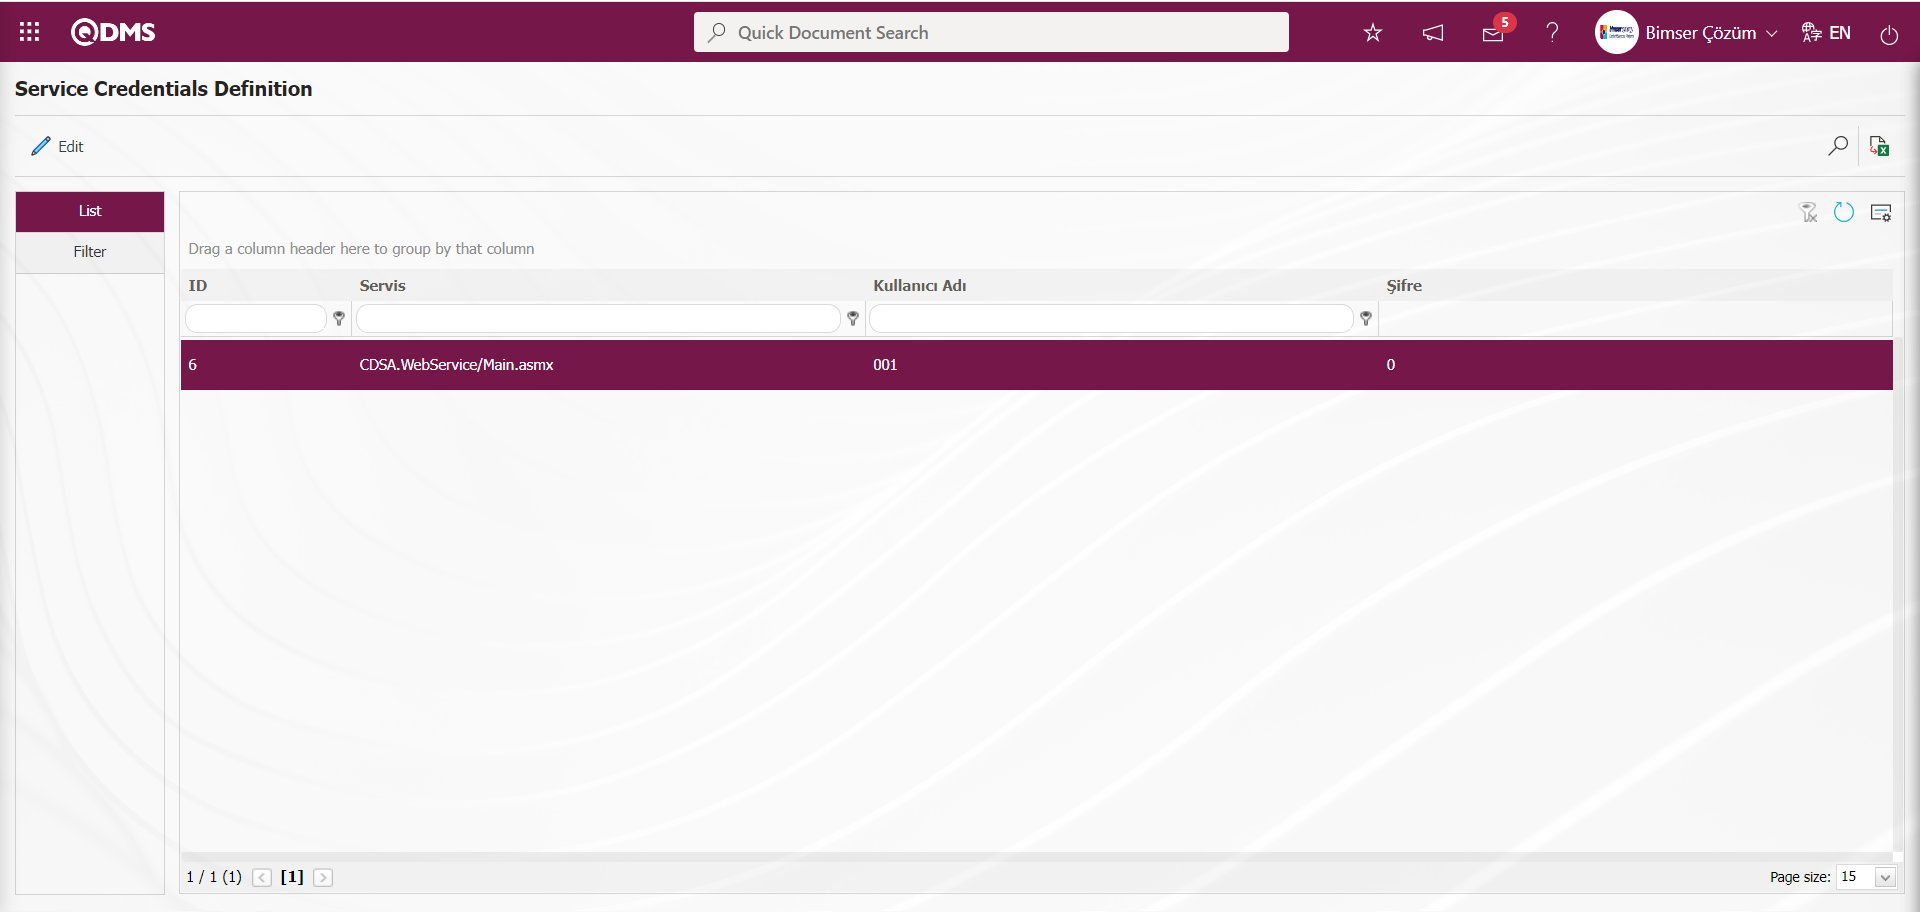
- On the screen that opens, QDMS.Client program user name and password information is written and the program is logged in by clicking the
 button.
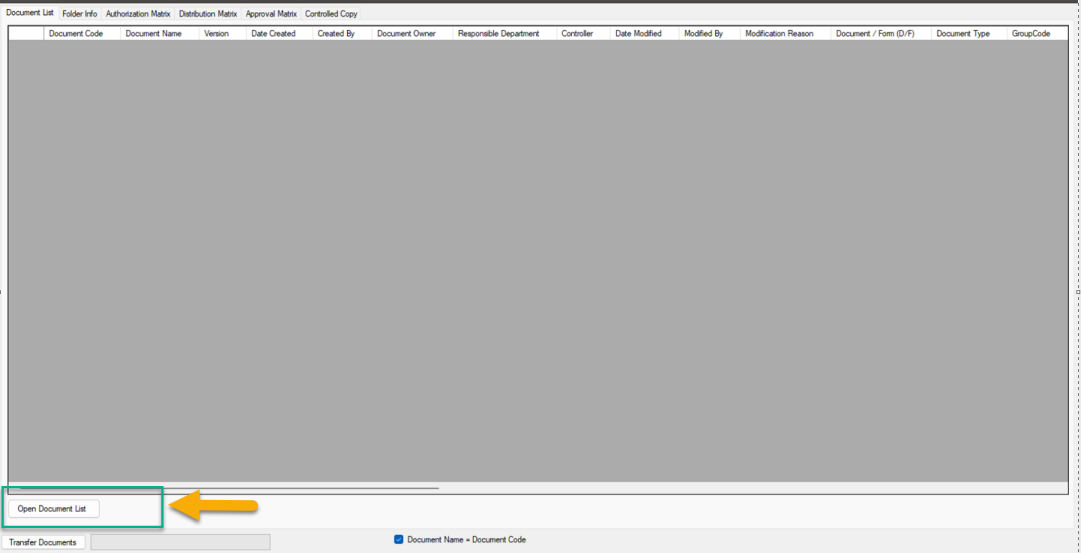
- The first thing to do after the program runs is to open the list of transfer templates prepared with the “Open Document List” button.
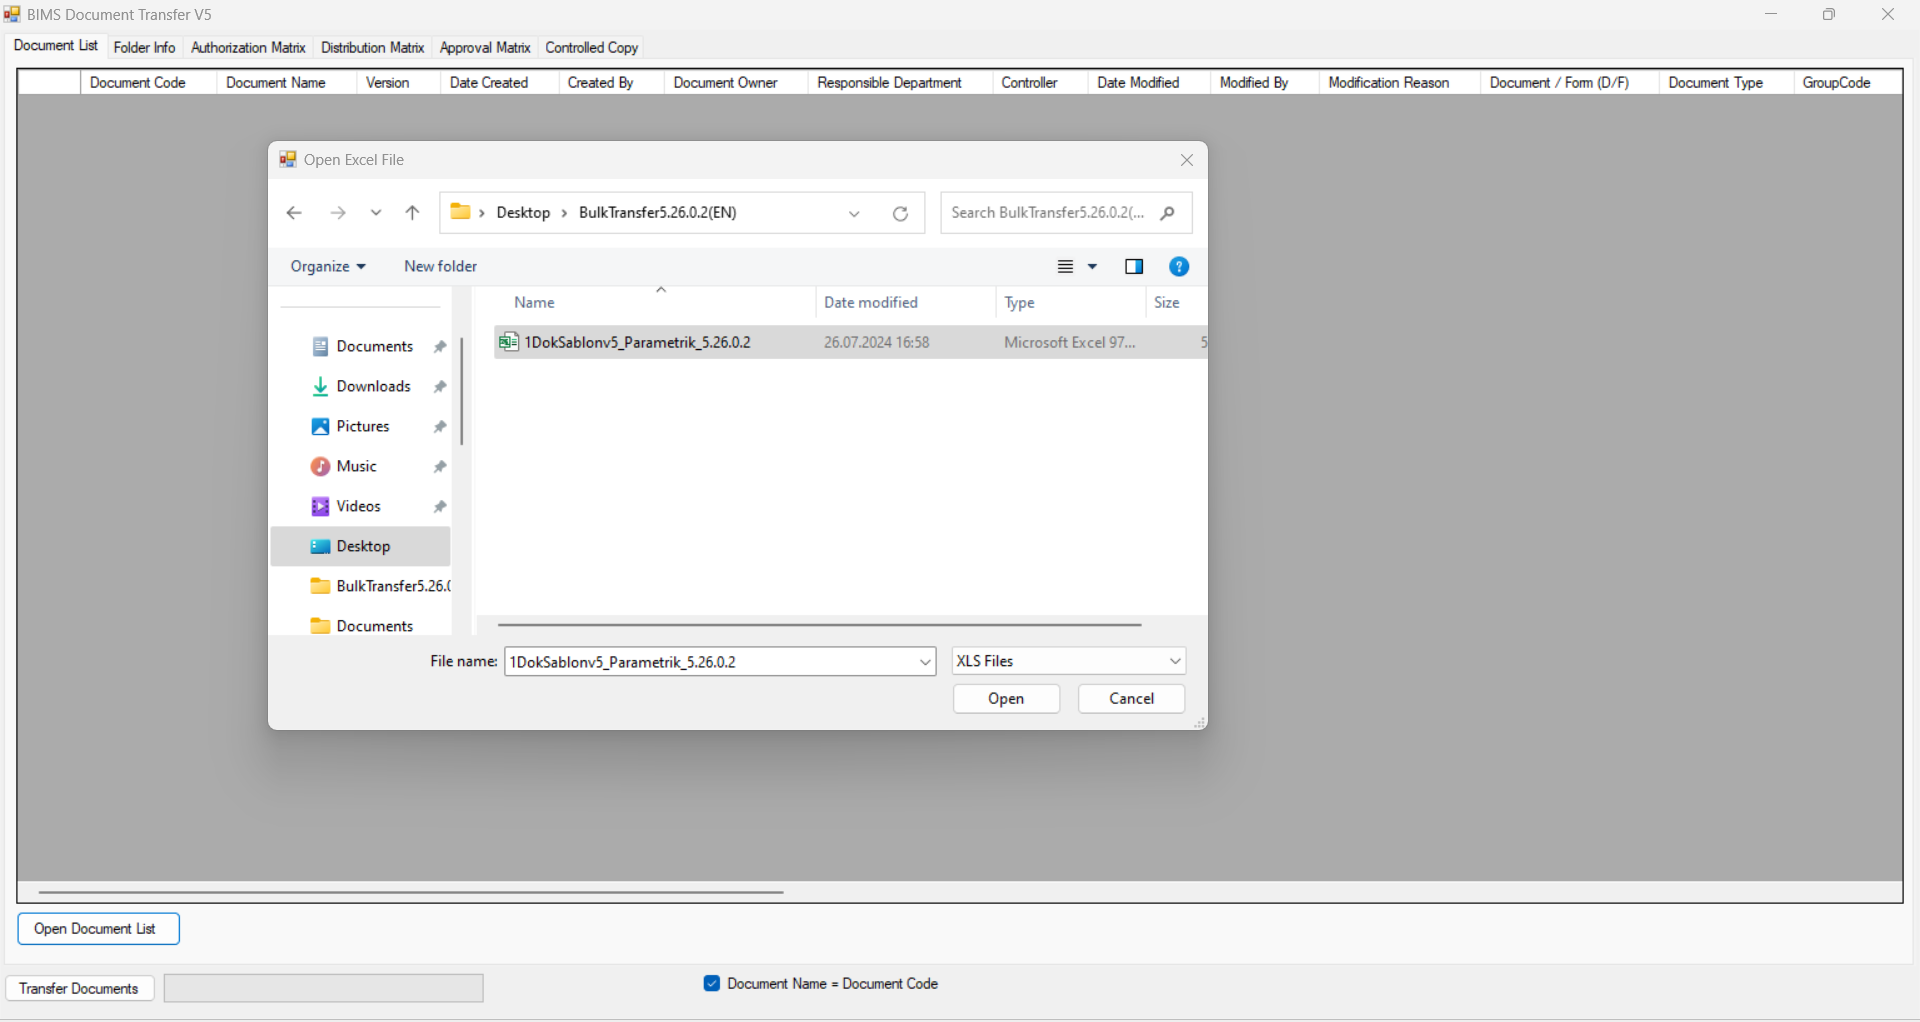
After the Transfer Template List is opened, company transfer documents are listed on the screen.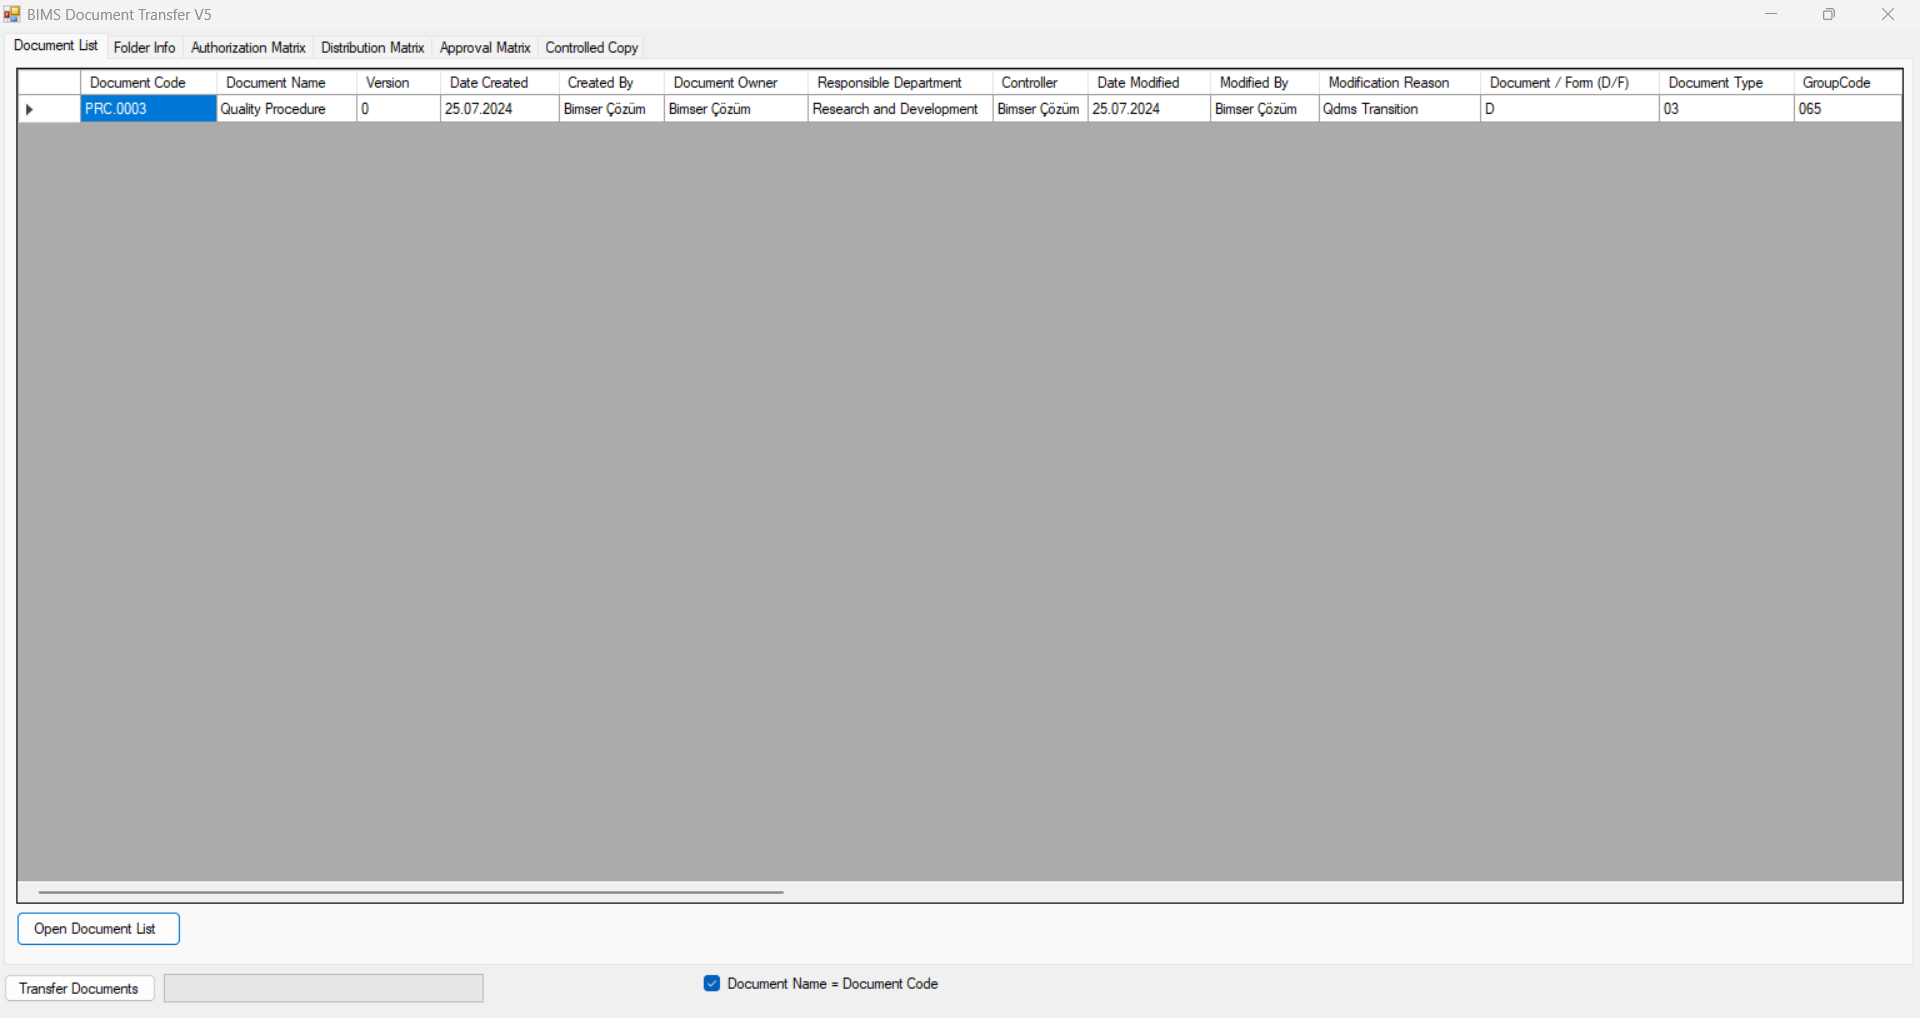
- Select the folder into which these documents are to be sent in the “Folder Info” tab. If the documents are to be sent to more than one folder, it will be sufficient to select the folder at the top level if the addressing is done by specifying group codes in the transfer template.
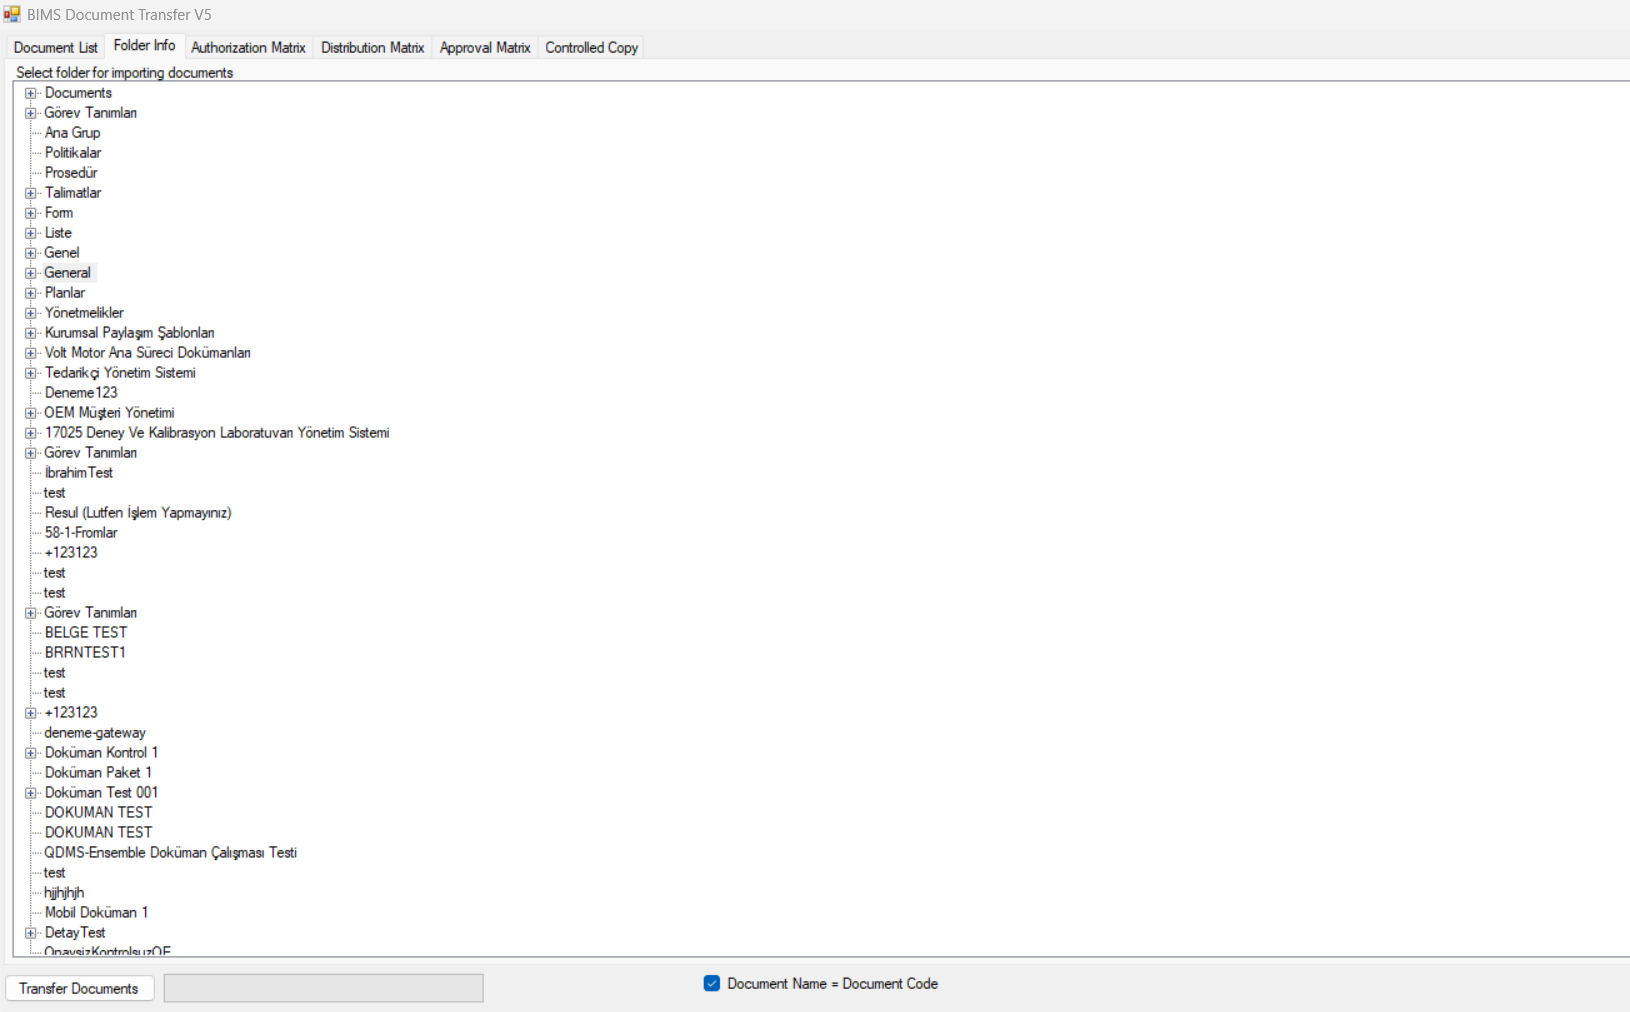
- Authorization/ Distribution/ Approval matrices tabs are also clicked to check whether these fields are defined correctly.
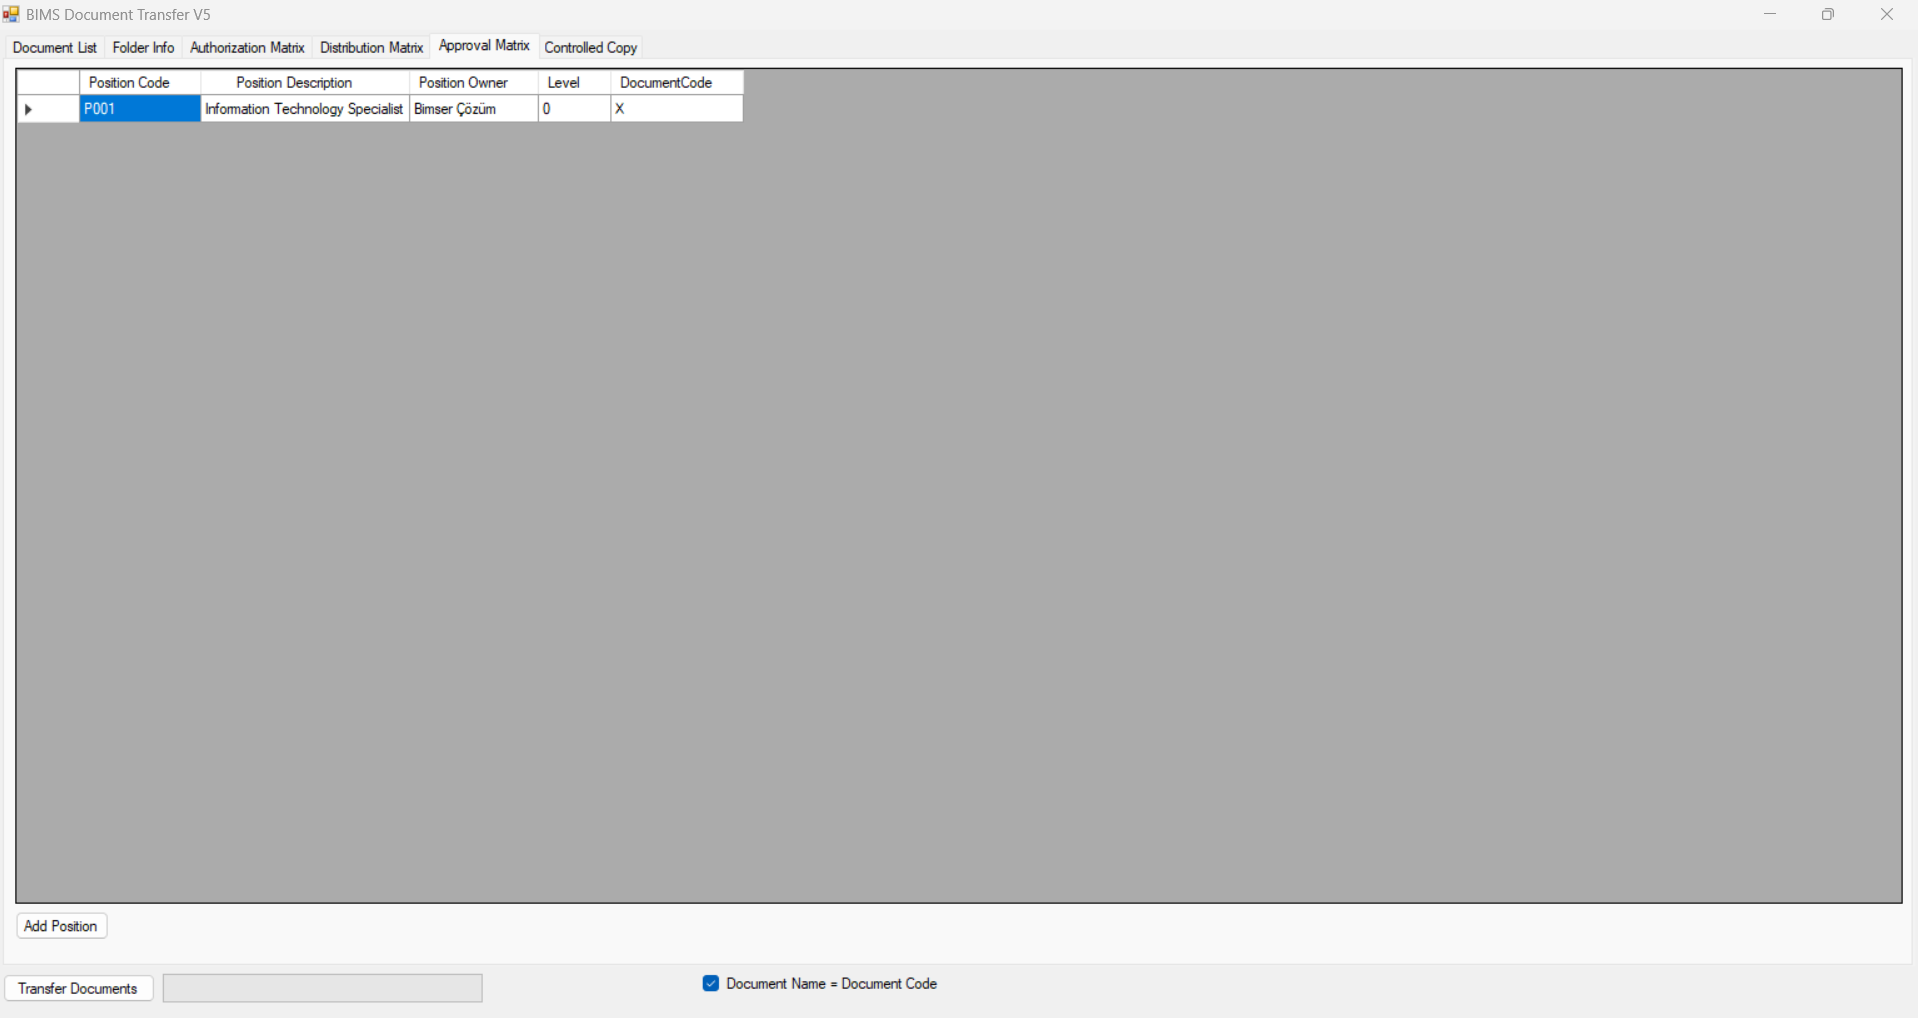
- As the last step, the bulk document transfer process is performed by clicking the “Transfer Document” button at the bottom.
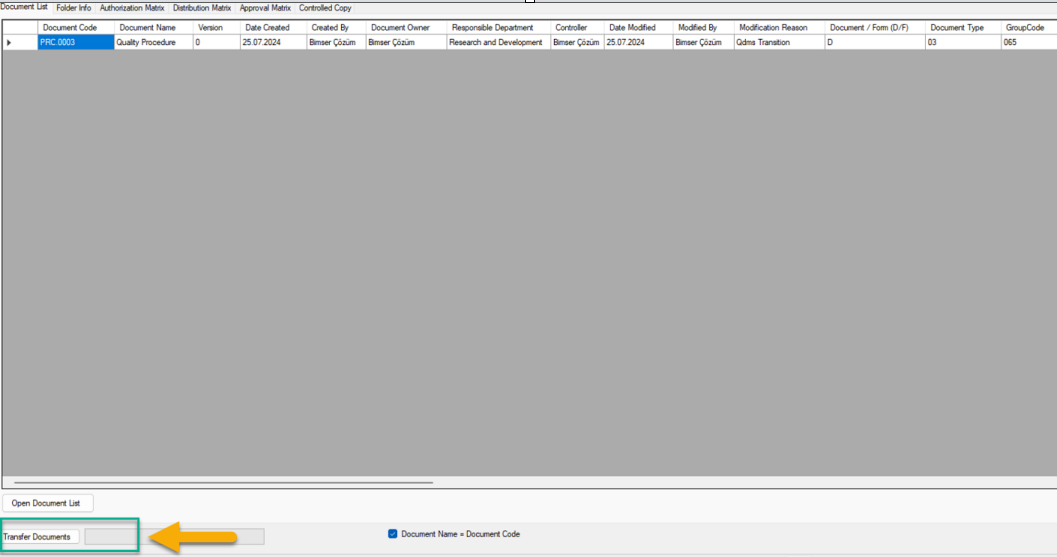
In this way, the transfer of a single document is done in the same way as the transfer of documents in bulk.
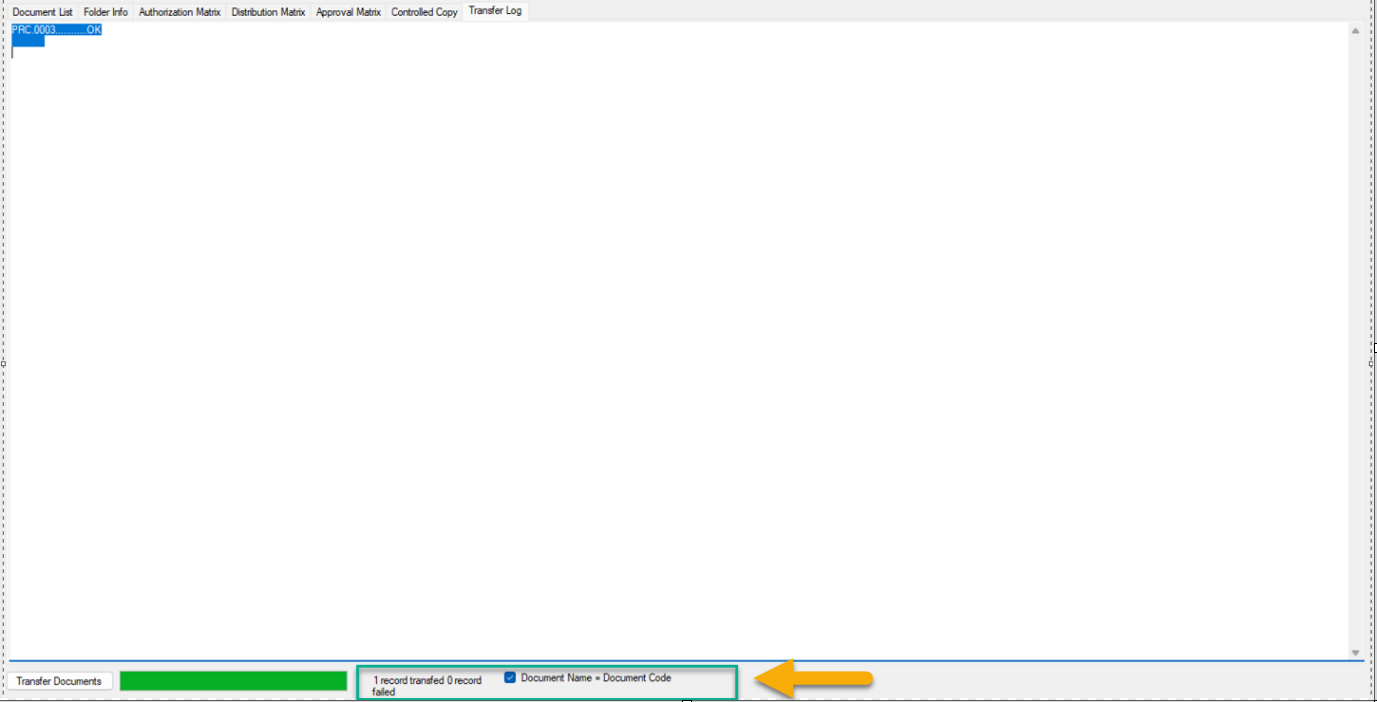
- If any document cannot be transferred, an error message is received in the Transfer Log tab.
6.2.4. Document Preparation Process
Menu Name: Integrated Management System/ Document Operations/ Document Preparation
“Document Preparation” menu is used to prepare a new document within the scope of management systems. In order for the personnel to prepare a document on the folder, it must be defined as a user group or position in the folder authorization matrix tab and the document preparation authorization must also be assigned. Personnel cannot prepare documents in folders for which they do not have authorization, and the system will receive the warning “You are not authorized to prepare documents in this folder”. Therefore, it is important to create the folder authorization matrix correctly. The document preparation process in the folder with document preparation authorization goes as opinion, pre-control (if necessary adjustments are made in the relevant parameters), control, approval, and finally as a reading task to the people defined in the distribution matrix. Opinion is not mandatory in the document. The document that goes to the opinion is returned to the preparer as “Documents Returned from Opinion” by taking the opinions of the reviewer. In the pre-control, the content and structure of the document are examined by the pre-controller. He/she approves or rejects the document. In the rejection process, the reason for the rejection of the document is written and sent to the document preparer. In the control phase, the controller makes changes on all information of the document and on all tabs of the document. After the control phase, the approving person approves and rejects the document. In the rejection process, the reason for rejection is written and the document goes back to the preparer. After the approval process, the document is published and falls to the people in the distribution matrix as a reading task. In the Pre-Control Phase, the document falls to the pending jobs of the relevant people as “Documents pending in Pre-Control”, “Documents pending in Control” in the Control phase and “Documents pending Approval” in the approval phase. In distribution, the task description changes according to whether it is an important document or not. If it is an important document, it is assigned to the people in the distribution matrix as “List of Important Documents to Read”. In the other case, it is assigned to my pending tasks as “List of Documents to be Read”.
To prepare a new document, click on Integrated Management System/Document Operations/Document Preparation menu. Select the folder you want to prepare a document from the folder tree structure and click on the 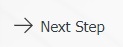 button.

Document Information tab;
It is the tab where basic information about the document is defined.
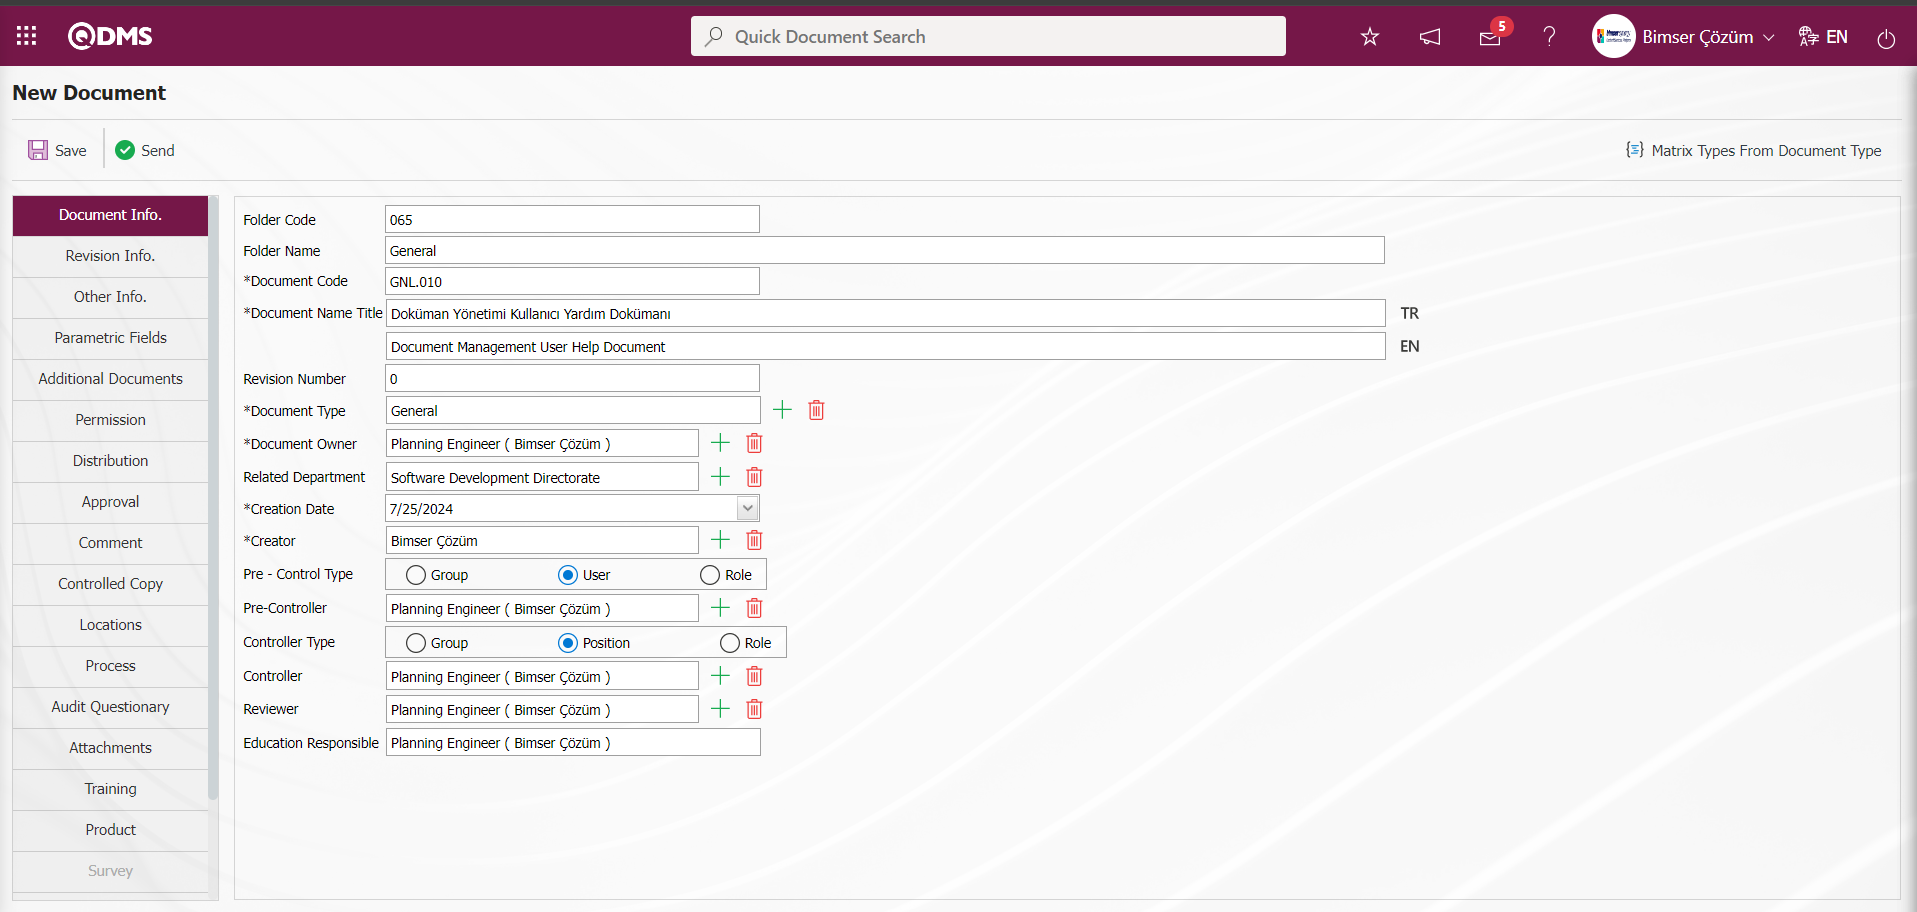
Related fields are defined on the screen that opens:
Group Code: It is the field where the code information of the folder to be prepared in the Document Information tab on the New Document screen is given by the system.
Folder Code: It is the field where the name of the folder to be prepared in the Document Information tab on the New Document screen is written.
Document Code: It is the field where the code information of the document prepared in the Document Information tab on the New Document screen is given by the system. The code information comes automatically according to the code template and counter value defined in the folder where the document is prepared. Code template information: 2024-[TIP].#### and when the counter value is defined according to “2”, it comes as 2024-PR.003. In the TIP section, if the document type has short code information, if not, the code information comes.
Document Name: It is the field where the name of the document prepared in the folder in the Document information tab on the New Document screen is written.
Revision Number: This is the field where the revision information of the newly prepared document in the folder in the Document Information tab on the New Document screen is given. Revision Number is defined as “0” for newly prepared documents. The revision number is given in this field depending on two options as manual and automatic in the Revision Number change field on the Folder Settings screen on the Defining in Folder - New Record screen. Defining in Folder -When automatic is selected in the Revision Number change field on the Folder Settings screen on the New Record screen, the system assigns the revision number to automatically assign the code. Defining in Folder - If the Revision Number change field in the Folder Settings screen on the New Record screen is selected as manual, the user determines the revision number by typing manually.
Document Type: In the Document Information tab on the New Document screen, the document type of the document prepared in the folder is given. Document Type information comes as defined from the folder in which the document is located. If desired, the document type field can be changed by clicking the (Select) button and selecting from the list of Document Types defined in the system. Procedure:PR, Instruction:TA
Document Owner: This is the field where the document preparer information is given in the Document Information tab on the New Document screen. Document Owner Qdms comes automatically by the system by default as the person at the login address. If desired, the Document Owner (Select) button can be clicked and the person in another position can be selected by selecting from the Position list defined in the system. It can be the position of the document preparer, senior supervisor, process owner, department supervisor
Related Department: In the Document Information tab on the New Document screen, this is the field where the department to which the document belongs is given.
Preparation Date: This is the field where the preparation date information is selected in the Calendar field in the Document Information tab on the New Document screen. The date of the day is given by the system. If the document was started to be prepared on a date older than the date of the day, it is selected from the system. When the parameter value of parameter 55 of the Document Management Module parameters is selected as “No”, the parameter is disabled.

After the parameter is disabled, the Preparation Date field is locked and the user cannot make a selection in the Calendar field and cannot intervene in the related field.
Preparer: This is the field where the preparer information is given in the Document Information tab on the New Document screen. The person who prepared the document comes automatically by the system by default as the person at the Qdms login address. If desired, another personnel can be selected by clicking the (Select) button and selecting from the list of personnel defined in the system. If the parameter value of the Document Management Module 394 parameter is selected as “No”, the parameter is disabled.

After the parameter is deactivated, the system enters the person information in the Prepared By field. The system does not allow changes to be made in this field. When the parameter is enabled, the system allows the Preparer to be selected as another person.
Pre- Control Type: It is a field displayed on the Document Information tab on the New Document screen depending on the parameters. If you want the document to go to pre-control before going to control after it is prepared, the parameter value of parameter 76.numbered parameter from Document Management parameters should be selected as “Yes” and the parameter should be activated.

Displaying the options as Pre-Control type is provided by activating the relevant parameters.
To select group as Pre-Control Type;
The parameter value of parameter 296 in Document Management Parameters is selected as “Yes” and the parameter is “Active”.
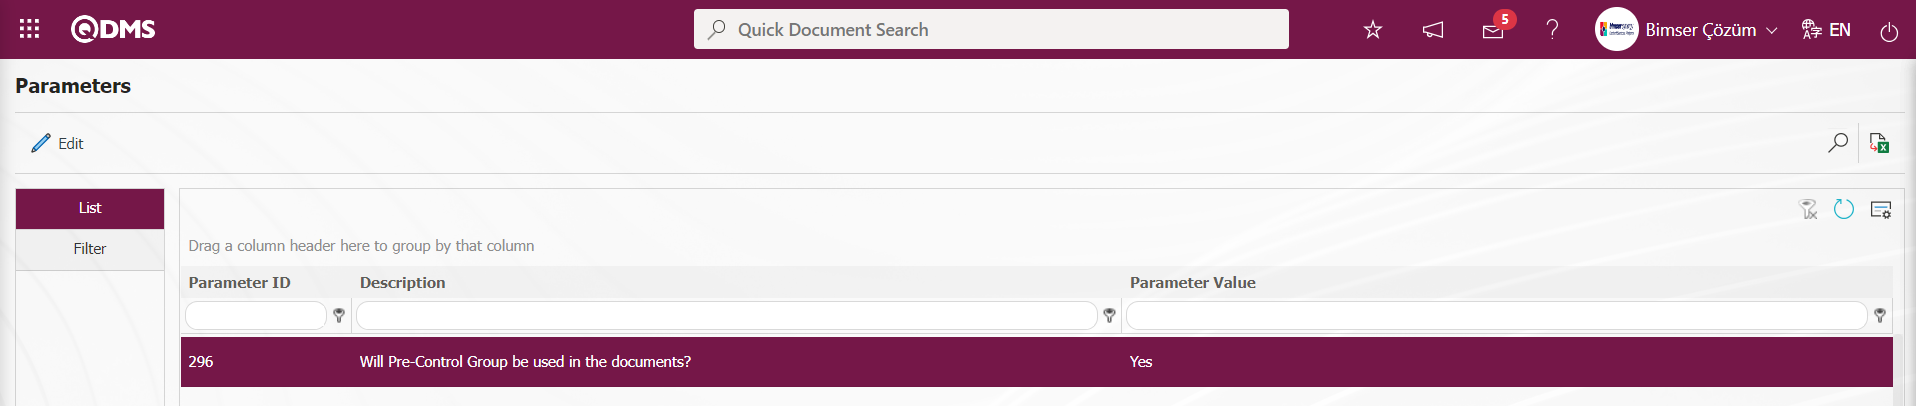
After the parameter is activated, the Group option is displayed in the Pre-Check Type field. In the Pre-Control Group field displayed on the New Document screen, click the (Select) button and select the user group that will perform pre-control in the user group list defined in the system. The selected user group provides the structure and content control of the document.

To select User as the Pre-Control Type;

When the user is selected as the Pre-Control type, the position to perform pre-control is selected in the system-defined Position list that opens by clicking the (Select) button in the Pre-Controller field displayed. The person in the selected position ensures that the document is checked for structure and content. The document prepared in the pre-control phase is sent to the relevant users in the department of the person who prepared it, the supervisor of the person who prepared it, or a user who has information about the document. In the control phase, the prepared document is usually forwarded to quality system managers for structure and content control.
To select Role as the Pre-Control Type;

When Role is selected as the Pre-Control type, the Role that will perform pre-control is selected in the list of Roles defined in the system that opens by clicking the (Select) button in the Pre-Control Role field. Role option in the pre-control type field is a field that is displayed depending on the parameter. The parameter value of parameter 298 in the Document Management parameters is activated by selecting “Yes”.
After the parameter is activated, the role option is displayed in the relevant field in the Pre-Check Type options. The selection process is made as the User type for the folder defined in the Pre-Check Type field.
Pre- Control User: From the New Document screen, the position to be pre-checked is selected in the position list defined in the system opened by clicking the (Select) button on the Document Information tab. For the documents prepared in the defined folder, the person in the position is the person who will review the document in terms of structure and content at the pre-control stage.
Control Type: It is the field where the options of the control type of the document are selected in the Document Information tab on the New Document screen.
To select Group as Control Type;

When Group is selected as the control type, the User Group that will control the document before approval is selected in the User Group list defined in the system that opens by clicking the (Select) button in the Control Group field displayed. As well as controlling the document in terms of structure and content, it has the authority to make changes on all tabs in the document preparation phase. In group control, the control of one person in the group is sufficient. When one person checks, the document will be in approval status. It is the field displayed depending on the parameter. The parameter is activated by selecting “Yes” for parameter 80 in Document Management parameters.

After the parameter is activated, the Group option is displayed in the Control Type field and the selection process is made to send the prepared document to a group for control before approval.
To select User as Control Type;

When User is selected as the control type, the position that will control the document before approval is selected in the position list defined in the system opened by clicking the  (Select) button in the User field displayed. As well as controlling the document in terms of structure and content, it has the authority to make changes on all tabs during the document preparation phase.
To select Role as Control Type;

When Role is selected as the control type, the Role that will control the document before approval is selected in the list of Roles defined in the system that opens by clicking the (Select) button in the Control Role field displayed. As well as controlling the document in terms of structure and content, it has the authority to make changes on all tabs in the document preparation phase. It is the field displayed depending on the parameter. The parameter is activated by selecting “Yes” for parameter 180 in Document Management parameters.

After the parameter is activated, the Role option is displayed in the Control Type field and a selection is made to send the prepared document to a role control before approval.
Controlling Position: This is the field where the position that will control the document prepared in the Document Information tab on the New Document screen is selected from the list of positions defined in the system that opens by clicking the (Select) button.
Reviewer: It is the field where it is determined by whom the document prepared in the Document Information tab on the New Document screen will be reviewed.
Training Responsible: It is the field where the training responsible is selected from the Position List defined in the system that opens by clicking the (Select) button to give a training related to the document prepared in the Document Information tab on the New Document screen. Depending on the parameter, authorization is given to make changes on this field. The parameter is activated by selecting “Yes” for parameter 121 in the Document Management Module parameters.

When the parameter is activated, the person who provides training is changed while preparing a new document. When the parameter is disabled, this field is defined as it is defined in the folder and cannot be intervened. Generally, for documents such as Machine Operating Instructions documents, the process of assigning a training officer is done.
Revision Information Tab;
When a revision is made in the document, it is the tab where fields such as Reviser, Revision reason and what was done in the revision are written. When a new document is prepared, the fields in this tab are left blank. The display of this tab is displayed depending on the parameter. If you do not want this tab to be displayed when preparing a new document, the parameter value of parameter 83 in the Document Management parameters is activated by selecting “Yes”.

After the parameter is activated, the Revision information tab is not displayed during the document preparation phase.

Other Information Tab: This is the tab where the type of the prepared document is determined, the reason for printing, the association with reference documents and system item number, if any, whether to use a questionnaire, and the review date.
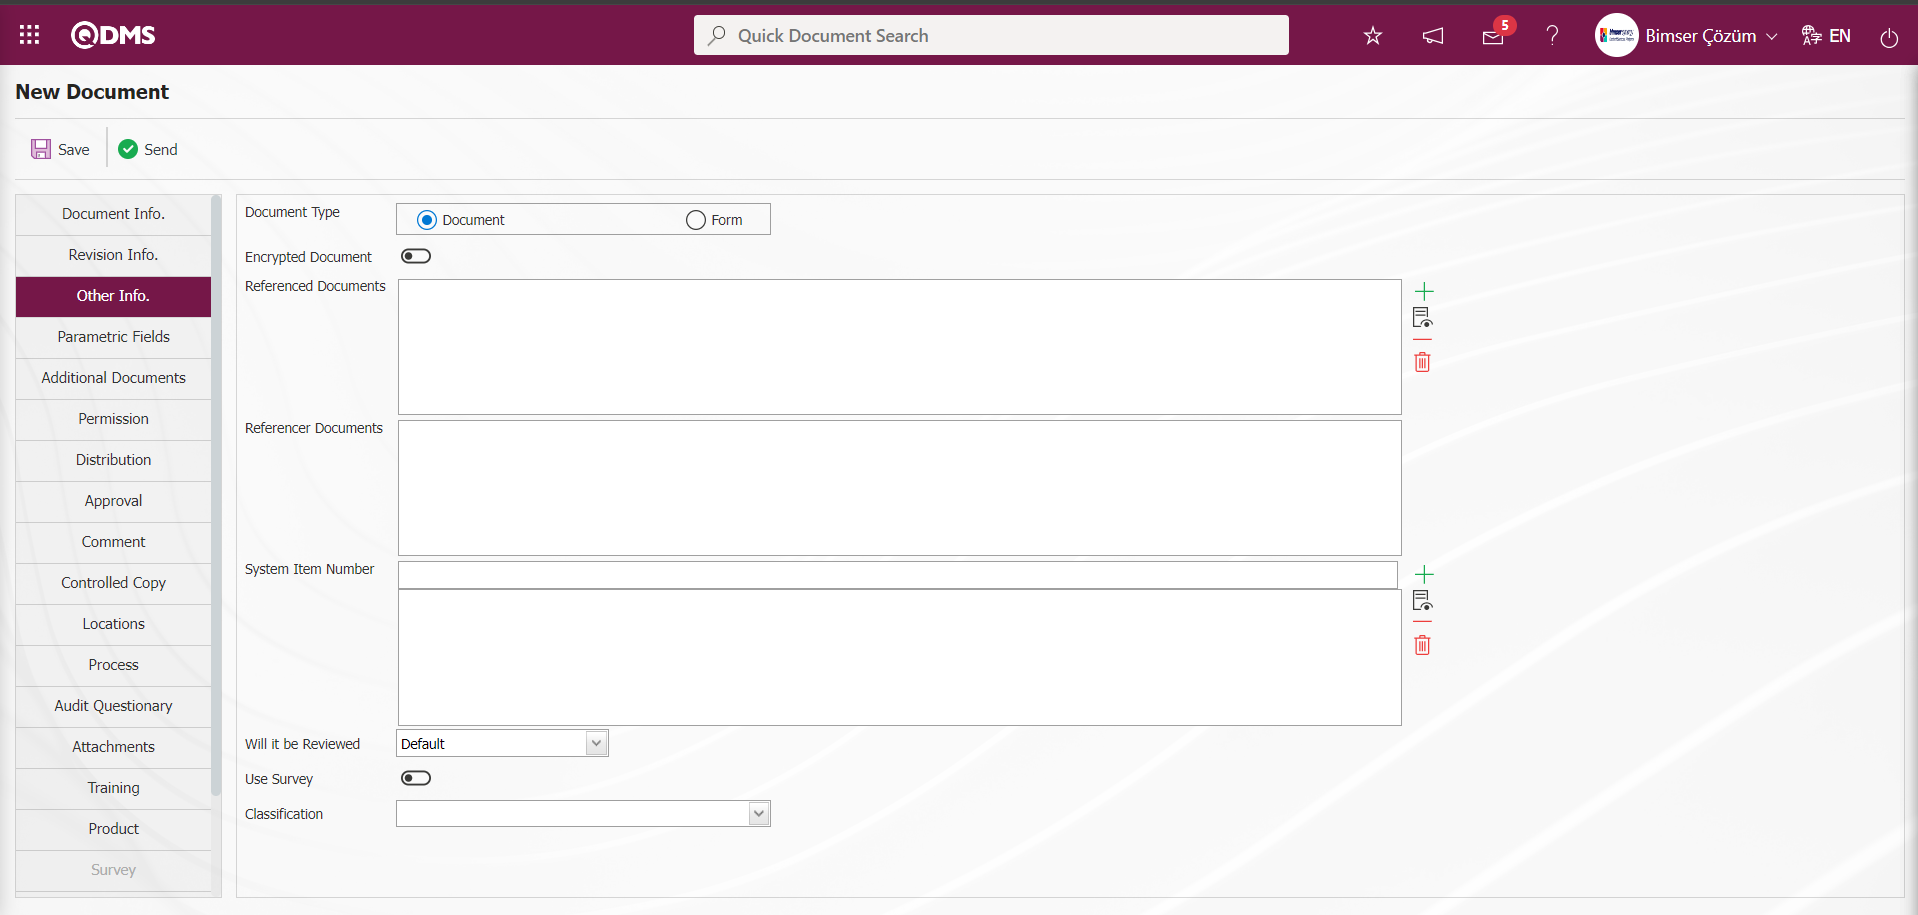
Related fields are defined on the screen that opens:
Document Type: This is the field where the type of the document prepared in the Other Information tab on the New Document screen is selected. If it is a document on which an operation is performed, “Form” option is selected, if it is a document such as procedure-instruction, “Document” option is selected. When “Form” is selected, the appropriate one among “Quality Record, Ready Form, Document Template and Printed Form” options is selected as “Usage Type”. If it will be processed as a quality record in the system, the quality record option is selected. If it will be used as “Printed Form”, the relevant option is selected.
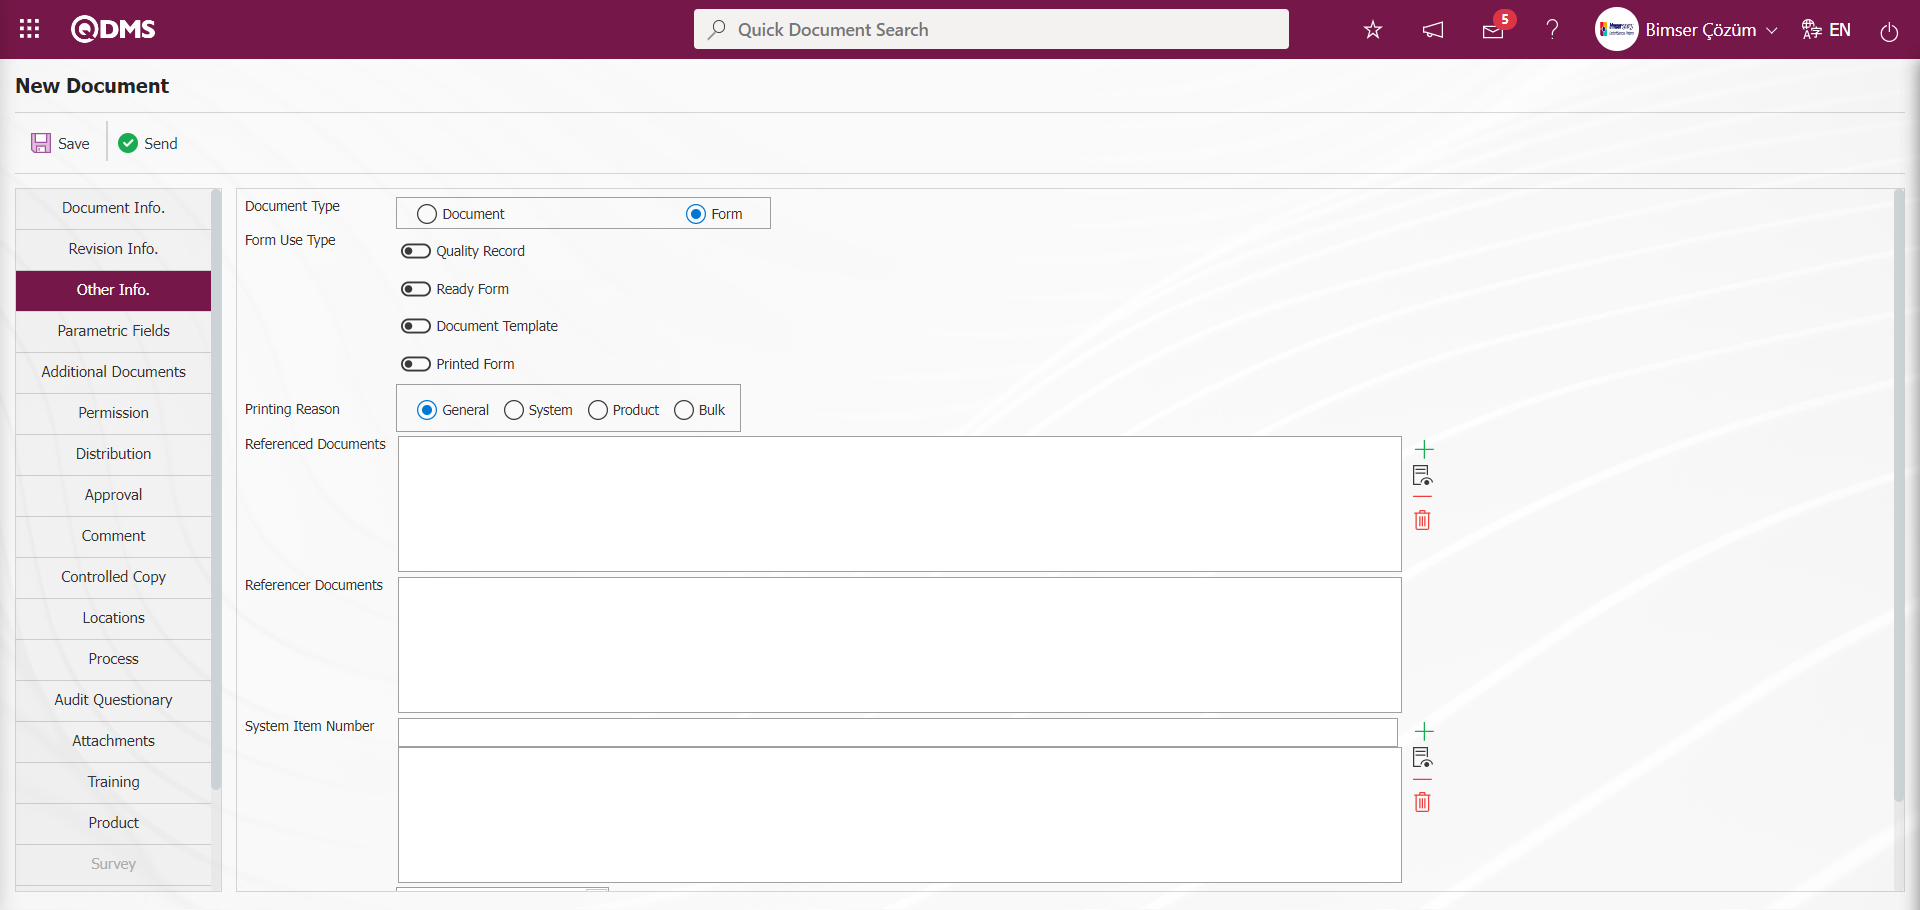
Print Reason: In the Other Information tab on the new document screen, “General, System, Product, Bulk” options are selected. If the printing feature will be used to track controlled/uncontrolled copies, this field is used.
Encrypted Document: This is the field where the relevant check box is checked if the encrypted document feature is desired to be used in the Other Information tab on the new document screen. It is a field that is displayed depending on the parameter. The parameter is activated by selecting the parameter value “Yes” of parameter 324 in the Document Management parameters. Encrypted document feature is used in document management module.

Reference Documents: If there are documents to be associated with the document prepared in the Other Information tab on the new document screen, this field is selected from the document list opened by clicking the  (Add) button. The parameter is activated by selecting the parameter parameter value “Yes” of parameter 99 of Document Management parameters.
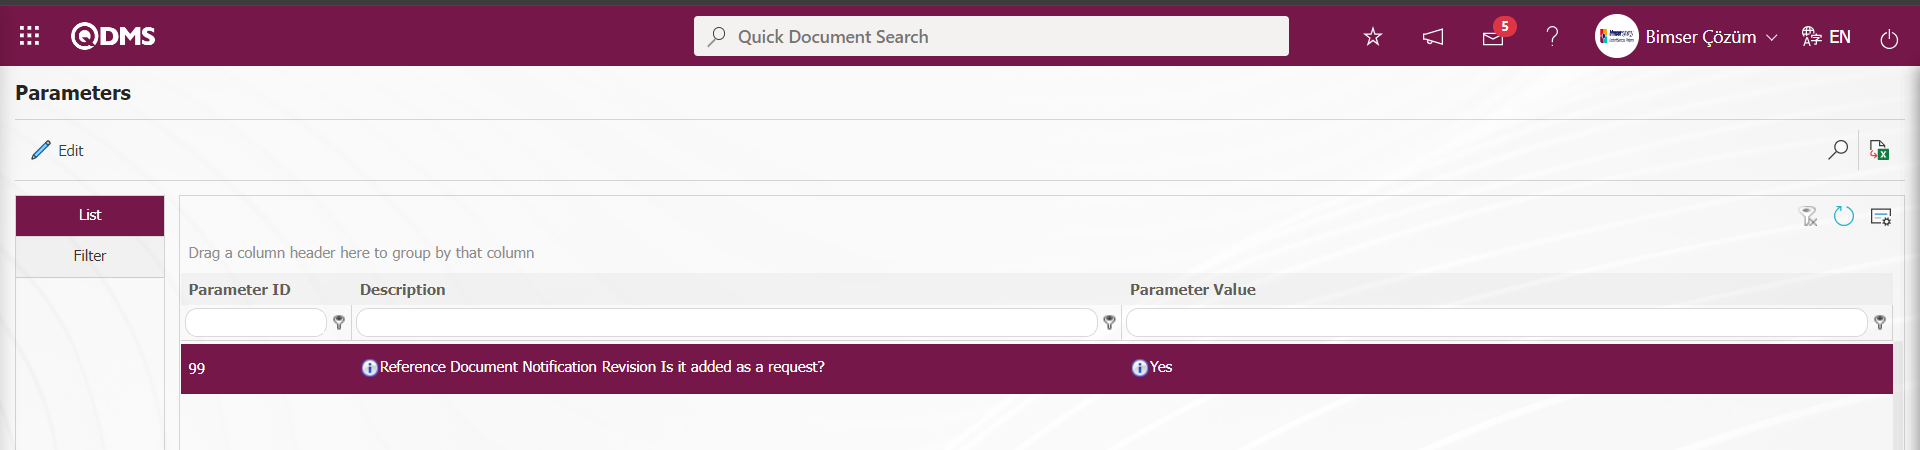 When the parameter is activated, the revision request is initiated by the system.
System - Item No: It is the field where the document prepared in the Other Information tab on the new document screen is associated by selecting the item number in the item number list defined in the system opened by clicking the  (Add) button.
On the New Document screen, in the Other Information tab, in the System - Item No field (Add) button is clicked and the document System - Item No is added.
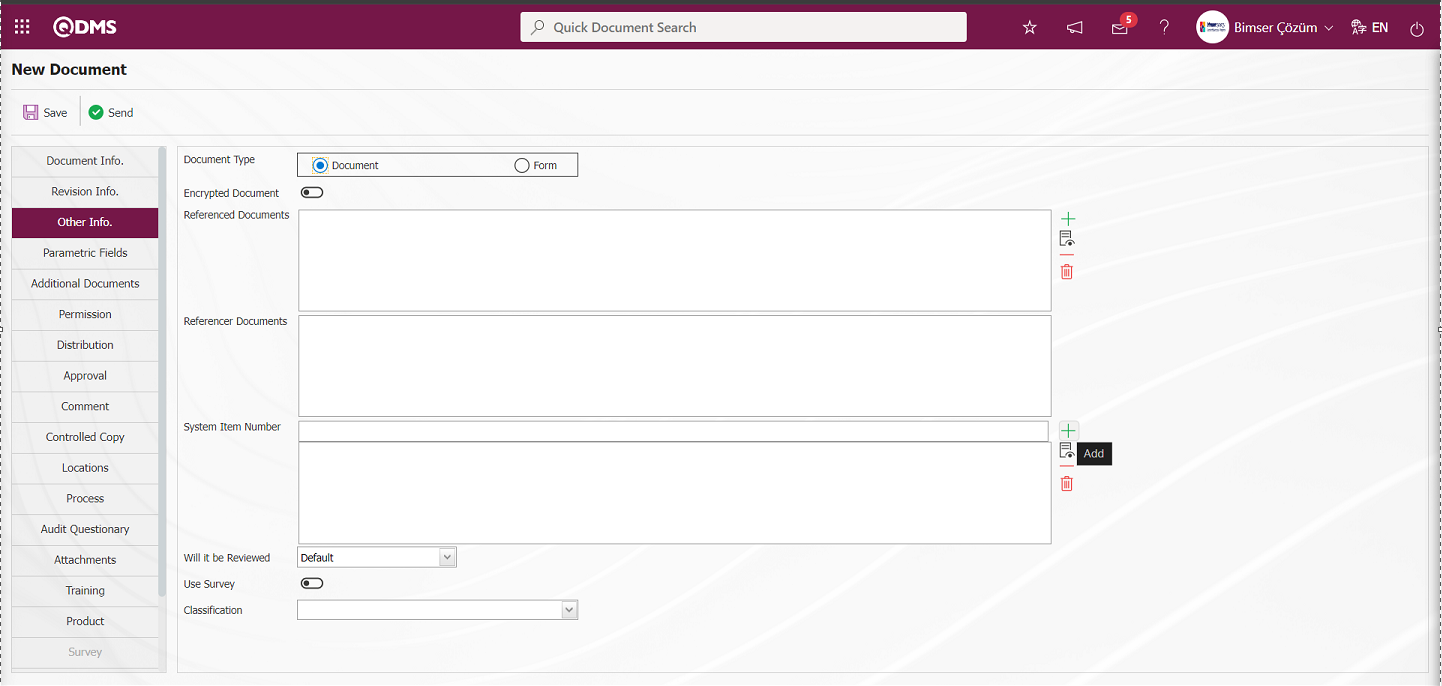
Select the Item No in the Item No list that opens.
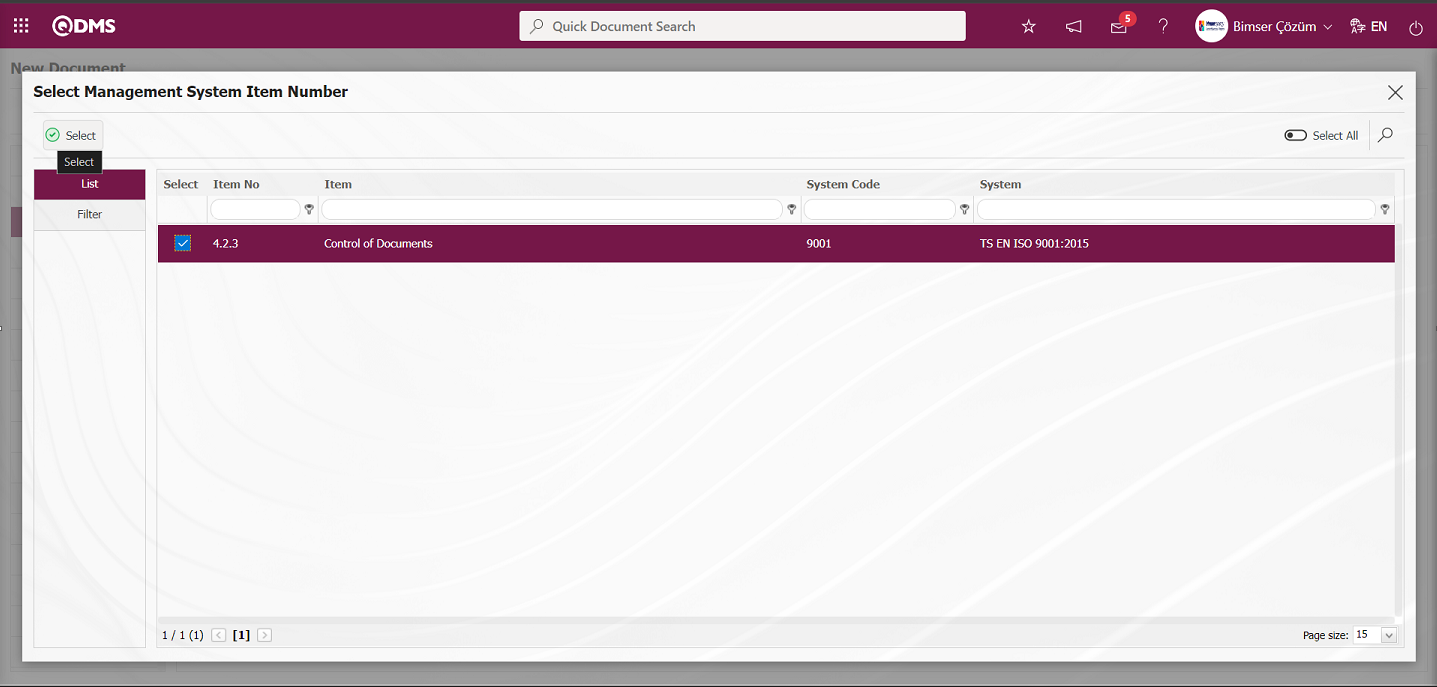
By selecting System - Item No, the prepared document is associated with the system item number.
Survey will be used: In the new document screen, in the Other Information tab, you can see the document prepared with the prepared document.
If a related questionnaire will be prepared, the relevant check box is checked. Questionnaire is created for the users in the document distribution matrix. In order to use this feature, the check box related to the survey must be checked for the users in the distribution matrix. When the check box related to the questionnaire is checked, the Questionnaire tab becomes active on the New Document screen and the questionnaire questions related to the document are defined with the help of the 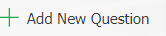 button.
Classification It is a list-type parametric field defined in the list-type field that is inactive by selecting the Document Module as the module of the System Infrastructure Definitions/BSID/Configuration Settings/Language Settings screen in the document prepared in the Other Information tab on the New Document screen.
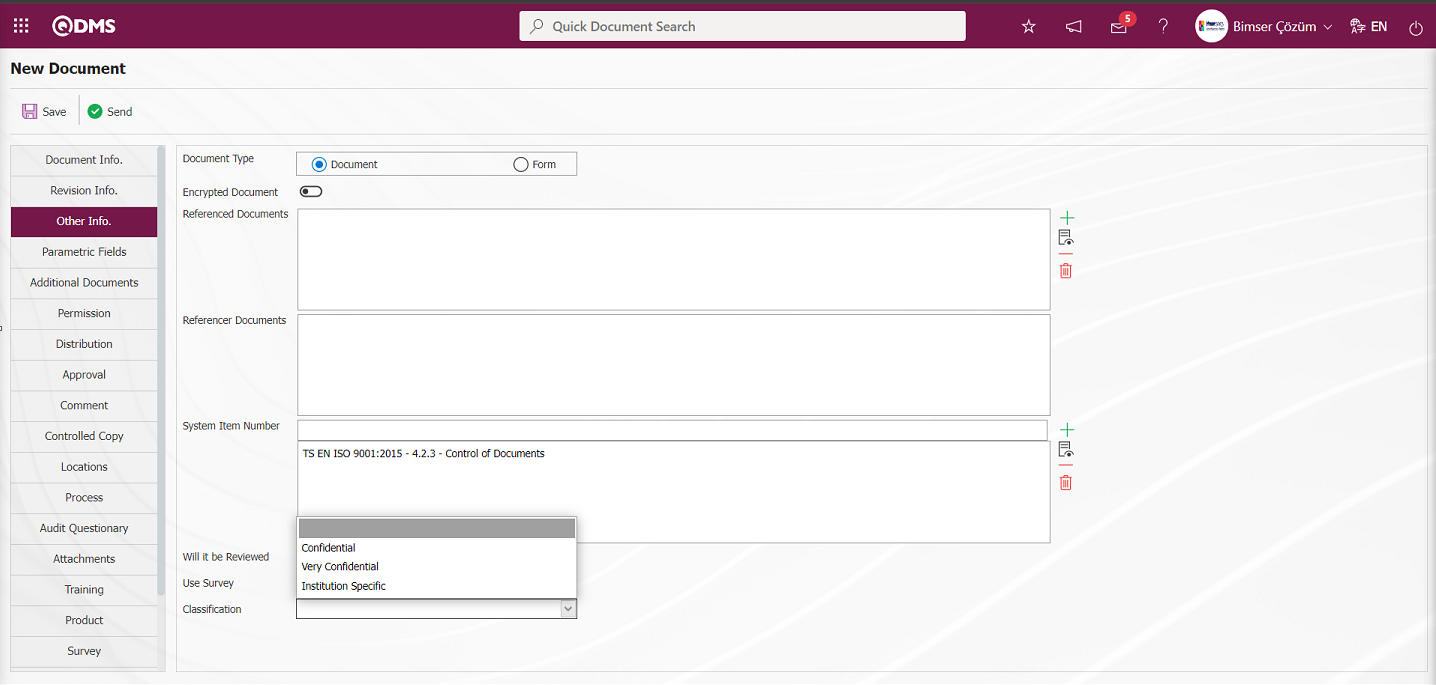
In this tab, you can define text, text (Multiple Row), unit of measurement, monetary, Personnel, Personnel (Multiple Selection), Department, Department (Multiple Selection), Query, type parametric fields.
Parametric Fields Tab:
If there are parametric fields defined on folder basis, it is the tab where data entry is made in line with the desired information. In the Folder Definition screen, the  button that is displayed depending on the parameter number 109 is used to define parametric fields such as text, multiple text, date, numeric.

When the folder where the document is prepared is selected and the parametric fields are defined by clicking the button, the parametric fields defined in this tab are displayed. For example Standard Conformity is a list type parametric field.

Additional Documents Tab;
New document If there are additional files attached to a document in the Additional Documents tab, it is used to upload them to the system. Additional documents cannot be uploaded before the main document is uploaded. When the main document is revised or canceled, the same operations are performed for additional documents. At which stages the additional documents are uploaded depends on the parameter. In parameter 36, the loading process of the additional document is determined at which stages according to the parameter value.
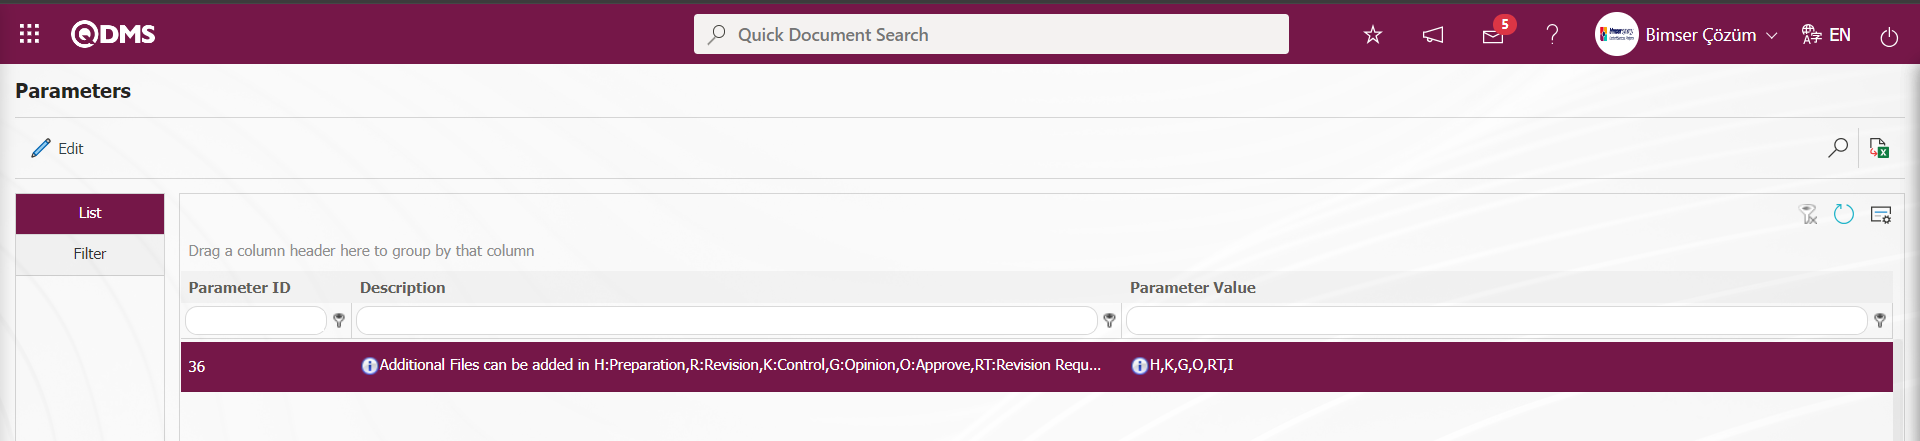
In the parameter value, “H” is written to the parameter value at the Preparation stage.
In the Parameter value, “G” is written to the parameter value at the Opinion stage.
In the parameter value, the letter value corresponding to the stage is written in the parameter value as “K” in the Control stage. For more than one stage, a comma is placed between the letters corresponding to the stages and defined in the parameter.
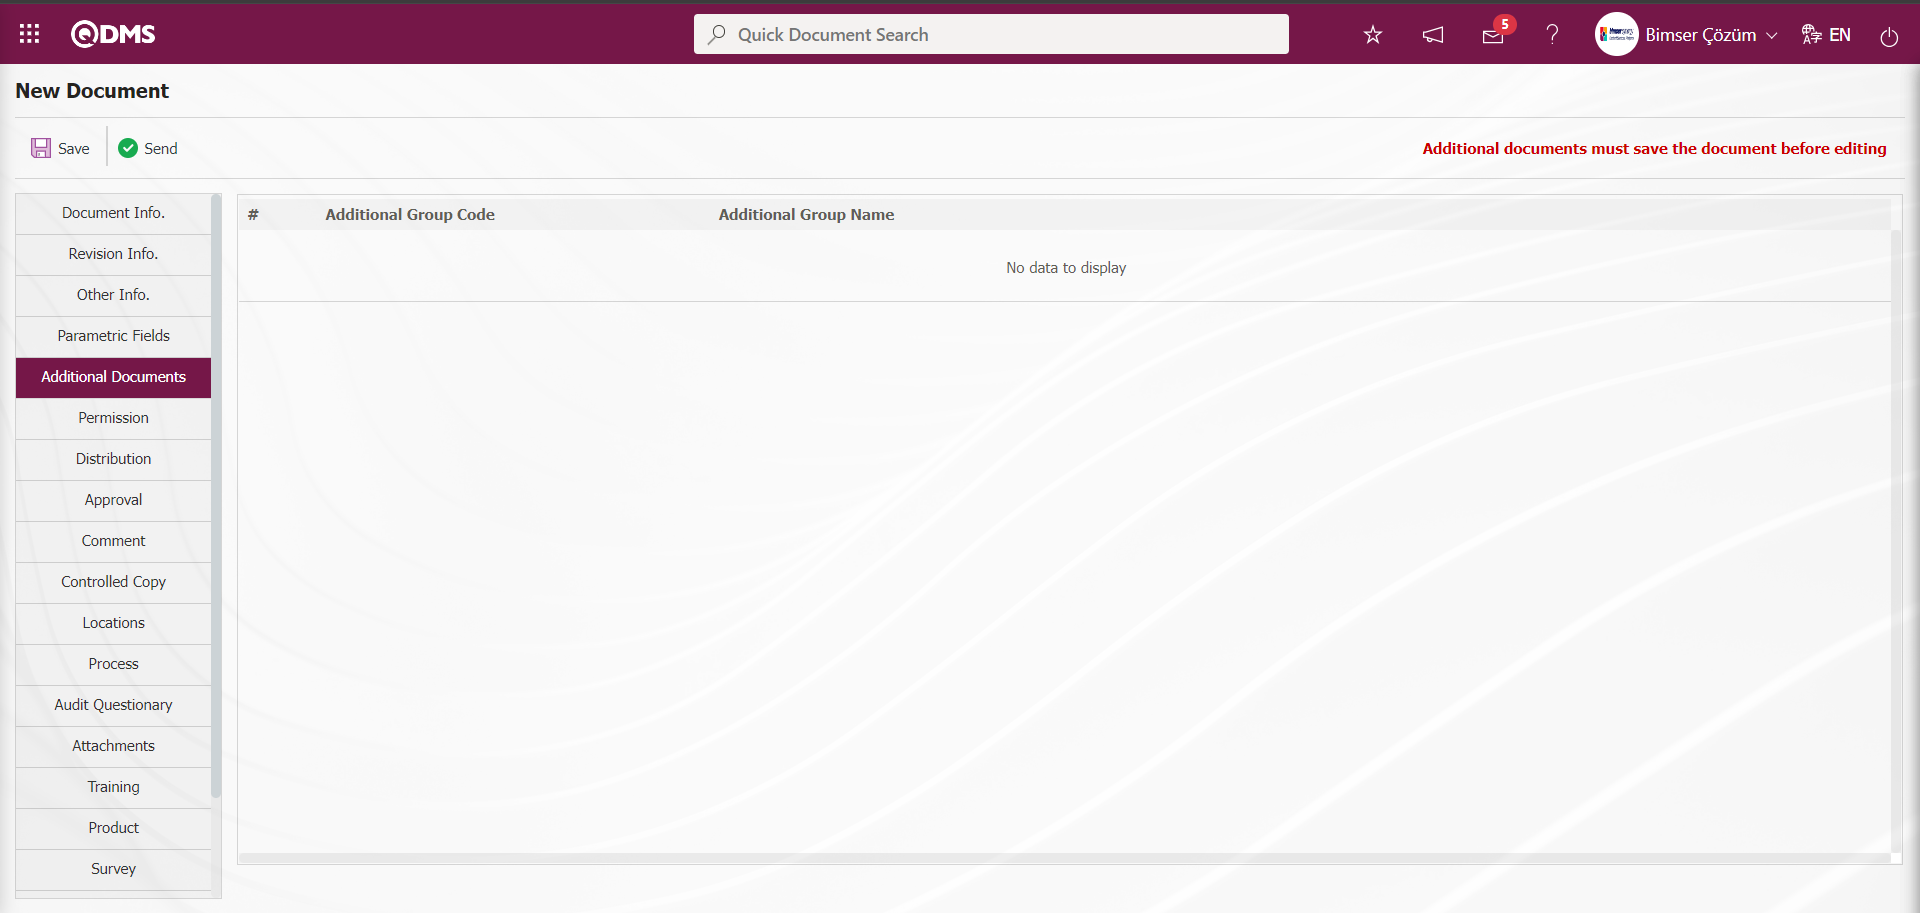
Authorization Matrix Tab;
In this tab, the authorization matrix created for the folder is defined. According to the settings of the folder, the authorization matrix can be changed or not at this stage. If the relevant check box is checked in the “Authorization Matrix cannot be changed” field in the Folder Information tab on the Folder Identification-New Registration screen, the buttons are not displayed on this tab and changes cannot be made to the authorization matrix. If the check box related to the “Mandatory” field of the User Group/ Positions added in the Authorization matrix tab on the Folder Definition - New Record screen is checked, the system will not allow deletion in the User Group/ Positions authorization matrix with the “Mandatory” field checked in the Document Preparation stage. If the authorization matrix is to be changed, the operations at this stage are the same as the operations performed when editing the folder authorization matrix. By selecting the Position/ User Group, “Reading, Printing, Preparing/ Revising, Seeing Old Revisions, Canceling” authorizations are defined.
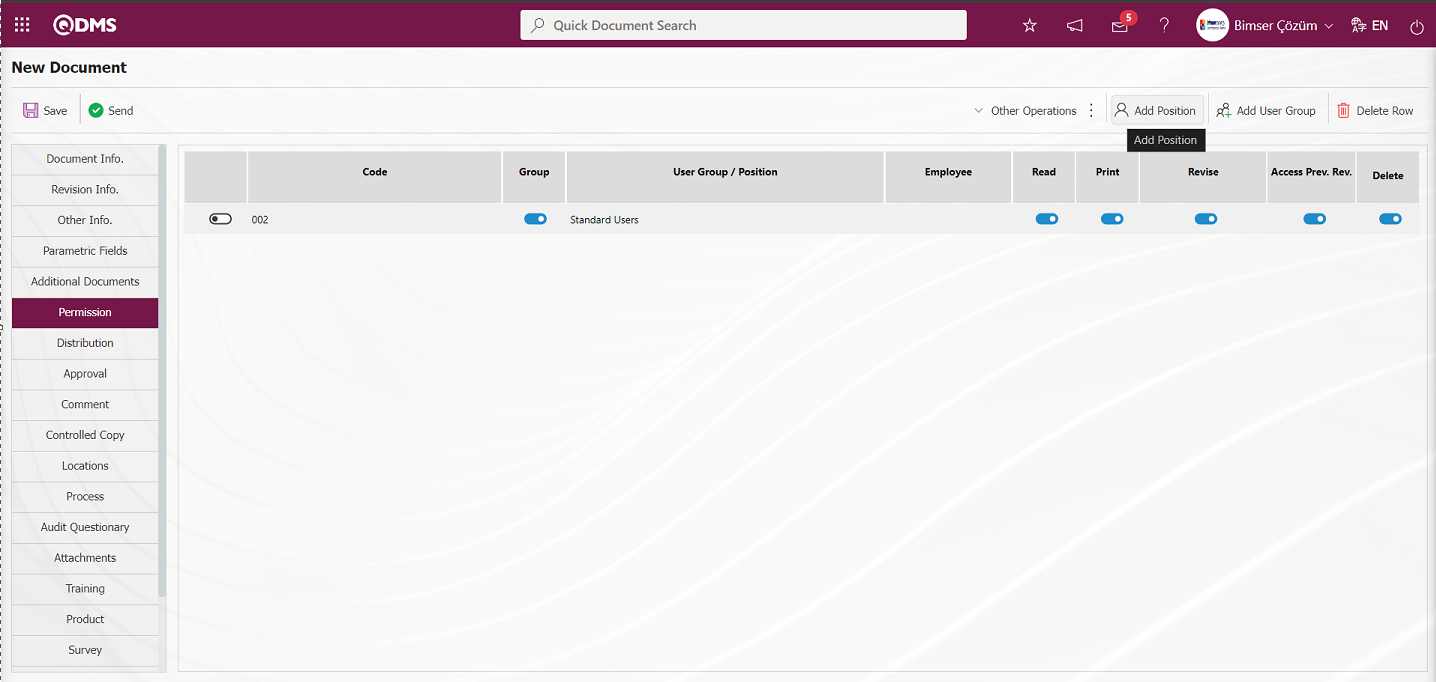
With the help of the buttons on the screen;
 : Shows the personnel in the selected user group.
 : Add position to the list.
 : User group is added to the list.
 : Delete the selected row in the authorization matrix.
Click the  /
/  buttons to assign authorization matrix from the New Document screen. In the User Group/ Position list defined in the system, a selection is made for the users to be authorized. Which authorizations are desired to be given are marked.
In the Authorization Matrix Tab on the New Document screen, click the button and select the position in the position list defined in the system and click the  button to add the position to the Authorization Matrix.
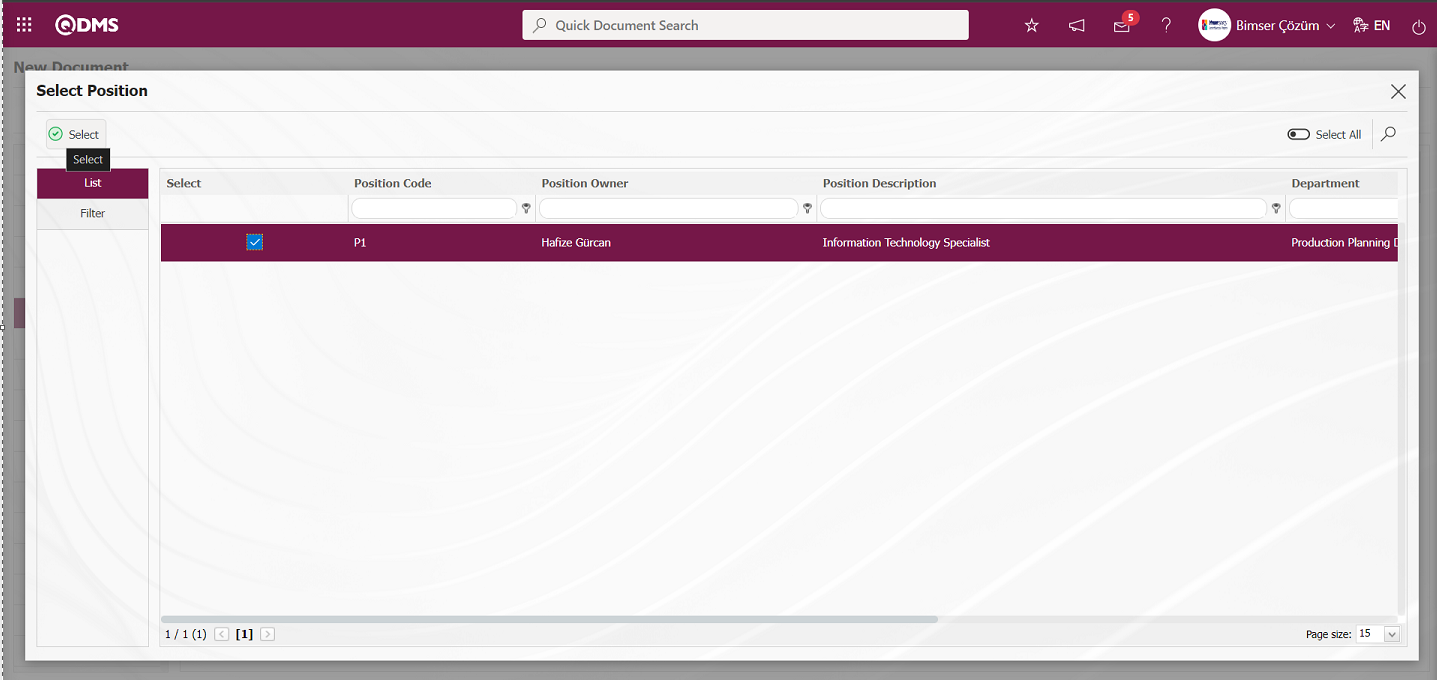
In the process of Adding Positions to the Authorization Matrix, the check boxes related to the authorizations are marked.
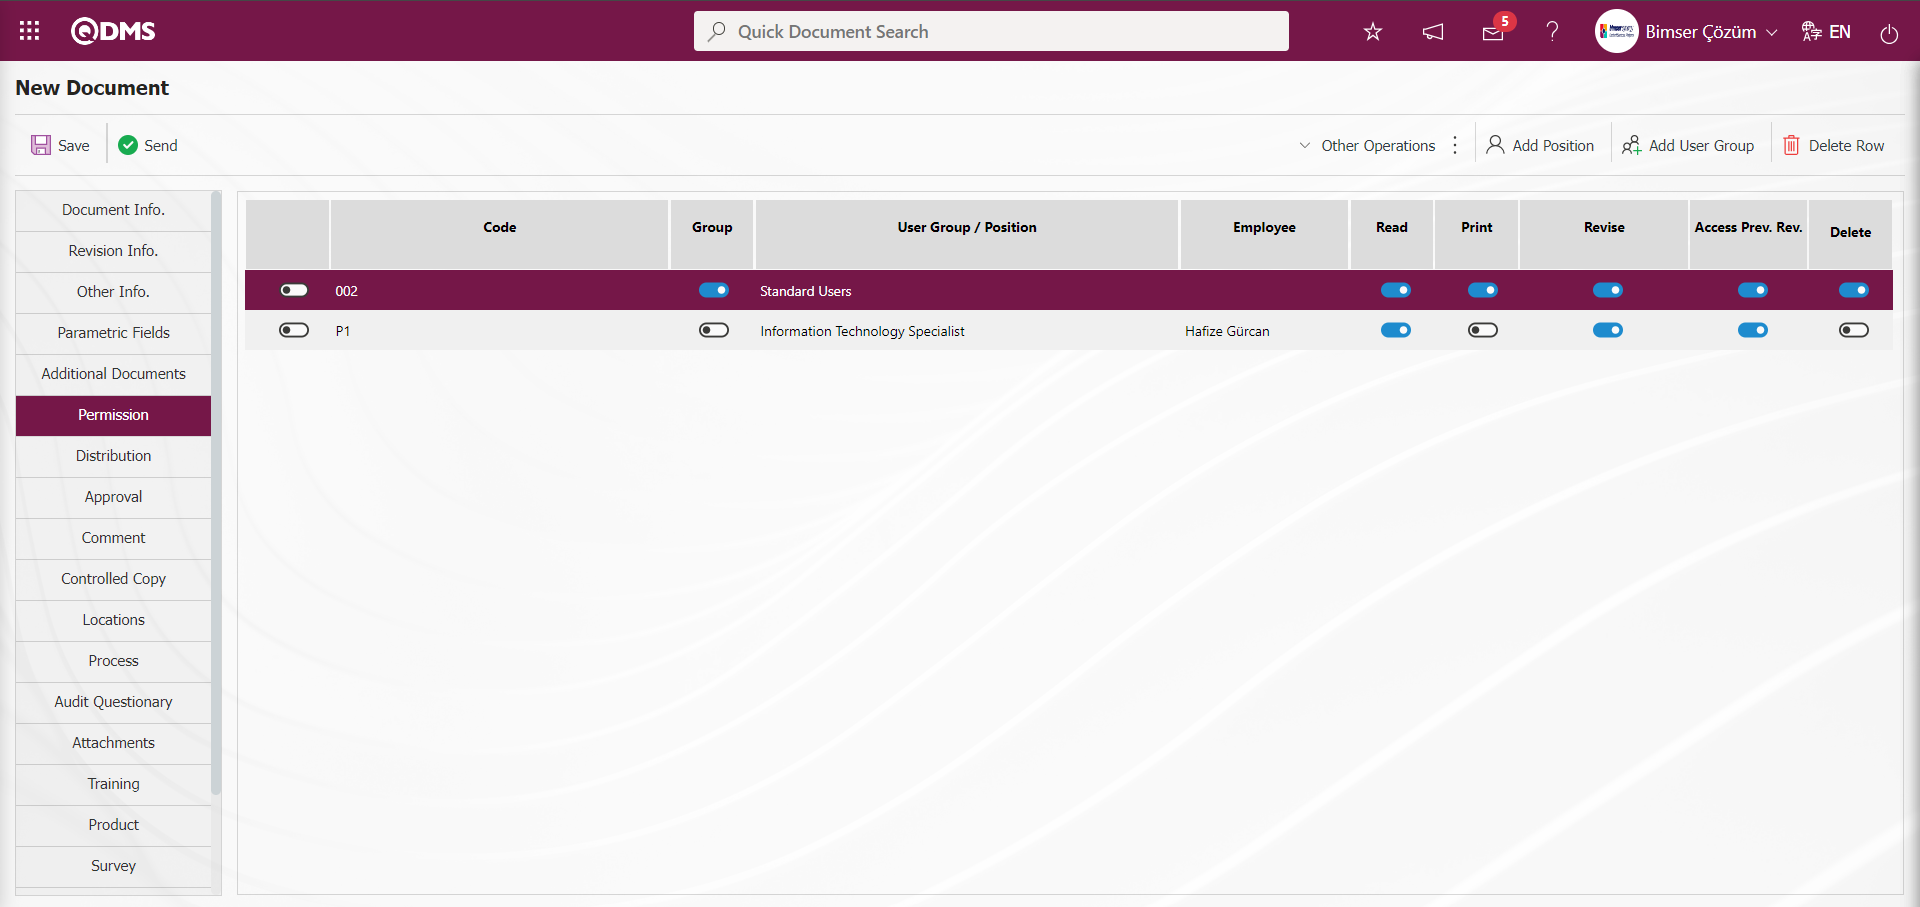
If there is an undefined position code or user group, the check box related to the “Continue Ignoring Undefined Code Information” field is checked in order to continue without ignoring the error received. The parameter is activated by selecting the parameter value “Yes” in parameter 123 in the Document Management Module parameters.
 If there is no appointed position holder in the authorization matrix, it contains Undefined code information. This is passed by checking the “Continue without ignoring undefined code information” option. In order to ignore the undefined code information by checking this option, parameter 123 must be active and the check box related to the “Continue Ignoring Undefined Code Information” field must be checked. Otherwise, if the parameter is inactive and the authorization matrix contains undefined code information, the system gives a warning message “Authorization matrix contains undefined code information” in document preparation/ revision processes registration processes.
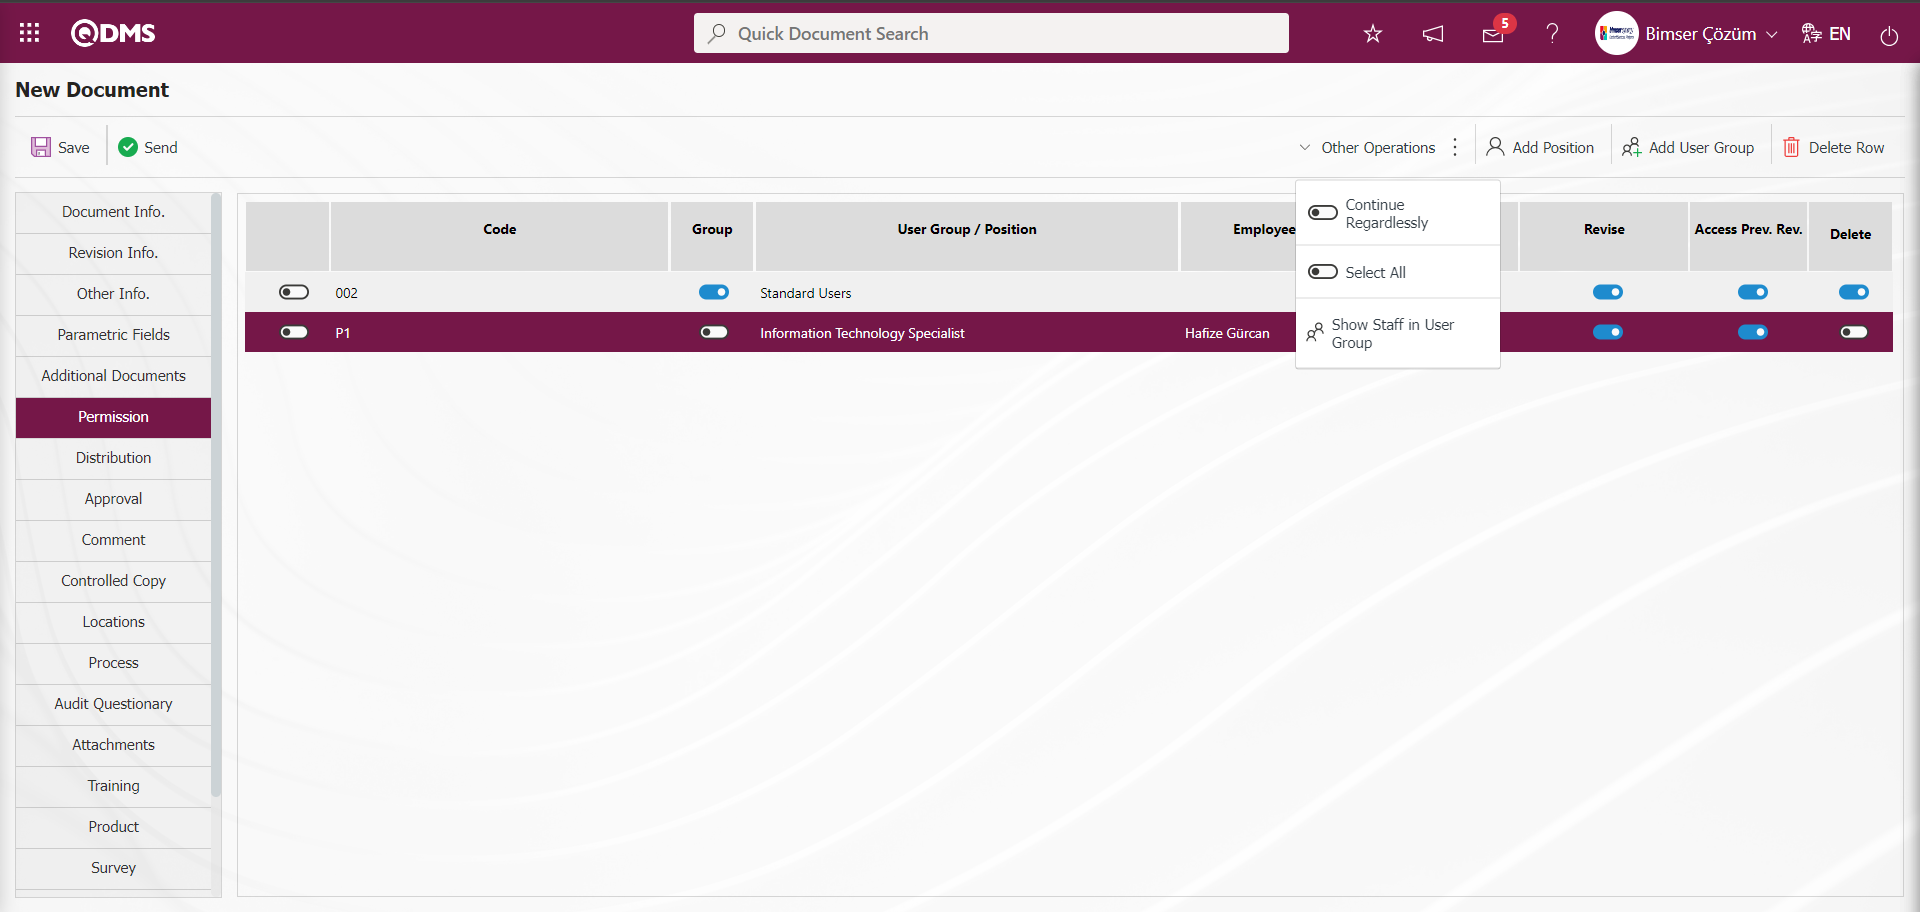
Distribution Matrix Tab;
In this tab, it is specified to whom the documents will be published as reading tasks. Users and user groups can be selected. These people are obliged to read the document. Distribution Matrix comes defined from the folder. Distribution matrix can be changed/not changed according to the folder setting. If the relevant check box is checked in the “Distribution Matrix cannot be changed” field in the Folder Information tab on the Folder Definition-New Record screen, the buttons are not displayed on this tab and changes cannot be made on the distribution matrix. A reading task called “List of Important Documents to Read” is created for user groups or positions for which the check box related to the “Important” field in the Document Distribution Matrix is checked. It is displayed as “List of Important Documents to Read” in the person's “My Pending Jobs” menu. If you do not want to send a document reading task to the personnel, but only a document publishing e-mail, check the “Do Not Send Reading Task” option. In the Distribution Matrix, the parameter is activated and displayed by selecting the parameter value “Yes” to parameter 273 of the Important function.

In the Document Management Module parameters, the type of reading task assignment is determined for parameter 162.

According to this parameter, the parameter value is defined as “3” as a reading task. According to the parameter value, reading tasks are assigned to pending jobs as “List of Documents to be Read” and “List of Important Documents to be Read”. When a value other than 1, 2, and 3 is assigned in the parameter value, reading tasks will not fall as tasks to pending jobs.
In the Distribution Matrix, the parameter value of parameter 274 of the “Do not drop reading task” function is selected as “Yes” and the parameter is activated and displayed
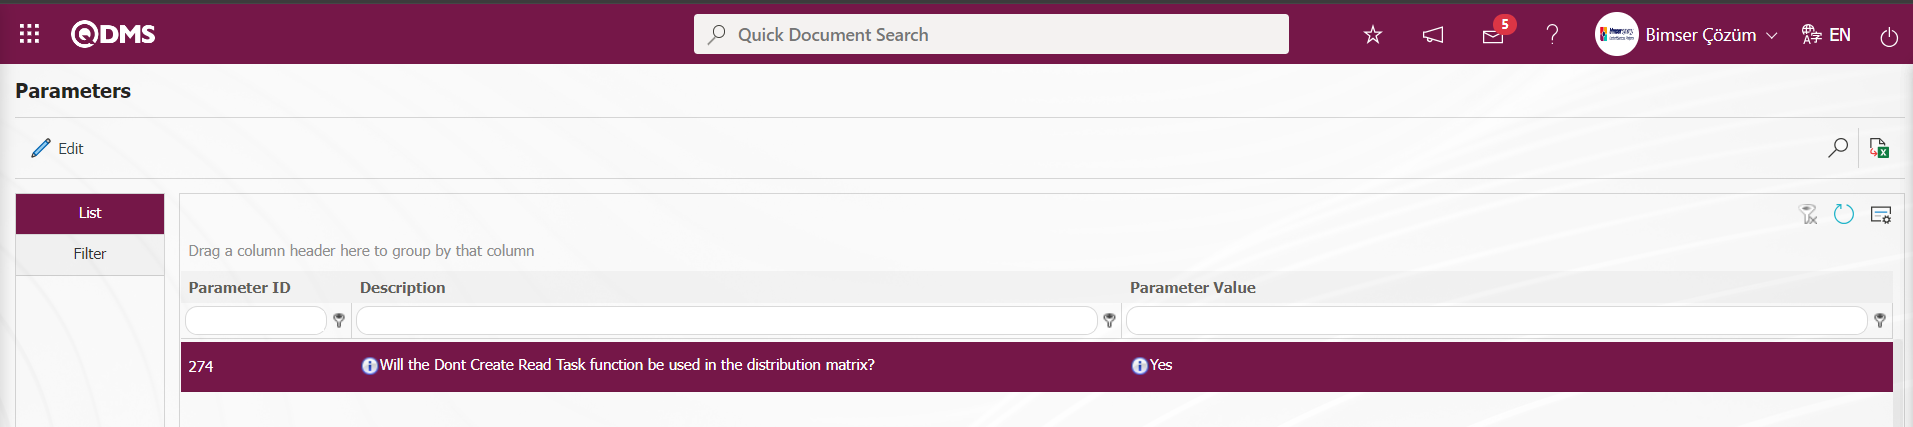
It is a field that is displayed by activating the parameter by selecting the parameter value “Yes” of the parameter 81 of the “Survey” function in the Distribution Matrix.
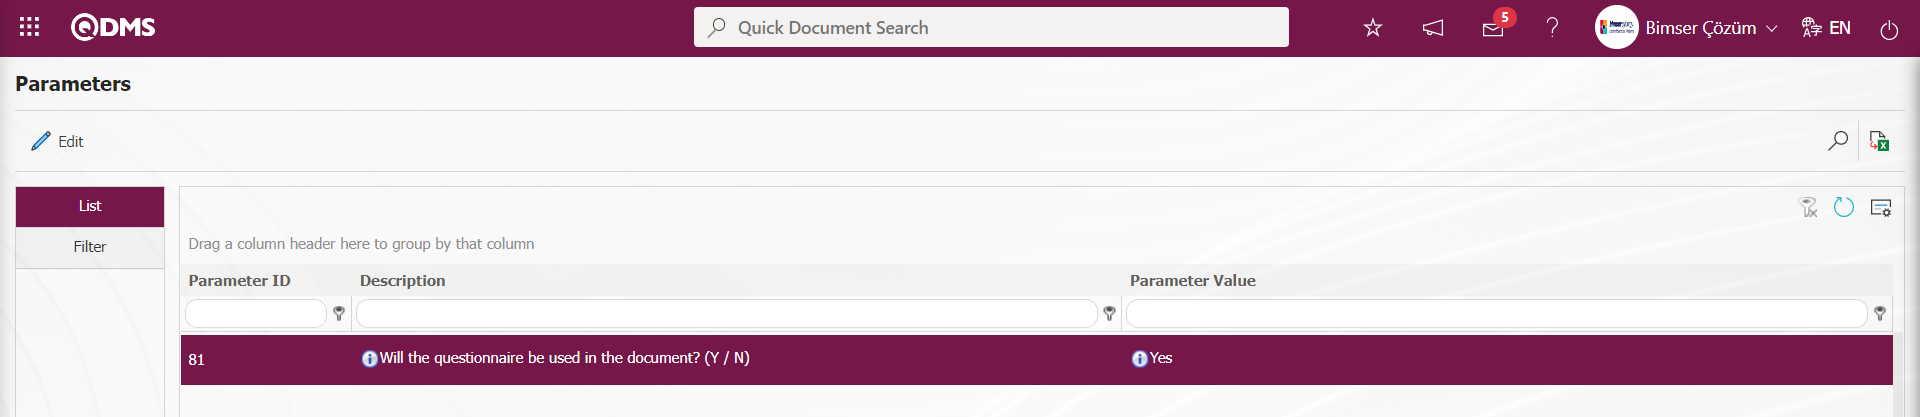
In the Integrated Management System/ Document Operations/ Reports/ Document Monitoring Report, the reading status of Important and Unimportant documents, task assignment dates and how many days they were read can be seen.
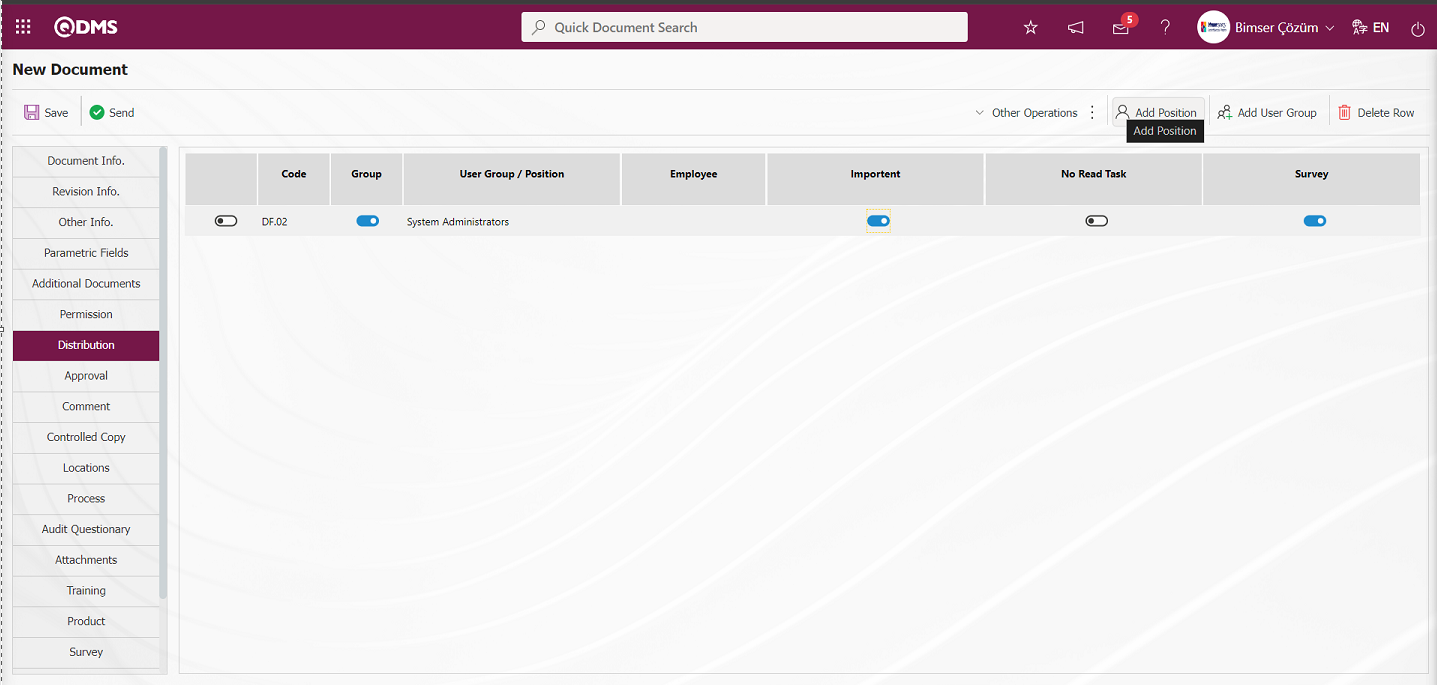
With the help of the buttons on the screen;
 : Shows the personnel in the selected user group.
: Add position to the list.
: User group is added to the list
 : Deletes users in the selected position/user group in the list.
Click the / buttons to assign distribution matrix on the New Document screen. From the User Group/ Position list defined in the system, a selection is made for the users to be added to the distribution.
In the Distribution Matrix tab on the New Document screen, click the button to add a position to the distribution matrix.
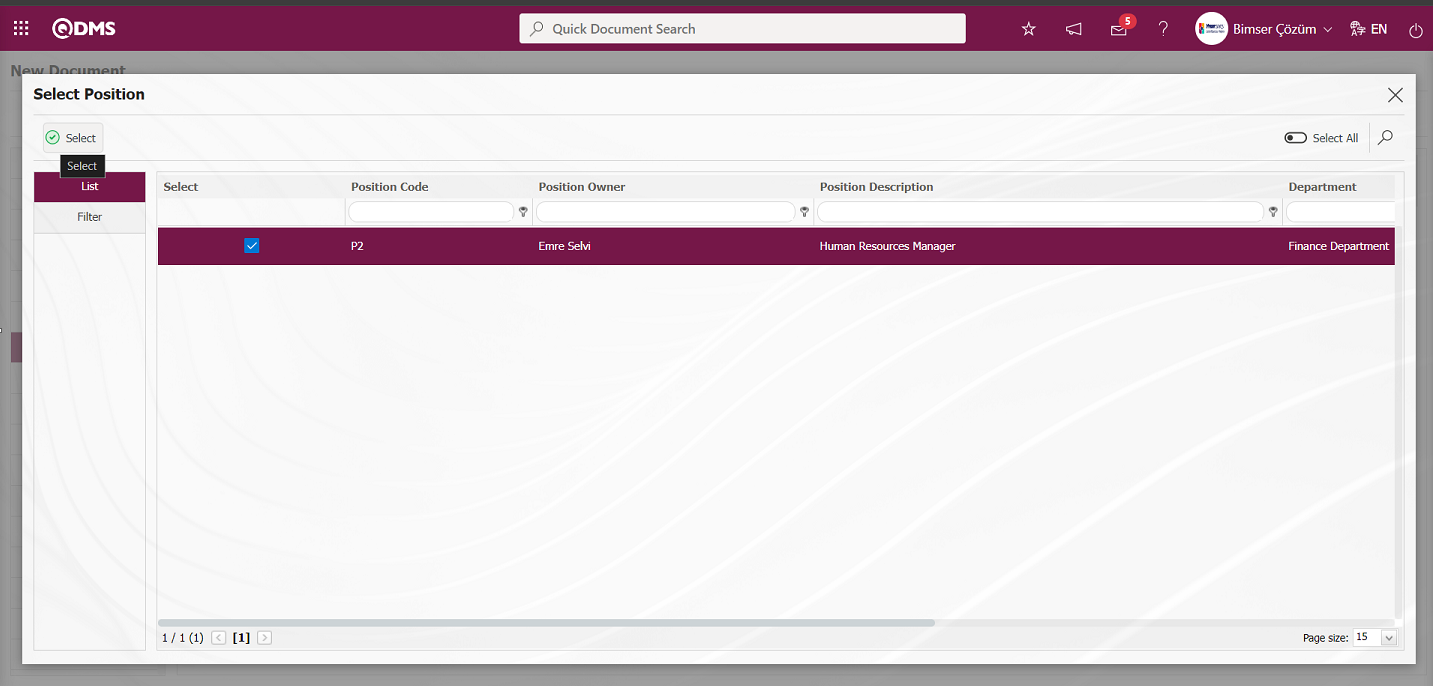
Select the position to be added to the distribution matrix in the position list and click the  button to add the position to the distribution matrix.

After the process of adding a position to the Distribution Matrix, if it is an important document, the check box related to the important field is checked, if it is desired not to drop a reading task, the check box related to the check box or if it is desired to drop a survey task, the check box related to the survey is checked.
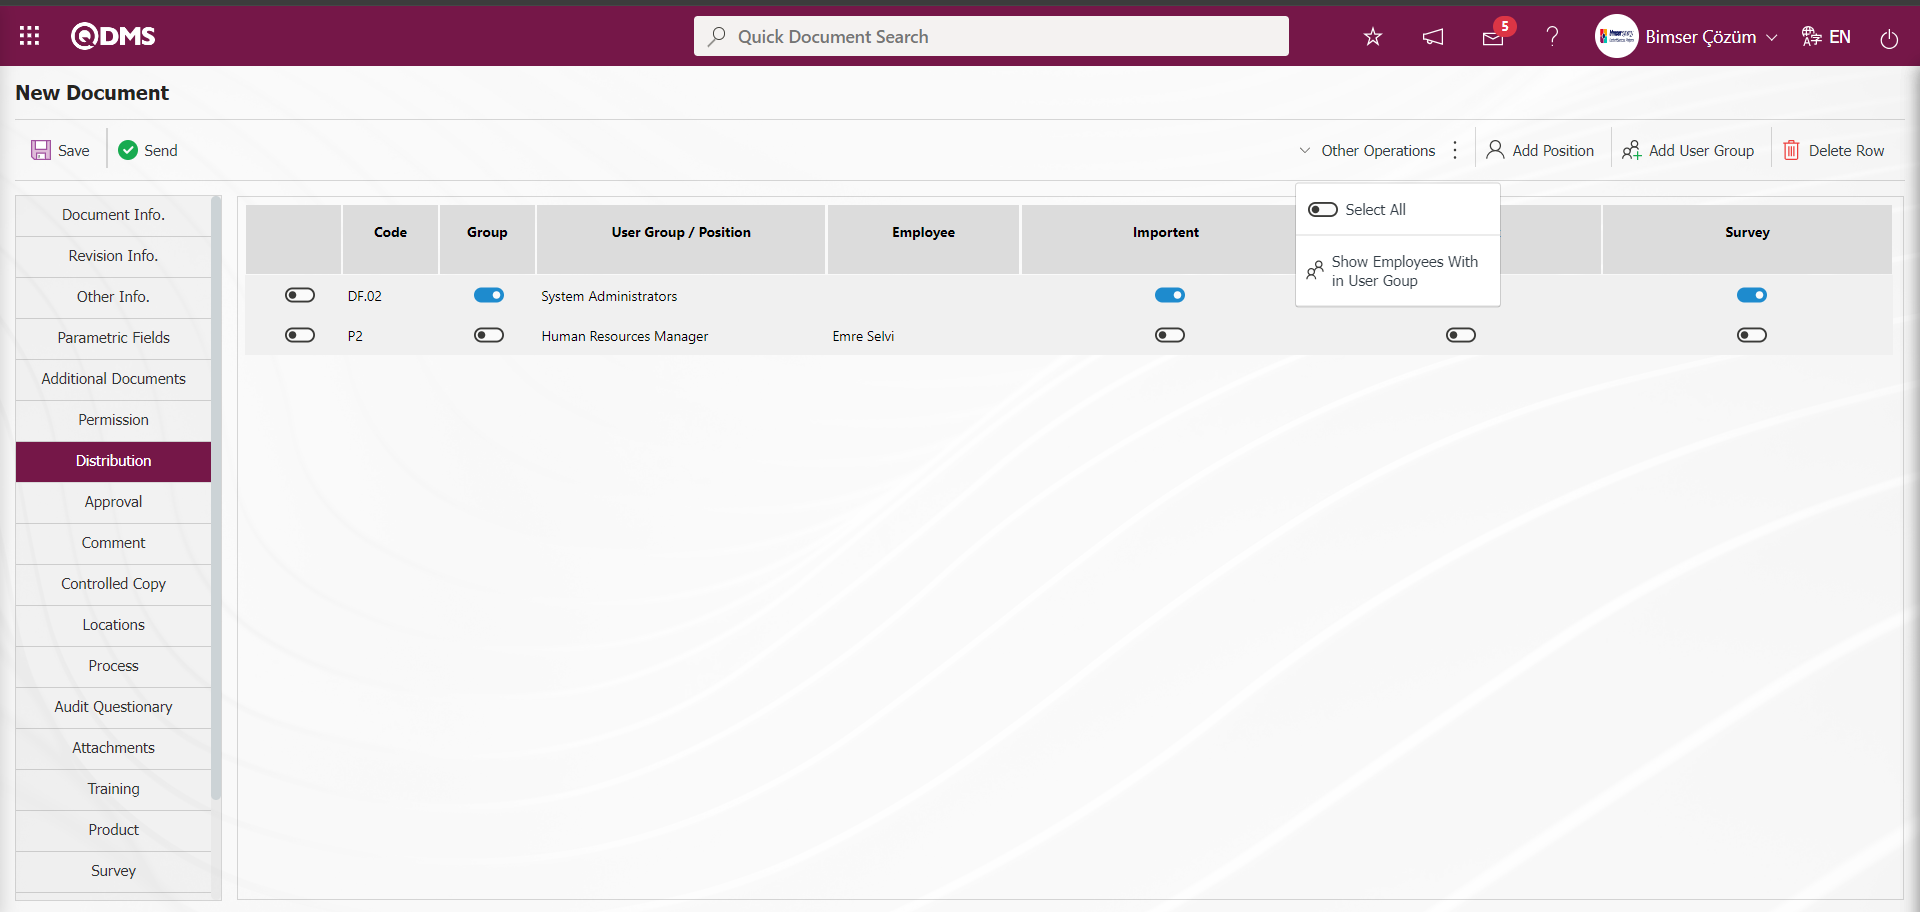
Approval tab
Select who will approve this document and approval levels. If there is a defined approver in the folder, it is displayed in this tab. More than one approver can be selected. Levels can be 0,1,2,3,.... Level zero is the last approver and the document is published after it is approved by this position.
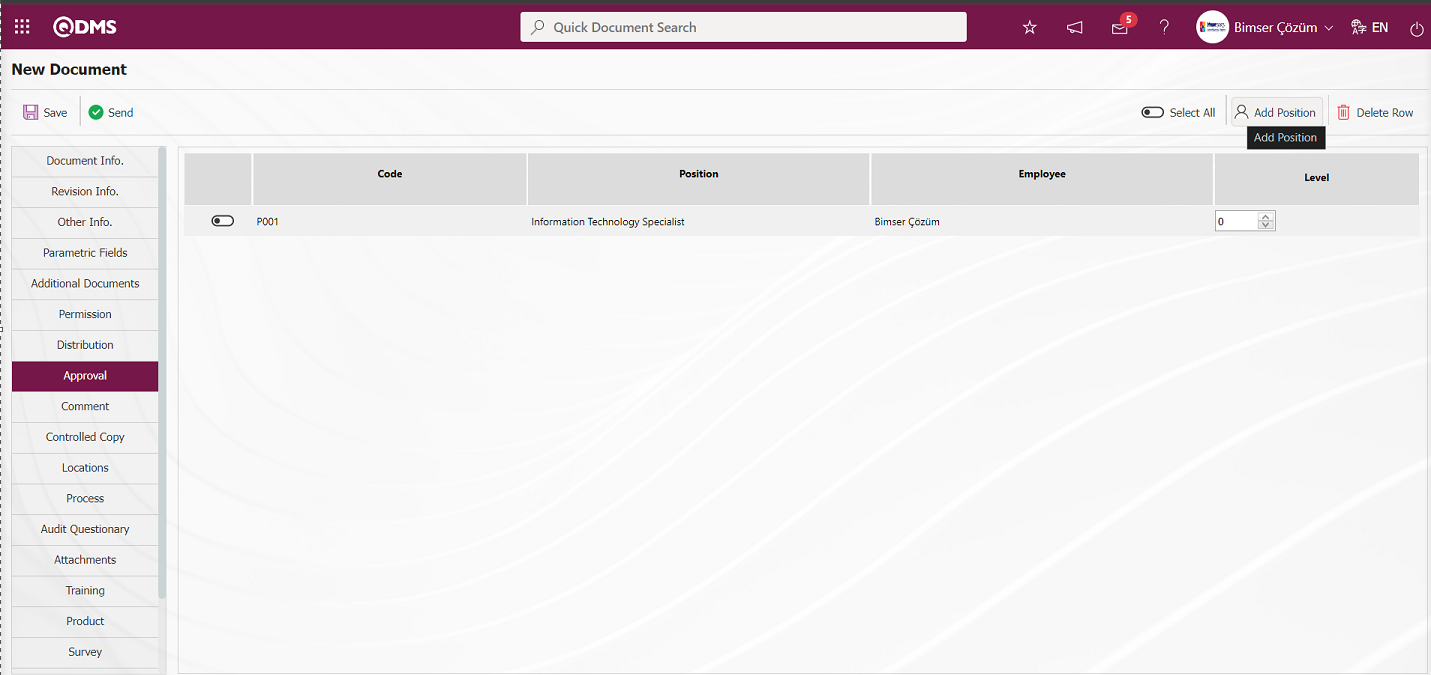
With the help of the buttons on the screen;
 : Adds a position to the list.
 : Deletes the selected position in the list.
On the new document screen, click on the button to assign the approvers desired to be in the approval matrix. From the position list defined in the system, a selection is made for the users to be added to the approval matrix.
For adding approvers to the approval matrix in the Approval matrix tab on the New Document screen, click the button and select the position from the position list defined in the system and click the  button to add the position to the approval matrix.

After adding approvers in the approval matrix, the approval level of the document is determined. The approval process starts in reverse order with the last approver being “0”.
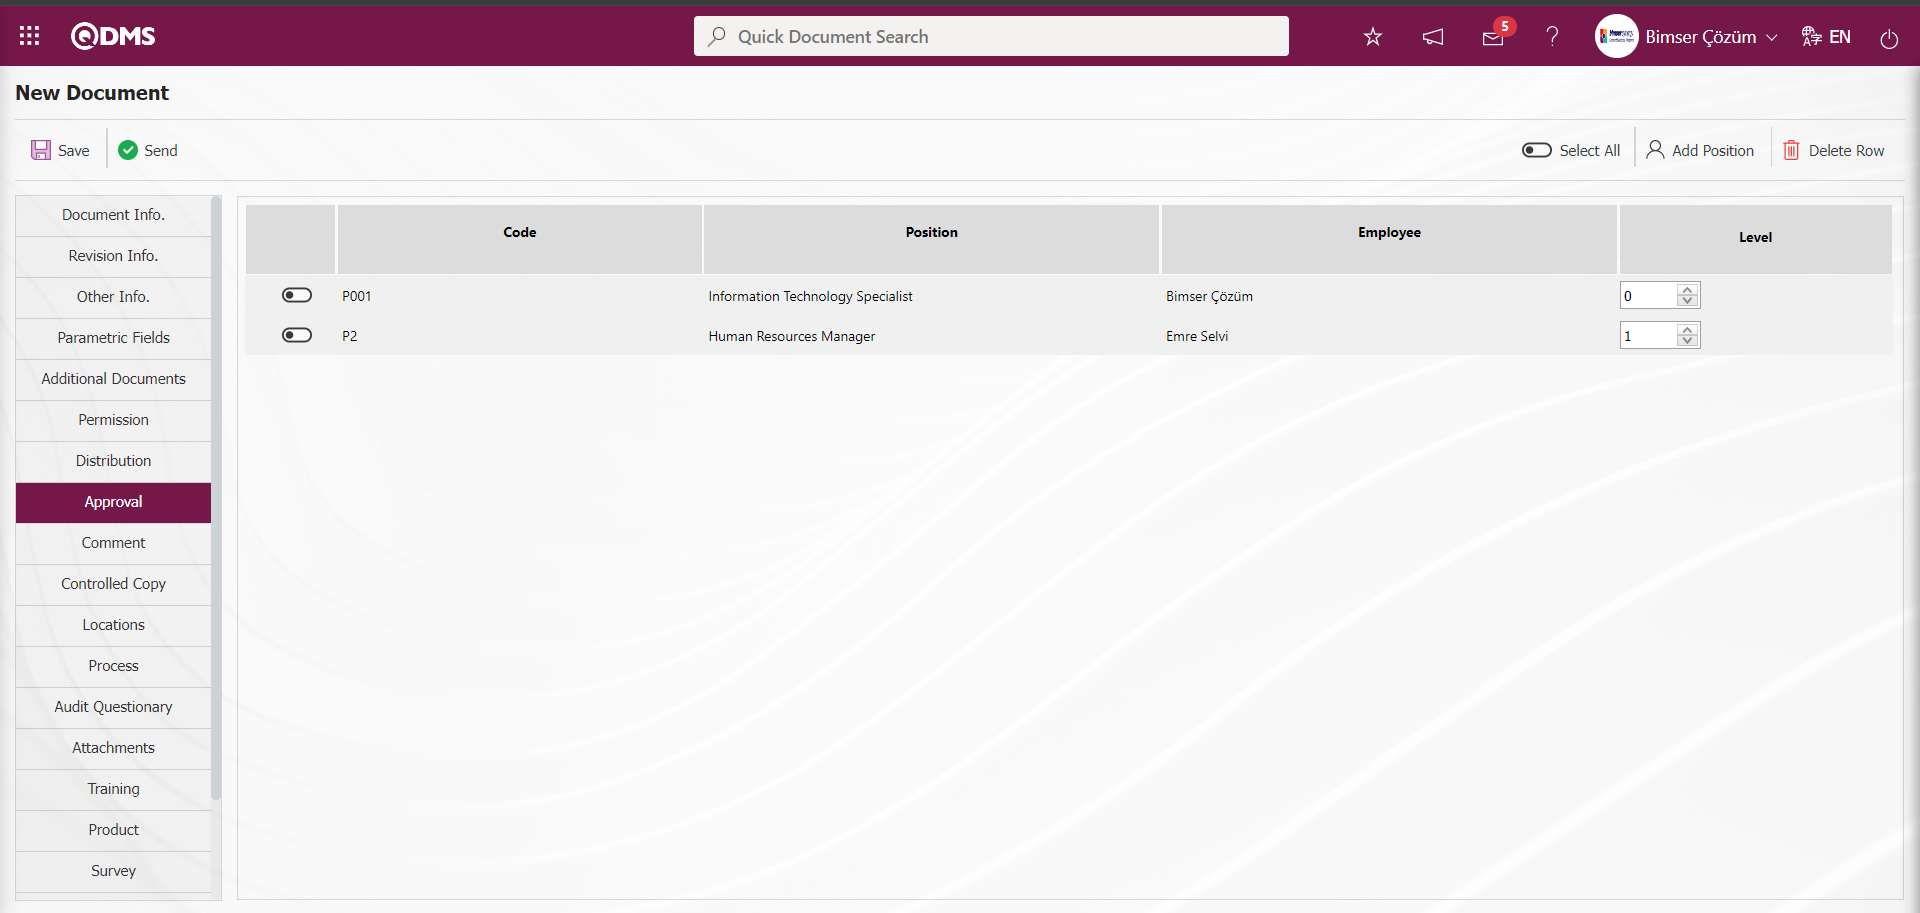
Comment tab;
In this tab, if it is desired to send the document to the opinion of the users before the control approval, the opinion matrix is defined by determining the day and person policy. It would be more accurate to assign the opinionator to the opinion matrix not in the folder but in the document-specific assignment process.
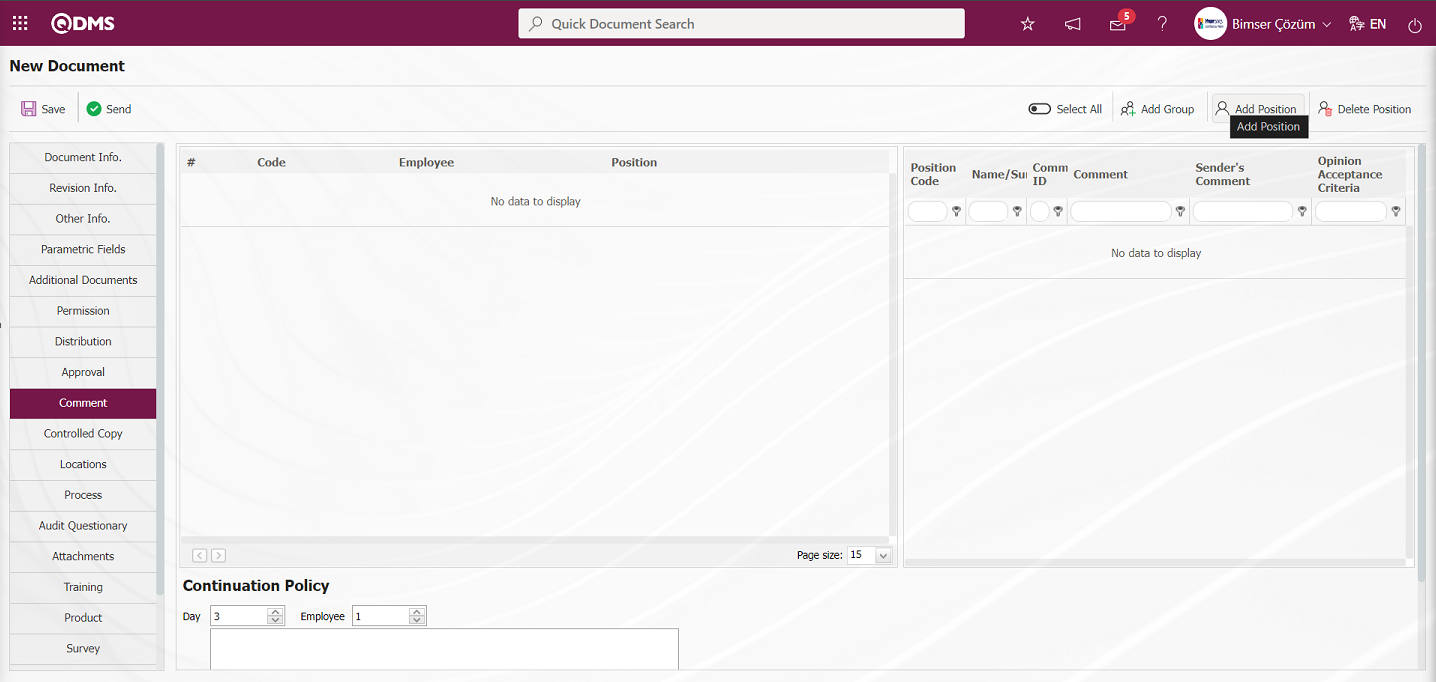
With the help of the buttons on the screen;
 : User group is added to the list.
 : Add position to the list.
 : Deletes the selected position in the list.
Click on the button to assign the interviewers desired to be in the opinion matrix in the folder. From the position list defined in the system, selection is made for the users to be added to the opinion matrix.
On the New Document screen, in the Opinion matrix tab, click on the button to add an interviewer to the opinion matrix and select the position from the list of positions defined in the system and click on the button.

In the field of attendance policy, it is specified how many people are asked for opinions within how many days. For example; It is sufficient for 1 person to give an opinion within 3 days. According to the Continuation Policy, the opinion of 1 person is taken within 3 days and the opinions received are sent to the preparer. However, if 1 person does not give an opinion within the specified time, only 3 days are expected to expire.
If the opinion tab is set in the folder, it comes as defined. It can be changed/not changed according to the setting made in the folder. If the check box related to “Opinion Matrix cannot be changed” is checked in the Folder Information tab on the Folder Definition-New Record screen, the buttons in the Opinion tab on the New document screen are not displayed and the opinion matrix cannot be changed.
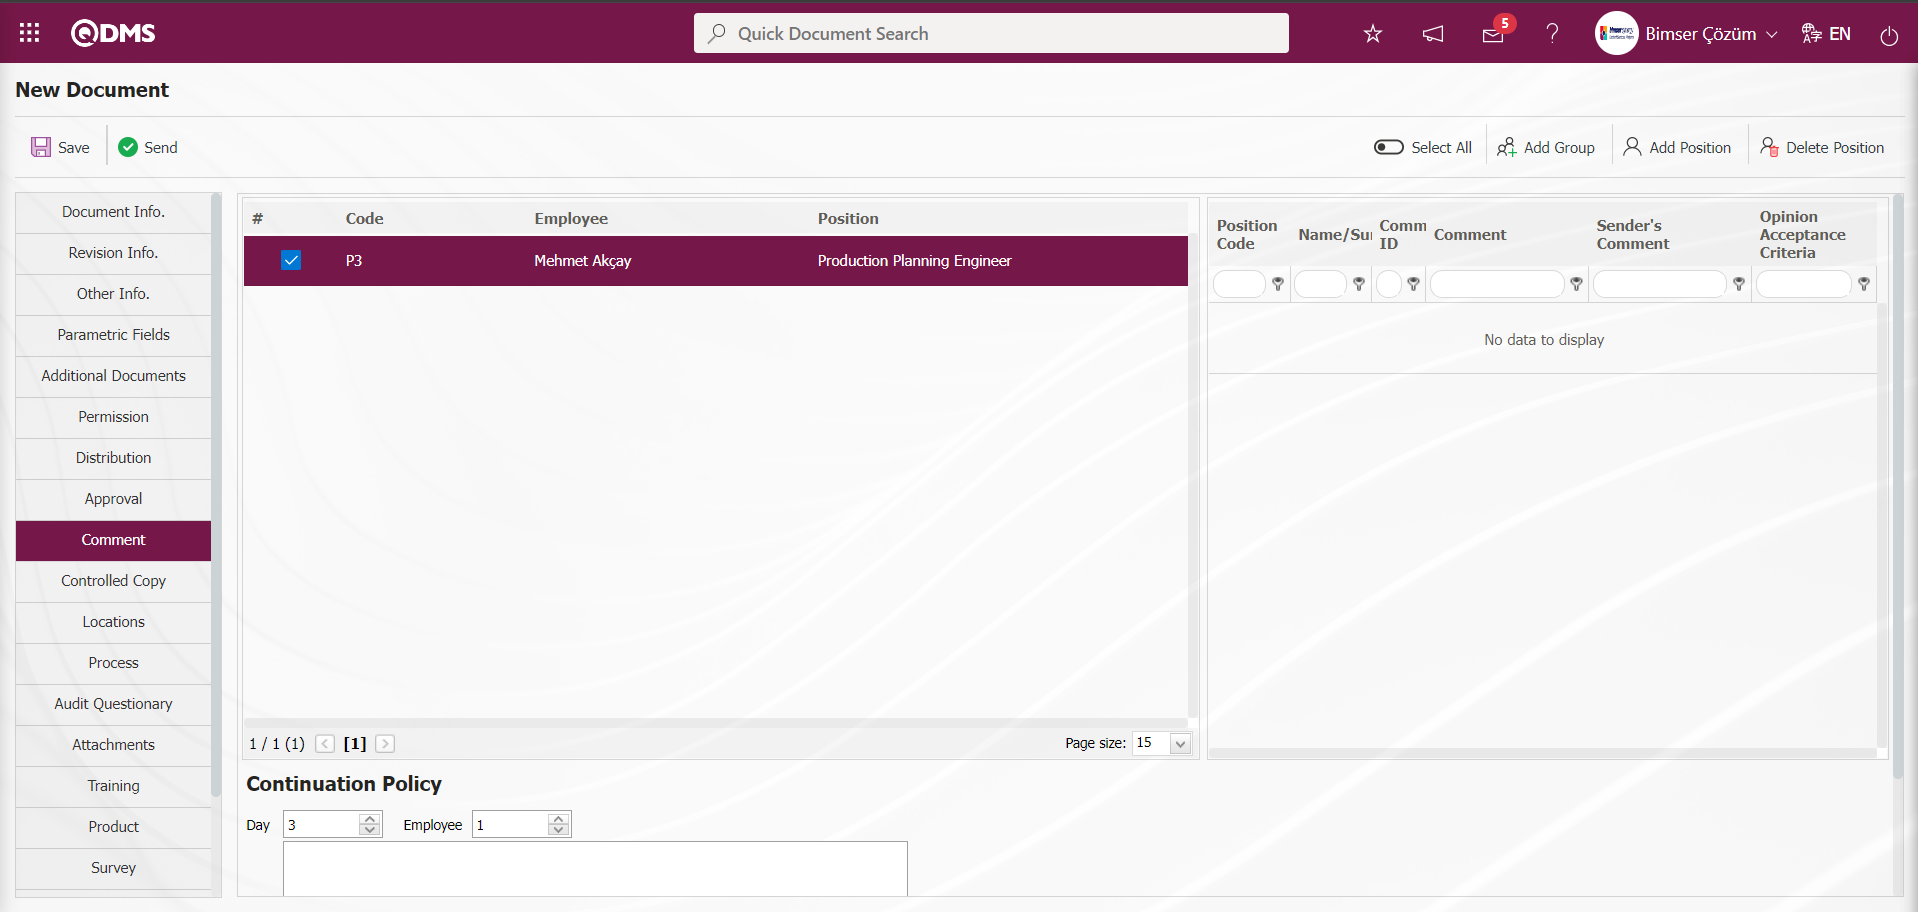
Controlled Copy tab;
In this tab, controlled copy distribution locations of the document are selected on the document preparation/revision pages. When the document is published, the people responsible for distribution are informed by the system via e-mail that they need to distribute controlled copies. This information can be monitored and reported from the Integrated Management System/ Document Operations/ Controlled Copy menu. This tab is activated by selecting the parameter value “Yes” for parameter 39 of the Document Management Module parameters.
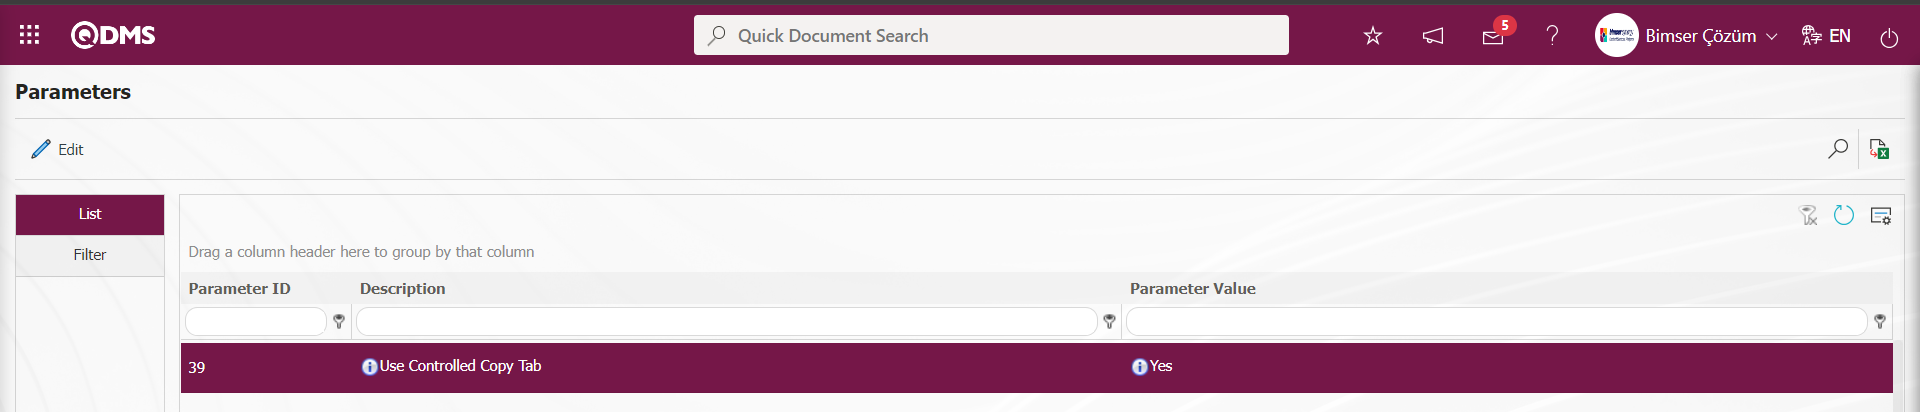
After the parameter is activated, the Controlled Copy tab is displayed on the New Document screen.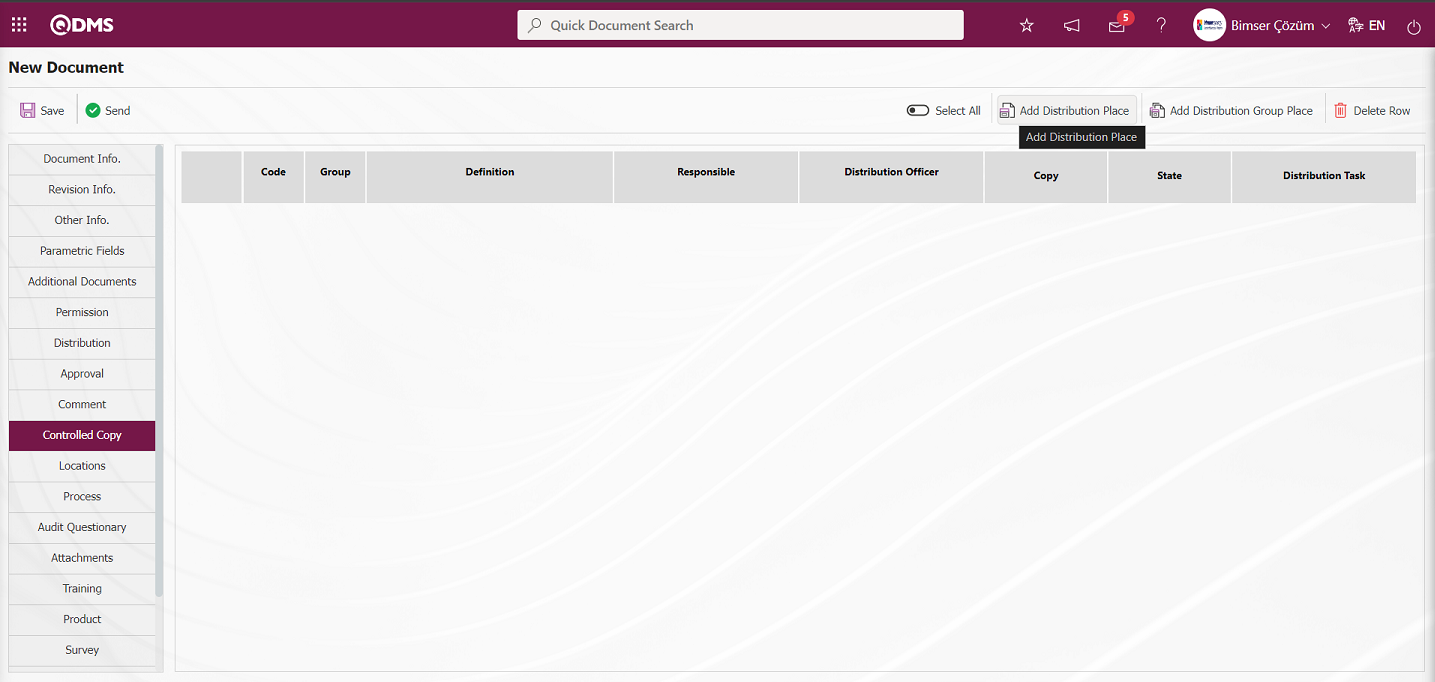
With the help of the buttons on the screen;
 : Distribution location is added.
 : Distribution place group is added.
 : The distribution information selected in the list is deleted.
By clicking on the document button, the distribution places where the document will be physically distributed defined in the system are selected and the button is clicked.

Click on the button on the New Document screen.
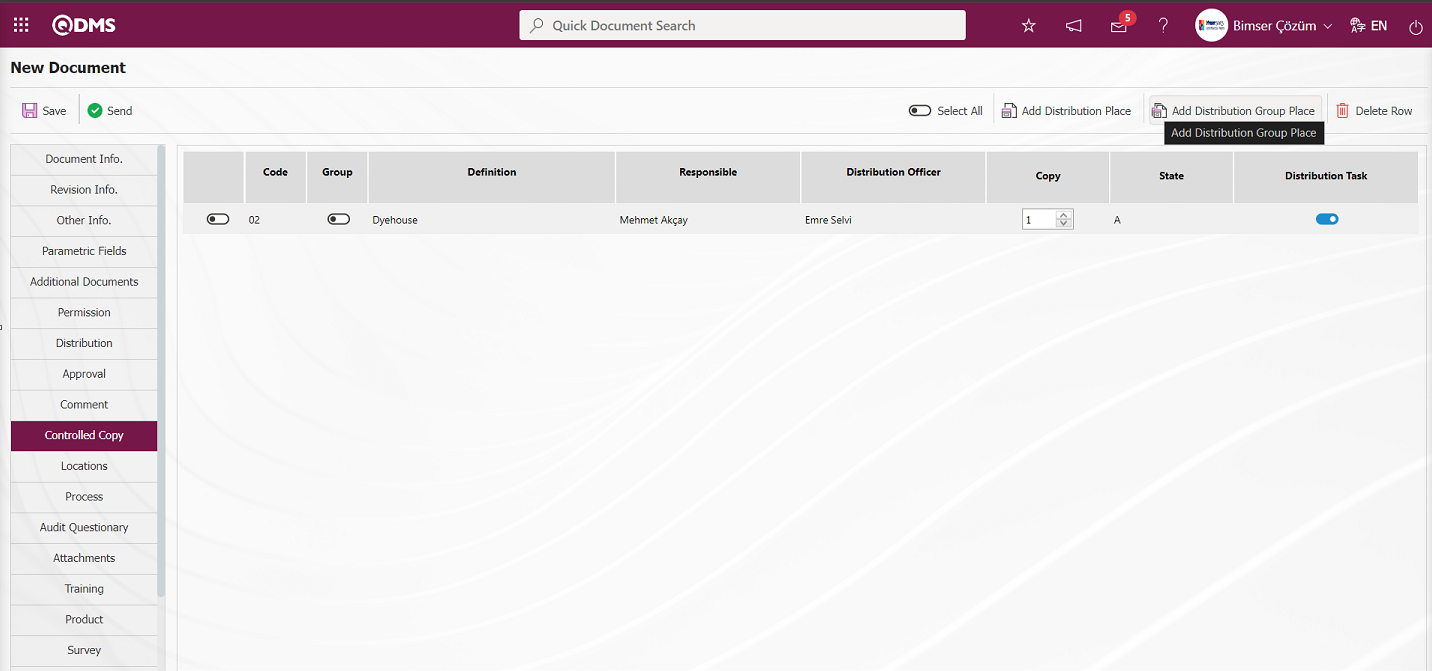
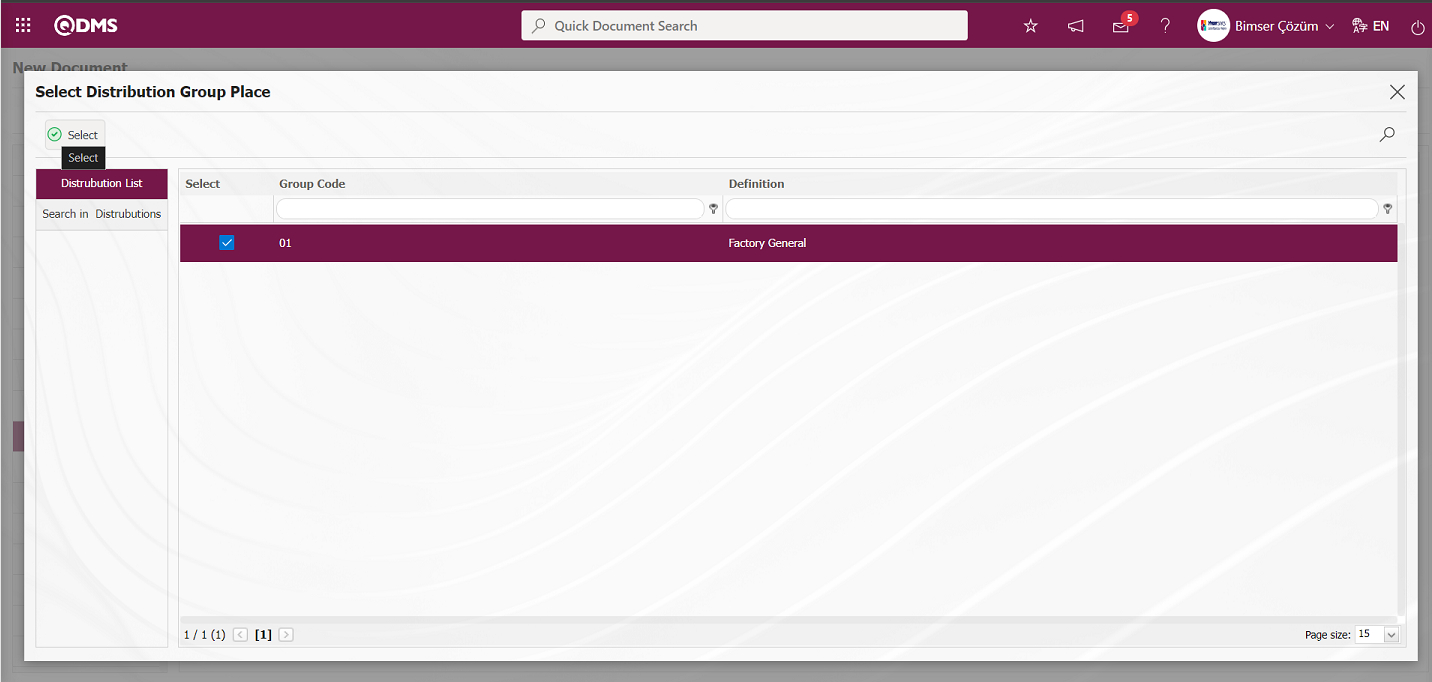
Adding Distribution Place Group to the document is done by selecting from the Distribution Place Group list defined in the system and clicking the button.
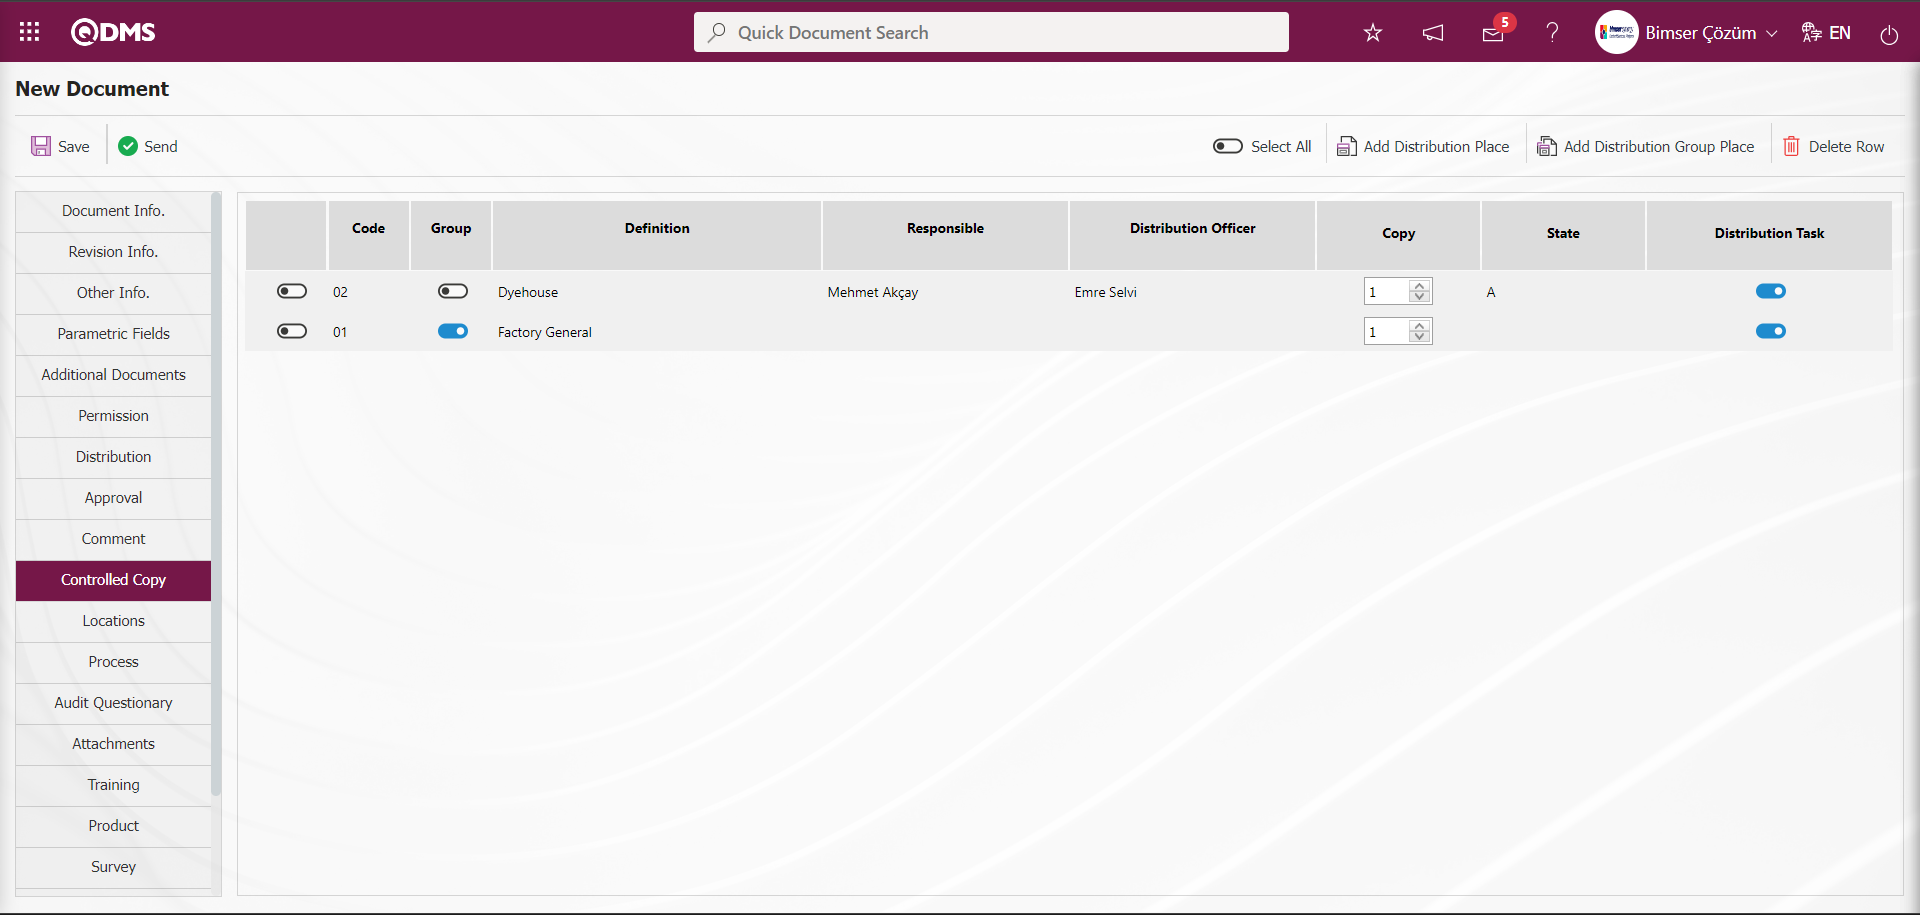
Location of Use tab;
It is the tab where the information about the departments in which the document will be used is selected in the list of departments defined in the system. It is a tab that is displayed depending on the parameter. The parameter is activated by selecting the parameter value “Yes” of parameter 40 of the Document Management Module parameters.
 After the parameter is activated, the Use Location tab is displayed on the Document Preparation/Revision screens.
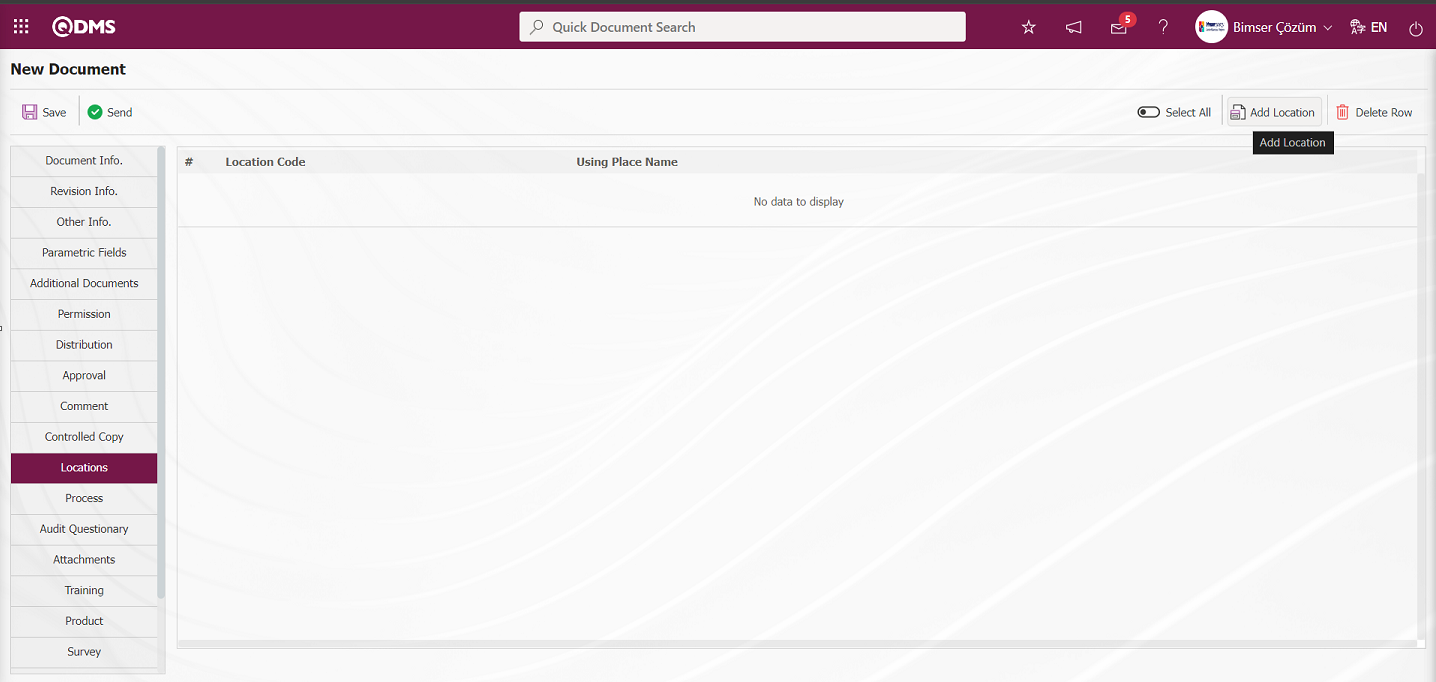
With the help of the buttons on the screen;
 : Adding a location of use is done.
 : Deletes the selected line in the list.
Click the button to add a new place of use in the Location tab from the New Document screen.
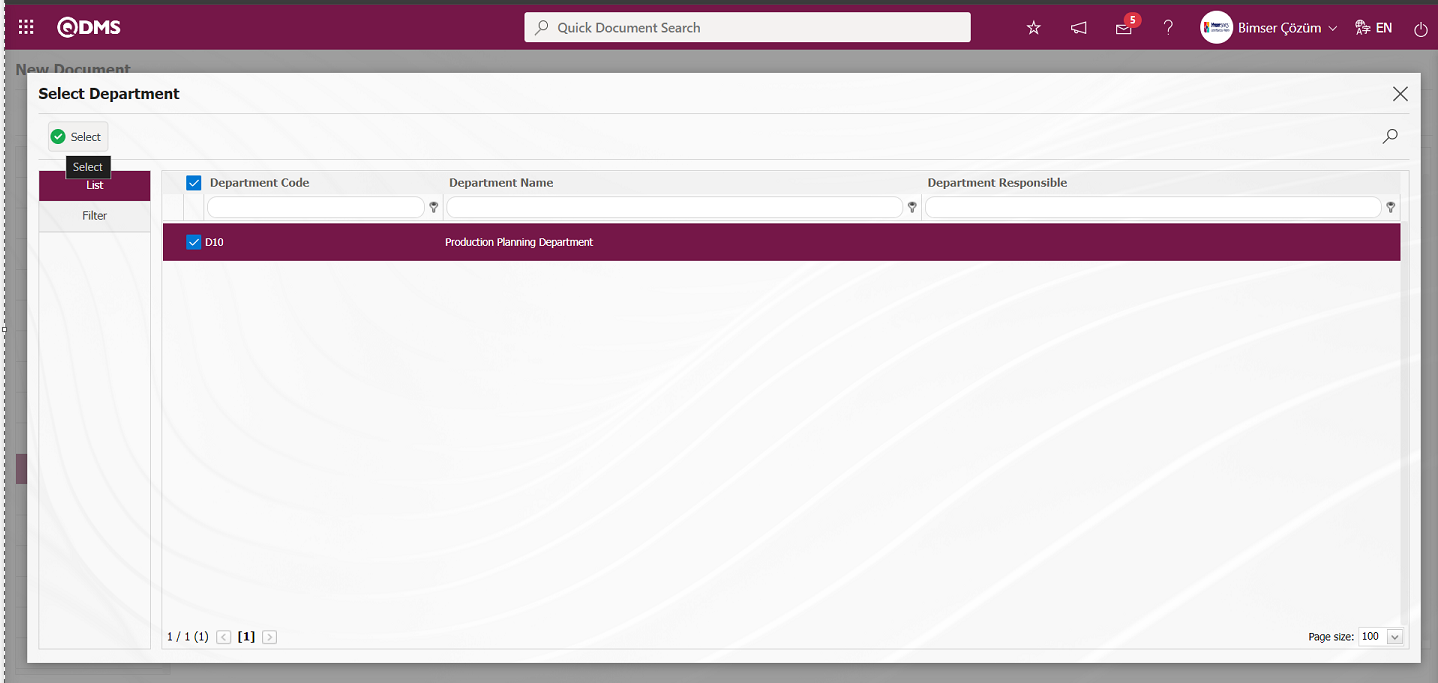
In the list of departments defined in the system, the department selection process button is clicked to add a place of use.
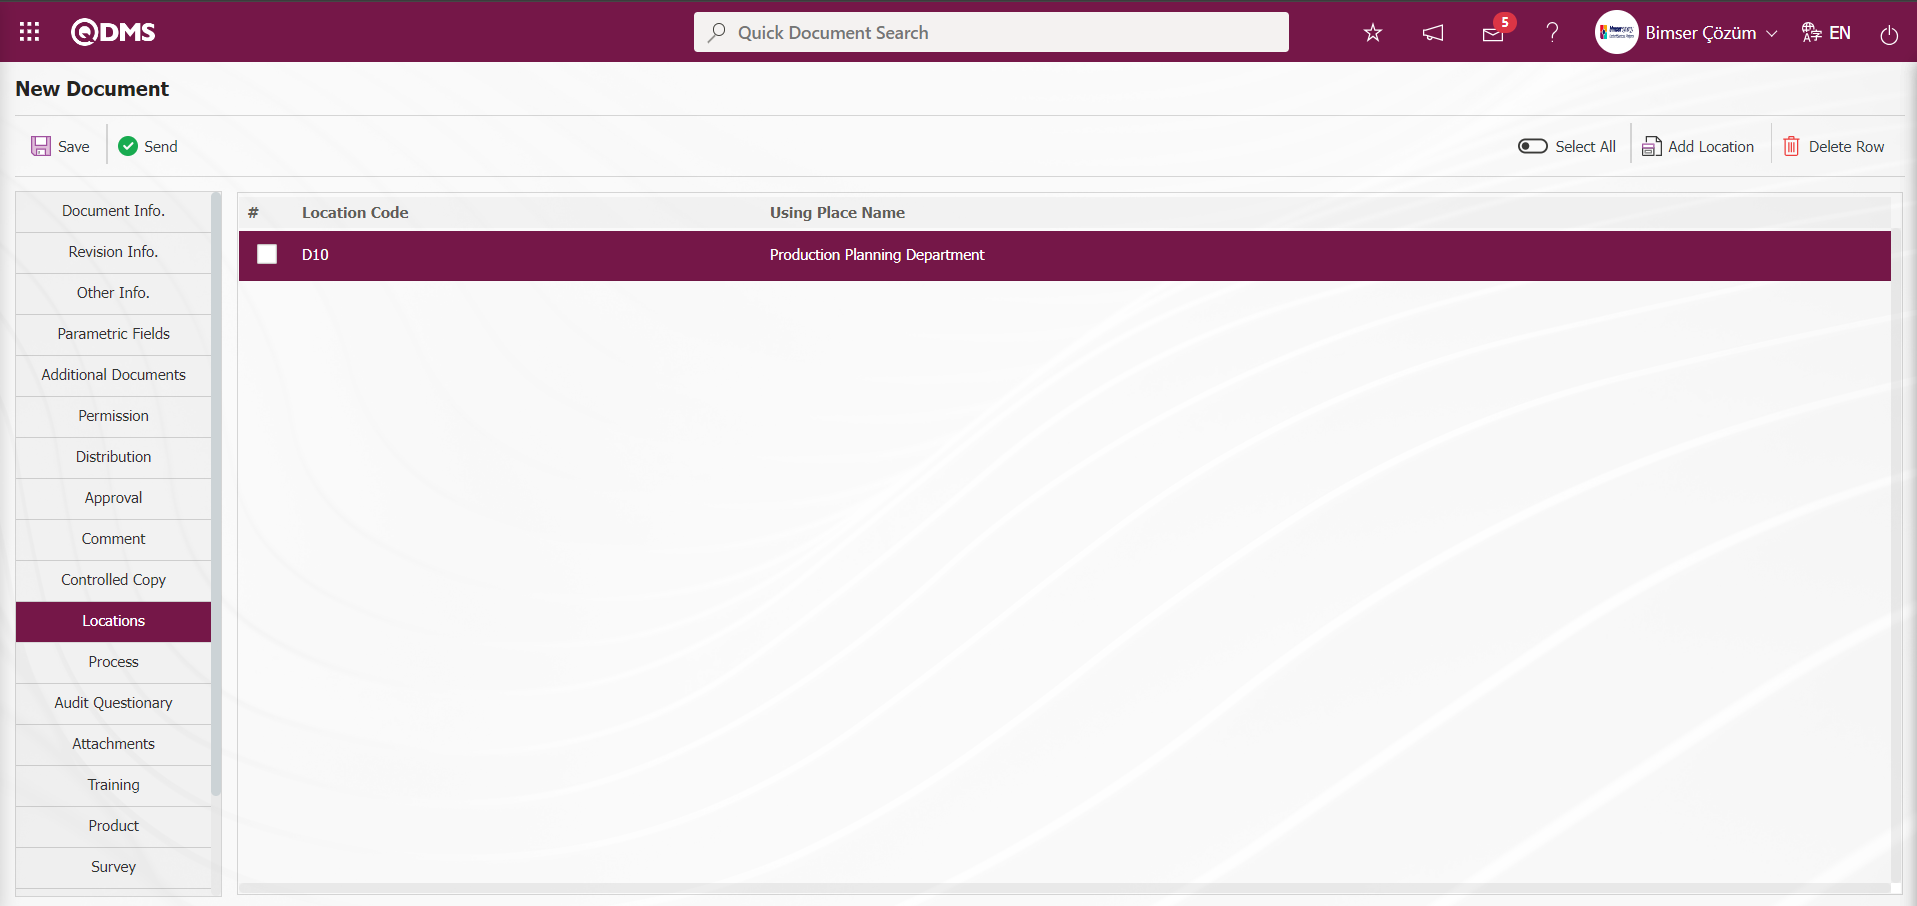
Process Tab;
It is the tab where the prepared document is associated with the processes of the company defined in the system. This tab is a tab that is displayed depending on the parameter. The parameter value of parameter 41 in the document management module parameters is activated by selecting “Yes”.
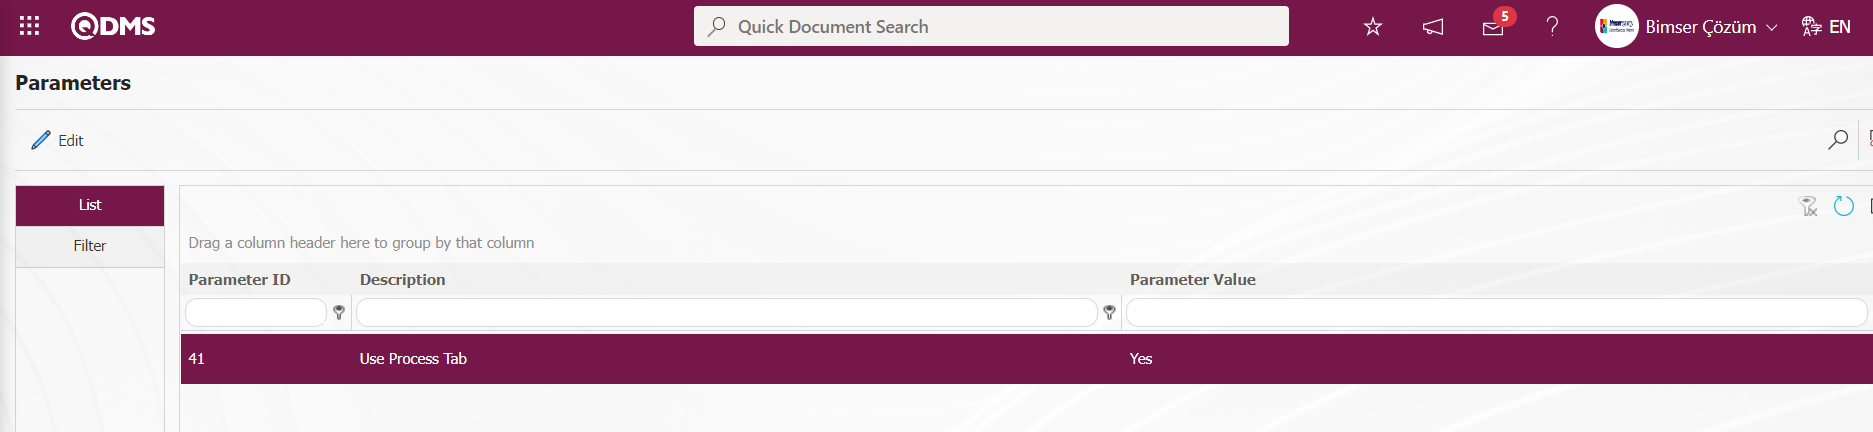
After the parameter is activated, the Process tab is displayed on the Document Preparation/Revision screens. After the process tab is displayed on the Document Preparation screens, the document is associated with the processes defined in the system by adding the  button Process to the document.
The parameter is activated by selecting the parameter value “Yes” in parameter 291 in the Document Module parameters.
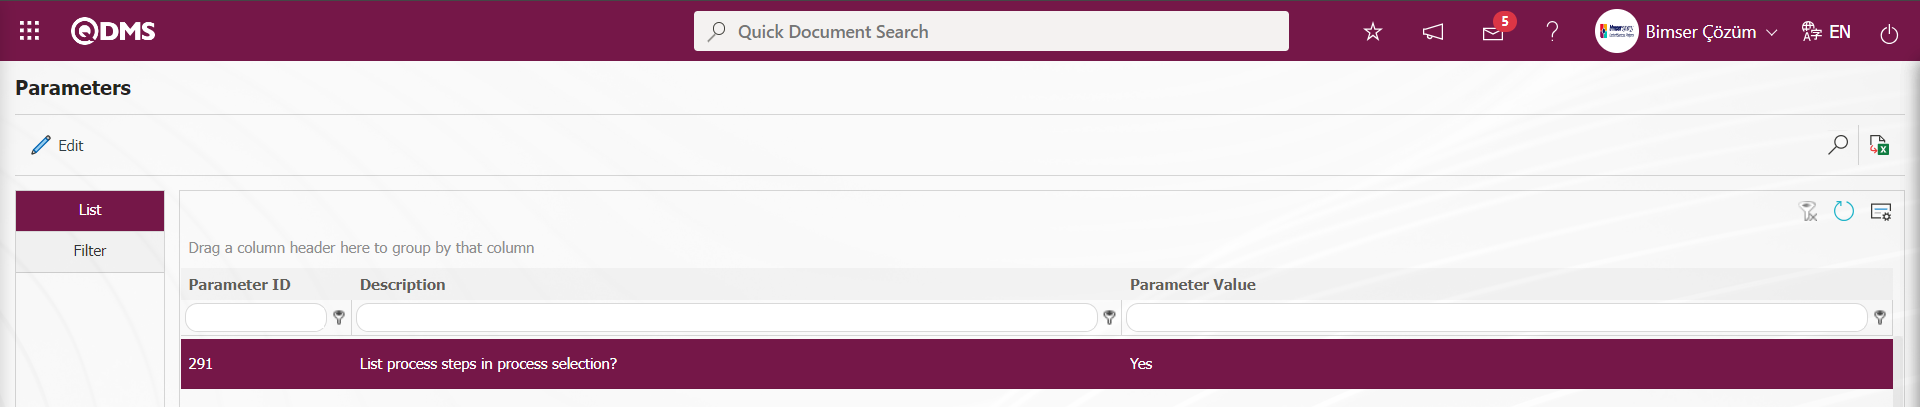
After the parameter is activated, Process steps are listed in Process selection.
In the Document Management parameters, the letters corresponding to the fields of the parameter values in parameter value 297 are written to the parameter value and the related fields are displayed in the grid in the process tab.

Parameter defined fields In the Processes tab, the Purpose of the process and the input, which is the process component, if any, are displayed in the grid. Objective=A and Input=G values are defined in the parameter.
In Document Management Parameters, the parameter value of the parameter 344 “Should a link be used for processes?” is selected as “Yes” and the parameter is activated. After the parameter is activated, the processes added in the Processes tab on the Document Preparation/ Revision screens are added as links. By clicking on the relevant link, the process is displayed in the Ensemble program.
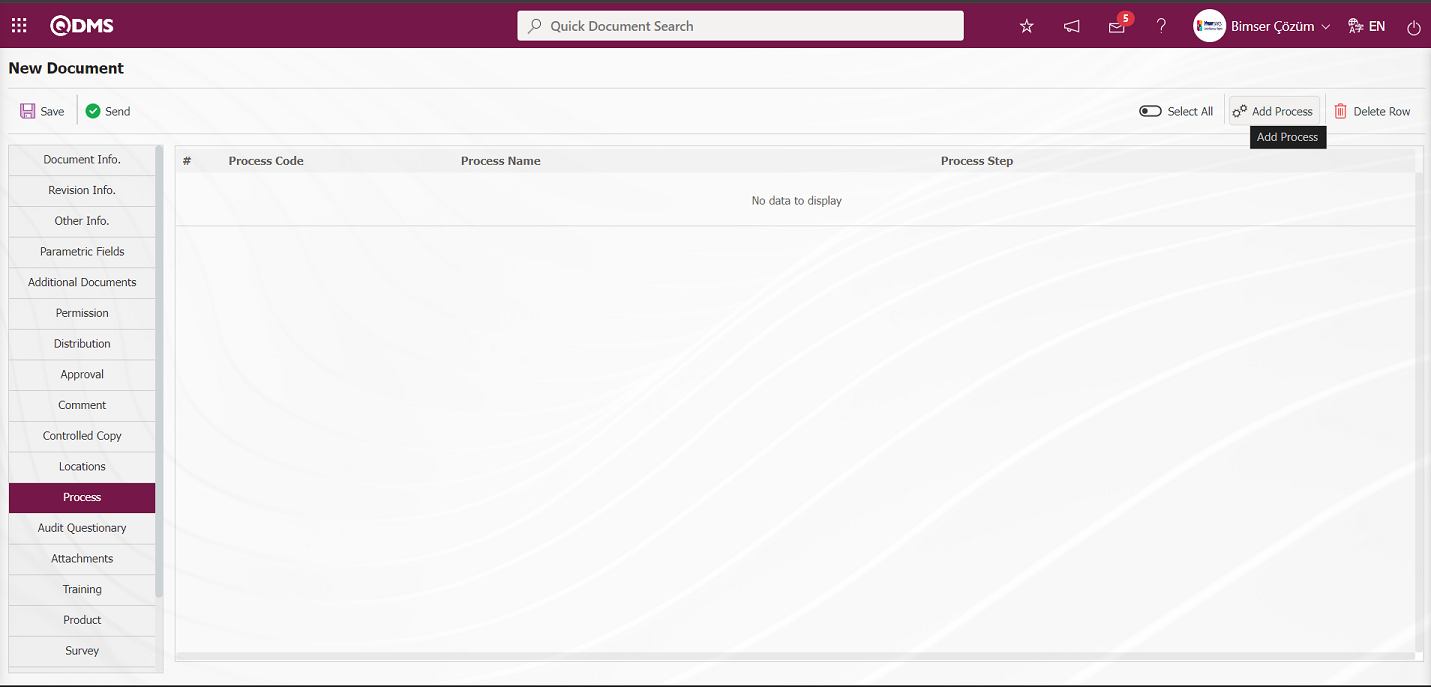
With the help of the buttons on the screen;
 : Process addition operation is performed.
 : Deletes the selected line in the list.
Click on the button to add a new process in the Processes tab of the New Document screen.
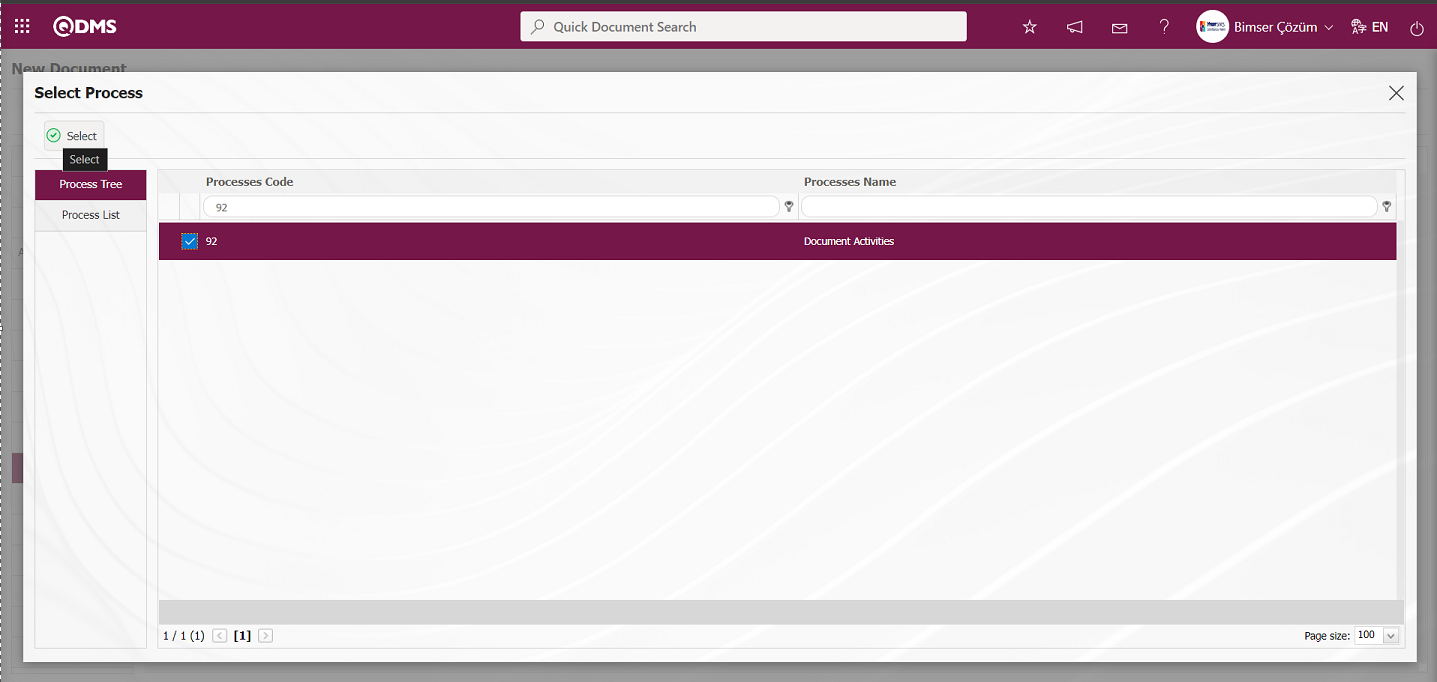
In the Process list that opens, the process defined in the system is selected and the Process is added to the document by clicking the button.
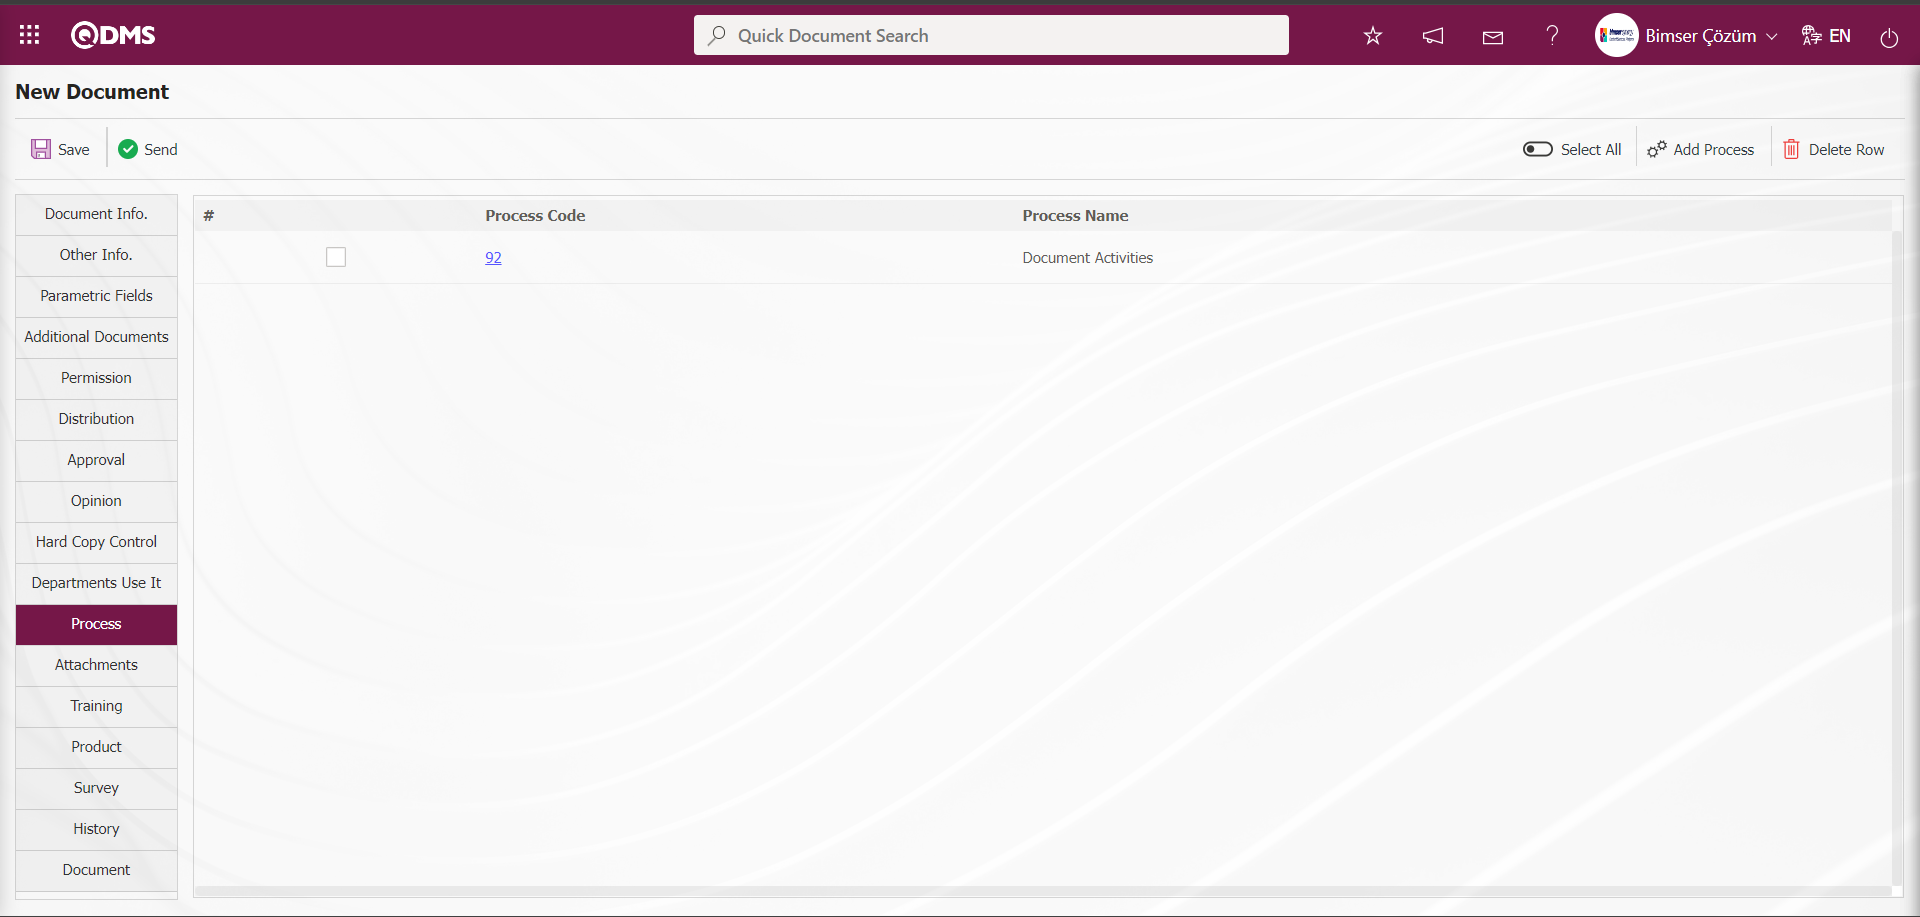
The process defined in the Ensemble program is displayed by clicking the link in the Process code field added in the Processes tab on the New Document screen.
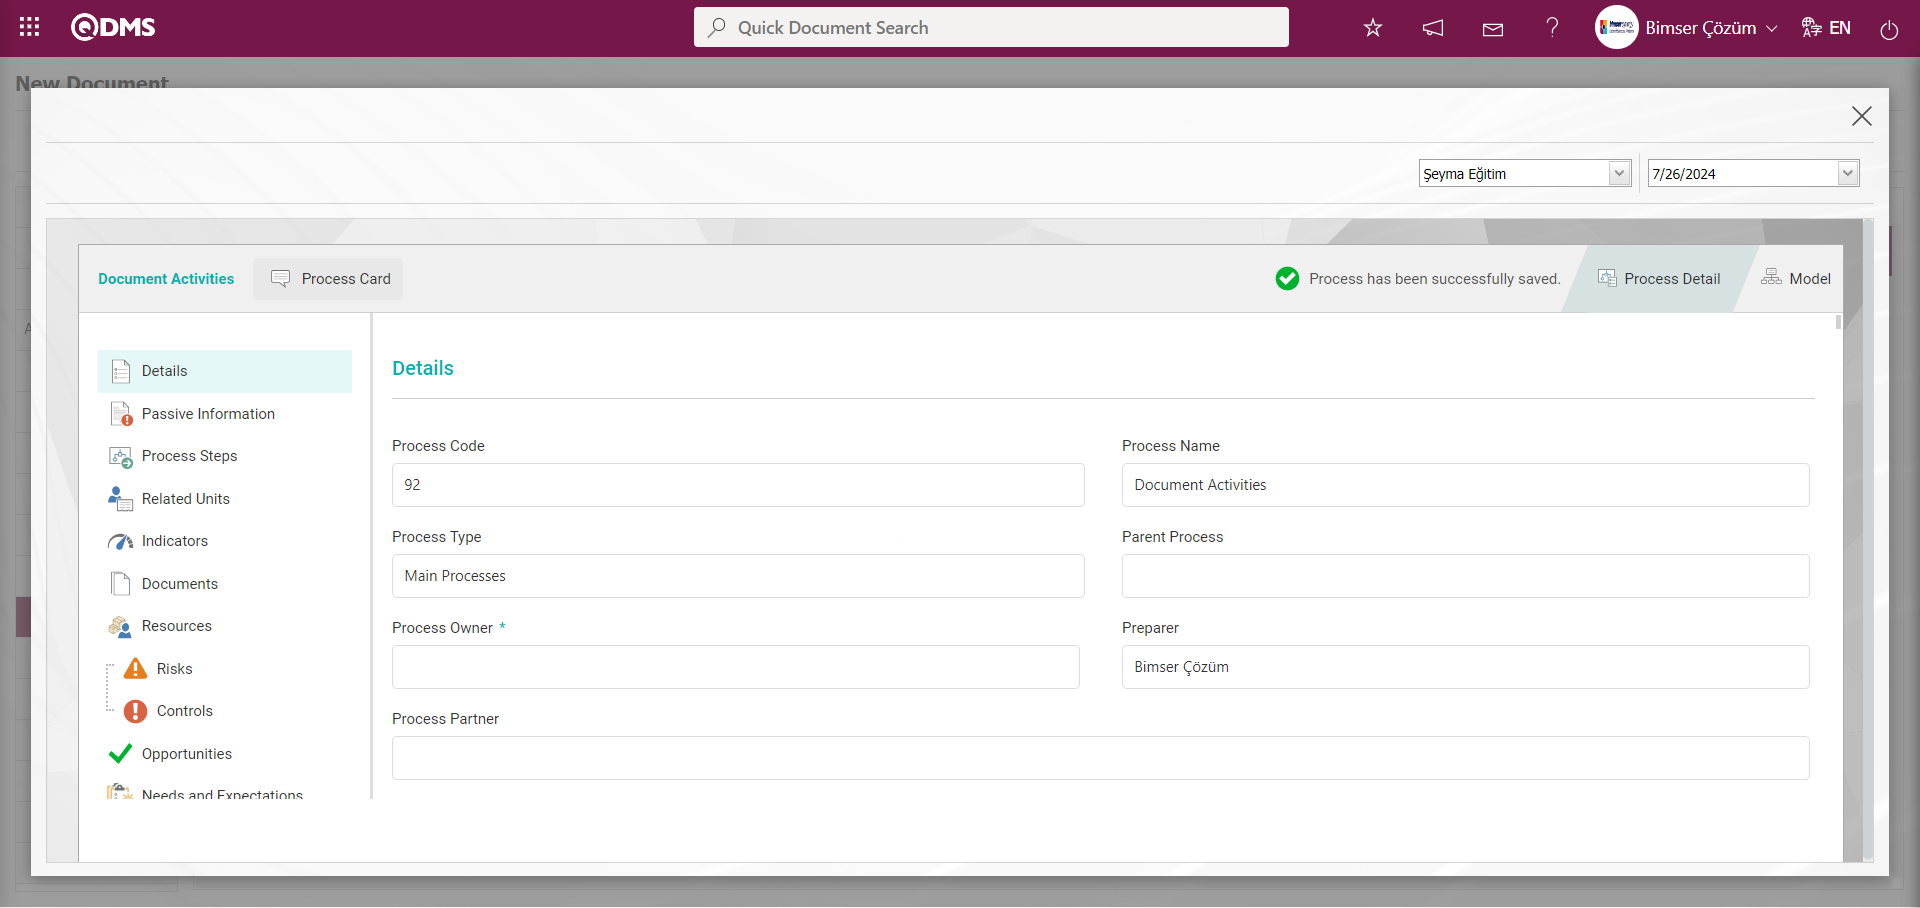
The visual module of the Process is displayed by clicking the  button on the Process Detail screen.
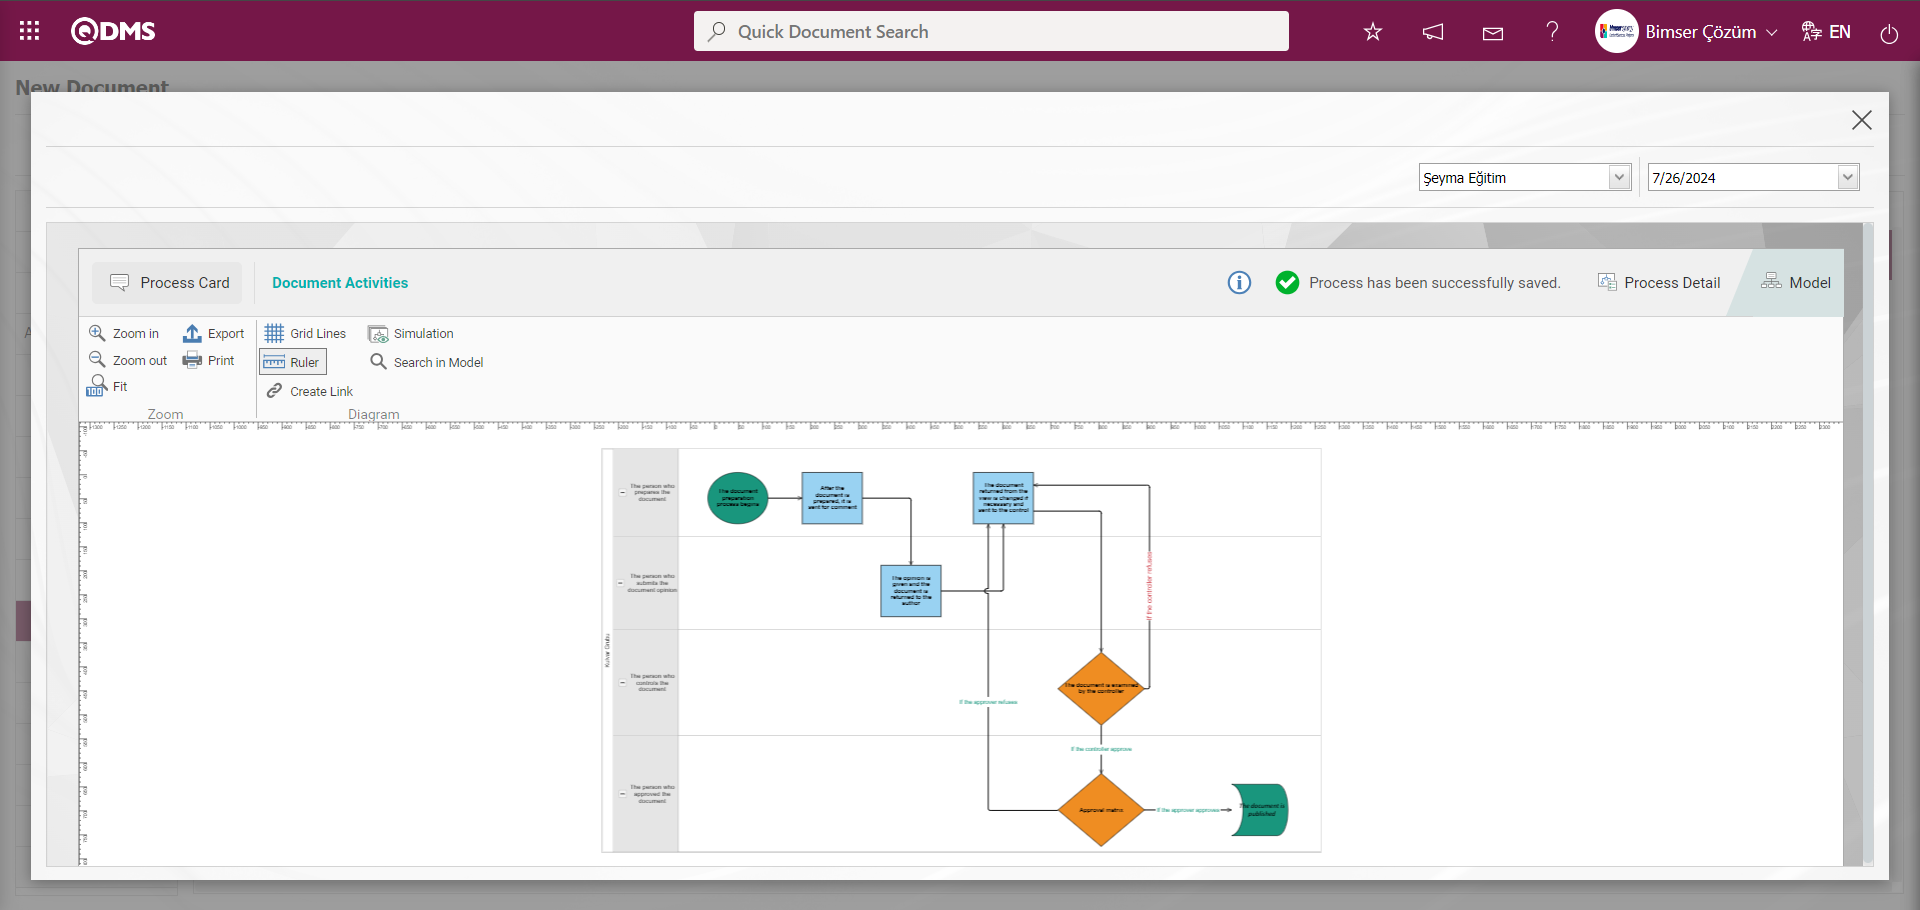
Audit Questions
It is the tab where the prepared document is associated with the questions defined from the system in the Audit Activities module question pool menu. In order for the Audit Activities module and the Document Management module to work integrated with the Document Management module, the parameter value of the 42 numbers parameter in the Document Management module parameters is activated by selecting “Yes”.

After the parameter is activated, the Audit Questions tab is displayed and by clicking the  button on the tab, the association process is made with the questions in the Audit Activities Module question pool defined in the system.
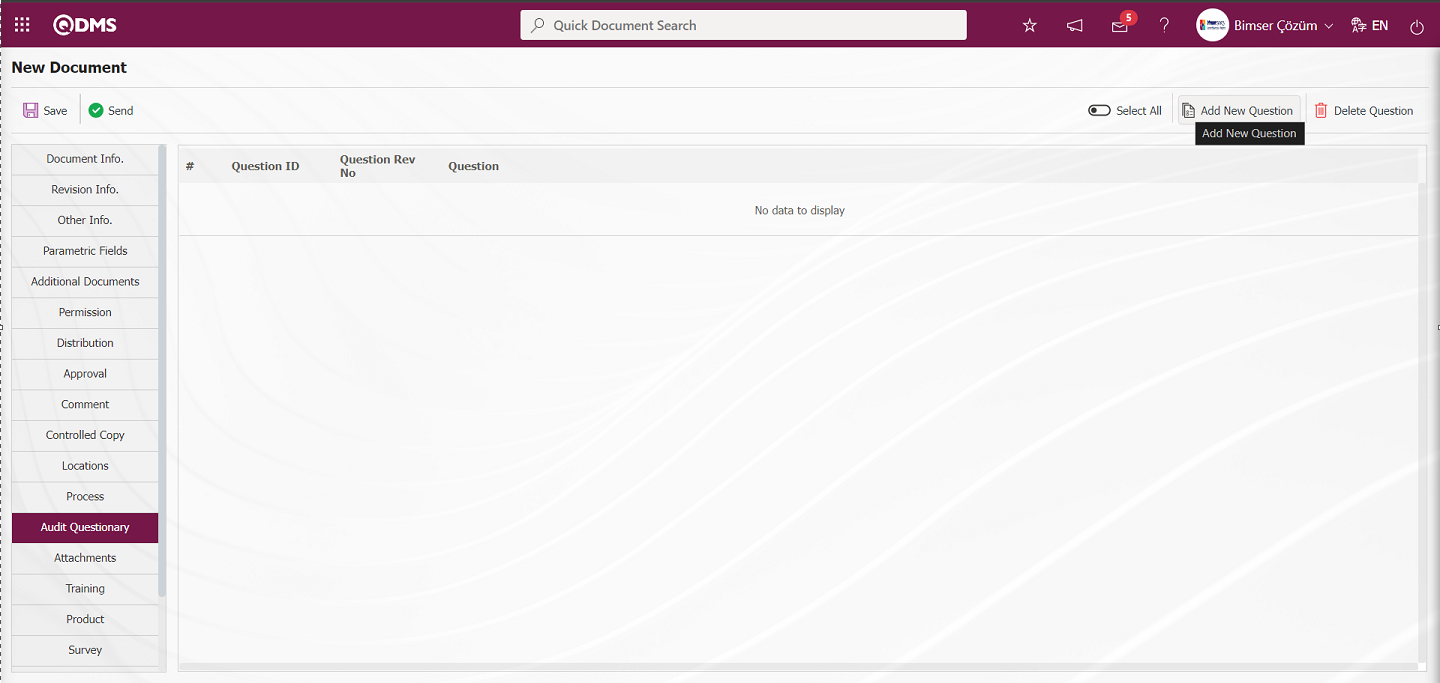
With the help of the buttons on the screen;
: Adding an audit question is done.
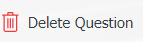 : Delete the selected audit question in the list.
Click the button to add a new audit question in the Audit Questions tab on the New Document screen.

In the Question list defined in the system, select the question to be added to the document to be prepared and click the button to add an audit question.
Additional Files Tab;
It is the tab where additional files in formats such as pictures, minutes, documents, etc. are uploaded to the prepared document. The parameter value of parameter 43 in the Document Management Module parameters is activated by selecting “Yes”.

After the parameter is activated, the Additional Files tab is displayed on the Document Preparation/Revision screens. In this tab, adding files, viewing the added file and deleting the added file if desired are done with the help of buttons.
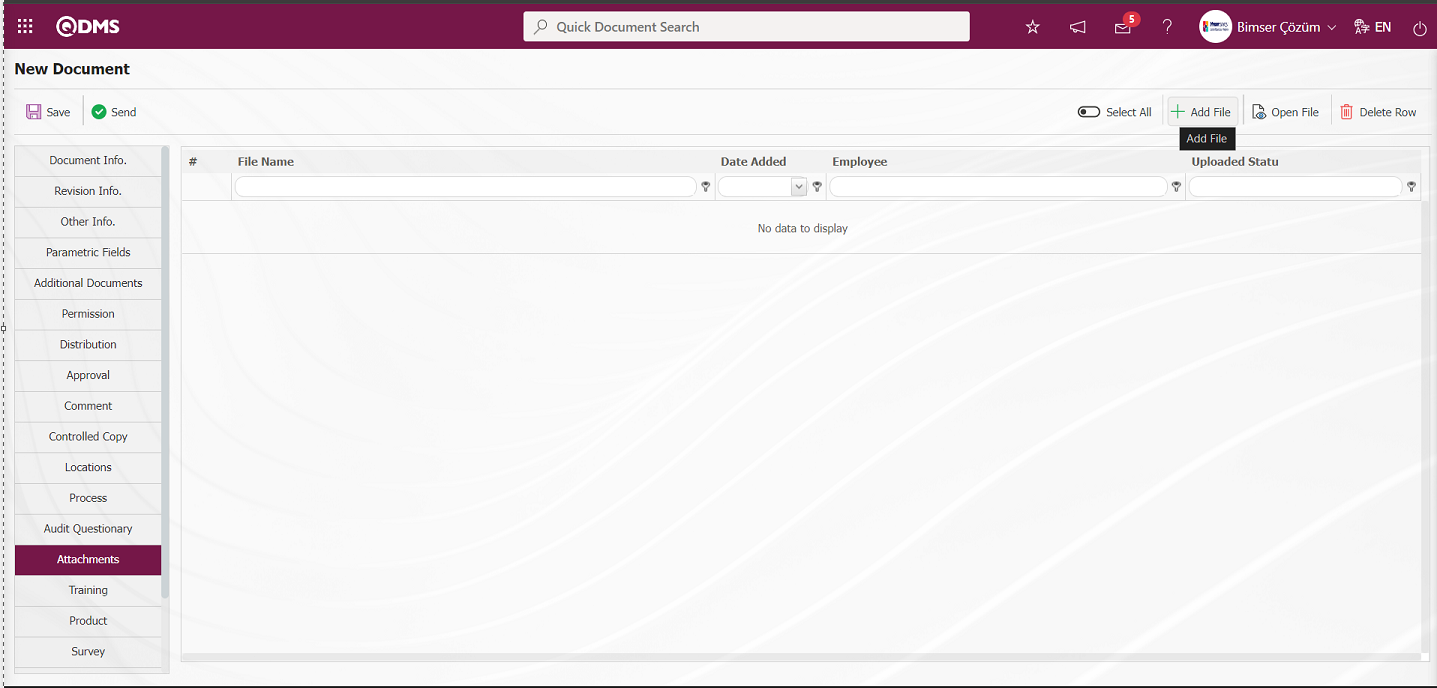
With the help of the buttons on the screen;
 : Upload a new file.
 :Viewing the selected file in the list is done.
 : Delete the selected file in the list.
Click the button to upload a new additional file in the Additional File tab on the New Document screen. Click the Browse button on the Add File screen.
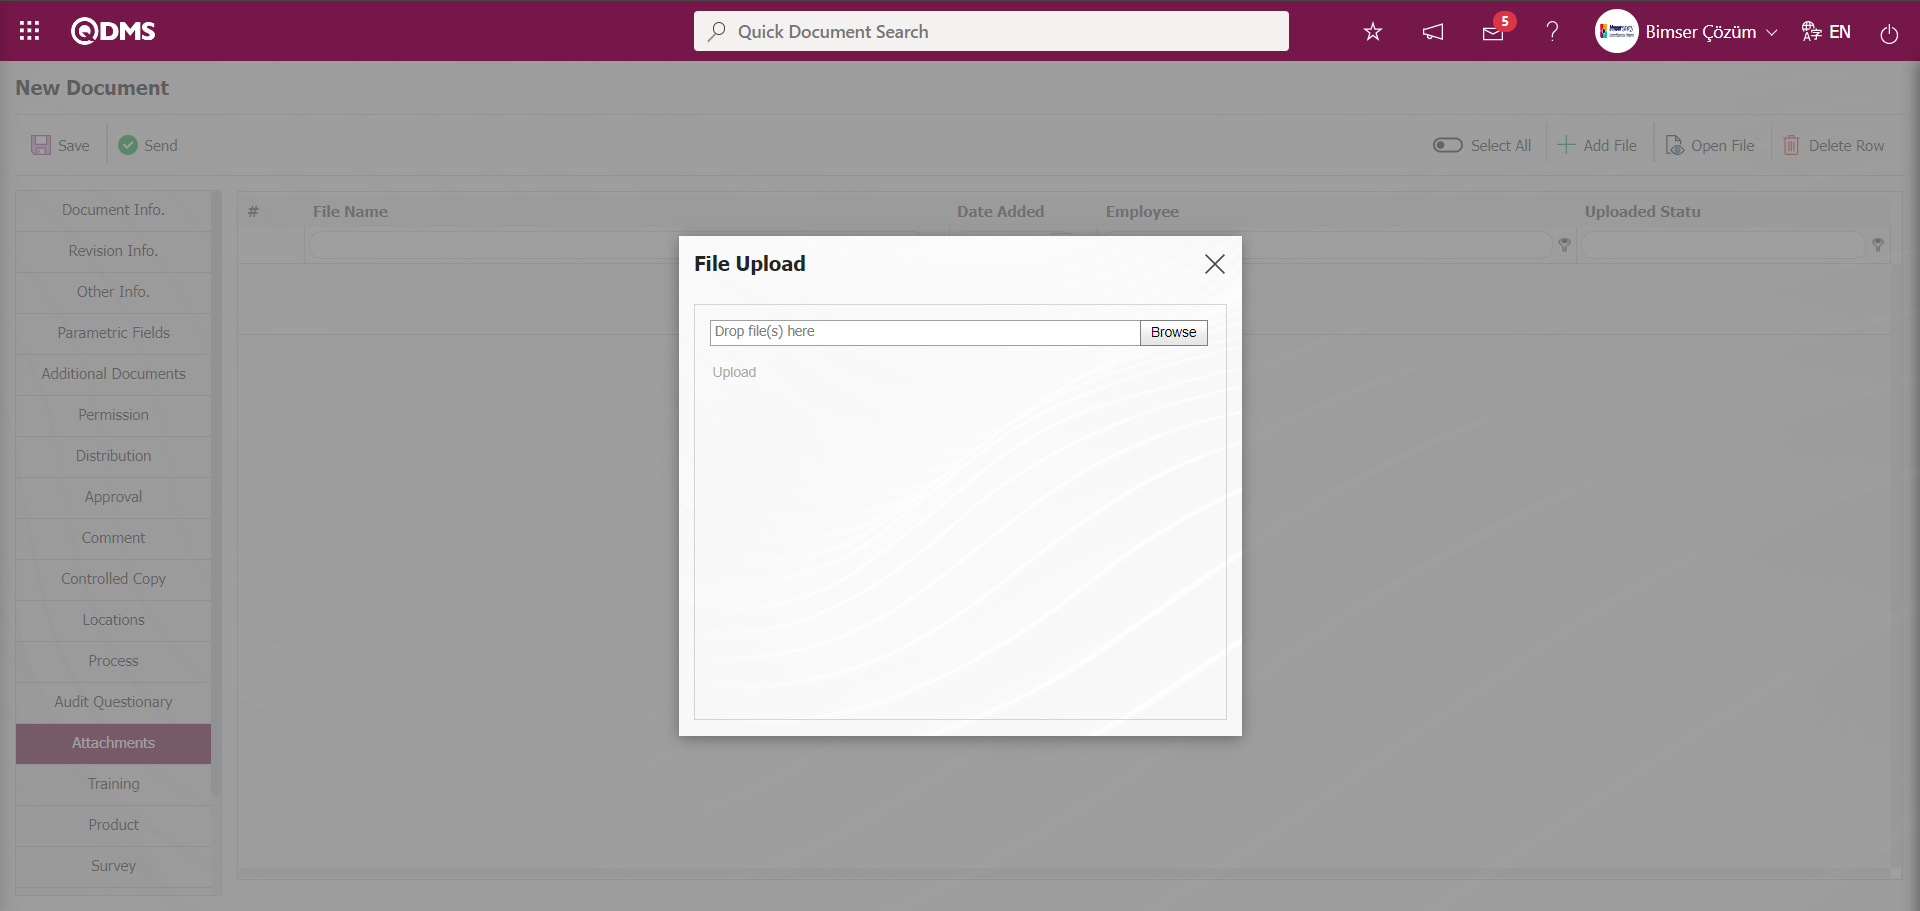
The file to be uploaded is selected.
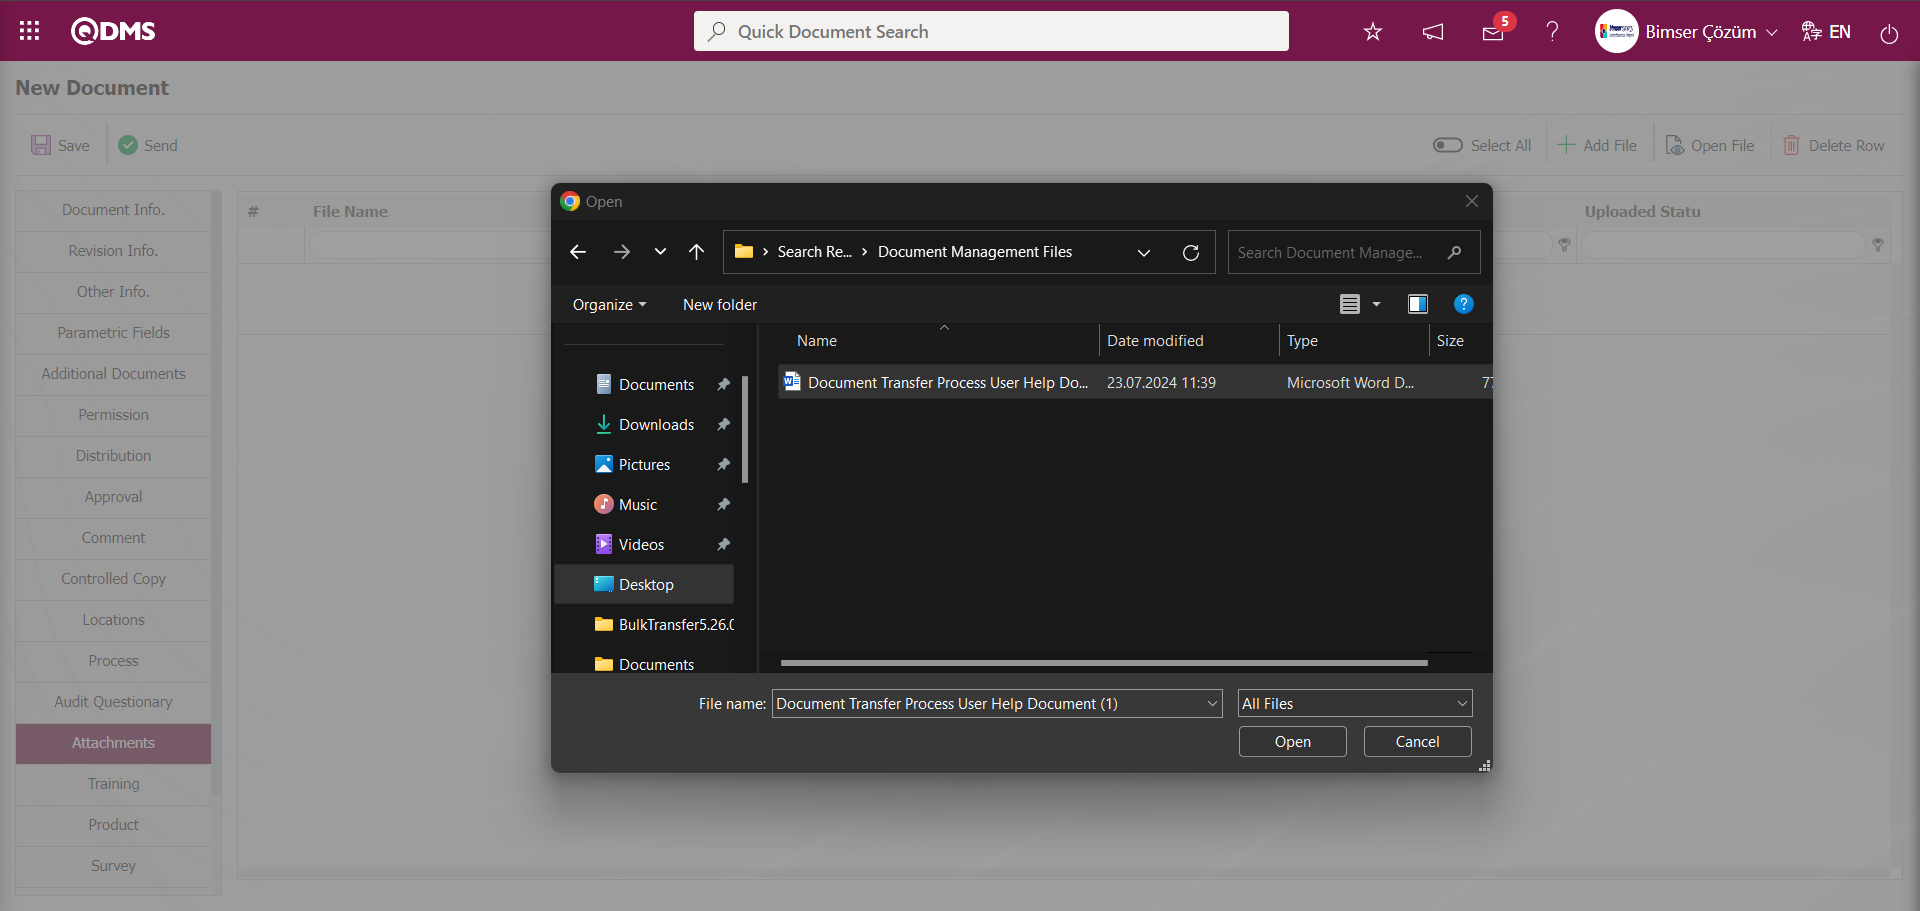
After selecting the file to be uploaded on the Add File screen, the file is uploaded by clicking the “Upload” button.

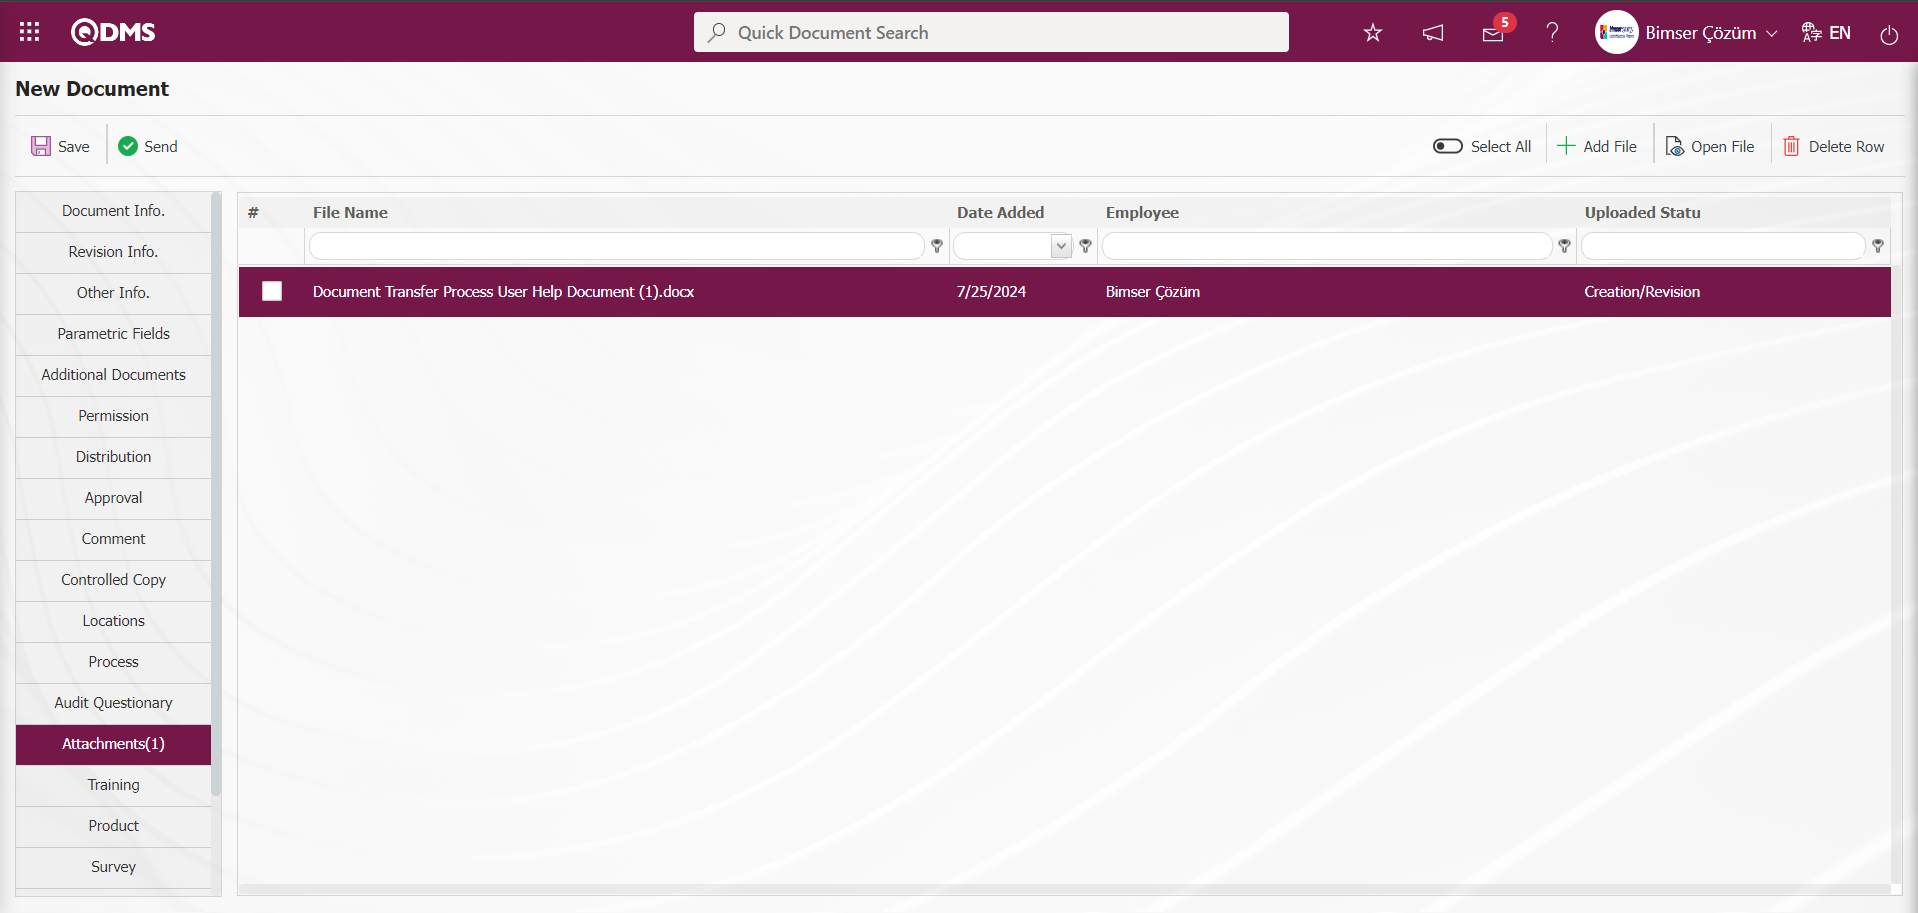
Education tab;
After selecting the training officer in the document information tab, go to the training tab. The titles to be trained are determined from the title addition field. After the document is approved, the training related to the document is given by the training officer and the document is published. Training tab is a tab displayed depending on the parameter. The parameter value of parameter 48 of Document Management parameters is activated by selecting “Yes”.
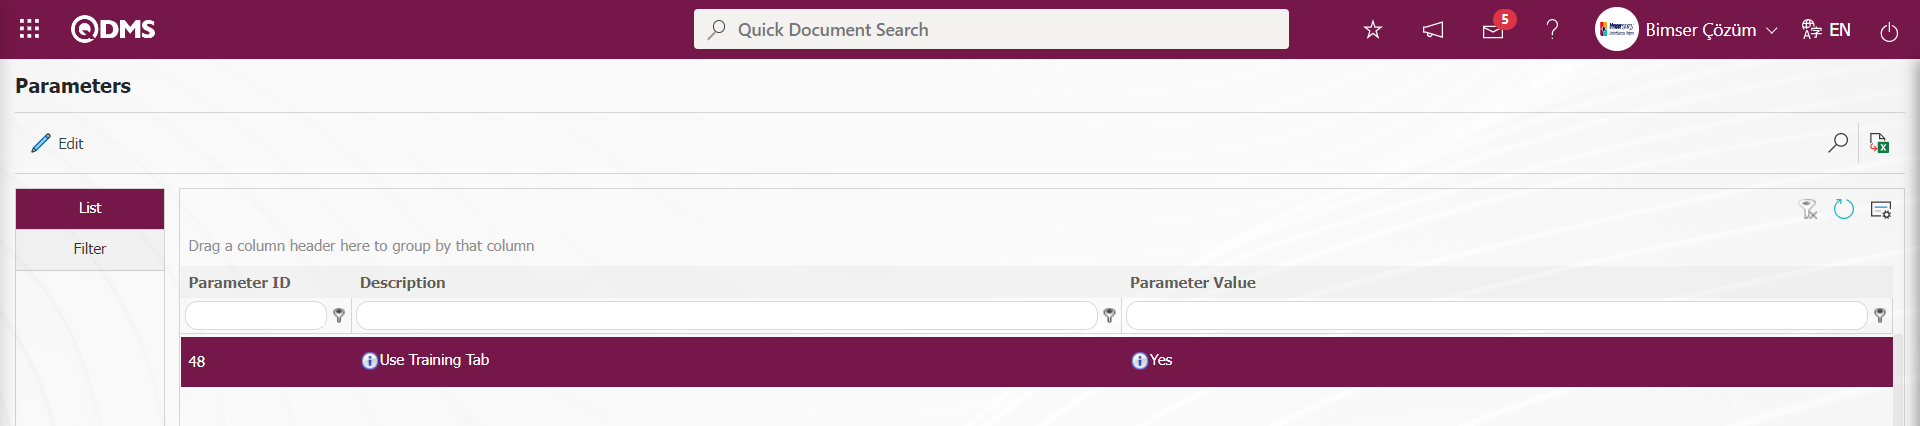
After the parameter is activated, the Training tab is displayed on the Document Preparation/Revision screens. In order to provide a training related to the document, the relevant parameter settings must be made for the Training tab. When the parameter value of the 110th parameter of the document parameters is selected as “Yes” and the document is approved, an action task is created for the training officer to perform training.
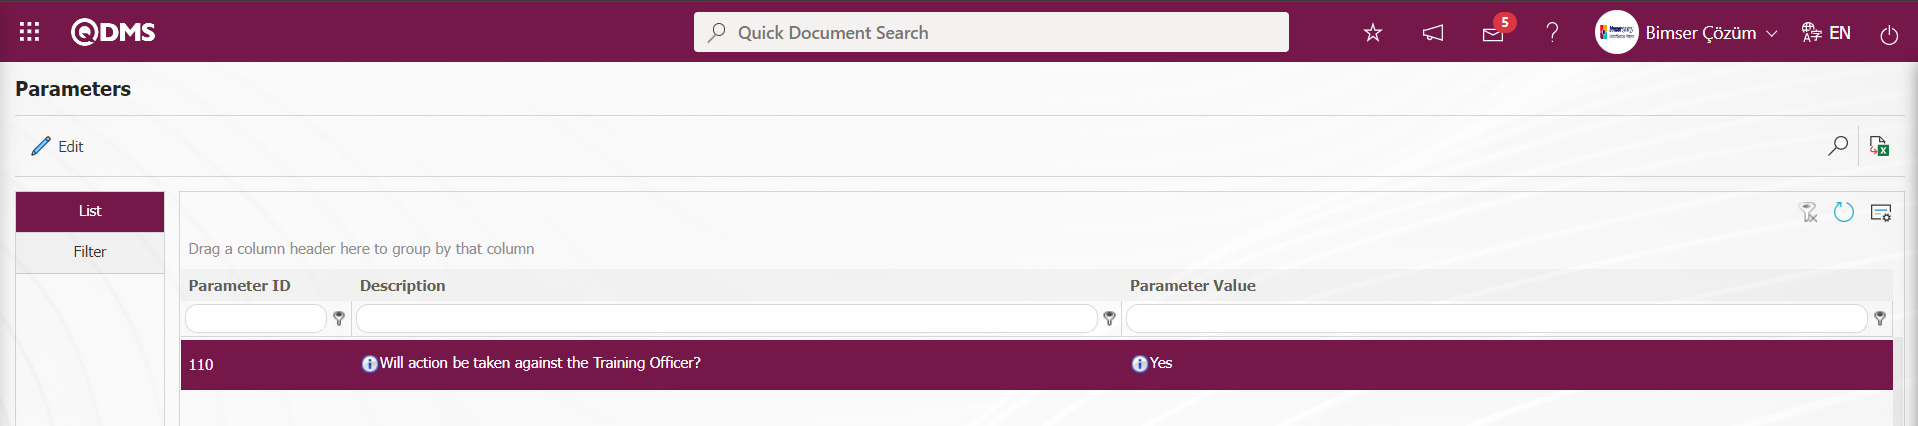
For this to happen, the plan code of the action to be opened to the training officer must be defined in the parameter value in parameter 111. The Action Plan Code information defined in the parameter is taken on the Integrated Management System/Action Management/Planning screen.
The type code of the action to be opened to the training officer is defined in the parameter value in parameter 112. Action type code information is obtained from System Infrastructure Definitions/Action/Action Item Type Definition menu.

If the parameter value of parameter 145 of the Document Management parameters, “Can the training officer publish a document while there are open actions on it” is “Yes”, when the last approver clicks on the send button, a warning message appears as “There are open actions on the training officer, should it still be sent”, if approved, the document is published before the training task is completed. If the parameter value of the 145th parameter is “No”, it warns “There are open actions on the training supervisor, they cannot be closed”. The document cannot be published until the training officer gives the trainings and closes the action.
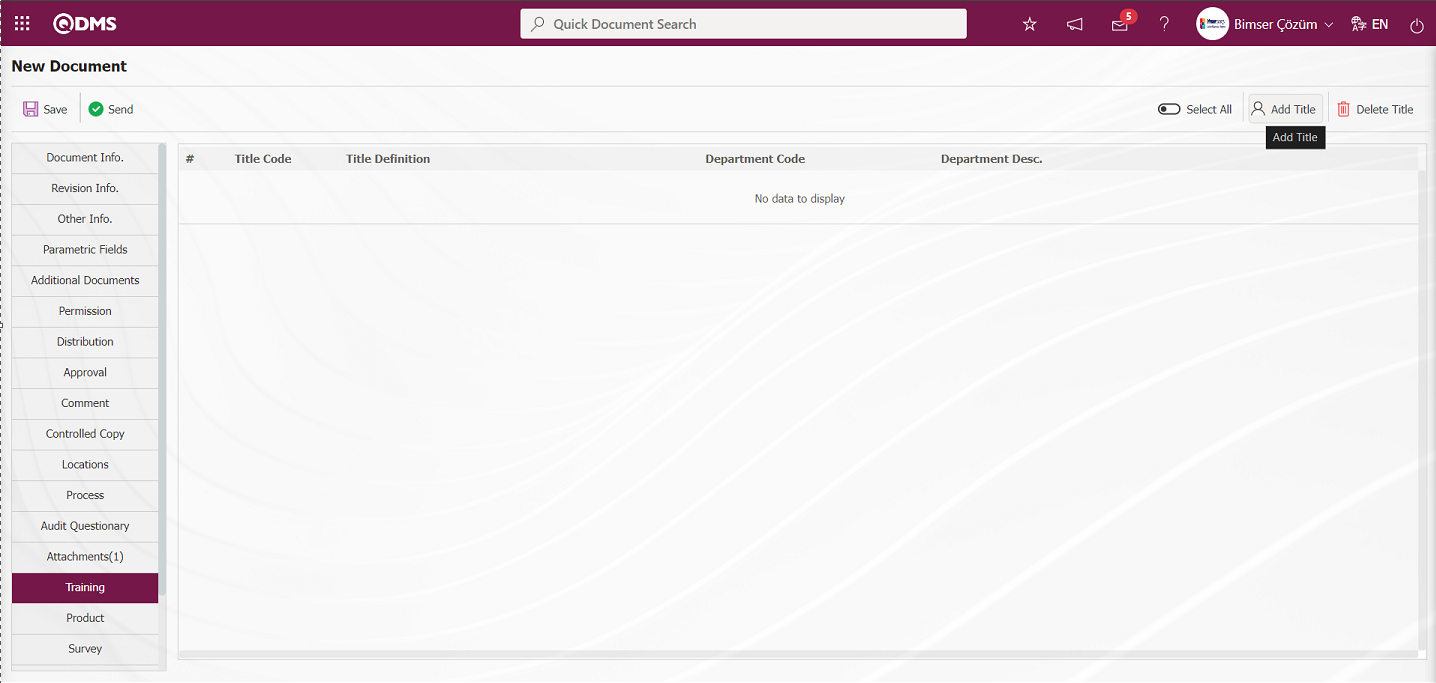
With the help of the buttons on the screen;
 : Adding a title is done.
 : Delete the selected Title information in the list.
On the new document screen, click the button in the upper right corner of the screen to add a new Title in the Education tab.
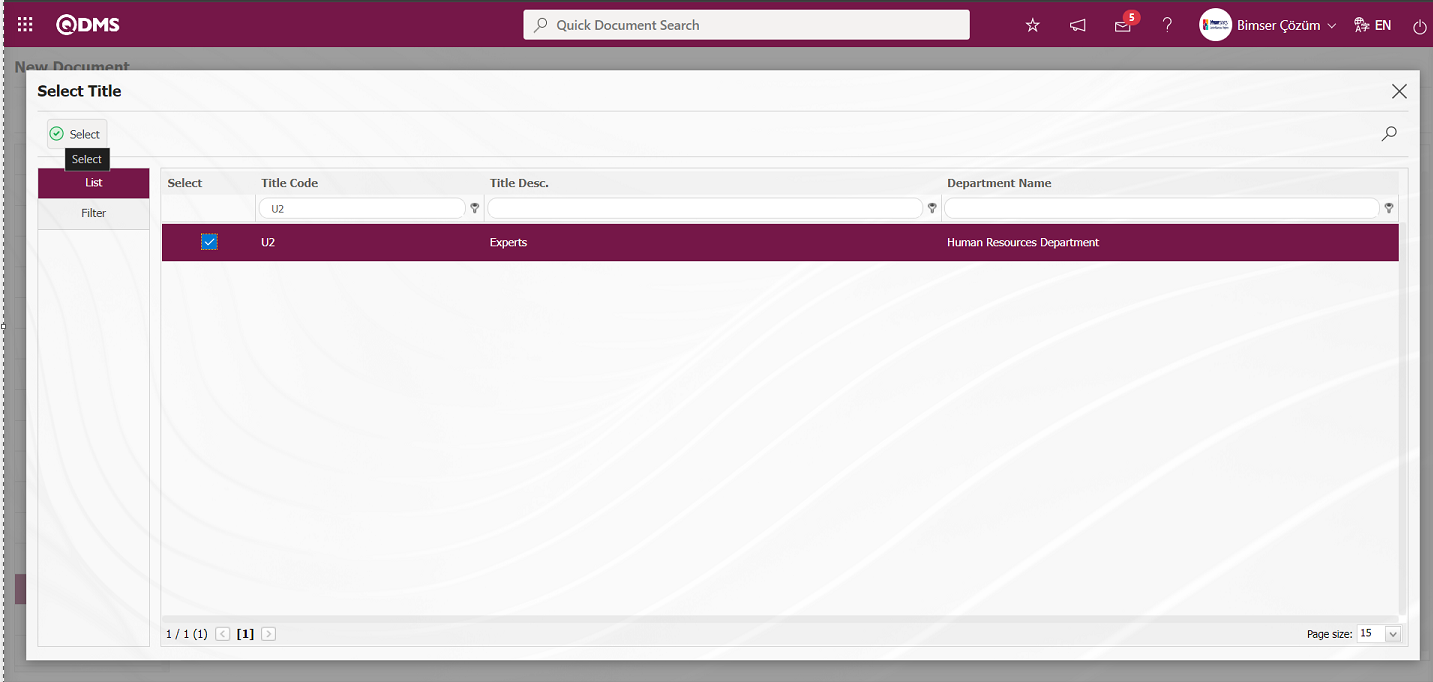
In the system-defined Title list that opens, the Title selection process is made and the Title is added to the Education tab by clicking the button.
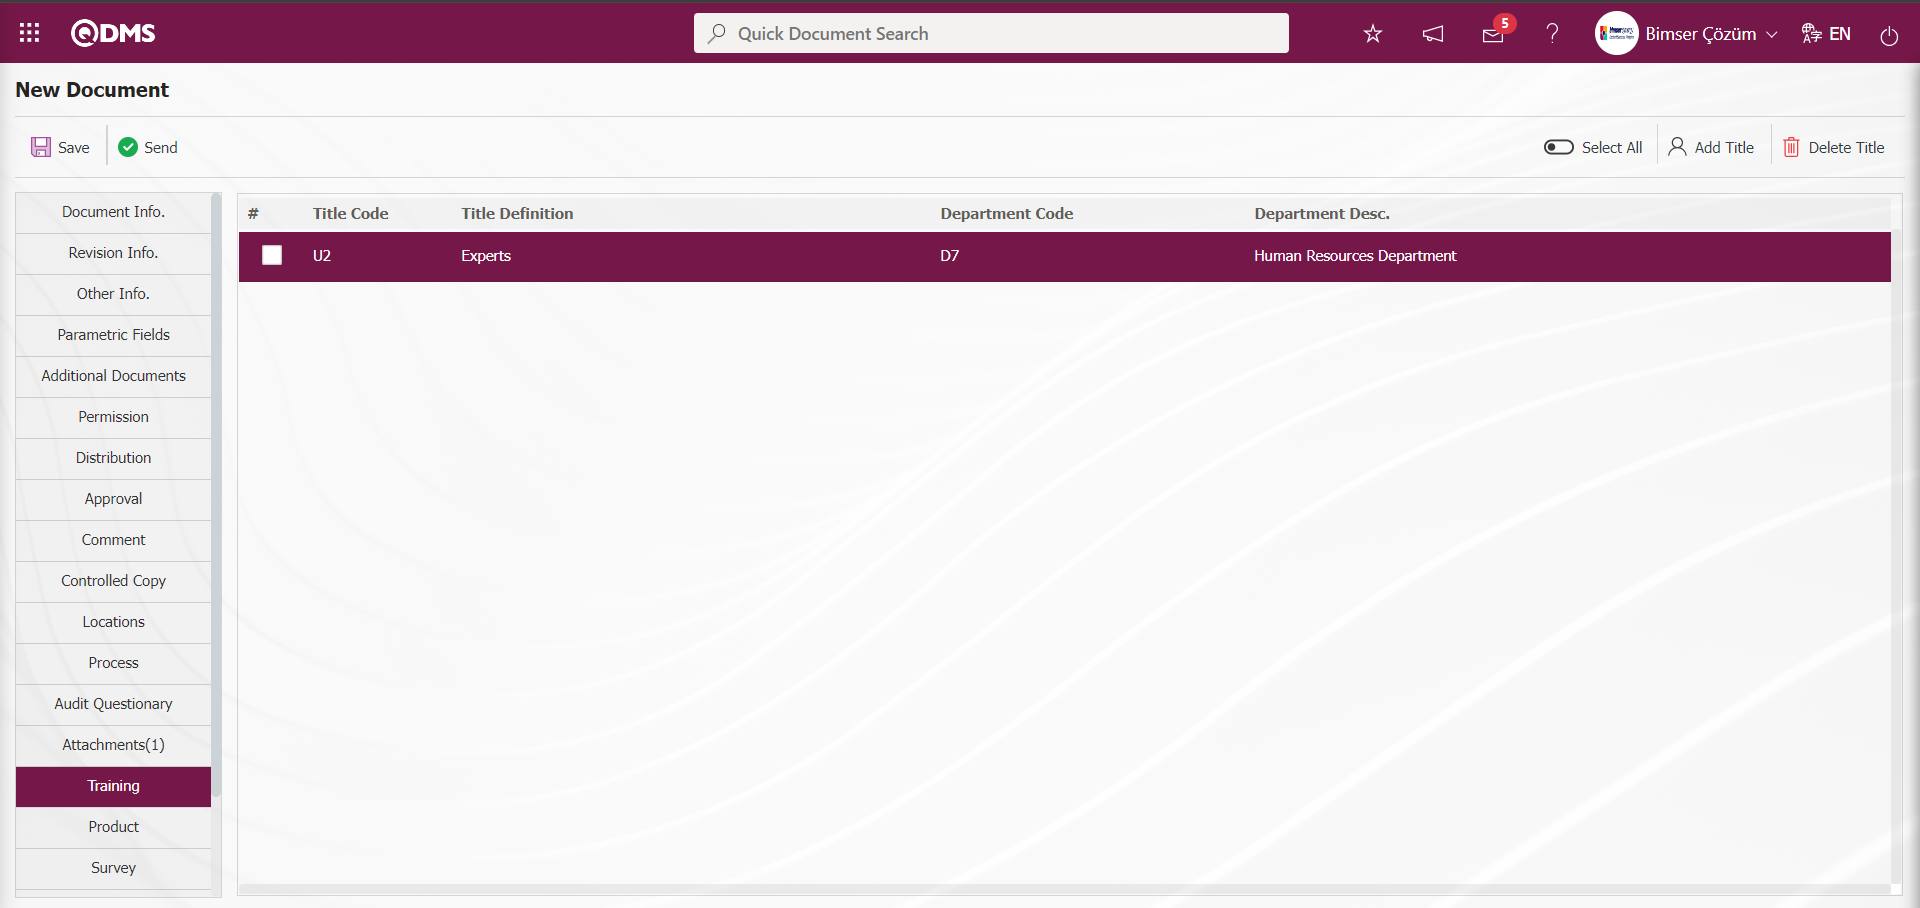
Product tab;
It is the tab where the prepared document is associated with the products defined in the system. It is a tab that is displayed depending on the parameter. The parameter value of parameter 66 in the Document Management Module parameters is activated by selecting “Yes”.
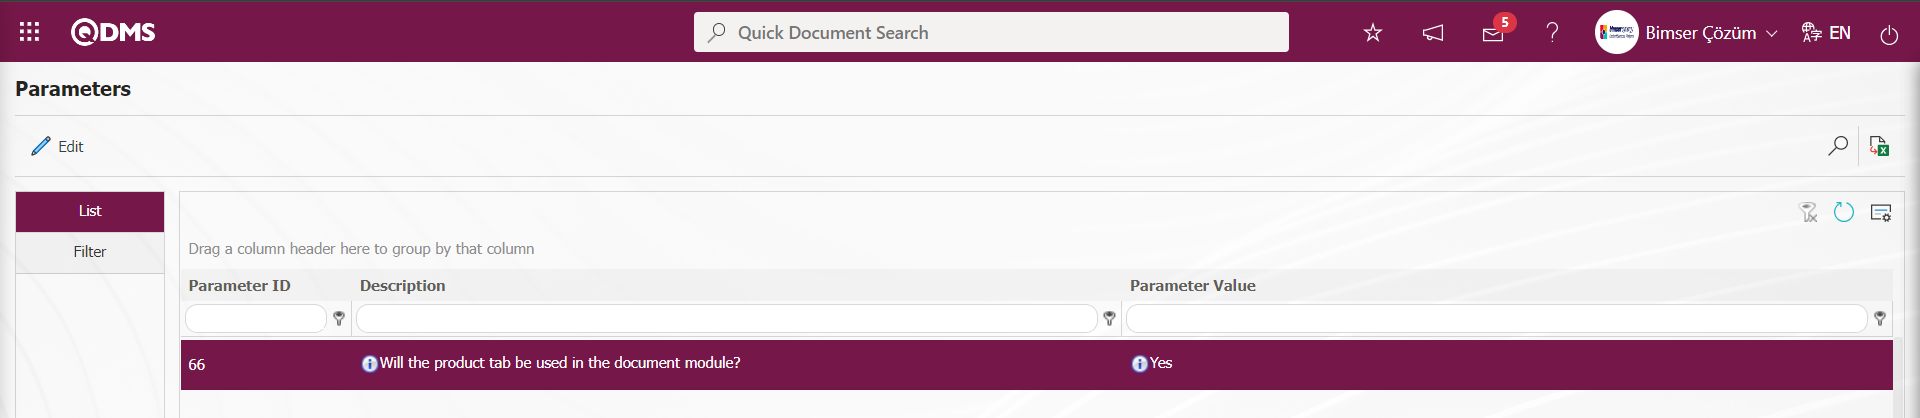
After the parameter is activated, the product tab is displayed on the Document Preparation/ Revision screens. The new document prepared with this tab is associated with the products defined in the system with the help of the buttons.
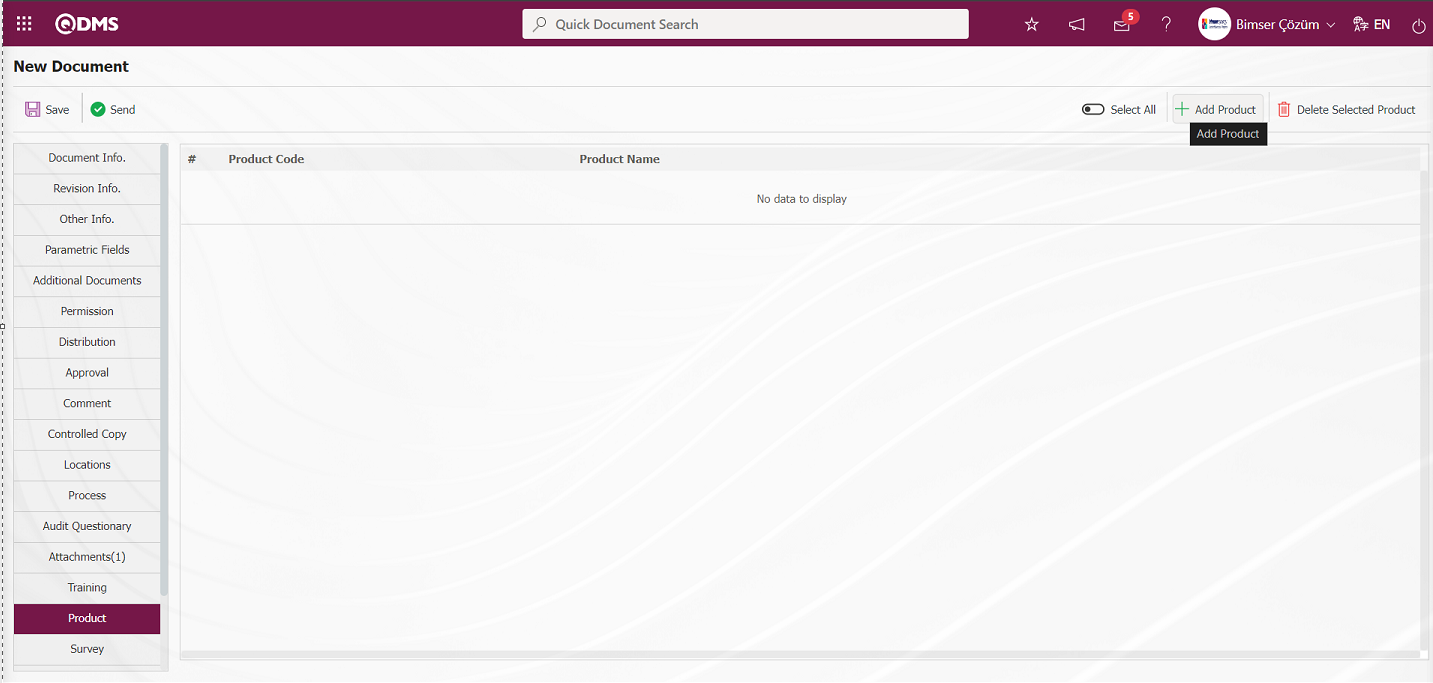
With the help of the buttons on the screen;
 : Product addition is done.
 : Selected product information is deleted in the list.
In the Product tab on the new document screen, click the button on the top right corner of the screen to add a new product.
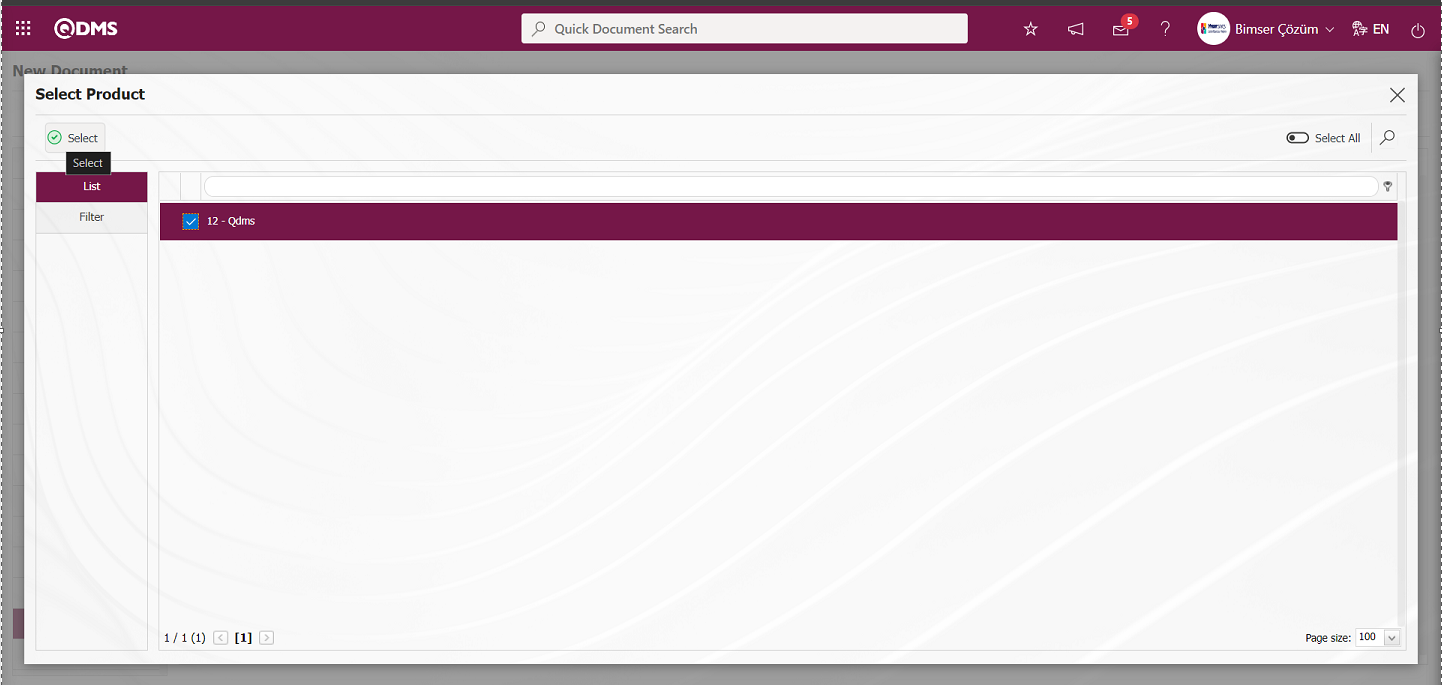
Select from the list of products defined in the system and click on the button to add a product and establish a relationship with the document product.
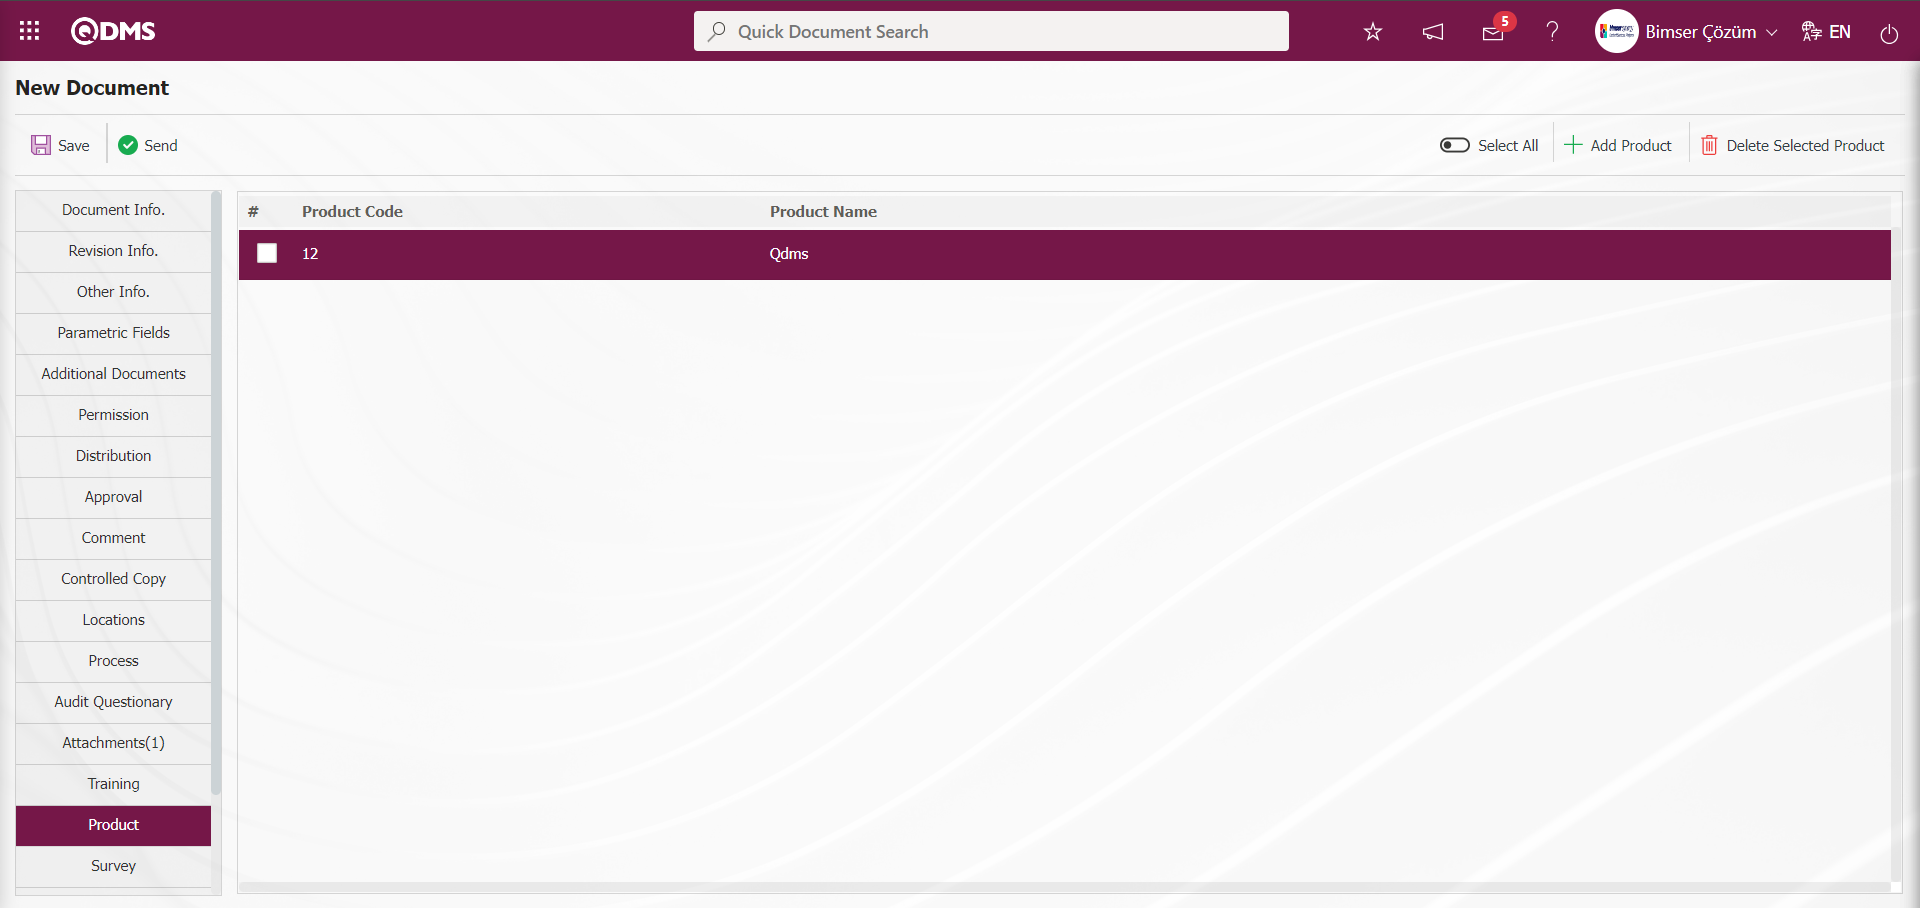
Survey Tab;
If you want to send a survey about the document to the users selected in the distribution matrix after the document is published, the parameter value of parameter 81 of the Document Management Module parameters is activated by selecting “Yes”.

After the parameter is activated, the Questionnaire tab is displayed on the Document Preparation/Revision screens. In this tab, the  button is clicked to add questions in the desired format. In order for the Questionnaire tab to be activated, first of all, the check box related to the Questionnaire To Be Used field in the Other Information tab must be checked.
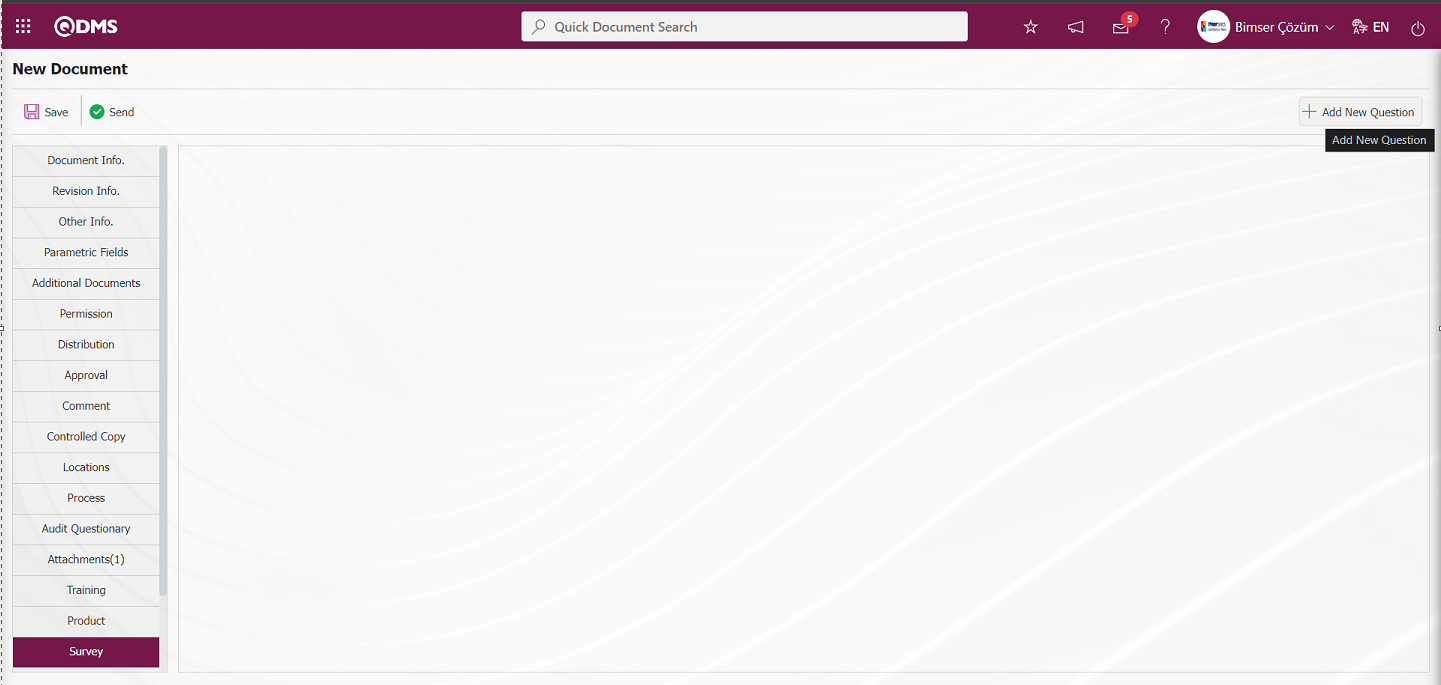
With the help of the buttons on the screen;
: Adding a question to the survey is done.
On the new document screen, click on the button to add question 1 to the questionnaire in the Questionnaire tab.
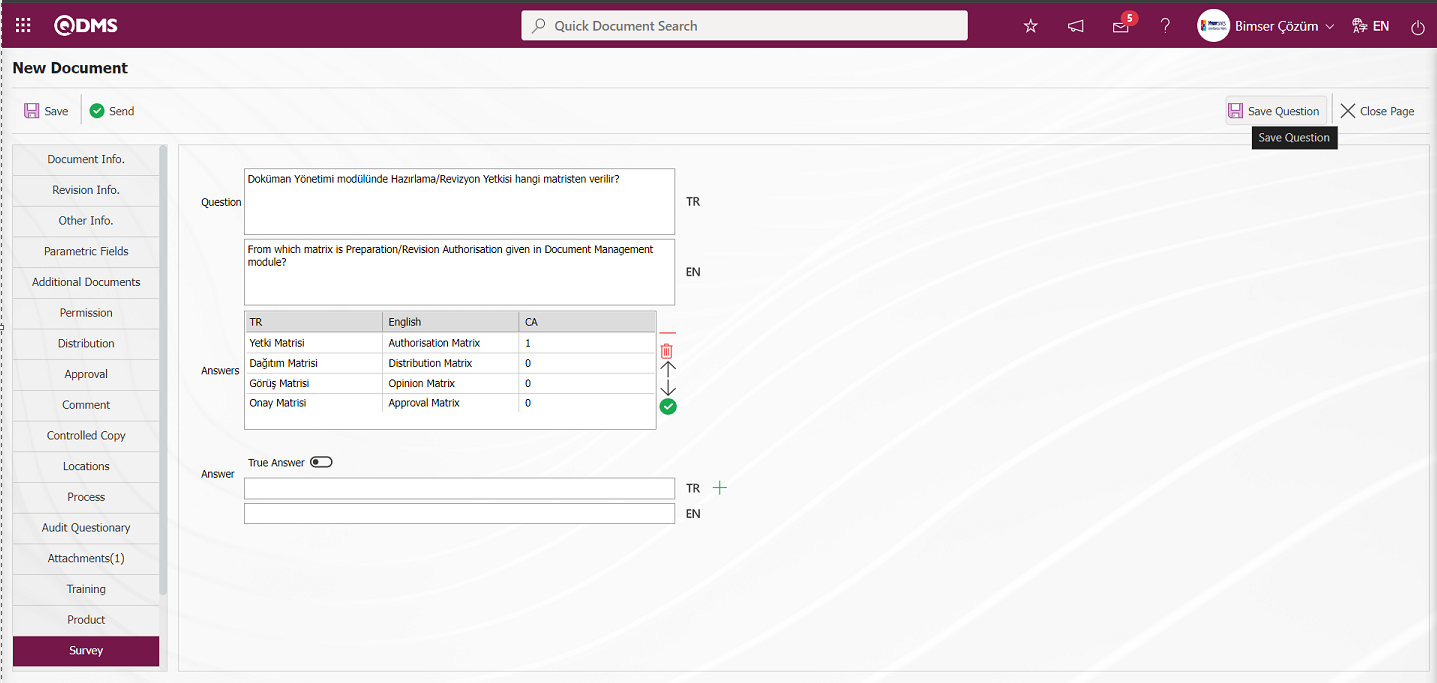
In the question field of the questionnaire on the screen that opens, the 1st question definition of the questionnaire is written in the question field and the options are written in the option section, and after entering the necessary information in the required fields, the questionnaire question registration process is done by clicking the  button in the upper right corner of the screen. On the new document screen, click the
  button to add the 2nd question to the questionnaire in the Questionnaire tab.
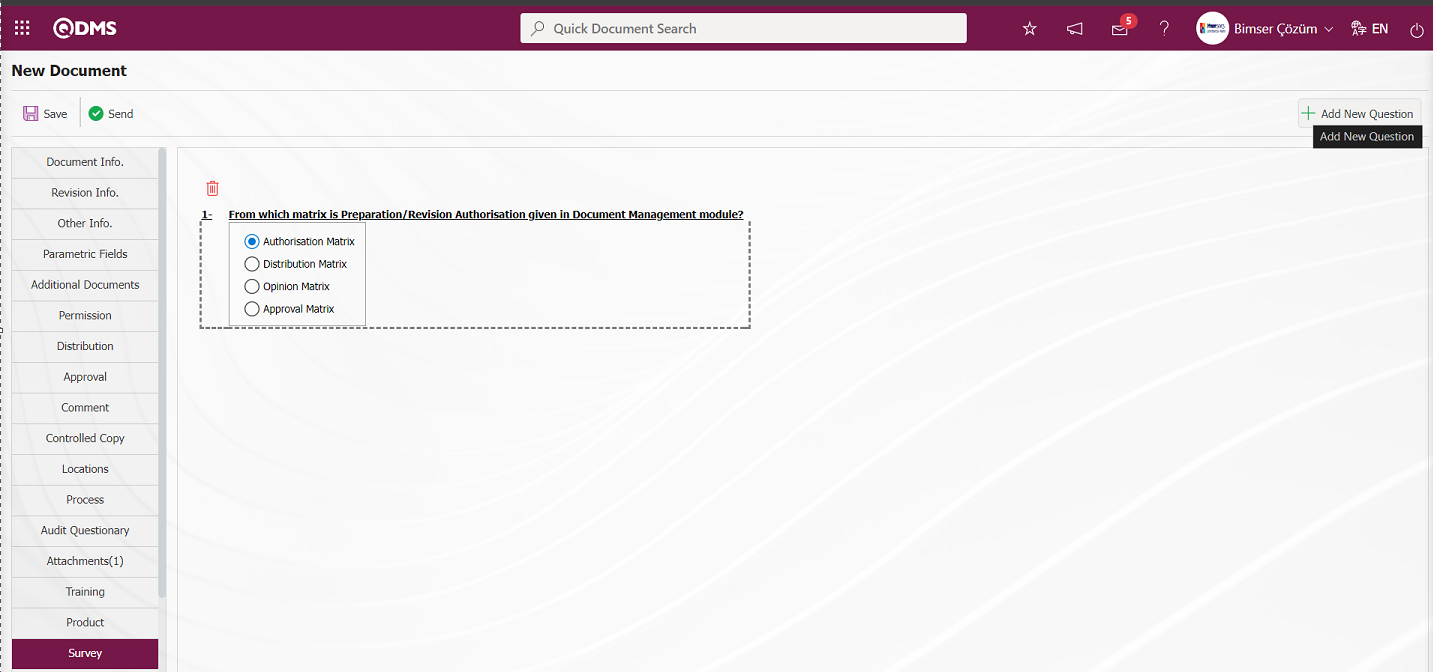
In the screen that opens, the 2nd question definition of the questionnaire is written in the question field and the options are written in the option section, and after entering the relevant information in the required fields, the Survey question registration process is done by clicking the button in the upper right corner of the screen.
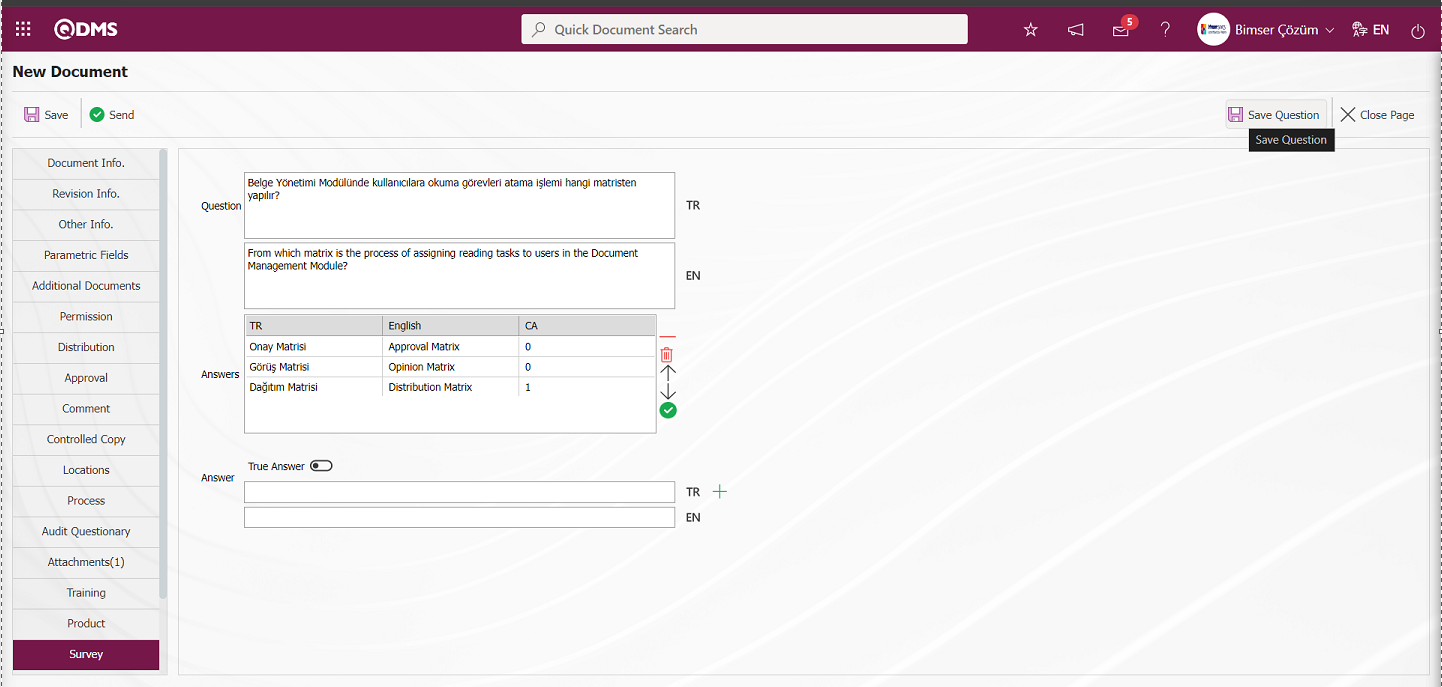
The point to be considered in Question Identification is that the correct option of the question must be defined as marked
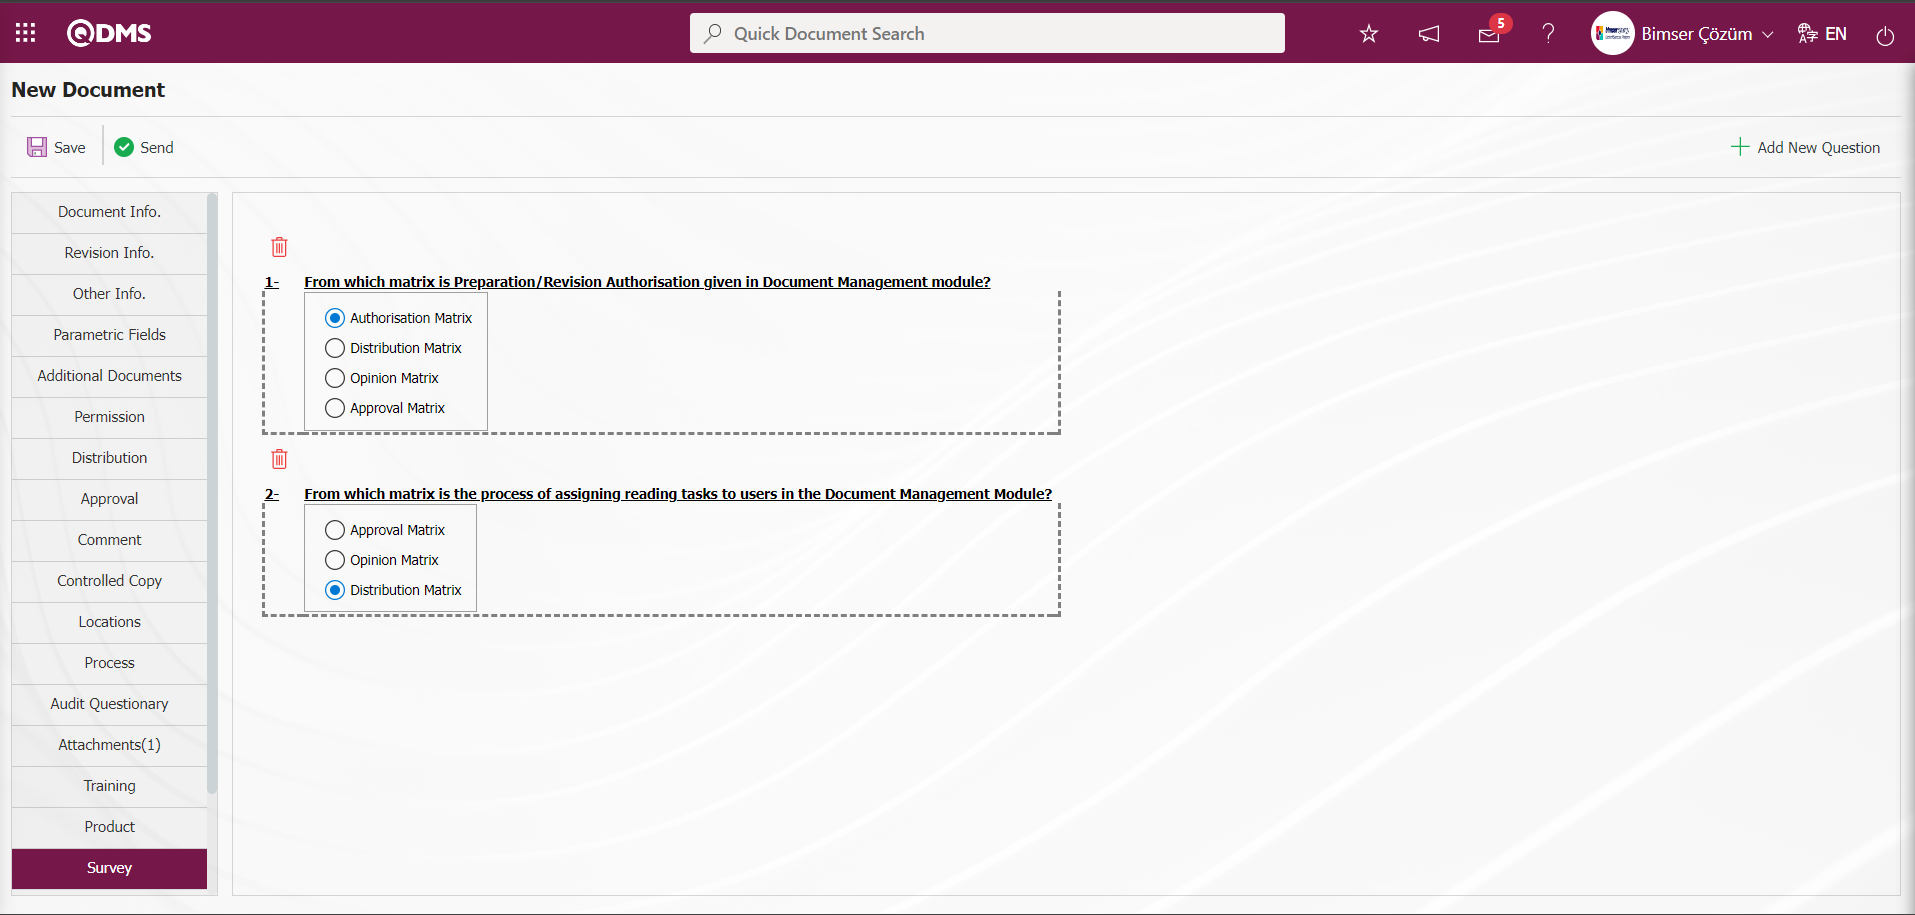
Document Viewing Format Tab;
This is the tab where the document viewing format is selected. It is the tab where the viewing formats of the document are selected for viewing, printing, opinion stage, approval stage and document quality record. Company format, using Pdf, original, Document Viewer and Document Viewer options are selected as the viewing format.
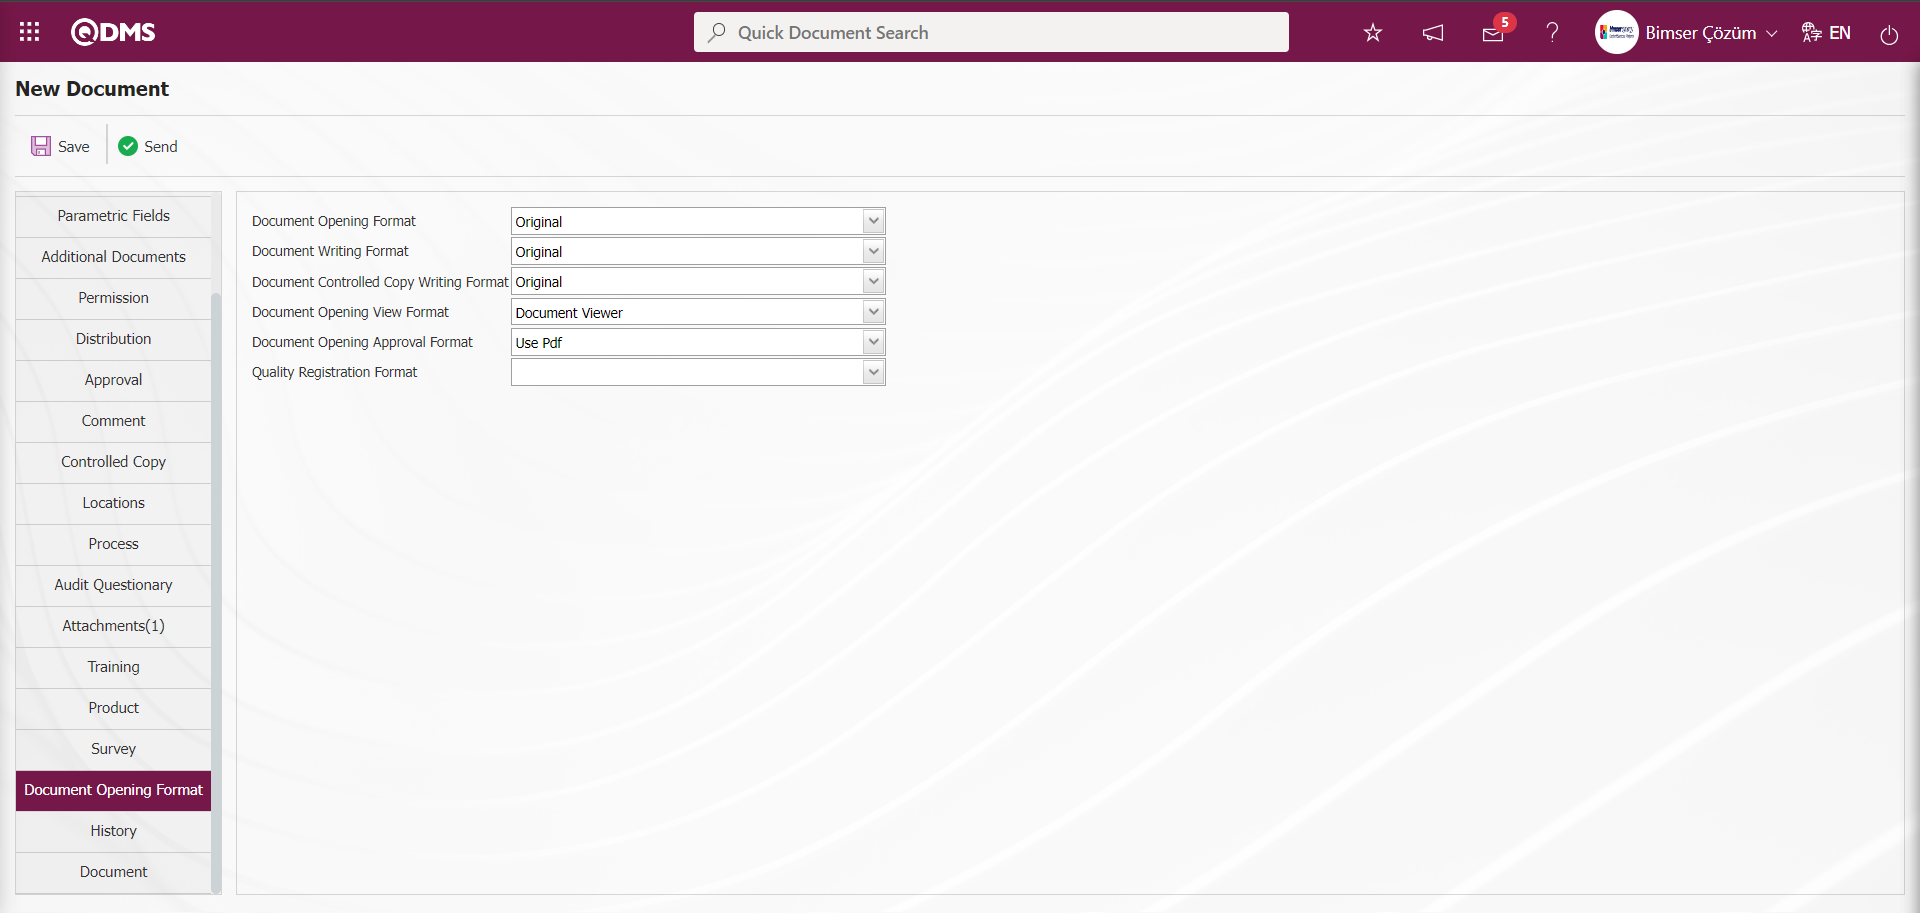
History Tab;
It is the tab that shows which processes the document has gone through before. This section is empty during the new document preparation phase.
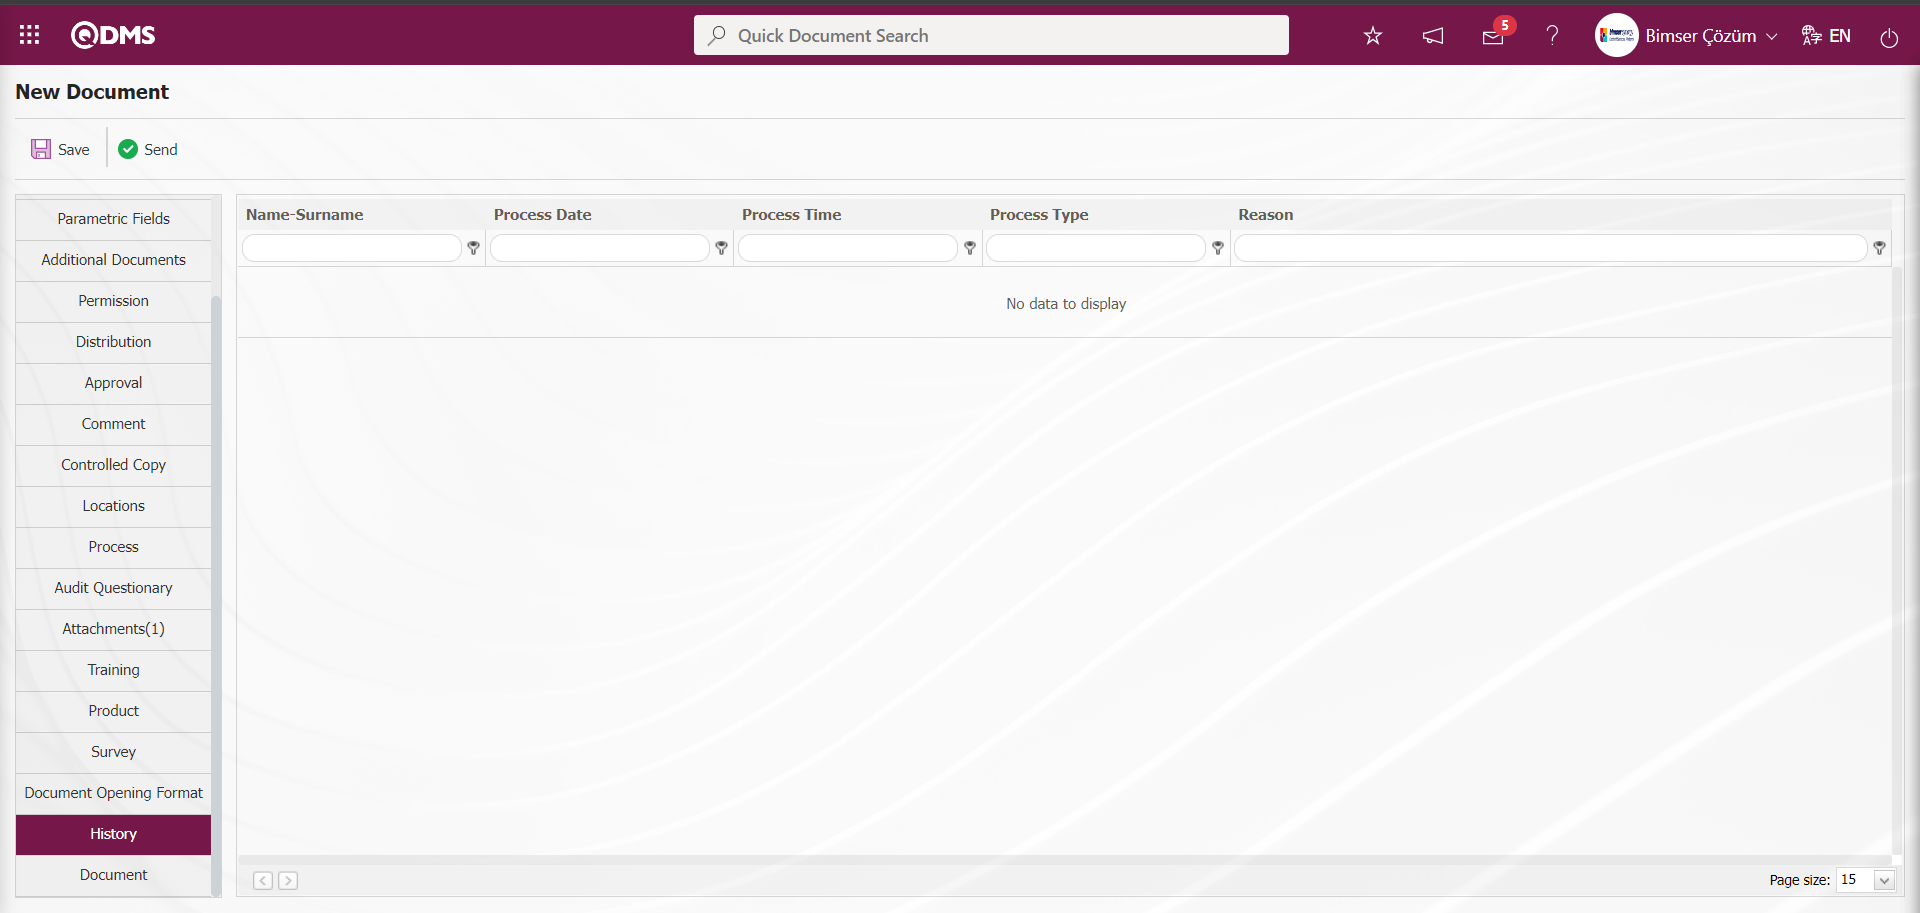
Document Tab;
The document to be uploaded to the system is uploaded by clicking the  (Add file) button in the “Add Document File (Turkish)” field, selecting the Turkish language file of the document to be uploaded from the computer and the upload process is performed. Then, by clicking the (Add file) button in the “Add Document File (English)” field, the English language file of the document to be uploaded from the computer is selected and the upload process is performed.
The versions of the document in the available languages can be uploaded from the language descriptions. The uploaded document can be viewed with the (View File) button.
On the New Document screen, click the (Add file) button in the “Upload Document File (Turkish)” field.

Click the Browse button on the Add File screen.
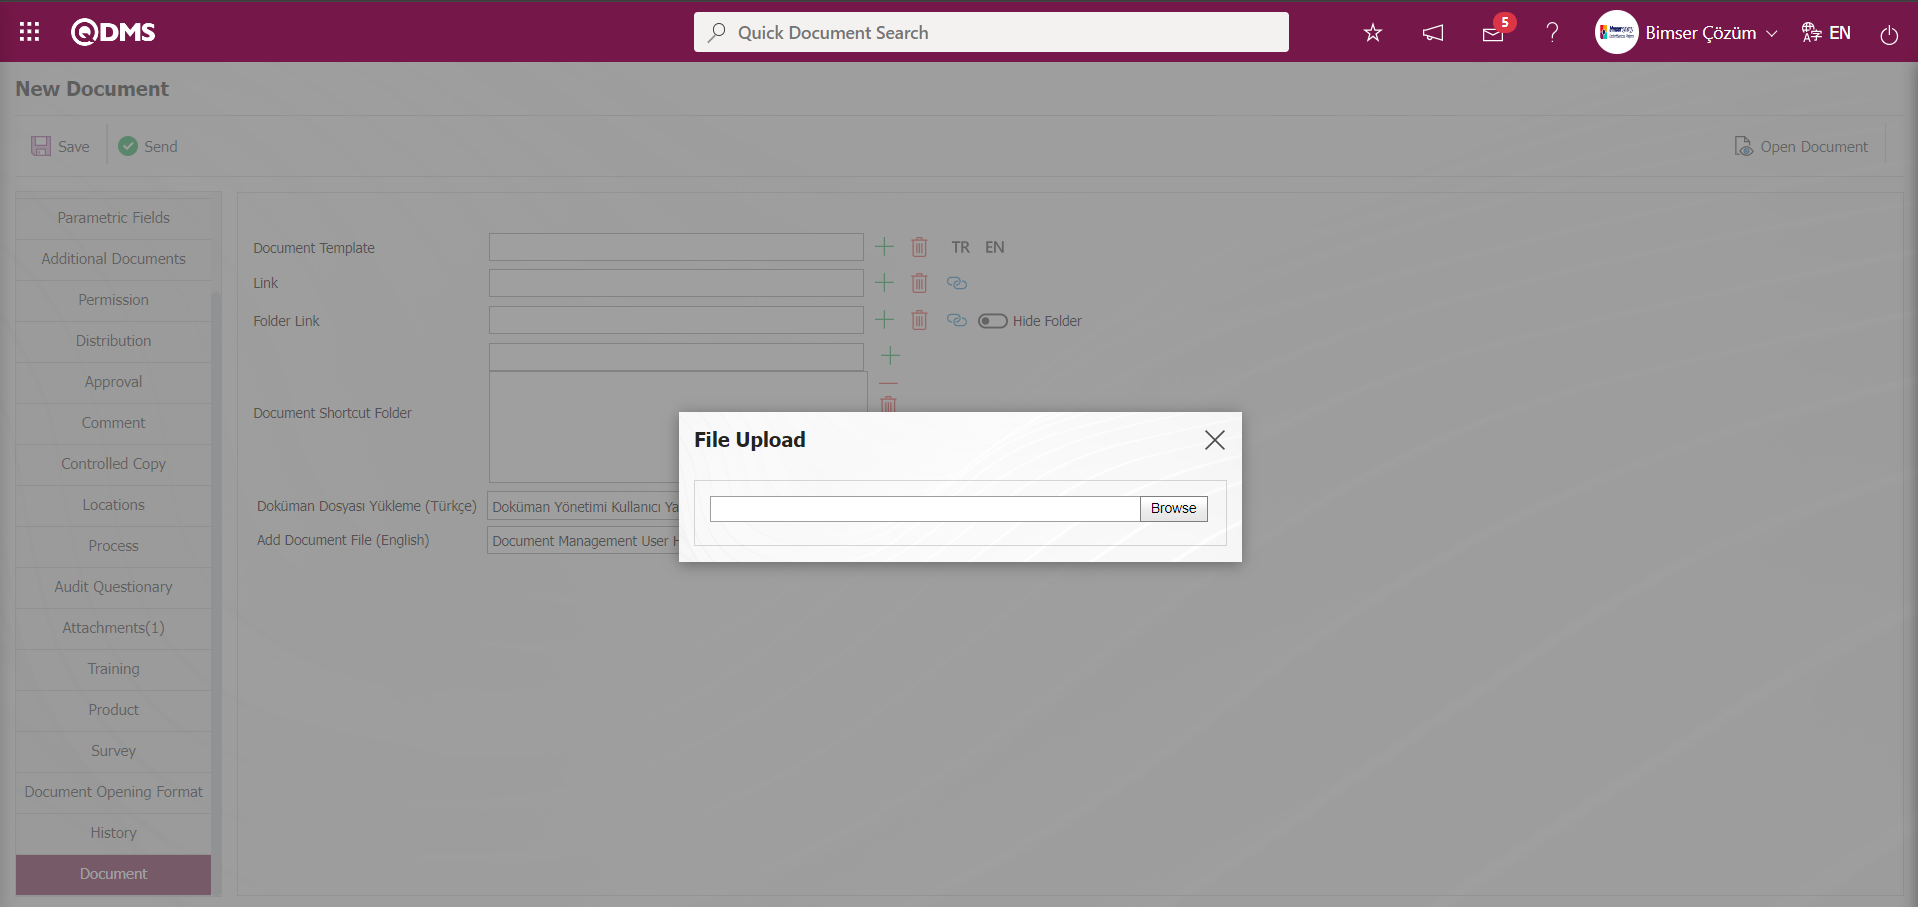
The selection process of the Turkish Language file of the document to be uploaded on the computer is done.
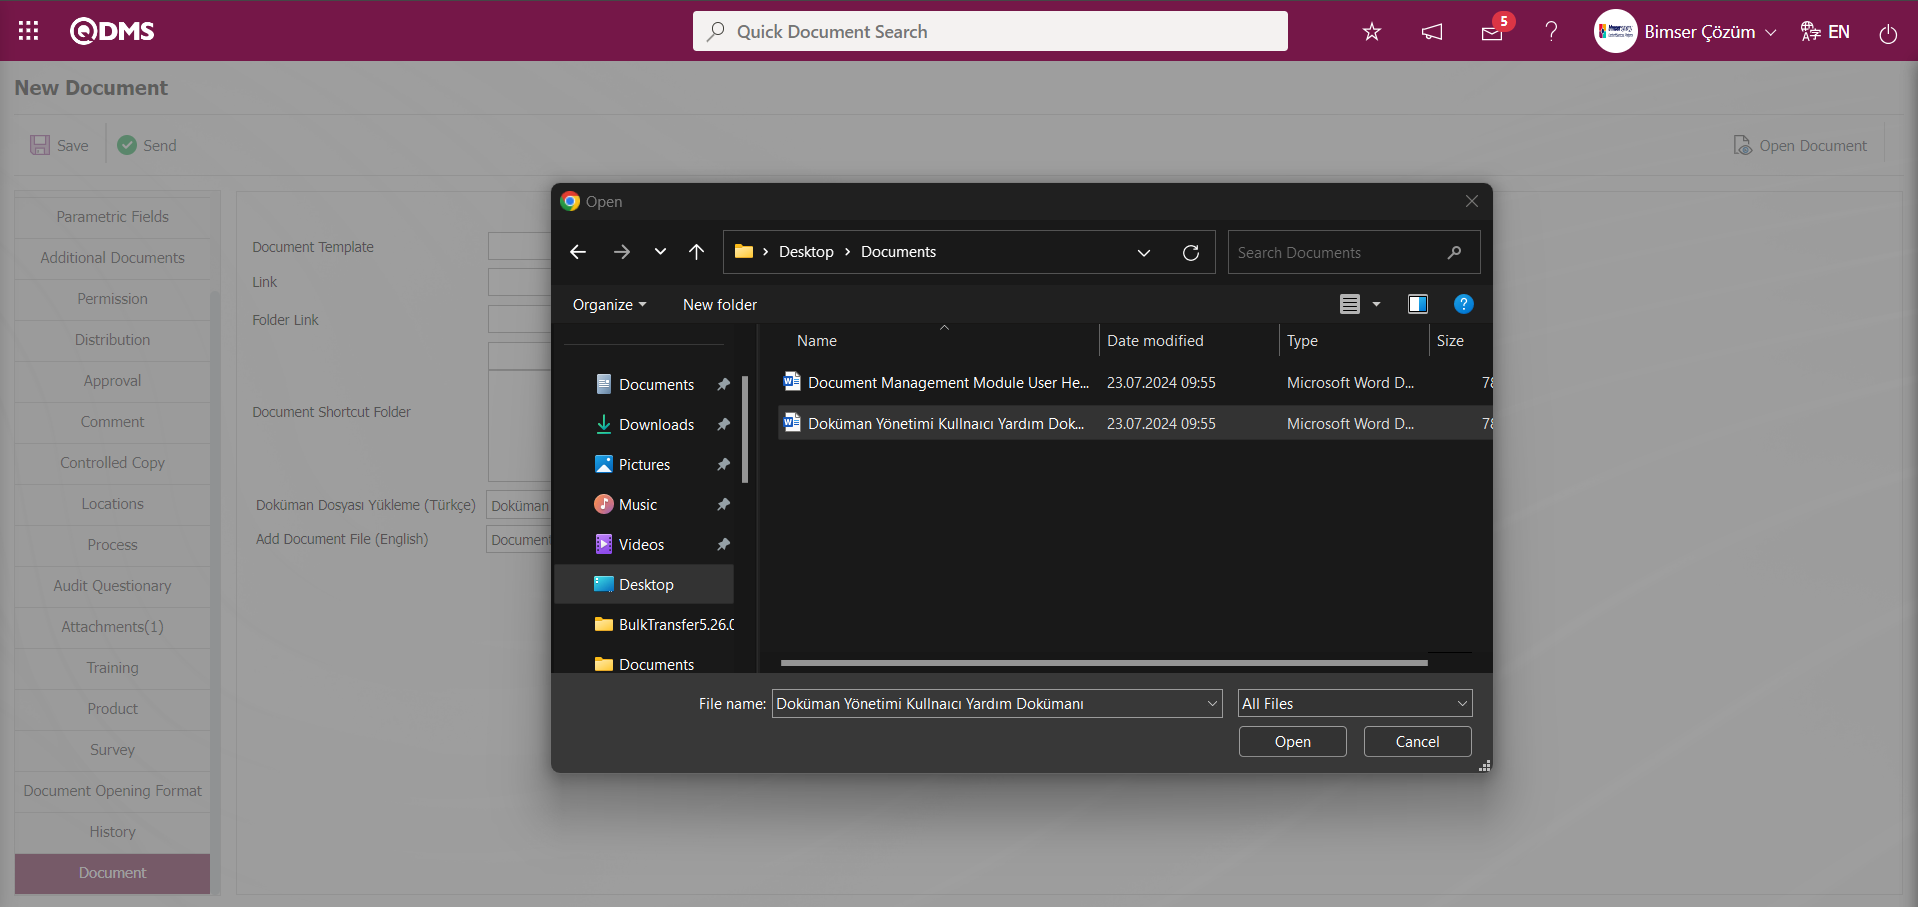
When the document is uploaded, the system receives the information “The file has been successfully transferred”.

After uploading the Turkish language file of the document, click on the “Add Document File (English)” field ( Add file) button.
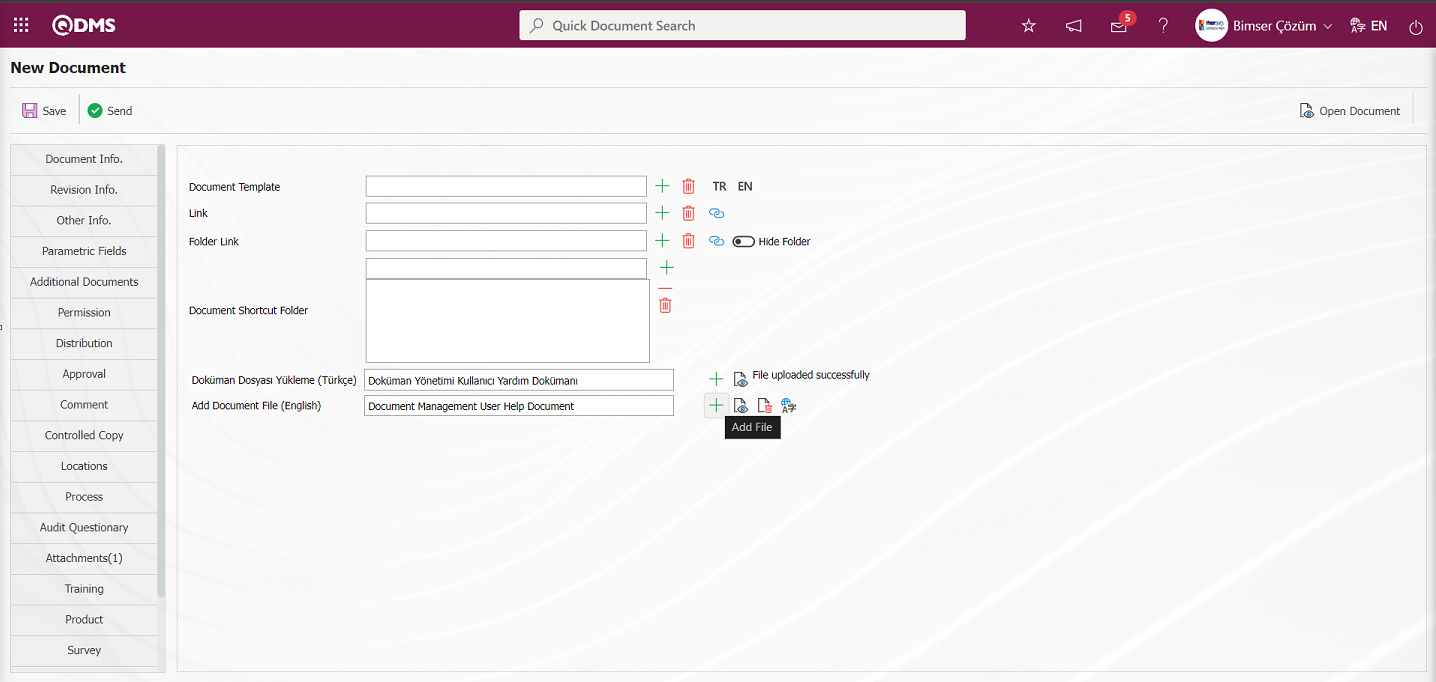
Click the Browse button on the Add File screen.

The English Language file of the Document to be uploaded on the computer is selected.

When the document is uploaded, the system receives the information “The file has been successfully transferred”
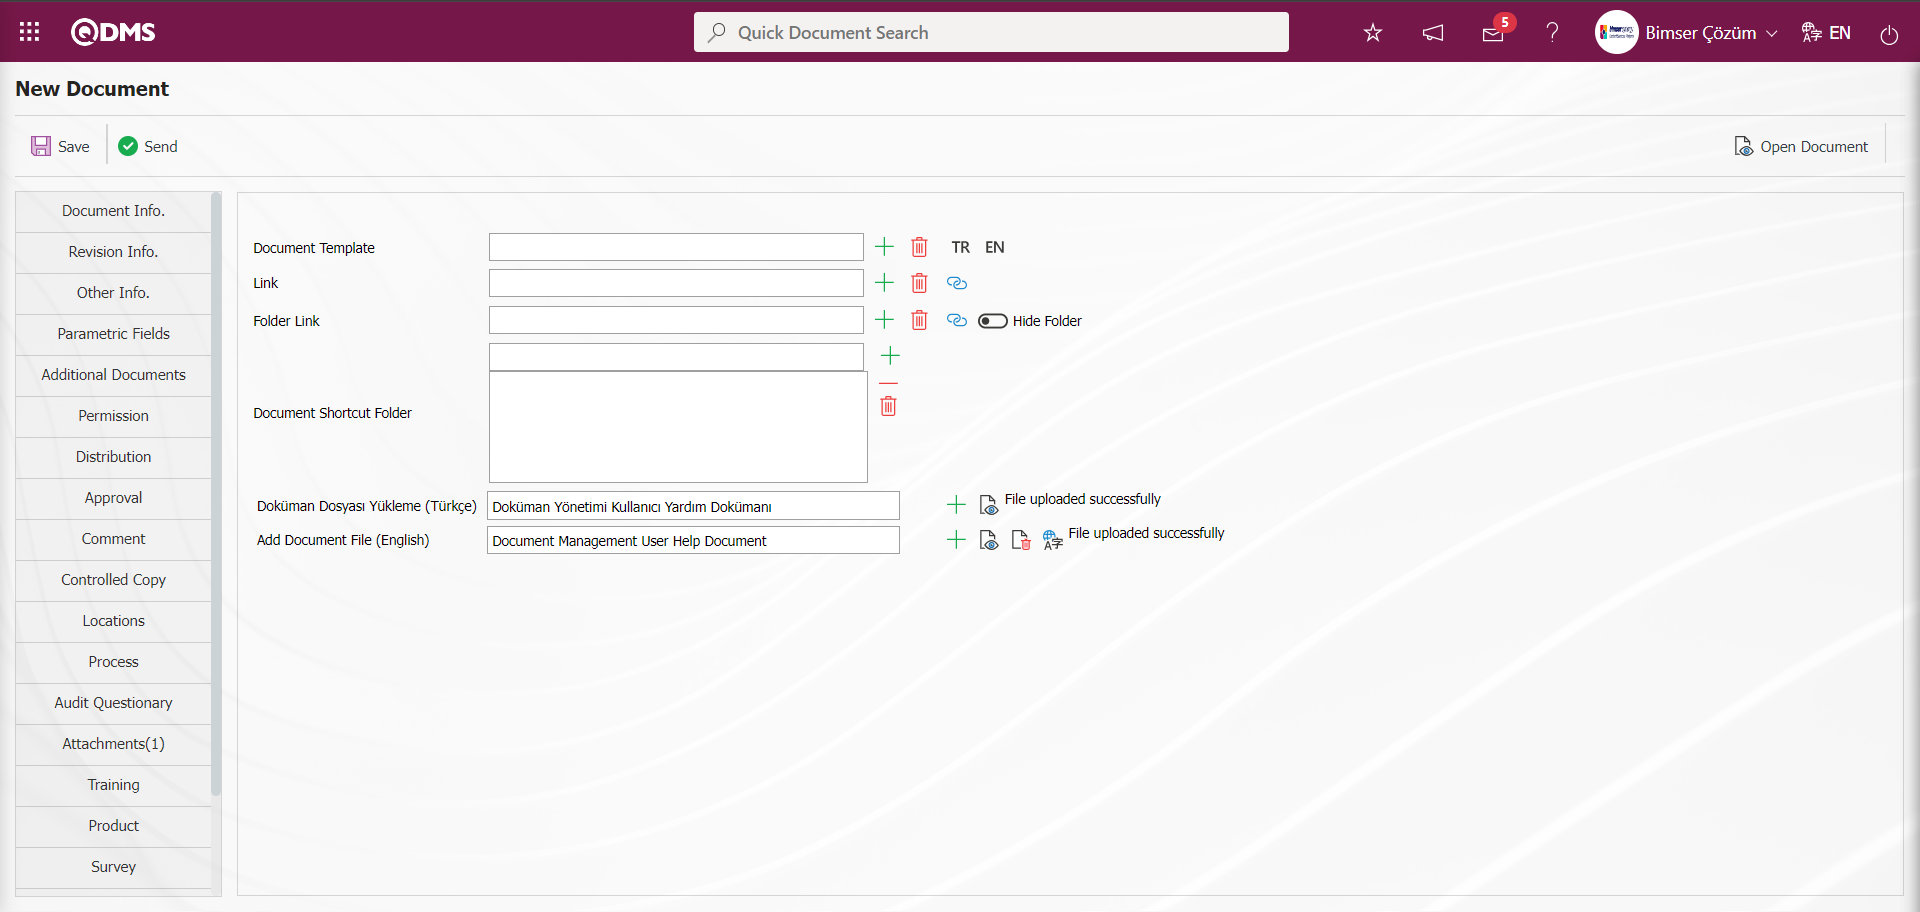
In the Document tab, the Turkish and English language files of the prepared document are uploaded to the system from the computer. With the  (Assign Translator Task) button, a translator task can be assigned to translate the document into other languages.
At this stage, links to other documents and folders can be taken if desired. Select the document/folder from the drop-down lists and get the link with the  (Get Link) button. This link can be used within the document to link to other documents.
If the preparation process has not yet been completed after the document upload process, the document can be converted into a draft and stored with the  button from the document information tab. The draft document is displayed as “Stored Documents” on the “My Pending Jobs” page of the preparer.
If all the preparation processes related to the document are completed, the document approval process is started with the  button on the Document Information page.
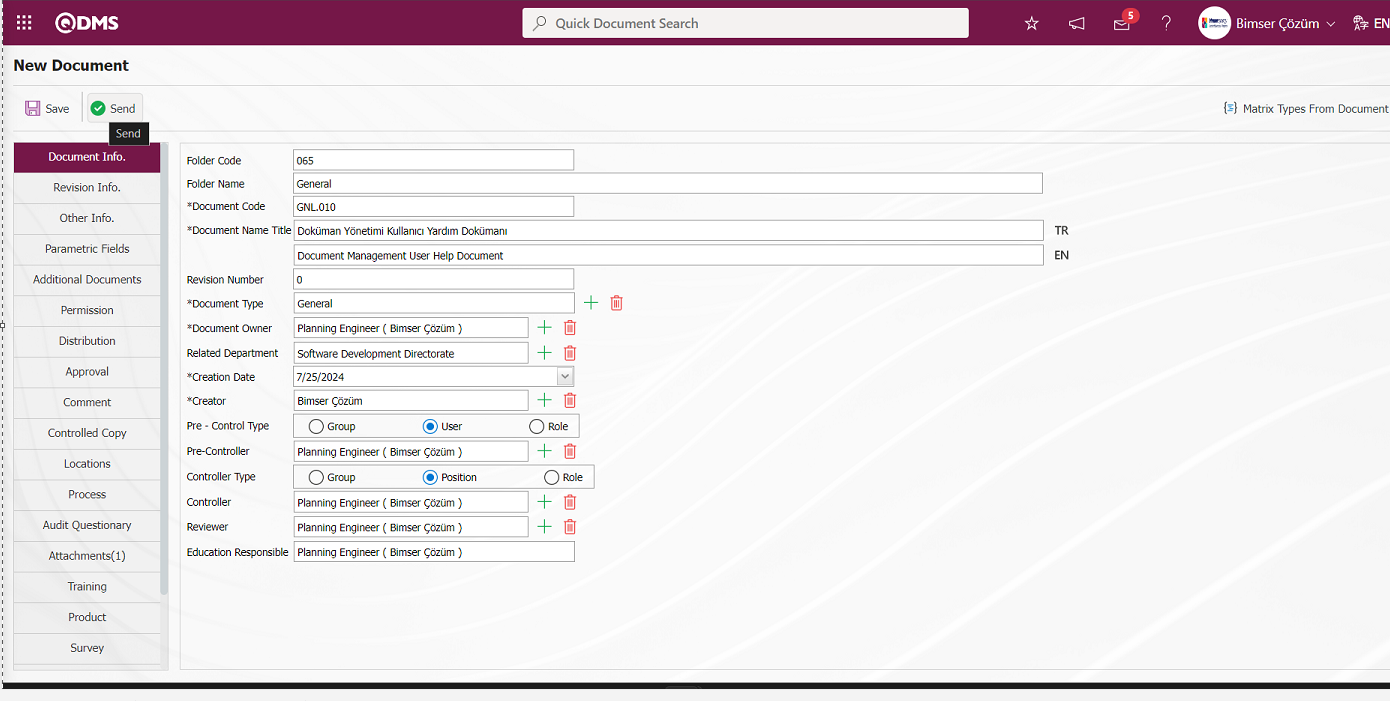
The system will ask “Are you sure you want to send it? “ message, the “OK” button is clicked.
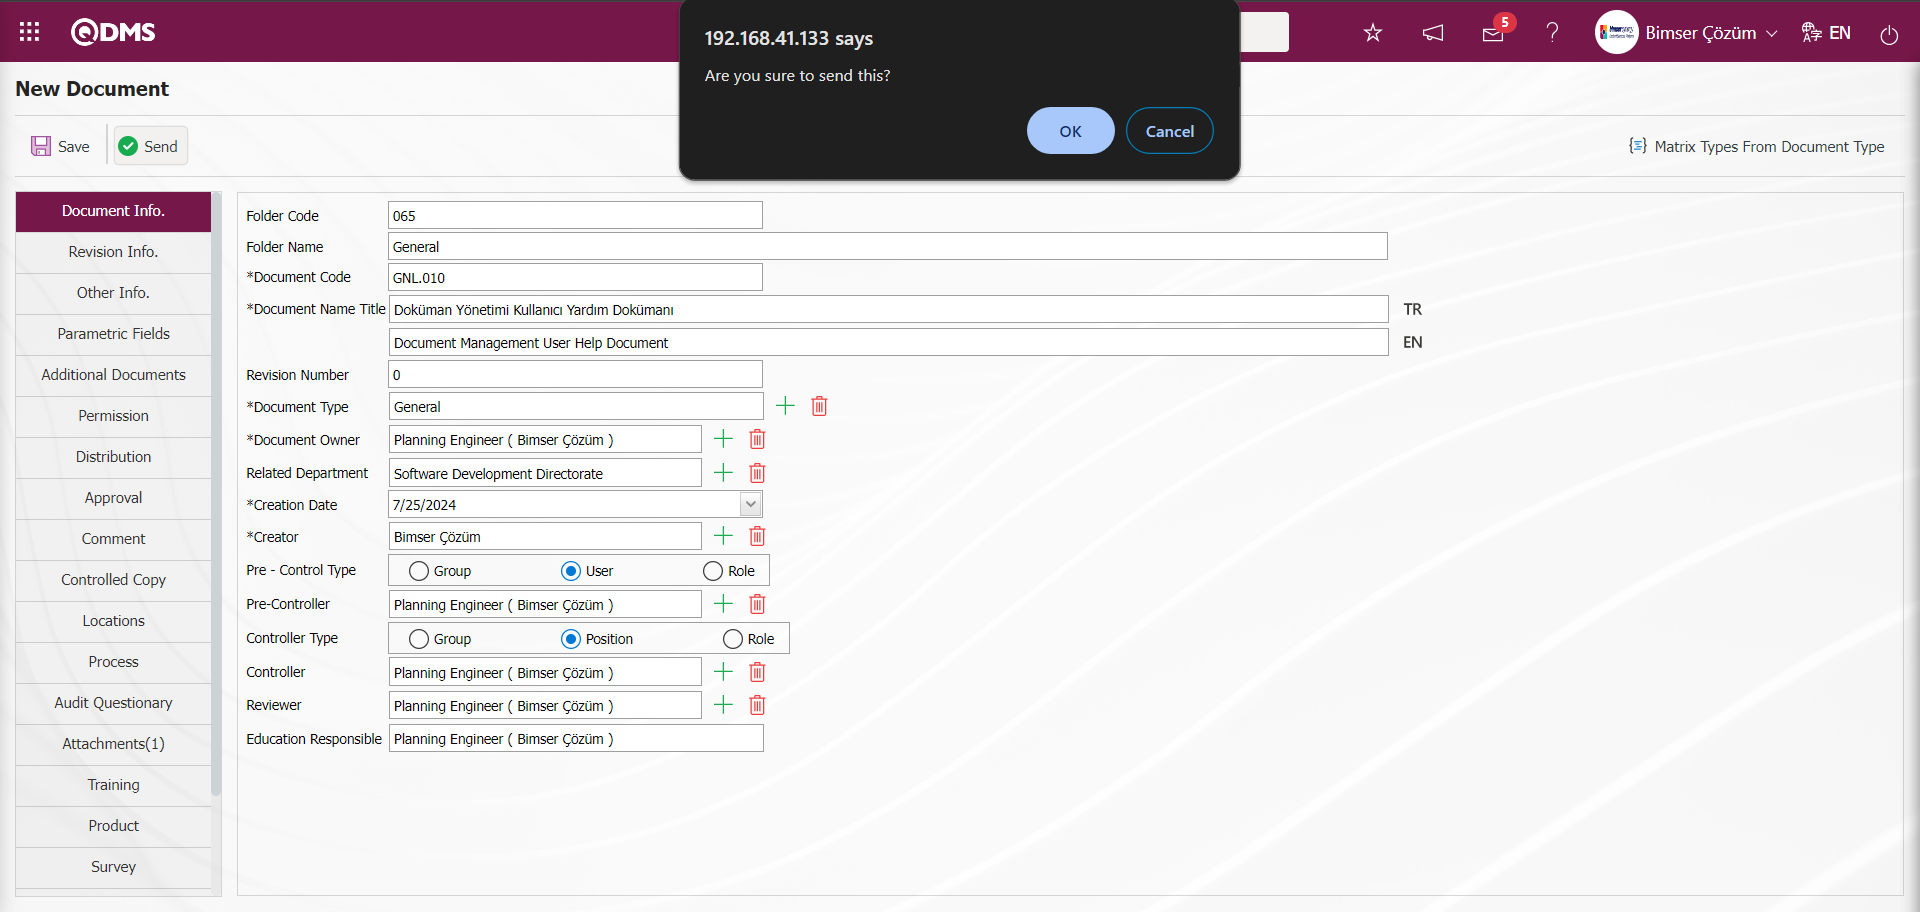
If an opinion is requested, the prepared document will be sent for opinion. If no opinion is to be used (in processes where opinion matrix is not defined), the process continues with control approval. If the controller is defined, it goes to control approval first, if the controller is not defined, it goes to the approval of the people defined in the approval matrix.
The system informs the user that the document was sent for review and the user to whom it was sent.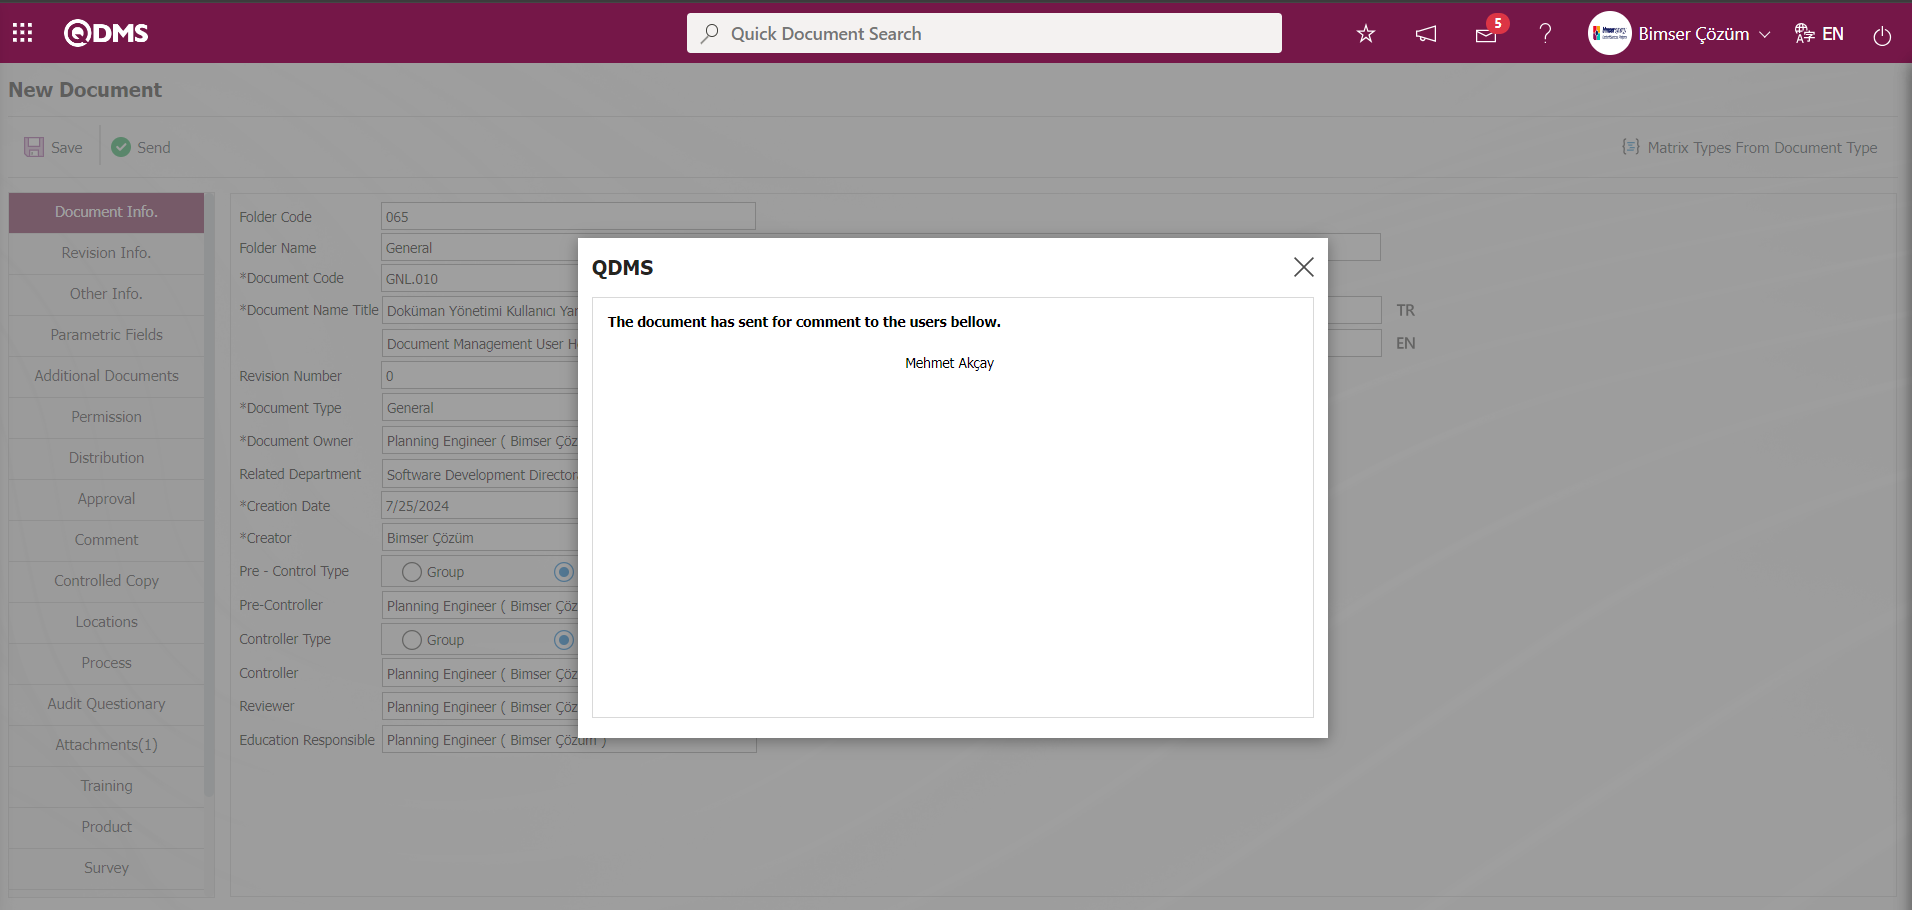
6.2.4.1. Commenting Process
People who will give opinions are assigned as“Document for comment Reguest” on the “My Pending Jobs” page. In addition, the documents sent for comment are also notified to the personnel who will give comments via e-mail. During the comment phase, the user name and password of the commenter are entered to the Qdms local address on the Qdms main login screen.
Click on the “Document for comment Reguest” task on the My pending jobs screen of the interviewer.
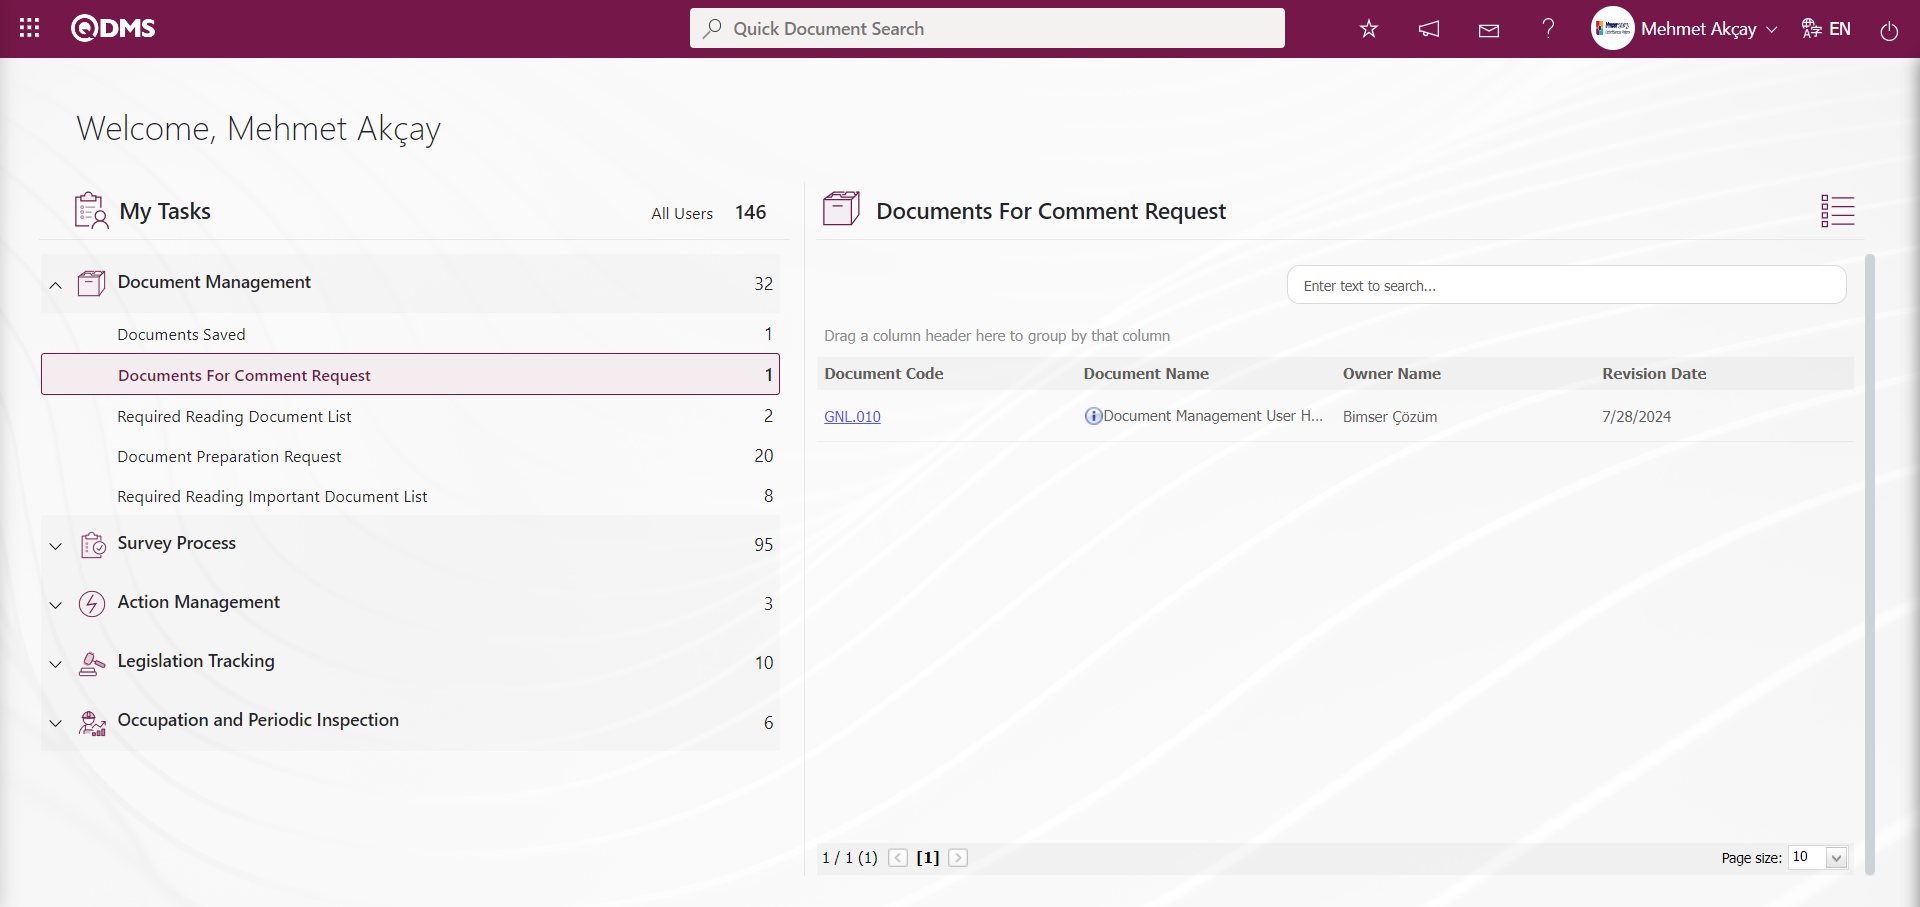
Click on the link in the document code field in the relevant task to access the relevant document information.
During the comment phase, the commenter clicks on the document tab to see the document. In the fields “Upload Document File (Turkish)” and “Add Document File (English)”  (View File), he/she downloads the document to his/her computer and views it in Turkish and English. It examines the documents displayed and if it wants the documents it has examined and evidence files, if any, it uploads files in the Additional Files tab. In the Additional Files tab, the status of the additional file uploaded at this stage is displayed as “Opinion” in the added status field.

After reviewing the document, click on the opinions tab to express your opinions. The parameter value of parameter 266 in the Document Management Module parameters is activated by selecting “Yes”.

After the parameter is activated, the Opinion selection field is displayed in the Opinion tab. By selecting the relevant options in this field, it is ensured that the Accept - Reject feature is used in the Opinion phase.
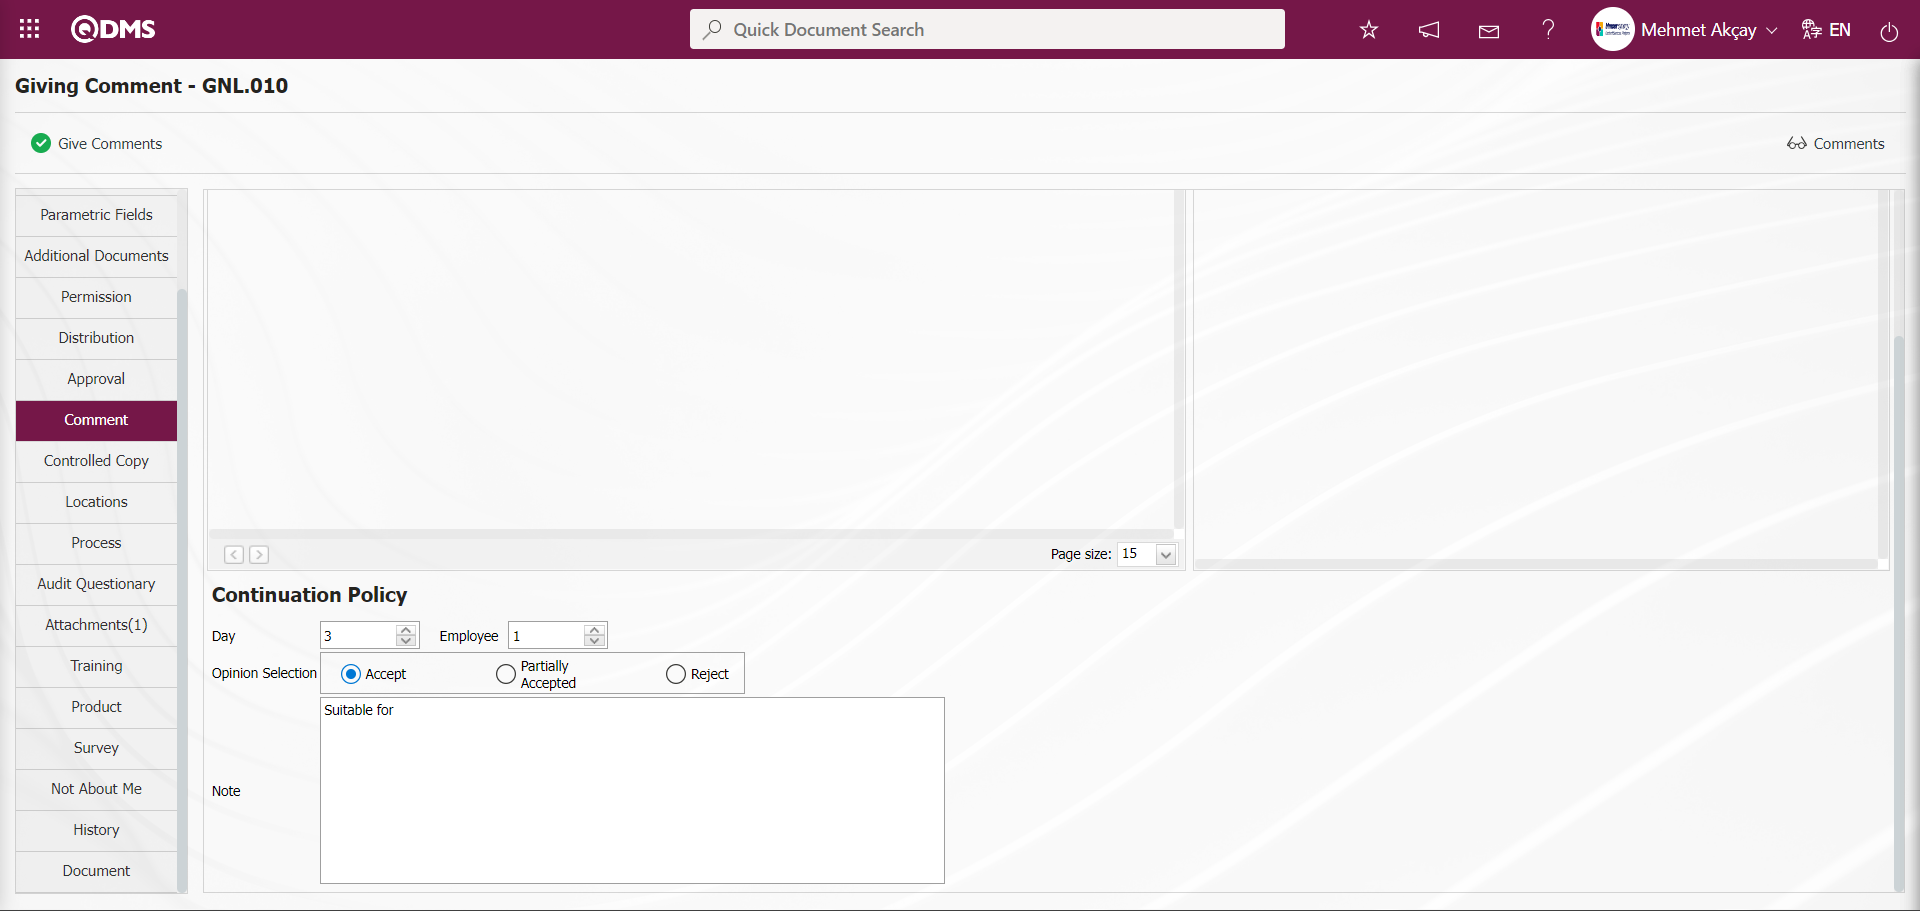
The reviewer makes the selection by checking the check box related to the relevant options in the opinion selection field in the Accept - Reject feature displayed depending on the parameter. In the Opinions tab, the Reviewer reports the opinions about the document he/she has reviewed in the Note field. The relevant opinion is forwarded to the person who prepared the document by clicking the  button.
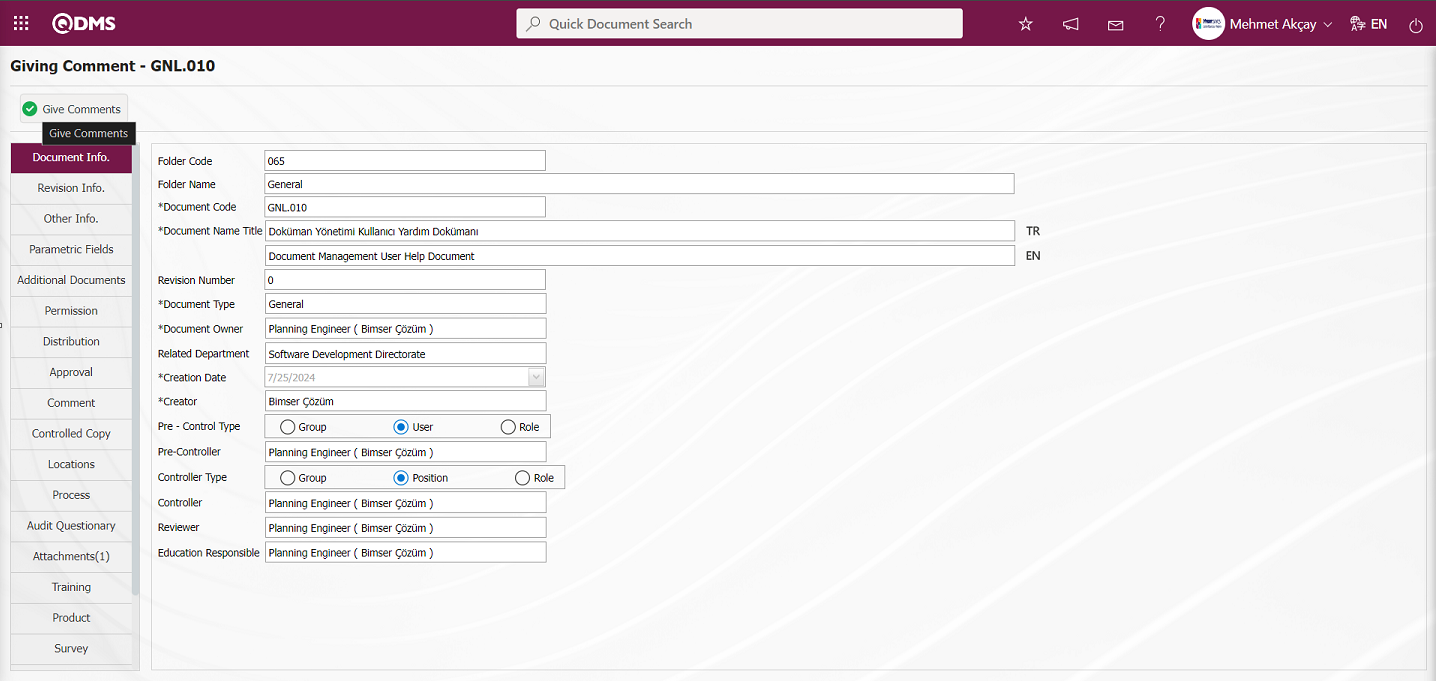
The system will say “Your comment has been successfully recorded.” Message is given.

On the “My Pending Jobs” page of the person who prepared the document, the“Documents After Comment Request” task is assigned. On the Qdms main login screen, the user name and password of the person who prepared the document are typed and the My Pending Work page is displayed by logging into Qdms.

It is displayed as the“Documents After Comment Request” task on the My Pending Jobs page of the person who prepared the document.
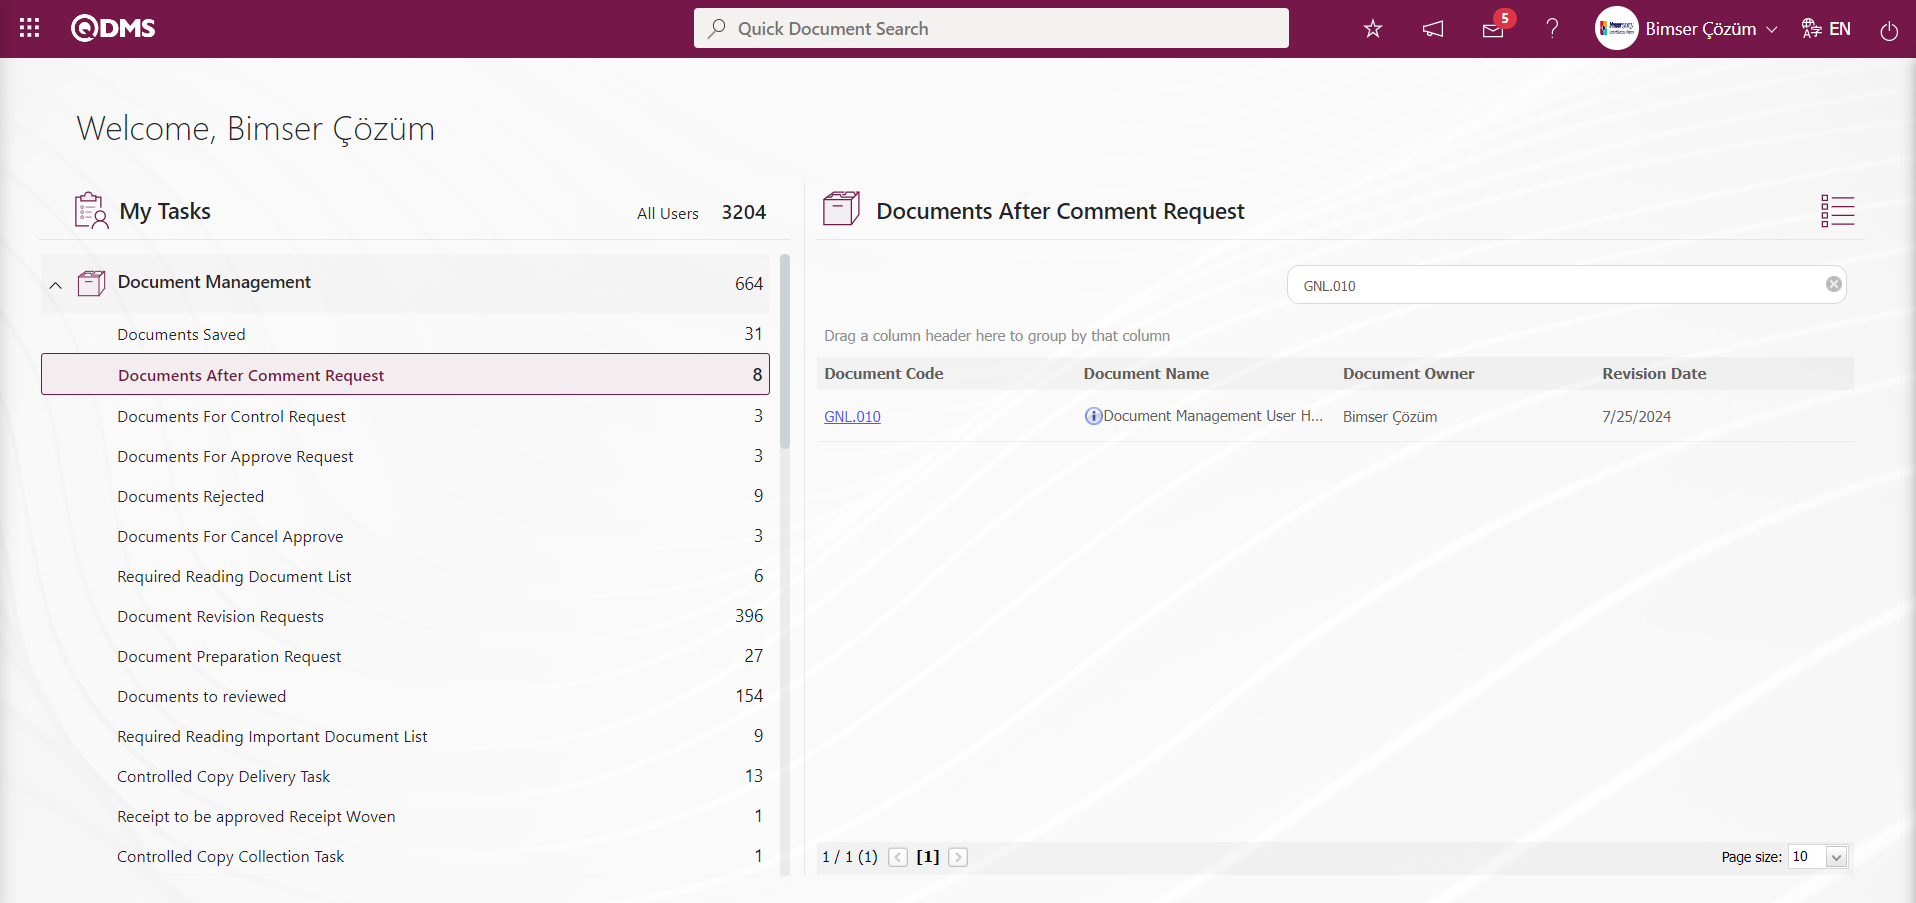
By clicking on the link in the document code field in the displayed task, the relevant document information and the opinions given are accessed.
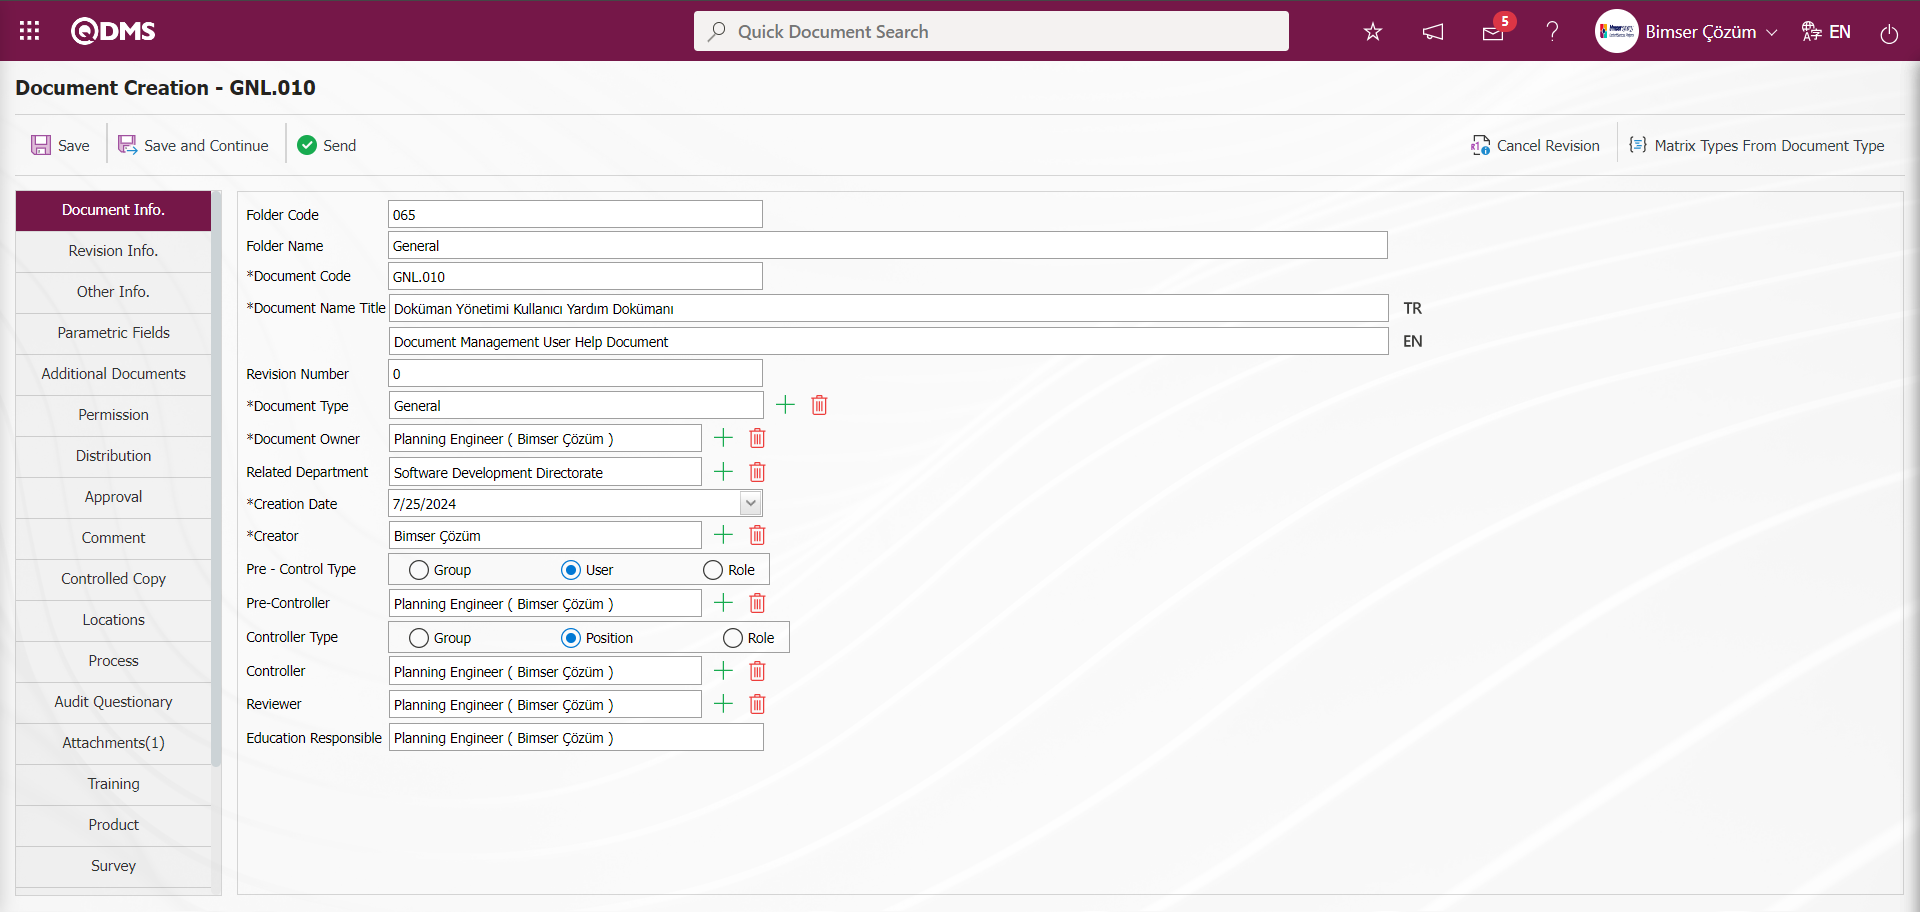
Click on the Opinion tab. The list of which opinion is given by which user is displayed.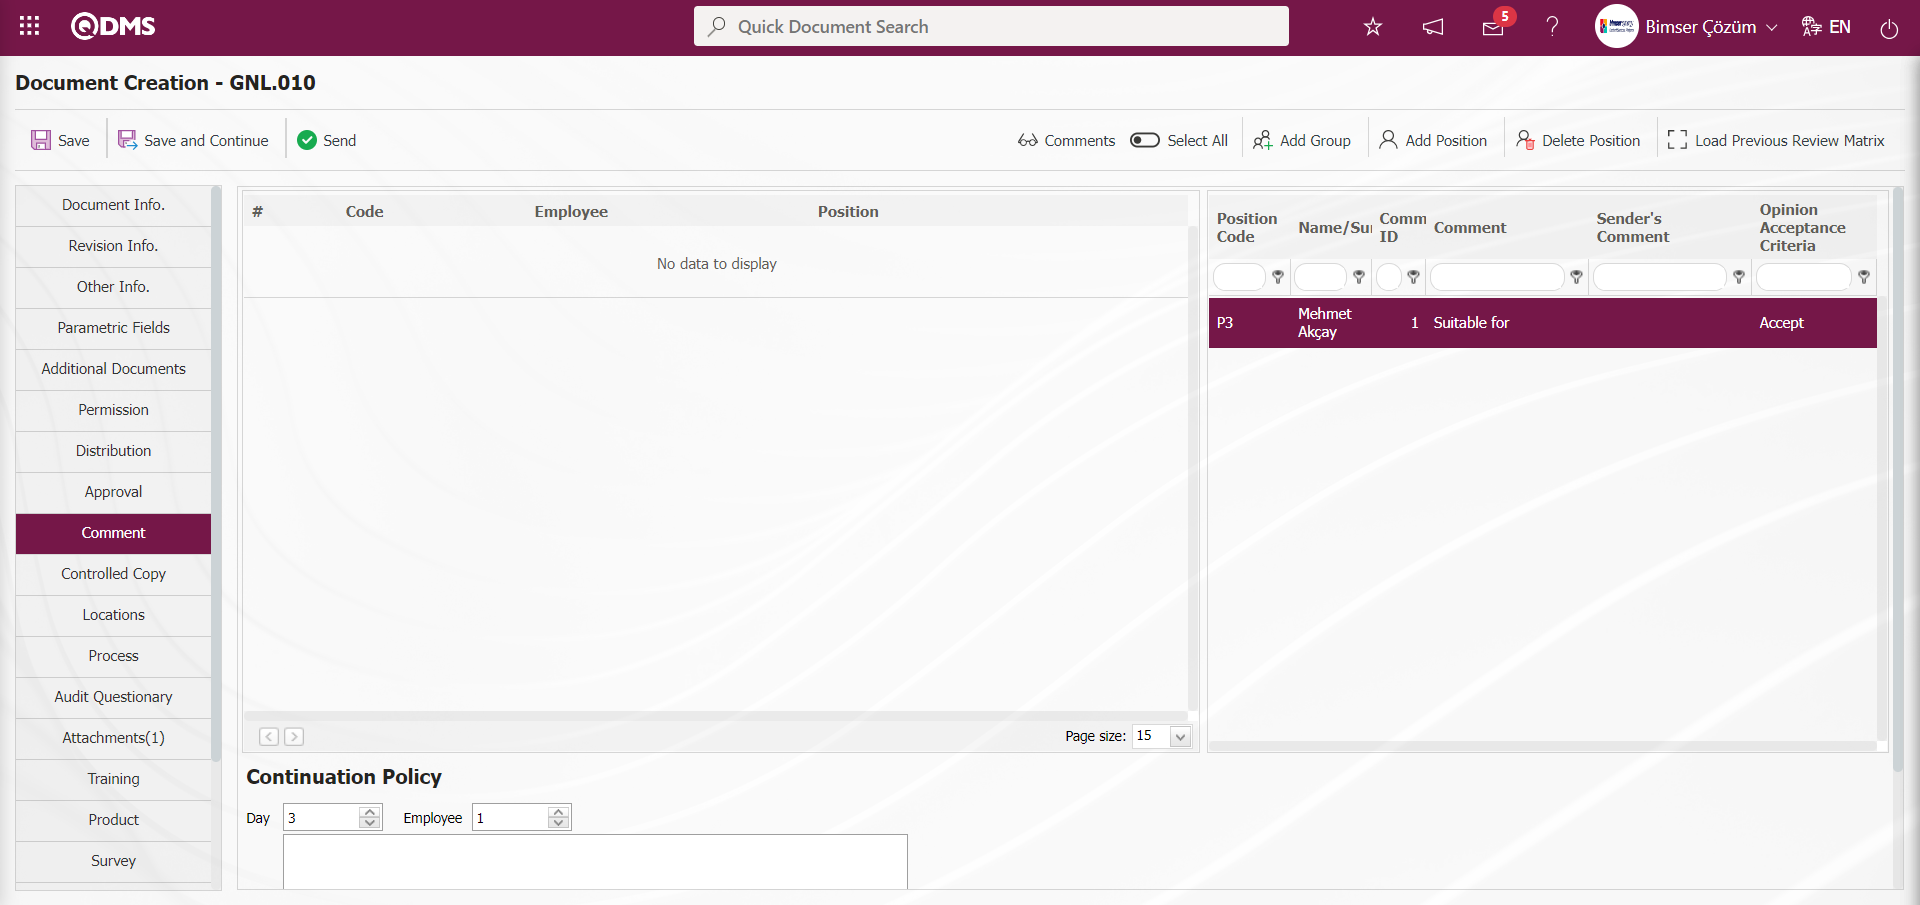
With the help of the buttons on the screen;
 : Opinion information about the document is displayed
 : A user group is added to the list as a viewer.
 : Position is added to the list as a negotiator.
 : Deletes the selected view position in the list.
 : The document is sent to the previous commentators again.
If changes are to be made to the document according to the comments received, click on the document tab and make the necessary arrangements on the document. If the edited document is to be sent for review again, it can be sent for review by clicking on the review tab and clicking the  button for new personnel or the
  button for user groups. If desired, the document can be sent to the previous reviewers again with the
  button.
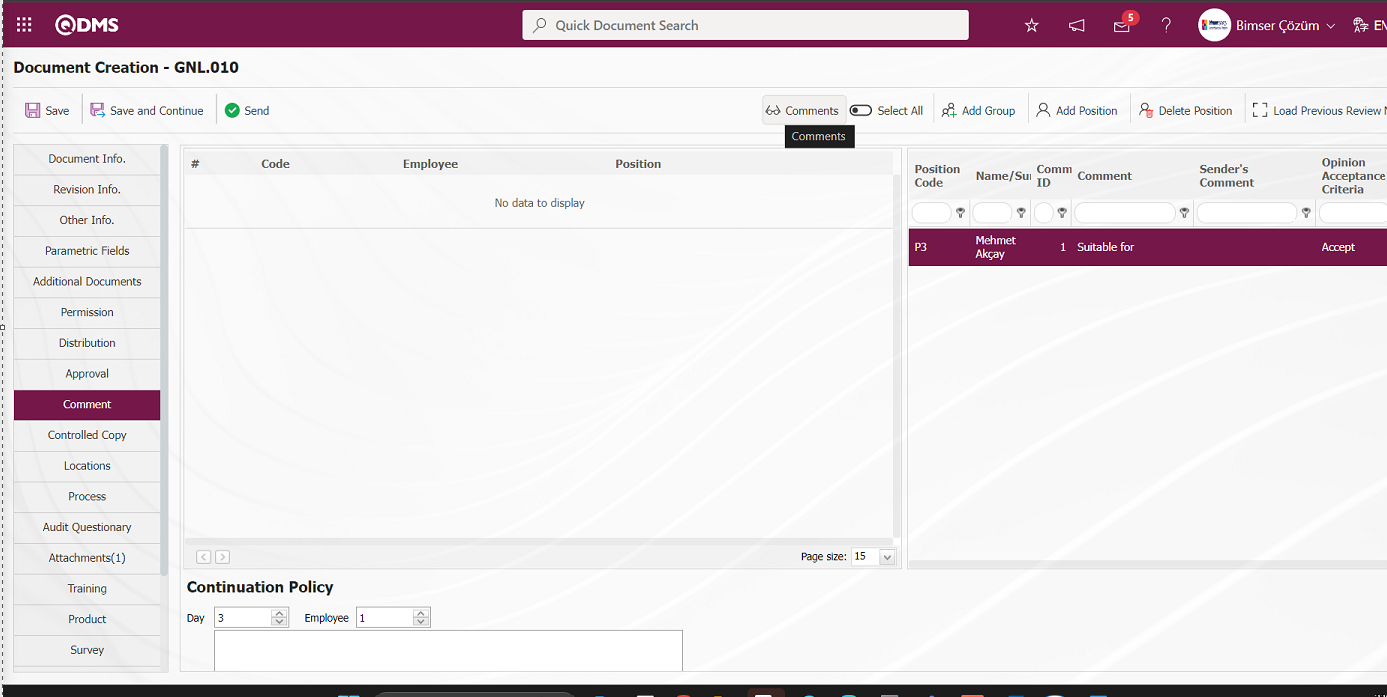
 button displays the selected user opinions. It is seen that the Opinion Acceptance Criteria feature, which is displayed depending on the parameter related to the opinions on the Opinions screen, is also used. If available, the files uploaded in the Additional files tab are examined.

If the document will not be sent for review again, with the  button, the document is first sent for pre-control if a pre-controller is defined, then for control after the pre-control phase (if a controller is defined) and then for approval.
Click on the Document Information tab.

By clicking the button on the Opinion tab on the Document Preparation screen, it is sent to the document pre-controls of the person defined in the pre-control.
Click the “OK” button in the message given by the system.

The system informs the user to whom the document is sent with pre-control and the user to whom it is sent

6.2.4.2. Pre-Control Process
During the document pre-control phase, a task is created as“Documents For Pre-Control Reguest” on the “My Pending Jobs” page of the pre controller.-
"Documents For Pre-Control Reguest" task is displayed on the ‘My Pending Jobs’ screen of the pre-controller.
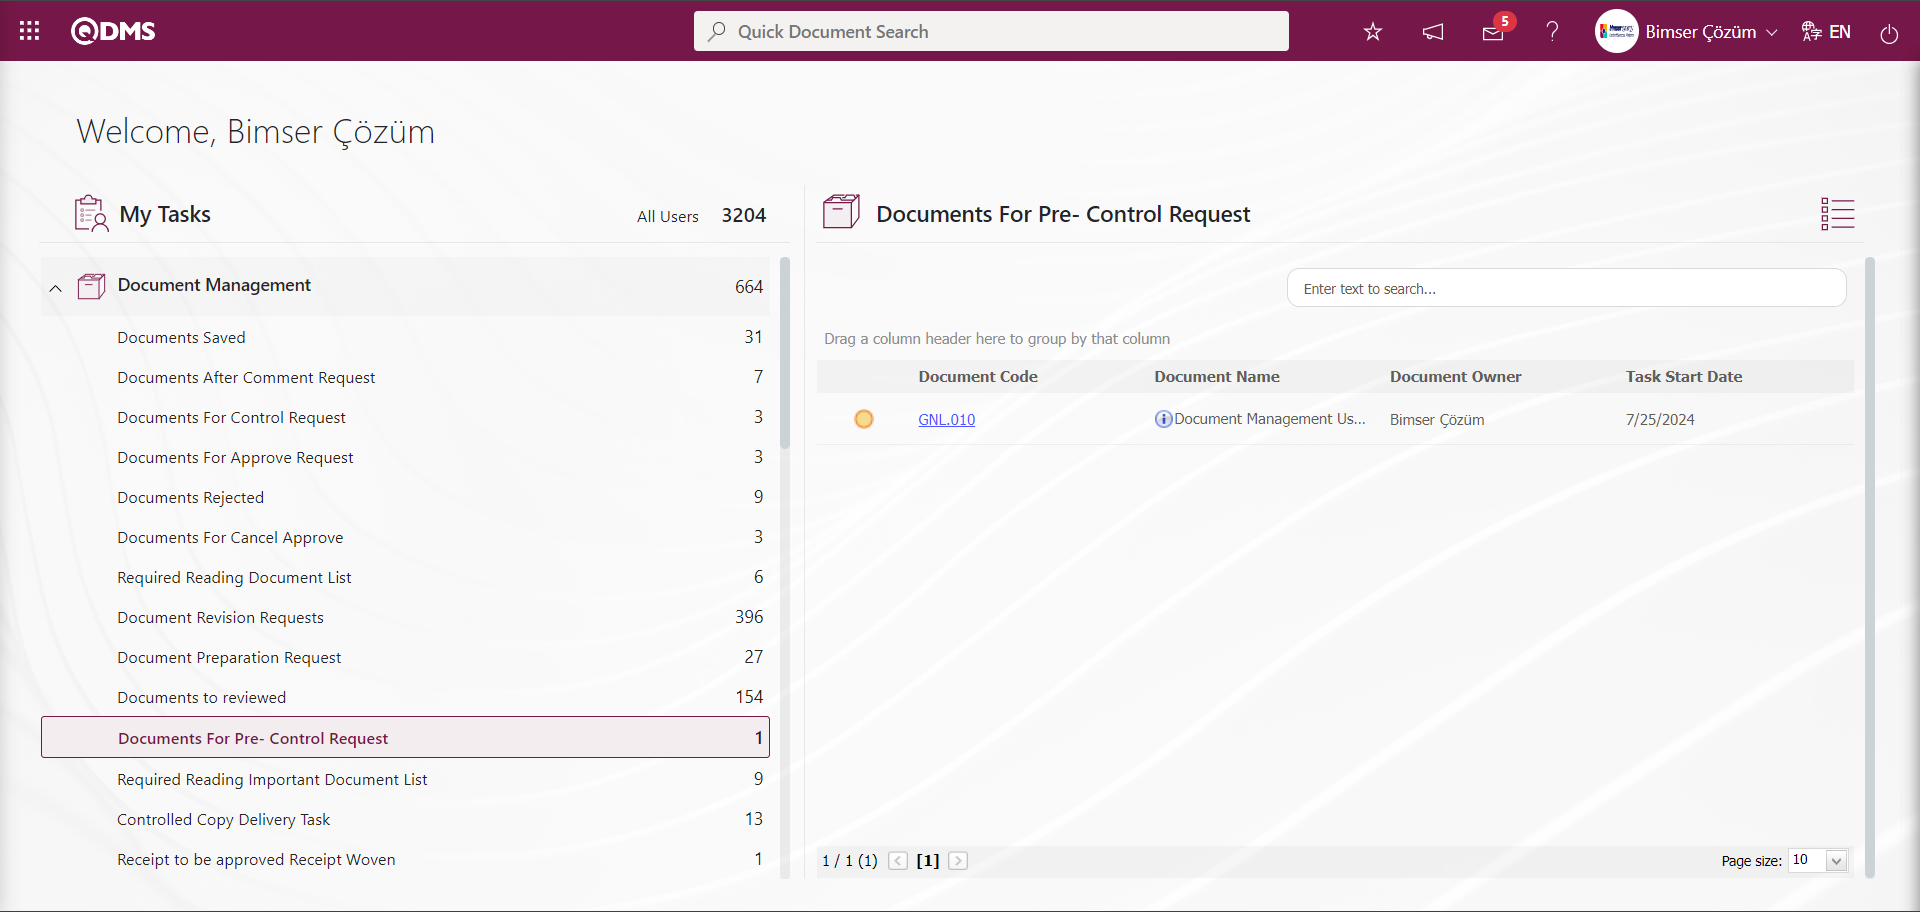
The relevant document information is accessed by clicking the link in the document code field in the displayed task. The pre-checker is just like the document preparer. When he/she deems necessary, he/she can make all kinds of changes on the document, upload the modified document without rejecting the document and continue the process. He/she can make changes both on the prepared document and on every tab opened such as document information/ authorization matrix/ distribution matrix/ approval matrix during the preparation phase.

With the help of the buttons on the screen;
 : Registration of the document is done.
 : Save and continue operation is done. It is a button displayed depending on the parameter. The parameter is activated by selecting the parameter value “Yes” for parameter 331 in the Document Management parameters.

After the parameter is activated, the  button is displayed at the Document Preparation stage.
 : Document approval process is done.
 : Rejecting the document is done by writing the reason for rejection.
 : At this stage, comments are requested from the relevant people. It is a button displayed depending on the parameter. The parameter value of parameter 113 in Document Management parameters is activated by selecting “Yes”.

After the parameter is activated, the ![A close-up of a white background
Description automatically generated]ref110 button is displayed and comments are received from these personnel at this stage by selecting the relevant personnel.
 : Shows the defined comment information.
In the Pre-Control phase, the drop-down list in the Other operations field is clicked and the ![A close-up of a white background
Description automatically generated]ref110 button is clicked.

In the screen that opens, click the  (Select) button in the field where the comment will be requested and select the person whose comment will be requested in the Personnel list defined in the system. In the Description field, the comment information of the selected person about the document is written.
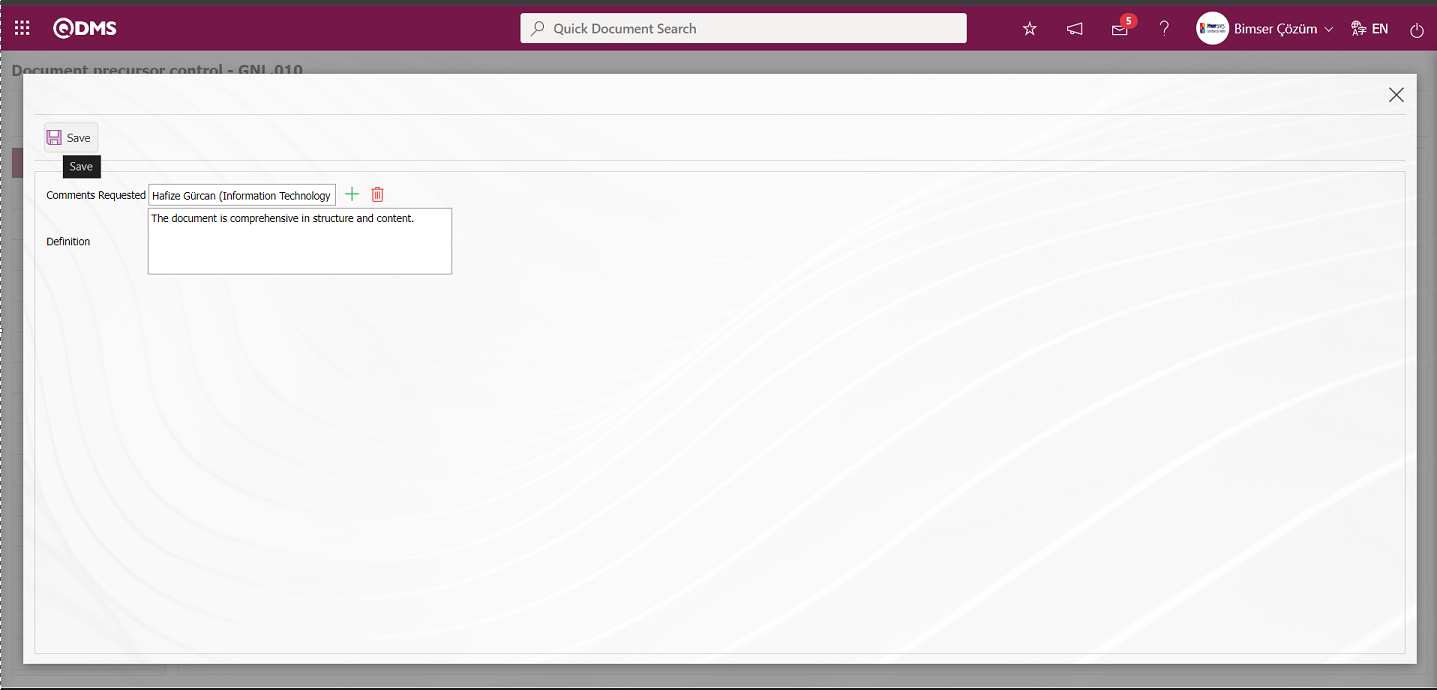
After entering the information related to the required fields, the comment of the relevant person is saved by clicking the  button in the upper left corner of the screen.
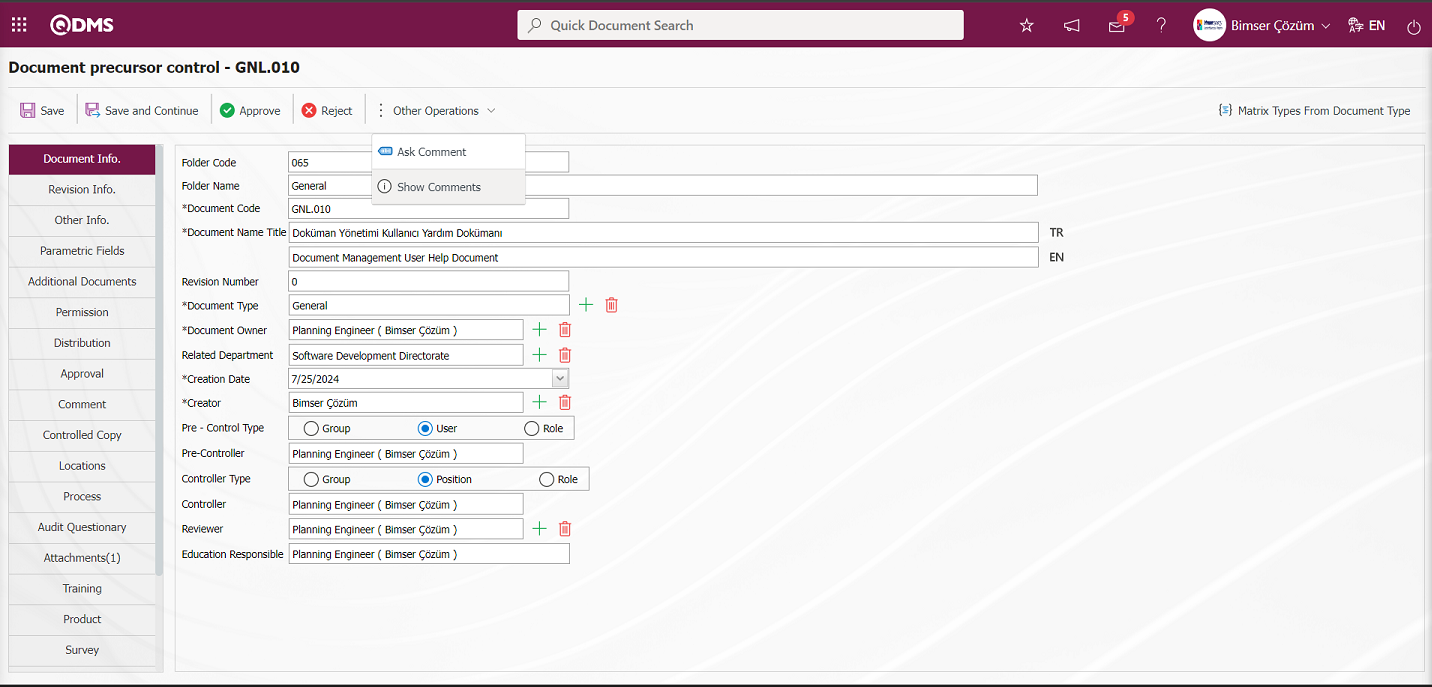
In order to see the defined comments, the button is clicked to display them.
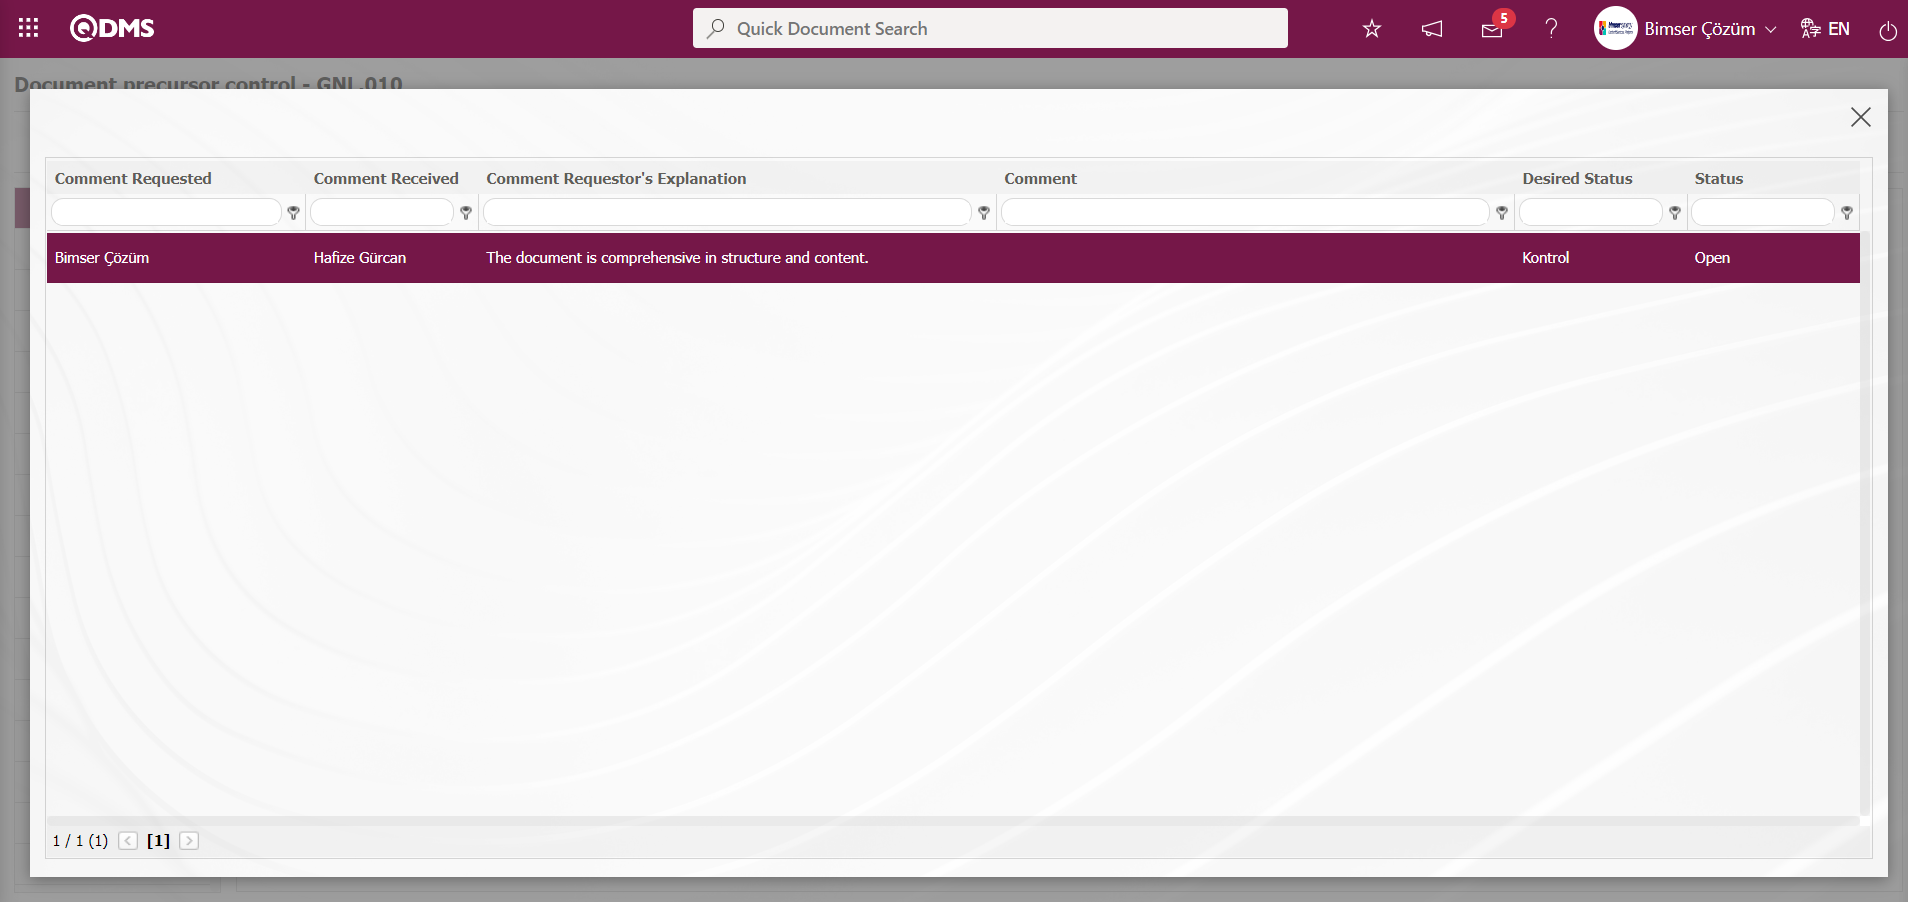
During the Pre-Control phase, the pre-controller downloads and displays the Turkish and English language files of the document in the “Add Document File (Turkish)” and “Add Document File (English)” fields by clicking on the Document tab and downloading the document to his/her computer with the  (View File) button.
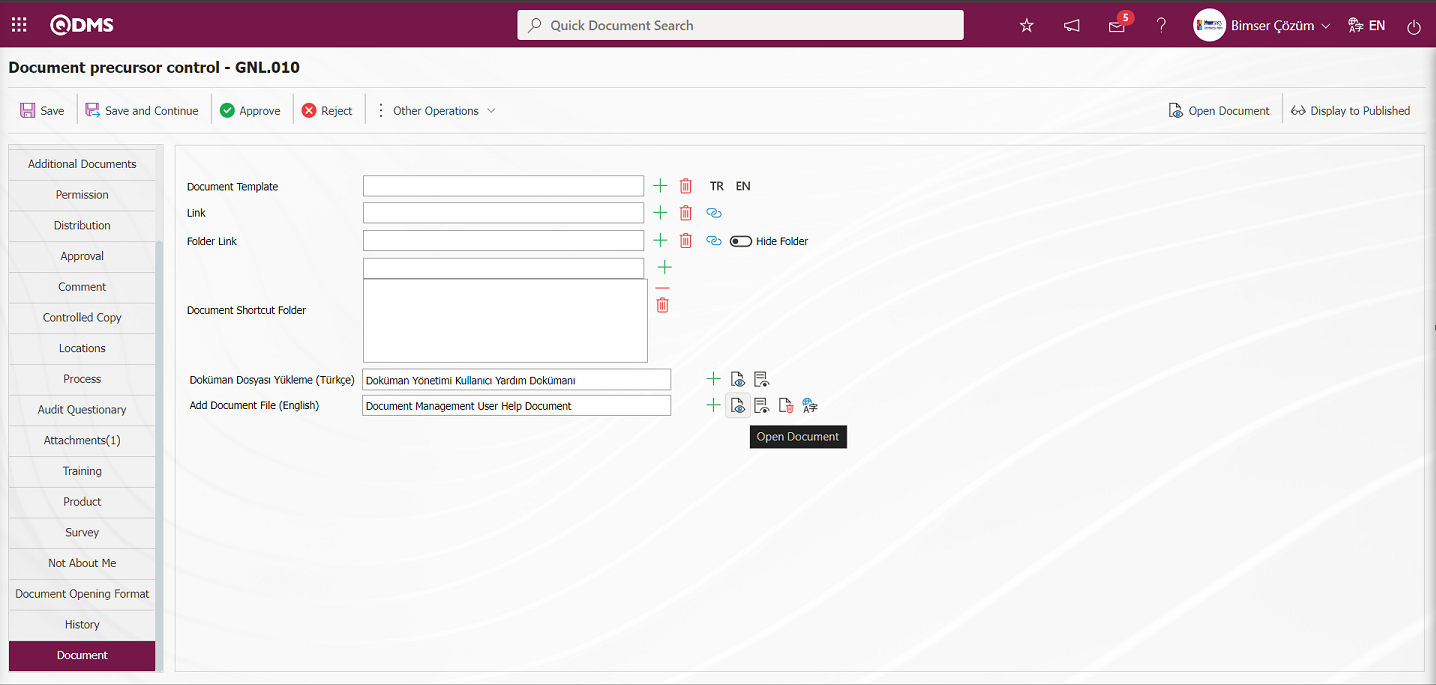
The Pre-Controller examines the document displayed at this stage in terms of structure and content. After examining the document in terms of structure and content, the document is approved and rejected.
In the Pre-Control Phase, the document is rejected by clicking the  button.
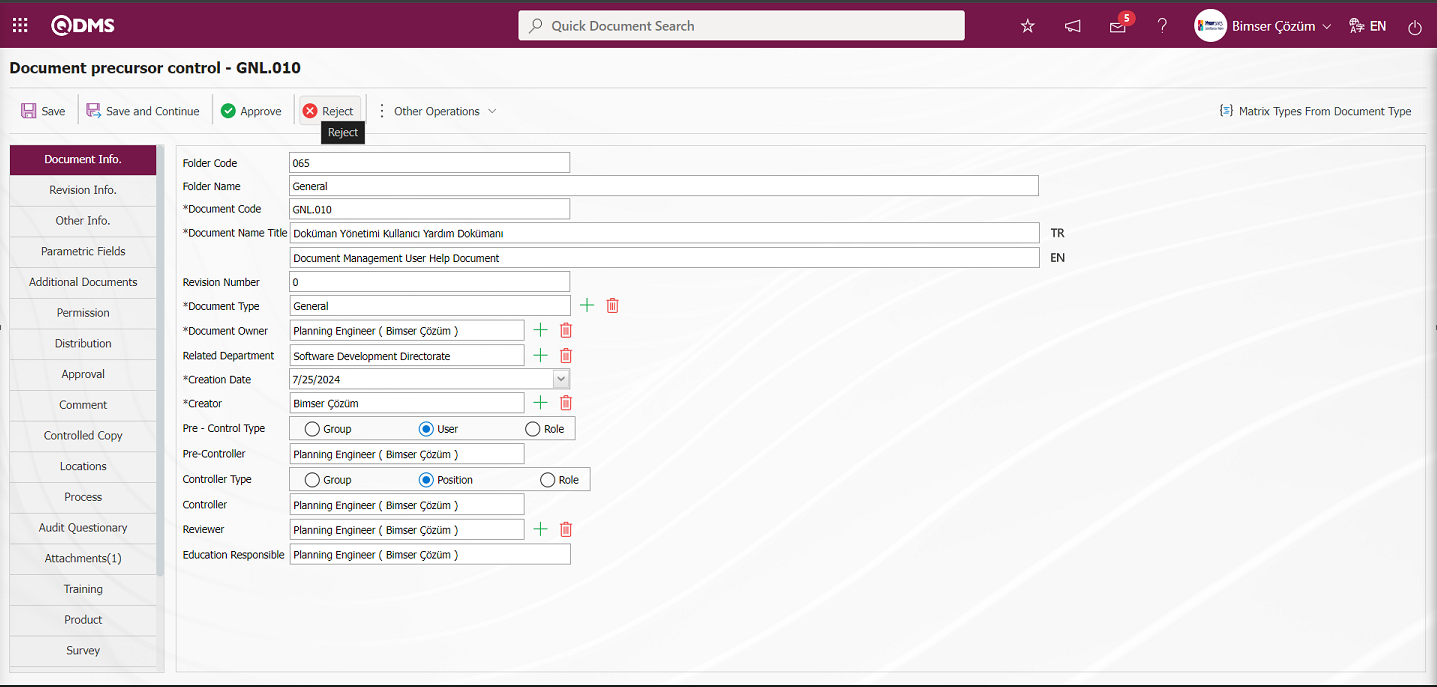
In the document rejection process, the reason for rejection must be written compulsorily. In the document rejection process, the preparer sends the document by writing the reason for rejection and uploading additional files related to the reason for rejection, if any.
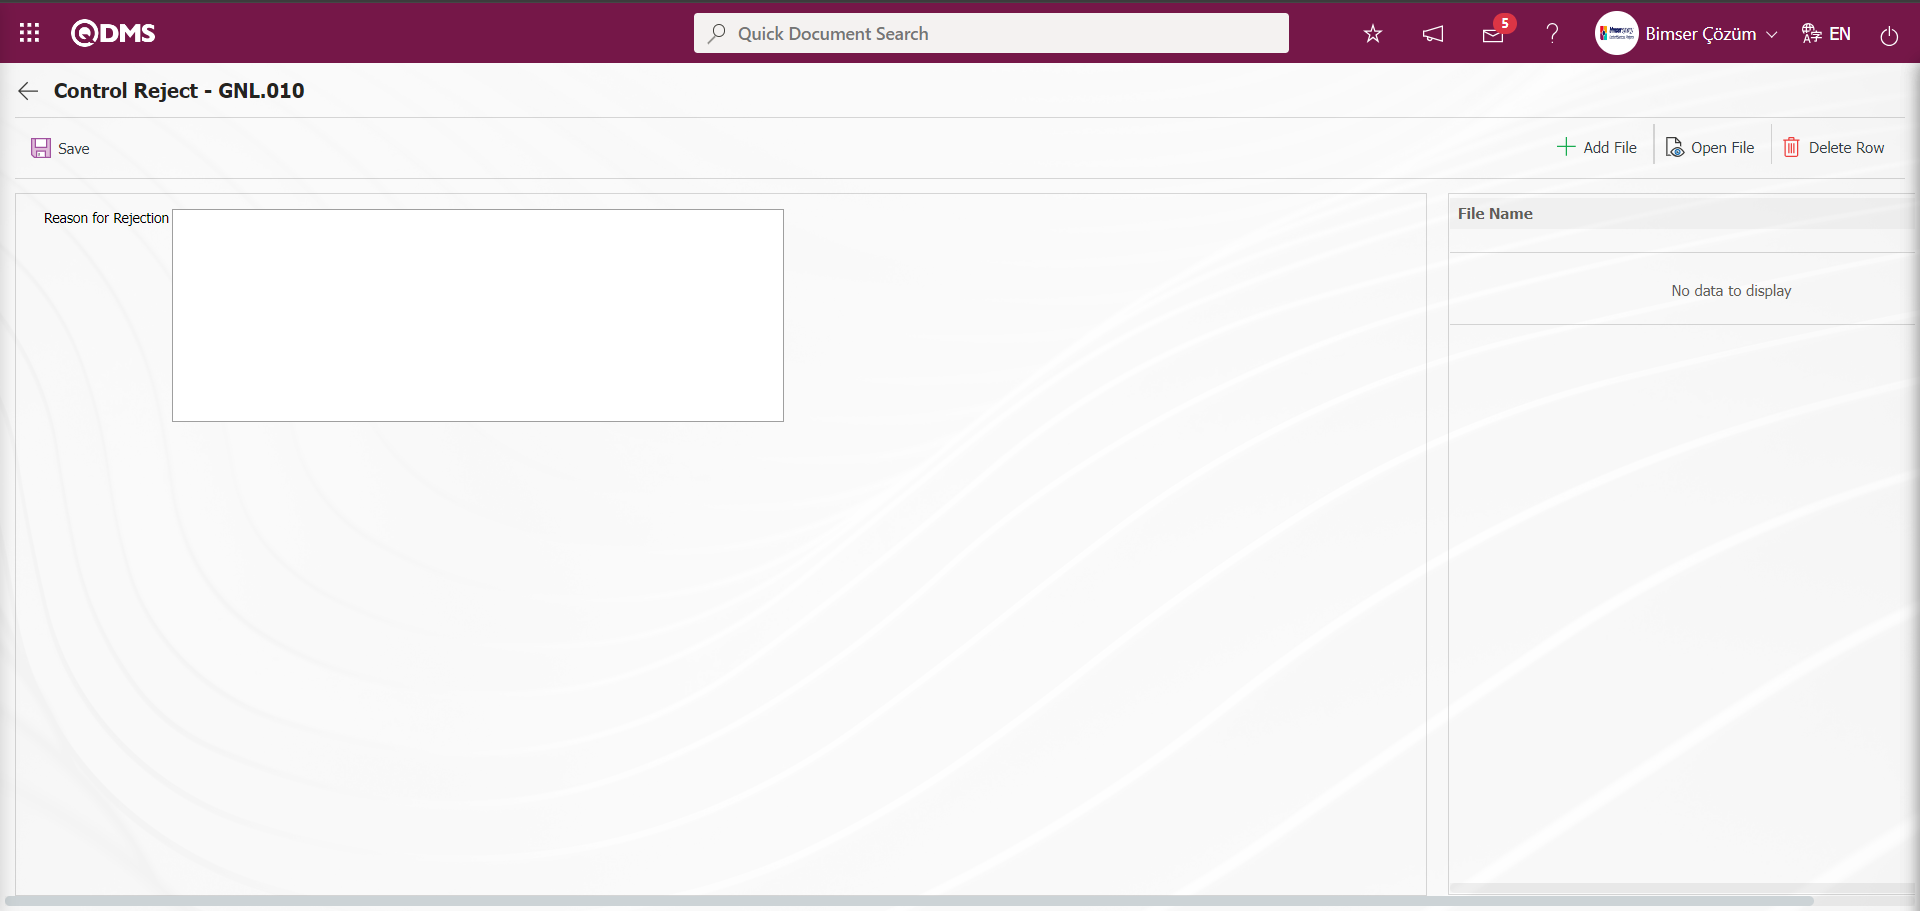
After the Pre-Controller examines the document in terms of structure and content, he/she states his/her opinions and information at this stage by uploading files in the Additional Files tab.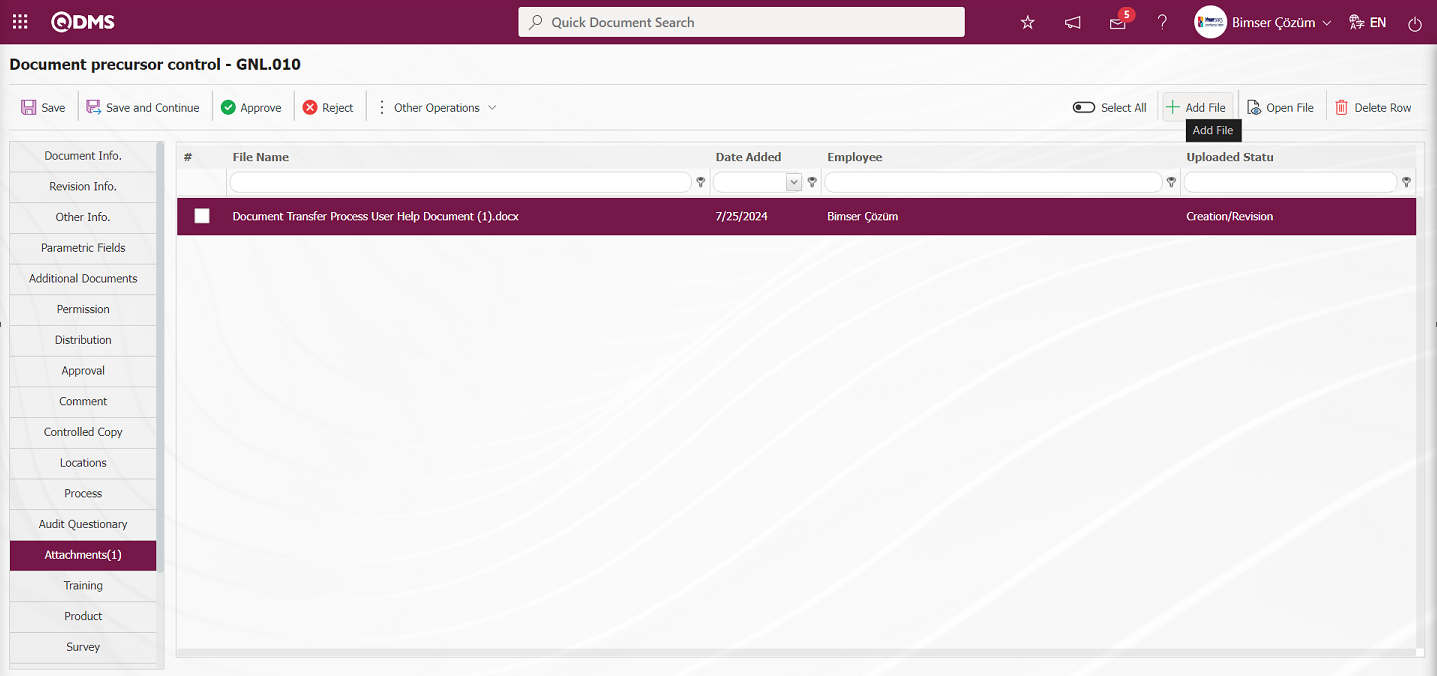
By clicking the  button on the Additional Files tab on the Document Pre-control screen, the user uploads the additional file specified by his/her views.
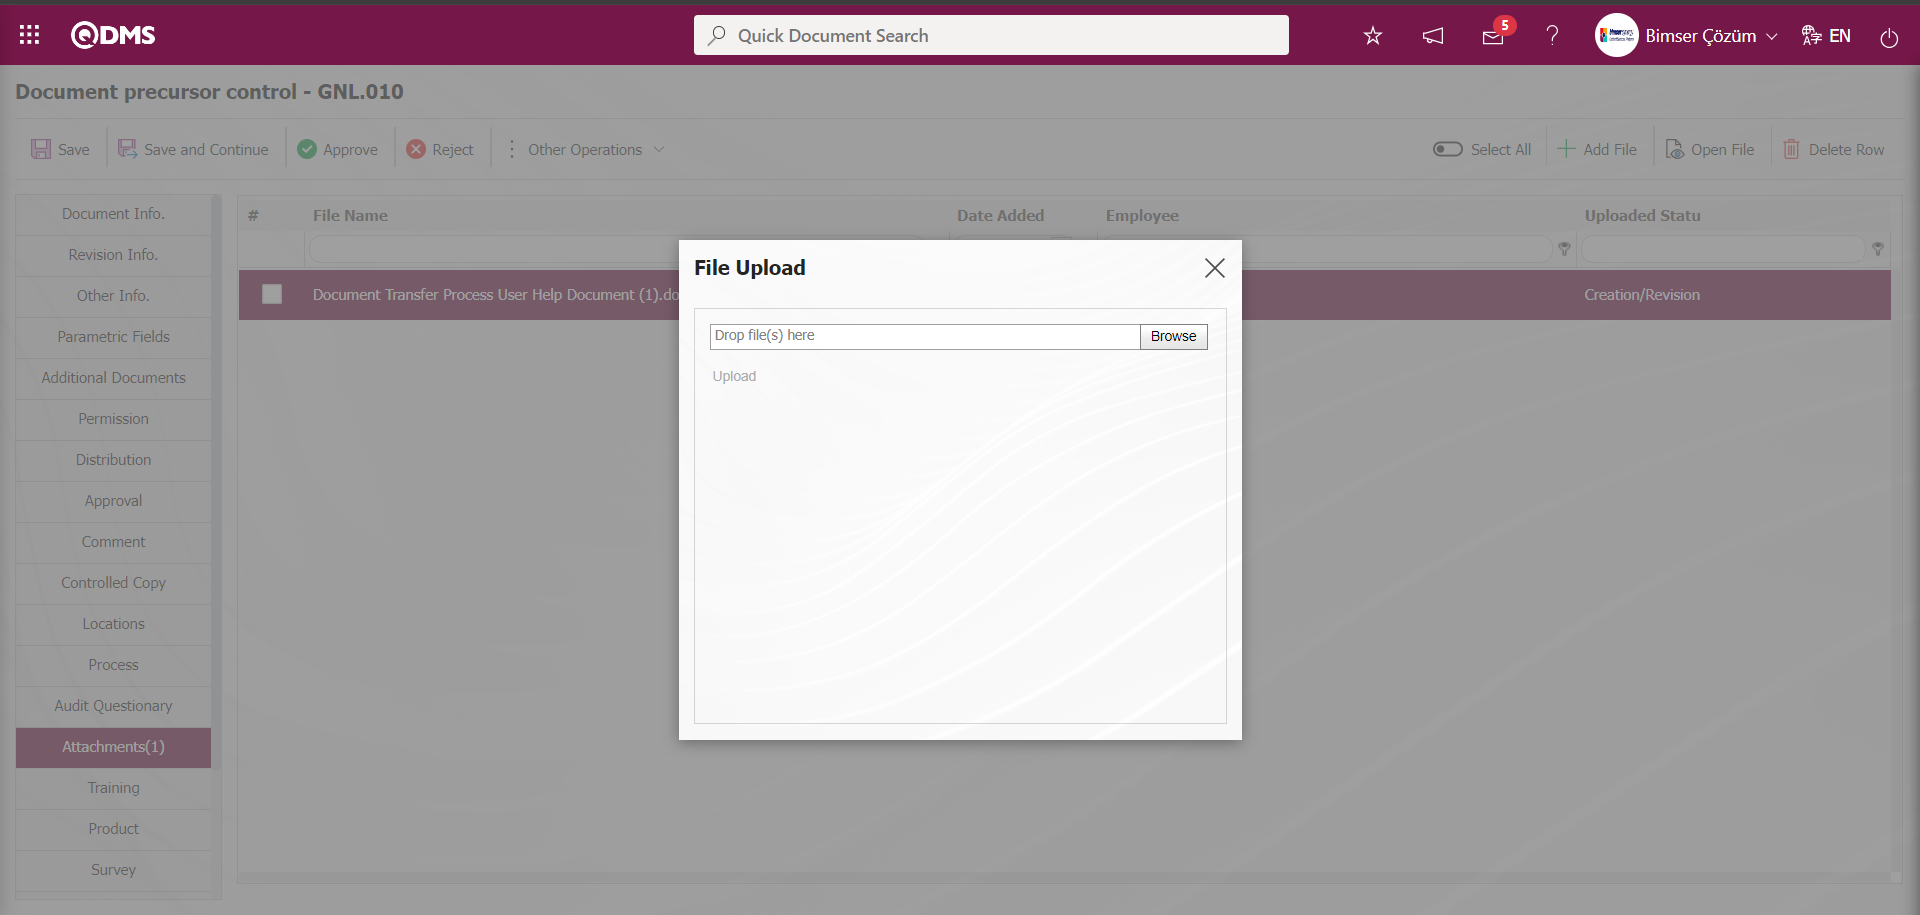
On the Add File screen, click the “Browse” button and select the additional file to be uploaded.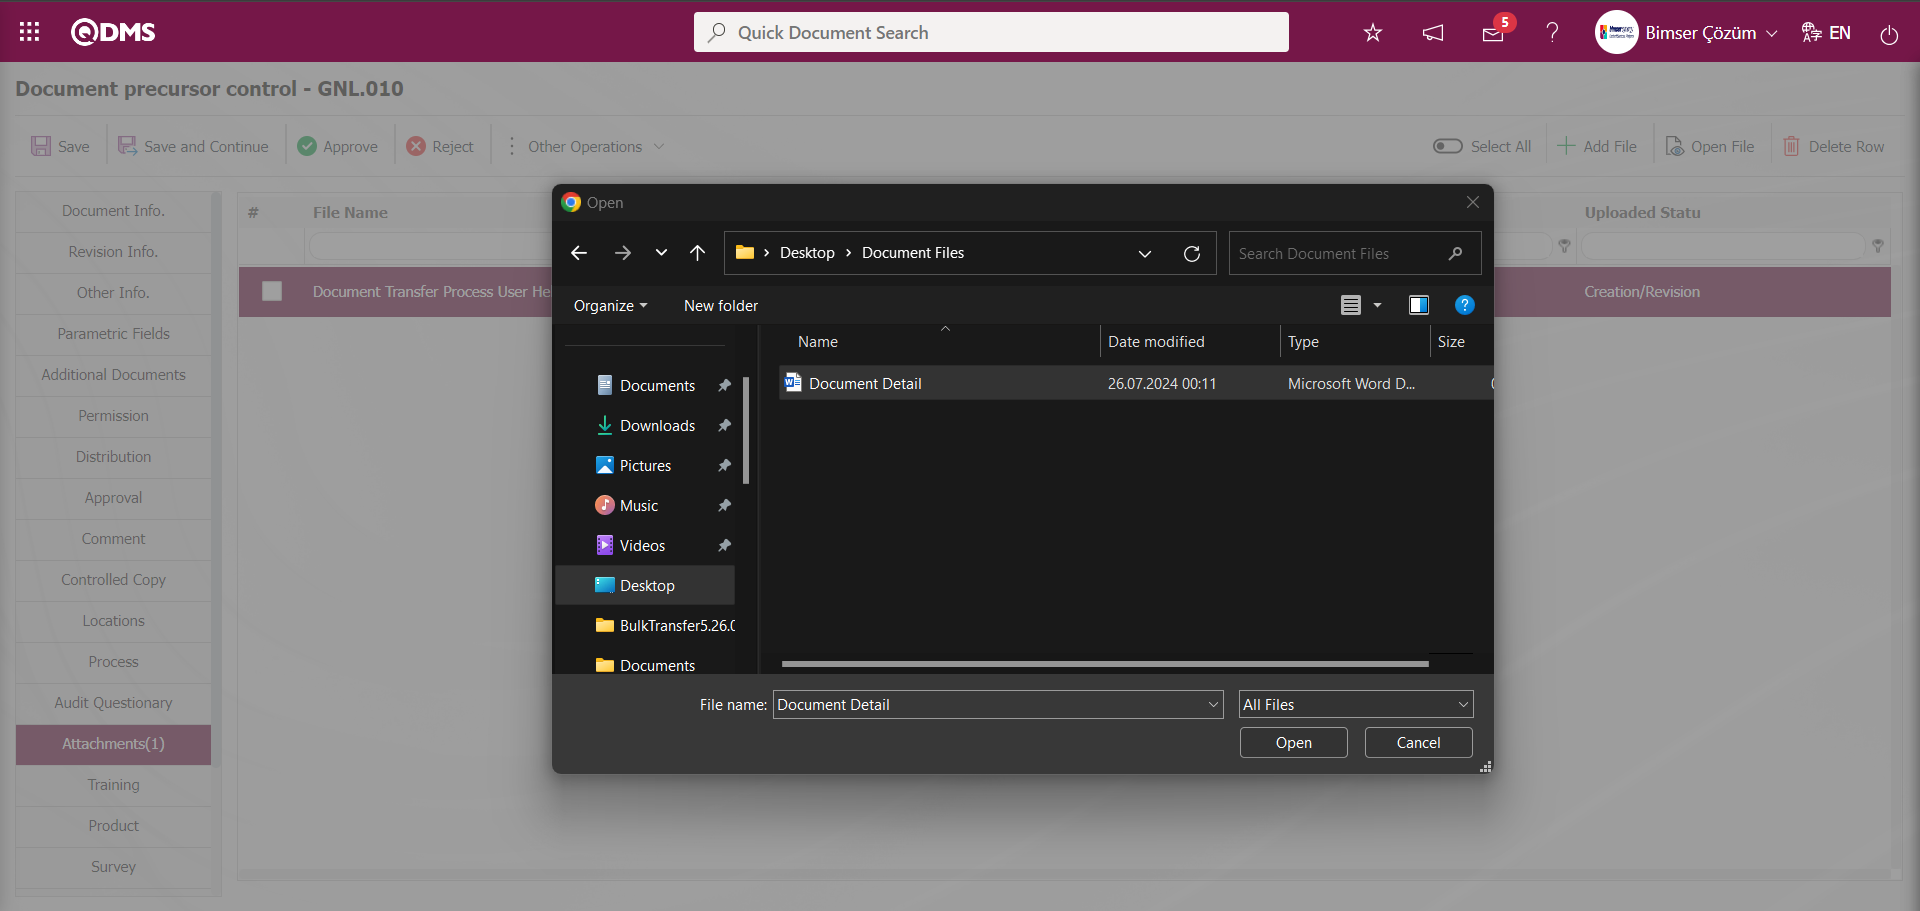
The additional file is uploaded at this stage by clicking the “Upload” button on the Add File screen.
In the Additional Files tab, at which stage the additional file upload process was performed, its status is specified by the system in the Status field.
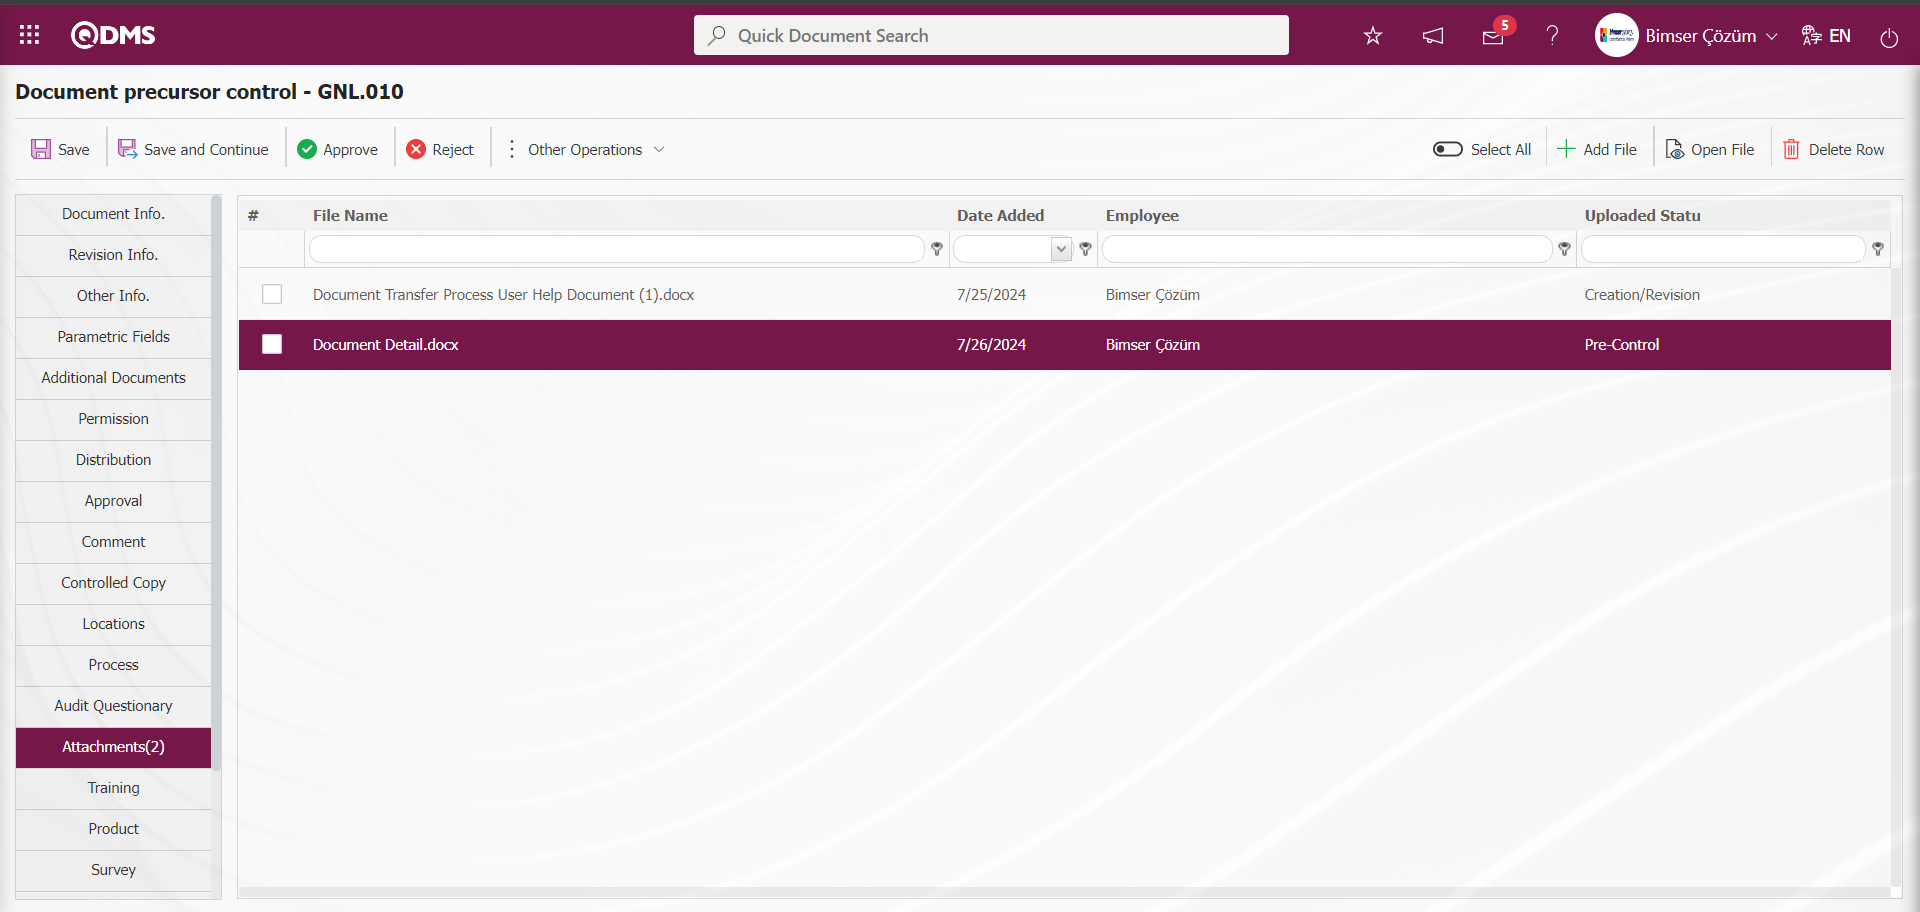
The Pre-Controller clicks on the Document Information tab after the upload process in the structure and content review of the document and the attachment file related to this review in the pre-control phase.
By clicking the  button on the Document Information tab, it sends the document to the controller from the control stage in the flow to perform the control process.
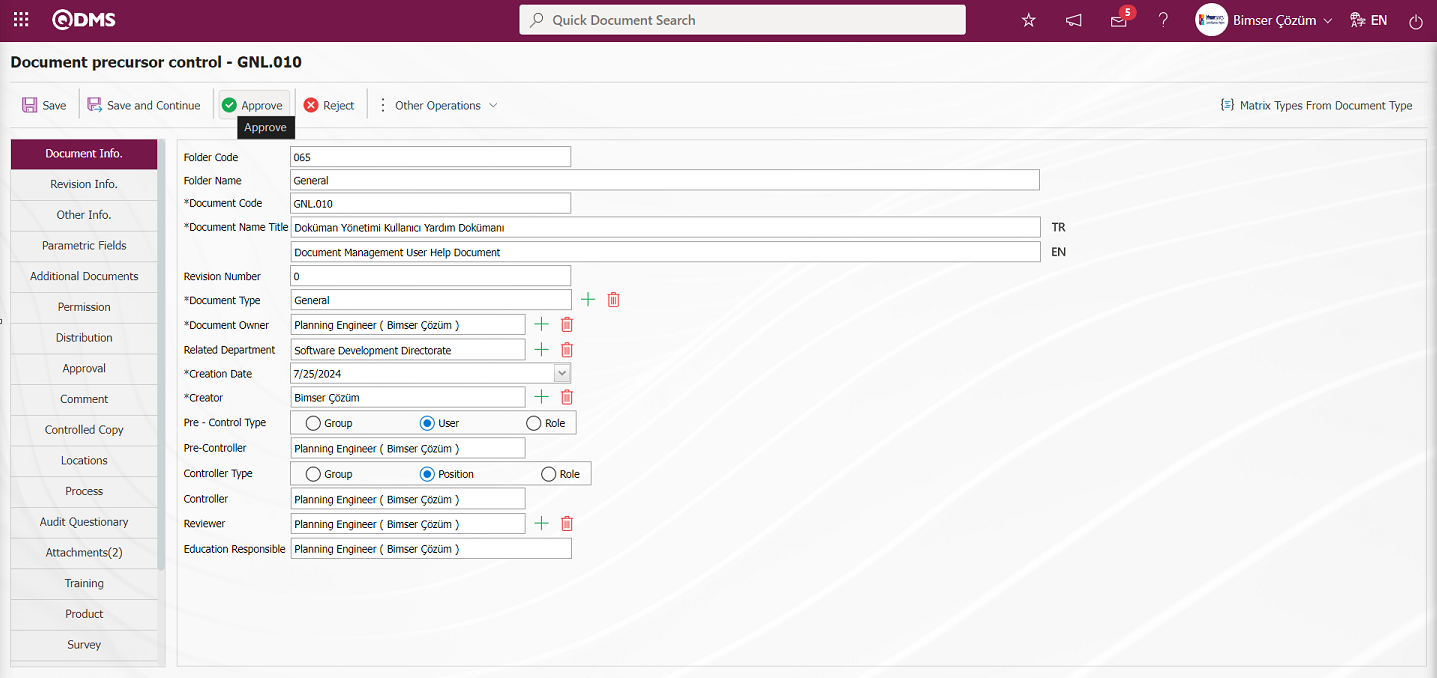
Click the “OK” button in the message given by the system.

The system provides the information that the document was sent to the control and the user to whom it was sent.
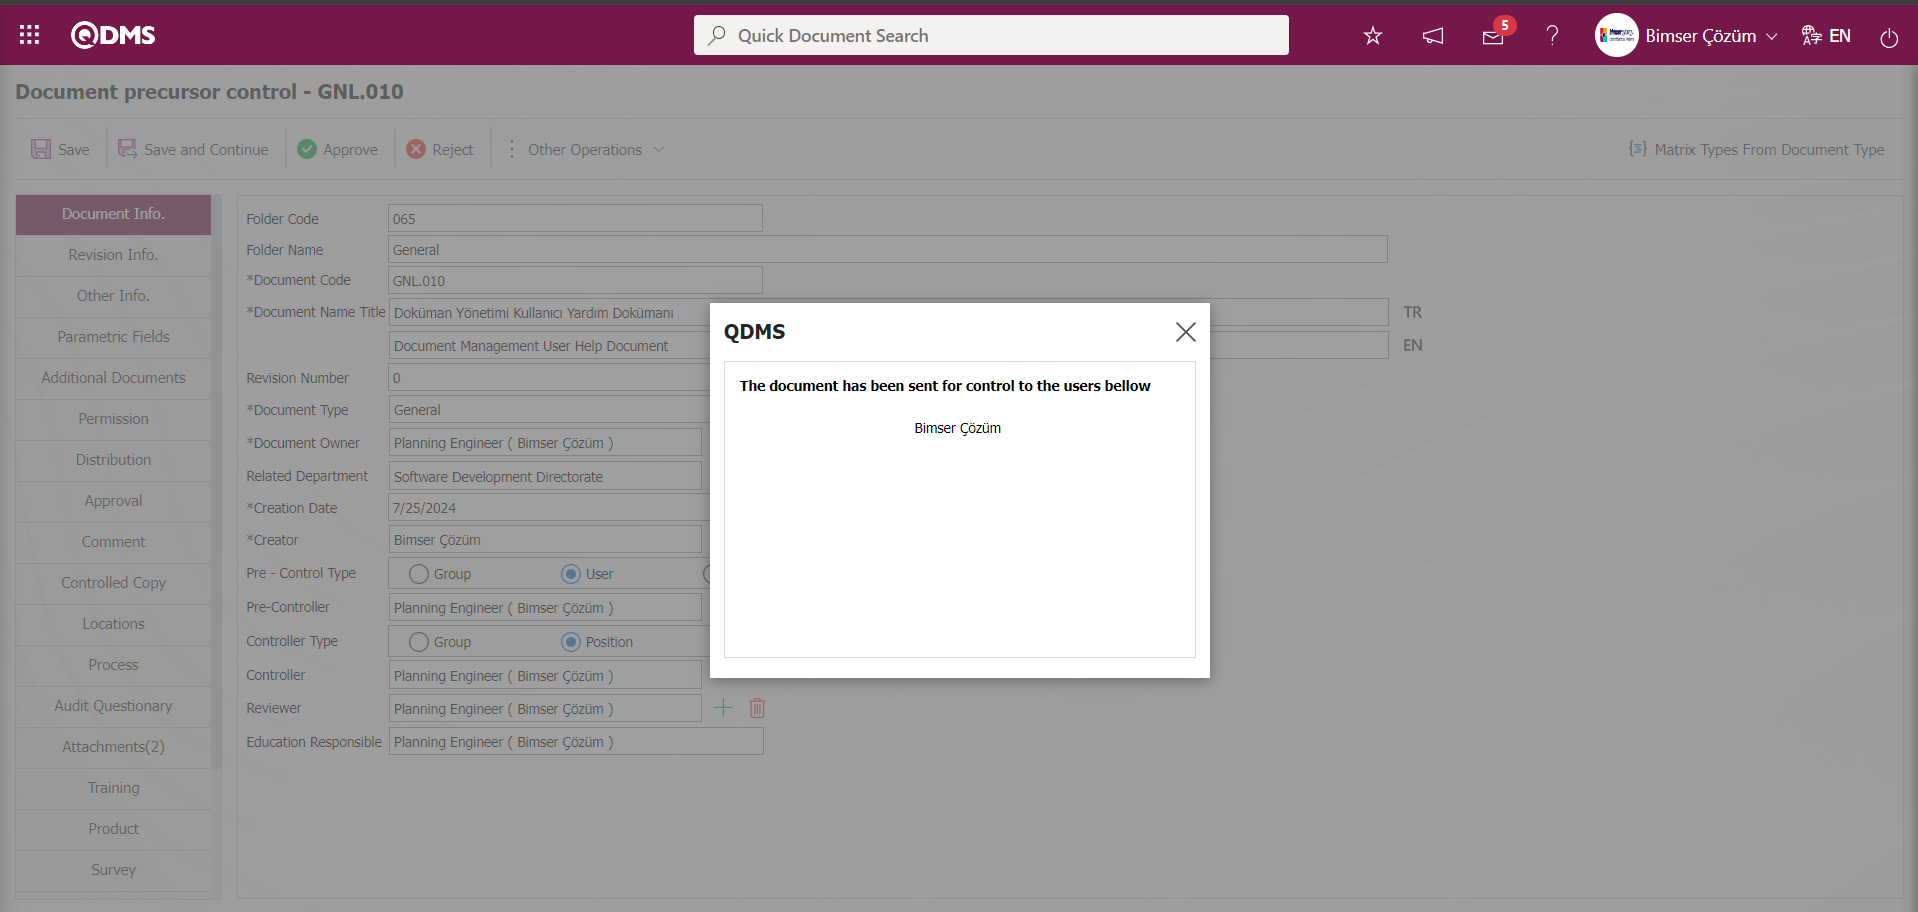
During the control phase, the document is assigned as a “Documents For Control Request” job on the “My pending transactions” page of the controller.
6.2.4.3. Control Process
The document sent for control is displayed under the “Documents For Control Request” list on the “My Pending Jobs” page of the controller. The relevant document information is opened by clicking the document link in the document code field.
The checker is just like the document preparer. When he/she deems necessary, he/she can make all kinds of changes on the document, reload the document without rejecting it and continue the process. He/she can make changes both on the prepared document and on every tab opened such as document information/ authorization matrix/ distribution matrix/ approval matrix during the preparation phase.
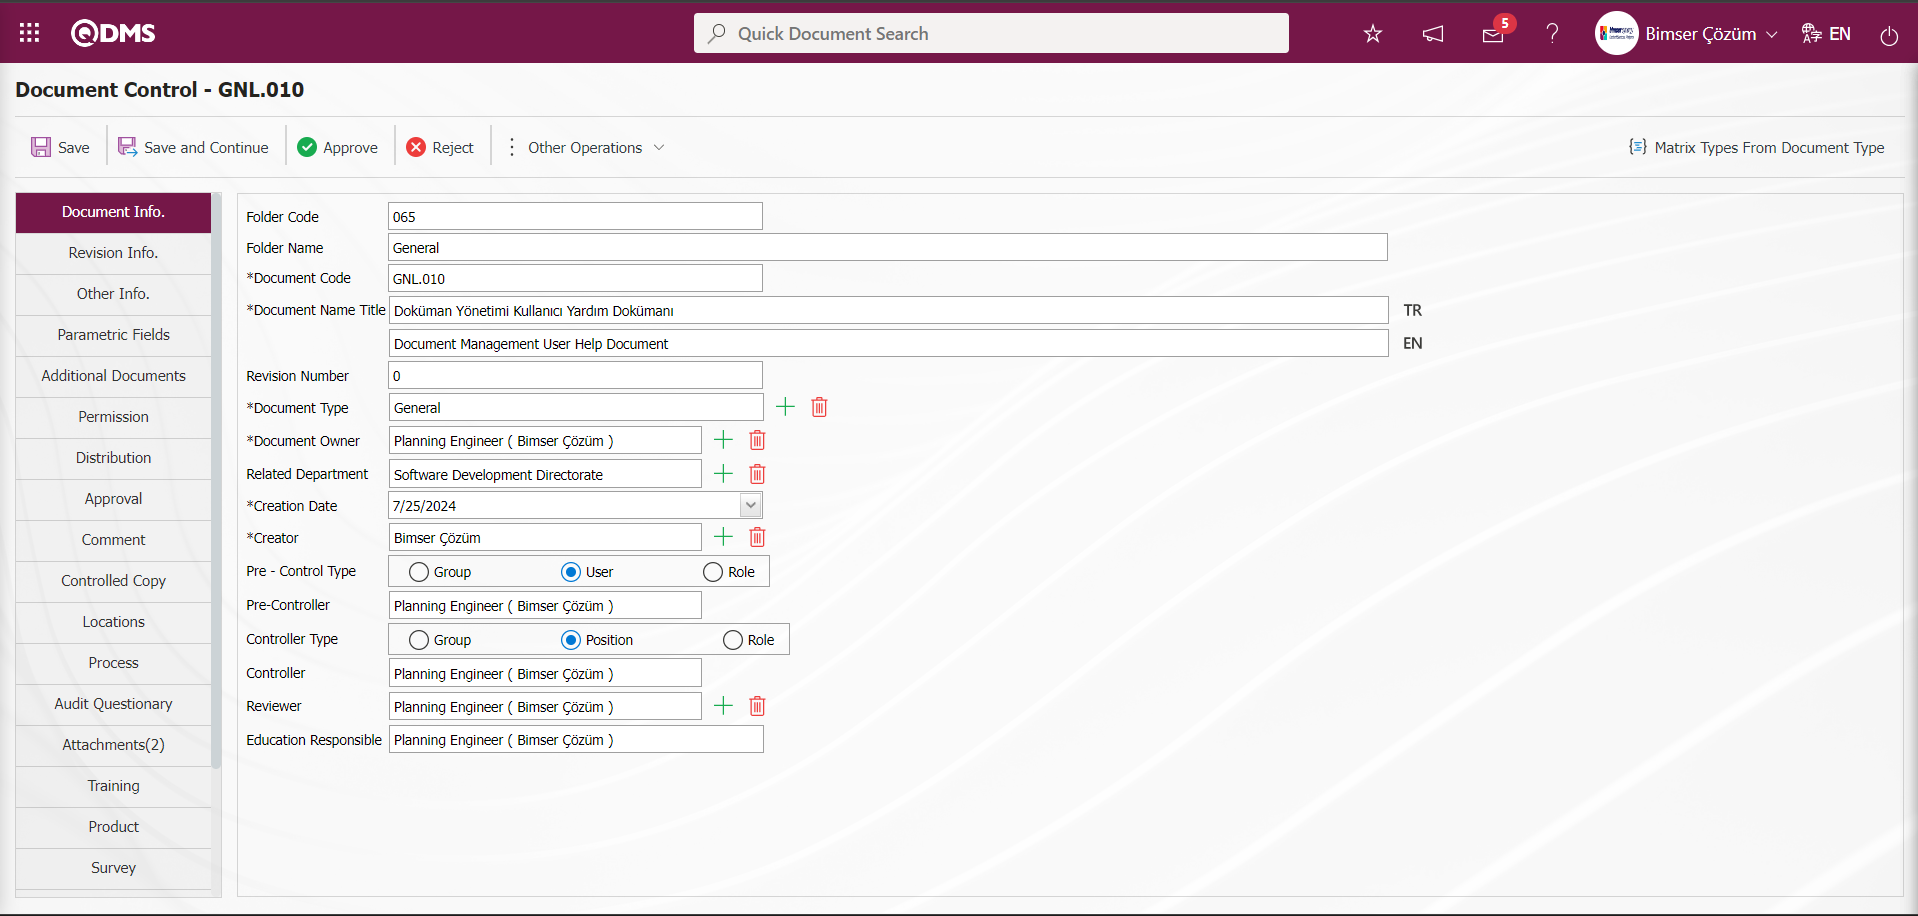
With the help of the buttons on the screen;
 : Saving the document is done.
: Save and continue the process. It is a button displayed depending on the parameter. The parameter is activated by selecting the parameter value “Yes” for parameter 331 in the Document Management parameters.

After the parameter is activated, the button is displayed at the Document Preparation stage.
 : Document control confirmation is made.
: Rejection is made by writing the reason for document rejection.
 : At this stage, comments are requested from the relevant people. It is a button displayed depending on the parameter. Parameter value of parameter 113 in Document Management parameters is activated by selecting “Yes”.

After the parameter is activated, the ![A close-up of a white background
Description automatically generated]ref115 button is displayed and the relevant personnel are selected and comments are received from these personnel at this stage.
 : Shows the defined comment information.
In the control phase, the controller downloads and displays the Turkish and English language files of the document of the “Add Document File (Turkish)” and “Add Document File (English)” fields by clicking on the Document tab by downloading the documents to his/her computer with the (View File) button. At this stage, the controller reviews the document and all tabs displayed. If he/she has opinions about the document, he/she uploads it in the Additional Files tab by specifying these opinions in an additional file. The status of the additional file uploaded at this stage is indicated as “Control” by the system.
After reviewing the document with the information on the document, the document is approved and rejected. The Document Information tab is clicked.
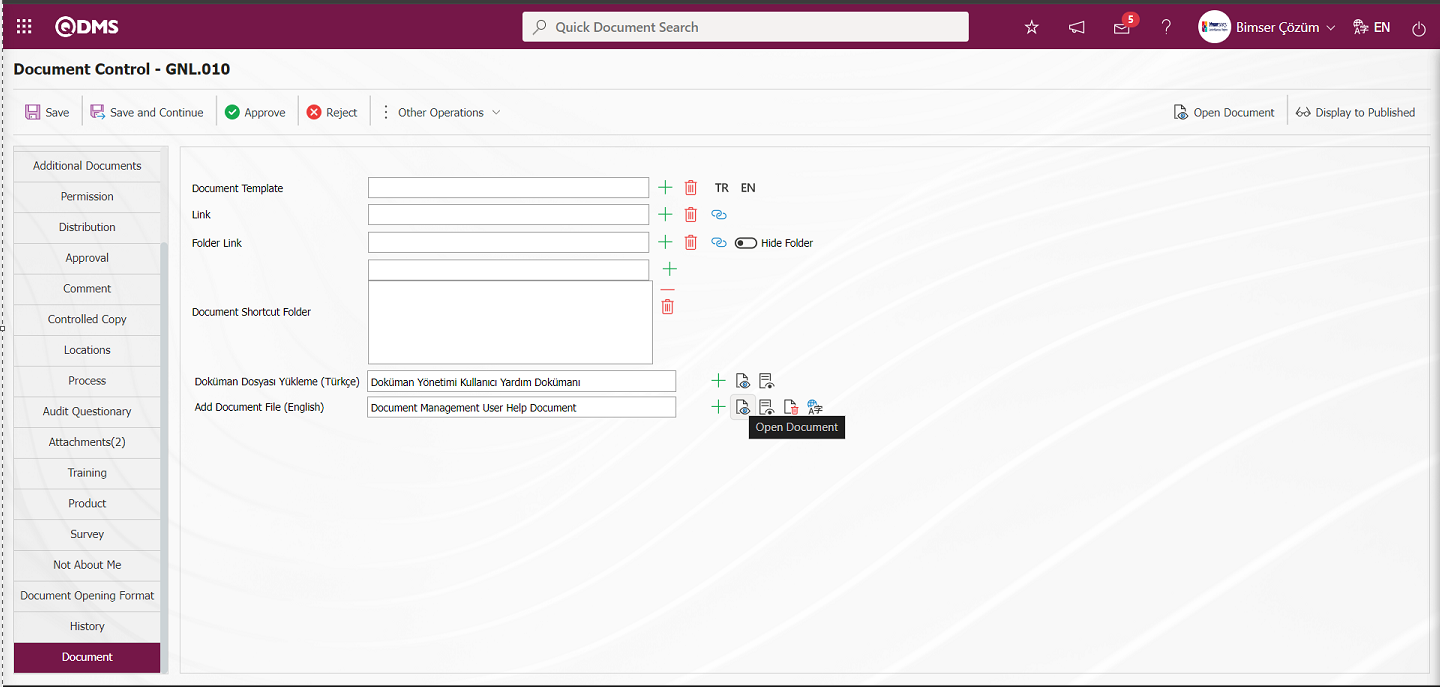
If desired, the document can be rejected by clicking the button at the Control stage in the Document Information tab.

The reason for rejection must be written mandatorily in the document rejection process. In the document rejection process, the document is sent to the person who prepared the document by writing the reason for rejection and uploading additional files related to the reason for rejection, if any.

In the control phase, when the controller deems the document appropriate after examining and reviewing the document information and tabs, the document is sent for approval to the approvers in the approval phase by clicking the button.
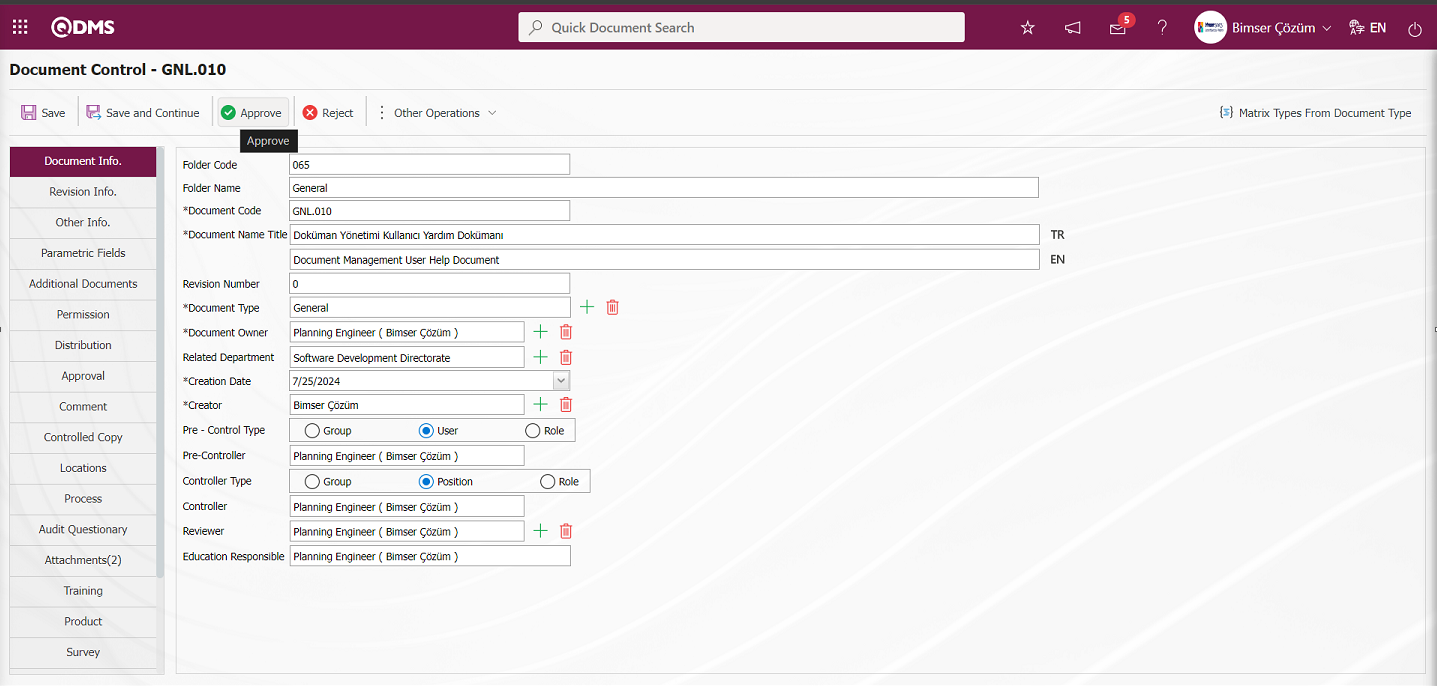
The “OK” button is clicked in the message by the system.
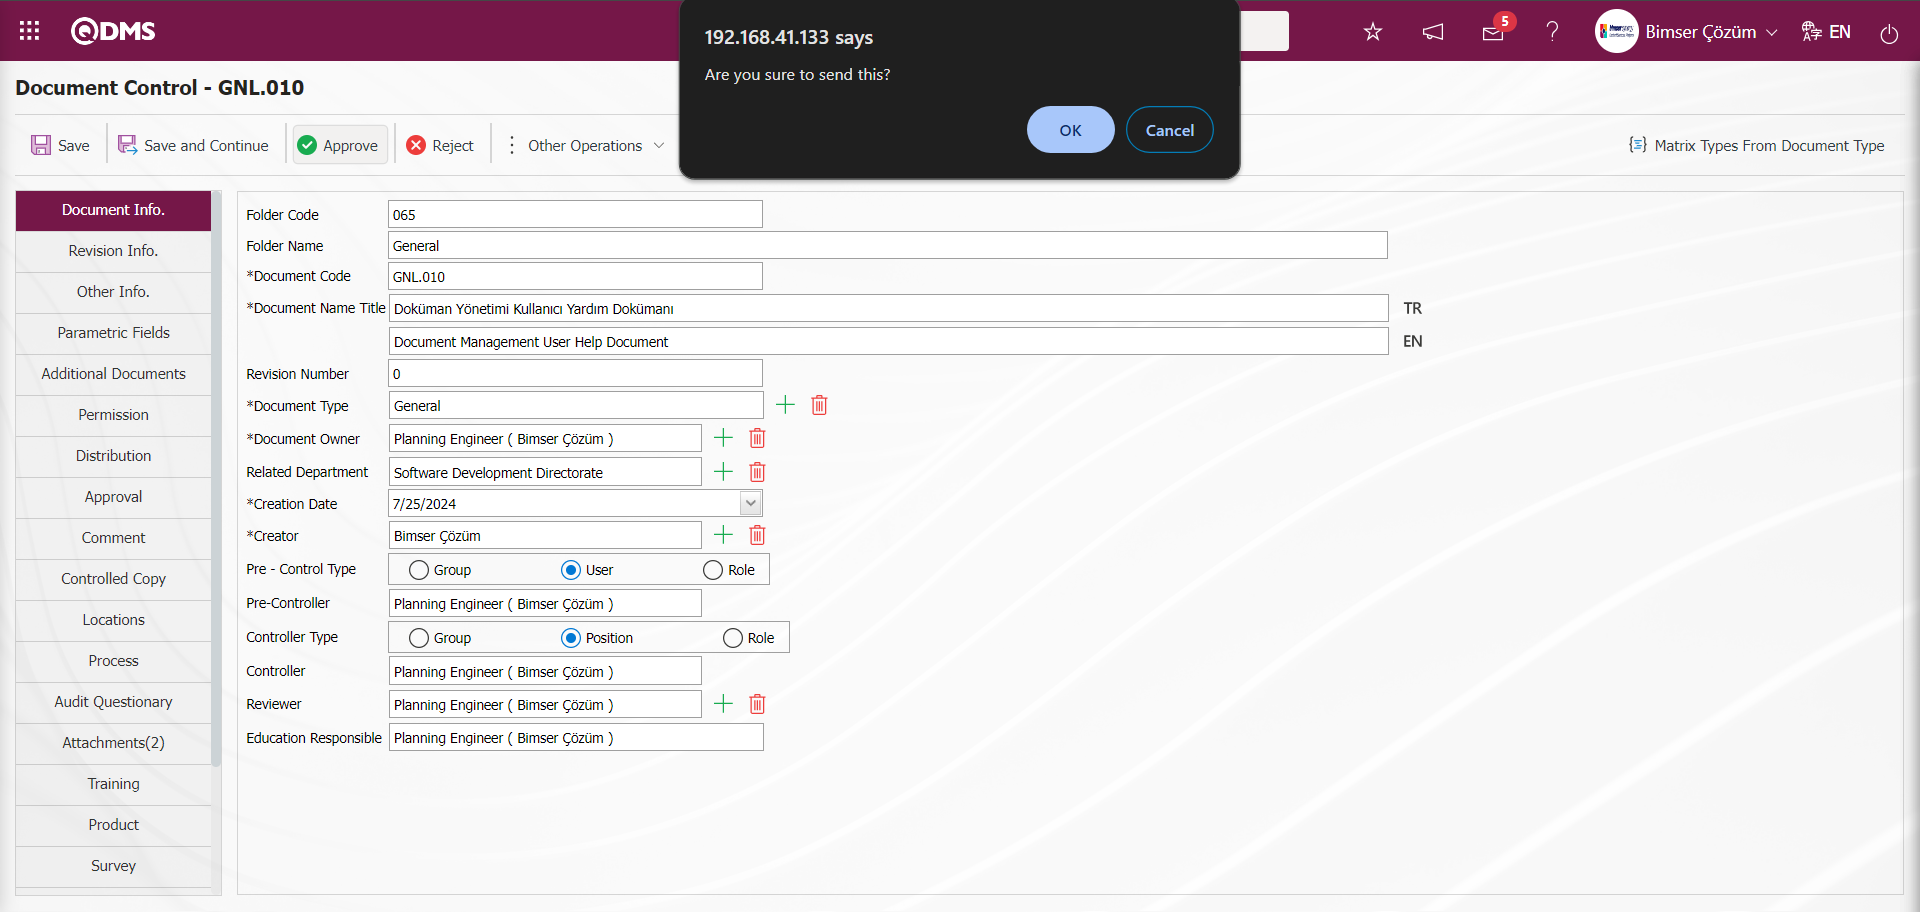
There are 2 approvers in the Approval Matrix tab. “0” zero is the last approver and the approval phase works in reverse. First, after the approval process is done at the 1st level approver, the approval phase is completed with the 0th level approver and the document falls to the people in the distribution matrix as a reading task.

From the 1st level approver's “My Pending Jobs” page, the task falls as “Documents For Approve Request” job. From the Qdms main login screen, login to the Qdms local address with the username and password information of the 1st level approver.
6.2.4.4. Approval Process
The documents sent for approval are displayed in the approval matrix according to their levels, respectively, under the“Documents For Approve Request” list on the “My Pending Jobs” page of the approver.
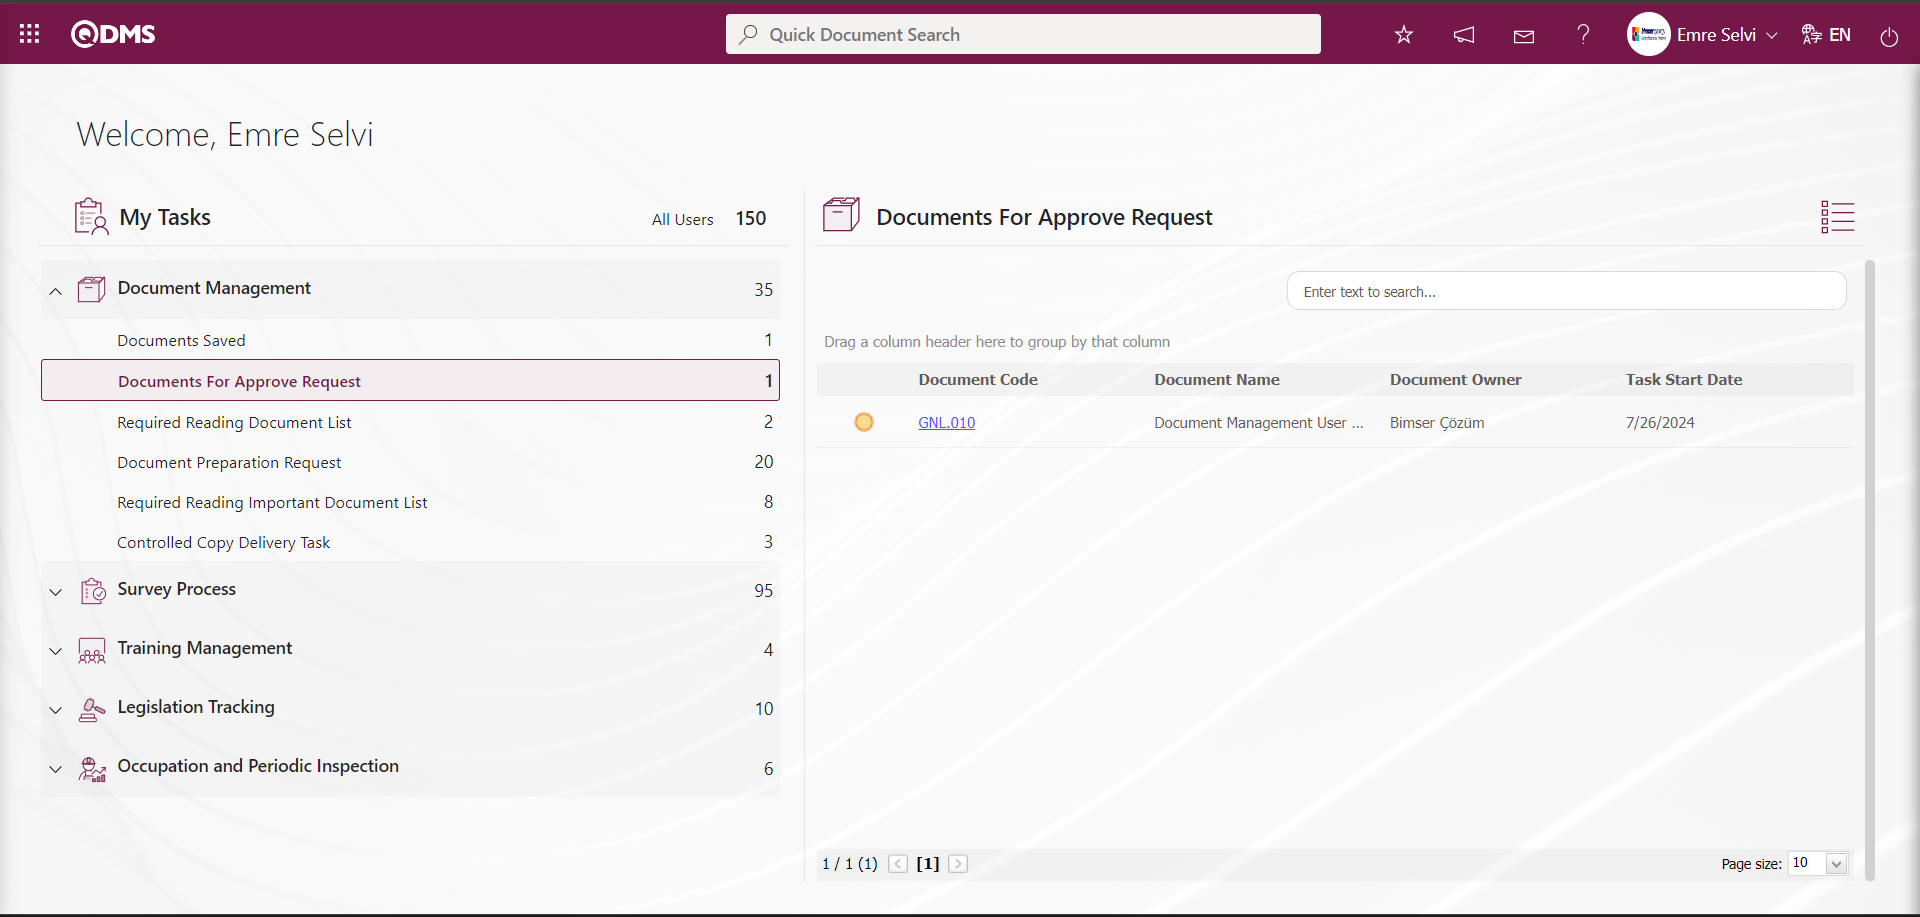
The relevant document information is opened by clicking the document code link in the Document code field in the relevant task. The approver cannot make changes on the document information. At this stage, only the document can be viewed and approval/rejection operations are performed.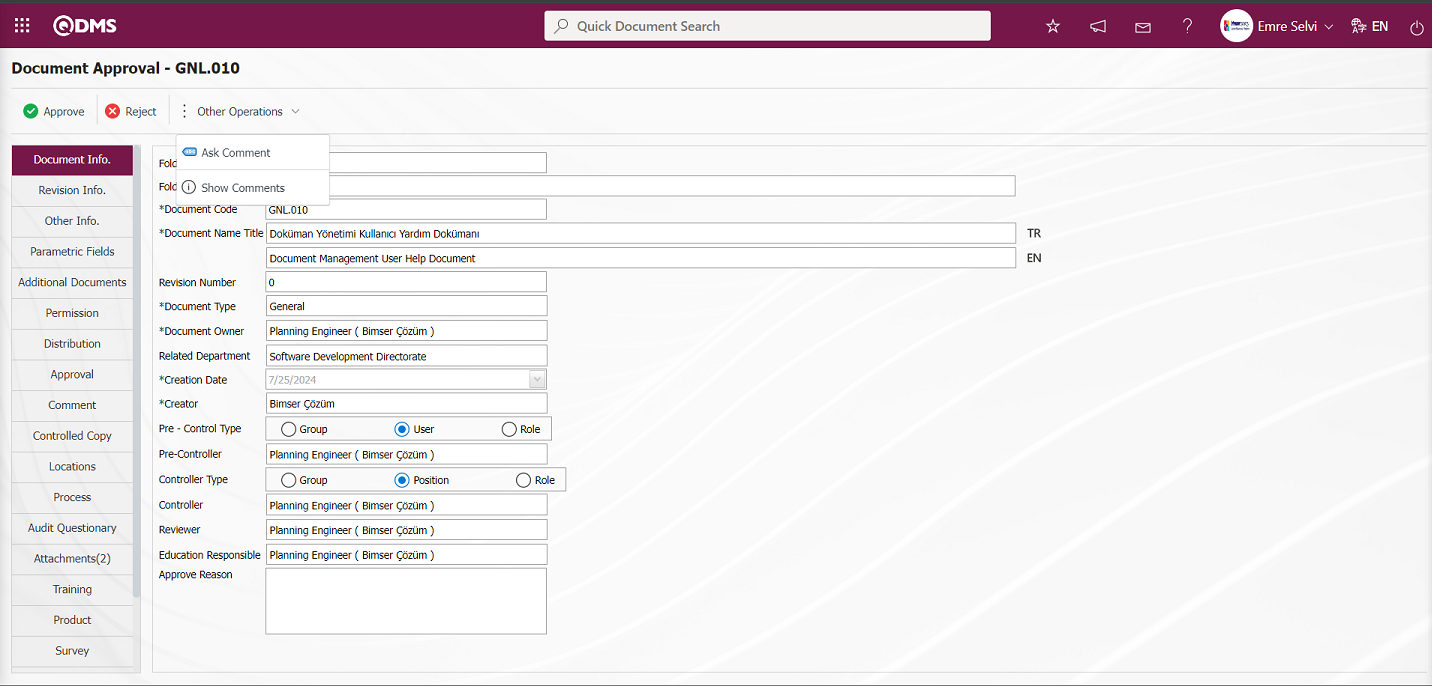
With the help of the buttons on the screen;
: Document approval process is done.
: Rejection is made by writing the reason for document rejection.
![A close-up of a white background
Description automatically generated]ref115: At this stage, comments are requested from the relevant people. It is a button displayed depending on the parameter. The parameter value of parameter 113 in Document Management parameters is activated by selecting “Yes”.
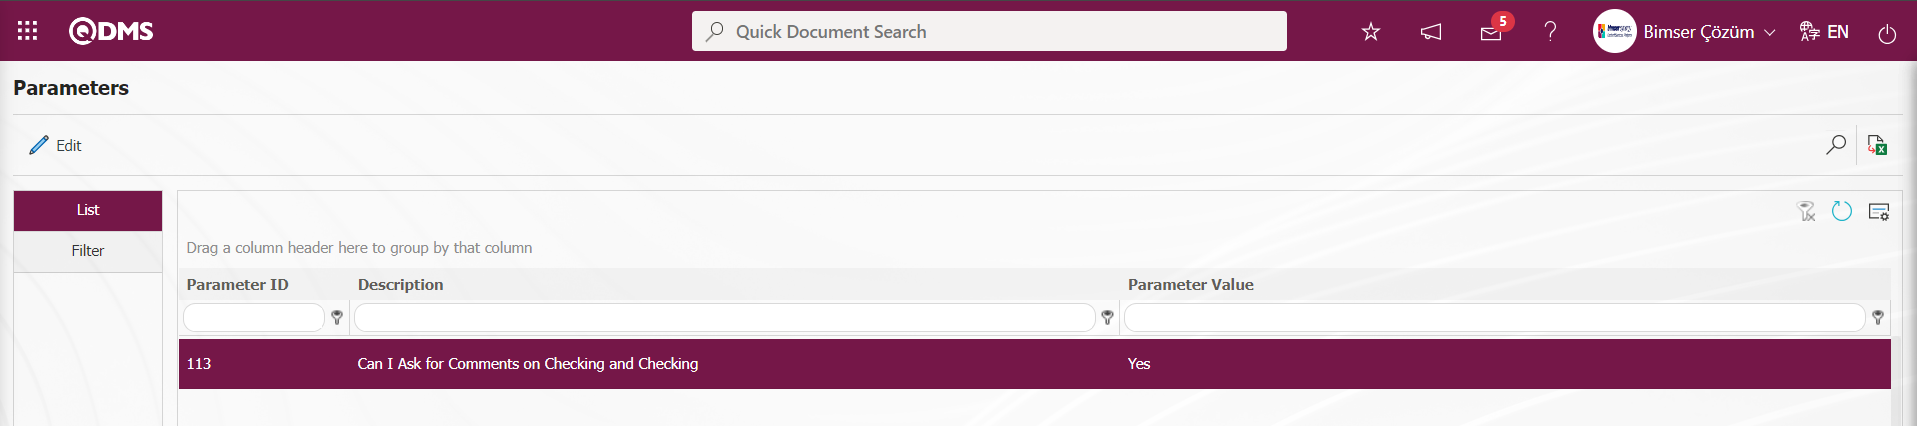
After the parameter is activated, the ![A close-up of a white background
Description automatically generated]ref115 button is displayed and the relevant personnel are selected and comments are received from these personnel at this stage.
: Shows the defined comment information.
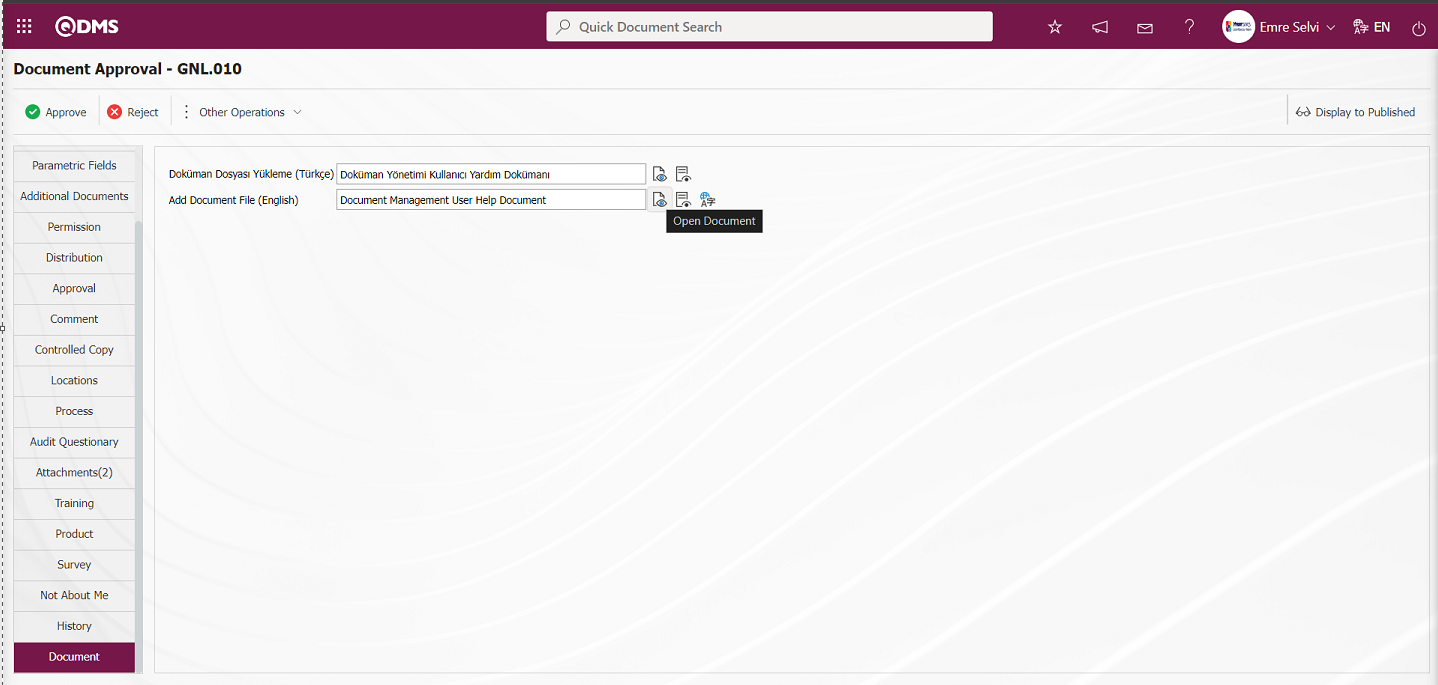
Documents are opened by clicking on the “Upload Document File (Turkish)” and “Add Document File (English)” fields by clicking on the Turkish and English language files of the document  (view file) button. For documents prepared using a template, the
  (show published version) button is used to display the documents created with the preparation template. Click on the Document Information tab
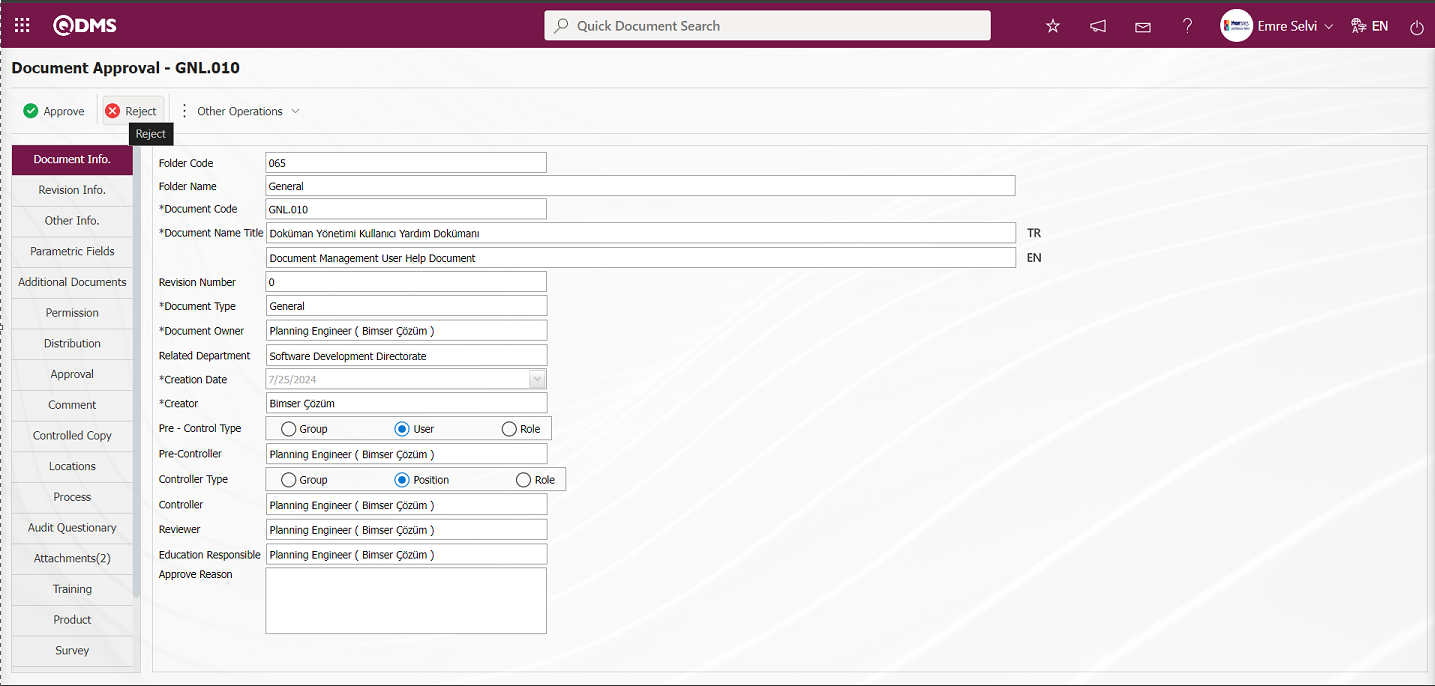 In case of rejection, the reason for rejection must be entered. If desired, additional file upload process related to the reason for rejection is made. At this stage, in the field of the person to be sent, the selection process is made in the Preparer/ Reviser, Checker and Pre-checker options.
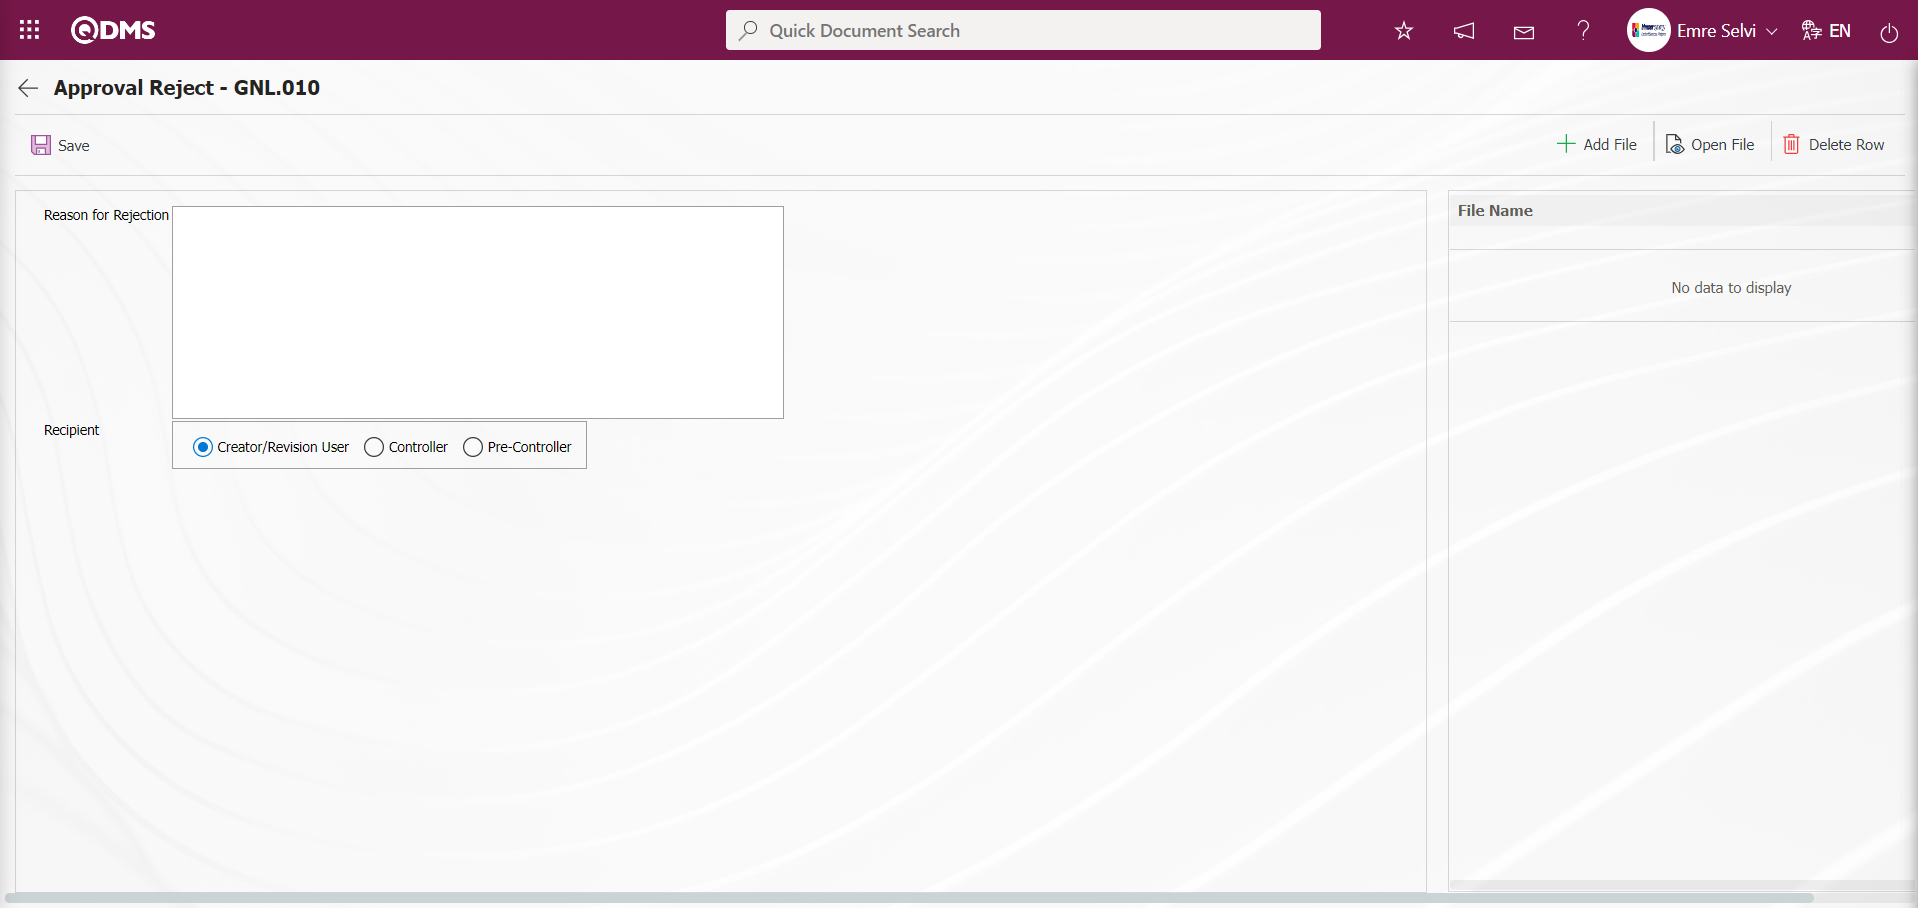
On the Document Approval screen, the approval description information is entered in the Document Information tab on the Document Approval screen and the document is sent for approval to the user at Level 0 at the approval stage by clicking the button. At this stage, the approval description is a field that is displayed depending on the parameter. Parameter 85 is activated by selecting the parameter value “Yes”.
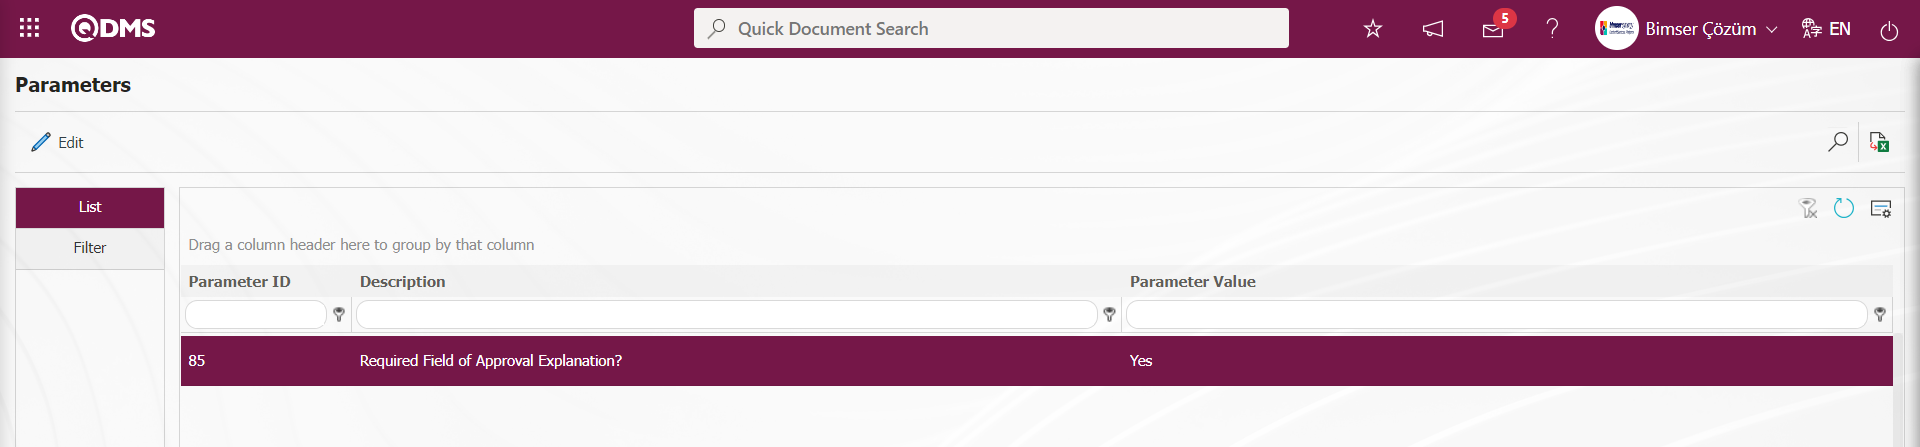
After the parameter is activated, it is mandatory to enter the information of the relevant person in the approval description field in the approval process in a document at the approval stage.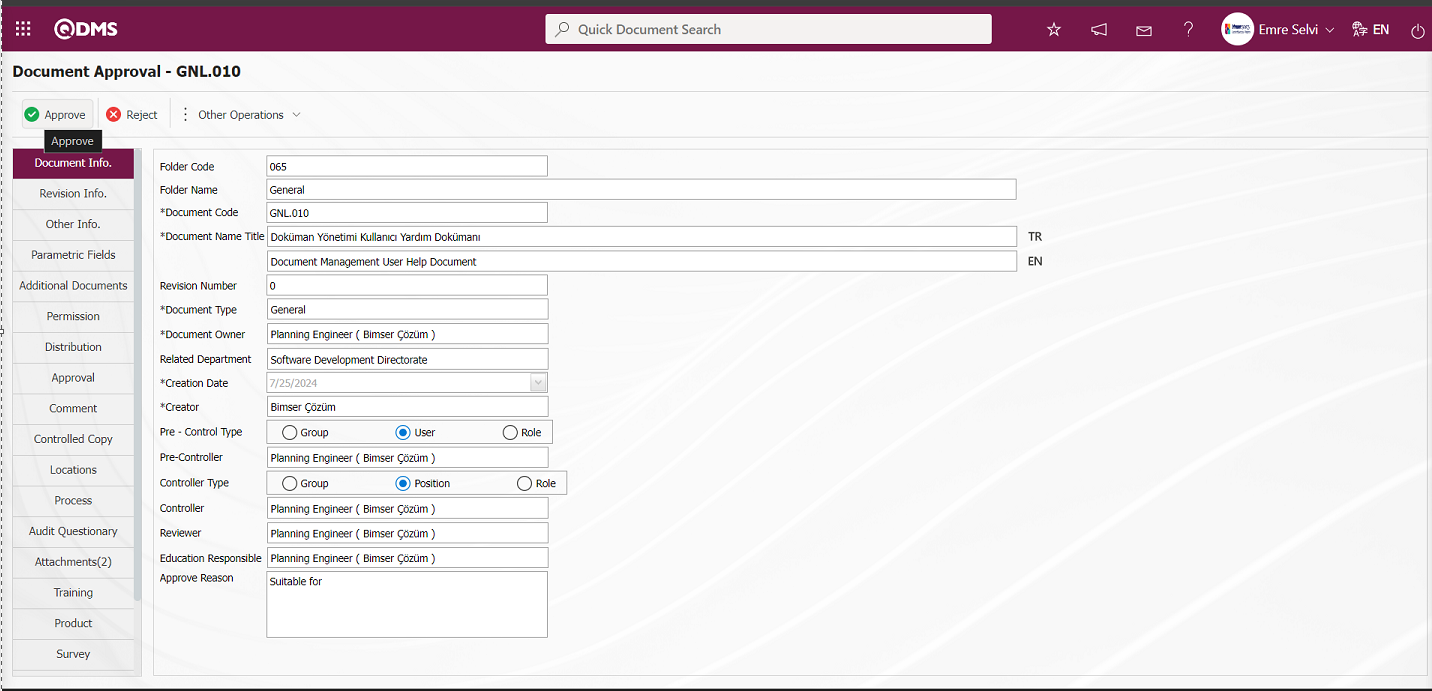
Click the “OK” button in the message by the system.
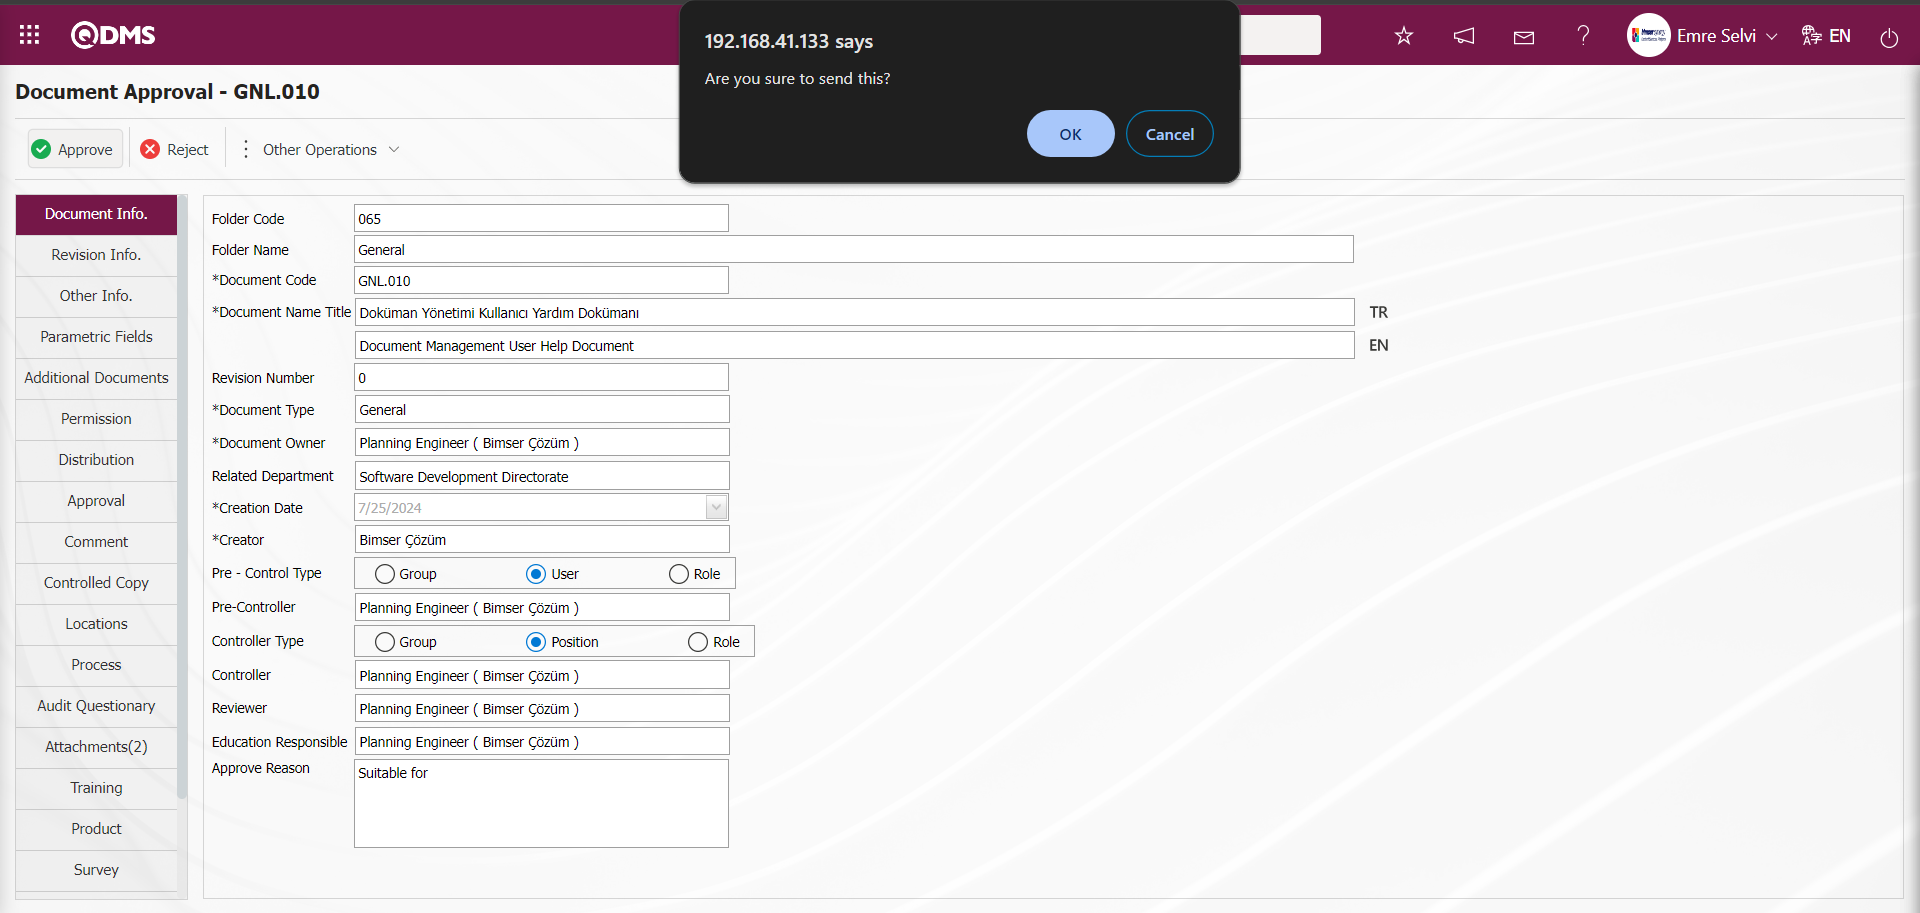
The system provides the information that the document was sent for approval and the user to whom it was sent.
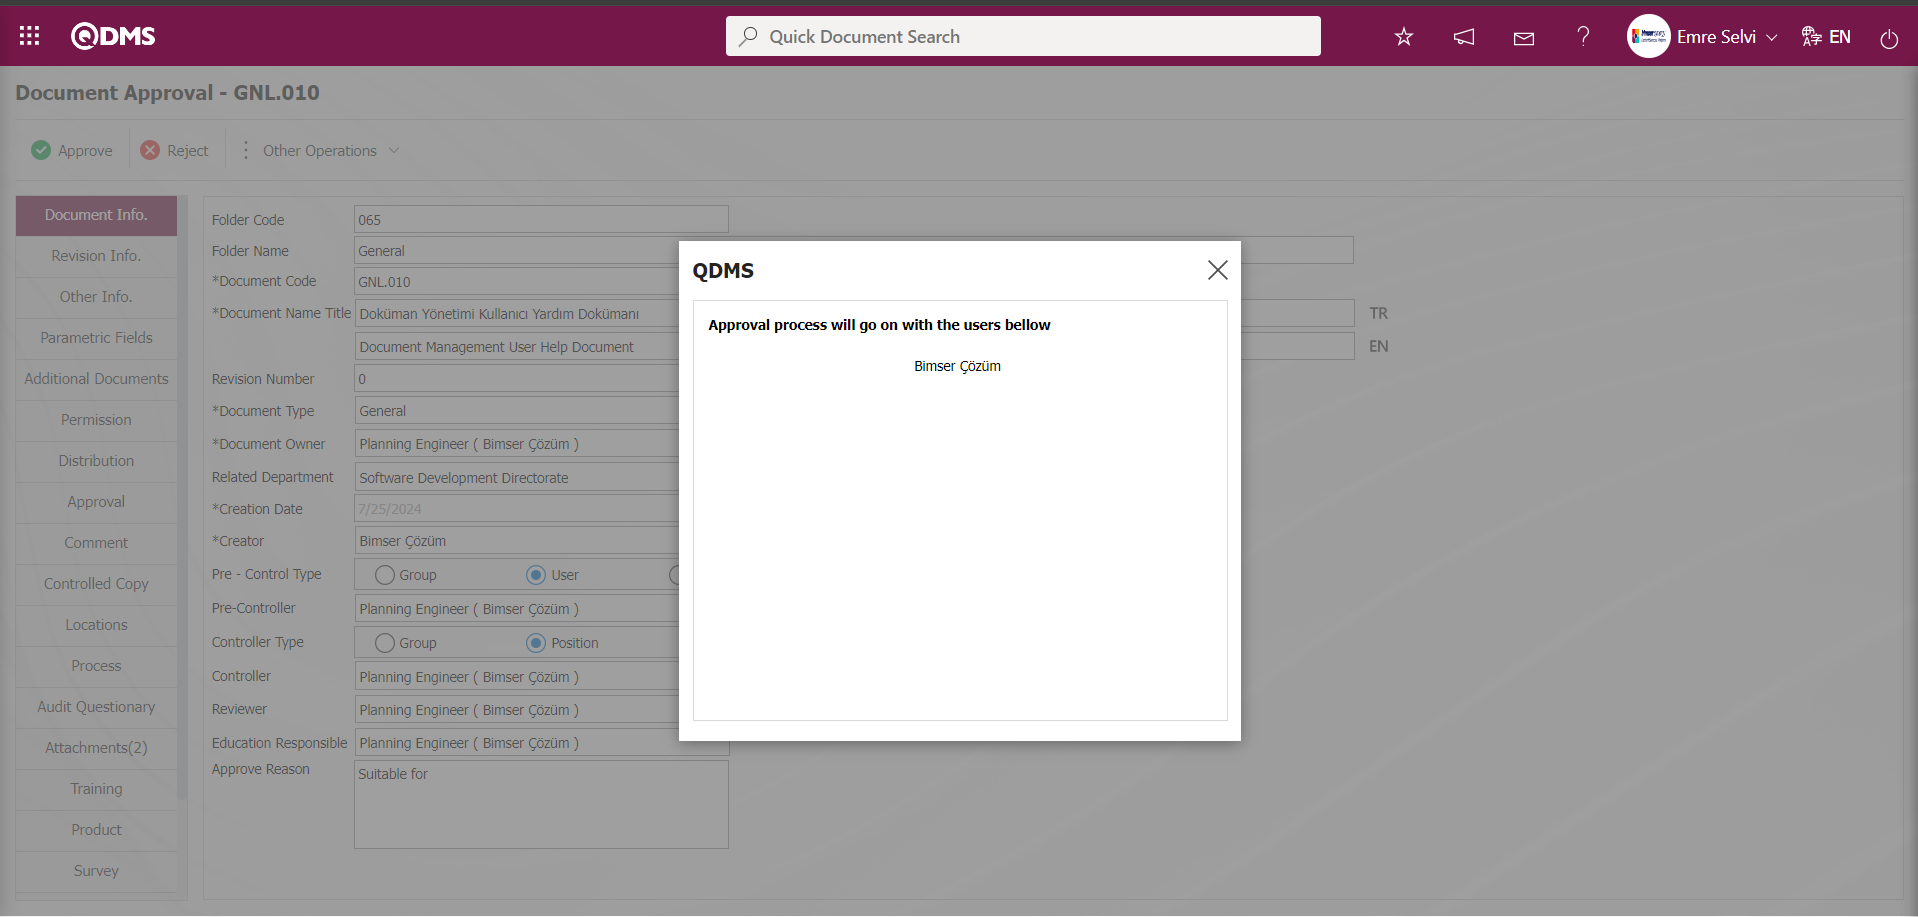
After the approval process of the user who is the approver in the 1st level approval matrix is finished, the document is assigned as a“Documents For Approve Request” job on the “My Pending Jobs” page of the 0th Level Approver, who is the last approver. The user name and password information of the last approver is logged in to the Qdms local address.
The document sent for approval is displayed on the “My Pending Jobs” page of the final approver under the“Documents For Approve Request” list.
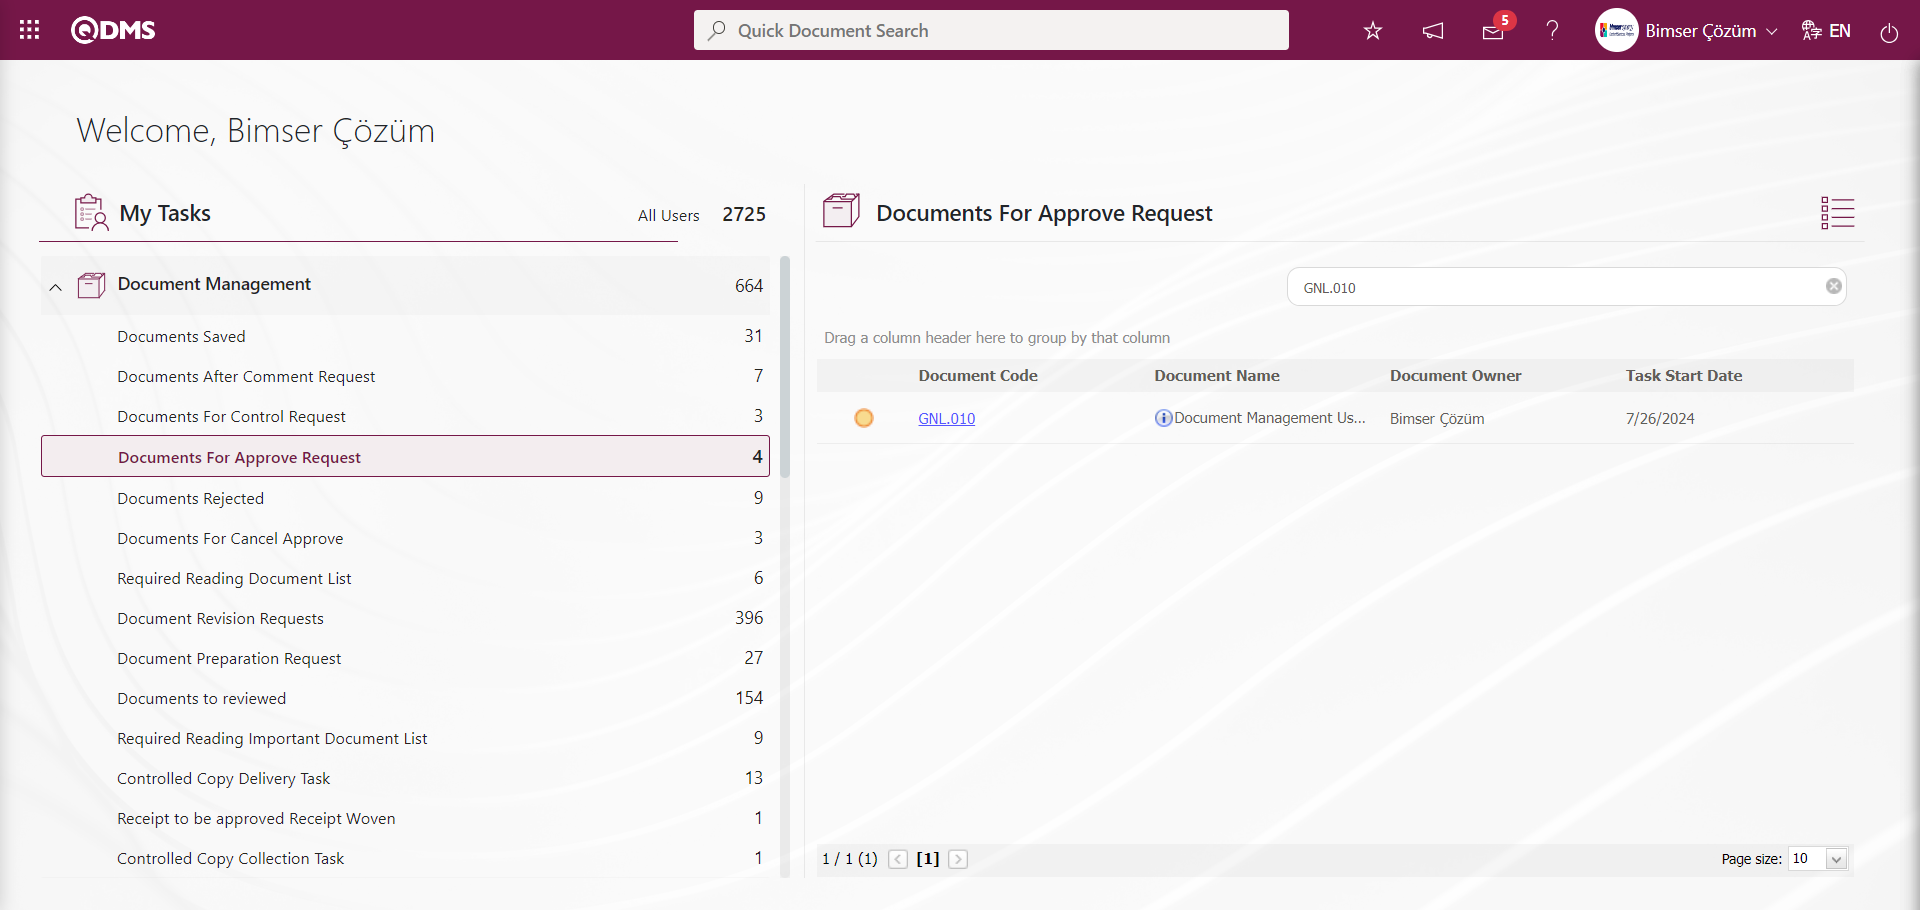
The relevant document information is opened by clicking the document code link in the Document code field in the relevant task. The final approver at the approval stage cannot make changes to the document information. At this stage, only the document can be viewed and approval/rejection operations are performed.
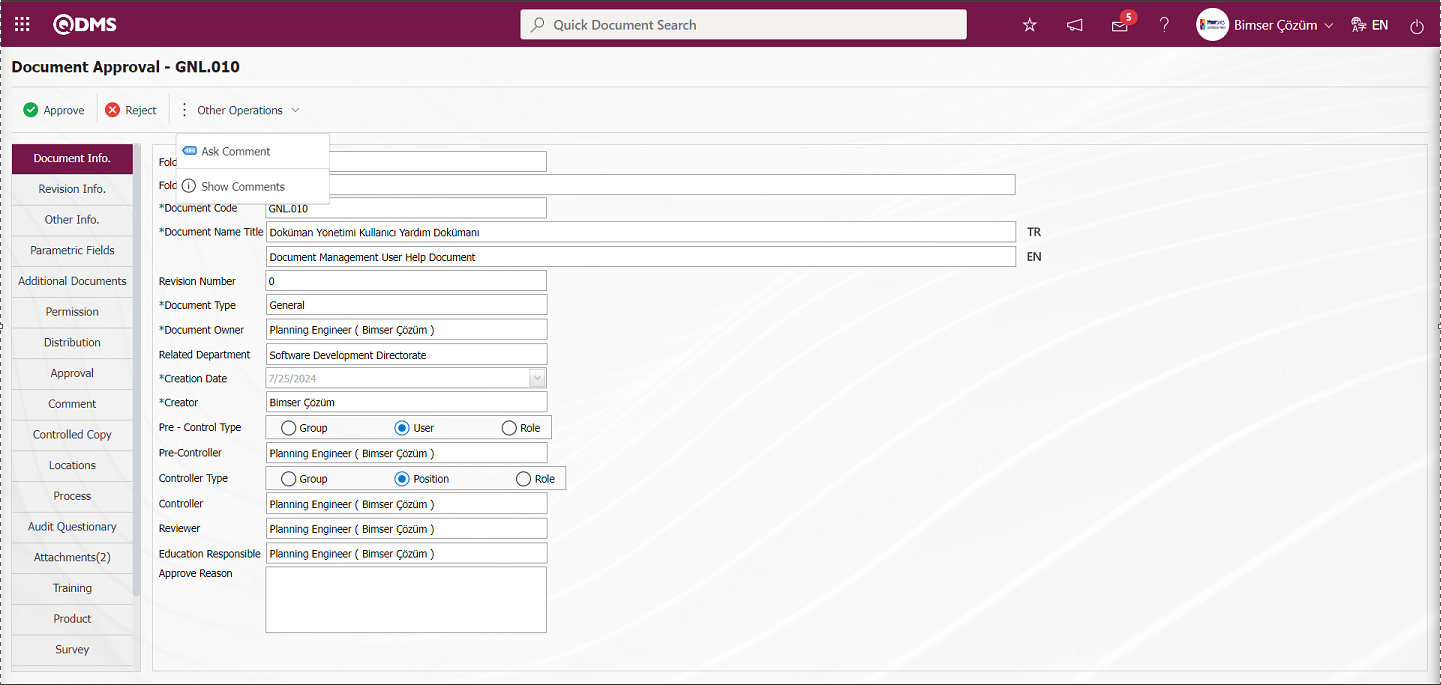
With the help of the buttons on the screen;
: Document approval process is done.
: Rejection is made by writing the reason for document rejection.
![A close-up of a white background
Description automatically generated]ref115: At this stage, comments are requested from the relevant people. It is a button displayed depending on the parameter. The parameter value of parameter 113 in Document Management parameters is activated by selecting “Yes”.
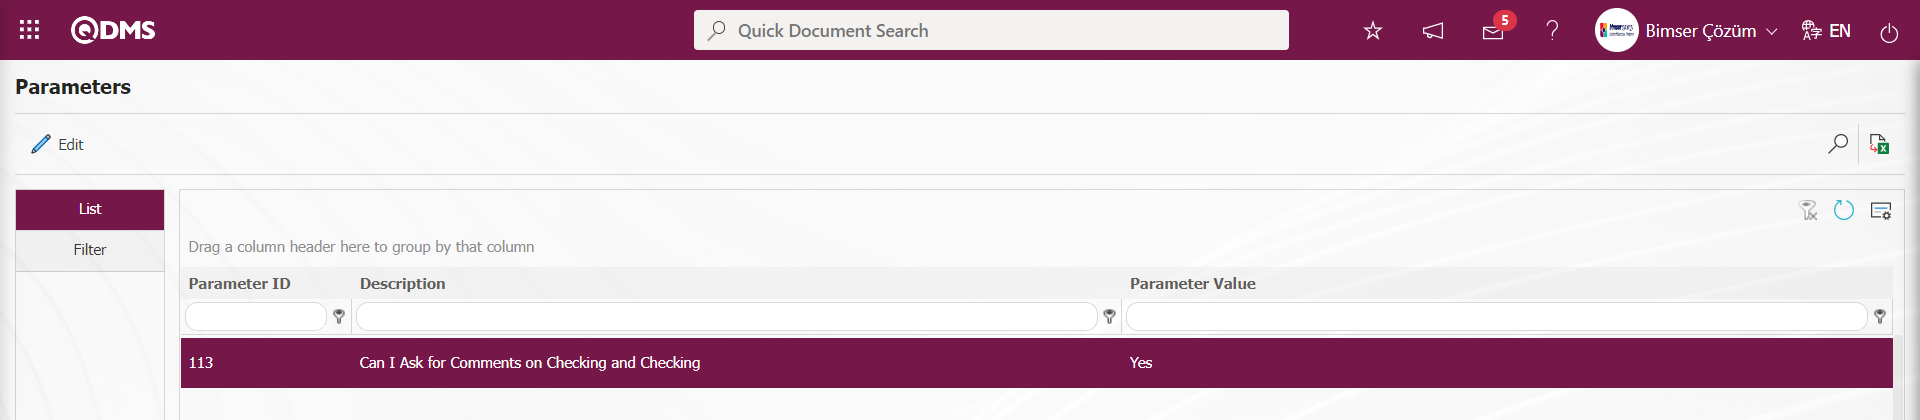
After the parameter is activated, the ![A close-up of a white background
Description automatically generated]ref115 button is displayed and the relevant personnel are selected and comments are received from these personnel at this stage.
: Shows the defined comment information.

Documents can be viewed by clicking on the “Upload Document File (Turkish)” and “Add Document File (English)” fields of the documents in Turkish and English by clicking on the (view file) button. For documents prepared using a template, the document created with the preparation template is displayed with the (show published version) button. Click on the Document Information tab.
In the approval process from the Document Approval screen, the document approval is rejected by entering the rejection reason with the button.
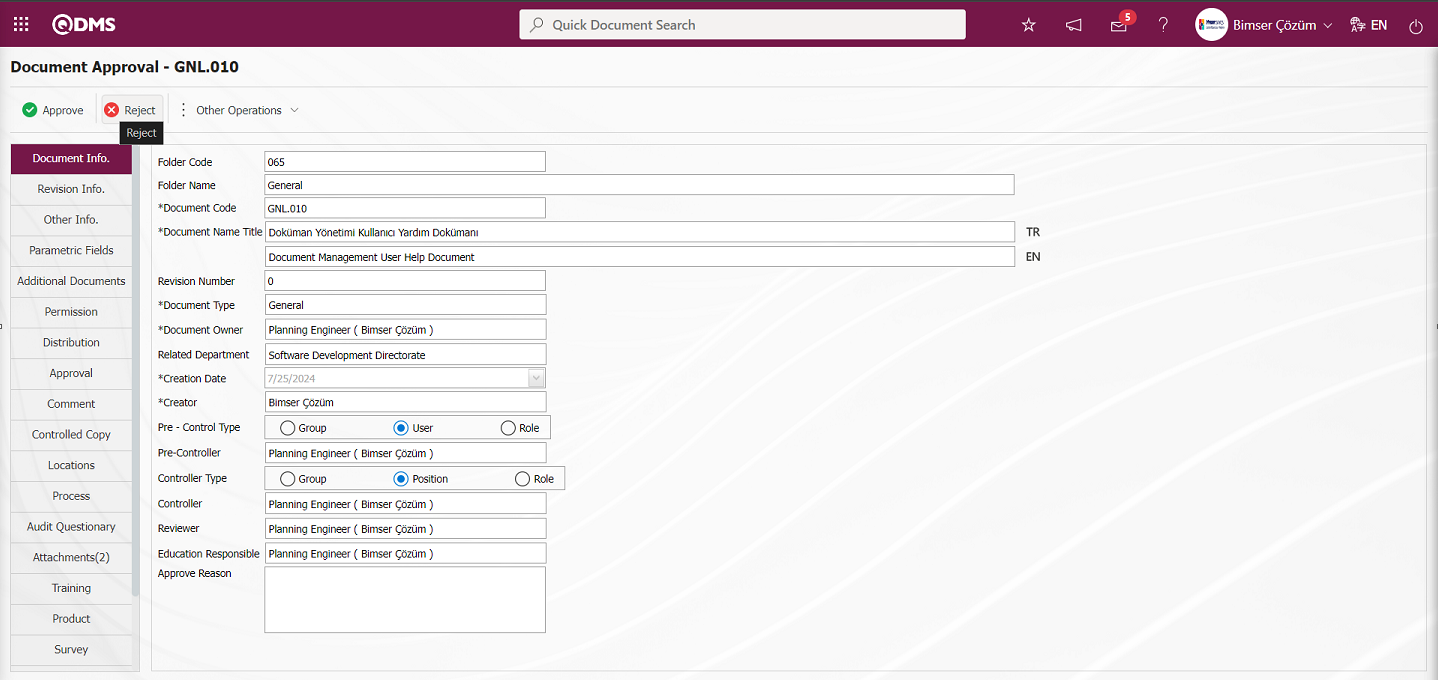 In case of rejection, the reason for rejection must be entered. If desired, additional file upload process related to the reason for rejection is made. At this stage, in the field of the person to be sent, the selection process is made in the Preparer/ Reviser, Checker and Pre-checker options.
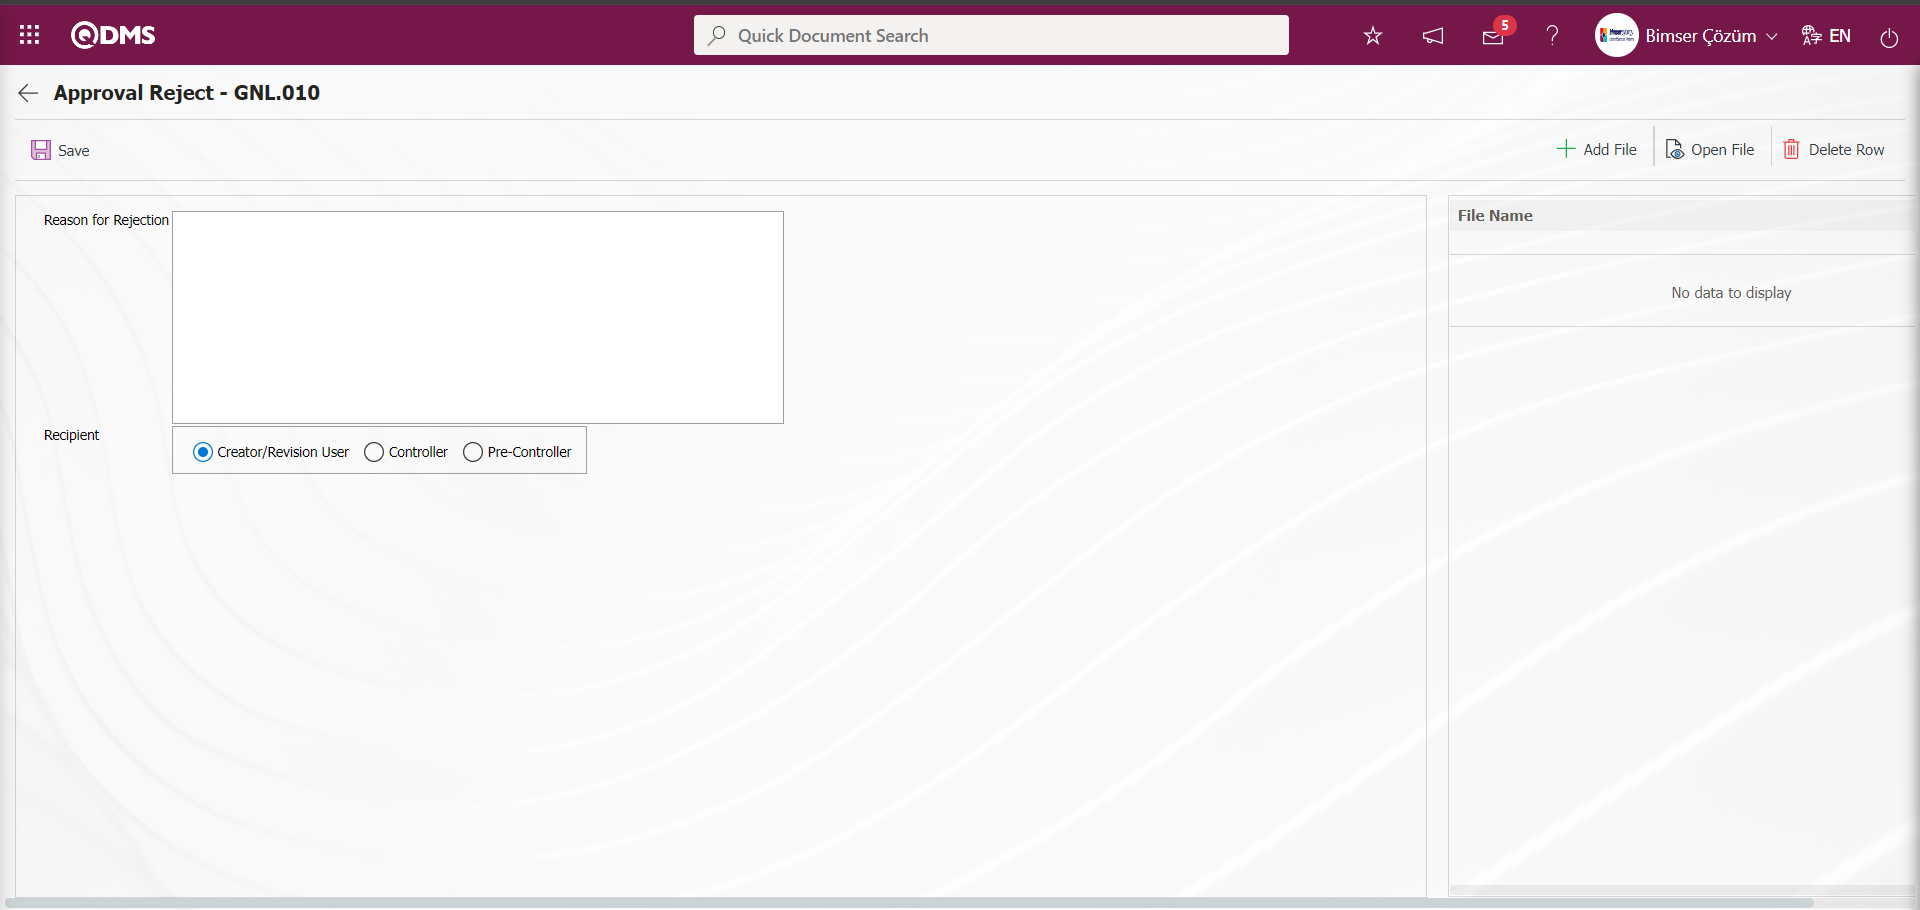
On the Document Approval screen, the approval process is started by entering the approval description information in the Document Information tab and clicking the button.
At this stage, the approval description is a field that is displayed depending on the parameter. Parameter 85 is activated by selecting the parameter value “Yes”.

After the parameter is activated, the approval description field is displayed in the approval process in a document at the approval stage and the information of this field is required to be entered.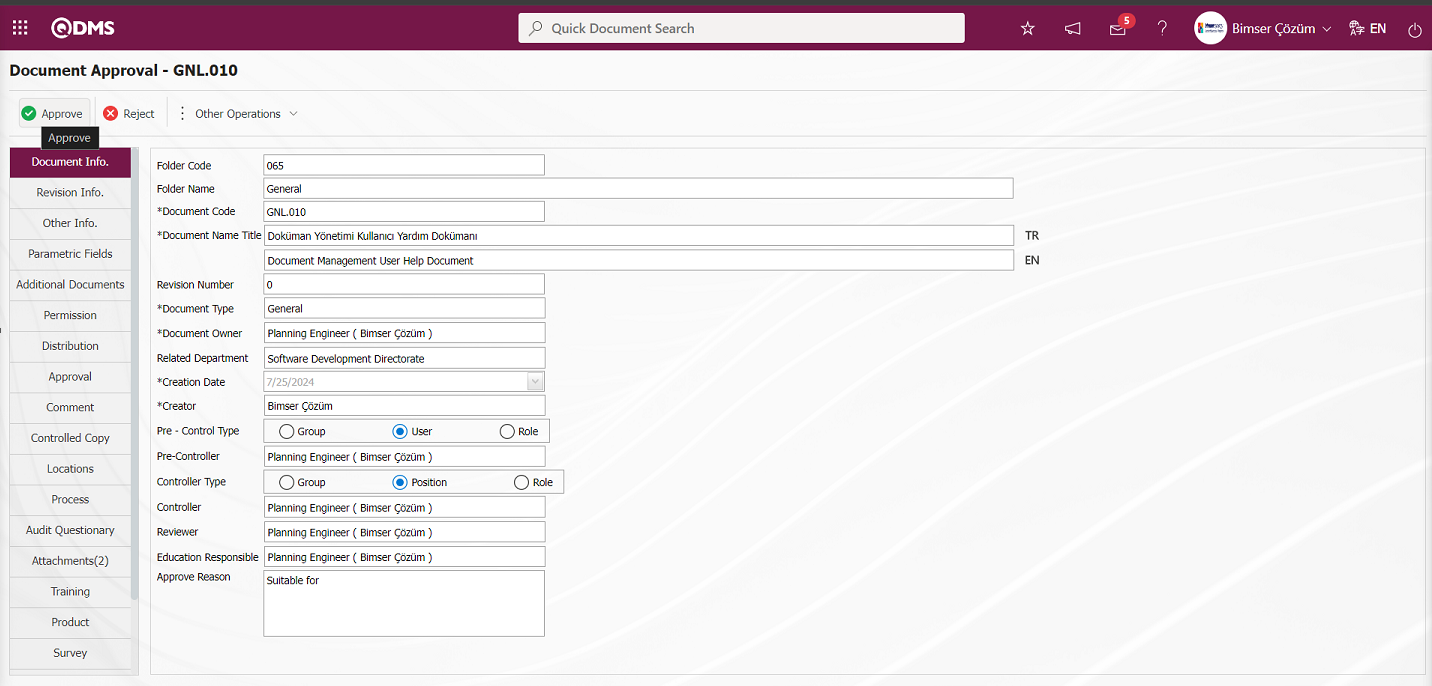
Click the “OK” button in the message by the system.
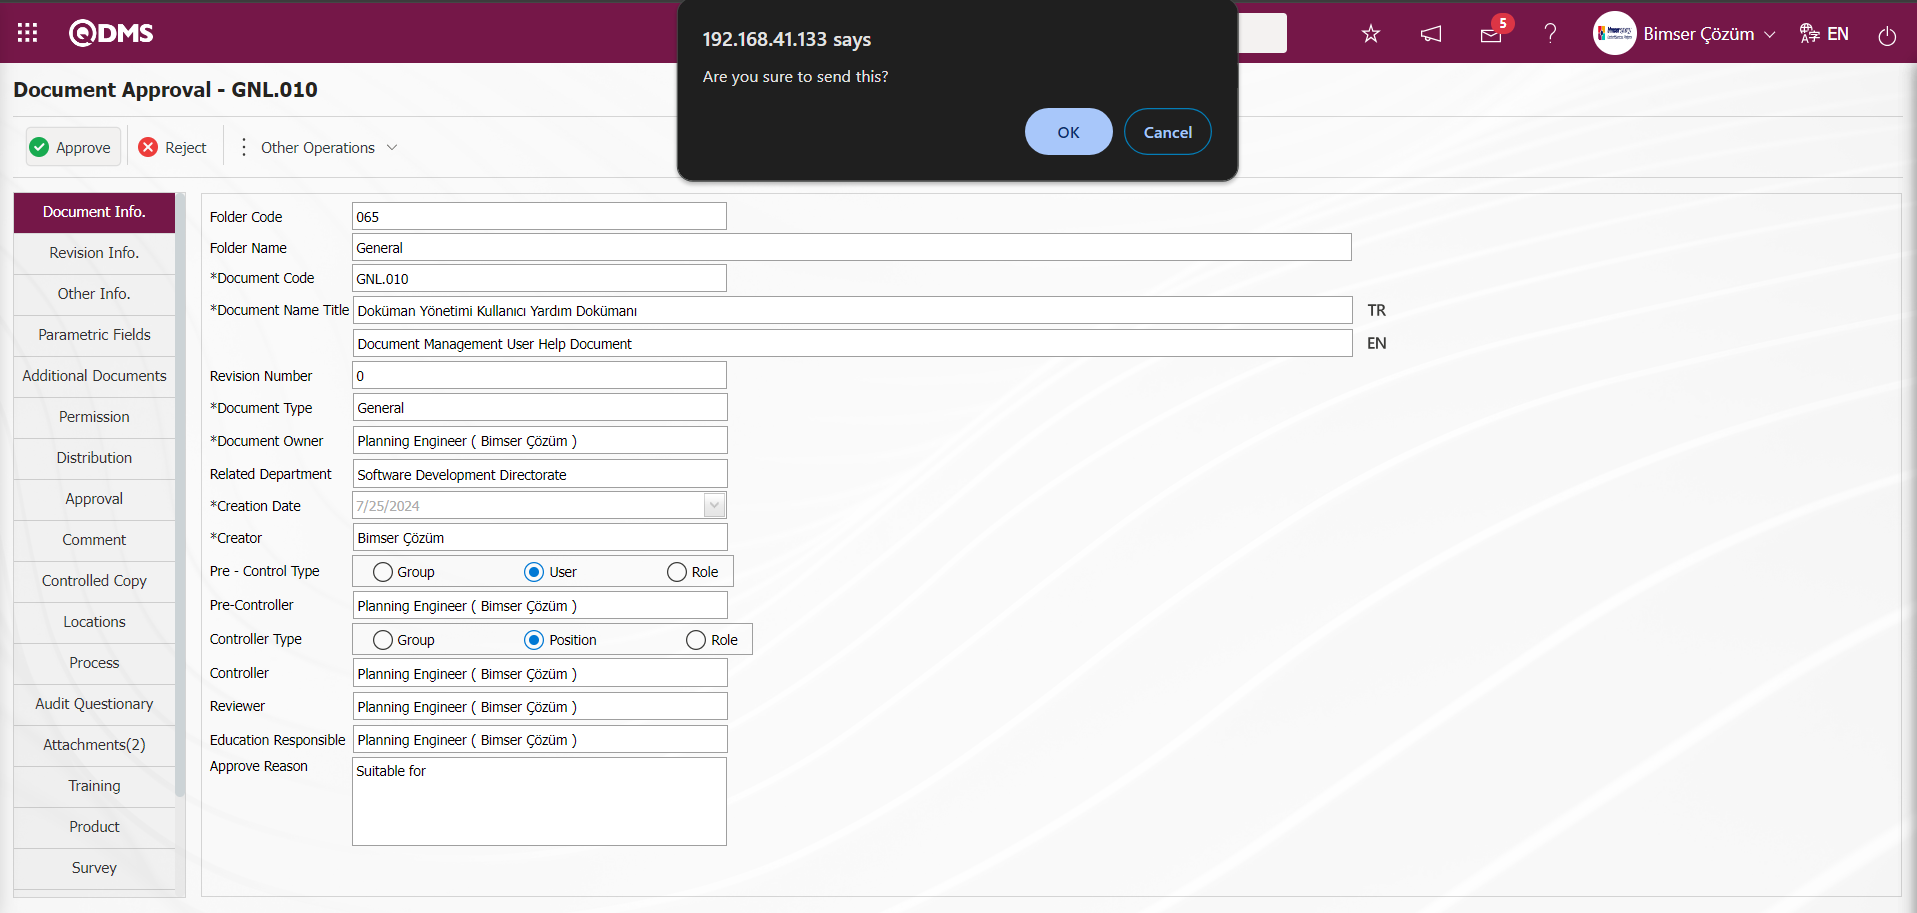
The system sends a message that the document has been published and made available.
During the approval phase, the document that has passed the final approval according to the order in the approval matrix is published, distributed to the people in the distribution matrix and made available for use. An e-mail is sent to the relevant people in the distribution matrix by the system and the document can now be accessed by authorized persons. From the Qdms main login screen, the name and password of the user in the distribution matrix are entered and the Qdms local address is logged in.

On the user's “My Pending Jobs” page, a task is created as"Required Reading Document List ”. Click on the document code link in the document code field in the relevant task.
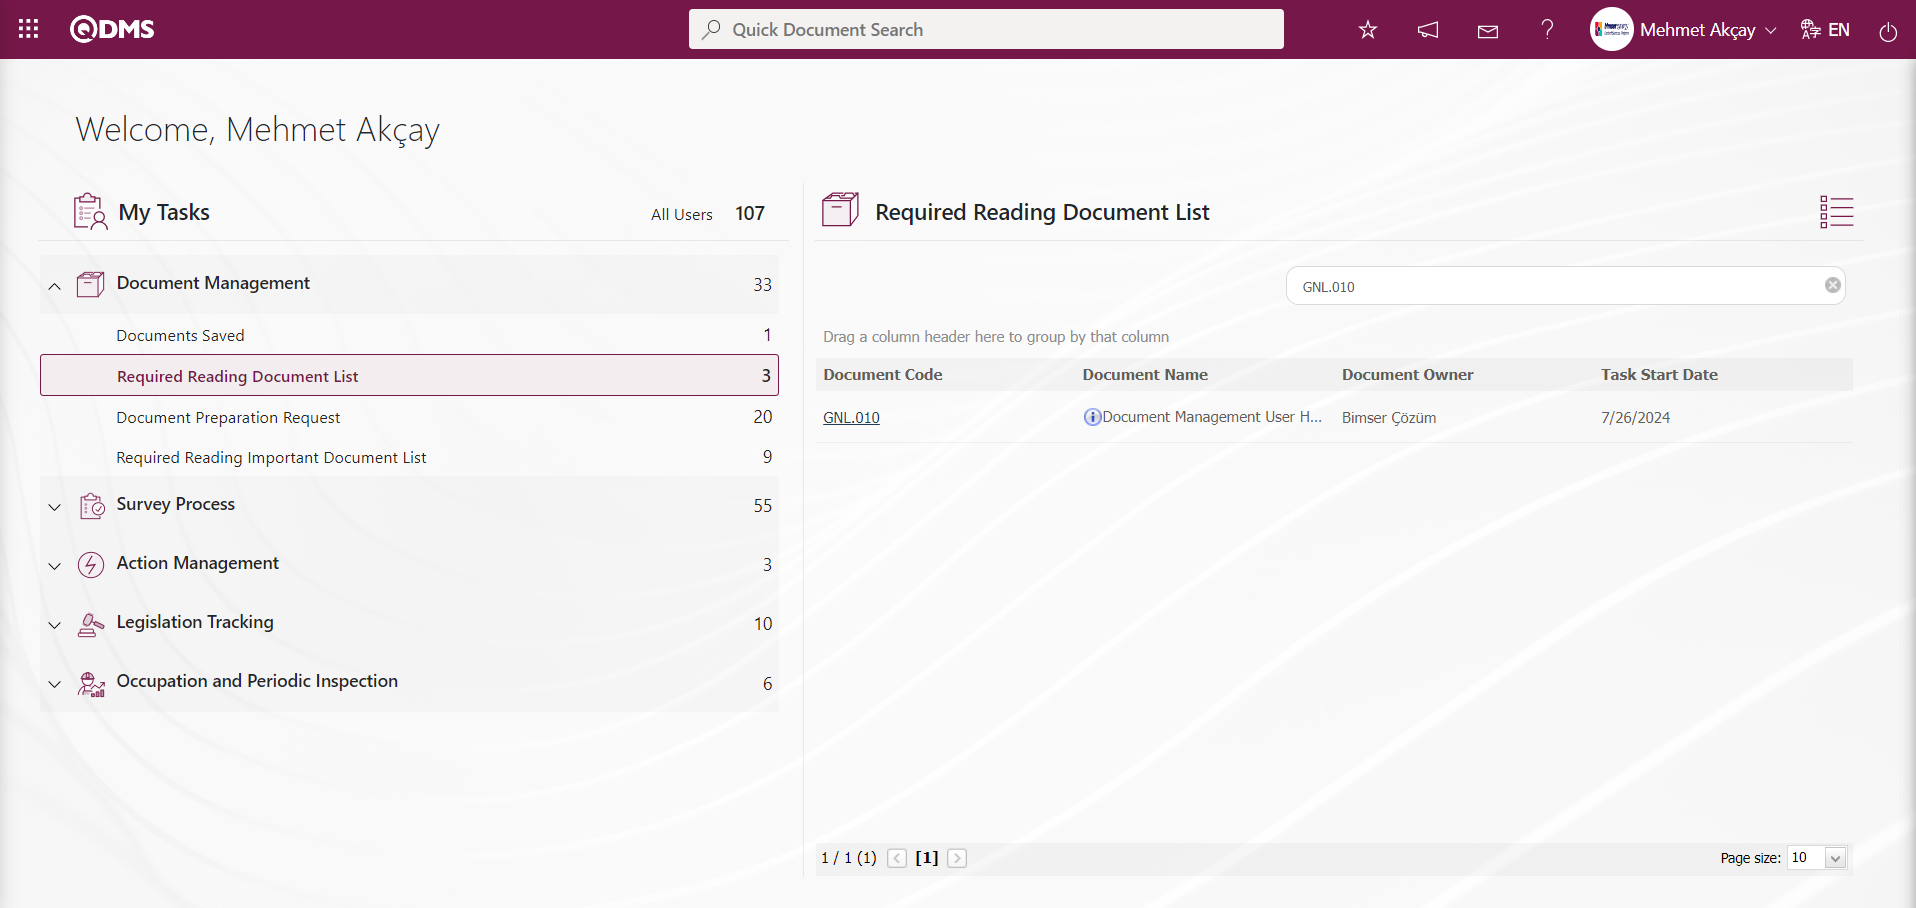
The document is downloaded to the computer and viewed from the Document View screen.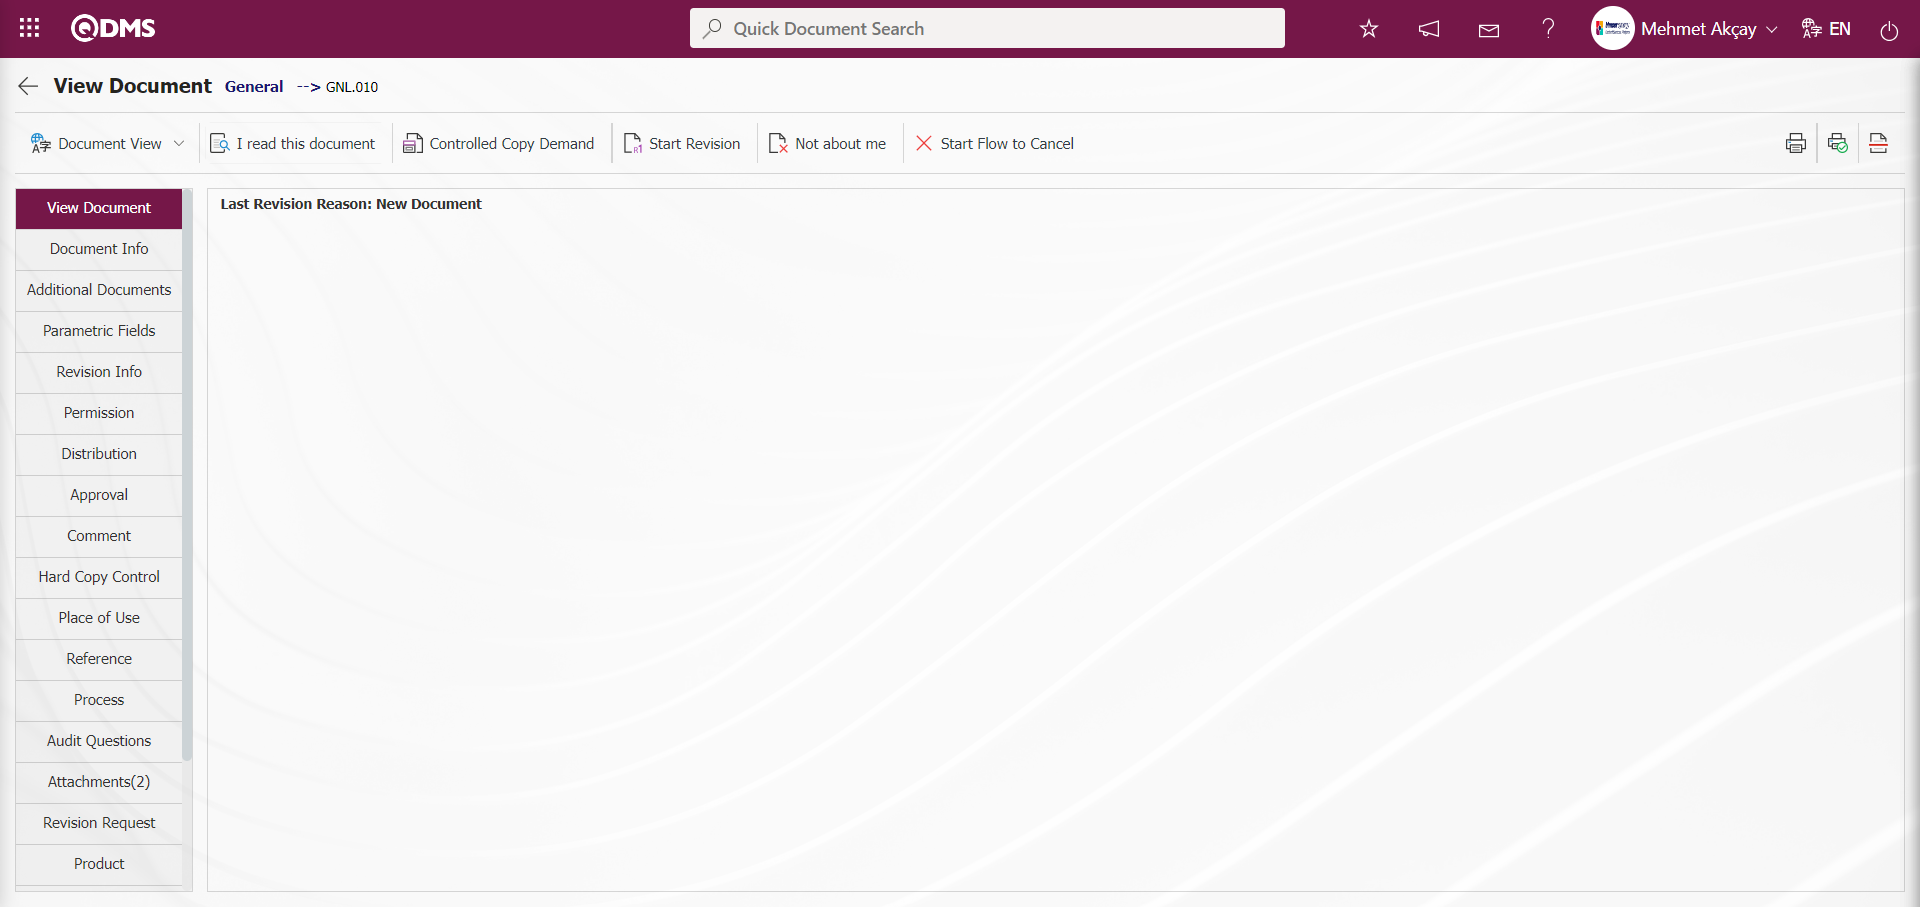
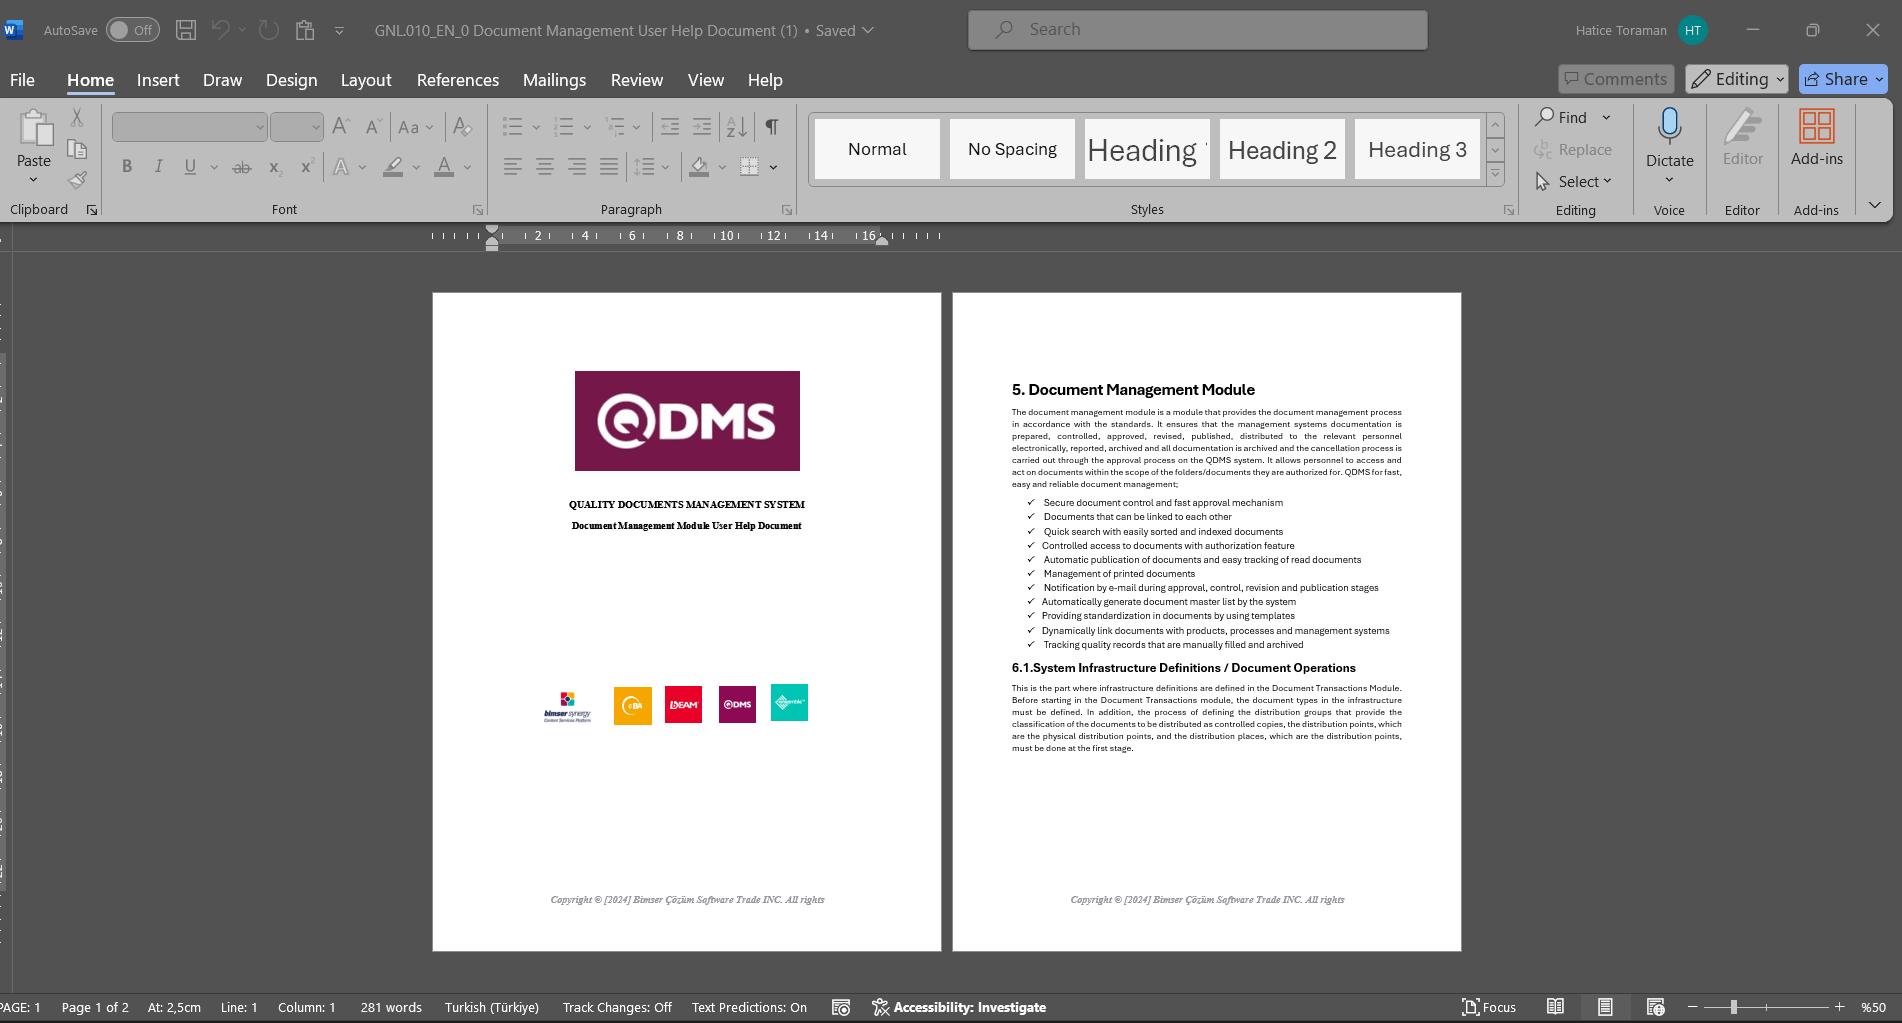
If the document is loaded in other languages, the relevant language option is selected to download the document in other languages.
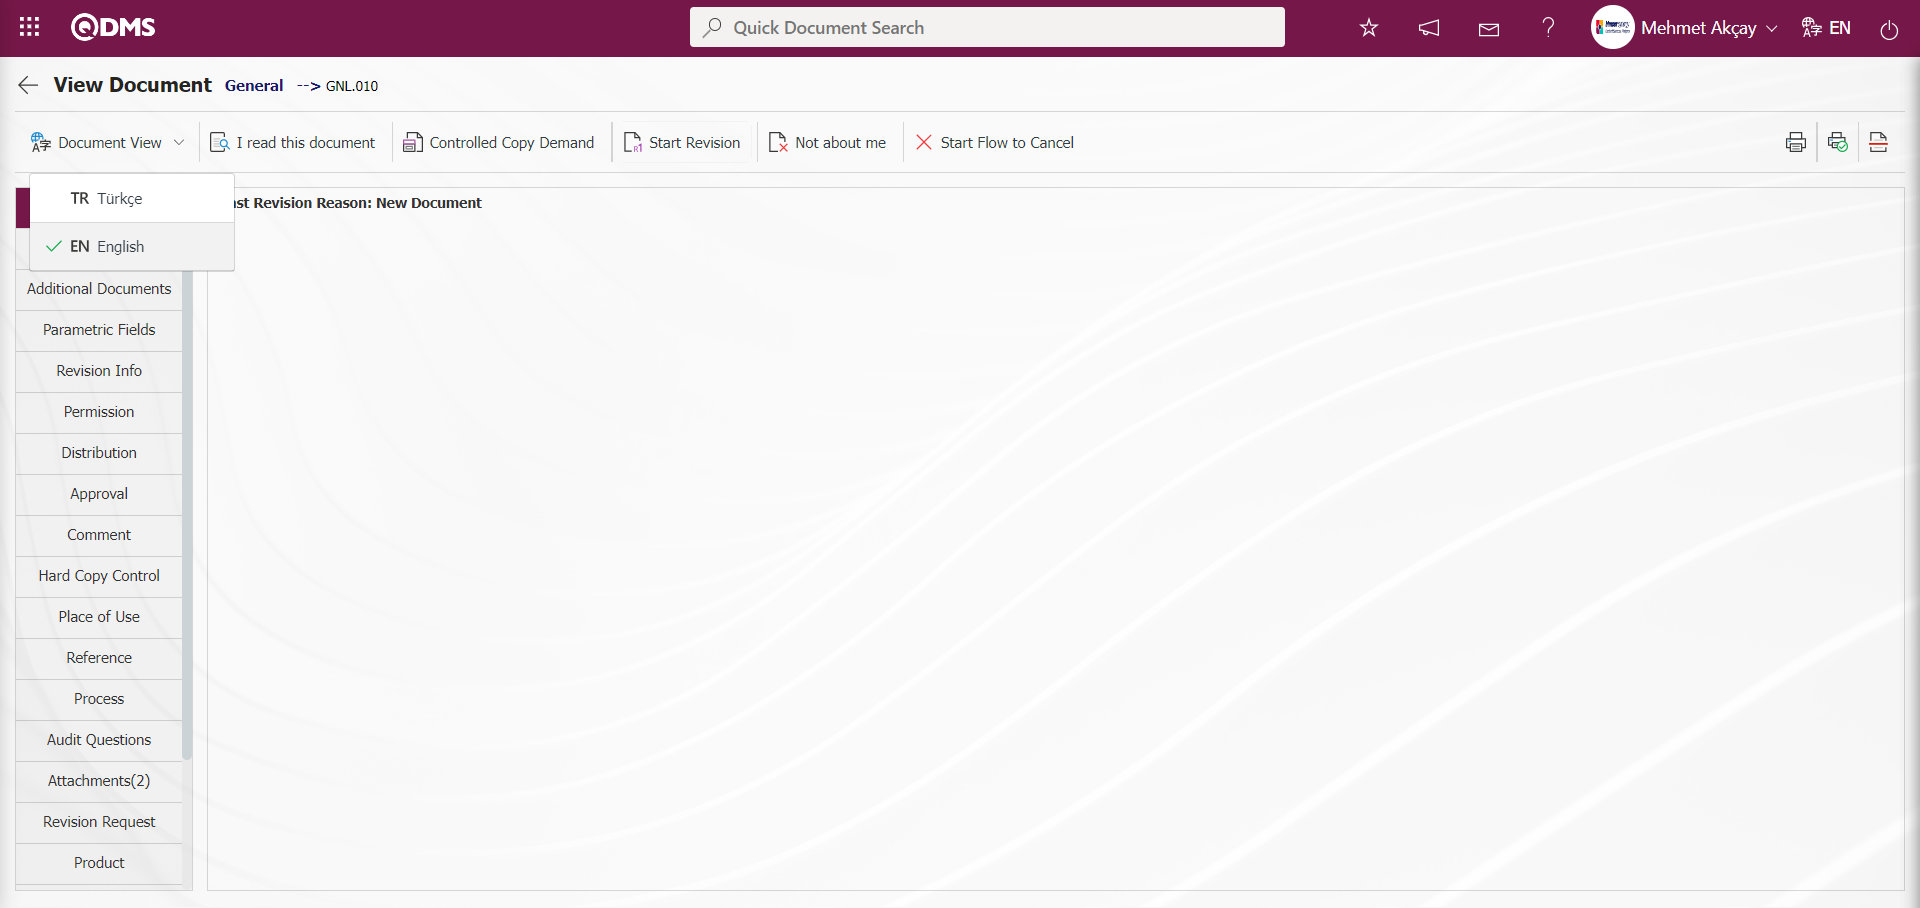
With the help of the buttons on the screen;
 : The document can be downloaded and viewed in Turkish and other languages in the upload language options.
 : It is used to request a controlled copy.
 :Revision process is started on the document.
 :It is determined whether the document is related to the relevant people or not. It is a field displayed depending on the parameter. The parameter is activated by selecting the parameter value “Yes” of parameter 335 of Document Management parameters.
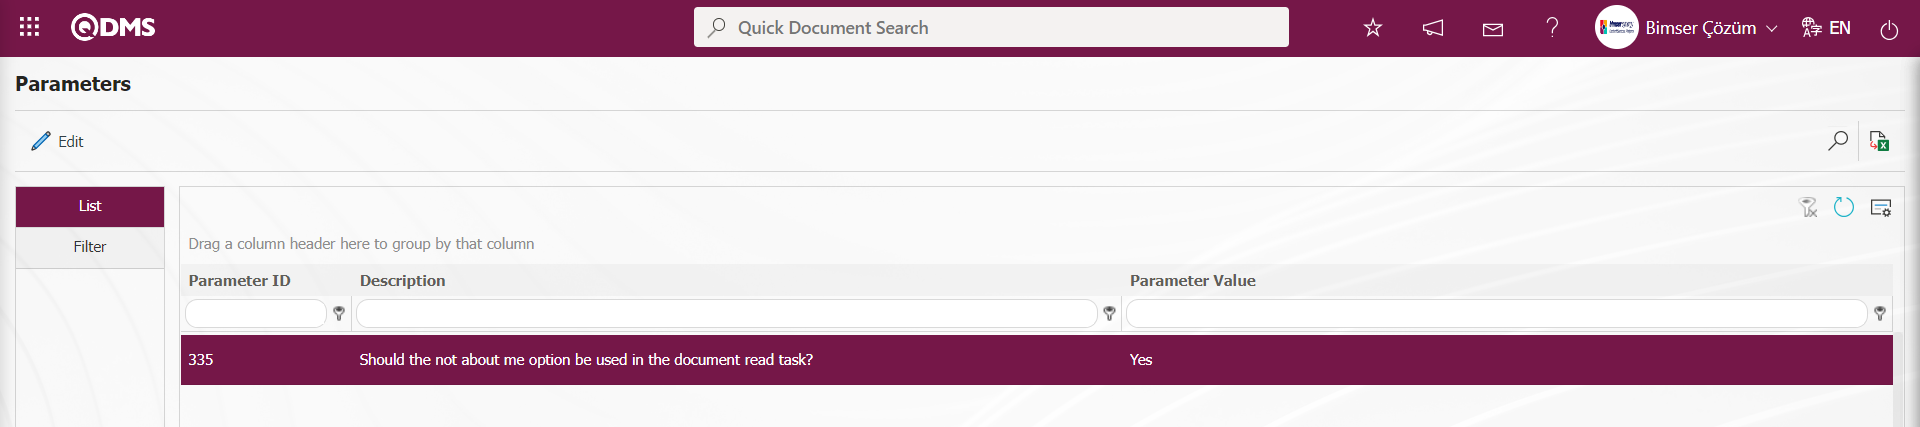
After the parameter is activated, the “Not Related to Me” button is displayed on the document viewing screen. When the relevant button is clicked by users who are not interested in the document whose publishing process has been completed, it is ensured that the document is not related to me information is sent as an e-mail to the person who prepared/ revised it.
In the Document Management Module, notifications not related to me are sent to the role code defined in parameter 336 in the parameters.
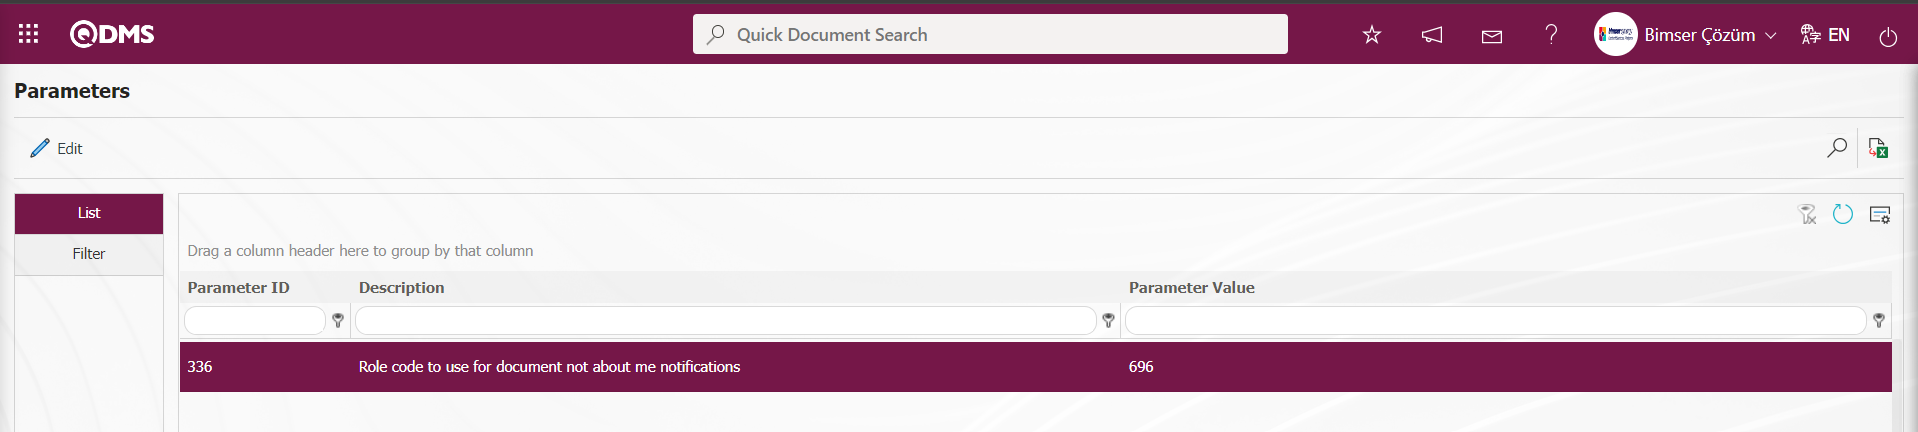
The message body code to be used for the Document not related to me notifications that will go in the role code is defined in parameter 337.

 : It is ensured to initiate the cancellation process related to the document. On the screen that opens, the “Cancellation Reason” reason information is written and sent to the approvers in the approval matrix for cancellation approval by clicking the
  button.
 : Used to print the document.
 : Used to print the cover information of the document.
Click the  button from the Document View screen.
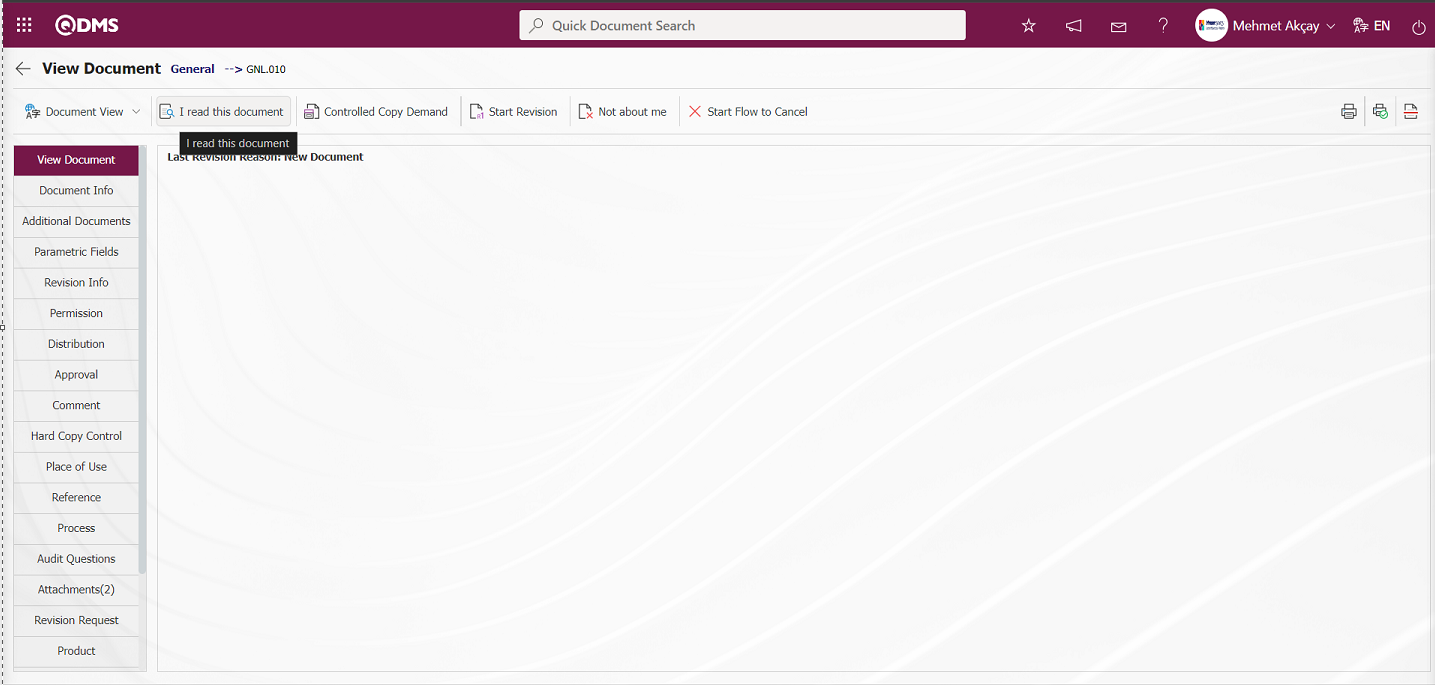
The system gives a message that the document has been successfully read. The document is set to “read” status.

Users whose check box is checked for the option related to the “Important” field in the Distribution matrix for the document will be assigned as a“Required Reading Important Document List” job after the document is published on the “My Pending Jobs” page. From the Qdms main login screen, login to Qdms local address by typing the name and password of the user in the Distribution matrix.
On the user's “My Pending Jobs” page, a task is created as“Required Reading Important Document List”. Click on the document code link in the document code field in the relevant task.
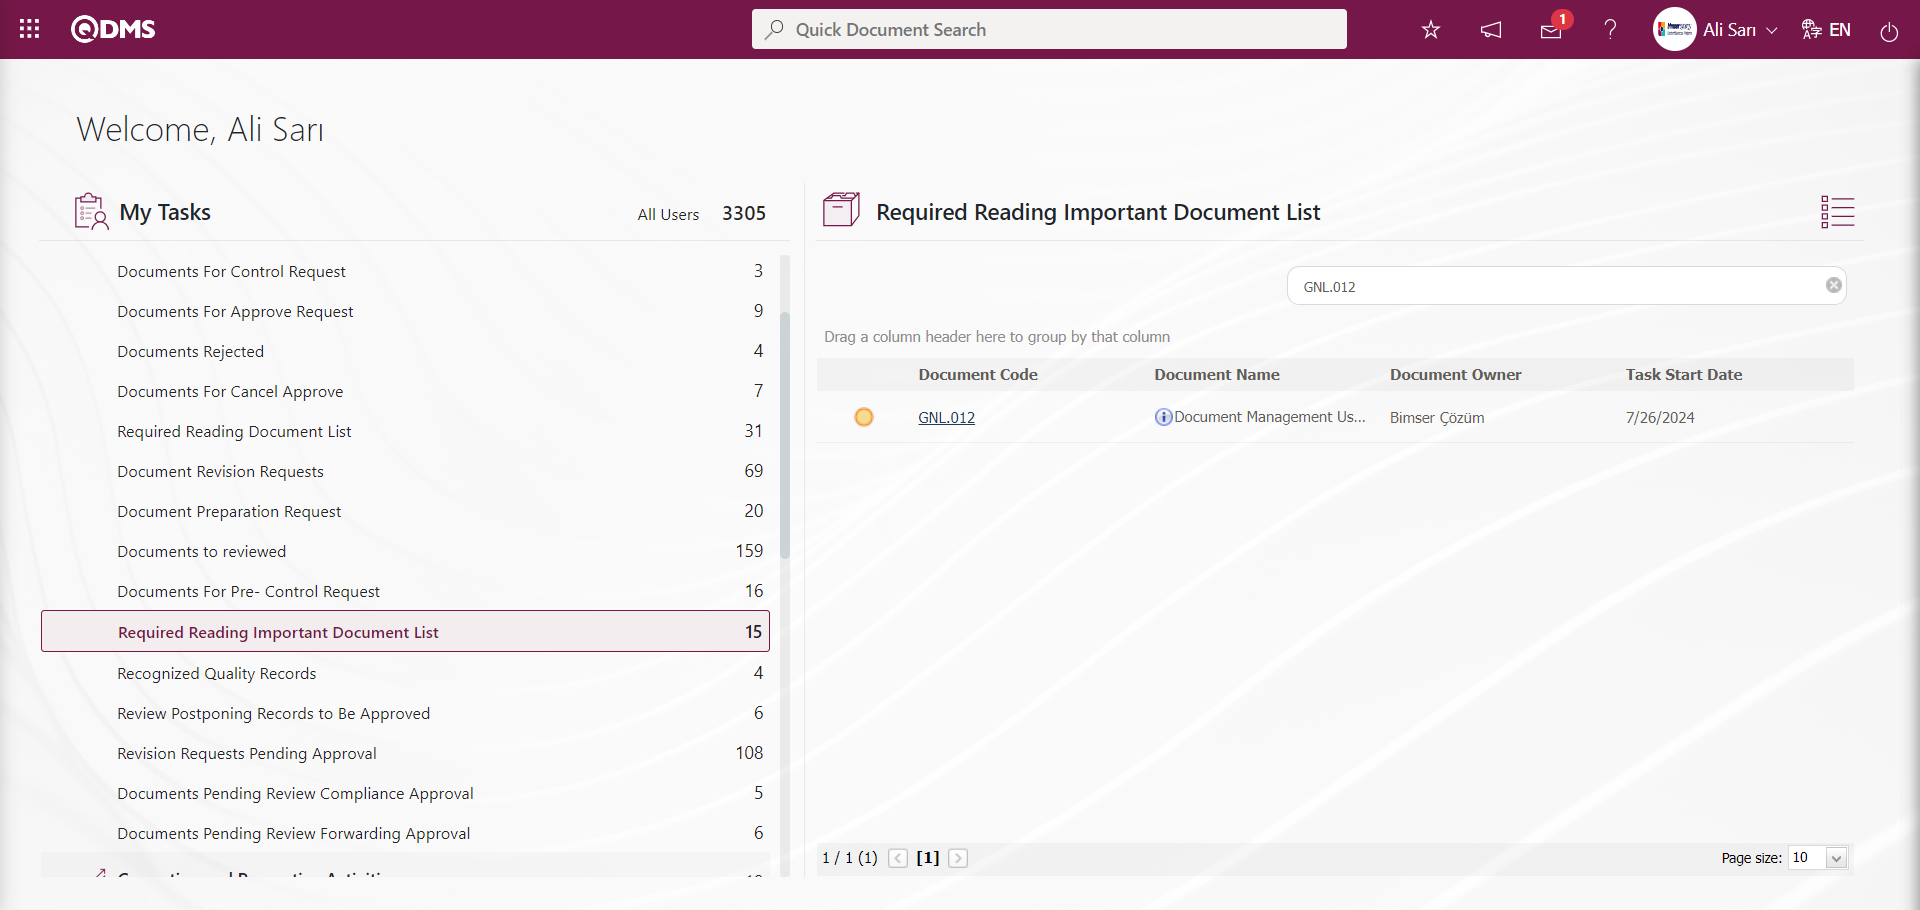
The document is downloaded to the computer and viewed from the Document View screen.
If the document is loaded in other languages, the relevant language option is selected to download the document in other languages.
With the help of the buttons on the screen;
 : The document can be downloaded and viewed in Turkish and other languages in the upload language options.
 : Survey questions related to the document are displayed and answered. Parameter 81 of the Document Management parameters is activated by selecting the parameter value “Yes”.
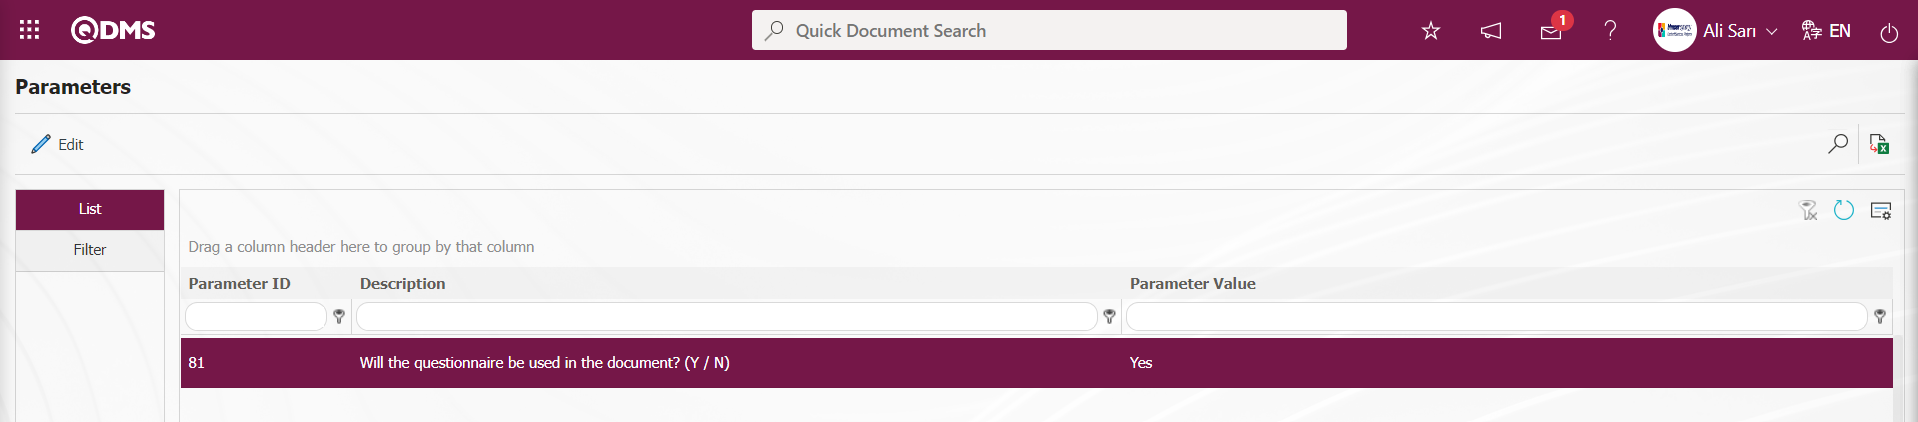
After the parameter is activated, the Survey tab is displayed on the Document Preparation/Revision screen. On the Document Preparation/Revision screen, the Survey tab is activated by checking the check box related to the Survey To Be Used field in the Other Information tab on the Document Preparation/Revision screen, and after the process of defining the survey questions related to the document is done, the task of filling out the survey is assigned to the users whose check box is checked in the Distribution tab related to the Survey field in the users.
In the survey filling task, the success percentage in the survey is determined according to the value defined in parameter 82 of the Document Management parameters. We can define a success percentage from this parameter to the questionnaire we have defined and we can 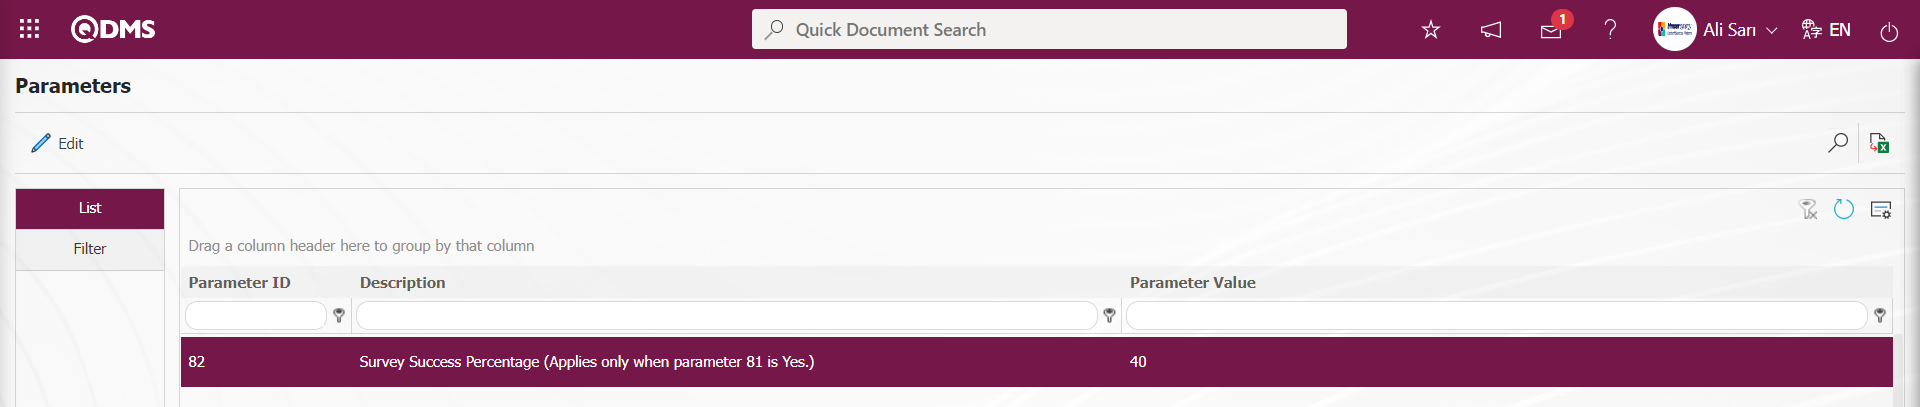
 : Used to request a controlled copy.
 :Revision process is started on the document.
 : Determines whether the document is related to the relevant persons or not. It is a field displayed depending on the parameter. The parameter is activated by selecting the parameter value “Yes” of parameter 335 of Document Management parameters.
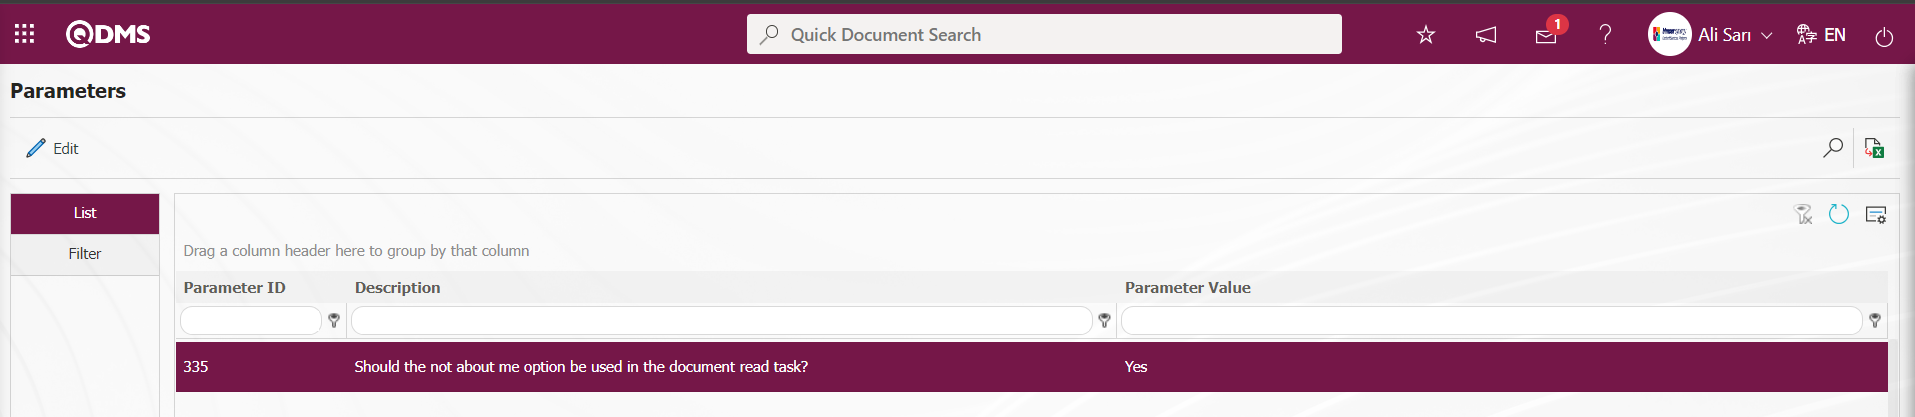
After the parameter is activated, the “Not Related to Me” button is displayed on the document viewing screen. When the relevant button is clicked by users who are not interested in the document whose publishing process has been completed, it is ensured that the document is not related to me information is sent as an e-mail to the person who prepared/ revised it.
In the Document Management Module, notifications not related to me are sent to the role code defined in parameter 336 in the parameters.

The message body code to be used for the Document not related to me notifications that will go in the role code is defined in parameter 337.
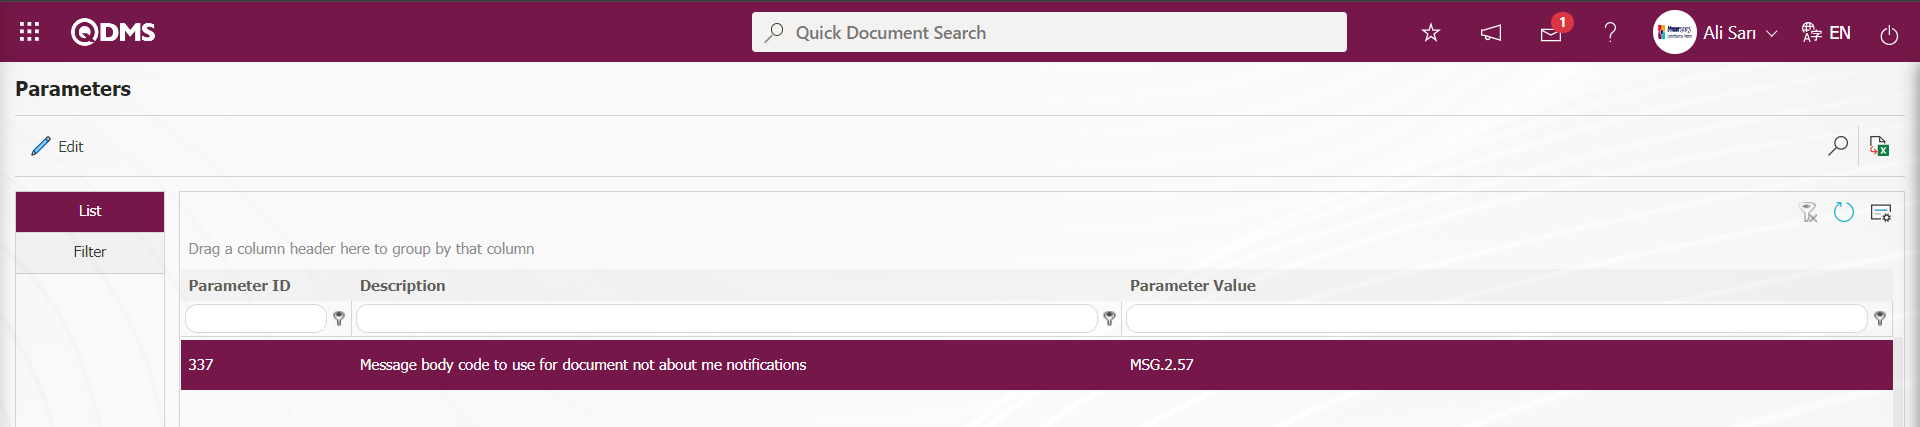
 : It is ensured that the cancellation process related to the document is initiated. On the screen that opens, the “Cancellation Reason” reason information is written and sent to the approvers in the approval matrix for cancellation approval by clicking the ( )button.
: Used to print the document.
: Used to print the cover information of the document.
By clicking the button on the Document View screen, the process of answering the survey questions related to the survey is done.
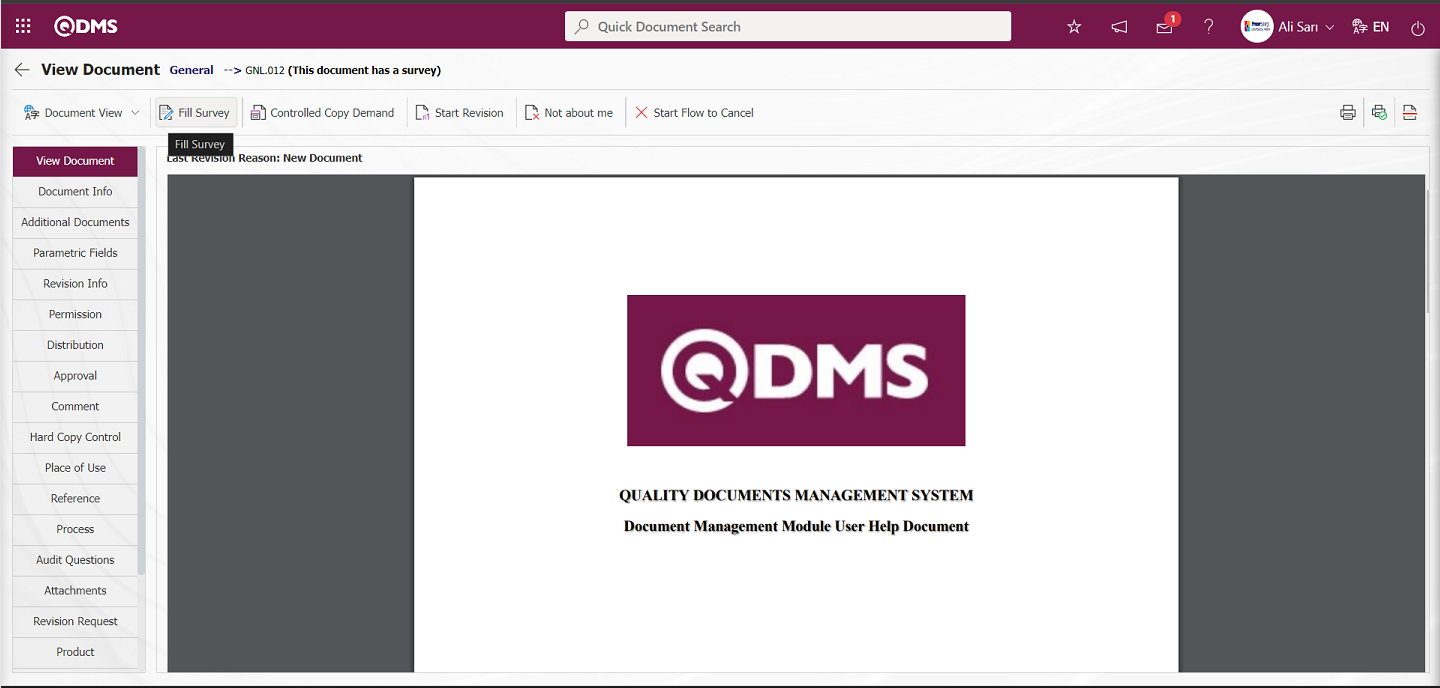
Opened Survey questions are answered by the user.
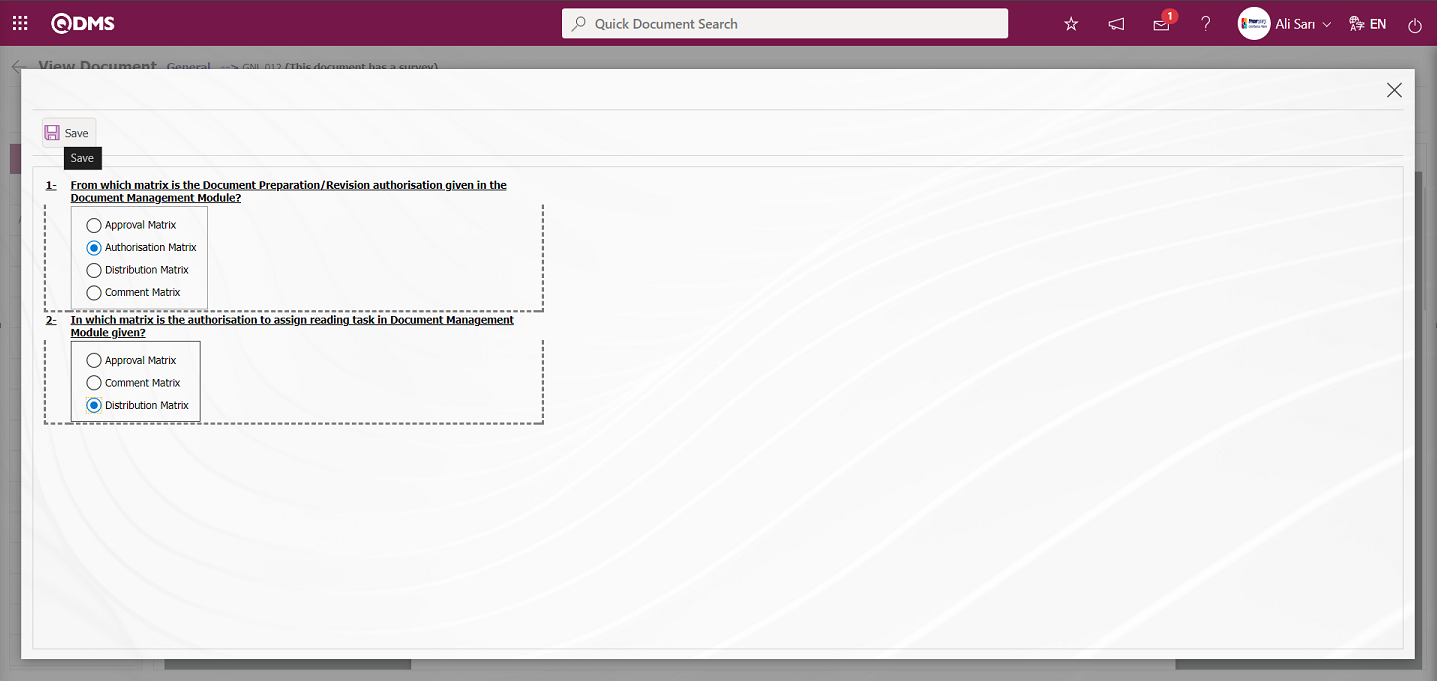
After answering the survey questions by the user, the survey filling registration process is done by clicking the  button in the upper left corner of the screen. In order to view the results of the completed questionnaire, it is displayed in the Document Monitoring Report from the Document Management Module reports.
6.3.5Document Viewing
Menu Name: Integrated Management System/ Document Operations/ Document Viewing
This is the menu where all published documents are displayed. Personnel/user groups authorized to view documents can view the relevant document. When the Document View menu is opened, the folder tree is displayed on the left side. There are three tabs on the document view screen: Document List, Document Search and Quick Search tabs. In the Document Search and Quick Search tabs, filtering is performed according to the search criteria and in the Document list, the relevant records are listed according to the filtering operations performed according to these search criteria. In the Quick Search tab, only the search criteria operations are performed according to the fields such as Document Code, Document Name and Document Type and the search operation is performed quickly. In the Document Management Module parameters, the first tab to be opened on the document view screen is determined according to the value defined in the parameter value of 140 numbers.
Since the “L” value corresponding to the list value is defined in the parameter, the list tab is displayed as the first tab to be opened from the document view page. The user can set the first tab to be opened from the document view screen according to his/her wishes.

With the help of the buttons on the screen;
 : Document viewing process is done.
 : Document Preparation Request Process is done. It is a button displayed depending on the parameter. The parameter is activated by selecting “Yes” for parameter 229 of the Document Management Module parameters
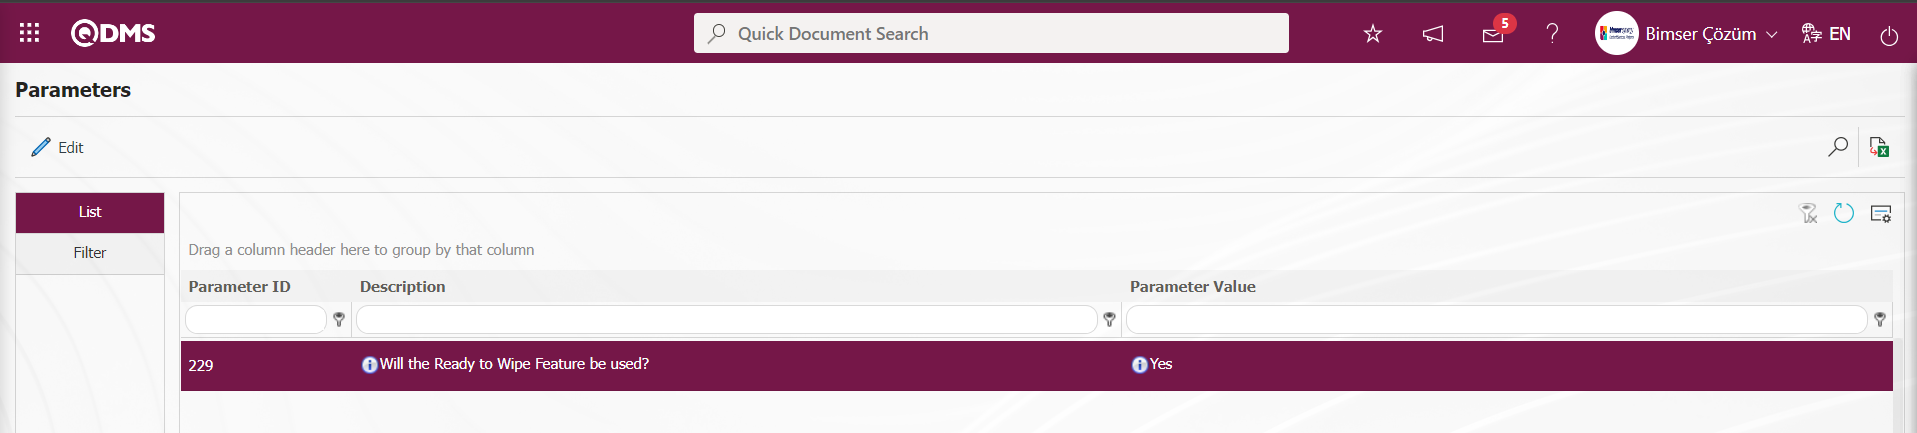
After the parameter is activated, the button is displayed on the document viewing screen and the document preparation request is made in the selected folder.
 : Adding a favorite page to favorites is done. It is a button displayed depending on the parameter. The parameter is activated by selecting the parameter value “Yes” of parameter 131 in the Document Management parameters.
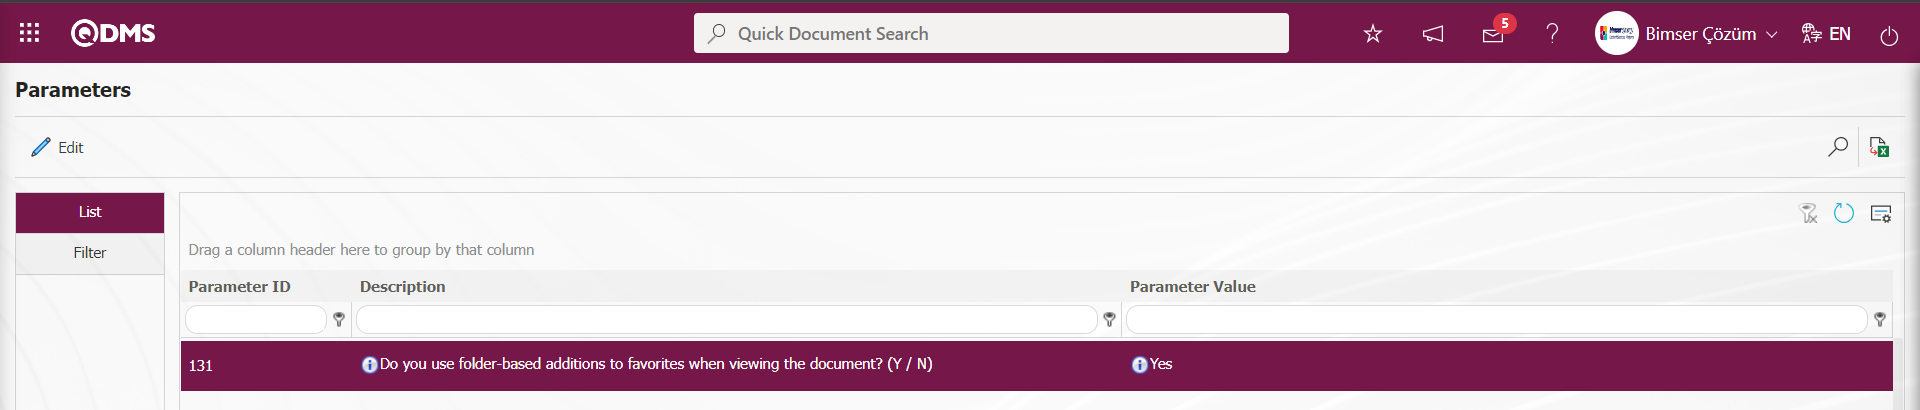
After the parameter is activated, the button is displayed on the Document View screen and the process of adding favorites to favorites is done.
Select the folder where the documents will be displayed. All documents in the relevant folder are listed.
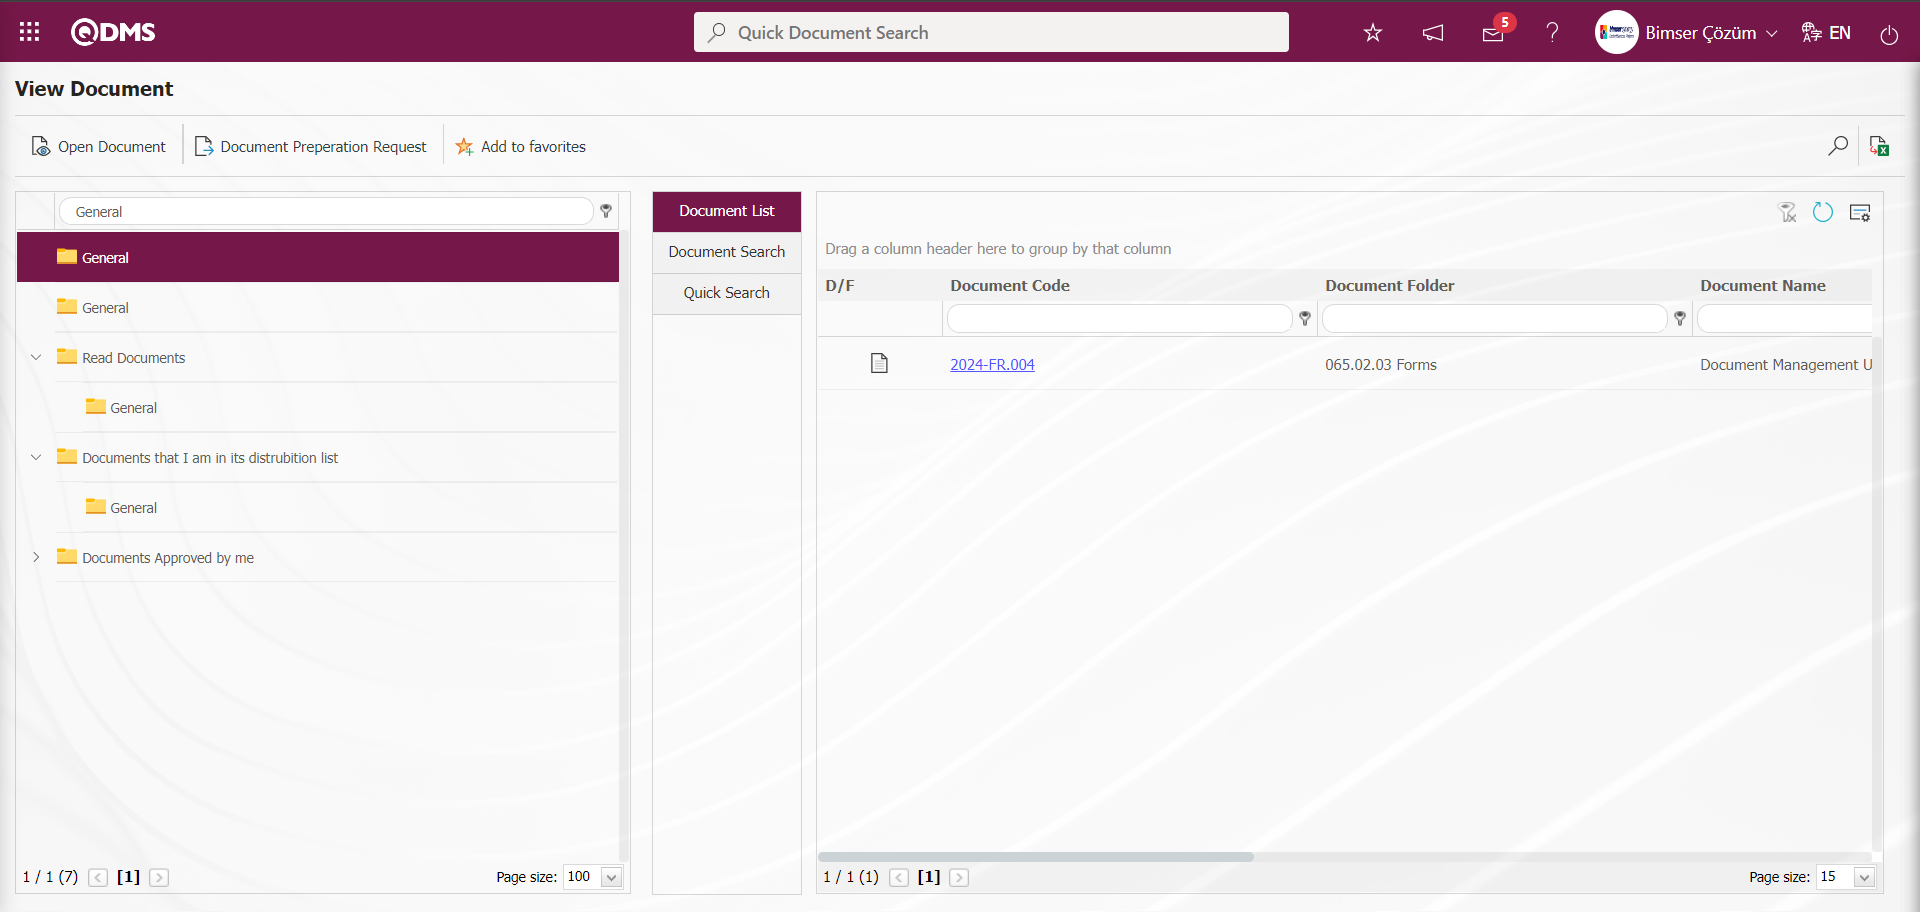
Select the document to be viewed, click on the document code and open the document. Information about the document is accessed.
With the help of the buttons on the screen;
 : The document can be downloaded and viewed in Turkish and other languages in upload language options.
 : It is used to request a controlled copy.
 :Revision process is started on the document.
 : Cancellation process related to the document is started. Document Cancellation screen opens. On the screen that opens, the “Reason for Cancellation” reason information is written and sent to the approvers in the approval matrix for cancellation approval by clicking the button.
: Used to print the document.
: Used to print the cover information of the document.
“Revision Information” tab is opened for tracking old revisions. All previous revision information of the document is displayed as a list. If the user is authorized to “see old revisions” in the authorization matrix, the user can view the documents of old revisions. The old revision document is opened by clicking the  button on the relevant revision number.
Select the document with revision number “0” and click on the button to view it.
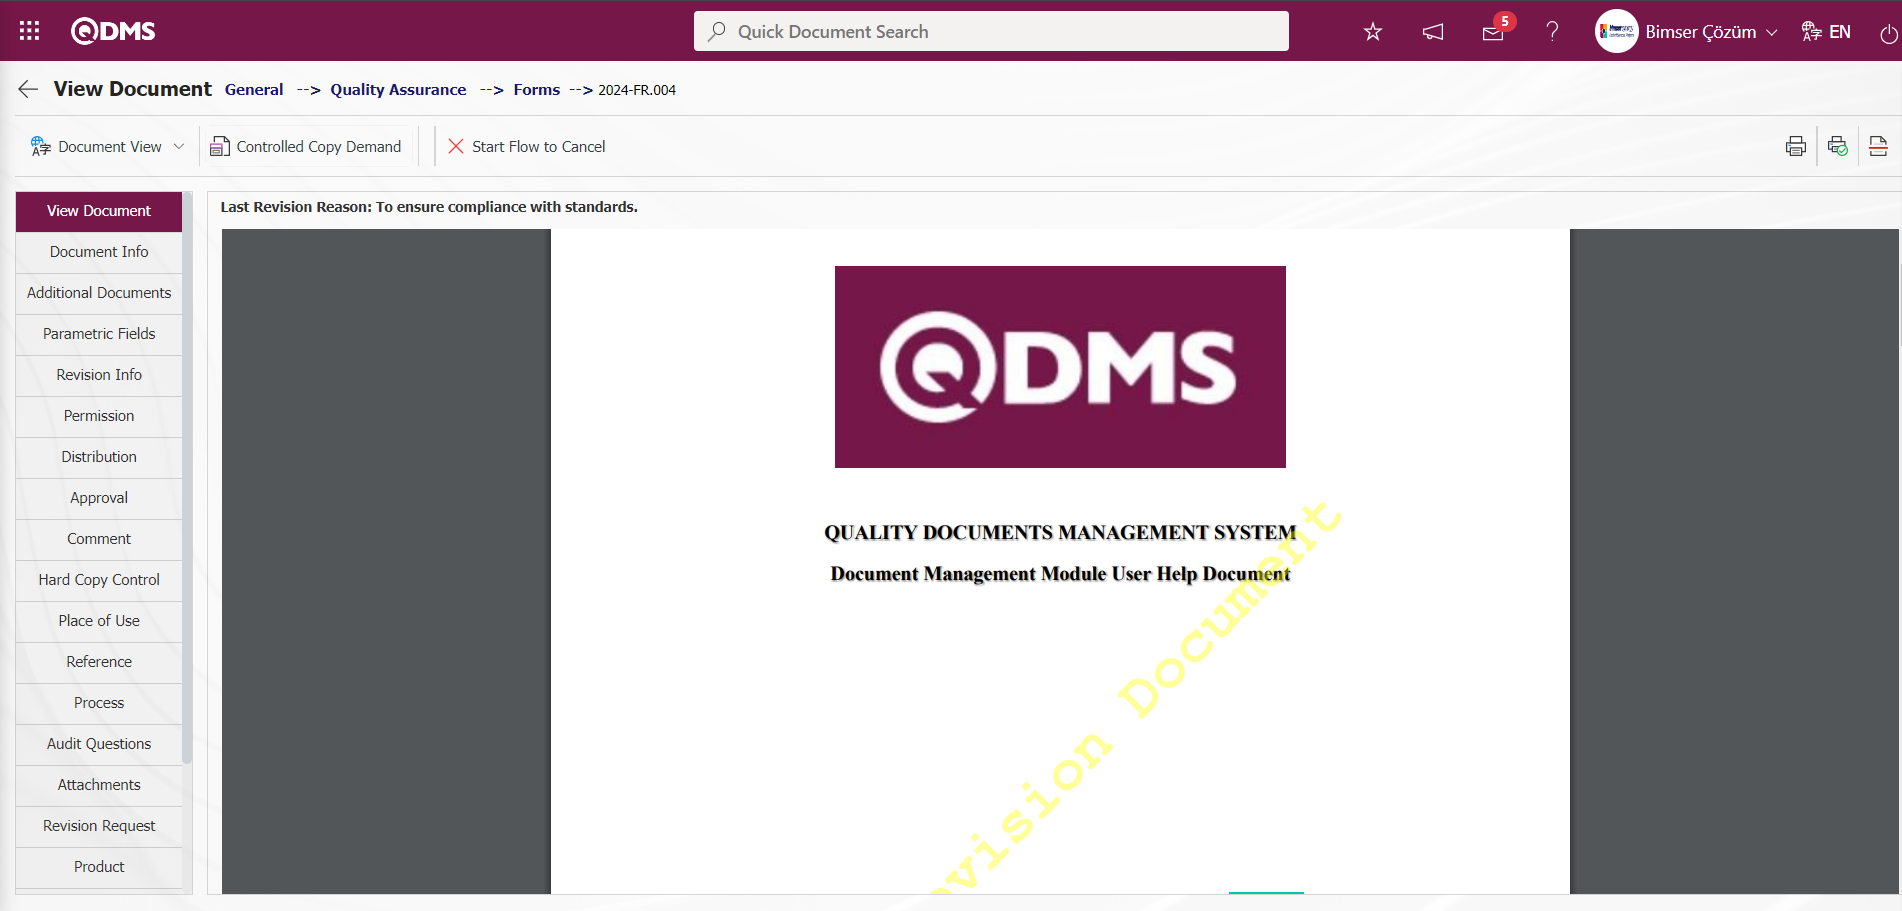
In parameter 165 of the document, the label, which is the text that will be seen on the document when old revisions are displayed, is defined
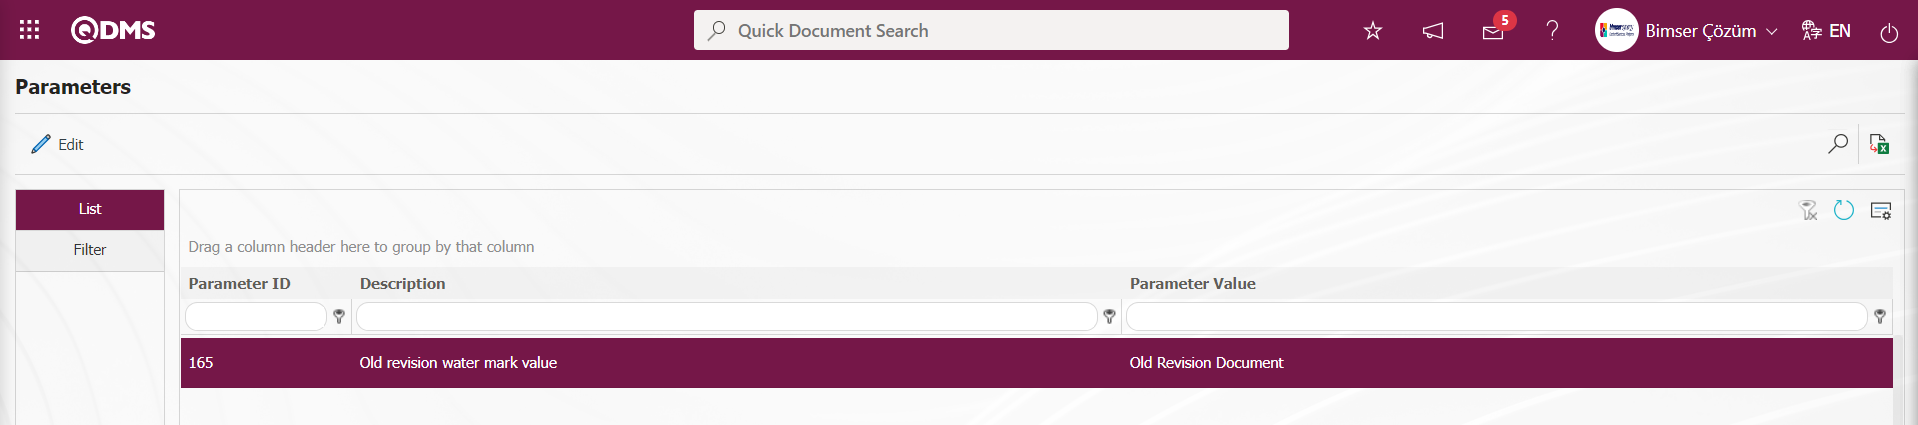 The label with this definition is displayed on the old revisions are displayed.
In the“Revision Request” tab, the revision request process is performed for users who are not authorized to revise the document. The parameter is activated by selecting the parameter value “Yes” in the 150 numbers parameter in the Document Management Module parameters.
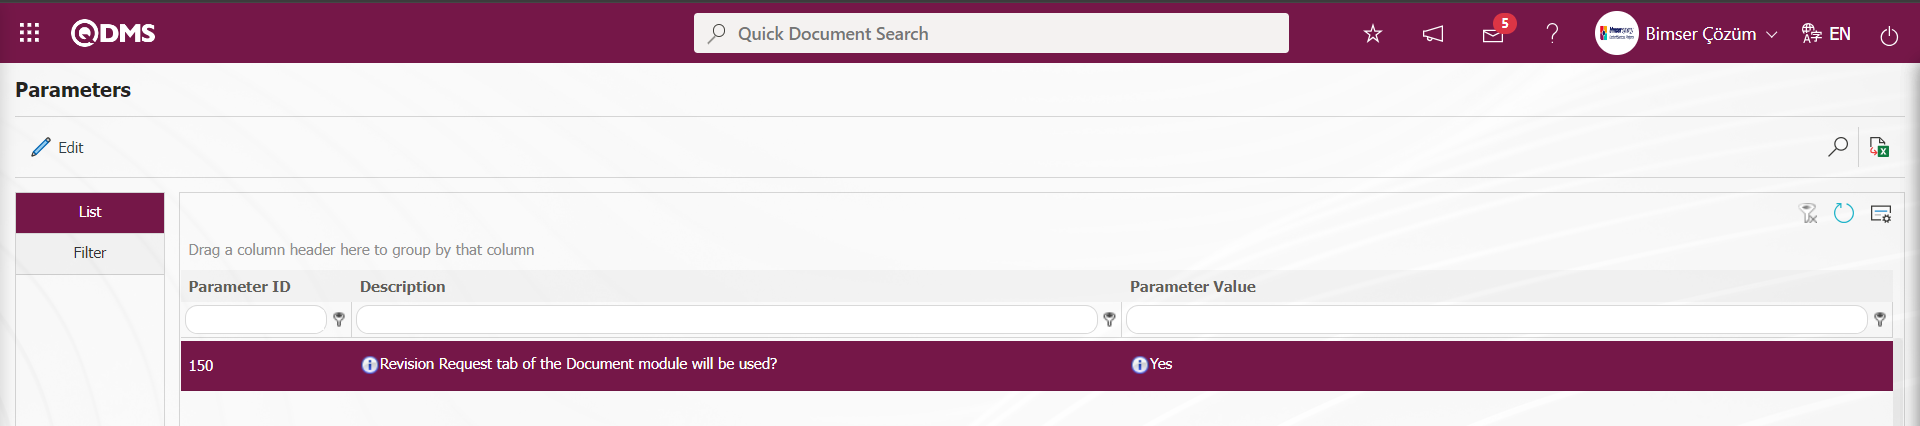
After the parameter is activated, the Revision Request tab is displayed on the Document Preparation/Revision screens.
Revision requests are sent to the person whose parameter value is defined in parameter 91 of the Document Management Module parameters. In the parameter, the parameter value is defined by writing the corresponding values as Reviser, Responsible and Administrator.
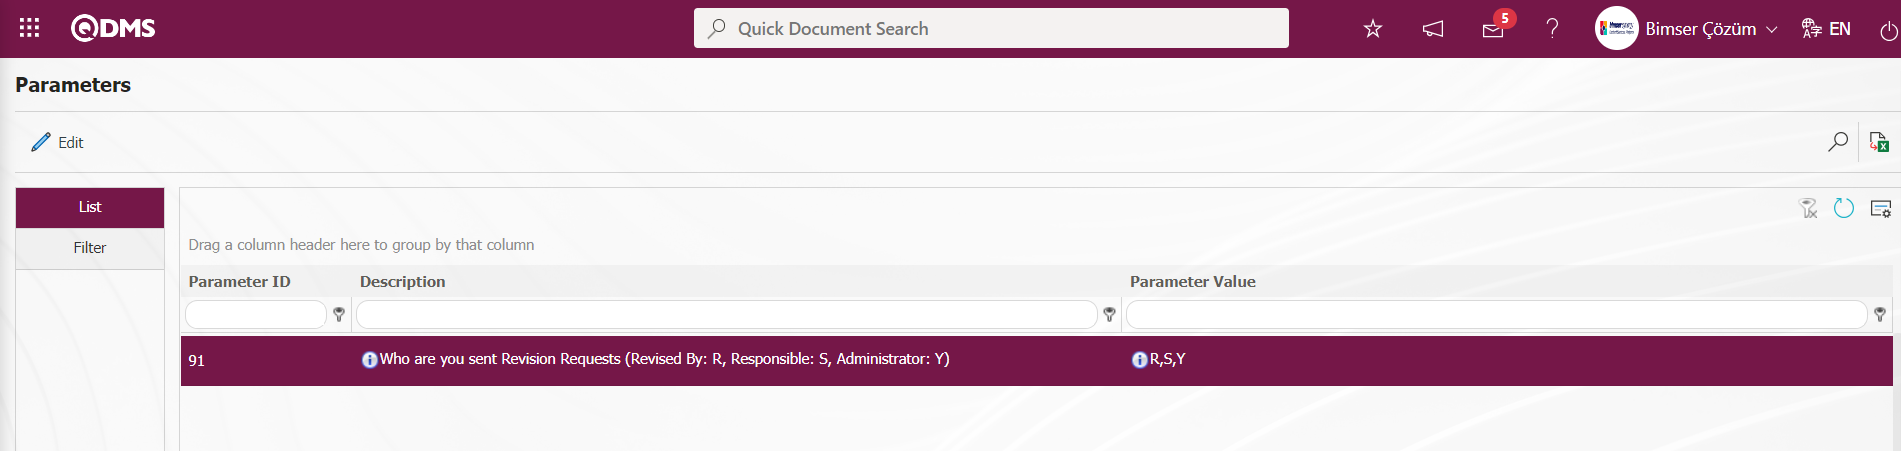
The parameter is activated by selecting the parameter value “Yes” for parameter 167 in the Document Management Module parameters.
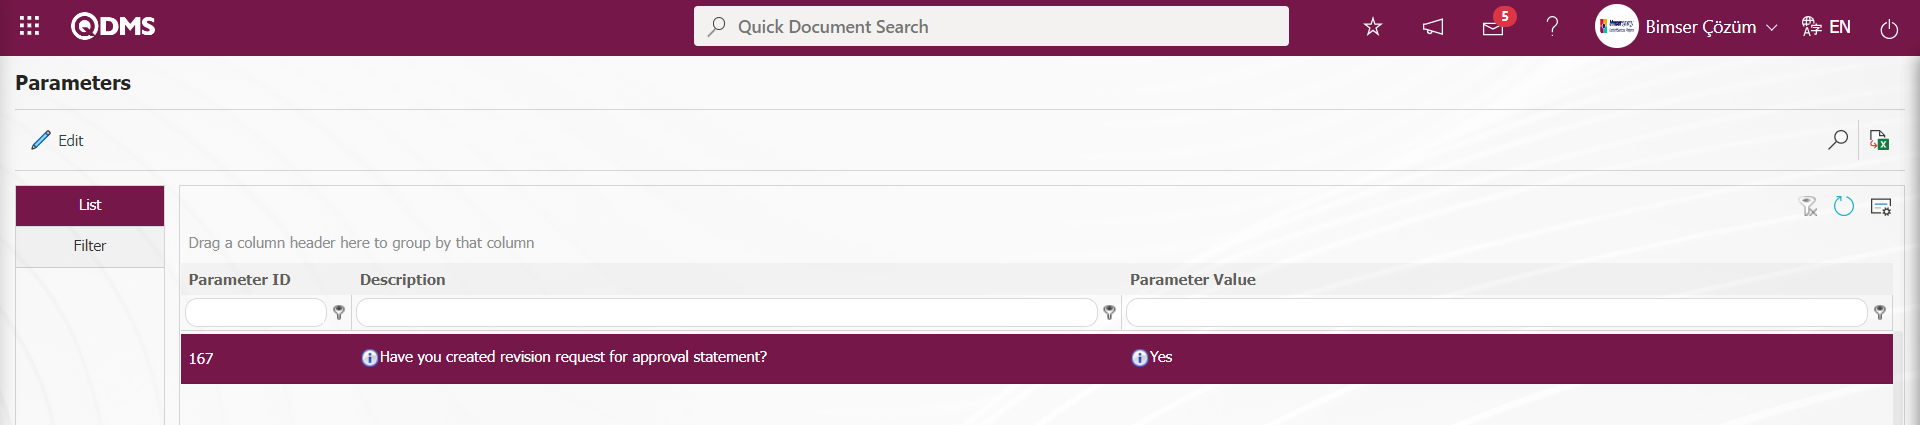
After the parameter is activated, a revision request is created for the approval description for the document. If there is approval description information, it automatically comes to the Revision Request tab as a revision request automatically defined as a revision request by the system.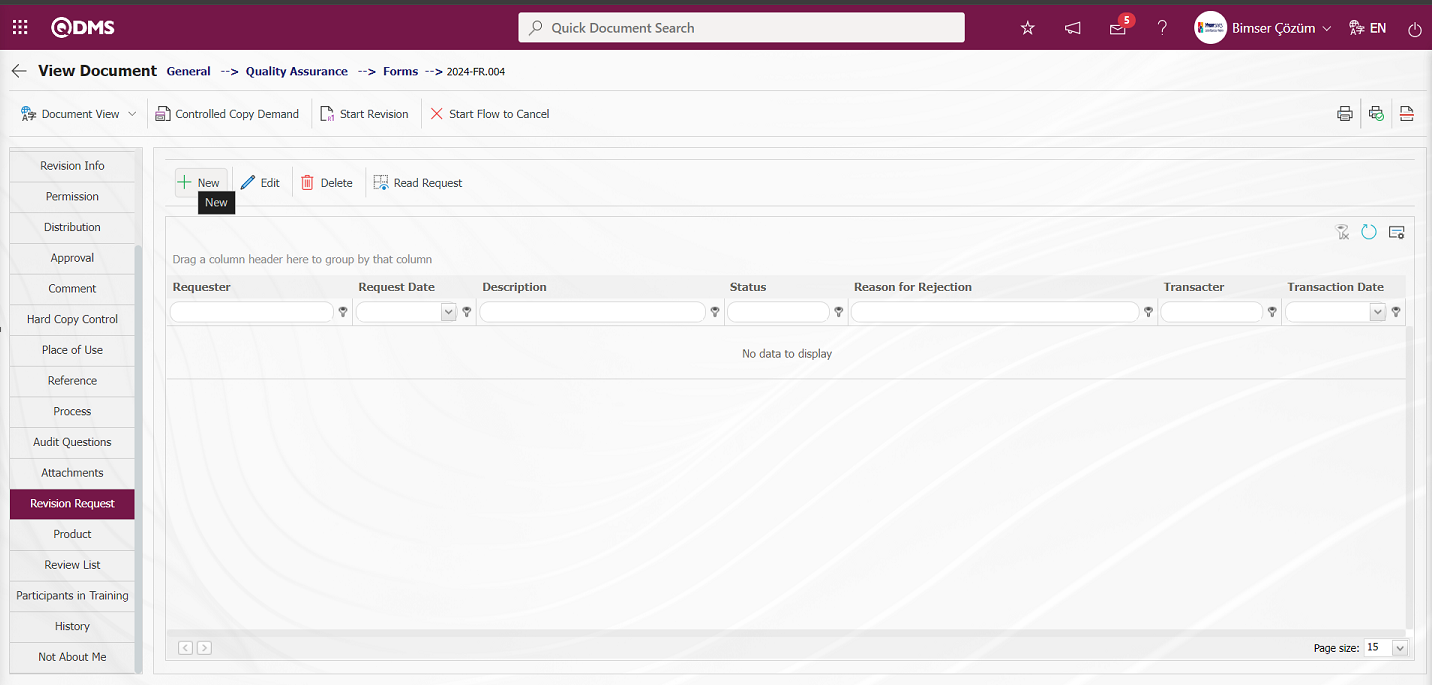
With the help of the buttons on the screen;
 : Defining a new revision request is done.
 : Changes/ updates/ edits are made on the selected revision request information in the list.
 : The revision request information selected in the list is deleted. Deletion is done depending on the parameter. In Document Management parameters, deletion is made according to the users defined in the parameter.

Users authorized to delete the revision request according to the value defined in the parameter are defined according to the parameter as Administrator and Document Owner. The value corresponding to the defined values is written to the parameter value.
 : The selected request information in the list is read by displaying it.
To add a new revision request in the Document Revision Request tab, click the  button to open the Document Revision Request screen.

Related fields are defined on the screen that opens:
Request: This is the field where the request description information is written on the Document Revision Request screen.
The request description information defined in the Document Revision Request screen is written. If there is any additional file related to the request description, additional file attachment is made. After the necessary information is written in the required fields, the  button in the upper left corner of the screen is clicked and the request is sent for approval to the approval person in the registration process.
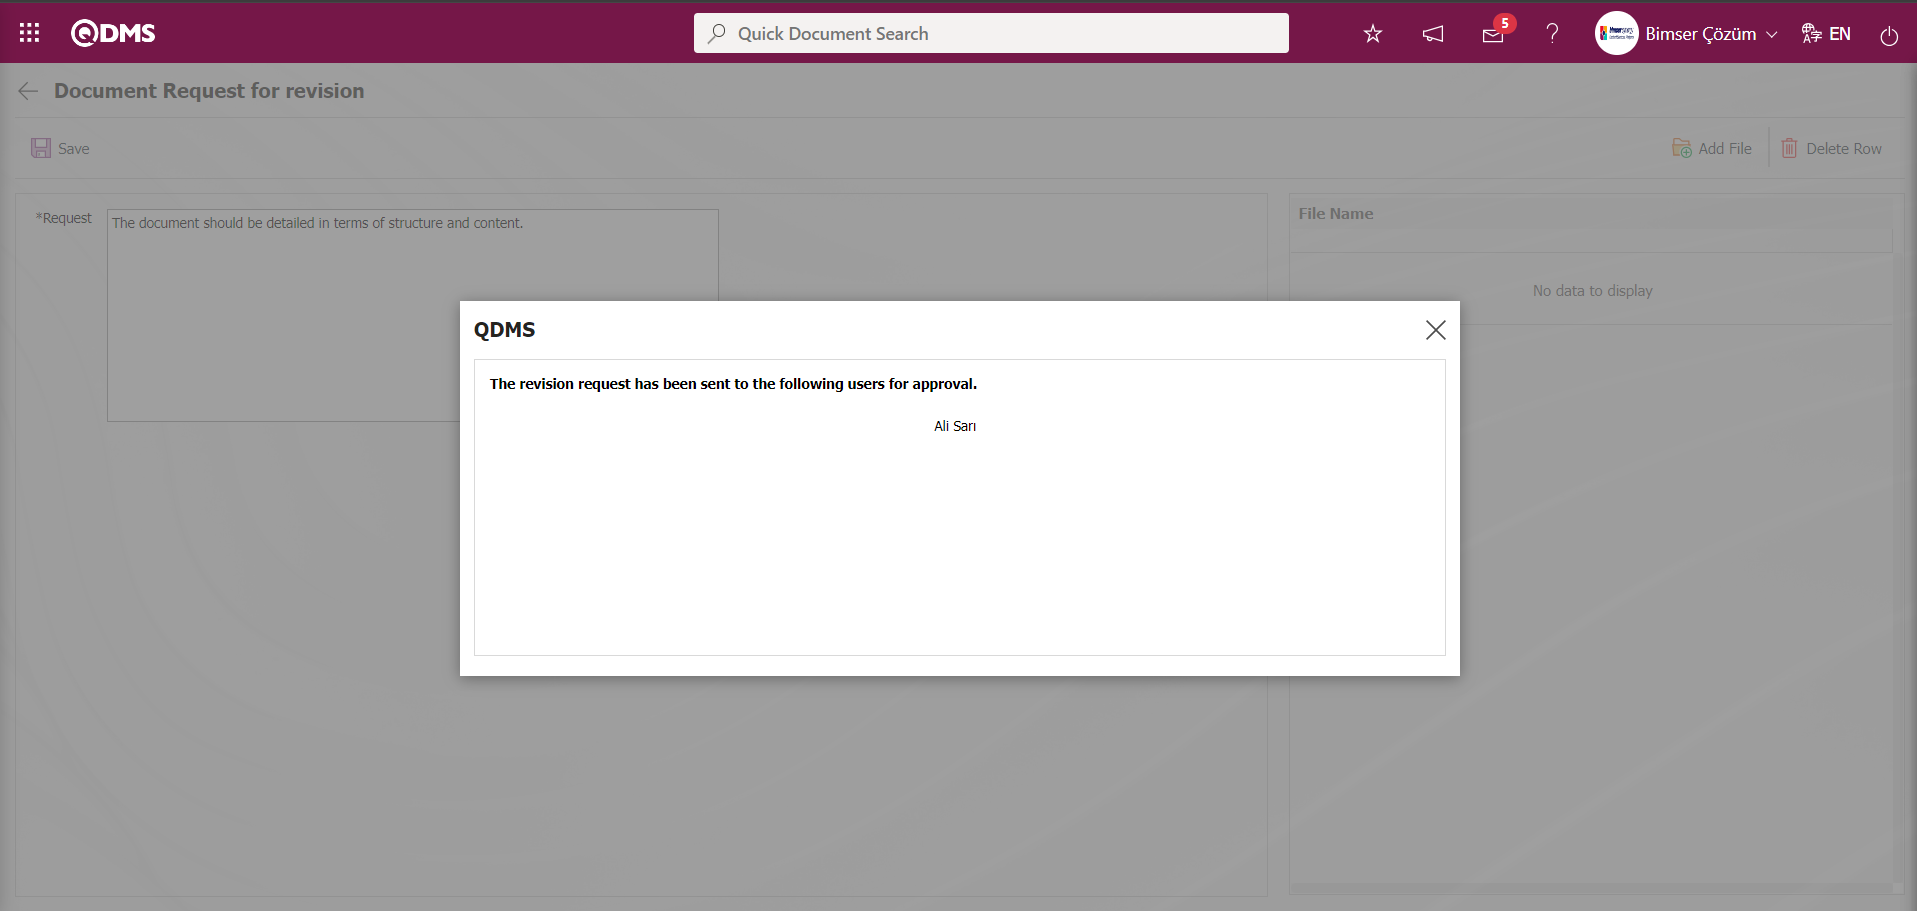
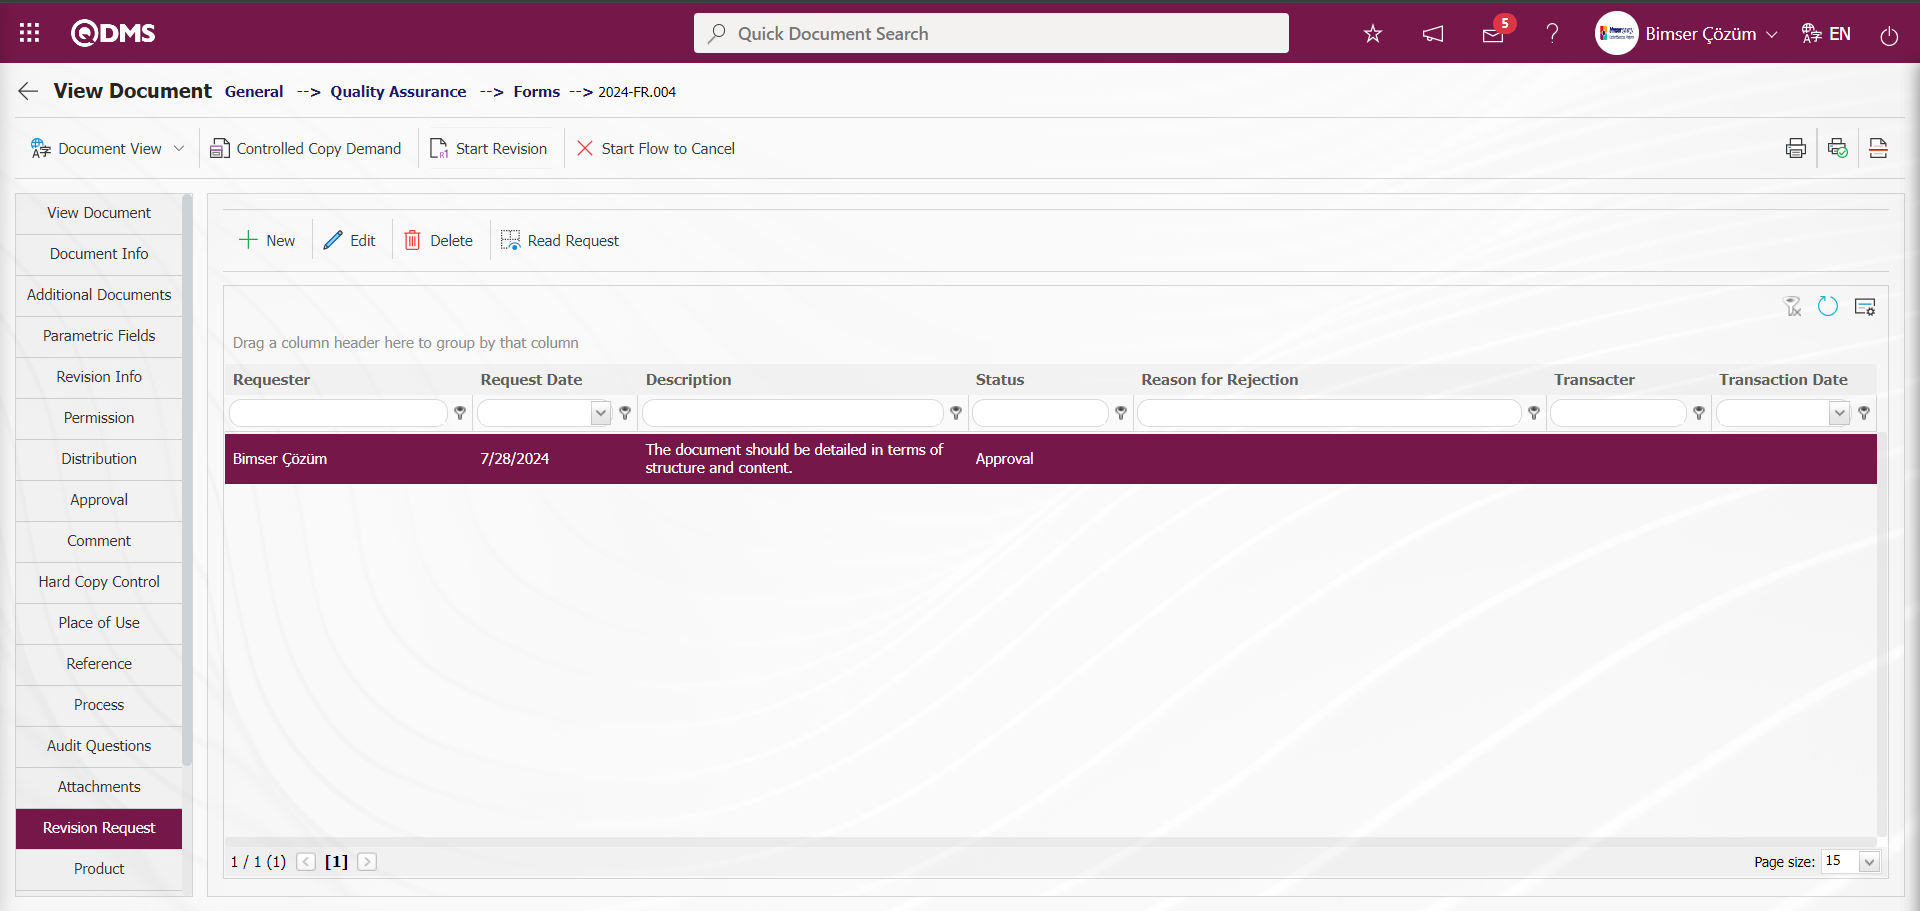 For the approval of the Revision Request sent for approval, the local address of the user in the approval flow is logged in with username and password information.

In the process of approving the revision request, the user in the approval flow is assigned the task“Revision Requests Pending Approval” on the “My Pending Jobs” page.
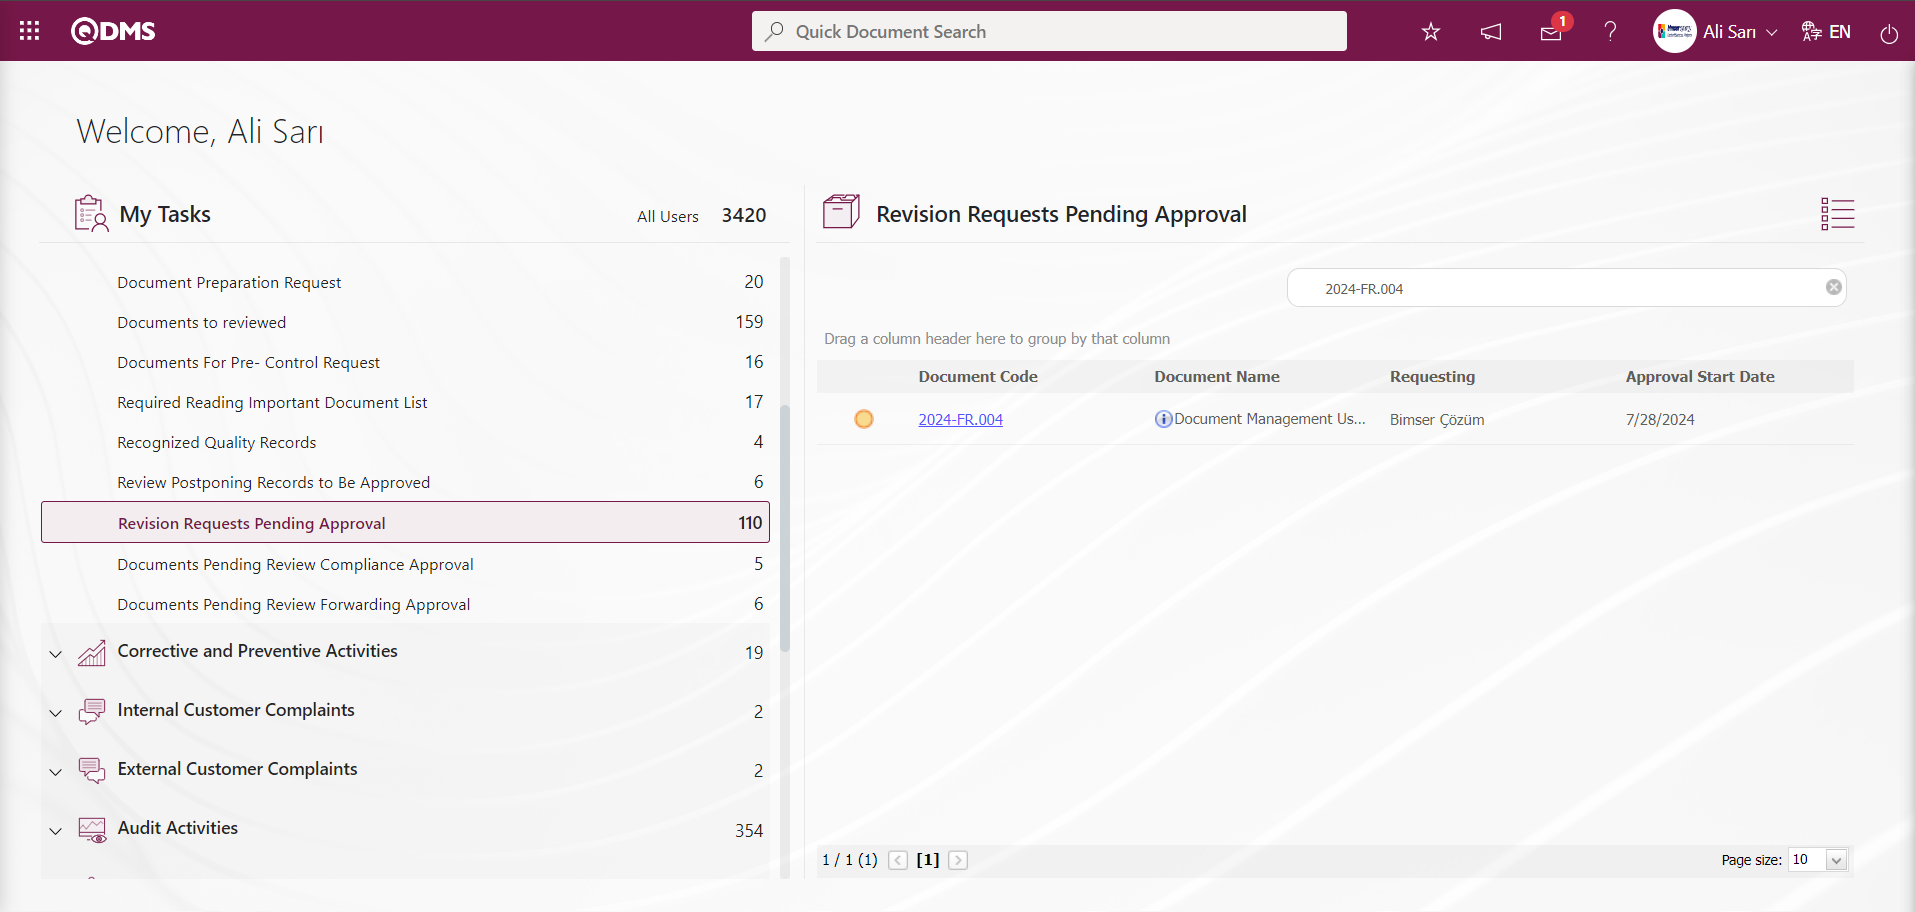
Click on the document code link in the Document Code field in the relevant task.
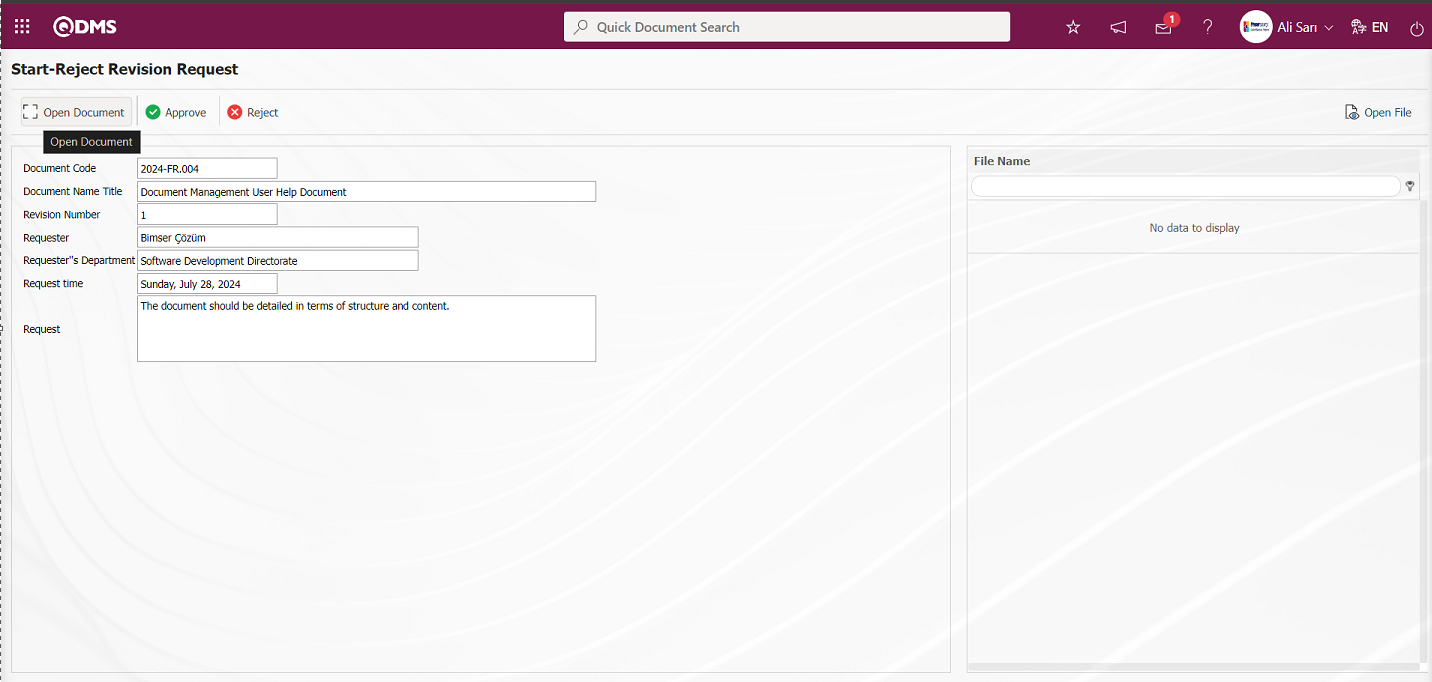
With the help of the buttons on the screen;
 : Document viewing is done.
 : Approval of the revision request is made.
 : Rejection is made by writing the reason for rejection of the revision request.
On the Revision Request Starts-Reject screen, the document is viewed by clicking the button.

Click the button on the screen that opens.
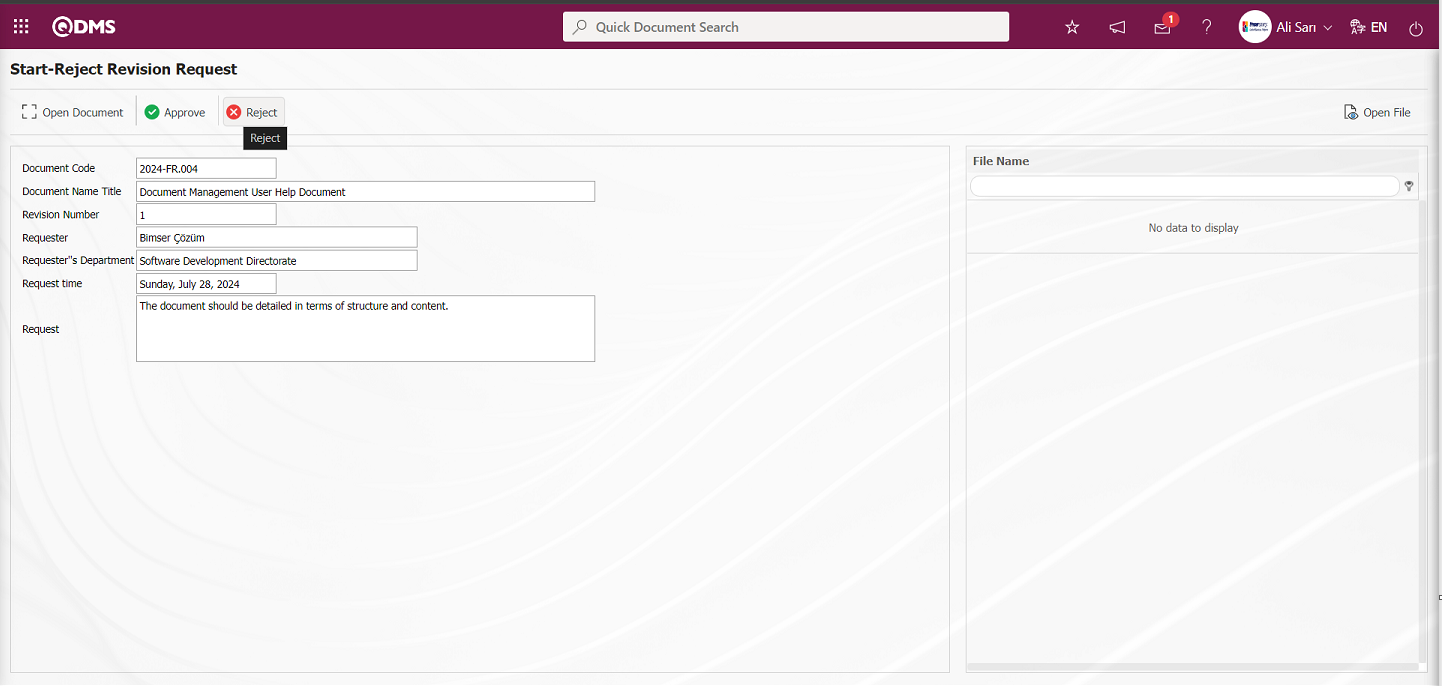
Rejection of the Revision Request is made by writing the Reason for Rejection information on the screen that opens.
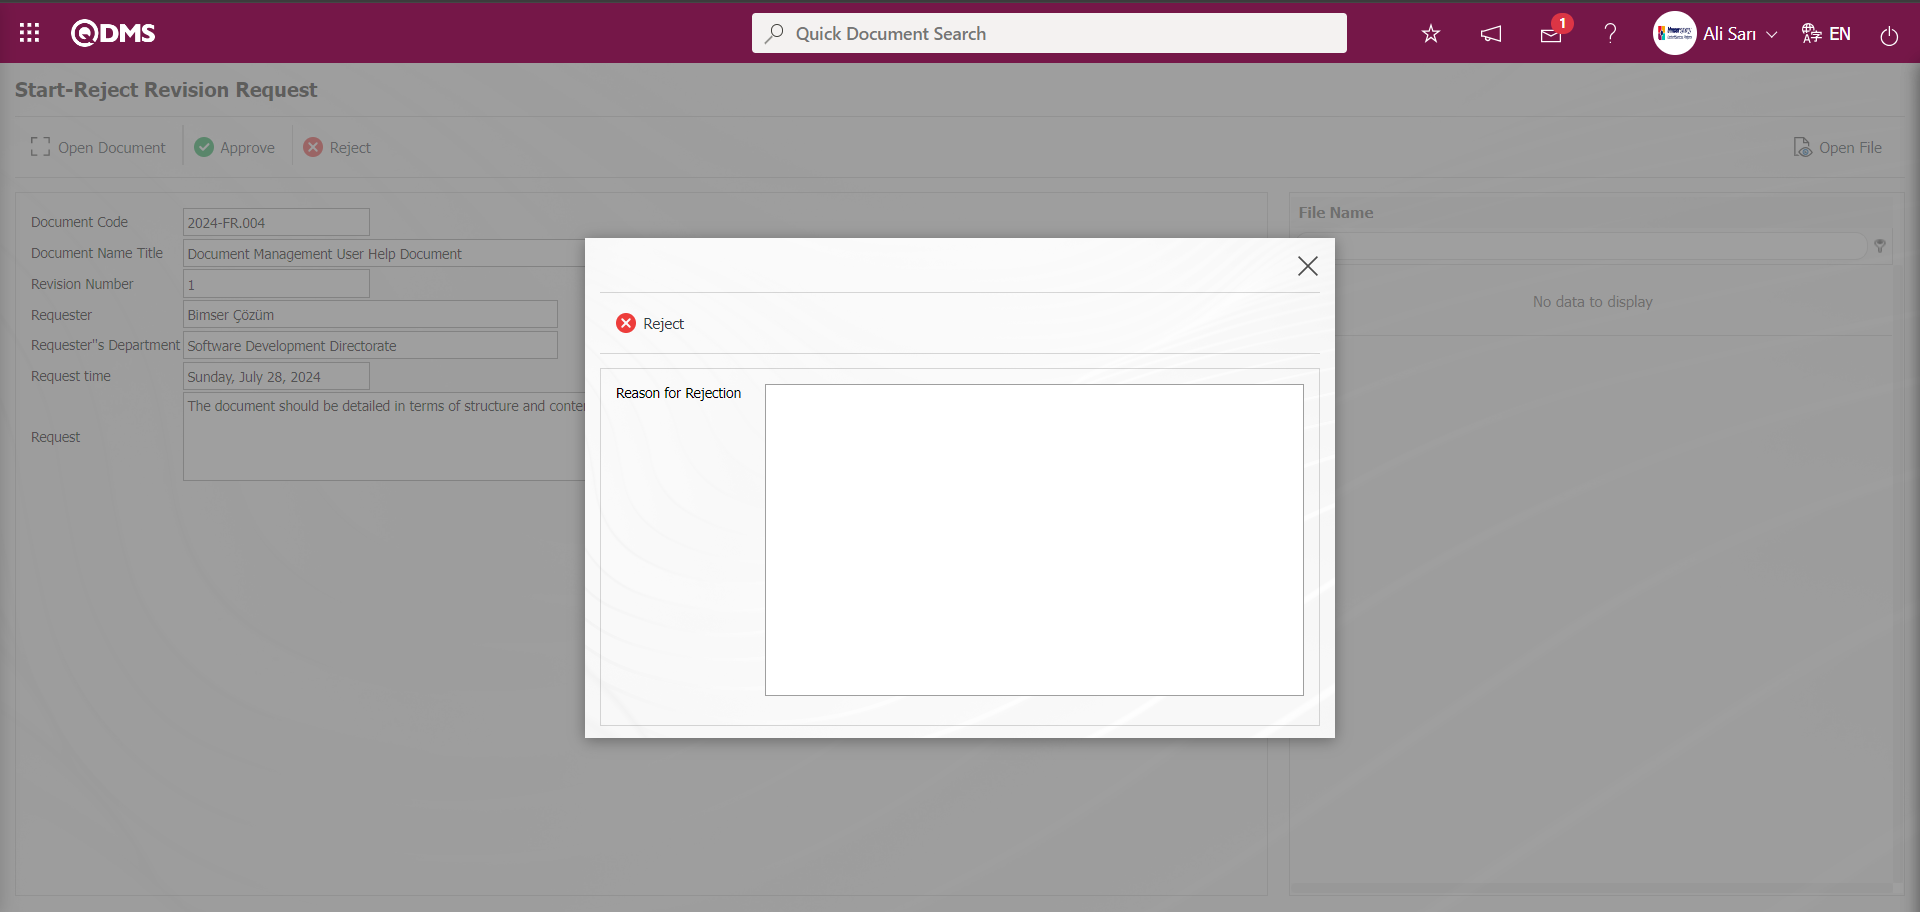
The revision request is approved by clicking the  button on the screen that opens.
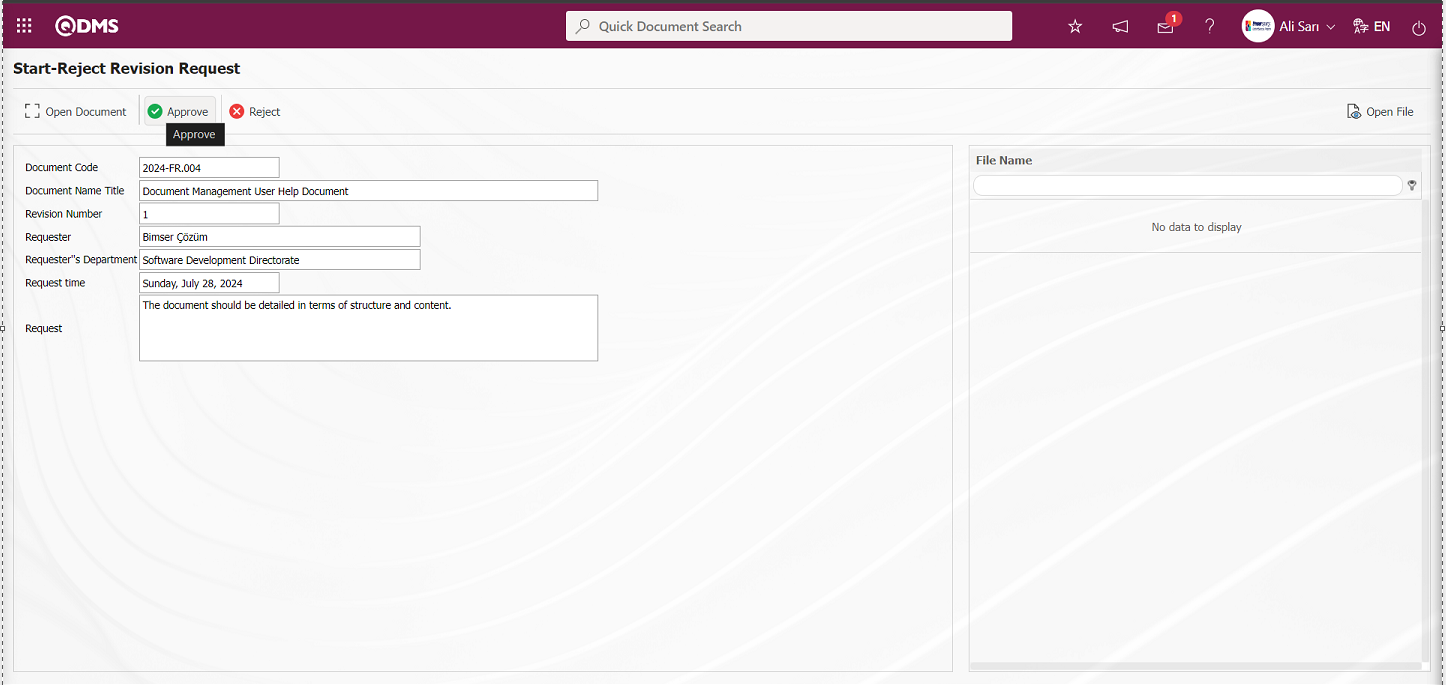 With the message given by the system, the information of the approval process of the Revision Request is sent to the relevant persons.
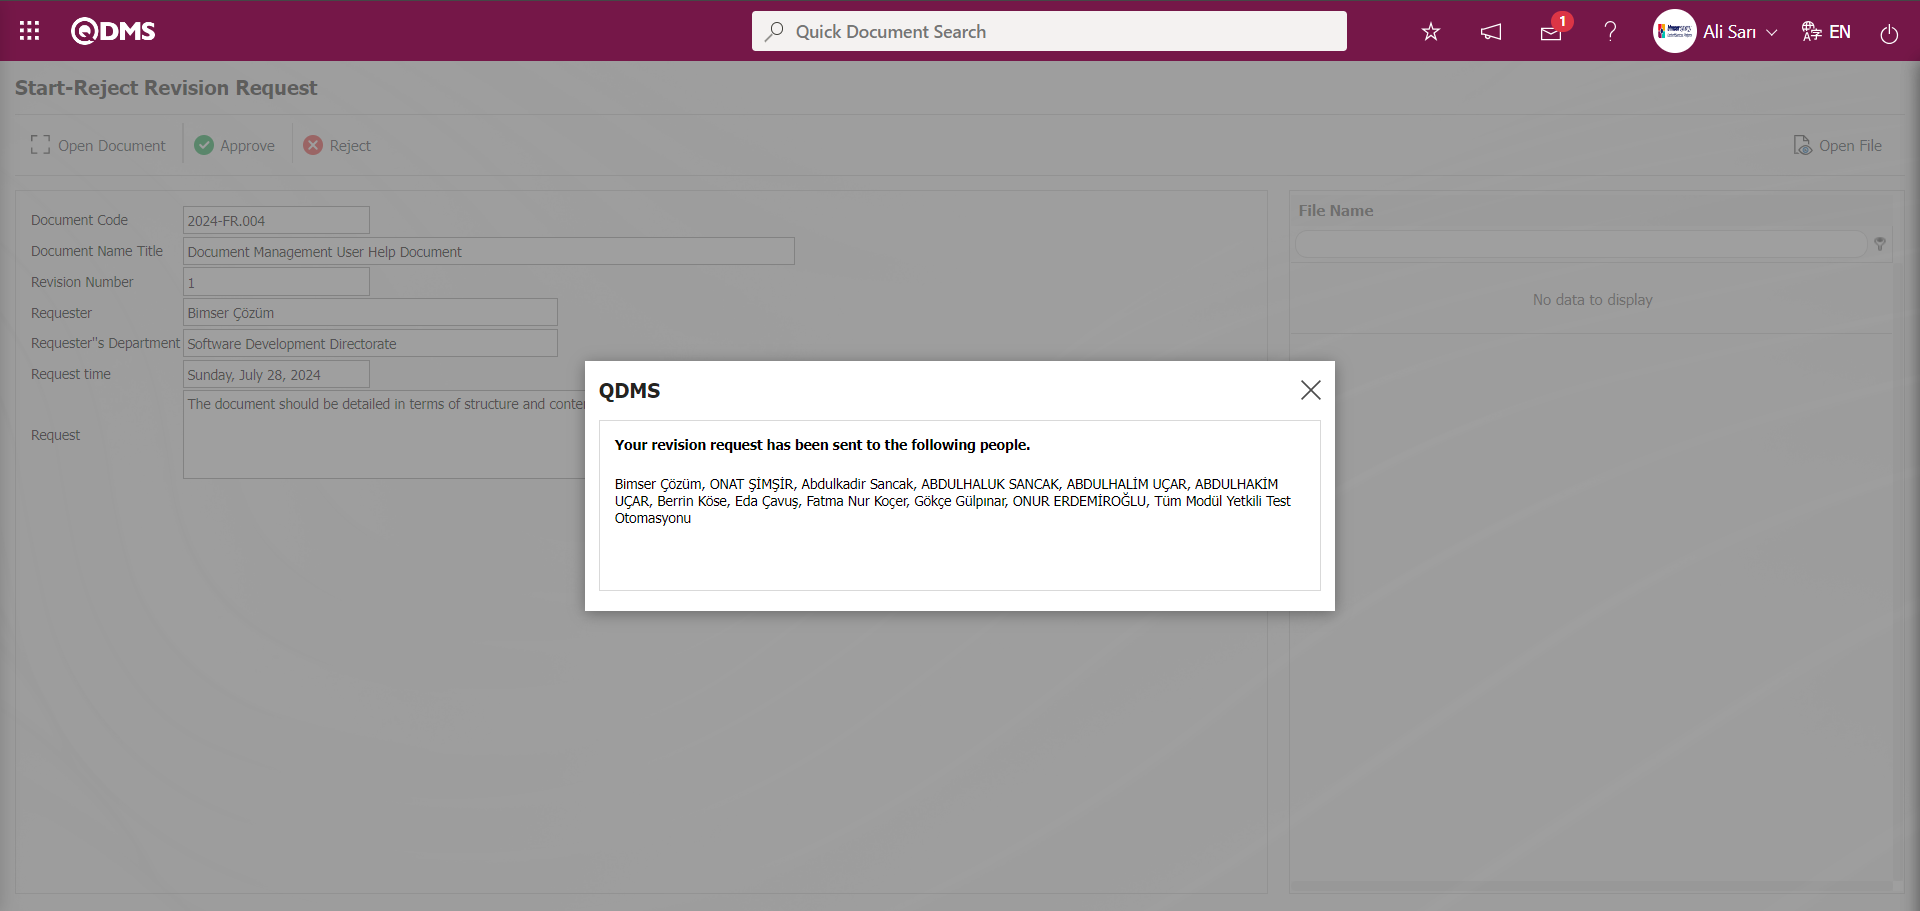
After the approval process of the Revision Request, the status becomes “Open”.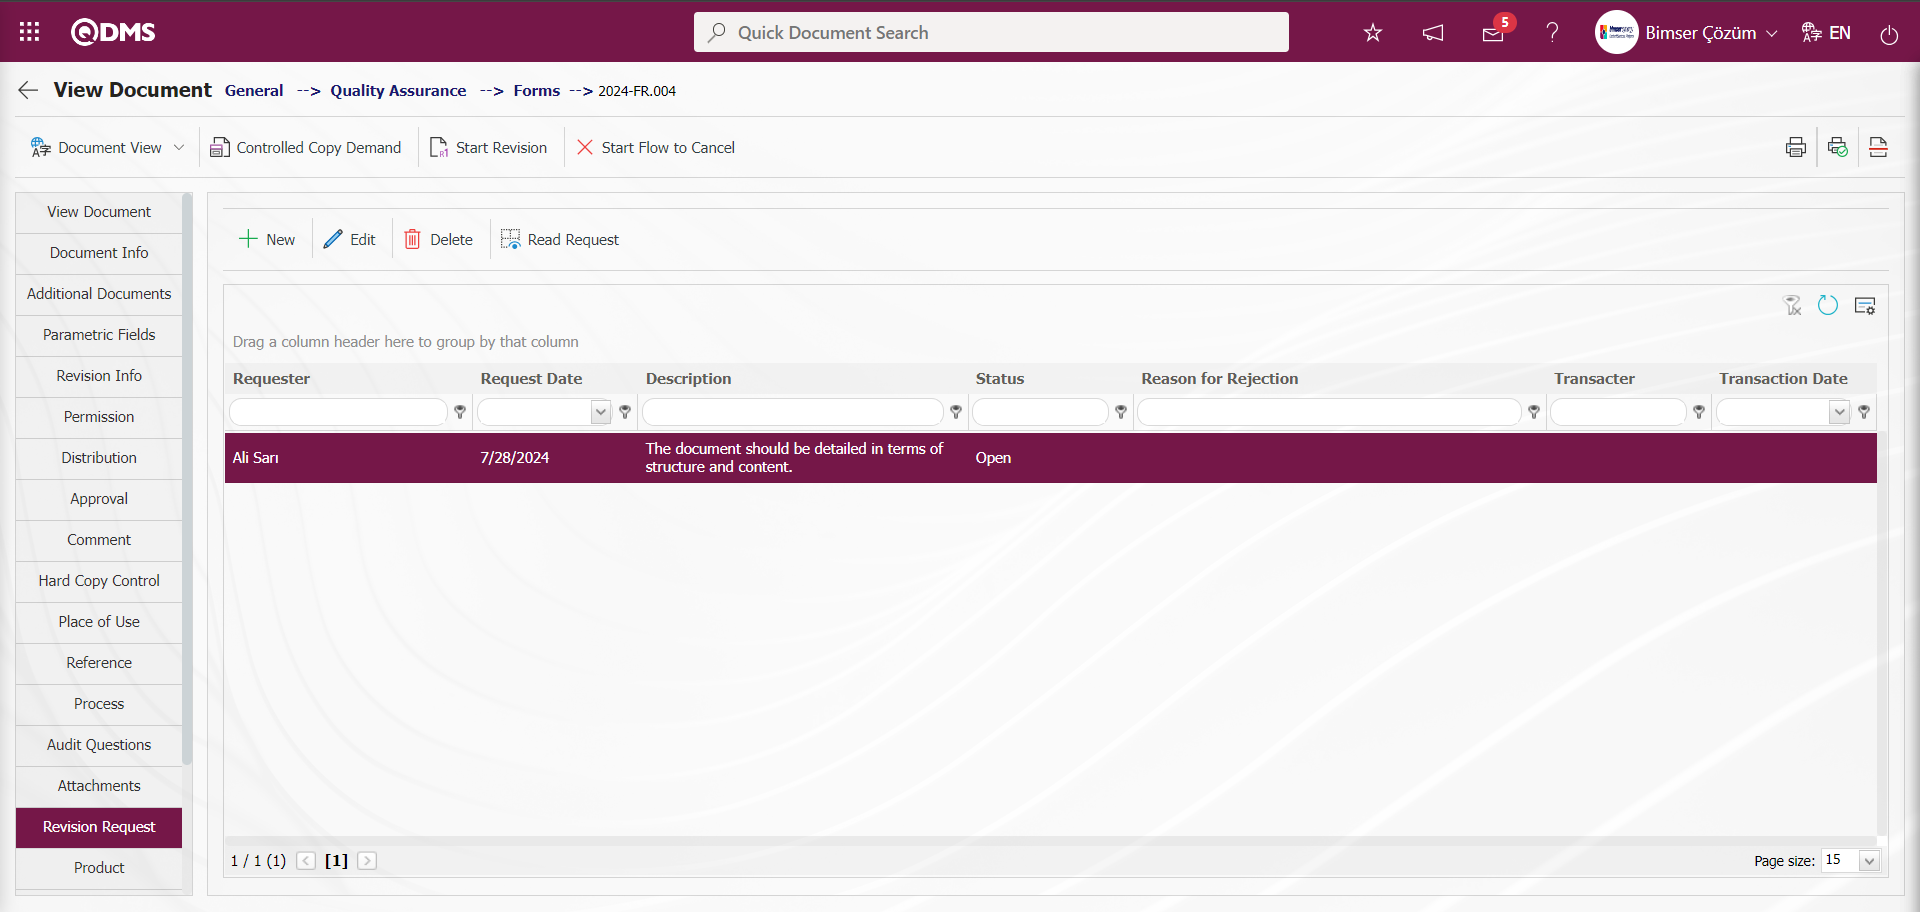
In Document Revision Requests Pending transactions that come to open status, the task falls as “Document Revision Requests” job according to the Reviser, Responsible and Administrator defined in the parameter value in parameter 91.
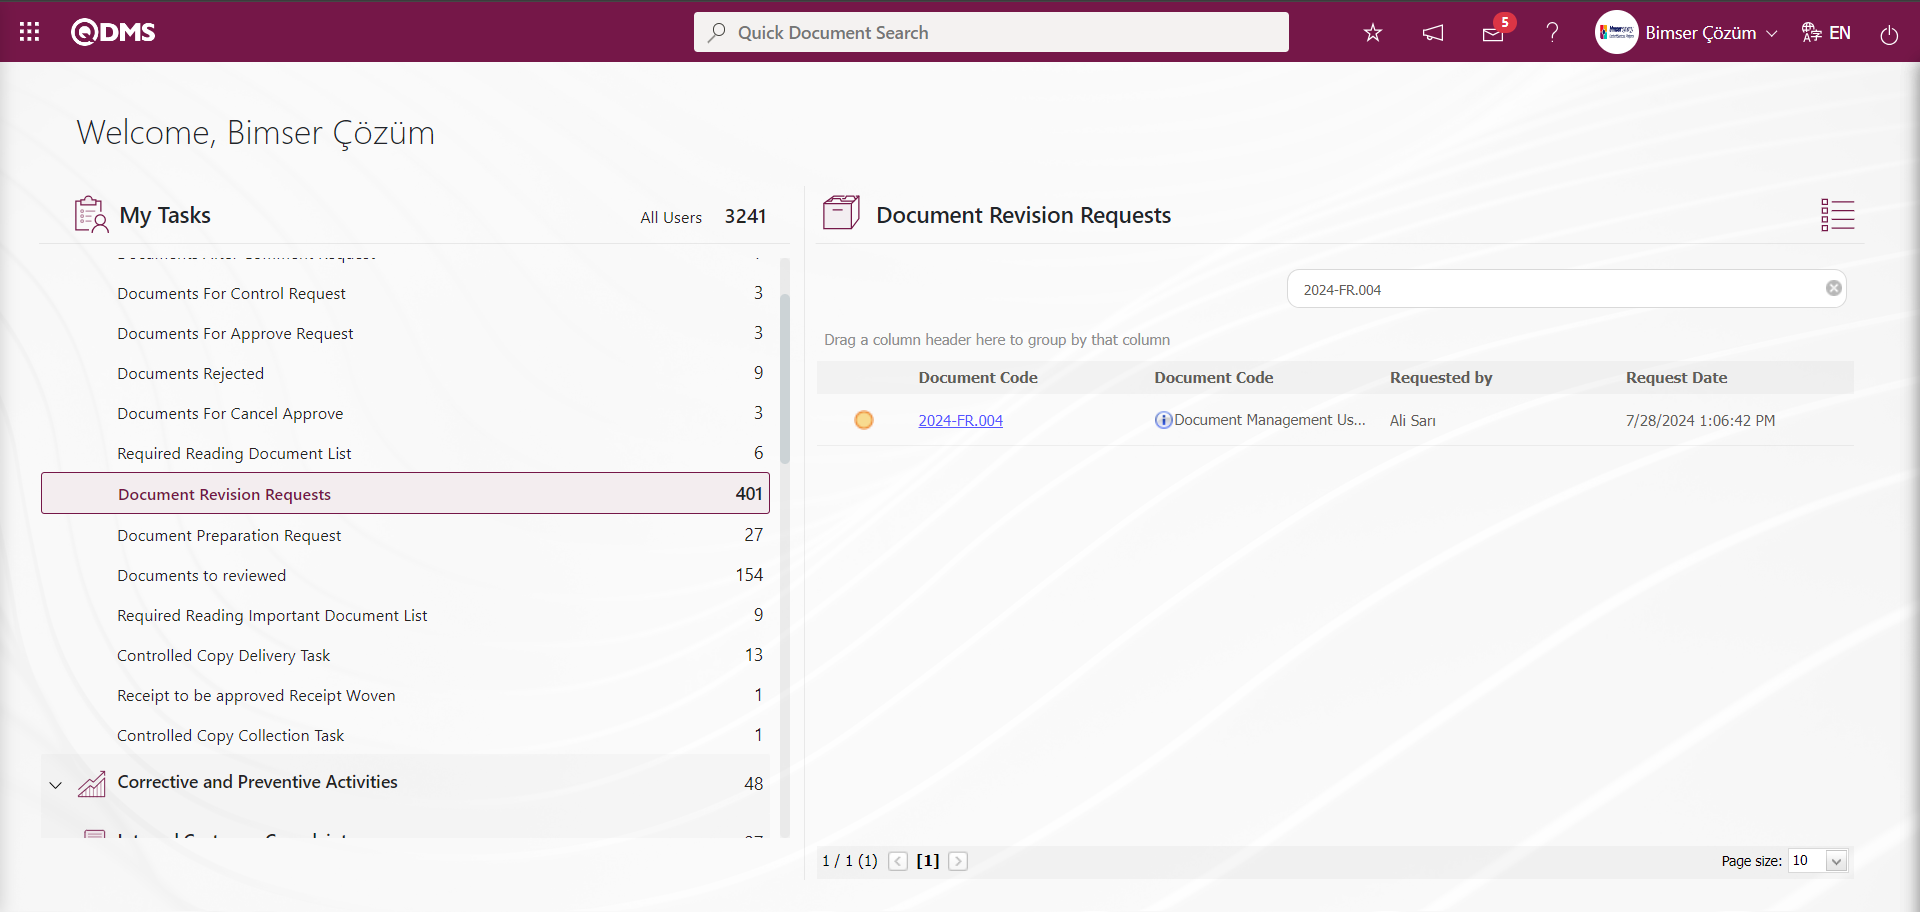
By clicking the document code link in the Document Code field in the relevant task, the Revision Request Starts-Reject screen opens.
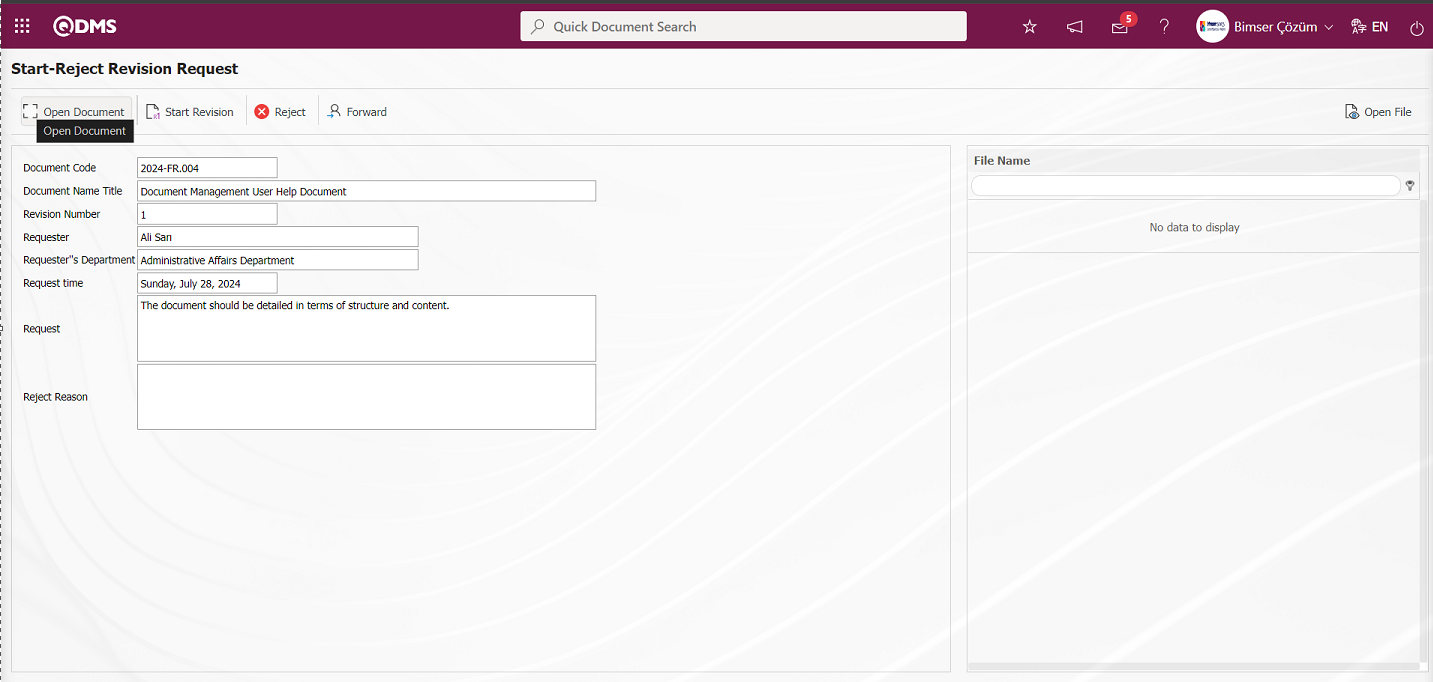
With the help of the buttons on the screen;
 : Document viewing is done.
 : Revision request is accepted and revision is started.
 : Rejection is made by writing the reason for rejection of the revision request.
 : The revision request is forwarded to another user.
Document viewing is done by clicking the  button on the Revision Request Starts-Reject screen.

On the Revision Request Starts-Reject screen, if desired, the reason for rejection is written and the Revision Request is rejected by clicking the  button.
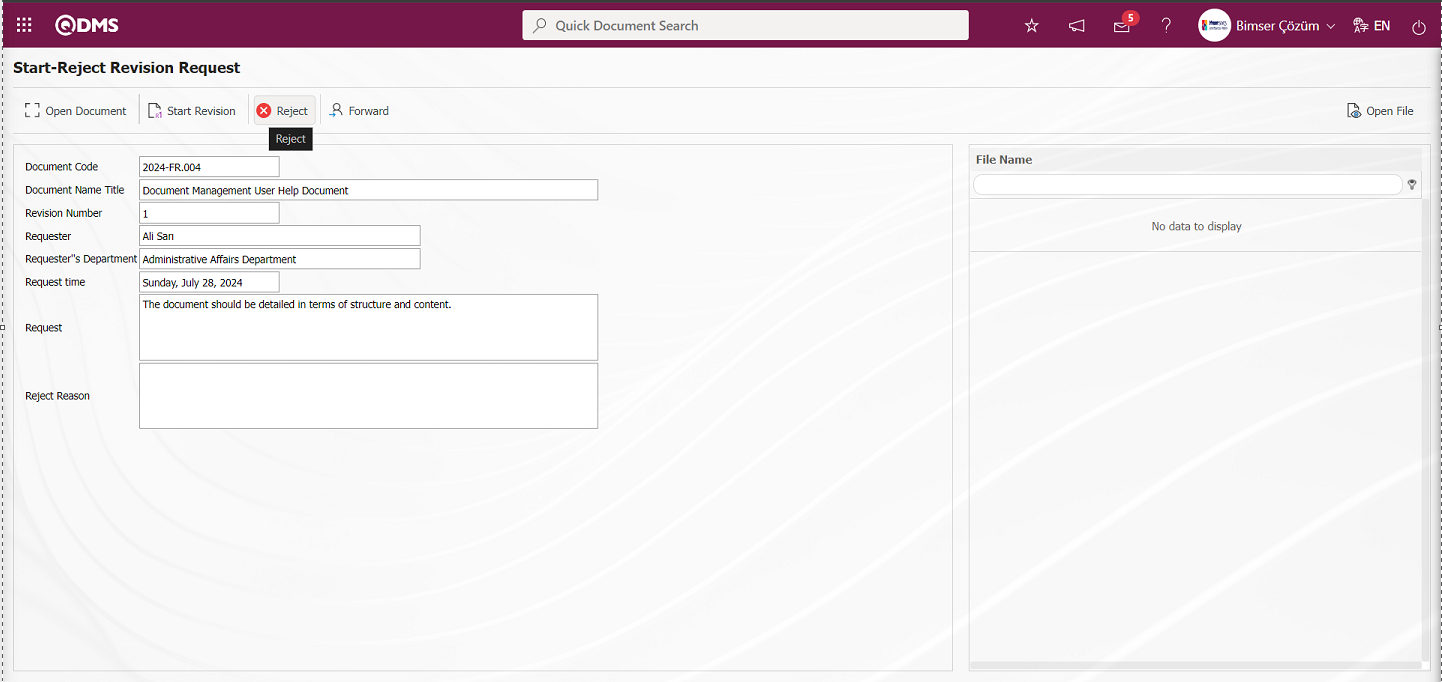
Click the  button on the Revision Request Starts-Reject screen.
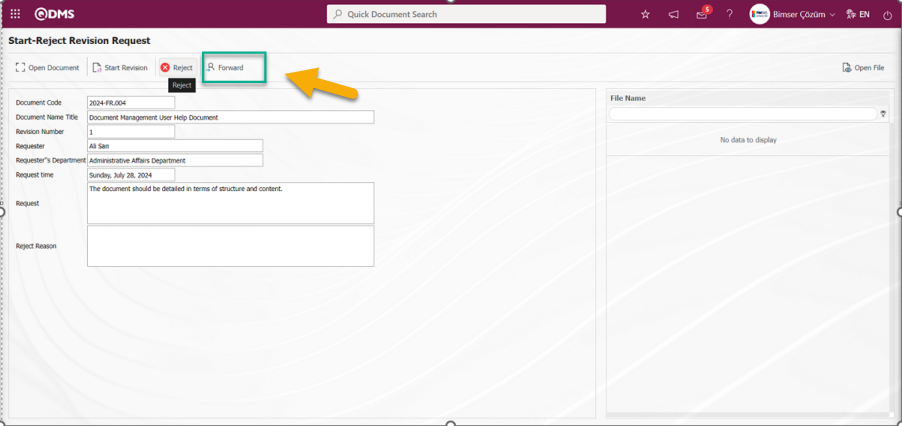
Revision Request Routing screen opens.

On the Revision Request Routing screen, click the  (Select) button and select the person whose request will be routed in the list of personnel defined in the system. If available, note information about the request routing process is written. After entering the necessary information in the required fields, the Revision Request Routing process is performed by clicking the
  button in the upper left corner of the screen.
From the Revision Request Starts - Reject screen, the Revision process is started within the scope of the Revision request by clicking the  button.
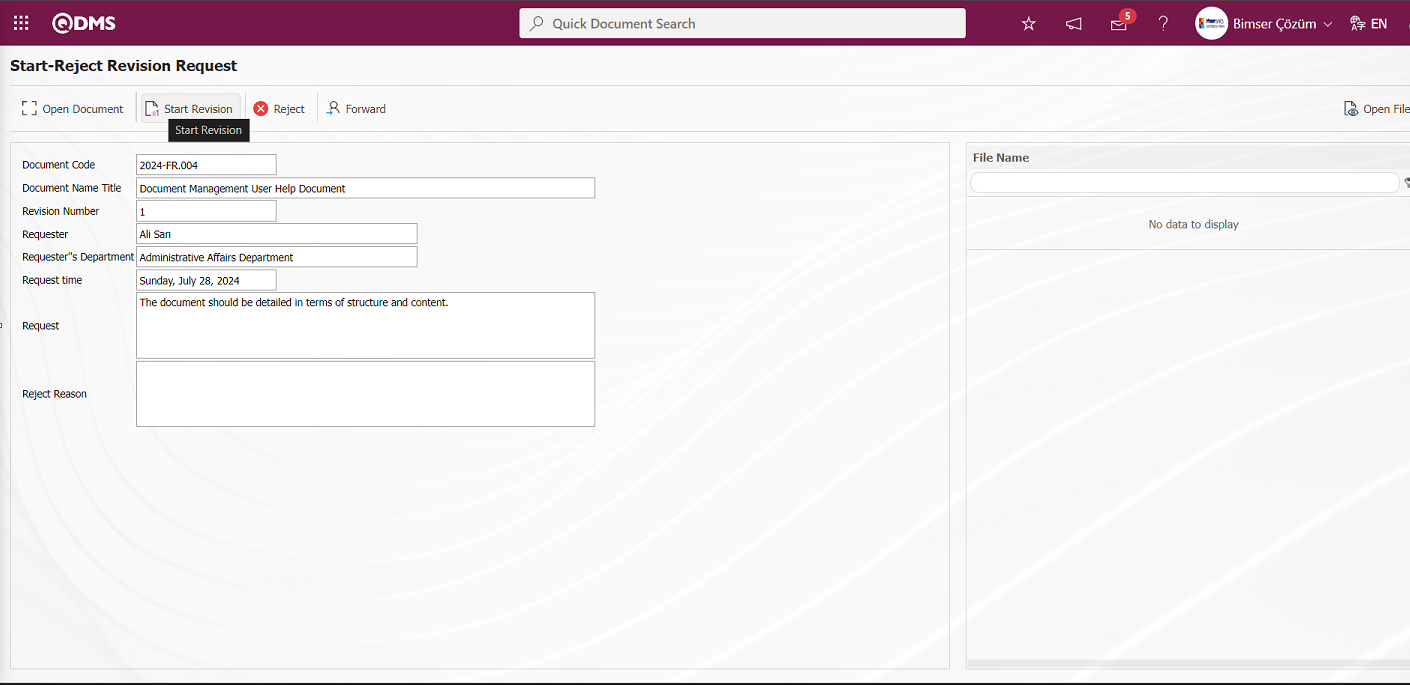
Click the “OK” button in the message by the system.
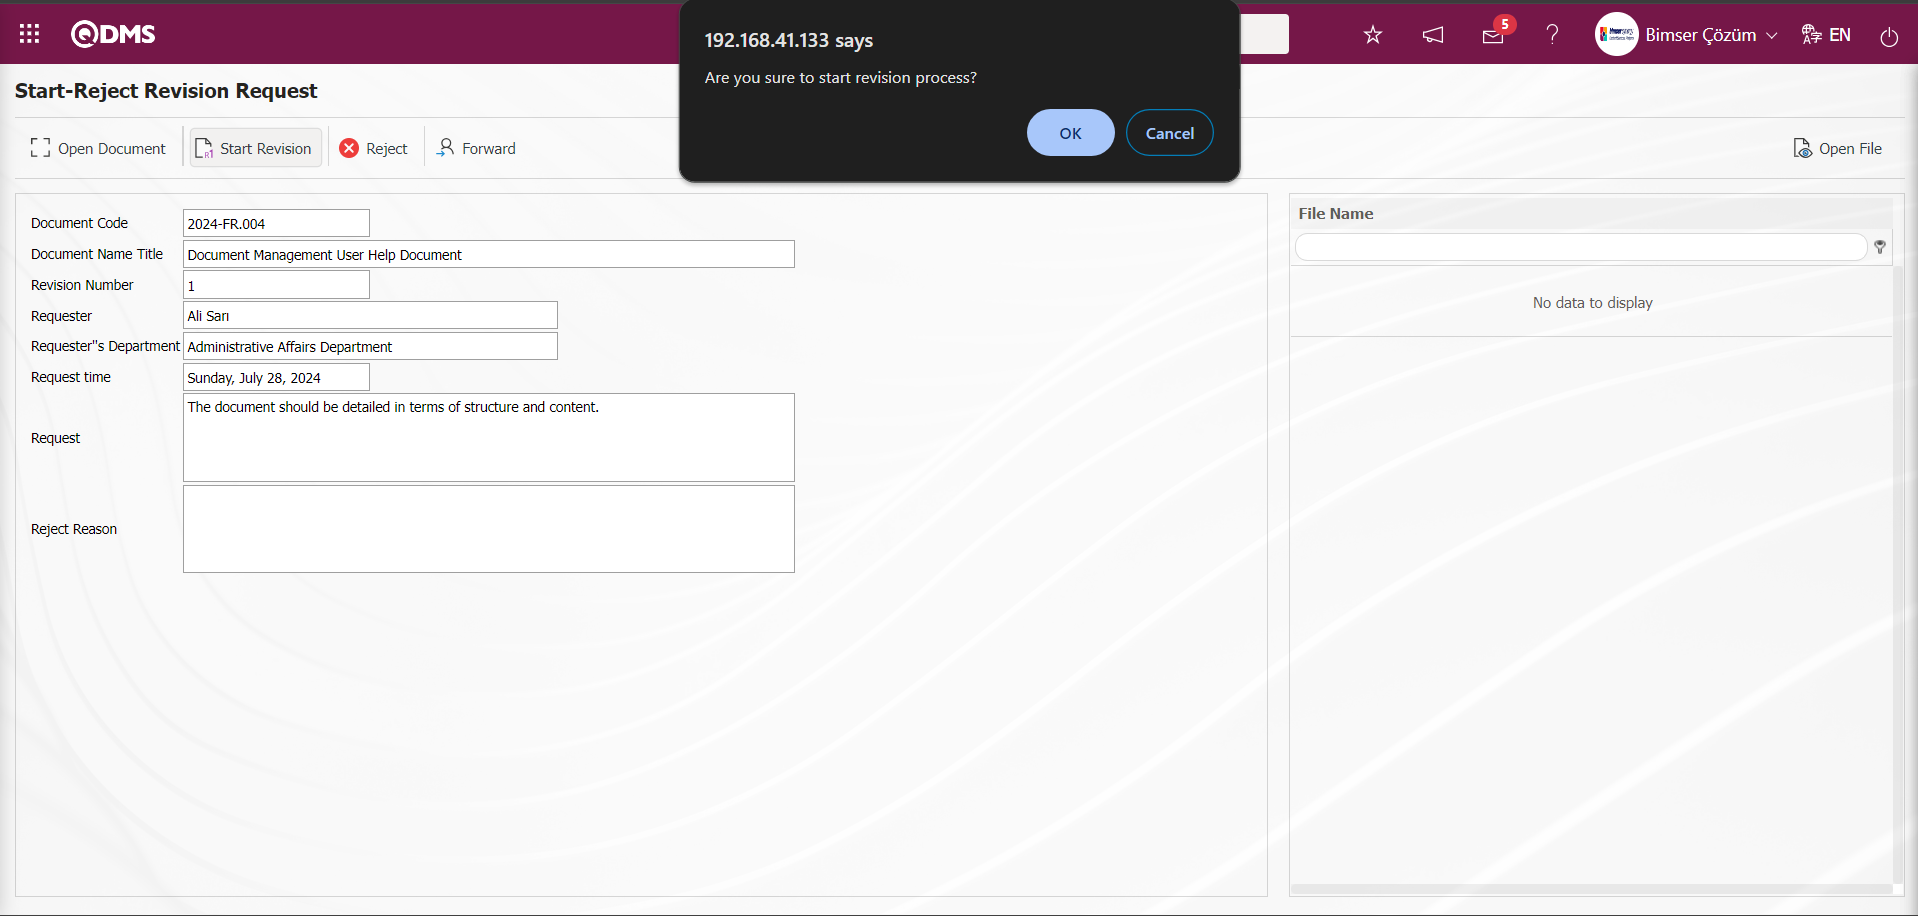
The document was saved successfully by the system. It is indicated that the revision process has started by giving a message about the revision process has started.

From the Document Revision screen, it is informed that the revision process has been started with this revision, revision request.
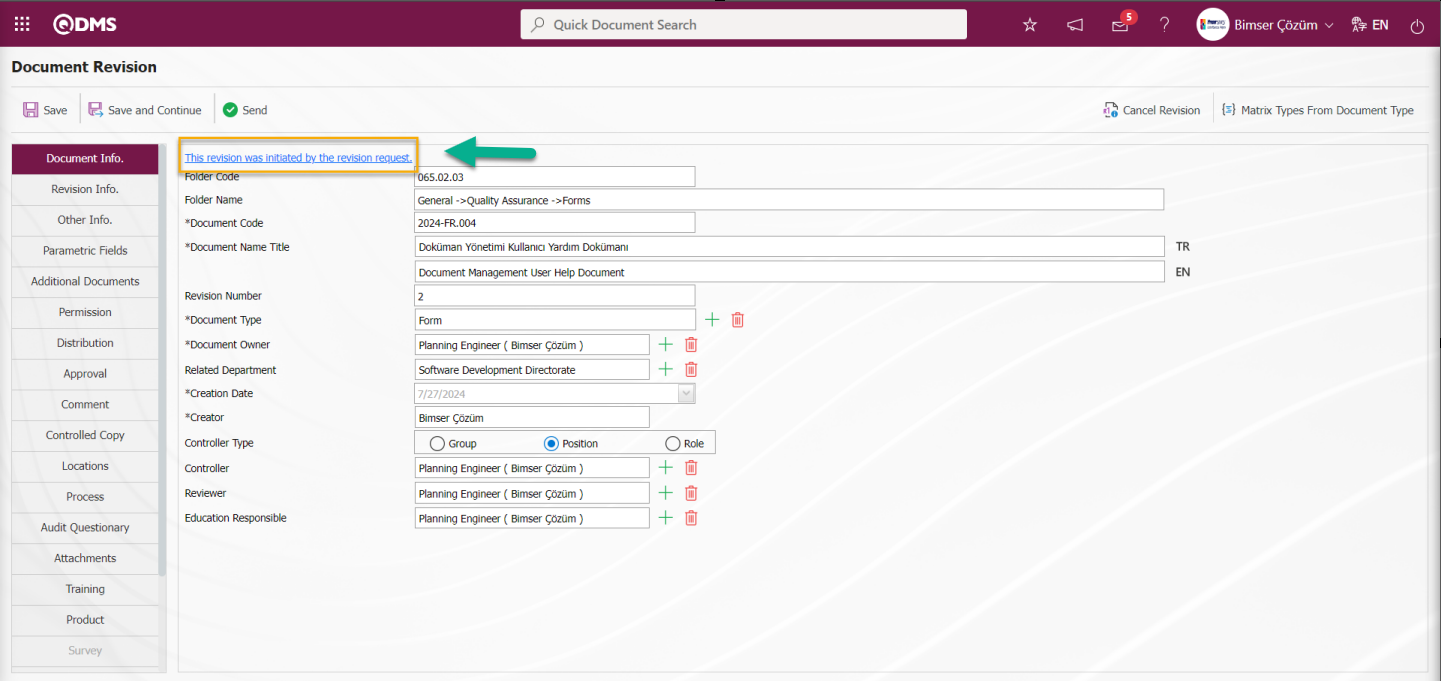
The revision number is given automatically by the system. (If it is defined manually in the folder, the revision number information is entered).
Desired changes can be made on document information, matrix tabs and all document tabs within the scope of revision. In the “Revision Information” tab, the reason for revision is entered. What is done in the revision is defined. If a revision is initiated due to a revision request, the request information is selected.
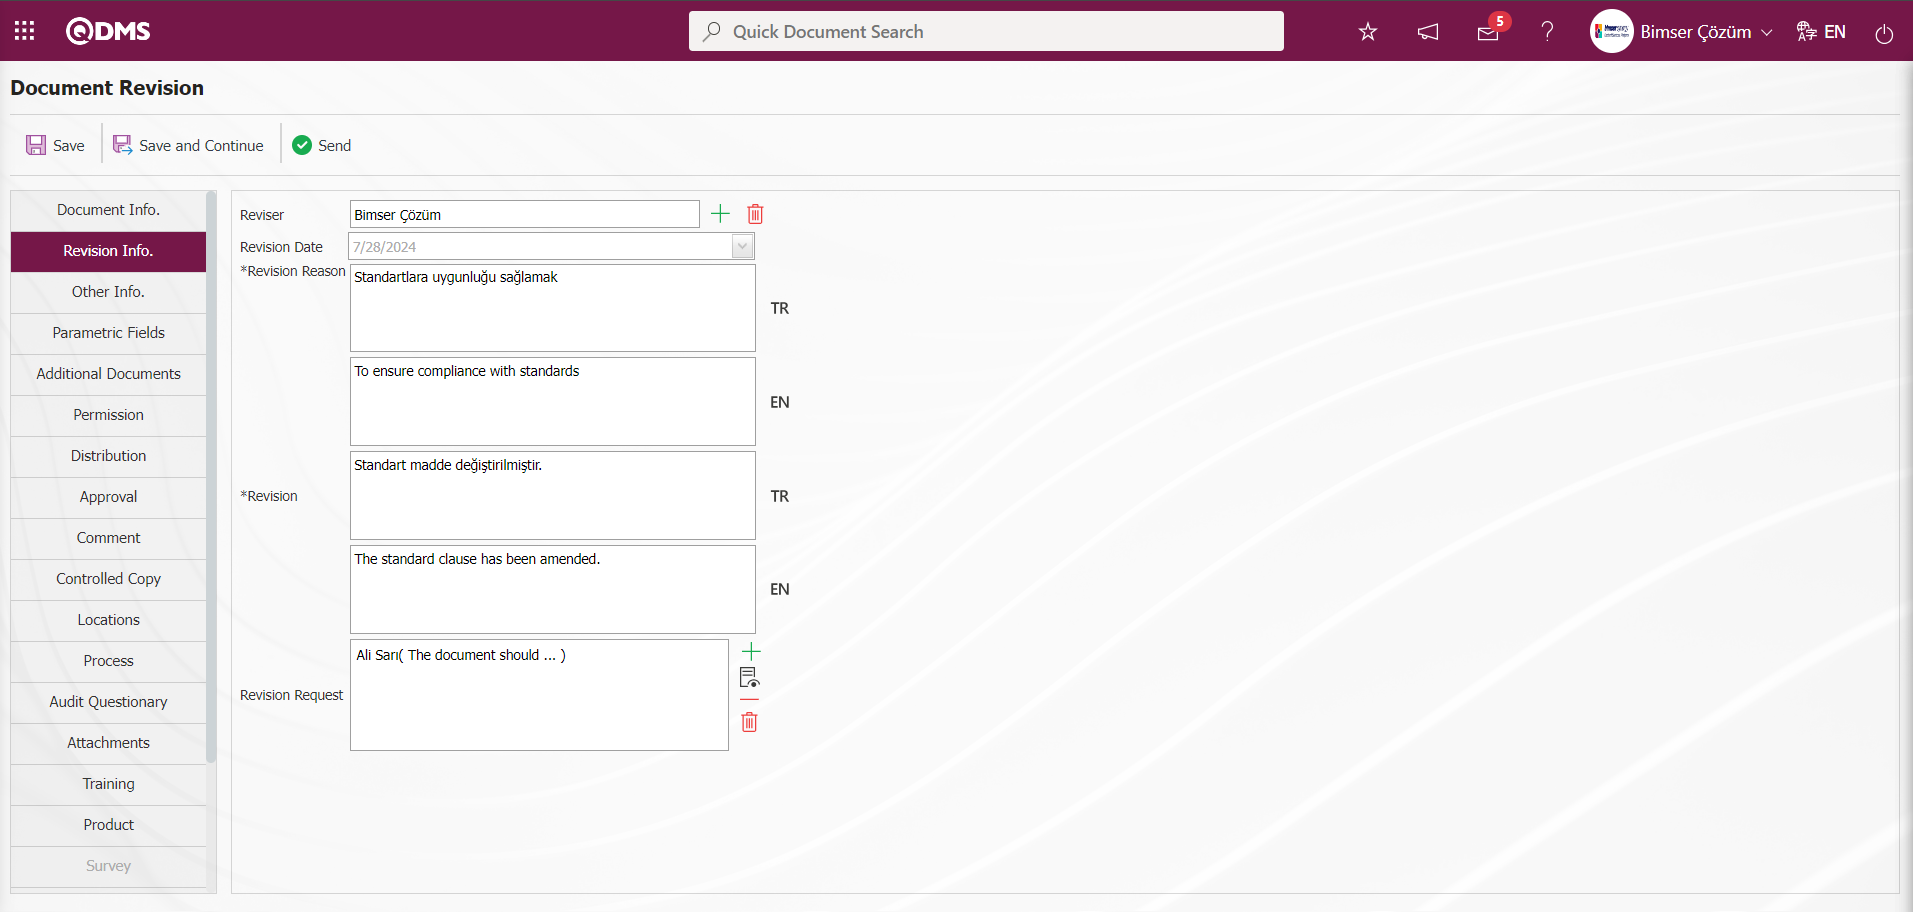
Click on the Document tab on the Document Revision screen. On the screen that opens, click the  (View File) button in the “Add Document File (English)” field.
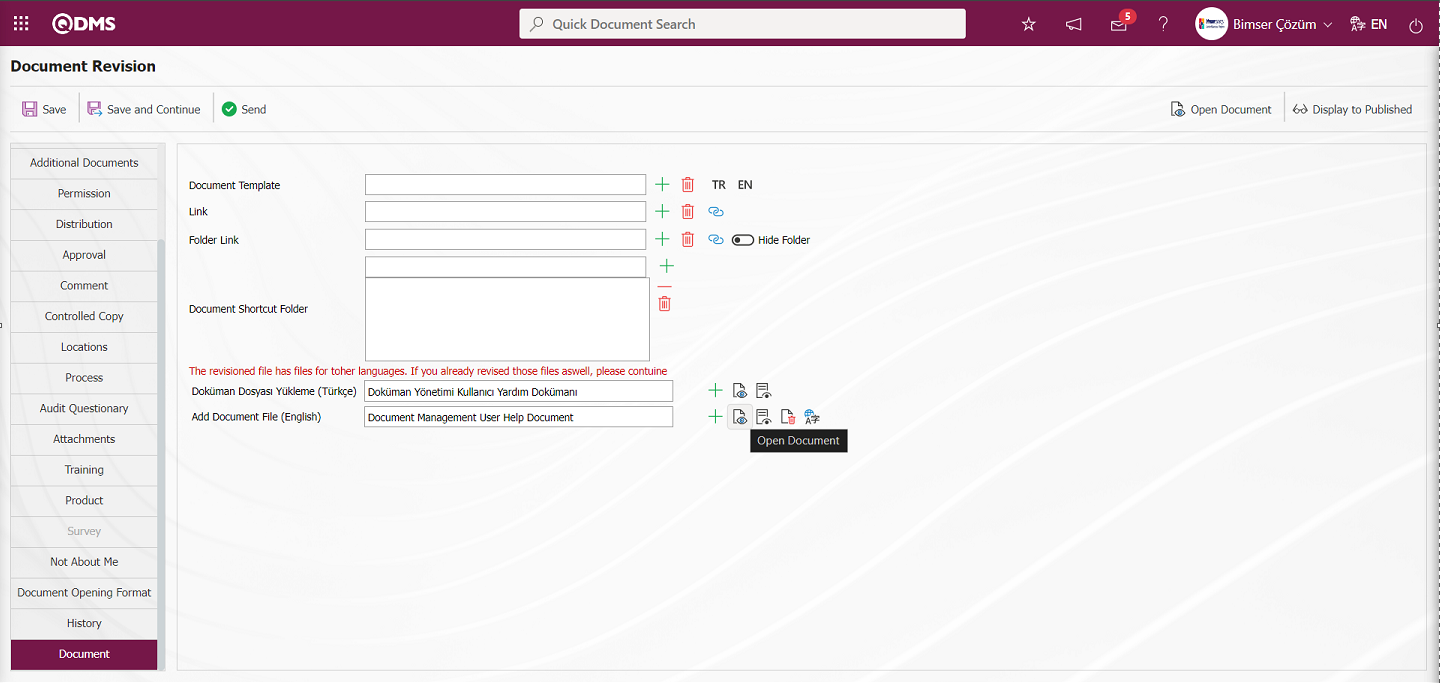
The English language file of the document is downloaded to the computer.

After the revision operations are performed on the document, the document is uploaded to the system with the  (Add File) button in the “Add Document File (English)” field. The name of the document downloaded from the system and the name of the document uploaded to the system must be the same. Otherwise, the system gives an error.
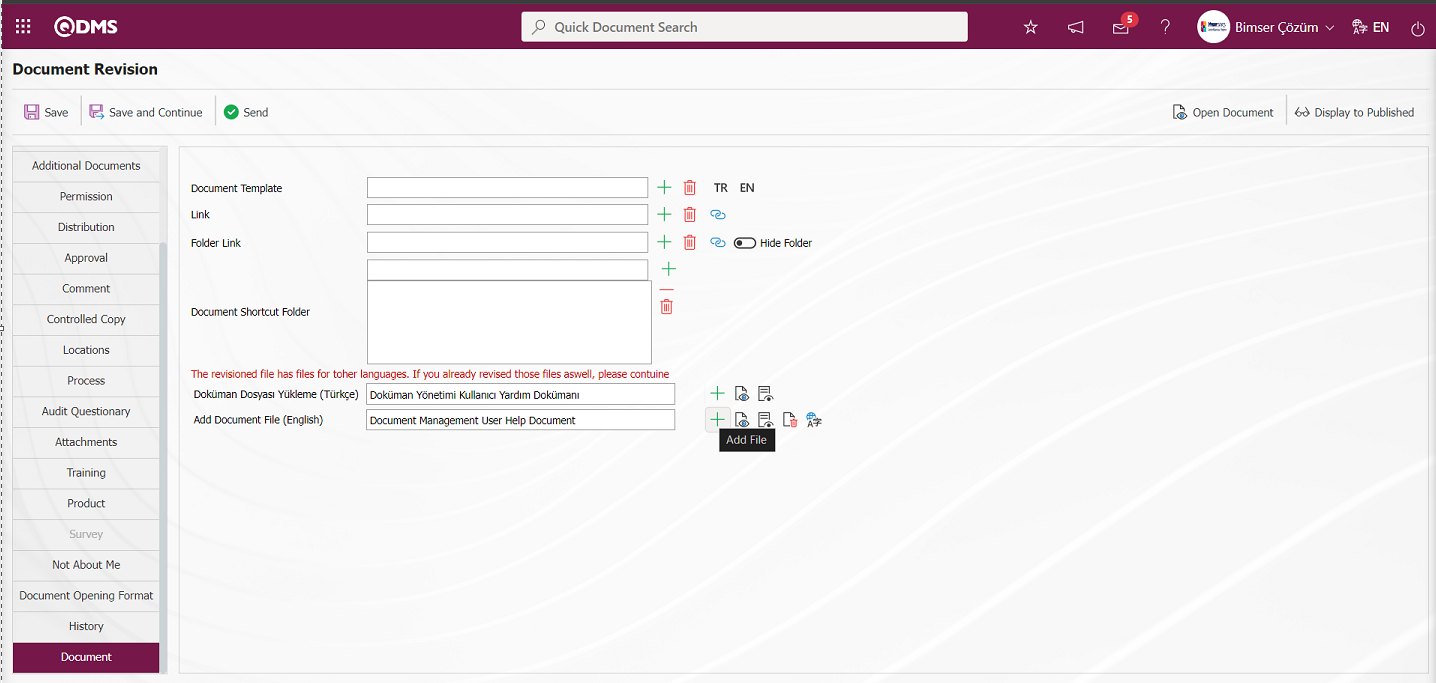
Click the Browse button on the Add file screen.
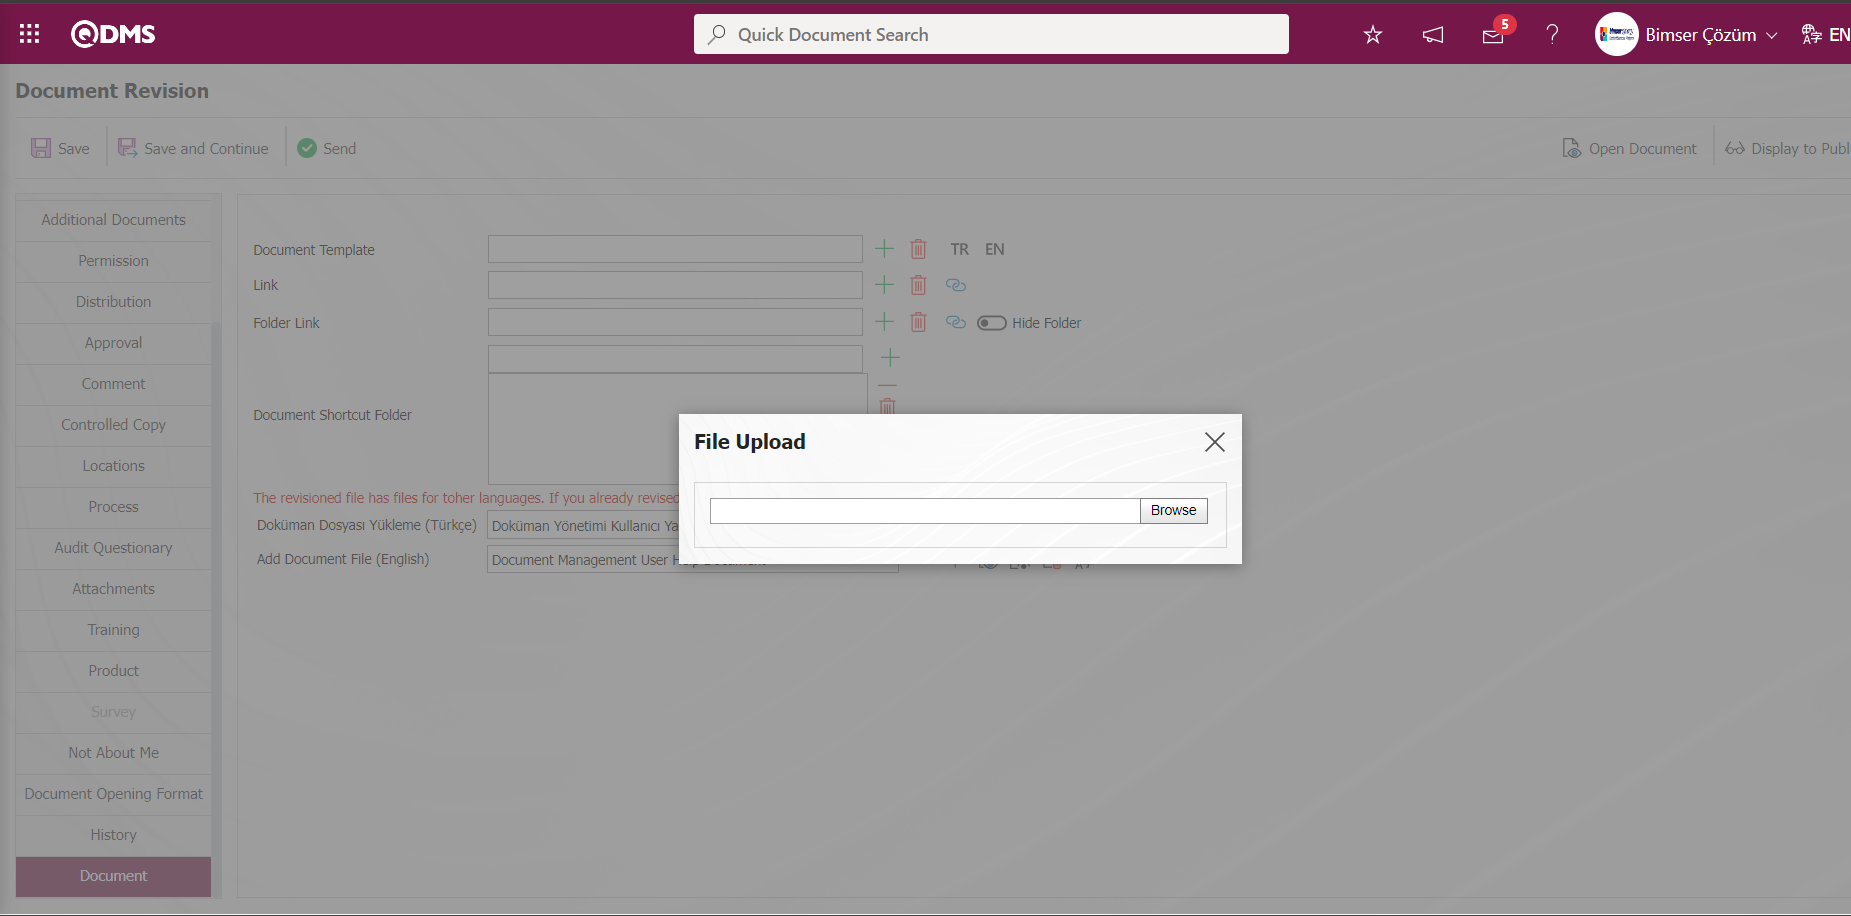
From the screen that opens, the selection process of another document language file that does not have the same name as the English language file of the document downloaded in the system is made.
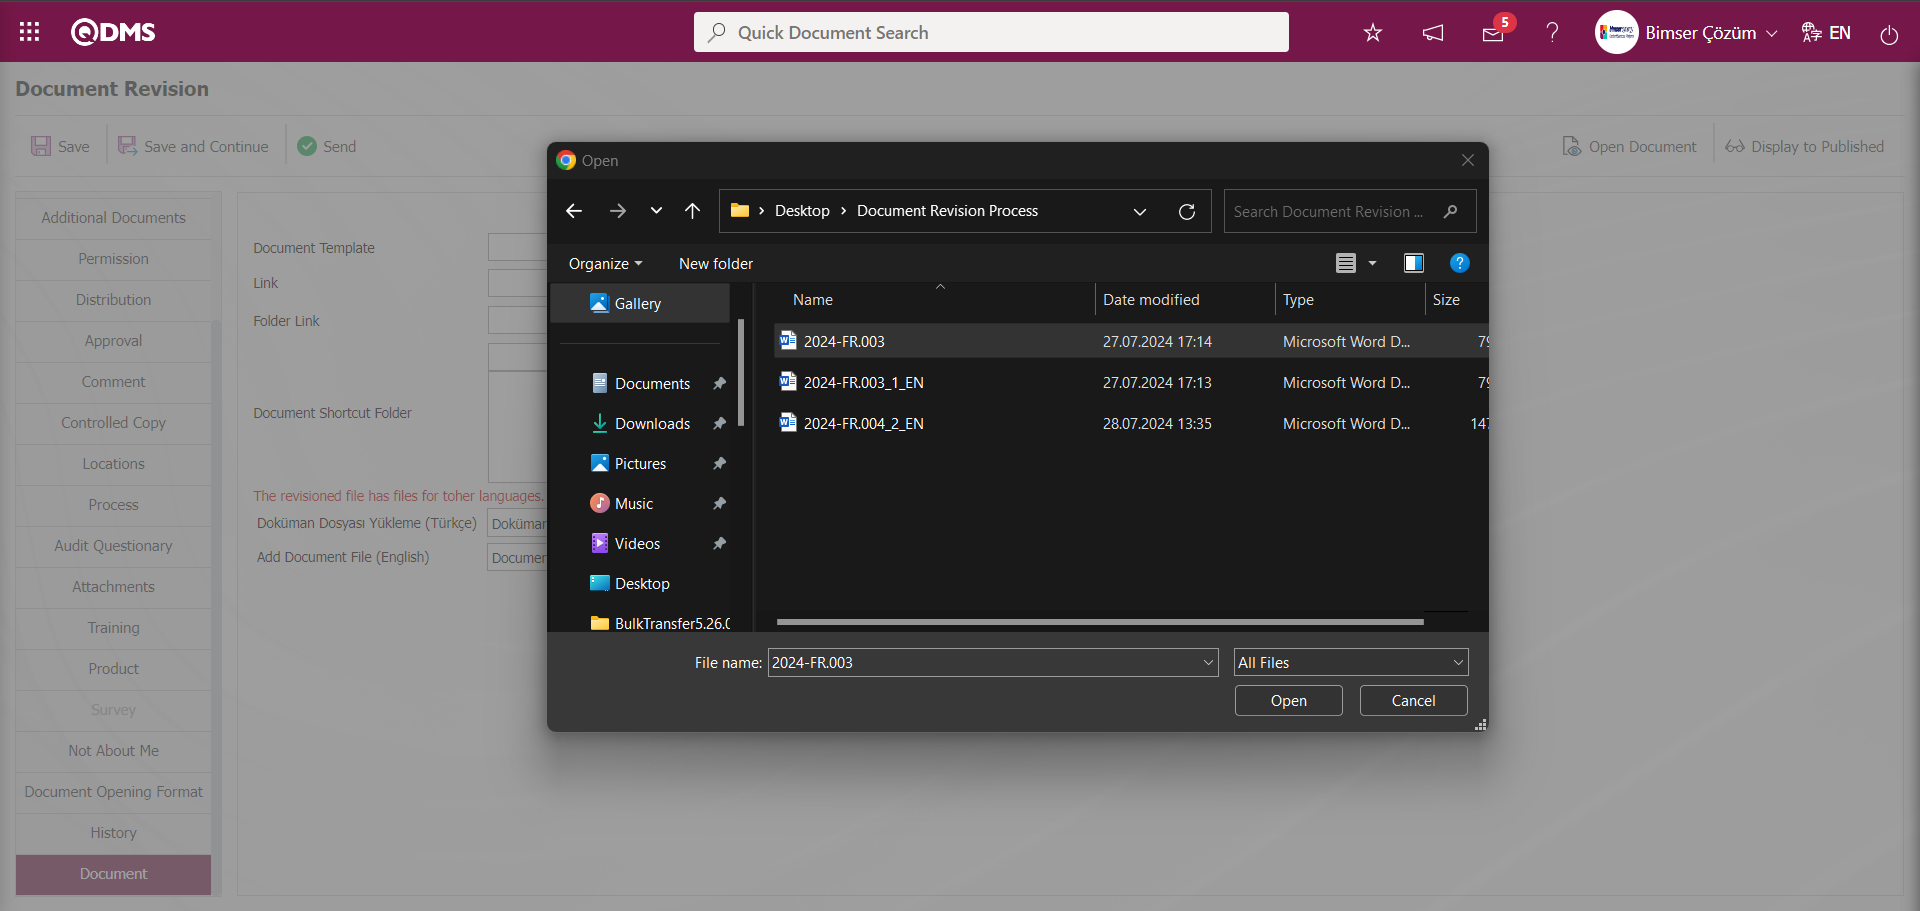
The system gives an error warning when the name of the English language file of the document downloaded from the system is not the same as the name of the English language file of the document uploaded to the system.

For example; let the document name downloaded from the system be 2024-FR.004_2. Let the name of the revised document be 2024-FR.004, the Document Management User Assistant Document. When the revised document is tried to be uploaded to the system in this way, an error warning is given by the system
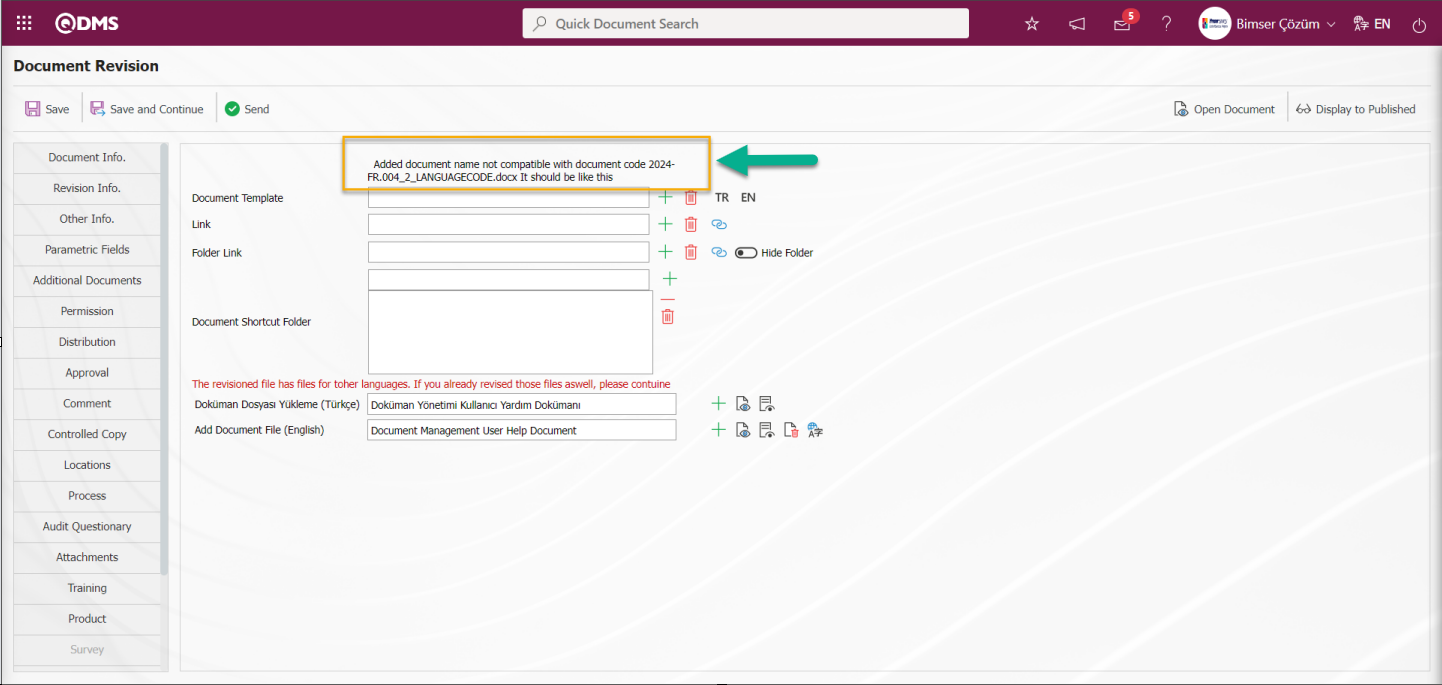
The name of the revised document is changed to whatever the name downloaded from the system is, i.e. 2024-FR.004_2 and uploaded to the system. The _2 part in the name of the document downloaded in the system indicates that the document is in the 2nd revision.
On the Document Revision screen, click the  (Add File) button in the Add Document File (English) field on the Document tab.
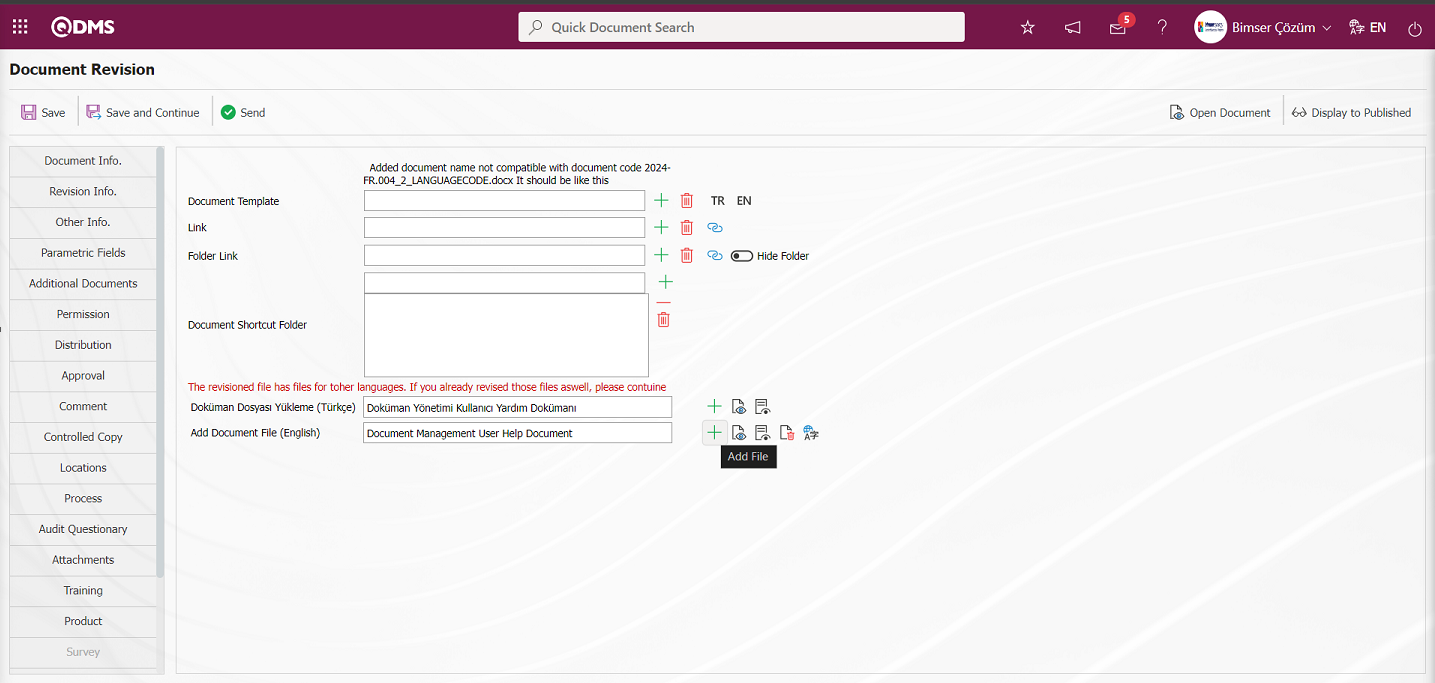
Click the Browse button on the Add file screen.

On the screen that opens, the name of the revised document is changed to whatever the name downloaded from the system is, and the selection of the English language file of the saved document is made.

On the Document Revision screen, the message “File uploaded successfully” appears on the Document tab.
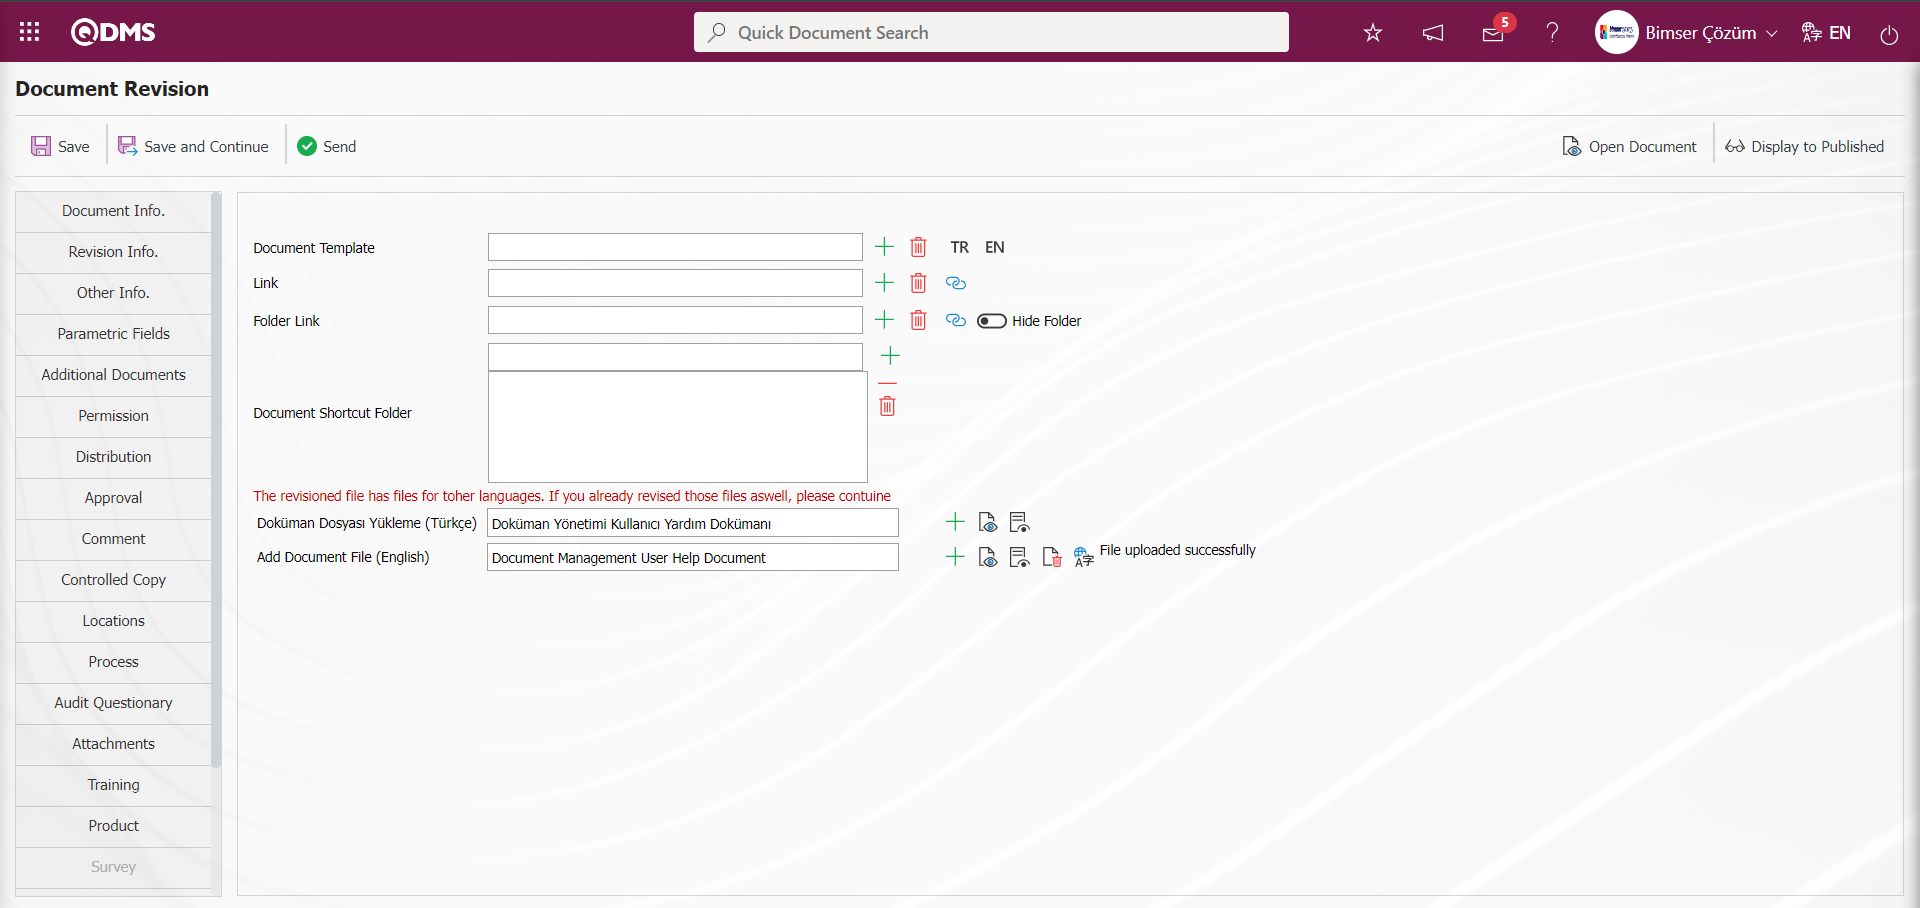
On the Document Revision screen, click on the Document Information tab.
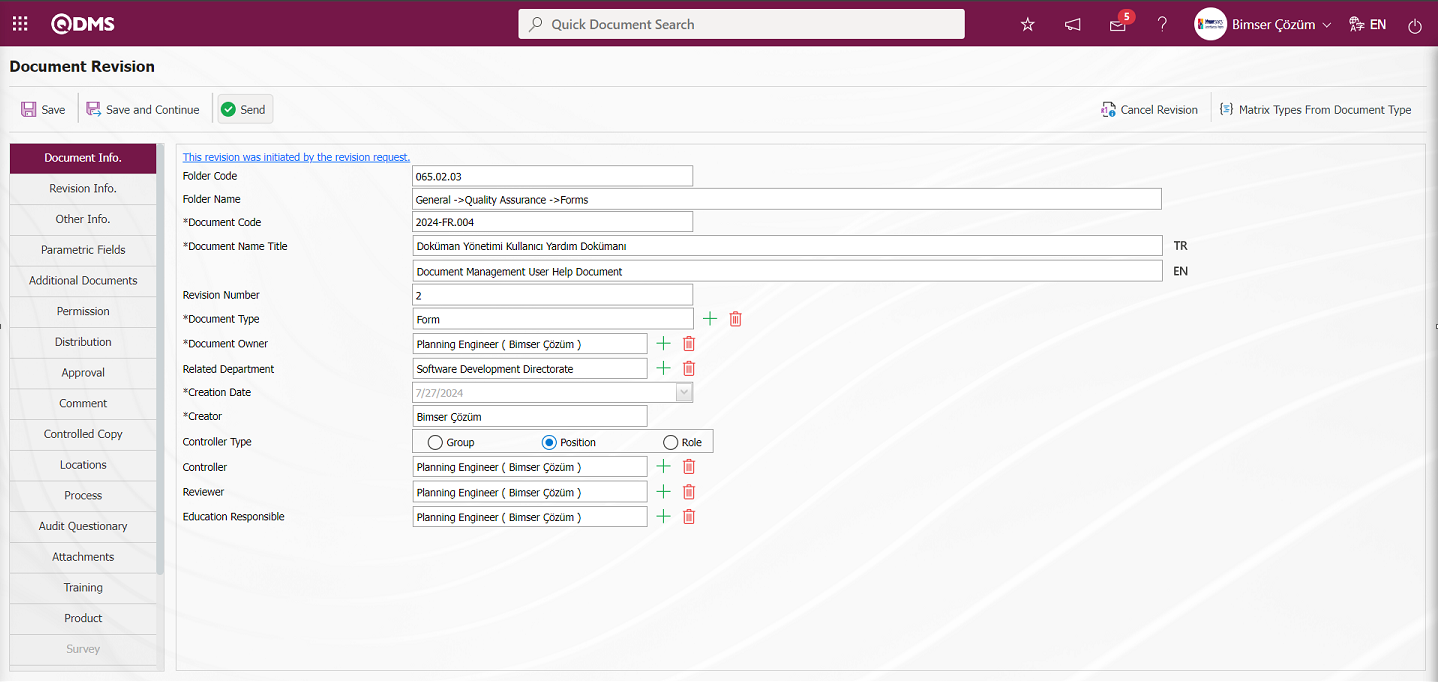
On the Document Revision screen, click on the  button on the Document Information tab.
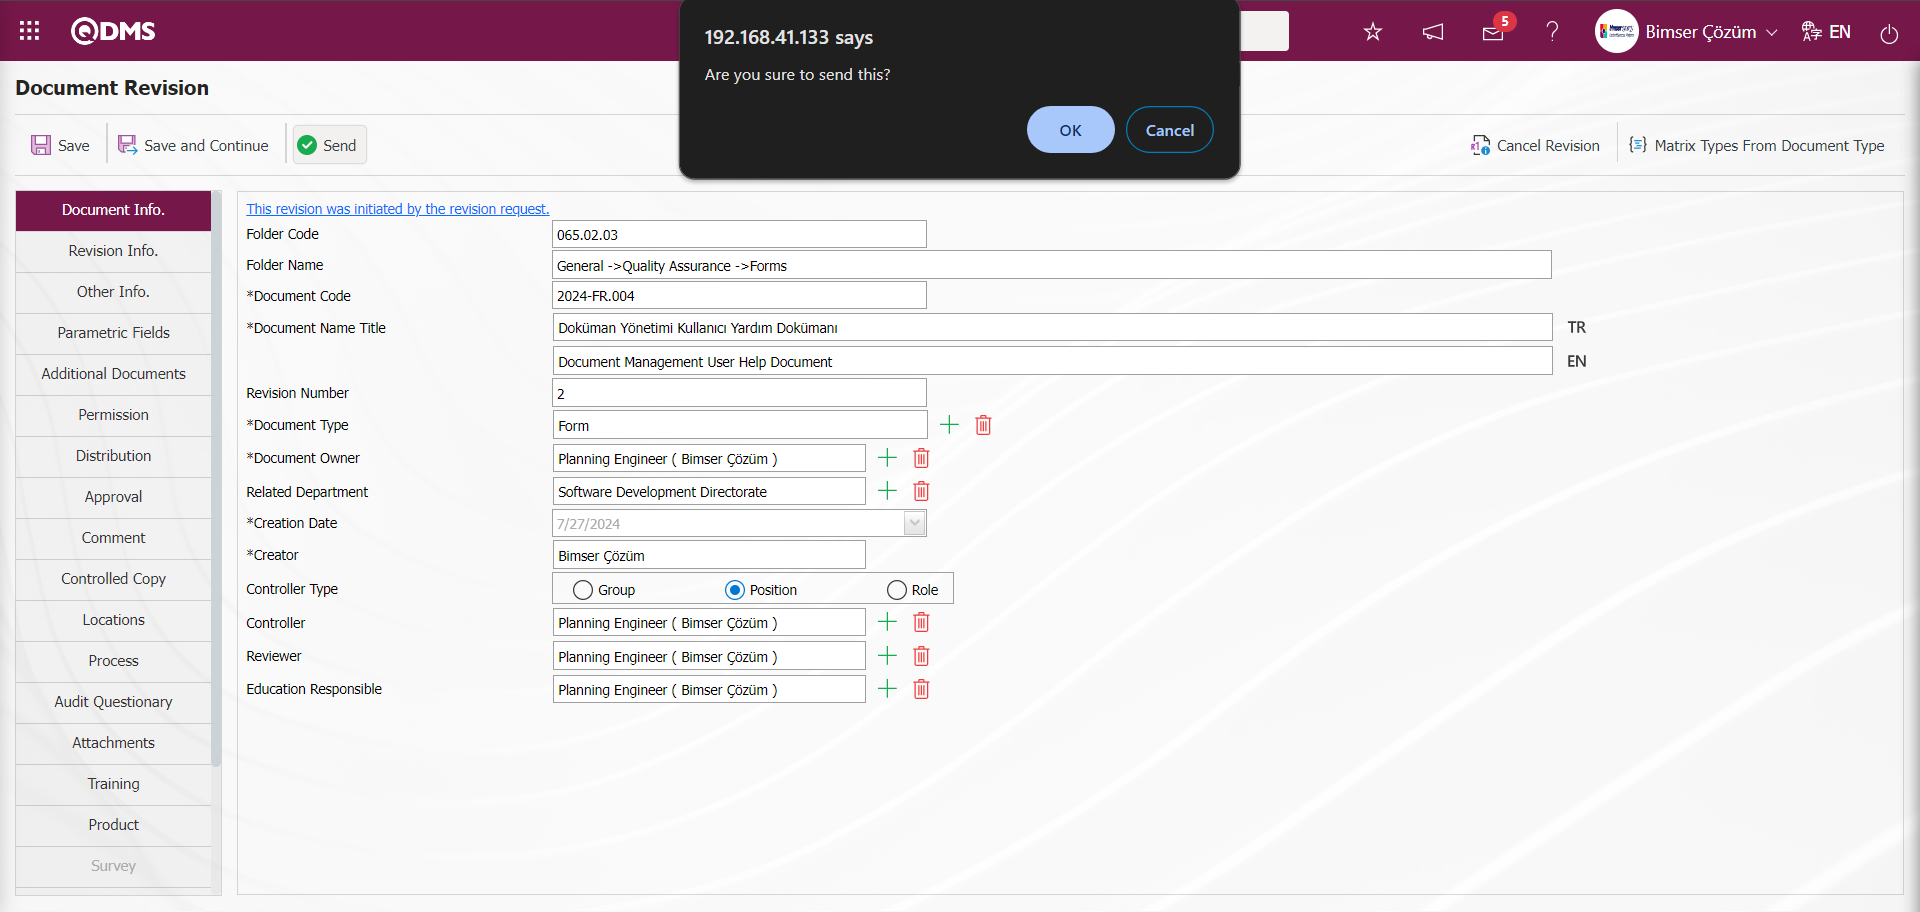
Click the “OK” button in the message given by the system.

In the document revision process, when the opinion, control and approval stages are set up in the folder where the document is located in the document revision process, the process stages made in the document preparation menu are performed in the same way.When the check box related to the “Unapproved/ Uncontrolled” field is checked in the Folder Settings tab in the folder in which the document is located, the document is assigned as a reading task to the people in the distribution matrix without the approval and control stages in the revision process. After the revision process phase is over, the published document is assigned to the users in the distribution matrix as a “Required Reading Important Document List” task on the “Pending Jobs” page.
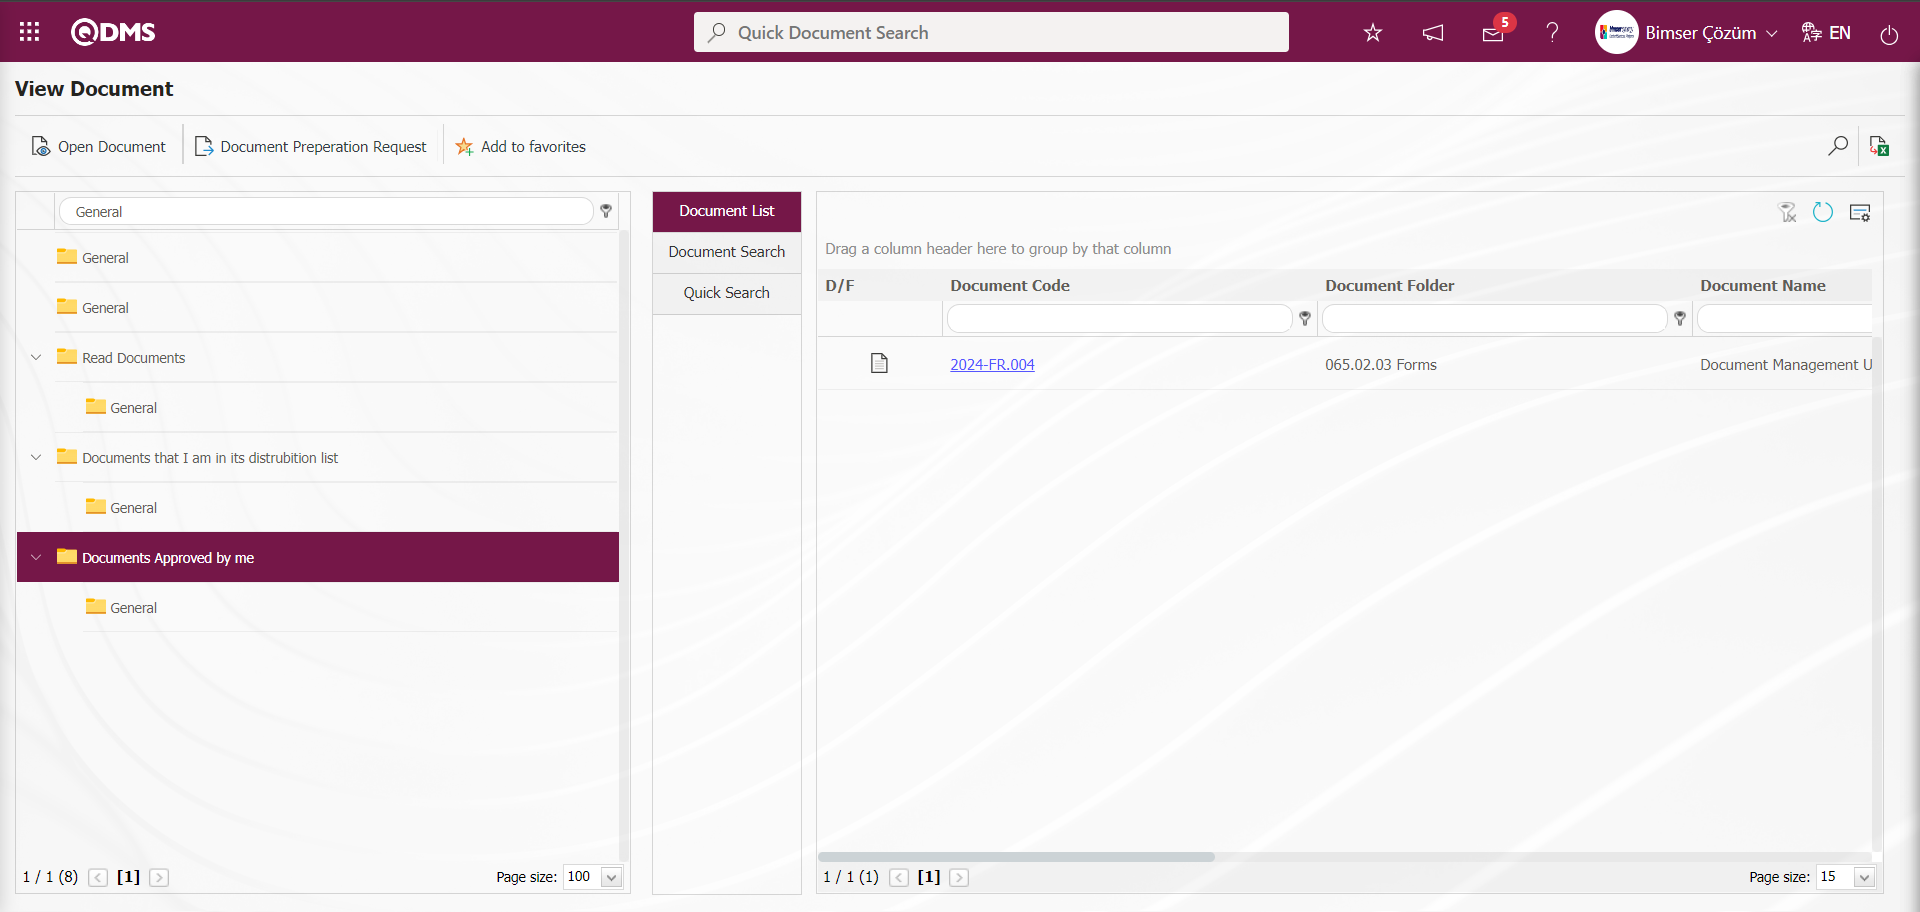
The revision number of the document is displayed in Revision 2 with increasing revision number 1.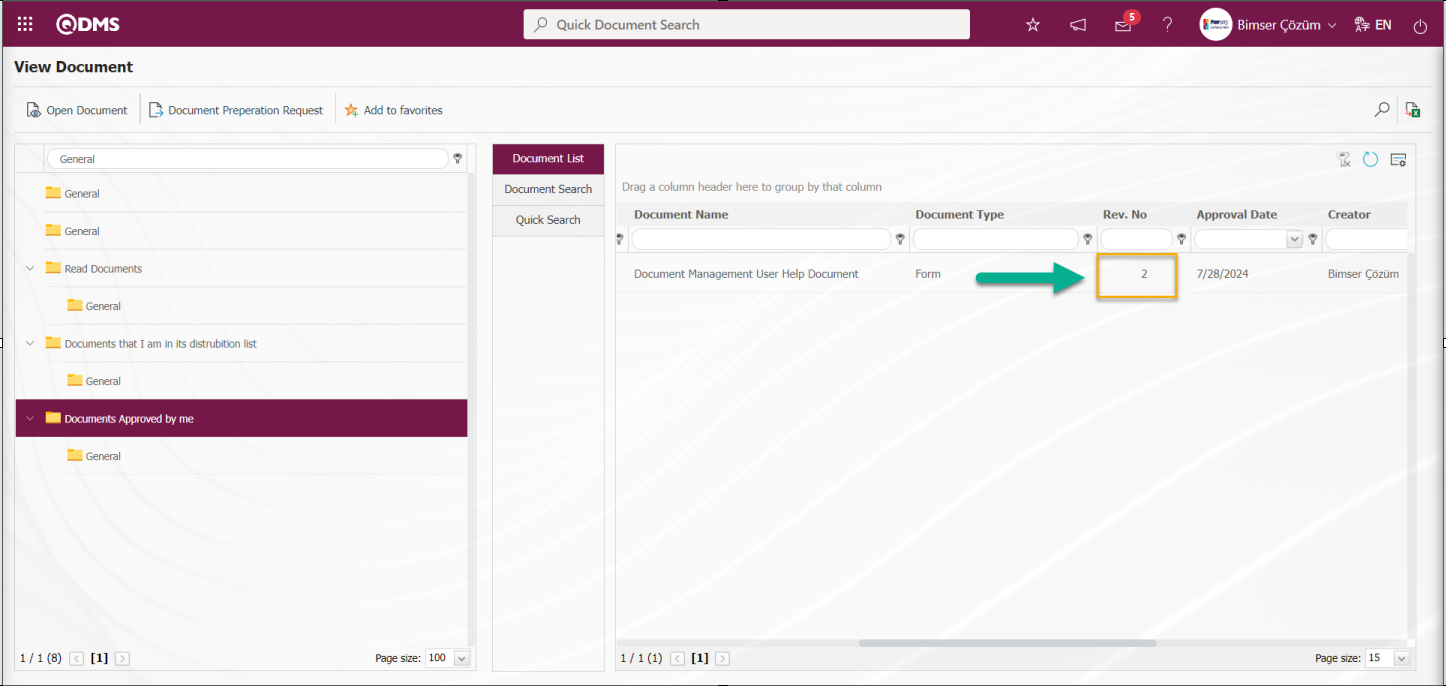
The document is viewed by clicking the code of the revised document on the Document View screen.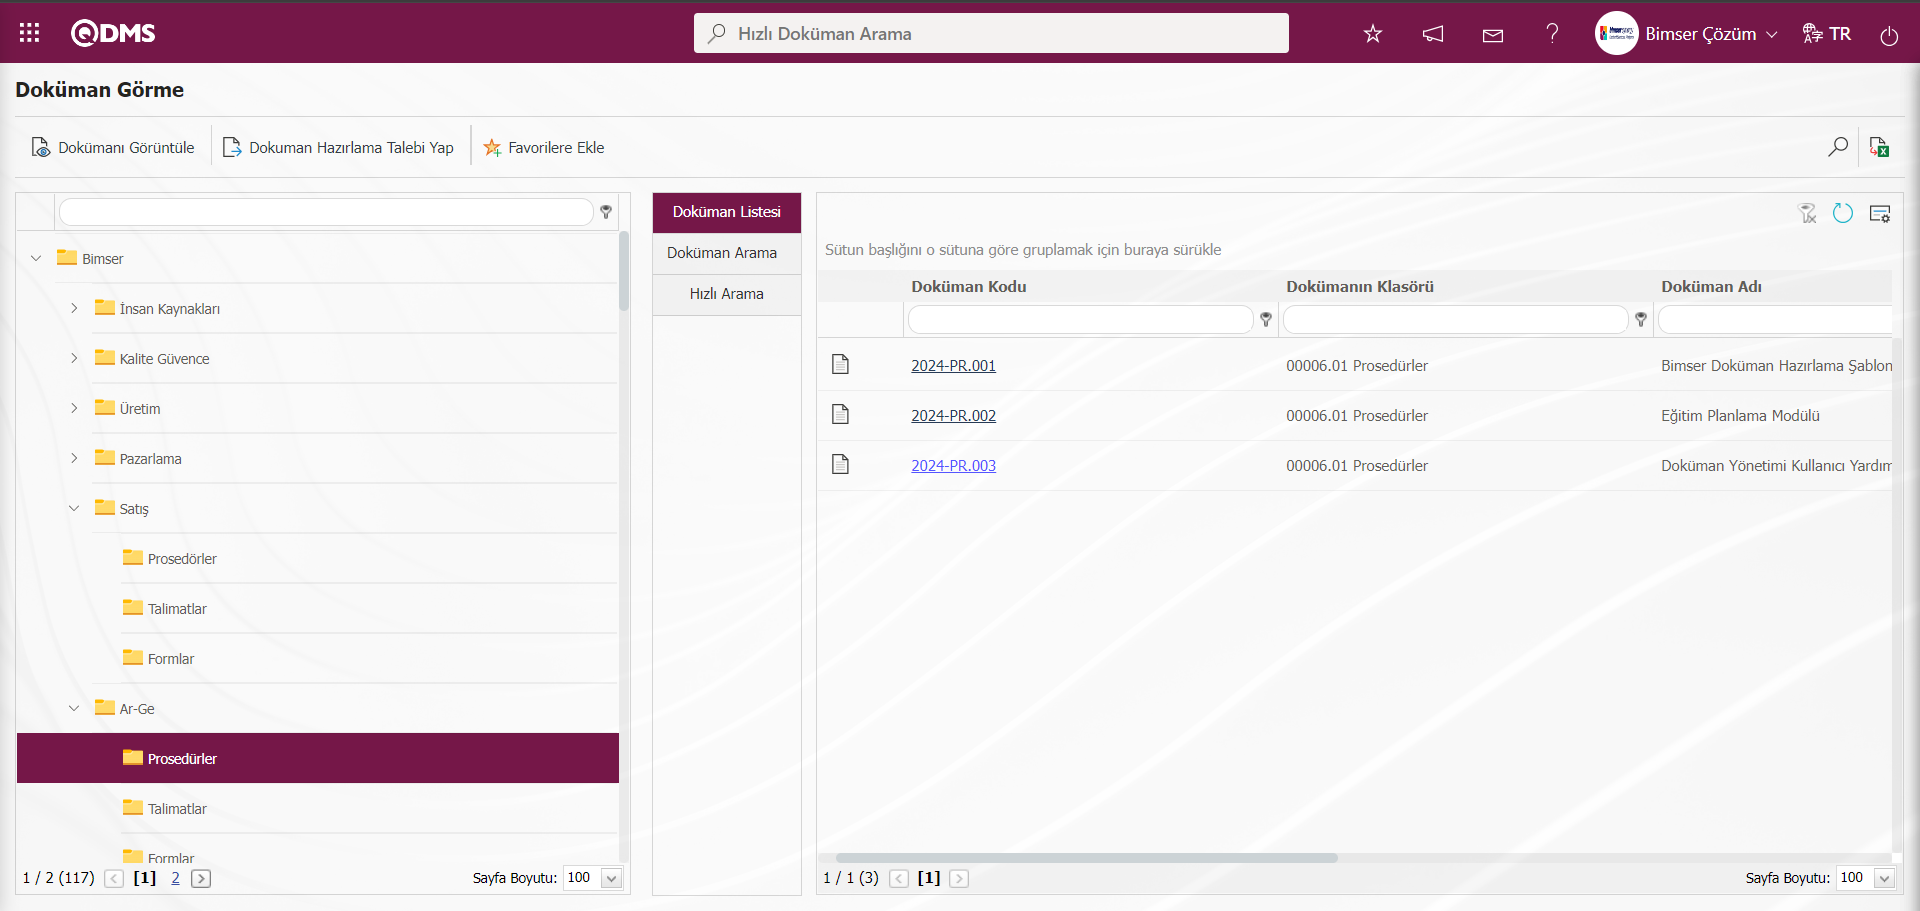
The last revision reason information is displayed in the displayed document.
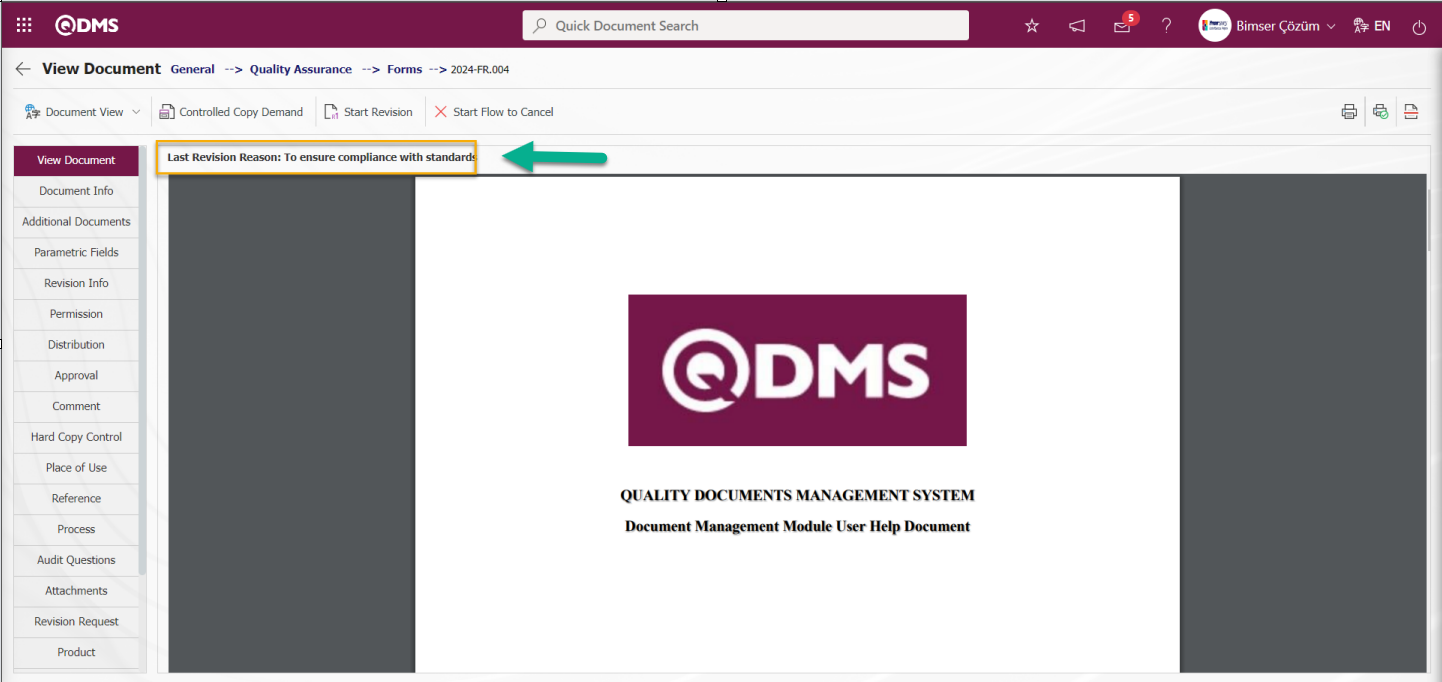
The revisions made to the document are displayed by clicking the Revision Information tab in the displayed document.
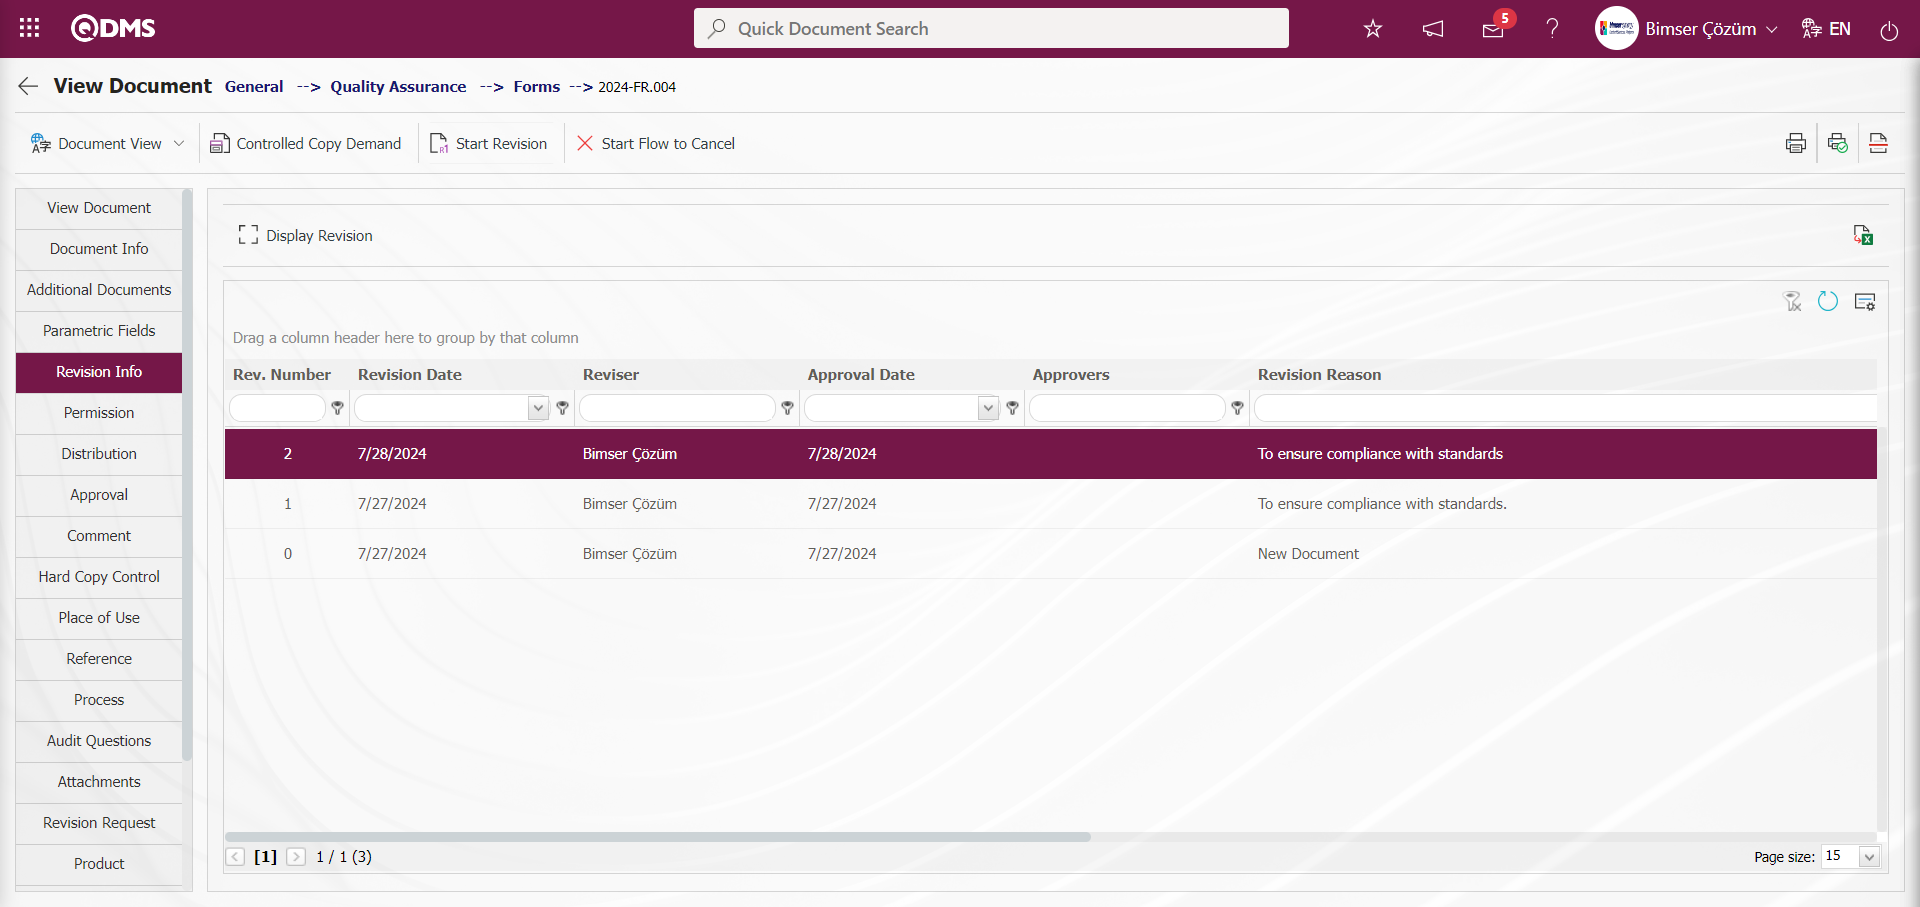
In the Revision Information tab, information about the old revisions of the document is accessed and the old revisions can be viewed with the 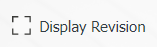 button.
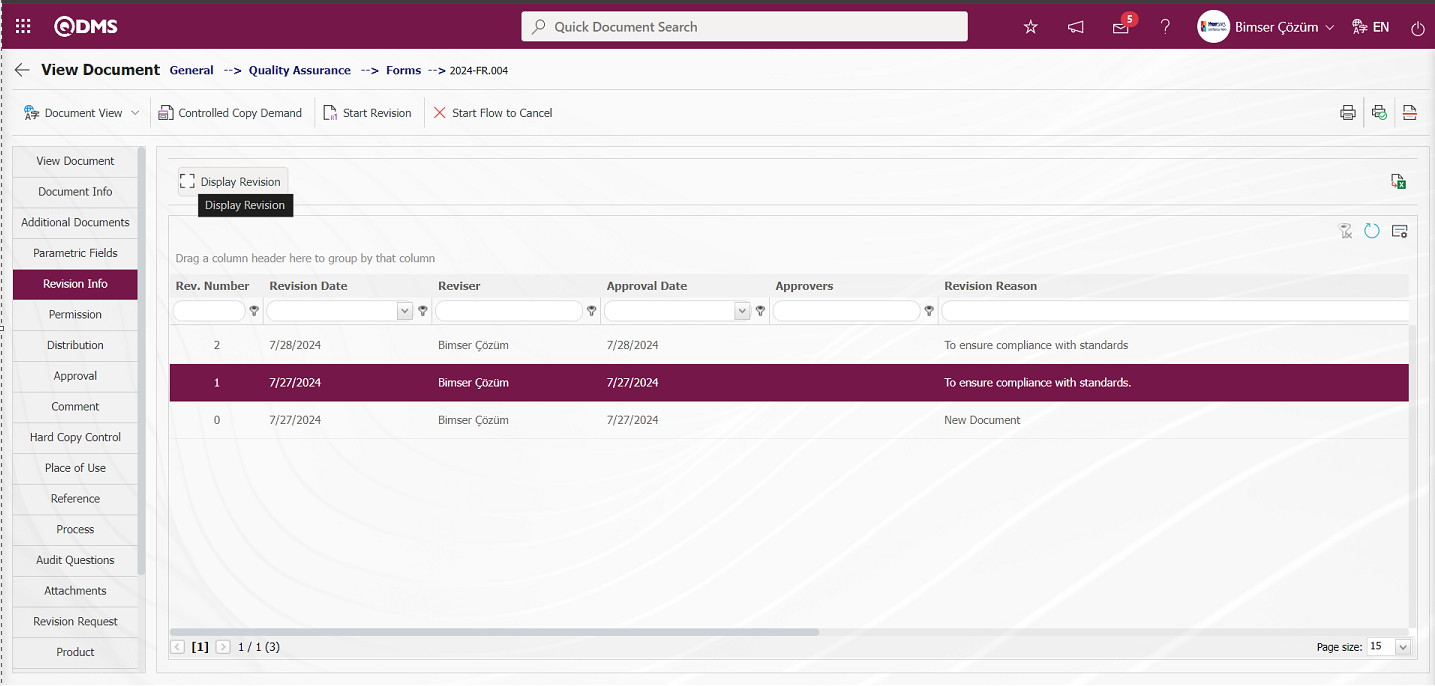
In the Revision Information tab, the 1st revision of the document is selected and the viewing process is performed by clicking the button
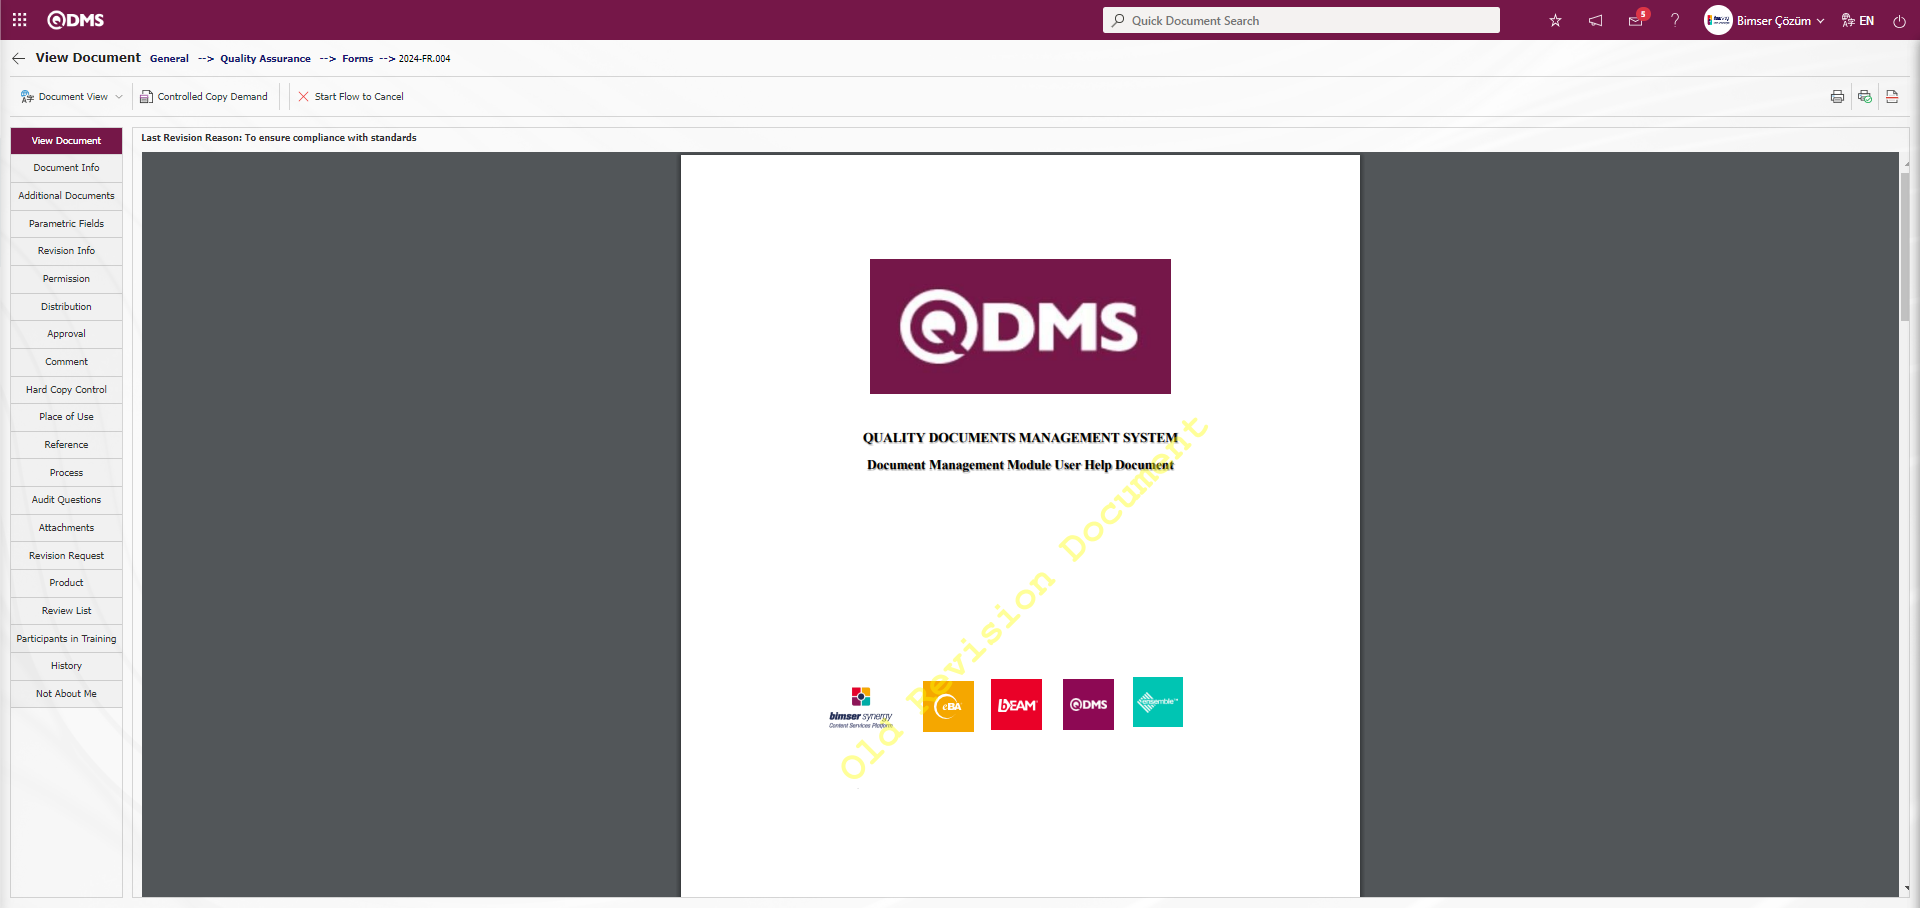
In the “Document Search” tab on the Document View screen, the search process is performed by filtering the documents according to the desired criteria.
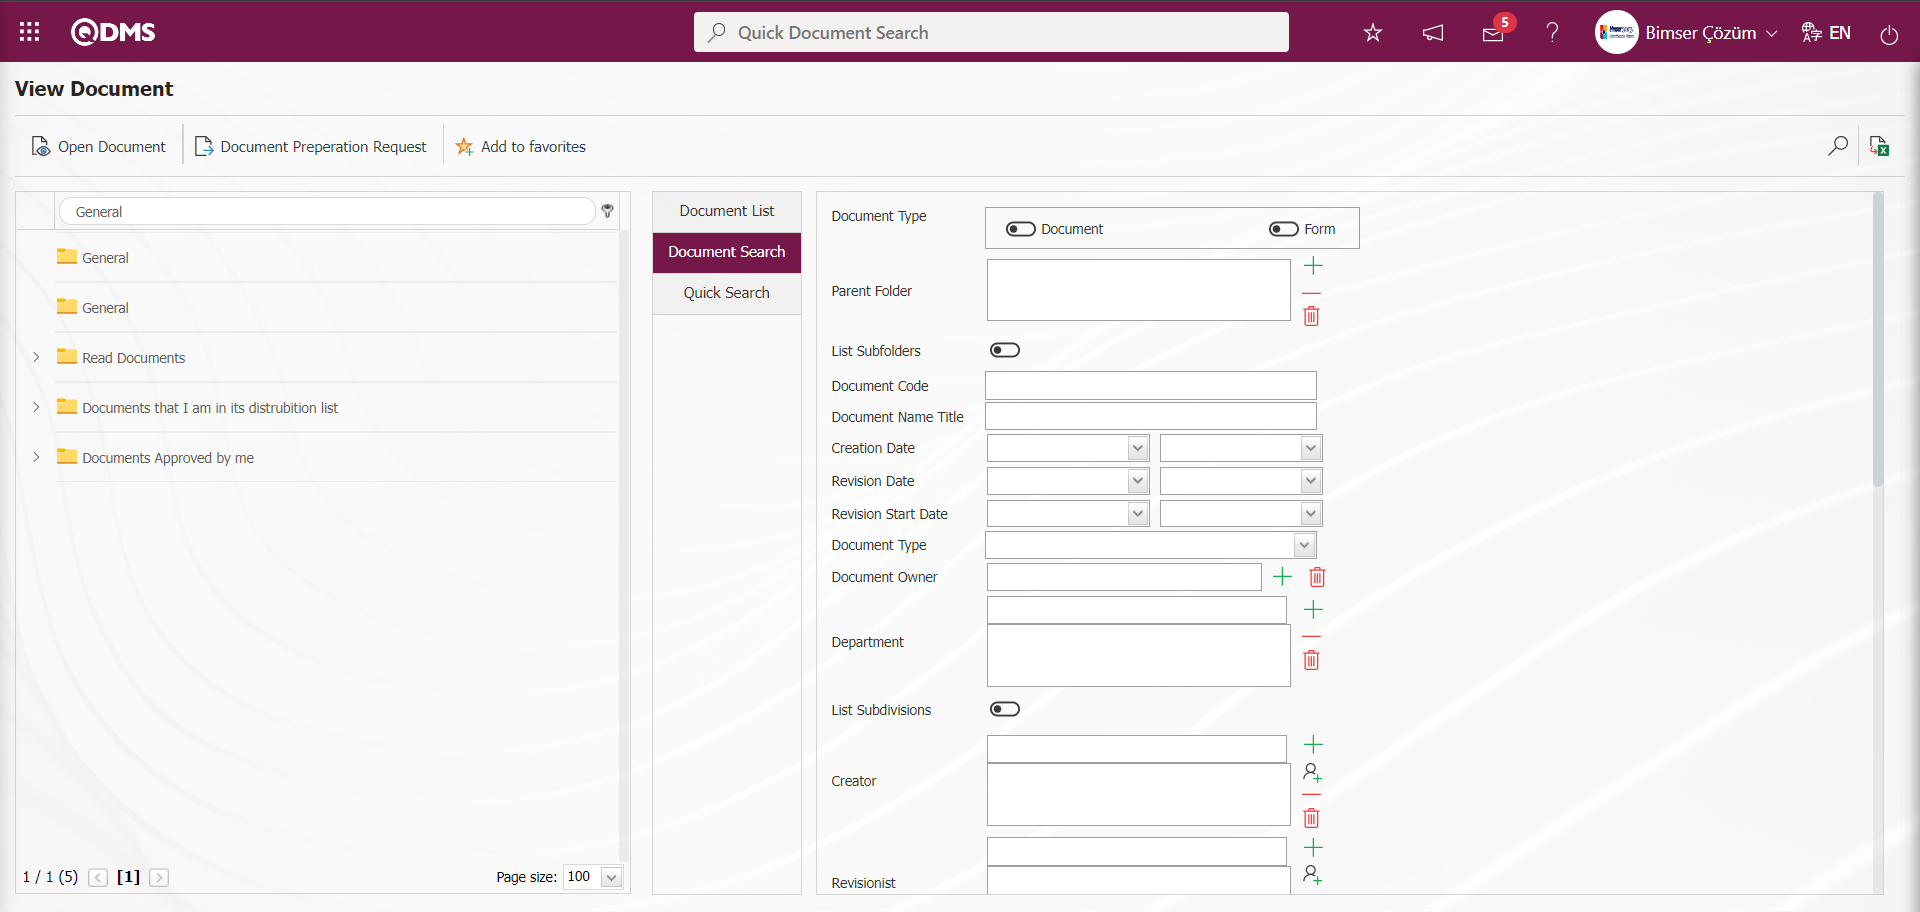
After the relevant fields are filled in, the  (Search) button is pressed. With the Quick Search feature, you can search by document code, document name and document type.
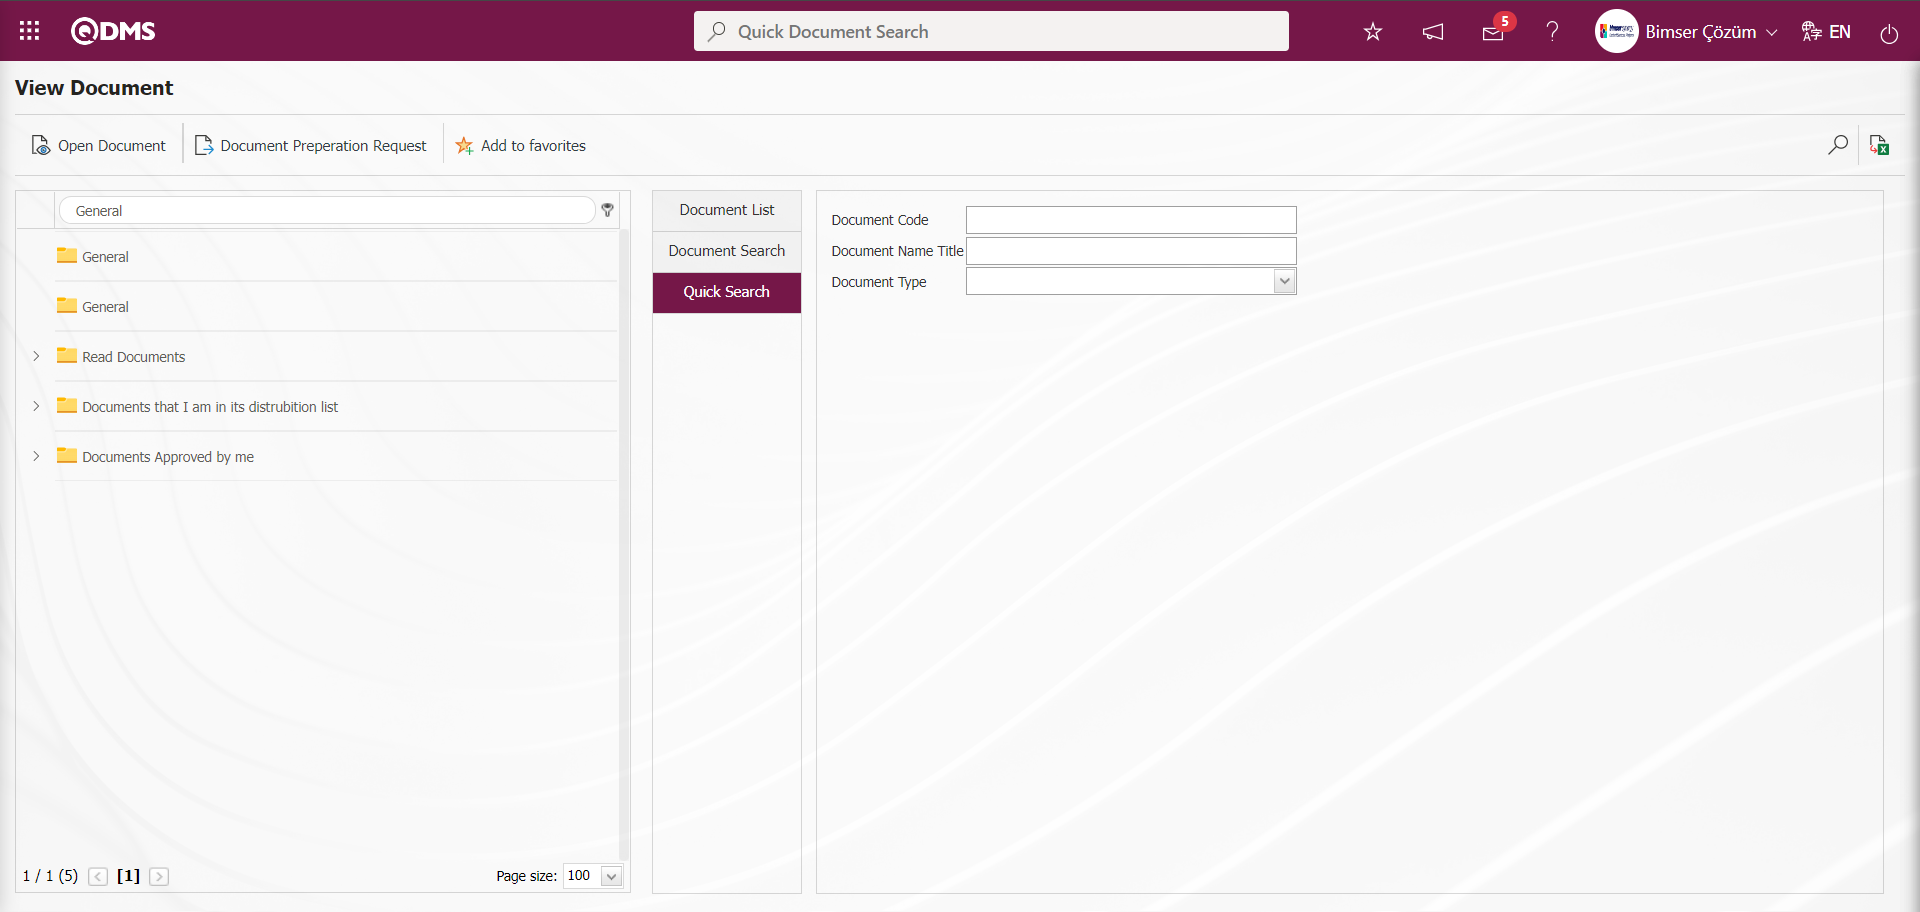
Document Preparation Request;
It can make a document preparation request in the selected folder with the  button displayed on the Document View screen depending on parameter 229.
 In order for the Document Preparation Request to be made in the relevant folder, the group to which the Document Preparation Request will go must be defined in the Document Preparation Request Group field in the Folder Settings tab. When the Folder settings group is not defined in the folder, the Document Preparation Request registration process is not performed. The system will say “The group to which the Preparation Request will go is not set on the folder. Make the necessary arrangements on the folder.” warning message is given. In the process of finding a Document Preparation Request, the process of setting the response time to the document preparation request in parameter 62 in the Document Management Module parameters is also done.
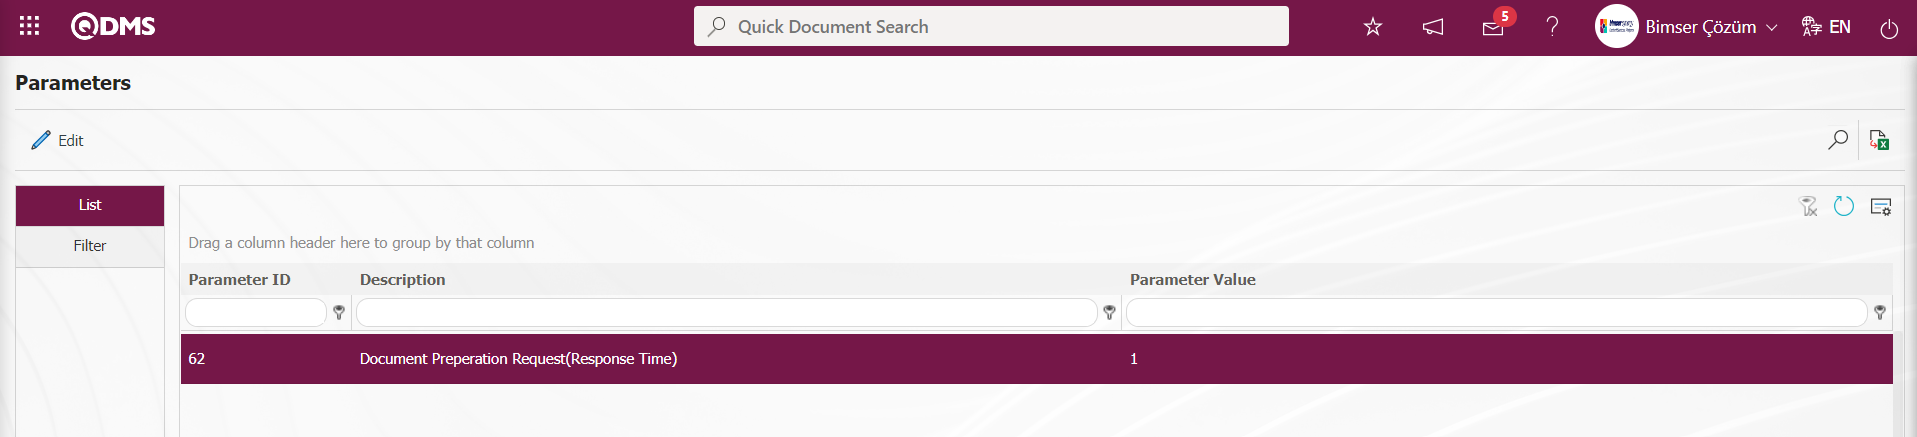
It is ensured that the document preparation request is responded according to the time information set in the parameter.
Click the button while the folder is selected for the document preparation request process from the Document View screen.
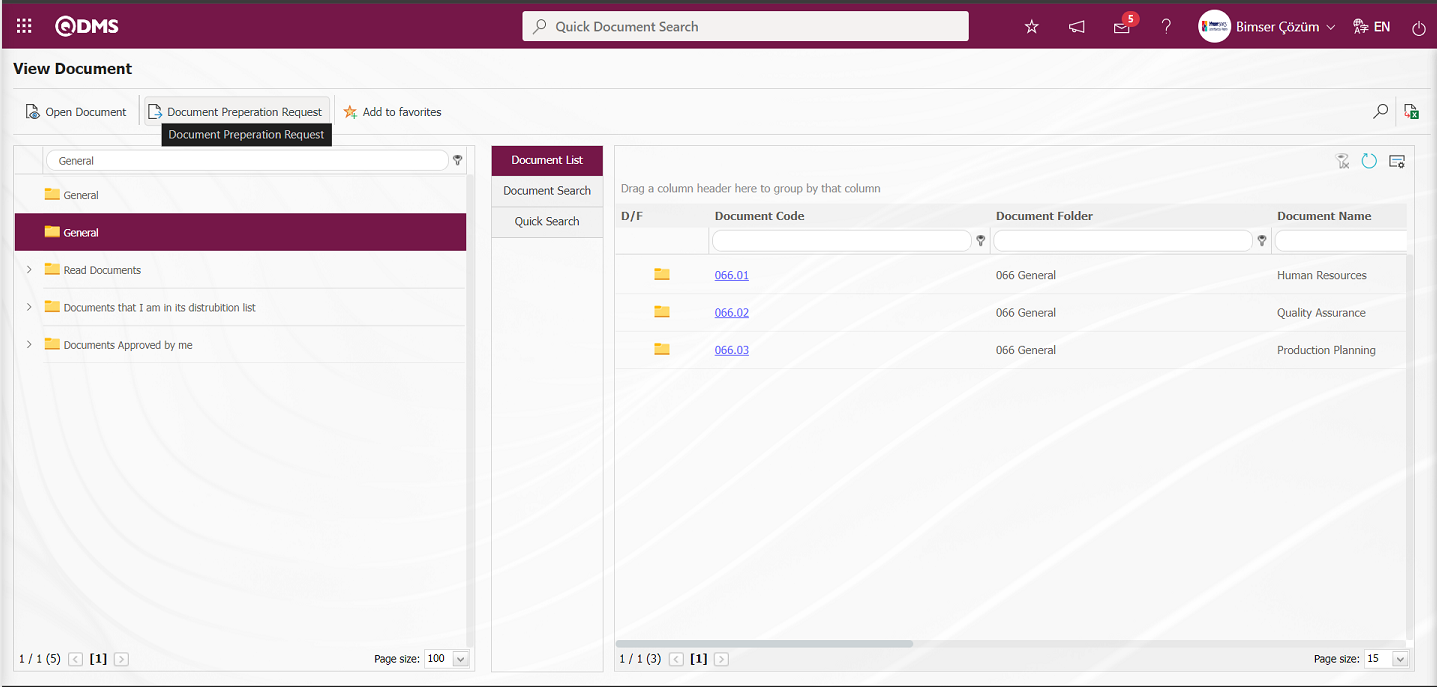
The Document Preparation Request screen opens.
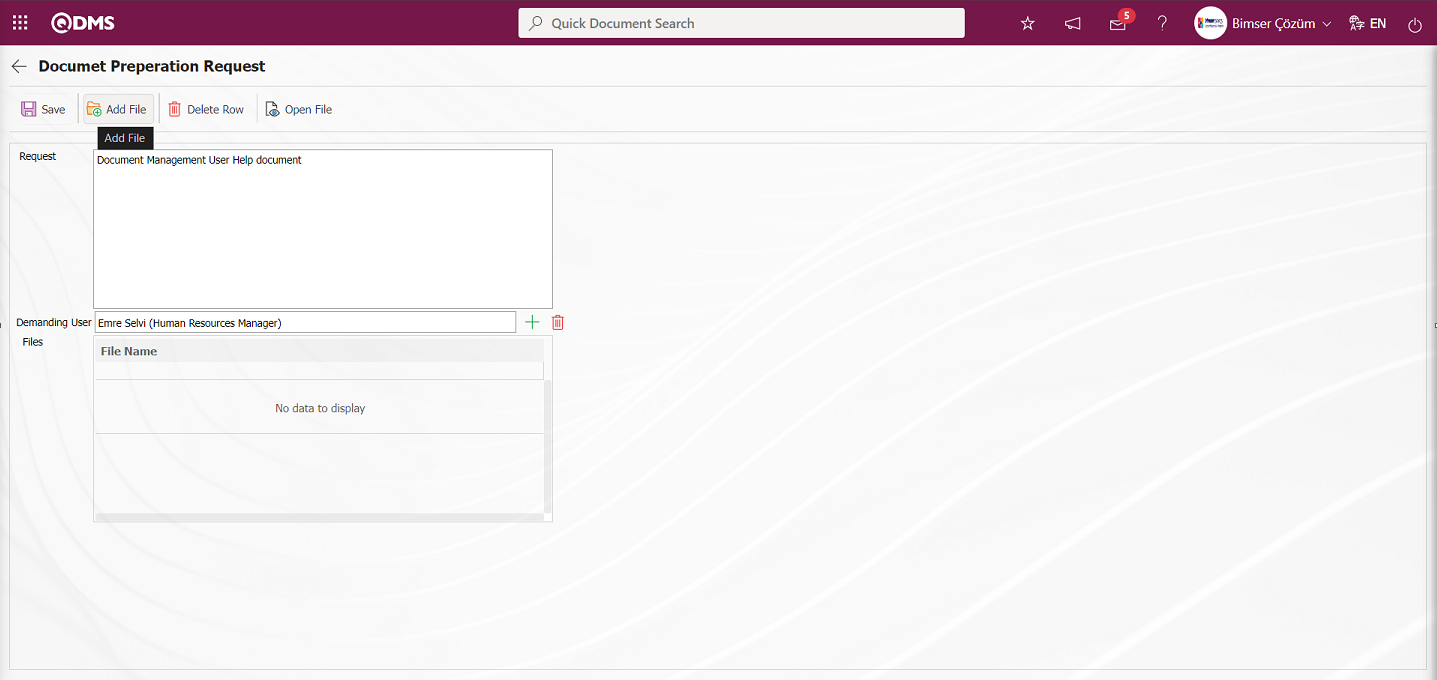
With the help of the buttons on the screen;
 : Registration is done.
 : Adding a file is done.
 : Delete the file added in the list.
 :Viewing the file added in the list is done.
Related fields are defined on the screen that opens:
Request: This is the field where the description of the document requested to be prepared on the Document Preparation Request screen is written.
Demanding User: This is the field where the user to whom the document preparation request will go on the Document Preparation Request screen is selected from the group members defined in the Document Preparation Request To Go Group field in the Folder Settings tab in the Folder that opens by clicking the  (Select) button. The selected user must be a member of the group defined in the Document Preparation Request To Go Group field in the Folder Settings tab in the Folder. The parameter is activated by selecting the parameter value “Yes” of parameter 271 in the Document Management parameters.

After the parameter is activated, the User To Request field is displayed on the Document Preparation Request screen and the user to whom the document preparation request will go is selected.
On the Document Preparation Request screen, the  button is clicked to upload additional files related to the document preparation request.
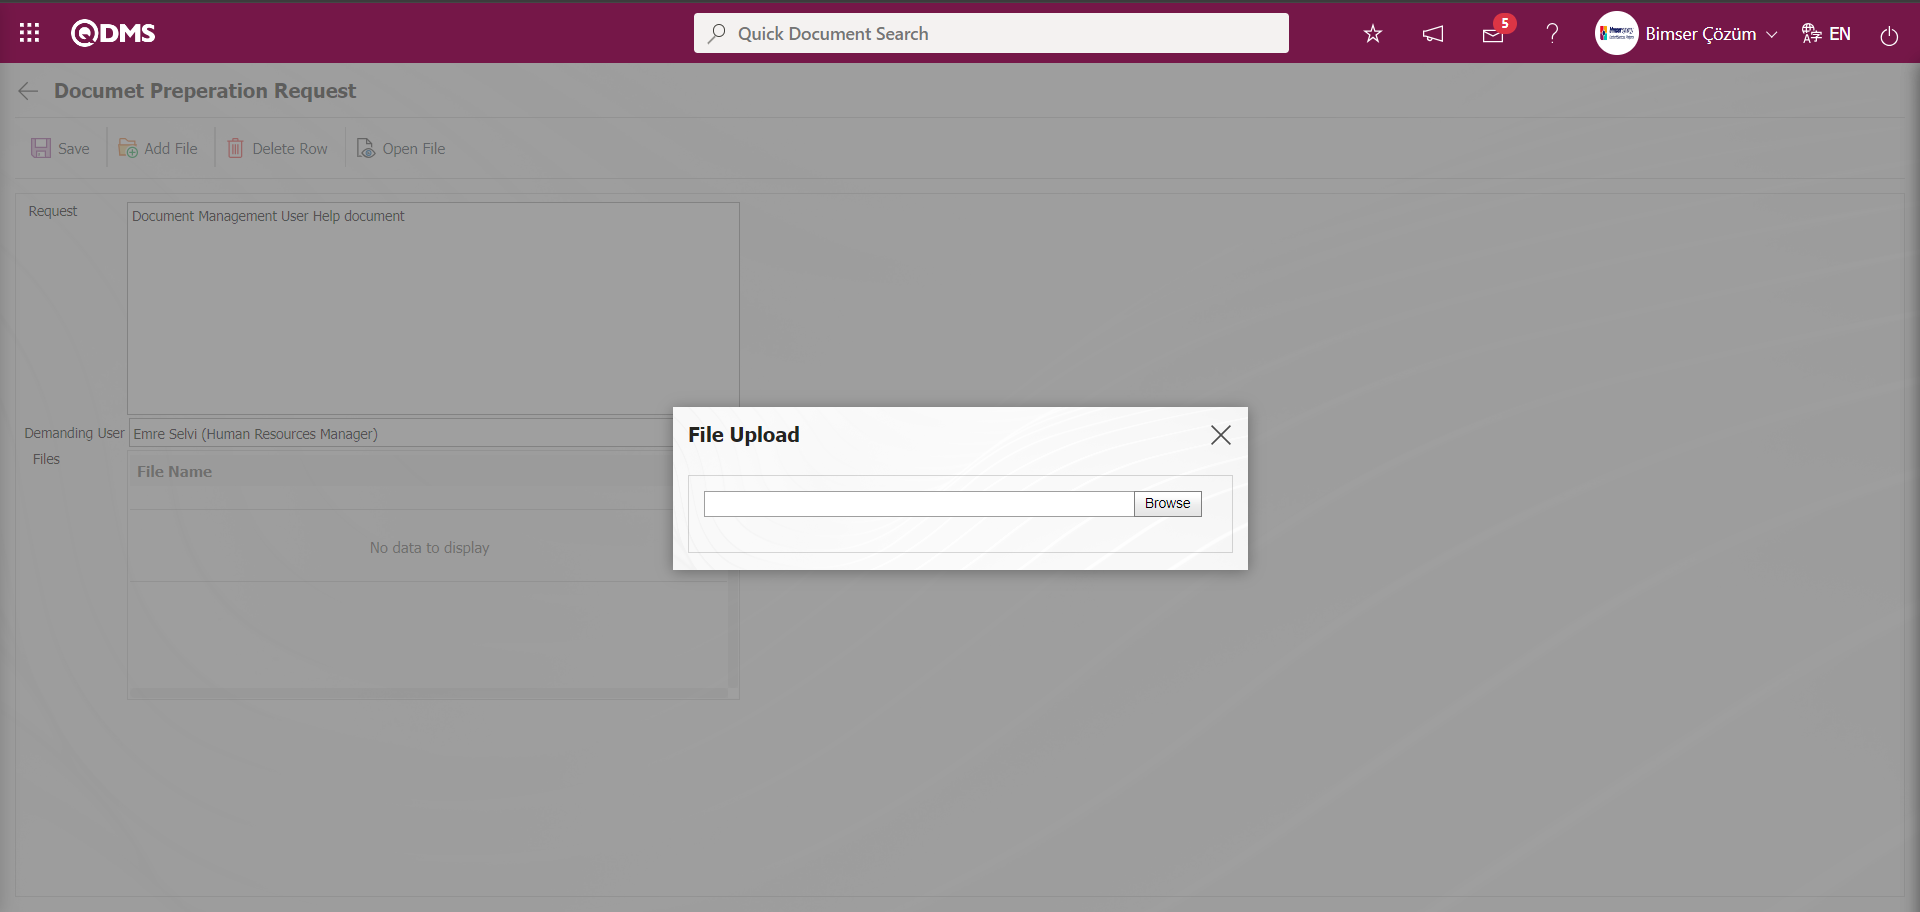
On the Add File screen, the process of selecting the additional file to be added to the document preparation request of the “Browse” screen is made.
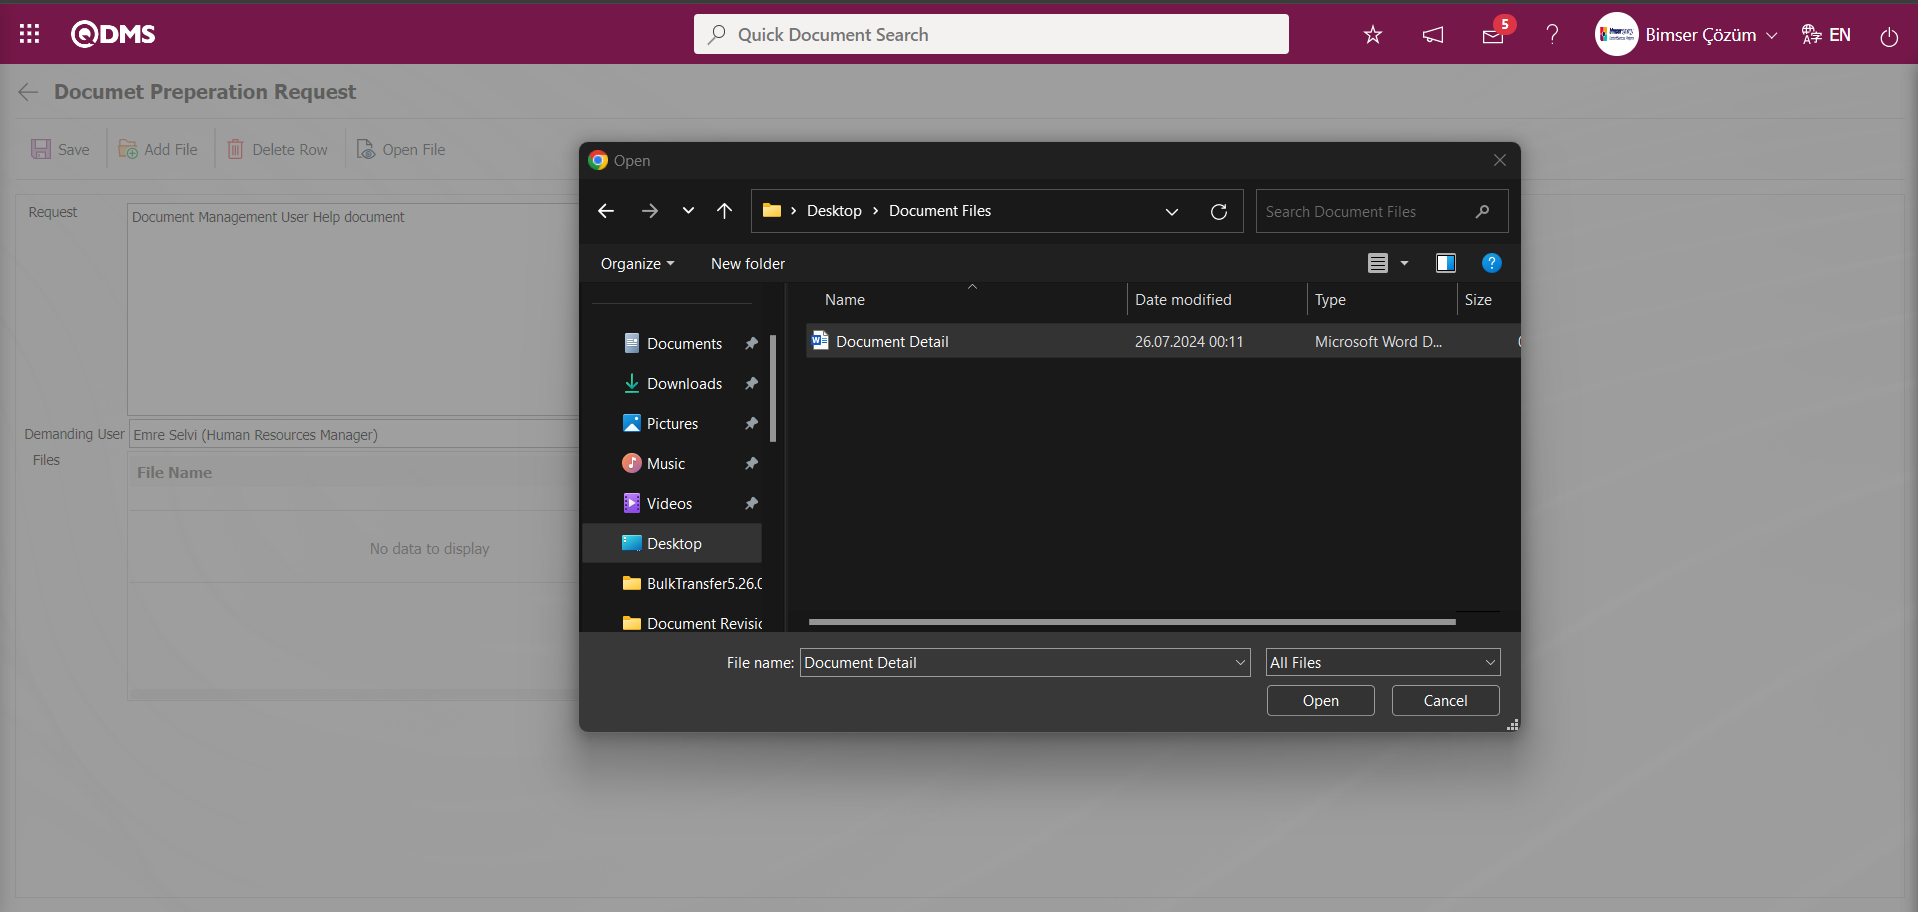
After the file is selected, uploading is done on the Document Preparation Request screen.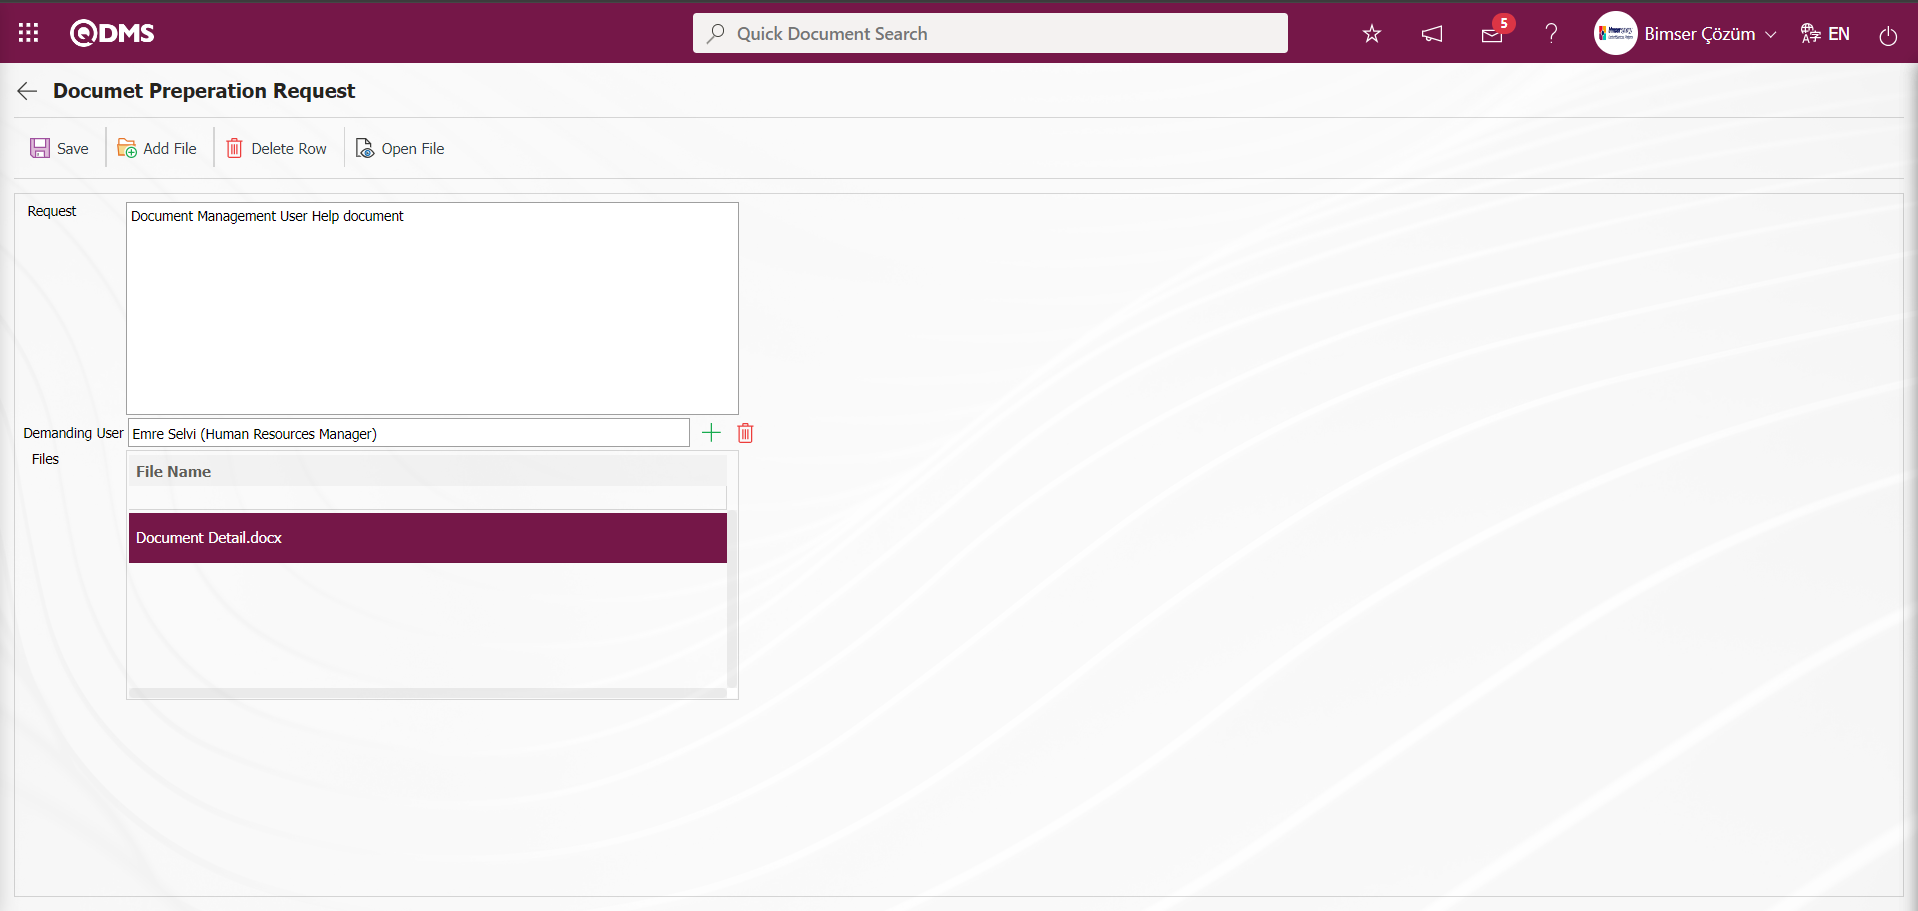
After entering the relevant information in the required fields on the Document Preparation Request screen, the Document Preparation Request registration process is performed by clicking the  button in the upper left corner of the screen.After the registration process, the system informs the relevant user that a document preparation request has been sent.
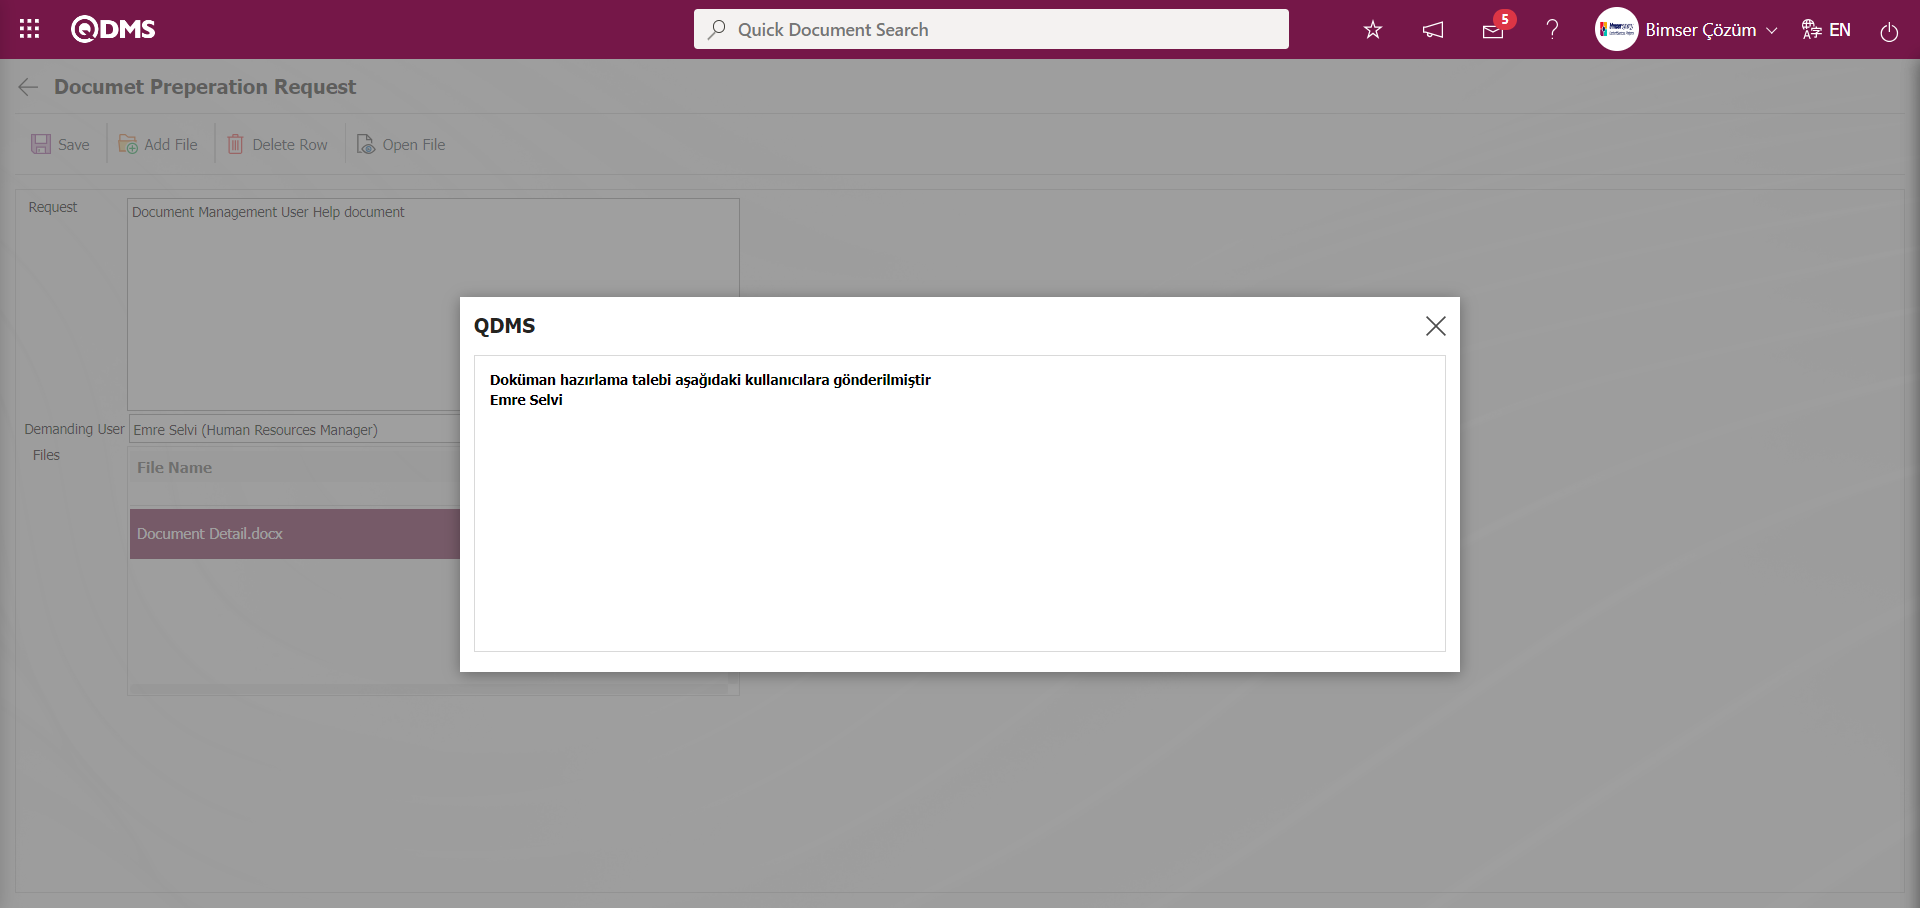
After the registration process of Document Preparation Requests, it is assigned as“Document Preparation Requests” job on the “My Pending Jobs” page of the relevant user.
In the parameter number 270 of the Document Management Module parameters, the process of sending to the person defined in the parameter value is made. Administrator=Y, User=K values are entered in the parameter value.

Document Preparation Requests are sent to the user because it is defined as User in the parameter value in the parameter.
Add to Favorites Process;
Adding the screen displayed on the Document View screen to the My Favorites page of the screen displayed on the Document View screen is done by clicking the  button displayed on the Document View screen depending on the parameter 131. While the screen displayed on the Document Viewing screen is open, click the button.
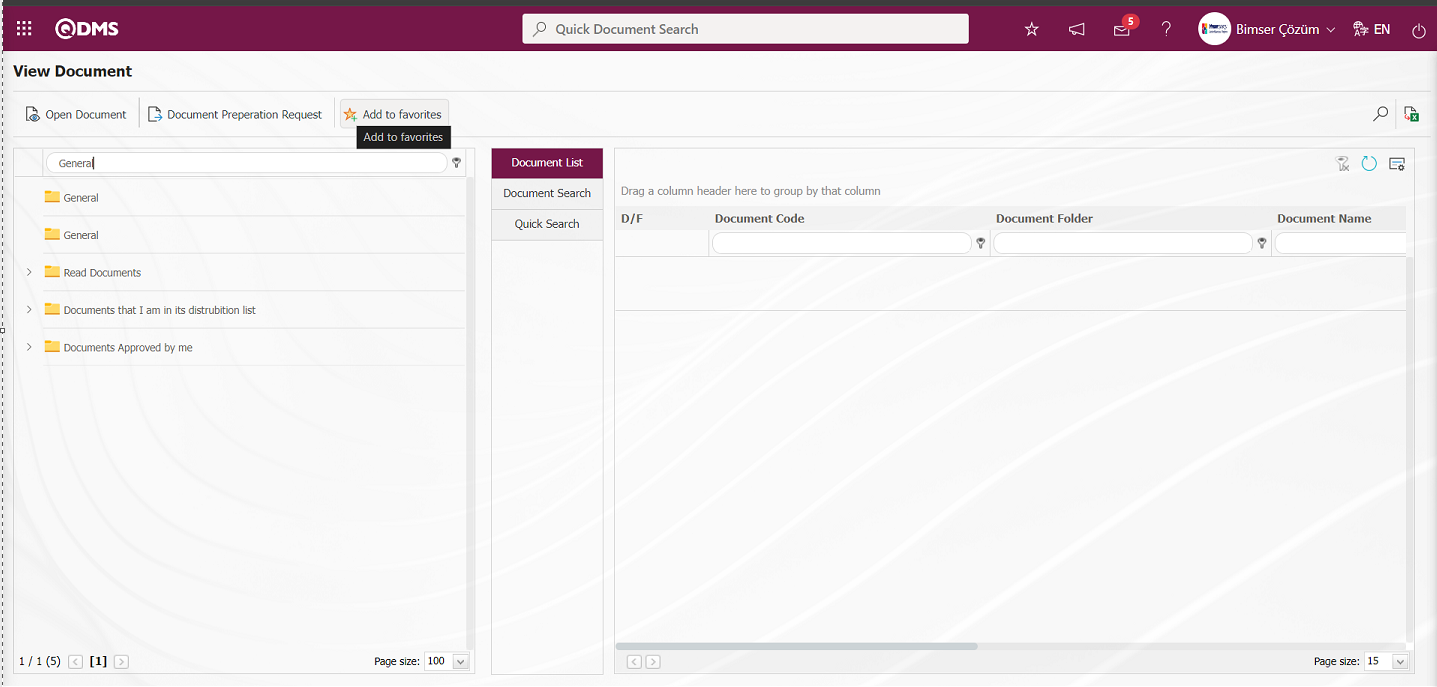
On the Add Favorite screen, in the Description field, type the name of the screen that is open on the Document Viewing screen to be given as the favorite page.
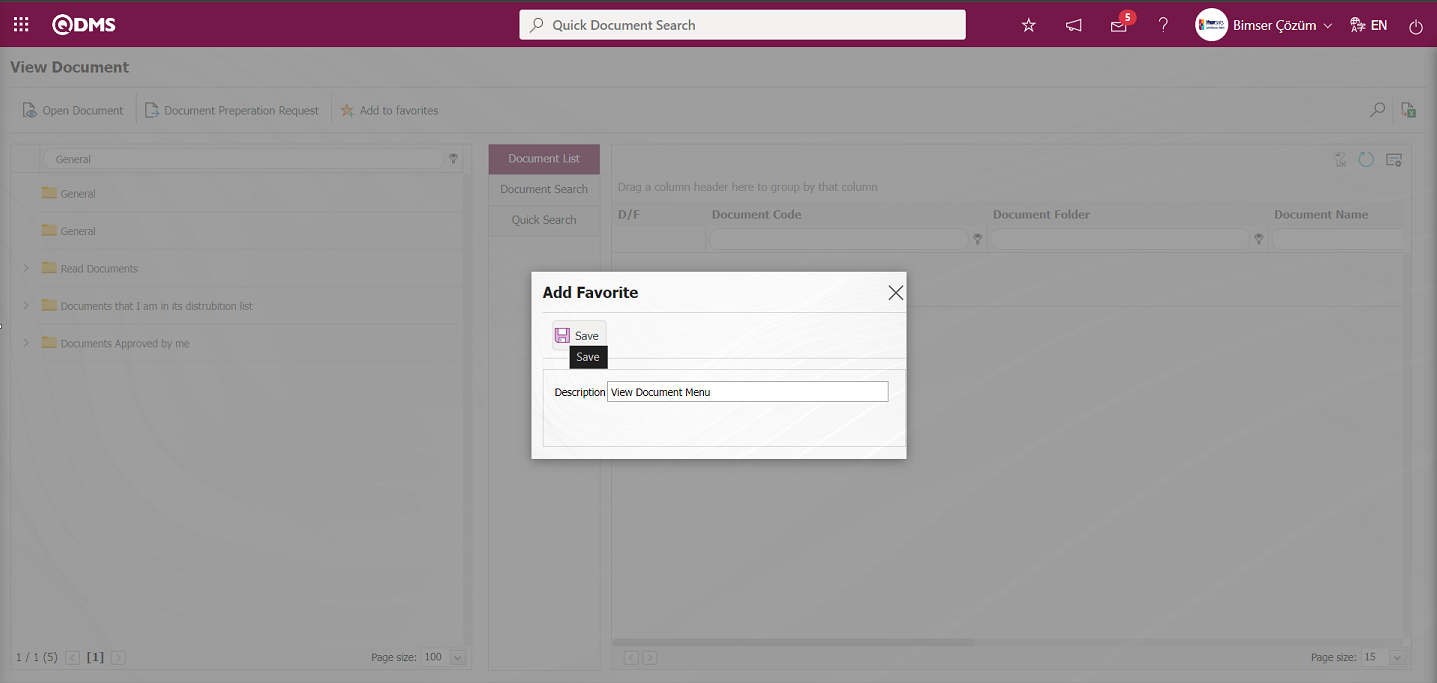
After typing the necessary information in the required fields on the Add Favorite screen, the button in the upper left corner of the screen is clicked to register as a favorite page. To view the page added as a favorite page on the document viewing screen, click the  (My Favorites) button in the section with the Qdms username.
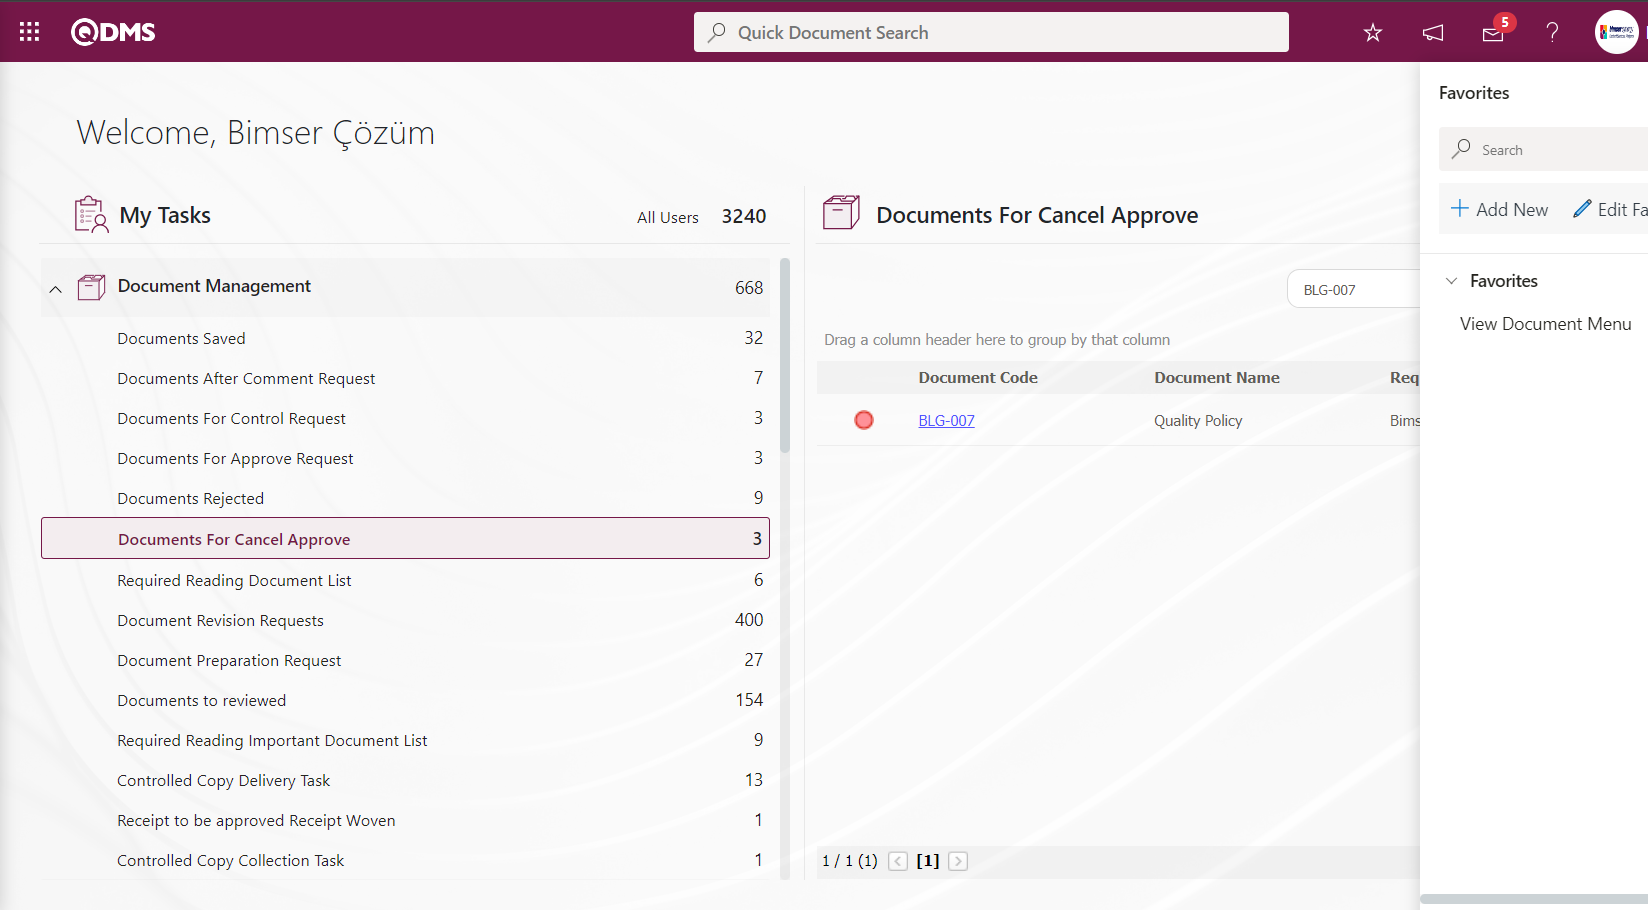
On the My Favorites screen, the favorite page link added as a favorite on the document viewing screen is clicked to open the page saved as a favorite.
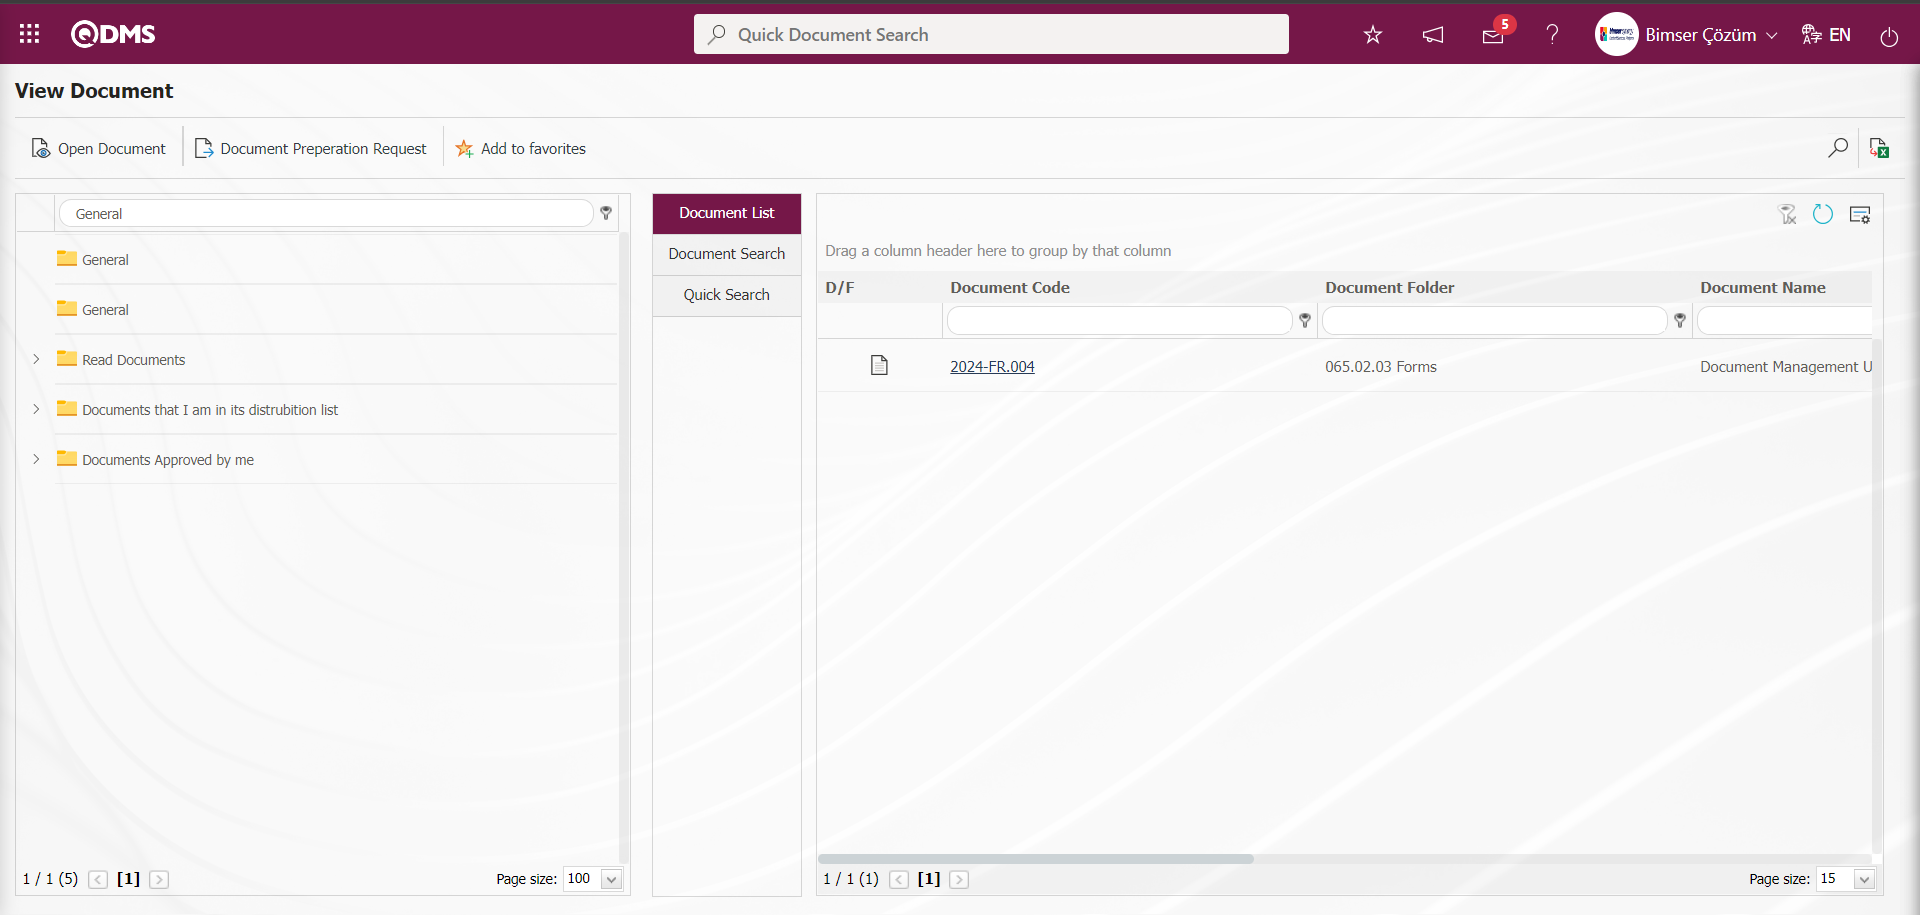
The document is viewed by clicking the link in the Document code field in the Folder from the Document View screen.
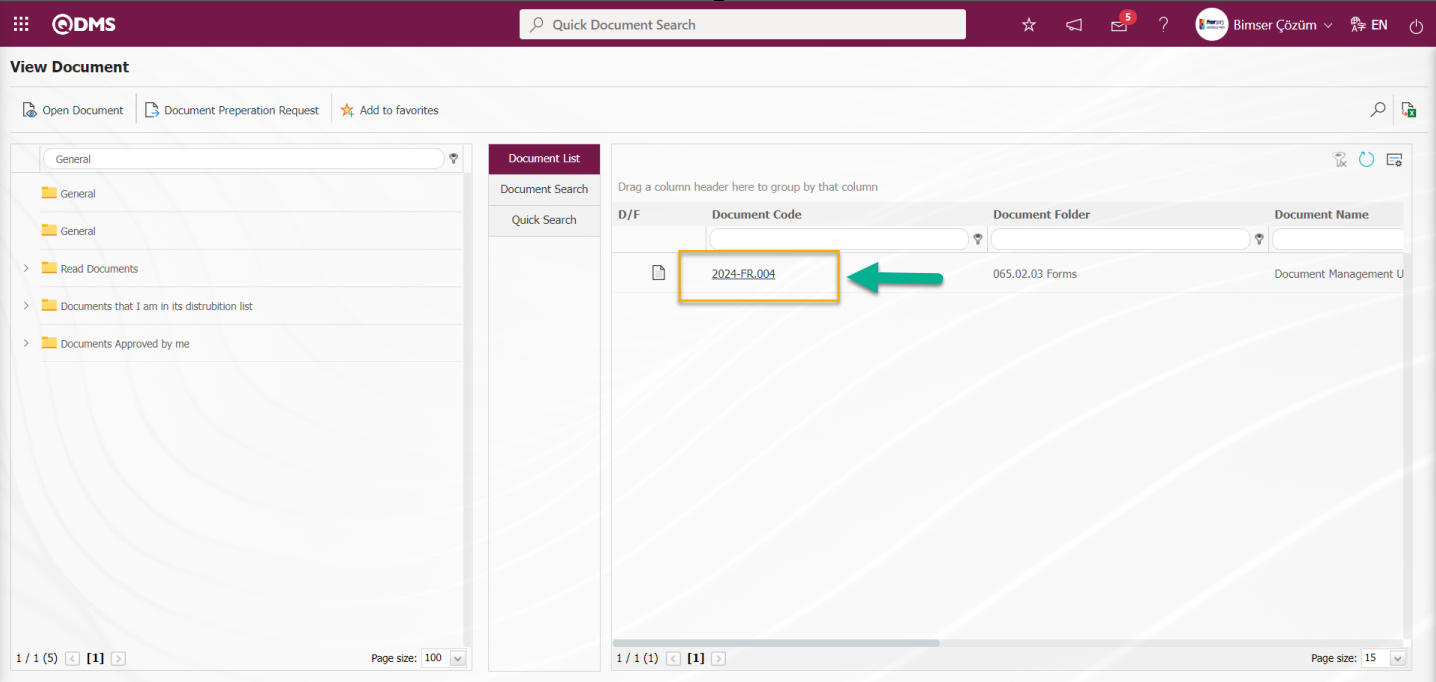
On the Document screen, click on the  (Print Document) button to print the document.
With the help of the buttons on the screen;
 : Document printing is done.
 : Controlled copy printing is done. It is a button displayed depending on the parameter. Parameter 87 in the Document Management module parameters is activated by selecting the parameter value “Yes”.
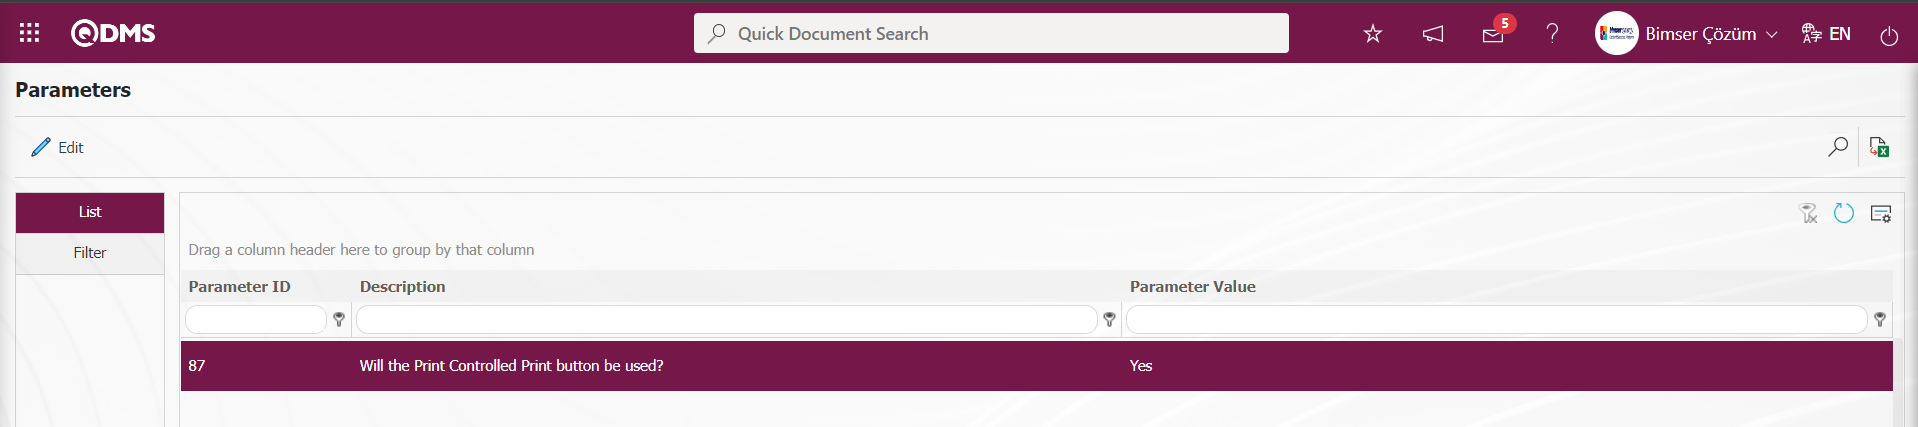
After the parameter is activated, the Print Controlled Copy button is displayed on the document view screen and controlled copy printing is performed.
 :Cover printing is done in the document.
The document is printed by clicking the  (Print) button on the screen that opens.
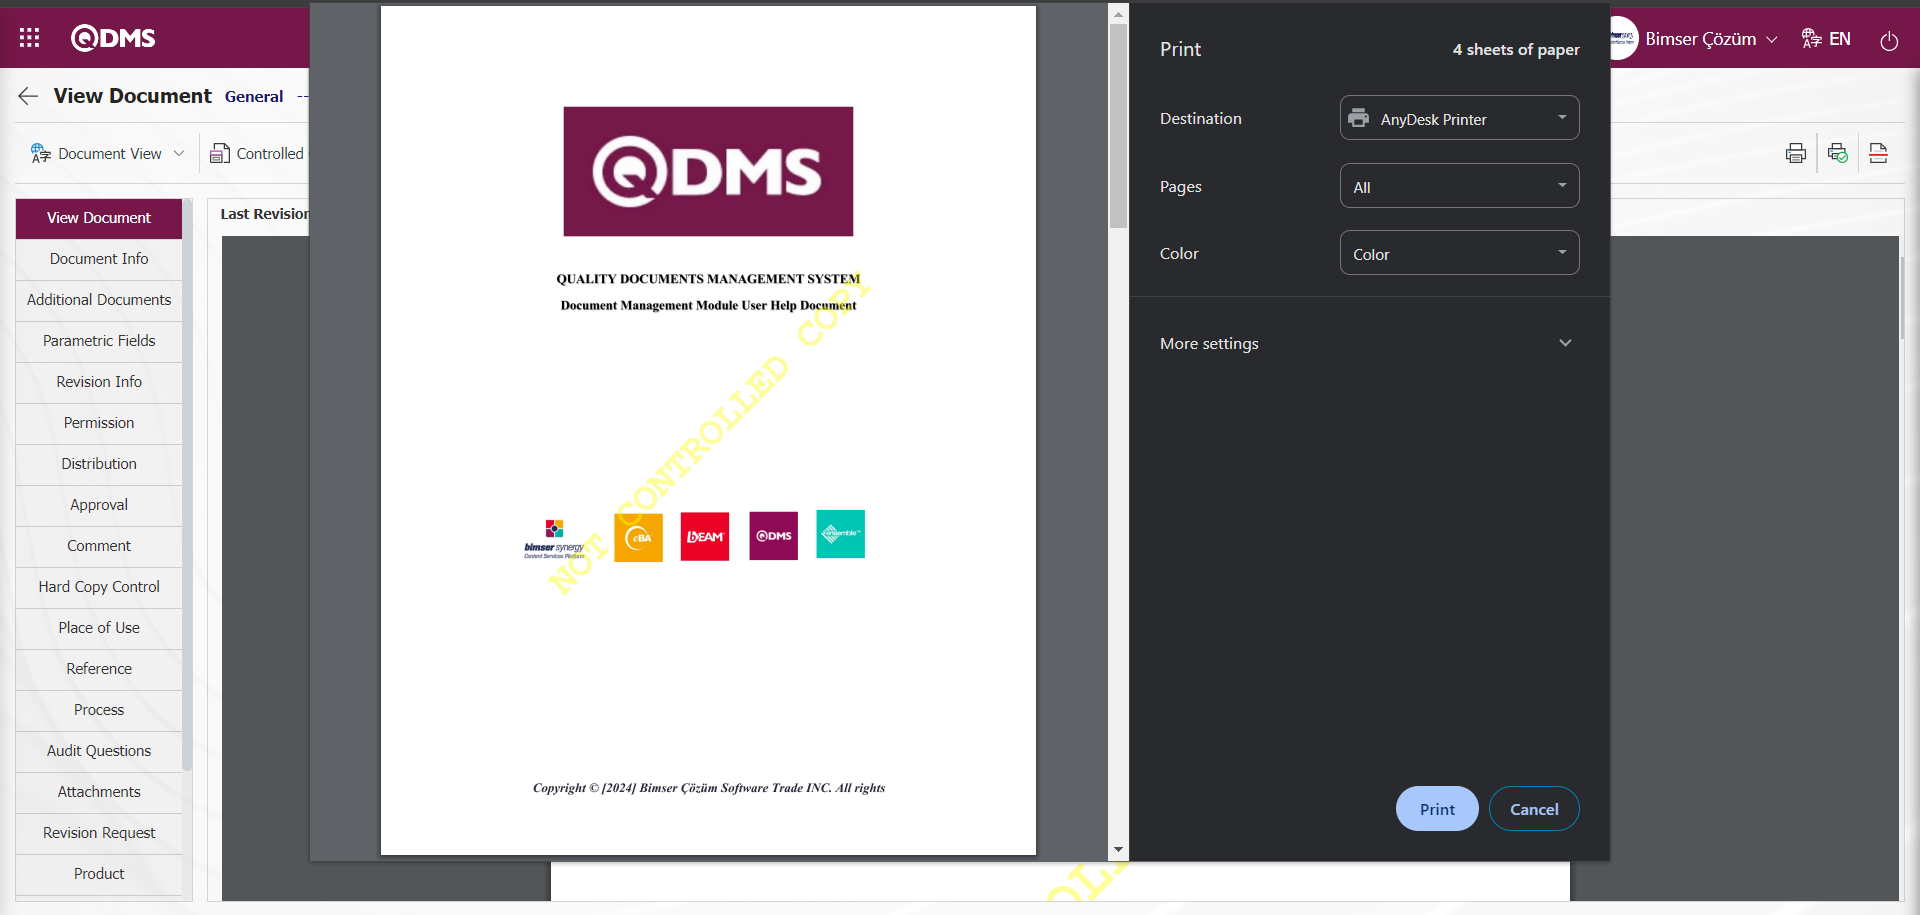
Control Copy Printing;
According to the button displayed on the Document View screen depending on the parameter number 87 in the Document Management Module parameters in the Document Management Module parameters, controlled copying is performed in the documents. When the controlled copy will be printed according to the parameter number 10 of the parameters in the Document Management module, what kind of text will be printed in the output received when the controlled copy is printed is determined by the text written in the parameter value.

In the parameter “CONTROLLED COPY...” is displayed in the output in the controlled copy according to the text defined in the parameter.
Click the (Print Controlled Copy) button to print the Controlled Copy from the Document View screen.
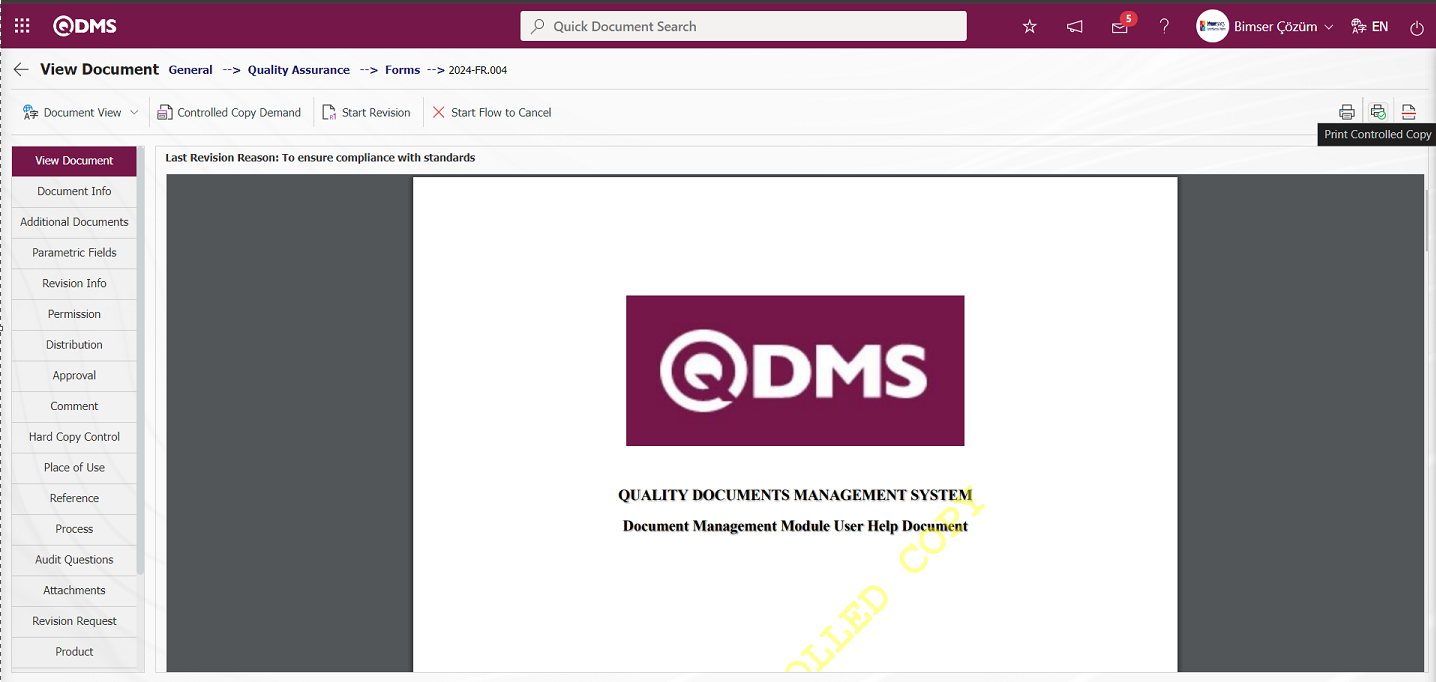
The Print Controlled Copy screen opens.

Related fields are defined on the screen that opens:
Document Code: This is the field where the document code is given by the system.
Document Name Title:This is the field where the document name is given by the system.
Copy Count: It is the field where the numerical value of the number of controlled copies is determined.
Description: It is the field where the explanation information about why the controlled copy is taken is written. The explanation field is set to be made mandatory in the parameter. The parameter is activated by selecting the parameter value “Yes” of parameter 133 of the Document Management Module parameters. After the parameter is activated, the reason for printing from the controlled copy printing page becomes mandatory. If the parameter parameter value is “No”, there is no need for such an obligation.

After entering the information about the required fields, controlled copy printing is done by clicking the  button in the upper left corner of the screen.
The parameter is activated by selecting the parameter value of parameter 89 “Yes” within the scope of Document Management module parameters.

When the parameter is activated, if we say Configure security during controlled copy printing, the person concerned can download the document to his/her computer but will not be authorized to make any changes to the document.
Cover Printing Process;
On the Document View screen, printing the cover in the document module is done by clicking the  (Print Cover) button.
Users can upload the document cover format in the desired format in the System Infrastructure Definitions/BSID/ Configuration Settings/Report Formats Edit menu to print the cover in the desired format.
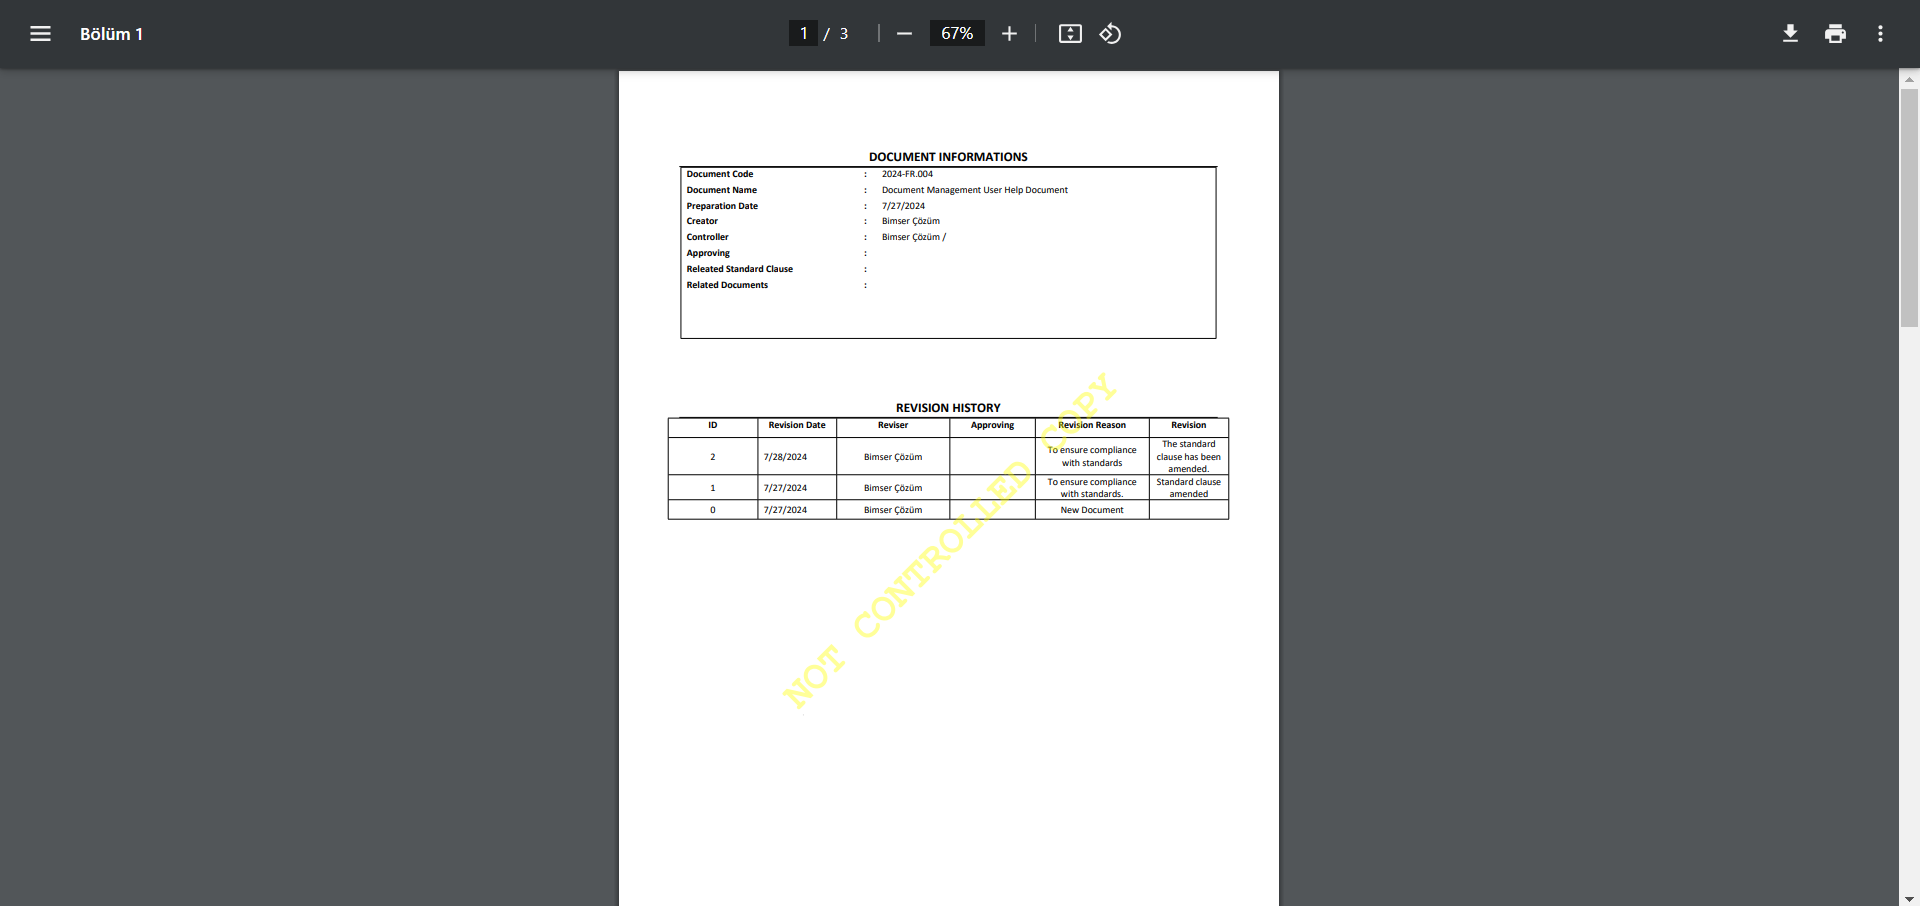
According to the value defined in the parameter value in parameter number 11 in the Document Management Module parameters, it is determined what kind of text can be printed when printing uncontrolled copies.

6.2.6.Document Revision
Menu Name: Integrated Management System/ Document Operations/ Document Revision
This is the menu where revision operations of documents are performed. There are two methods to revise documents. These are
Option 1;
In order to perform document revision, first click on Integrated Management System/Document Operations/Document Revision menu, select the folder containing the document to be revised on the screen that opens and click on the  button.
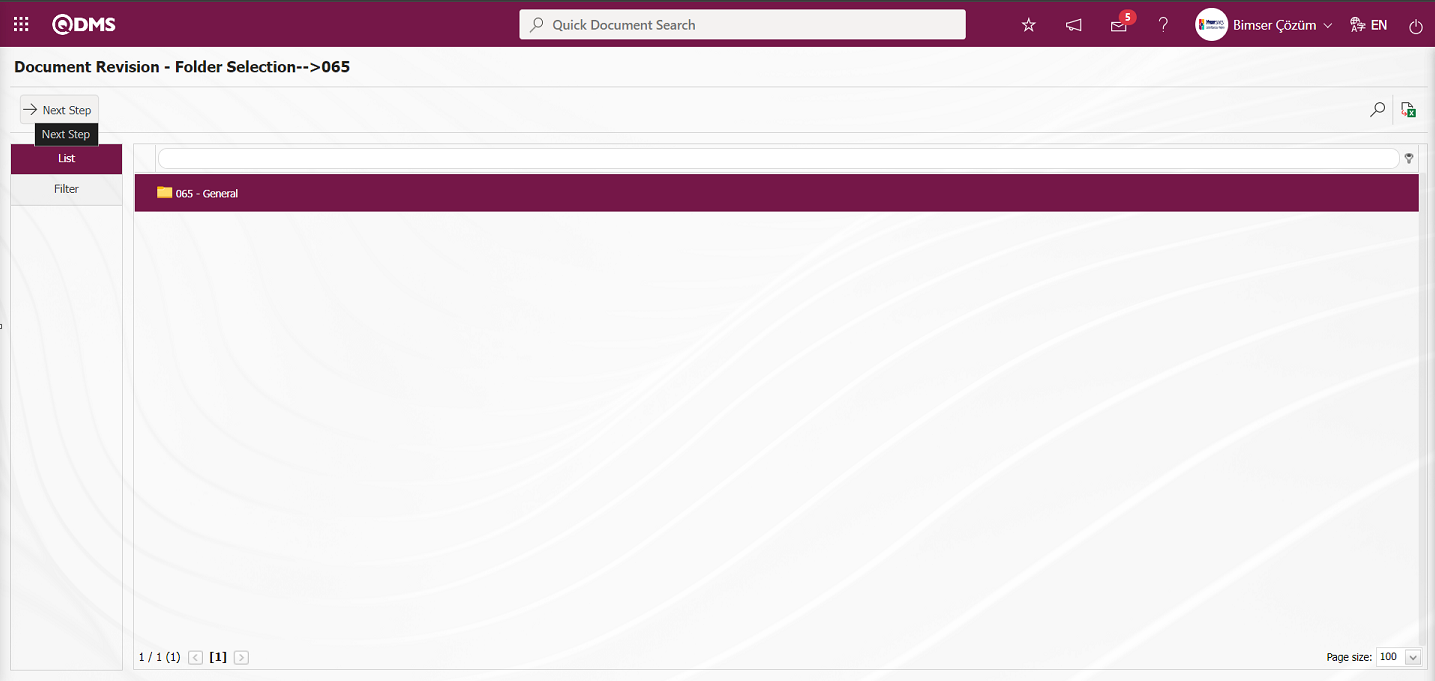
In the screen that opens, select the document to be revised and click the  button.
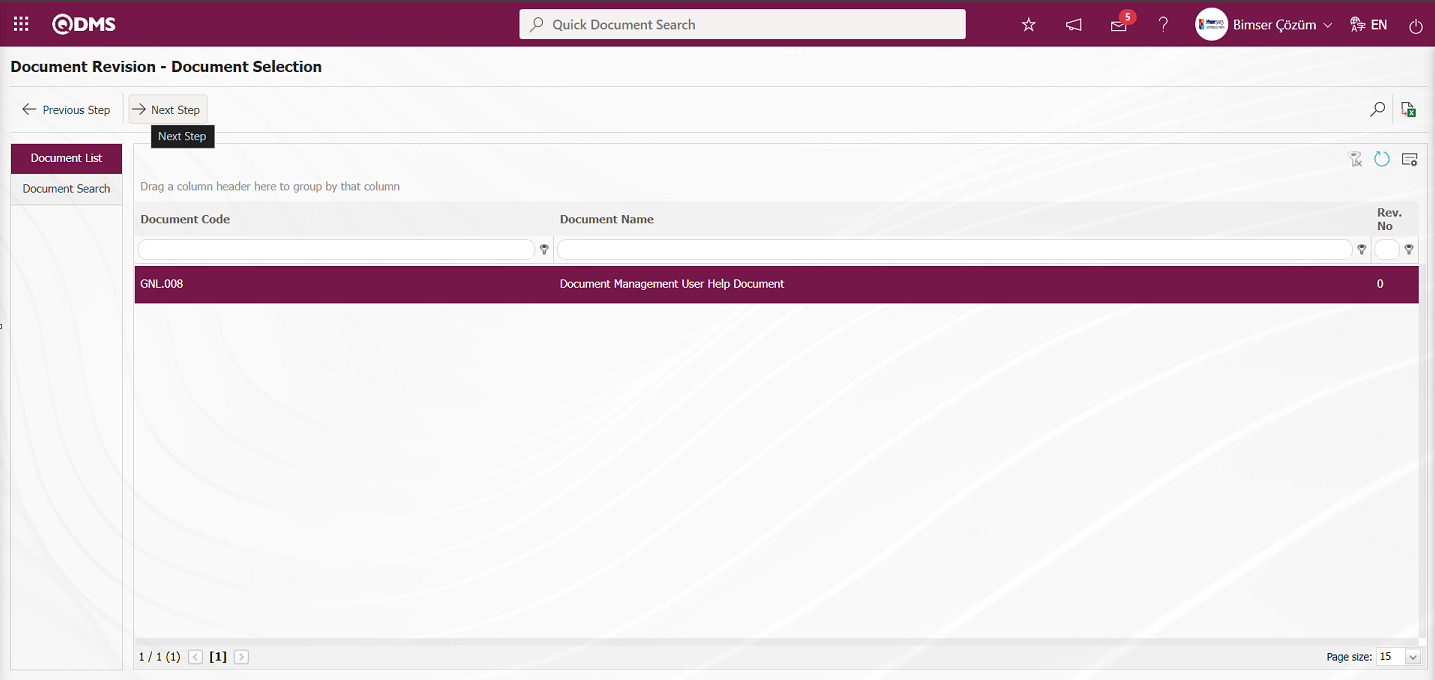
The document was saved successfully by the system. A message is given about the revision process has started.

In the Document Revision process, the revision number is automatically incremented as “1” by the system. (If it is defined manually in the folder, the revision number information is entered.)
On the Document Revision screen, the information created on the Document Preparation screen appears. At this stage, desired changes can be made on the document information. Desired changes can be made on document information, matrix tabs and all document tabs within the scope of revision.
On the Document Revision screen, click on the Revision Information tab. In the Revision Reason field, information about why the document is revised is written. In the What was done in the revision field, what was done in the revision process in the document is written.

It is downloaded to the computer by selecting the document tab and clicking the (View File) button.
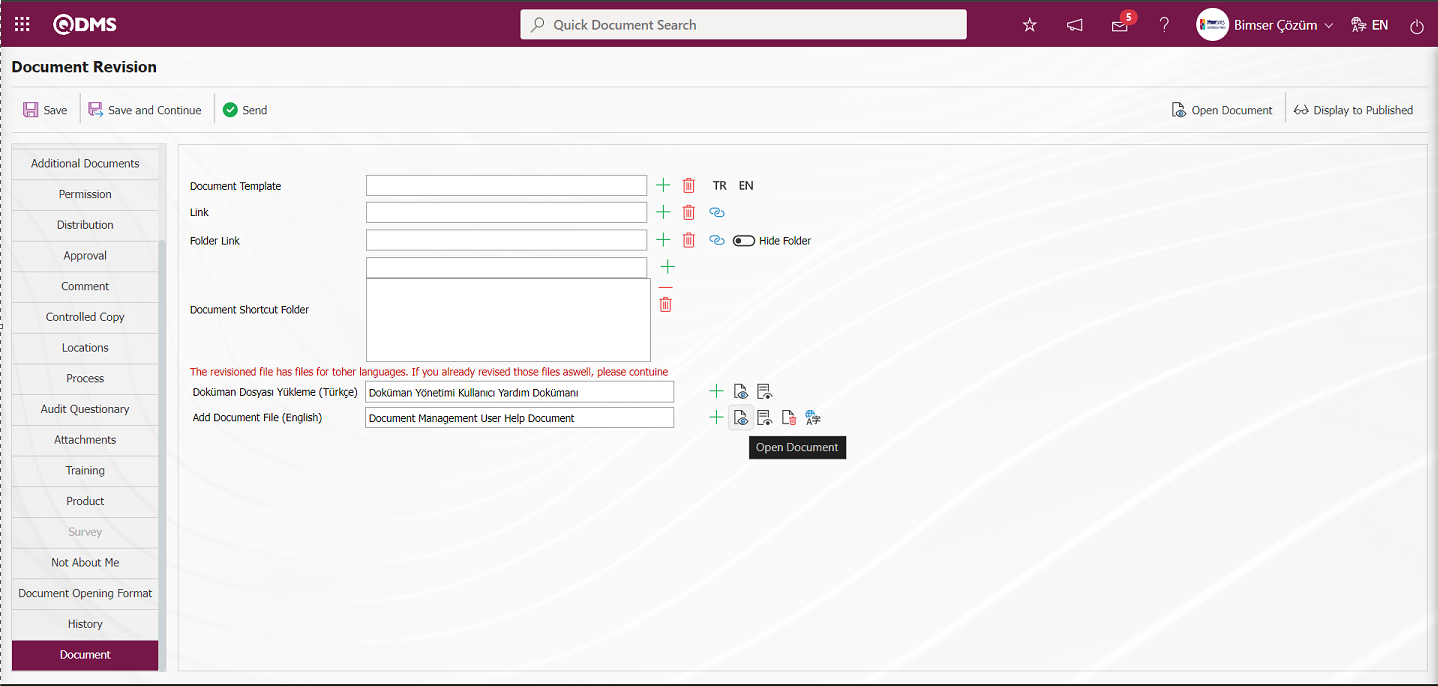
Changes are made to the document in terms of structure and content.
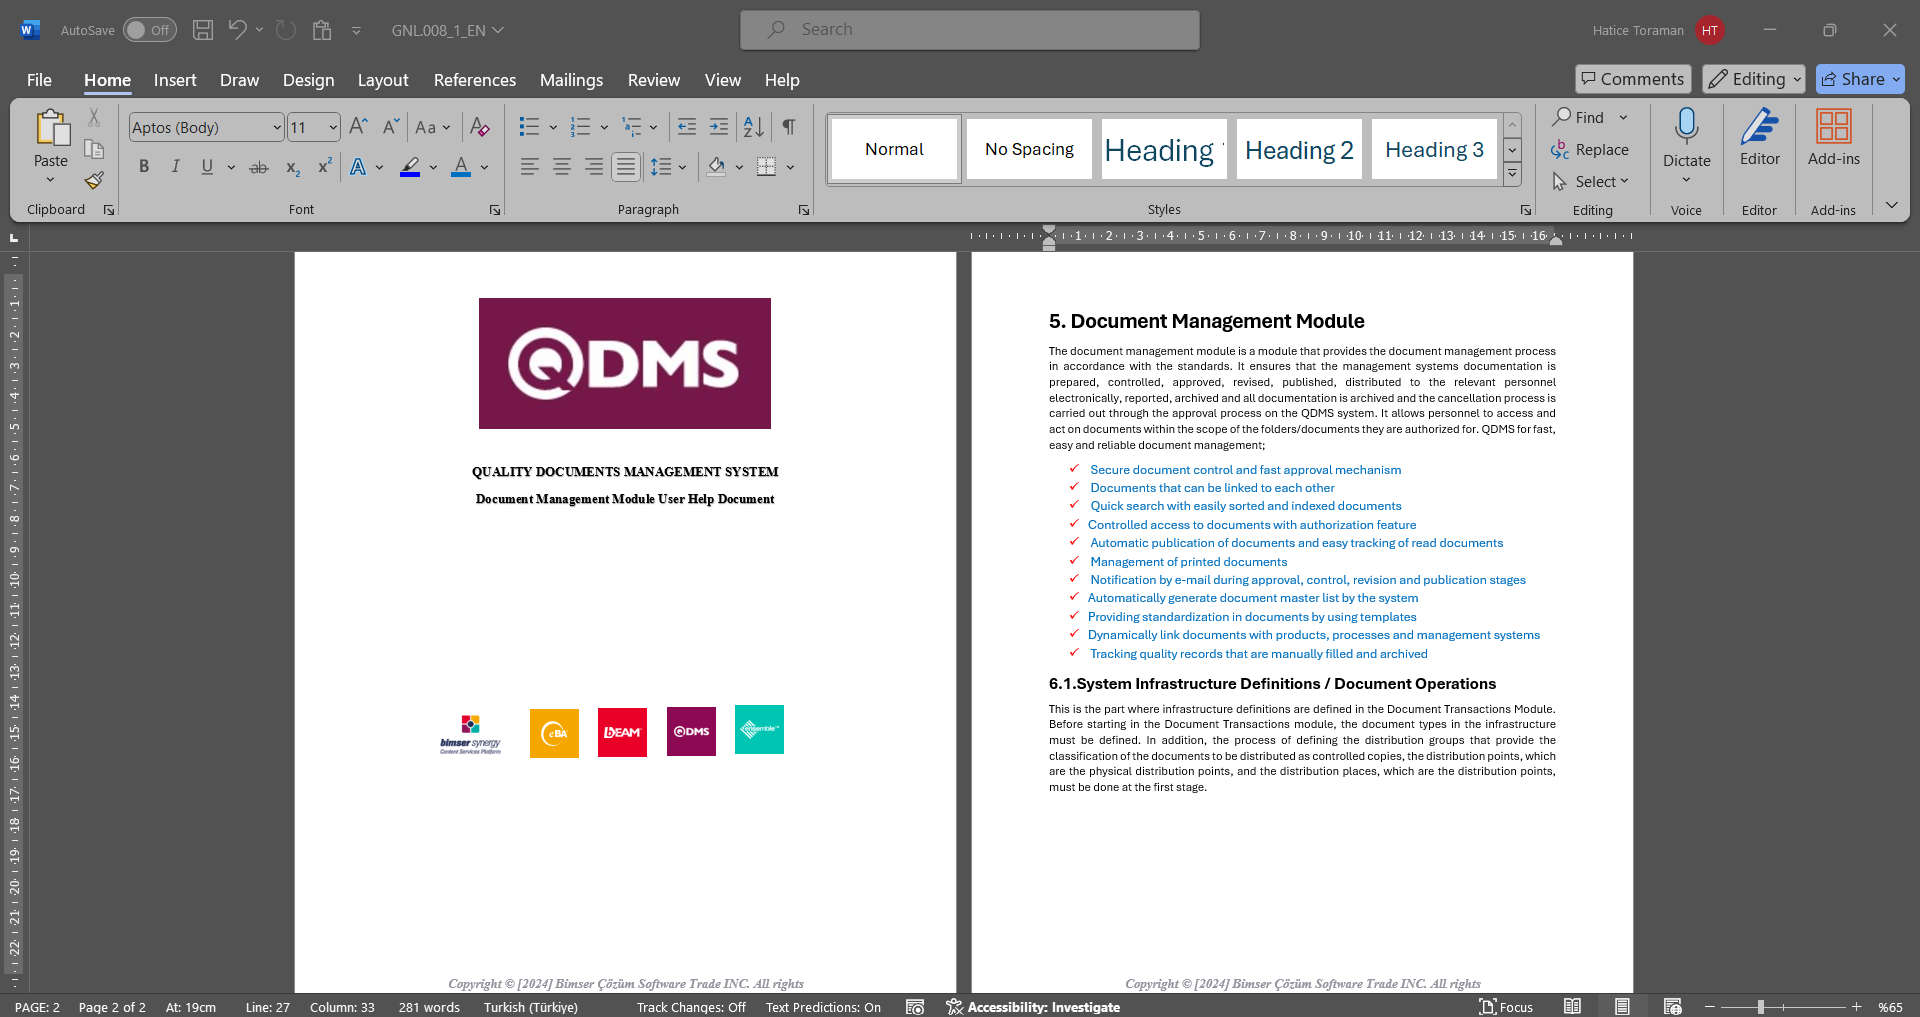
After the revision operations are performed on the document, the document is uploaded to the system with the Add “Document File (English)” field (Add File) button on the Document tab. The name of the document downloaded from the system and the name of the document uploaded to the system must be the same. Otherwise, the system gives an error.
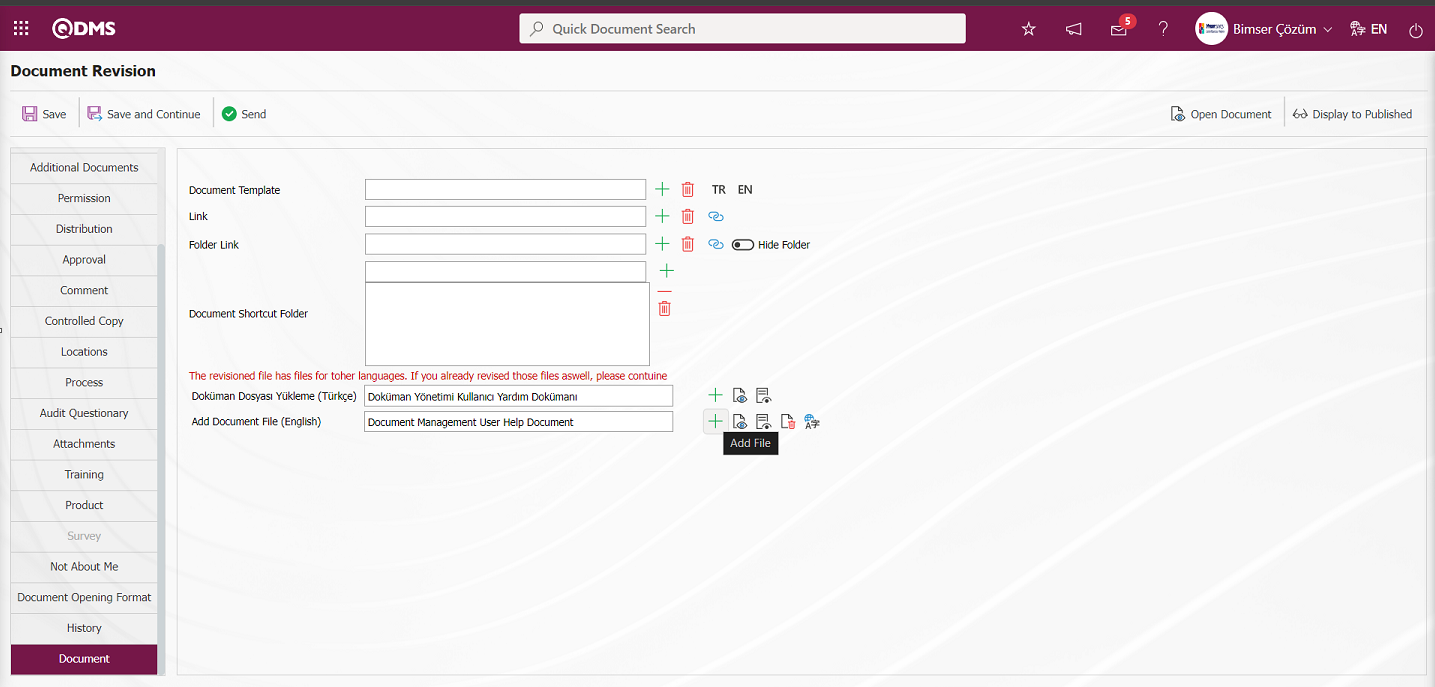
The system gives an error warning when the name of the document downloaded from the system and the name of the document uploaded to the system are not the same. The system gives a message that the file name you added does not match the document code. Click the Browse button on the Add file screen

On the screen that opens, the name of the uploaded file is different from the name of the file saved on the computer.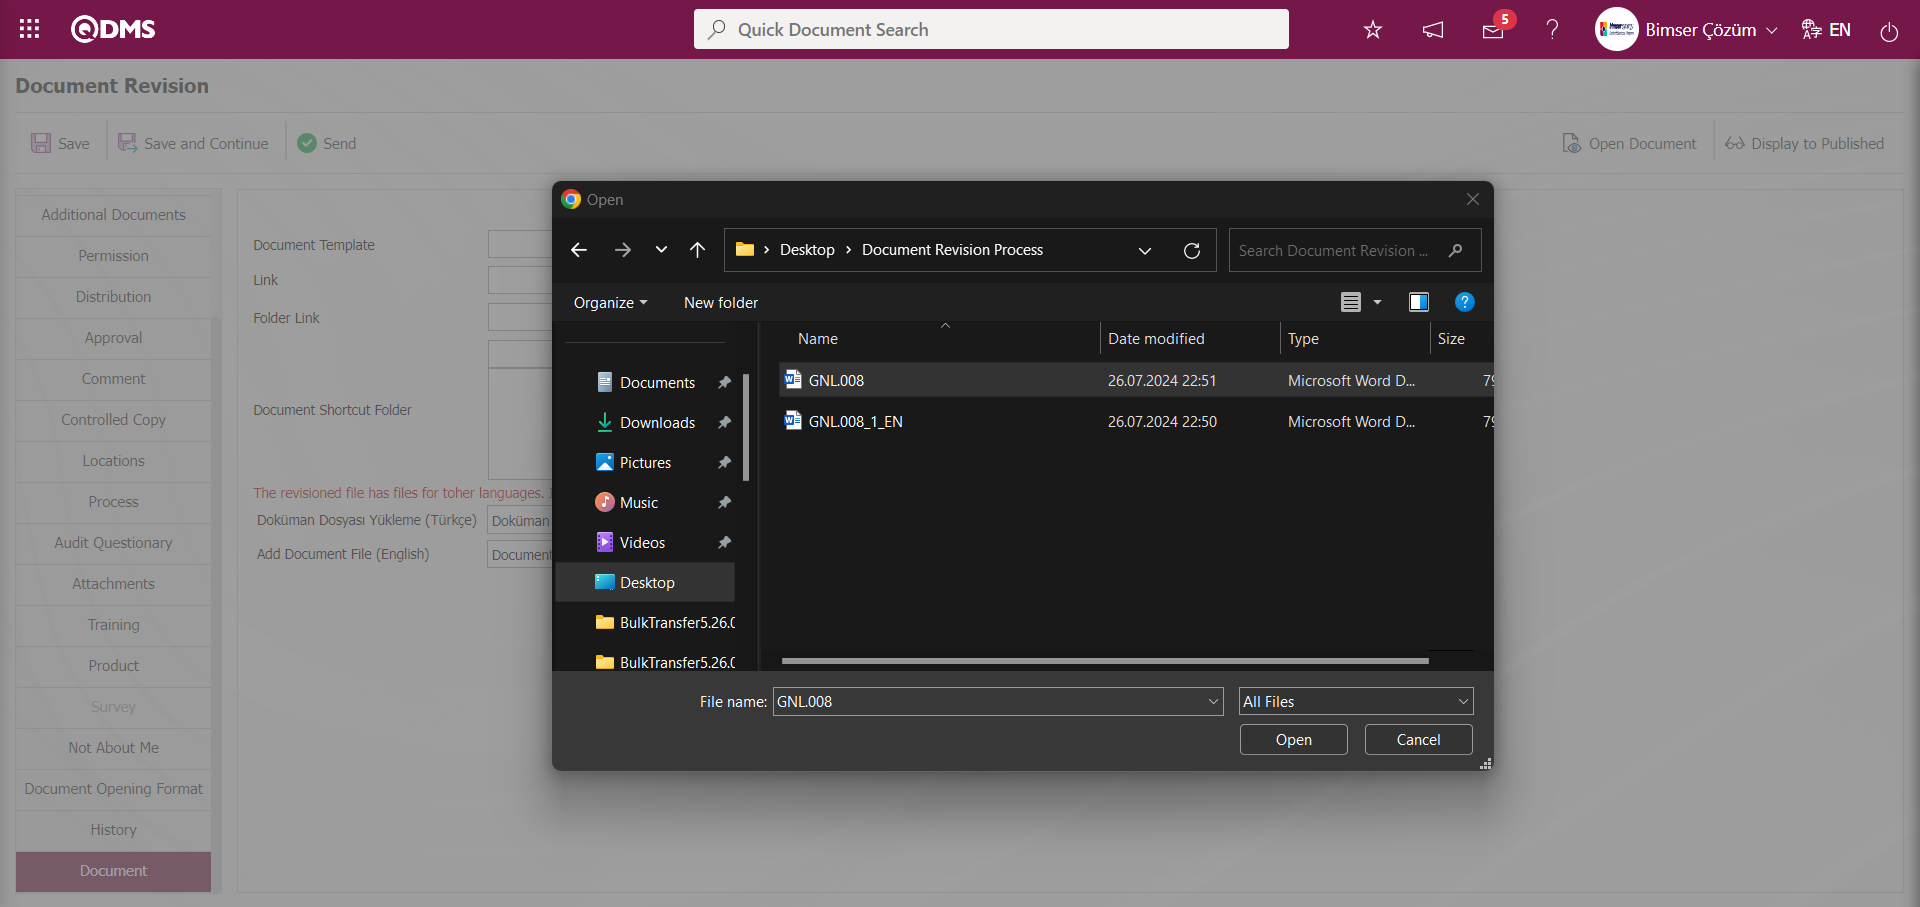
For example; Let the document name downloaded from the system be GNL.008_1_EN. Let the name of the revised document be GNL.008 Document Management User Help document. When the revised document is tried to be uploaded to the system in this way, an error warning is given by the system. The name of the revised document is changed to whatever the name downloaded from the system is, i.e. GNL.008_1_EN, and uploaded to the system. The _1 part in the name of the document downloaded in the system indicates that the document is in the 1st revision. On the Document Revision screen, the document is uploaded to the system with the Add “Document File (English)” field  (Add File) button on the document tab. The name of the revised document is changed to whatever the name downloaded from the system is and uploaded to the system.
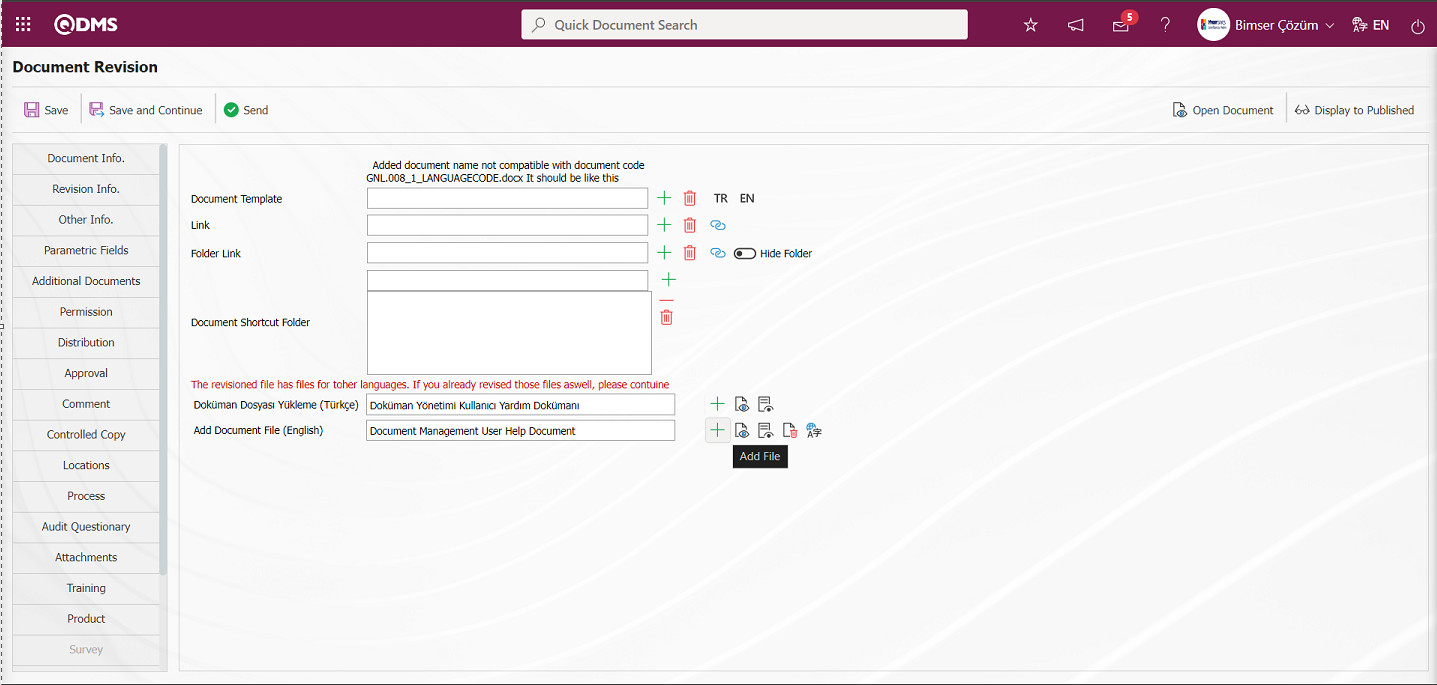
Click the Browse button on the Add File screen.
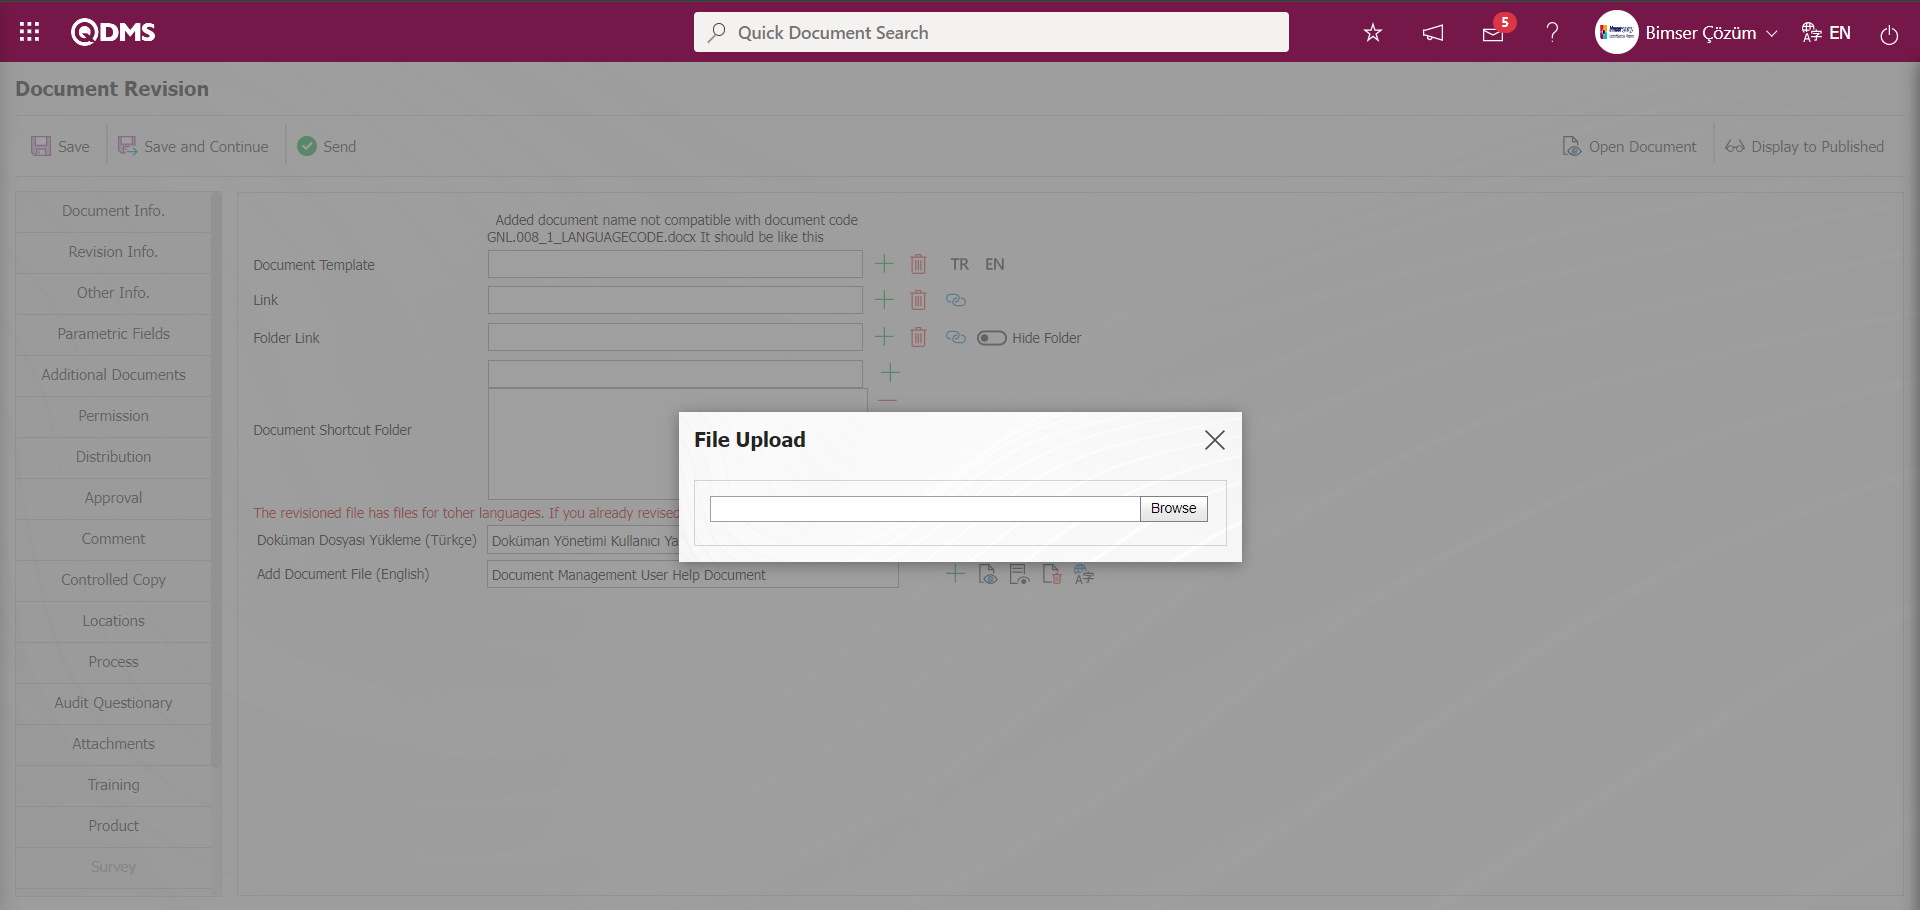
On the screen that opens, the selection process of the document to be uploaded to the system is done,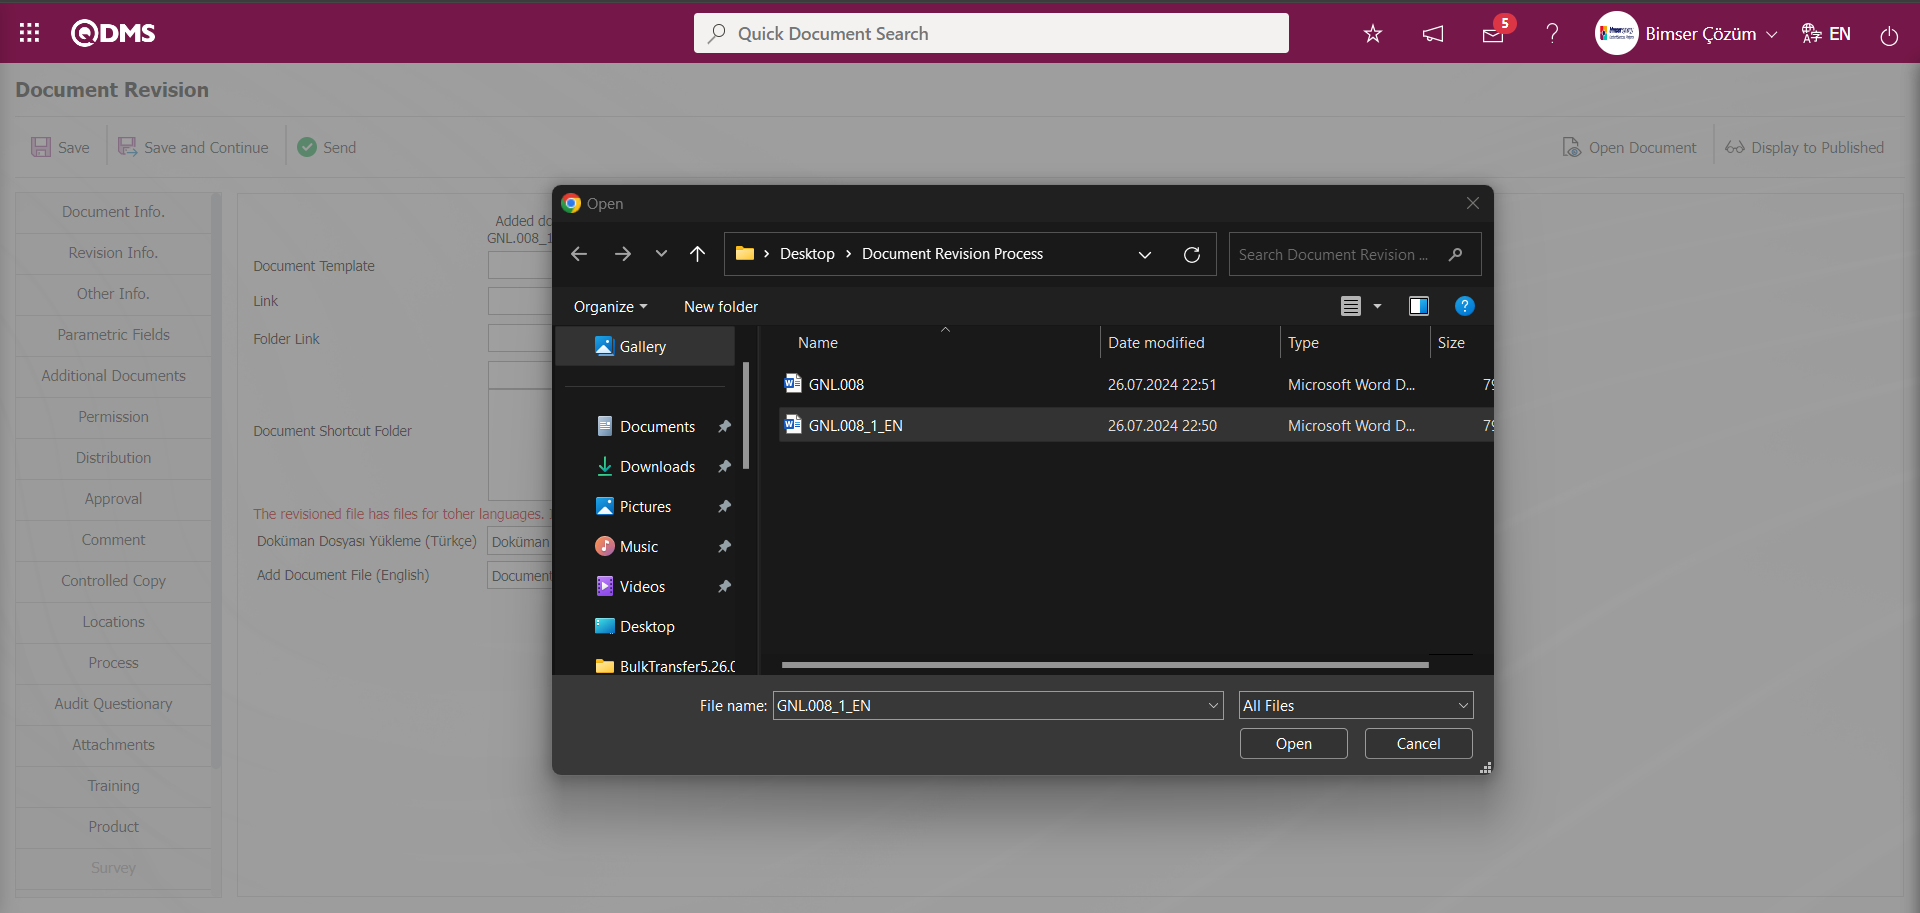
On the Document Revision screen, the message “File uploaded successfully” appears on the Document tab.
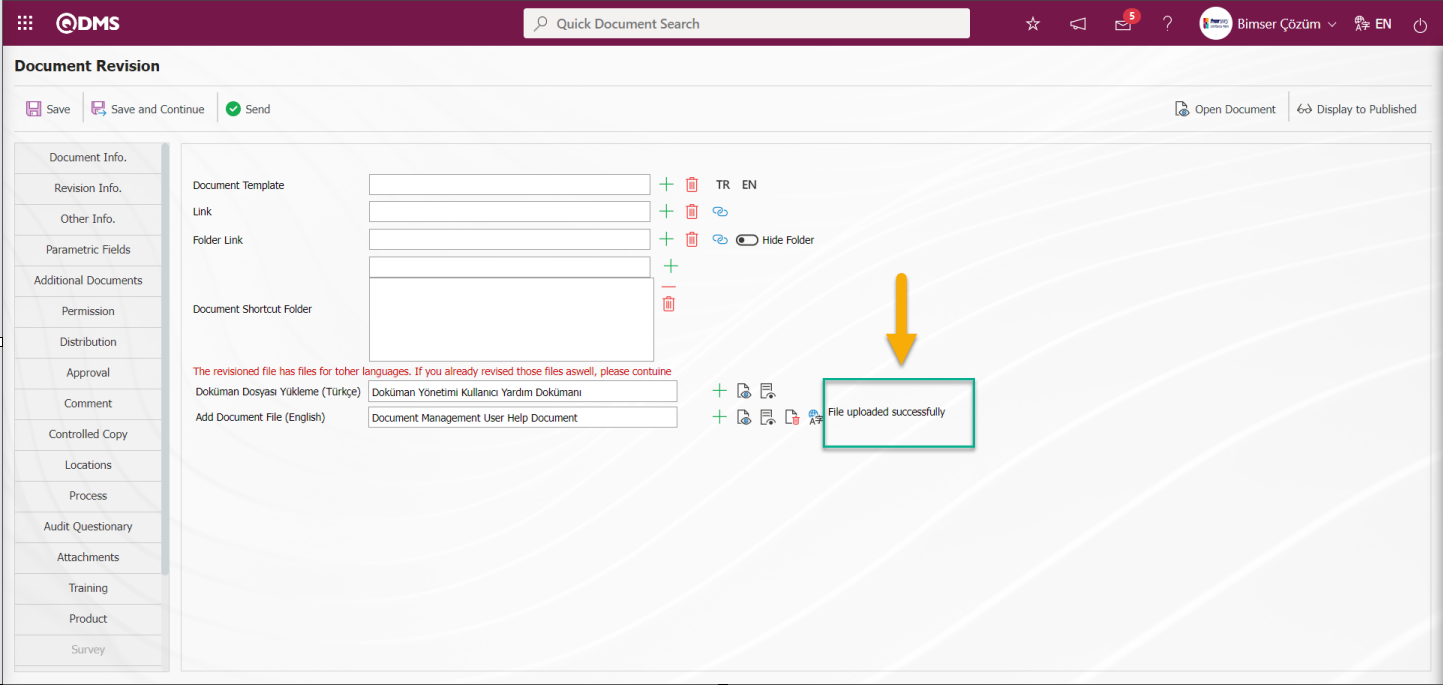
On the Document Revision screen, click on the Document Information tab.
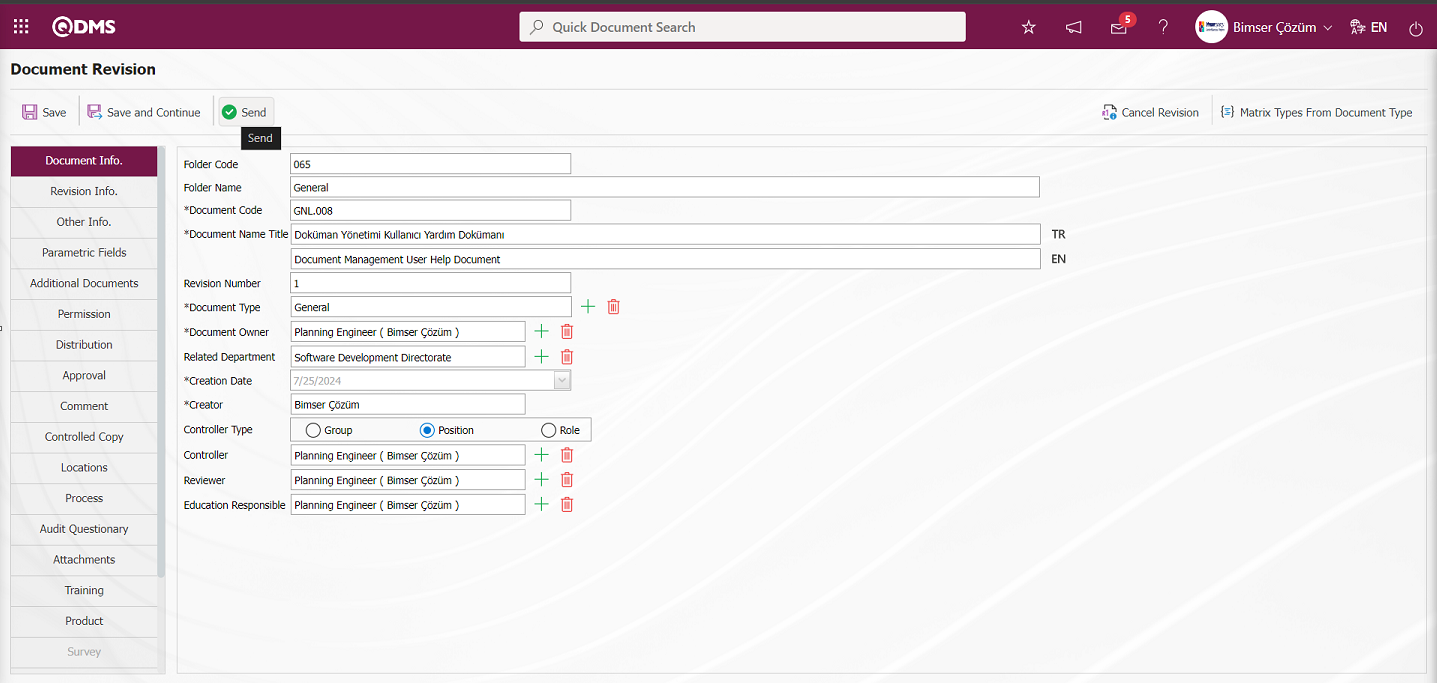
On the Document Revision screen, click the  button on the Document Information tab.

Click the “OK” button in the message by the system.
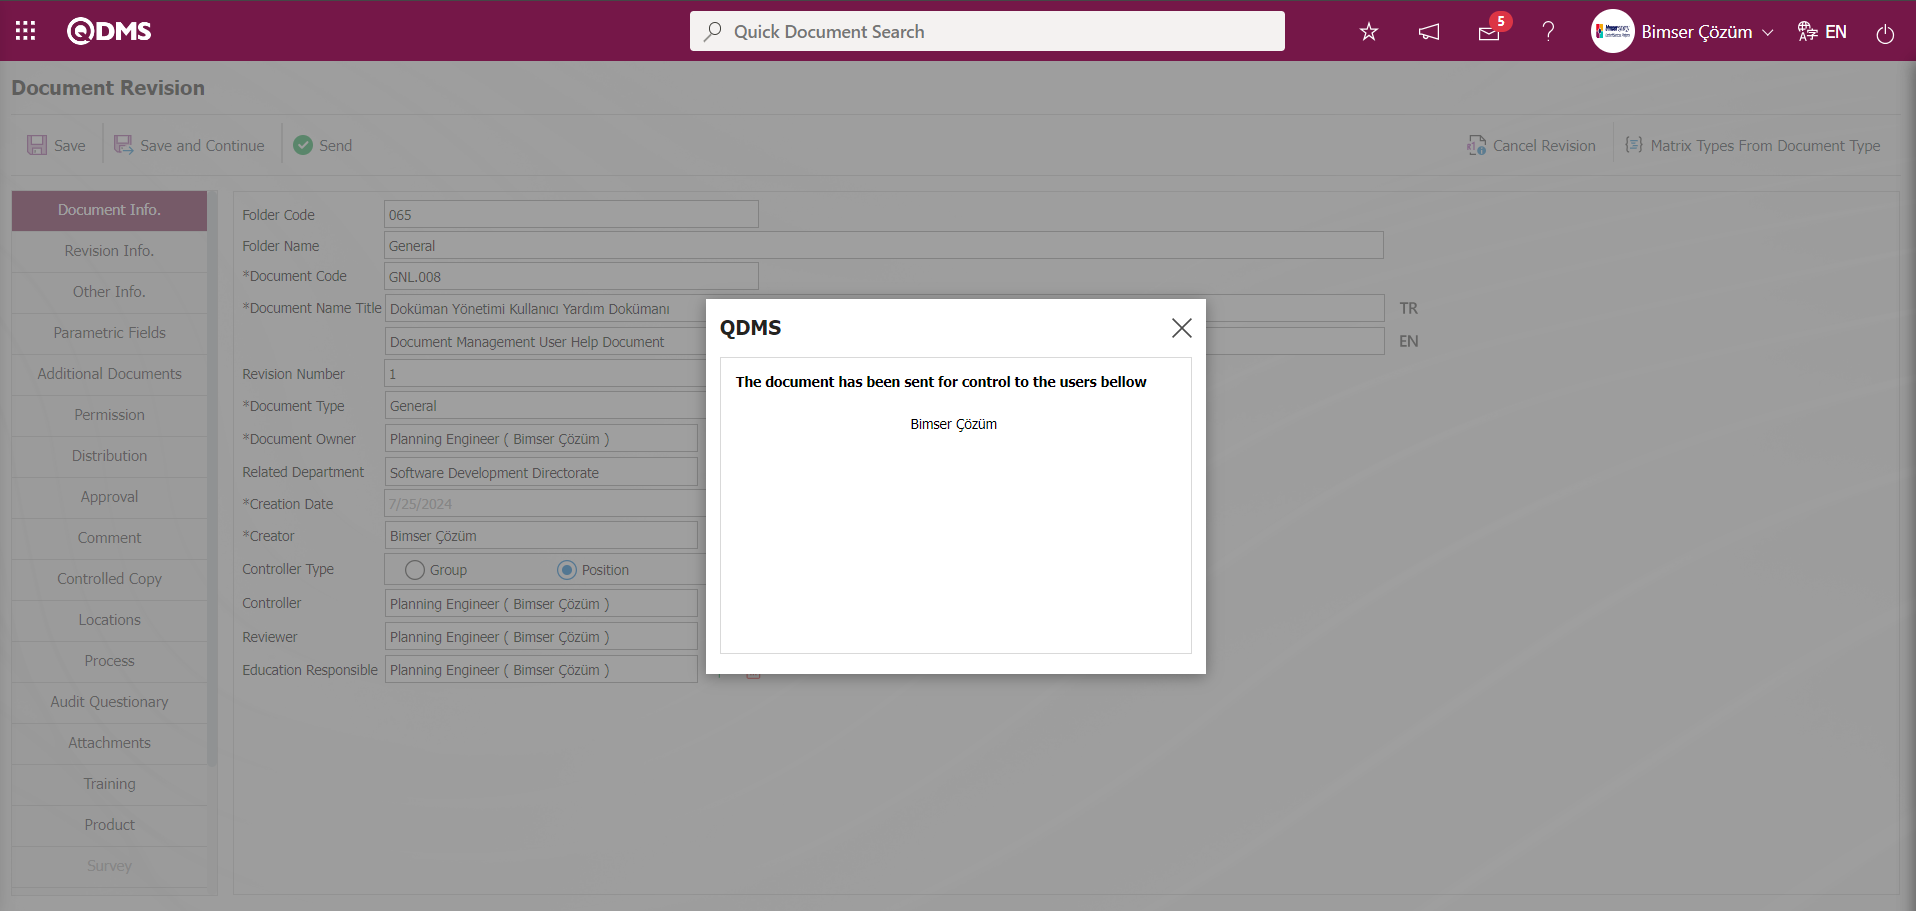
If there is an opinion in the opinion matrix in the system, if there is no opinion, it is forwarded to/ control/ approval processes. The same stages are carried out with the flow in document preparation processes. The revised document is assigned as“Documents For Control Request” on the“My Pending Jobs” page of the controller. The revision process of the document is completed by starting at the control stage and performing the approval stages.
Control phase in Revision Process;
The document sent to the control in the revision process is assigned as a“Documents For Control Request” job in the “My Pending Jobs” menu of the controller.

The controller displays the document information screen by clicking the link in the document code field in the relevant task.

With the help of the buttons on the screen;
: Saving the document is done.
: Save and continue the process. It is a button displayed depending on the parameter. The parameter is activated by selecting the parameter value “Yes” for parameter 331 in the Document Management parameters.
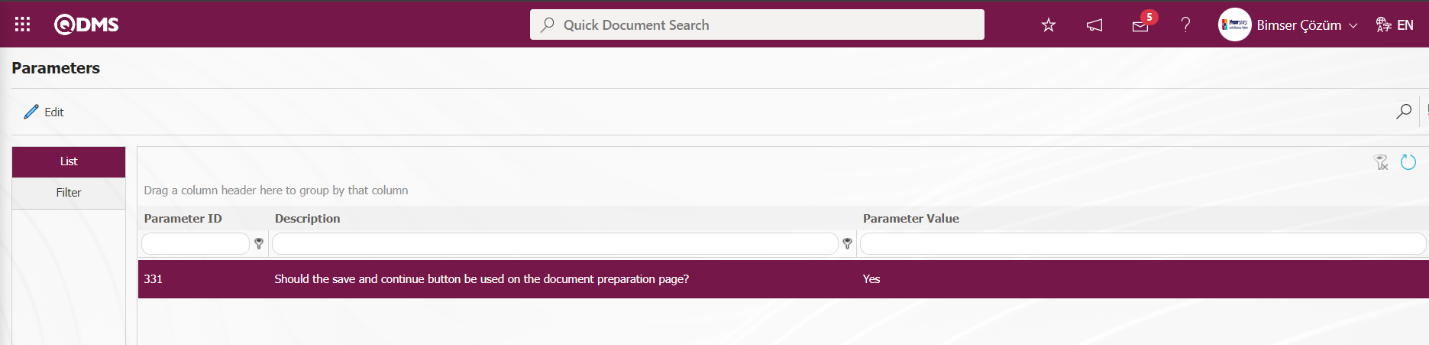
After the parameter is activated, the button is displayed at the Document Preparation stage.
: Document control approval process is done.
: Rejection is made by writing the reason for document rejection.
![A close-up of a white background
Description automatically generated]ref115: At this stage, comments are requested from the relevant people. It is a button displayed depending on the parameter. The parameter value of parameter 113 in Document Management parameters is activated by selecting “Yes”.
In the meantime, in the Document Control phase, in the Document tab, in the Add “Document File (English)” field  (View File), the document is displayed with the (View File) button and changes and edits are made on the document.
In the Additional file tab, it can upload an additional file containing opinions about the document. On the Document Revision screen, the button is clicked on the Document Information tab.
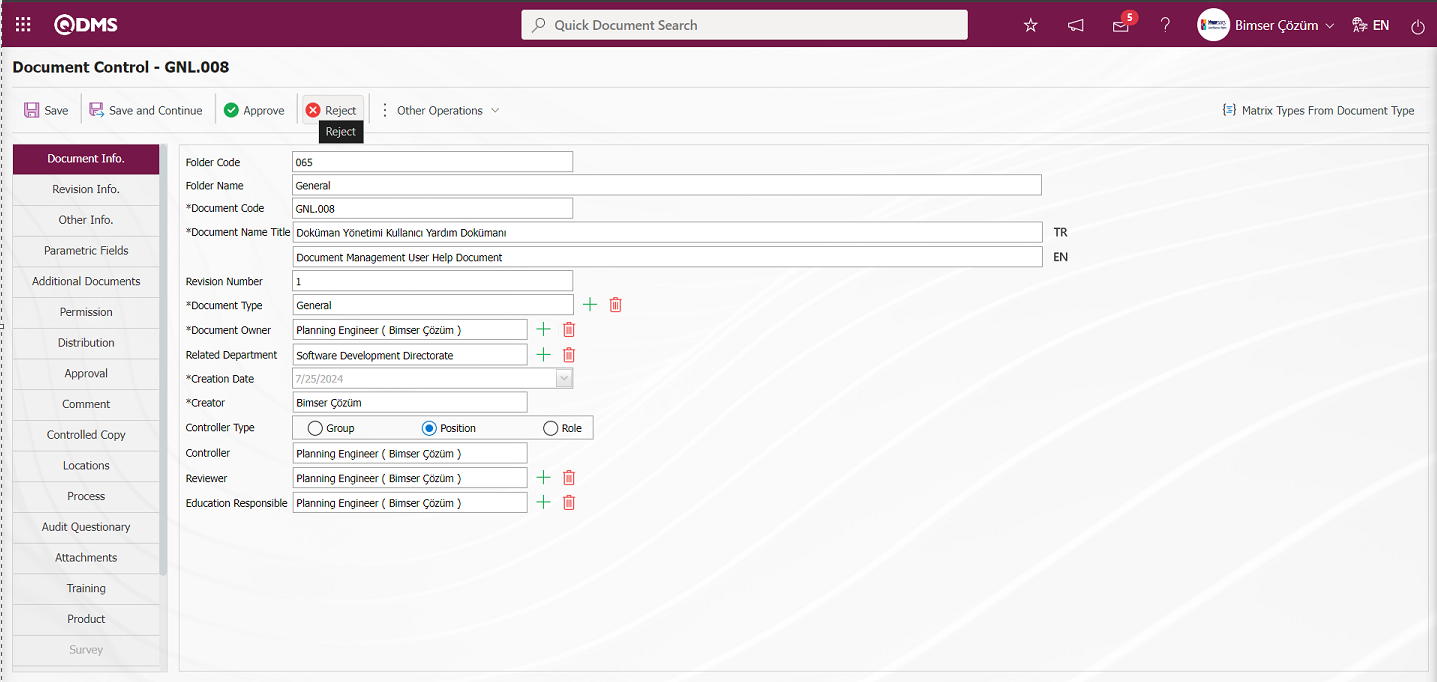
The Control Ret screen opens.

In the document revision process, it is mandatory to enter the reason for rejection of the document at the rejection stage of the document at the control stage. If desired, additional files related to the reason for rejection can be uploaded.
If there is no problem in the revision process in the document, the document is sent for approval according to the order in the approval matrix by pressing the button.
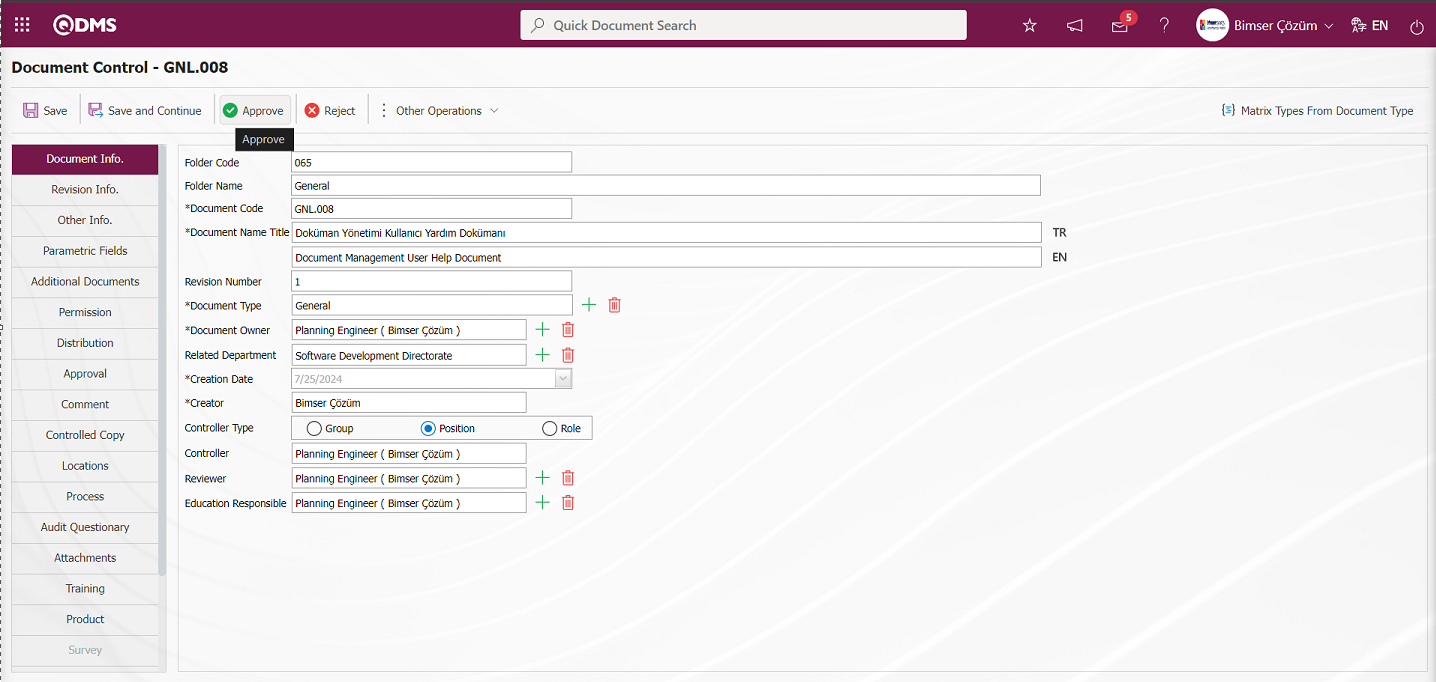
Click the “OK” button from the message given by the system.
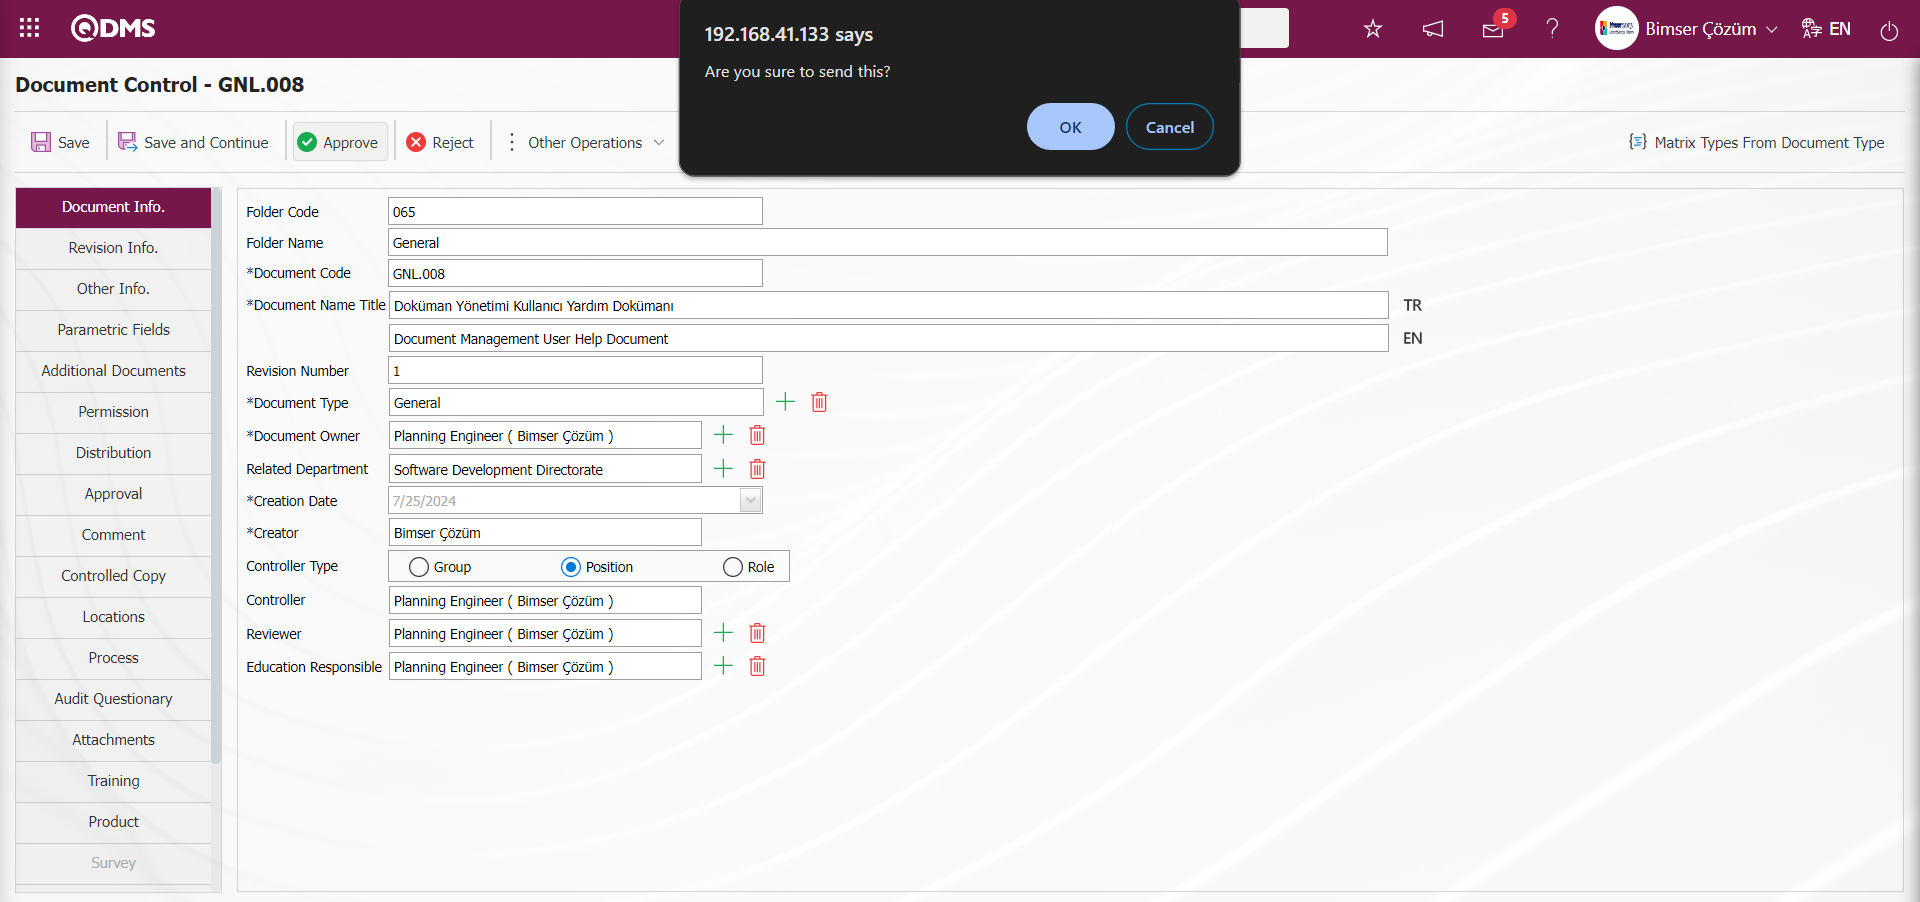
After the document is completed in the control process at the revision process stage, the system informs the approval person that it has been sent for approval.
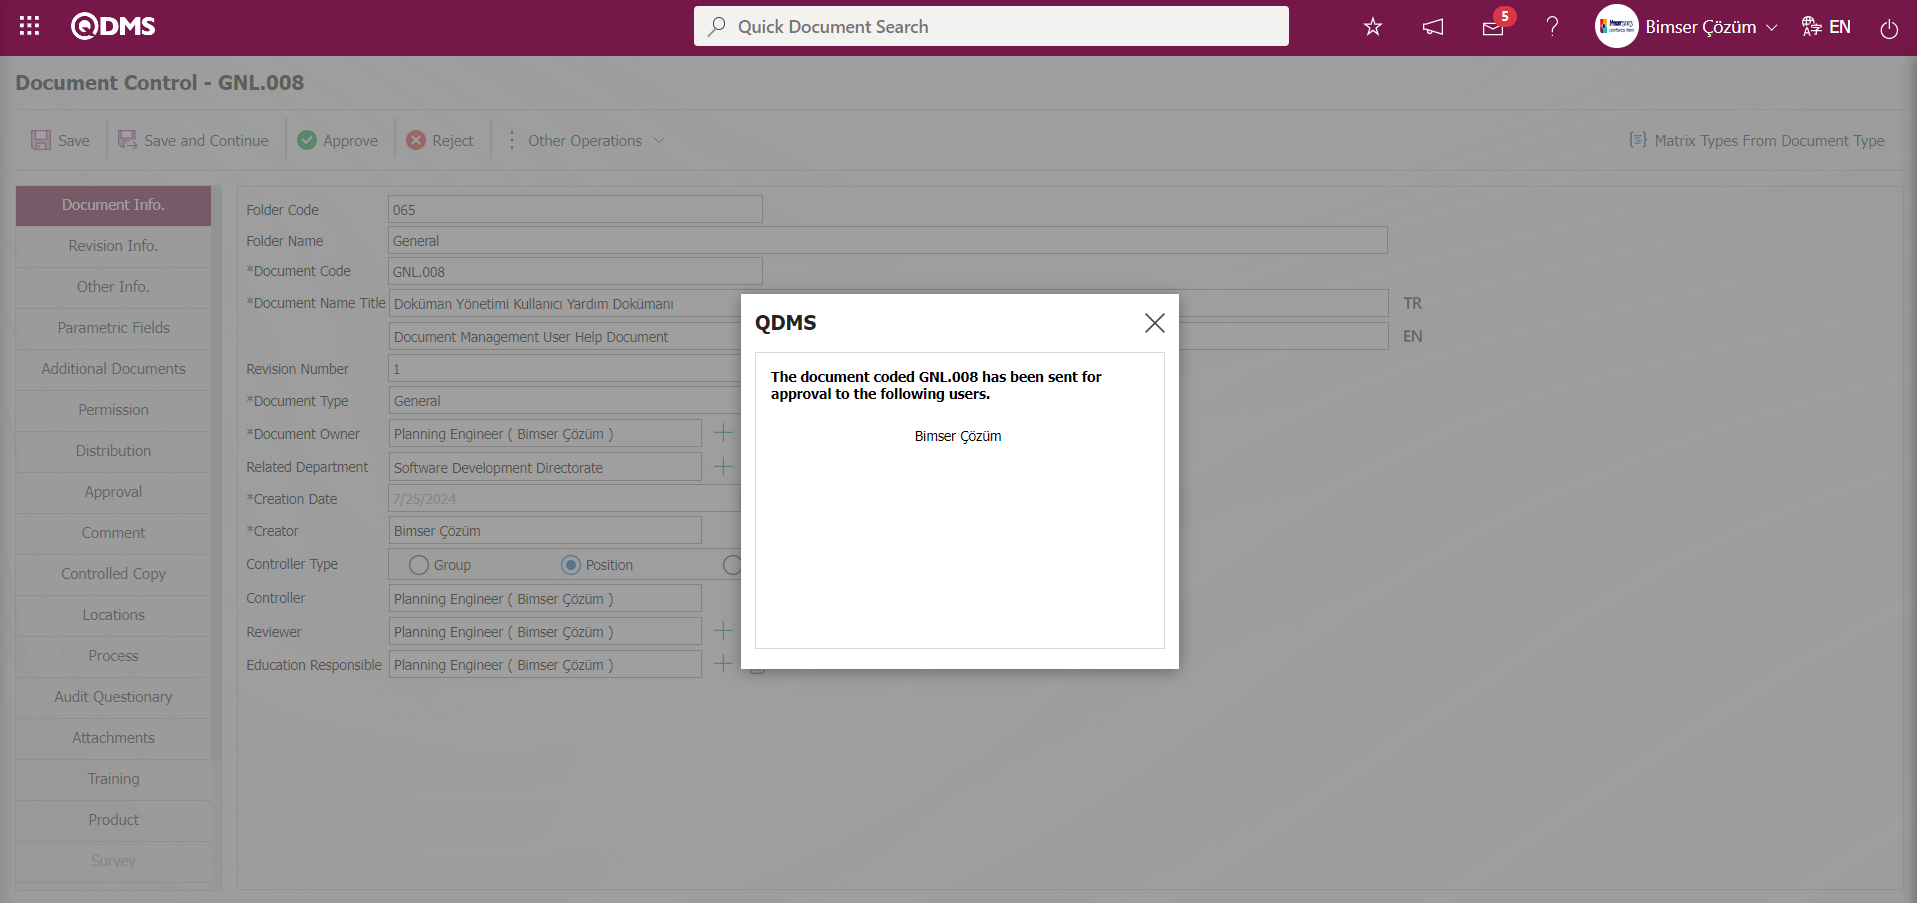
Approval stage in Document Revision Process;
The users in the approval matrix in the document revision process will perform the approval process respectively according to their levels. In the “My Pending Jobs” menu of the approvers, “Documents For Approve Request” is assigned as a job.

The approver displays the Document Approval screen by clicking the link in the document code field in the relevant task. The approving person does not make any changes on the document information. At this stage, only the document can be viewed and approval/rejection operations are performed.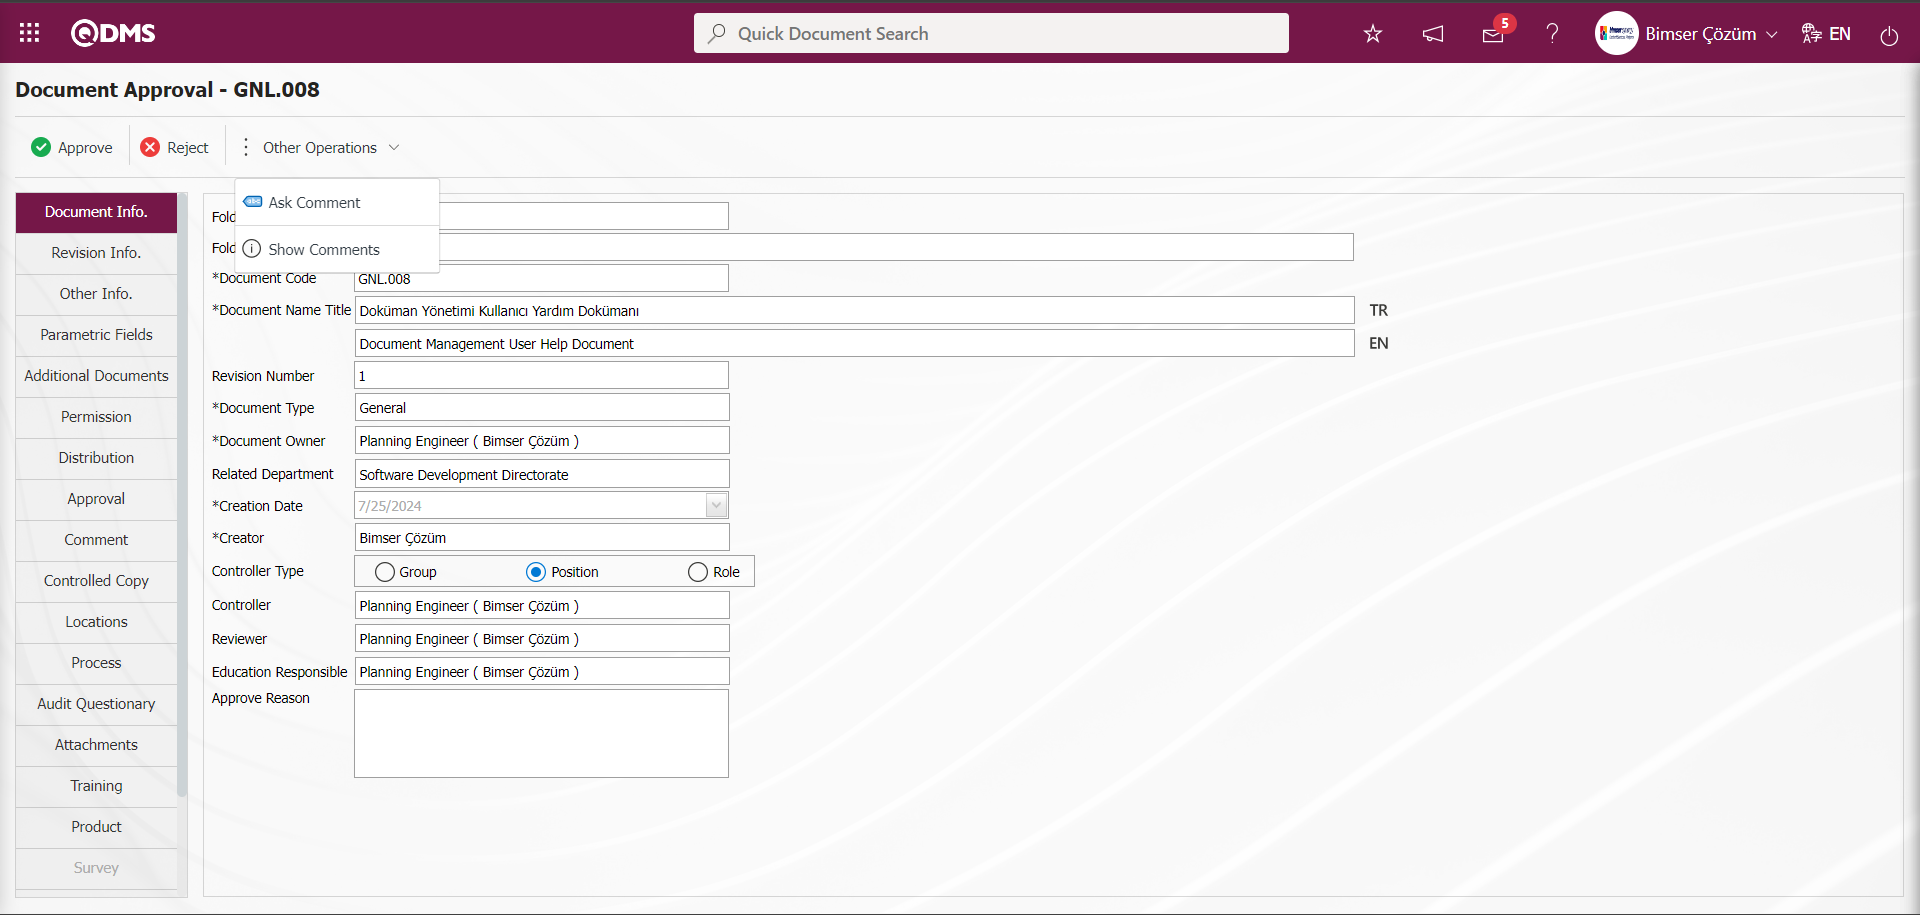
With the help of the buttons on the screen;
: Document approval process is done.
: Rejection is made by writing the reason for document rejection.
![A close-up of a white background
Description automatically generated]ref115: At this stage, comments are requested from the relevant people. It is a button displayed depending on the parameter. The parameter value of parameter 113 in Document Management parameters is activated by selecting “Yes”.

After the parameter is activated, the ![A close-up of a white background
Description automatically generated]ref115 button is displayed and comments are received from these personnel at this stage by selecting the relevant personnel.
: Shows the defined comment information.
In the Add “Document File (English)” field in the Document tab, the document is opened with the (view file) button. In documents prepared using a template, the document created with the preparation template is displayed with the (show published version) button. Click on the Document Information tab.
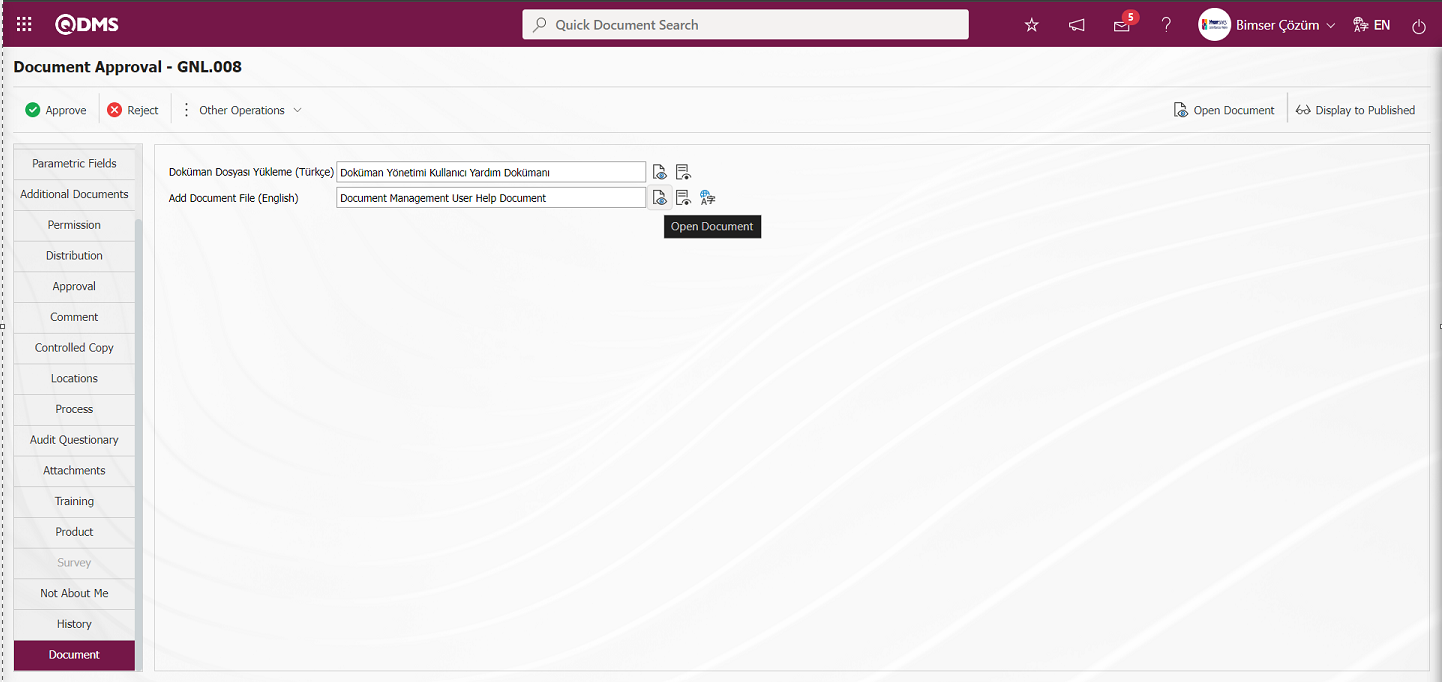
Click the button on the Document Approval screen.
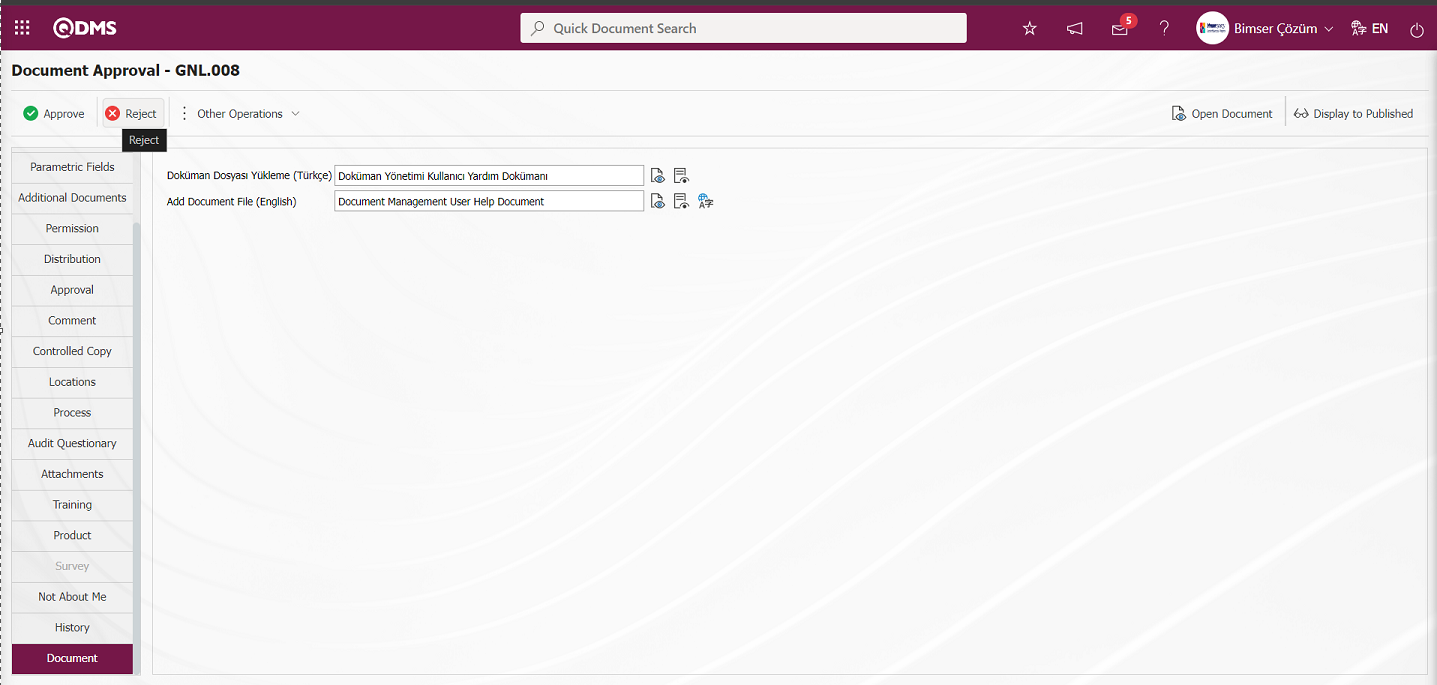
The Reject Approval screen opens. Document revision approval process is rejected. Reason for rejection is mandatory in the rejection process. Rejection of the approval process is done by writing the reason for rejection and, if desired, uploading additional files related to this rejection reason at this stage.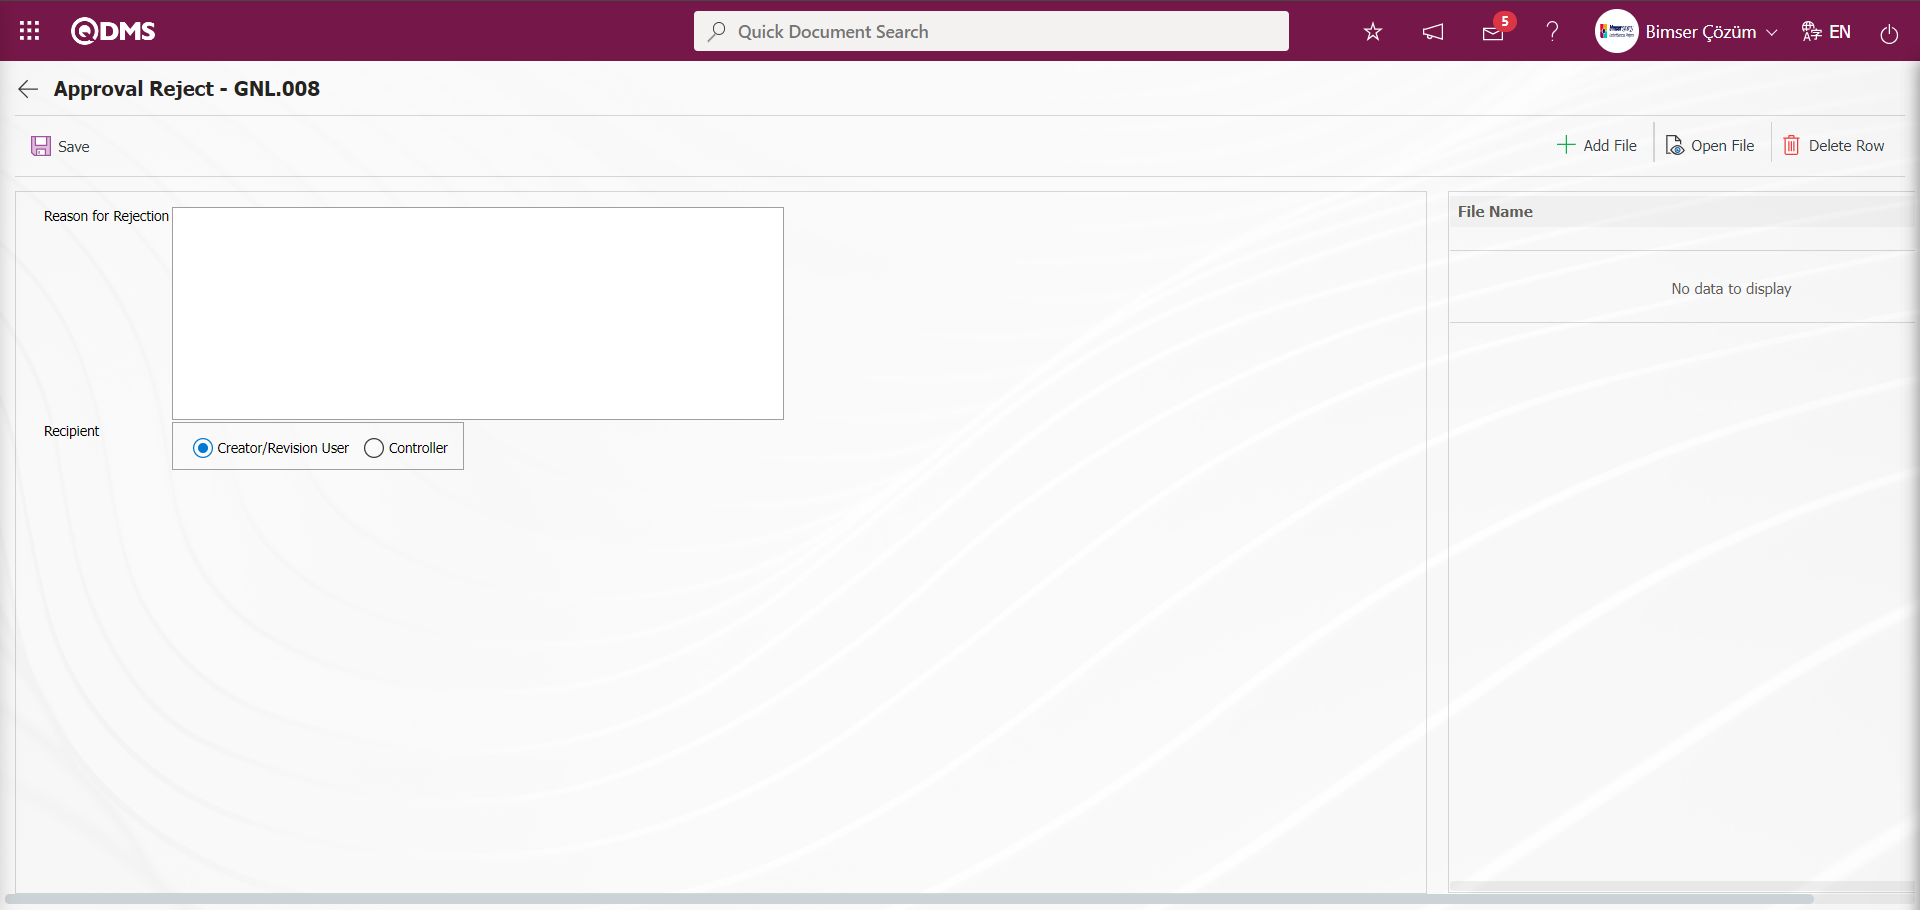
Click on the Document Information tab on the Document Approval screen. In the document revision process, the approval description information is written by the approver on the Document Approval screen and the button is clicked.

Click the “OK” button in the message given by the system.

After the approval process of the document during the revision process by the system, a message is given about the document being published and made available for use.
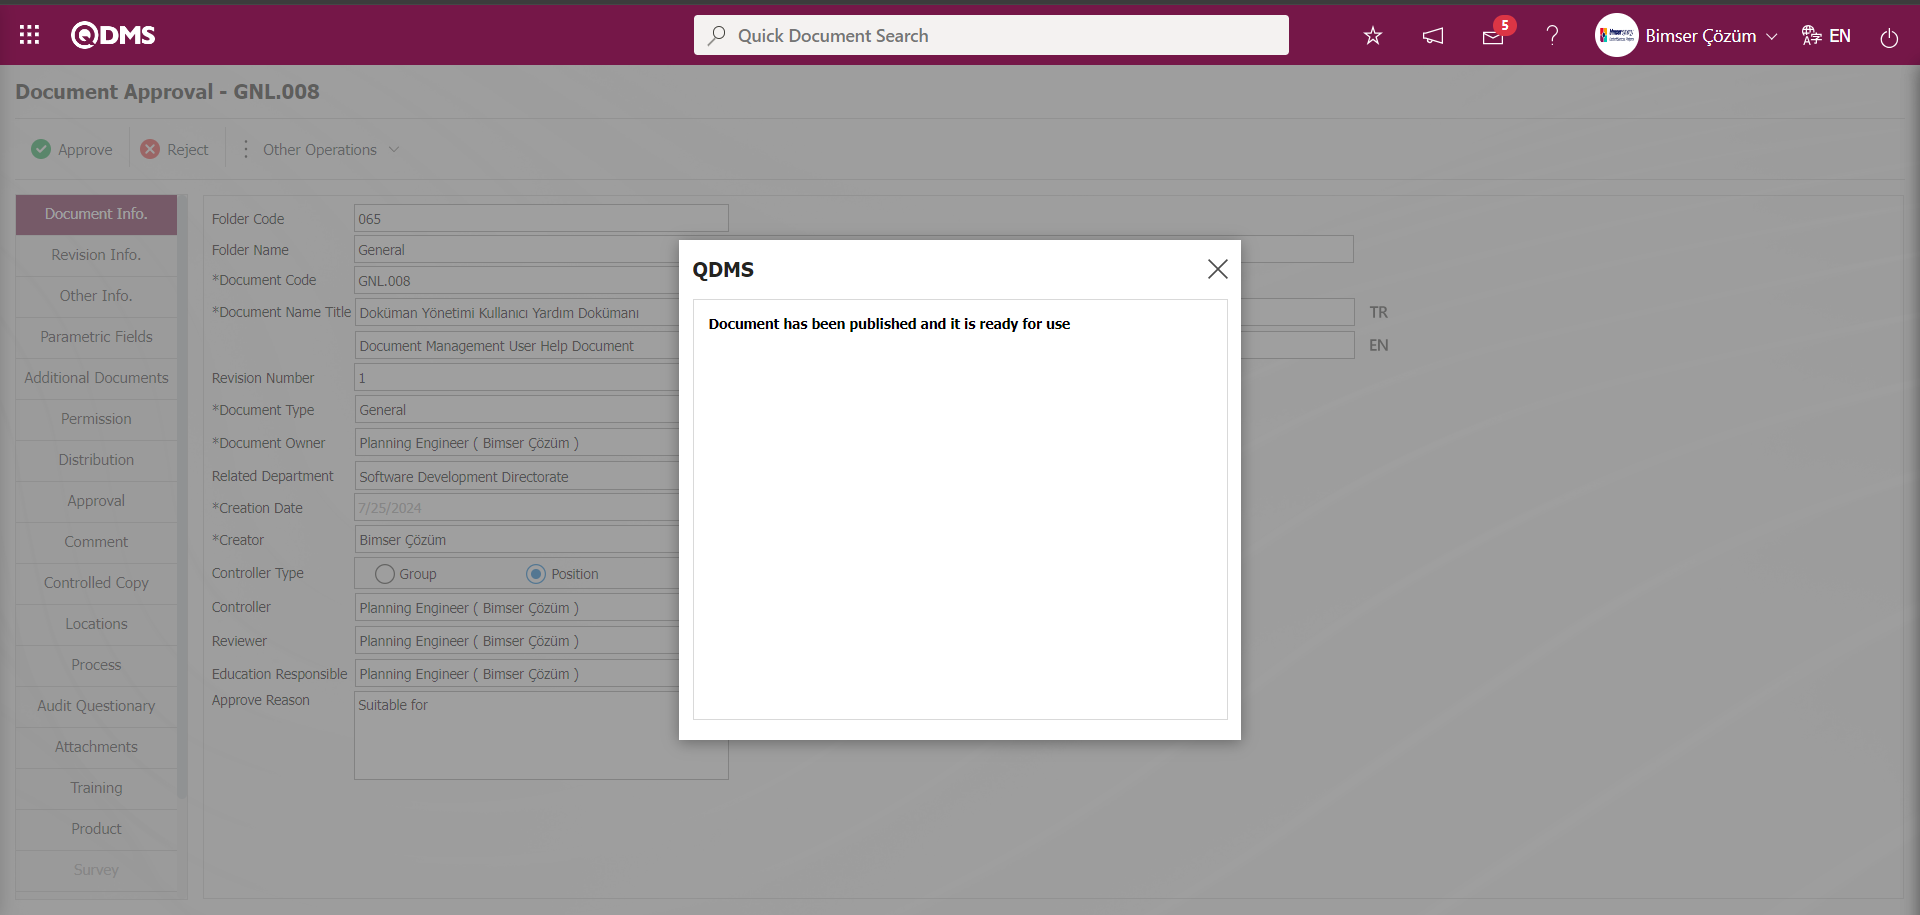
In the document revision process, if there is an opinion, if there is no opinion, the approval and control stages are the same as in the document preparation process. After the approval and control phase of the revised document, the “Required Reading Document List” in the pending jobs of the defined people in the distribution matrix and the “Required Reading Important Document List” if the check box related to the important field for important documents in the distribution matrix is checked.
On the Qdms Main login screen, login to Qdms local address by typing the name and password of the user in the distribution matrix.
It is assigned as“Required Reading Important Document List ‘ job on the “My Pending Jobs” page of the user logged in to Qdms.
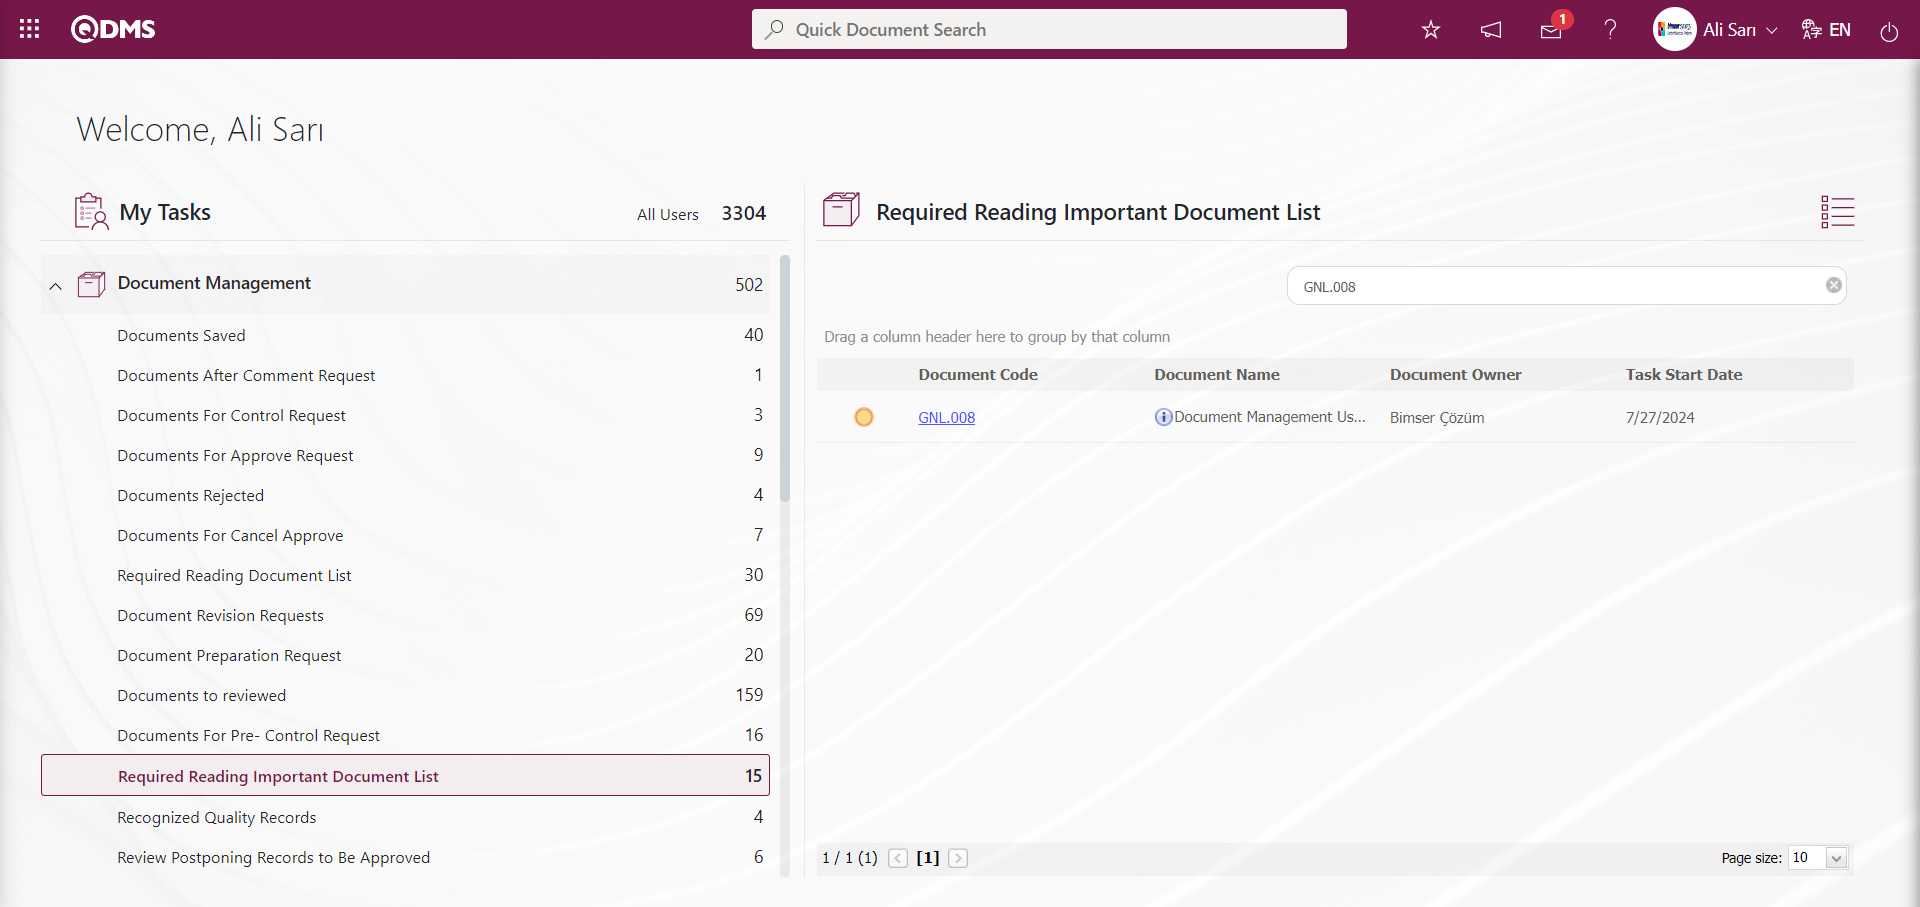
The document information screen is displayed by clicking the link in the document code field in the relevant task. It is seen that the last revision reason information is written in the Last Revision Reason field of the document displayed on the Document View screen.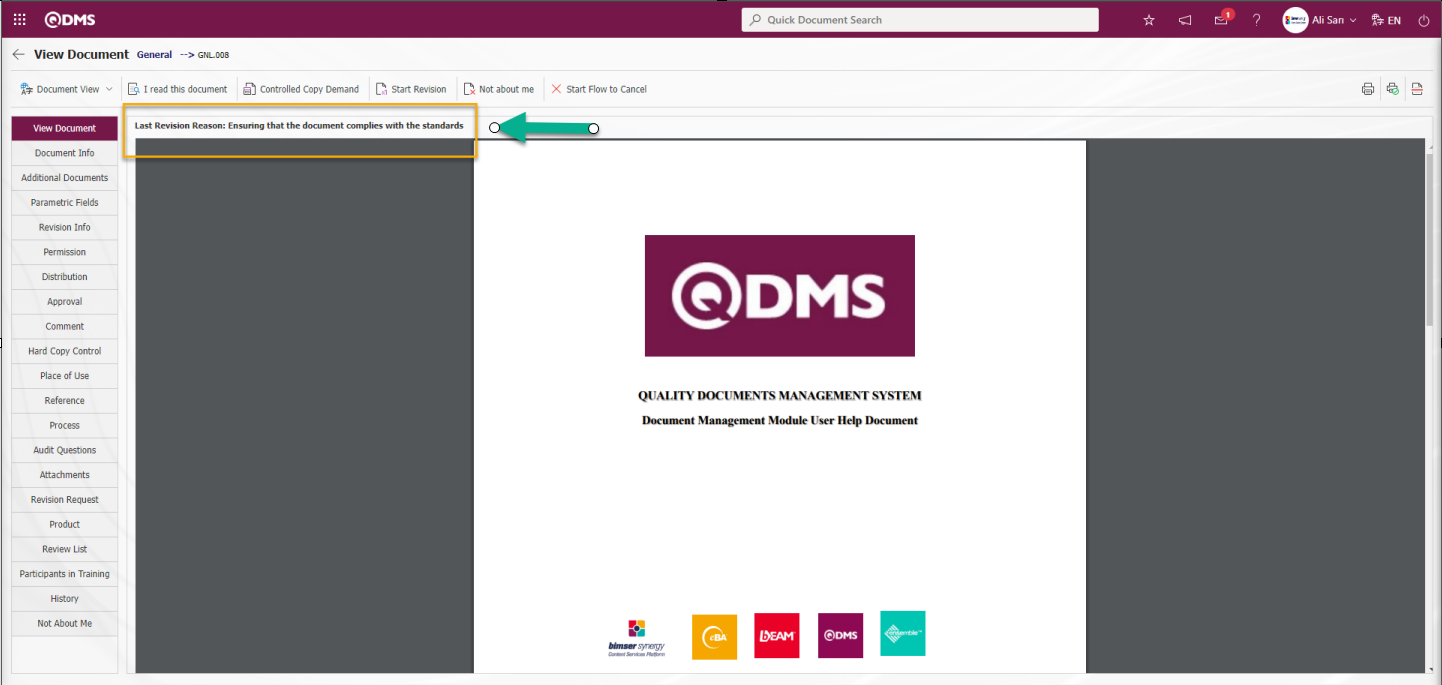
On the screen opened by clicking the Document Information screen, it is seen that the Revision Number automatically comes as “1” by the system.
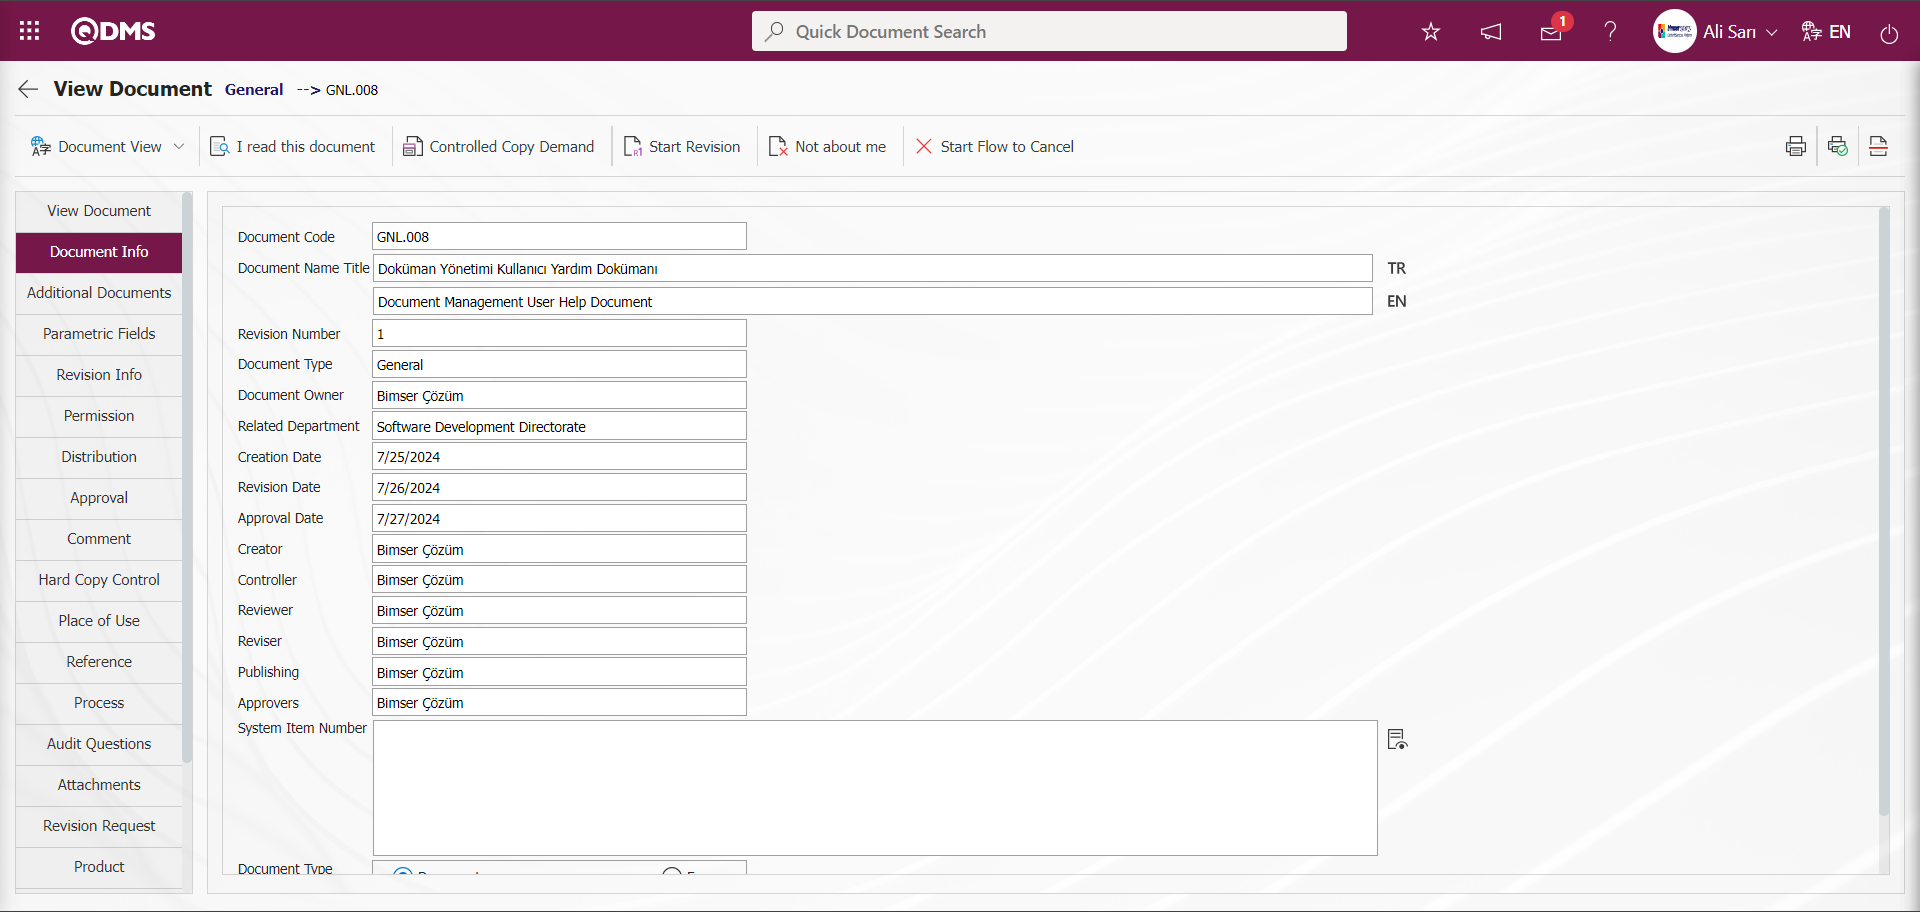
Option 2;
Click on Integrated Management System/ Document Operations/Document View menu
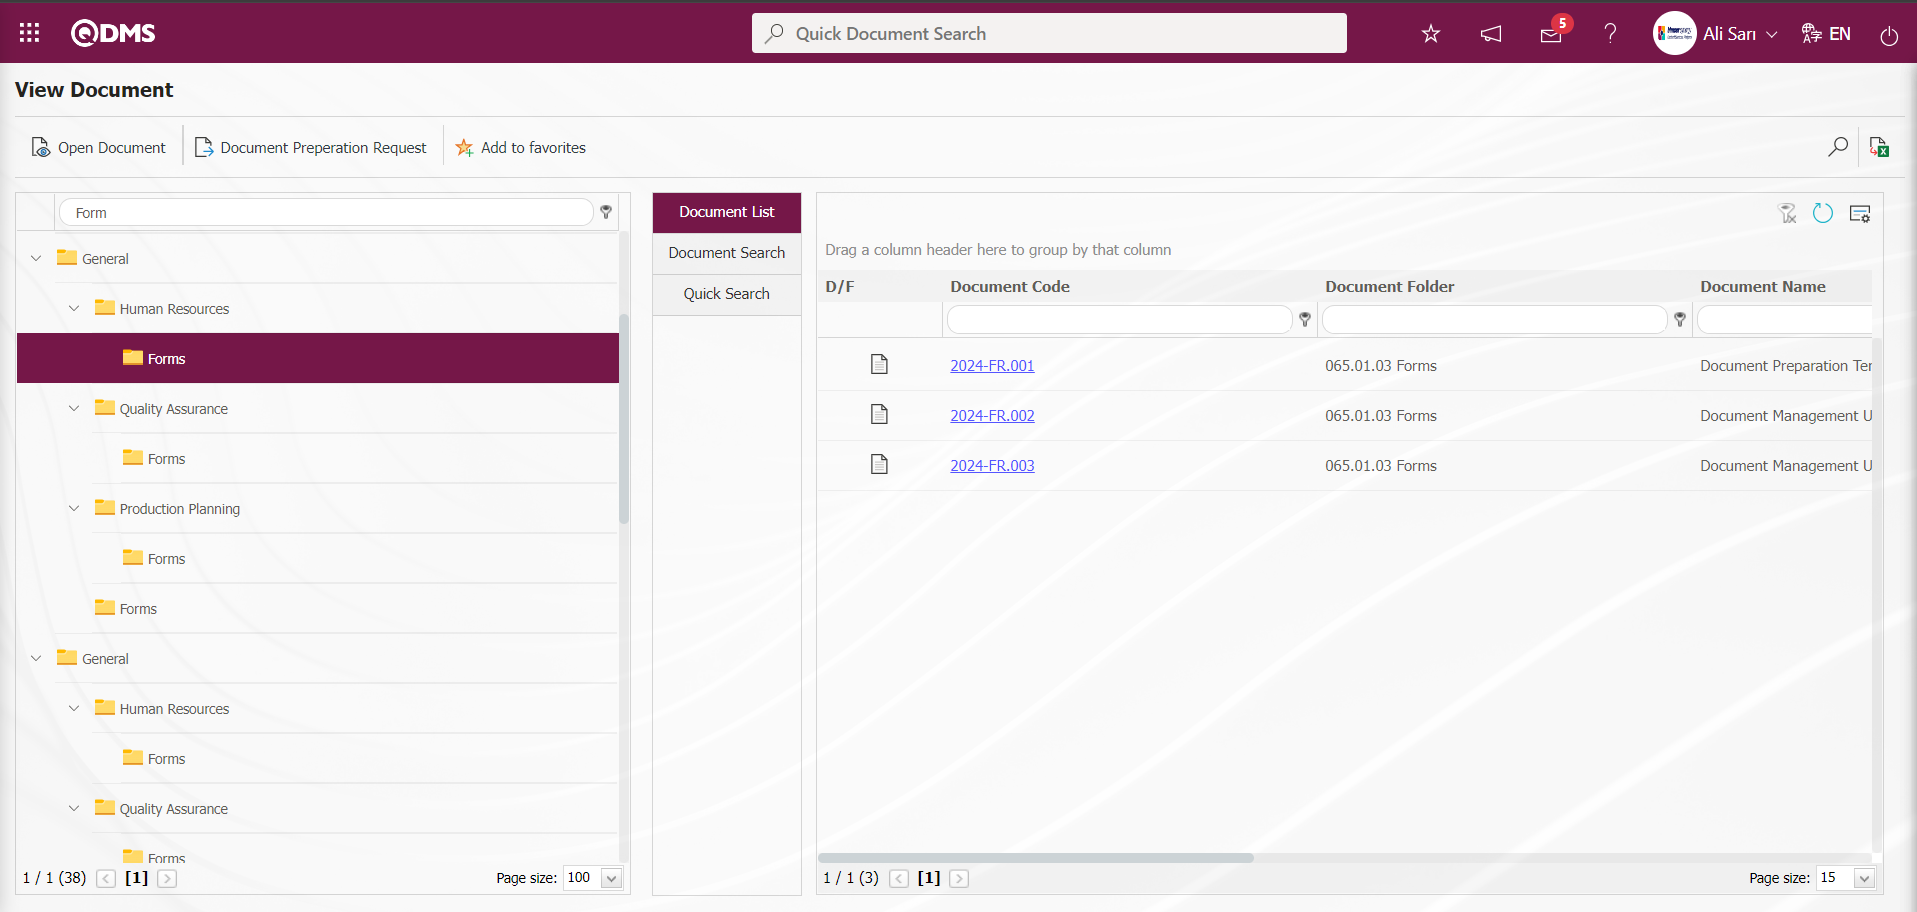
The folder containing the document to be revised is selected and the documents in the Document List are listed. The information of the document to be revised is displayed by clicking the code of the document to be revised listed in the Document List. While viewing the relevant document on the Document View screen, the revision process is started by clicking the 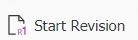 button in the upper left corner of the page.
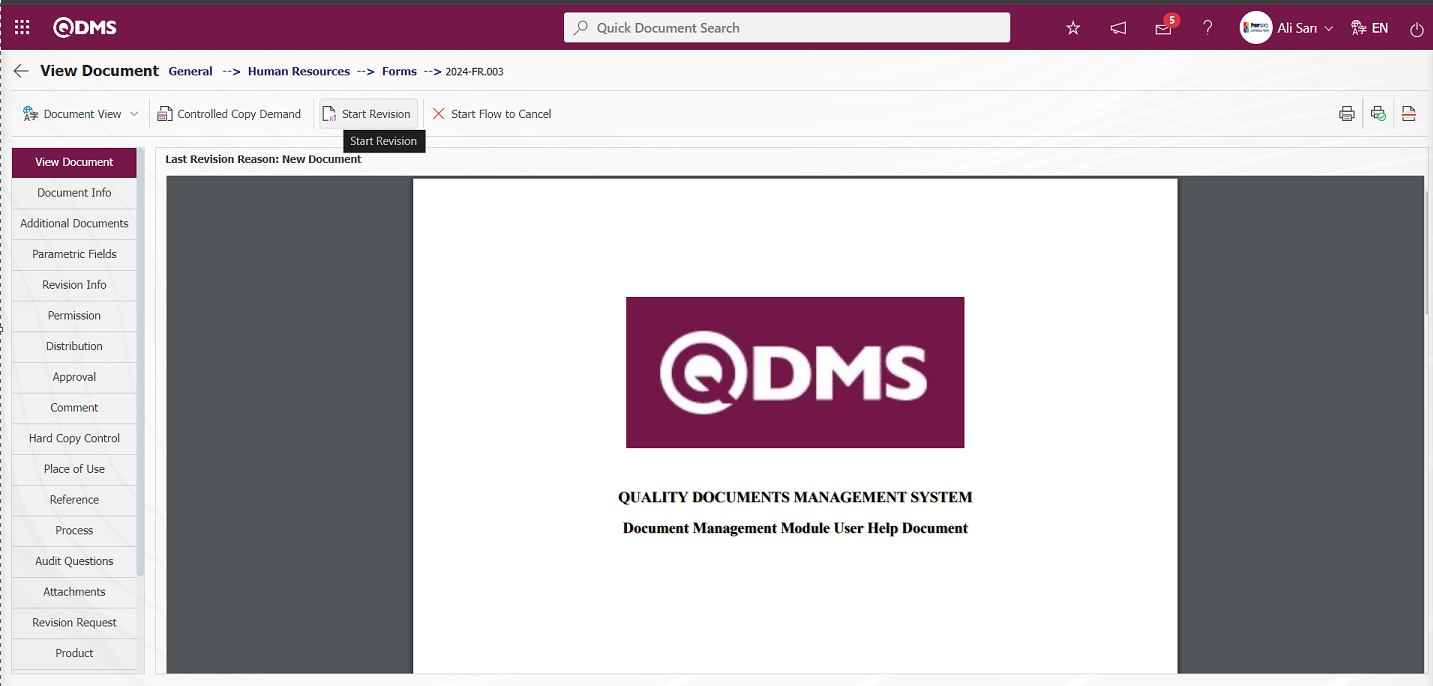
Click the “OK” button in the message given by the system.
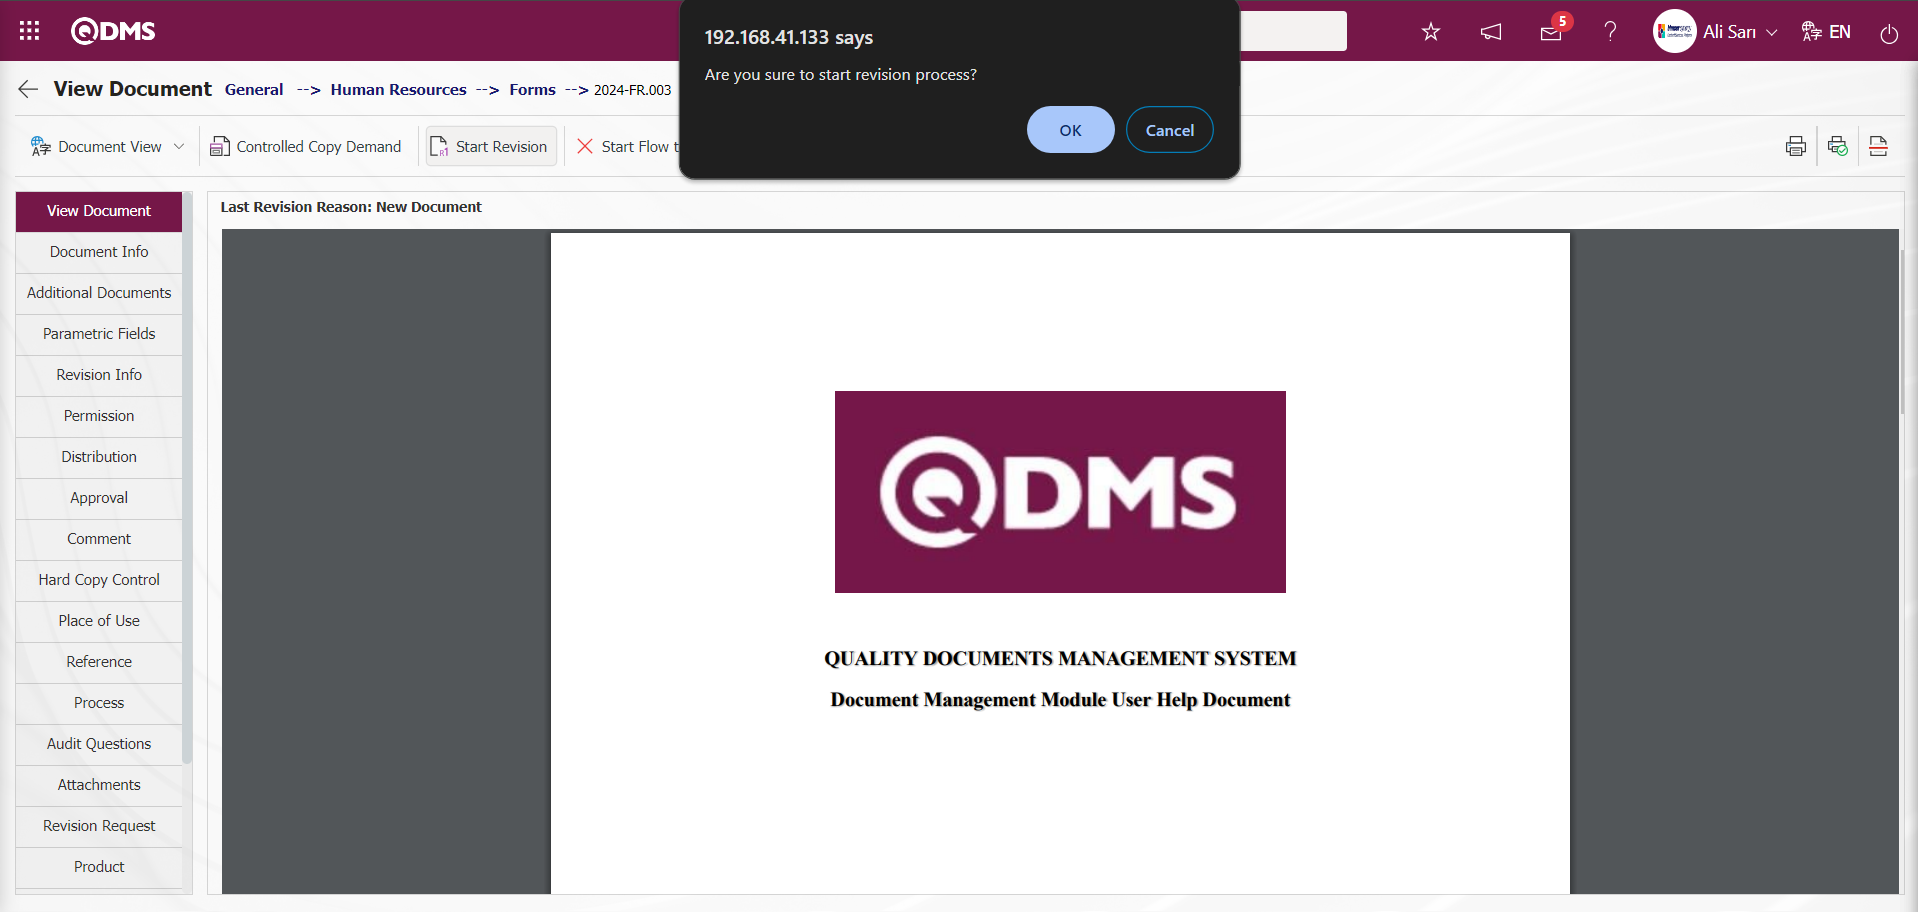
A message is given by the system that the document has been successfully saved and the revision process has been initiated.

On the Document Revision screen, we see the information created on the Document Preparation screen. Revision number is given automatically by the system.
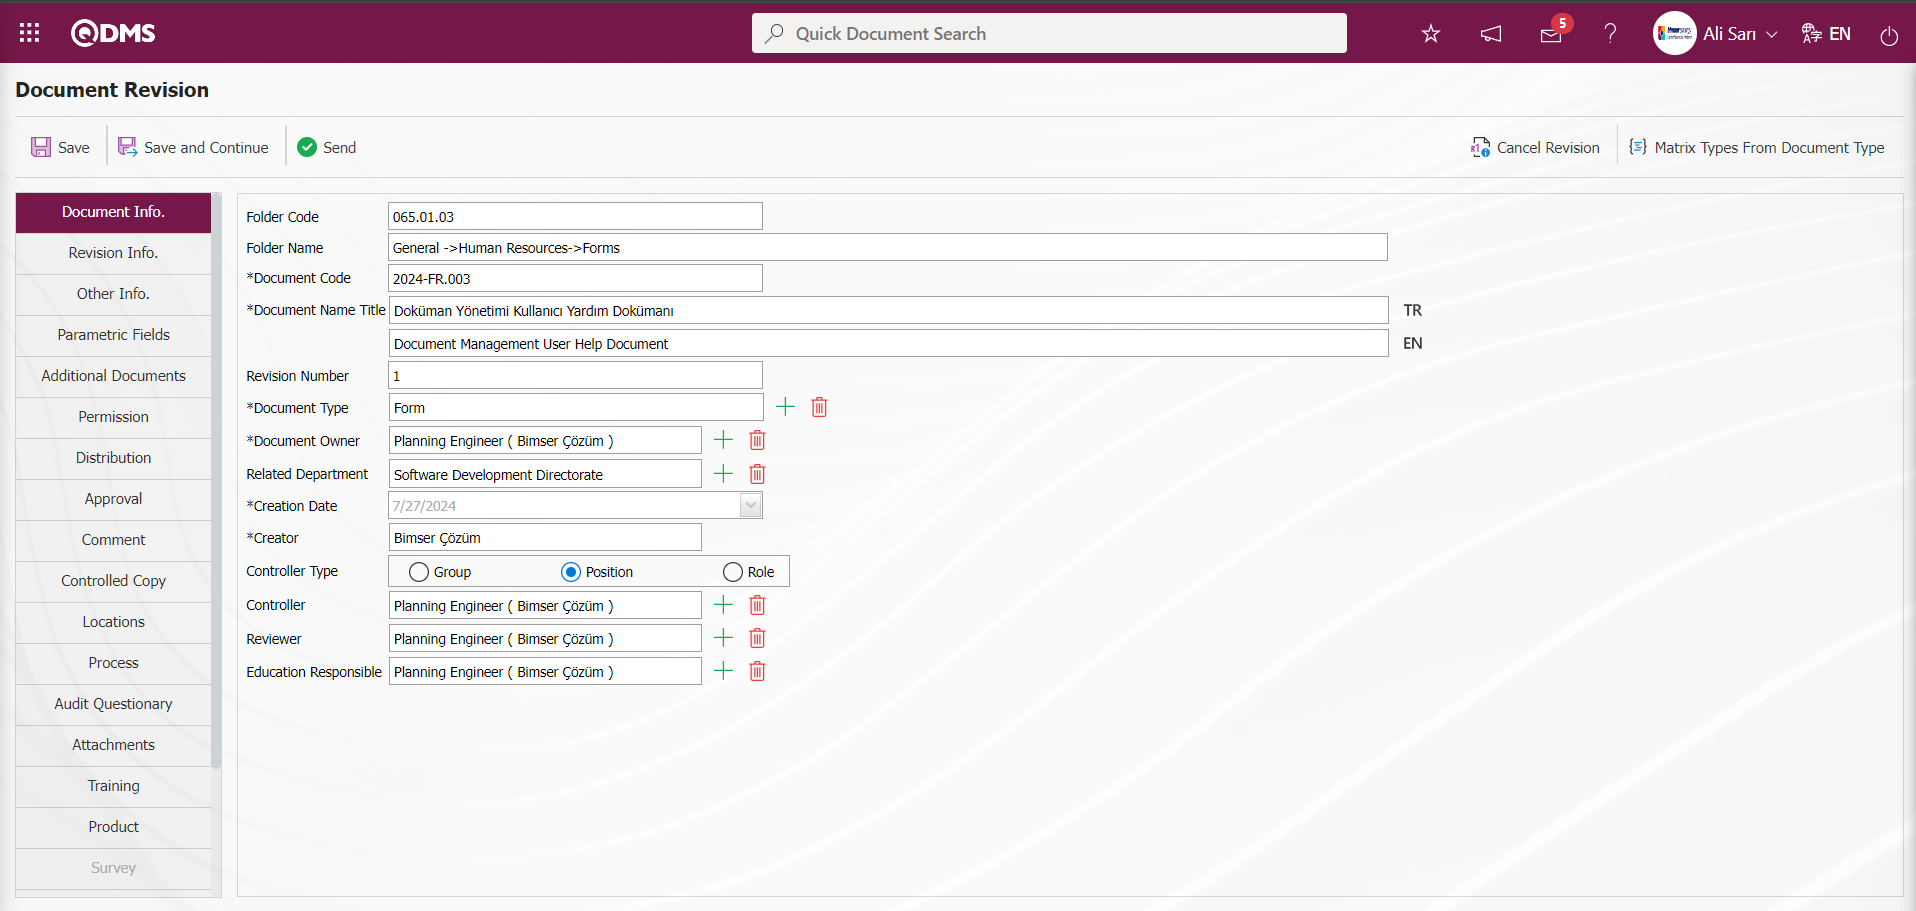 At this stage, desired changes can be made on the information of the document. The reason for revision is entered by clicking on the “Revision Information” tab on the screen. What is done in the revision can be entered. If it comes from a revision request, the request can be selected and specified.

On the Document Revision screen, the English language file of the document is downloaded for revision with the  (View file) button in the Add Document File (English) field on the Document tab.
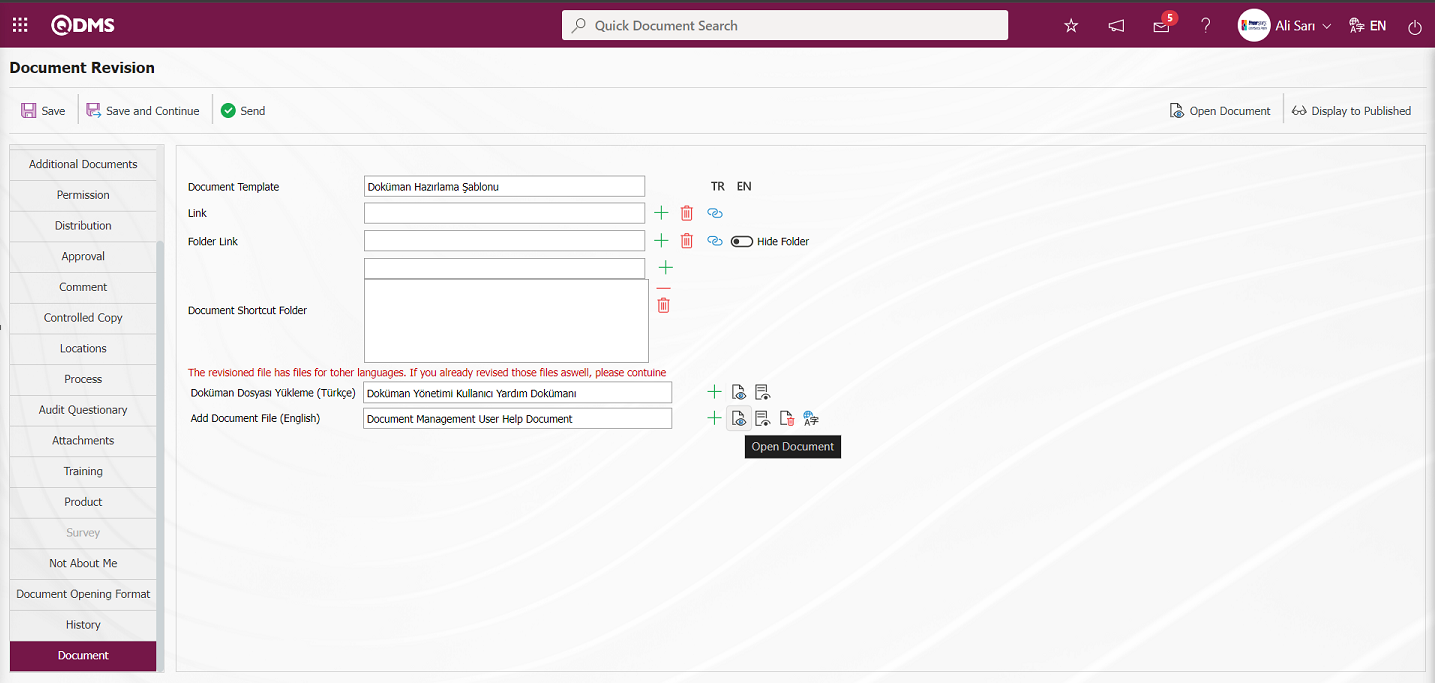
The content of the English file of the downloaded document is displayed. The important point to note here is that the name of the downloaded document appears as _X. X here indicates the revision of the document
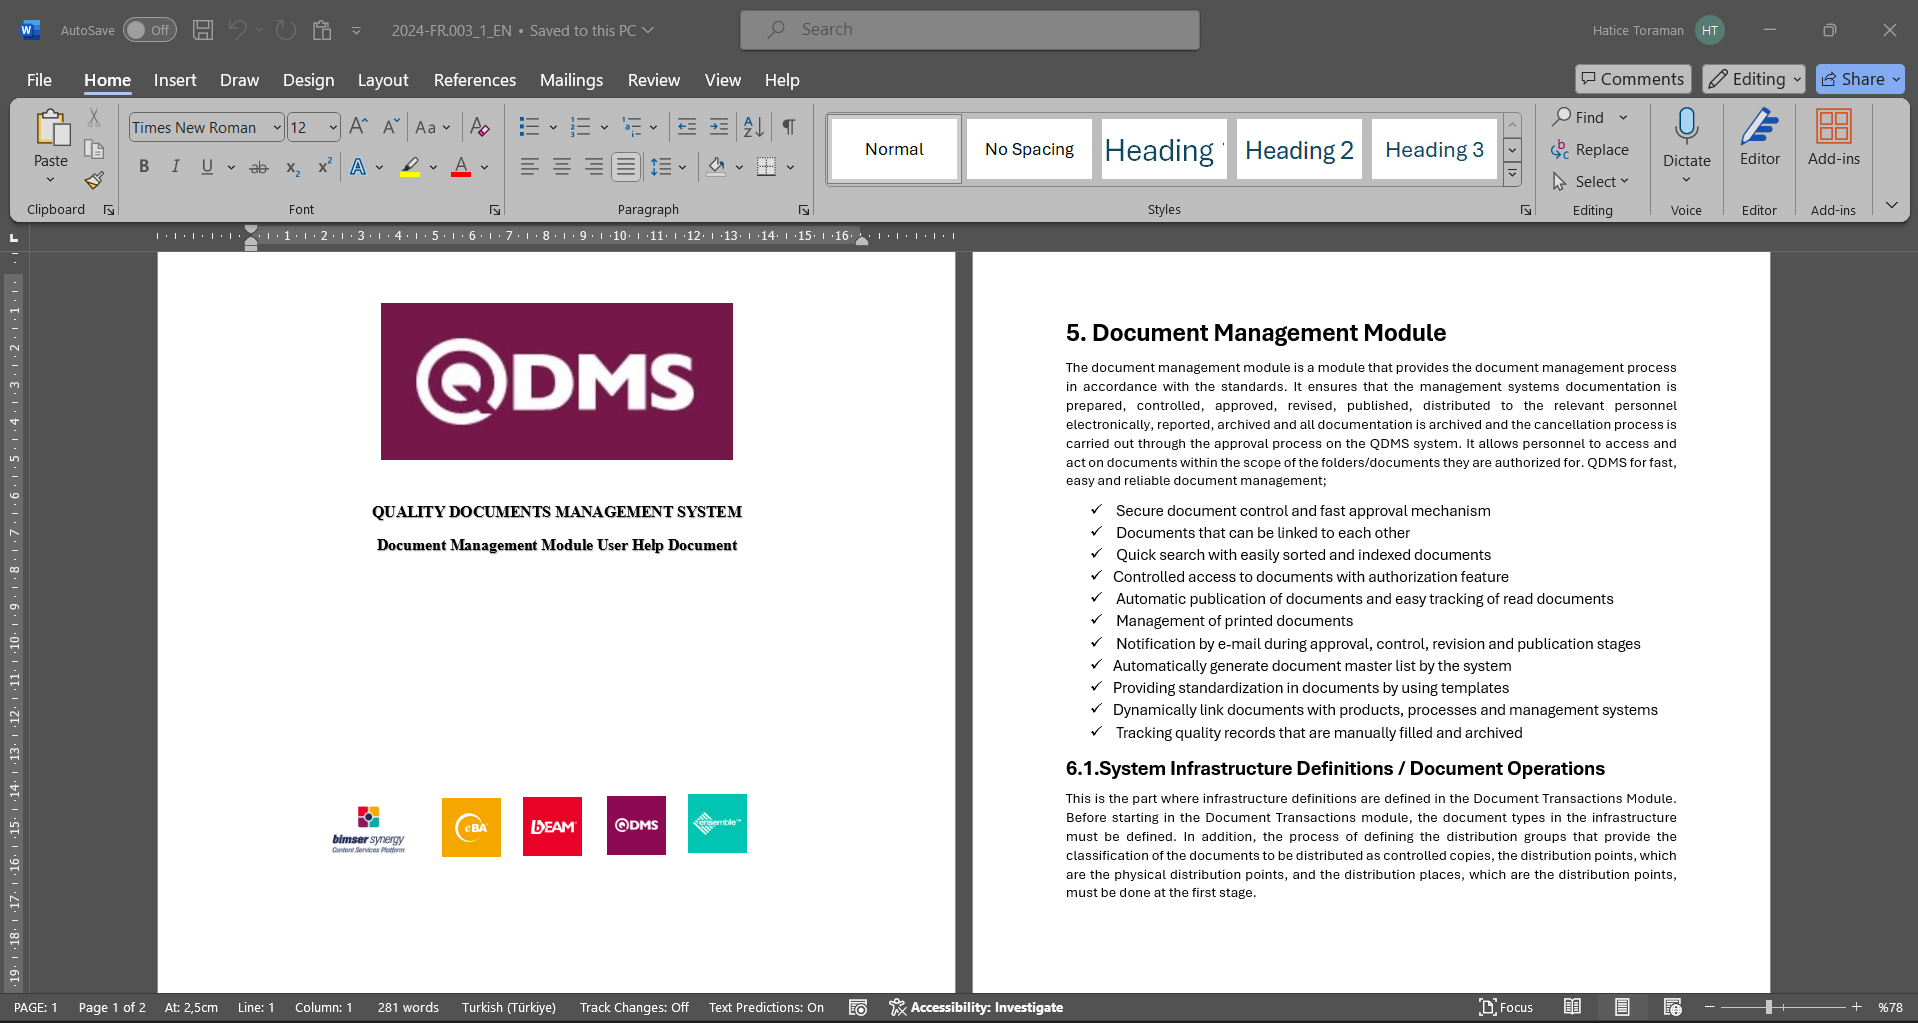
The revision process is performed by making changes and edits on the content of the displayed Document English language file.
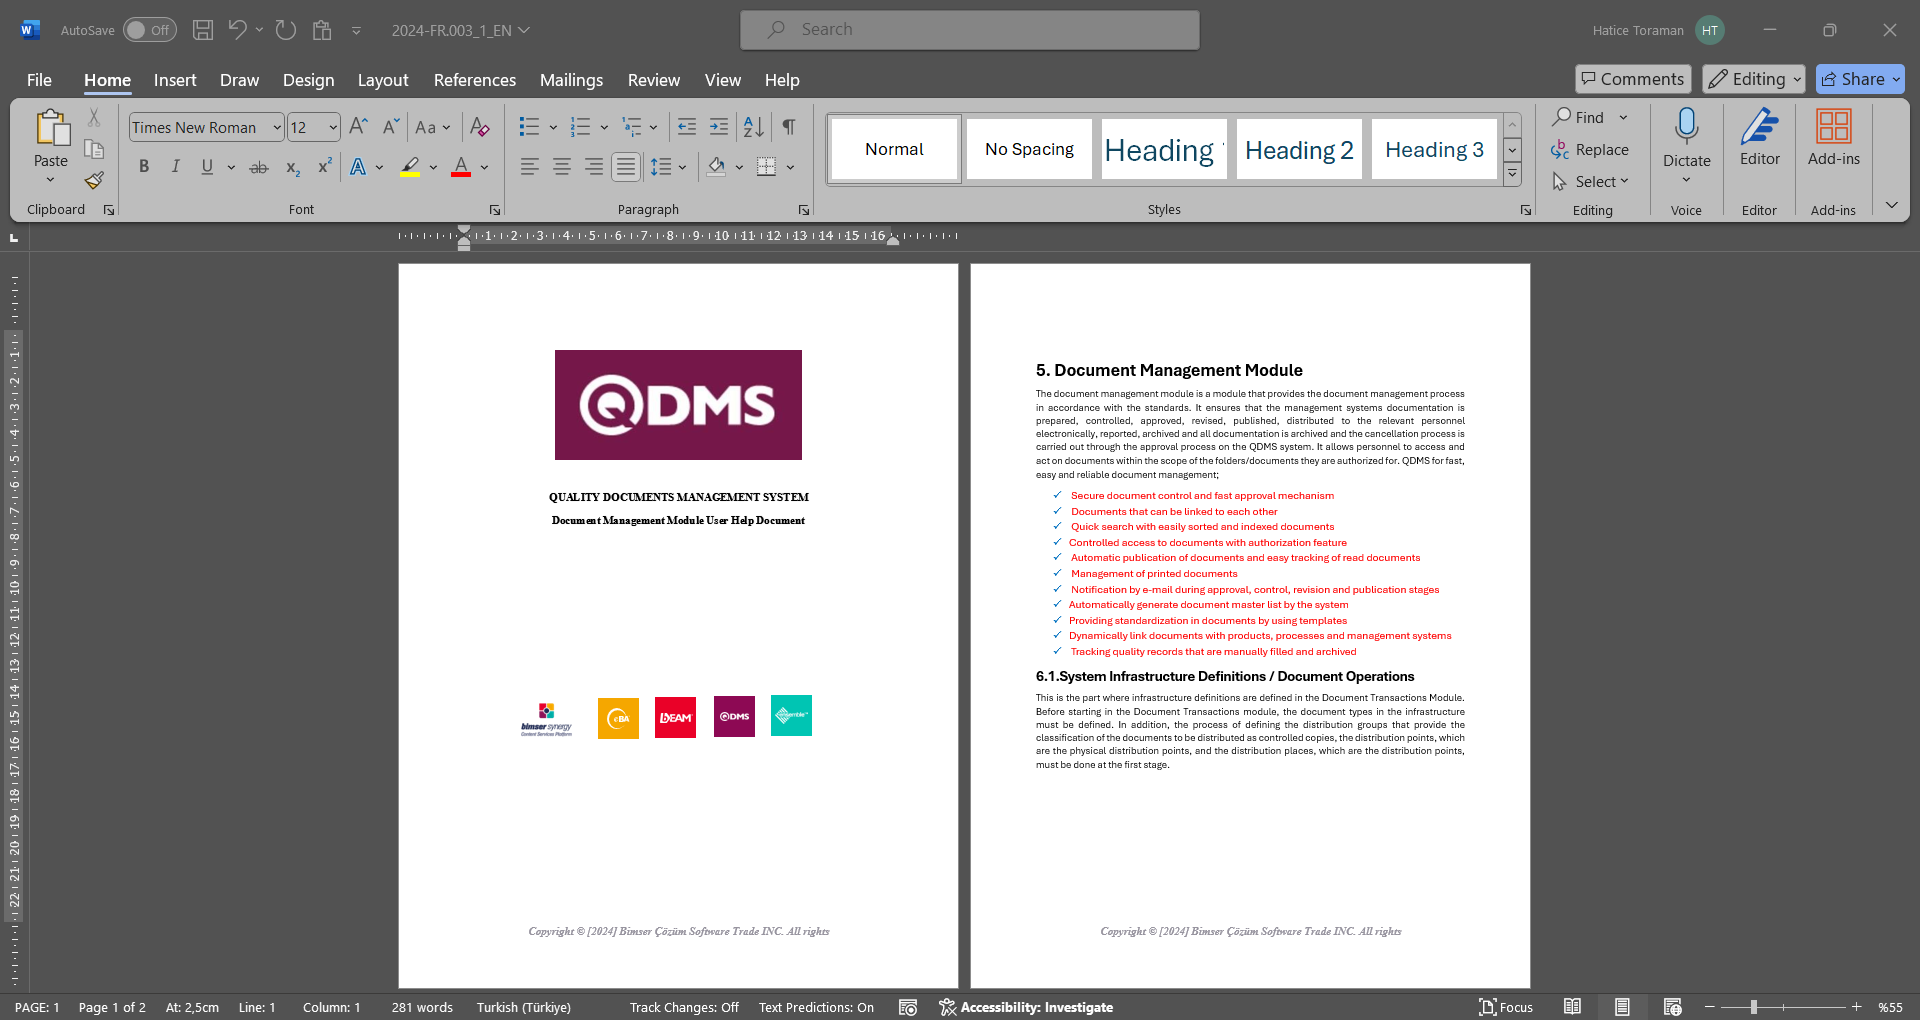
After the revision operations are performed on the document, the document is uploaded to the system with the Add Document File (English) field  (Upload file) button. The point to be considered here is that the name of the language file of the document downloaded from the system and the name of the document language file uploaded to the system must be the same. Otherwise the system gives an error. There is a warning that the downloaded document must be uploaded to the system with the language file name. The file name we will add is changed to _X and the file is uploaded again.
After the revision operations are performed on the document, a different document language file is uploaded to the system by clicking the (Upload file) button in the Add Document File (English) field.

Click the Browse button on the Add File screen.
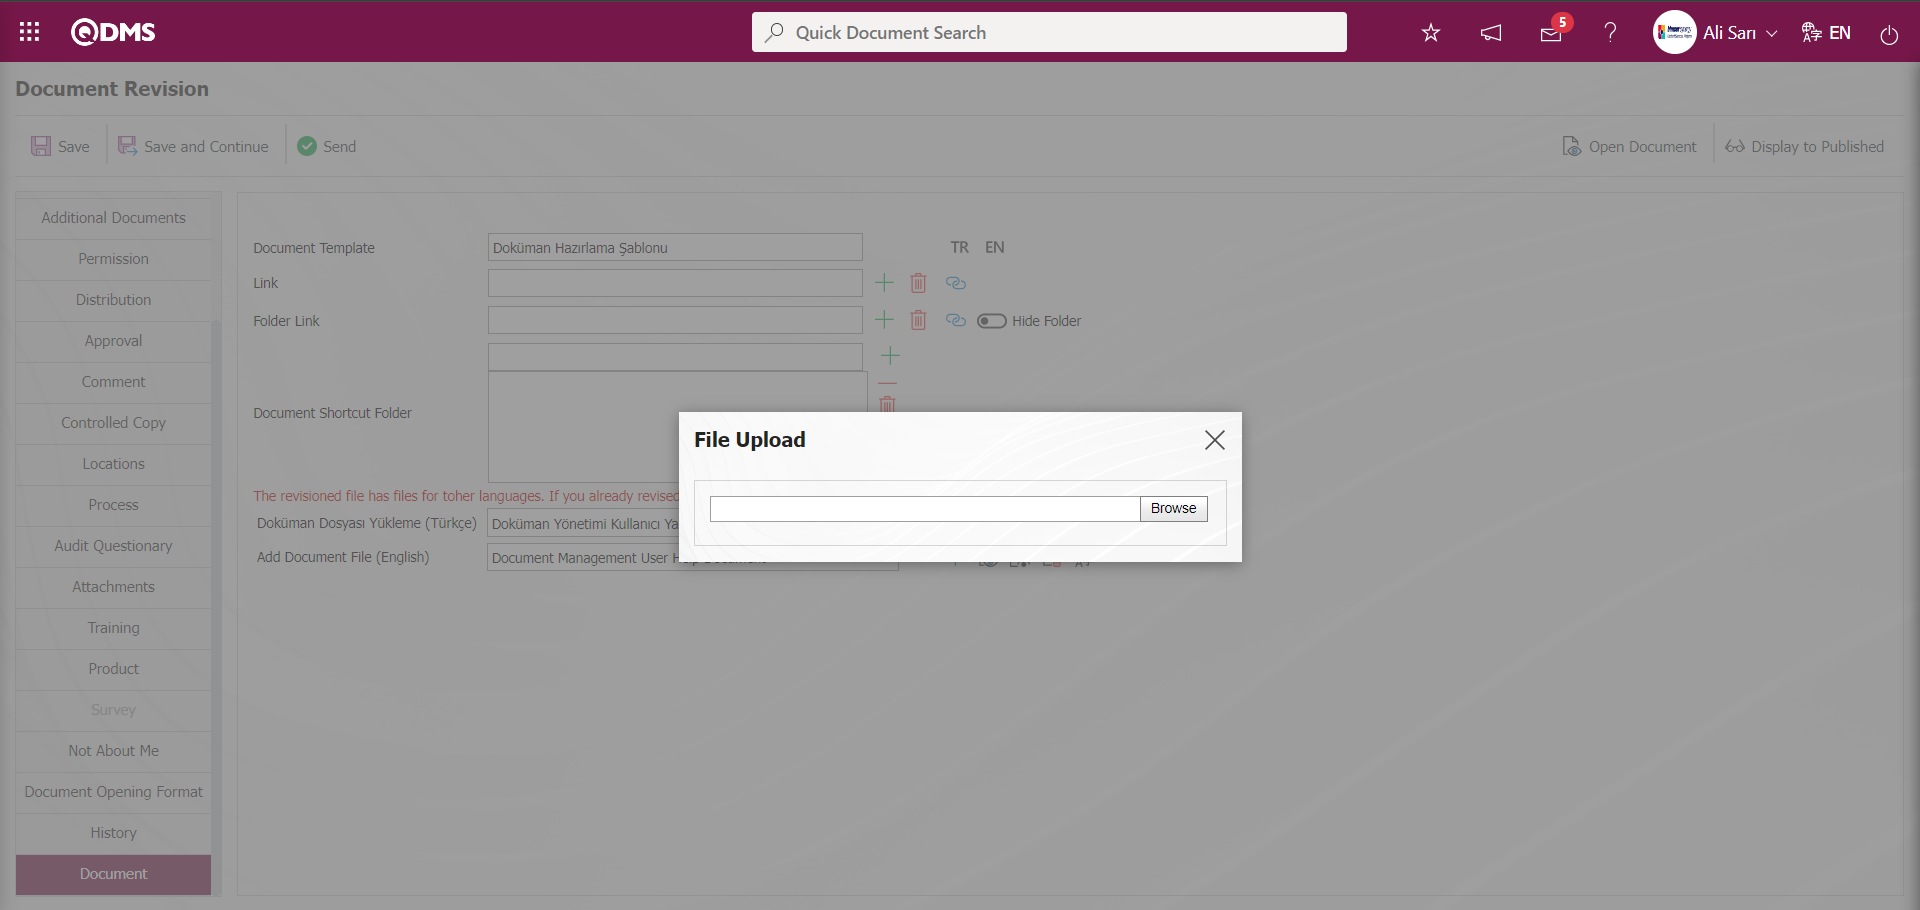
In the screen that opens, select a different file as the document language file.
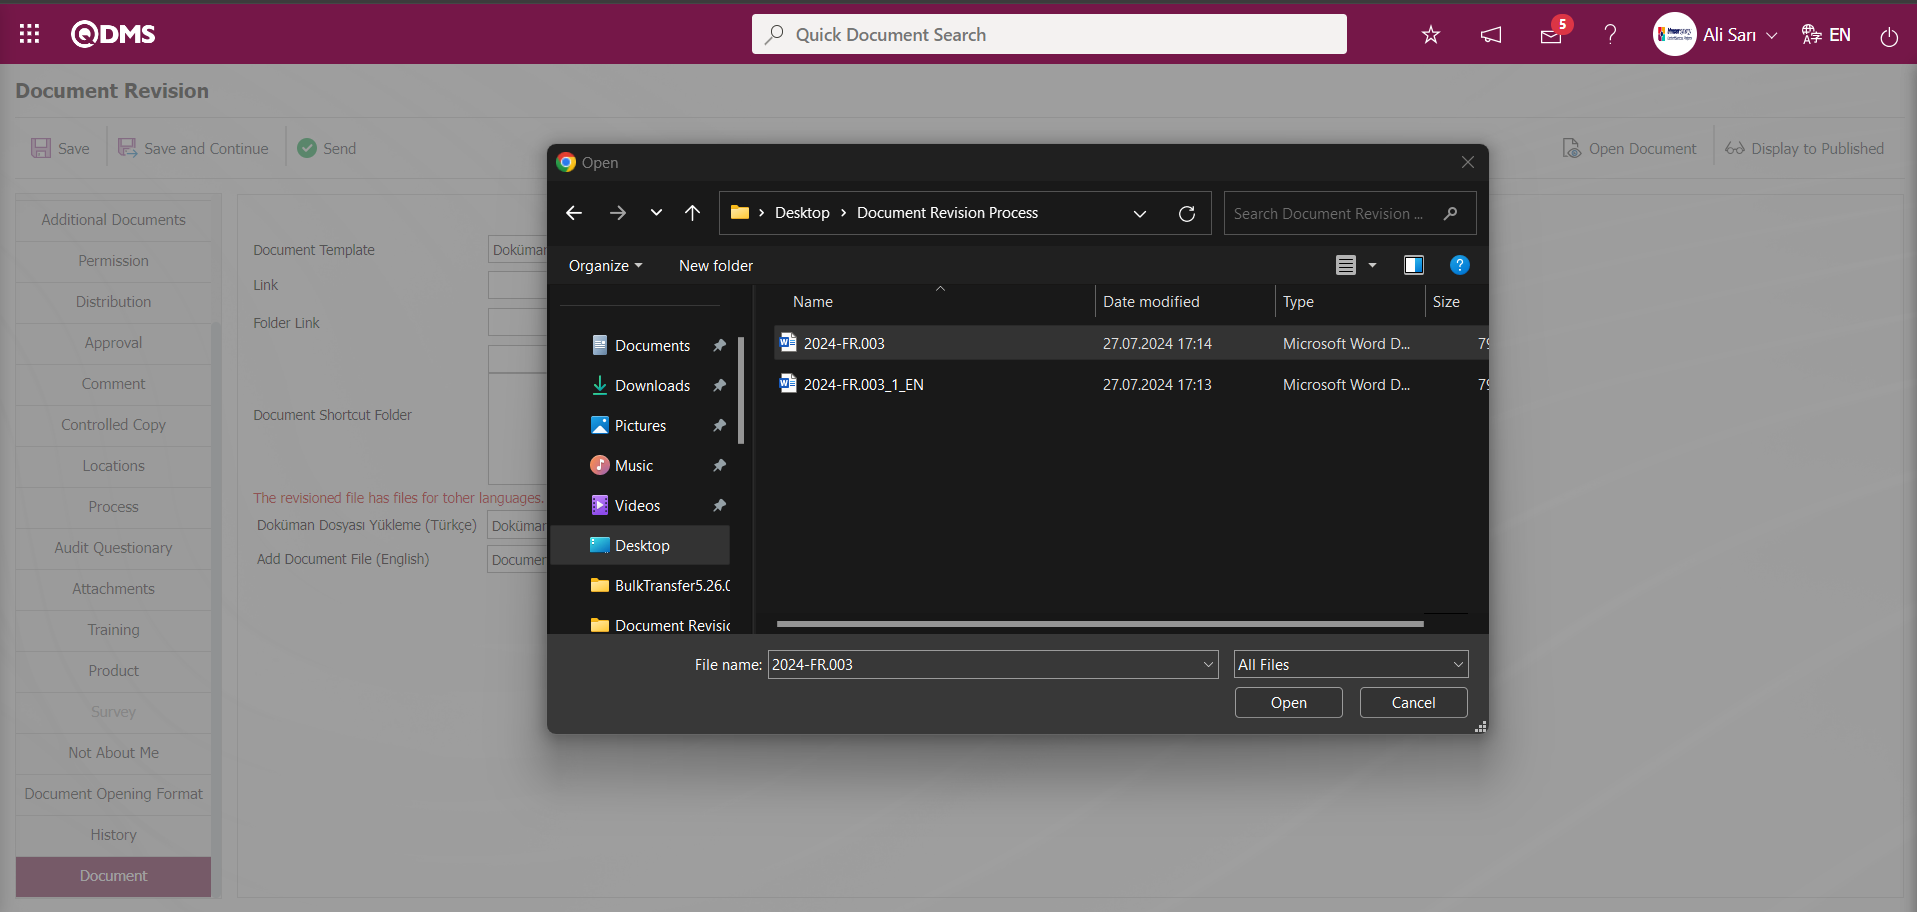
A message is given about the file name added by the system does not match the document code.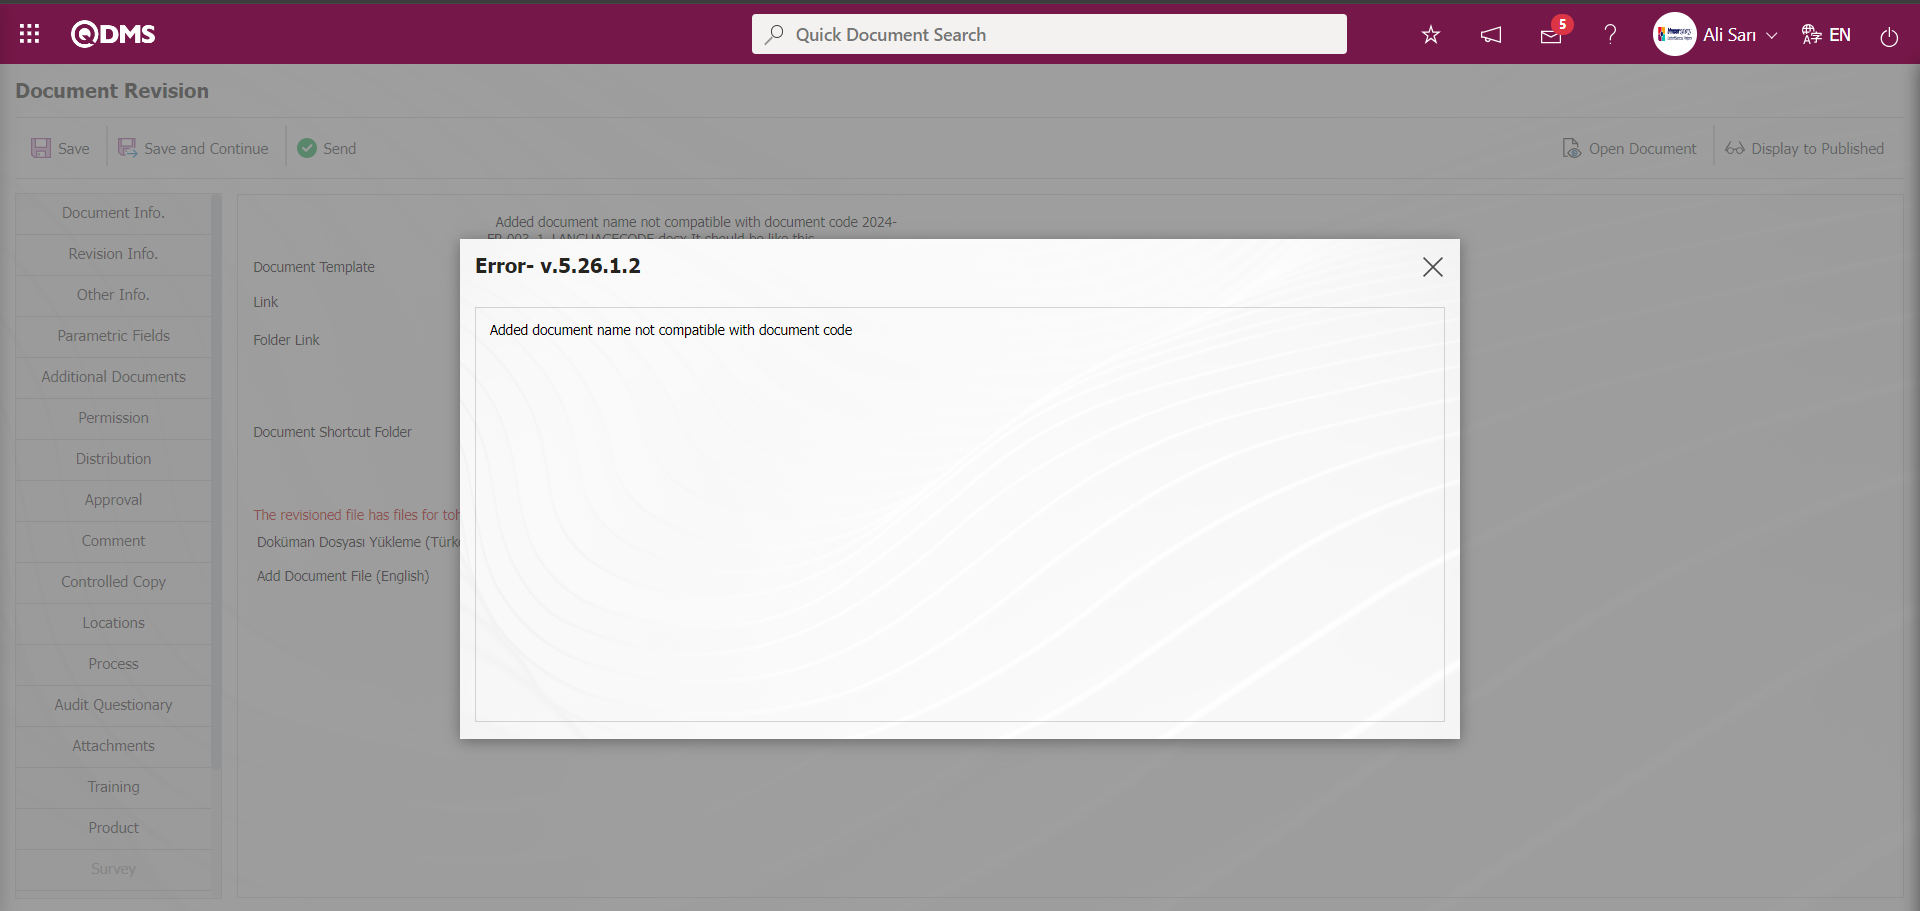
Considering the warning given by the system, the upload process is performed by clicking the (Upload file) button in the Add Document File (English) field of the document language file for which revision is made. The name of the revised document is changed to whatever the name downloaded from the system is and uploaded to the system.
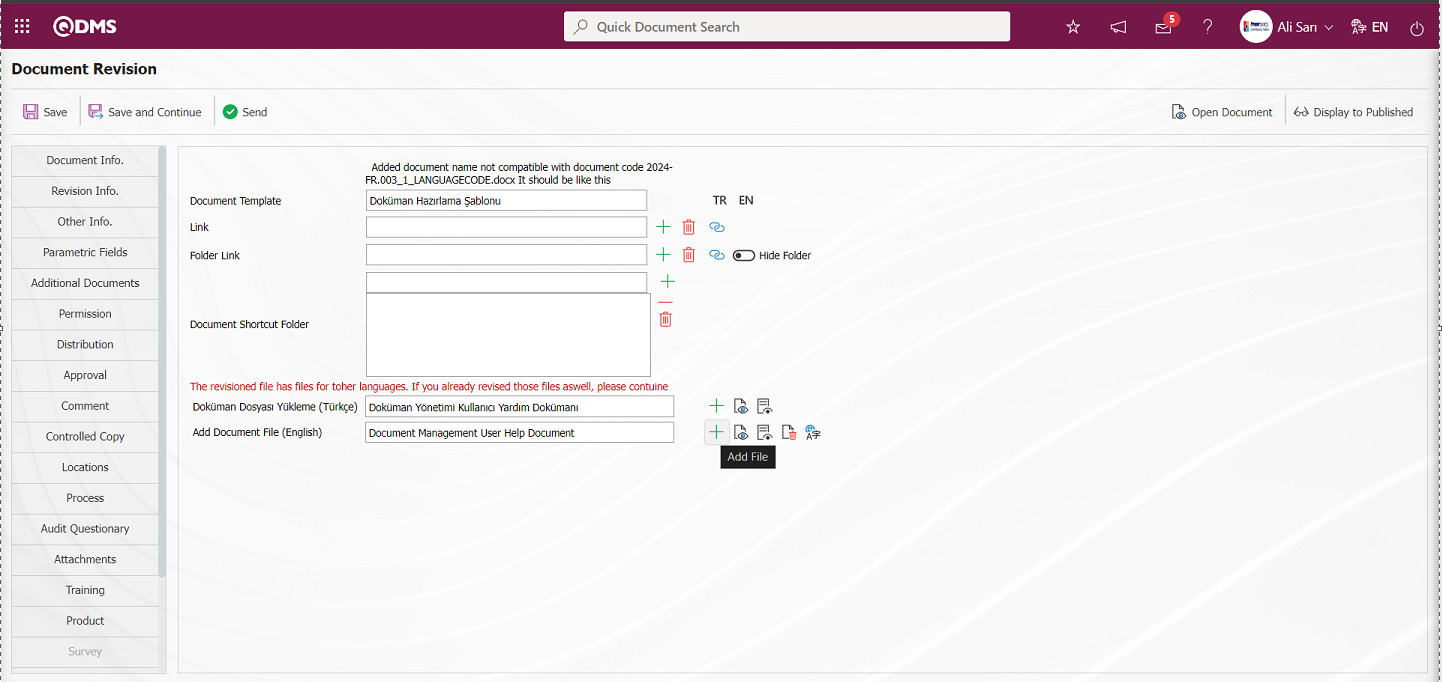
Click the Browse button on the Add file screen.
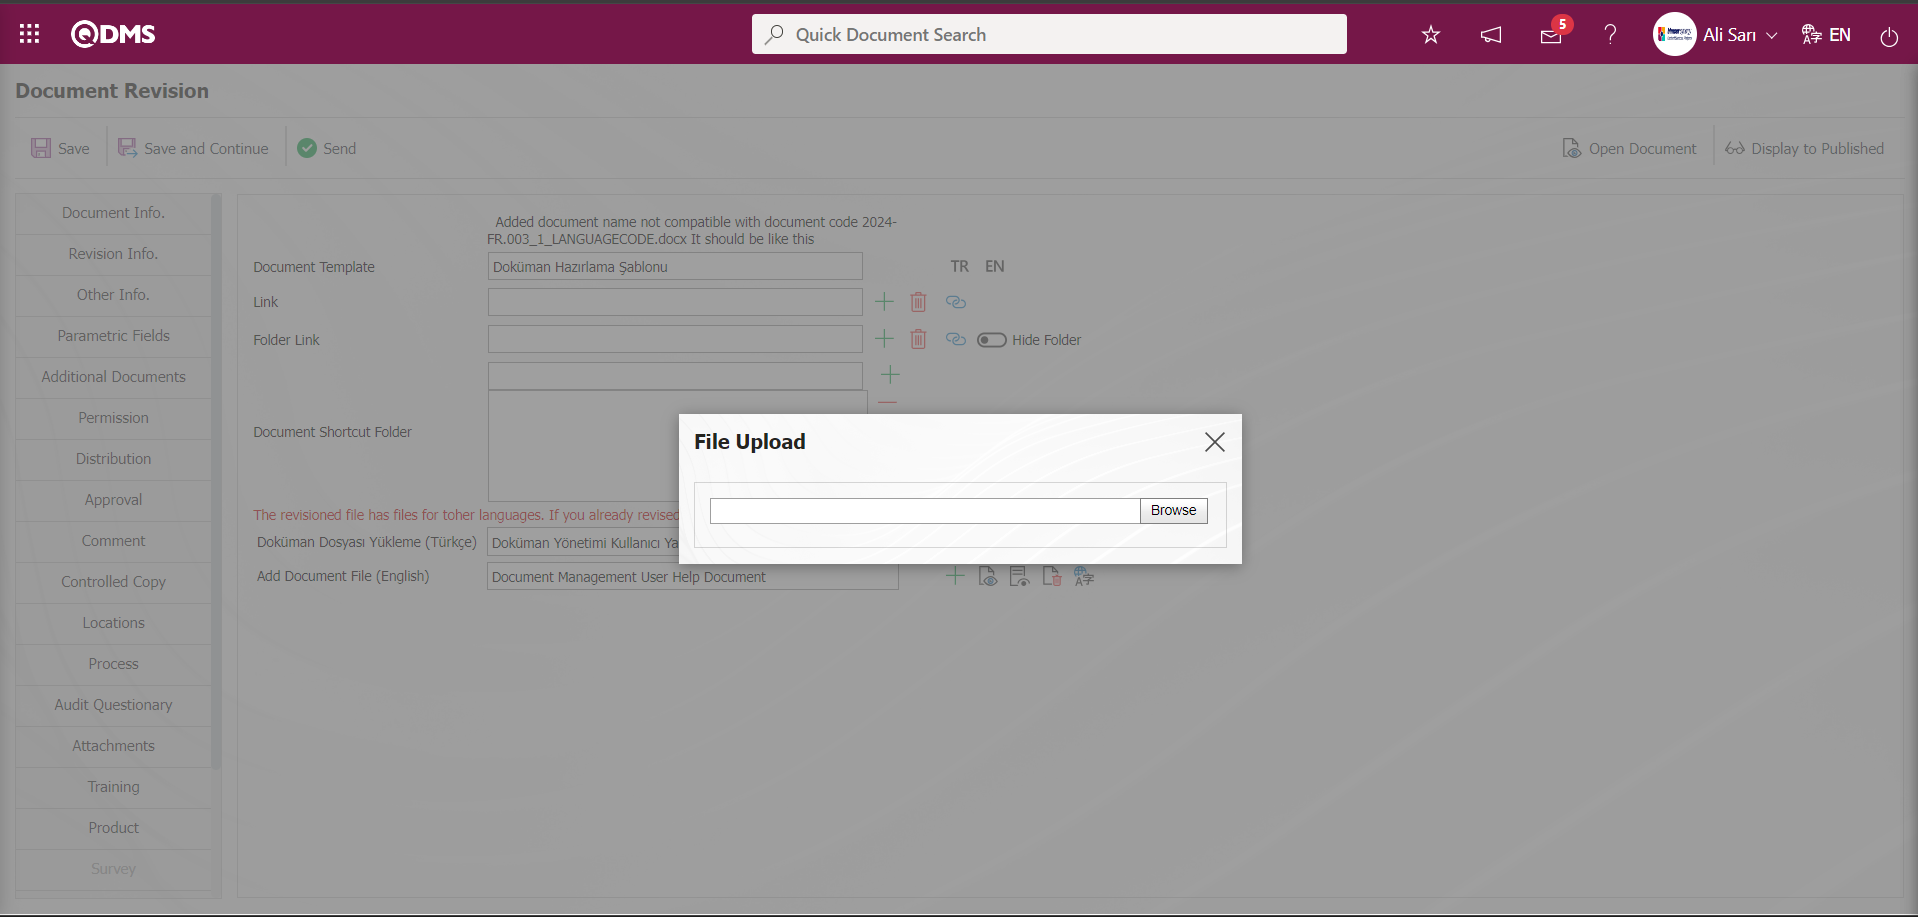
Select the revised document language file on the screen that opens.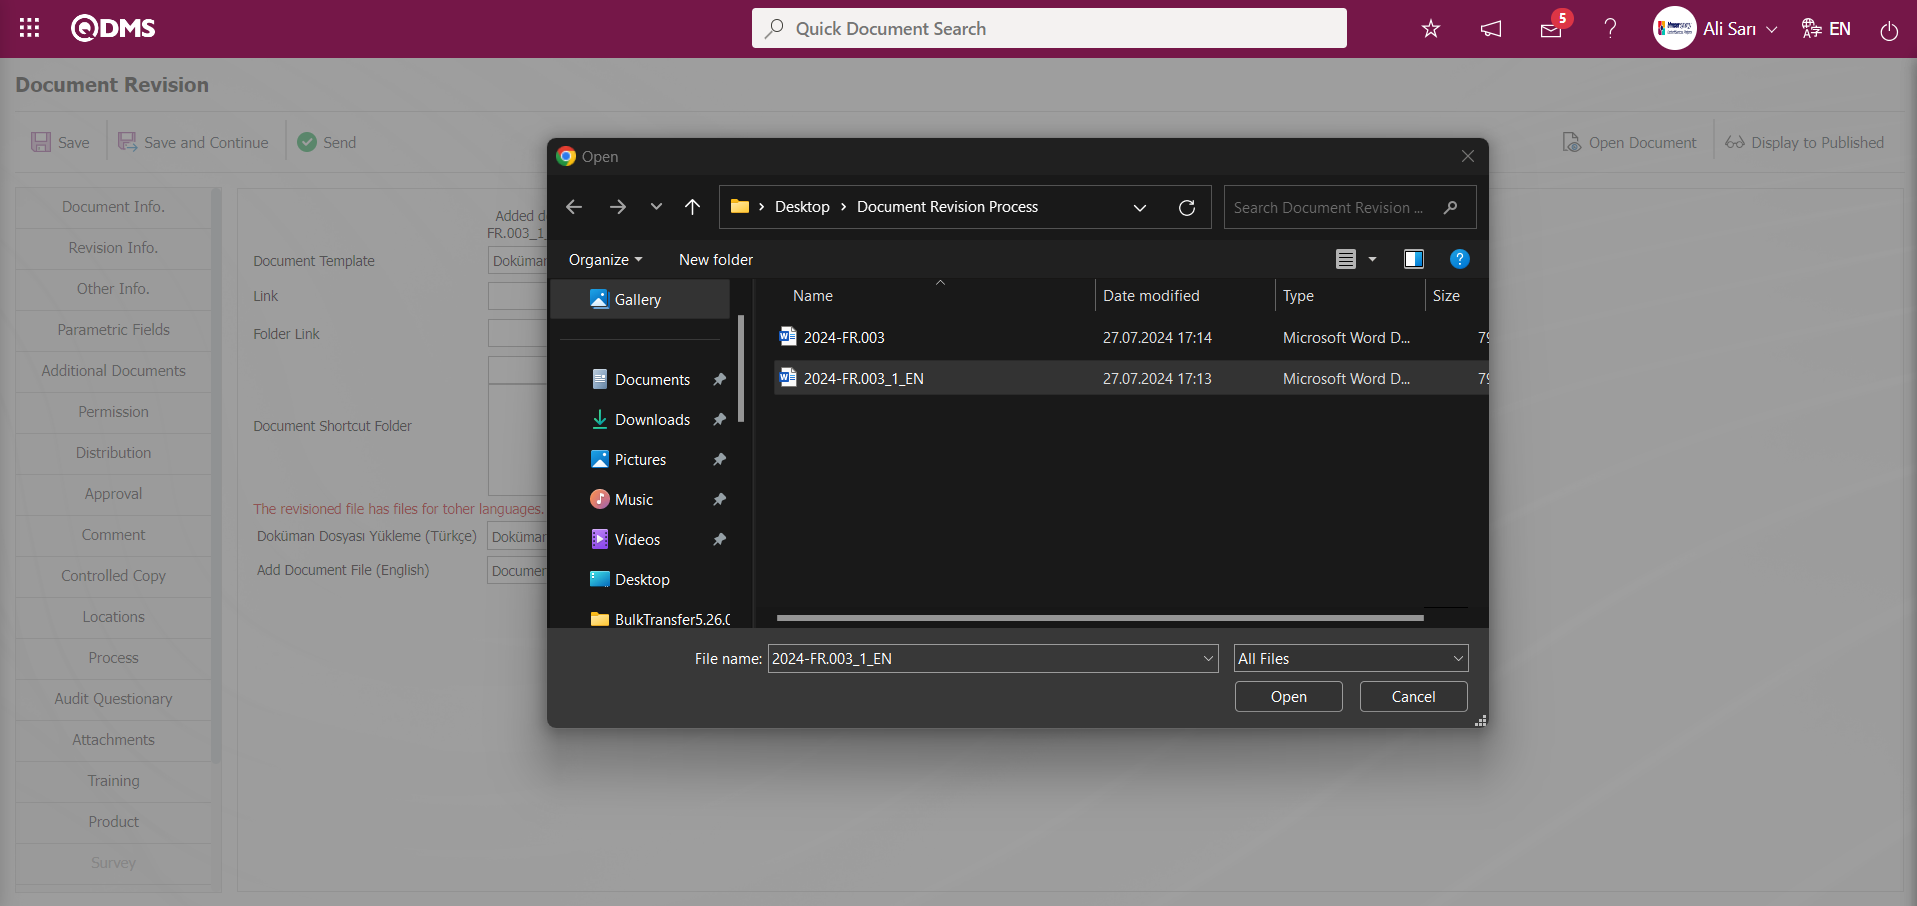
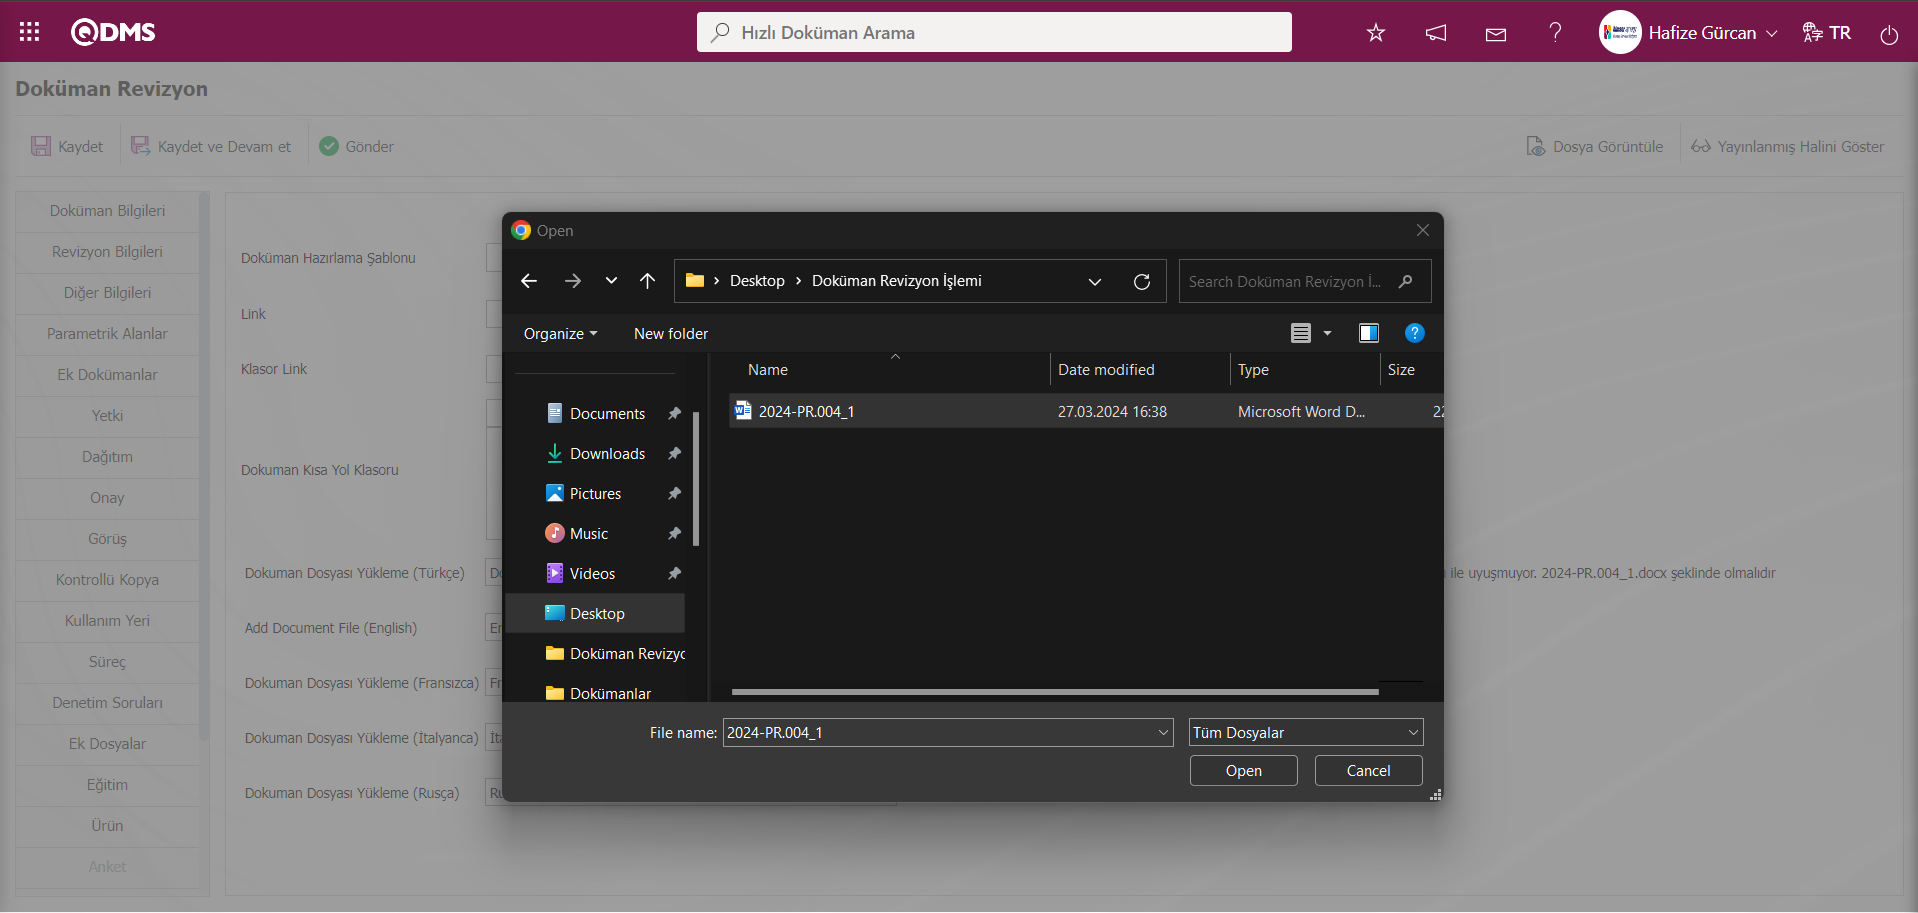
On the Document Revision screen, the message “File uploaded successfully” appears on the Document Document tab.
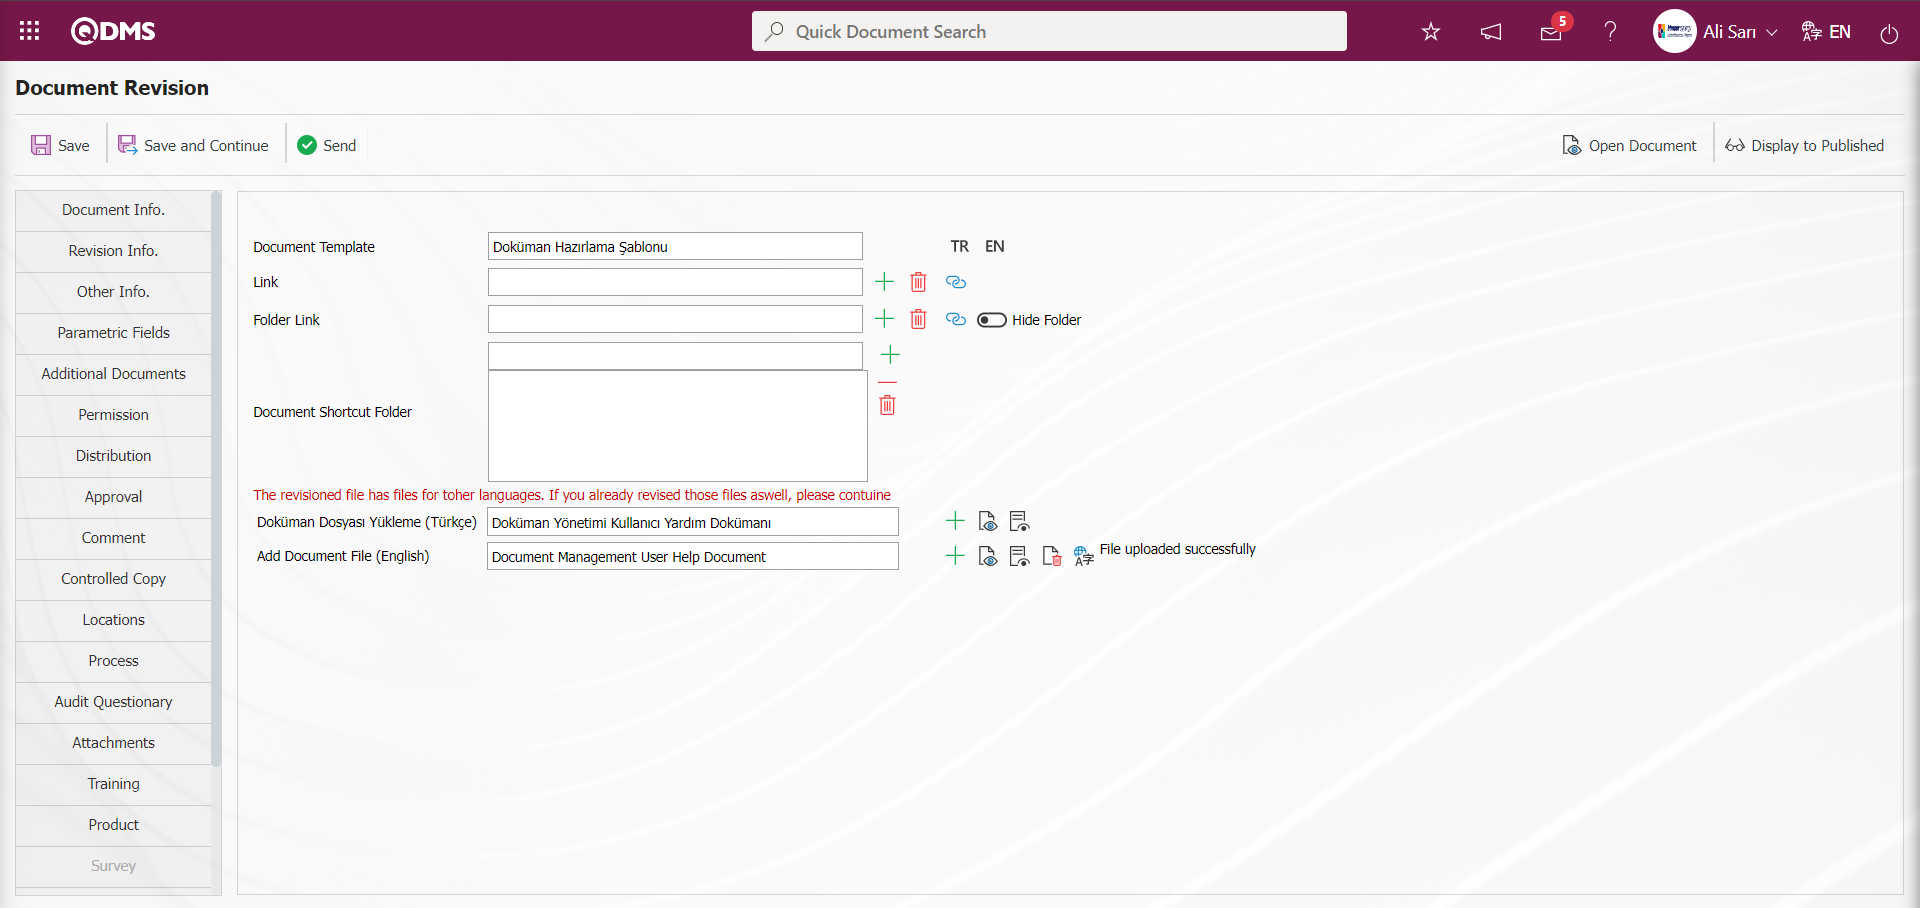
On the Document Revision screen, click on the Document Information tab.
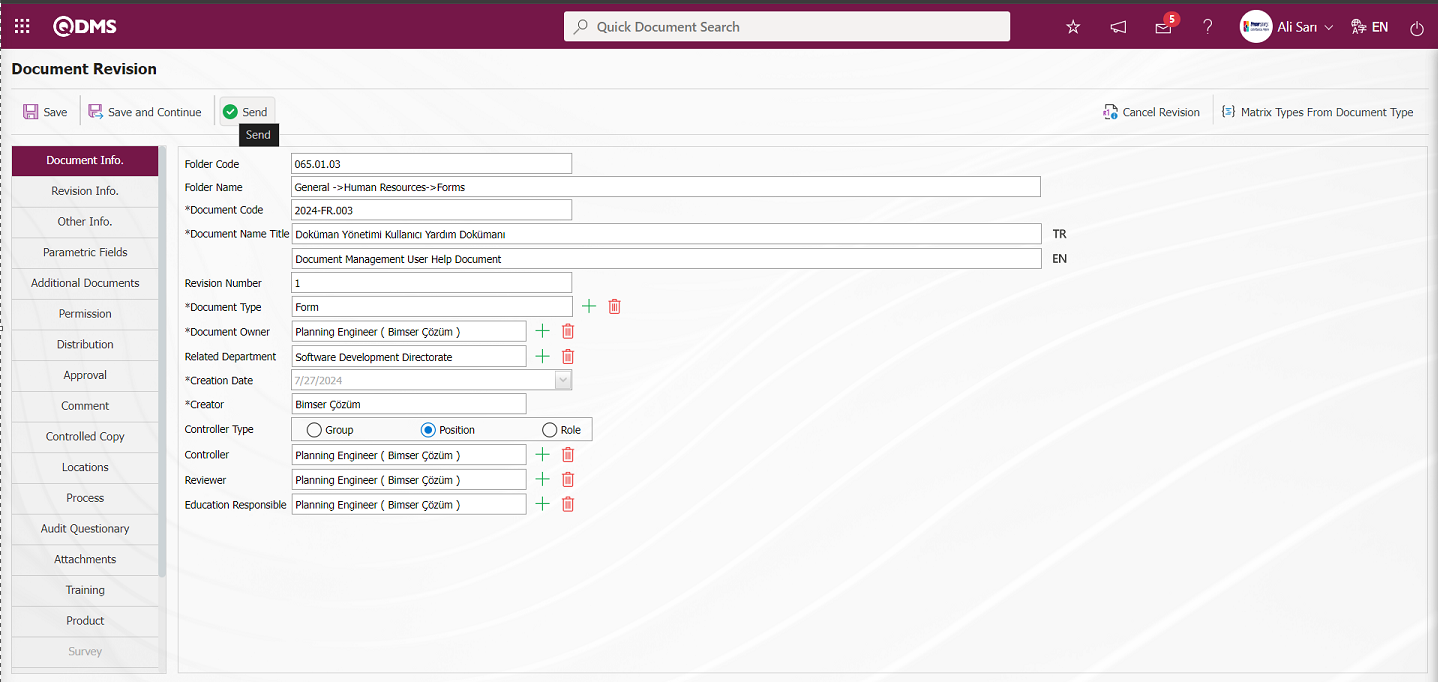
On the Document Revision screen, click on the  button on the document information tab.
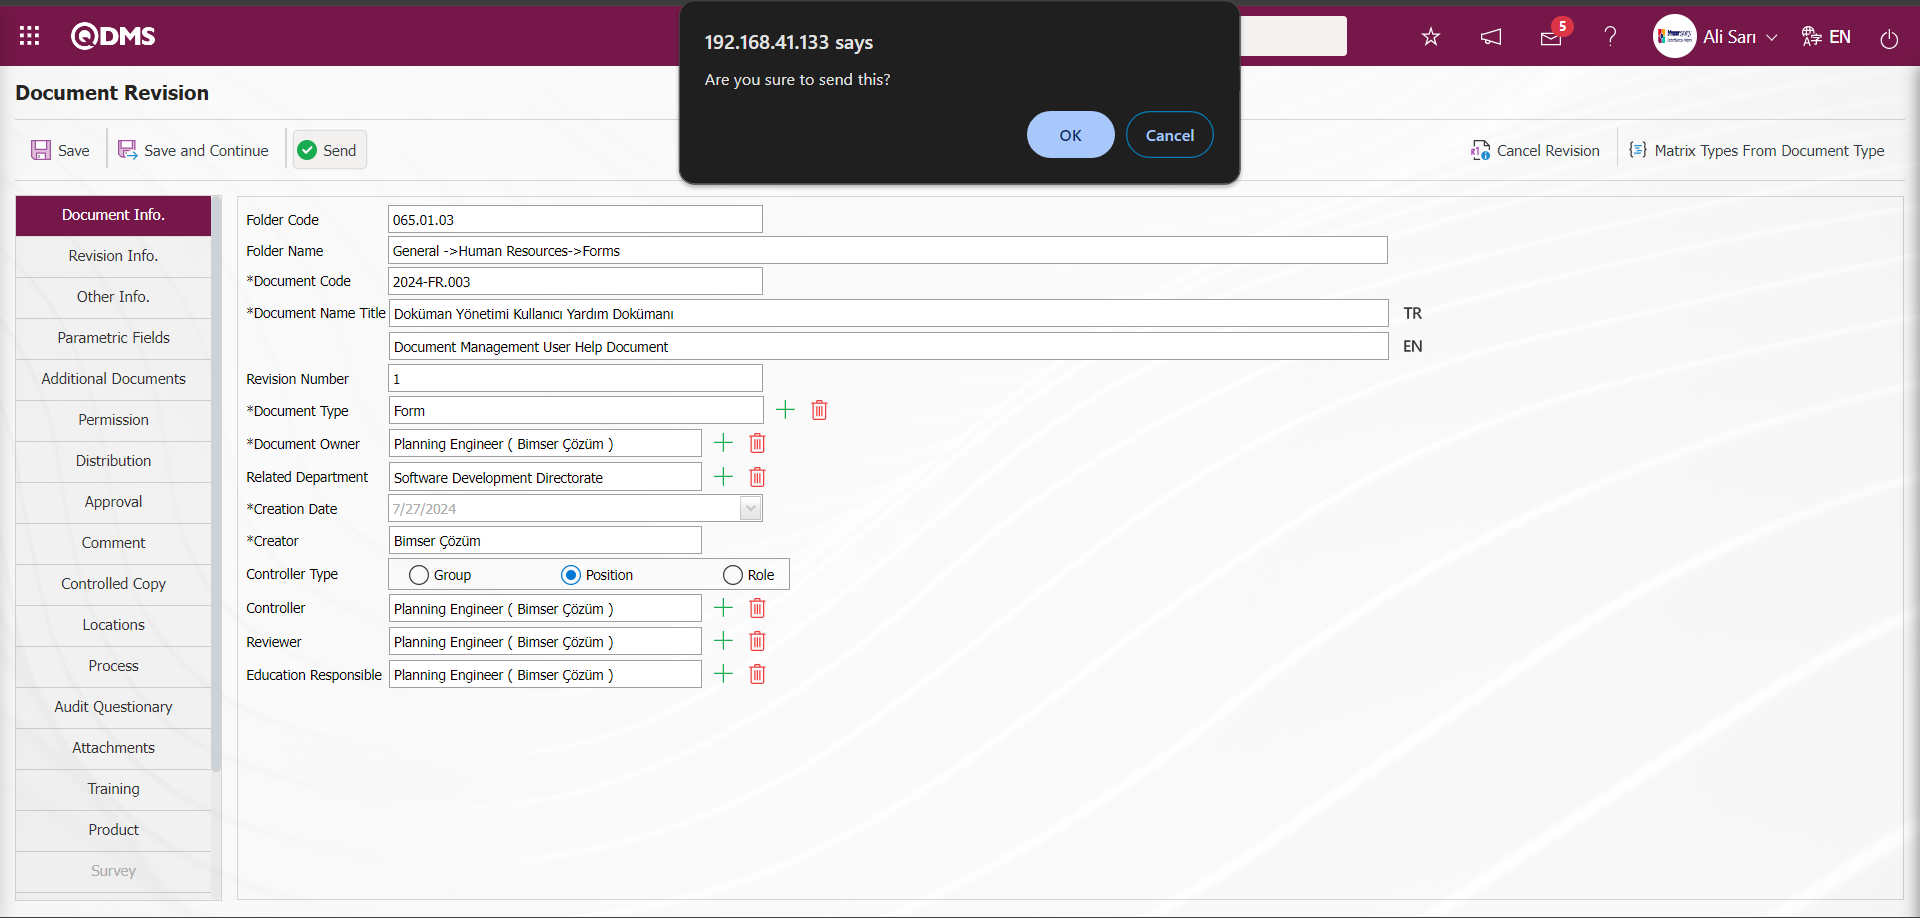
Click the “OK” button in the message given by the system.

In the document revision process, when the opinion, control and approval stages are set up in the folder where the document is located in the document revision process, the process stages made in the document preparation menu are carried out in the same way. When the check box related to the “Unapproved/ Uncontrolled” field is checked in the Folder Settings tab in the folder in which the document is located, the document is assigned as a reading task to the people in the distribution matrix without the approval and control stages in the revision process. After the revision process phase is over, the users in the published document distribution matrix are assigned as“Required Reading Important Document List 1 task on the “My Pending Jobs”** page.
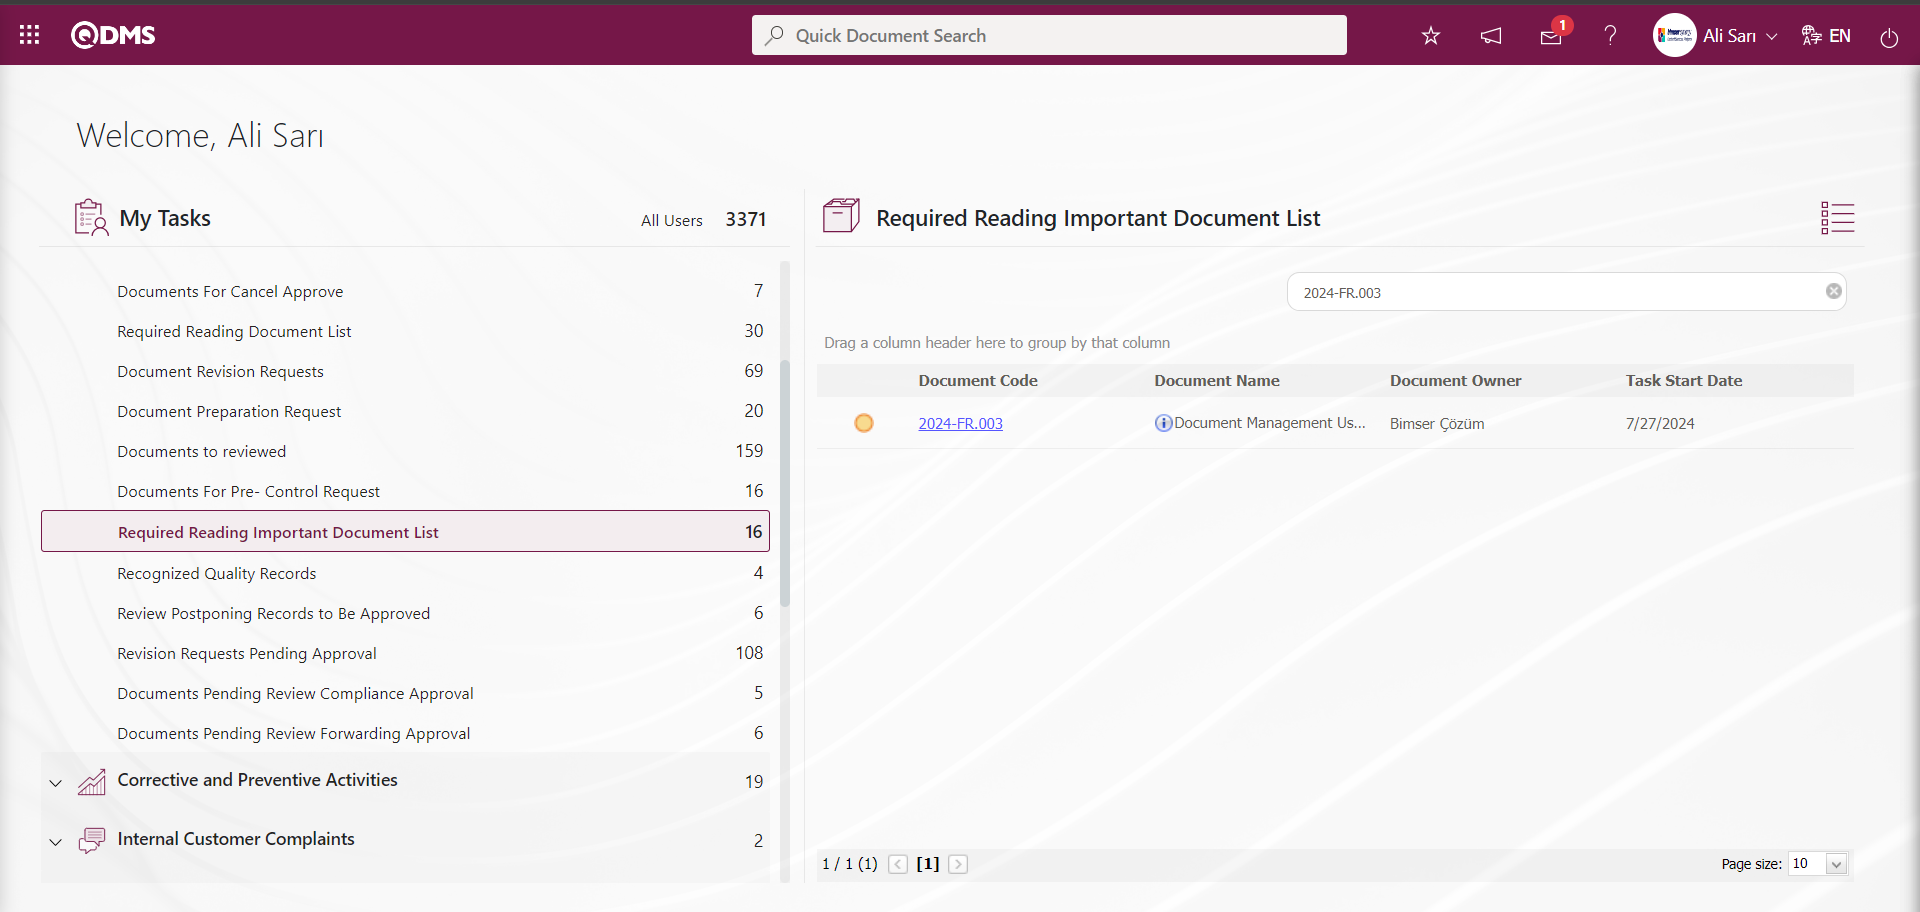
Click on the link in the document code field of the document code field in the relevant task. It is seen that the last revision reason information is written in the Last Revision Reason field of the document displayed on the Document View screen.
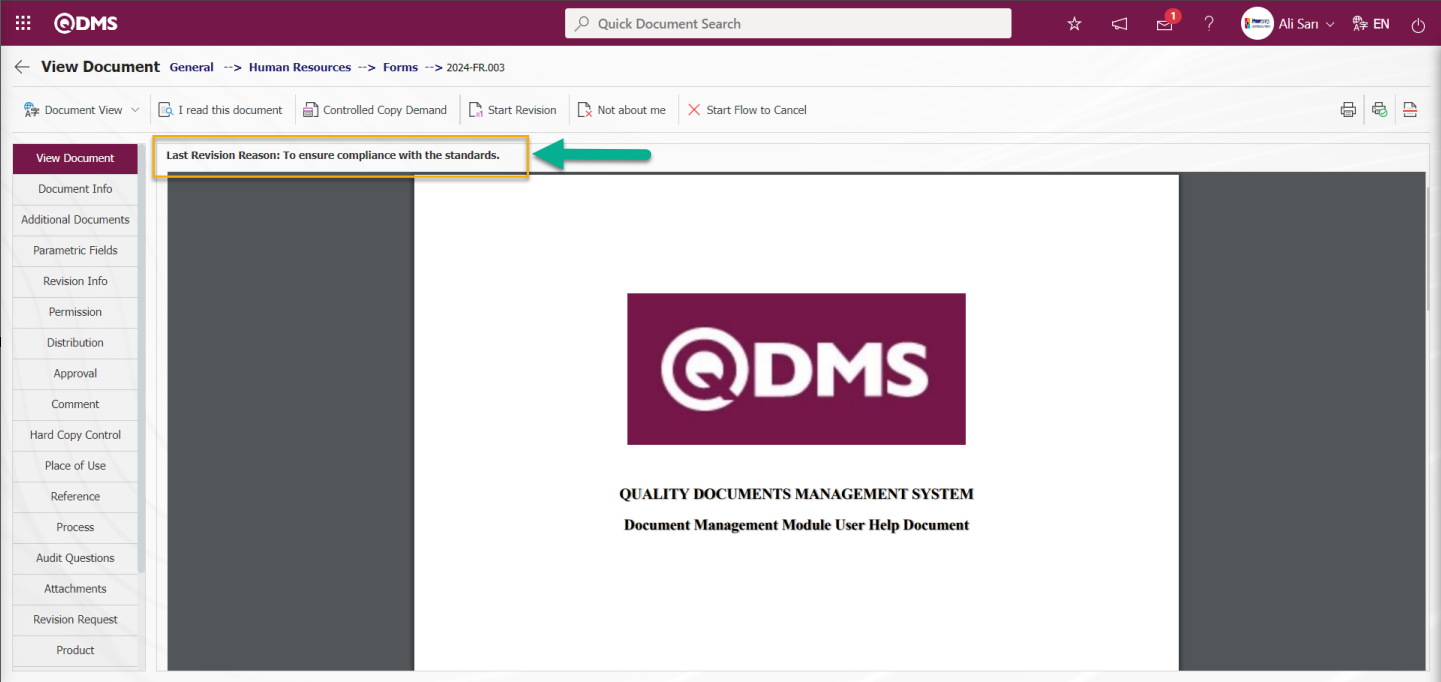
In the document View screen, the structure and content changes made on the revised document are displayed.
On the Document View screen, in the document information tab, the revision of the revised document is seen in the Revision Number field.
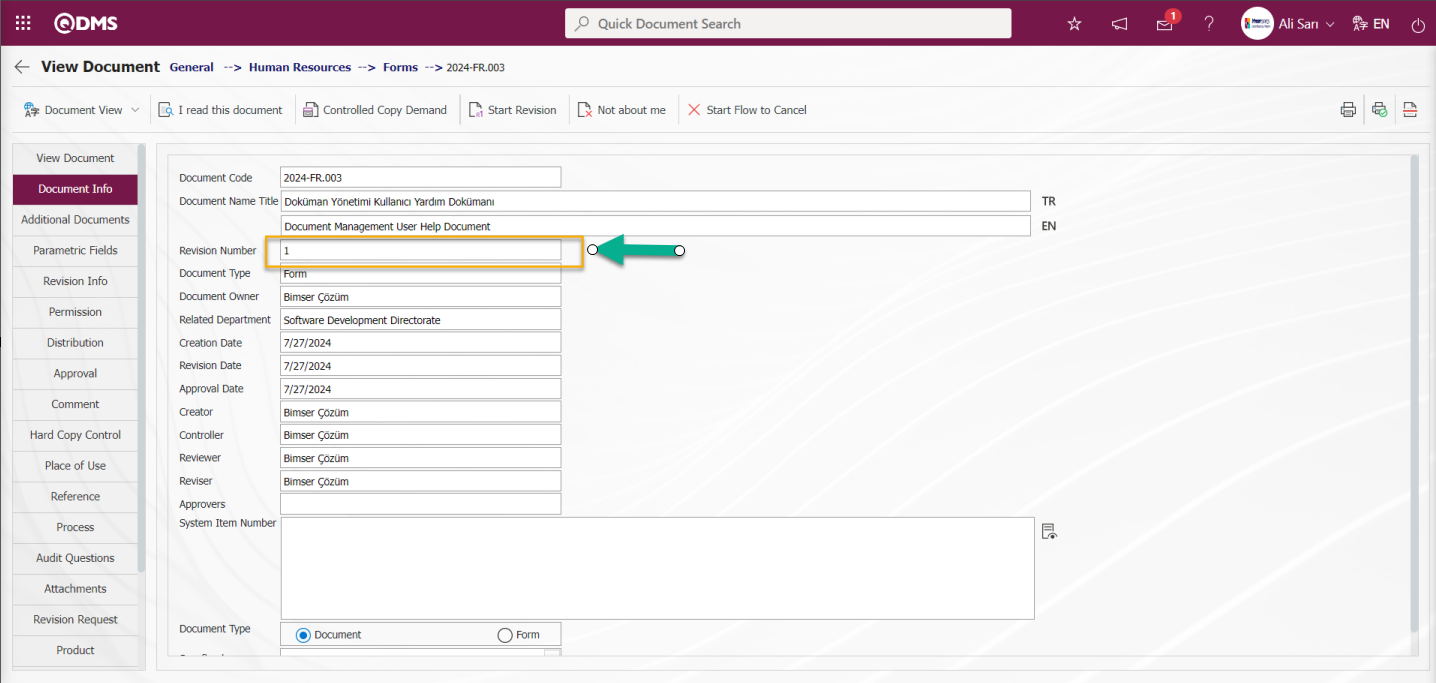
6.2.7.Cansel Document Process
Menu Name: Integrated Management System/ Document Operations/ Cansel Document Process
This is the menu where the cancellation process of the documents is performed. “Cancel Process” is initiated when the document is to be canceled. In order for a user to cancel a document, the “Cancel” authorization must be granted from the “Authorization Matrix” tab of the relevant document. The cancellation process goes through the “Approval” process just like the document preparation and revision processes and then the document is canceled.
The Integrated Management System/ Document Operations/ Cansel Document Process screen opens. On the Document Cansel - Folder Selection screen, the folder containing the document to be canceled is selected and the  button is clicked.
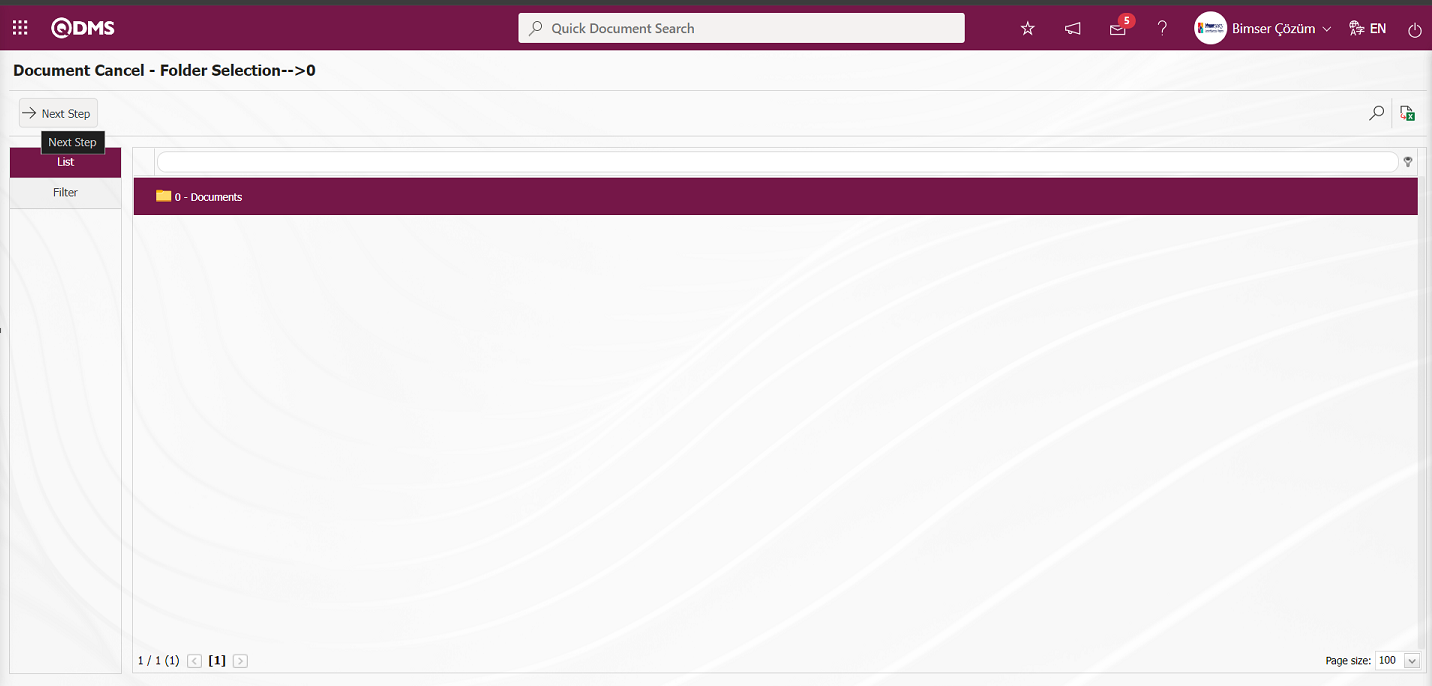
The document to be canceled is selected from the Document Cancel - Document Selection** screen and the cancellation process of the document is started by clicking the  button.
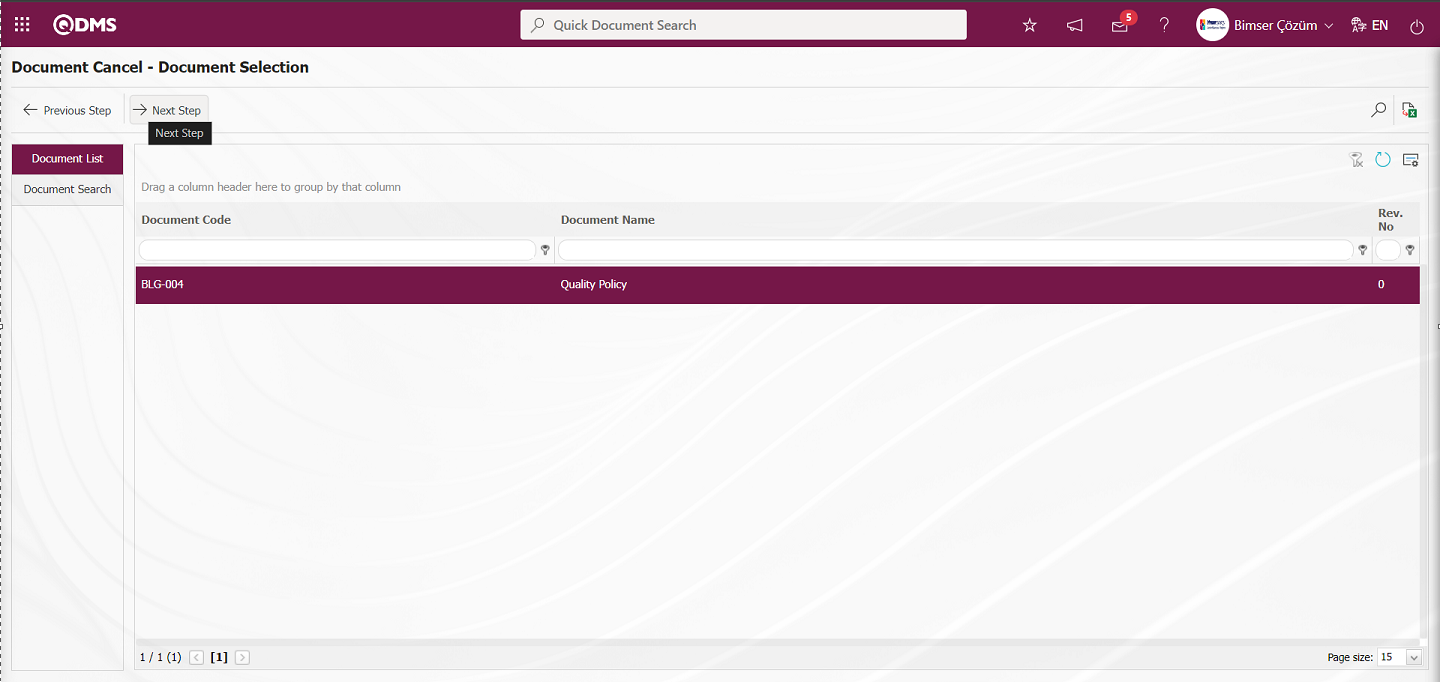
On the screen that opens, under the document information tab “Cansel Reason” information is written.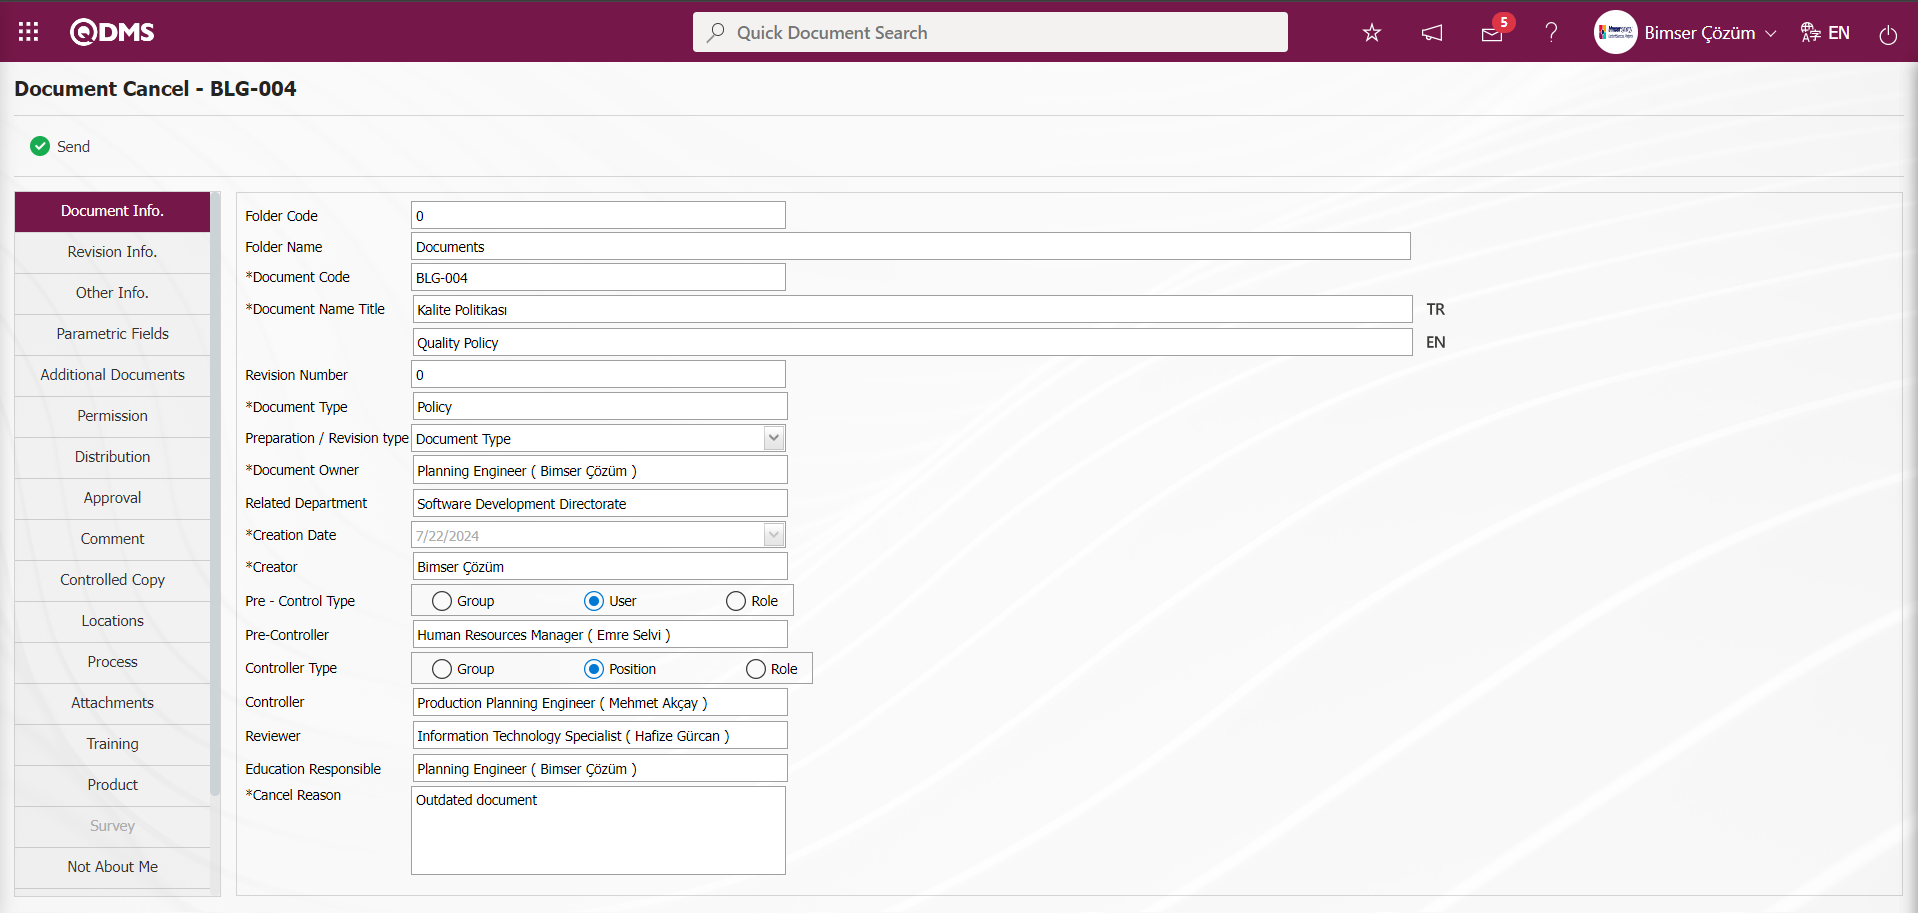
After writing the Cancel Reason information of the document in the Document Information tab on the Document Cancel screen, the document is sent to the approvers in the approval matrix by clicking the  button.
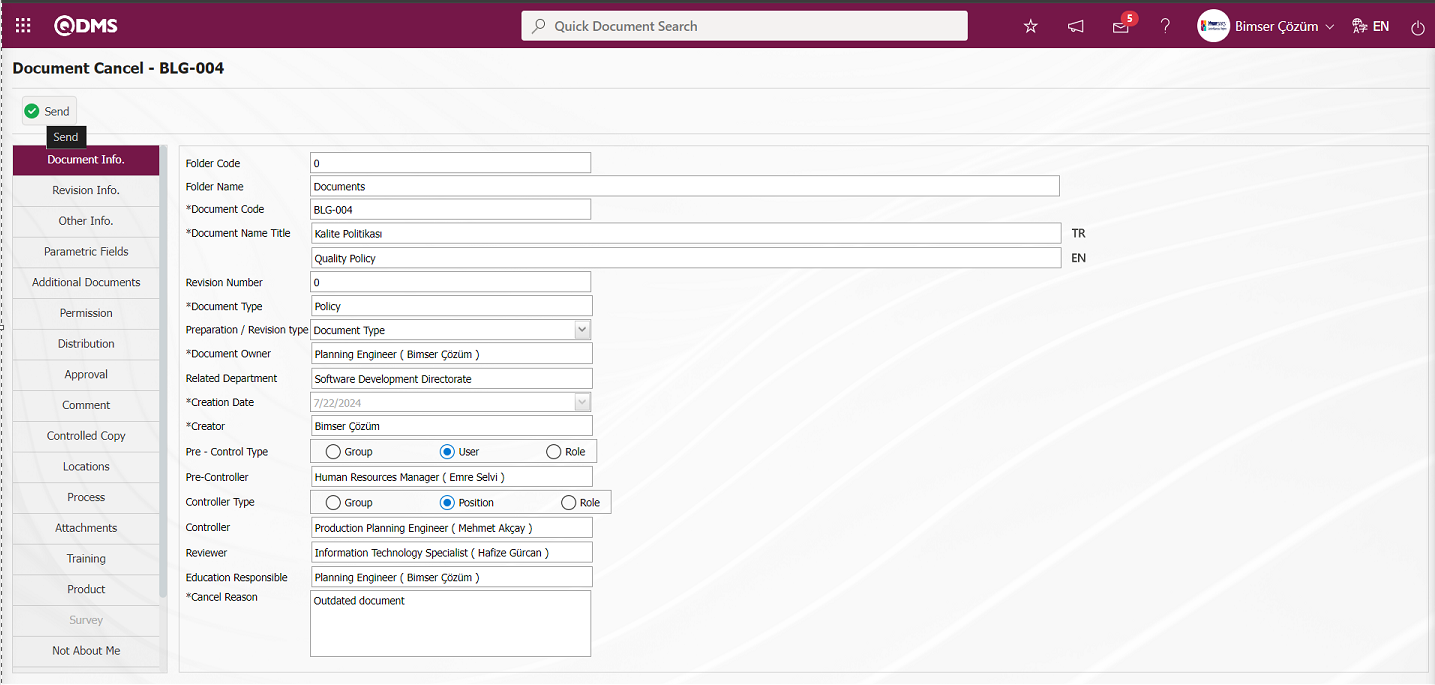
Click the “OK” button in the message given by the system.
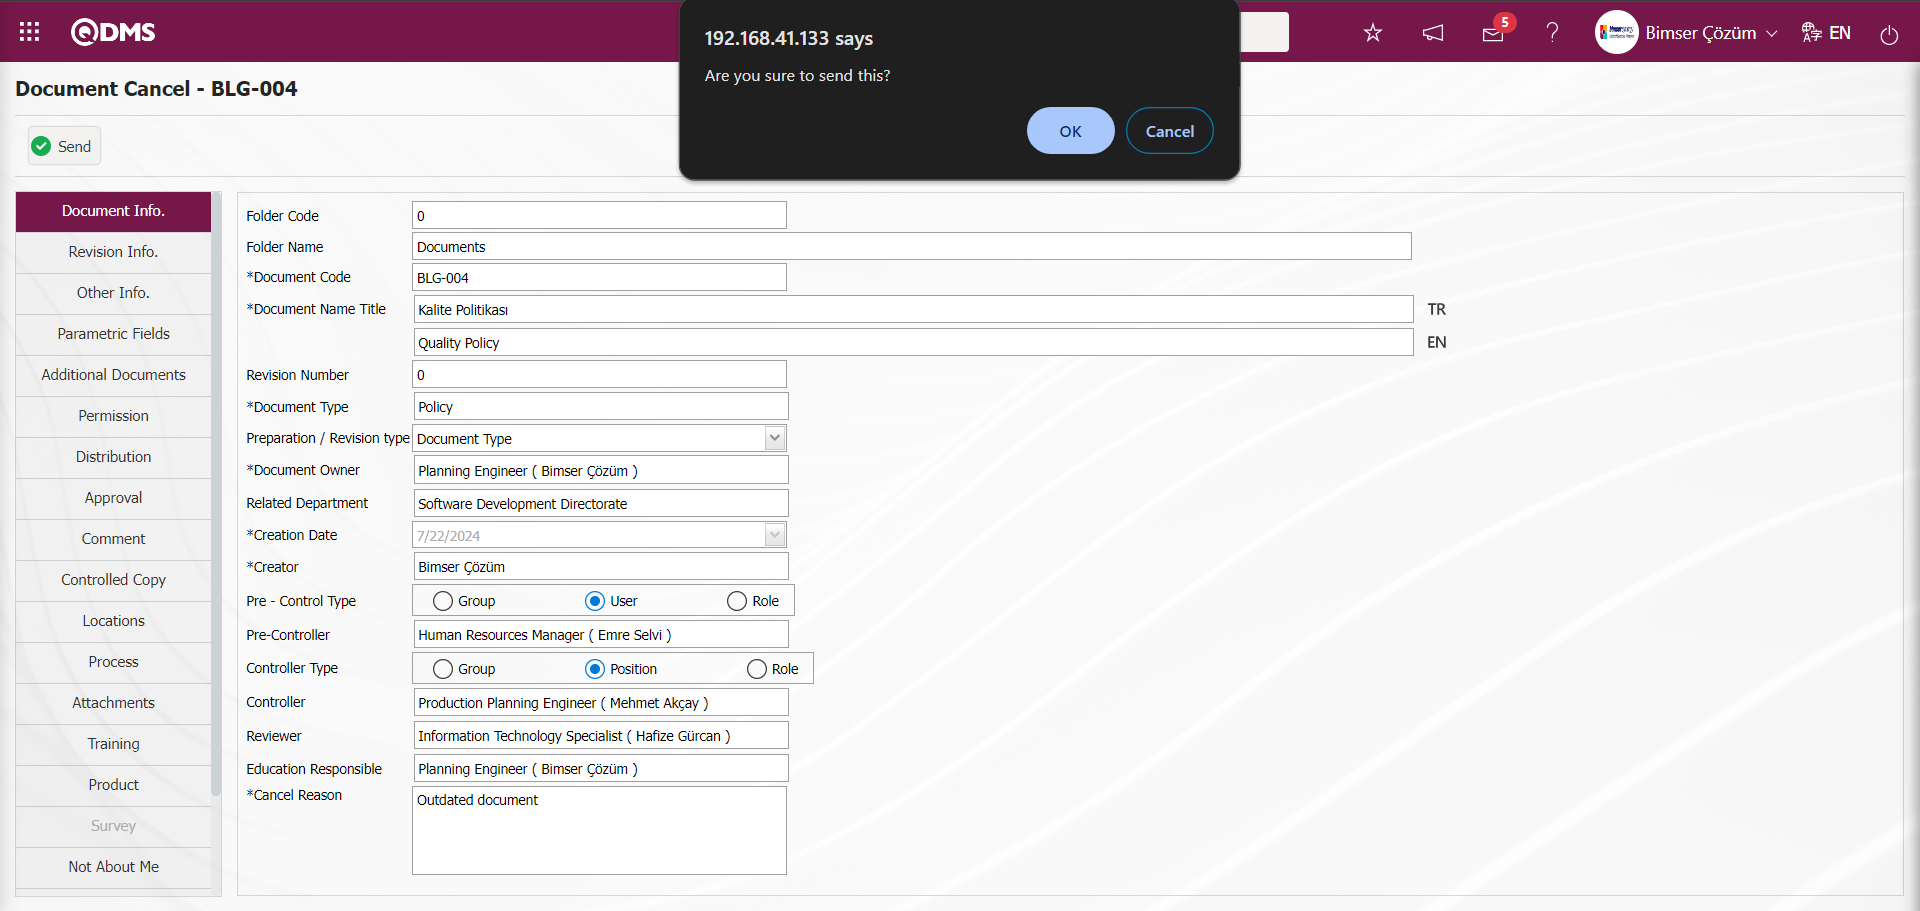
The information of the user to whom approval is sent by the system for document cancelation is given.

The relevant document is assigned as a“Documents For Cansel Approve” job on the“My Pending Jobs” page of the approver.
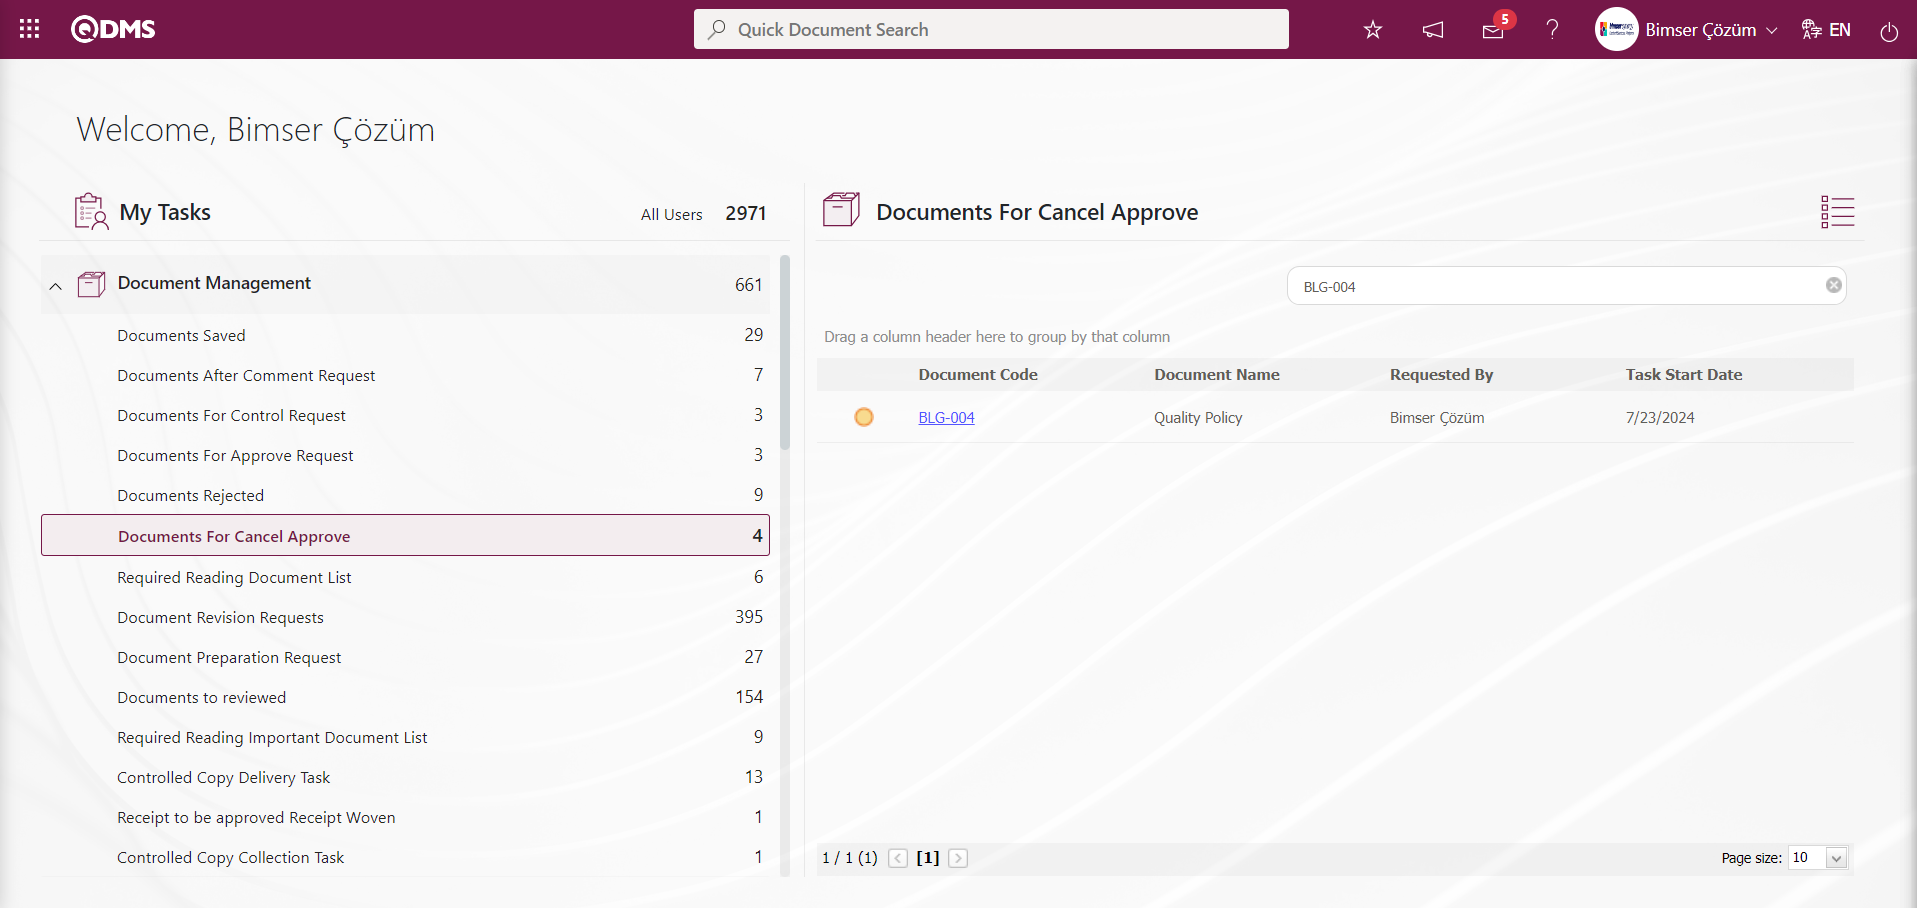
Click on the link in the document code field in the relevant task to open the document information page.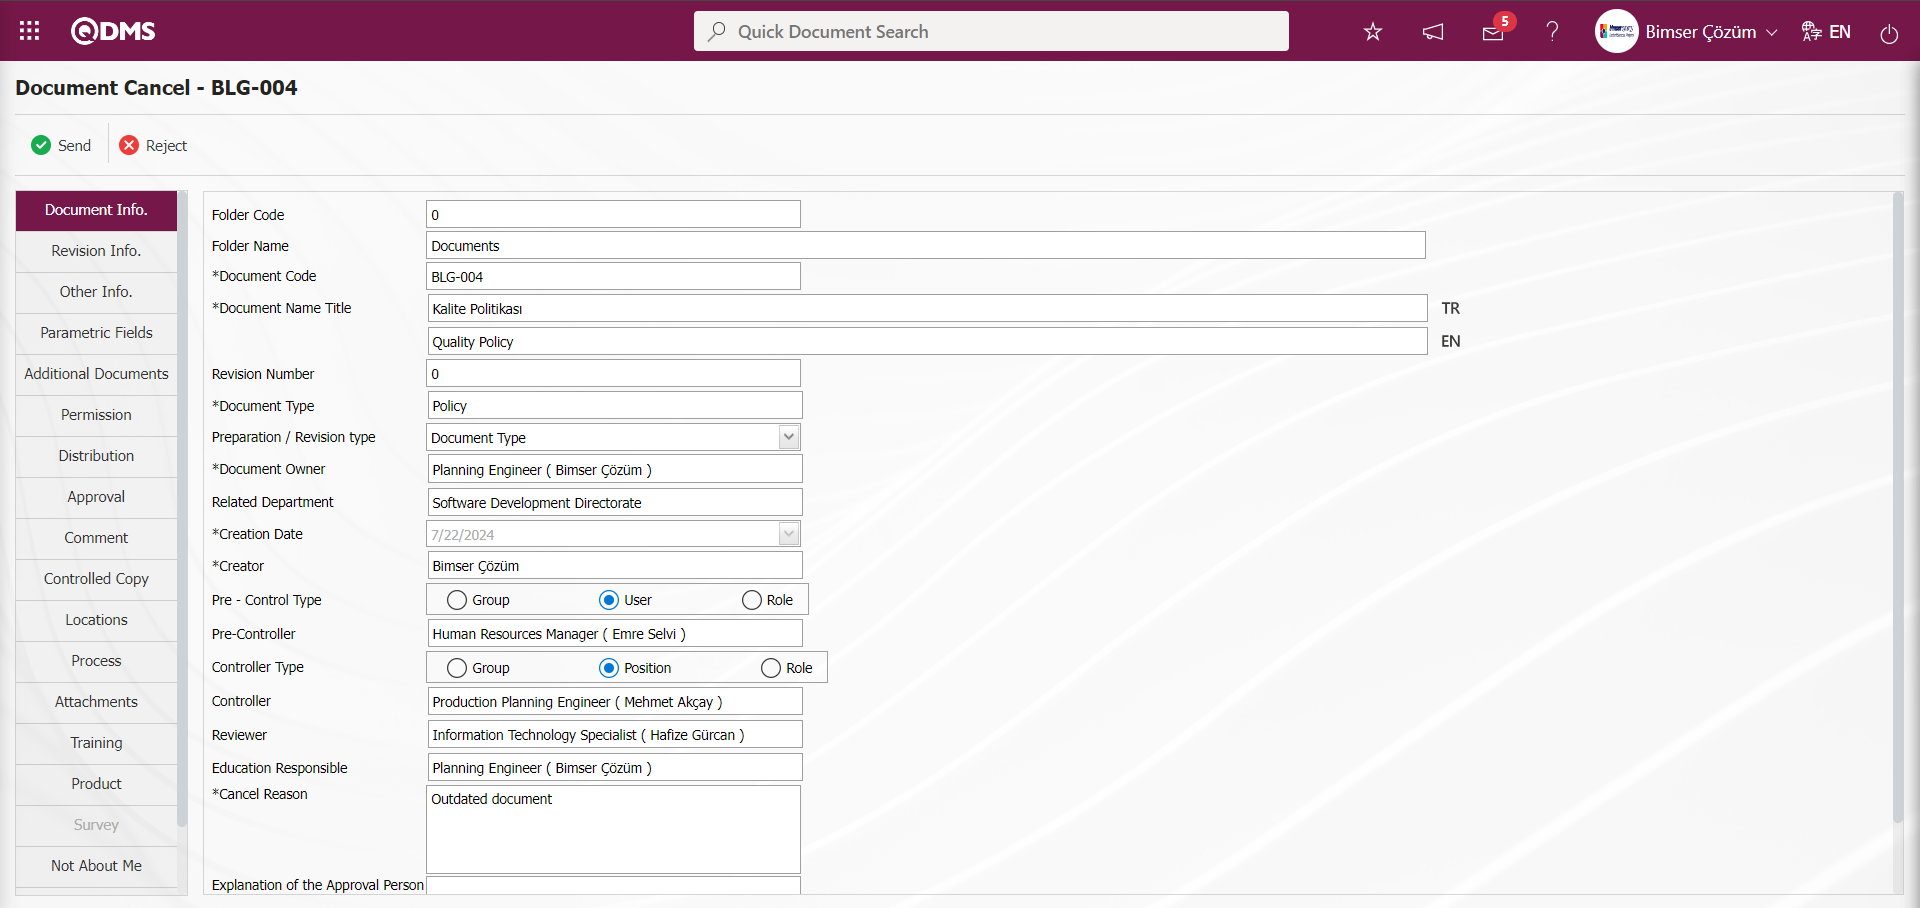
With the help of the buttons on the screen;
 : The document cancelation process is approved.
 : Cancellation of the document is rejected.
If the cancellation request of the document is not found appropriate and will be rejected by the approver, the button is clicked.
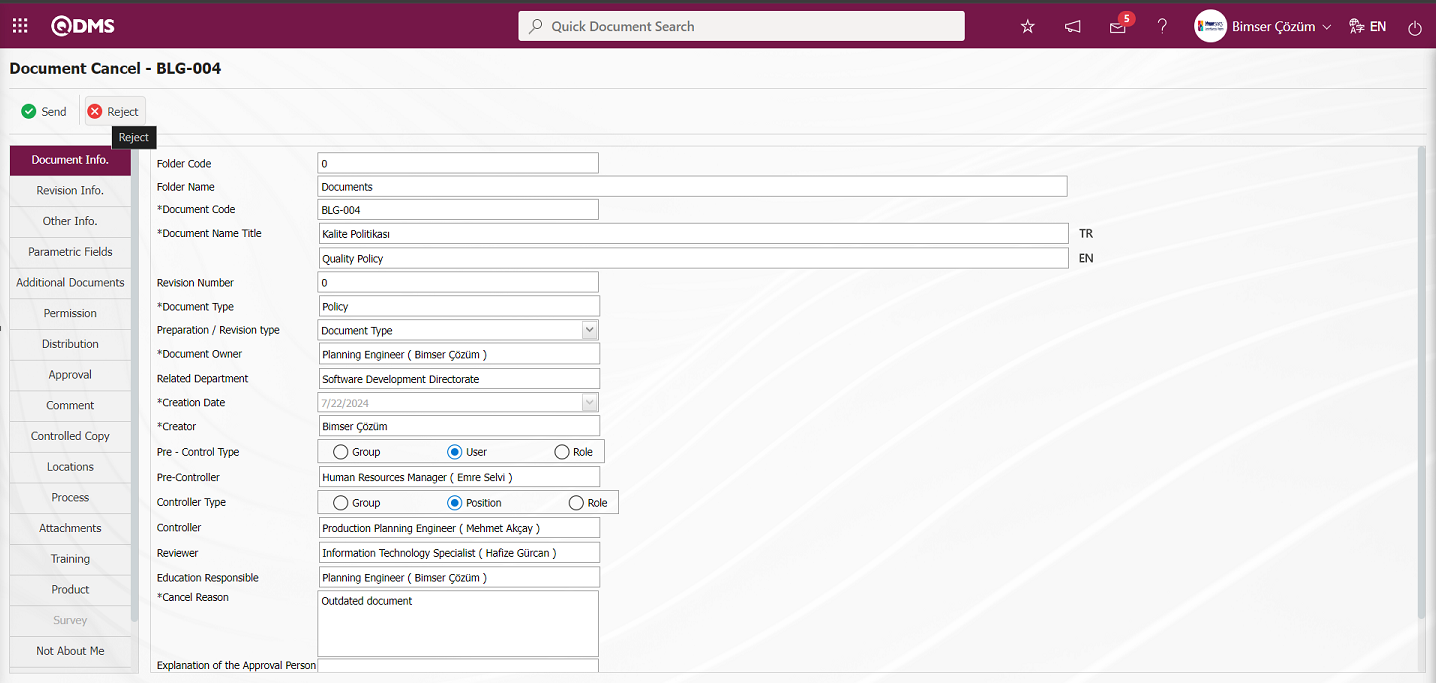
It opens on the Document Cancelling-Approval Reject screen.

With the help of the buttons on the screen;
 : Adding a file is done.
 :Viewing the added file is done.
 :Deleting the added file is done.
On the Document Cancelling-Approval Reject screen, the Reason for Rejection information is entered and, if desired, the rejection of the document cancellation process is recorded by clicking the button in the upper left corner of the screen by clicking the  button by uploading additional files related to the reason for rejection.
 (Back) button is clicked to return to the previous screen.
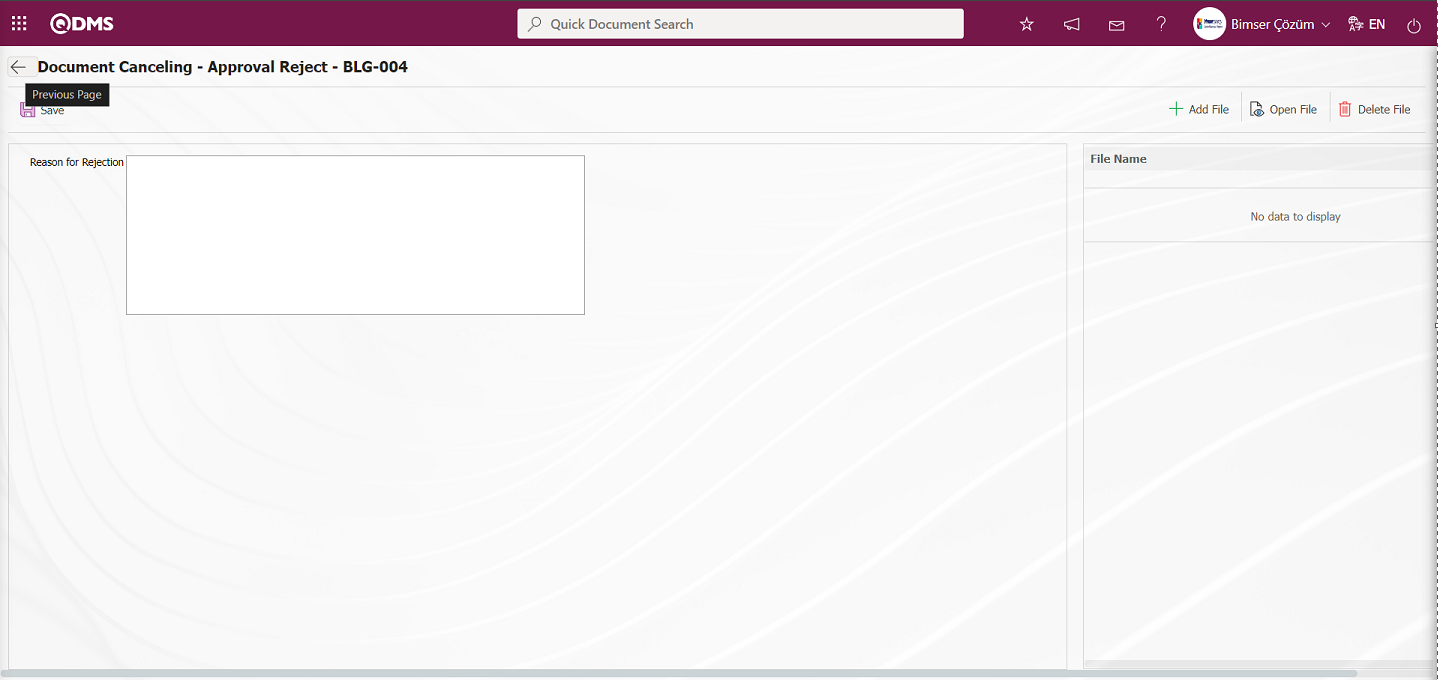
Cancel reason information is displayed during the document cancellation process. The description of the person who will give approval is displayed depending on the parameter. The parameter value of parameter 341 in the Document Management Module parameters is activated by selecting “Yes”.
After the parameter is activated, the “Explanation of Approval Person” field is displayed. In this field, the approver enters the explanation information about the cancellation of the document.
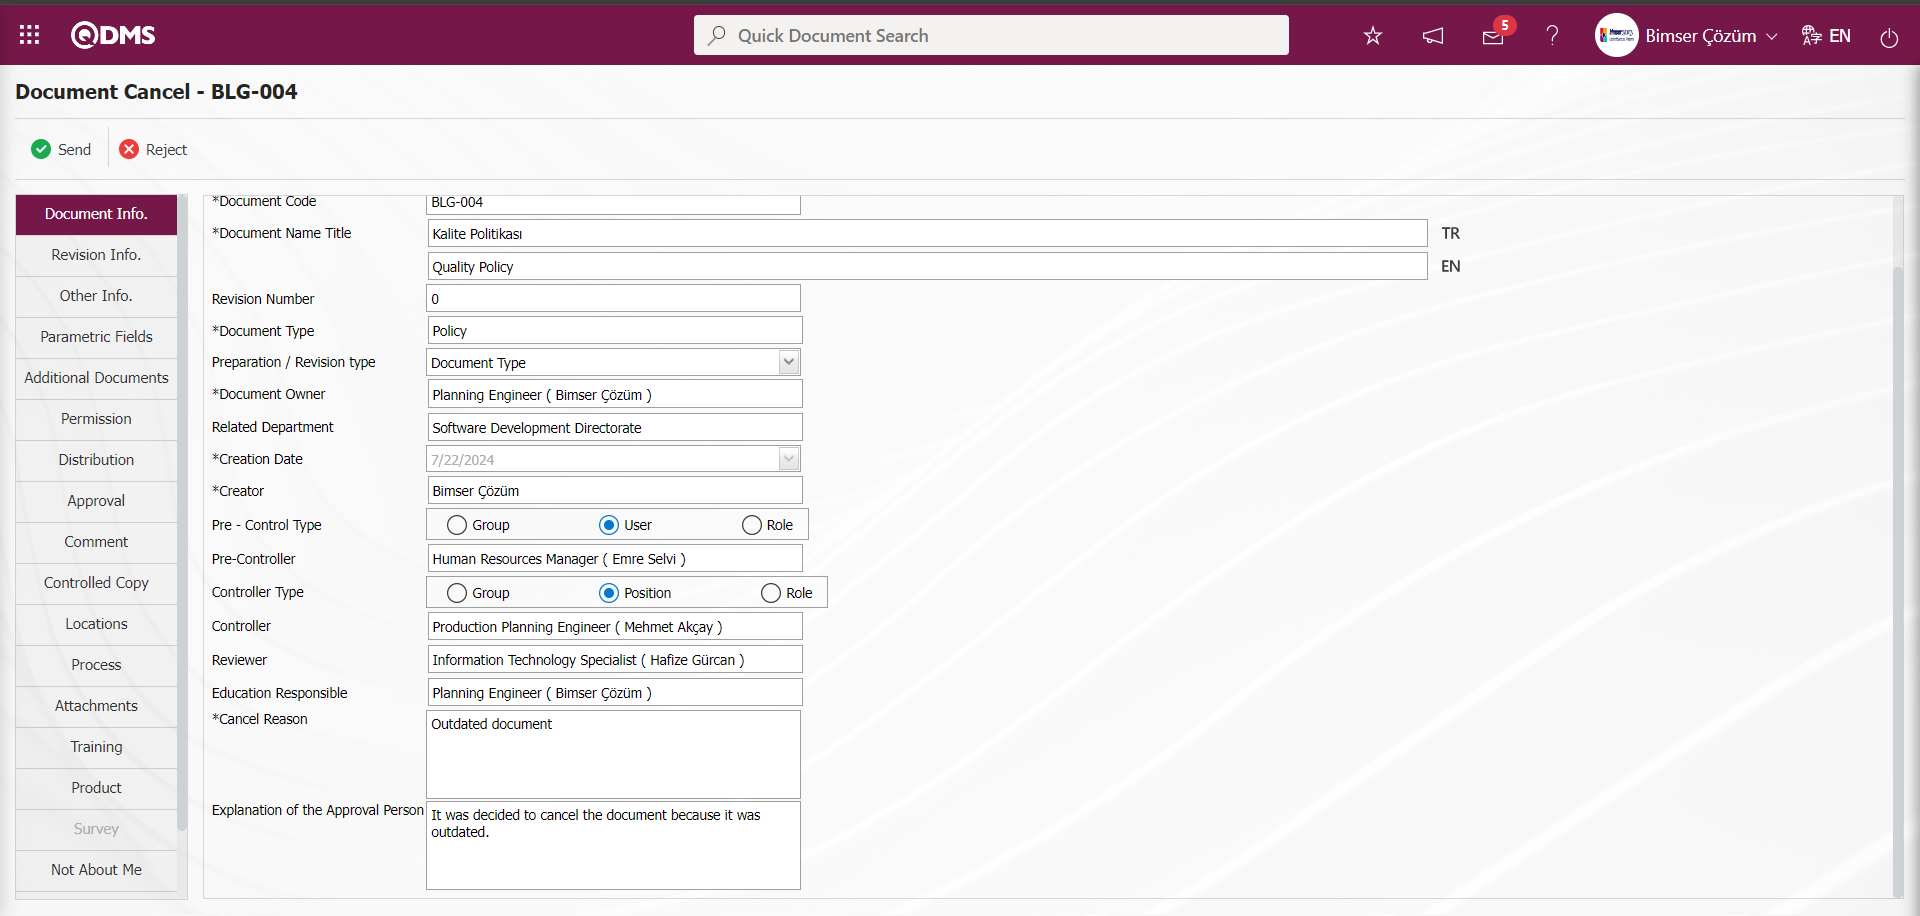
After the person in the approval enters the explanation information about the cancellation of the document, the request for cancellation of the document is found appropriate and the document cancellation process is started by clicking the  button.
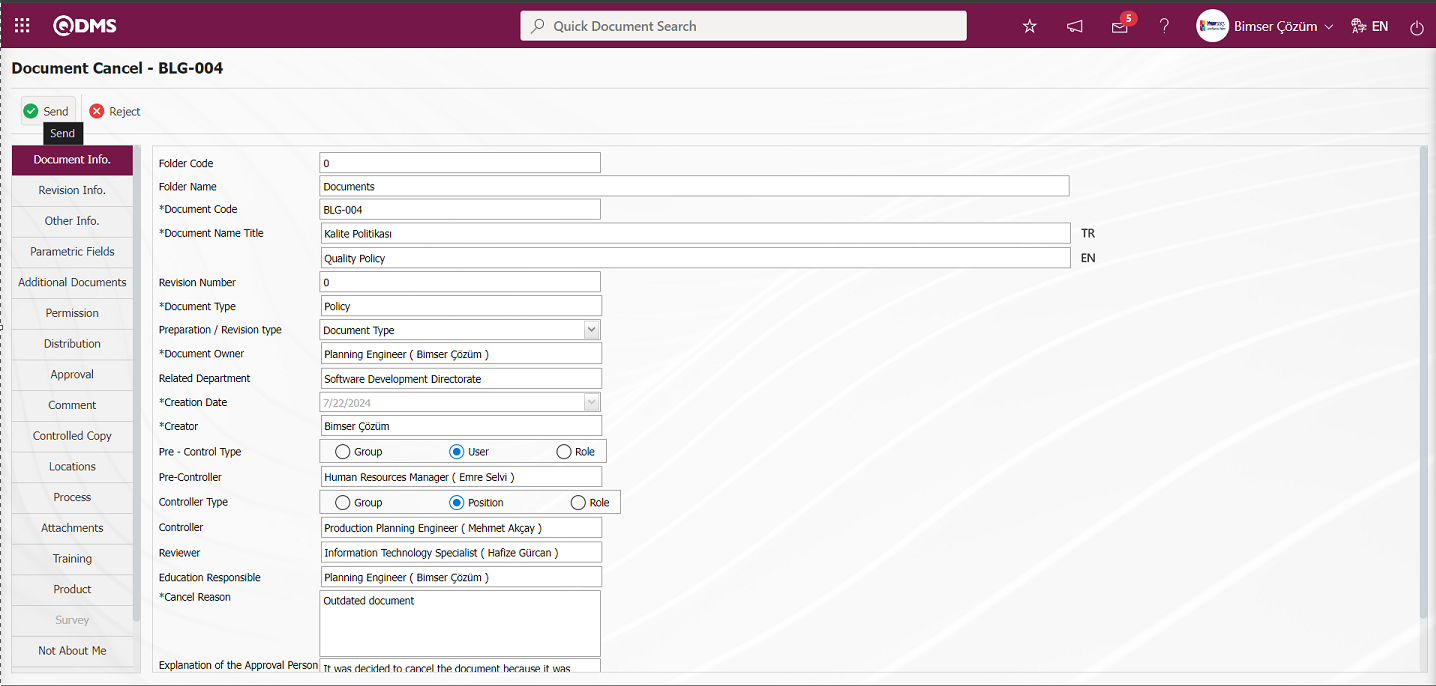
Click the “OK” button in the message given by the system.

The system completes the document cancellation approval and sends a message about sending it to the archive.

When the cancellation approval is given, the document cancellation process is completed and can be reported from the “Canceled Documents” list in the reports menu. Integrated Management System/Document Operations/Reports/ Canceled Document List menu is clicked.
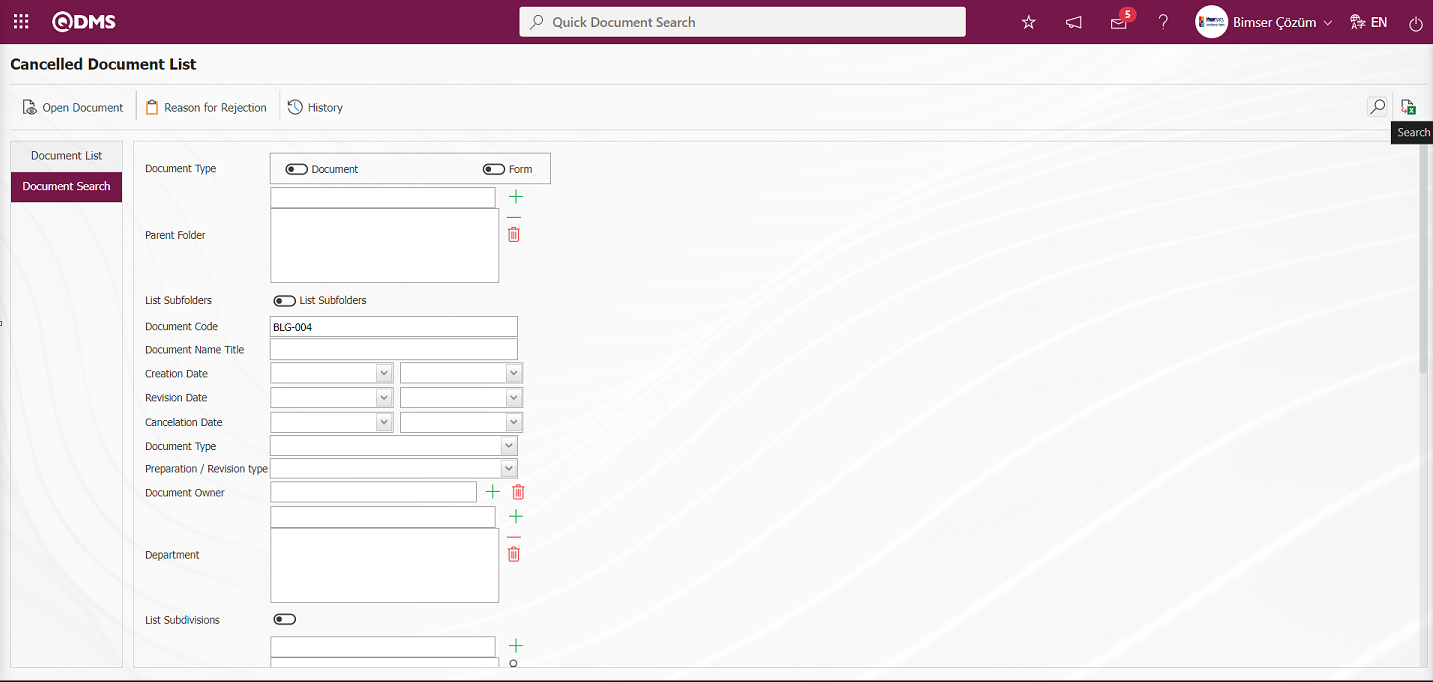
On the Canceled Document List screen, on the Document Search tab, type the code information of the canceled document in the Document Code field from the search criteria in the filter and click the  (Search) button.
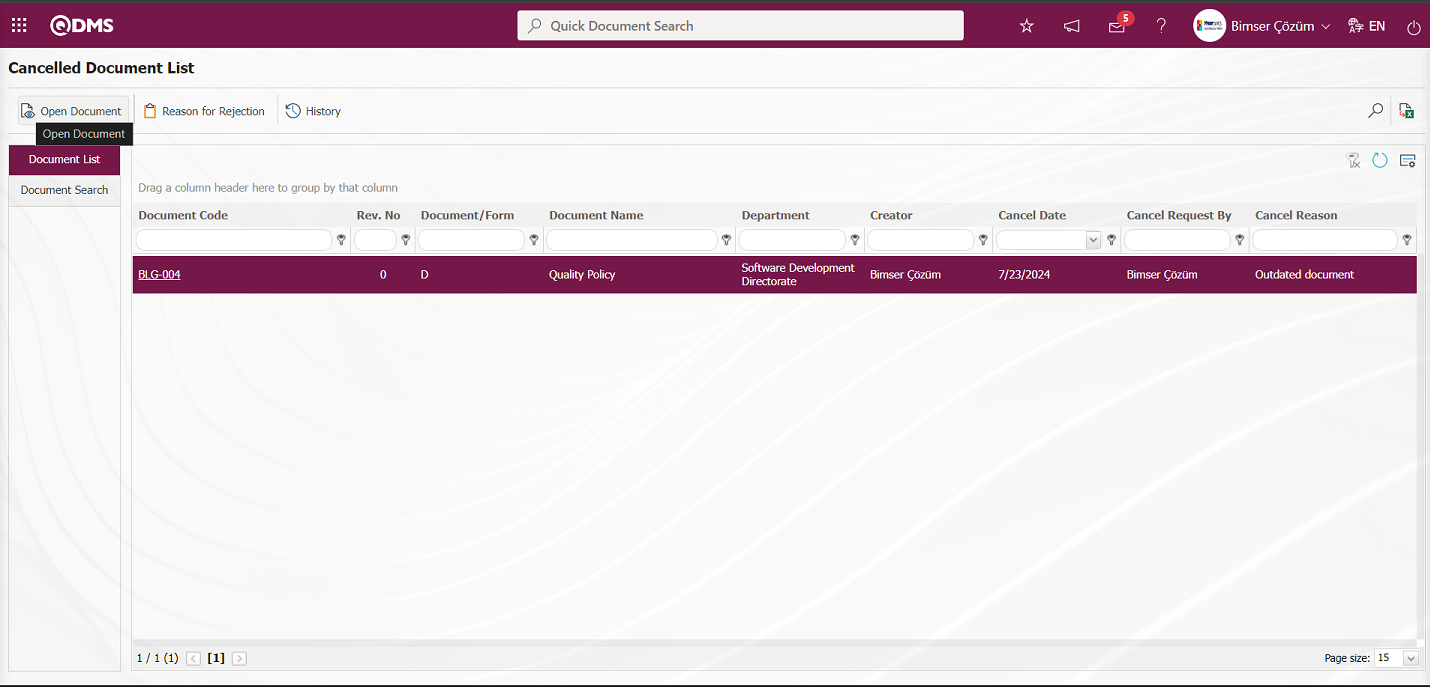
On the Canceled Document List screen, click the  button while the canceled document is selected in the Document List. In the screen that opens, the text to be seen in PDF format in canceled documents is set according to the text written in parameter 92 of the Document Management Module parameters.
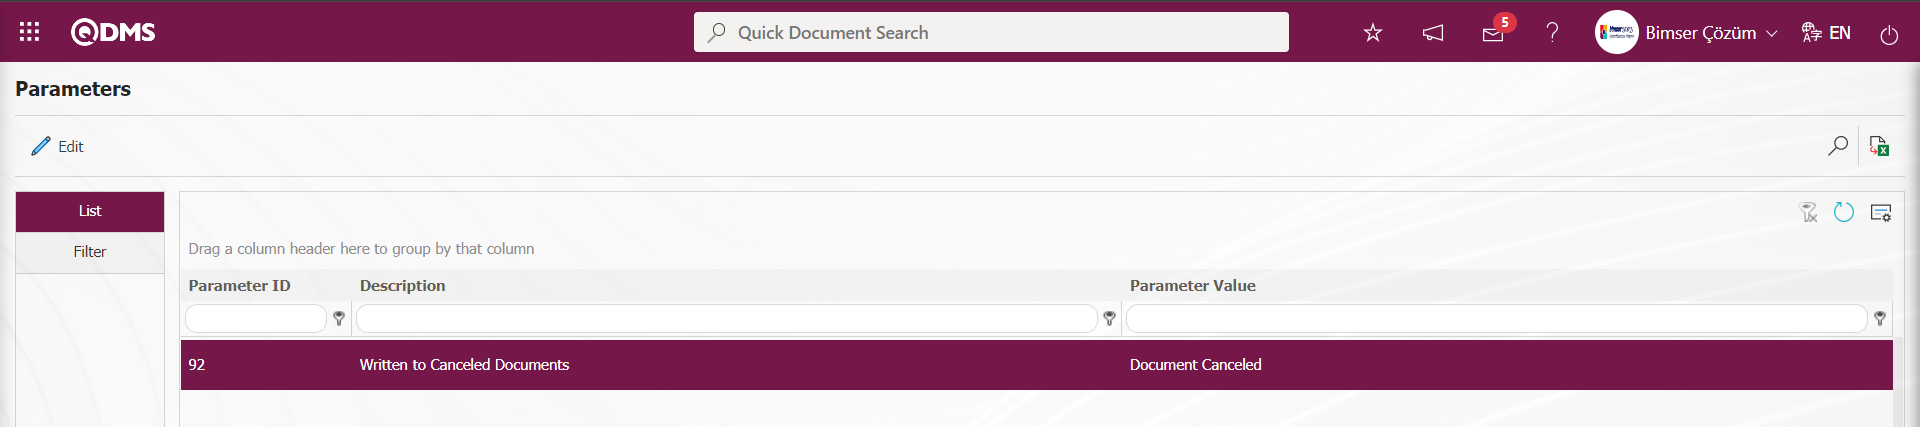
After determining the text to be written to the canceled documents in this parameter, if we want it to appear in the form of a cross in the form of a hologram, the parameter value of parameter 93 must be activated by selecting “Yes”.
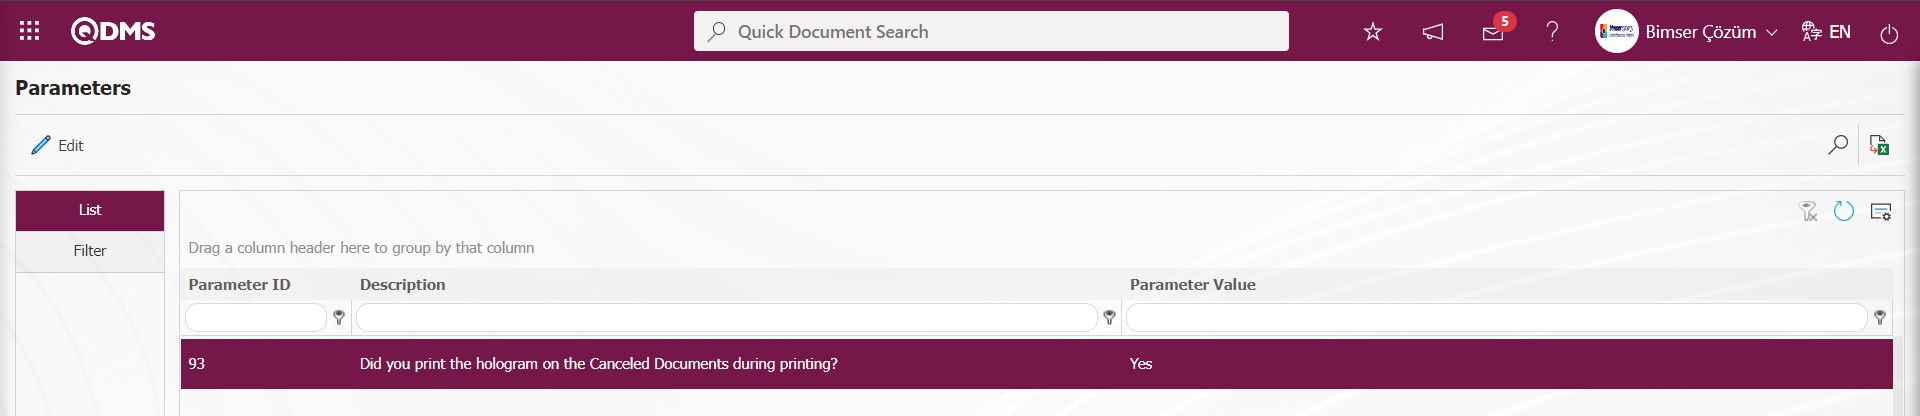
After the parameter is activated, the canceled documents are printed in the form of holagrams of the text as a screenshot.
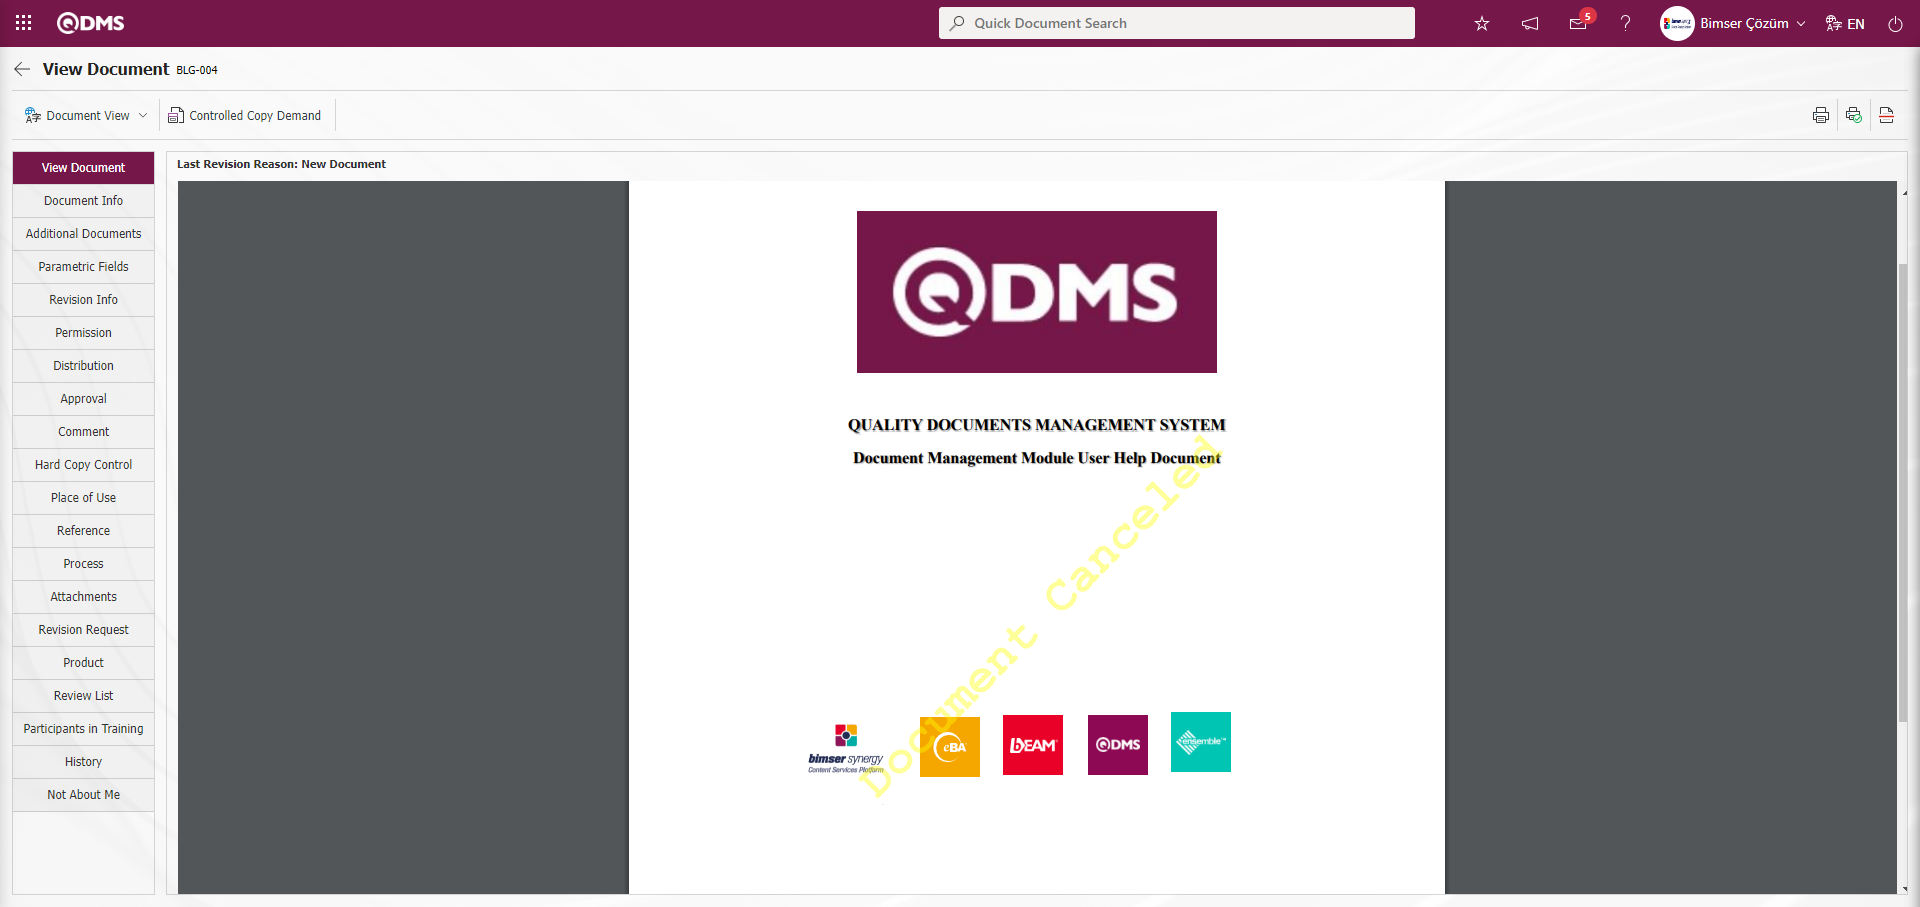
System Infrastructure Definitions/Document Operations/ Document Reactivation menu is used to bring back canceled documents from the cancellation process.
As a second method to cancel the document, click on the document code in the Document List tab of the Document View menu. It is done by clicking the  button on the Document View screen where the document is displayed.
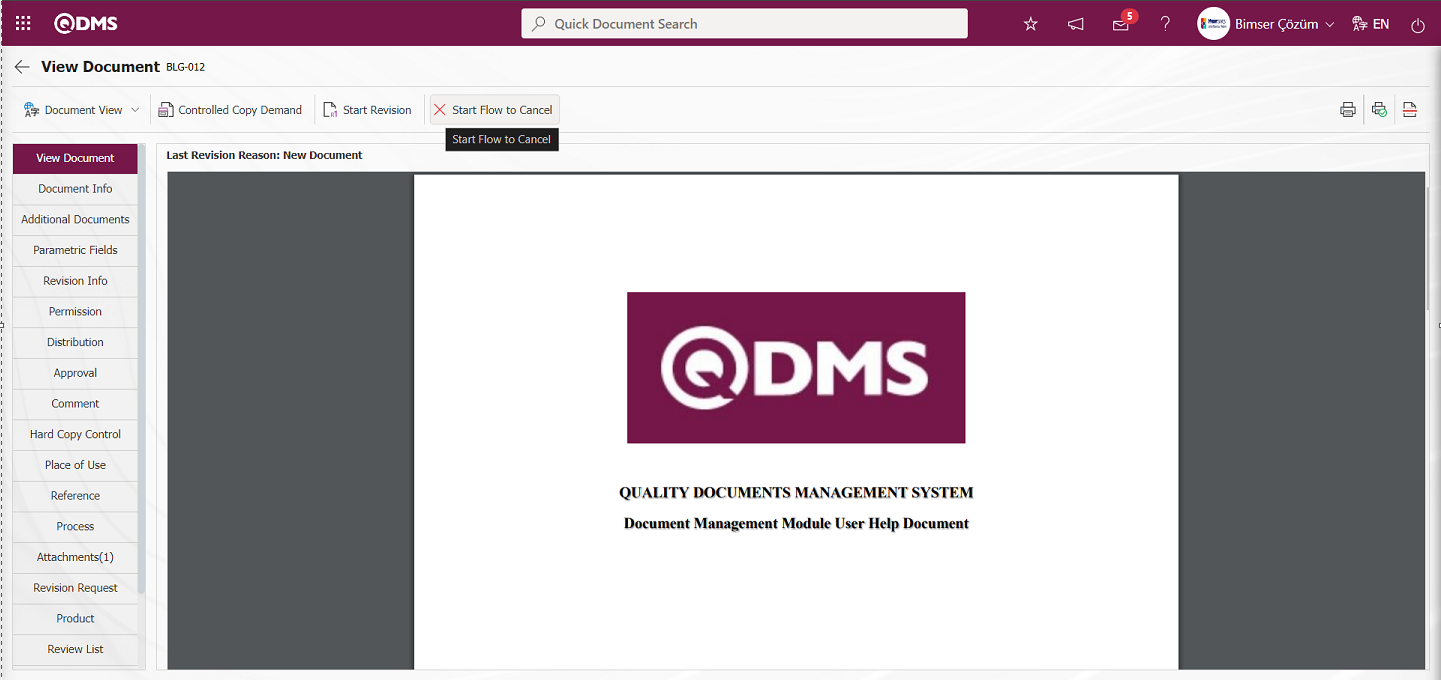
Click the button on the Document View screen.
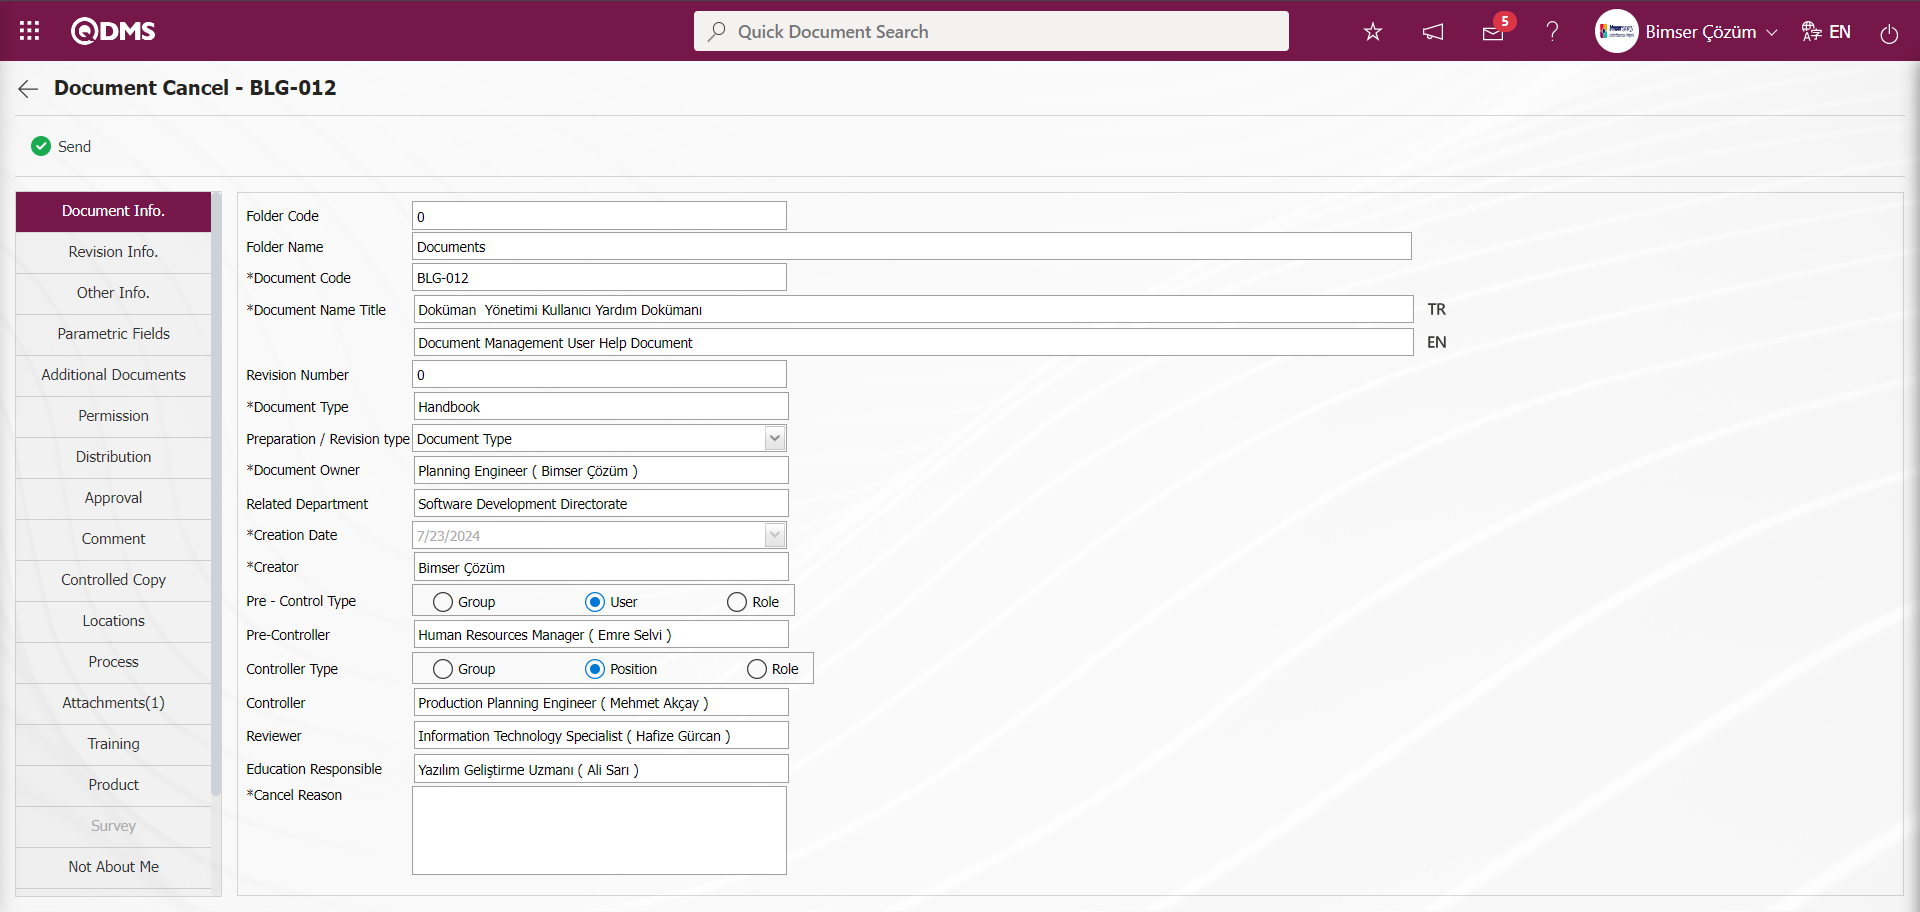
On the Document Cansel screen, the reason why the document is canceled is written in the Cancel Reason field and the  button is clicked. The document is canceled by performing the steps in the same way as in the Document Cancellation Process menu.
6.2.8. Activate/Deactivate Document
Menu Name: Integrated Management System/ Document Operations/ Activate/Deactivate Document
Documents can be closed to access by authorized users when desired. Active-Passive feature is used with the document suspension process. The suspended document is inactive and no one can access the document until it is reactivated. To remove the document from suspension, select the inactive document from the document suspension menu and reactivate it.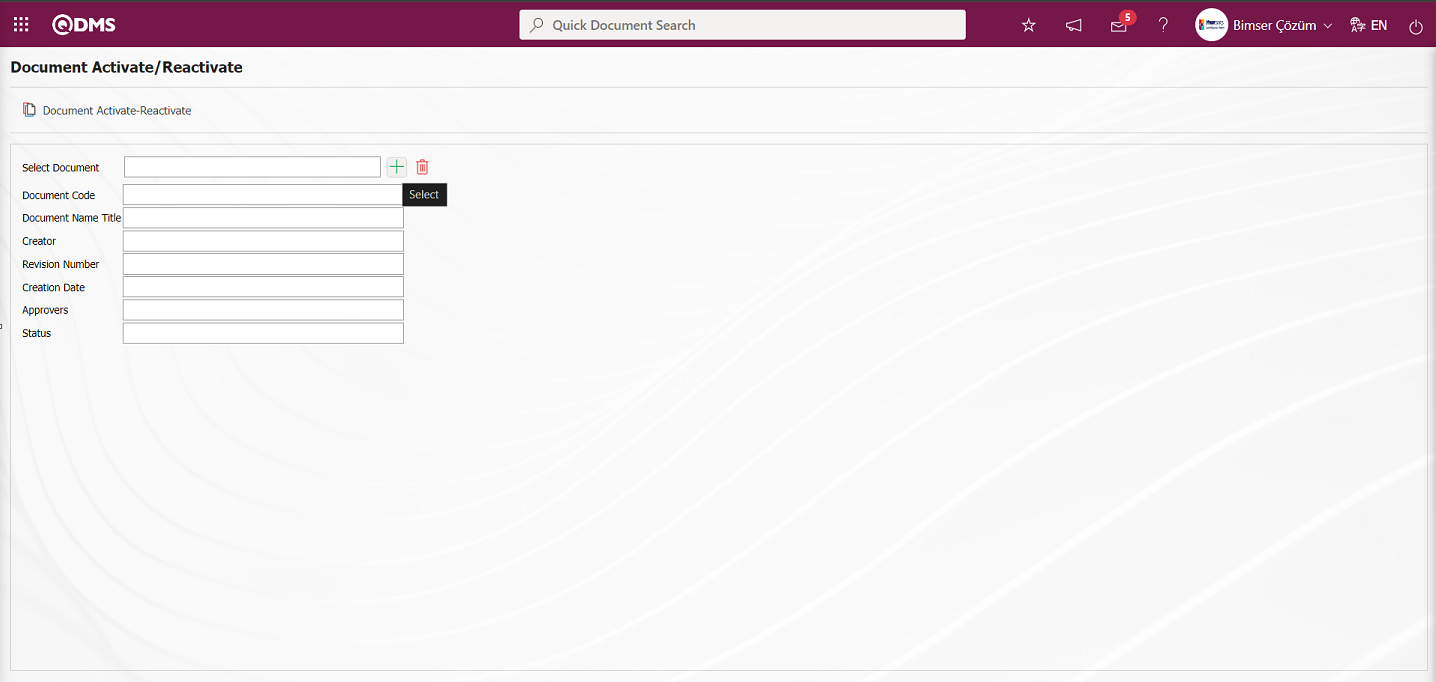
To suspend a document from the Document Activate/Reactivate screen, first click the  (Select) button in the Select Document field and select the relevant document in the list of documents loaded in the system.

After the document selection process, the information in the fields related to the documents information is automatically given by the system.
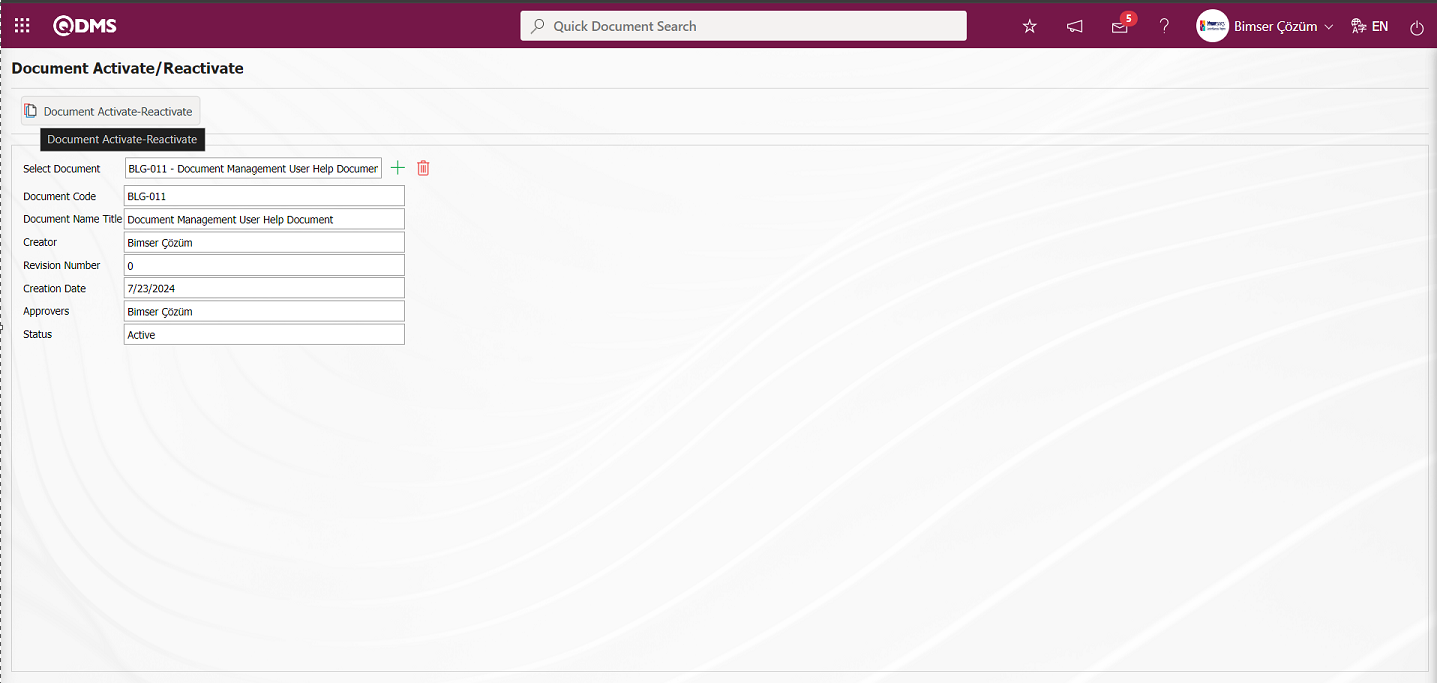
After selecting the document from the Document Activate/Reactivate screen, click the  button.
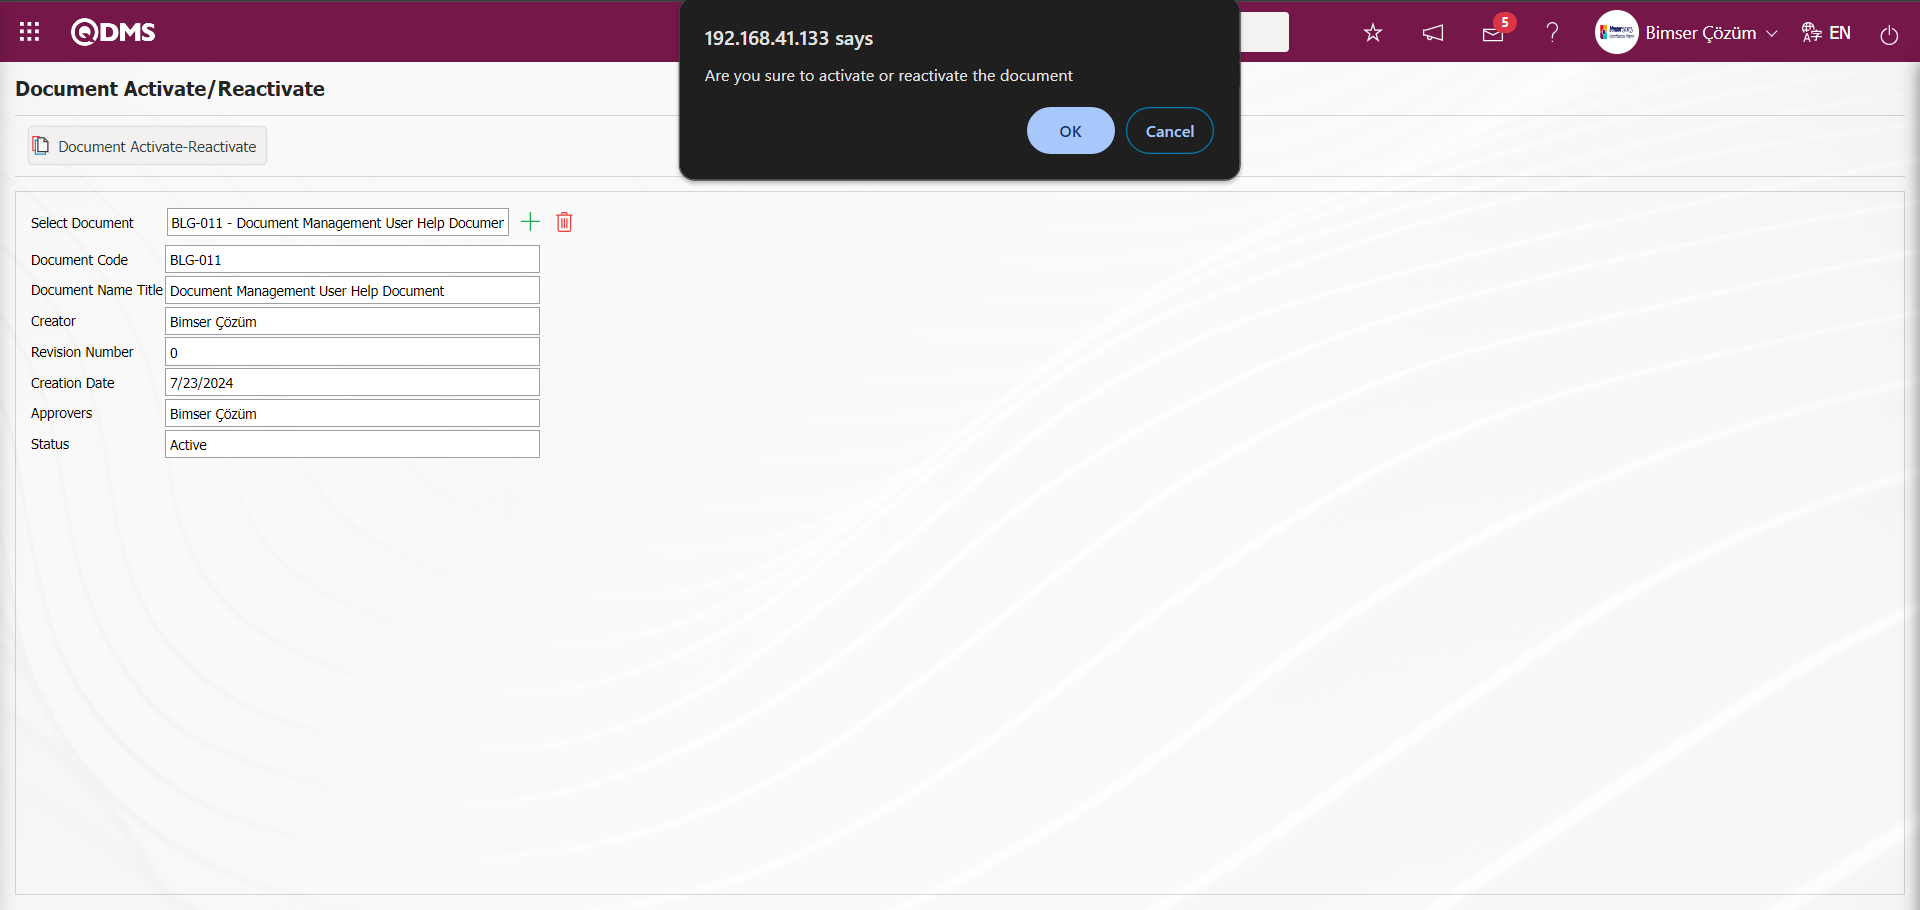
Click the “OK” button in the message given by the system.

After selecting the document, the button is clicked and the document whose status is “active” is made “passive”.
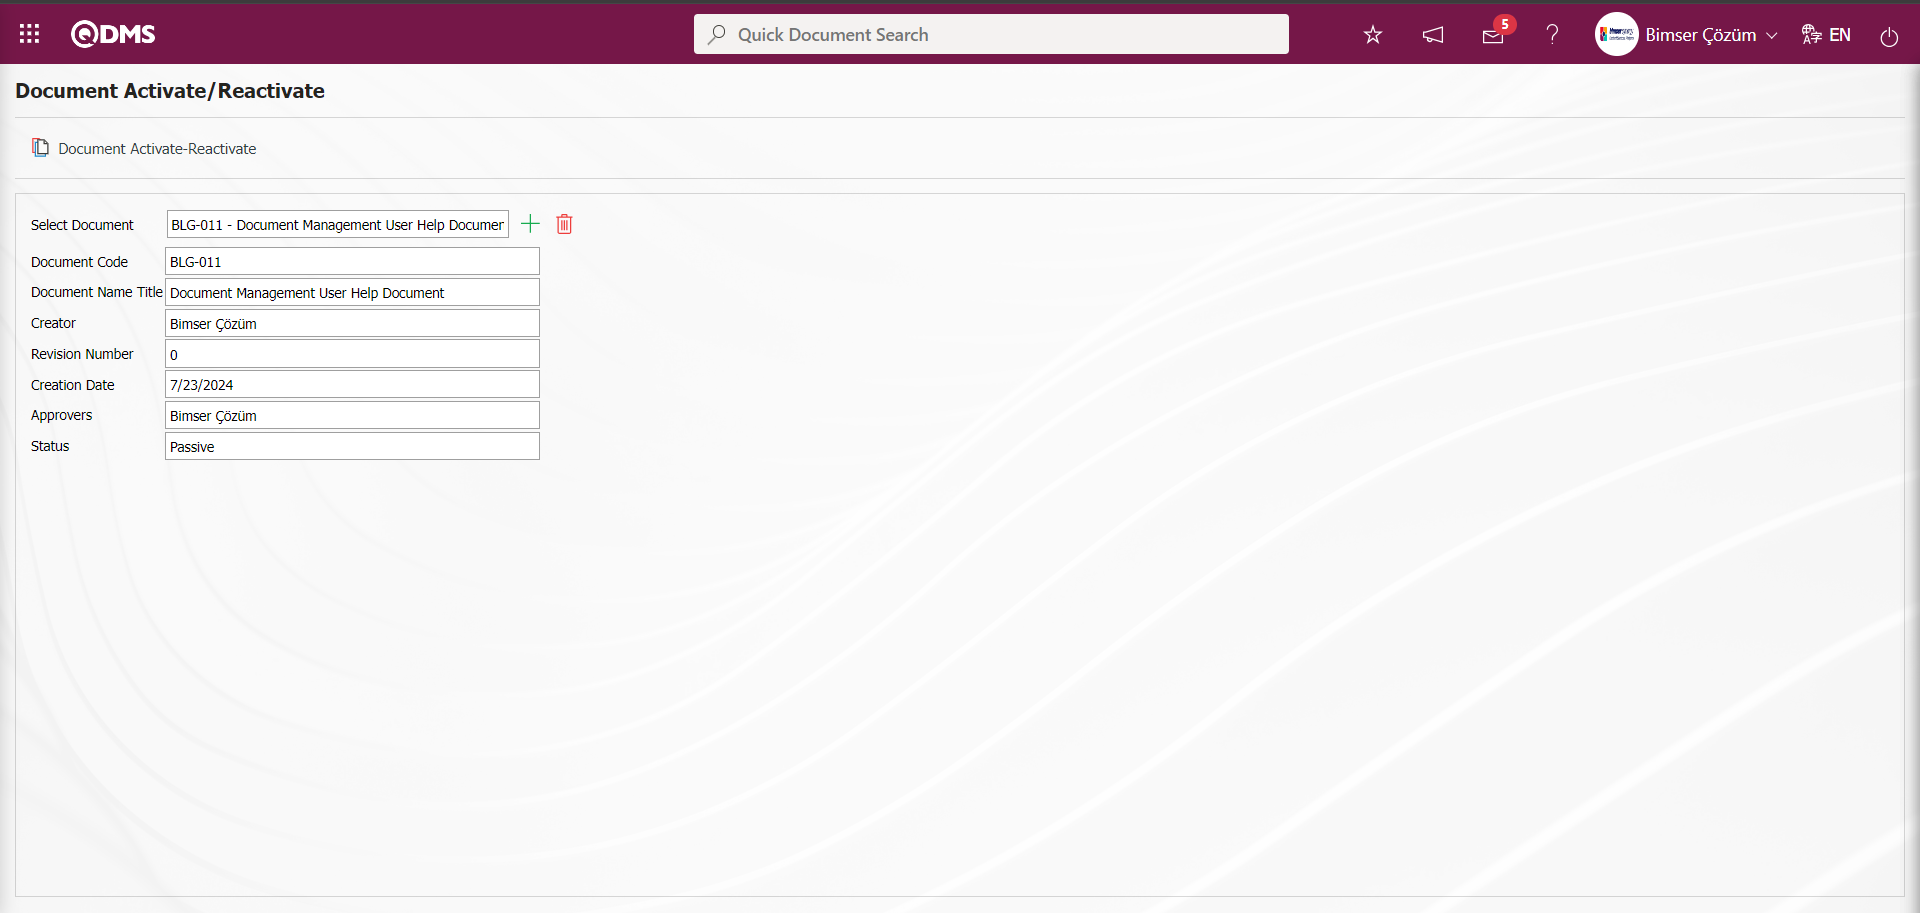
From the Document Activate/Reactivate screen, click on the  button to change the status of the passive document to “Active” status.
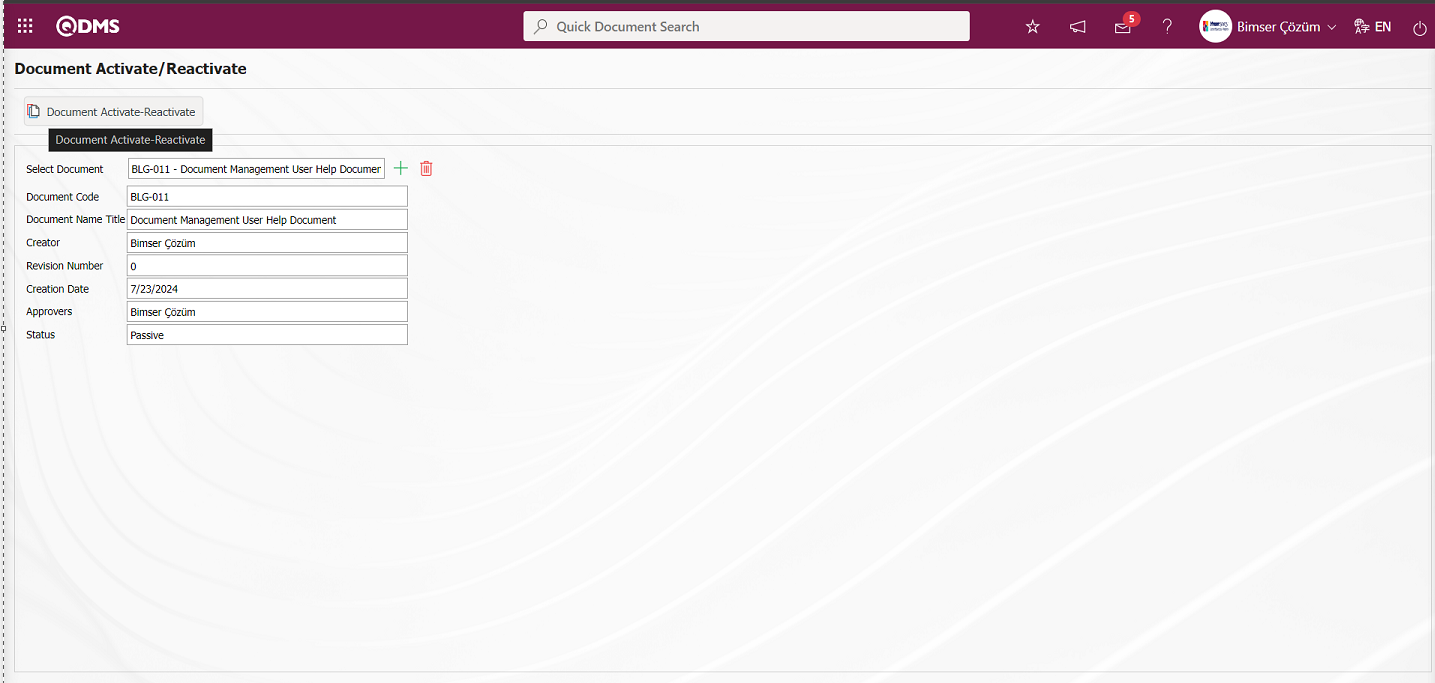
Click the “OK” button in the message given by the system.
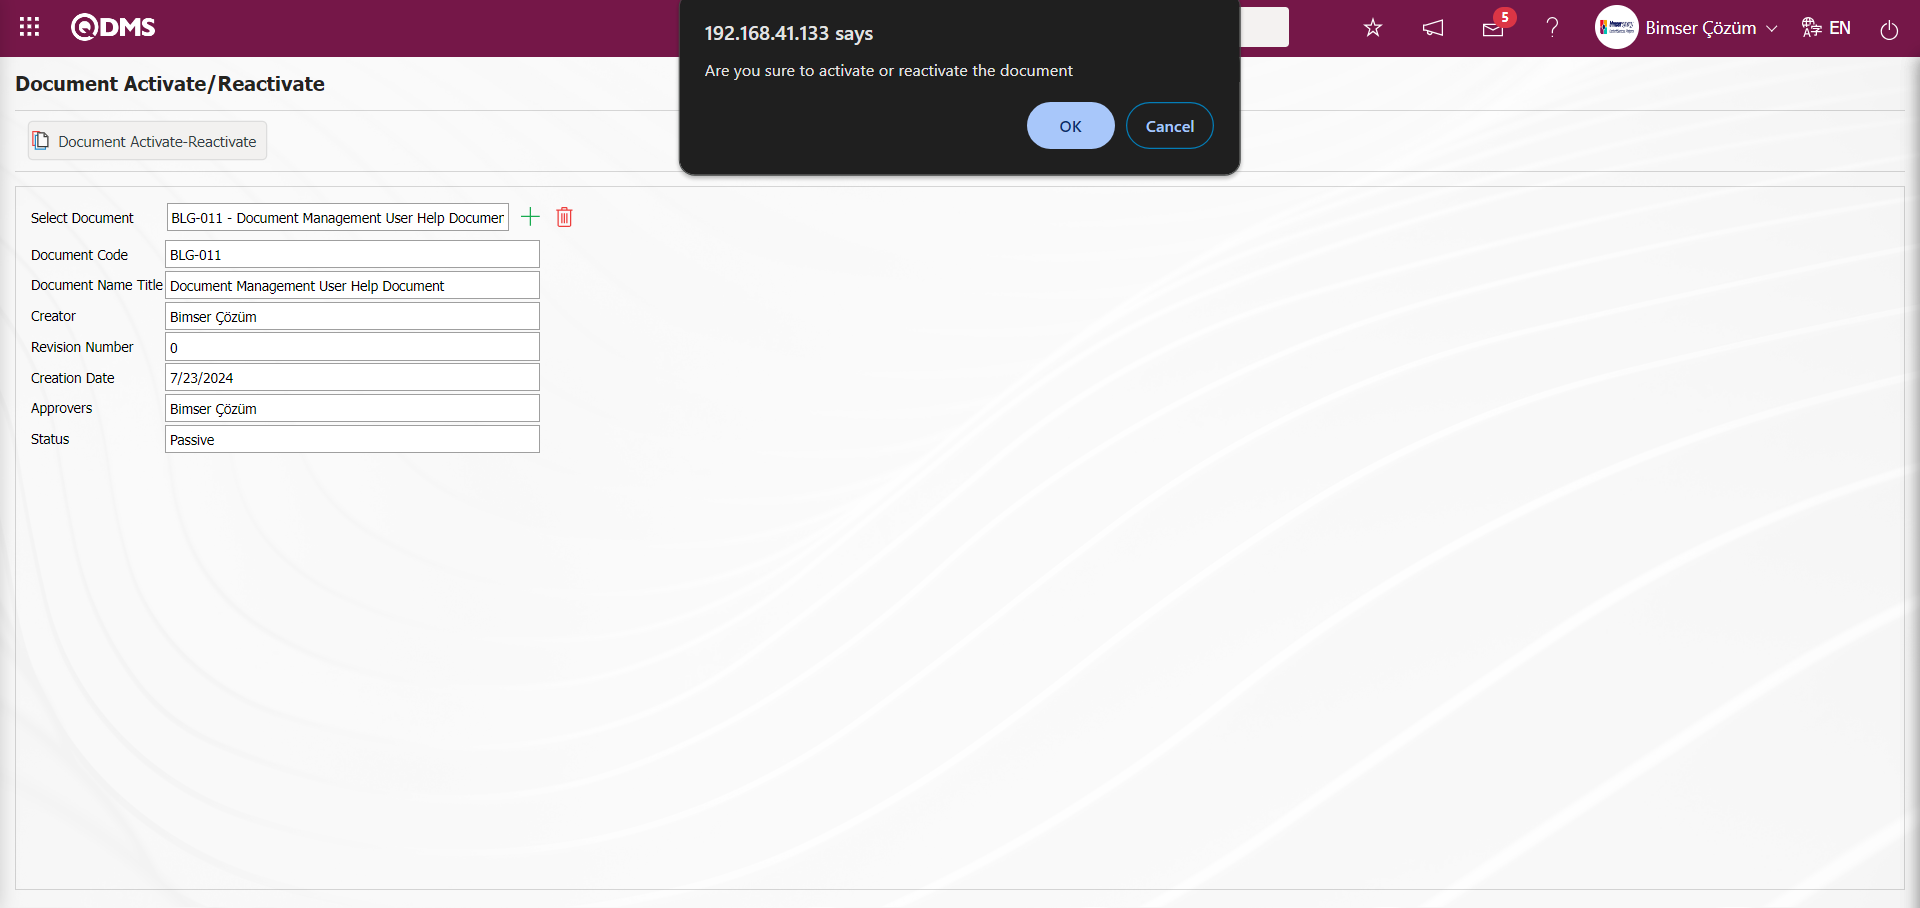
Document Activate/Reactivate ekranından  By clicking the button, the document whose status is "passive “ is made ”active ’.
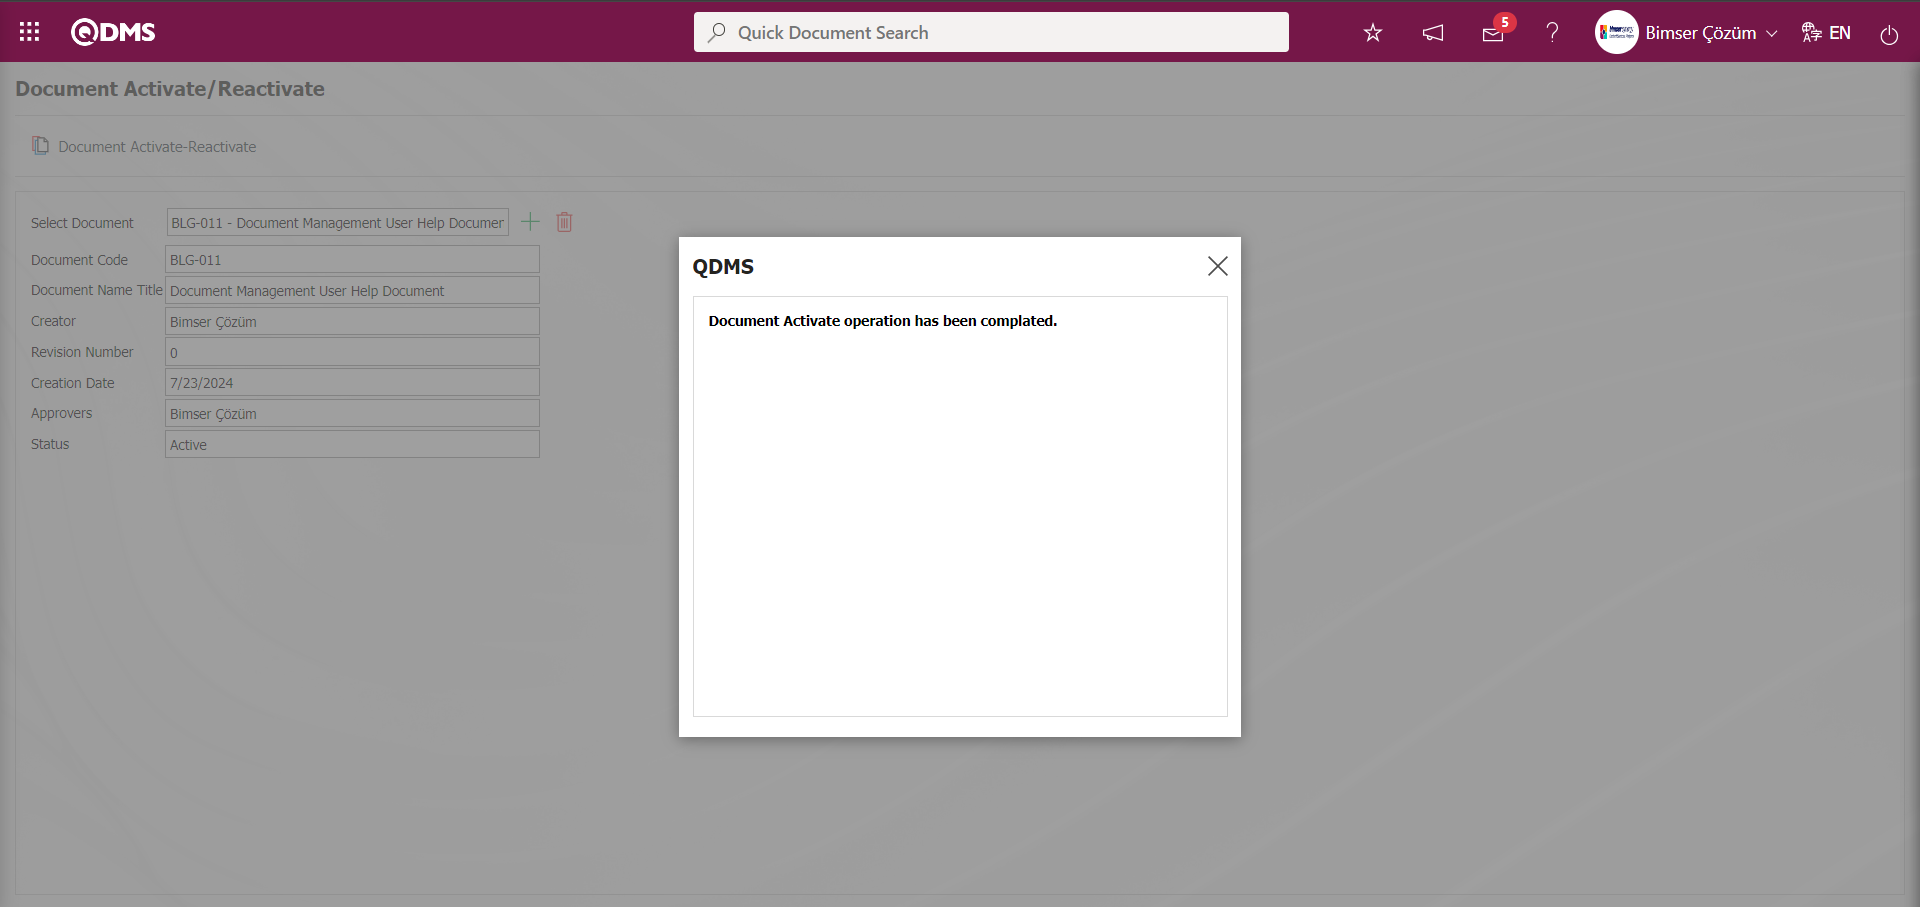

The list of suspended documents is accessed from the Integrated Management System/Document Operations/Reports/Suspended Document List menu.
6.2.9. Document Change Order
Menu Name: Integrated Management System/ Document Operations/ Document Change Order
This menu is used by senior authorized users to assign tasks for revising documents/ preparing new documents. Task assignment can be made for the operation to be performed in multiple documents. The personnel to whom Document Change Order will be made are defined by writing their registration numbers to the parameter value in parameter 49 of the Document Management Module parameters.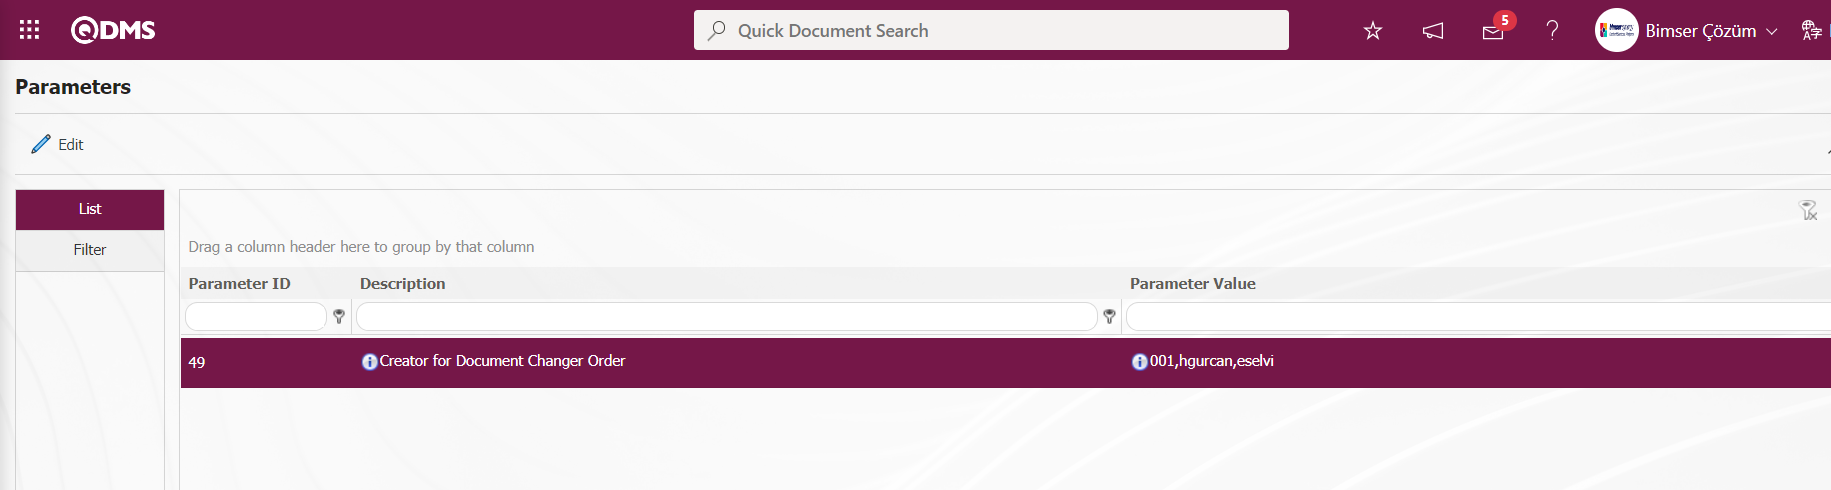
The button is displayed on the Document Change Order screens of the personnel whose registration numbers are defined in the parameter. The defined personnel are authorized to assign tasks through the button displayed on the Document Change Order screen.

With the help of the buttons on the screen;
: A new Document Change Order is defined.
 : The selected Document Change Order information is displayed in the list
: Deletes the selected Document Change Order information in the list.
: Records are filtered and searched.
 : Data is exported to Excel.
: The search criteria on the menu screens are used to clean the data remaining in the filter fields in the grid where the search operation is performed.
: The menu screen is restored to its default settings.
 : User-based designing of the menu screen is done with the show-hide feature of the fields corresponding to the columns on the menu screens, that is, the hiding feature.
Defining a new Document Change Order is done by clicking the button on the Document Change Order screen.
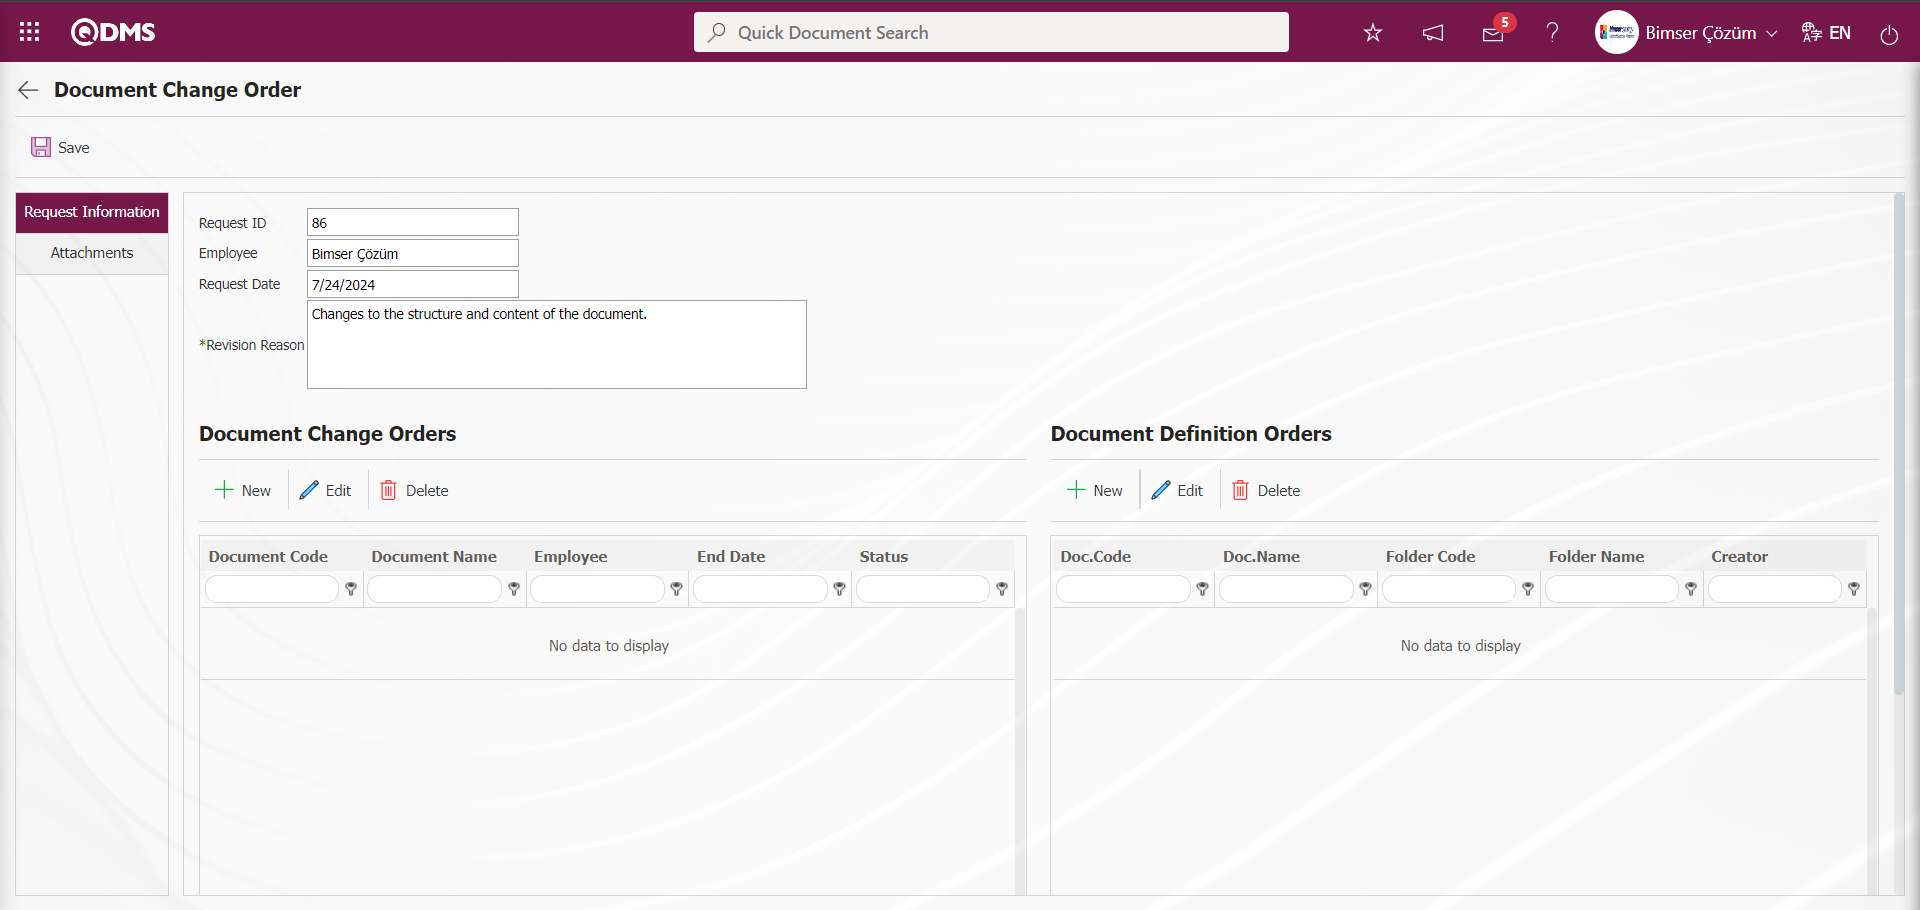
With the help of the buttons on the Document Change Order Screen;
: A new Document Change Order is made.
 : The selected Document Change Order information is displayed in the list
: The selected Document Change Order information in the list is deleted.
A new Document Change Order is defined by clicking the button on the Document Change Order screen.

On the Document Change Order screen, click the  (Select) button in the Document field.
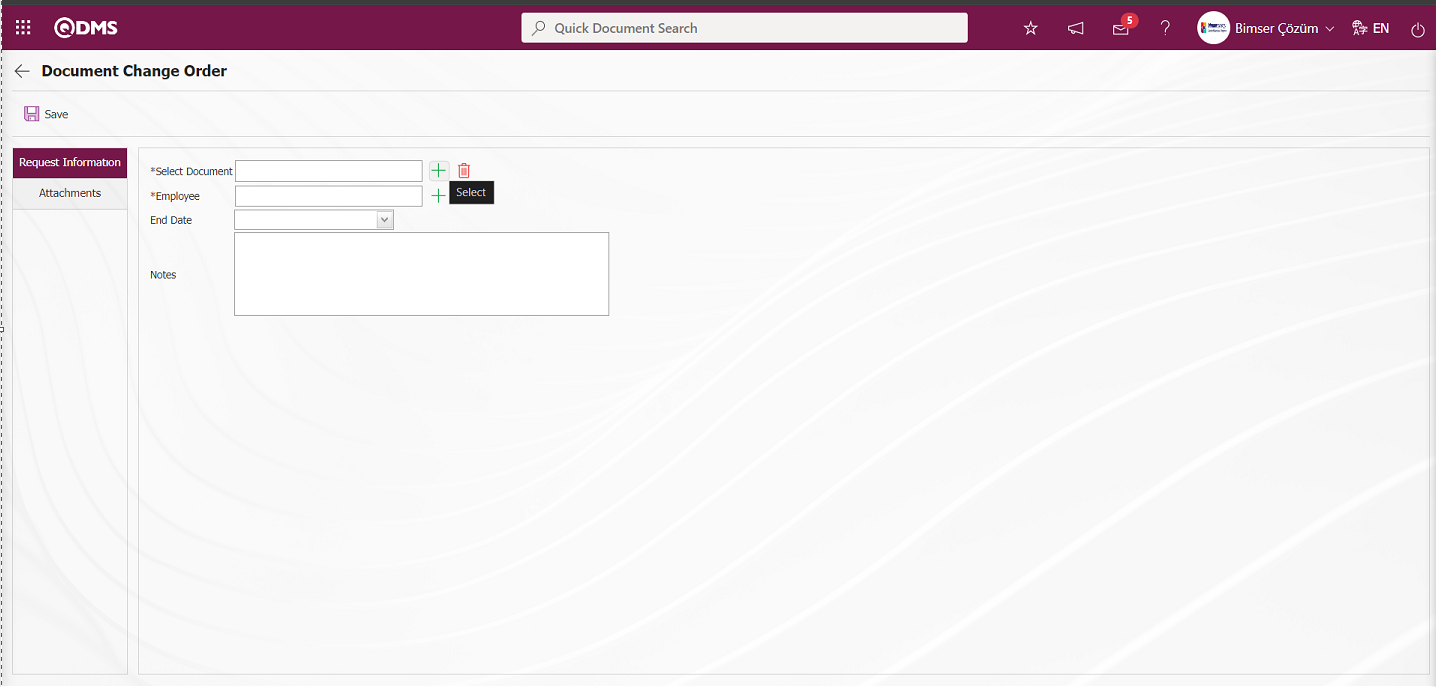
In the Document List opened, select the document for which a change request will be made and click the  button.
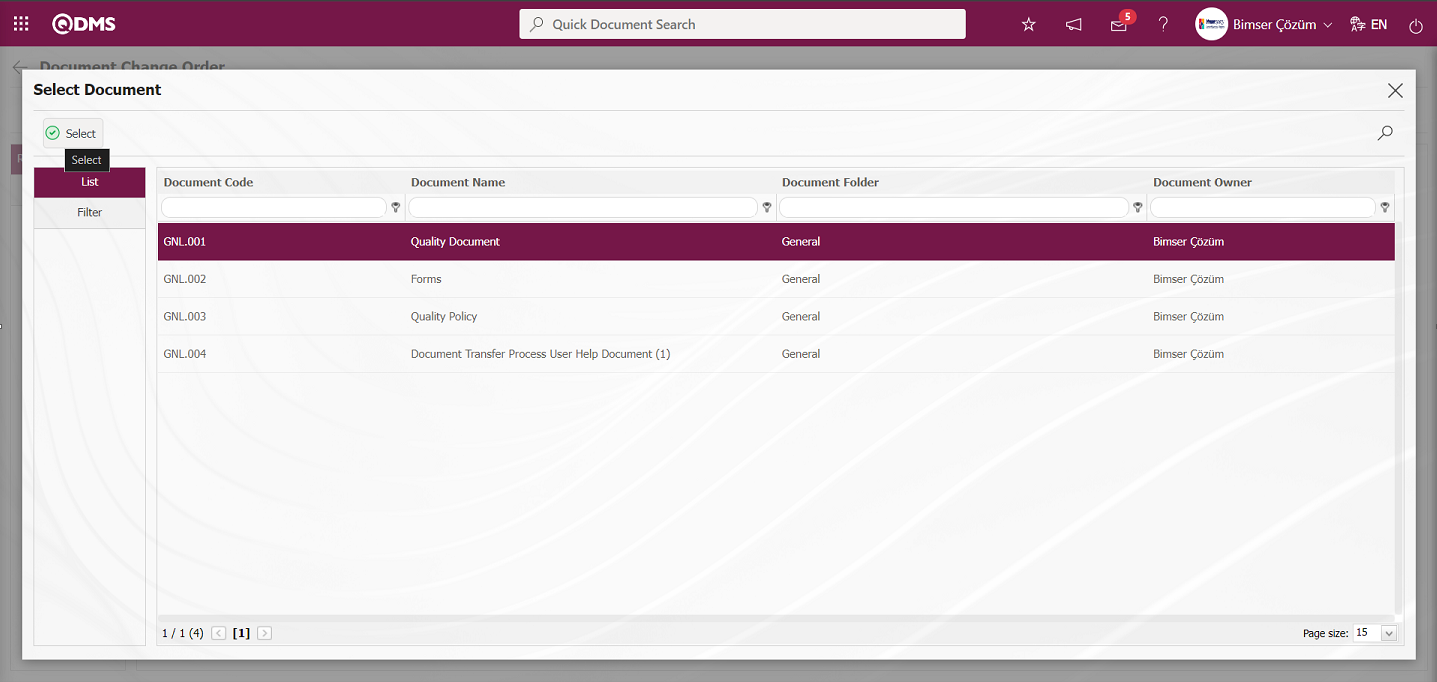
Select Document Change Order, which document it is and who will perform this request. The end date of the work is selected. In the Notes field, enter the note information, if any.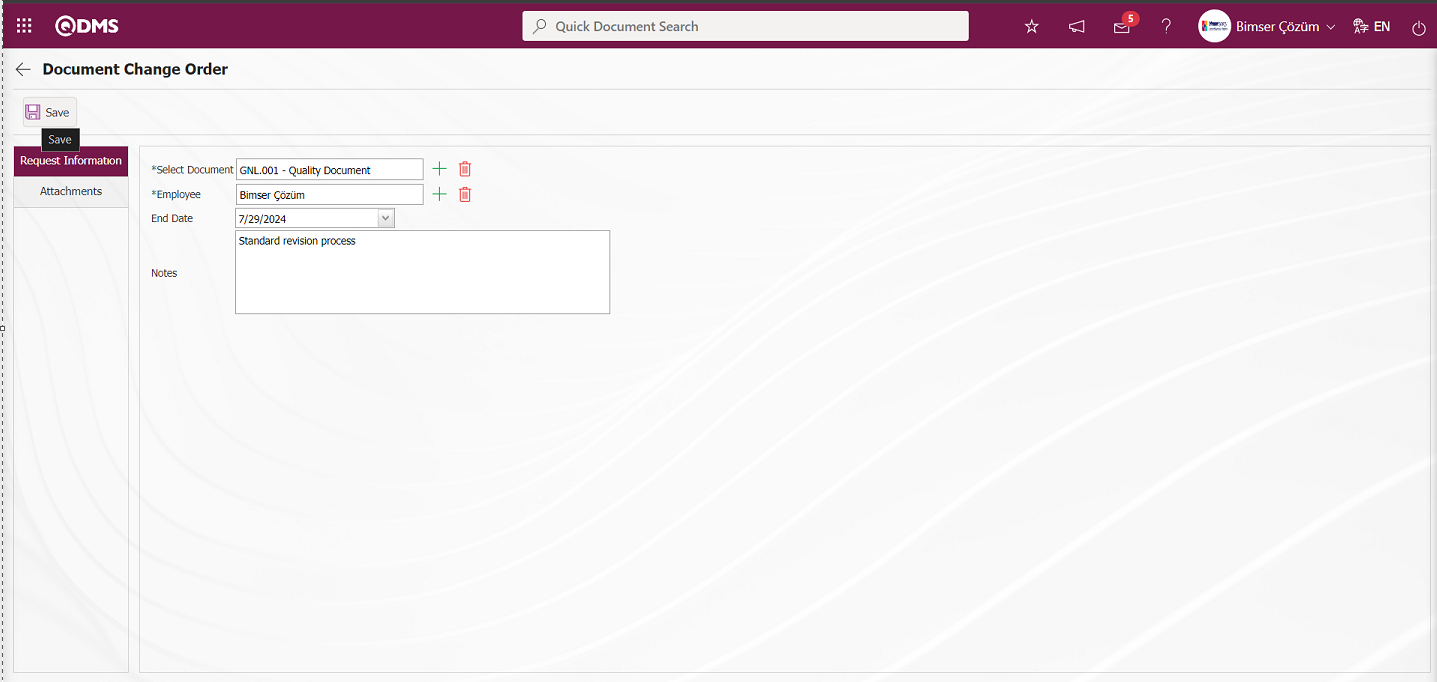
After entering the relevant information in the required fields on the Document Change Order screen, the document change request registration process is done by clicking the  button in the upper left corner of the screen.
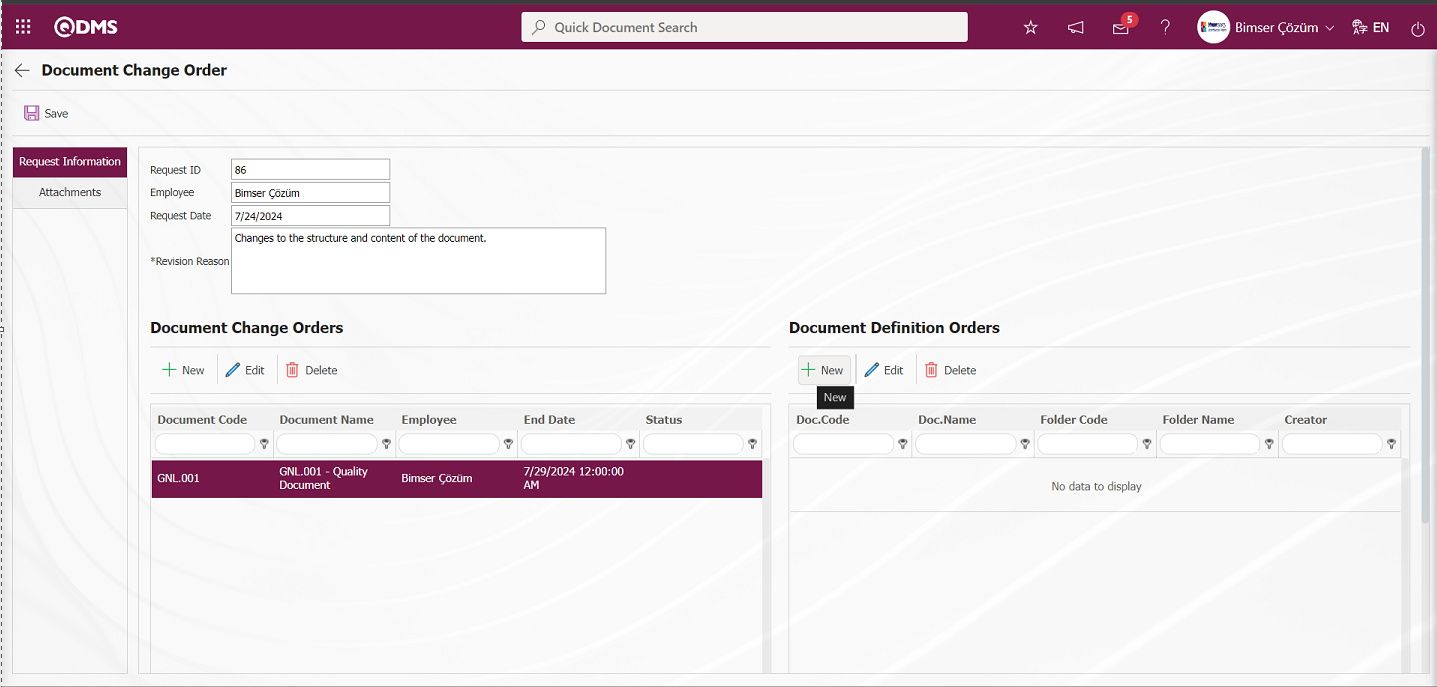
With the help of the buttons on the Document Preparation Orders Screen;
: A new document preparation order is made.
: The document preparation order information selected in the list is displayed
: The document preparation order information selected in the list is deleted.
A new document preparation order transaction is defined by clicking the button on the Document Preparation Requests screen.
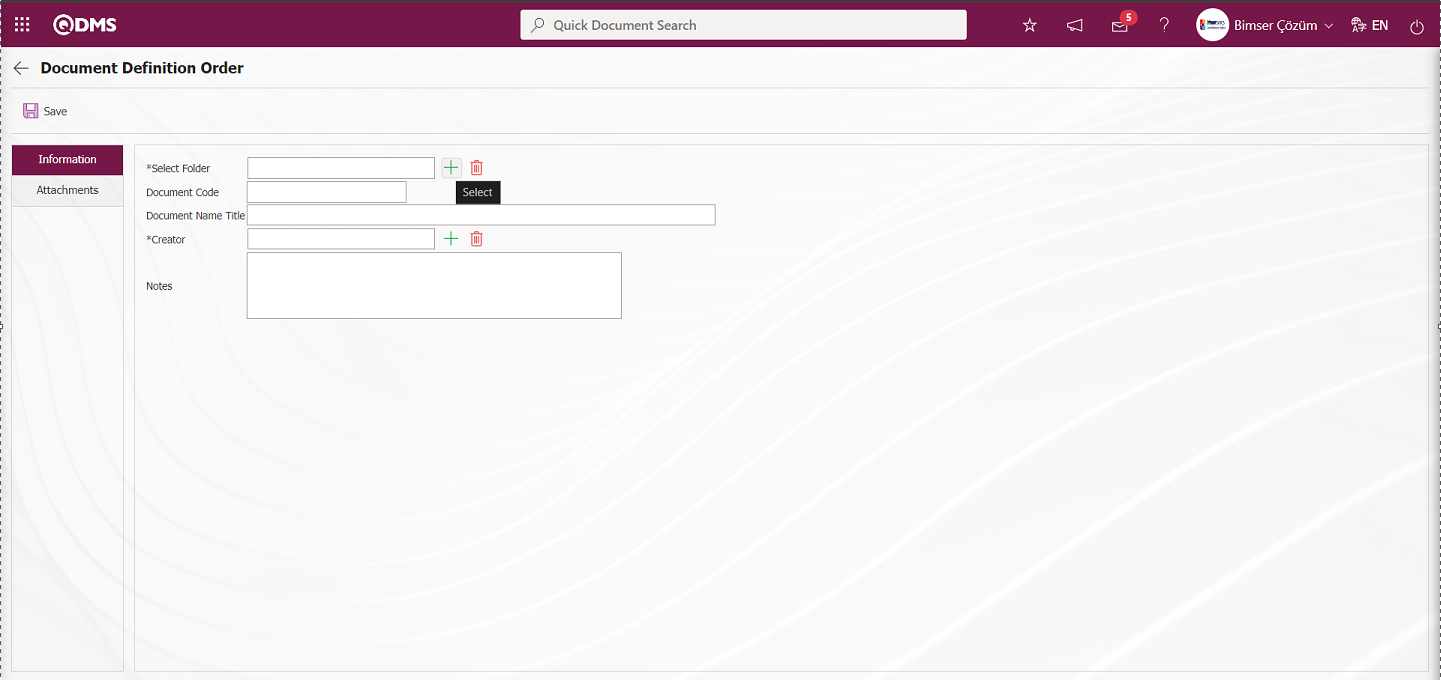
On the Document Preparation Orders** screen, click the (Select) button on the Select Folder screen.
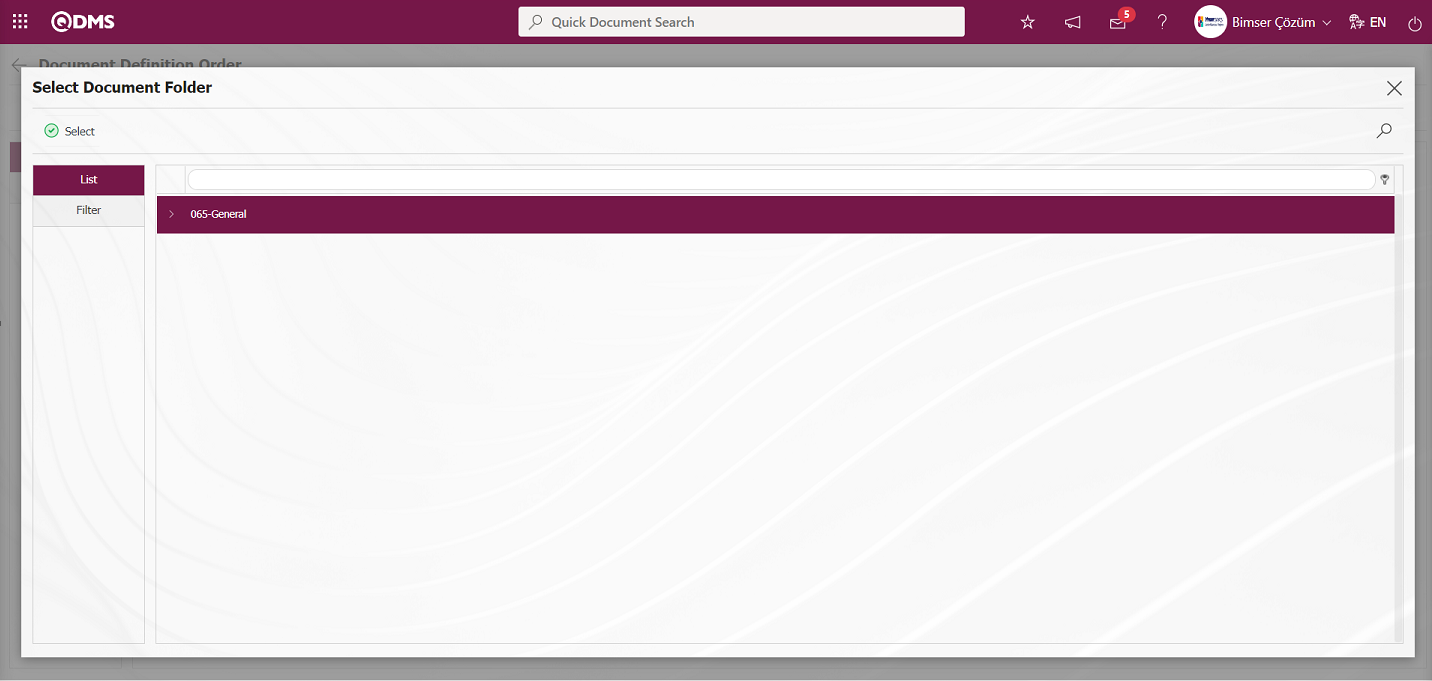
In the Document Folder list, select the folder where the document preparation request will be made and click  button

On the New Document Preparation Orders screen, select the folder where the document will be prepared and define the Document Code and Name. Select the information by whom the document will be prepared. If there is any note information in the Notes field, enter the note information.
After entering the relevant information in the required fields on the Document Preparation Orders screen, the document preparation request registration process is done by clicking the button in the upper left corner of the screen.
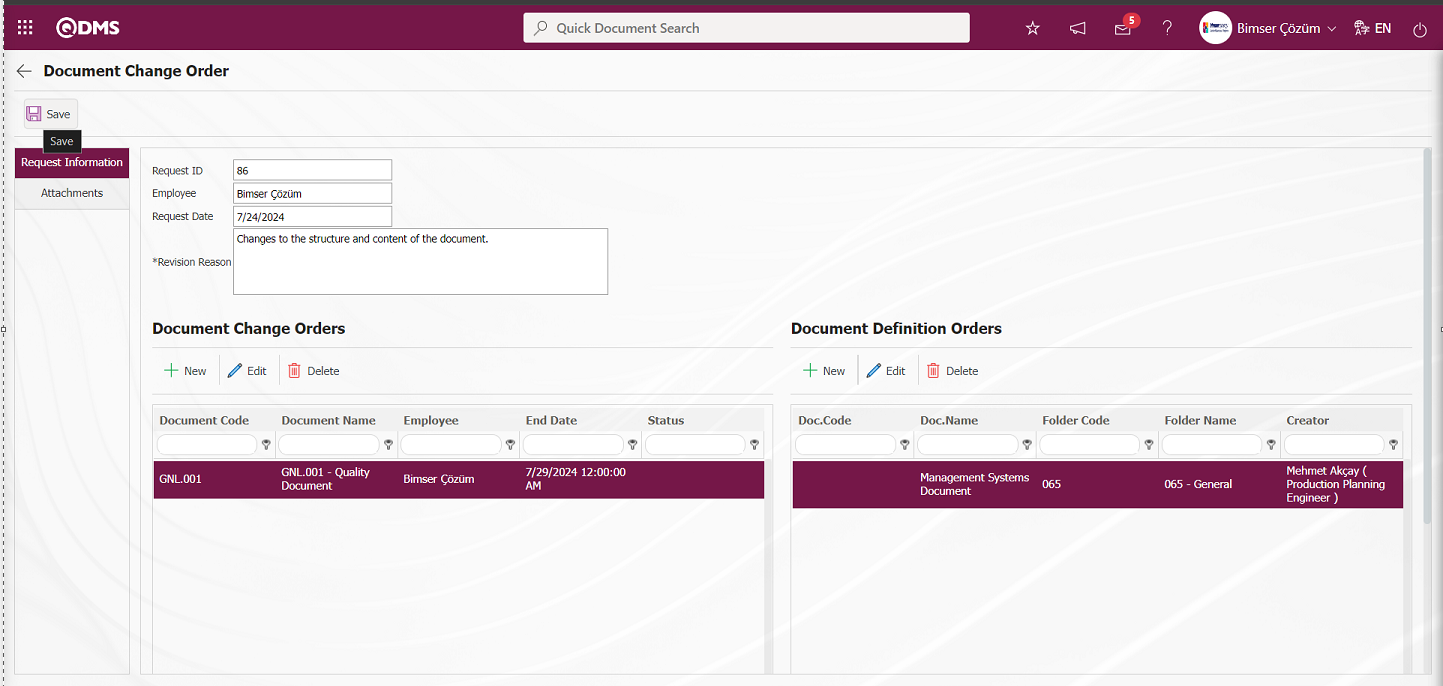
On the Document Change Order screen, the Revision Reason information is written and the Document Change Order is registered by clicking the button in the upper left corner of the screen.
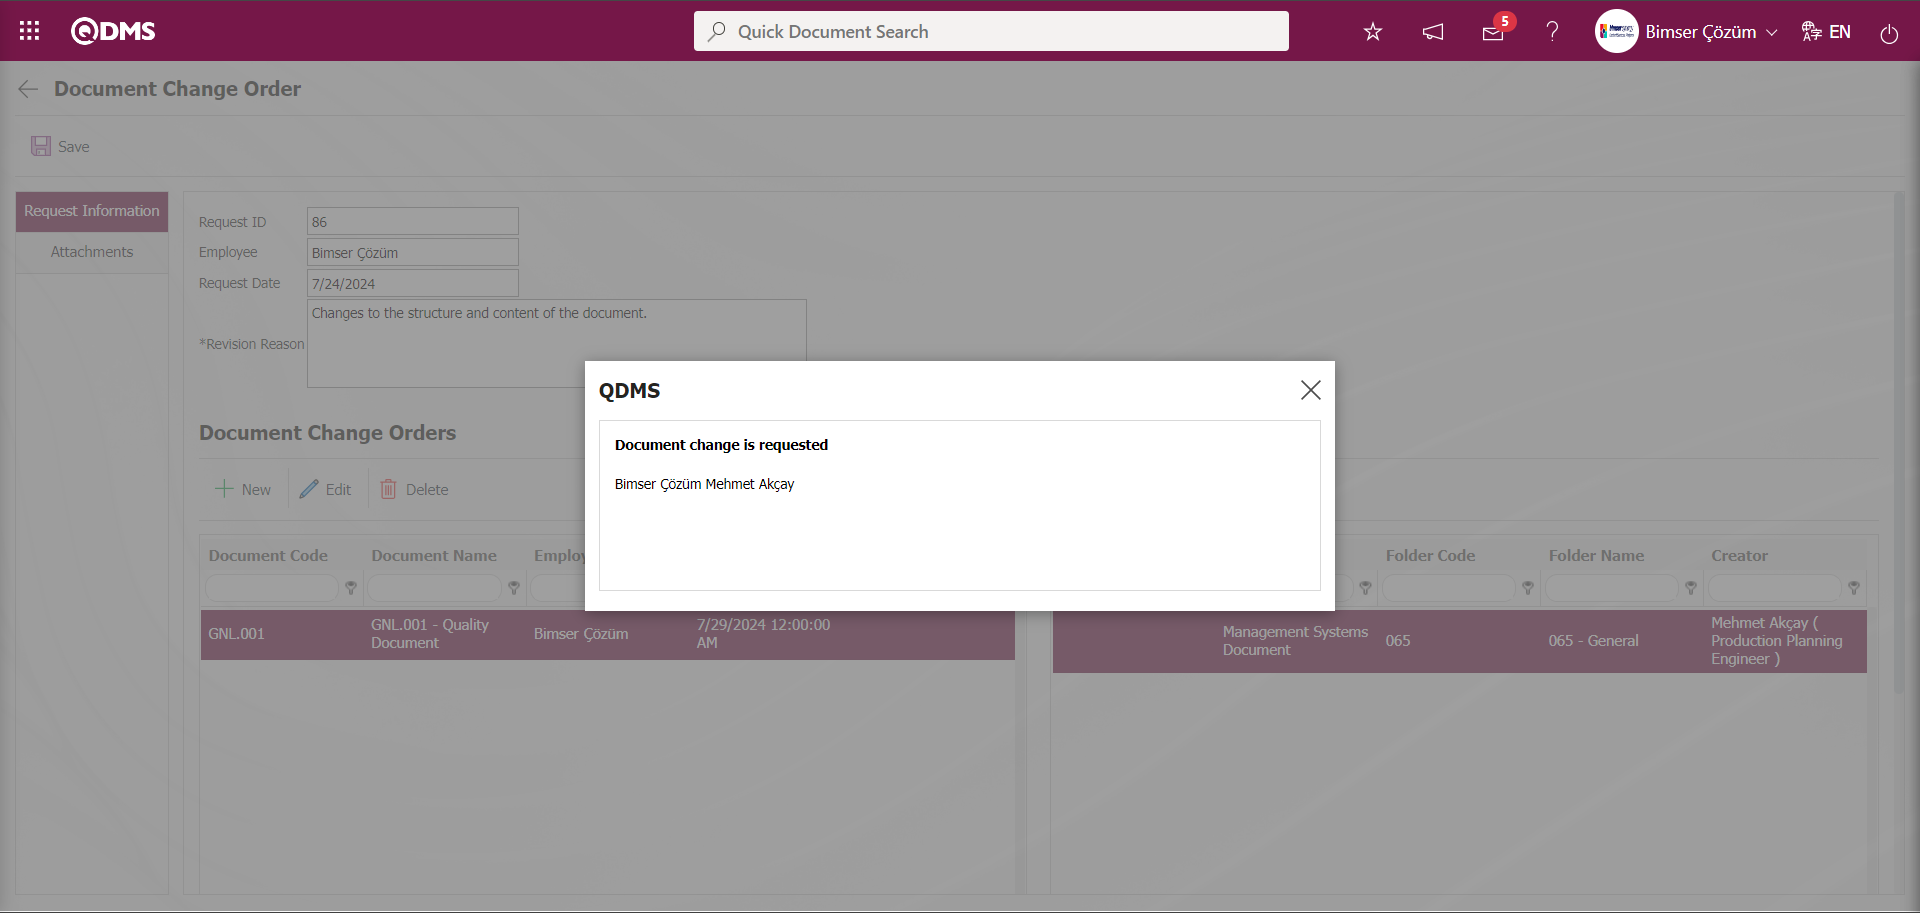

Tasks assigned to contacts are displayed on the “My Pending Jobs” page under the“Documents Saved” list.
Document Change Order;
On the Document Revision screen opened by clicking on the link in the document code field in the relevant task, the process continues with the process steps made in the document revision process stages in the Document Revision menu.
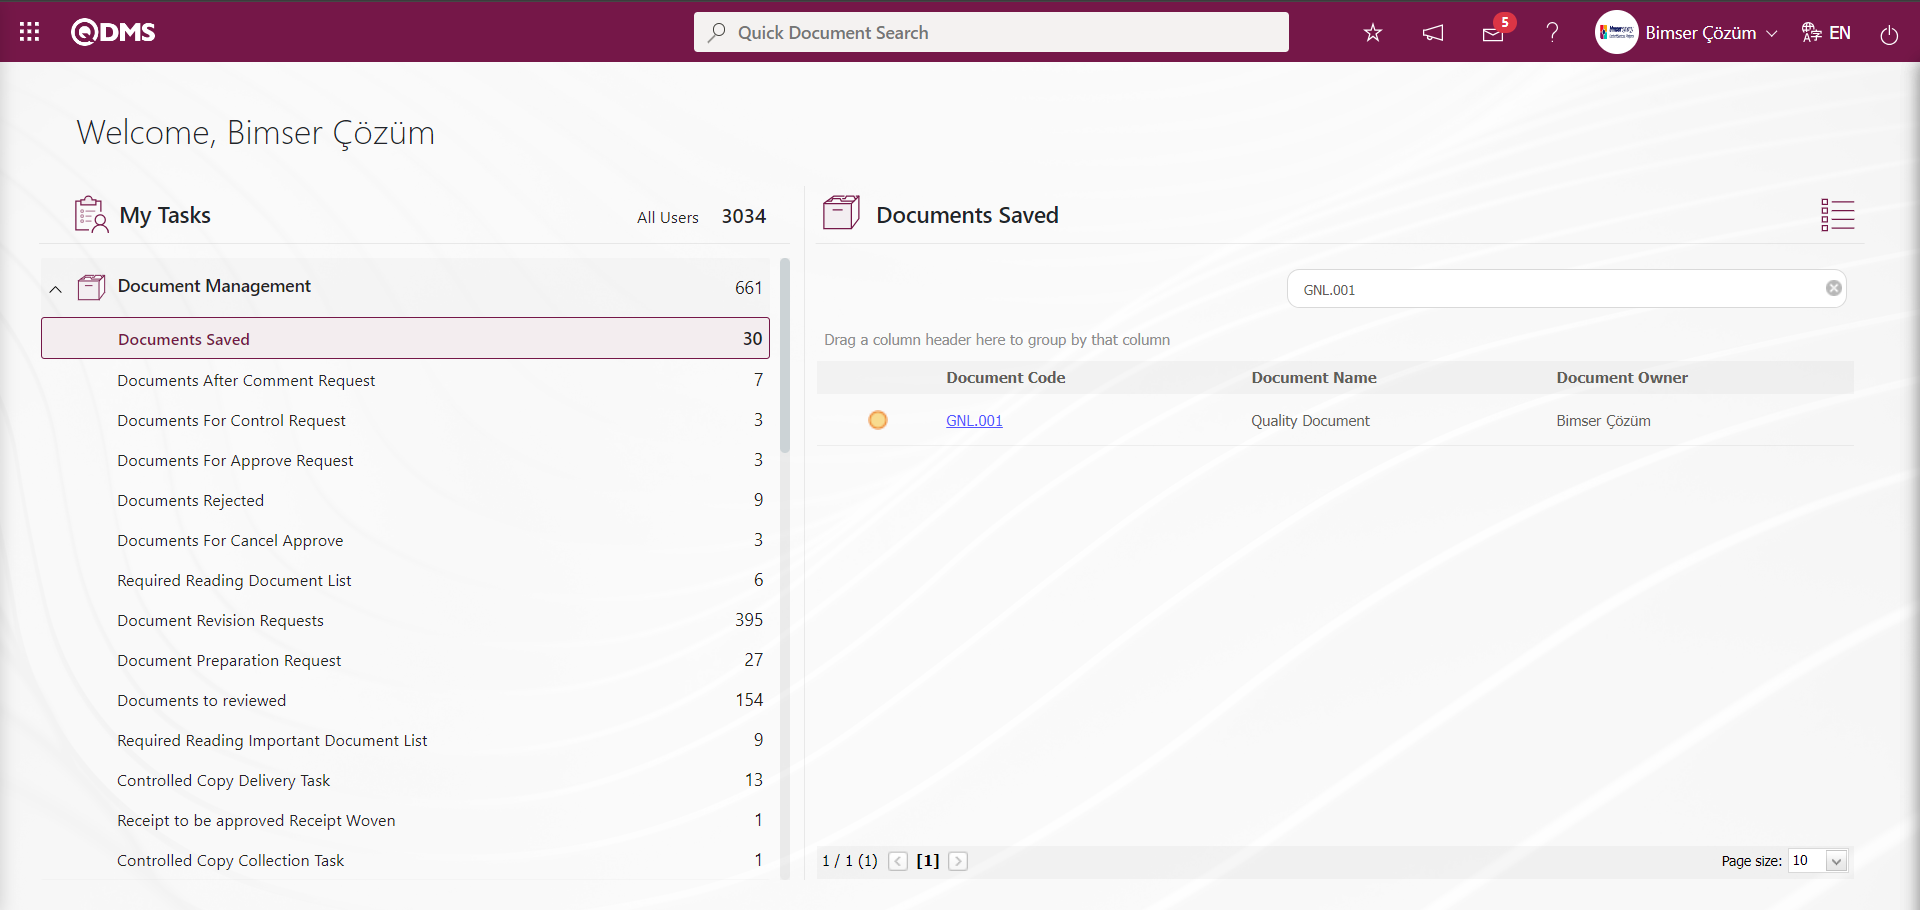
Document Preparation Orders;
On the New Document screen opened by clicking on the link in the document code field in the relevant task, the process is continued with the process steps made in the document preparation process stages in the Document Preparation menu.
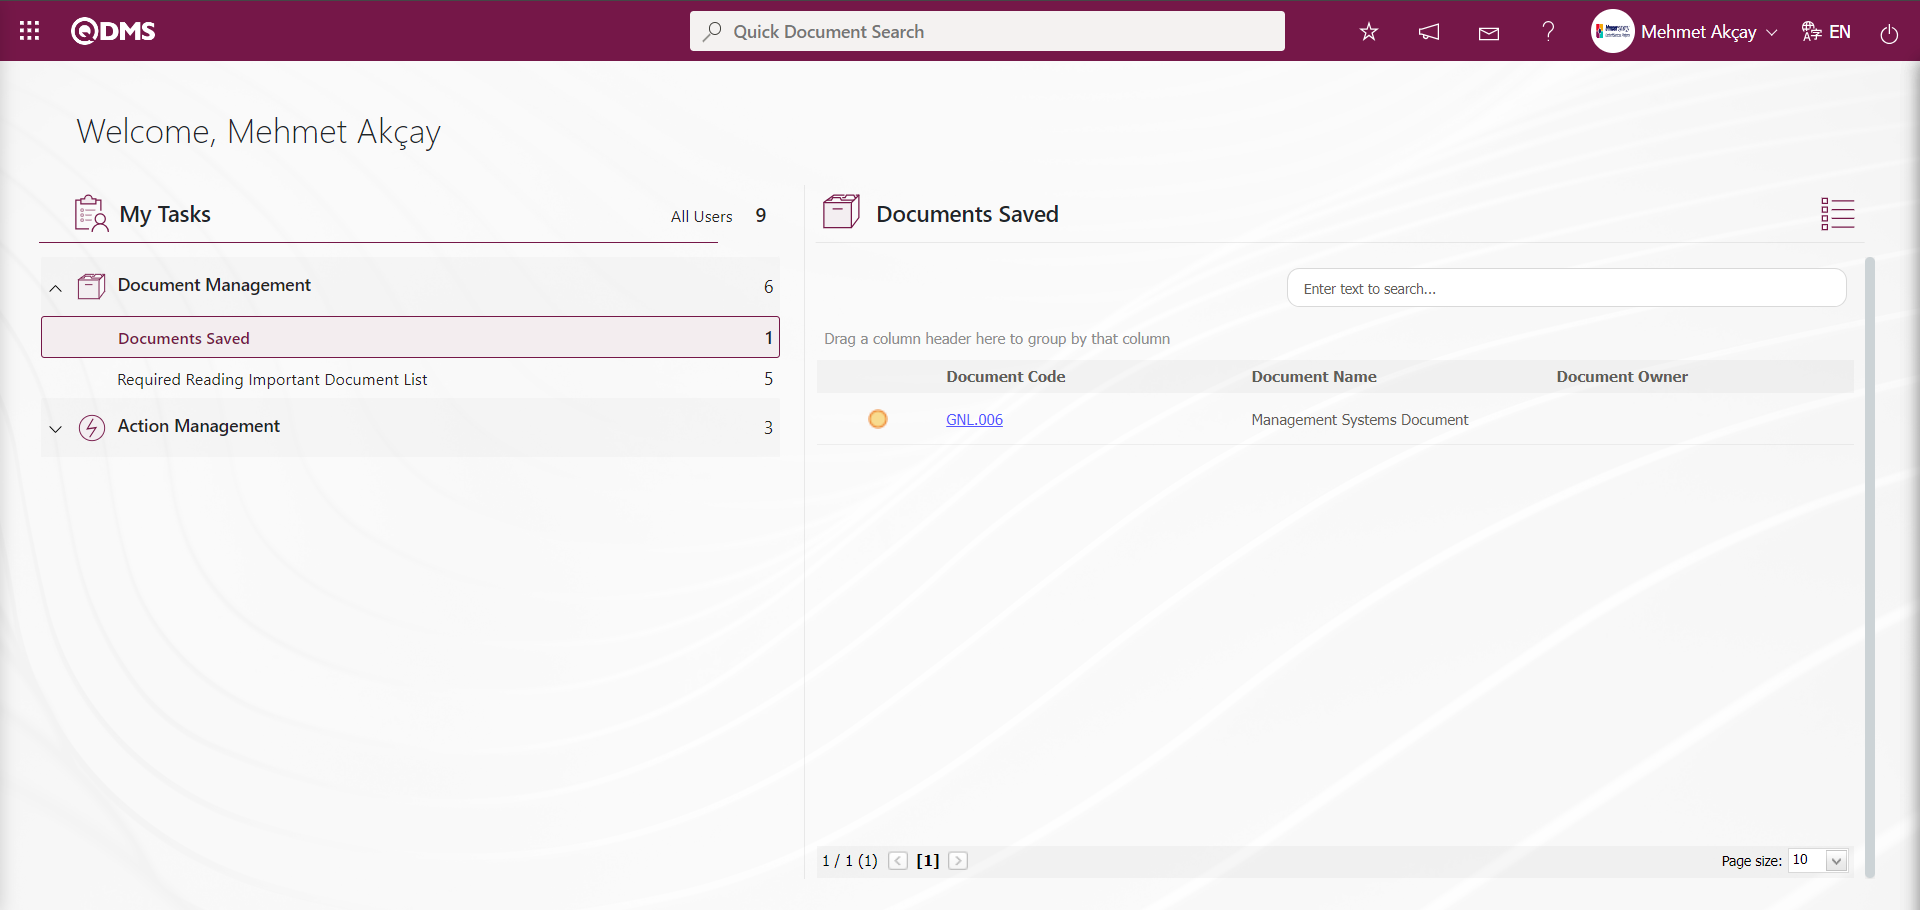
6.2.10. Hard Copy Control
Menu Name: Integrated Management System/ Document Operations/ Hard Copy Control
This is the menu where distribution reports of documents distributed as Controlled Copies are received.
6.2.10.1.Print Distribution Sheet
Menu Name: Integrated Management System/ Document Operations/ Hard Copy Control/ Print Distribution Sheet
This is the menu where a distribution sheet is taken for a selected document. Two tabs, Document Search and Document List tabs, appear on the Distribution Sheet printing screen. In the Document Search tab, filtering is done according to the search criteria. In the Document List tab, the records are listed according to the filtering process according to these search criteria.
With the help of the buttons on the screen;
: Records are searched by filtering.
: Data is transferred to Excel.
 : The search criteria on the menu screens are used to clear the data remaining in the filter fields in the grid where the search operation is performed.
 : The menu screen is restored to its default settings.
 : User-based designing of the menu screen is done with the show-hide feature, that is, the hiding feature of the fields corresponding to the columns on the menu screens.
Click the  (Select) button in the Select Document field on the Print Distribution Sheet screen.
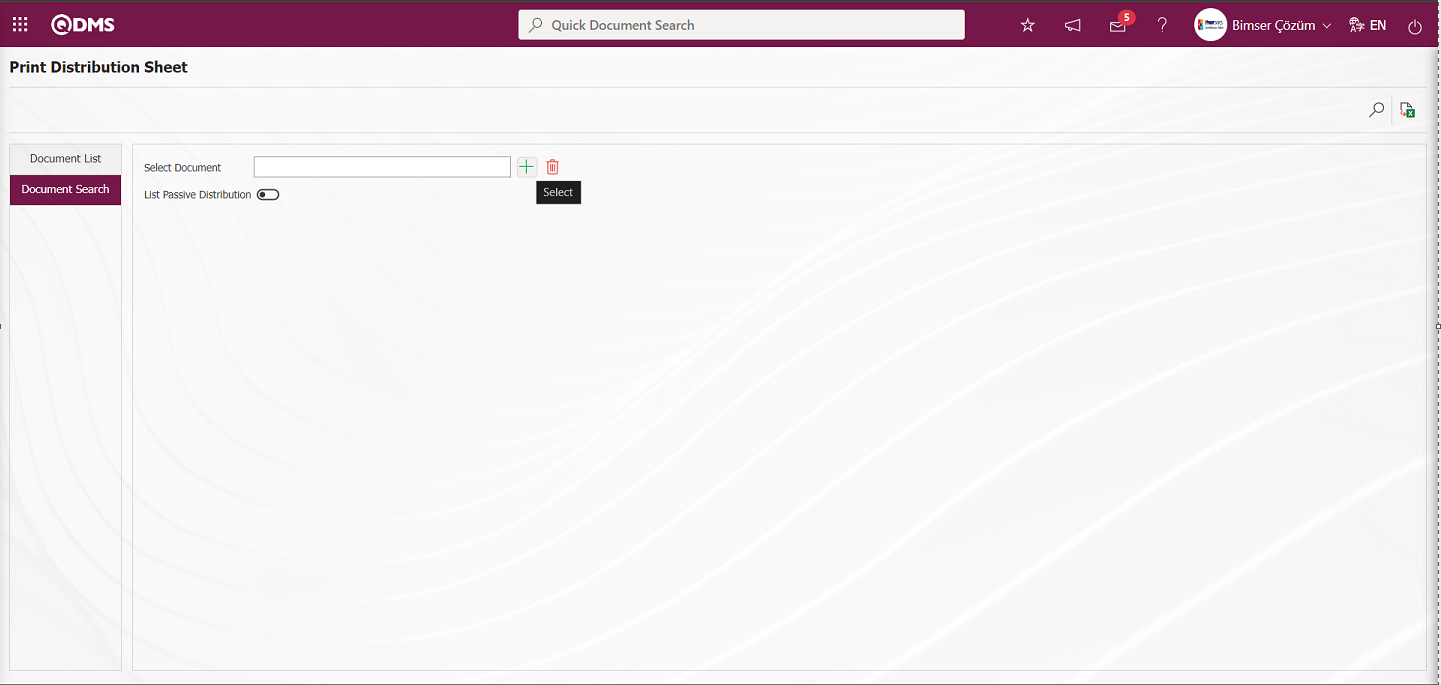
Select the document in the Document List and click on the button.

After selecting the document on the Print Distribution Sheet screen, click the  (Search) button.
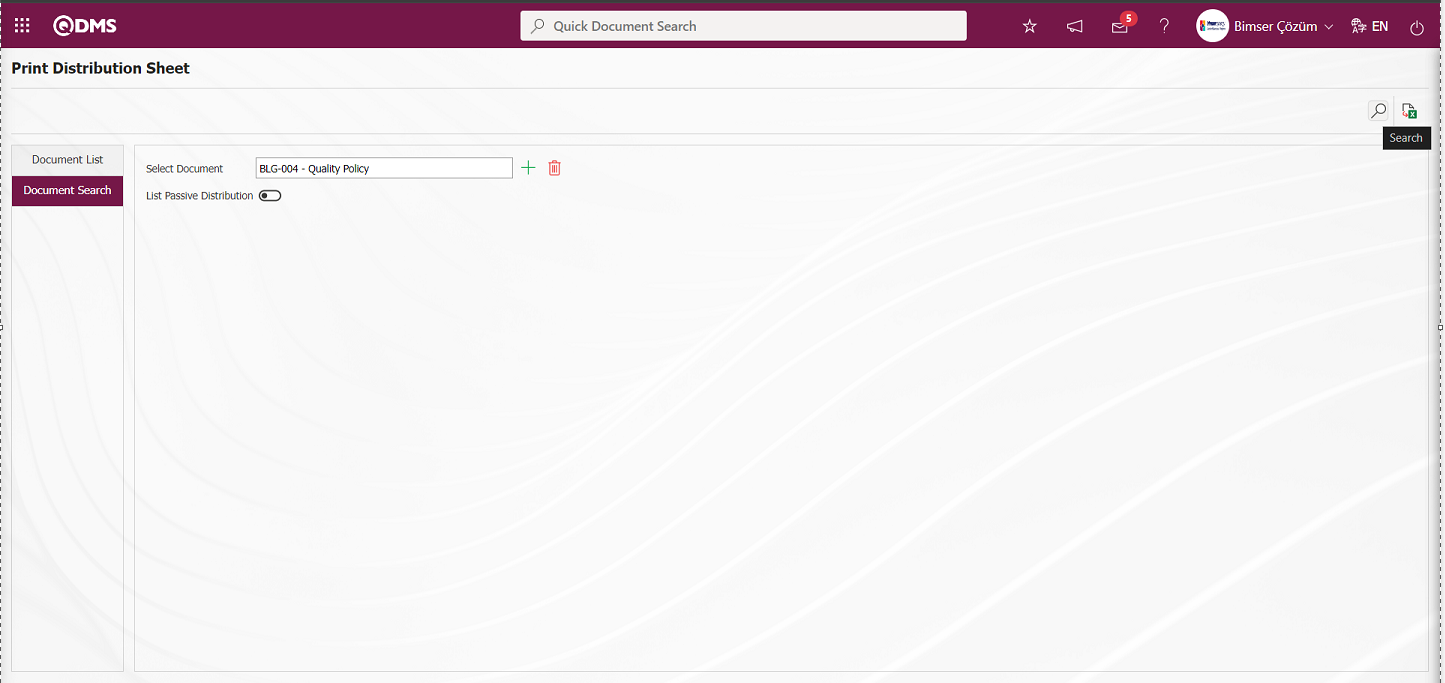
Distribution locations are listed according to the Document selected in the Document List tab on the Print Distribution Sheet screen.

On the Print Distribution Sheet screen, the distribution locations of the document are selected and the Print Distribution Sheet report in Excel format is obtained by clicking the  (Export to Excel) button.
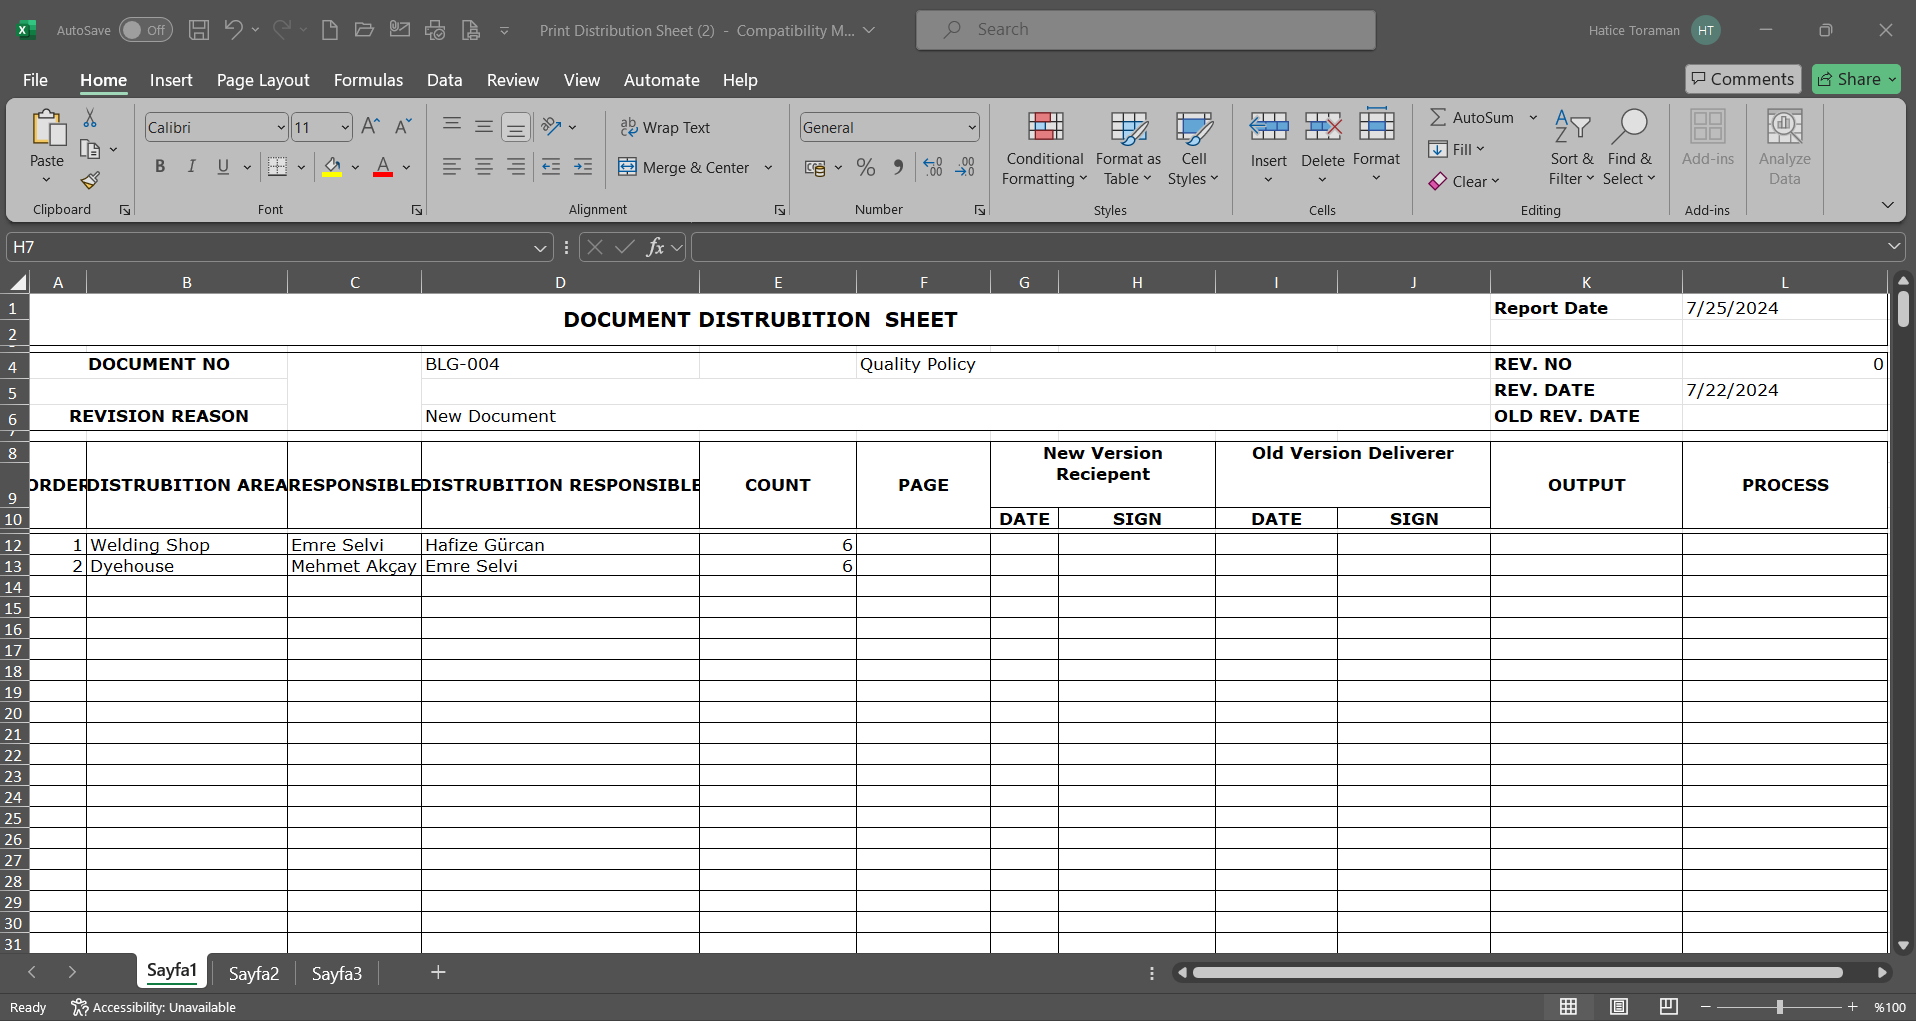
6.2.10.2. Distribution Sheet by Document Groups
Menu Name: Integrated Management System/ Document Operations/ Hard Copy Control/ Distribution Sheet by Document Groups
This is the menu where the documents distributed as Controlled Copies are reported on “Folder” basis. Two tabs appear on the Distribution Sheet by Document Groups screen. They are Document View and Document Selection tabs. In the document view tab, filtering is done according to the search criteria. In the document selection tab, the records are listed according to the filtering process according to these search criteria.

With the help of the buttons on the screen;
: Records are searched by filtering.
: Data is transferred to Excel.
: The search criteria on the menu screens are used to clear the data remaining in the filter fields in the grid where the search operation is performed.
: The menu screen is restored to its default settings.
: User-based designing of the menu screen is done with the show-hide feature, that is, the hiding feature of the fields corresponding to the columns on the menu screens
On the Document Selection tab, click the  (Select) button in the Select Folder field.

In the Document Folder list that opens, the folder is selected by clicking the button.
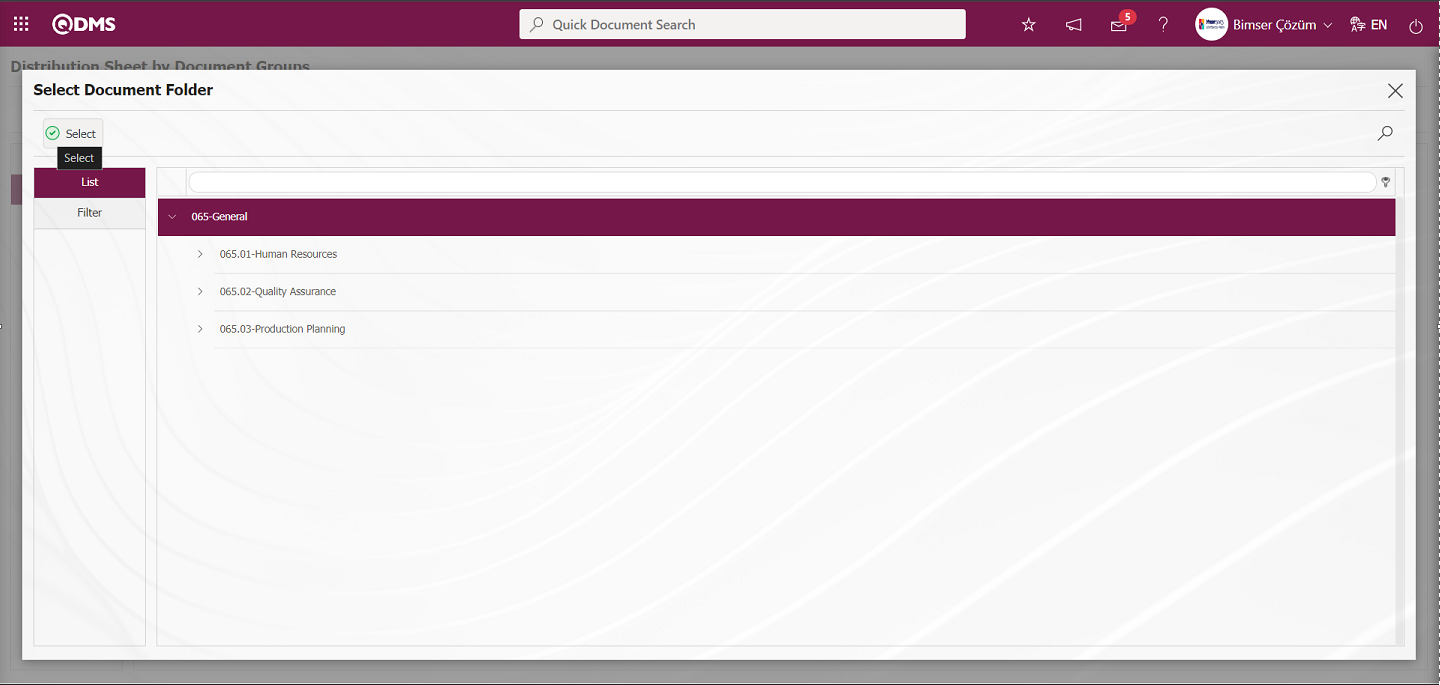
After folder selection, click the  (Search) button.
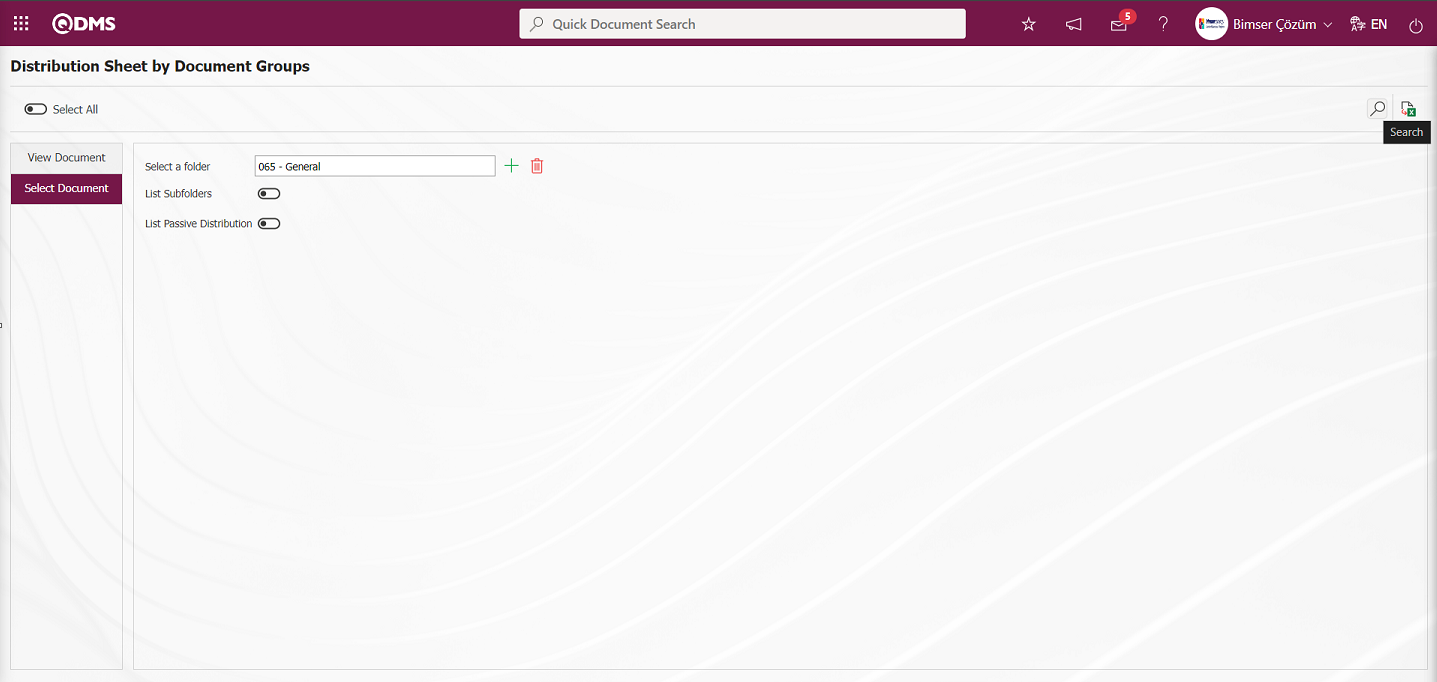
On the Distribution Sheet by Document Groups screen, the controlled copy information related to the documents selected according to the filtering process in the Document Selection tab is listed.
Documents listed on the Distribution Sheet by Document Groups screen are selected.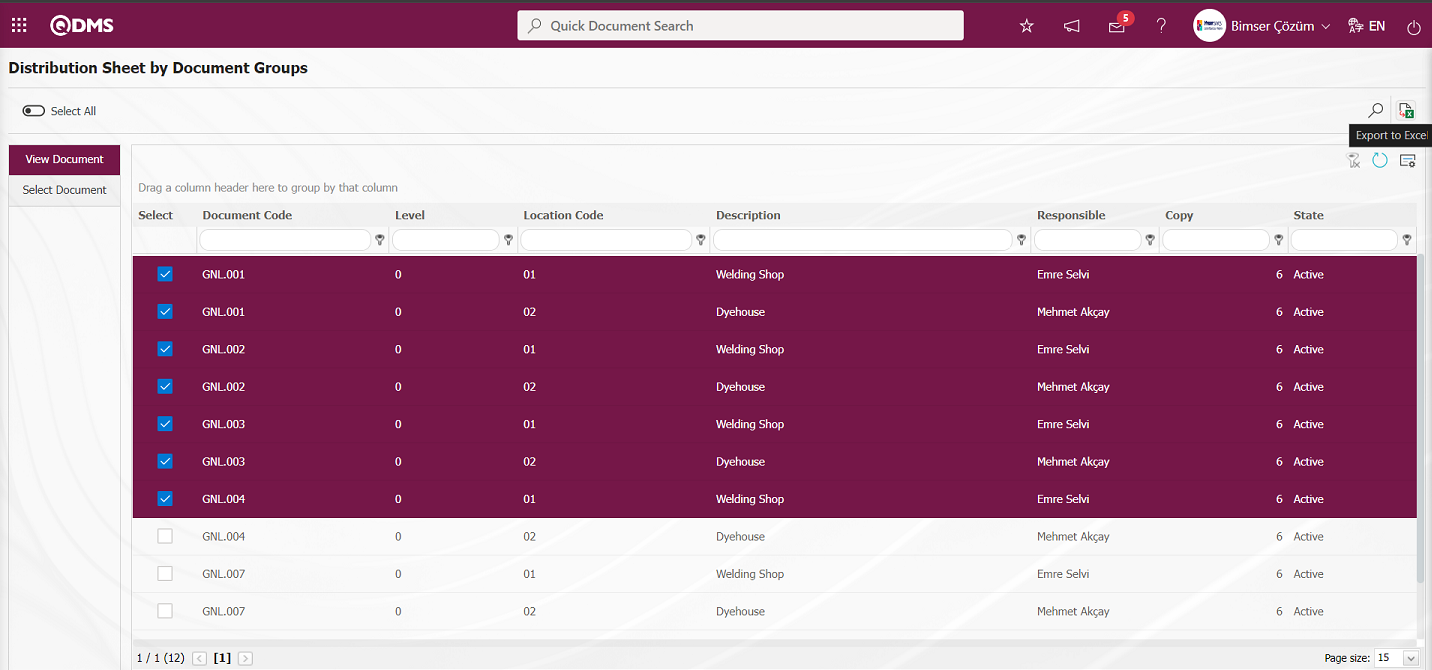
On the Distribution Sheet by Document Groups screen, (Export to Excel) button is clicked to get the report in Excel format.
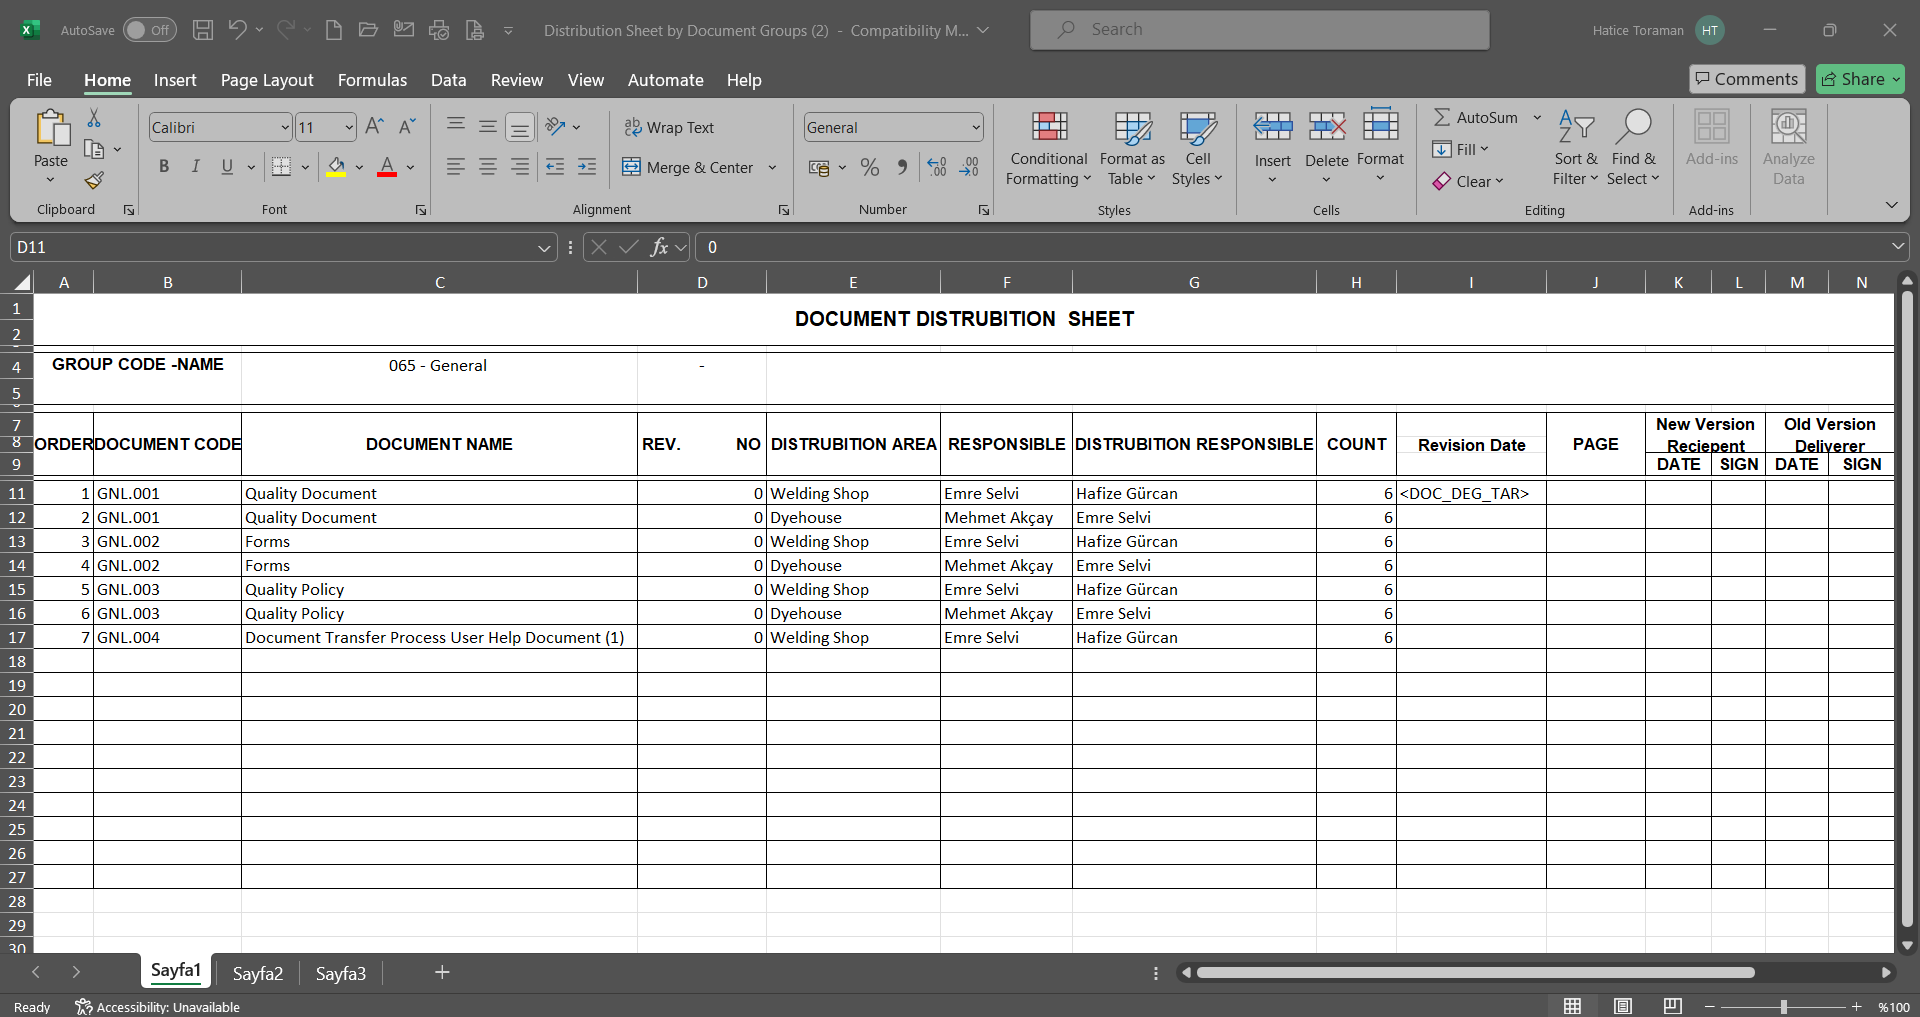
6.2.10.3. Distribution Sheet by Distrubition Areas
Menu Name: Integrated Management System/ Document Operations/ Hard Copy Control/ Distribution Sheet by Distrubition Areas
It is the menu where the documents distributed as Controlled Copies are reported on the basis of “Distribution Locations”. Two tabs appear on the Distribution Sheet by Distrubition Areas** screen. Document View and Document Location Selection tabs. In the Document View tab, filtering is done according to the search criteria. In the Document Location Selection tab, the records are listed according to the filtering process according to these search criteria.
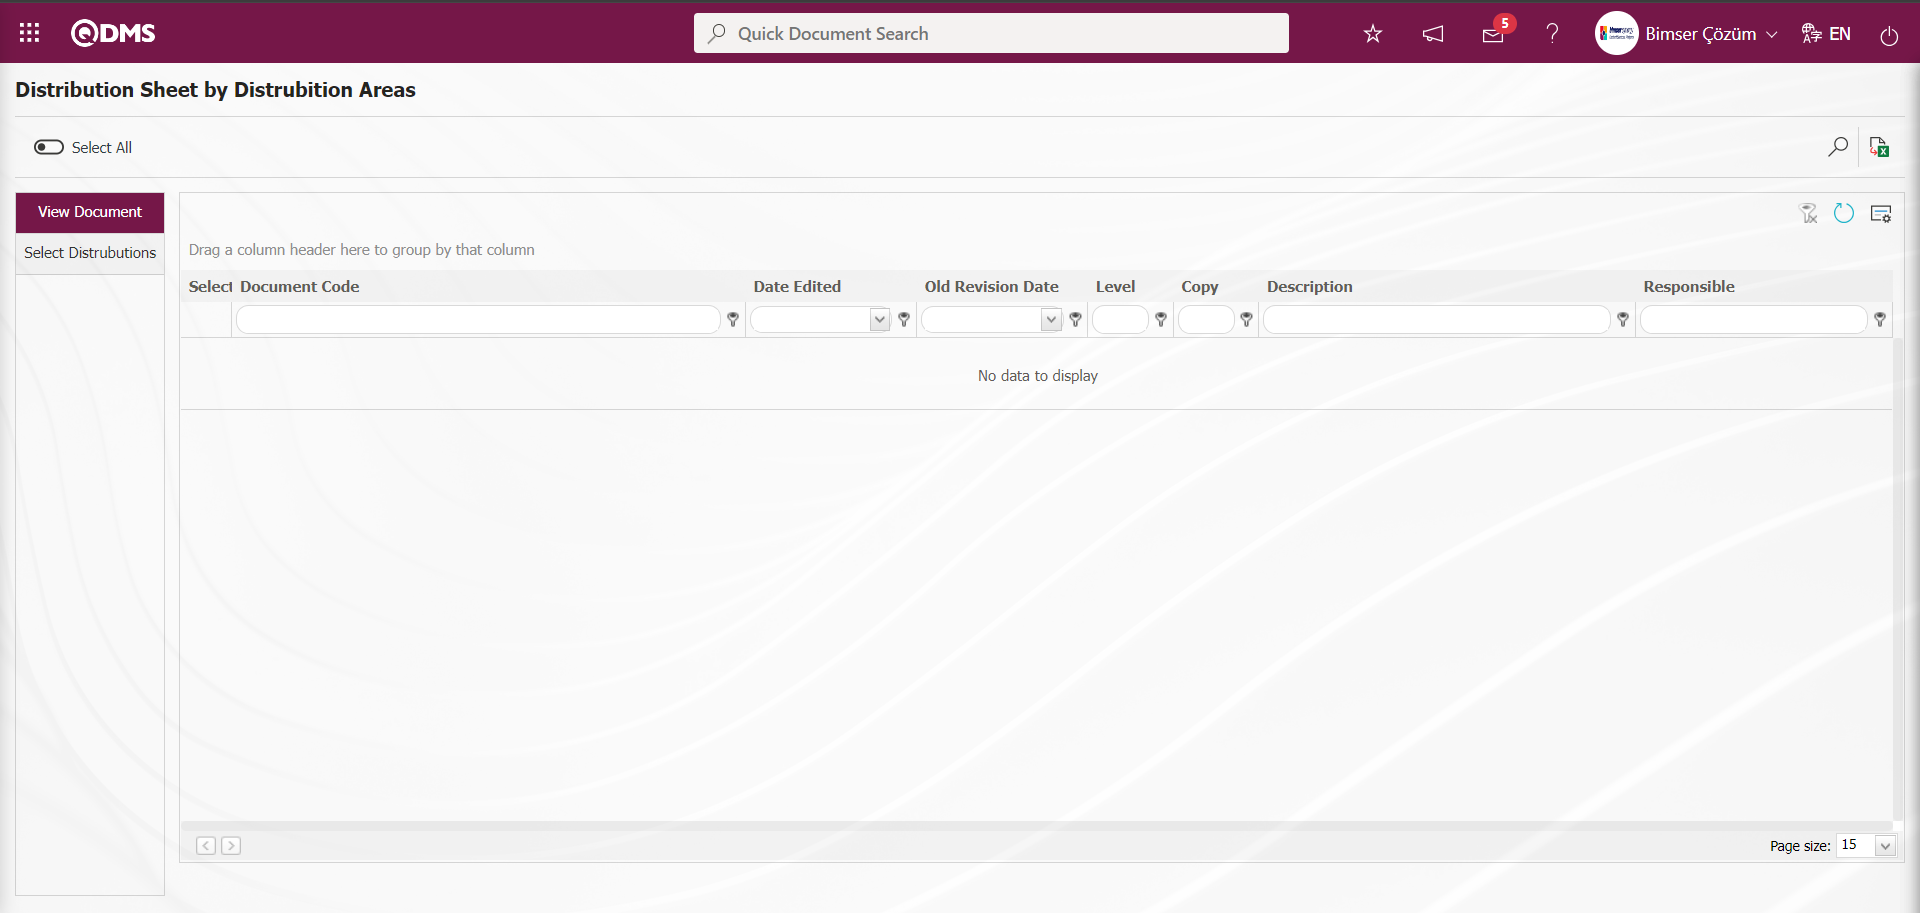
With the help of the buttons on the screen;
: Records are searched by filtering.
: Data is transferred to Excel.
: The search criteria on the menu screens are used to clear the data remaining in the filter fields in the grid where the search operation is performed.
: The menu screen is restored to its default settings.
: User-based designing of the menu screen is done with the show-hide feature, that is, the hiding feature of the fields corresponding to the columns on the menu screens
In the Select Distribution Location tab, click the  (Select) button in the Select Distribution Location field.
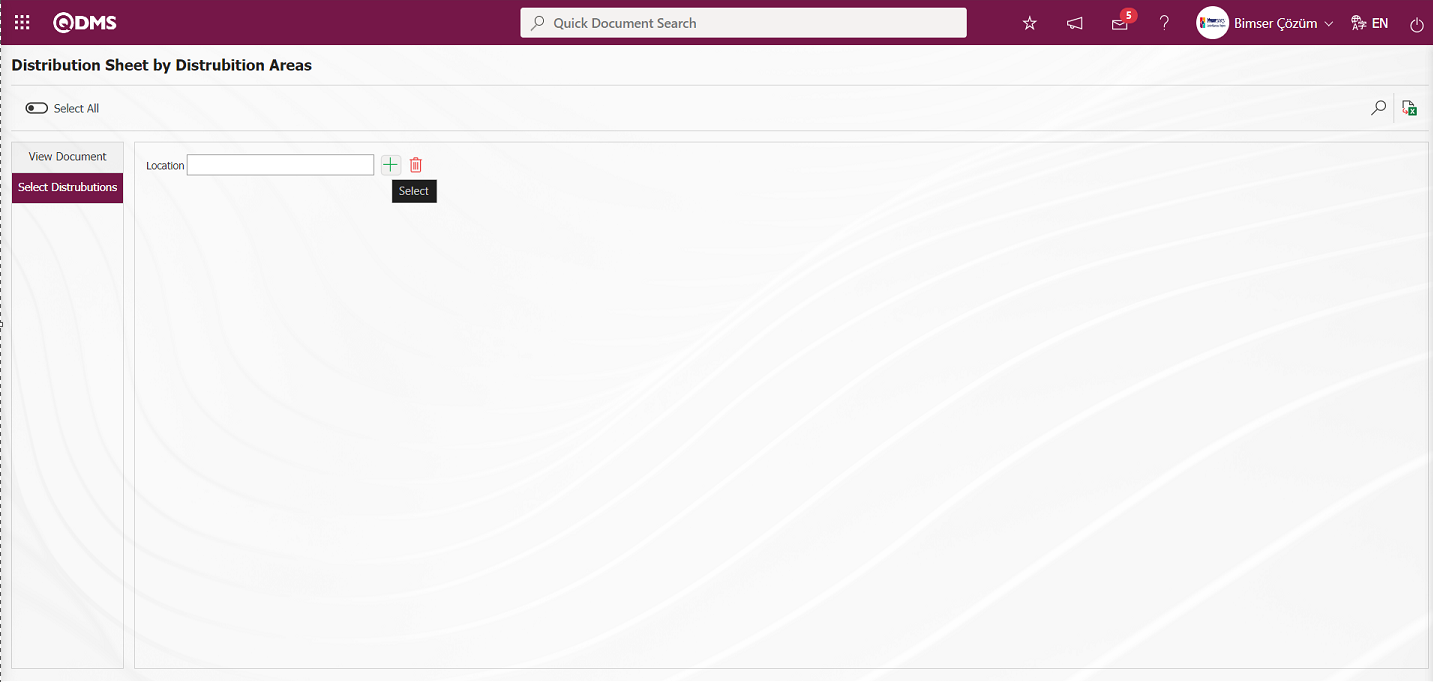
In the Distribution Place list that opens, the Distribution place is selected by clicking the  button.
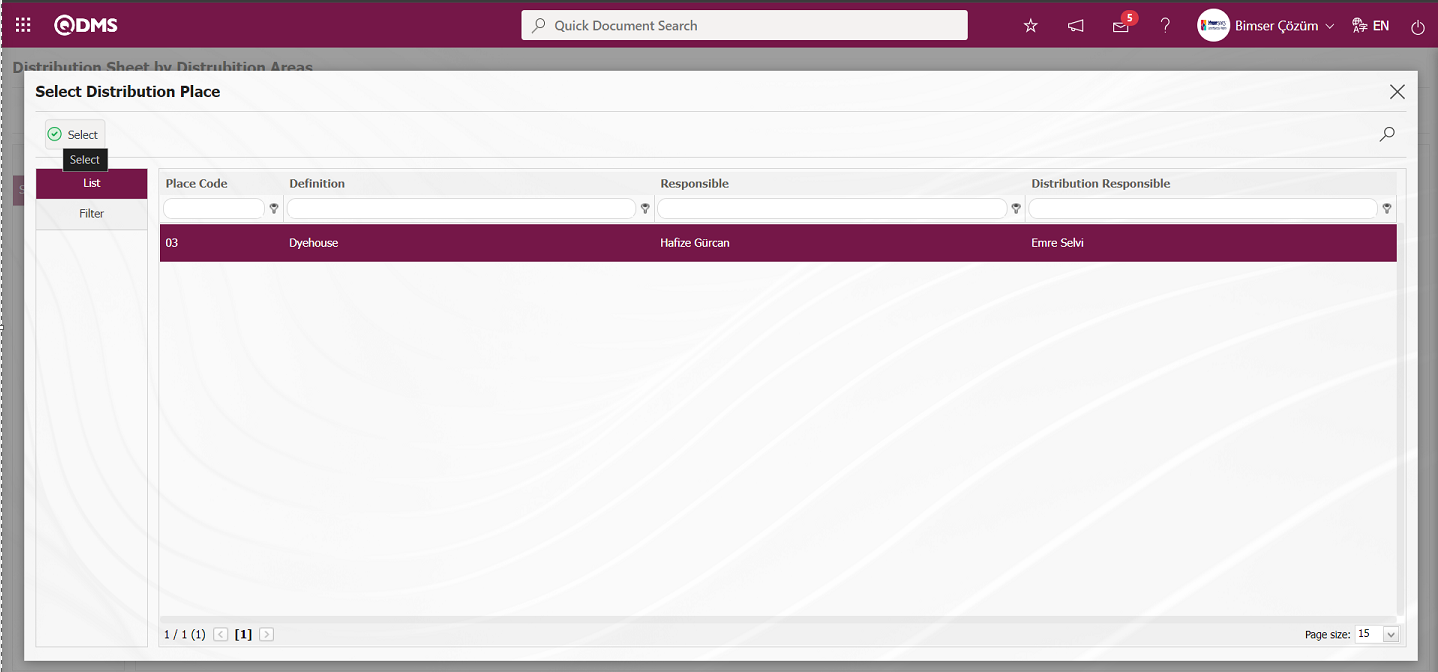
After selecting the Distribution Location, click on the (Search) button.
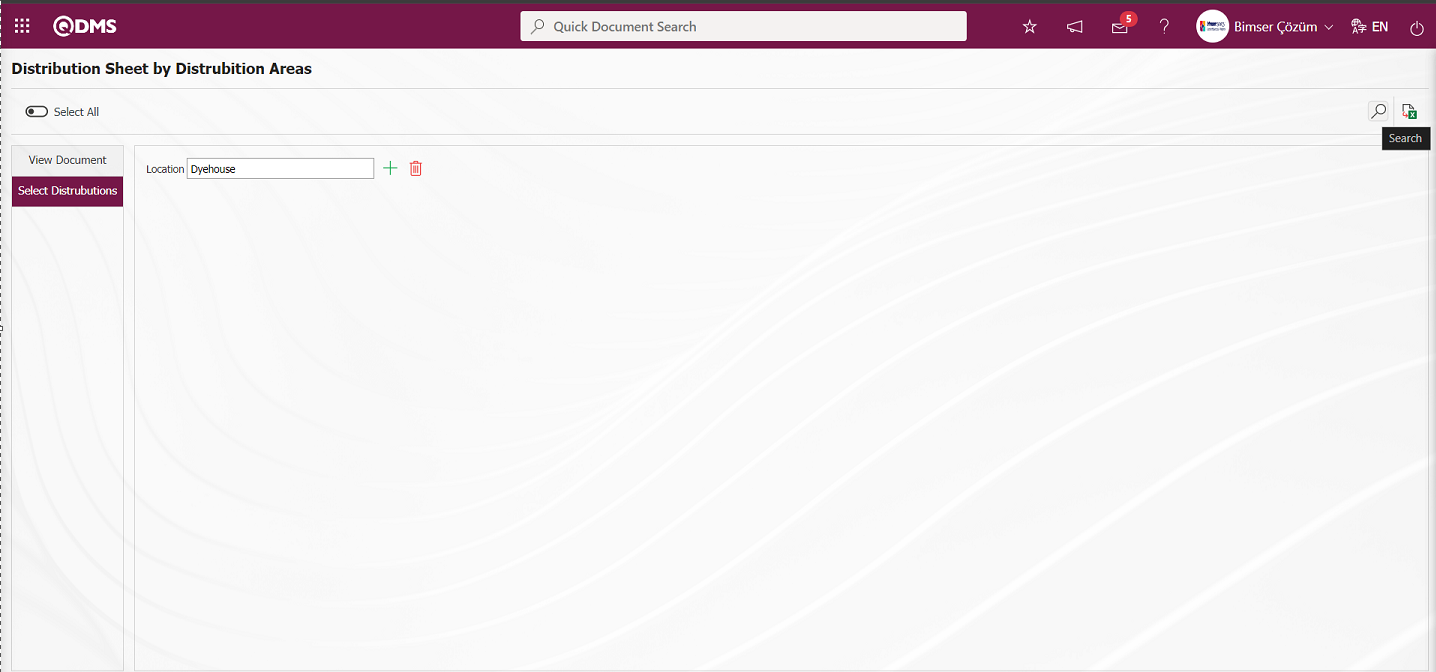
Distribution Sheet by Distrubition Areas screen lists the documents distributed as controlled copies on the basis of distribution locations according to the filtering process in the Distribution Location Selection tab.

On the Distribution Sheet by Distrubition Areas screen, the documents listed in the Select Distribution Areas tab are selected.
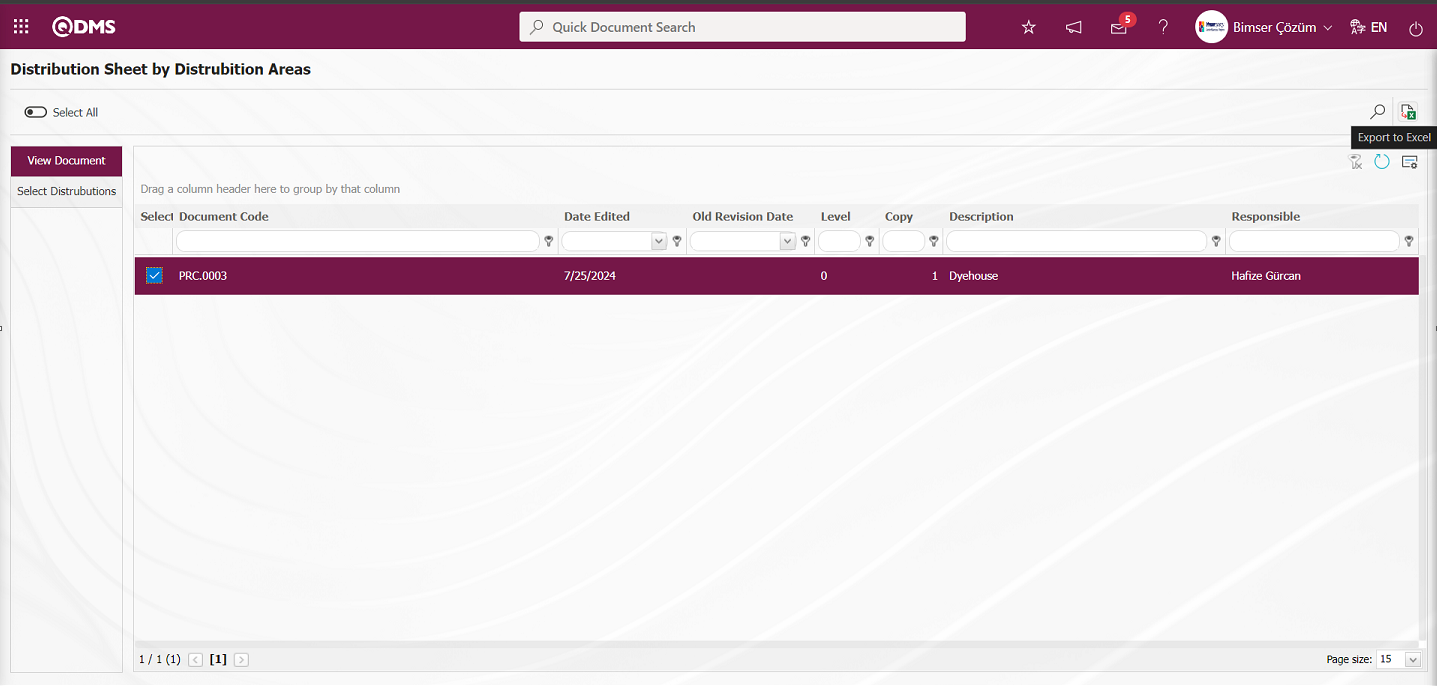
On the Distribution Sheet by Distrubition Areas screen, (Export to Excel) button is clicked to get the report in Excel format.
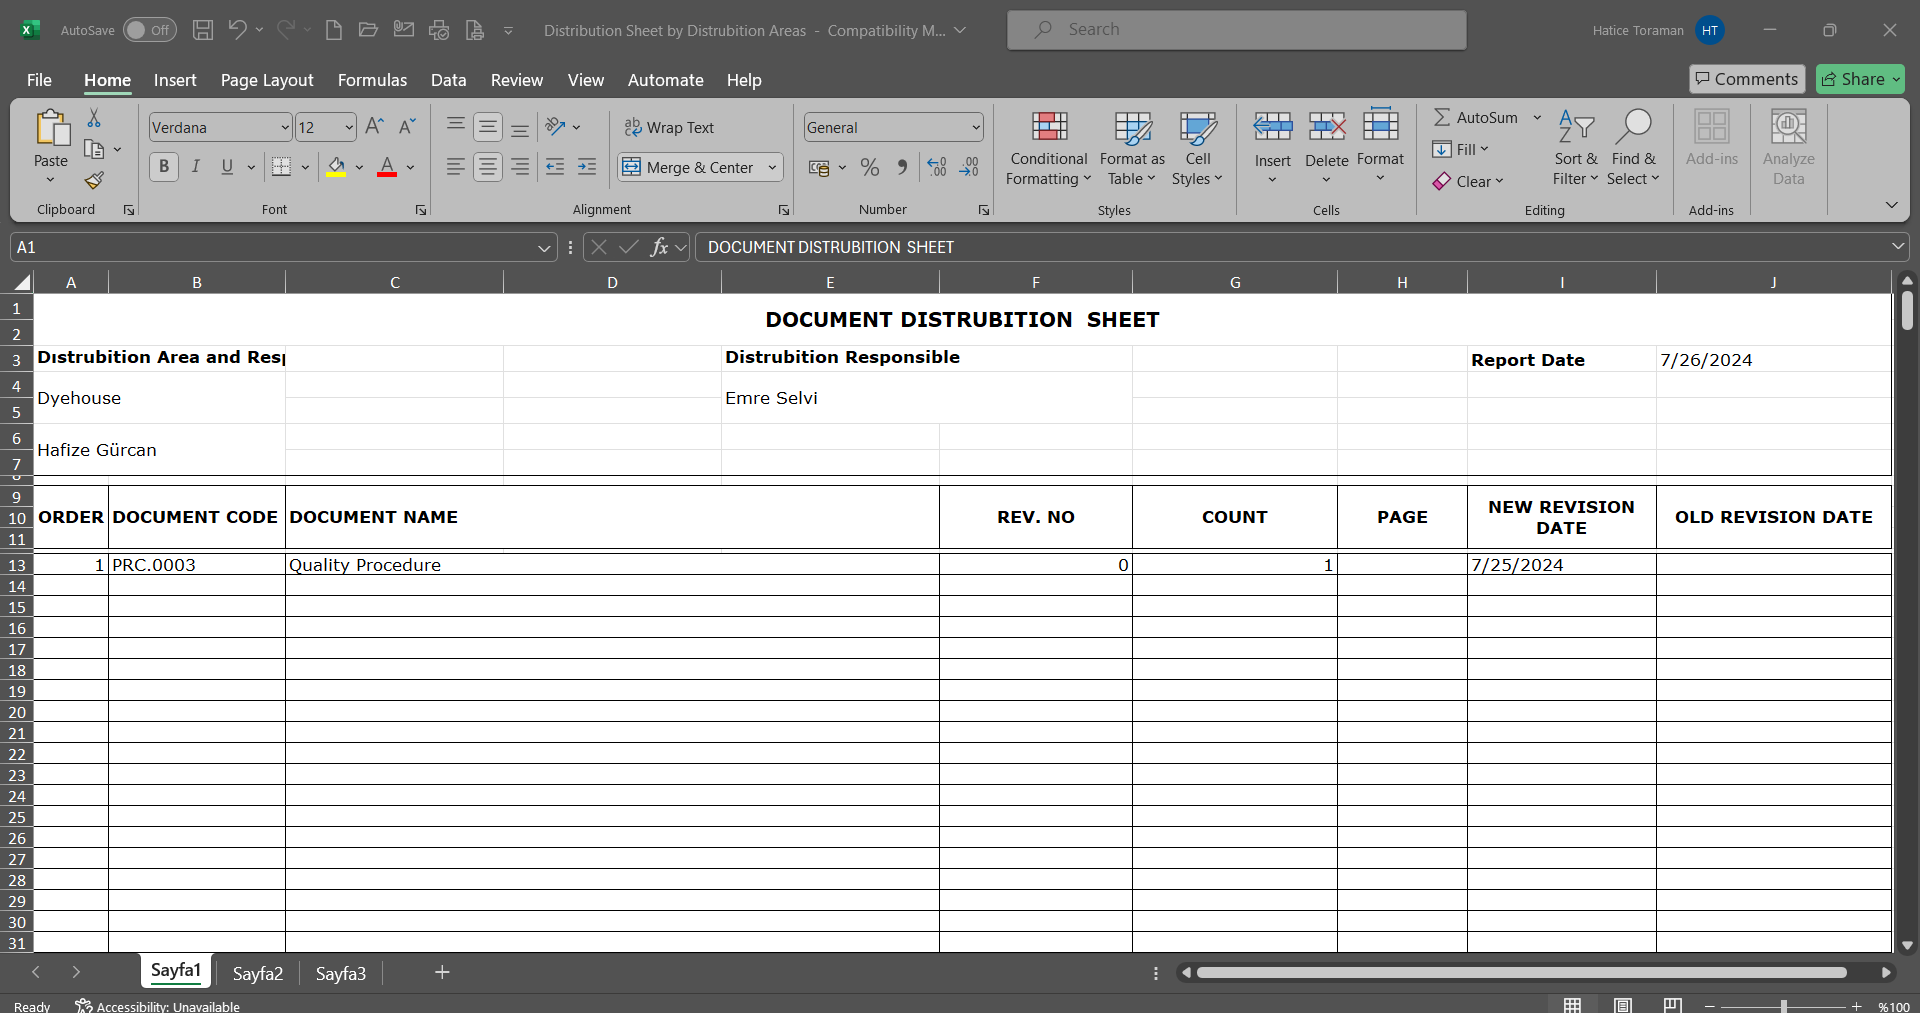
6.2.10.4. General Distrubition Sheet
Menu Name: Integrated Management System/ Document Operations/ Hard Copy Control/ General Distrubition Sheet
This is the menu where the “General” report of the documents distributed as Controlled Copies is taken. Two tabs appear on the General Distrubition Sheet screen. Document View and Document Selection tabs. In the document view tab, filtering is done according to the search criteria. In the document selection tab, the records are listed according to the filtering process according to these search criteria.
With the help of the buttons on the screen;
: Records are searched by filtering.
: Data is transferred to Excel.
: The search criteria on the menu screens are used to clear the data remaining in the filter fields in the grid where the search operation is performed.
: The menu screen is restored to its default settings.
: User-based designing of the menu screen is done with the show-hide feature, that is, the hiding feature of the fields corresponding to the columns on the menu screens
On the General Distrubition Sheet screen, type the document code in the document code field in the filter search criteria and click the  (Search) button.

On the General Distrubition Sheet screen, records are listed according to the search criteria made in the Document Viewing tab.

The selection process of the records listed on the General Distrubition Sheet screen is done.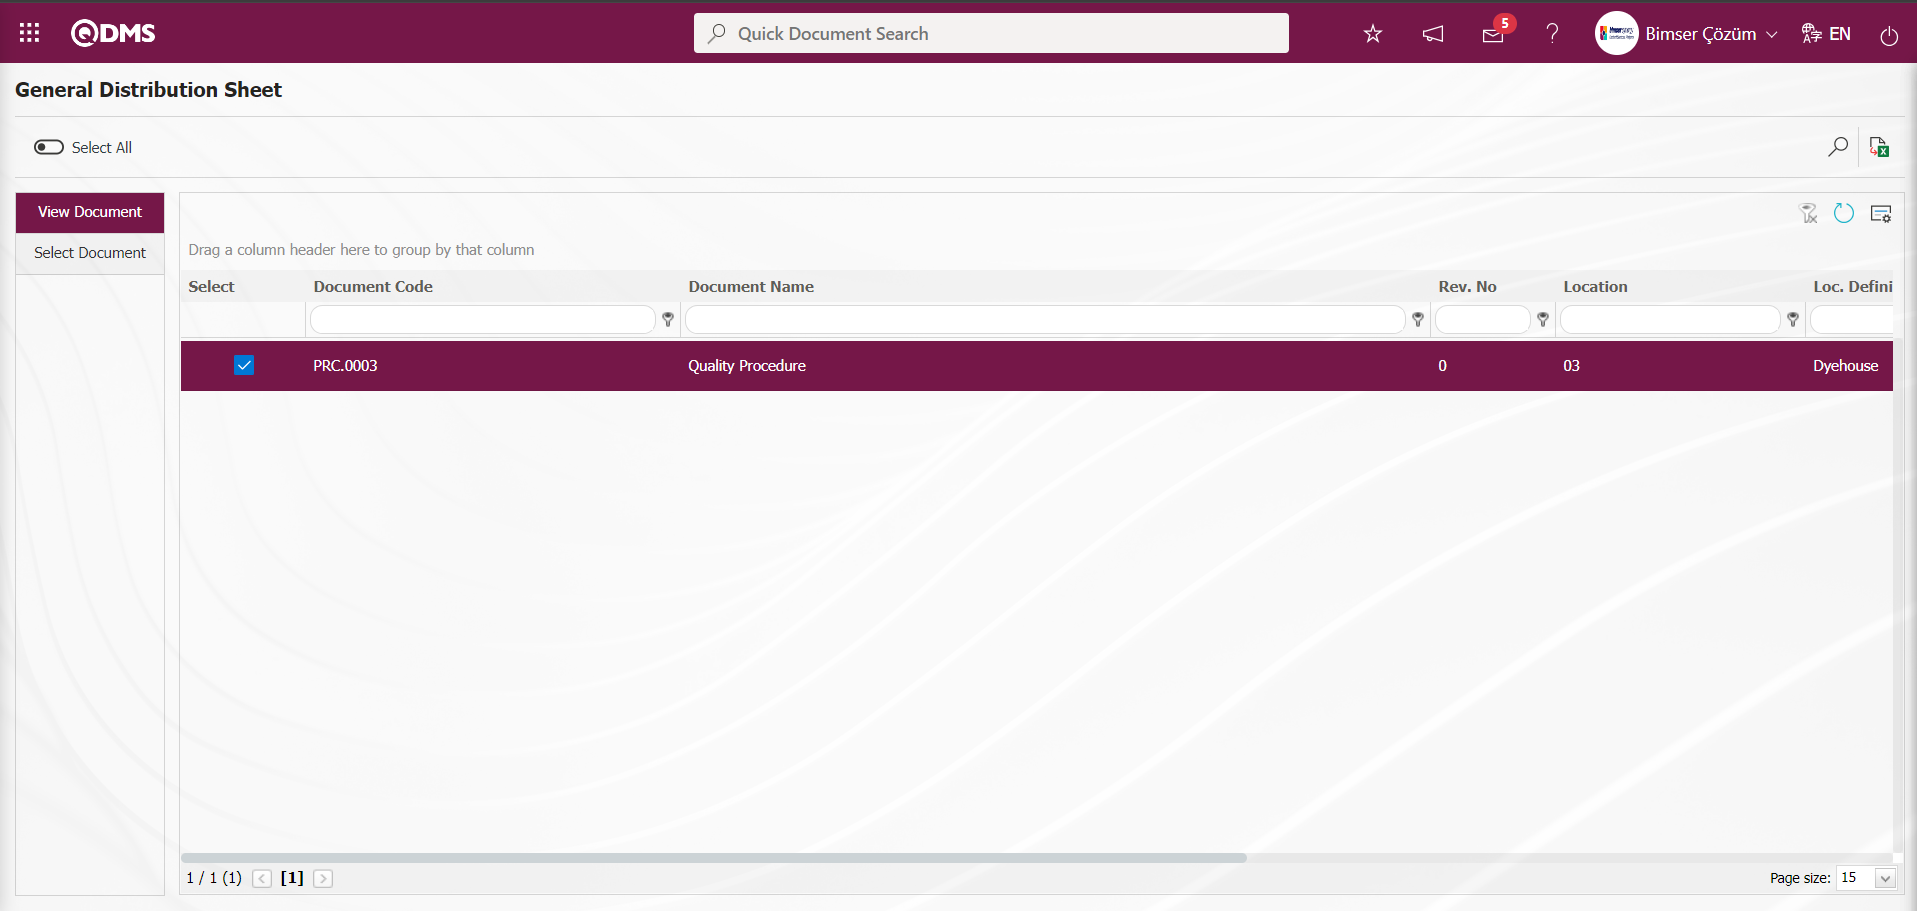
On the General Distrubition Sheet screen, click on the (Export to Excel) button to get the report in Excel format.
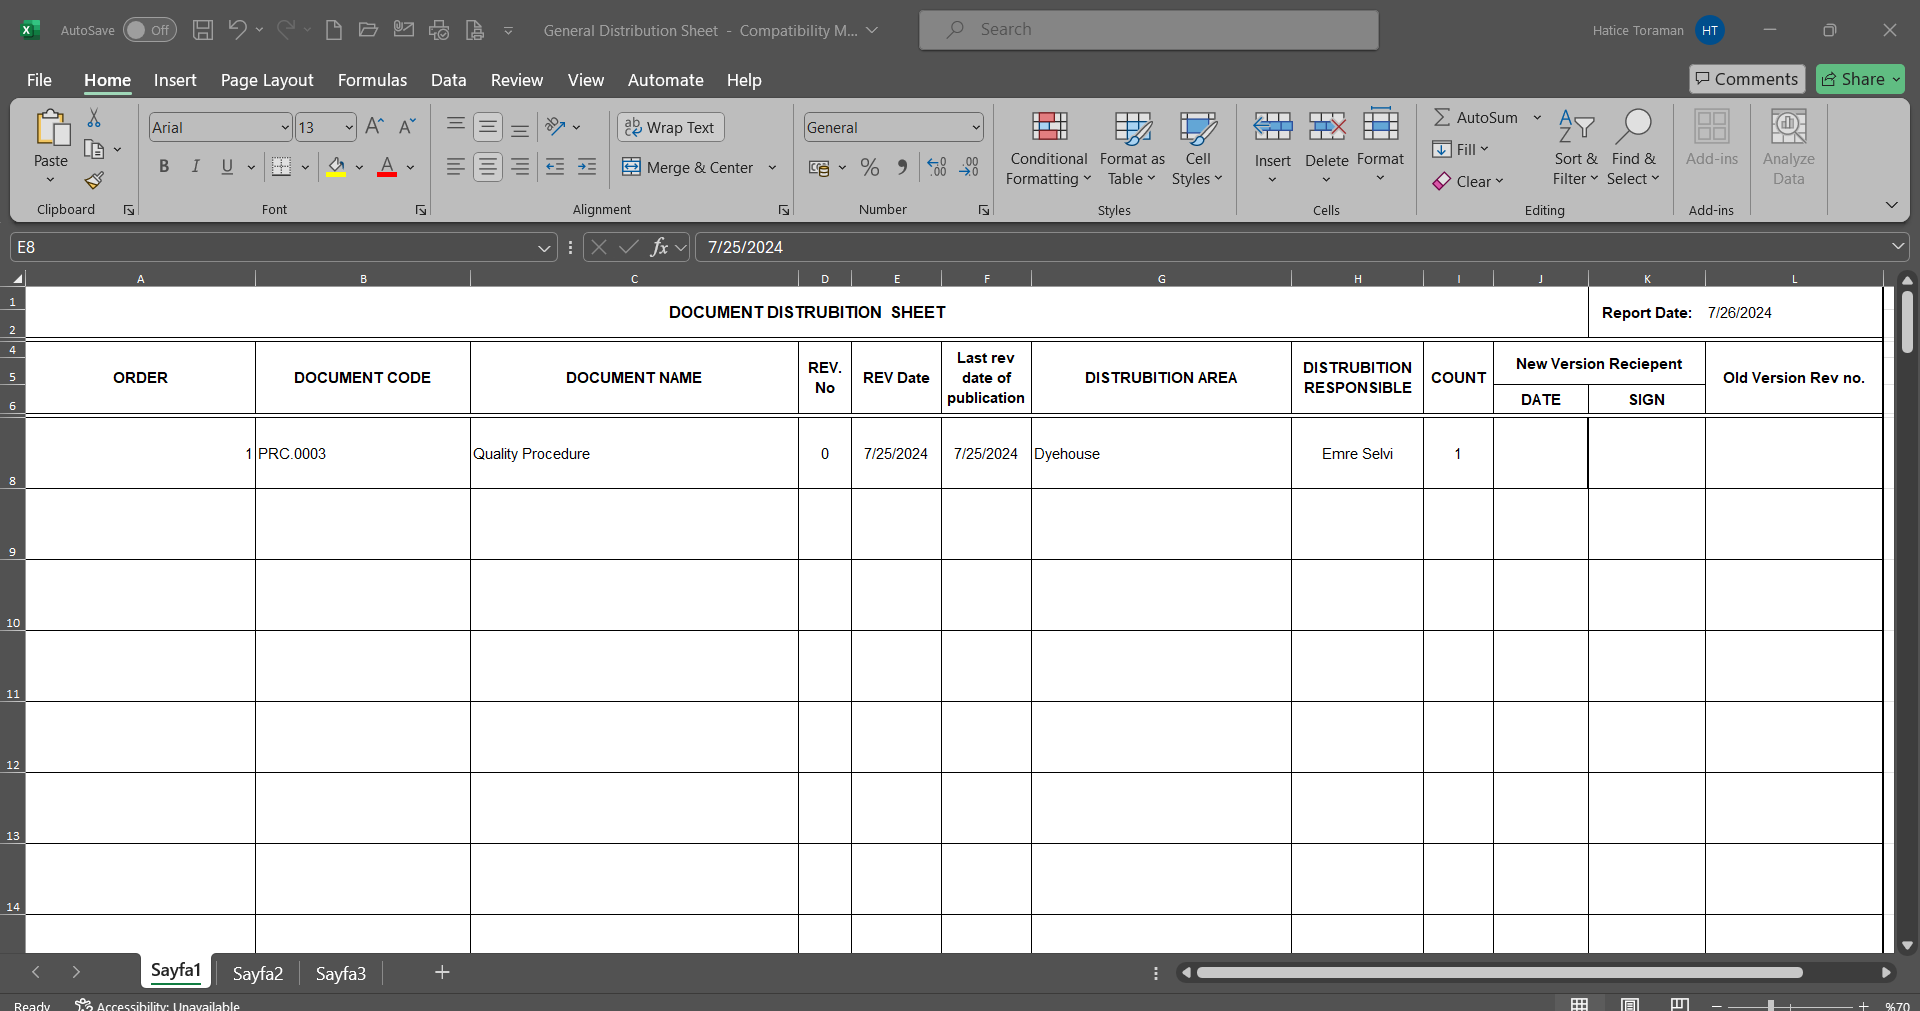
6.2.11.Quality Records
Menu Name: Integrated Management System/ Document Operations/ Quality Records
6.2.11.1. Quality Record Activities
Menu Name: Integrated Management System/ Document Operations/ Quality Records/ Quality Record Activities
In the quality record operations menu, the blank form is filled in, shared and stored in the system as a record. In order for a form to be actively used in the quality records menu, the blank form must be marked as “Form” and the usage method must be selected as “Quality Record” when it is created in the QDMS system. Forms that meet this condition are listed under the relevant folders on the left side of the screen.
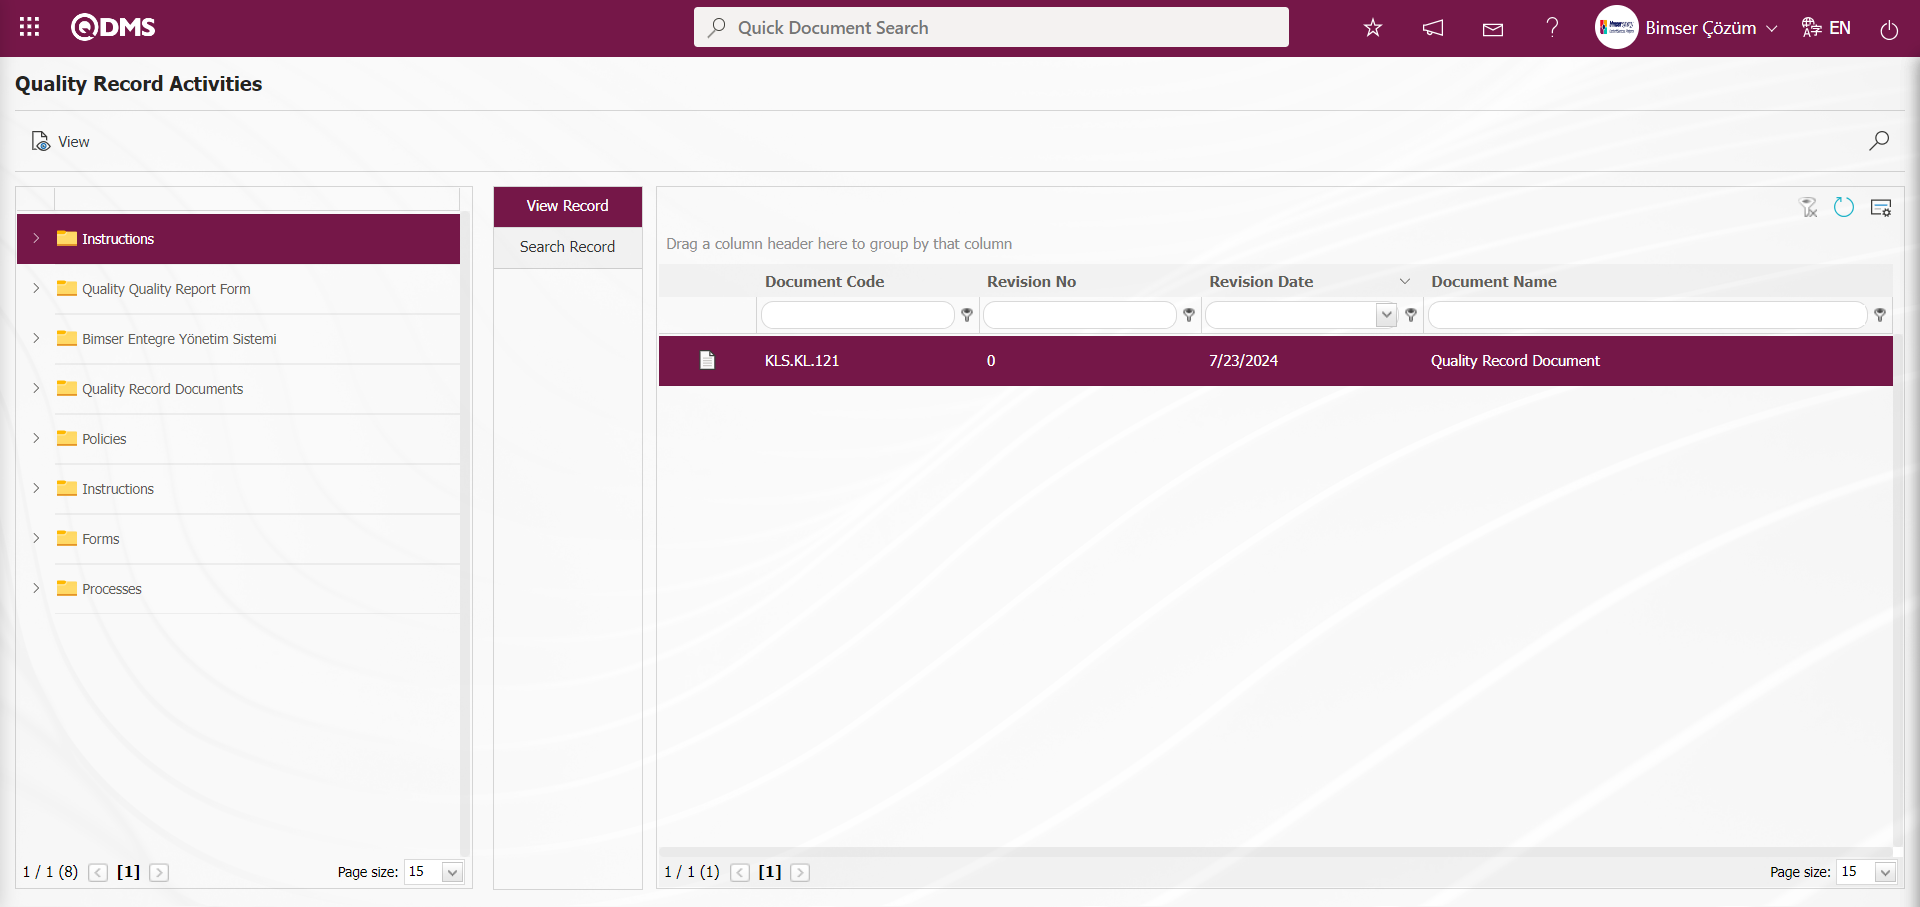
Select the form to create a record and press the  button.
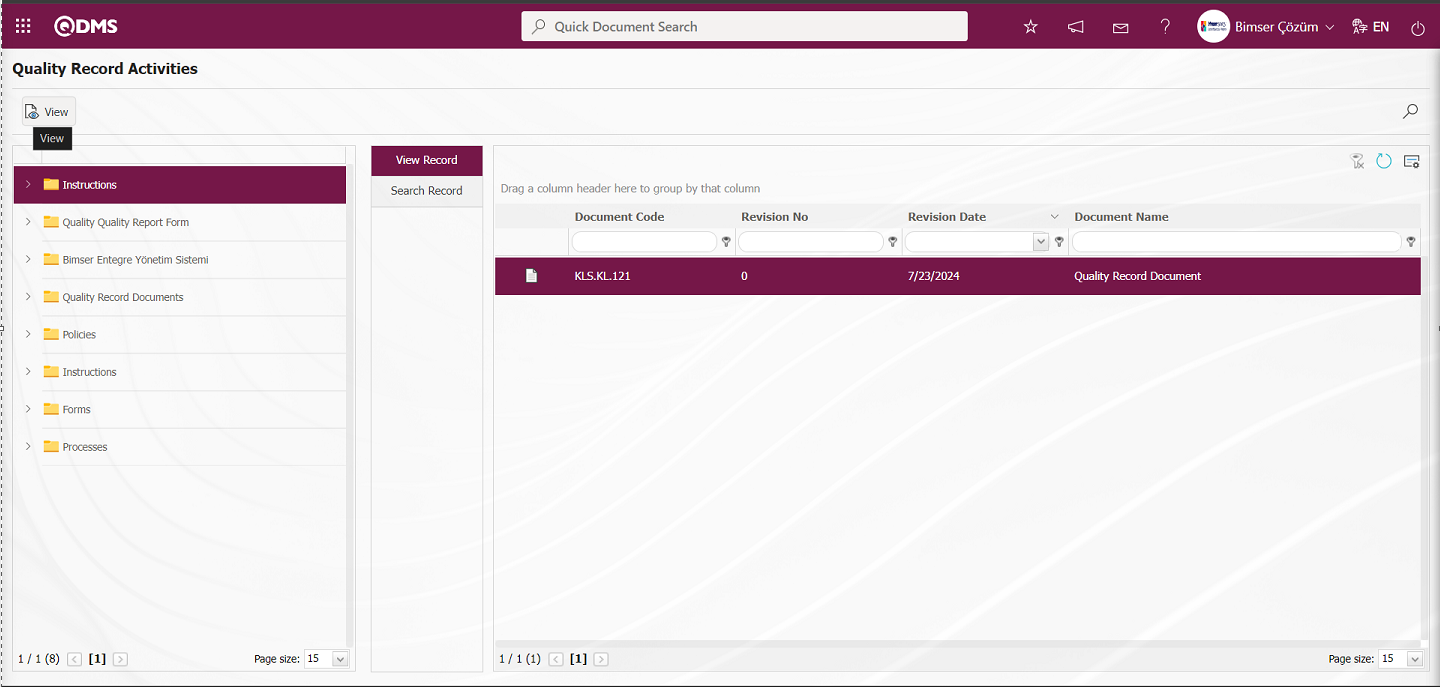
The Quality Record List screen opens.
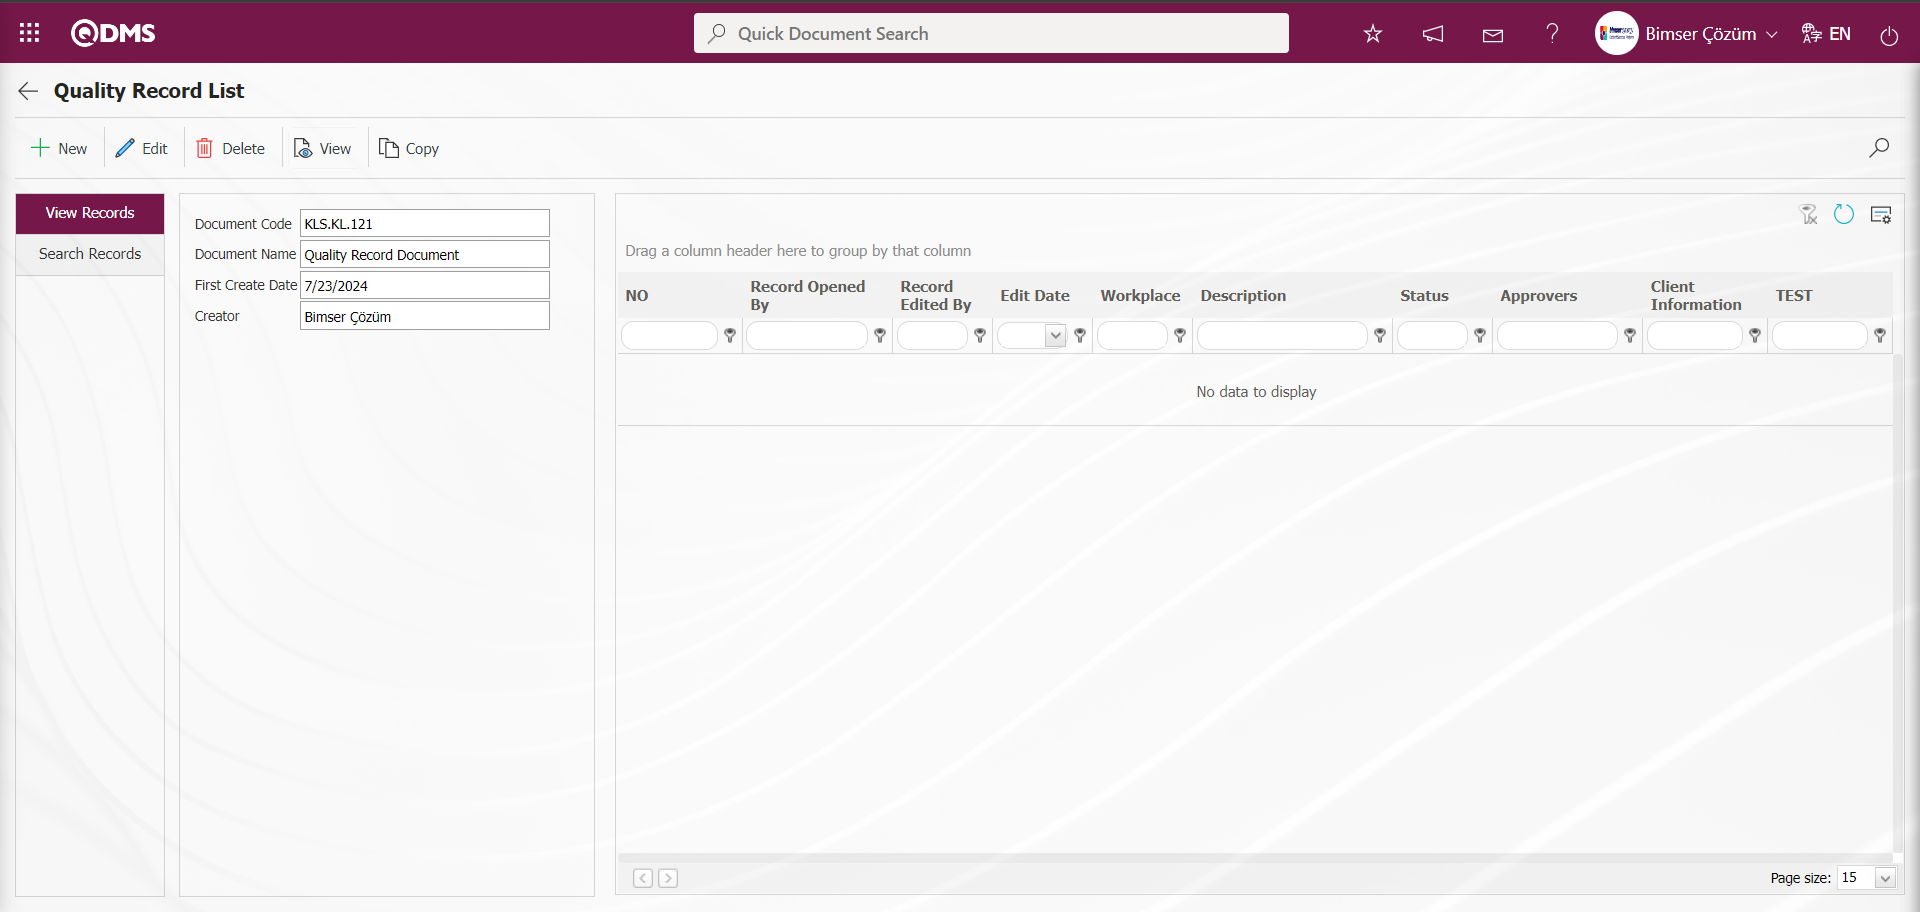
With the help of the buttons on the screen;
 : A new quality record is created.
 : The quality record information selected in the list is updated.
 : The quality record selected in the list is deleted.
: The quality record selected in the list is displayed.
 : The quality record selected in the list is copied
A new quality record is defined by clicking the button on the Quality Record List screen.

With the help of the buttons on the screen;
 :Registration is done.
 : The blank version of the quality record is displayed and downloaded to the computer.
 : The full version of the quality record is uploaded to the Qdms system.
By clicking the button on the Quality Record screen, the blank version of the quality record is displayed and downloaded to the user's computer.
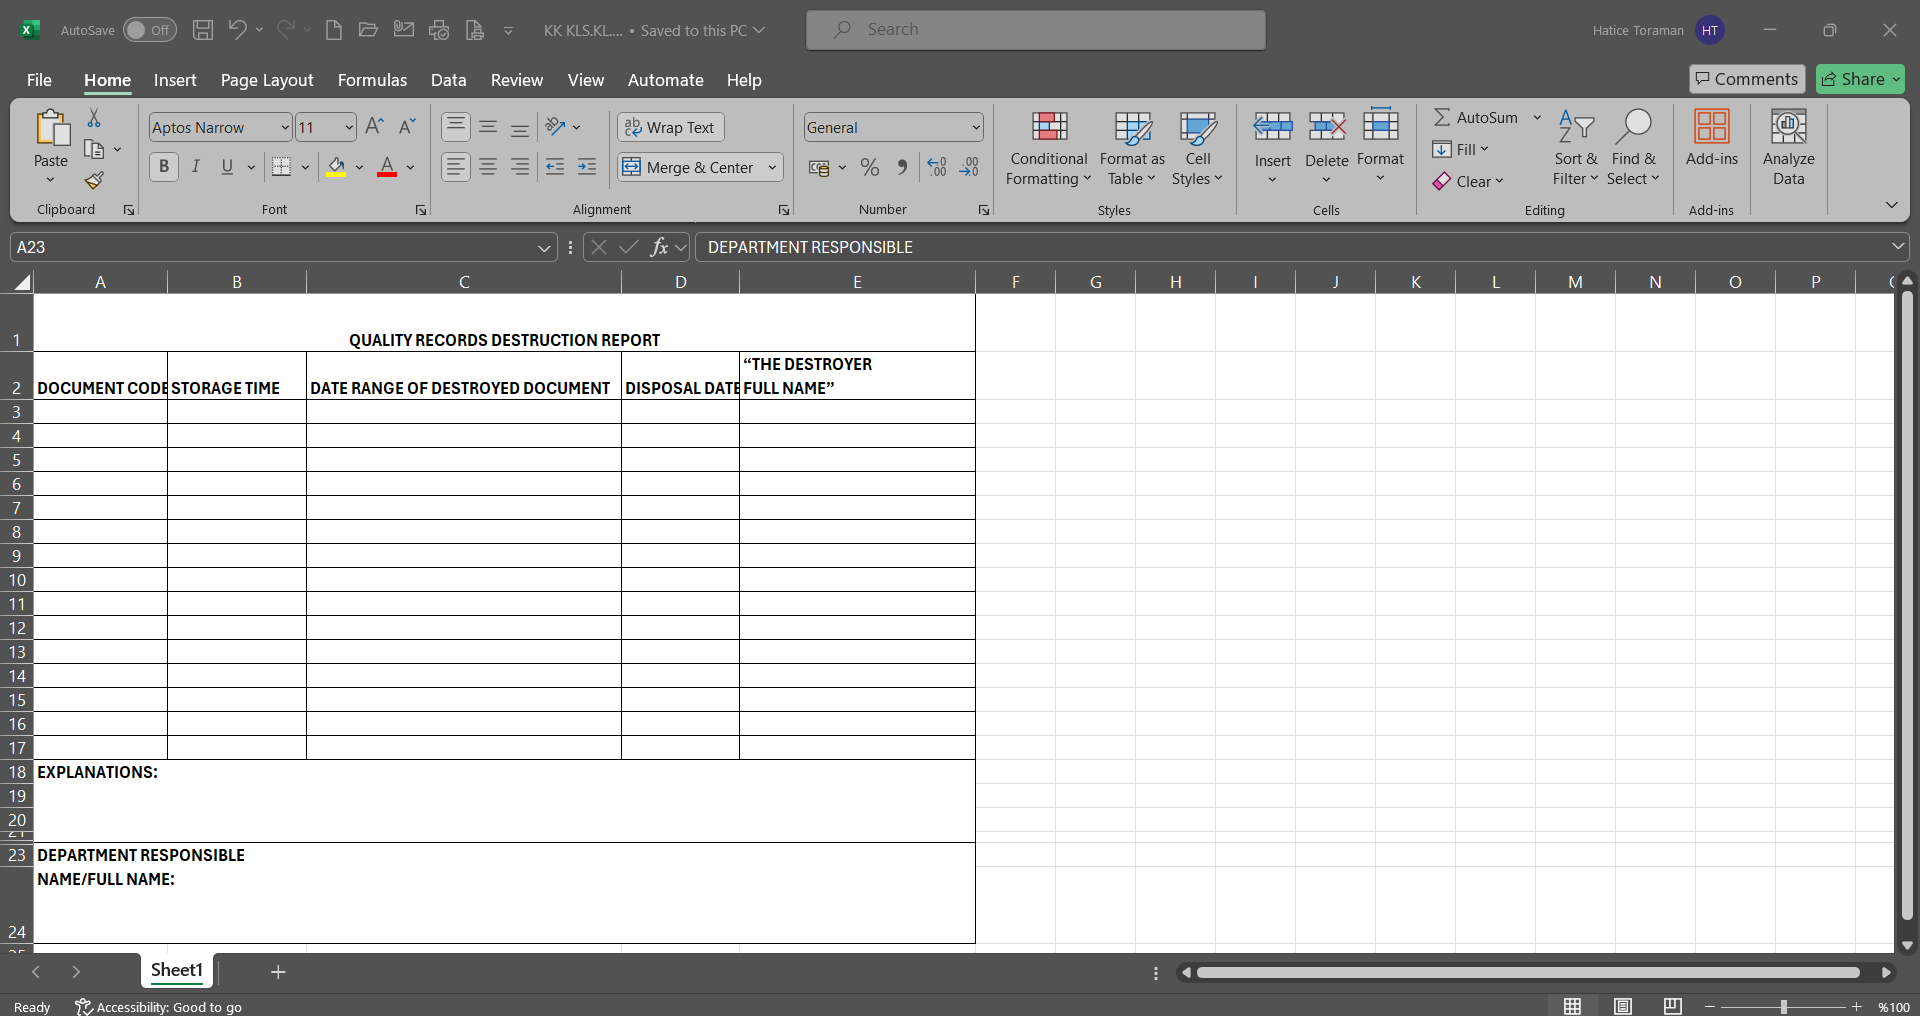
Fill in the relevant fields on the downloaded Quality record.
 When the completed form is uploaded to the computer, a name is given by the system and the created quality record is restored to Qdms with the
  button.
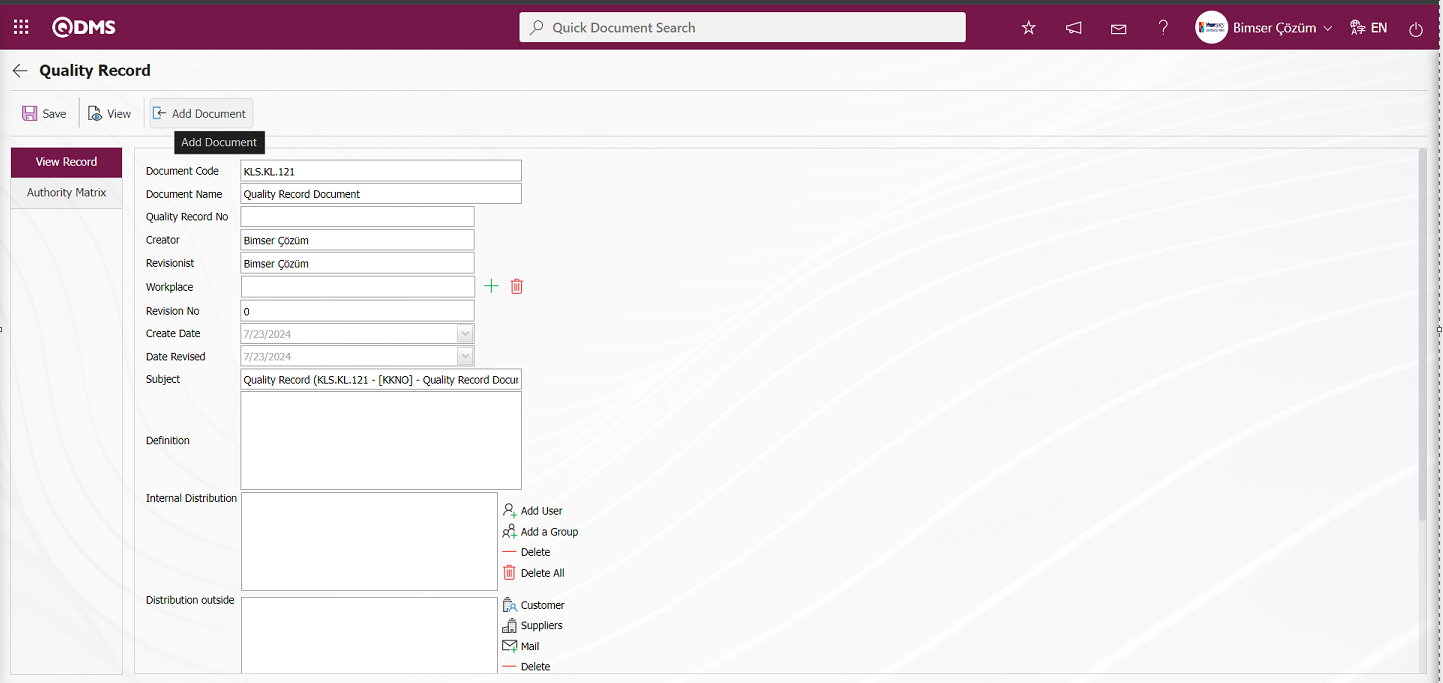
Click the Browse button on the Add File screen
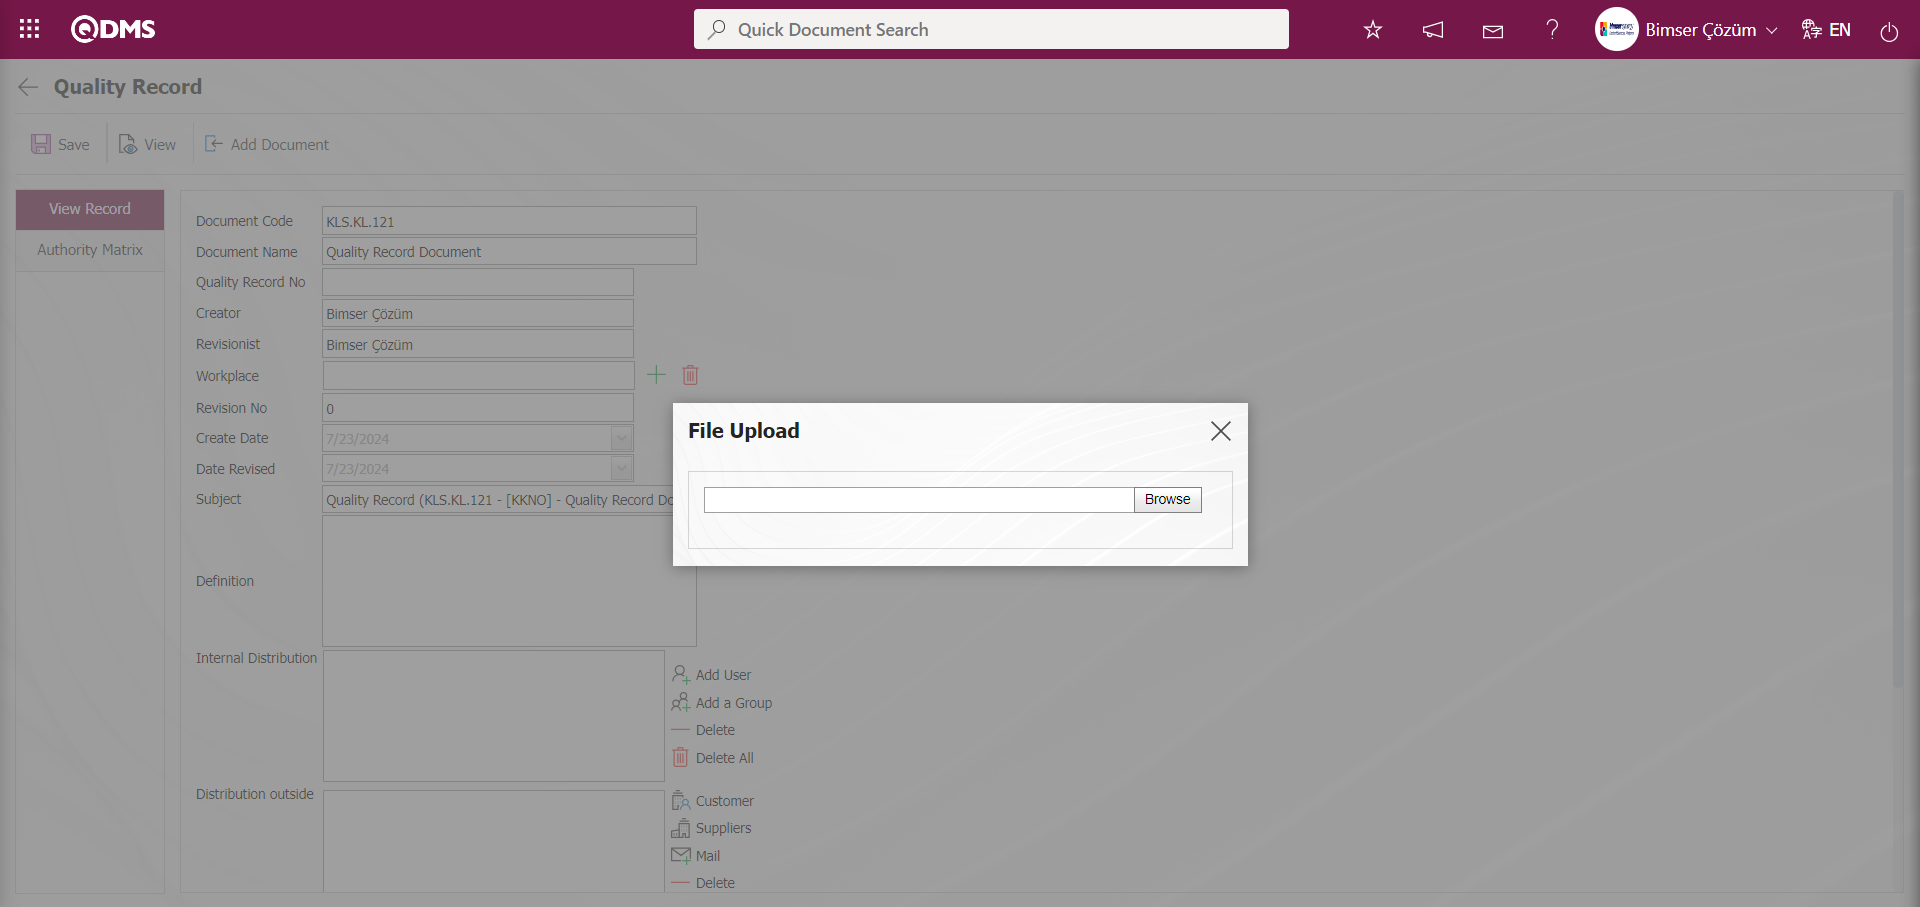
The full quality record is selected and uploaded to the Qdms system.

The system informs you that the file has been successfully uploaded.

People/groups to whom the quality record will be sent can be specified in the Internal Distribution and External Distribution fields.
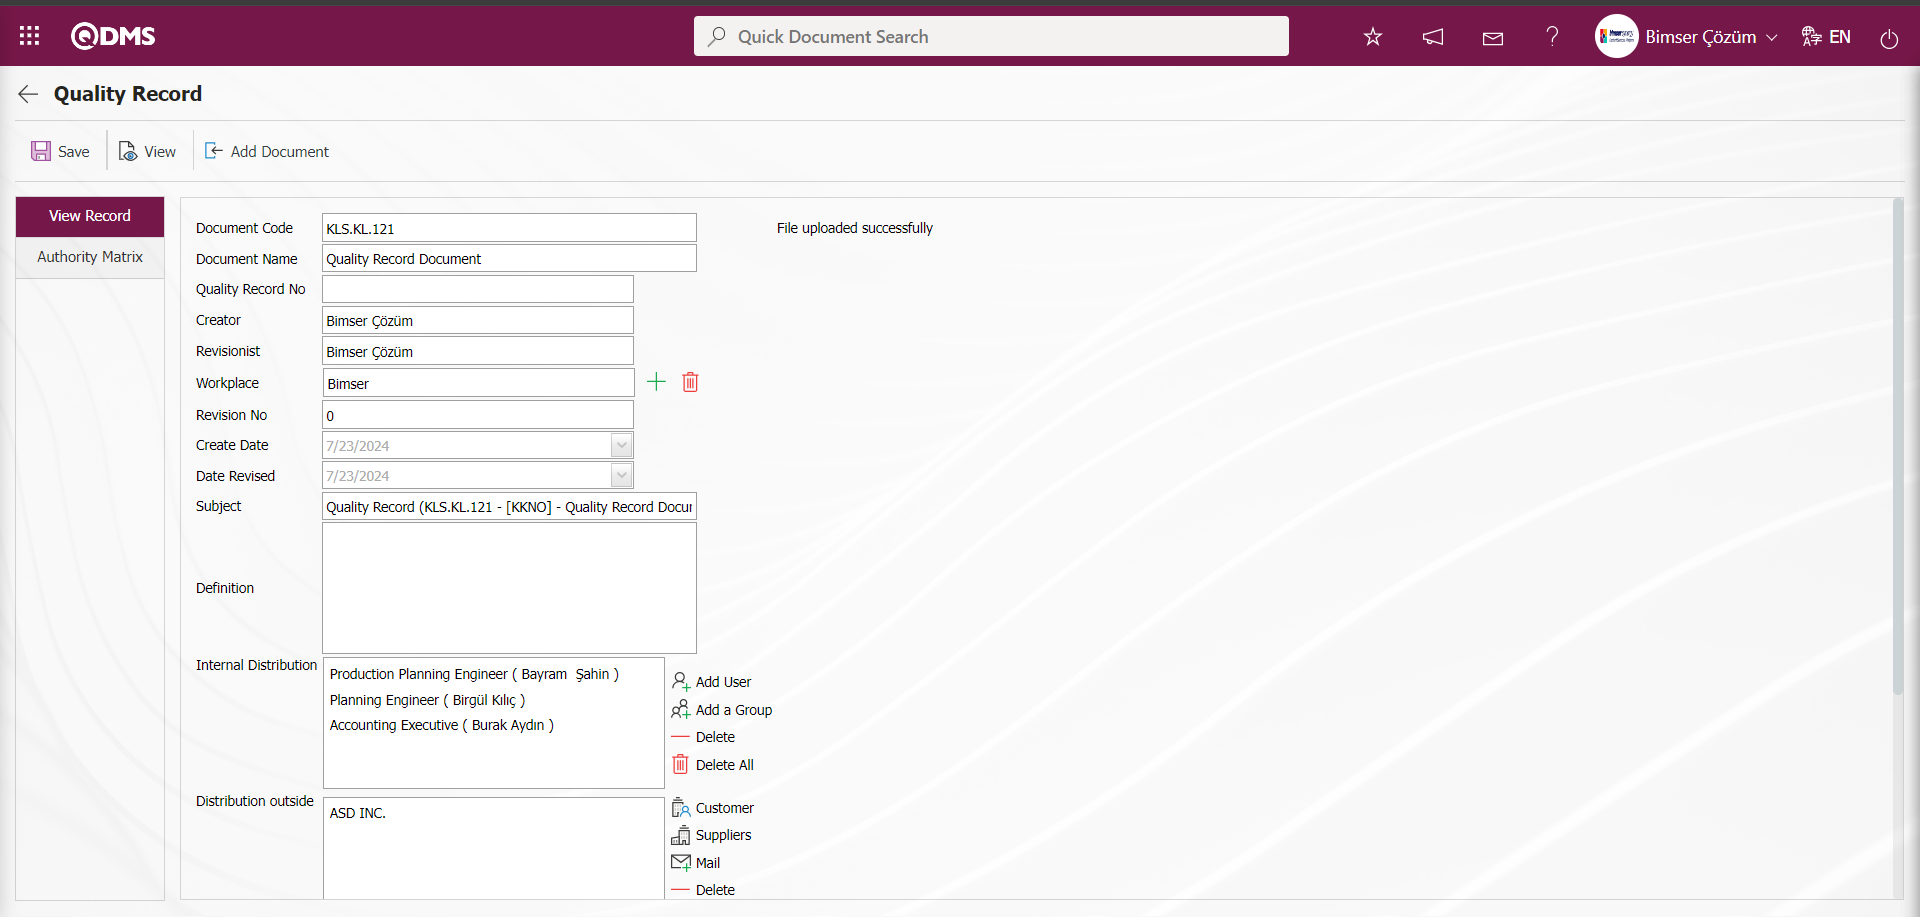
From the Quality Record screen, click on the Authorization Matrix tab. From the “Authorization Matrix” tab, select from the system which positions/ user groups are required to have “Read, Prepare/ Revise, Delete” authorization on this record.
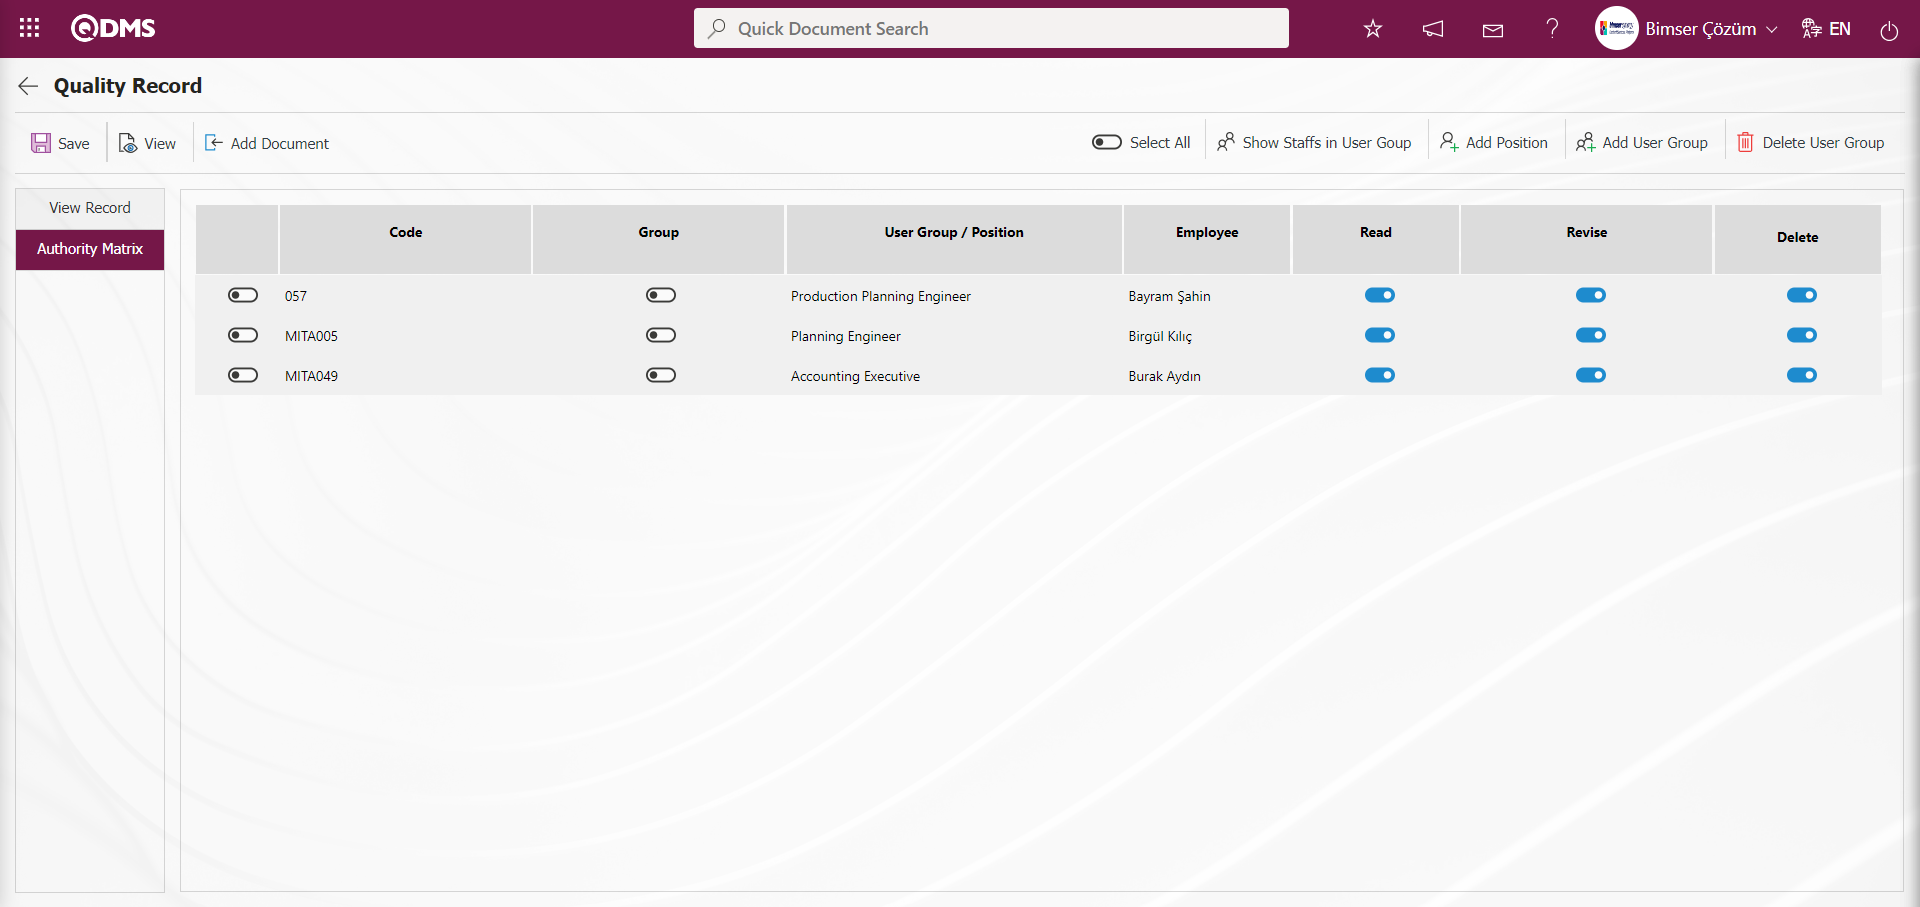
By clicking the buttons on the Authorization Matrix tab from the Quality Record screen, the authorization process related to the quality record is made on the basis of the position and user group in the authorization matrix. On the Quality Record screen, click on the View Record tab after the authorization process in the Authorization matrix.
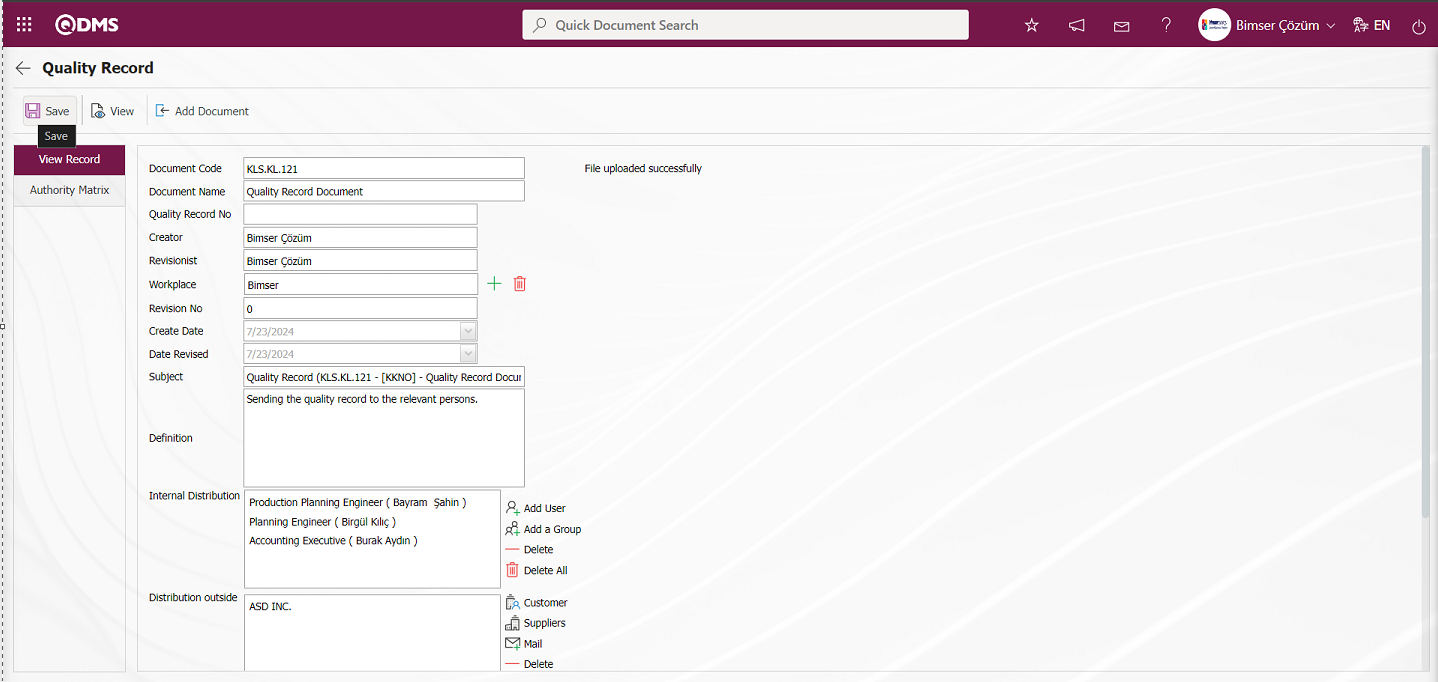
Finally, the relevant information is written in the description field and approval is sent to the person in the “Quality Record” approval flow with the  button.
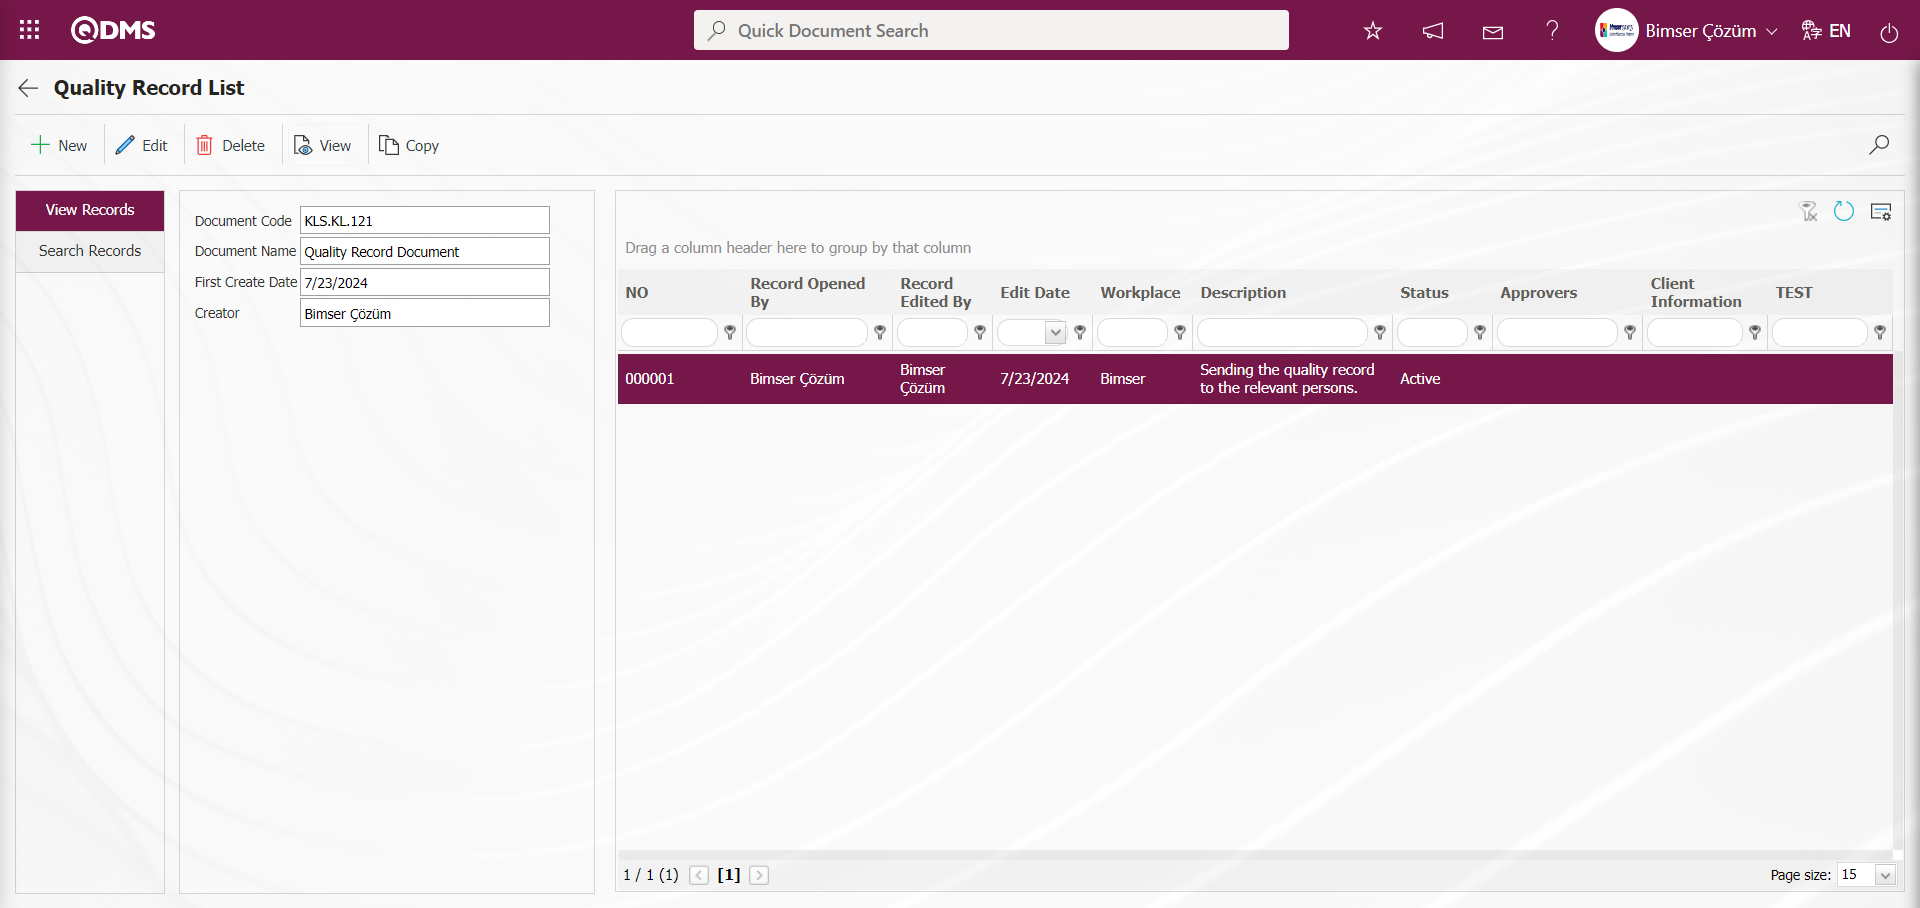
If it is desired that the quality records go for approval before going to distribution after they are created, the parameter value of parameter 227 of the Document Management Module parameters is activated by selecting “Yes”.
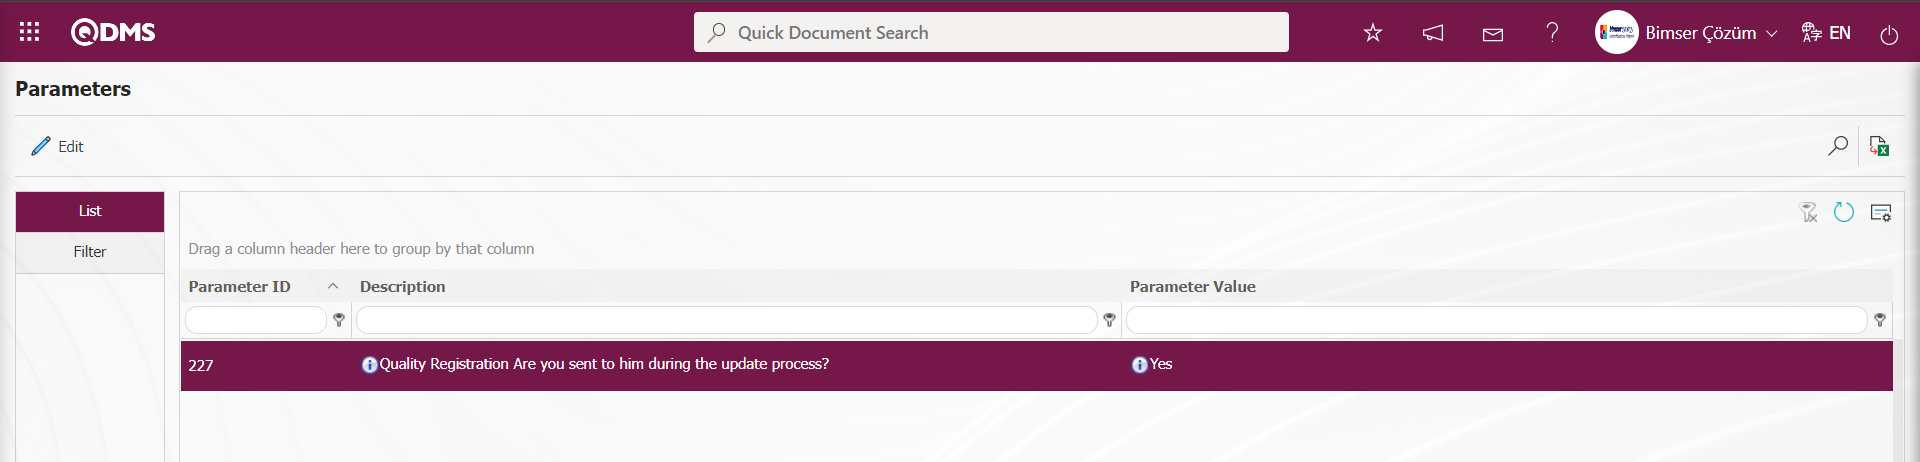
System Infrastructure/ BSID/ Configuration Settings/ Flow Identification and System Infrastructure/ BSID/ Configuration Settings/Role Identification menus are used to set to whom the flows will go. In this section, the relevant role is defined for the Quality Record Approval Flow. The control process of the flow must be done separately in the Sub-Module Definition menu.
62.11.2. Quality Record Report
Menu Name: Integrated Management System/ Document Operations/ Quality Record/ Quality Record Report
With the “Quality Record Report” menu, reports for all quality records are obtained. With the quality record filtering option, reports can be obtained according to the desired criteria. Two tabs appear on the Quality Record Report screen. These tabs are Record Search and Record Display tabs. In the record search tab, the relevant records are displayed in the record display tab by filtering according to the search criteria.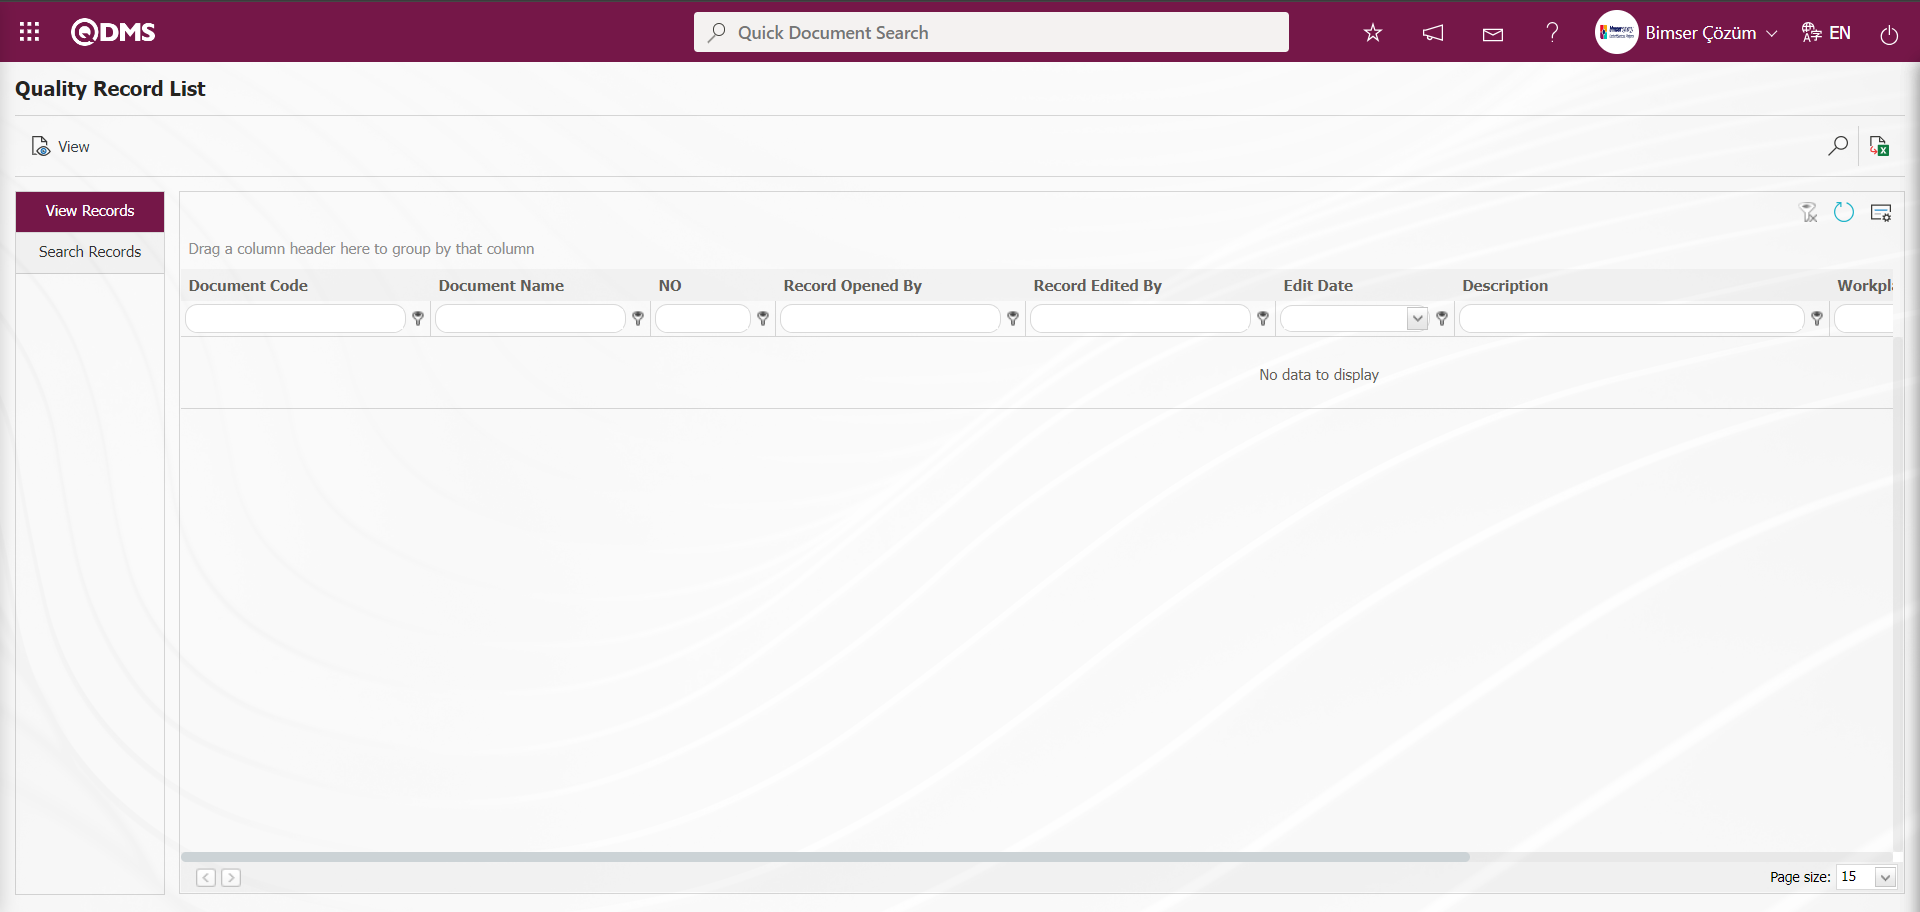
With the help of the buttons on the screen;
: Records are searched by filtering.
: Data is transferred to Excel.
: The search criteria on the menu screens are used to clear the data remaining in the filter fields in the grid where the search operation is performed.
: The menu screen is restored to its default settings.
: User-based designing of the menu screen is done with the show-hide feature, that is, the hiding feature of the fields corresponding to the columns on the menu screens.
On the Quality Record List screen, enter the code information of the quality record form in the document code field, which is the search criteria in the Record search tab, and click the  (Search) button.
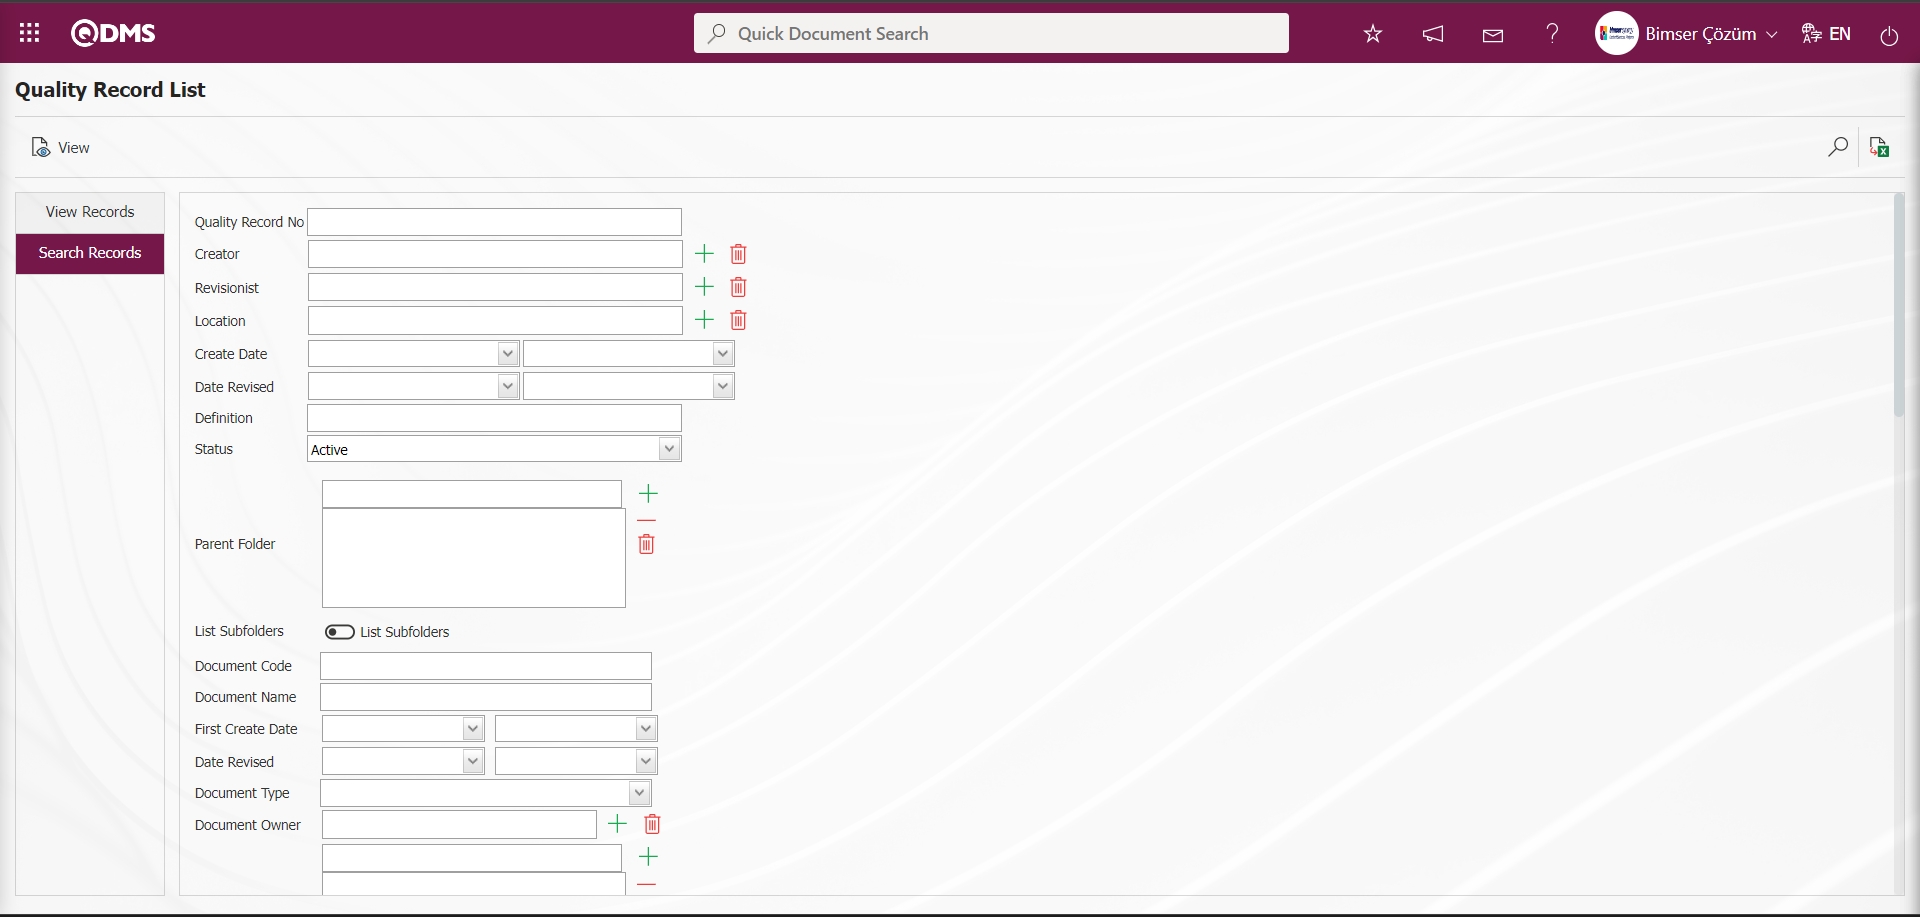
On the Quality Record List screen, records are listed according to the search criteria on the Record Display screen.
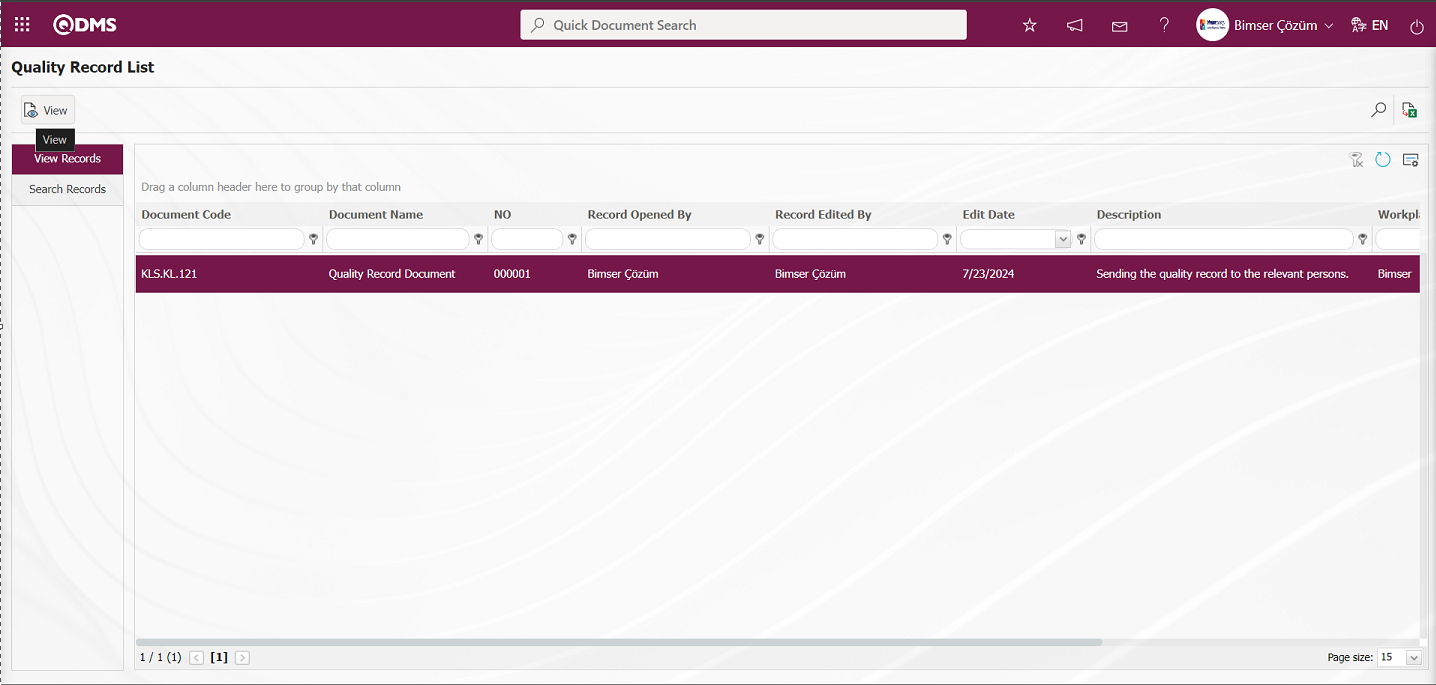
On the Quality Record List screen, click the  button while the record is selected in the Record Display tab.
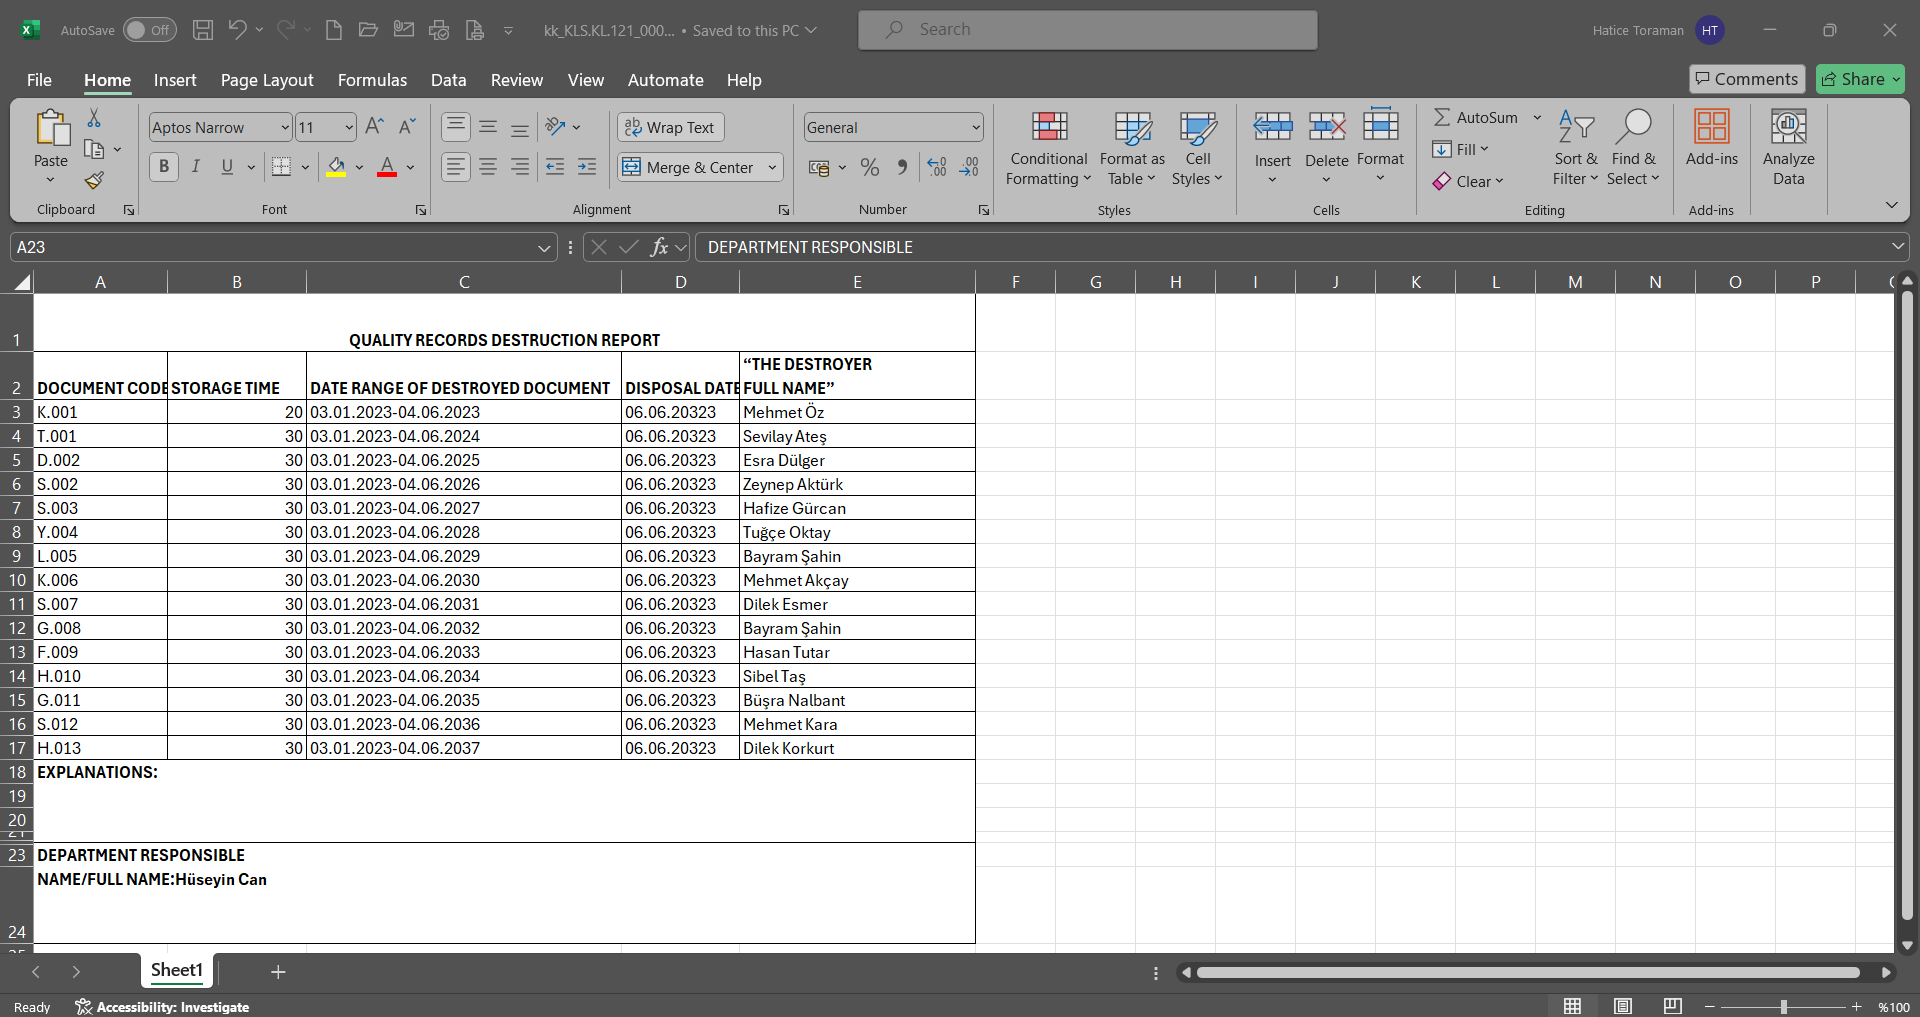
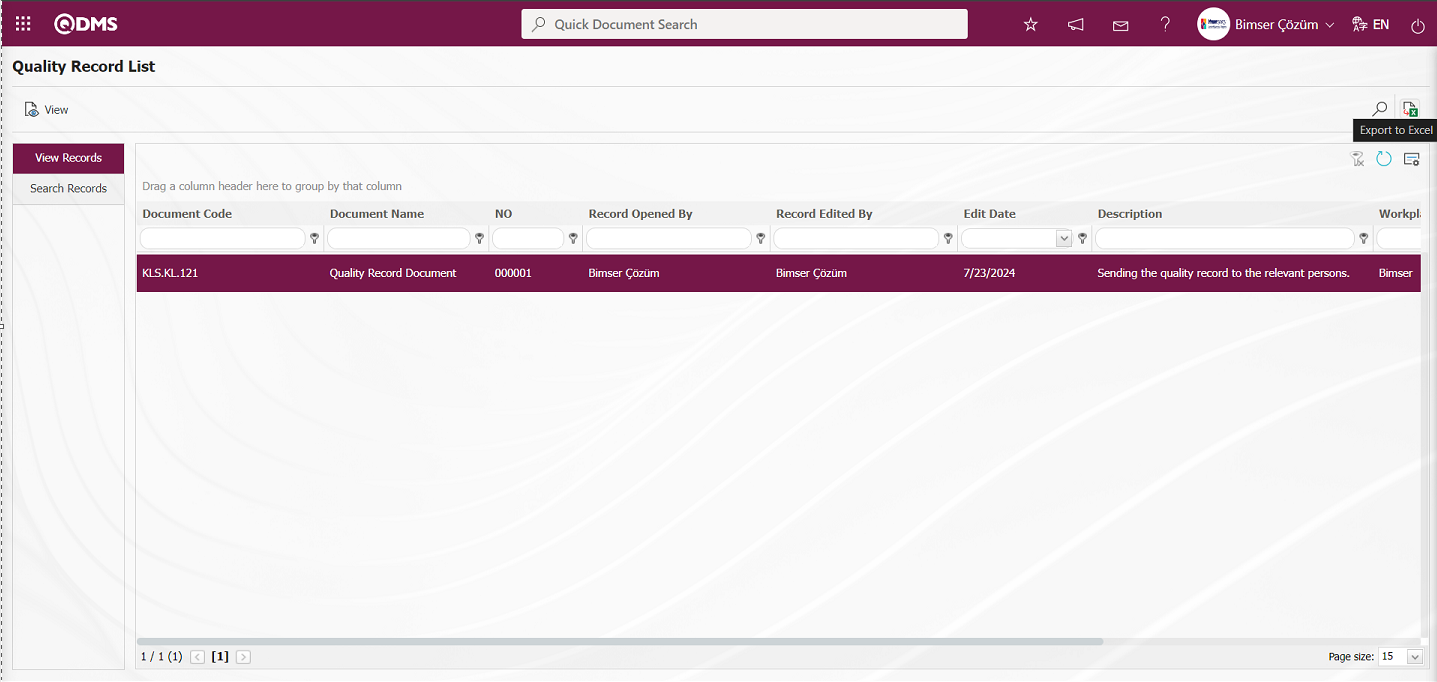
On the Quality Record List screen, click the (Export to Excel) button to get the Quality record report in Excel format.
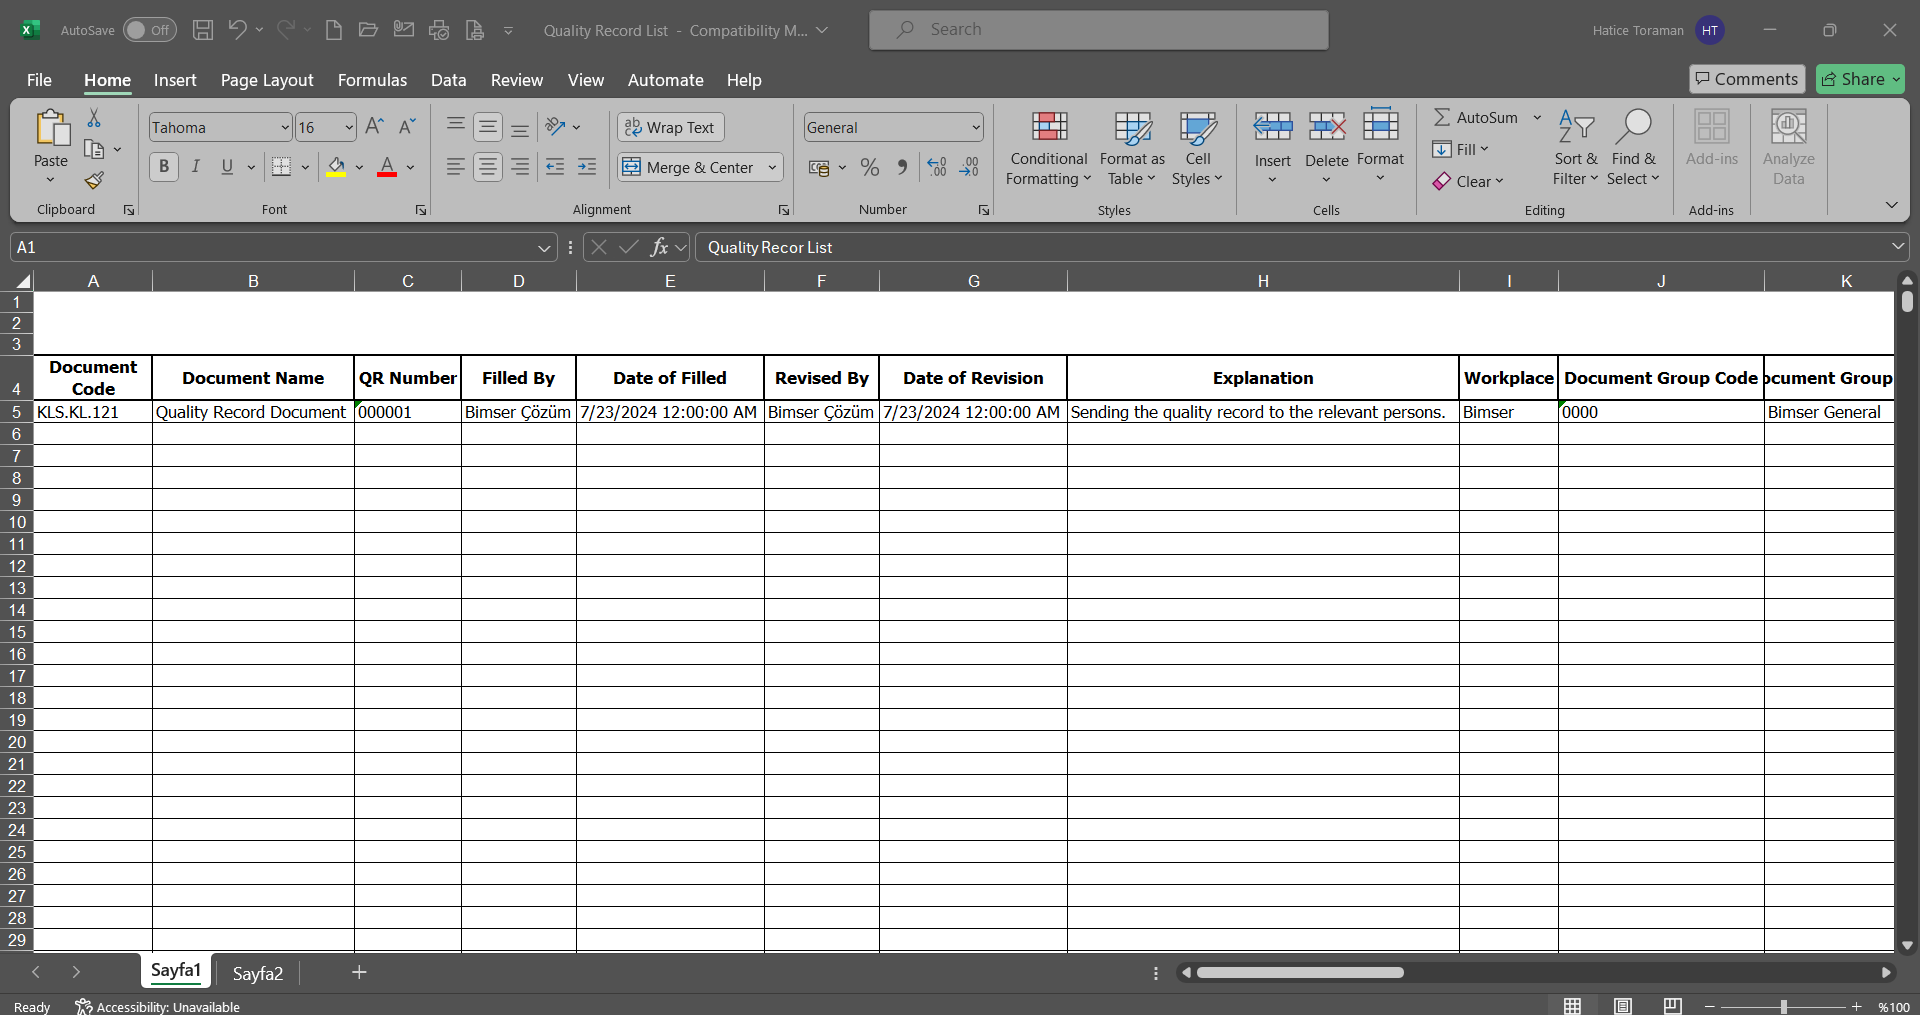
6.2.12.Reports
Menu Name: Integrated Management System/ Document Operations/ Reports
It is the menu where all reports related to the Document Management Module are accessed and these reports are displayed in excel format.
6.2.12.1. Document Summary List
Menu Name: Integrated Management System/ Document Management/ Reports/Document Summary List
This is the menu where the list of all documents in the system is accessed and the report is received. There are two tabs on the Document Summary List screen: Document Search and Document List tabs. In the document search tab, filtering is done according to the search criteria. In the document list tab, records are listed according to the filtering process according to these search criteria.
With the help of the buttons on the screen;
: Records are searched by filtering.
: Data is transferred to Excel.
: The search criteria on the menu screens are used to clear the data remaining in the filter fields in the grid where the search operation is performed.
: The menu screen is restored to its default settings.
: User-based designing of the menu screen is done with the show-hide feature, that is, the hiding feature of the fields corresponding to the columns on the menu screens.
In the document search tab on the Document Summary list screen, type the document code in the “Document Code” field, which is the filter search criteria, and click the (Search) button.
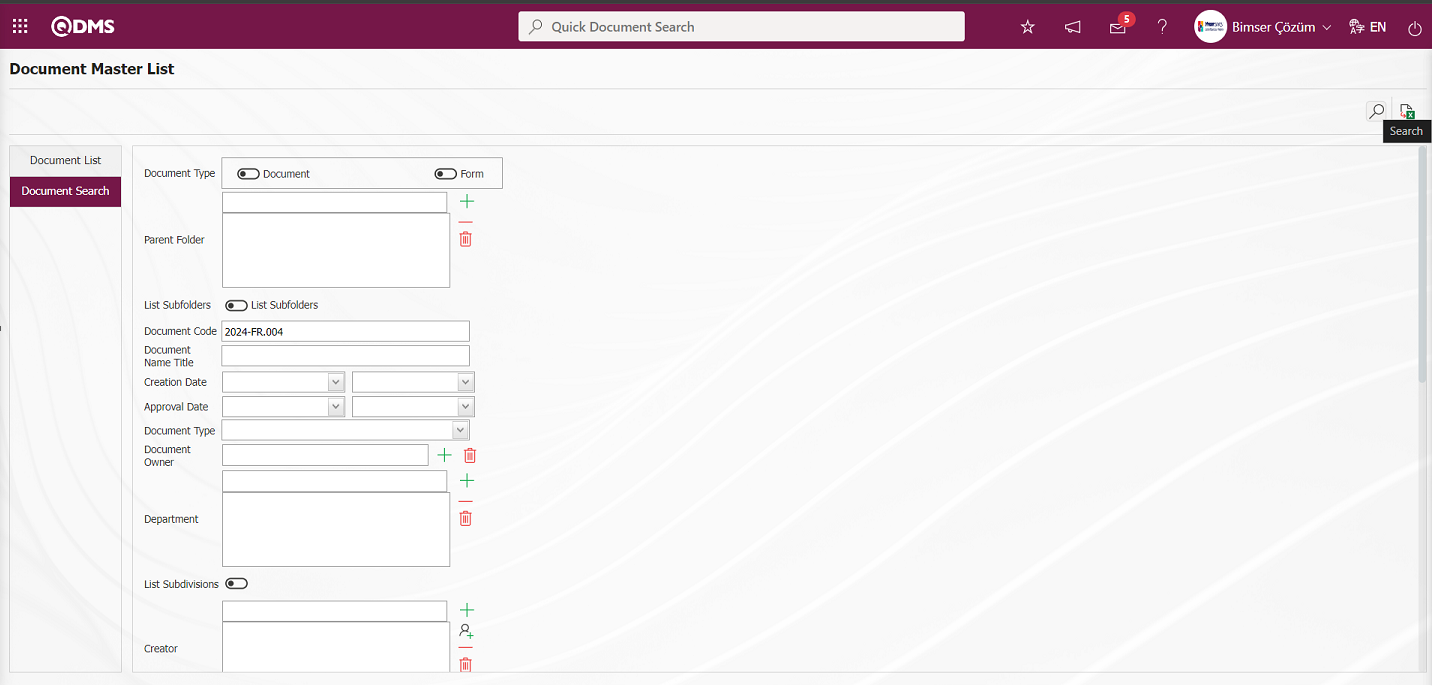
On the Document Summary list screen, records are listed according to the search criteria in the filter made on the Document List tab.

For the documents listed in the document list tab on the Document Summary list screen, the document code link is clicked to view the document.
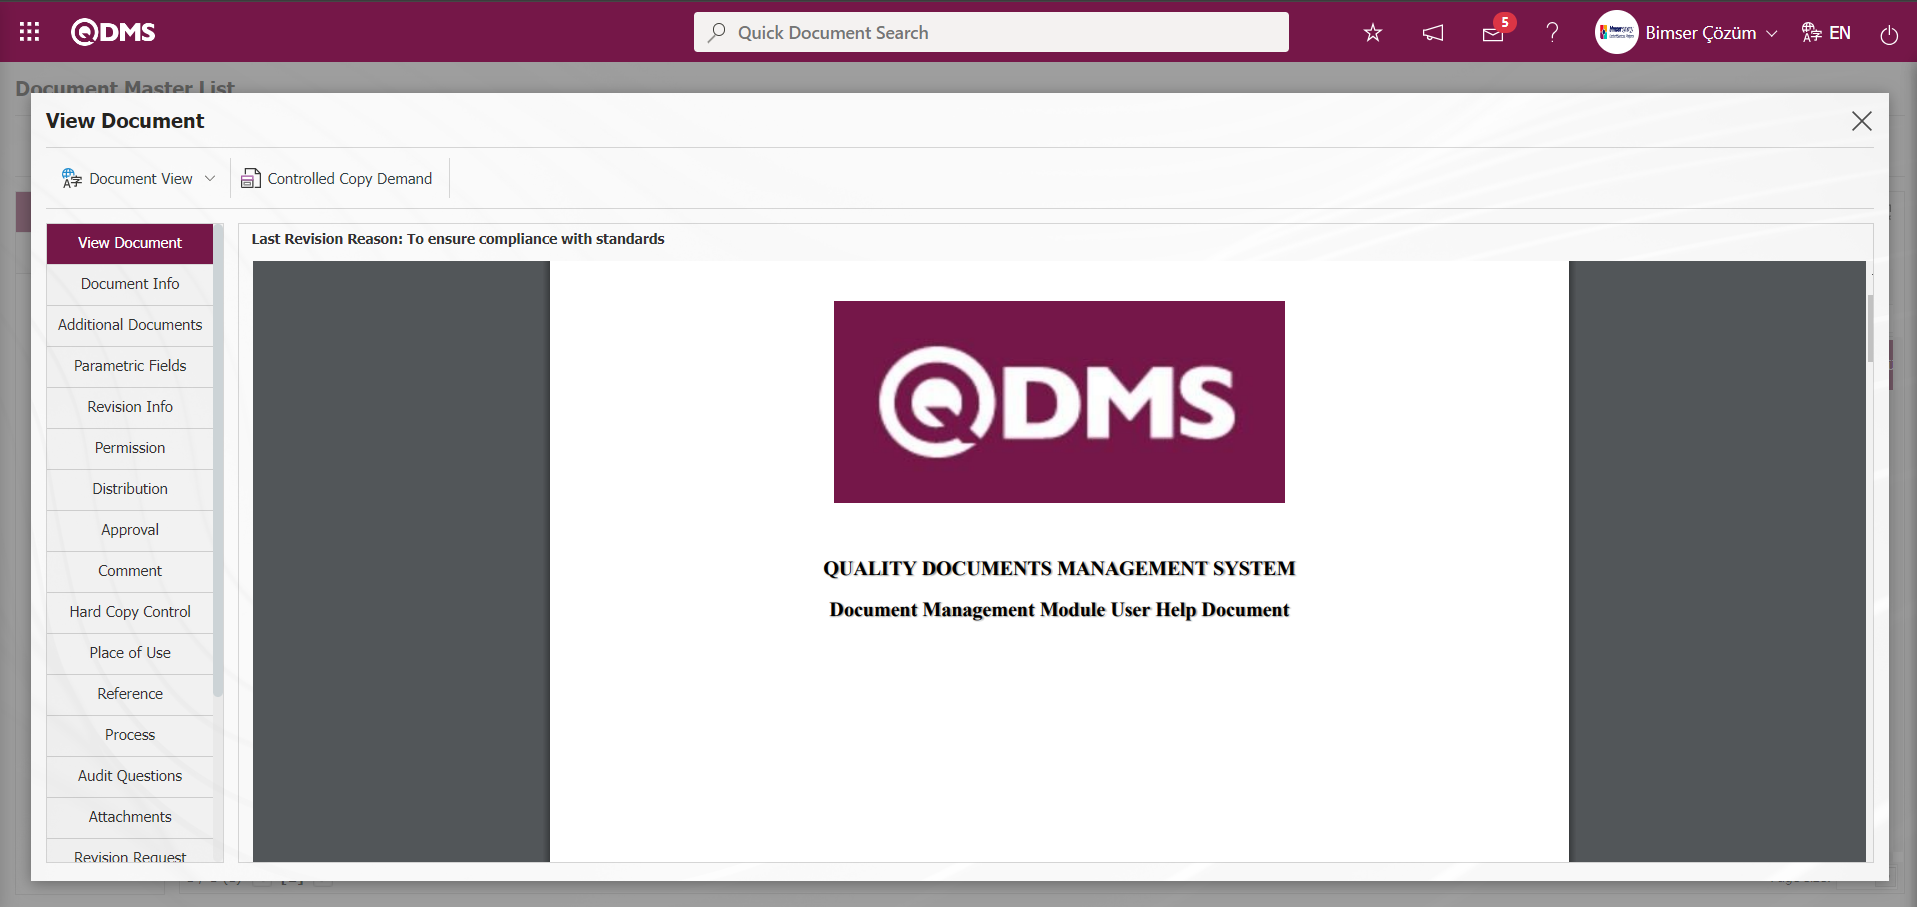
At this stage, if the document has been uploaded in different languages, the process of viewing the document in those languages is performed. By clicking the  button, the process of requesting a control copy is made.
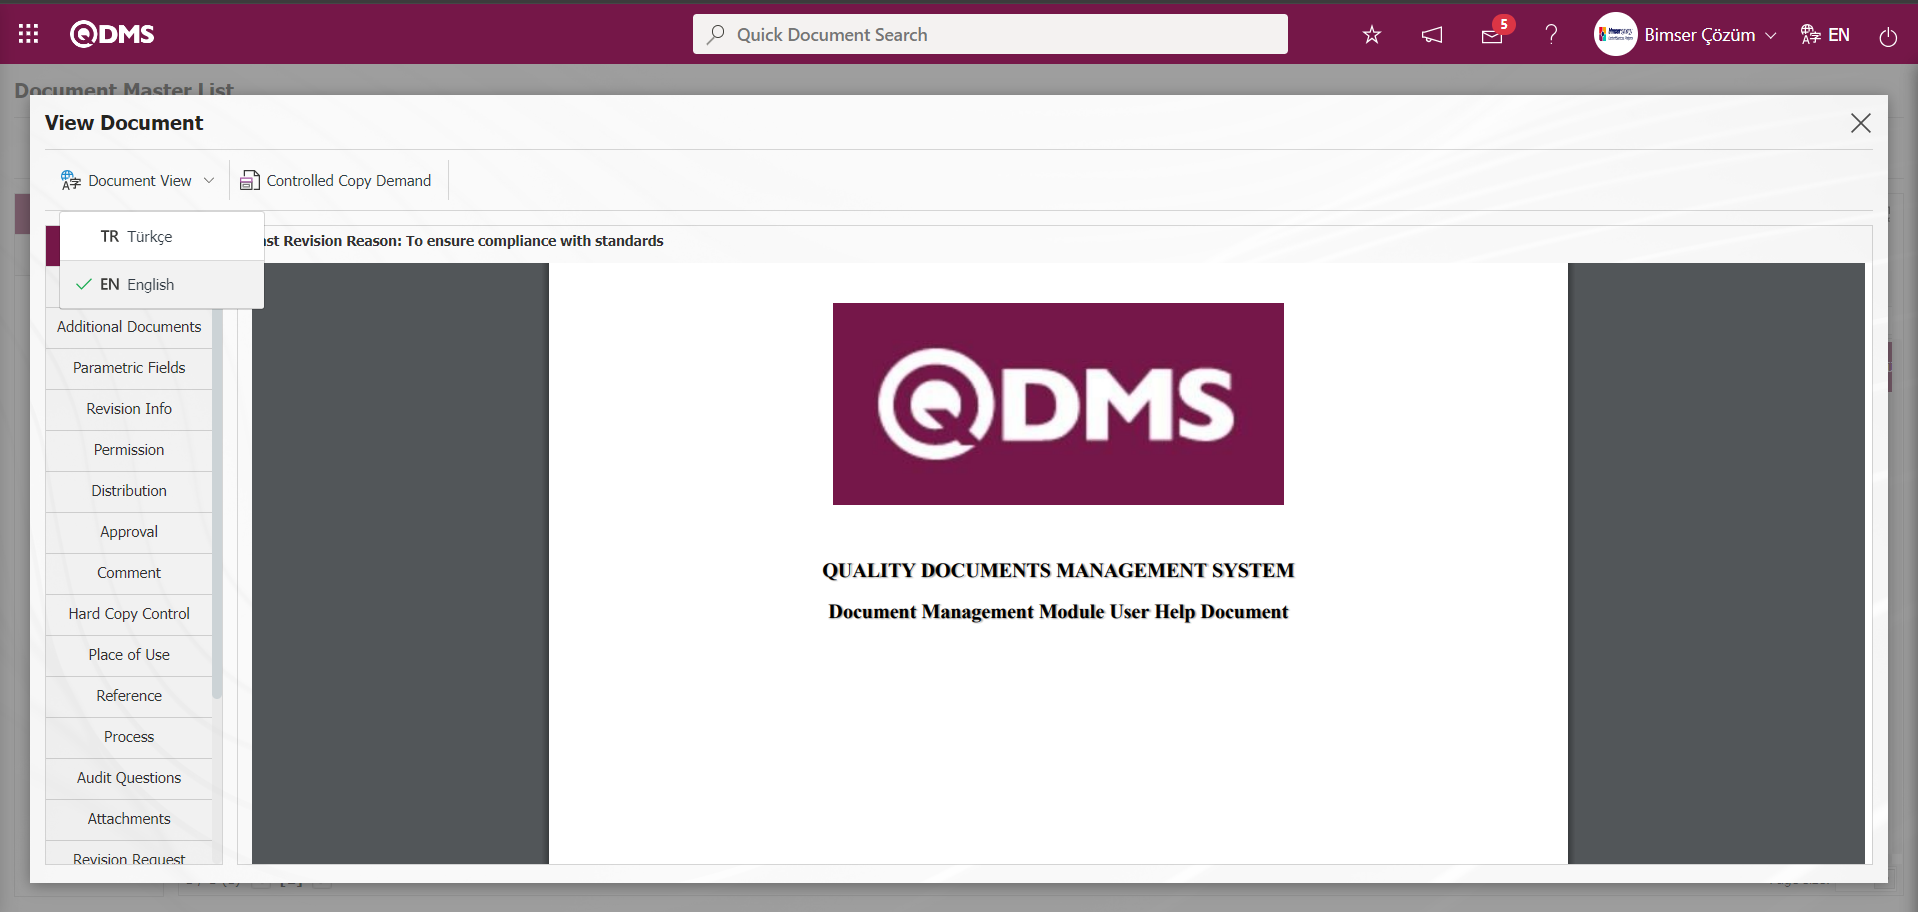
Click the (Export to Excel) button on the Document Summary List screen.
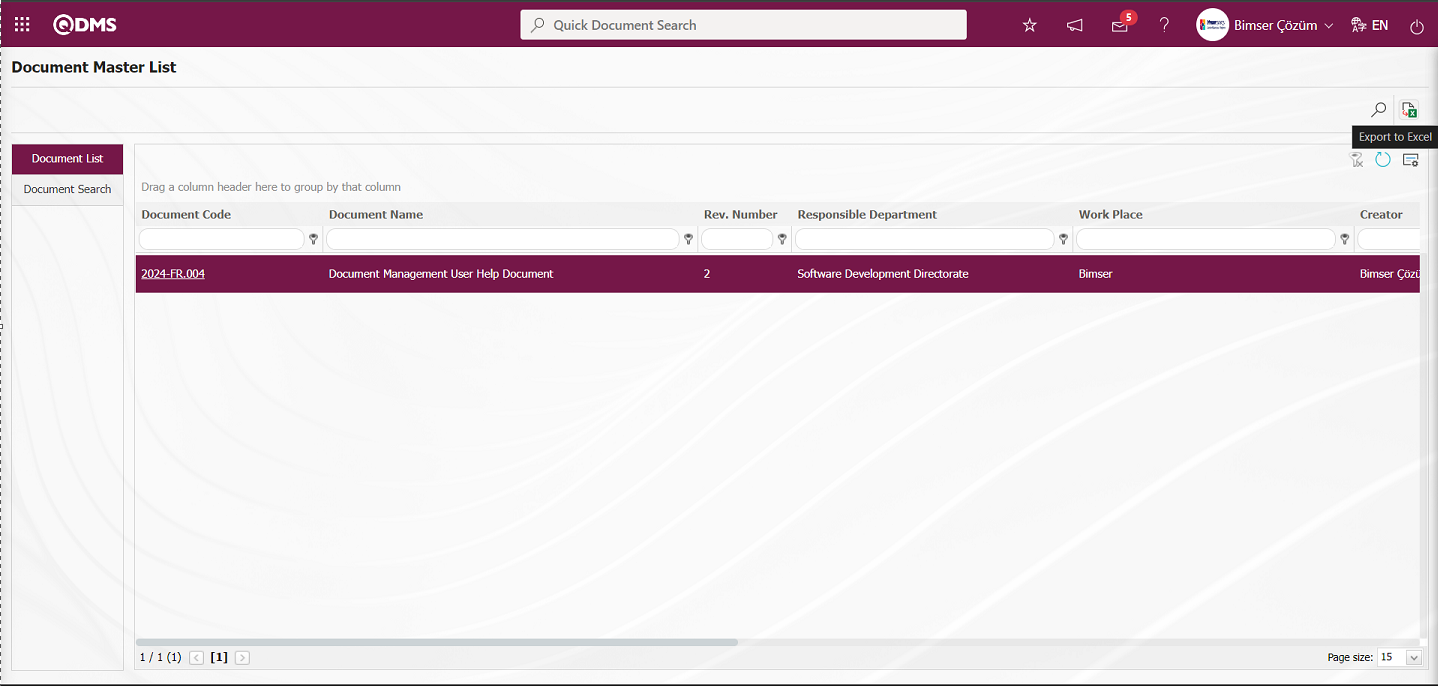 The report of the Document Summary List Report in Excel format is displayed.
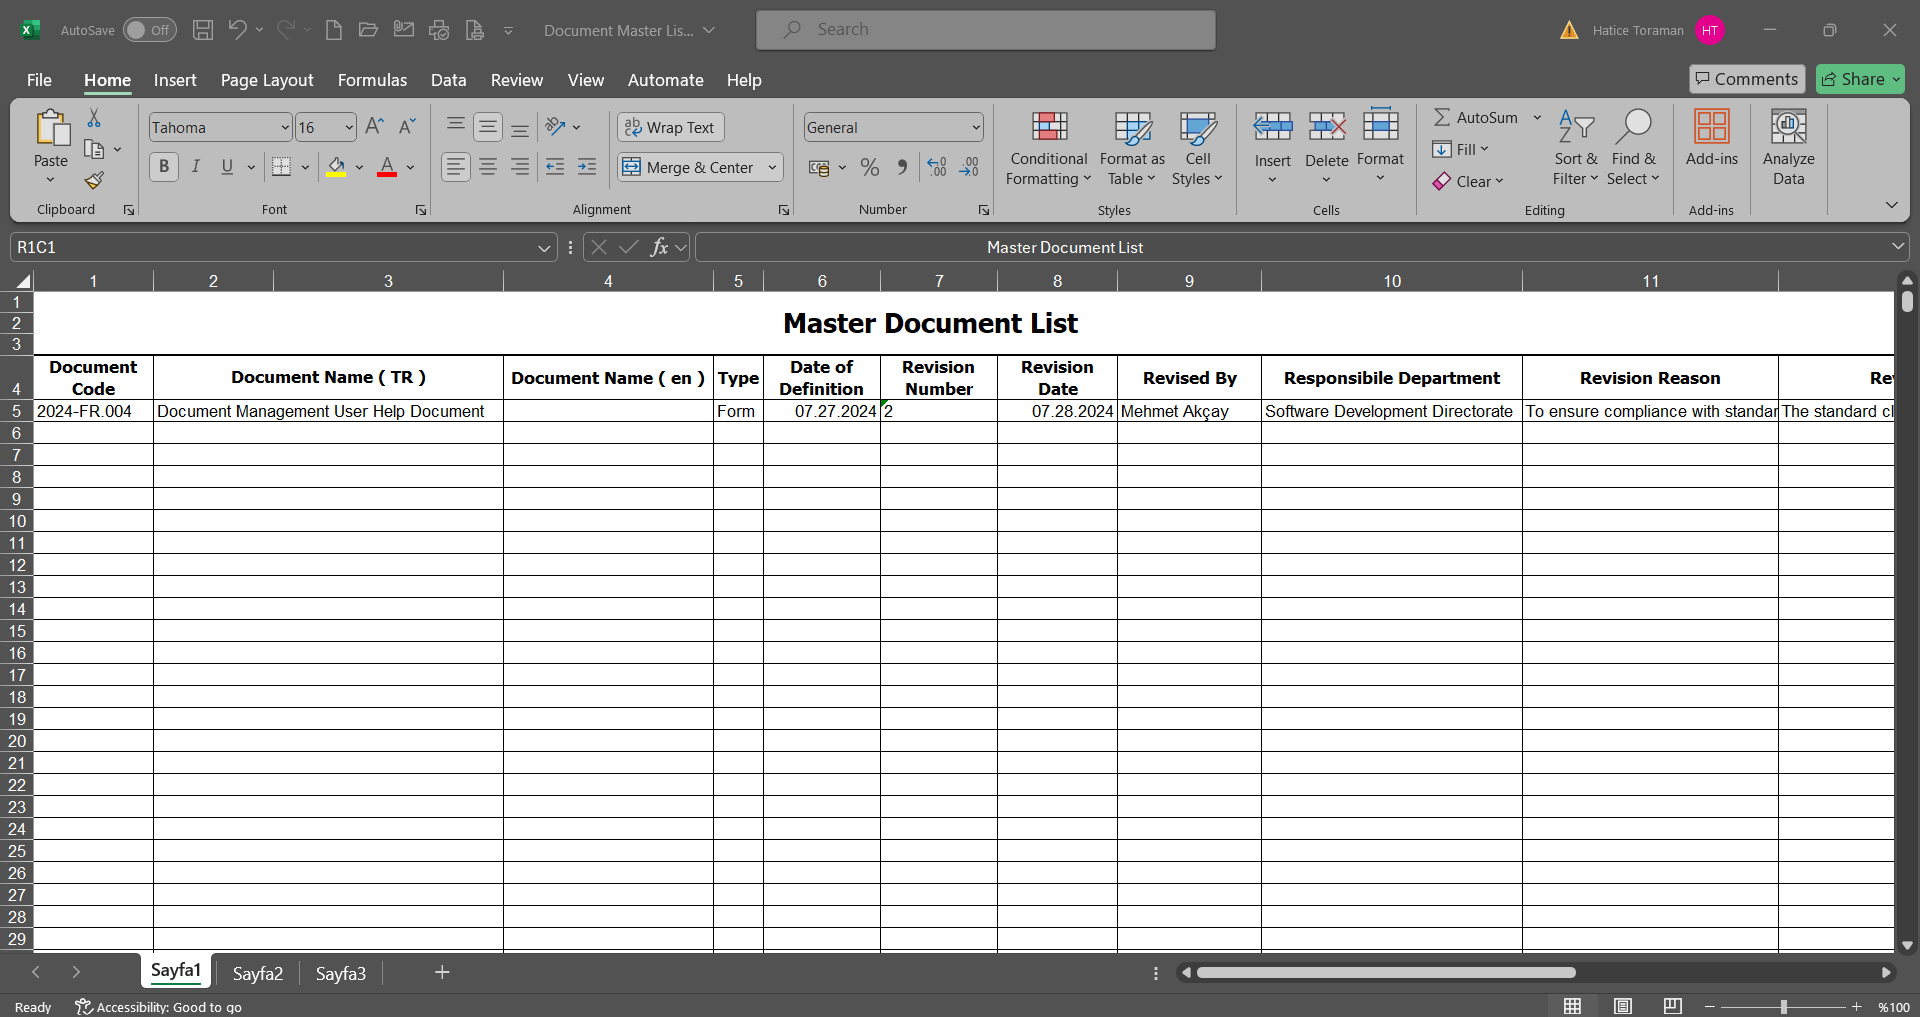
6.2.12.2. Documents Pending Approval
Menu Name: Integrated Management System/ Document Management/ Reports/Documents Pending Approval
This is the menu where the list of the documents that have been prepared and sent for approval and how many days they have been waiting for approval is displayed and the report is received. On the Documents Pending Approval screen, there are two tabs: document search and document list tab. In the document search tab, filtering is done according to the search criteria. In the document list tab, the records are listed according to the filtering process according to these search criteria.
With the help of the buttons on the screen;
 : Viewing of the selected document in the list is done.
 :Changing the approver in the approval matrix of the document selected in the list is don
: Records are searched by filtering.
: Data is transferred to Excel.
: The search criteria on the menu screens are used to clear the data remaining in the filter fields in the grid where the search operation is performed.
: The menu screen is restored to its default settings.
: User-based designing of the menu screen is done with the show-hide feature, that is, the hiding feature of the fields corresponding to the columns on the menu screens.
On the Document List, Waiting For Approval screen, on the document search tab, select the folder in the “Parent folder” field, which is the filter search criteria, and click the (Search) button.
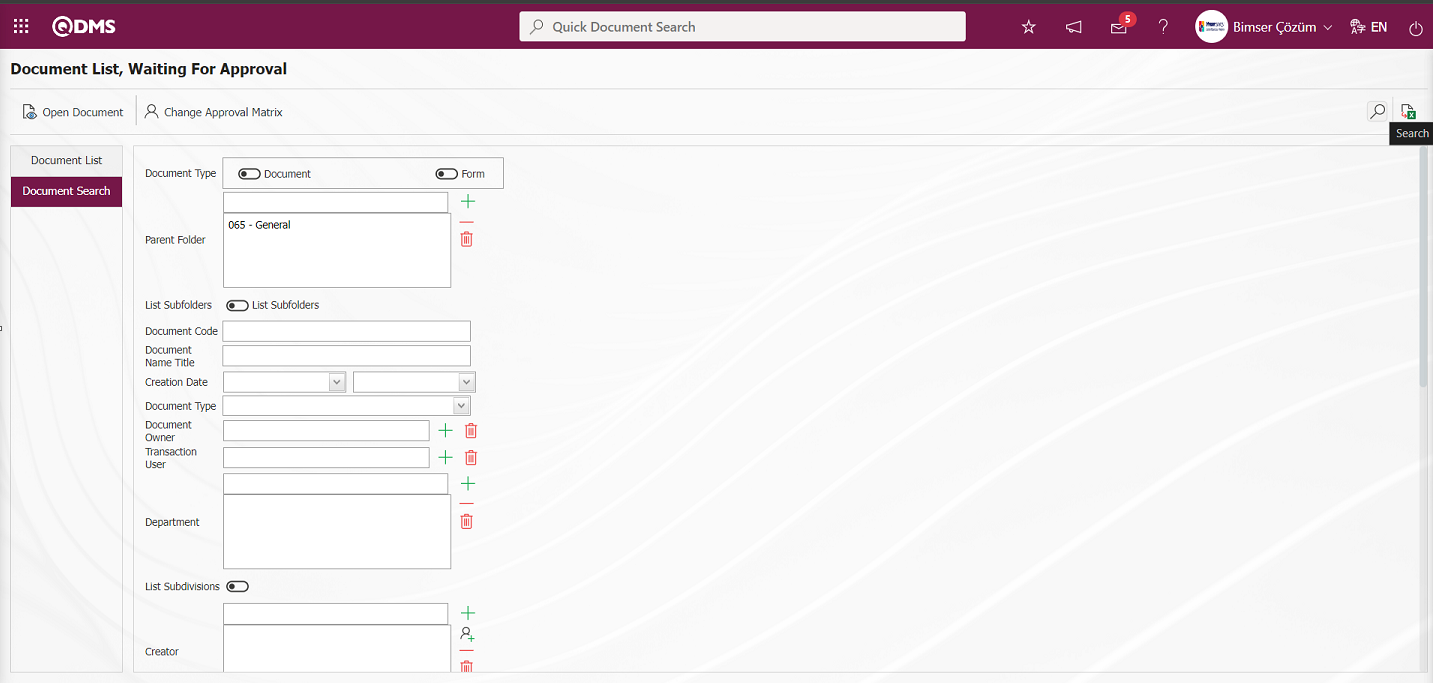
On the Document List, Waiting For Approval screen, records are listed according to the search criteria in the filter made in the document list tab.

On the Document List, Waiting For Approval screen, select the document from the document list screen and click the  button to open the Document Approval screen.
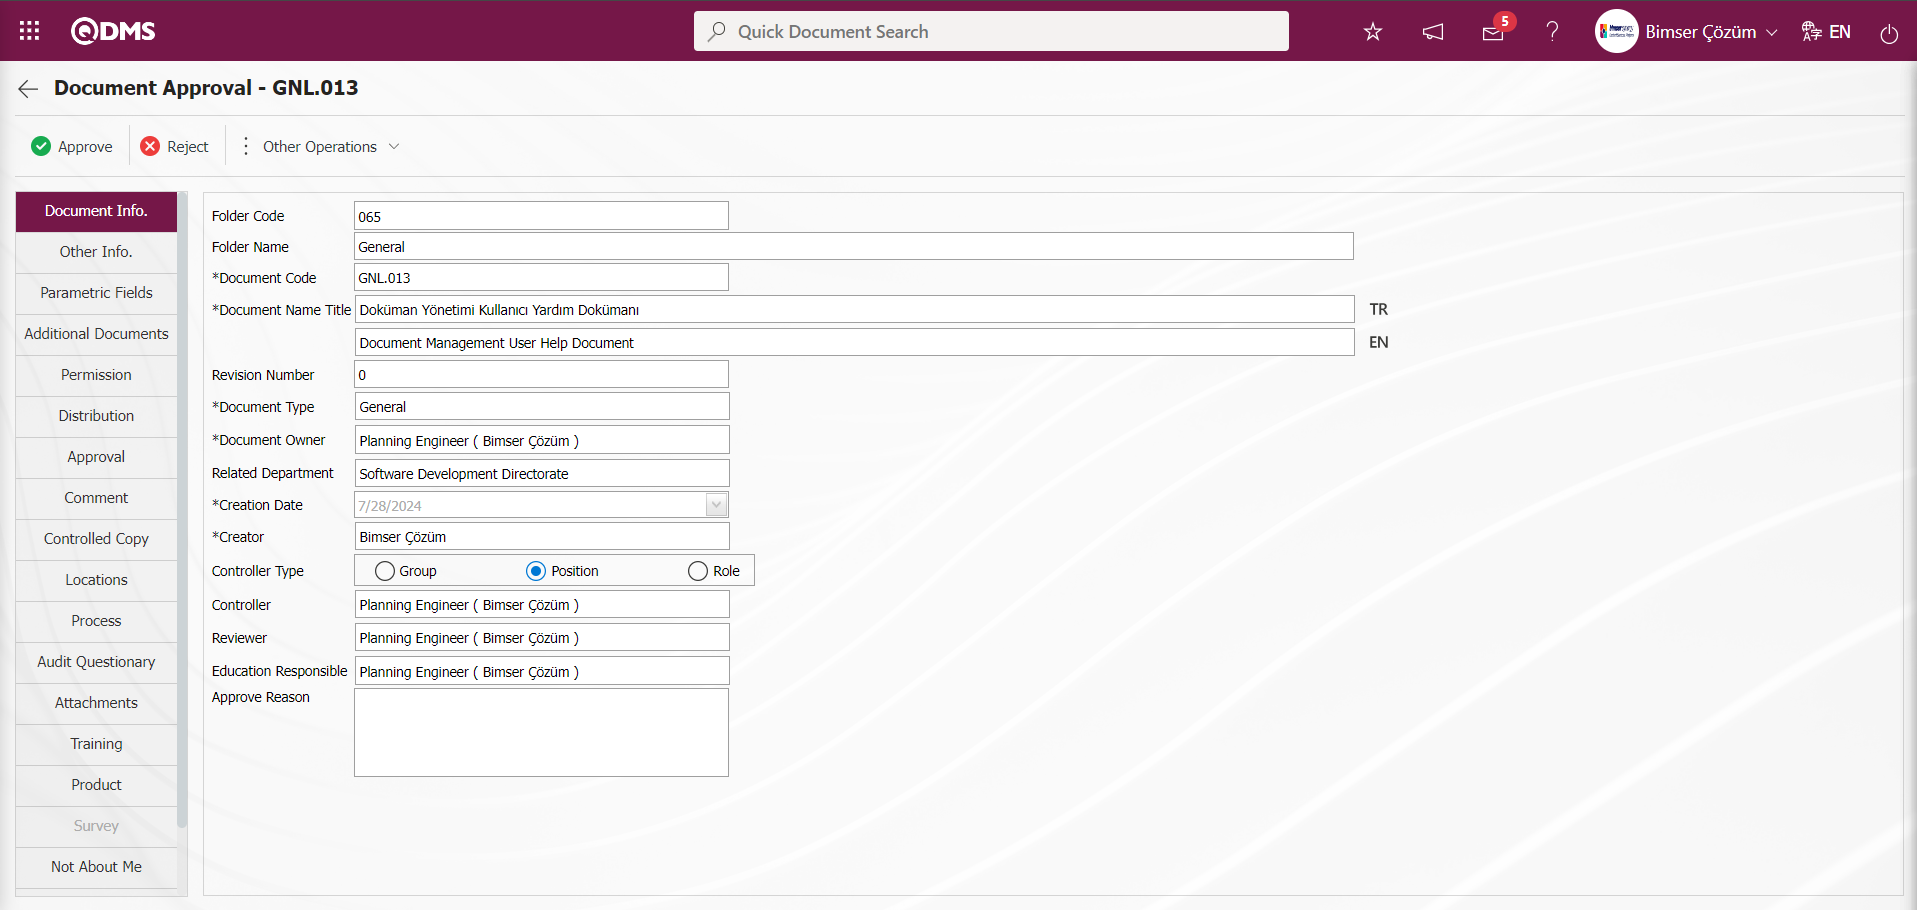
With the help of the buttons on the screen;
: Document approval process is done.
: Rejecting the document by writing the reason for rejection.
![A close-up of a white background
Description automatically generated]ref115: At this stage, comments are requested from the relevant people. It is a button displayed depending on the parameter. Parameter value of parameter 113 in Document Management parameters is activated by selecting “Yes”.

After the parameter is activated, the ![A close-up of a white background
Description automatically generated]ref115 button is displayed and the relevant personnel are selected and comments are received from these personnel at this stage.
: Shows the defined comment information.
At this stage from the document approval screen, click the button to approve the document, click the button to reject the document by writing the reason for rejection and send it back to the preparer,![A close-up of a white background
Description automatically generated]ref115 button to receive comments from the relevant personnel and button to show the comments made.
On the Document List, Waiting For Approval screen, click the  button.

On the screen that opens, you can change the approver in the approval matrix or add a new approver.
With the help of the buttons on the screen;
 : Registration process is done.
 : Adding a position to the approval matrix is done.
 : Delete the selected row in the list.
The person in the position to be added to the approval matrix from the list of positions defined in the system opened by clicking the button is selected by clicking the  button.

After the approval matrix change process on the screen that opens, the approval matrix change registration process is done by clicking the button in the upper left corner of the screen.
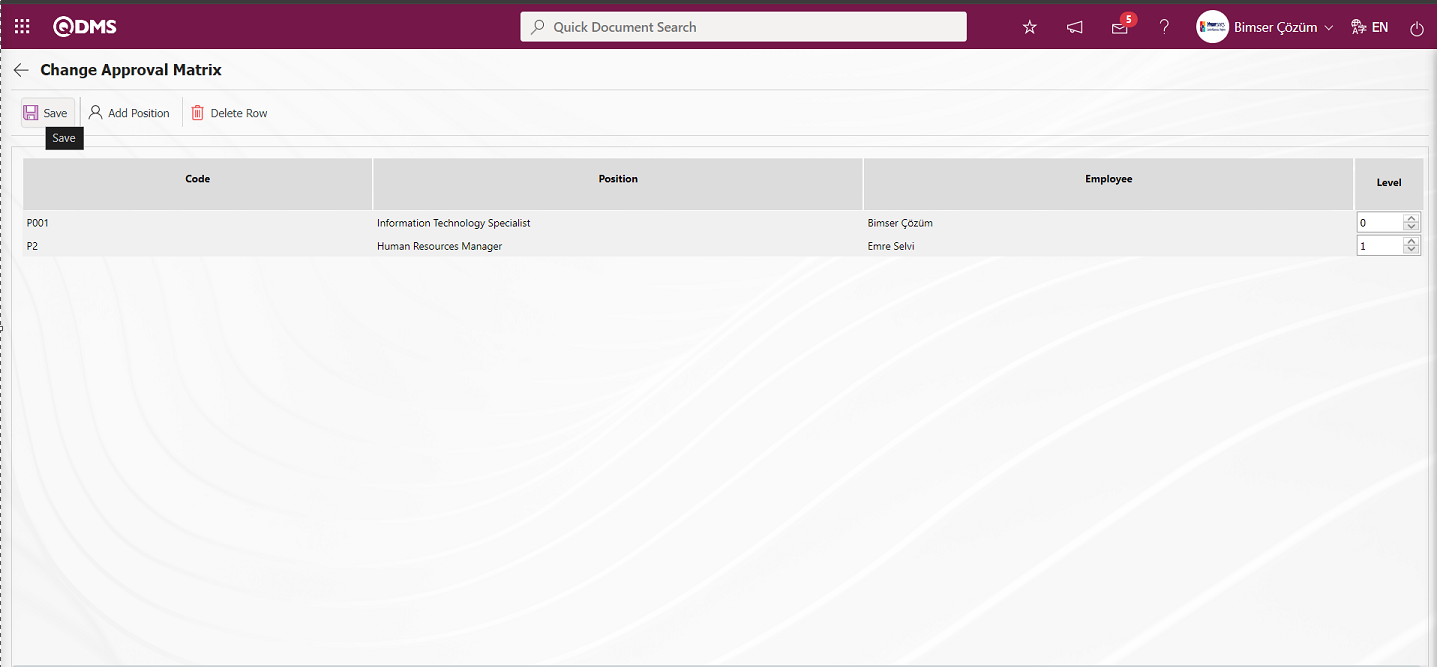
Click the “OK” button in the message given by the system.
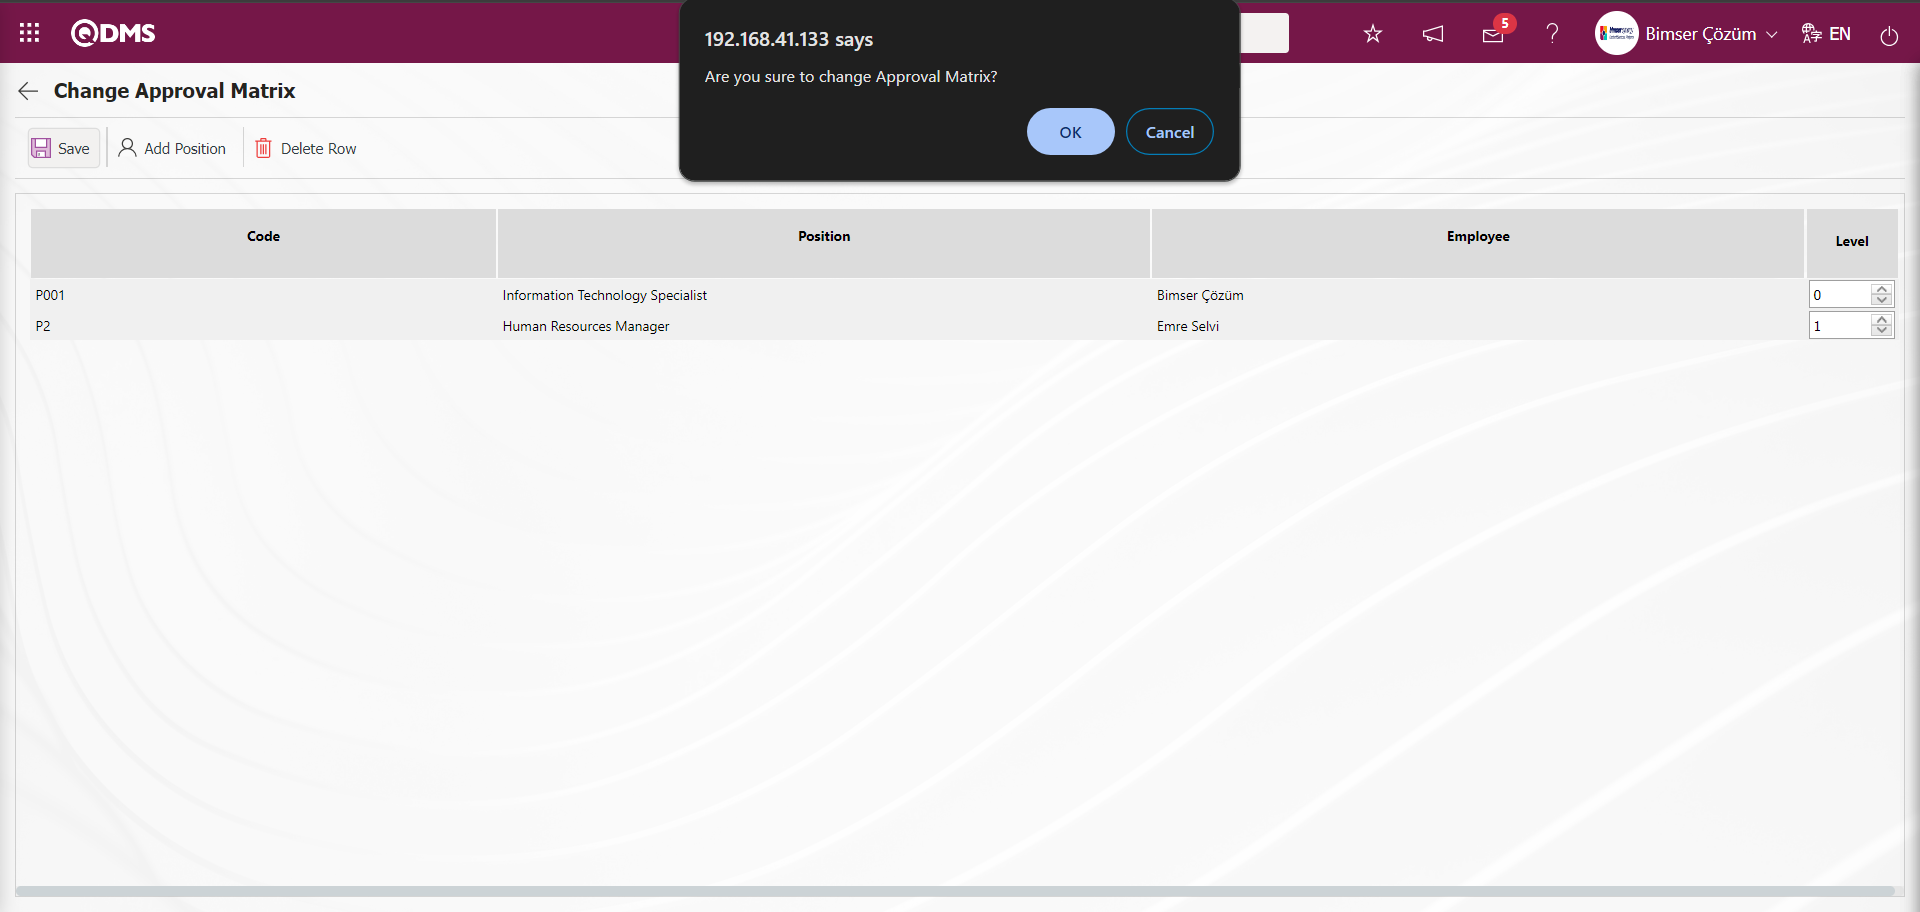
The system gives a message indicating that the approval matrix has been modified.
On the Document List, Waiting For Approval screen, click the  (Export to Excel) button.
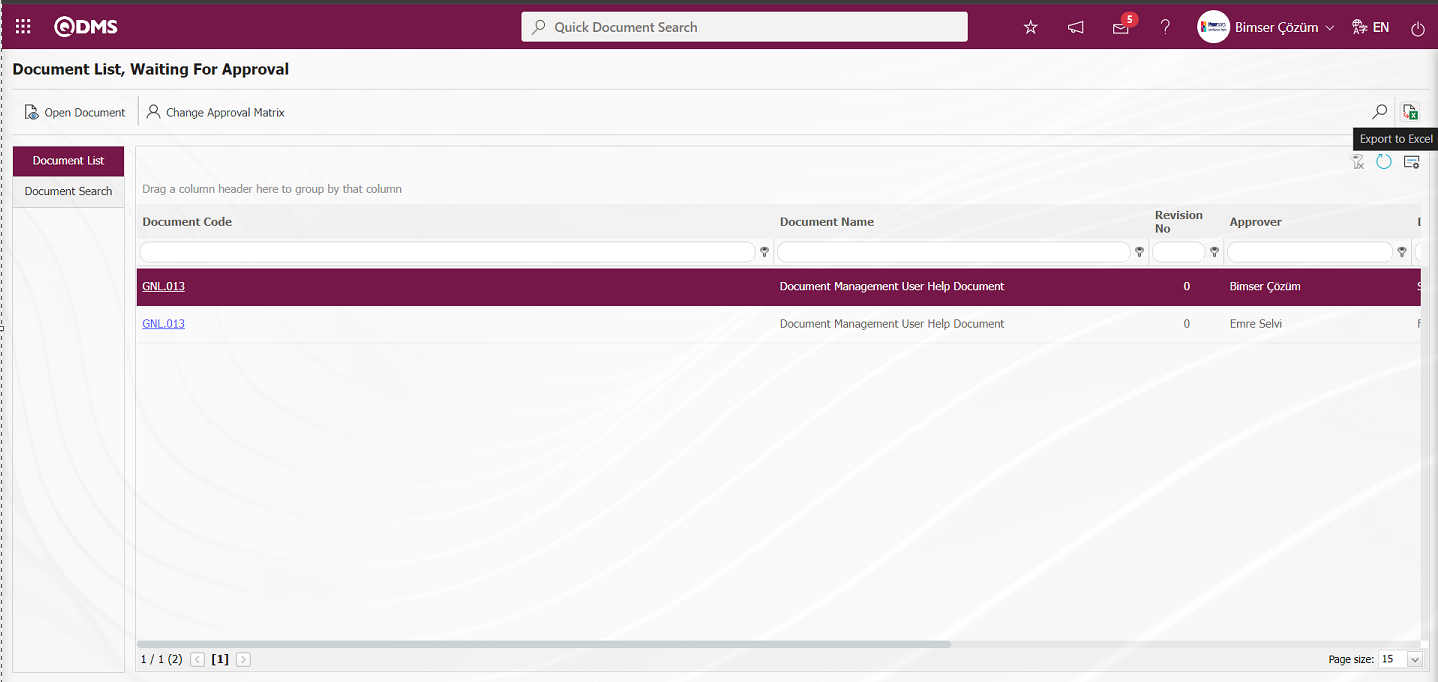
On the Document List, the Excel format report of the Waiting For Approval report is displayed.
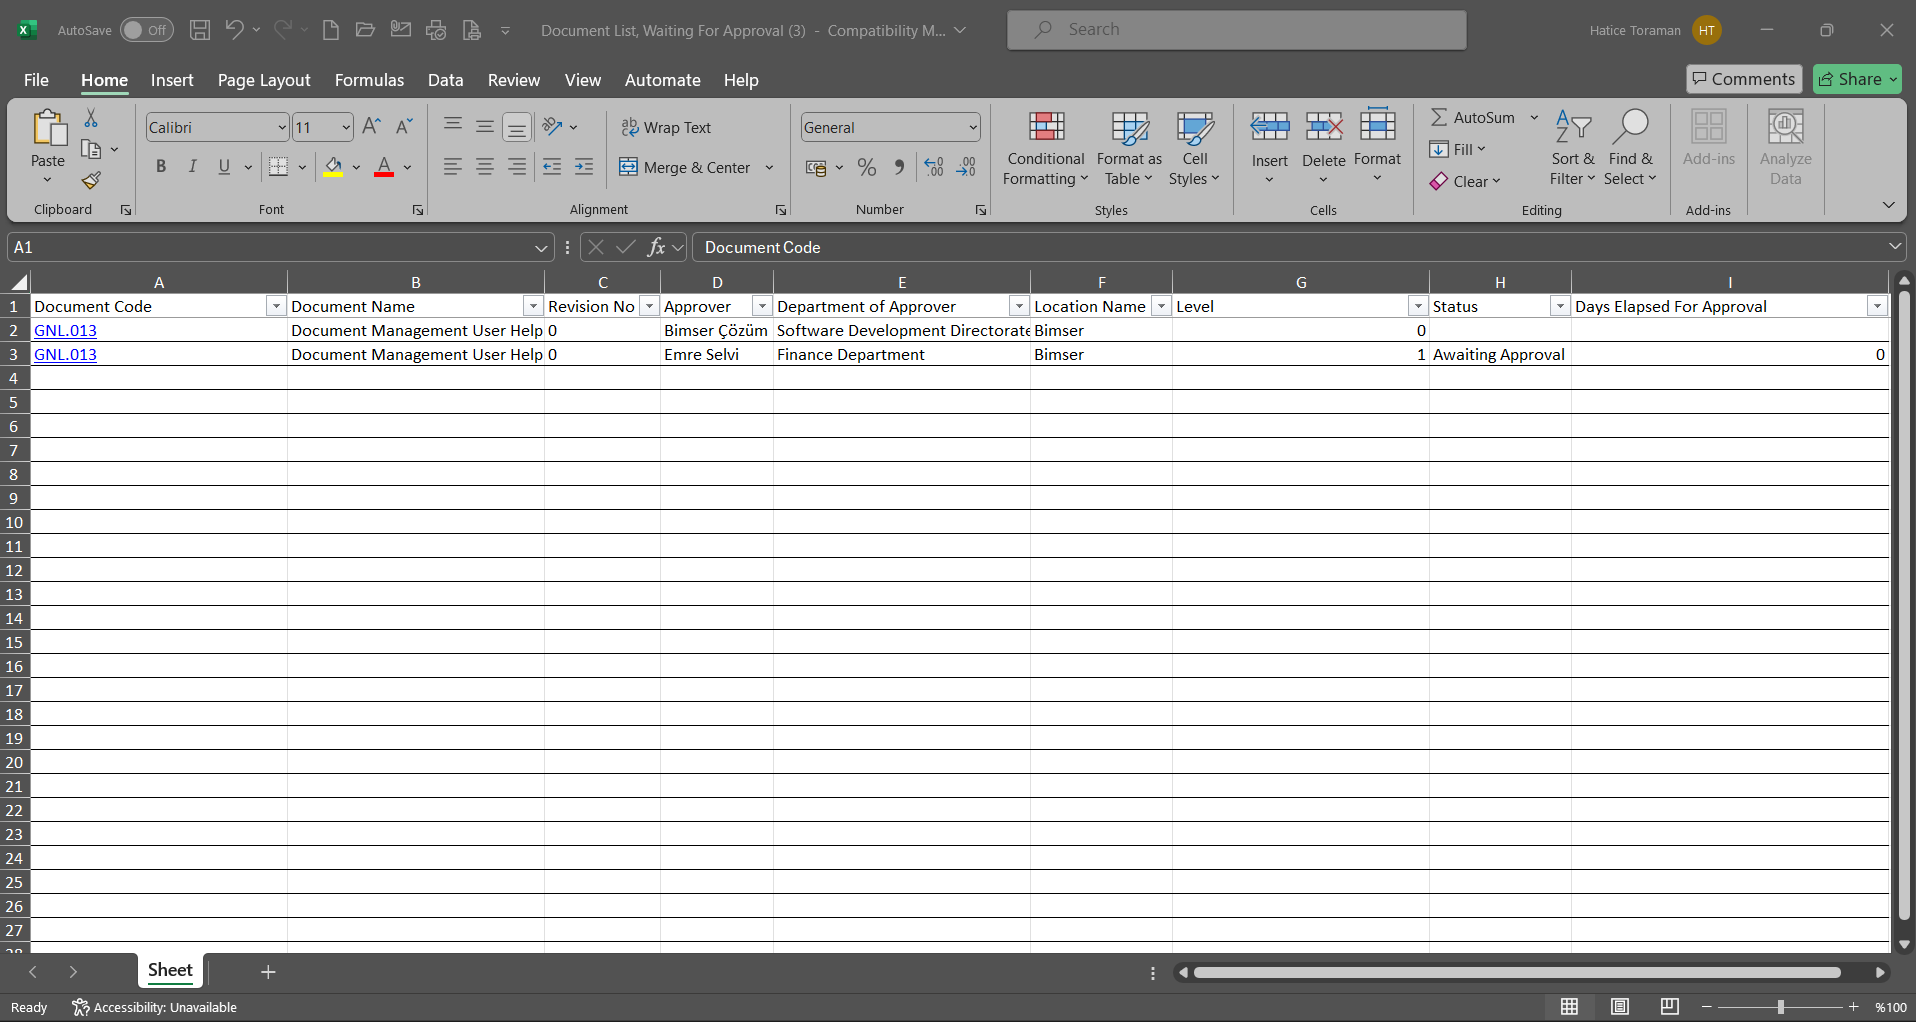
6.2.12.3. Document File Size Report
Menu Name: Integrated Management System/ Document Management/ Reports/ Document File Size Report
It is the menu where the list of the size of the documents uploaded to the system within the scope of the Document Management Module is displayed in Kilobytes and the report is received in Excel format. Two tabs appear on the Document File Size Report screen. These tabs are document list and document search tabs. In the document search tab, filtering is done according to the search criteria. In the document list tab, records are listed according to the filtering process according to these search criteria.
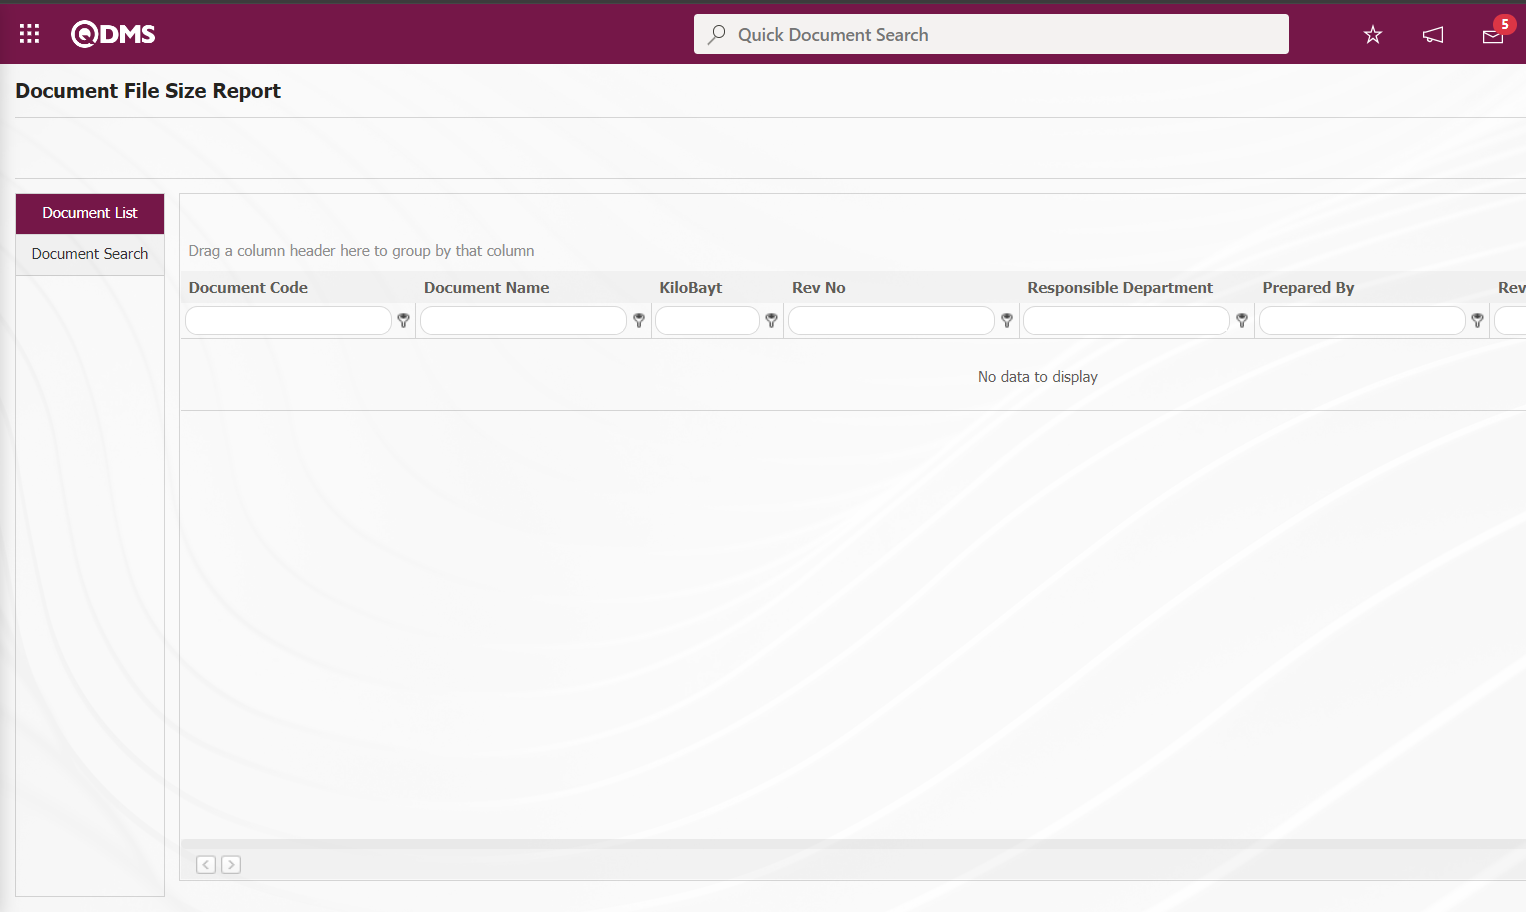
With the help of the buttons on the screen;
: Records are searched by filtering.
: Data is transferred to Excel.
: The search criteria on the menu screens are used to clear the data remaining in the filter fields in the grid where the search operation is performed.
: The menu screen is restored to its default settings.
: User-based designing of the menu screen is done with the show-hide feature, that is, the hiding feature of the fields corresponding to the columns on the menu screens.
On the Document File Size Report screen, type the document code in the “Document Code” field, which is the filter search criteria in the document search tab, and click the (Search) button.

On the Document File Size Report screen, records are listed according to the search criteria in the filter made from the document list.

On the Document File Size Report screen, click the (Export to Excel) button to get the Document File Size Report report in Excel format.
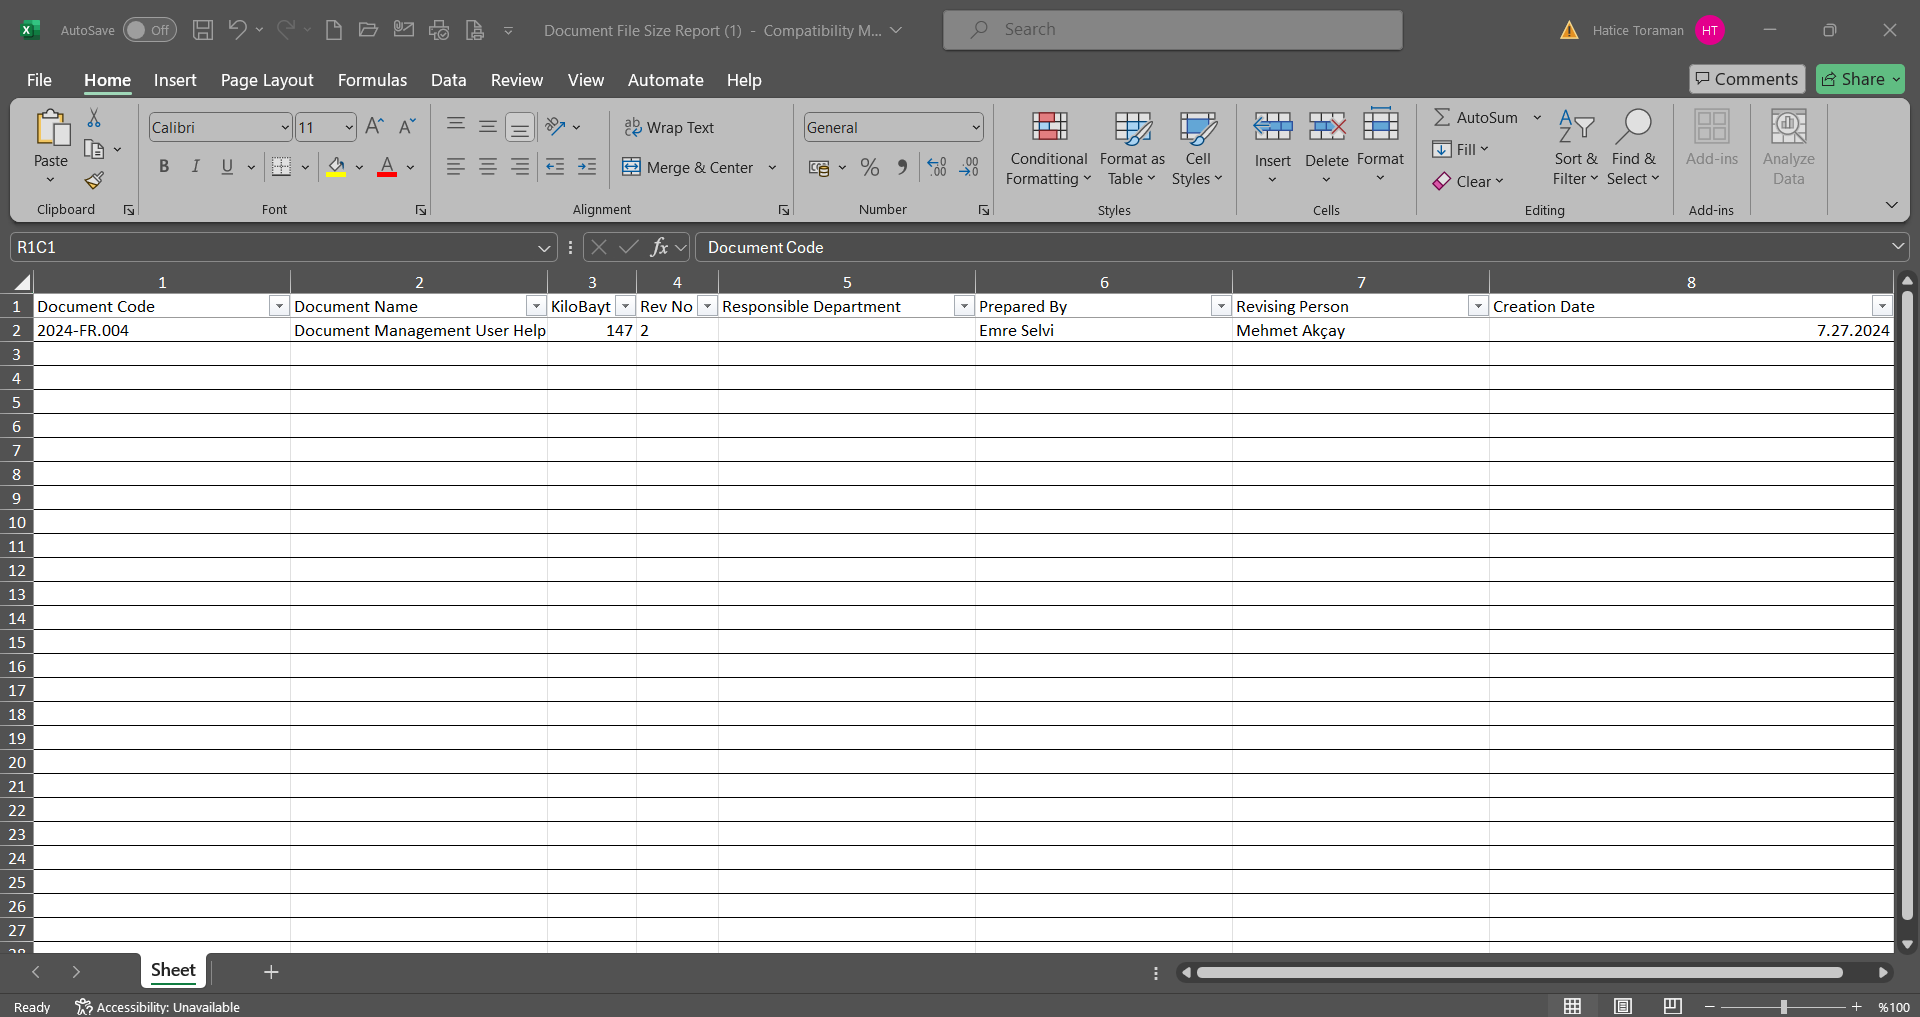
6.2.12.4.Document Pending Control
Menu Name: Integrated Management System/ Document Management/ Reports/ Document Pending Control
It is the menu where the list and report of the documents that have been prepared and sent for control are taken. On the Document Pending Control screen, there are two tabs: document search and document list tab. In the document search tab, filtering is done according to the search criteria. In the document list tab, the records are listed according to the filtering process according to these search criteria.
With the help of the buttons on the screen;
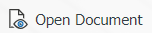 : In order to display this button, the user must be defined as Module Administrator in the Document Management module in the System Infrastructure Definitions/ BSID/ Configuration Settings/ Administrator Identification menu.
: Records are searched by filtering.
: Data is transferred to Excel.
: The search criteria on the menu screens are used to clear the data remaining in the filter fields in the grid where the search operation is performed.
: The menu screen is restored to its default settings.
: User-based designing of the menu screen is done with the show-hide feature, that is, the hiding feature of the fields corresponding to the columns on the menu screens.
On the Document List, Waiting For Control** screen, type the document code in the “Document Code” field, which is the filter search criteria in the document search tab, and click the (Search) button.

On the Document List, Waiting For Control screen, records are listed according to the search criteria in the filter made in the document list tab.

On the Document List, Waiting For Control screen, select the document from the document list screen and click the button to open the Document Control screen.
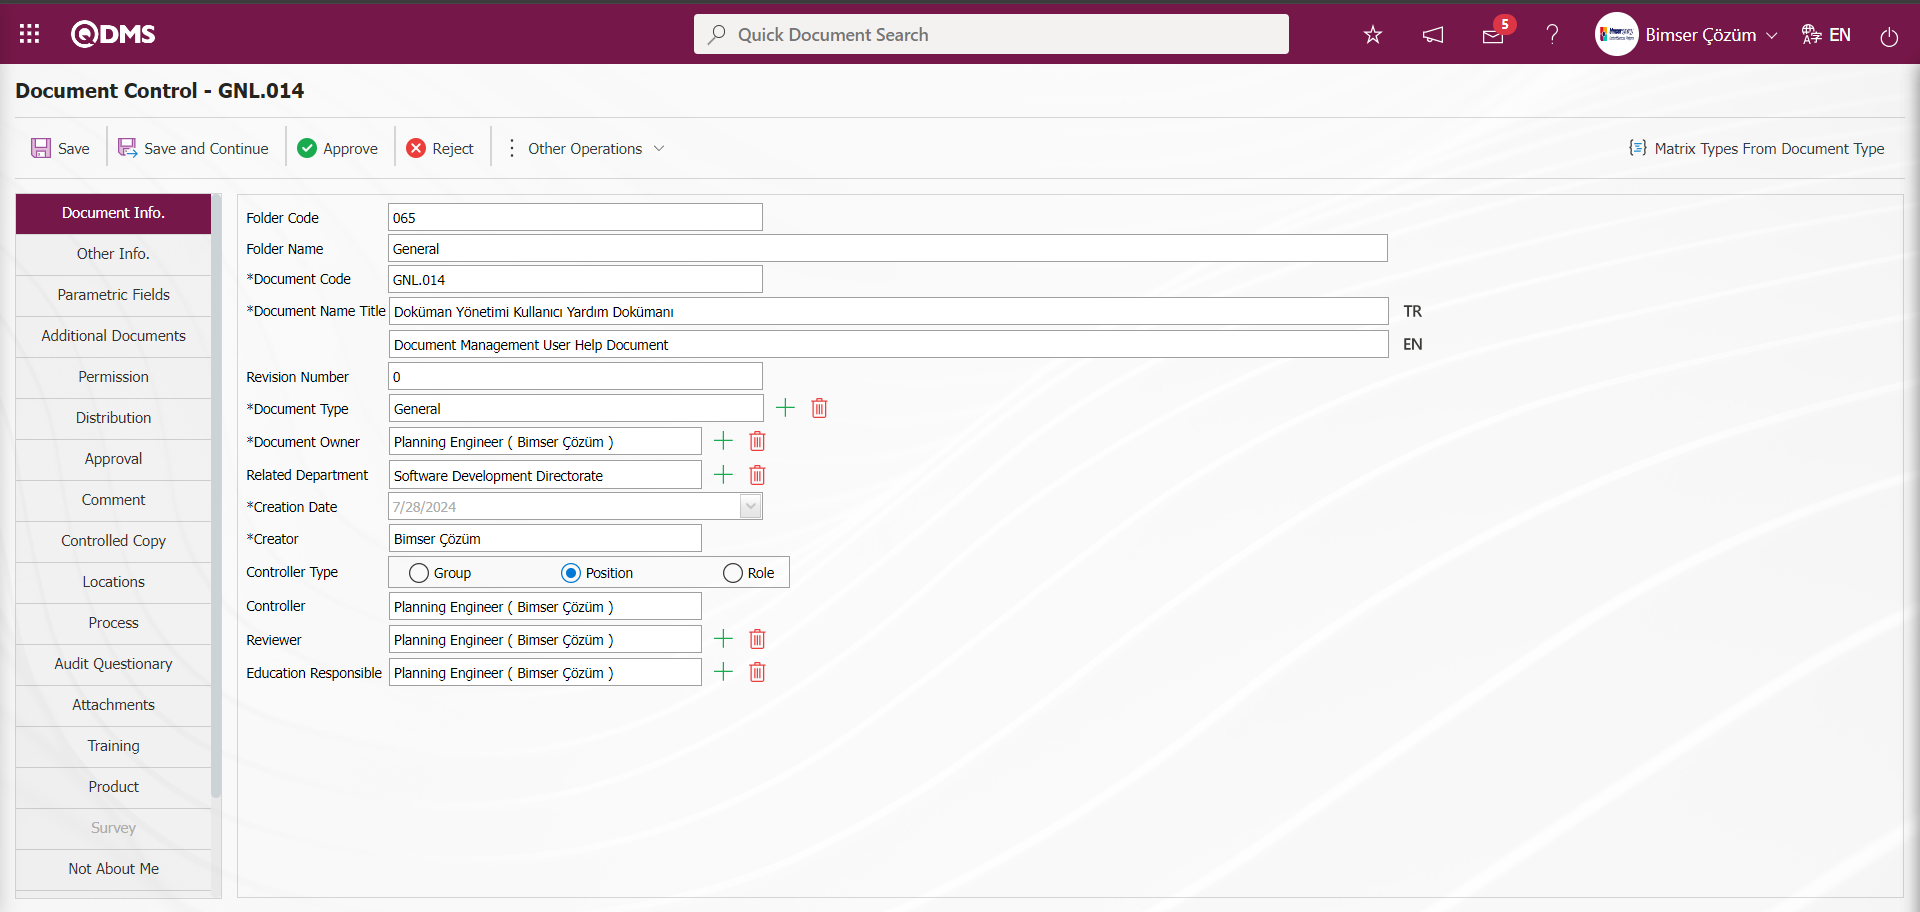
With the help of the buttons on the screen;
: Saving the document is done.
: Save and continue. It is a button displayed depending on the parameter. The parameter is activated by selecting the parameter value “Yes” for parameter 331 in the Document Management parameters.
![A screenshot of a computer
Description automatically generated]ref152
After the parameter is activated, the button is displayed at the Document Preparation stage.
: Document control approval process is done.
: Rejection is made by writing the reason for document rejection.
![A close-up of a white background
Description automatically generated]ref115: At this stage, comments are requested from the relevant people. It is a button displayed depending on the parameter. Parameter value of parameter 113 in Document Management parameters is activated by selecting “Yes”.
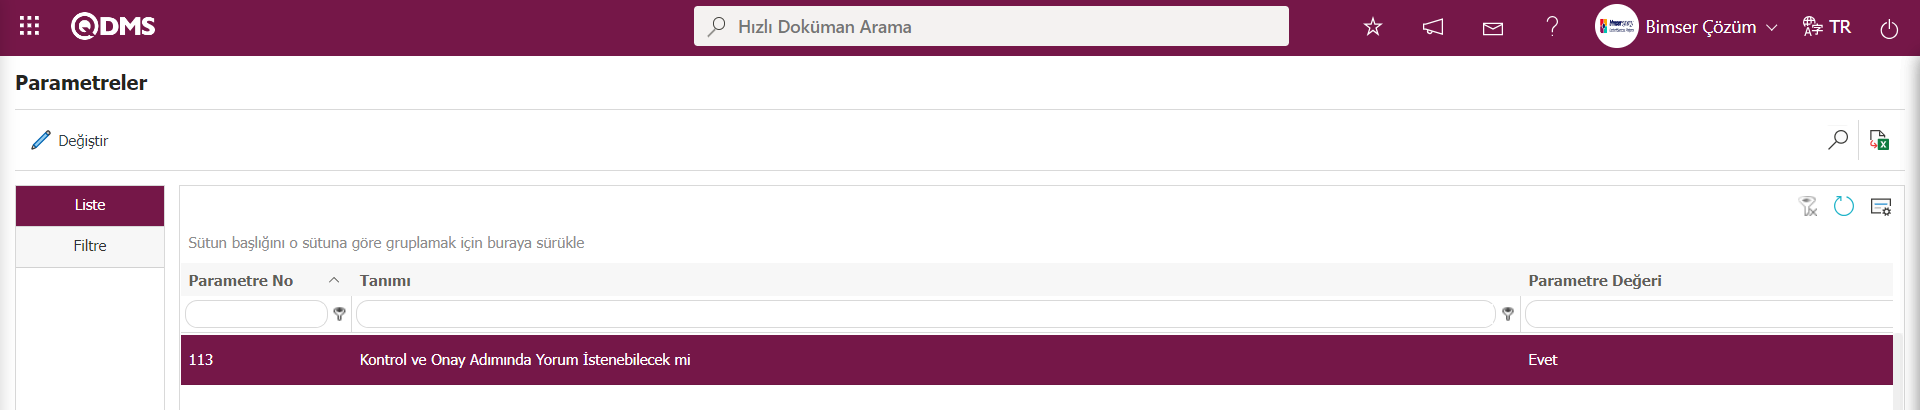
After the parameter is activated, the ![A close-up of a white background
Description automatically generated]ref115 button is displayed and comments are received from these personnel at this stage by selecting the relevant personnel.
: Shows the defined comment information.
From the document control screen, the module administrator user has the authority to make all kinds of changes to the document information and tabs just like the controller. At this stage, the process of sending the document to the approver in the approval matrix by performing the control process by clicking the button, the process of sending the document back to the preparer by rejecting the document by writing the reason for rejection by clicking the button, the process of receiving comments from the relevant personnel with the ![A close-up of a white background
Description automatically generated]ref115 button and showing the comments made with the button.
Click the button on the Document Control screen.
On the screen that opens, the reason for rejection is written and the person who prepared the document is sent by uploading additional files related to the reason for rejection, if any.
Click the button on the Document Control screen.
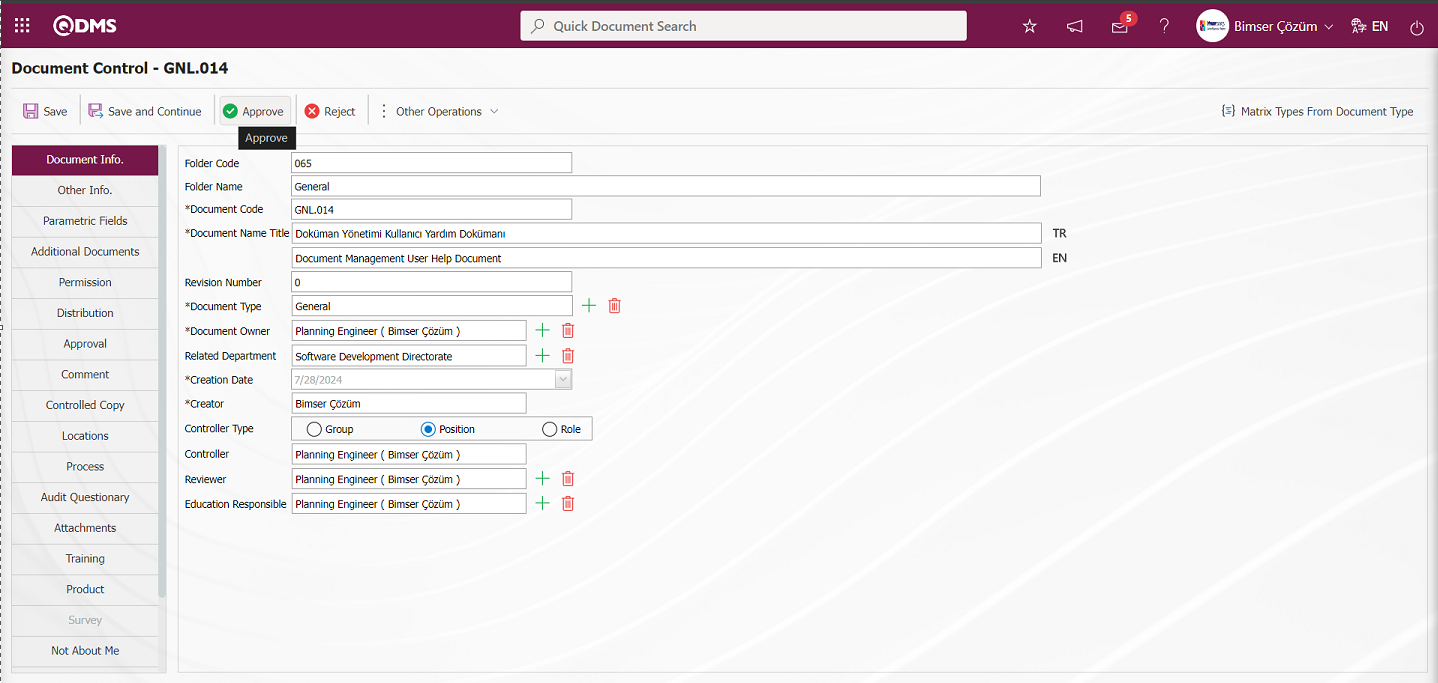
Click the “OK” button in the message given by the system.

After the control approval of the document on the Document Control screen, the document is sent to the approver assigned in the approval matrix for approval.
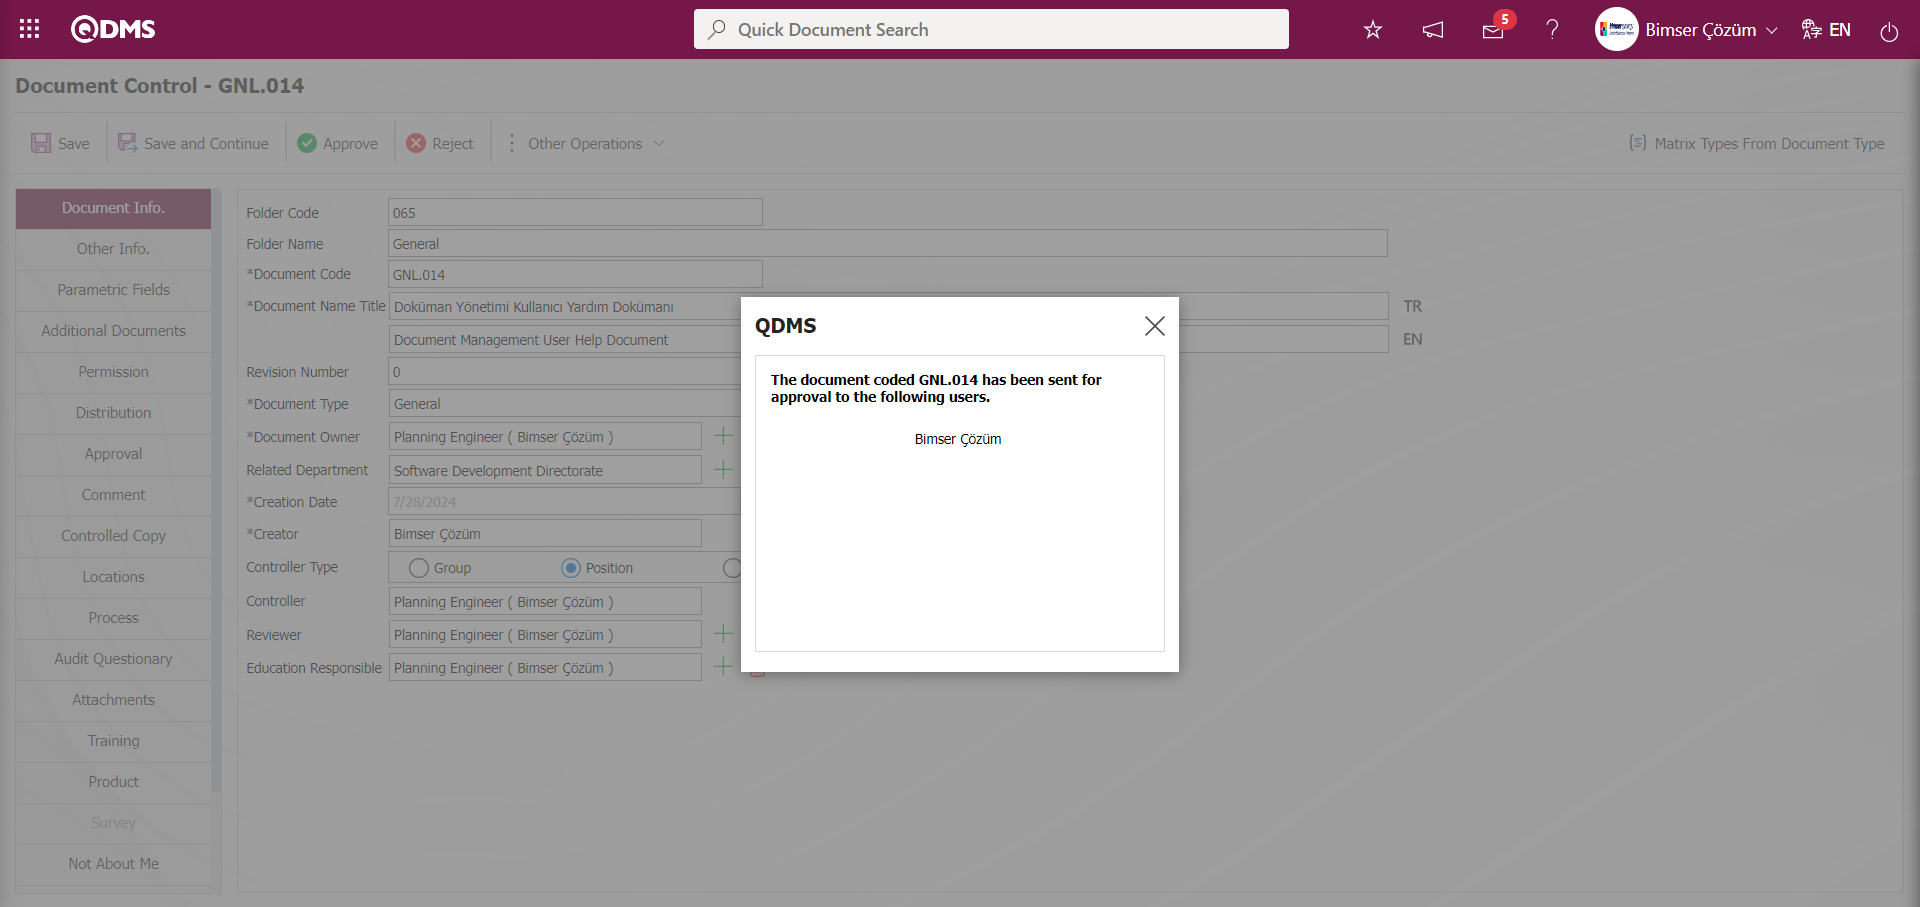
On the Document List, Waiting For Control screen, type the document code in the “Document Code” field, which is the filter search criteria in the document search tab, and click the (Search) button.
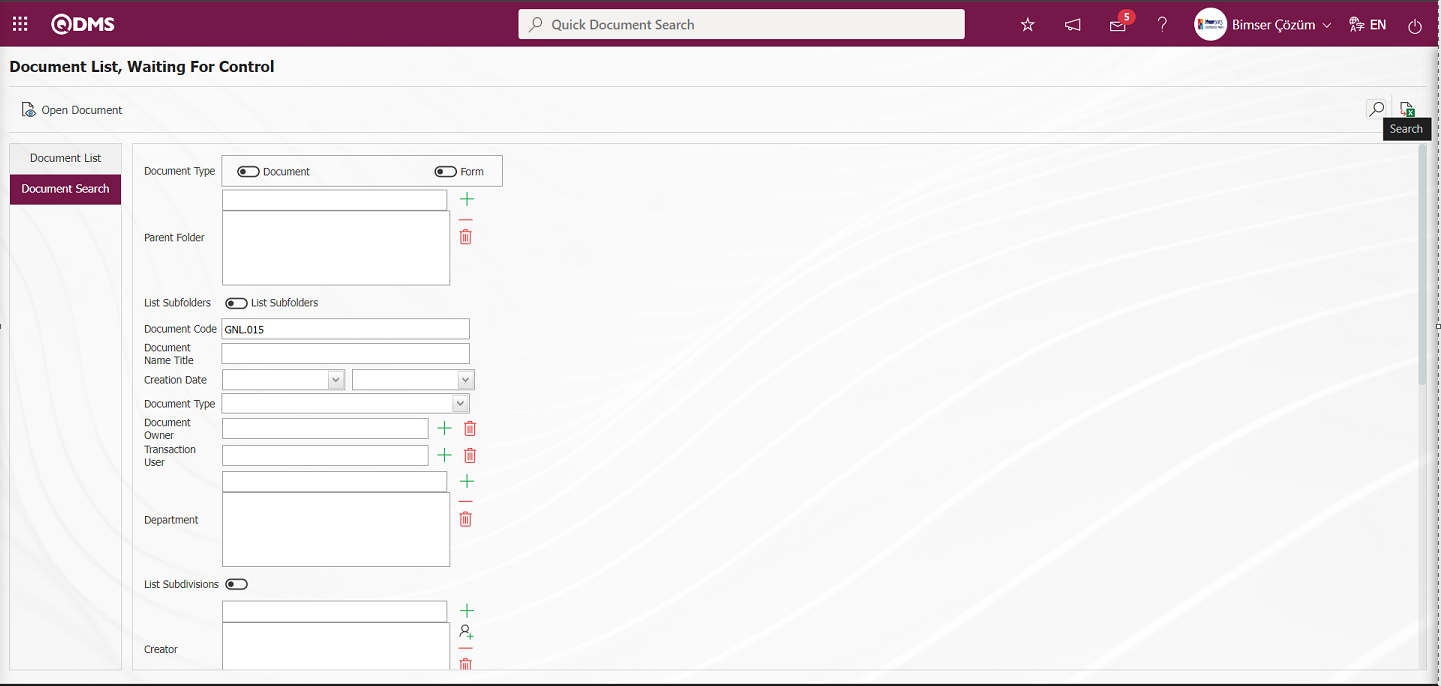
On the Document List, Waiting For Control screen, records are listed according to the search criteria in the filter made from the document list. On the Document List, Waiting For Control screen, click the (Export to Excel) button.
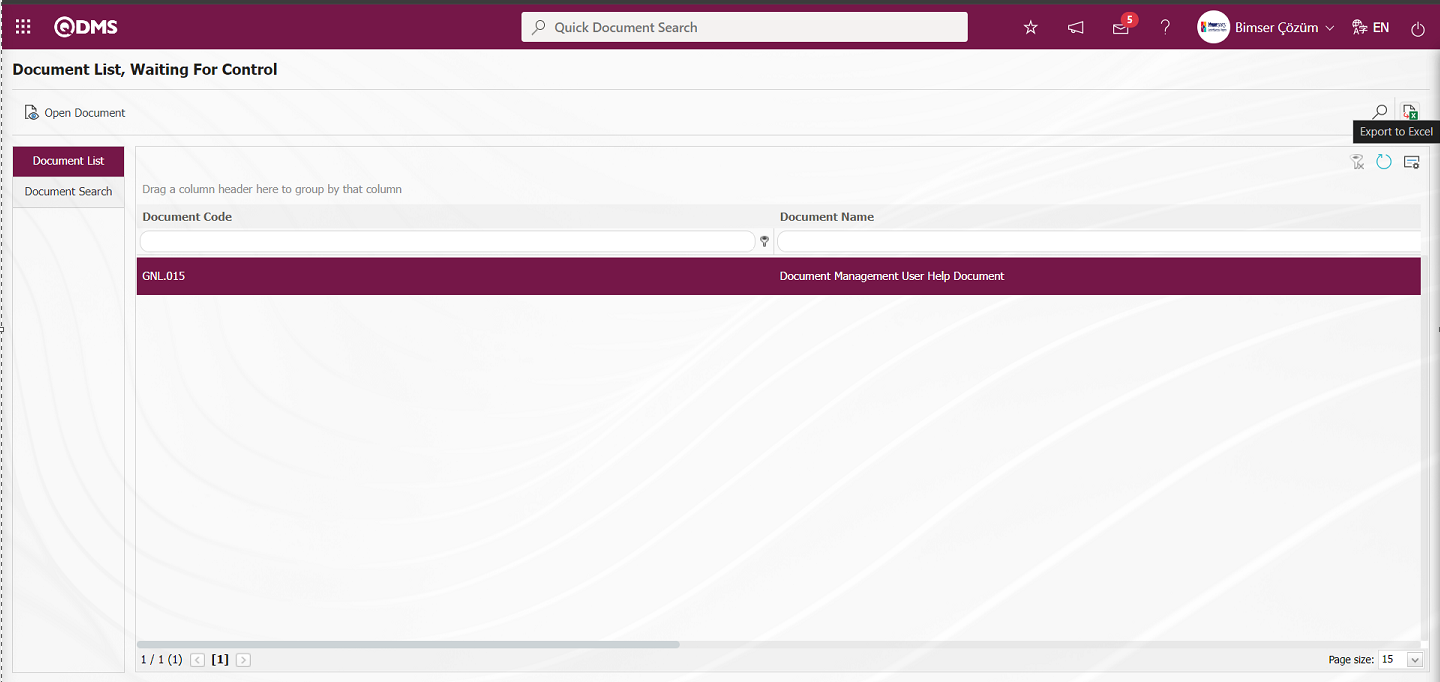
The report of the Document Pending Control report in Excel format is displayed.
6.2.12.5.Documents Pending Cancelation Approval
Menu Name: Integrated Management System/ Document Management/ Reports/Documents Pending Cancelation Approval
It is the menu where the list and report of the documents that have been prepared and sent for cancellation approval are taken. On the Documents Pending Cancelation Approval screen, the buttons on the screen change according to whether the user is a module administrator or not. Two tabs appear: document search and document list tab. In the document search tab, filtering is done according to the search criteria. In the document list tab, the records are listed according to the filtering process according to these search criteria.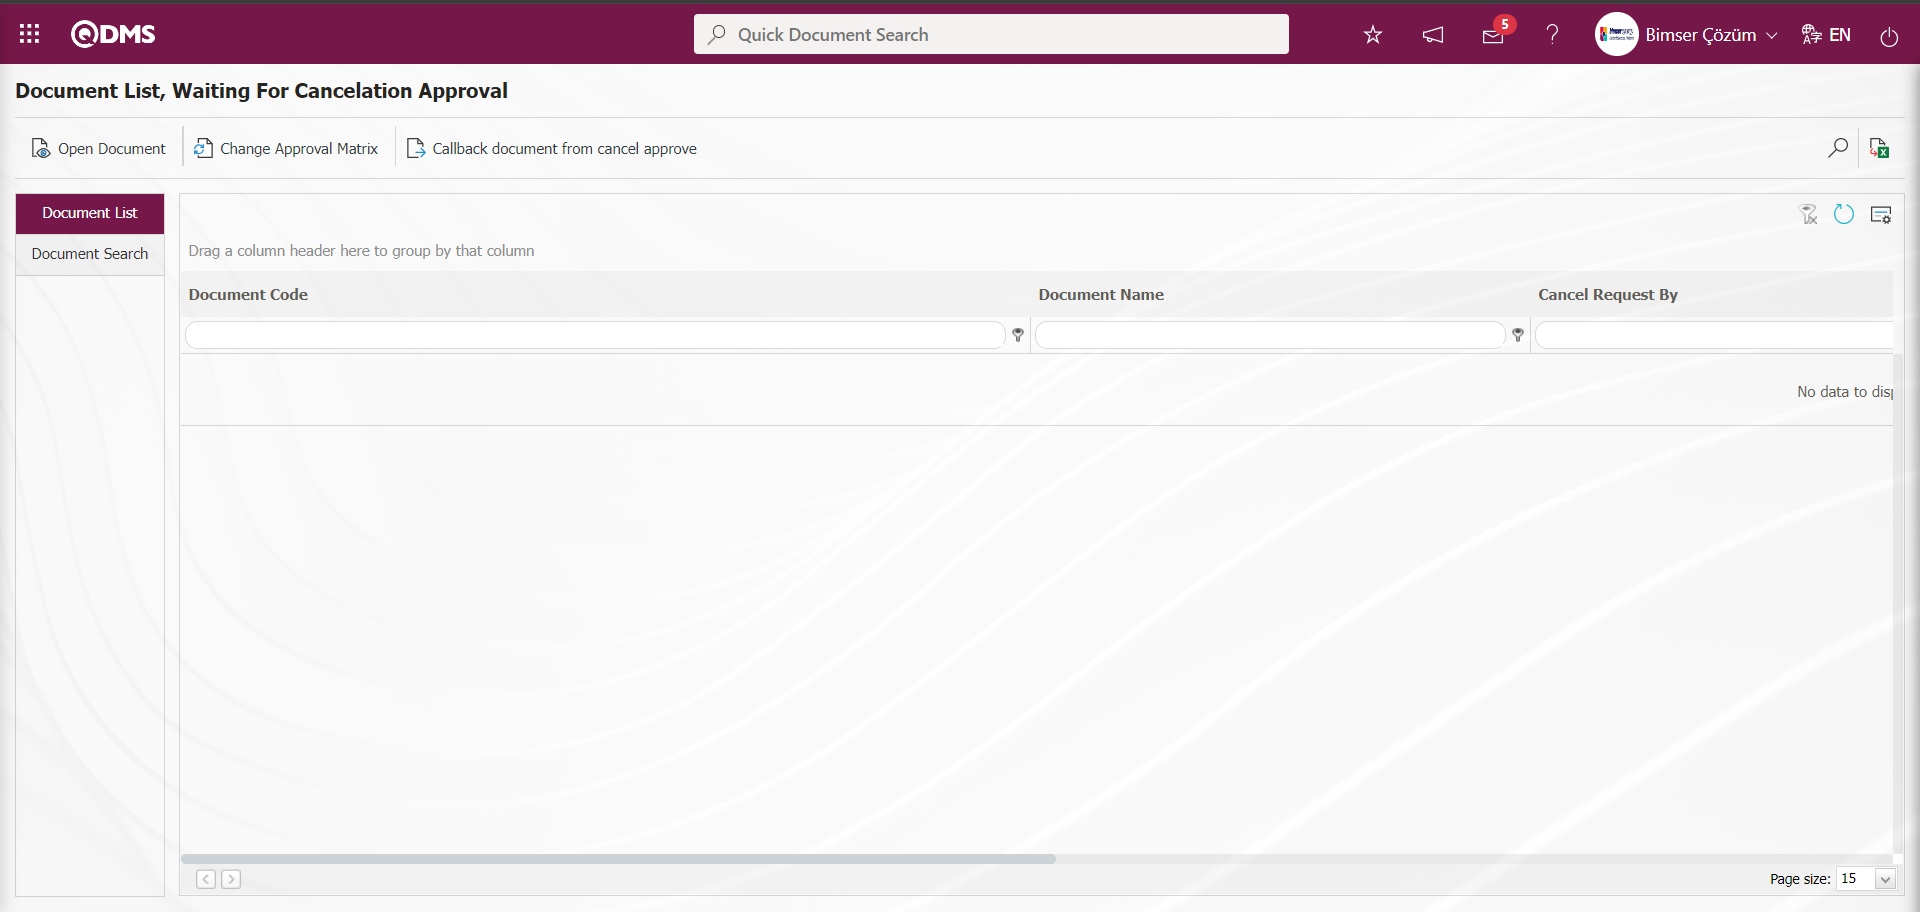
With the help of the buttons on the screen;
 : Document viewing is done. In order for this button to be displayed, the user must be defined as the Module administrator in the Document Management Module in the System Infrastructure Definitions/BSID/Configuration Settings/Administrator Identification menu.
 : The approval matrix of the document is changed. In order for this button to be displayed, the user must be defined as the Module administrator in the Document Management Module in the System Infrastructure Definitions/ BSID/ Configuration Settings/ Administrator Identification menu.
 : The process of bringing the document back from the cancel approval is done. In order for this button to be displayed, the user must be defined as the Module administrator in the Document Management Module in the System Infrastructure Definitions/ BSID/ Configuration Settings/ Administrator Definition menu.
: Records are searched by filtering.
: Data is transferred to Excel.
: The search criteria on the menu screens are used to clear the data remaining in the filter fields in the grid where the search operation is performed.
: The menu screen is restored to its default settings.
: User-based designing of the menu screen is done with the show-hide feature, that is, the hiding feature of the fields corresponding to the columns on the menu screens.
On the Document List, Waiting For Cancelation Approval** screen, type the document code in the “Document Code” field, which is the filter search criteria in the document search tab, and click the  (Search) button.
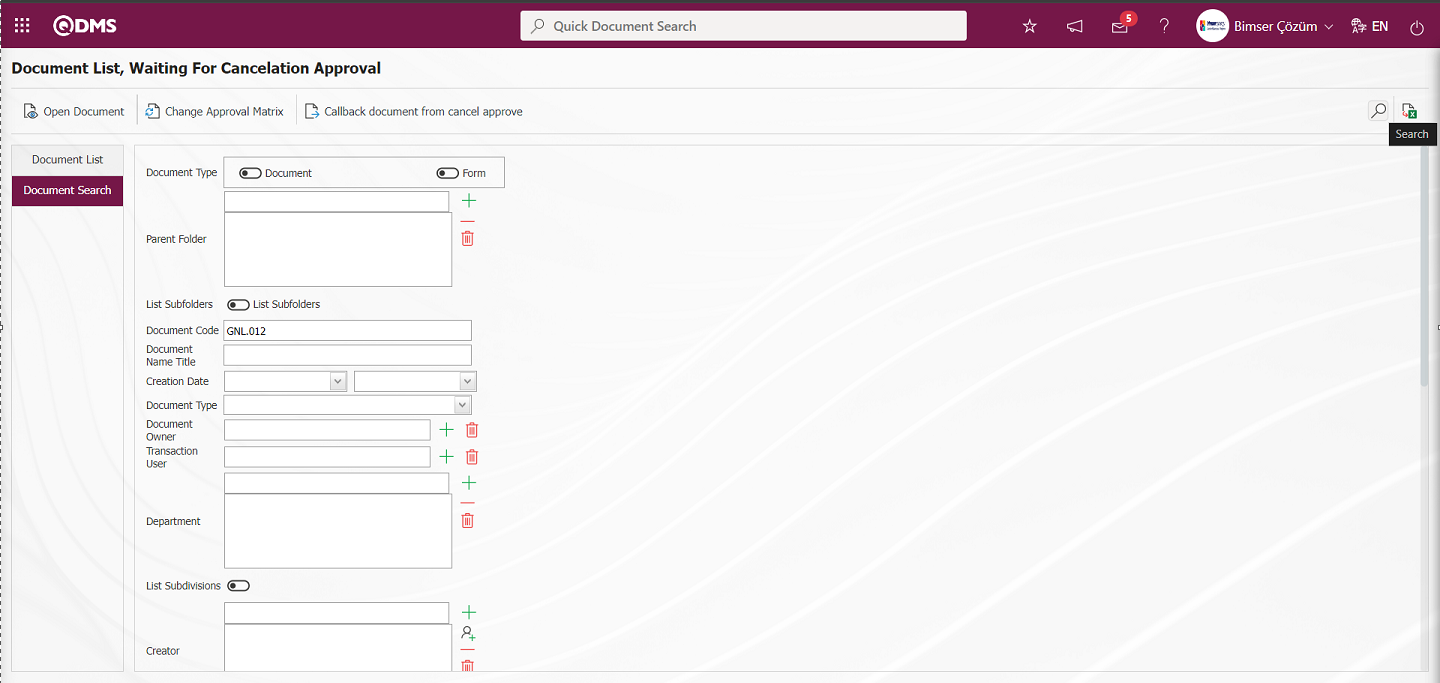
On the Document List, Waiting For Cancelation Approval screen, records are listed according to the search criteria in the filter made in the document list tab.
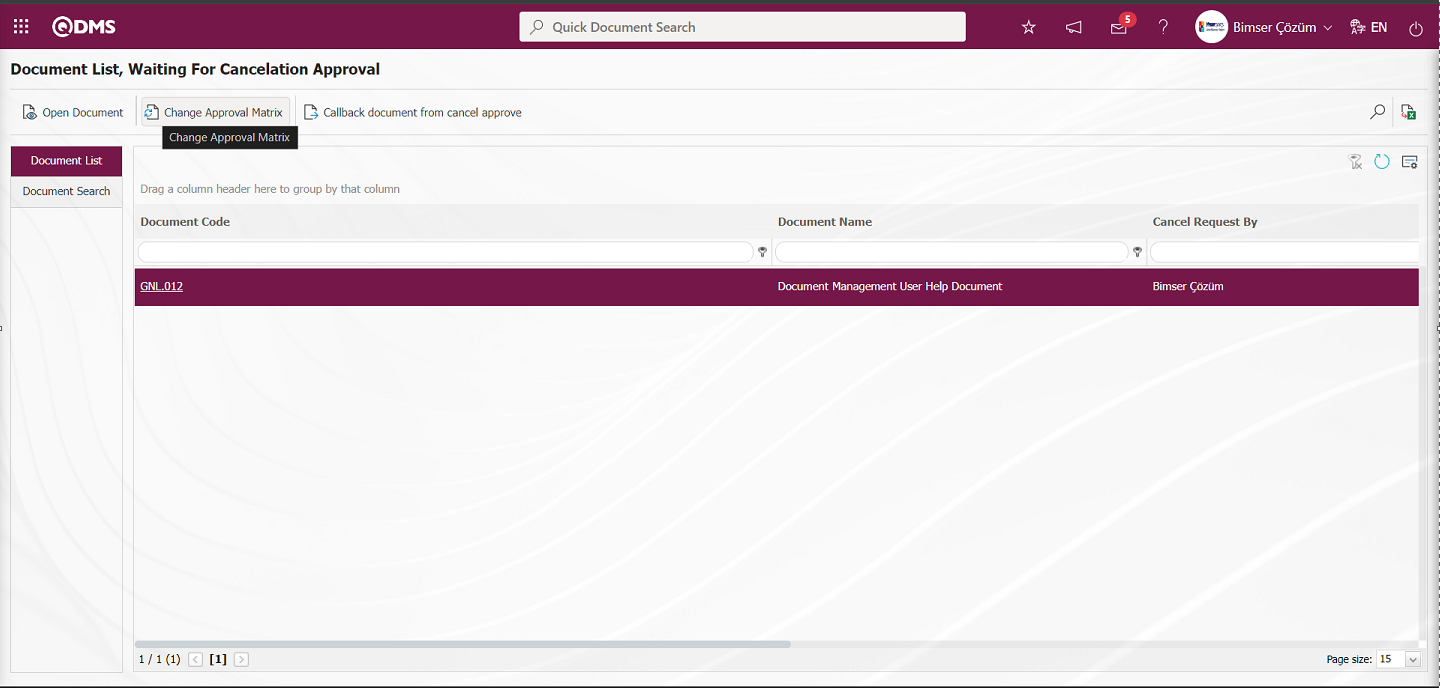
Click the  button on the Document List, Waiting For Cancelation Approval screen.
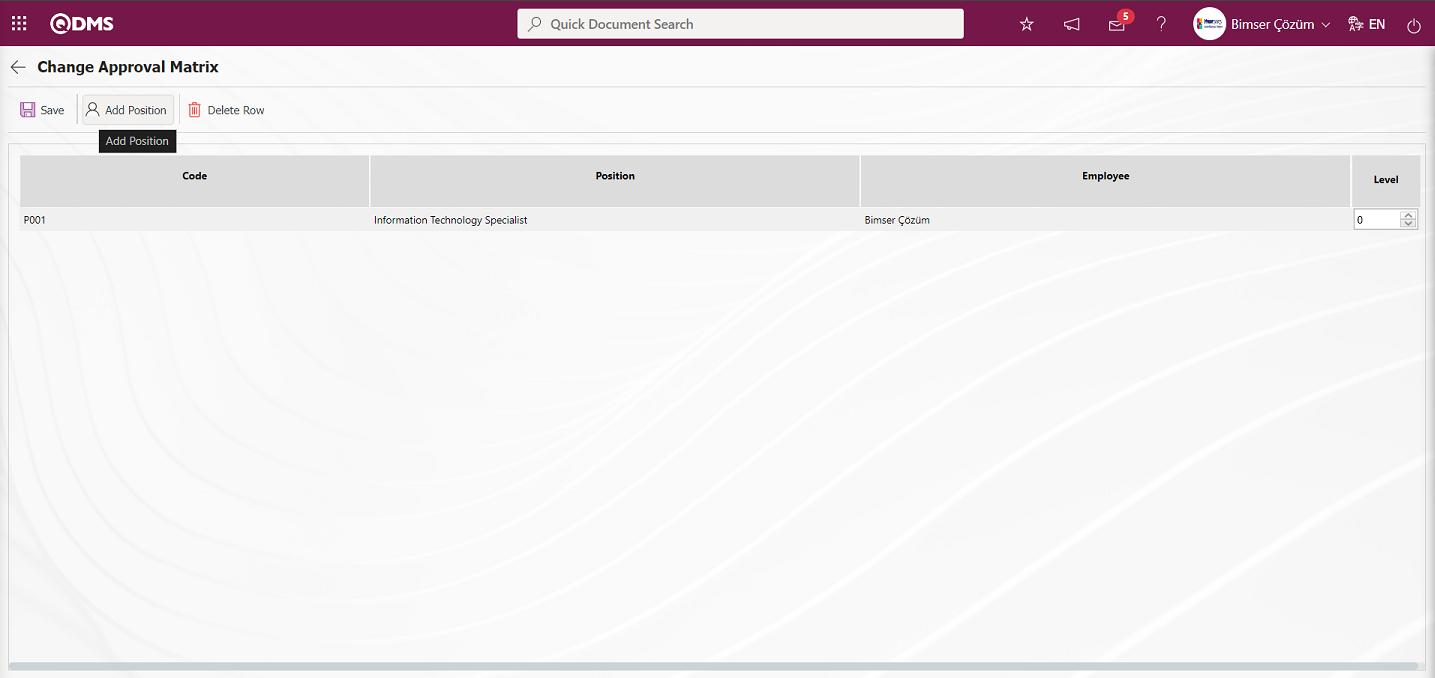
With the help of the buttons on the screen;
 : Registration process is done.
 : Adding a position to the approval matrix is done.
 : Delete the selected row in the list.
The person in the position to be added to the approval matrix from the list of positions defined in the system opened by clicking the button is selected by clicking the  button.

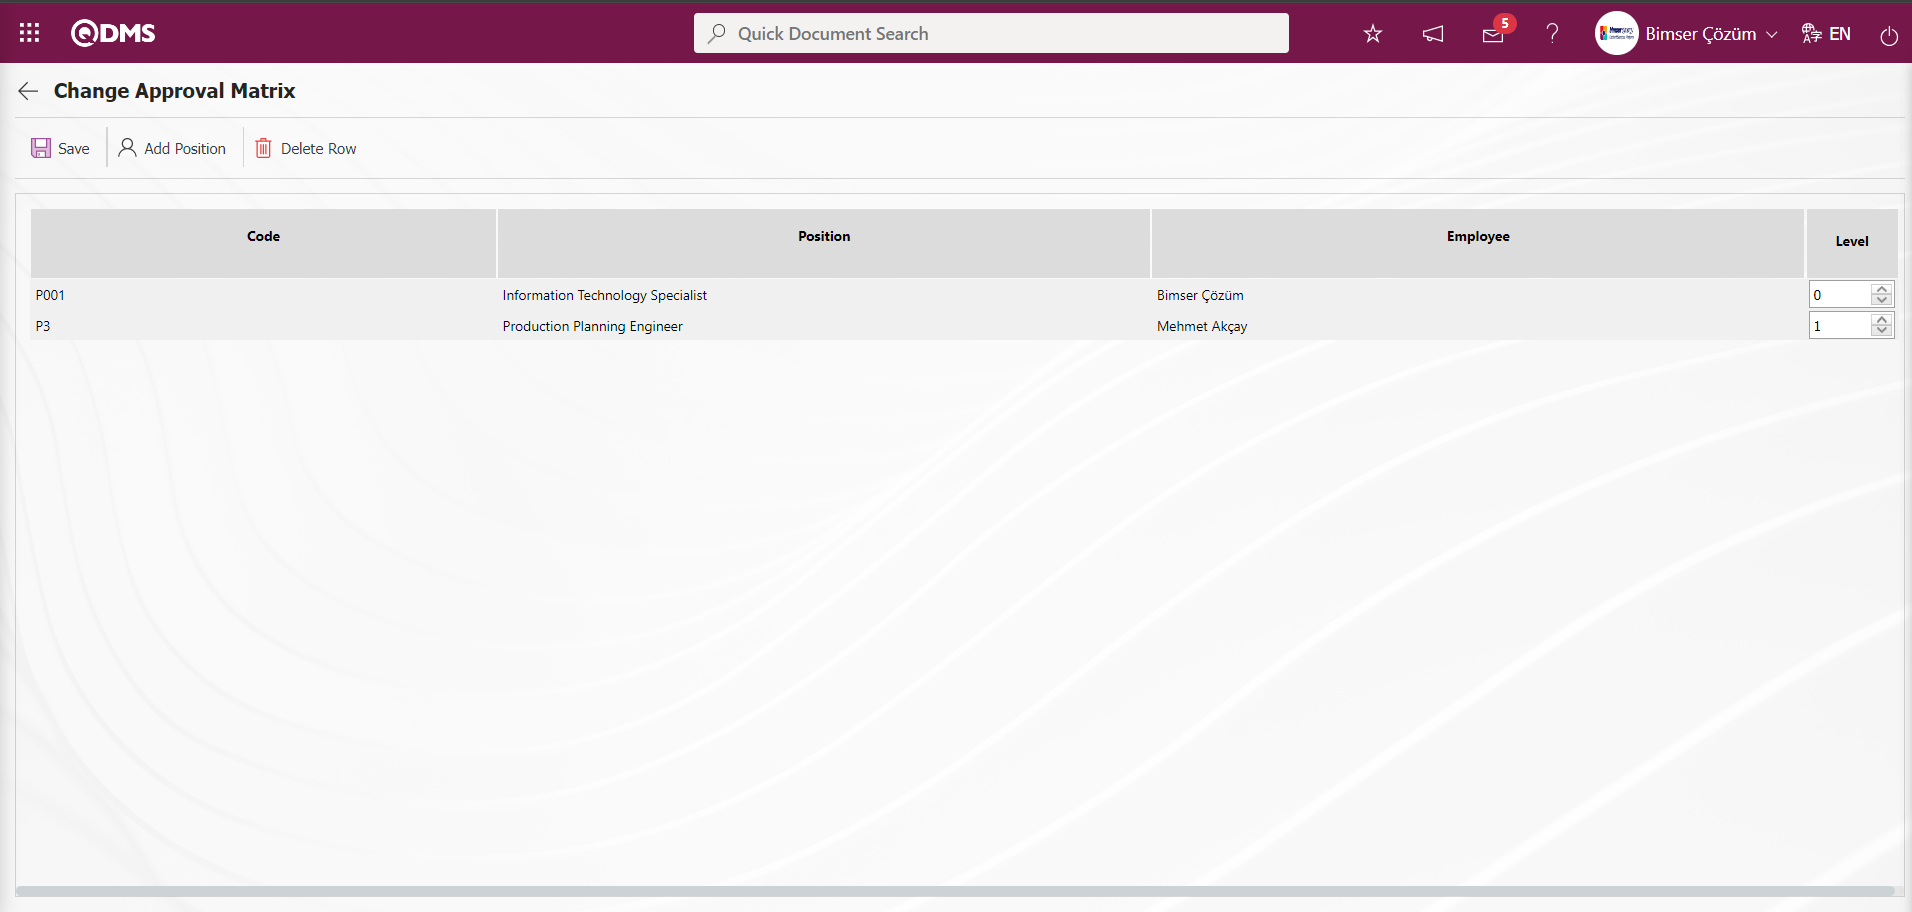
Delete the position in the approval matrix by clicking the 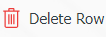 button on the screen that opens
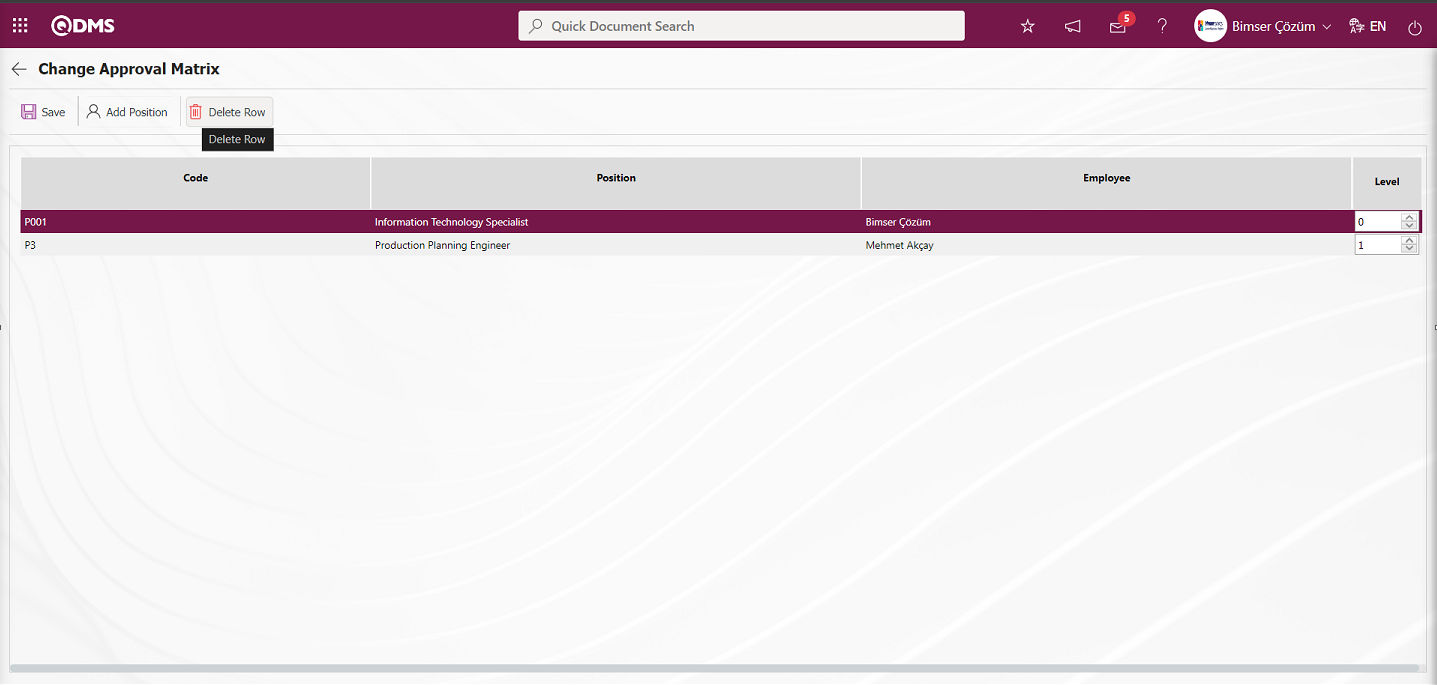
In the screen that opens, the level of the person in the position in the added approval matrix is changed to “0” because he/she is the last approver and after the approval matrix change process, the approval matrix change registration process is done by clicking the  button in the upper left corner of the screen.
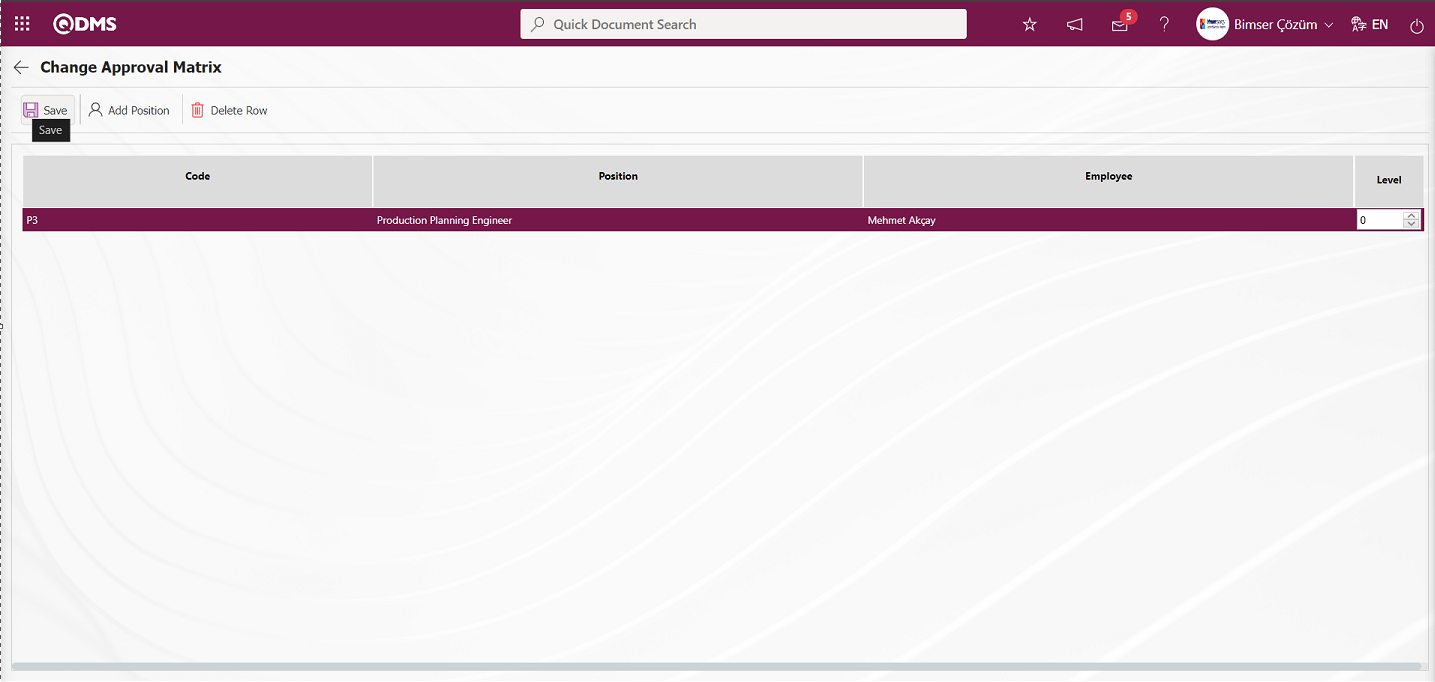
Click the “OK” button in the message given by the system.
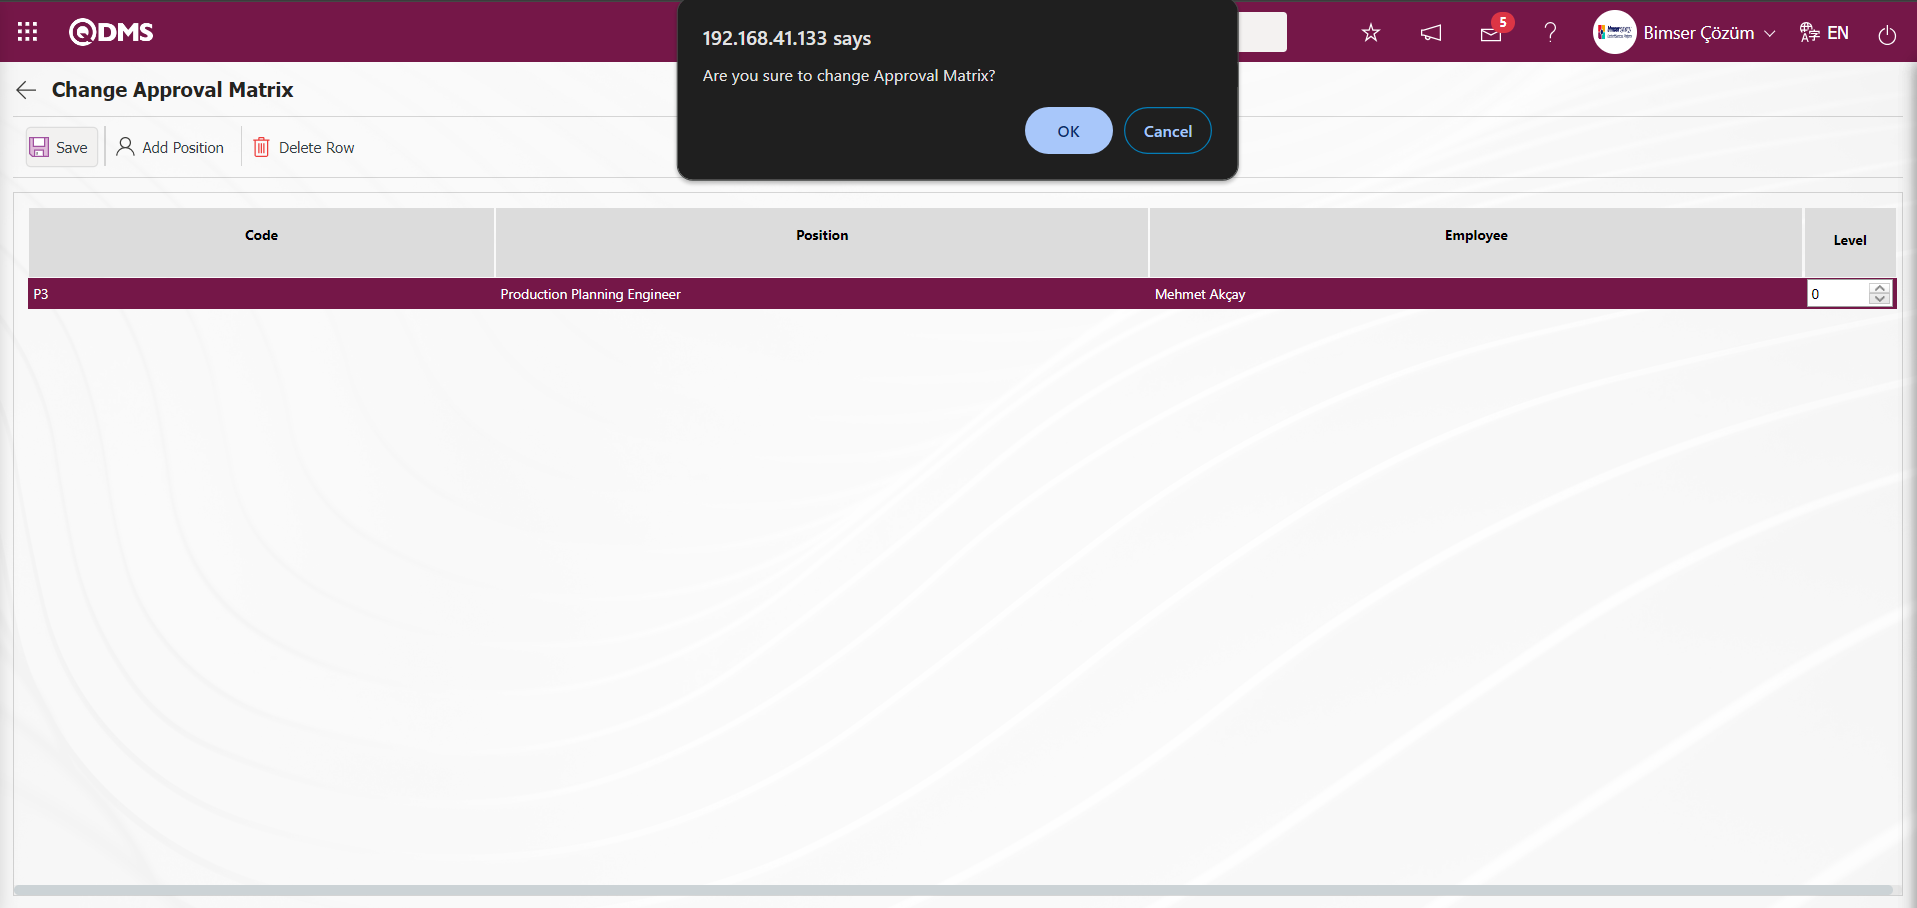
The message given by the system indicates that the approval matrix has been modified.
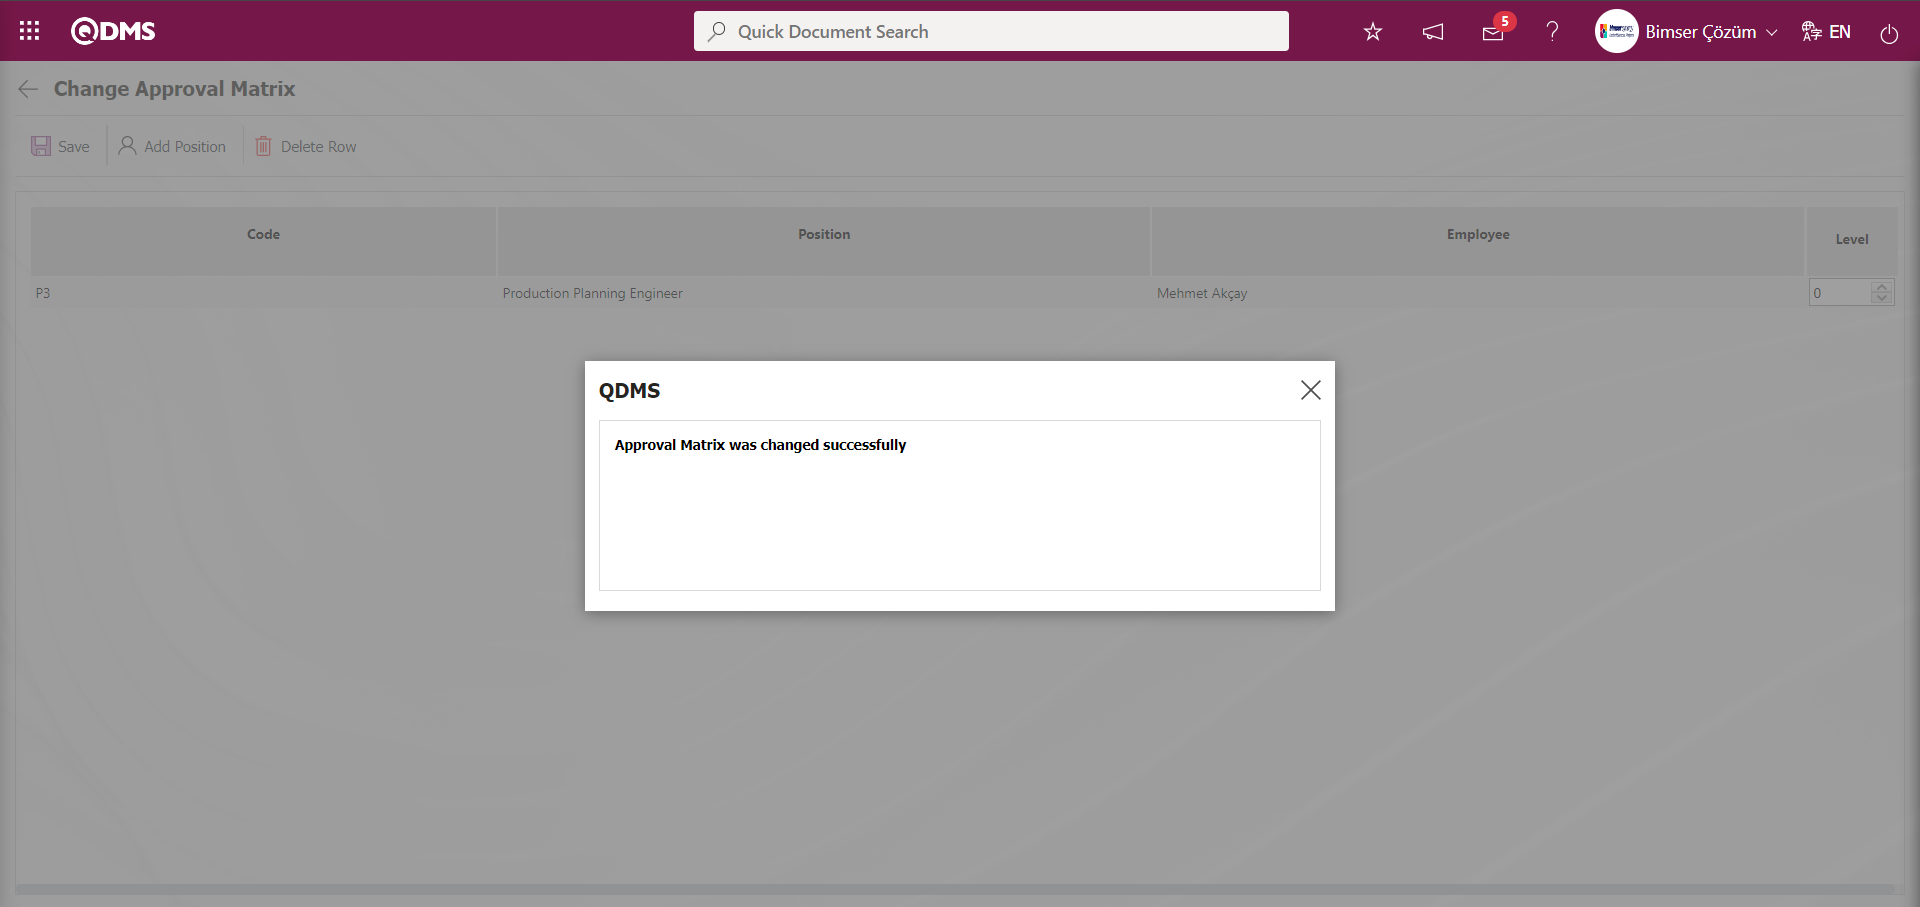
In the Document List, Waiting For Cancelation Approval** screen, click the  button while the document is selected to bring a document back from the cancellation approval
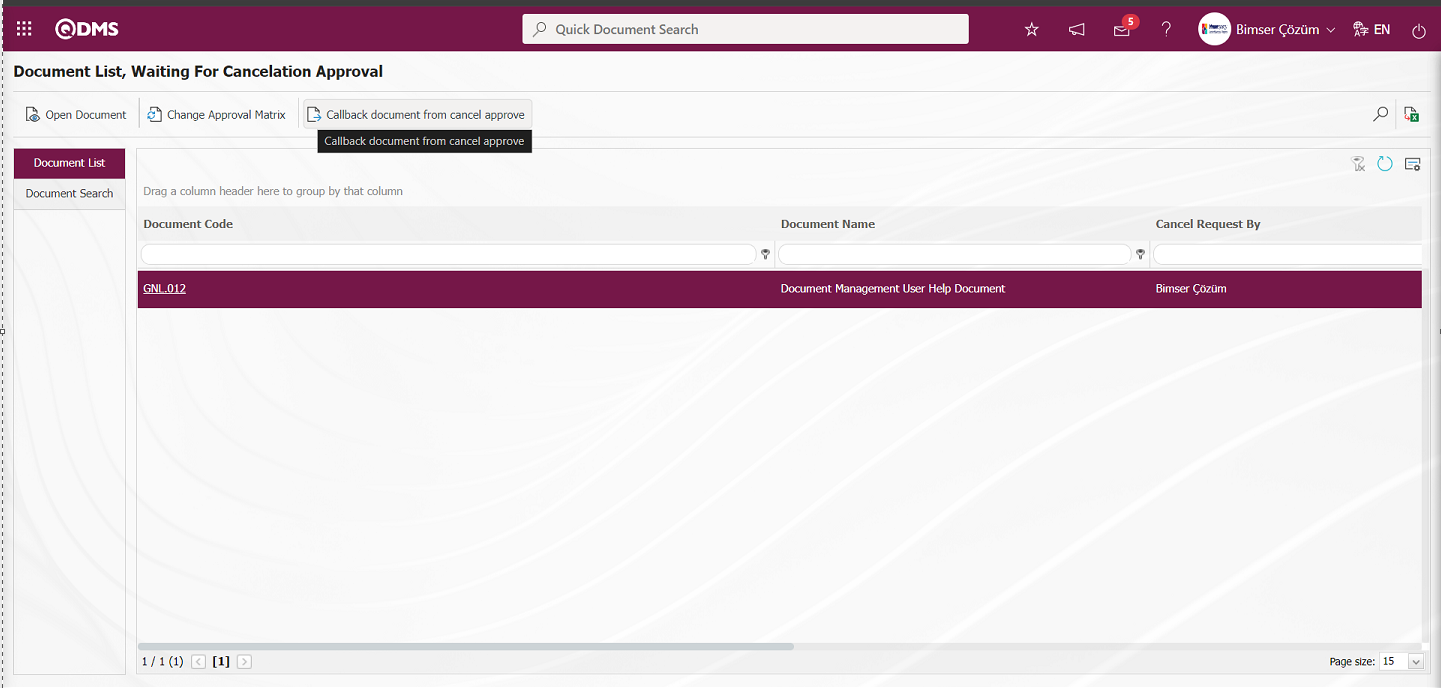
Click the “OK” button in the message given by the system.
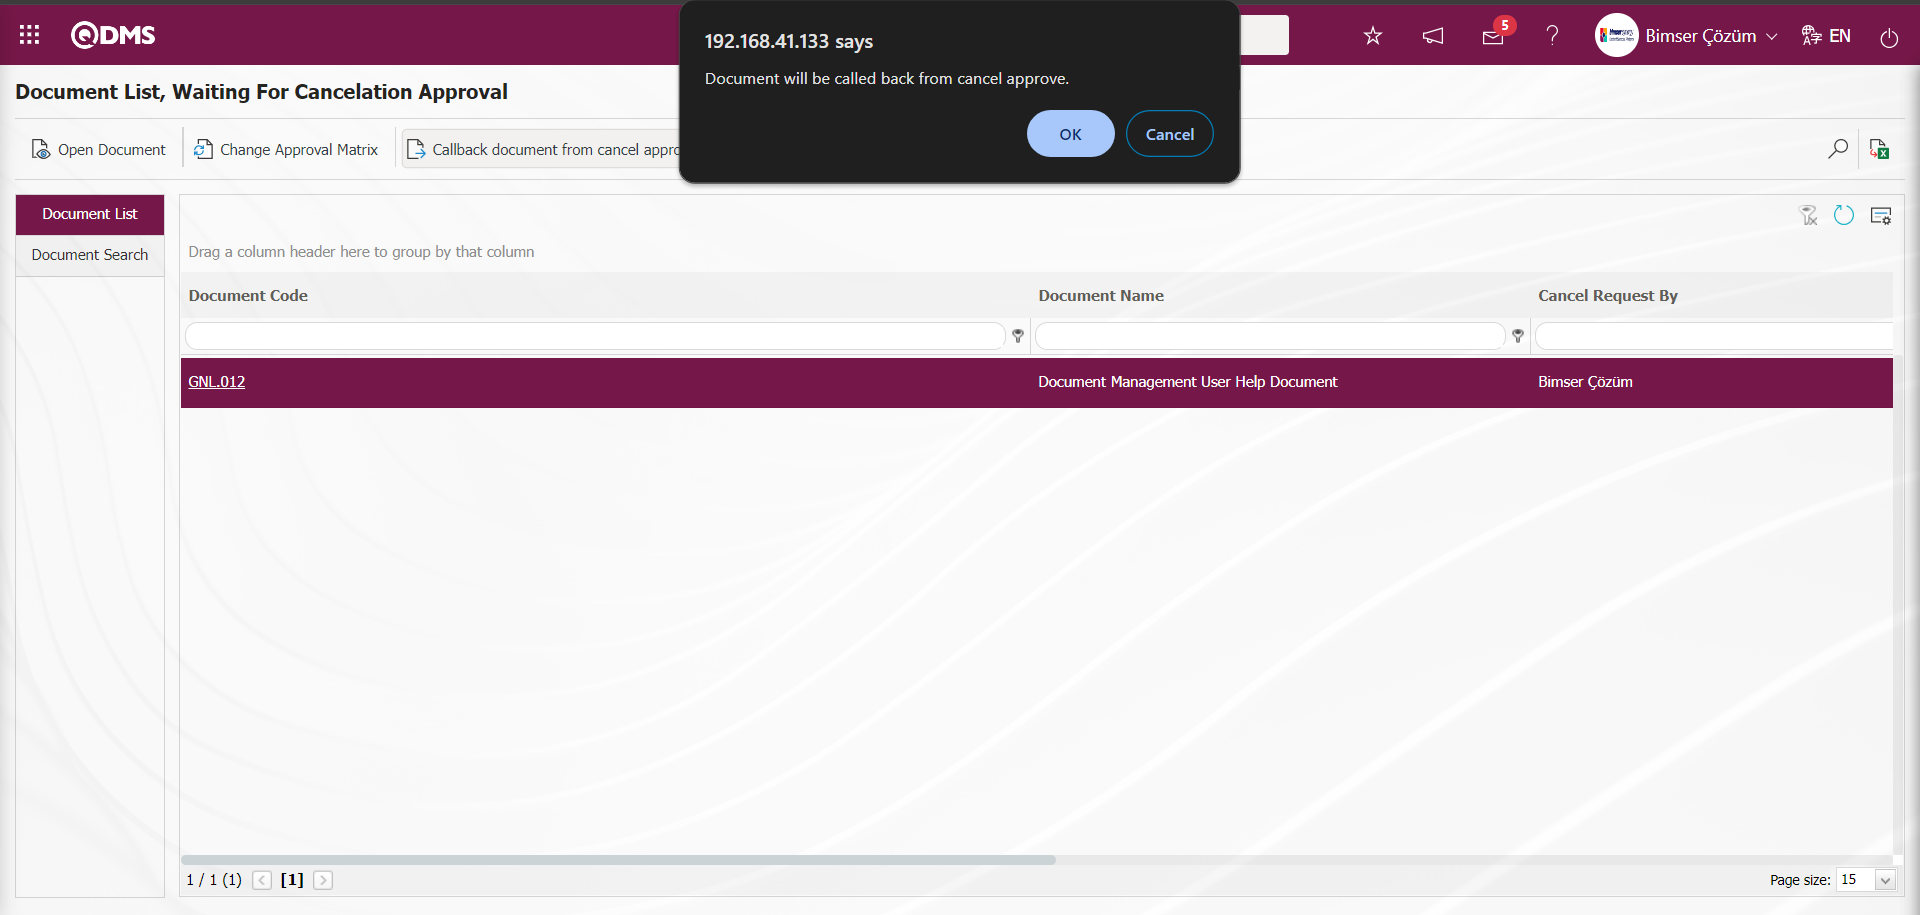
The message given by the system indicates that the document has been brought back from revocation approval.
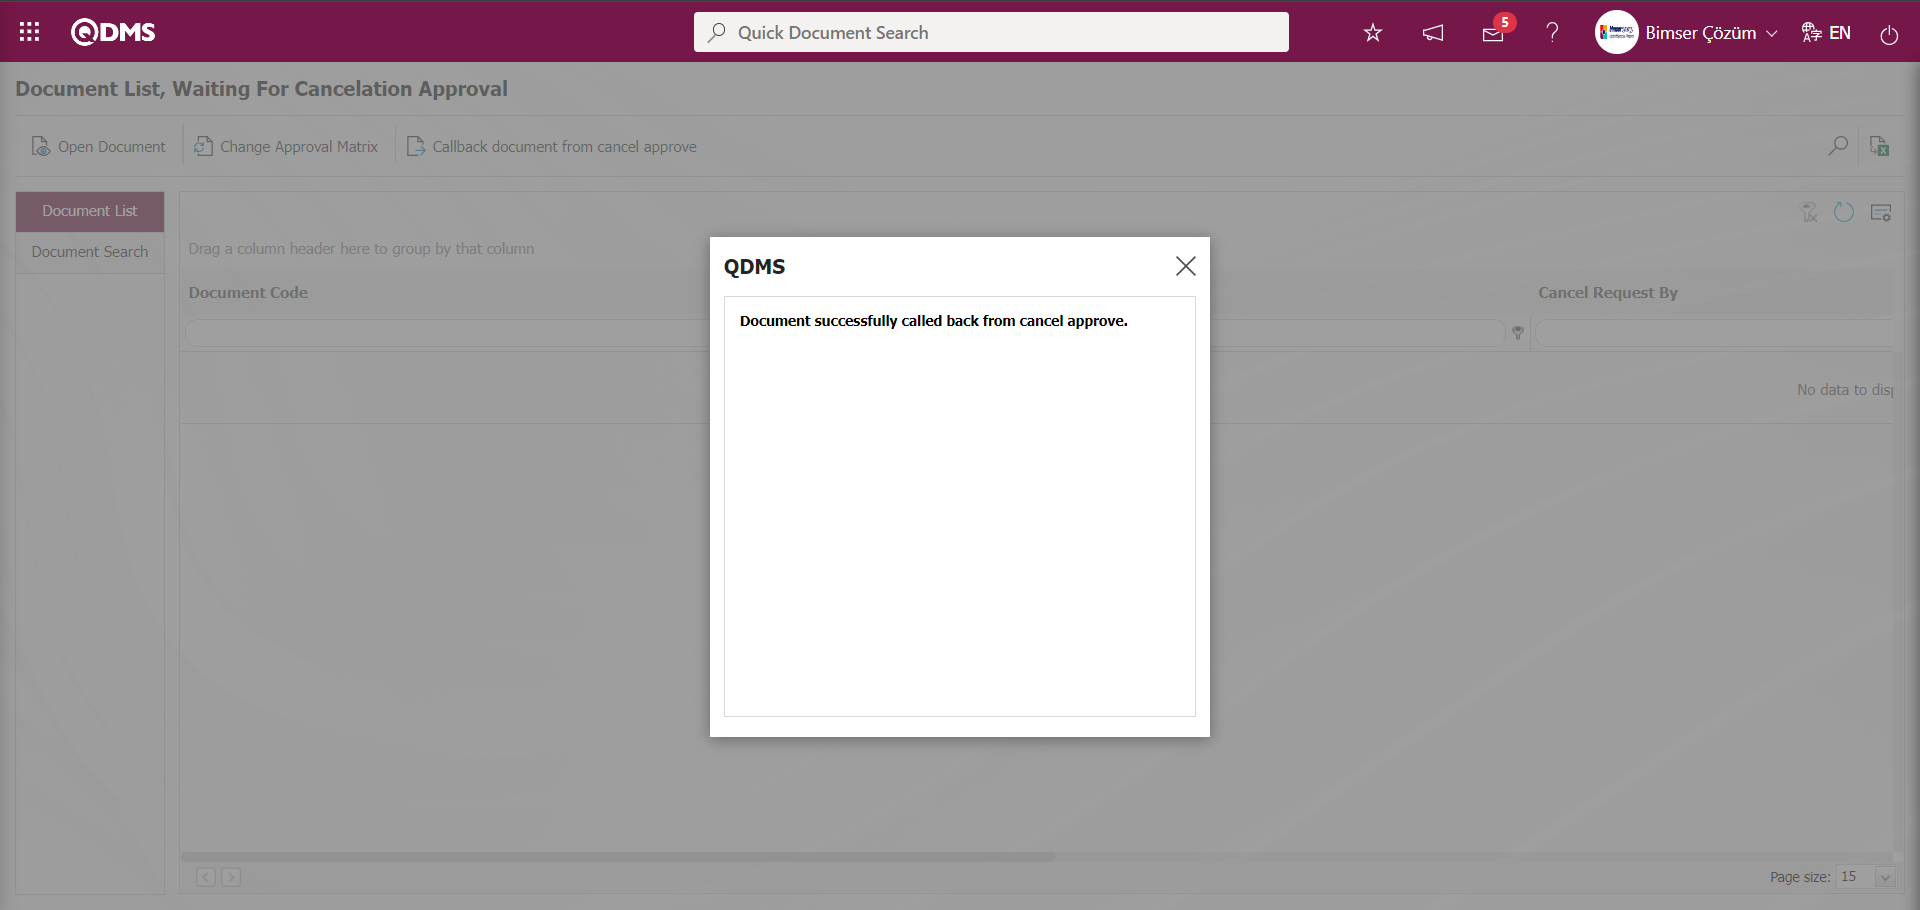
Select the document in the document list on the Document List, Waiting For Cancelation Approval screen.
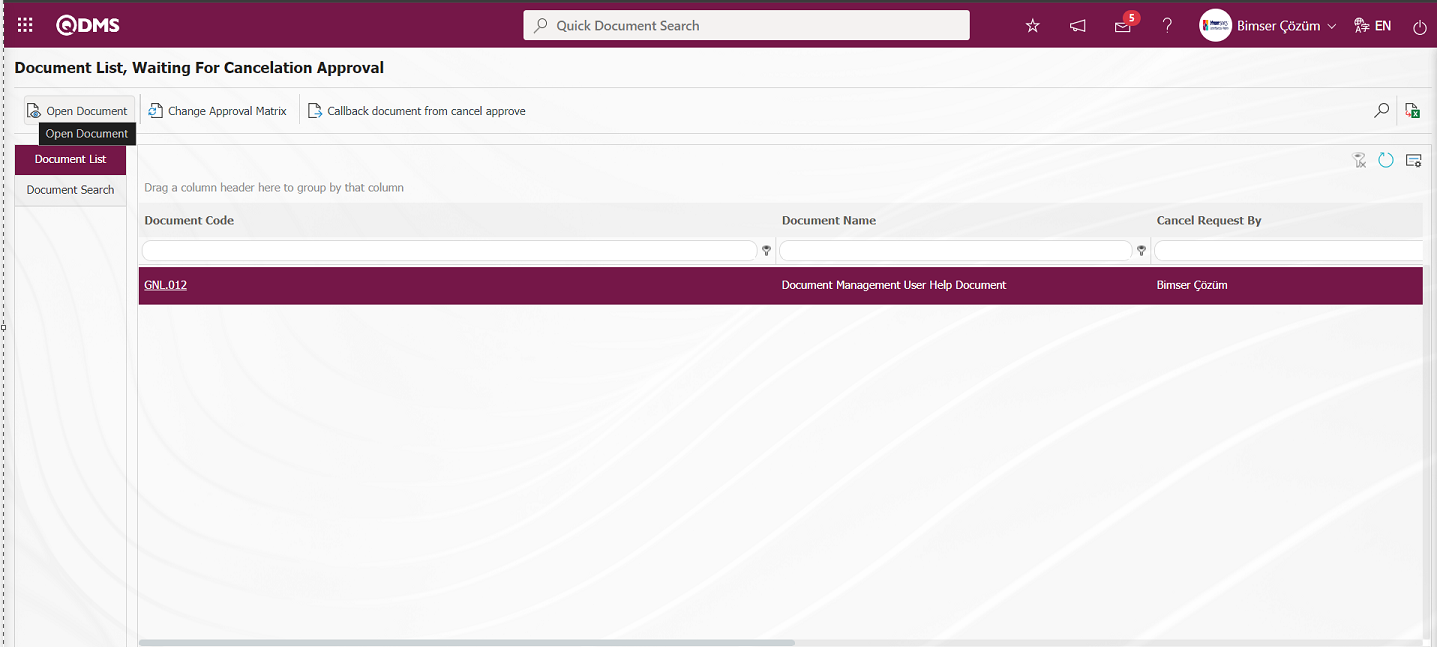
Click the  button while the document is selected on the Document List, Waiting For Cancelation Approval screen.

With the help of the buttons on the screen;
: The document cancelation process is approved.
: The cancellation of the document is rejected.
On the Document Cancellation screen, the button is clicked. The rejection of the document cancellation approval is made by writing the reason for rejection on the screen that opens and uploading additional files, if any, related to the reason for rejection. The rejected document is sent back to the person who prepared/revised it.
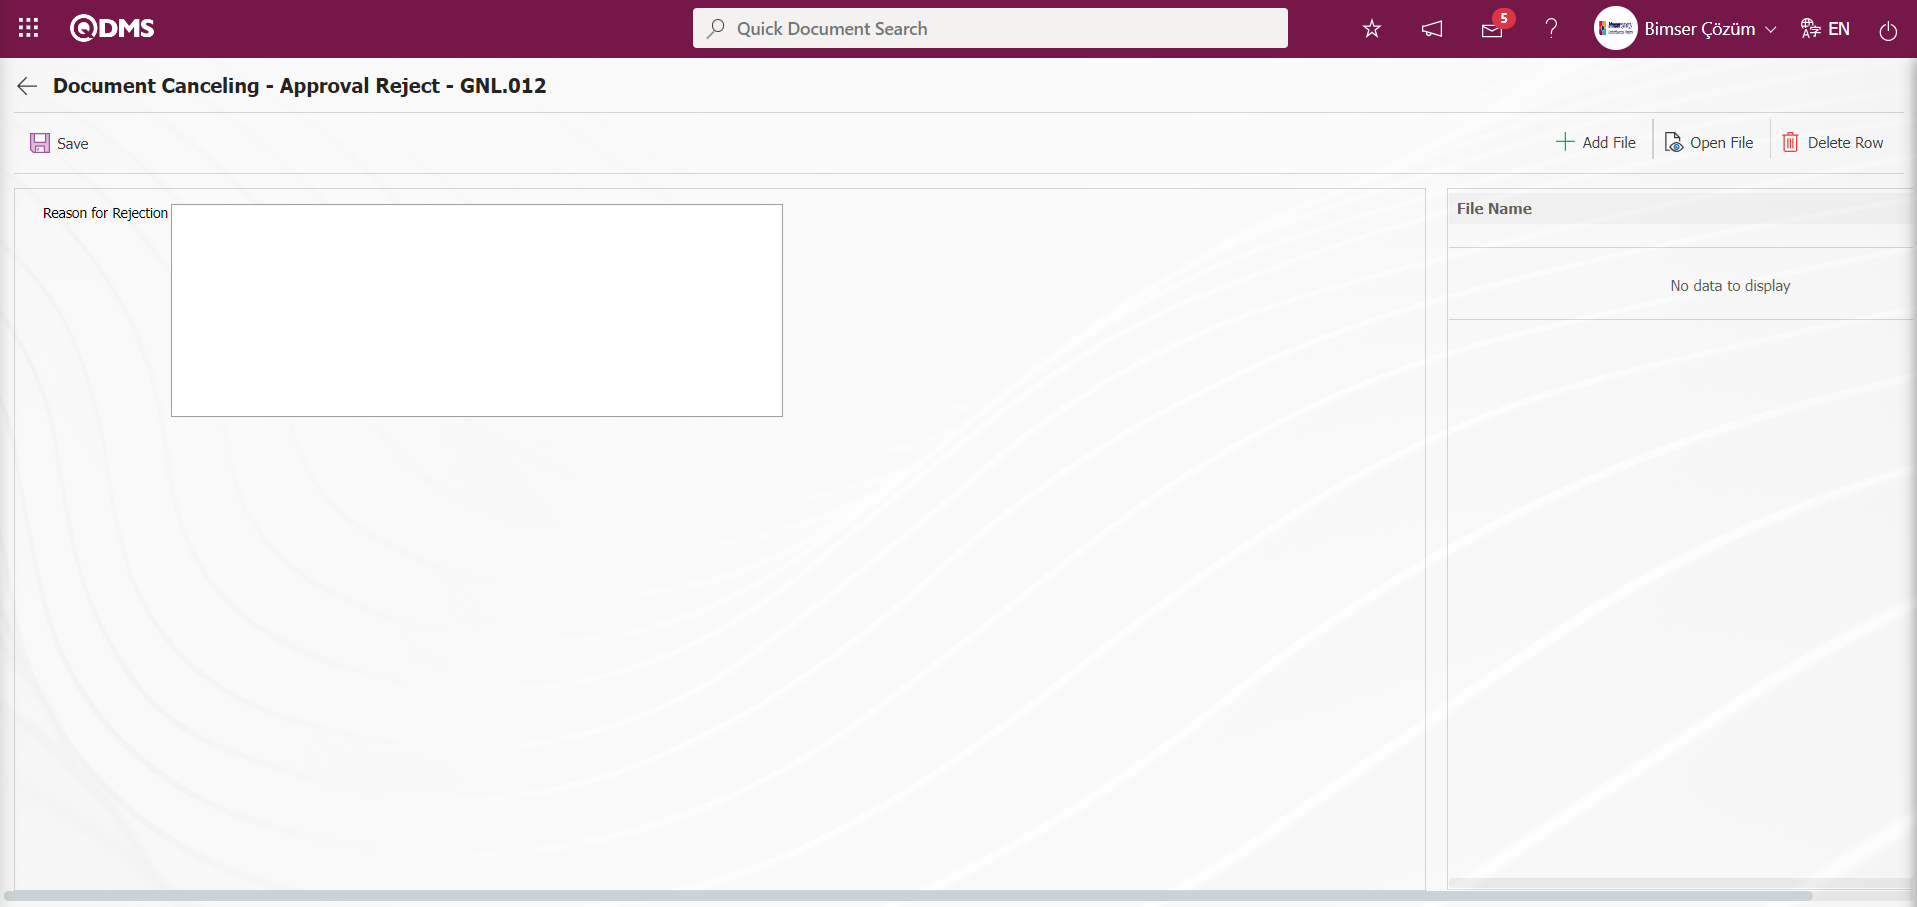
On the document cancellation screen, the person who will give the explanation information in the “Explanation of the Person to Give Approval” field displayed depending on the parameter 341 “Enter Annotation in Document Cancellation Confirmation ?” and the document is canceled by clicking the  button.
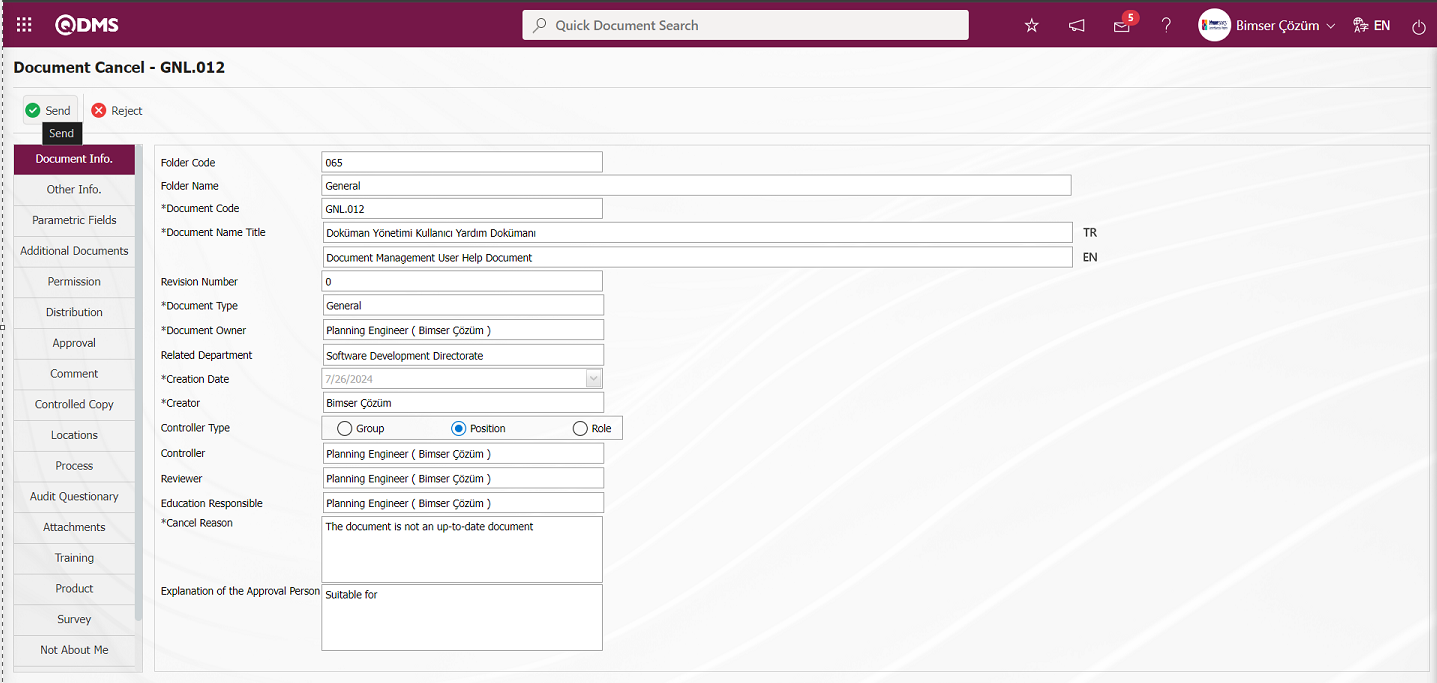
Click the “OK” button in the message given by the system.
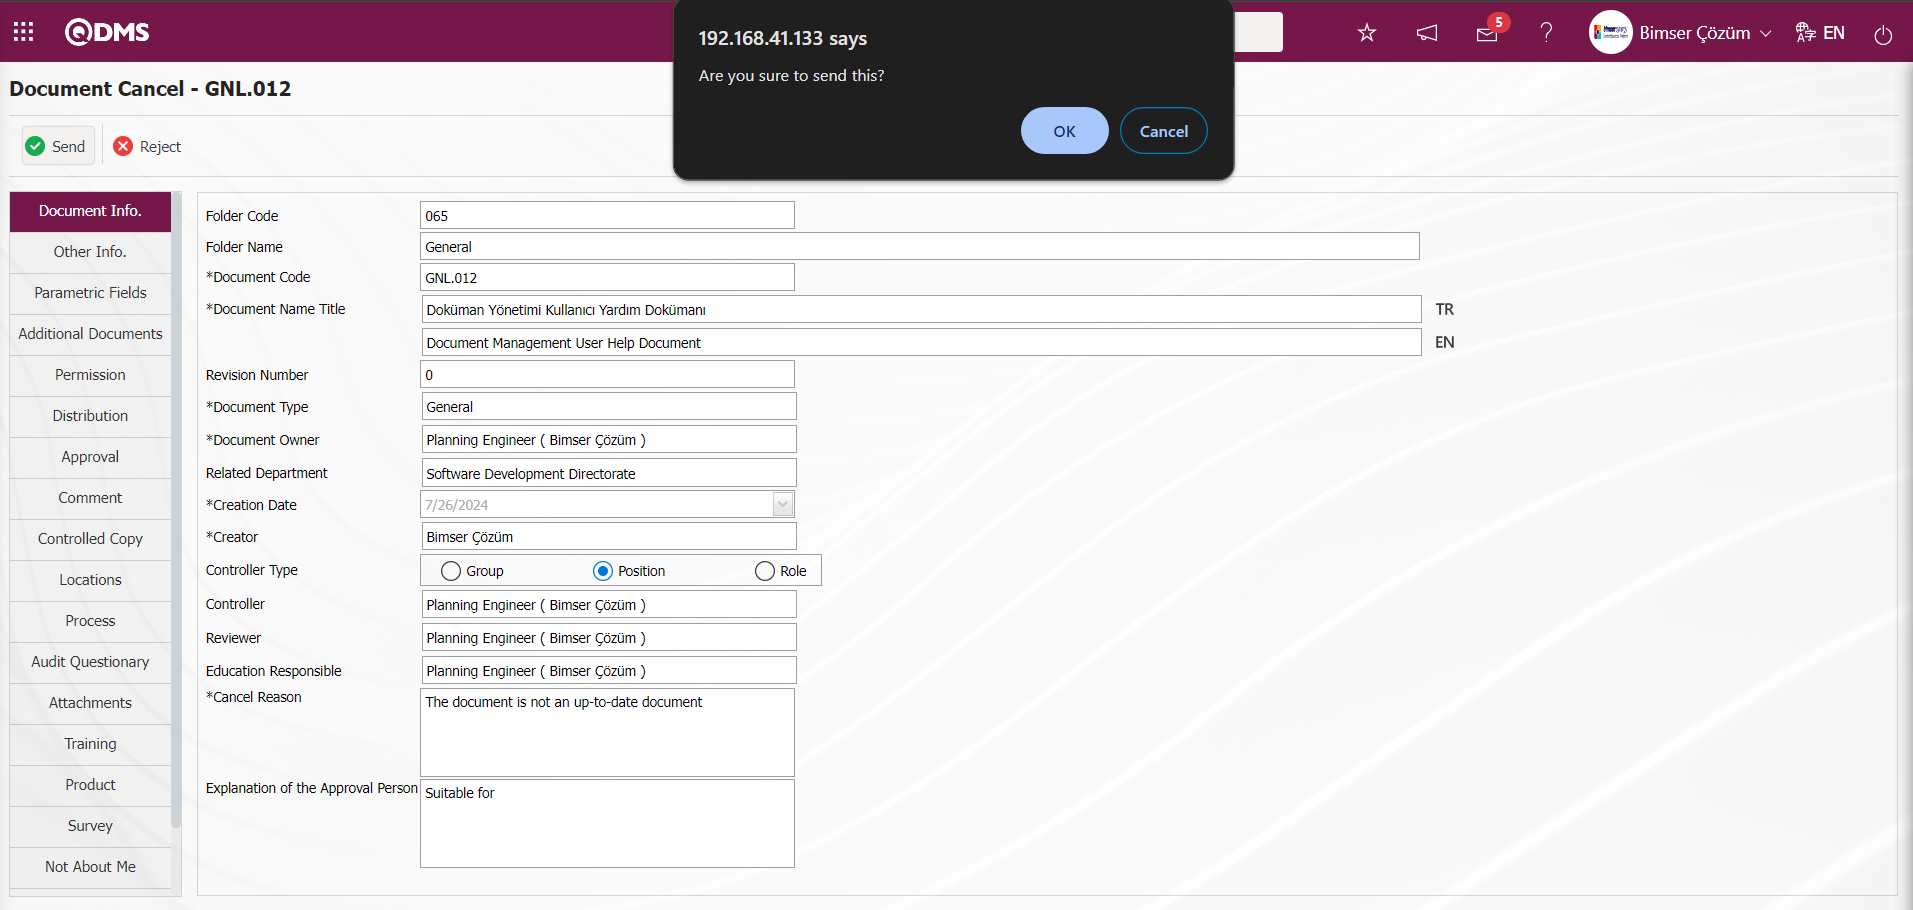
The system gives a message about the completion of the document cancellation approval and sending it to the archive, indicating that the document cancellation approval process has been completed.
In the Document List, Waiting For Cancelation Approval screen, the user must be defined as a module administrator in the Document Management module in order to view the  ,
,  and
and  buttons and perform these operations.
On the Document List, Waiting For Cancelation Approval screen, click the (Export to Excel) button while the document is selected in the document list.
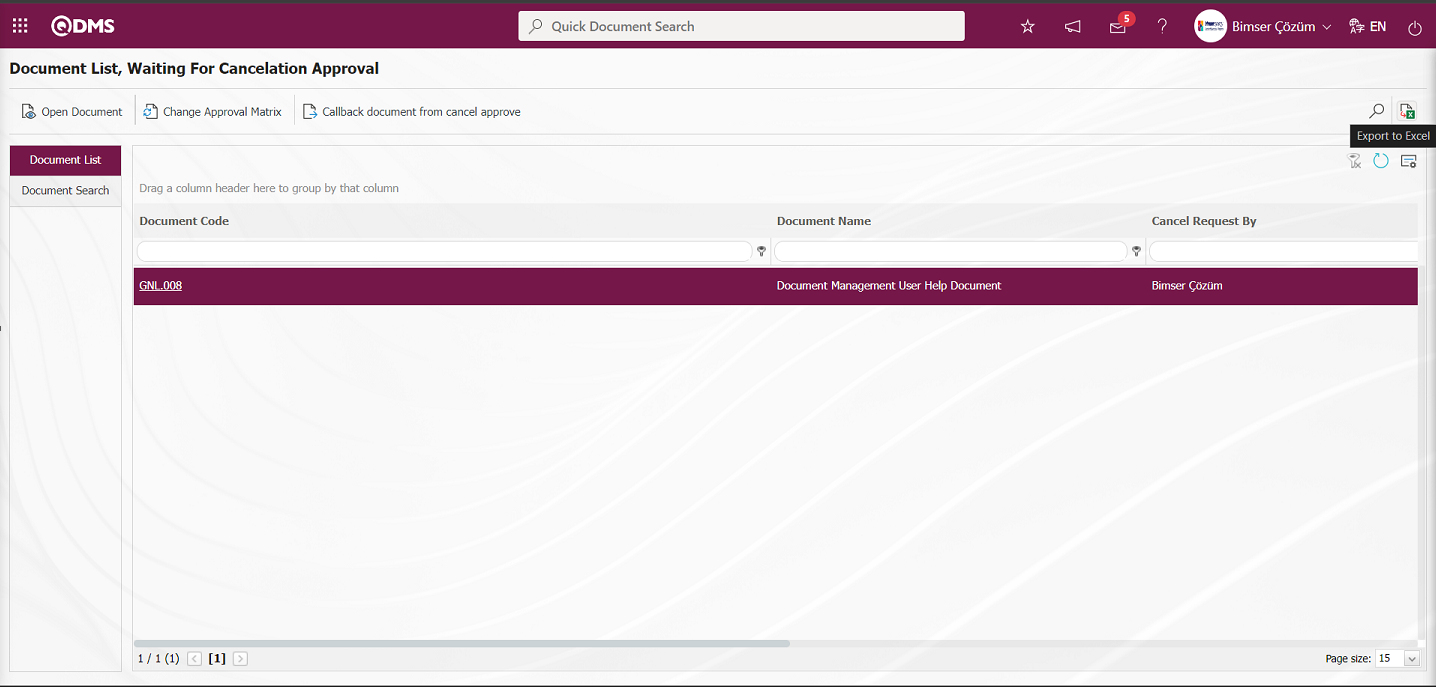
The Excel format report of the Document List, Waiting For Cancelation Approval report is displayed.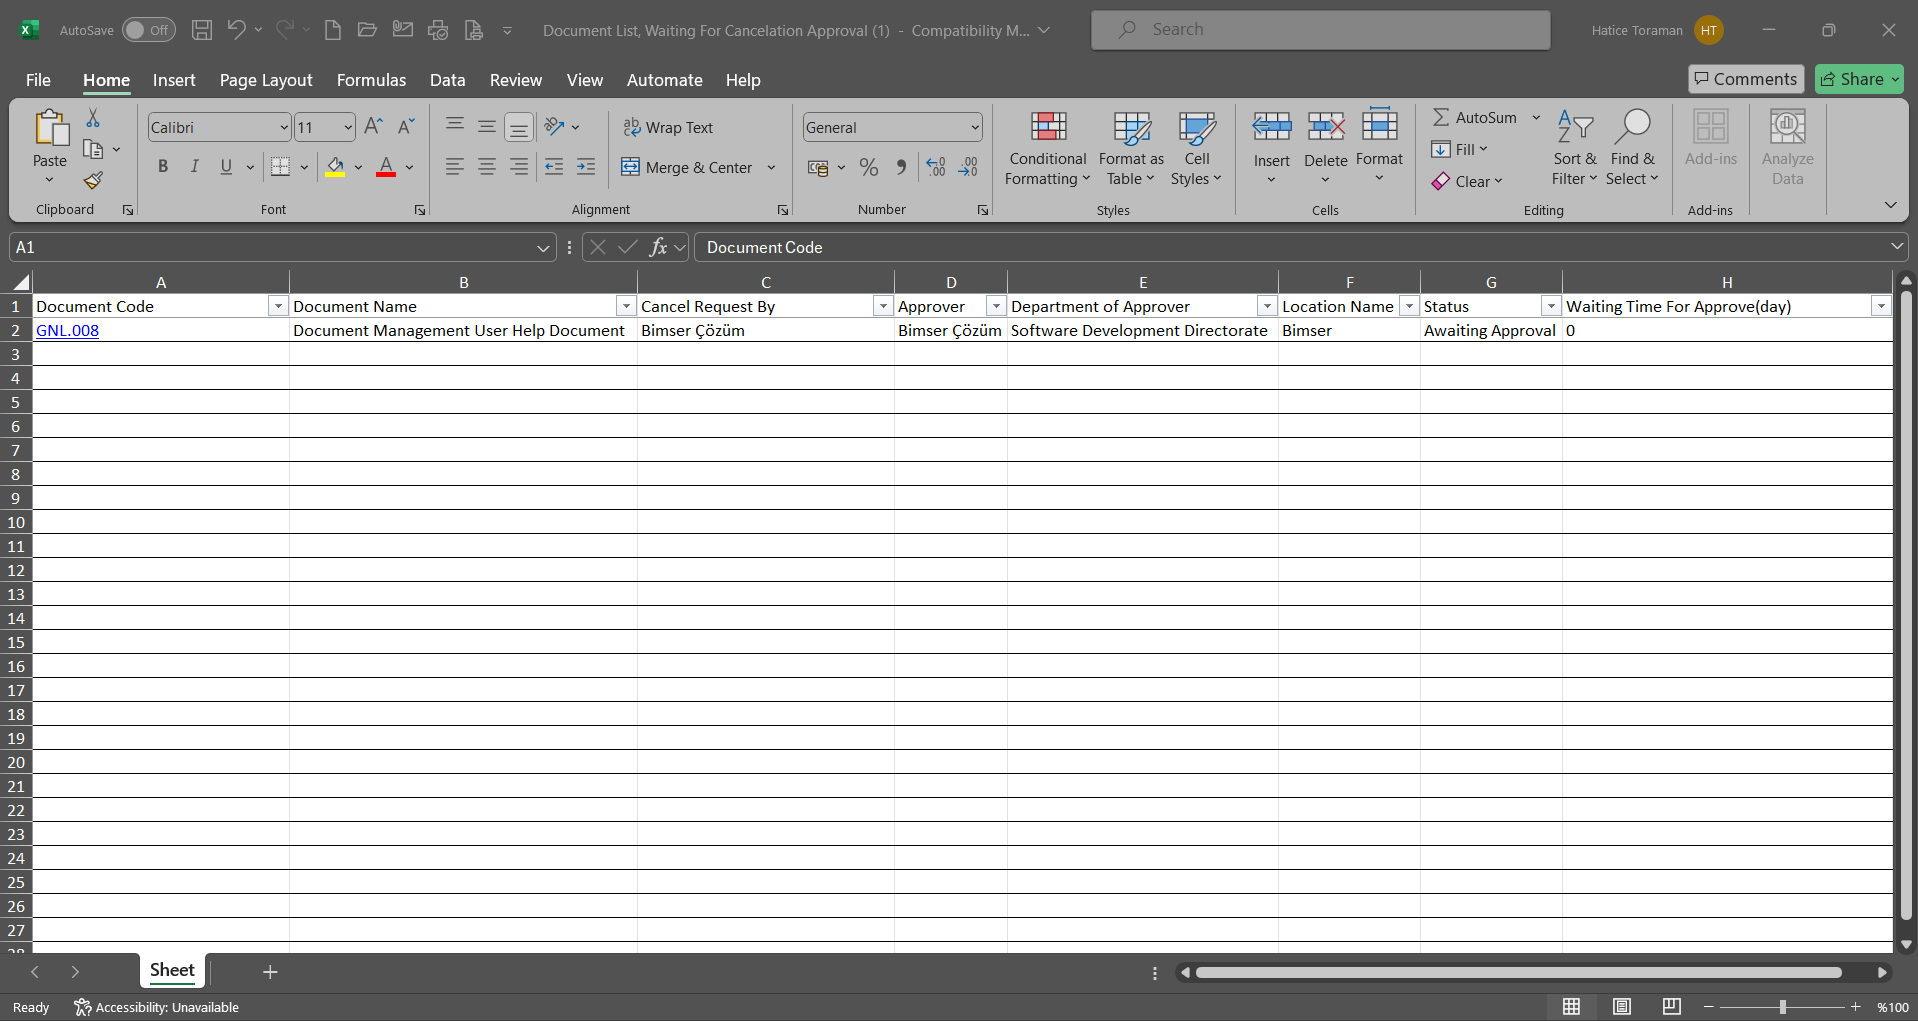
6.2.12.6.Documents Pending Follow-Up Report
Menu Name: Integrated Management System/ Document Management/ Reports/ Documents Pending Follow-Up Report
This is the menu where it is monitored by whom the distributed documents are read/not read. With this report, the date on which the reading task was assigned to whom, the date the document was read, how many days the document has been waiting for the reading task, if a survey was used, the survey results or the number of days the document was read are displayed. On the Documents Pending Follow-Up Report screen, we see two tabs: document search and document list tab. In the document search tab, filtering is done according to the search criteria. In the document list tab, records are listed according to the filtering process according to these search criteria.
With the help of the buttons on the screen;
 : The results of the survey created about the document selected in the list are displayed.
: Records are searched by filtering.
: Data is transferred to Excel.
: The search criteria on the menu screens are used to clear the data remaining in the filter fields in the grid where the search operation is performed.
: The menu screen is restored to its default settings.
: User-based designing of the menu screen is done with the show-hide feature, that is, the hiding feature of the fields corresponding to the columns on the menu screens.
On the Document Follow-up Report** screen, in the document search tab, type the document code in the “Document Code” field, which is one of the filter search criteria, and select the status as “reading” and click the (Search) button.
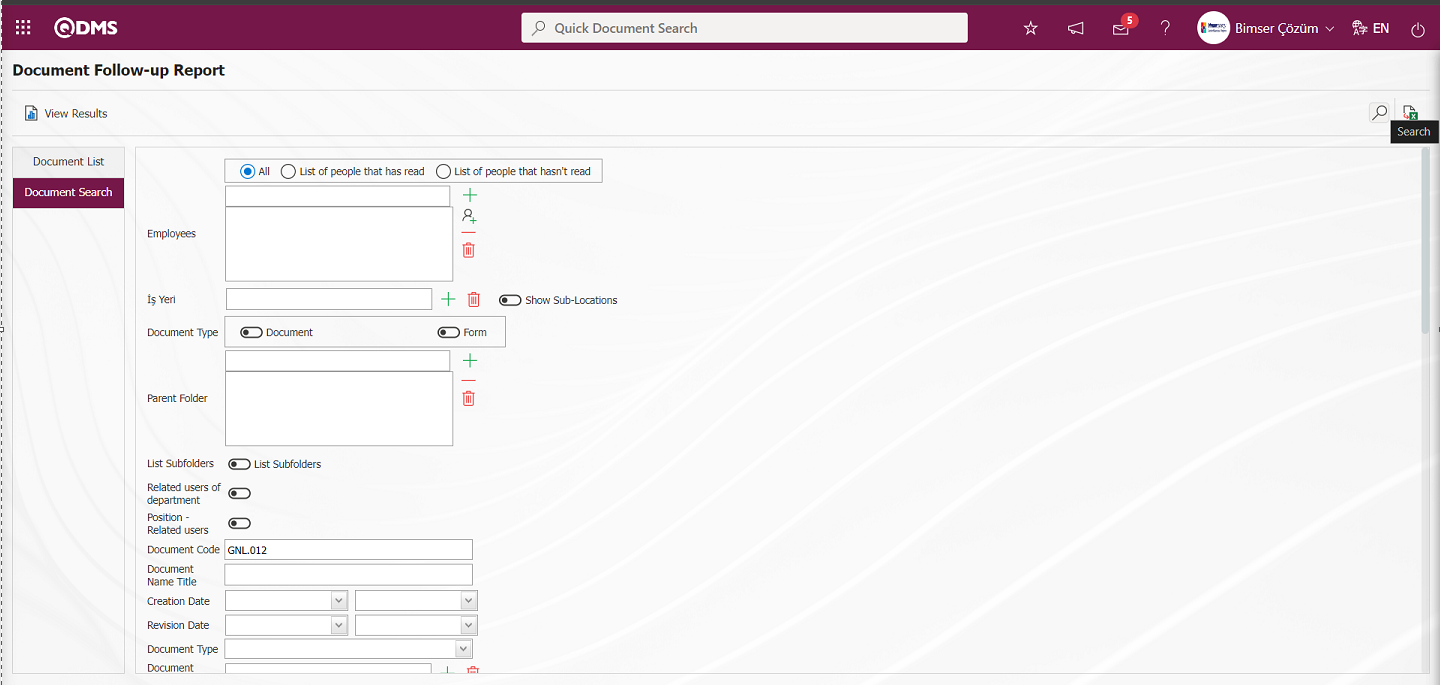
On the Document Follow-up Report screen, records are listed according to the search criteria in the filter made in the document list tab.
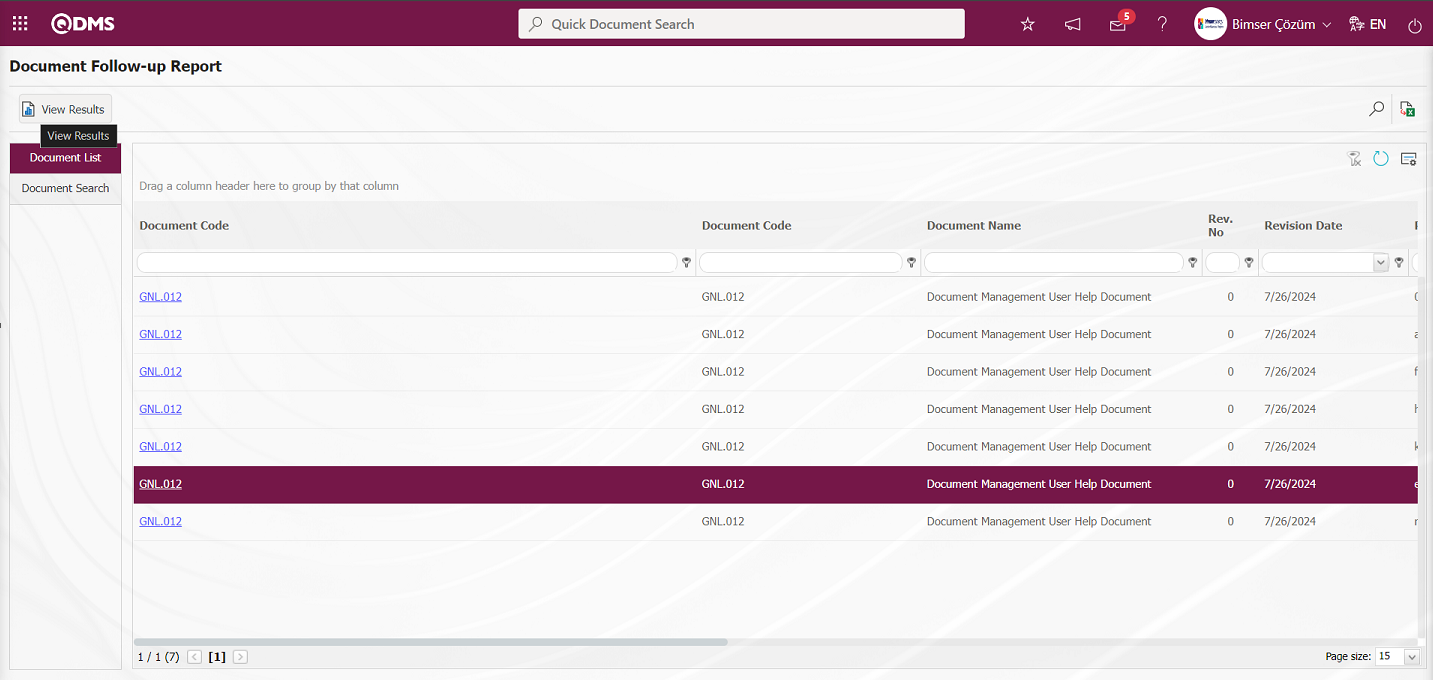
On the Document Follow-up Report screen, the results of the questionnaire created about the document can be viewed with the button.
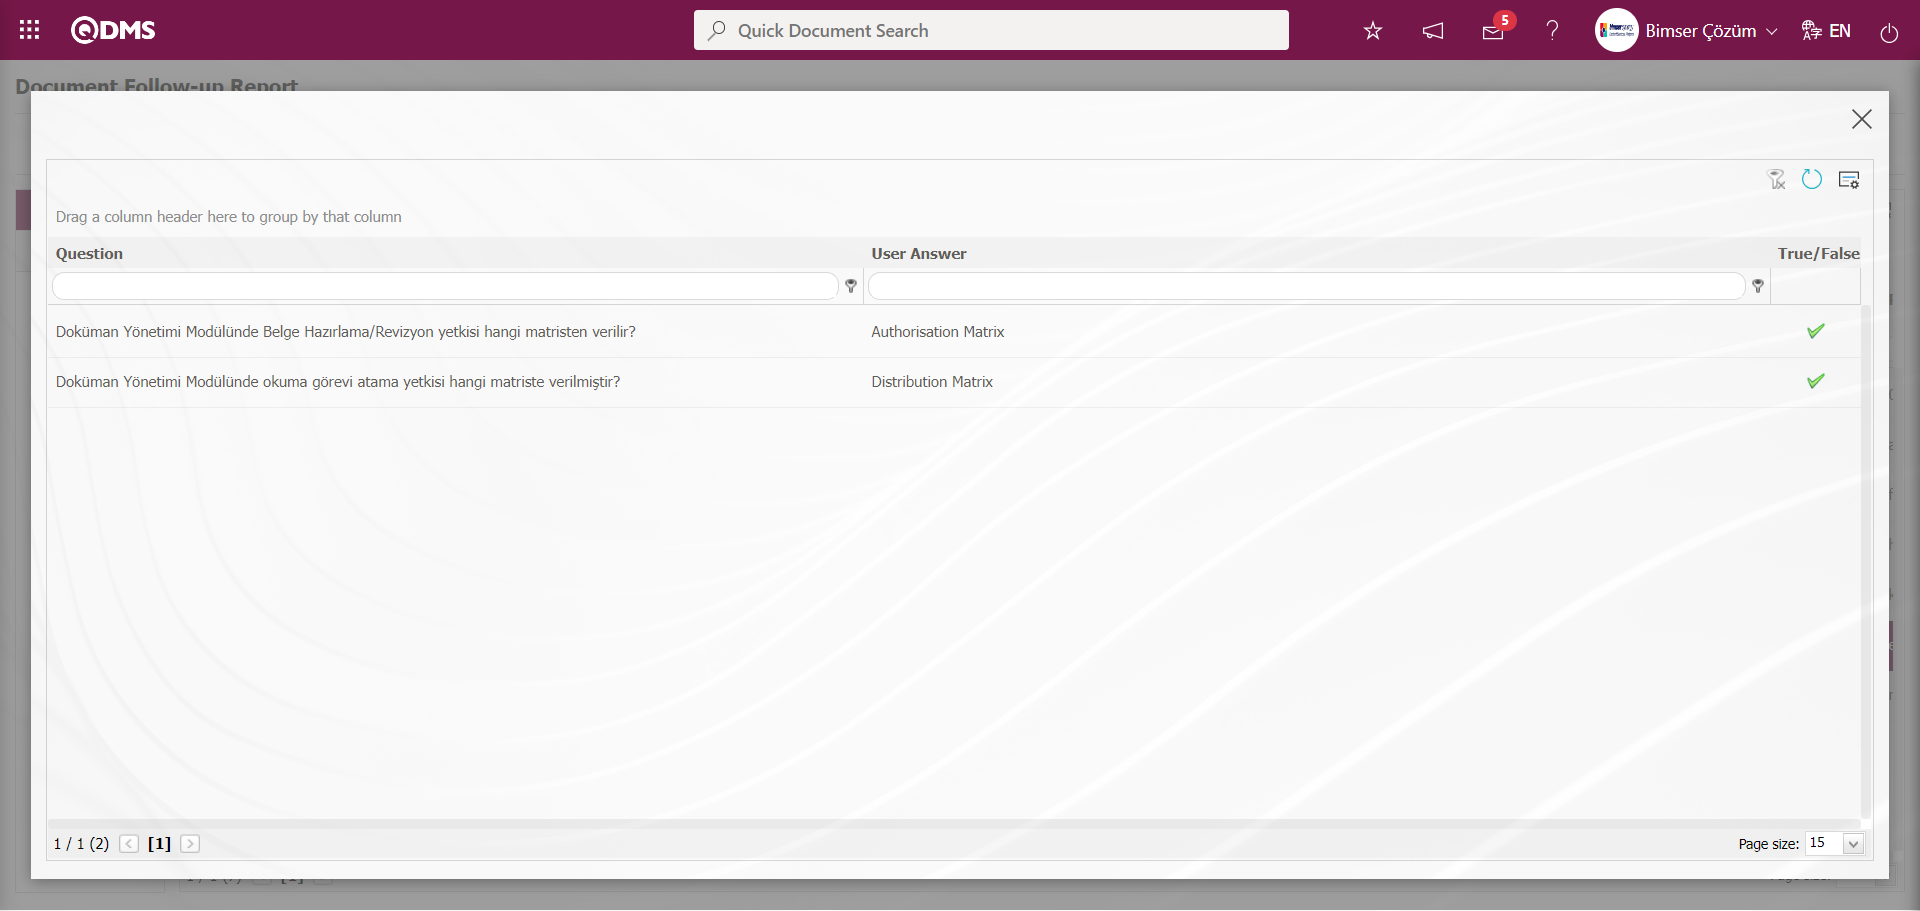
On the Document Follow-up Report screen, in the Document Search tab, enter the document code information in the Document Code field.
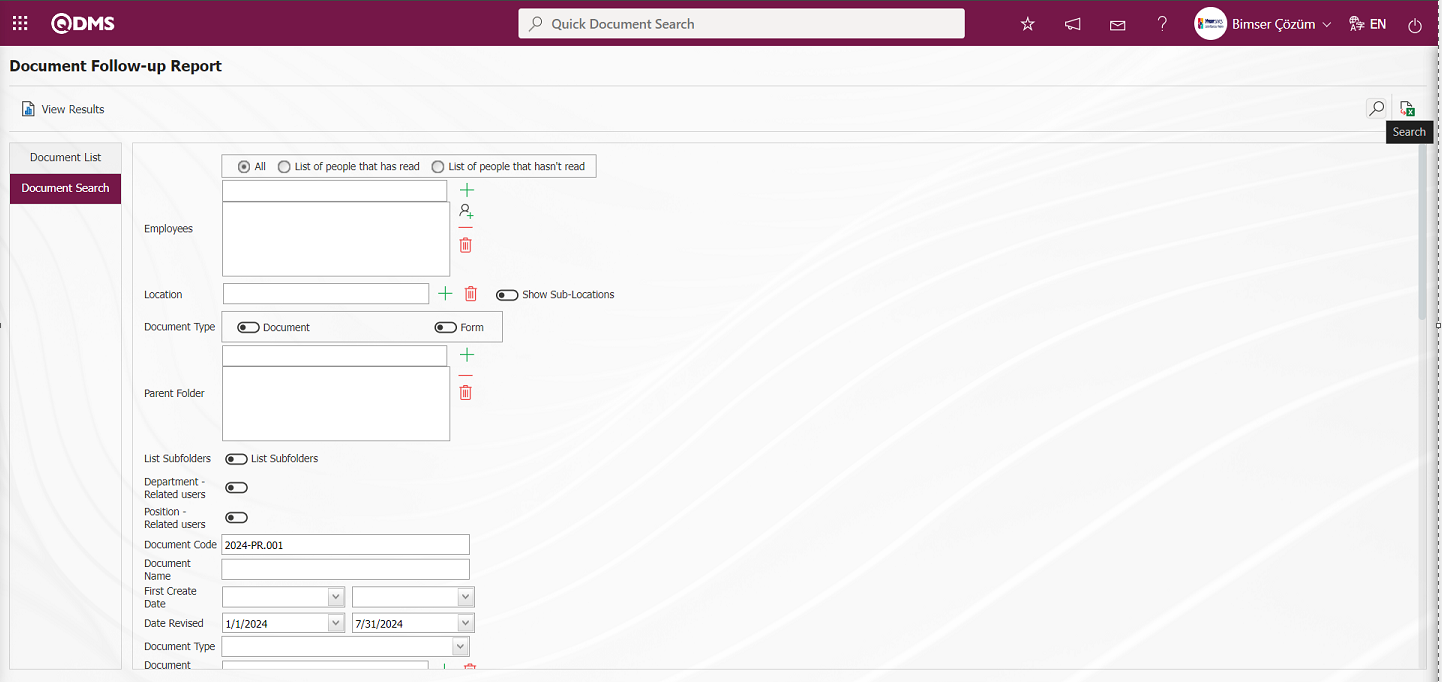
In the Document Follow-up Report screen, records are listed according to the search criteria in the Document List tab. Click the  (Export to Excel) button on the Document Follow-up Report screen.
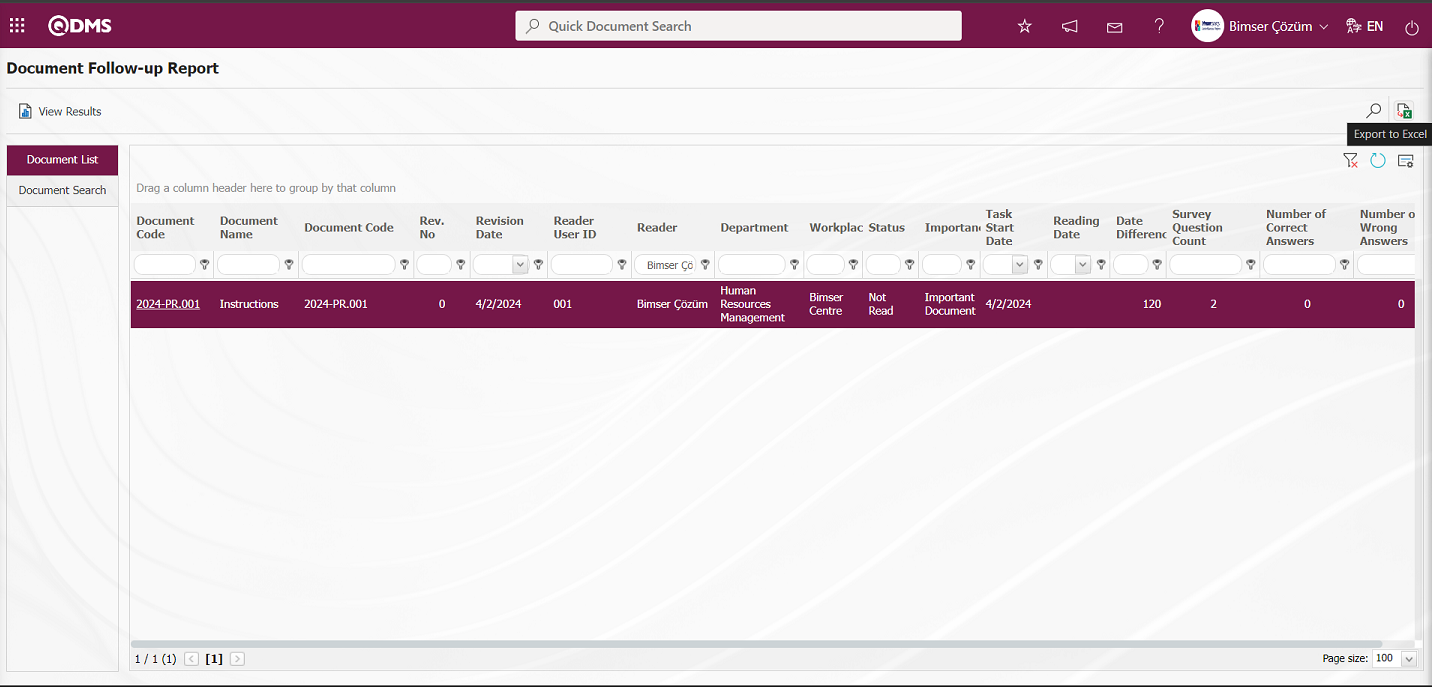
Document Follow-up Report Report in Excel format
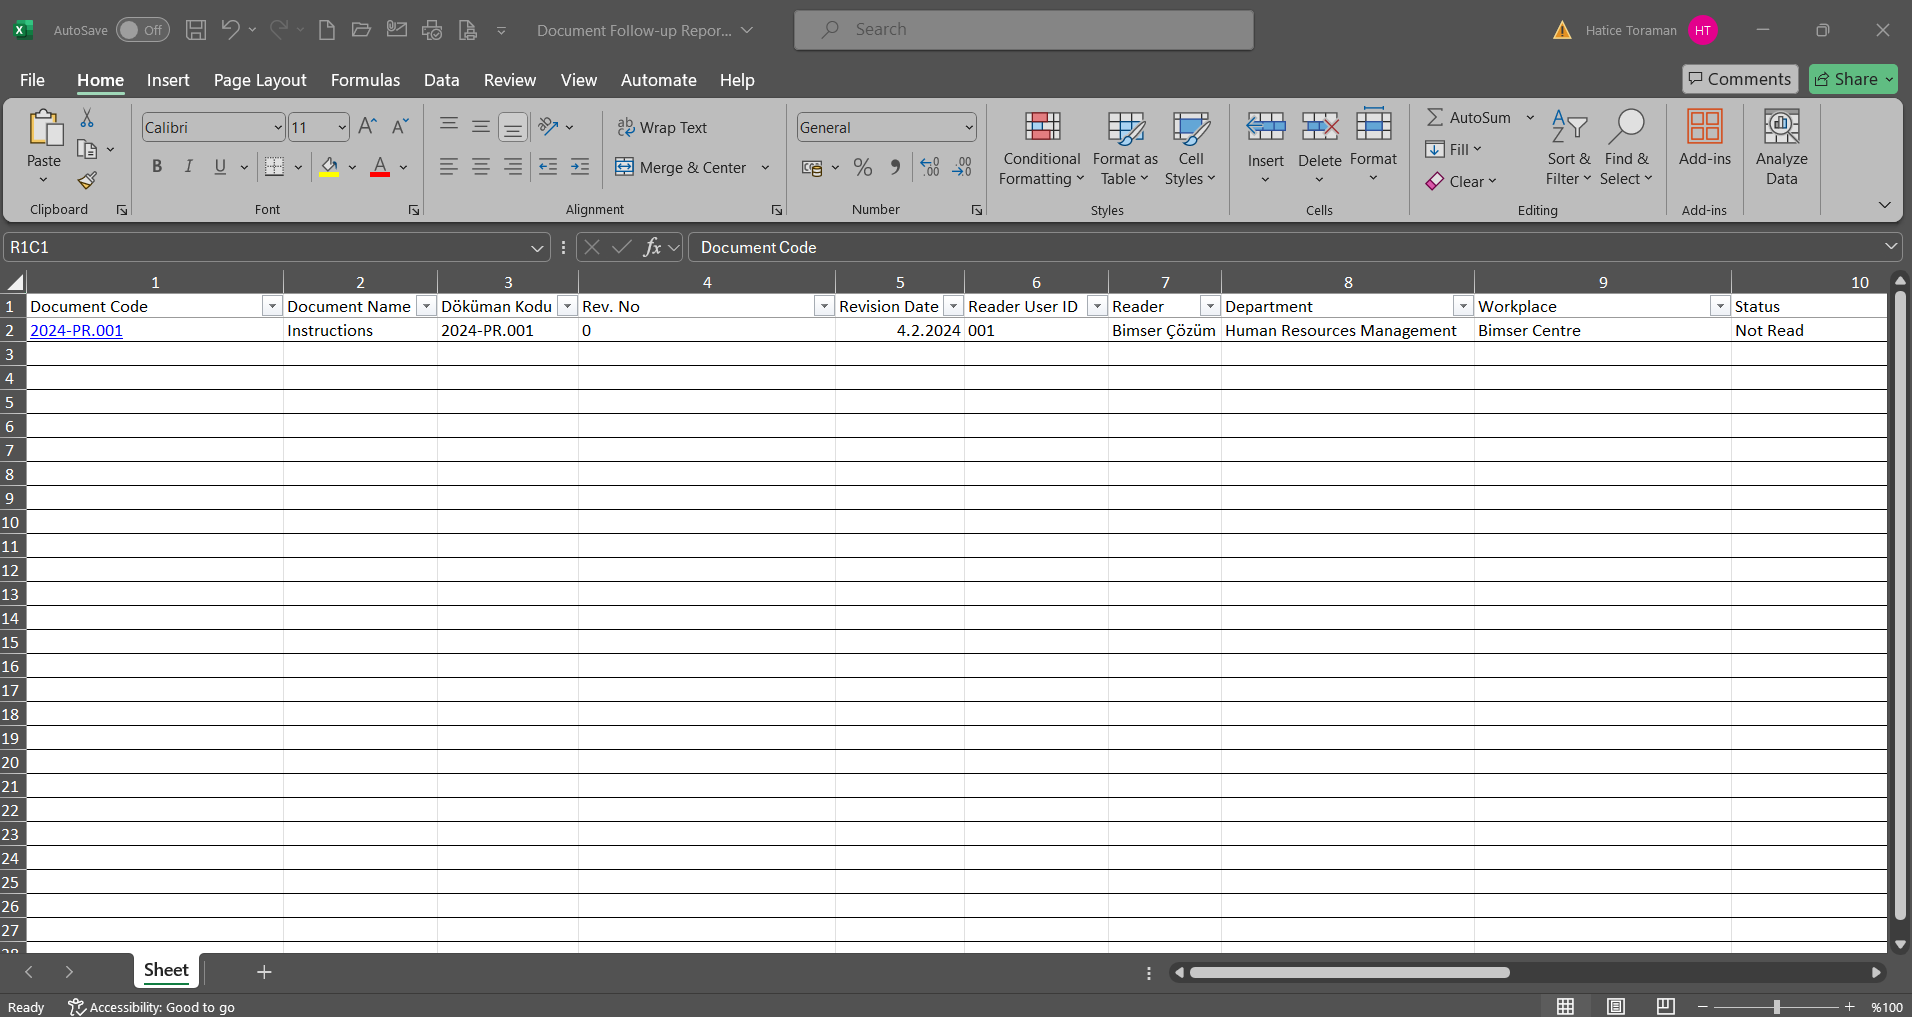
6.2.12.7.Ready Forms List
Menu Name: Integrated Management System/ Document Management/ Reports/ Ready Forms List
It is the menu where the forms defined in the system are sent to the specified people by clicking the  button. On the Ready Forms list screen, there are two tabs: document search and document list tab. In the document search tab, filtering is done according to the search criteria. In the document list tab, the records are listed according to the filtering process according to these search criteria.

With the help of the buttons on the screen;
: The ready form submission screen of the form selected in the list is displayed.
: Records are searched by filtering.
: Data is transferred to Excel.
: The search criteria on the menu screens are used to clear the data remaining in the filter fields in the grid where the search operation is performed.
: The menu screen is restored to its default settings.
: User-based designing of the menu screen is done with the show-hide feature, that is, the hiding feature of the fields corresponding to the columns on the menu screens.
On the Ready Form List** screen, type the document code in the “Document Code” field, which is the filter search criteria in the document search tab, and click the  (Search) button.

On the Ready Form List screen, records are listed according to the search criteria in the filter made in the Document List tab.

On the Ready Form List screen, while the form is selected in the list, click on the button to open the ready form submission screen.
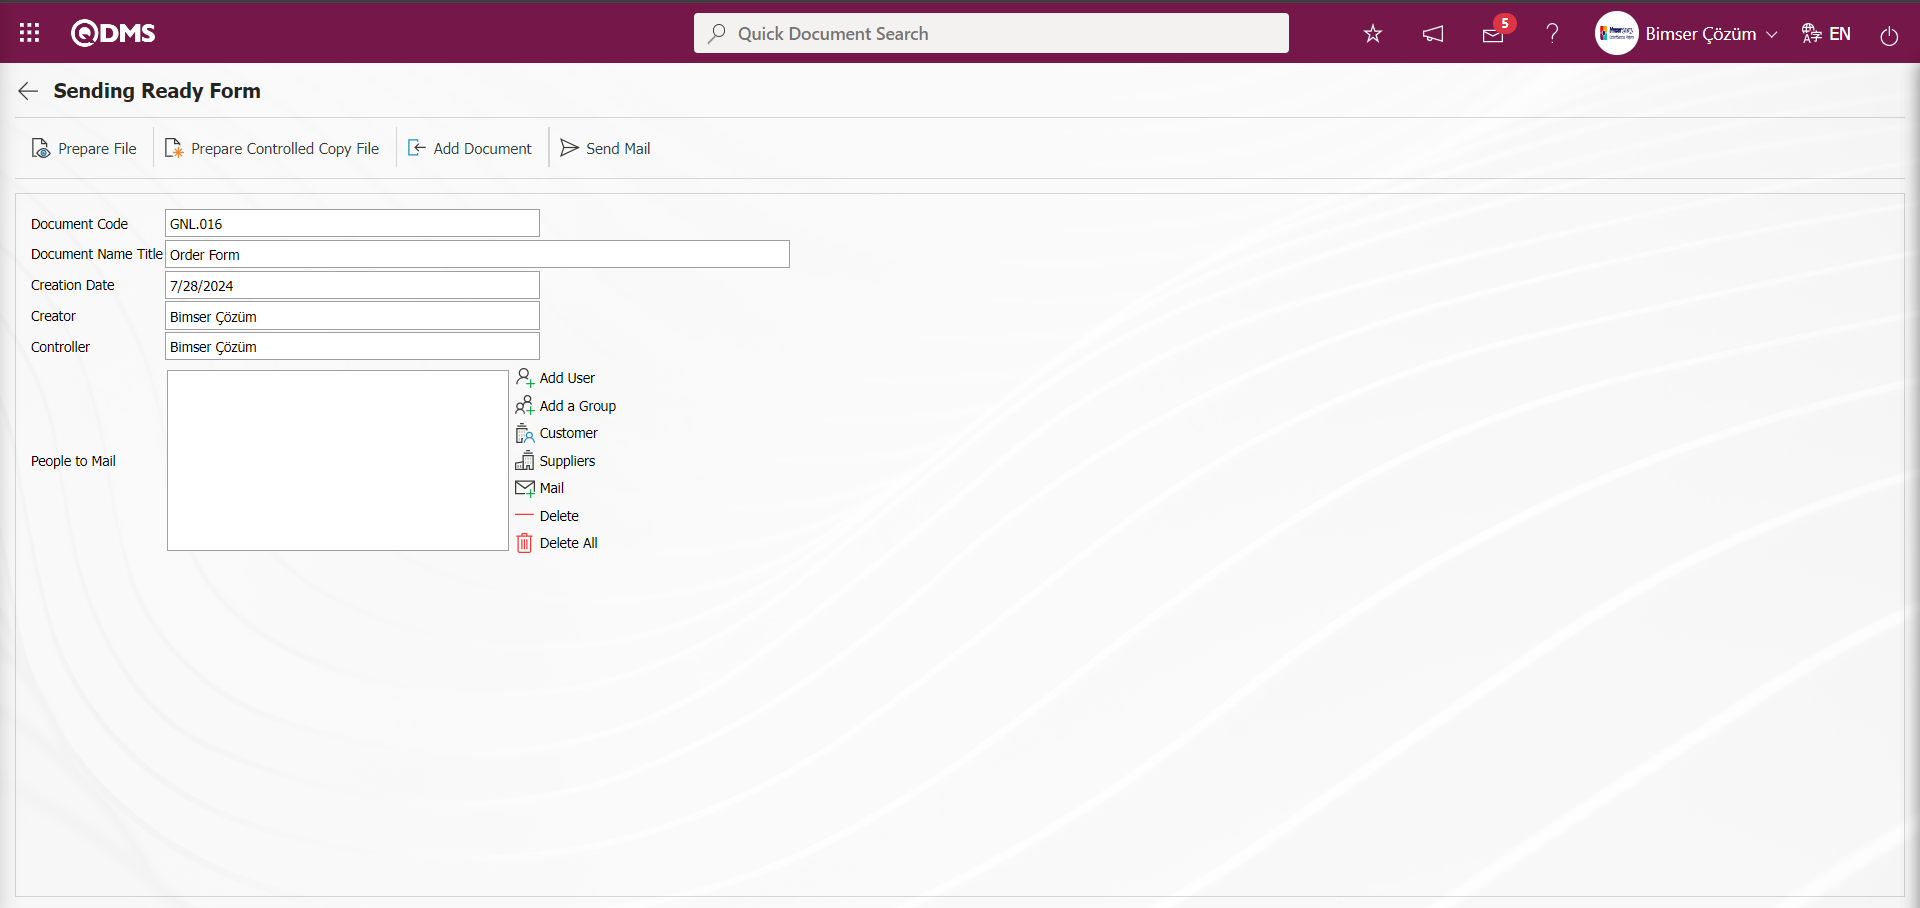
With the help of the buttons on the screen;
 : Go back to the previous screen.
 : The form is downloaded to the computer with the Prepare File button.
 : Controlled Copy is prepared.
 : The downloaded form is uploaded to the system with the Add file button
 : Mail is sent to the people to whom mail will be sent.
The form is downloaded to the user's computer by clicking the button on the Ready Form List screen.
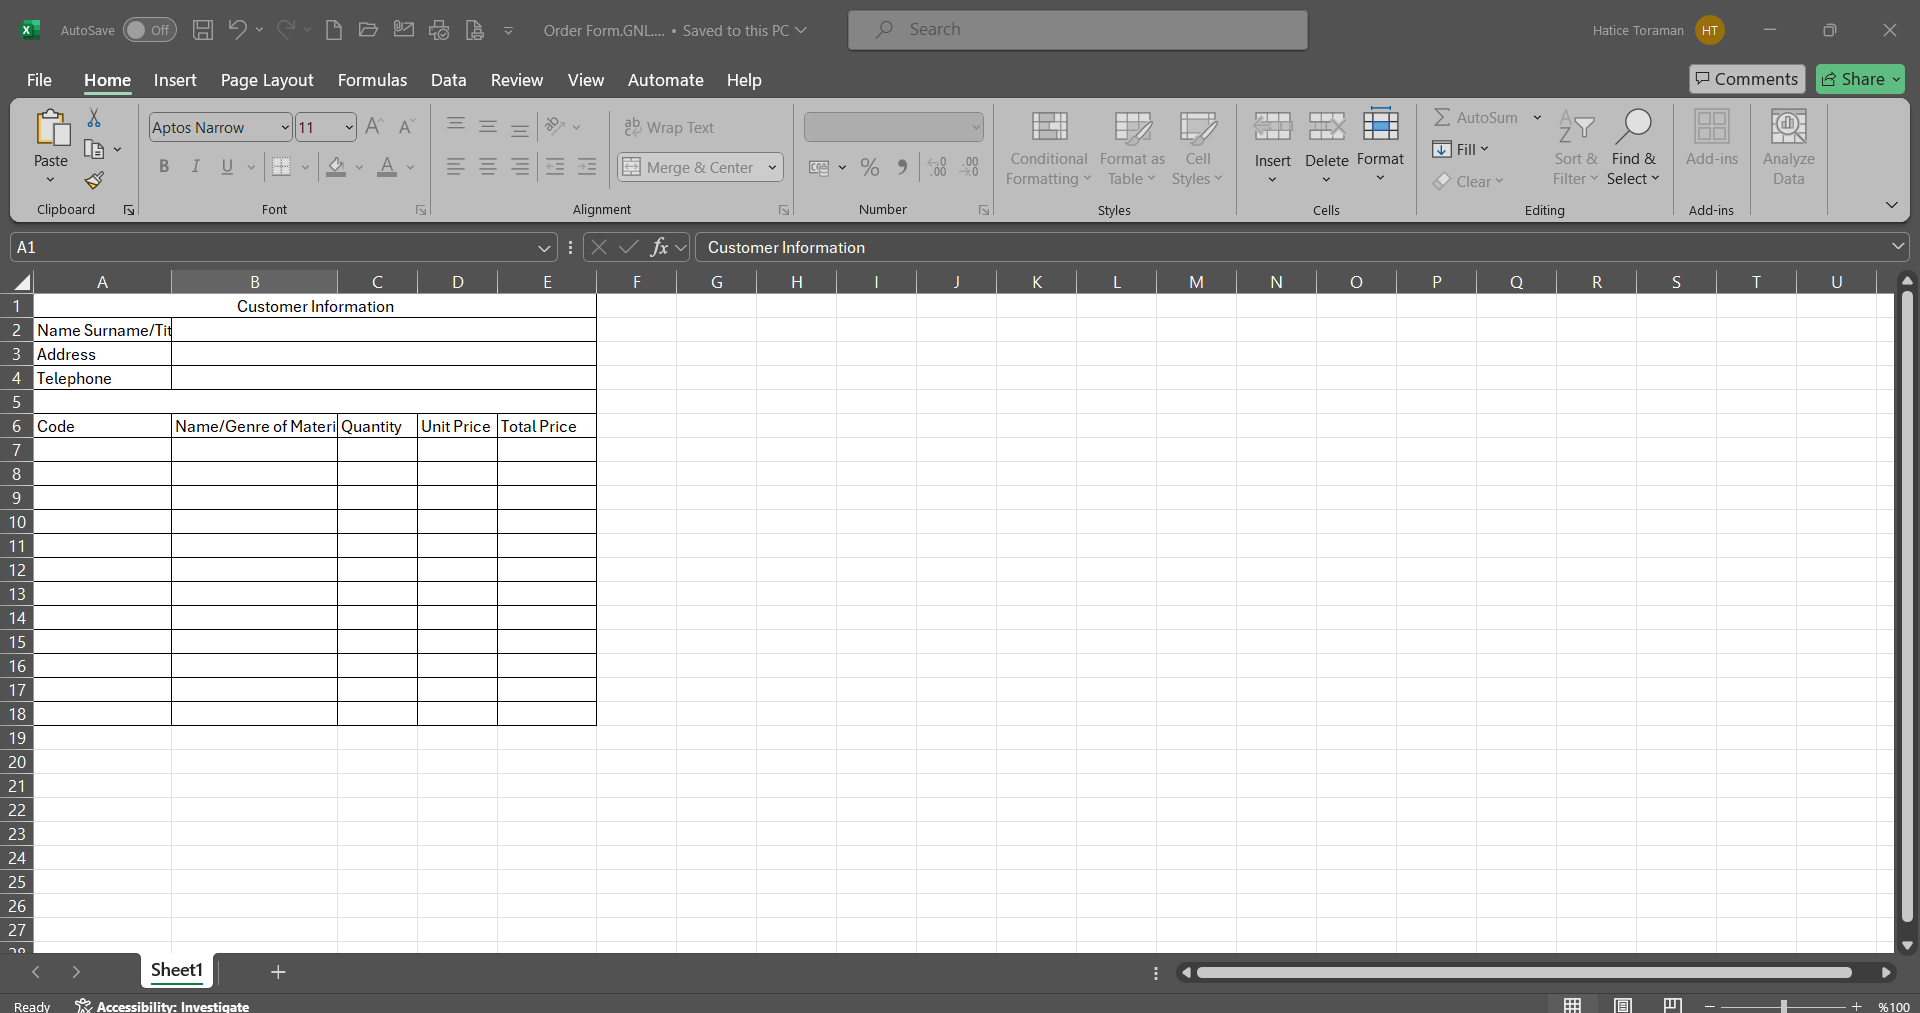
The downloaded Form is filled in.
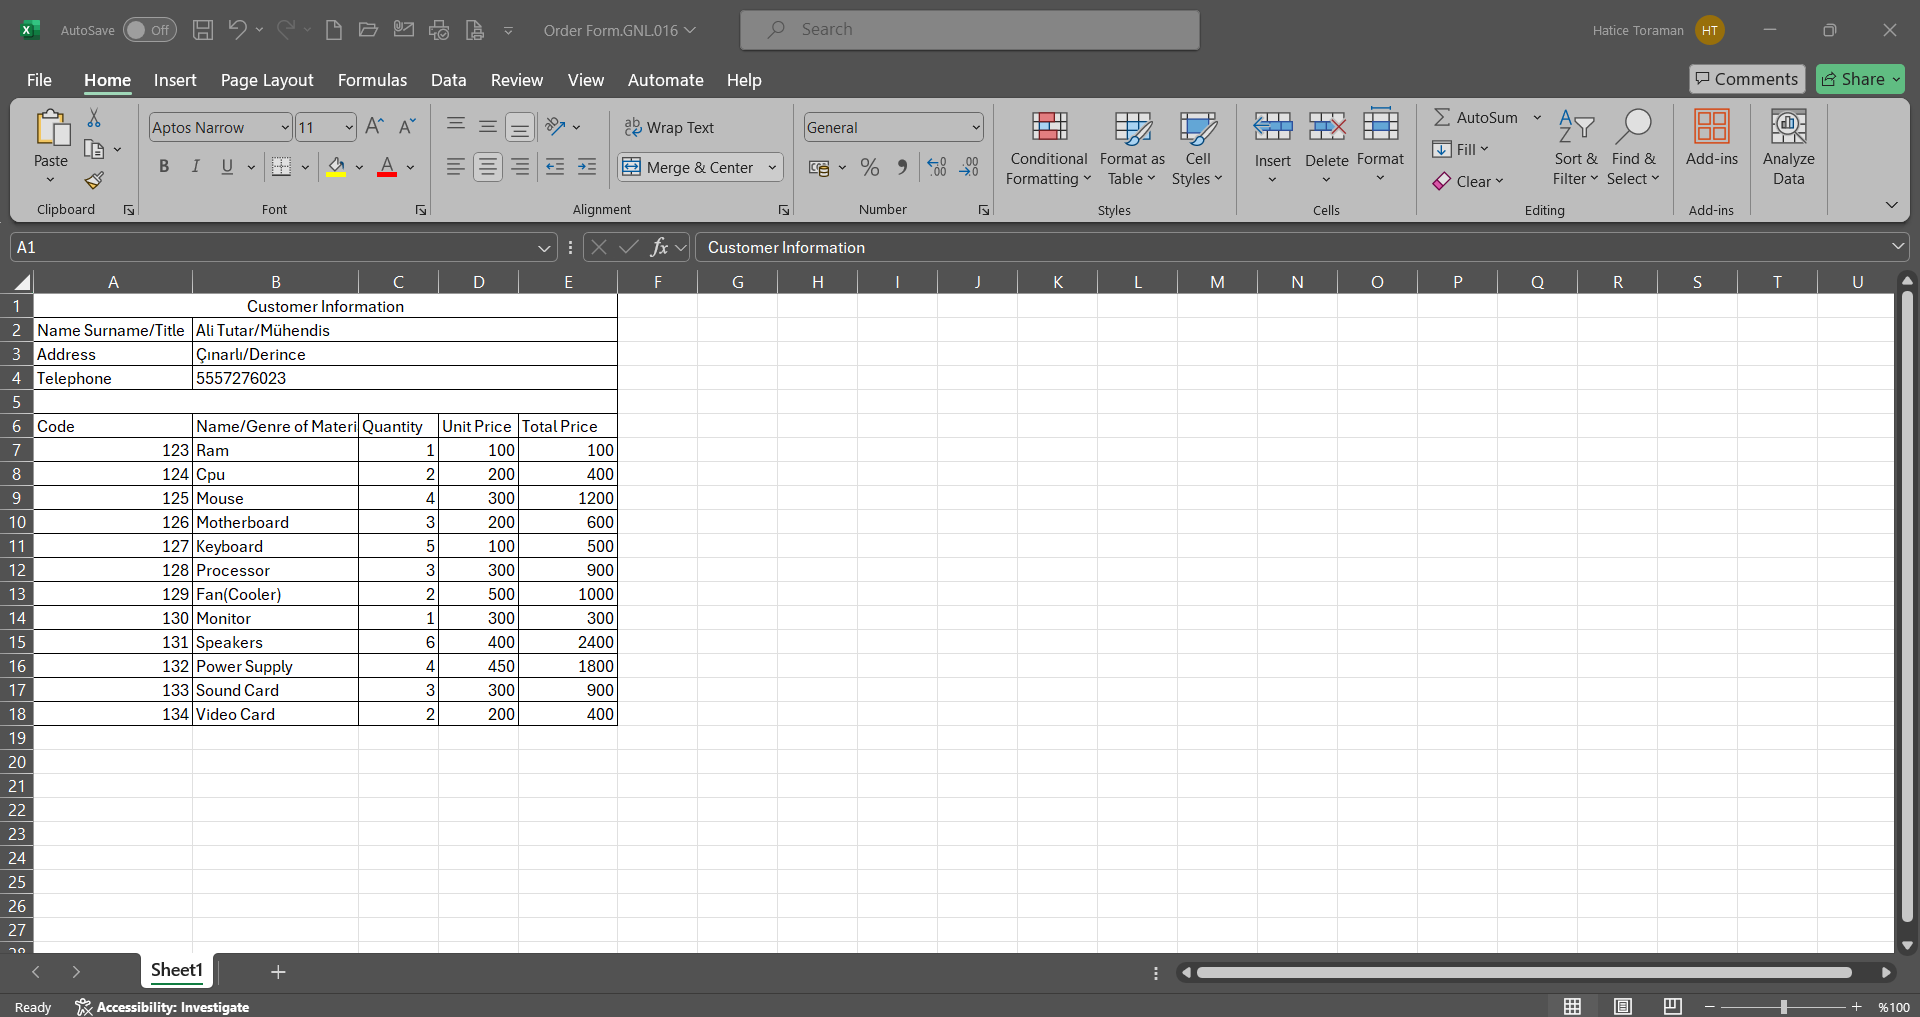
The completed form is restored to the Qdms system with the button.

Click the Browse button on the Add File screen.

On the Add File screen, the selection process of the filled file is done by clicking the Browse button.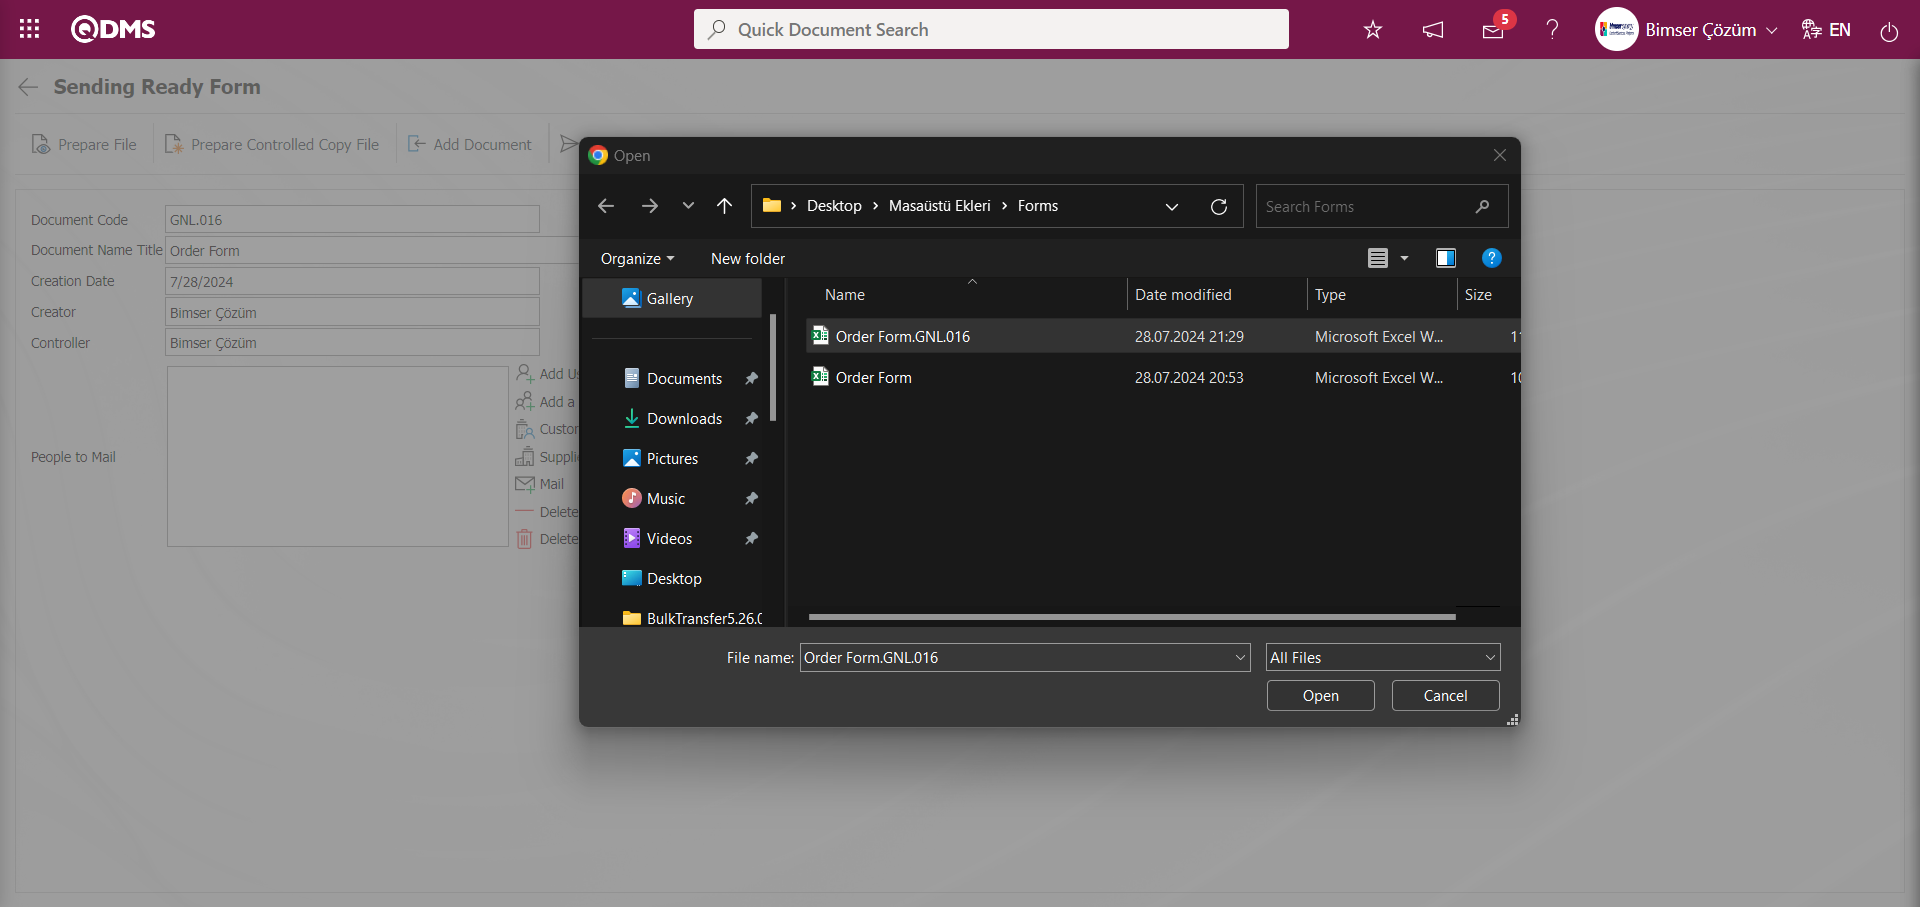
The message given by the system informs that the file has been successfully uploaded

After the file transfer process, the people to whom the mail will be sent are determined in the user/user group/ customer/contributor fields and, if desired, by typing the e-mail address in the mail. On the Sending Ready Form** screen, the mail is sent to the people to be sent with the button.
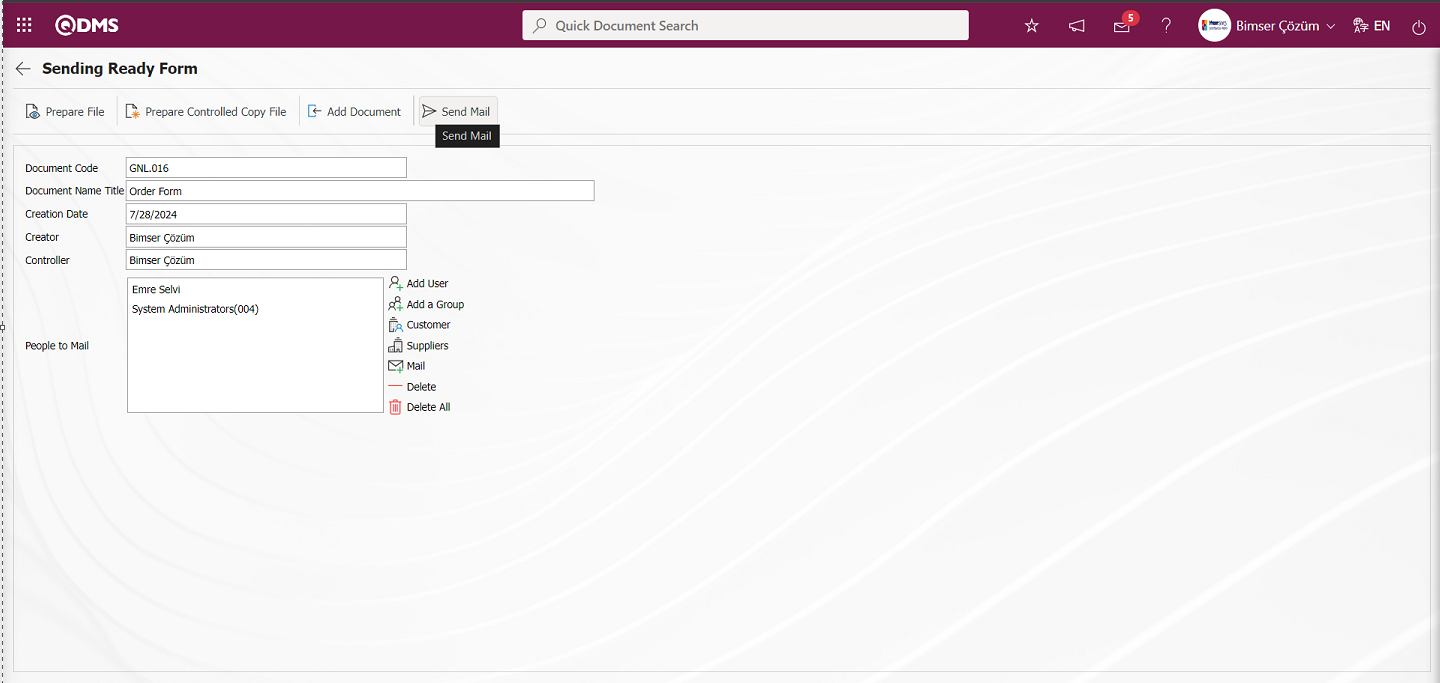
The message given by the system informs that the file has been successfully sent to the relevant persons
Click the  (Export to Excel) button on the Ready Form List** screen.
 Ready Form List displays the report in Excel format.
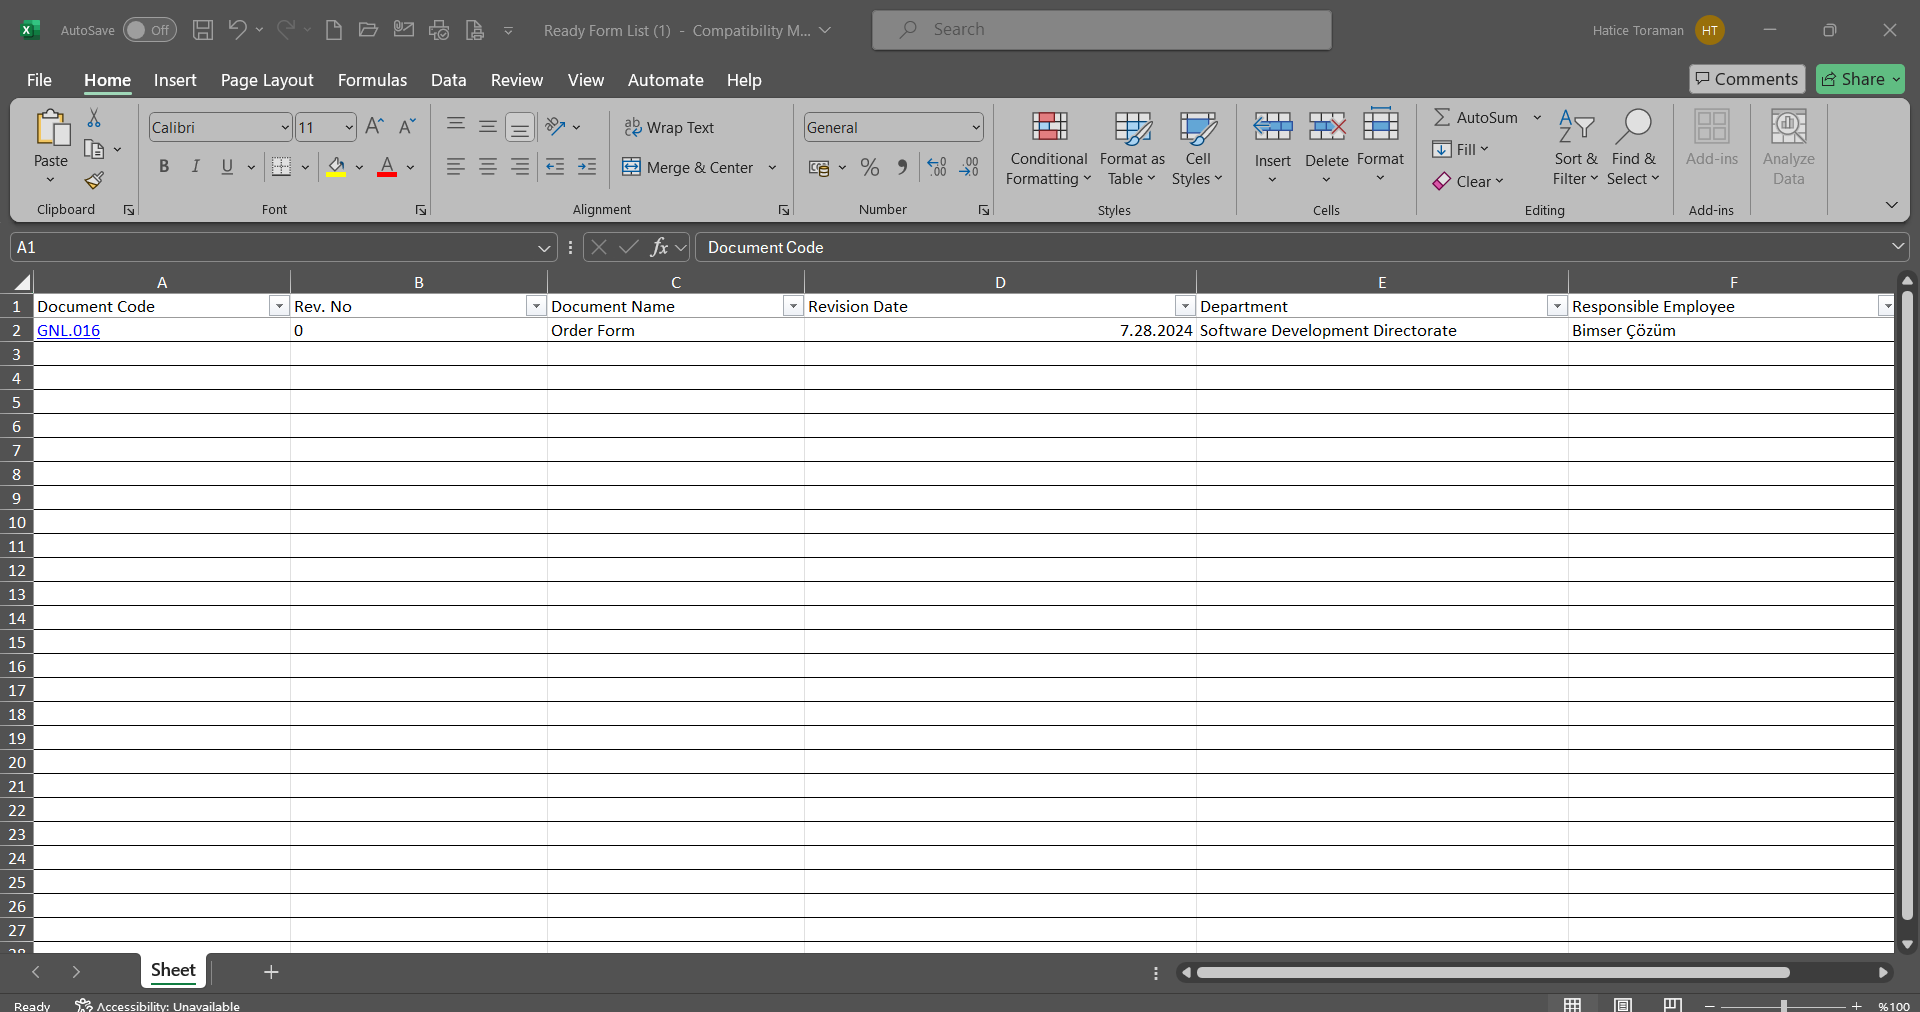
6.2.12.8. Suspended Document List
Menu Name: Integrated Management System/ Document Management/ Reports/ Suspended Document list
It is the menu where the list of documents suspended in the system is displayed and the report is received in Excel format. On the Suspended Document list screen, there are two tabs: document search and document list tab. In the Document Search tab, filtering is done according to the search criteria. In the document list tab, the records are listed according to the filtering process according to these search criteria.
With the help of the buttons on the screen;
: Records are searched by filtering.
: Data is transferred to Excel.
: The search criteria on the menu screens are used to clear the data remaining in the filter fields in the grid where the search operation is performed.
: The menu screen is restored to its default settings.
: User-based designing of the menu screen is done with the show-hide feature, that is, the hiding feature of the fields corresponding to the columns on the menu screens.
On the Suspended Document List** screen, type the document code in the “Document Code” field, which is the filter search criteria in the document search tab, and click the (Search) button.

Suspended Document List screen, records are listed according to the search criteria in the filter made in the Document List tab.
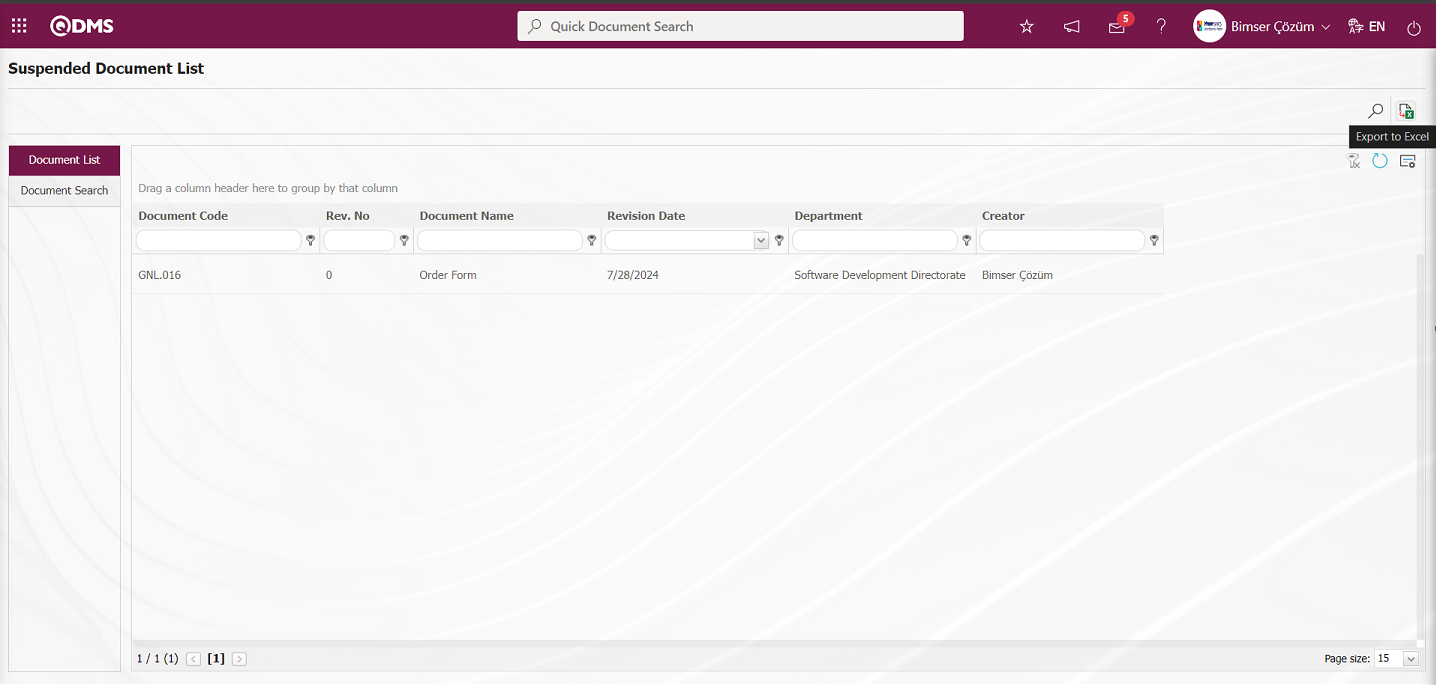
On the Suspended Document List screen, click the (Export to Excel) button to get the Suspended Document List report in Excel format.
6.2.12.9. Canceled Document List
Menu Name: Integrated Management System/ Document Management/ Reports/ Canceled Document List
This is the menu where the list of canceled documents in the system is displayed and the report is received in Excel format. On the Canceled Document List screen, there are two tabs: document search and document list tab. In the document search tab, filtering is done according to the search criteria. In the document list tab, records are listed according to the filtering process according to these search criteria.
With the help of the buttons on the screen;
 : The selected document is displayed in the list.
 : Cancel reason information of the selected document in the list is displayed
 : Information about the approval history of the document selected in the list is displayed. It is a button that is displayed depending on the parameter. The parameter is activated by selecting the parameter value “Yes” of parameter 326 in the Document Management Module parameters.
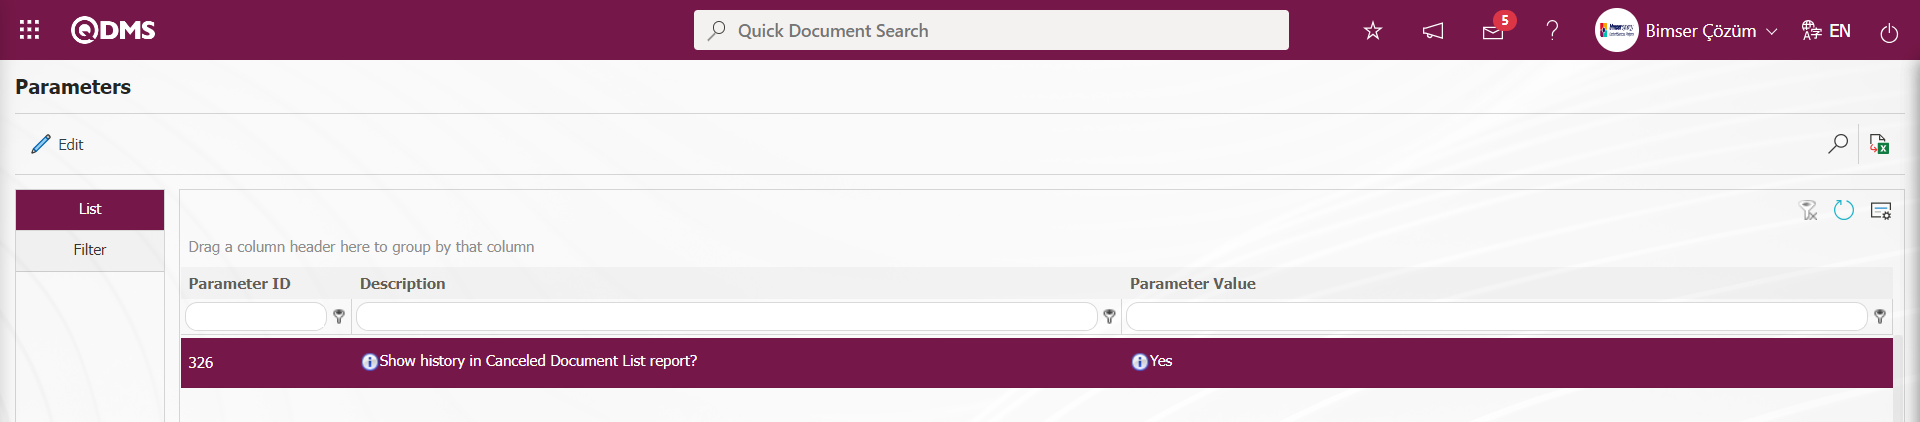
After the parameter is activated, the History button is displayed on the Canceled Document List screen.
: Records are searched by filtering.
: Data is transferred to Excel.
: The search criteria on the menu screens are used to clear the data remaining in the filter fields in the grid where the search operation is performed.
: The menu screen is restored to its default settings.
: User-based designing of the menu screen is done with the show-hide feature, that is, the hiding feature of the fields corresponding to the columns on the menu screens.
On the Cancelled Document List** screen, type the document code in the “Document Code” field, which is the filter search criteria in the document search tab, and click the (Search) button.

In the Cancelled Document List screen, records are listed according to the search criteria in the filter made in the document list tab.

On the Cancelled Document List screen, while the canceled document is selected in the list, the document is viewed by clicking the  button.
On the Cancelled Document List screen, click the  button while the canceled document is selected in the list.
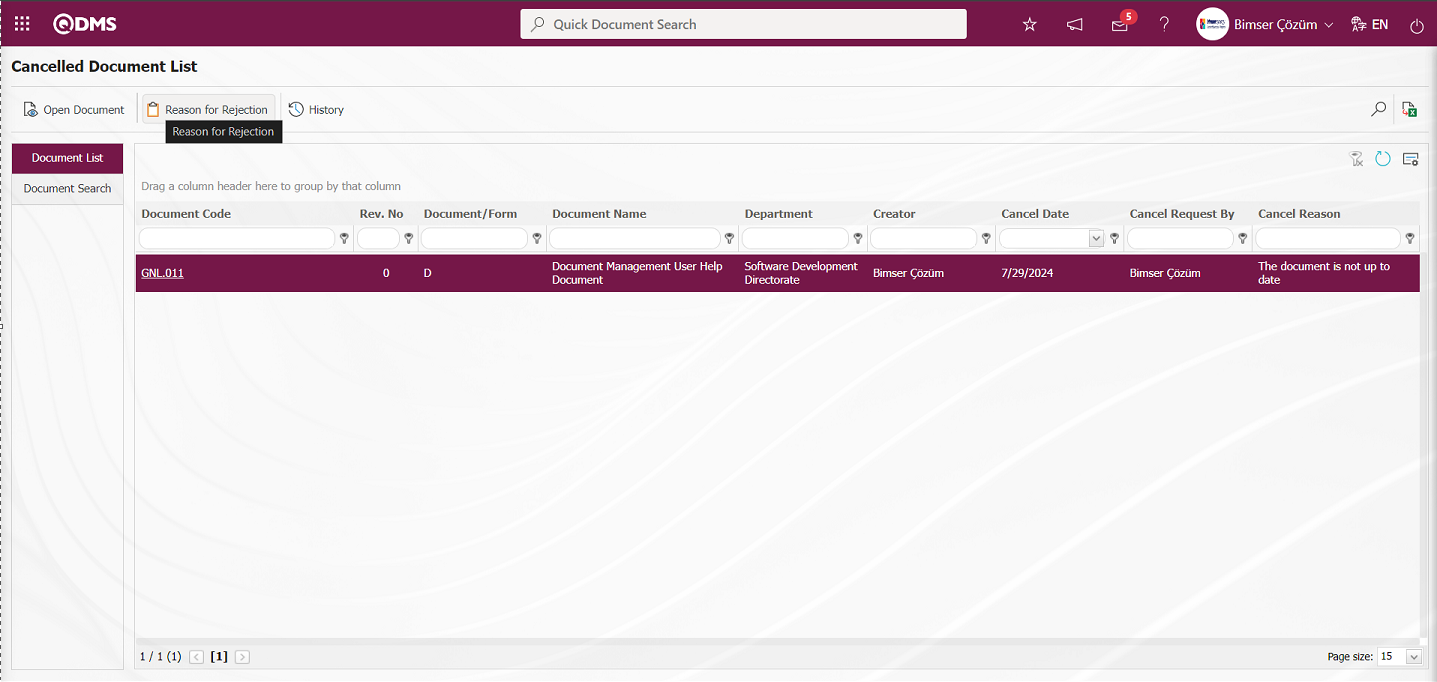
On the Cancelled Document List screen, the cancellation reason information of the document is displayed.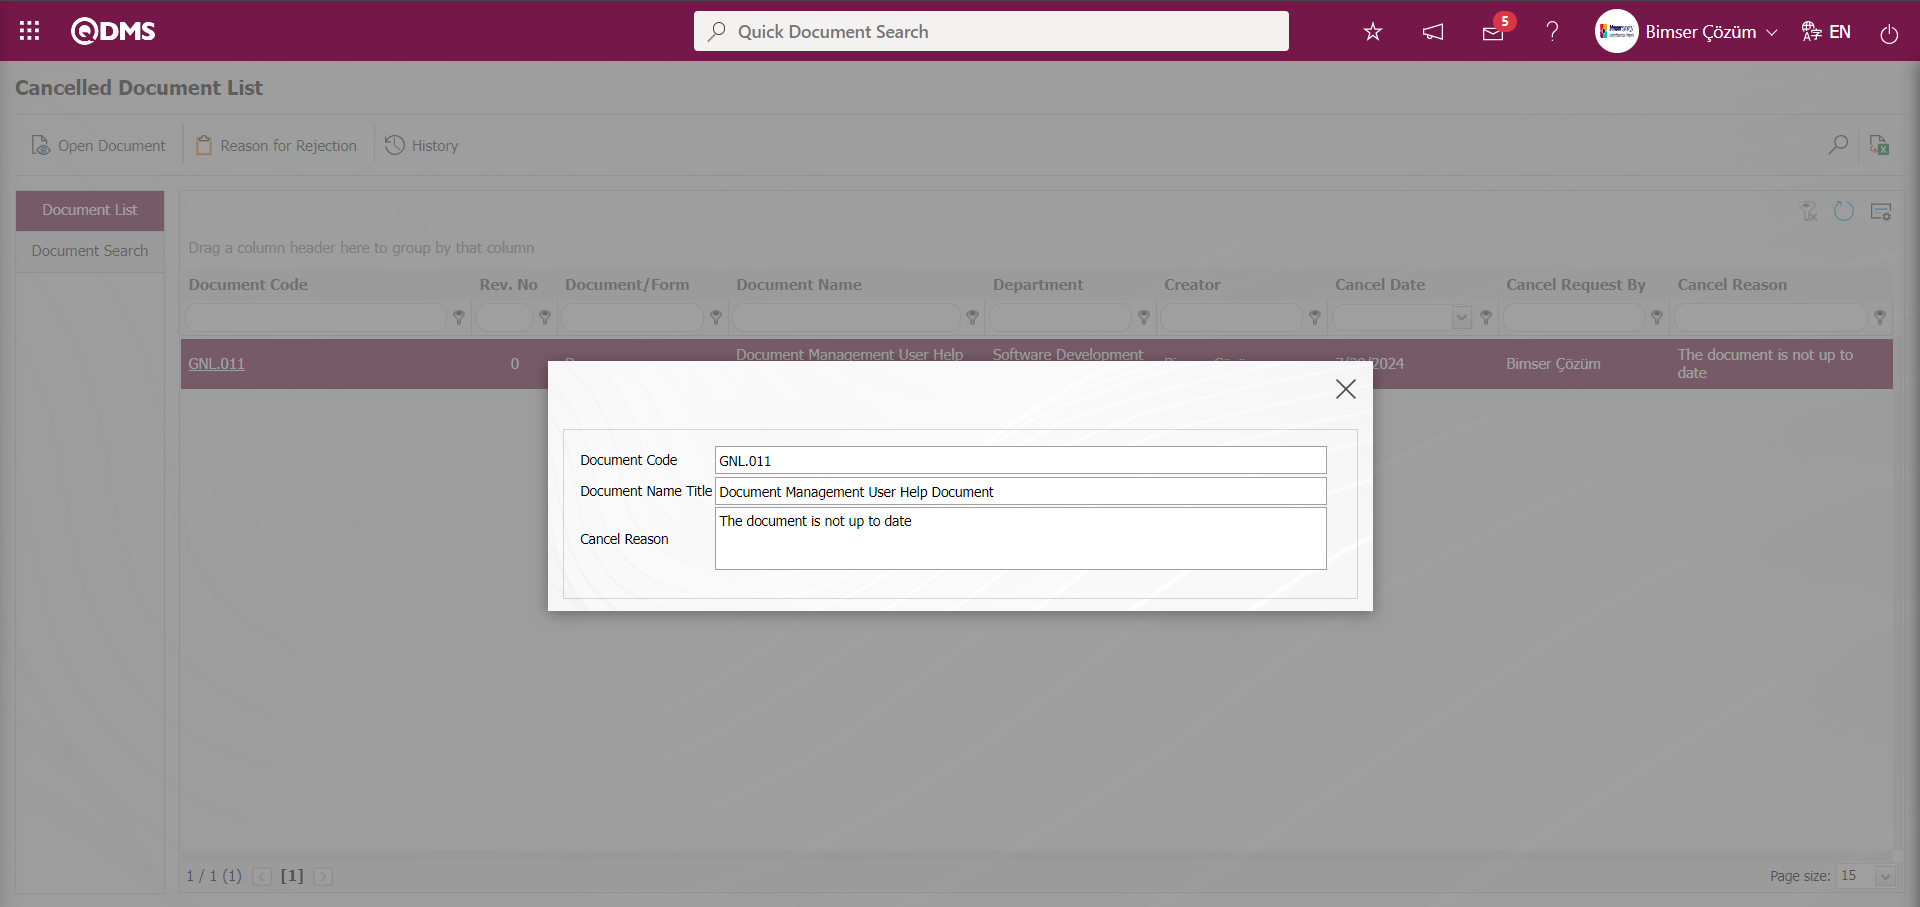
On the Cancelled Document List screen, click the  button while the canceled document is selected in the list.

Information about the approval history of the canceled document is displayed. The name and surname of the user who made the cancelation assigned in the approval matrix, the date, time and reason for the cancellation can be accessed from the history section
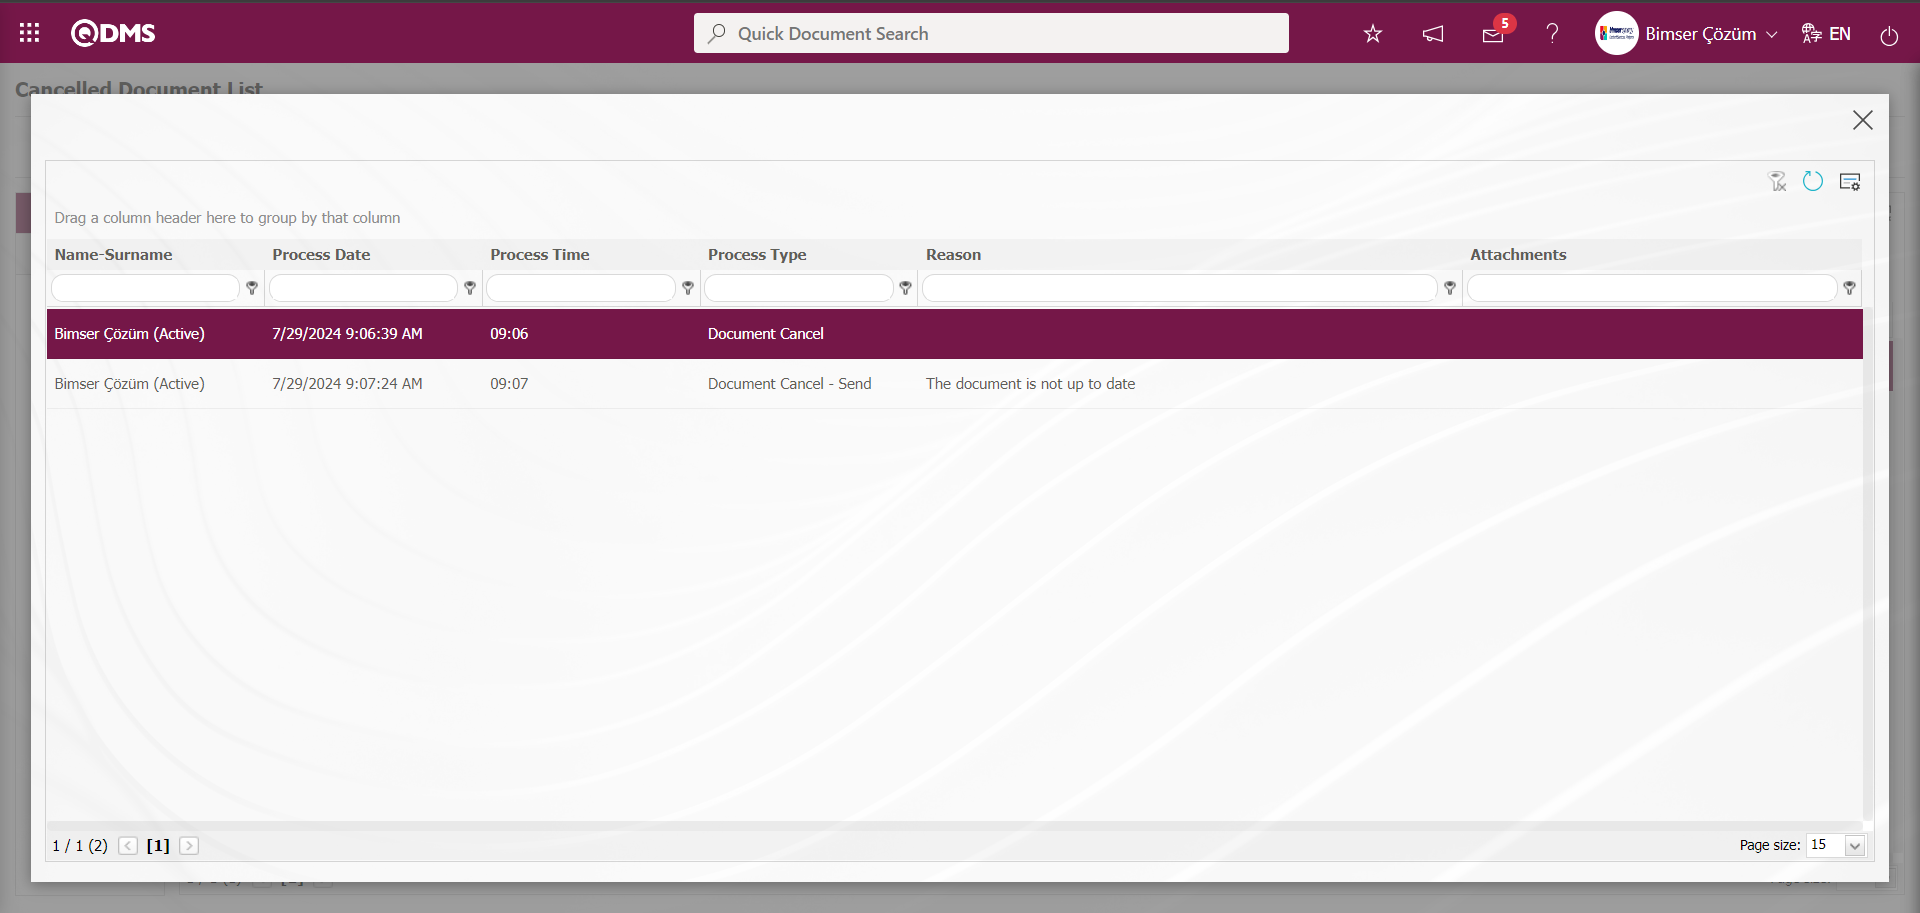
On the Cancelled Document List screen, click the (Export to Excel) button while the canceled document is selected in the list.
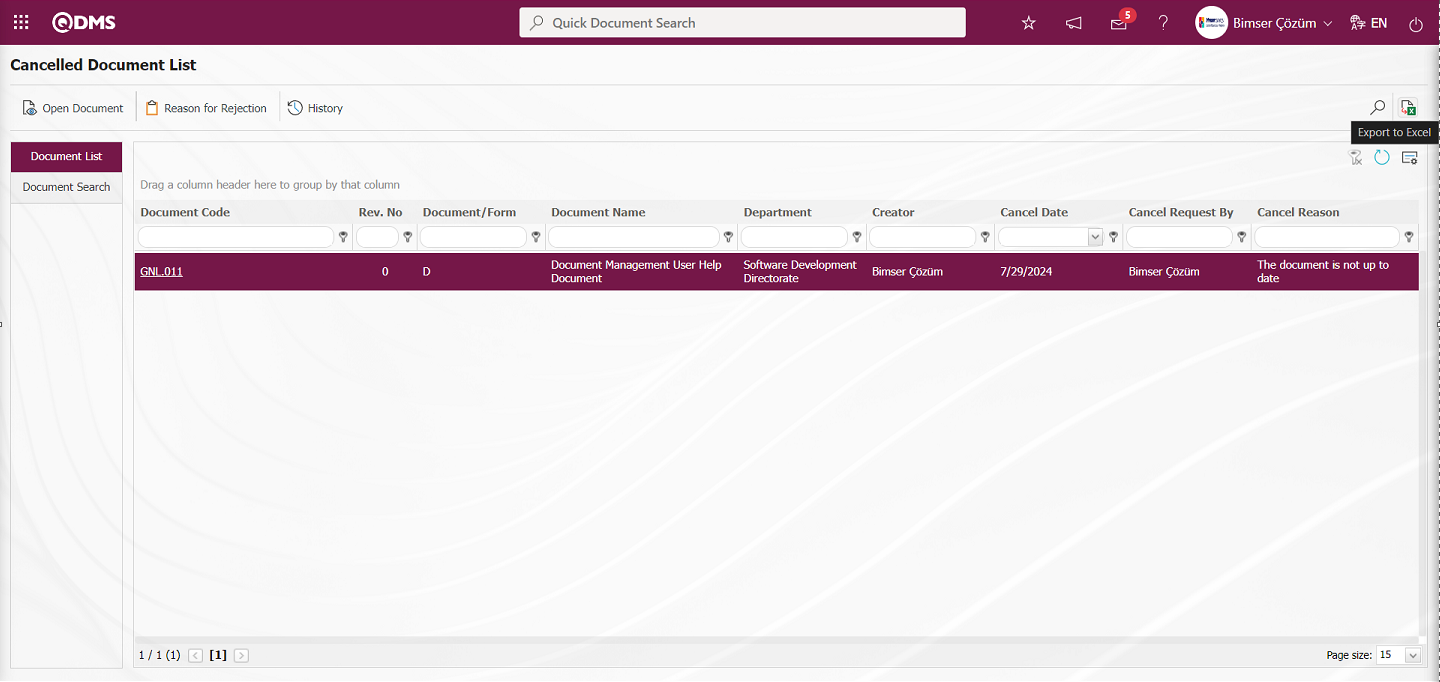
The report of the Cancelled Document is taken from the Excel format of the Cancelled Document List screen.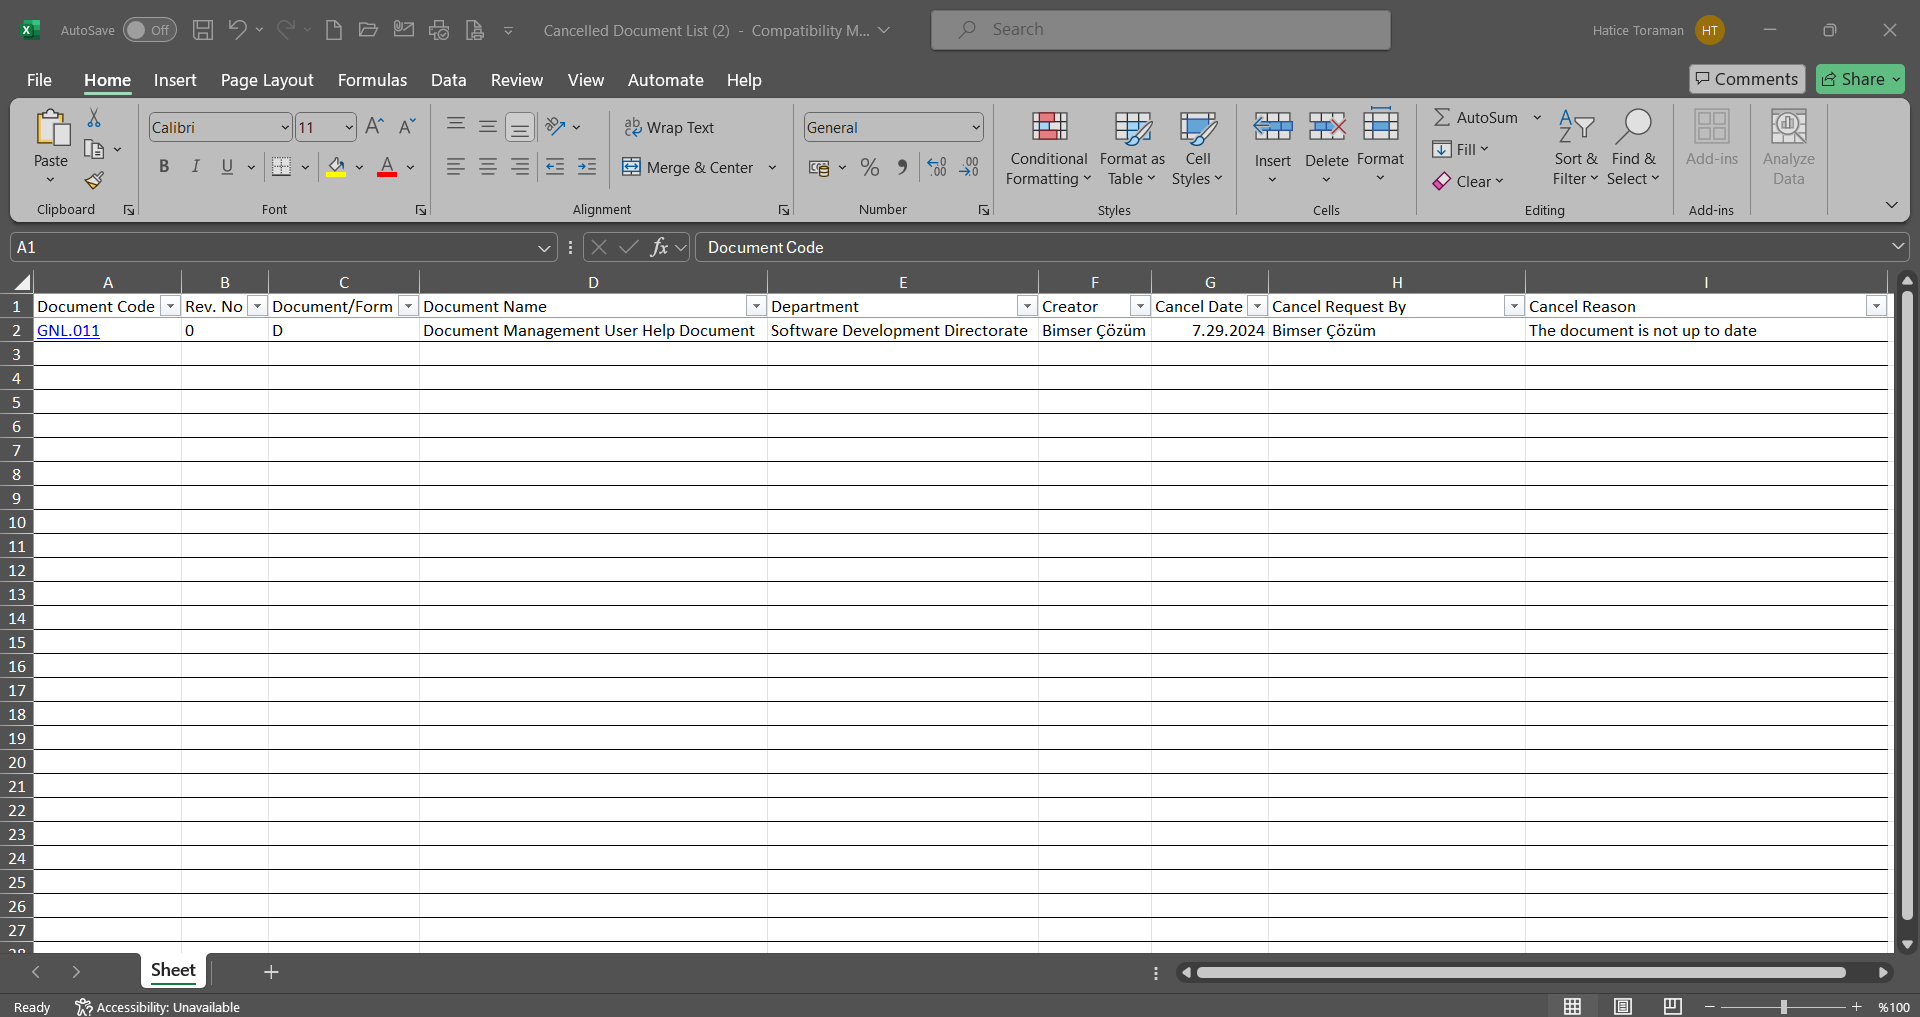
6.2.12.10. Draft Document List
Menu Name: Integrated Management System/ Document Management/ Reports/ Draft Document List
It is the menu where the status information of the documents is checked, the status of the documents is accessed and the report is received in Excel format. On the Draft Document List screen, the buttons on the screen change according to whether the user is a module administrator or not. There are two tabs on the Draft Document List screen: document search and document list tab. In the document search tab, filtering is done according to the search criteria. In the document list tab, records are listed according to the filtering process according to these search criteria.
Operations performed on the document whose status is “ Saved” in the Draft Document List menu;
In the document search tab in the Draft Document list, the code information of the document in the “Saved” status in the search criteria is written and the document is displayed in the document list by clicking the  (Search) button.

With the help of the buttons on the screen;
 :Viewing the selected document in the list is done.
 : The process of viewing the opinions given by the commentators in the document whose status is selected in the list is at the opinion stage.
 : Changing the personnel of the selected document in the list is done. For this button to be displayed, users must be defined as module administrator in the Document Management Module in the System Infrastructure Definitions/BSID/Configuration Settings/Administrator Identification menu.
 : Deletion of the selected document in the list is done. If it is a newly prepared document, it is possible to delete the draft document, if it is a document in revision, it is possible to delete the revision process and restore the document to its previous state. For this button to be displayed, users must be defined as module administrator in the Document Management Module in the System Infrastructure Definitions/BSID/Configuration Settings/Administrator Identification menu.
 : Print the cover of the document selected in the list.
 : Printing of the document selected in the list is done.
 : The document in the selected opinion status in the list is sent back from the opinion. The status of the document sent back from the opinion becomes “Returned from Opinion” status.
: Records are searched by filtering.
: Data is transferred to Excel.
: The search criteria on the menu screens are used to clear the data remaining in the filter fields in the grid where the search operation is performed.
: The menu screen is restored to its default settings.
: User-based designing of the menu screen is done with the show-hide feature, that is, the hiding feature of the fields corresponding to the columns on the menu screens.

While the document with the status “Saved” is selected on the Draft Documents list screen, the document is viewed by clicking the button  .
.
On the Draft Documents list screen, click the  button while the document whose status is “Saved” is selected.
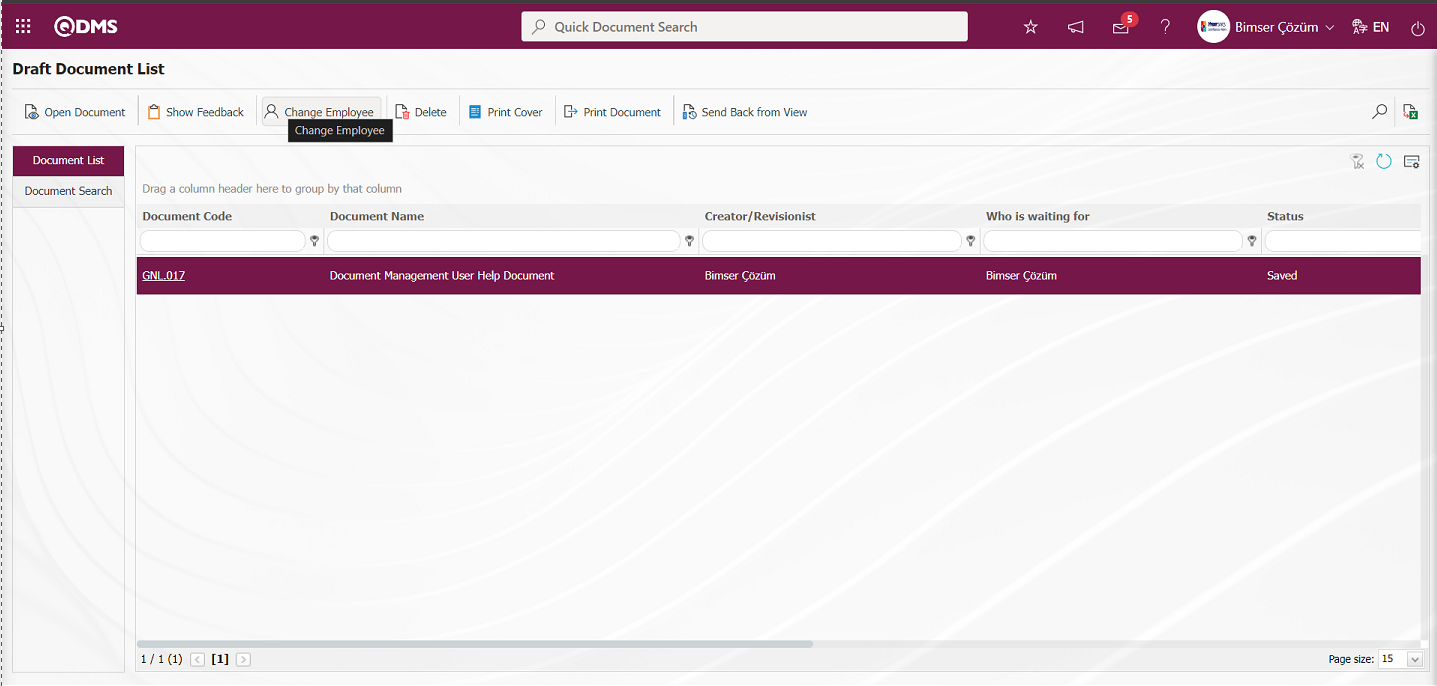
Select the personnel in the Personnel list defined in the system and click the  button.
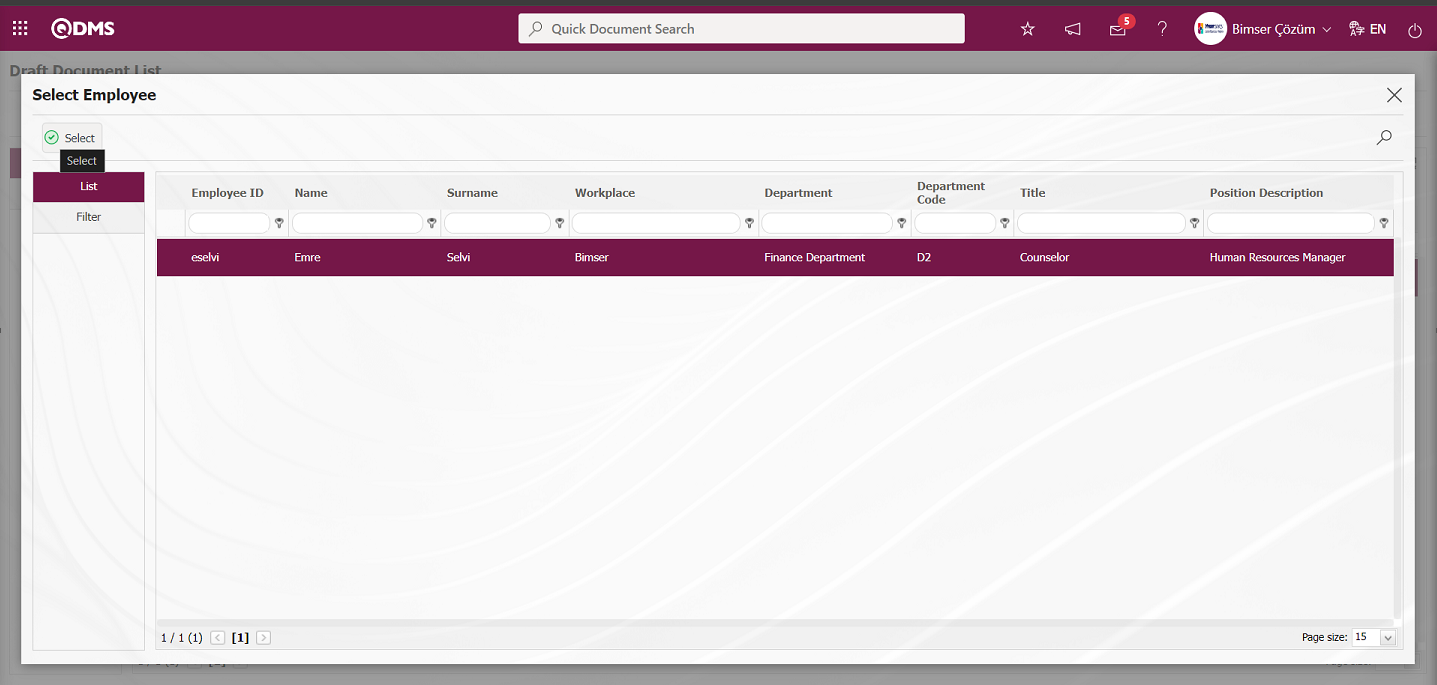
The process of changing the person who prepared/revised the document is done.
On the Draft Documents list screen, click the  button while the document whose status is “ Saved” is selected.
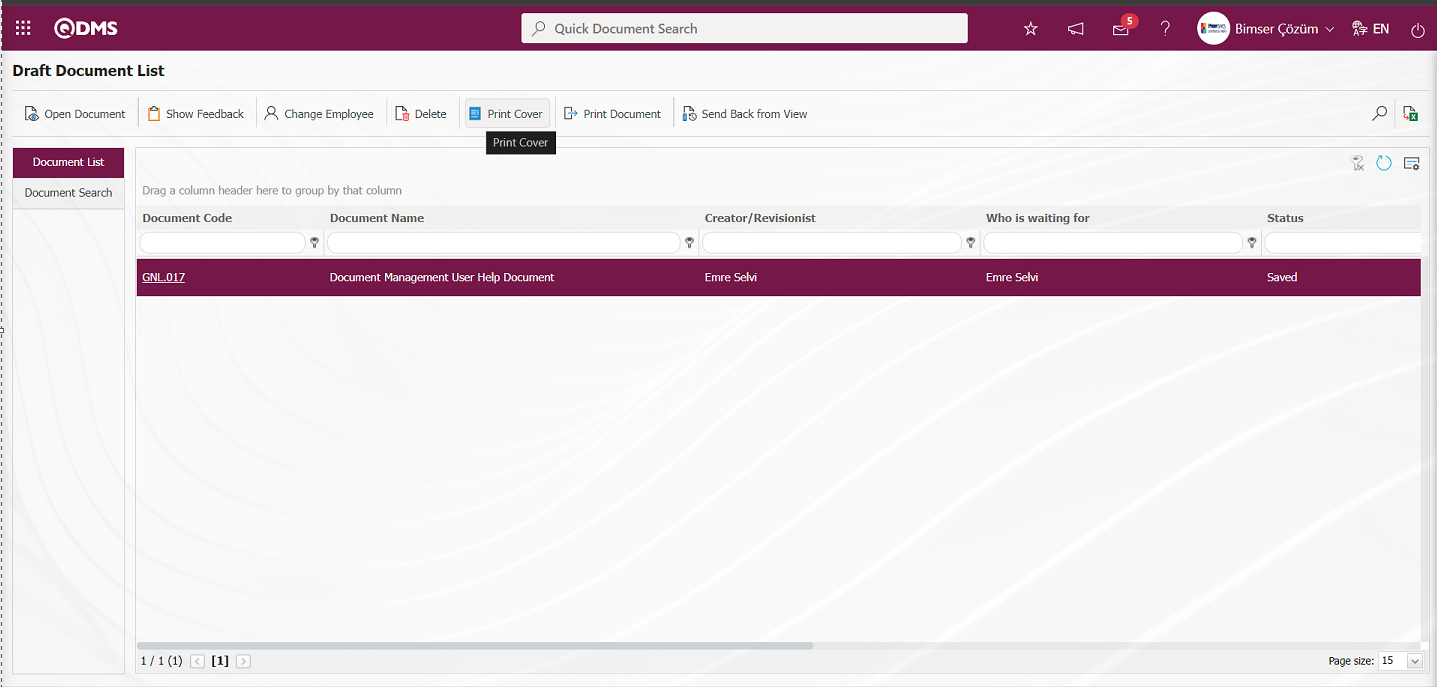
The cover of the document in the saved status is printed.
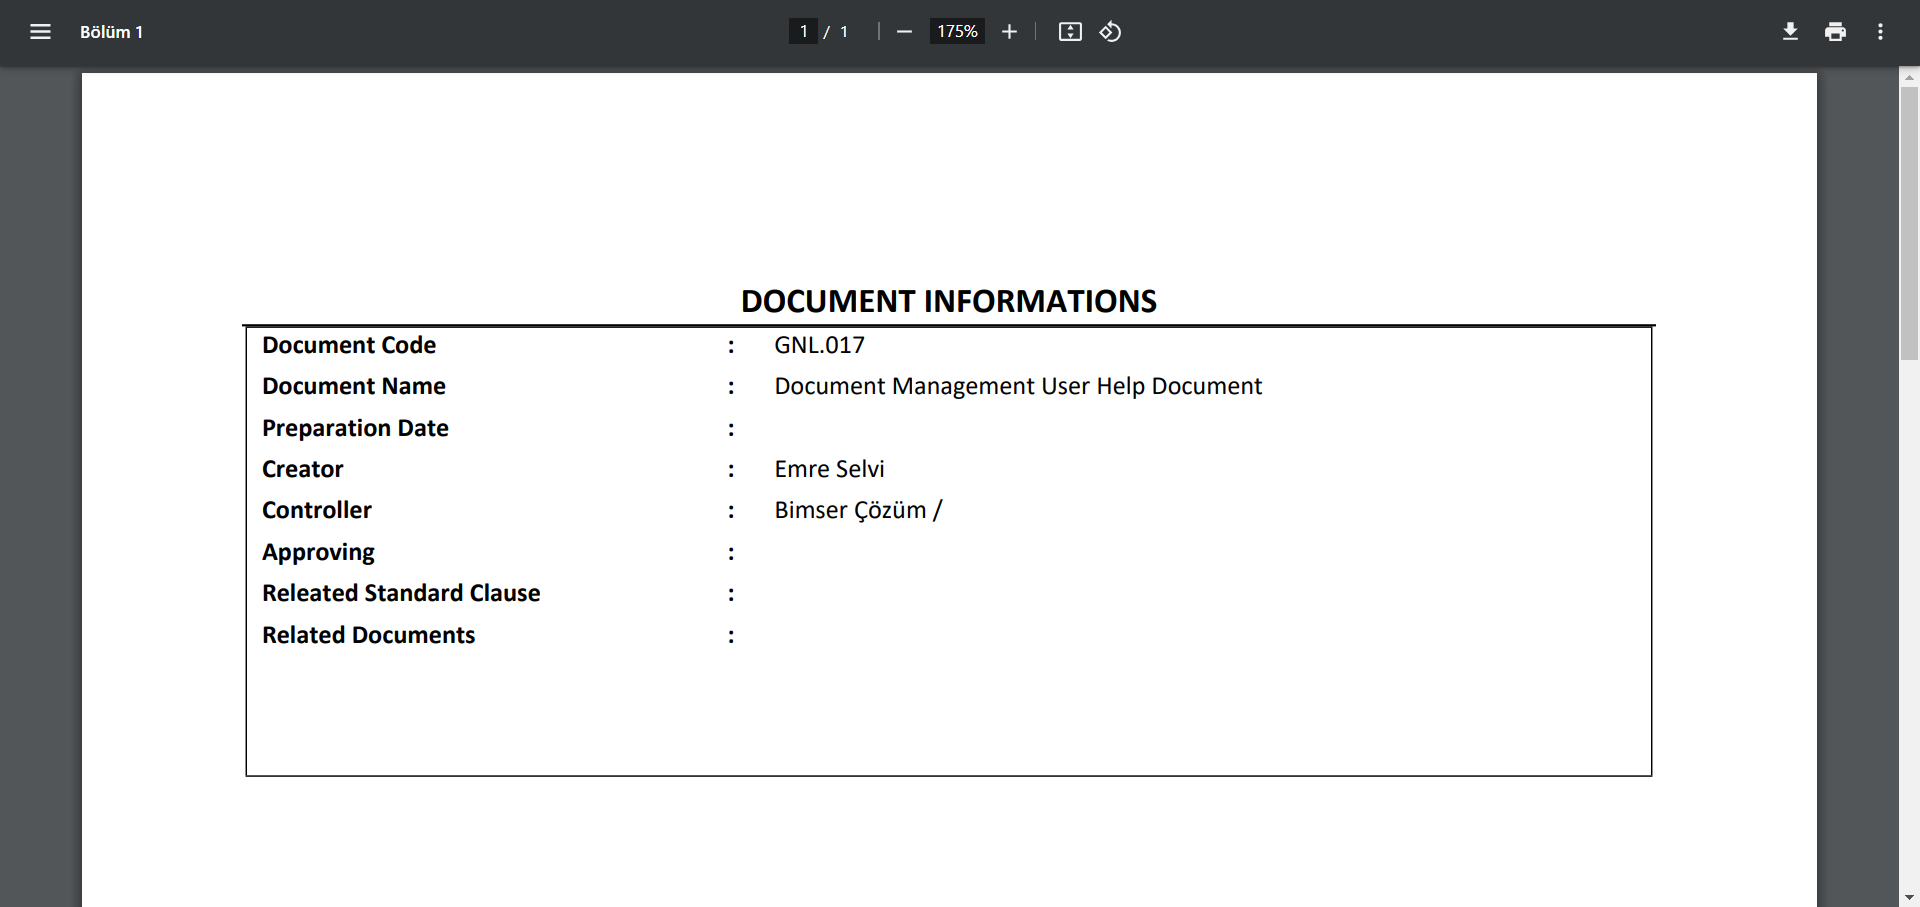
On the Draft Documents list screen, click the  button while the document whose status is “ Saved” is selected.
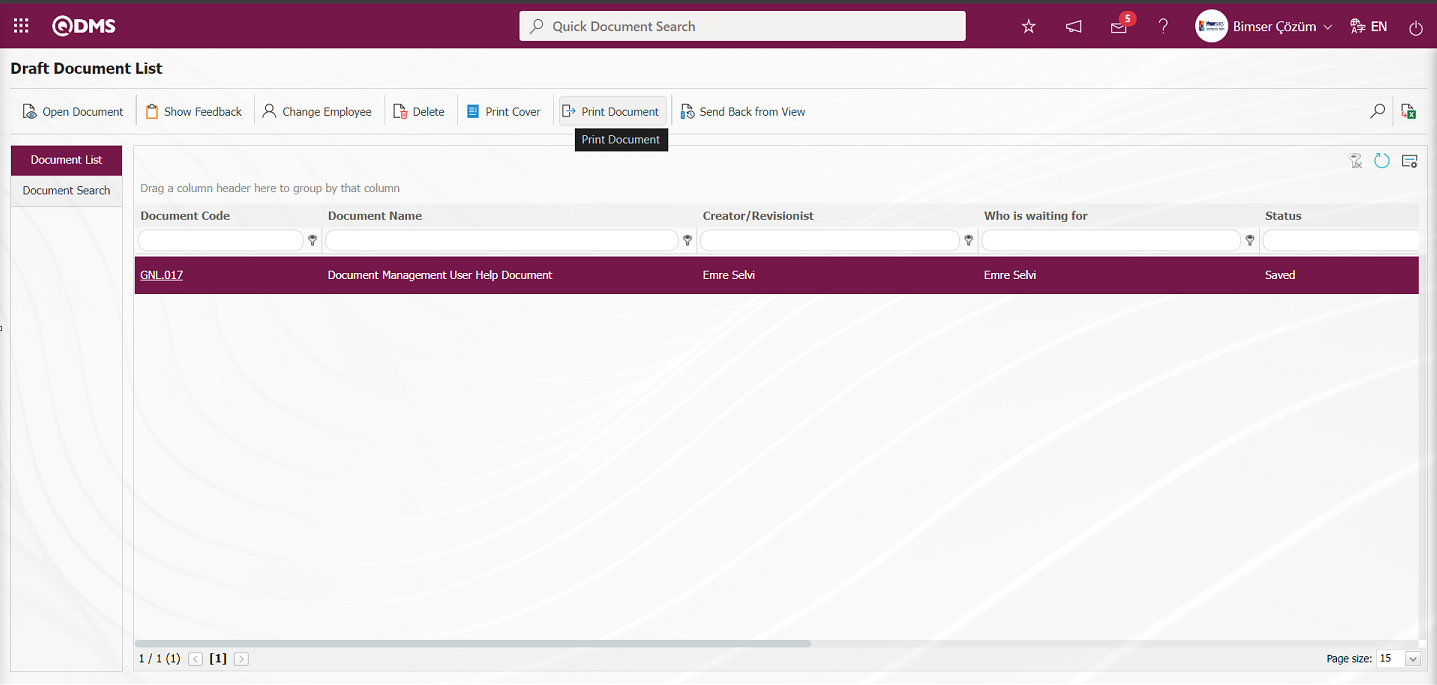
Click on the  button on the screen that opens and the document is printed.
While the document with the status “ Saved” is selected on the Draft Documents list screen, the document is deleted by clicking the  button.

In the message given by the system, the “OK” button is clicked and the document is deleted.
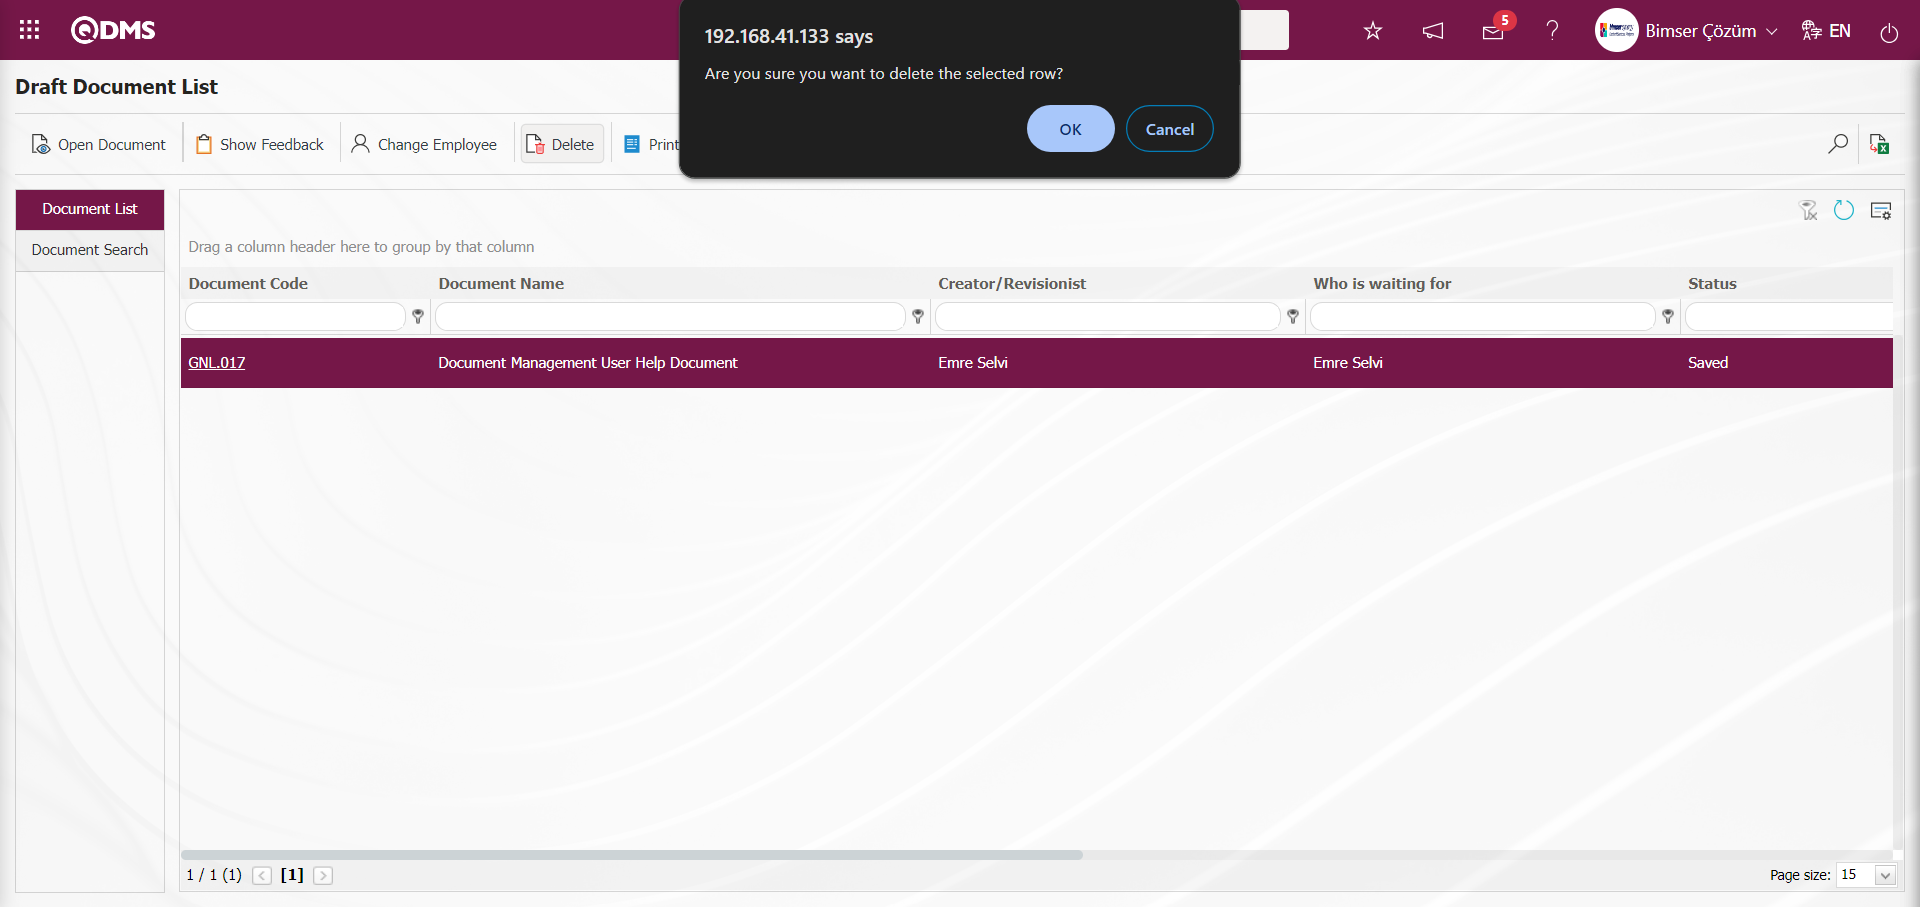
Click the  (Export to Excel) button on the Draft Documents list screen.

The “Draft Document List” report is displayed in Excel format.
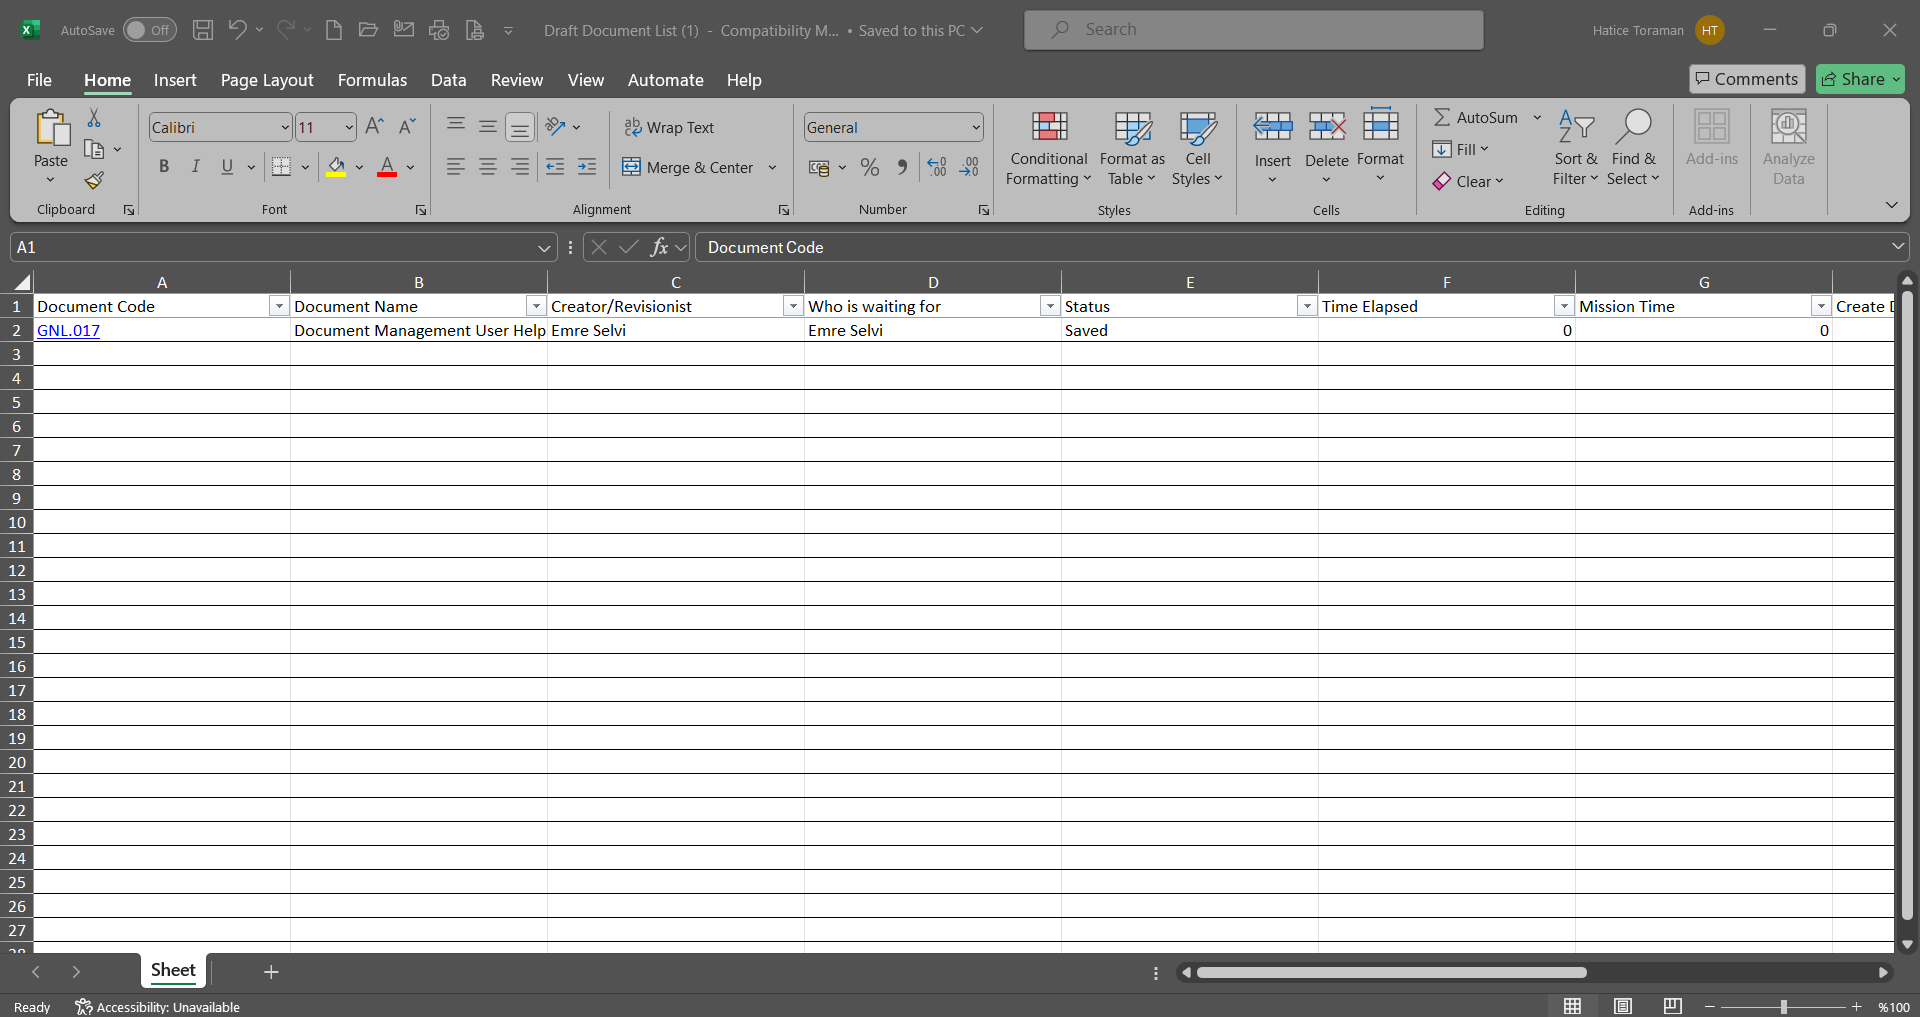
On the draft documents list screen, the status of the document is selected in the Draft Status field, which is the search criteria in the document search tab on the document search tab, and the relevant records are listed in the document list tab and the process steps are carried out in this way by using the buttons on the screen. The buttons vary according to the status of the document.
6.2.12.11. Folder Matrix Report
Menu Name: Integrated Management System/ Document Management/ Reports/ Folder Matrix Report
It is the menu where folder-based authorization, approval, distribution and opinion matrices are displayed and reported in Excel format. Folder-based controller information is accessed. It is seen to whom the documents in the folder are assigned as reading tasks with the distribution matrix. On the Folder Matrix Report screen, there are two tabs: document search and document list tab. In the document search tab, filtering is done according to the search criteria. In the document list tab, records are listed according to the filtering process according to these search criteria
With the help of the buttons on the screen;
: Records are searched by filtering.
: Data is transferred to Excel.
: The search criteria on the menu screens are used to clear the data remaining in the filter fields in the grid where the search operation is performed.
: The menu screen is restored to its default settings.
: User-based designing of the menu screen is done with the show-hide feature, that is, the hiding feature of the fields corresponding to the columns on the menu screens.
On the Folder Matrix Report screen, click the  (Select) button in the “Folder Code” field, which is the filter search criteria in the document search tab.

In the Document Folder list defined in the system, folder selection is made and the  button is clicked.
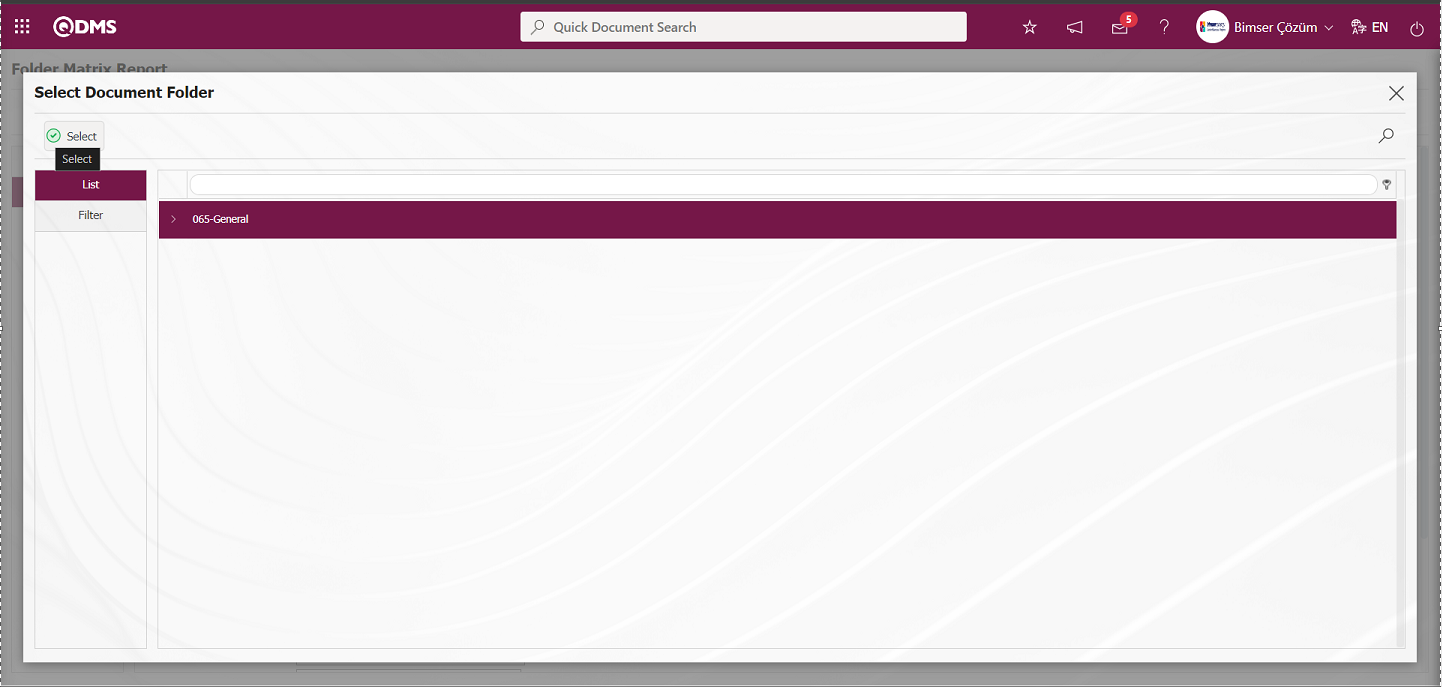
After selecting the folder according to the search criteria in the Document Search tab, click the  (Search) button.

In the Folder Matrix Report screen, records are listed according to the search criteria in the filter made in the Document List tab.
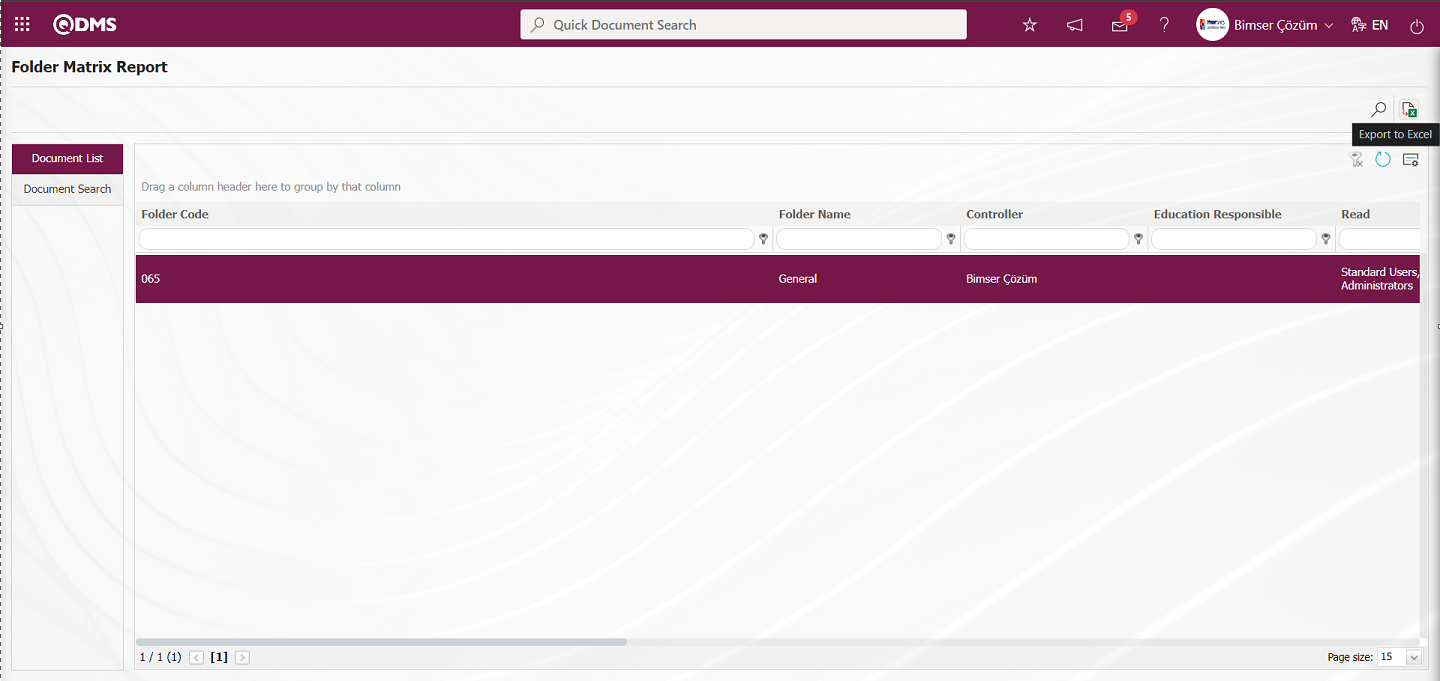
On the Folder Matrix Report screen, click the (Export to Excel) button to get the Folder Matrix Report report in Excel format.
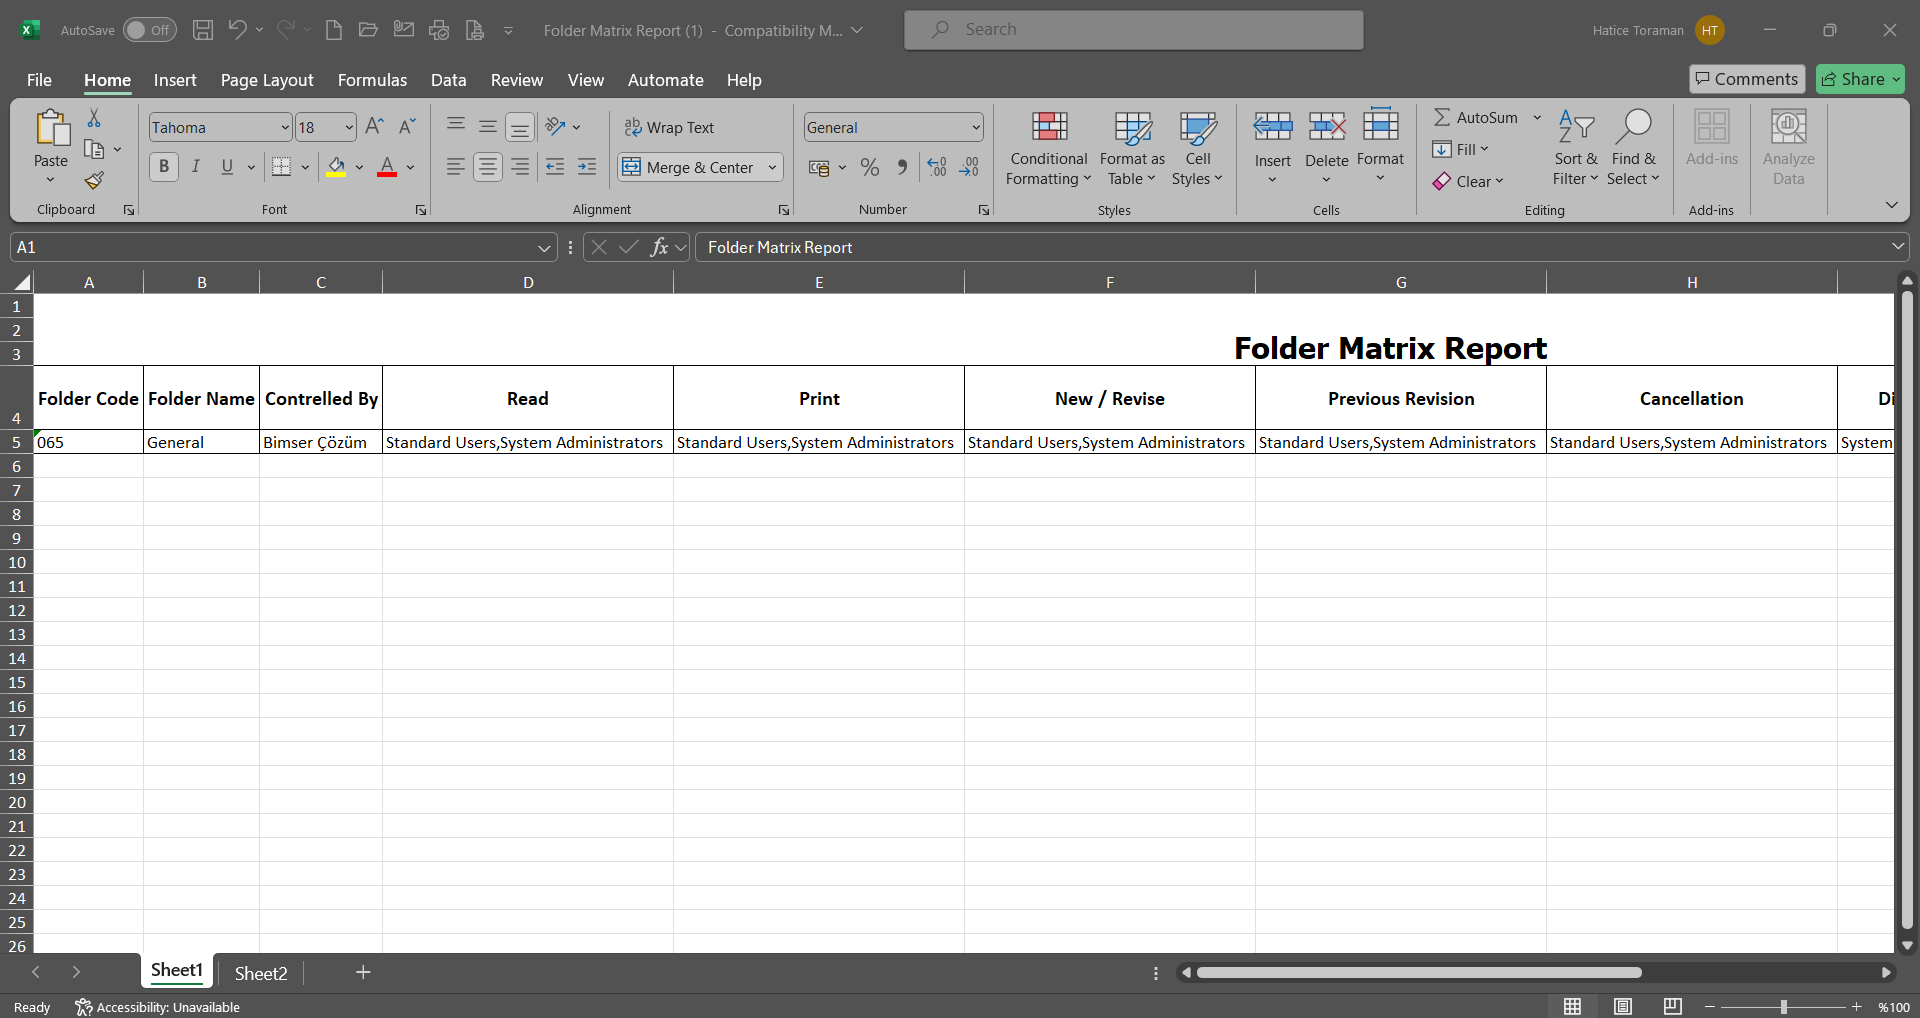
6.2.12.12. Document Matrix Report
Menu Name: Integrated Management System/ Document Management/ Reports/ Document Matrix Report
It is the menu where document-based authorization, approval, distribution, process matrices are displayed and the report is taken from Excel format. On the Document Matrix Report screen, there are two tabs: document search and document list tab. In the document search tab, filtering is done according to the search criteria. In the document list tab, records are listed according to the filtering process according to these search criteria.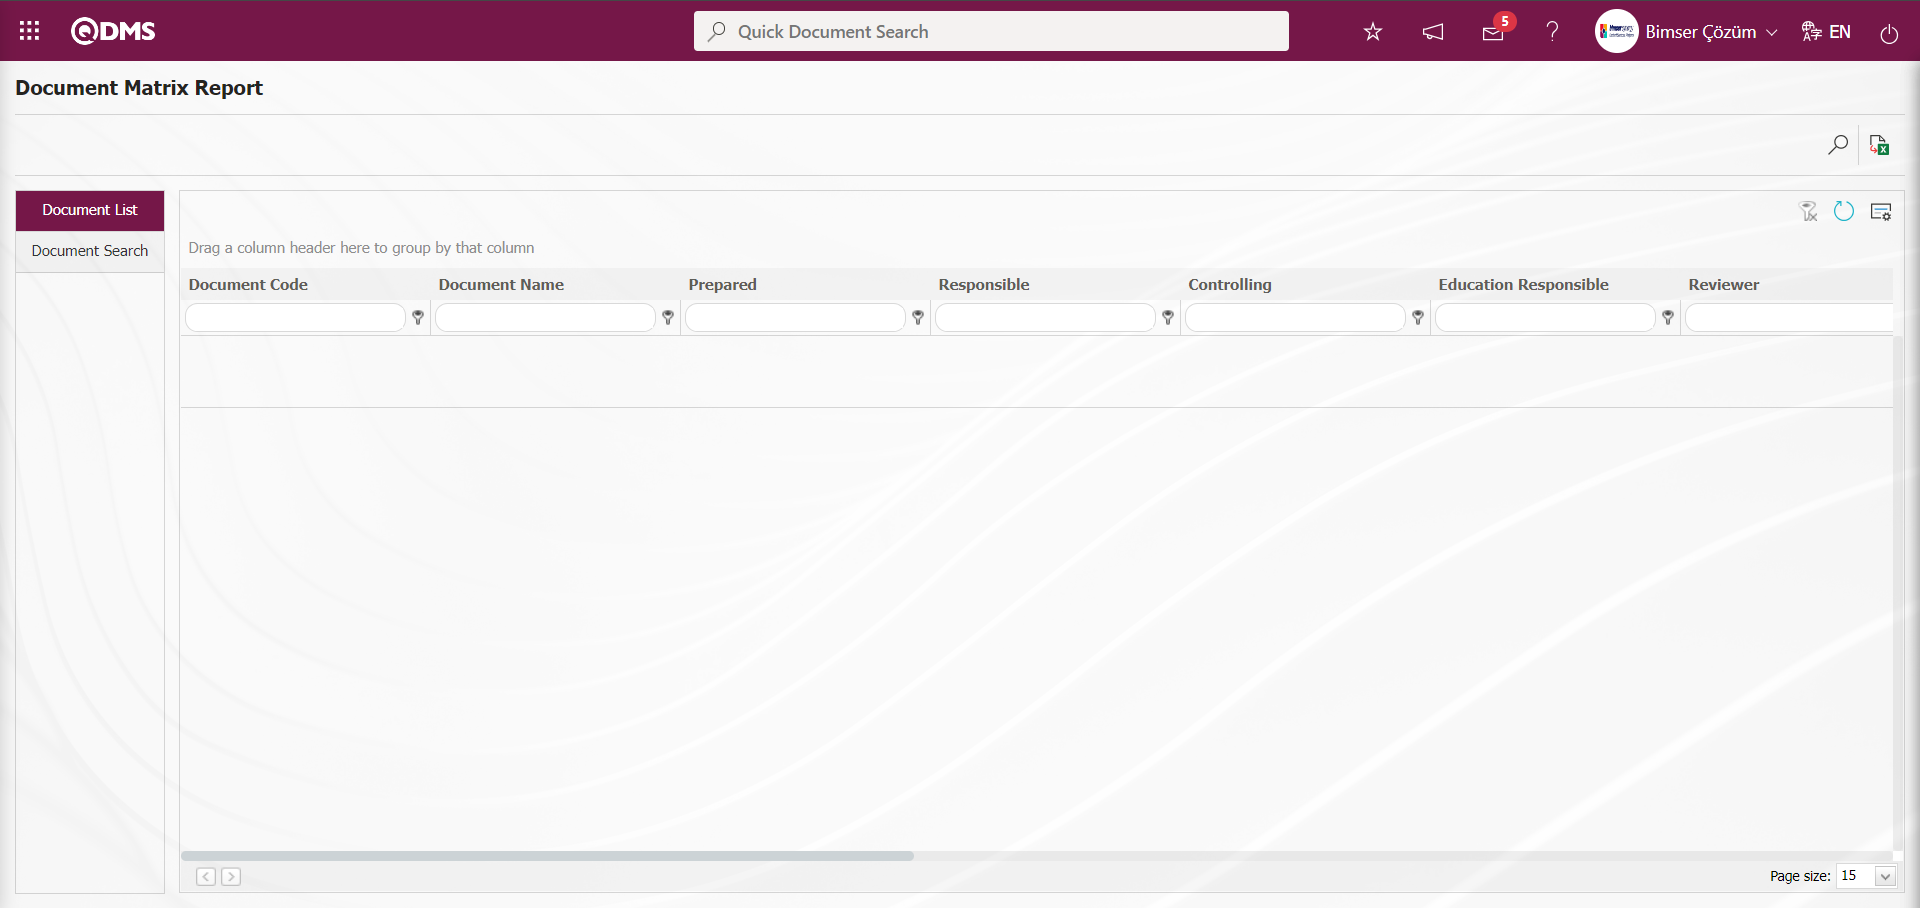
With the help of the buttons on the screen;
: Records are searched by filtering.
: Data is transferred to Excel.
: The search criteria on the menu screens are used to clear the data remaining in the filter fields in the grid where the search operation is performed.
: The menu screen is restored to its default settings.
: User-based designing of the menu screen is done with the show-hide feature, that is, the hiding feature of the fields corresponding to the columns on the menu screens.
On the Document Matrix Report screen, type the document code in the “Document Code” field, which is the filter search criteria in the document search tab, and click the (Search) button.

In the Document Matrix Report screen, records are listed according to the search criteria in the filter made in the Document List tab.
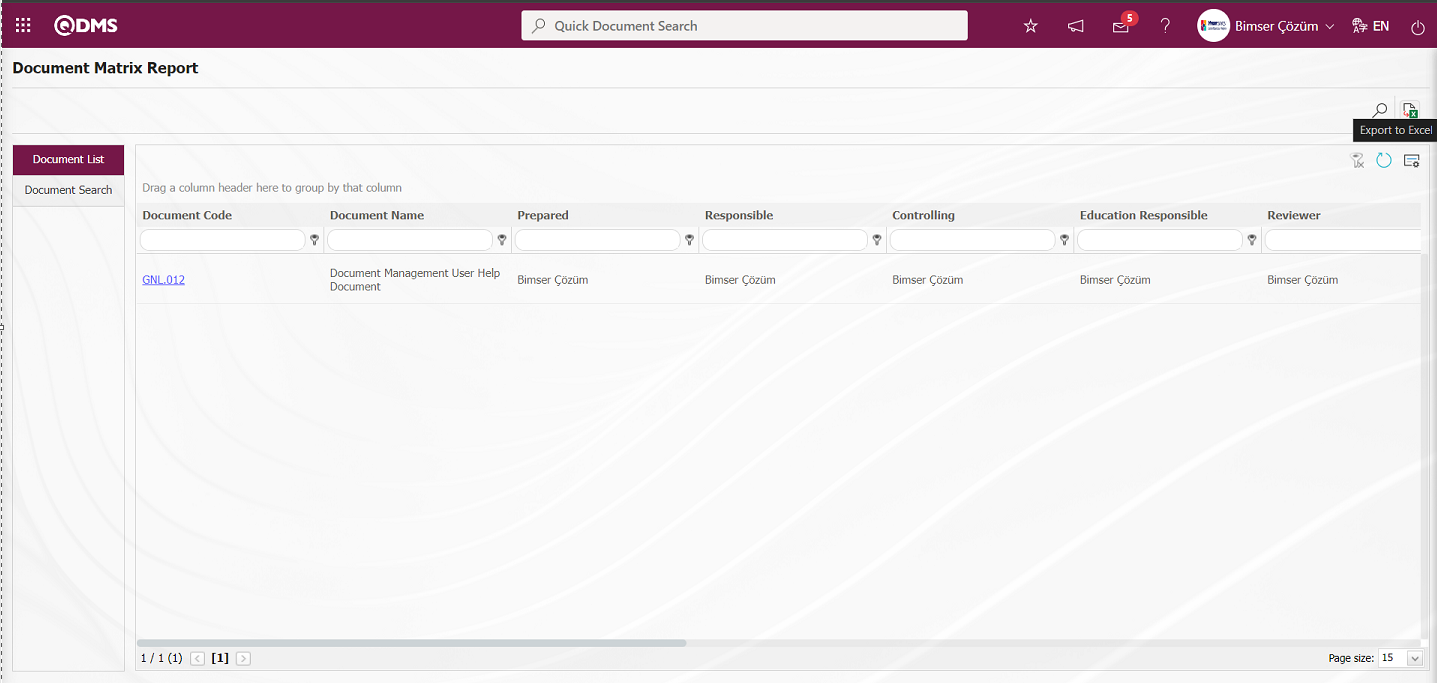
On the Document Matrix Report screen, click the (Export to Excel) button to get the Document Matrix Report report in Excel format.
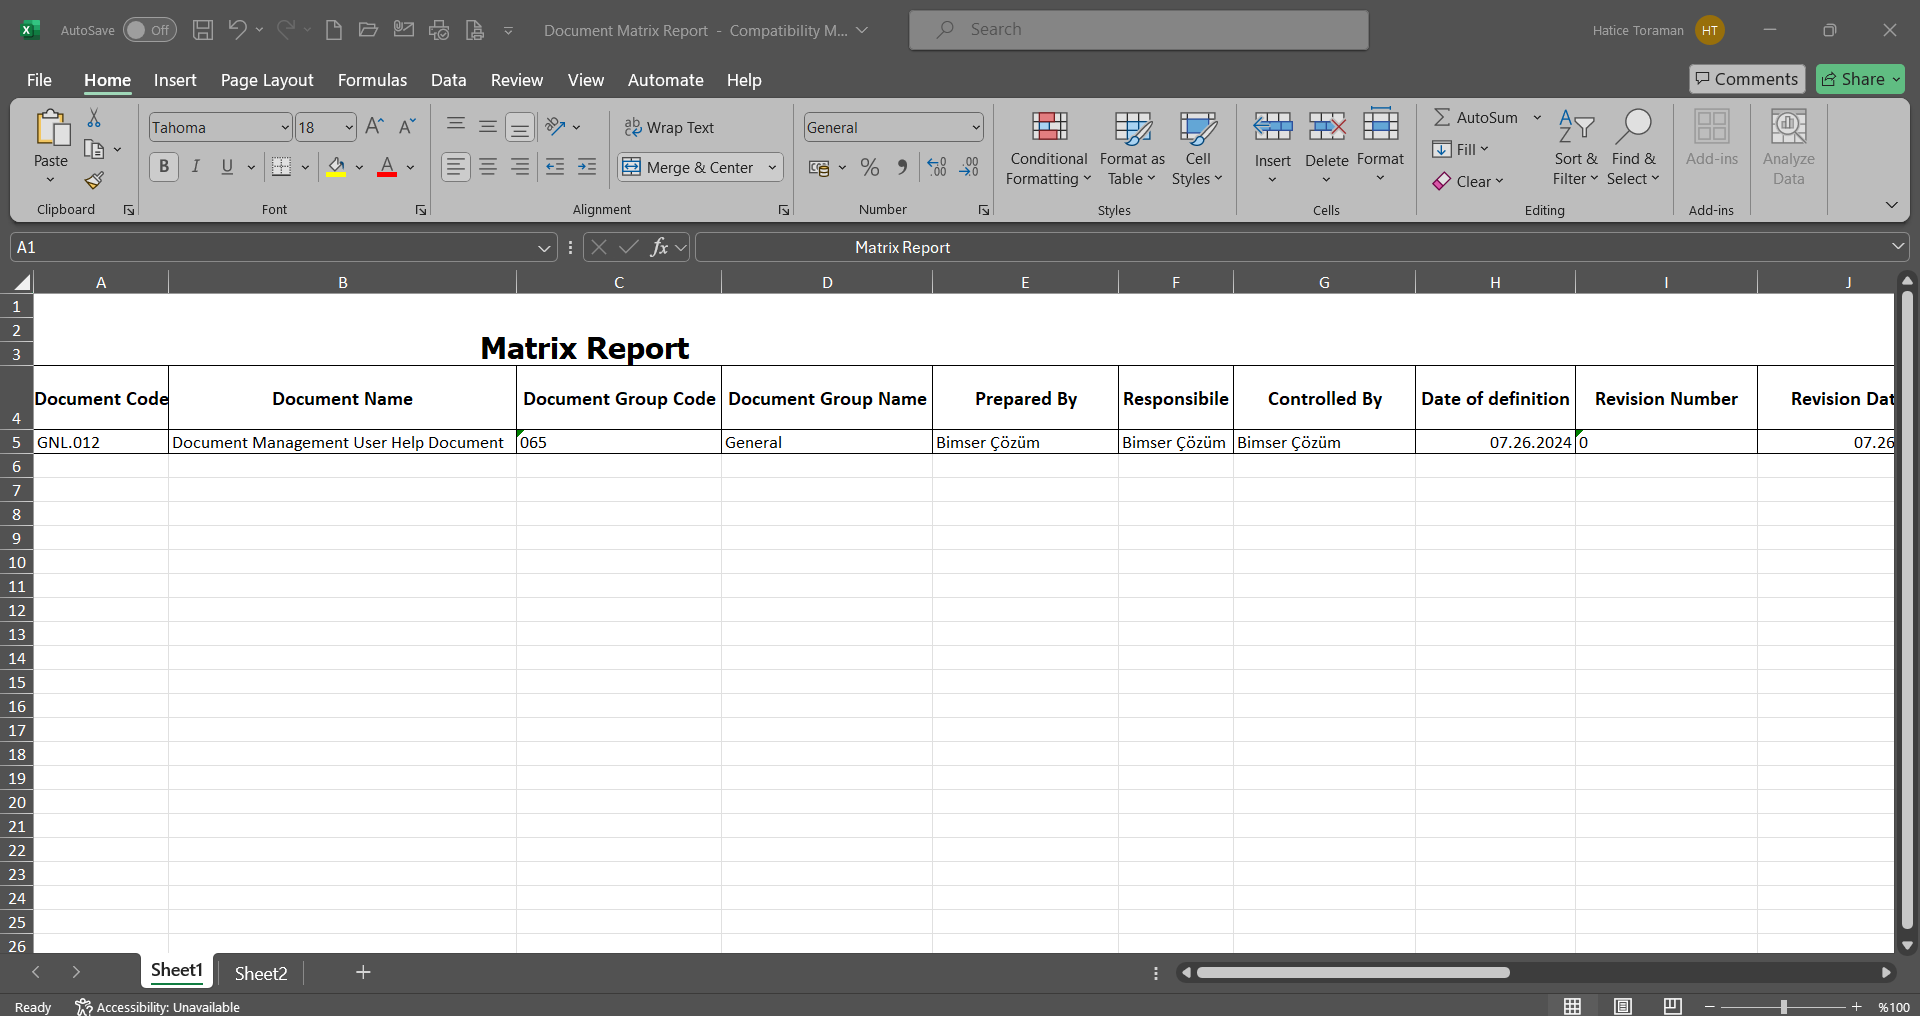
6.2.12.13.Document Review List
Menu Name: Integrated Management System/ Document Management/ Reports/ Document Review List
It is the menu where it is possible to track whether the documents have been reviewed or not and get the report in Excel format. With the Document Review Report, the list of documents that are due for review according to the review periods specified in the folder/ document is accessed. On the Document Review List screen, the buttons on the screen change according to whether the user is a module administrator or not. In this menu, the Module Administrator can change the personnel responsible for the review with the help of the  button on the Document Review List screen in the Document Management module. In addition, the Module Administrator can cancel the routing process with the help of the
  button on the Document Review List screen in the Document Management module. On the Document Review List screen, there are two tabs: document search and document list tab. In the document search tab, filtering is done according to the search criteria. In the document list tab, records are listed according to the filtering process according to these search criteria. “Reviewed” or ‘Unreviewed’ documents can be listed by selecting from the document search tab

With the help of the buttons on the screen;
 :Review operation is performed for the document selected in the list.
: The personnel responsible for reviewing the document selected in the list is changed. For this button to be displayed, users must be defined as module administrator in the Document Management module in the System Infrastructure Definitions/BSAT/Configuration Settings/Administrator Identification menu.
: It is done to cancel the routing process performed in the review process of the selected document in the list. For this button to be displayed, users must be defined as module administrator in the Document Management module in the System Infrastructure Definitions/BSID/Configuration Settings/Administrator Identification menu.
: Records are searched by filtering.
: Data is transferred to Excel.
: The search criteria on the menu screens are used to clear the data remaining in the filter fields in the grid where the search operation is performed.
: The menu screen is restored to its default settings.
: User-based designing of the menu screen is done with the show-hide feature, that is, the hiding feature of the fields corresponding to the columns on the menu screens.
 : The review history of the document selected in the list is transferred.
On the Document Review List screen, type the document code in the “Document Code” field, which is the filter search criteria in the document search tab, and click the (Search) button.

On the Document Review List screen, records are listed according to the search criteria in the filter made in the Document List tab.
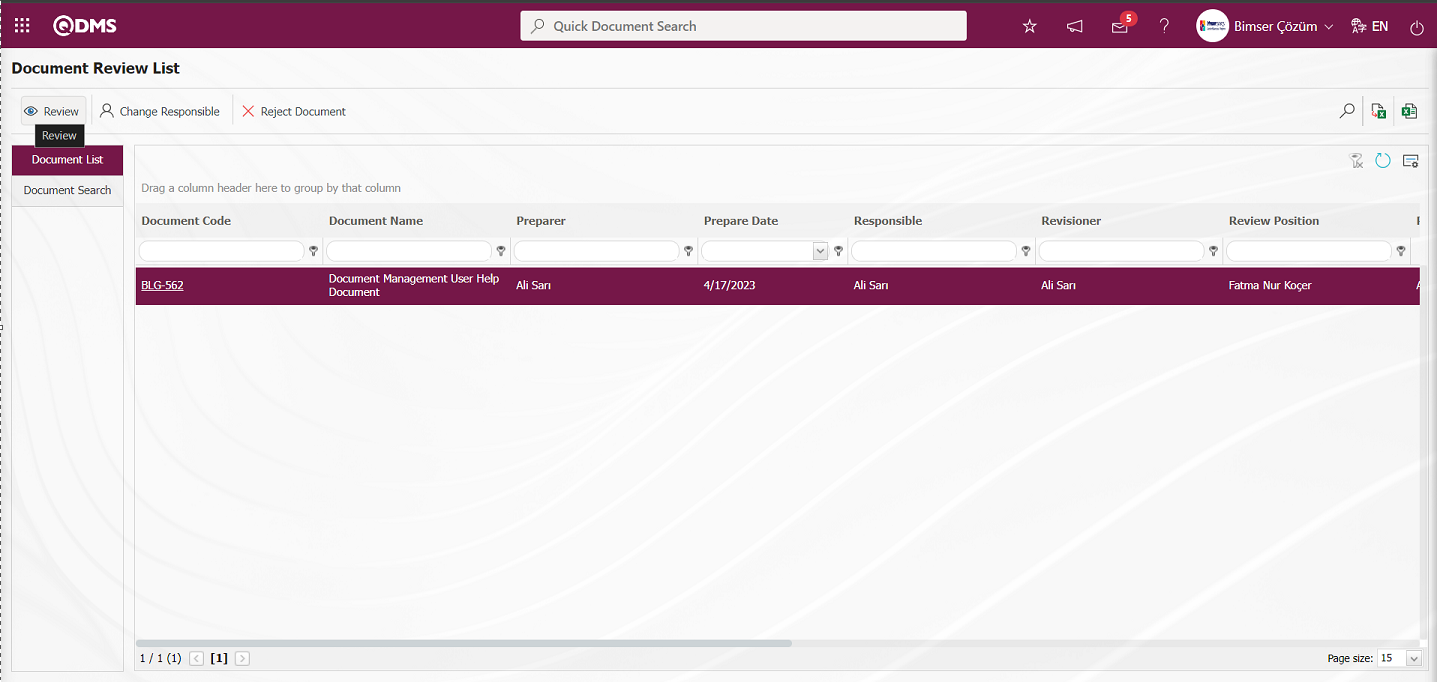
Click the (Export to Excel) button on the Document Review List screen.

“Document Review List Report” is displayed in Excel format.
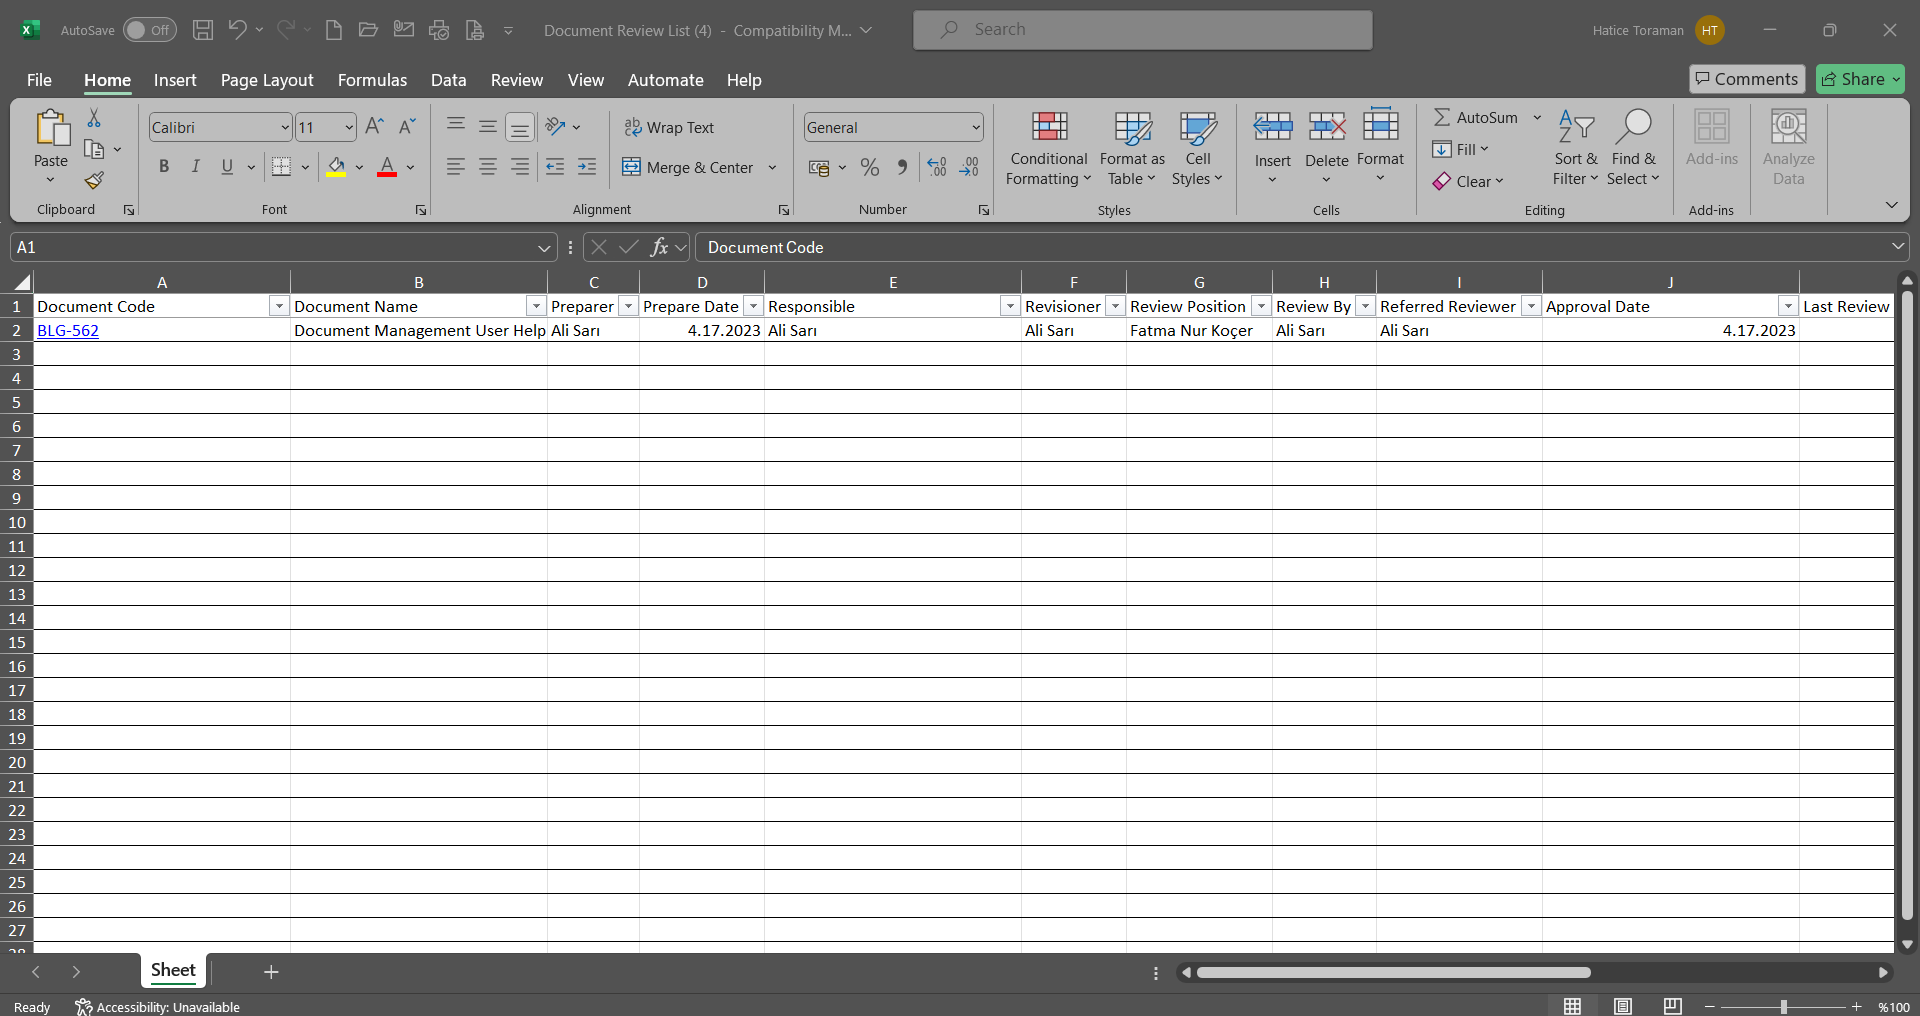
Click the  (Export Review History to Excel) button on the Document Review List screen.
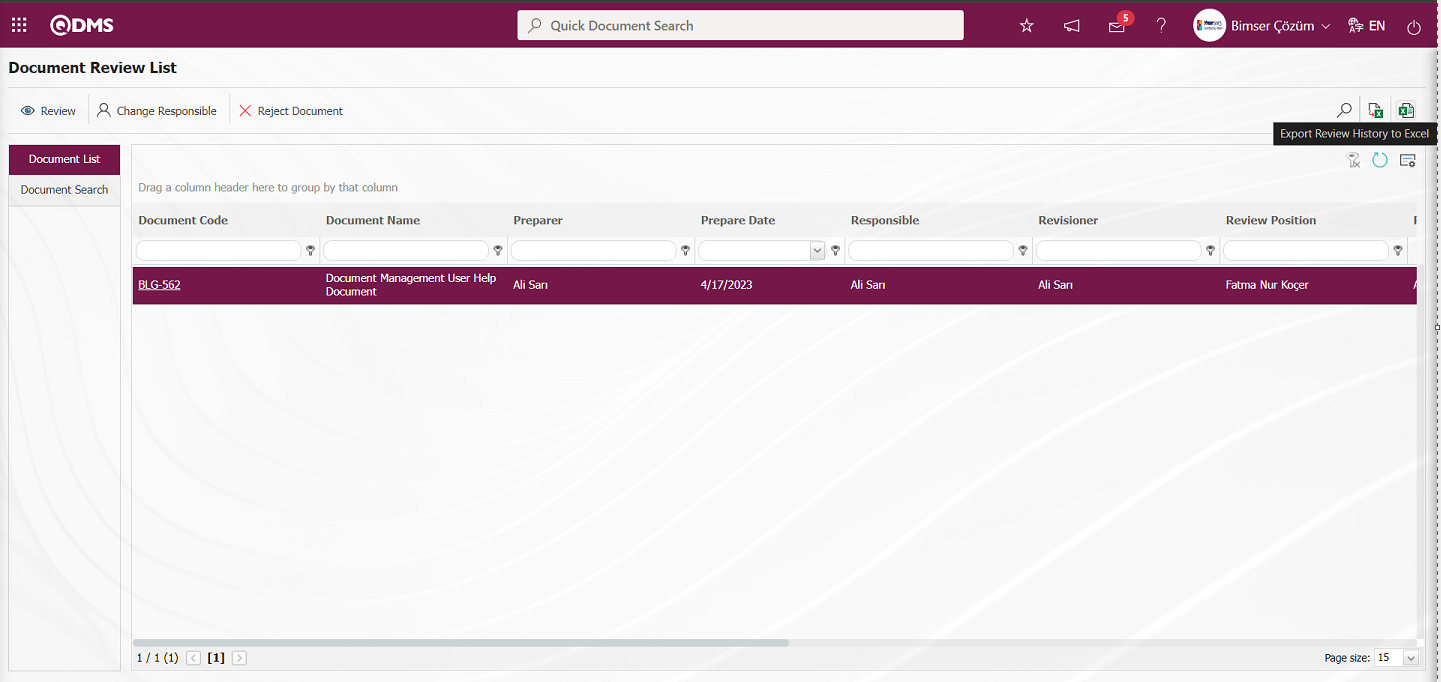
“Document Review History” is displayed in Excel format.
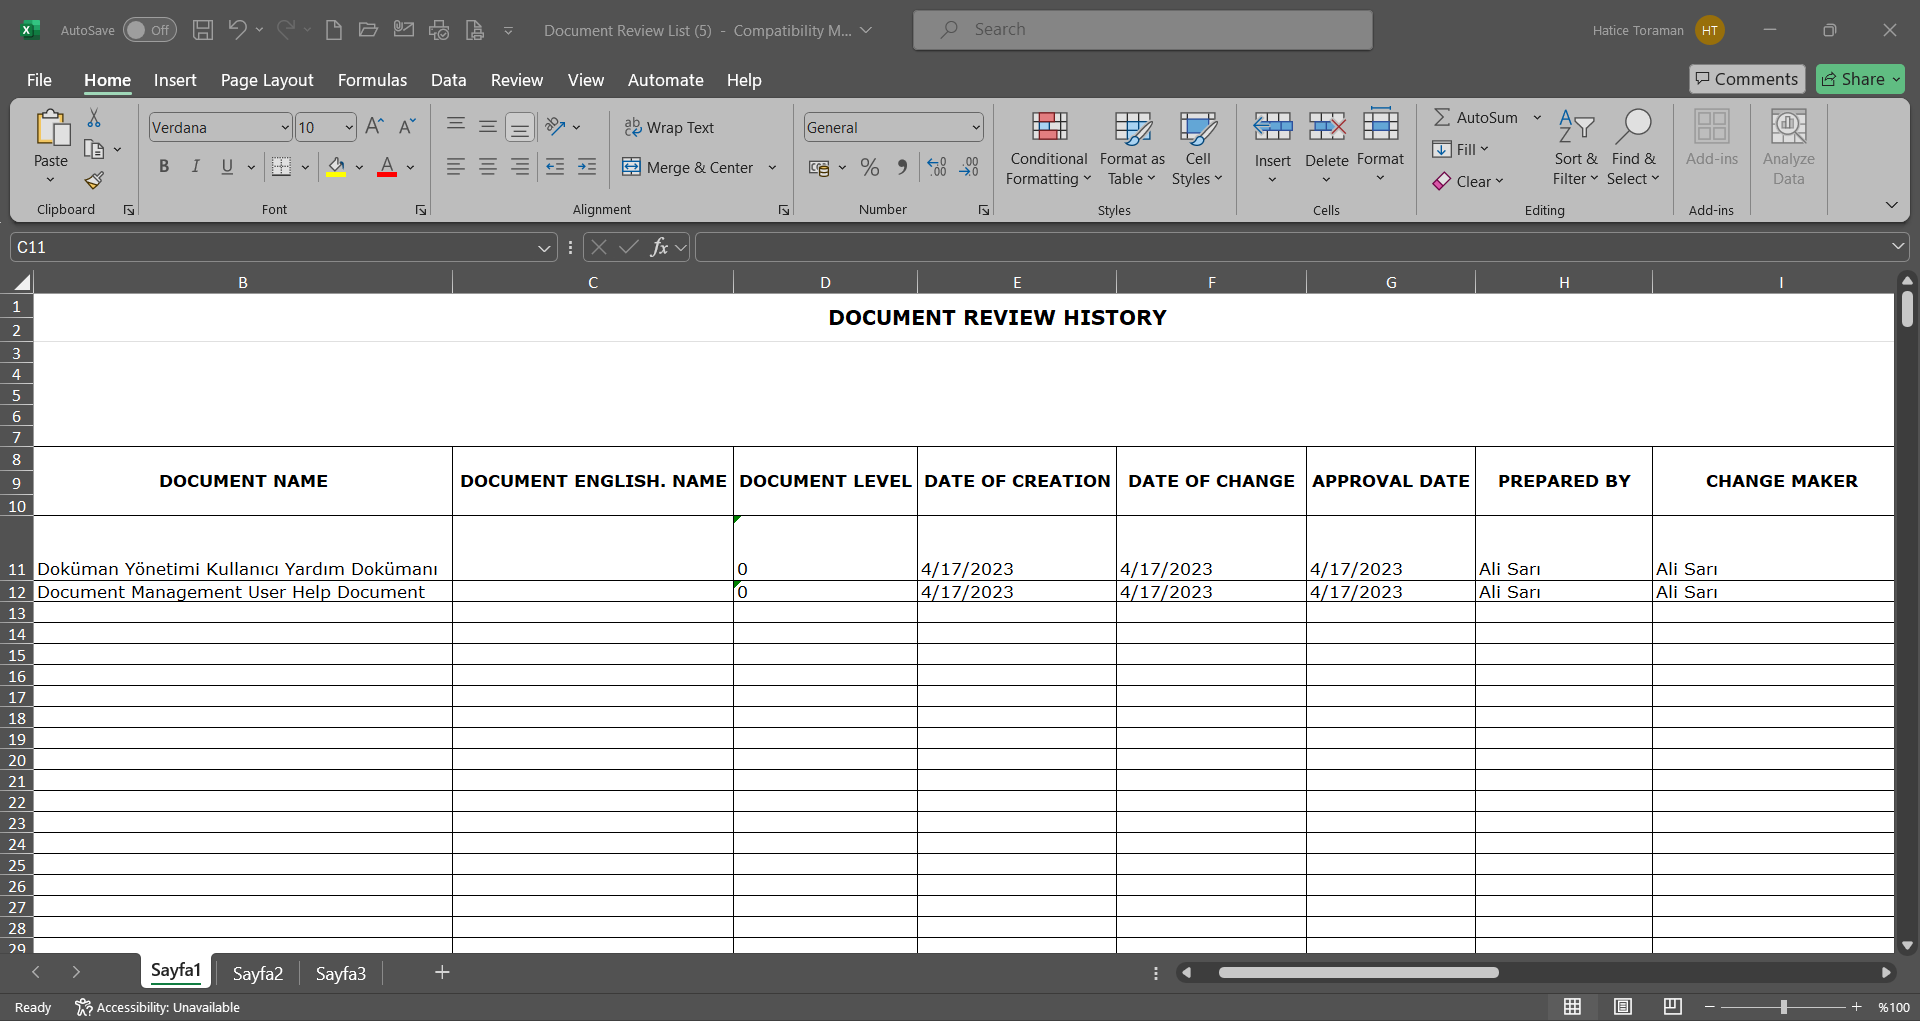
6.2.12.14. Document Management System List
Menu Name: Integrated Management System/ Document Management/Reports/ Document Management System List
It is the menu where the list of standard item numbers associated with documents is displayed and the report is taken from Excel format. On the Document Management System List screen, there are two tabs: document search and document list tab. On the Document Management System List screen, filtering is done according to the search criteria in the Document search tab. In the document list tab, records are listed according to the filtering process according to these search criteria.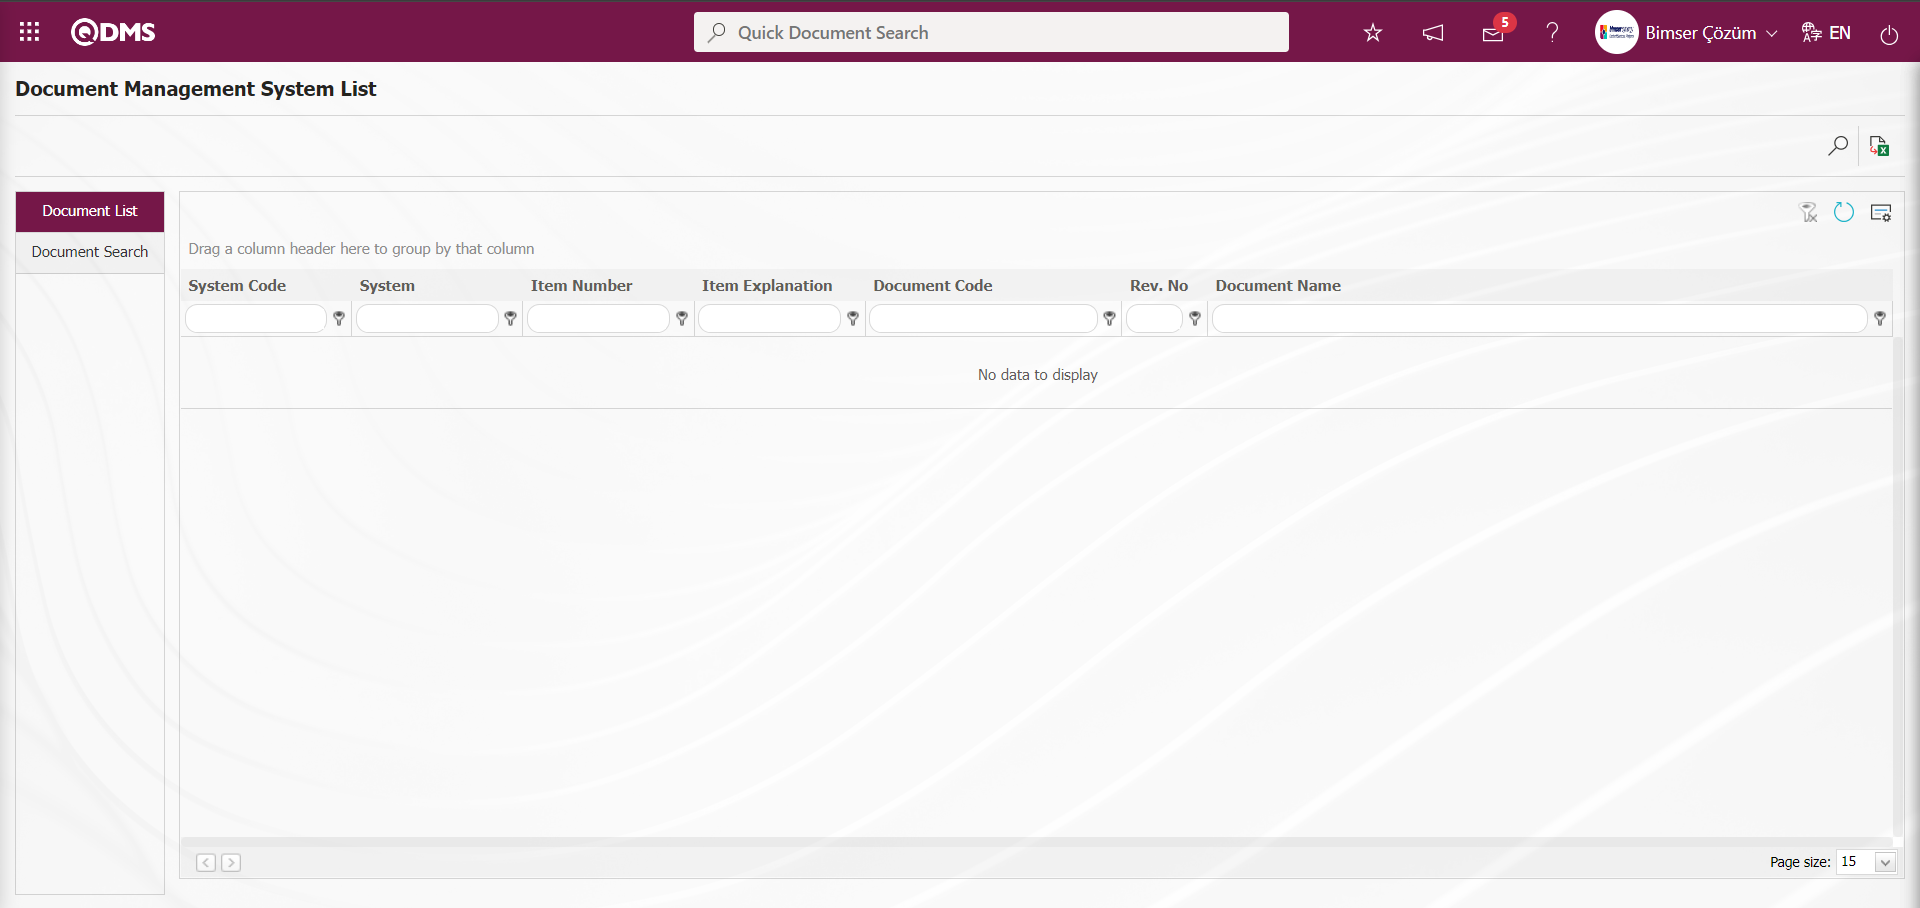
With the help of the buttons on the screen;
: Records are searched by filtering.
: Data is transferred to Excel.
: The search criteria on the menu screens are used to clear the data remaining in the filter fields in the grid where the search operation is performed.
: The menu screen is restored to its default settings.
: User-based designing of the menu screen is done with the show-hide feature, that is, the hiding feature of the fields corresponding to the columns on the menu screens.
On the Document Management System List screen, click the  (Add) button in the “System” field, which is the filter search criteria in the document search tab.
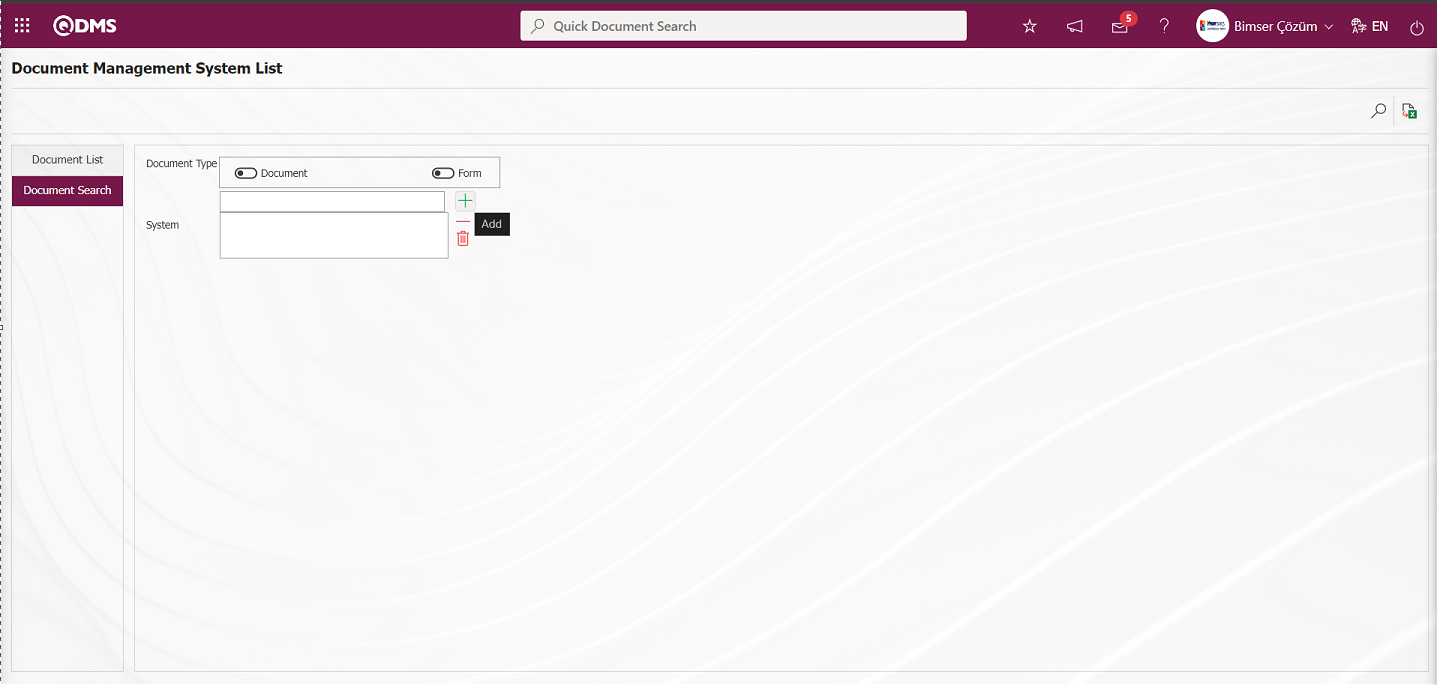
On the Select Item No. screen, select the management system item no. which is the search criterion in the filter tab and click the  (Search) button.
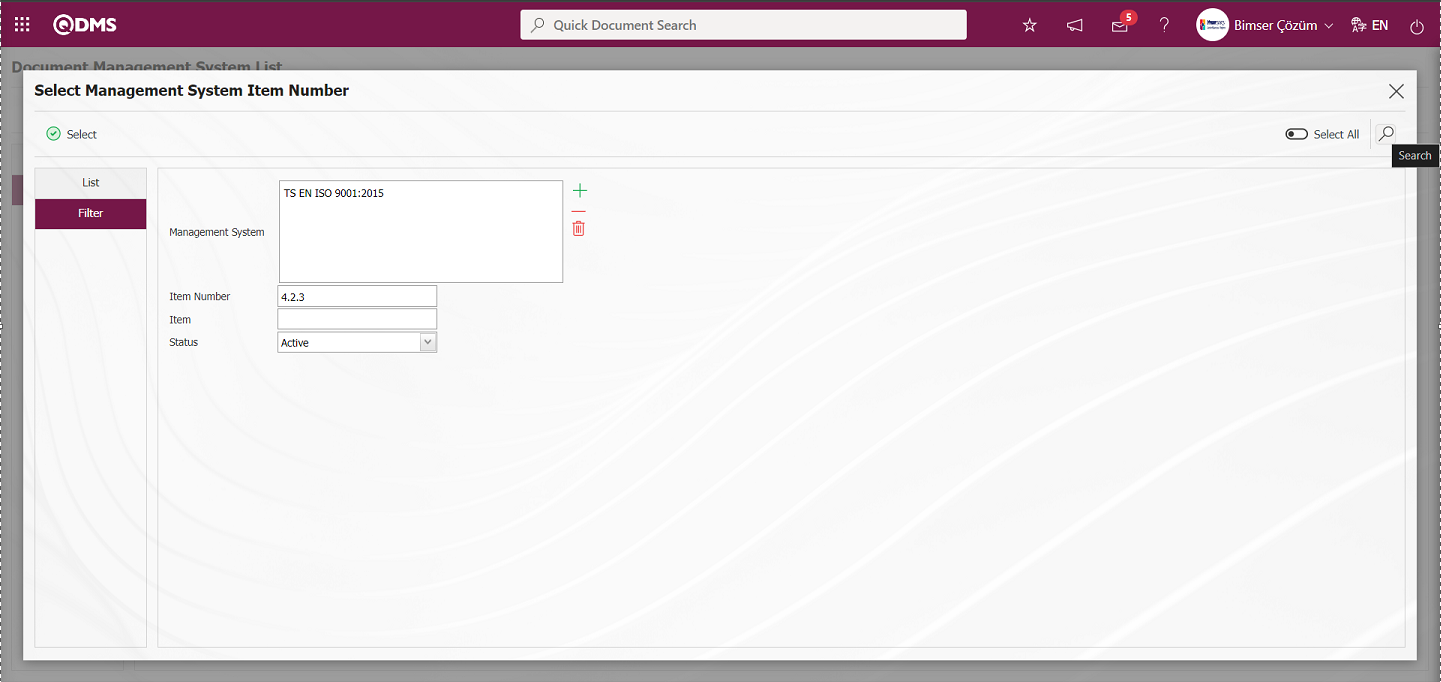
Select the item number of the selected management system and click the  button.
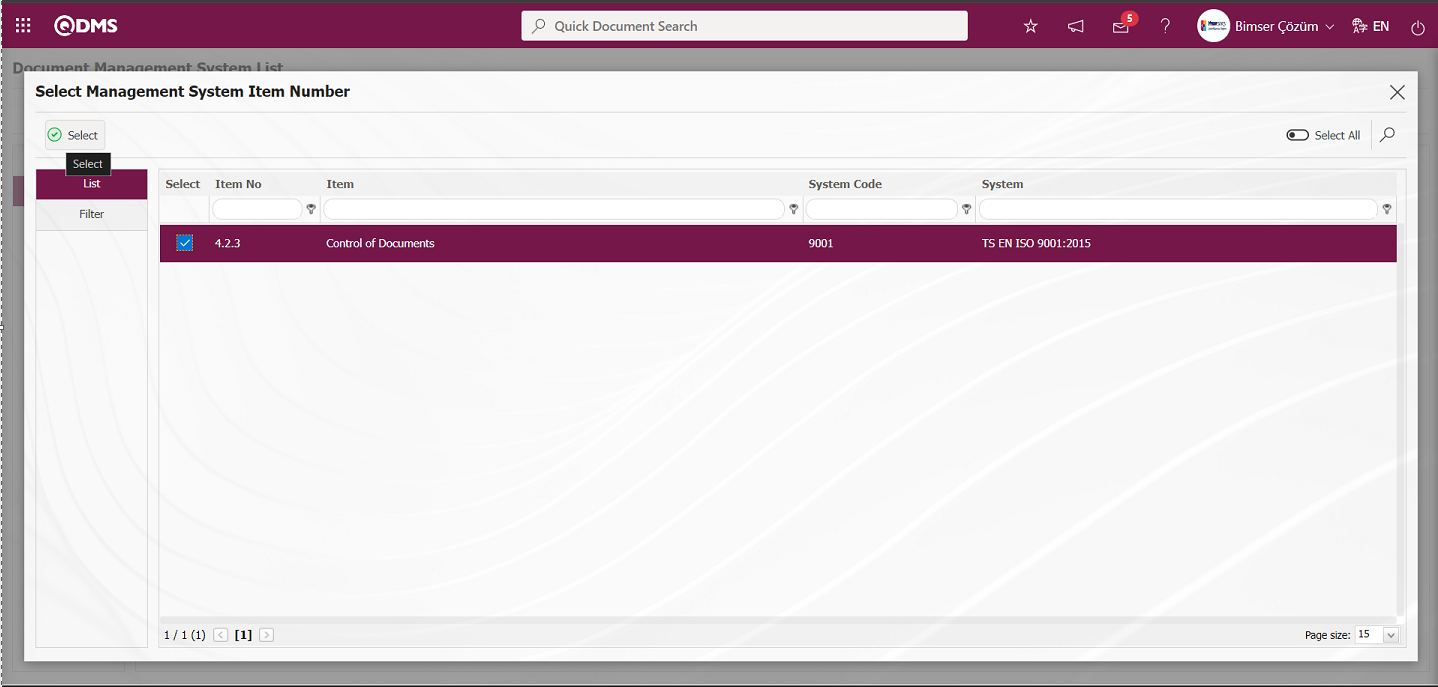
On the Document Management System List screen, click the (Search) button after selecting the item number of the Standard in the search criteria System field in the document search tab.
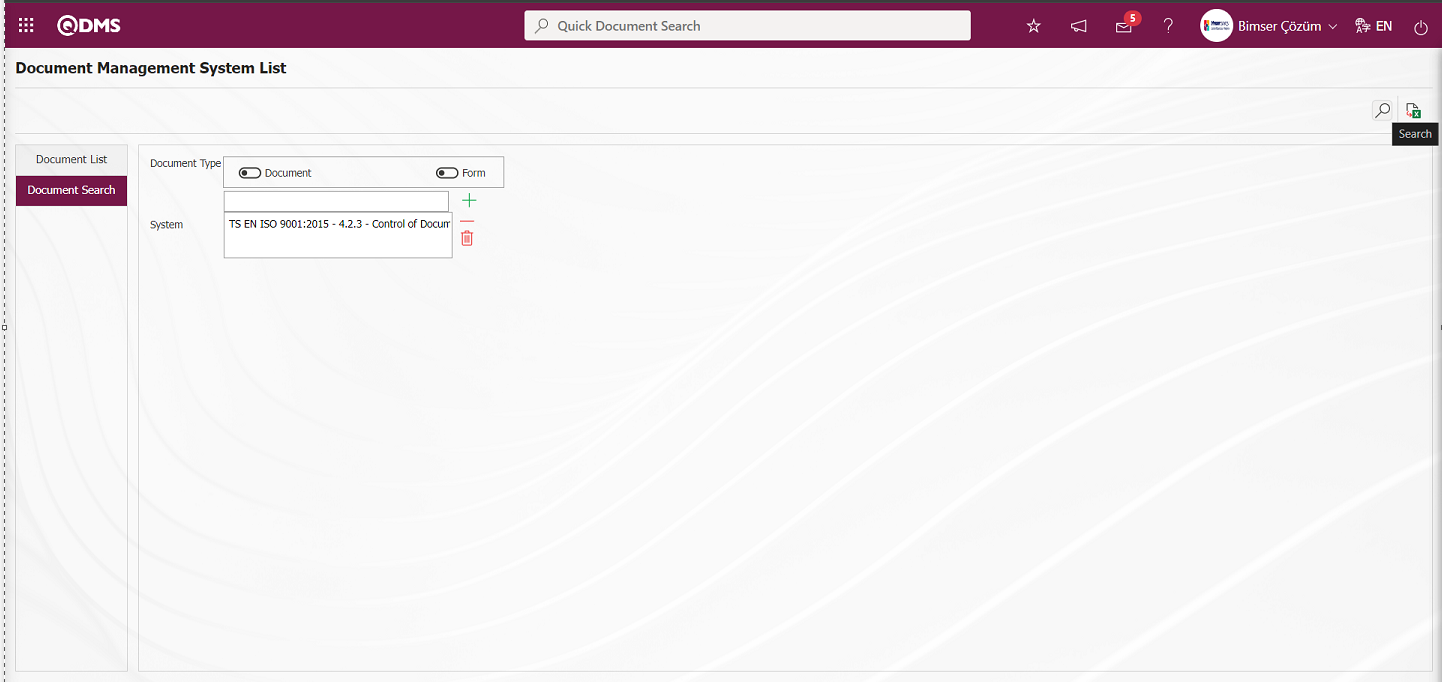
On the Document Management System List screen, the relevant records are displayed in the document list according to the document search criteria.

By clicking the (Export to Excel) button in the Document Management System List, an excel format report is obtained in the Document Management System List.
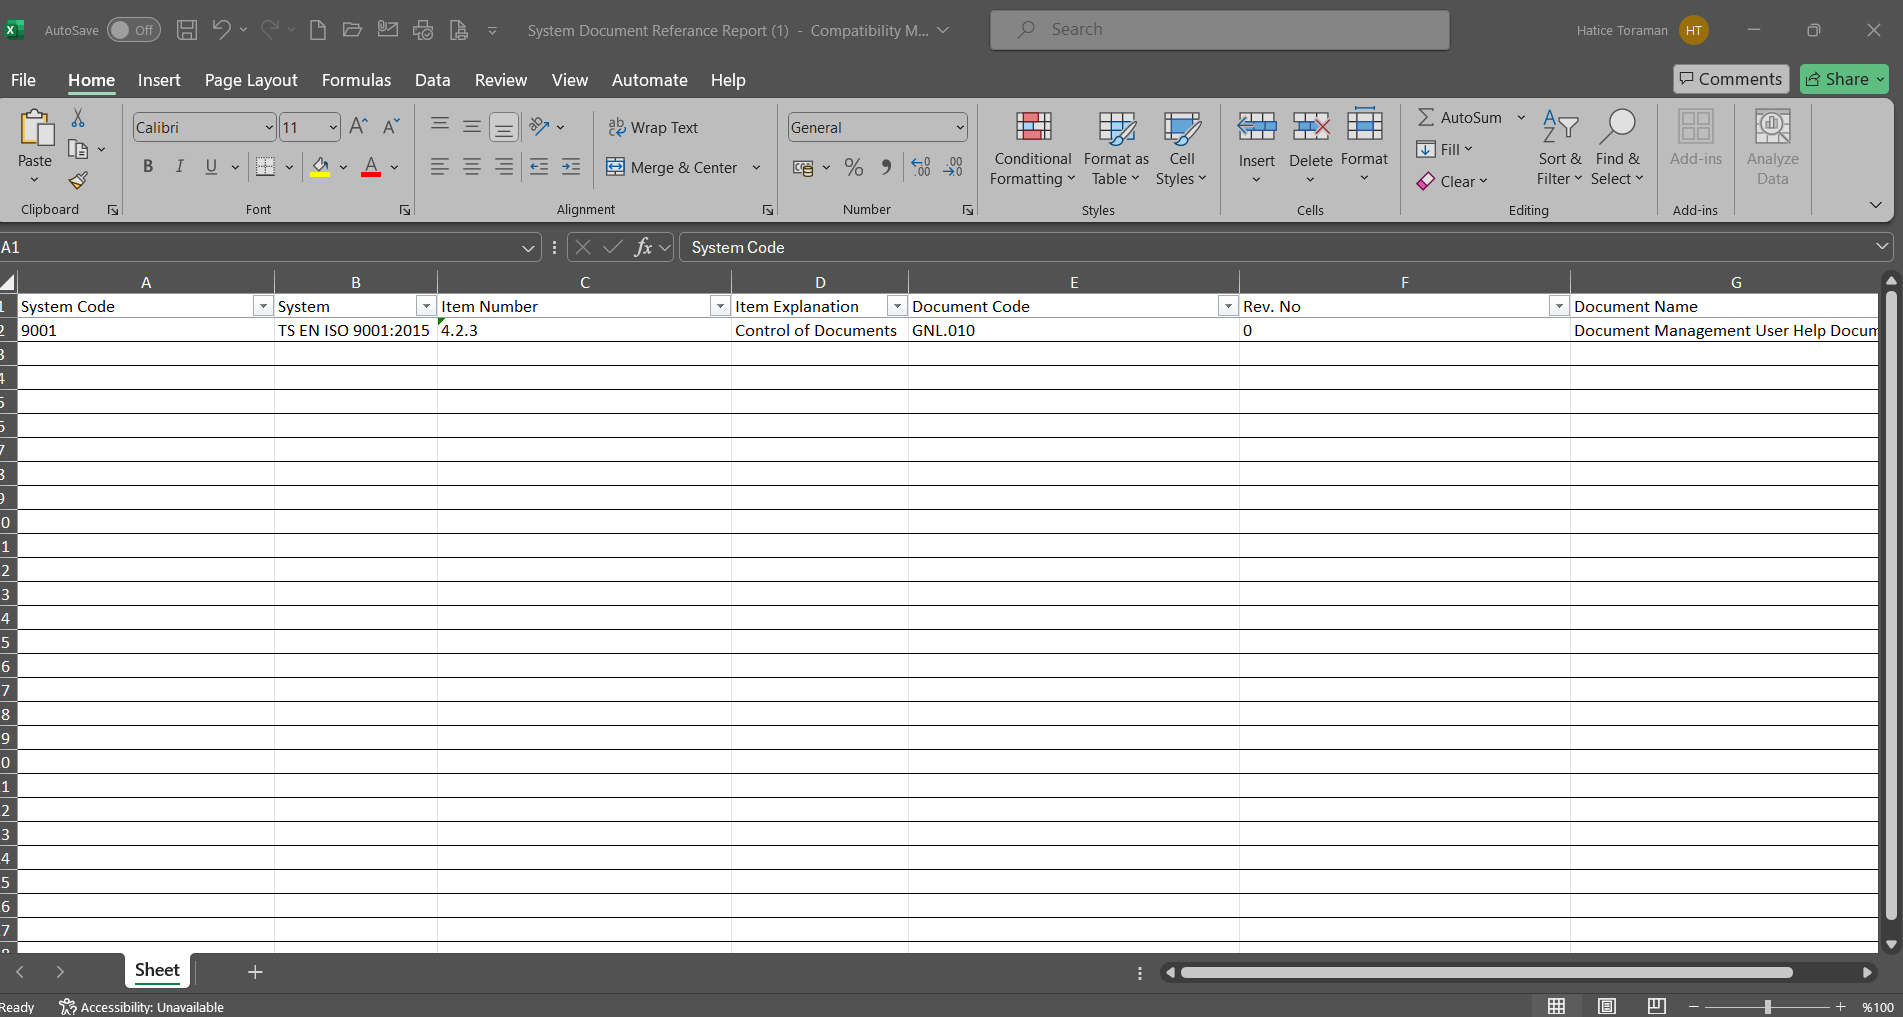
6.2.12.15. Revision Request List
Menu Name: Integrated Management System/ Document Management/ Reports/ Revision Request List
It is the menu where the list of documents with revision request is displayed and the report is received in Excel format. On the Revision Request List screen, there are two tabs: document search and document list tab. On the Document Revision Request List screen, filtering is done according to the search criteria in the document search tab. In the document list tab, records are listed according to the filtering process according to these search criteria.
With the help of the buttons on the screen;
 : The revision request information of the document selected in the list is displayed.
: Records are searched by filtering.
: Data is transferred to Excel.
: The search criteria on the menu screens are used to clear the data remaining in the filter fields in the grid where the search operation is performed.
: The menu screen is restored to its default settings.
: User-based designing of the menu screen is done with the show-hide feature, that is, the hiding feature of the fields corresponding to the columns on the menu screens.
On the Revision Request List screen, type the document code in the “Document Code” field, which is the filter search criteria in the document search tab, and click the (Search) button.
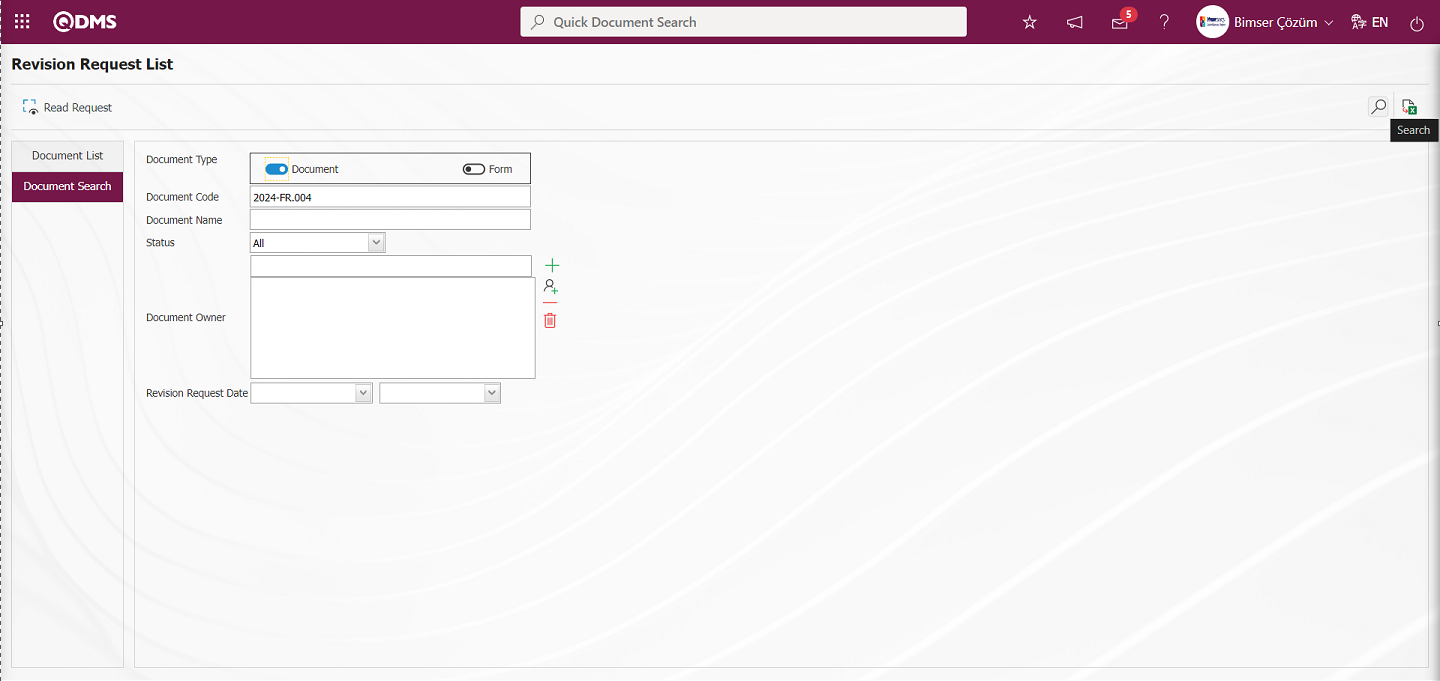
On the Revision Request List screen, records are listed according to the search criteria in the filter made in the document list tab.

On the Revision Request List screen, the request information of the document is displayed by clicking the button while the document is selected in the list in the document search tab.

On the Revision Request List screen, click the (Export to Excel) button while the document is selected in the document list.

On the Revision Request List screen, the Revision Request List report is received in Excel format.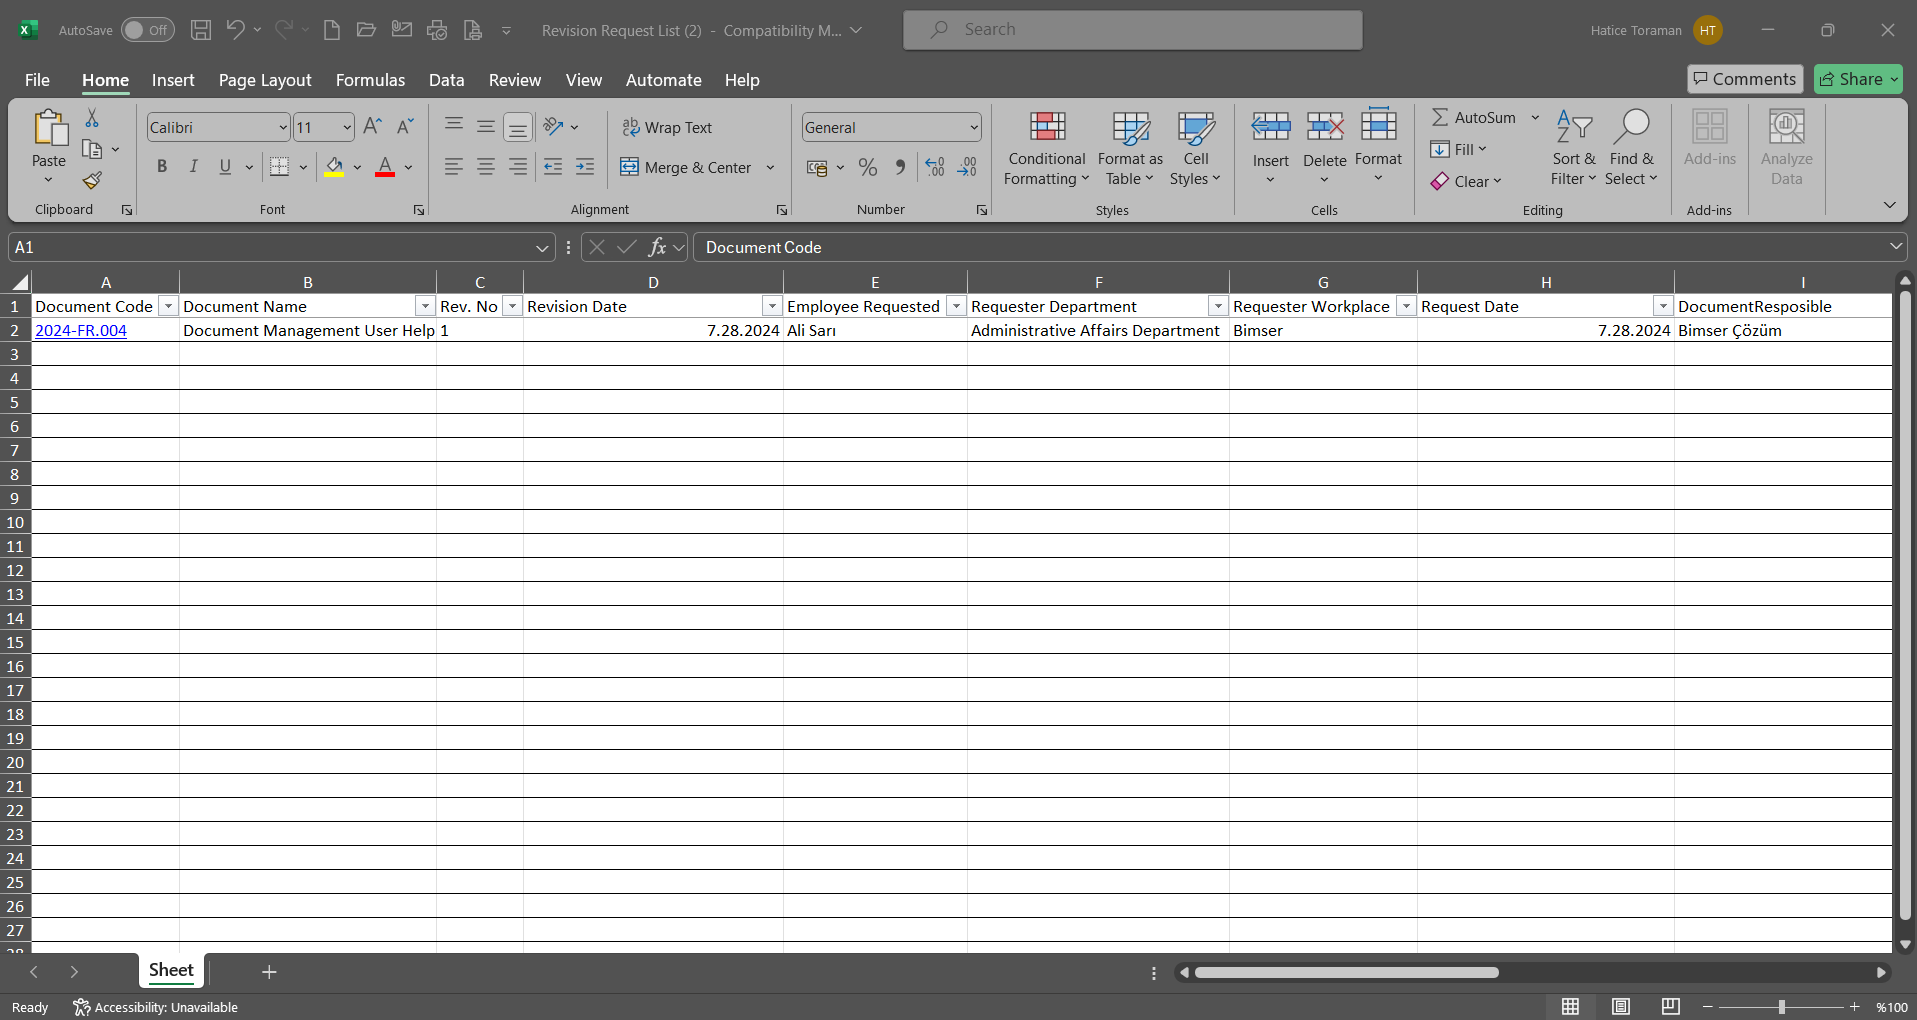
6.2.12.16. Document Count in Folders
Menu Name: Integrated Management System/ Document Management/ Reports/ Document Count in Folders
It is the menu where the information about how many documents are in which folder is accessed and the report is received in Excel format. By selecting the folder on the left side of the screen, the list of documents in that folder is accessed.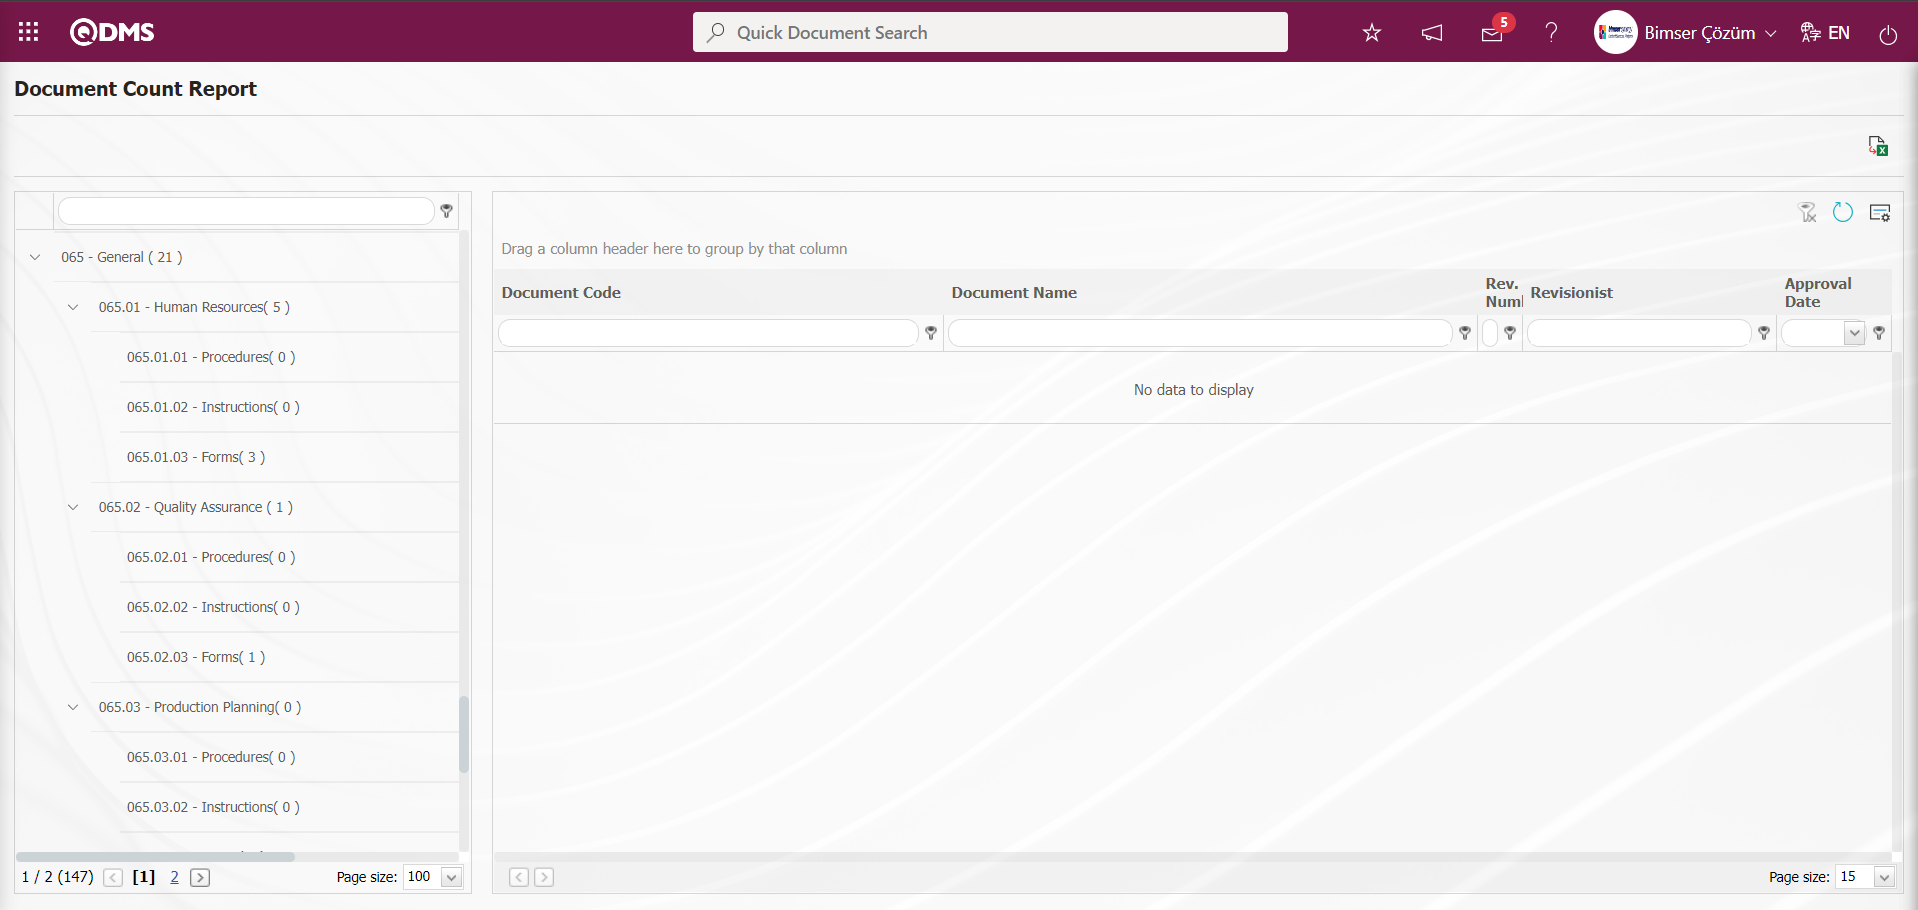
With the help of the buttons on the screen;
: Records are searched by filtering.
: Data is transferred to Excel.
: The search criteria on the menu screens are used to clear the data remaining in the filter fields in the grid where the search operation is performed.
: The menu screen is restored to its default settings.
: User-based designing of the menu screen is done with the show-hide feature, that is, the hiding feature of the fields corresponding to the columns on the menu screens.
While the folder is selected on the Document Count Report** screen, click the (Export to Excel) button.
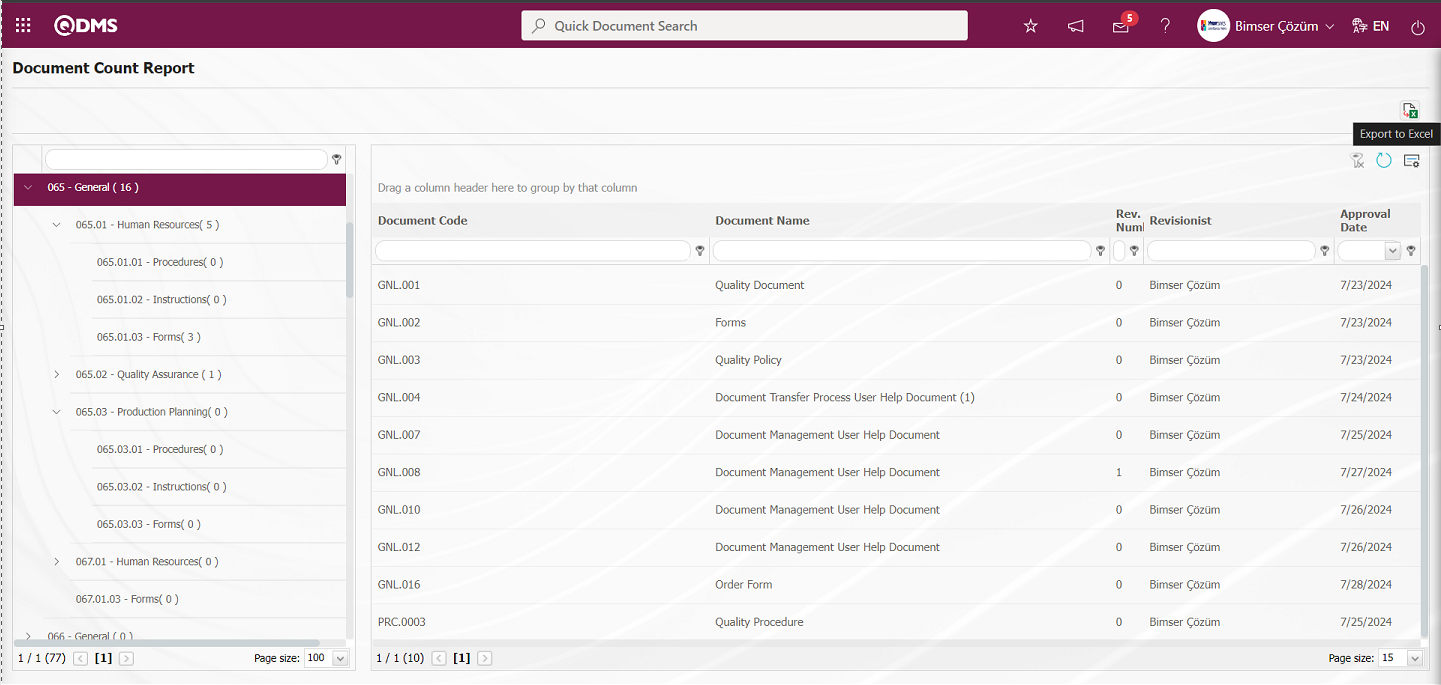
In the Document Count Report screen, the report of the “Document Counts” report in Excel format is obtained.
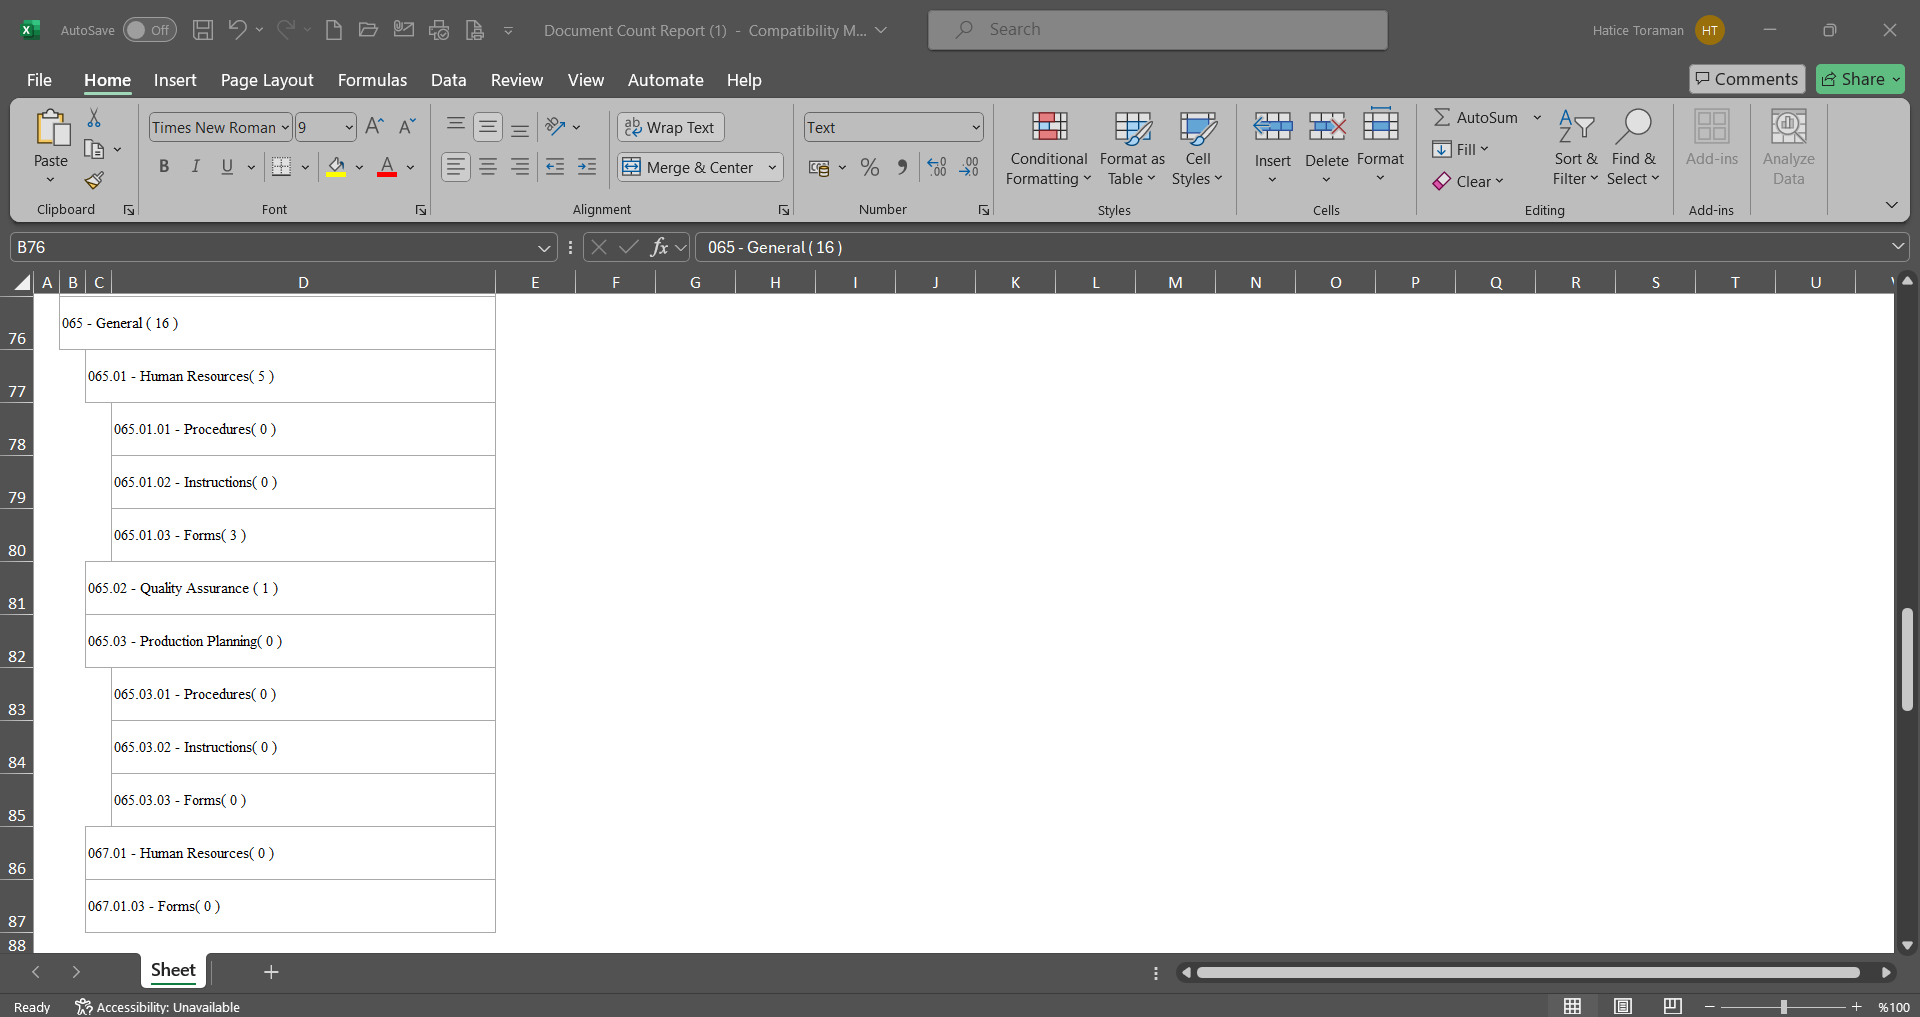
6.2.12.17. Reference Document Report
Menu Name: Integrated Management System/ Document Management/ Reports/ Reference Document Report
It is the menu where the documents referenced to each other are listed and the report is taken in Excel format.
Reference Document Report There are two tabs on the screen: document search and document list tab. In the document search tab, filtering is done according to the search criteria. In the document list tab, the records are listed according to the filtering process according to these search criteria.

With the help of the buttons on the screen;
: Records are searched by filtering.
: Data is transferred to Excel.
: The search criteria on the menu screens are used to clear the data remaining in the filter fields in the grid where the search operation is performed.
: The menu screen is restored to its default settings.
: User-based designing of the menu screen is done with the show-hide feature, that is, the hiding feature of the fields corresponding to the columns on the menu screens.
In the document search tab on the Reference Document List** screen, type the document code in the “Document Code” field, which is the filter search criteria, and click the (Search) button.

On the Reference Document List** screen, records are listed according to the search criteria in the filter made in the document list tab.
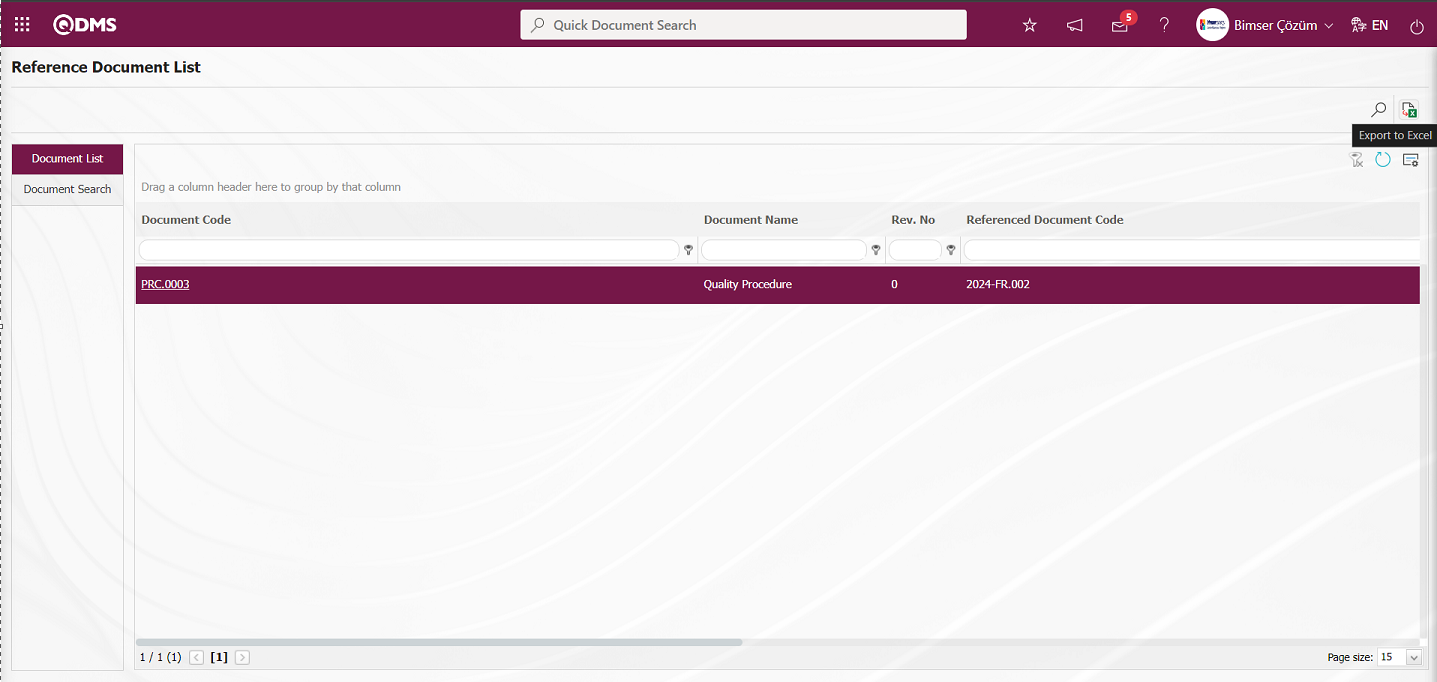 **
**
On the Reference Document List screen, click the (Export to Excel) button to get the System Reference Document List report in Excel format.
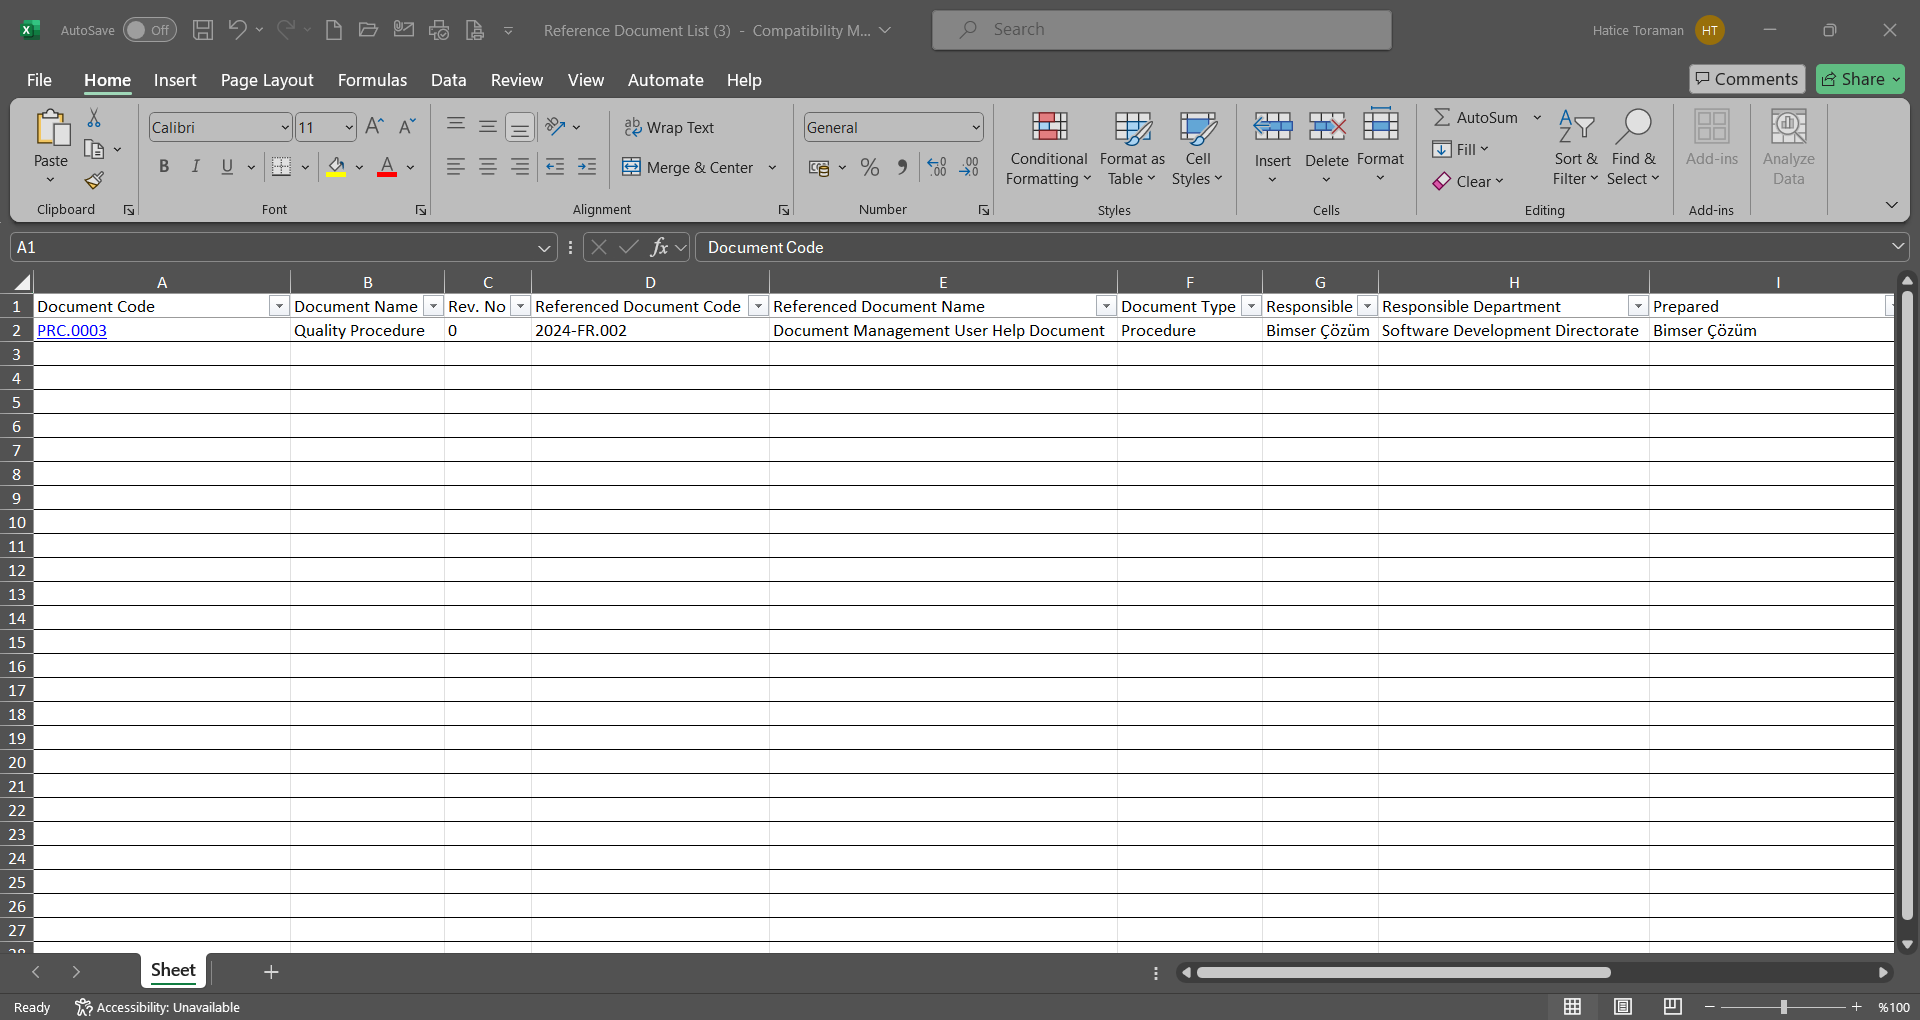
6.2.12.18.Document Approval Time Report
Menu Name: Integrated Management System/ Document Management/ Reports/ Document Approval Times Report
It is the menu where the list of approval times (days), approval dates and approver information of the document is taken and the report is taken from Excel format. On the Document Approval Times Report screen, there are two tabs: document search and document list tab. In the document search tab, filtering is done according to the search criteria. In the document list tab, records are listed according to the filtering process according to these search criteria.
With the help of the buttons on the screen;
: Records are searched by filtering.
: Data is transferred to Excel.
: The search criteria on the menu screens are used to clear the data remaining in the filter fields in the grid where the search operation is performed.
: The menu screen is restored to its default settings.
: User-based designing of the menu screen is done with the show-hide feature, that is, the hiding feature of the fields corresponding to the columns on the menu screens.
On the Document Approval Times Report screen, type the document code in the “Document Code” field, which is the filter search criteria in the document search tab, and click the (Search) button.
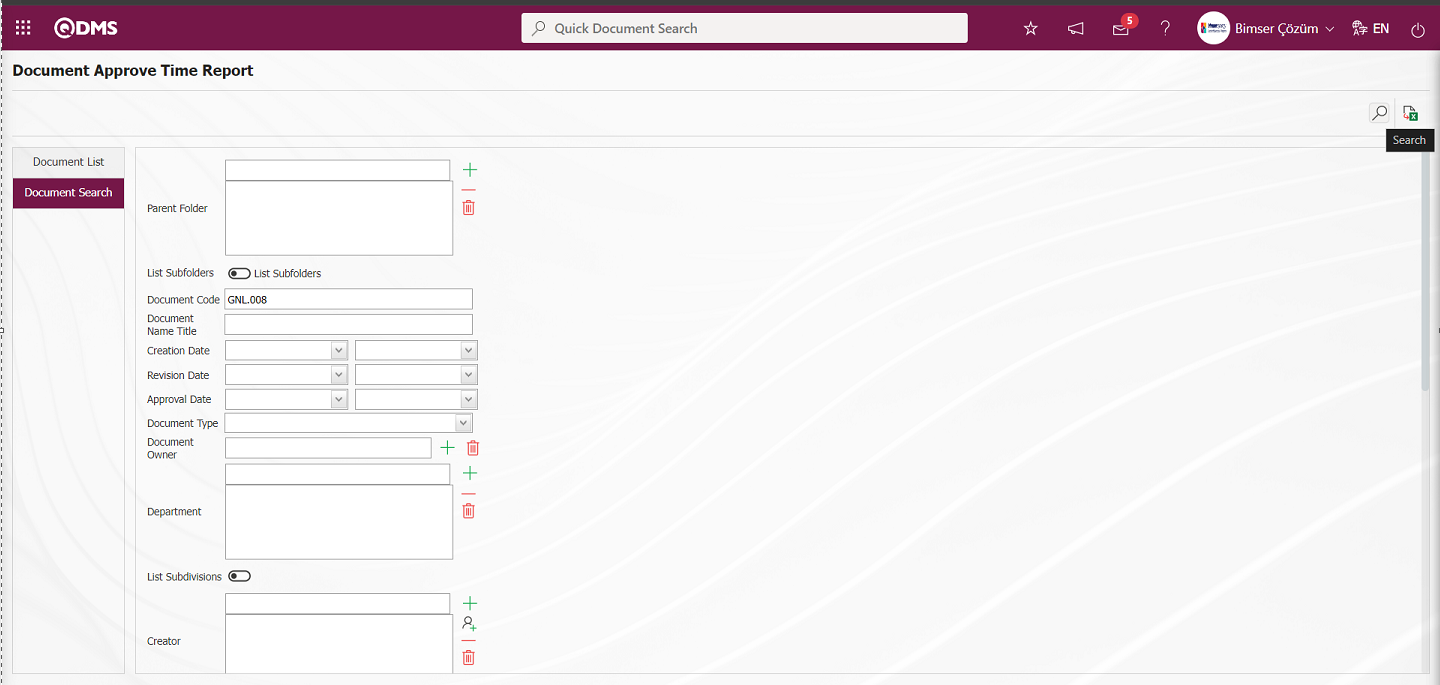
In the Document Approval Times Report screen, records are listed according to the search criteria in the filter made in the document list tab.

On the Document Approval Times Report screen, click on the (Export to Excel) button to get the report of the Document Approval Times Report in Excel format.
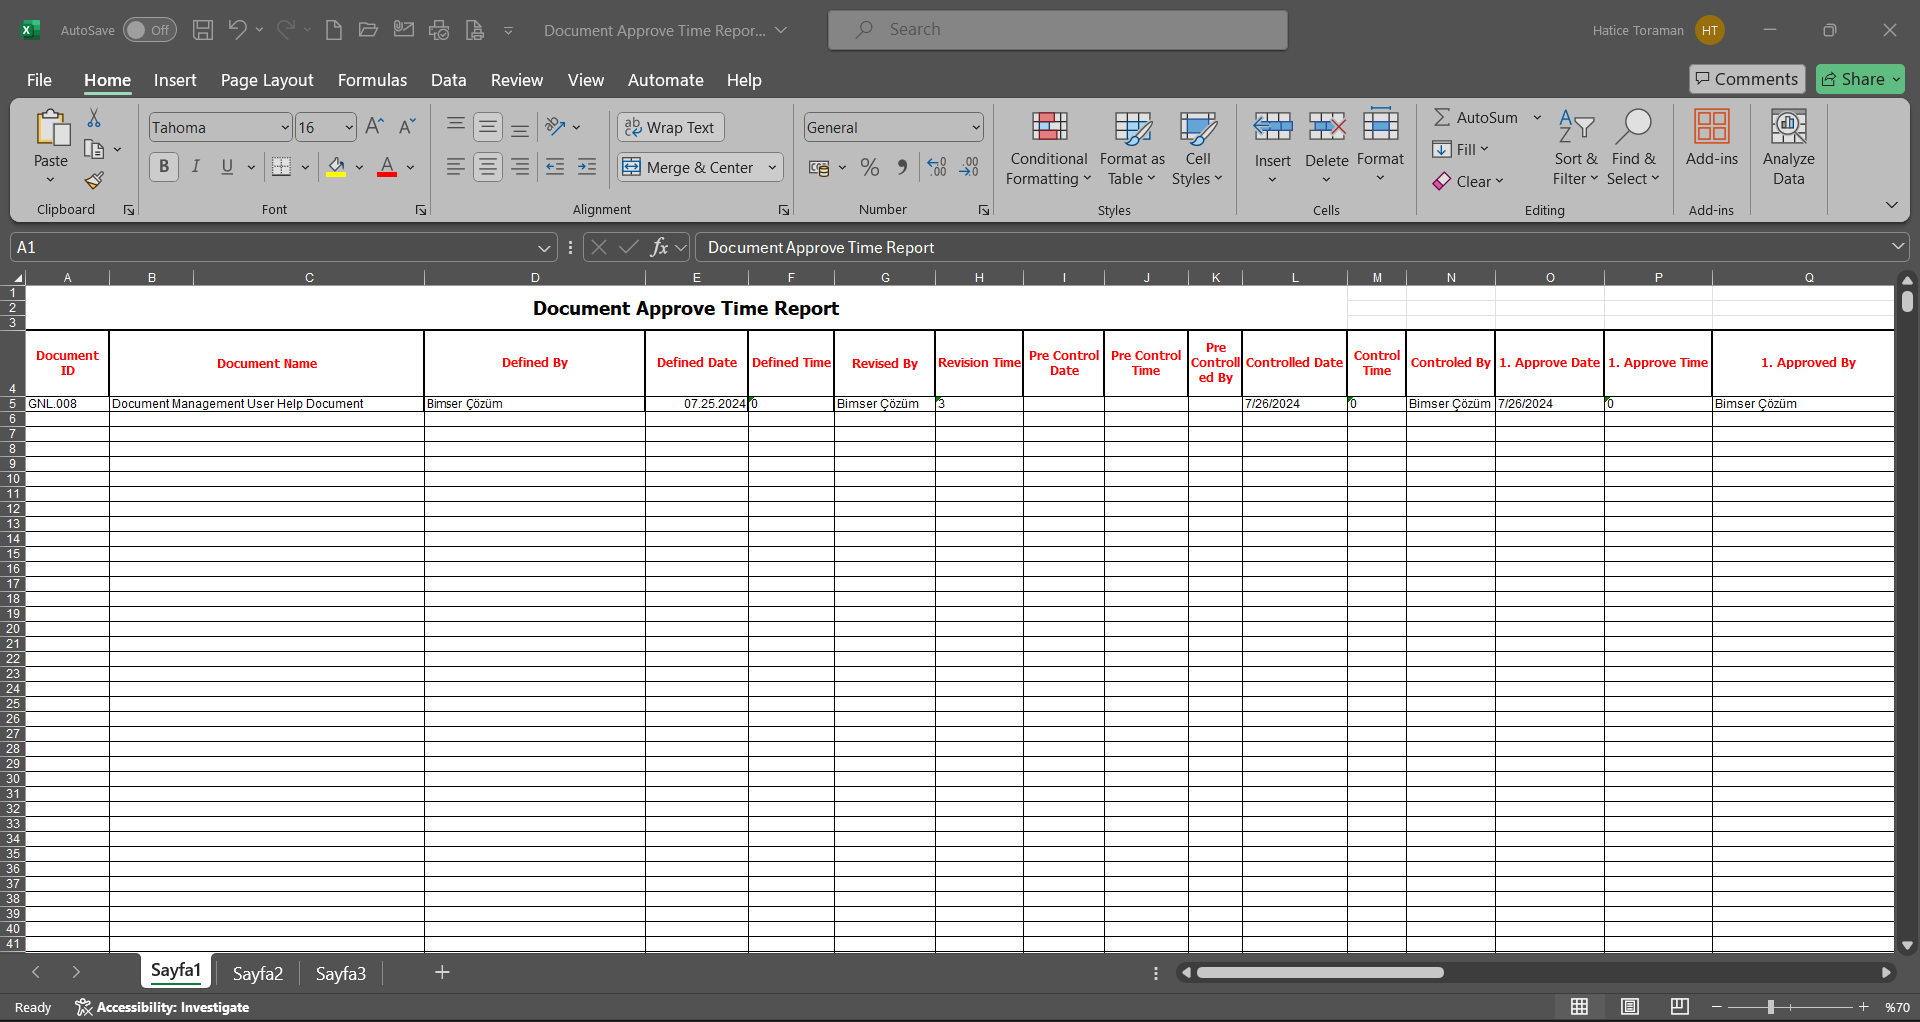
6.2.12.19.Advanced Document Monitoring Report
Menu Name: Integrated Management System/ Document Management/ Reports/ Advanced Document Monitoring Report
It is the menu where all transaction information made on the documents can be accessed with IP and time details and the report can be obtained in Excel format. This report is a log report. It can extract in detail who did what from which IP about the document at which time. On the Advanced Document Monitoring Report screen, there are two tabs: document search and document list tab. In the Document Search tab, filtering is done according to the search criteria. In the Document List tab, records are listed according to the filtering process according to these search criteria.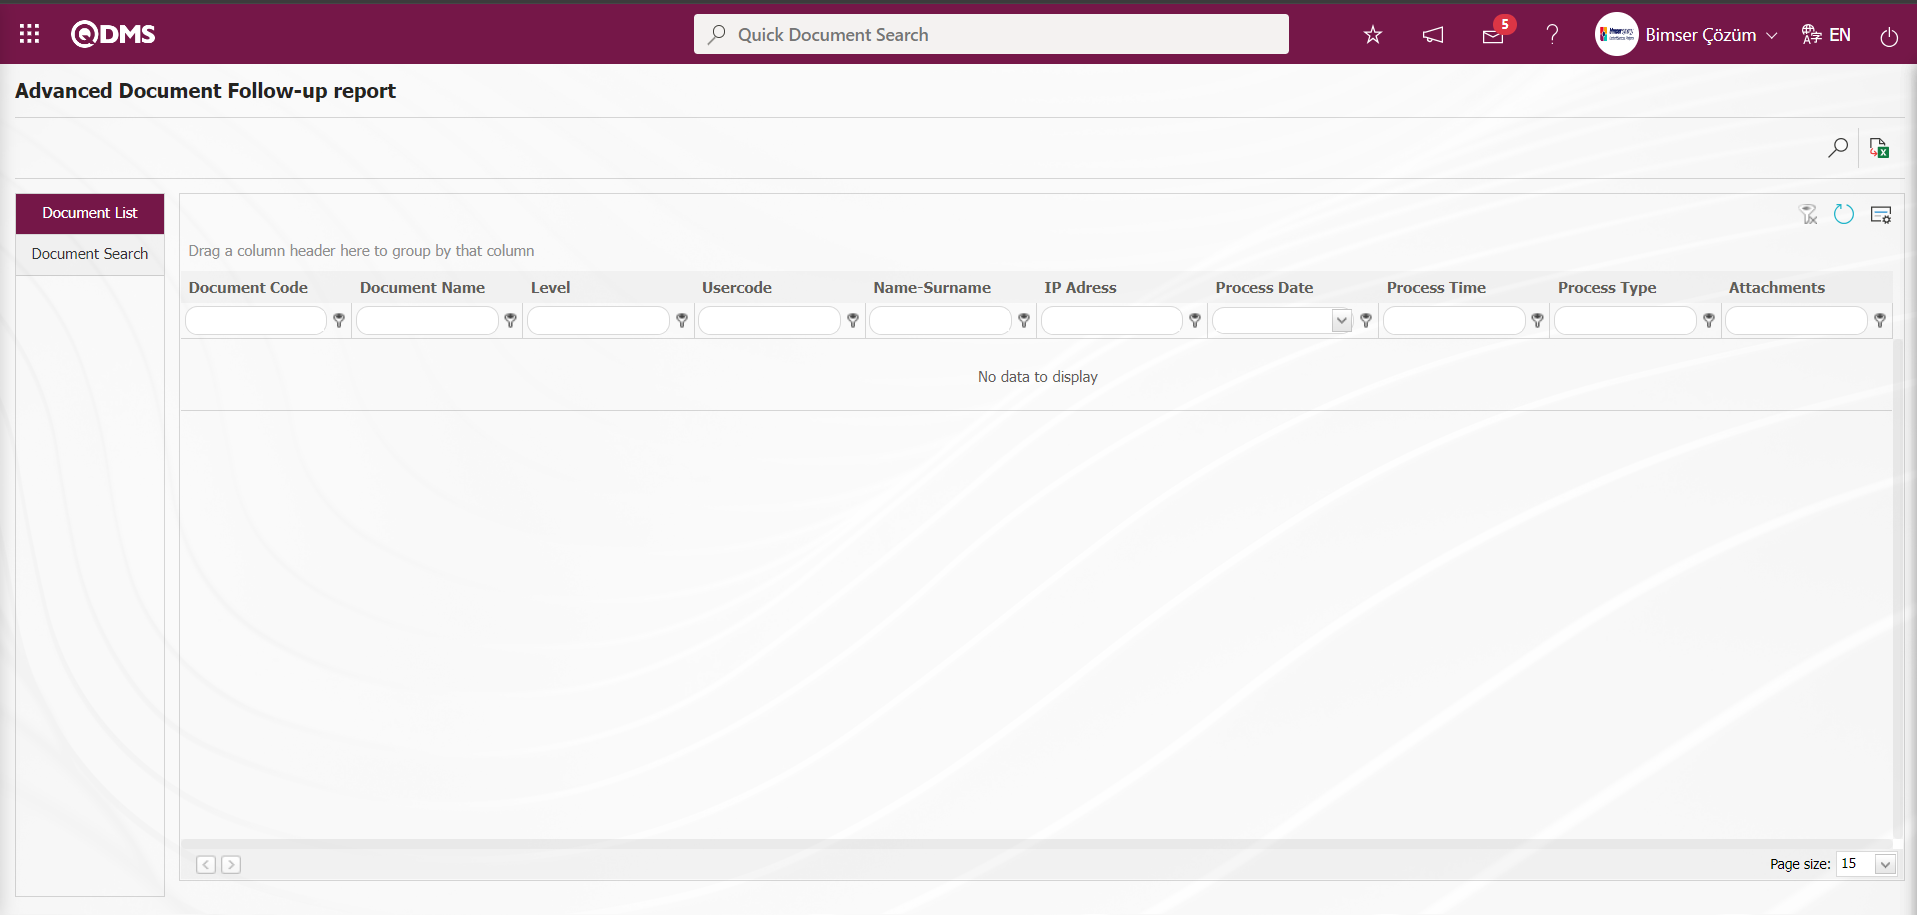
With the help of the buttons on the screen;
: Records are searched by filtering.
: Data is transferred to Excel.
: The search criteria on the menu screens are used to clear the data remaining in the filter fields in the grid where the search operation is performed.
: The menu screen is restored to its default settings.
: User-based designing of the menu screen is done with the show-hide feature, that is, the hiding feature of the fields corresponding to the columns on the menu screens.
On the Advanced Document Follow-up report** screen, on the document search tab, type the document code in the “Document Code” field and select the relevant check boxes in the transaction type field and click the (Search) button.
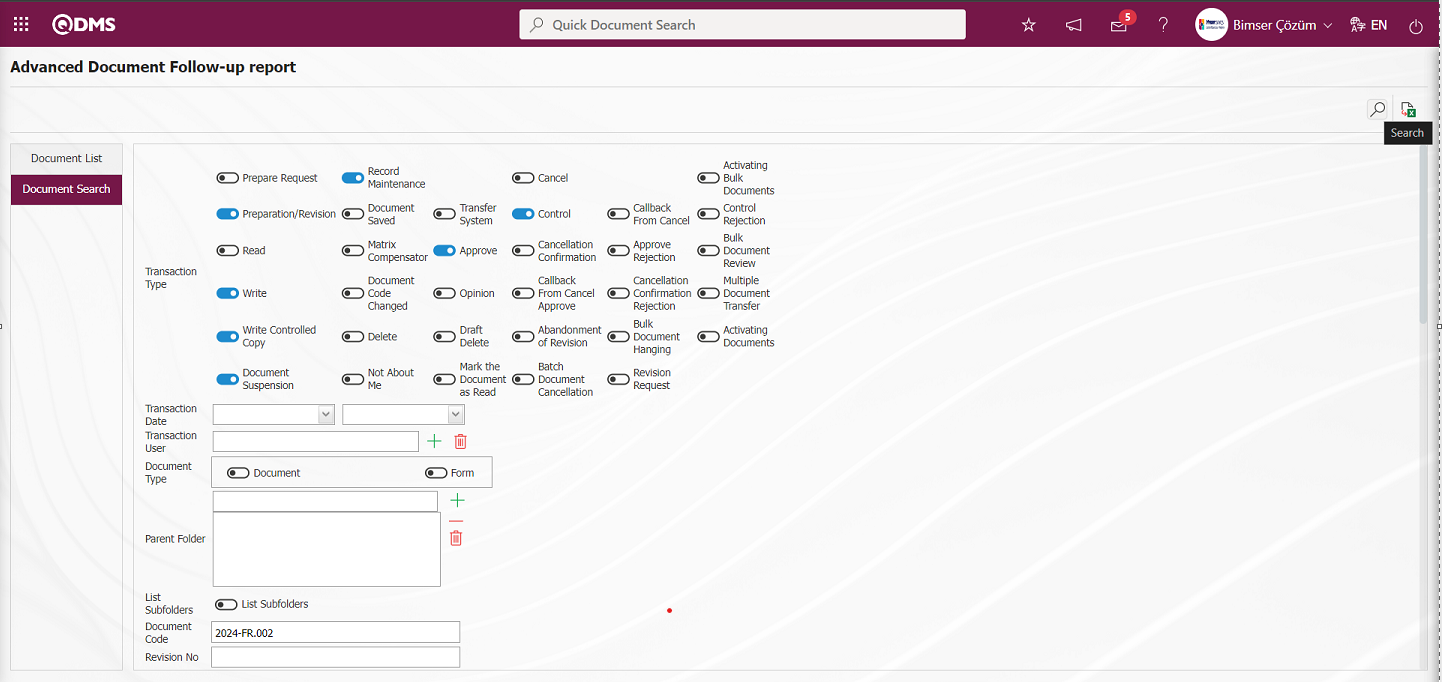
In the Advanced Document Follow-up report screen, records are listed according to the search criteria in the filter made in the document list tab.
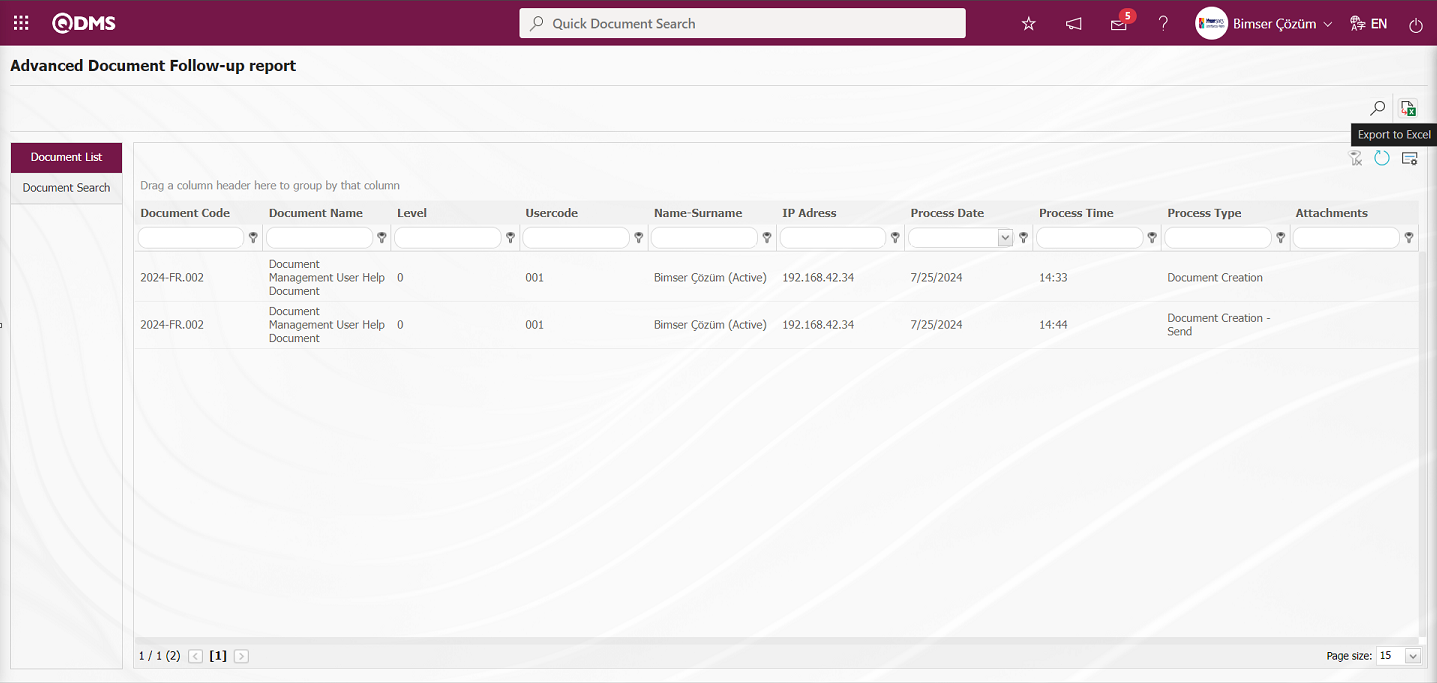
On the Advanced Document Follow-up report screen, click the  (Export to Excel) button to get the Advanced Document Monitoring report in Excel format.
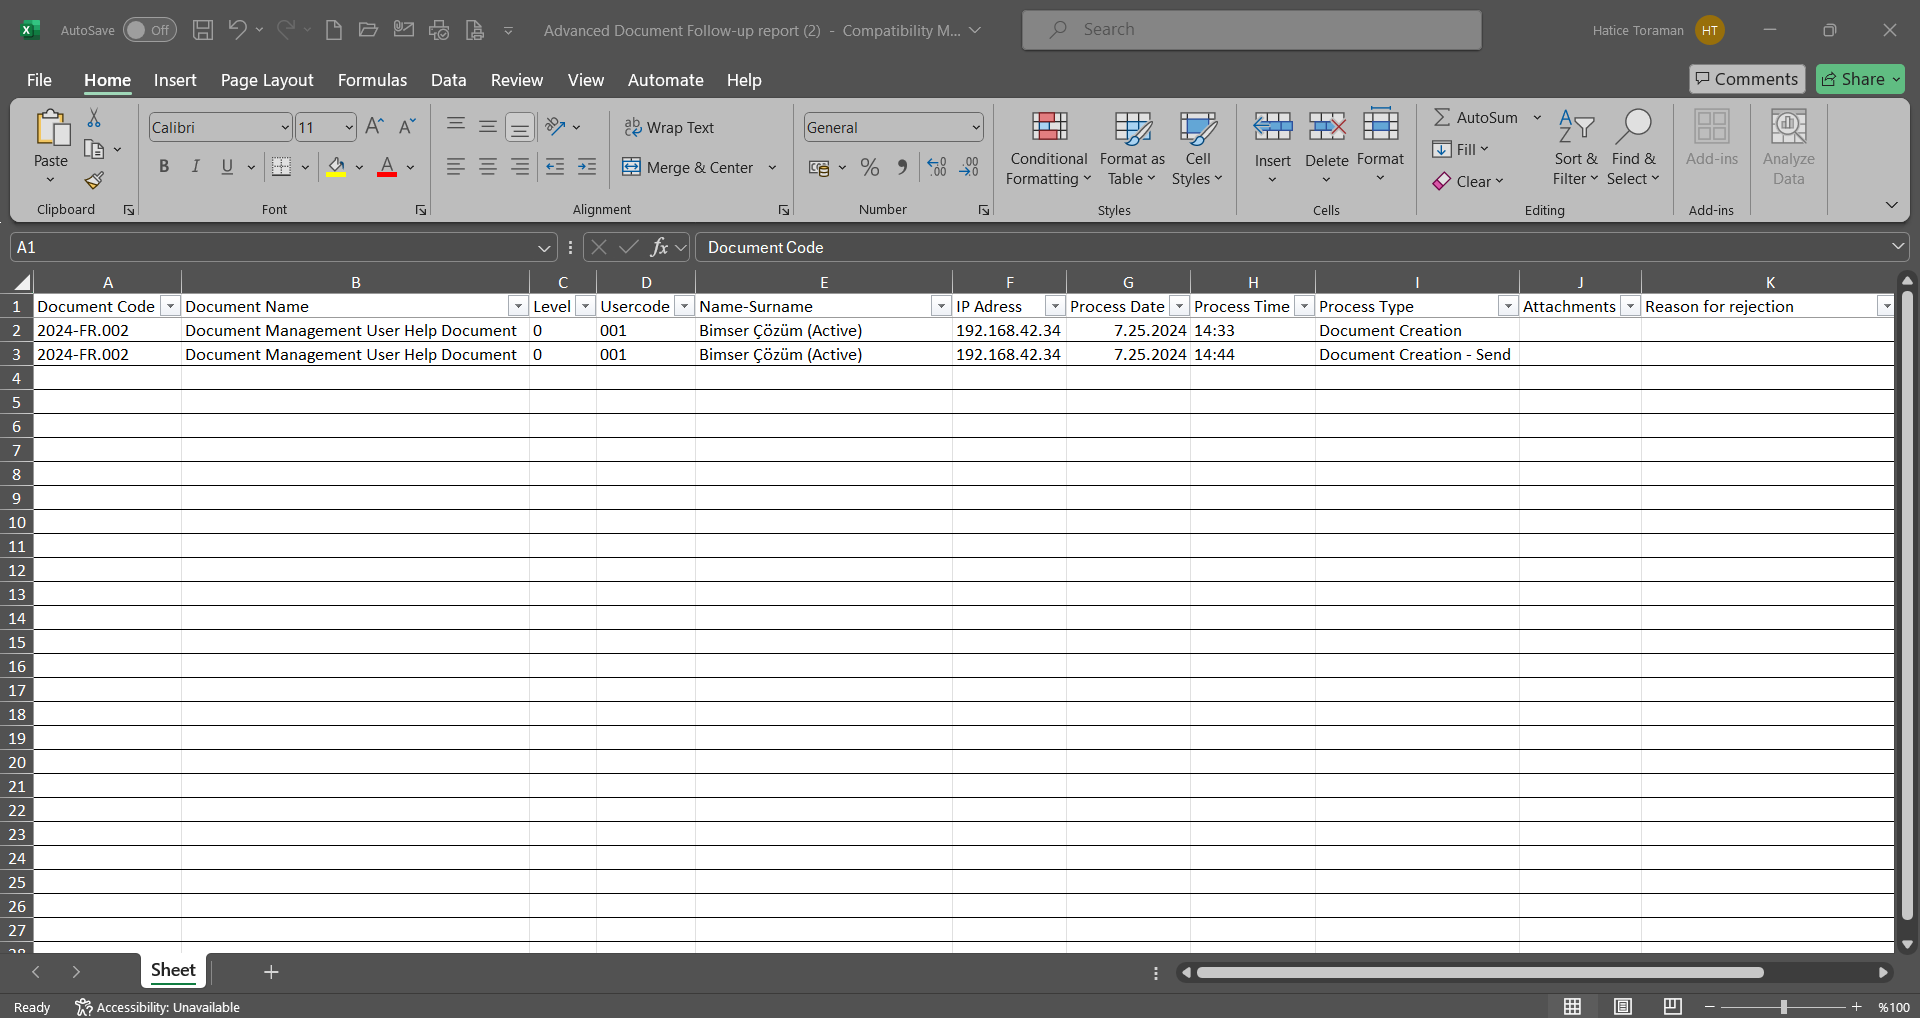
6.2.12.20.Ready Document List
Menu Name: Integrated Management System/ Document Management/ Reports/ Ready Document List
It is the menu where the documents defined in QDMS are sent by e-mail to the users selected in the system and the report is received in Excel format. On the Ready Document List screen, there are two tabs: document search and document list tab. In the document search tab, filtering is done according to the search criteria. In the document list tab, the records are listed according to the filtering process according to these search criteria.
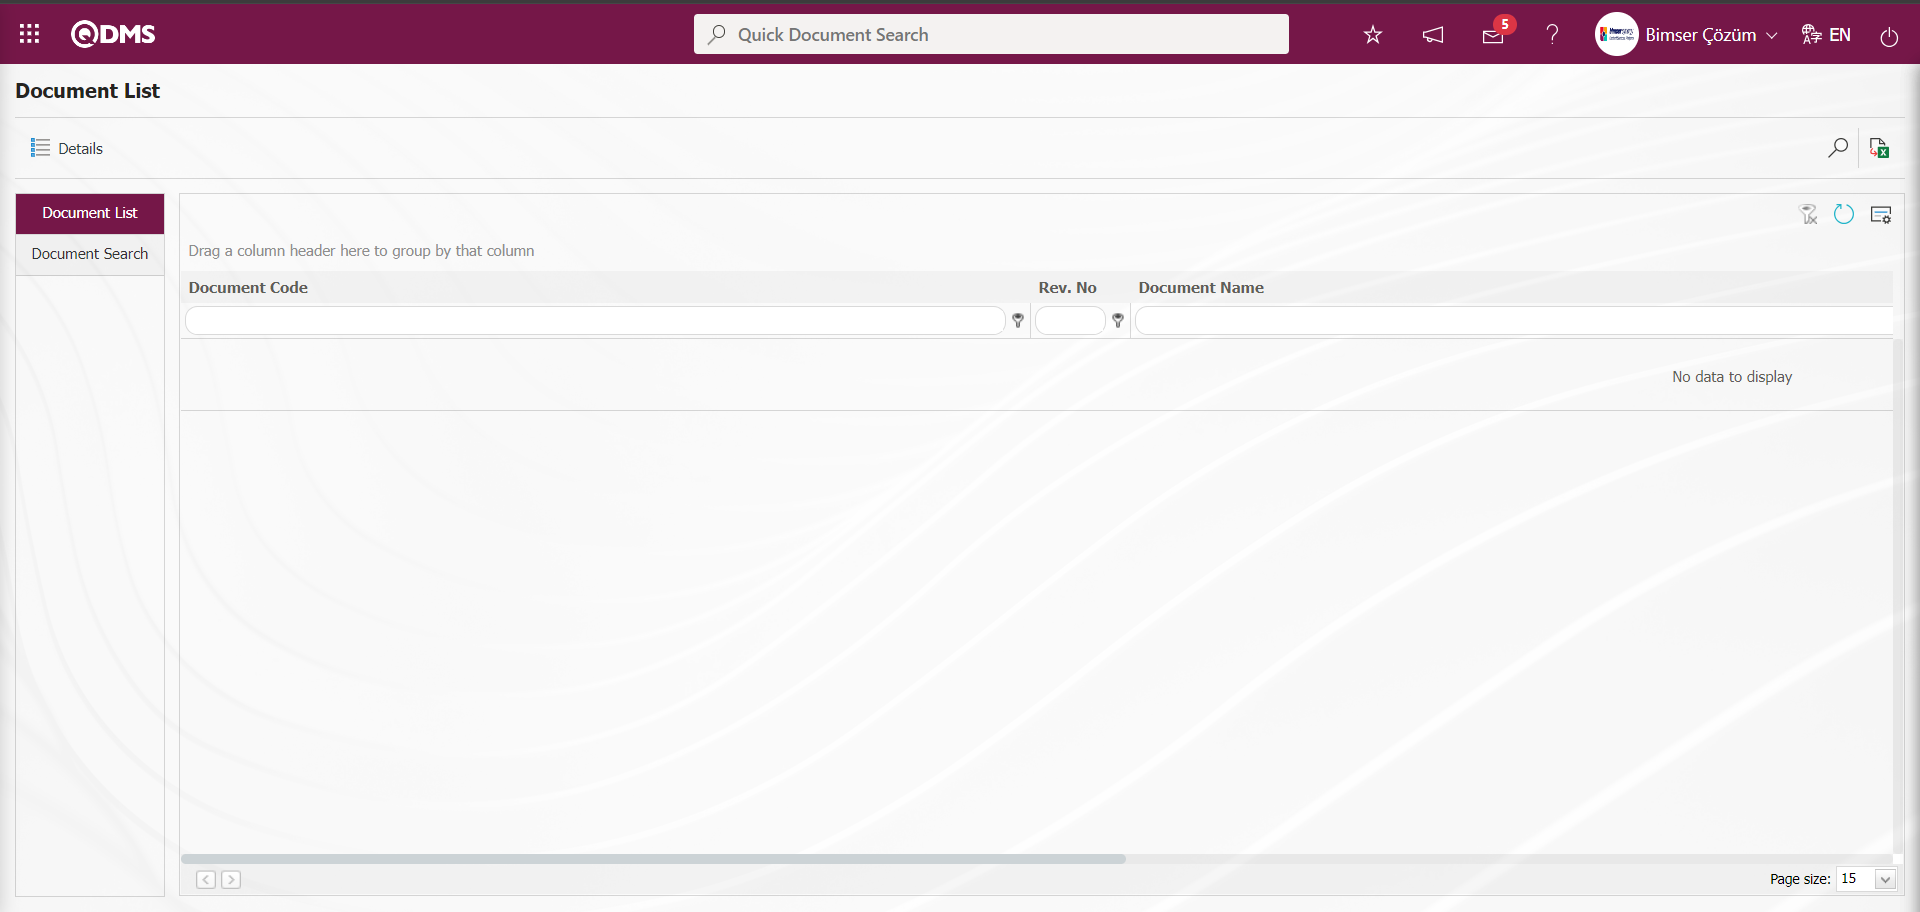
With the help of the buttons on the screen;
 : Detailed information of the document selected in the list is displayed.
: Records are searched by filtering.
: Data is transferred to Excel.
: The search criteria on the menu screens are used to clear the data remaining in the filter fields in the grid where the search operation is performed.
: The menu screen is restored to its default settings.
: User-based designing of the menu screen is done with the show-hide feature, that is, the hiding feature of the fields corresponding to the columns on the menu screens.
On the Document List** screen, type the document code in the “Document Code” field, which is the filter search criteria in the document search tab, and click the (Search) button.

On the Document List screen, records are listed according to the search criteria in the filter made in the Document List tab.

On the Document List screen, click ![A close up of a logo]
Description automatically generated button while the document is selected in the document list.
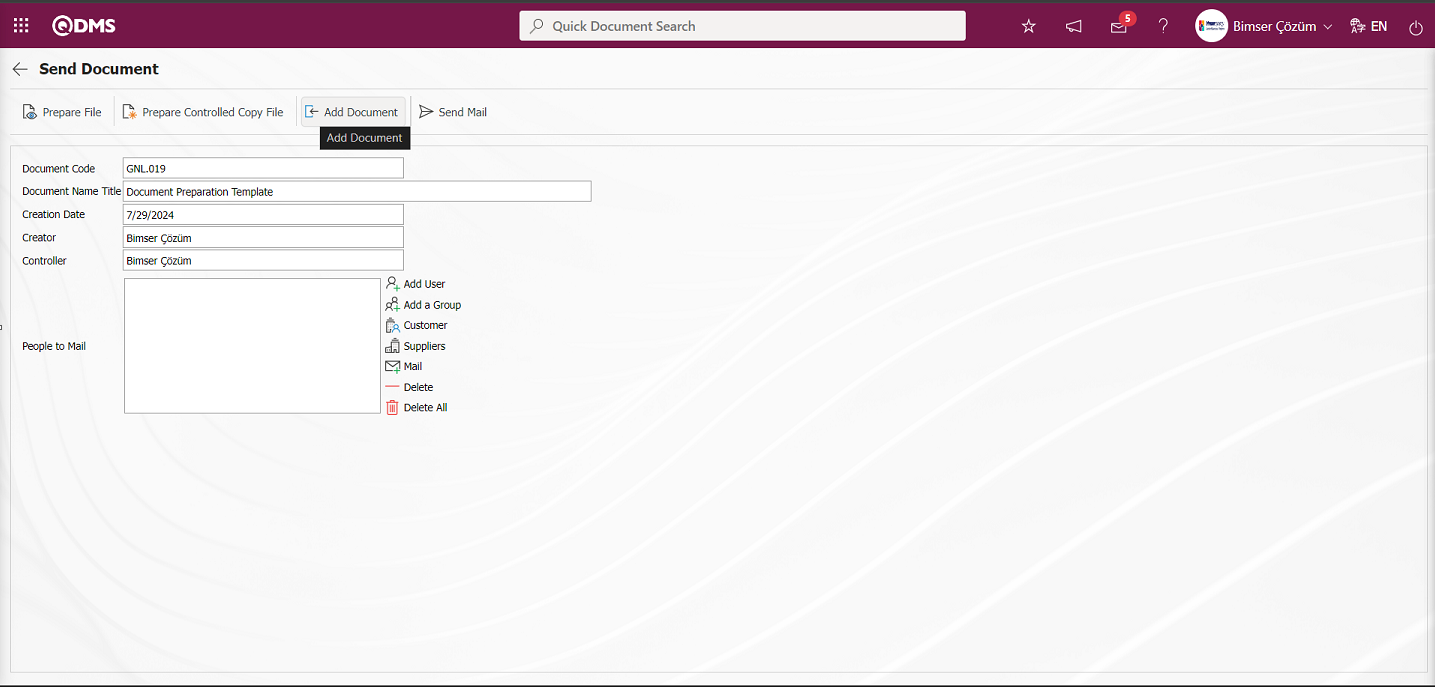
With the help of the buttons on the screen;
 : Go back to the previous screen.
 : The form is downloaded to the computer.
 : A Controlled Copy is prepared.
 : Downloaded form is uploaded to the system
 : Mail is sent to the people to whom mail will be sent.
The document is downloaded to the user's computer by clicking the button on the Send Document screen.
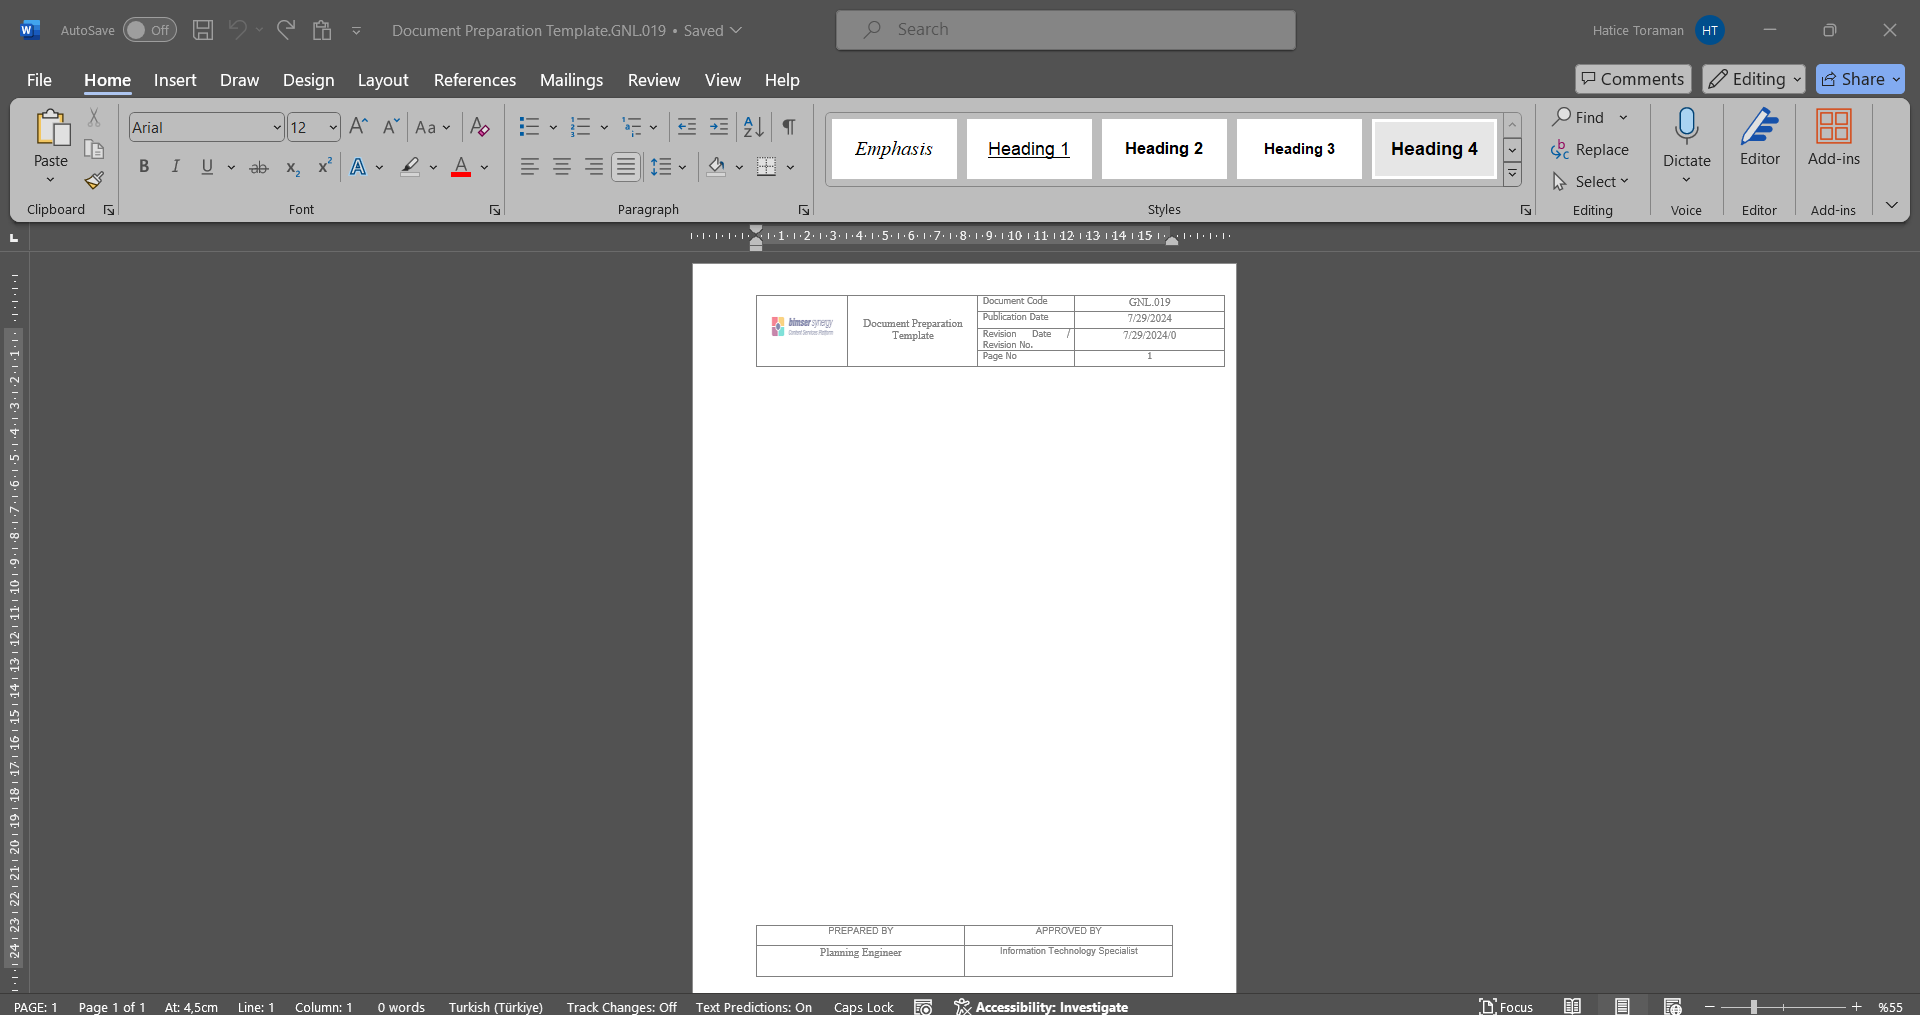
The downloaded document is edited.
The edited document is restored to the Qdms system with the  button.
![A screenshot of a computer
Description automatically generated]ref221
On the Add File screen, the selection process of the filled file is done by clicking the Browse button.

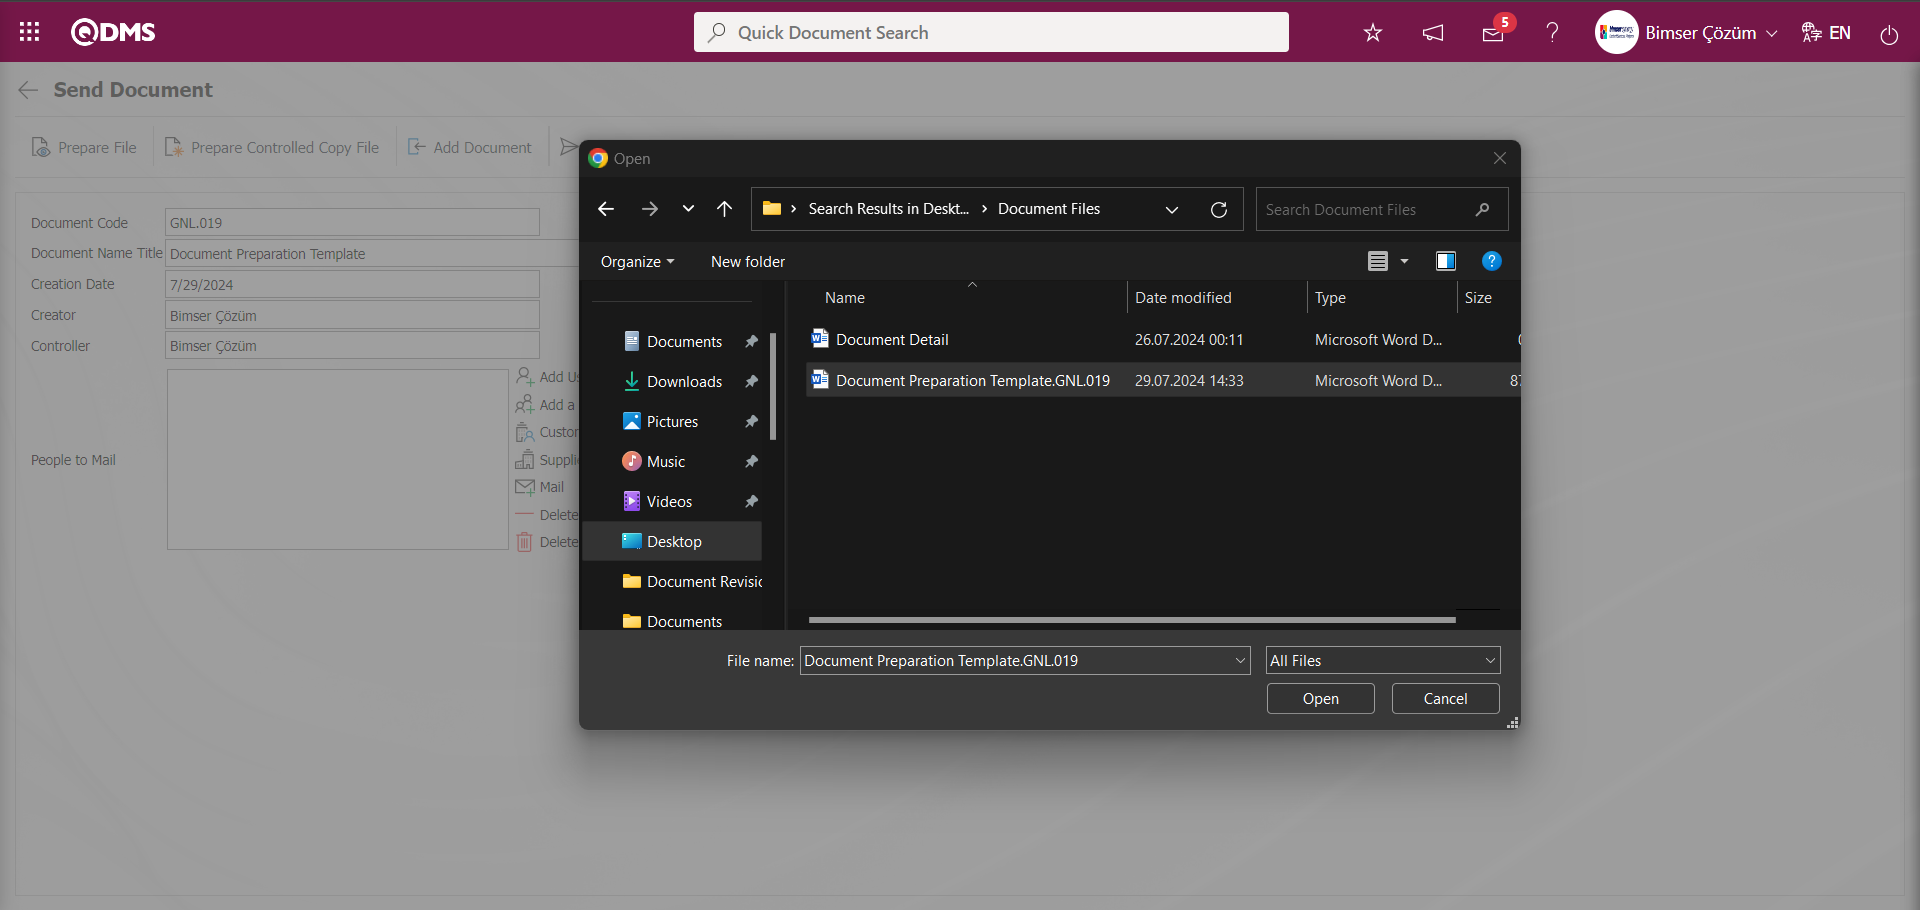 The message given by the system informs that the file was successfully transferred
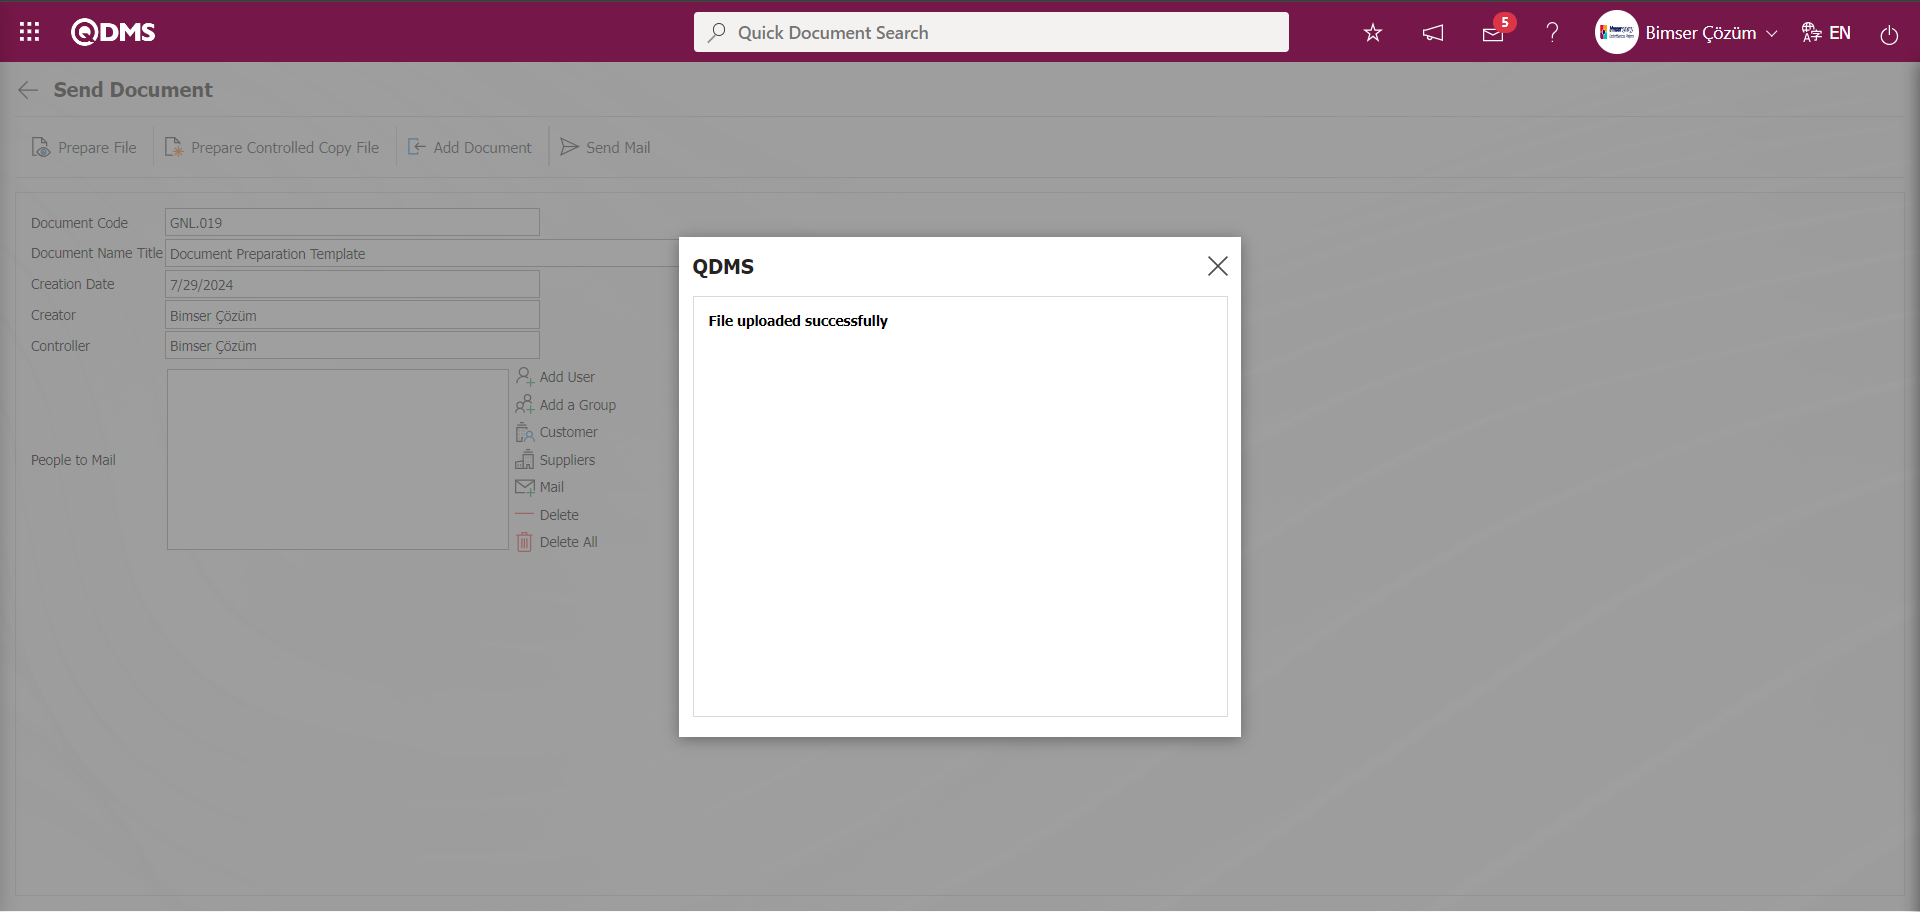
After the file transfer process, the people to whom the mail will be sent are determined by typing the e-mail address in the user/ user group/ customer/ supplier fields and, if desired, in the mail. On the Send Document** screen, the mail is sent to the people to whom the mail will be sent with the button.

The message given by the system informs that the file was successfully sent to the relevant persons

In the document search tab on the ready document list screen, type the document code information in the document code field in the search criteria and click the (Search) button.
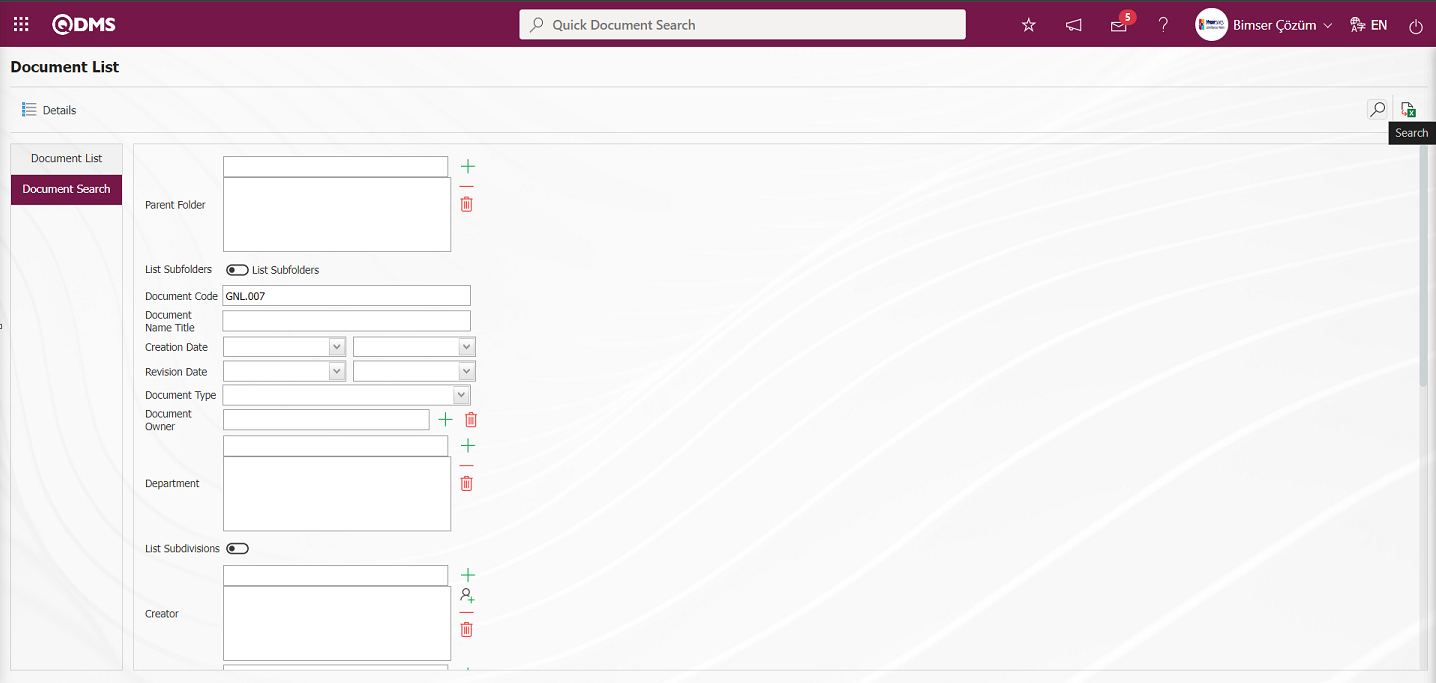 In the Document list, records are listed according to the search criteria in the Document search tab.
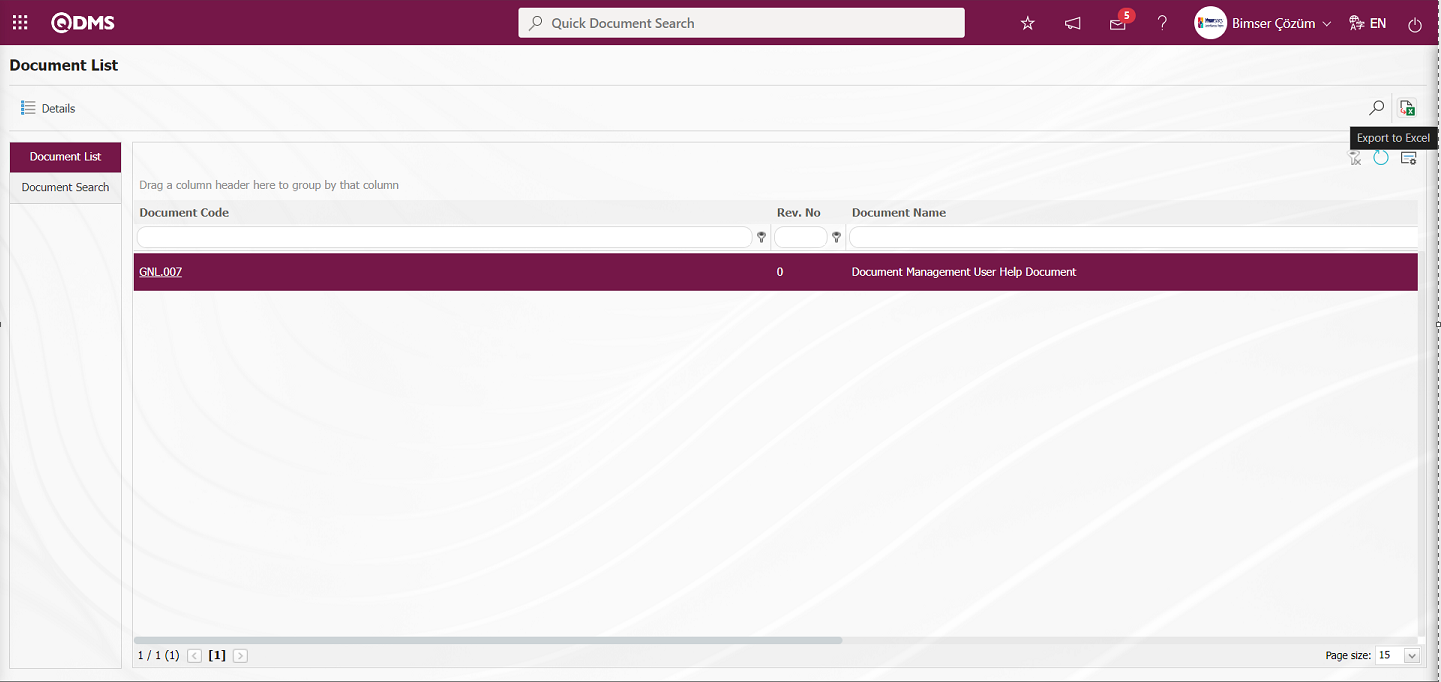
While the document is selected in the document search tab on the Document List** screen, the report in Excel format is obtained by clicking the  (Export to Excel) button.
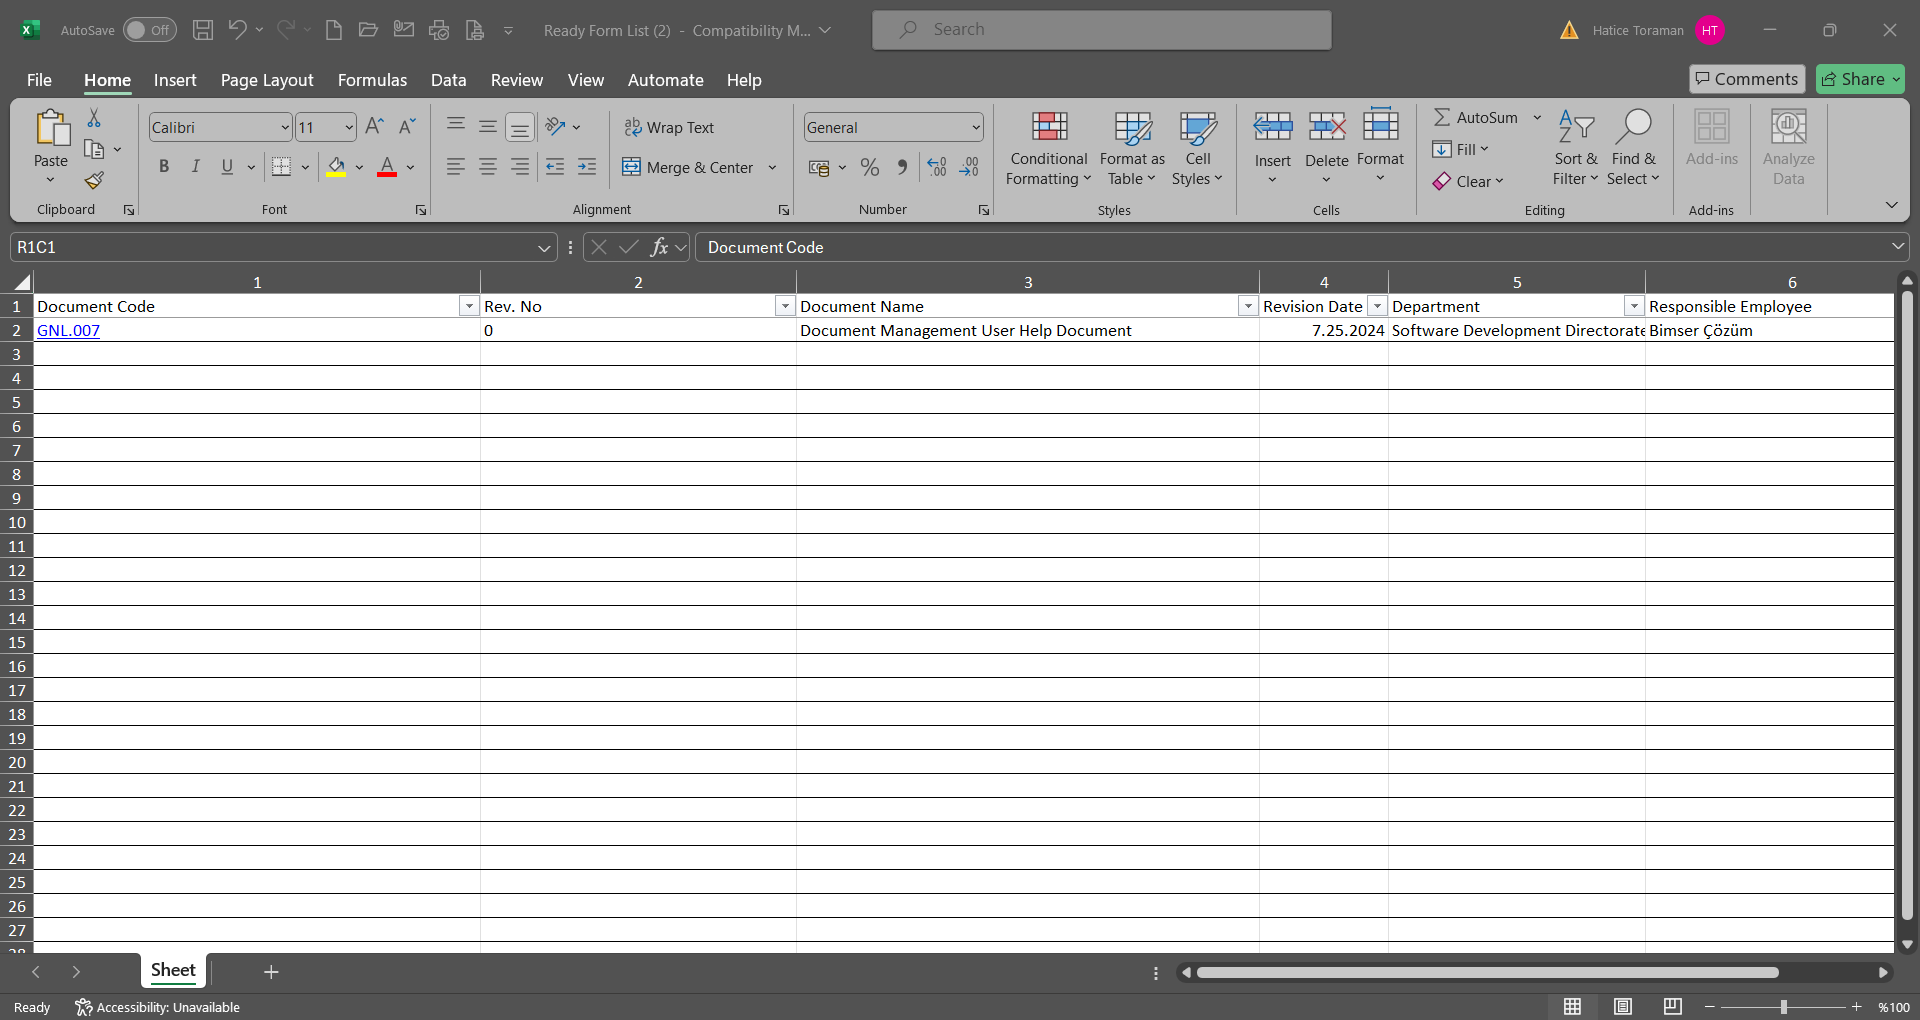
6.2.12.21.Document Parametric Fields Report
Menu Name: Integrated Management System/ Document Management/ Reports/ Document Parametric Field Report
It is the menu where the list of parametric fields opened on folder basis is displayed and the report is taken in Excel format.
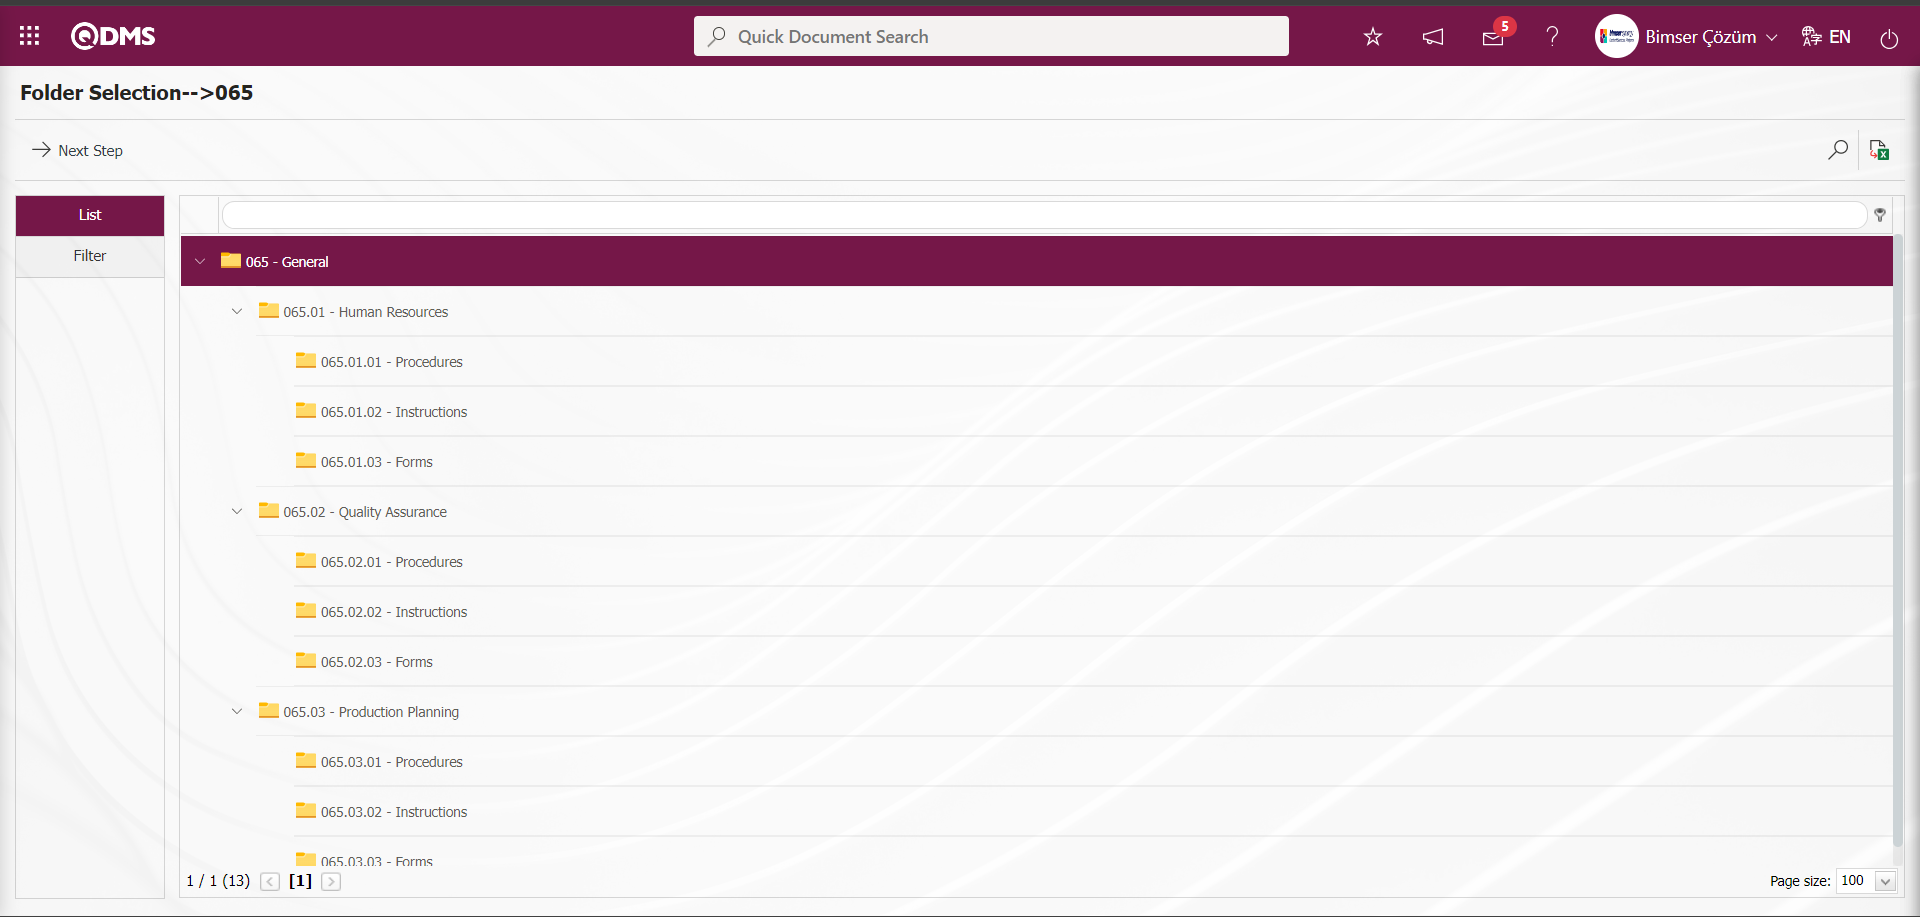
With the help of the buttons on the screen;
: Records are searched by filtering.
: Data is transferred to Excel.
: The search criteria on the menu screens are used to clear the data remaining in the filter fields in the grid where the search operation is performed.
: The menu screen is restored to its default settings.
: User-based designing of the menu screen is done with the show-hide feature, that is, the hiding feature of the fields corresponding to the columns on the menu screens.
On the screen that opens, select the folder whose parametric fields are desired to be displayed and enter the folder with the  button.

On the Parametric Fields Report** screen, click on the Development Search Criteria tab to display the defined parametric fields.

In the Parametric Fields Report screen, the information to be displayed in the report is selected from the fields to be listed tab.

The report is created with the (Search) button on the Parametric Fields Report screen. If desired, the report can be customized by filtering using search criteria or advanced search criteria
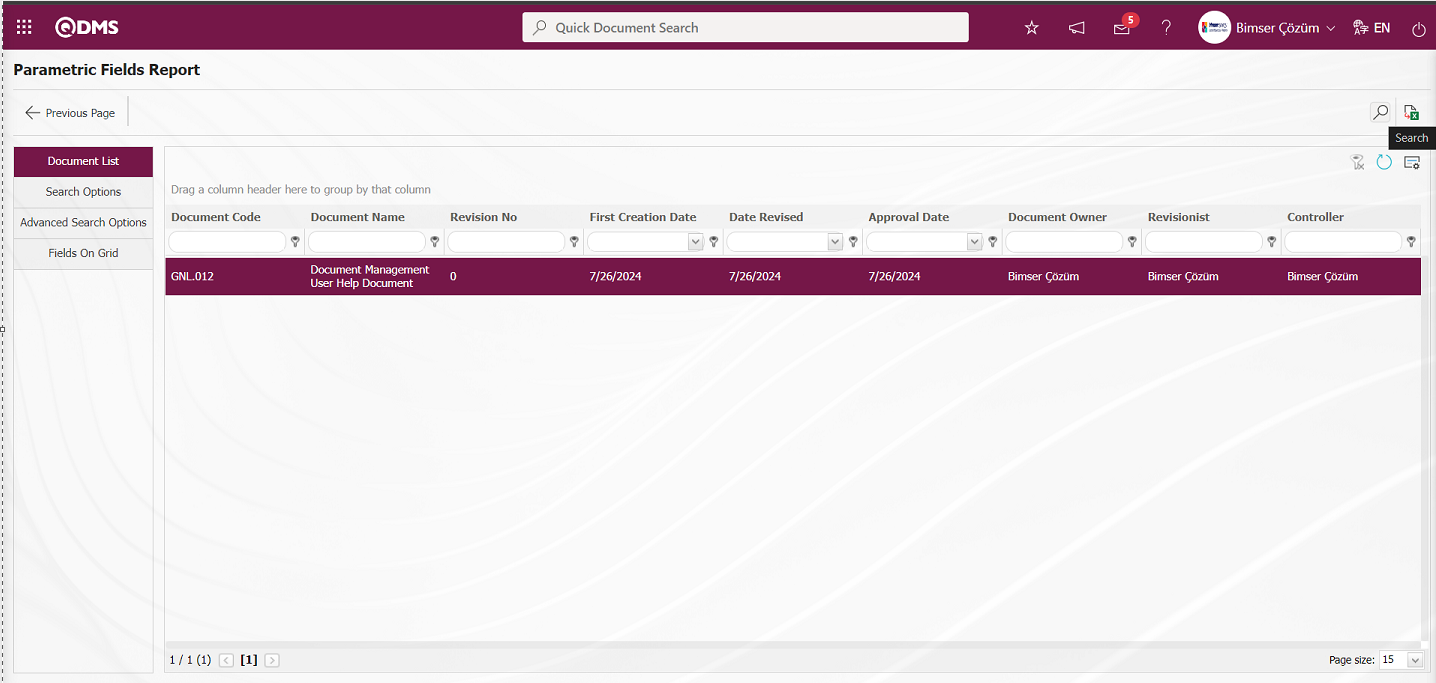
In the Parametric Fields Report** screen, the report of the Parametric Field Report in Excel format is obtained by clicking the (Export to Excel) button on the Document List screen.
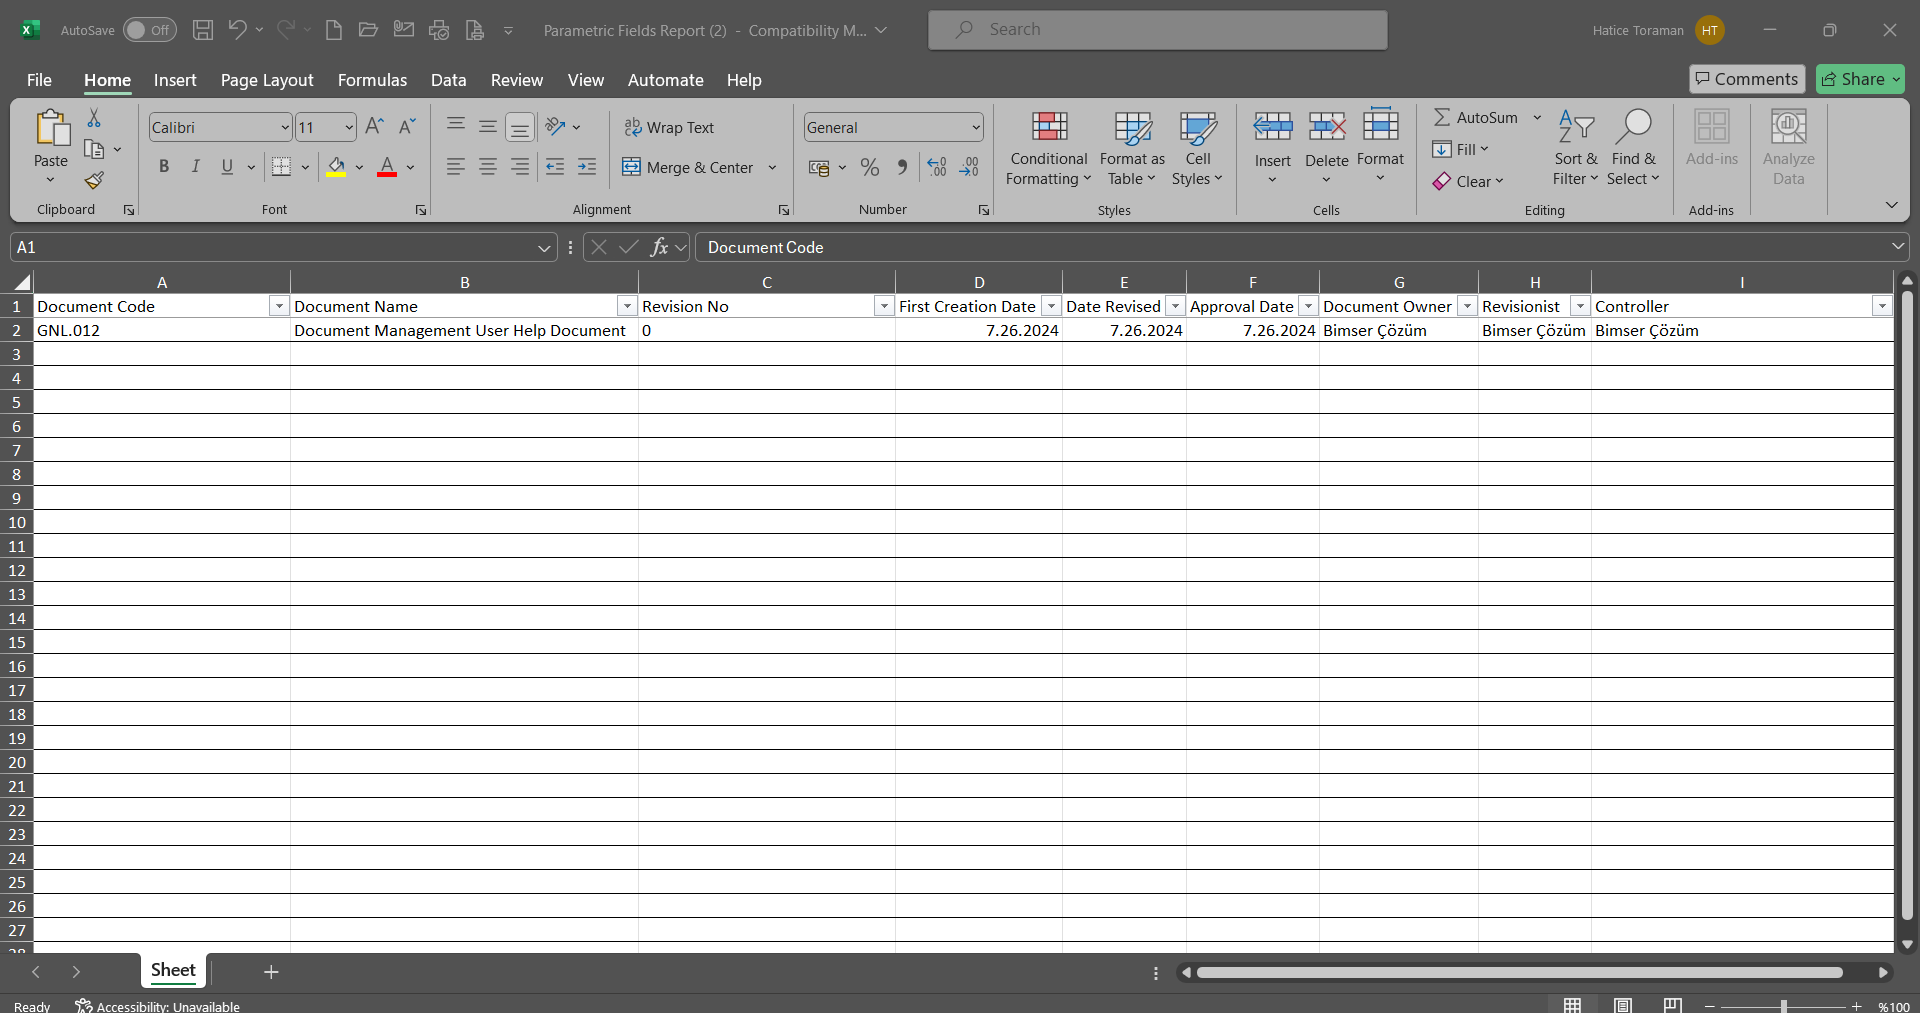
6.2.12.22.Stuff Base Document Reading Lists Report
Menu Name: Integrated Management System/ Document Management/ Reports/Stuff Base Document Reading Lists Report
It is the menu that shows the number of documents that the personnel should read and the report is received in Excel format. In this menu, the report of the number of documents to be read by the person is obtained. On the Stuff Base Document Reading Lists Report screen, we see two tabs, Filter and Document List tab. In the filter tab, filtering is done according to the search criteria. In the document list tab, the records are listed according to the filtering process according to these search criteria.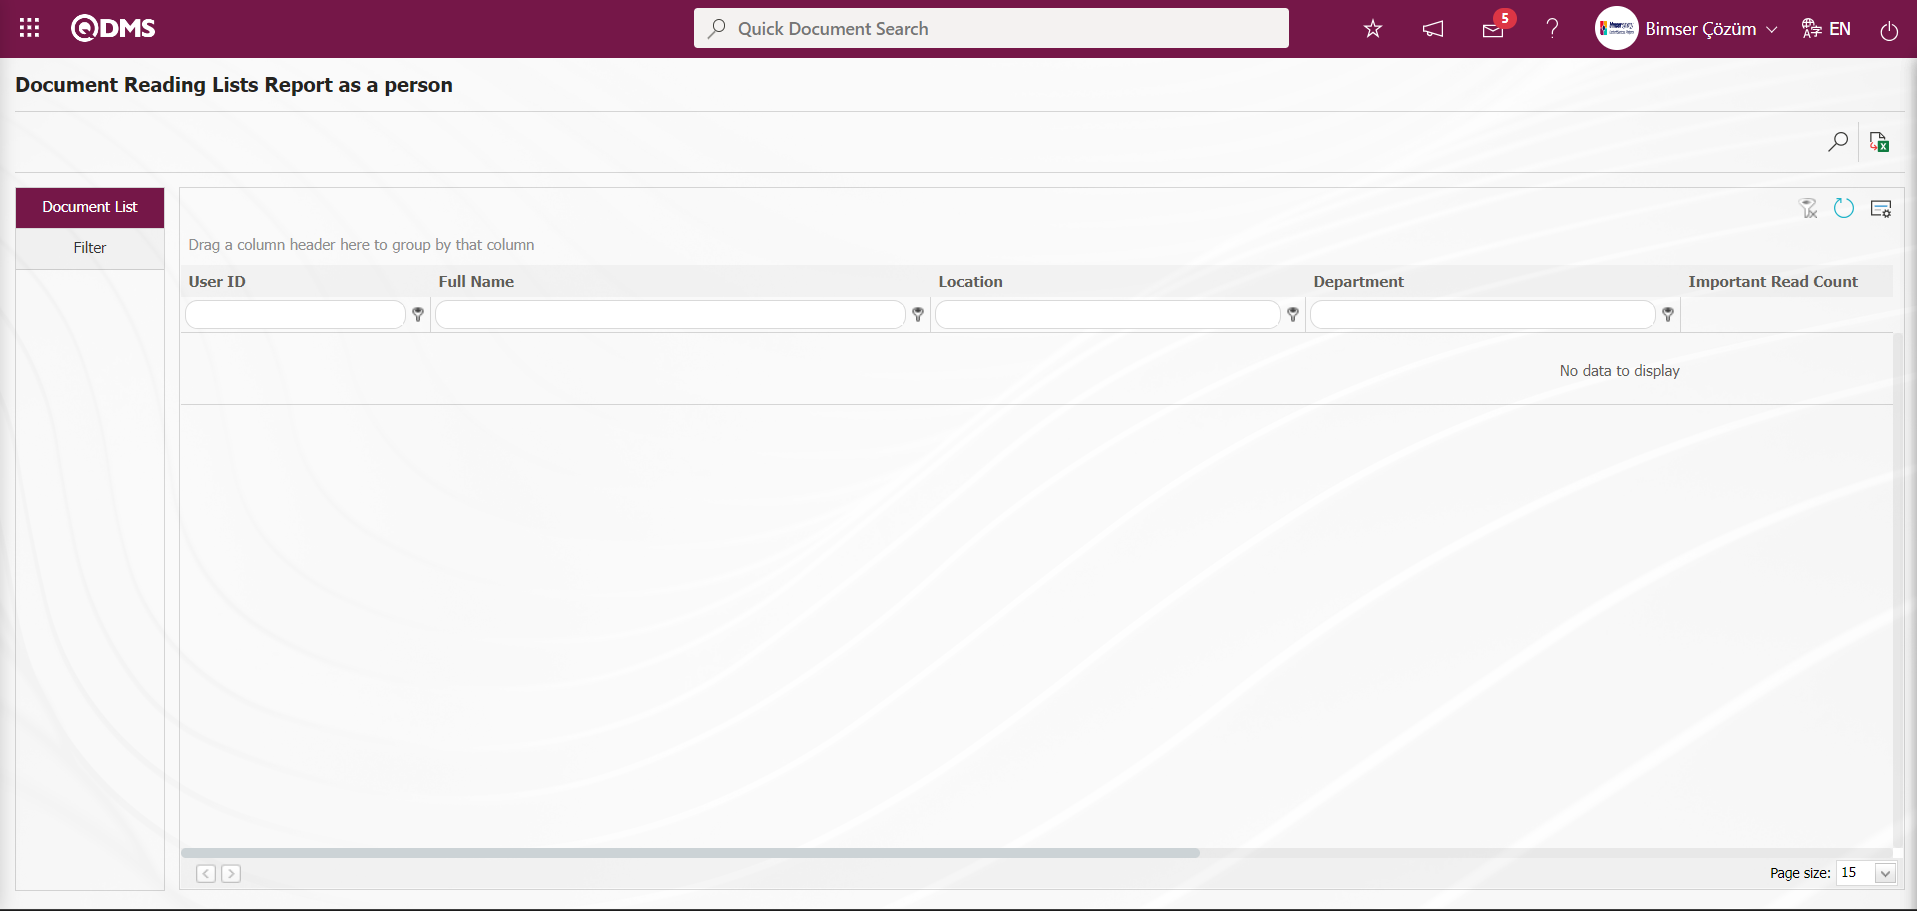
With the help of the buttons on the screen;
: Records are searched by filtering.
: Data is transferred to Excel.
: The search criteria on the menu screens are used to clear the data remaining in the filter fields in the grid where the search operation is performed.
: The menu screen is restored to its default settings.
: User-based designing of the menu screen is done with the show-hide feature, that is, the hiding feature of the fields corresponding to the columns on the menu screens.
On the Stuff Base Document Reading Lists Report screen, select the personnel from the personnel list defined in the system in the “Employees” field, which is the search criteria in the filter tab, and click the (Search) button.
 In the Stuff Base Document Reading Lists Report screen, records are listed according to the search criteria in the filter made in the document list tab.
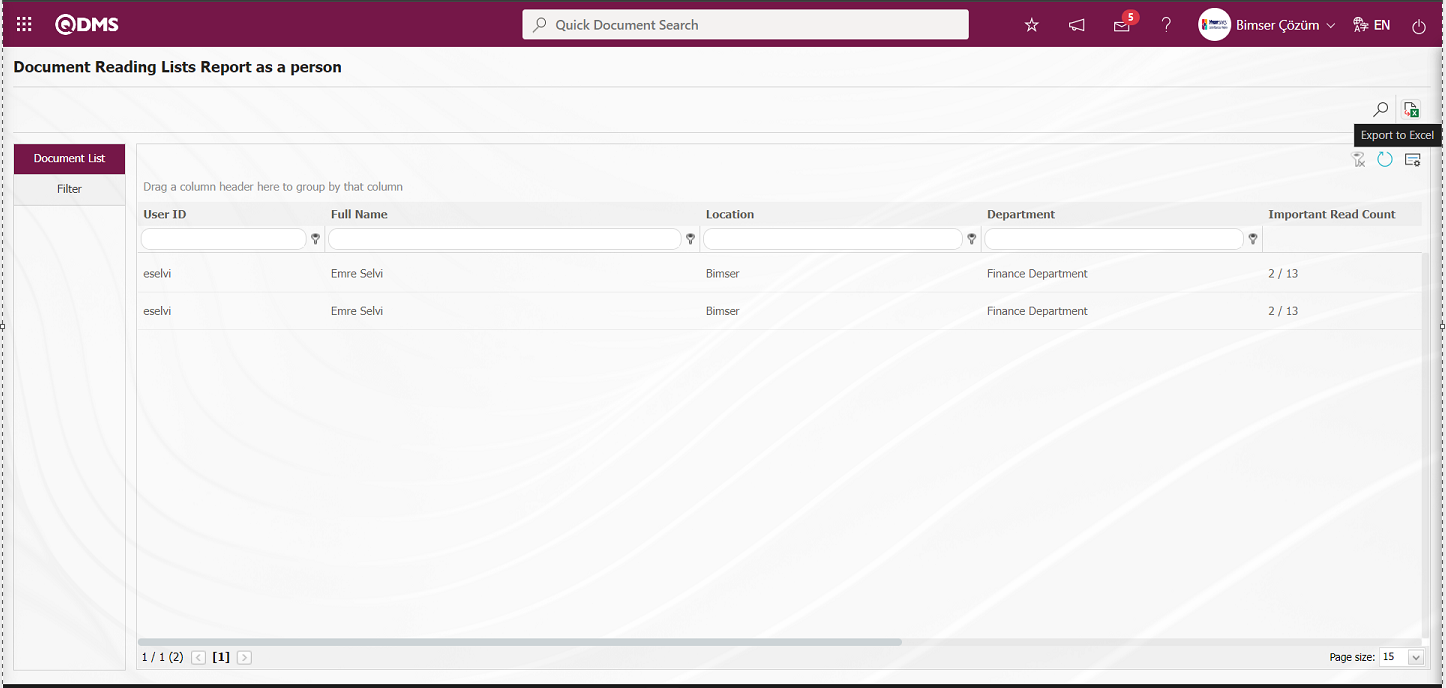
On the Stuff Base Document Reading Lists Report screen, click the (Export to Excel) button to get the Stuff Base Document Reading Lists Report report in Excel format.
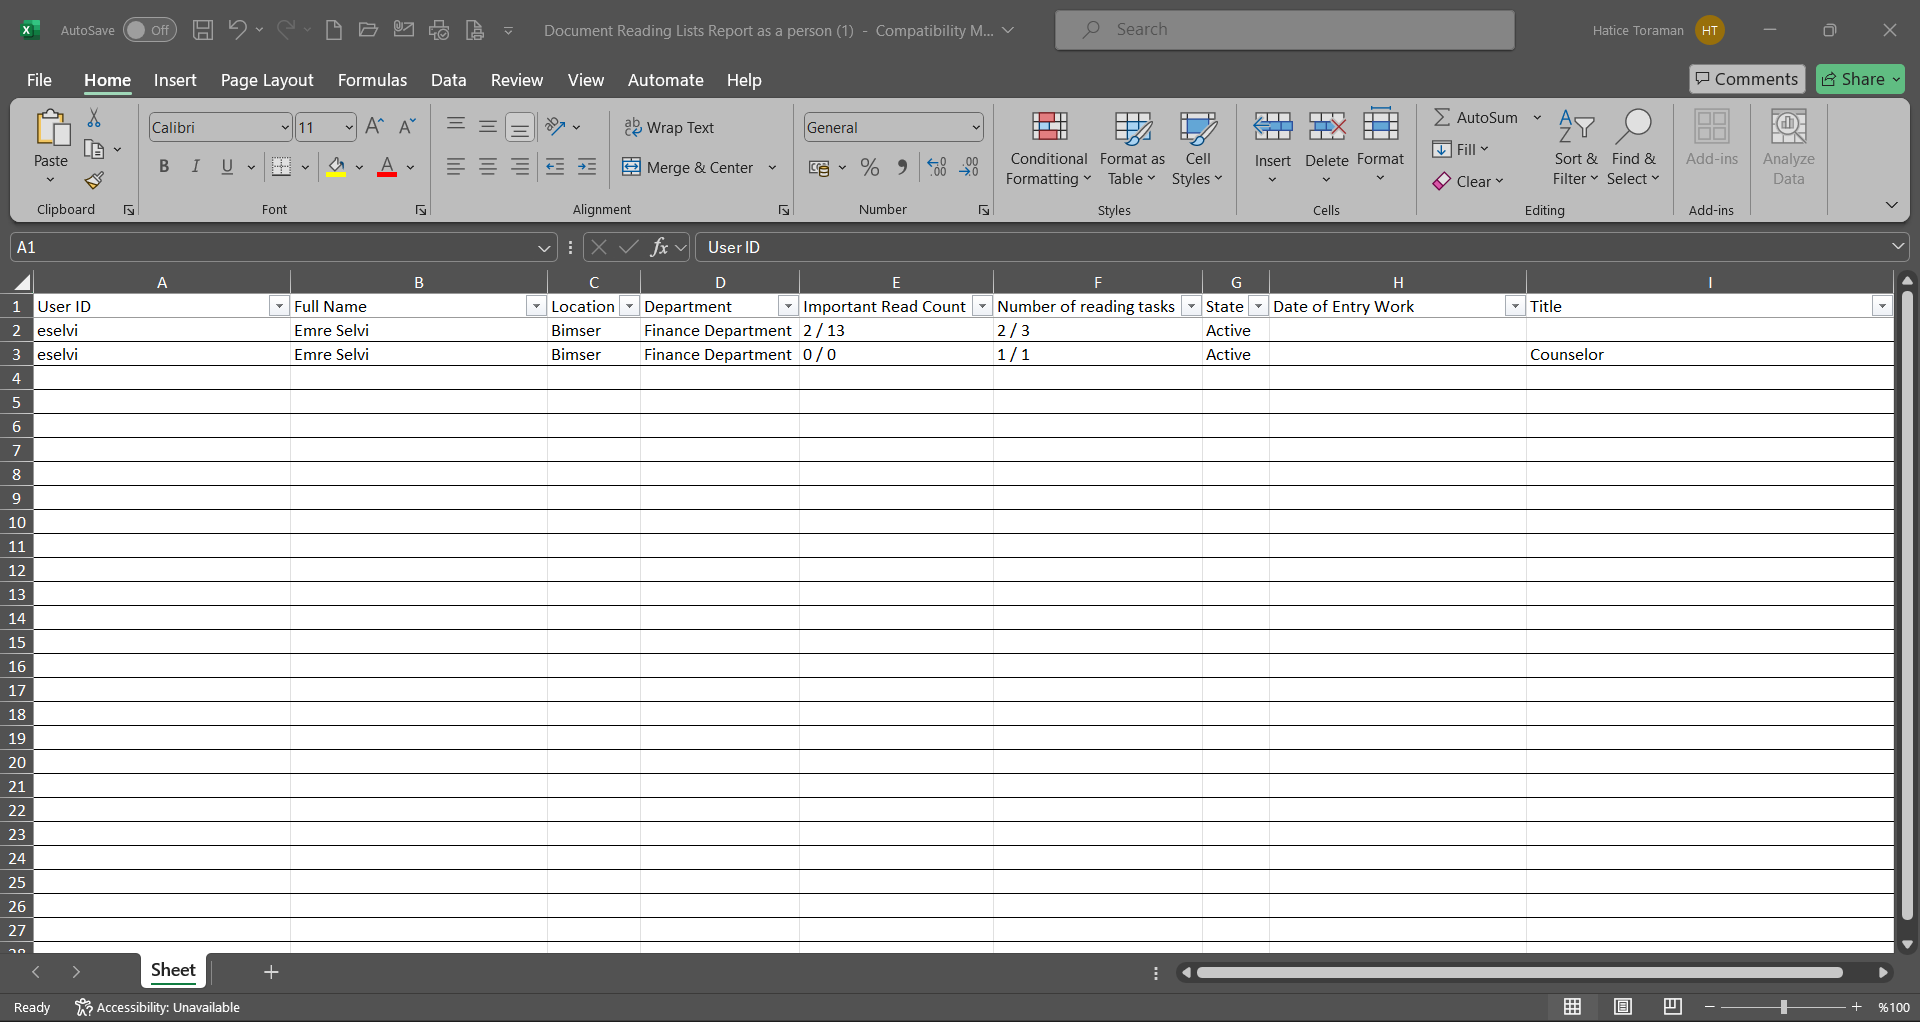
6.2.12.23.Department Base Document Reading Lists Report
Menu Name: Integrated Management System/ Document Management/ Reports/ Department Base Document Reading Lists Report
It is the menu that shows the number of documents read by the users on a department basis and the report is taken in Excel format. On the Department Base Document Reading Lists Report screen, there are two tabs: filter and document list tab. In the filter tab, filtering is done according to the search criteria. In the document list tab, the records are listed according to the filtering process according to these search criteria..

With the help of the buttons on the screen;
: Records are searched by filtering.
: Data is transferred to Excel.
: The search criteria on the menu screens are used to clear the data remaining in the filter fields in the grid where the search operation is performed.
: The menu screen is restored to its default settings.
: User-based designing of the menu screen is done with the show-hide feature, that is, the hiding feature of the fields corresponding to the columns on the menu screens.
On the Department Base Document Reading Lists Report screen, select the department from the list of departments defined in the system in the “Department” field, which is the search criteria in the filter tab, and click the (Search) button.
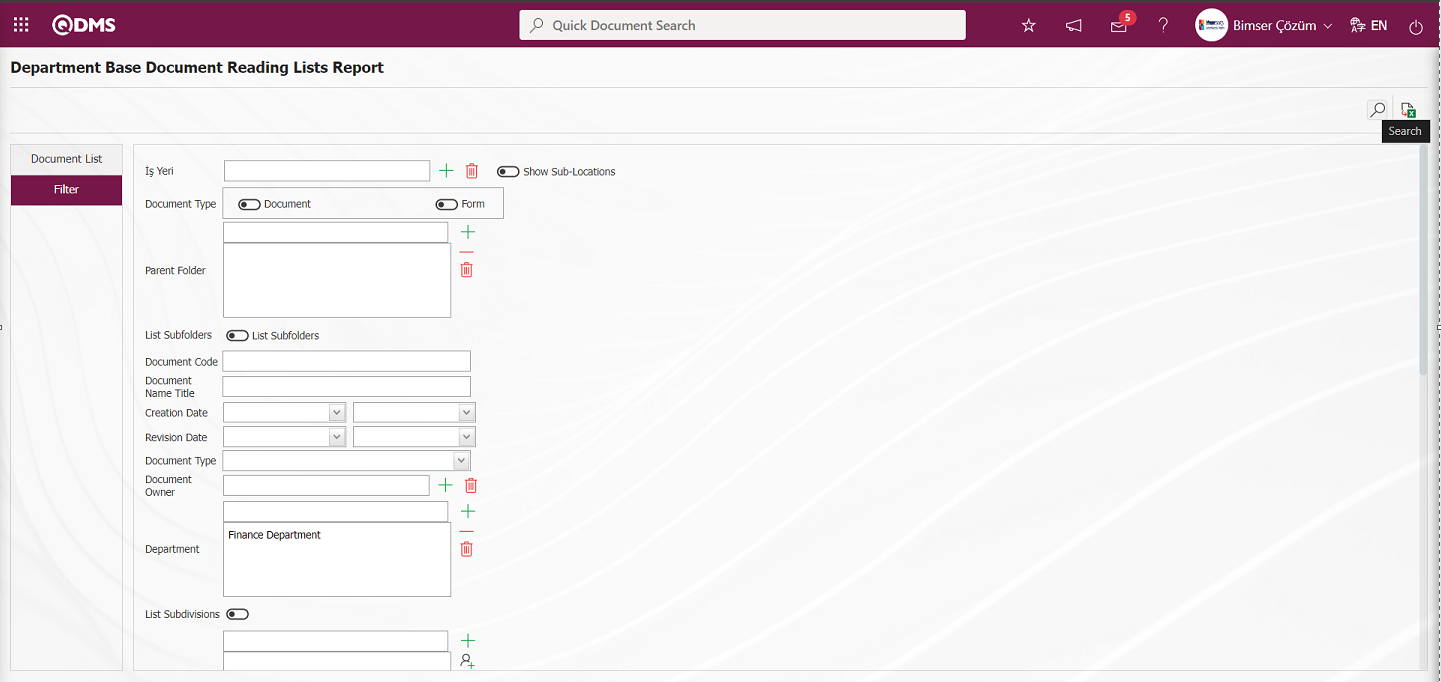
In the Department Base Document Reading Lists Report screen, records are listed according to the search criteria in the filter made in the document list tab.

On the Department Base Document Reading Lists Report screen, click the (Export to Excel) button to get the Department Base Document Reading Lists Report in Excel format.
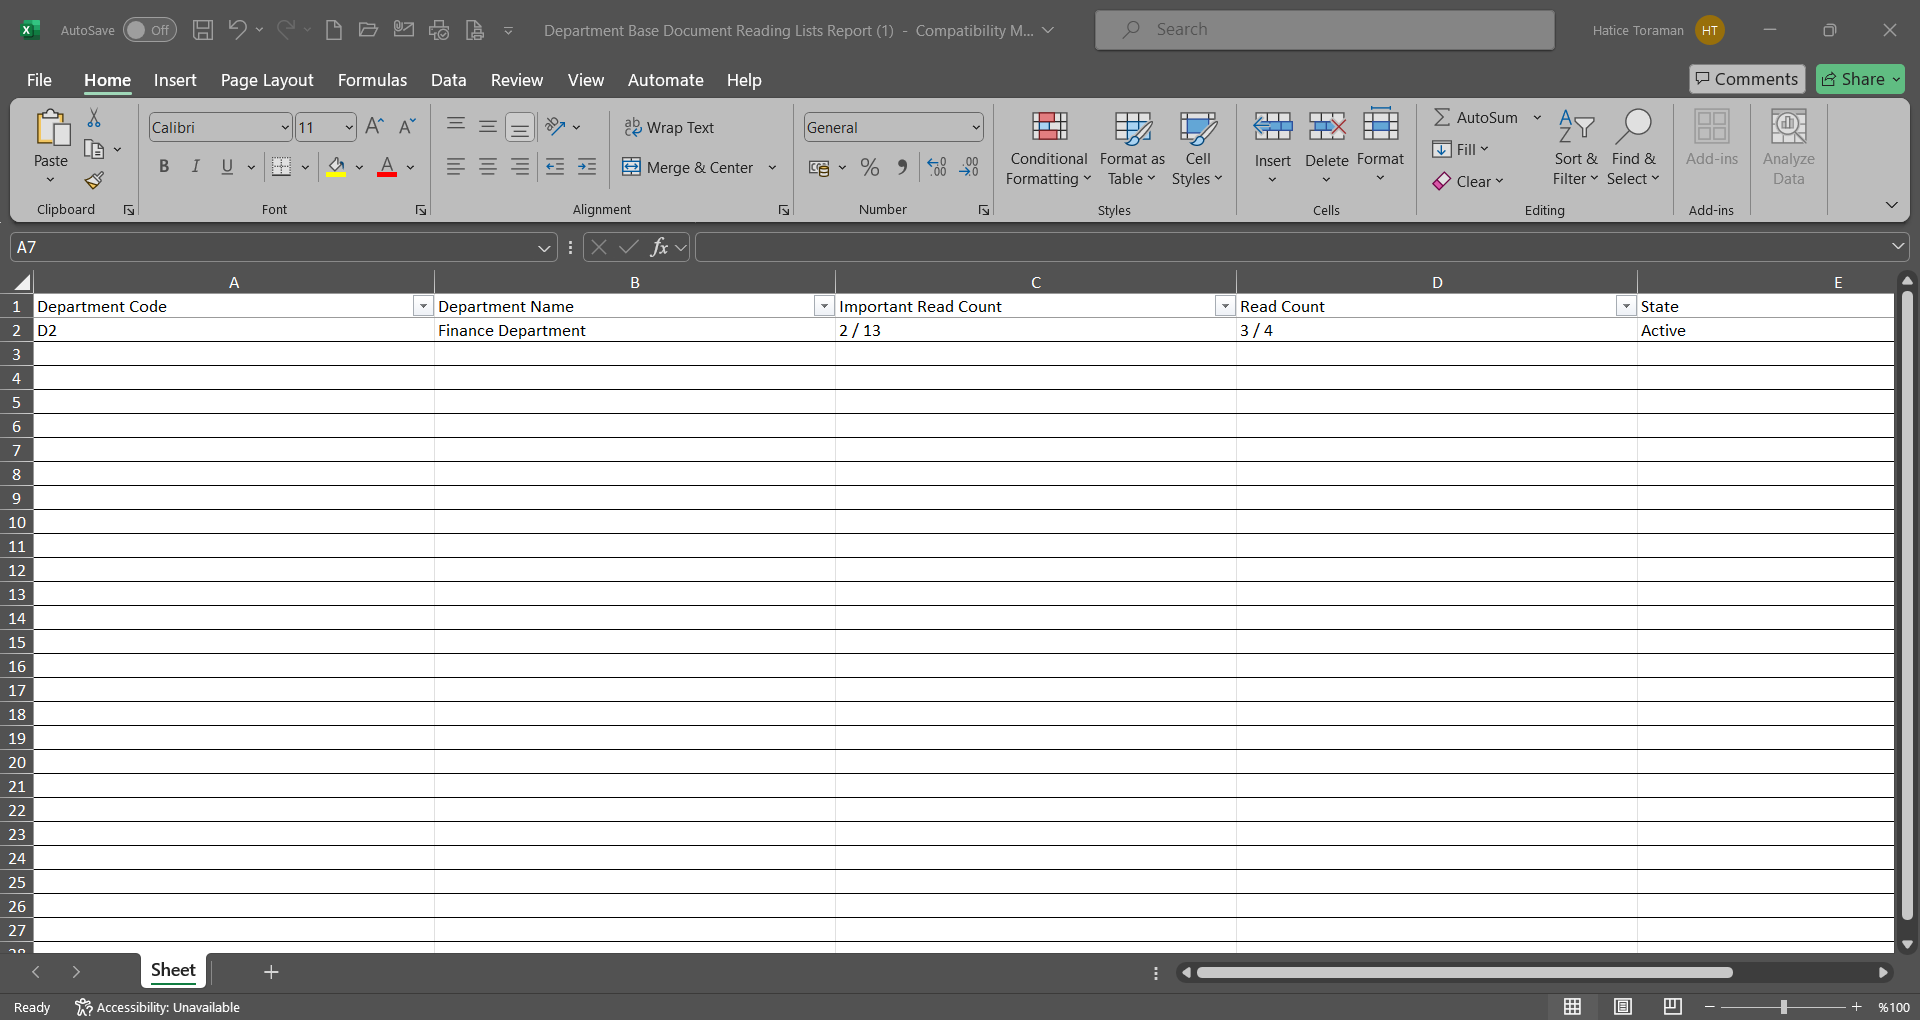
6.2.12.24.Additional Document Report
Menu Name: Integrated Management System/ Document Management/ Reports/ Additional Document Report
It is the menu where the list of documents given in addition to the documents is displayed and the report is taken in Excel format. On the Additional Document Report screen, there are two tabs: document search and document list tab. In the document search tab, filtering is done according to the search criteria. In the document list tab, the records are listed according to the filtering process according to these search criteria. From the document search tab, the report is created by selecting the criterion whether “List by Main Document” or “List by Additional Document” report will be created.
With the help of the buttons on the screen;
: Records are searched by filtering.
: Data is transferred to Excel.
: The search criteria on the menu screens are used to clear the data remaining in the filter fields in the grid where the search operation is performed.
: The menu screen is restored to its default settings.
: User-based designing of the menu screen is done with the show-hide feature, that is, the hiding feature of the fields corresponding to the columns on the menu screens.
On the Additional Document Report screen, type the document code in the “Document Code” field, which is the filter search criteria in the document search tab, and click the  (Search) button.
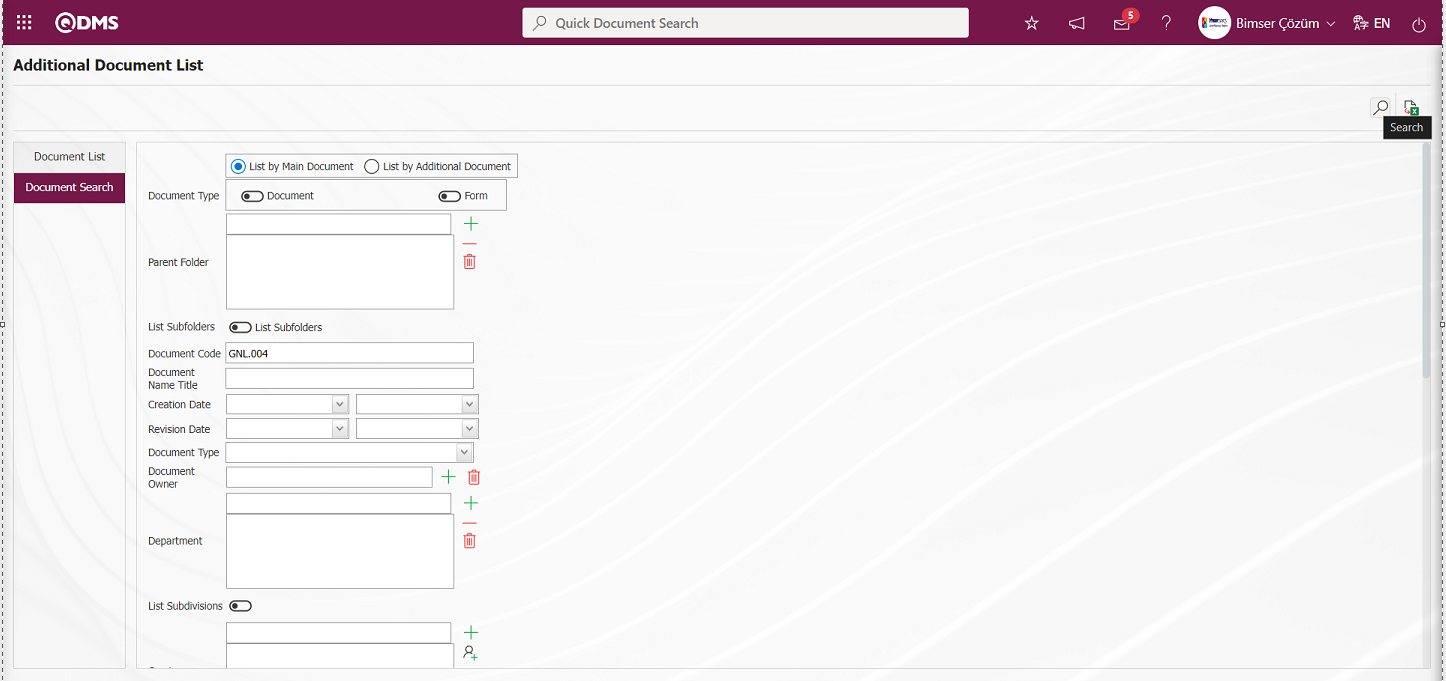
In the Additional Document Report screen, records are listed according to the search criteria in the filter made in the document list tab.
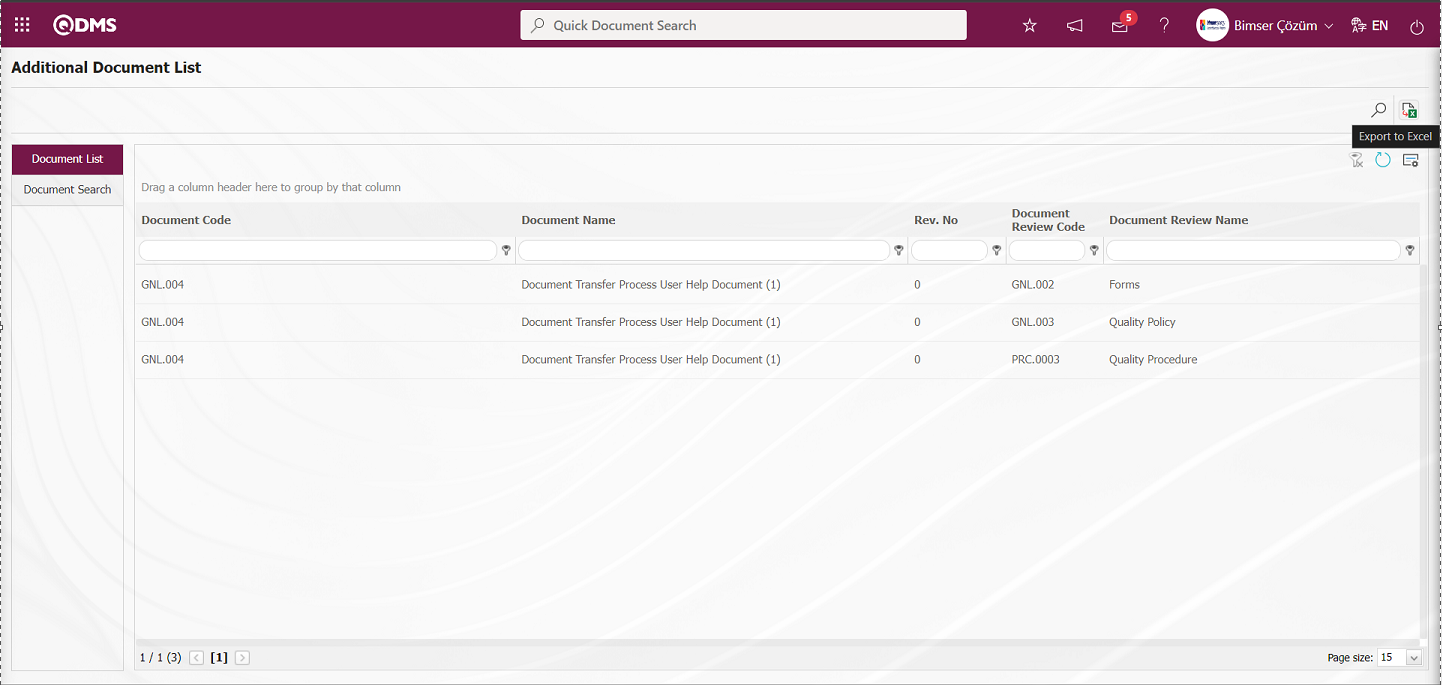
On the Additional Document Report screen, click the (Export to Excel) button to get the Additional Document report in Excel format.
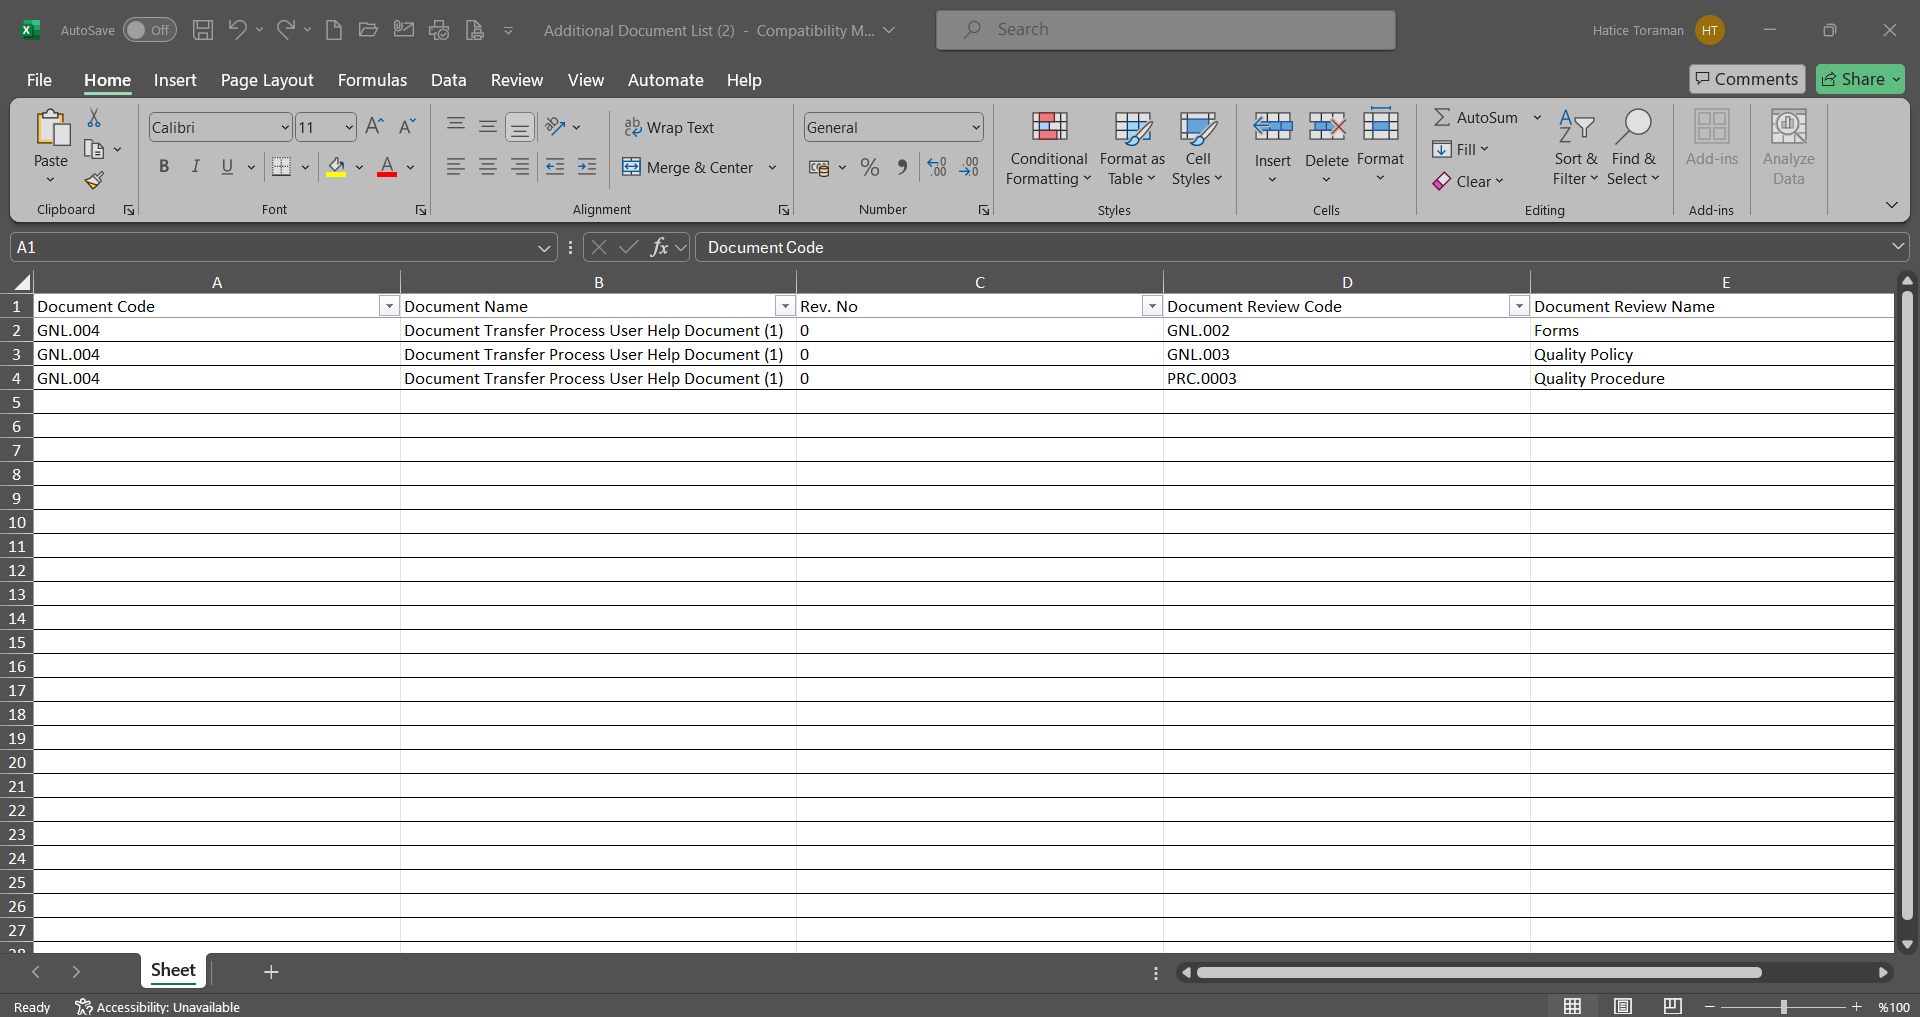
6.2.12.25.Document Product Report
Menu Name: Integrated Management System/ Document Management/ Reports/ Document Product Report
It is the menu where the products connected to the documents are displayed and the report is taken in Excel format. On the Document Product Report screen, there are two tabs: document search and document list tab. In the document search tab, filtering is done according to the search criteria. In the document list tab, the records are listed according to the filtering process according to these search criteria.

With the help of the buttons on the screen;
: Records are searched by filtering.
: Data is transferred to Excel.
: The search criteria on the menu screens are used to clear the data remaining in the filter fields in the grid where the search operation is performed.
: The menu screen is restored to its default settings.
: User-based designing of the menu screen is done with the show-hide feature, that is, the hiding feature of the fields corresponding to the columns on the menu screens.
On the Document Product Report screen, type the document code in the “Document Code” field, which is the filter search criteria in the document search tab, and click the (Search) button.

Records are listed according to the search criteria in the filter made in the Document List tab on the Document Product Report screen.

On the Document Product Report screen, the Product Document report in Excel format is obtained by clicking the (Export to Excel) button.
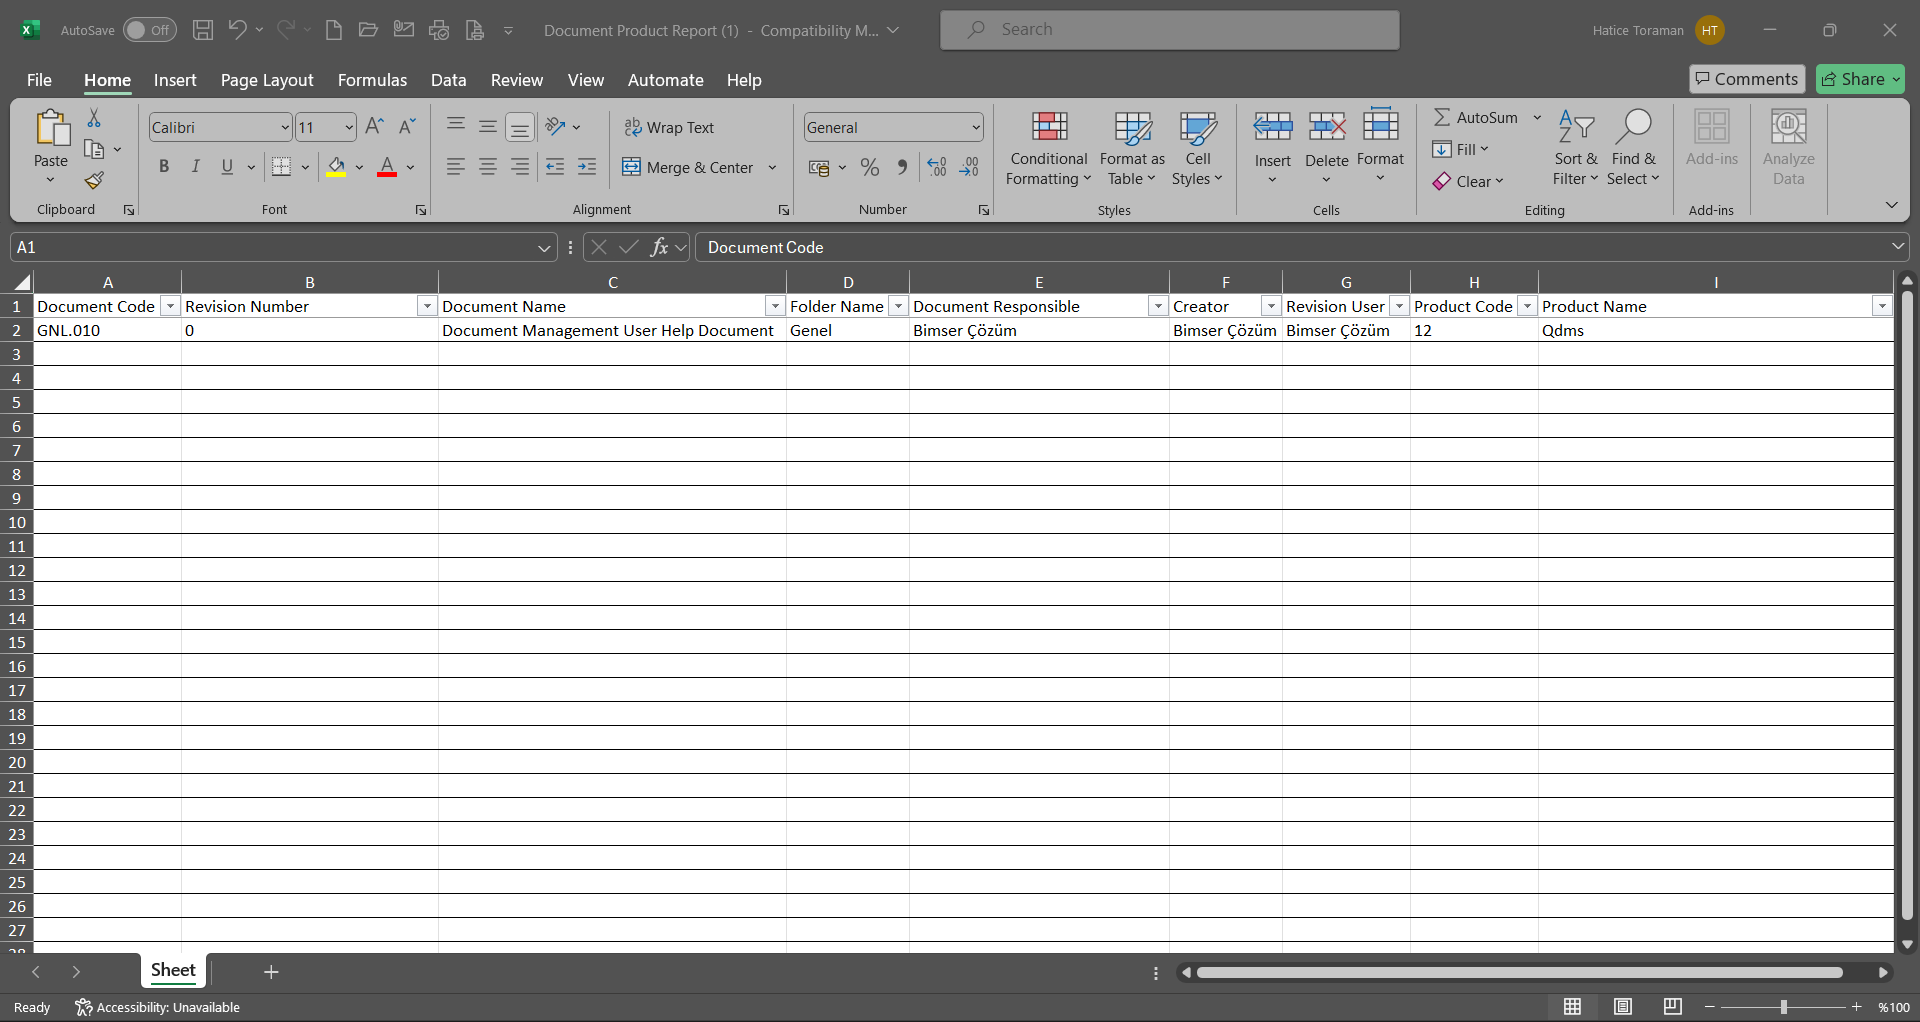
6.2.12.26.Document Preparation Request List
Menu Name: Integrated Management System/ Document Management/ Reports/ Document Preparation Request List
It is the menu where the document preparation requests made by the users in the document viewing menu are displayed and the report is received in Excel format. On the Document Preparation Request List screen, there are two tabs: document search and document list tab. There are two tabs document search and document list tabs. In the document search tab, filtering is done according to the search criteria. In the document list tab, the records are listed according to the filtering process according to these search criteria.

With the help of the buttons on the screen;
: Records are searched by filtering.
: Data is transferred to Excel.
: The search criteria on the menu screens are used to clear the data remaining in the filter fields in the grid where the search operation is performed.
: The menu screen is restored to its default settings.
: User-based designing of the menu screen is done with the show-hide feature, that is, the hiding feature of the fields corresponding to the columns on the menu screens.
On the Document Preparation Request List screen, select the folder from the document folder list in the “Parent Folder” field, which is the filter search criteria in the document search tab, and click the (Search) button.

On the Document Preparation Request List screen, records are listed according to the search criteria in the filter made in the Document List tab.

On the Document Preparation Request List screen, the report of the Document Preparation Request List in Excel format is obtained by clicking the (Export to Excel) button.
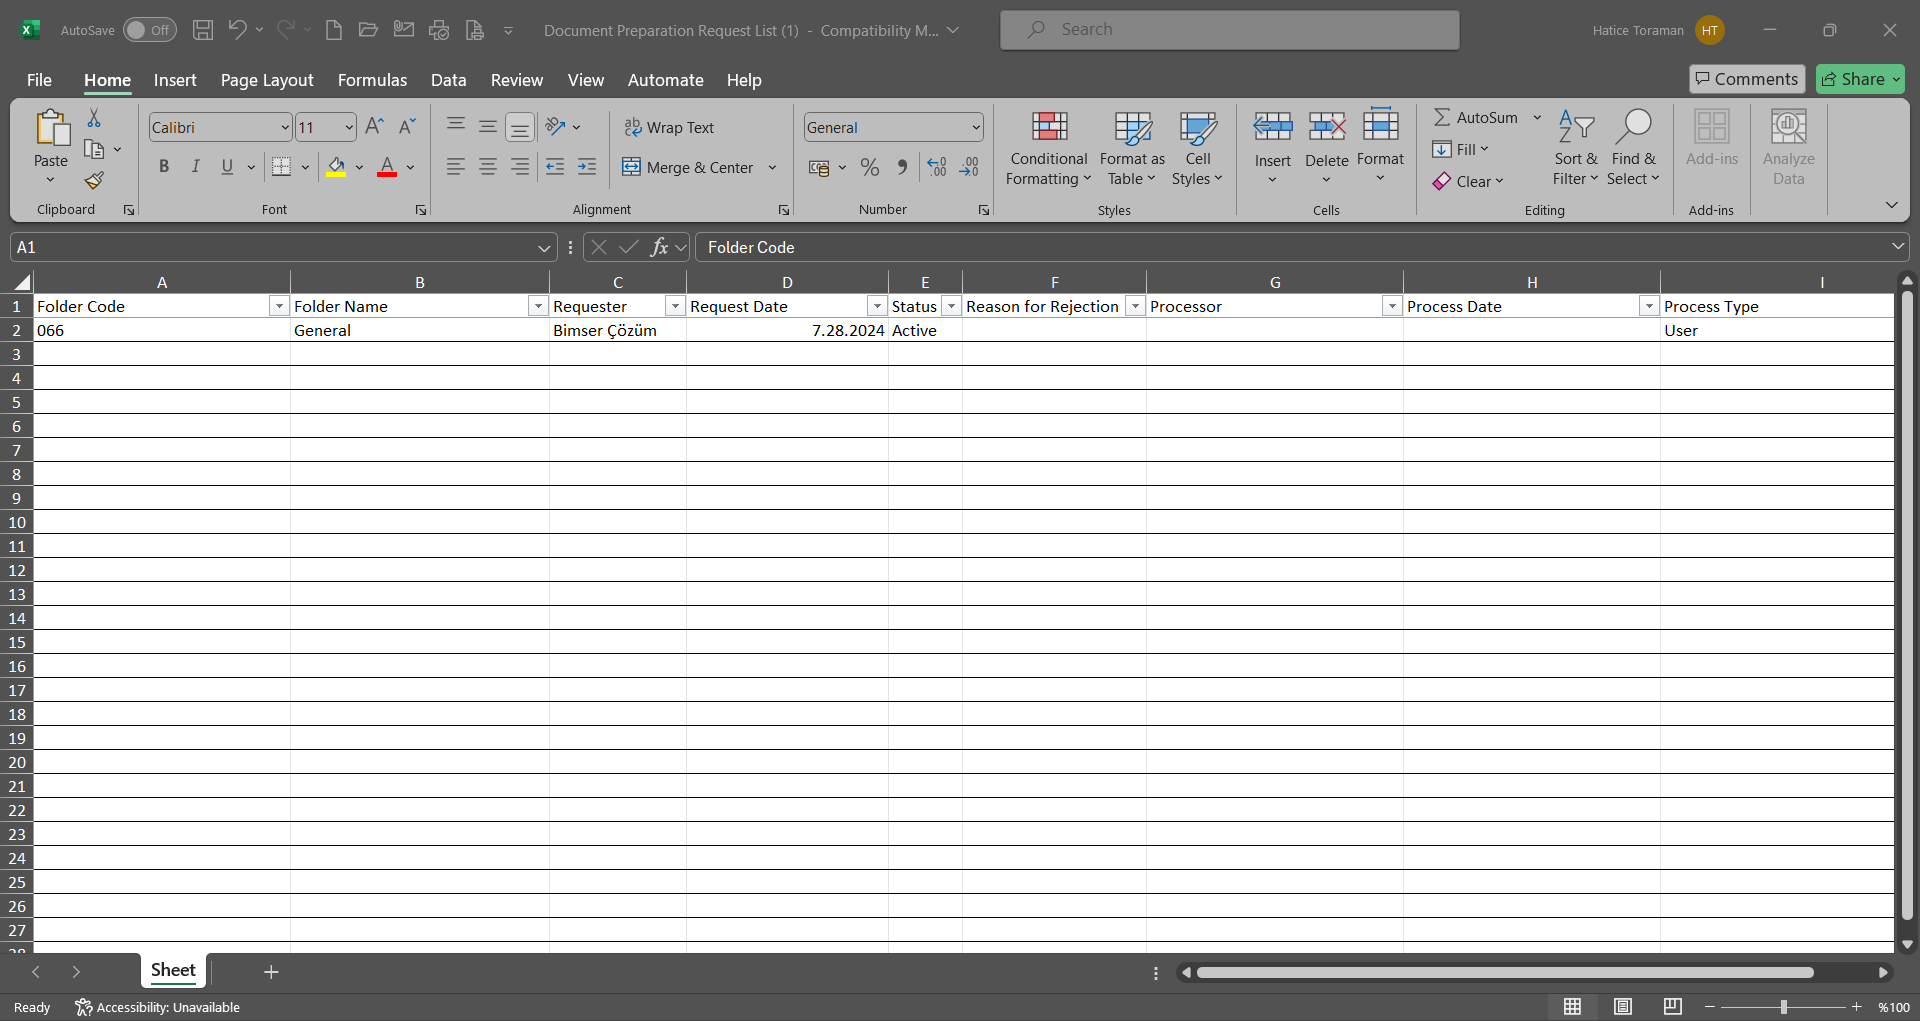
6.2.12.27.Controlled Copy Demand Report
Menu Name: Integrated Management System/ Document Management/ Reports/ Controlled Copy Demand Report
It is the menu where the controlled copy requests made in the document view menu are listed and the report is received in Excel format. On the Controlled Copy Demand Report screen, there are two tabs: document search and document list tab. In the document search tab, filtering is done according to the search criteria. In the document list tab, records are listed according to the filtering process according to these search criteria.
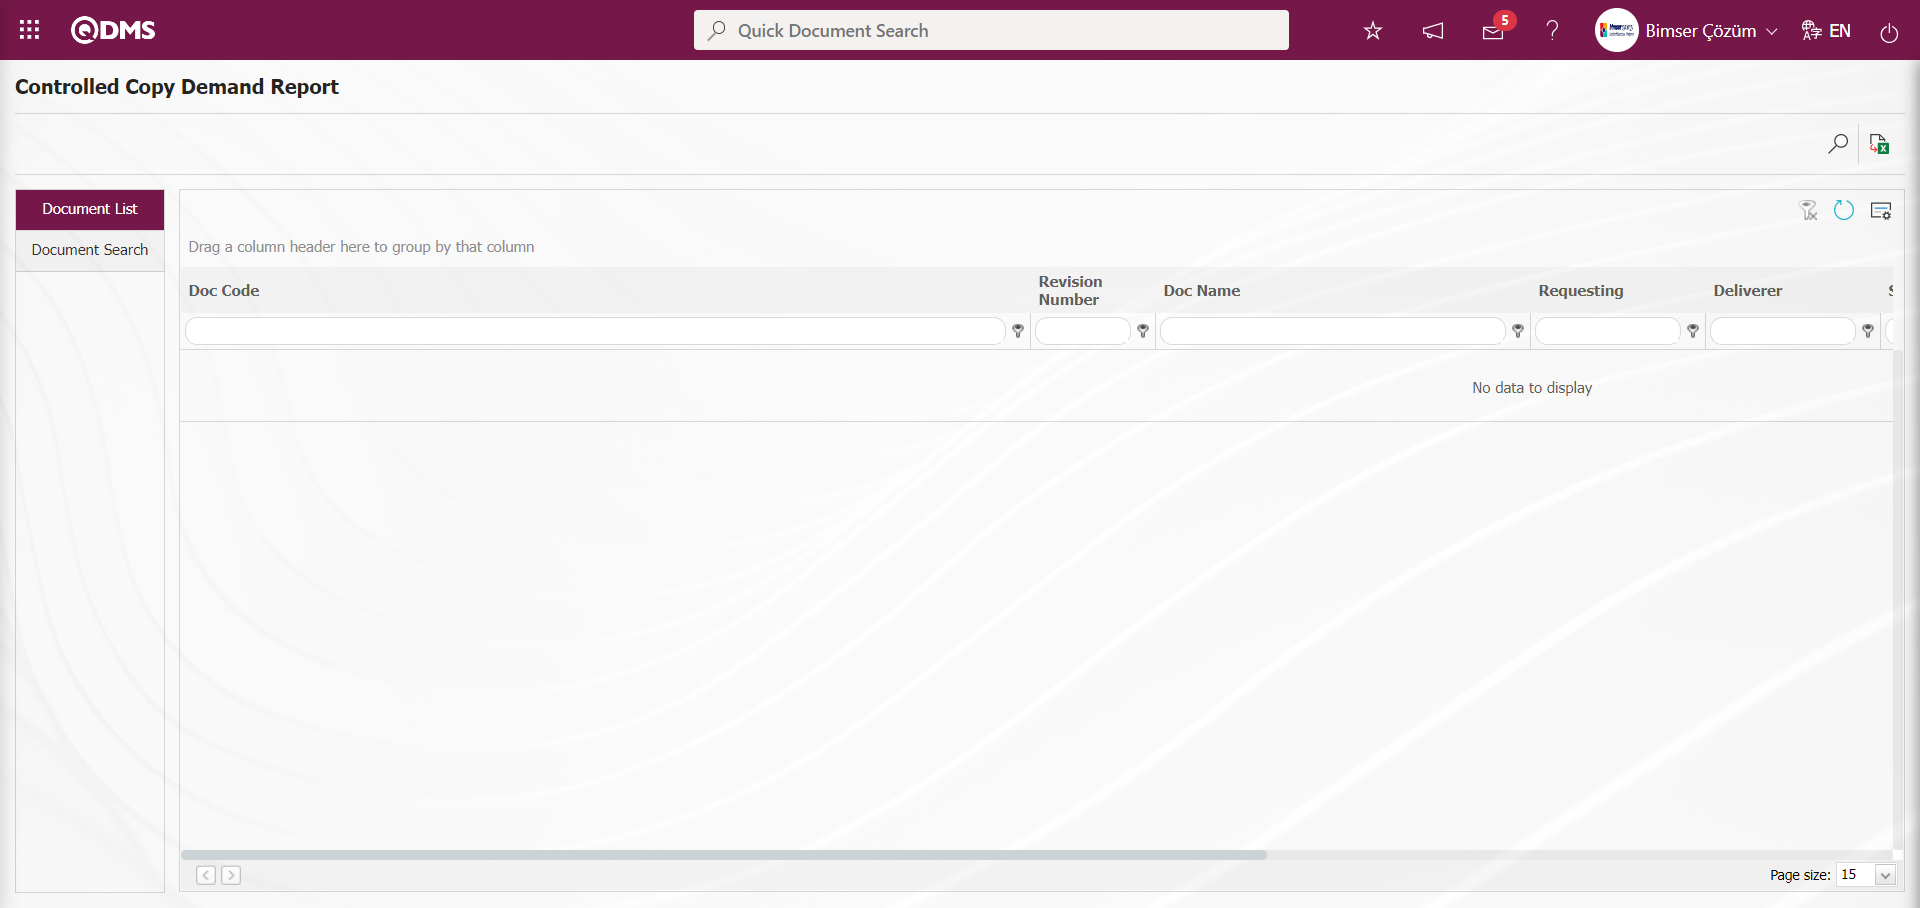
With the help of the buttons on the screen;
: Records are searched by filtering.
: Data is transferred to Excel.
: The search criteria on the menu screens are used to clear the data remaining in the filter fields in the grid where the search operation is performed.
: The menu screen is restored to its default settings.
: User-based designing of the menu screen is done with the show-hide feature, that is, the hiding feature of the fields corresponding to the columns on the menu screens.
On the Controlled Copy Demand Report** screen, type the document code in the “Document Code” field, which is the filter search criteria in the document search tab, and click the (Search) button.

On the Controlled Copy Demand Report** screen, records are listed according to the search criteria in the filter made in the document list tab.
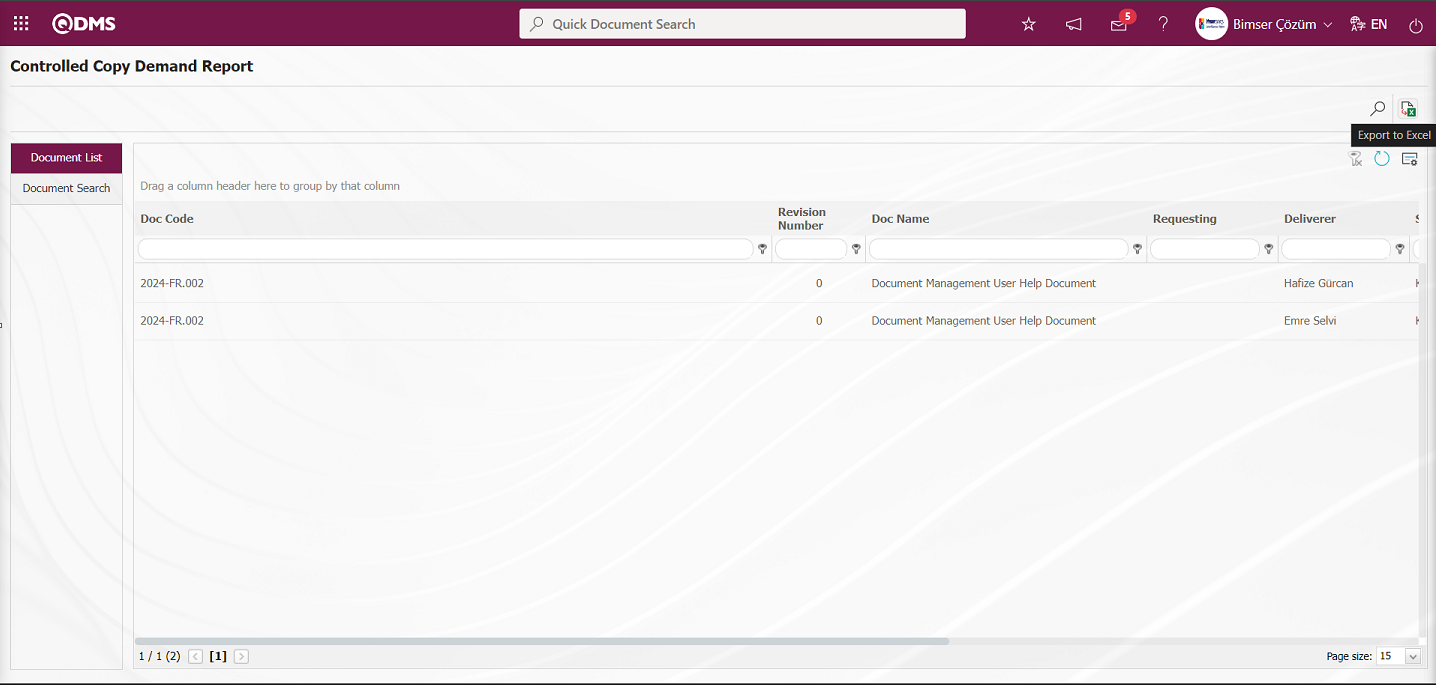
On the Controlled Copy Demand Report screen, the Controlled Copy Demand report in Excel format is obtained by clicking the (Export to Excel) button.
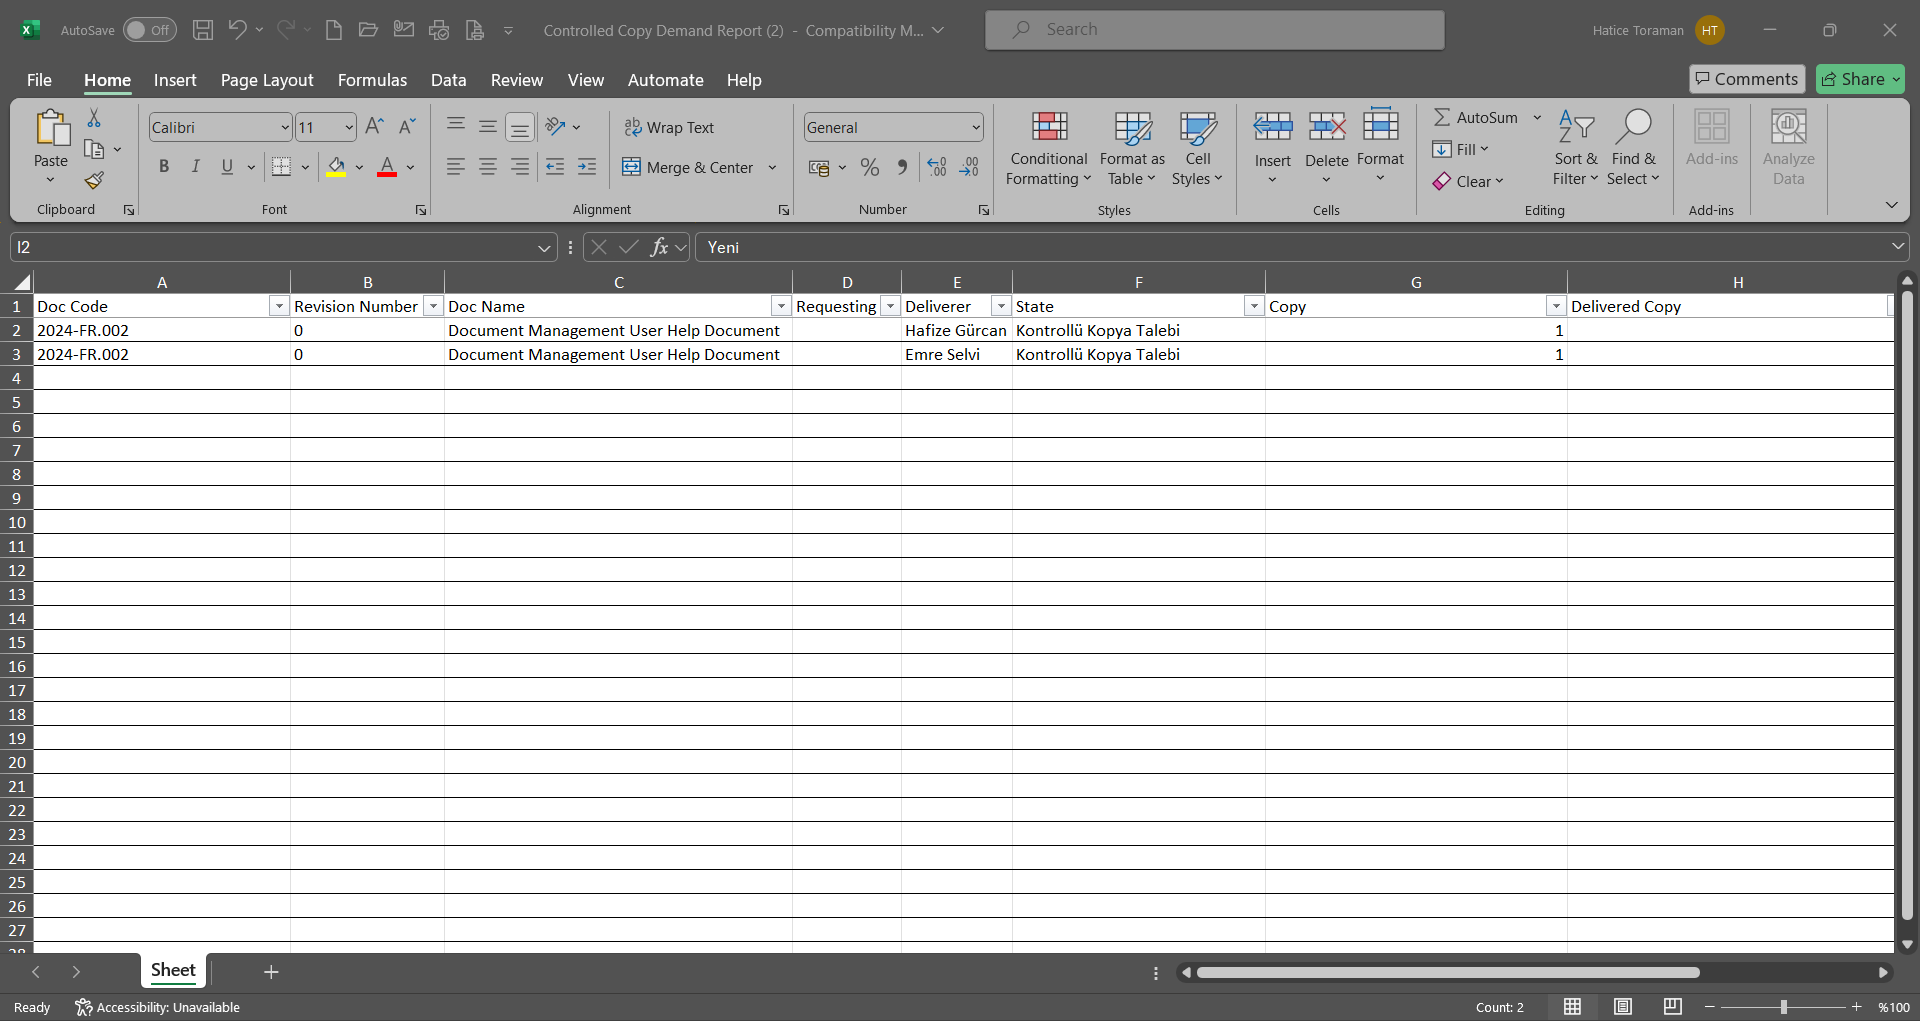
6.2.12.28. Controlled Copy Collection Report
Menu Name: Integrated Management System/ Document Management/ Reports/ Controlled Copy Collection Report
It is the menu where the recollection tasks of the controlled copies previously distributed to the field due to document revision or cancellation are listed and the report is received in Excel format. On the Controlled Copy Collection Report screen, there are two tabs: document search and document list tab. In the document search tab, filtering is done according to the search criteria. In the document list tab, records are listed according to the filtering process according to these search criteria.
With the help of the buttons on the screen;
: Records are searched by filtering.
: Data is transferred to Excel.
: The search criteria on the menu screens are used to clear the data remaining in the filter fields in the grid where the search operation is performed.
: The menu screen is restored to its default settings.
: User-based designing of the menu screen is done with the show-hide feature, that is, the hiding feature of the fields corresponding to the columns on the menu screens.
On the Controlled Copy Collection Report** screen, type the document code in the “Document Code” field, which is the filter search criteria in the document search tab, and click the (Search) button.
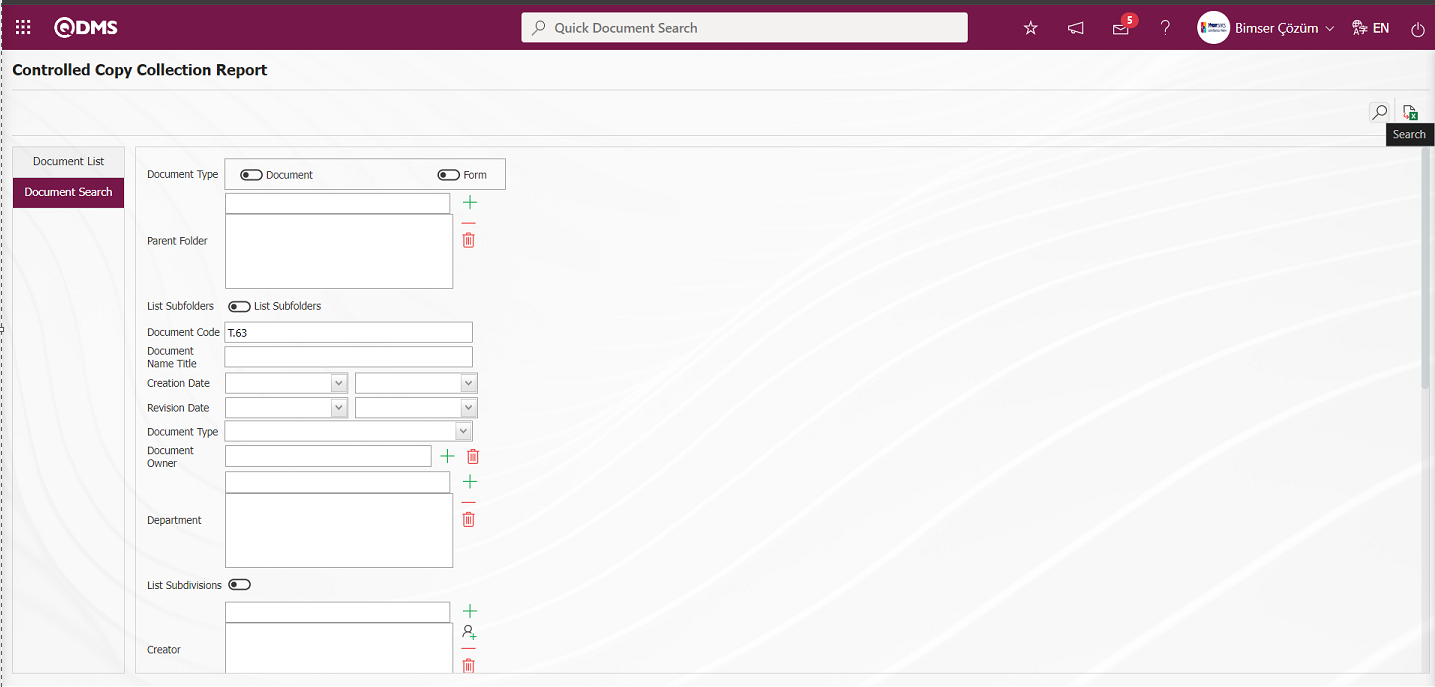
On the Controlled Copy Collection Report screen, records are listed according to the search criteria in the filter made in the document list tab.
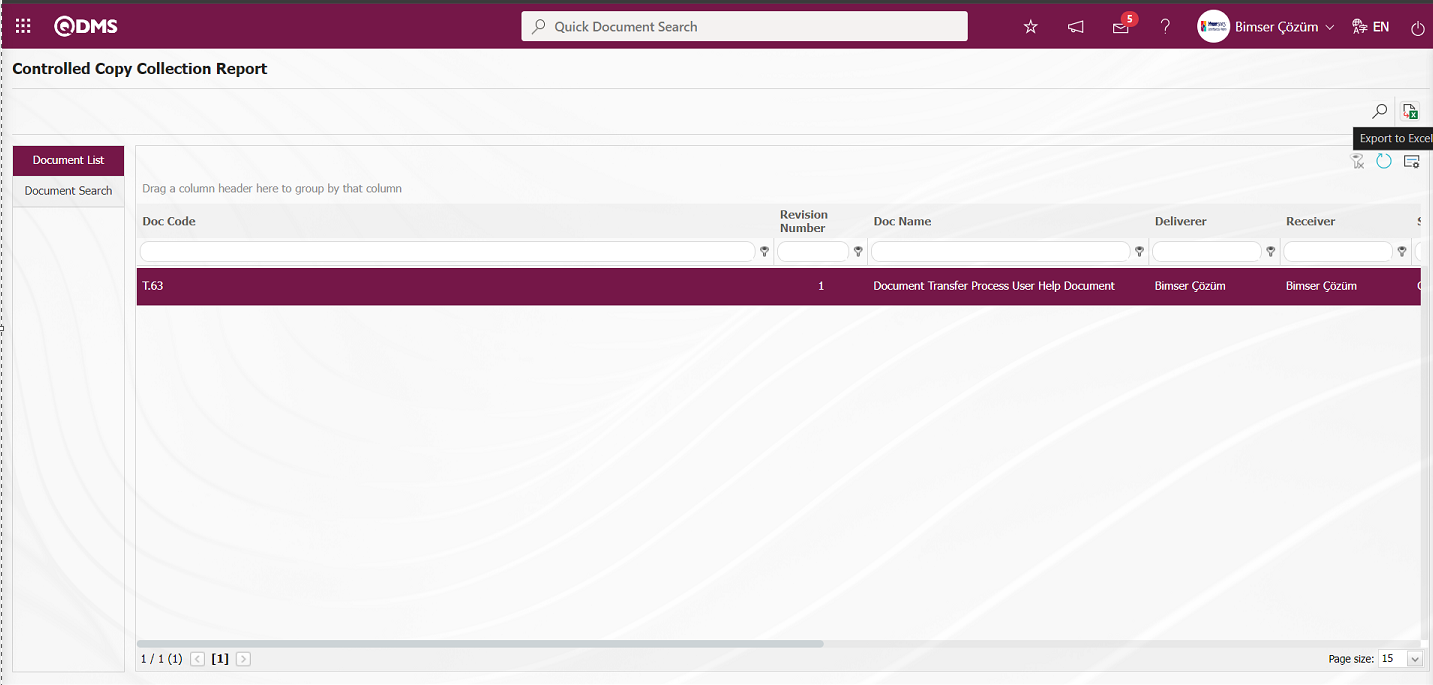 **
**
On the Controlled Copy Collection Report screen, the Controlled Copy Collection report in Excel format is obtained by clicking the  (Export to Excel) button.
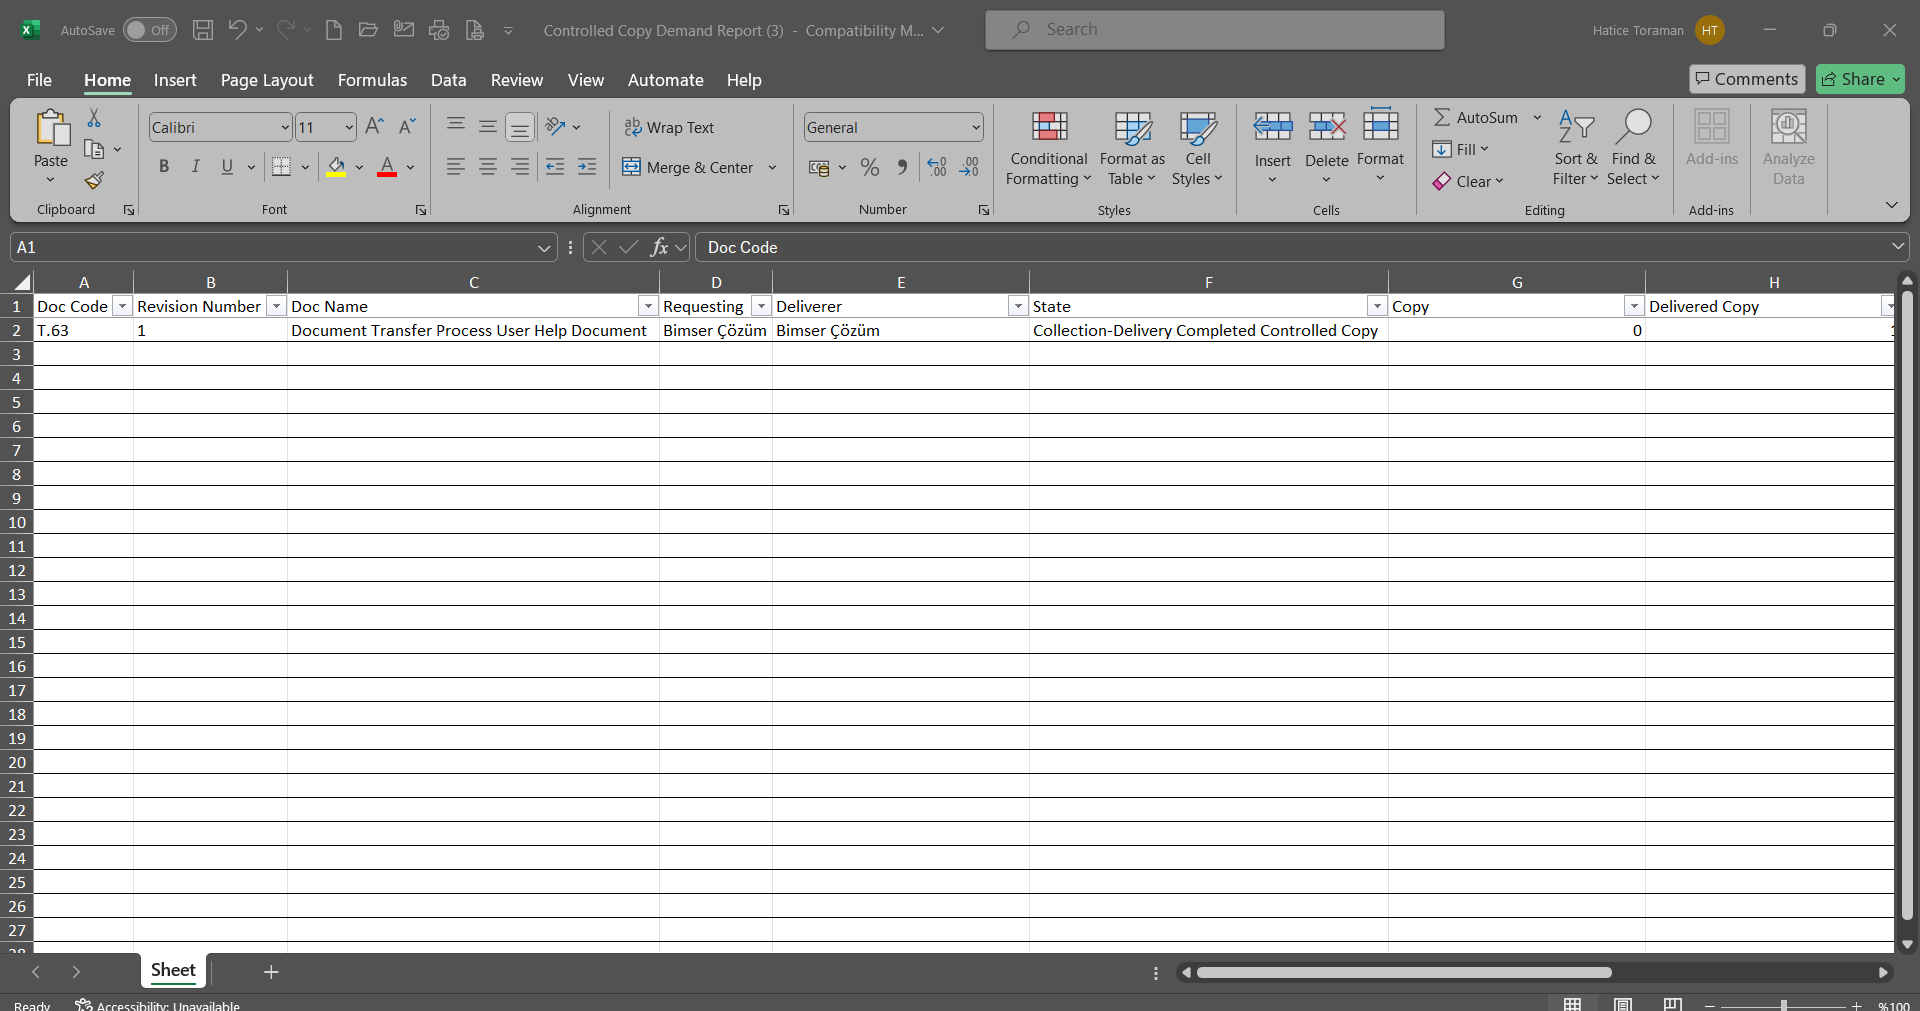
6.2.12.29. Document Revision List
Menu Name: Integrated Management System/ Document Management/ Reports/Document Revision List
It is the menu where the list of documents that have been revised is displayed and the report is taken from Excel format. On the Document Revision List screen, there are two tabs: document search and document list tab. In the document search tab, filtering is done according to the search criteria. In the document list tab, records are listed according to the filtering process according to these search criteria.

With the help of the buttons on the screen;
: Records are searched by filtering.
: Data is transferred to Excel.
: The search criteria on the menu screens are used to clear the data remaining in the filter fields in the grid where the search operation is performed.
: The menu screen is restored to its default settings.
: User-based designing of the menu screen is done with the show-hide feature, that is, the hiding feature of the fields corresponding to the columns on the menu screens.
On the Document Revision List screen, type the document code in the “Document Code” field, which is the filter search criteria in the document search tab, and click the (Search) button.

On the Document Revision List screen, records are listed according to the search criteria in the filter made in the Document List tab.
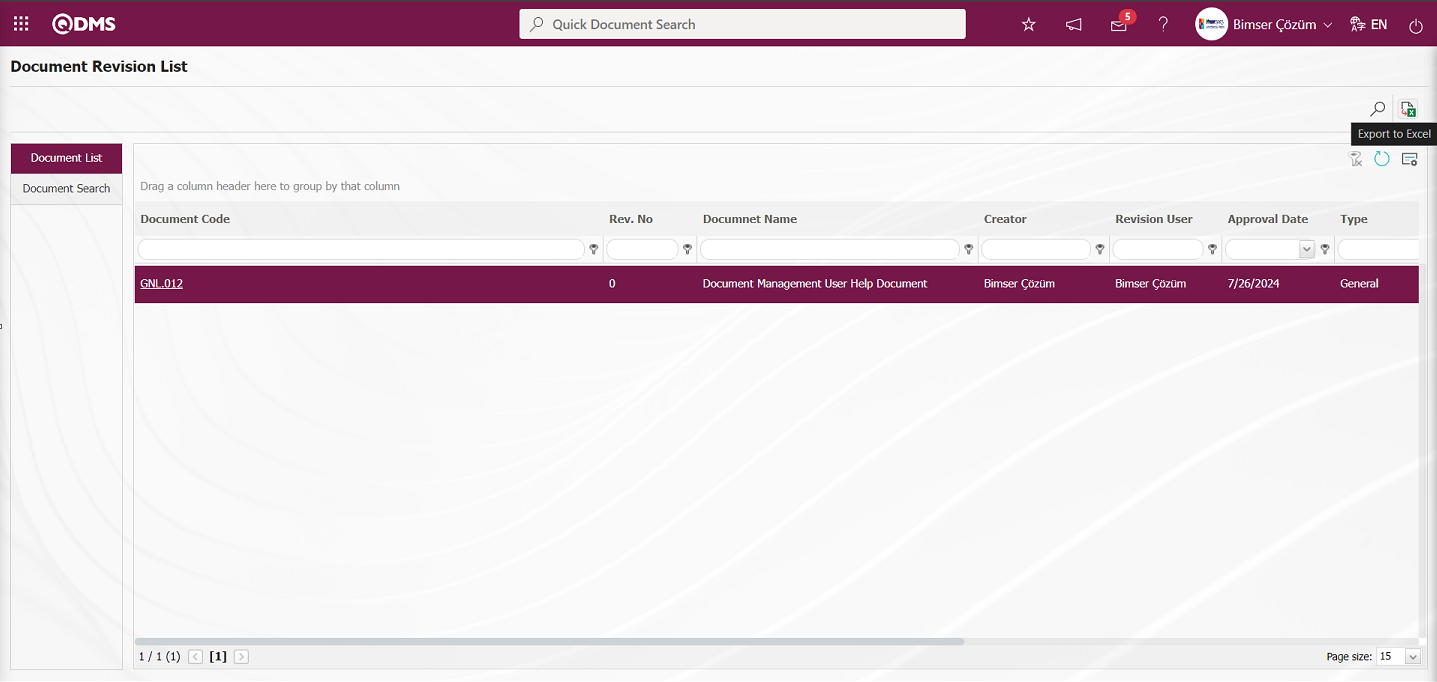
Click the (Export to Excel) button on the Document Revision List screen to get the Document Revision List report in Excel format.
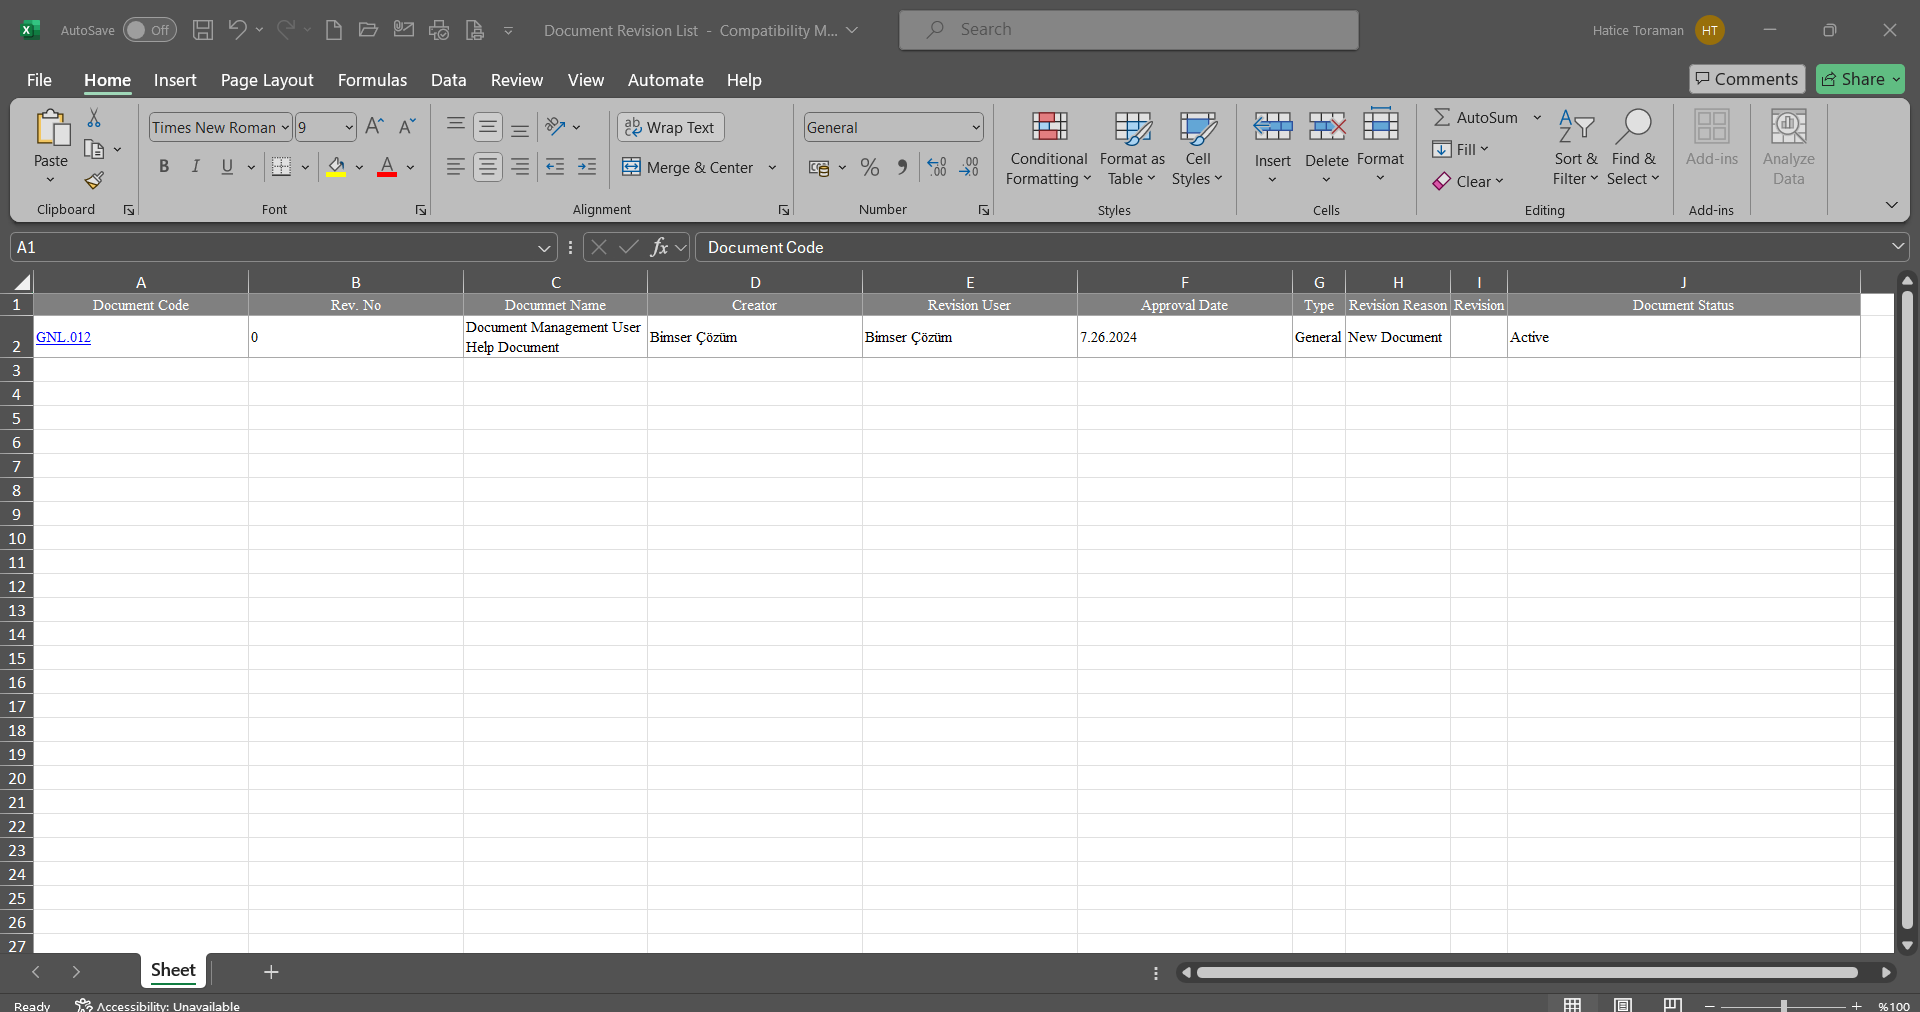
6.2.12.30. Document Translation Report
Menu Name: Integrated Management System/ Document Management/ Reports/Document Translation Report
It is the menu where information about the translation such as who translated the documents translated within the scope of the Document Management module, the language of the translation, the start and end date of the translation are displayed and the report is received in Excel format. On the Document Translation Report screen, there are two tabs: document search and document list tab. In the document search tab, filtering is done according to the search criteria. In the document list tab, records are listed according to the filtering process according to these search criteria.
With the help of the buttons on the screen;
: Records are searched by filtering.
: Data is transferred to Excel.
: The search criteria on the menu screens are used to clear the data remaining in the filter fields in the grid where the search operation is performed.
: The menu screen is restored to its default settings.
: User-based designing of the menu screen is done with the show-hide feature, that is, the hiding feature of the fields corresponding to the columns on the menu screens.
On the Document Translation Report screen, type the document code in the “Document Code” field, which is the filter search criteria in the document search tab, and click the (Search) button.

On the Document Translation Report screen, records are listed according to the search criteria in the filter made in the document list tab

On the Document Translation Report screen, click the  (Export to Excel) button to get the Document Translation Report in Excel format
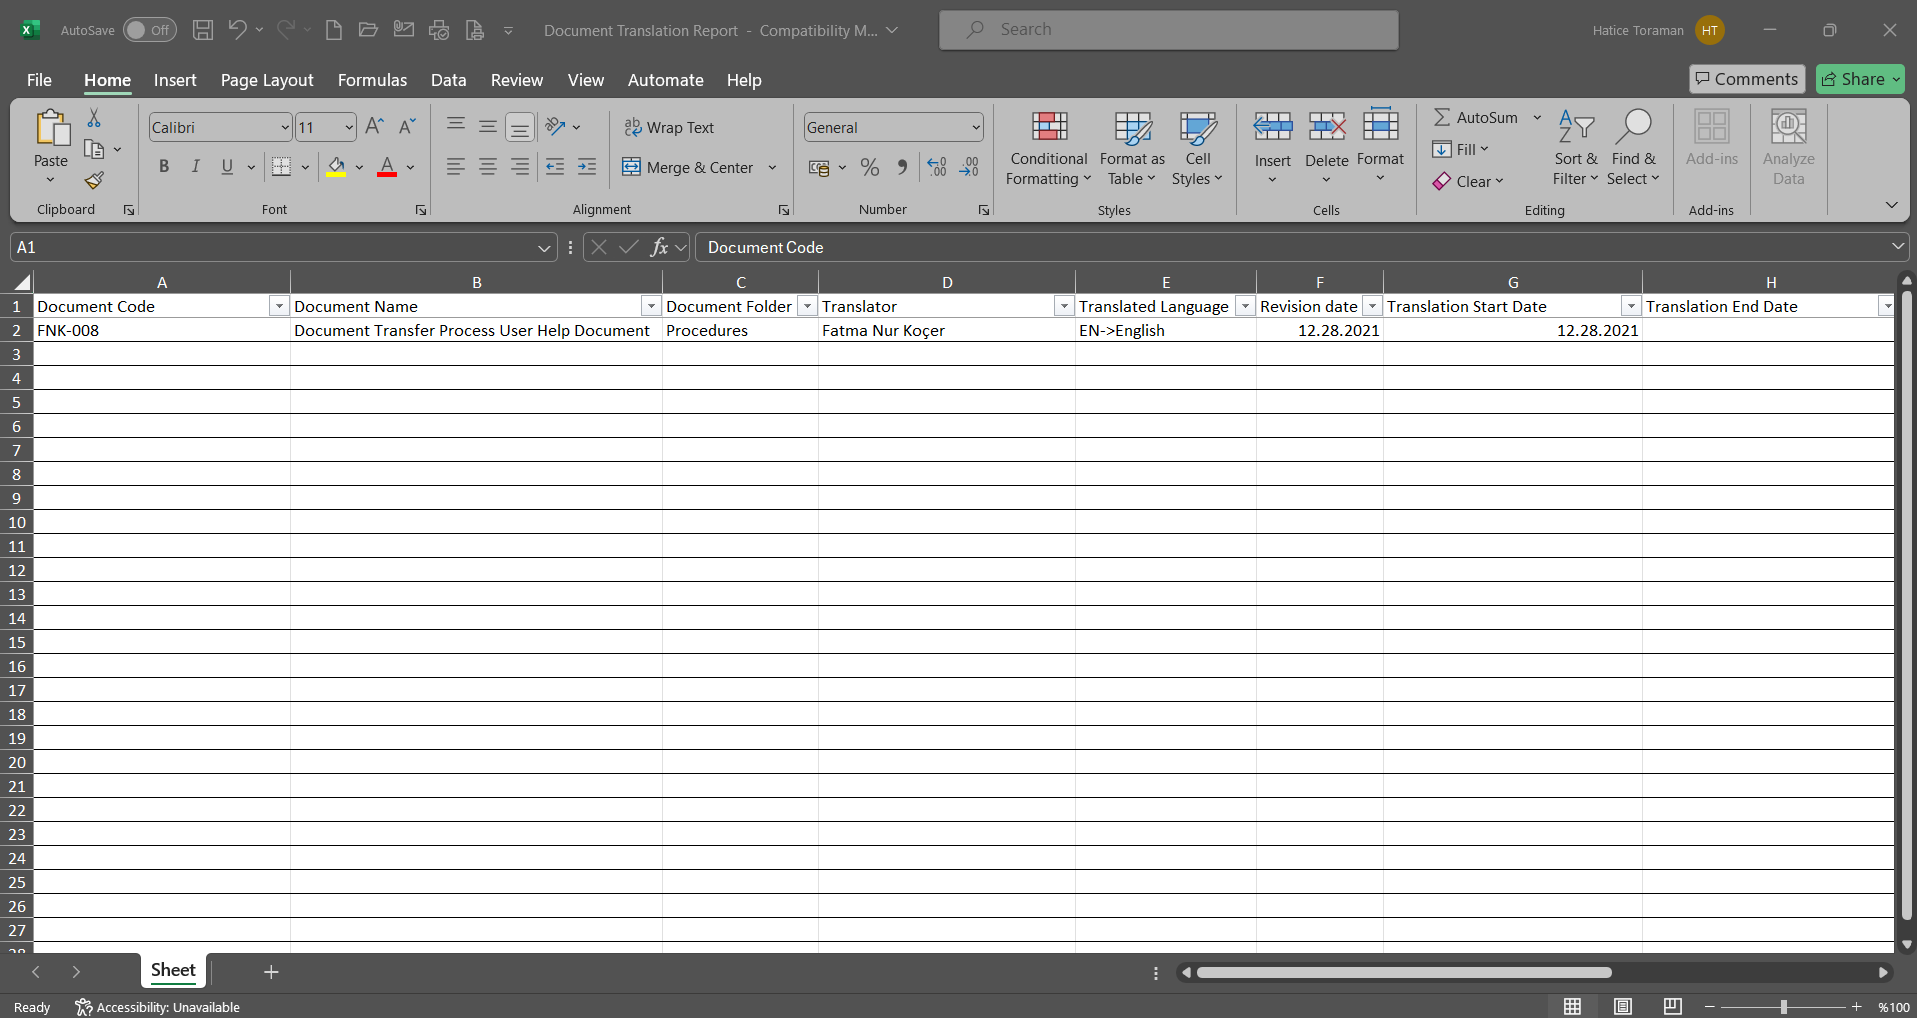
6.2.12.31. Controlled Copy Distribution Task Report
Menu Name: Integrated Management System/ Document Management/ Reports/ Controlled Copy Distribution Task Report
It is the menu where controlled copy distribution tasks are displayed and the report is taken in Excel format. On the Controlled Copy Distribution Task Report screen, we see two tabs: document search and document list tab. In the document search tab, filtering is done according to the search criteria. In the document list tab, records are listed according to the filtering process according to these search criteria.
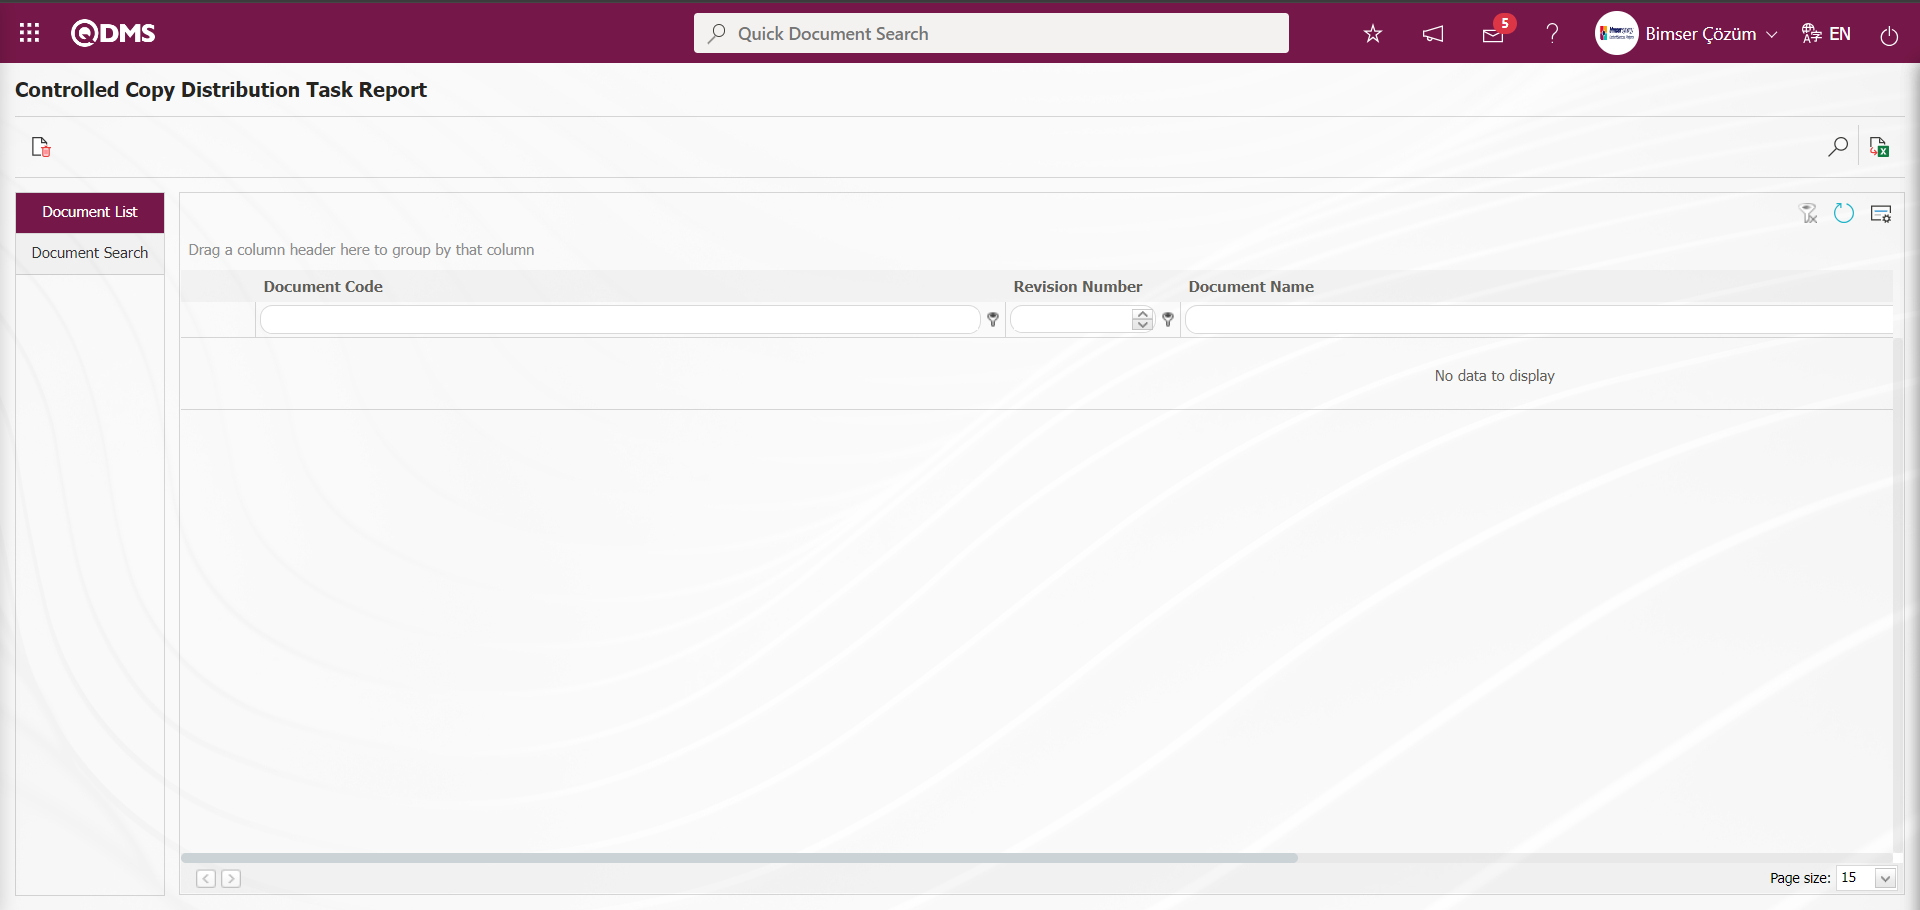
With the help of the buttons on the screen;
 : Delete the selected Controlled Copy Distribution task in the list.
: Records are searched by filtering.
: Data is transferred to Excel.
: The search criteria on the menu screens are used to clear the data remaining in the filter fields in the grid where the search operation is performed.
: The menu screen is restored to its default settings.
: User-based designing of the menu screen is done with the show-hide feature, that is, the hiding feature of the fields corresponding to the columns on the menu screens.
On the Controlled Copy Distribution Task Report** screen, type the document code in the “Document Code” field, which is the filter search criteria in the document search tab, and click the (Search) button.
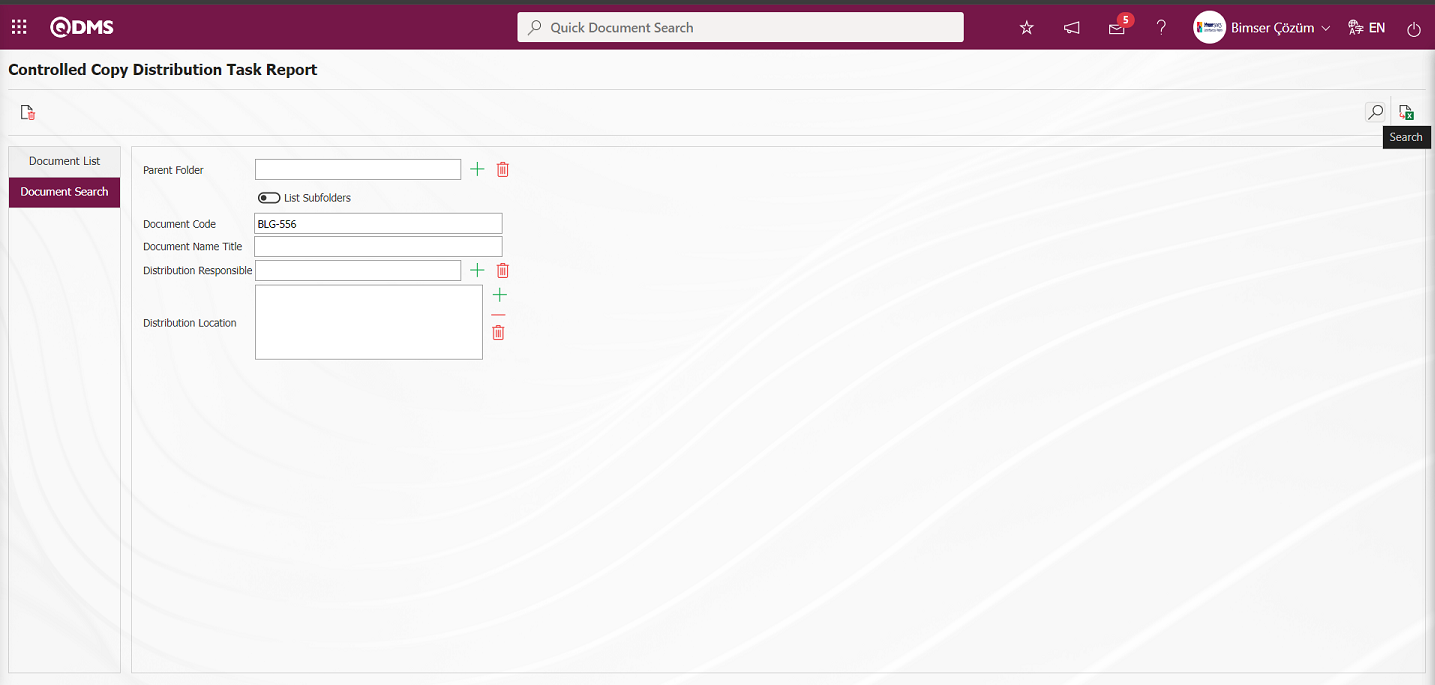
On the Controlled Copy Distribution Task Report screen, records are listed according to the search criteria in the filter made in the document list tab
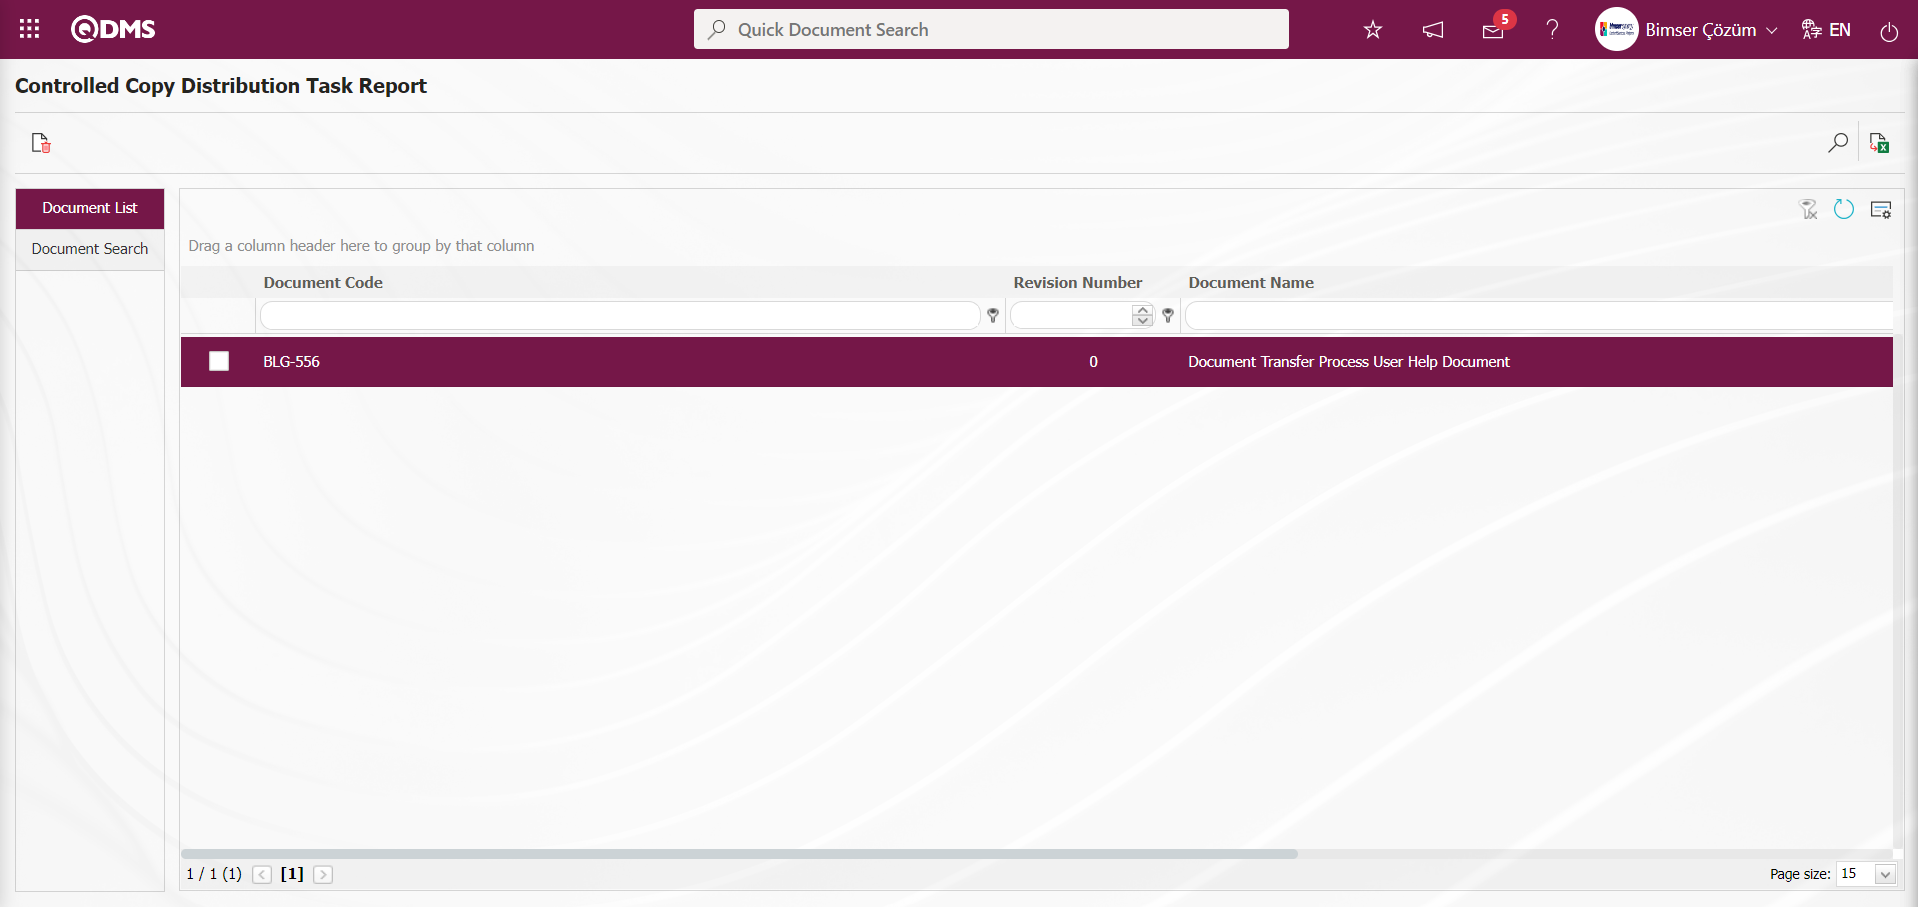
On the Controlled Copy Distribution Task Report screen, click the  (Delete) button while Controlled Copy Distribution Task is selected in the Document List tab.
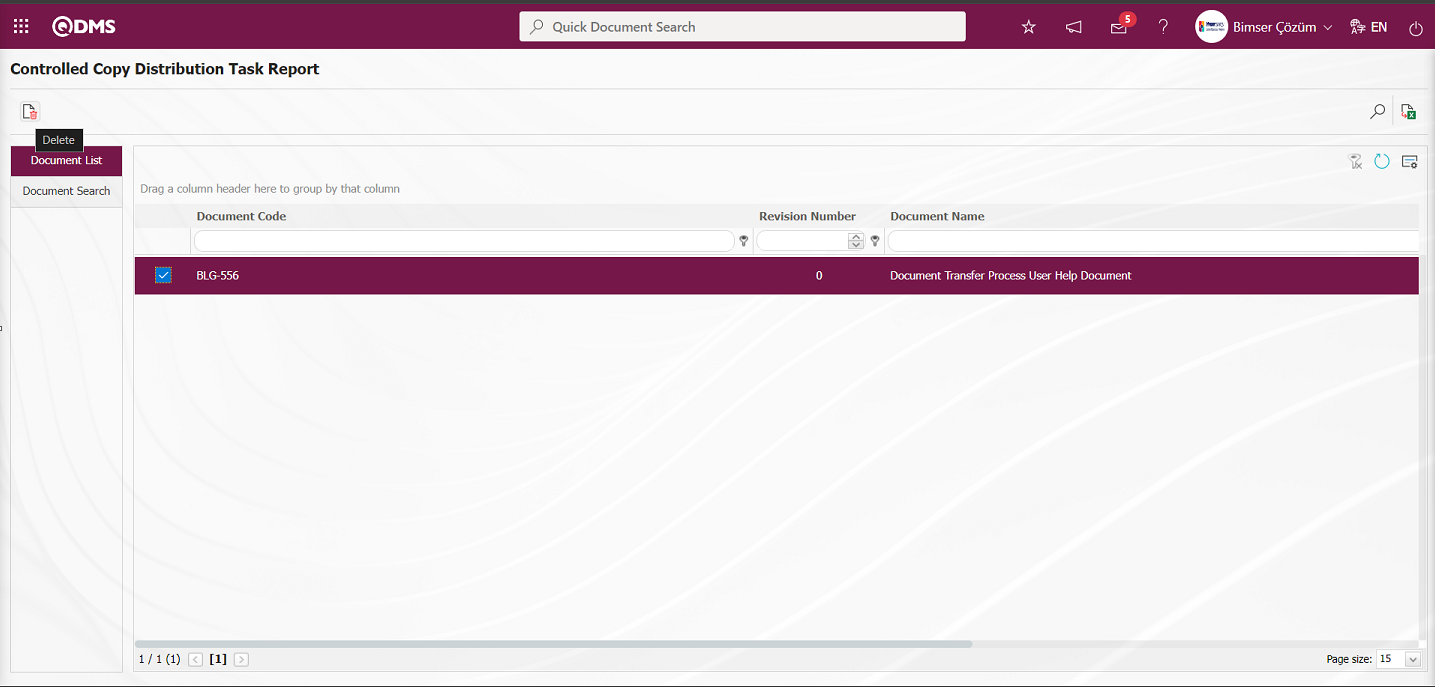
Click the “OK” button in the message given by the system.
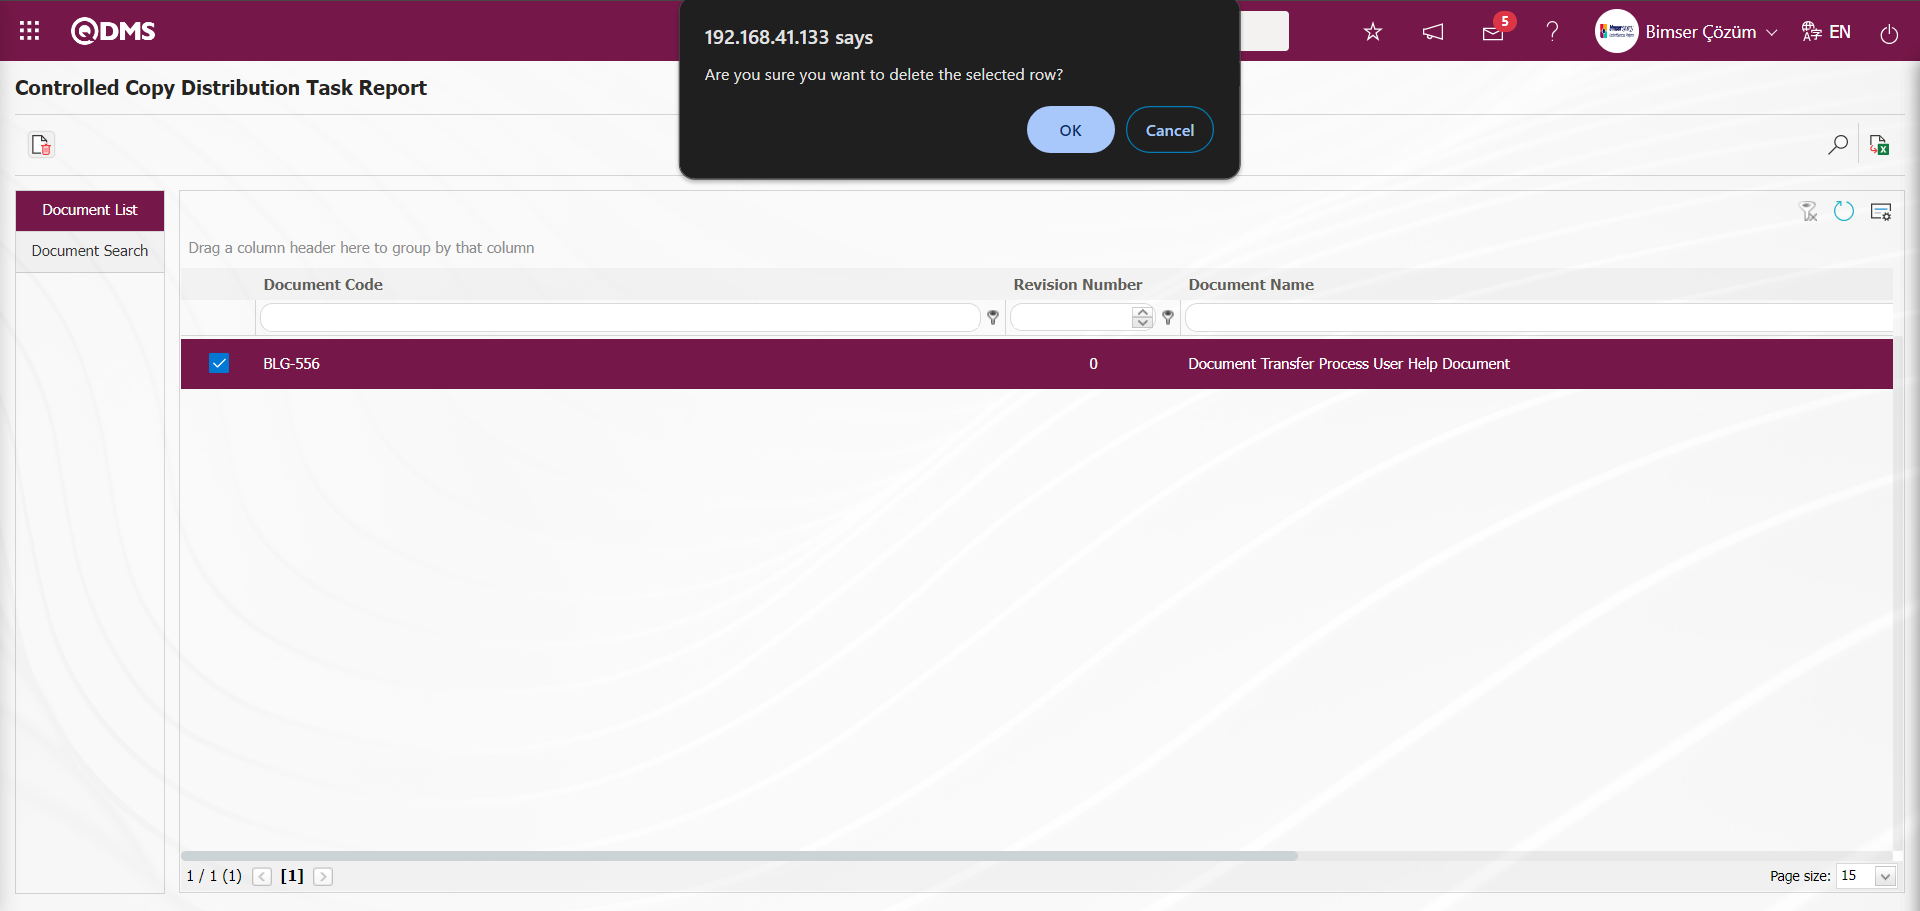
The message given by the system indicates that the Controlled Copy Distribution task has been deleted.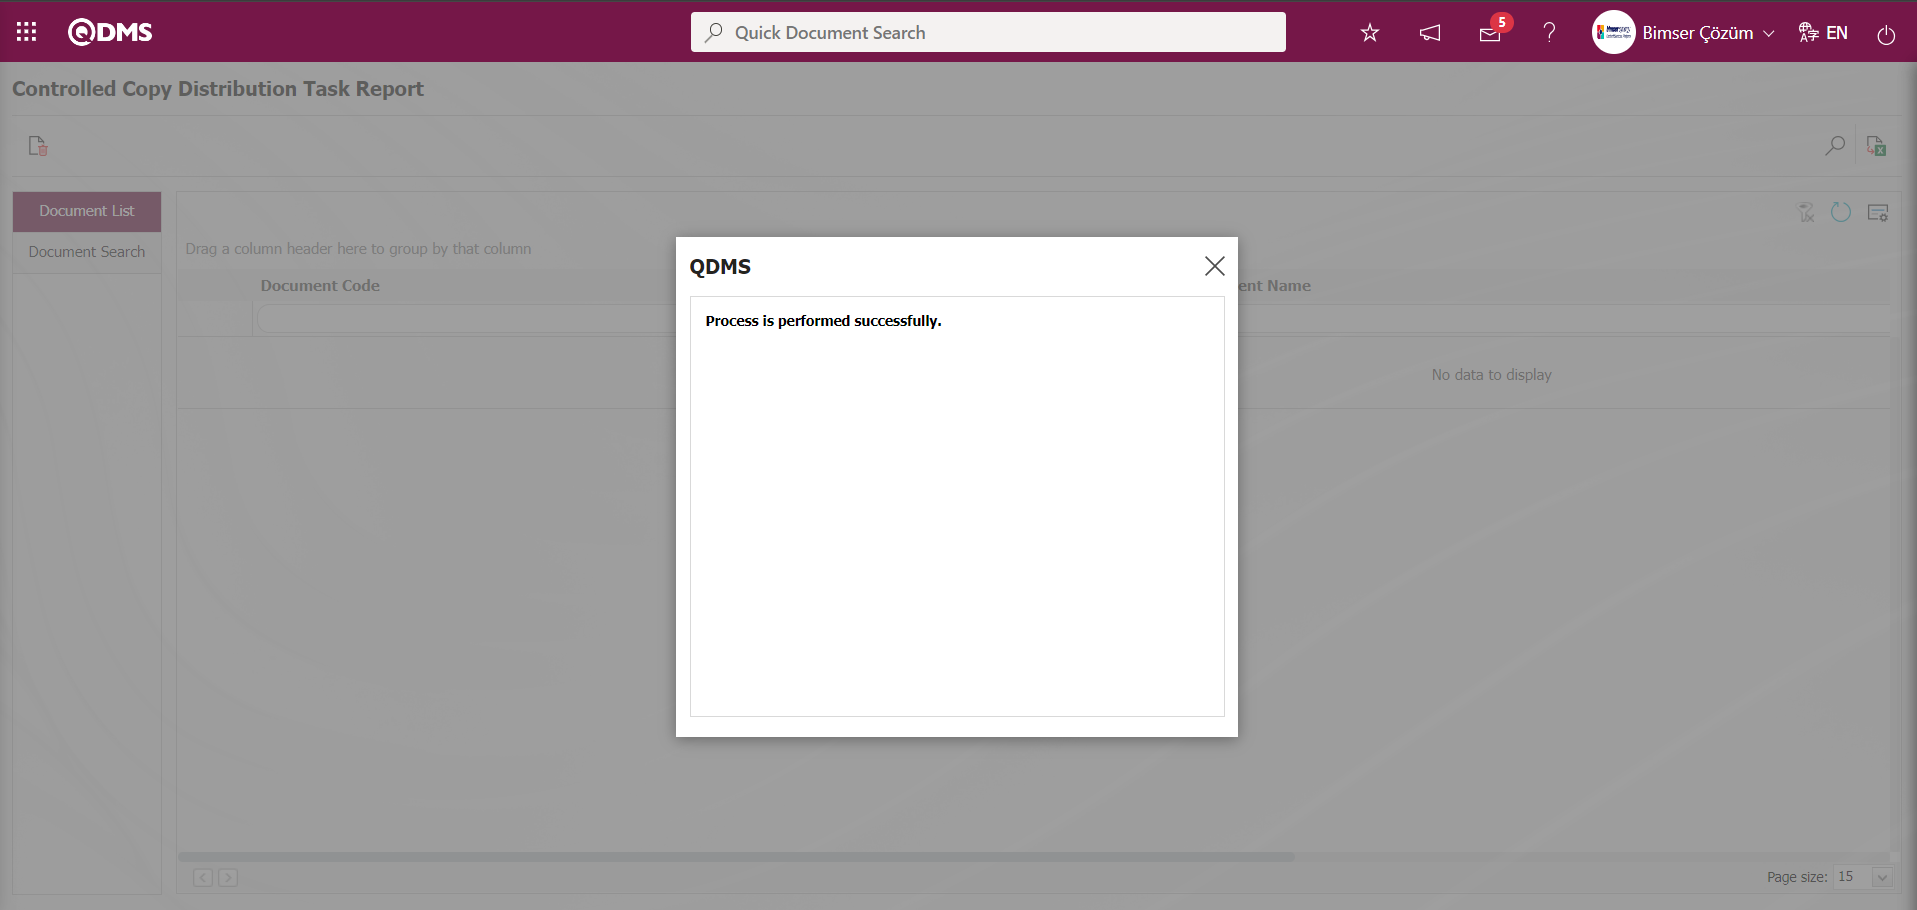
On the Controlled Copy Distribution Task Report screen, click the  (Export to Excel) button while the Controlled Copy Distribution Task is selected.

Controlled Copy Distribution Task report is received in Excel format.

6.2.12.32. Cancellation Confirmation Time Report
Menu Name: Integrated Management System/ Document Management/ Reports/Cancellation Confirmation Time Report
It is the menu where Document Cancellation Confirmation Times are displayed and the report is received in Excel format. On the Cancellation Confirmation Time Report screen, there are two tabs: document search and document list tab. In the document search tab, filtering is done according to the search criteria. In the document list tab, records are listed according to the filtering process according to these search criteria.

With the help of the buttons on the screen;
: Records are searched by filtering.
: Data is transferred to Excel.
: The search criteria on the menu screens are used to clear the data remaining in the filter fields in the grid where the search operation is performed.
: The menu screen is restored to its default settings.
: User-based designing of the menu screen is done with the show-hide feature, that is, the hiding feature of the fields corresponding to the columns on the menu screens.
On the Cancellation Confirmation Time Report** screen, type the document code in the “Document Code” field, which is the filter search criteria in the document search tab, and click the (Search) button.

On the Cancellation Confirmation Time Report screen, records are listed according to the search criteria in the filter made in the Document List tab.
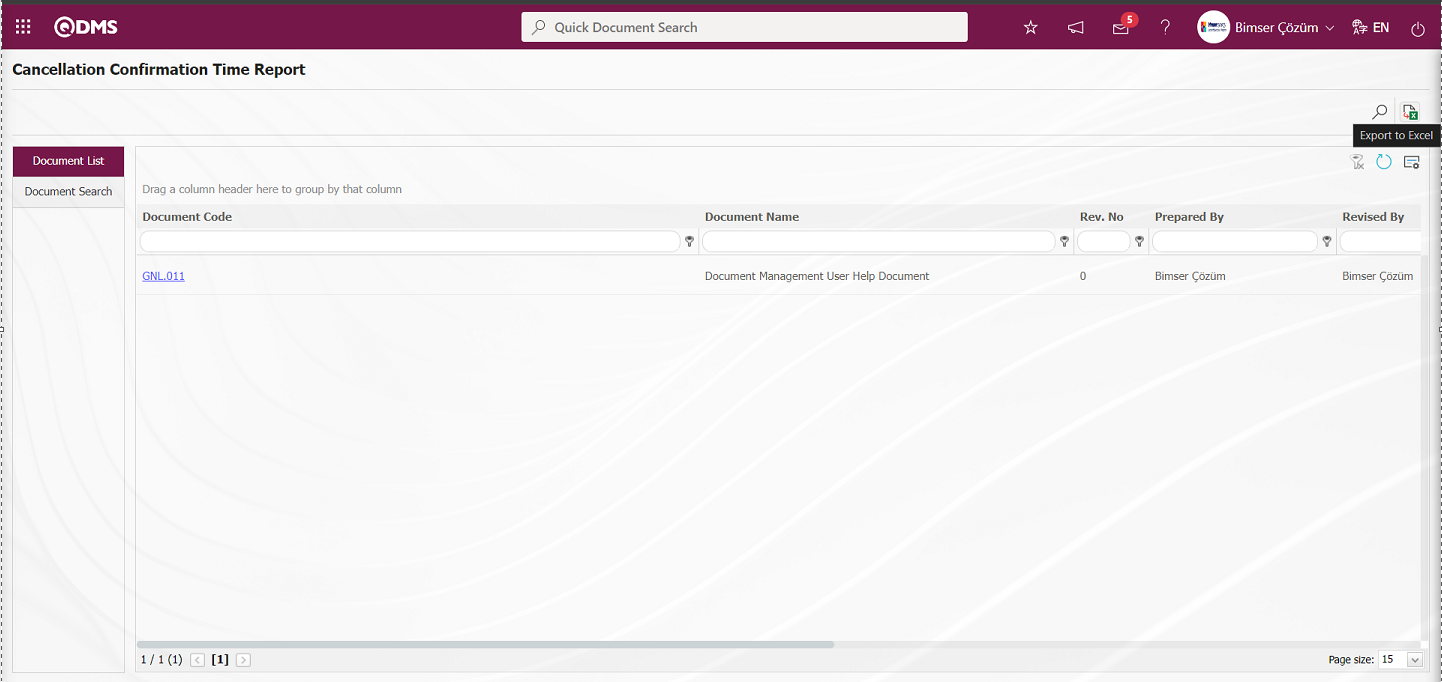
On the Cancellation Confirmation Time Report screen, the Cancellation Confirmation Time Report in Excel format is obtained by clicking the (Export to Excel) button.
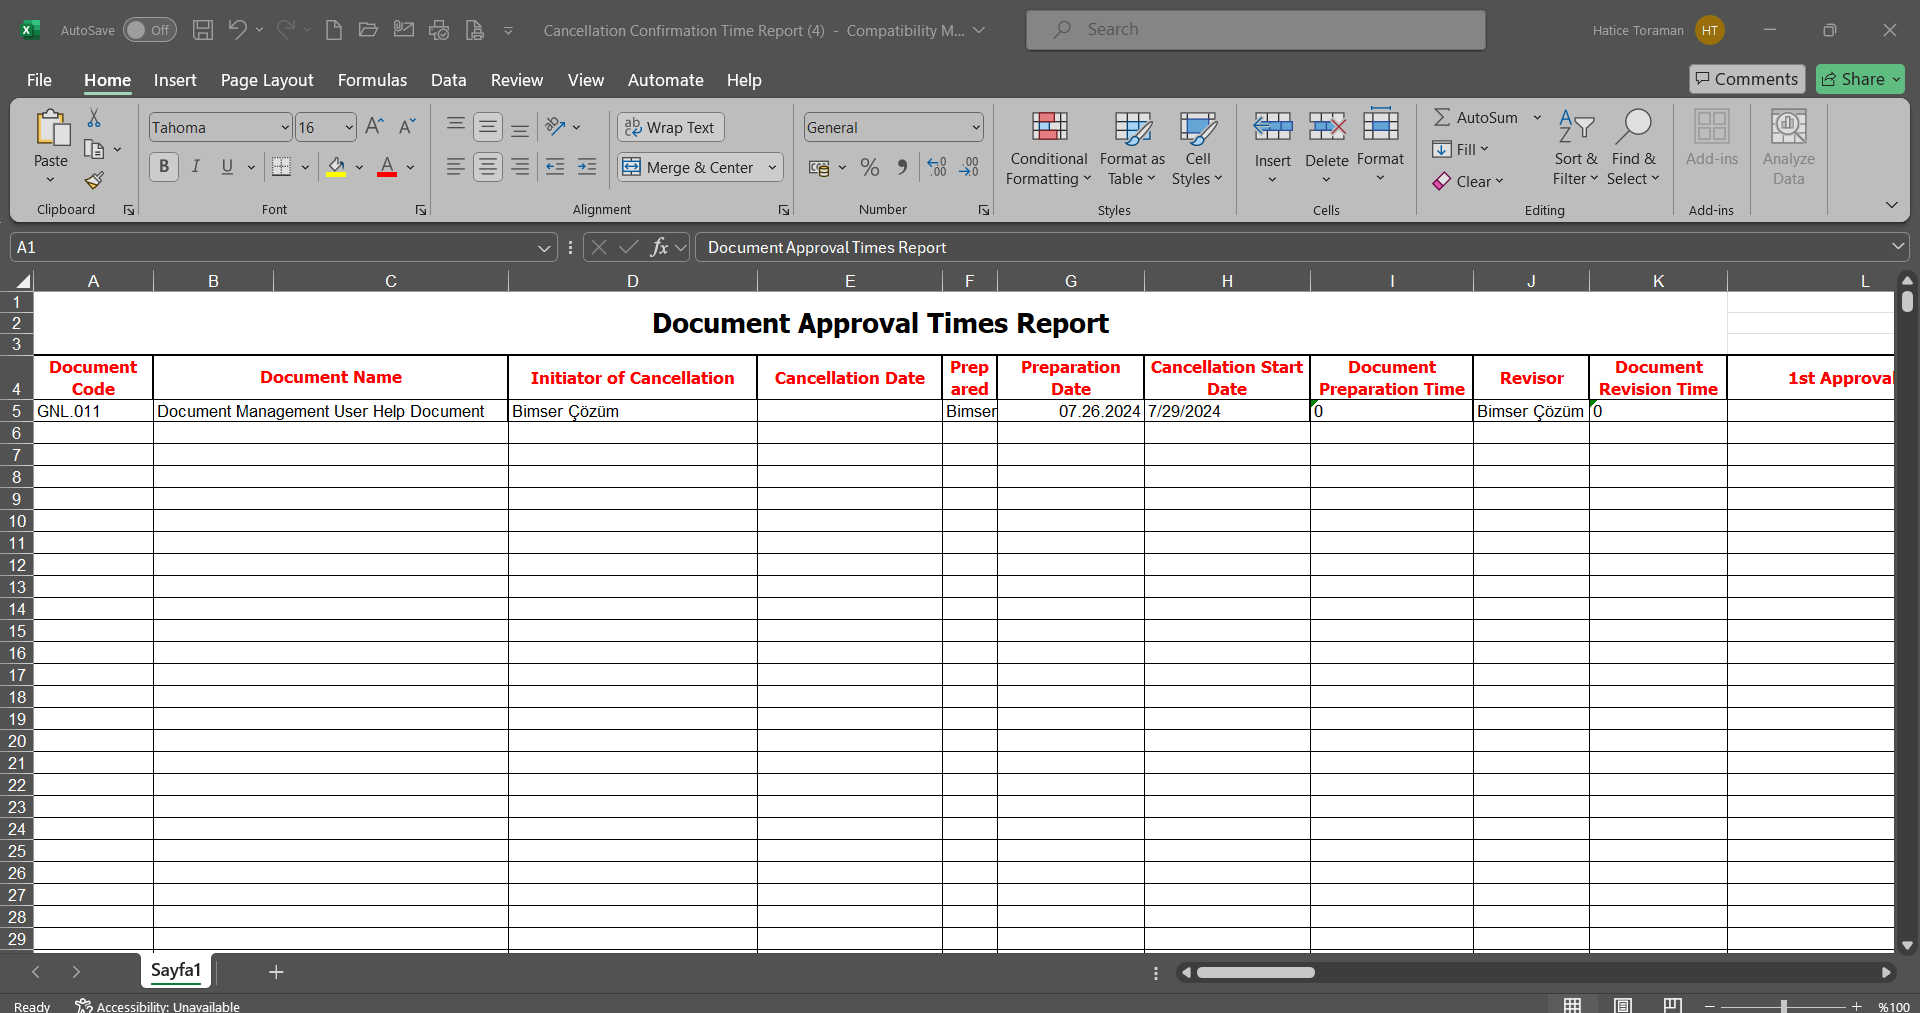
6.2.12.33. Document Status Report
Menu Name: Integrated Management System/ Document Management/ Reports/Document Status Report
Within the scope of the Document Management Module, it is the menu where the status information of the documents loaded in the system such as being prepared, published, in revision and status information such as “draft status” such as returning from opinion, stored, opinion and reports in Excel format are accessed. There are two tabs on the Document Status Report screen: Document Search and Document List tabs. In the Document Search tab, filtering is done according to the search criteria. In the Document List tab, records are listed according to the filtering process according to these search criteria.

With the help of the buttons on the screen;
: Records are searched by filtering.
: Data is transferred to Excel.
: The search criteria on the menu screens are used to clear the data remaining in the filter fields in the grid where the search operation is performed.
: The menu screen is restored to its default settings.
: User-based designing of the menu screen is done with the show-hide feature, that is, the hiding feature of the fields corresponding to the columns on the menu screens.
On the Document Status Report screen, type the document code in the “Document Code” field, which is the filter search criteria in the document search tab, and click the (Search) button.
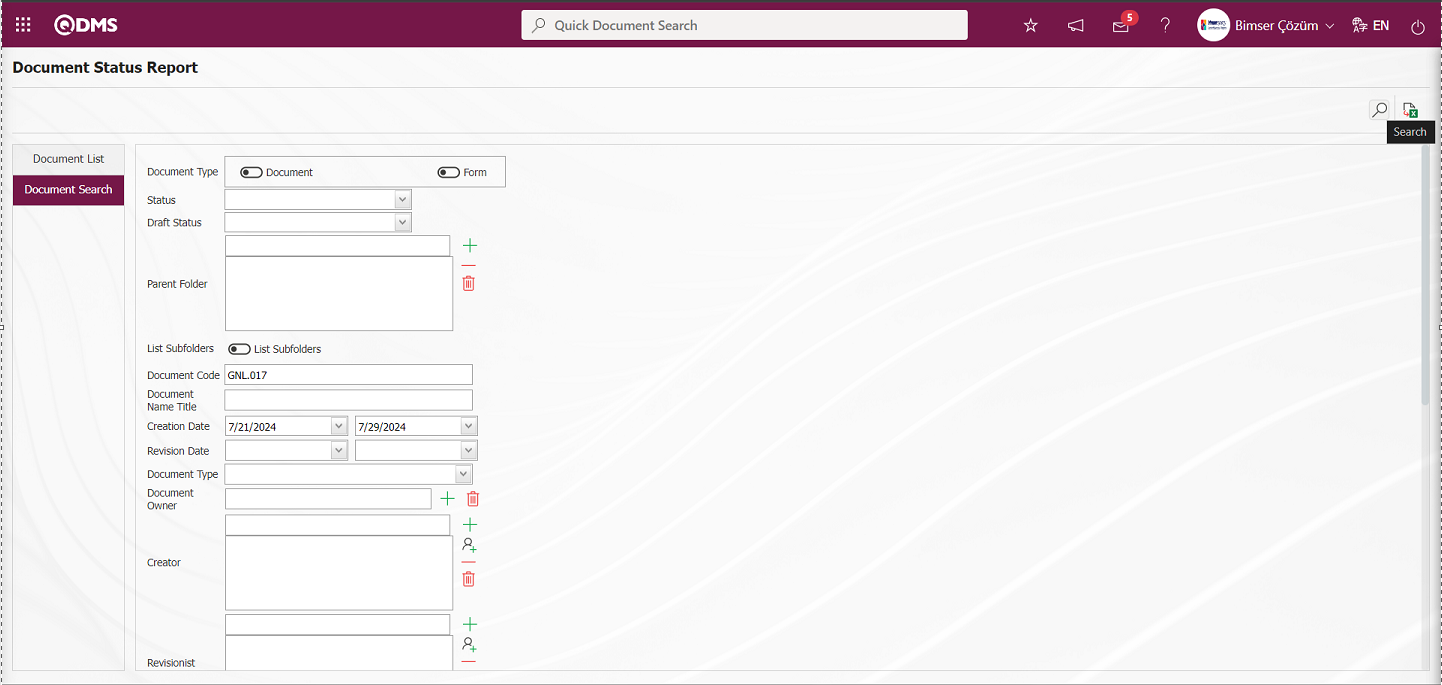
On the Document Status Report screen, records are listed according to the search criteria in the filter made in the document list tab

On the Document Status Report screen, click the (Export to Excel) button to get the Document Status report in Excel format.
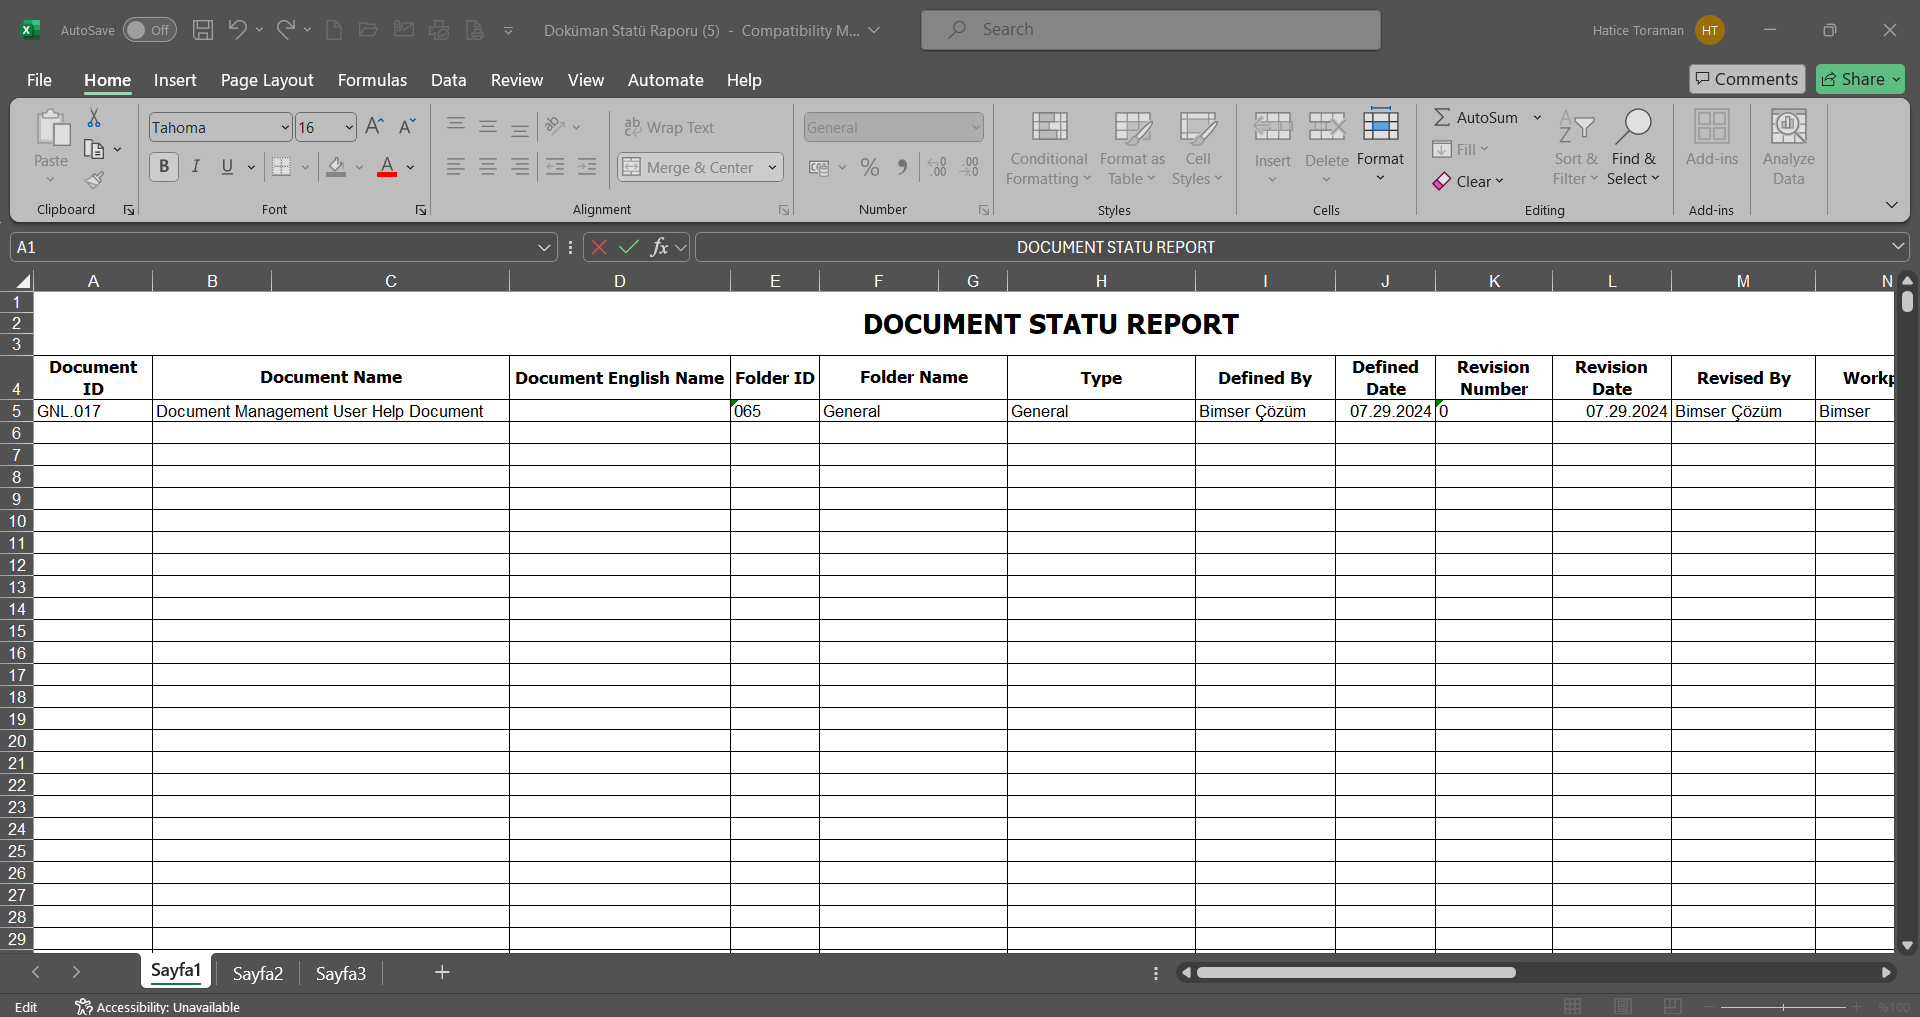
6.2.12.34. Task falling Documents Report
Menu Name: Integrated Management System/ Document Management/ Reports/ Task falling Documents Report
When documents are revised or canceled, it is a report that lists the reading tasks waiting for users by showing to whom they fall along with the previous revisions. There are two tabs on the Task falling Documents Report screen: filter and document list tab. In the filter tab, filtering is done according to the search criteria. In the document list tab, the records are listed according to the filtering process according to these search criteria.

With the help of the buttons on the screen;
 ::Delinquent document logs are listed
: Records are searched by filtering.
: Data is transferred to Excel.
: The search criteria on the menu screens are used to clear the data remaining in the filter fields in the grid where the search operation is performed.
: The menu screen is restored to its default settings.
: User-based designing of the menu screen is done with the show-hide feature, that is, the hiding feature of the fields corresponding to the columns on the menu screens.
On the Task falling Documents Report screen, type the document code in the “Document Code” field, which is the search criteria in the filter tab, and click the (Search) button.

On the Task falling Documents Report screen, records are listed according to the search criteria in the filter made in the document list tab
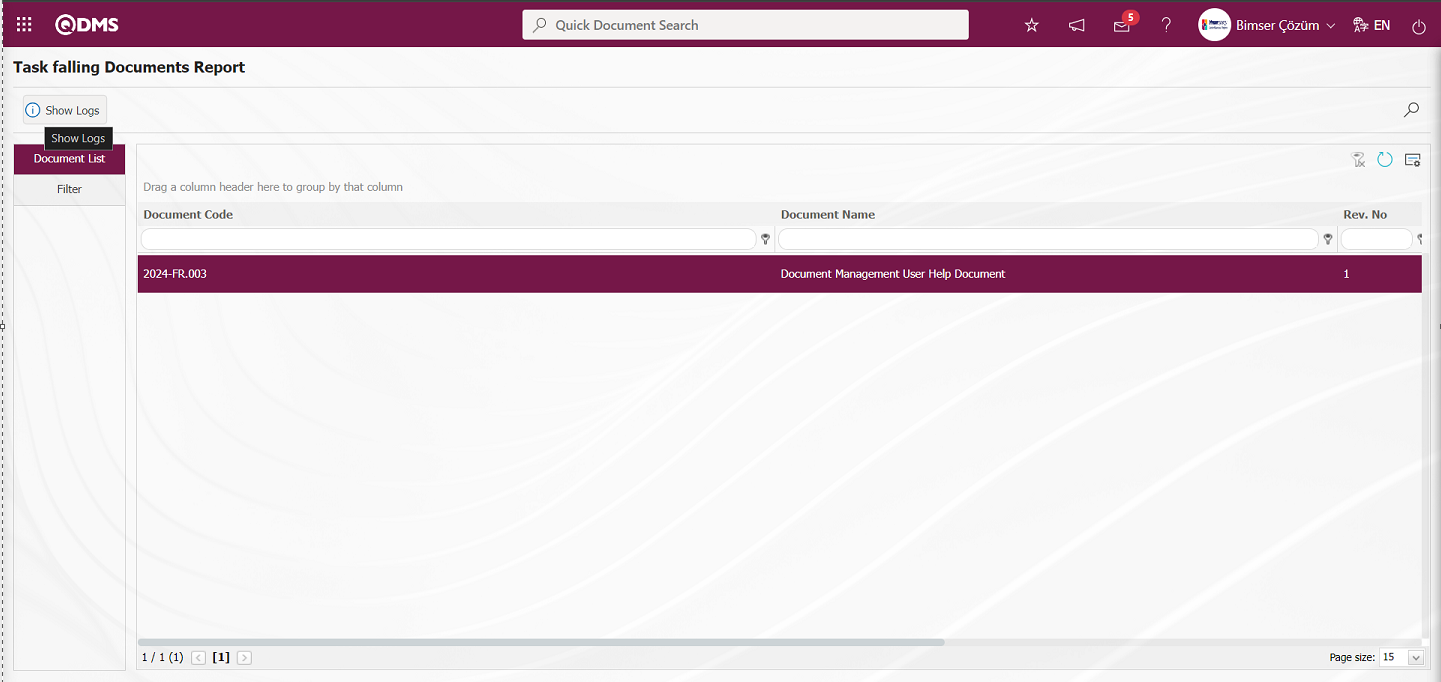
On the Task falling Documents Report screen, while the document is selected in the Document list, the  button is clicked to list the task falling document logs.
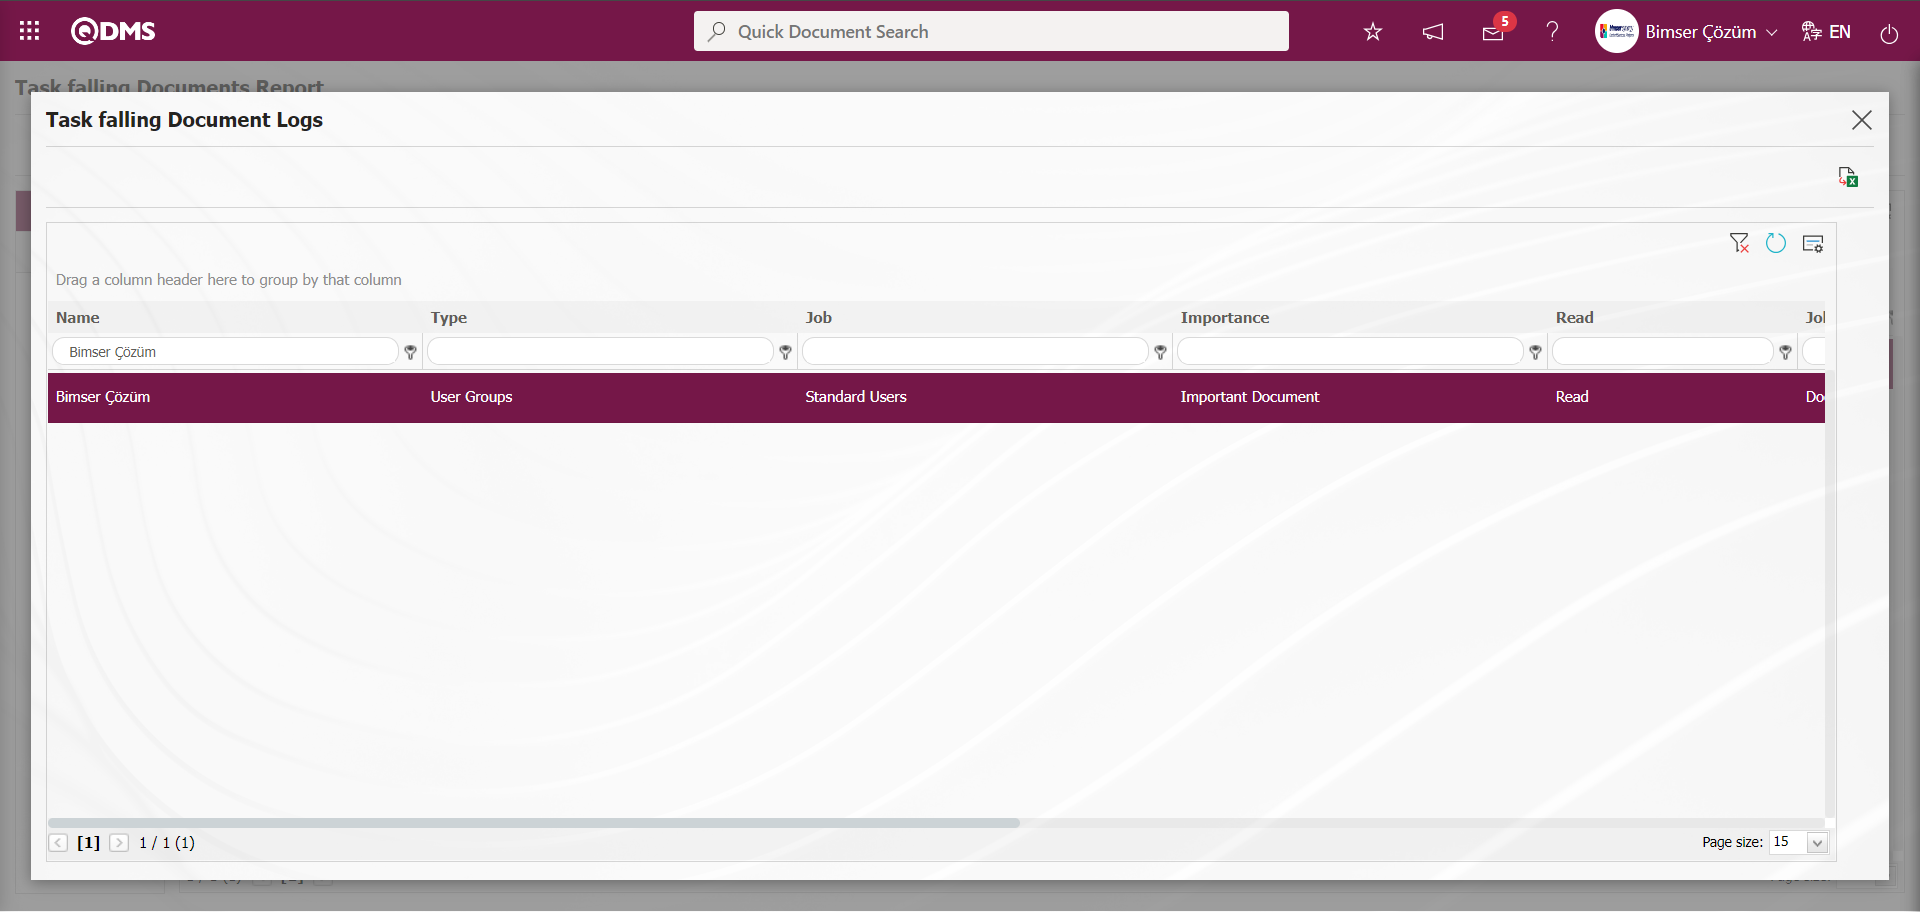
6.2.12.35. List of Documents Using Place Name
Menu Name: Integrated Management System/ Document Management/ Reports/ List of Documents Using Place Name
It is the menu that shows the matrices of the documents' using place matrices and the report is taken in Excel format. On the List of Documents Using Place Name screen, there are two tabs document search and document list tab. In the document search tab, filtering is done according to the search criteria. In the document list tab, the records are listed according to the filtering process according to these search criteria.

With the help of the buttons on the screen;
: Records are searched by filtering.
: Data is transferred to Excel.
: The search criteria on the menu screens are used to clear the data remaining in the filter fields in the grid where the search operation is performed.
: The menu screen is restored to its default settings.
: User-based designing of the menu screen is done with the show-hide feature, that is, the hiding feature of the fields corresponding to the columns on the menu screens.
On the List of Documents Using Place Name screen, type the document code in the “Document Code” field, which is the filter search criteria in the document search tab, and click the (Search) button.
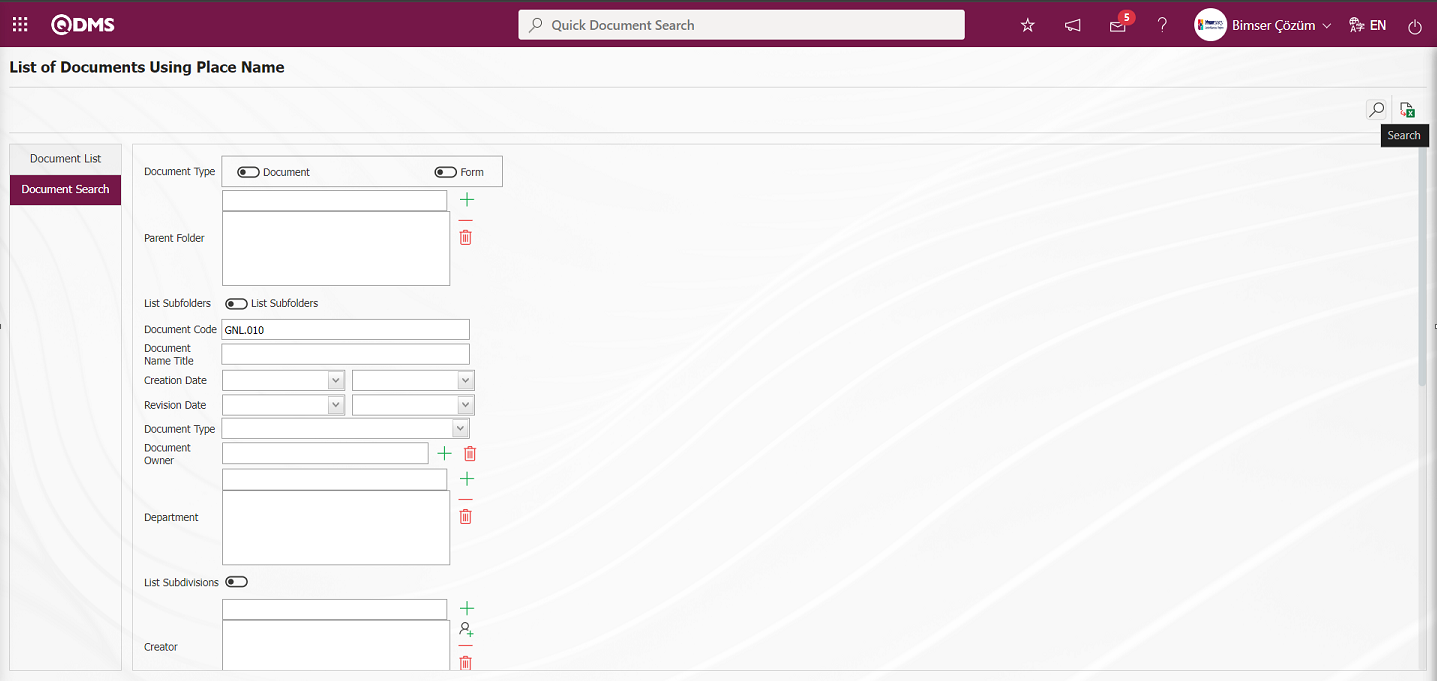
In the List of Documents Using Place Name screen, records are listed according to the search criteria in the filter made in the document list tab
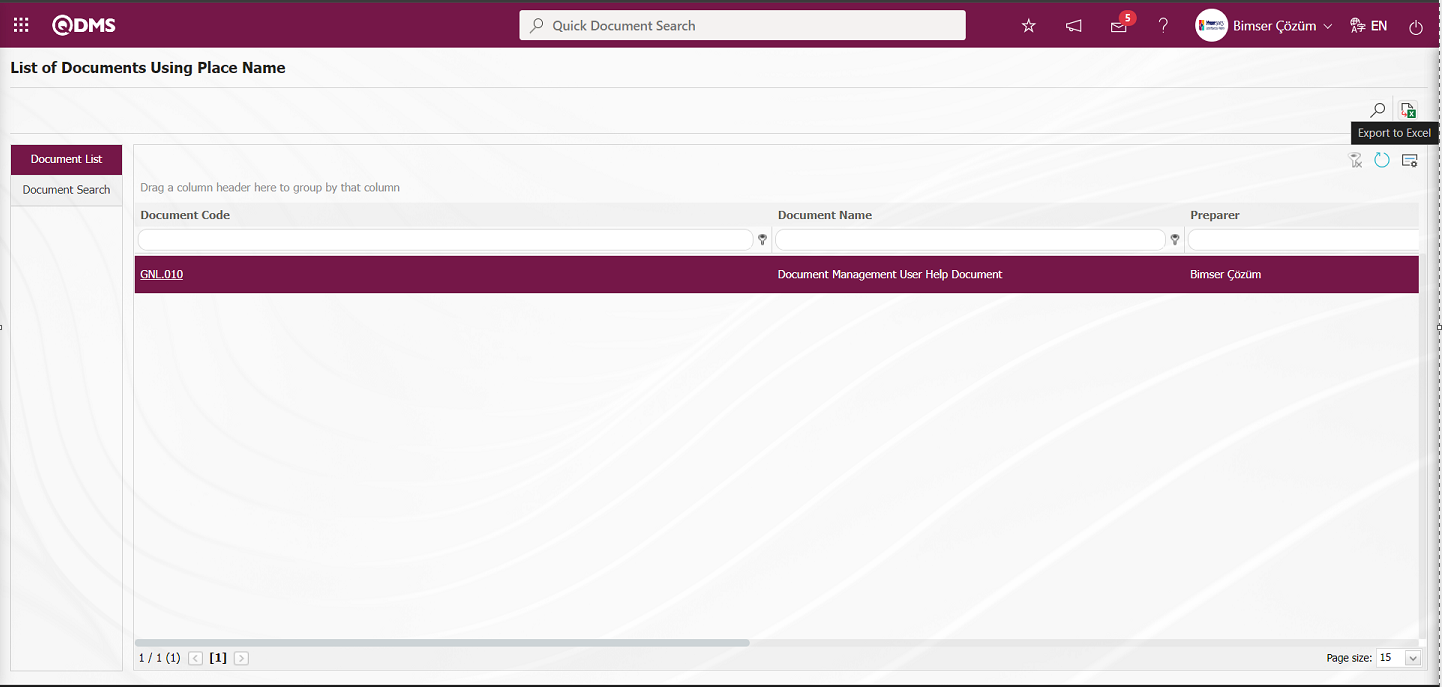
On the List of Documents Using Place Name screen, click the (Export to Excel) button to get the List of Documents Using Place Name report in Excel format.
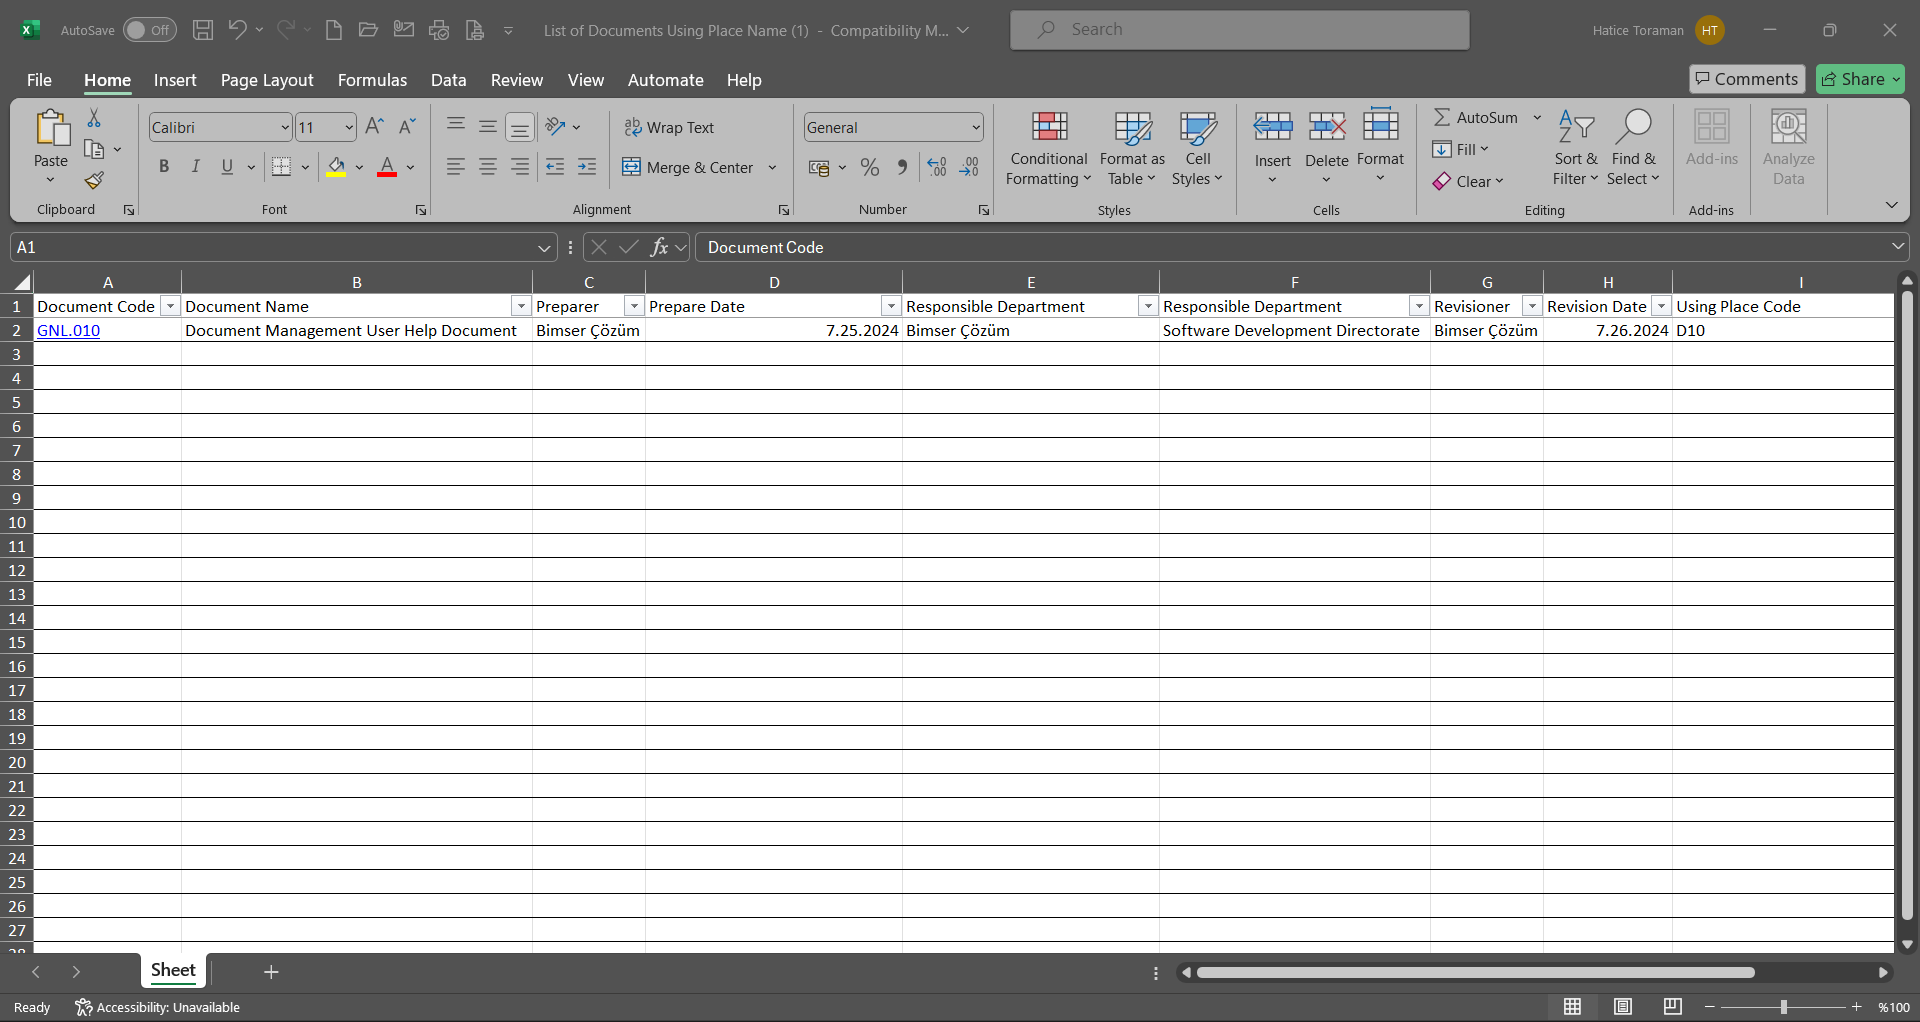
6.2.12.36.Task falling Personal Report
Menu Name: Integrated Management System/ Document Management/ Reports/ Task falling Personal Report
Task falling Personal report is similar to Task falling documents report. It is a report that shows person based tasks. It is a report in which reading tasks are listed in status situations such as personnel's duty change, leaving work, guest, job application. Necessary adjustments must be made in parameters 162 and 163 in the Document Management Module parameters. After the adjustment made in parameter 163, it enables the creation of reading tasks in relation to parameter In parameter 162;
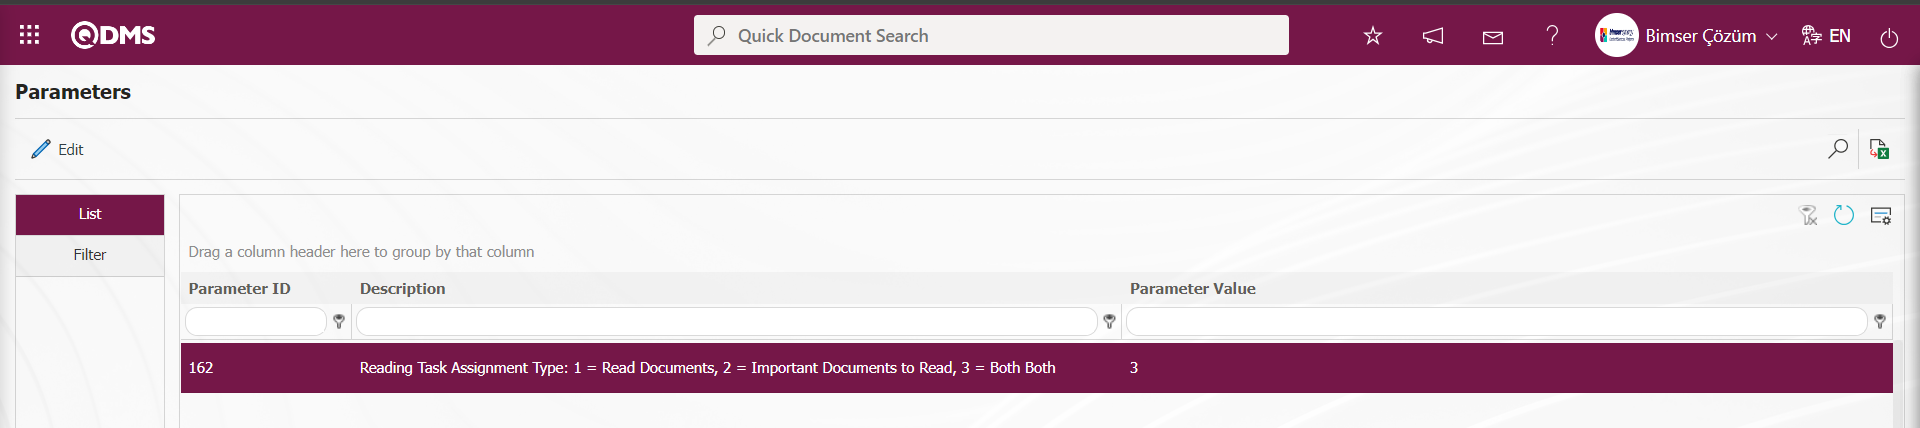
In parameter 163;

Reading tasks are assigned to the value defined in the parameter values. For more than one stage, the corresponding values of the stages are defined in the parameter by placing a comma between the values.
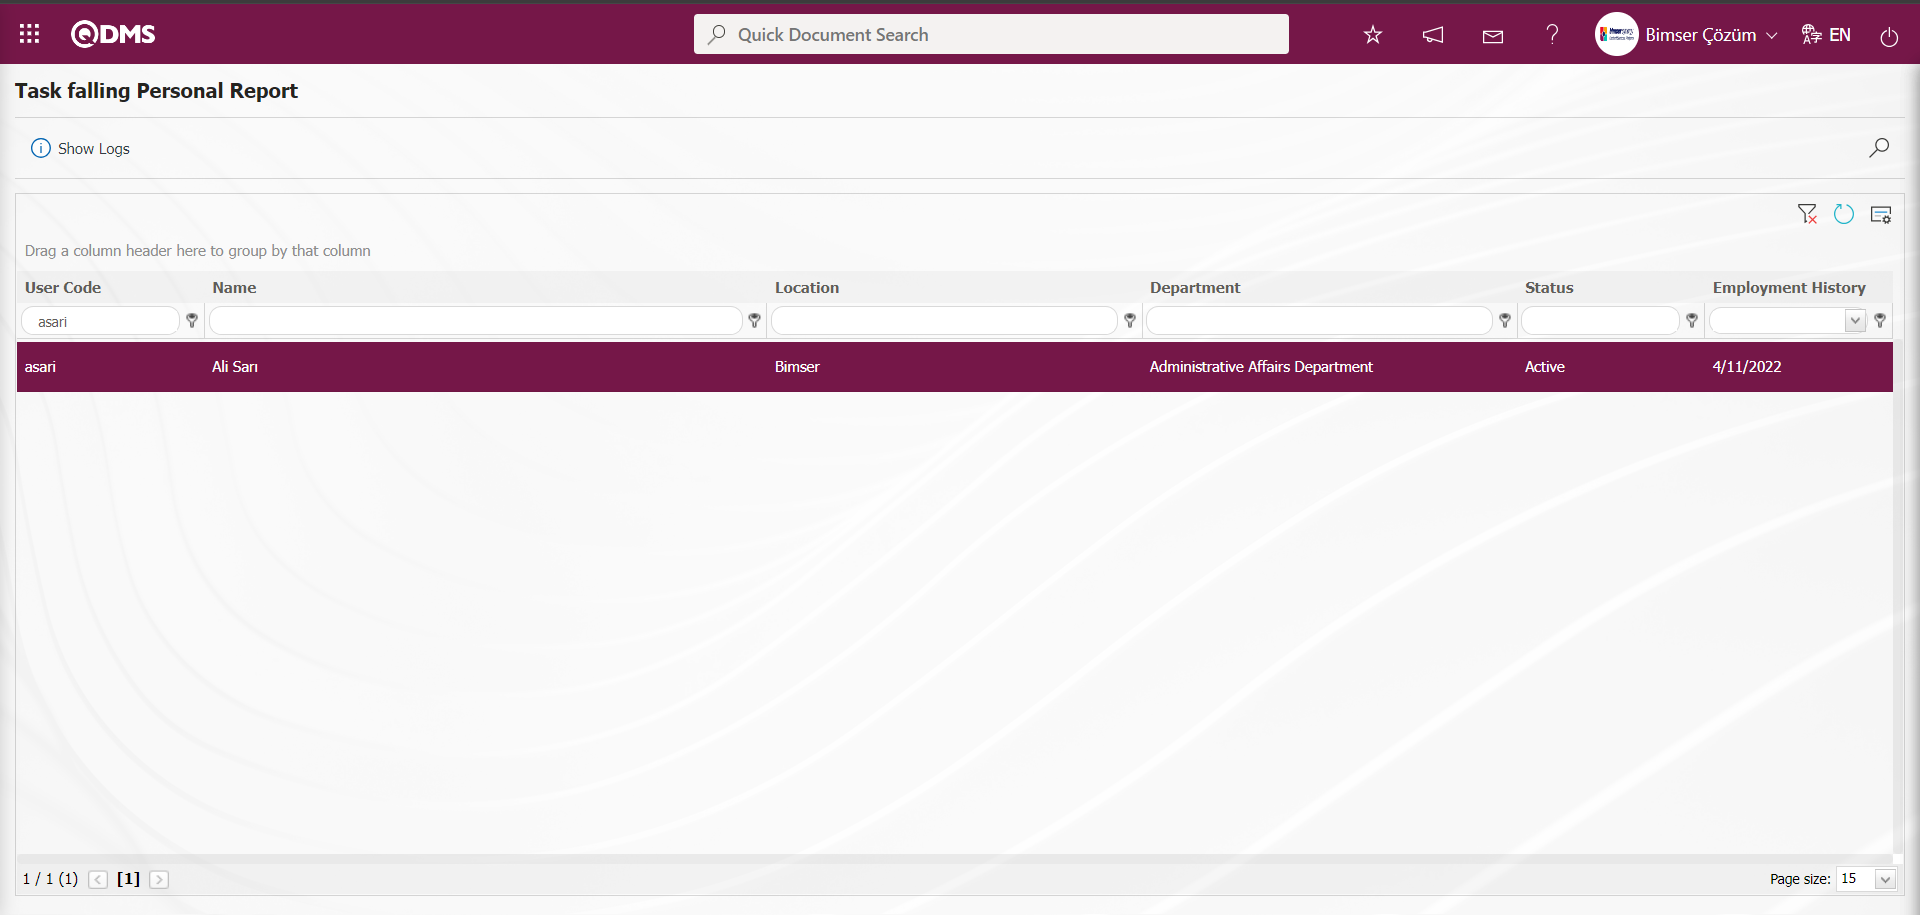
With the help of the buttons on the screen;
 : Delegated Document lists person logs.
: Records are searched by filtering.
: Data is transferred to Excel.
: The search criteria on the menu screens are used to clear the data remaining in the filter fields in the grid where the search operation is performed.
: The menu screen is restored to its default settings.
: User-based designing of the menu screen is done with the show-hide feature, that is, the hiding feature of the fields corresponding to the columns on the menu screens.

By clicking the  button on the Task falling Personal Report screen, the task falling person logs are displayed
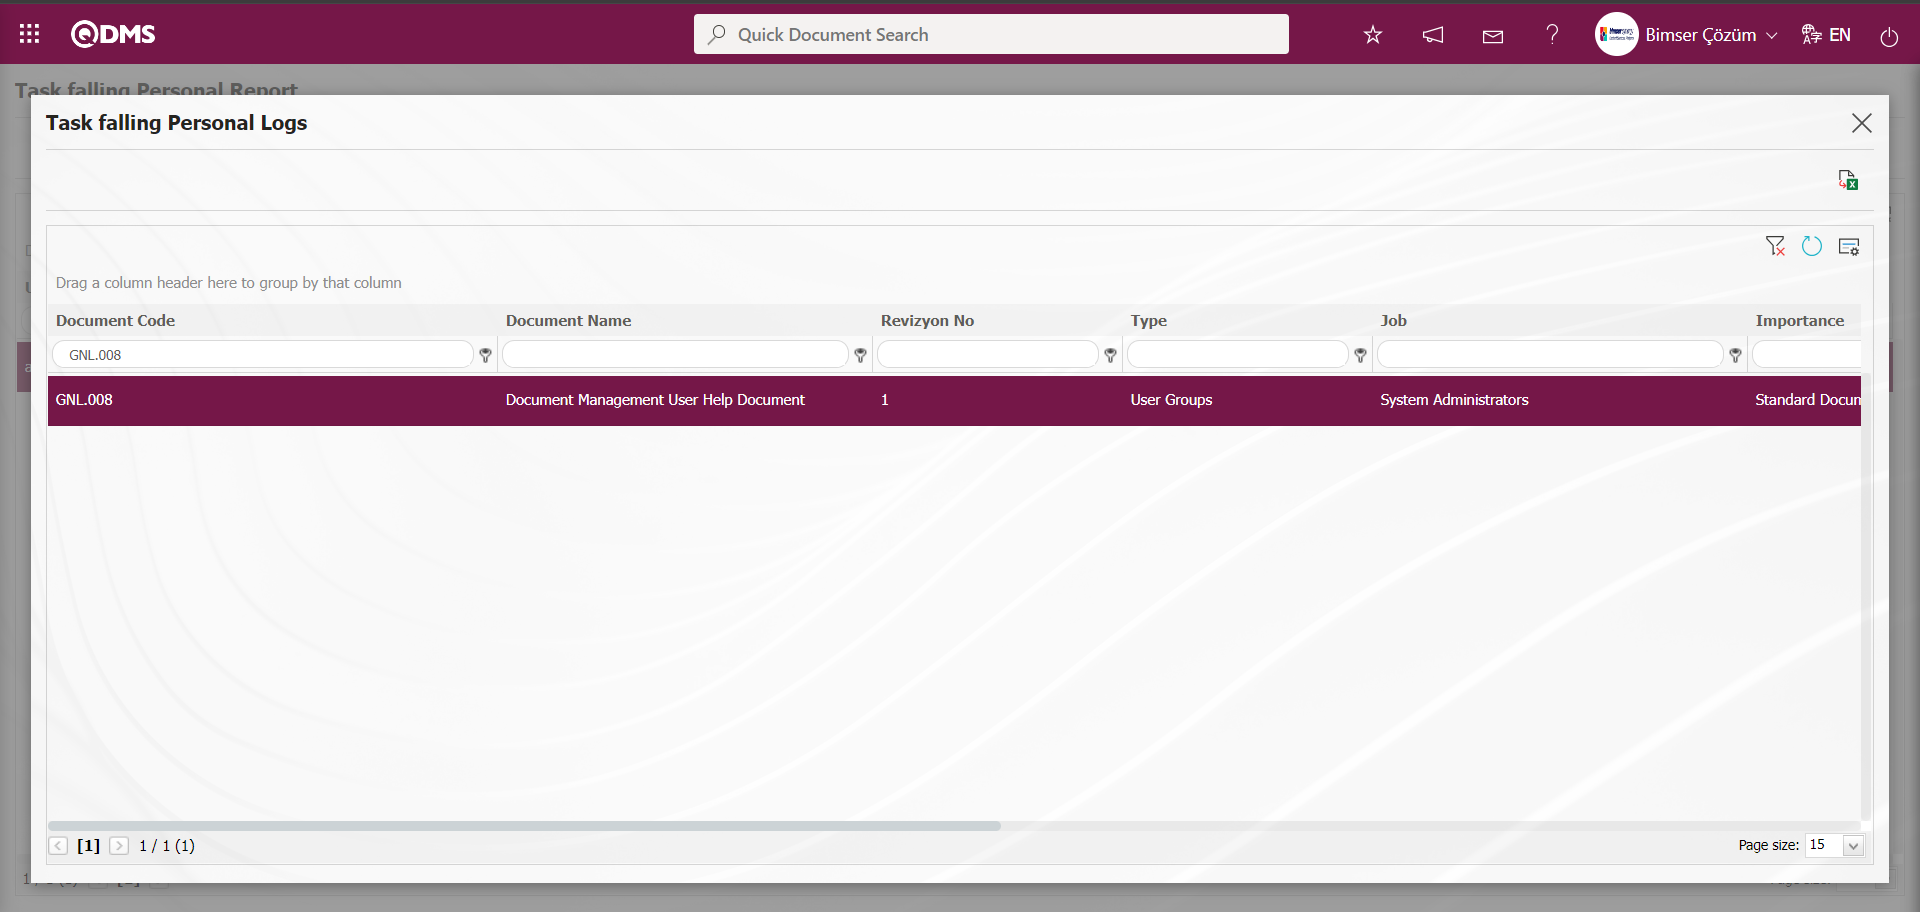
6.3.System Infrastructure Definitions/ Document Operations/ Part 2
6.3.1.Document Transfer
Menu Name: System Infrastructure Definitions/ Document Activities/ Document Transfer
This is the menu where documents that have already completed the approval and distribution processes can be quickly included in the system without going to the system for approval and control. The only difference from the Document Preparation menu is that there are no approval mechanisms. Document Transfer menu is used by system administrators.
In the Document Transfer - Folder Selection screen, select the folder where the document will be transferred and click the 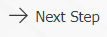 button.

On the screen that opens, the information of the document is entered in the Document Information tab. By typing the name of the document, the preparation date is selected from the calendar field and the detail information is filled in. These operations are carried out in the same way as the process steps in the document preparation menu.

After entering the detailed information of the document in the Document Information tab on the Document Transfer to System screen, click on the Document tab. In the Document tab, the default language file is uploaded to the system by clicking the  (Add) button in the Document File Upload (Turkish) field.
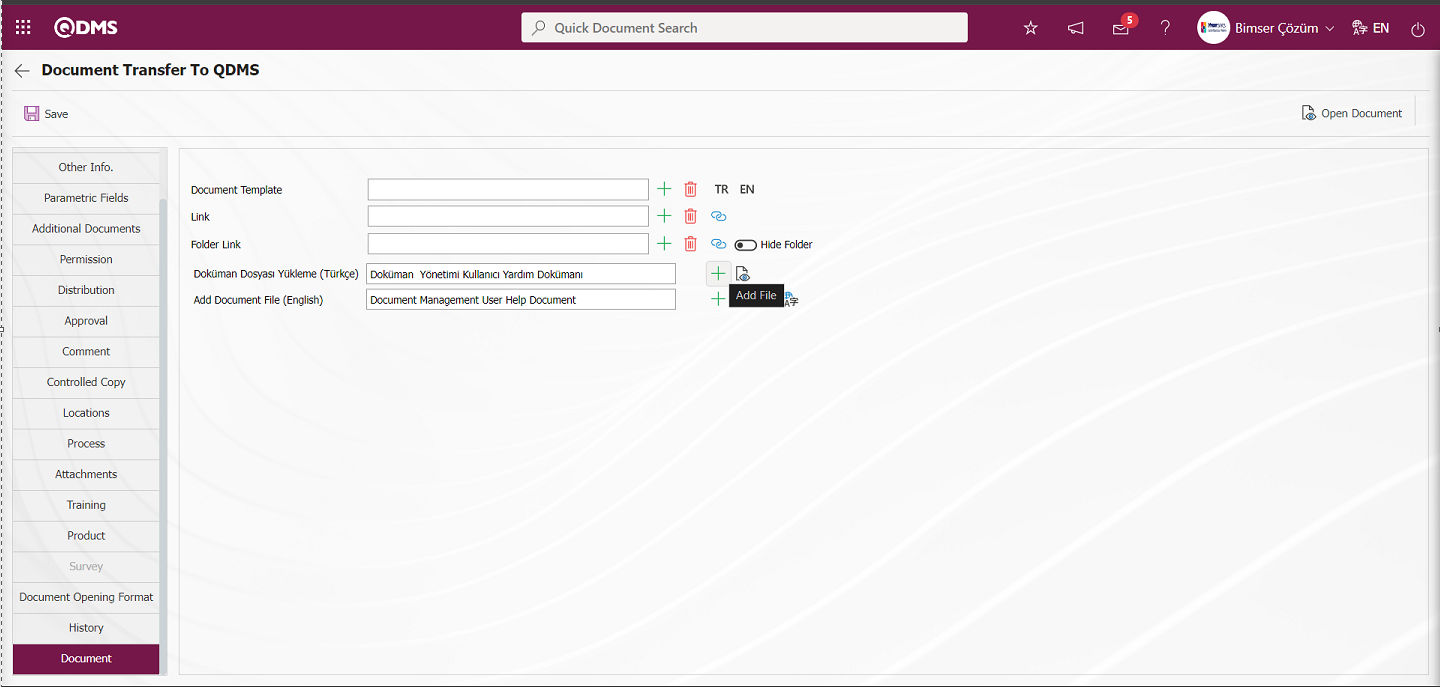
Click the Browse button on the Add File screen on the Document Transfer to QDMS screen.

Select the Document to be transferred to the system.
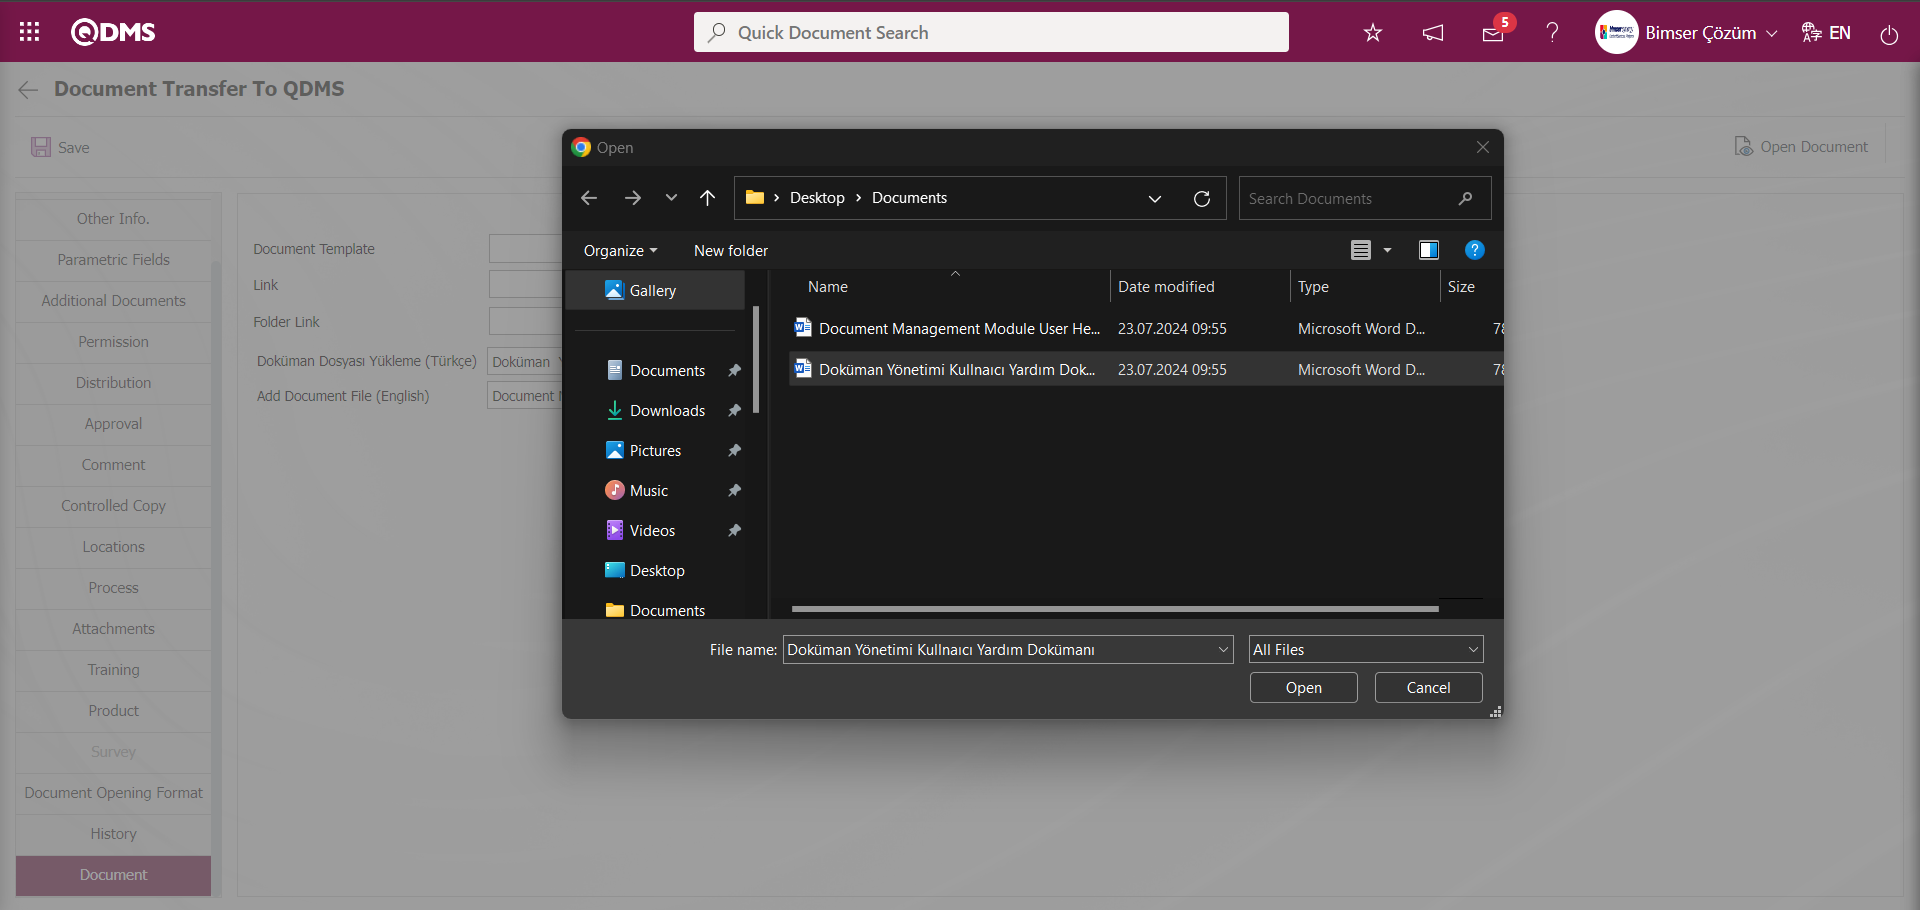
The system displays the message “File uploaded successfully”.

After uploading the default language file, the English document of the file to be uploaded to the system is uploaded by clicking the (Add) button from the Add Document File (English) field.
Click the Browse button on the Add File screen on the Document Transfer to QDMS screen.

Select the Document to be transferred to the system.

The system displays the message “File uploaded successfully”.
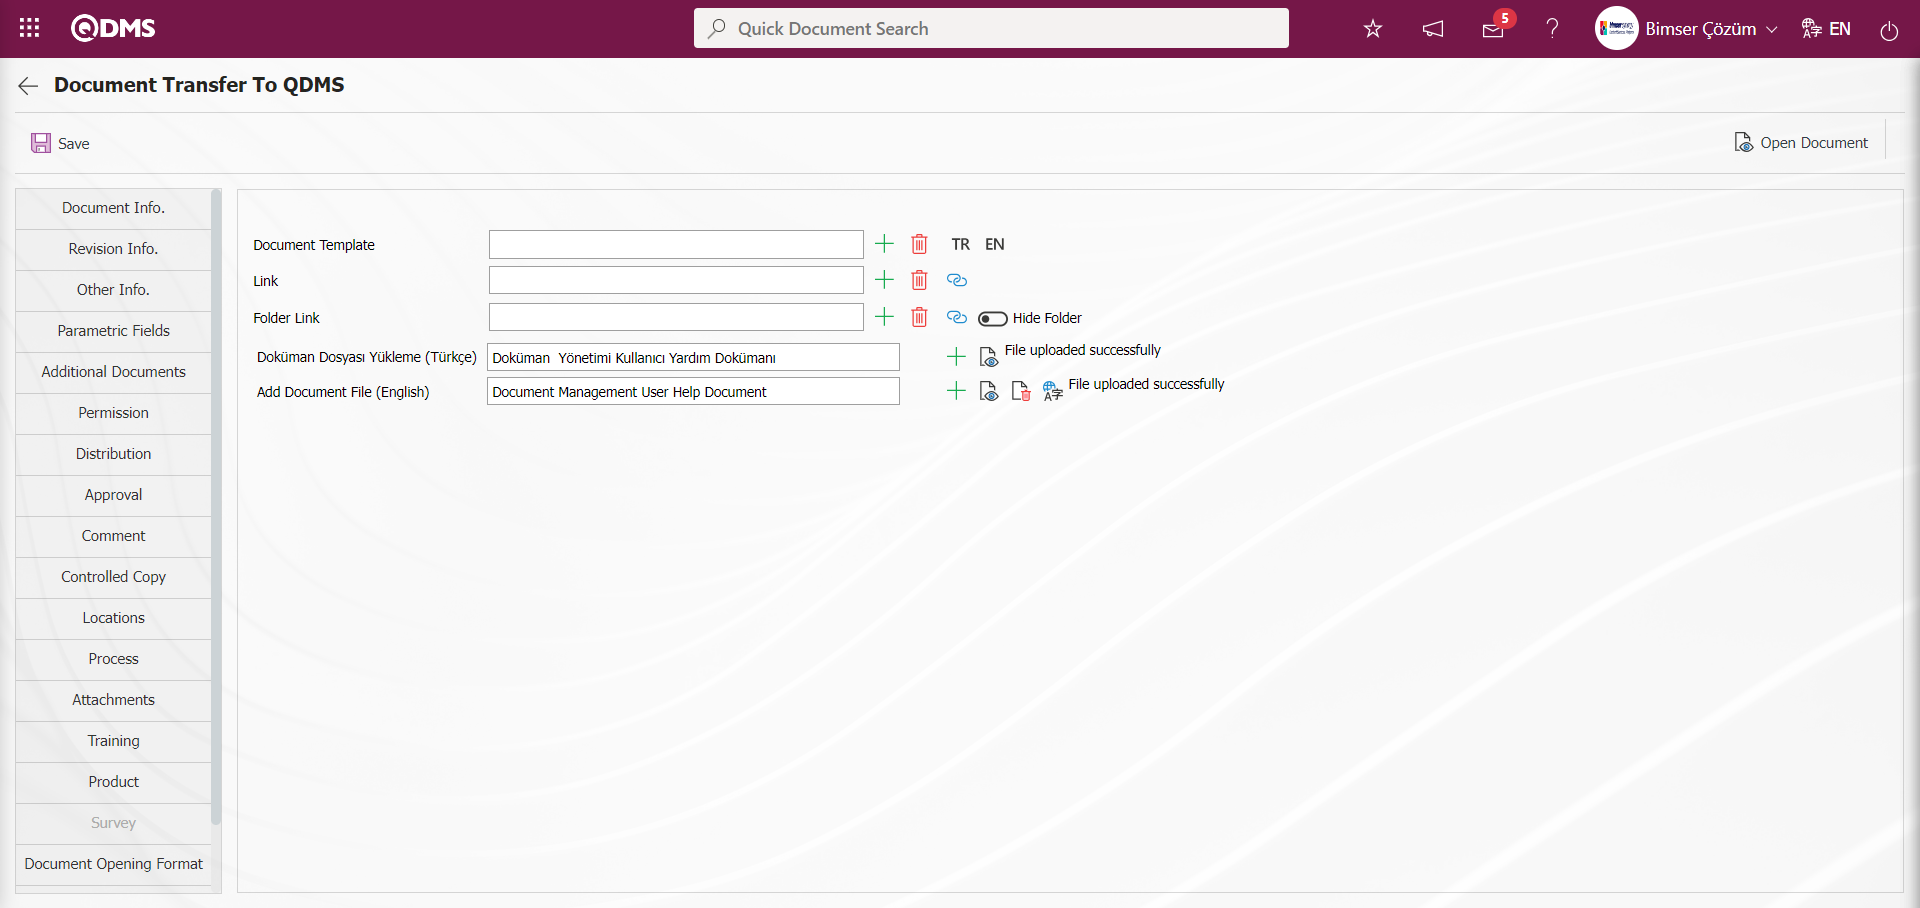
On the Document Transfer to QDMS screen, click on the Document Information tab and after entering all the information about the document, click on the  button on the top left corner of the screen.
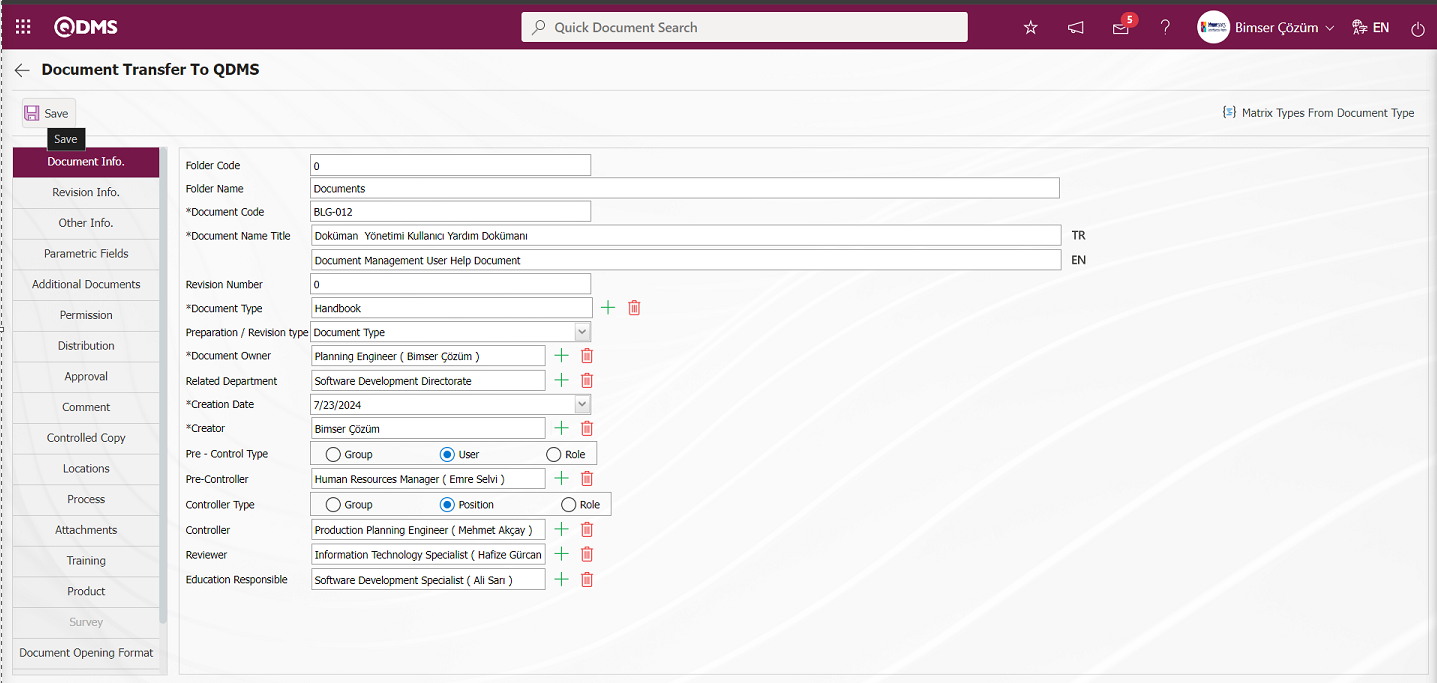
The system will give the message that the file has been saved successfully, indicating that the document has been transferred to the system.
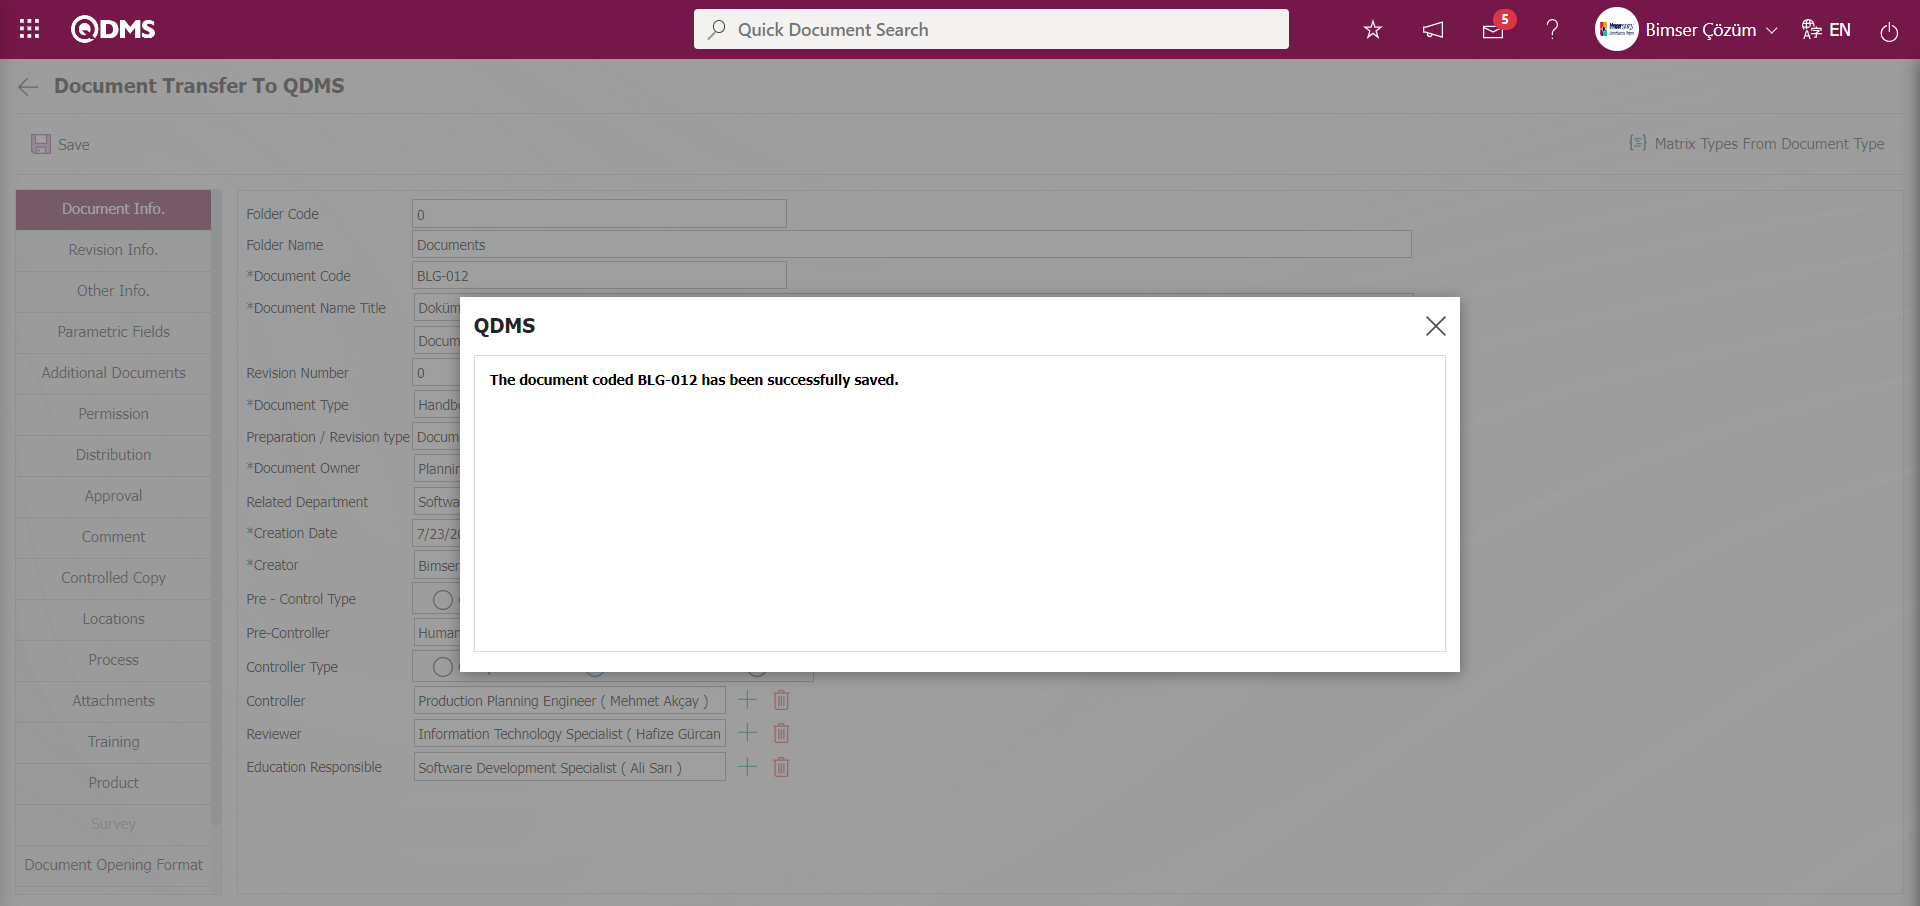
6.3.2. Document Maintenance
Menu Name: System Infrastructure Definitions/ Document Activities/ Document Maintenance
It is the menu where small changes that do not require revision can be made in the document. For example; document preparation date, punctuation errors in the document. With the document record maintenance feature, documents can be revised without obtaining a revision number. This menu is used if you want to change something in the document but do not want to get a revision number.
Click on the Document Maintenance menu. In the Document Record Maintenance - Folder Selection screen, select the folder containing the relevant document to be edited and click on the  button.

On the Document Record Maintenance - Document Selection** screen, select the relevant document in the Document List and click on the  button.
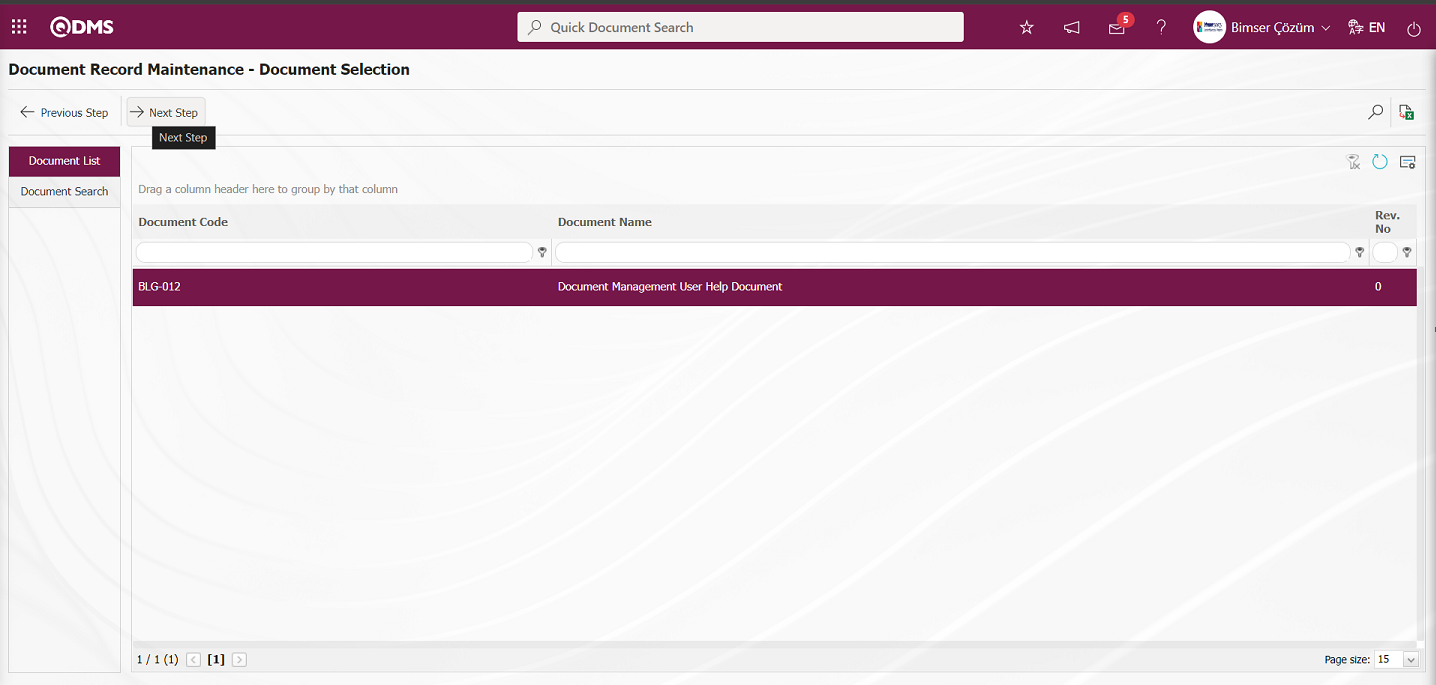
The page with the information of the relevant document is displayed. The information on this page can be edited as desired.
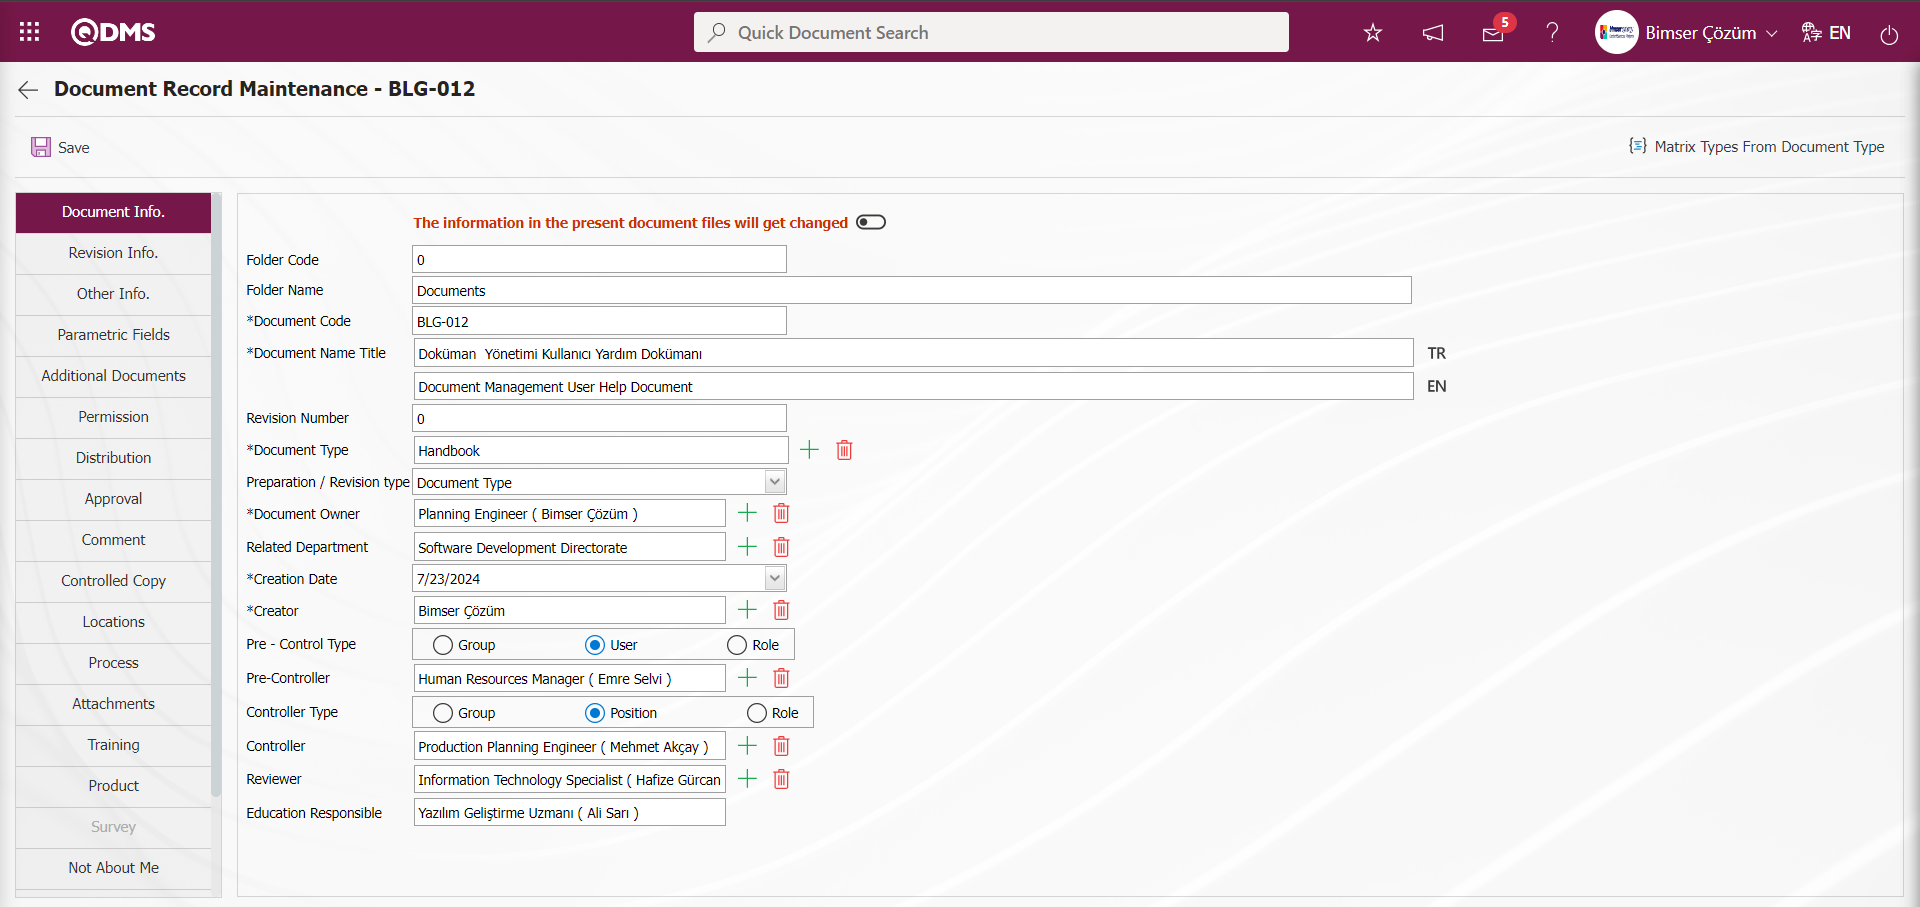
Click on the Document tab on the Document Record Maintenance** screen. The document is downloaded to the user's computer with the  (View File) button.
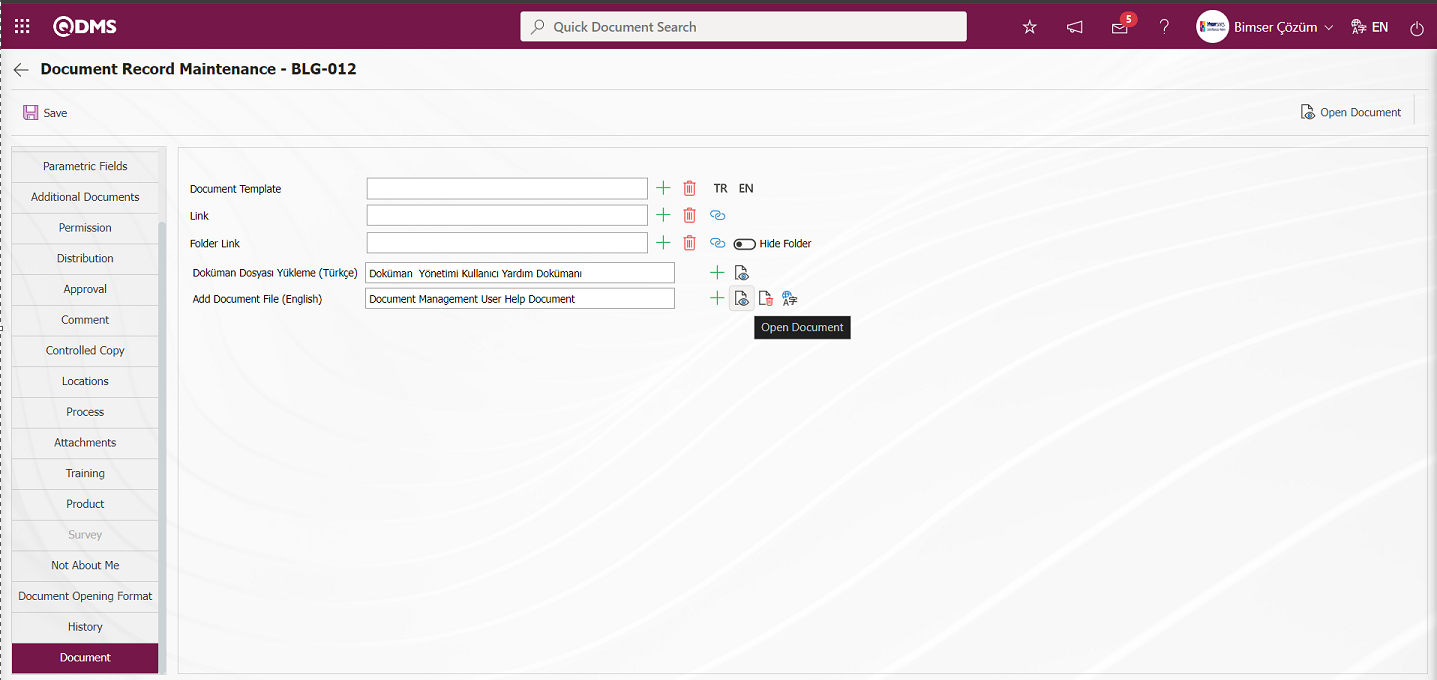
Desired changes are made on the downloaded document within the scope of structure and content.
The document whose structure and content is changed is uploaded to the system by clicking the  (Add File) button in the Add Document File (English) field in the Document tab on the Document Record Maintenance screen
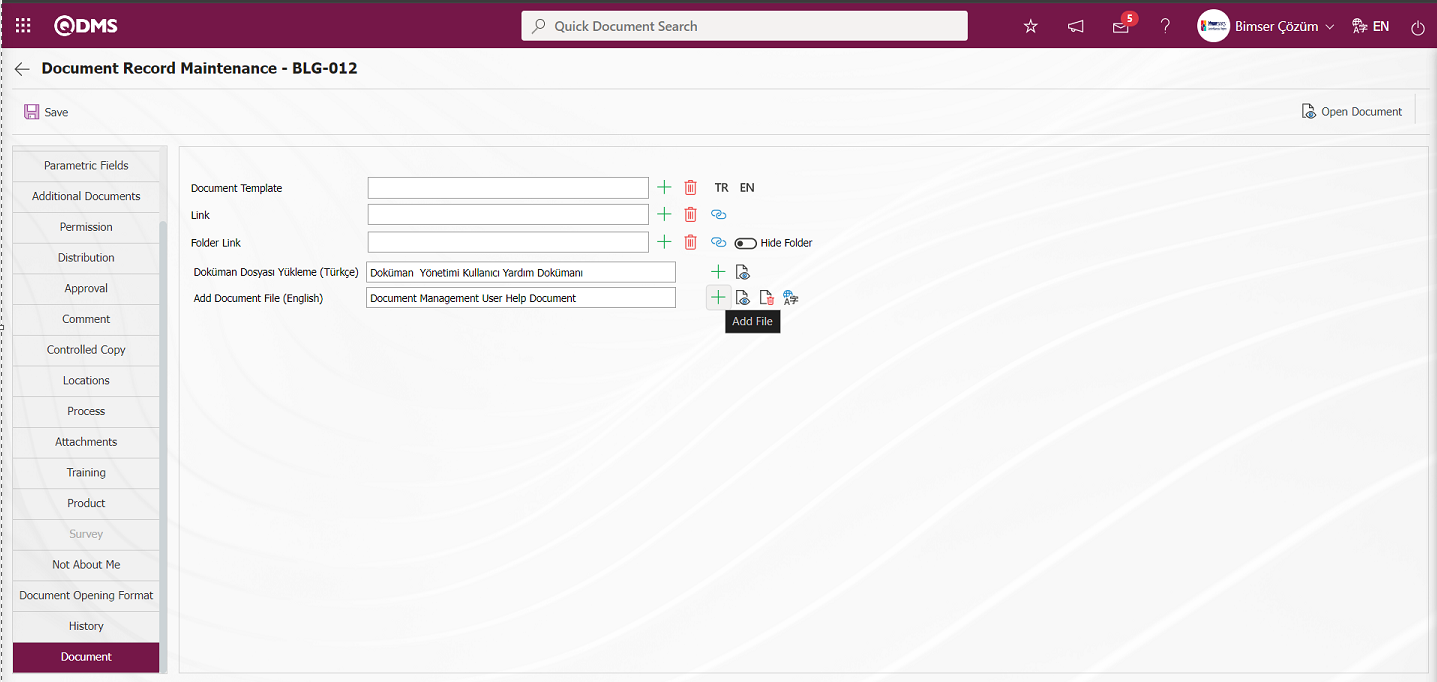
Click the Browse button on the Add File screen.

The document with changed structure and content is selected and uploaded to the system.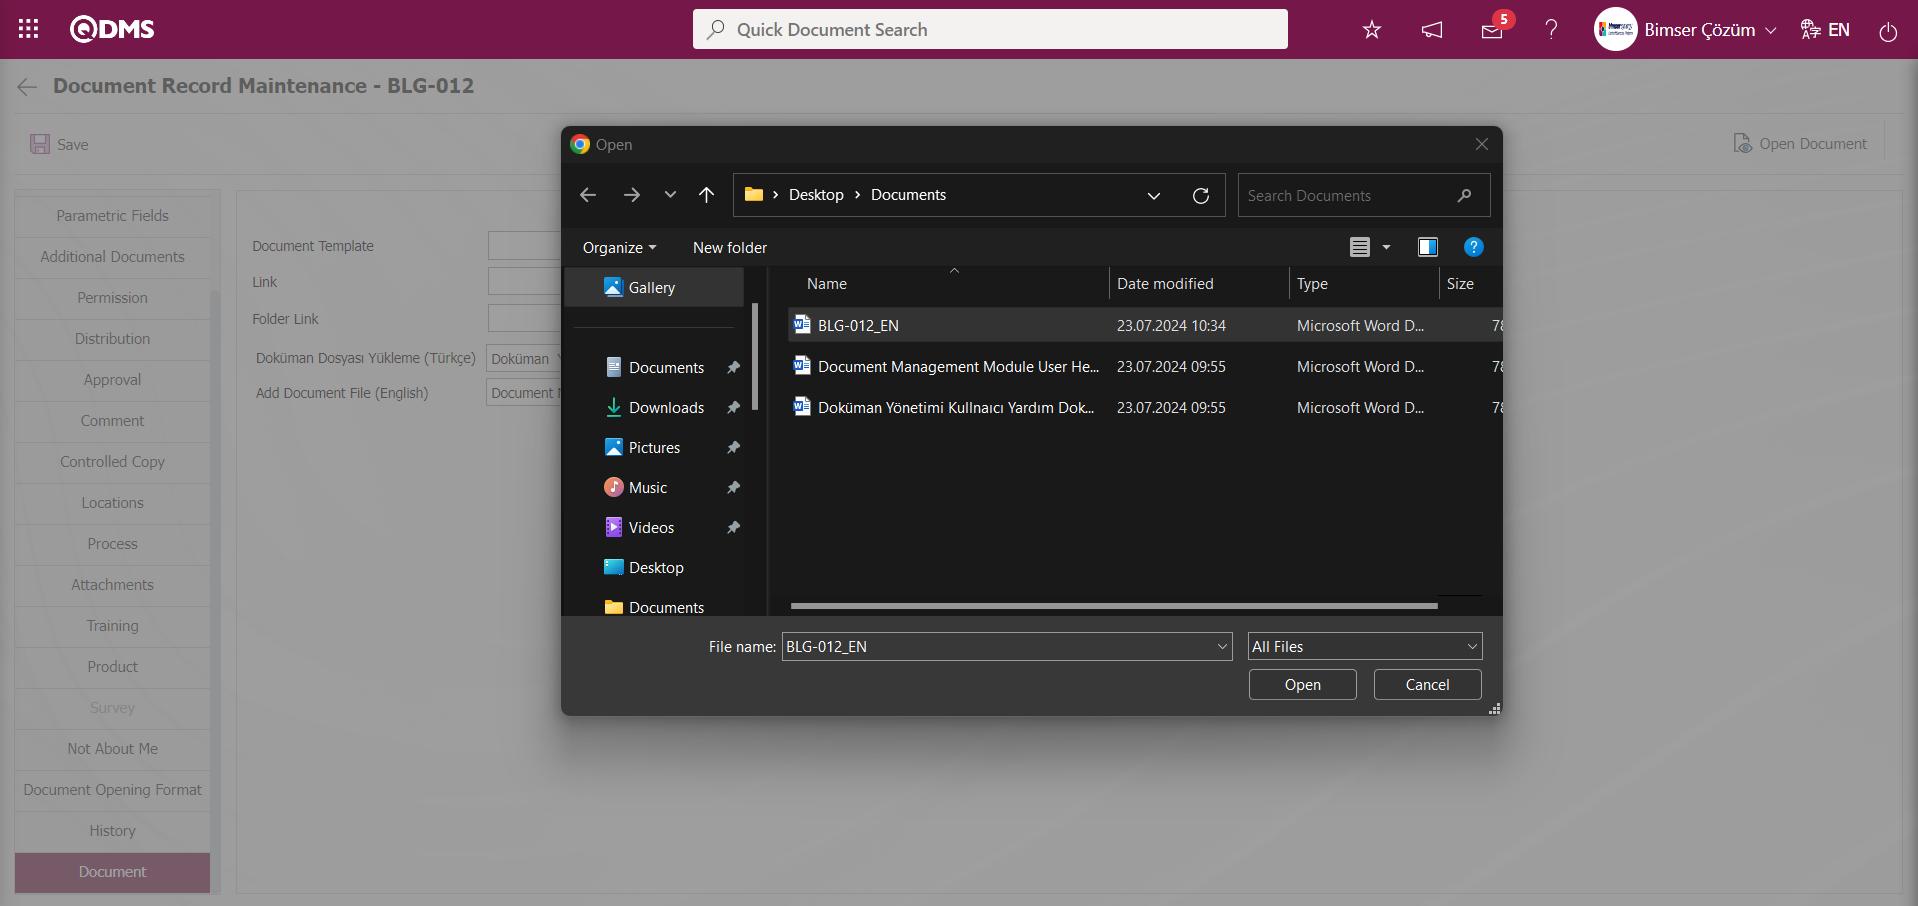
The system gives the message “File uploaded successfully”.
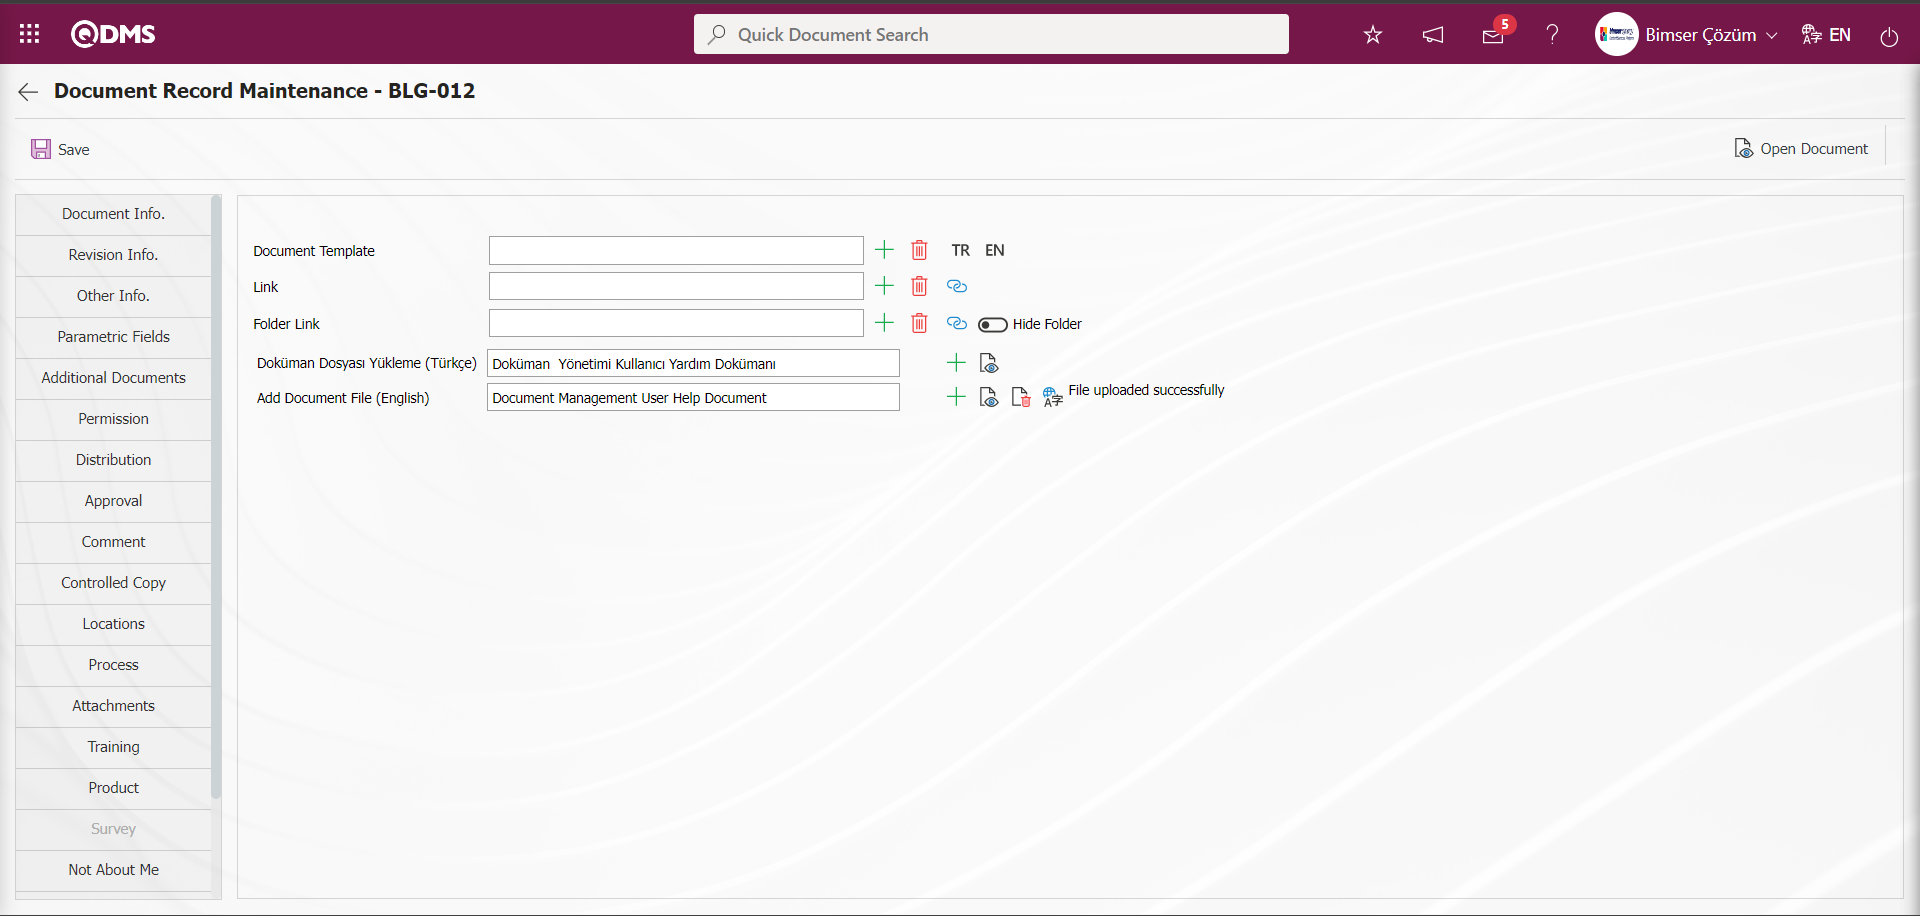
After uploading the document changed in terms of structure and content to the system, click on the Document Information tab. In the Document Information tab, click on “The information in the present document files will get changed” field and the related check box is checked. If the check box related to this field is checked, the changes made in the document information section will be reflected in the document template and the document will be displayed with new information (For example; document preparation date, preparer, checker, approver information). In the Document Record Maintenance screen, the changes made with the help of the  button in the upper left corner of the screen in the document information tab are saved.
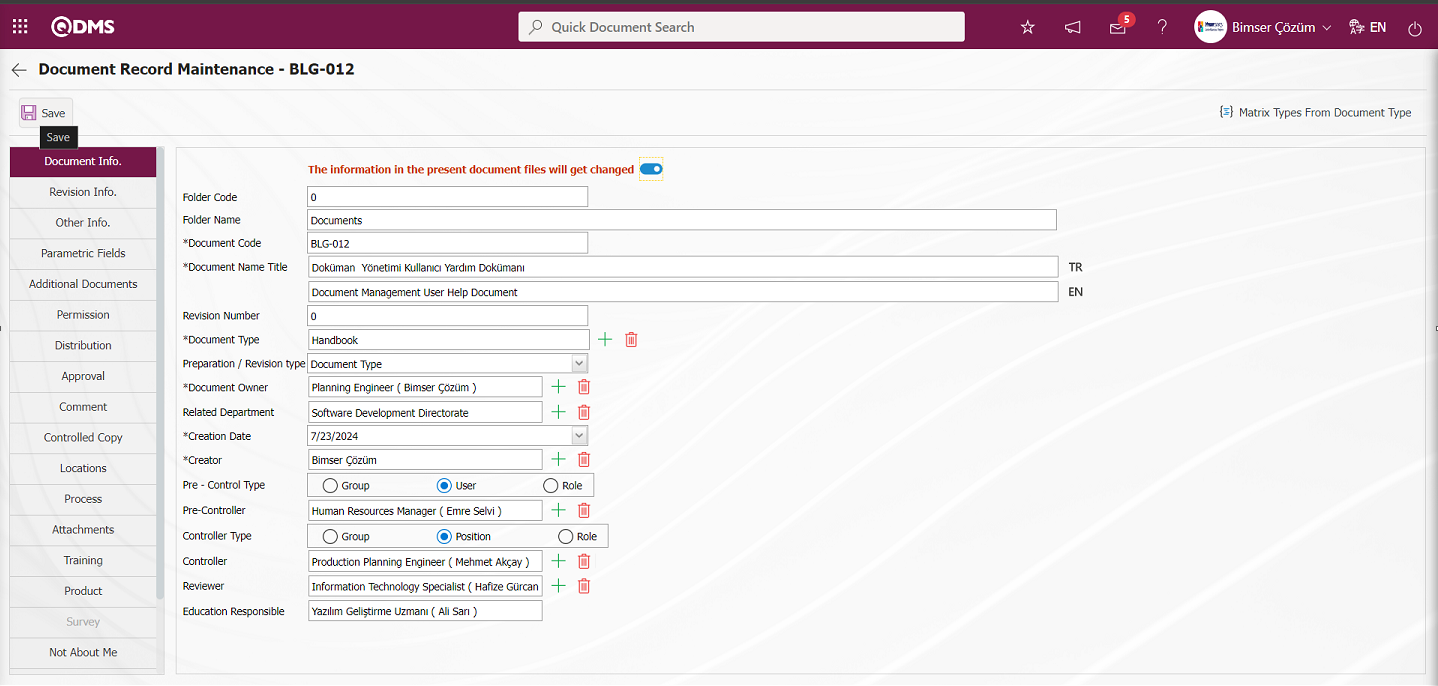
It is indicated that the document record maintenance process has been performed by the system by giving a message about the successful saving of the document.
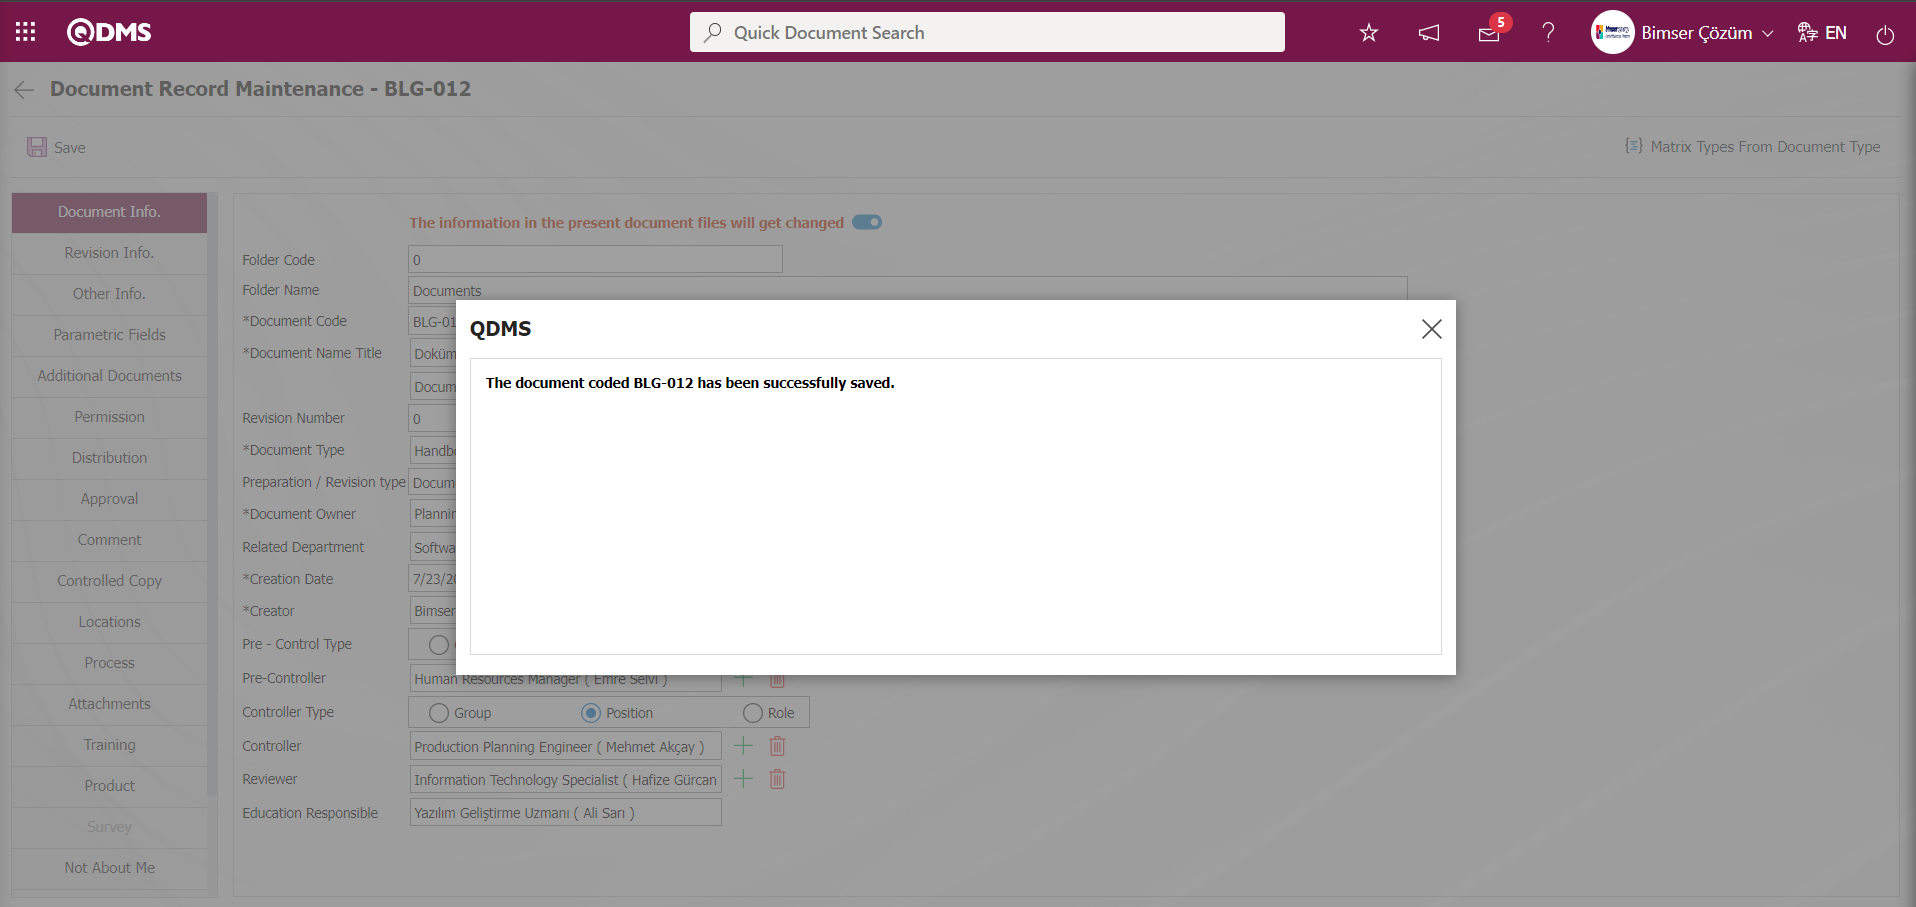
6.3.3.Draft Document Attachment Organizer
Menu Name: System Infrastructure Definitions/ Document ActivitiesDraft Document Attachment Organizer
This is the menu where the attachment files uploaded in the Attachment Files tab of the documents at the draft stage within the scope of the Document Management Module are viewed and edited, the edited attachment files are uploaded to the system again or a different attachment file is uploaded at this stage. Click on the Document Attachments** menu.
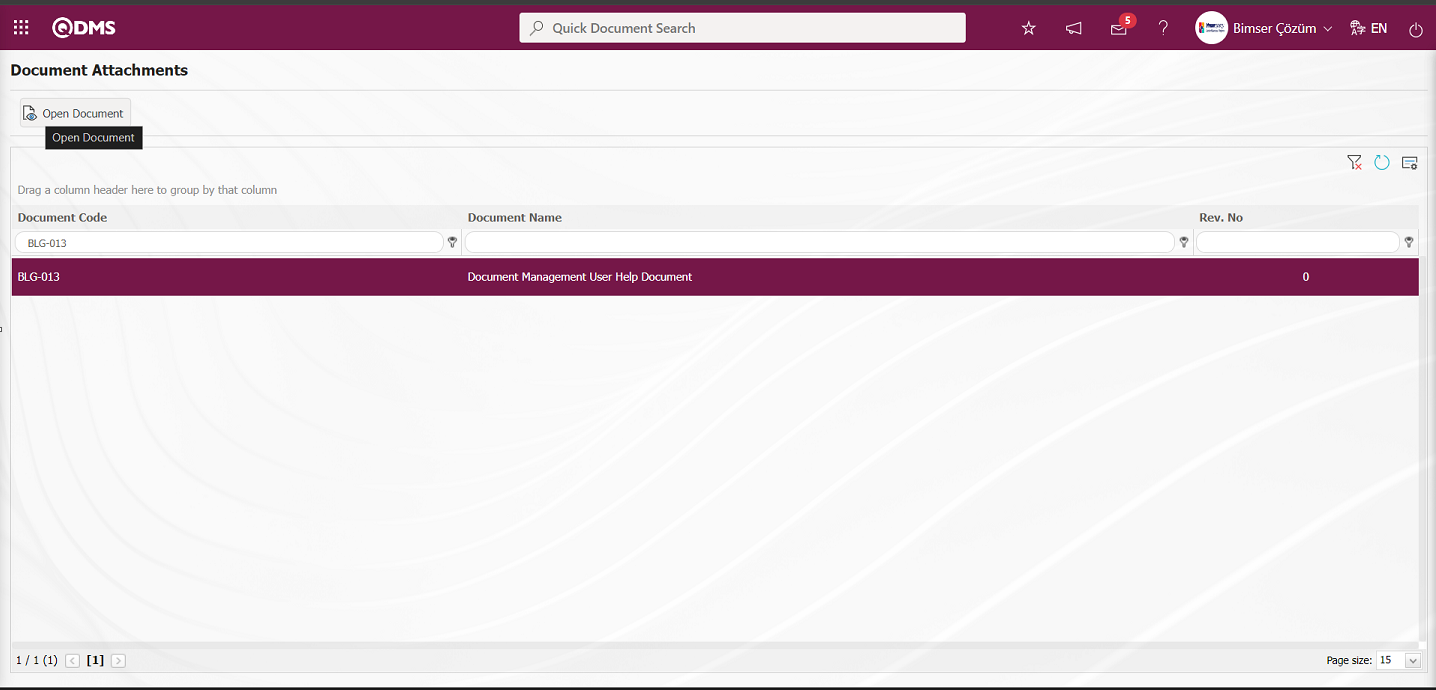
In the Document Attachments screen, select the document from the list and click the  button to go to the screen where the attachment files will be edited.
With the help of the buttons on the screen;
 : Registration is done.
 : File is uploaded.
 : The file selected in the list is opened.
 : The file selected in the list is deleted.
On the Document Attachments screen, the additional file selected in the list is downloaded to the system and displayed by clicking the button.
After the Additional file added at the draft stage downloaded to the computer is edited, it is uploaded to the system again by clicking the  button.
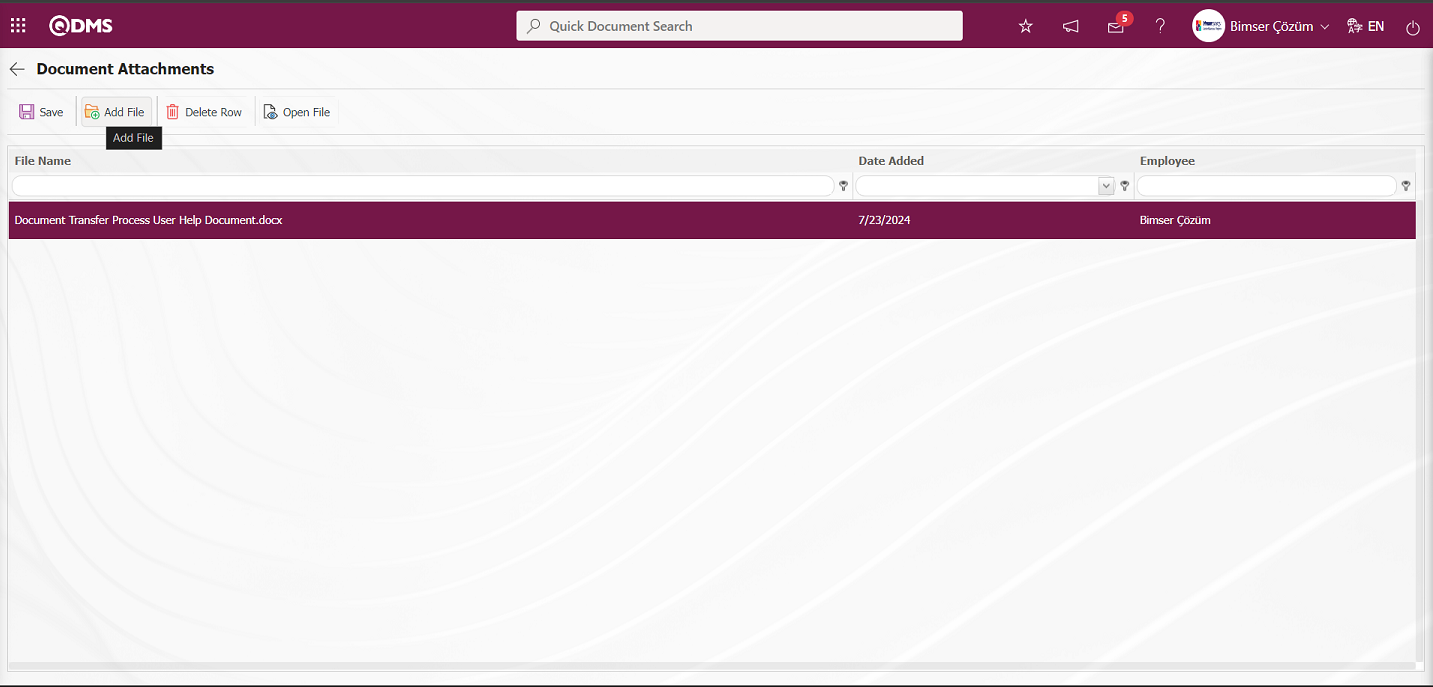
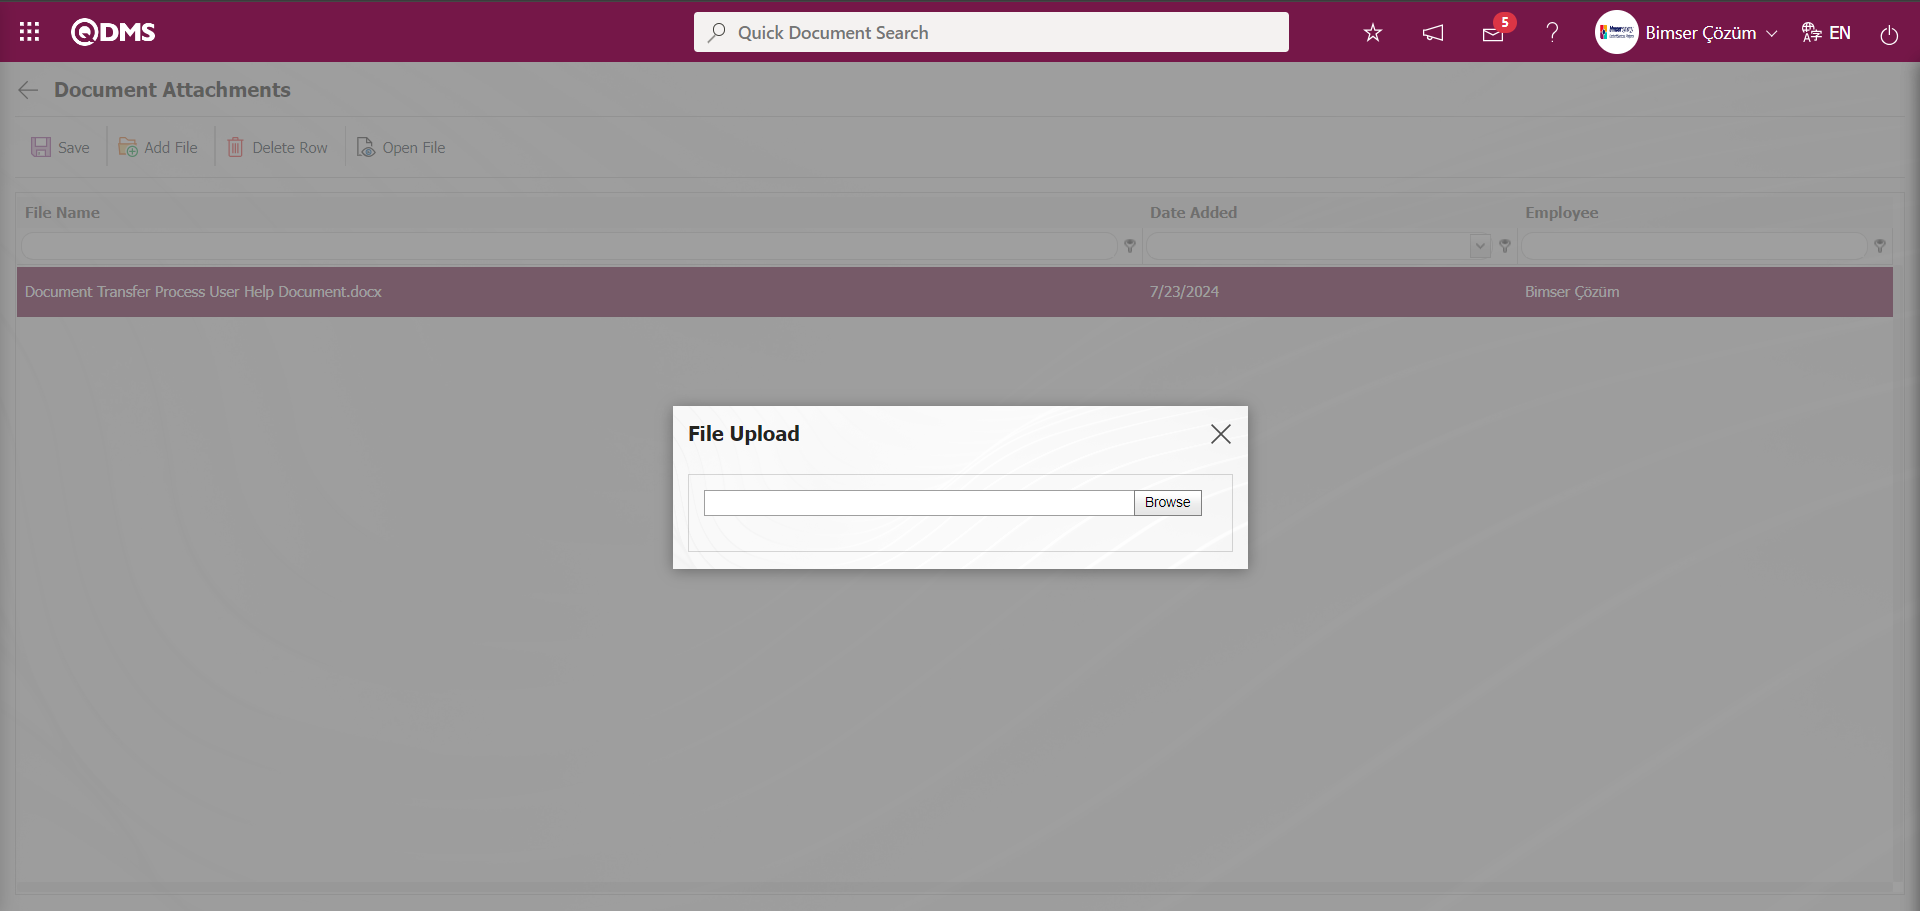
On the Add File screen, click the Browse button and select the file and upload the edited version to the system.

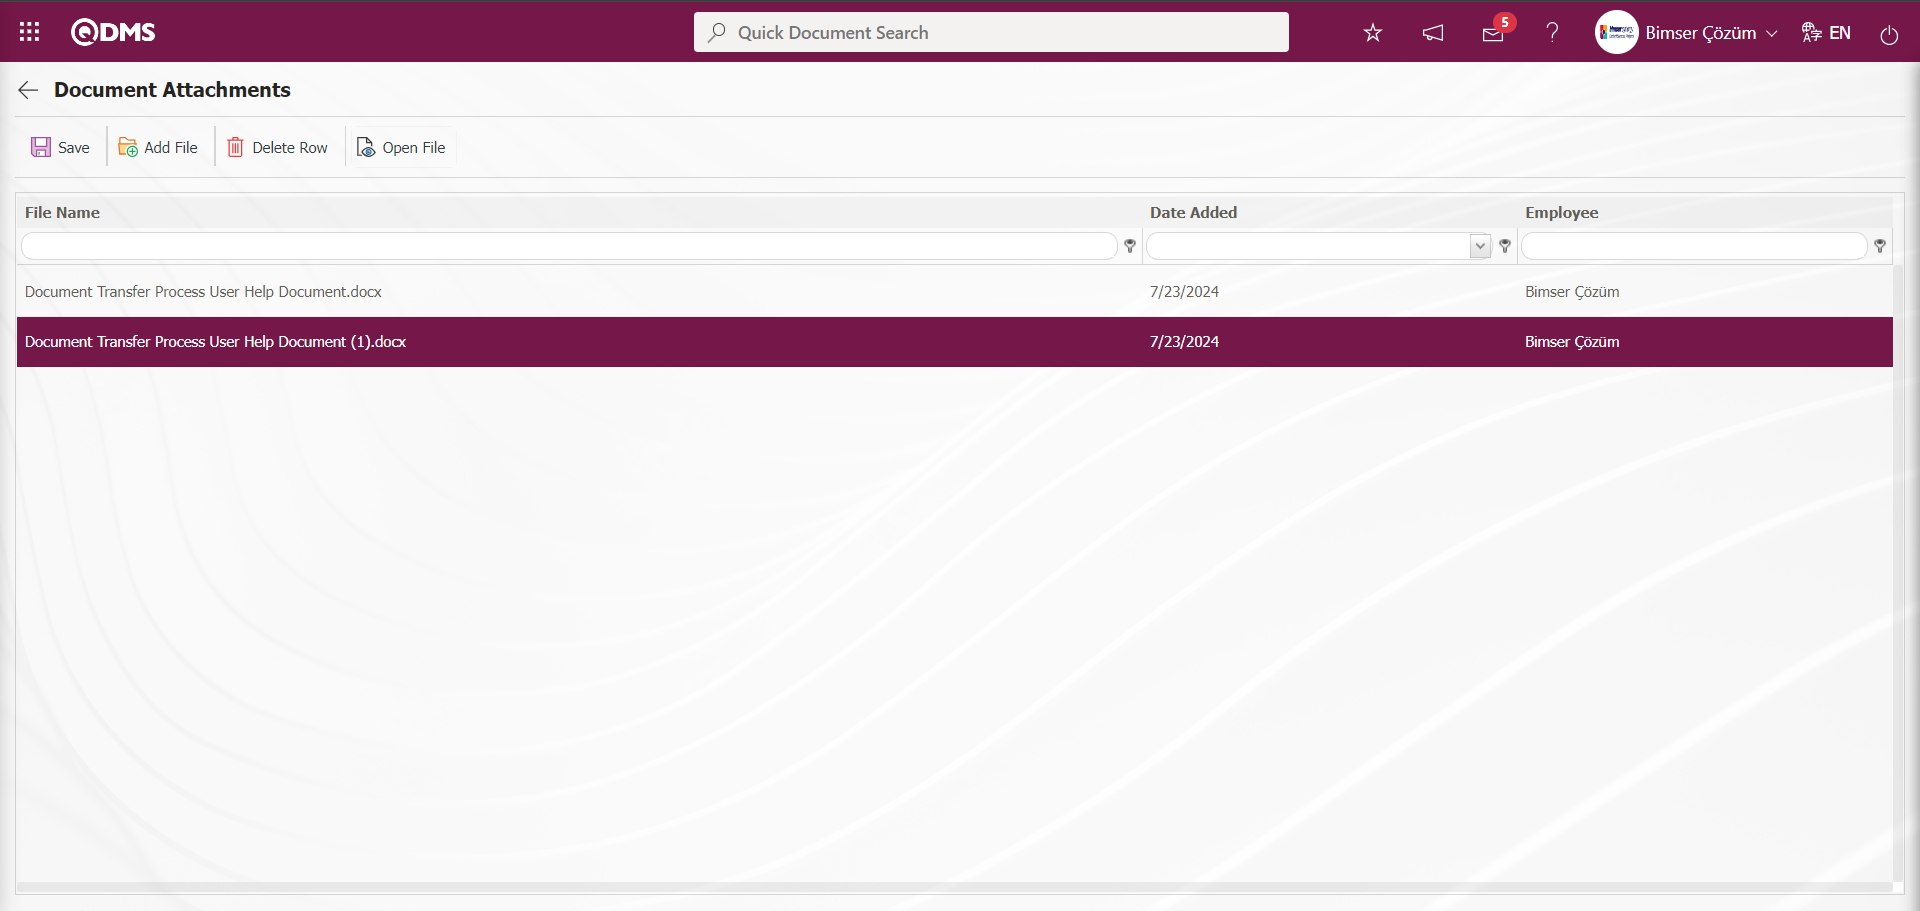
On the Document Attachments screen, click the  button to delete the Attachment File loaded in the system. On the Document Attachments screen, select the Attachment File loaded in the system in the list.
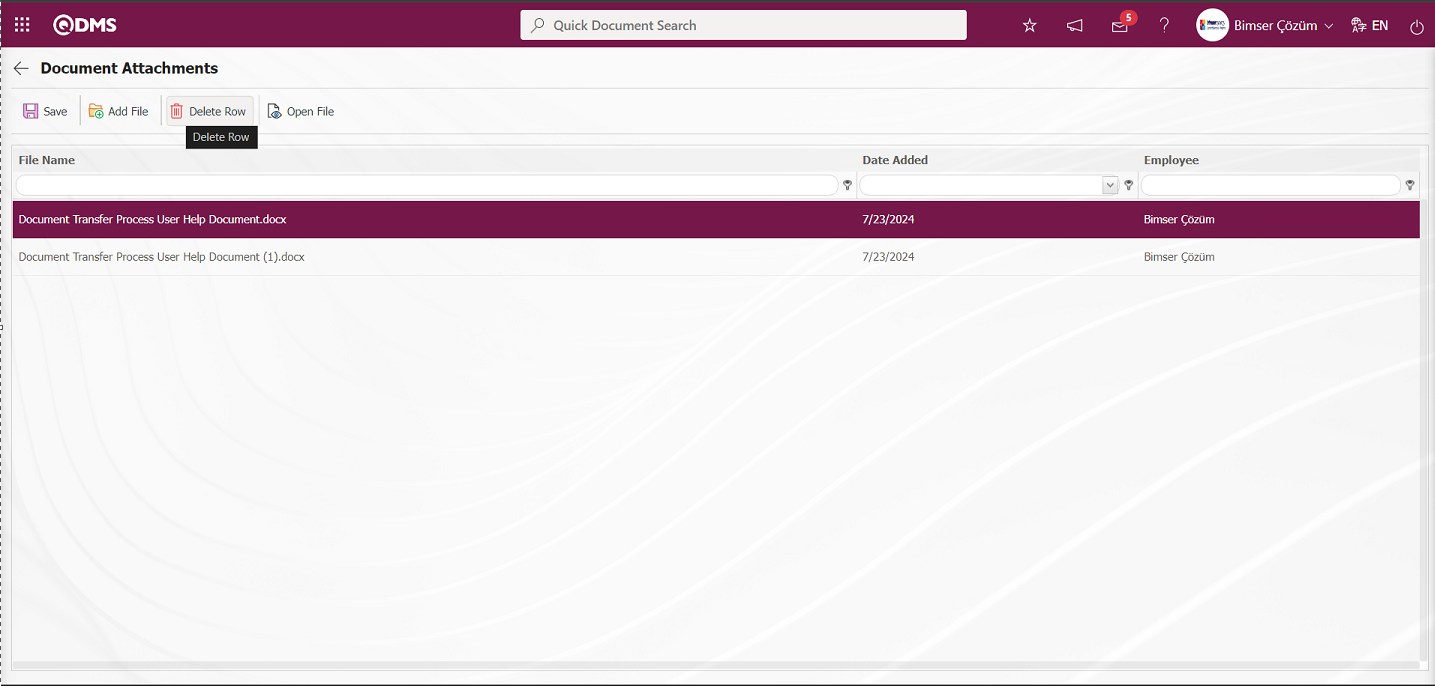
While the selected Additional File is selected in the list, click the button to delete the selected Additional File in the list and click the  button in the upper left corner of the screen.
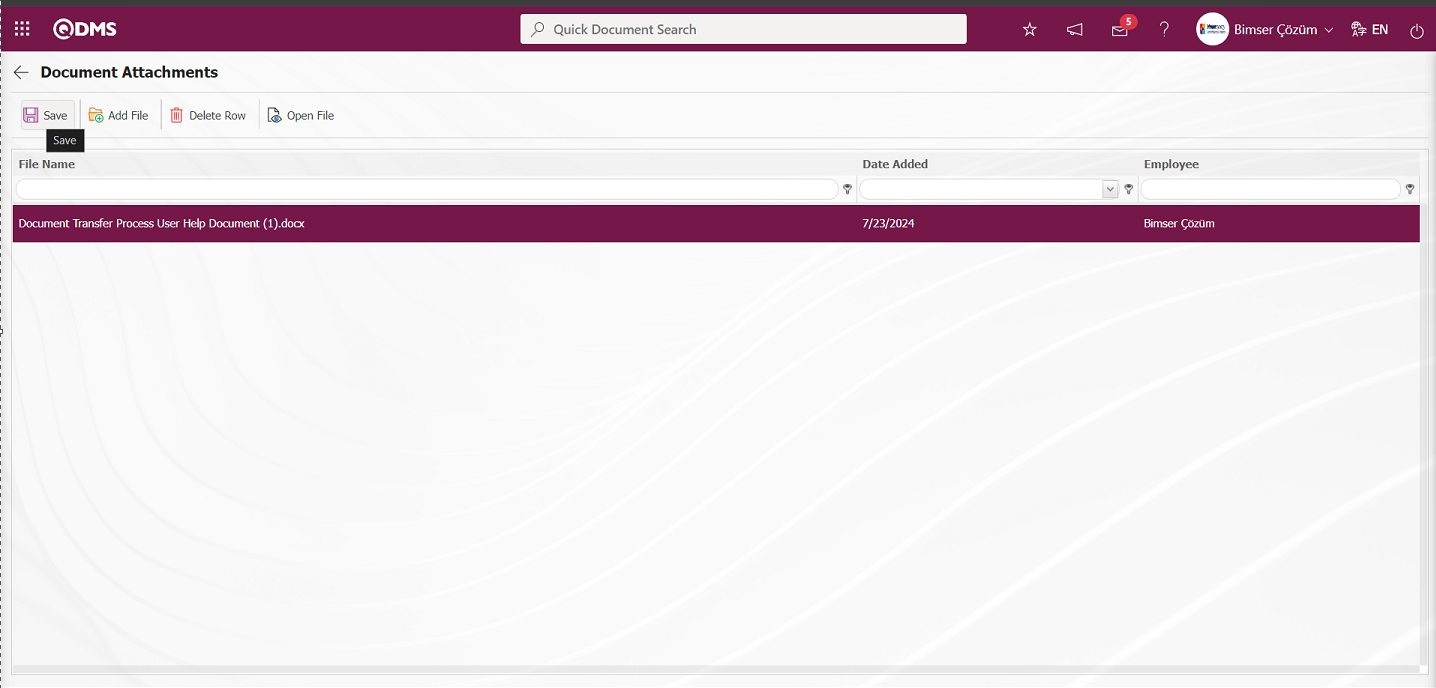
On the Document Attachments screen, the list of Attachment files uploaded in the Attachment tab in the Draft stage is displayed by clicking the  button. On the Edit Additional Files screen, the Additional Files in the list are downloaded to the computer with the help of
  and after editing the downloaded Additional Files, the edited version is uploaded from the computer to the system again with the
  button. On the Document Attachments screen, the files uploaded at the Draft stage can be viewed and edited, as well as a file on the computer can be uploaded to the system with the button. In the “Documents Saved” task in my pending jobs, the document in the draft stage is selected in the list and the document code is clicked. On the New Document screen, click the Attachment Files tab and the list of files edited and uploaded from the computer is displayed in the Draft Document Attachment Organizer menu.
6.3.4.Published Document Attachment Organizer
Menu Name: System Infrastructure Definitions/ Document Activities/ Published Document Attachment Organizer
In the approval process within the scope of Document Management, the document that has passed the final approval according to the order in the approval matrix is published, distributed to the people in the distribution matrix and made available for use. An e-mail is sent to the relevant persons in the distribution matrix by the system and the document can now be accessed by authorized persons. The published document is assigned as a reading task to the authorized persons in the distribution matrix. It is displayed as“Required Reading Document List” on the “Pending Work” page of the persons. In addition, a reading task called “Required Reading Important Document List” is also created for user groups or positions whose “Important” check box is checked in the Document Distribution Matrix. This is the menu where the attachment files uploaded in the Attachment Files tab during the publishing phase of the documents published in this way are viewed and edited, the edited attachment files are uploaded back to the system or a different attachment file from the computer is uploaded to the system at this stage. On the Published Document Attachment Organizer screen, there are two tabs, Filter and List tabs. In the Filter tab, filtering is done according to the search criteria and the records are displayed in the list tab.
On the Published Document Attachment Organizer screen, type the document code in the “Document Code” field, which is the search criteria in the Filter tab, and click the (Search) button.

On the Published Document Attachment Organizer screen, records are listed according to the search criteria in the filter made in the list tab.
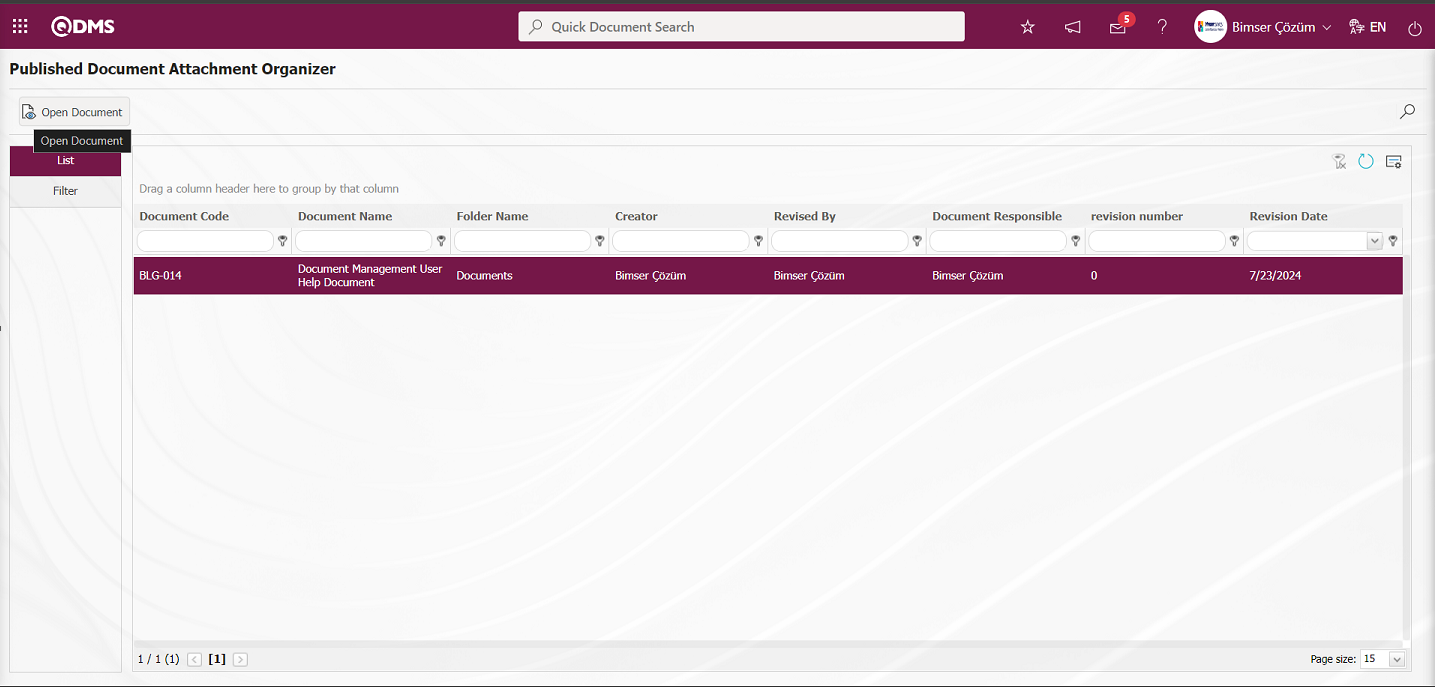
On the Published Document Attachment Organizer screen, select the document whose attachment files will be edited from the list and click the  button to get to the screen where the attachment files will be edited
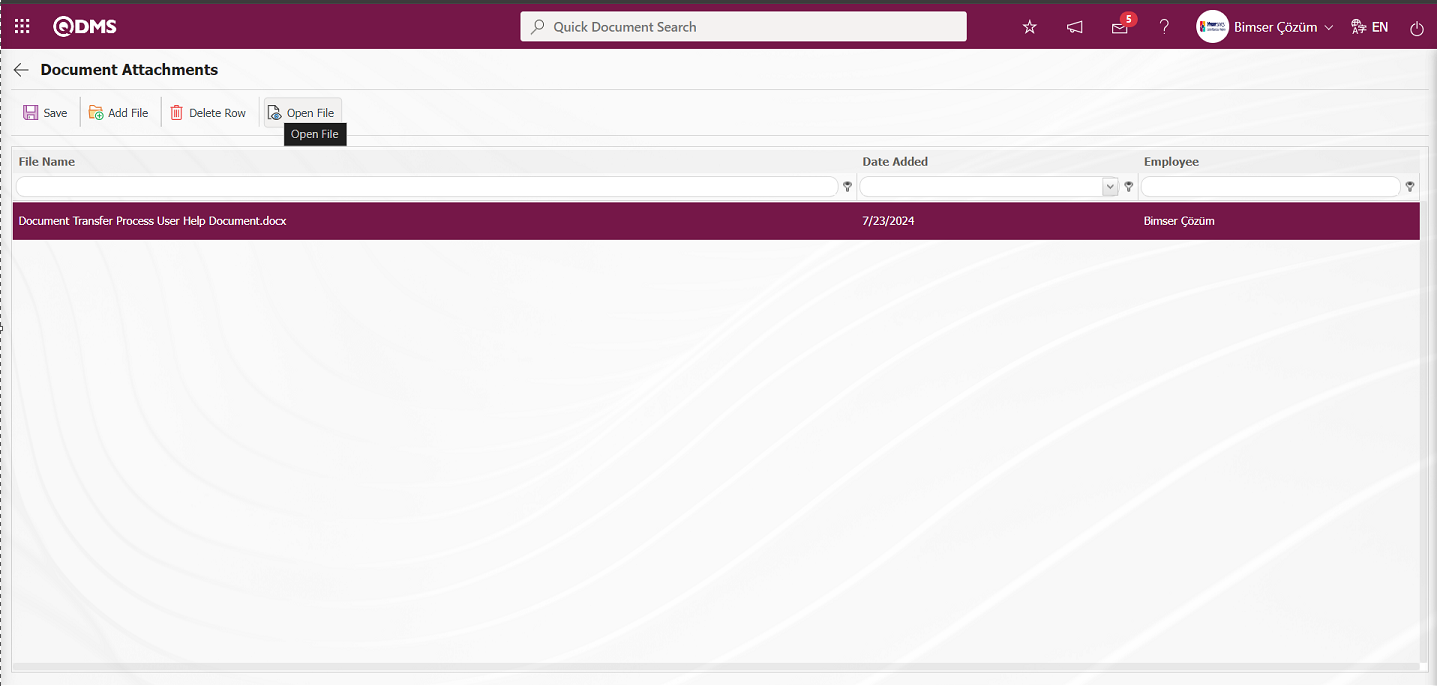
With the help of the buttons on the screen;
: Registration is done.
: File is uploaded.
: The file selected in the list is opened.
: The file selected in the list is deleted.
On the Document Attachments screen, the additional file selected in the list is downloaded to the system and displayed by clicking the button.
After the additional file downloaded to the computer is edited, it is uploaded to the system again with the button.

On the Add File screen, click the Browse button and select the file and upload the edited version to the system.
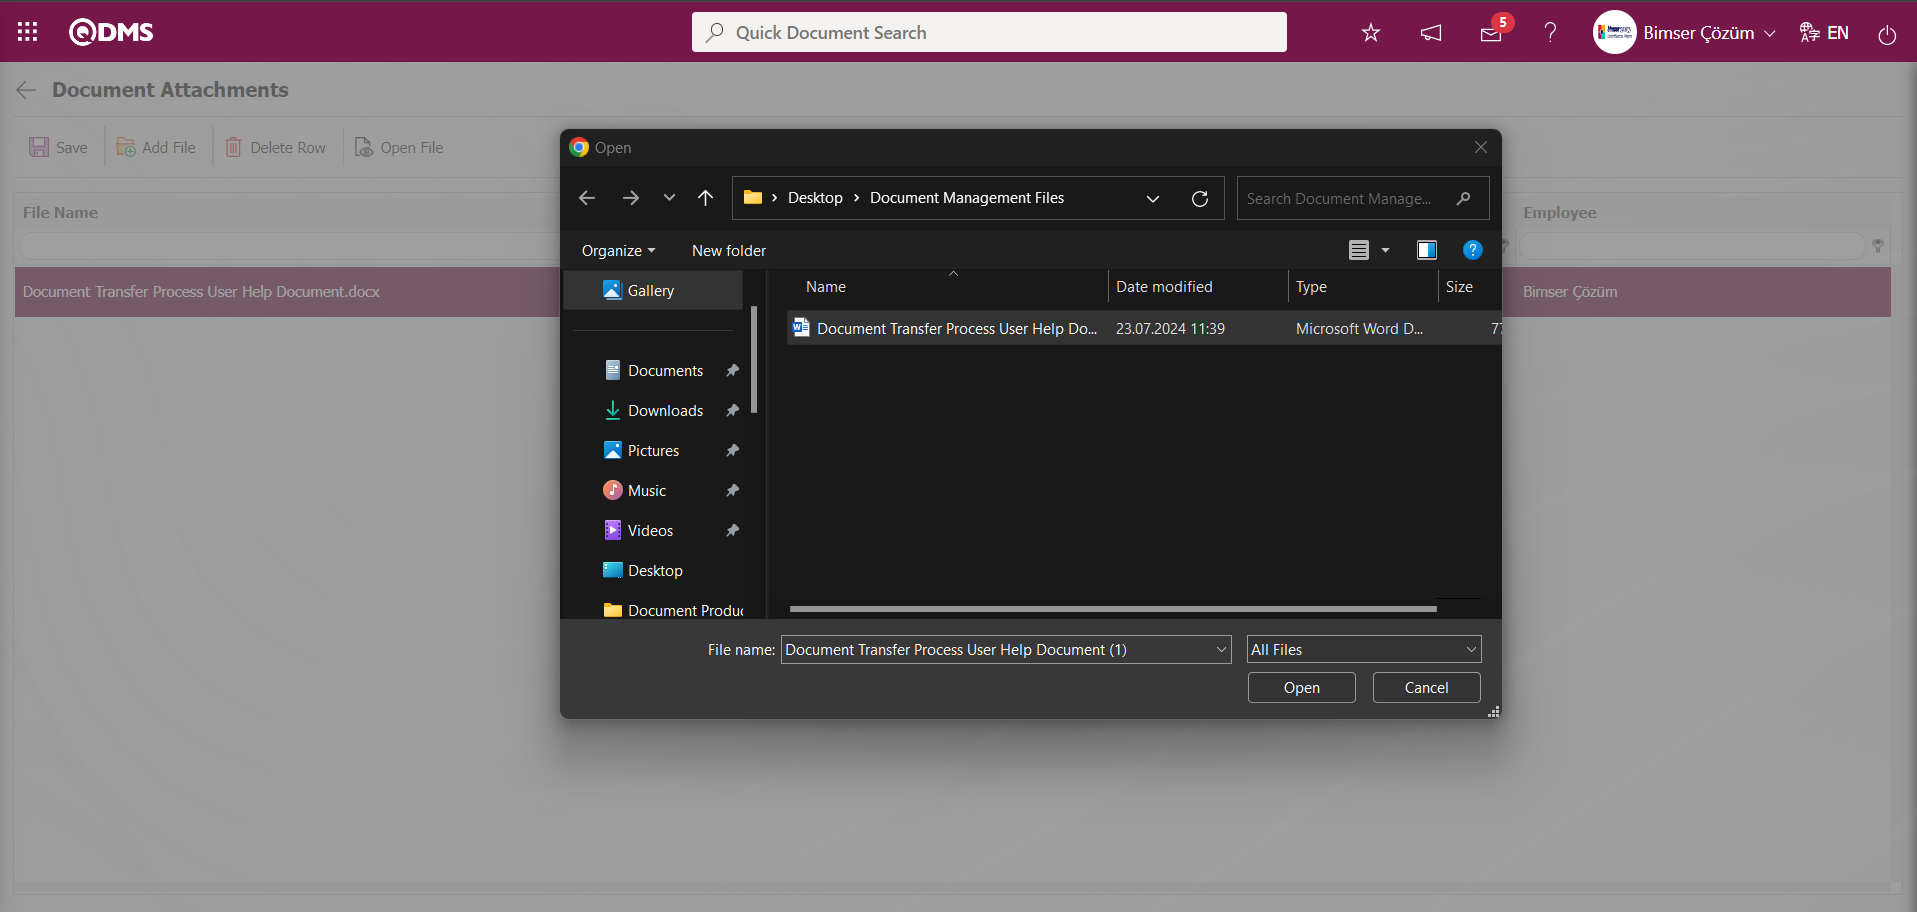

On the Document Attachments screen, click the button to delete the Attachment File loaded in the system. Select the Attachment File loaded in the system in the list.

While the selected Additional File is selected in the list, click the button to delete the selected Additional File in the list and click the  button in the upper left corner of the screen.
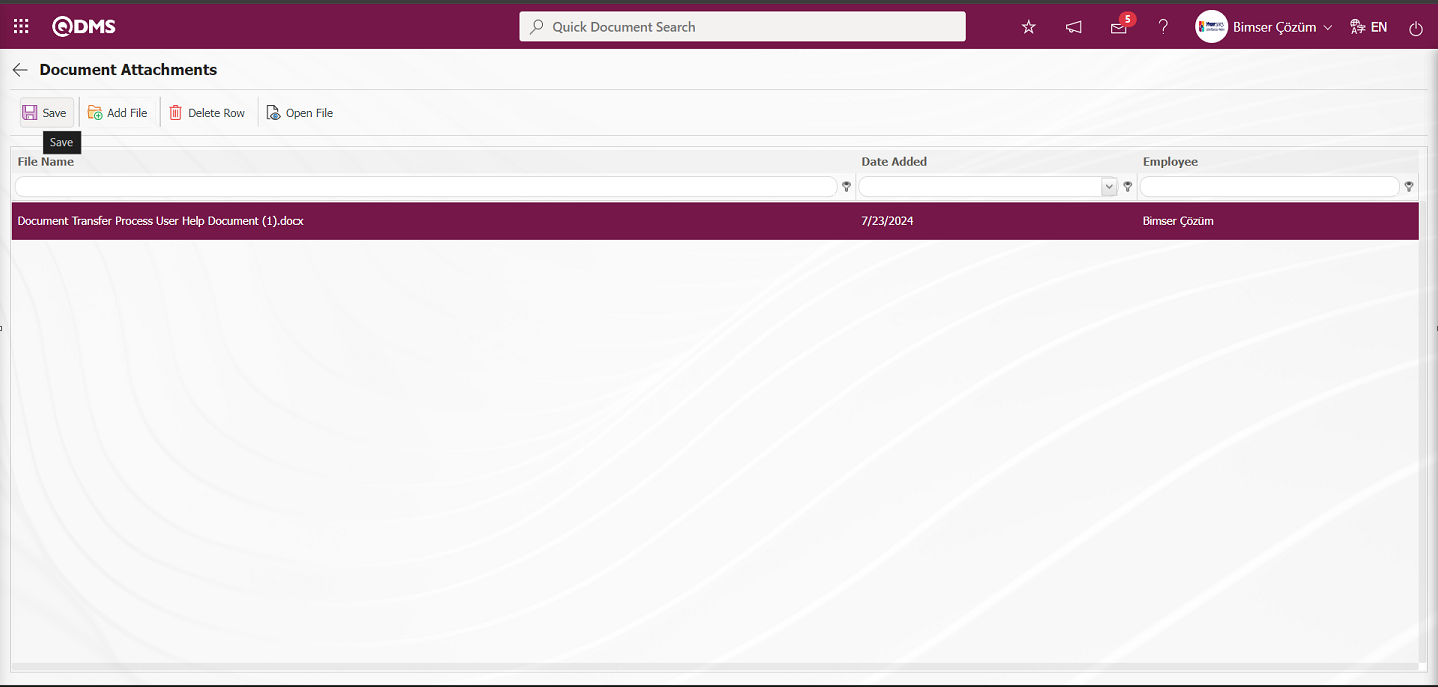
In the Document Attachments screen, the list of the attachment files uploaded in the Attachment File tab of the documents whose publishing phase is over is displayed by clicking the  button. In the Document Attachments screen, the Additional Files in the list are downloaded to the computer with the help of and after the downloaded Additional Files are edited, the edited form is uploaded back to the system from the computer with the button. In the Document Attachments screen, the files uploaded in the published documents can be viewed and edited, as well as a file on the computer can be uploaded to the system with the button.
6.3.5.Document Link
Menu Name: System Infrastructure Definitions/ Document Activities/ Document Link
This is the menu where the link of the document selected in the Select Document field is received in Qdms and the link received is shared via e-mail.
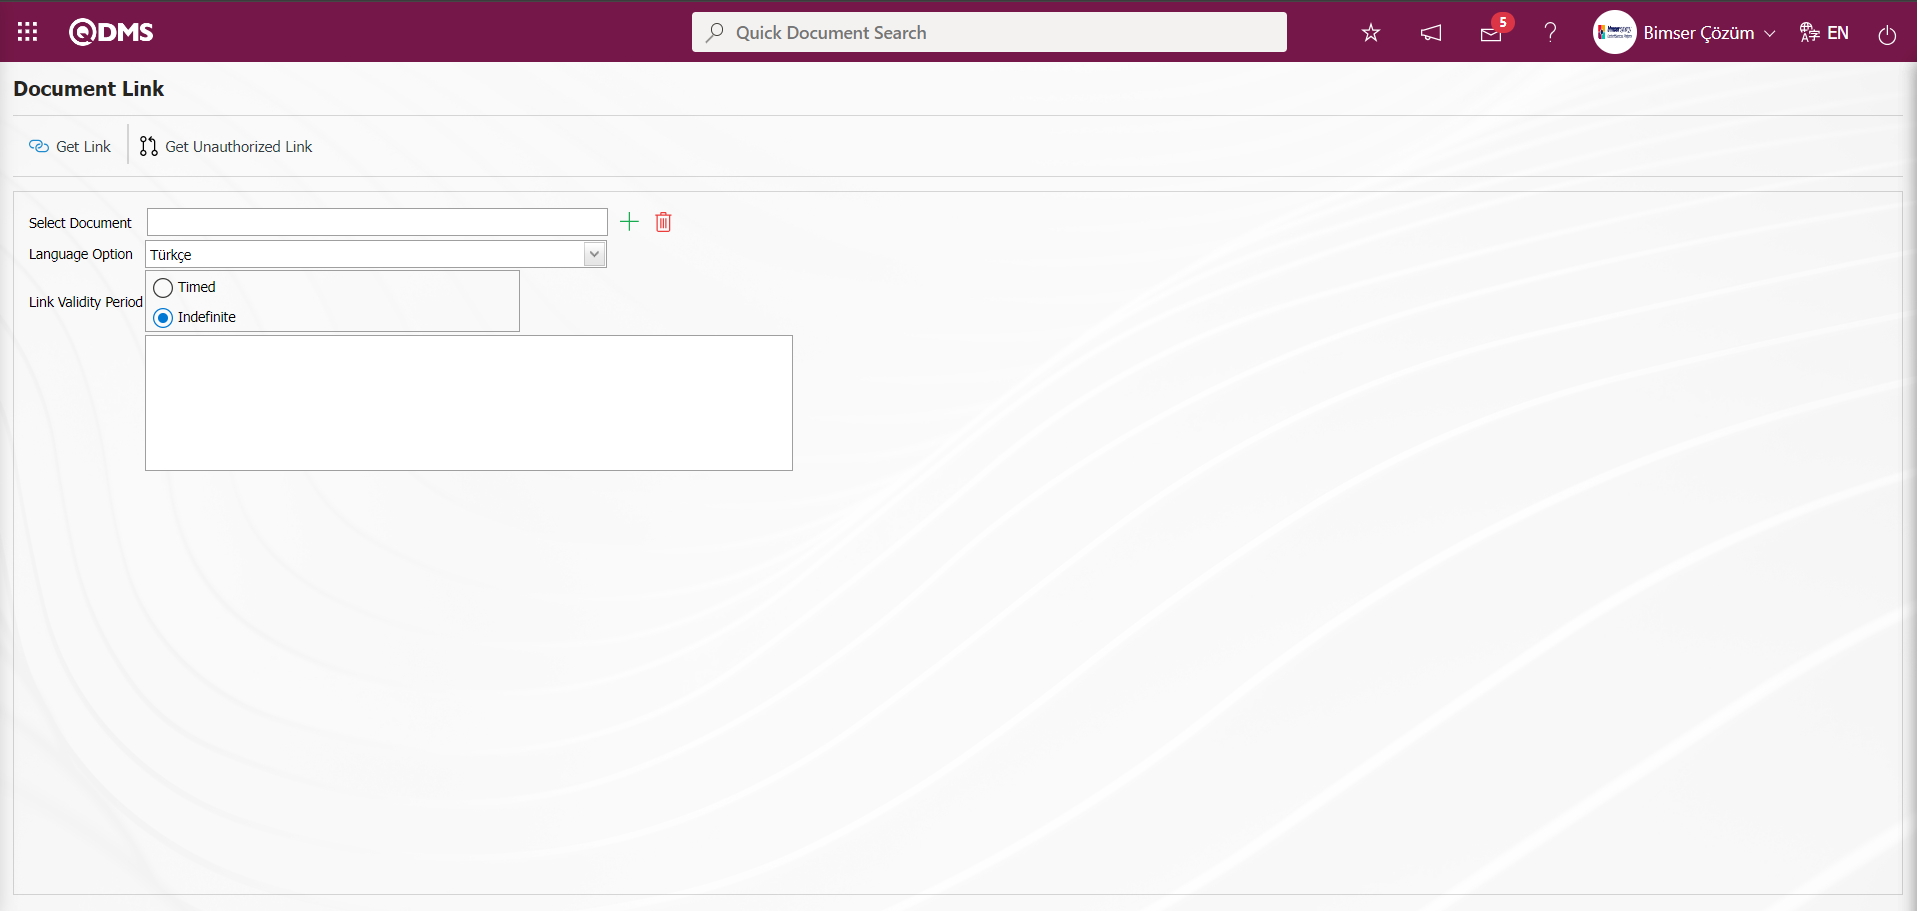
With the help of the buttons on the screen;
 : The link retrieval operation of the document selected on the Document Link screen is performed. In the Qdms system, the display of the document in the document view menu is performed.
 :Unauthorized link retrieval of the document selected on the Document Link screen is done. With the received link, the document is accessed without entering Qdms.
Link Validity Period: It is the field where the link validity period is selected as permanent or indefinite on the Document Link screen.
Timed: It is the field where the validity period of the link on the Document Link screen is selected depending on a certain period of time. In this field, the link validity date information is selected in the Calendar field.

On the Document Link screen, click the  (Select) button in the Select document field.

On the Document Selection screen, type the document code in the “Document Code” field, which is the filter search criteria in the Filter semi, and click the (Search) button.
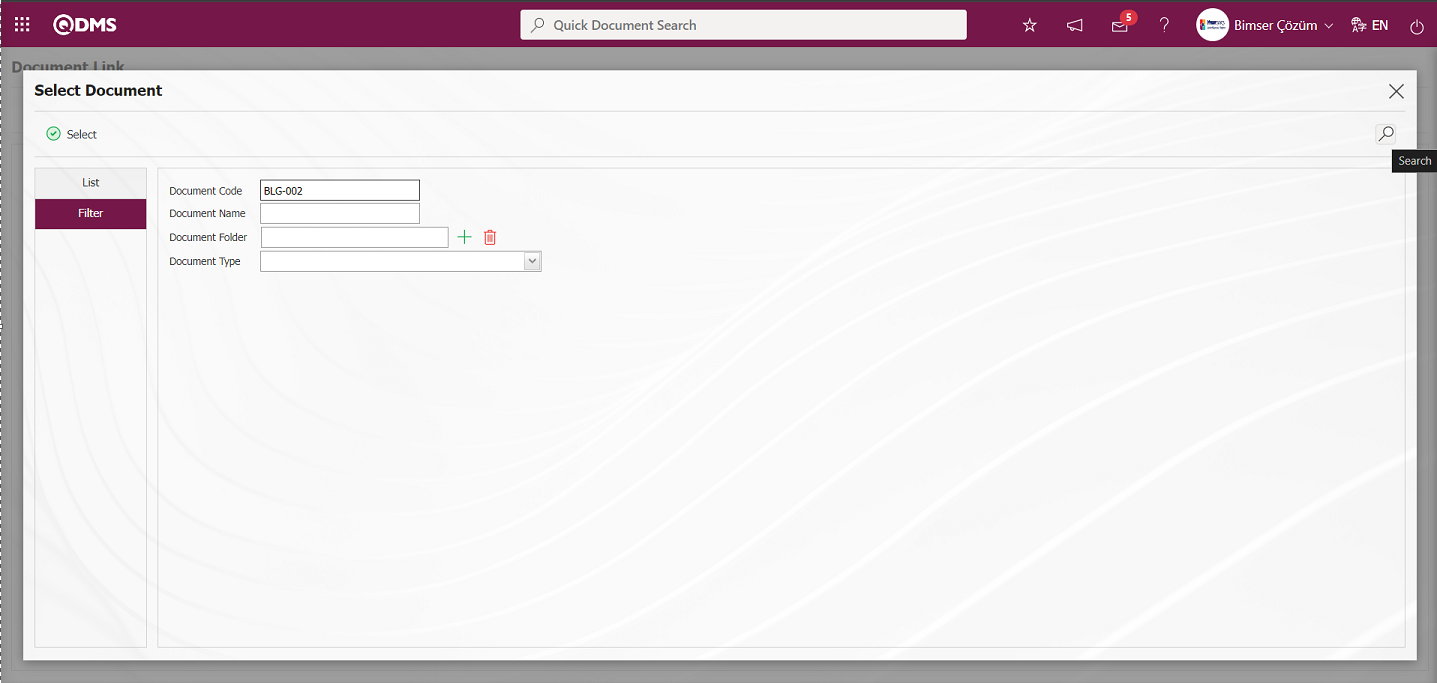
The list tab lists the records according to the search criteria in the filter.
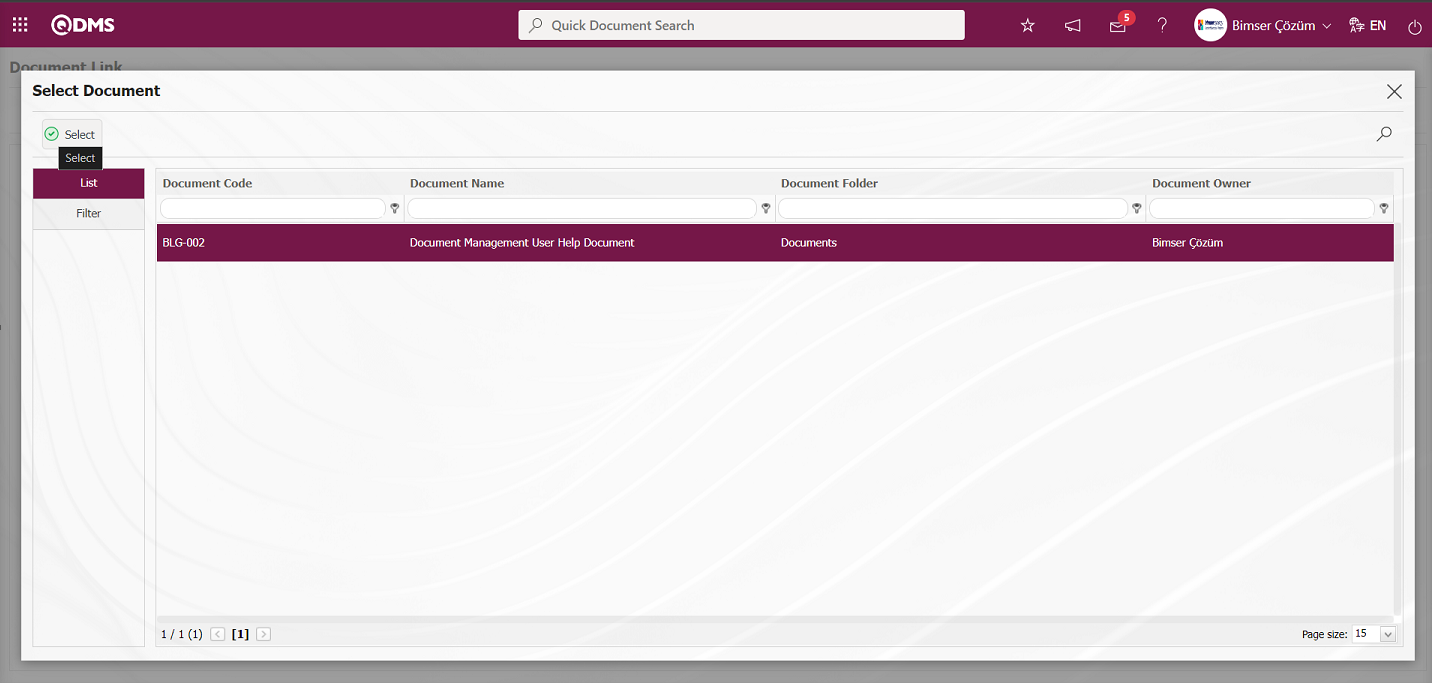
After the document is selected, the document is selected by clicking the  button.
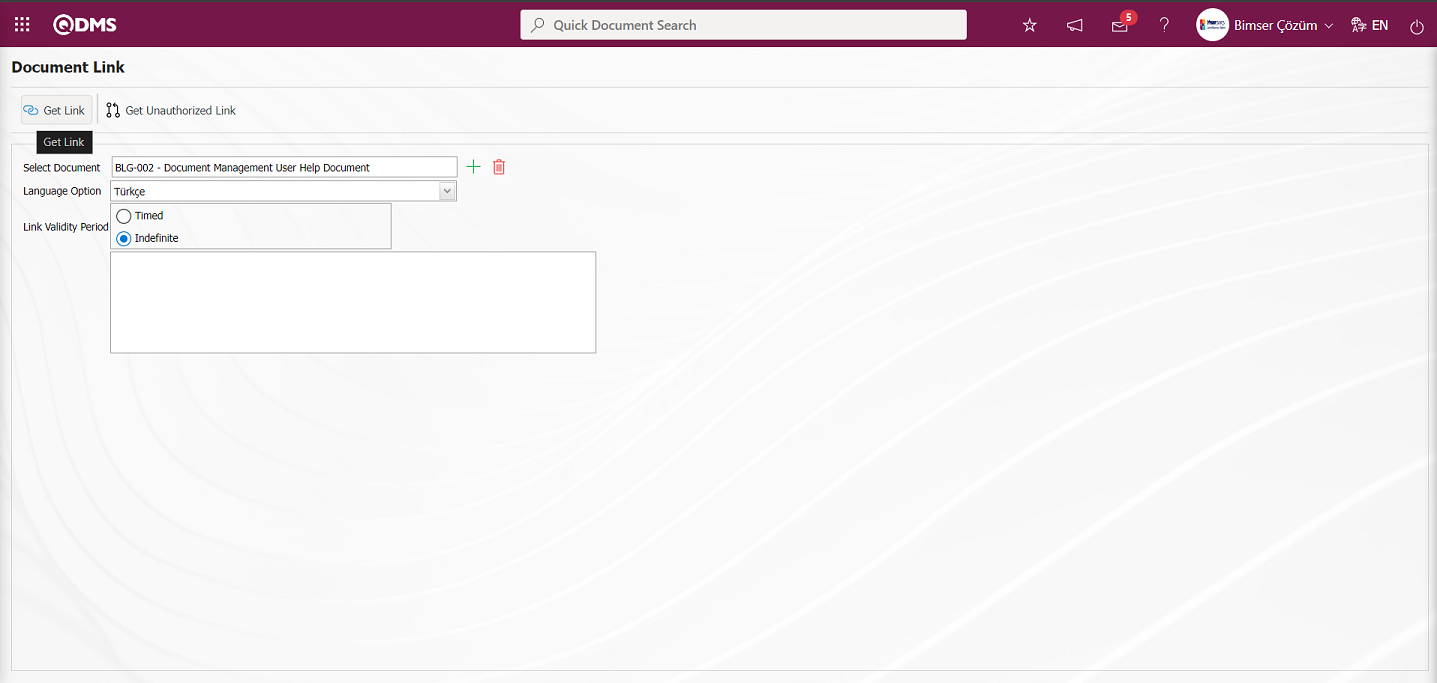
After selecting the document, the link retrieval process of the document is done by clicking the  button.
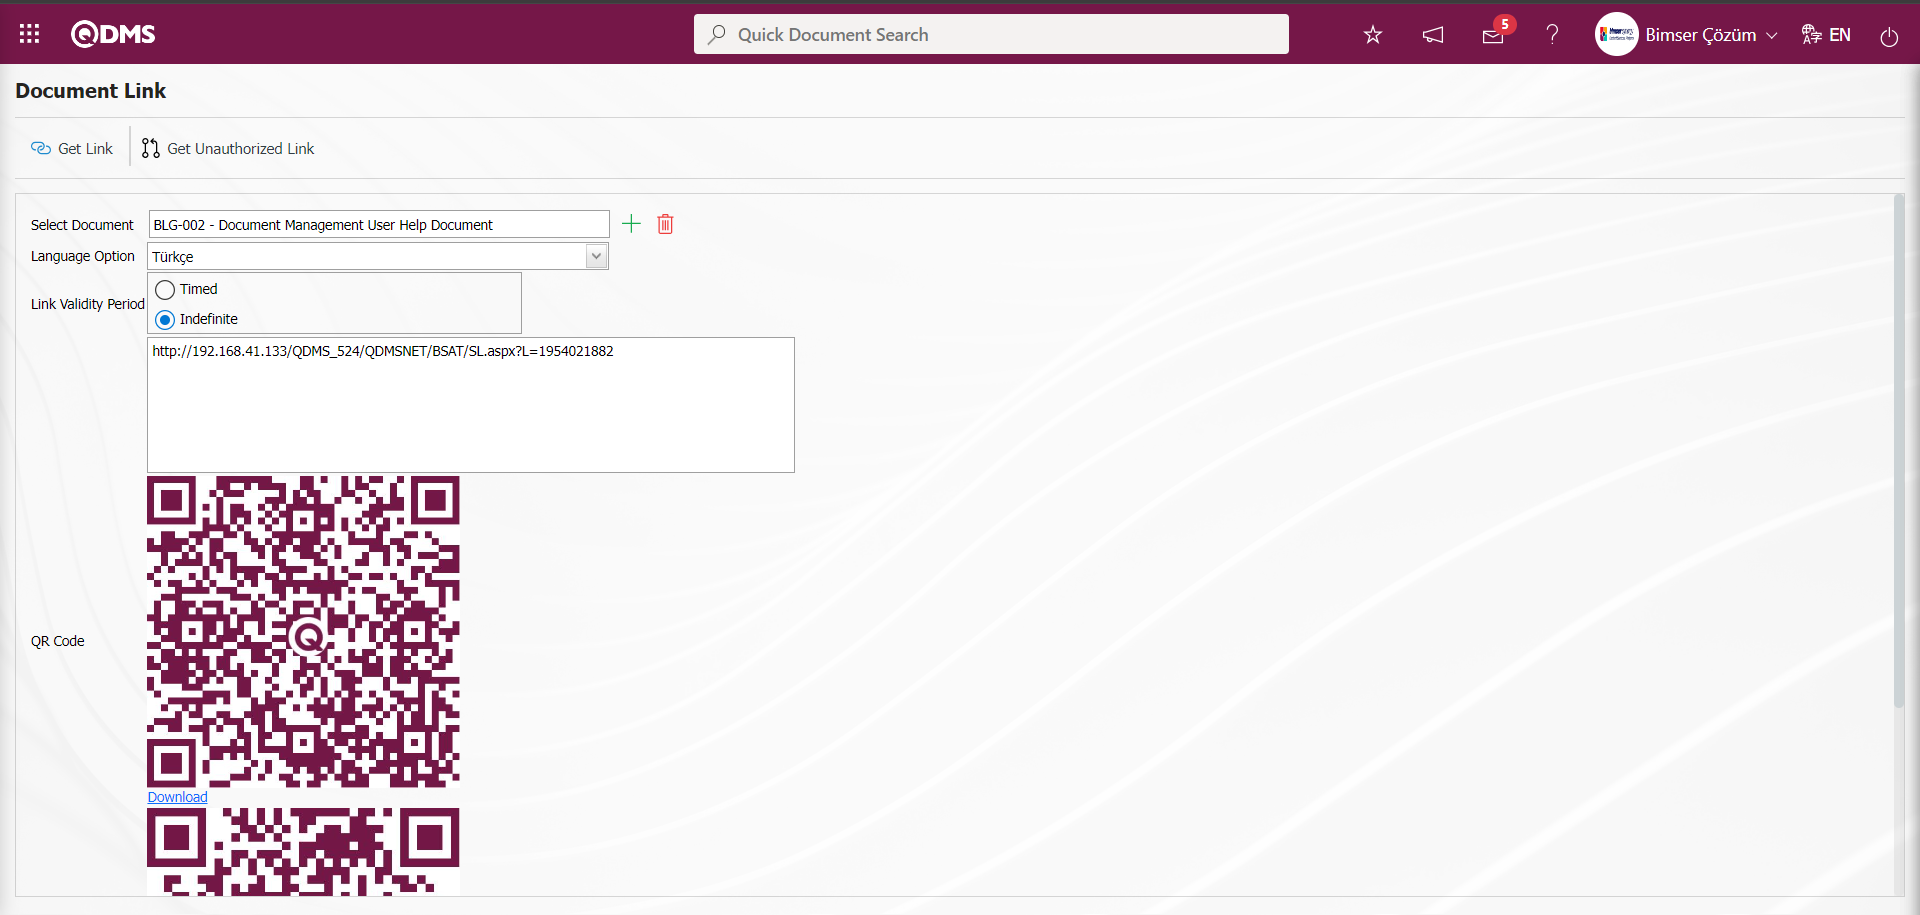
With this link address, a link can be given to any document defined in the system (such as setting up a microsoft link) or the link received can be shared with a Qdms user. The link received can be viewed by opening the Document View menu in the Qdms system in a new tab with the right-click/ copy-paste method and shared with the relevant people who are Qdms users.

Select the document in the Select Document field on the Document Link screen
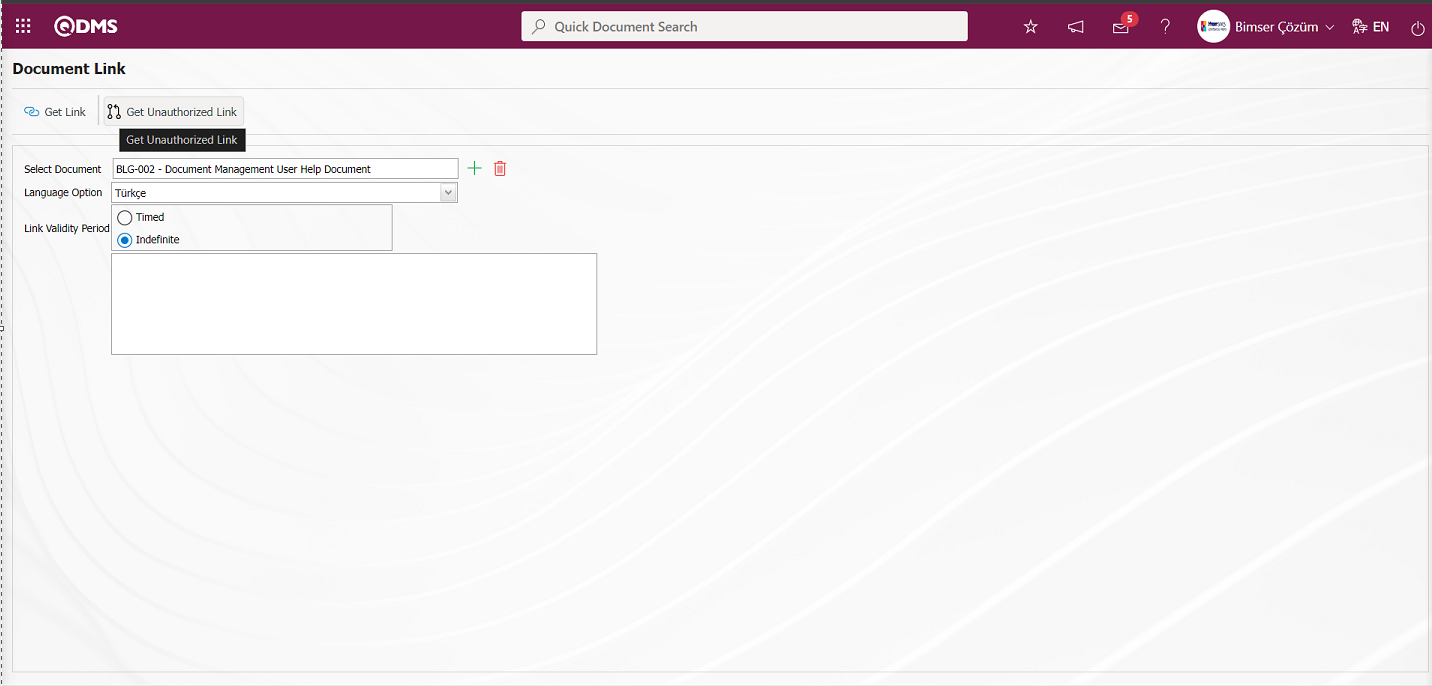
After selecting the document on the document link screen, if the relevant link is shared with the personnel who are not Qdms users by clicking the  button, they can access the document without entering Qdms.
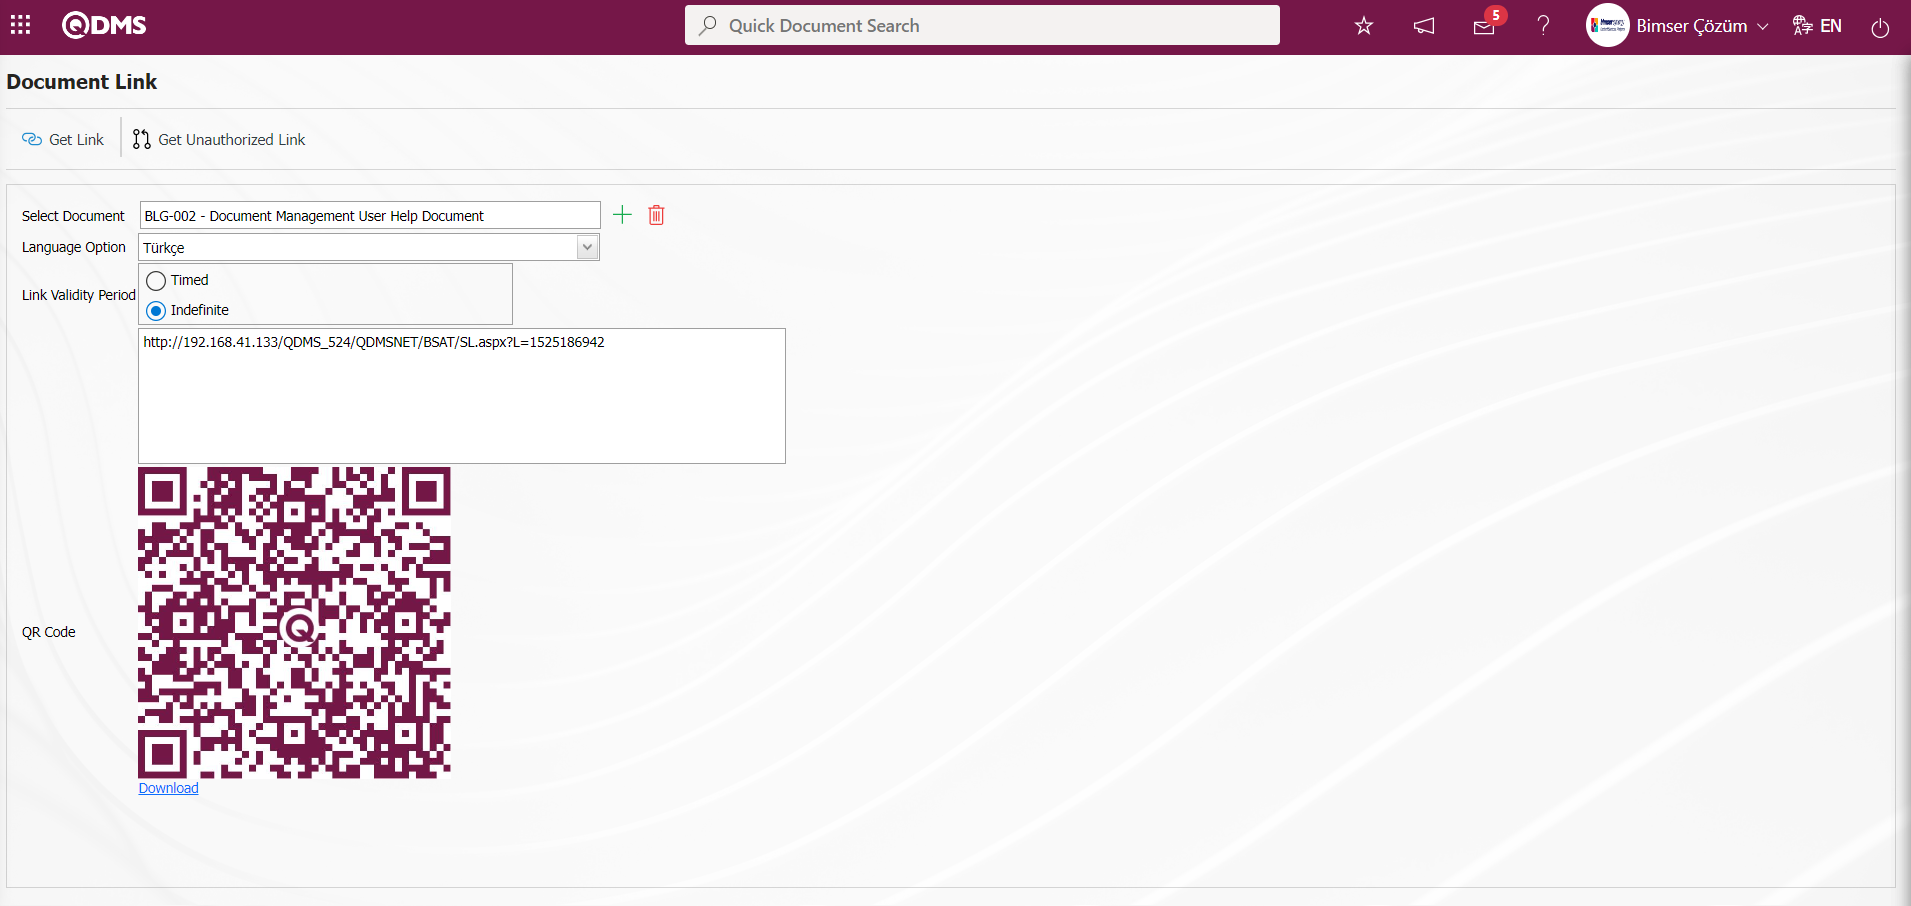
With the right-click/copy-paste management of the received link, the document is displayed and shared with the relevant people without entering the Qdms system in a new tab.

6.3.6.Document Code Changer
Menu Name: System Infrastructure Definitions/ Document Activities/ Document Code/ Name Changer
This is the menu where document codes are changed.
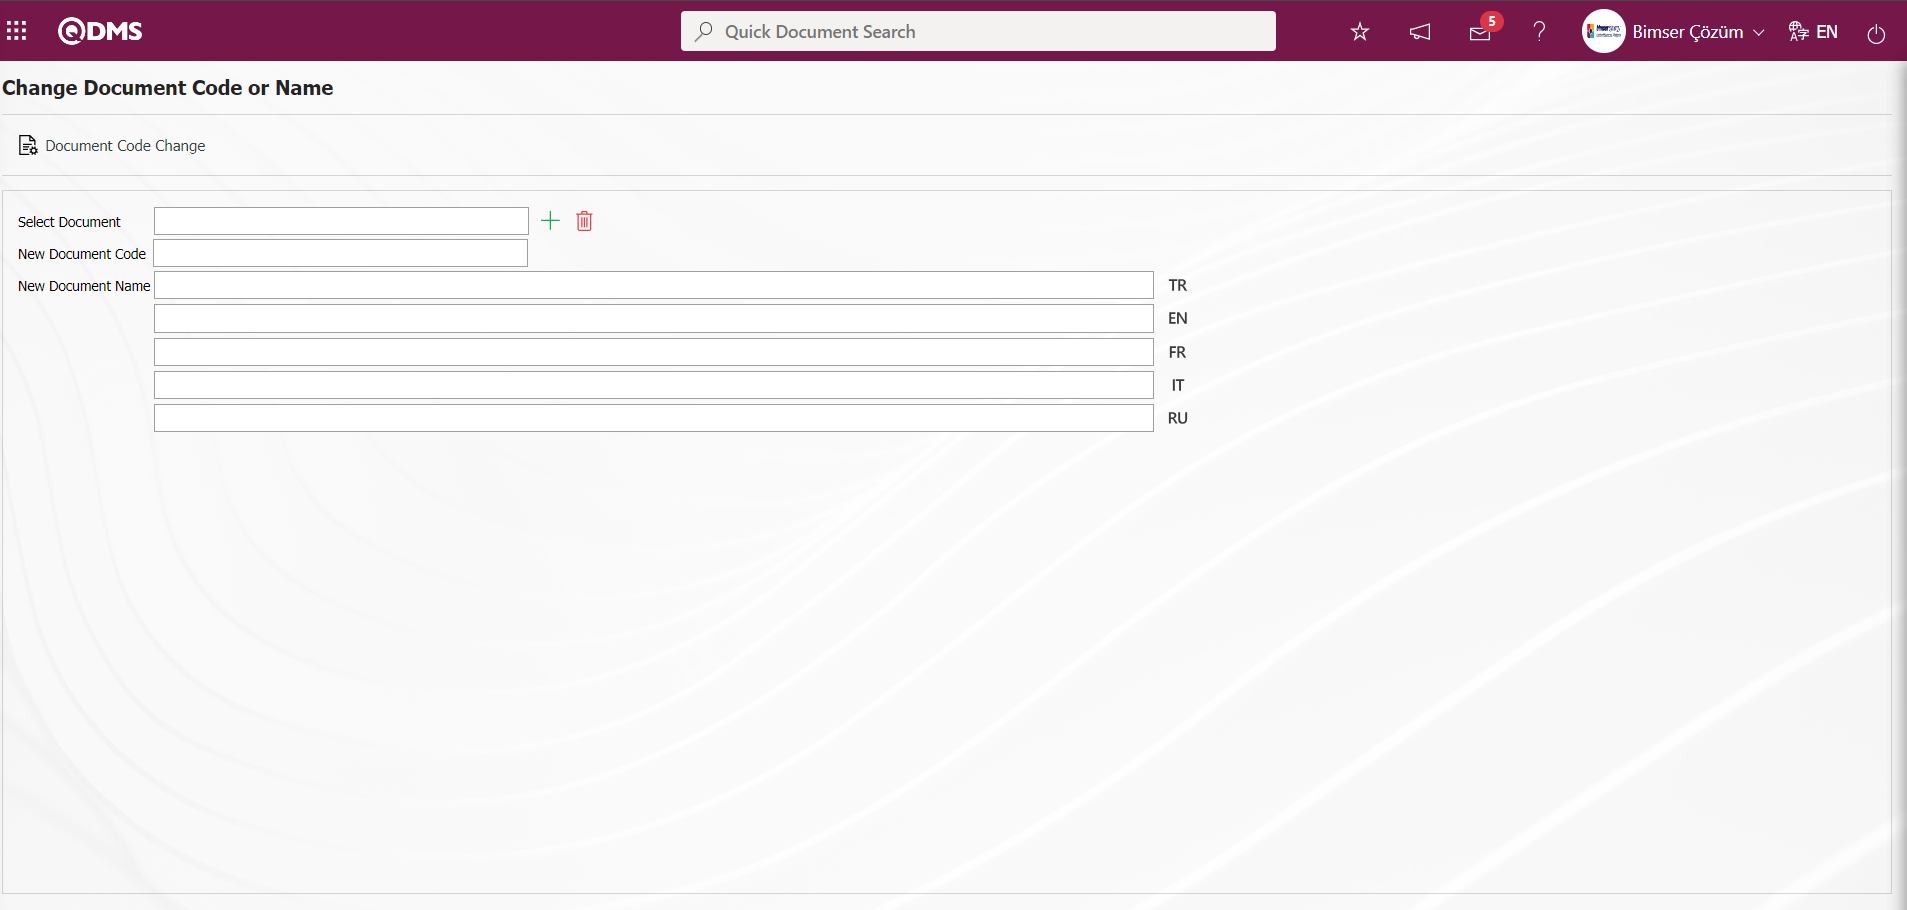
With the help of the buttons on the screen;
 : Change the code of the document selected in the list.
Click the  (Select) button in the Select Document field on the Change Document Code or Name** screen.
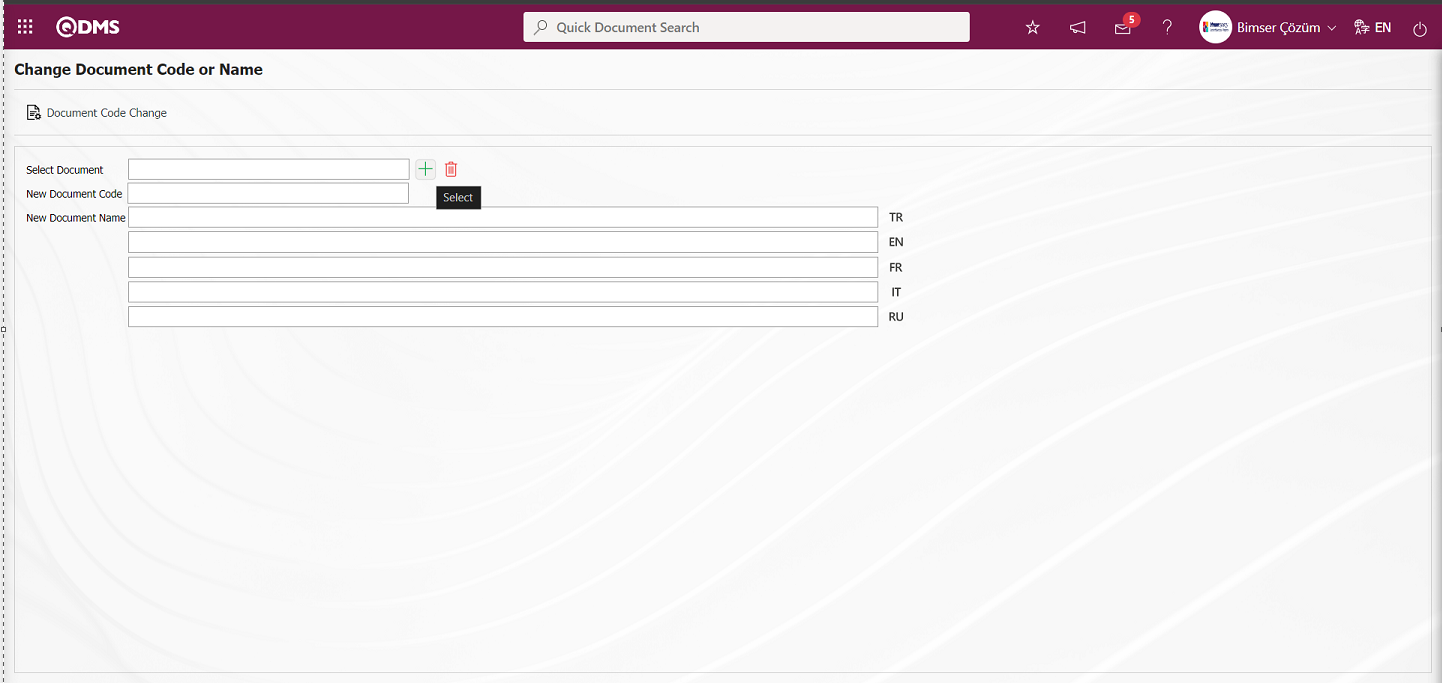
On the screen that opens, on the Select Document screen, select the document whose code will be changed in the Document list and click the  button.

When the code of the document is changed in this field and the button is pressed, the document code is changed. If desired, after entering the new name to be given to the document in the “New Document Name” field, the changes made with the button are saved.
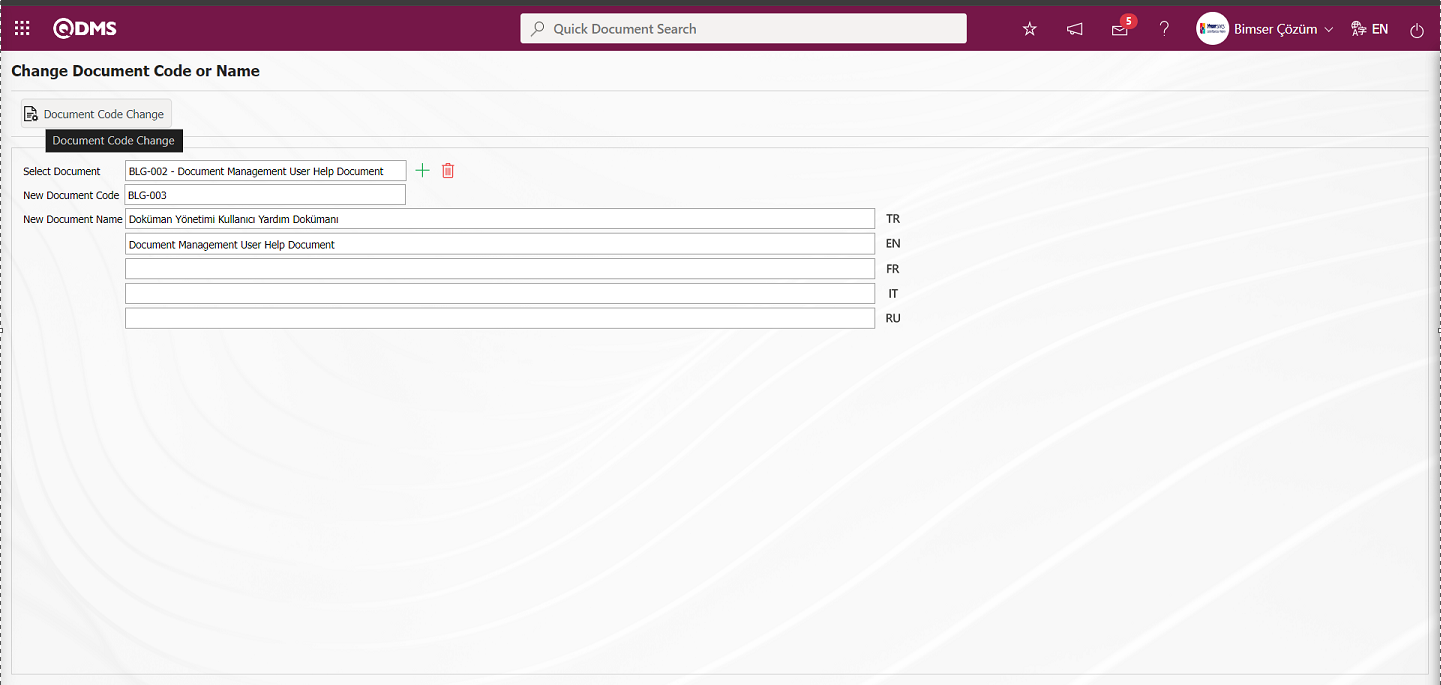
Click the “OK” button when the system displays the message “Are you sure to change document code.”.
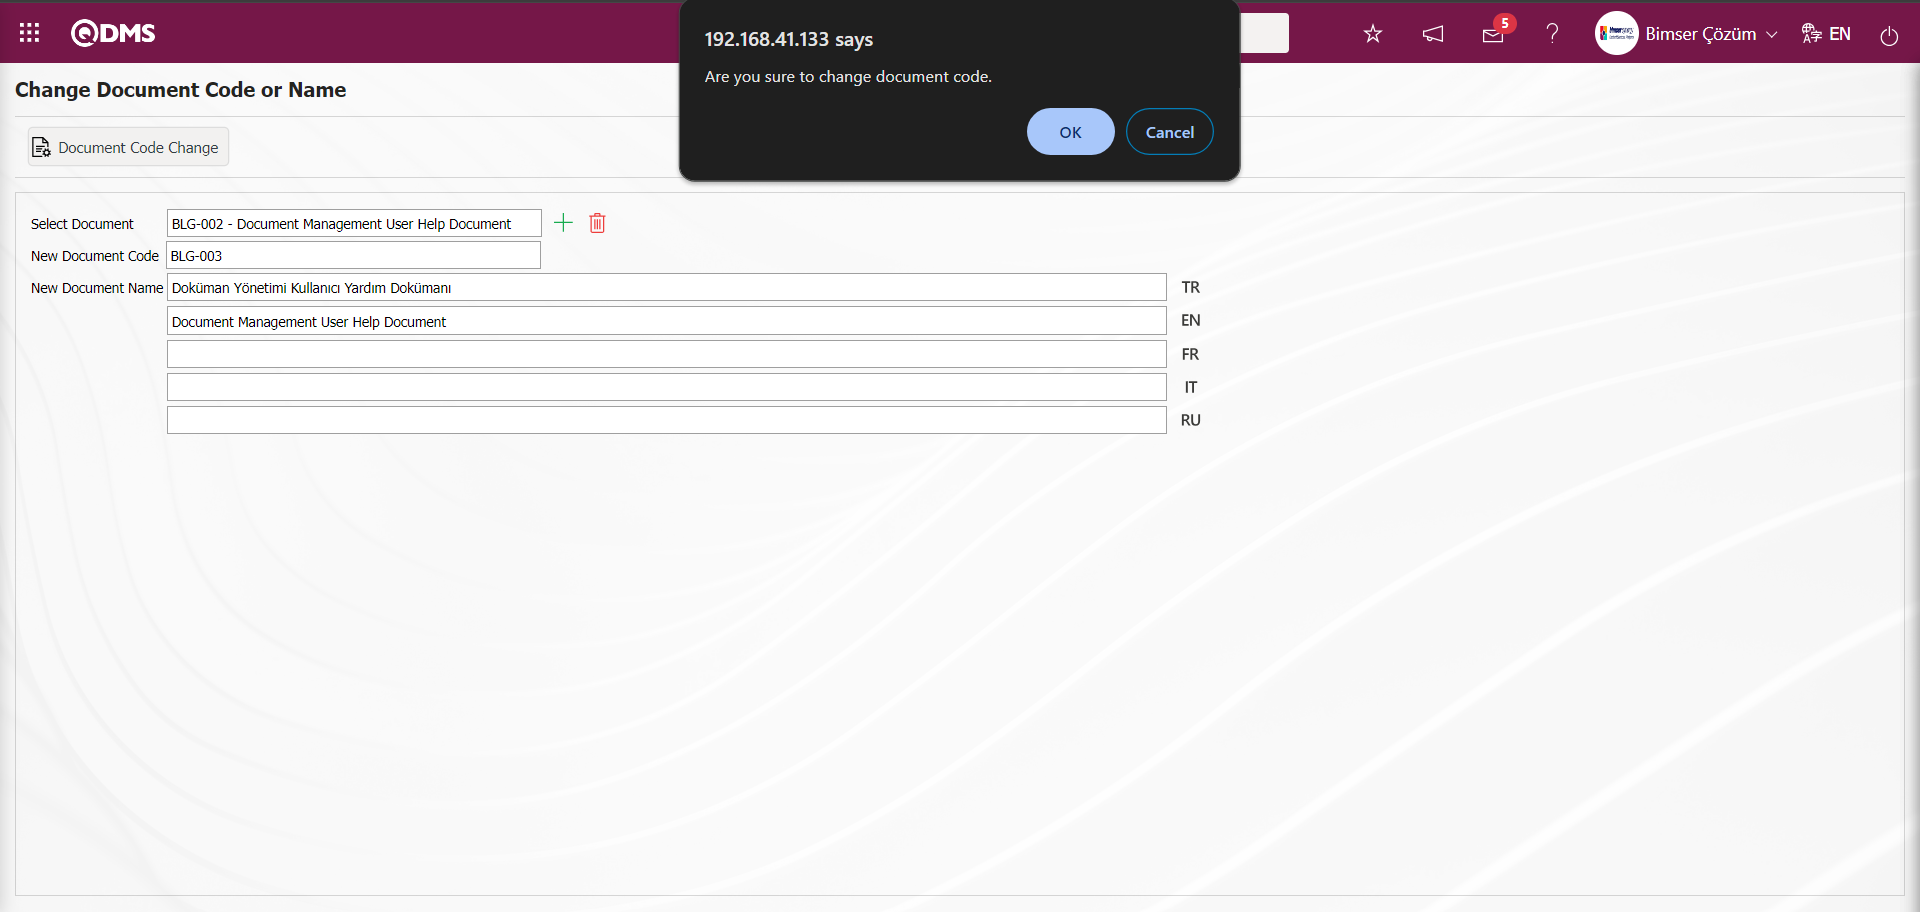
“Document code and name are changed” message is given by the system, indicating that the document code has been changed.
6.3.7.Document Matrix Compensator
Menu Name: System Infrastructure Definitions/ Document Activities/ Document Matrix Compensator
When changes are made in the authorization, distribution, approval, controlled copy matrices in a folder or when changes are made in the fields such as document responsibles, control related changes, preparer, reviser, reviewer, document type, document type, etc. connected to the folder, matrix synchronization is required for this change to be reflected in subfolders and documents.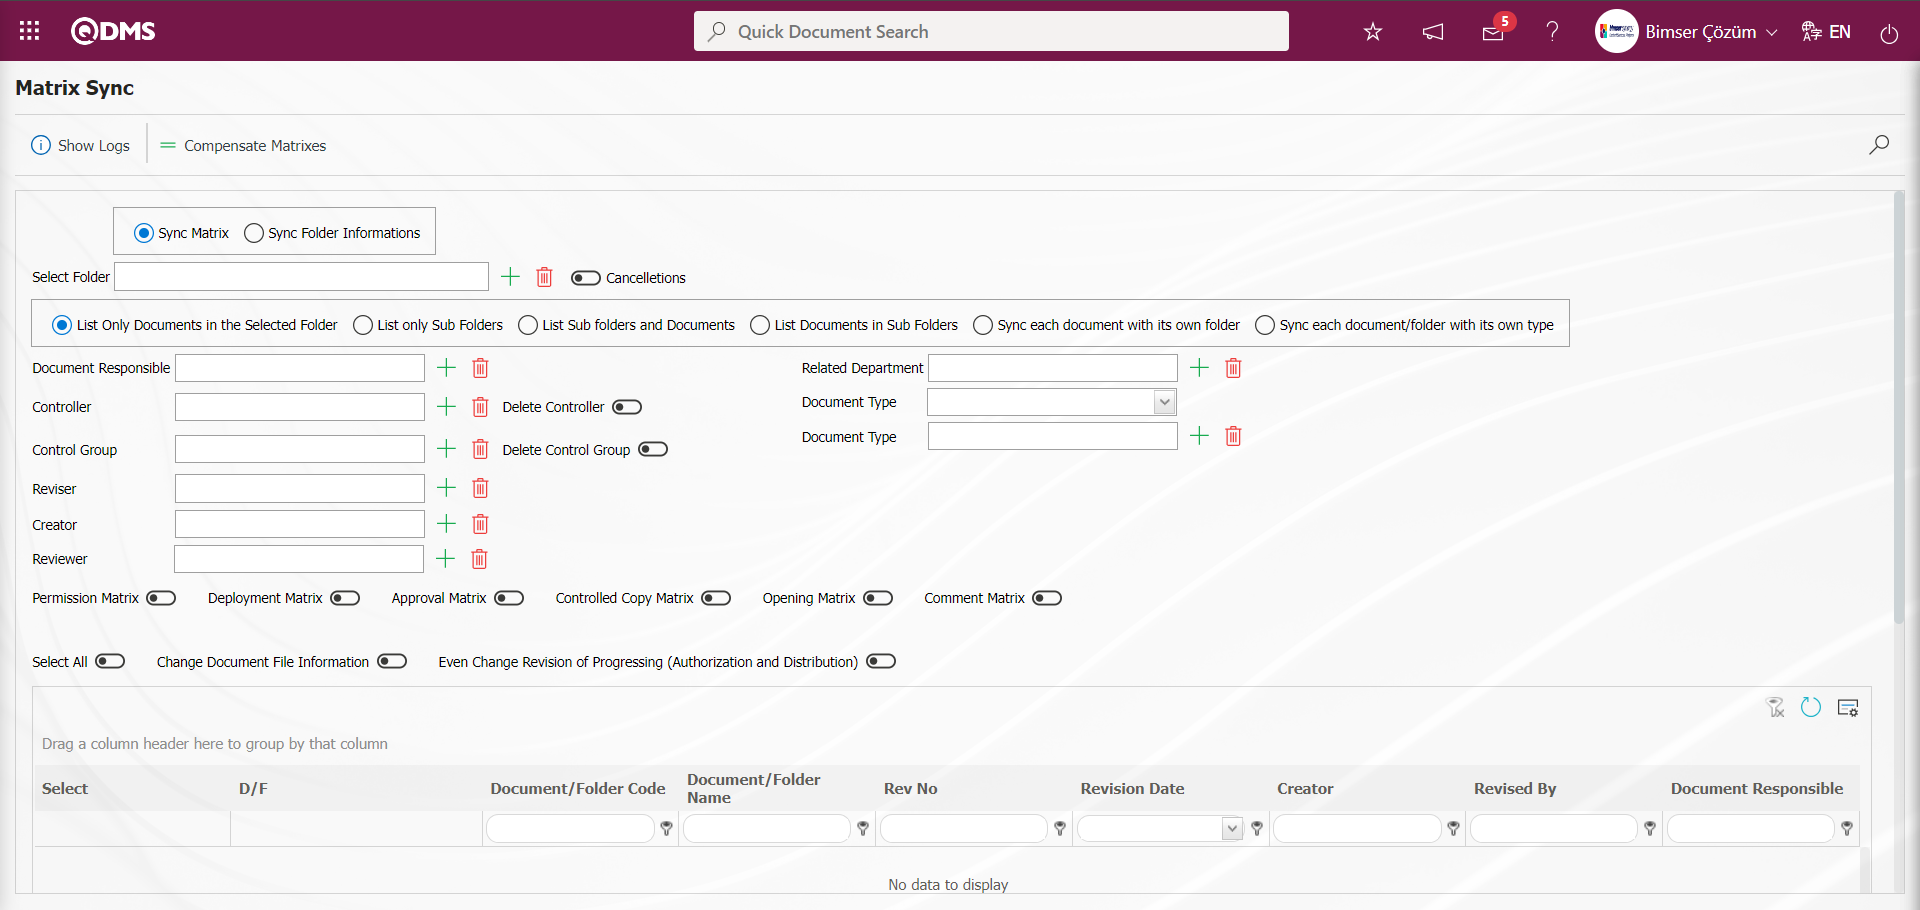
With the help of the buttons on the screen;
 :Log records related to the matrix equalization process are displayed.
 :Matrix equalization operation is performed.
For Document Matrix Sync;
On the Matrix Sync screen, click the  (Select) button in the Select Folder field and select the desired folder from the Document Folder list. On the Matrix Sync screen, check the check box related to the field related to the “Matrix Sync” option.
 After selecting the folder, the corresponding option depending on the folder's breakdown is checked (For example: List Only Documents in the Selected Folder)
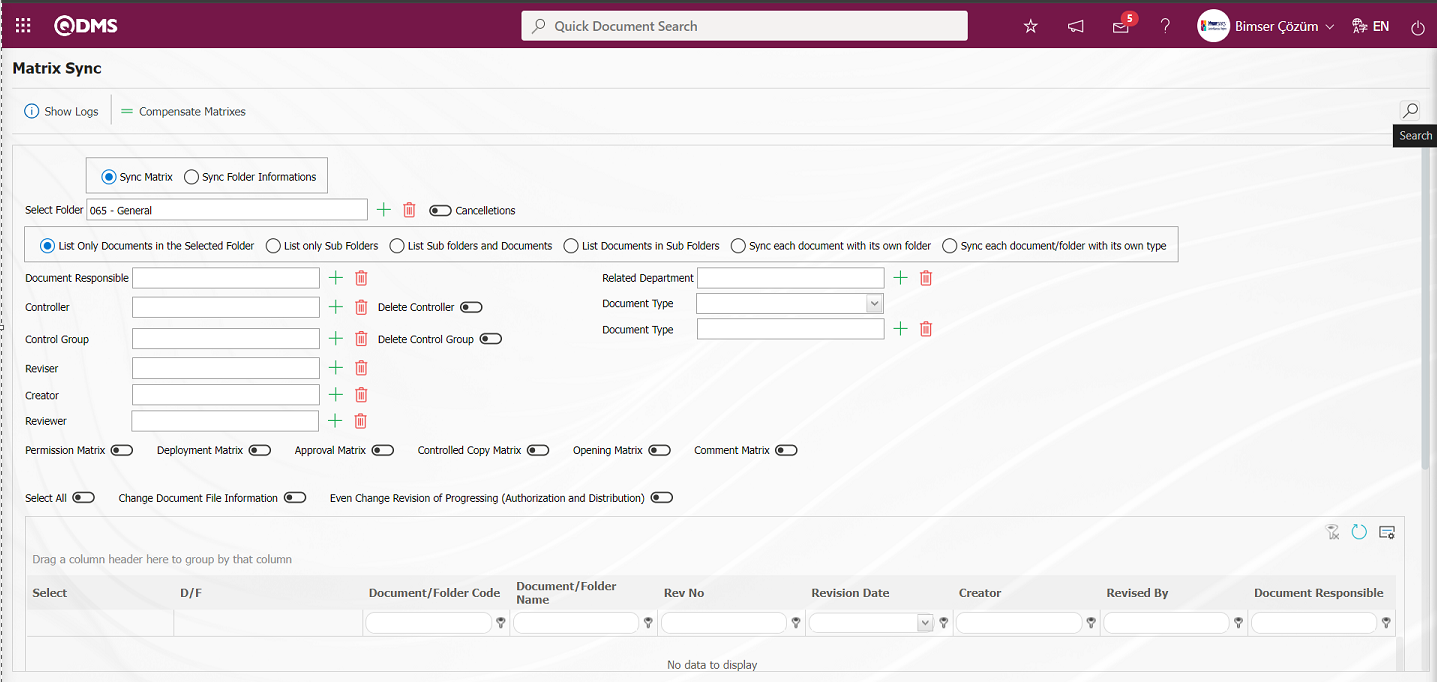
On the Matrix Sync** screen, the documents are filtered with the  (Search) button.

On the Matrix Sync** screen, the documents to be modified later are selected and determined. If desired, fields such as Document Responsible, Checker, Reviser and Preparer, Related section, Document Type, Document type can also be edited.
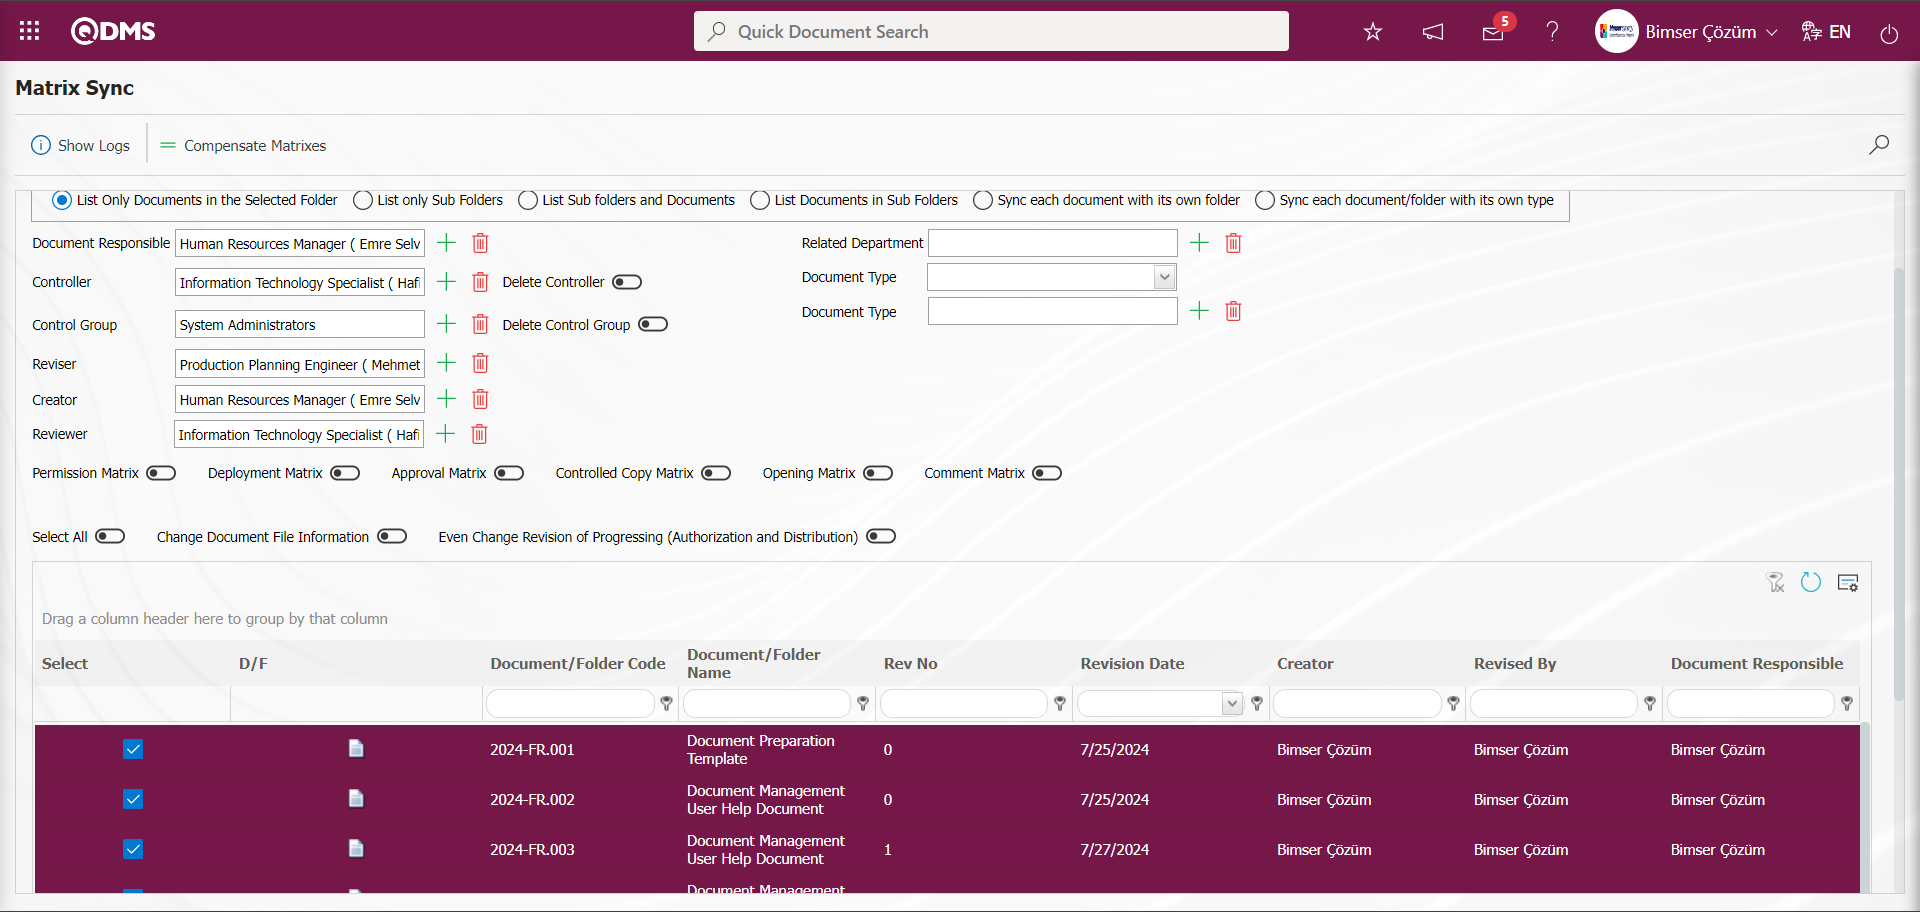
Check box related to the matrix to be modified such as Authorization-Distribution-Approval-Controlled Copy-View Matrix is checked.
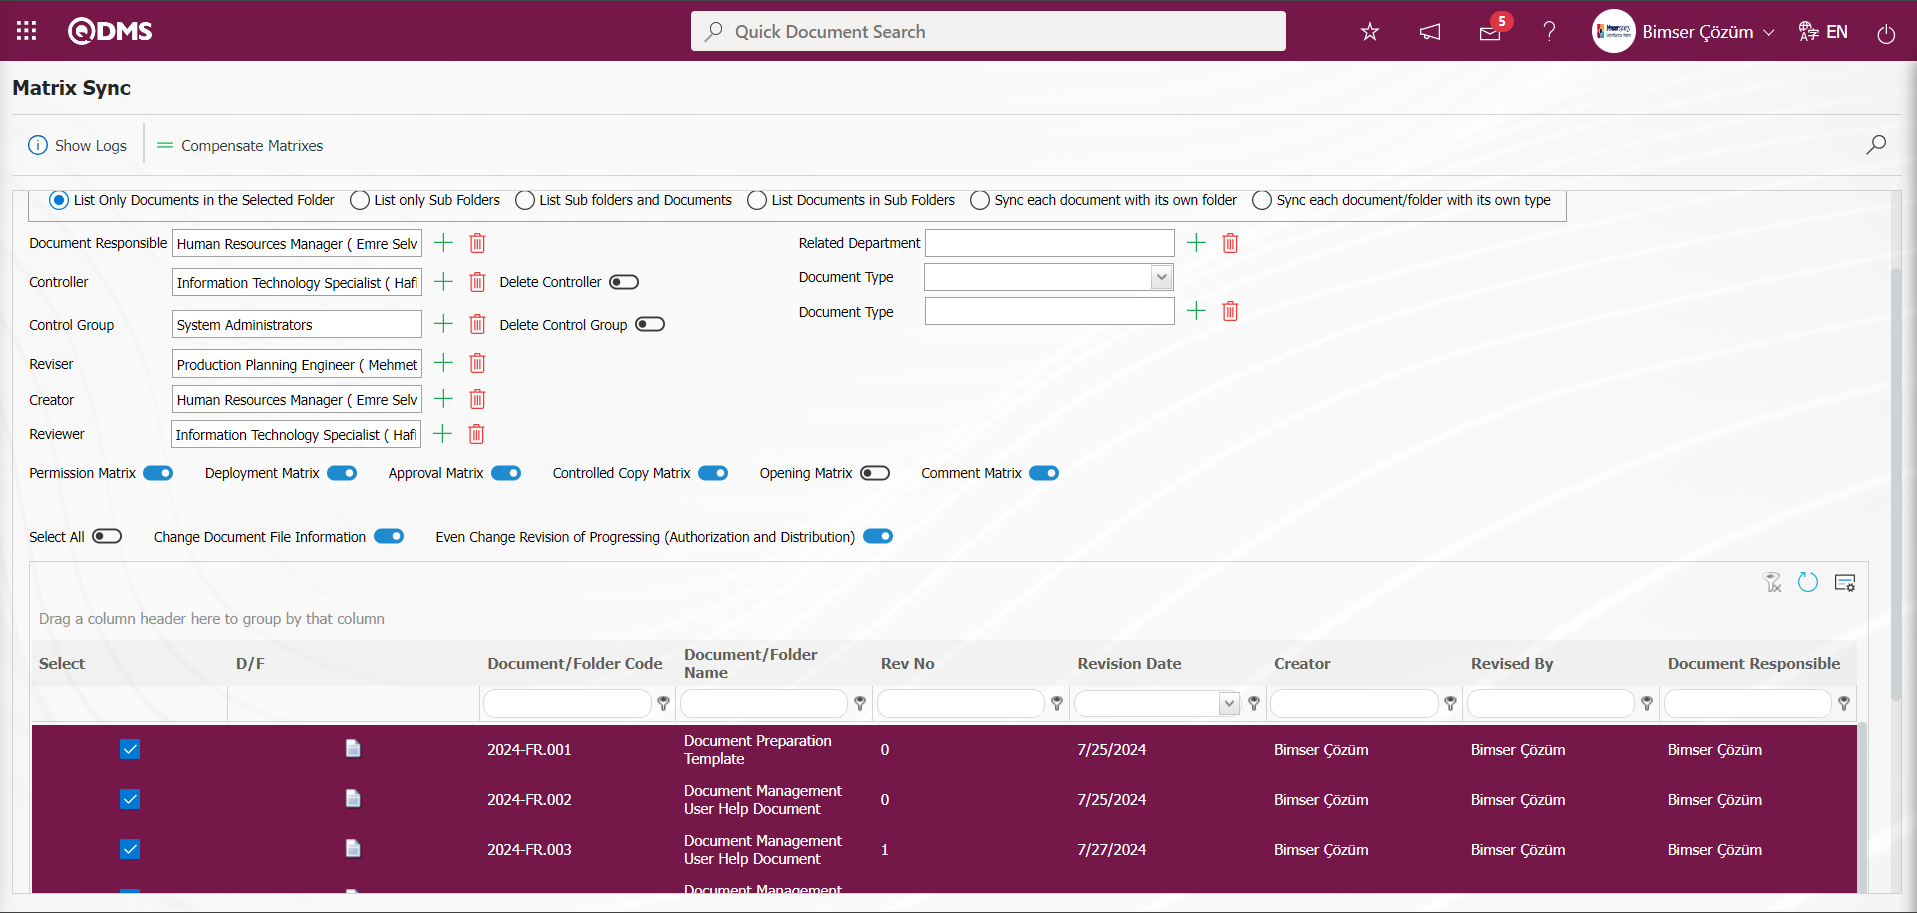
If it is desired to reflect the changes made to the <...> variables in the document file, the “Change Document File Information” check box is checked. “Even Change Revision of Progressing (Authorization and Distribution)” check box is checked in order to perform matrix synchronization for documents whose revision process is in progress while document matrix synchronization is performed.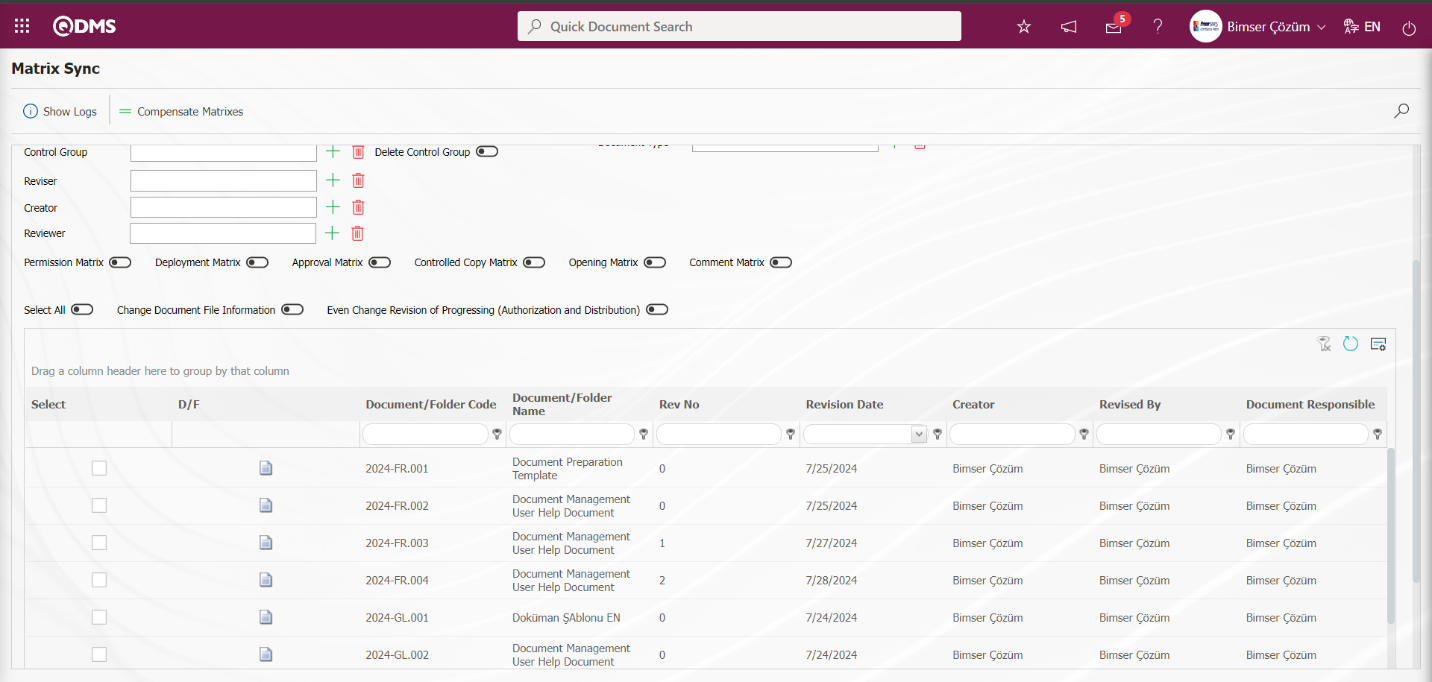
On the Matrix Sync** screen, after selecting the document and checking the check box related to the fields to be modified, click the  button.
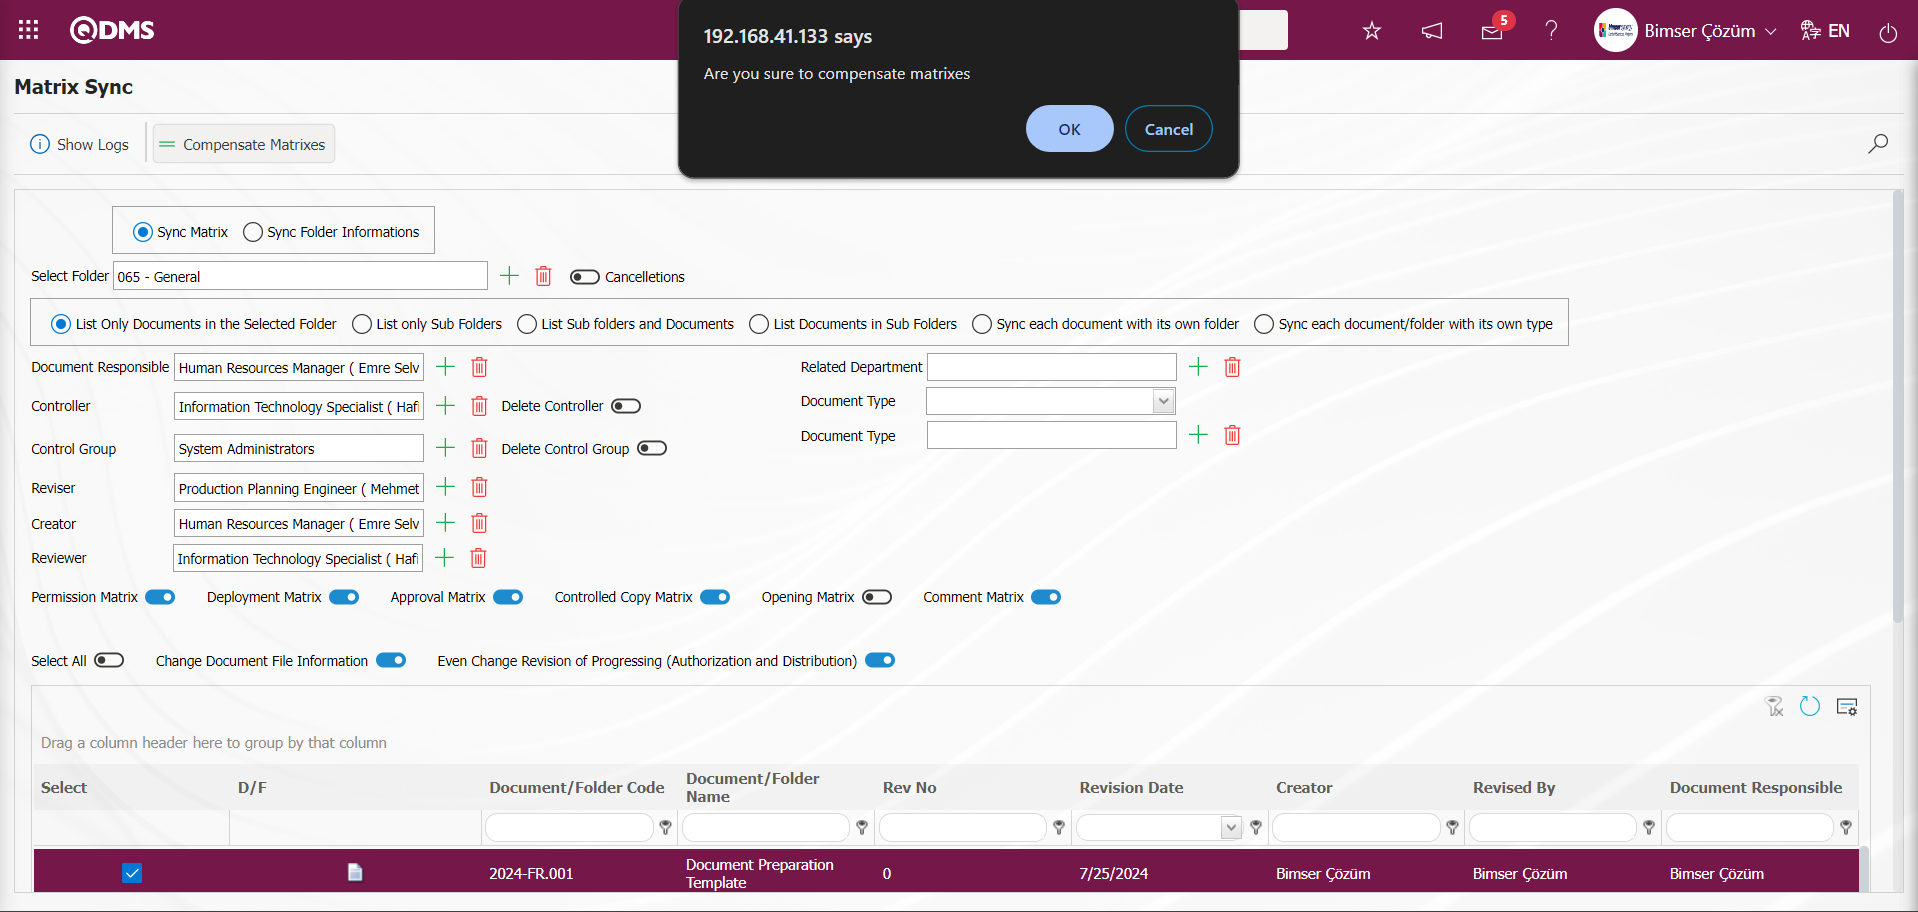
Click the “OK” button when the system displays the message “Are you sure to compensate matrixes”

The Matrix Sync screen shows that the matrix synchronization process is completed for the selected documents.
Sync Folder Information;
Subfolders of the selected folder are listed. By selecting the subfolders, synchronization of the folder settings information of the selected subfolders of the selected folders is performed. In this process, the selected subfolders are changed according to the selected folder settings information of the main folder, which is the selected folder. To perform this operation, first select the Folder in the Document Folder list opened by clicking the  (Select) button in the Select Folder field. On the Matrix Sync screen, check the relevant check box in the Synchronize Folder Information option field.
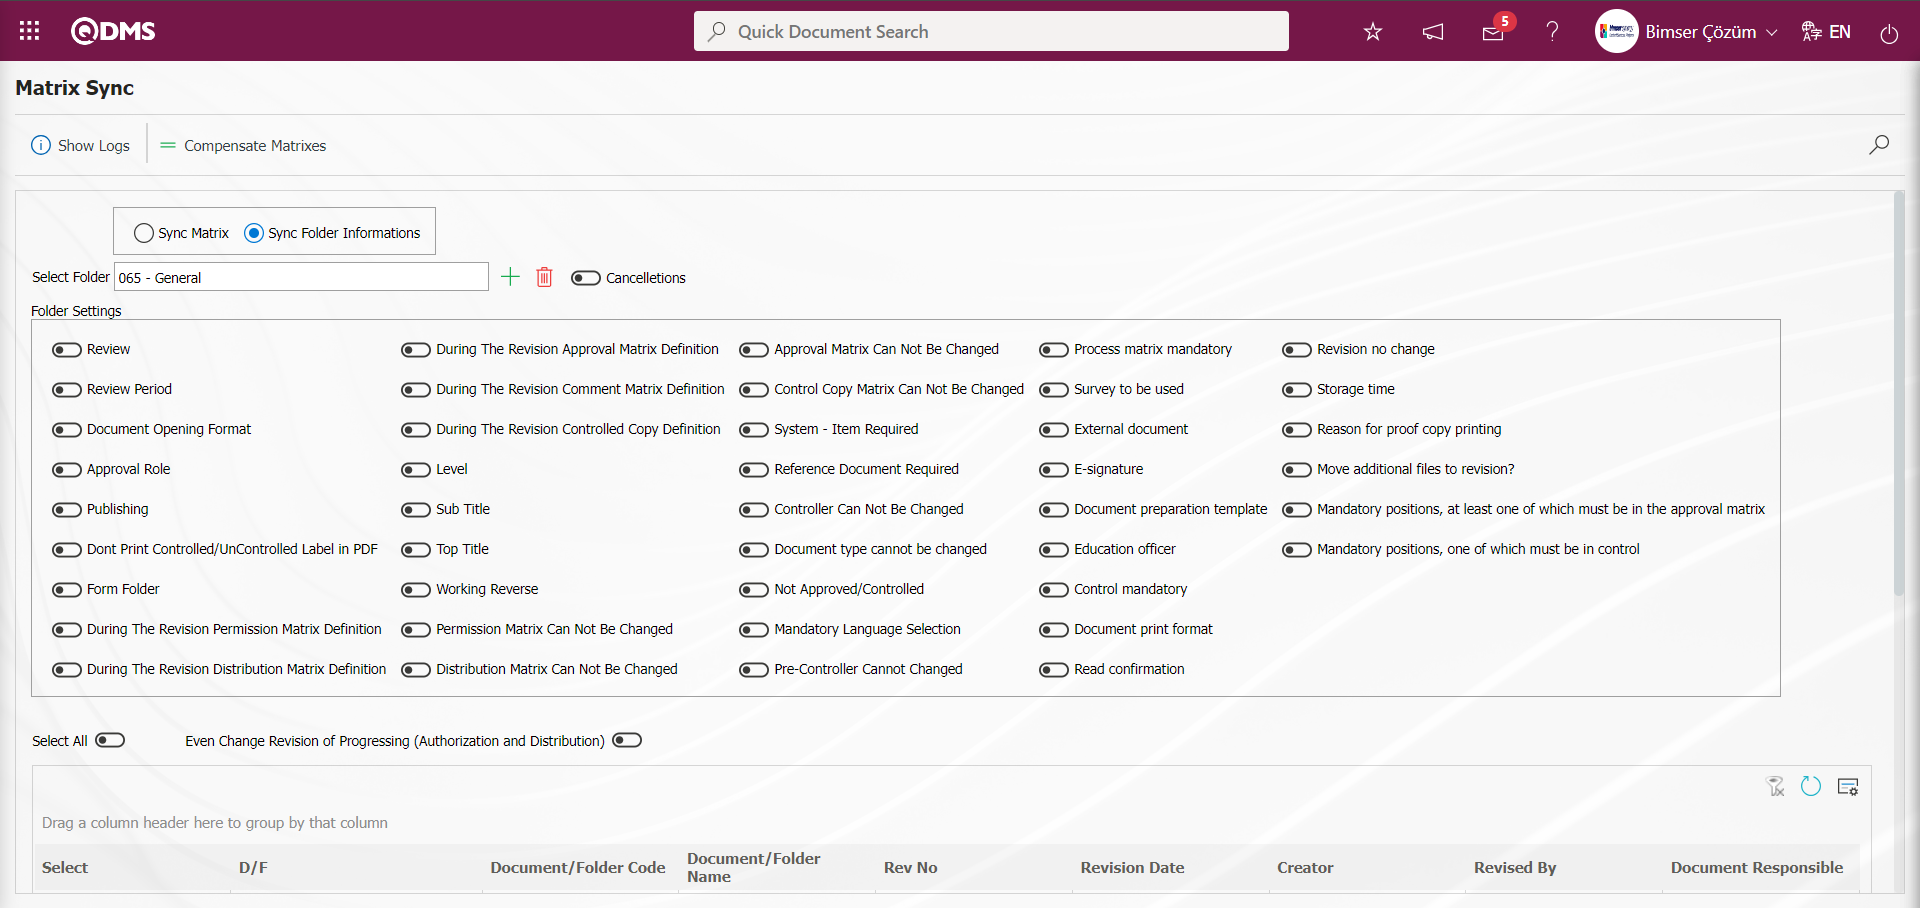
In the folder selection process on the Matrix Sync screen, the subfolders of the folder are listed by clicking the  (Search) button.
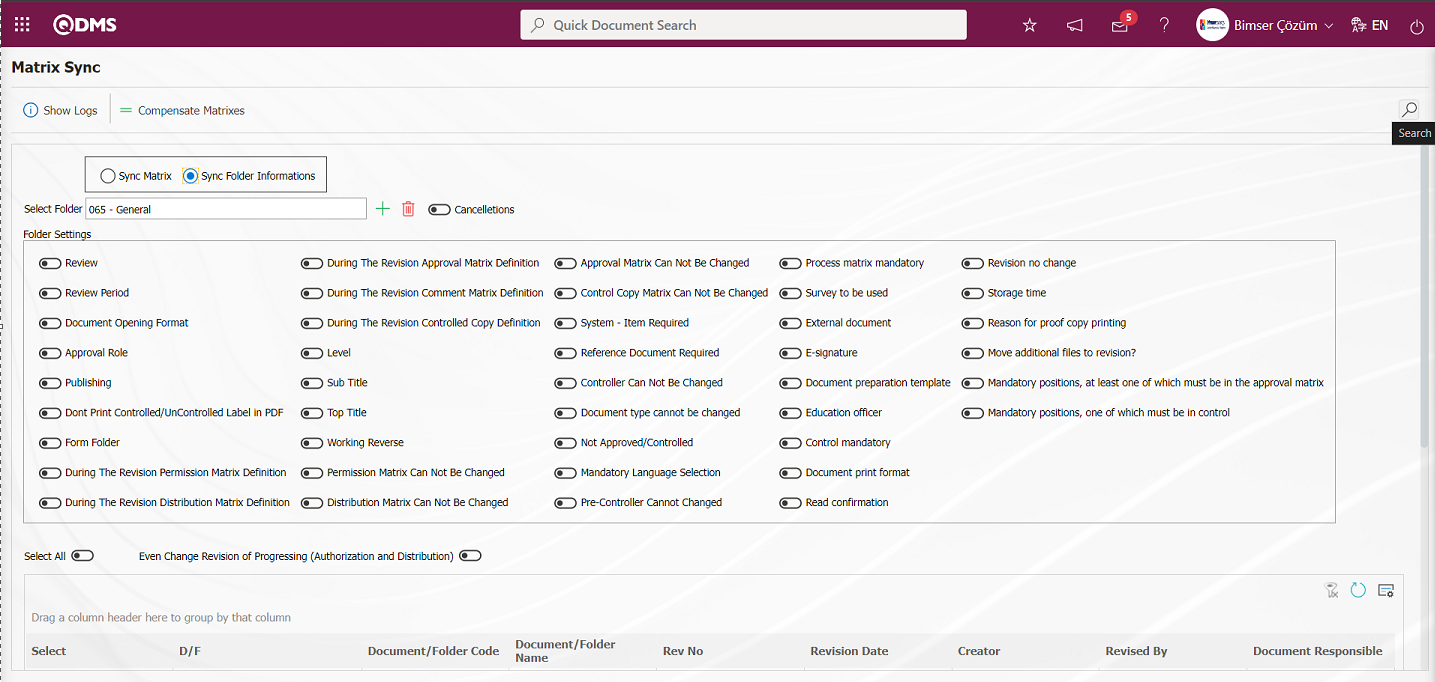
Select the listed subfolders of the selected Folder.
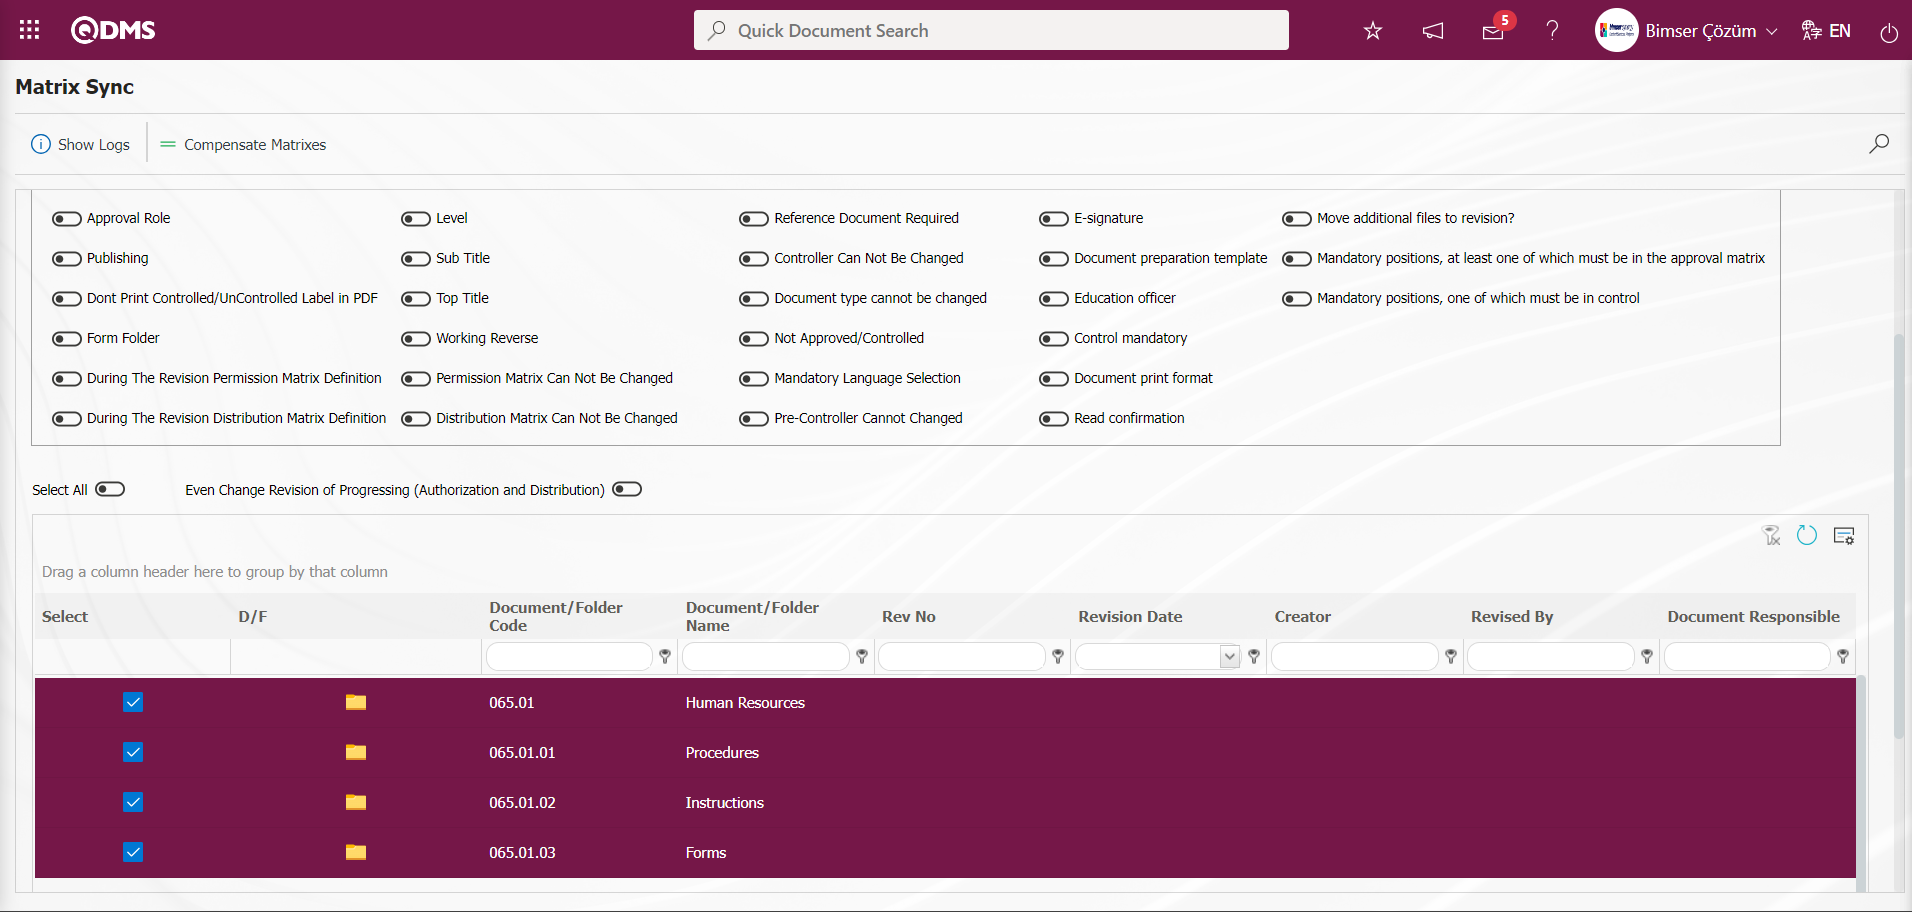
After the selection process of the subfolders of the selected folder, the check boxes related to the folder settings of the selected folder are checked. At this stage, the fields related to the folder settings of the selected folder, which is the main folder, are selected according to the selected subfolders.
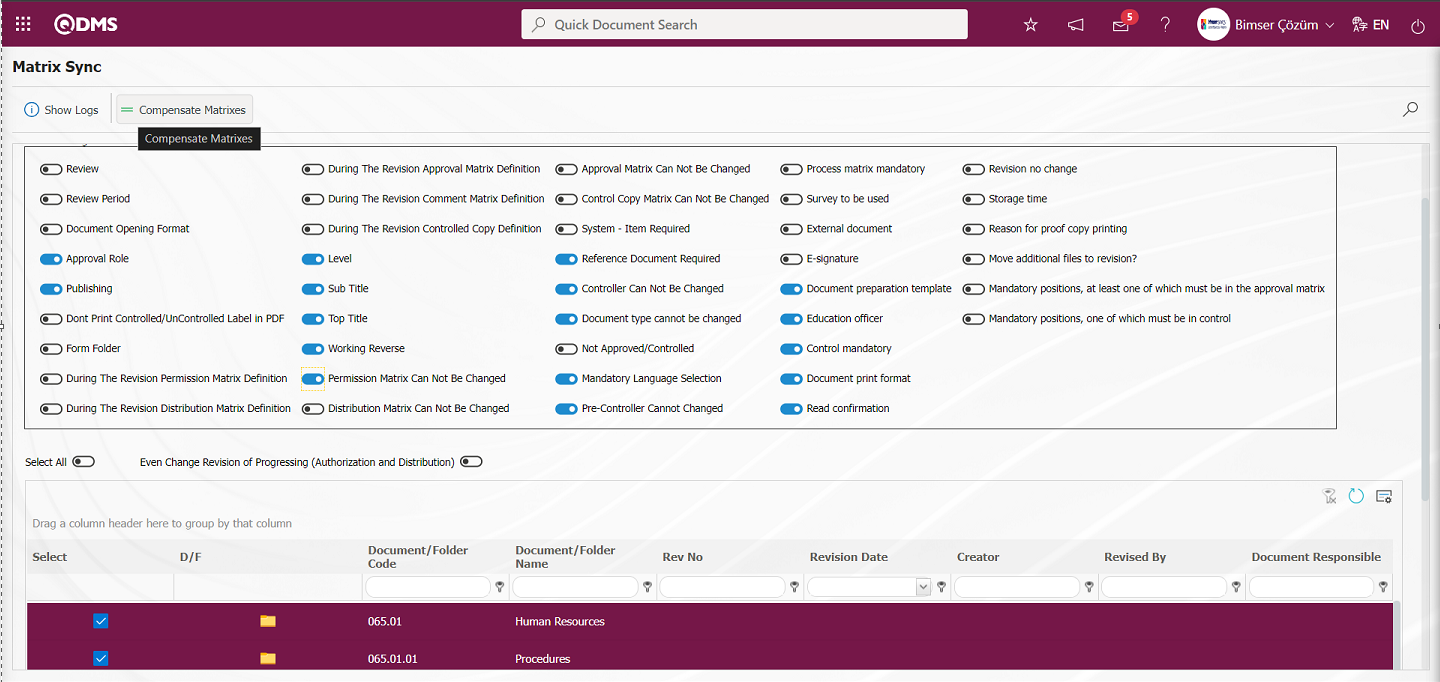
After the selection of the areas that are desired to be changed in the sub-folder of the folder selected as the main folder, the  button is clicked.
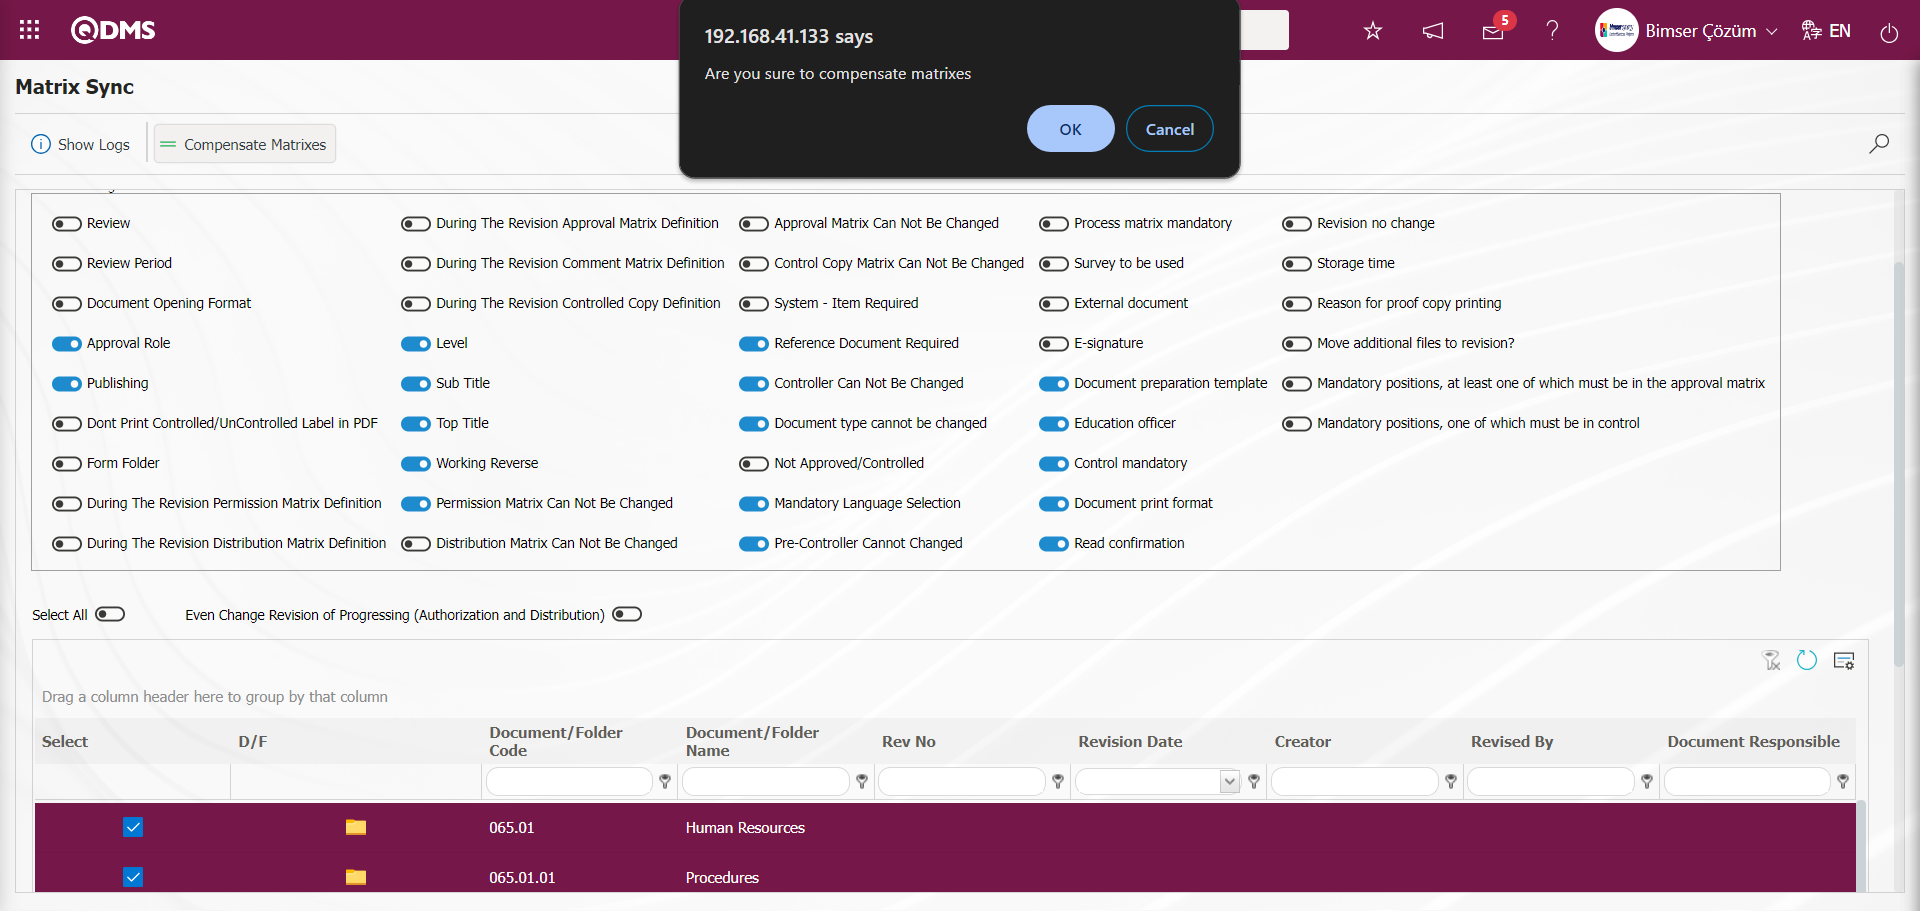
Click the “OK” button when the system prompts “Are you sure to compensate matrixes?”.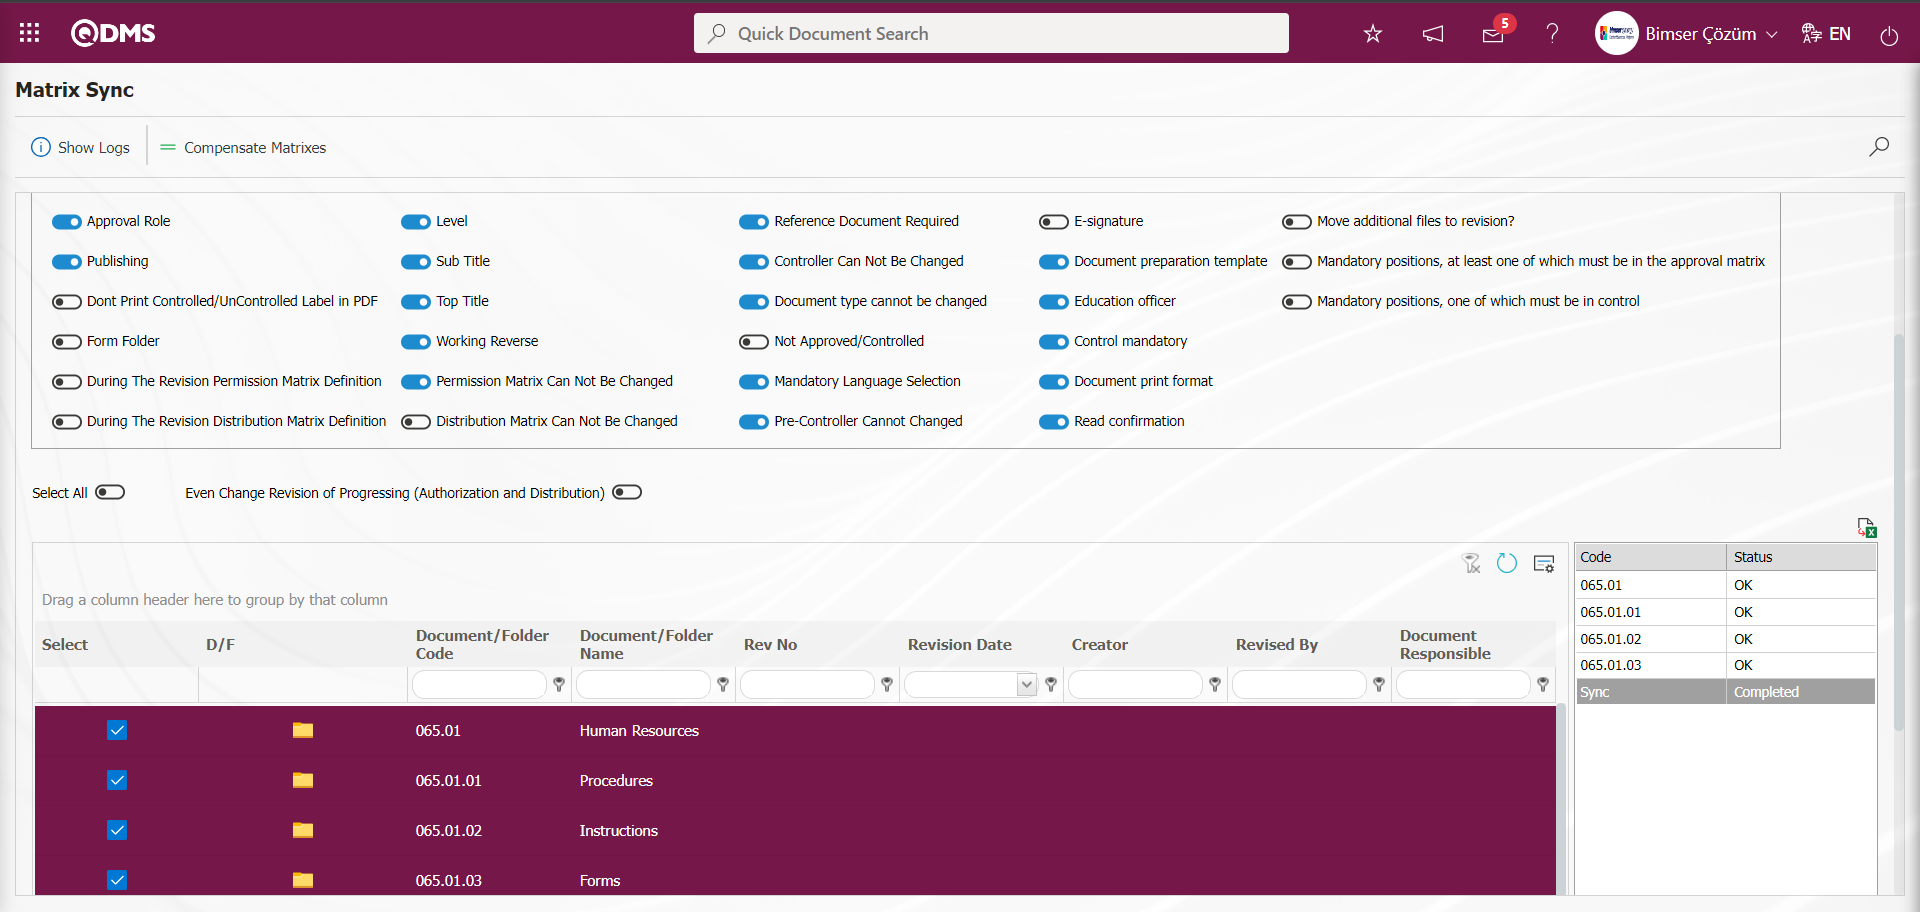
On the Matrix Synchronizer screen, it is seen that the matrix synchronization process is completed for the information related to the folder settings fields of the selected folder, which is the selected main folder for the selected subfolders.
Show Log Transaction;
The log records of all the operations performed in the Matrix Synchronizer are displayed. By clicking the  button on the Matrix Sync screen, the log records of the matrix synchronization process are displayed.
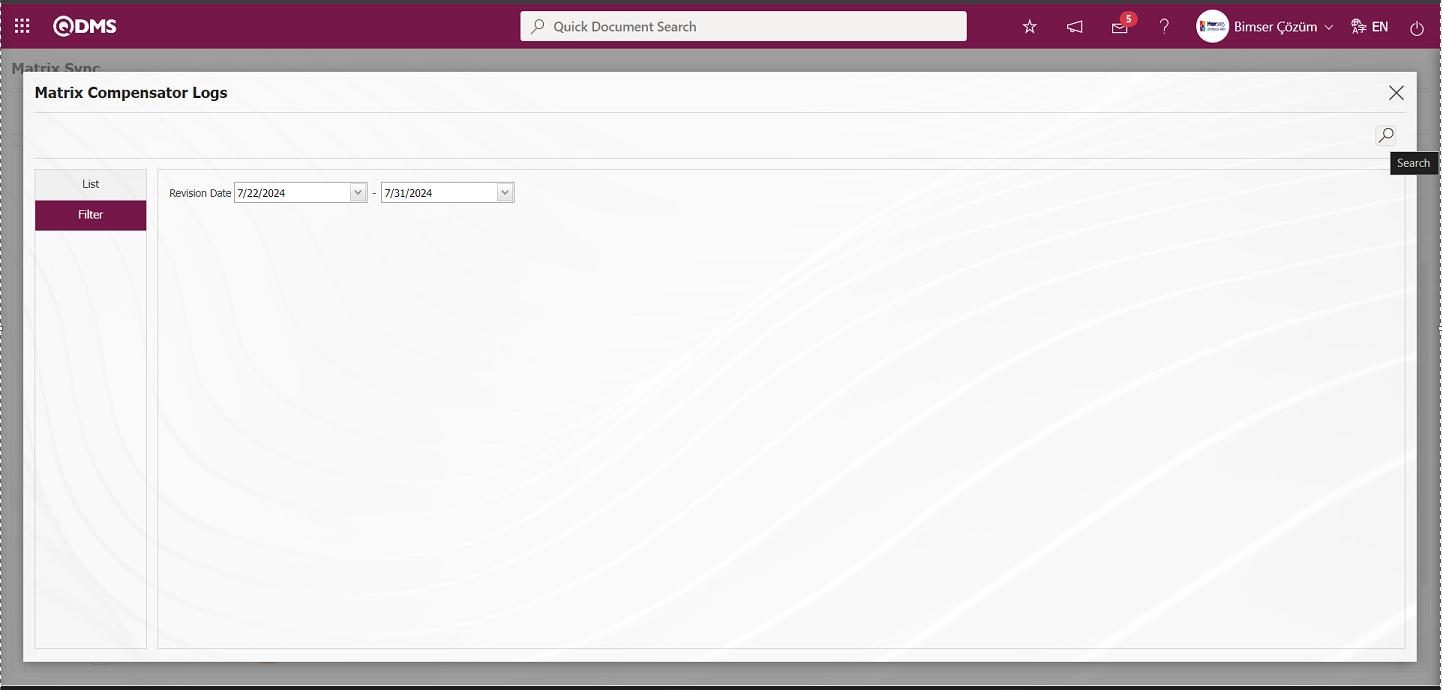
By selecting the Calendar field opened in the Revision Date field in the Filter tab, the detailed information of the Matrix Compensator Logs records is displayed in the list tab according to the search criteria.
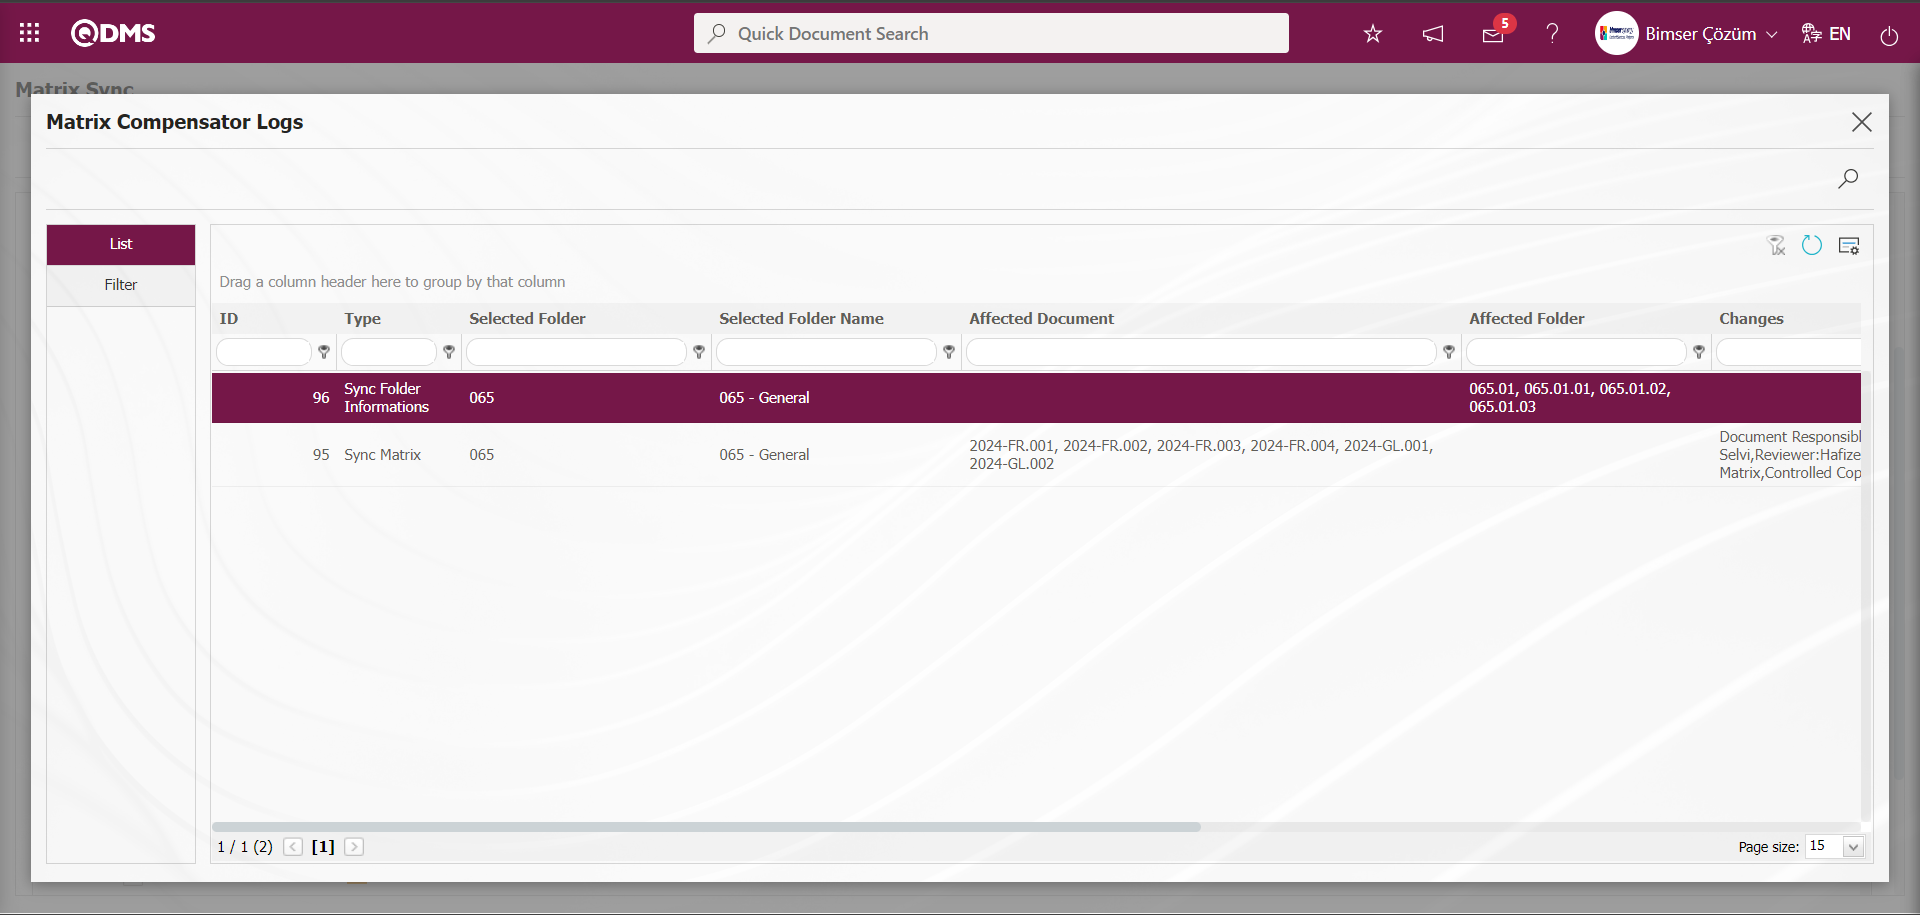
6.3.8.Multiple Folder Code Changer
Menu Name: System Infrastructure Definitions/ Document Activities/ Multiple Folder Code Changer
It is the menu used to change the code of multiple documents collectively at the same time. (Old Document Code, New Document Code) In order to perform this operation, the Multiple Document Code Changer template is filled by writing the old document code information defined in the system in the old document code information field in the Multiple Document Code Changer template downloaded to the computer by clicking the  button and the document code information to be changed in the new document code field is filled in the Multiple Document Code Changer template by writing the new document code field. After the information is written in the relevant fields in the Multiple Folder Code Changer template, the Multiple Document Code Changer template is loaded into the menu in the Qdms system by clicking the
  button. If the transferred data is suitable for transfer, the transfer is realized through the
  button.

With the help of the buttons on the screen;
 : Multiple Document Code Changer template is downloaded to the computer.
 : The filled Multi Document Code Changer template is uploaded to the system.
: The transfer process is performed.
 : Data is transferred to Excel.
: The data remaining in the filter fields in the grid where the search criteria on the menu screens are searched is cleaned.
: The menu screen is restored to its default settings.
: User-based designing of the menu screen is done with the show-hide feature, that is, the hiding feature of the fields corresponding to the columns on the menu screens.
Click the button on the Multiple Folder Code Changer screen and download the Multiple Document Code Changer template to the computer. In the downloaded Multiple Folder Code Changer template, the relevant fields are filled with the relevant information and saved to the computer.
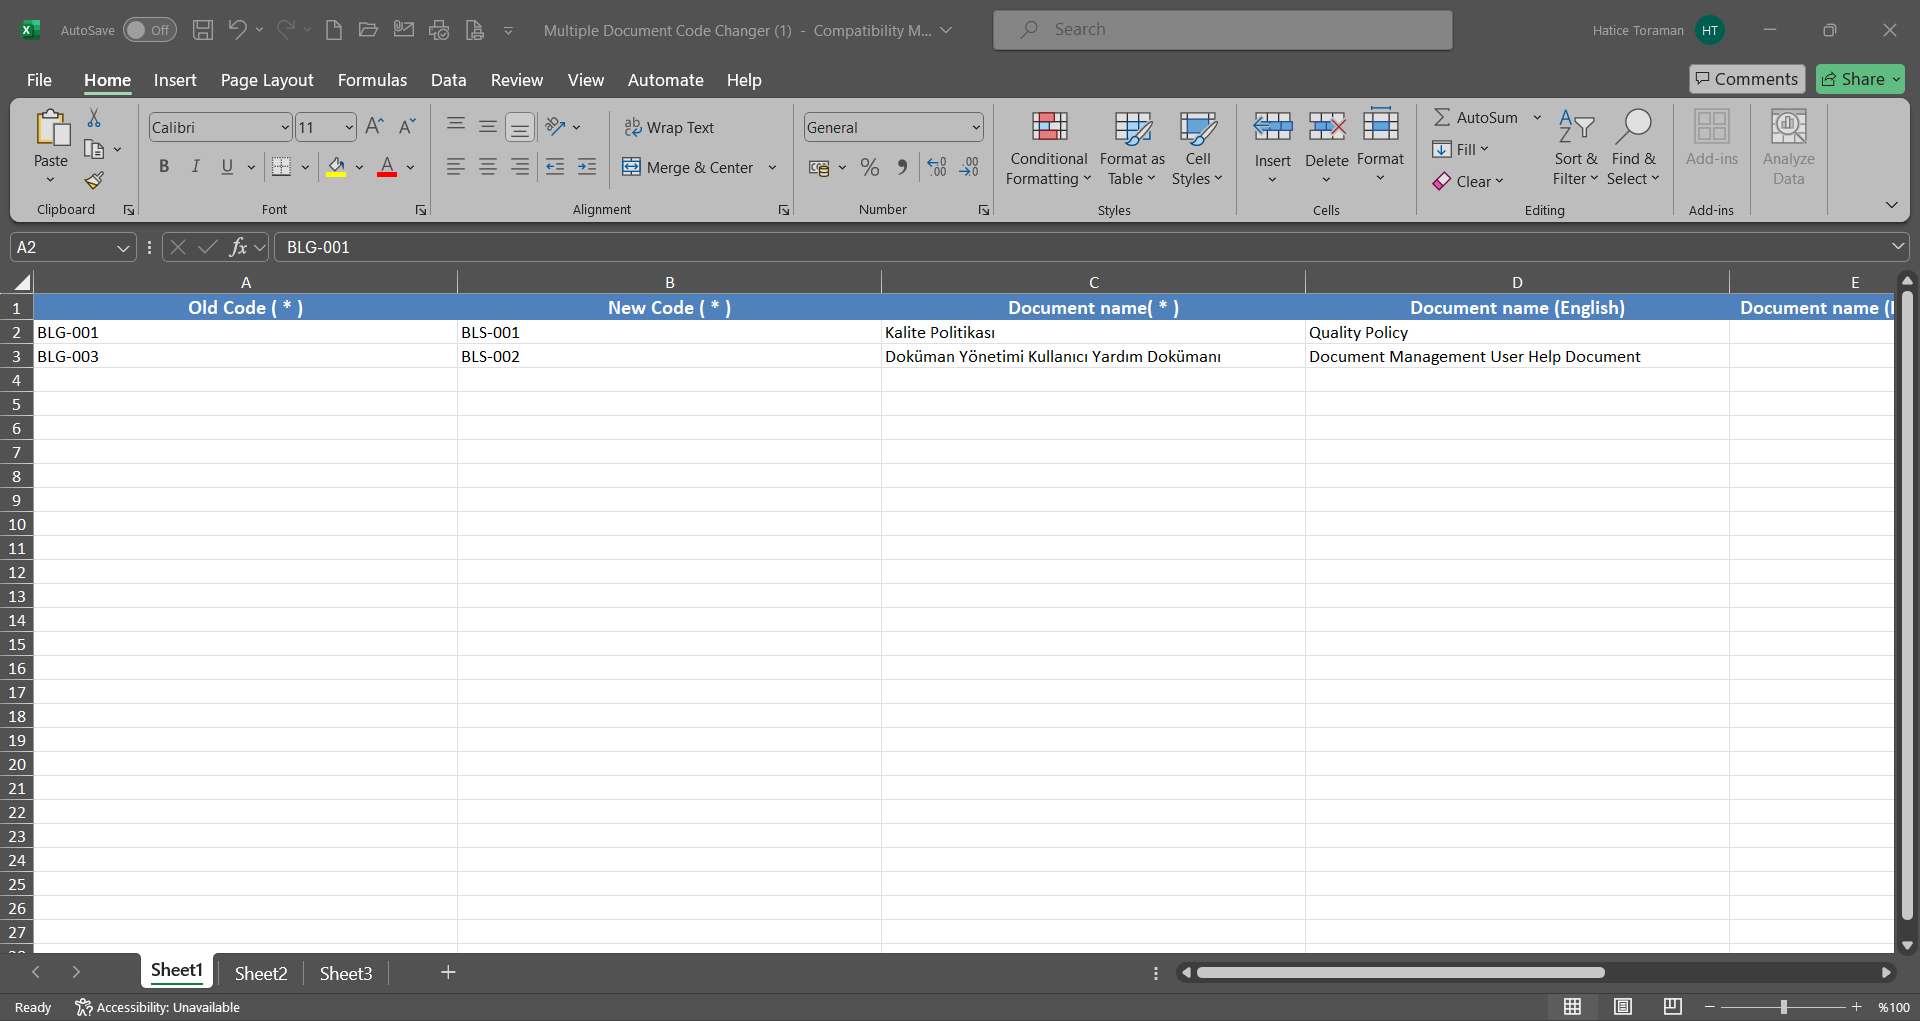
The Multiple Document Code Changer template filled in the Multiple Folder Code Changer screen is uploaded to the system by clicking the button.
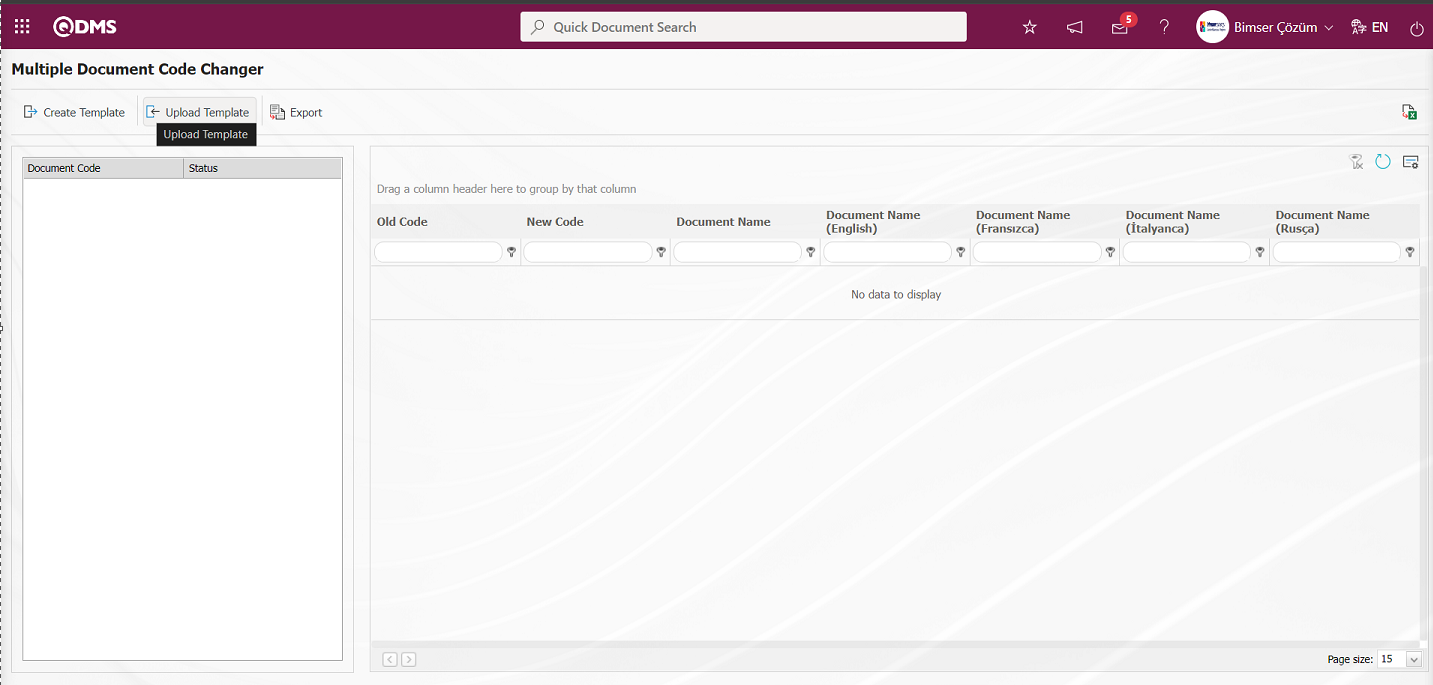
Click the “Browse” button on the Upload File screen.
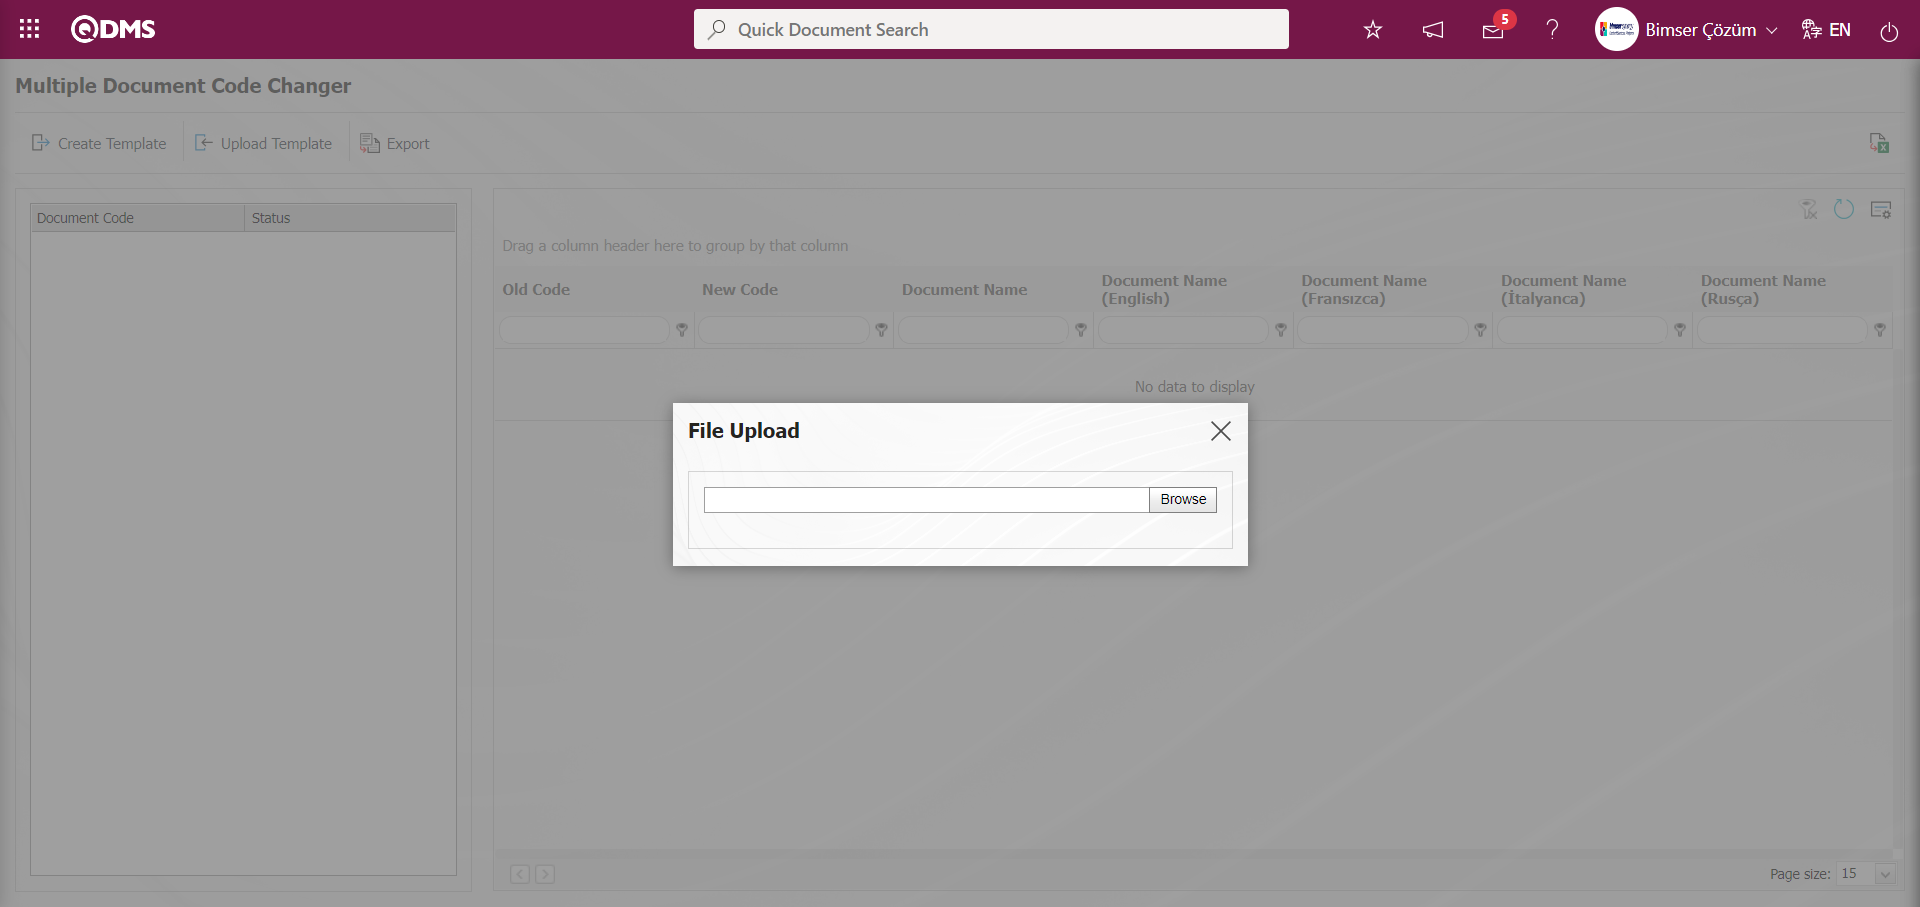
On the screen that opens, the filled Multiple Document Code Changer template is selected.

By clicking the 3rd button  on the Multiple Folder Code Changer screen, the old document codes are replaced with new document codes and the system is transferred.
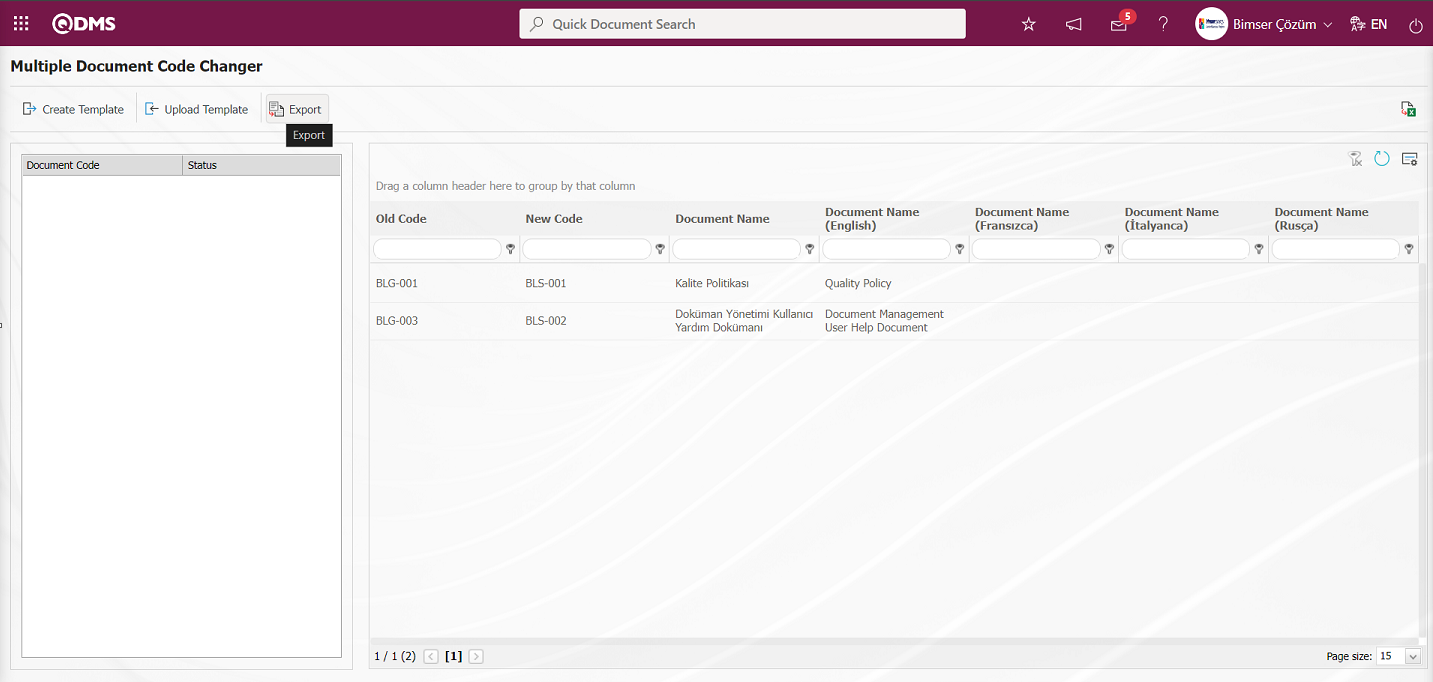
The system informs that the document codes have changed from the Multiple Document Code Changer screen in the Status field. Document code change operation is not performed for documents that are under revision process. The system gives the information “In revision, cannot change” in the status field.
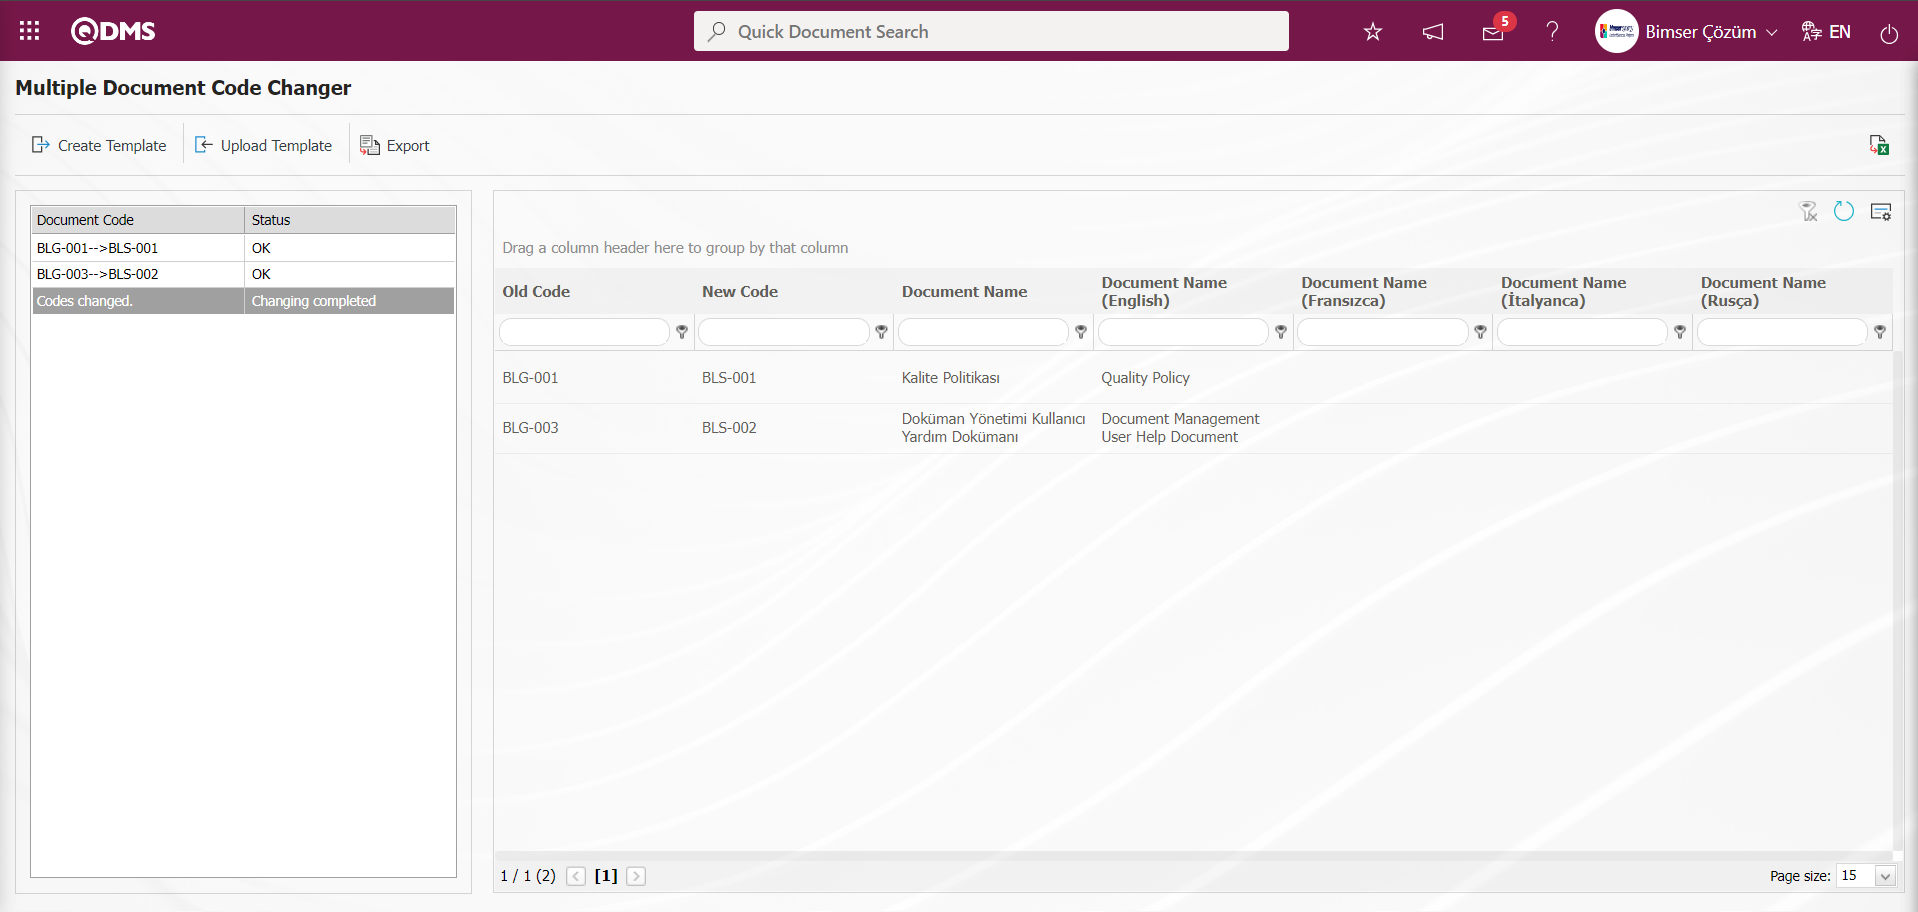
6.3.9.Multiple Folder Code Changer
Menu Name: System Infrastructure Definitions/ Document Activities/ Multiple Folder Code Changer
It is the menu used to change the code of multiple folders collectively at the same time. (Old Folder Code, New Folder Code) In order to perform this operation, the Multiple Folder Code Changer template is filled by typing the old folder code information defined in the system in the old folder code information field in the Multiple Folder Code Changer template downloaded to the computer by clicking the  button and the folder code information to be changed in the new folder code field is filled in the Multiple Folder Code Changer template by typing the new folder code field. After the information is written in the relevant fields in the Multiple Folder Code Changer template, the Multiple Folder Code Changer template is loaded into the menu in the Qdms system by clicking the
  button. If the transferred data is suitable for transfer, the transfer is realized through the
  button.
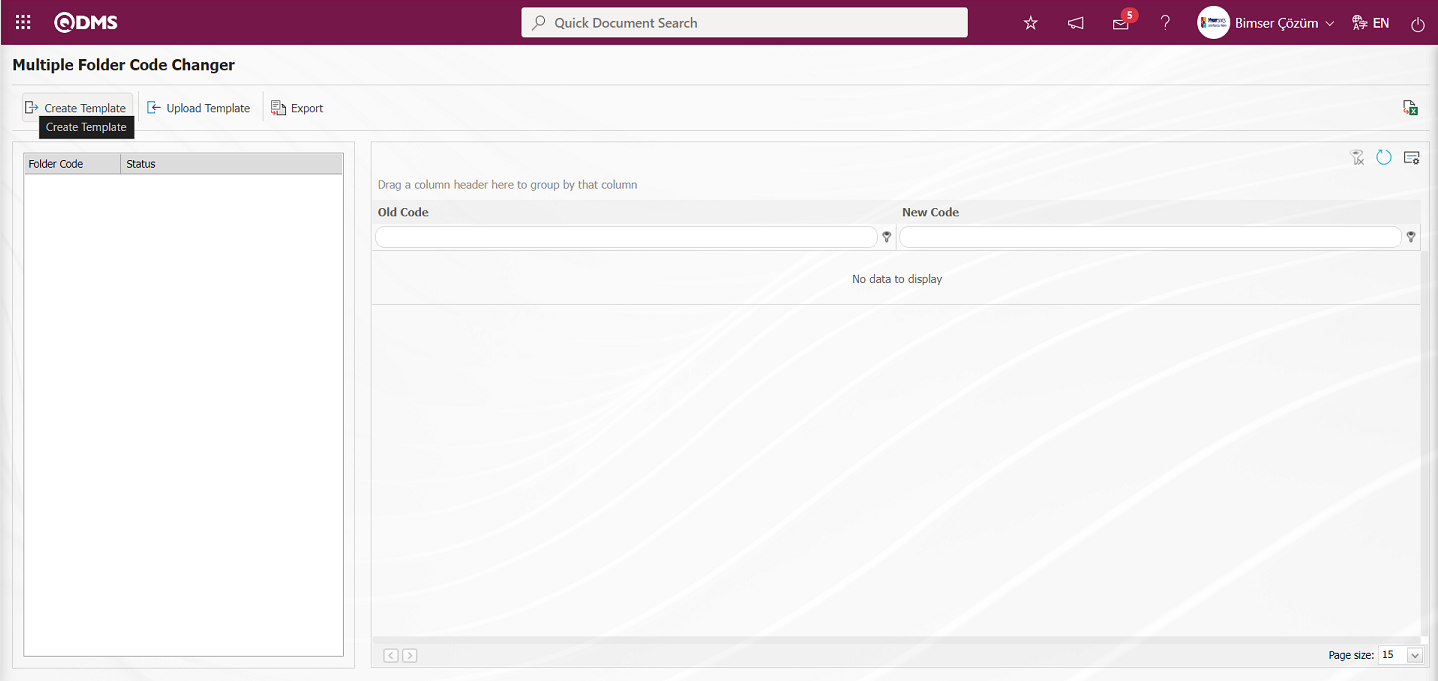
With the help of the buttons on the screen;
 : The Multiple Folder Code Changer template is downloaded to the computer.
: The filled Multiple Folder Code Changer template is uploaded to the system.
 : The transfer process is performed.
: Data is transferred to Excel.
: The data remaining in the filter fields in the grid where the search criteria on the menu screens are searched is cleaned.
: The menu screen is restored to its default settings.
: User-based designing of the menu screen is done with the show-hide feature, that is, the hiding feature of the fields corresponding to the columns on the menu screens.
Click the button on the Multiple Folder Code Changer** screen and download the Multiple Folder Code Changer template to the computer. In the downloaded Multi Folder Code Changer template, the relevant fields are filled with the relevant information and saved to the computer.
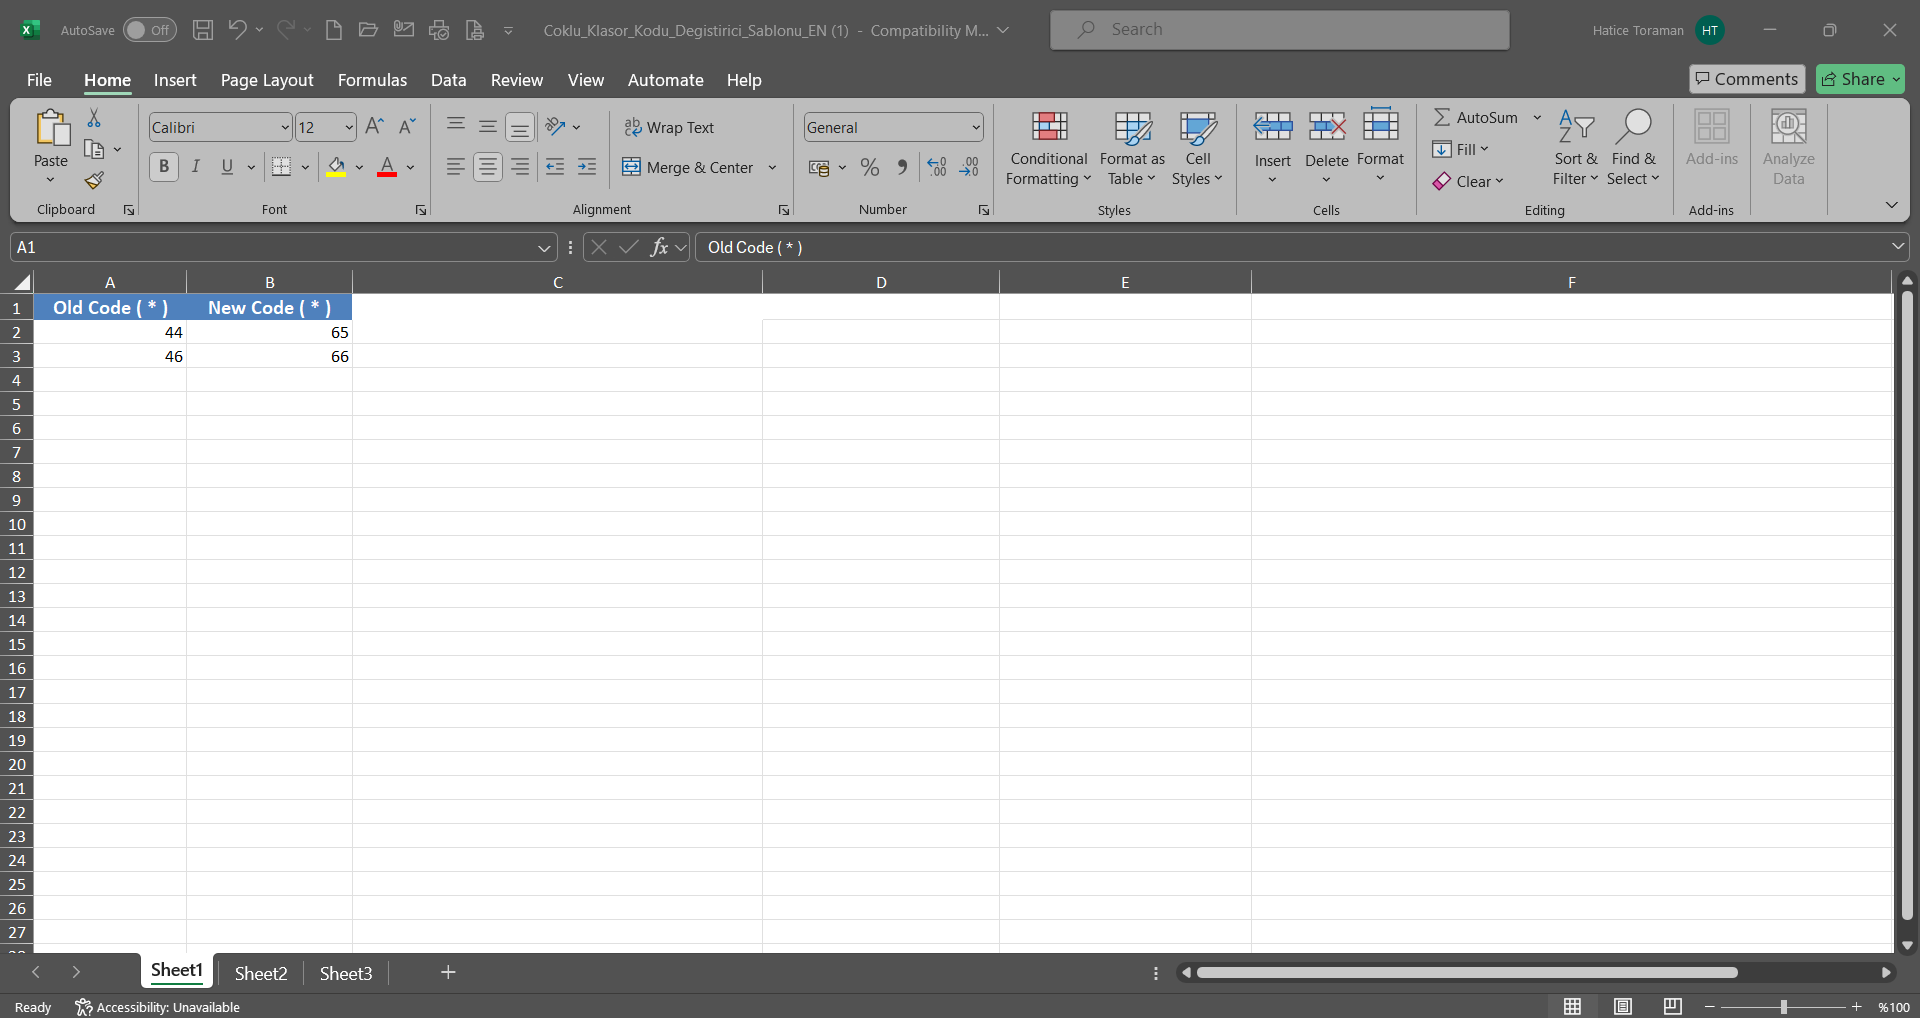
The Multiple Folder Code Changer template filled in the Multiple Folder Code Changer screen is uploaded to the system by clicking the  button.
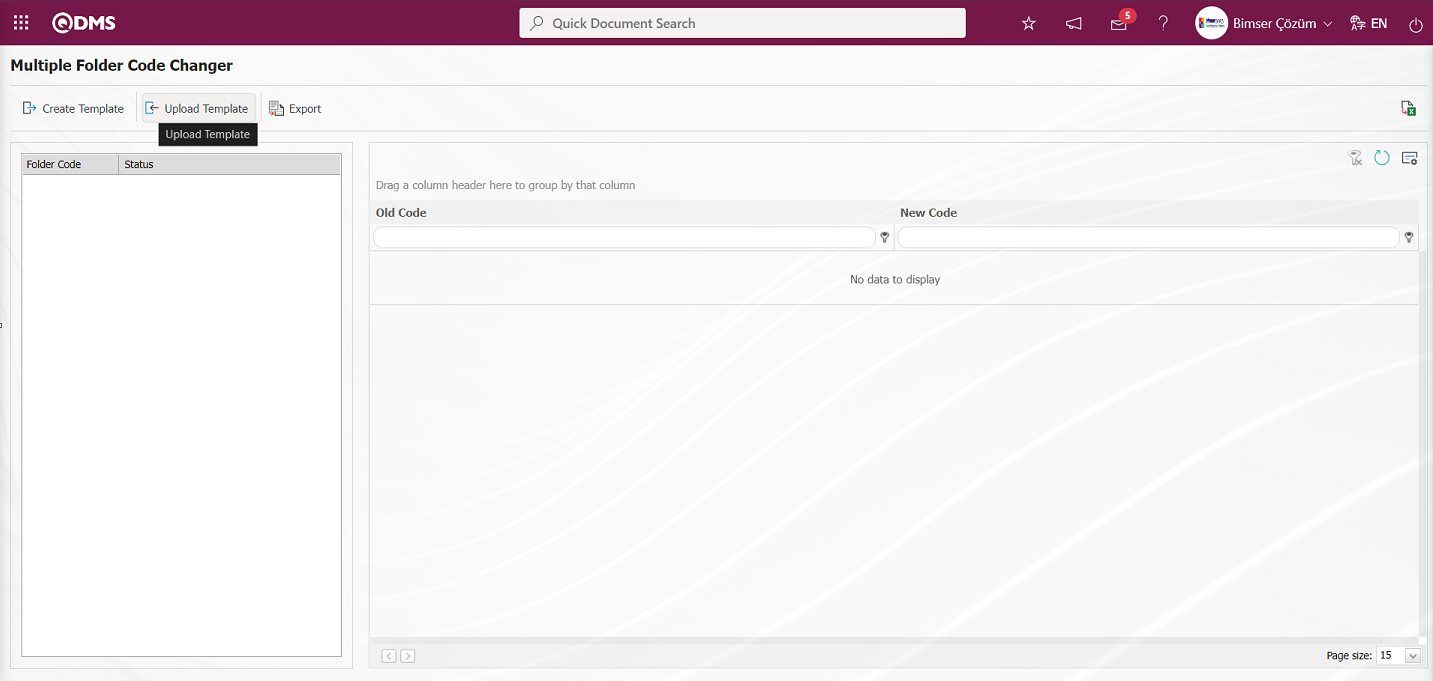
Click the “Browse” button on the Upload File screen.
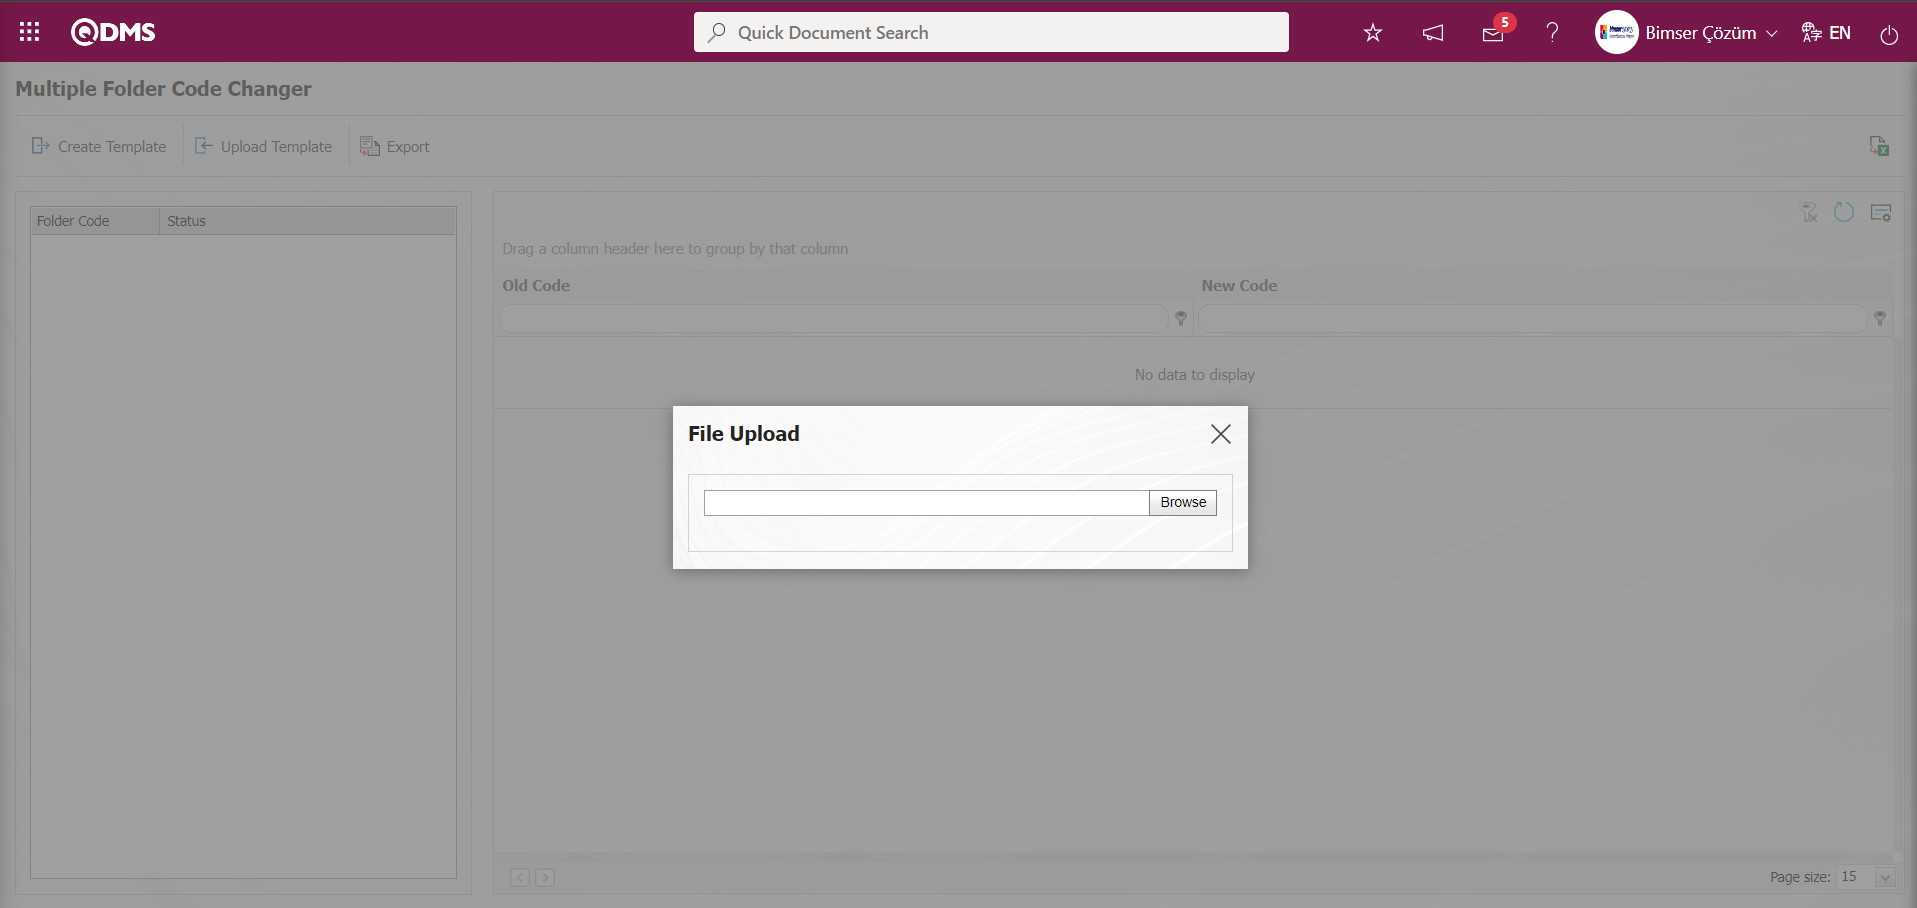
On the screen that opens, the filled Multiple Folder Code Changer template is selected.

By clicking the 3rd button on the Multiple Folder Code Changer screen, it allows the system to be transferred by replacing the old Folder codes with the new Folder codes.
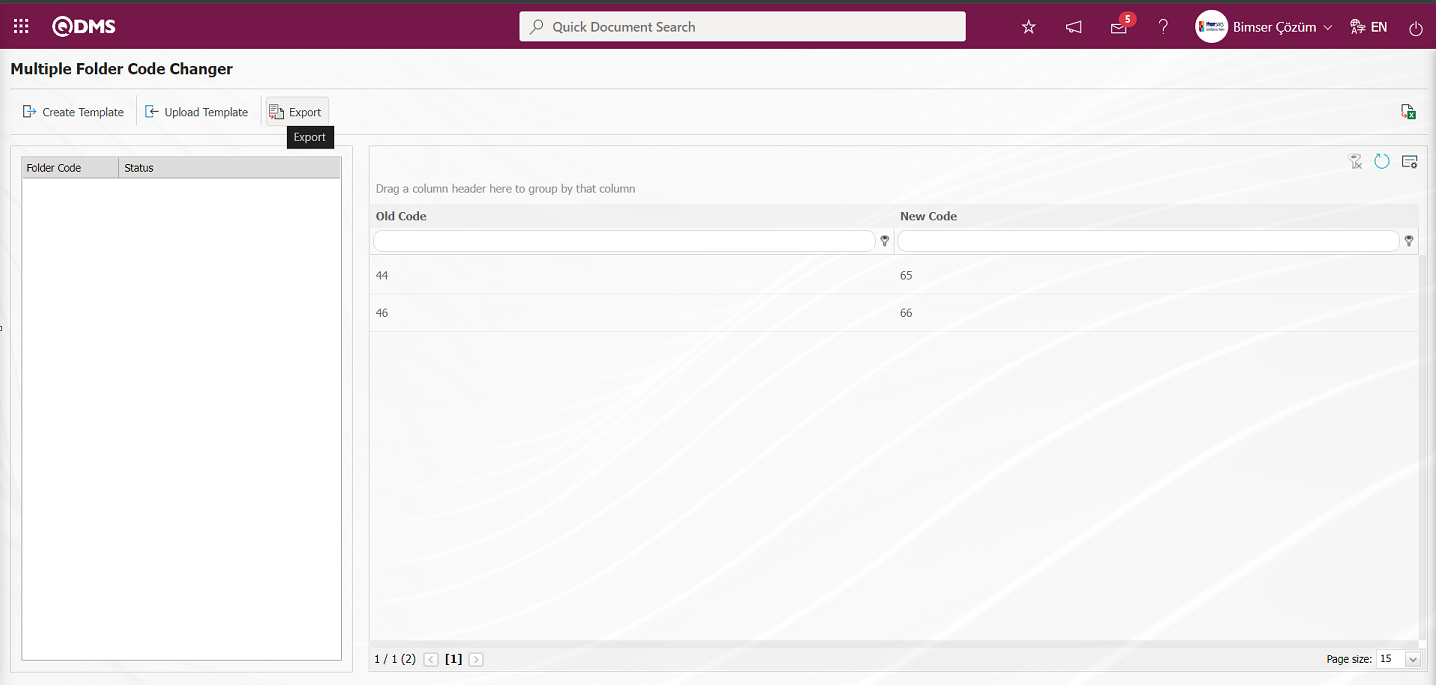
The system informs that the folder codes have changed by giving the information that the document codes have changed from the Multiple Folder Code Changer screen by giving “ Transaction Successful” information in the Status field.
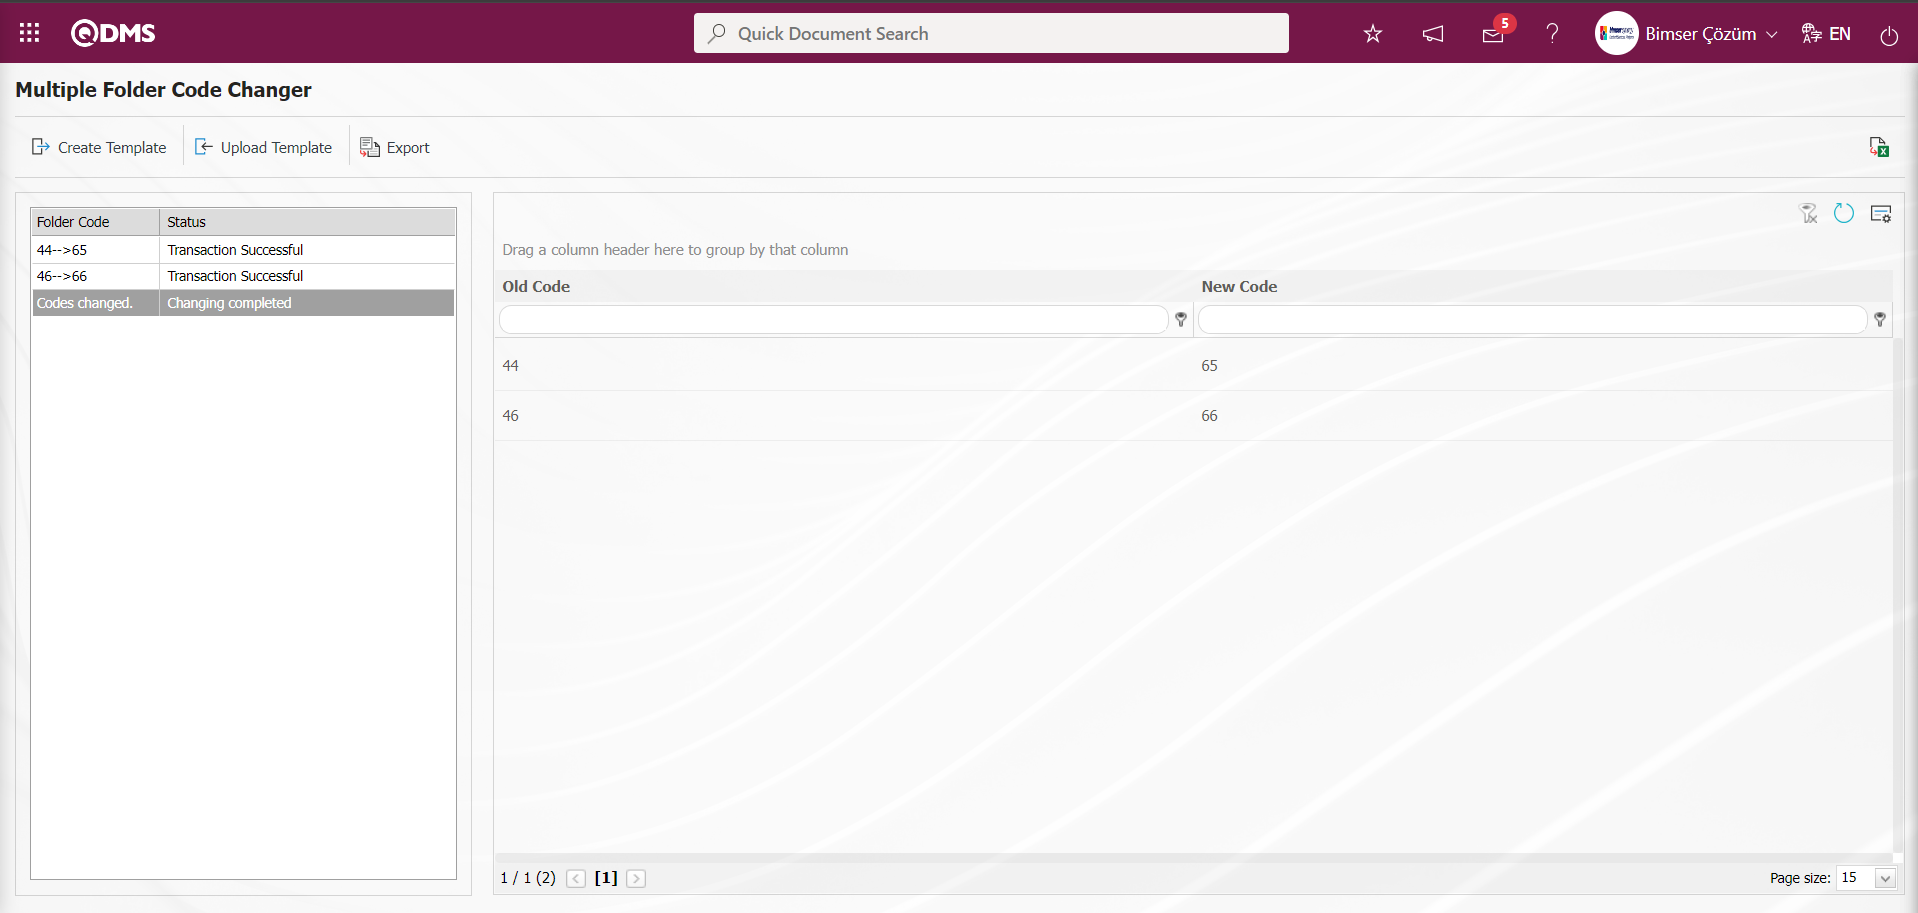
6.3.10. Document Shortcut Definition
Menü Adı: Sistem Altyapı Tanımları/ Document Activities/ Document Shortcut Definition
Qdms’de var olan bir dokümanın kısayol şeklinde başka bir klasöre kopyalanmasını sağlar. Kısayol olarak tanımlanan dokümanda revizyon işlemi yapılamaz. Dokümanın revize işlemleri asıl dokümanda yapılır. Doküman listesi ekranında kısayol olarak tanımlanan dokümanlar listelenmektedir.
With the help of the buttons on the screen;
 : Defining a new shortcut is done.
 : Changes and updates are made on the shortcut information selected in the list.
To add a Document Shortcut, the Document Shortcut Definition/ New Record screen is opened by clicking the button in the upper left corner of the screen.
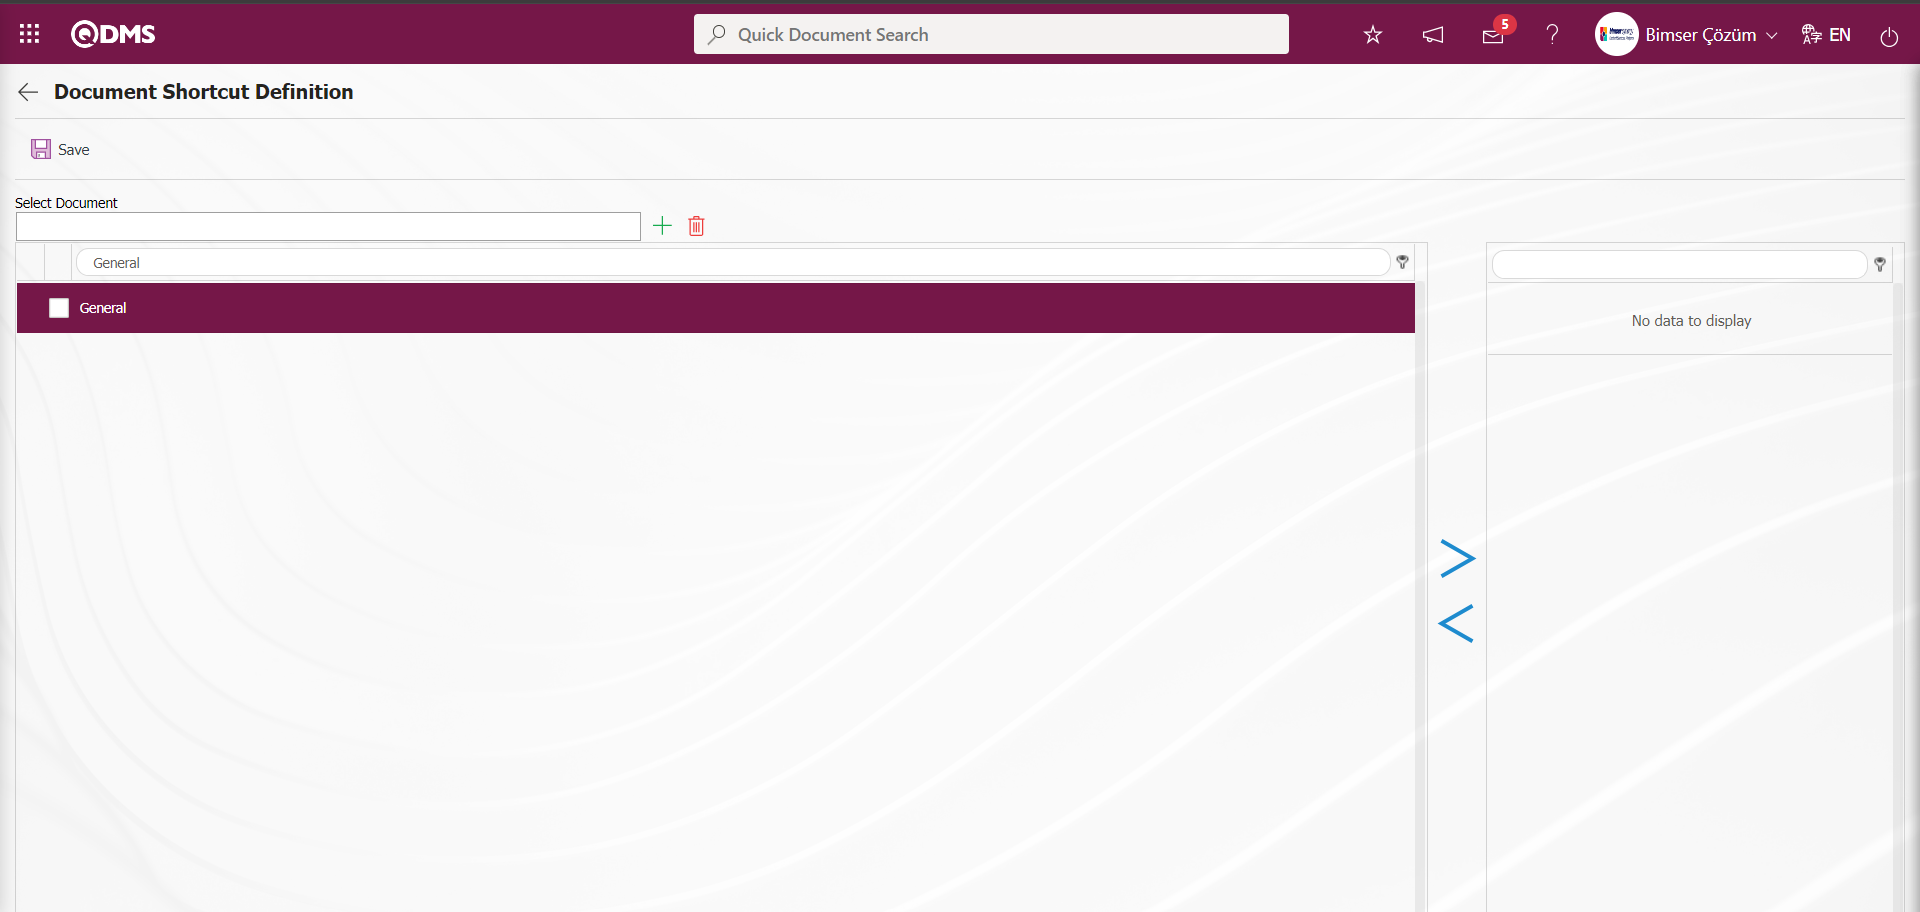
Select the document to be moved as a shortcut on the screen that opens. Specify to which folder the shortcut will be defined.
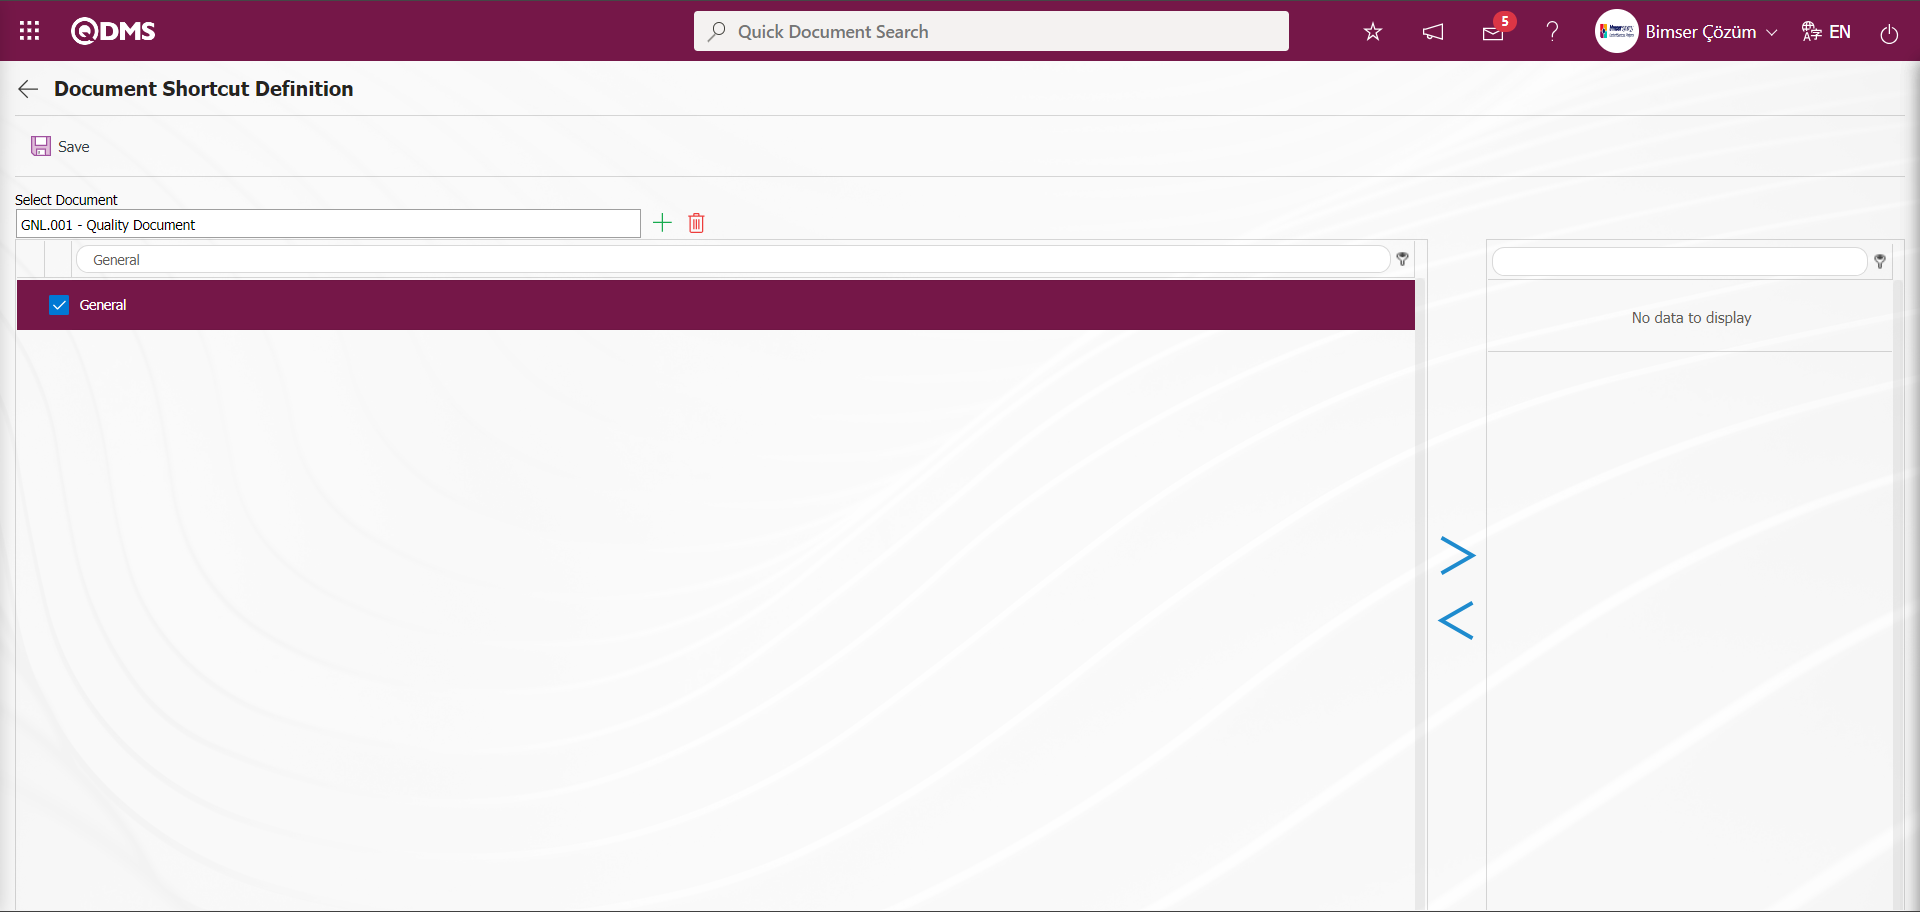
From the folder tree on the left side of the screen, select the folders under which the document will be displayed and save the folder selection process with the  button.
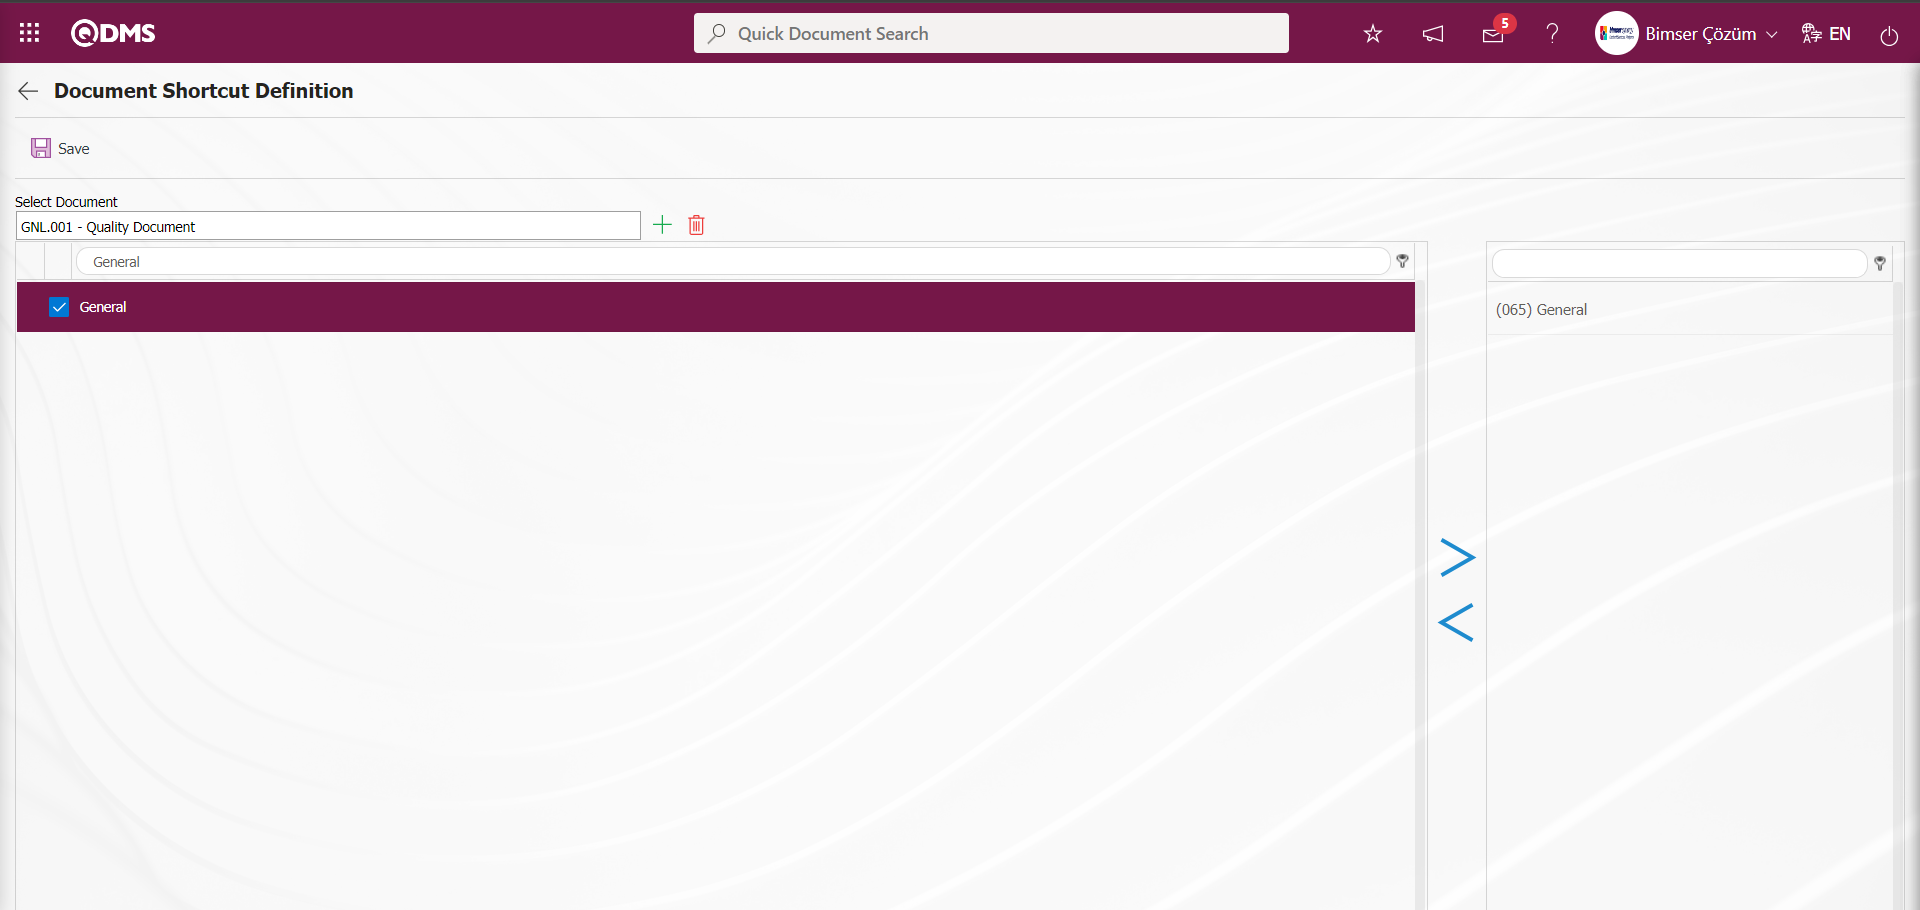
In the Document Shortcut Definition Definition screen, the document shortcut registration process is performed by clicking the  button in the upper left corner of the screen.

6.3.11.Document Permission Modification
Menu Name: System Infrastructure Definitions/ Document Activities/ Document Permission Modification
This is the menu where the authorization process related to documents is organized easily and quickly. This feature can be used when you do not want to authorize all documents in the folders, when you want to authorize only some documents in the folder or when you want to get authorization.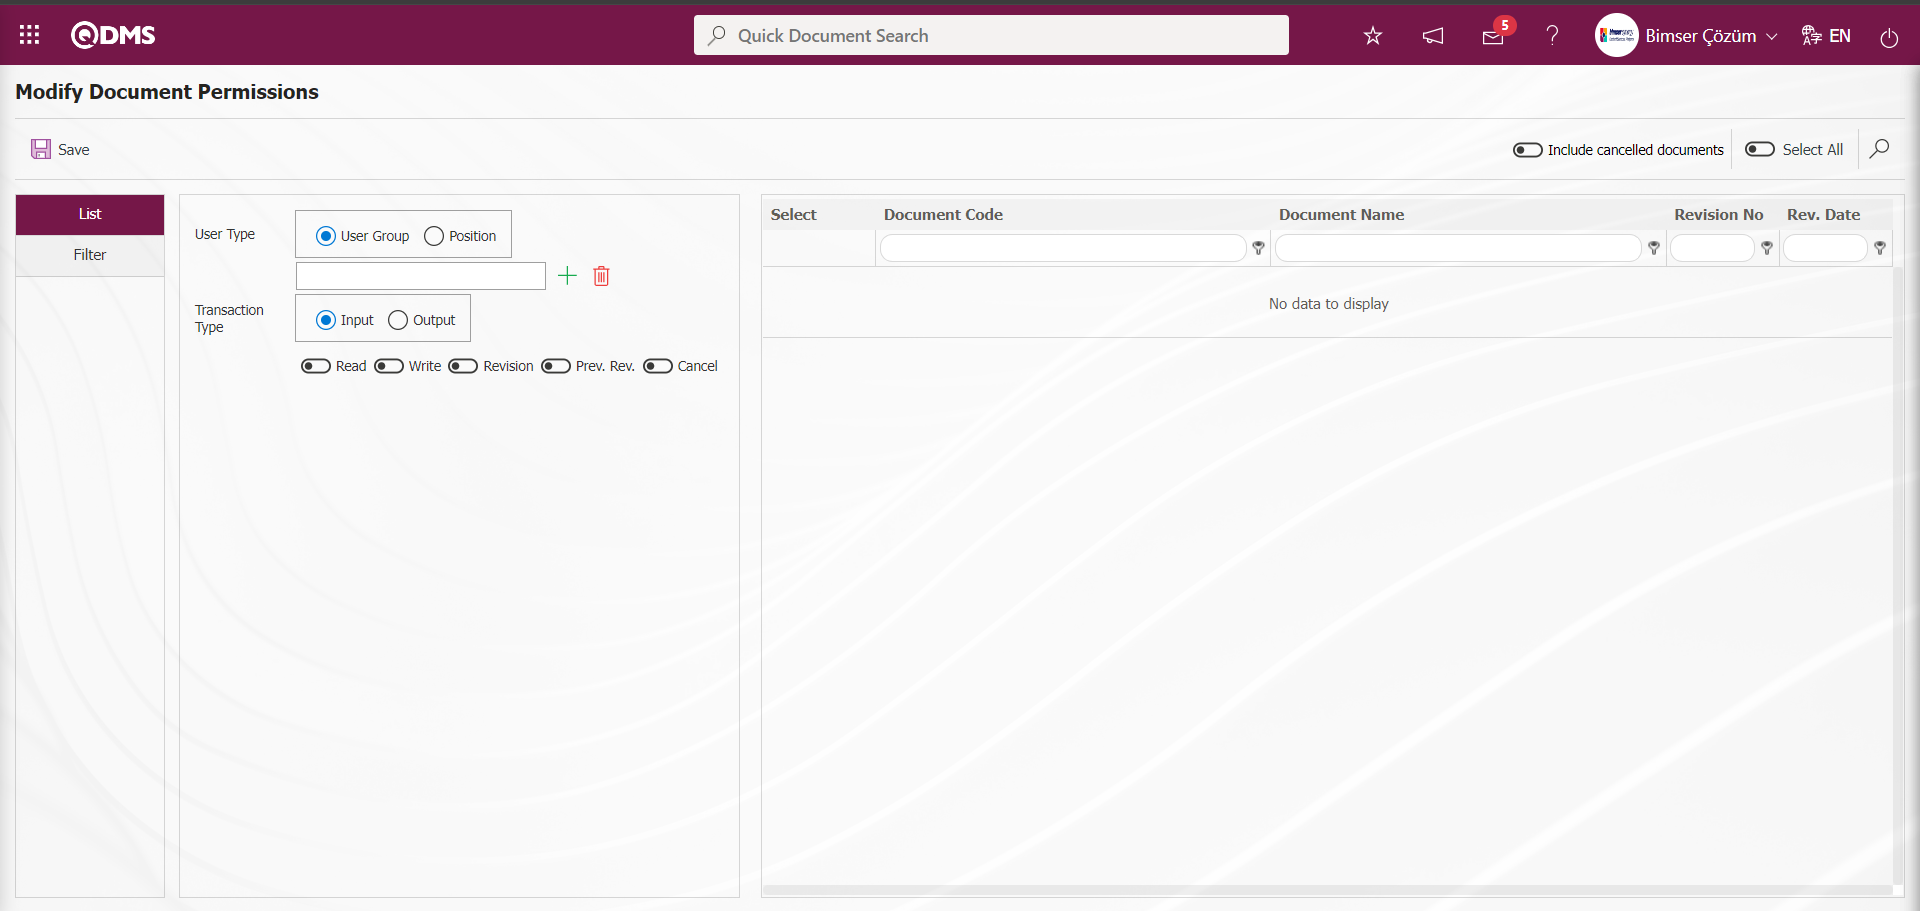
Click on Modify Document Permissions** menu. In the Filter tab, click the  (Select) button from the Parent Folder field and select the Folder from the Document Folder list.

On the Modify Document Permissions screen, the documents in the folder are listed by clicking the  (Search) button.
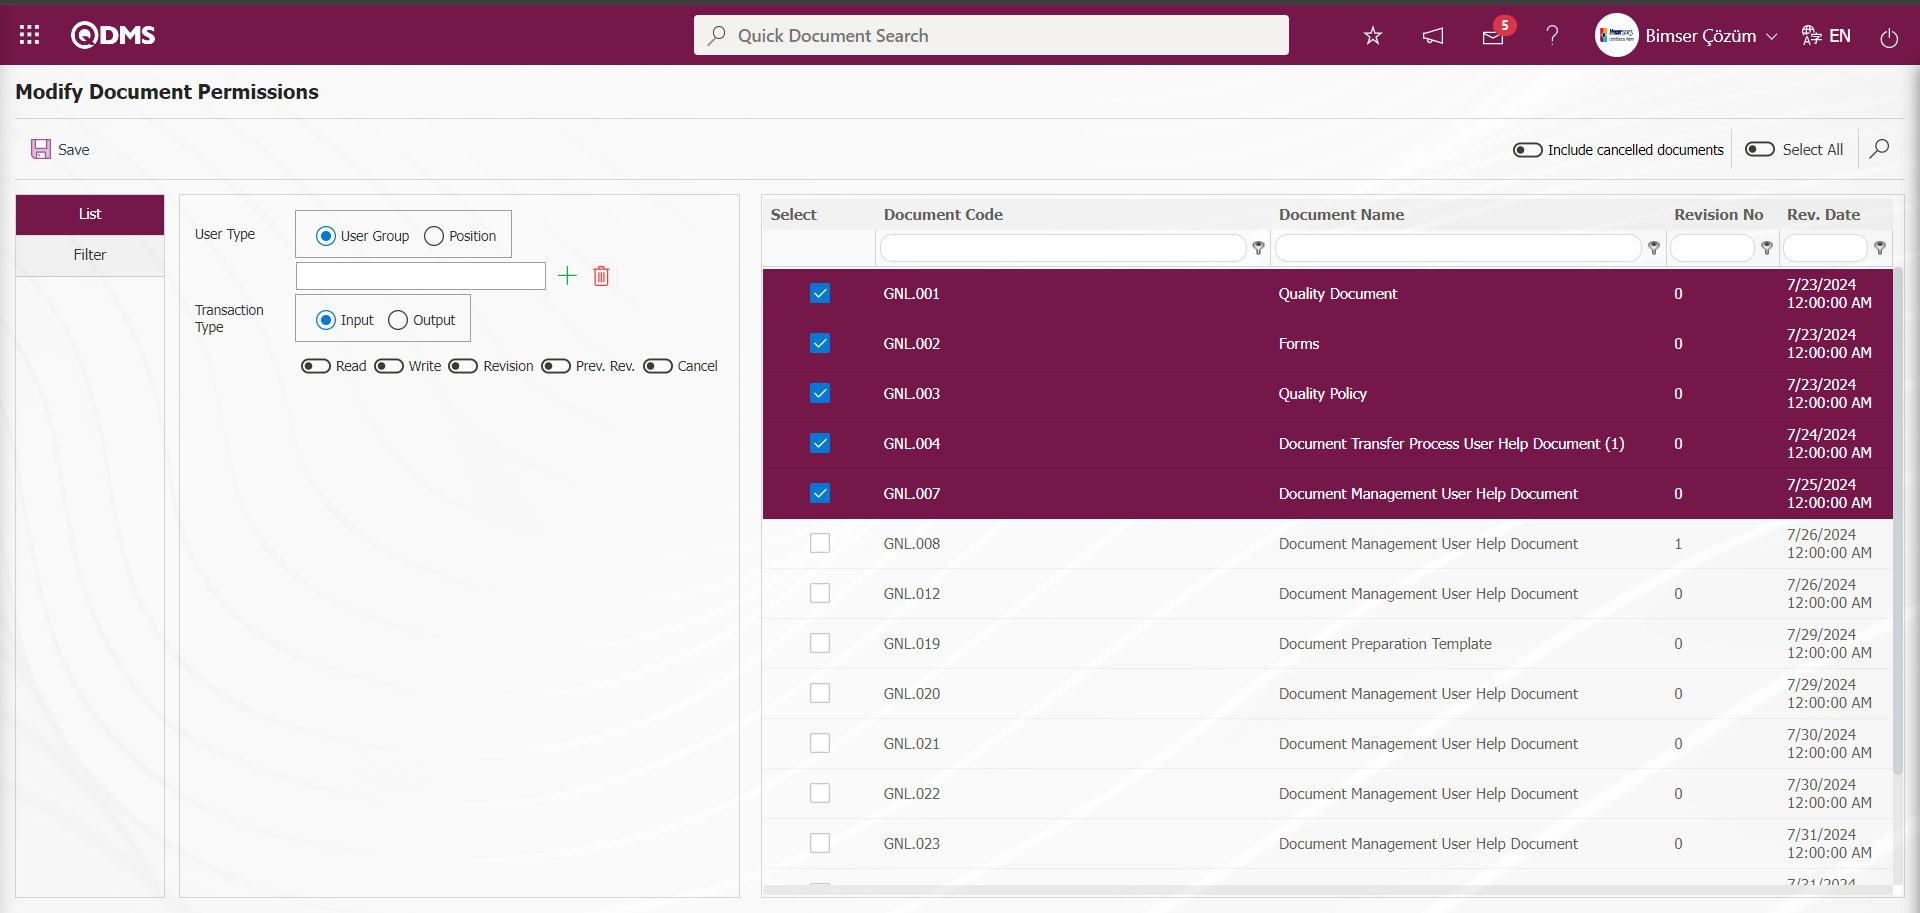
On the Modify Document Permissions screen, the staff or user group is selected as the user type; then the check box related to the read, print, revise, see old revisions, delete fields are checked
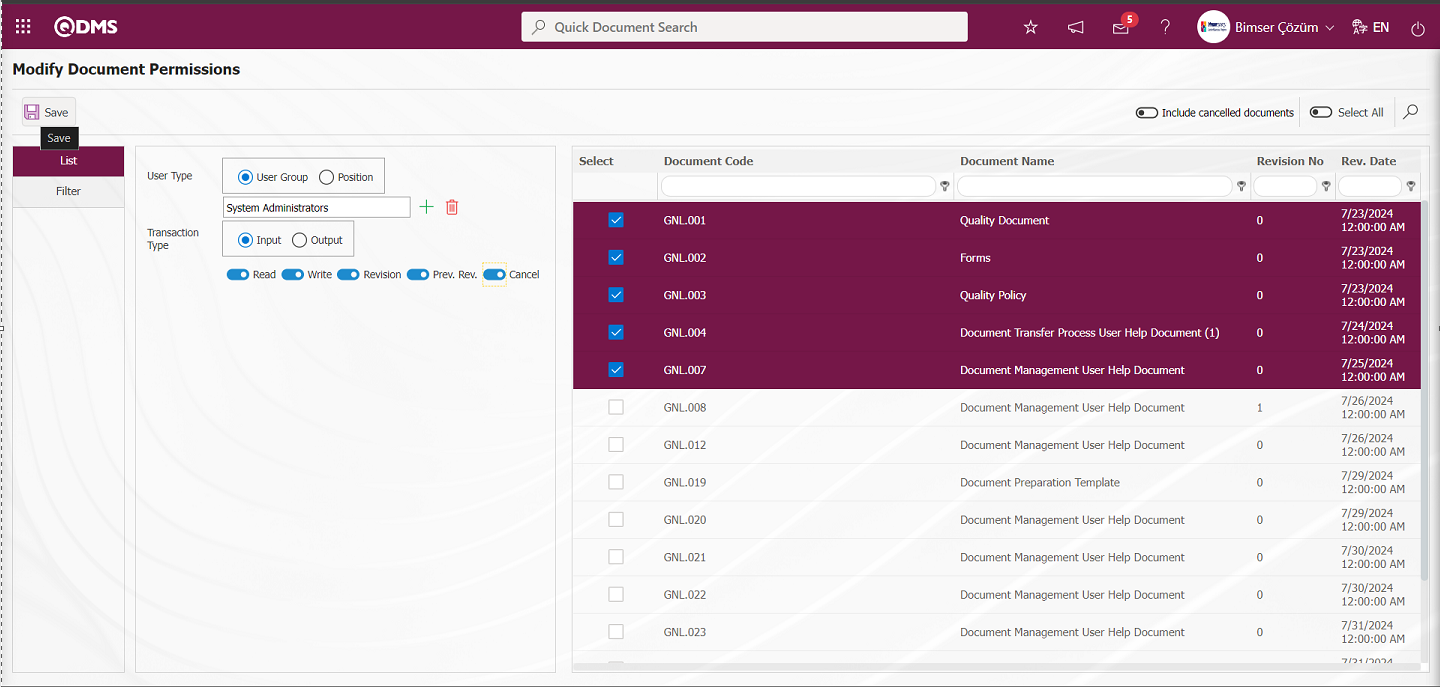
Finally, the  button at the top left corner of the screen can be clicked to make a quick and batch authorization edit.
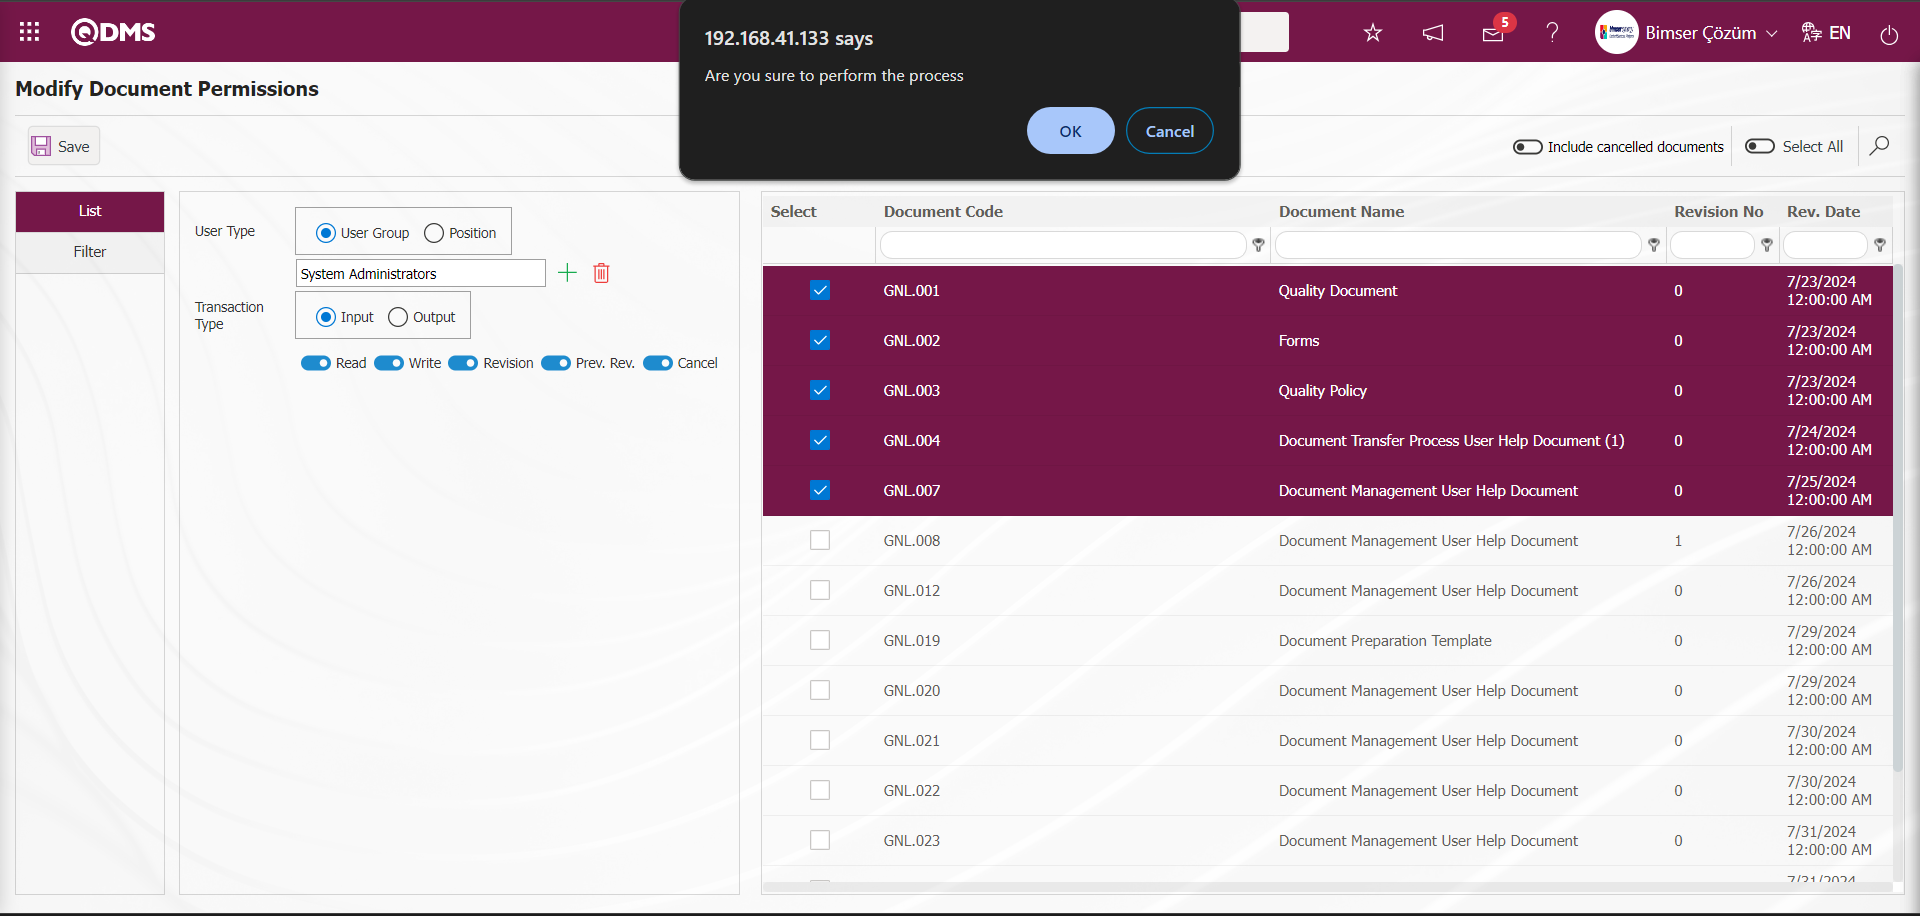
Click the “OK” button in the message given by the system
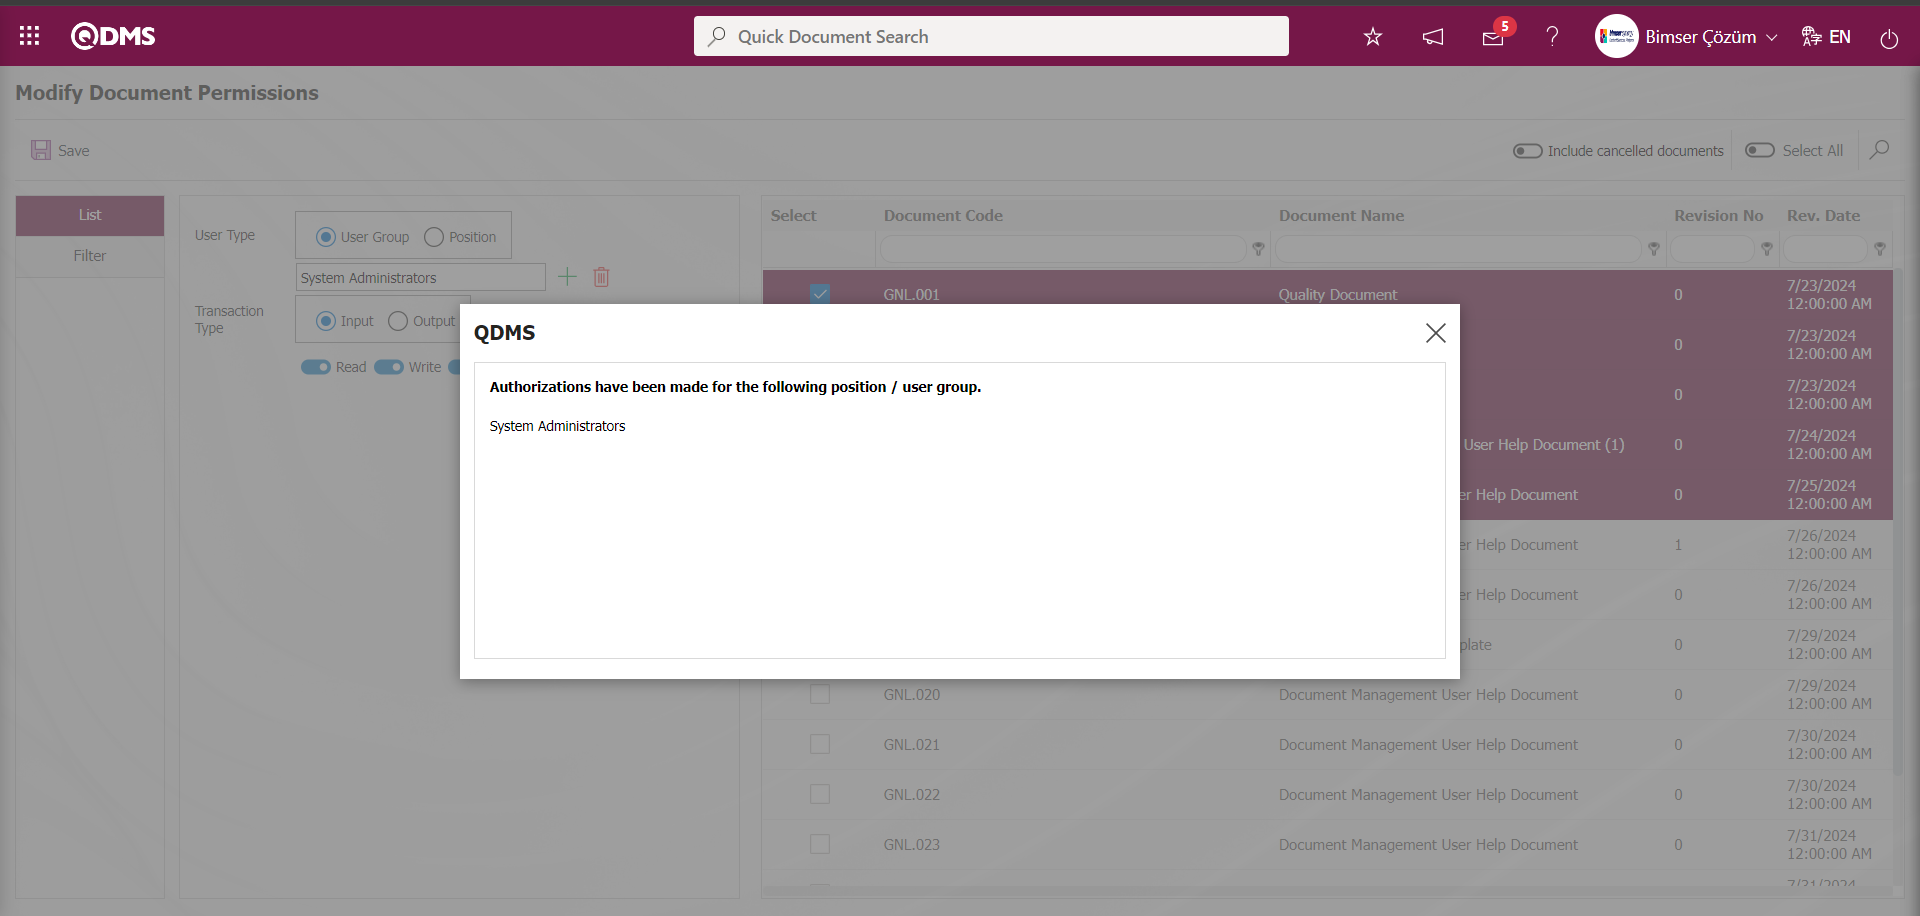 The information that authorizations are issued by the system for the position/user group and the information of the position/user group whose authorizations are issued is given. Authorization can be given on document basis and authorizations can also be removed from this section. Necessary arrangements can also be made on documents that have been canceled in this menu.
6.3.12.Folder Permission Modification
Menu Name: System Infrastructure Definitions/ Document Activities/ Folder Permission Modification
This is the menu where the authorization process related to folders can be organized easily and quickly. Authorizations can be given to personnel or user groups as user type after the folder selection.
In the Filter tab, click the  (Select) button from the Parent Folder field and select the folder to be authorized in the Document Folder list defined in the system and click the
  (Search) button.
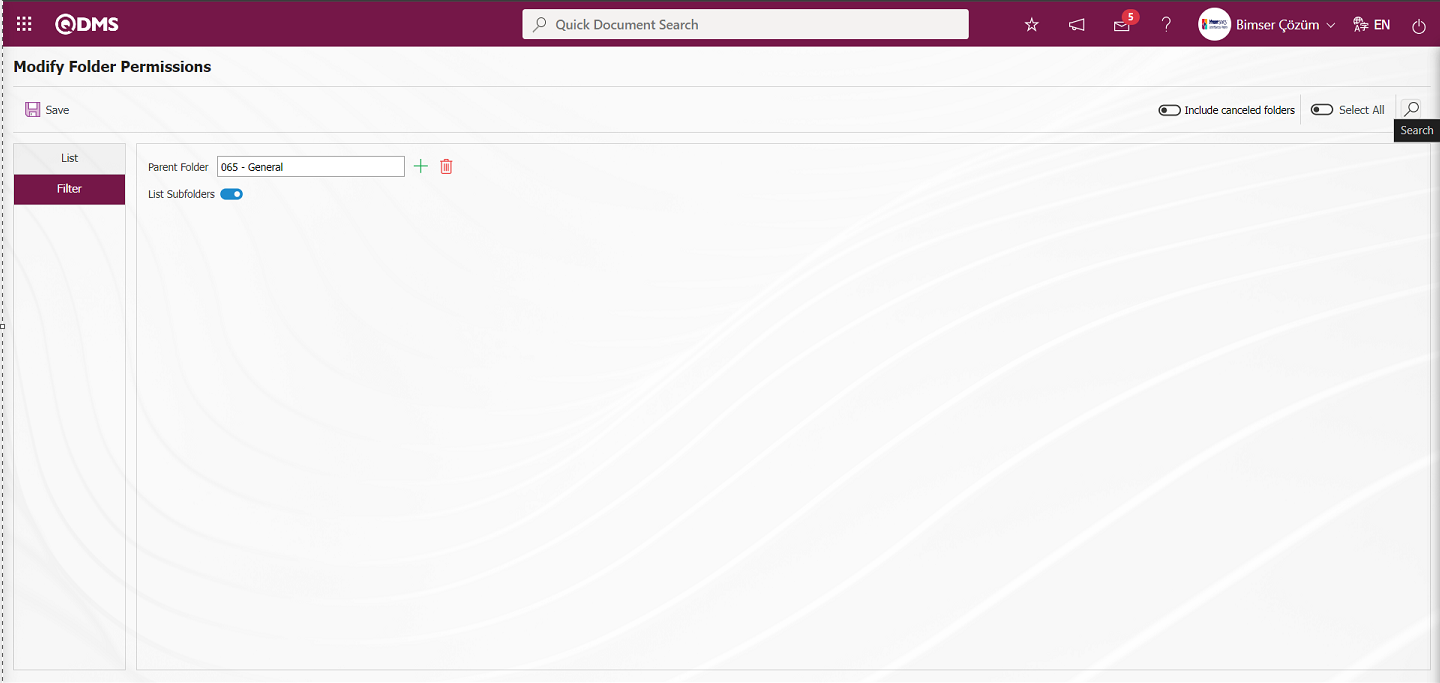 After filtering according to the search criteria in the Filter tab, the folder to be authorized is displayed in the list tab.

Then, the folders to be authorized are selected. In the User Type field, it is determined as personnel or user group, then the check boxes related to the read, print, revise, see old revisions, cancel fields are checked. In the Operation Type field, the Add option is selected as the relevant option according to the addition or removal of authorizations.
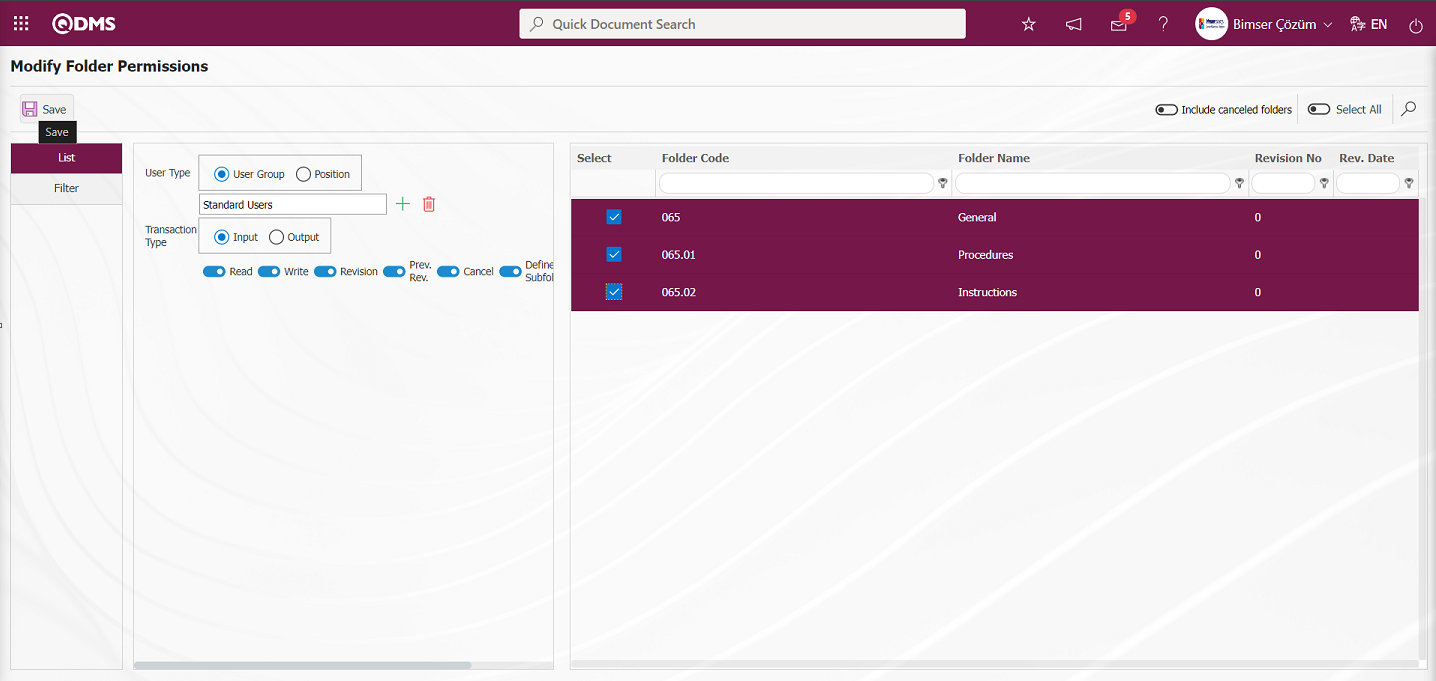
Finally, by clicking the  button in the upper left corner of the screen, folder authorization editing is done quickly.
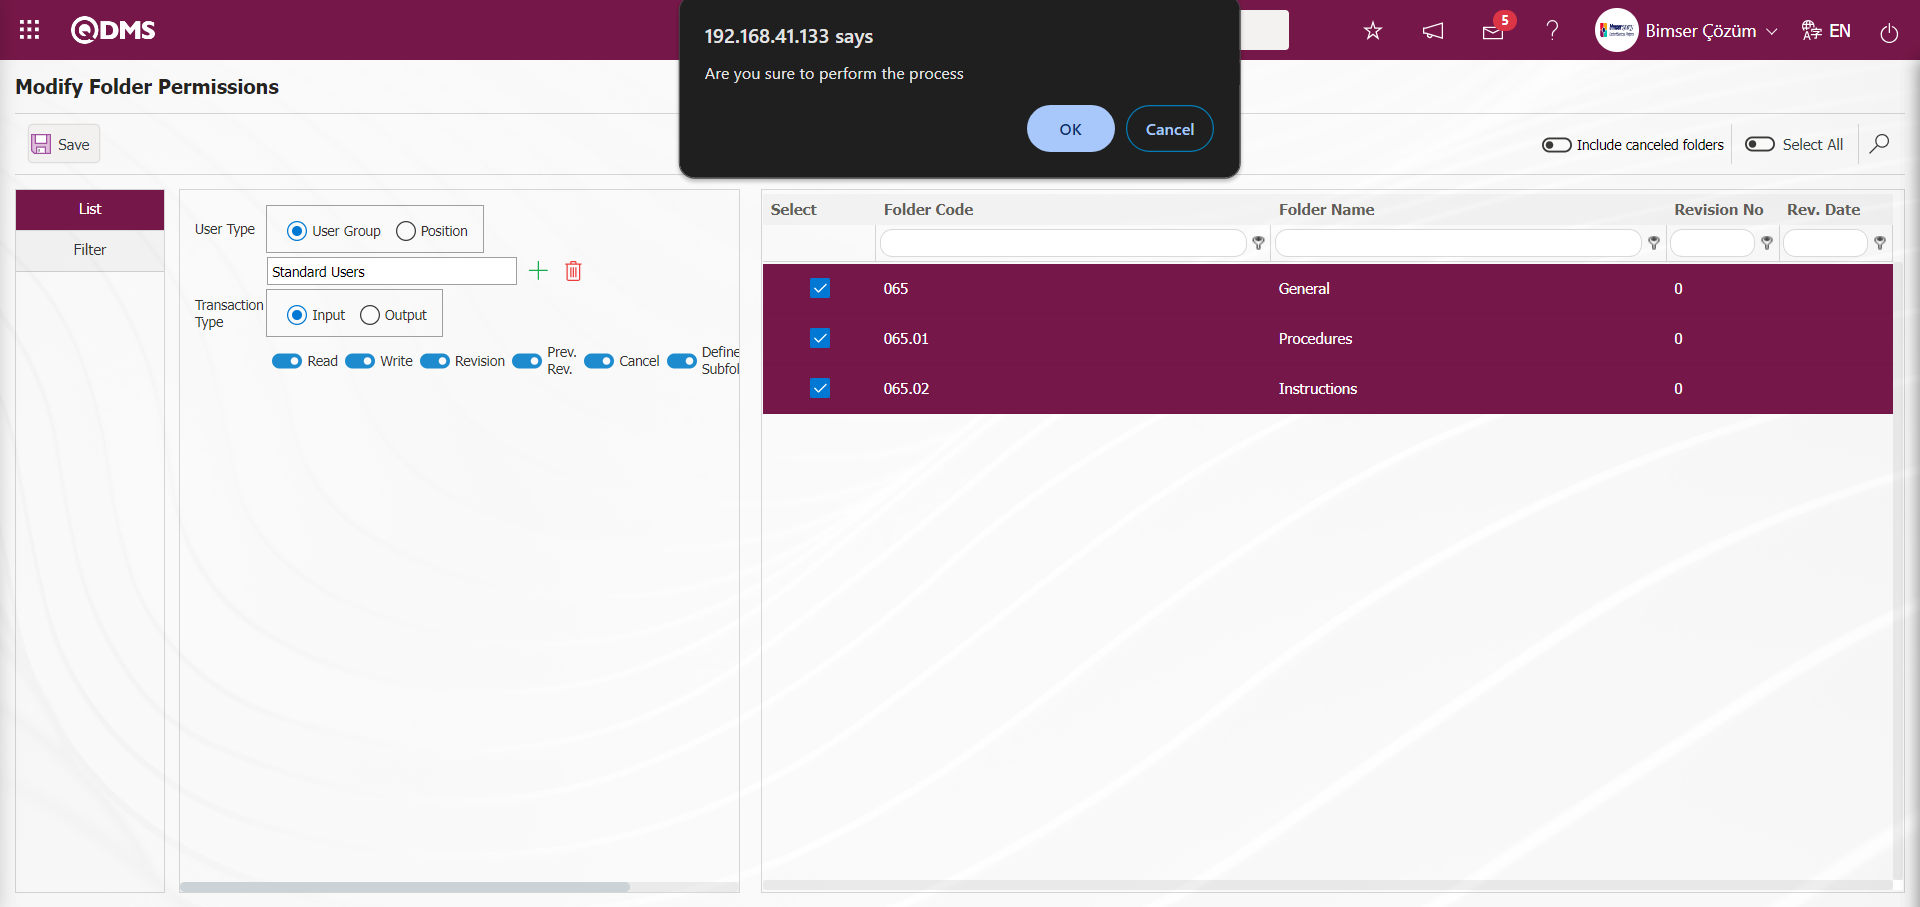
Click the “OK” button in the message given by the system.
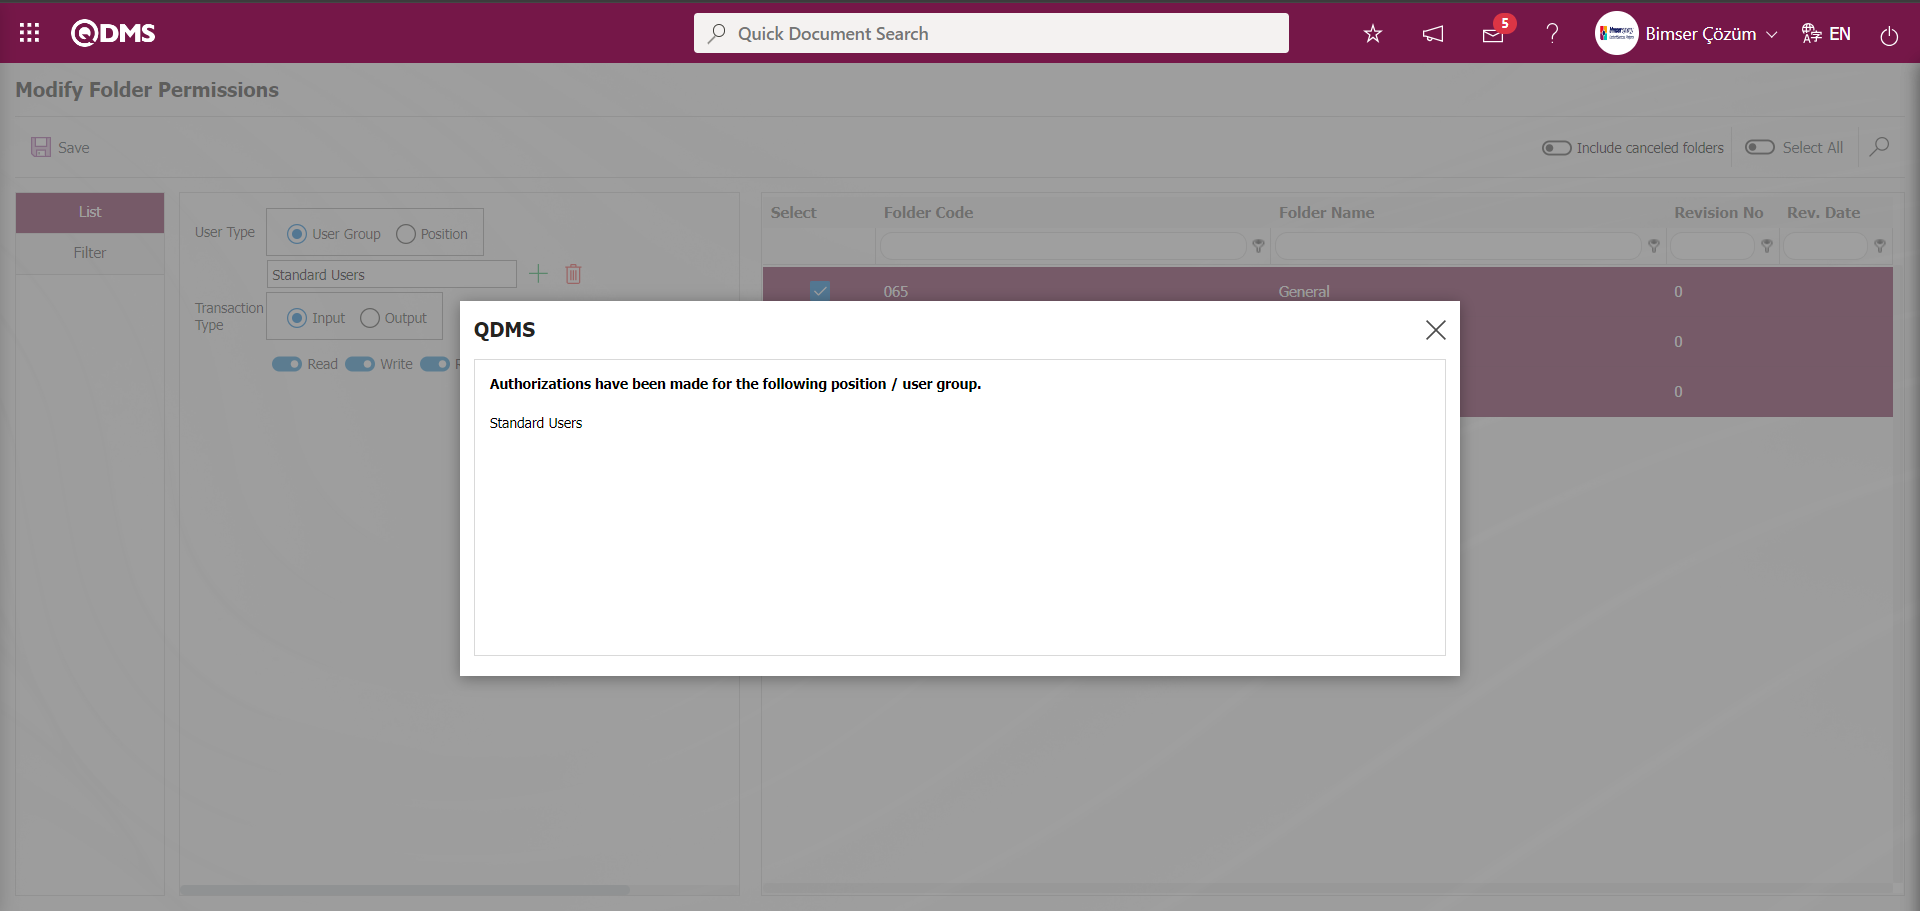
It is seen that authorizations are edited by the system for the position/user group and the information of the position/user group for which the authorizations are edited is given. Authorization can be given on folder basis as well as authorizations can be removed from this section. In this menu, necessary arrangements related to authorizations can also be made on folders that have been canceled.
6.3.13.Document Reactivation
Menu Name: System Infrastructure Definitions/ Document Activities/ Document Reactivation
This is the menu where a canceled document can be withdrawn from cancellation and put back into use.
Go to the Retrieve Document from Cancel menu. After filling in the fields such as Folder Code, Document Code or Document Name in the Filter tab, the documents are brought to the screen according to the desired criteria by performing the filtering process with the  (Search) button. After selecting the documents, the
  button is clicked and the documents are brought back from cancelation.
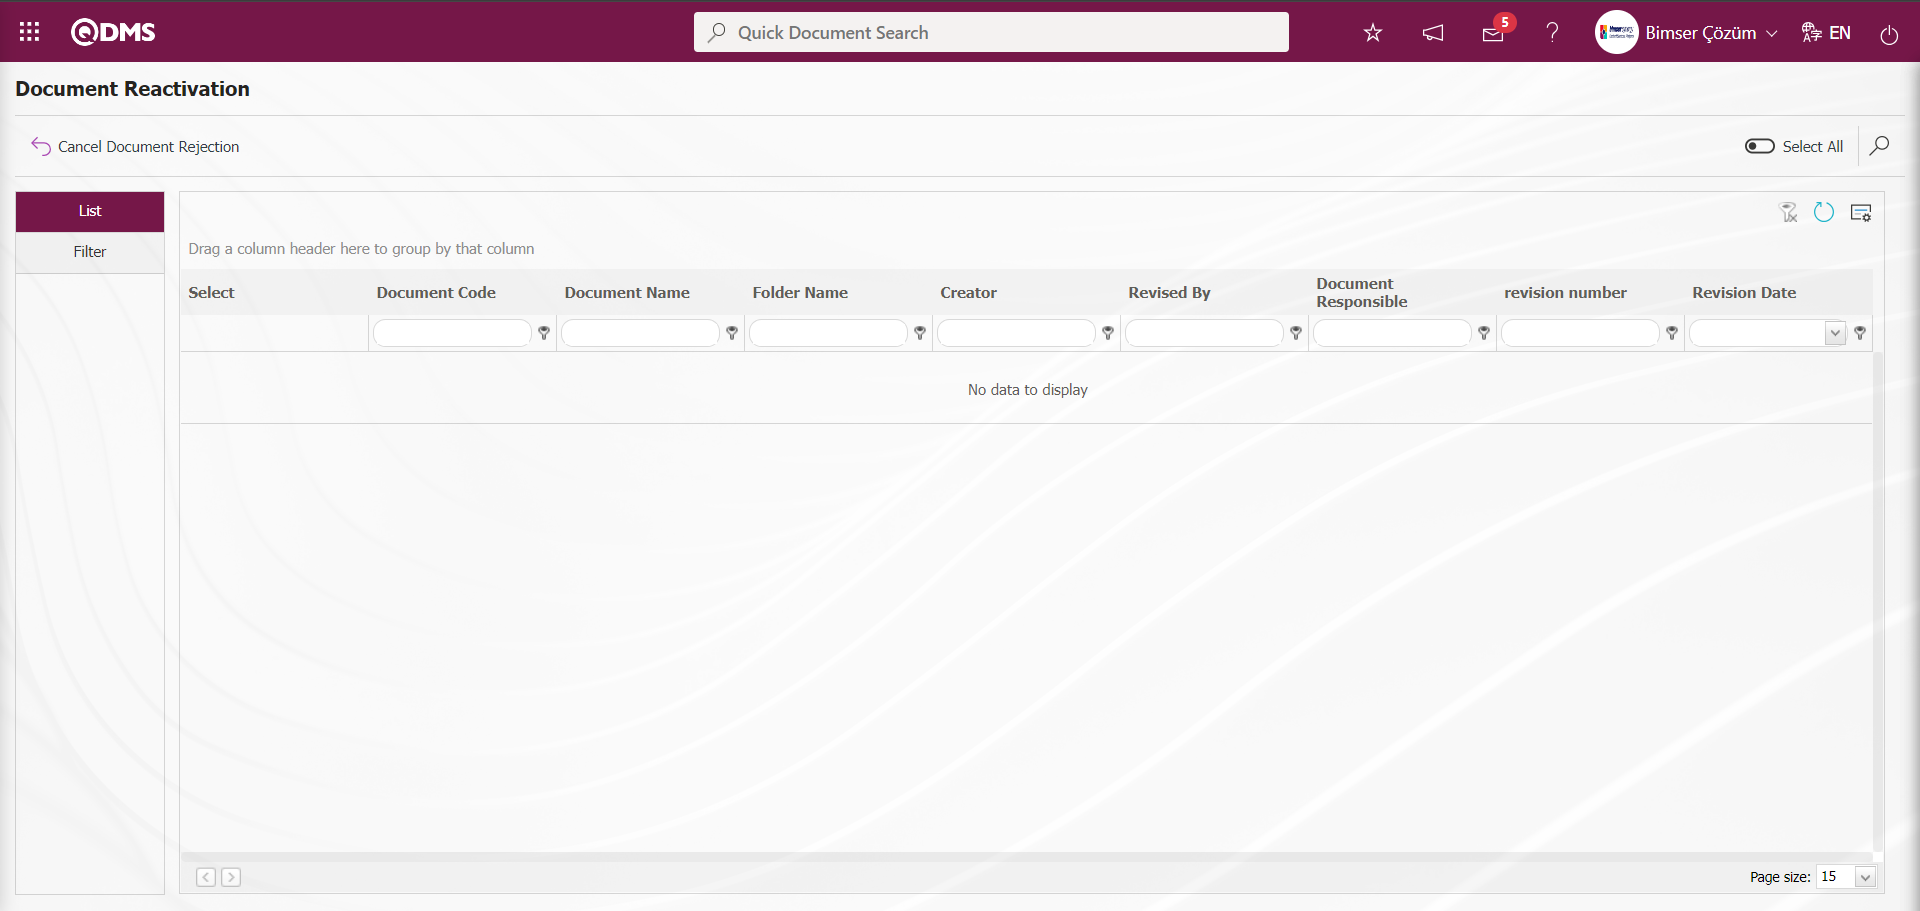
With the help of the buttons on the screen;
: The documents selected in the list in the canceled status are brought back from cancellation. The documents selected in the list are returned to use again from cancellation.
: Records are searched by filtering.
: The data remaining in the filter fields in the grid where the search criteria on the menu screens are searched is cleaned.
: The menu screen is restored to its default settings.
: User-based designing of the menu screen is done with the show-hide feature, that is, the hiding feature of the fields corresponding to the columns on the menu screens.
On the Document Reactivation** screen, in the Document Search tab, enter the code of the canceled document in the Document Code field and click the (Search) button.

In the list tab, the document that has been canceled is displayed. The document to be brought back from cancelation is selected from the list and the document is brought back from cancelation by clicking the button.

Click the “OK” button in the message given by the system.
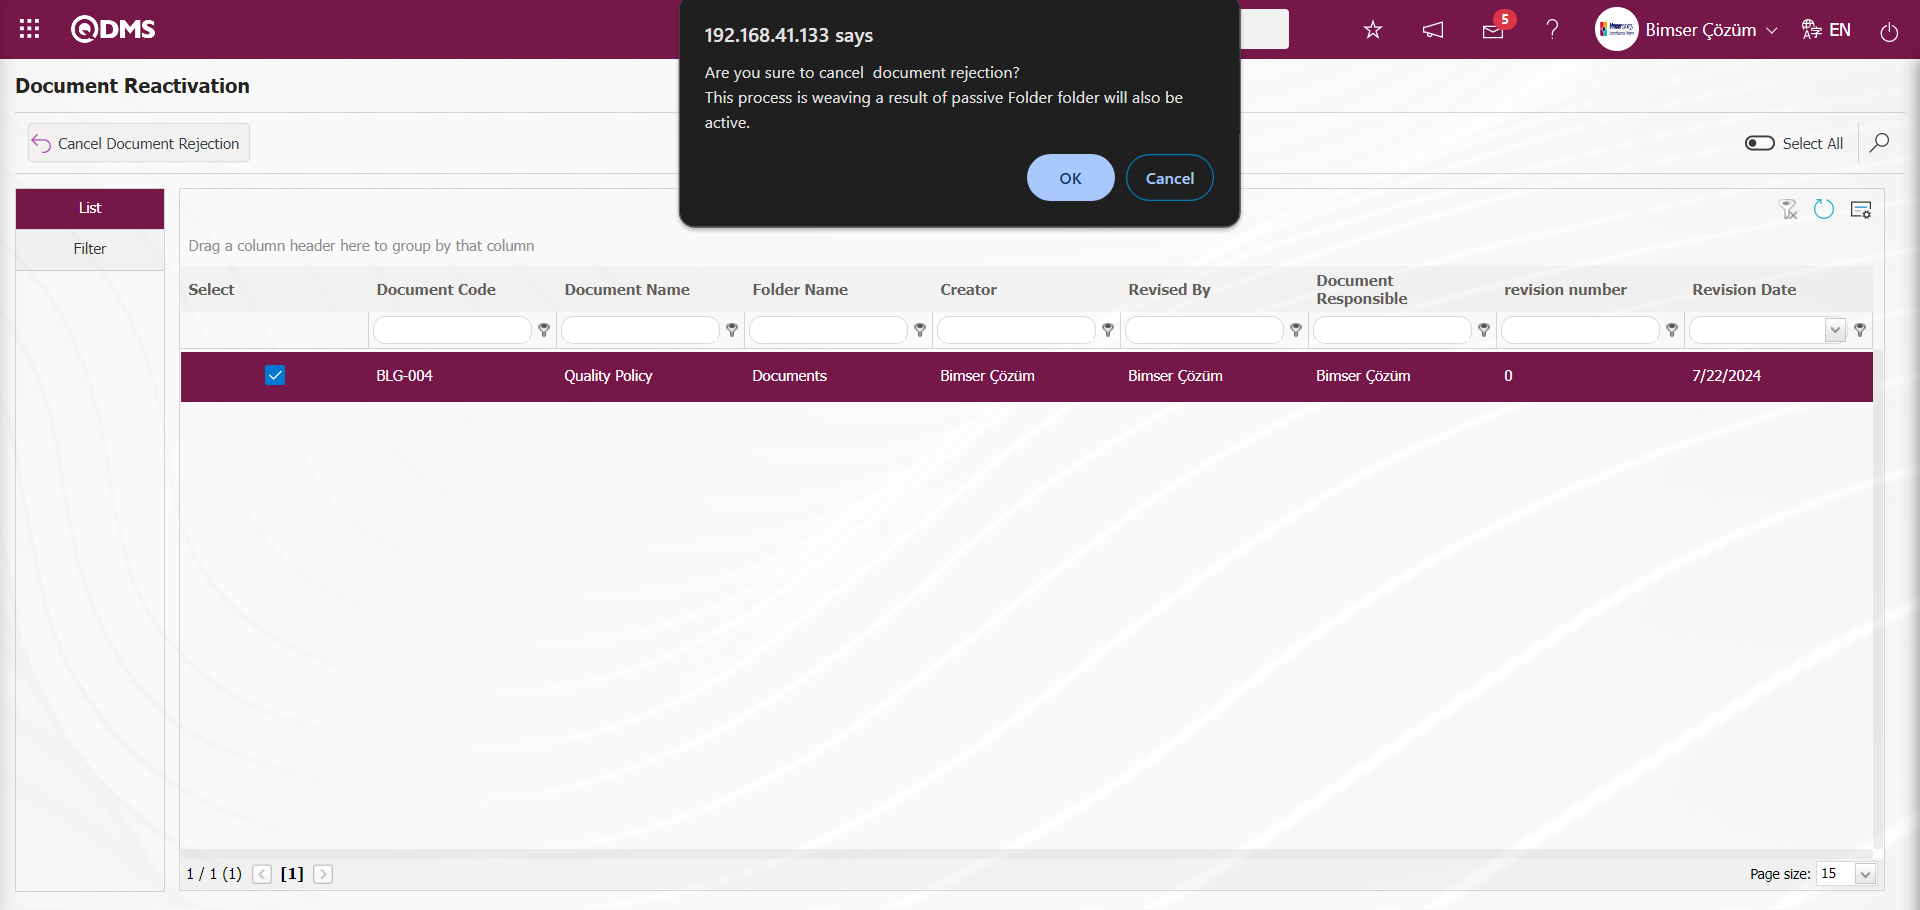
The system gives the message “Selected document(s) successfully returned.” and the selected documents are returned from the cancelation. The documents go back to the same folder they were in before they were canceled.
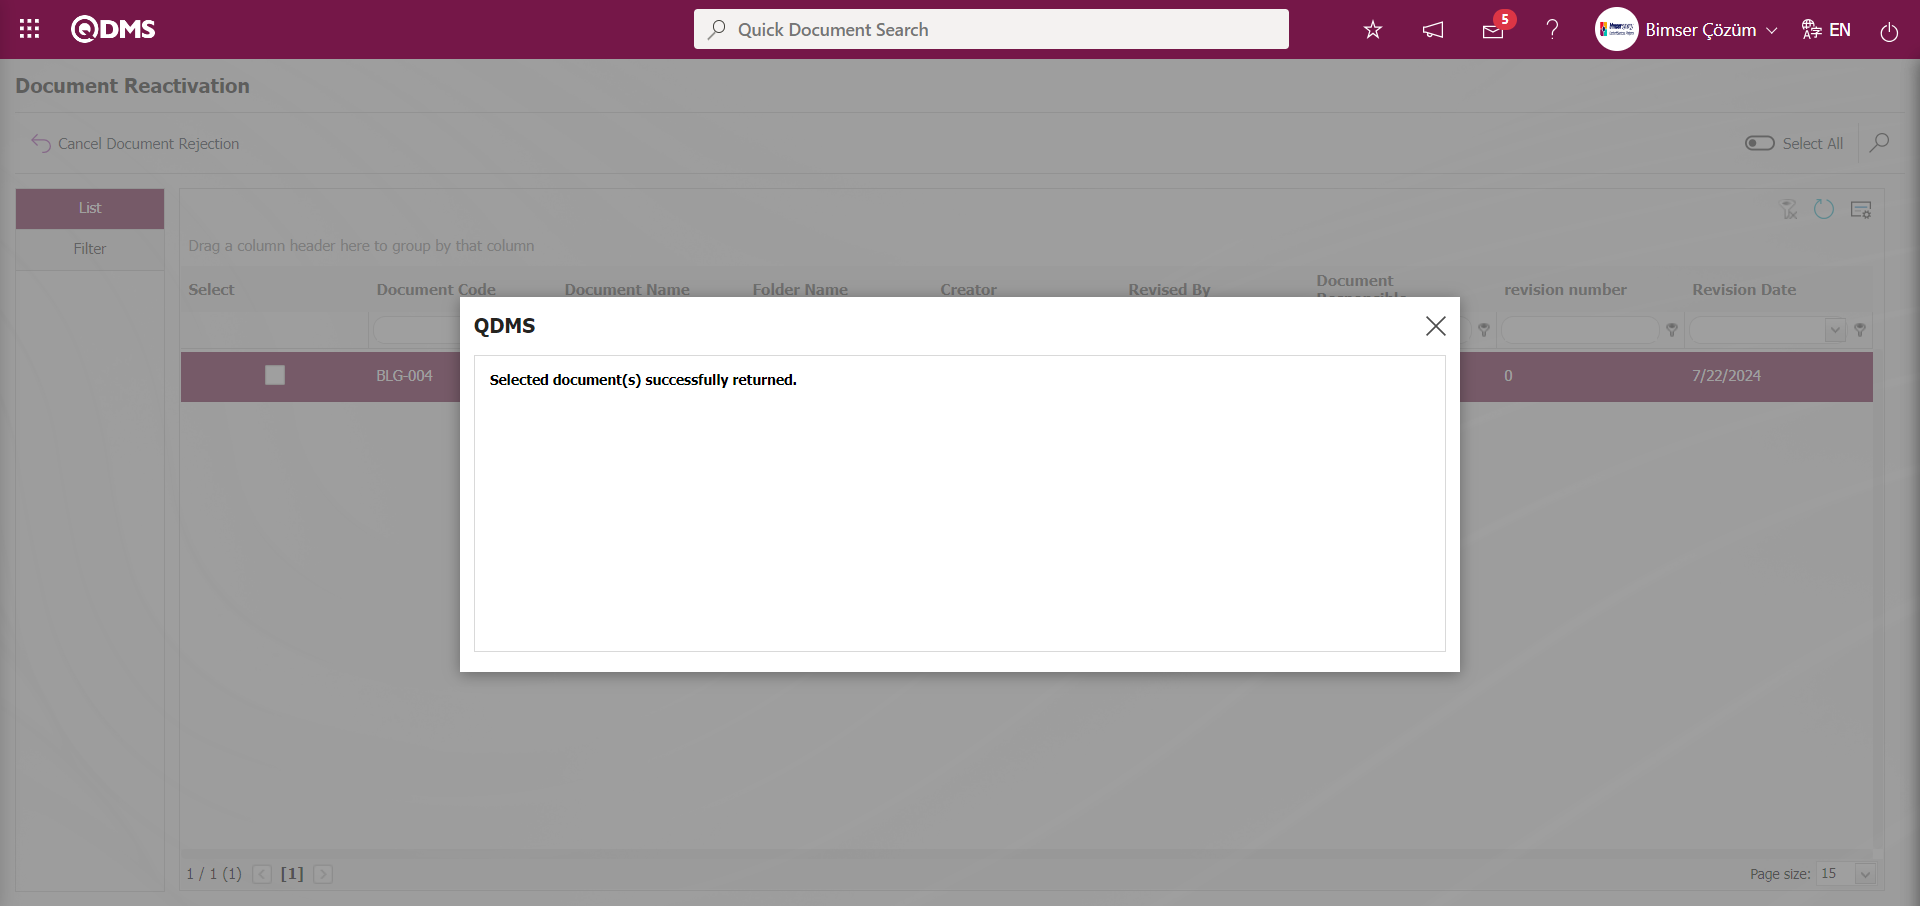
6.3.14.Document Deletion
Menu Name: System Infrastructure Definitions/ Document Activities/ Document Deletion
This is the menu where the process of completely deleting the selected documents from the system is performed. After this process, the documents cannot be accessed again and the system cannot store this document in the database. Go to the Document Deletion menu. After filling in the fields such as Folder Code, Document Code or Document Name in the Filter tab, the documents are brought to the screen according to the desired criteria by performing the filtering process with the (Search) button. After selecting the documents, the documents are deleted by clicking the  button.
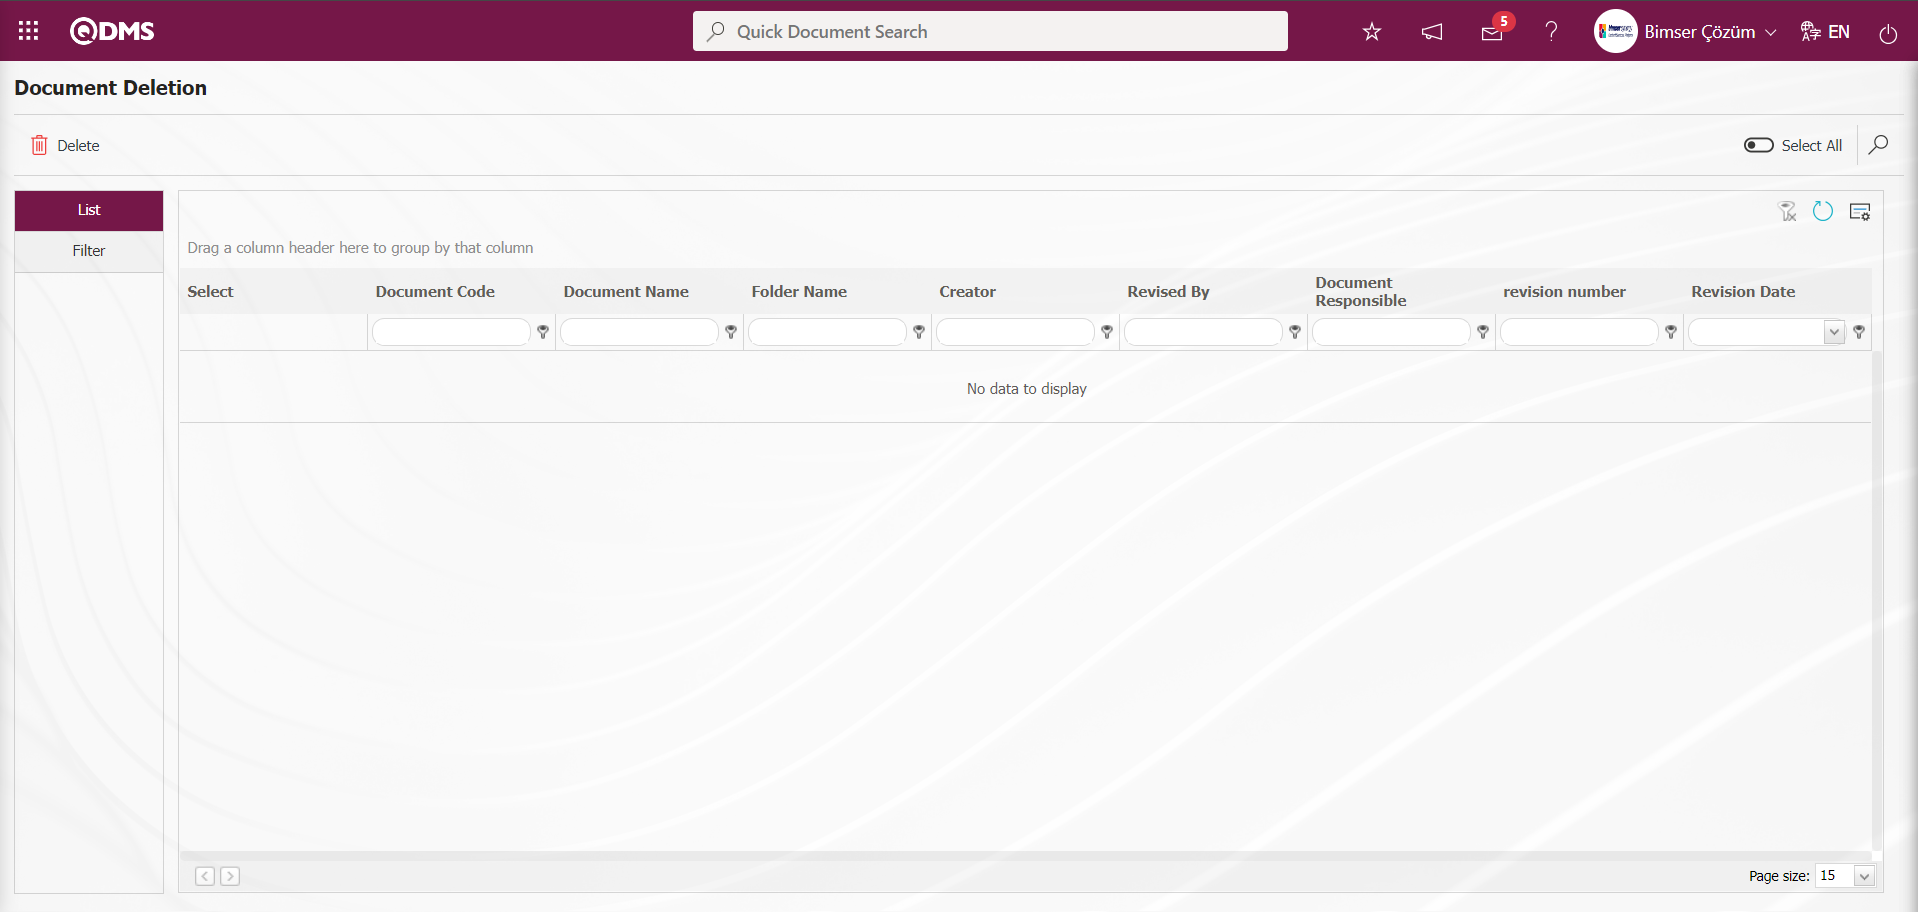
With the help of the buttons on the screen;
: Delete the selected document in the list.
: Records are searched by filtering.
: The data remaining in the filter fields in the grid where the search criteria on the menu screens are searched is cleaned.
: The menu screen is restored to its default settings.
: User-based designing of the menu screen is done with the show-hide feature, that is, the hiding feature of the fields corresponding to the columns on the menu screens.
On the Document Deletion screen, type the document code in the “Document Code” field, which is the filter search criteria in the document search tab, and click the (Search) button.

On the Document Deletion screen, the records are listed according to the search criteria in the filter made in the document list tab. The document listed in the document list tab is selected and the document is deleted by clicking the  button.
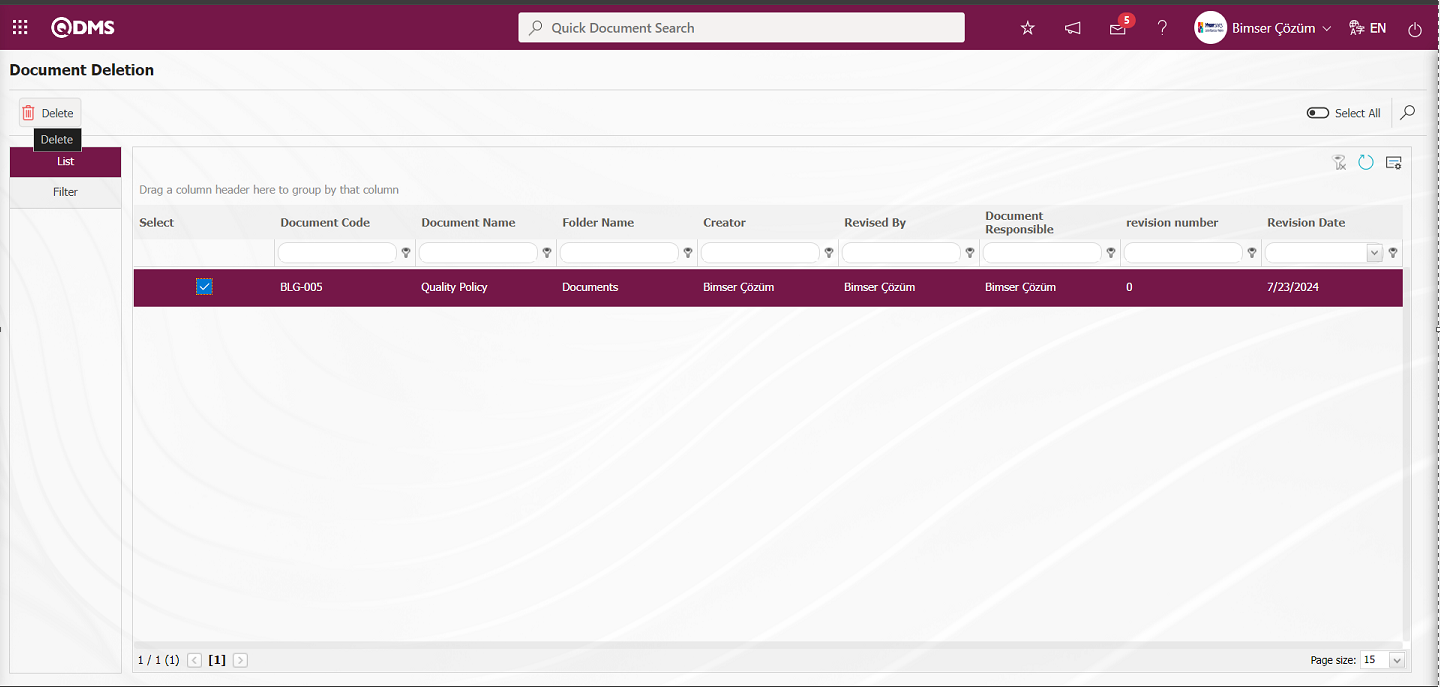
Click the “OK” button in the message given by the system.
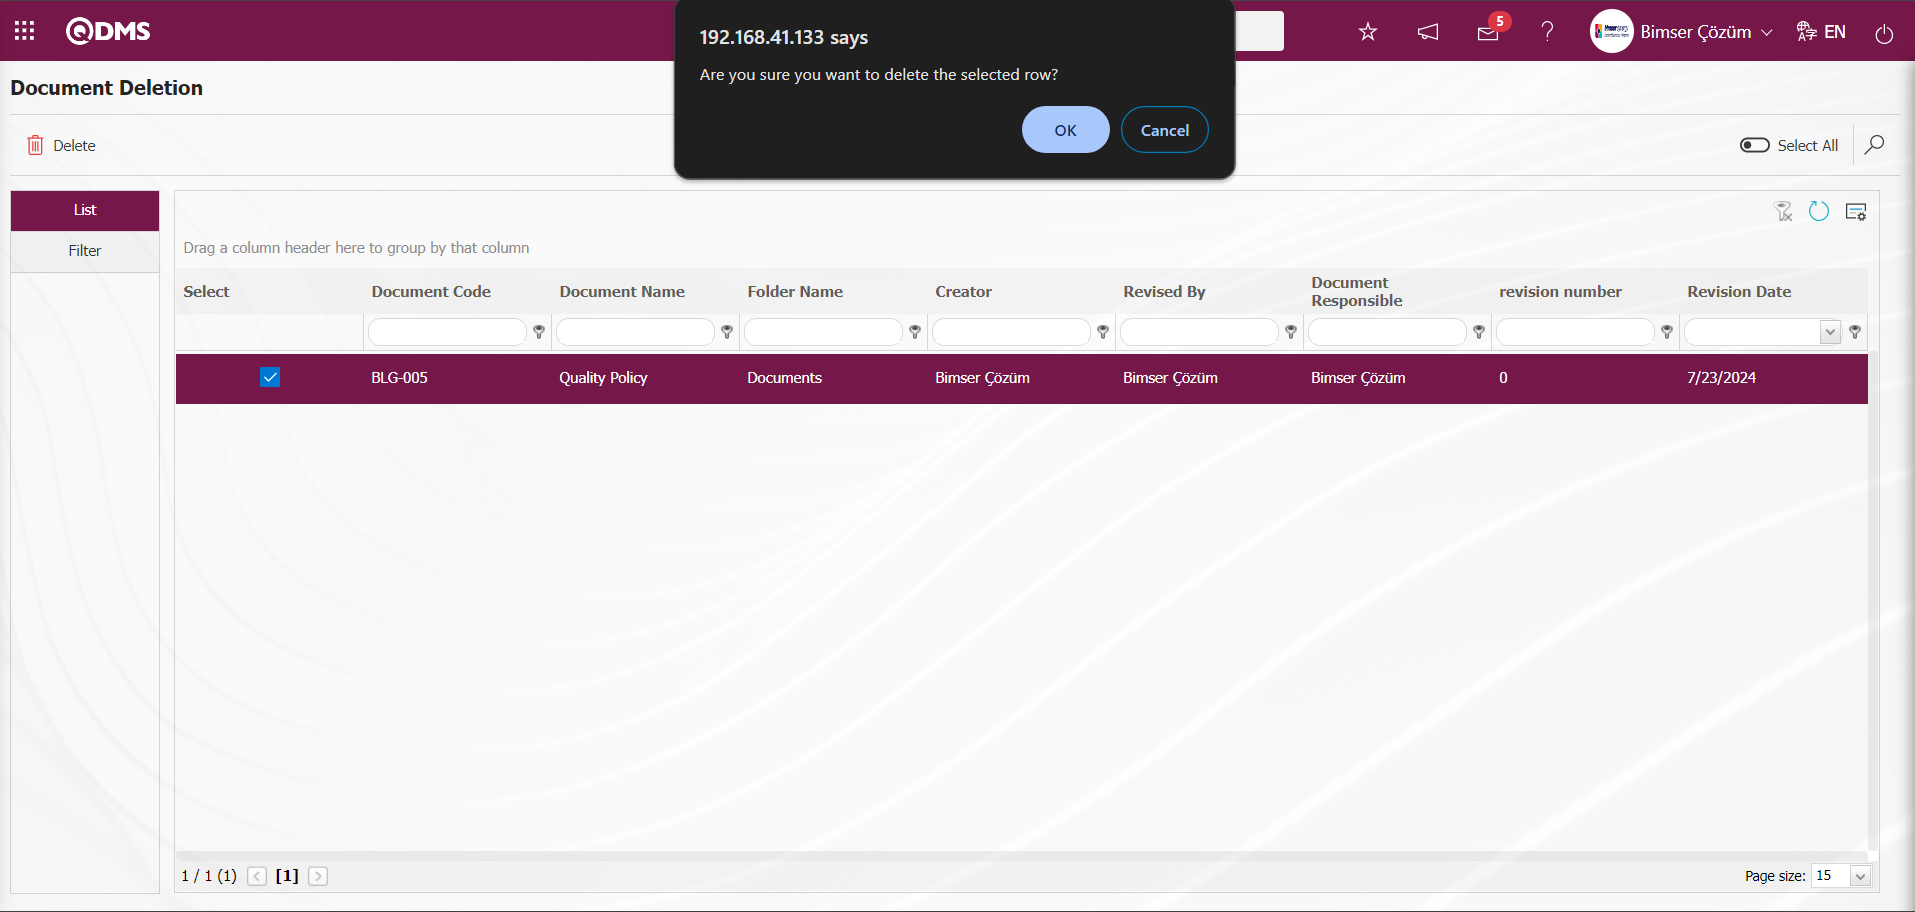
The system gives the message “Selected document(s) successfully deleted.” indicating that the document deletion process has been completed.

6.3.15. Delete Draft Document
Menu Name: System Infrastructure Definitions/ Document Activities/ Delete Draft Document
Draft status is the menu where the documents in the status such as Opinion, Returned from Opinion, Initial Control, Initial Control Rejection, Cancellation, Stored are completely deleted. After this process, the documents cannot be accessed again and this document is not stored in the system database. Click on the Delete Draft Document menu.
On the Delete Draft Documen screen, document list and document search tabs appear. By filtering according to the search criteria in the document search tab, the relevant records are listed in the document list according to these search criteria. By selecting the listed records and clicking the  button, the deletion of the documents in the draft stage is done.

With the help of the buttons on the screen;
: Deletion of the document in the selected draft status in the list is done.
: Records are searched by filtering.
 : The data remaining in the filter fields in the grid where the search criteria on the menu screens are searched is cleaned.
 : The menu screen is restored to its default settings.
 : User-based designing of the menu screen is done with the show-hide feature, that is, the hiding feature of the fields corresponding to the columns on the menu screens.
On the Delete Draft Document screen, type the document code in the “Document Code” field, which is the filter search criteria in the document search tab, and click the (Search) button.
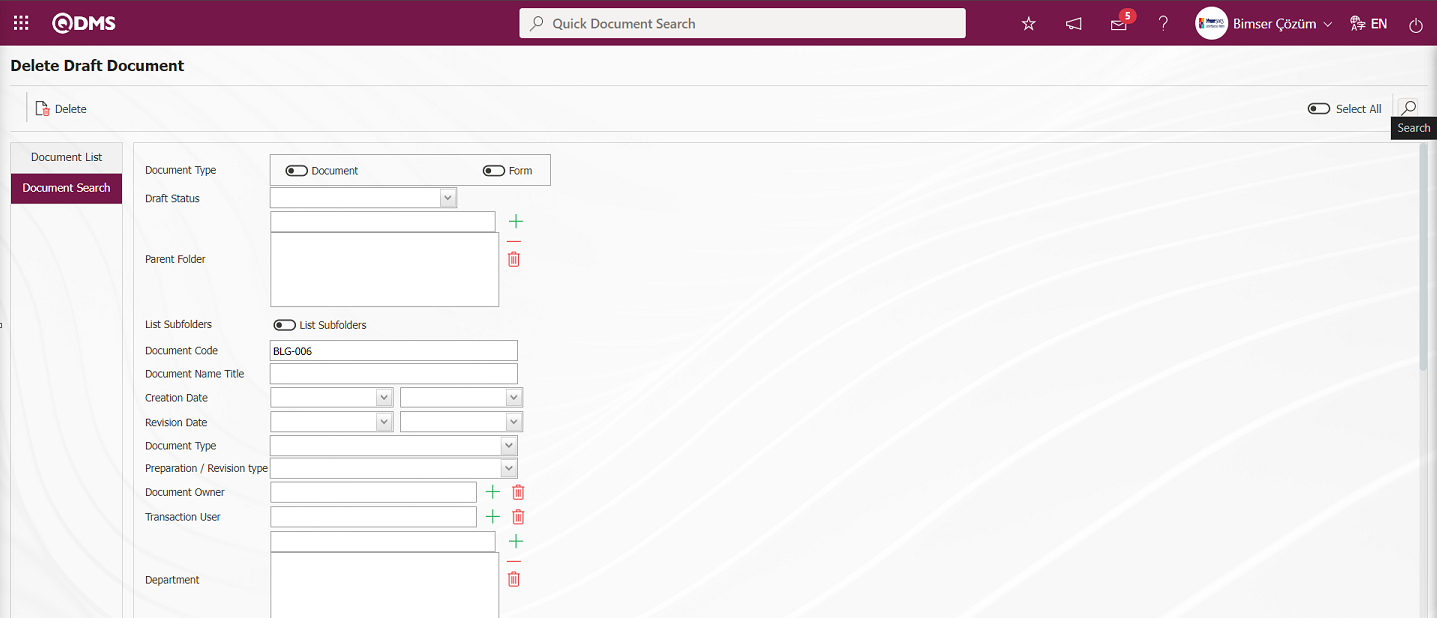
On the Delete Draft Document screen, the records are listed according to the search criteria in the filter made in the Document List tab. By selecting the document listed in the Document List tab and clicking the  button, the deletion of the document in the “Saved” draft stage is made.

Click the “OK” button in the message given by the system.

The system gives the message “Selected document(s) successfully deleted.” indicating that the document deletion process has been completed.
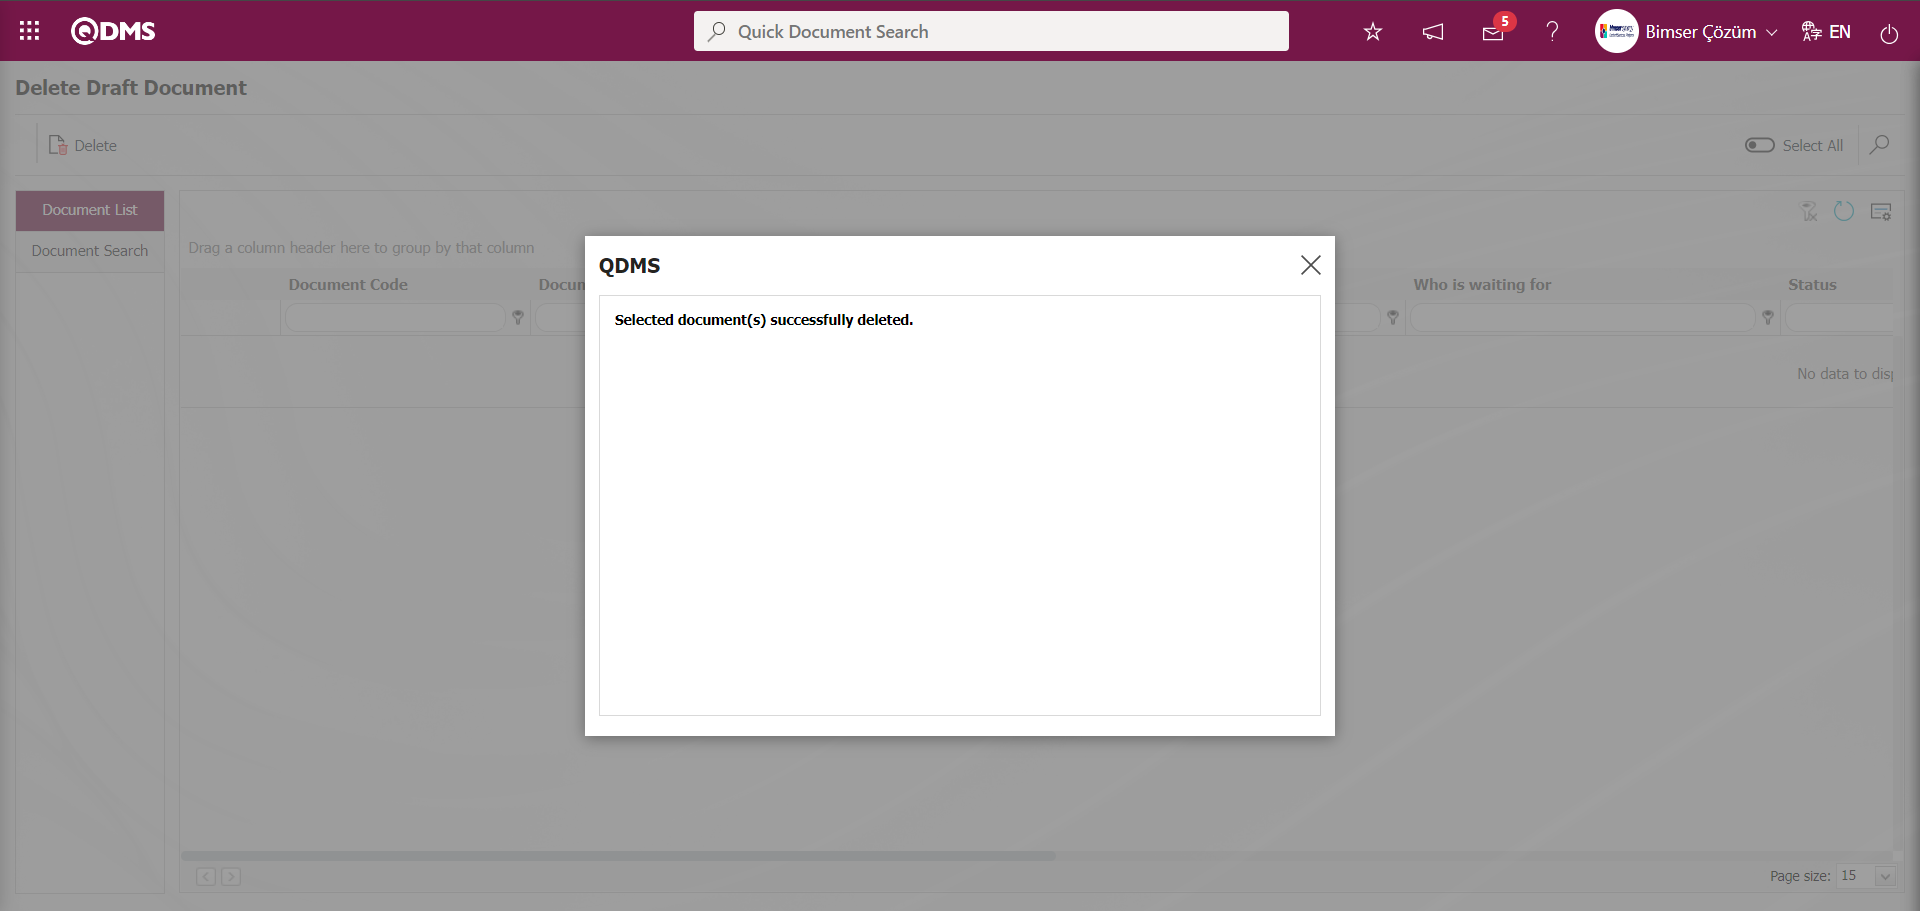
6.3.16.Delete Controlled Copy Distribution Task
Menu Name: System Infrastructure Definitions/Document Activities/ Delete Controlled Copy Distribution Task
This is the menu where the controlled copy distribution task deletion process takes place. Document List and Document Search tabs appear on the Delete Controlled Copy Distribution Task screen. By filtering according to the search criteria in the Document Search tab, the relevant records are listed in the Document list according to these search criteria. By selecting the listed records and clicking the  button, the deletion of controlled copy distribution tasks is performed.
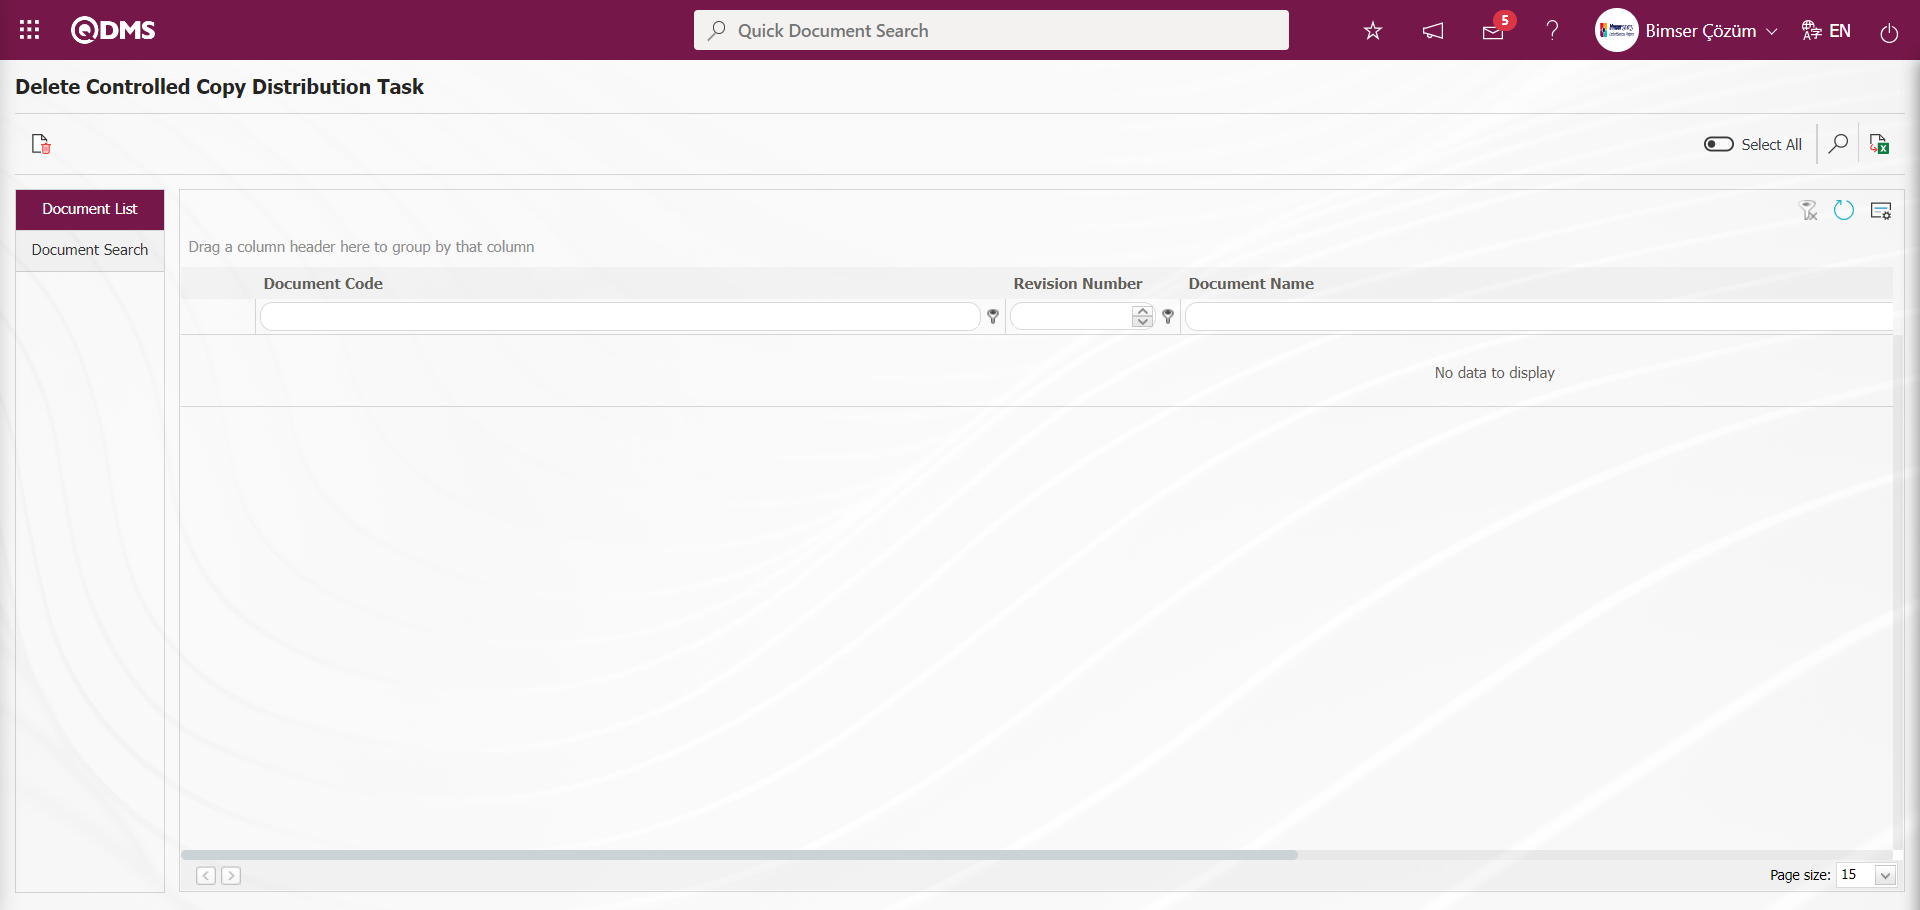
With the help of the buttons on the screen;
 : Deleting the selected controlled copy distribution task in the list
: Records are searched by filtering.
: The data remaining in the filter fields in the grid where the search criteria on the menu screens are searched is cleaned.
: The menu screen is restored to its default settings.
: User-based designing of the menu screen is done with the show-hide feature, that is, the hiding feature of the fields corresponding to the columns on the menu screens.
On the Delete Controlled Copy Distribution Task screen, type the document code in the “Document Code” field, which is the filter search criteria in the document search tab, and click the (Search) button.
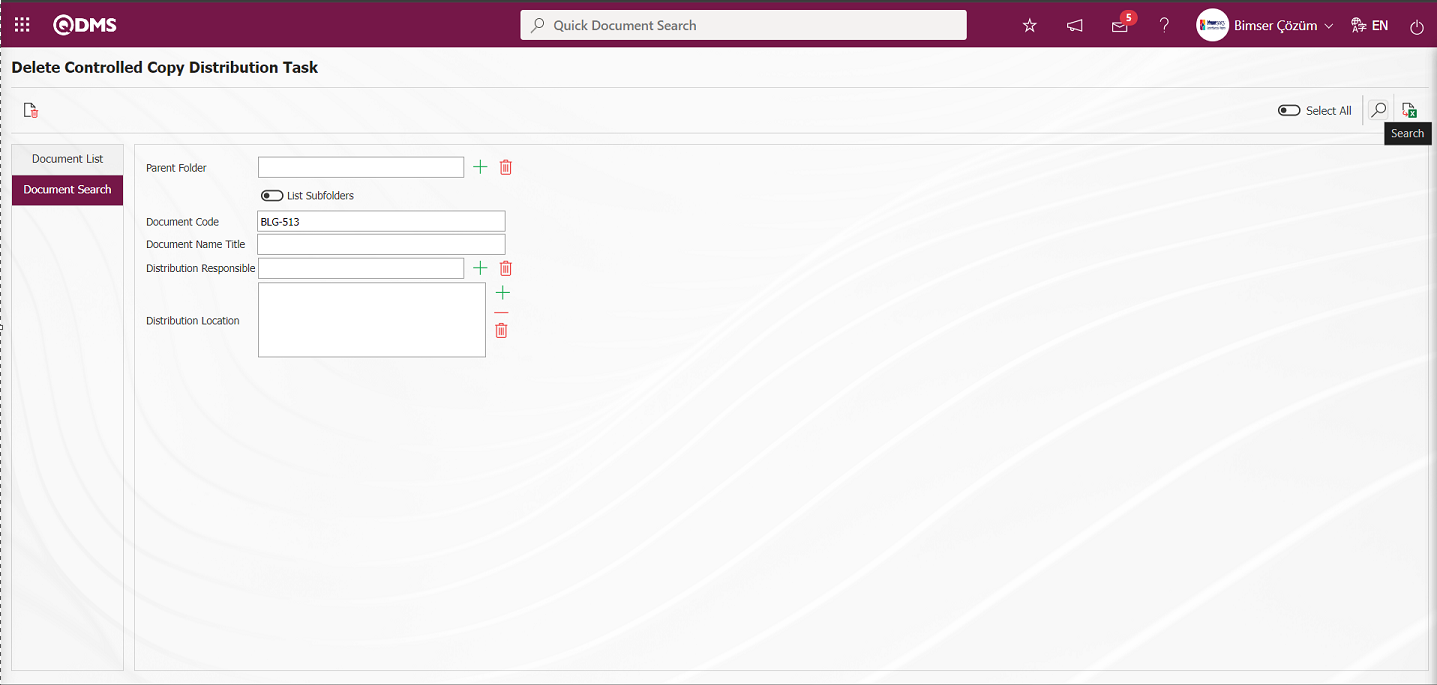
On the Delete Controlled Copy Distribution Task screen, the records are listed according to the search criteria in the filter made in the Document List tab. The document listed in the Document List tab is selected and the controlled copy distribution tasks are deleted by clicking the button.

Click the “OK” button in the message given by the system.
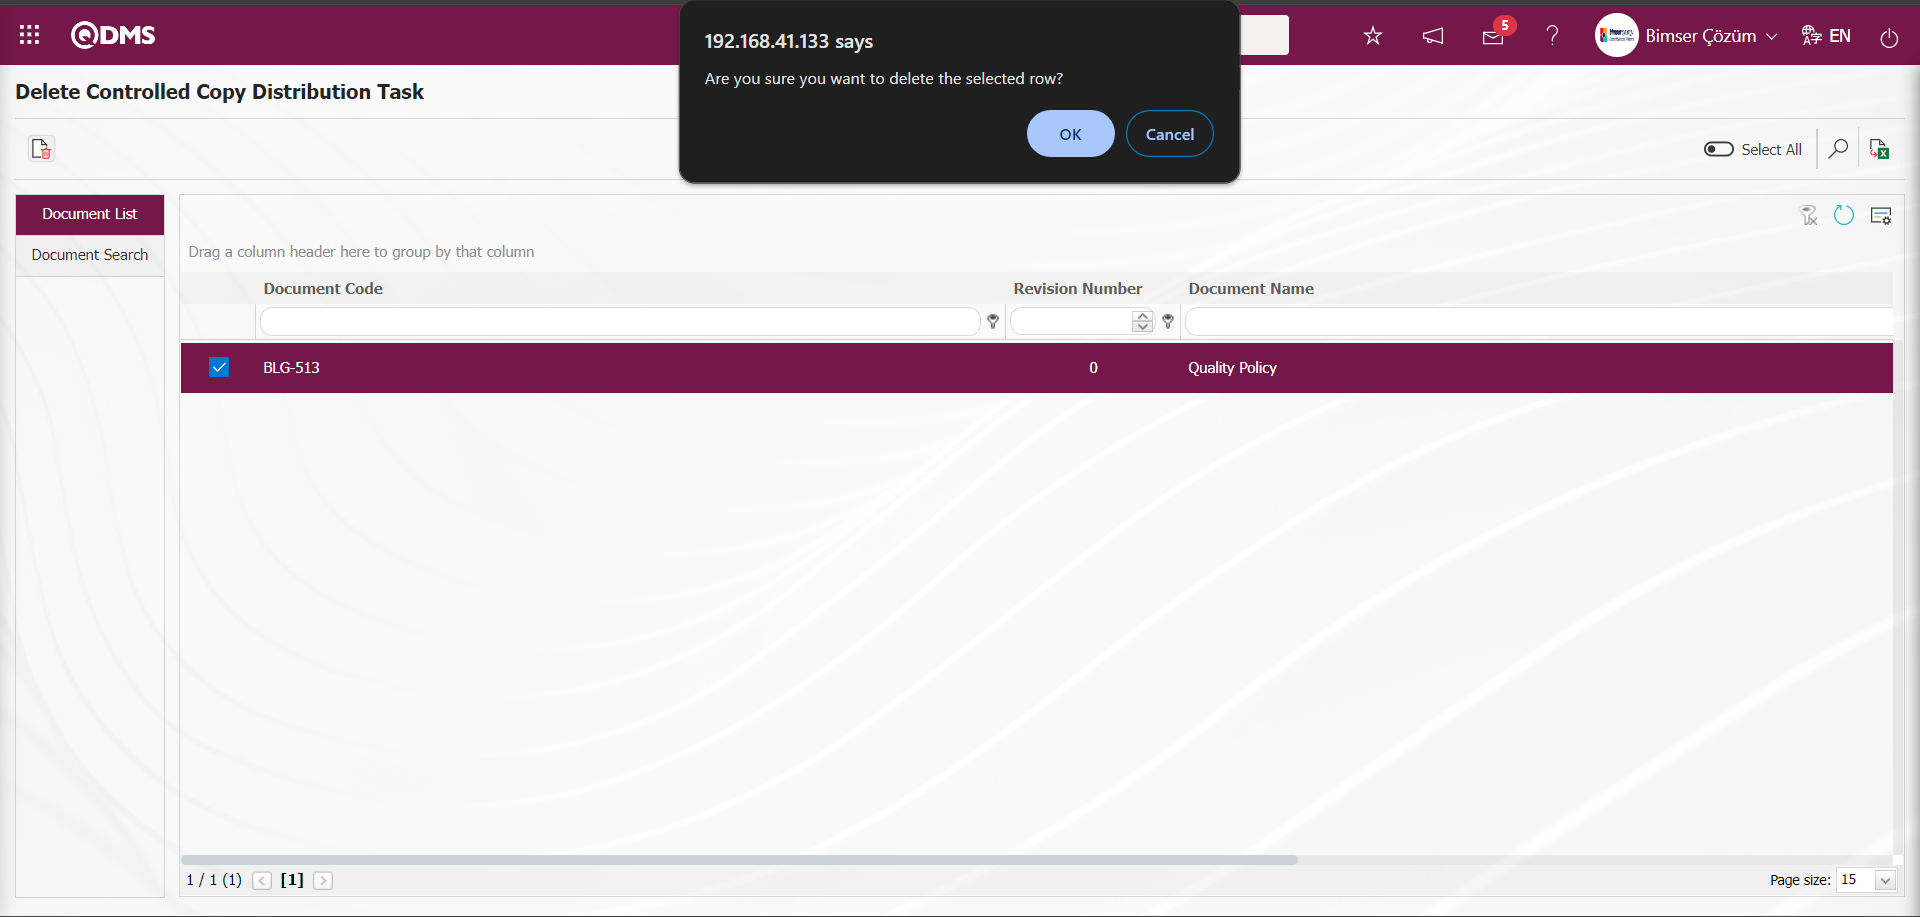
The message given by the system indicates that the deletion of controlled copy distribution tasks has taken place.

6.3.17.Document Transfer into Another Folder
Menu Name: System Infrastructure Definitions/ Document Activities/ Document Transfer into Another Folder
This is the menu where a document defined in the system is moved to a folder other than the folder to which it is connected. On the Move document to another folder screen, list and filter tabs appear. In the filter tab, filtering is done according to the search criteria. Select the document listed in the list tab. The selected documents are moved to the destination folder by specifying the destination folder and clicking the  button.

With the help of the buttons on the screen;
: The documents selected in the list are moved to the destination folder.
: Records are searched by filtering.
: The data remaining in the filter fields in the grid where the search criteria on the menu screens are searched is cleaned.
: The menu screen is restored to its default settings.
: User-based designing of the menu screen is done with the show-hide feature, that is, the hiding
On the Document Transfer into Another Folder screen, type the document code in the “Document Code” field, which is the filter search criteria in the document search tab, and click the (Search) button.
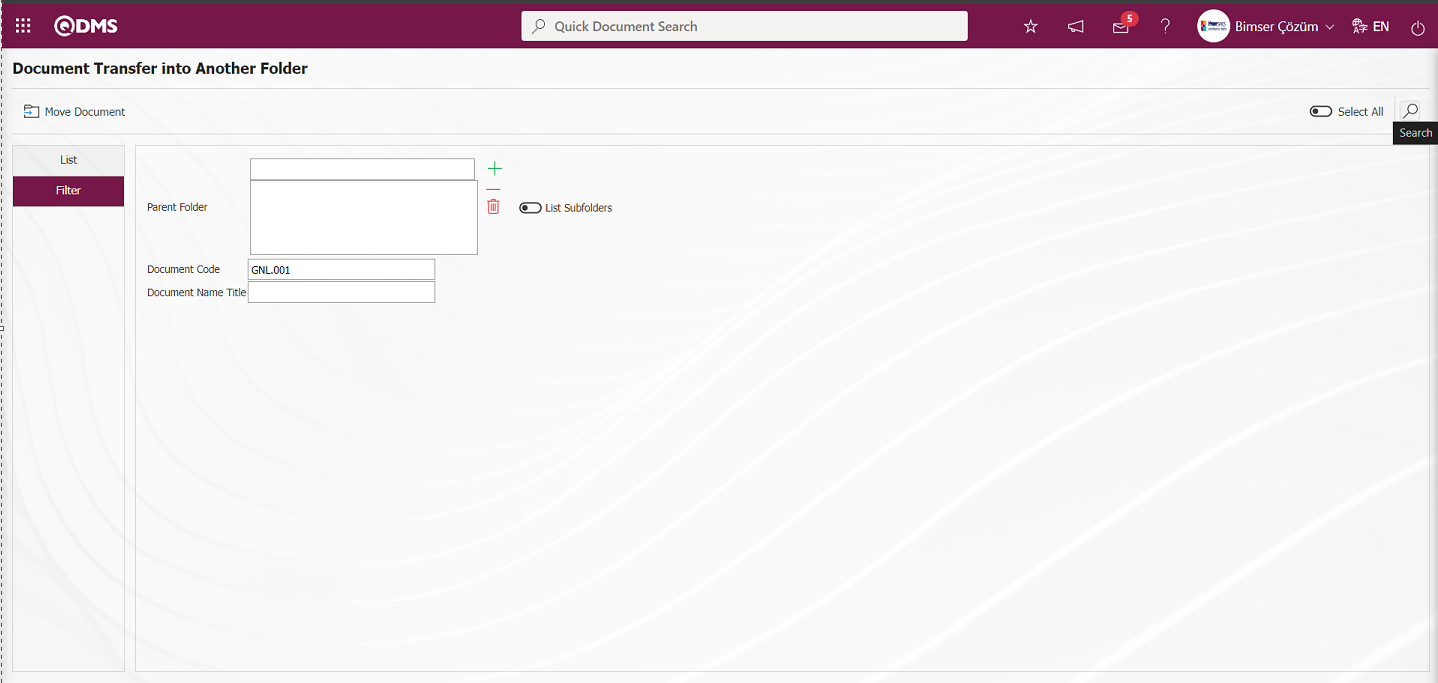
On the Document Transfer into Another Folder screen, the records are listed according to the search criteria in the filter made in the document list tab on the Document List tab.The selection process of the document listed on the List tab is made. On the List screen, the destination folder is selected in the system-defined Document folder list opened by clicking the  (Select) button in the Destination folder field. After selecting the document and the destination folder to be moved in the document list, the
  button is clicked.
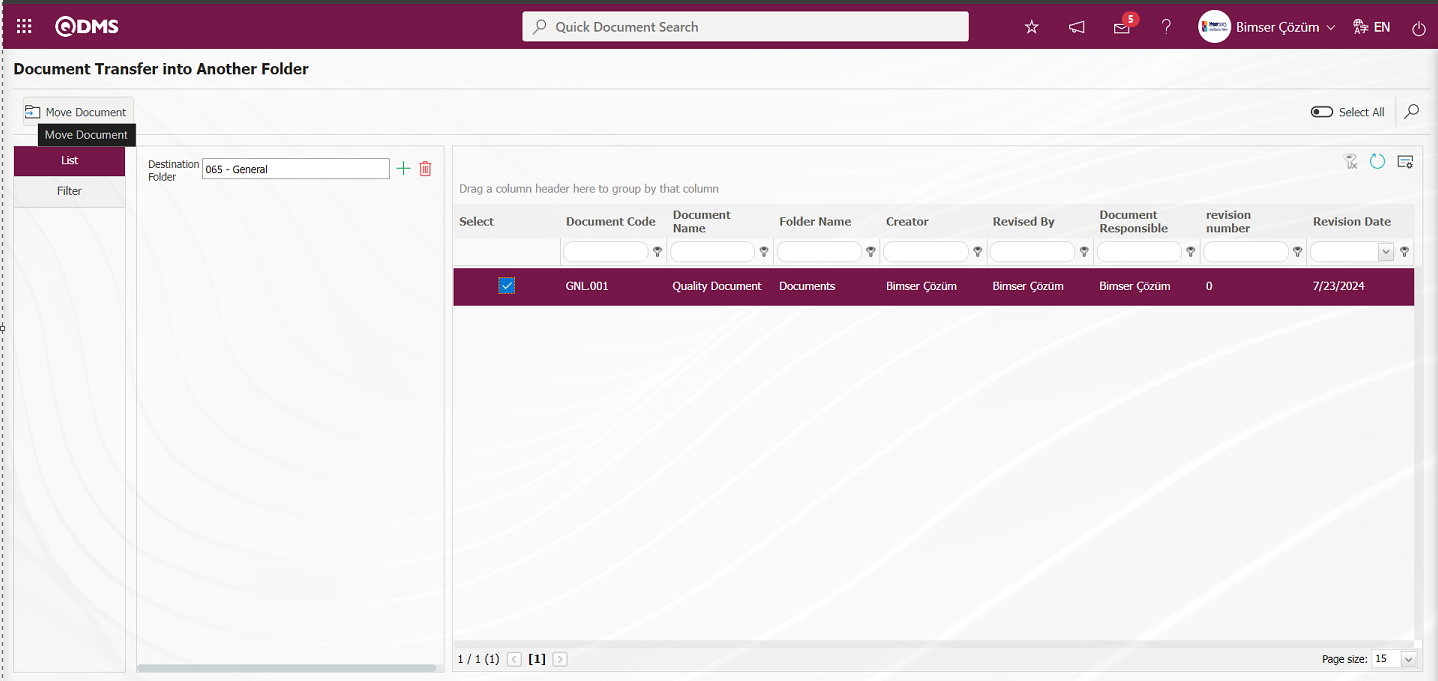
Click the “OK” button in the message given by the system.

The system informs you that the documents selected by the system have been successfully transported.
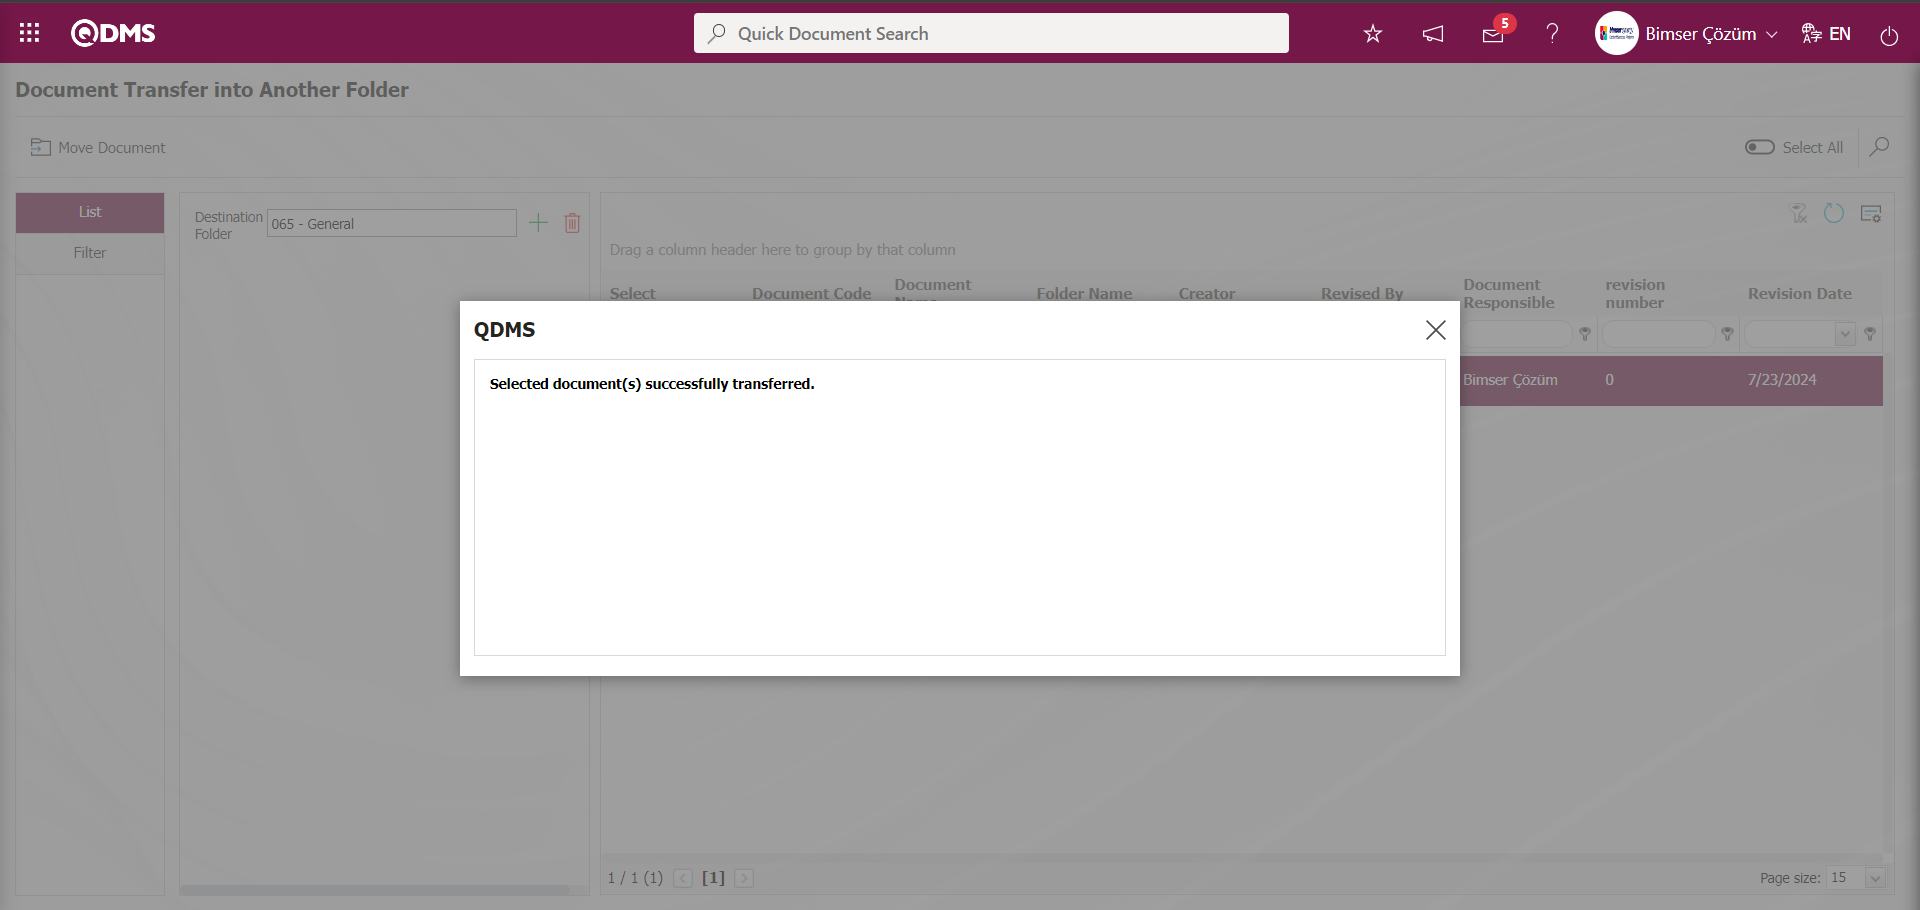
6.3.18.Mark Documents as 'Read'
Menu Name: System Infrastructure Definitions/ Document Activities/ Mark Documents as 'Read'
It is the menu where the documents determined for the selected personnel or all personnel are brought to the “read” status. On the screen that opens, the document list is opened by filtering according to various criteria such as Folder Code, Document Code and Document Name.

With the help of the buttons on the screen;
 : The selected documents are made “read” for the selected personnel/user group.
 : The selected documents are made “read” for everyone.
: Records are searched by filtering.
: The data remaining in the filter fields in the grid where the search criteria on the menu screens are searched is cleaned.
: The menu screen is restored to its default settings.
: User-based designing of the menu screen is done with the show-hide feature, that is, the hiding
In the Filter tab on the Mark Documents as 'Read** ' screen Parent Folder Click the  (Select) button in the field and select the folder in the Document Folder list and click the (Search) button.

On the Mark Documents as 'Read' screen, documents are listed according to the search criteria in the list tab. On the Mark Documents as 'Read' screen, Personnel/ User Group selection is made. By clicking the button on the Mark Documents as 'Read' screen, the selected documents are made “read” for the selected user group personnel.
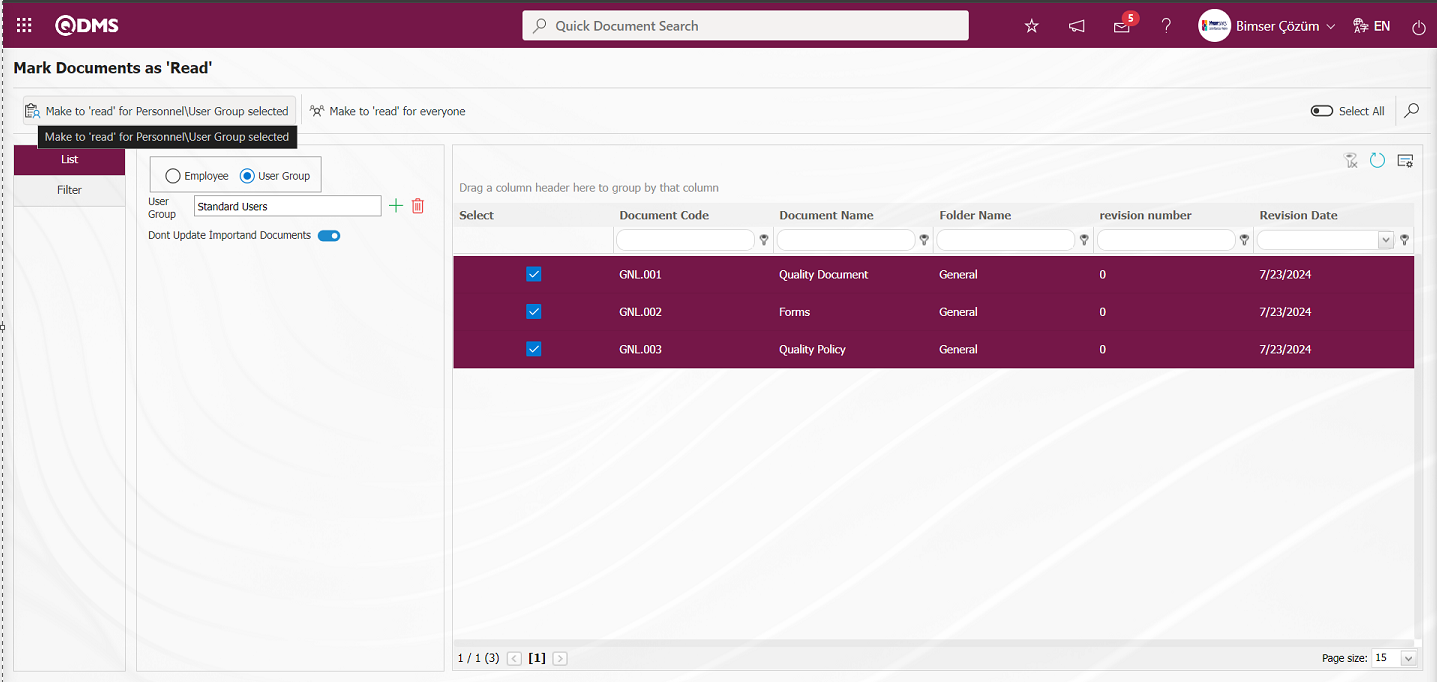
“Selected documents for corresponding staff will be set as read. Are you sure to continue?” message, click the ‘OK’ button.
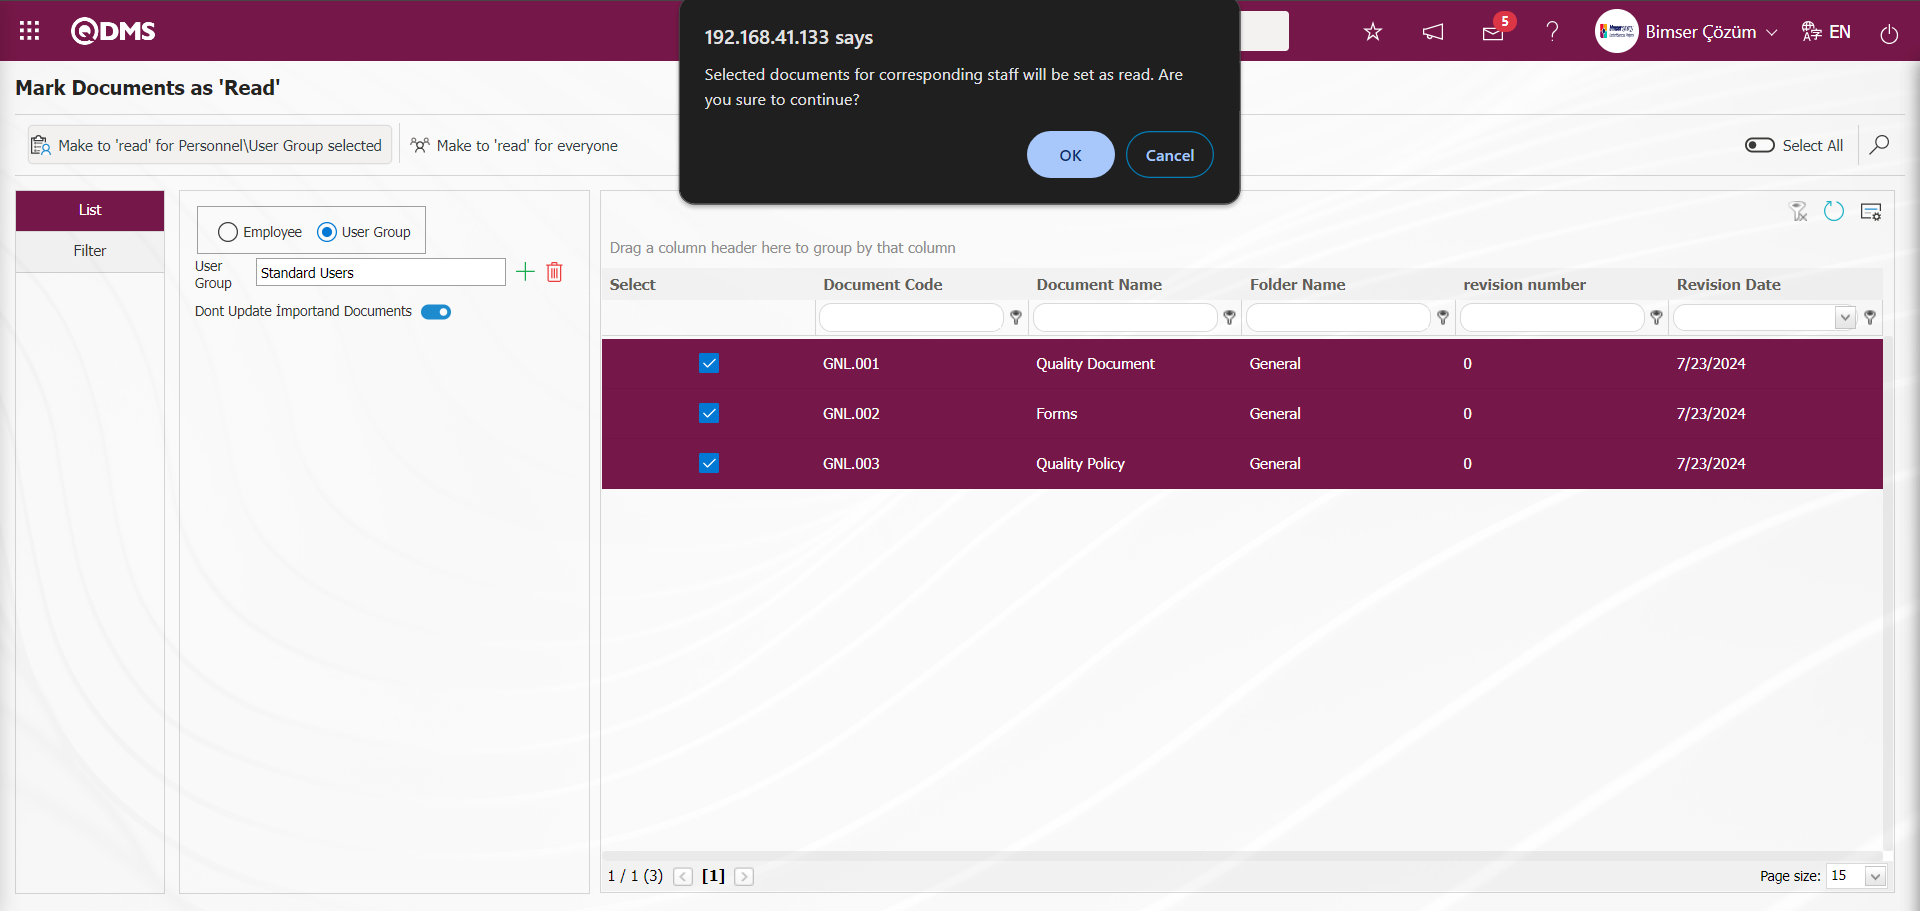
The system gives the message “ The process is performed successfully.”, indicating that the process of “read” the documents selected for the selected user group personnel has been realized.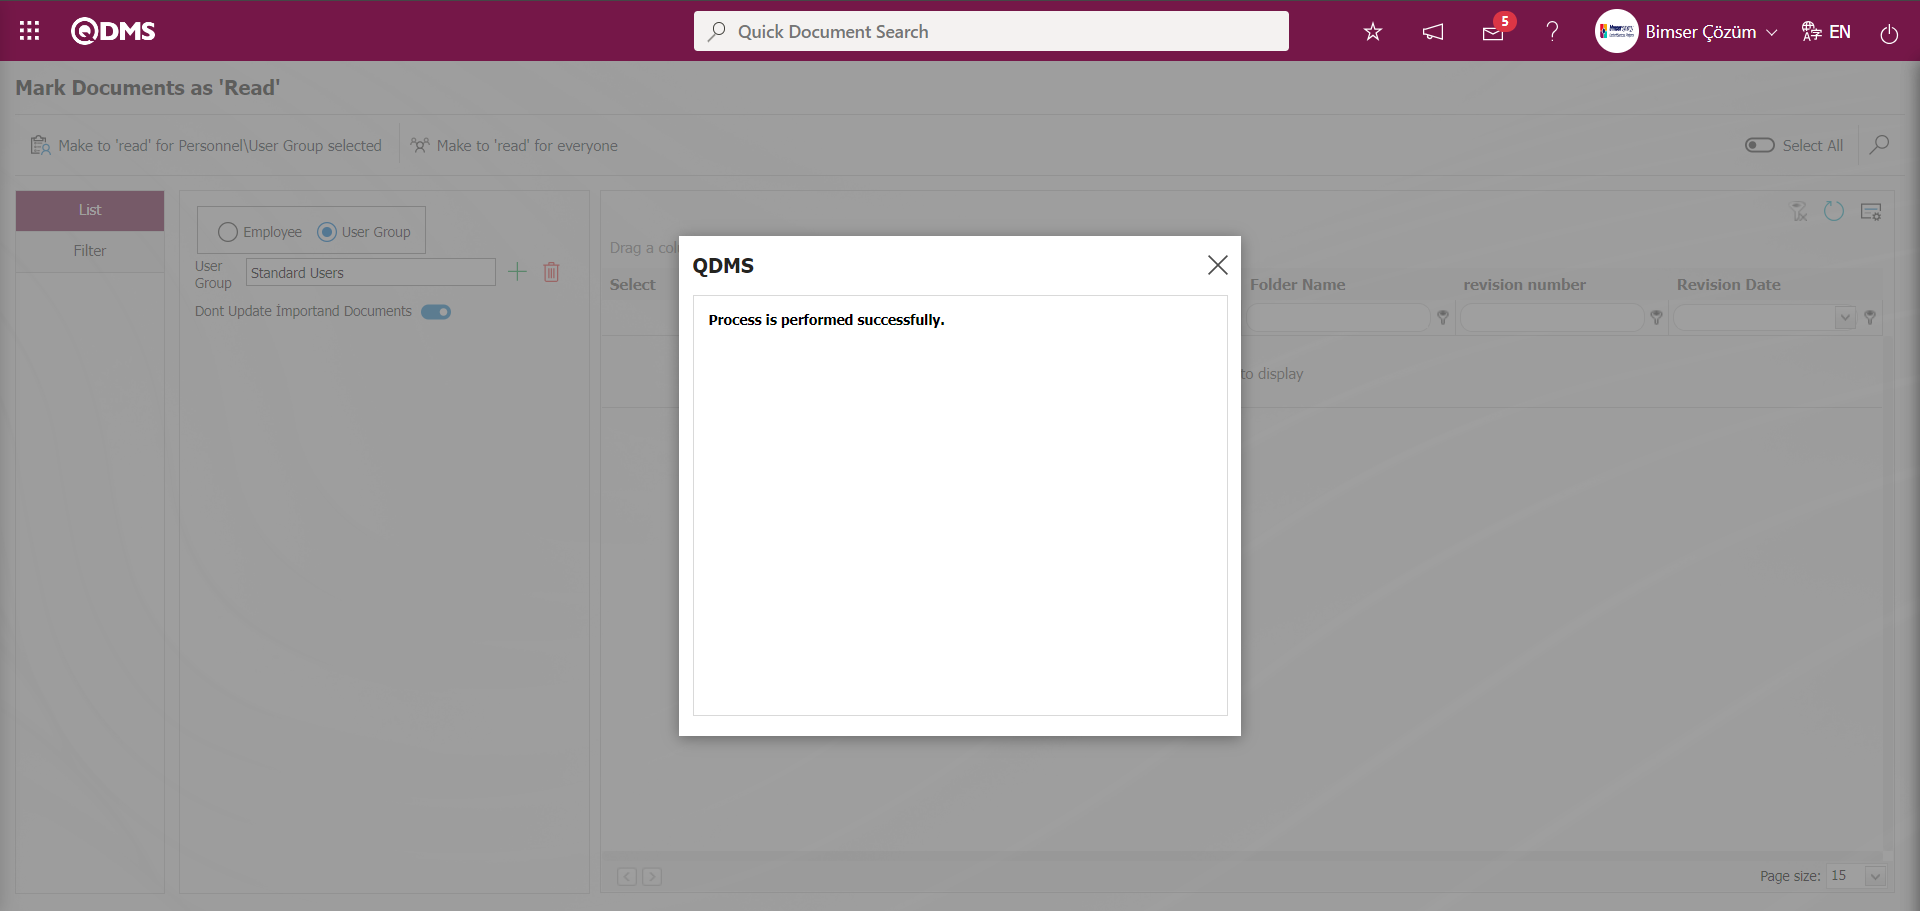
If desired, the selected documents can be made “read” for everyone with the help of the  button. If the “Do not make important documents read” option is checked, the documents that are assigned to read as important documents will not be made “read”.
6.3.19. Send Document Distribution Emails
Menu Name: System Infrastructure Definitions/ Document Activities/ Send Document Distribution Emails
It is the menu where the reading tasks created with the distribution matrix while preparing the document are re-dropped to the specified personnel/ user groups or reading tasks are assigned to the newly defined people in the system. On the Document Distribution Mail creation screen, the documents connected to the folder are listed with the help of filtration. After the selection process of the listed documents, the  /
/  /
/  buttons are clicked to send a document distribution mail to All People/ Non-Readers/ Selected person.
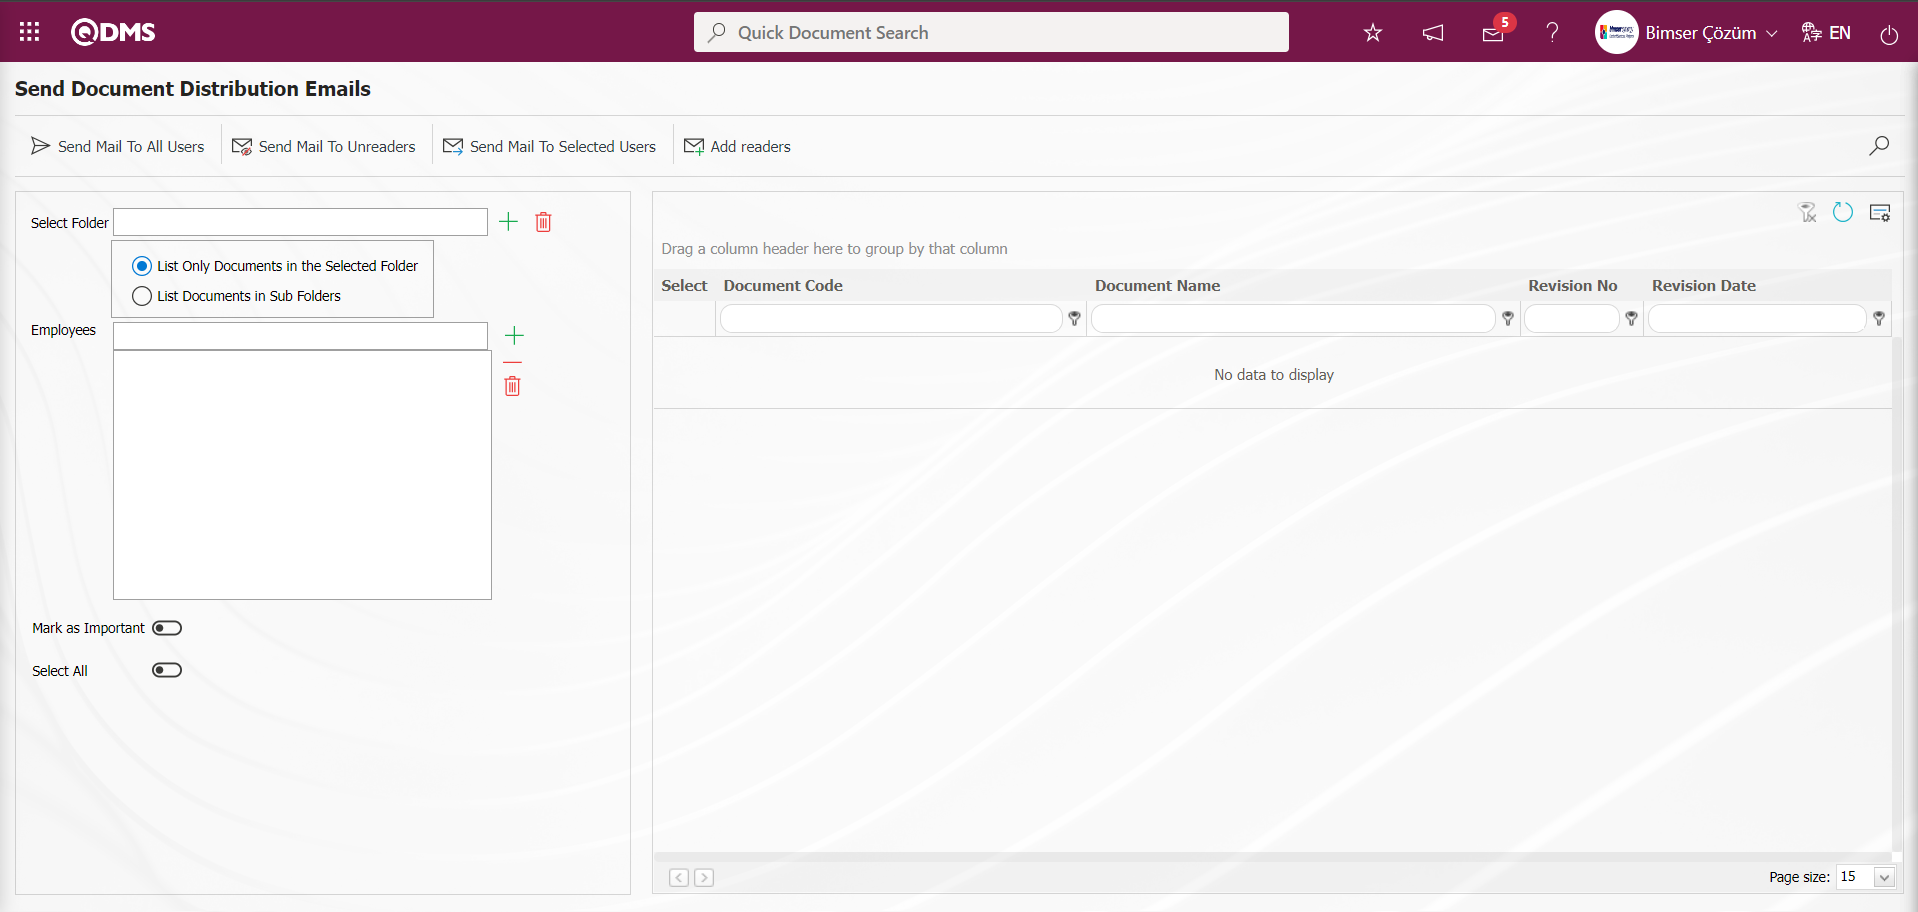
With the help of the buttons on the screen;
 : Distribution mail is sent to all persons.
 : Distribution mail is sent to unread people.
 : Distribution mail is sent to the selected people.
 : Adding to the people who will read it is done.
: Records are searched by filtering.
: The data remaining in the filter fields in the grid where the search criteria on the menu screens are searched is cleaned.
: The menu screen is restored to its default settings.
: User-based designing of the menu screen is done with the show-hide feature, that is, the hiding
Click on Send Document Distribution Emails** menu. Select the folder in the Document Folder list opened by clicking the (Select) button in the Select Folder field, select the List only the documents of the selected folder option and click the  (Search) button.
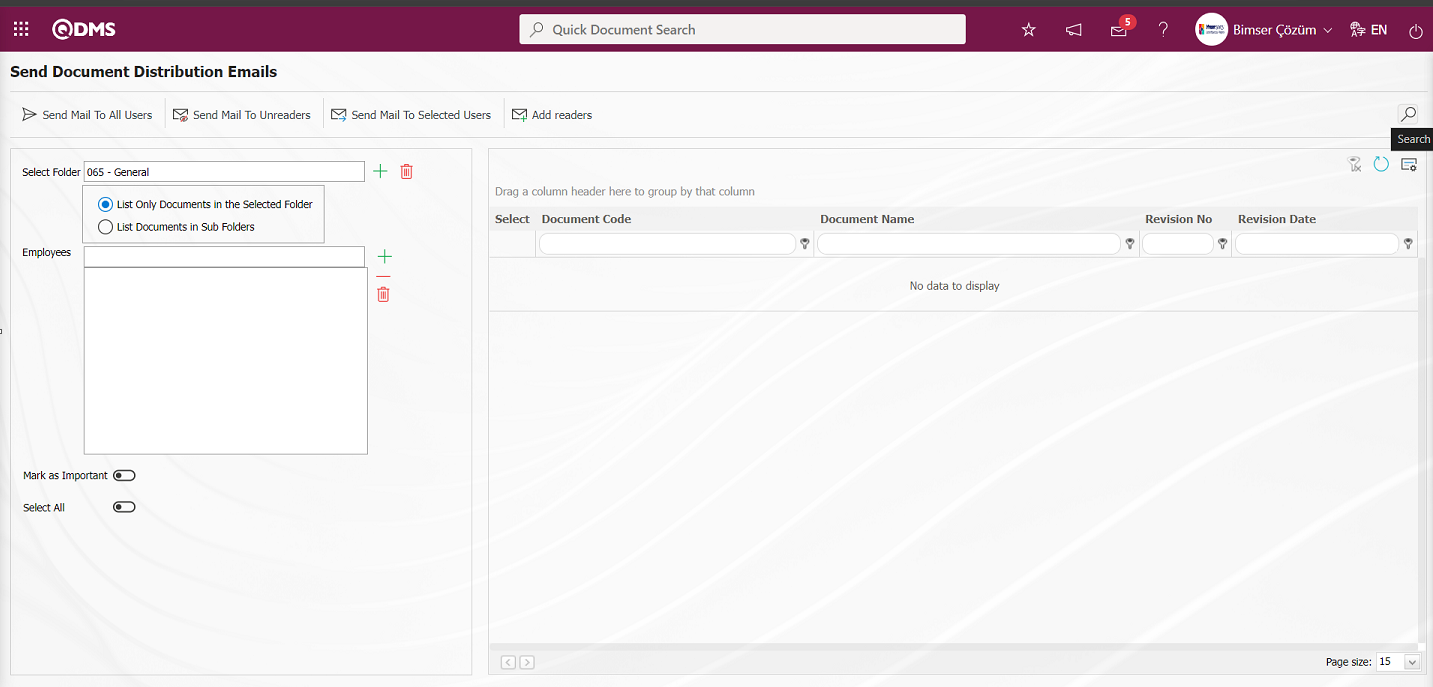 In Send Document Distribution Emails screen, documents connected to the folder are listed with the help of filtration.
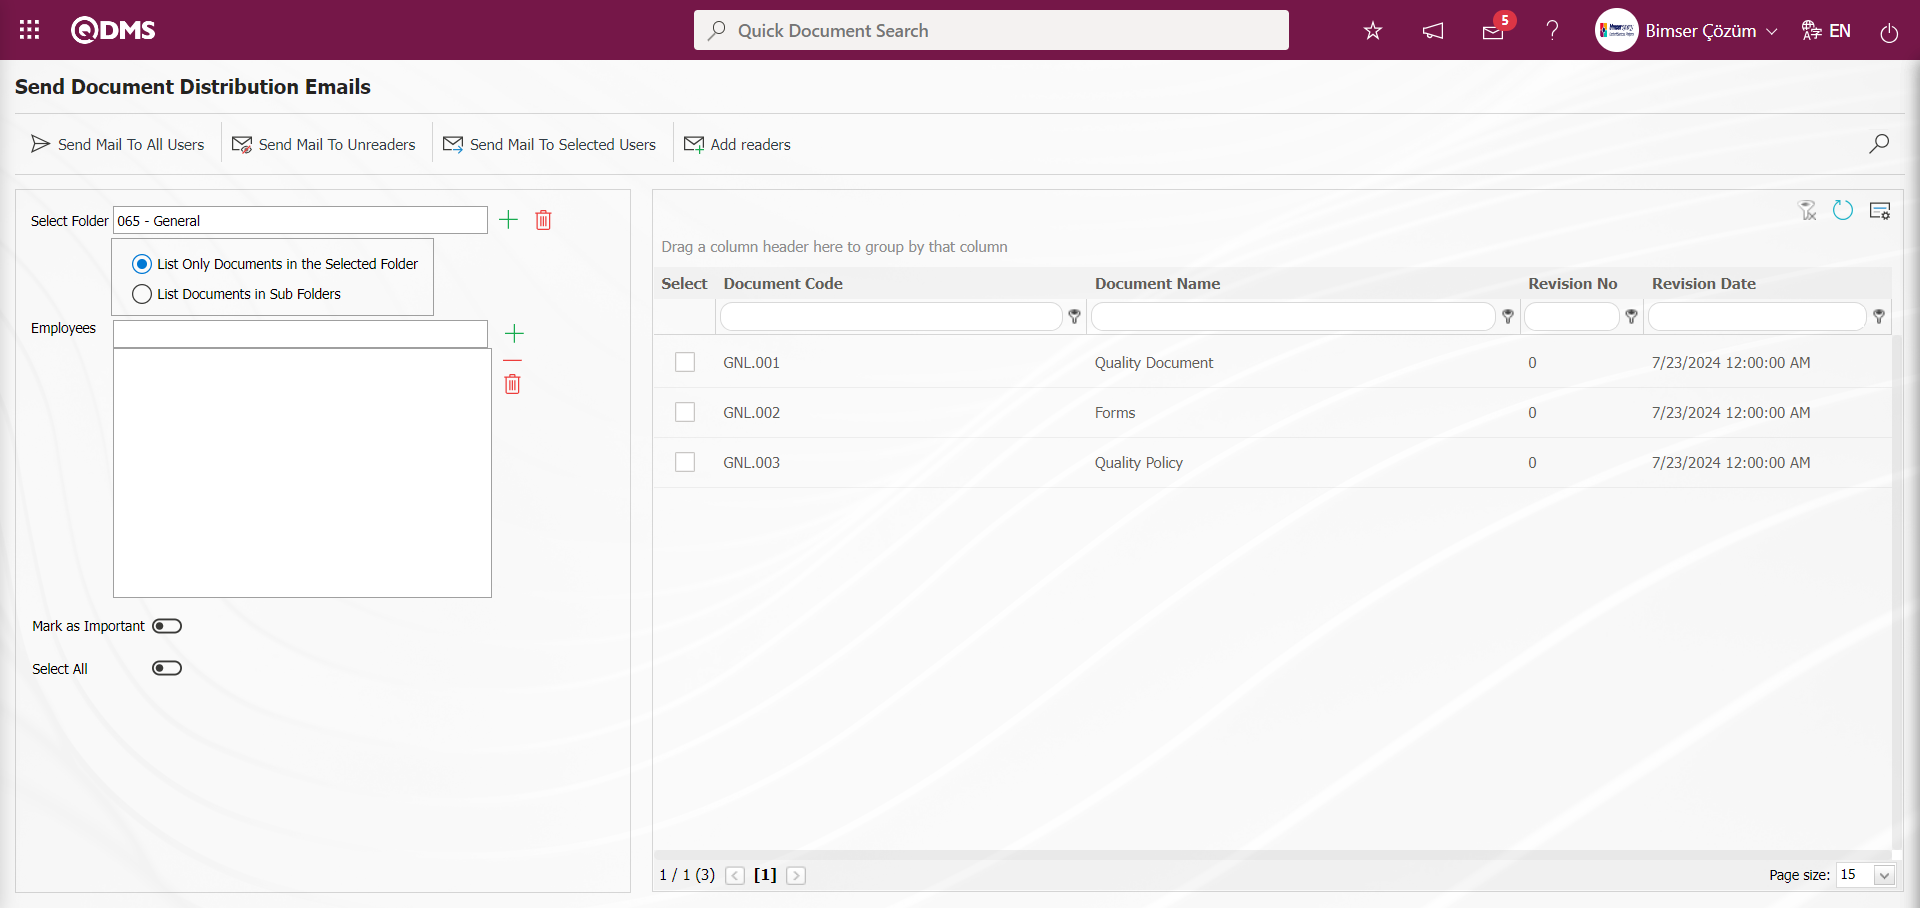
In Send Document Distribution Emails screen, the documents listed are selected. If it is desired to send an e-mail to be read as important, the relevant check-box is checked. After the selection of the documents, the button is clicked to send distribution emails to all users.

The system sends the message “Documents were sent to the relevant persons.”, indicating that the distribution mail was sent to all users.
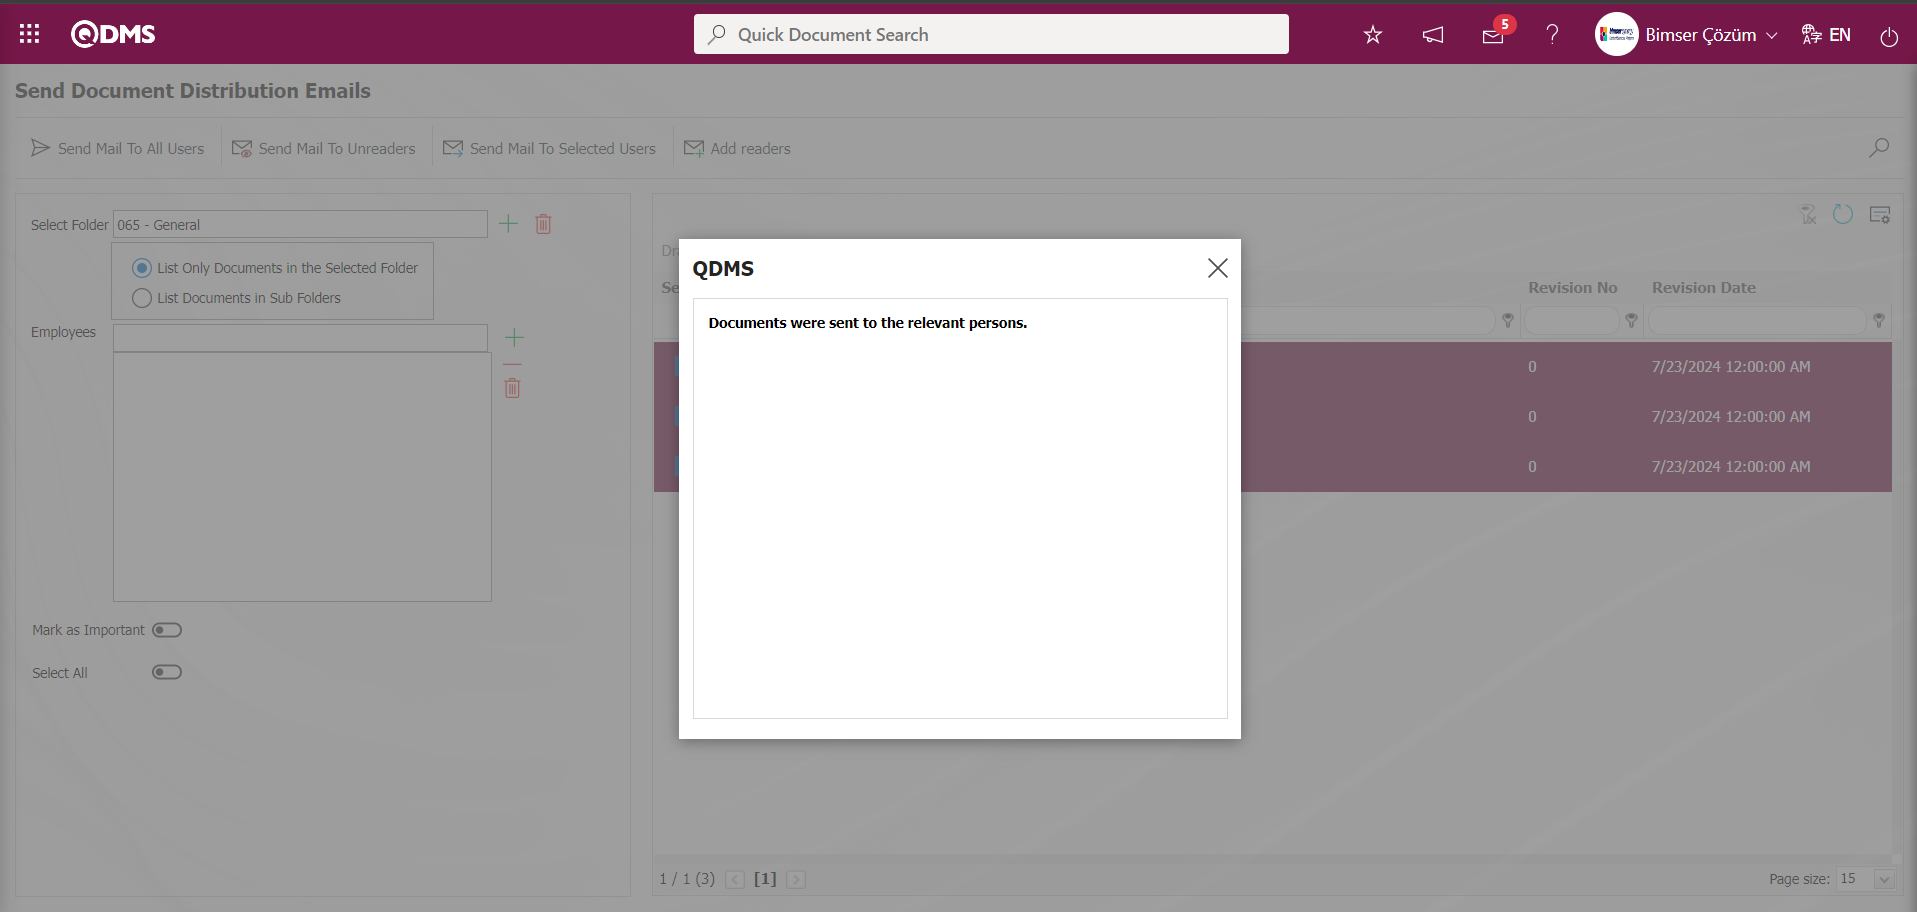
In the document distribution mails creation screen, the person is assigned to the person who will read the mail to the selected person and the documents are selected in the document list and the relevant person is assigned to the document distribution matrix by clicking the  button.
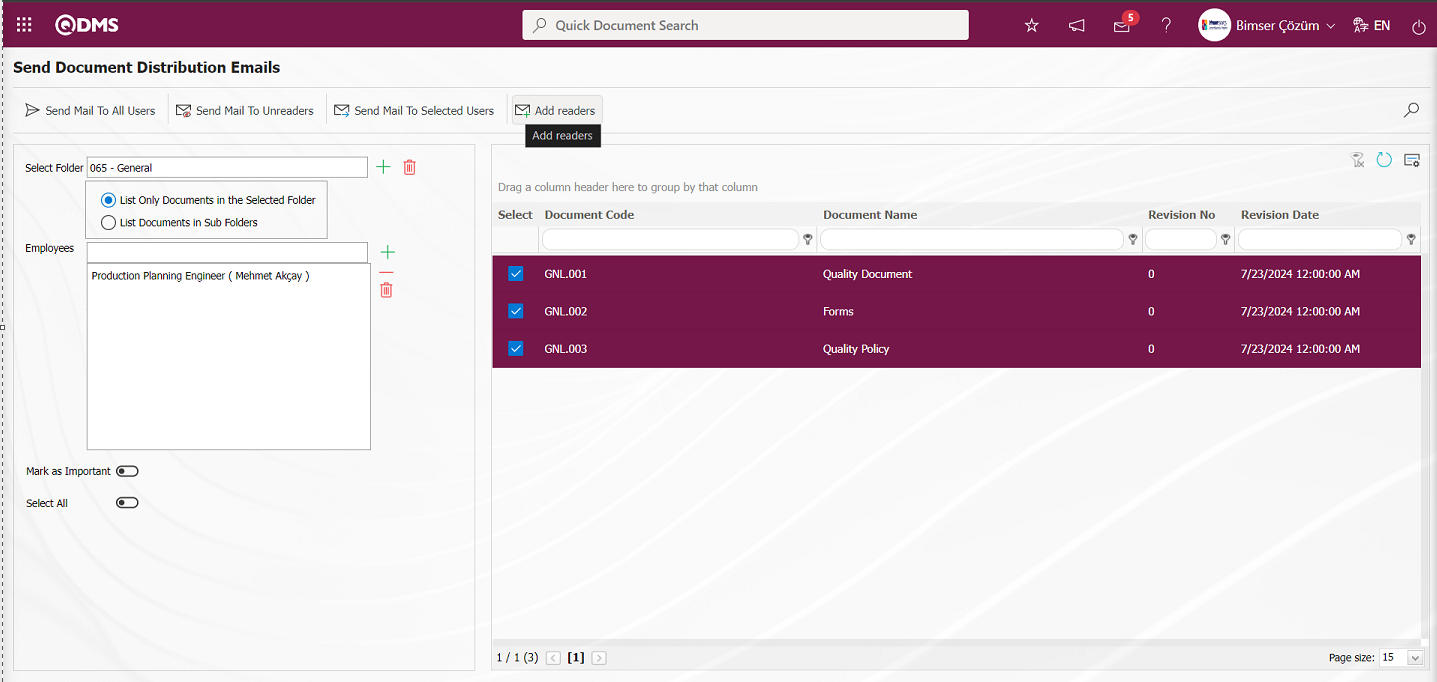
On the Send Document Distribution Emails screen, the status field informs that the process of assigning the relevant person to the document distribution matrix is completed.
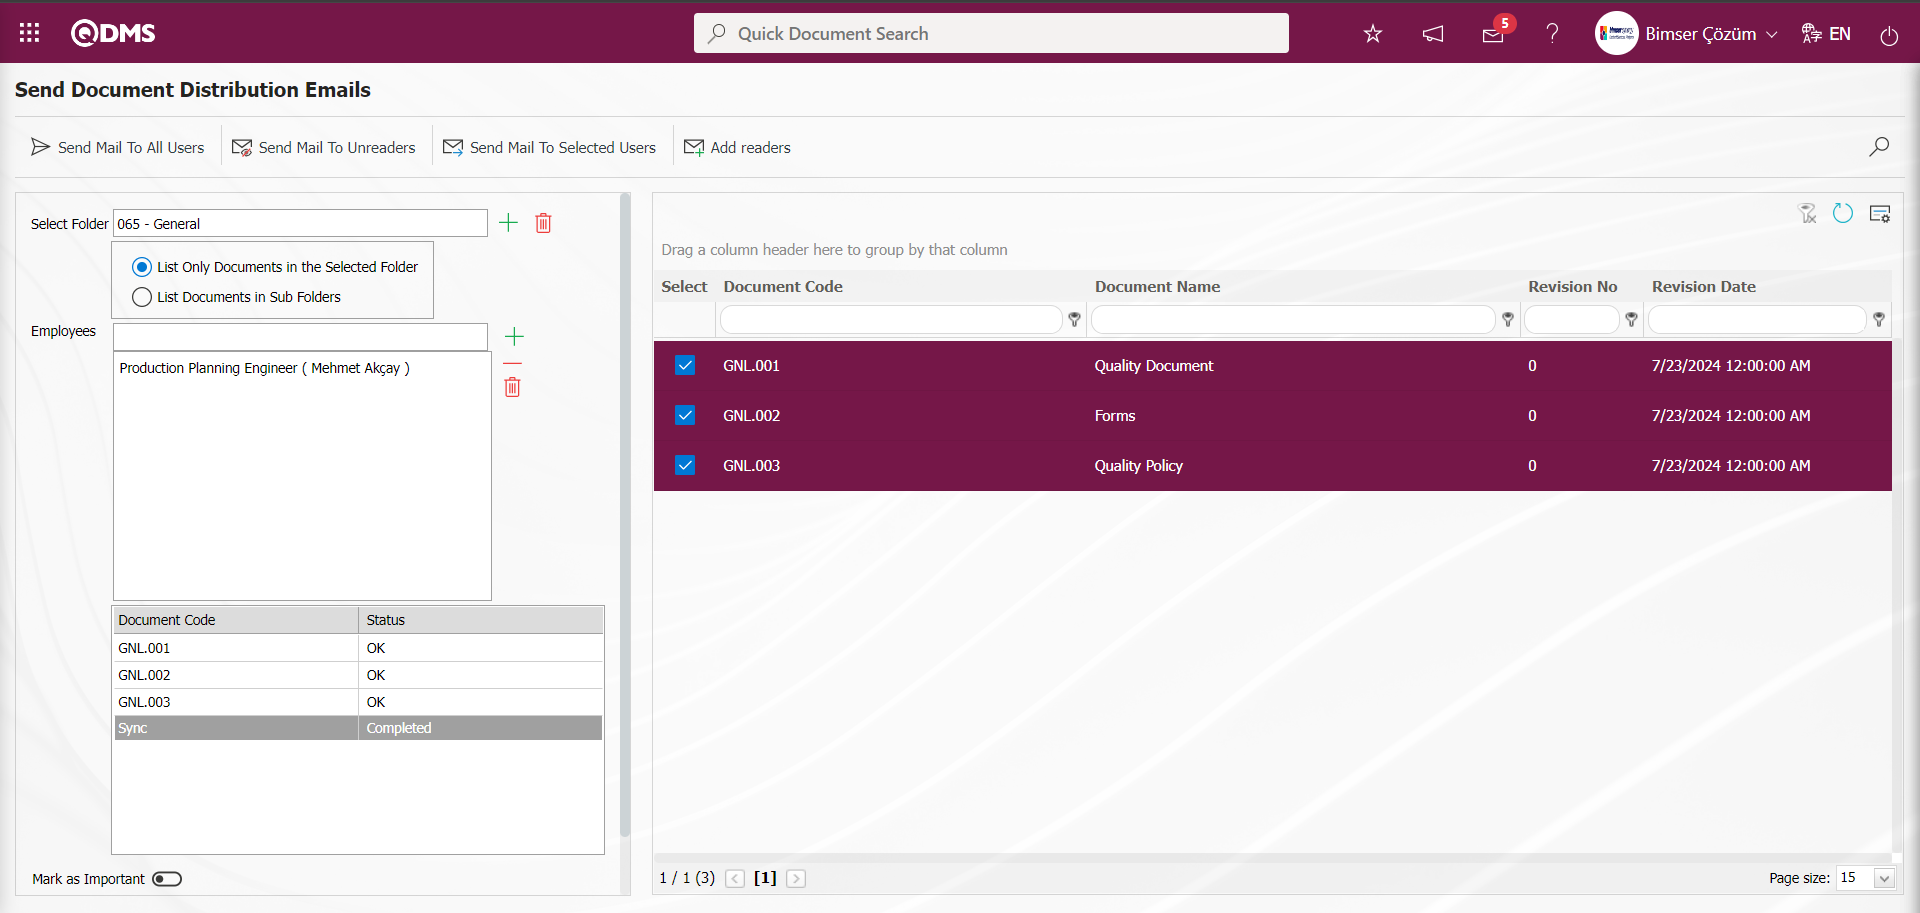
6.3.20. Document Print Format Definition
Menu Name: System Infrastructure Definitions/ Document Activities/ Document Print Format Definition
This is the menu where the footer/header fields in document templates are defined. Then this defined format can be defined on a folder basis by opening the relevant folder from the folder definition menu and selecting the defined document print format from the Document Print Format field in the folder settings tab.
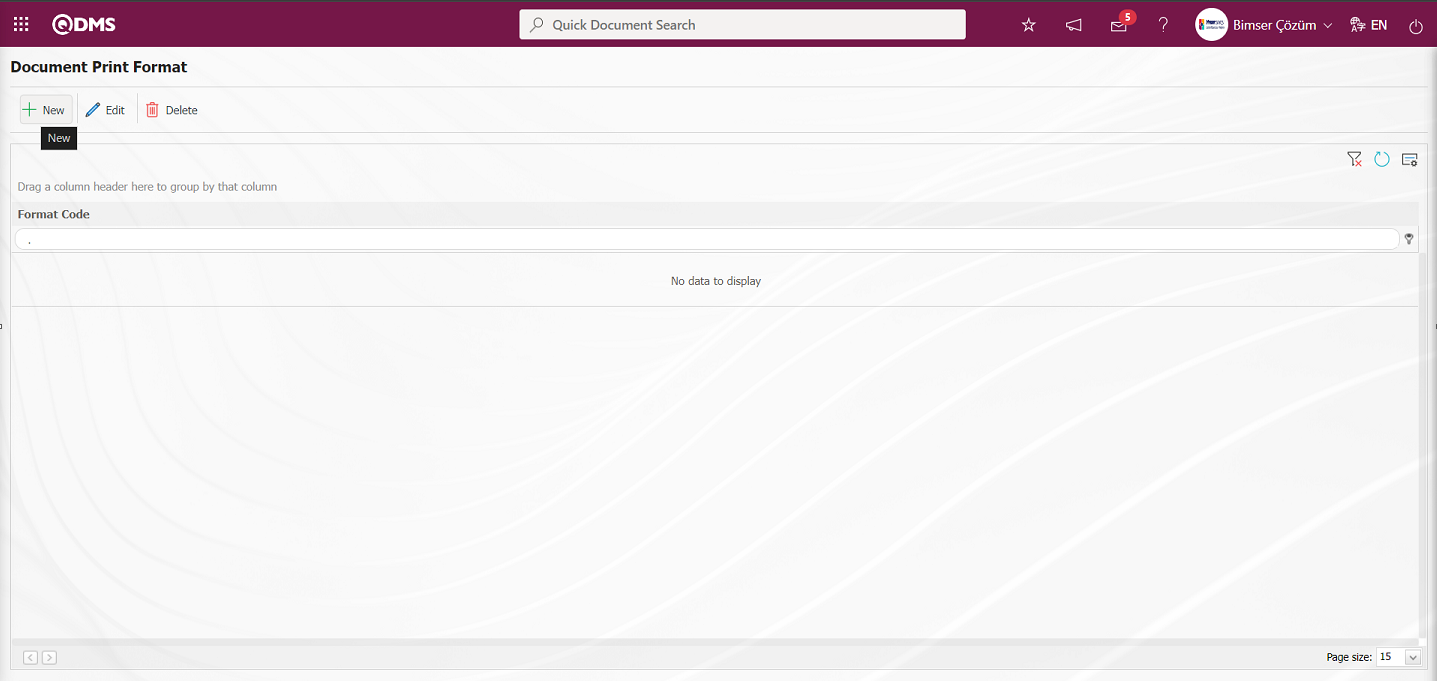
With the help of the buttons on the screen;
: A new Document Print Format is defined.
: Changes and edits are made on the selected Document Print Format information in the list.
: Selected Document Print Format information in the list
: The data remaining in the filter fields in the grid where the search criteria on the menu screens are searched is cleaned.
: The menu screen is restored to its default settings.
: User-based designing of the menu screen is done with the show-hide feature, that is, the hiding
Doküman Print Format ekranında yeni bir Doküman Print Format tanımlamak için butonu tıklanılır.
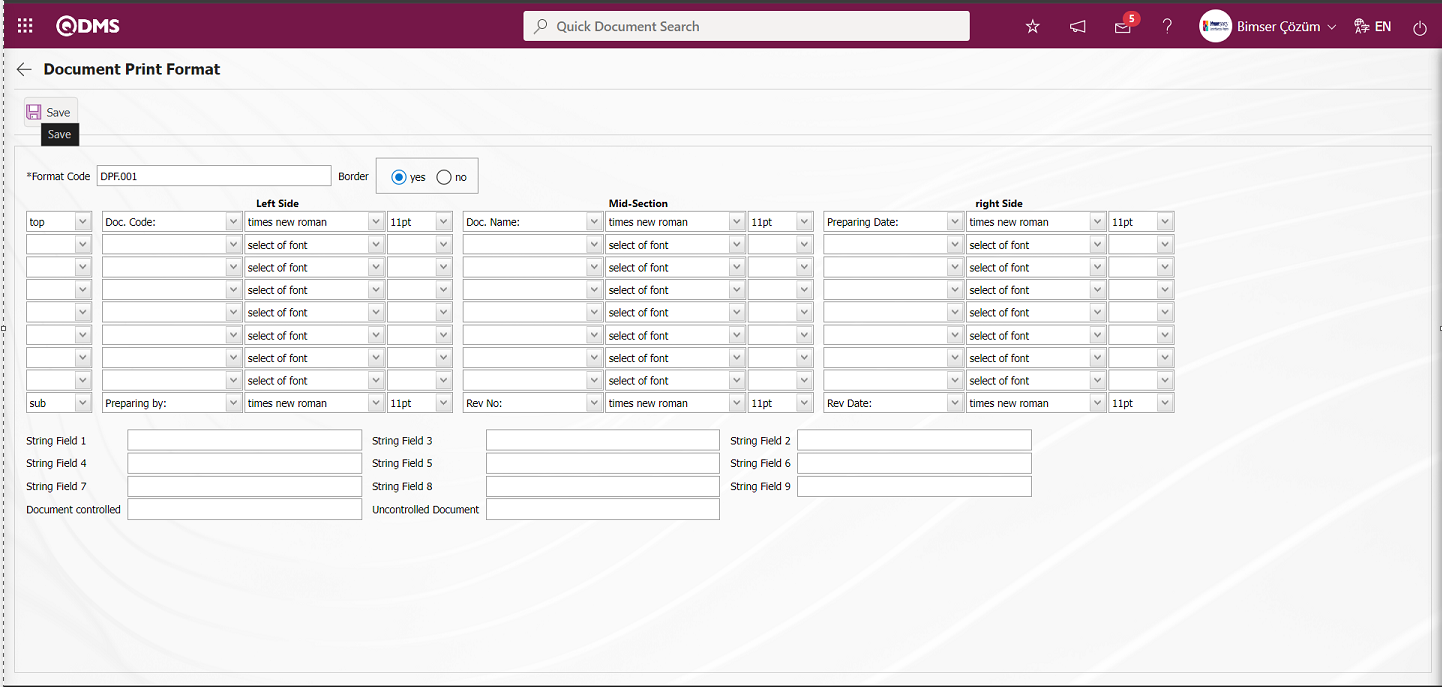
By selecting the header (top), footer (bottom) and left-right-center section from the Document Print Format Definition menu, specify which areas will appear in the document view and click the  button in the upper left corner of the screen to register the Document Print Format definition.
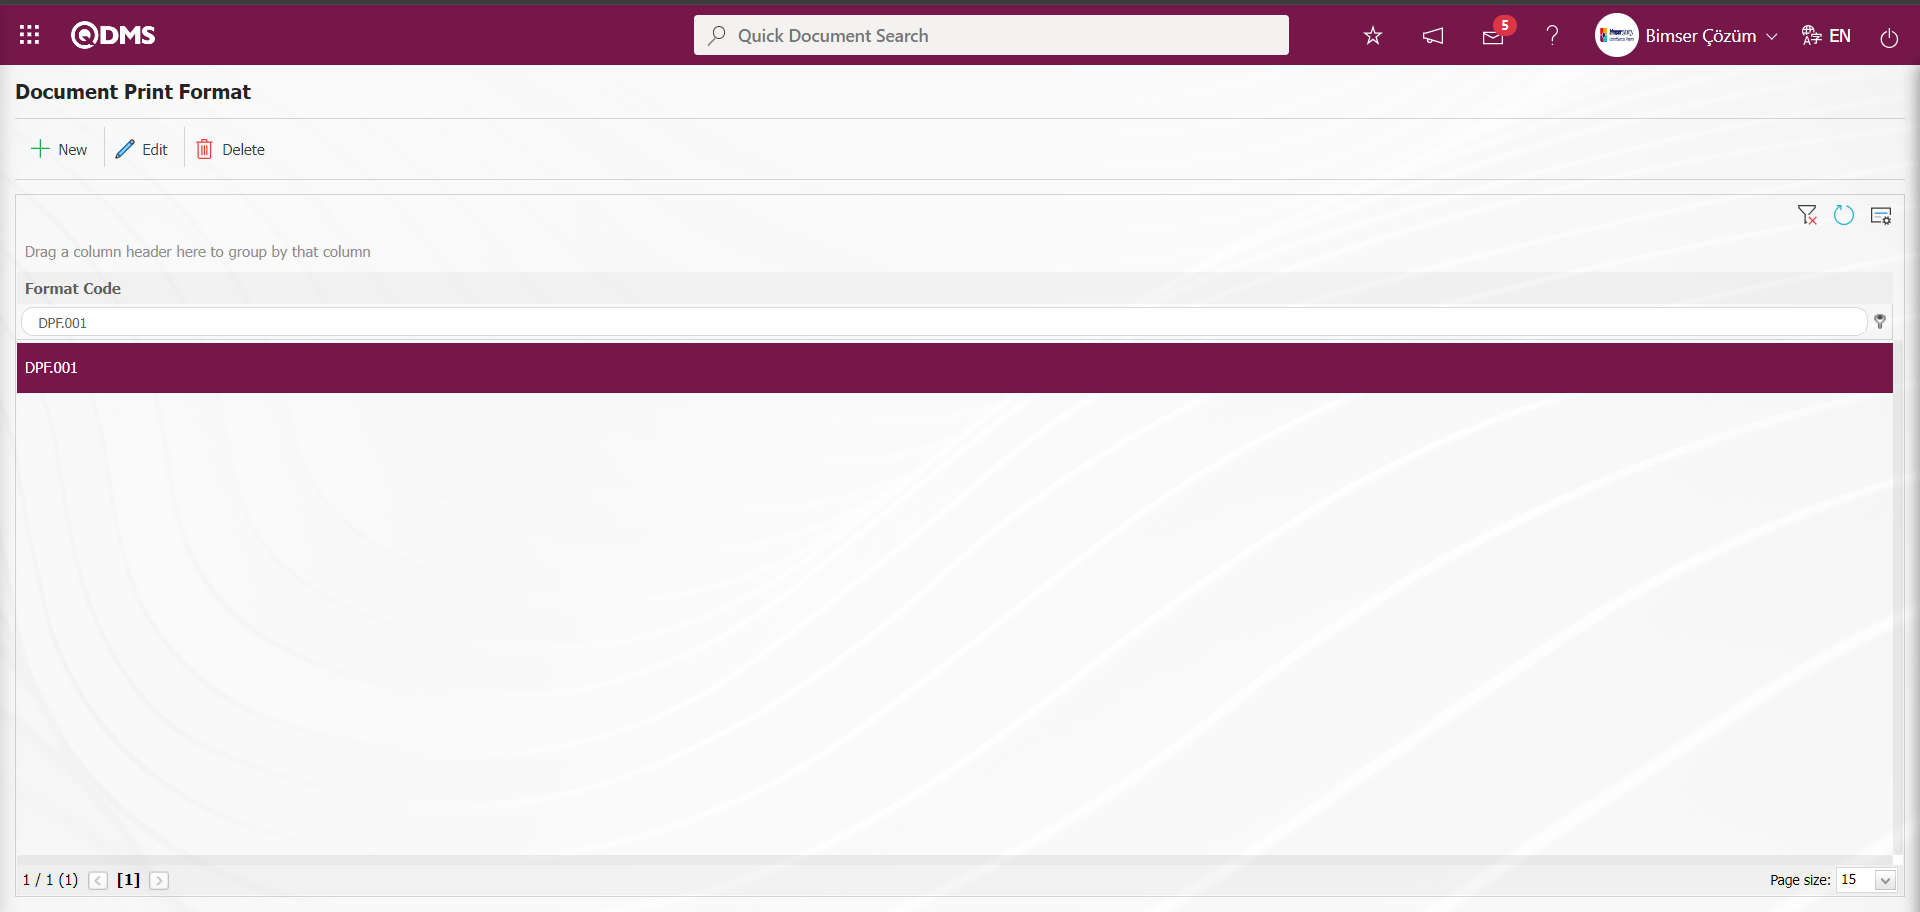
Click on Integrated Management System/ Document Management/ Folder Definition menu.
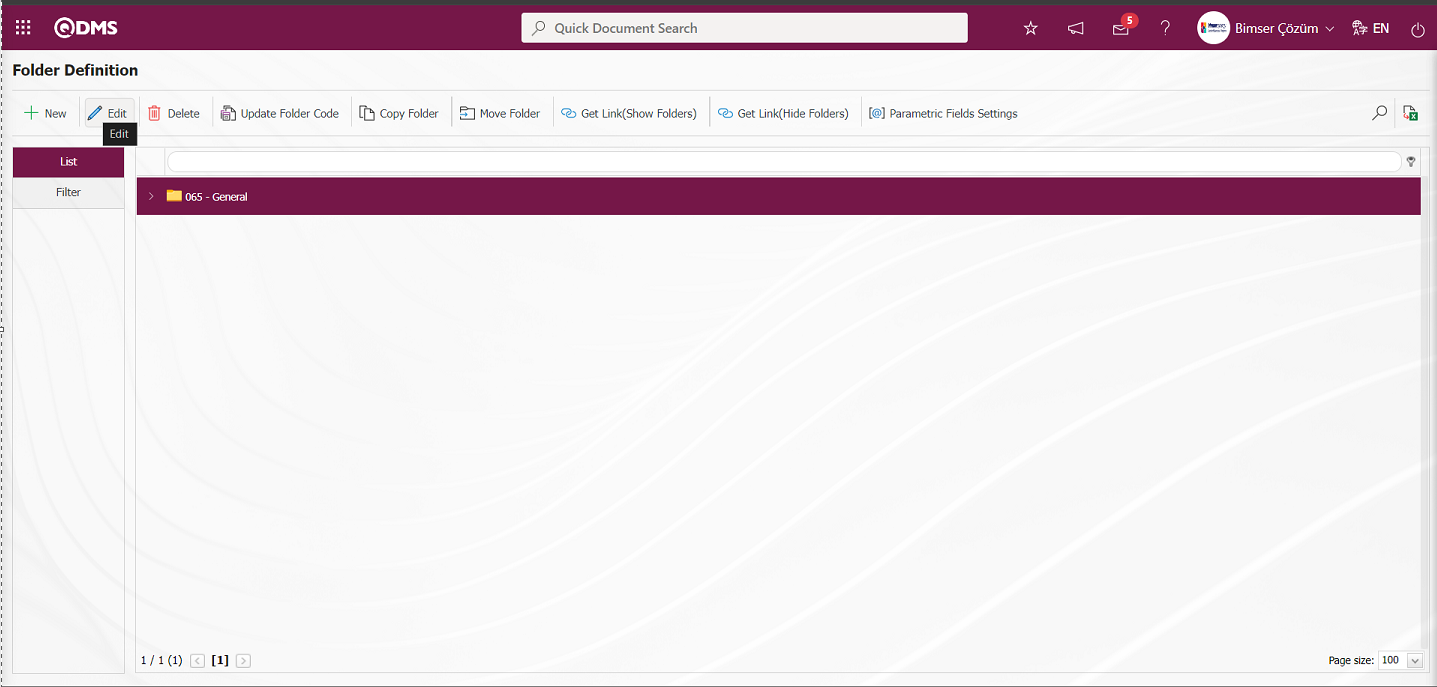
Click on the button to define a folder and select Document Print Format in the folder settings on the screen that opens.
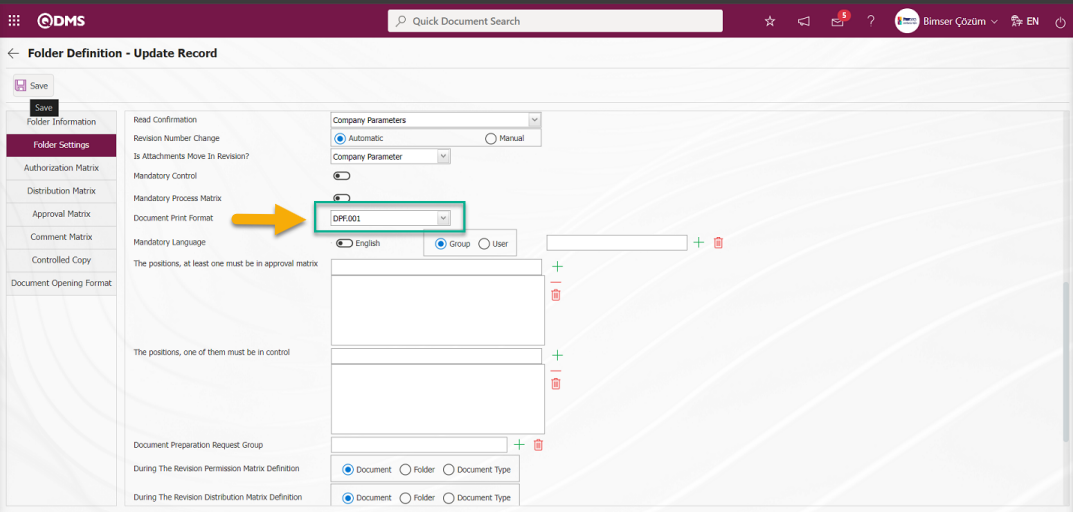
Click on Integrated Management System/ Document Management/ Document View menu. In the Document Viewing screen, select the folder with Document Print Format in the folder tree list and click on the document code in the document list and the display of the Document Print Format of the document is displayed.
6.3.21.Multiple Document Review
Menu Name: System Infrastructure Definitions/ Document Activities/ Multiple Document Review
When the first batch transfer is made to Qdms, if the documents have exceeded the review period specified in the folder according to the revision date, this menu feature has been introduced because too many review tasks fall into the My Pending Jobs menu. Go to the Batch Review menu. With the help of filtration, select which documents will be reviewed collectively.

With the help of the buttons on the screen;
 :Review the documents selected in the list.
: Records are searched by filtering.
: The data remaining in the filter fields in the grid where the search criteria on the menu screens are searched is cleaned.
: The menu screen is restored to its default settings.
: User-based designing of the menu screen is done with the show-hide feature, that is, the hiding feature of the fields corresponding to the columns on the menu screens.
On the Multiple Document Review screen, type the document code in the “Document Code” field, which is the filter search criteria in the document search tab, and click the (Search) button.

In the document list, the document to be reviewed is listed, the documents to be reviewed are selected from the list and the  button is clicked.

Click the “OK” button in the message given by the system.
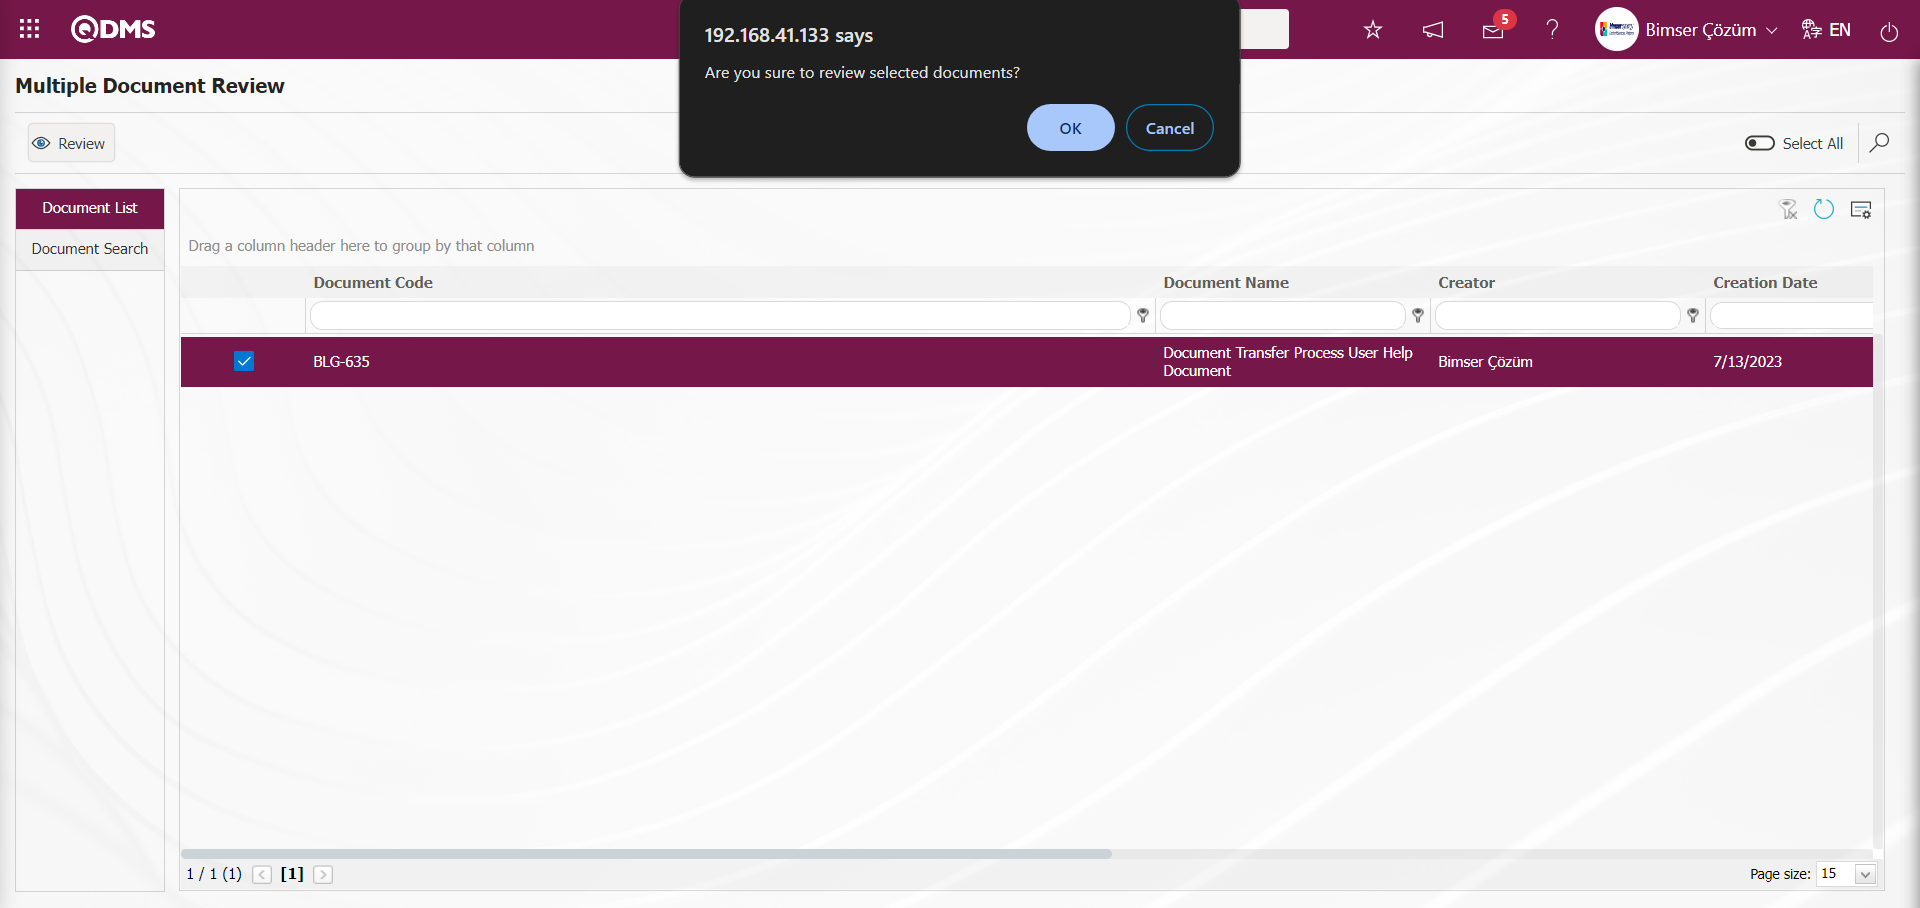
On the screen that opens, in the Calendar field opened in the Review Date field, the review date is selected and the review process and description information is written and the bulk review process is performed by clicking the 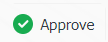 button.
“Selected documents are rewieved.” message is given by the system, indicating that the batch review process has been performed.
In this way, documents with single and multiple review tasks are selected on the Multiple Document Review screen and review task operations are performed.
6.3.22.Document Parameters
Menu Name: System Infrastructure Definitions/ Document Activities/Document Parameters
It is the menu where users can make various adjustments for the Document Management Module according to their requests and needs and determine (select) the parameters accordingly. In the Filter tab, the Document Transactions Module is selected in the Modules field and the parameters of the Document Transactions Module are listed in the List tab. button is used to make changes on the selected parameter information. In the Filter tab, filtering is done according to parameter number and parameter definition search criteria and in the List tab, search is done according to parameter number and definition fields in the grid.
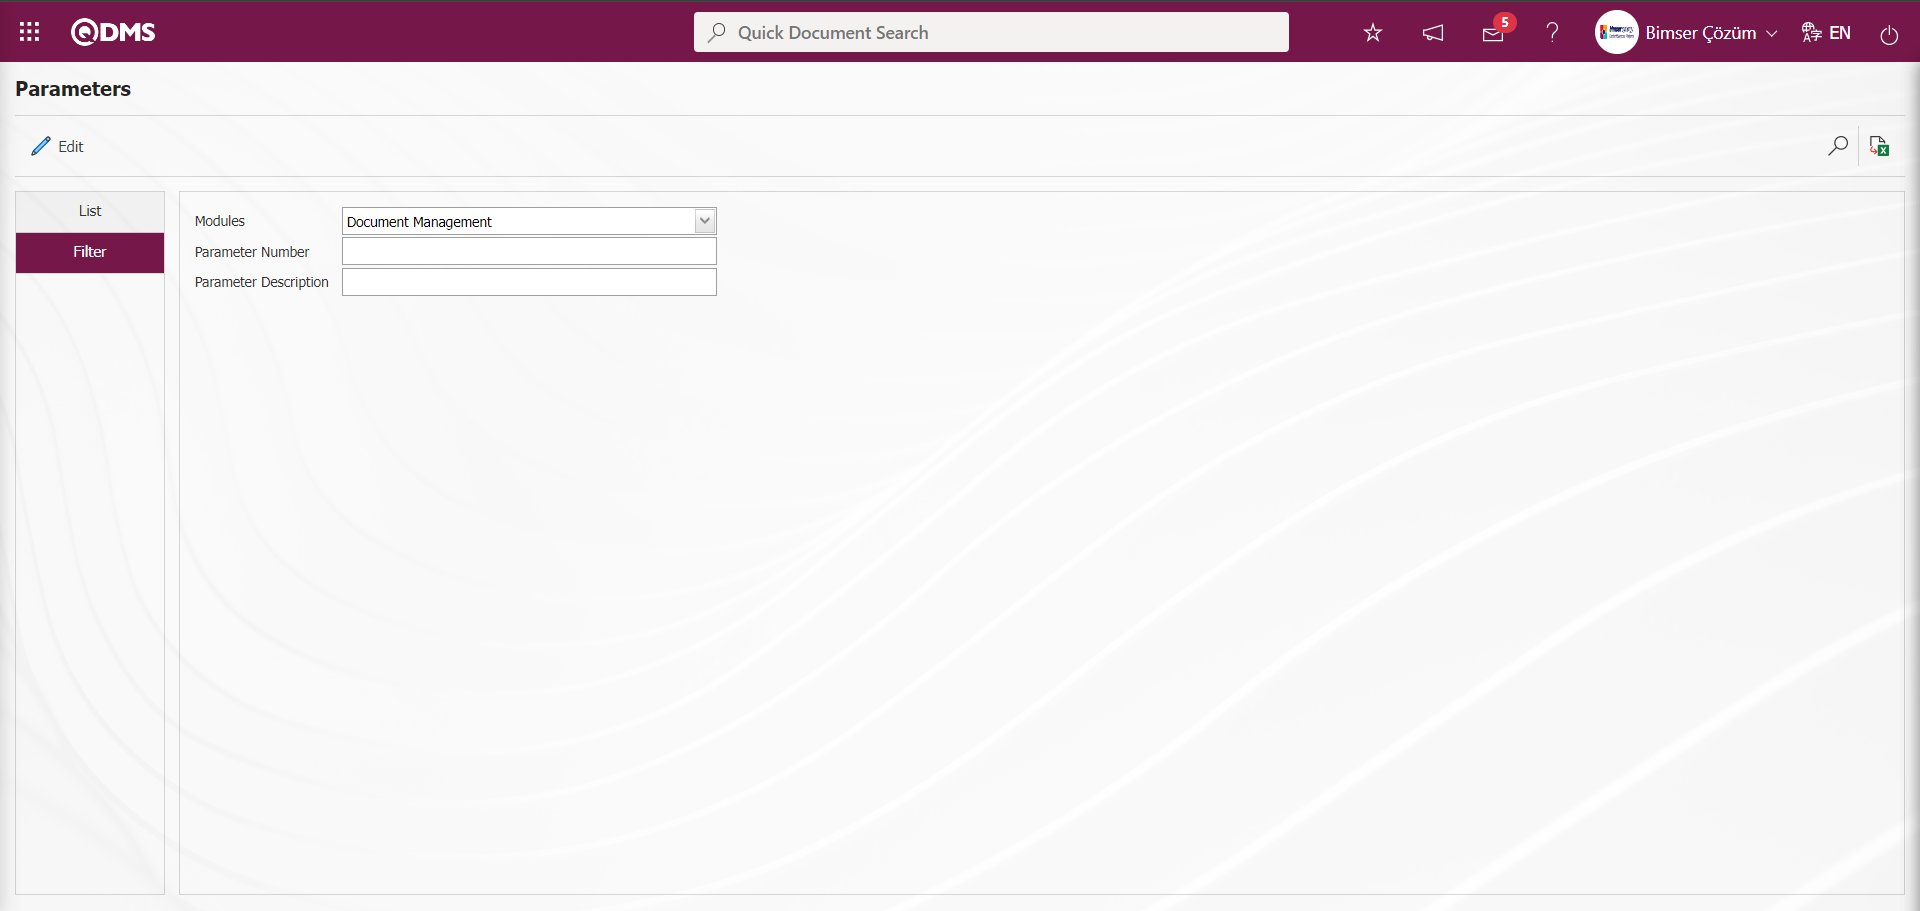
With the help of the buttons on the screen;
: Changes and edits are made on the parameter selected in the list.
: Records are searched by filtering.
: The data remaining in the filter fields in the grid where the search criteria on the menu screens are searched is cleaned.
: The menu screen is restored to its default settings.
: User-based designing of the menu screen is done with the show-hide feature, that is, the hiding feature of the fields corresponding to the columns on the menu screens.
On the Parameters screen, click on the button while the number 1 parameters are selected in the list tab.

In the parameters screen, changes are made on the parameter value information of the “Reading Time (day)” parameter. If desired, the default value information about the parameter value of the parameter is provided by clicking the  button on the parameters screen.
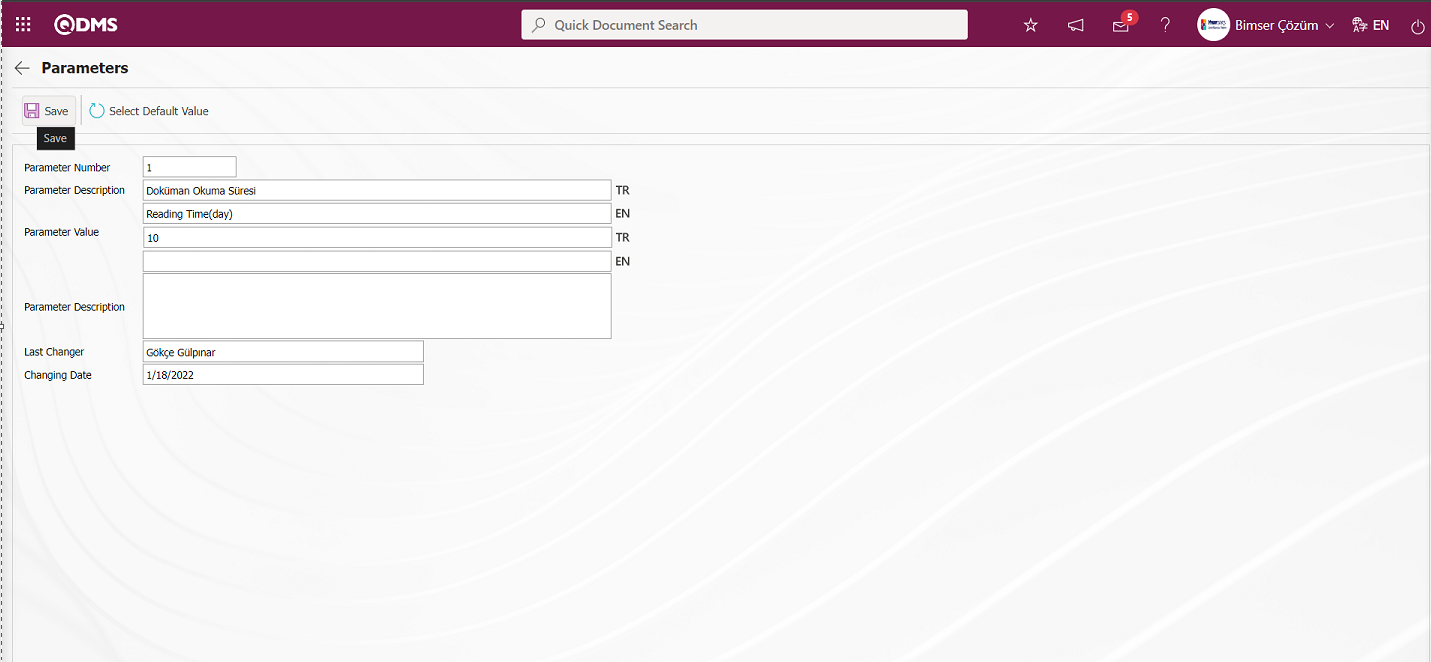
After entering the relevant information in the required fields, the parameter record update process is performed by clicking the  button in the upper left corner of the screen.

By clicking the button on the Parameters screen, the parameter value of the selected passive parameter is selected “Yes” to activate the parameter, the parameter value of the selected activated parameter is selected “No” to deactivate the parameter, the value of the selected parameter, if any, is changed and the default value of the selected parameter is selected.
6.3.23. Multiple Document Cancel
Menu Name: System Infrastructure Definitions/ Document Activities/ Multiple Document Cancel
It is the menu where documents are canceled in bulk. Select the Bulk Document Cancellation menu. With the help of filtration, it is selected which documents will be canceled in bulk. After the document selection process, the documents are canceled by clicking the button.

With the help of the buttons on the screen;
 : Cancel the documents selected in the list.
: Records are searched by filtering.
: The data remaining in the filter fields in the grid where the search criteria on the menu screens are searched is cleaned.
: The menu screen is restored to its default settings.
: User-based designing of the menu screen is done with the show-hide feature, that is, the hiding feature of the fields corresponding to the columns on the menu screens.
On the Multiple Document Cancel** screen, click the  (Add) button in the Parent Folder field in the document search tab and select the folder in the document folder list and click the (Search) button.
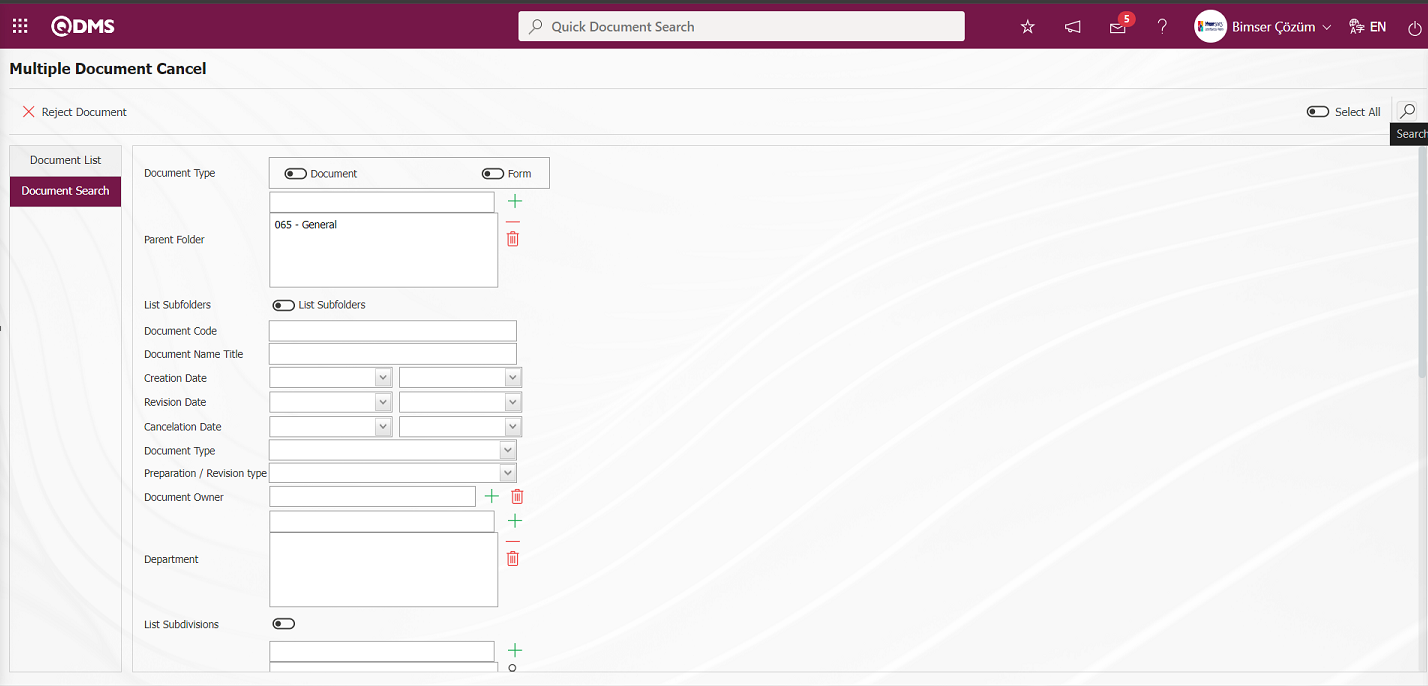
In the document list, the documents to be canceled in bulk are listed. Bulk Select the documents to be canceled from the list and click the  button.
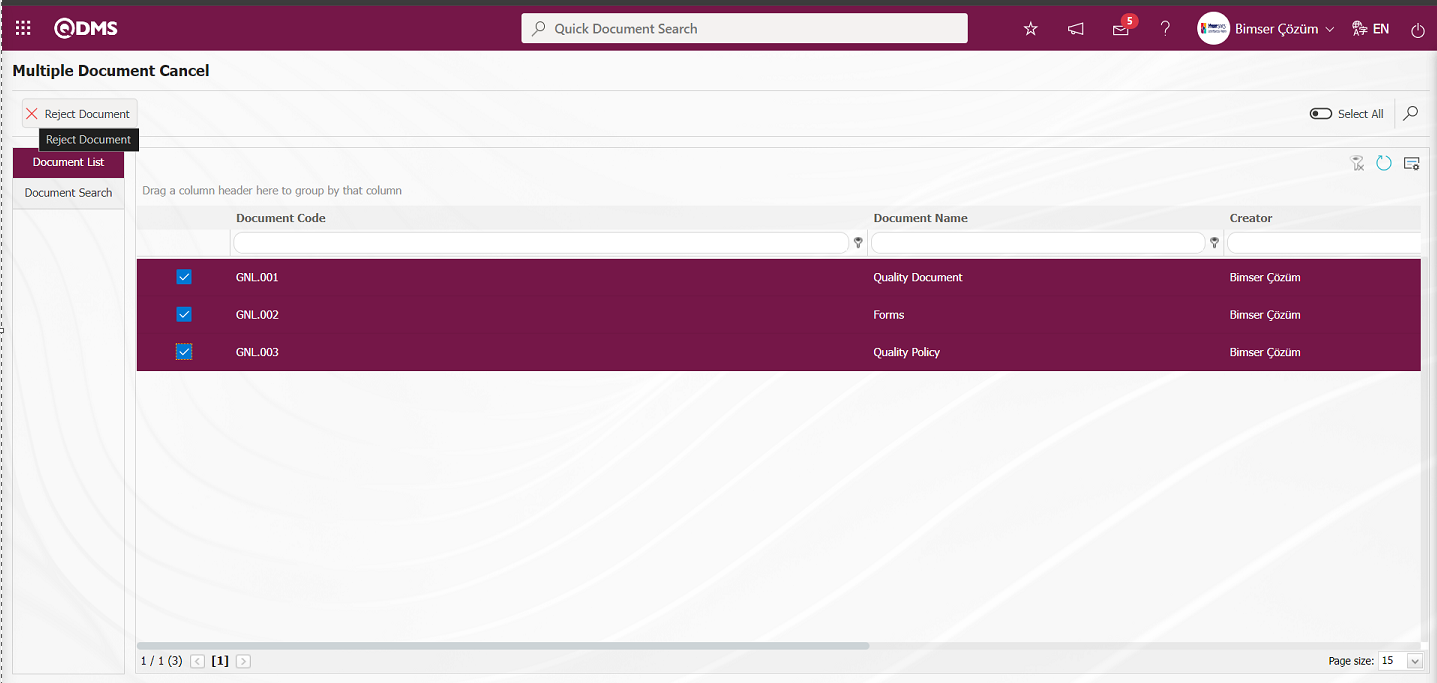
In the screen that opens, the canceling person comes as the system enters and if desired, the canceling person information is selected from the personnel list by clicking the (Select) button in the canceling field. In the Cancel Reason field, the reason why the documents are canceled is written and the bulk cancellation of the documents is done by clicking the  button.
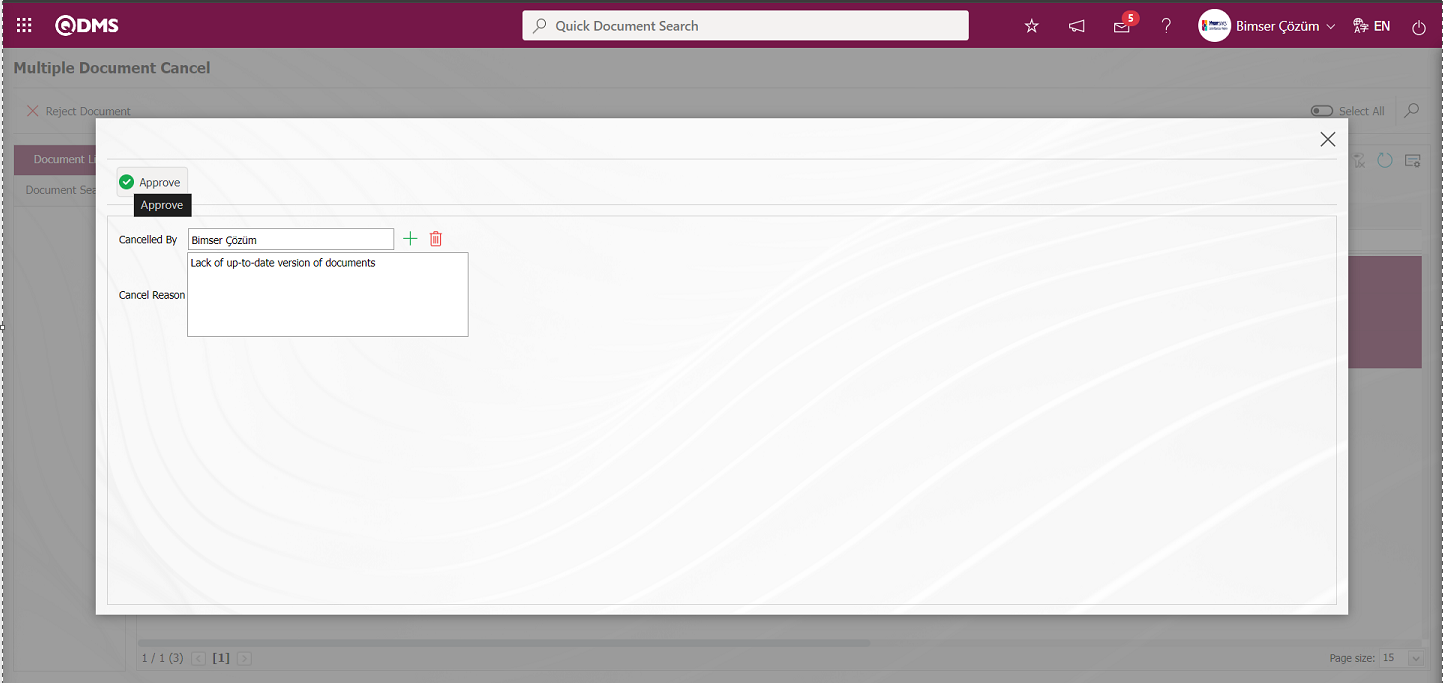
Click the “OK” button when the system displays the message “Are you sure you want to cancel selected documents?”.
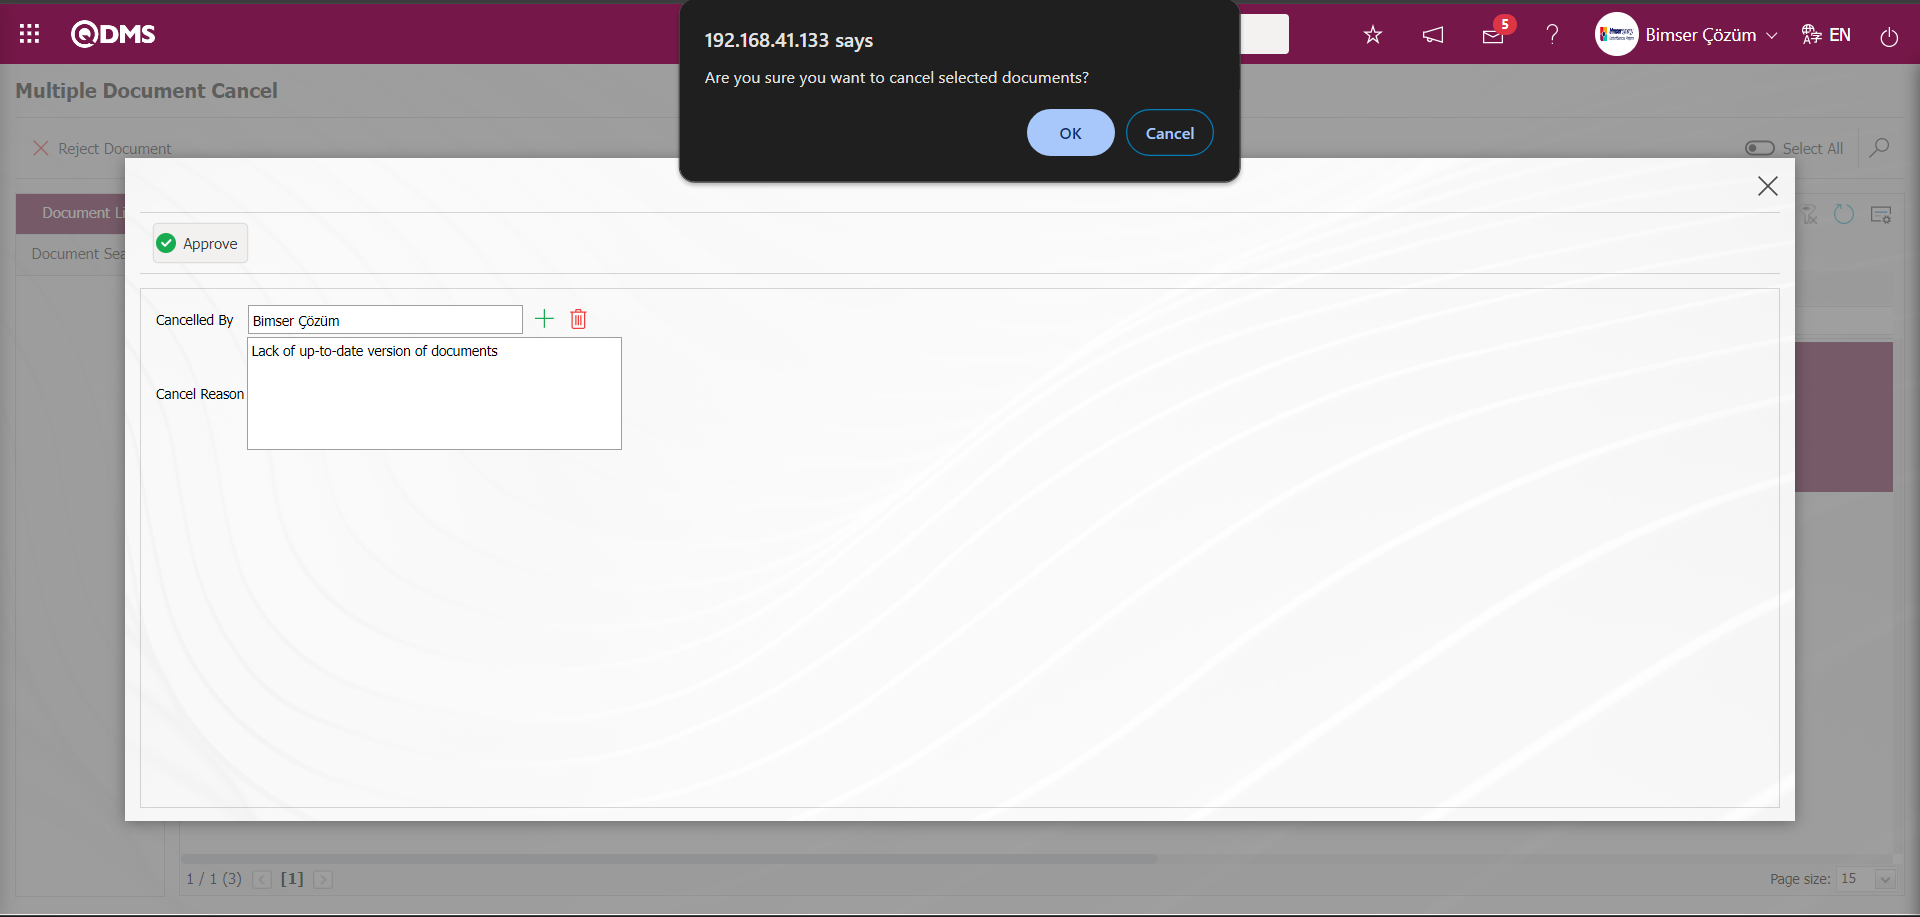
The system displays the message “Selected documents successfully cancelled.”

The system gives the message “The cancellation process is completed, the following documents could not be canceled because they are in revision.” and informs that the cancellation process of the document other than the document in the revision process has been completed. When performing Multiple Document Cancel, it should be taken into consideration that Bulk Document Cancel cannot be performed for documents that are in revision process.
6.3.24. Multiple Document Reactivation
Menu Name: System Infrastructure Definitions/ Document Activities/ Multiple Document Reactivation
This is the menu where the bulk suspension of documents is performed. Go to the Suspension menu.
In the Document Search tab, the documents are listed by selecting the Document type and Parent folder and clicking the (Search) button. In the Document List tab, the bulk document suspension is performed by selecting the listed documents and clicking the  button.

With the help of the buttons on the screen;
: Suspension of the documents selected in the list is made.
: Records are searched by filtering.
: The data remaining in the filter fields in the grid where the search criteria on the menu screens are searched is cleaned.
: The menu screen is restored to its default settings.
: User-based designing of the menu screen is done with the show-hide feature, that is, the hiding feature of the fields corresponding to the columns on the menu screens.
On the Multiple Document Reactivation screen, click the (Add) button in the Parent Folder field in the document search tab, select the folder in the Document Folder list and click the (Search) button.

In the document list, the documents to be mass document suspended are listed. Select the documents for Multiple Document Reactivation from the list and click button

Click the “OK” button when the system asks “Are you sure you want to reactivate selected documents?”.
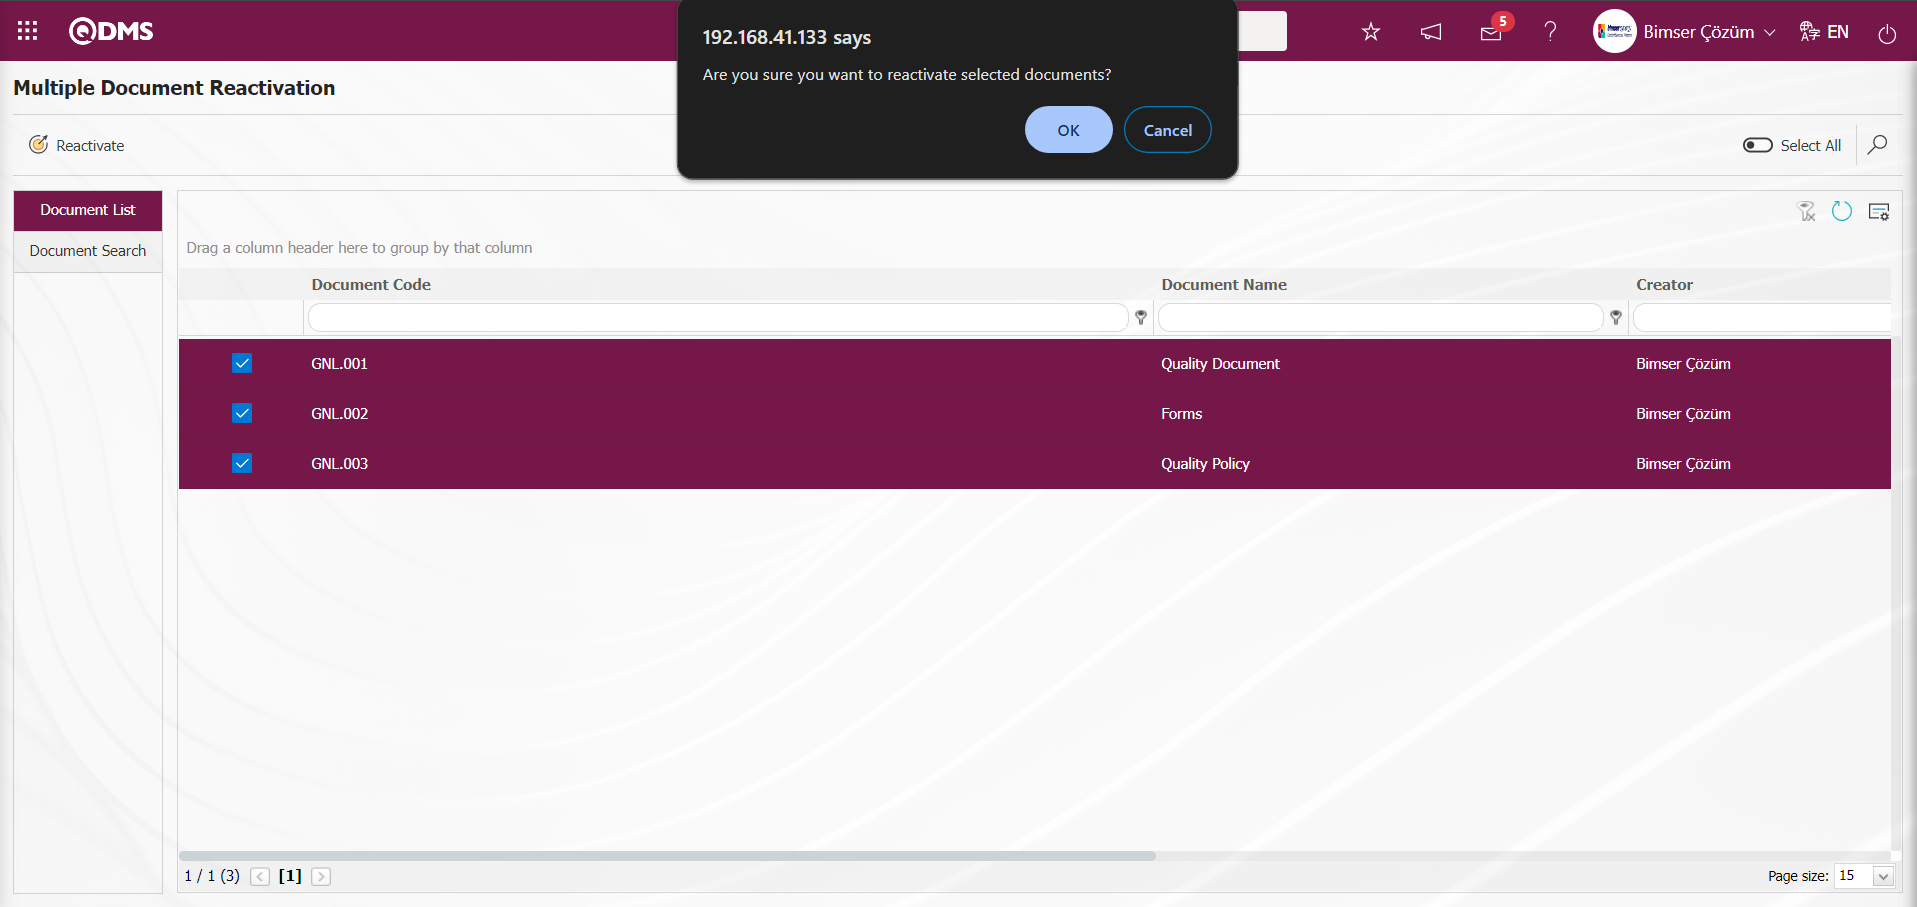
“Selected documents have been reactivated.” message is given by the system, indicating that the bulk document suspension process has been performed for the selected documents.

6.3.25.E-Mail Settings
Menu Name: System Infrastructure Definitions/ Document Operations/ E-Mail Settings
In the E-Mail Settings screen, it is the menu where it is determined to whom e-mail and sms will be sent at which stage of the Document Transactions processes.
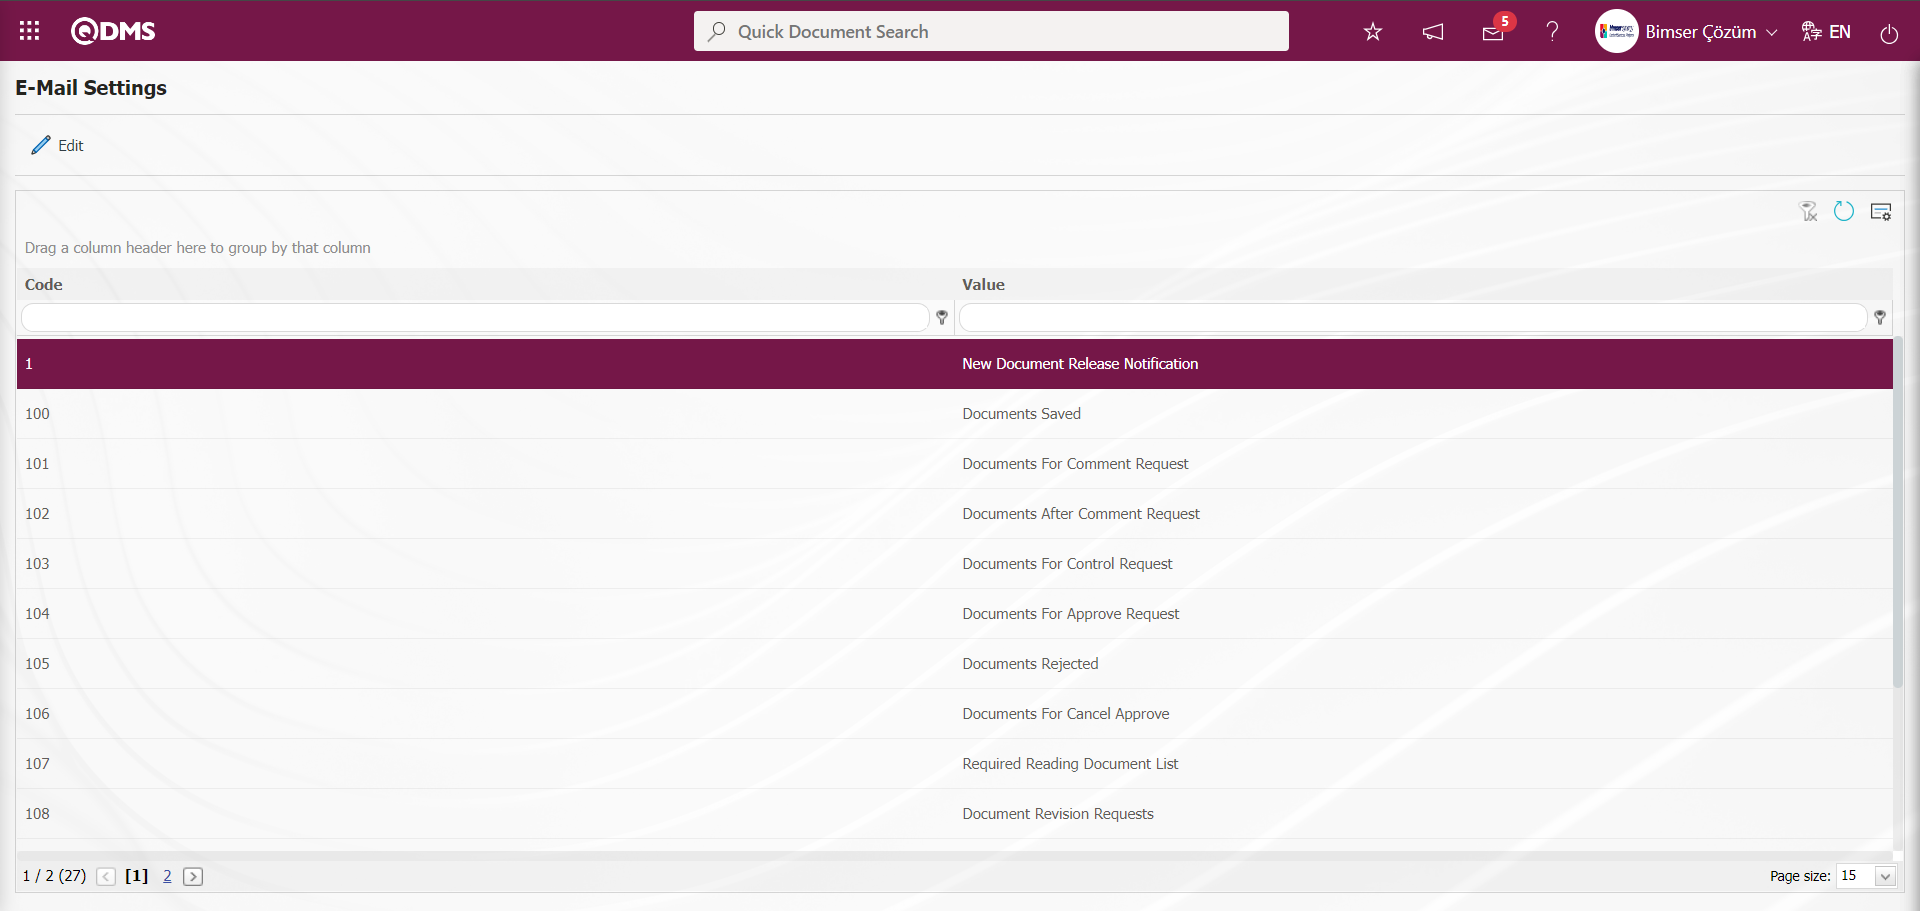
With the help of the buttons on the screen;
: Listede seçili olan E-postaları değeri bilgisi üzerinde düzenleme/değişiklik/güncelleme işlemi yapılır.
: The data remaining in the filter fields in the grid where the search criteria on the menu screens are searched is cleaned.
: The menu screen is restored to its default settings.
: User-based designing of the menu screen is done with the show-hide feature, that is, the hiding feature of the fields corresponding to the columns on the menu screens.
If SMS notification will be used in E-mail Settings;
Click on System Infrastructure Definitions/BSID/Configuration Settings/ Parameters menu. In the parameters of the System Infrastructure Definitions module parameters listed on the Parameters screen, the parameter number 102 “Will using SMS notification?” is selected by typing the parameter number in the parameter no field in the Filter tab on the parameters screen and clicking the  (Search) button.
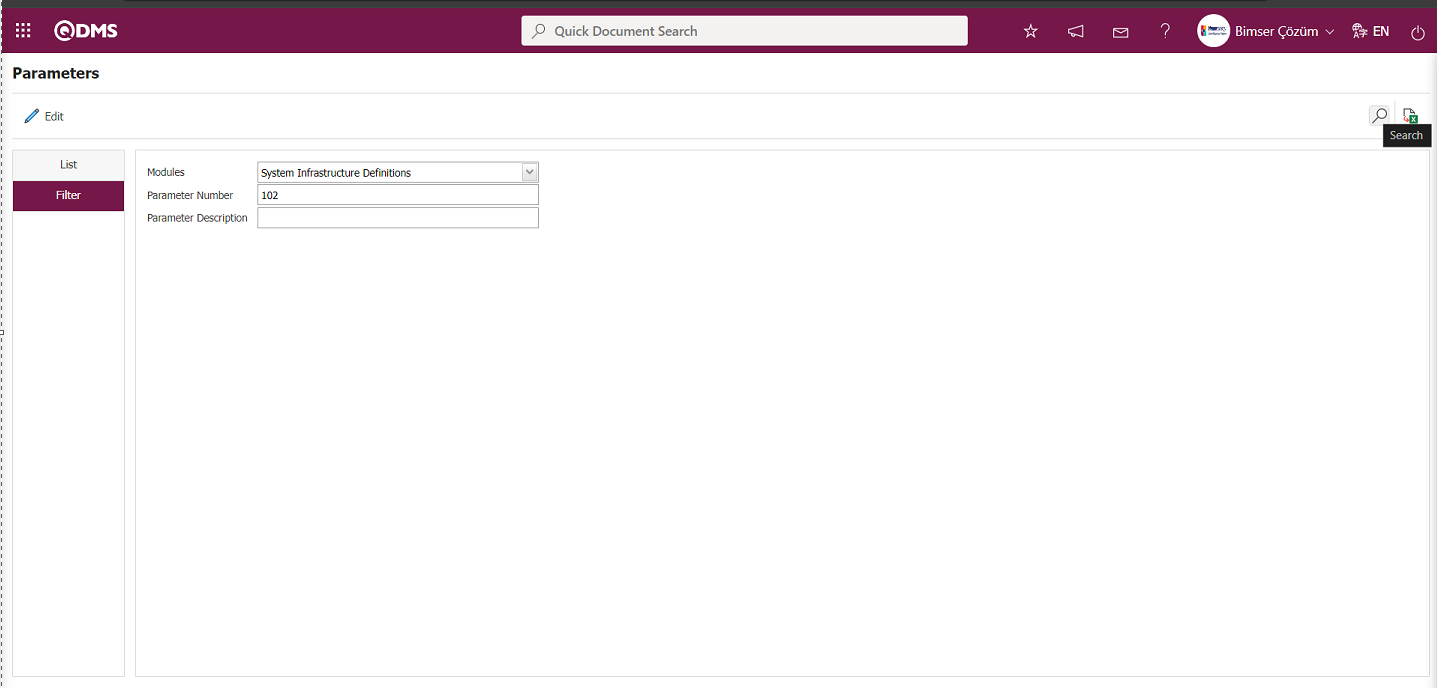
After selecting parameter 102 **“Will using SMS notification? in System Infrastructure Definitions module parameters, click  button.

Select the parameter value “Yes“ on the parameters screen.
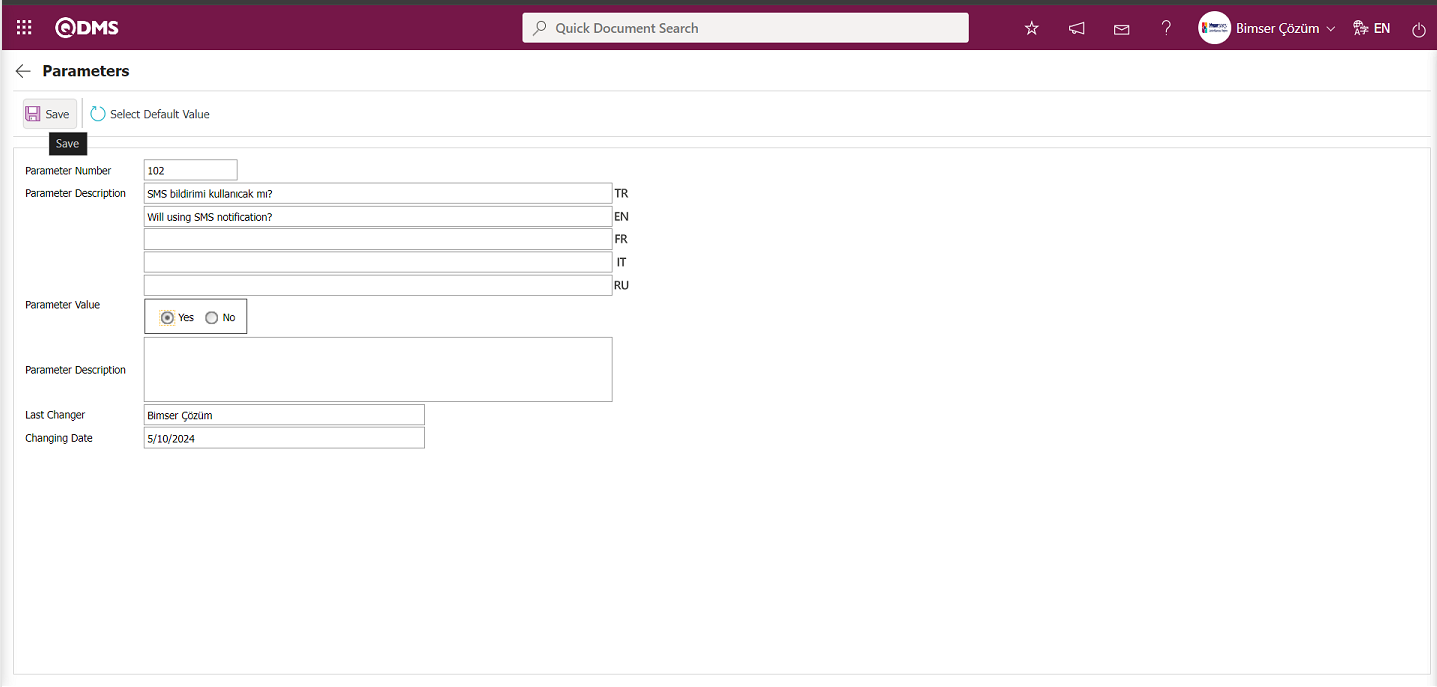
After selecting the parameter value “Yes“ on the Parameters screen, the  button on the top left of the screen is clicked and the parameter is activated.
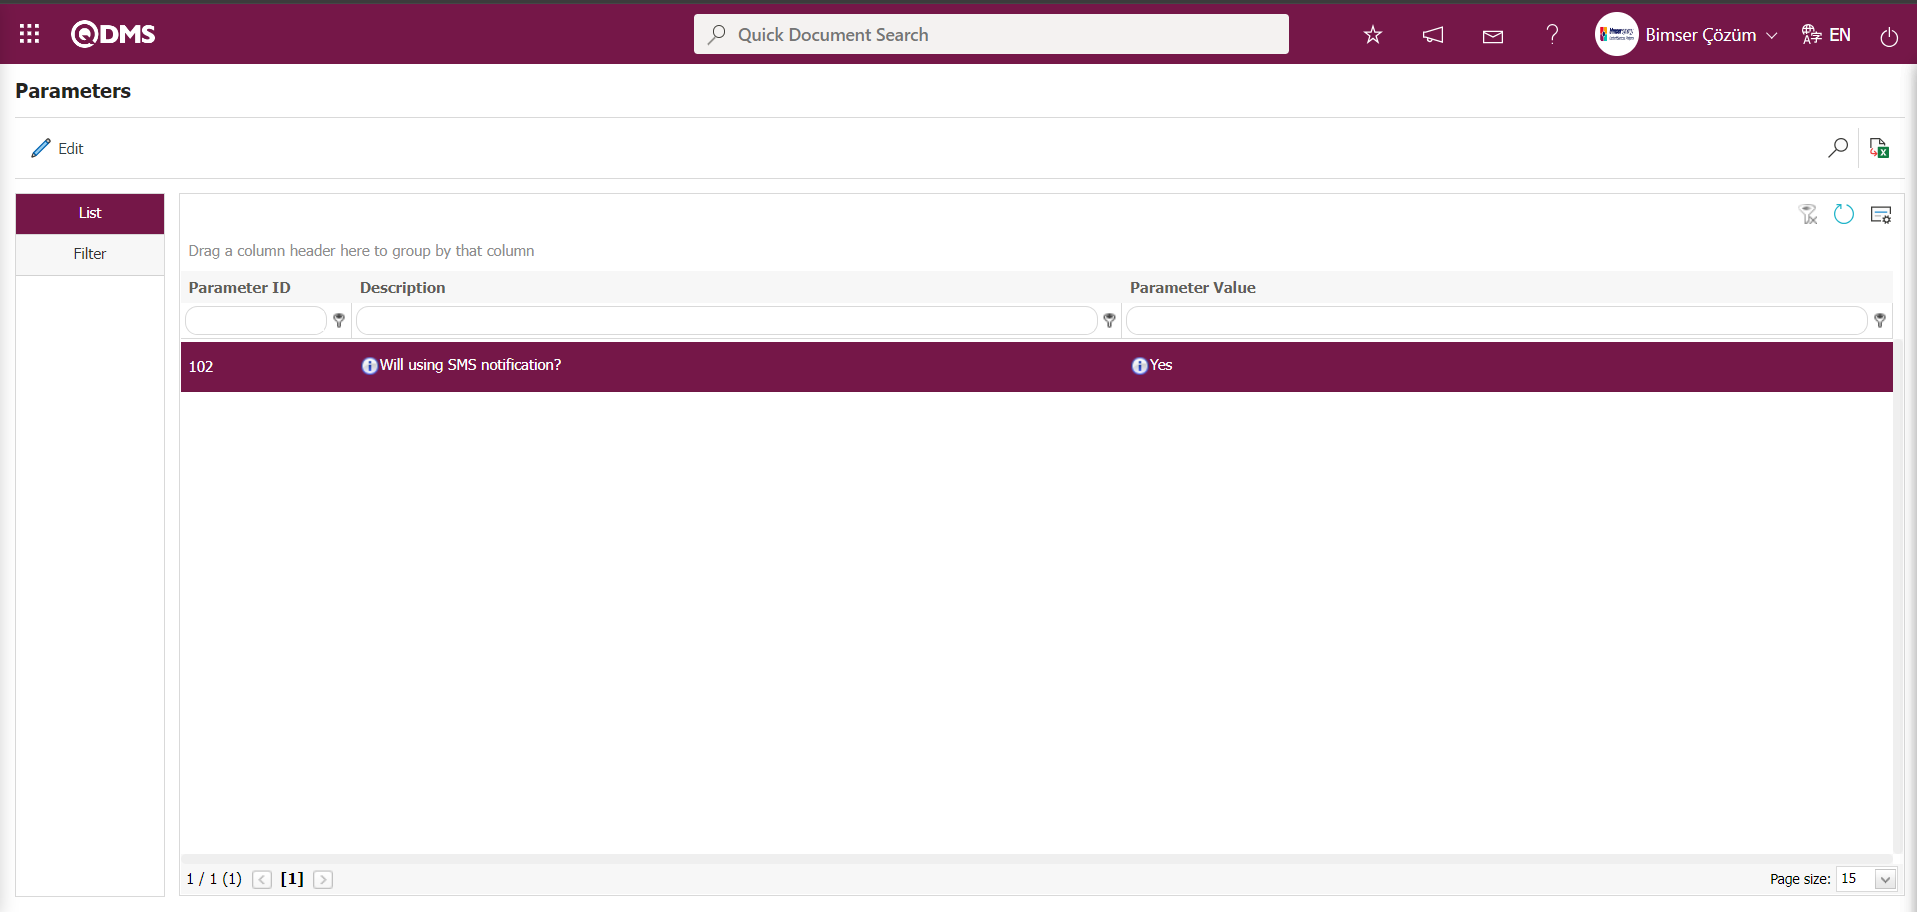
After the parameter is activated, the check box related to the “Send SMS” field related to the use of SMS notification is displayed on the E-Mail Settings screen. By checking the relevant check box, SMS notification is used in E-Mail settings.
Select which step you want to send e-mail/message and click the button.
For example: Select the “Documents For Comment Request” step on the E-Mail Settings screen and click the button.
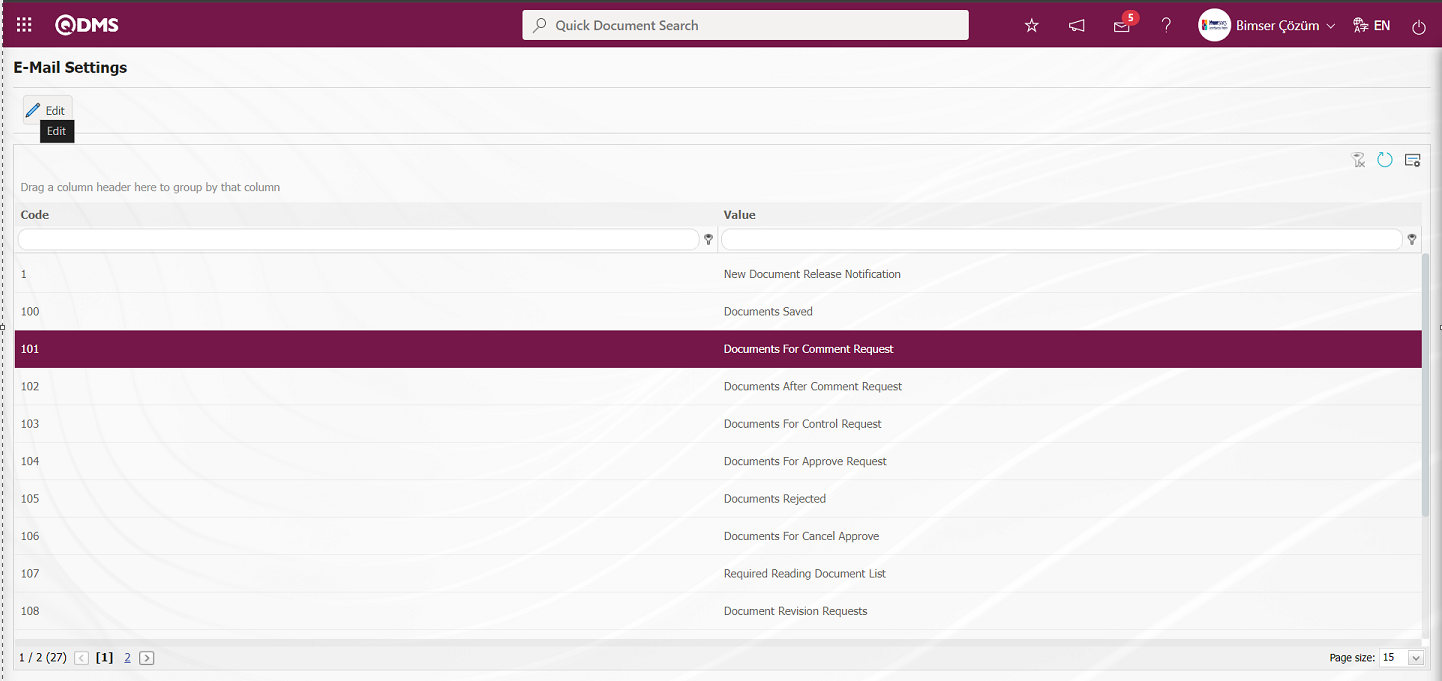
The E-Mail Settings/** Documents For Comment Request screen is displayed. The Roles section shows the role to which my e-mail and message notification will go.
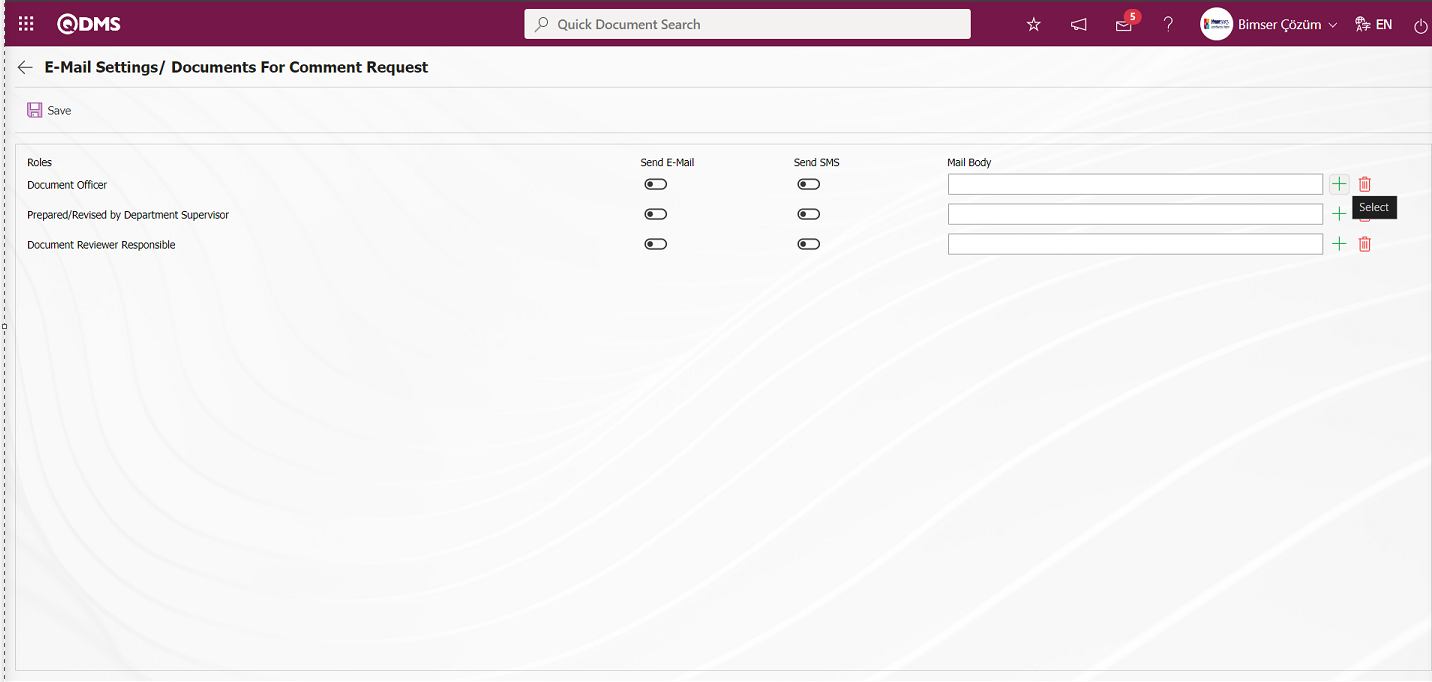
On the E-Mail Settings/ Documents For Comment Request screen, click the  (Select) button and select the message body to be sent from the related list in the Message Body list defined in the system.
  (Delete) button is used to delete an incorrectly added message body.

By selecting the message body in the Message Body list and clicking the  button, the content of the message body is displayed in detail.
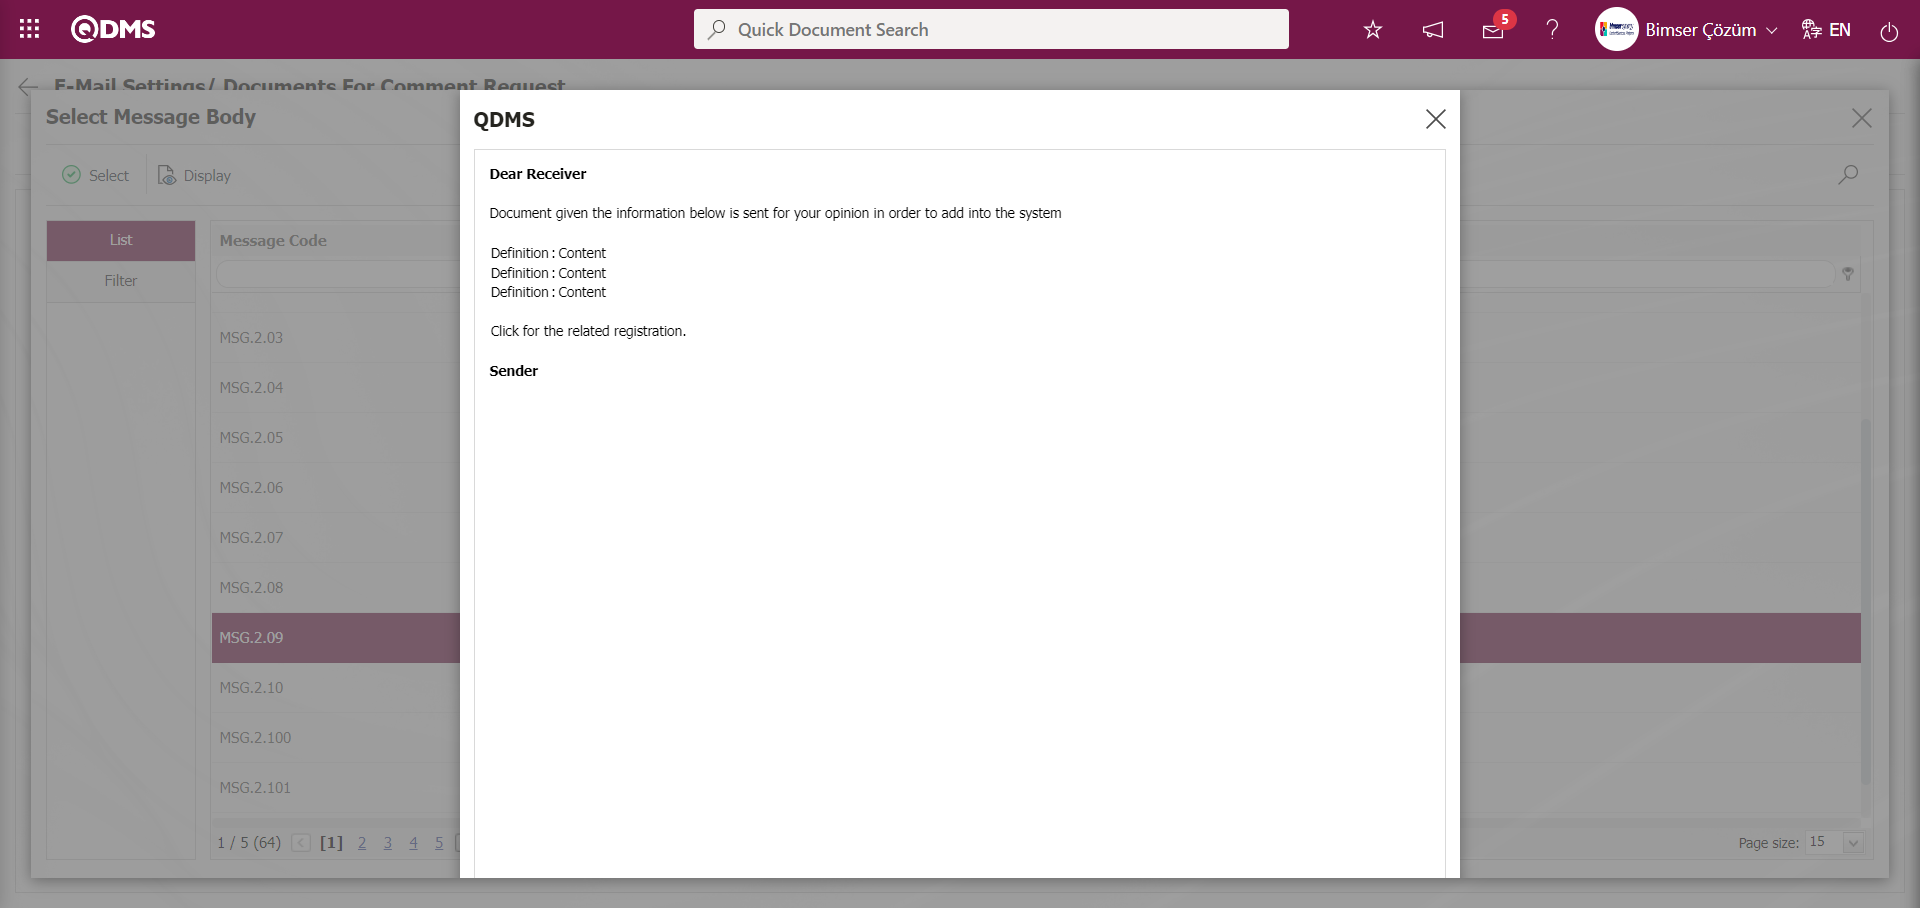
The message bodies to be sent for the relevant roles are selected by selecting the message body in the message body list and clicking the  button.
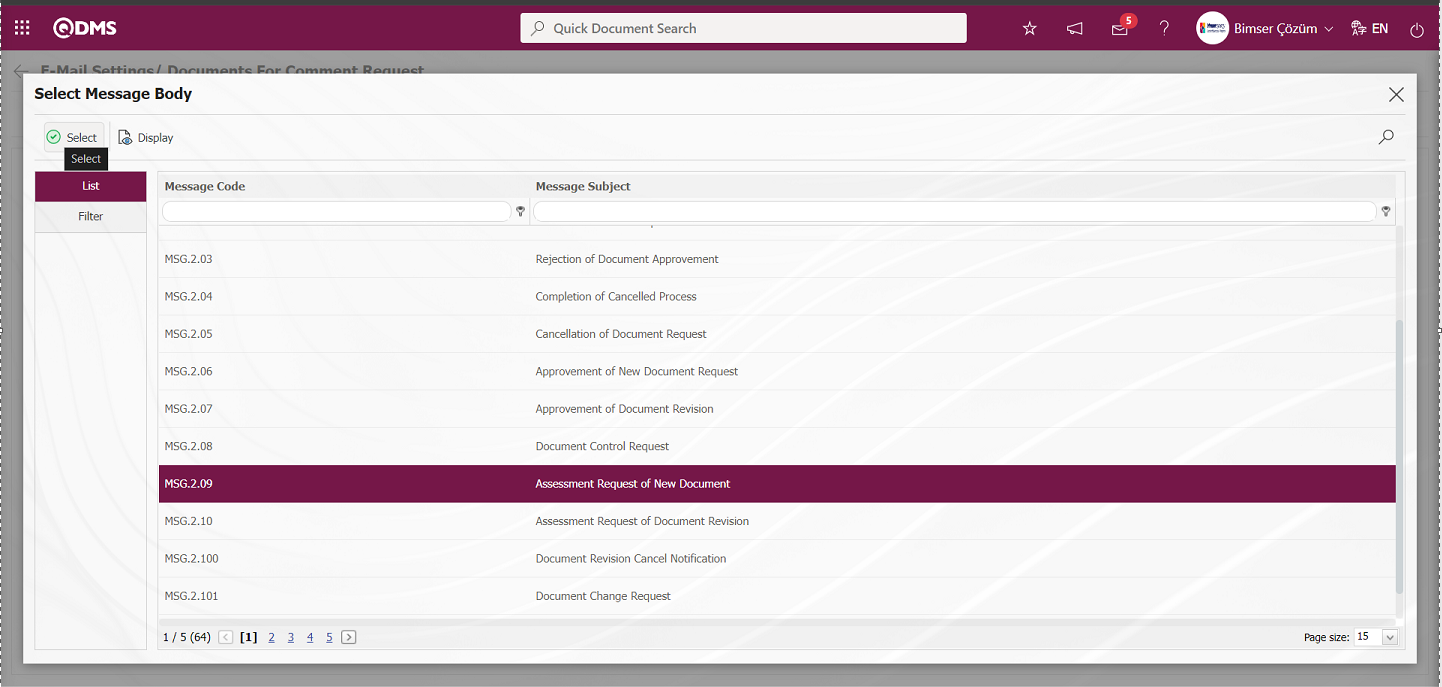
If you want to send an e-mail to whom, the “Send E-Mail/ Send SMS” check box related to that role is checked. The mobile phone number of the person defined in the role must be defined on the personnel identification screen in order to send a message.
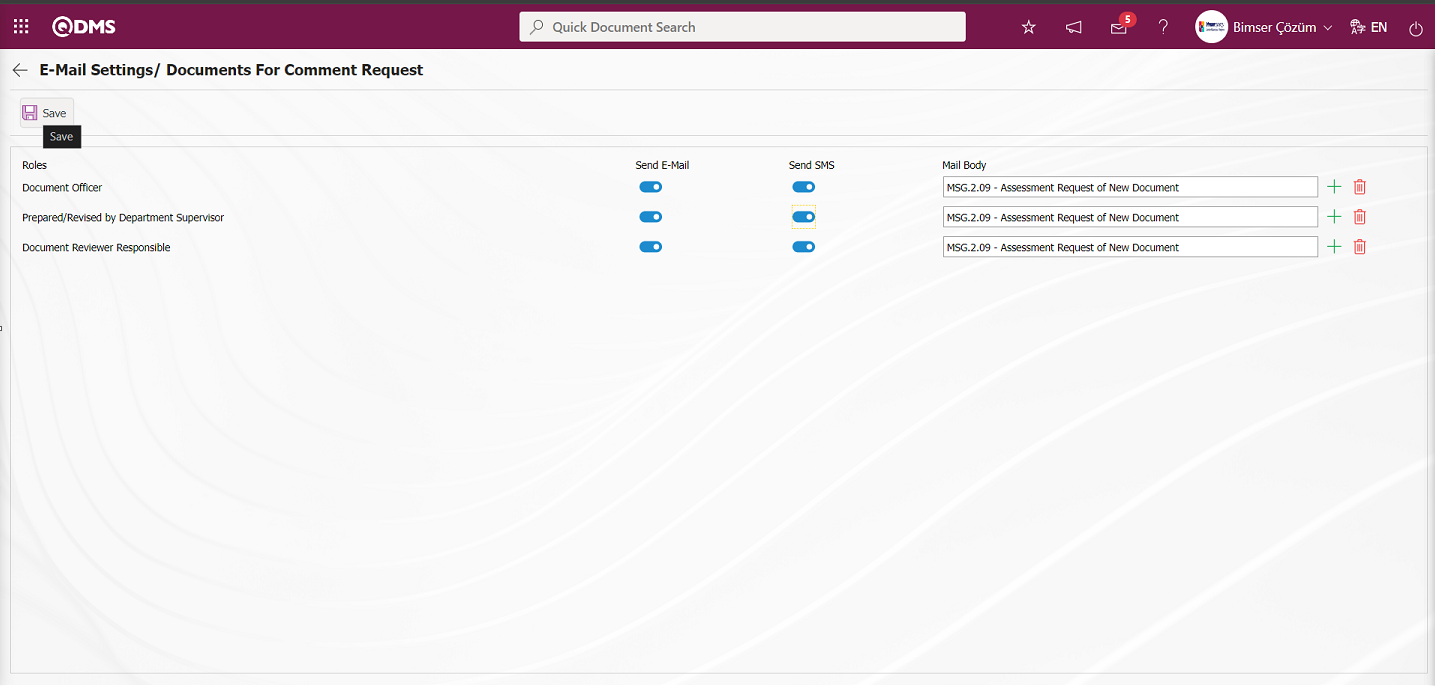
On the E-Mail Settings/ Documents For Comment Request** screen, after the “Send E-Mail/ Send SMS” check box related to the roles to send e-mail is checked, the E-Mail Settings registration process is performed by clicking the  button in the upper left corner of the screen.
6.3.26. Multiple Document Activation
Menu Name: System Infrastructure Definitions/ Document Activities/Multiple Document Activation
It is the menu where the suspended documents are activated collectively. Select the Multiple Document Activation menu. In the Document Search tab, the Document type and Parent folder are selected in the search criteria and the Documents are listed by clicking the (Search) button. After the selection of the documents listed in the Document List, the bulk document activation process is performed by clicking the  button.

With the help of the buttons on the screen;
: Activation of the documents selected in the list is done.
: Records are searched by filtering.
: The data remaining in the filter fields in the grid where the search criteria on the menu screens are searched is cleaned.
: The menu screen is restored to its default settings.
: User-based designing of the menu screen is done with the show-hide feature, that is, the hiding feature of the fields corresponding to the columns on the menu screens.
On the Multiple Document Activation screen, on the Document Search tab, click the  (Add) button in the Parent Folder field and select the folder in the Document Folder list and click the
  (Search) button.

In the document list, the documents to be activated in bulk are listed. Select the documents for Multiple Document Activation from the list and click button.
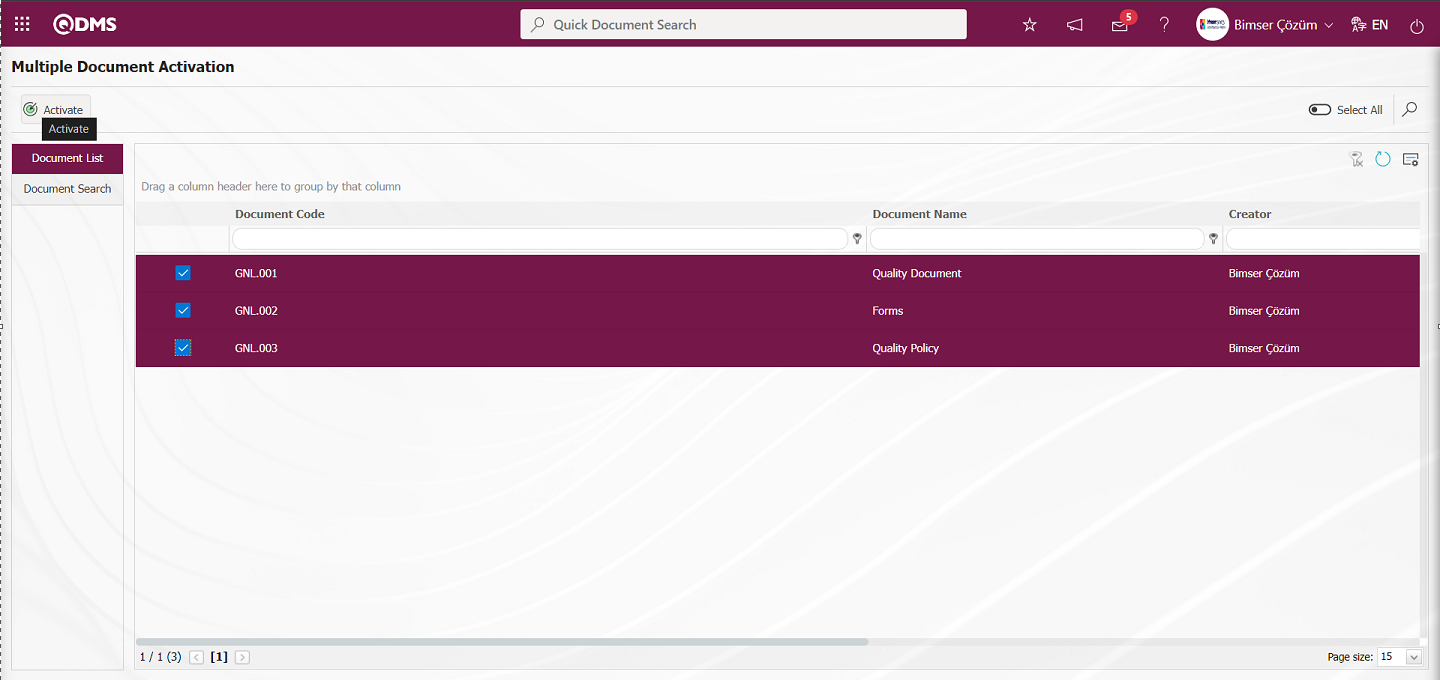
Click the “OK” button when the system asks “Are you sure you want to activate selected documents?”.
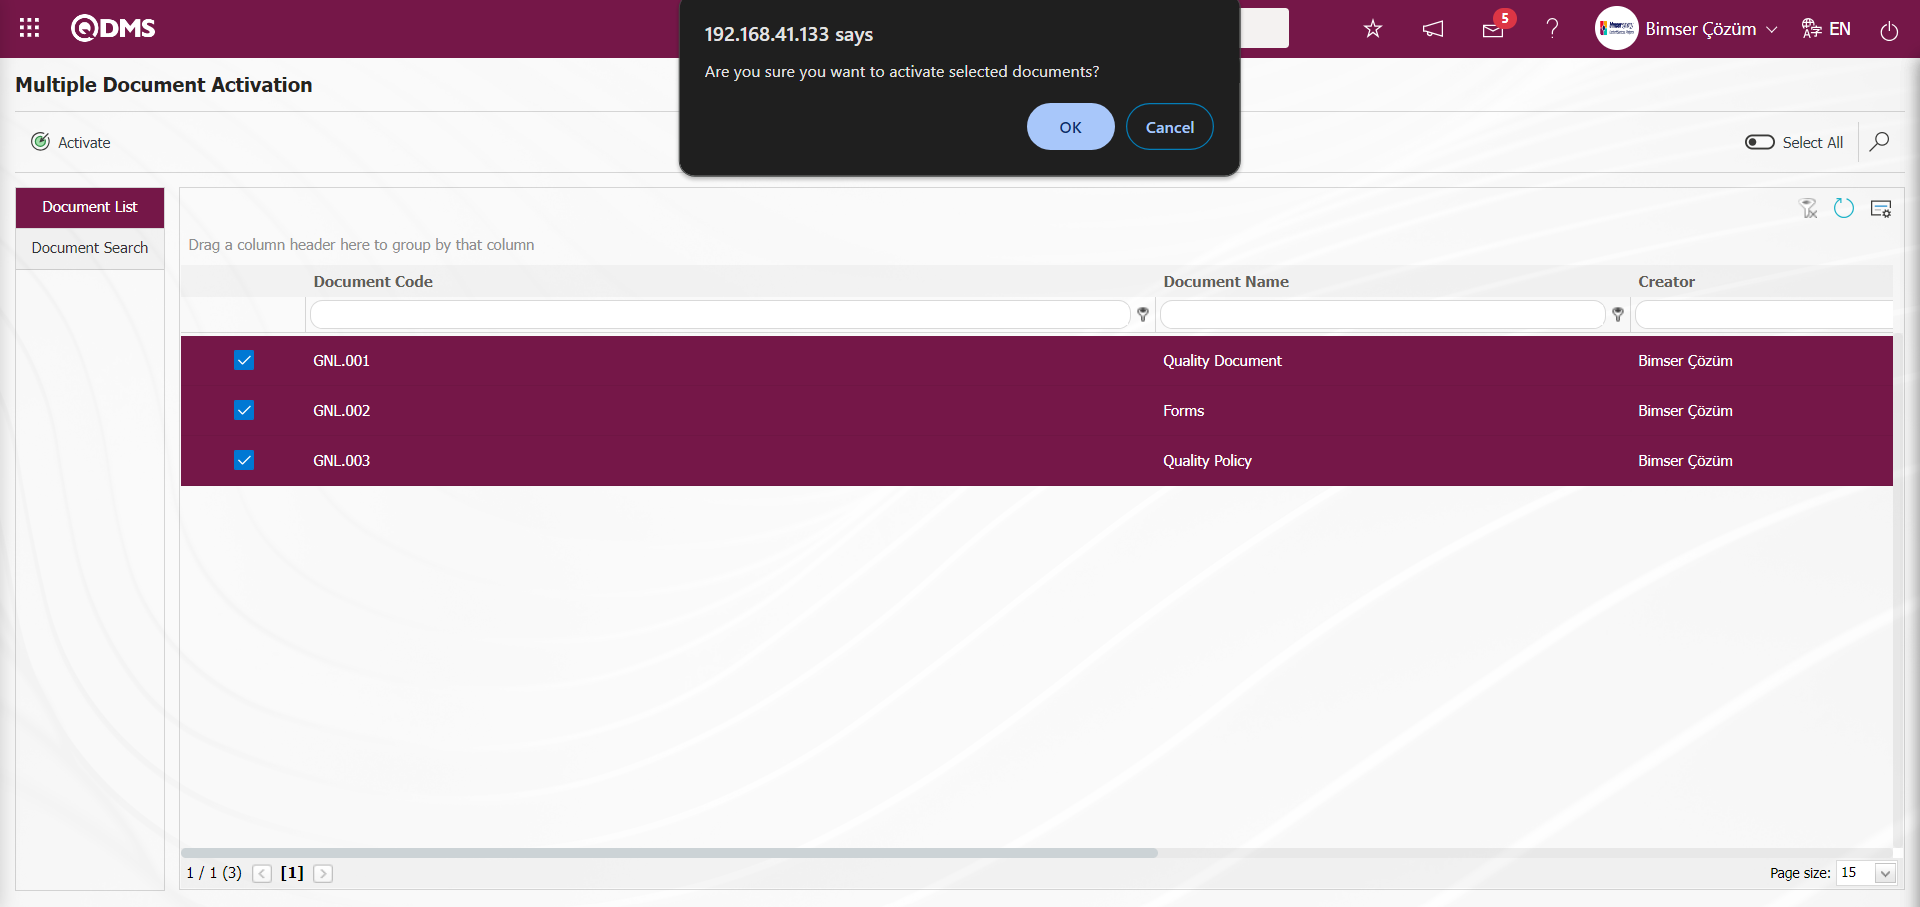
The system gives the message “Selected documents are activated.”, indicating that the selected suspended documents are activated collectively.
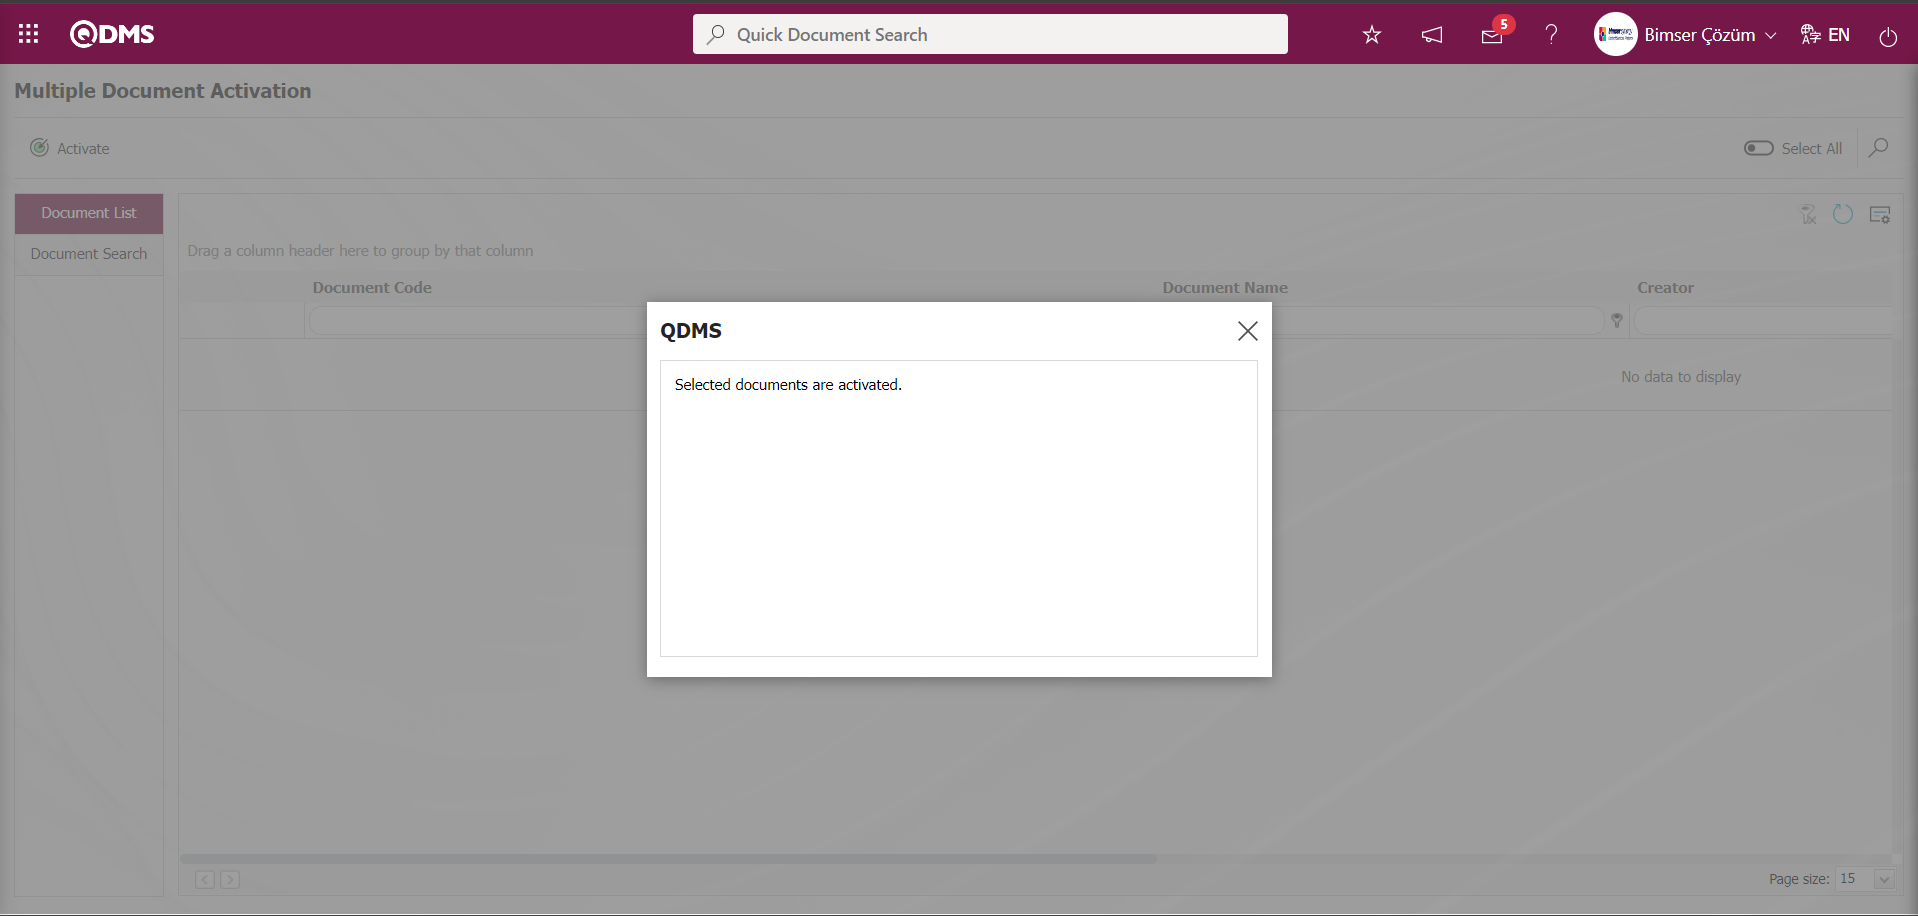
6.3.27. Document Distribution Matrix Editing
Menu Name: System Infrastructure Definitions// Document Activities/ Document Distribution Matrix Editing
It is a menu used to make changes on user groups and positions previously added to distribution matrices in Folders. Go to the Document Distribution Matrix Editing menu. First of all, the relevant documents are listed by using the filter tab. In the list tab, the documents to edit the document distribution matrix are selected. When the user group option is selected in the User type field, selection operations are performed in the User group list and in the Position list when the Position option is selected. In the operation type field, the appropriate option is selected according to the arrangement to be made according to the addition and subtraction operation according to the user group or position selected in the distribution matrix. In the distribution matrix, the document distribution matrix editing process is done by clicking the  button in the upper left corner of the screen by marking the relevant check boxes according to the important document, the documents that need to be read and the definition of the questionnaire in the document.
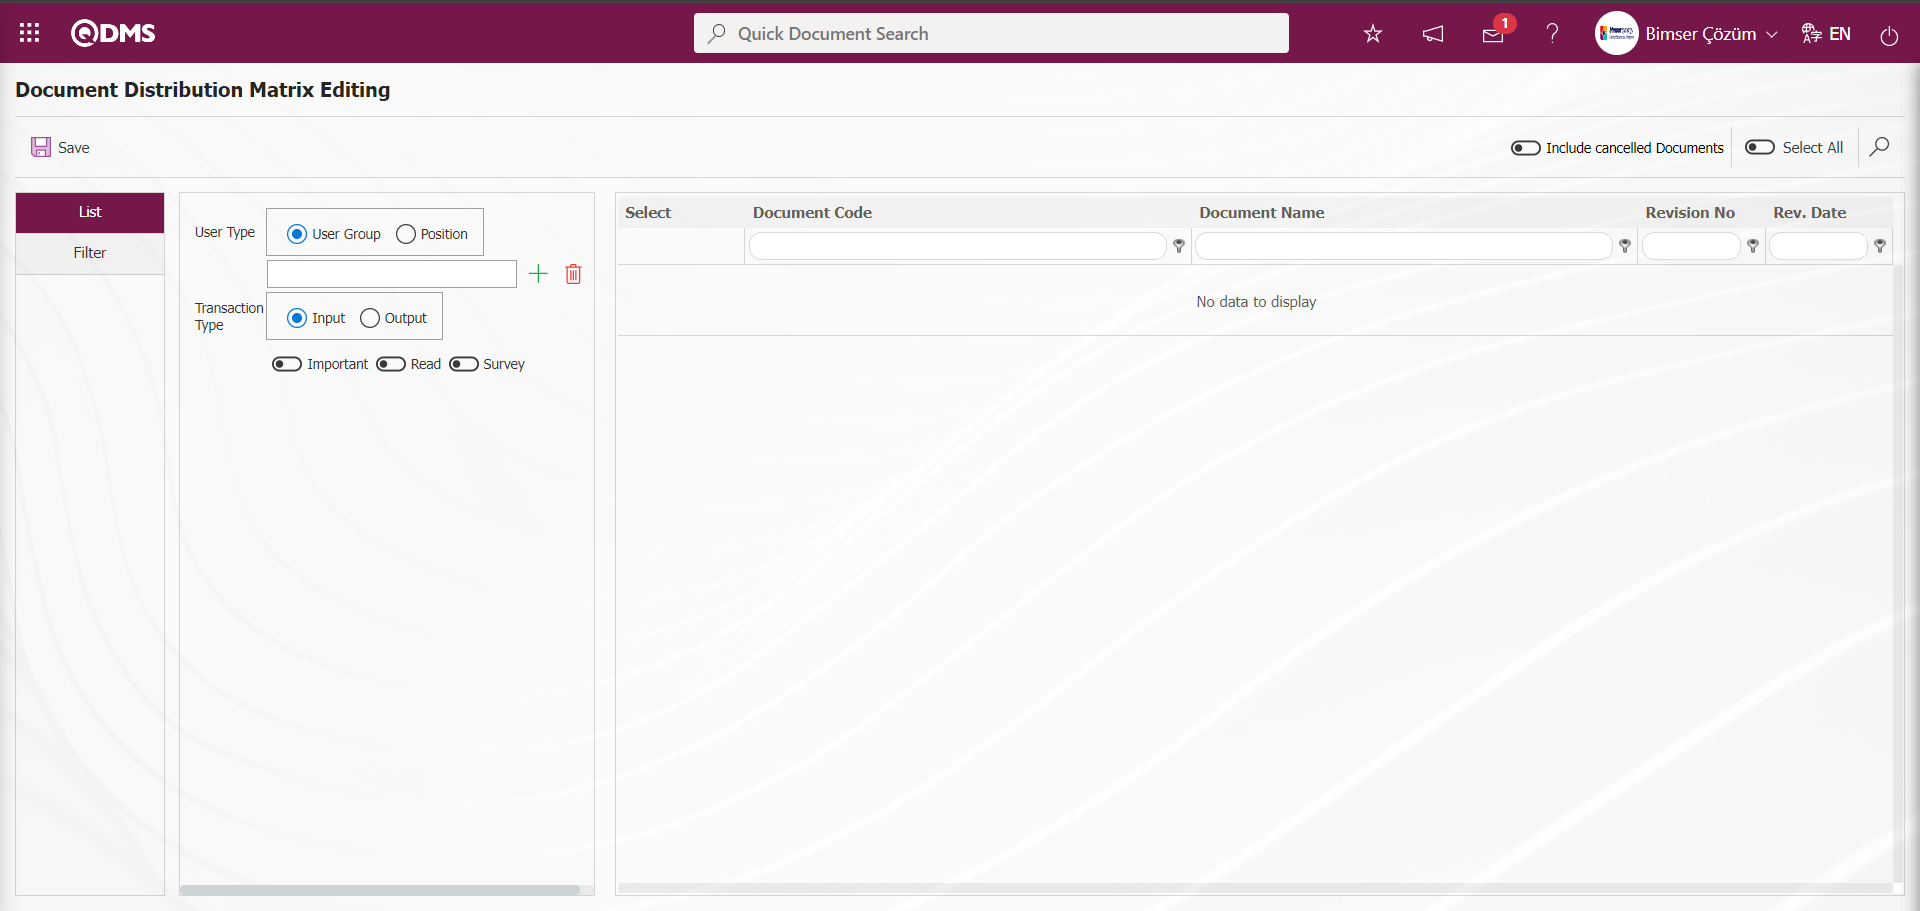
With the help of the buttons on the screen;
: The distribution matrix editing registration process of the documents selected in the list is done.
On the Document Distribution Matrix Editing screen, on the Document Search tab, click the (Select) button in the Parent Folder field and select the folder in the Document Folder list and click the (Search) button.
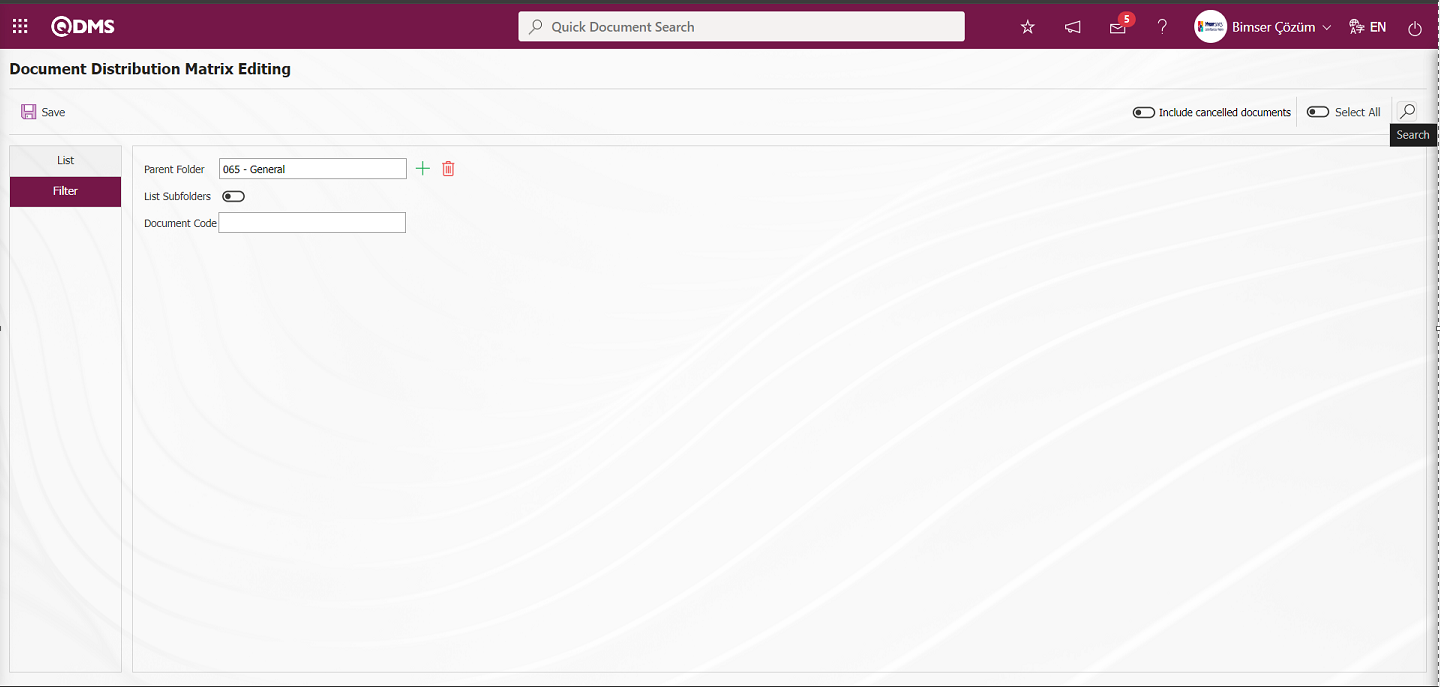
In the document list, the documents for document distribution matrix editing are listed. In the User Type field, the User Group option is selected and the user group selection process is performed in the user group list defined in the system that opens by clicking the  (Select) button. In the distribution matrix tab to be added, the important field according to the important document and the check boxes related to the questionnaire if the questionnaire is to be defined in the document are checked and the document distribution matrix editing process is performed for the selected documents by clicking the button in the upper left corner of the screen.
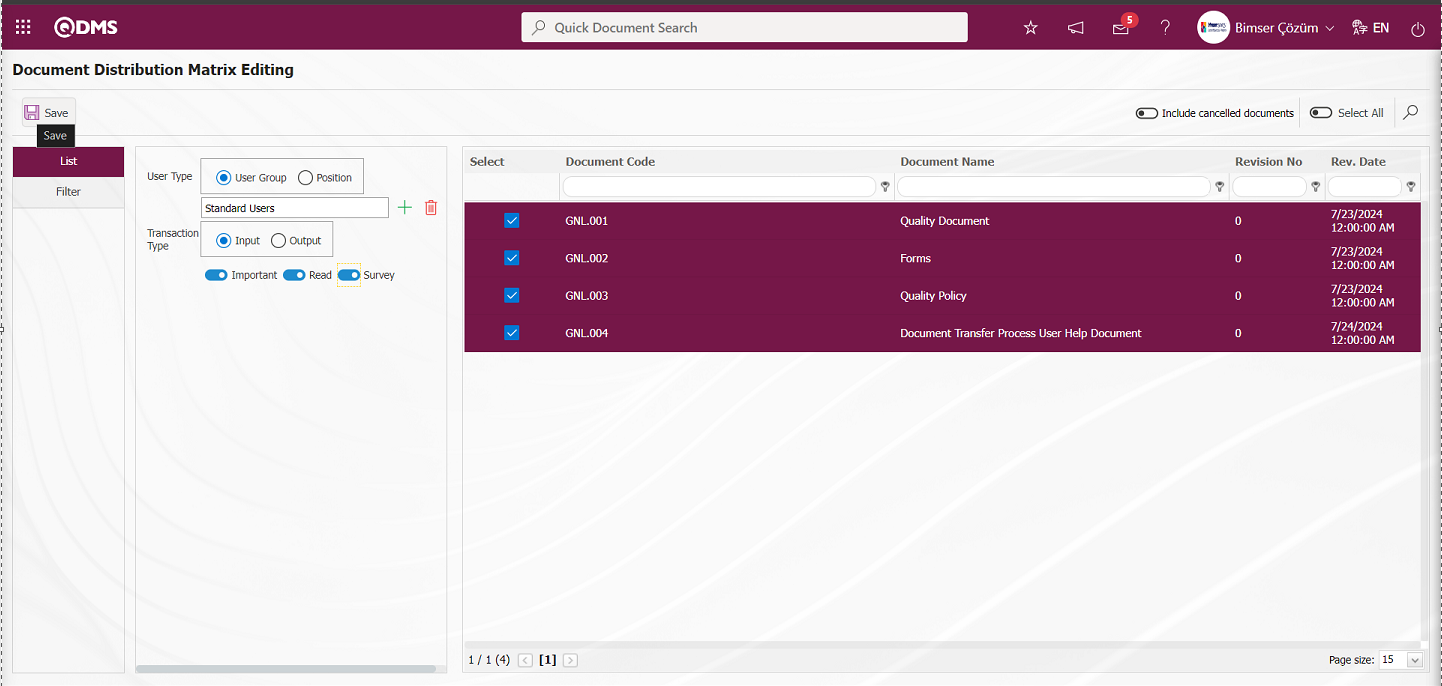
Click the “OK” button in the message given by the system.
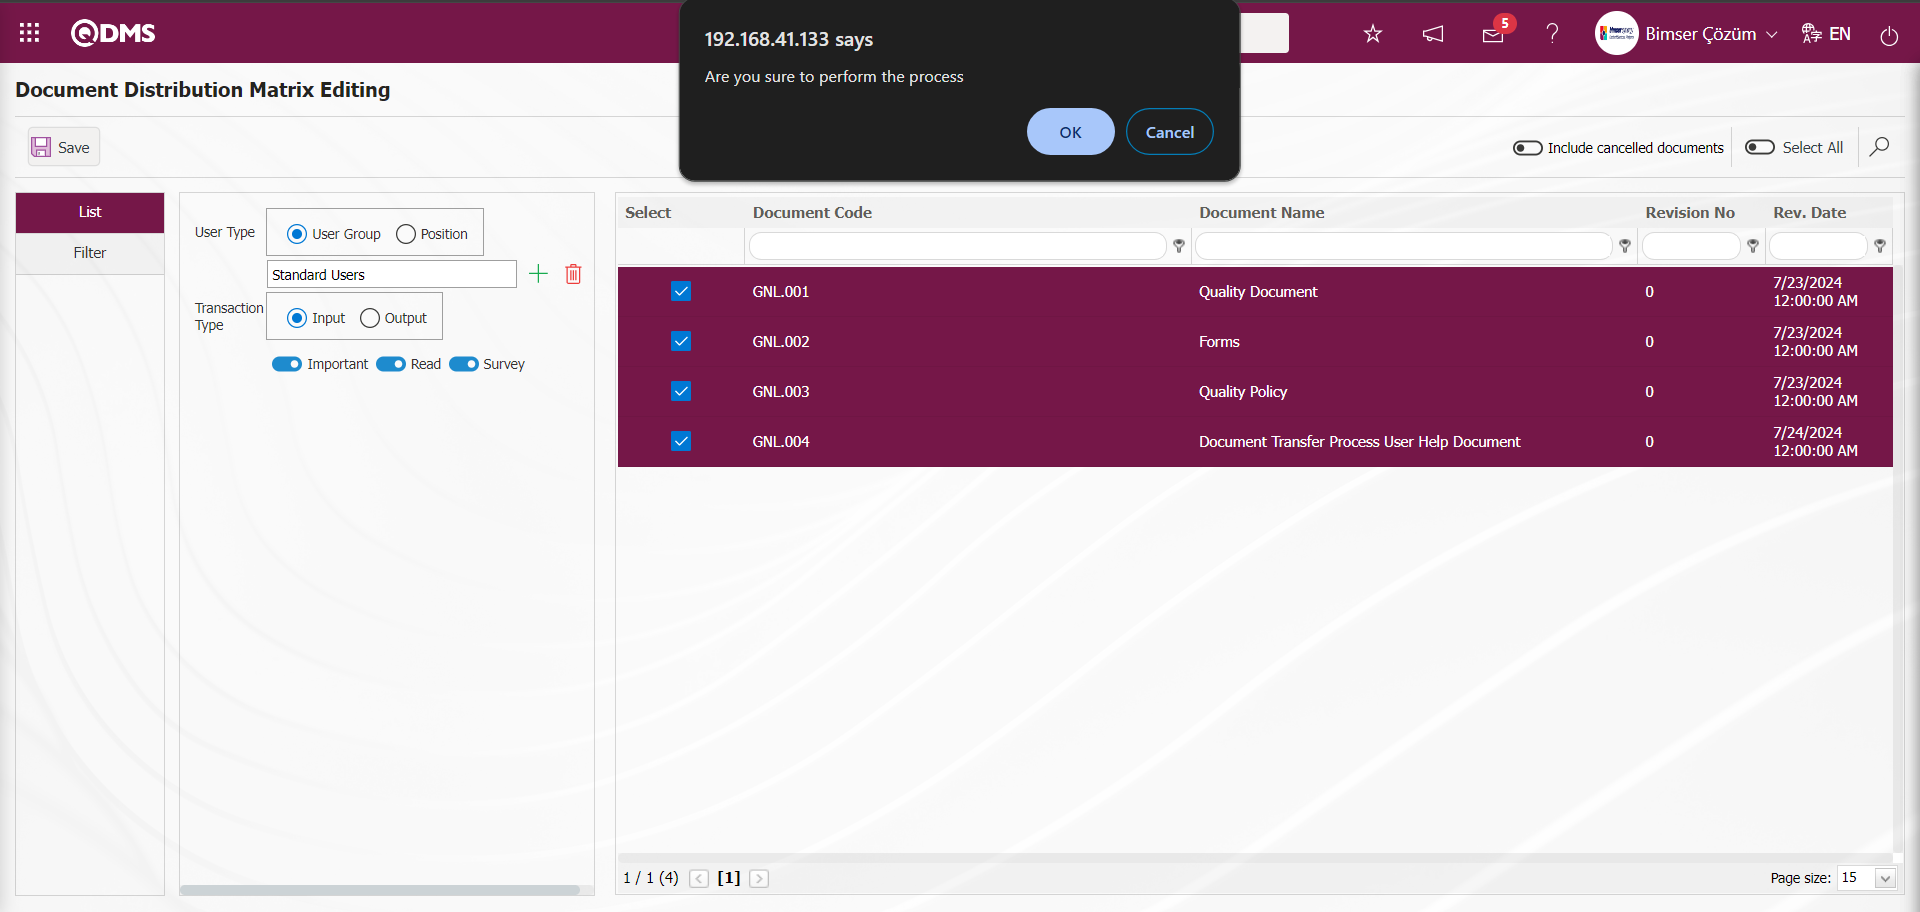
“Authorizations have been made for the following position/ user group.” message is given by the system and the information about which position/ user group the authorizations have been made for is included in the message.
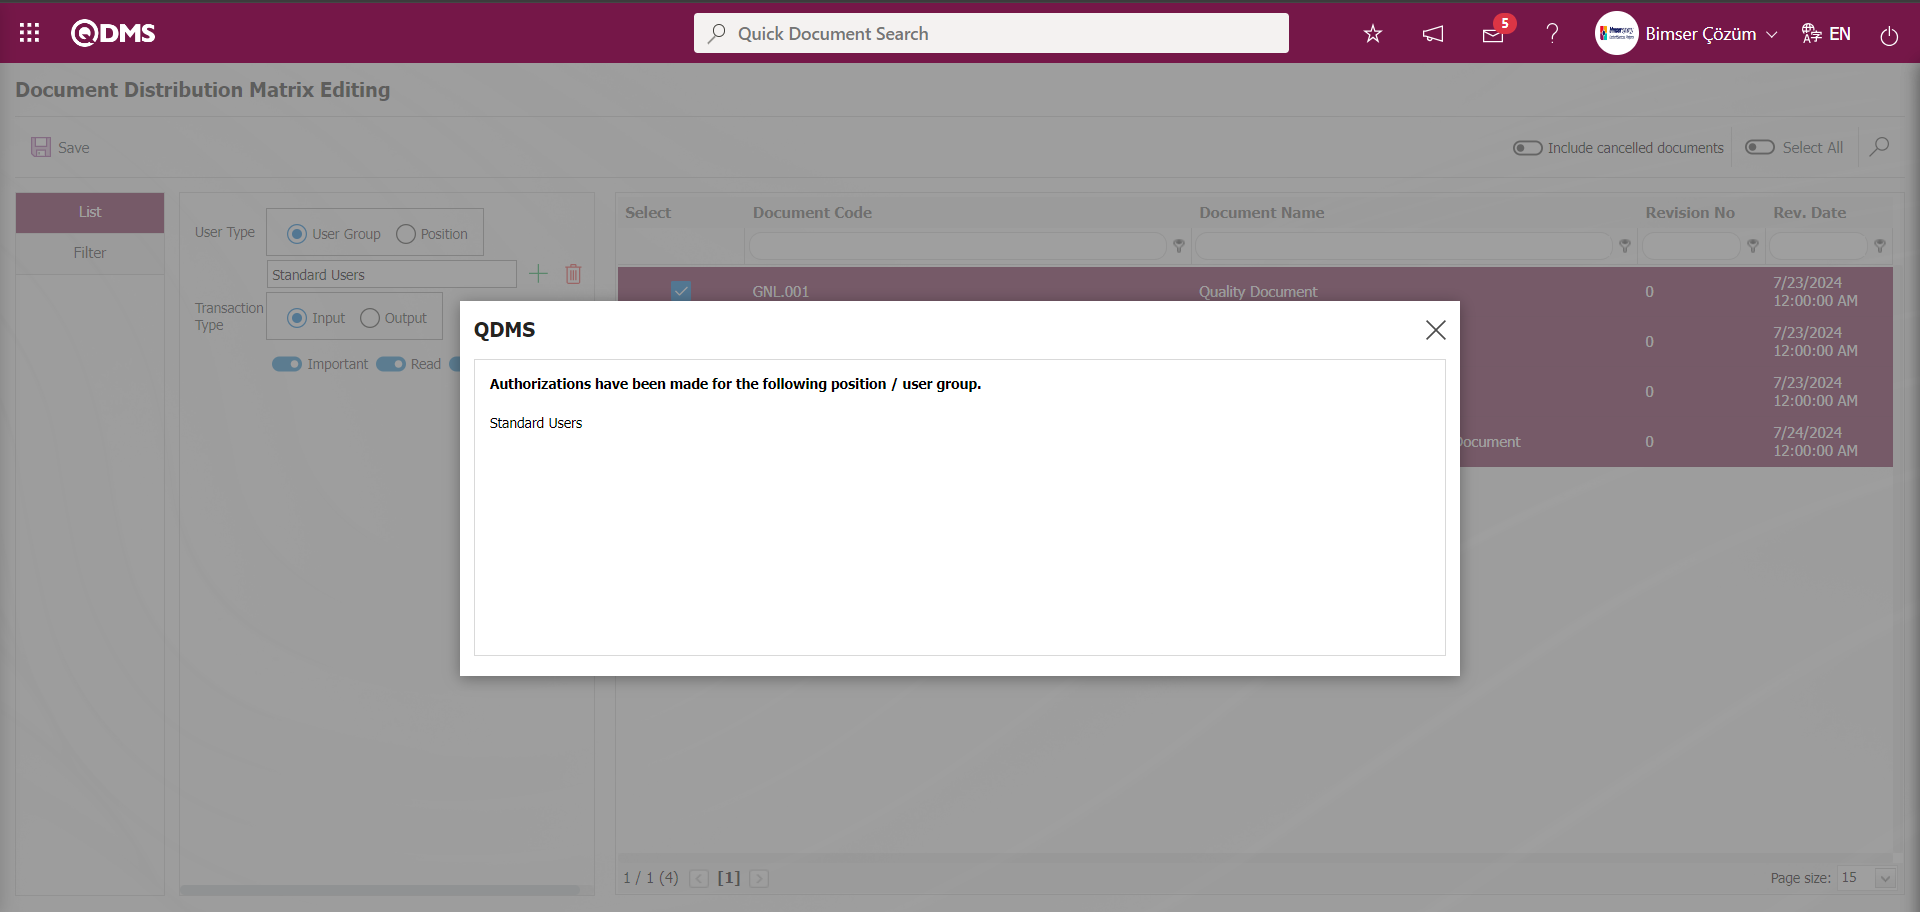
In the distribution matrix on document basis, the related options can be authorized or the authorizations can be removed from this section. Necessary arrangements can also be made on the documents that have been canceled in this menu.
6.3.28. Will the preparation/ revision type be used
Menu Name: System Infrastructure Definitions/ Document Activities/ Will the preparation/ revision type be used
It is the menu where the definition of document preparation/ revision type such as New Document, Administrative, Major, Minor is made. In screens such as Document Preparation, Document Revision, Document Transfer to System menus, the selection is made in the Document Preparation/ Revision Type field, which is displayed depending on the parameter in the Document Information tab. This field is a field displayed by activating the parameter by selecting the parameter value “Yes” of parameter 269 “Will the preparation/ revision type be used?” in Document Management parameters.
With the help of the buttons on the screen;
: Defining a new document preparation/revision type.
: Changes and updates are made on the document preparation/revision type information selected in the list.
: Delete the document preparation/ revision type information selected in the list.
Will the preparation/ revision type be used To define a new Document Preparation/ Revision Type in the definition screen, click the button and Will the preparation/ revision type be used - New Record screen is displayed.

On the Preparation/ Revision type Definition - New Record** screen, the definition information of the Document Preparation/ Revision Type is written and the relevant check box is checked in the field Let the training officer come blank. The status section is selected active. After entering the relevant information in the required fields, the button in the upper left corner of the screen is clicked and the Document Preparation/ Revision Type definition registration process is done.
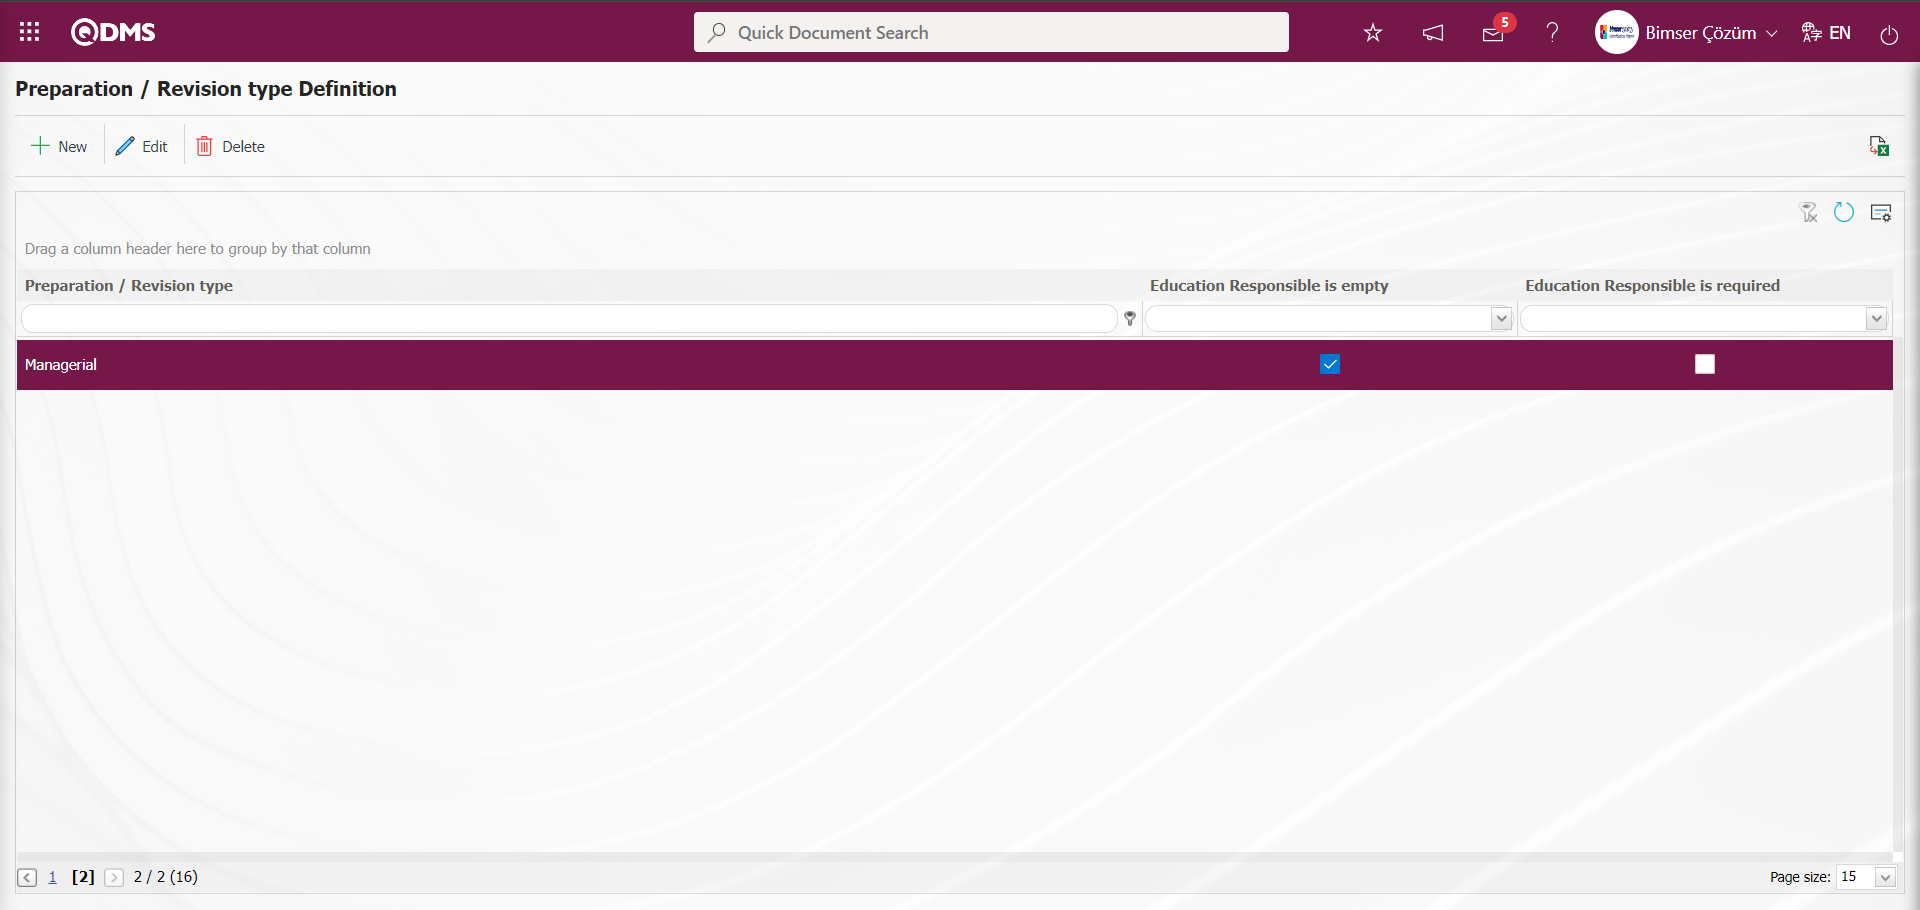
6.3.29. Product Transfer
Menu Name: System Infrastructure Definitions/ Document Activities/ Product Transfer
This menu is used for batch transfer of the products associated with the document on the Excel template. The process of associating with the documents and defined products installed in the system is done. For this process, the Product Document template is filled by typing the document code information installed in the system in the Document code information field and the Product code information defined in the system in the Product code field in the Product Document template downloaded to the computer by clicking the  button. After the information is written in the relevant fields in the Product Document template, the Product Document template is loaded to the menu in the Qdms system by clicking the
  button. If the transferred data is suitable for transfer, the transfer is realized through the
  button.
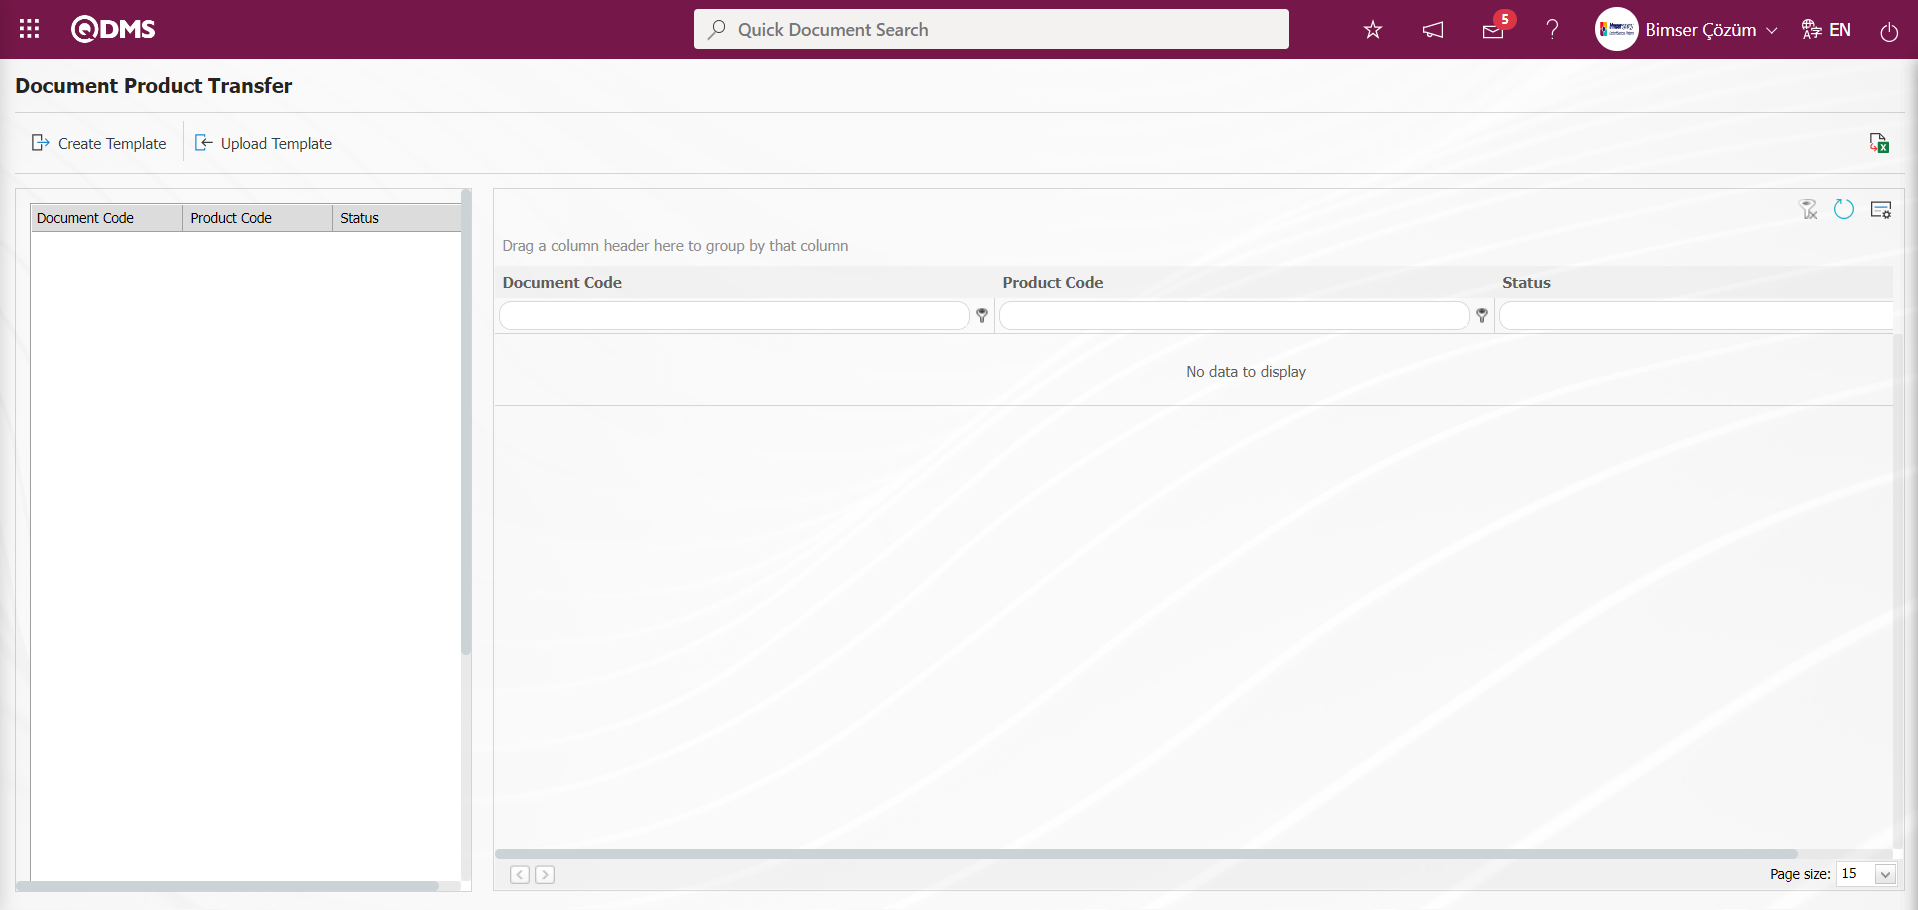
With the help of the buttons on the screen;
 : Product Document template is downloaded to the computer.
 : The filled Product Document template is uploaded to the system.
: The transfer process is performed.
: Data is transferred to Excel.
: The cleaning process of the data remaining in the filter fields in the grid where the search criteria on the menu screens are searched is performed.
: The menu screen is restored to its default settings.
: User-based designing of the menu screen is done with the show-hide feature, that is, the hiding feature of the fields corresponding to the columns on the menu screens.
On the Document Product Transfer screen, the Product Document template is downloaded to the computer by clicking the button.

The relevant fields in the Downloaded Product Document template are filled by typing the relevant information and saved to the computer.
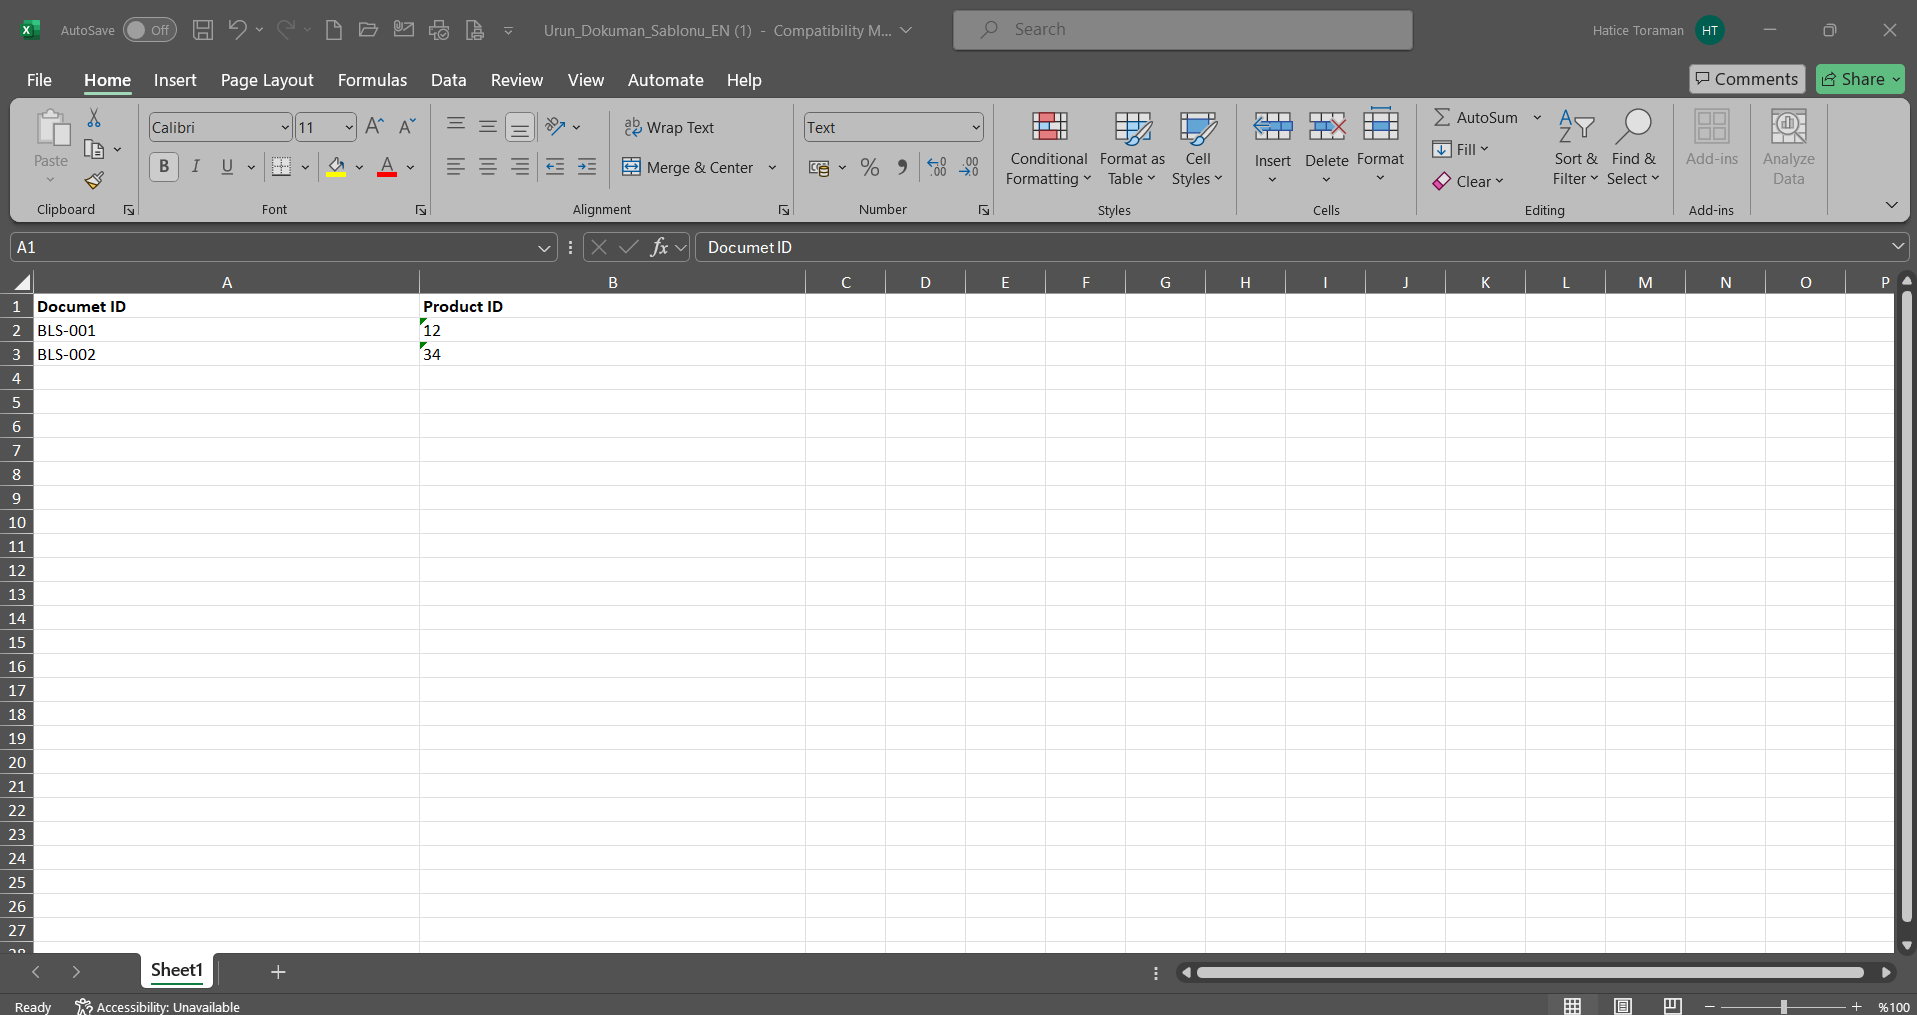
The Product Document template filled in the Document Product Transfer** screen is uploaded to the system by clicking the button.

Click the “Browse” button on the Upload File screen.

On the screen that opens, the filled Product Document template is selected.
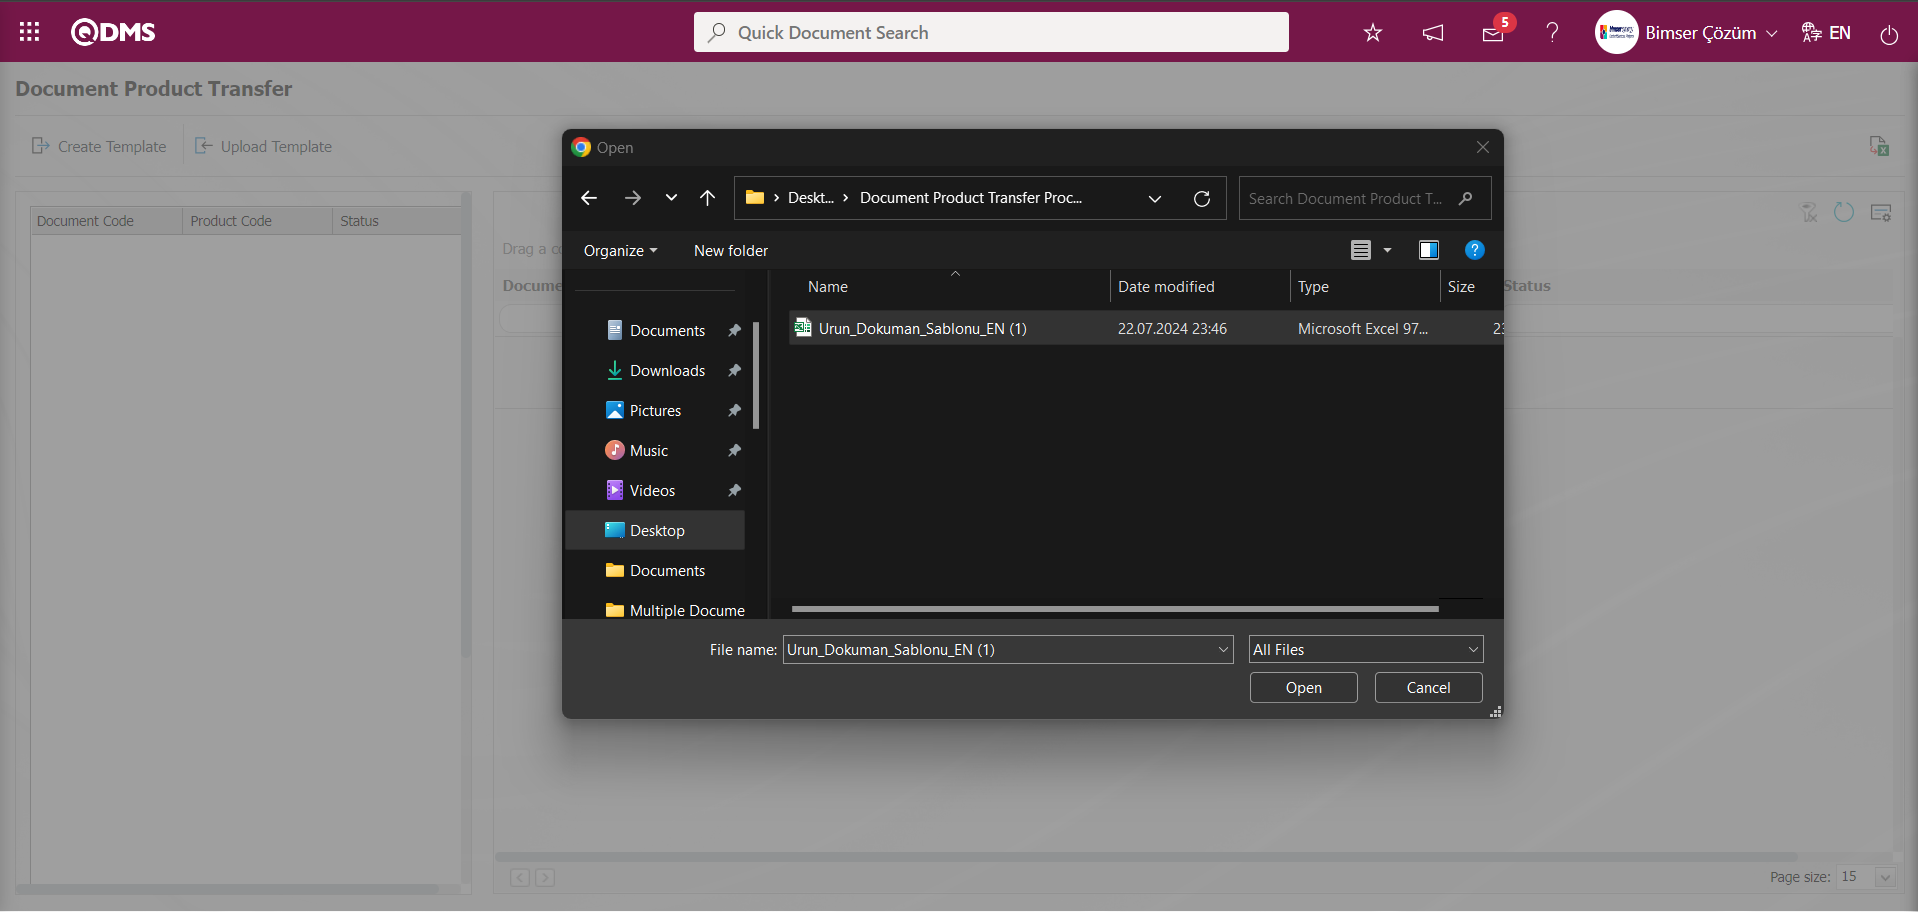
The Document Product Transfer process is performed by clicking the 3rd button displayed on the Document Product Transfer screen.
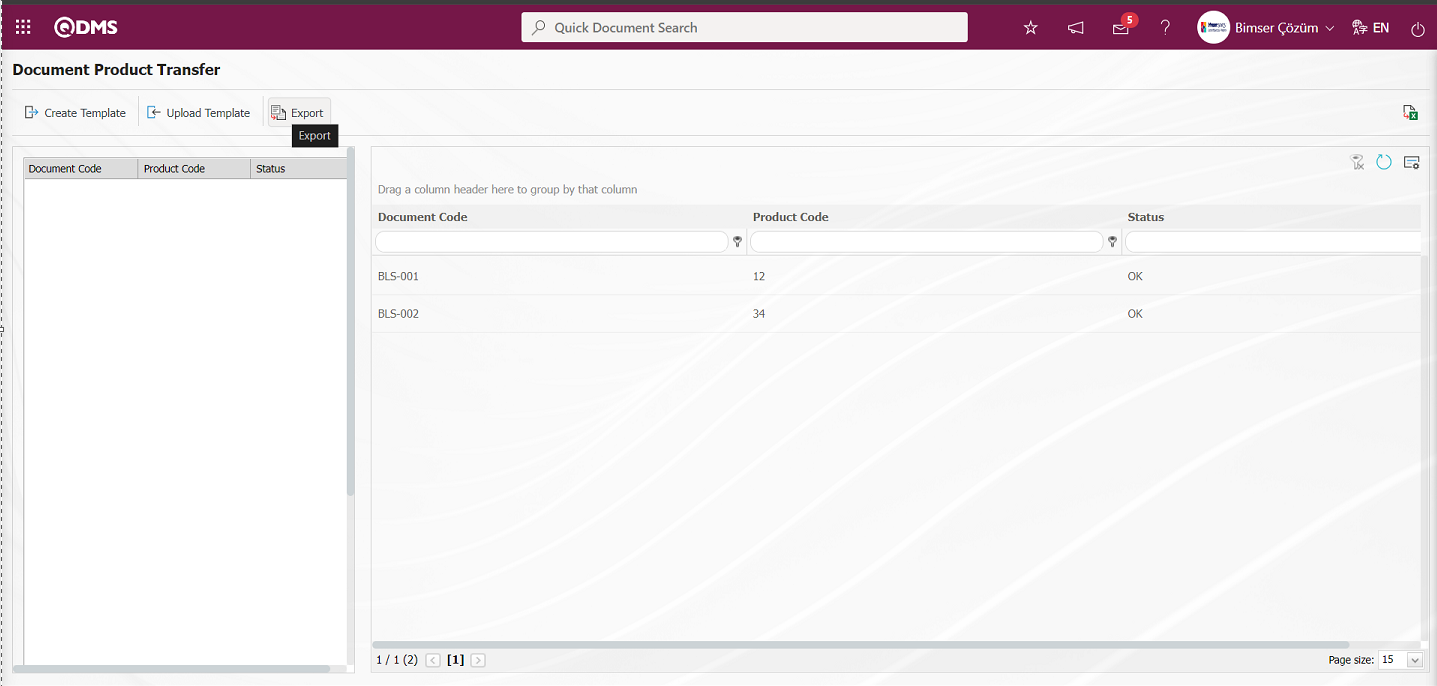
On the Document Product Transfer screen, the status field indicates that the Document Product Transfer operation is finished.

When the documents are displayed in the Document View menu in the documents with Document Product Transfer operation, the product tab is clicked to display the associated products.
6.3.30.Controlled Copy Matrix Editing
Menu Name: System Infrastructure Definitions/ Document Activities/ Controlled Copy Matrix Editing
It is the menu used for adding and removing distribution places collectively for controlled copy matrices on the document.
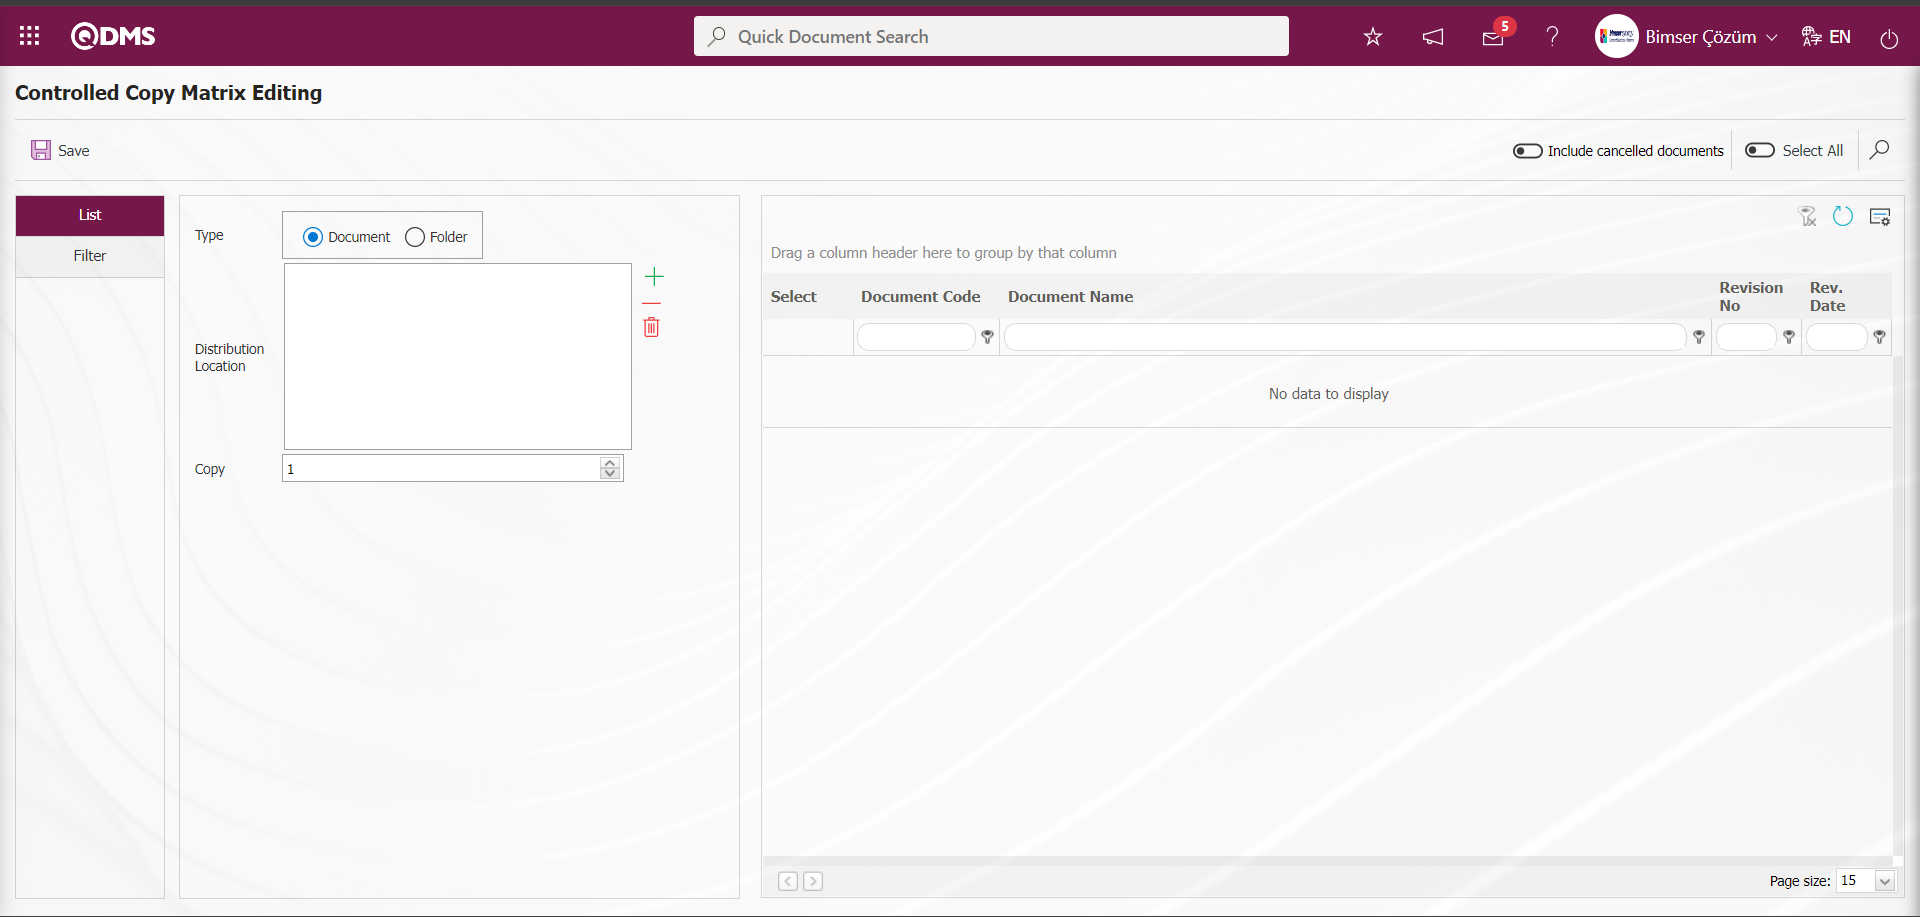
Go to Controlled Copy Matrix Editing** menu. From the Document Search tab, select the relevant folder from the Select Document Folder List from the Folder Code field and click the (Search) button and the Documents are listed.

Select the documents listed in the list tab.
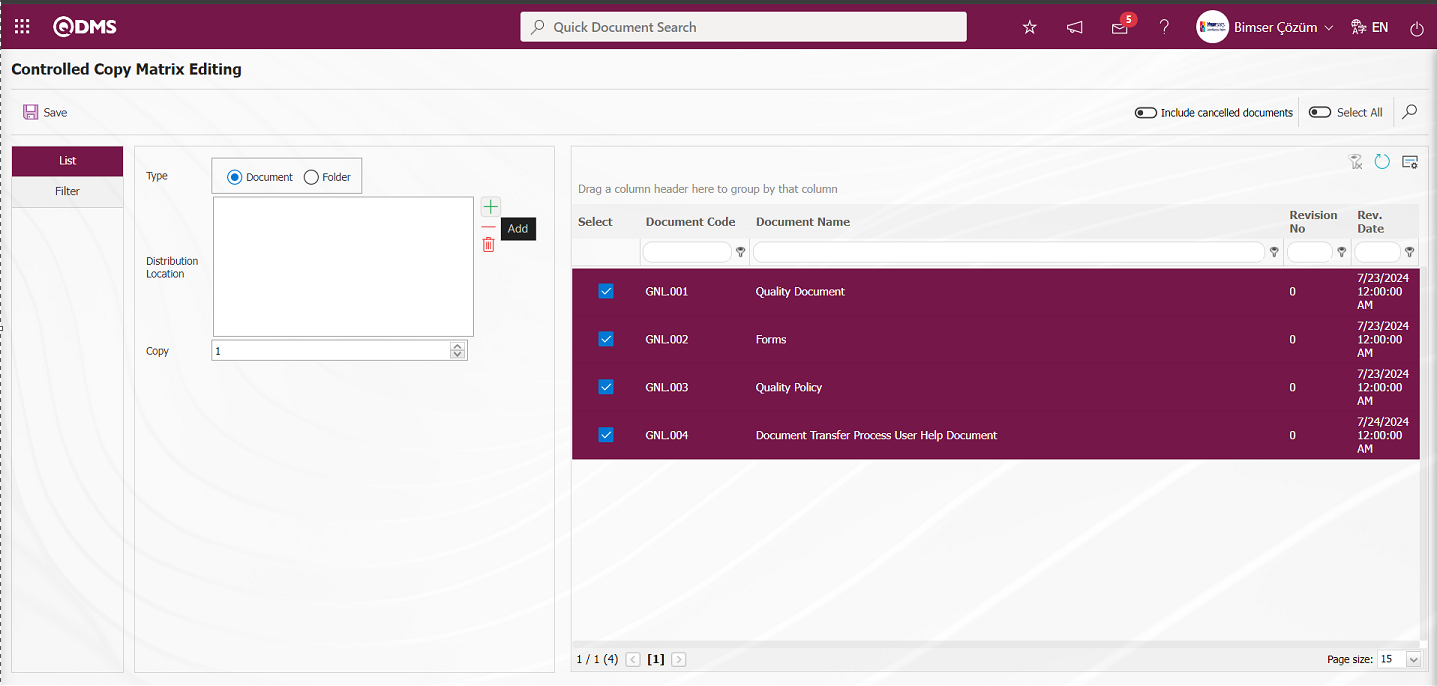
By clicking the  (Add) button in the Distribution Location field, the selection process is performed in the list of distribution locations defined in the system and the selection process of the distribution location is performed by clicking the
  button.

After the distribution place and document selection process, after selecting the number of copies to be received in the number of copies field, click the button in the upper left corner of the screen.

The message given by the system informs that the controlled copy matrix editing process has been performed.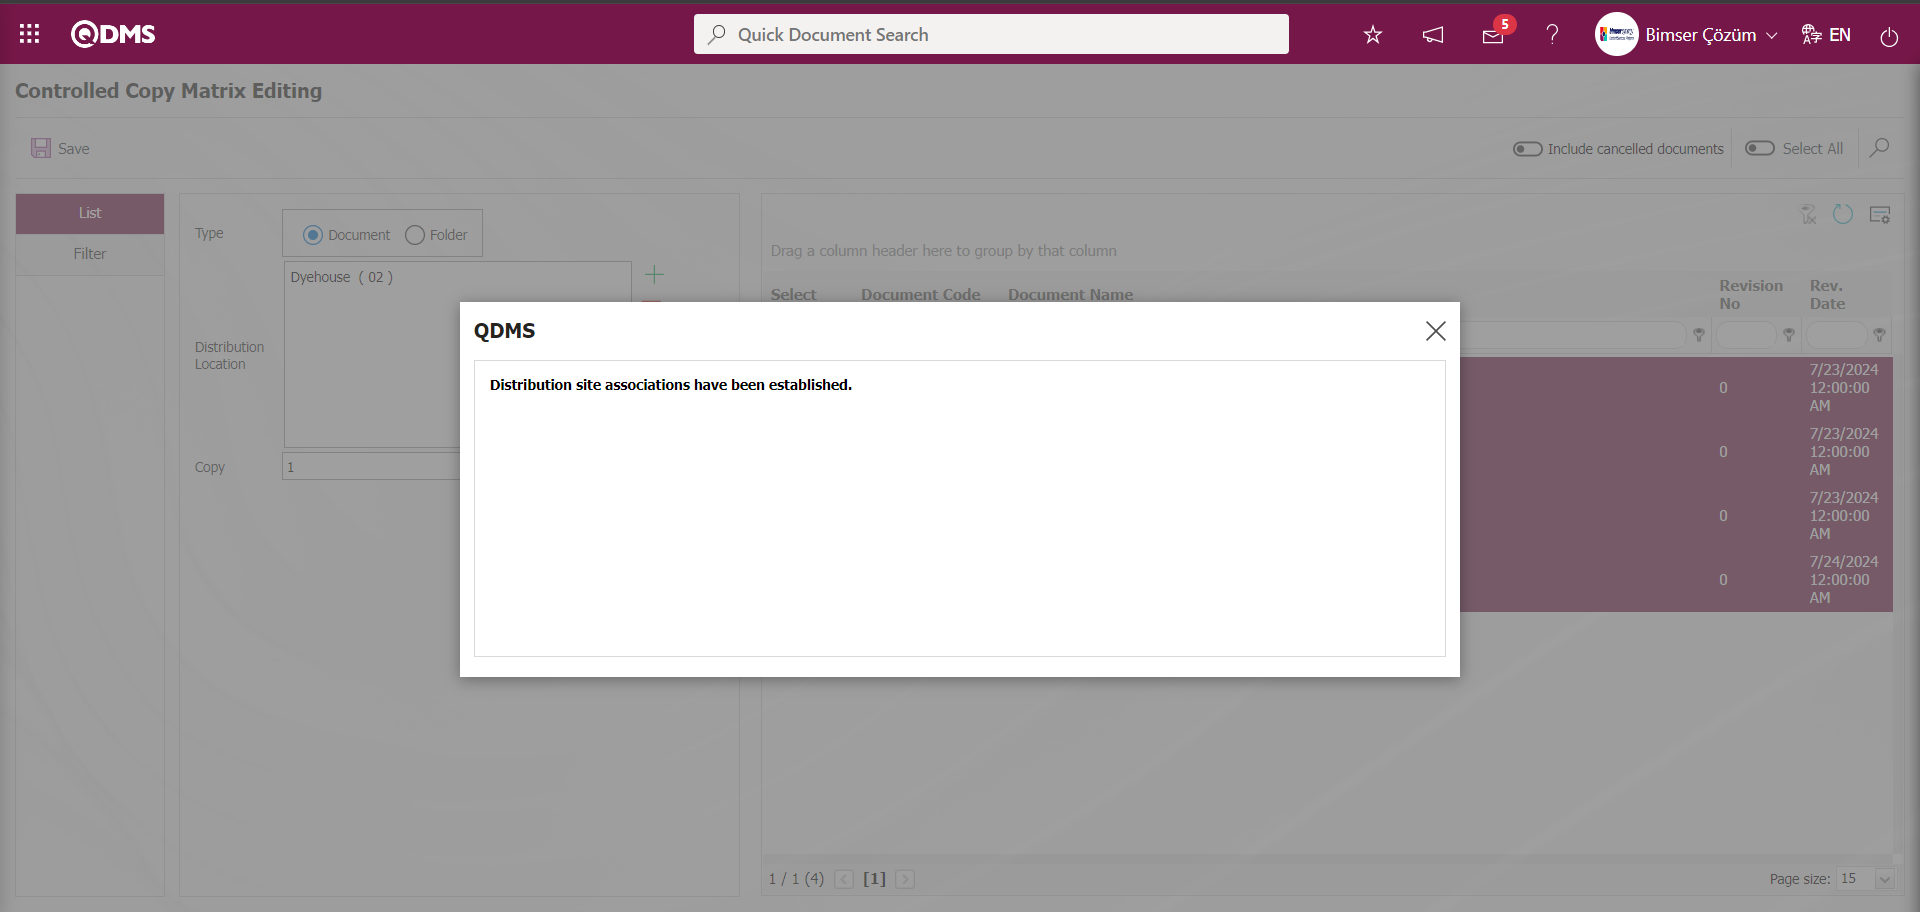
6.3.31.Document Reference Transfer
Menu Name: System Infrastructure Definitions/ Document Activities/ Document Reference Transfer
It is the menu where the documents that will be referenced to each other within the scope of the Document Management module are transferred at the same time at one time with the “bulk transfer feature” method in the system. The Document Reference Transfer menu is used to transfer the reference of multiple documents to each other at one time. In this menu, the template is downloaded to the computer with the  button. The main document code and the Reference Document code to be associated with the downloaded template are entered and saved to the computer. The filled template is uploaded to the system with the
  button. The documents whose document codes are entered in this template must be installed in the system. Otherwise, after the template loading process is done for the documents for which document codes are entered that are not installed, the system gives a warning message in the form of “Document and reference document code could not be found.”. Therefore, the transfer process is performed between the documents installed in the system. On the Document Reference Transfer screen, if the data is suitable for transfer after the template loading process, the
  button is displayed and the reference document is transferred by clicking the
  button.
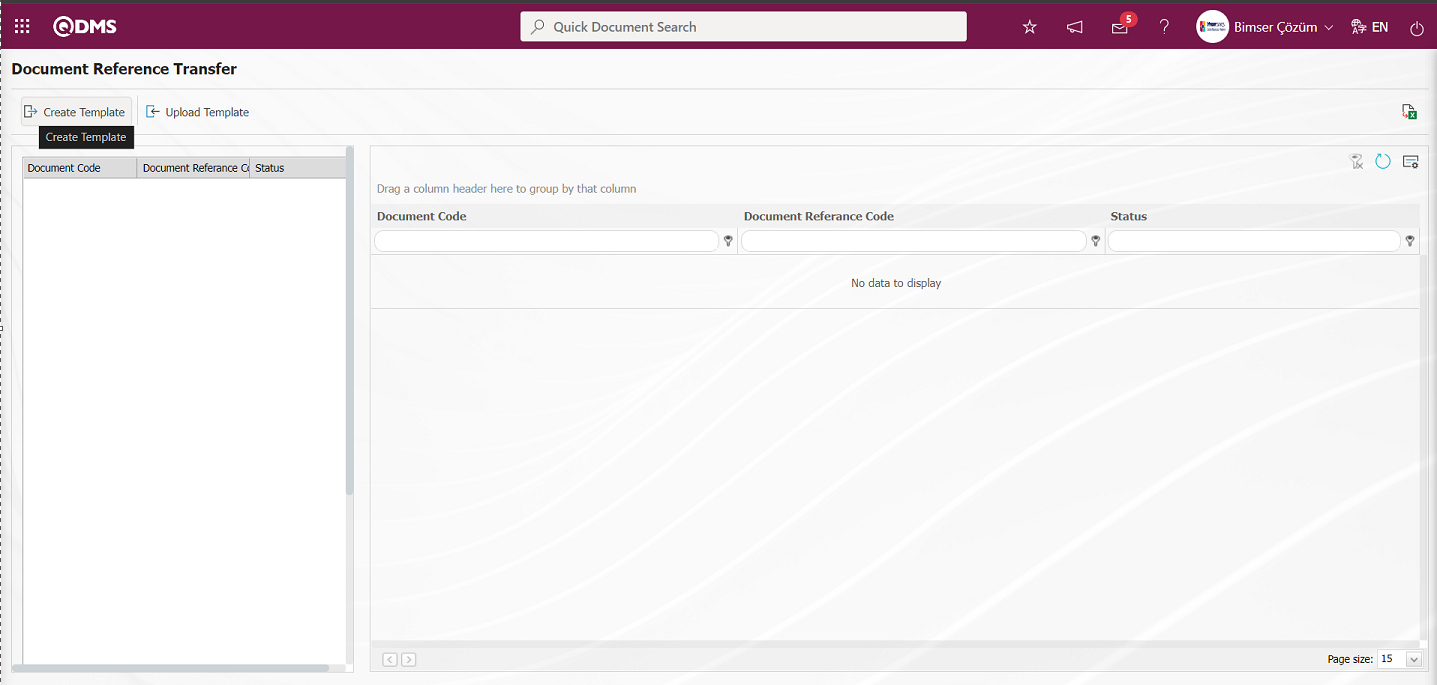
With the help of the buttons on the screen;
 : The Reference Document template is downloaded to the computer.
 : The filled Reference Document template is uploaded to the system.
: The transfer process is performed.
: Data is transferred to Excel.
: The data remaining in the filter fields in the grid where the search criteria on the menu screens are searched is cleaned.
: The menu screen is restored to its default settings.
: User-based designing of the menu screen is done with the show-hide feature, that is, the hiding feature of the fields corresponding to the columns on the menu screens.
The Reference Document template is downloaded to the computer by clicking the  button on the Document Reference Transfer** screen.
In the downloaded Reference Document template, the relevant fields are filled with the relevant information and saved to the computer. If more than one reference document is to be entered, they should be written one after the other.
Example: Document A will be referenced to documents B and C. To Excel;
A's document code=B's document code
Document code of A = document code of C should be written in the template.
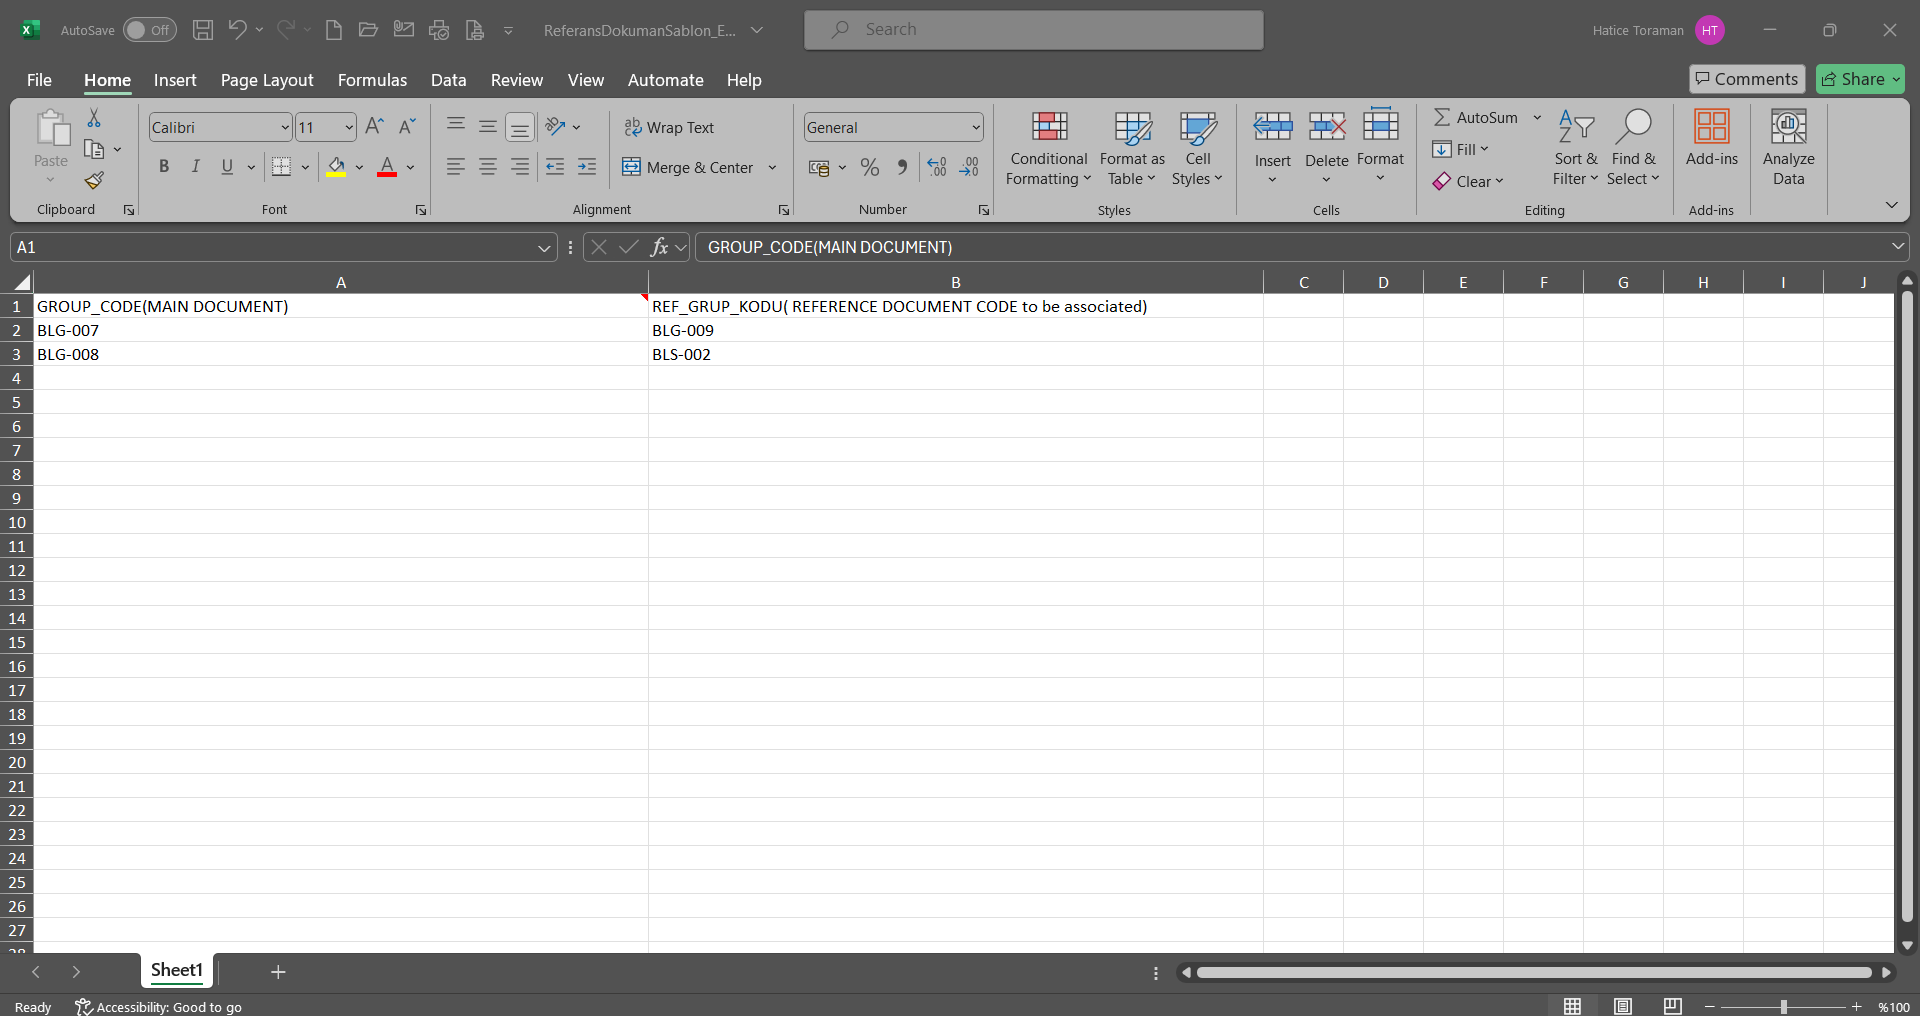
The Reference Document template filled in the Document Reference Transfer screen is uploaded to the system by clicking the  button.
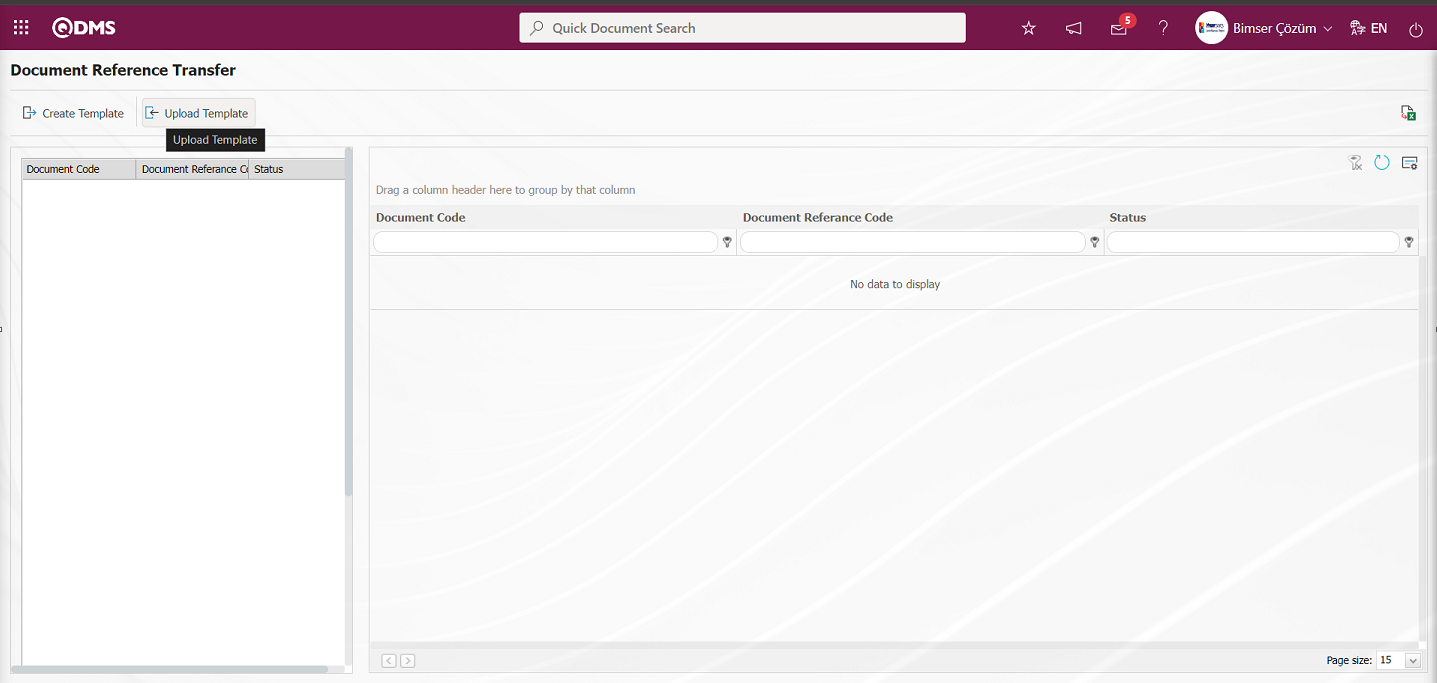
Click the “Browse” button on the Upload File screen.
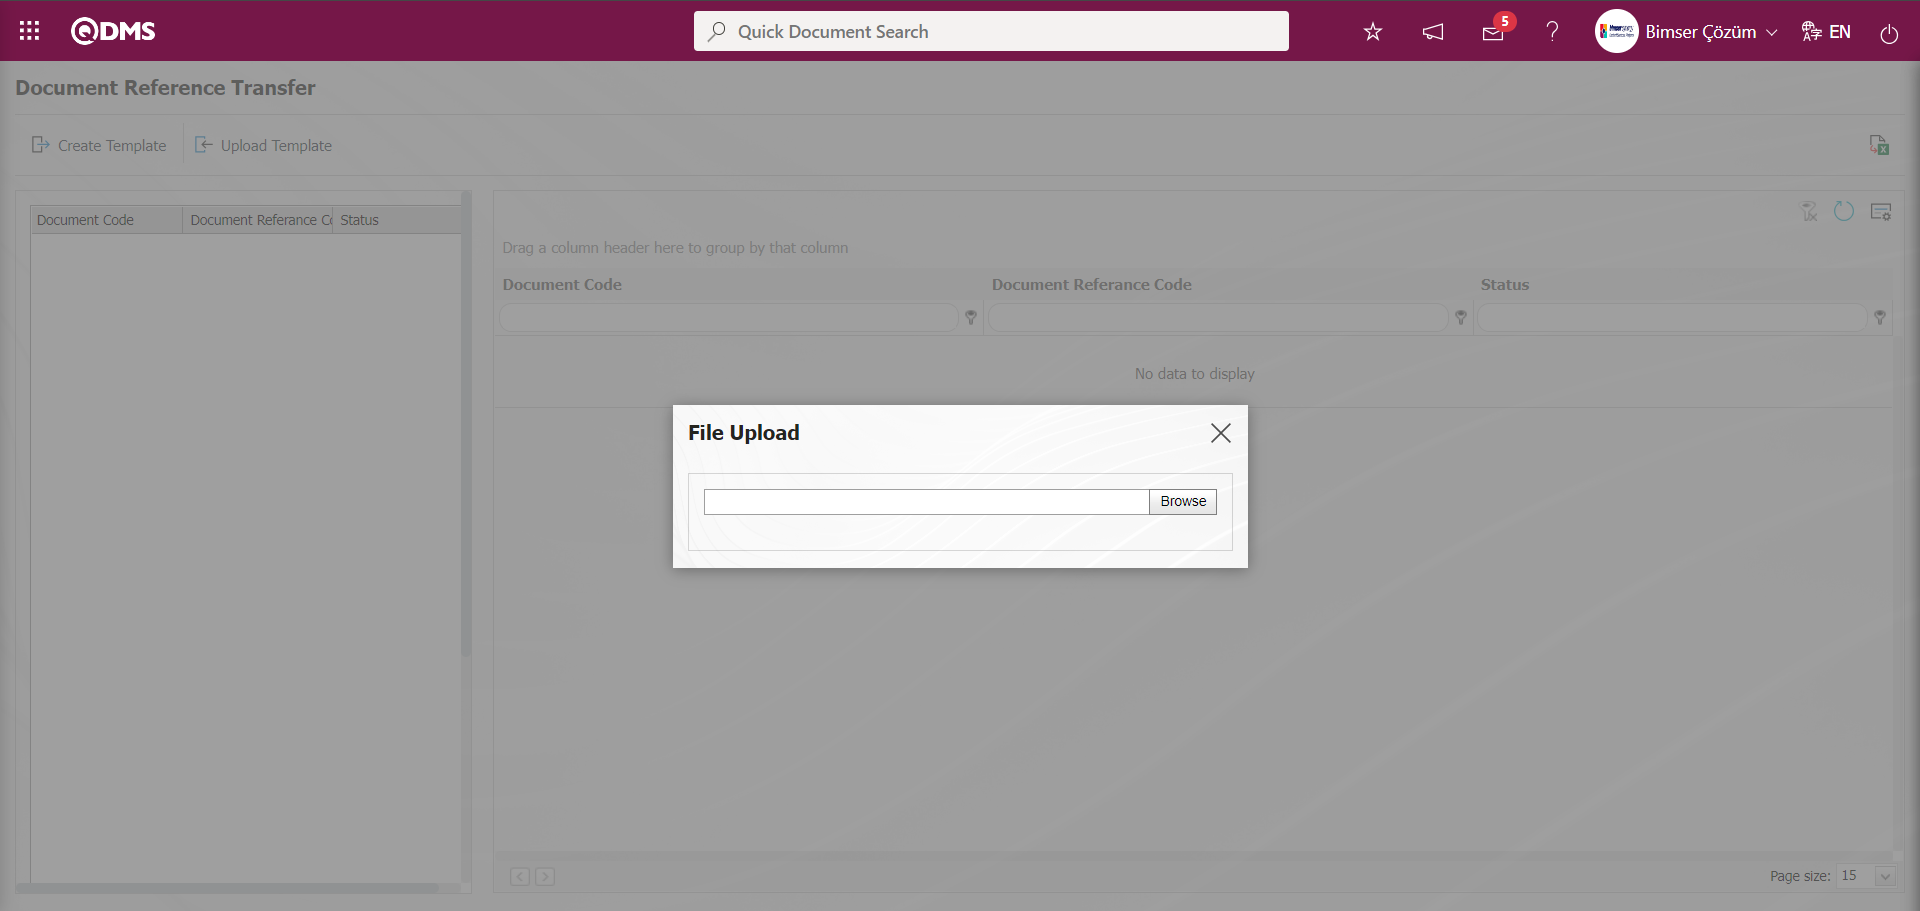
Select the filled Reference Document template on the screen that opens.

The Document Reference Transfer process is performed by clicking the 3rd button displayed on the Document Reference Transfer screen.

On the Document Reference Transfer screen, the status field indicates that the Document Reference Transfer operation is finished.
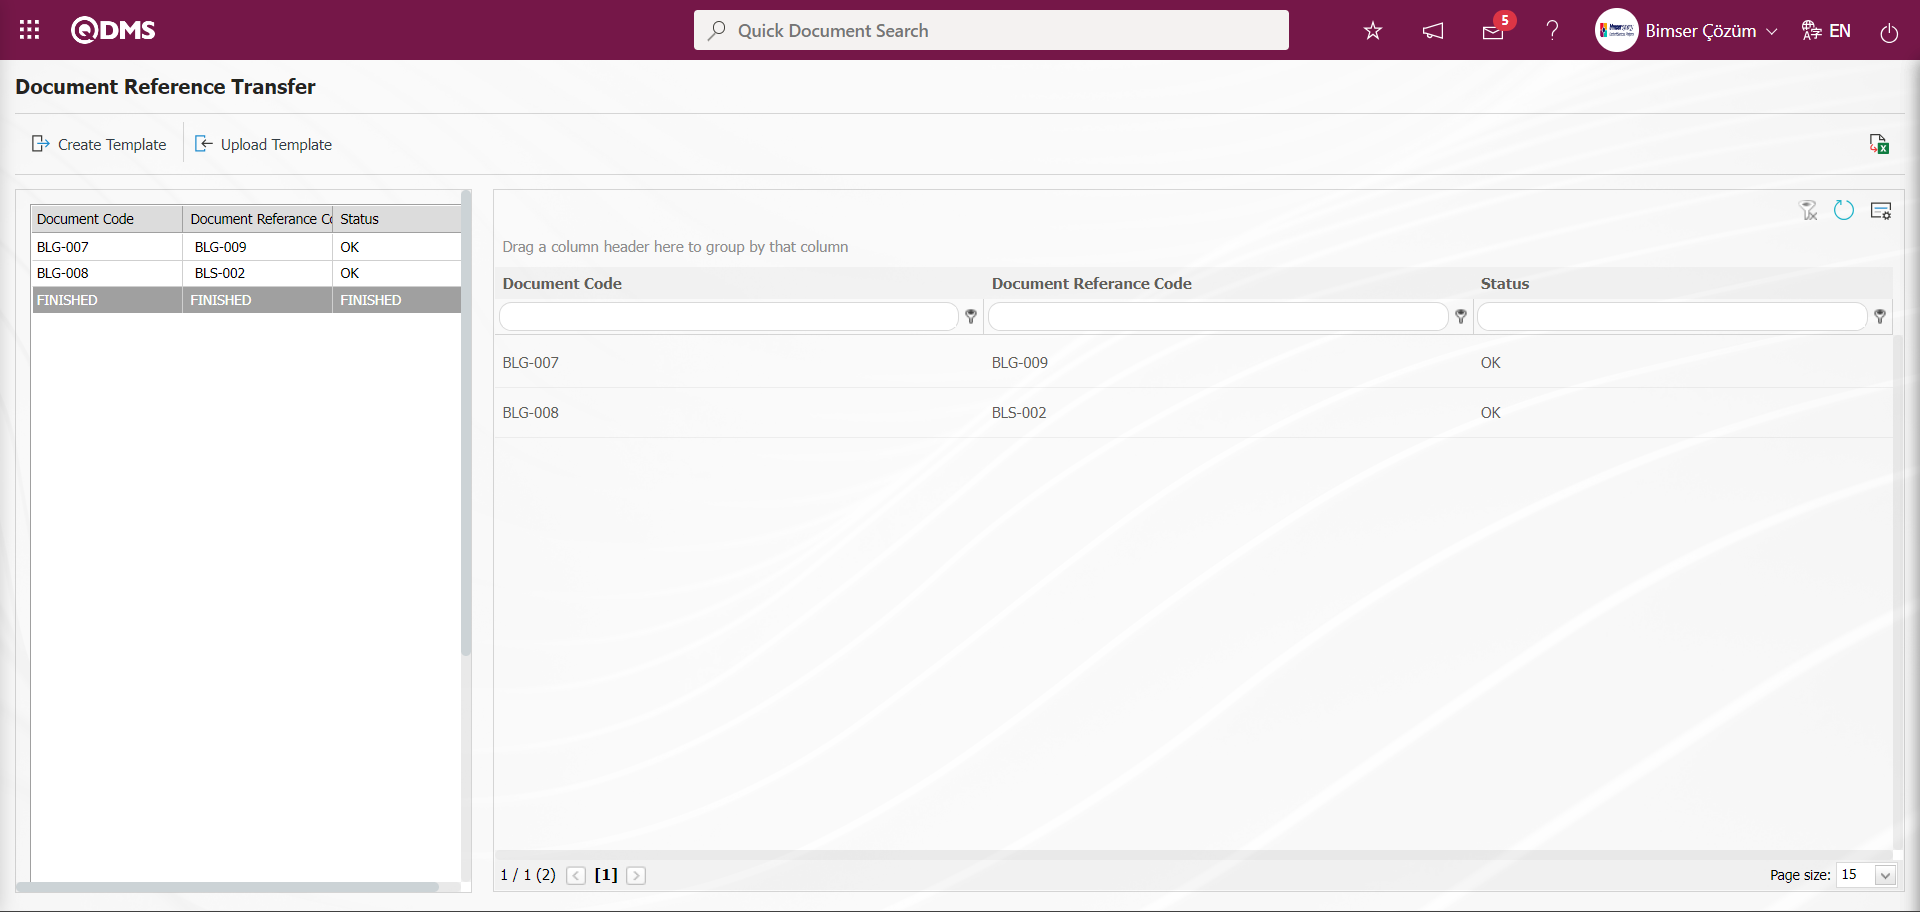
After the Document Reference Transfer process, the documents that have a reference relationship with the main document are displayed in the reference tab of the document displayed in the Document View menu.
6.4.Dashboard/Document Management
Menu Name: Dashboard/ Document Management/ Document Dashboard
It is the part of the Qdms system that allows users to view transactions, metrics, graphs and reports on a single screen. Dashboard is defined as a display of indicators, a business dashboard and a table of indicators used to summarize the flow and/or content of information and to explain a particular situation through graphs and tables. Its purpose is to present the necessary information in the shortest time, with the least interaction and thinking requirements. It is the screen that people in managerial positions often use. Dashboard feature has been introduced within the scope of Document Management Module in Qdms system. Depending on the authorization to see the menu, this screen appears.
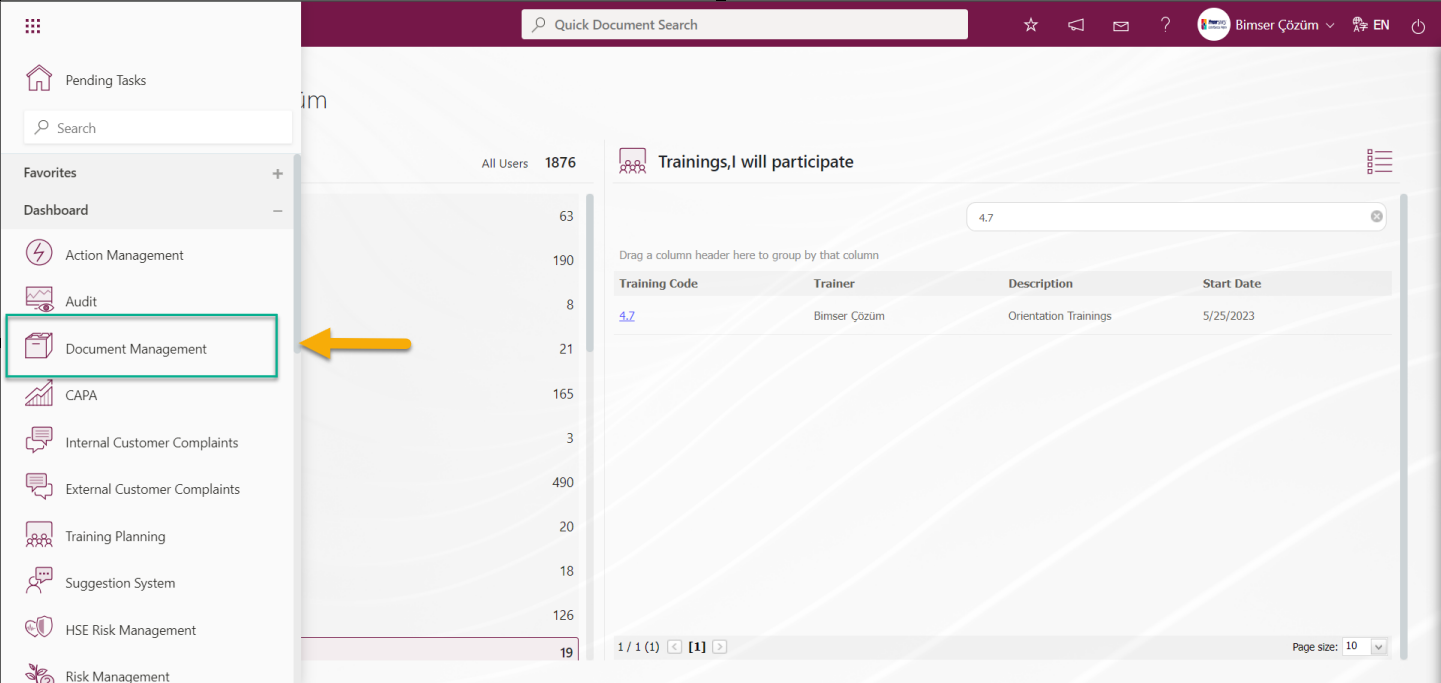
When the Dashboard menu is clicked, two tabs, list and filter tab, appear.
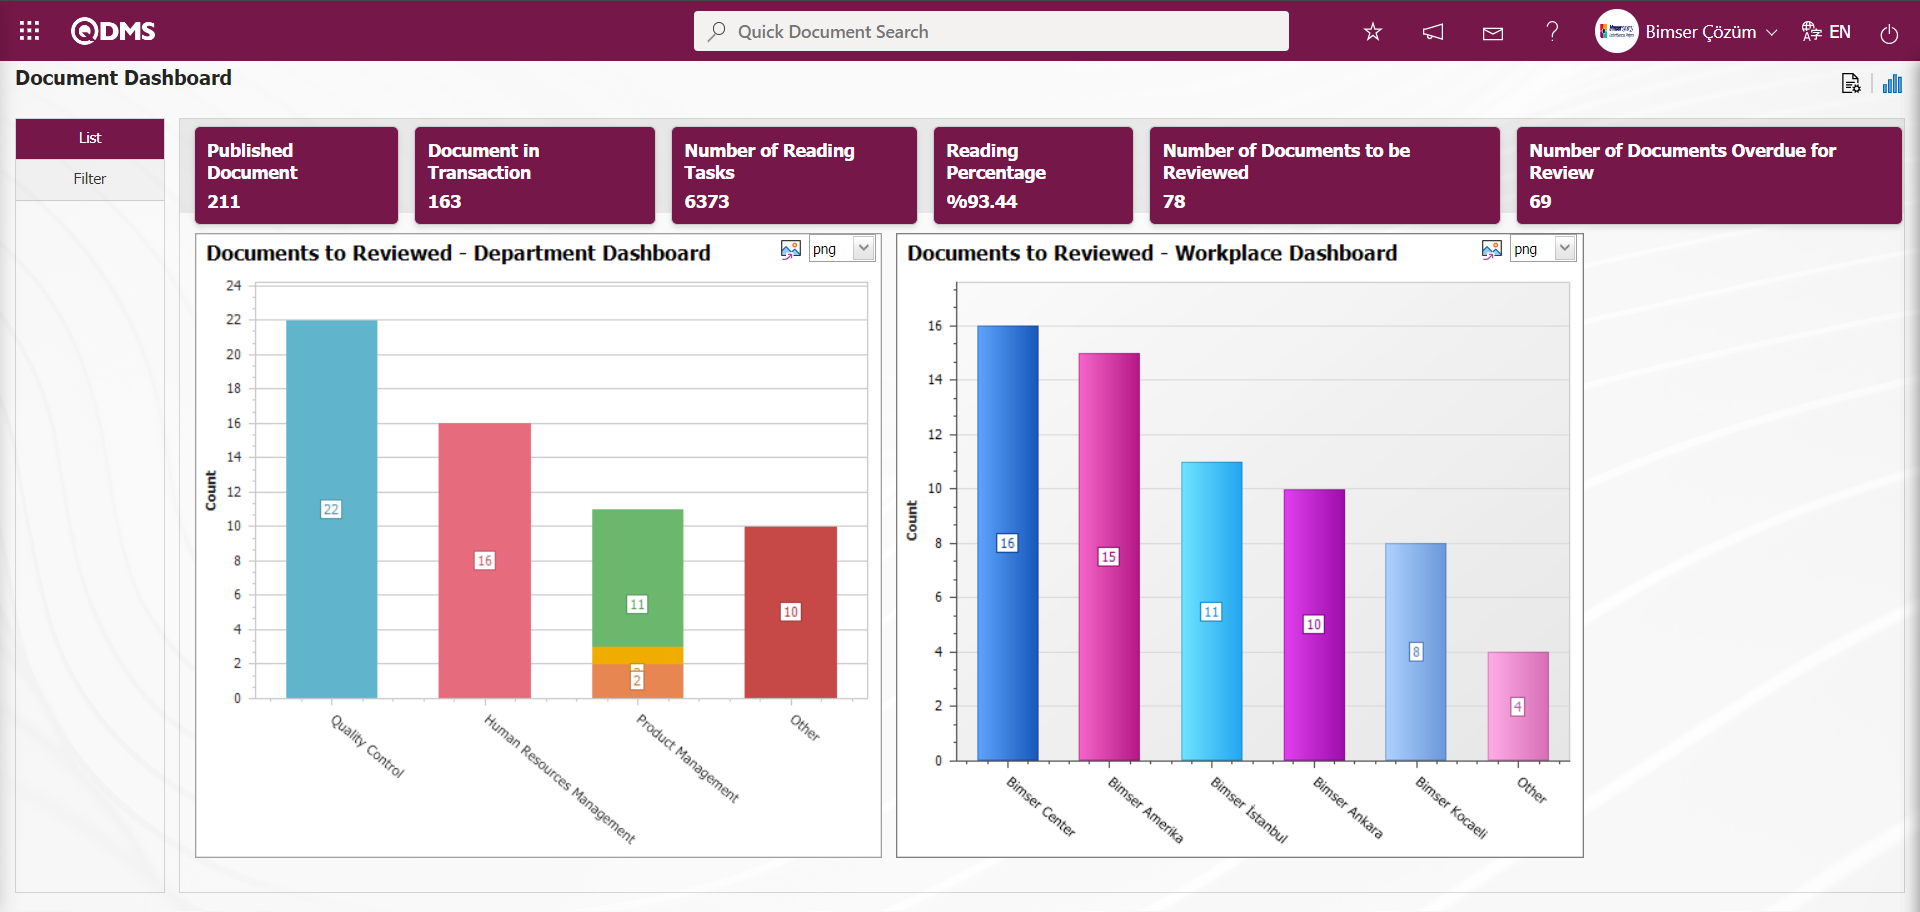
In the Filter tab, filtering is done according to the fields in the search criteria.
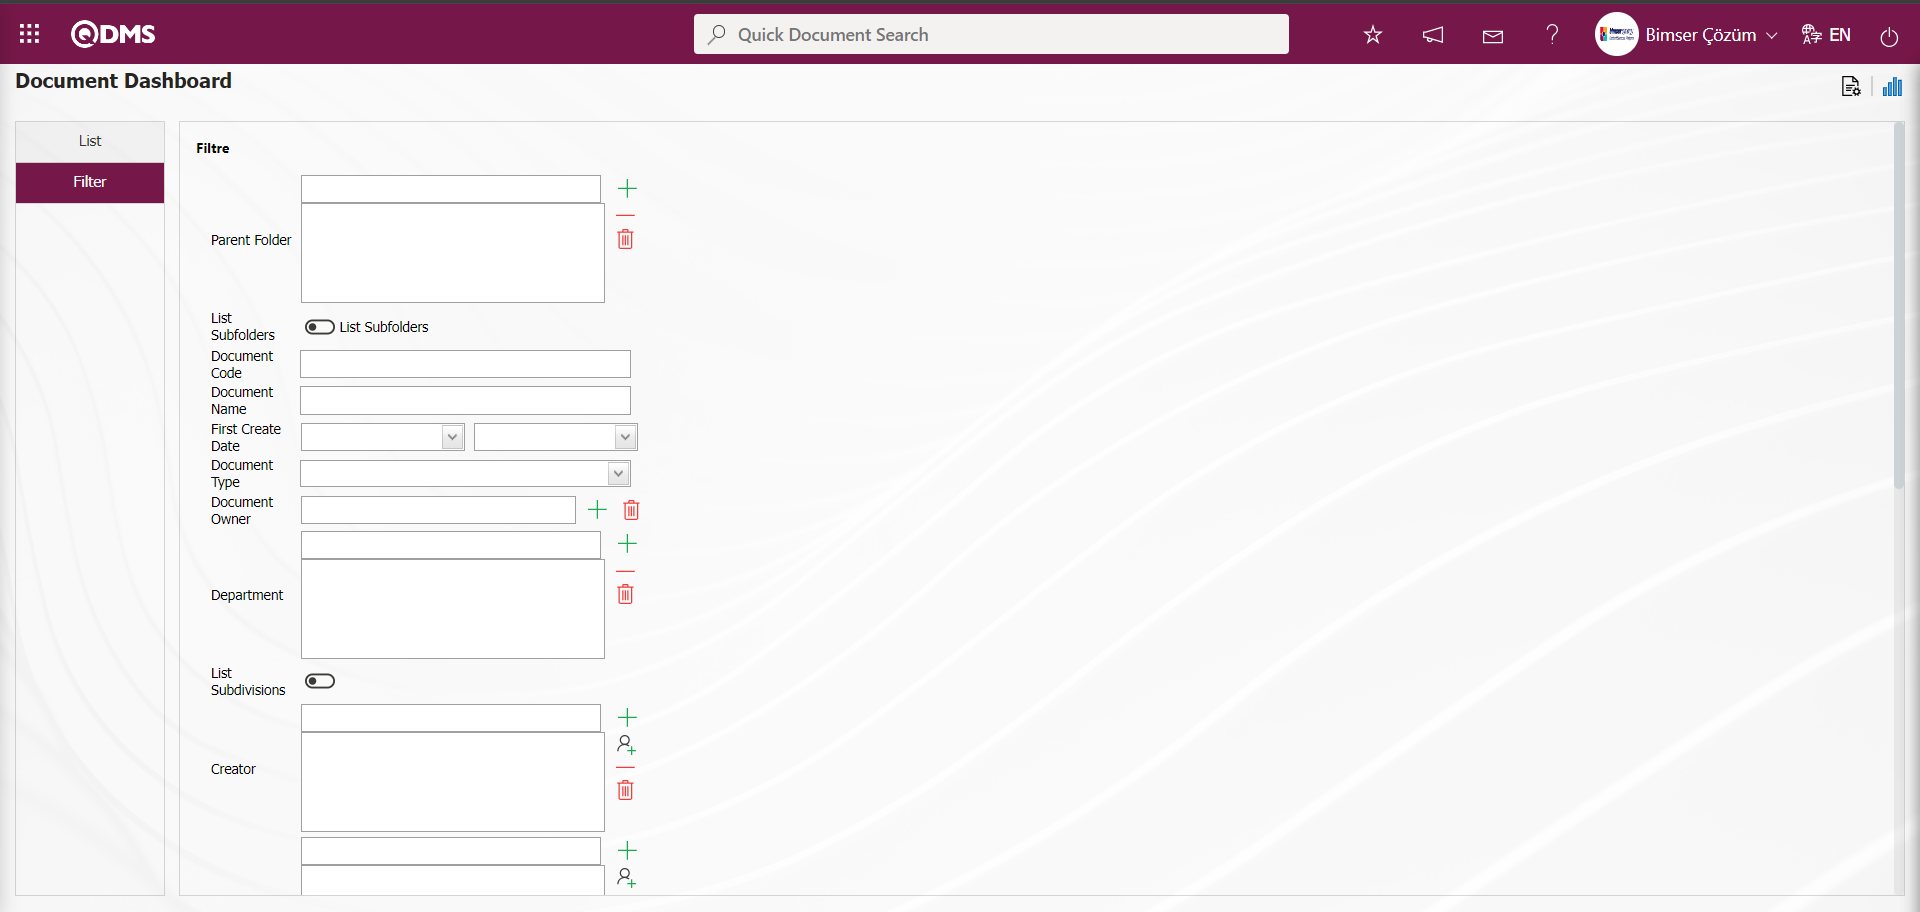
In the Document Management module, on the Document Dashboard screen, fields such as Published Document, Document in Transaction, Number of Reading Tasks, Reading Percentage, Number of Documents to be Reviewed and Number of Documents Overdue for Review are displayed as fixed fields and no editing is done on them.
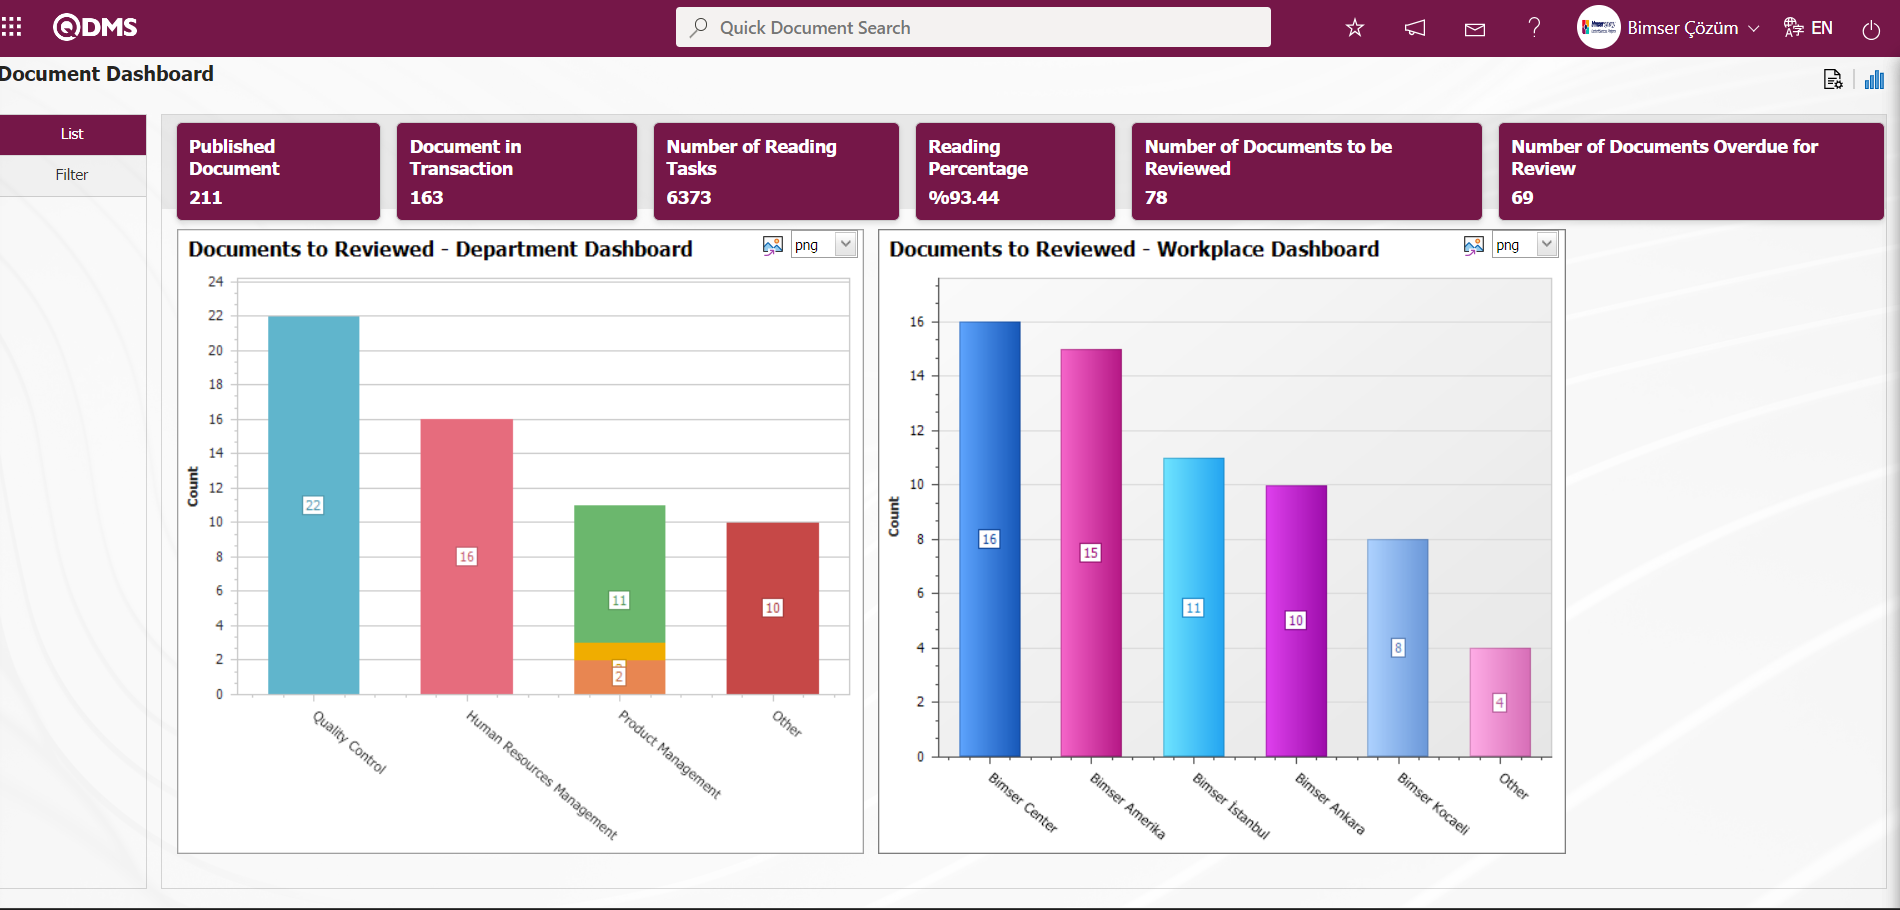
On the Document Dashboard screen, the graphic design process is done with settings such as how many graphics there will be, what the name of the graphic will be, what the order of the graphics will be, which areas will be on the Z axis, Y axis, graphic length, graphic width and graphic type. In order to make these adjustments on the Document Dashboard screen, the user must be defined as a Module Administrator in the Document Management Module. (Module administrator identification is made in the Document Management Module in the System Infrastructure Definitions/BSID/Configuration Settings/Administrator Identification menu).
When the user is not a Module Manager in the Document Management Module, the button in the screenshot below is displayed on the Document Dashboard screen.
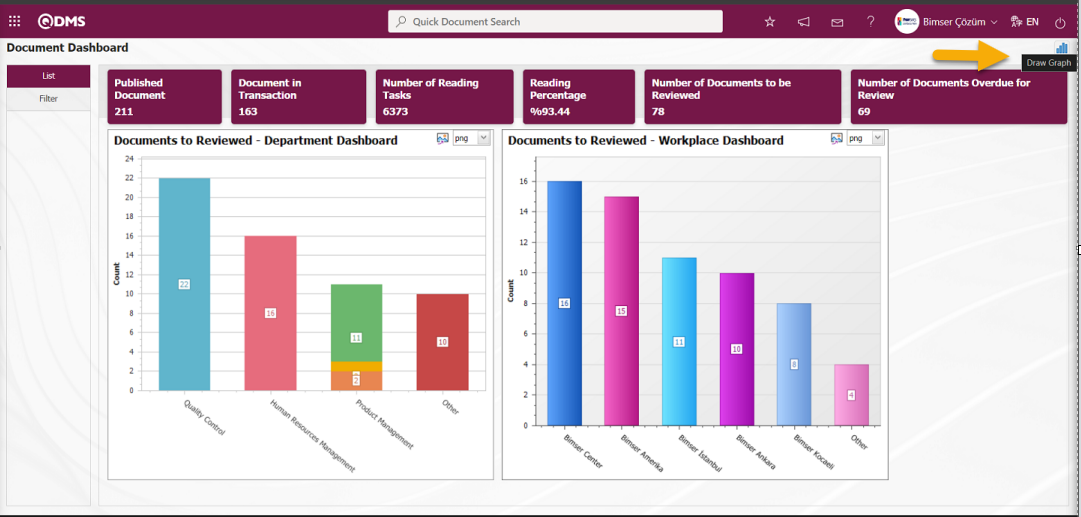
In the Document Management Module, the first button  (Graphic Settings) is displayed on the Document Dashboard screen of the user defined as the module Administrator. The user who is the Module Administrator makes the necessary adjustments on the Document Dashboard screen with the help of the (Graphic Settings) button. Users who are not Module Administrators can also make graphic design operations by making the necessary adjustments in the Dashboard Configuration screen in the System Infrastructure Definitions/ BSID/ Configuration Settings/ Dashboard Configuration/ Document Management menu.
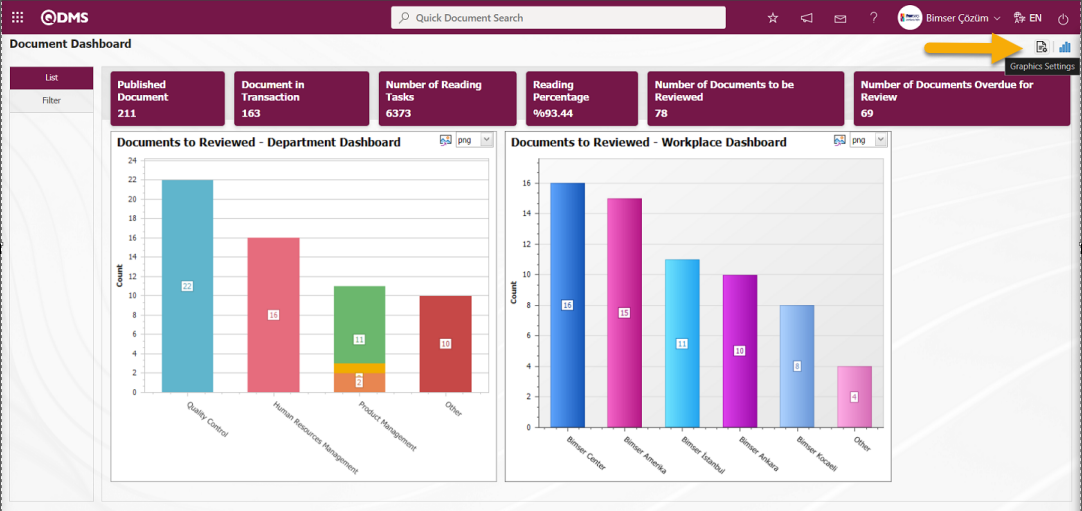
Click on the (Graphic Settings) button to design graphics in the Document Management Module, update and delete the selected graphic information in the list.
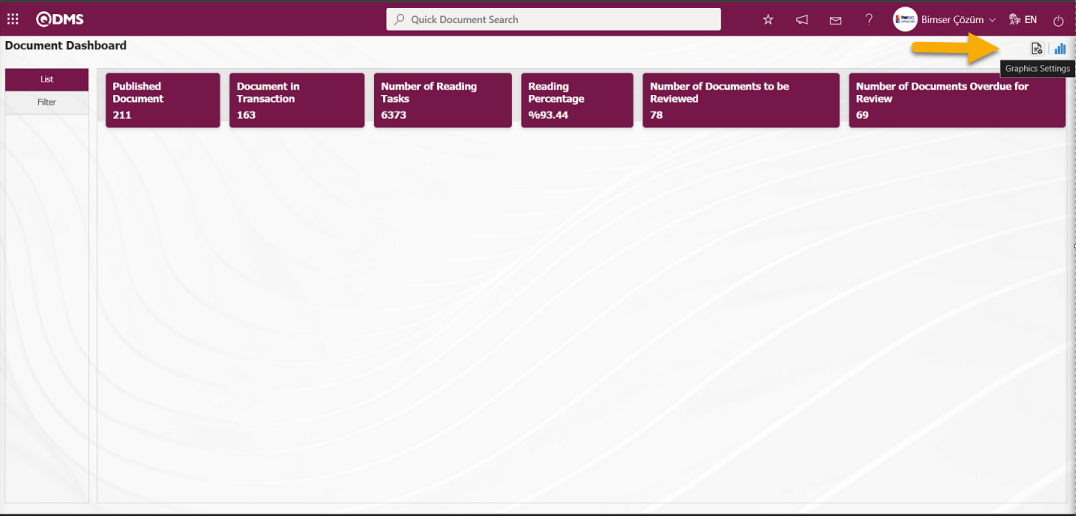
The Dashboard Configuration screen opens.
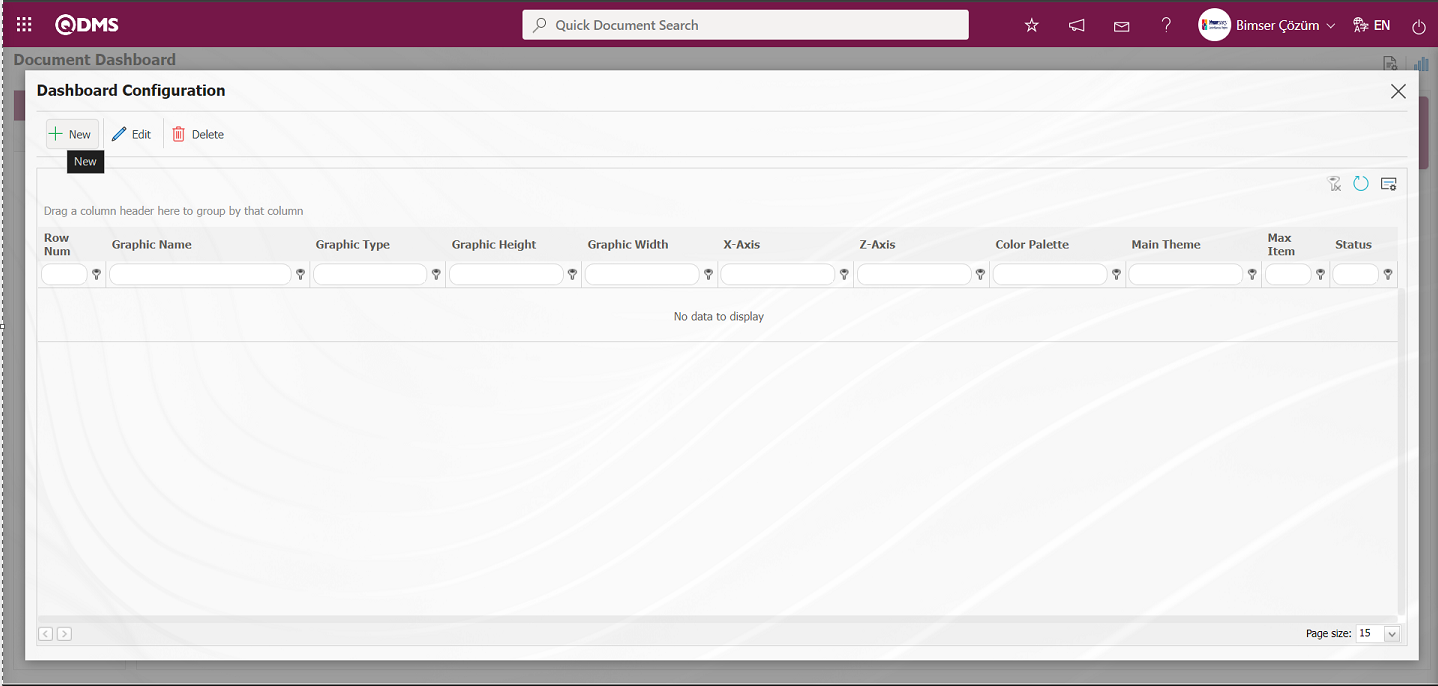
With the help of the buttons on the screen;
: A new Dashboard is defined.
: Correction/ change/ update is made on the Dashboard information selected in the list.
: The Dashboard information selected in the list is deleted.
-: Dashboard Configuration screen is closed.
Click the button to add a new Dashboard in the Document Management Module
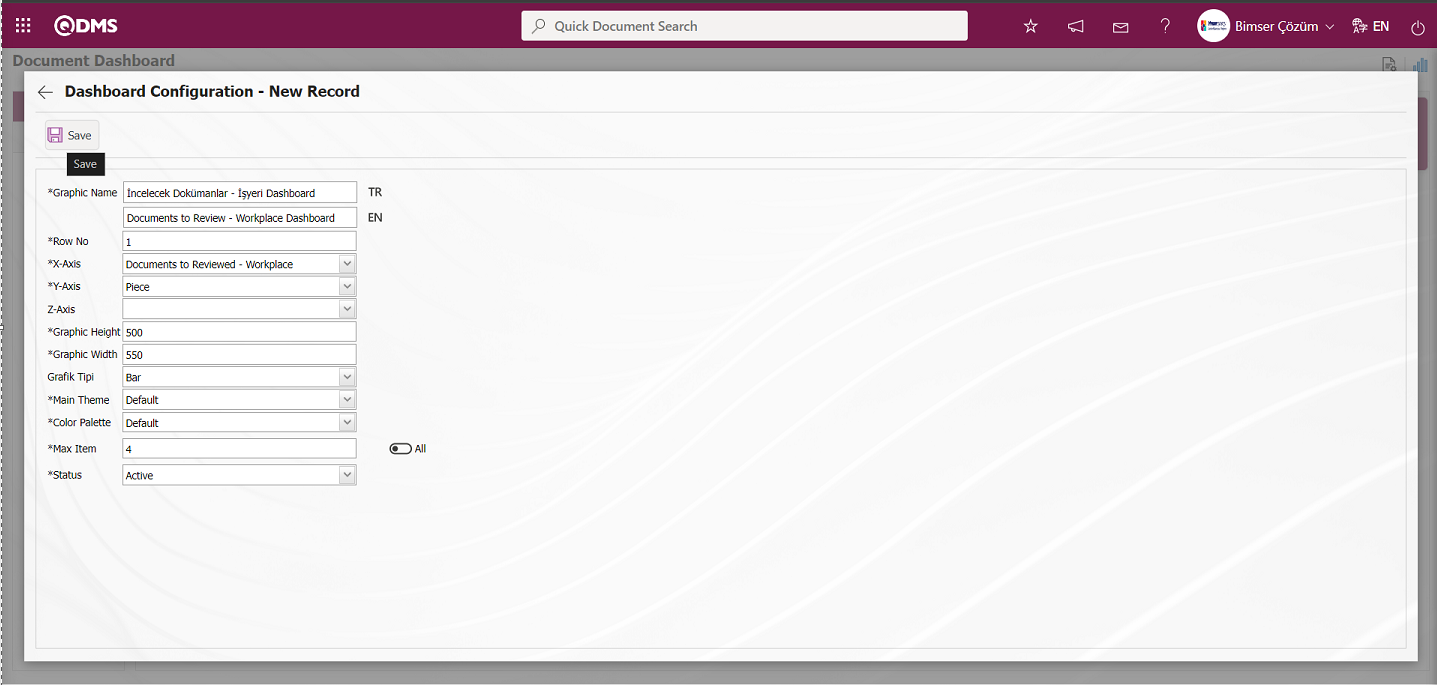
Dashboard Configuration - After filling in the required fields on the New Record screen, click the  button on the top left of the screen.
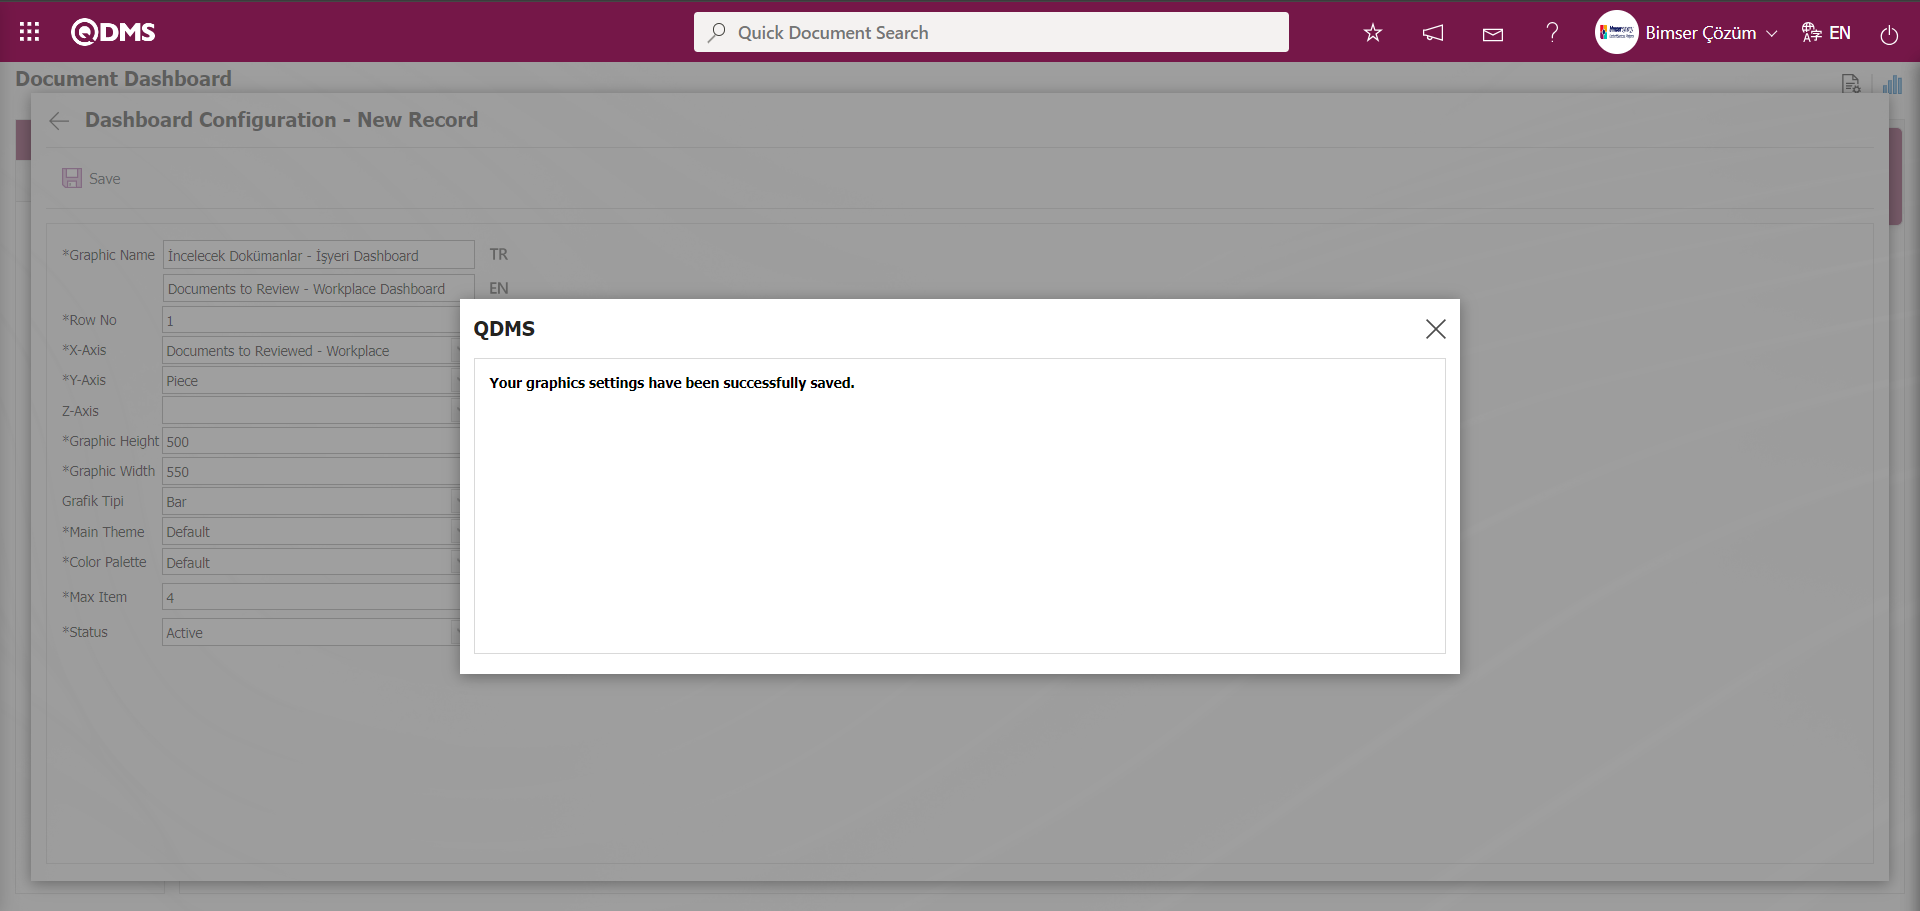
The system displays the message “Your graphic settings have been successfully saved”, indicating that the saving process has been completed.
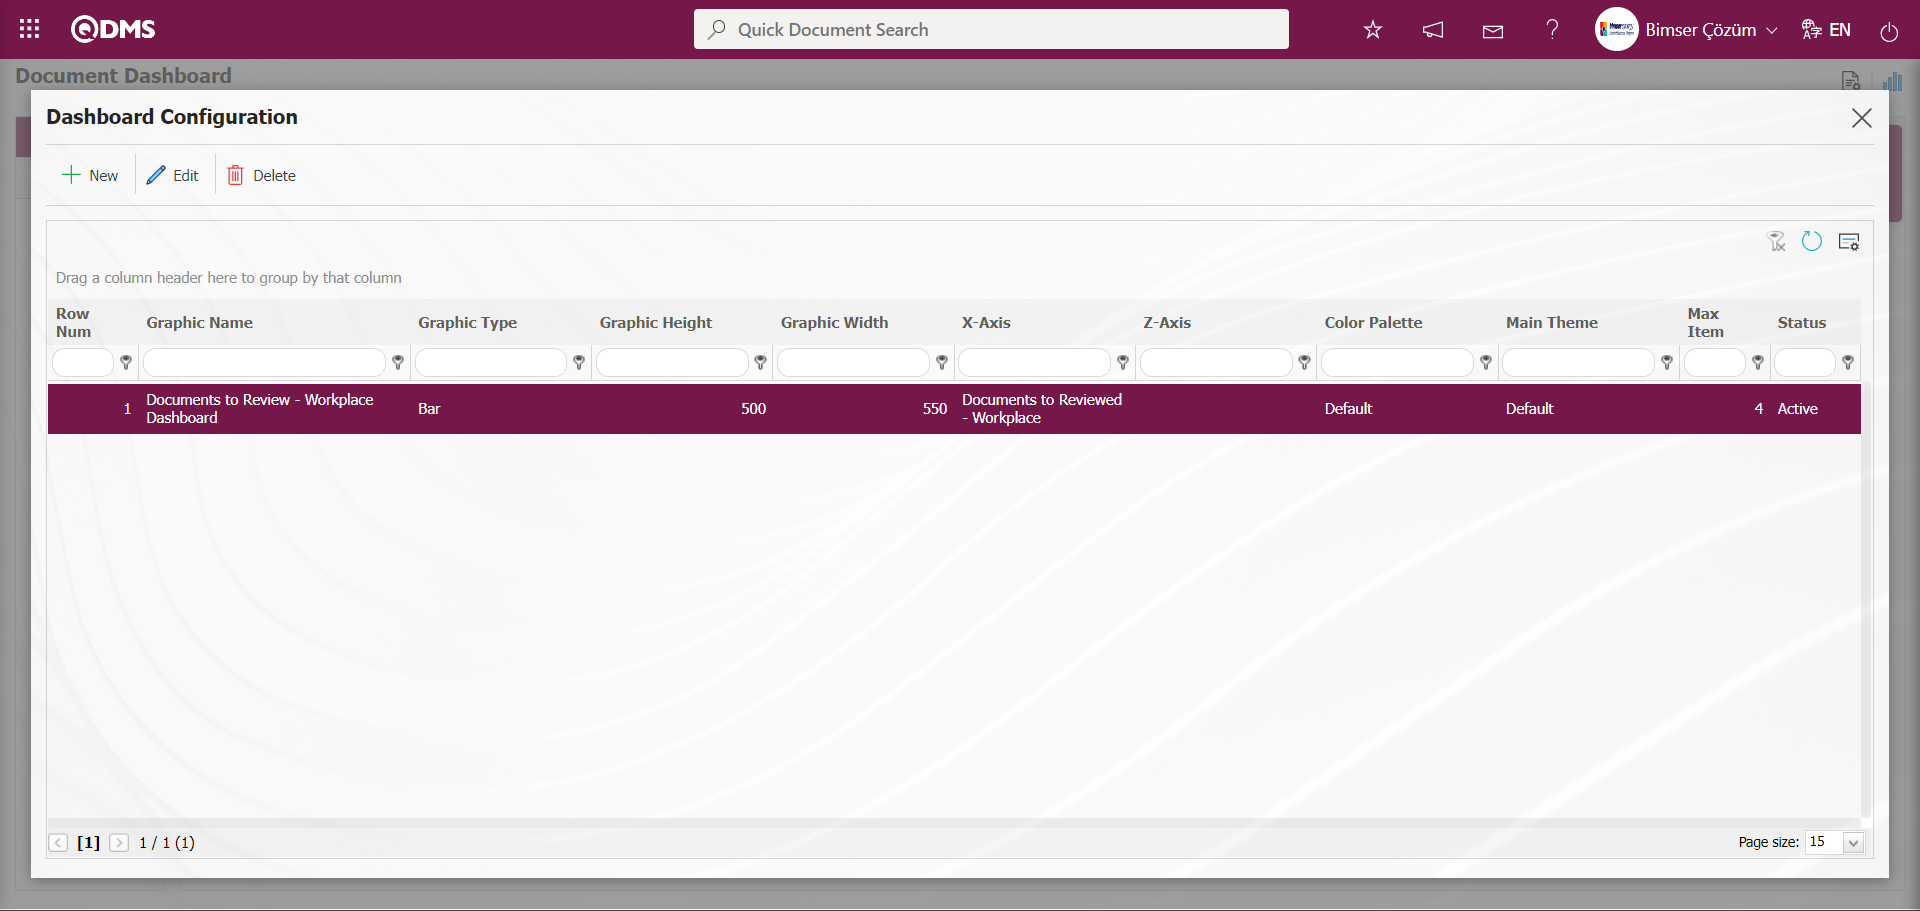
The Dashboard defined in the Document Dashboard screen is displayed.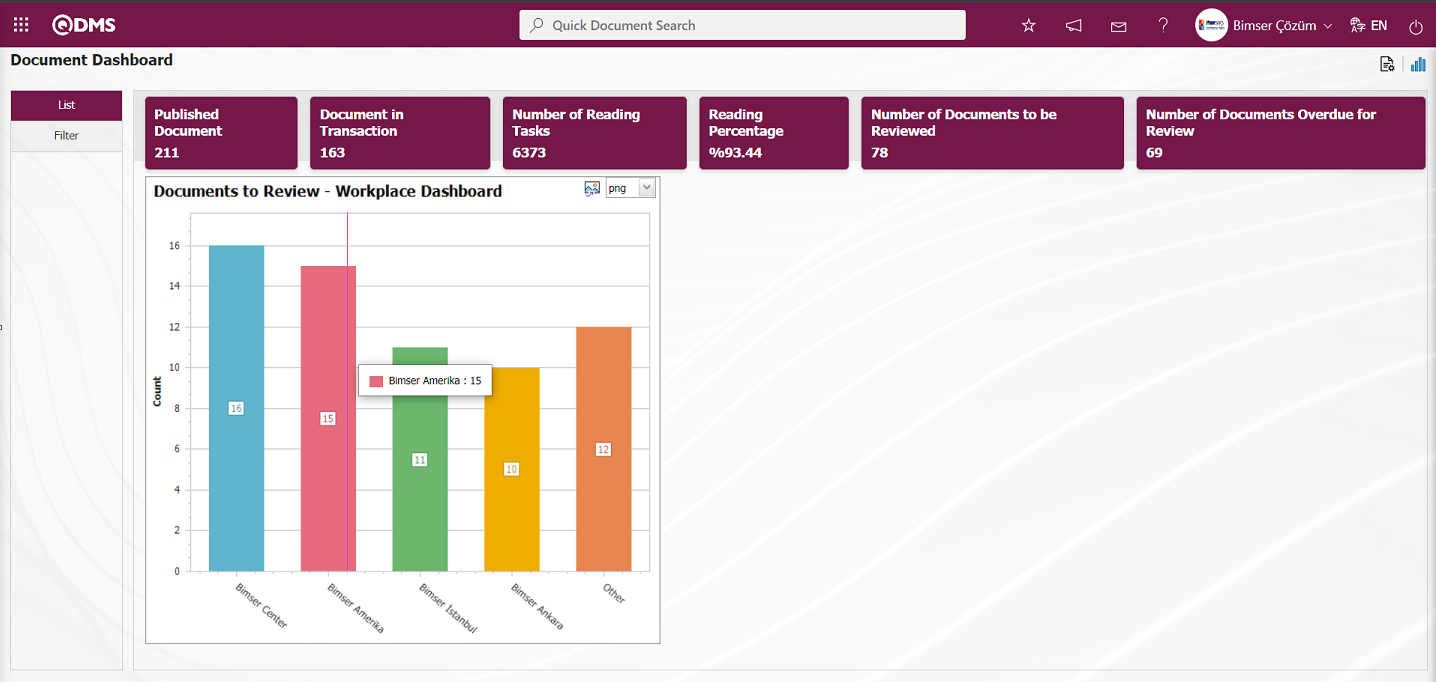 The document is displayed as the Dashboard PieChart defined in the Dashboard screen.
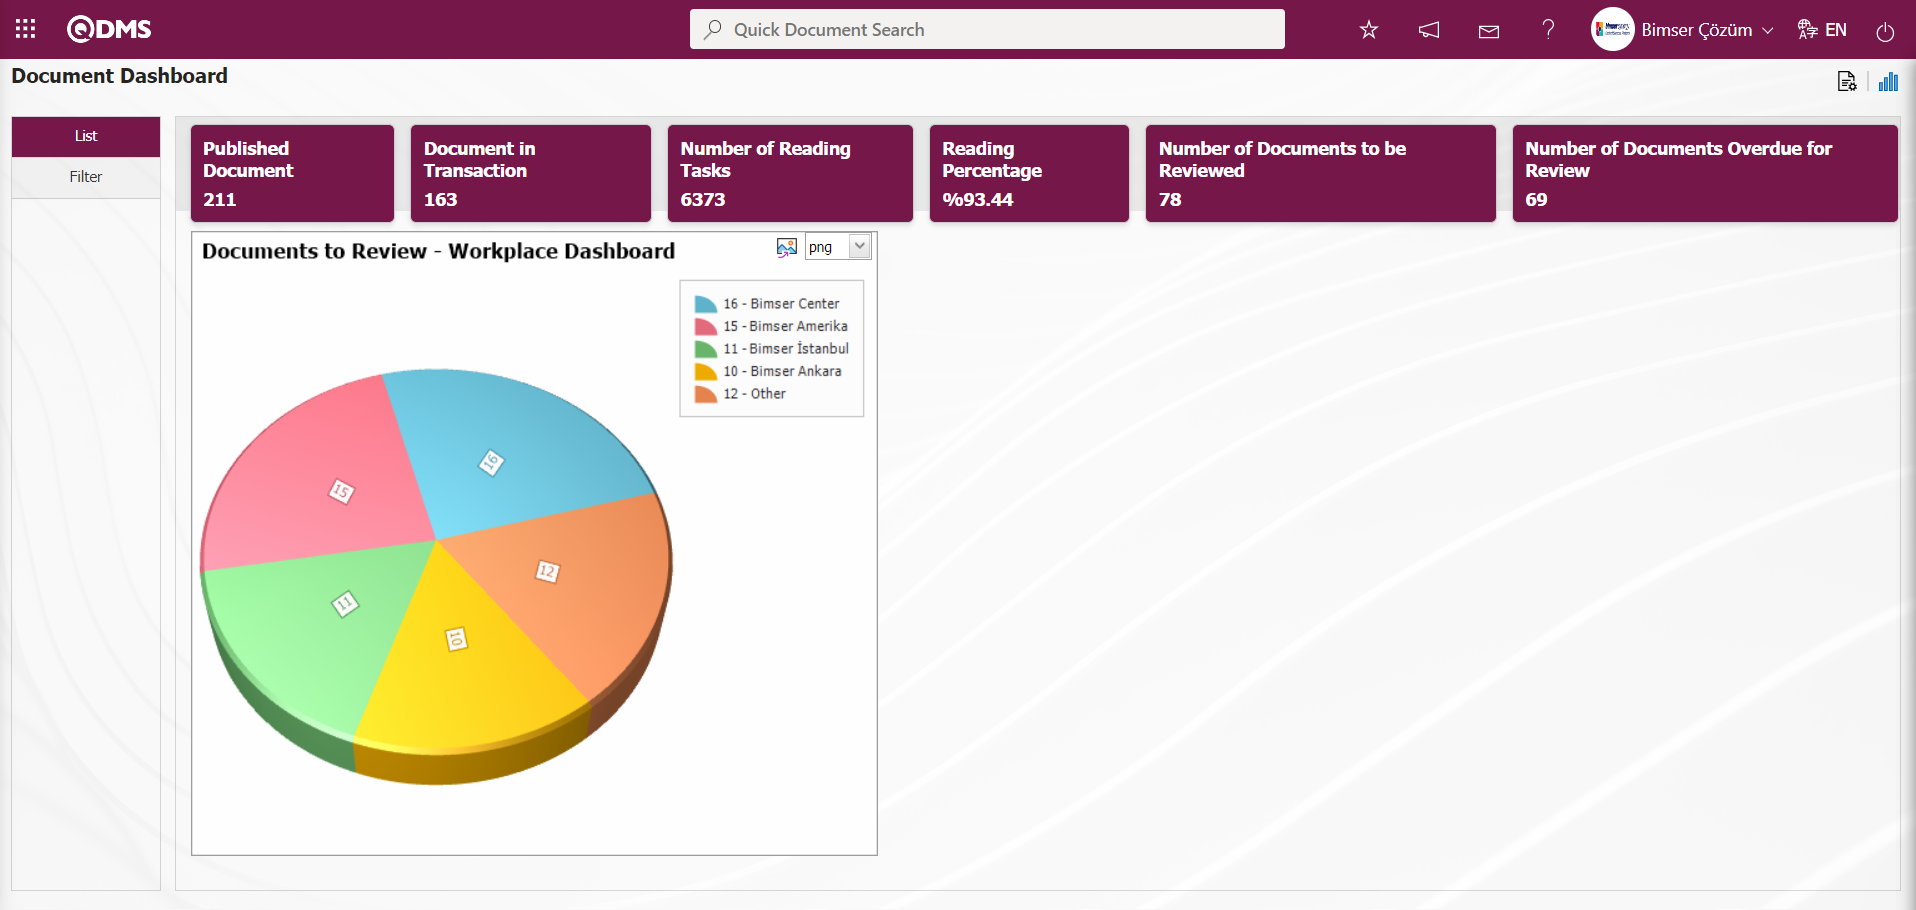
By clicking the  (Export Graphic) button, the graphic can be exported to the external environment by converting it to the format type (png, jpg, bmp, xls, etc.) selected from the drop-down menu.
Graphic Length is limited to a min value of 500 and a maximum of 1000. Graphic Width is limited to a min value of 550 and a max value of 1800. Chart Length and Width should be selected between these values. Dashboard Configuration - If the row number is already used on the New Record screen, an error message “The row number you specified is in use, you must specify a row number that is not in use.” is given by the system during the saving phase.
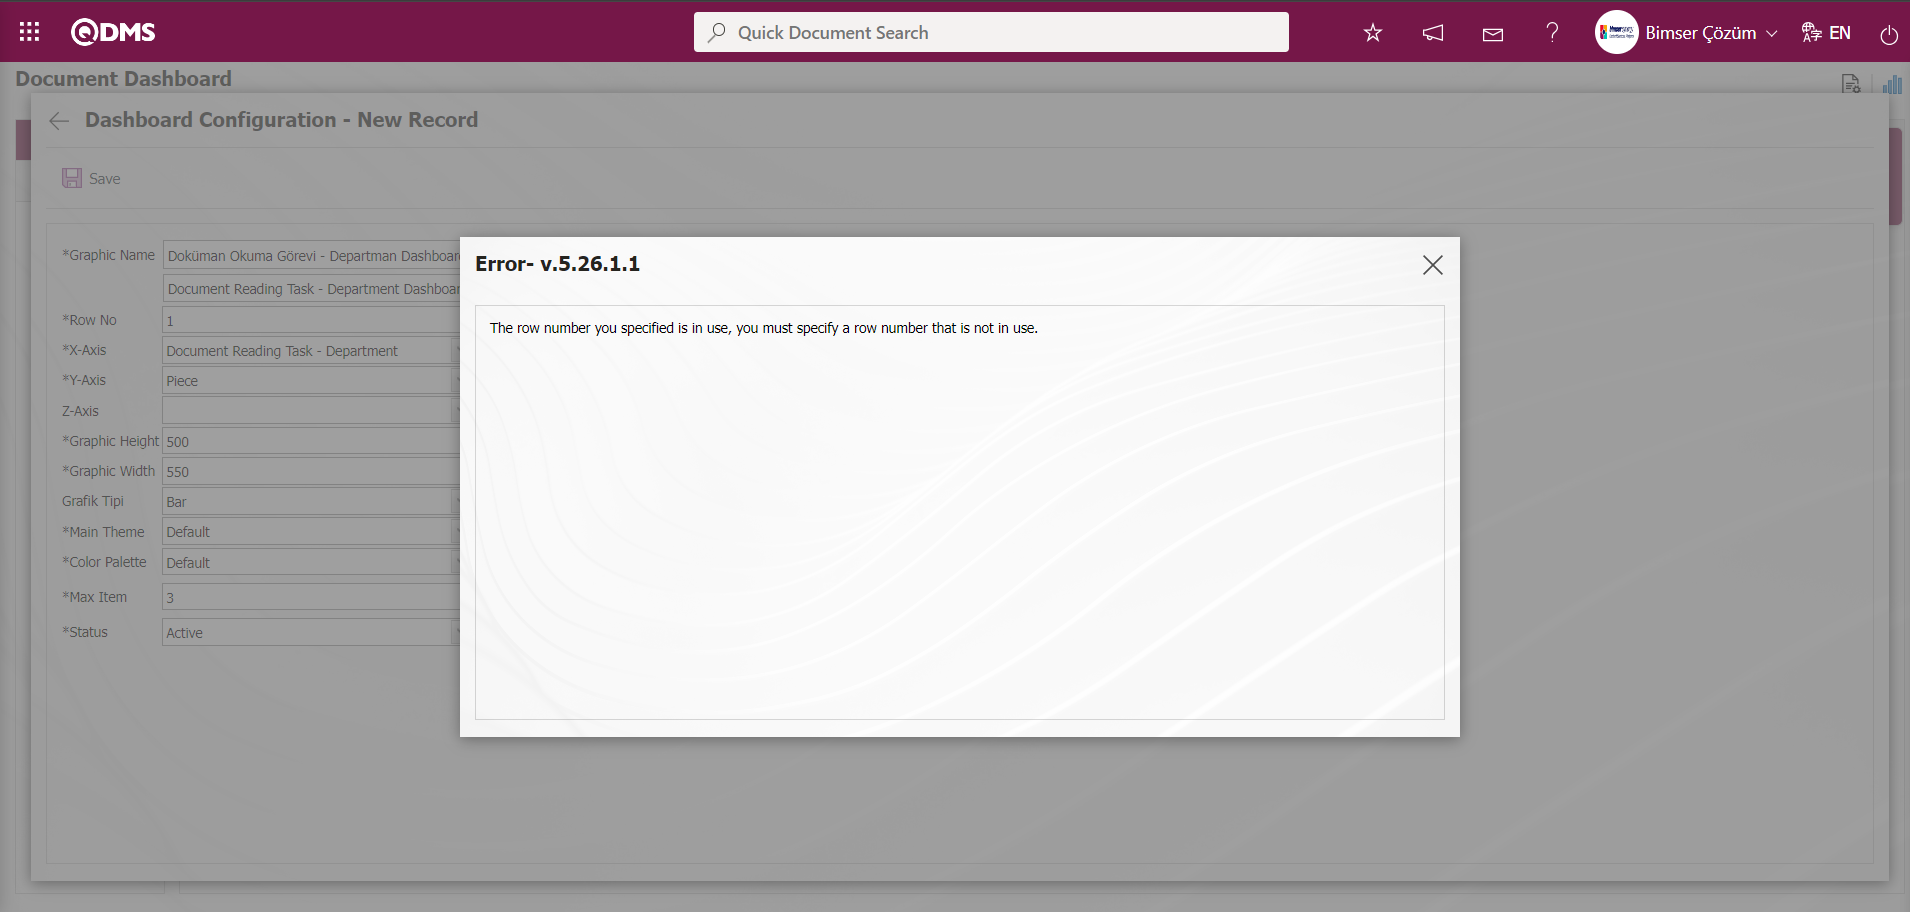
In this way, a new chart can be added on the screen opened with the Chart Settings button. Editing, updating, changing and deleting operations are performed on the added chart information. The filtering screen for the relevant graphics in the list is defined and set as downloadable.
For users who are not Module Administrators, the Dashboard Configuration screen is opened by clicking on the System Infrastructure Definitions/BSID/Configuration Settings/ Dashboard Configuration/Document Management menu and the necessary adjustments are made on the screen that opens and the graphic design process is also done.
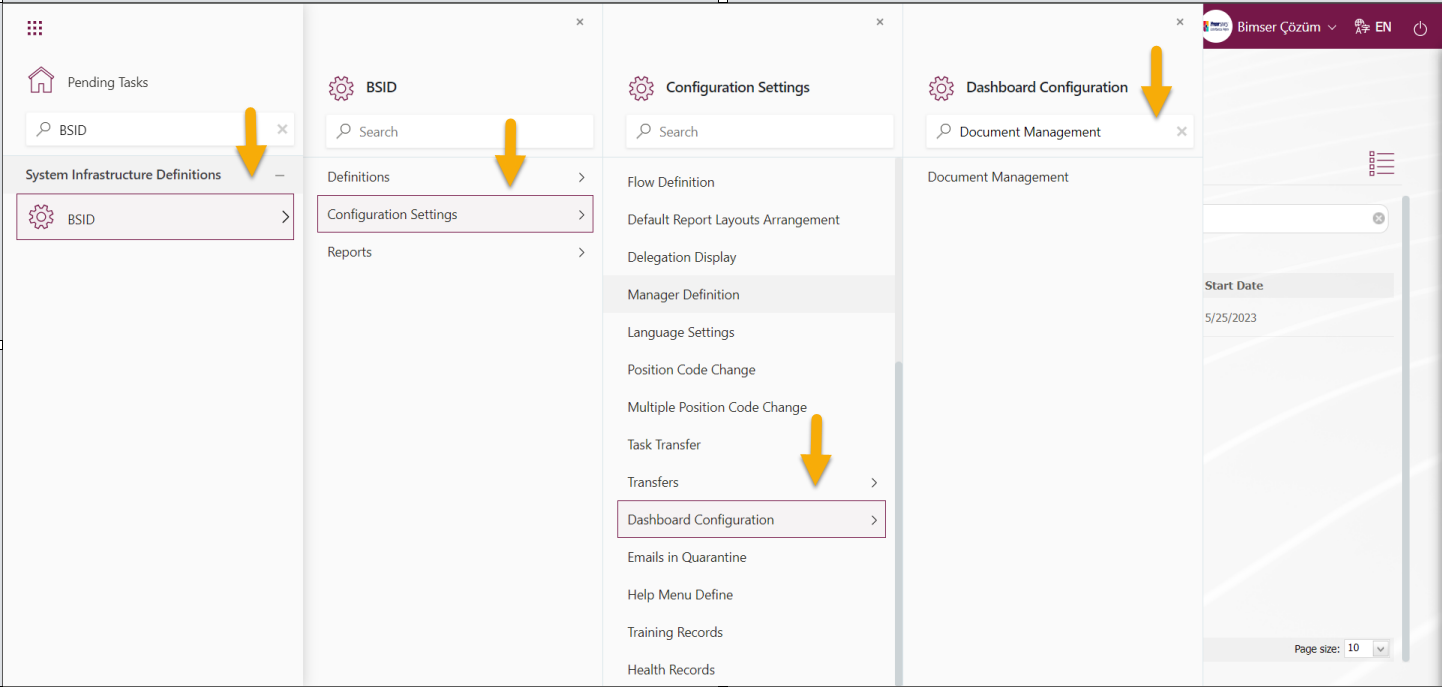
They can define a new Dashboard by using the same buttons on the Document Dashboard Configuration screen and performing the same steps.