CAPA
Information
You can quickly reach the relevant topic with the help of navigation on the right side.
CAPA Module (v.5.26) User Help Document
Module Version: 5.26
1. INTRODUCTION:
“Corrective and Preventive Actions Module” is the module that enables all corrective actions within the Management Systems to be tracked in the QDMS system within certain rules.
2. PURPOSE:
The purpose of this help guide is to explain the working process of the QDMS “CAPA” Module. The CAPA Module is used to collect the corrective actions under a single roof through the system and to ensure that they proceed in a certain standard.
3. RESPONSIBILITIES:
Personnel Authorized to Open CAPA, CAPA Team Leader, CAPA Team Members, Action Responsible, Action Worker, Monitoring Responsible, CAPA Closure Approver. Optional Responsibilities; CAPA Opening Approver, Activity Evaluator, Progress Report Compliance Approver, Action Opening Approver, Action Closing Approver.
4. ABBREVIATIONS:
QDMS: “Quality Document Management System”
CAPA: Corrective and Preventive Activities
5. WORK FLOW:
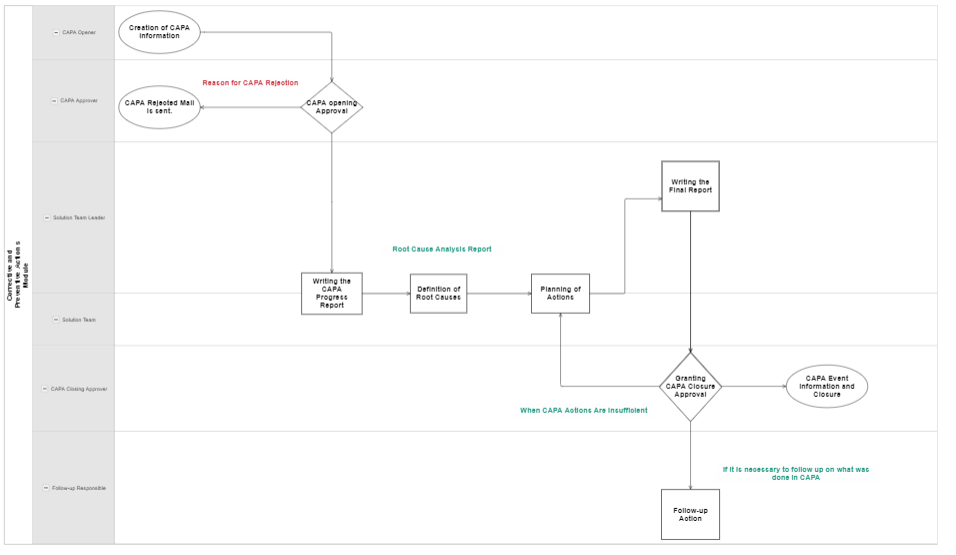
6. Corrective and Preventive Actions (CAPA)
CAPA is a module that enables a nonconformity to be resolved by taking corrective actions, recording nonconformities and managing them effectively in an end-to-end digital environment.
- Instant tracking and automatic notification of actions taken regarding corrective/preventive actions are provided.
- Periodic reminders are provided to the relevant persons and managers for delayed works.
- Defining the desired flow and approval steps in the CAPA process.
- Design different root cause analysis methods and assign actions based on root causes.
- Define notification, progress and result report templates.
- Define different report formats for customer, supplier and in-house, and receive reports automatically generated by the system.
- Global 8 Discipline (G8D) support is provided for customers and suppliers.
- Integration with Audit, Customer Complaint, Incident Reporting and Risk Management modules is provided.
- Transaction sources, nonconformity categories and root causes are defined specific to the organization.
- Nonconformity reports and graphs are obtained.
- Corrective/Preventive actions are monitored in different criteria such as management system and process.
- Pre- and post-closure effectiveness evaluation of corrective/preventive actions is performed.
- Web Service support is provided for opening Corrective/Preventive action records from external applications.
6.1. System Infrastructure Definitions/ CAPA
This is the part where the infrastructure of the CAPA module is created and the module infrastructure design where definitions are made. Data appears according to these definitions made in the entries from the Integrated Management System menu.
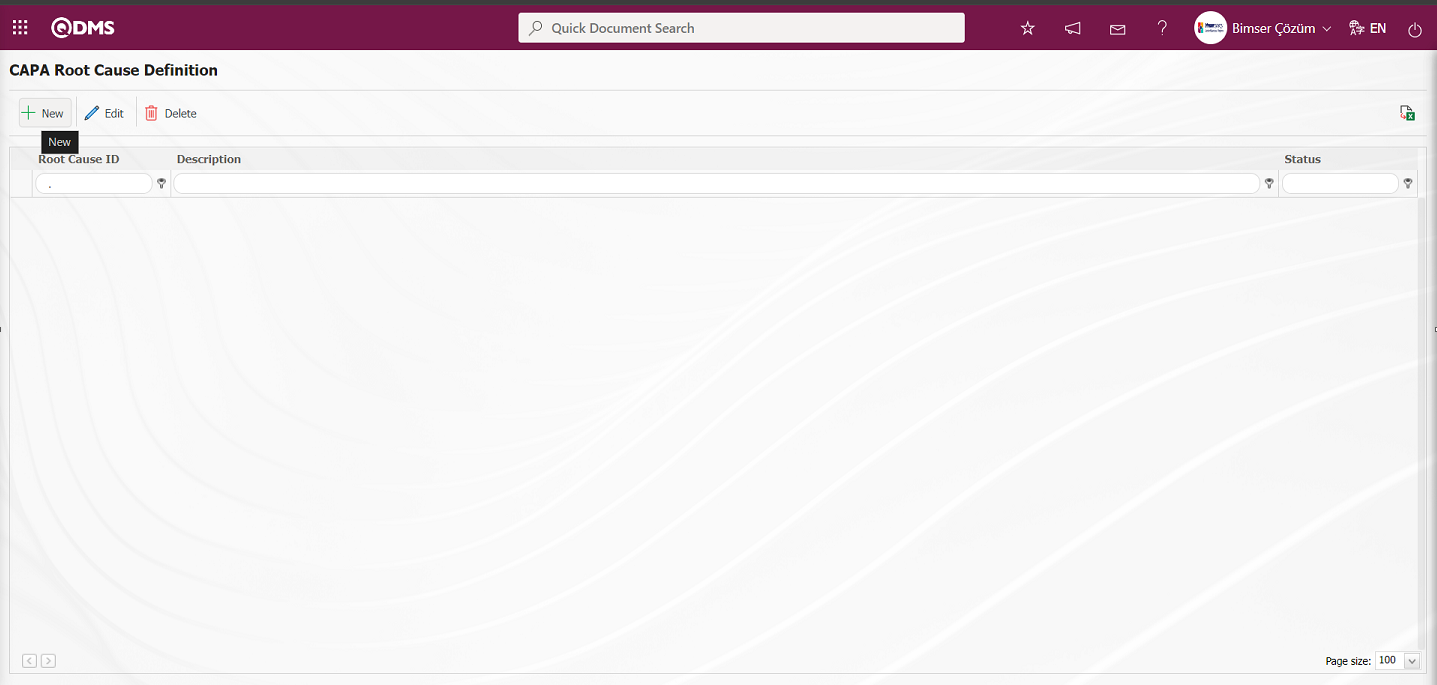
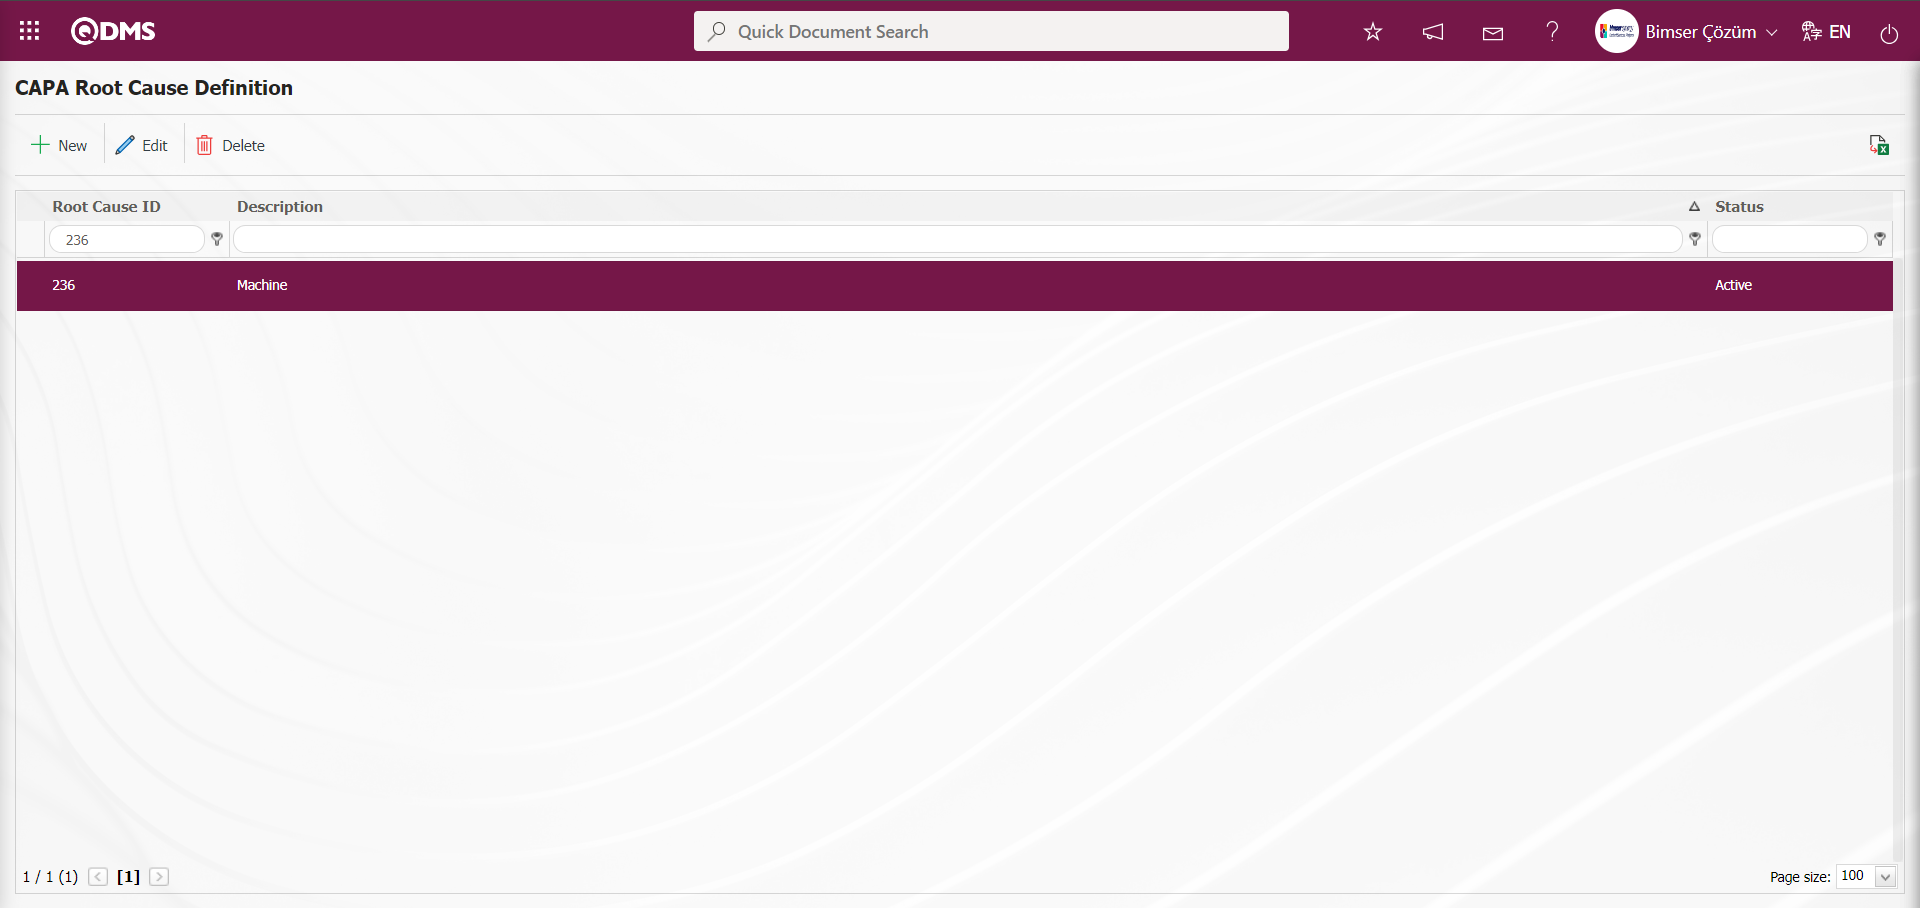
6.1.1. CAPA Root Cause Definition
Menu Name: System Infrastructure Definitions/CAPA/ CAPA Root Cause Definition
This is the menu where the root causes used in the company within the scope of CAPA Module are defined. The titles of the root causes are defined according to the cause-cause analysis. In the Root Causes tab, the source of the nonconformity is defined and in this tab, the actual cause of the nonconformity is selected. Although it is determined as “Human, Machine, Method, Material / Equipment, Environment, Management” as standard, root causes vary from company to company. As the sectors change, the need to write more specific root causes arises, so companies can make more meaningful choices for themselves.
With the help of the buttons on the screen;
 : A new root cause is defined.
 : Edit/change/update the root cause information selected in the list.
Note: The passive feature is used to prevent the end user from seeing the root cause type when it is no longer intended to be used. When this operation is done, the old information is stored, but end users cannot select the type that has been disabled.
 : The root cause information selected in the list can be deleted. It is not recommended to delete a root cause information that has been used for a long time, as soon as it is deleted, if this type was used in old records, the records will be corrupted.
 : Data can be exported to excel. (The report of the Root Cause list in the list tab on the Root Cause Identification screen is taken in Excel format).
To add a new Root Cause to the Root Cause Definition screen, the Root Cause Definition\New Record screen is displayed by clicking the button in the upper left corner of the screen.
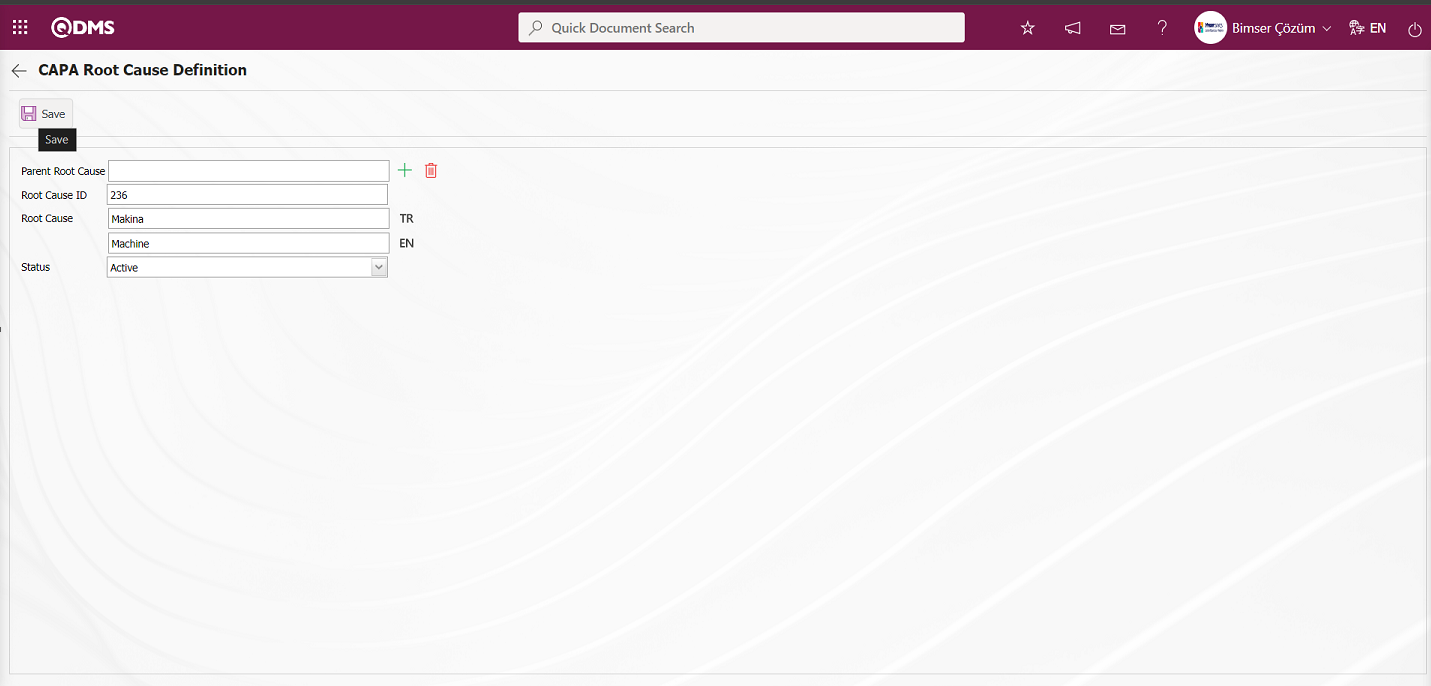
Define the relevant fields on the screen that opens:
Parent Root Cause: If the Top Root Cause, which is in the process of being created on the Root Cause Definition screen, is a sub-fraction of a Root Cause definition, this field is automatically filled. The name of the Root Cause definition to which it is connected is written in the filled field. If you want to delete the top breakdown to which it is connected, use the  (Delete) button on the right side or if you want to change it, use the
  (Select) button on the right side. If there is no parent Root Cause, this field is blank.
Root Cause ID: This is the field where Root Cause ID information is entered on the Root Cause Definition screen.
Root Cause: This is the field where Root Cause Definition information is entered on the Root Cause Identification screen. In the field with the English language equivalent icon, the English language equivalent of the root cause definition is written.
Status: This is the field where the active or inactive status of the Root Cause information can be selected on the Root Cause Definition screen.
On the Root Cause Definition screen, enter Root Cause No and Root Cause definition information. Select Active in the Status section. After filling in the required fields on the Root Cause Identification screen, the Root Cause Identification registration process is performed by clicking the  button in the upper left corner.
6.1.2. CAPA Source Definition
Menu Name: System Infrastructure Definitions/ CAPA/ CAPA Source Definition
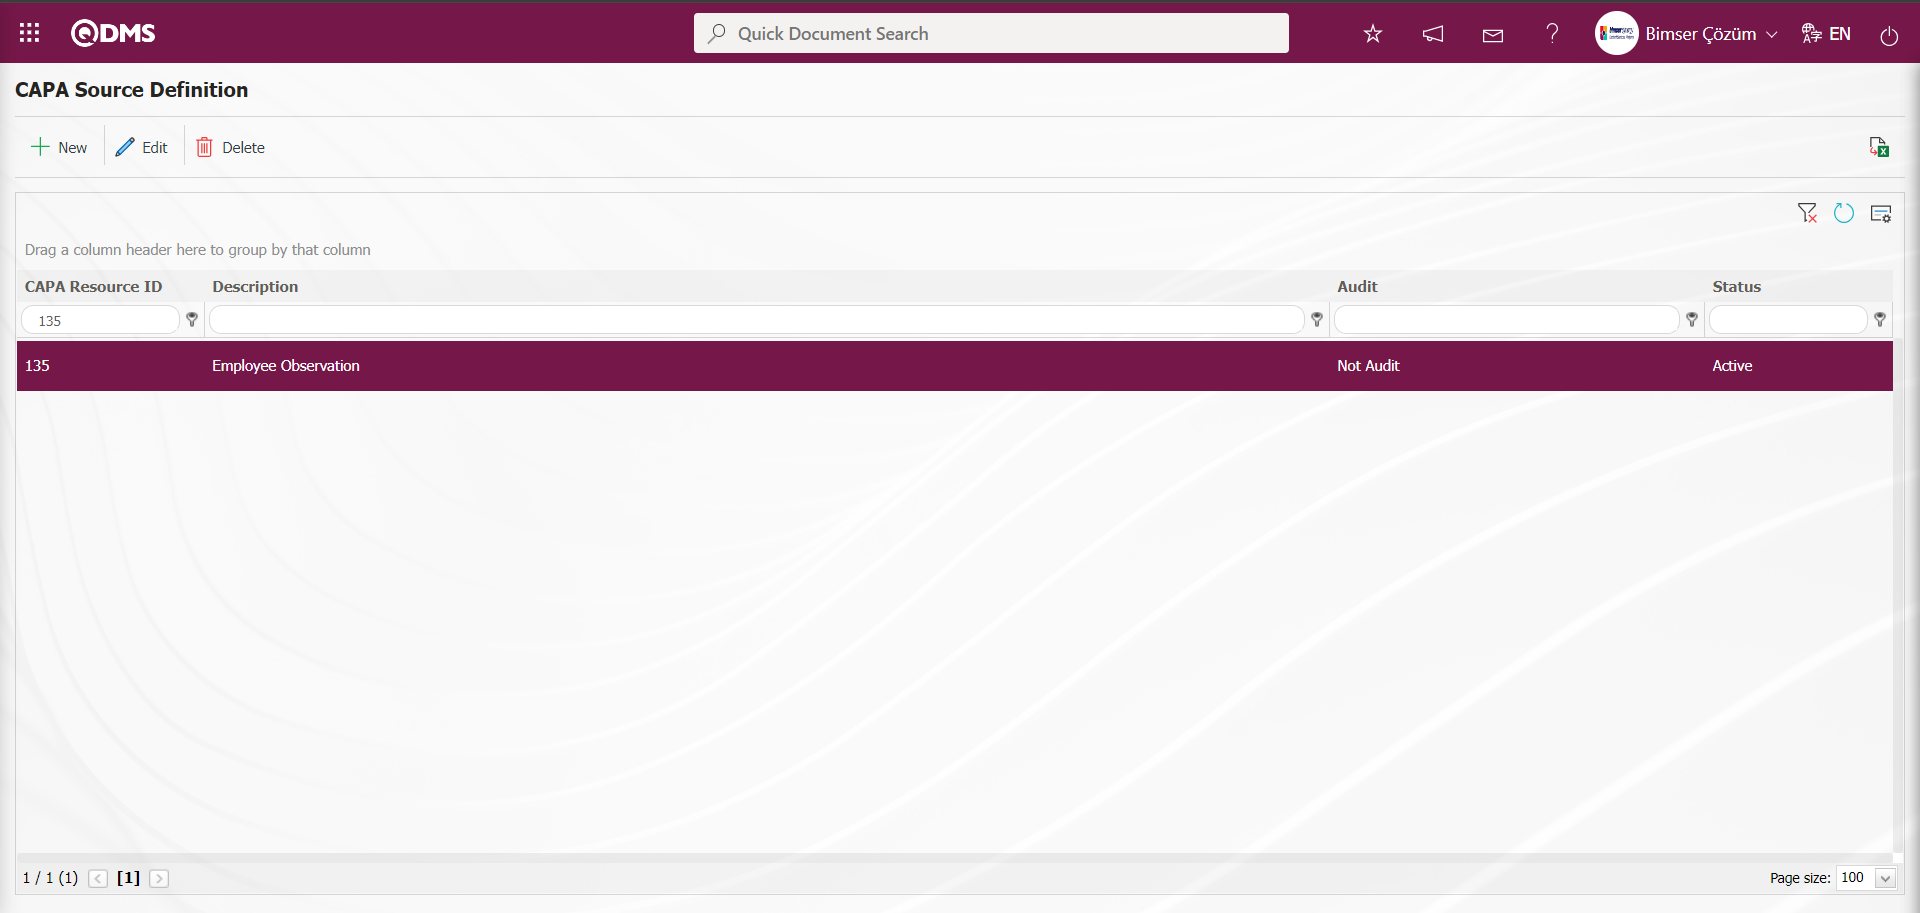
CAPA Source Definition is the menu where the process takes place. Transaction Source is the part where the channel where CAPA occurs is defined. The purpose of defining CAPA Source Definition; It is the screen where it is shown how the CAPA emerges, that is, from which channel it comes from. For example, it is the menu where CAPA Transaction Sources such as customer complaint, work accident, audit are determined.

With the help of the buttons on the screen;
 : A new capa source is defined.
 : Edit/change/update the capa source information selected in the list.
 : The capa source information selected in the list is deleted. It is not recommended to delete a capa source information that has been used for a long time, if it was used in old records as soon as it is deleted, the records will be corrupted.
 : The data is transferred to Excel. (The report of the capa source list in the list tab on the capa source Identification screen is taken in Excel format).
 : The data remaining in the filter fields in the grid where the search criteria search operation on the menu screens is performed is cleaned.
 : The menu screen is restored to its default settings.
 : User-based designing of the menu screen is done with the show-hide feature of the fields corresponding to the columns on the menu screens, that is, the hiding feature.
To add a new CAPA source to the CAPA Source Definition screen, the CAPA Source Definition screen is displayed by clicking the button in the upper left corner of the screen.
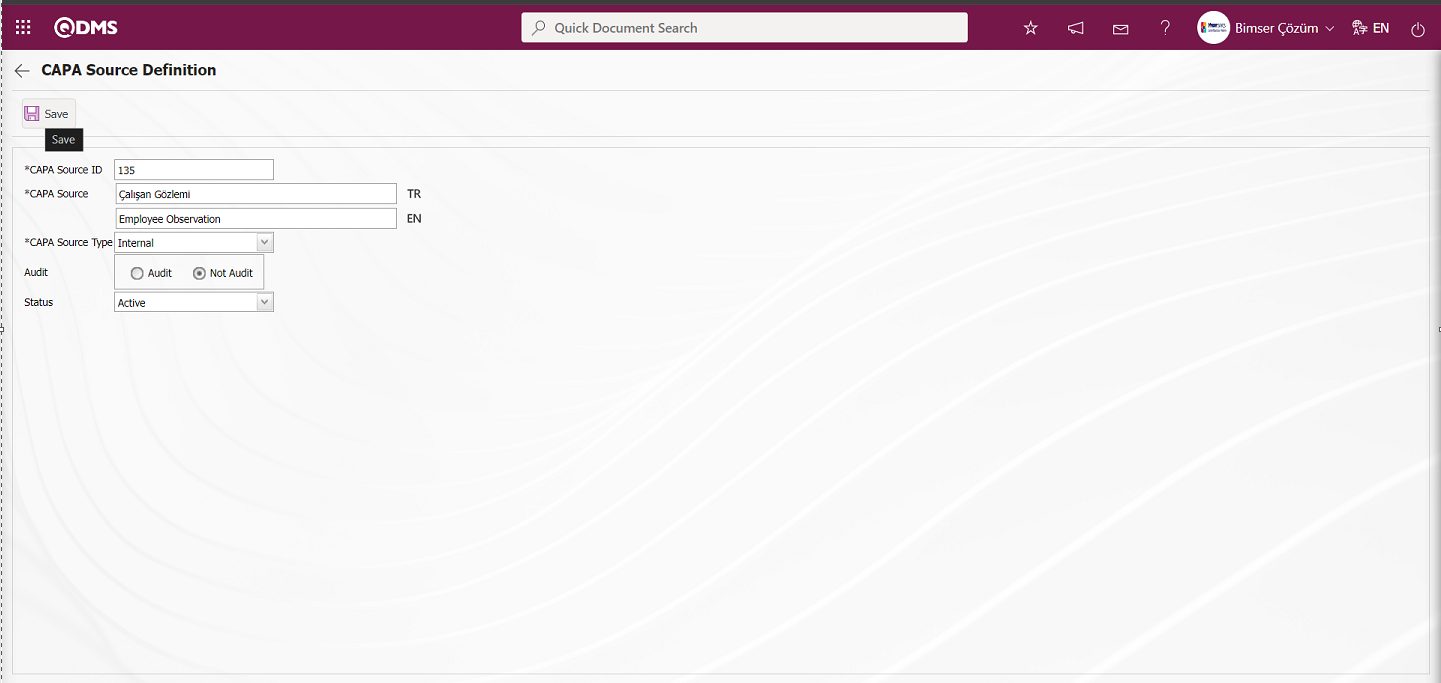
Related fields are defined on the screen that opens:
CAPA Source ID: This is the field where the Transaction Source ID information is entered in the CAPA Source Definition screen.
CAPA Source: This is the field where CAPA Source definition information is entered in the Transaction Source Definition screen. In the field with the English language equivalent icon, the English language equivalent of the definition part of the CAPA source is written.
CAPA Source: This is the field where CAPA Source Type information can be selected on the CAPA Source Definition screen. In the CAPA source type field, a total of 4 options are defined as CAPA source type. These are Internal, External, Customer Complaint and Supplier CAPA source types.

CAPA Activities - New Record according to selected typethe place title that users encounter on the screen changes:
- When in-house is selected, the department selection area where the nonconformity is encountered is displayed. On the CAPA Activities - New Record screen, in the Department field where the nonconformity is found, click on the
 (Select) button and view it from the list of departments defined in the system and select the department in the department list.

- When External is selected, the customer selection field appears. On the CAPA Activities - New Record screen, click the (Select) button in the Customer field to display the Customer list defined in the system and select the customer in the Customer list.

- When the supplier is selected, the Supplier selection field appears. On the CAPA Activities - New Record screen, by clicking the
 (Select) button in the Supplier field, the Supplier List defined in the system is displayed and the supplier is selected from the Supplier list.

- When Customer Complaint is selected, a transaction source that talks to the Customer Complaint Module is created. When it is clear who the Customer Complaint is from, there is no need to select it. When CAPA is opened in Customer Complaint Modules, the list of transaction sources is displayed in the transaction source field on the CAPA Activities - New Record screen and this transaction is not displayed on the CAPA Activities - New Record screen.
Audit This is the field where Audit and Not Audit options can be selected on the CAPA Source Definition screen.

When the “Audit” option is selected, the transaction source is displayed in the list of transaction sources in the transaction source field on the CAPA Activities - New Record screen that opens CAPA in the Audit Activities Module. When the “Not Audit” option is selected, the transaction sources are not displayed in the list in the transaction source field on the CAPA Activities - New Record screen that opens CAPA in the Audit Activities Module. In the CAPA Activities - New Record screen, which opens CAPA in the Audit Activities Module, which is the CAPA Record definition screen, which transaction sources will be displayed in the transaction sources field and which transaction sources will not be displayed is determined in this field. It is used for the transaction sources that are desired to be associated withthe Audit Activities Module and CAPA Module. When CAPA is opened in the Audit Activities Module, the user is presented with the Audit selected ones.
The parameter is activated by selecting “Yes” for parameter 162 of the CAPA parameters.
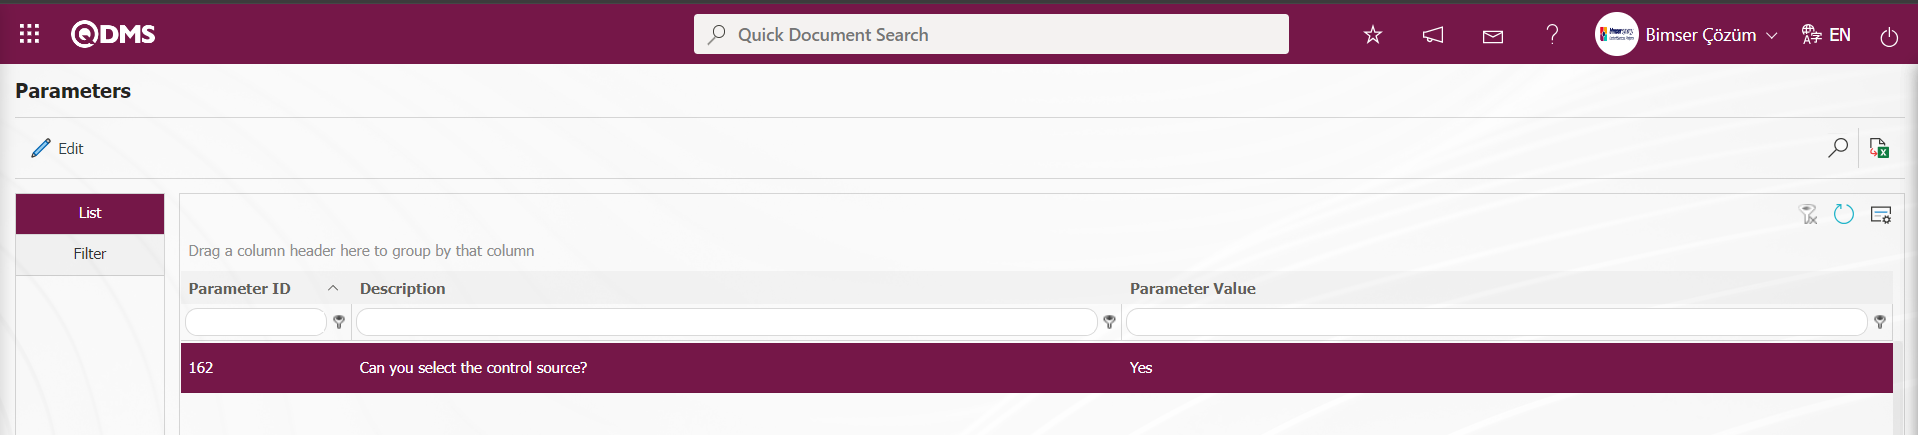 After the parameter is activated, the transaction sources with the “Audit” option selected in the transaction sources defined after the parameter is activated will be displayed in the CAPA Source list in the CAPA Source field on the CAPA Activities - New Record screen in the CAPA Module and the process of selecting these transaction sources will be performed. When the parameter is disabled by selecting the parameter value “No”, if “Audit” is selected at the transaction source stage, these transaction sources are not displayed in the CAPA Source list in the CAPA Source field on the CAPA Activities - New Record screen in the CAPA Module . In the Audit Activities Module, when CAPA is opened, the user is presented with the Audit selected transaction sources.
Status: This is the field where the Active or Inactive status of the CAPA Source information can be selected.
On the CAPA Source Definition screen, CAPA Source No and CAPA Source definition information is entered. CAPA source information is selected as In-house, Audit information is selected as Not Under Audit and Status is selected as Active. After filling in the required fields on the CAPA Source Definition screen, the CAPA Source Definition registration process is realized by clicking the  button in the upper left corner.
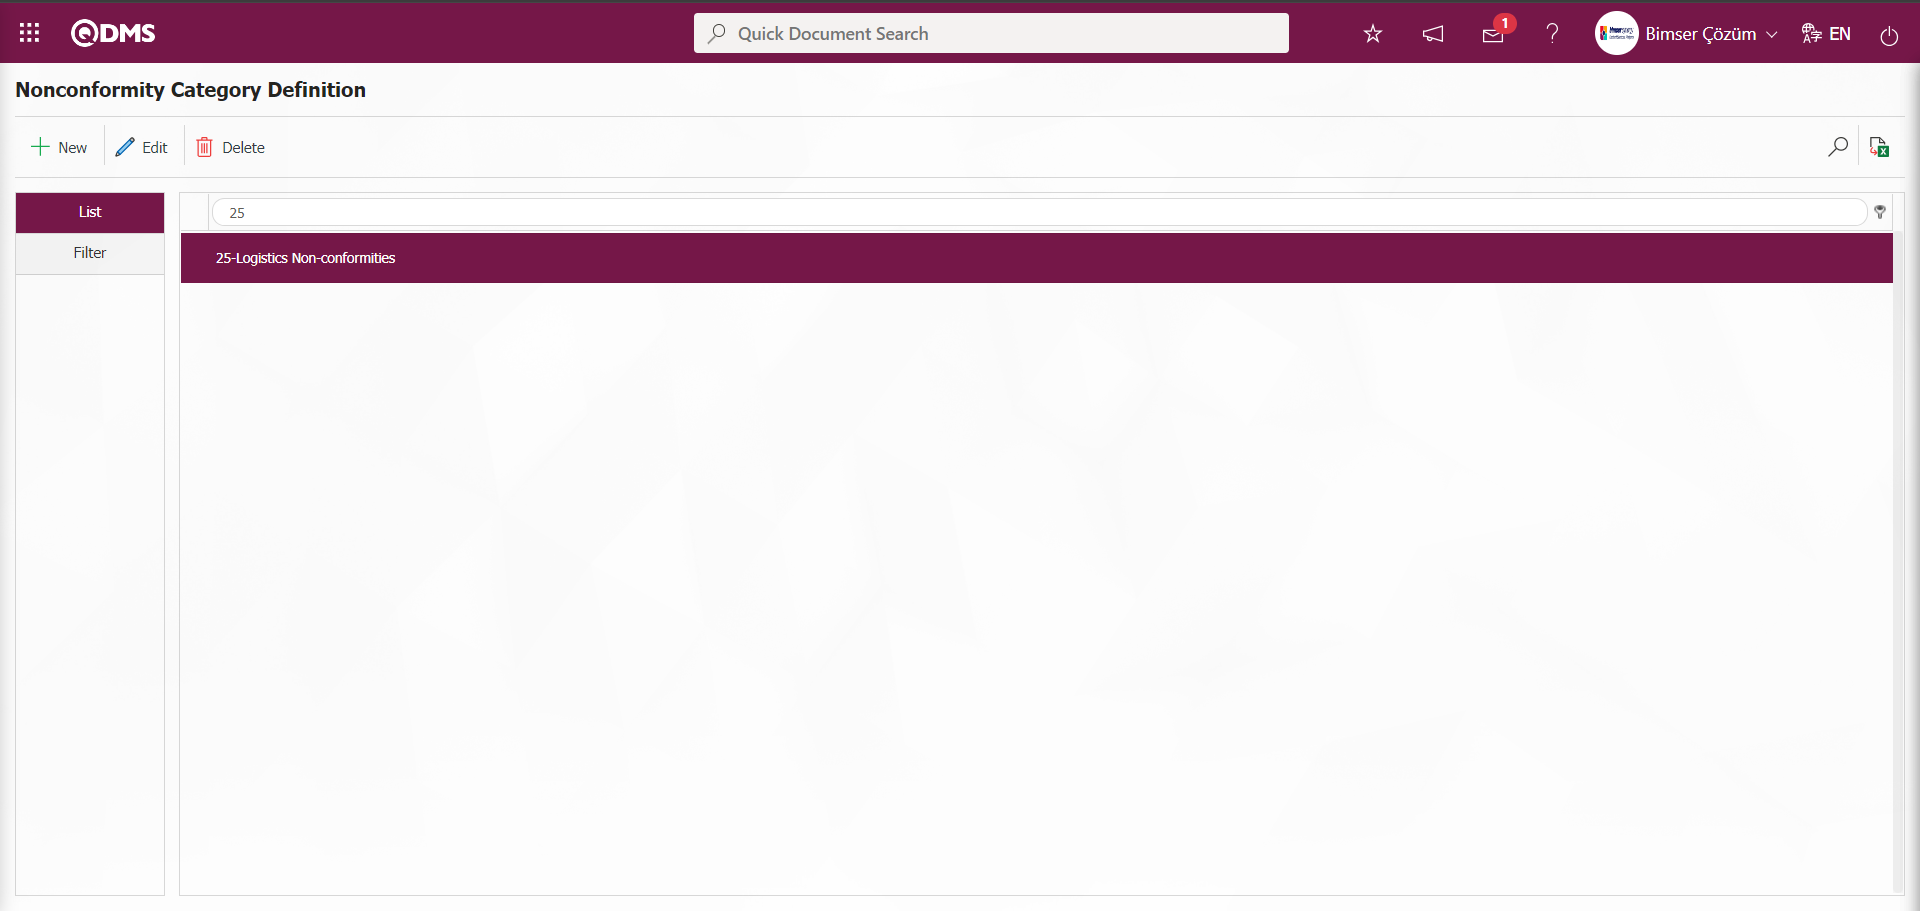
6.1.3. Define Nonconformity Categories
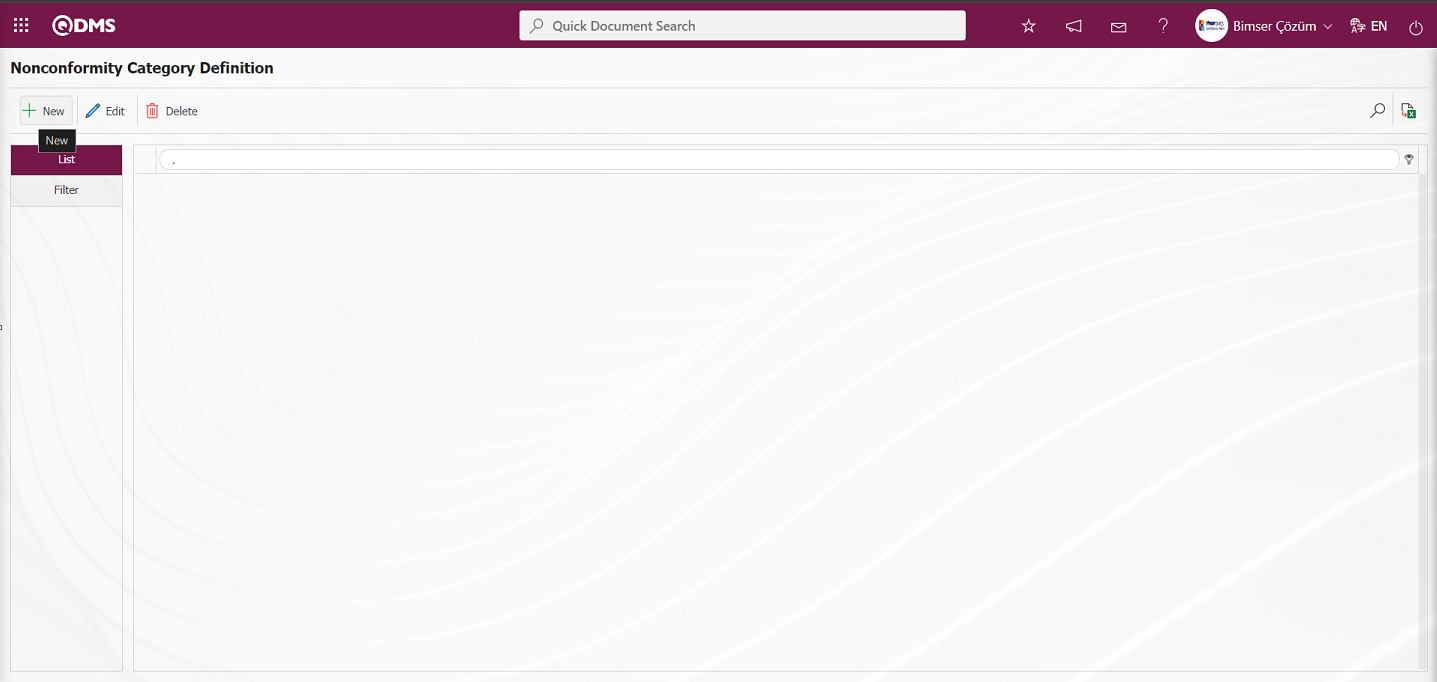
Menu Name: System Infrastructure Definitions/ CAPA/ Define Nonconformity Categories
This is the menu where the Nonconformity Category definition process takes place. Nonconformity category is important for analyzing CAPAs. This menu is used to categorize the identified CAPAs. When defining the nonconformity categories, it is necessary to sub-divide them based on the nonconformities experienced by the company.
With the help of the buttons on the screen;
: A new nonconformity category is defined. If the direct new button is clicked by selecting one of the categories while creating the main category, a title is defined under the relevant category.
: Editing/changing/updating is done on the nonconformity category information selected in the list.
: The nonconformity category information selected in the list is deleted. It is not recommended to delete a nonconformity category that has been used for a long time, as soon as it is deleted, the records are corrupted because it is used in old records.
 : Records can be searched by filtering.
: Data is exported to Excel. (The report of the Nonconformity Category Identification list in the list tab on the Nonconformity Category Identification screen is taken in Excel format).
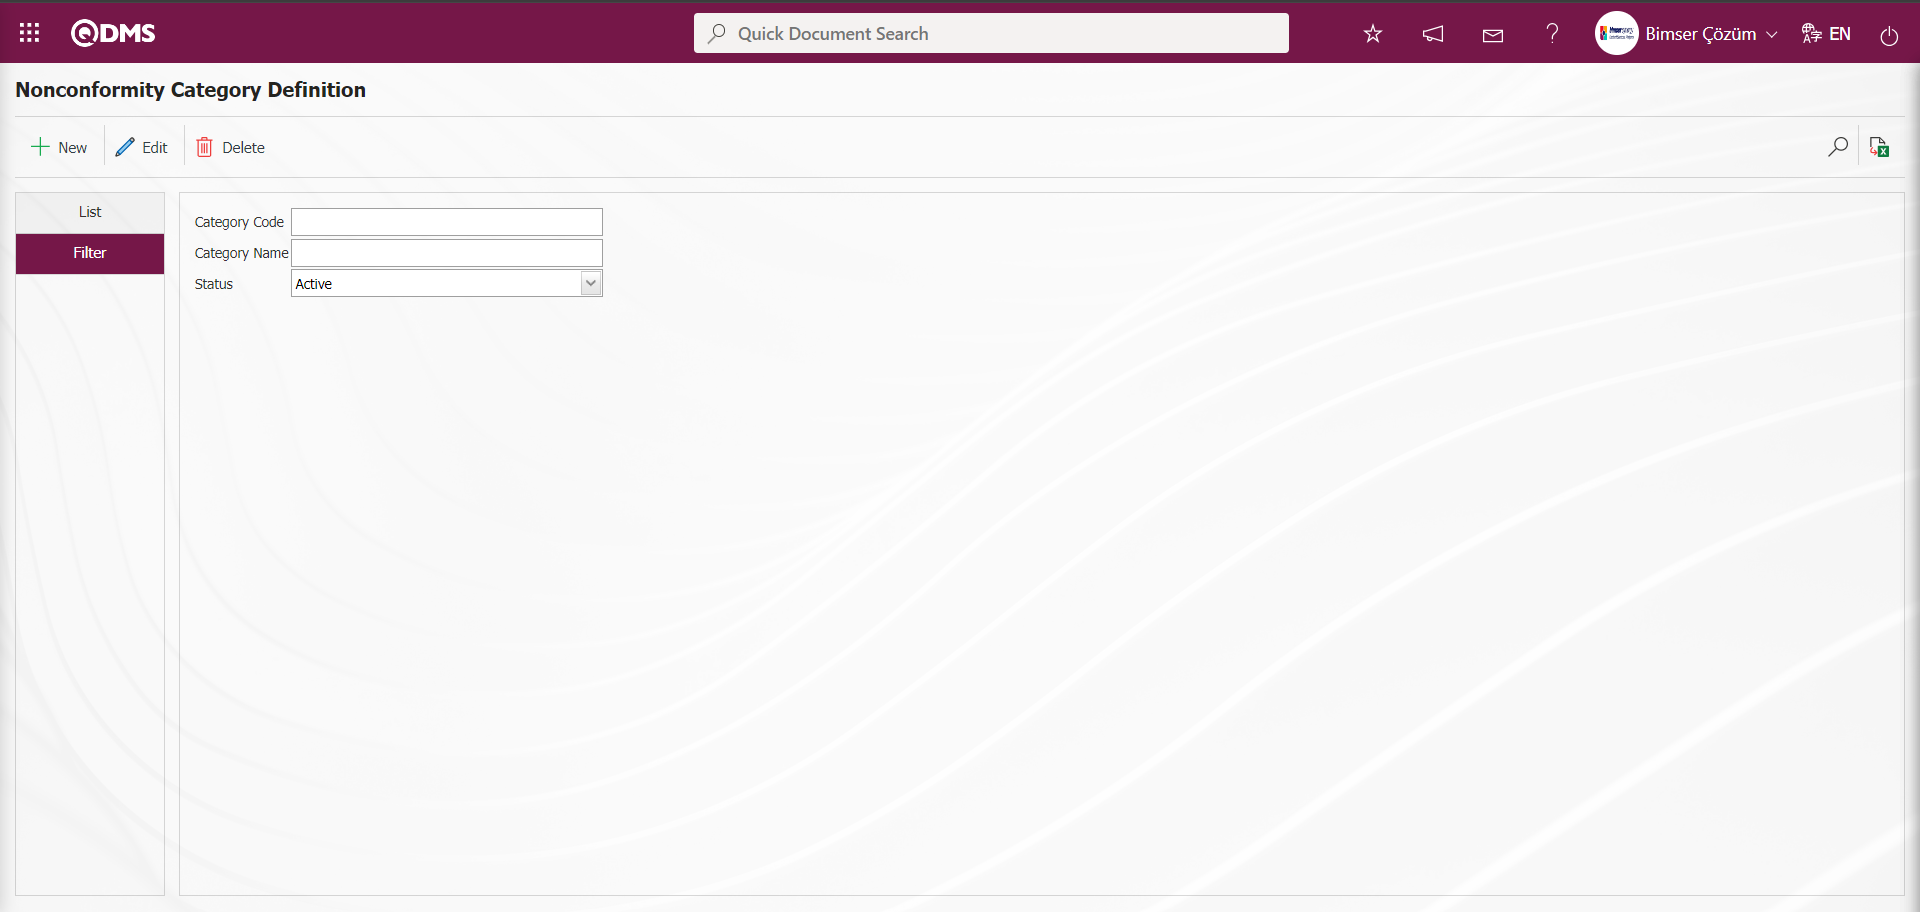
To add a new Nonconformity Category on the Nonconformity Category Definition screen, click the button at the top left corner of the screen to display the Nonconformity Category Definition\New Record screen.
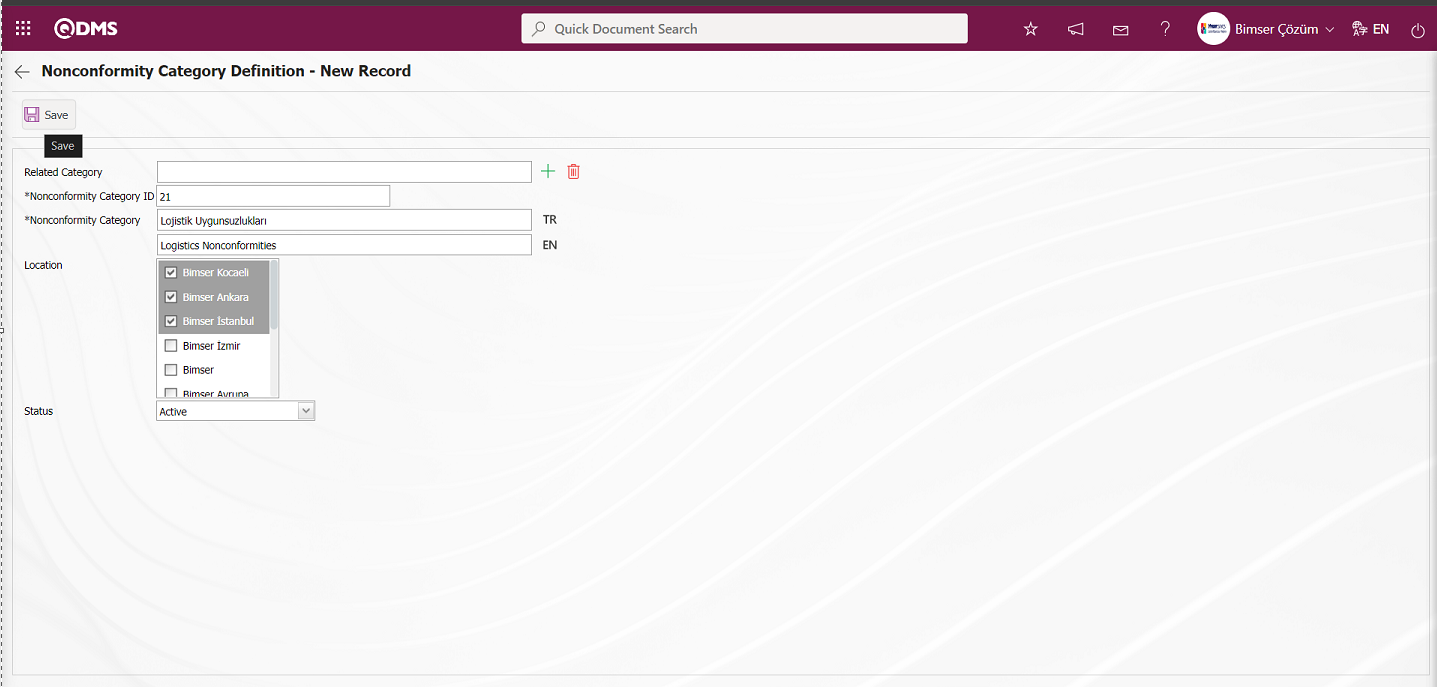
Related fields are defined on the screen that opens:
Related Category: Nonconformity Category Definition - If the Related Category, which is in the definition phase on the New Record screen, is a subset of a nonconformity category definition, this field is automatically filled. In the filled field, the name of the Nonconformity Category definition to which it is connected is written. If you want to delete the parent category to which it is connected, the  (Delete) button on the right side is used or if you want to change it, the
  (Select) button on the right side is used. If there is no parent nonconformity category to which it is linked, this field is blank.
Nonconformity Category ID: This is the field where the Nonconformity Category code information is entered on the Nonconformity Category Identification screen.
Setting the CAPA nonconformity category tree breakdown format;
Click on System Infrastructure Definitions/CAPA/CAPA Parameters menu. In the Corrective and Preventive Actions Module parameters listed on the Parameters screen, parameter 131 is selected by typing the parameter number in the parameter no field in the Filter tab on the parameters screen and searching by clicking the  (Search) button.

After selecting parameter 131 in the Corrective and Preventive Actions Module parameters, click on the button.

In the parameters screen, the information of the tree breakdown format is written in the parameter value.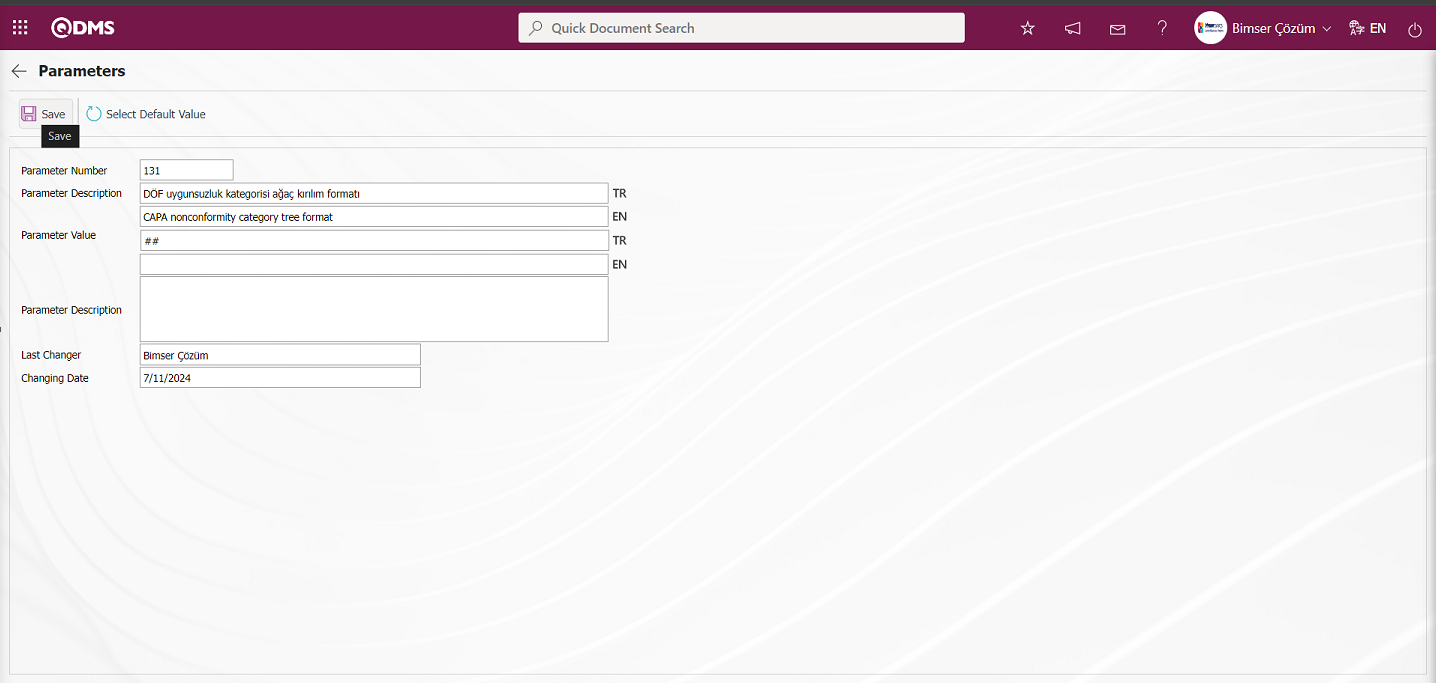
After typing the tree breakdown format information in the parameter value, the parameter record update process is performed by clicking the button in the upper left corner of the screen.
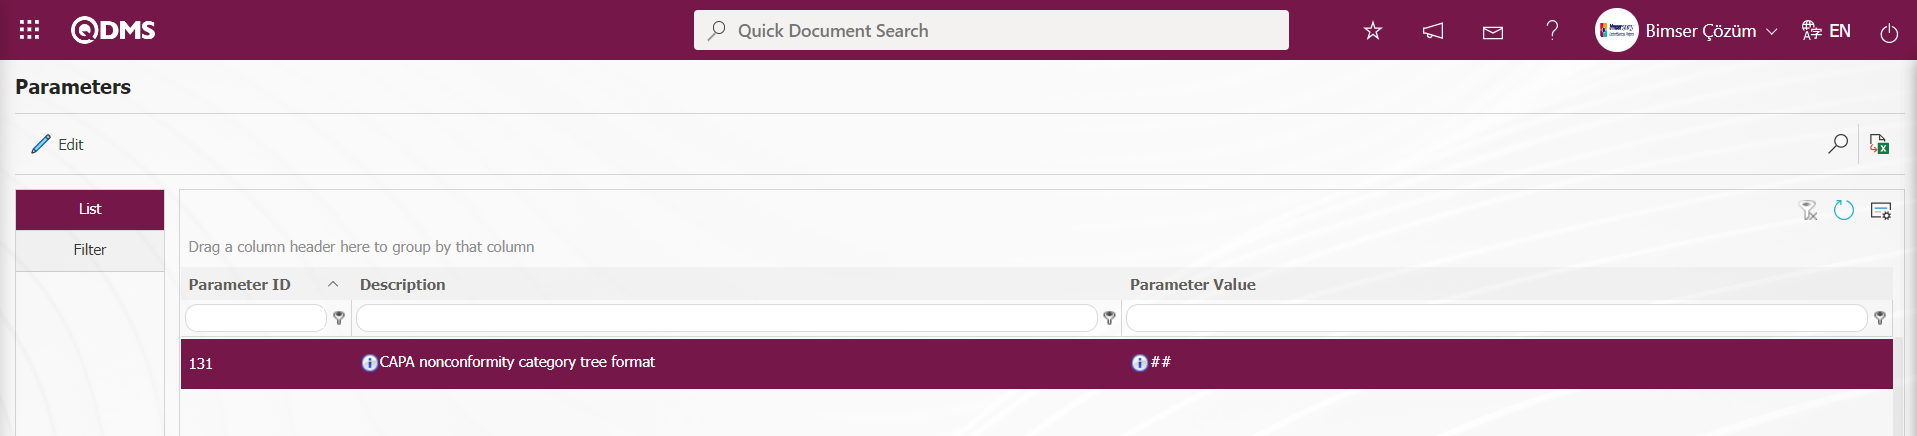 The system automatically assigns the code according to the tree breakdown format according to the systematic setting made in the parameter on the Nonconformity Category Identification screen. The system does not allow intervention in the Nonconformity Category code field. For example: 01,02,03 Nonconformity Category code assignment is done in order. With this parameter, it is determined how the category codes appear on the CAPA nonconformity category definition screen. Otherwise, if the parameter value is left blank in the parameter, the code structure can be used as desired when defining.
Nonconformity Category: This is the field where the Nonconformity Category Definition information is entered on the Nonconformity Category Definition screen. In the field where the English language equivalent icon is located, the English language equivalent of the definition part of the nonconformity category is written.
Location: This is the field where the information of the Location link can be selected on the Nonconformity Category Identification screen. More than one Location and Nonconformity category relationship can be established.
The parameter value of parameter 170 of Corrective and Preventive Actions module parameters is activated by selecting “Yes”.

After the parameter is activated, when the selection is made in the workplace field on the CAPA Activities - New Record screen, it is ensured that the nonconformity categories related to that workplace are included in the list according to the categories related to the workplace on the nonconformity category definition screen.
Status: This is the field where the active or inactive status of the Nonconformity Category information can be selected.
In the Nonconformity Category Definition screen, the code and definition information of the Nonconformity Category is entered. Workplaces with workplace connection in the Workplace field are selected in the list of workplaces. Select Active in the Status section. After the required fields are filled in the Nonconformity Category Definition screen, the Nonconformity Category registration process is realized by clicking the  button in the upper left corner.
Category Code, Category Name with the Filter tab on the Nonconformity Category Definition screen and Status fields and then click the (search) button to filter according to the search criteria.
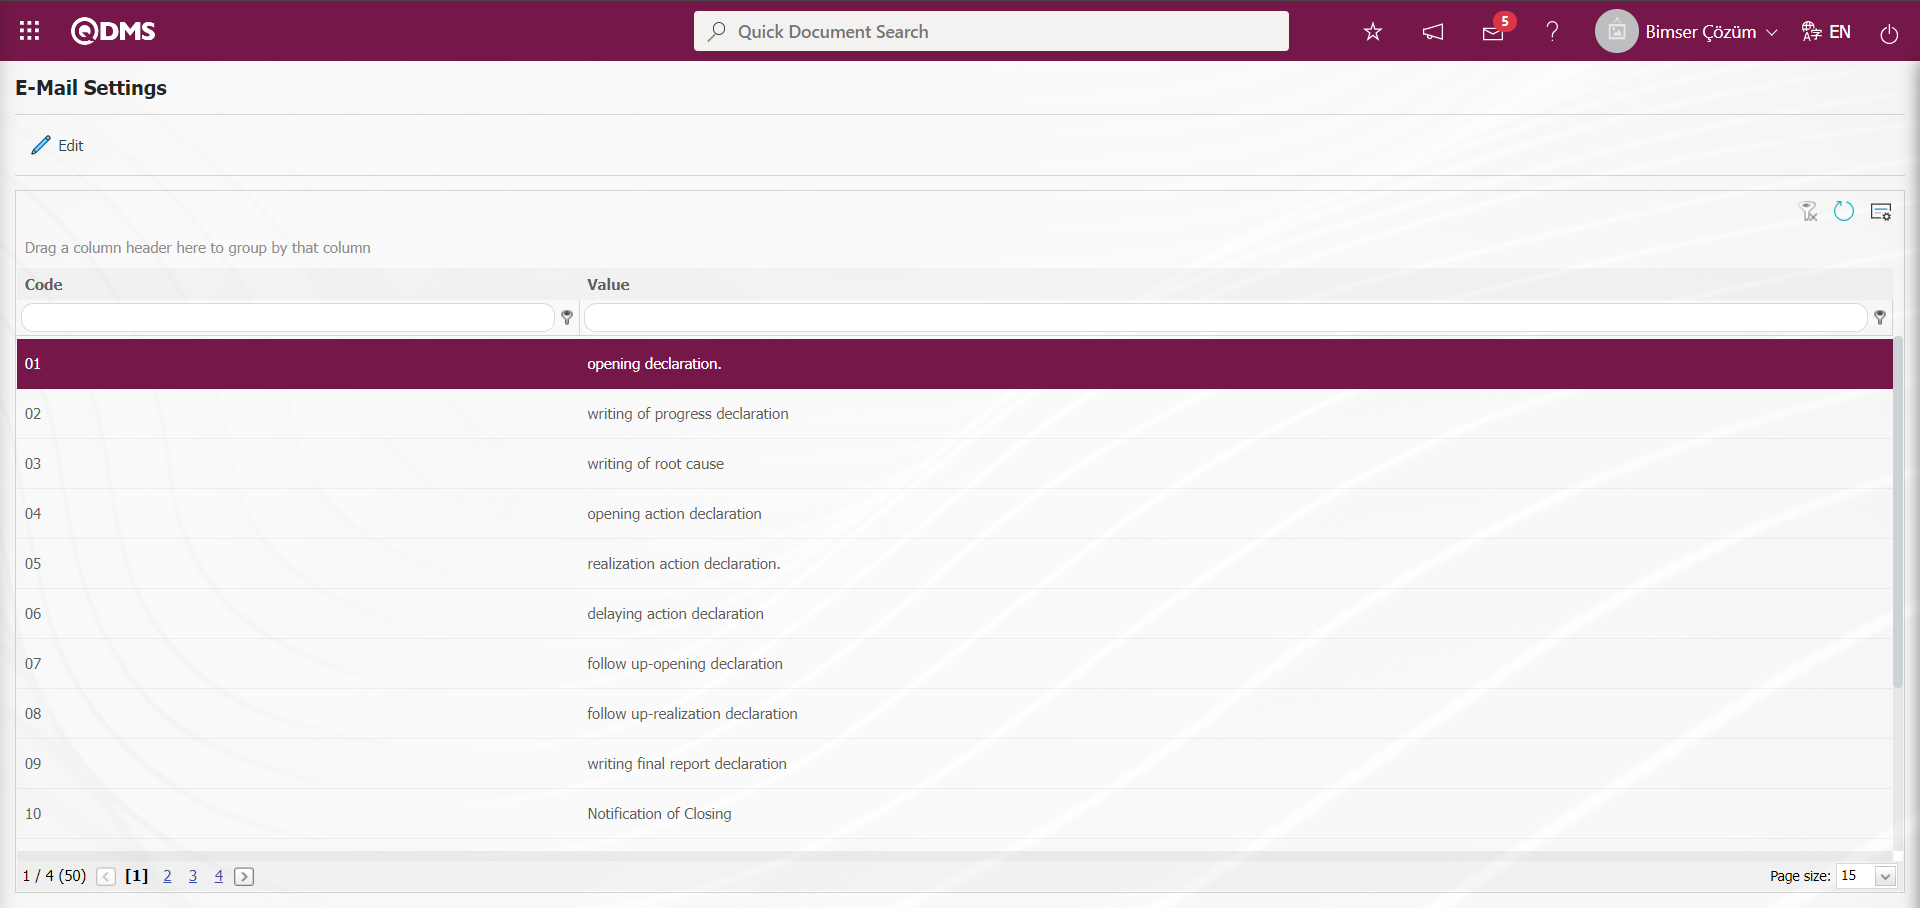
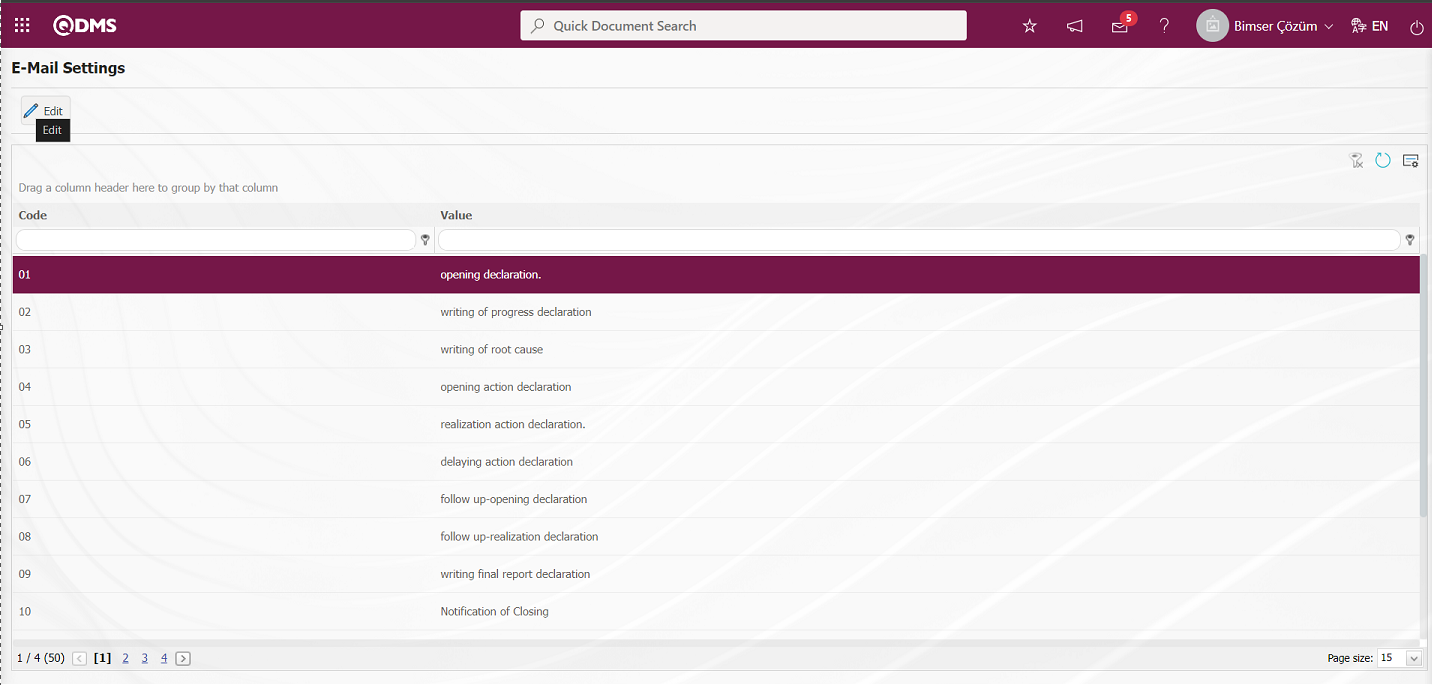
6.1.4. E-Mail Settings
Menu Name: System Infrastructure Definitions/ CAPA/ E-Mail Settings
It is the menu where it is determined to whom e-mails/messages will be sent at which stage of CAPA Module processes.
With the help of the buttons on the screen;
 : Editing/changing/updating is done on the value of the e-mails selected in the list.
: Clearing the data remaining in the filter fields in the grid where the search criteria search operation on the menu screens is performed
: The process of returning the menu screen to its default settings is done.
: User-based designing of the menu screen is done with the show-hide feature, that is, the hiding feature of the fields corresponding to the columns on the menu screens.
If SMS notification will be used in E-mail Settings;
Click on System Infrastructure Definitions/BSID/Configuration Settings/ Parameters menu. In the parameters of the System Infrastructure Definitions module parameters listed on the Parameters screen, the parameter number 102 “Will using SMS notification?” is selected by typing the parameter number in the parameter no field in the Filter tab on the parameters screen and clicking the  (Search) button.
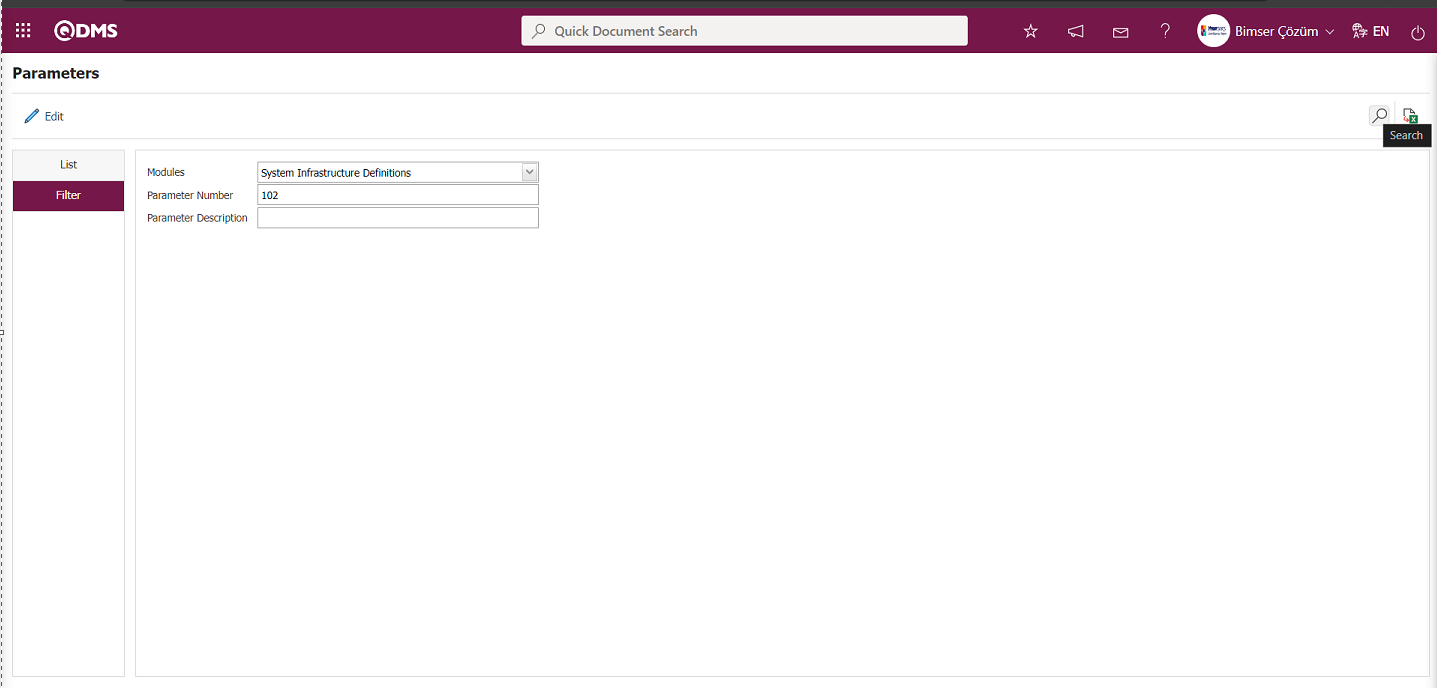
After selecting parameter 102 “Will using SMS notification? ” in System Infrastructure Definitions module parameters, click  button.

Select the parameter value ‘Yes’ on the parameters screen.
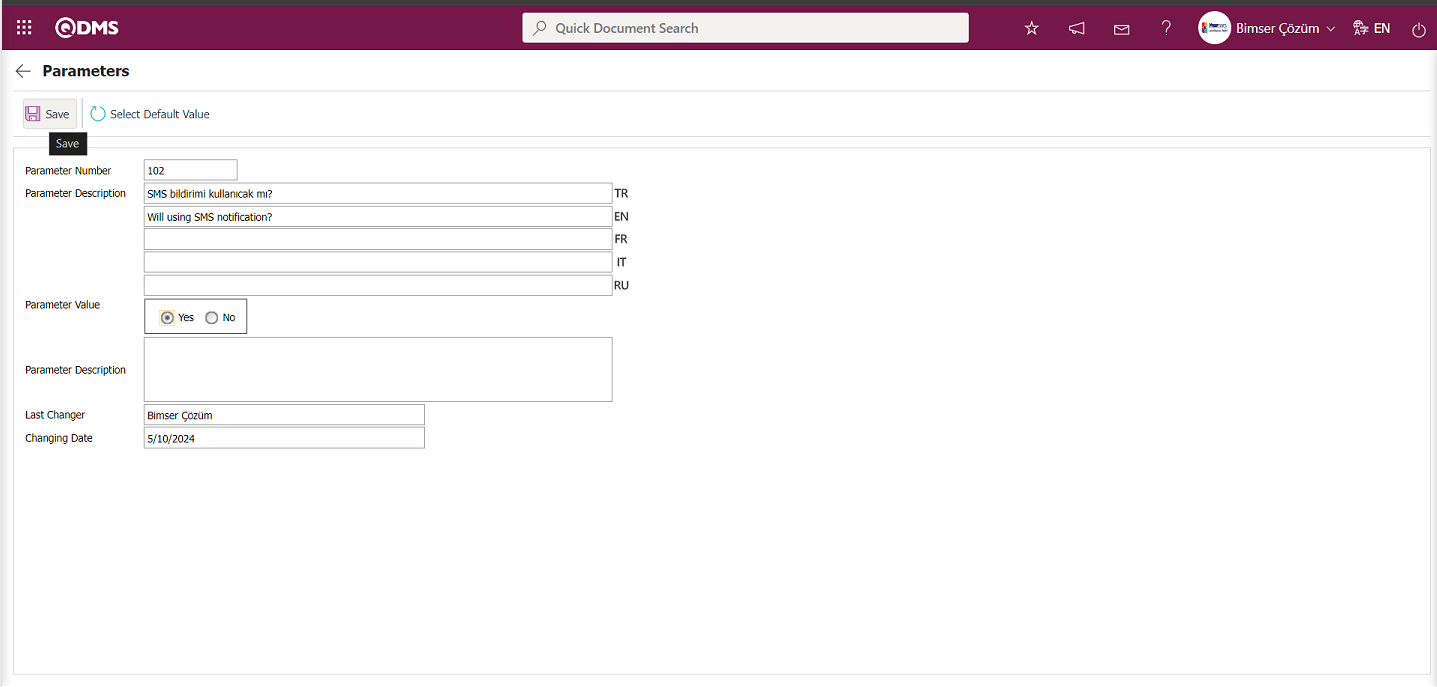
After selecting the parameter value ‘Yes’ on the Parameters screen, the  button on the top left of the screen is clicked and the parameter is activated.

After the parameter is activated, the check box related to the “Send SMS” field related to the use of SMS notification is displayed on the E-Mail Settings screen. By checking the relevant check box, SMS notification is used in E-Mail settings.
Select which step you want to send e-mail/message and click the button.
For example: Select the step “opening declaration.” and click the button.
The “opening declaration.” screen is displayed. The Roles section shows the role to which my e-mail and message notification will go.
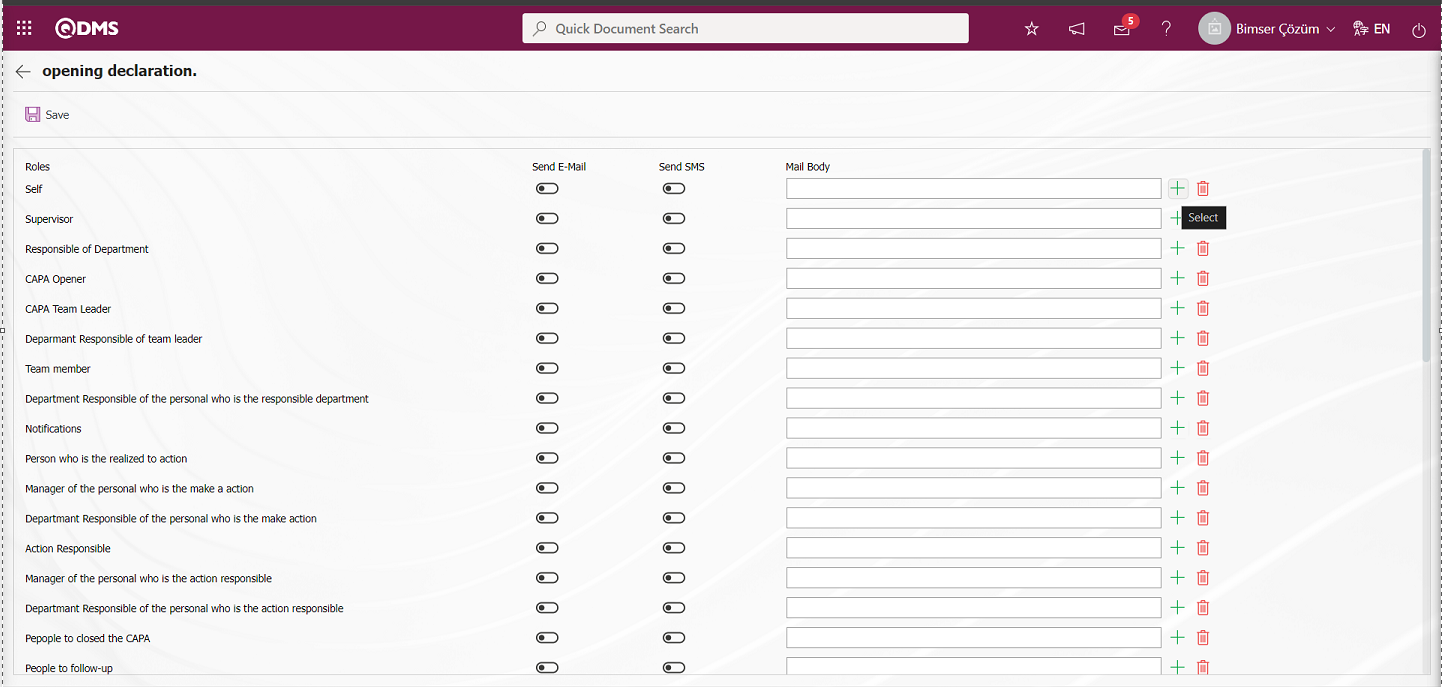
On the “opening declaration.” screen, click the  (Select) button and select the message body to be sent from the list of the message body defined in the system.
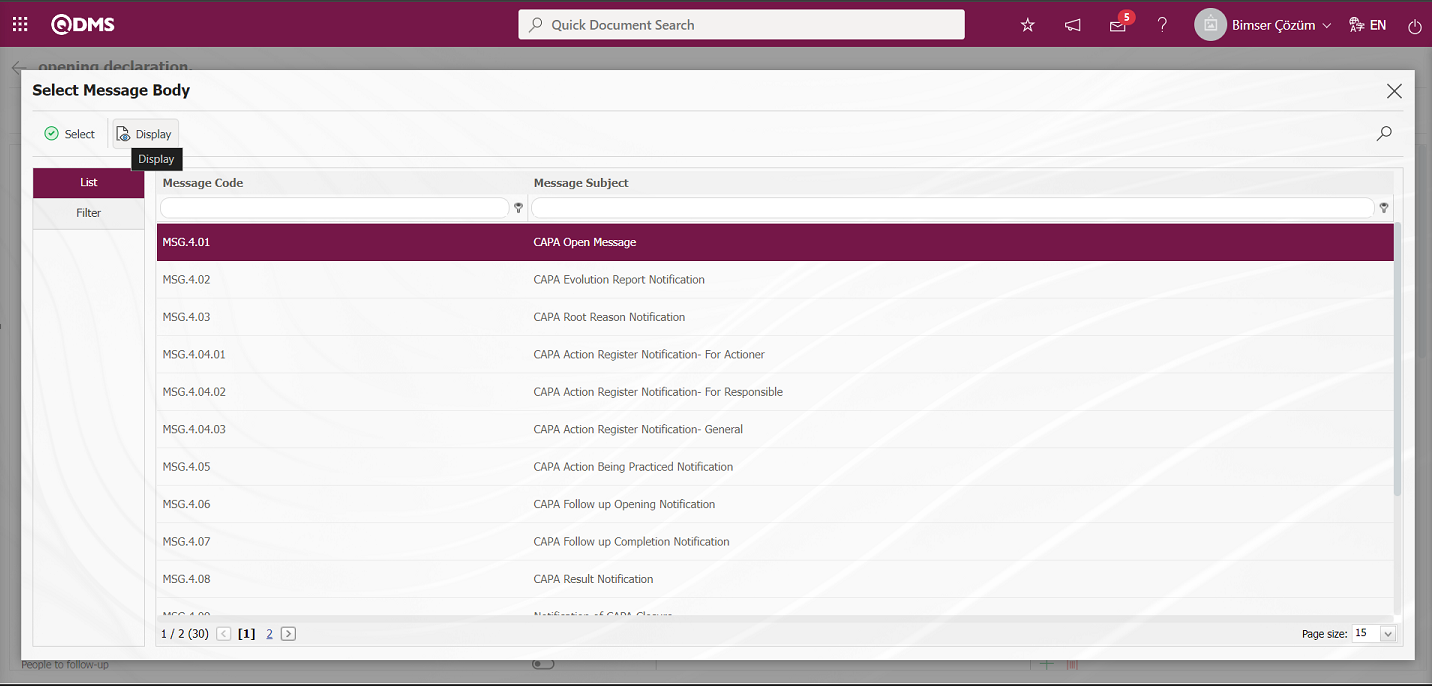
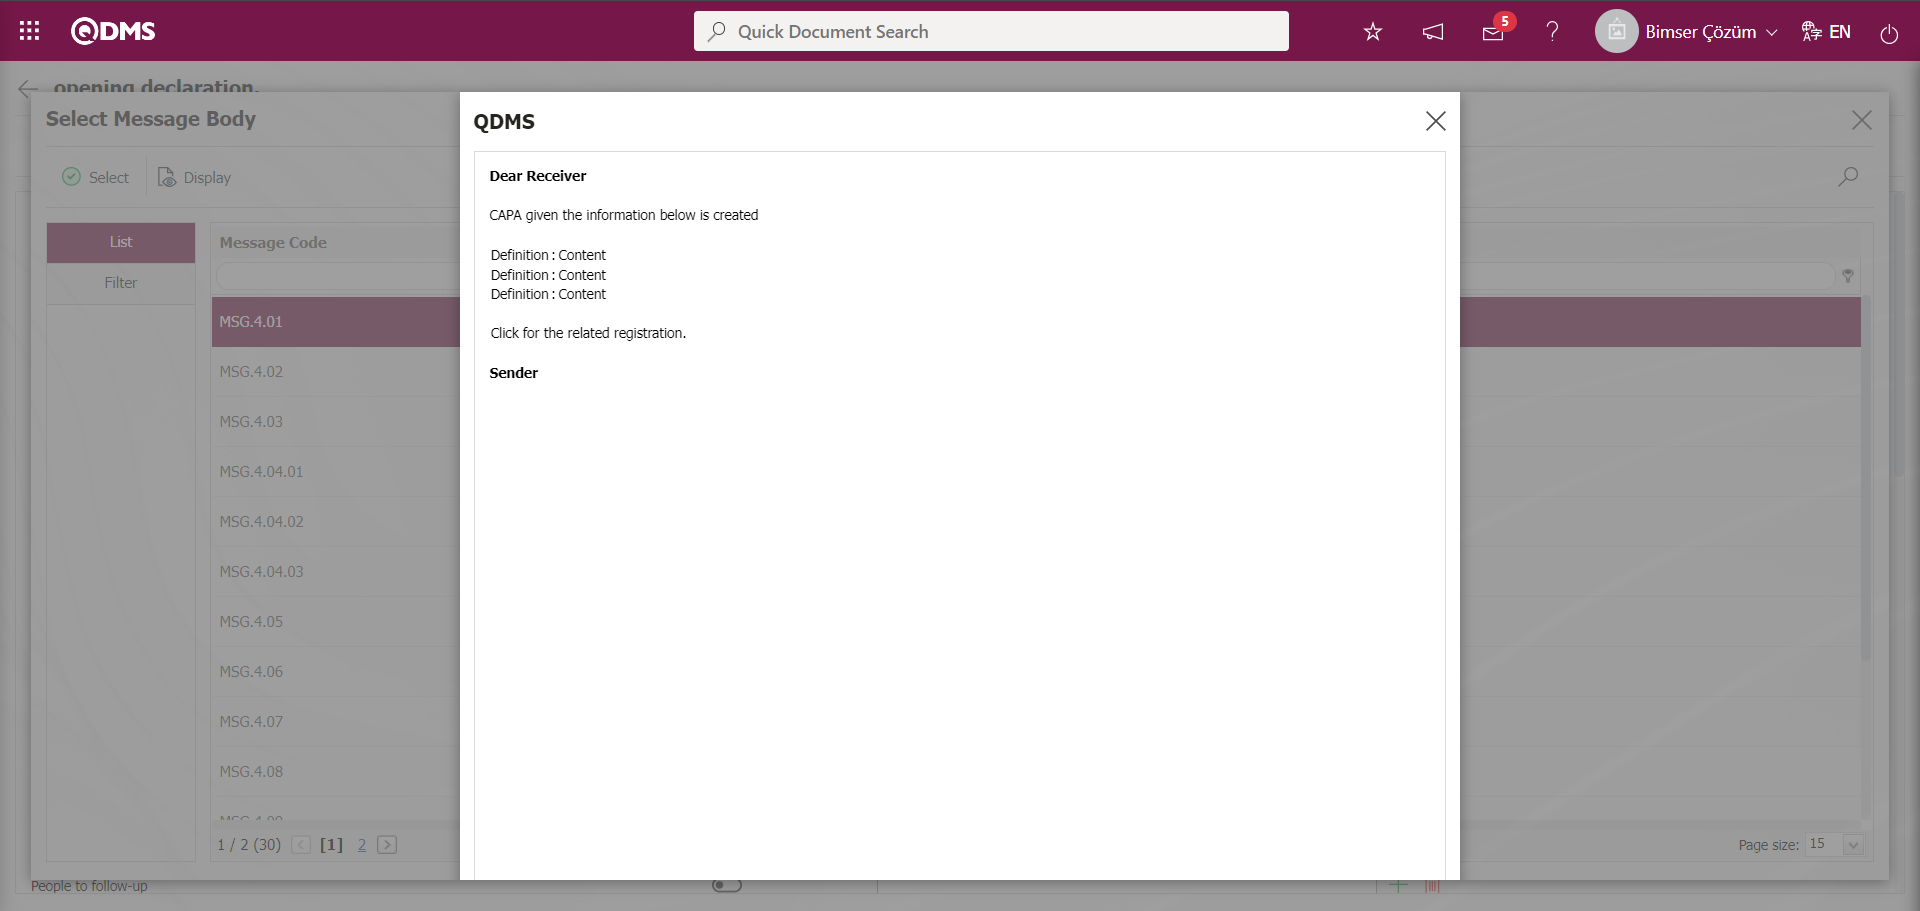
 button displays the content of the Message Body in detail.
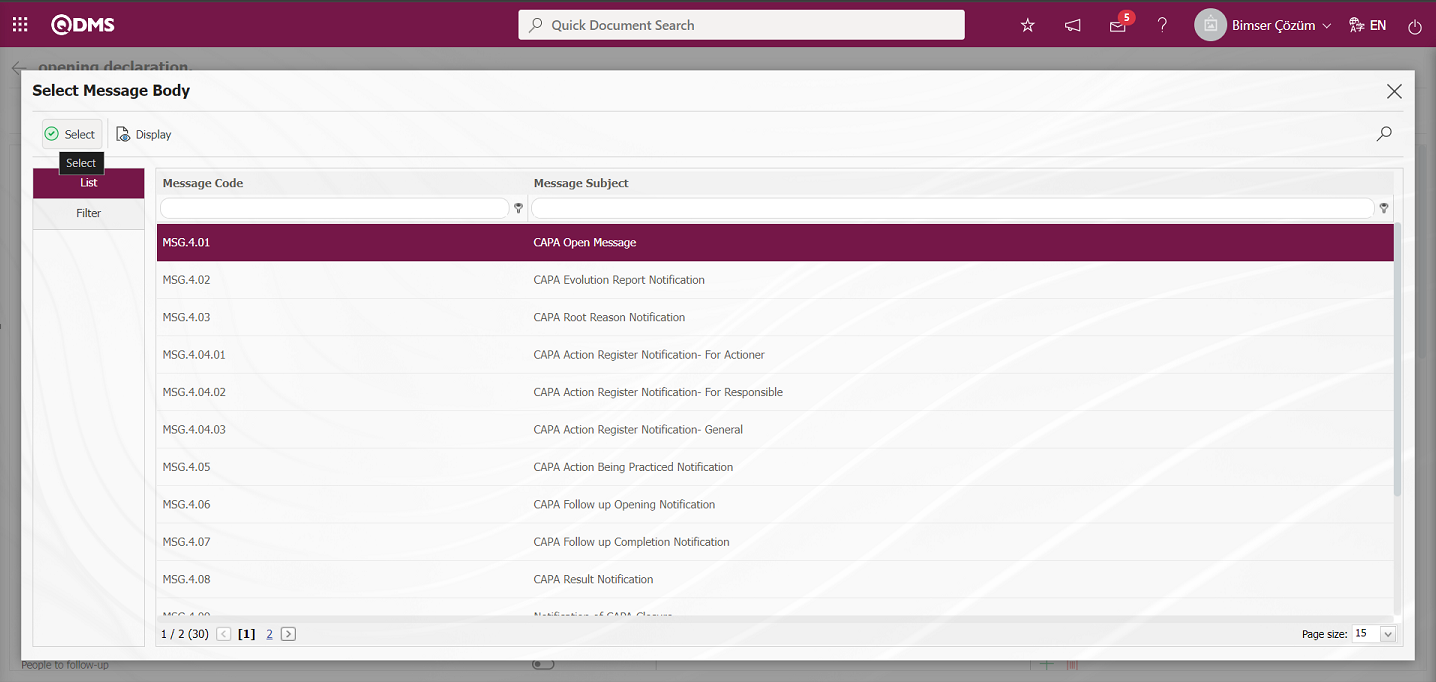
The Message Body selected in the Message Body list is selected by clicking the  button.
If you want to send an e-mail to whom, the “Send E-Mail / Send SMS” check box related to that role is checked. The mobile phone number of the person defined in the role must be defined on the personnel identification screen in order to send a message.
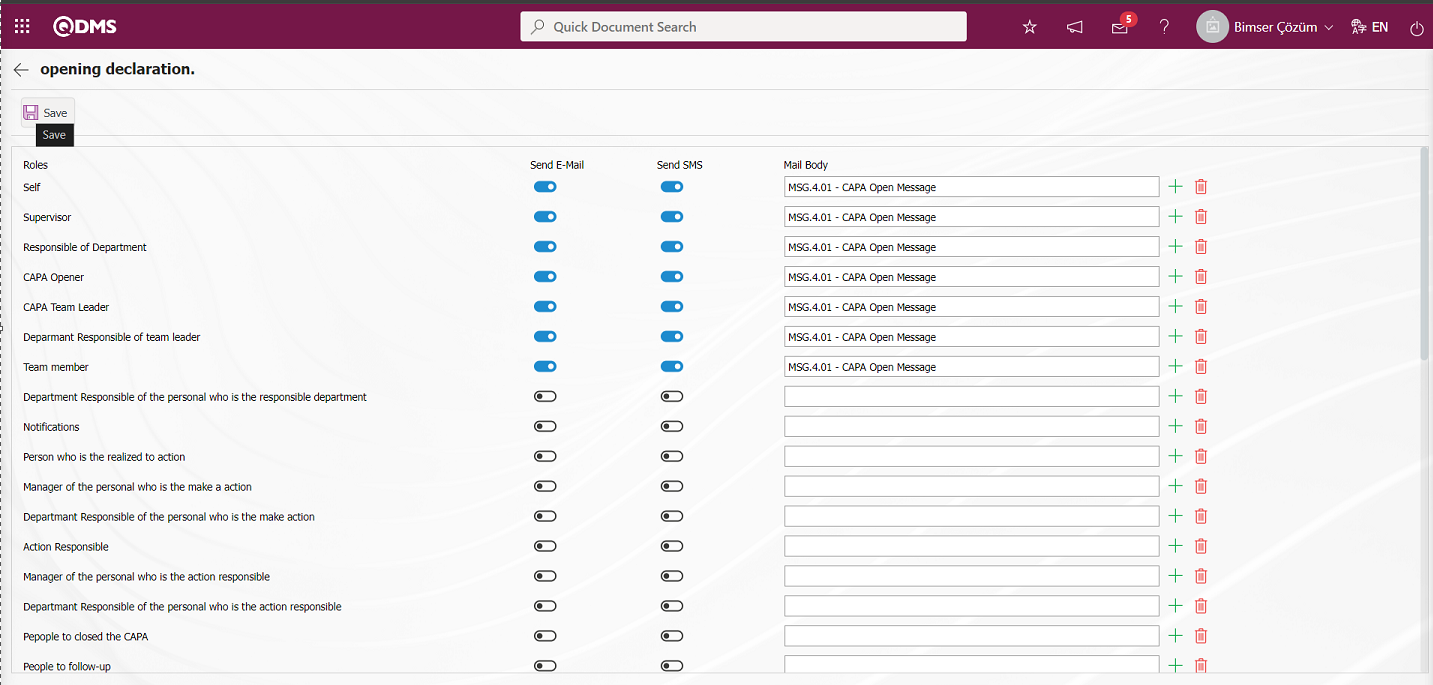
On the opening declaration** screen, after the “Send E-Mail / Send SMS” check box related to the roles to send e-mail is checked, the E-Mail Settings registration process is performed by clicking the button in the upper left corner of the screen.
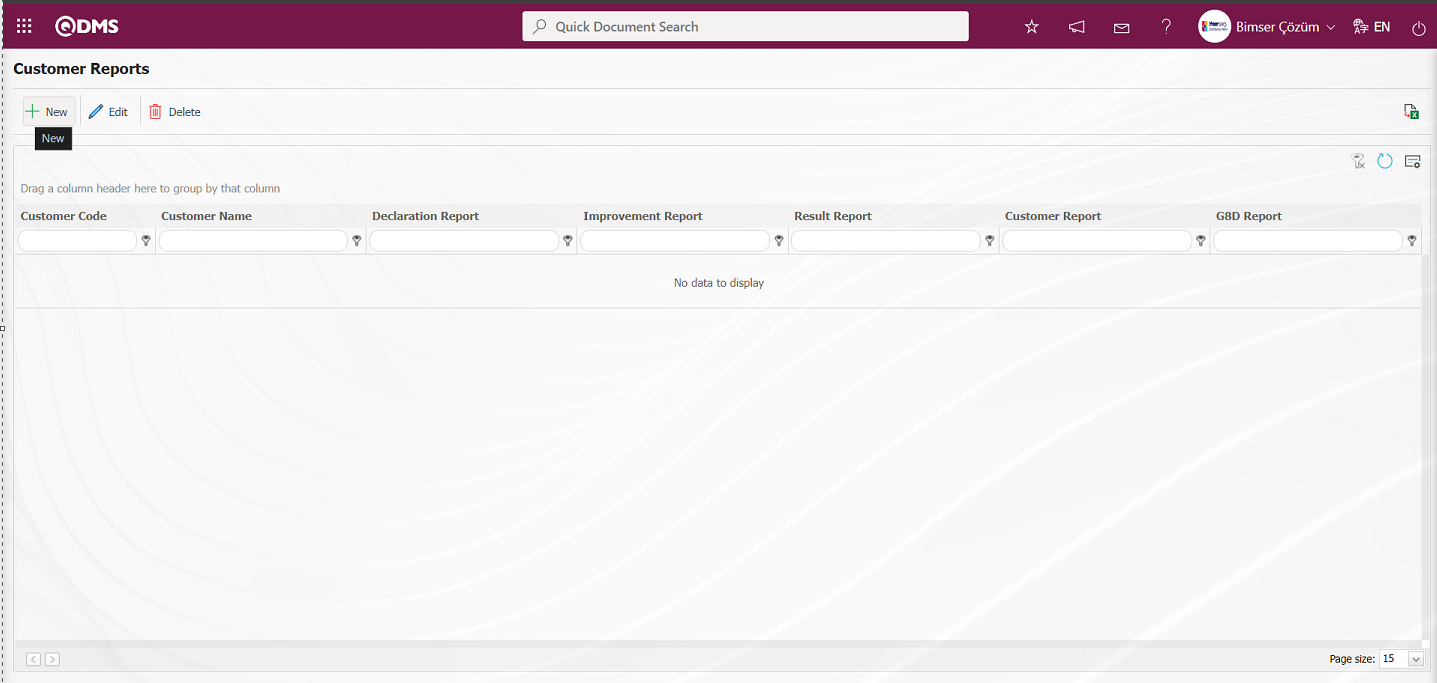
6.1.5. Customer Reports
Menu Name: System Infrastructure Definitions/ CAPA/ Customer Reports
This is the menu where customer report formats are defined in the CAPA Module. Notification, development, result, customer and G8D reports created separately for each customer are uploaded. The uploaded reports are sent to the customer's e-mail addresses. For the uploaded reports to be sent with the customer's e-mail addresses, the e-mail addresses of the customers must be defined on the Customer-Supplier Definition screen.
With the help of the buttons on the screen;
: Define a new customer report format.
: The selected customer report format information in the list is updated.
: The customer report format information selected in the list can be deleted.
: The data remaining in the filter fields in the grid where the search criteria search operation on the menu screens is performed is cleared.
: The menu screen is restored to its default settings.
: User-based designing of the menu screen is done with the show-hide feature, that is, the hiding feature of the fields corresponding to the columns on the menu screens.
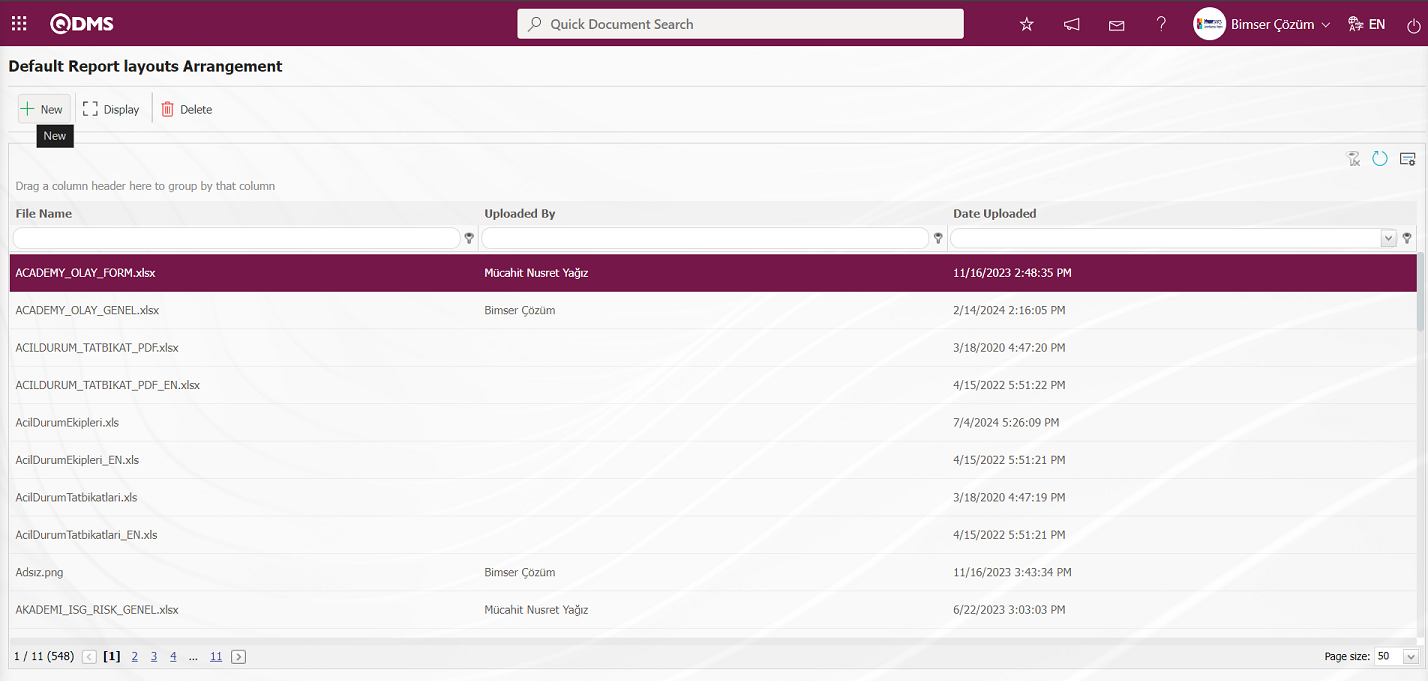
For this, first of all, all report formats that we will create should be defined in the System Infrastructure Definitions/BSID/Configuration Settings/Default Report Layouts Arrangement menu.
With the help of the buttons on the screen;
 : A new report format template is uploaded to the system.
 : The report format template selected in the list is displayed and downloaded.
 : The report format template selected in the list is deleted.
: The data remaining in the filter fields in the grid where the search criteria search operation on the menu screens is performed is cleared.
: The menu screen is restored to its default settings.
: User-based designing of the menu screen is done with the show-hide feature, that is, the hiding feature of the fields corresponding to the columns on the menu screens.
On the Default Report Layouts Arrangement screen, click the button to add a new report format to the system. Click the Browse button on the File Upload screen.

The relevant report is selected and uploaded to the Edit Report Formats menu.

On the Default Report Layouts Arrangement screen, notification, progress, result, customer and G8D reports created separately for the customer are loaded.
Click on the Customer Report Formats menu.

To add a new Customer Reports on the Customer Reports screen, click the button in the upper left corner of the screen and the Customer Reports \New Record screen is displayed.
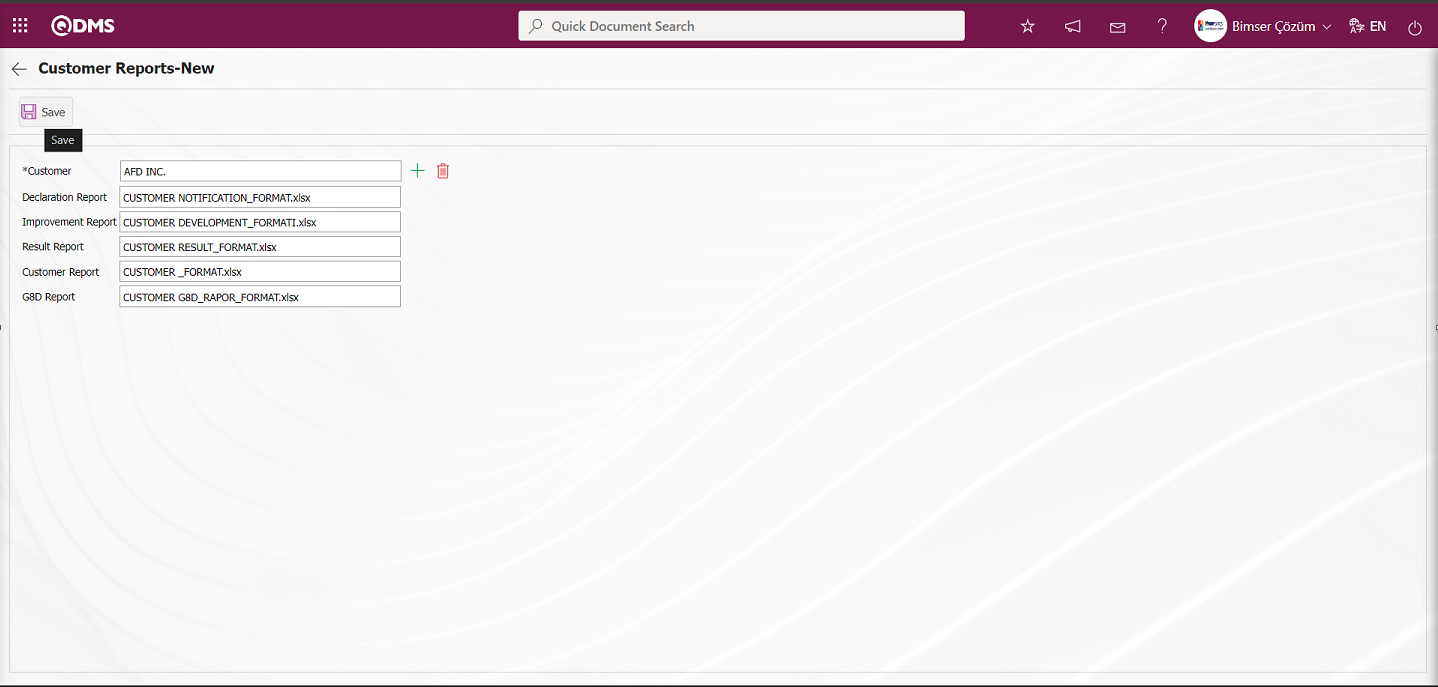
Define the relevant fields on the screen that opens:
Customer: It is the field where the Customer information is selected from the Customer list defined in the system opened by clicking the  (Select) button on the Customer Reports-New Record screen.
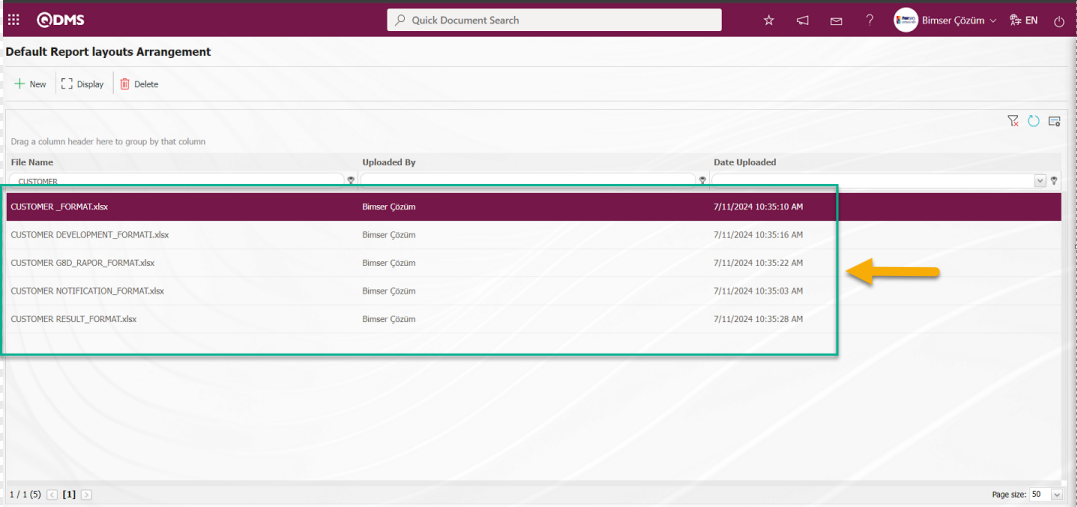
Declaration Report: This is the field where the name and extension of the Declaration Report on the Customer Reports-New Record screen is pasted after copying it in the System Infrastructure Definitions/BSID/ Configuration Settings/ Default Report Layouts Arrangement menu.
Improvement Report: This is the area where the name and extension of the Improvement Report on the Customer Reports-New Record screen are pasted after copying in the System Infrastructure Definitions /BSID/ Configuration Settings/ Default Report Layouts Arrangement menu.
Result Report: This is the field where the name and extension of the Result Report on the Customer Reports-New Record screen are pasted after copying in the System Infrastructure Definitions /BSID/ Configuration Settings/ Default Report Layouts Arrangement menu.
Customer Report: This is the area where the name and extension of the Customer Report on the Customer Reports-New Record screen are pasted after copying in the System Infrastructure Definitions /BSID/ Configuration Settings/ Default Report Layouts Arrangement menu.
G8D Report: Customer Reports-New Record is the area where the name and extension of the G8D Report are pasted after copying in the System Infrastructure Definitions /BSID/ Configuration Settings/ Default Report Layouts Arrangement menu.
On the System Infrastructure Definitions /BSID/ Configuration Settings/ Default Report Layouts Arrangement screen, the notification, development, result, Customer and G8D reports created separately for the Customer are uploaded. After selecting the customer from the customer list, the name and extension of the report formats are pasted into the relevant fields by right-click/copy-paste method. After entering the relevant information in the required fields on the Customer Reports - New Record screen, the Customer Report formats are registered by clicking the button in the upper left corner of the screen.

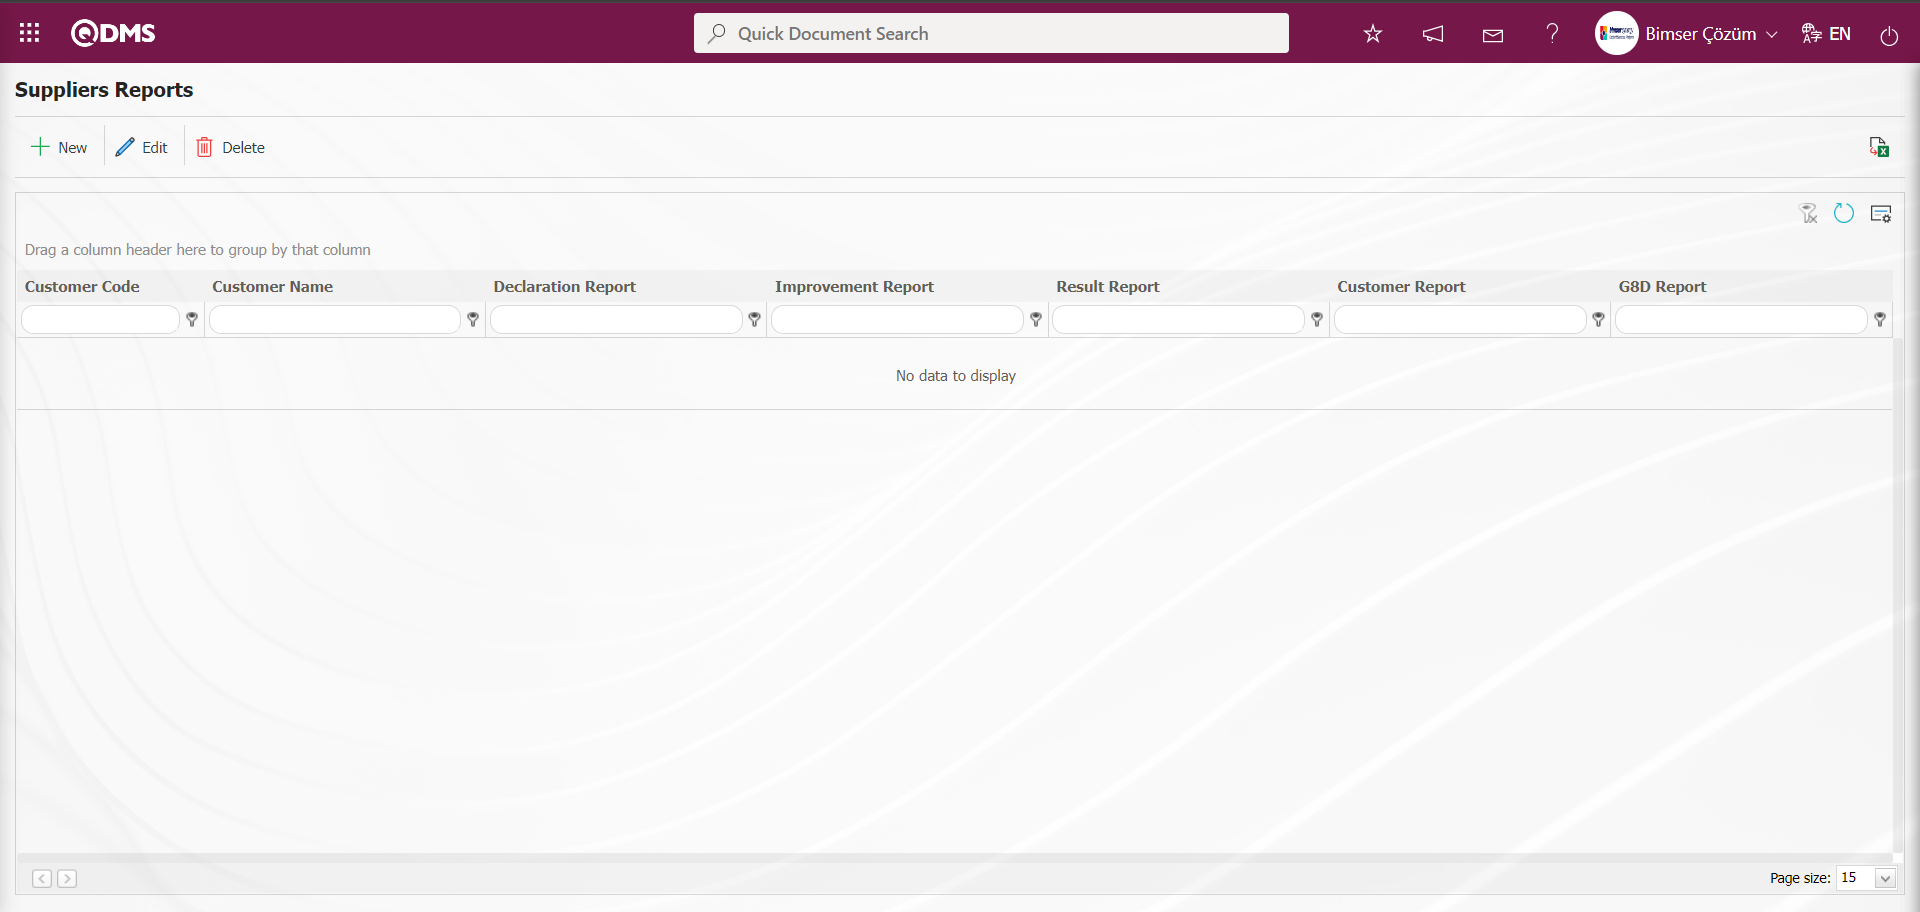
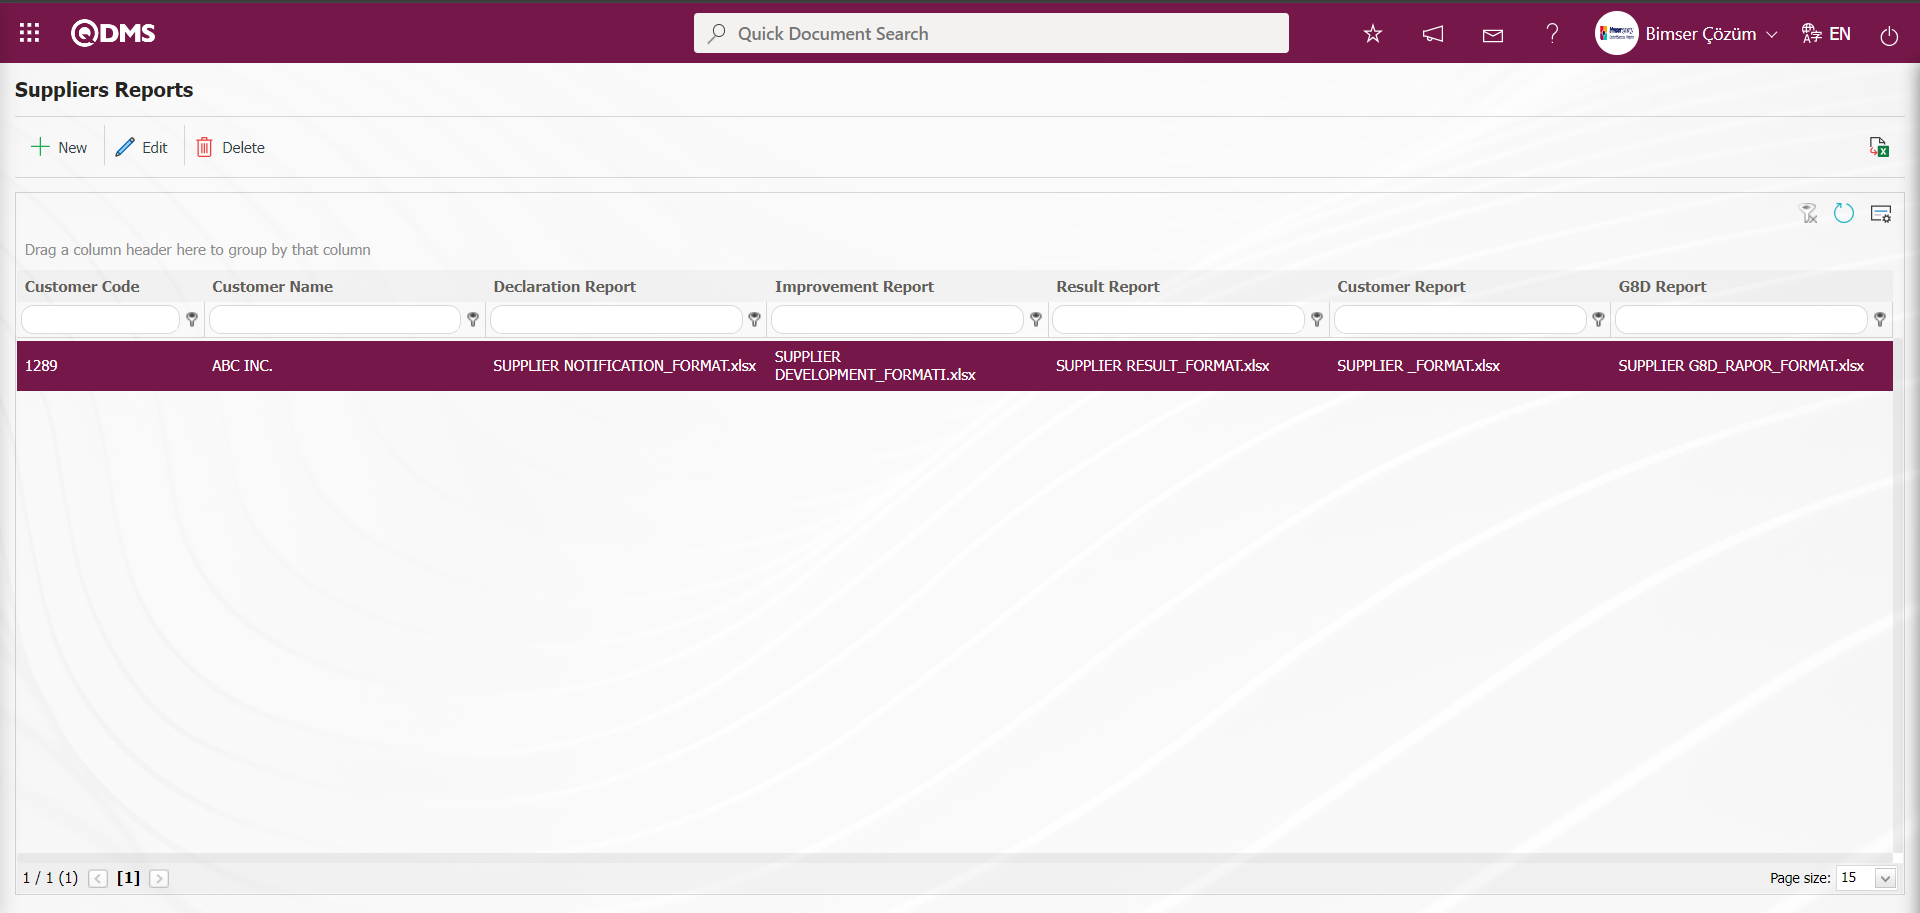
6.1.6. Suppliers Reports
Menu Name: System Infrastructure Definitions/ CAPA/ Suppliers Reports
This is the menu where supplier report formats are defined in the CAPA Module. Notification, development, result, customer and G8D reports created separately for each supplier are uploaded. The uploaded reports are transmitted via the supplier's e-mail addresses. For the uploaded reports to be sent with the supplier's e-mail addresses, the supplier's e-mail addresses must be defined on the Customer-Supplier identification screen.
With the help of the buttons on the screen;
: Define a new supplier report format.
: Selected supplier report format information in the list is updated.
: The supplier report format information selected in the list can be deleted.
: The data remaining in the filter fields in the grid where the search criteria search operation on the menu screens is performed is cleared.
: The menu screen is restored to its default settings.
: User-based designing of the menu screen is done with the show-hide feature, that is, the hiding feature of the fields corresponding to the columns on the menu screens.
For this, first of all, all report formats that we will create should be defined in the System Infrastructure Definitions/BSID/Configuration Settings/ Default Report Layouts Arrangement menu.![A screenshot of a computer
Description automatically generated]ref19
With the help of the buttons on the screen;
: A new report format template is uploaded to the system.
: The report format template selected in the list is displayed and downloaded.
: The report format template selected in the list is deleted.
: The data remaining in the filter fields in the grid where the search criteria search operation on the menu screens is performed is cleared.
: The menu screen is restored to its default settings.
: User-based designing of the menu screen is done with the show-hide feature, that is, the hiding feature of the fields corresponding to the columns on the menu screens.
On the Default Report Layouts Arrangement screen, click the button to add a new report format to the system. Click the Browse button on the File Upload screen.
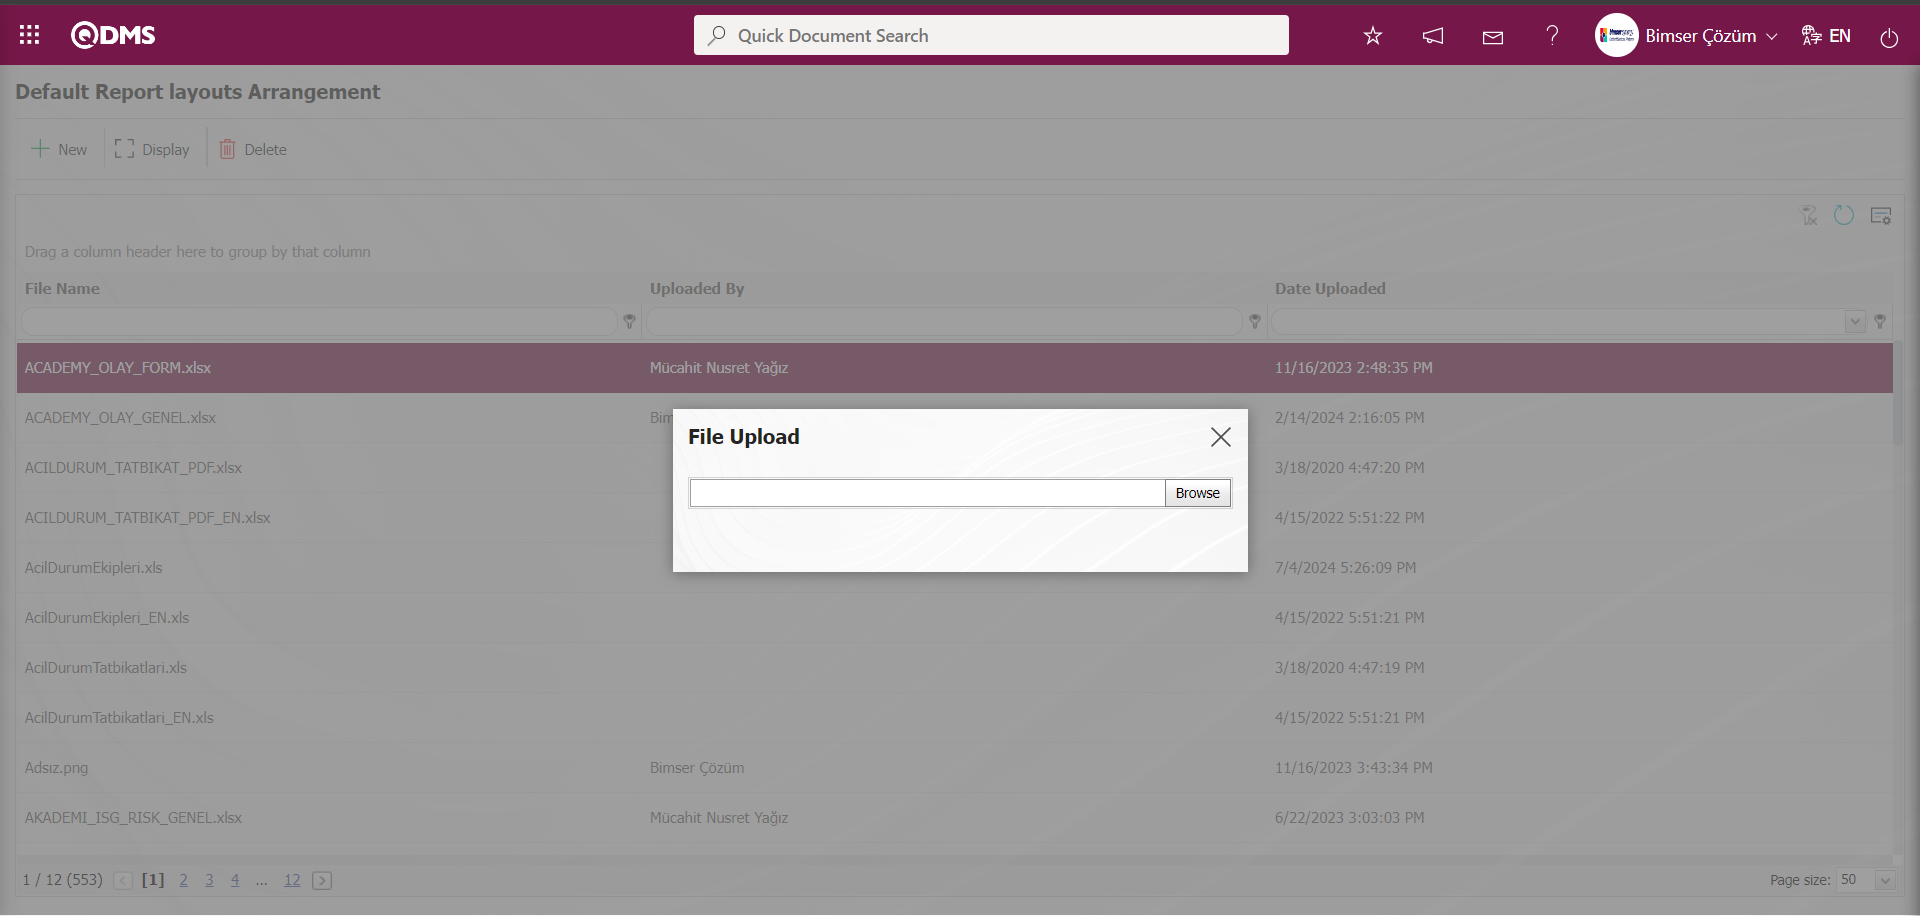
The relevant report is selected and uploaded to the Edit Report Formats menu.
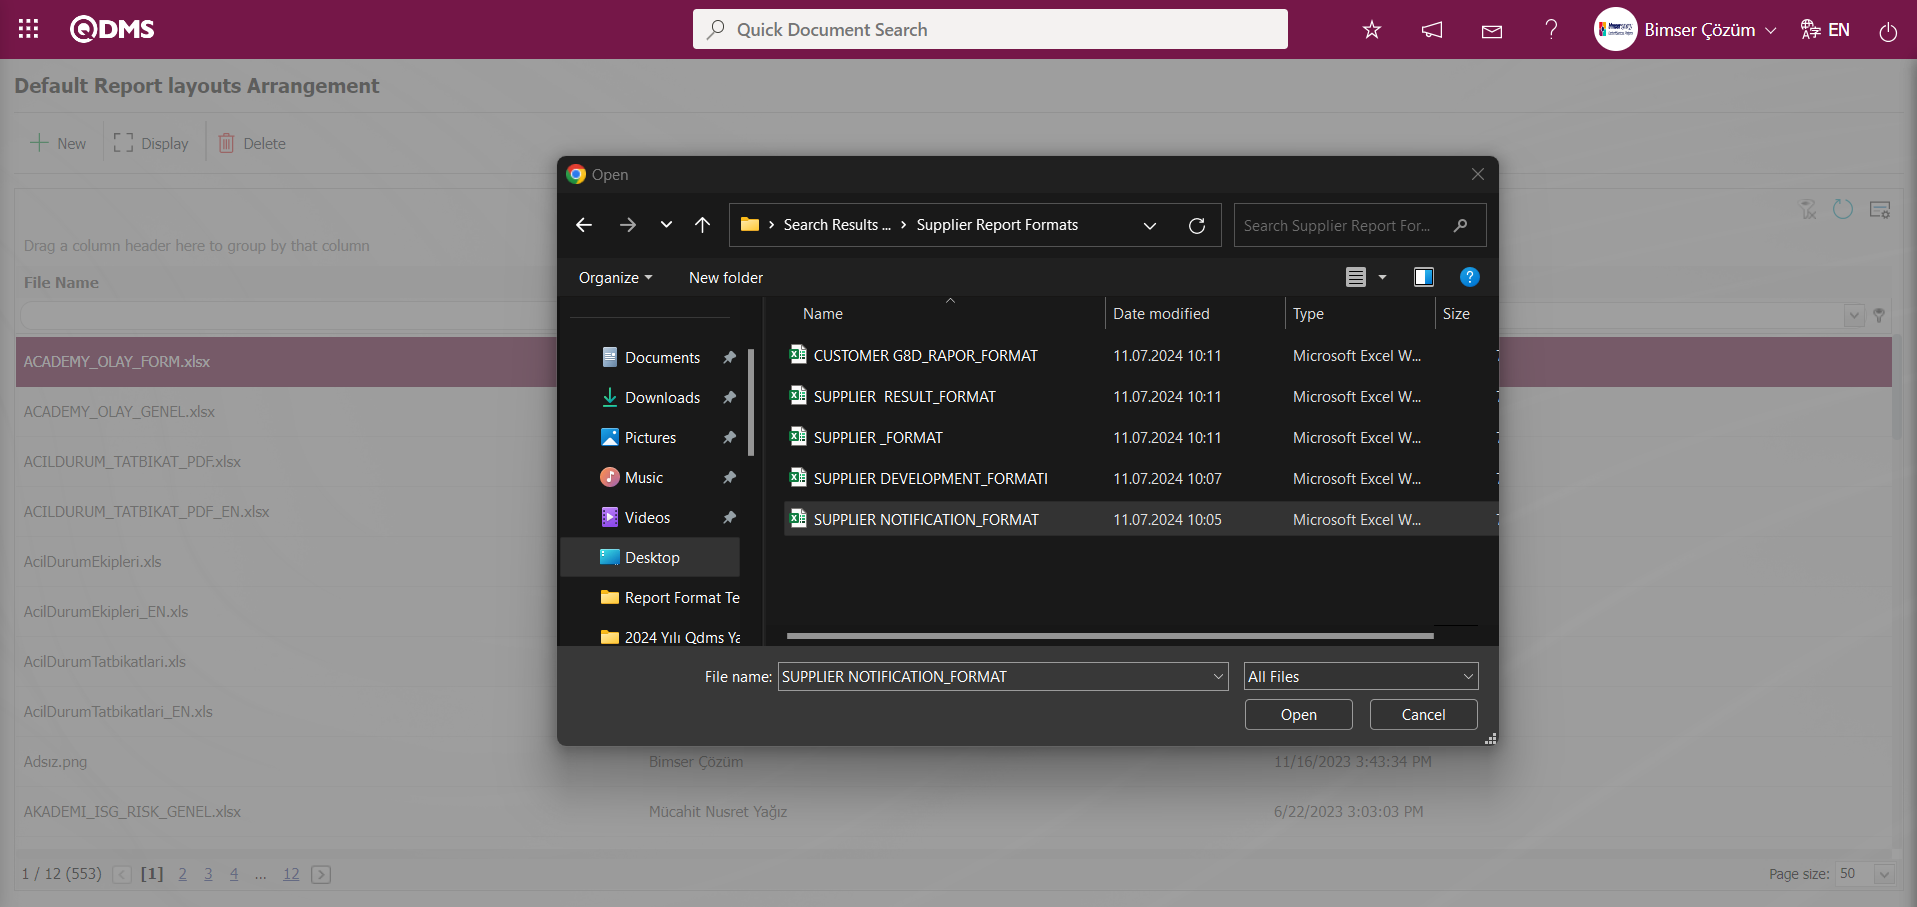
On the Default Report Layouts Arrangement screen, notification, progress, result, customer and G8D reports created separately for the supplier are loaded.
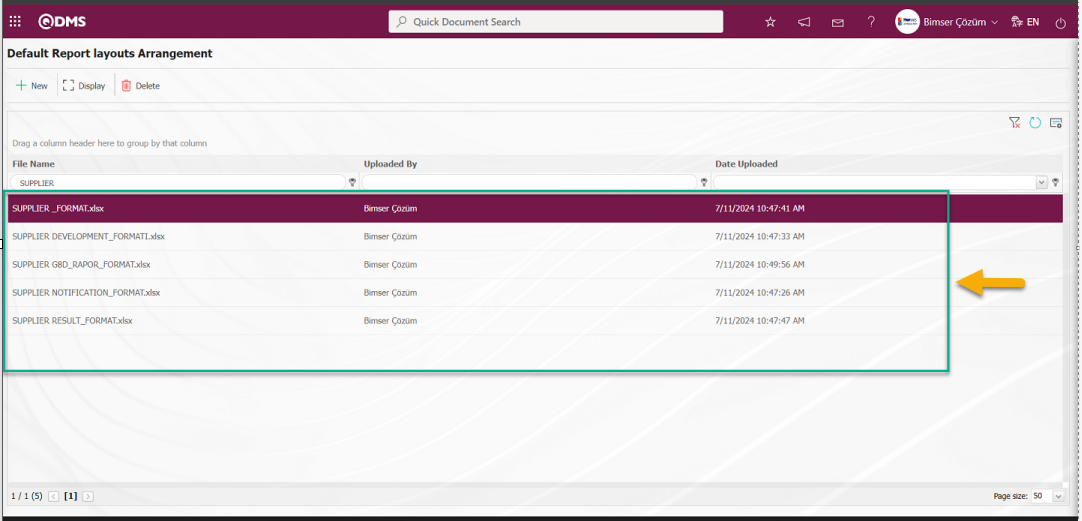
Click on the Supplier Reports menu.

To add a new Supplier Report format on the Supplier Reports screen, click the button in the upper left corner of the screen to display the Supplier Reports \New Record screen.
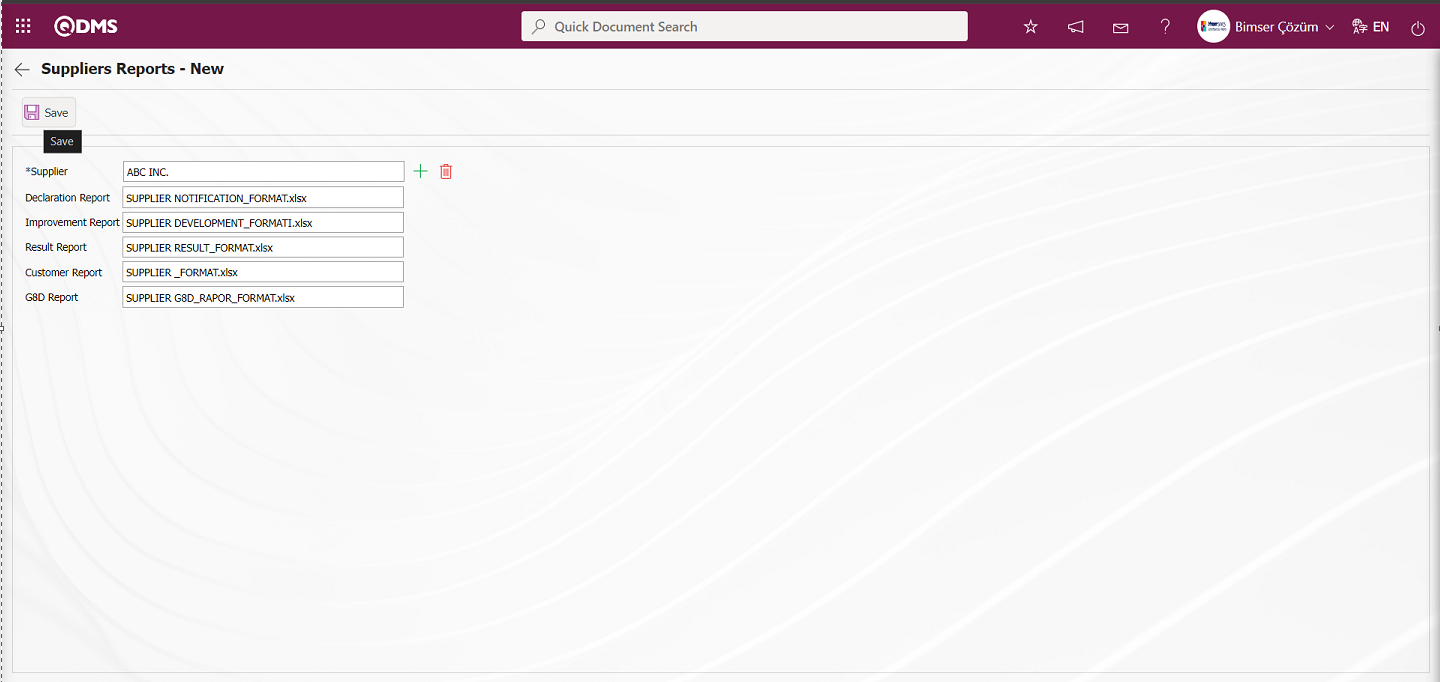
Define the relevant fields on the screen that opens:
Supplier: This is the field where the Supplier information is selected from the Supplier list defined in the system that opens by clicking the (Select) button on the Suppliers Reports -New Record screen.
Declaration Report: This is the field where the name and extension of the Declaration Report is pasted after copying in the System Infrastructure Definitions/BSID/ Configuration Settings/ Default Report Layouts Arrangement menu on the Suppliers Reports -New Record screen.
Improvement Report: This is the area where the name and extension of the Improvement Report on theSuppliers Reports -New Record screen are pasted after copying in the System Infrastructure Definitions / BSID / Configuration Settings / Default Report Layouts Arrangement menu.
Result Report: This is the area where the name and extension of the Result Report on the Suppliers Reports -New Record screen are pasted after copying in the System Infrastructure Definitions / BSID/ / Configuration Settings / Default Report Layouts Arrangement menu.
Customer Report: Supplier Report Formats - This is the area where the name and extension of the Customer Report is pasted after copying in the System Infrastructure Definitions / BSID / Configuration Settings / Default Report Layouts Arrangement menu on the New Record screen.
G8D Report: This is the area where the name and extension of the G8D Report is pasted after copying in the System Infrastructure Definitions /BSID/ Configuration Settings/ Report Layouts Arrangement menu on the Suppliers Reports -New Record screen.
On the System Infrastructure Definitions / BSID / Configuration Settings / Report Layouts Arrangement screen, the notification, development, result, Customer and G8D reports created separately for the Supplier are uploaded. After selecting the Supplier from the Supplier list, the name and extension of the report formats are pasted into the relevant fields by right-click / copy-paste method.
Suppliers Reports** - After entering the necessary information in the required fields on the New Record screen, the Supplier Report formats are registered by clicking the button in the upper left corner of the screen.
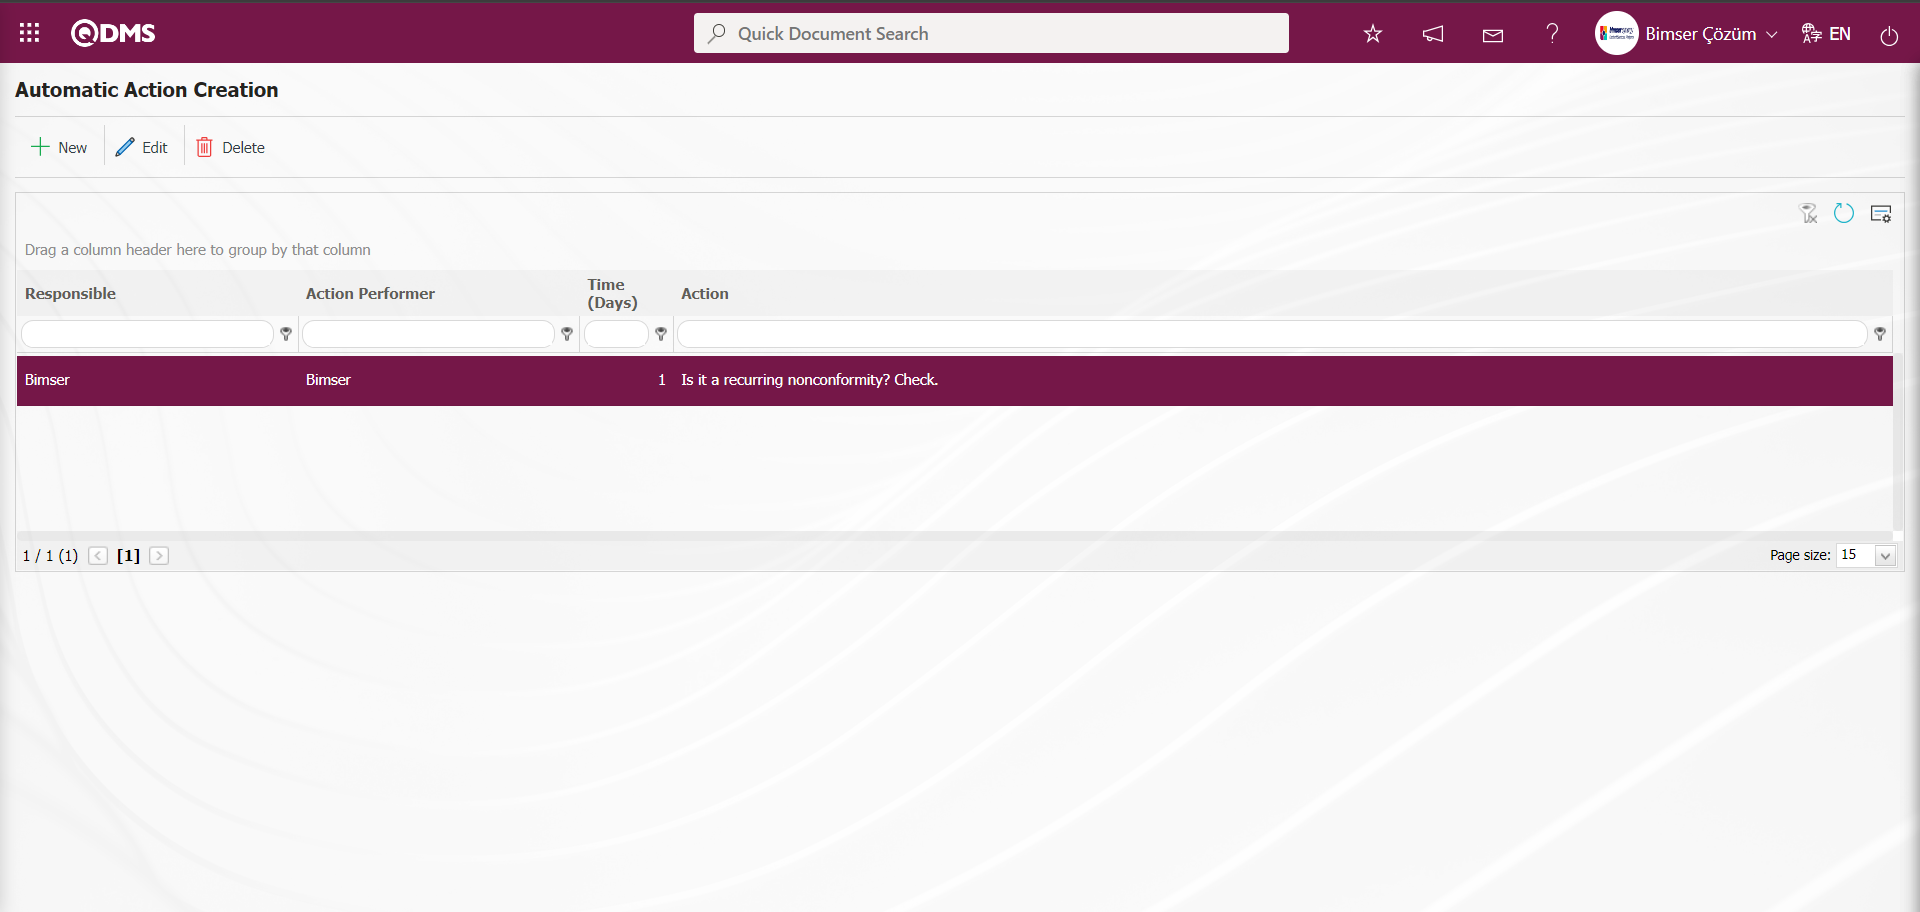
6.1.7.Automatic Action Creation
Menu Name: System Infrastructure Definitions/ CAPA/ Automatic Action Creation
This is the menu where the Automatic Action definition process takes place in the CAPA Module. The purpose of using this menu; If there is an action that the company takes classically / definitely in every CAPA and if this action is done by a certain role, the automatic action is defined and the automatic opening of this specified action after root causes is provided. According to parameter 107 in the CAPA Module parameters, it can be set to not define the automatic action, to define it depending on the user or to always define it. When the parameter value is entered as “0”, automatic action definition is not performed.

When “1” is entered in the parameter value CAPA Activities - New Record In the Progress Report tab on the screen, the “Start Auto Actions” field and check box are displayed. If the user wishes, the user can start the automatic action definition process by checking the check box in the relevant field.
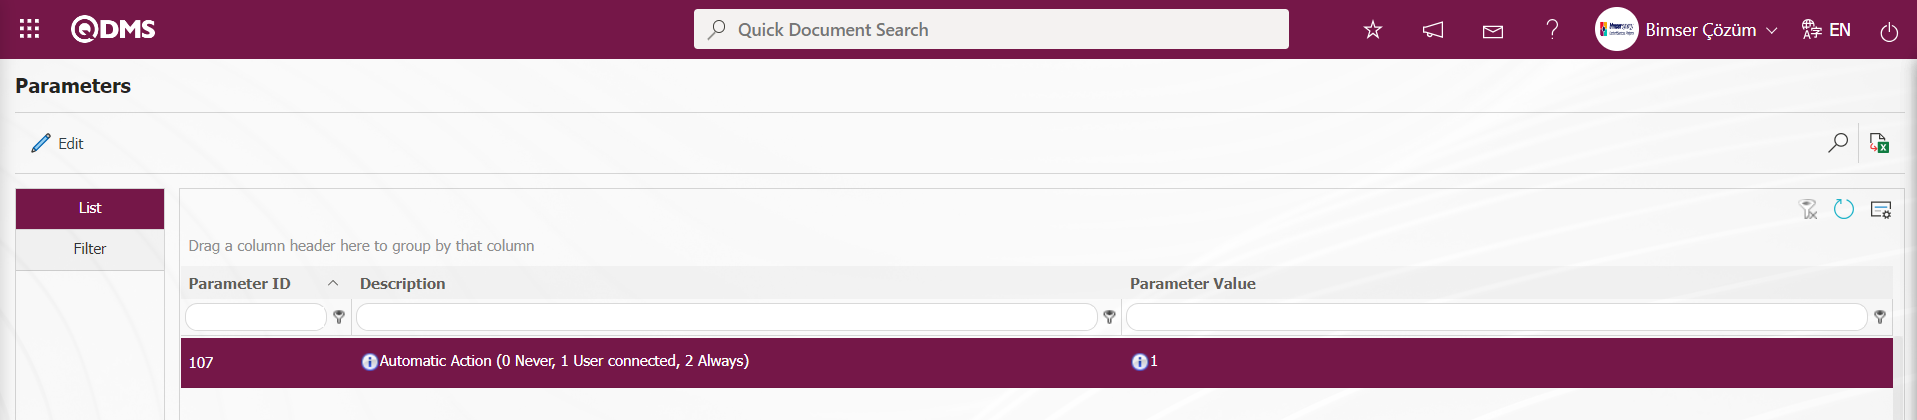 When the parameter value is “2”, if automatic actions are defined in the system, the system automatically opens the actions.

Click on the Automatic Action Creation menu.
With the help of the buttons on the screen;
: A new Automatic Action is defined.
: Any correction, change or update is made about the Automatic Action information selected in the list.
: The Auto Action information selected in the list is deleted.
: The data remaining in the filter fields in the grid where the search criteria search operation on the menu screens is performed is cleared.
: The menu screen is restored to its default settings.
: User-based designing of the menu screen is done with the show-hide feature, that is, the hiding feature of the fields corresponding to the columns on the menu screens.
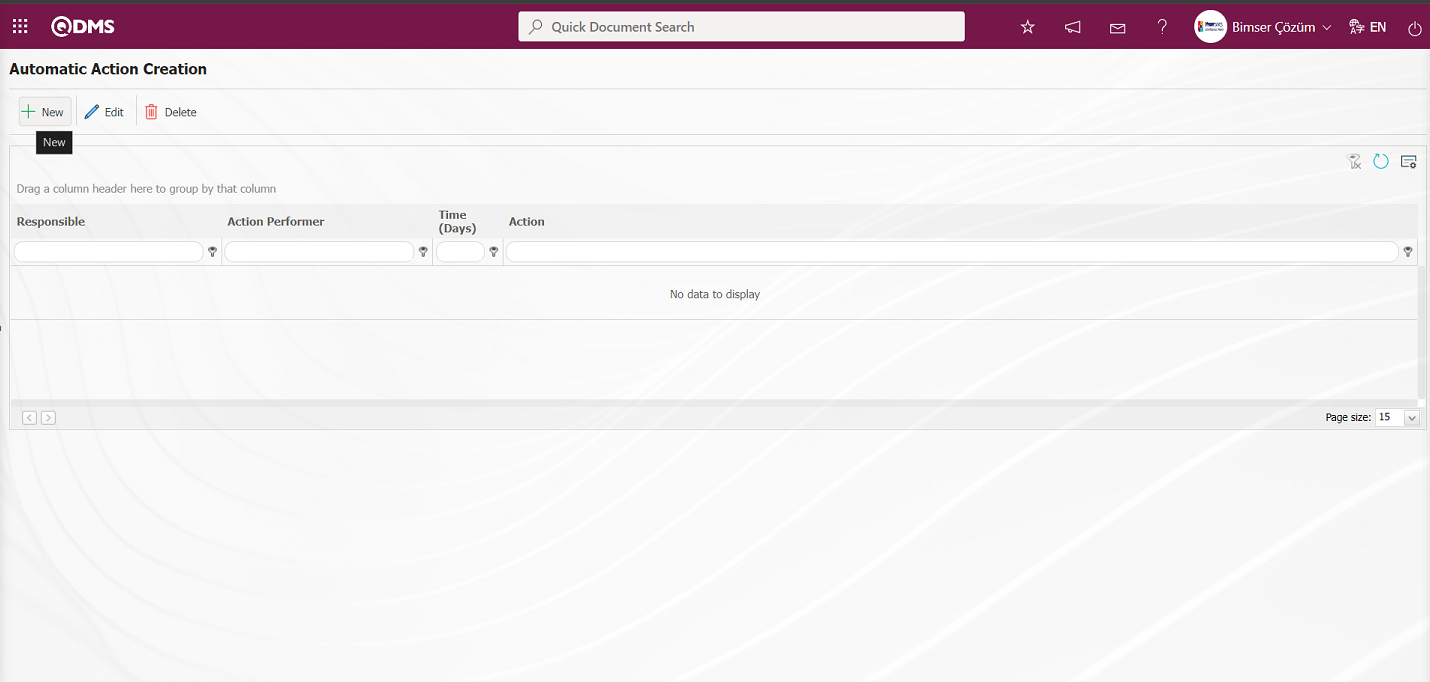
To add a new Automatic Action to theAutomatic Action Creation screen, click the button at the top left corner of the screen to display the Automatic Action Creation - New Record screen.

Related fields are defined on the screen that opens:
Action Type: This is the field where Action Type information can be selected. Corrective, Remedial and Preventive action types are selected.
Responsible: It is the field where the responsible person information can be selected from the list of Role definitions defined in the system opened by clicking the (Select) button in the responsible person field. The list of role definitions defined for the Corrective and Preventive Actions Module is displayed in the System Infrastructure Definitions/BSID/Configuration Settings/Role Definition menu and the appropriate role is selected. If desired, a new role is defined and selected for the Corrective and Preventive Actions Module in the Role Definition menu.
Action Performer: This is the field where the Person to Perform the Work can be selected from the list of Role definitions defined in the system opened by clicking the (Select) button in the responsible person field. The list of role definitions defined for the Corrective and Preventive Actions Module is displayed in the System Infrastructure Definitions/BSID/Configuration Settings/Role Definition menu and the appropriate role is selected. If desired, a new role is defined and selected for the Corrective and Preventive Actions Module in the Role Definition menu.
Action: This is the field where action definition information is entered.
Time (Day): This is the field where the duration of the Action to be opened automatically is entered in days.
Action Type Corrector is selected on the screen that opens. Responsible and the person who will do the work is selected from the list of Role definitions defined in the system. Action definition and duration in days are entered.After filling in the required fields on the Automatic Action Creation - New Record screen, click on the  button in the upper left corner to register the Actions to be opened automatically.
Automatic actions are defined by performing the same steps on the Automatic Action Definition screen.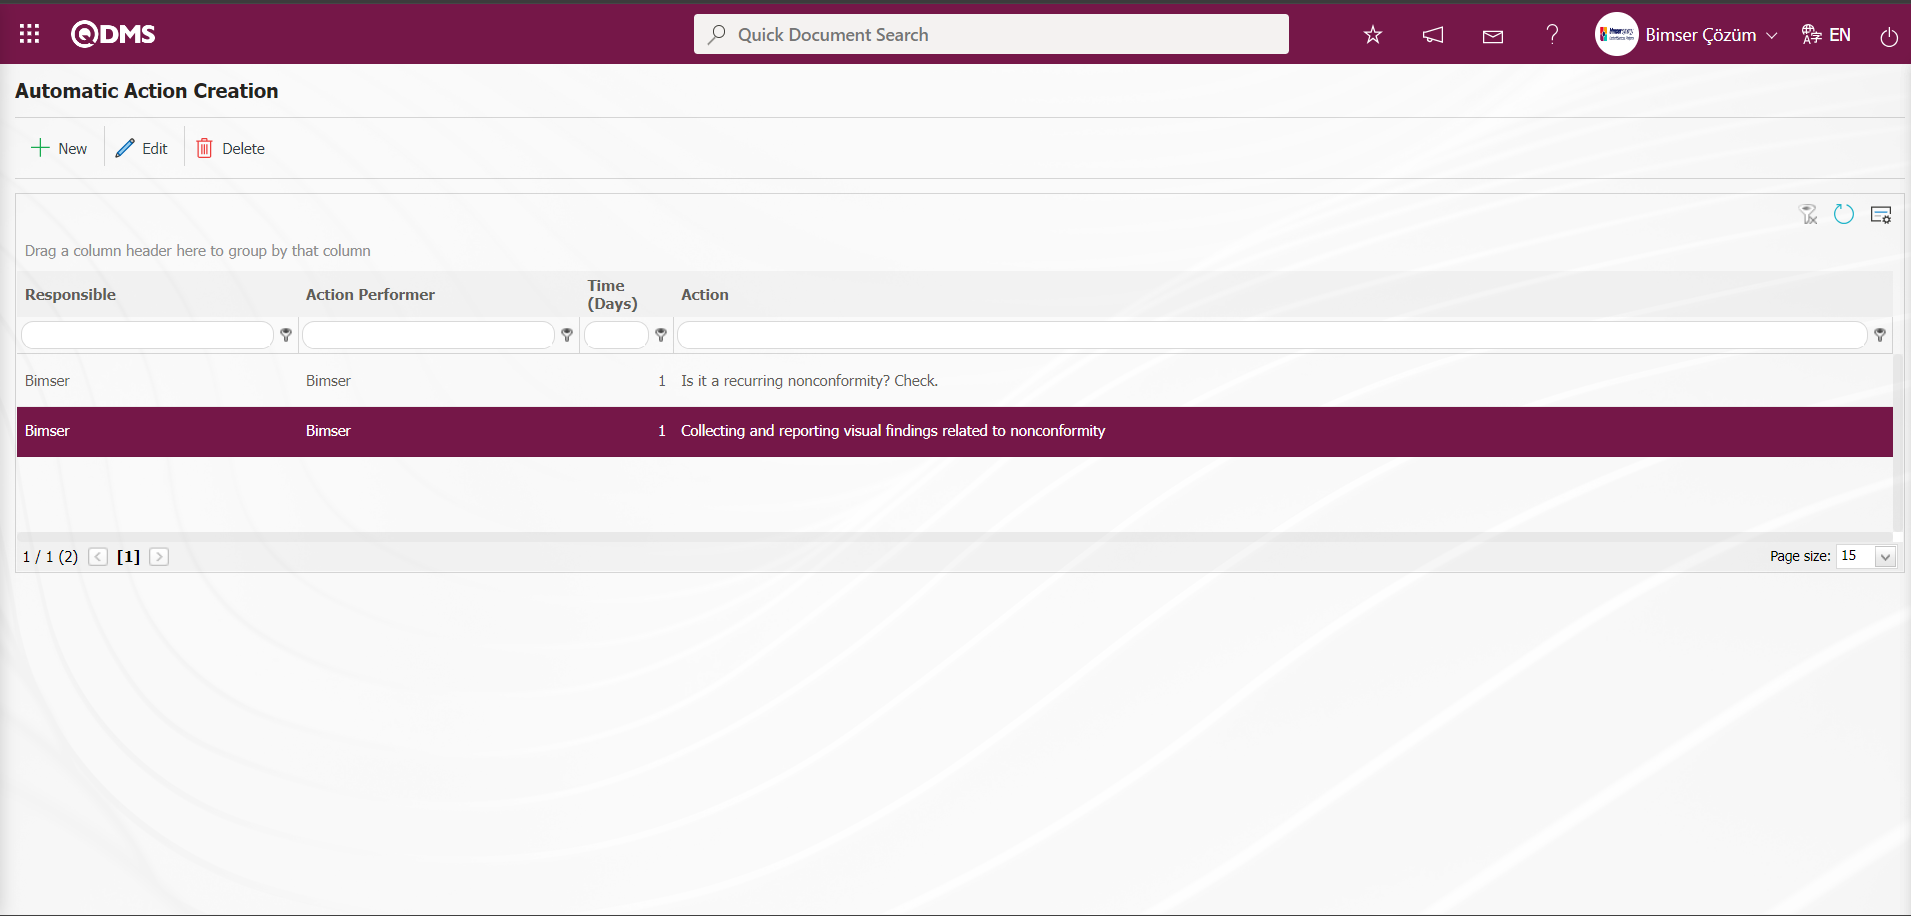
When the value of parameter 107 is “0”;
Even if automatic action is defined in the Automatic Action Definition menu, automatic action is never opened when a CAPA record is defined.
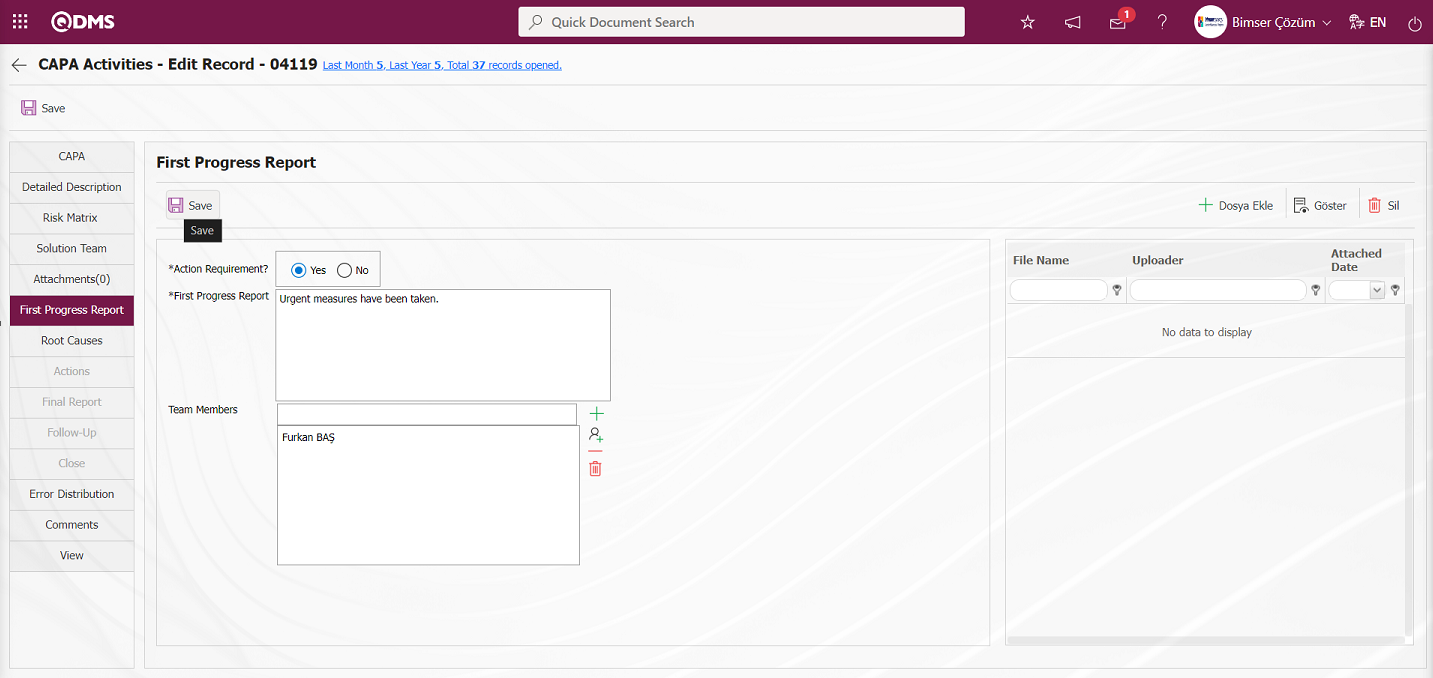
When the value of parameter 107 is “1”;
![A screenshot of a computer
Description automatically generated]ref24
A new CAPA record is opened on the CAPA Activities - New Record** screen. This CAPA record is assigned to my Pending Jobs as a “CAPA list of First Progress Report to be written” job.
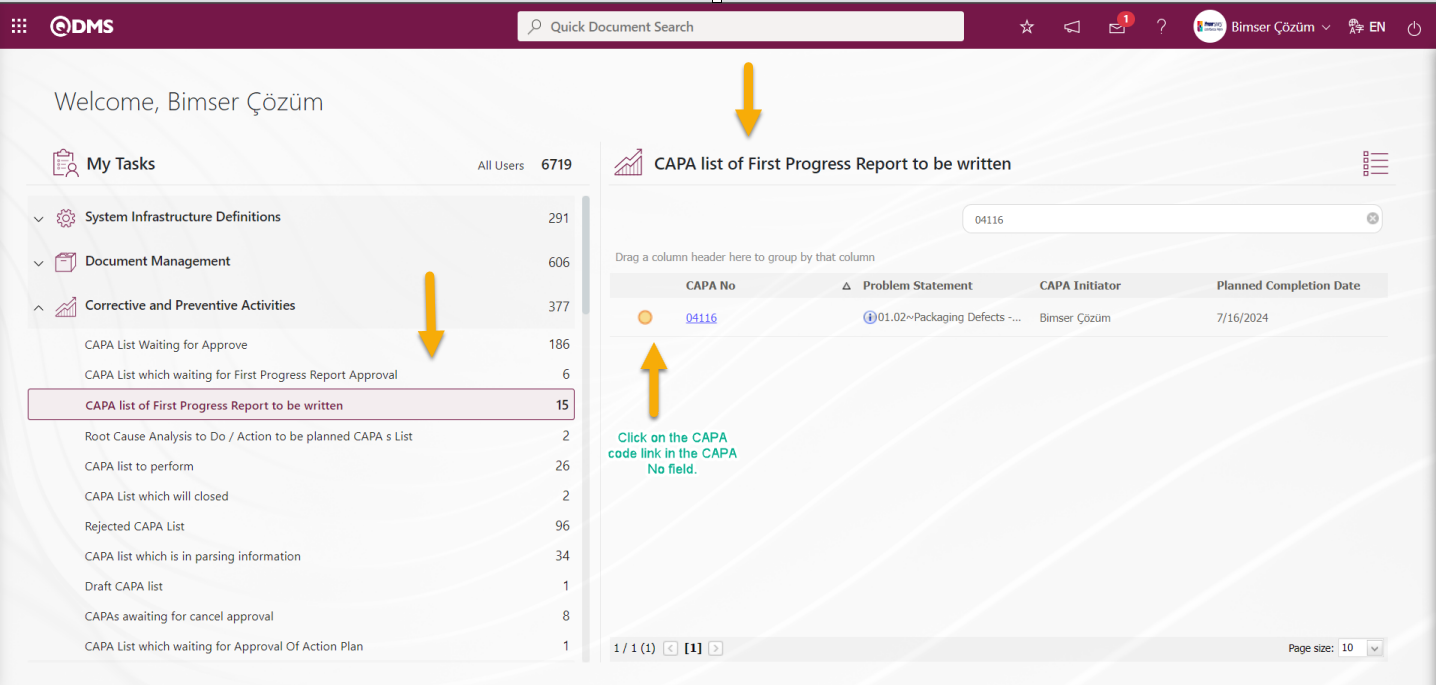
At the Progress Report stage, the “Start Auto Actions” field in the related task, the relevant check box is checked and automatic action opening process is performed depending on the user.
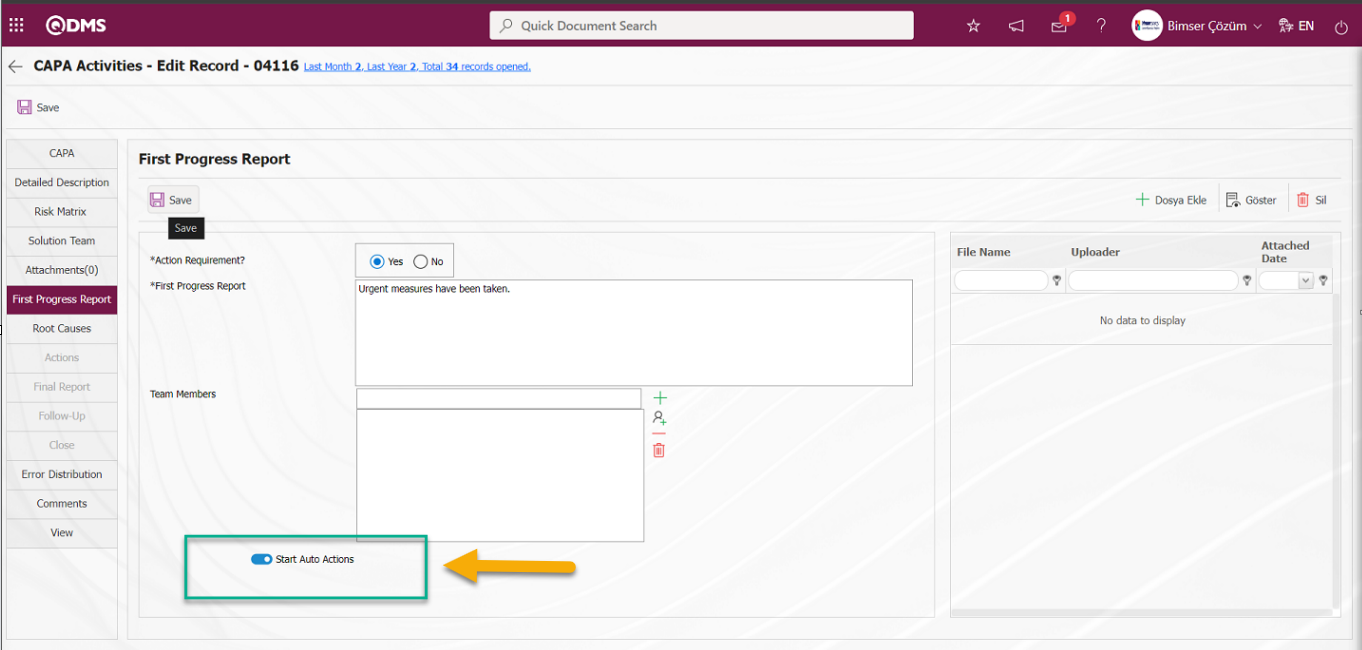
After the required fields related to the Progress Report stage are entered, the Progress Report stage registration process is done by clicking the button in the upper left corner of the screen. In the message given by the system, the number of the automatic action is given and it is given that the action is opened and the information is sent to the relevant people.
After the Root Cause analysis is made in the relevant CAPA record, it is seen that the action defined in the Automatic Action Definition menu is in the approval status in the Actions tab where the Actions stage is made.
When the value of parameter 107 is “2”, the system automatically opens the action if an automatic action is defined in the Automatic Action Definition menu.
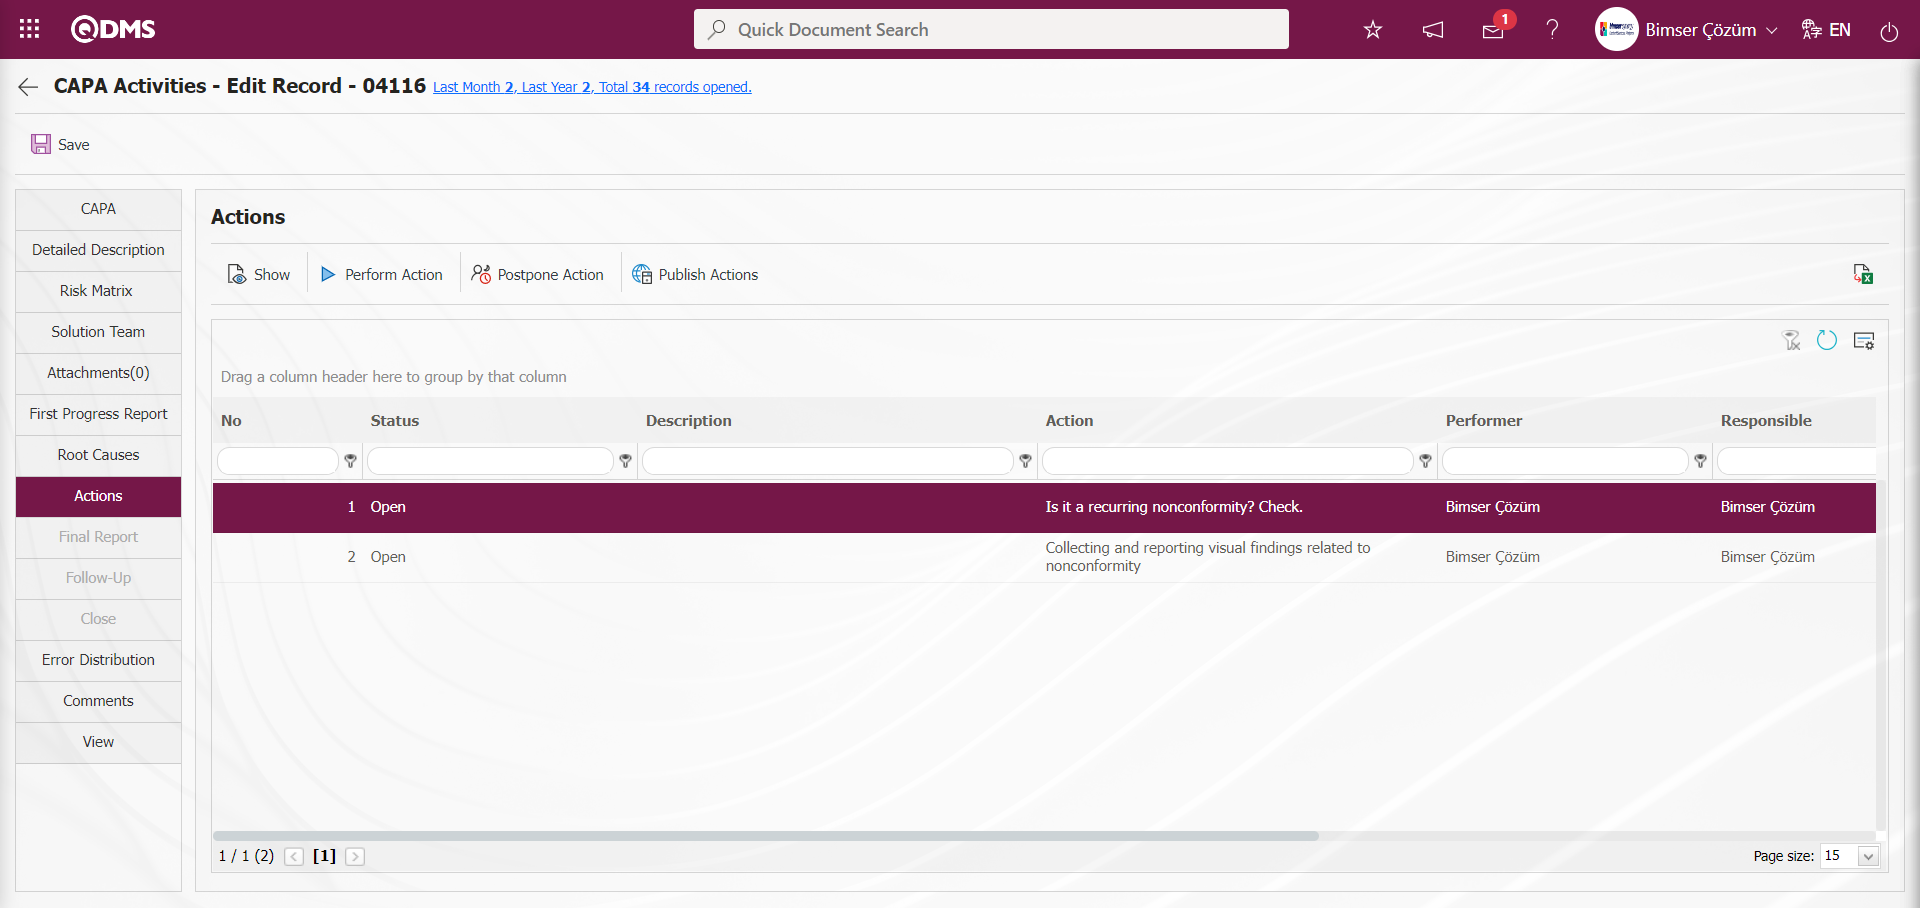
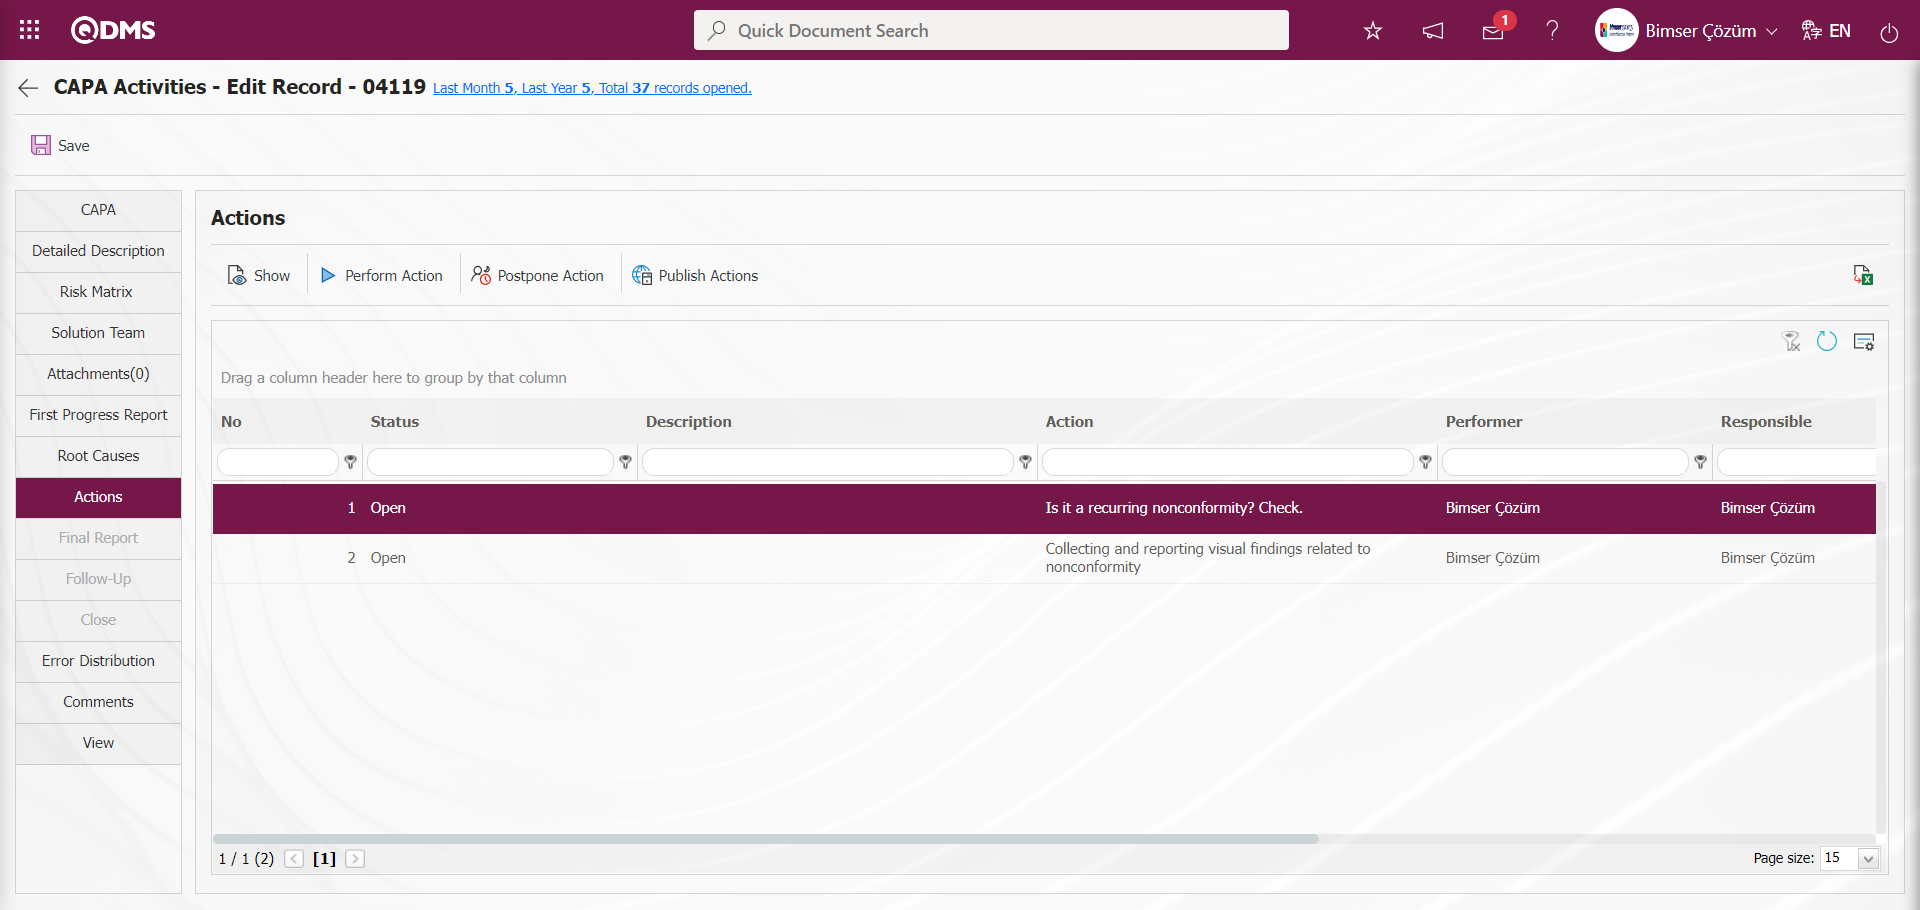
Actions defined in the Actions to Open Automatically menu:
![A screenshot of a computer
Description automatically generated]ref26
All actions defined in the Automatic Action menu are always opened by the system after the progress report phase on the CAPA registration screen.
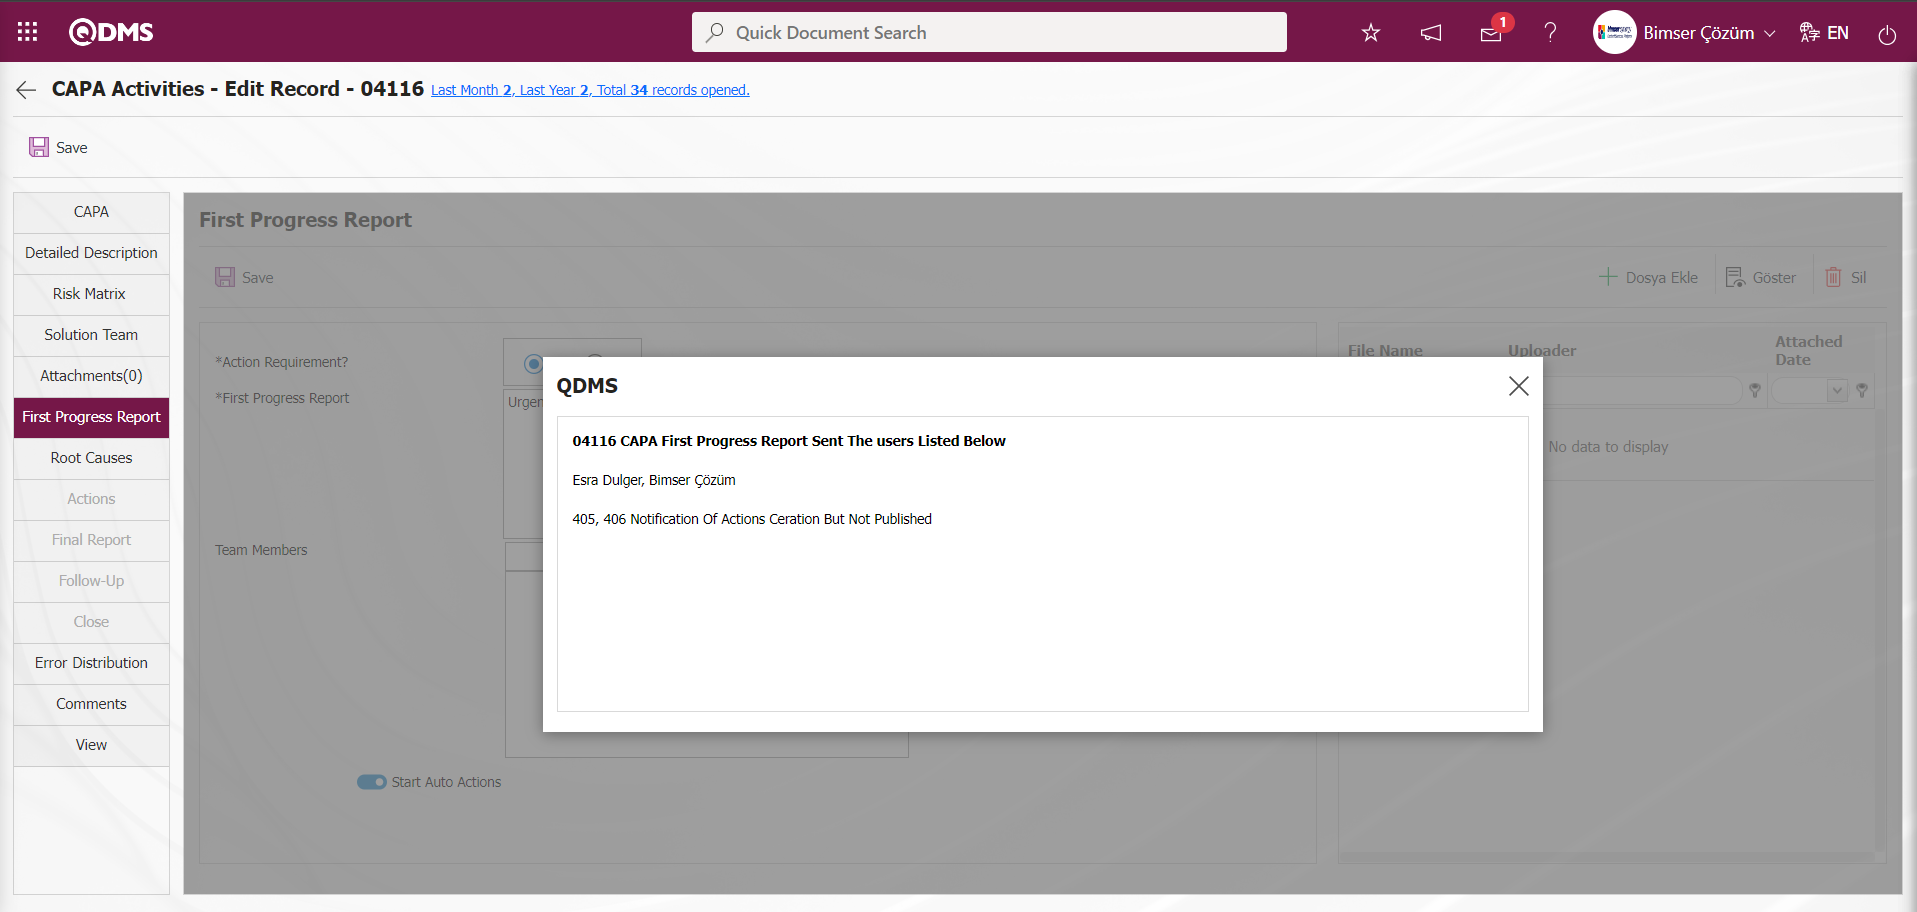
![A screenshot of a computer
Description automatically generated]ref25
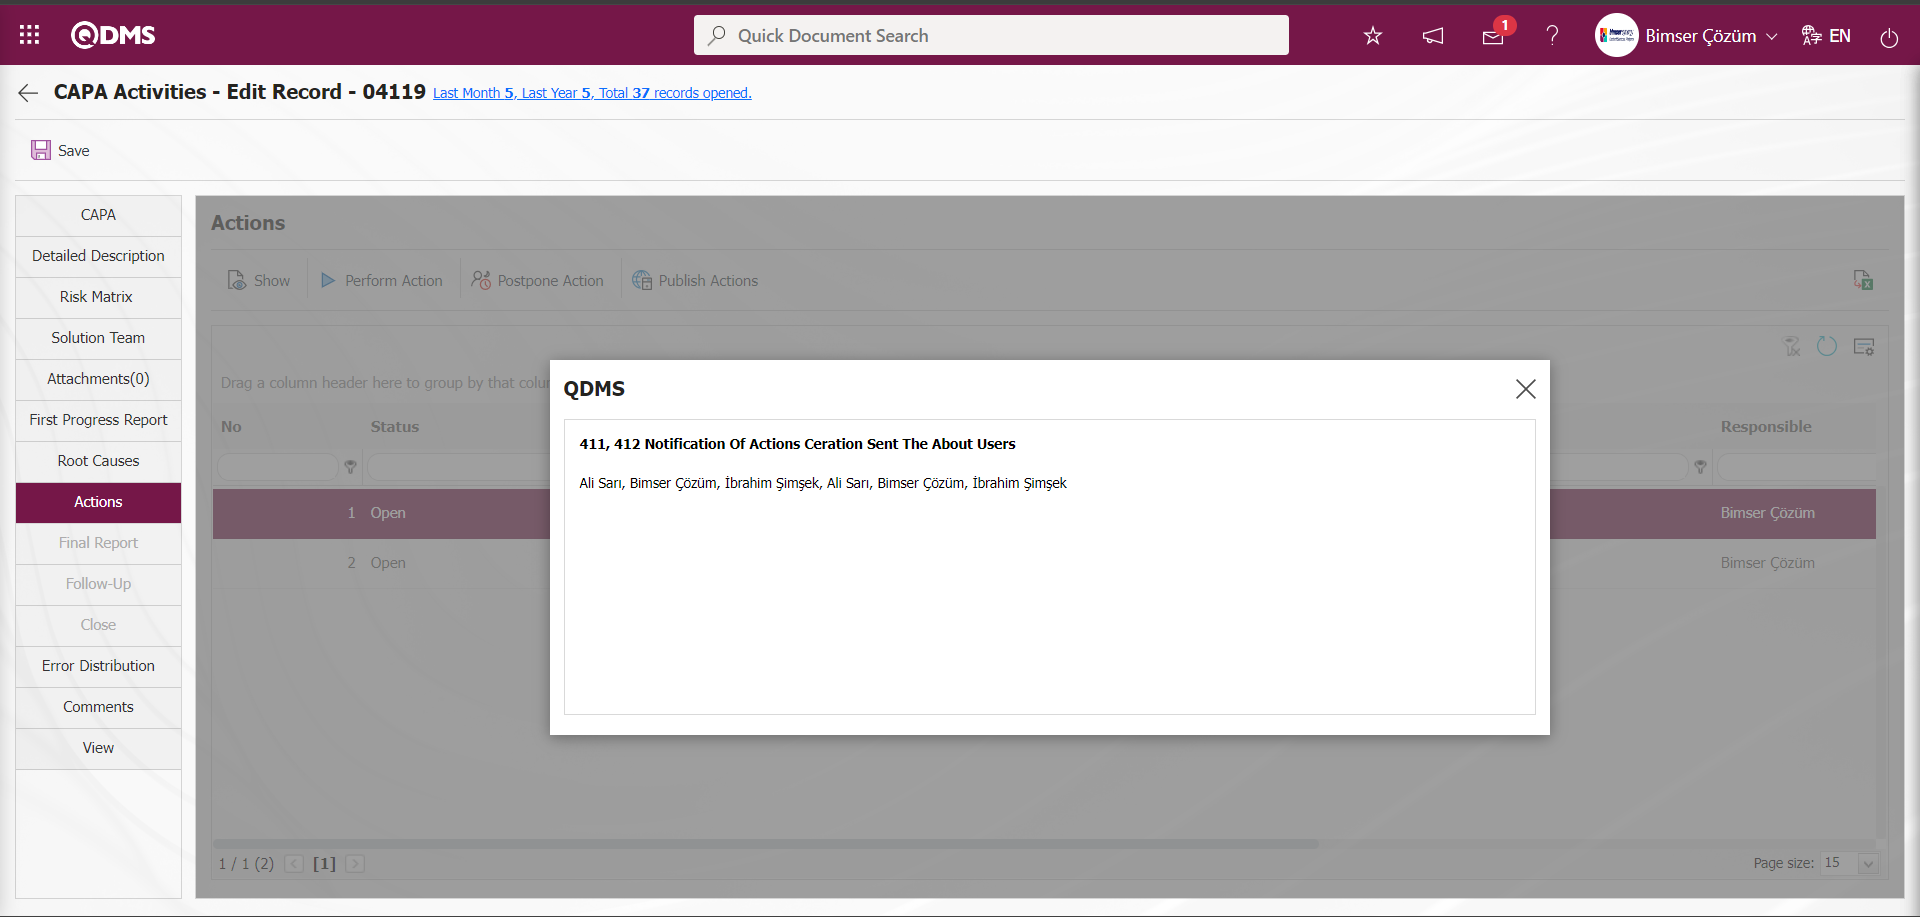
On the CAPA Activities - Edit Record screen, in the Progress Report tab, click the button in the upper left corner of the screen after entering the relevant fields of the First Progress Report.
 After the progress report registration process, the system automatically opens the Automatic actions defined in the System Infrastructure Definitions section.
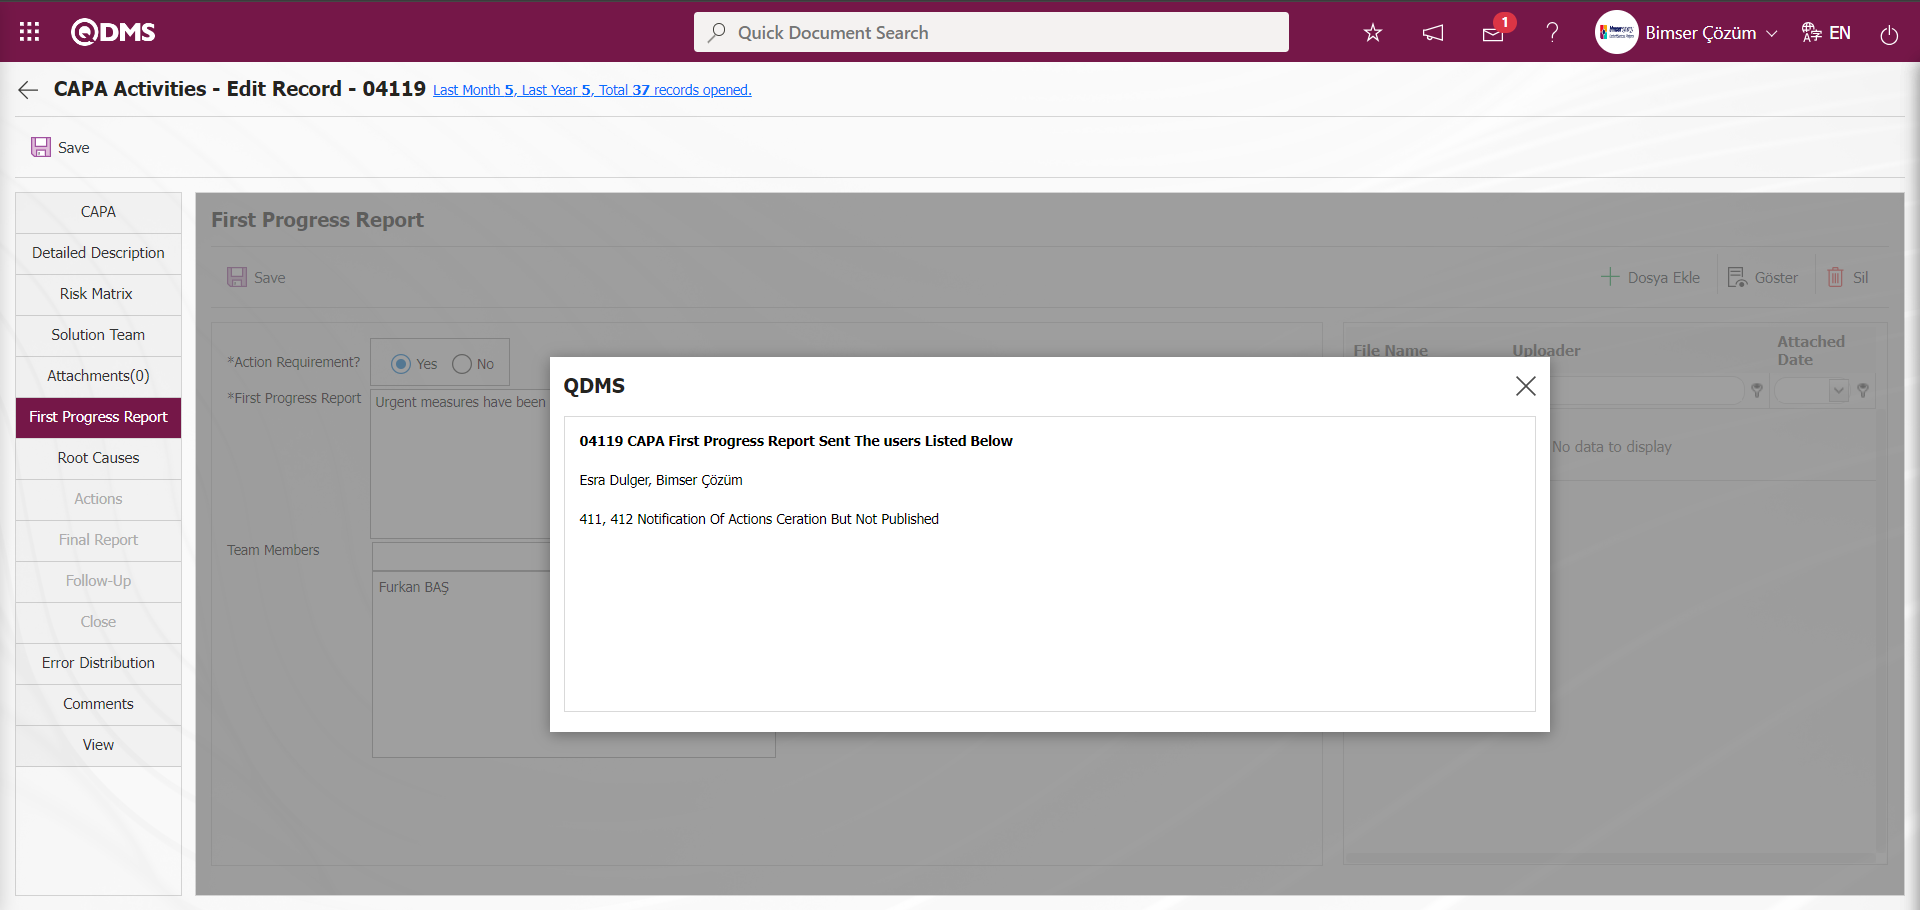
The message in the content of the action number information “Actions 411, 412 were opened but not published” is given by the system. After the opened Actions, root cause analysis is performed by adding root cause in the root cause tab. After the root cause analysis process is done, it is seen that the automatic actions defined in the system are opened according to the value “2” in the parameter 107 in the parameter in the Actions tab.
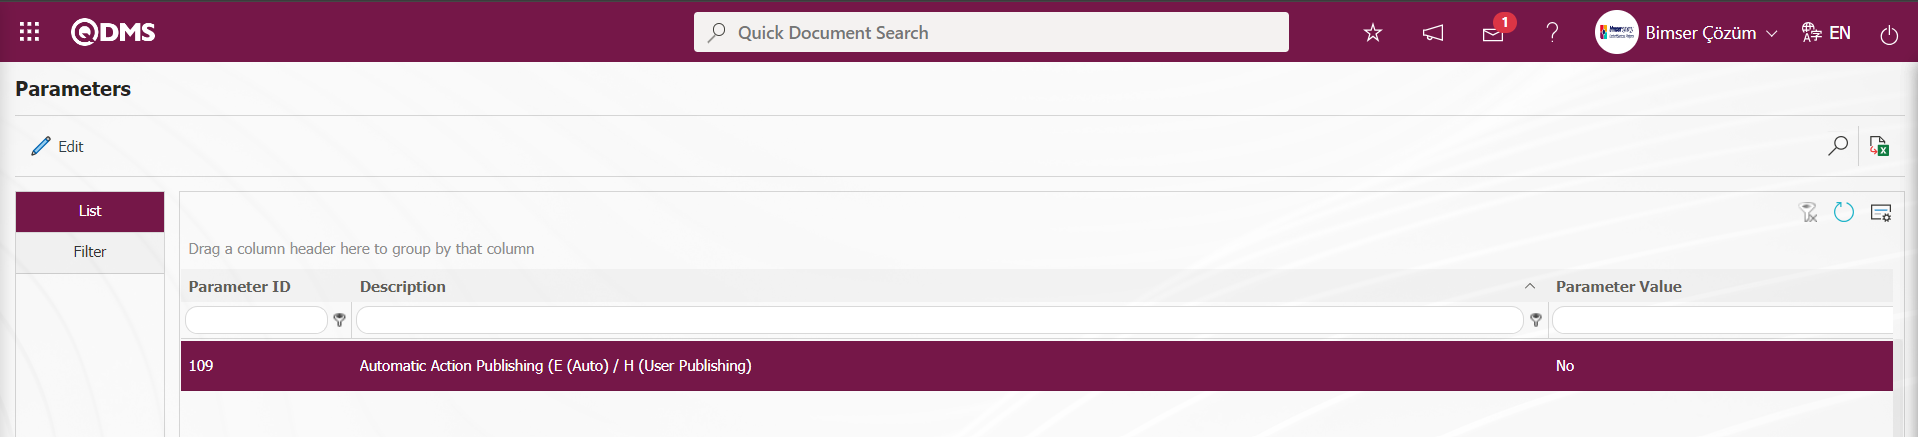
If the value of parameter 109 in the Corrective and Preventive Actions module parameters is “No”, the  button is displayed.
By clicking the button, the publishing process is done depending on the user in the publishing process of the automatic Action.
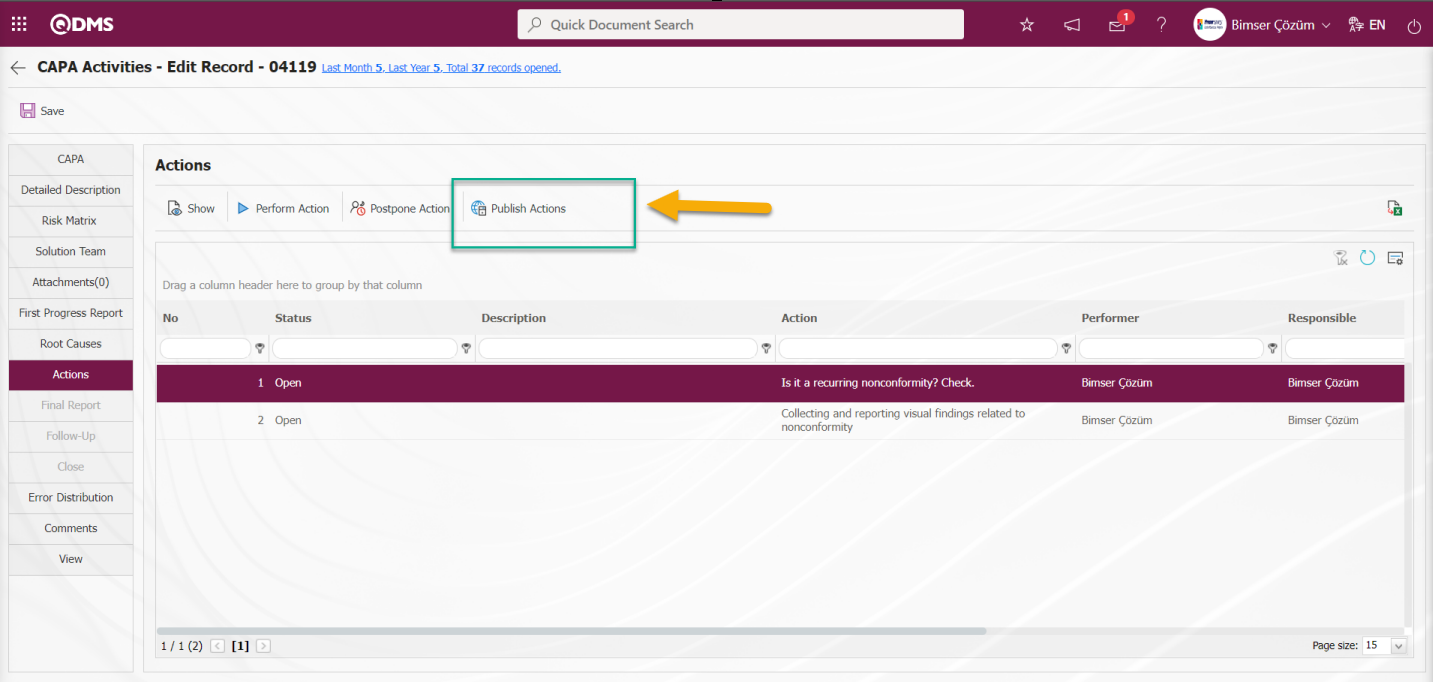
The button is displayed in the Actions tab where the Actions stage is realized and the process of publishing Automatic Actions is done by clicking this button.
When the value of parameter 109 in the Corrective and Preventive Actions module parameters is “Yes”, the button is not displayed and the system automatically publishes automatic actions.
6.1.8. CAPA Parameters
Menu Name: System Infrastructure Definitions/ CAPA/ CAPA Parameters
It is the menu where various adjustments can be made for the CAPA Module according to the wishes and needs of the user and the parameters can be determined (selected) accordingly. The adjustments made in this menu in the system only cover the content of the CAPA module. Changes made in the parameters cover all Qdms users. On the Parameters screen, we see two tabs, List and Filter tabs. The List tab lists all parameters related to the Corrective and Preventive Actions Module.
With the help of the buttons on the screen;
 : Edit/change/update the parameter information selected in the list.
 : Data is transferred to Excel.
 : Records are filtered and searched.
 : The search criteria on the menu screens are used to clean the data remaining in the filter fields in the grid where the search operation is performed.
 : The menu screen is restored to its default settings.
 : User-based designing of the menu screen is done with the show-hide feature, that is, the hiding feature of the fields corresponding to the columns on the menu screens.
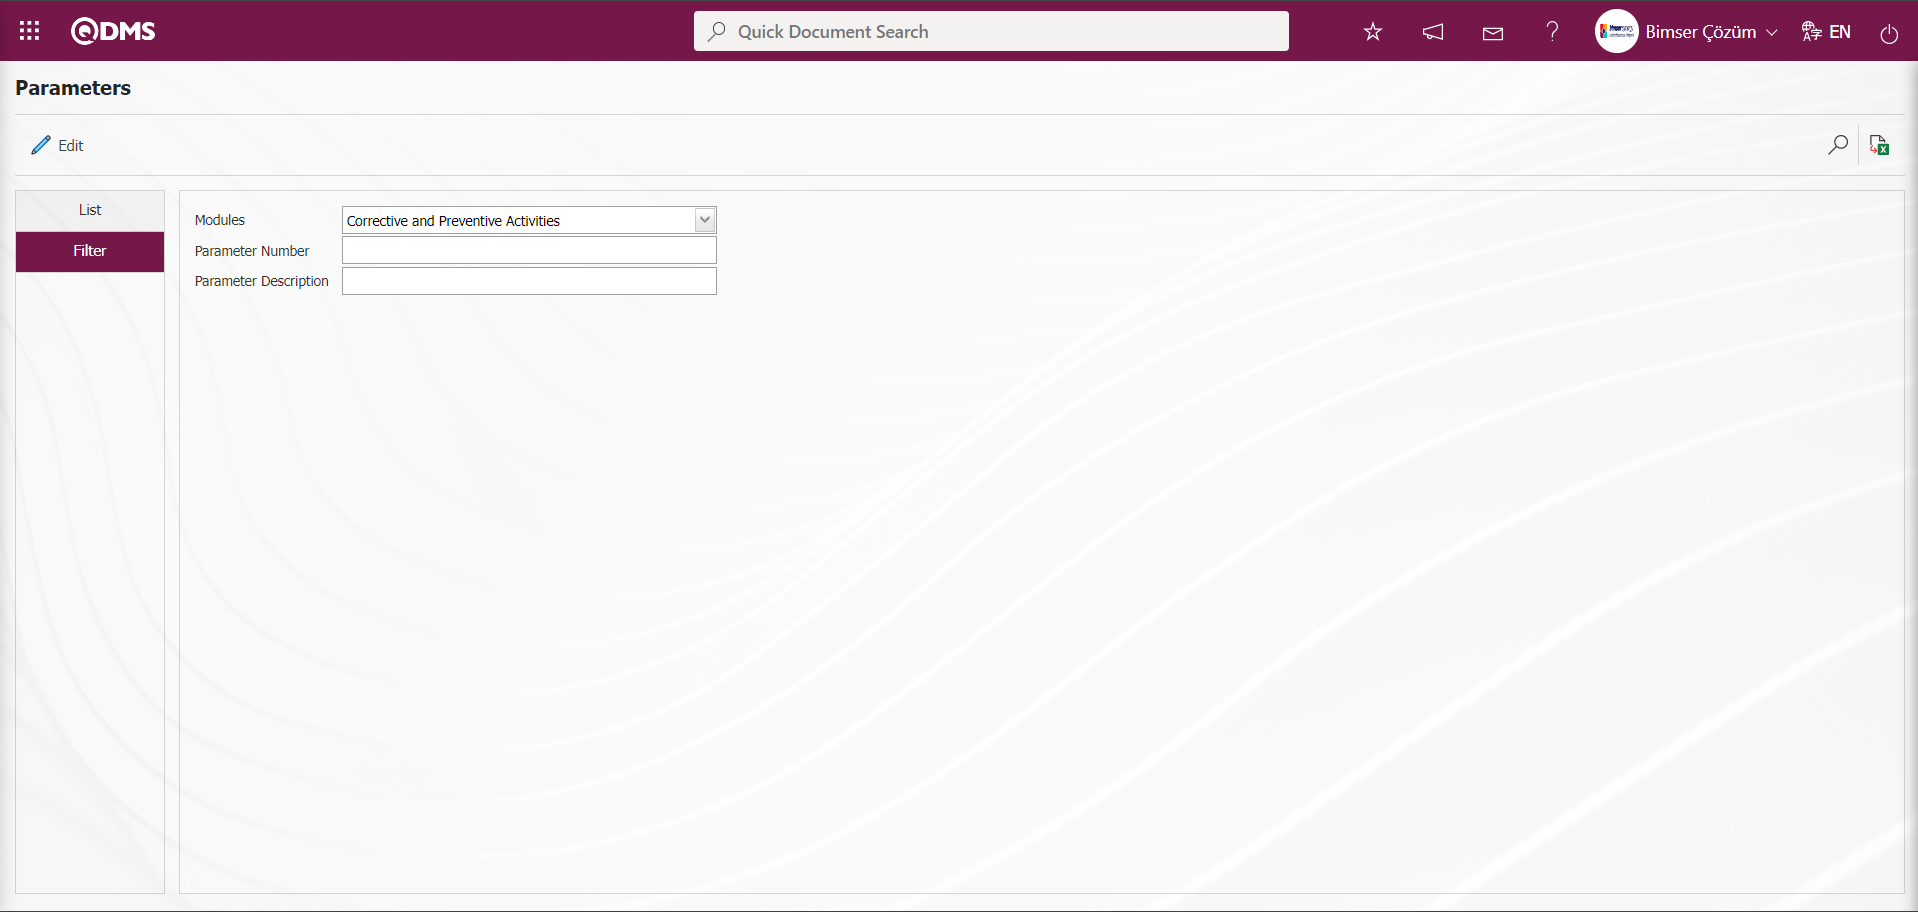
In the Filter tab on the Parameters screen, data is entered in fields such as Parameter No and Parameter Definition, and filtering operations are performed according to the search criteria by clicking the (Search) button.
If you want to make changes to a parameter, first select the parameter you want to make changes to. While the parameter is selected, operations such as activating the parameter in the inactive state, deactivating the parameter in the active state or changing the parameter value are performed.
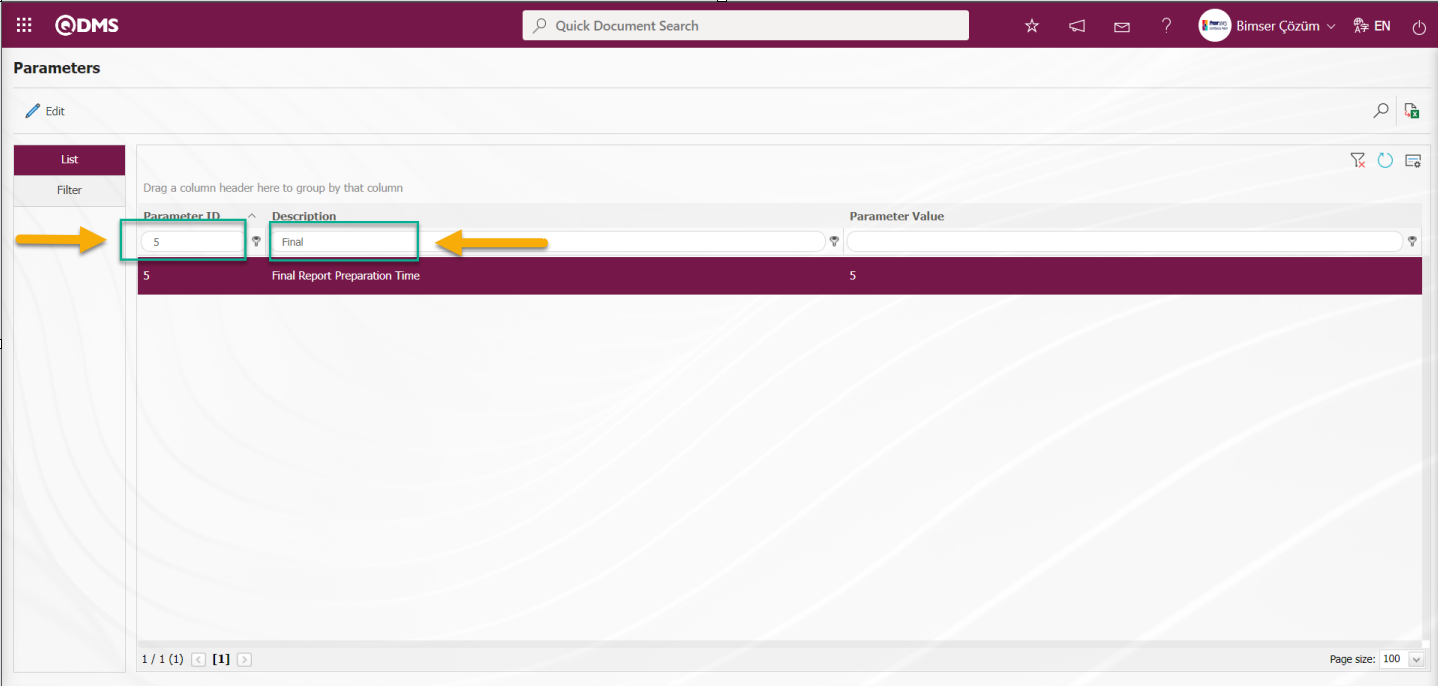
In the Corrective and Preventive Actions Module parameters, the parameter number 5 “Final Report Preparation Time” is selected by typing the number in the parameter no field in the Filter tab on the parameters screen and clicking the (Search) button.
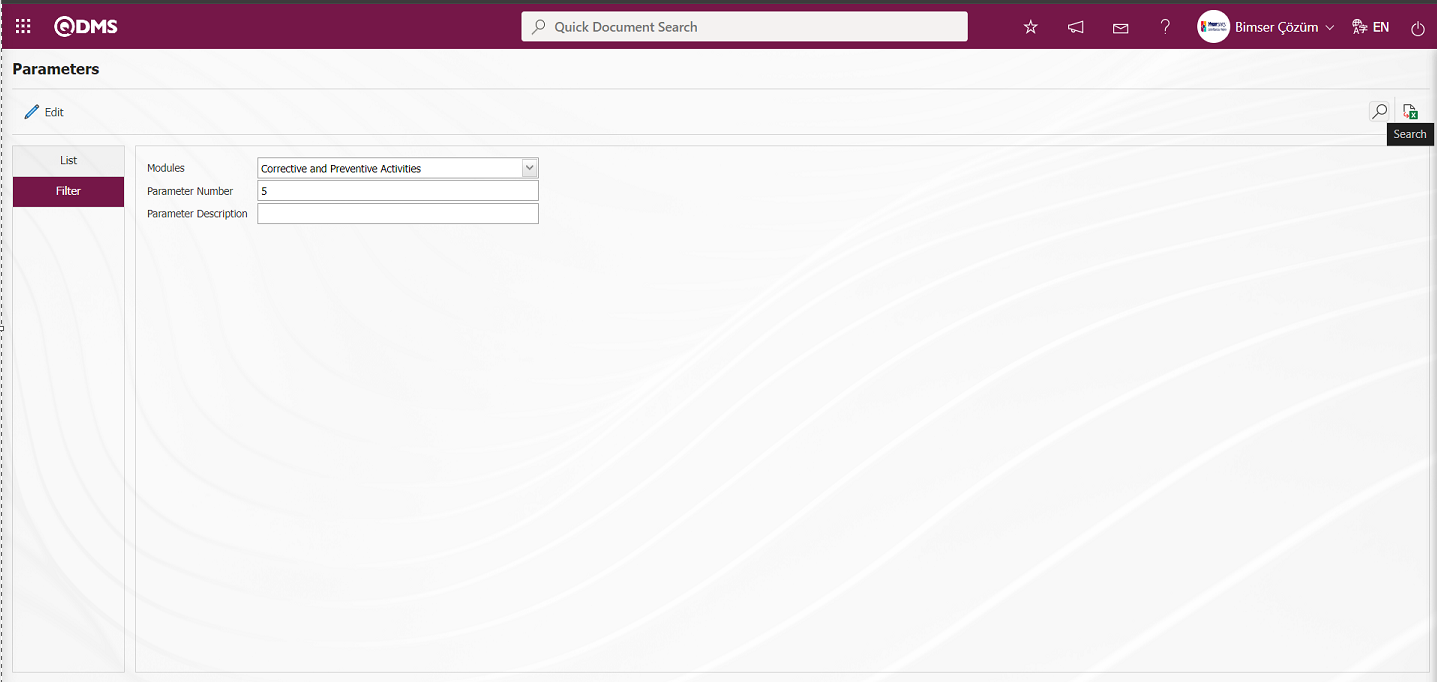
For the search operation, it is used in the fields corresponding to the columns in the grid in the list tab on the Parameters screen. If the parameter number is not known, the parameter can also be searched by typing a key word in the parameter in the Description field in the grid on the parameter list tab. Or if the parameter number is known, the parameter number can be searched by typing the parameter number in the parameter No field in the grid.
After selecting the parameter, click the button.

In the parameters screen, enter the new value information that you want to change the parameter value.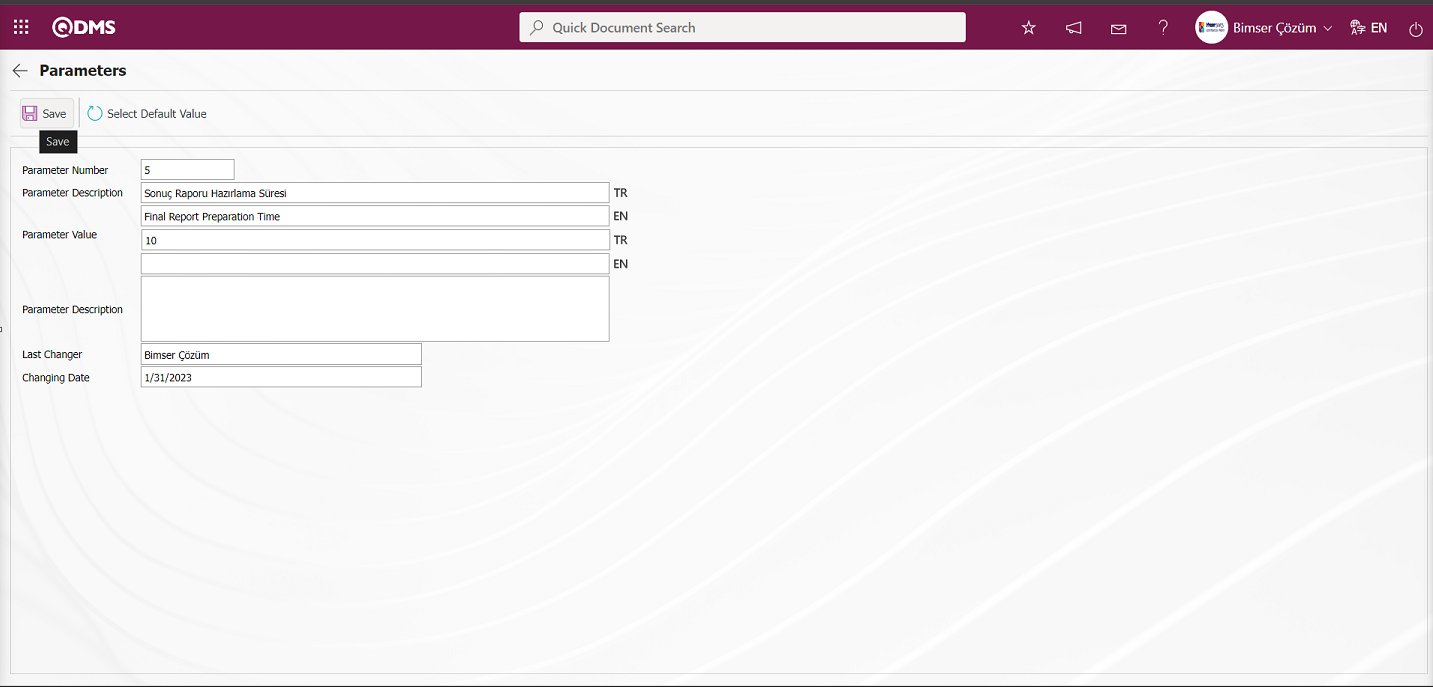
After the new value information entered in the parameter value on the Parameters screen, the parameter record update process is performed by clicking the  button in the upper left corner of the screen. After the actions are performed according to the newly entered parameter value, the systemic setting of the number of days within which the result report will be prepared is made as a maximum of 10 days.

In the Corrective and Preventive Actions module parameters, parameter 13 “Include to inform the departmental account (Y / N)” is selected by typing the parameter number in the parameter no field in the Filter tab on the parameters screen and clicking the  (Search) button.
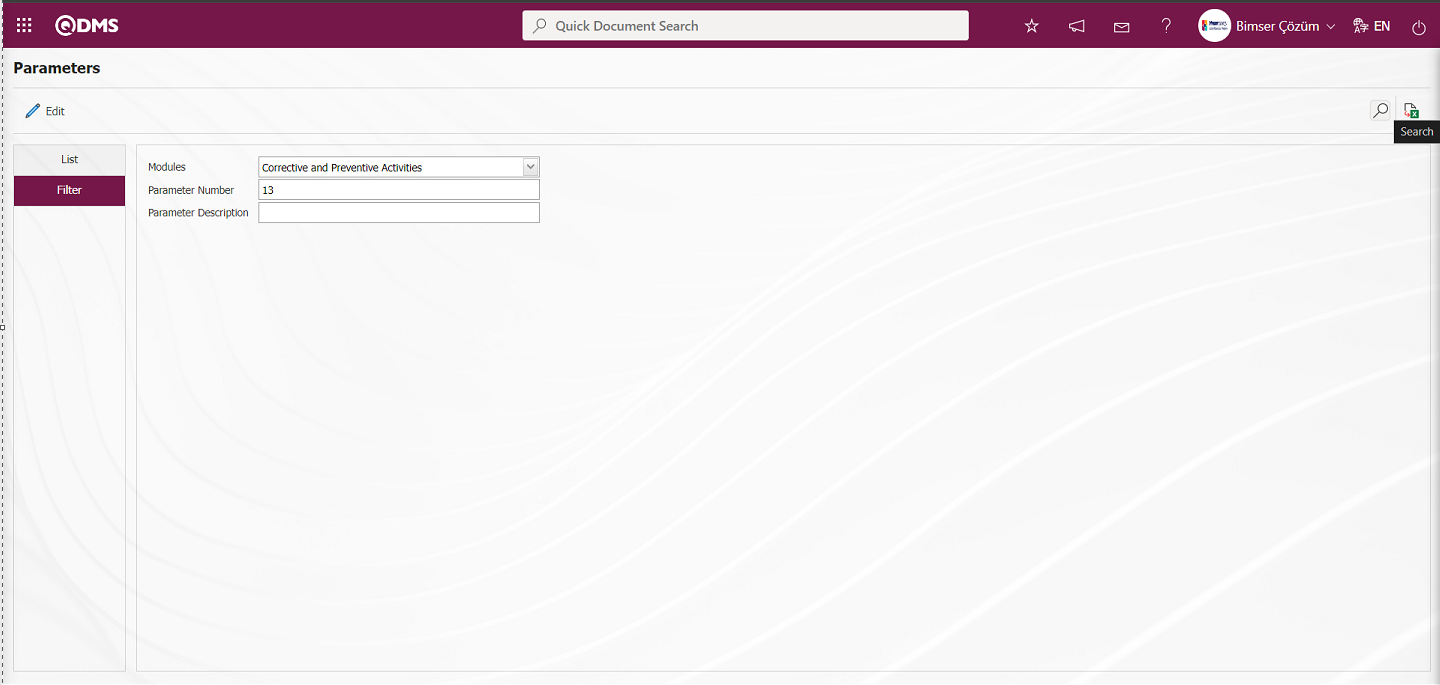
After selecting the parameter, click the button.

In the parameters screen, select the relevant check box “Yes” in the parameter value options.

After selecting the parameter value “Yes” on the Parameters screen, the parameter activation registration process is done by clicking the  button on the upper left corner of the screen.

In order to list the parameters related to the Non-Compliance Category in the Corrective and Preventive Actions module in the list tab, type the keywords related to the “Compliance Category” in the Parameter Definition field in the Filter tab or in the grid and click the (Search) button.
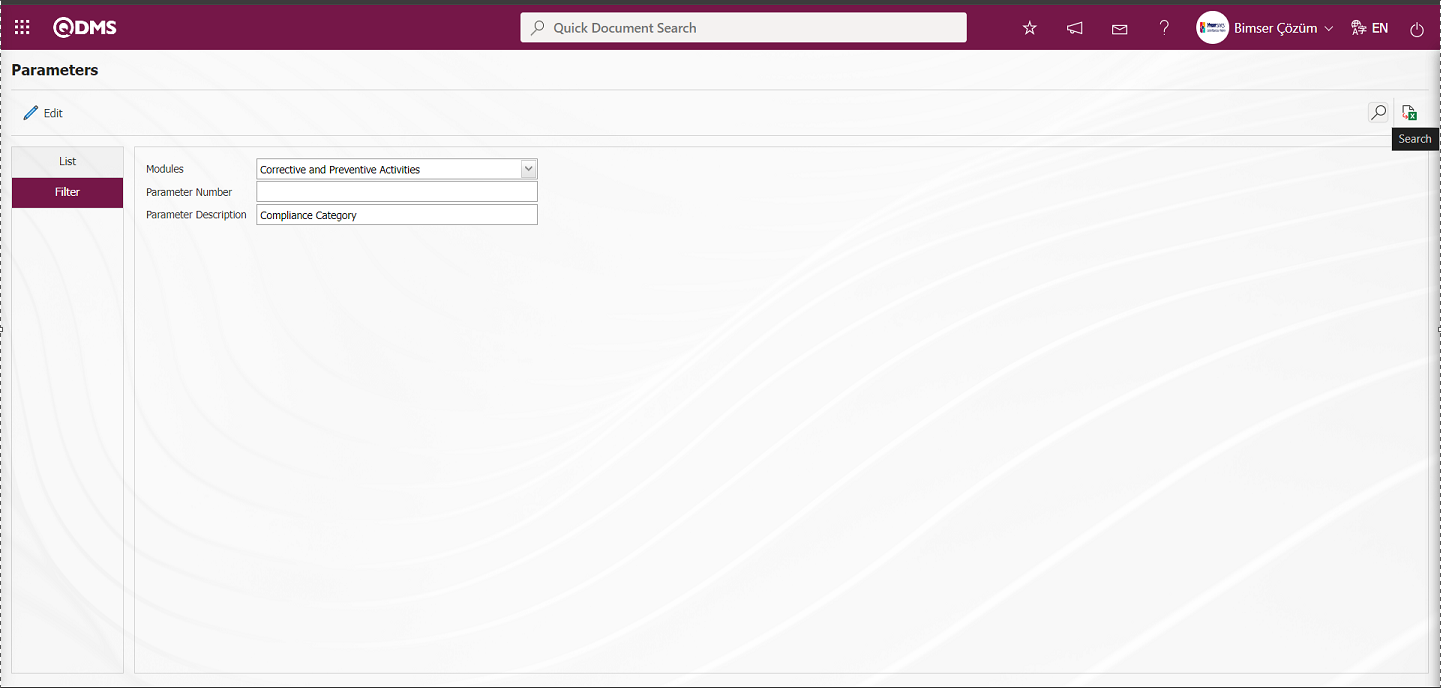
It is ensured that the Nonconformity Category is mentioned in the content of the definition and the parameters related to the Nonconformity Category are listed.
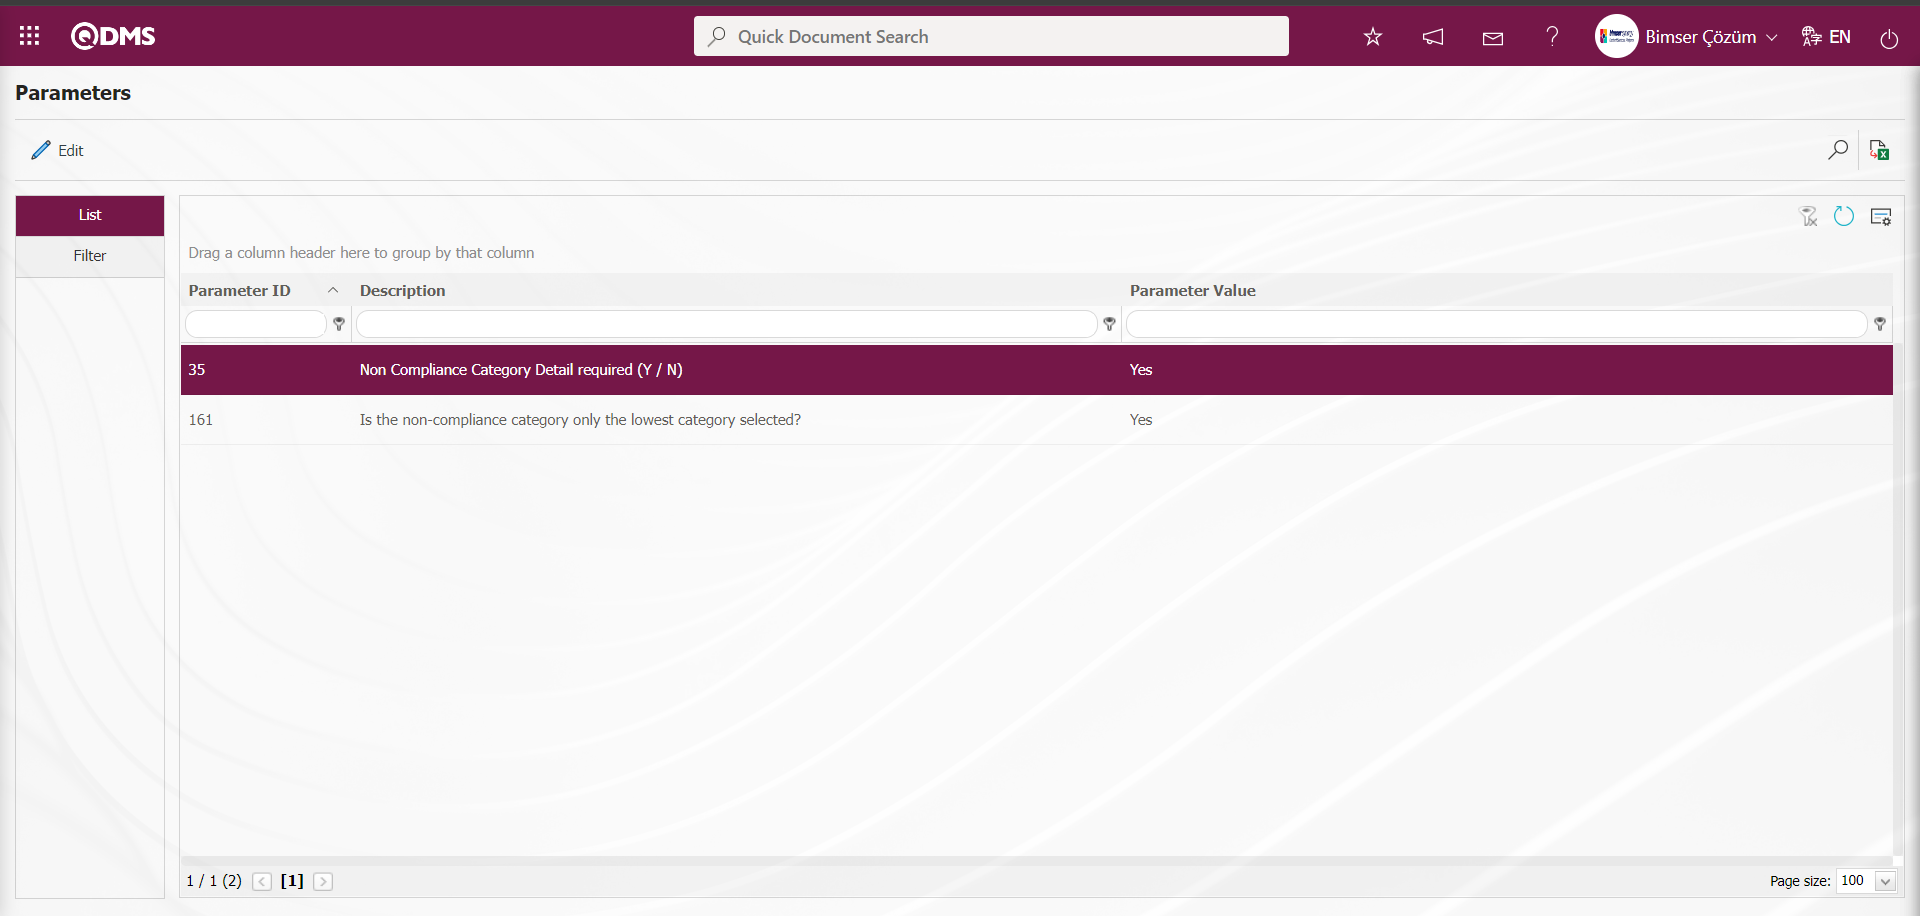
In this way, on the parameters screen, by using the fields with search criteria in the filter tab and the fields in the grid in the List tab, the related parameter is searched and operations such as activating the parameter whose content is displayed by clicking the button, deactivating the activated parameter or changing the value of the parameter are performed.
6.1.9. Bulk CAPA Cancellation
Menu Name: System Infrastructure Definitions/ CAPA/ Bulk CAPA Cancellation
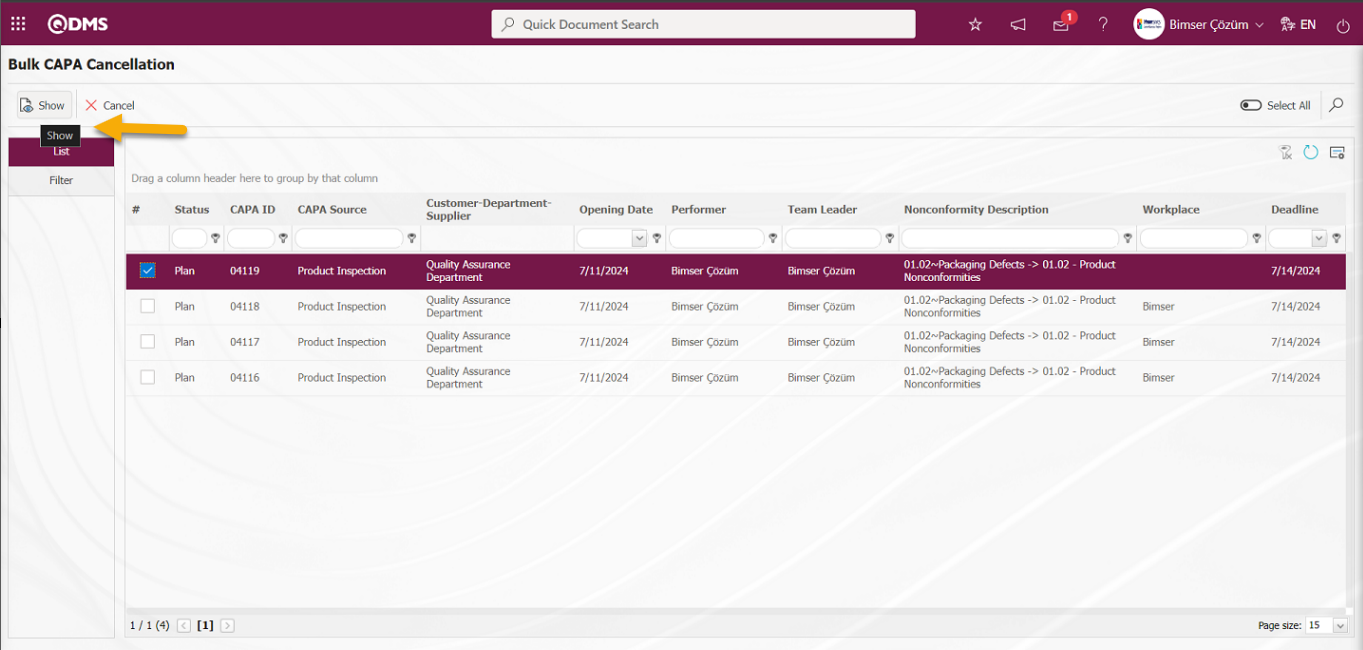
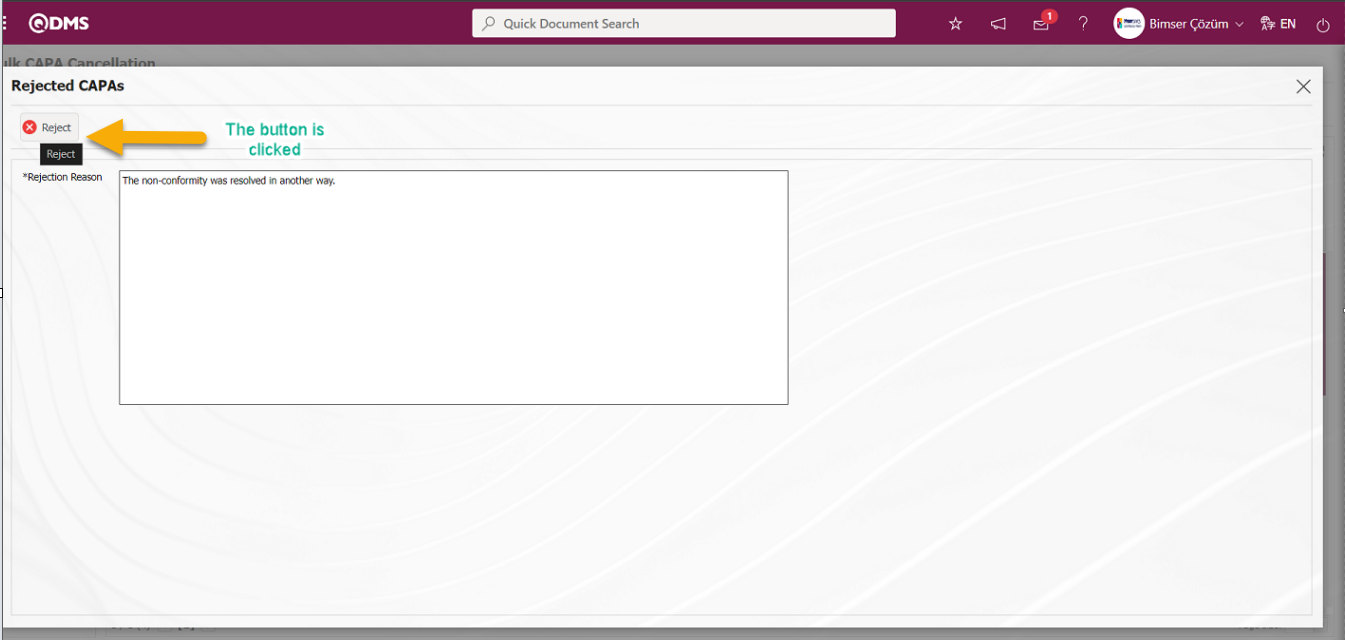
It is the menu where the CAPA records defined in the system are canceled in bulk. The purpose of this menu is to perform the bulk cancellation of CAPA records in bulk. In order to perform this operation in the CAPA module, the System Infrastructure Definitions / CAPA / “Bulk CAPA Cancellation” menu is clicked. On the “Bulk CAPA Cancellation” screen, two tabs are displayed as List and Filter tabs. In the List tab, CAPA records defined in the system are listed. In the List tab, if desired, CAPA cancellation can be done individually by making a single selection or CAPA records can be canceled collectively by writing Rejection Reason information in the “Rejected CAPAs” pop-up opened by clicking the  button by making multiple selections. By selecting the check box related to the “Select All” option in the CAPA List, all of the CAPA' records are selected in the CAPA List in bulk by selecting all of the CAPA' records in the CAPA List by clicking the button and writing the “Rejection Reason” information in the “Rejected CAPAs” pop-upn. The status of CAPA records that are canceled in bulk changes to “Canceled” status. CAPA records that are canceled collectively are listed in the Corrective and Preventive Actions Report in the CAPA Module reports by selecting the status as “Canceled” in the Filter tab in the Corrective and Preventive Actions Report.
With the help of the buttons on the screen;
 : The selected CAPA record in the list is displayed.
 : The CAPA record selected in the list is canceled.
: Records are filtered and searched.
: The search criteria on the menu screens are used to clean the data remaining in the filter fields in the grid where the search operation is performed.
: The menu screen is restored to its default settings.
: User-based designing of the menu screen is done with the show-hide feature, that is, the hiding feature of the fields corresponding to the columns on the menu screens.
While the CAPA record is selected on the Bulk CAPA Cancellation** screen, the CAPA record is displayed by clicking the button.

Select the CAPA records to be canceled on the Bulk CAPA Cancellation screen.
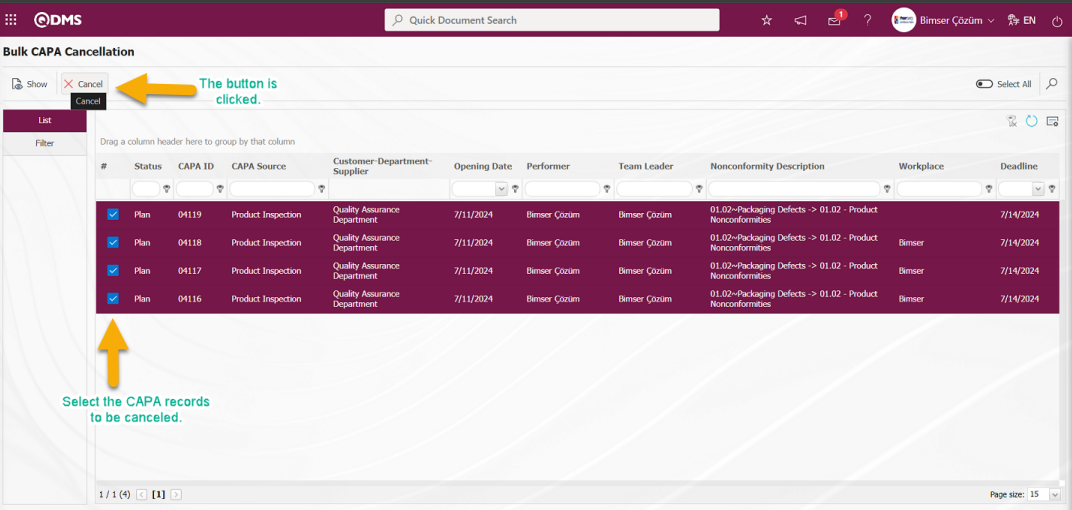
CAPA records are canceled collectively by writing Rejection Reason information in the “Rejected CAPAs” pop-up opened by clicking the button.
6.1.10. Field Identification
Menu Name: System Infrastructure Definitions/ CAPA/ Field Identification
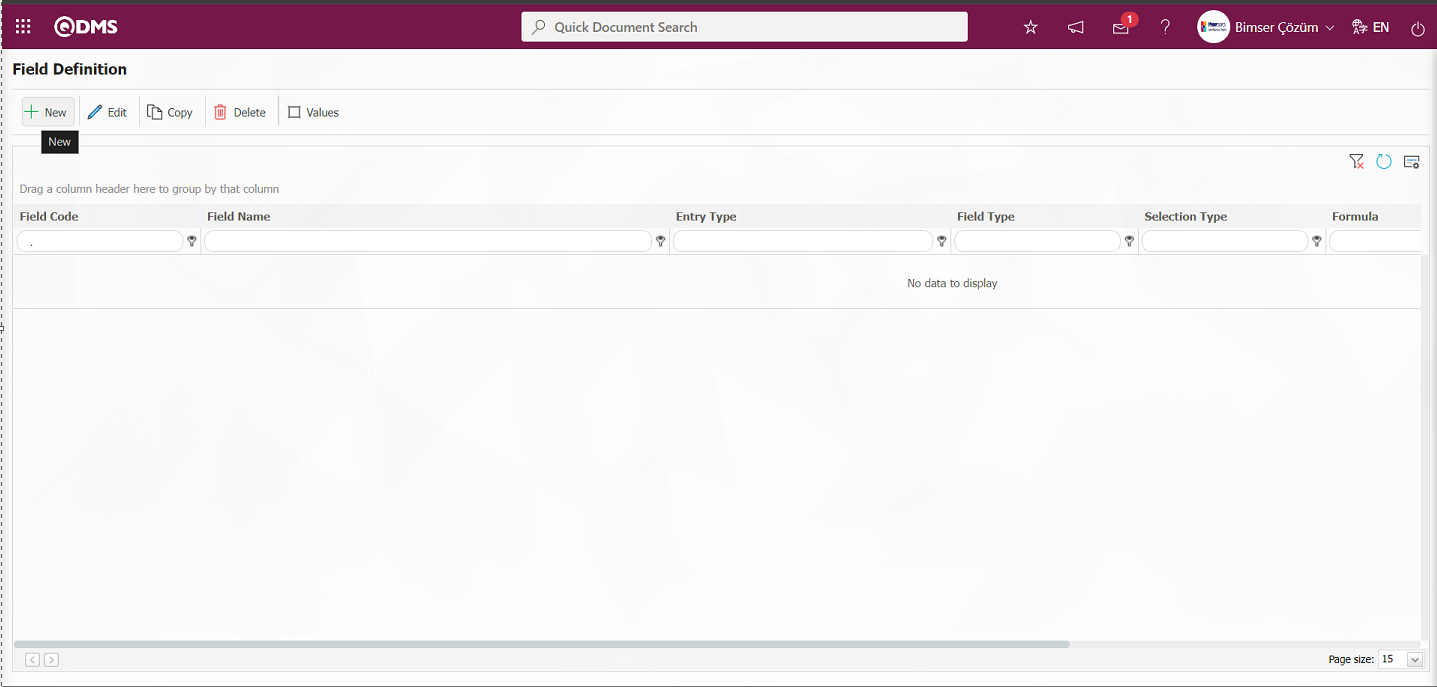
This is the menu where the field definition process is performed in the CAPA module. The fields defined with Field Definition are encountered in the Risk Matrix tab in the CAPA Operations menu. The purpose of the field definition menu is to specify the elements of the risk matrix and calculate the risk size of any CAPA on the company.
With the help of the buttons on the screen;
: Add a new field.
 : Correction / change / update is made on the field information selected in the list. Code information cannot be updated.
 : The field information selected in the list is copied.
: The field information selected in the list is deleted.
 : Values of the field are defined.
: The search criteria on the menu screens are used to clean the data remaining in the filter fields in the grid where the search operation is performed.
: The menu screen is restored to its default settings.
: User-based designing of the menu screen is done with the show-hide feature, that is, the hiding feature of the fields corresponding to the columns on the menu screens.
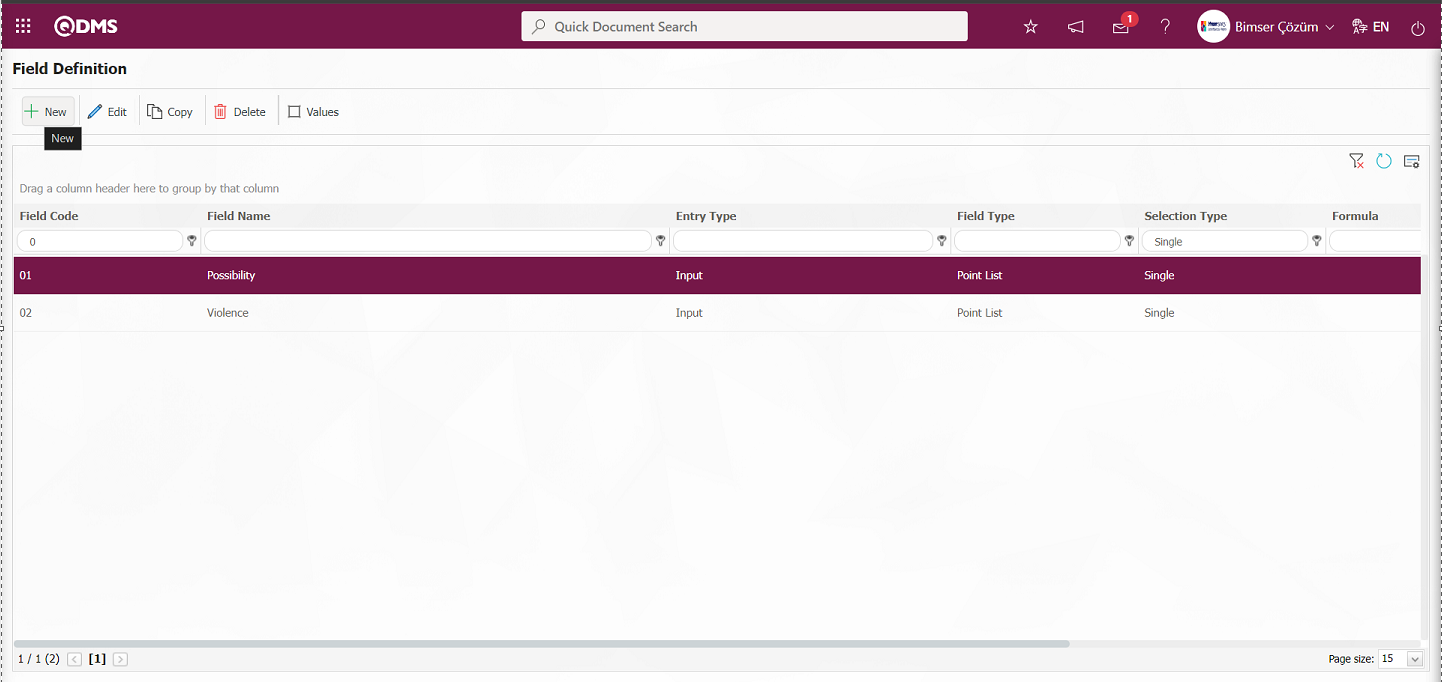
To add a new field to the Field Definition screen, click on the button at the top left corner of the screen to open the Field Definition\ New Record screen
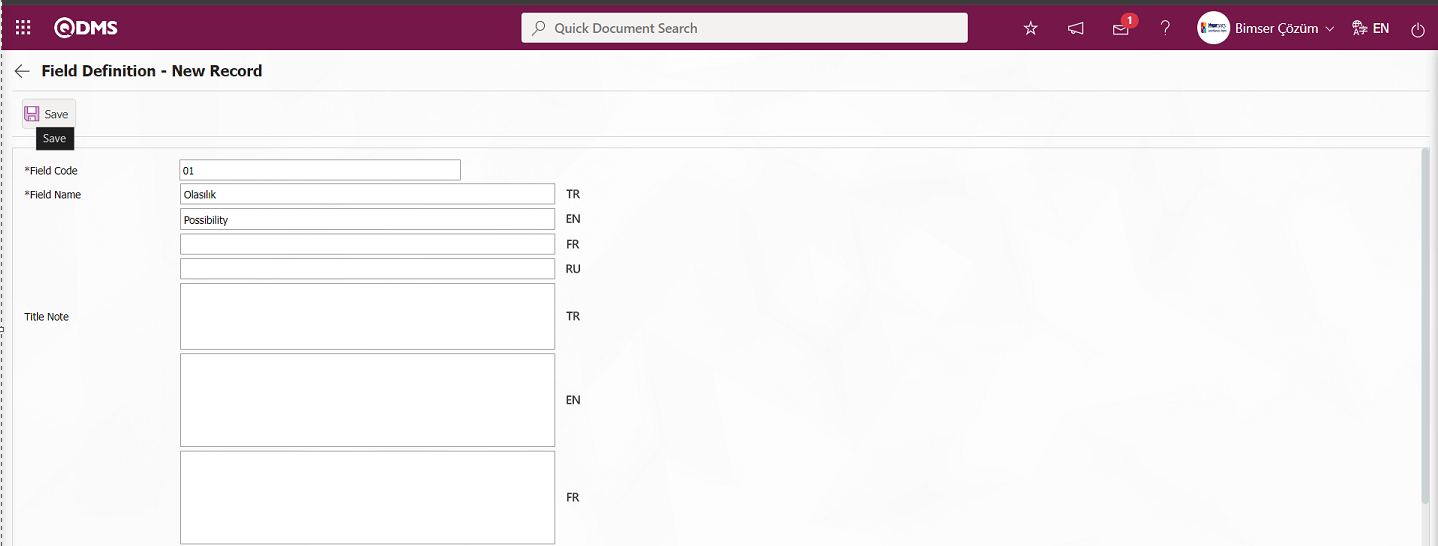
Related fields are defined on the screen that opens;
Field Code: It is the mandatory field where the Field Code information is entered on the Field Identification-New Record screen. It should be defined without using characters such as spaces and Turkish characters, so that it is not the same as previously defined fields. Ex. '001' , 'RK'
Field Name: This is the field where the Field Name information is entered on the Field Identification-New Registration screen.
Title Note: It is the field where the note information containing explanatory information about the field data entry is entered on the Field Identification-New Registration screen. It is the information displayed when the mouse hovers over the field.
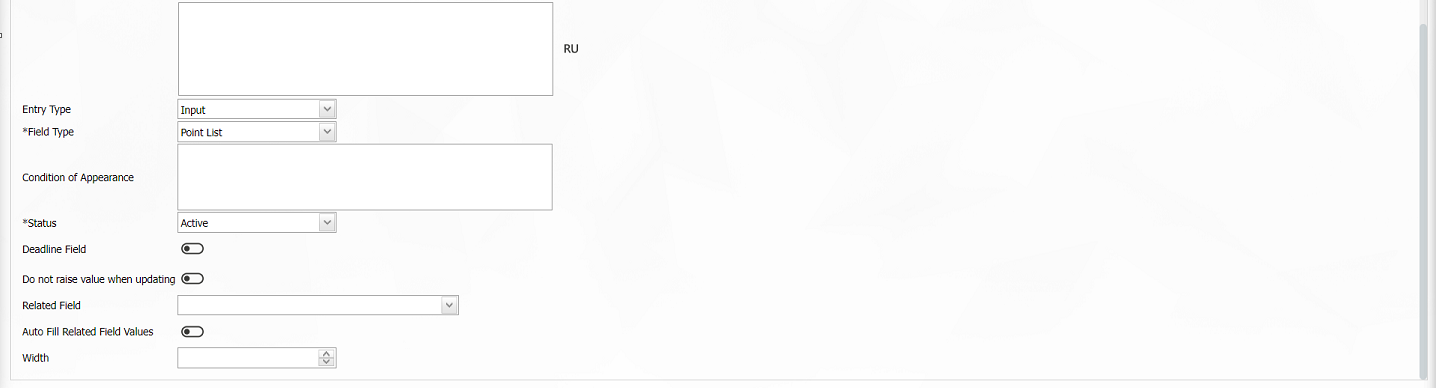
Entry Type: This is the field where the entry type can be selected as Calculated or Data Entry type on the Field Identification-New Registration screen. Entry Type option shows whether the created field will be determined manually by data entry or by calculation method. For example; Data Entry.
Field Type: This is the field where the field type information can be selected on the Field Definition-New Record screen. Field Type indicates which type of the created field is text, numeric, date, list, etc. Scored list is selected as Field Type.
Condition of Appearance: This is the field where the Condition of Appearance information is entered on the Field Definition-New Record screen. If a field will be seen depending on the condition of another field, the condition of appearance is used. It allows the field created according to the values of the list-type field to be displayed. Its usage is [ALANKODU]=ALAN_DEĞERİ etc. (For example, Is there an opportunity? Field's field code is 01 and Opportunity field's field code is 02. If the “Opportunity” Field needs to be seen if the “Yes” value with value code 100 is selected from the options in the “Is there an Opportunity?” Field, the 02 numbers Status: This is the field where the status can be selected as “Active” or “Inactive” on the Field Identification-New Record screen.
Deadline Field: If the deadline field will be activated, the relevant check box is checked. The deadlines of actions and SLOs are determined by considering the time period here.
Do not raise value when updating: If the Do not raisevalue when updating is to be activated, the relevant check box is checked. In the fields where this information is checked, the point value cannot be entered higher than the current value during updating.
Related Field: With the related field feature, a relationship can be established between two fields of option type. On the screen where the elements of the reference field are defined, it is possible to select which values are associated with the related field. Thus, when the value of the reference field changes on the form, the related field can be filled automatically or only the associated values can be selected from the selection screen.
Auto Fill Related Field Values: If the auto fill related field option is to be activated, the relevant check box is checked. It allows one of the fields to be filled automatically according to the relationship established between the values of two list-type fields.
Width: This is the field where the width information is entered on the Field Identification-New Record screen.
The field code and field name information is entered in the Field Identification-New Record field code and field name information is entered. Input Type data entry and Field Type are selected. Status section is selected. After the required fields are filled in the Field Definition screen, the Field Definition registration process is performed by clicking the  button in the upper left corner.
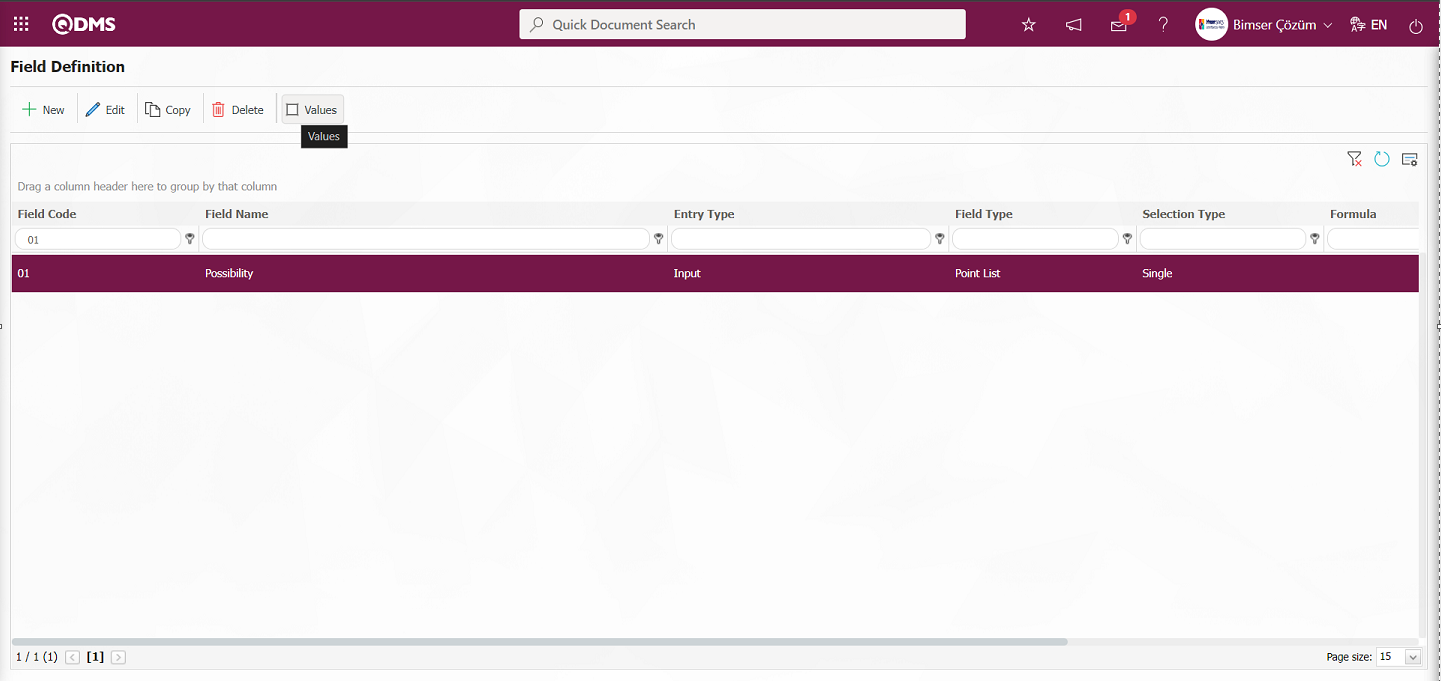
To add a value to the possibility field, while the probability field is selected, click on the  button to get to the screen where the values of the field will be introduced.
With the help of the buttons on the screen;
 :Define a new value
 :Correction or update operations are performed on the selected value information in the list.
 : Delete the selected value information in the list.
 :Records can be searched by filtering.
 :Data can be transferred to Excel.
 : Template is downloaded.
 : Template is loaded.
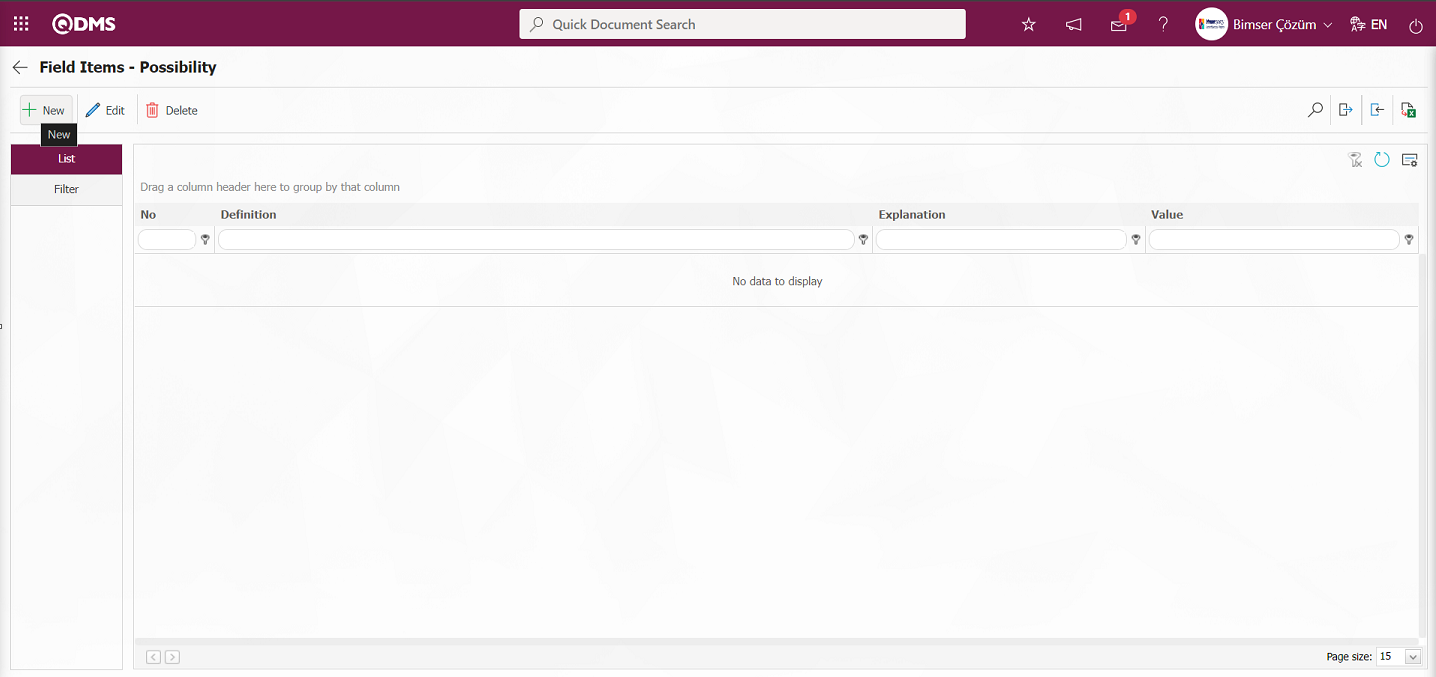
Note: (Download Template) and (Upload Template) buttons can be used to transfer field values to the system in bulk. With the template download button, the template in the system is downloaded to the user's computer. When the relevant template is filled in by the users and uploaded to the system with the template upload button, all field values in the template will be transferred to the system.
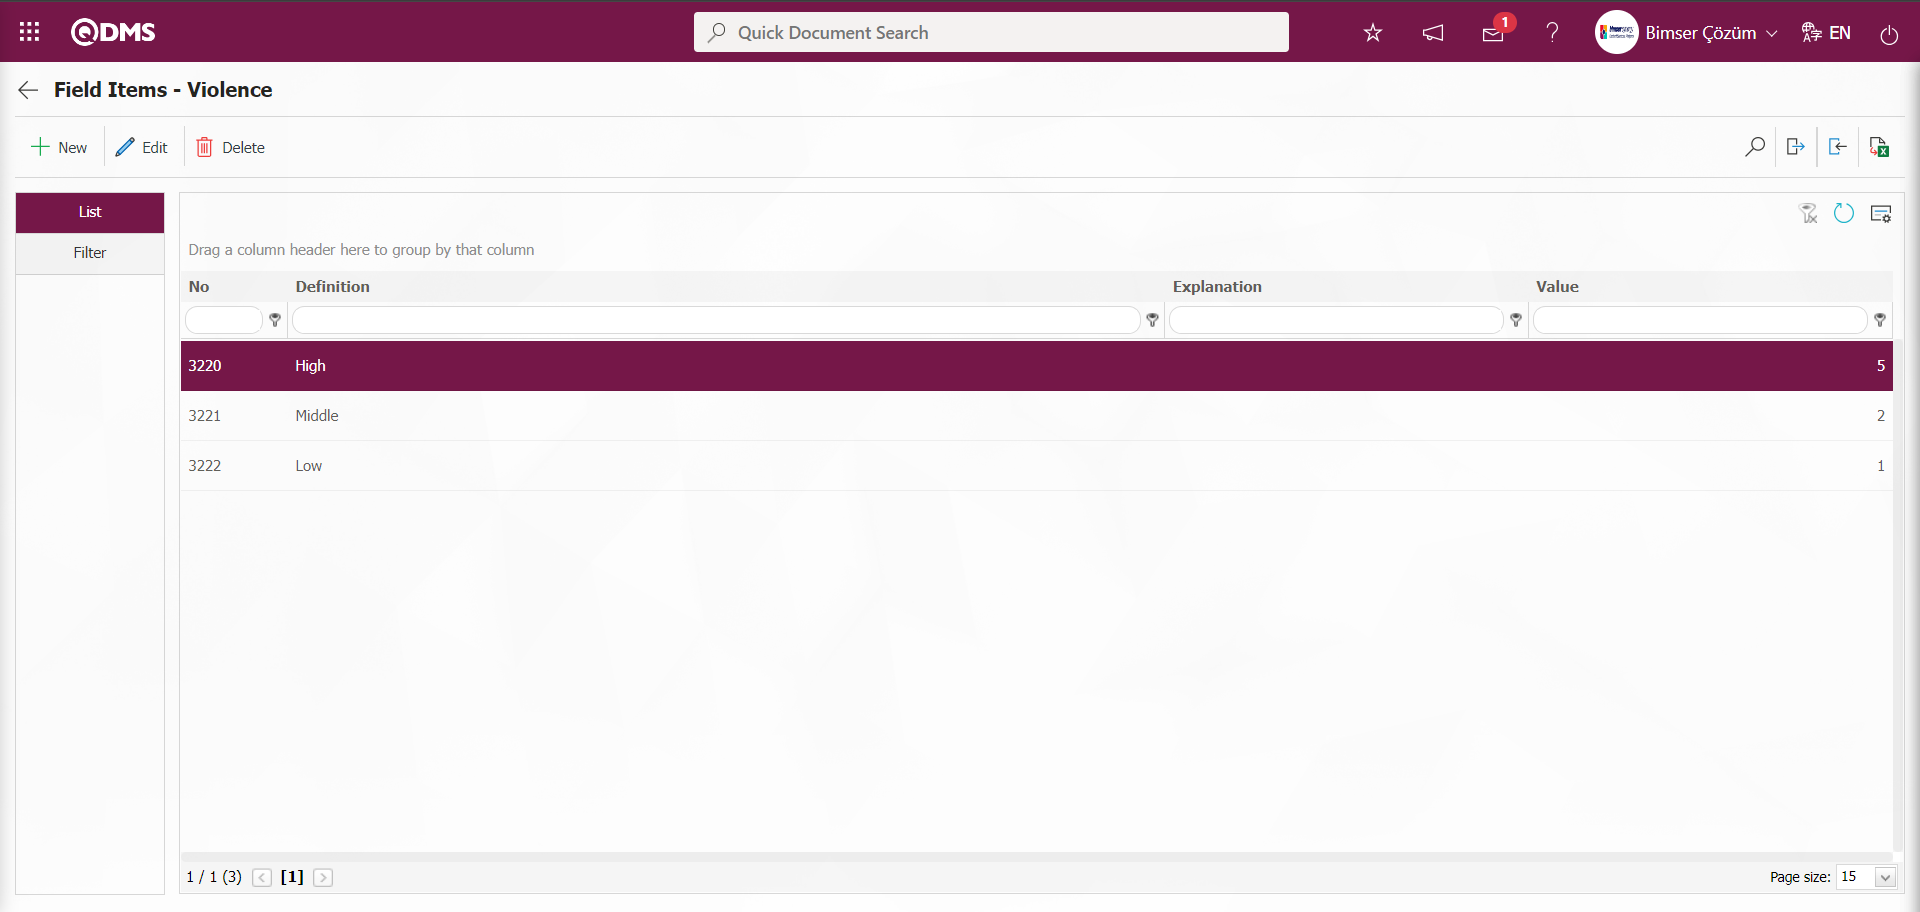
button to start the new value definition process.
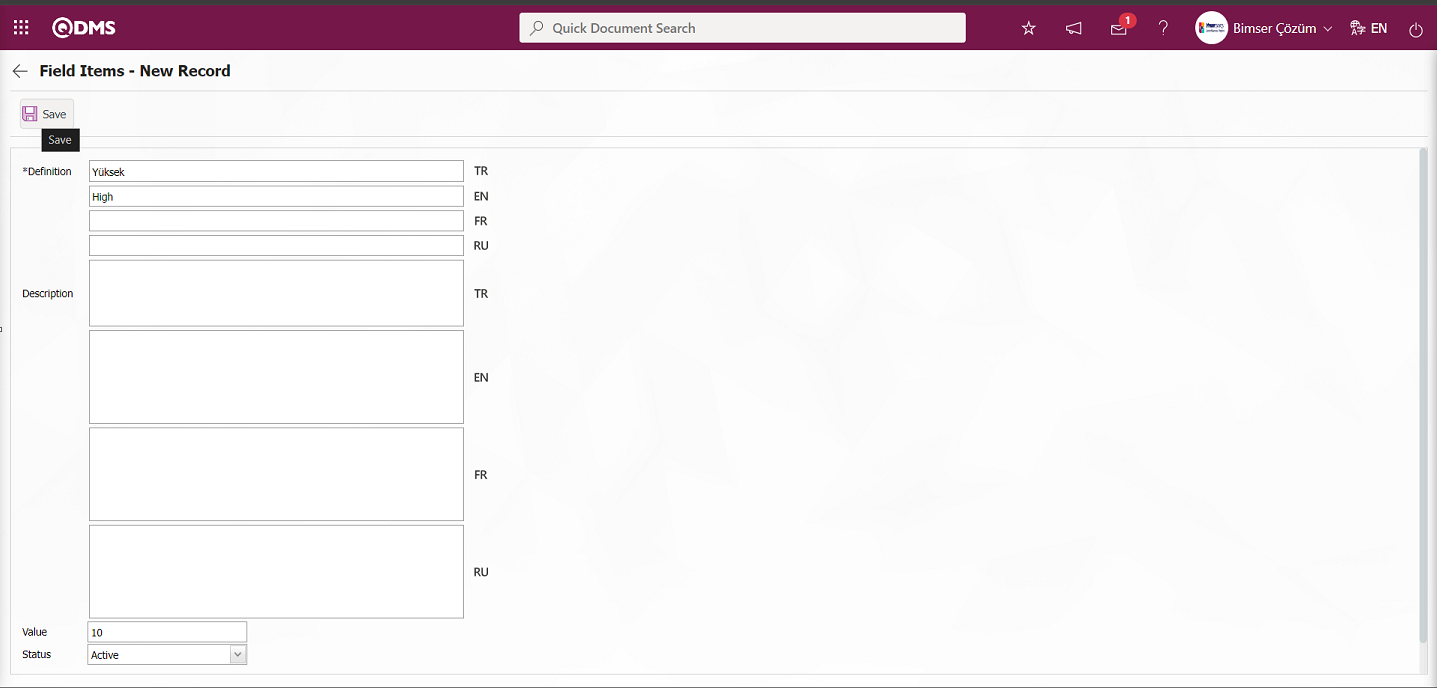
Define the relevant fields on the screen that opens:
Definition: Field Items - New Record definition information is entered.
Description: Description information is written in Field Items - New Record screen.
Value: Enter the point equivalent of the value on the Field Items - New Record screen.
Status: Select the status of the value as active or passive on the Field Items - New Record screen.
Default: Allows the relevant list value to appear in the field by default on the Field Items - New Record screen.
After filling in the required fields, the value definition process is performed by clicking the  button in the upper left corner. Probability, severity, frequency, etc. The value definition operations of scored list, list, list type fields with search feature are done in this way. There may be changes on this screen according to the field properties.
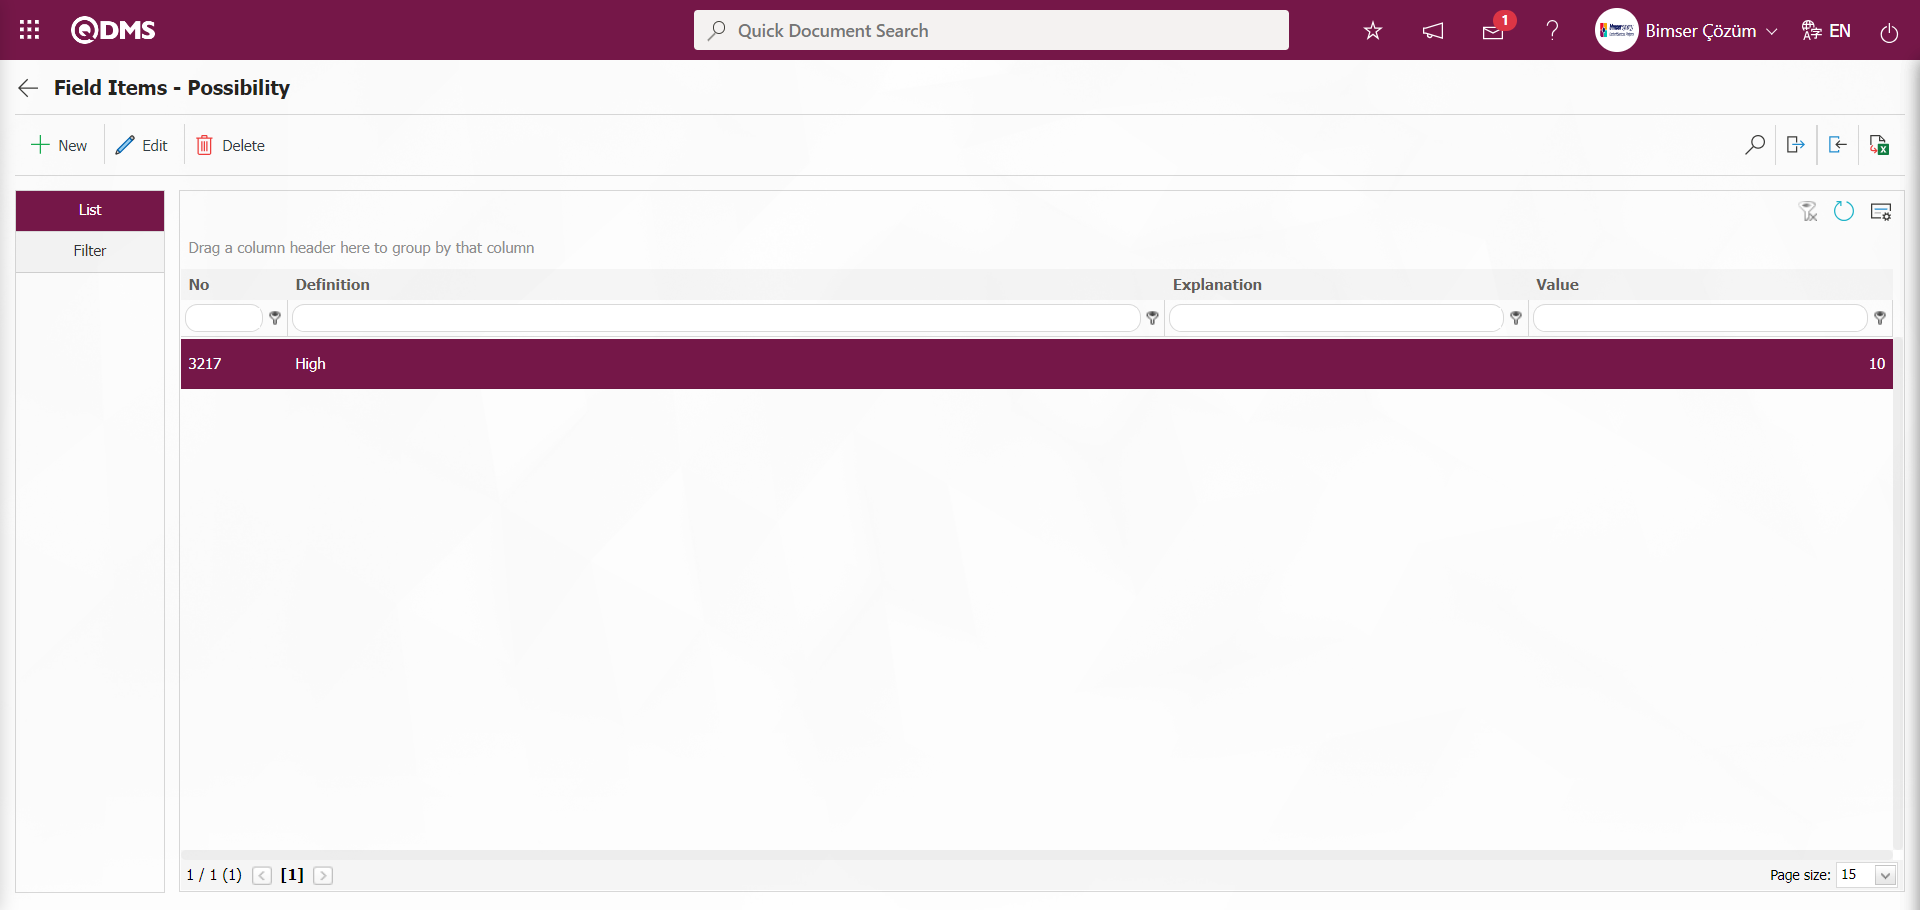
Defining all values related to the possibility field is done.
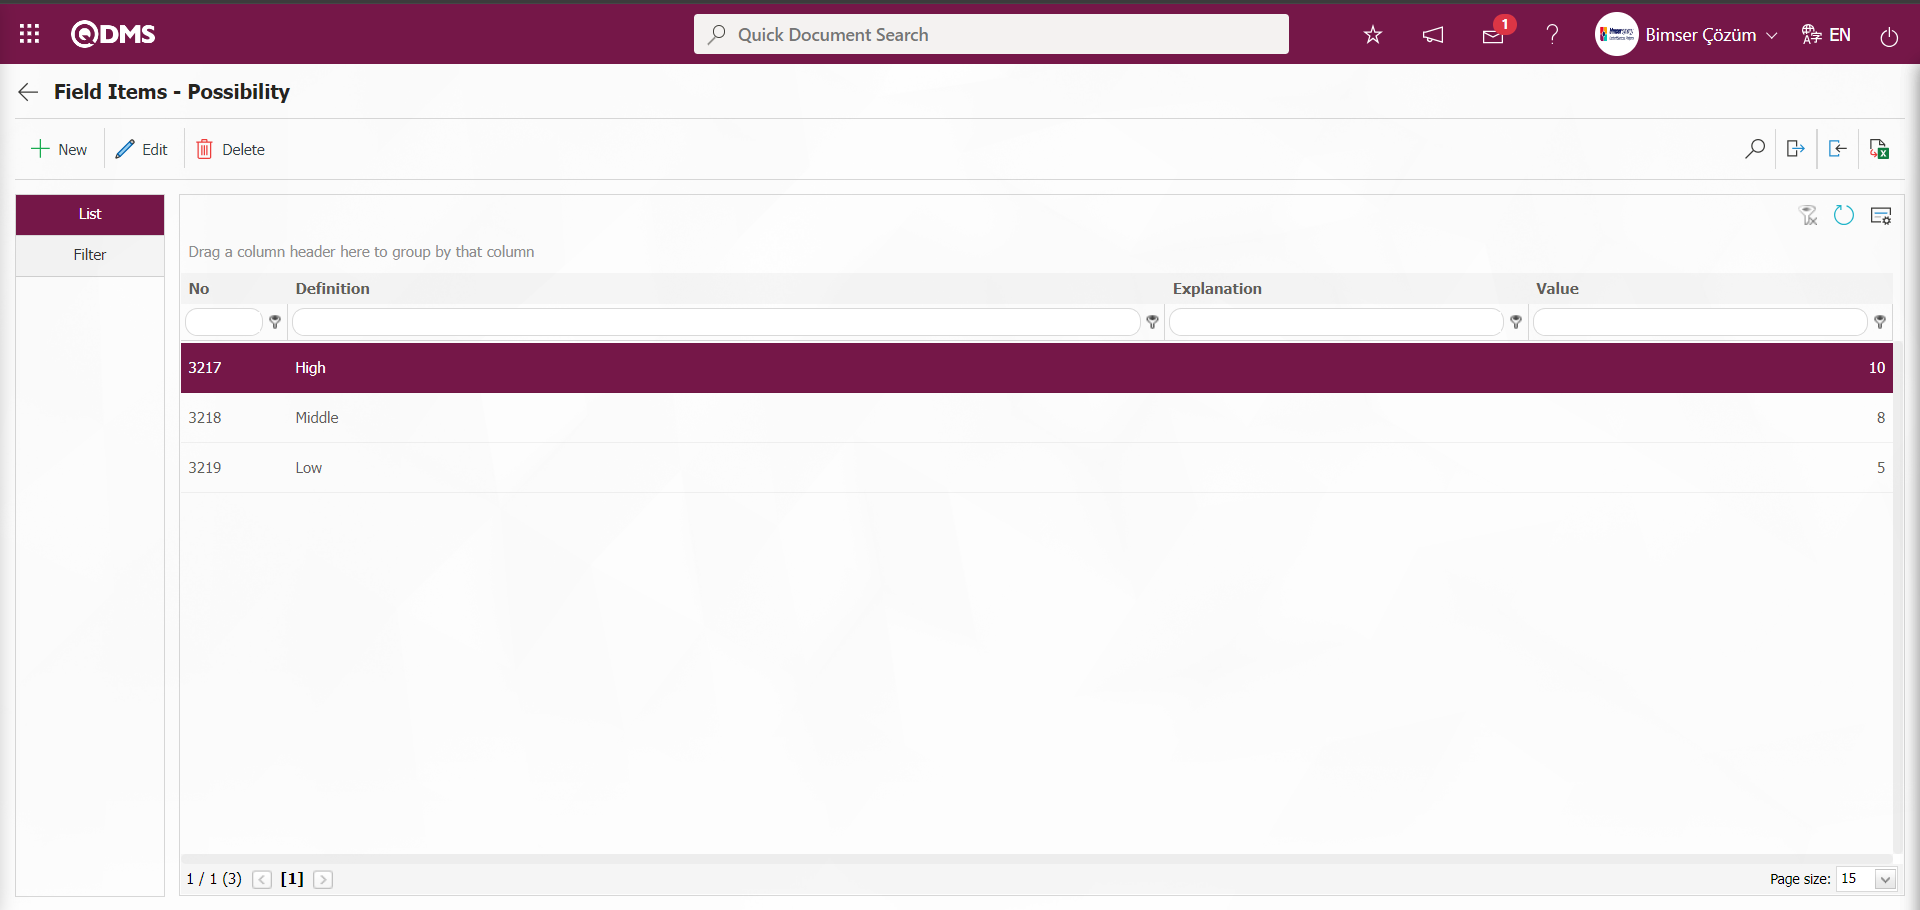
As in the possibility scored list type, the process of defining the Violence scored list type field is done in the same way by using the buttons.
In the same way as in the possibility scored list type, the process of defining all values of the Violence scored list field is done by using the buttons.
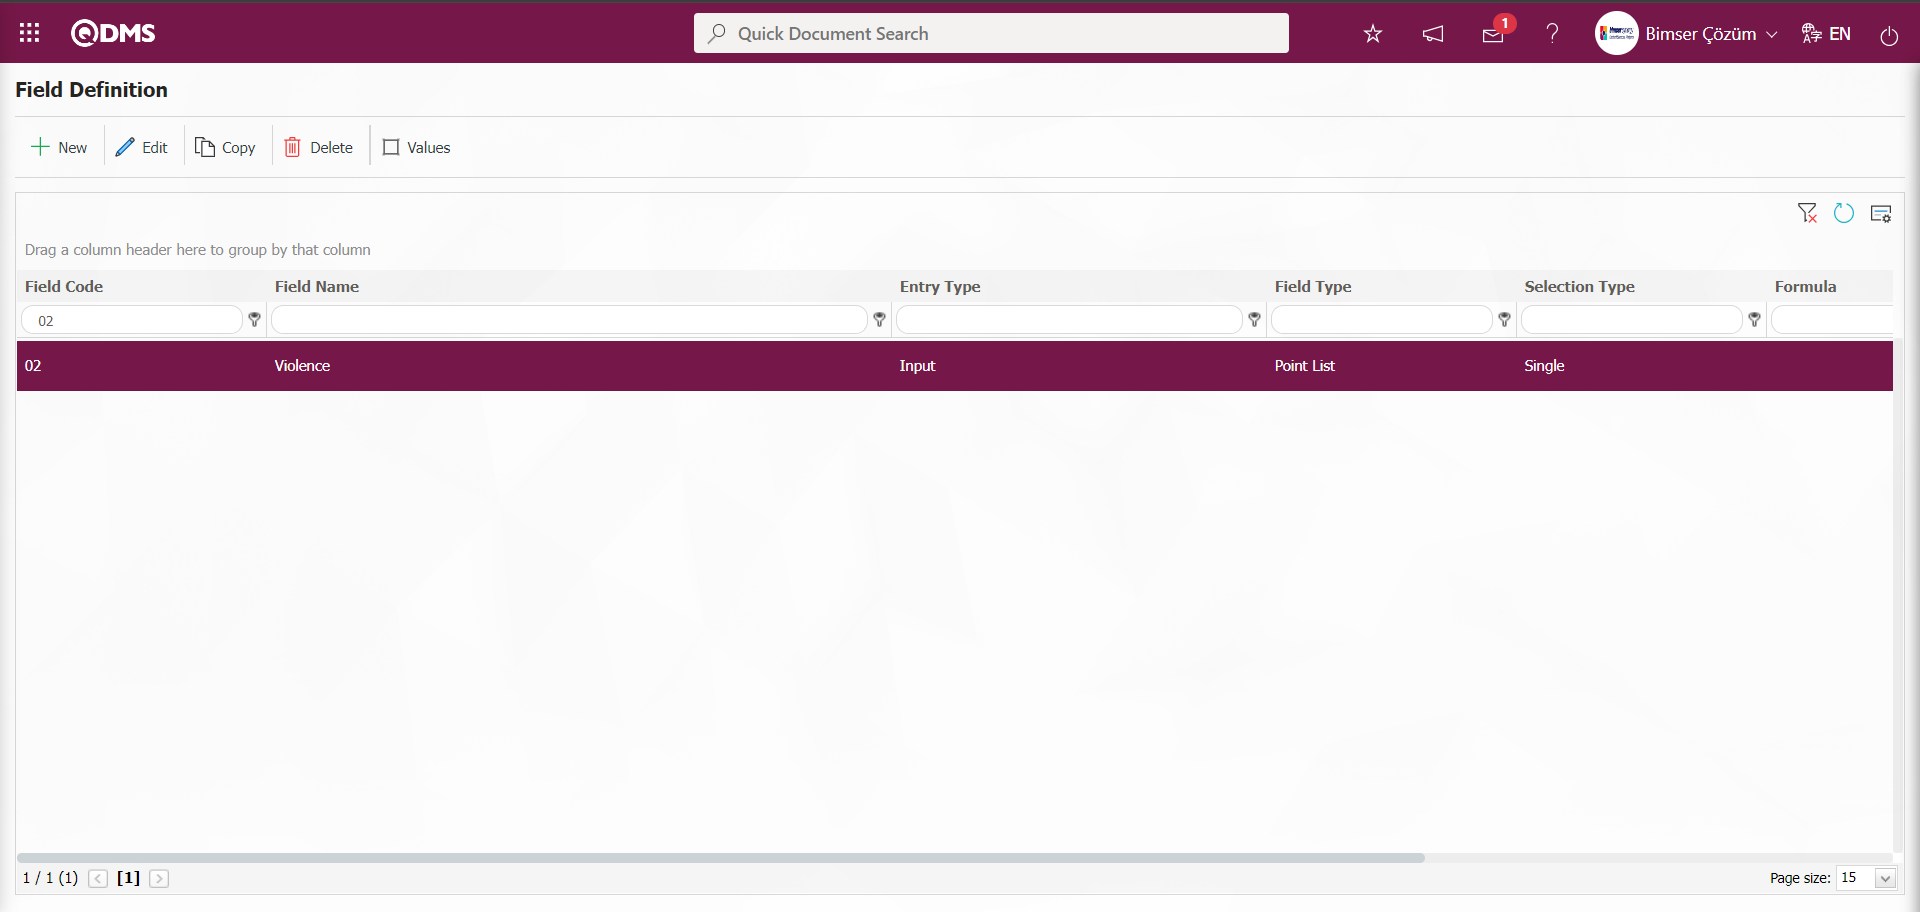
The fields for which data entry is selected as input type are defined as above. The fields whose input types will be calculated (such as Risk Magnitude) are defined with their formulas.
For the definition of the Risk Magnitude field, click the  button to open the Field Definition-New Record screen
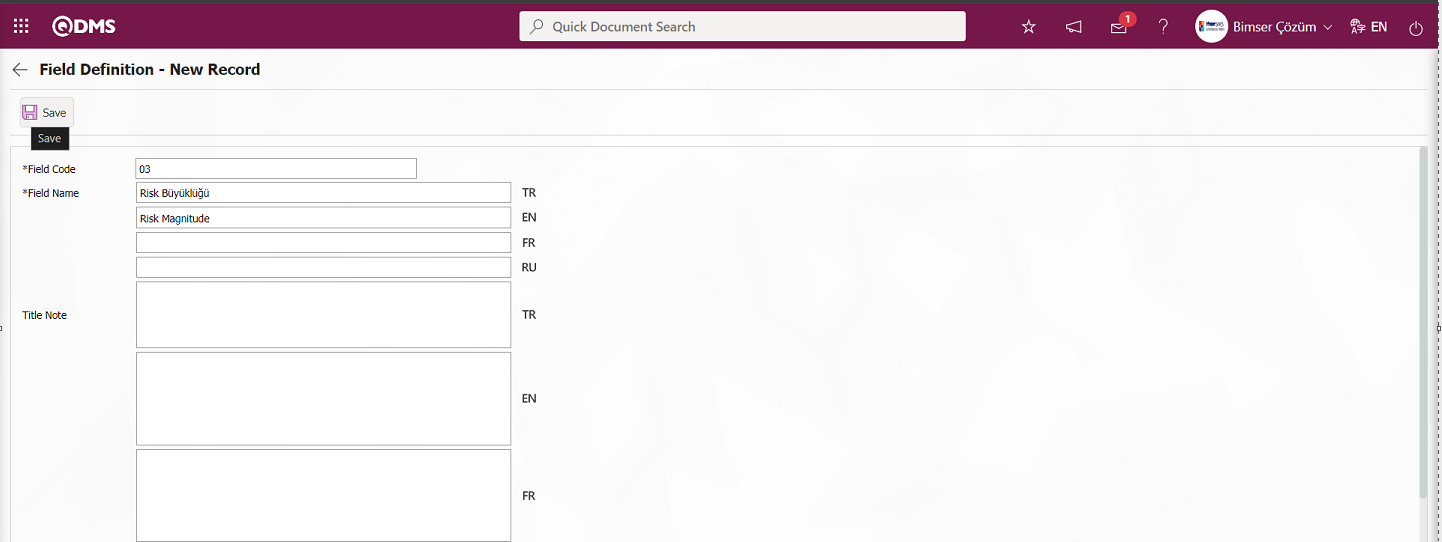

Related fields are defined on the screen that opens;
Field Code: This is the mandatory field where the Field Code information is entered on the Field Definition-New Record screen. It should be defined without using characters such as spaces and Turkish characters, so that it is not the same as previously defined fields. Ex. '001' , 'RK'
Field Name: This is the field where the Field Name information is entered on the Field Definition-New Registration screen.
Title Note: This is the field where the note information containing explanatory information about the data entry of the field on the Field Definition-New Registration screen is entered. It is the information displayed when hovering over the field with the mouse.
Entry Type: It is the field where the entry type can be selected as Calculated or Data Entry type on the Field Definition-New Record screen. Entry Type option shows whether the created field will be determined manually by data entry or by calculation method.
Formula Type: This is the field where the formula type option to be used in the field is selected as Excel or SQL on the Field Definition-New Record screen. It is necessary to get help from Bimser Support Team for the formula to be used in the SQL formula type option.
Formula: This is the field where the formula information to be written according to the formula type selected on the Field Definition-New Record screen is entered. Since Excel formula type option is selected, Excel Formula is written in the related field.
Field Type: This is the field where the field type options are selected on the Field Definition-New Record screen. Field types are Text, Numeric and List type options. Numeric field type is usually selected for formulas.
Condition of Appearance: This is the field where the Condition of Appearance information is entered on the Field Definition-New Record screen. If a field will be seen depending on the condition of another field, the condition of appearance is used. It allows the field created according to the values of the list-type field to be displayed. Its usage is [ALANKODU]=ALAN_DEĞERİ etc. (For example, Is there an opportunity? Field's field code is 01 and Opportunity field's field code is 02. If the “Opportunity” field should be seen if the “Yes” value with value code 100 is selected from the options in the “Is there an opportunity?” field, the formula should be written as follows in the “Opportunity” field's appearance condition
Status: This is the field where the status can be selected as “Active” or “Inactive” on the Field Identification-New Registration screen.
Trend: This is the field where the check box related to the relevant field to display the risk defined in the Field Definition-New Record screen as a trend is checked.
After filling in the required fields on the Field Definition-New Record screen, the field definition record process is performed by clicking the  button in the upper left corner.
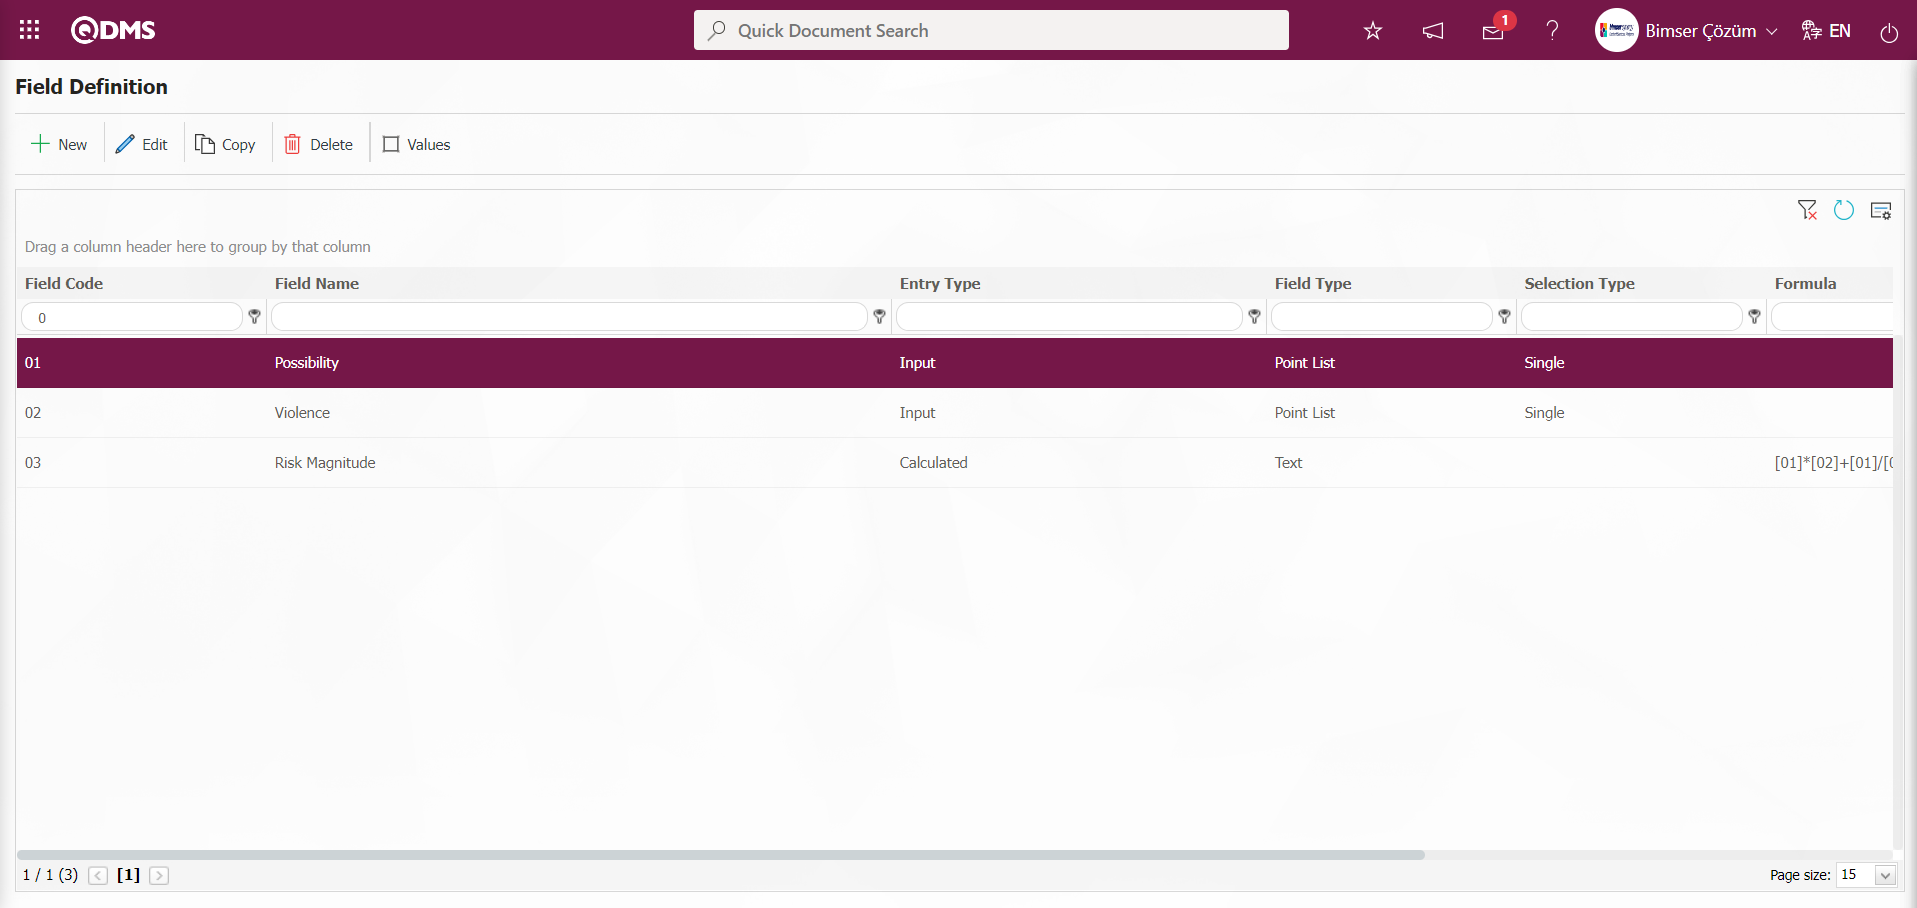
Formula entries are made on the definition screens of the relevant fields. For example, a formula can be analyzed as follows: In the formula related to Risk Magnitude, the expression written in square brackets in a field written as [01][02]+[01]/[02] represents the field codes. These expressions are determined by the user when defining the fields on the field definition screen. The formula coded as 01 for Possibility field and 02 for Severity field would be in the form of [01][02]+[01]/[02]. As a result of this formula, the Risk Magnitude Field will be calculated automatically by the system as the sum of the results of taking the product of the values selected in the Possibility and Violence field, taking the quotient of the Possibility and Violence field.
The full list of field types available in the system is given below;
- Text: Adds a text box that allows manual typing.
- Text Multiline: Adds a multi-line text box with no character limit for manual typing.
- Numeric: Enables numeric data entry.
- Numeric-Monetary: Enables numeric entry as monetary value.
- Numeric-Unit: Makes numeric entry as unit.
- Date: Adds a calendar field.
- List: Makes a single selection from multiple elements.
- Scored List: Makes a selection from the drop-down menu, list elements have point values.
- List with Search: Allows single and/or multiple selections from multiple elements with a wide search function.
- Tree List: Allows selection from more than one element with a tree breakdown in a way that can be searched with a wide search function.
- Personnel: Allows to select a person from QDMS personnel database.
- Department: Allows the selection of department information from the QDMS department database.
- Title: Allows to select title information from QDMS title database.
- Document: Allows you to select a document from the QDMS document database.
- Management System: Allows to select management system information from QDMS management system database.
- Customer: Allows to select customer information from QDMS customer database.
- Supplier: Allows the selection of supplier information from the QDMS supplier database.
- Product: Allows product information to be selected from the QDMS product database.
- Company Profile: Allows to select company profile information from QDMS company profile database.
- Title: Adds a title field to the forms to be written in bold letters.
- File: Will bring the appropriate field for file attachment**
- Image: Will bring available space for image attachment
- Image List: Allows selection from a list of images.
- Multiple Image: Allows to select multiple images.
- Table: Allows the creation of a table type field. (After adding this type of field, new field definitions must be made as field values.)
- Query: It is a field type that can be defined in order to make a selection from the main data in QDMS/Ensemble databases. (It should only be defined by Bimser Support Team) Single and multiple selections can be made.
- Query Tree: It is the type of field that can be defined in order to make a selection from the tree-delimited master data in QDMS/Ensemble databases. (It should only be defined by Bimser Support Team) Single and multiple selections can be made.
- Tab: Creates a new tab in which the fields can be seen in the existing risk assessment form by establishing a relationship, except for the tab containing the fields.
- Checkbox List: It is a list type field that can be used for single or multiple selection according to the request.
- Risk: It enables the selection of values from risk-based modules. After adding this type of field, it is necessary to select from which module the values will come from on the field definition screen.
- Annotated List: It is a field type that allows you to write a description next to the selected list value. When defining field values in the Field Definition menu, it is necessary to select whether the description box will be active for each value. According to the selection made here, when the relevant selection is made in the menu where this field will be seen under the Integrated Management System menu, the box is opened for the user to write a description next to the field value.
- Position: It allows to select position information from QDMS position database.
- Clock: Adds a clock type field.
6.1.11. Function Design
Menu Name: System Infrastructure Definitions/ CAPA/ Function Design
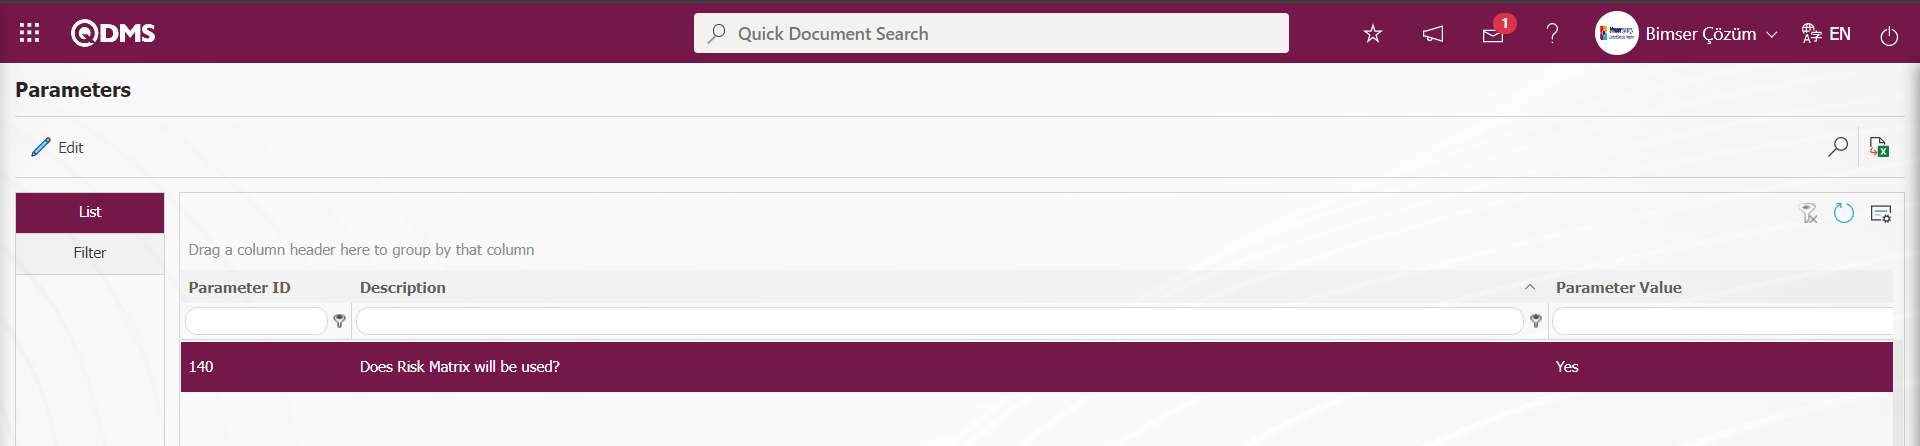
It is the menu where the process of linking the fields defined in the CAPA Module to the Risk matrix is realized. In the CAPA module parameters, parameter 140 “Does Risk Matrix will be used?” is activated by selecting the parameter value “Yes”.
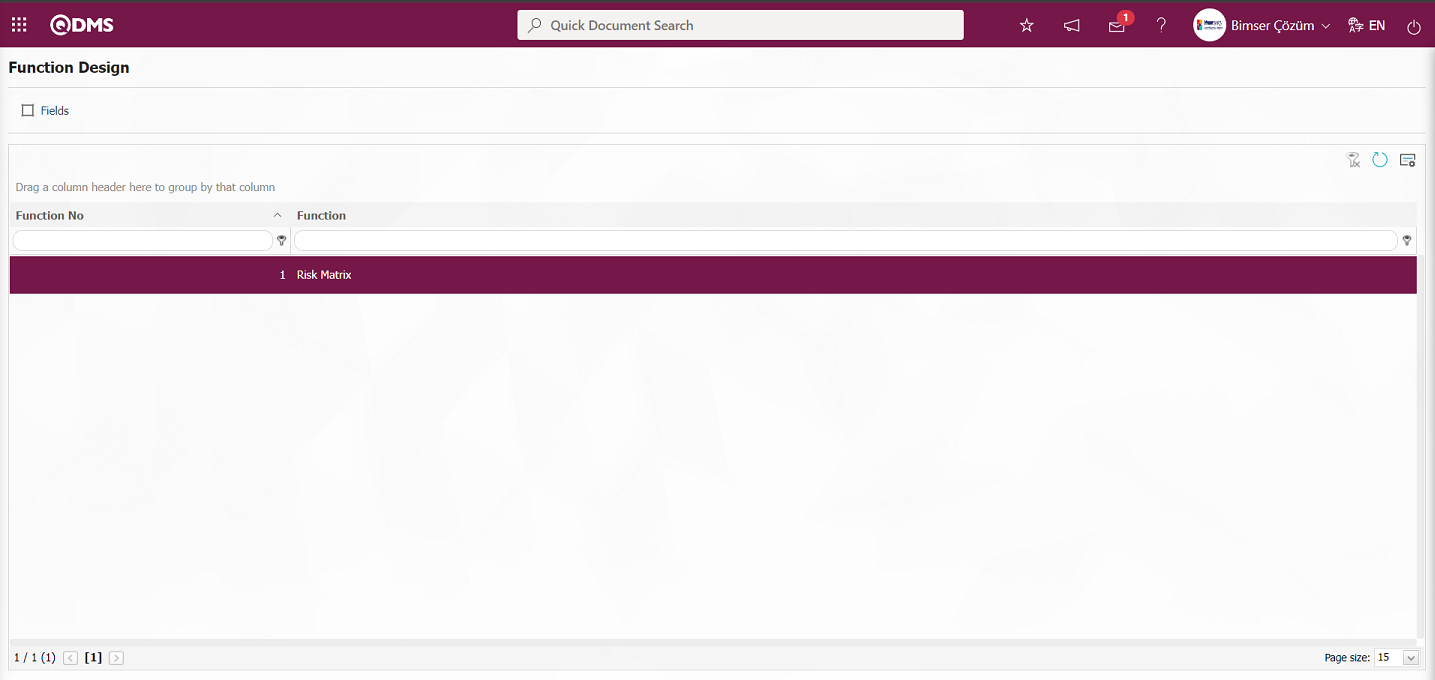
After the parameter is activated, it is enabled to calculate the risk size of any CAPA on the company by displaying the relevant fields in the Risk matrix tab on the CAPA Activities - New Record** screen and entering data in these fields. To do this, go to System Infrastructure Definitions / CAPA / Function Design Menu.
With the help of the buttons on the screen;
 : Fields are associated with functions.
: The search criteria on the menu screens are used to clean the data remaining in the filter fields in the grid where the search operation is performed.
: The menu screen is restored to its default settings.
: User-based designing of the menu screen is done with the show-hide feature, that is, the hiding feature of the fields corresponding to the columns on the menu screens.
Click the button on the Function Design screen.

With the help of the buttons on the screen;
 : A new field is added to the selected function in the list.
 : Changes / edits / updates are made on the field information added to the selected function in the list.
: Delete the field information added to the function selected in the list.
: The search criteria on the menu screens are used to clean the data remaining in the filter fields in the grid where the search operation is performed.
: The menu screen is restored to its default settings.
: User-based designing of the menu screen is done with the show-hide feature, that is, the hiding feature of the fields corresponding to the columns on the menu screens.
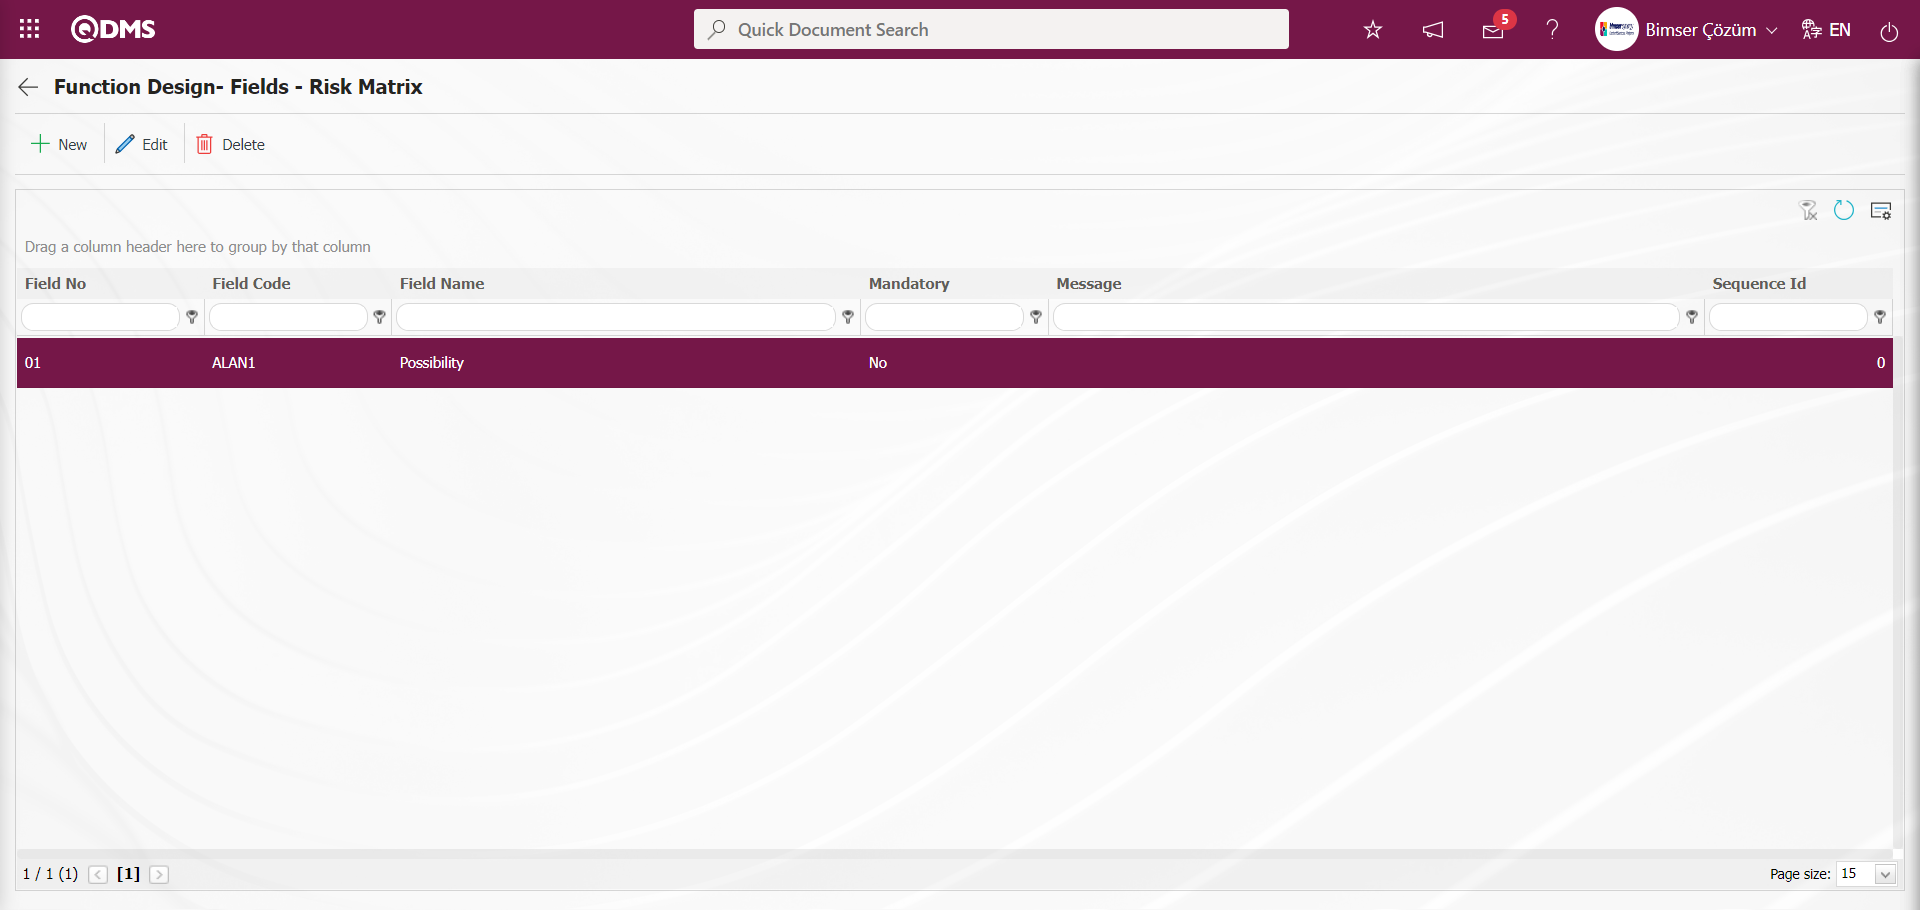
On the Function Design- Fields screen, the fields to be used in the selected function are determined by clicking the button.

Related fields are defined on the screen that opens:
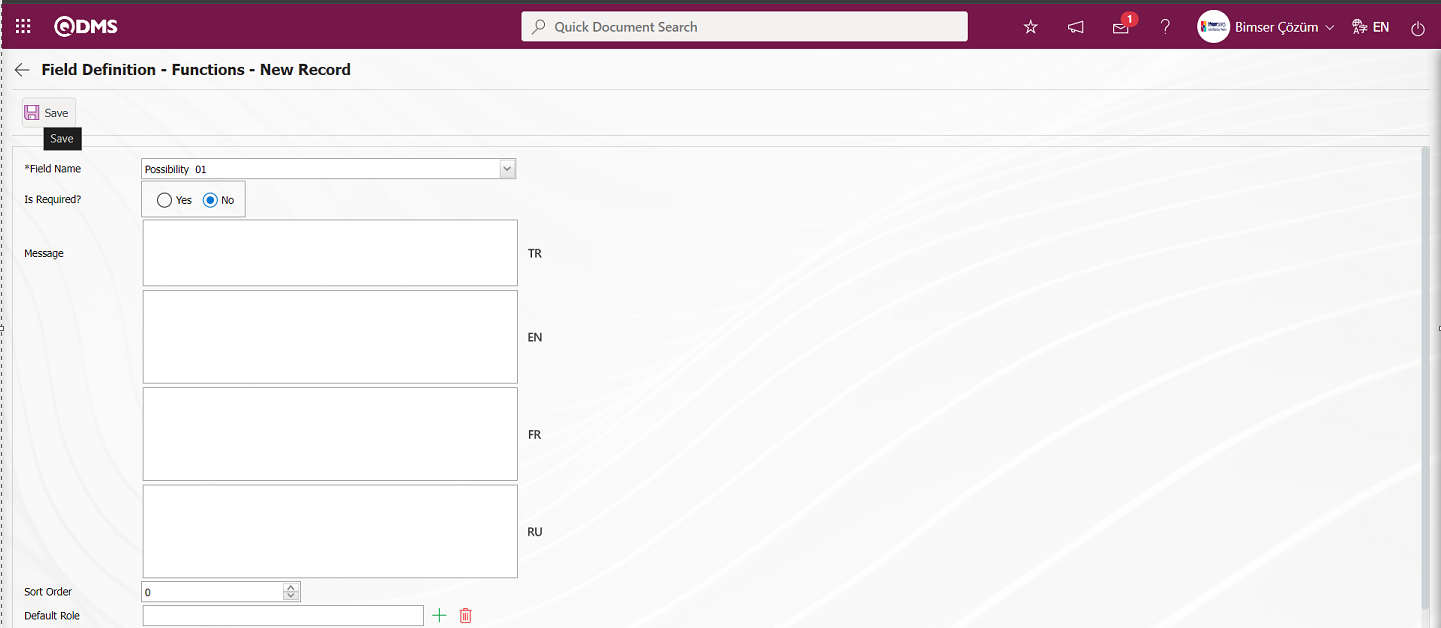
Field Name: This is the field where the field selection is made from the fields defined on the Field Definition - Functions - New Record screen.
Is Required?: Field Definition - Functions - New Record screen determines whether data entry is mandatory for the selected field. When “Yes” option is selected, data entry is mandatory for the field.
Message: This is the field where the Mandatory Message information is entered for the field selected on the Field Definition - Functions - New Record screen. The warning message information to be given when the mandatory fields are not filled is written.
Sort Order: It is the field where the sequence number of the field is determined on the Field Definition - Functions - New Record screen.
Default Role: For the field selected on the Field Definition - Functions - New Record screen, it is the field where the information about which role on the role definition screen will be approved is entered.
Default value is read only: If the default value of the field selected on the Field Definition - Functions - New Record screen is not desired to be changed, the relevant check box is checked.
Show in Grid: Field Definition - Functions - If the field selected on the New Record screen is desired to be displayed on the list grid screen, the relevant check box is checked.
Row Count: This is the field where the number of rows for the field selected in the Field Definition - Functions - New Record screen is determined.
Column Width: It is the field where the column width information is determined for the field selected on the Field Definition - Functions - New Record screen.
After filling in all required fields on the Field Definition - Functions - New Record screen, click on the  button on the top left corner of the screen to link the field to the risk matrix.
All fields added to the field pool are linked to the Risk matrix in the same way on the Field Definition - Functions - New Record screen.

In this way, it is determined which fields will be included in the Risk Matrix tab on the CAPA Activities - New Record screen. For the risk matrix to work, the parameter 140 “Does Risk Matrix will be used?” must be activated in the CAPA Module parameters. When the parameter is activated, the Risk Matrix tab is displayed on the CAPA Activities - New Record screen.
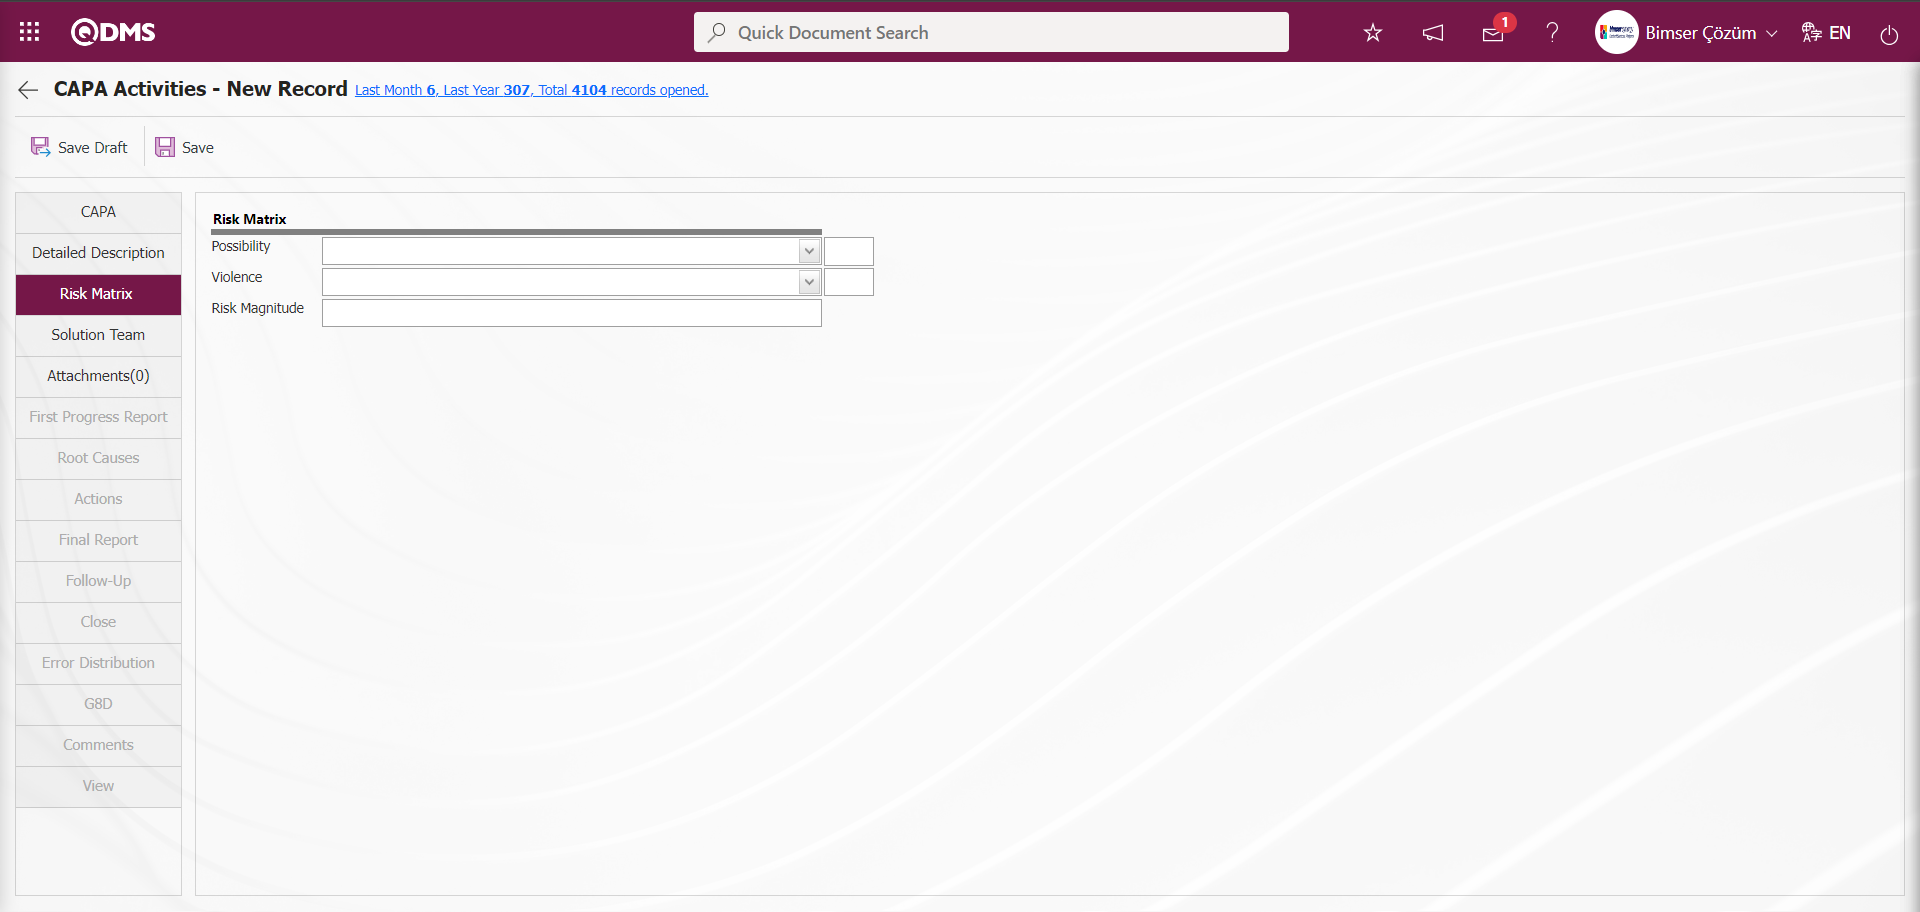
By viewing the relevant fields in the risk matrix tab and entering data in these fields, it is possible to calculate the risk size of any CAPA on the company.
The parameter value of parameter 178 of the CAPA Module parameters is activated by selecting “Yes”.
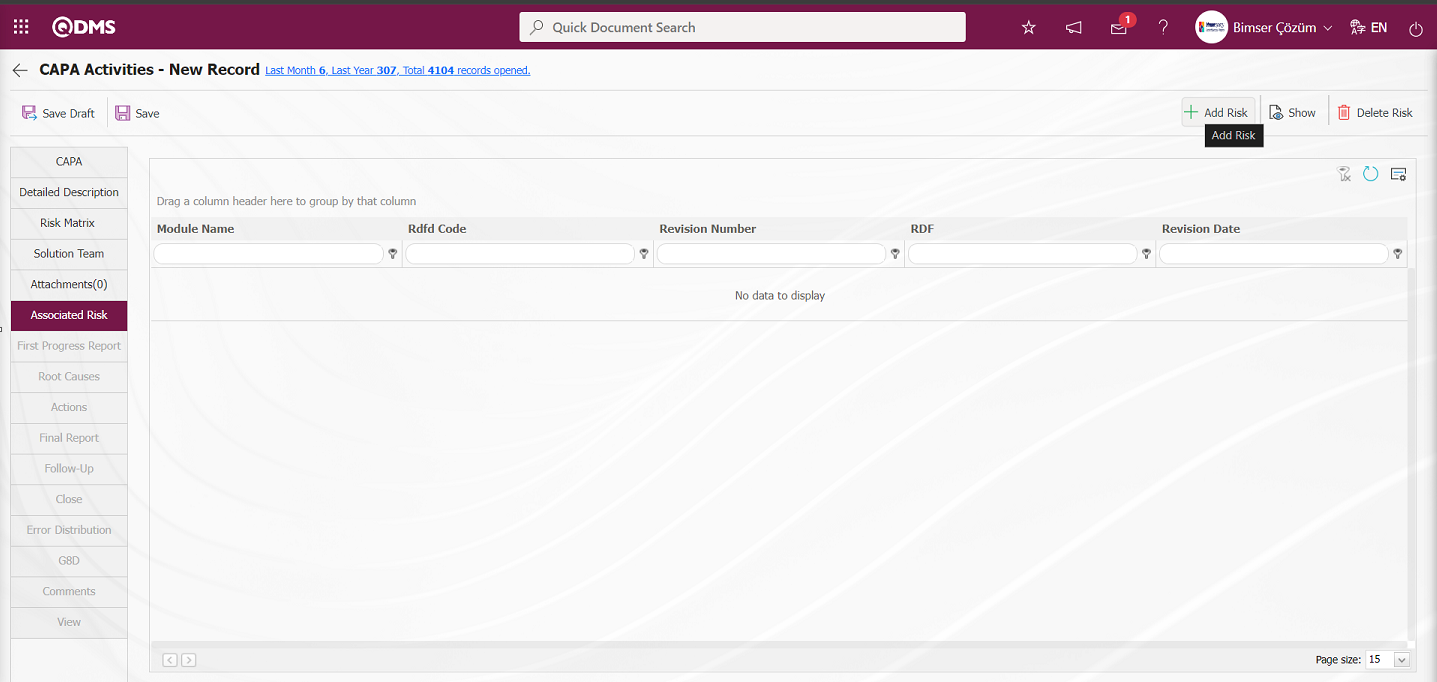
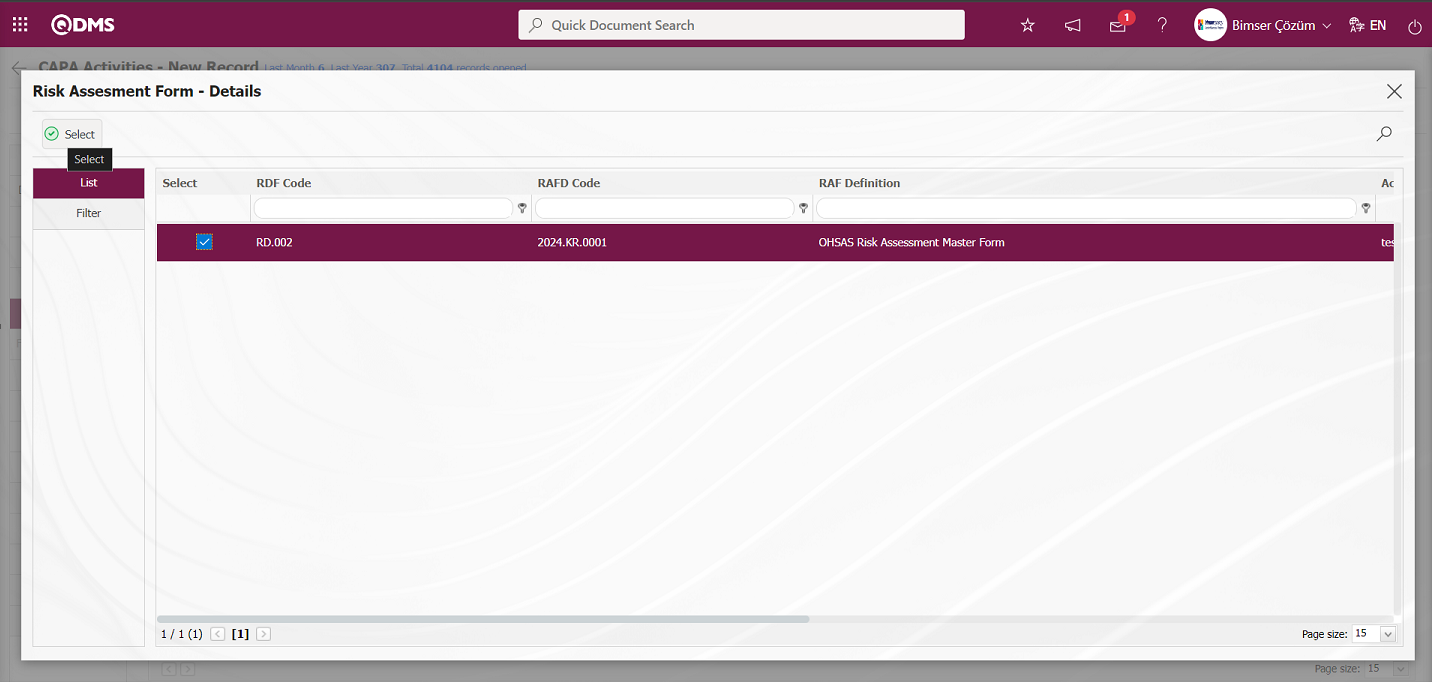
After the parameter is activated, the Associated Risk tab is displayed on the CAPA Activities - New Record screen. In this tab, it is ensured to establish a relationship with the risks defined in the system in the Risk modules in the CAPA module. Click on a defined CAPA Record to perform this operation. In the CAPA Activities - New Record screen that opens, the association is made with the risks defined in the system in the risk modules with the help of the buttons.
With the help of the buttons on the screen;
 : CAPA record is added to the risks defined in the selected module.
 : Viewing of the risk associated with the risk is done.
 : Deleting the risk associated with the risk is done.
On the CAPA Activities - New Record screen, click the button on the Associated Risk tab. In the Module list that opens, the risk module to be associated is selected and the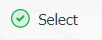 button selection process is performed.
After the module selection process, the list of risks defined in the system of the risk module to be associated is displayed. On the Risk Assessment Form-Details screen, the button is clicked by making a selection in the Risk list. By clicking the button on the Risk Assessment Form-Details screen, a new risk is defined in the risk module that is associated at this stage. On the CAPA Activities - New Record screen, the risks added to the risk module in the risk module in the associated Risk tab are displayed.
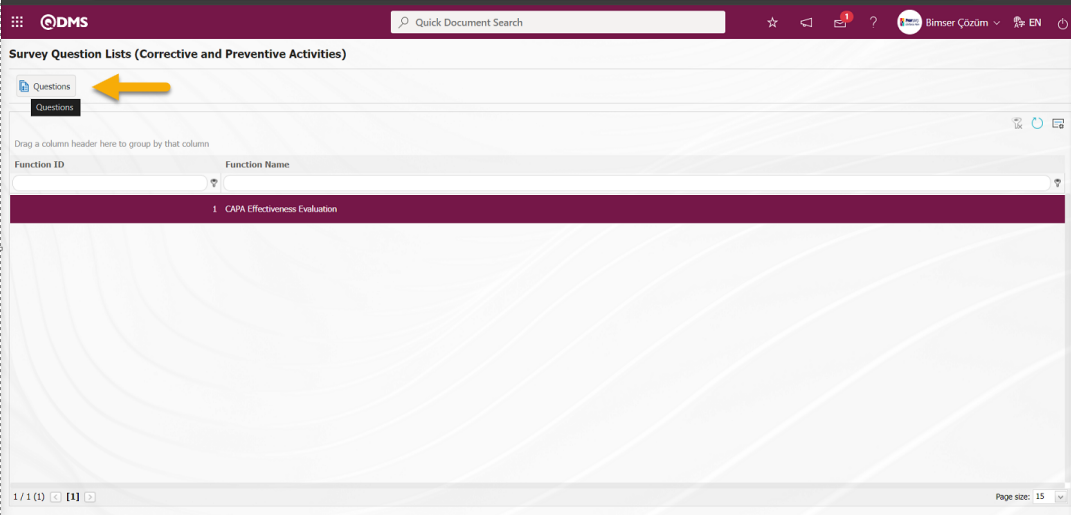
6.1.12. Survey Question Lists
Menu Name: System Infrastructure Definitions/ CAPA/ Survey Question Lists
This is the menu where Survey Question lists for Corrective and Preventive Actions Module are prepared for related functions. In the Questionnaire Question lists menu, the questionnaire task is created with the Agent application depending on the parameters. At the CAPA Closure stage, “Will CAPA's efficacy be evaluated?” is marked with the check box and at least 1 day after the record related to CAPA is closed, these surveys will be sent to the “My pending work” in the “Survey Operations Module”. “Surveys will be filled out.” as a task. In order for this task to fall, it is absolutely necessary to run the relevant function from the server in the agent program. Survey filling is done by clicking the link in the survey code field in the relevant task.
It is used for users who do not have a Survey Operations Module to design a Survey template for the relevant function in this module, as in the Survey Template screen opened in the Survey Operations module. This function is the “CAPA Effectiveness Evaluation” function. When the “CAPA Effectiveness Evaluation” function is selected as a function on the Questionnaire Question Lists screen, the  button on the top left is clicked and template questionnaires are designed and saved in this menu in the system in the logic of the Supplier Evaluation module. After the template surveys are designed, if the parameter value of the parameter 80 numbered “Activity Evaluation Survey Code”, which is the parameter related to the 1st function of the Corrective and Preventive Actions module, is empty, the system automatically defines the survey code to the parameter value.
With the help of the buttons on the screen;
 : Adding questions to the questionnaire to be defined.
 : The data remaining in the filter fields in the grid where the search criteria on the menu screens are searched is cleared.
 : The menu screen is restored to the default settings.
 : User-based designing of the menu screen is done with the show-hide feature, that is, the hiding feature of the fields corresponding to the columns on the menu screens.
 By clicking the button, the question addition screen for the relevant function for the CAPA module is displayed, such as the screen where the question addition process in the structure of the Survey Module is done, and the question is added from the question options.
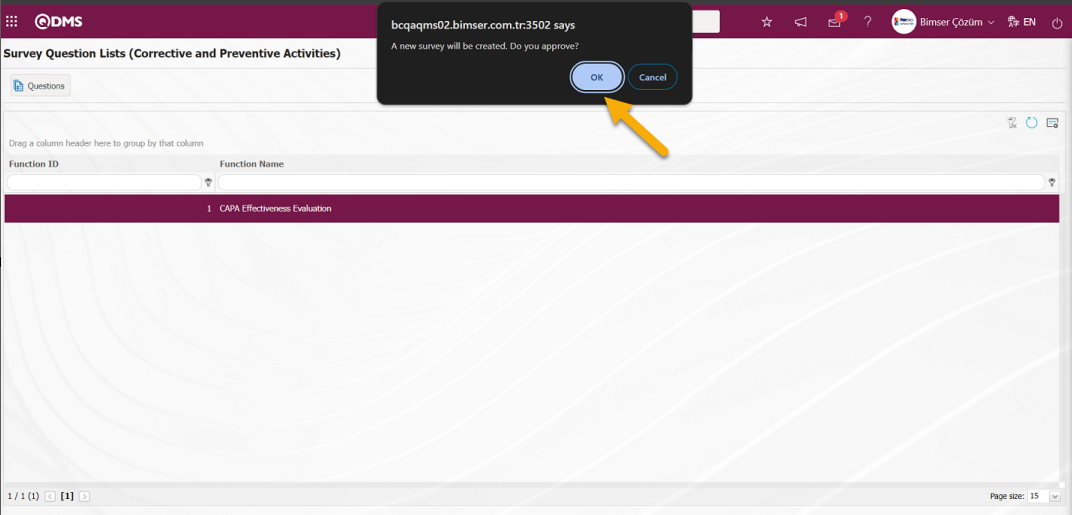
When no parameter code is defined in the parameter value of the parameter 80 “Activity Evaluation Survey Code” of the Corrective and Preventive Actions Parameters, the system displays the warning message “A new survey will be created. Do you approve?” warning message, the survey questions screen is displayed by clicking the ‘OK’ button.
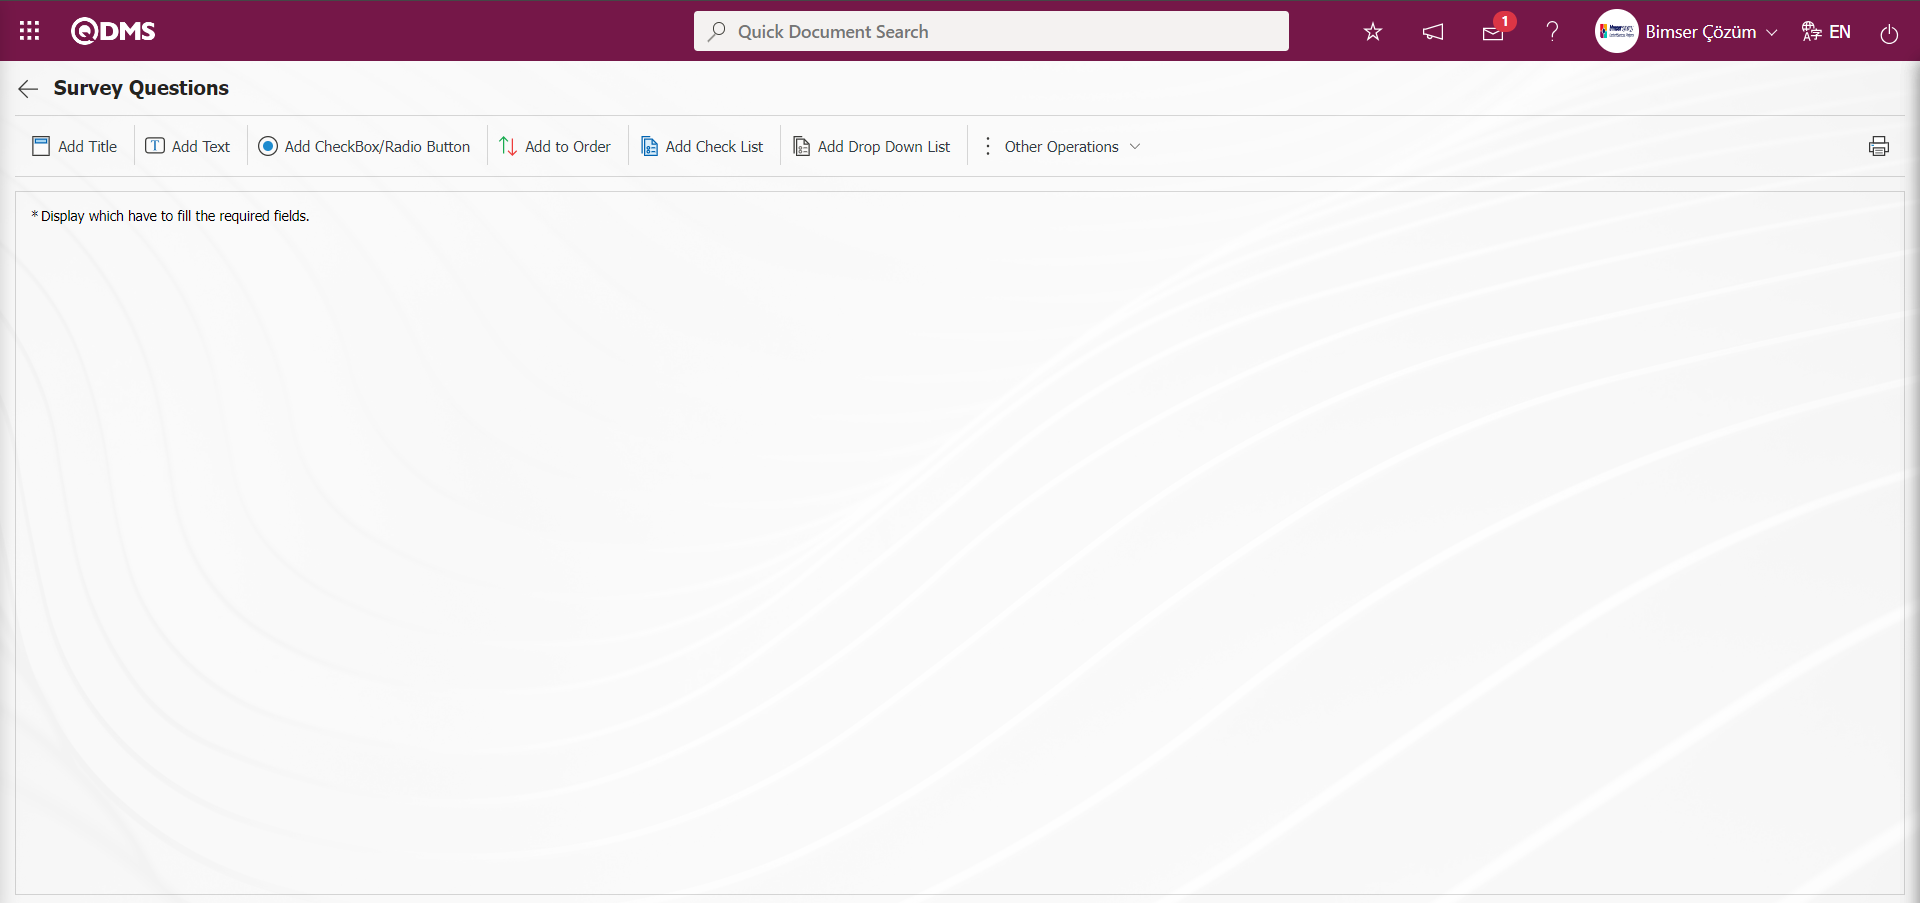
With the help of the buttons on the screen;
 : It is the button that allows you to print your questions.
 : This button is used if you want to section the questionnaire and add a title. After each title separator, the number of the defined question comes as 1.
 : It is the question type used when the people who fill out the questionnaire are asked questions that require free information.
 : It is used when the answers given are selected from the specified options.
 : It is used when all options of a question are preferred and listed in order of priority. The options are listed from more>less or less>most.
 : If there are too many options in the question to be created and they need to be selected like a check list, a multiple choice list type question can be added.
 : It is the question type to be used in case the question asked is selected as a single answer from the drop-down list.
 : This question type allows the selection of lists from the personnel, customer, department, company profile and product fields defined in Qdms.
 : It is a question type formed in the form of a matrix in which sub-questions are defined under the question text.
 : It is a type of question in the form of a picture matrix in which a picture is added in the question text field and a picture is added in the options.
 :** On the screen opened by clicking, the user can add a question to select a date.
 : Creates an Additional File field for adding additional files to the survey.
 : It is the question type that is selected from the list of question categories defined in the Question Categories screen opened in the Question Pool menu in the Survey Operations module.
Adding Sample Question options;
By clicking the button, the questionnaire is segmented and the title is added.
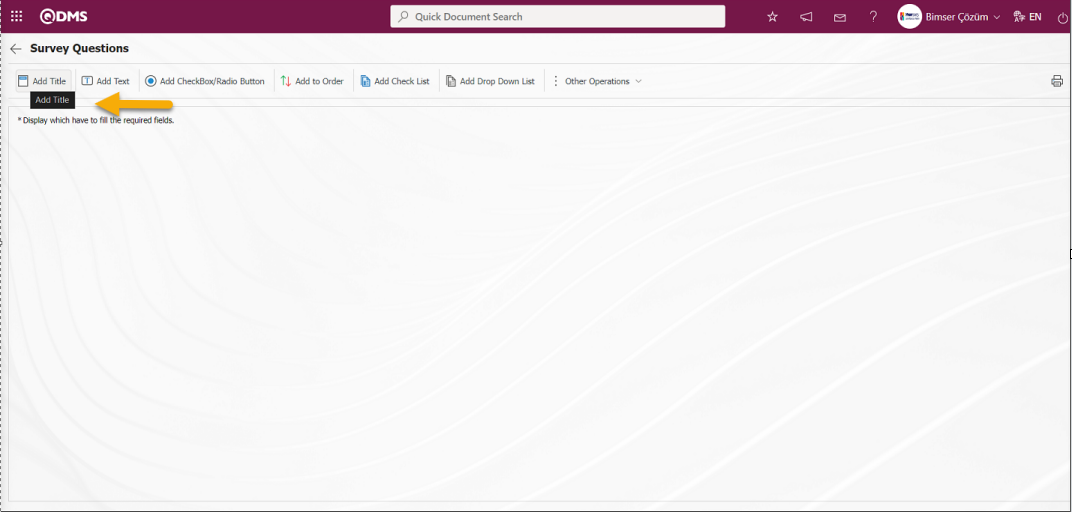
The Title Definition screen opens.
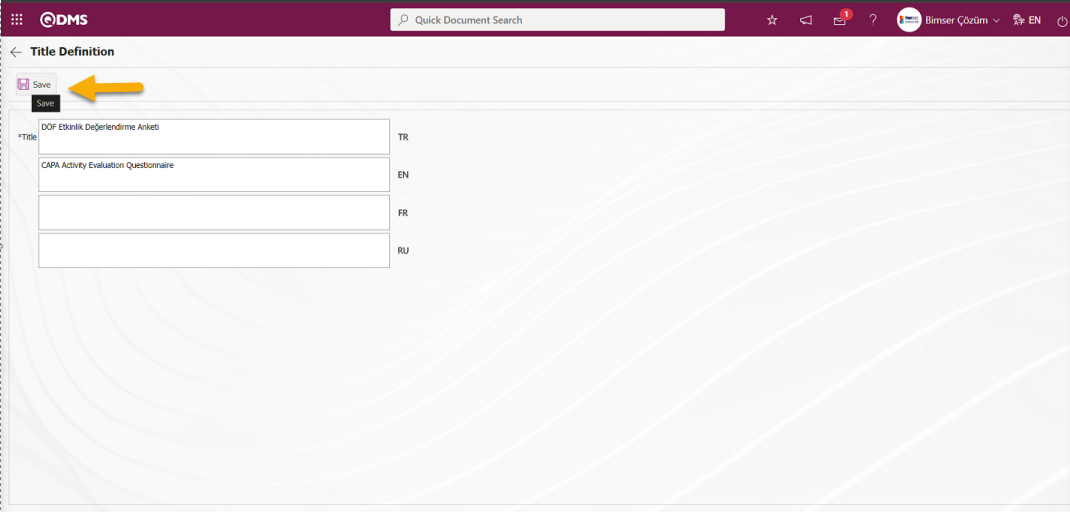
The relevant title is added to the Title Definition** field and the registration process is realized with the  button.
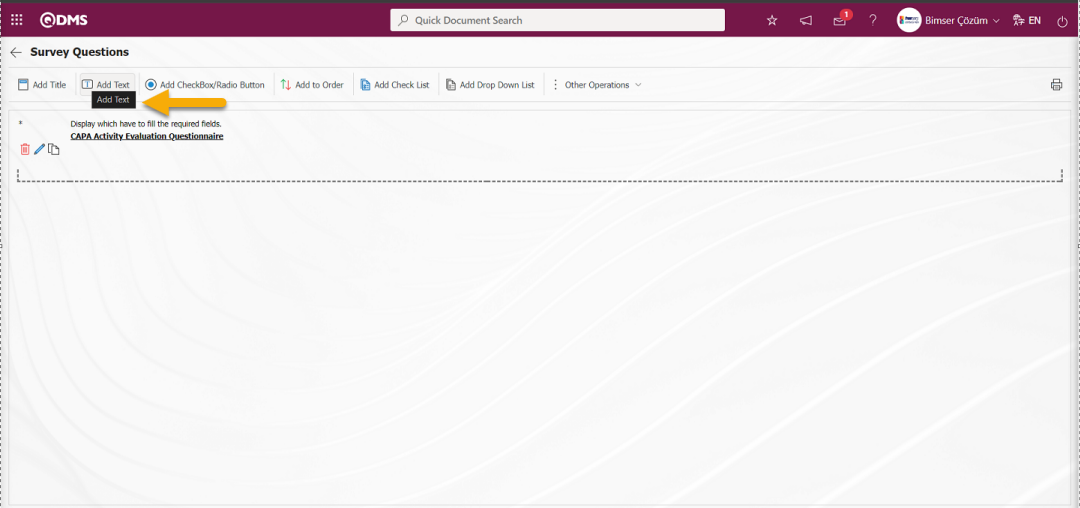
With the help of the buttons on the screen
 : The defined question information is deleted.
 : Editing and updating is done on the defined question information.
 : The defined question information is copied.
 :It is the question type used when people who fill out the questionnaire are asked Click the button to add the defined Text Definition question type. Text Definition screen opens.
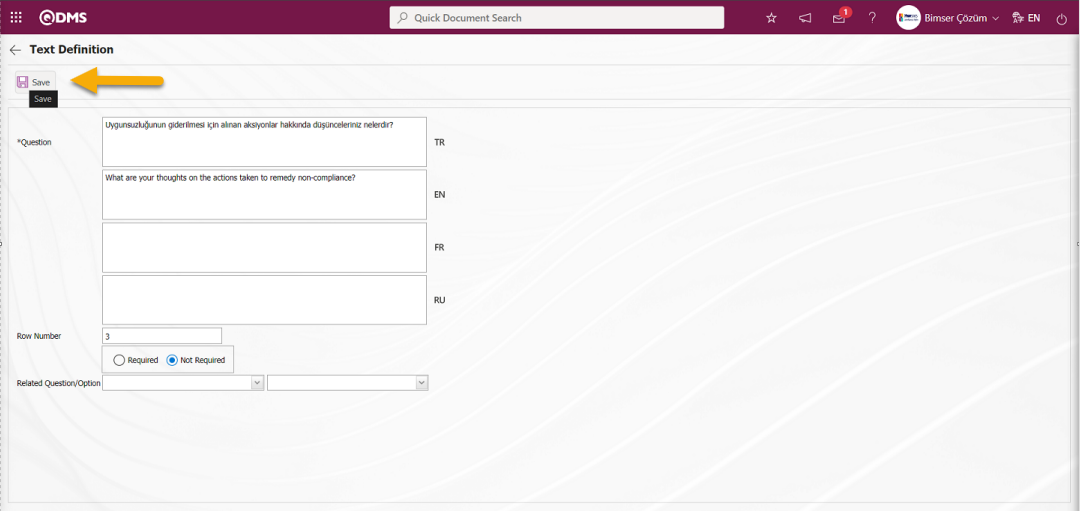
Related fields are defined on the screen that opens:
Question: This is the field where the text of the question to be asked on the Add Data Entry screen is written in the Turkish field. In case of use in other languages, the question data to be asked is entered in the field of the relevant languages.
Row Number: This is the field where the number of lines is entered on the Add Information Entry screen. It is used to determine the size of the text. If this field is 0 or 1, the area to be answered is seen as a single line.
It is the field where the obligation to answer the question to be asked is determined. Check boxes related to the relevant field are marked according to whether the question has to be answered or not.
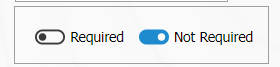
If there is an answer requirement, saving is not allowed when the question is not answered, a warning message is given.In the Add Information Entry screen, Turkish and English language equivalents are written in the Question Text field and the registration process is done by clicking the  button in the upper left corner of the screen.
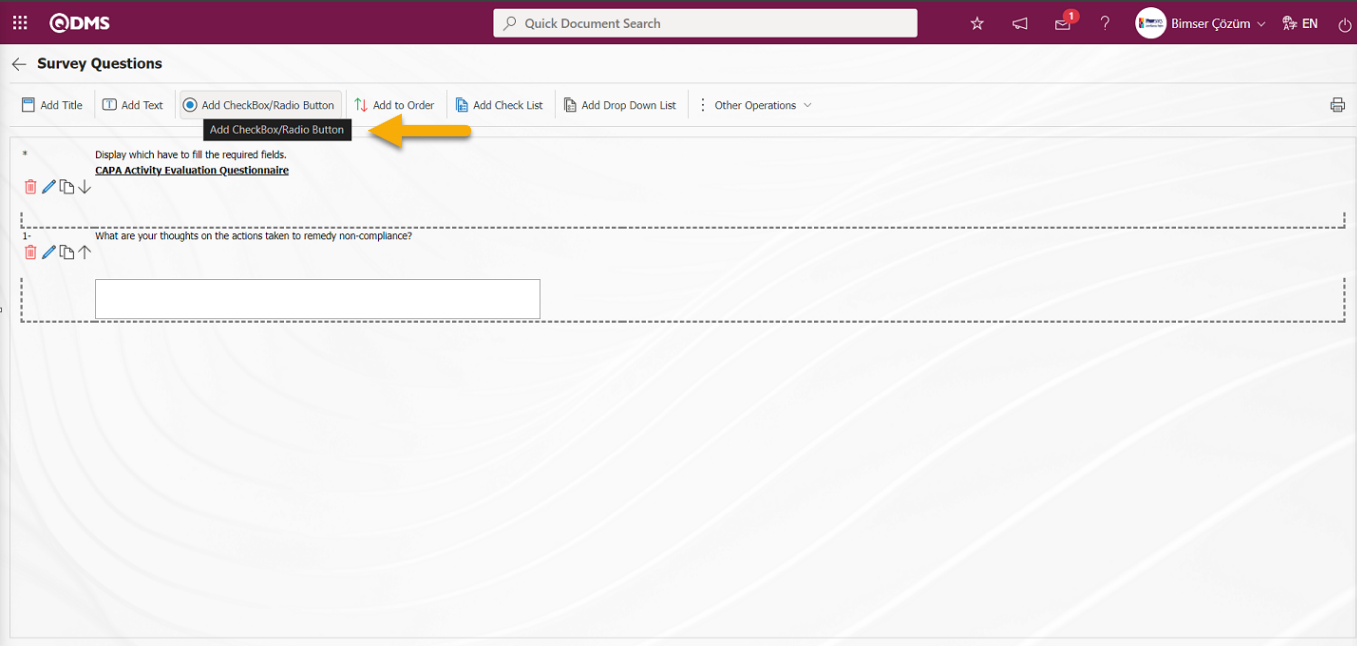
: It is a question type in which the answers given are selected from the specified options. Click the button to add Add CheckBox/Radio Button type to the survey defined in the Survey Questions screen. Add Option** screen opens.
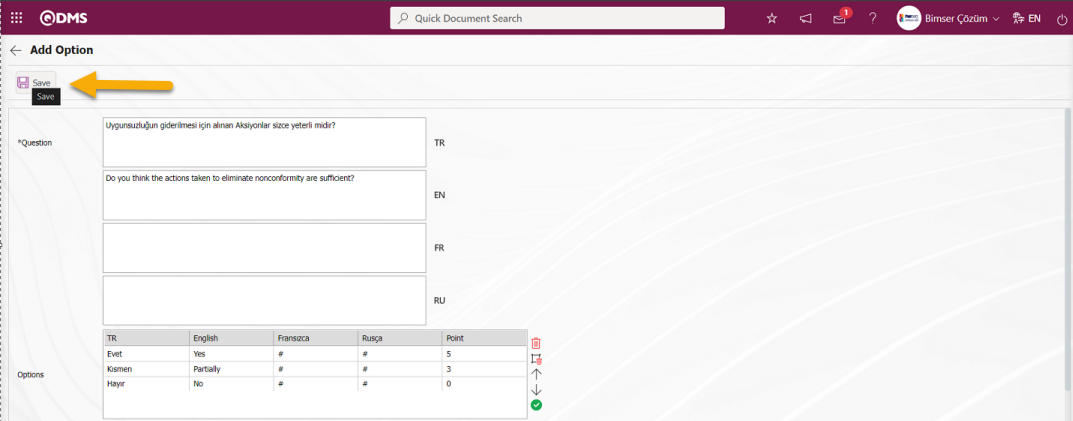
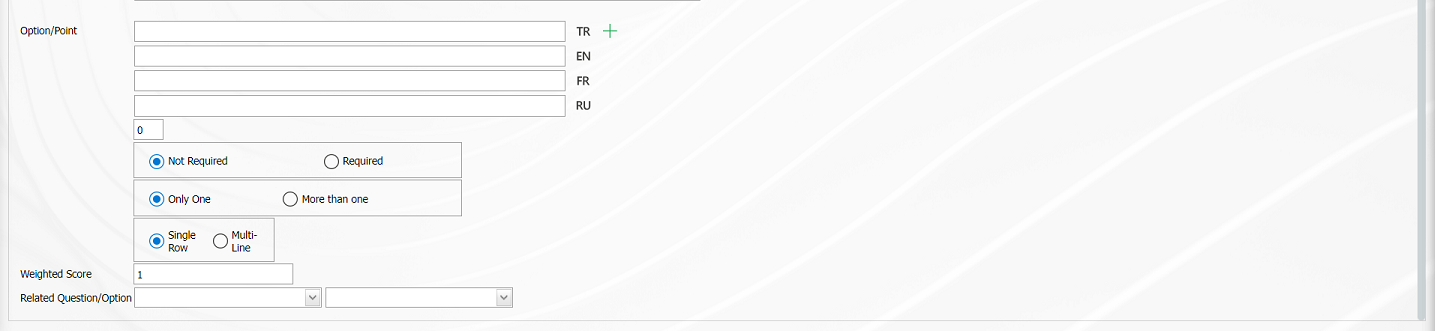
With the help of the buttons on the screen
 (Remove):On the options screen, the selected option is removed from the option list.
 (Delete All):Delete all options on the options screen.
 (Up):In the options screen, the selected option is removed upwards in the option list.
 (Down):In the options screen, the selected option is scrolled down in the option list.
 (Move):Moving the selected option on the Options screen to the Option-Score field allows editing and updating operations.
In the Option-Score field, the option and score information of the question is written and added to the Options list by clicking the  (Add CheckBox/Radio Button) button.

The obligation to answer the question to be asked is determined from this field.
Selecting 1 or more than 1 of the options is determined according to the check box in this field.
The options can be displayed side by side (Single Line) or stacked (Multi-Line).
If the multiline option is selected, a field called number of columns will appear and the options of the question will be displayed in as many columns as the specified value.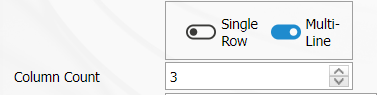
Calculation Method:In the Add Option screen, if the questionnaire is a scored questionnaire, this is the field where the method by which the points given to the options of this question will be calculated is determined. For example; A question in a survey that 10 people will answer has 4 options and each option has its own points. Assuming that the score of the first option is 5, if 10 users choose the first option, it is determined whether these scores are added up (50) or averaged (5) and included in the average score of the survey.

Weighted Score: In the Add Option screen, if the questionnaire is a scored questionnaire, this is the field where the weight of the question in the questionnaire is determined. If all questions are equally weighted, a value of 1 should be entered. If it is written as 0, the survey score is not calculated.

Related Question/Option: This is the field where the question is displayed depending on the option of the defined optional question. By selecting the option of the associated question and question, the associated question is displayed when the option of this question is selected.
After filling in the required fields on the Add Option screen, the registration process is realized by clicking the  button in the upper left corner of the screen
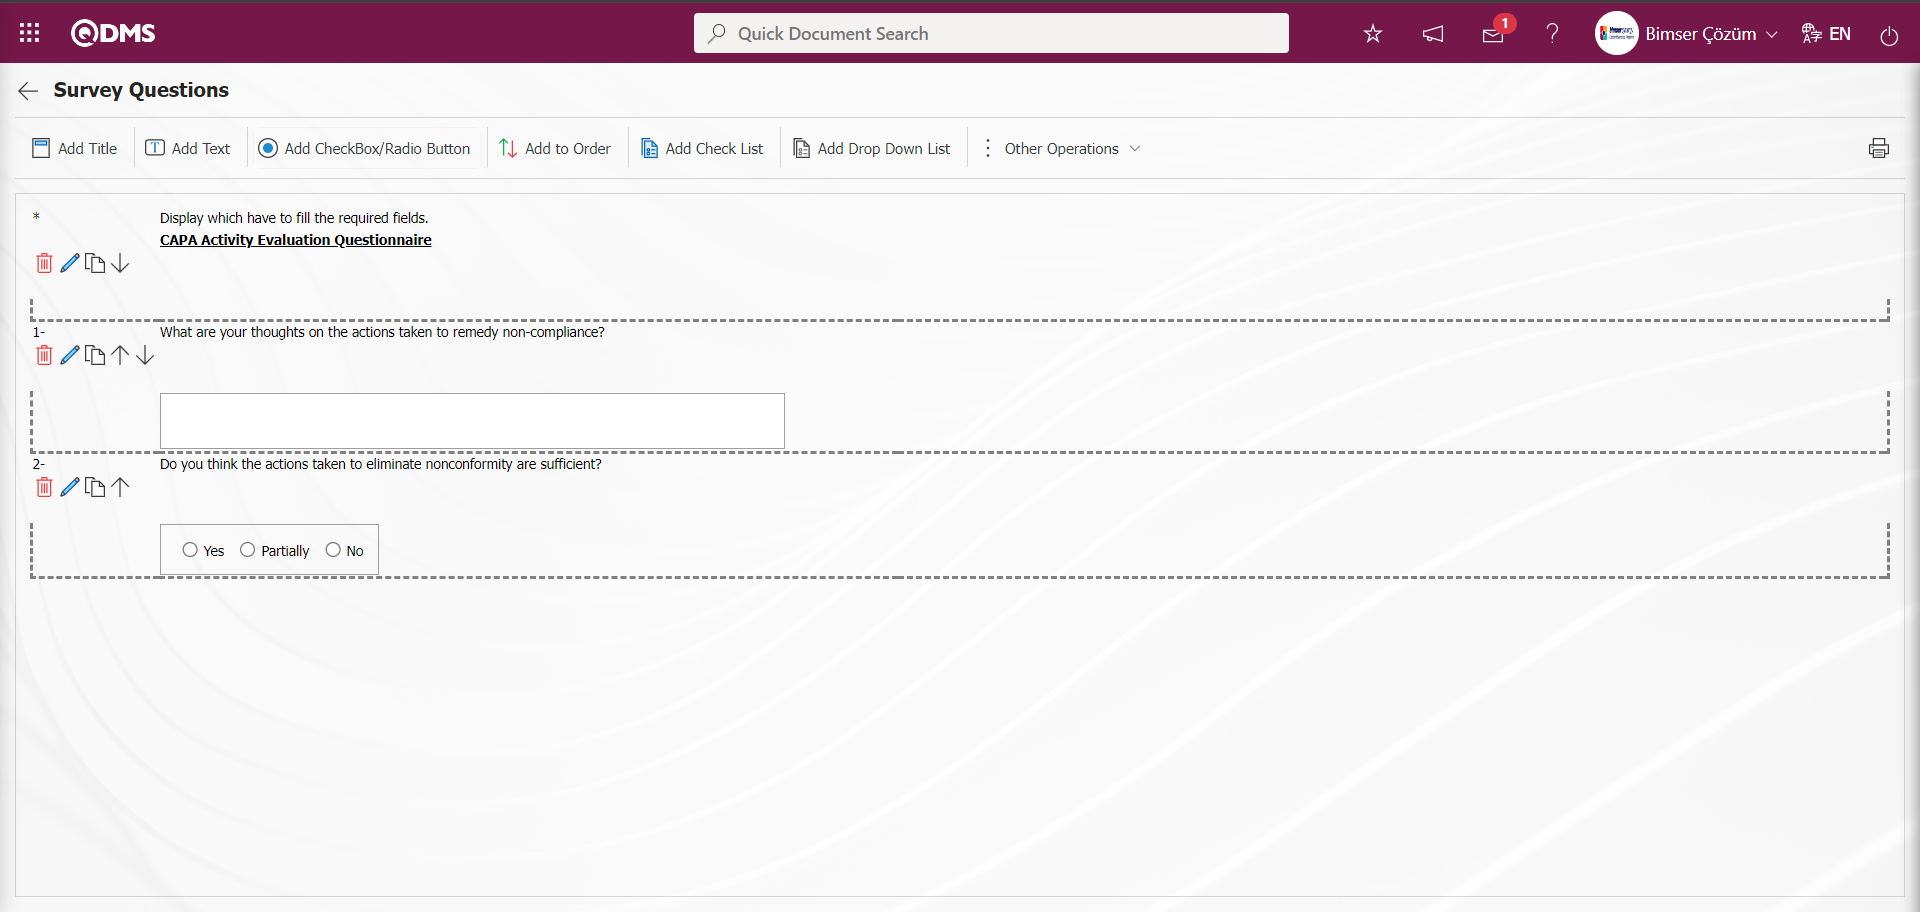
Survey Question Lists are defined by defining a few question options as an example on the Survey Questions screen opened by clicking the button while the relevant function is selected in the Survey Question Lists menu. The process of defining other question options is done in the same way as in the question definition screen of the Survey Operations Module. The screen that opens is the same as the Questionnaire Operations question definition screen. After the question definition process is done, the system automatically defines the survey code in the “Activity Evaluation Survey Code” parameter numbered 80, which is the relevant parameter of the Survey Question Lists menu related module.
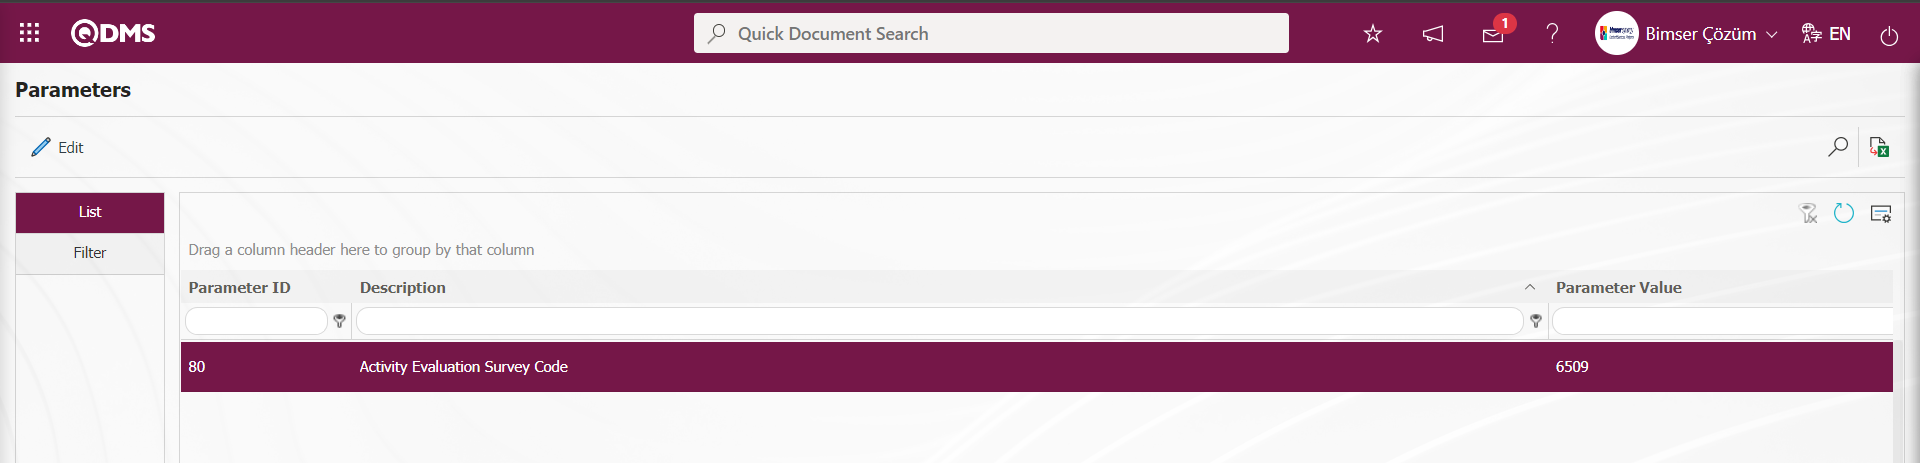
After the survey question definition process is done on the Survey Questions screen opened by clicking the button in the Survey Question Lists menu, a CAPA record in the CAPA Close stage is opened by clicking. On the CAPA Activities - Edit Record screen, the check box related to the “CAPA's efficacy be evaluated?” field is checked in the CAPA Close section in the Closure tab. The relevant duration information is entered in the Activity Evaluation period field.” After the check box related to the “CAPA's efficacy be evaluated?” field is checked, the survey task is created with the execution of the function related to the Agent application from the server depending on the parameters. When the relevant check box is checked, the Efficacy Evaluation Period field is displayed. In this field, CAPA's activity evaluation time information is written.
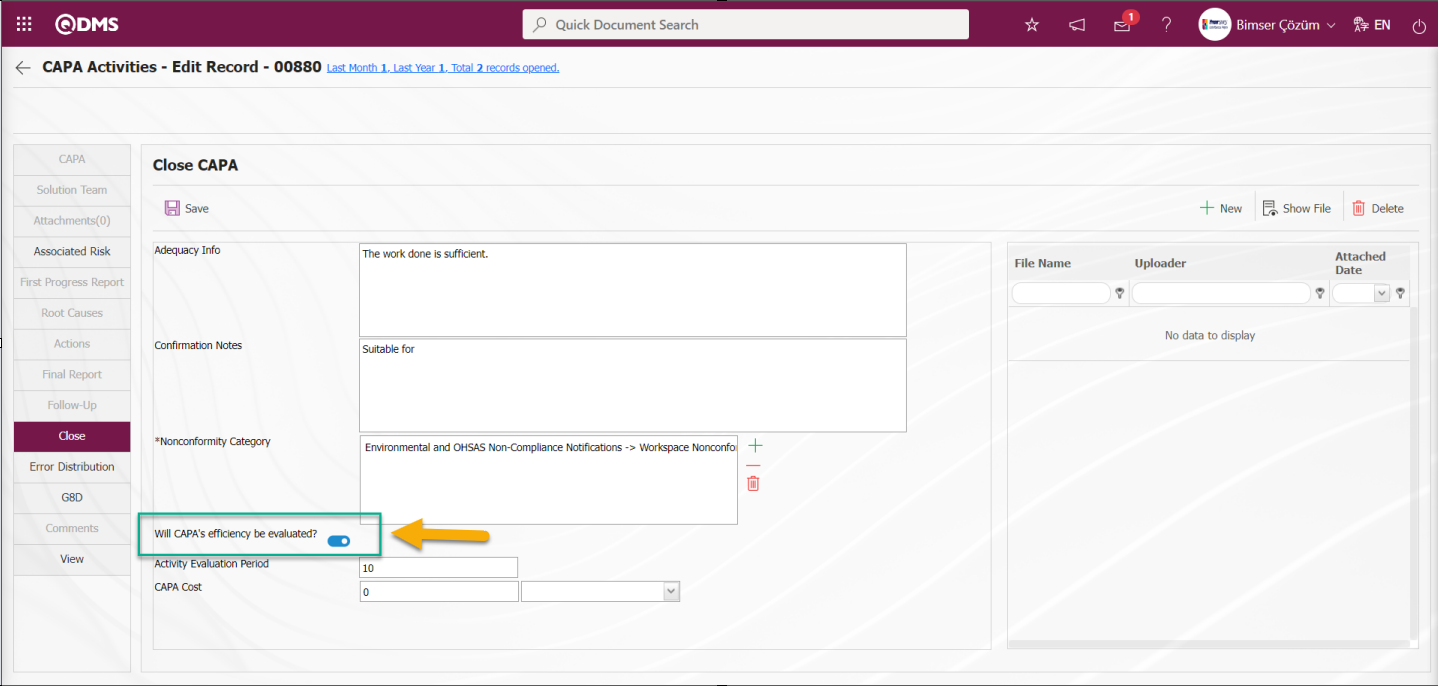

If the survey is defined in the Survey Question Lists menu when the code is not defined in the “Activity Evaluation Survey Code” parameter numbered 80 in the relevant CAPA Module parameters, the code of the defined survey is automatically defined in the system parameter. In another parameter related to the CAPA Module, the parameter value of the “Activity evaluation survey validity period” parameter numbered 83 must be entered.
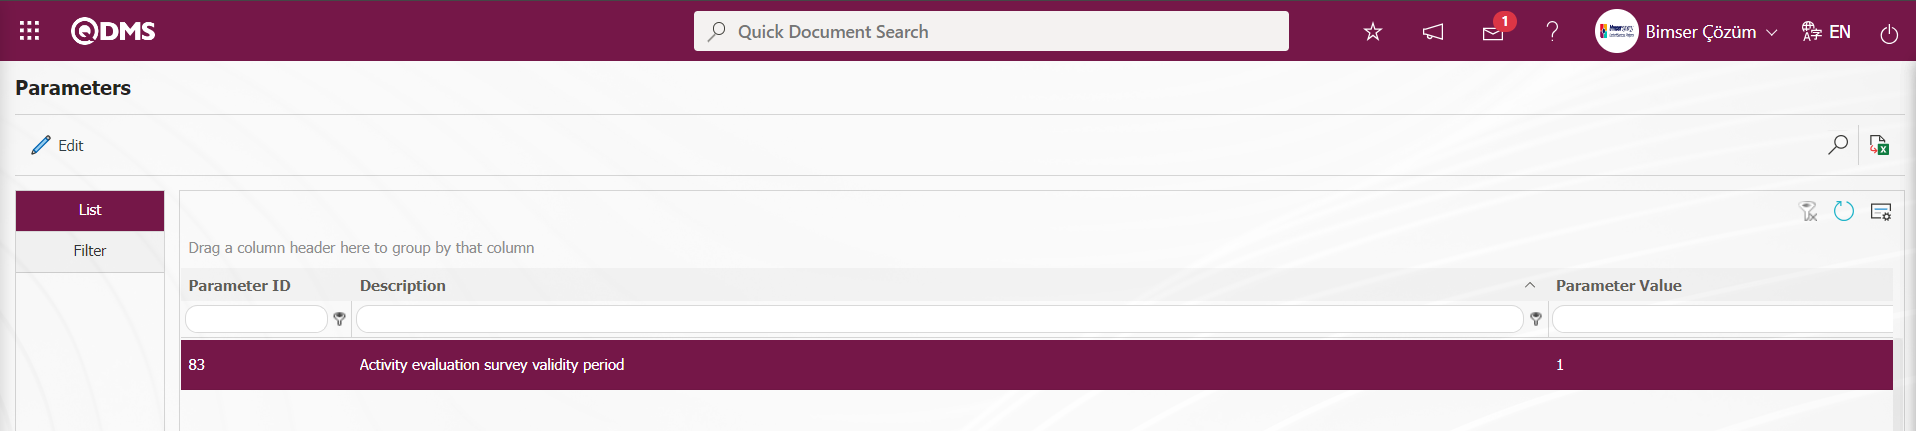
At least 1 day after the CAPA related registration is closed, these surveys will be assigned to the “Surveys will be filled out.” task in the Survey Operations Module of the “Pending tasks”. By clicking the Survey code link in the Survey code field in the relevant task, the Survey Filling screen opens. After the survey filling process is done by entering the relevant information about the survey questions on the survey filling screen, the survey filling process is performed by clicking the ![A purple and white logo
Description automatically generated]ref35 button at the top left of the screen. The “OK” button is clicked on the “Your survey has been successfully saved” warning message given by the system.
6.1.13. Repeated Records Report Template
Menu Name: System Infrastructure Definitions /CAPA/ Repeated Records Report Template
It is the menu where the fields in the CAPA records are given as a report according to their repetition status. First, the fields to be displayed in the report are selected from the System Infrastructure Definitions/ CAPA/Repeated Records Report Template menu and the report format is saved. Then the relevant report is accessed from the Integrated Management System/Corrective and Preventive Actions/Reports/Repeated Records report.
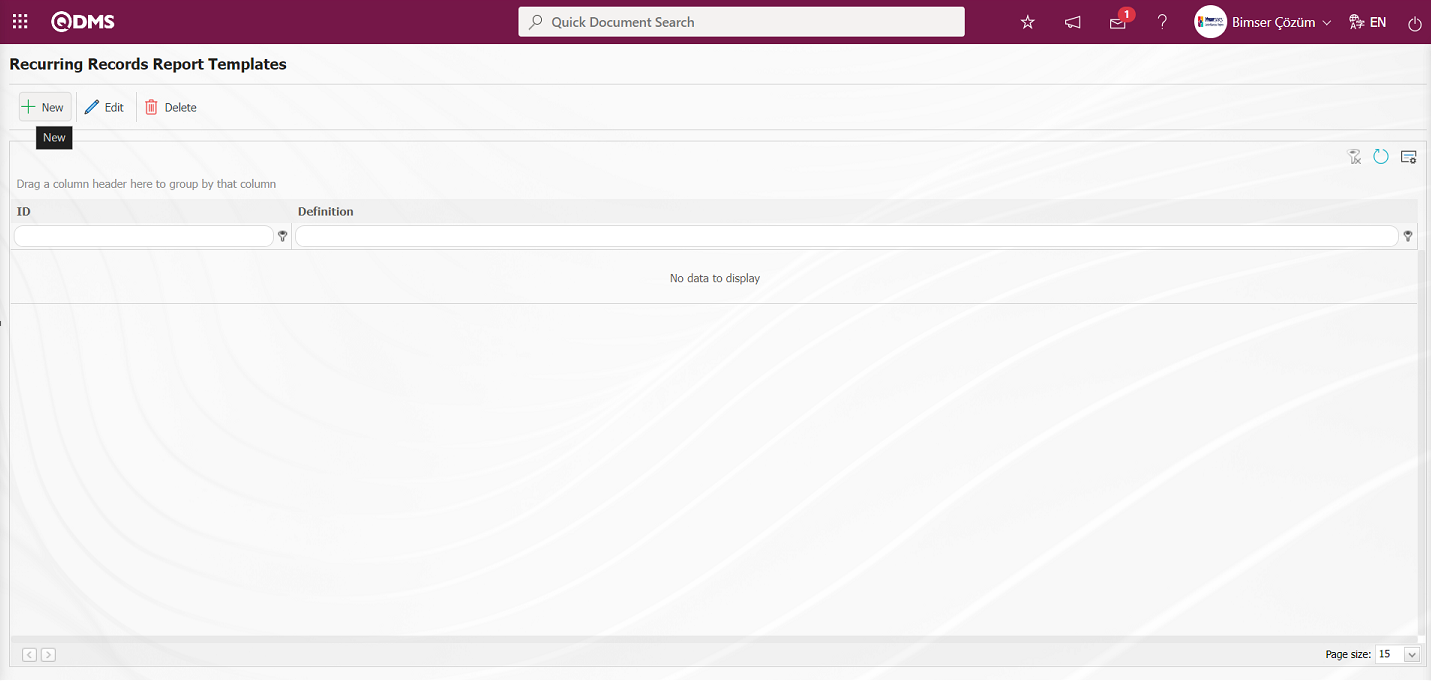
With the help of the buttons on the screen;
: New Recurring Records Template is defined
: Selected Recurring Records Template information in the list is updated.
: Selected Recurring Records Template information in the list can be deleted.
 : The search criteria on the menu screens are used to clean the data remaining in the filter fields in the grid where the search operation is performed.
 : The menu screen is restored to its default settings.
 : User-based designing of the menu screen is done with the show-hide feature, that is, the hiding feature of the fields corresponding to the columns on the menu screens.
To add a new Repeated Records Report Template to the Repeated Records Report Template screen, click the button at the top left corner of the screen and the Repeated Records Report Template \New Record screen is displayed
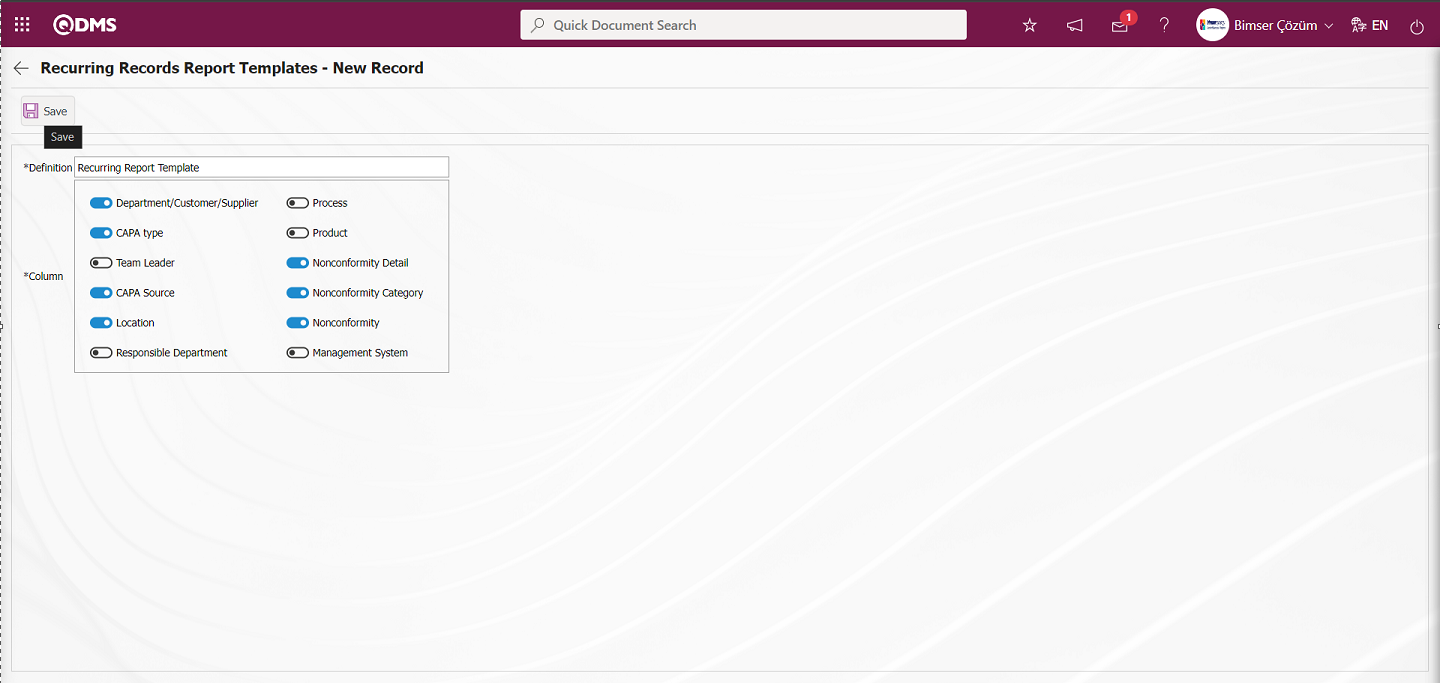
Define the relevant fields on the screen that opens:
Definition: This is the field where Recurring Records Report Templates definition information is entered on the Recurring Records Report Templates - New Record screen.
Column: This is the field where columns information can be selected on the Recurring Records Report Templates - New Record screen.
In the screen that opens, the definition information of the Repeating Records Report is entered. Related columns are selected. After filling in the required fields on the Recurring Records Report Templates screen, the Recurring Records Report Templates registration process is realized by clicking the  button in the upper left corner.
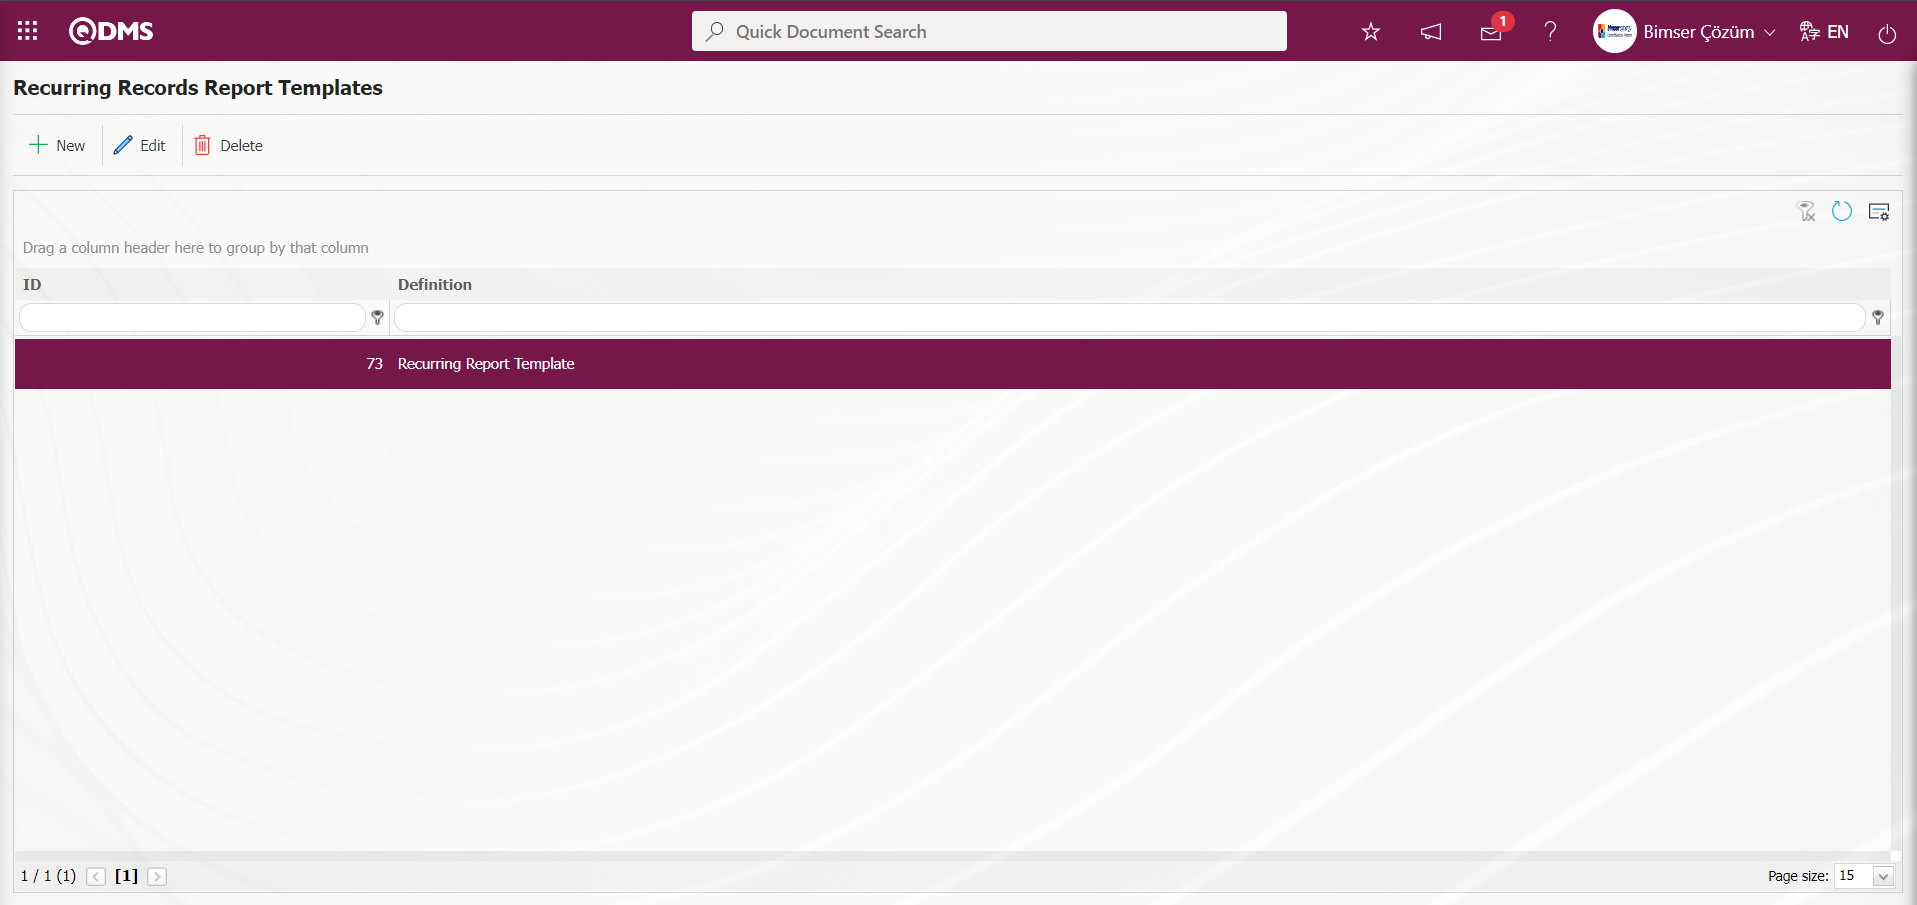
Integrated Management System/Corrective and Preventive Actions/Reports/Repeated Records Report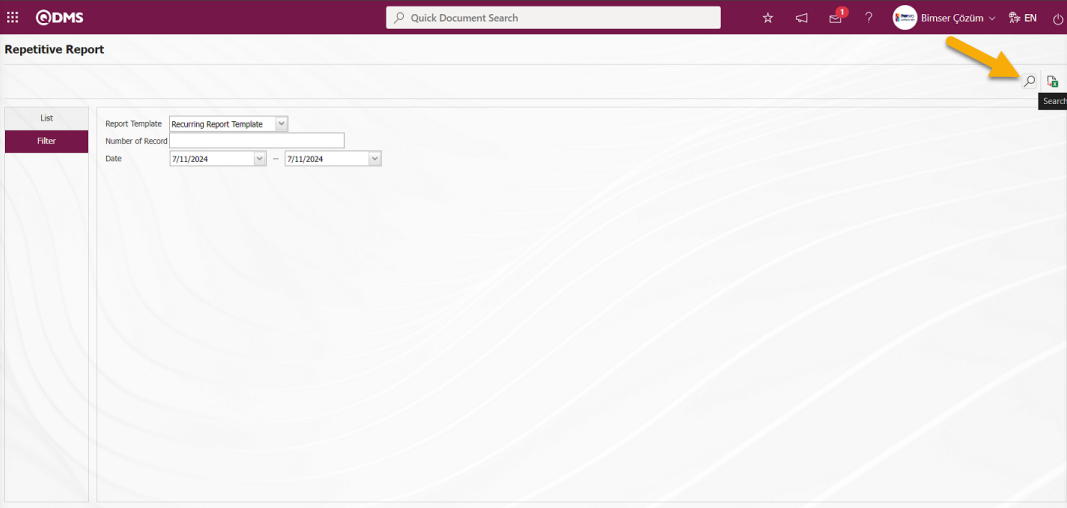
From the Repetitive Report screen, records can be filtered and searched with the (Search) button and the records are listed in the list tab.
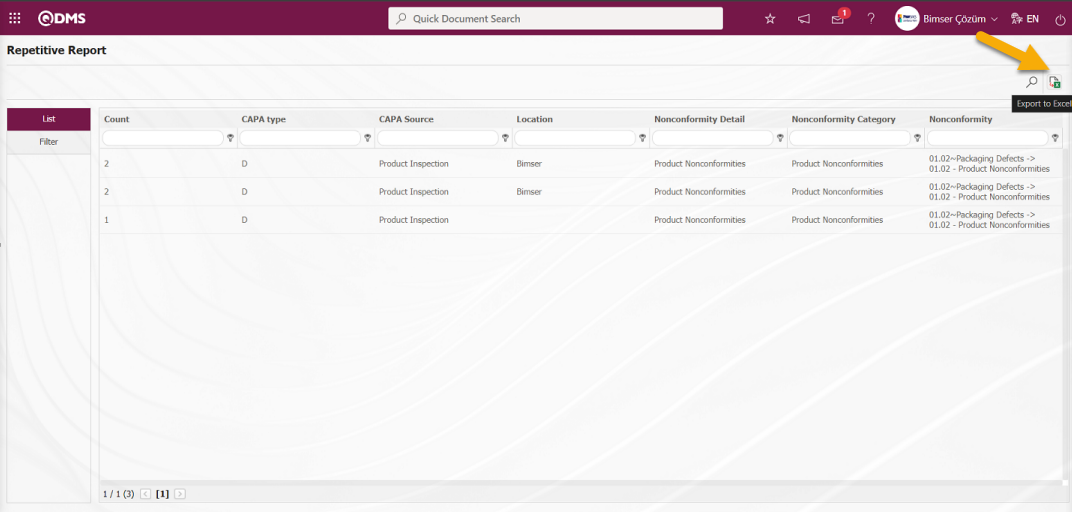
From the Repetitive Report screen, click on the (Export to Excel) button to get the Repetitive Report defined in Excel format.
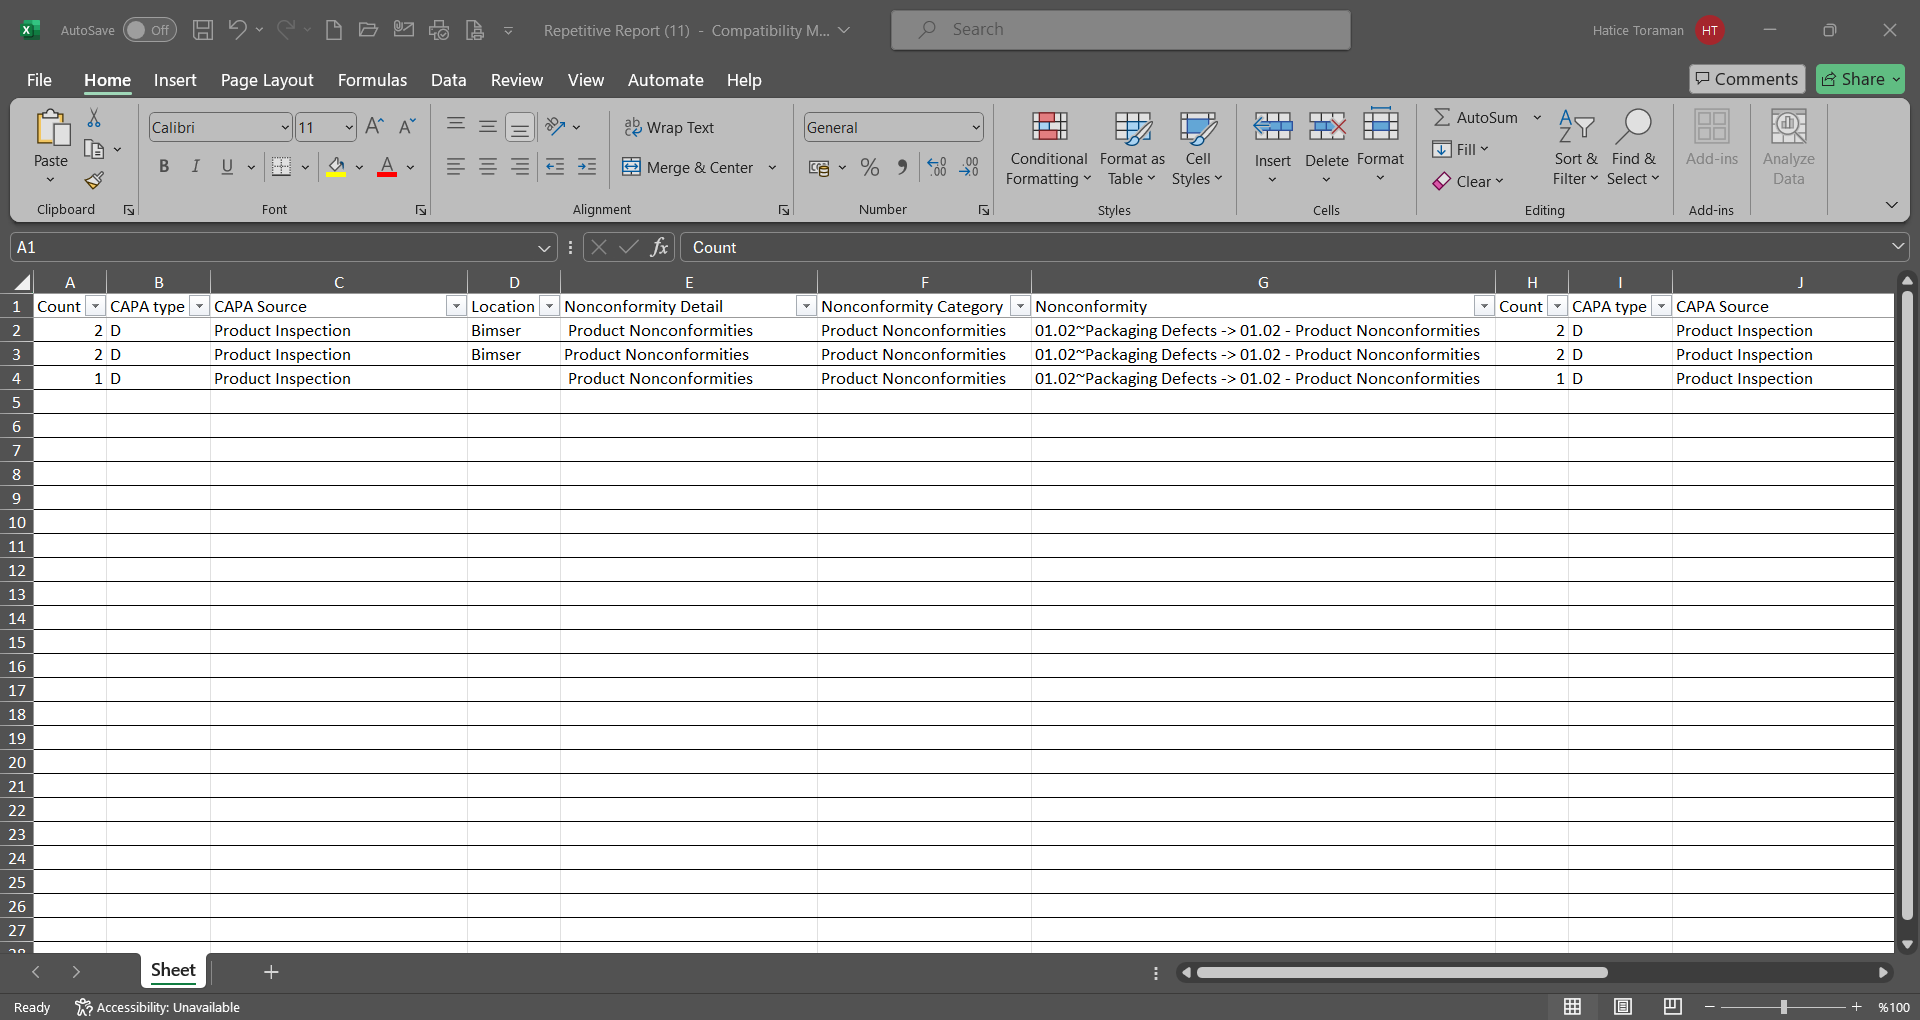
6.1.14. Dashboard/CAPA
Menu Name: Dashboard/CAPA/CAPA Dashboard
It is the part of the Qdms system that allows users to view transactions, metrics, graphs and reports on a single screen. Dashboard is defined as a display of indicators, a dashboard and a table of indicators used to summarize the flow and/or content of information and to explain a particular situation through graphs and tables. Its purpose is to present the required information in the shortest time, with the least interaction and thinking required. In the Qdms system, the Dashboard feature has been introduced within the scope of the Corrective and Preventive Actions Module. This screen appears depending on the authorization to see the menu.
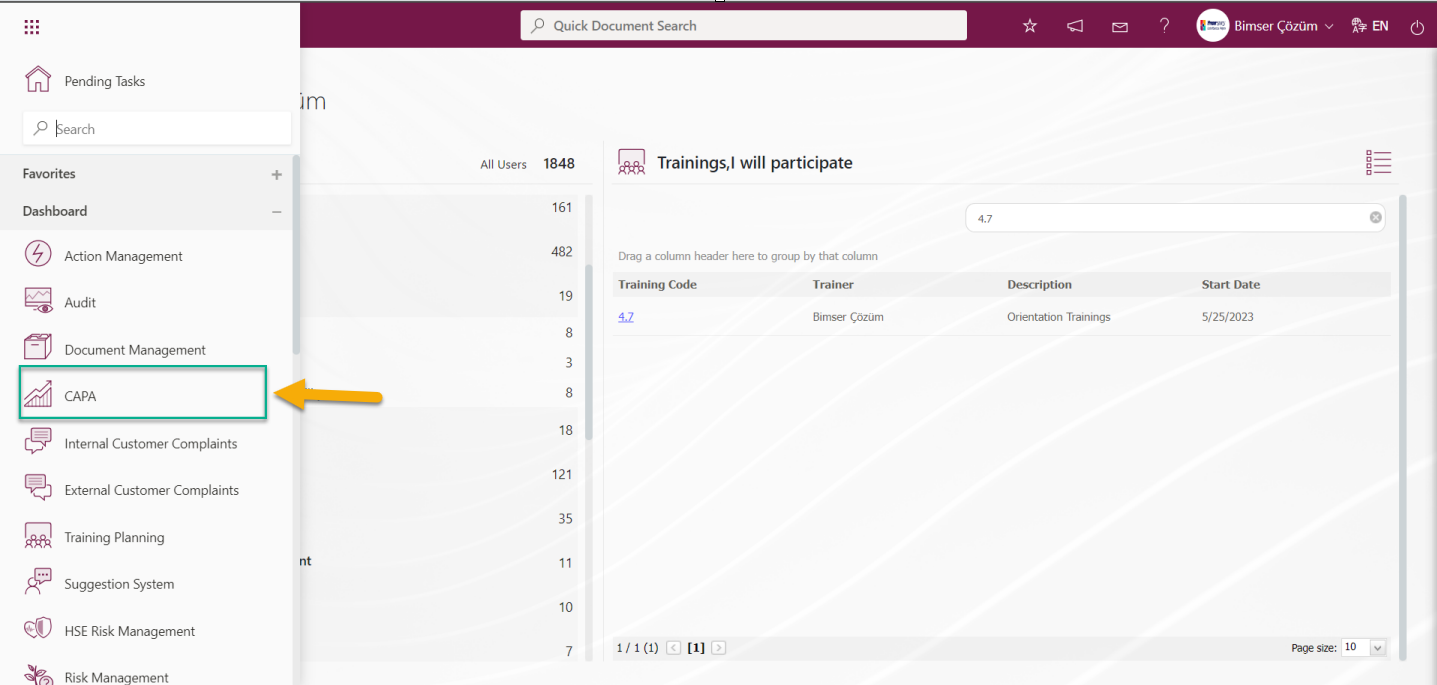
When the Dashboard menu is clicked, two tabs, list and filter tab, appear.
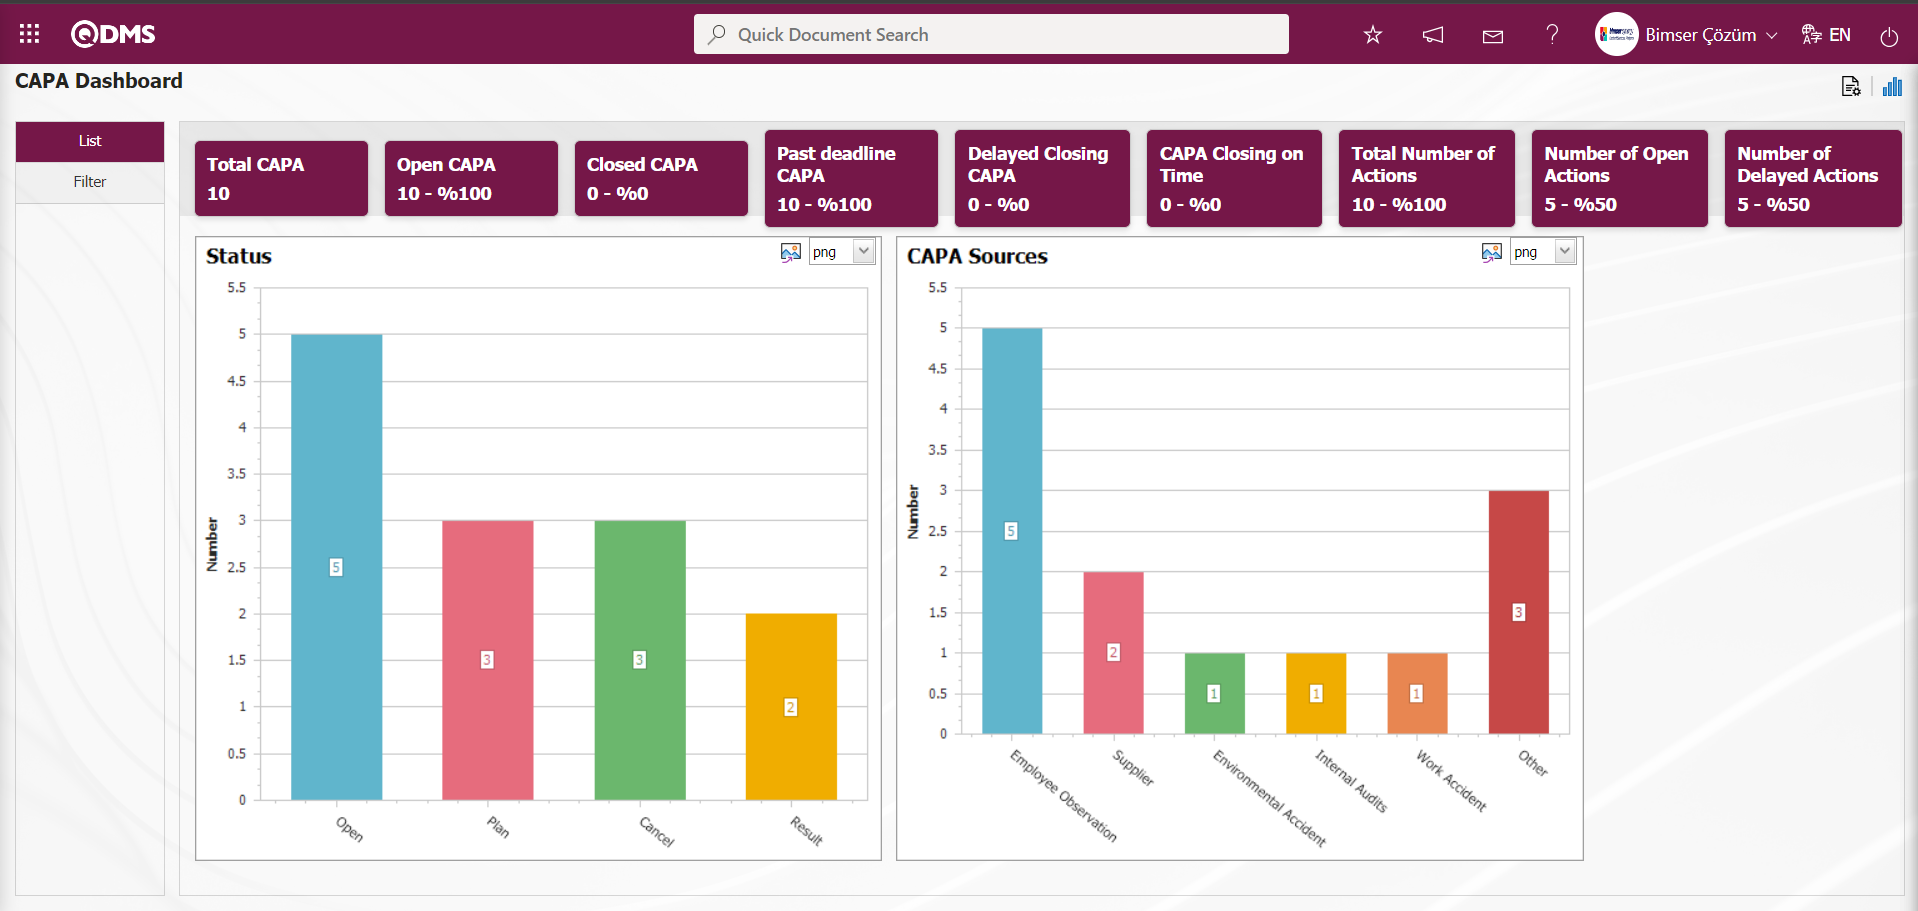
In the Filter tab, filtering is done according to the fields in the search criteria.
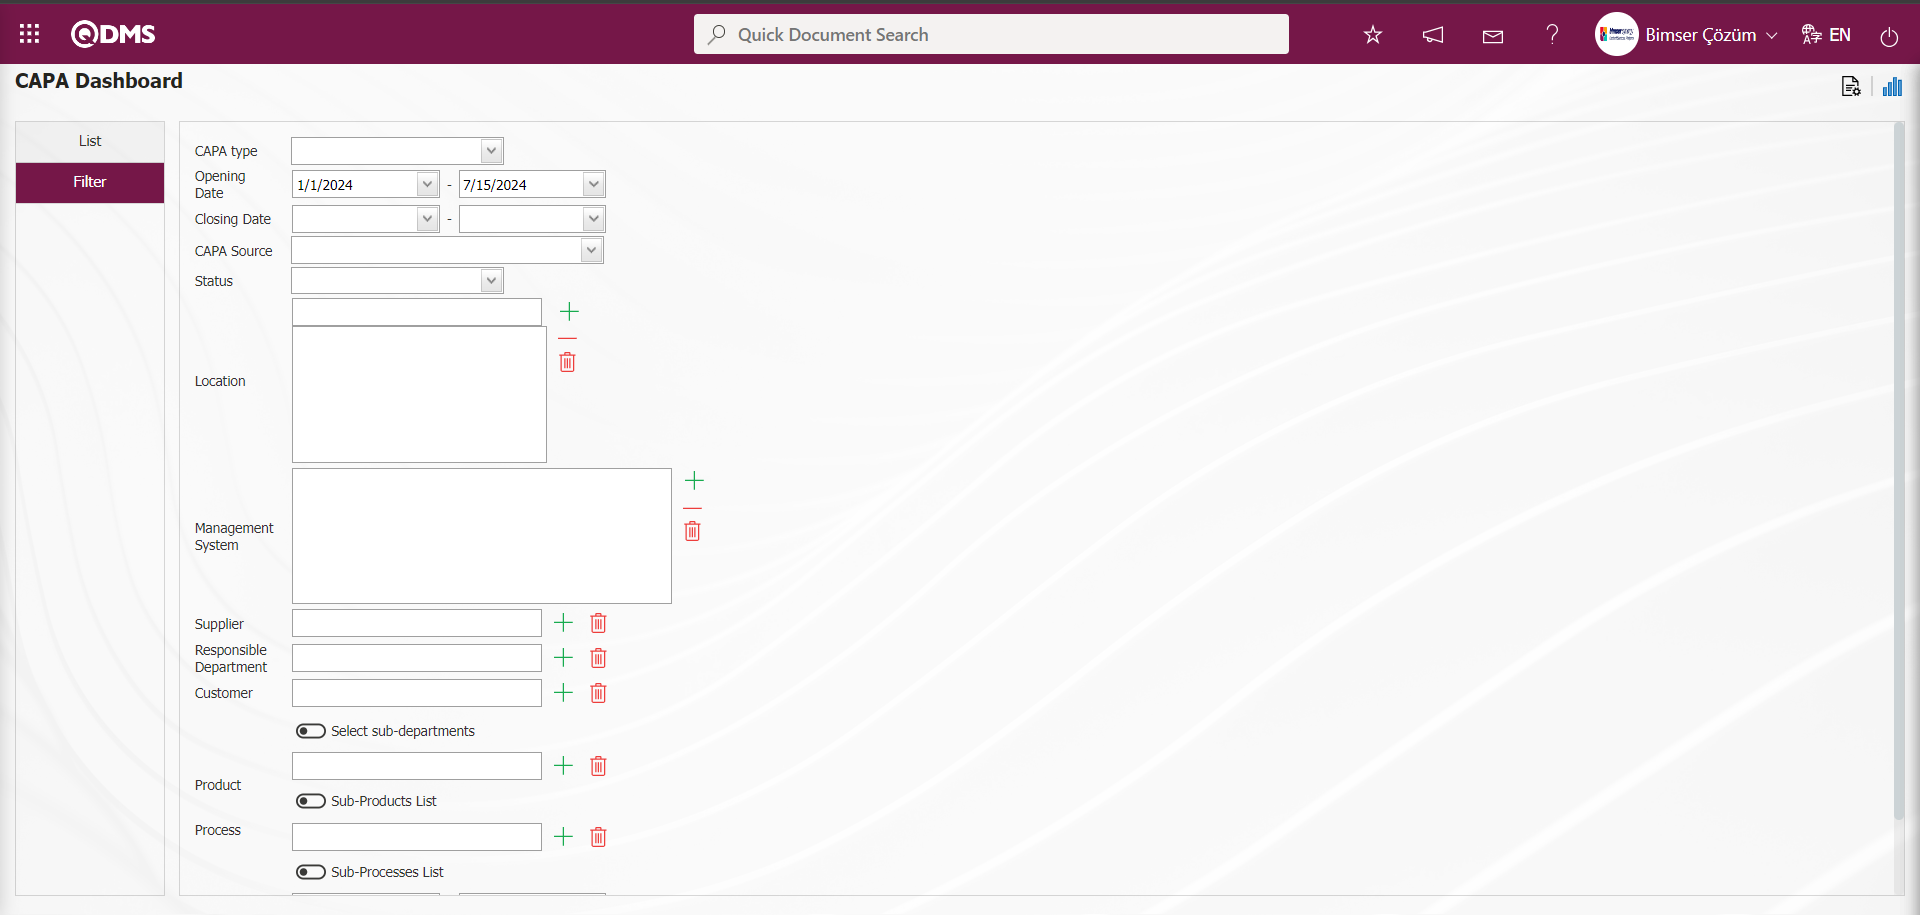
In the Corrective and Preventive Actions module, Total CAPA, Open CAPA, Closed CAPA, Past deadline CAPA, Delayed Closing CAPA, Delayed Closing CAPA, CAPA Closing on Time, Total Number of Actions, Number of Open Actions and Number of Delayed Actions fields are displayed as fixed fields and no editing is done on them
![A screenshot of a computer
Description automatically generated]ref60
On the CAPA Dashboard screen, the graphic design process is done with settings such as how many graphics there will be, what the name of the graphic will be, what the order of the graphics will be, which areas will be on the Z axis, Y axis, graphic length, graphic width and graphic type. In order to make these adjustments on the CAPA Dashboard screen, the user must be defined as CAPA Module Manager. (Module Manager identification is made in the CAPA Module in the System Infrastructure Definitions / BSID / Configuration Settings / Manager Defination menu).
When the user is not a Module Manager in the CAPA Module, the button in the screenshot below is displayed on the CAPA Dashboard screen.
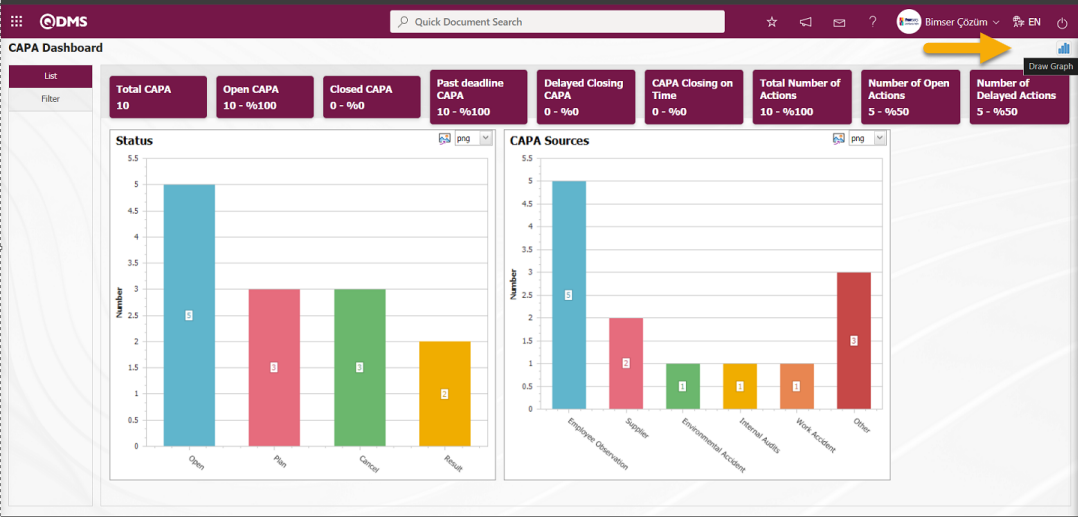
In the CAPA Module, the first button  (Graphic Settings) is displayed on the Corrective and Preventive Actions Dashboard screen of the user defined as the module Manager. The user who is the Module Manager makes the necessary adjustments on the CAPA Dashboard screen with the help of the (Graphic Settings) button. Users who are not Module Managers can also make graphic design by making the necessary adjustments in the System Infrastructure Definitions / BSID / Configuration Settings / Dashboard Configuration / CAPA menu on the Dashboard Configuration screen.
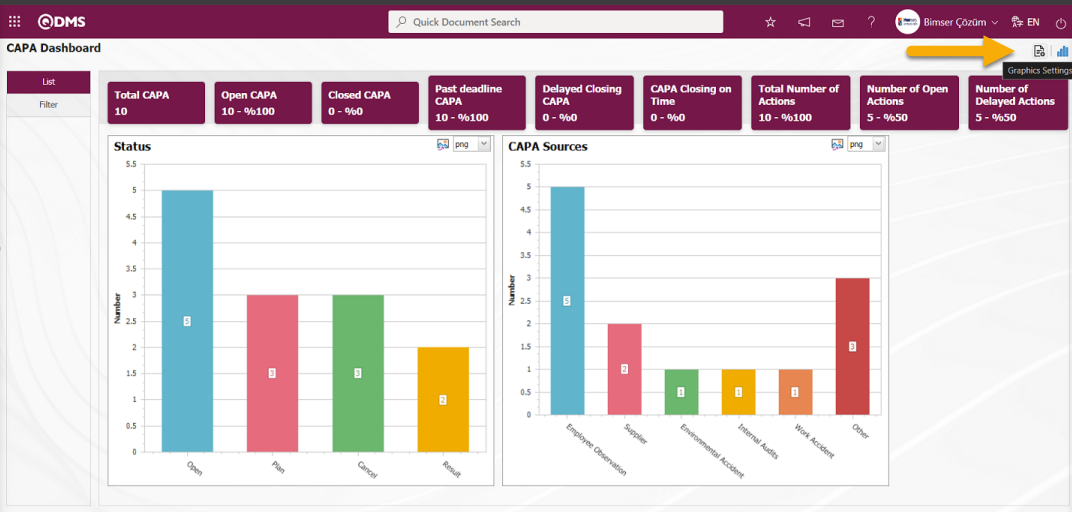
Click on the button to design graphics in the CAPA Module, update and delete the selected designed graphic information in the list.
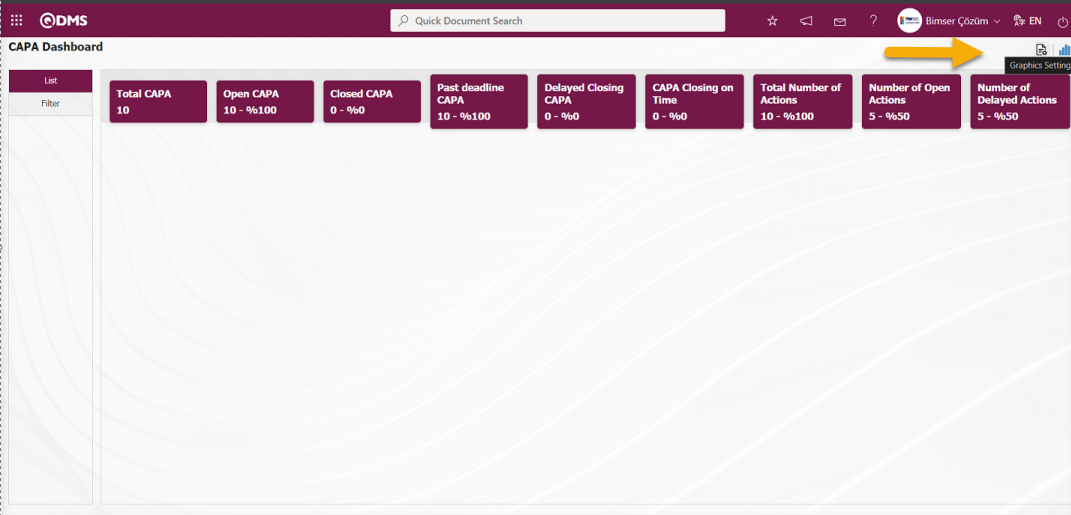
The Dashboard Configuration screen opens
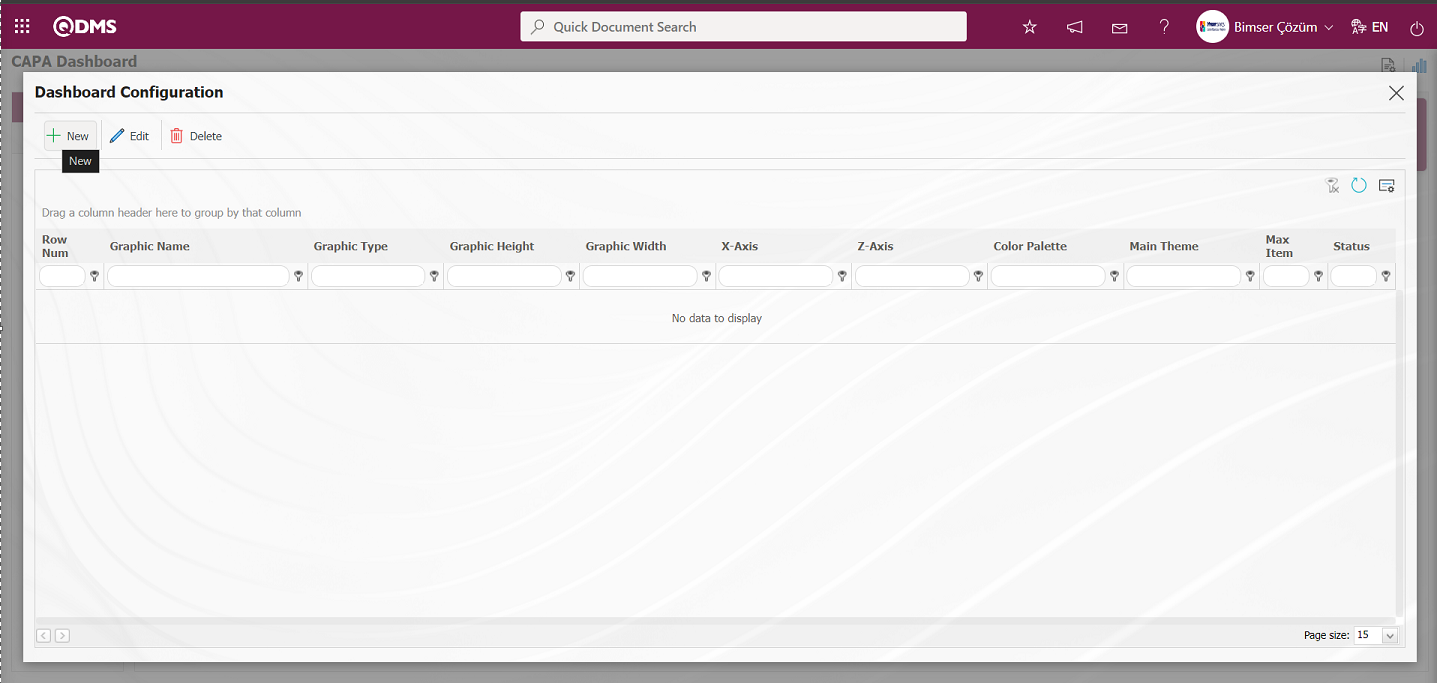
With the help of the buttons on the screen;
 : A new Dashboard is defined.
 : Correction / change / update is made on the Dashboard information selected in the list.
 : The Dashboard information selected in the list is deleted.
- : Dashboard Configuration screen is closed.
Click the button to add a new Dashboard in the CAPA Module
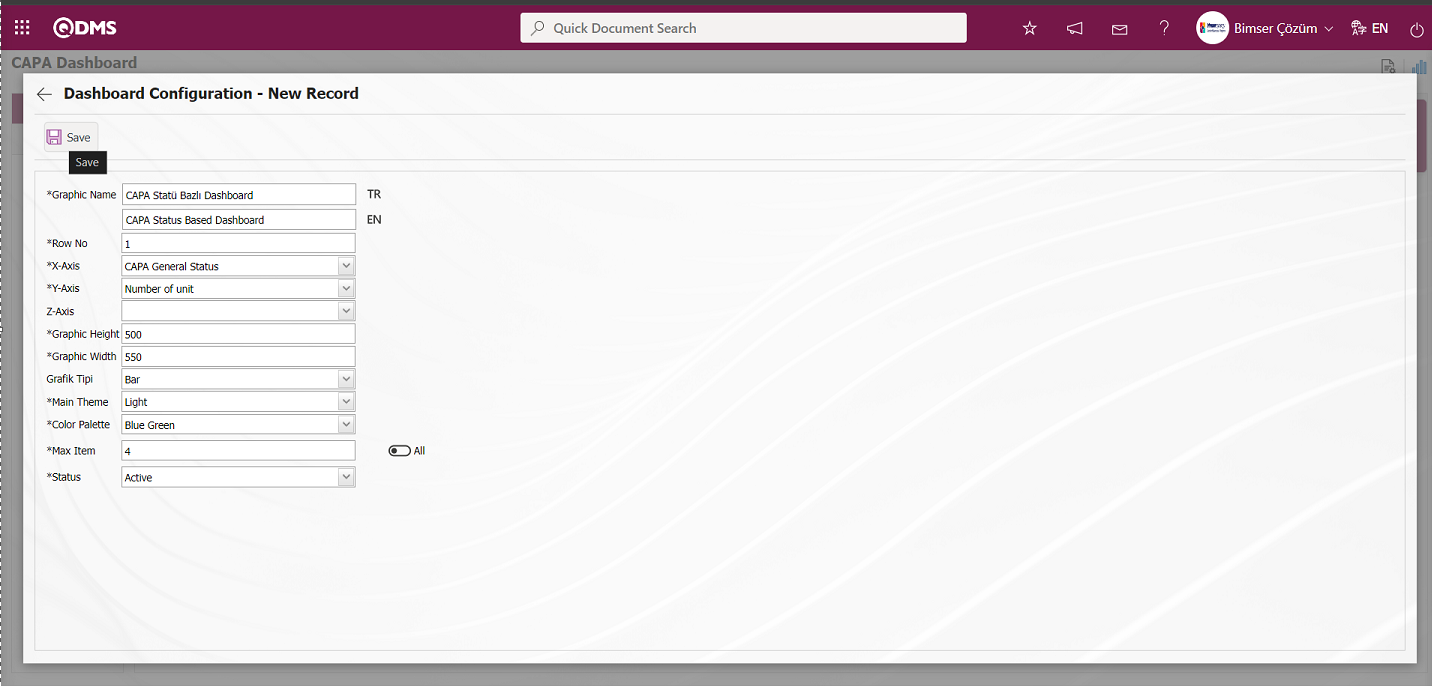
After filling in the required fields on the Dashboard Configuration - New Record screen, click the  button on the top left of the screen.
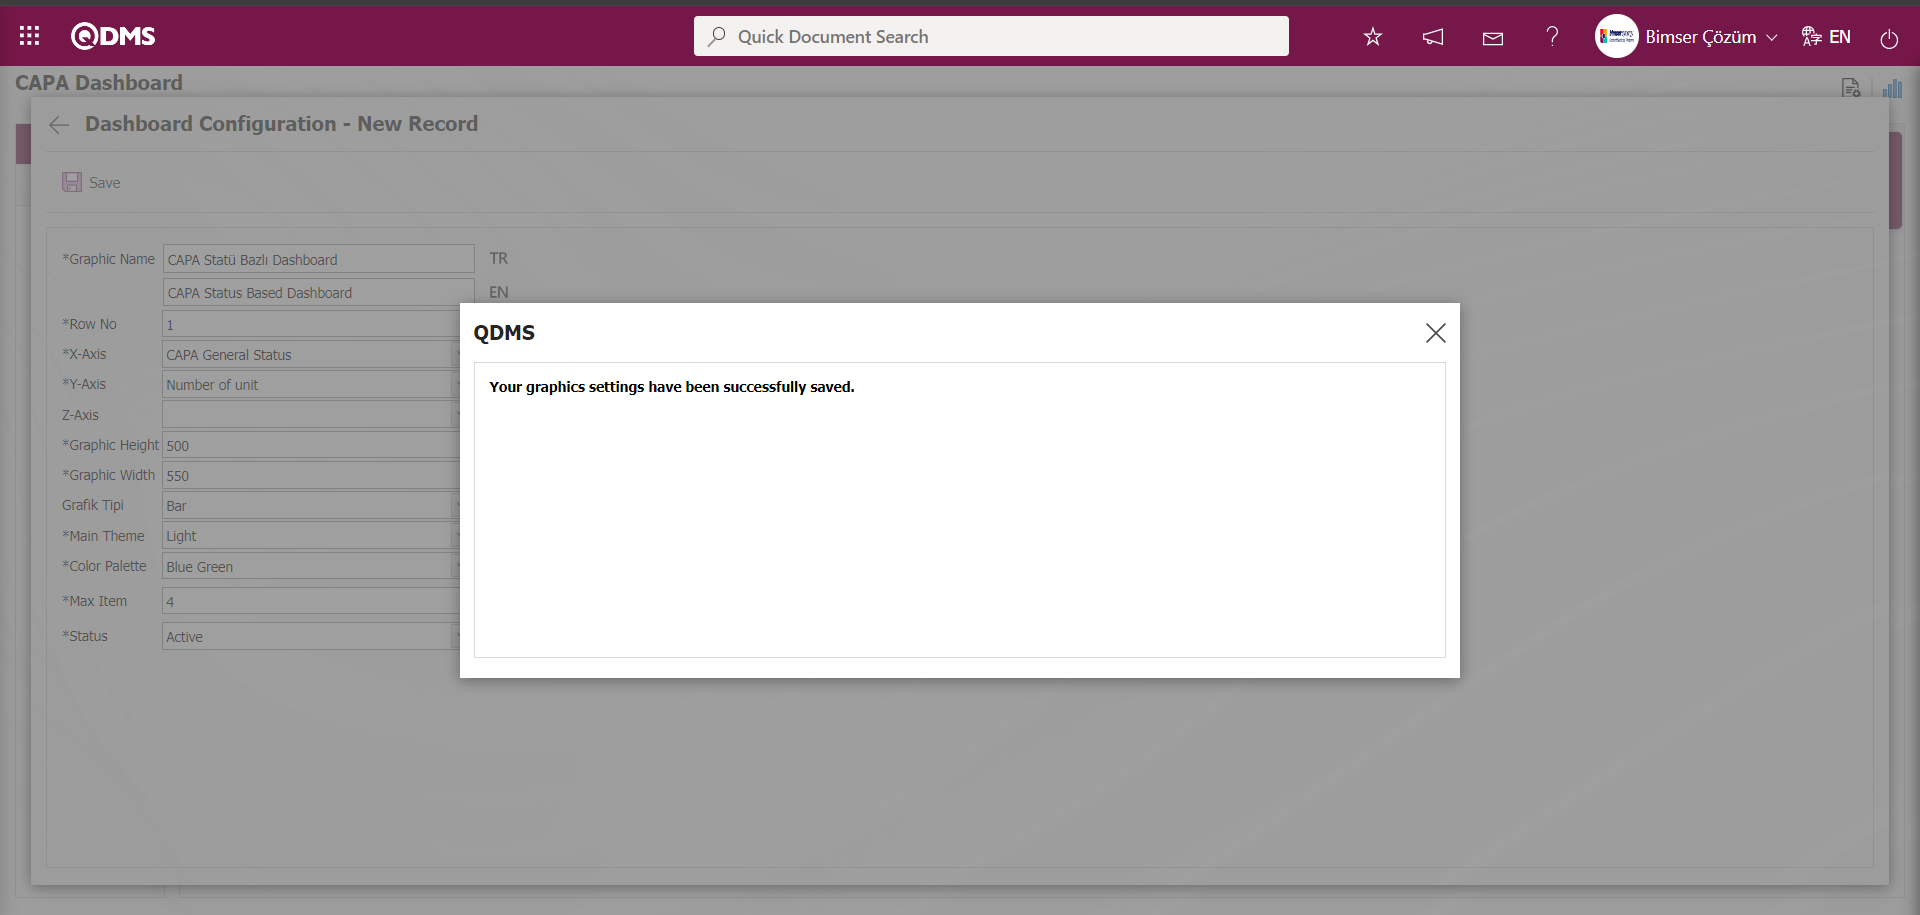
The system displays the message “Your graphics settings have been successfully saved.”, indicating that the saving process has been completed.
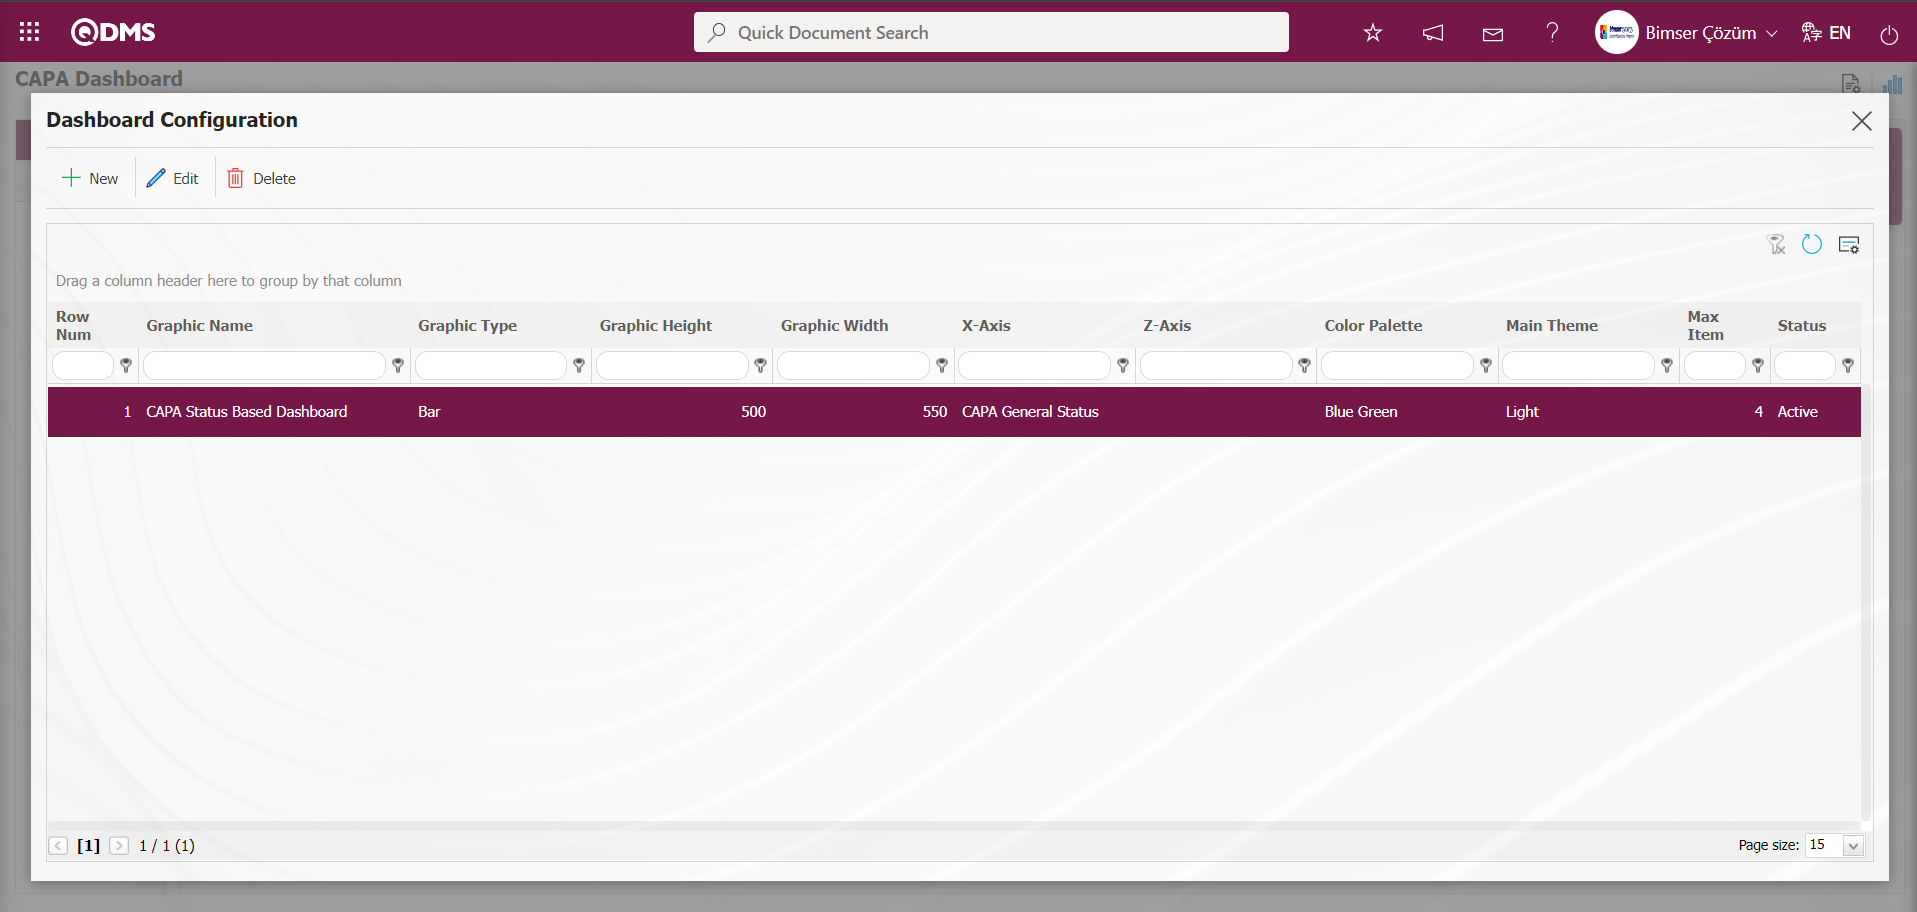
The defined Dashboard is displayed on the CAPA Dashboard screen.
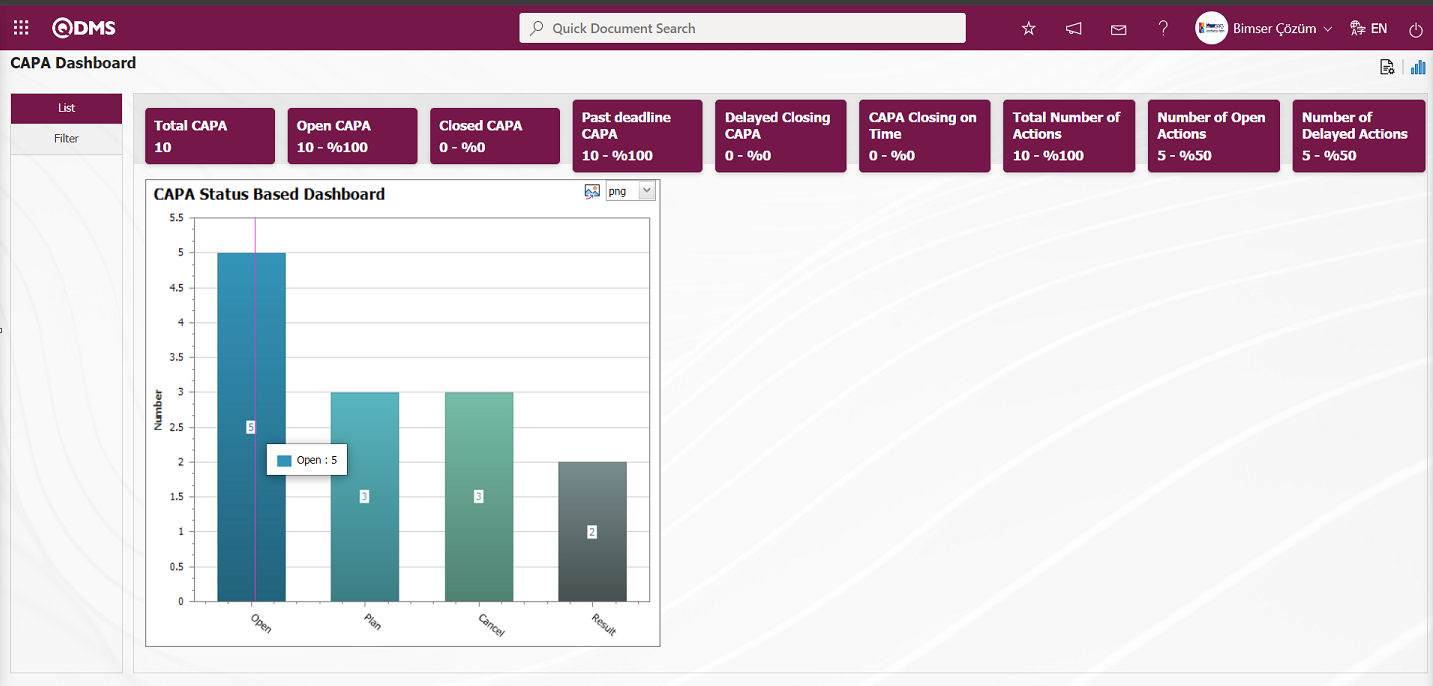
The Dashboard defined in the CAPA Dashboard screen is displayed as a PieChart.
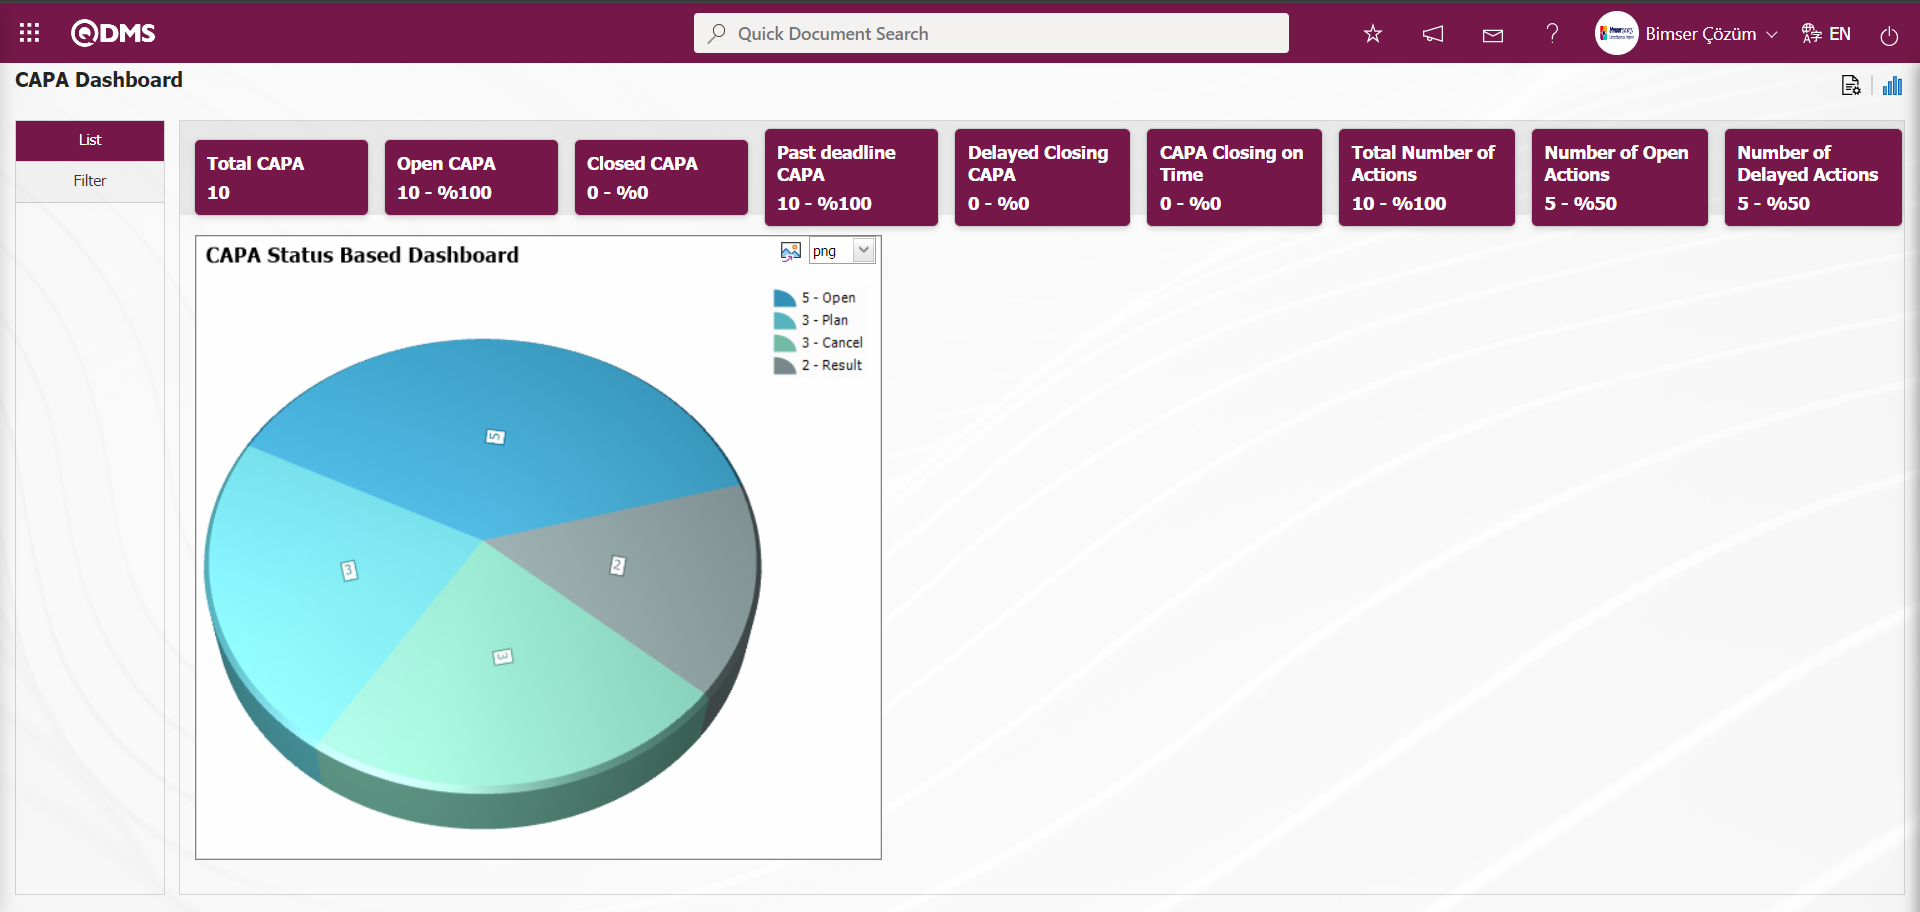
By clicking the (Export Graphic) button, the graphic can be exported to the external environment by converting it to the format type (png, jpg, bmp, xls, etc.) selected from the drop-down menu.
Graphic Length is limited to a min value of 500 and a maximum of 1000. Graphic Width is limited to a min value of 550 and a max value of 1800. Chart Length and Width should be selected between these values. Dashboard Configuration - If the row number is already used on the New Record screen, an error message “The row number you specified is in use, you must specify a row number that is not in use.” is given by the system during the saving phase.
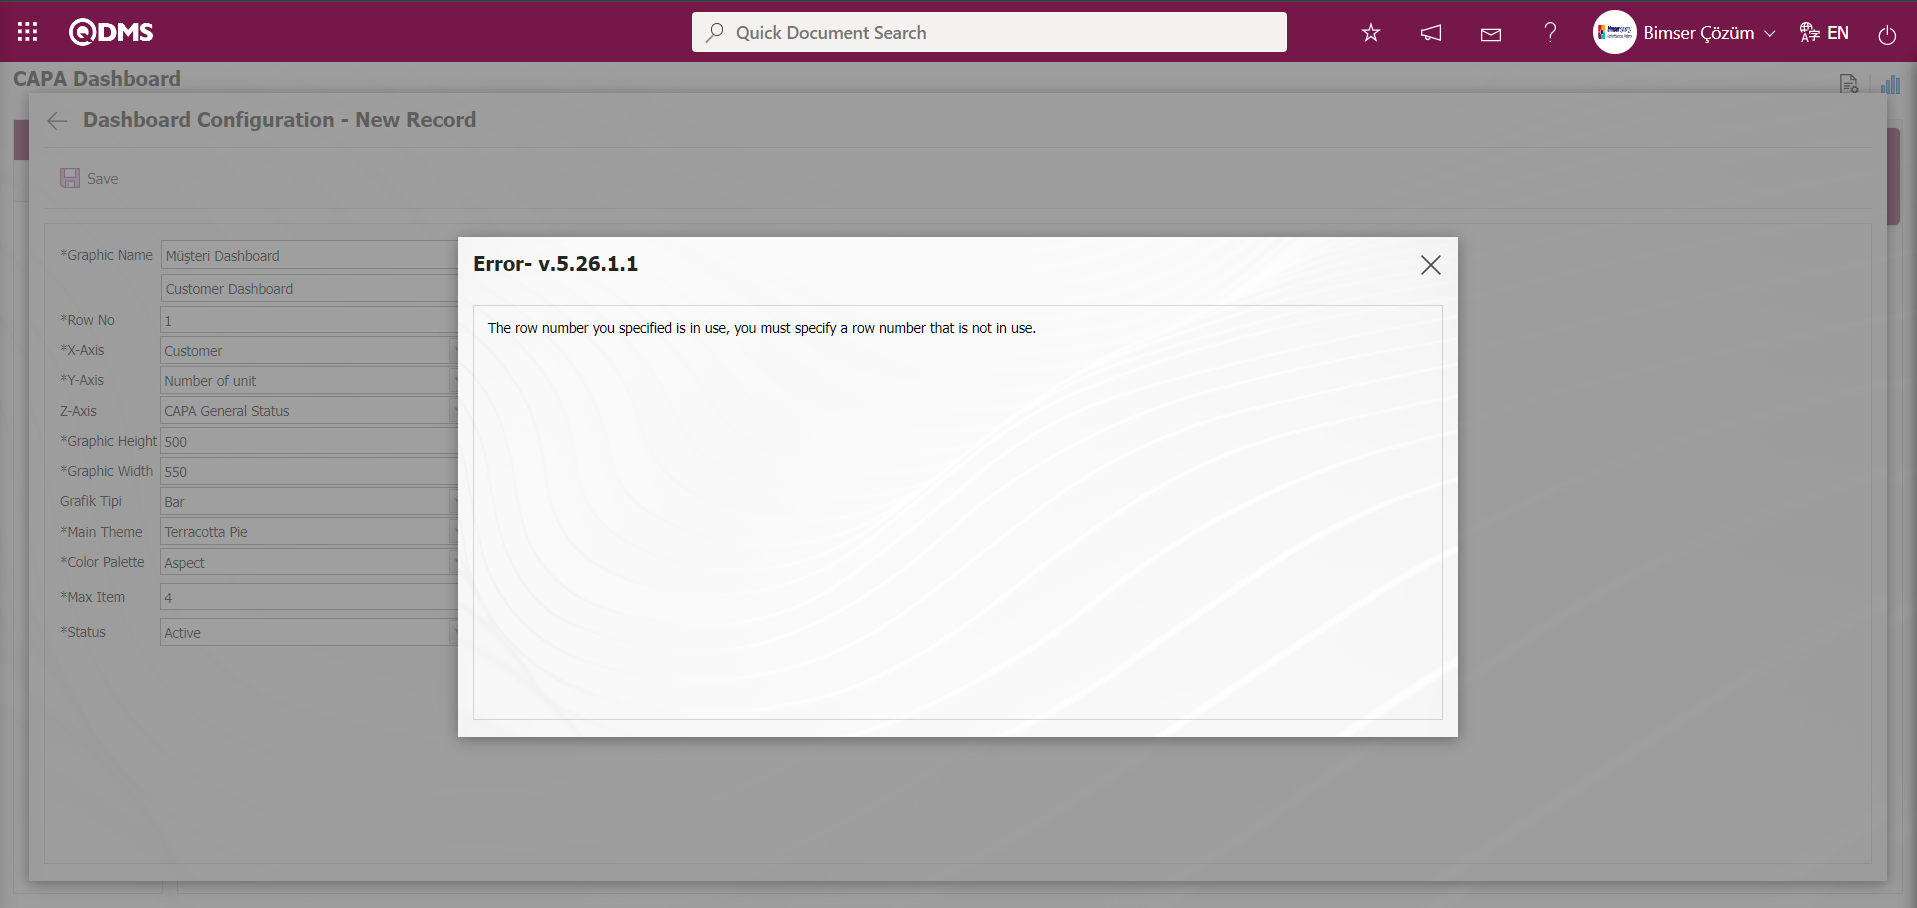
In this way, a new chart can be added on the screen opened with the Chart Settings button. Editing, updating, changing and deleting operations are performed on the added chart information. The filtering screen for the relevant graphics in the list is defined and set as downloadable.
For users who are not Module Managers, the Dashboard Configuration screen is opened by clicking on the System Infrastructure Definitions / BSID / Configuration Settings / Dashboard Configuration / CAPA menu and the necessary adjustments are made on the screen that opens and the graphic design process is also done.
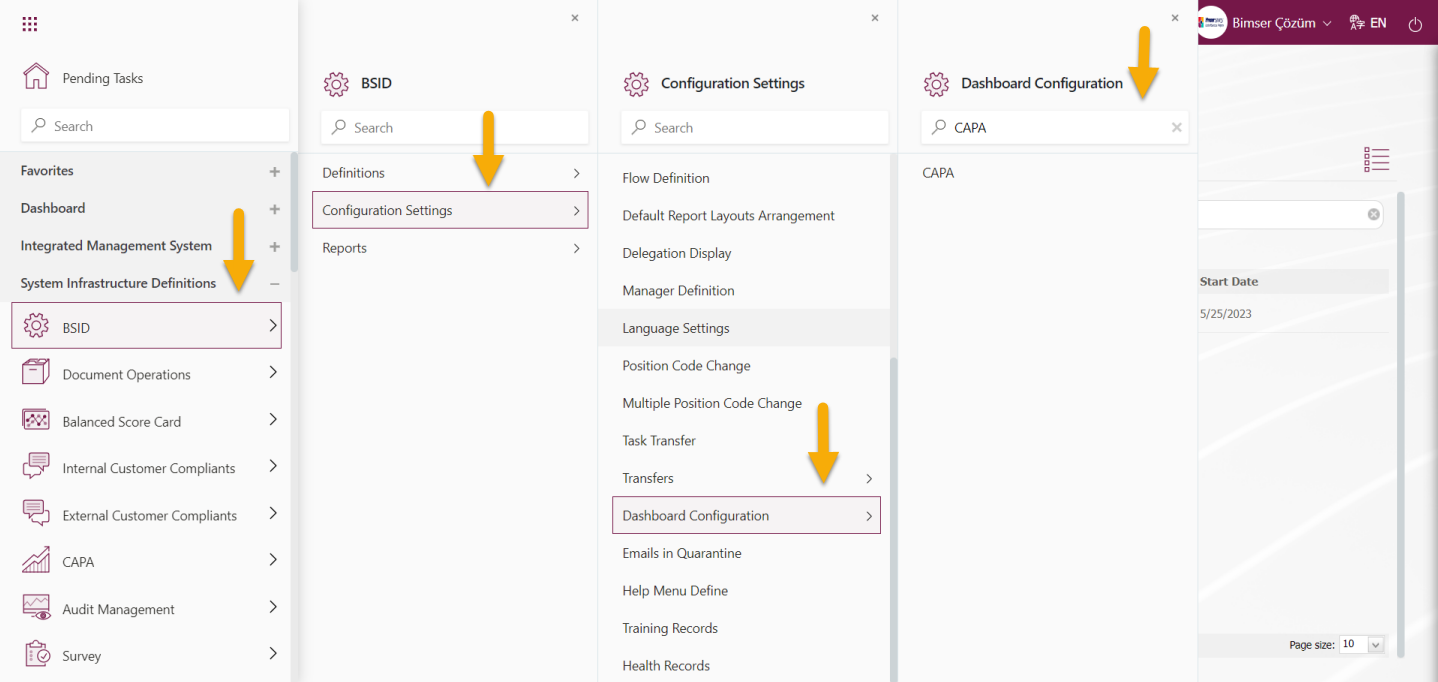
They can define a new Dashboard by using the same buttons on the CAPA Dashboard Configuration screen and performing the same steps.
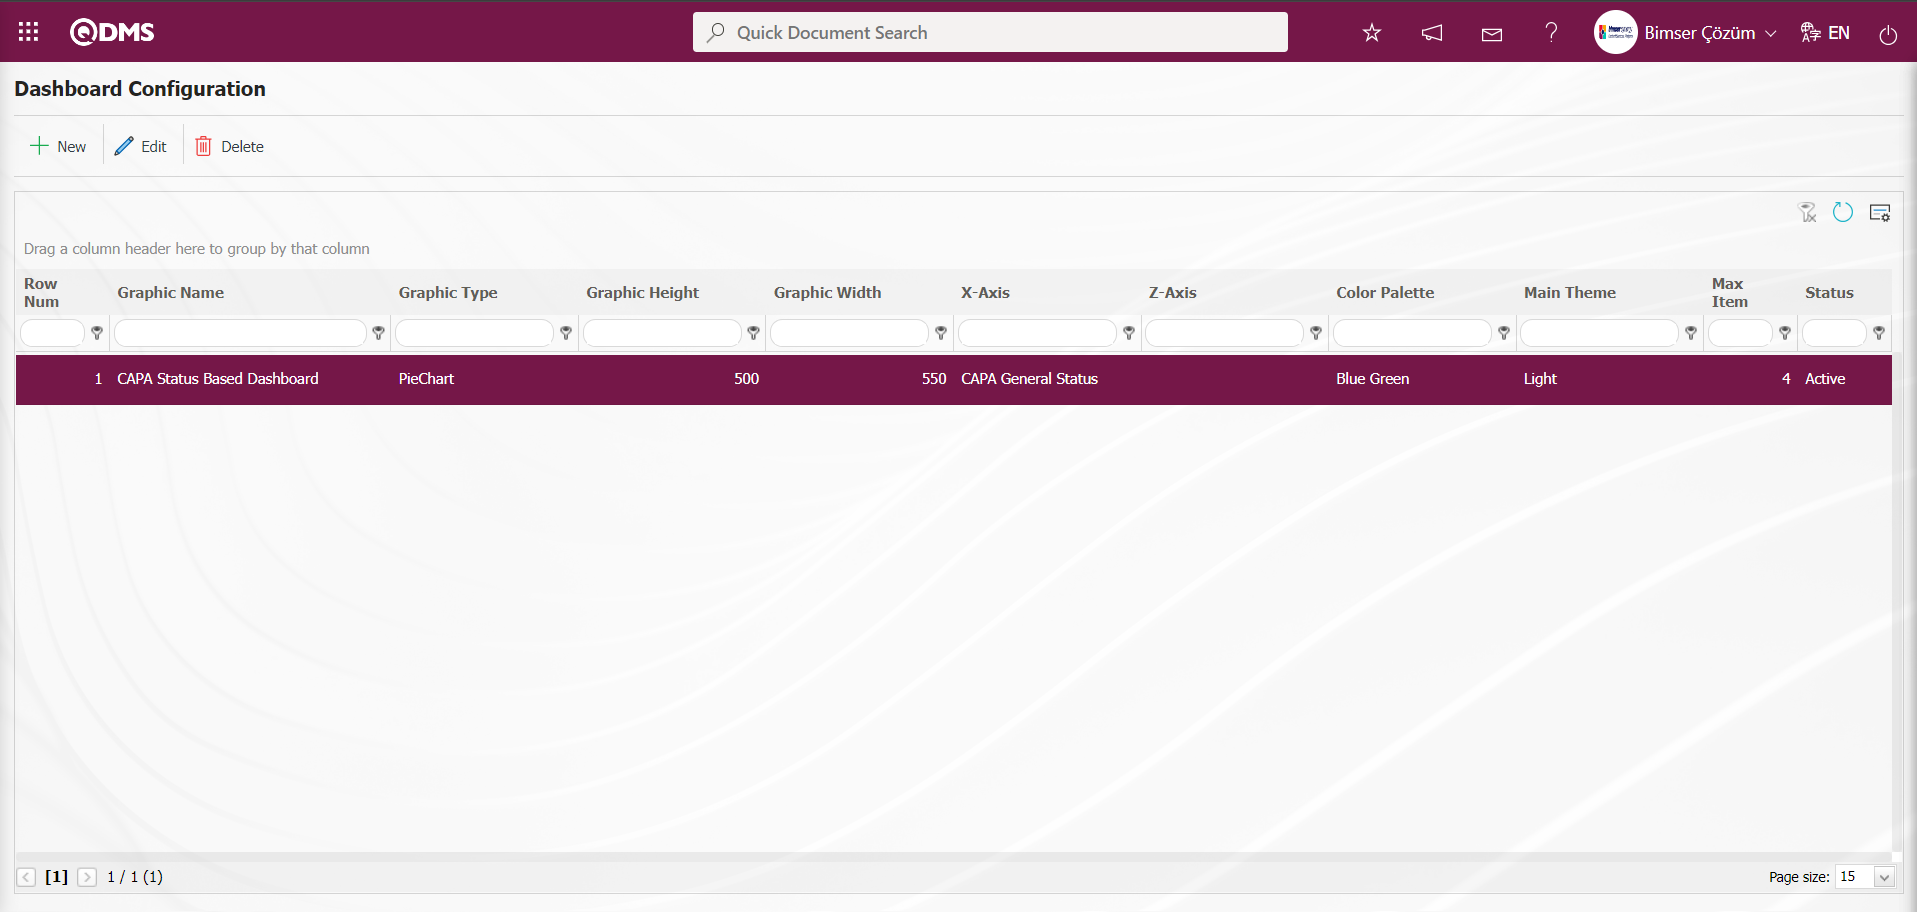
6.2. Integrated Management System / CAPA
This is the section in the CAPA Module where the operations of the CAPA transactions, the request for the CAPA, the approval of the CAPA, and the display of reports and graphs are realized.
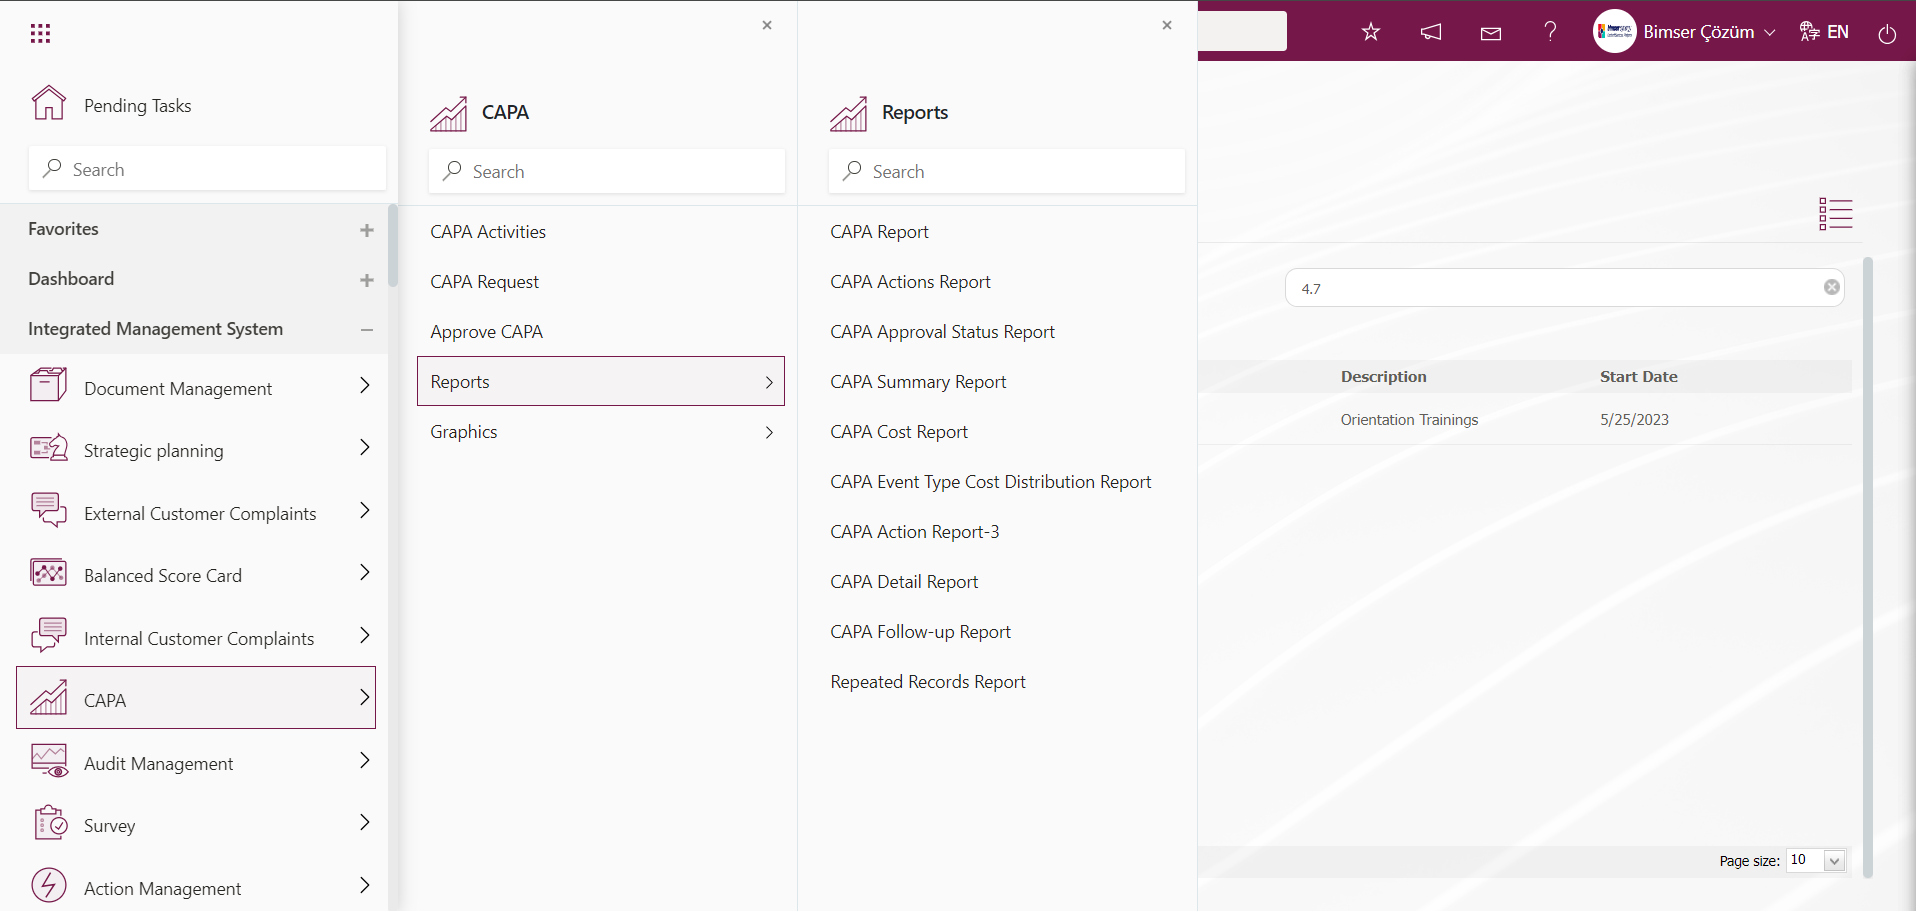
6.2.1. CAPA Activities
Menu Name: Integrated Management System/ CAPA /CAPA /CAPA Activities
It is the menu where the nonconformities occurring in the company are recorded. Two tabs are displayed on the CAPA Activities screen. These tabs are List and Filter tab.
List tab;
Within the scope of the CAPA Module, the CAPA Activities screen contains the list of CAPA records defined in the system. By using the relevant buttons on this tab, it is possible to define a new CAPA record, edit/update/change the selected CAPA record in the list depending on the authorization, delete the selected CAPA record of the users defined as module administrator in the CAPA module and use the record maintenance feature, cancel the selected CAPA record, and perform operations such as spreading the CAPA depending on the parameter.
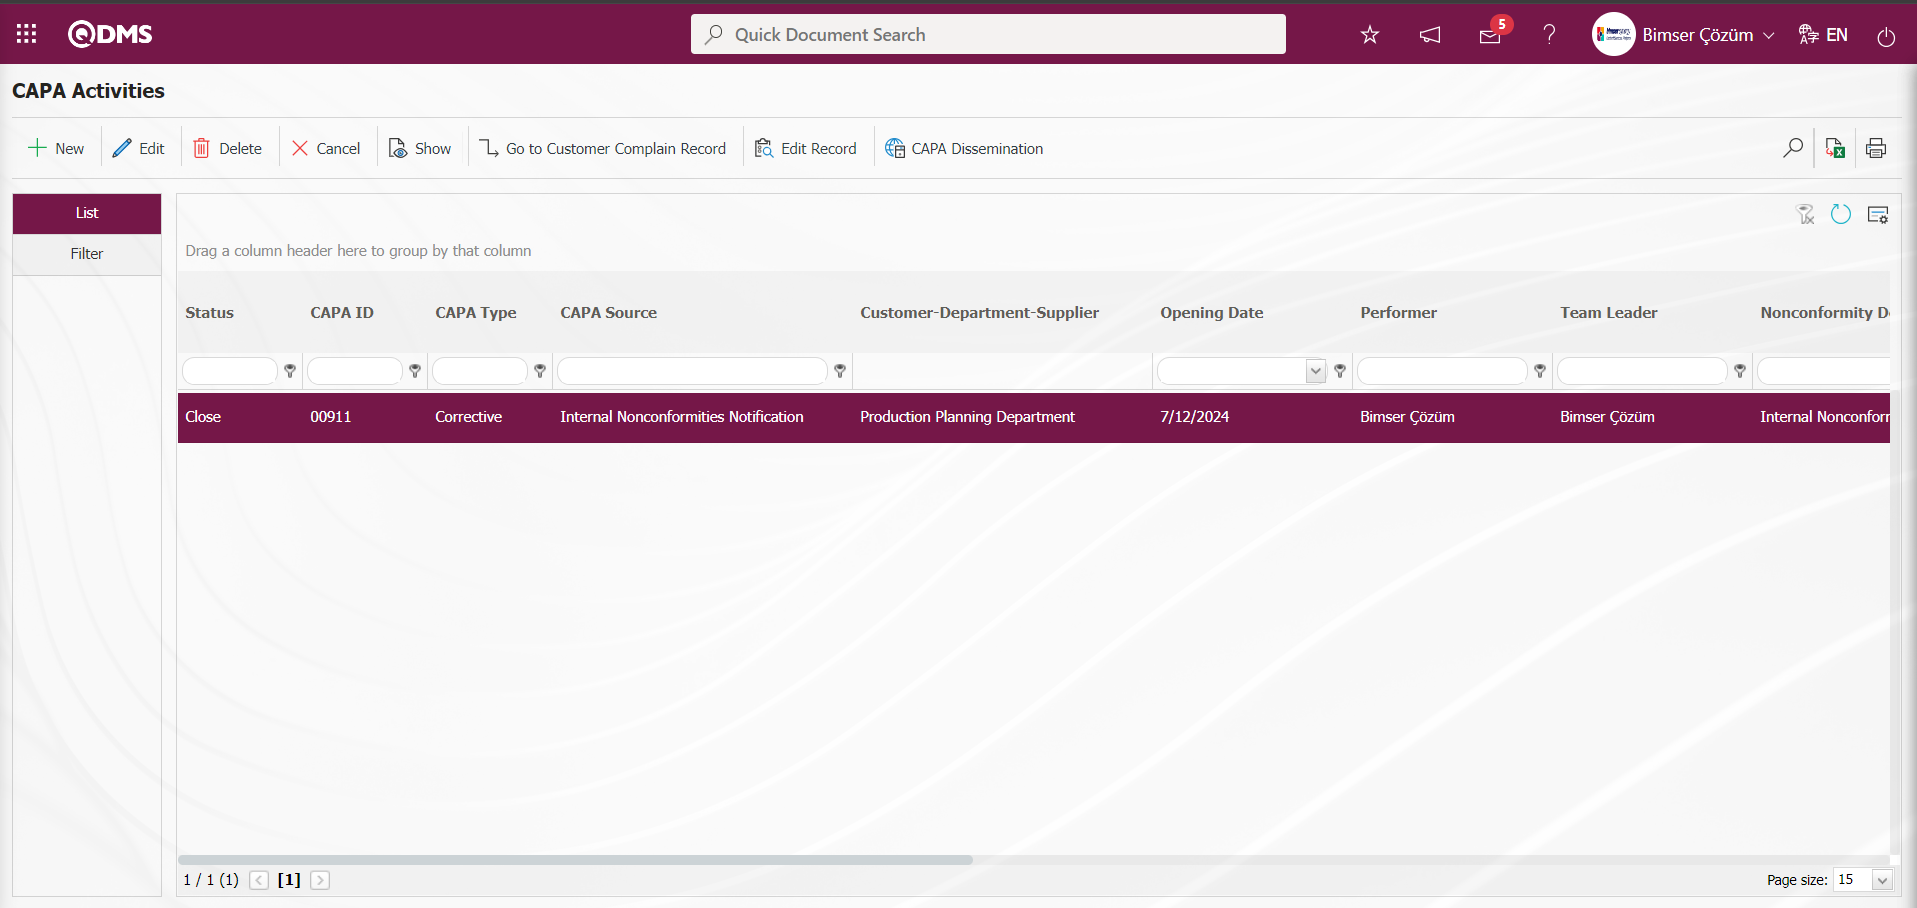
With the help of the buttons on the screen;
 :A new CAPA record is entered into the system and the identification process is performed.
 :If there is authorization on the selected CAPA record in the list, changes / updates / edits are made.
 :View all information of the CAPA record selected in the list.
 :If there is a Customer Complaint attached to the selected CAPA record in the list, it is taken to the relevant record.
 :It is the record maintenance button used for the corrections of the selected CAPA record in the list. You must be the Module Manager of the CAPA Module to view this button. In the System Infrastructure Definitions/BSID/Configuration Settings/Administrator Identification menu, the administrator identification process is performed in the CAPA Module.
 :It is the button to be used if you want to delete the selected CAPA record in the list. Appears in System Administrators. It is not visible for end users. For this button to be displayed, the user must be the Module Manager of the CAPA Module. In the System Infrastructure Definitions/BSID/Configuration Settings/Administrator Identification menu, administrator identification is made in the CAPA Module.
 : Although it is a parametric button, it appears on the screen of System Administrators. It is used to cancel CAPA records. It is a different process than deletion. The CAPA record stops functioning but continues to be registered in the system. It works within the framework of an approval flow. For this, the flow must be defined in the infrastructure. The flow is defined from the System Infrastructure Definitions / Configuration Settings / Flow Definition menu. (To determine which role will approve or reject the CAPA records to be canceled, go to the System Infrastructure Definitions / BSID / Configuration Settings / Flow Definition menu and connect to the role with the CAPA Cancel Approval Flow
  button).
 : If the CAPA record opened in the CAPA Module is desired to be applied in other locations or departments of the workplace, the CAPA Expansion feature is used. The parameter must be activated by selecting “Yes” for parameter 163 of the CAPA Module parameters. When the parameter is activated, the button is displayed on the CAPA operations - New Record screen and this feature is used.

According to the value entered in parameter 165 in the CAPA Module parameters, it is determined who will perform the dissemination process in the CAPA module.
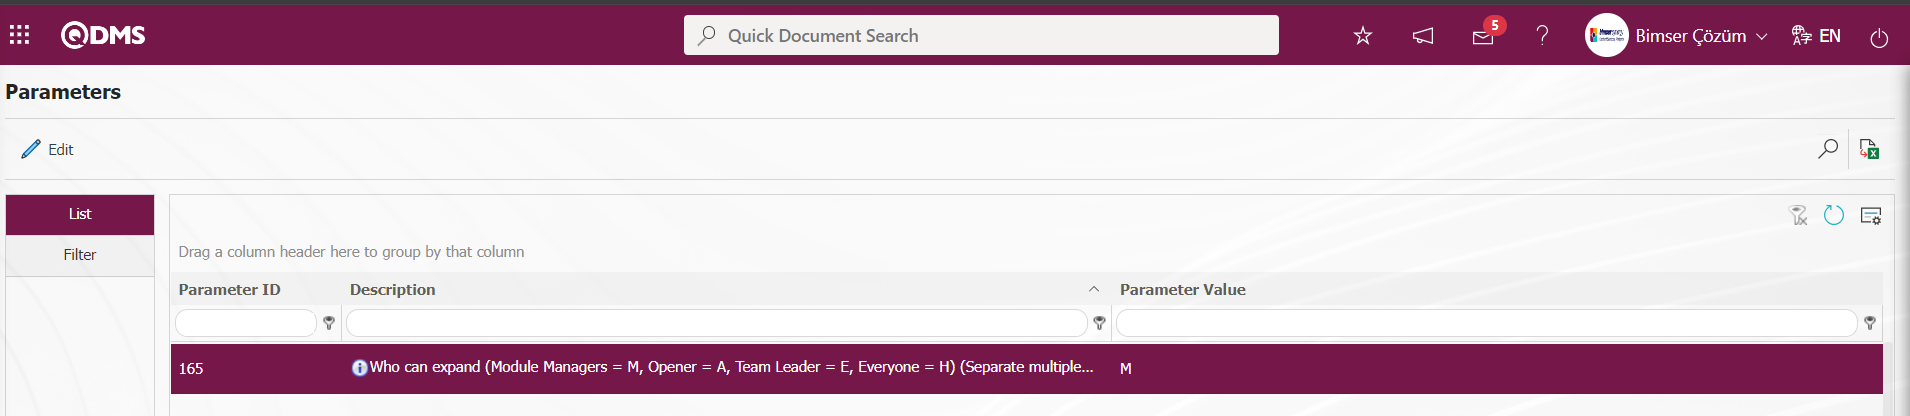
Module manager is defined as the person who will make publishing in the parameter. For this, the letter “M” was entered as a value in the parameter value.
 : Printout is done according to any stage of the CAPA record.
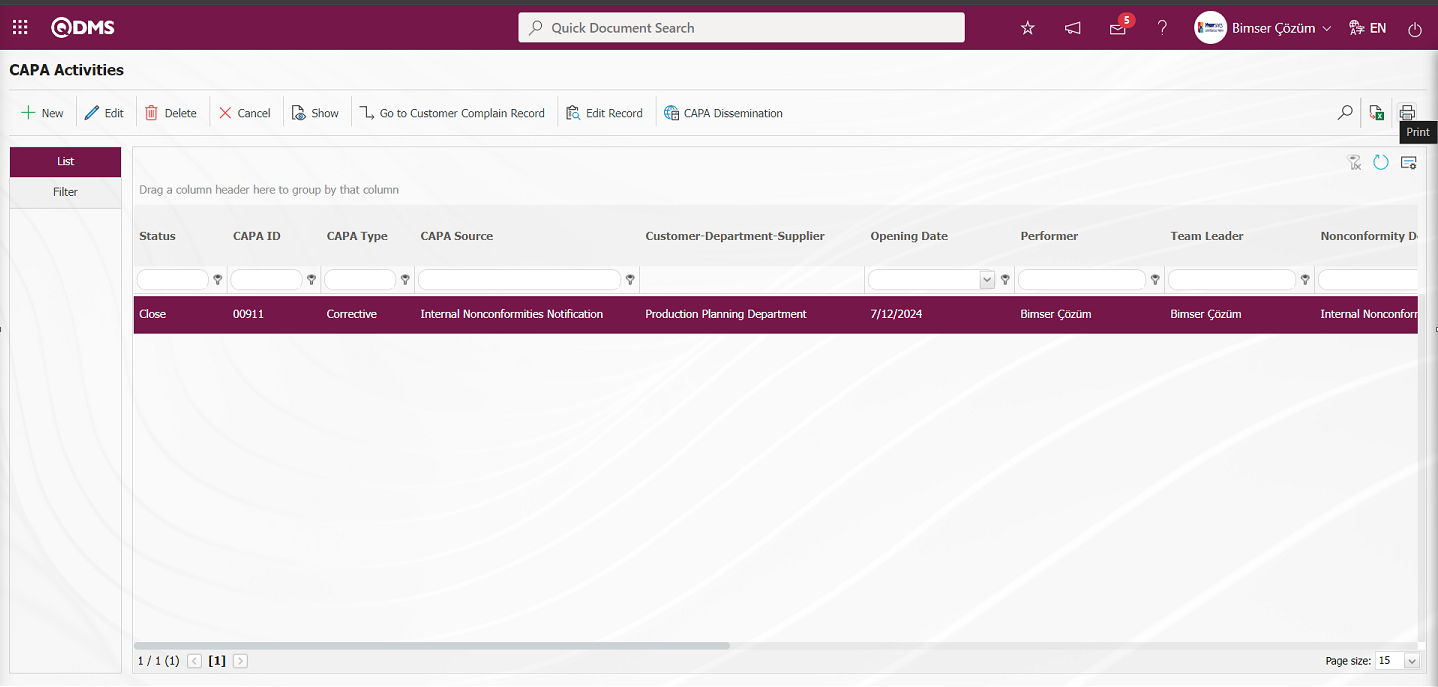
Select which stage of the report is desired and click on the (Print) button. The report for the selected record is taken to the computer.
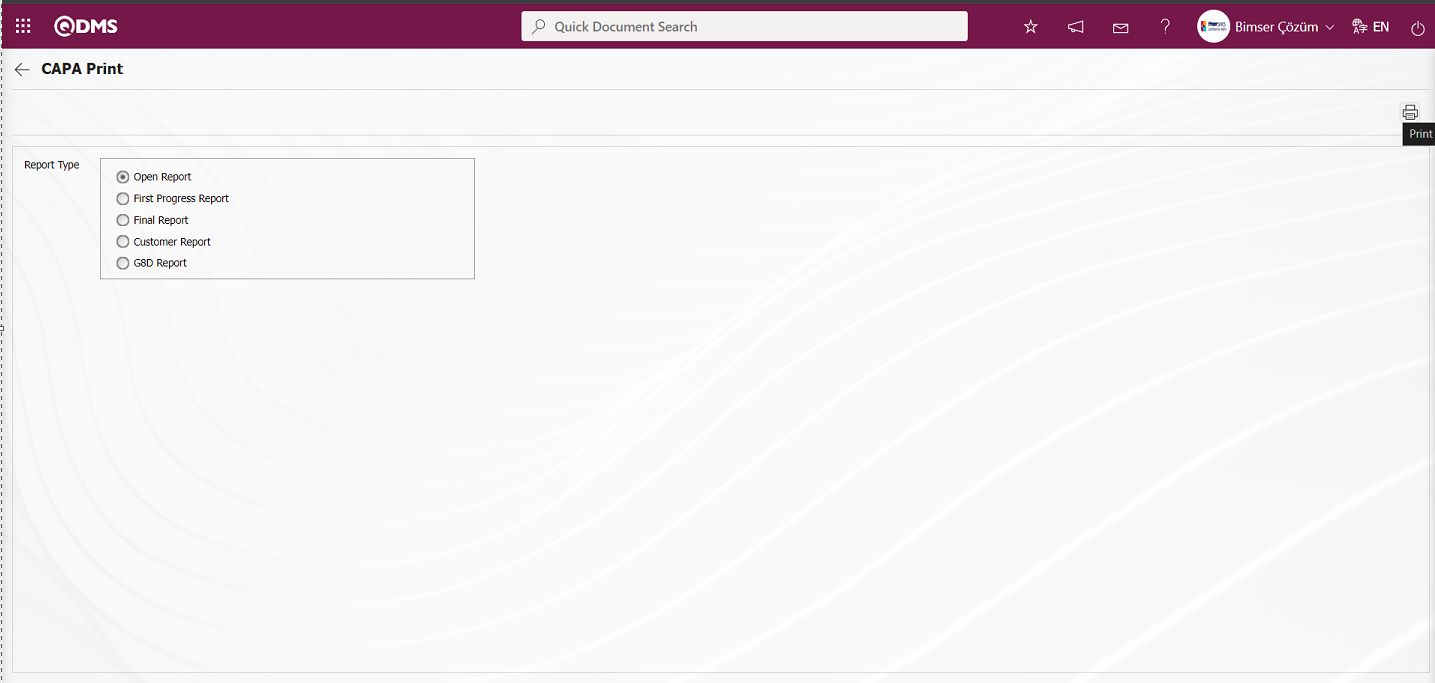
Notification Report;
In order to receive the Notification Report for CAPA records on the CAPA Print screen, the Notification Report template file must be uploaded in the Report Formats Edit menu and defined to parameter 65 in the Corrective and Preventive Actions Module parameters. For the definition process, the report must first be uploaded with the  button in the Report Formats Edit menu. The uploaded report format must be pasted into the relevant parameter with the name and extension of the template with right click/copy-paste management.

The CAPA Notification report template defined in this parameter is selected as Report Type “Open Report” on the CAPA Print screen and the (Print) button is clicked.
![A screenshot of a computer
Description automatically generated]ref65
On the CAPA Print screen, the Notification Report is received in Excel format.
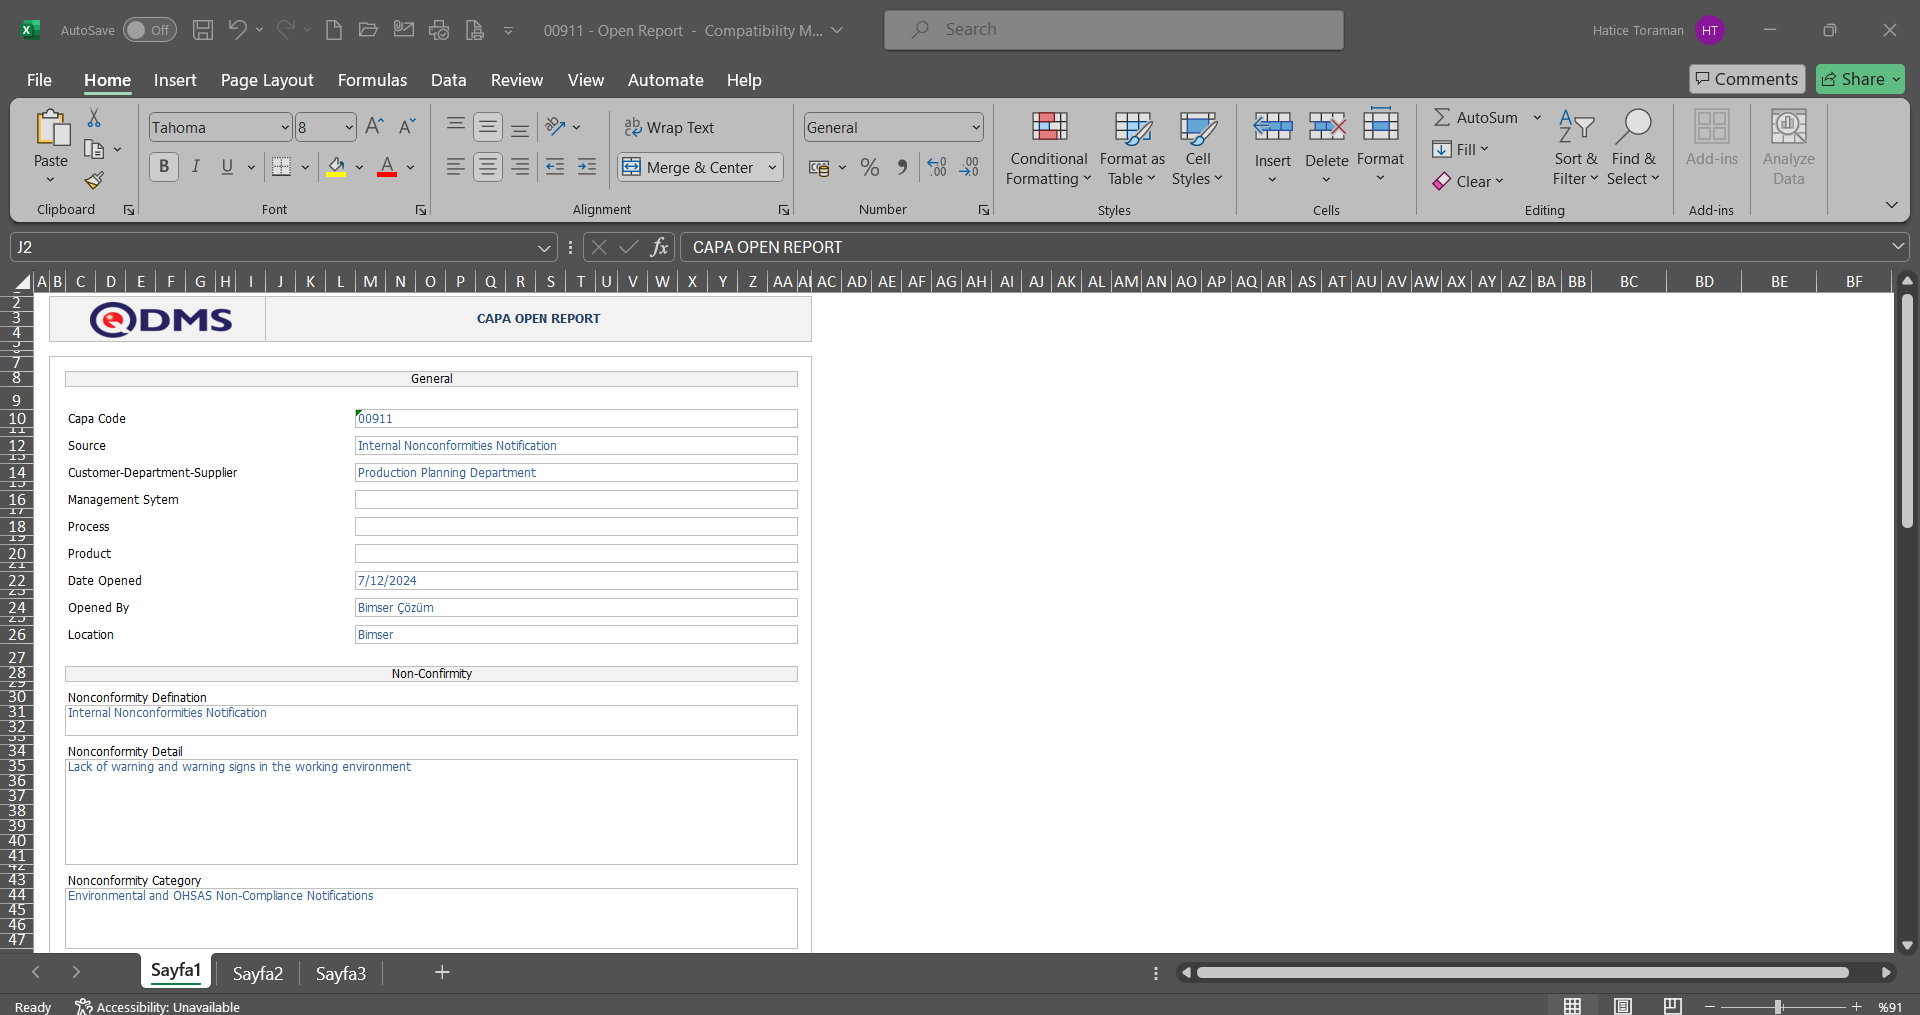
Progress Report;
In order to receive the Progress report for CAPA records on the CAPA Print screen, the Progress Report template file must be uploaded in the Report Formats Edit menu and the parameter 66 must be defined in the parameter value of the CAPA parameters. For the definition process, the report must first be uploaded with the button in the Report Formats Edit menu. The uploaded report format must be pasted into the relevant parameter with the name and extension of the template with right click/copy-paste management.

The CAPA Progress report template defined in this parameter is selected as Report Type “First Progress Report” on the CAPA Print screen and the (Print) button is clicked.
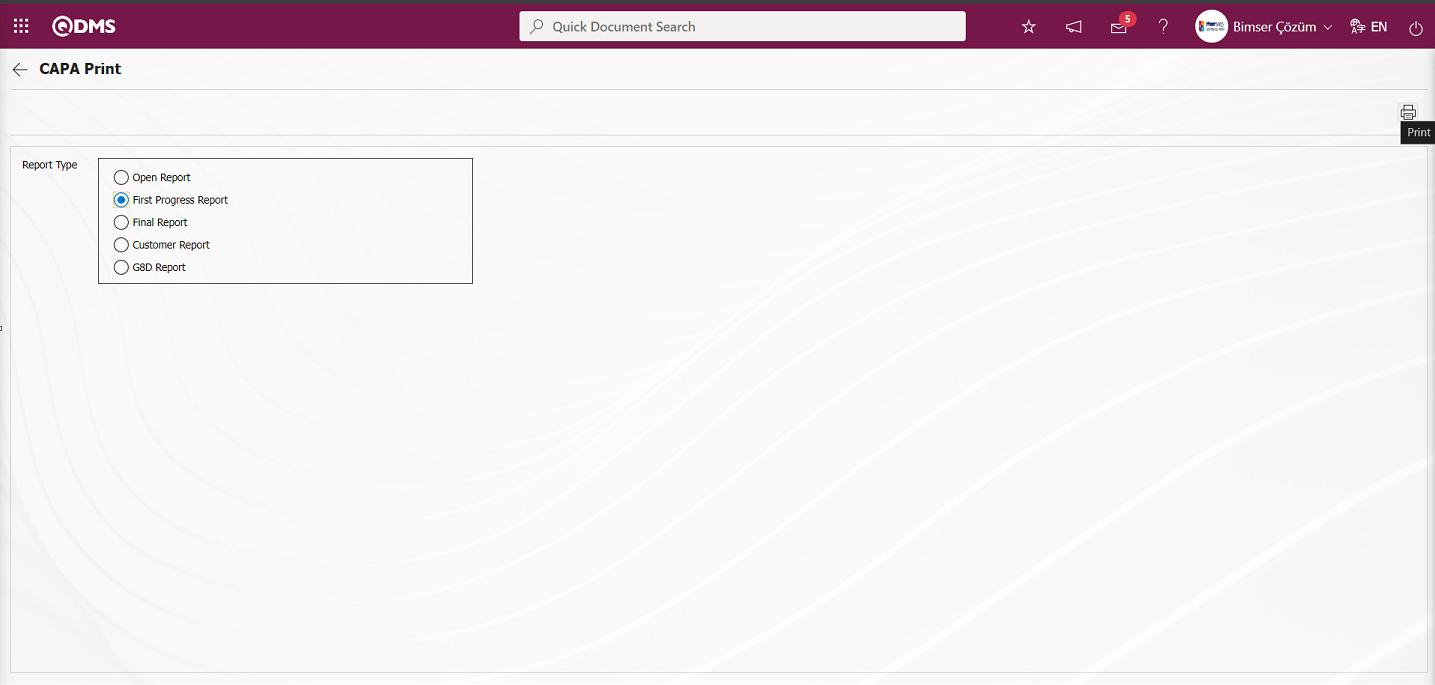
On the CAPA Print screen, the Progress Report is received in Excel format.
Result Report;
In order to receive the result report for CAPA records on the CAPA Print screen, the result report template file must be uploaded in the Report Formats Edit menu and the parameter 67 must be defined in the parameter value of the CAPA Module parameters. For the definition process, the report must first be uploaded with the  button in the Report Formats Edit menu. The uploaded report format must be pasted into the relevant parameter with the name and extension of the template with right click/copy-paste management.
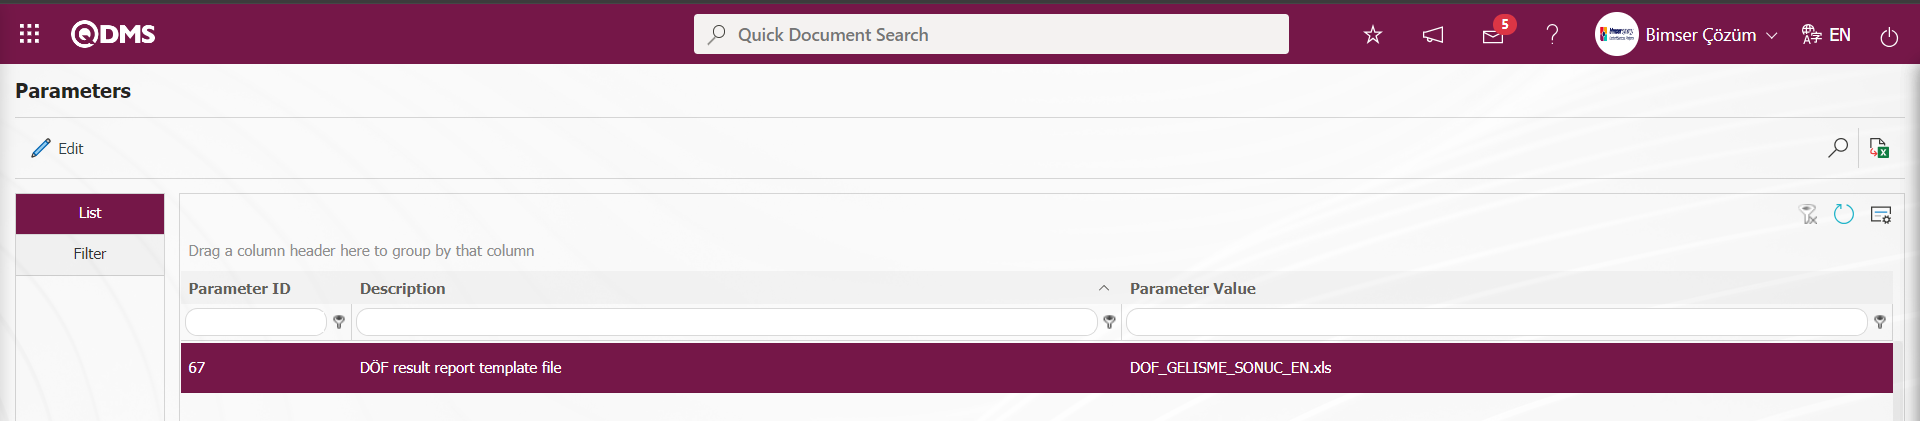
The CAPA Final Report template defined in this parameter is selected as Report Type “Final Report” on the CAPA Print screen and the (Print) button is clicked.
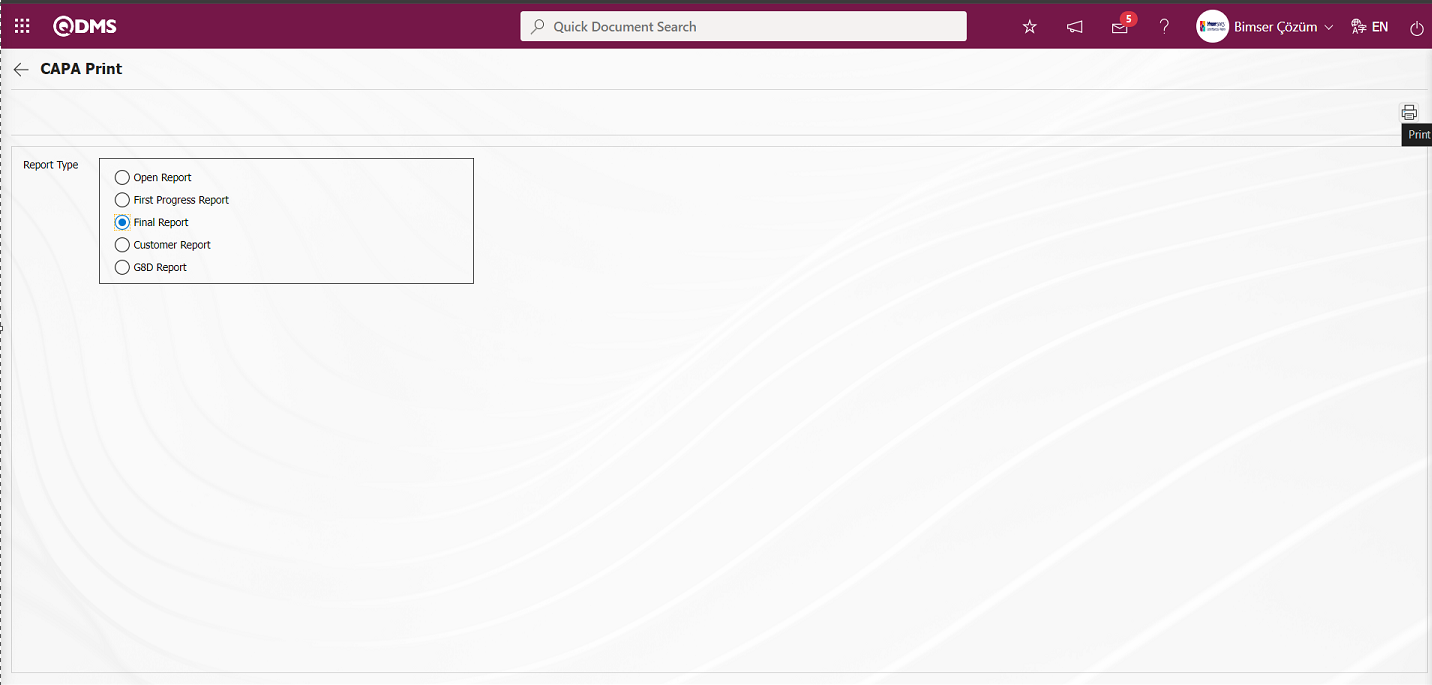
In the CAPA Print screen, the Result Report is received in Excel format.
Customer Report;
In order to receive the Customer report for CAPA records on the CAPA Print screen, the Customer Report template file must be uploaded in the Report Formats Edit menu and the parameter 68 must be defined in the parameter value of the CAPA Module parameters. For the definition process, the report must first be uploaded with the button in the Report Formats Edit menu. The uploaded report format must be pasted into the relevant parameter with the name and extension of the template with right click/copy-paste management.

The CAPA Customer report template defined in this parameter is selected as Report Type “Customer Report” on the CAPA Print screen and the (Print) button is clicked.
On the CAPA Print screen, the Customer Report is received in Excel format.
G8D Report;
In order to receive the G8D report for CAPA records on the CAPA Print screen, the G8D Report template file must be uploaded in the Report formats editing menu and the parameter 69 in the CAPA parameters must be defined in the parameter value. For the definition process, the report must first be uploaded with the button in the Report Formats Edit menu. The uploaded report format must be pasted into the relevant parameter with the name and extension of the template with right click/copy-paste management.
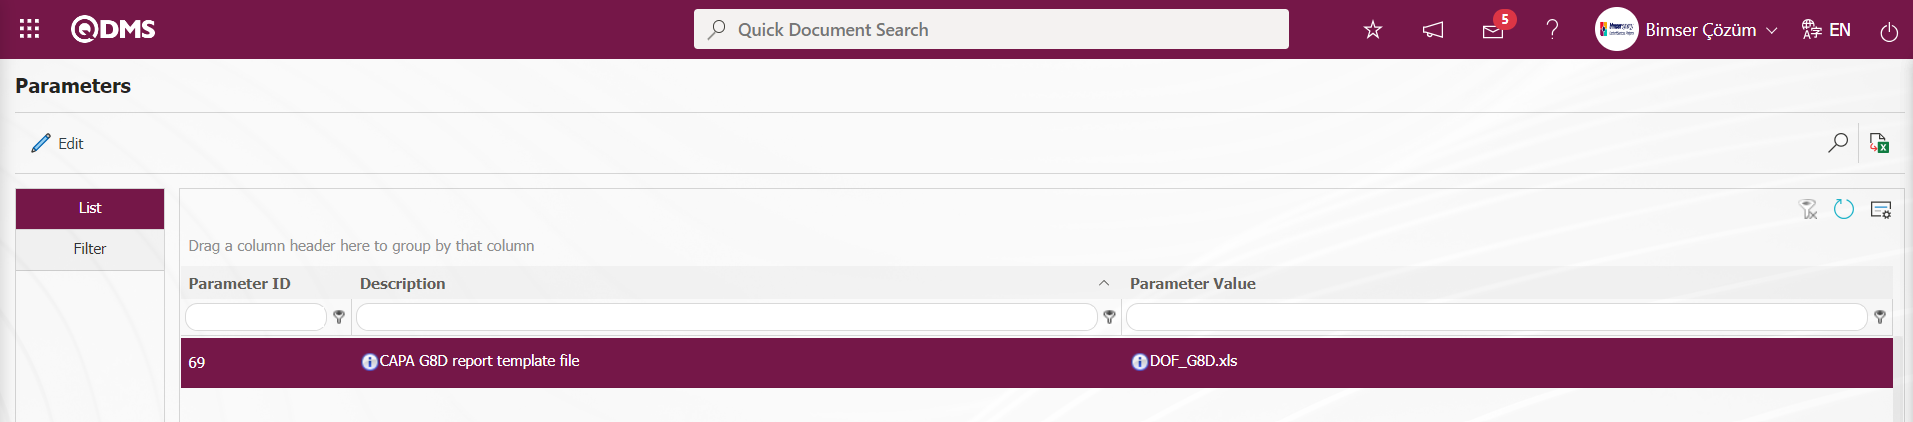
The CAPA G8D report template defined in this parameter is selected as Report Type “G8D Report” on the CAPA Print screen and the  (Print) button is clicked.

The G8D Report is received in Excel format on the CAPA Print screen.
: The CAPA records listed in the list tab on the screen are reported in Excel format.
: Records are searched by filtering
: The data remaining in the filter fields in the grid where the search criteria on the menu screens are searched are cleared.
: The menu screen is restored to its default settings
: User-based designing is done on the menu screen with the show-hide feature, that is, the hiding feature of the fields corresponding to the columns on the menu screens.
Filter tab;
Within the scope of the CAPA Module, data is entered on the CAPA Activities screen according to fields such as CAPA code, Status, Department/Customer/Supplier and Department of Non-Compliance, and filtering is done according to the search criteria by clicking the  (Search) button.
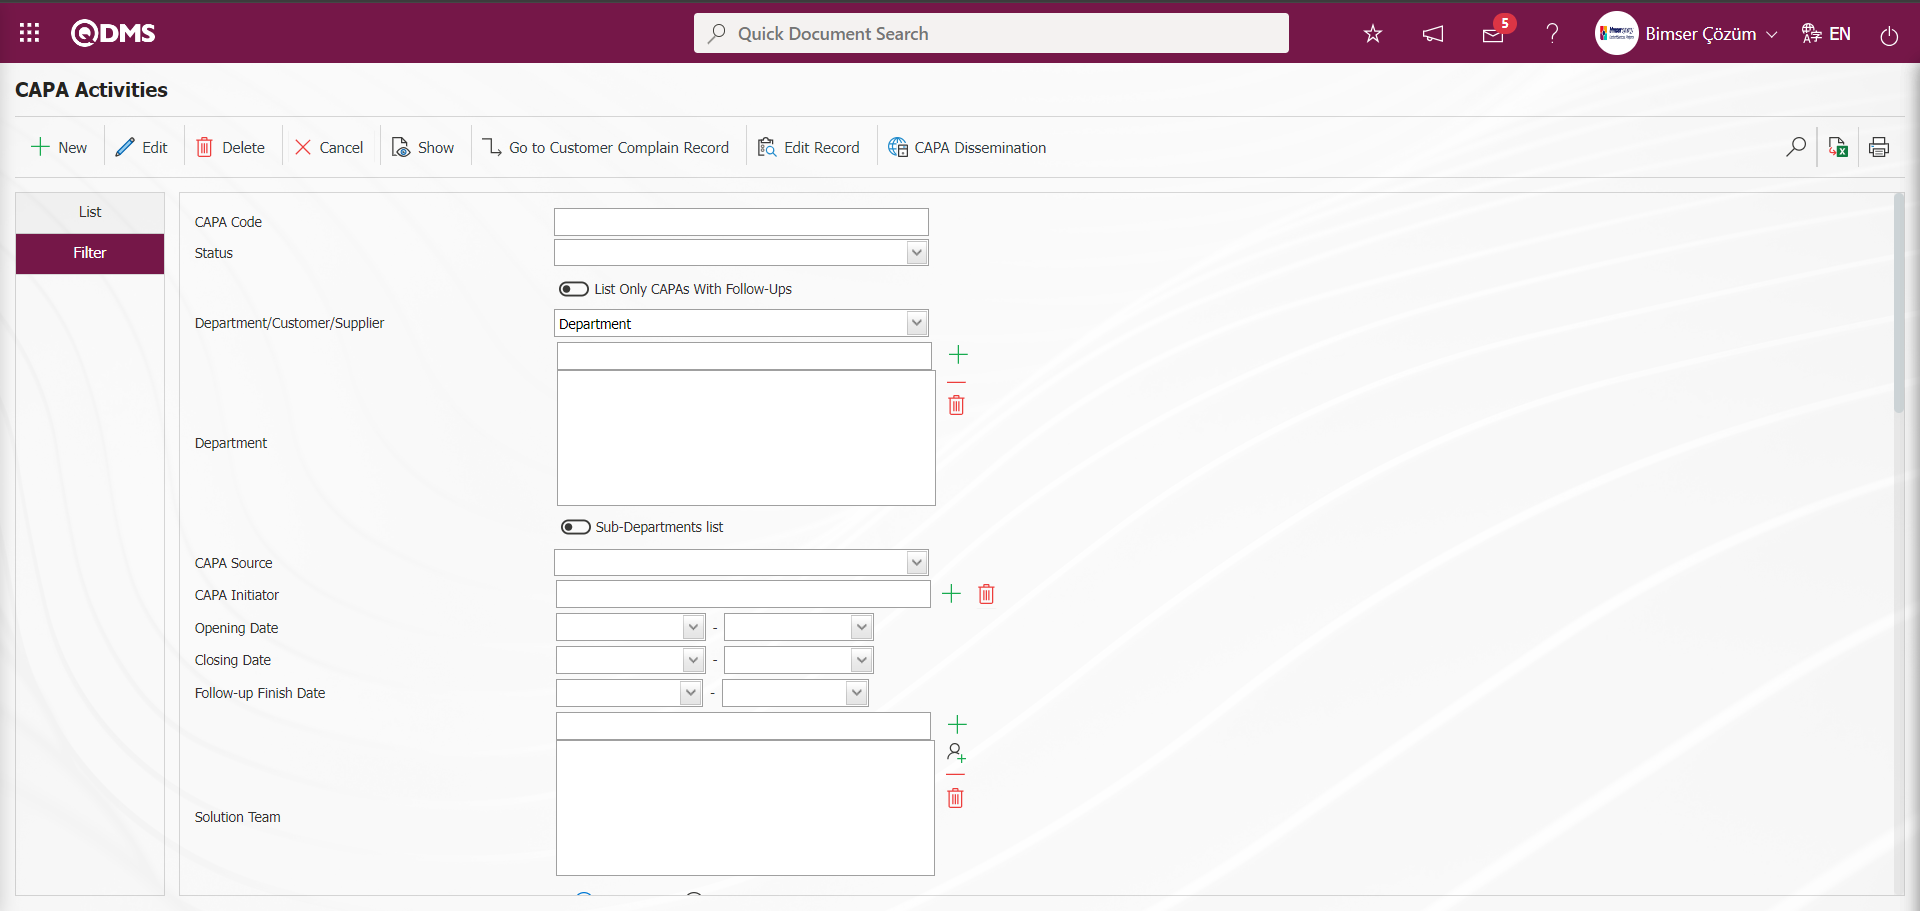
6.2.1.1.Opening a New CAPA Record.
To define a new CAPA record on theCAPA Activities screen, click the  button to open the CAPA Activities/ New Record screen.

CAPA tab;
On the CAPA Activities - New Record ” screen, the CAPA tab is the tab that contains CAPA detail information.
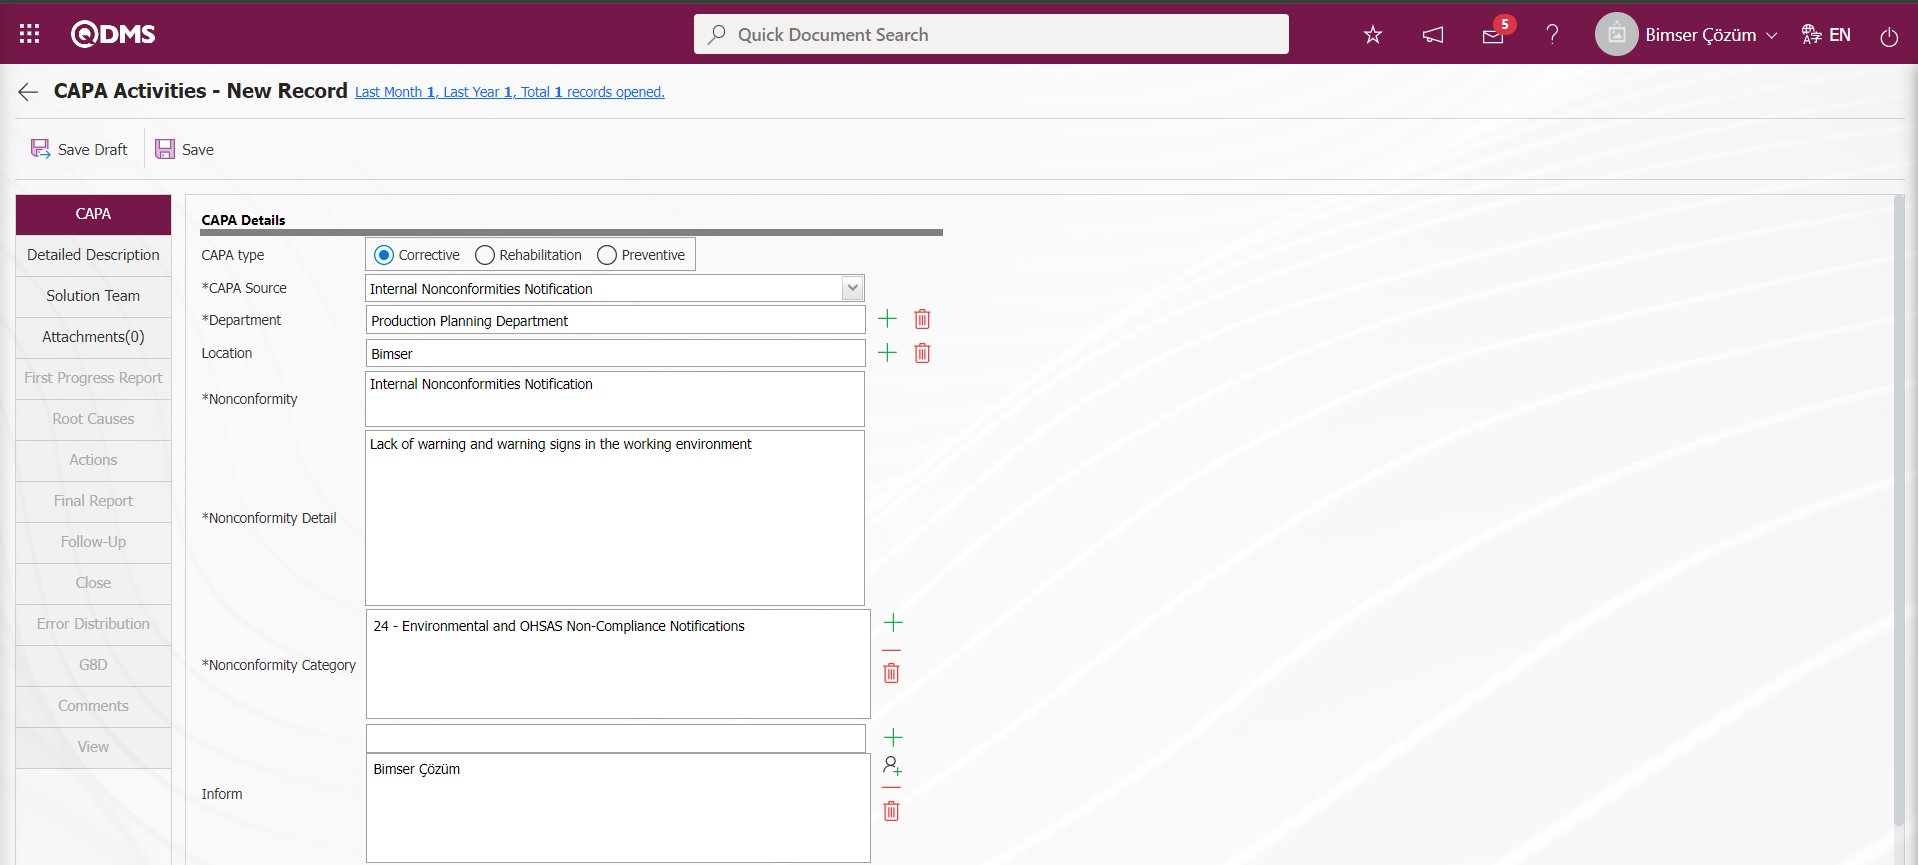

Define the relevant fields on the screen that opens:
CAPA Type: This is the field where CAPA Type information can be selected on the CAPA Activities screen. There are 3 types: Corrective, Remediation and Preventive. It is the field where corrective, remedial and preventive options are selected in CAPA type options. If the parameter value “K” is selected for parameter 22 in the CAPA Module parameters, when CAPA is opened, the type of CAPA (Corrective- Remediation-Preventive) is decided in this field.
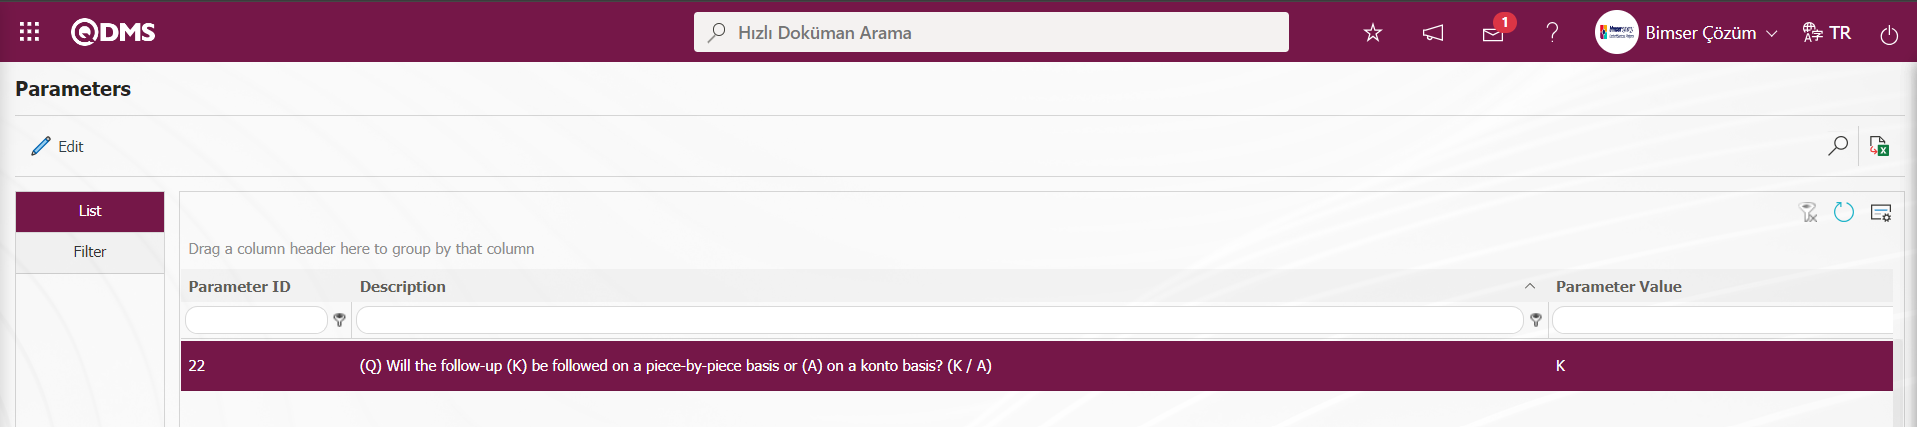
The parameter is activated by selecting “Yes” for parameter 88 in CAPA Module parameters.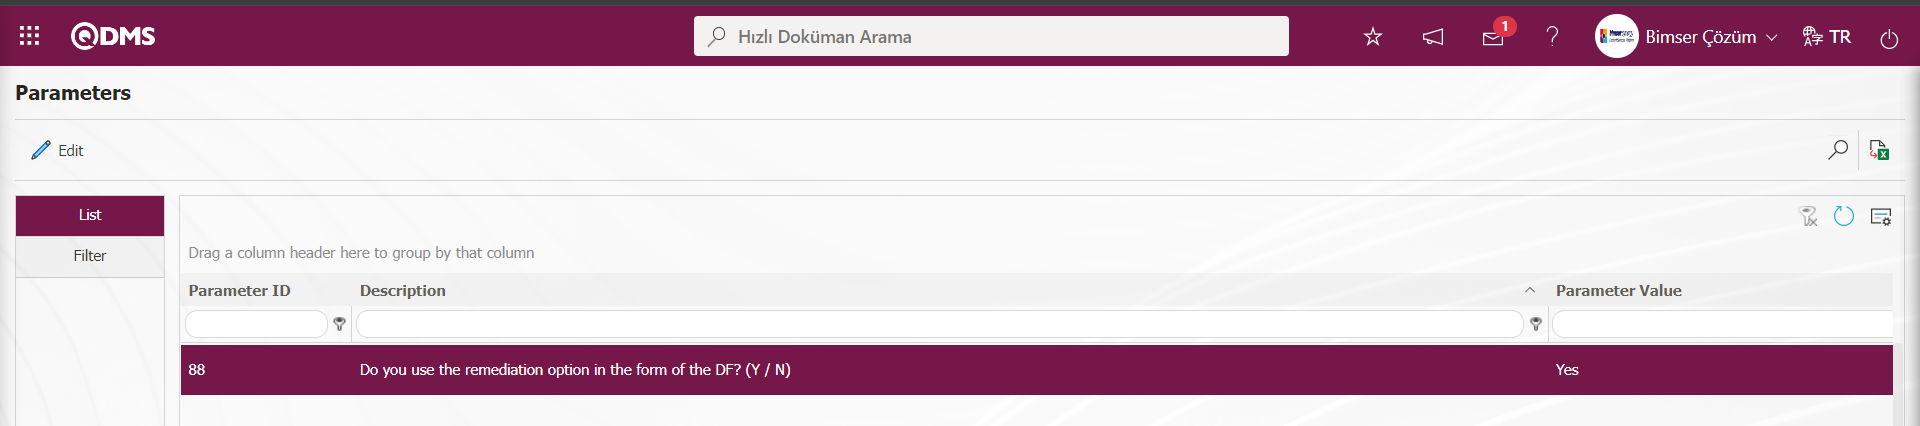
After the parameter is activated, the parameter value is activated as “Yes” if it is desired to use the Remediation option in addition to Corrective or Preventive for the CAPA type in the CAPA Type field. According to the settings made in these CAPA Module parameters 22 and 88, CAPA Type options come to the CAPA Type field.
CAPA Source: This is the field where CAPA Source information is entered from CAPA Activities - New Record screen. The list of sources defined in the System Infrastructure Definitions/CAPA/CAPA Source menu is displayed and a selection is made in this CAPA Source list. Since the CAPA Source selected in the CAPA Source CAPA Source Type field selected on the CAPA Source sources definition screen is in-house, the Department field where the nonconformity is displayed at the bottom. If the CAPA Source Type is selected as External in the selection of this field, the Customer list defined in the system will be displayed, and if the Supplier is selected, the Supplier list selected from the system will be displayed as an additional field. Customer Complaint CAPA Source Type will be displayed in the Customer Complaints modules and the field where the Audit option is selected will be displayed in the CAPA Source Audit Activities Module during the opening phase of the CAPA record.
Department: In CAPA Activities - New Record screen, the department of nonconformity can be selected from the list of departments defined in the system.
Location: It is the field where the workplace information can be selected from the Workplace list defined in the system on the CAPA Activities - New Record screen.
The parameter is activated by selecting “Yes” for parameter 127 in the CAPA module parameters.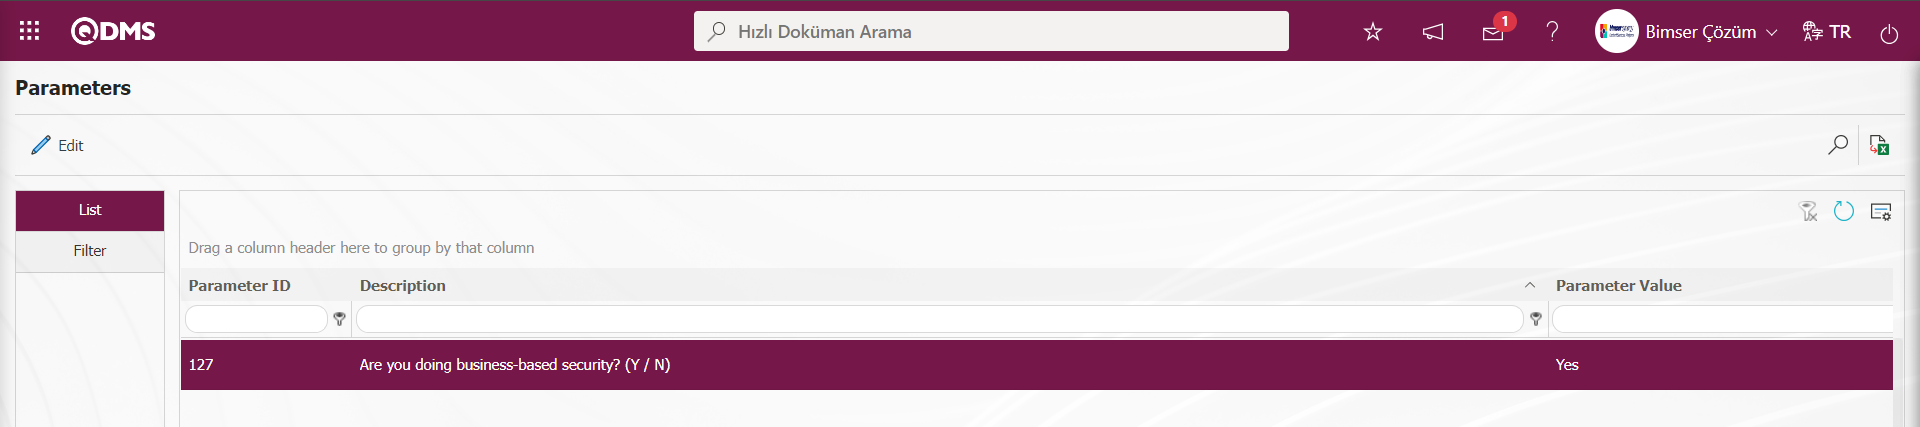
After the parameter is activated, people other than the Module manager can only see the CAPA records in their own workplace on the CAPA screen. CAPA records in other workplaces are hidden by bringing security.
Nonconformity: This is the field where the Nonconformity Definition information is entered on the CAPA Activities - New Record screen. If you want the nonconformity definition field to come automatically when the nonconformity category is selected, the parameter value of parameter 130 is activated by selecting “Yes”.
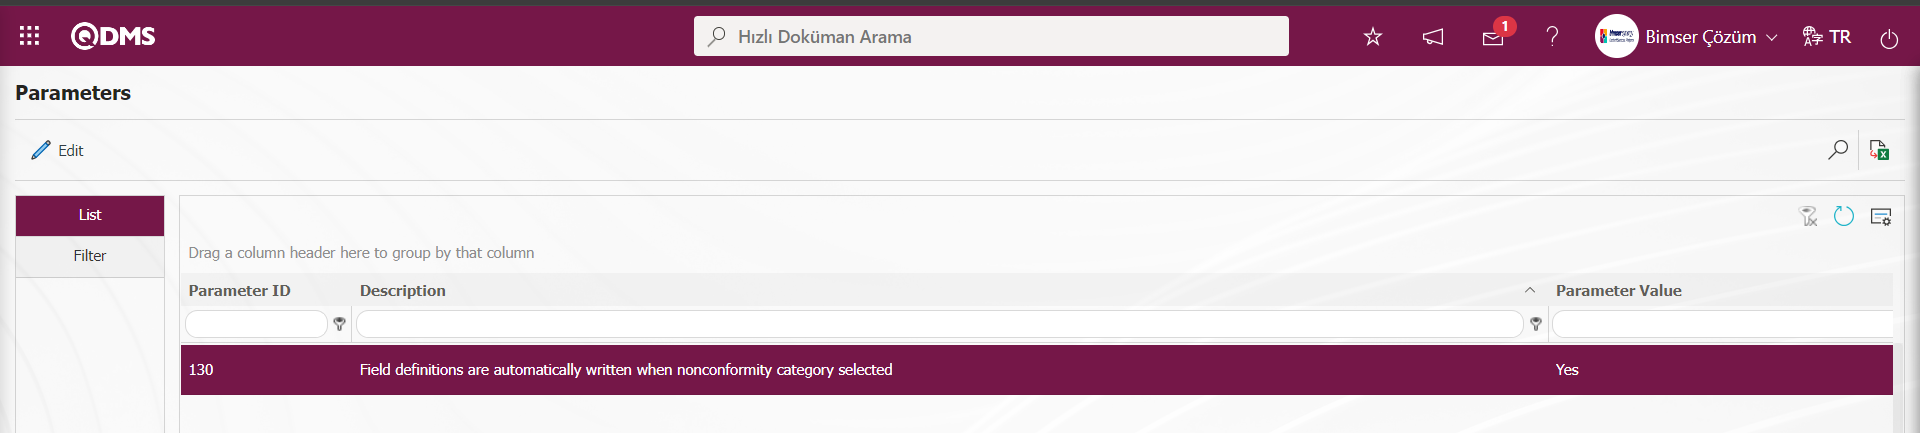
After the parameter is activated, the nonconformity category definition selected during CAPA entry is automatically written in the Nonconformity Definition field.
Nonconformity Detail: This is the field where nonconformity detail information is entered. The parameter is activated by selecting the parameter value “Yes” of parameter 35 in the CAPA module parameters related to Nonconformity Detail.
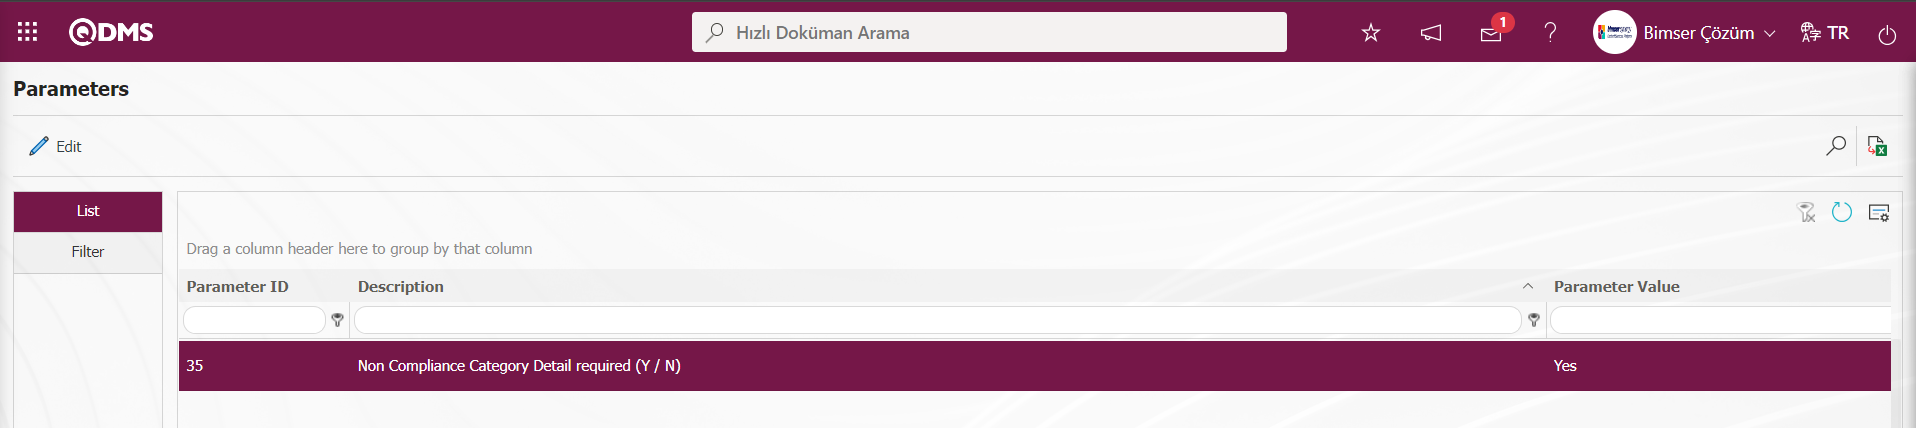
After the parameter is activated CAPA Activities - New Record It is mandatory to enter information in the Nonconformity Category Detail field of the screen.
Nonconformity Category: This is the field where the Nonconformity Category information on the CAPA Activities screen can be selected from the list of Nonconformity Category defined in the system. System Infrastructure Definitions/CAPA/Nonconformity Category
Make a selection from the Nonconformity Category list defined in the Nonconformity Category Definition menu.
On the CAPA Activities - New Record** screen, the Non-Compliance Category field is a field that is displayed depending on the parameter. The parameter is activated by selecting the parameter value of parameter 145 “Yes” in the CAPA module parameters.

After the parameter is activated, the Nonconformity Category field is displayed on the CAPA Activities - New Record screen. The parameter is activated by selecting “Yes” for parameter 108 in the CAPA module.
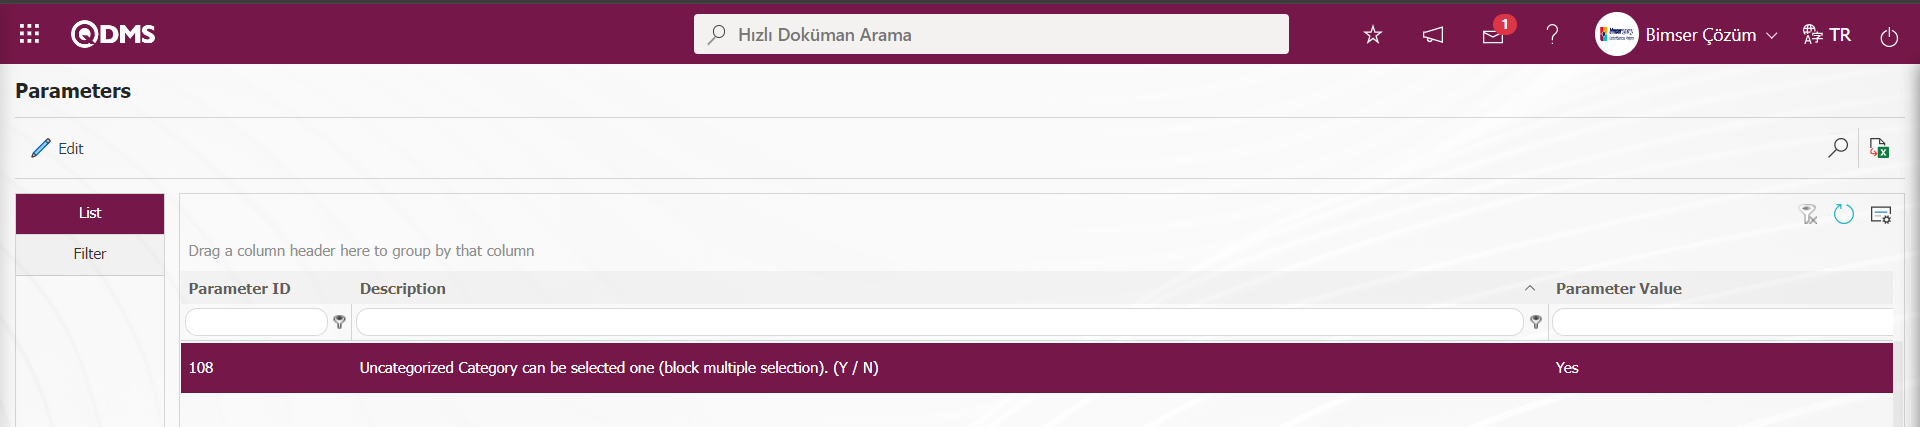
When the parameter is activated, single selection is allowed when selection is made in the Nonconformity Category list in the Nonconformity Category field on the CAPA Activities - New Record screen. When the parameter value is selected “No”, when the parameter is inactive, multiple selection is allowed in the Nonconformity Category list in the Nonconformity Category field. When a new CAPA record is created, if it is desired to select only the subcategories under the main breakdown when the nonconformity category is to be selected, the parameter value of parameter 161 should be selected “Yes”.
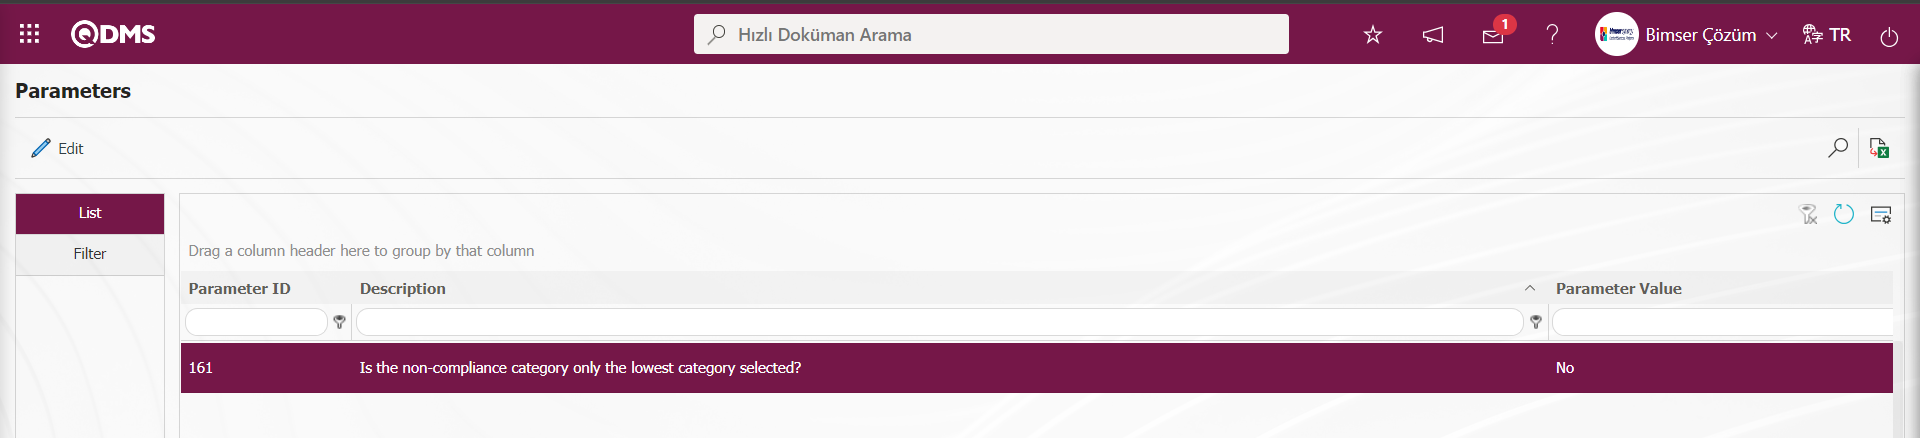
Inform: This is the field where the information of the person to be informed about the CAPA record on the CAPA Activities - New Record screen can be selected from the list of personnel defined in the system. By making the necessary adjustments in the parameters related to information in CAPA transactions, the information field is automatically added on the basis of person or default user group. Adjustments must be made in the relevant parameters in order to add the department supervisor of the CAPA record opener, the immediate supervisor, the department supervisor of the team leader, the immediate supervisor of the Team Leader, the supervisor when the workplace is selected, the process owner when the process is selected, the product group responsible when the product is selected, the immediate supervisor of the department where there is a nonconformity and the information field of the opener.

In the CAPA Module parameters, User Group code is defined in the parameter value of parameter 10.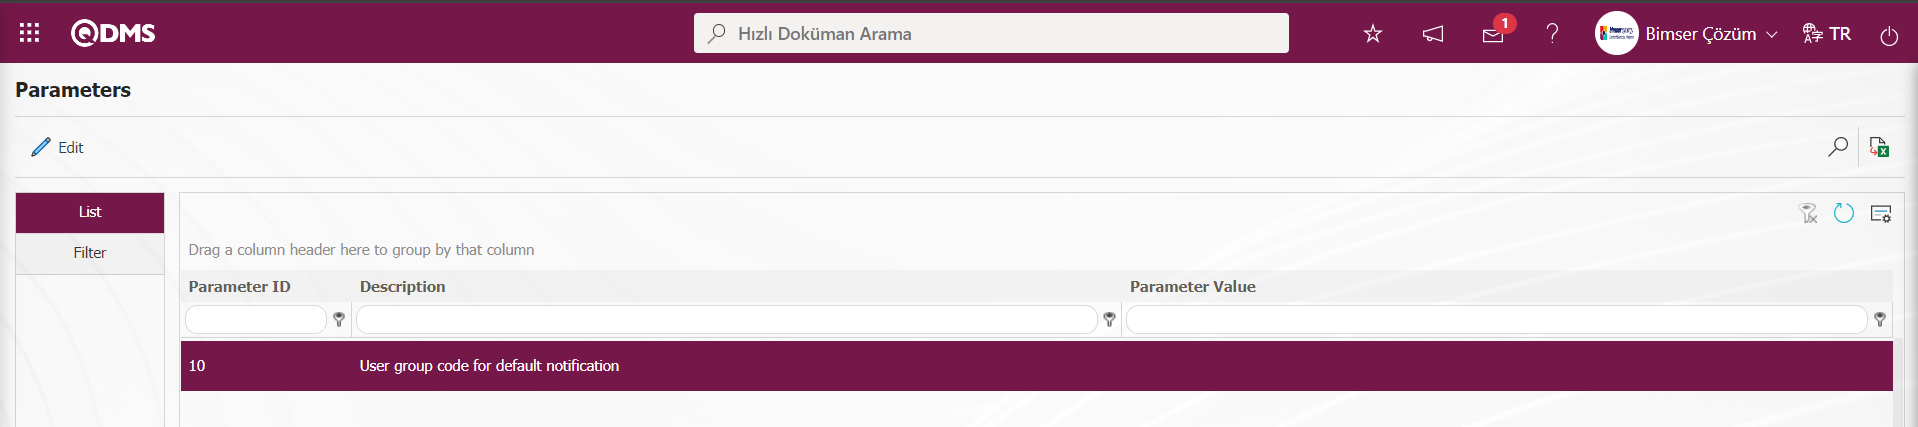 Defined User Group code information is obtained from System Infrastructure Definitions/BSID/Definitions/User Group Definition menu.
Process: In CAPA Activities - New Record screen, the Process information can be selected from the Process list defined in the system.
Management System: This is the field where the connection of the CAPA record with the Management System defined in the system can be selected on the CAPA Activities - New Record screen. Parameter 149 of the Corrective and Preventive Actions module parameters is activated by selecting the parameter value “Yes”.

After the parameter is activated, click the  (Add) button in the Management System field on the CAPA Activities - New Record screen and make multiple selection in the Management System list defined in the system.
Here, CAPA Type is selected according to corrective, remediation and preventive status. Then the process source, department, workplace, nonconformity definition, nonconformity detail and nonconformity category are determined. If desired, after selecting the personnel, workplace, process and item number to be added to the notification, the relevant management system is selected from the list from the management systems drop-down menu.
You can see how many CAPAs have been opened in the last 1 month, last 1 year and in total in the same selections according to the selection type fields.
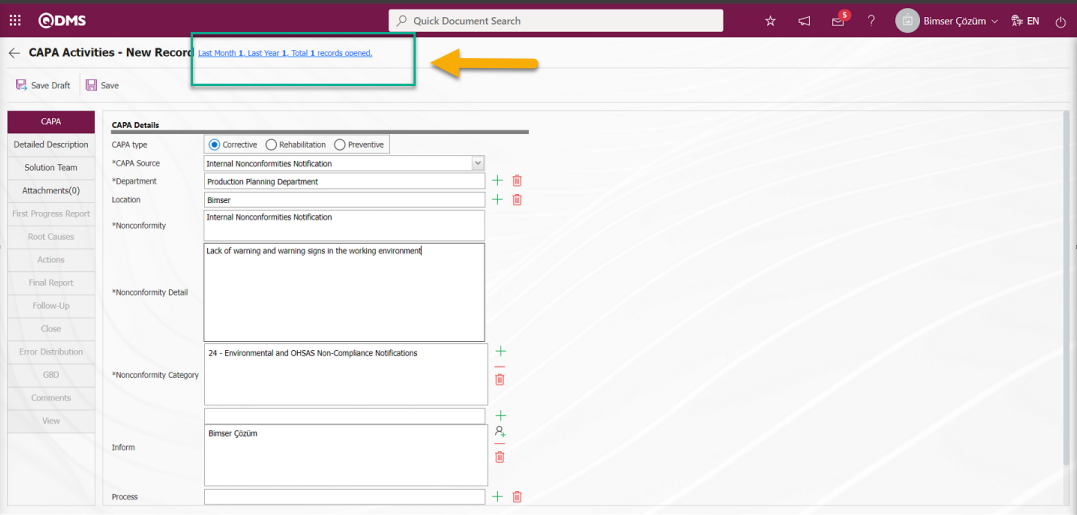
If you click on the blue area where the number is shown, you can view the content of these records.
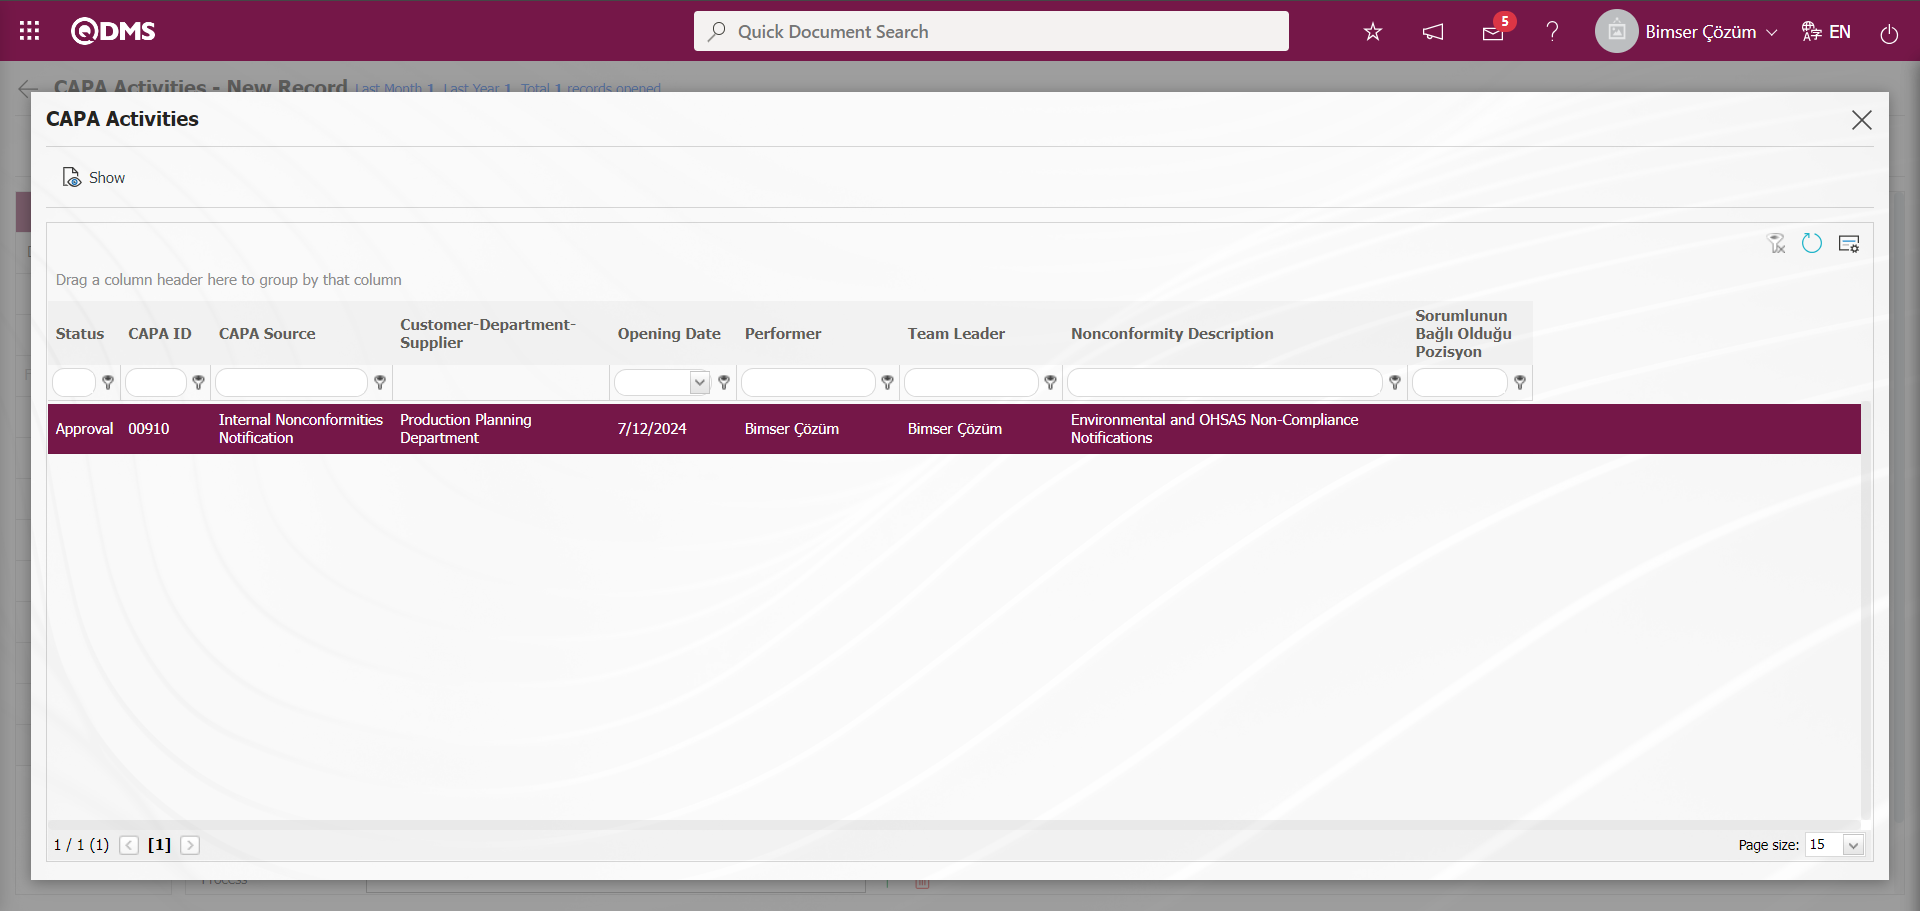
On the CAPA Activities screen, the CAPA record is displayed by clicking the  button.
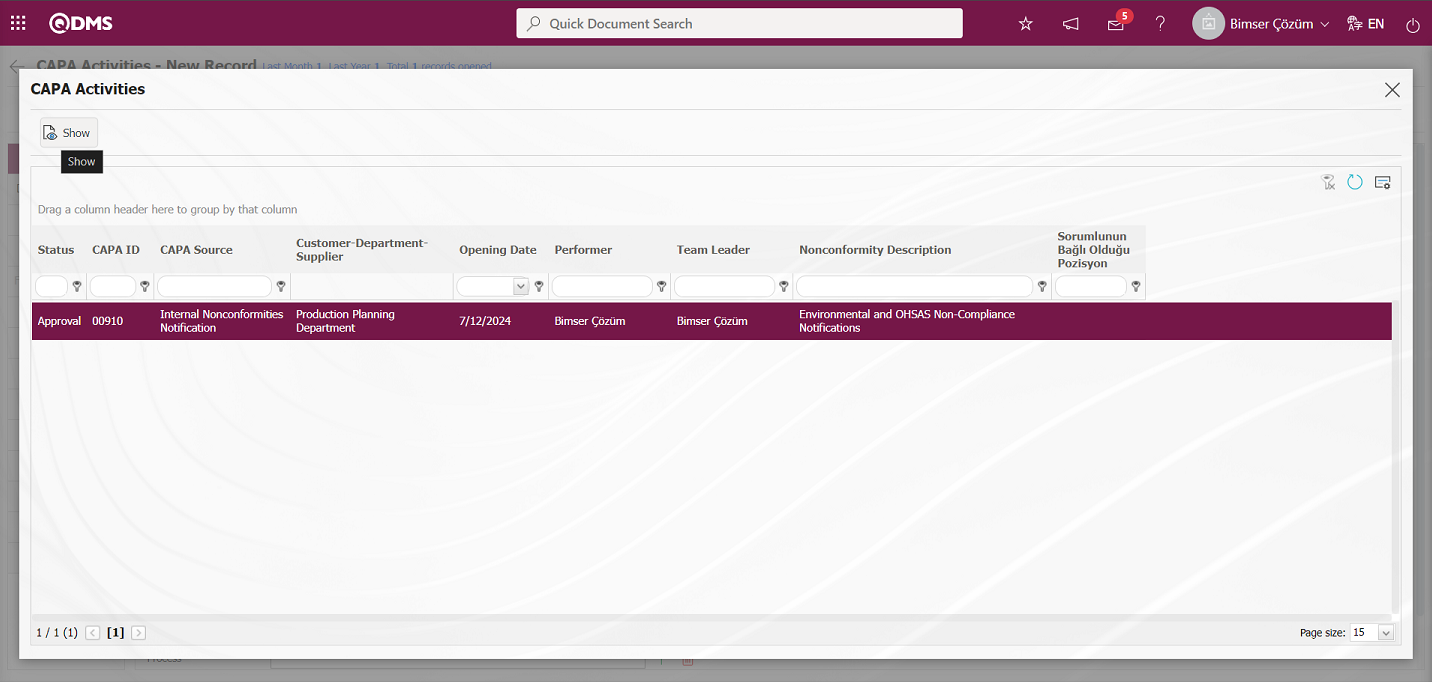
Click the  button on the CAPA View screen.
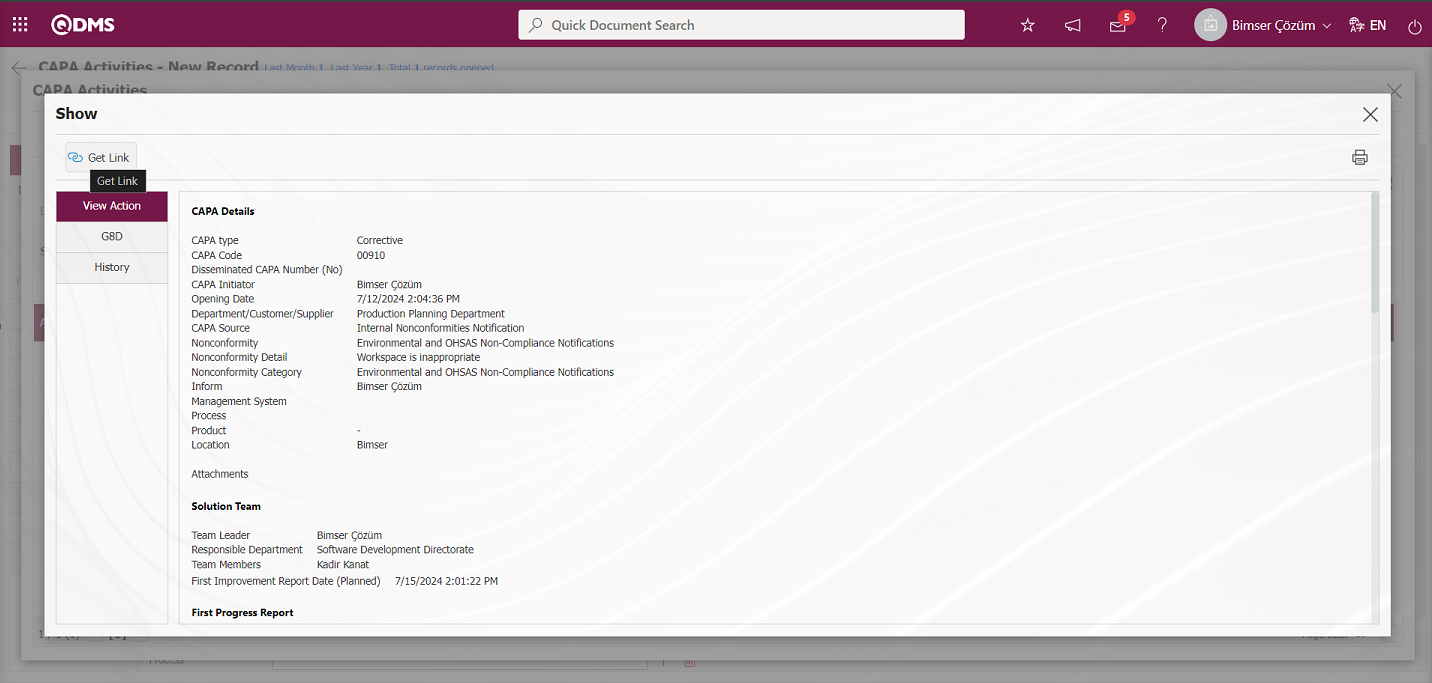
The link related to the CAPA record is displayed on the screen. Right-click/copy-paste methods or copy-paste shortcut keys (Ctrl+C-Ctrl+V) are used to view the CAPA record and share it to the relevant people.
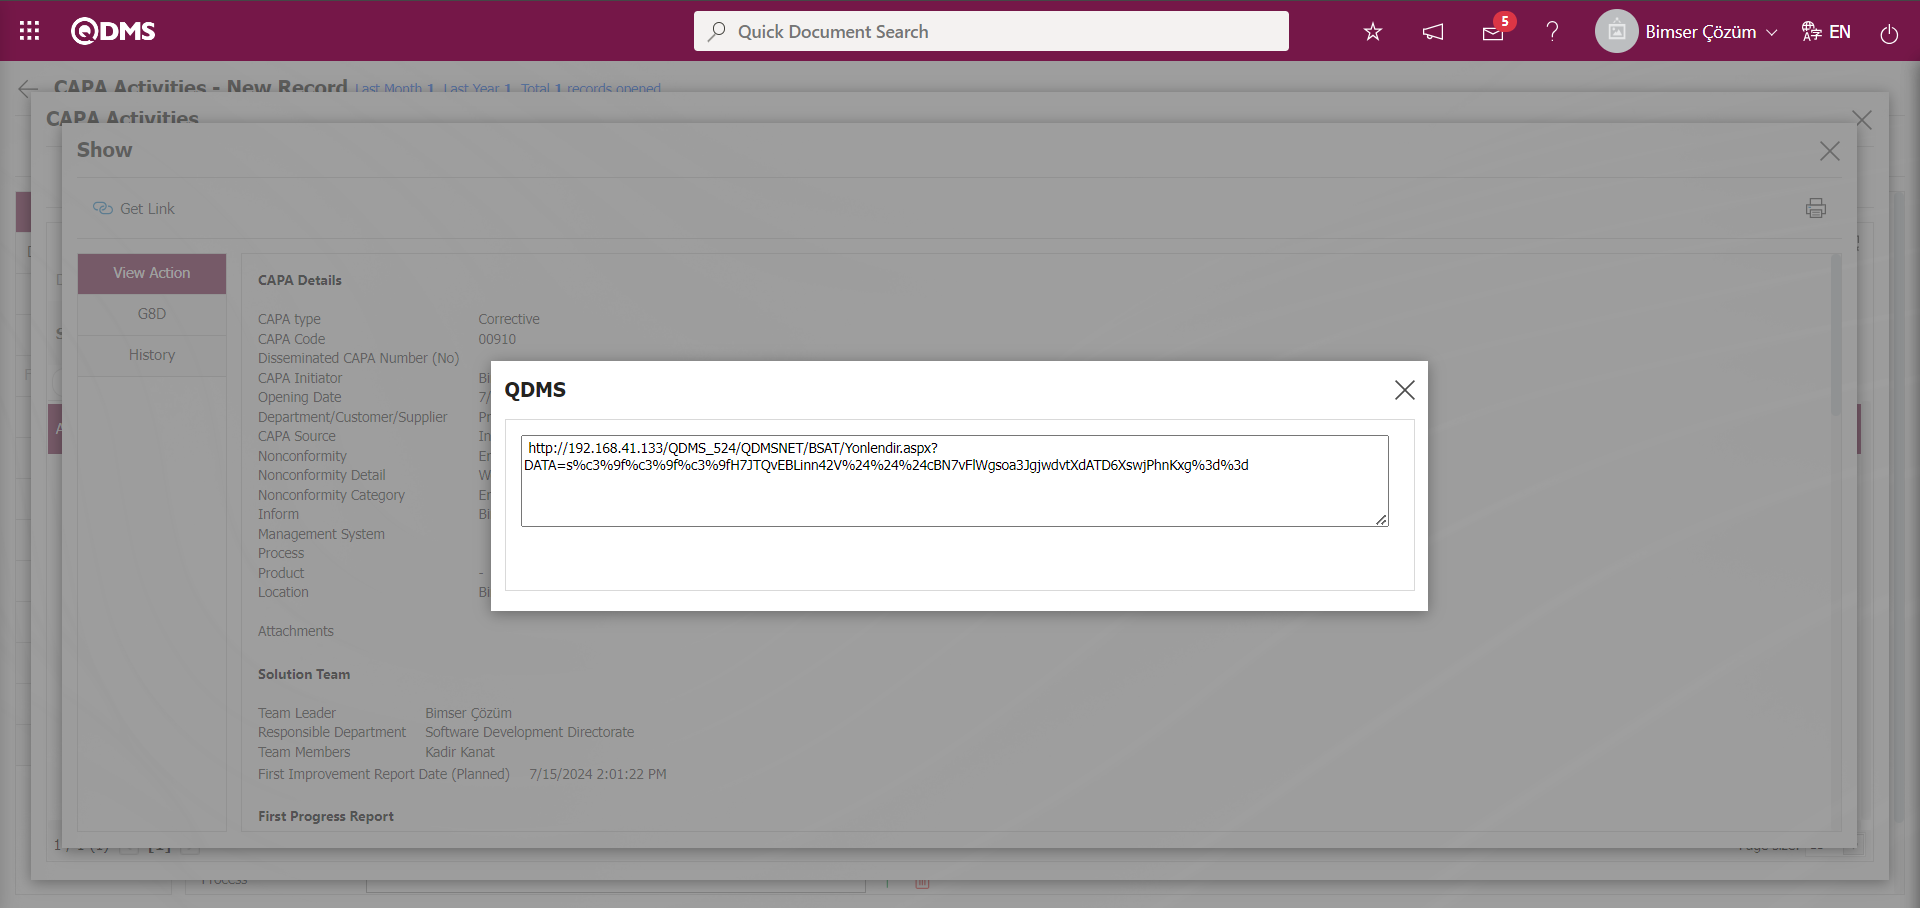
Detailed Description Tab;
If parametric field types are already defined for the CAPA module, they are displayed in the Detailed Description tab.
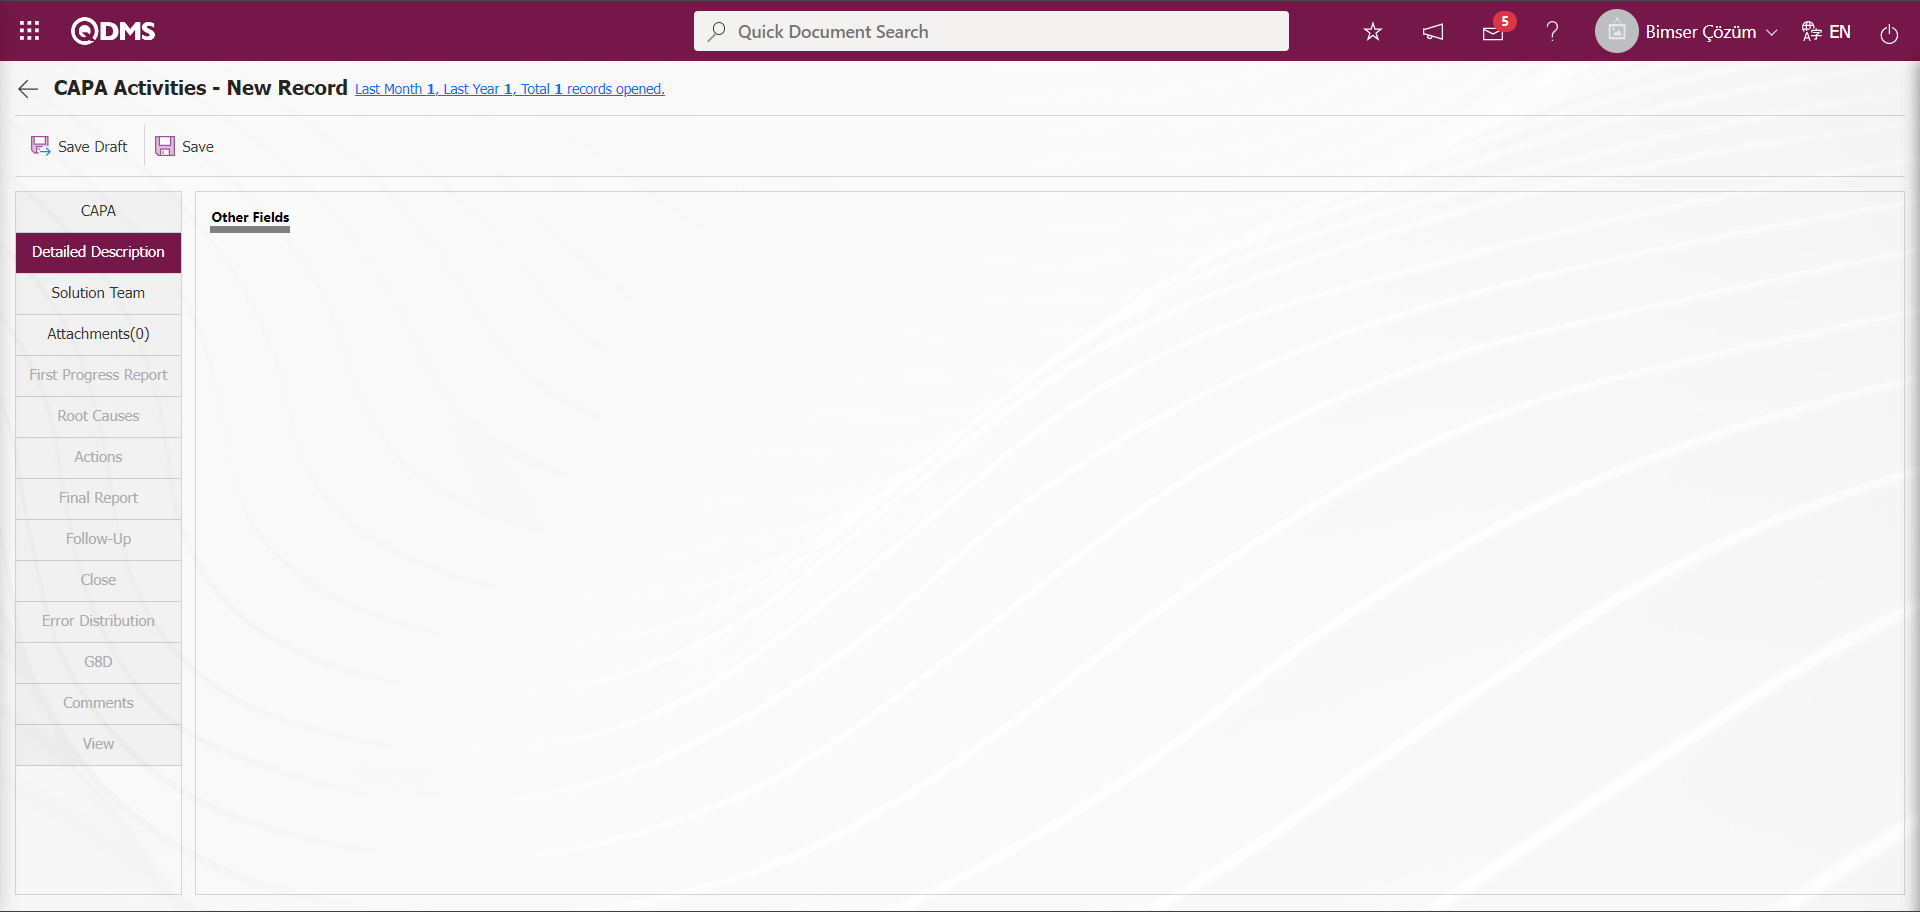
If parametric field types are not defined for CAPA module, this tab is not displayed. Defining parametric field types such as text, text (multiple rows), list, date, query related to CAPA Module is done in System Infrastructure Definitions/BSID/Configuration Settings/Language Settings menu. In the Language Settings menu, select CAPA module in the Modules field. Passive parametric fields to be defined for CAPA Module are displayed and selected in the list. While the passive parametric fields are selected in the list, the definition information of the parametric field is written in the Value field in the Language Settings screen opened by clicking the button and the parametric field definition process is done by clicking the
 button in the left corner of the screen.
Solution Team Tab;
It is the tab where the Team leader and Team identification process is performed to take urgent measures to eliminate the nonconformity, to make root cause analysis, to plan the actions to eliminate the root causes and to resolve the nonconformity. If not created, the CAPA solution team is defined by clicking the Solution Team tab. Select the solution team leader and responsible department on the CAPA solution team screen. Team members are selected from the personnel list. Also, the deadline for writing the Progress Report is set.
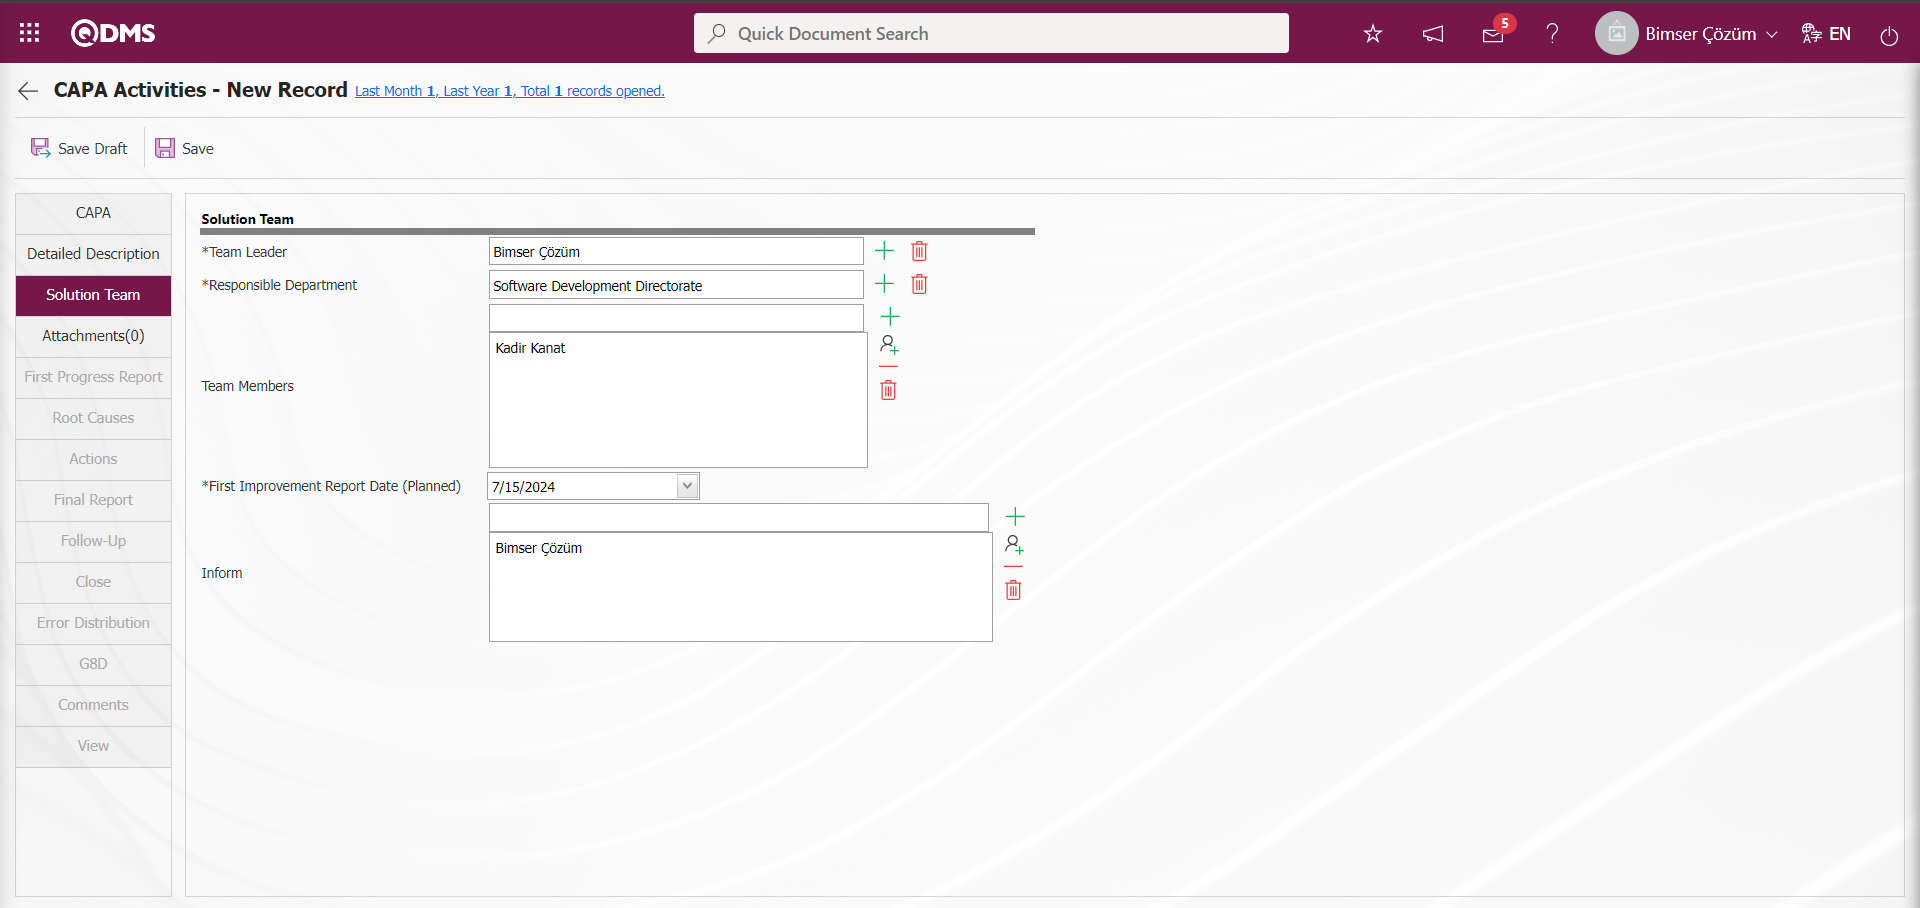
Define the relevant fields on the screen that opens:
Team Leader: This is the field where the team leader information can be selected from the list of personnel defined in the system opened by clicking the  (Select) button in the Solution Team tab. Role code is defined in parameter 8 of Corrective and Preventive Actions module parameters.

Role code This is the parameter where the code of the role defined in System Infrastructure Definitions/BSID/Configuration Settings/Role Definition menu is written. CAPA Activities** team leader within the enterprise is selected depending on a role.
If it is desired to appoint the responsible person of this product group as the direct team leader when a relationship is established with any CAPA Activities** product, the parameter value of parameter 104 in the CAPA Module parameters is selected as “Yes”.
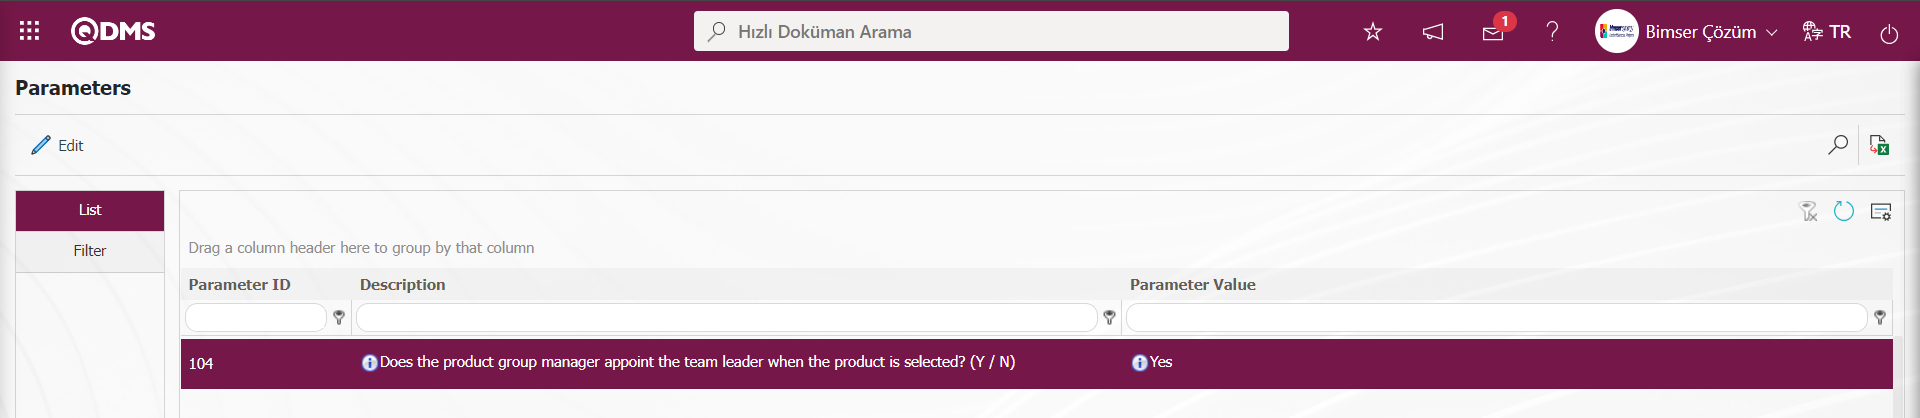
If it is desired to appoint the head of the department to which the personnel opening the CAPA record is connected as the team leader, the parameter value of parameter 135 in the CAPA module parameters is selected as “Yes”.

If it is desired to assign the process supervisor as the team leader when the relevant process is selected while opening the CAPA record, the parameter value of parameter 142 in the CAPA module parameters is selected as “Yes”.
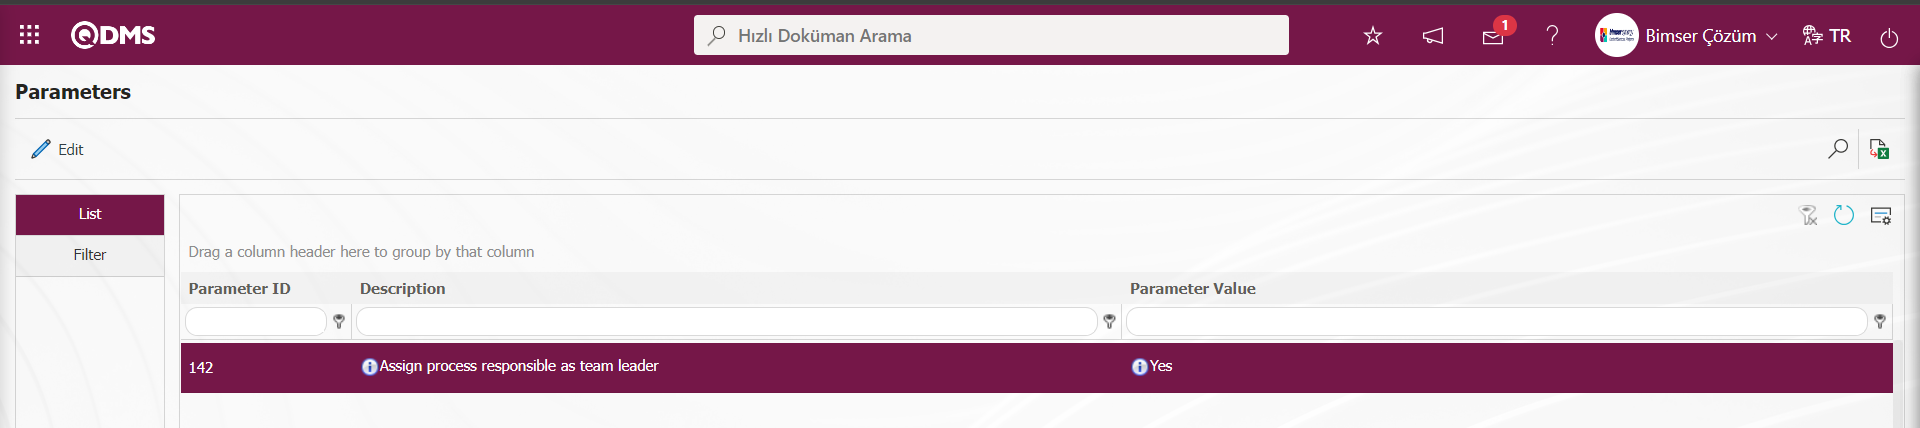
In CAPA module parameters such as these parameters, the team leader makes the necessary adjustments in the relevant parameters.
Responsible Department: In the Solution Team tab, the responsible department information can be selected in the department list defined in the system that opens by clicking the (Select) button.
Progress Report Date (Planned): In the Solution Team tab, this is the field where the Progress Report Date (Planned) information can be selected in the Calendar field.
Inform: This is the field where the informing information in the Solution Team tab can be selected from the list of personnel and user groups defined in the system.
Attachment;
By switching to the Attachment tab, it is possible to add the desired files to the CAPA record in document, audio, image, etc. formats.
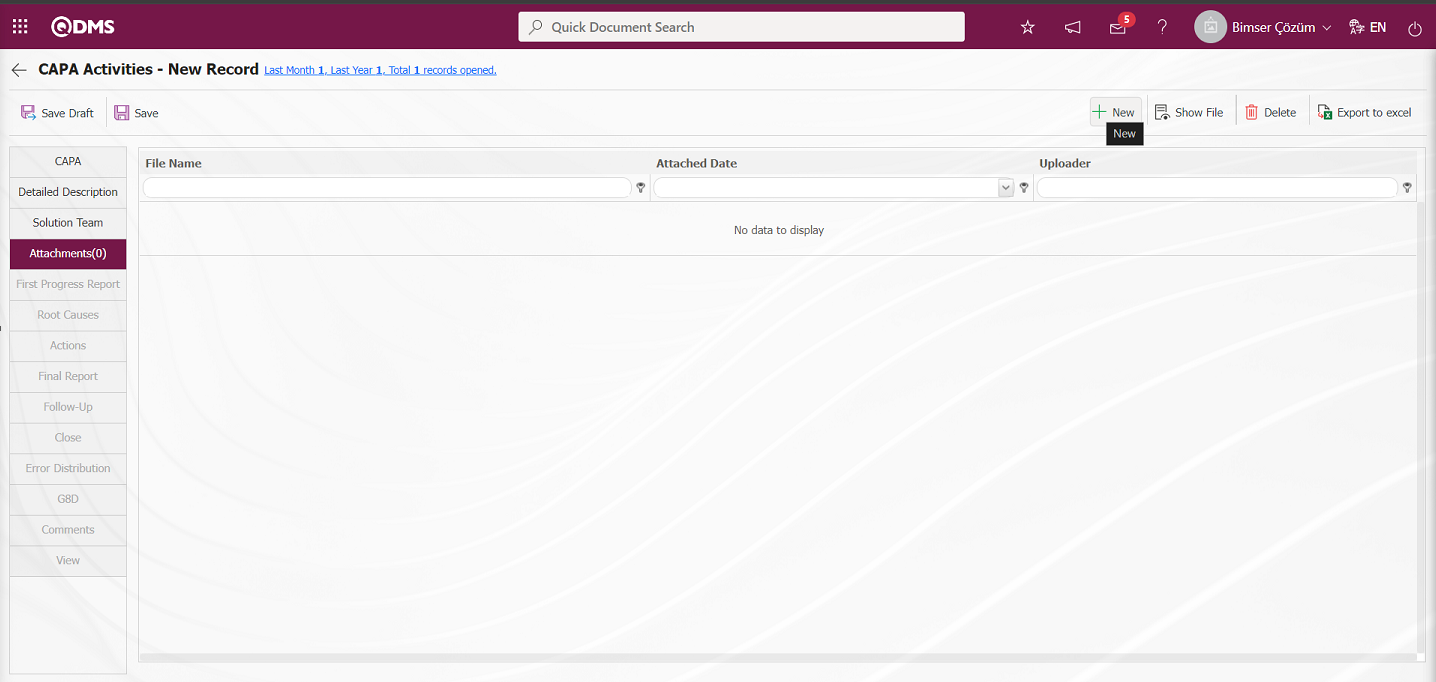
With the help of the buttons on the screen;
 : The additional file is uploaded to the system.
 : The uploaded additional file information is displayed.
 : The uploaded additional file information is deleted.
 : The report of the uploaded attachment file list is received in Excel format.
 button to add an additional file to the CAPA record. Multiple attachment files can be added.
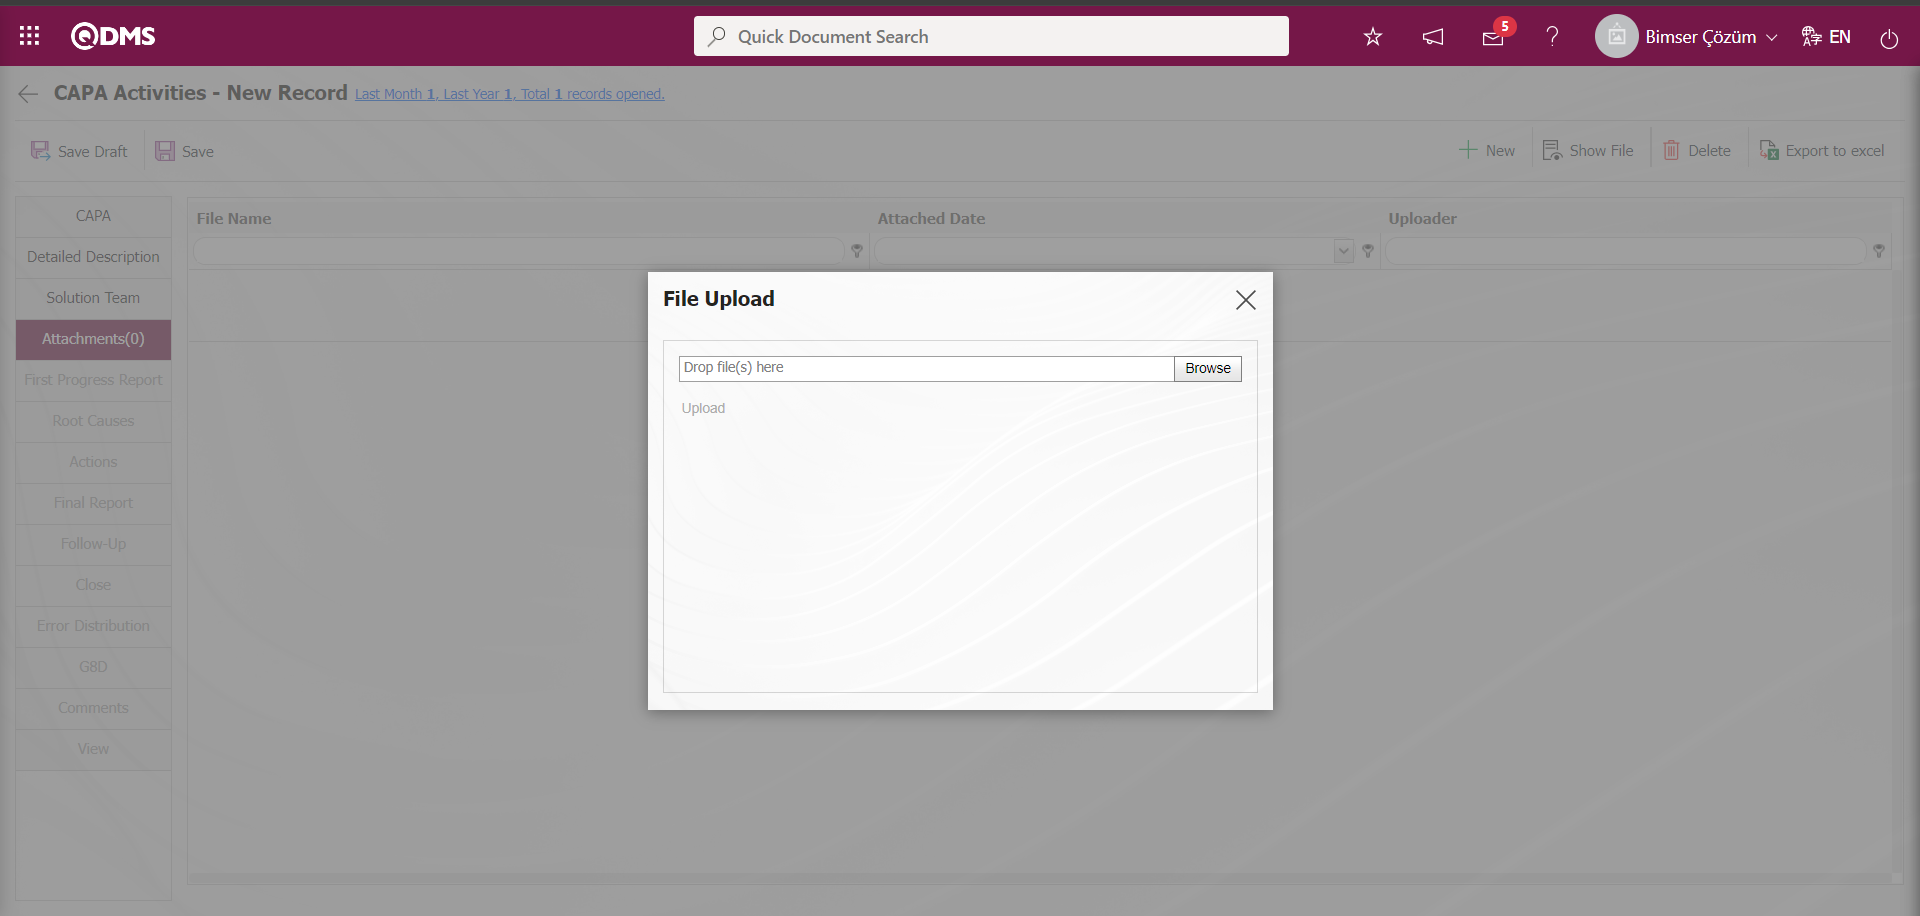
On the Add File screen, click the Browse button and select the file on the computer.
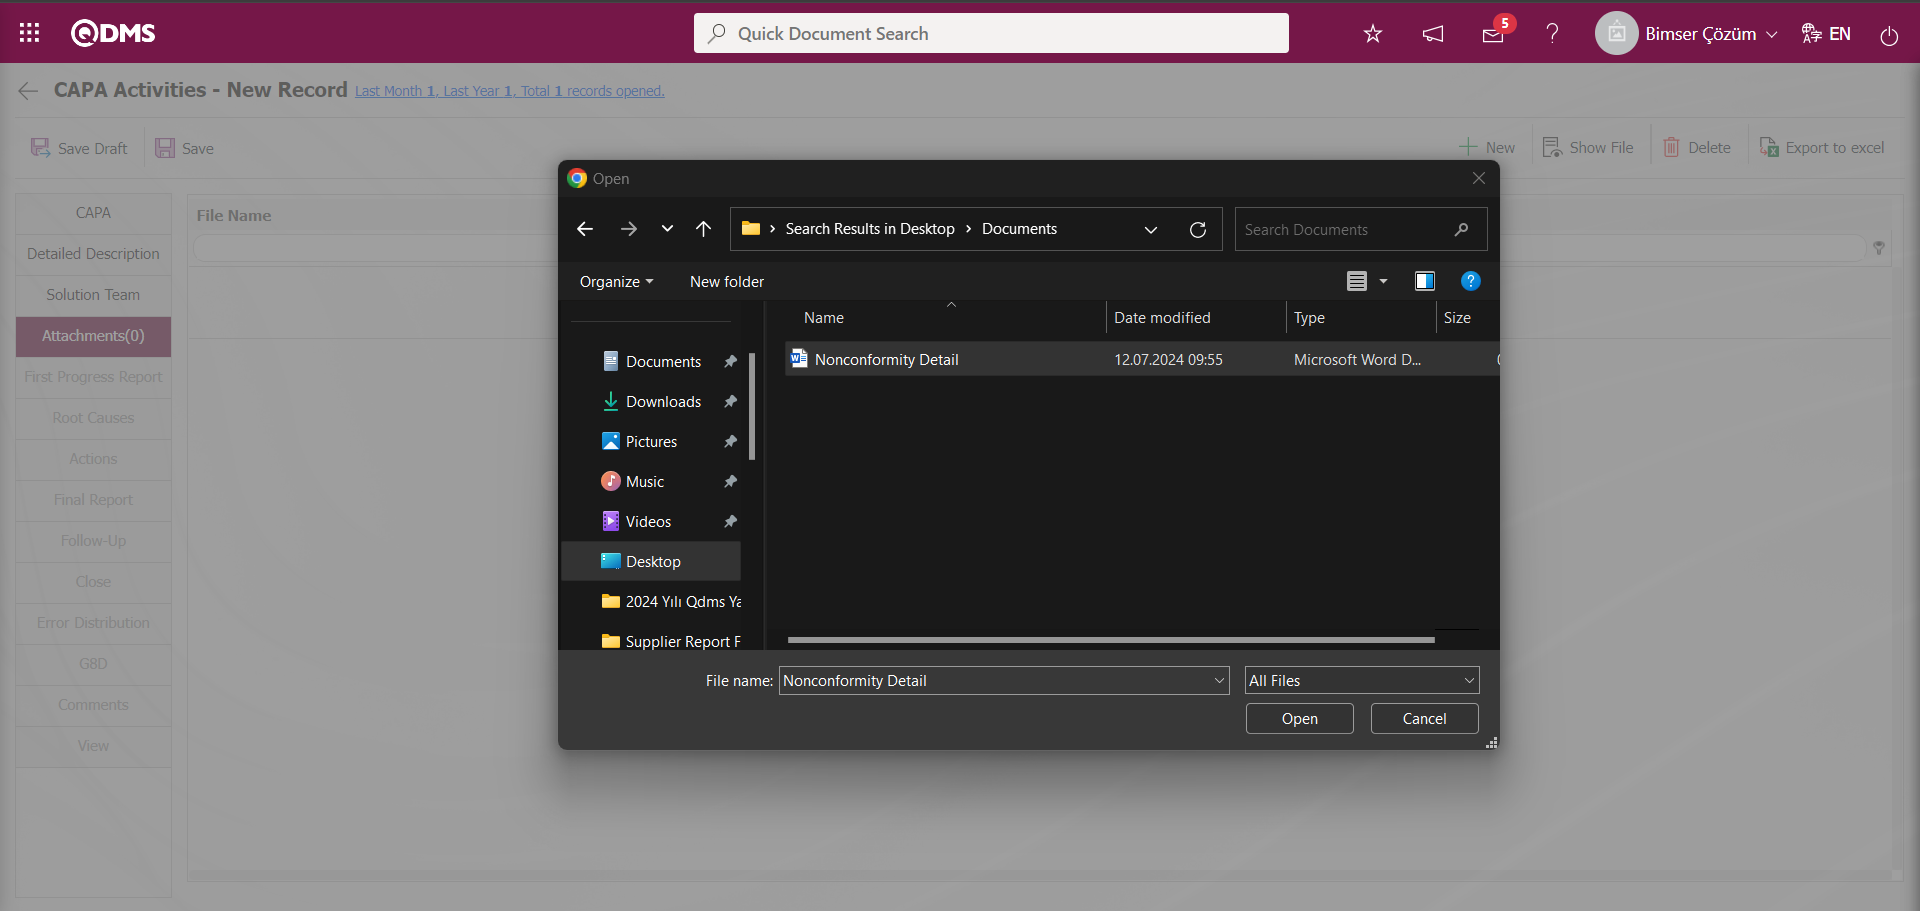
Click the Upload button on the Add File screen.

The file is uploaded to the system.
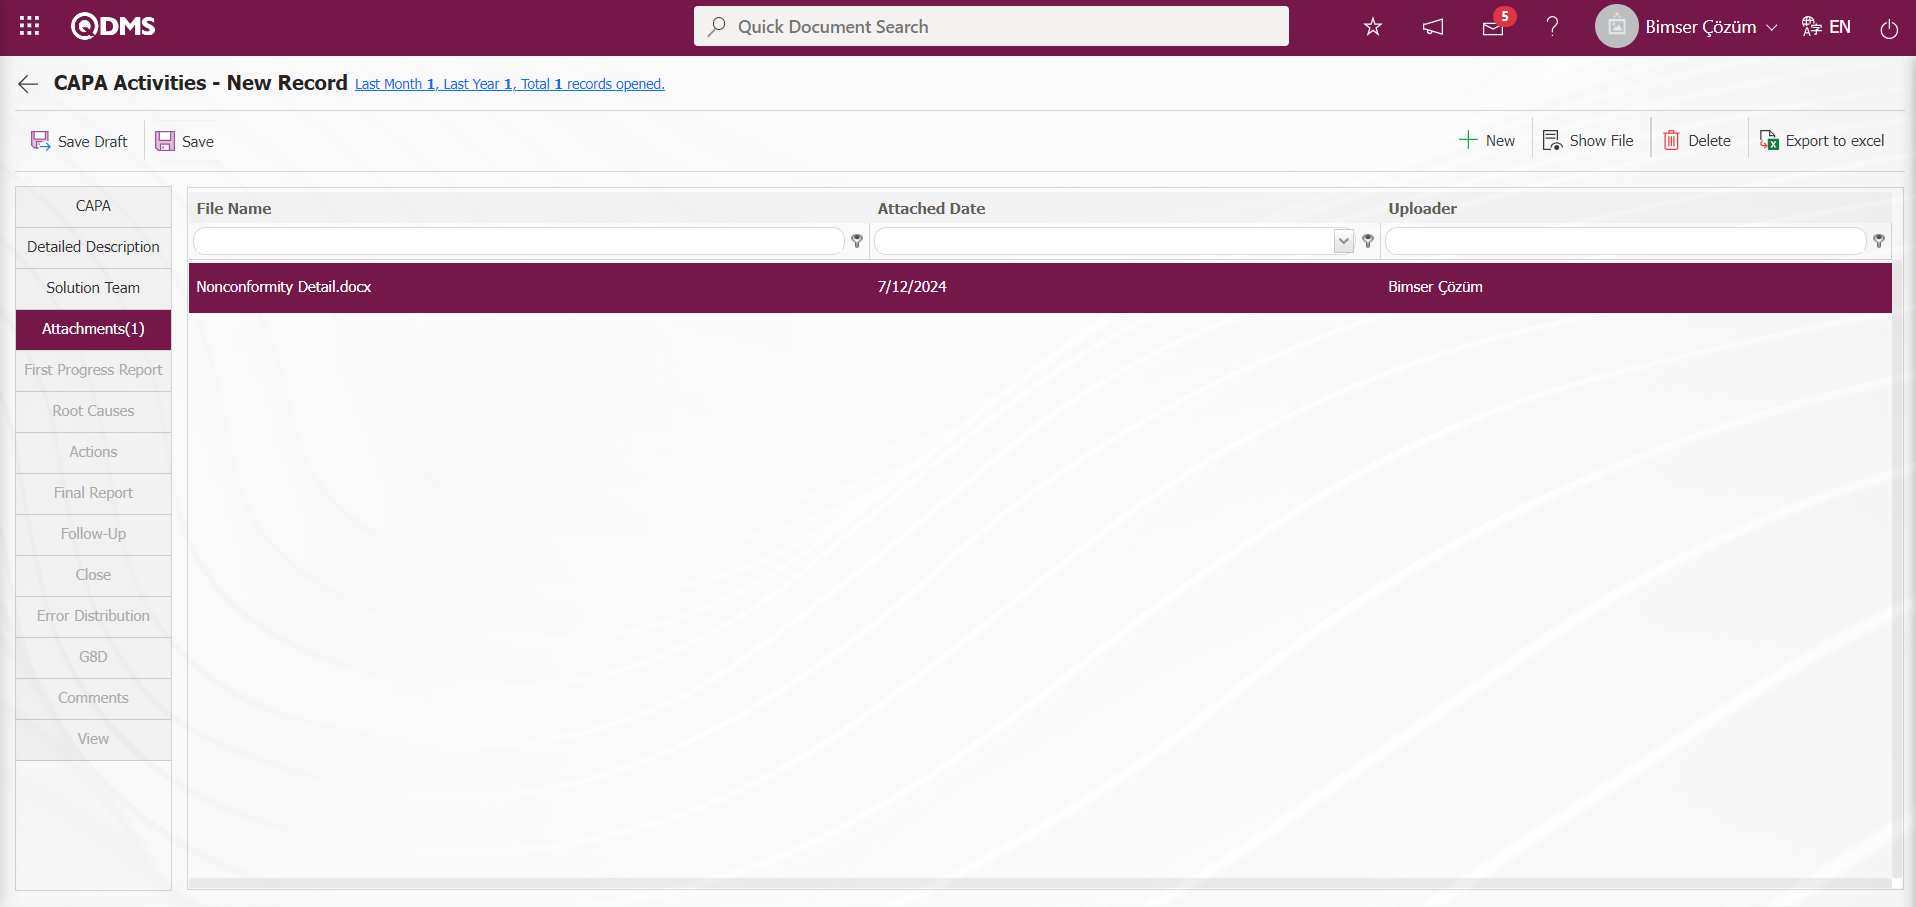
CAPA Activities - New Record After entering the relevant information in the required fields on the screen, the CAPA registration process is done by clicking the  button in the upper left corner of the screen. If a flow has been set up for CAPA opening approval, if it is not set up for the approval of the relevant role, the Team Leader is assigned to write a Progress Report.
By clicking the  button, the CAPA record is saved as a draft. In order for this button to be displayed, the parameter value of parameter 125 is selected as “Yes” and the parameter is activated.

When the parameter is activated CAPA Activities - New Record screen, the “Save to Draft” button is displayed and the CAPA record is saved as a draft by clicking this button. If the CAPA record has not yet been prepared, it is saved as a draft and processed.
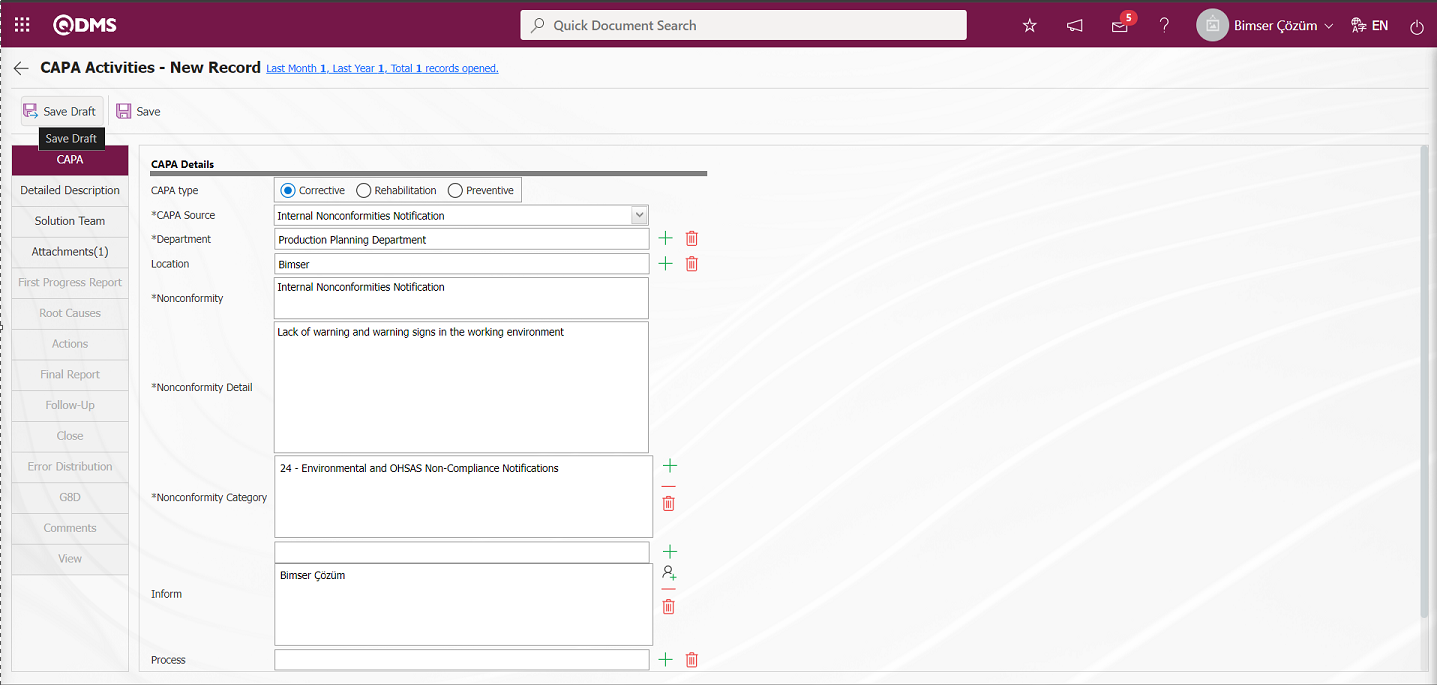
CAPA records saved as draft in My Pending Jobs in the CAPA Activities module are assigned as a “Draft CAPA List” job.
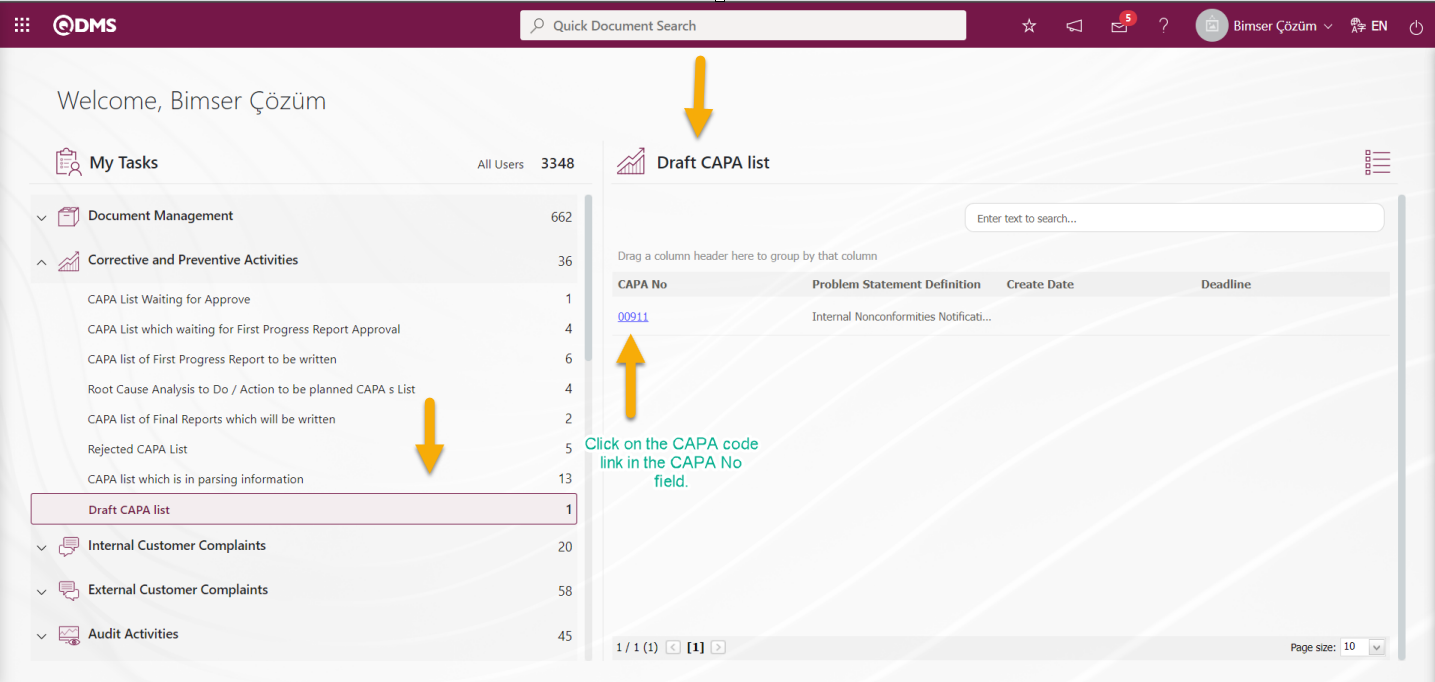
6.2.2.2. Draft CAPA List
CAPA Code link is clicked on the CAPA Code link in the CAPA No field in the CAPA No field in the “Draft CAPA List” task on the My Pending Jobs screen of the CAPA record saved as a draft. On the CAPA Activities - Edit Record screen, editing, modification and updating operations are made on the CAPA record in the draft stage and related fields if desired.
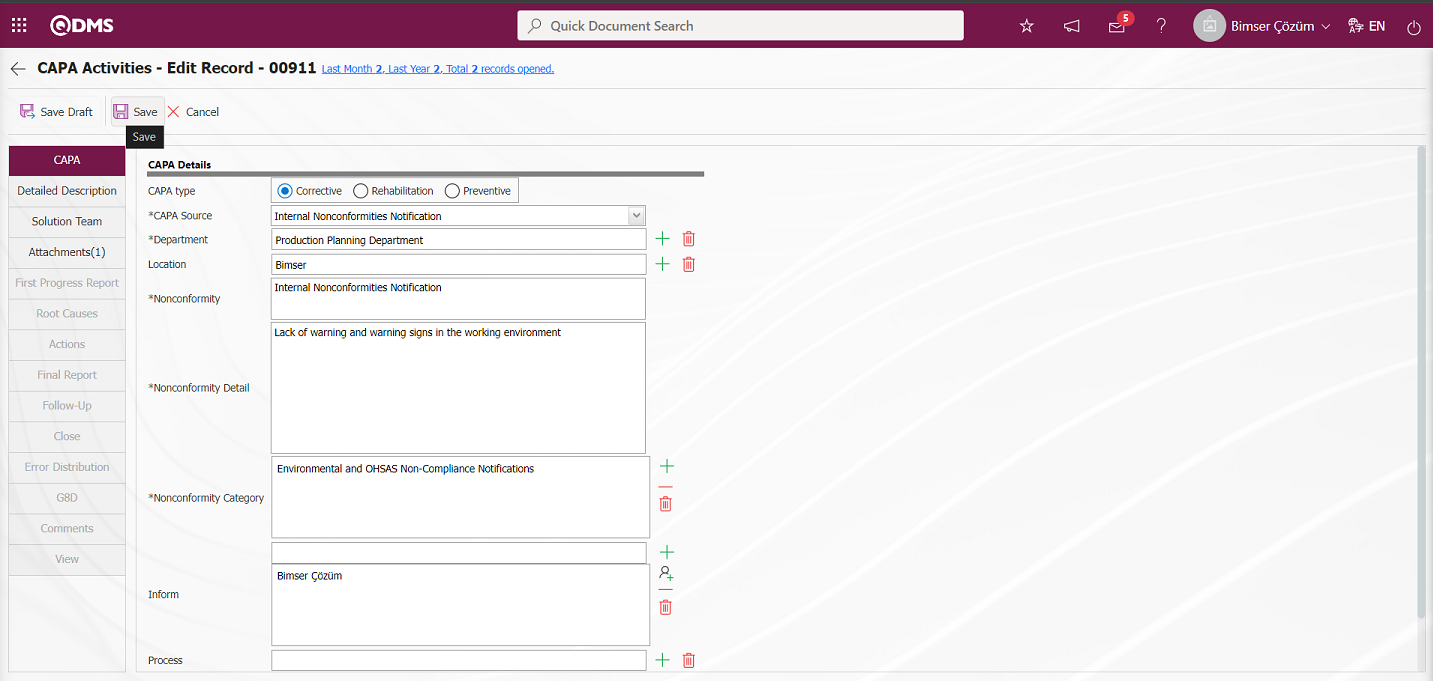
With the help of the buttons on the screen;
 : CAPA Activities - Edit Record screen, the information is entered with the relevant fields and the record is made as a draft.
 : The CAPA record is canceled.
 : Registration of the CAPA record is done.
After editing and updating the required fields on the CAPA Activities - Edit Record screen, the button is clicked and at this stage, if a flow is set up for CAPA opening approval in the CAPA record, if it is not set up for the approval of the relevant role, the Team Leader is assigned to write a Progress Report.
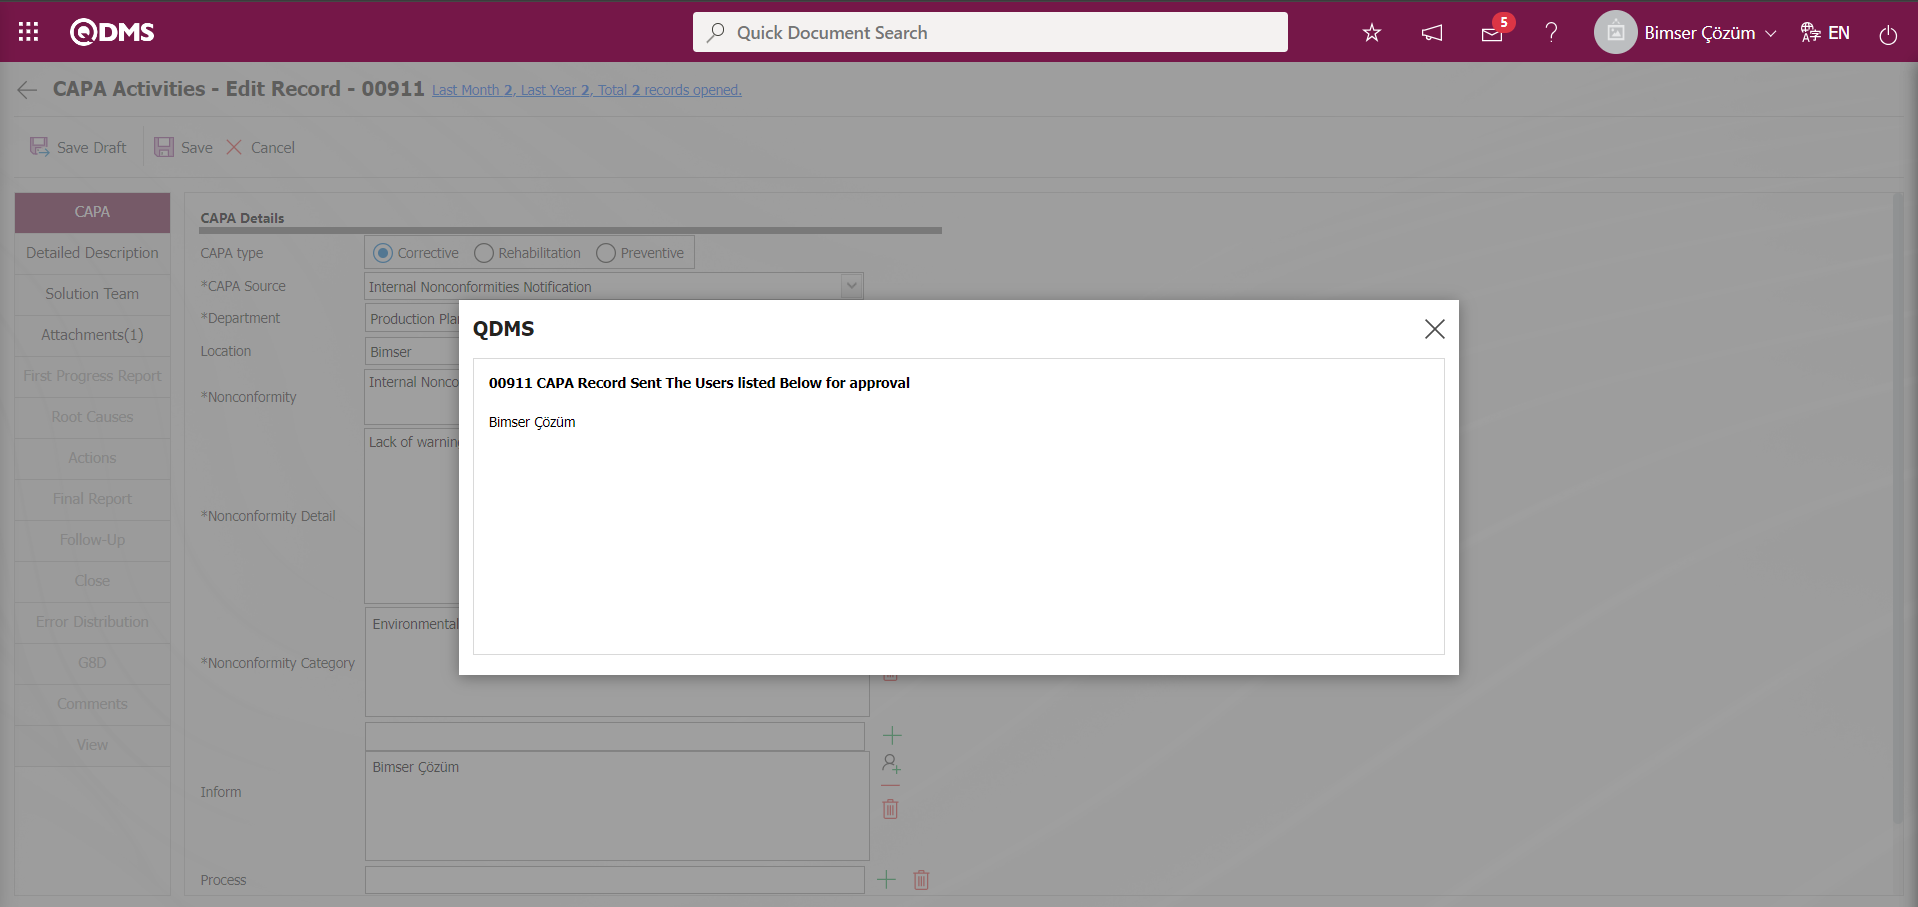
While the system sends an e-mail to the person on approval, at the same time, it is displayed as “CAPA List Waiting for Approve” to the pending jobs.
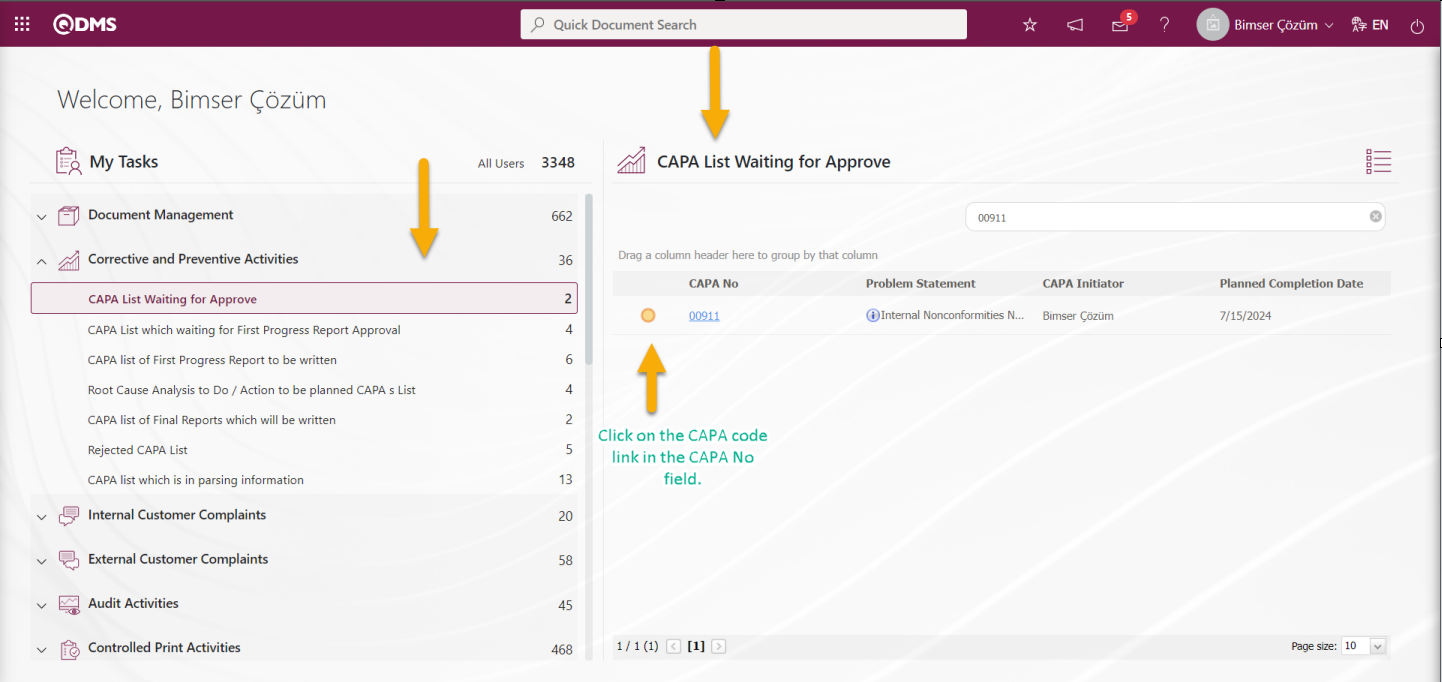
6.2.1.3. CAPA Approval
After the CAPA is sent for opening approval, the relevant person comes to the Pending Jobs and sees the CAPA to be approved for opening under the name “CAPA List Waiting for Approve”. By clicking on the CAPA code link in the field of CAPA number, it displays the “CAPA List Waiting for Approve” list.

With the help of the buttons on the screen;
 : The related CAPA record is displayed.
 : It is used if it is requested to make changes with the related CAPA record. If it is the CAPA opened from the request, the system will not allow us to make the approval process without filling in the mandatory fields.
 : It is used to make the CAPA approval process. After the approval process, the relevant CAPA record will fall in front of the Team leader.
 : Used to reject the CAPA if the information entered in the CAPA is not appropriate.
 : It is used when you want to search by filtering the information from the filter option in case there are too many CAPAs that need to be approved.
: It is used to clear the data remaining in the filter fields in the grid where the search criteria on the menu screens are searched.
: The menu screen is restored to its default settings.
: User-based designing is done on the menu screen with the show-hide feature, that is, the hiding feature of the fields corresponding to the columns on the menu screens.
Click the button on the CAPAs Waiting for Approval screen.

On the Display screen, click on the tabs related to the CAPA record and view the detail information. Click the  button on the display screen of the CAPA record.
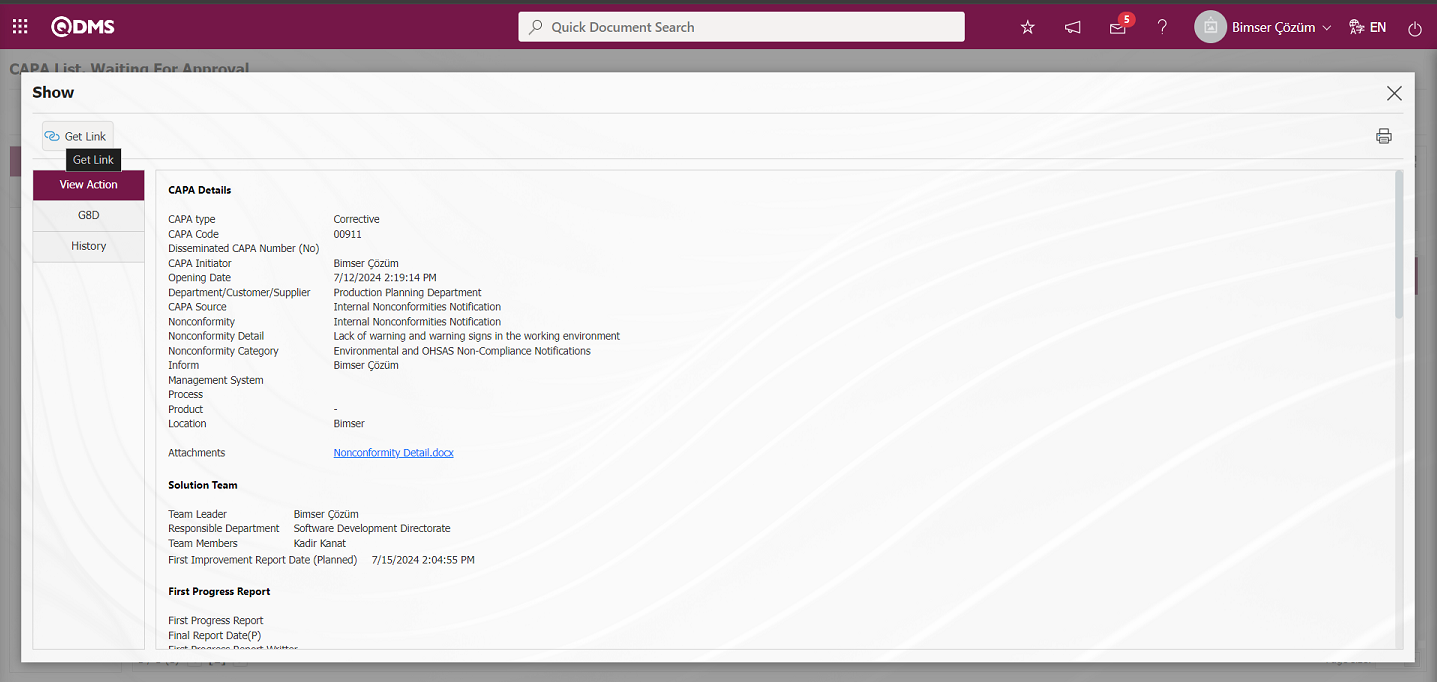
The link related to the CAPA Record is displayed on the screen. Right-click/copy-paste methods or copy-paste shortcut keys (Ctrl+C-Ctrl+V) are used to view the CAPA Record and share it to the relevant people.

Click the  button on the CAPAs Waiting for Approval screen.

In the tabs displayed on the CAPA Activities - Edit Record screen, the process of editing and making changes on the relevant fields is performed.
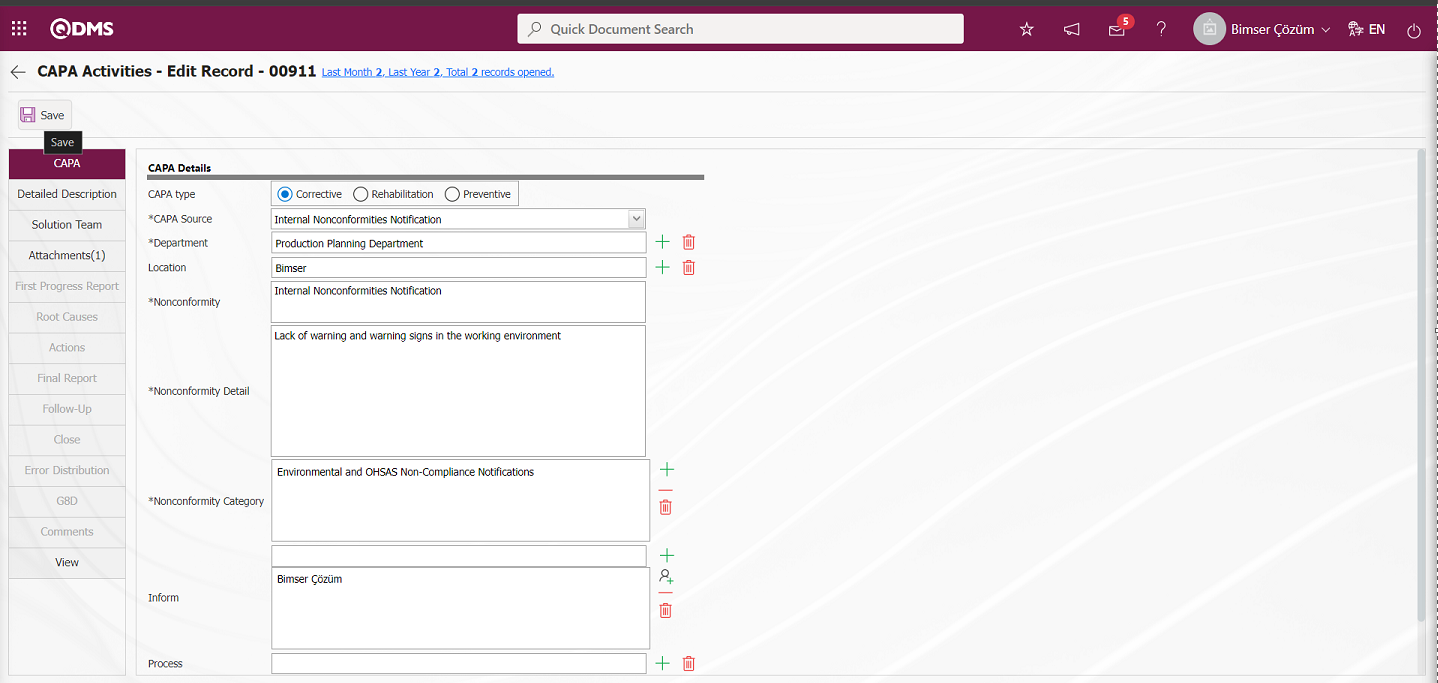
To save the changes made on the CAPA Activities - Edit Record screen, click the  button on the top left corner of the screen .
On the CAPAs Waiting for Approval screen, the CAPA record is rejected by clicking the button and entering the Reason for Rejection.
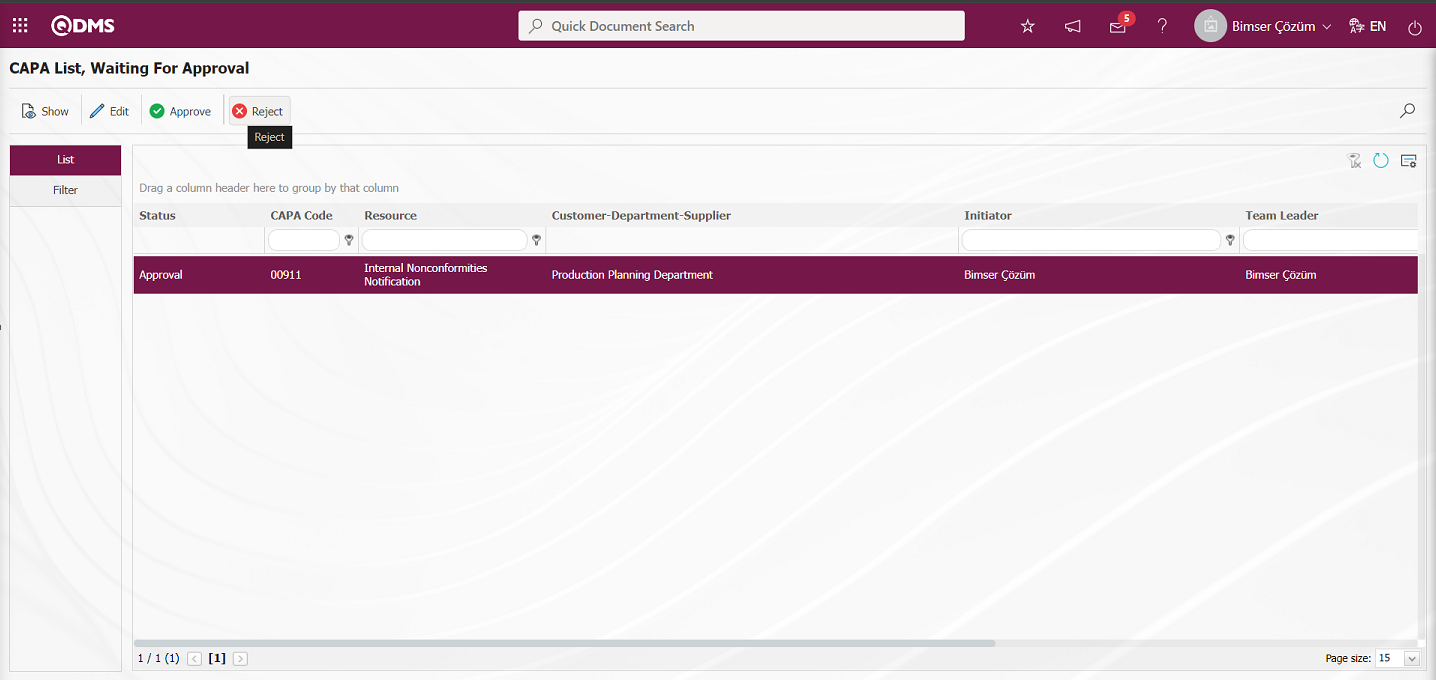
In the Rejected CAPAs screen, CAPA information is checked and when it is seen that it is not suitable, CAPA Rejection is made and Rejection Reason information must be written. It can be sent to therejected opener together with the reason for rejection. When rejecting, it can be rejected for detailed information or for the cancellation of the record, depending on this, it should select the relevant option.
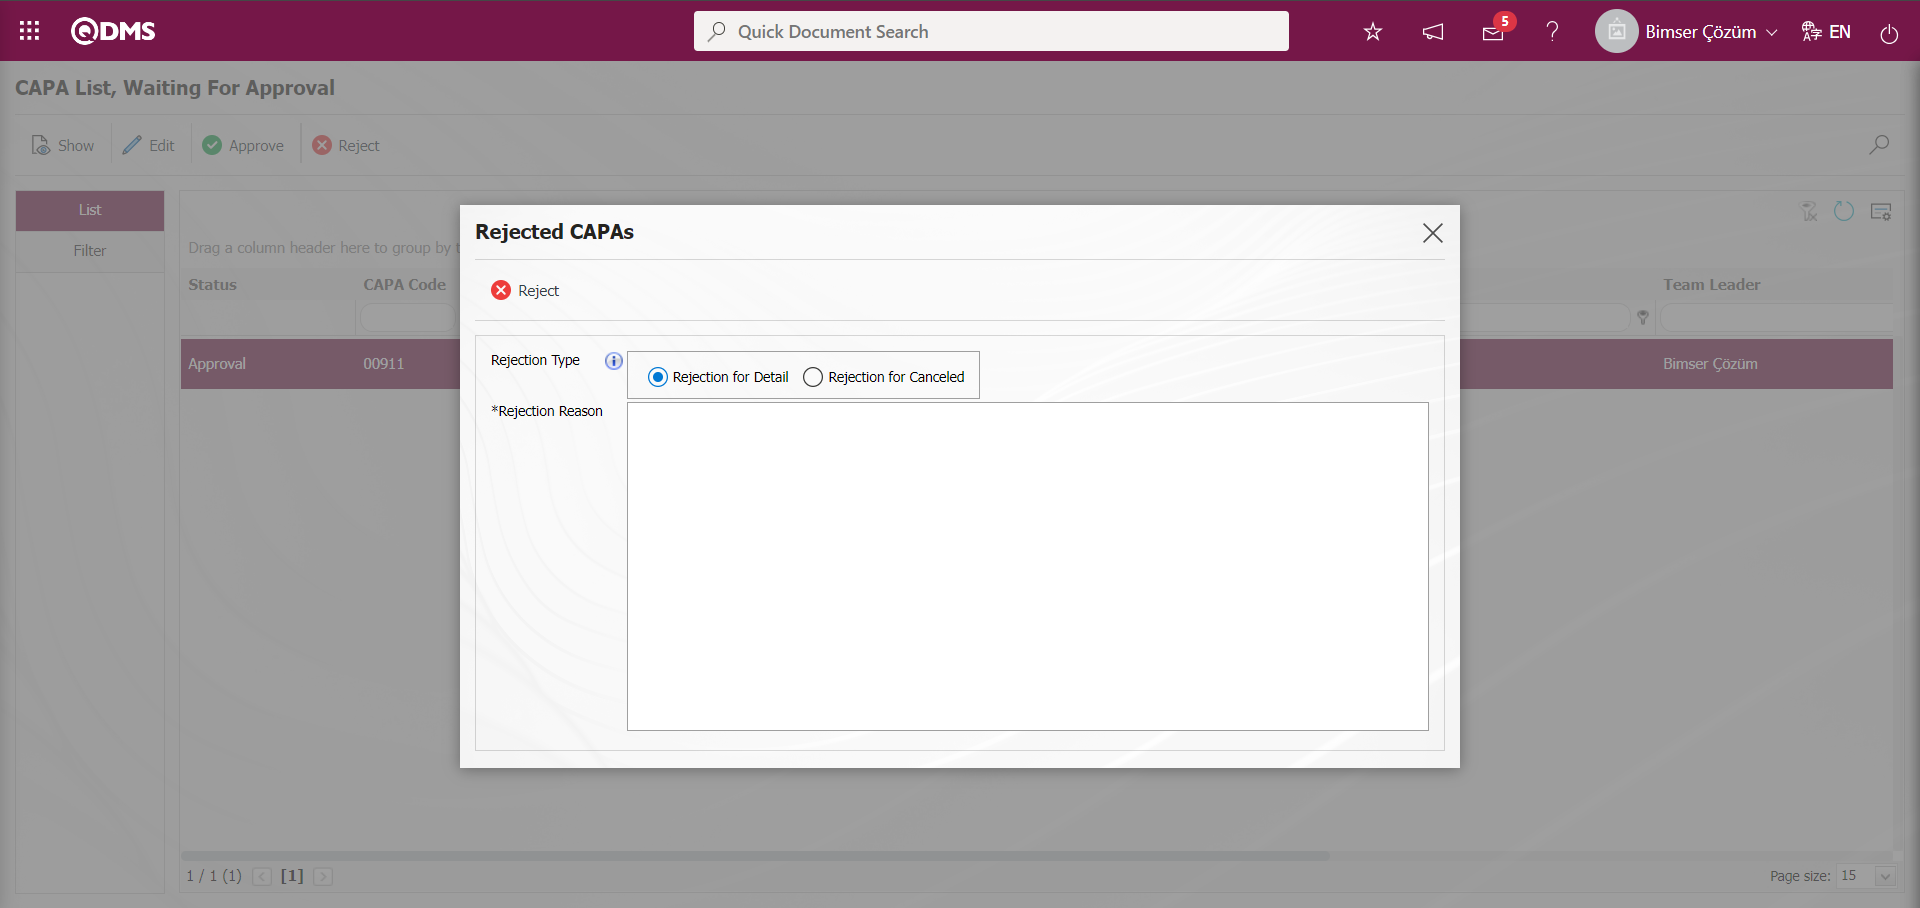
Click the buttonon the CAPAs Waiting for Approval screen.
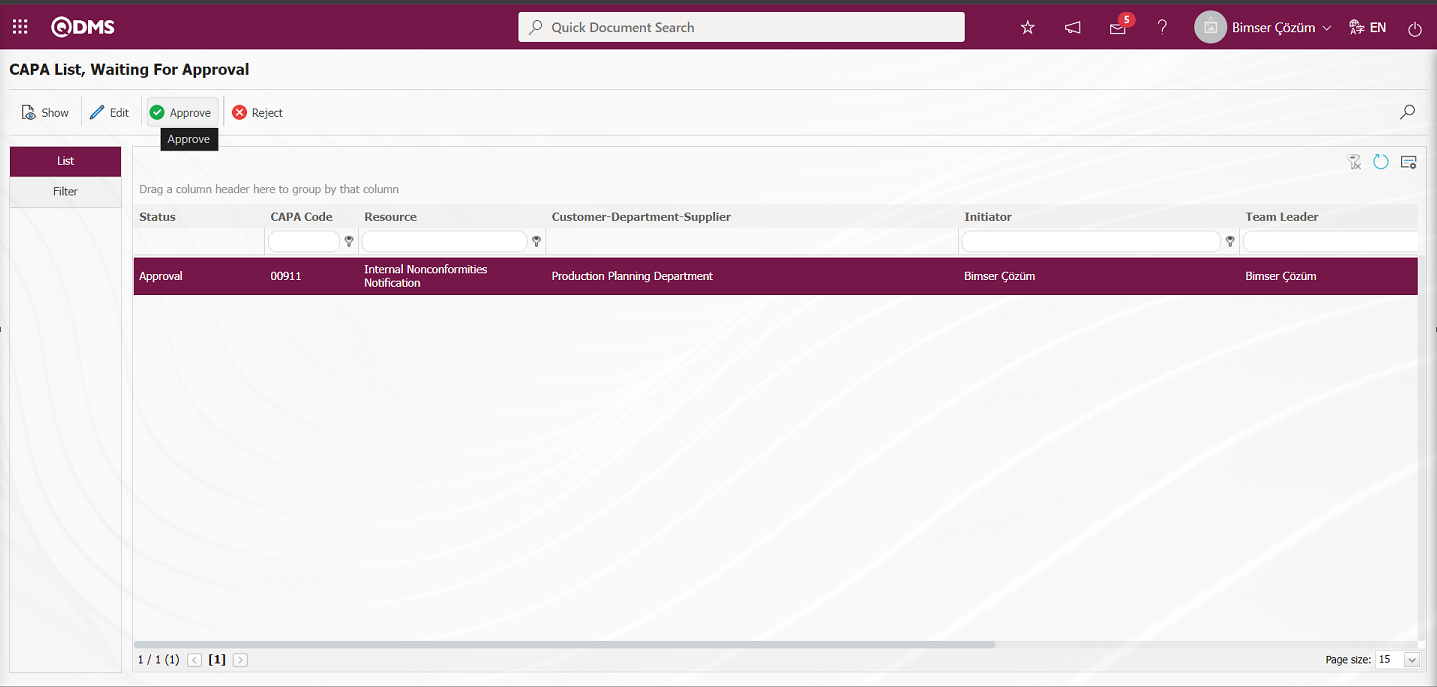
On the CAPA Approval** screen, Confirmation Notes information is written in the Confirmation Notes field and the CAPA record is approved by clicking the  button.
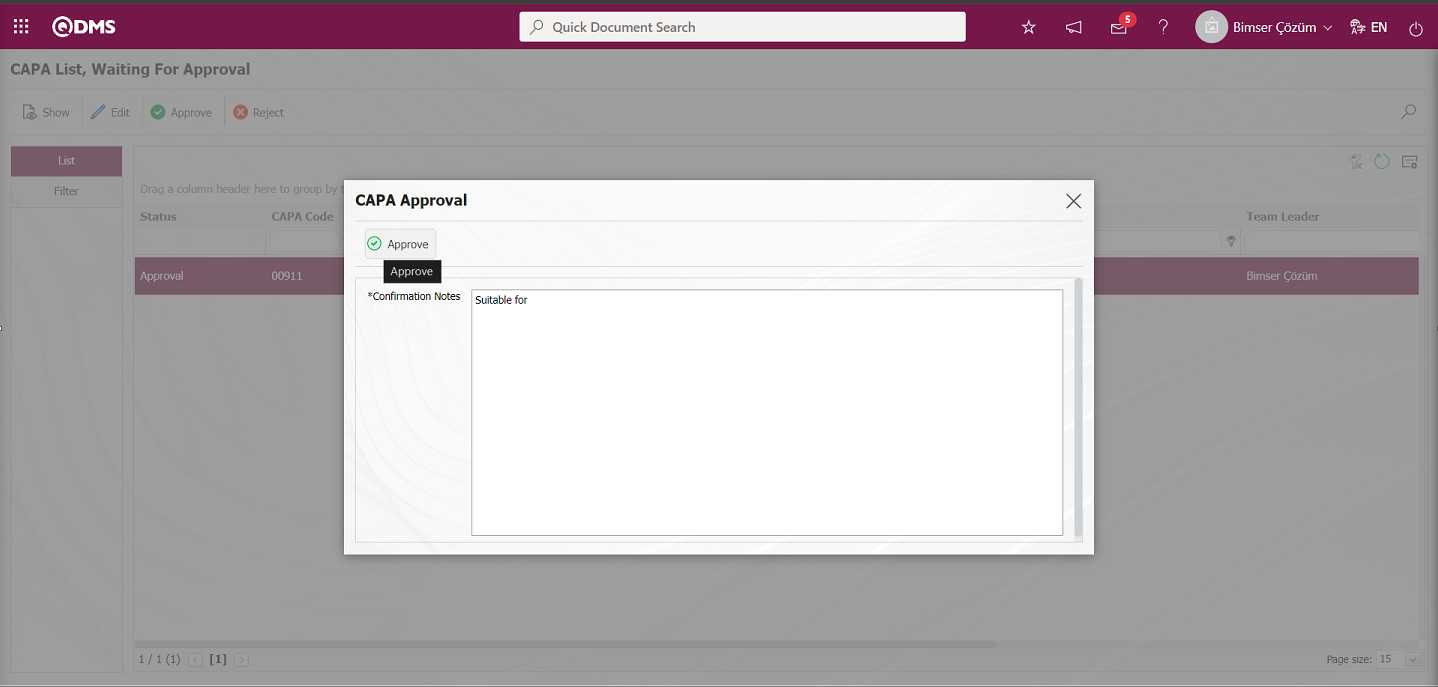
Confirmation note information when confirming CAPA The parameter is activated by selecting the parameter value “Yes” in parameter 154 in the CAPA module parameters.

After the parameter is activated, the Approval Note field is displayed on the CAPA Approval screens and CAPA approval is performed by entering the approval note information.
If a flow has been set up for CAPA First Progress approval, the CAPA record for which the CAPA approval process has taken place is assigned to the Team Leader to write First Progress if it is not set up for the approval of the relevant role.
6.2.1.4. First Progress Approval
Since the flow is designed for CAPA First Progress approval for CAPA Registration, while the system sends an e-mail to the person in the approval, at the same time, it assignsa task as “CAPA List which waiting for First Progress Report Approval”.
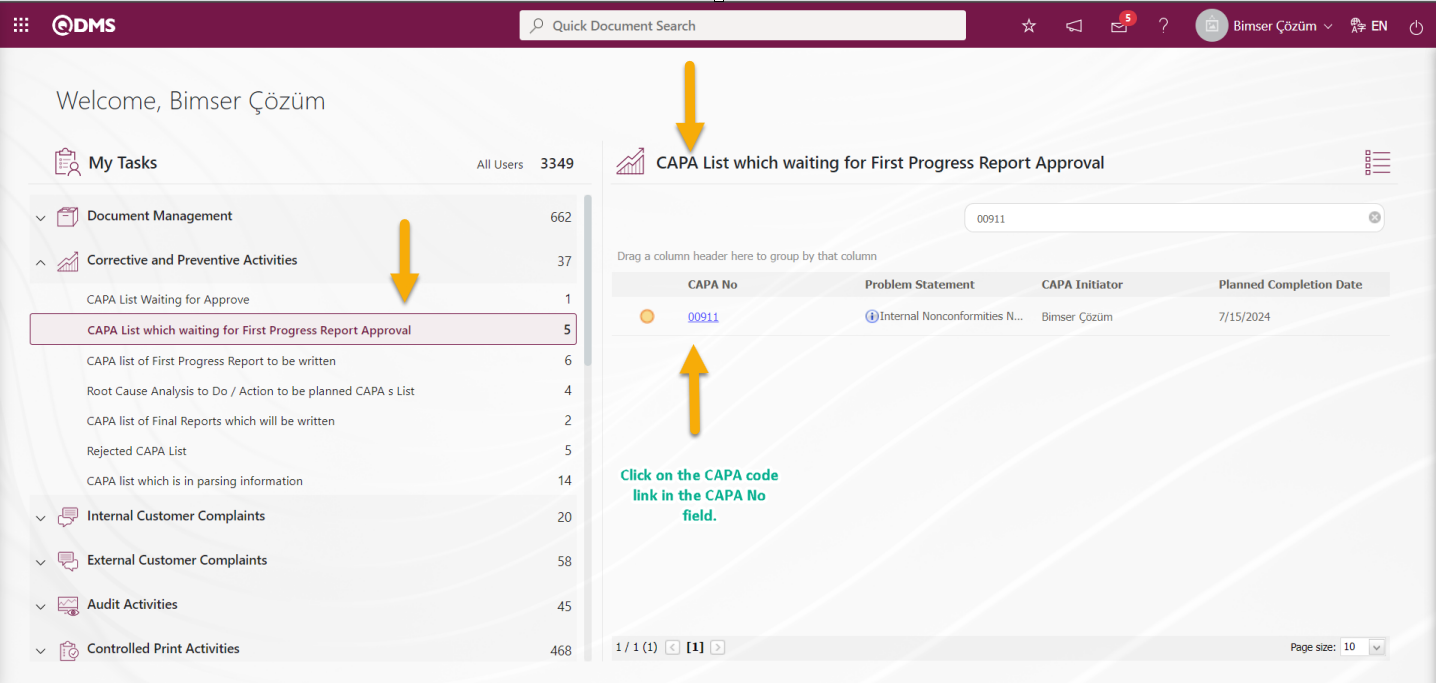
After the CAPA is sent for First Progress approval, the relevant person comes to the Pending Affairs and sees the CAPA for which First Progress approval will be given under the name“CAPA List which waiting for First Progress Report Approval”. By clicking on the CAPA code link in the field of CAPA number, it displays the “CAPAs Waiting for Approval” list.

With the help of the buttons on the screen;
: The related CAPA record is displayed.
: It is used if it is requested to make changes with the related CAPA record. If it is the CAPA opened from the request, the system will not allow us to make the approval process without filling in the mandatory fields.
: It is used to make the CAPA approval process. After the approval process, the relevant CAPA record will fall in front of the Team leader.
: Used to reject the CAPA if the information entered in the CAPA is not appropriate.
: It is used when you want to search by filtering the information from the filter option in case there are too many CAPAs that need to be approved.
: It is used to clear the data remaining in the filter fields in the grid where the search criteria on the menu screens are searched.
: The menu screen is restored to its default settings.
: User-based designing is done on the menu screen with the show-hide feature, that is, the hiding feature of the fields corresponding to the columns on the menu screens.
Click the button on the CAPAs Waiting for Approval screen.
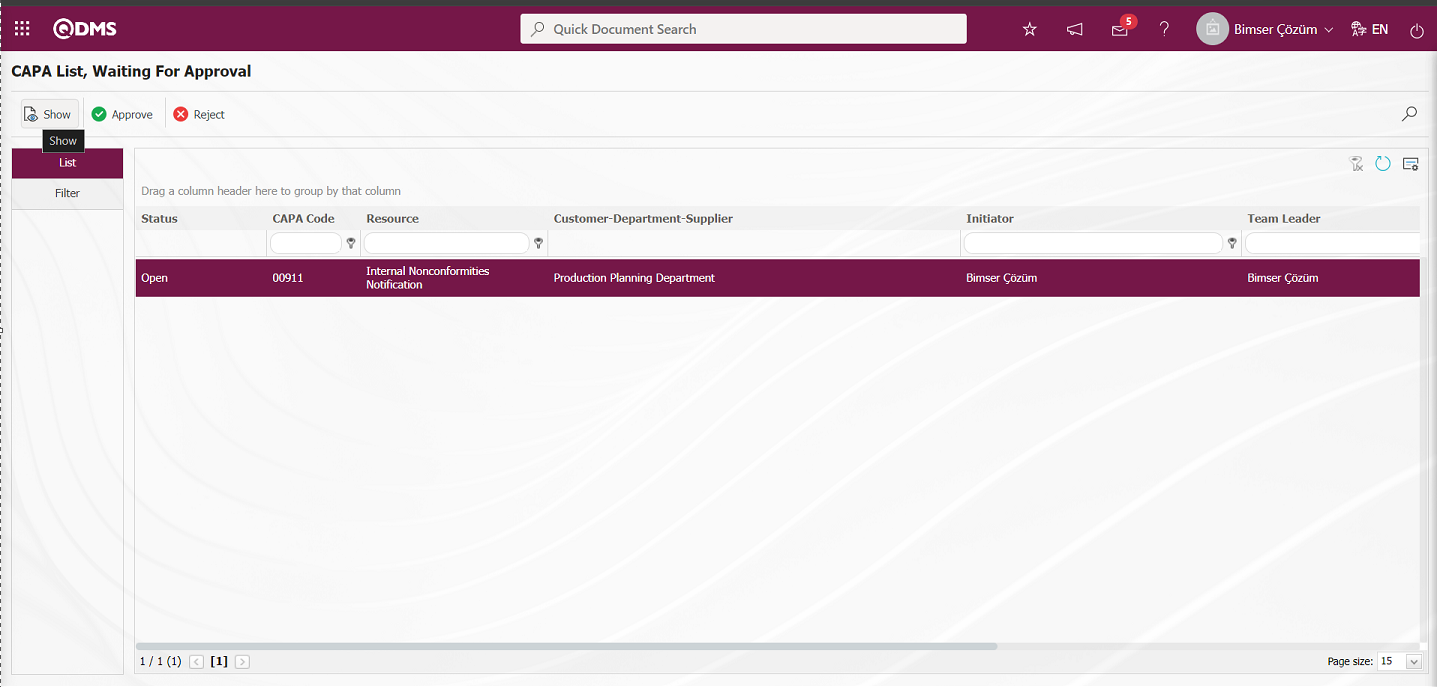
On the Display screen, click on the tabs related to the CAPA record and view the detail information. Click the  button on the display screen of the CAPA record.
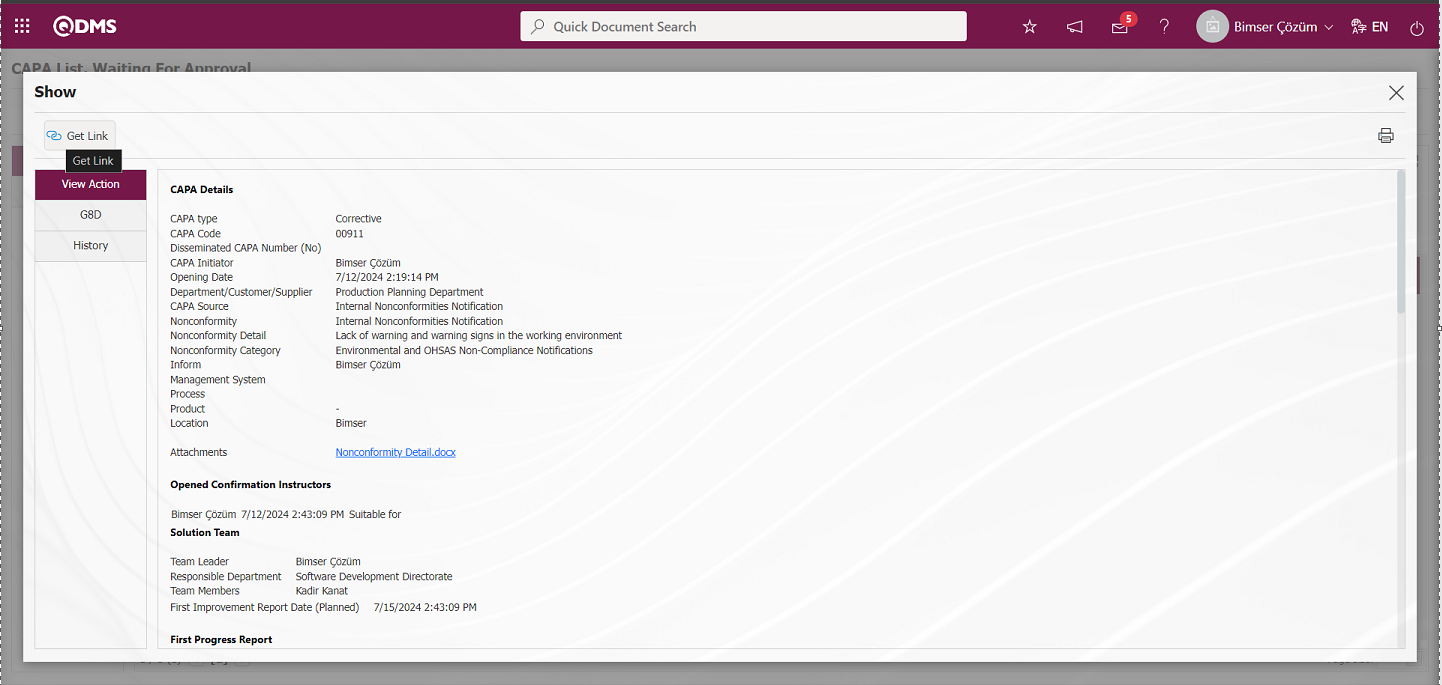
The link related to the CAPA Record is displayed on the screen. Right-click/copy-paste methods or copy-paste shortcut keys (Ctrl+C-Ctrl+V) are used to view the CAPA Record and share it to the relevant people.

On the CAPAs Waiting for Approval screen, the CAPA record is rejected by clicking the button and entering the Reason for Rejection
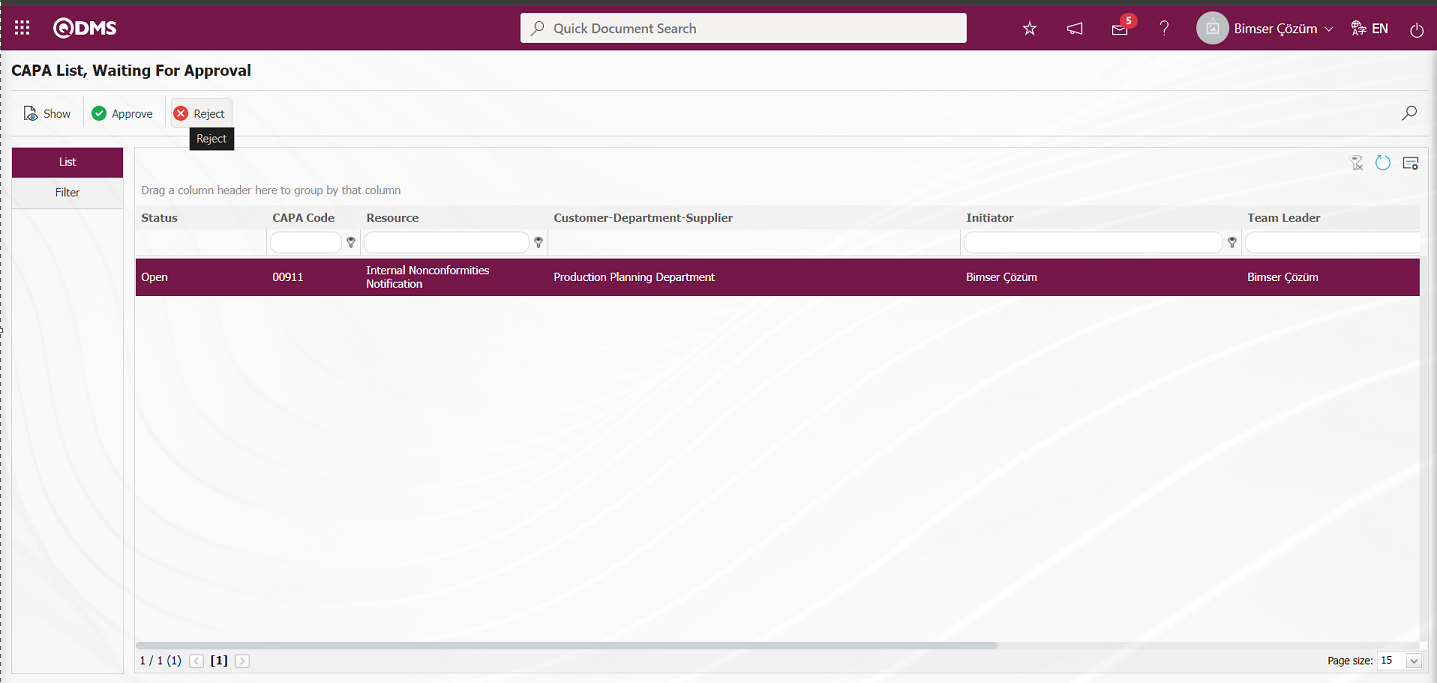
In the Rejected CAPAs screen, CAPA information is checked and when it is seen that it is not suitable, CAPA Rejection is made and Rejection Reason information must be written. It can be sent to therejected opener together with the reason for rejection.

Click the buttonon the CAPAs Waiting for Approval screen.
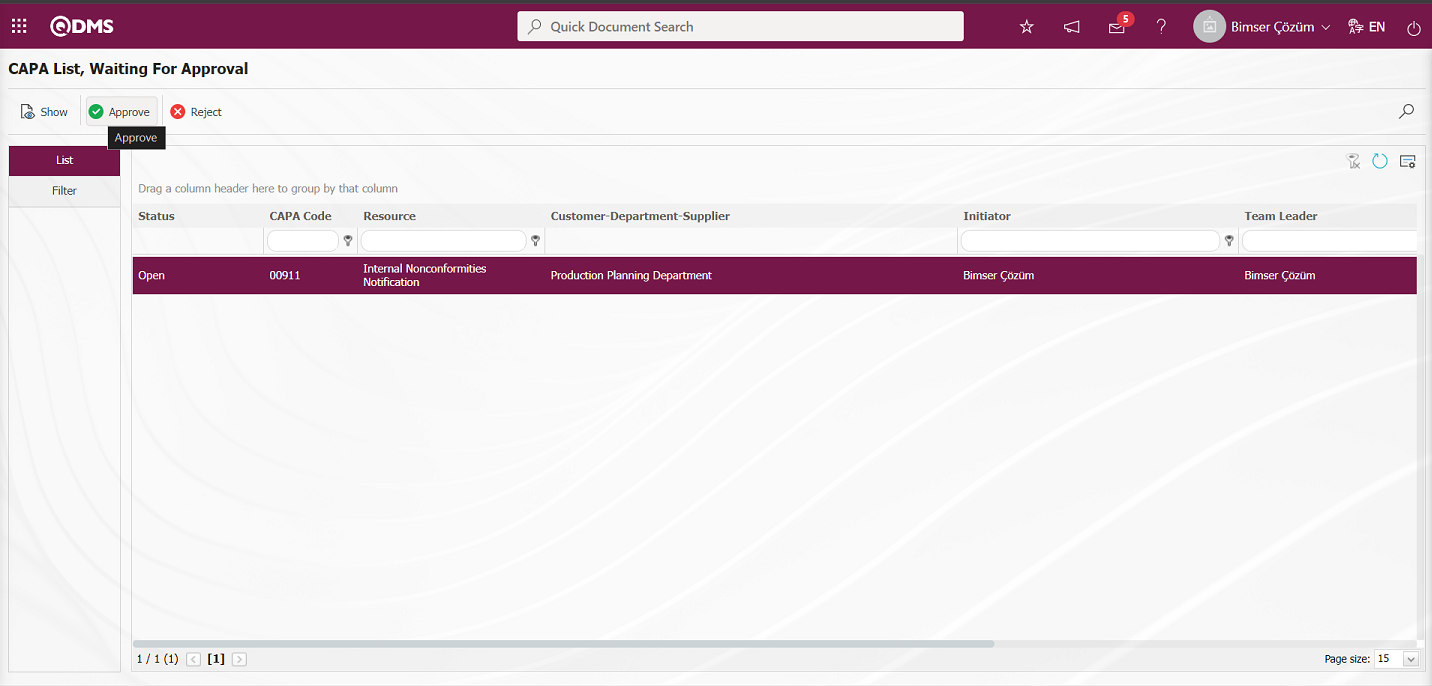
On the CAPA Approval** screen, Confirmation Notes information is written in the Confirmation Notes field and the CAPA record is approved by clicking the  button.
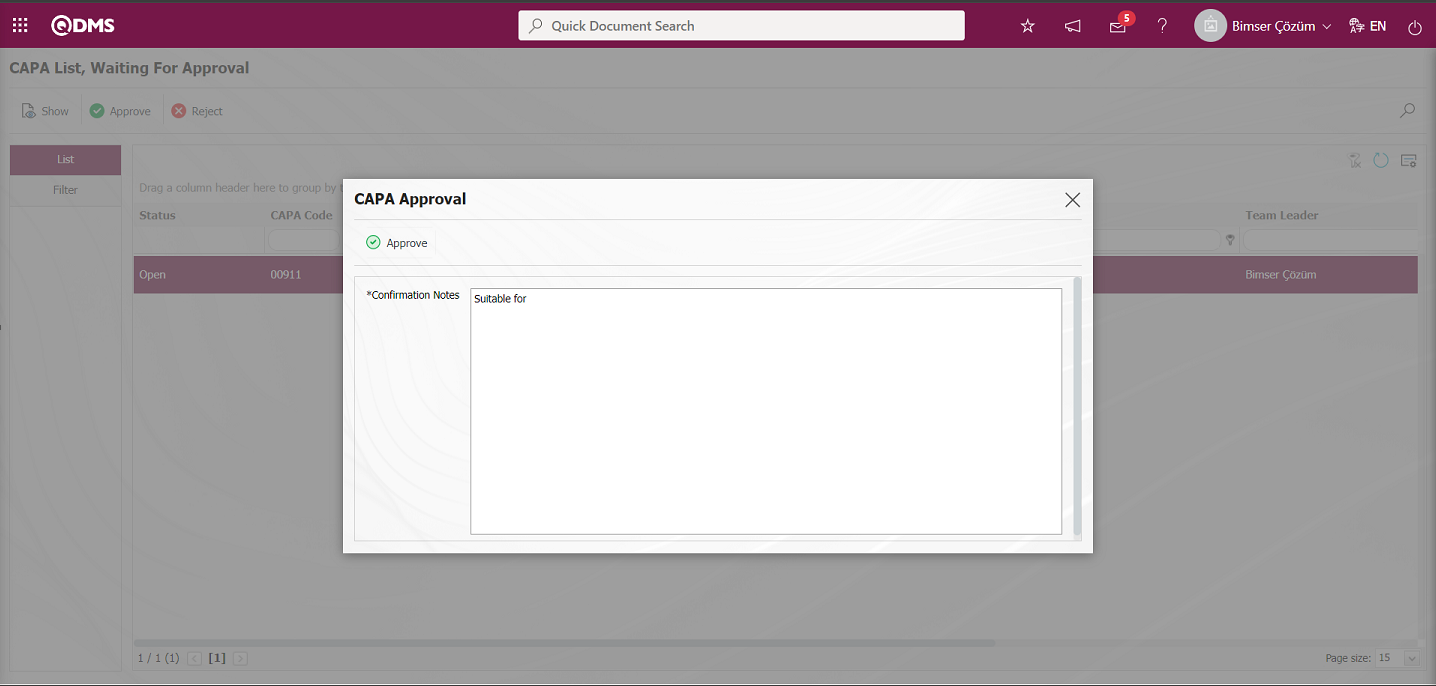
When confirming CAPA, the confirmation note information is displayed and entering the confirmation note is made mandatory because the parameter is activated by selecting the parameter value “Yes” in parameter 154 in the CAPA module parameters.
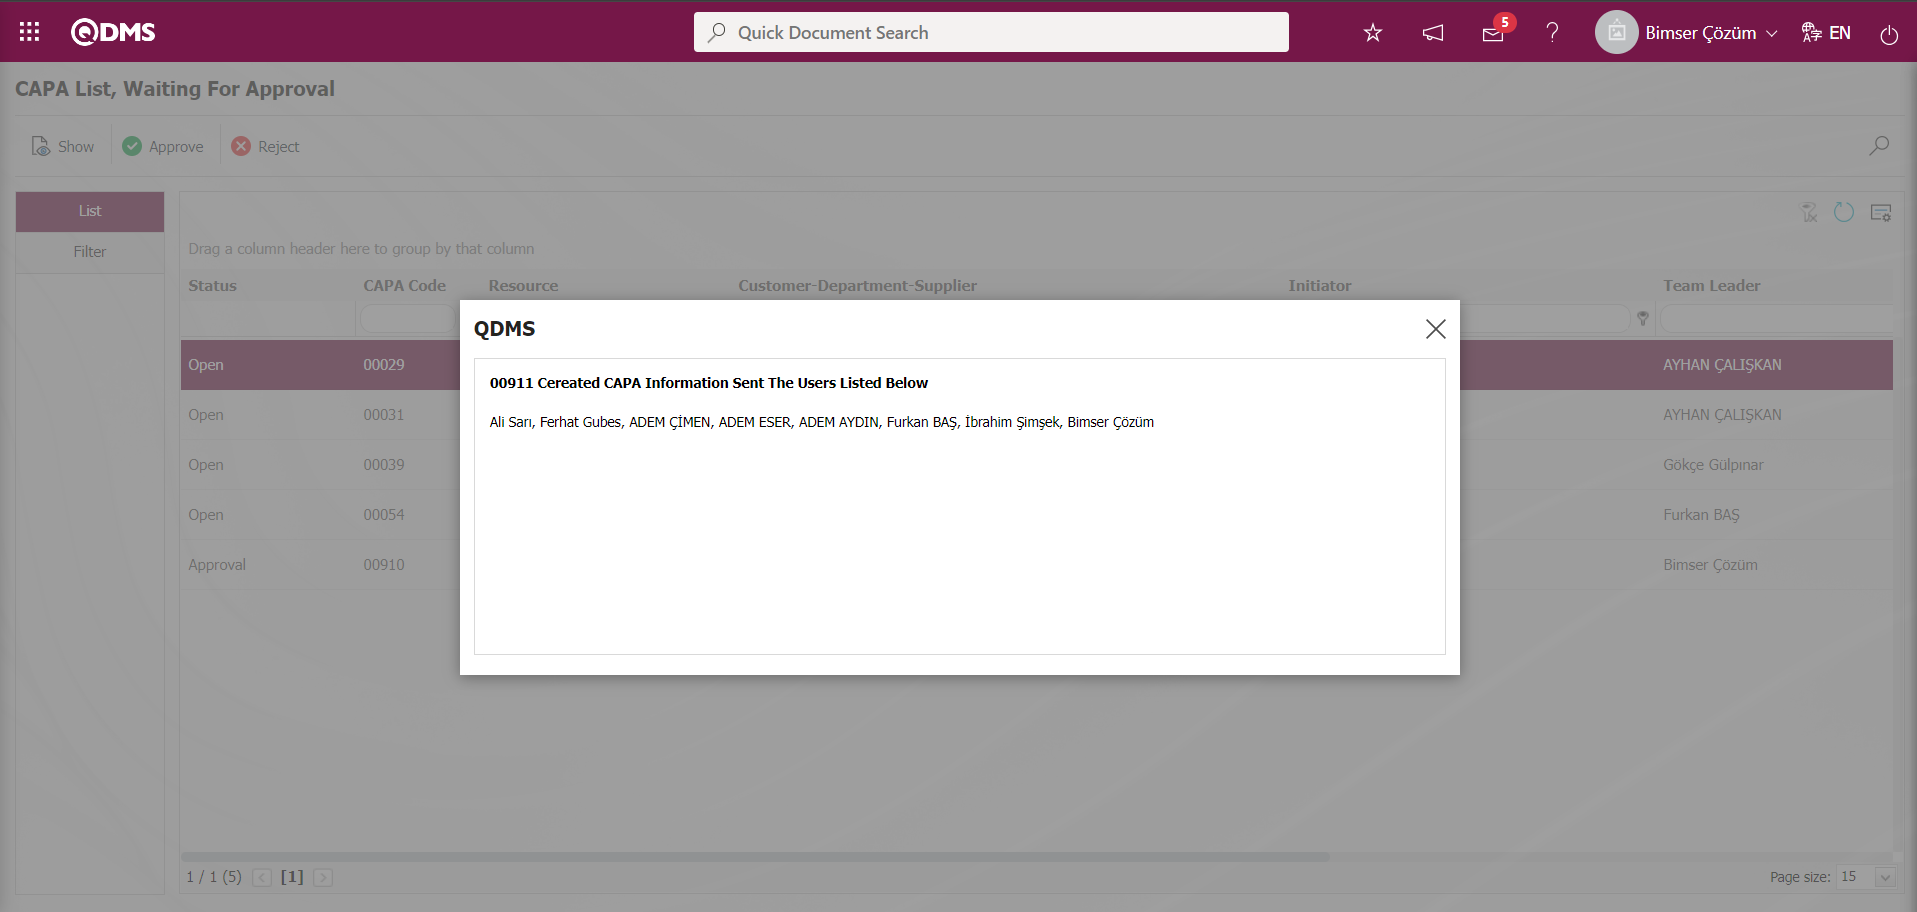
Once the CAPA First Progress report has been approved, the CAPA registration Team Leader is responsible for writing the First Progress report.
6.2.1.5. First Progress Report
After the approval of the First Progress Report approval, it falls to the team leader's pending jobs to write a progress report. Team members/team leader will be assigned to their Pending Jobs as“CAPA list of First Progress Report to be written” job.
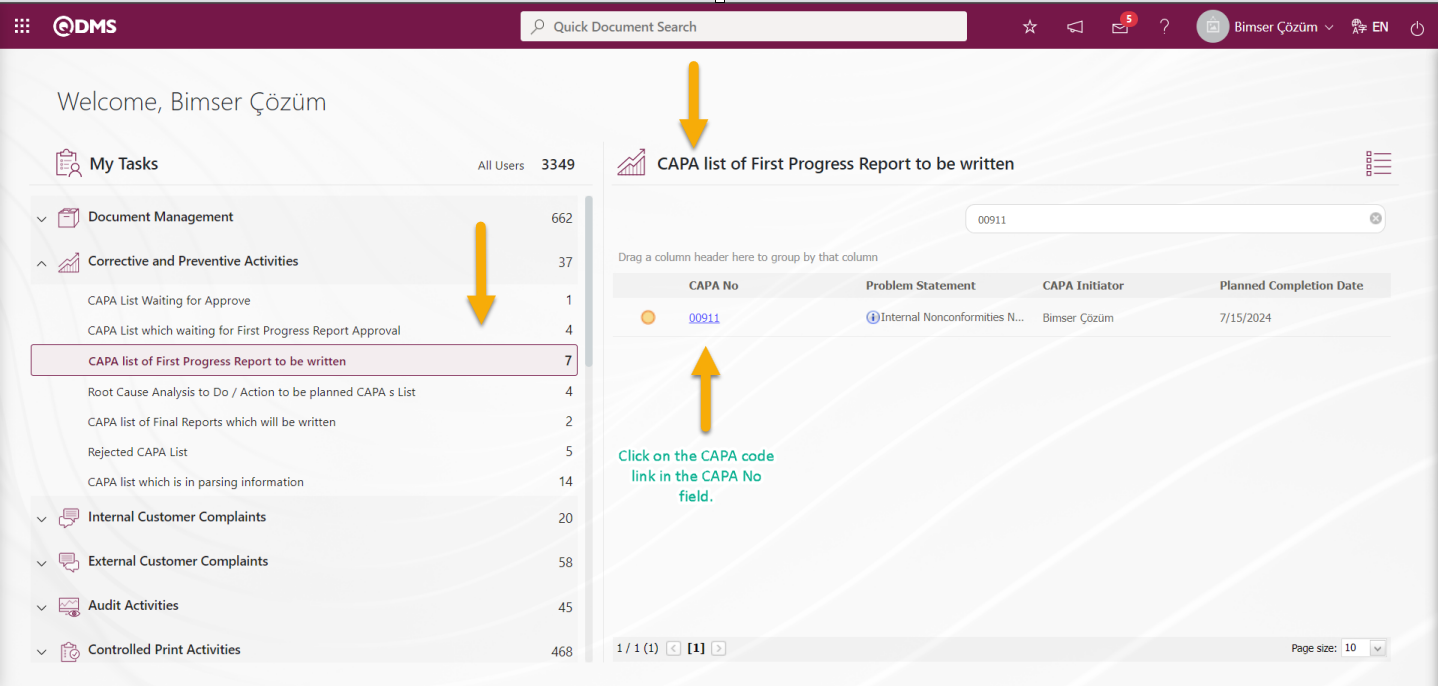
Click on the CAPA Code link in the relevant CAPA No field to get to the screen with CAPA information.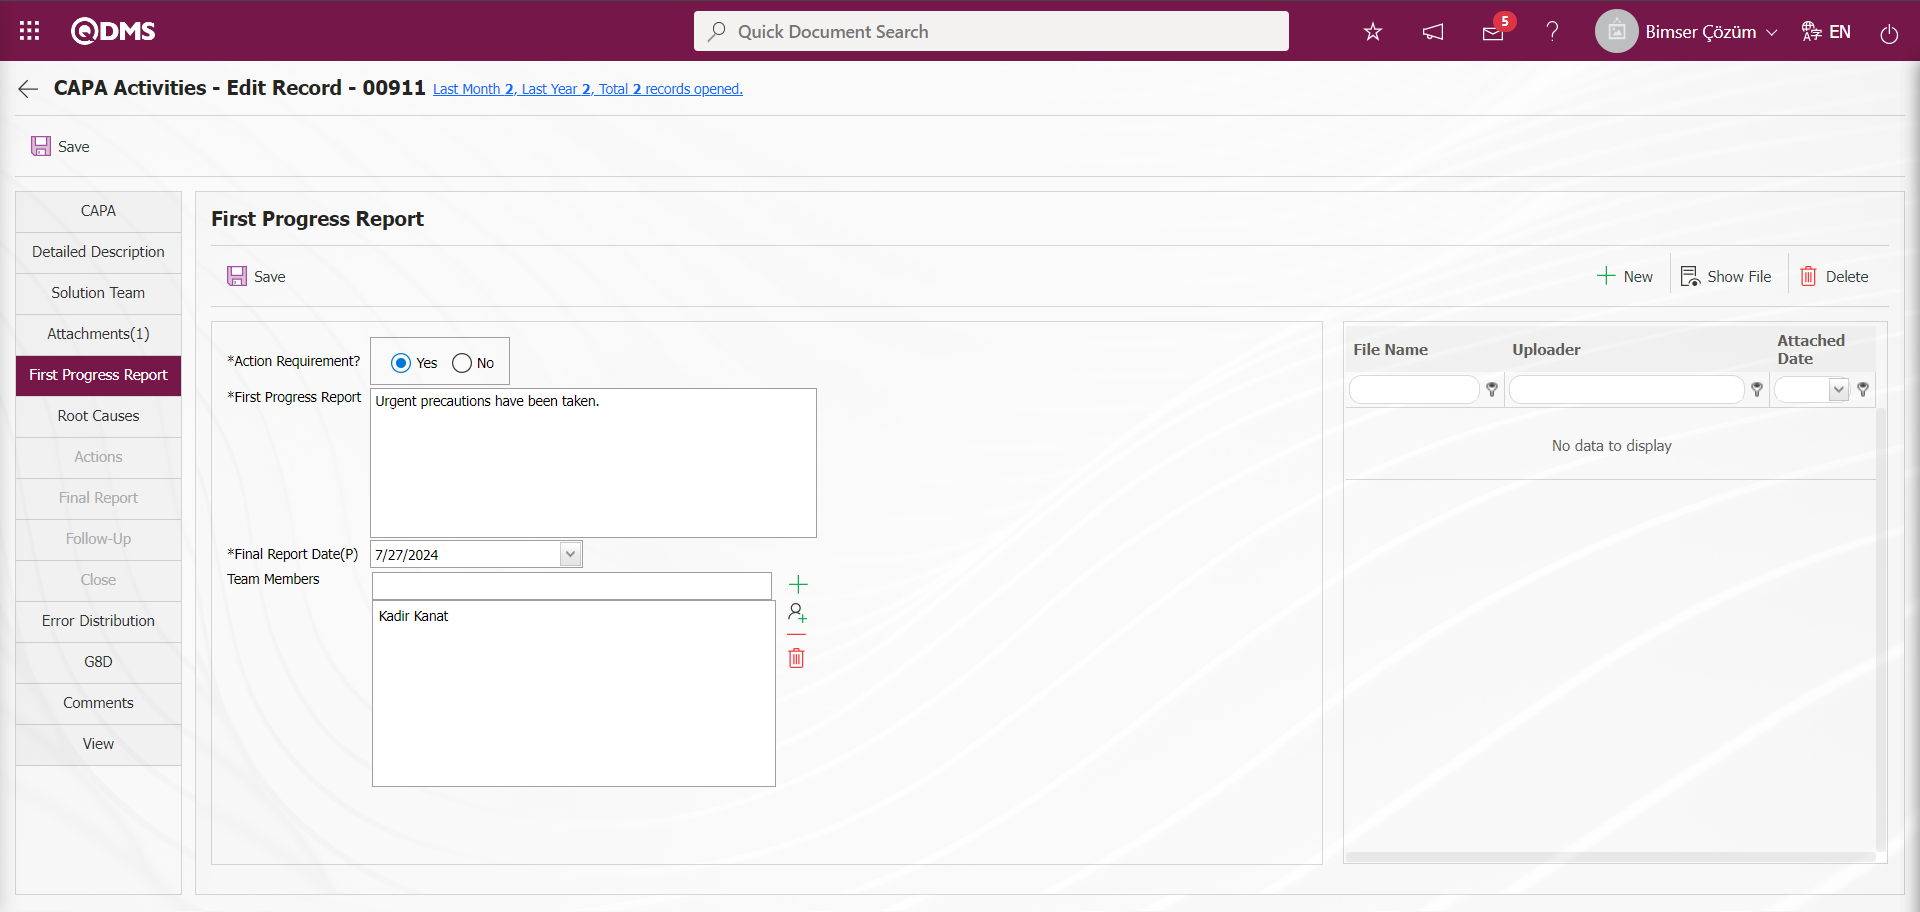 ** It is the tab where urgent measures related to nonconformity are taken in the progress report tab. A progress report is written by the Team Leader or any person in the Team. When the nonconformity is noticed, the first urgent measures to be taken are written in this report. If desired, new people can be added to the Team in this tab. The parameter value of parameter 78 in CAPA parameters is activated by selecting “Yes”.

After the parameter is activated, the First Progress Report tab is displayed on the CAPA Activities - Edit Record** screen and the First Progress report stage is used in the CAPA record.
In this tab, it is also determined whether actions are needed to resolve the nonconformity. Depending on the parameter, this field is activated by selecting the parameter value “Yes” of parameter 42 in the CAPA module parameters.
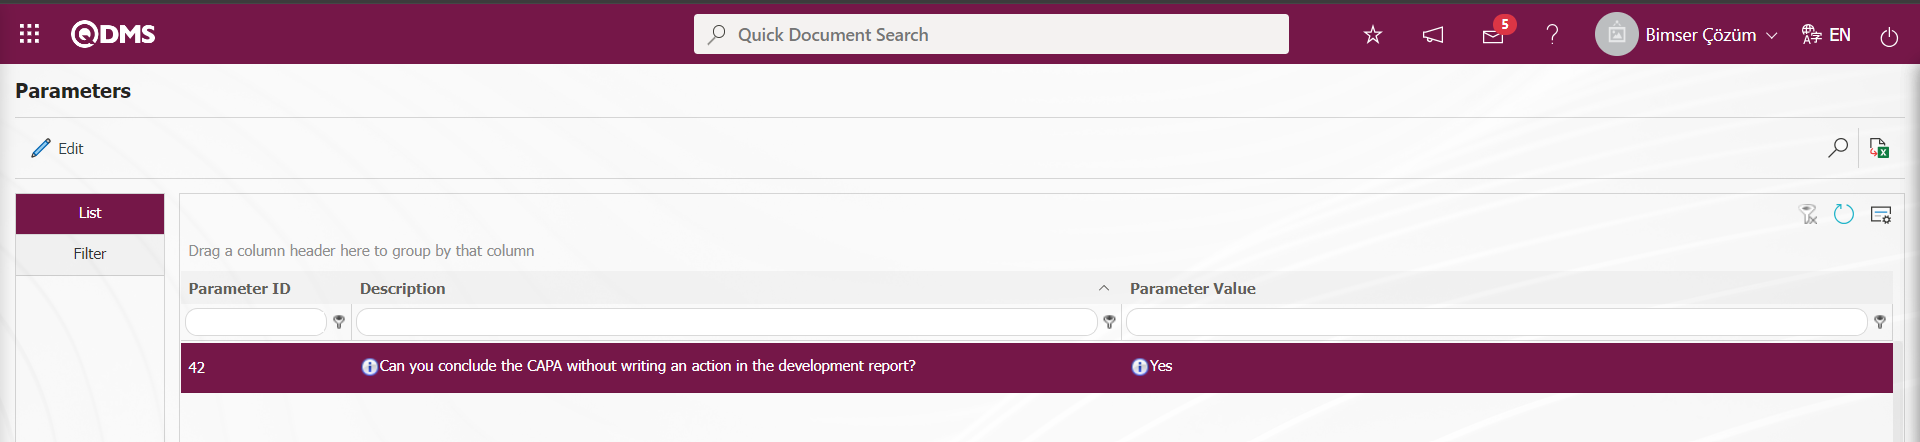
After the parameter is activated, the “Action Requirement?” field is displayed in the progress report tab. When the parameter is disabled by selecting “No”, this field is not displayed in the First Progress Report tab.
![A screenshot of a computer
Description automatically generated]ref85
Related fields are defined on the screen that opens:
Action Requirement?: The “Action Requirement?” field in the Progress Report tab on the CAPA Activities - Edit Record screen is the field where the “Yes” or “No” option can be selected to determine whether or not an action is required for the related CAPA record. The “Yes” option is selected for the CAPA record to require an Action.
First Progress Report: CAPA Activities - Edit Record screen First Progress Report tab is the field where First Progress Report description information is entered.
Final Report Date(P): First Progress on the CAPA Activities - Edit Record screen
This is the field where the planned result report date is determined in the Report tab.
According to the value entered in the parameter number 5 in the CAPA Module parameters, the information about how long it will be prepared is defined.

Team: This is the area where the information of the people who make up the Team is displayed in the First Progress Report tab.
Additional Files: At this stage in theFirst Progress Report tab, additional files such as evidence documents, photographs related to this First Progress report are uploaded with the help of the buttons. The obligation to upload additional files at the progress report stage is brought by making the necessary adjustments. For the process of making additional file uploading mandatory at theFirst Progress report stage, the parameter value of parameter 215 in the CAPA module parameters is activated by selecting “Yes”.

When the parameter is activated, during the First Progress report phase, the Additional File upload process is not performed. First Progress report registration does not take place.
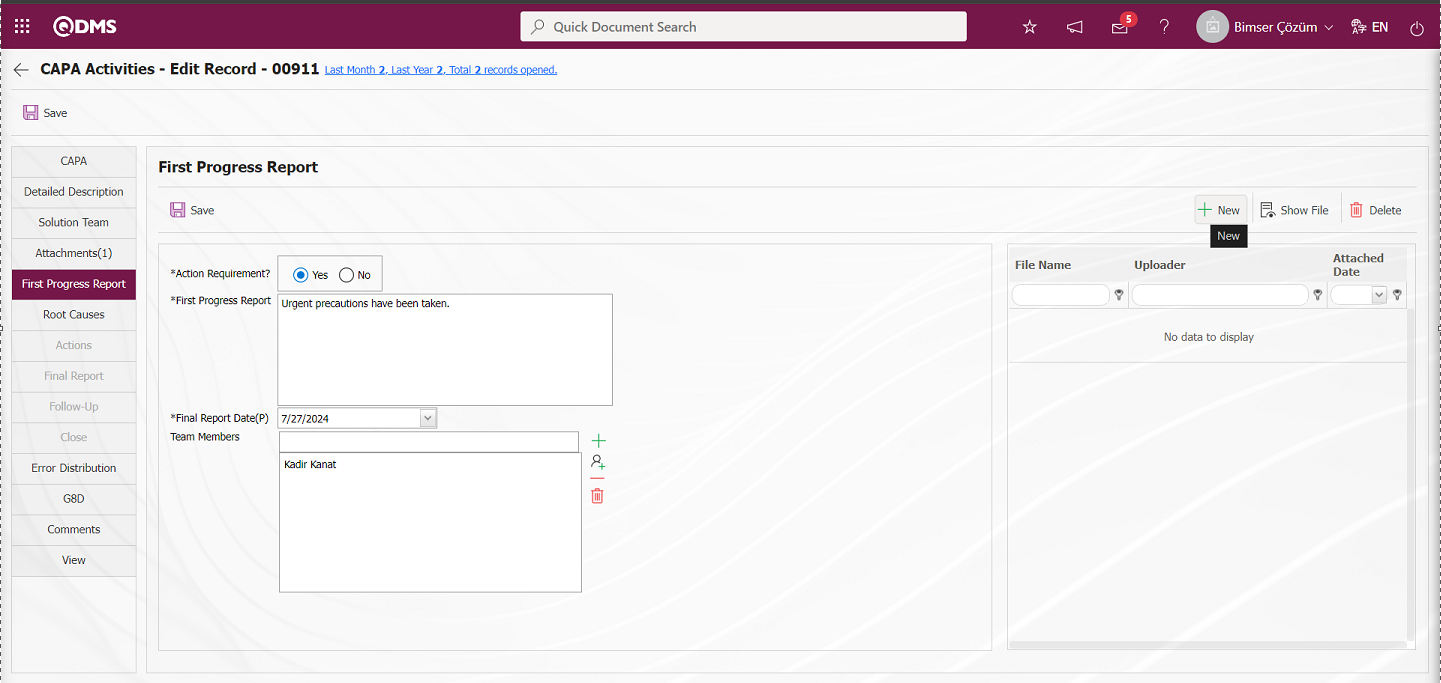
With the help of the buttons on the screen;
 : The additional file is uploaded to the system.
 : The uploaded additional file information is displayed.
 : The uploaded additional file information is deleted.
By clicking the button, additional file is added to the CAPA record at the progress report stage. Multiple attachment files can be added. The parameter value of parameter 32 in CAPA Module parameters is activated by selecting “Yes”.

After the parameter is activated, the Comments tab is displayed on the CAPA Activities - Edit Record screen. In this tab displayed on the CAPA Activities - Edit Record screen, the user can add comments, edit, update, modify and delete the added comments with the relevant buttons at each stage. In addition, in the list of added comments, it receives the report in excel format at this stage.
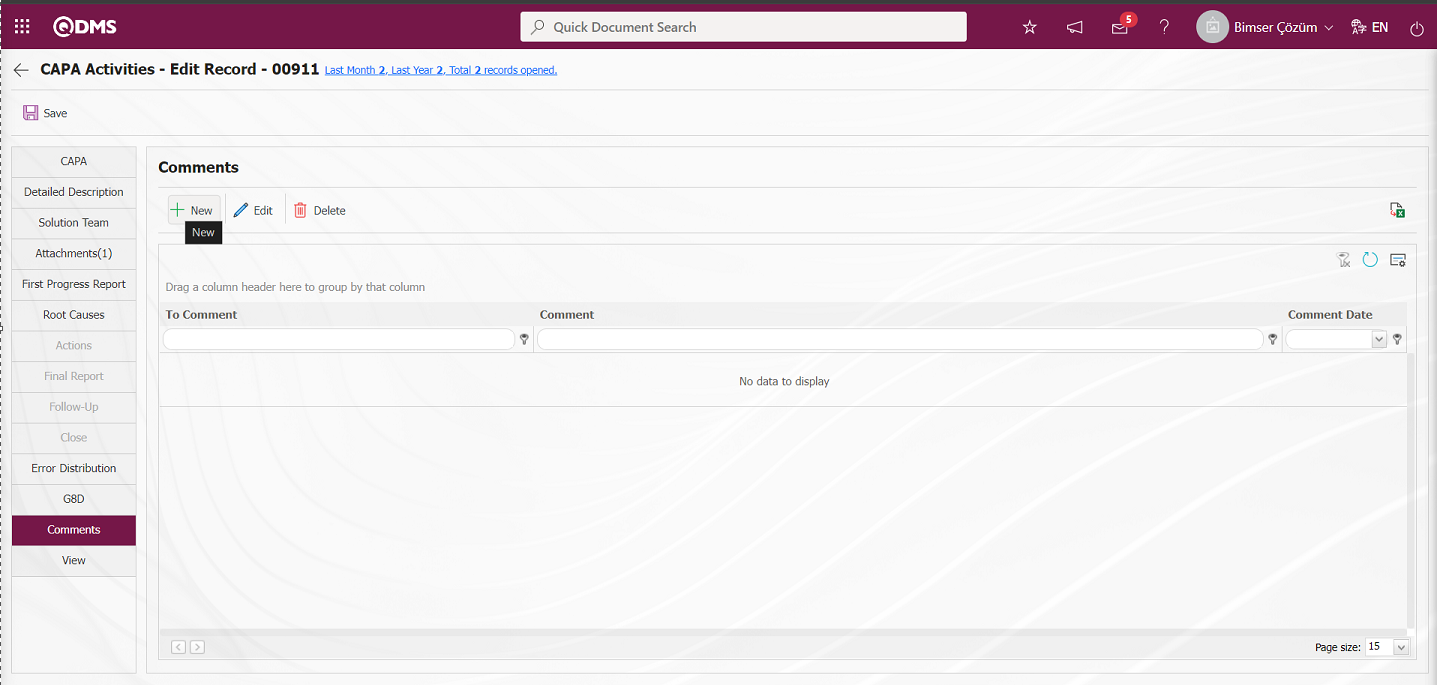
With the help of the buttons on the screen;
 : A new comment is defined.
 : Edit/change/update the comment information selected in the list.
 : The comment information selected in the list is deleted.
: Data is transferred to Excel. (Excel format report of the comment list in the list tab on the comments screen is taken.)
: The data remaining in the filter fields in the grid where the search criteria search operation on the menu screens is performed is cleaned.
: The menu screen is restored to its default settings.
: User-based designing of the menu screen is done with the show-hide feature of the fields corresponding to the columns on the menu screens, that is, the hiding feature.
To add a new comment to the Comments screen, click on the button at the top left corner of the screen to display the Comments-New Record screen.
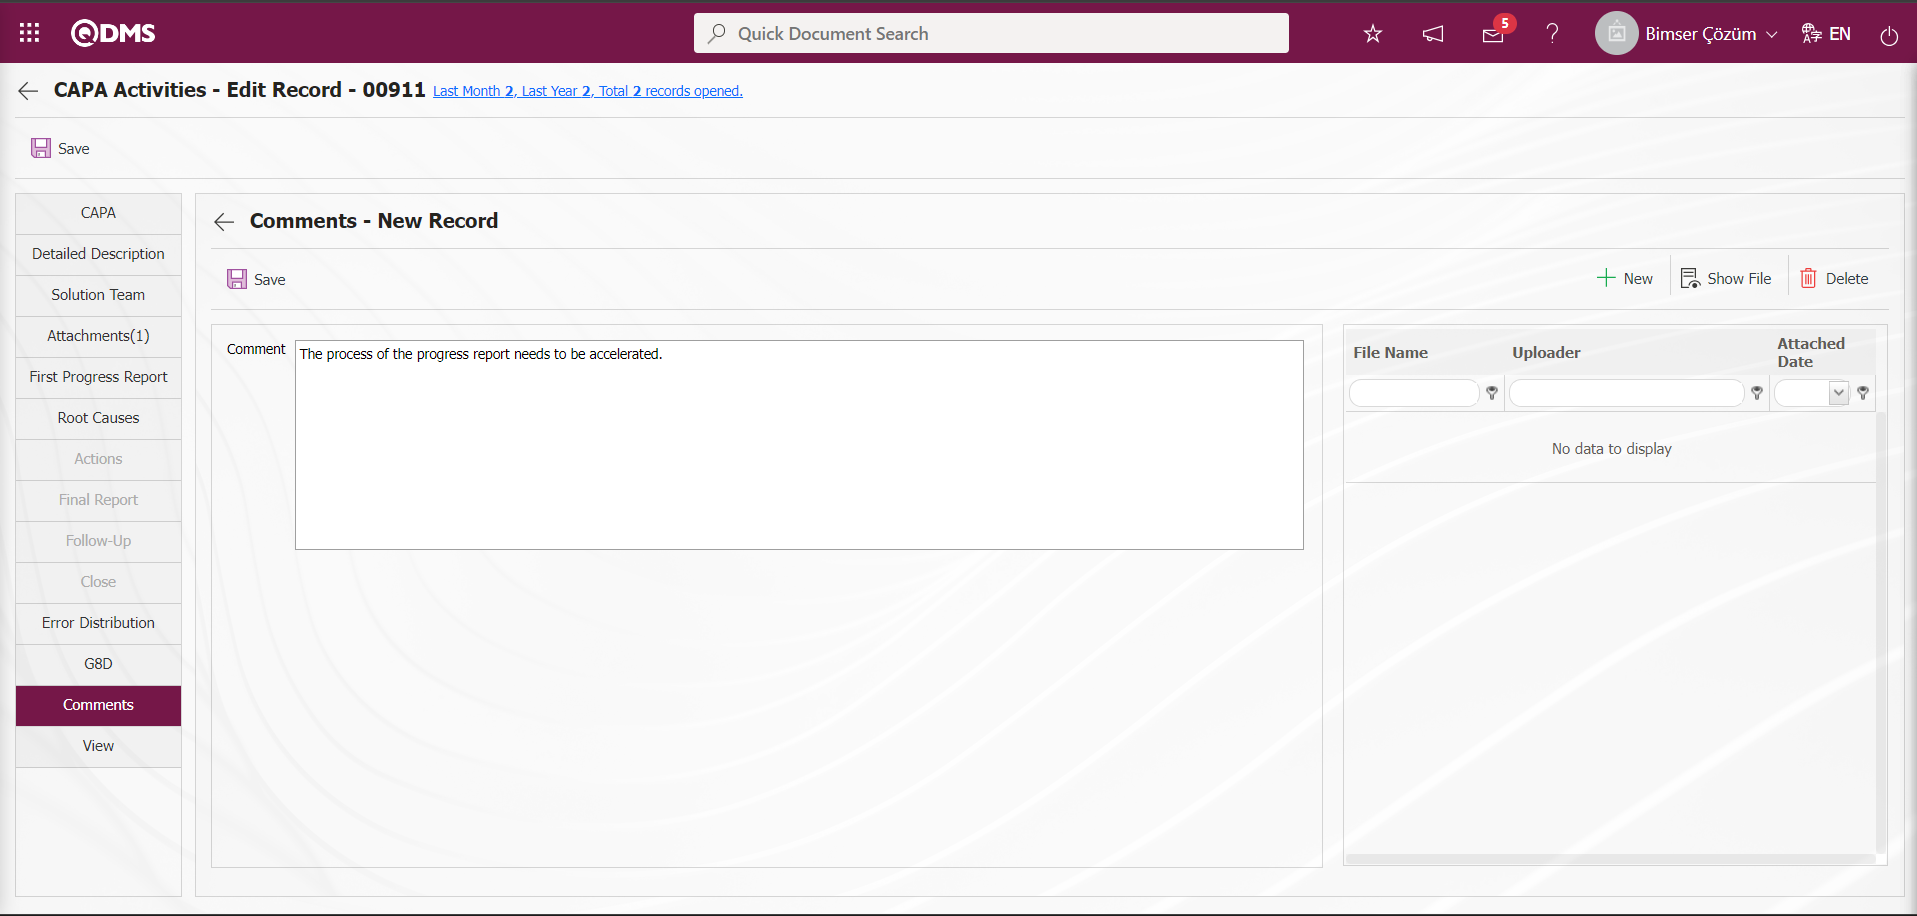
Related fields are defined on the screen that opens:
Comment: This is the field where the comment information made on the Comments-New Record screen is entered.
Additional Files: At this stage in the Comments tab, additional files such as evidence documents, photos, etc. related to the comment can be uploaded with the help of the buttons.

With the help of the buttons on the screen;
: The additional file is uploaded to the system.
: The uploaded additional file information is displayed.
: The uploaded additional file information is deleted.
button is clicked to add an additional file if desired. Multiple attachment files can be added.
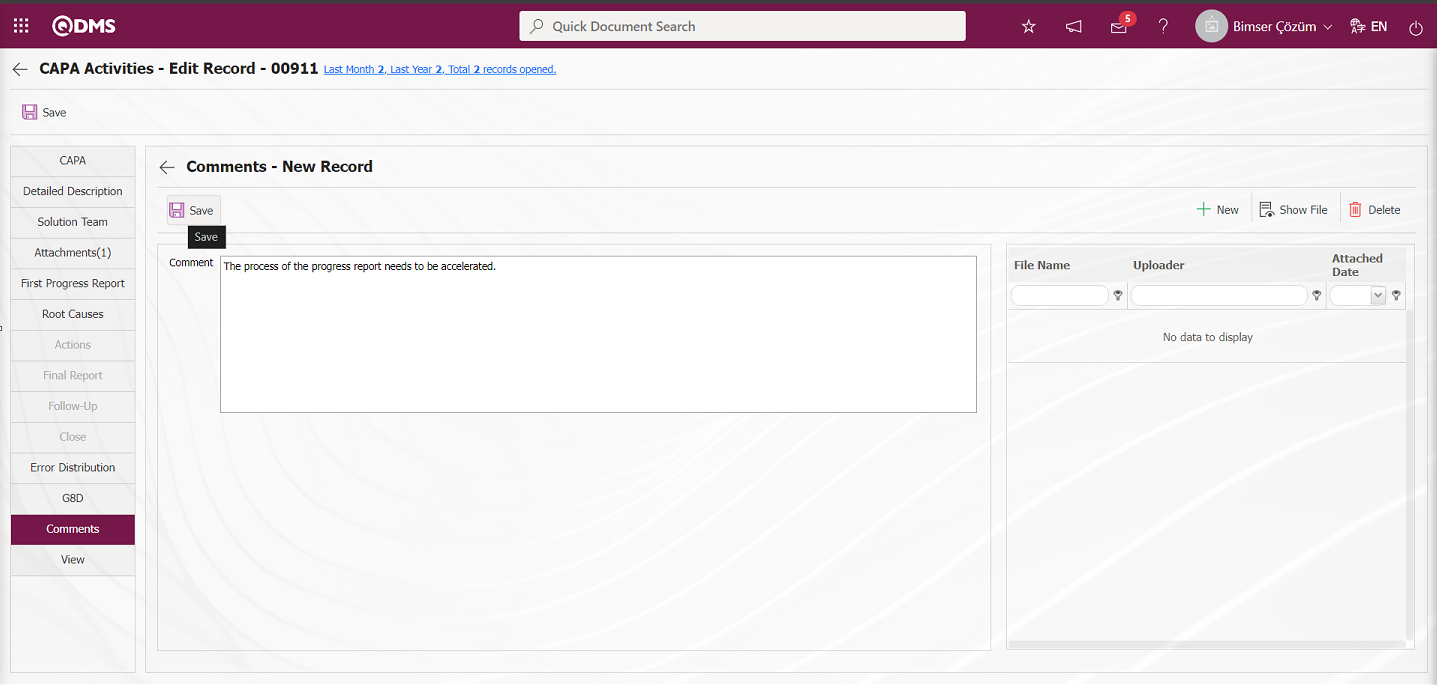
After filling in the required fields on the Comments - New Registration screen, the comment definition registration process is performed by clicking the  button in the upper left corner.
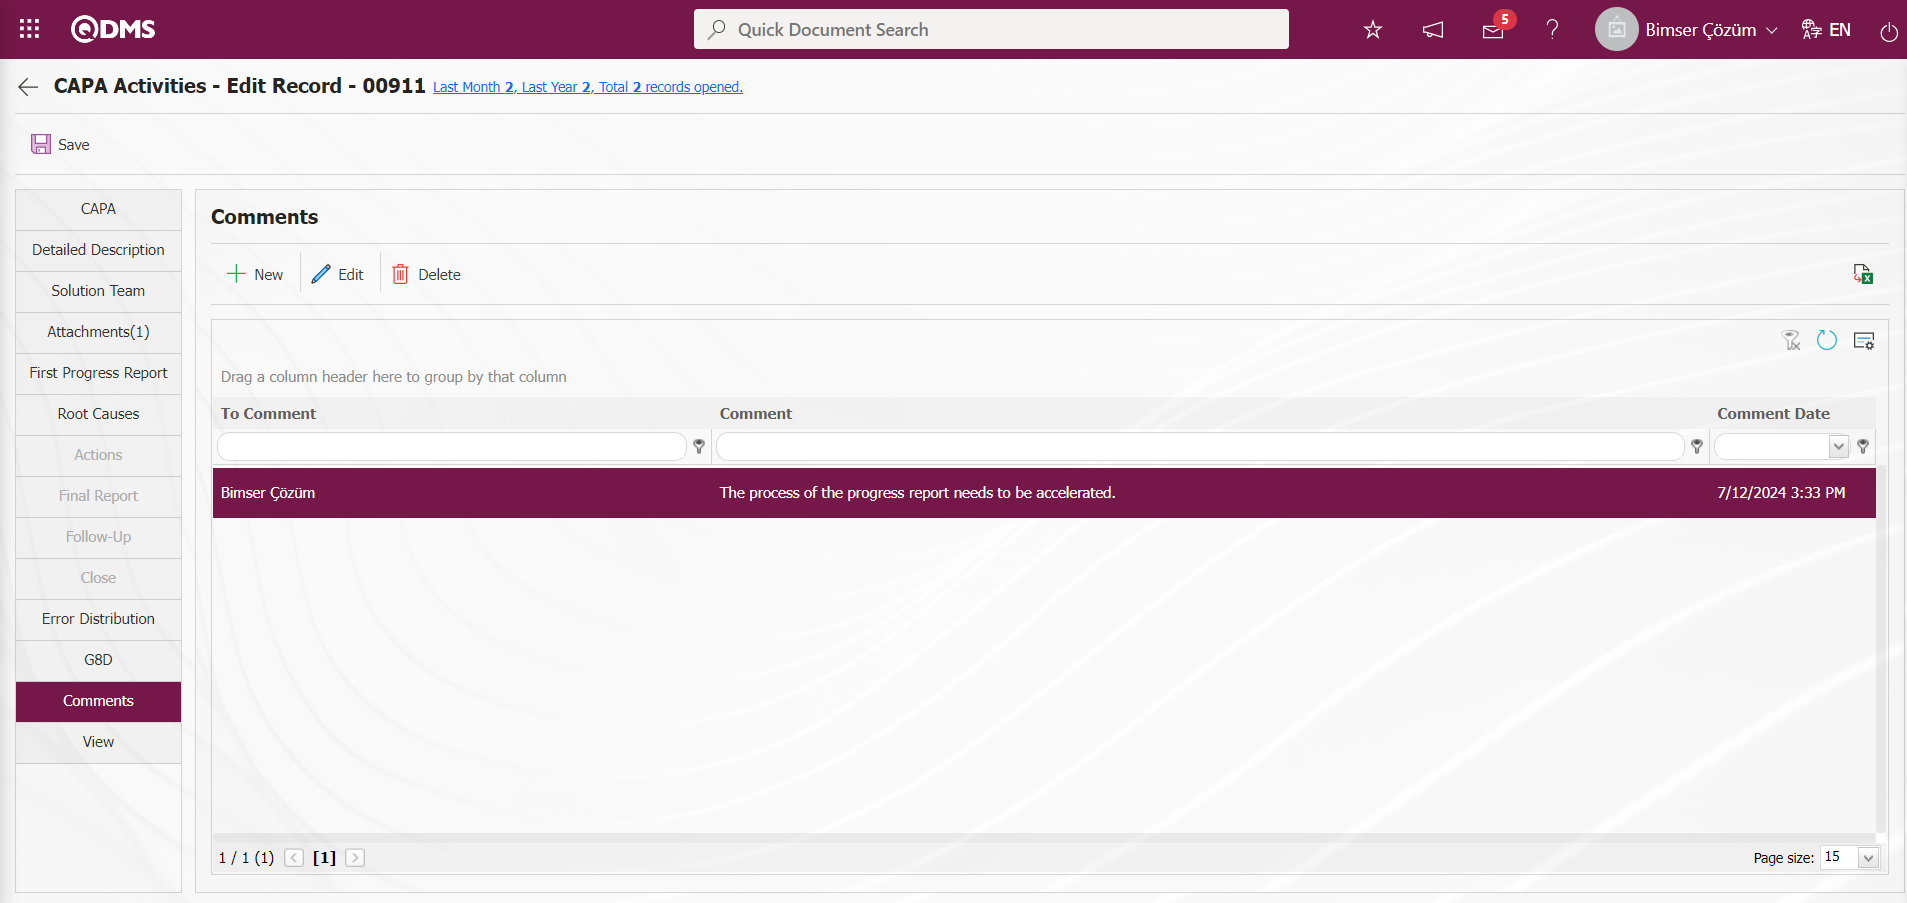 At the First Progress Report stage, after adding a comment, the team leader will write a comment about the measures taken urgently. First Progress writes the report.
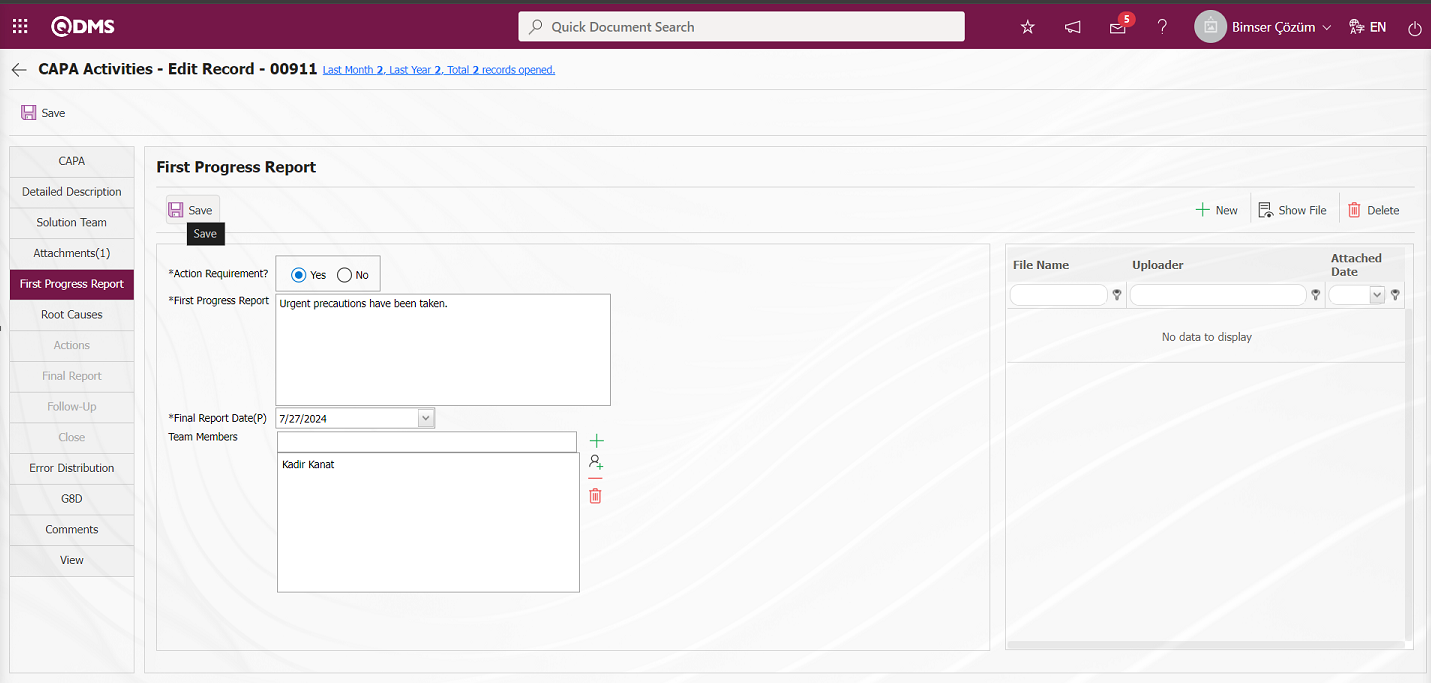
If CAPA clicks the  button by adding the finalization time, team and attachment file, if any, the next stage is started. The need for action is a parametric field. It is used if there are CAPAs closed without taking action. After entering the relevant information in the required fields, the First Progress Report is recorded by clicking the buttonin the upper left corner of the screen.
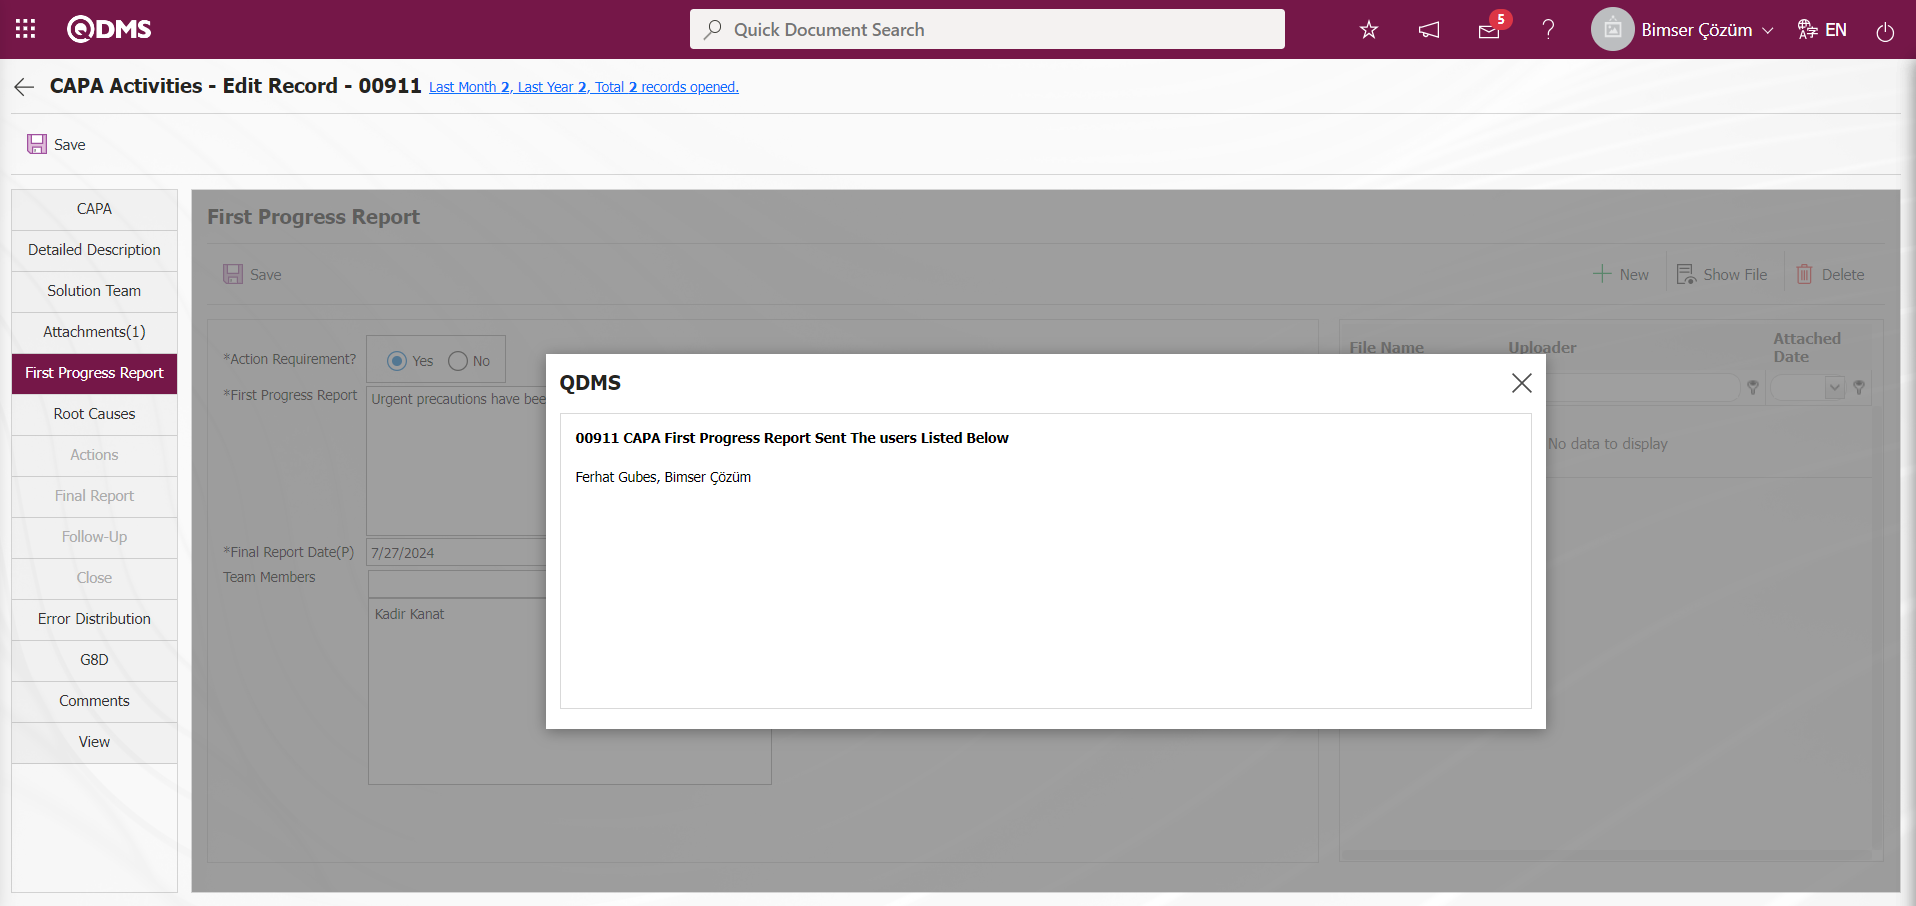
After the First Progress report stage, the Team Leader and the Team are tasked to carry out Root Cause Analysis/Action Planning for CAPA registration.
6.2.1.6.Root Causes
After the First Progress Report stage, for the Root Cause Analysis and Action to be planned, the CAPA Record is assigned as a****“Root Cause Analysis to Do / Action to be planned CAPA s List” job in the Team / Team Leader's Pending Jobs.
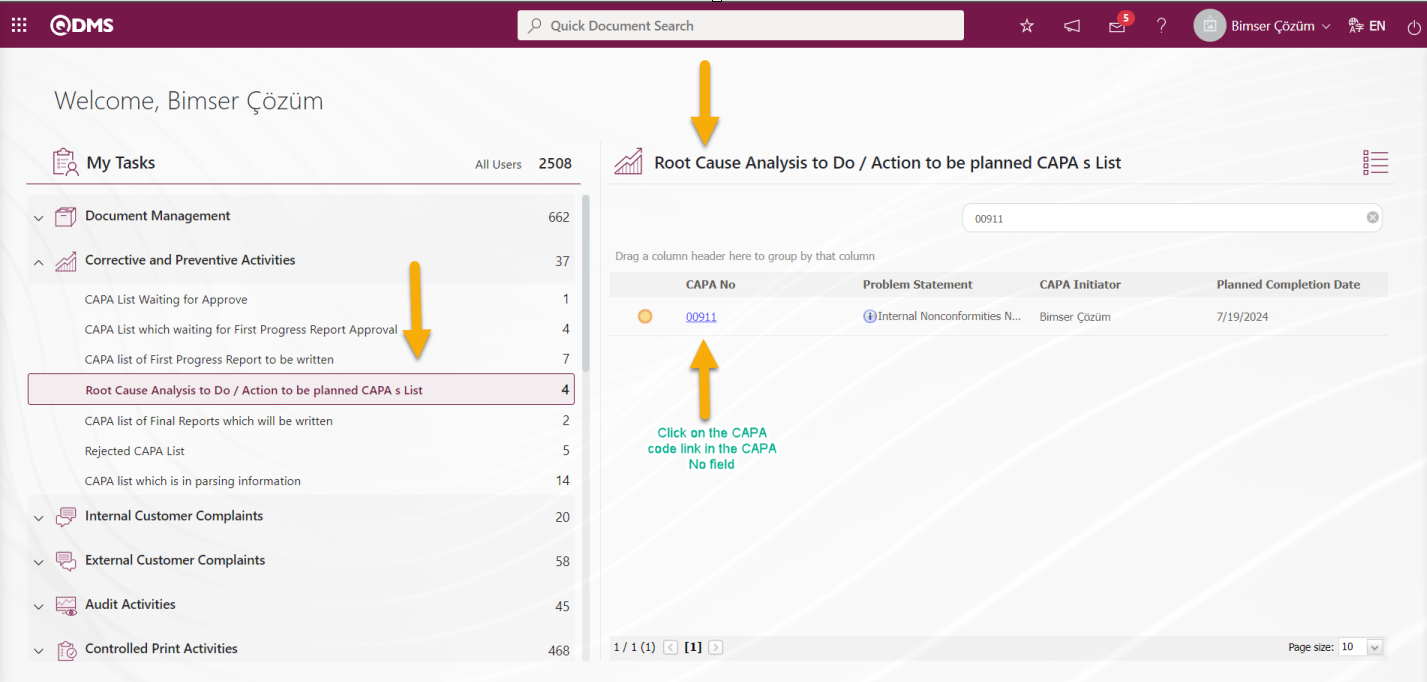
Click on the CAPA Code link in the relevant CAPA No field to get to the screen with CAPA information.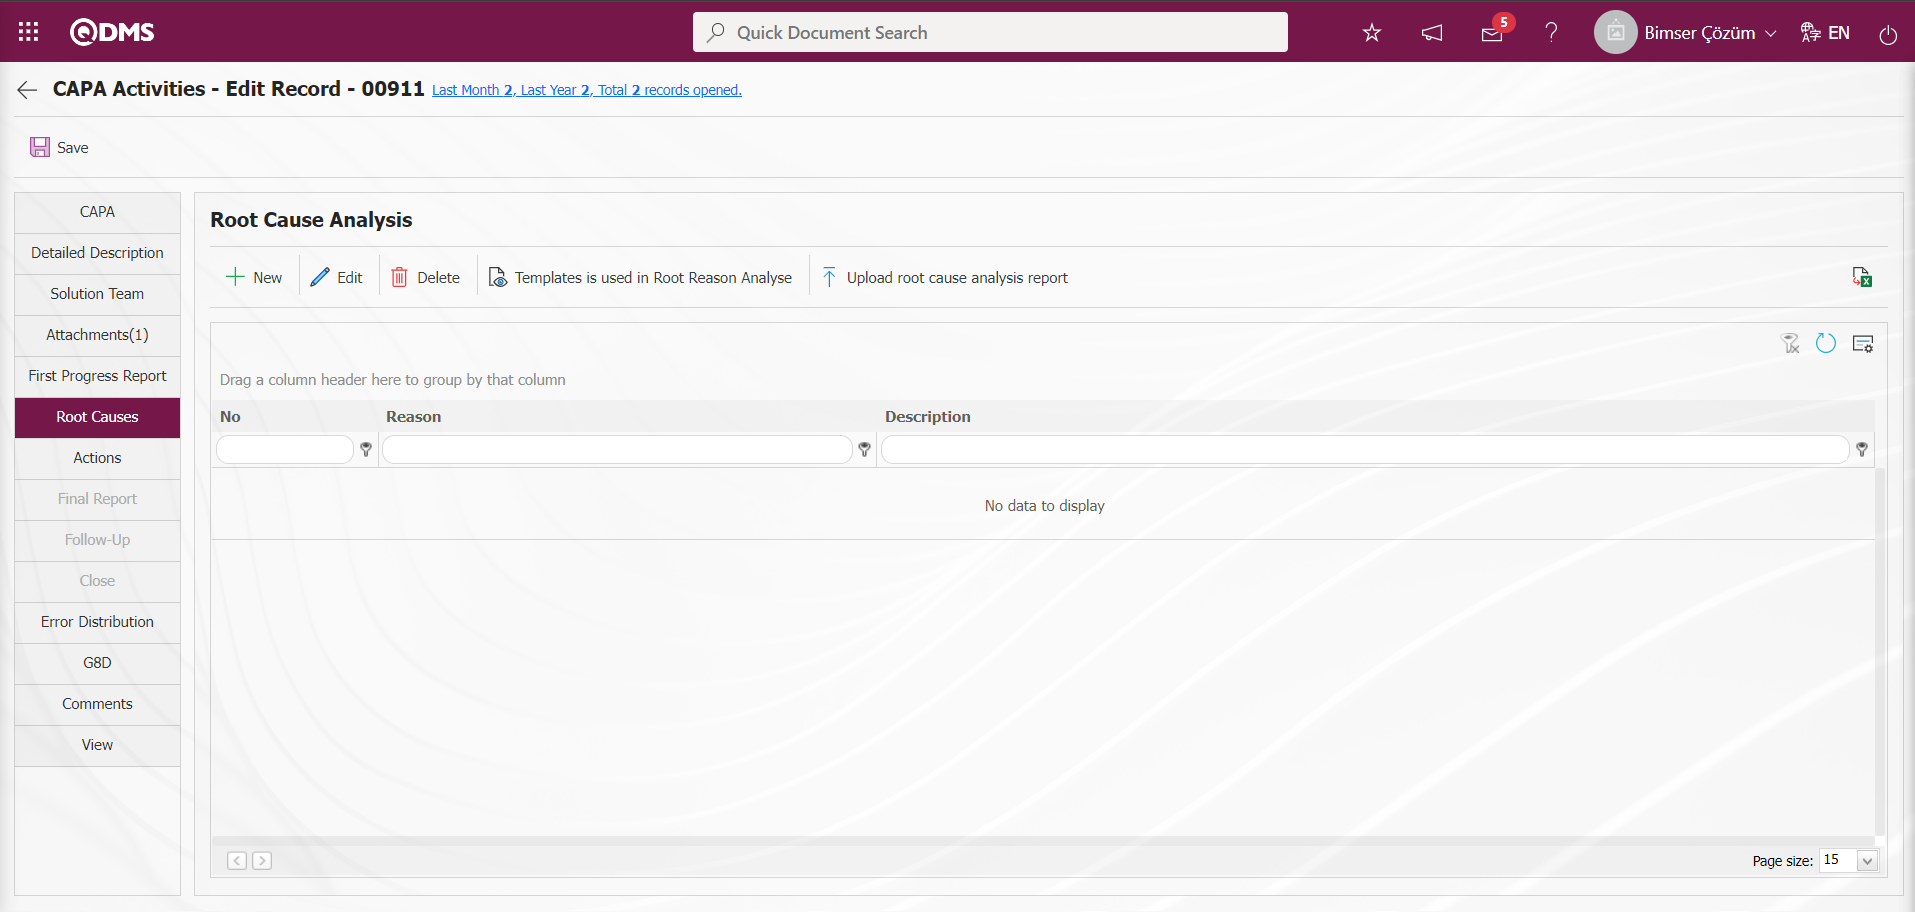
With the help of the buttons on the screen;
 : Adding a new Root Cause is done.
 :Change/edit/update the Root Cause information selected in the list.
 :Delete the Root Cause information selected in the list.
 : Templates to be used in Root Cause Analysis document codes are displayed and template documents to be used in root cause analysis are clicked and downloaded to the computer. It is a field that is displayed depending on the parameter. In the parameter 89 in the CAPA parameters, the template documents installed in the Document Management Module are defined in the parameter by writing the codes of the template documents installed in the Document Management Module in the parameter value. Template document codes are taken from the Integrated Management System/Document Management/Document View menu.
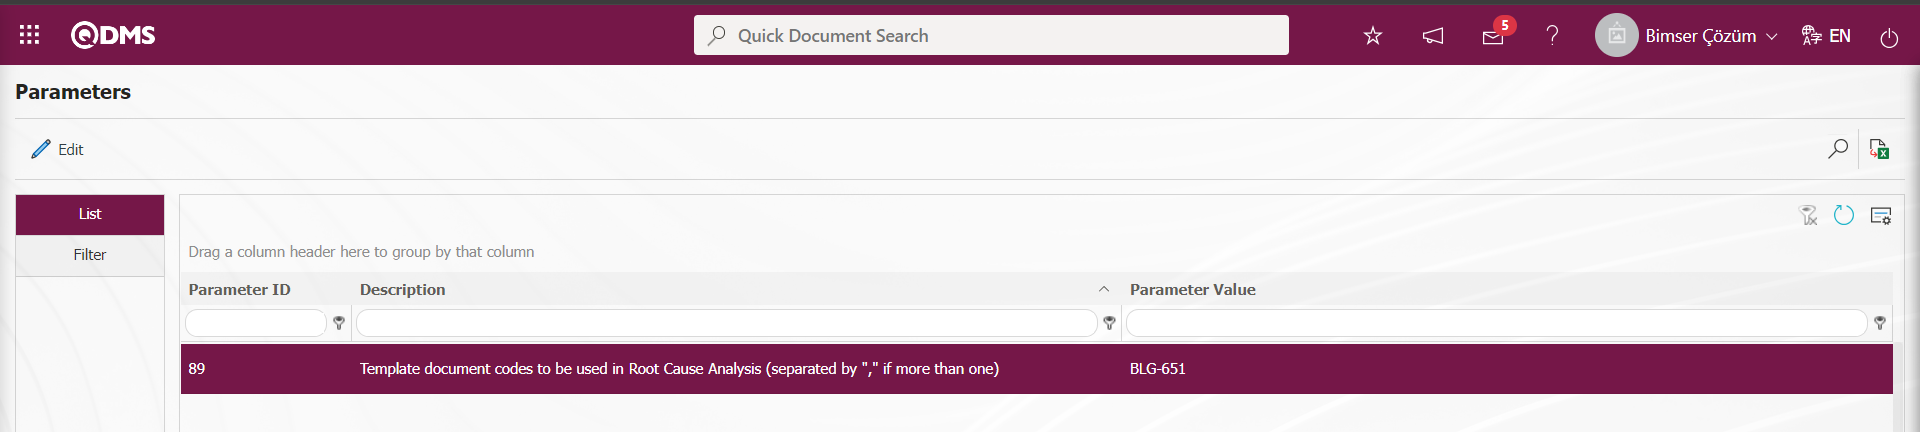
When the ![A close up of a sign
Description automatically generated]ref92 button is clicked, the template document codes defined for the parameter are displayed and the displayed template document codes are downloaded to the computer by clicking on them. The downloaded Templates to be used in Root Cause Analysis are uploaded to the system if desired in the Root Causes tab by clicking the  button.
![A black text on a white background
Description automatically generated]ref93: Root Cause Analysis Report upload process is done. Depending on the parameter, Root Cause Analysis Report upload process is left mandatory. The parameter value of parameter 25 in the Corrective and Preventive Actions module parameters is activated by selecting “Yes”.

When the parameter is activated, the Root Cause Analysis report upload process is made mandatory by giving a warning message by the system “You must upload the root cause analysis report before adding a root cause” before the root cause identification process is performed in the Root Causes tab.
After writing the First Progress report, the Root Causes tab becomes active. The Root Cause Analysis screen is displayed. It is the tab where the root cause of the nonconformity is determined and root cause analysis is performed. It is determined by the team and the solution team with the team leader to know the root causes of the nonconformity and to take permanent solutions that will eliminate these root causes. The parameter value of parameter 146 in CAPA parameters is activated by selecting “Yes”.
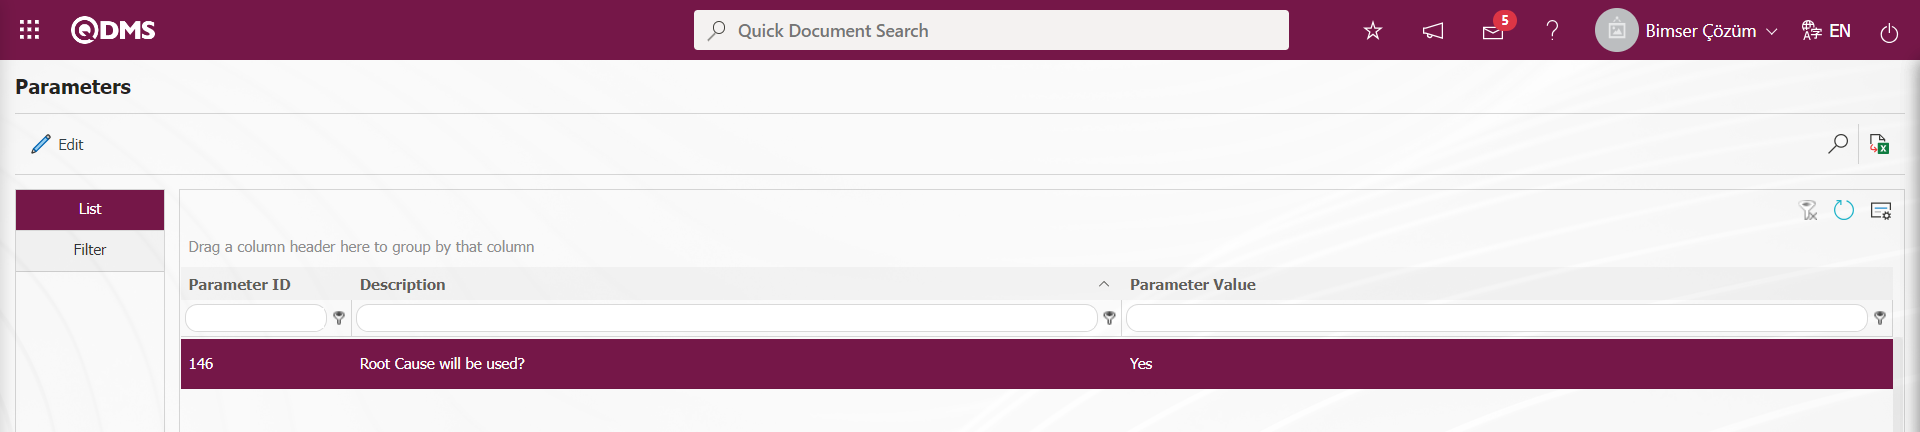
After the parameter is activated, the Root Causes tab is displayed on the CAPA Activities - Edit Record screen and the Root Causes stage is used in the CAPA record.
The parameter value of parameter 36 in the CAPA Module parameters is activated by selecting “Yes”.

After the parameter is activated, it is ensured that root cause entry is mandatory before action planning on the CAPA Activities screen. If such an obligation is not desired, the parameter is disabled by selecting “No”.
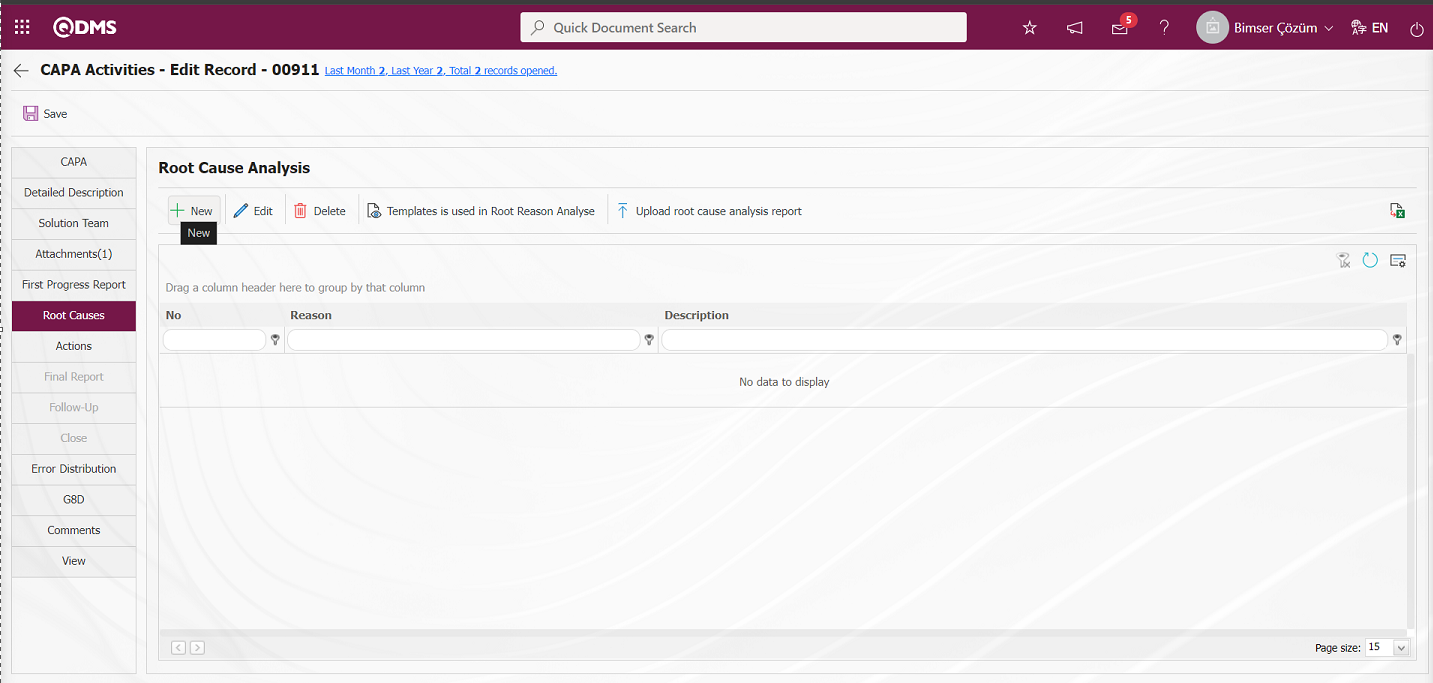
When parameter 25 of the CAPA module parameters is active, the system gives a warning message “You must upload the root cause analysis report before adding a root cause” because a new root cause is defined by clicking the button.
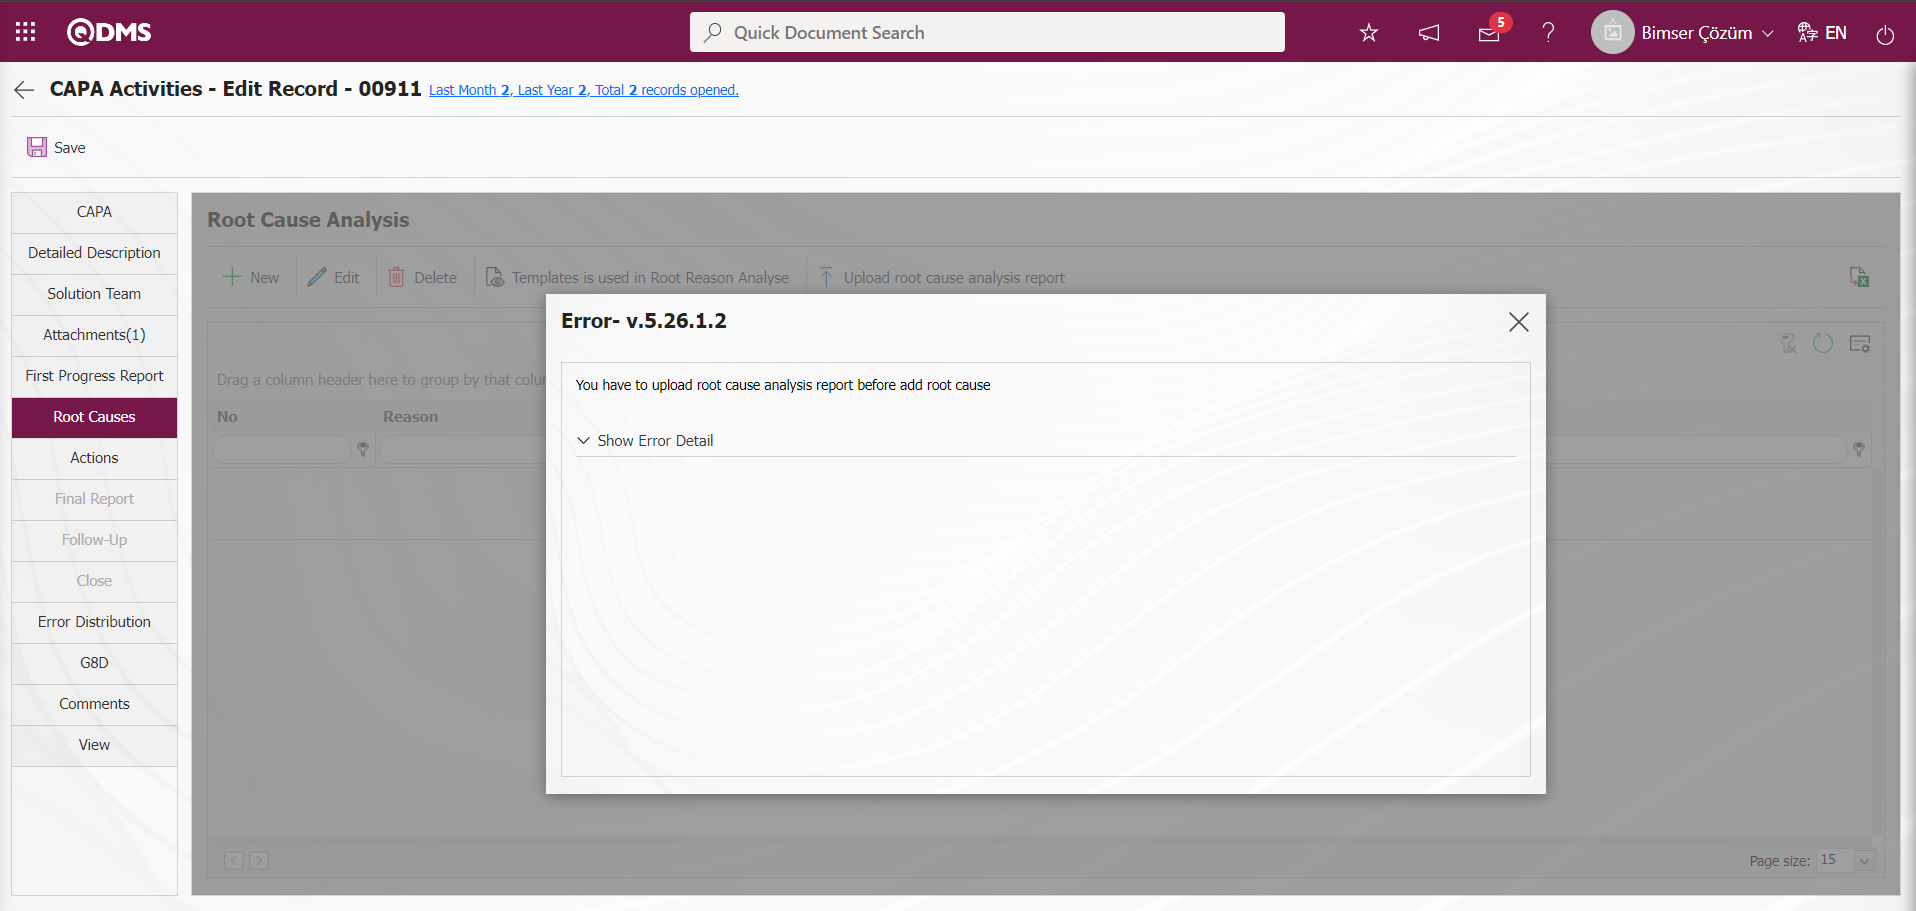
The templates to be used in Root Cause Analysis or the user's computer makes it mandatory to upload templates to the system.On the CAPA Activities - Edit Record** screen, click the button on the Root Cause Analysis tab.

Templates defined in the parameter are displayed.
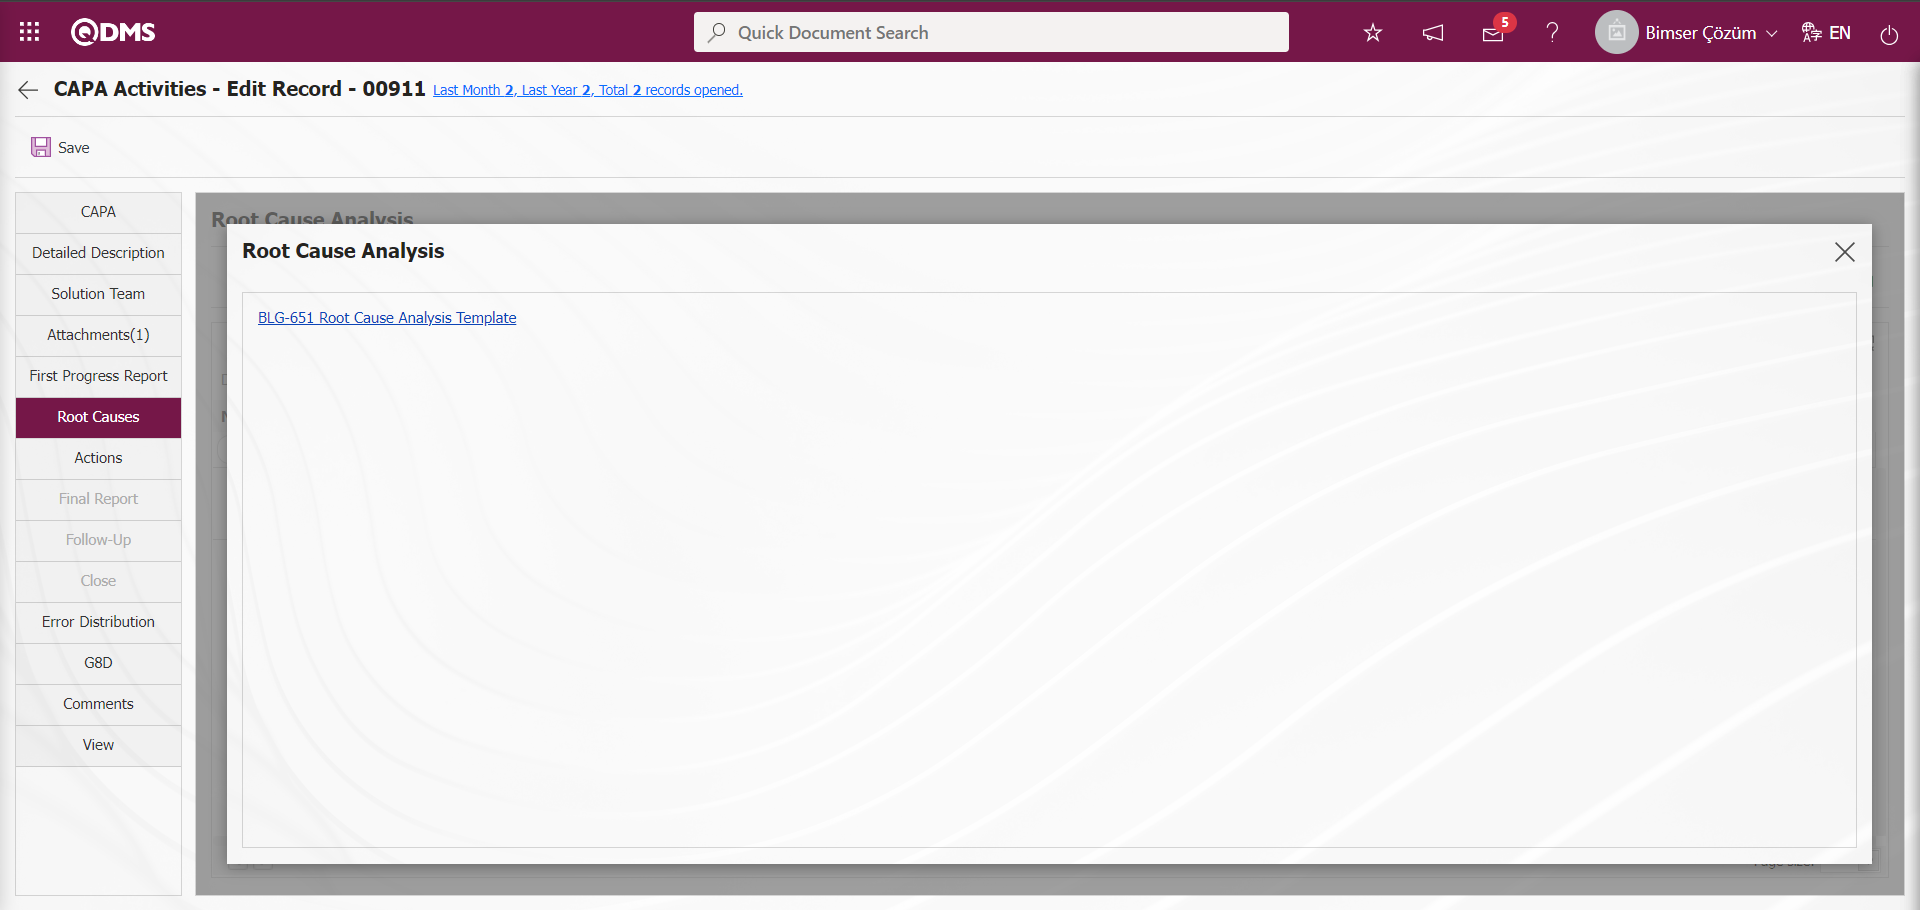
The Template to be used in Root Cause Analysis defined in parameter 89 in the system CAPA parameters is displayed and downloaded to the computer by clicking on it.
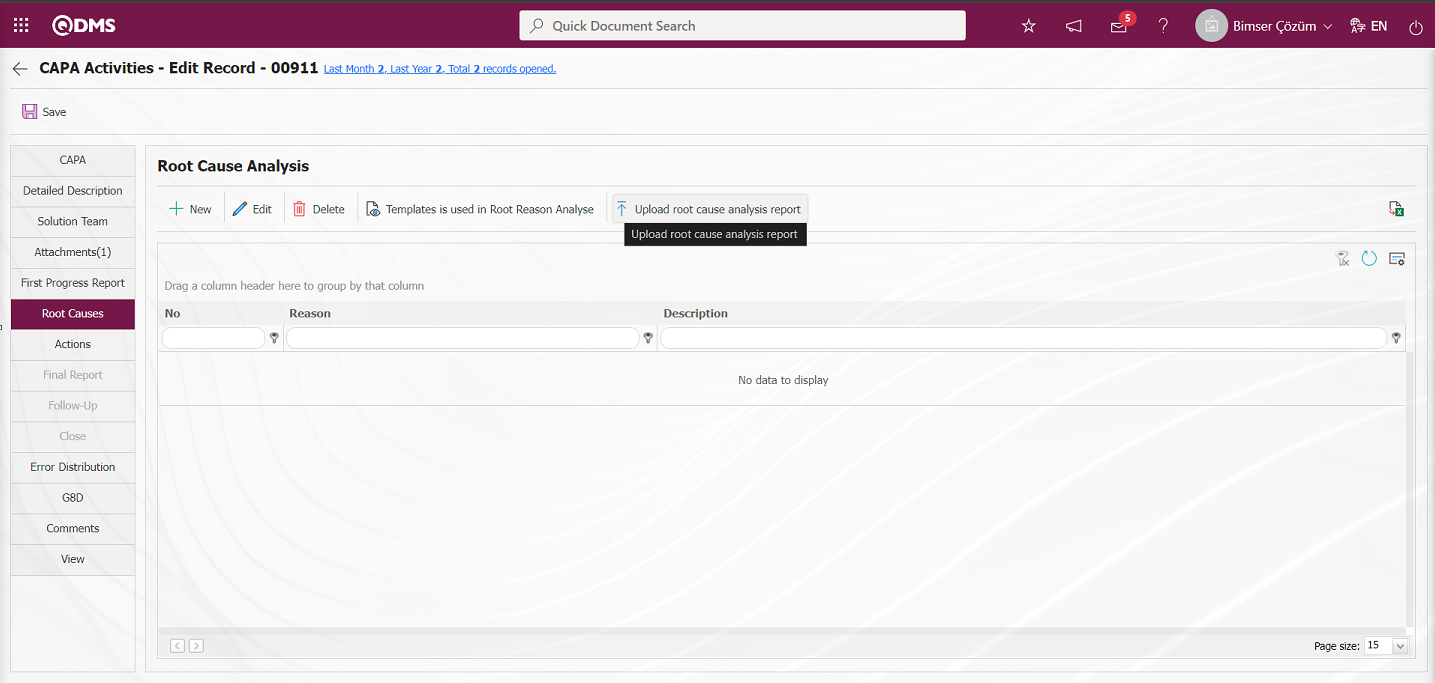
 button is clicked to upload the root cause analysis report to the system.
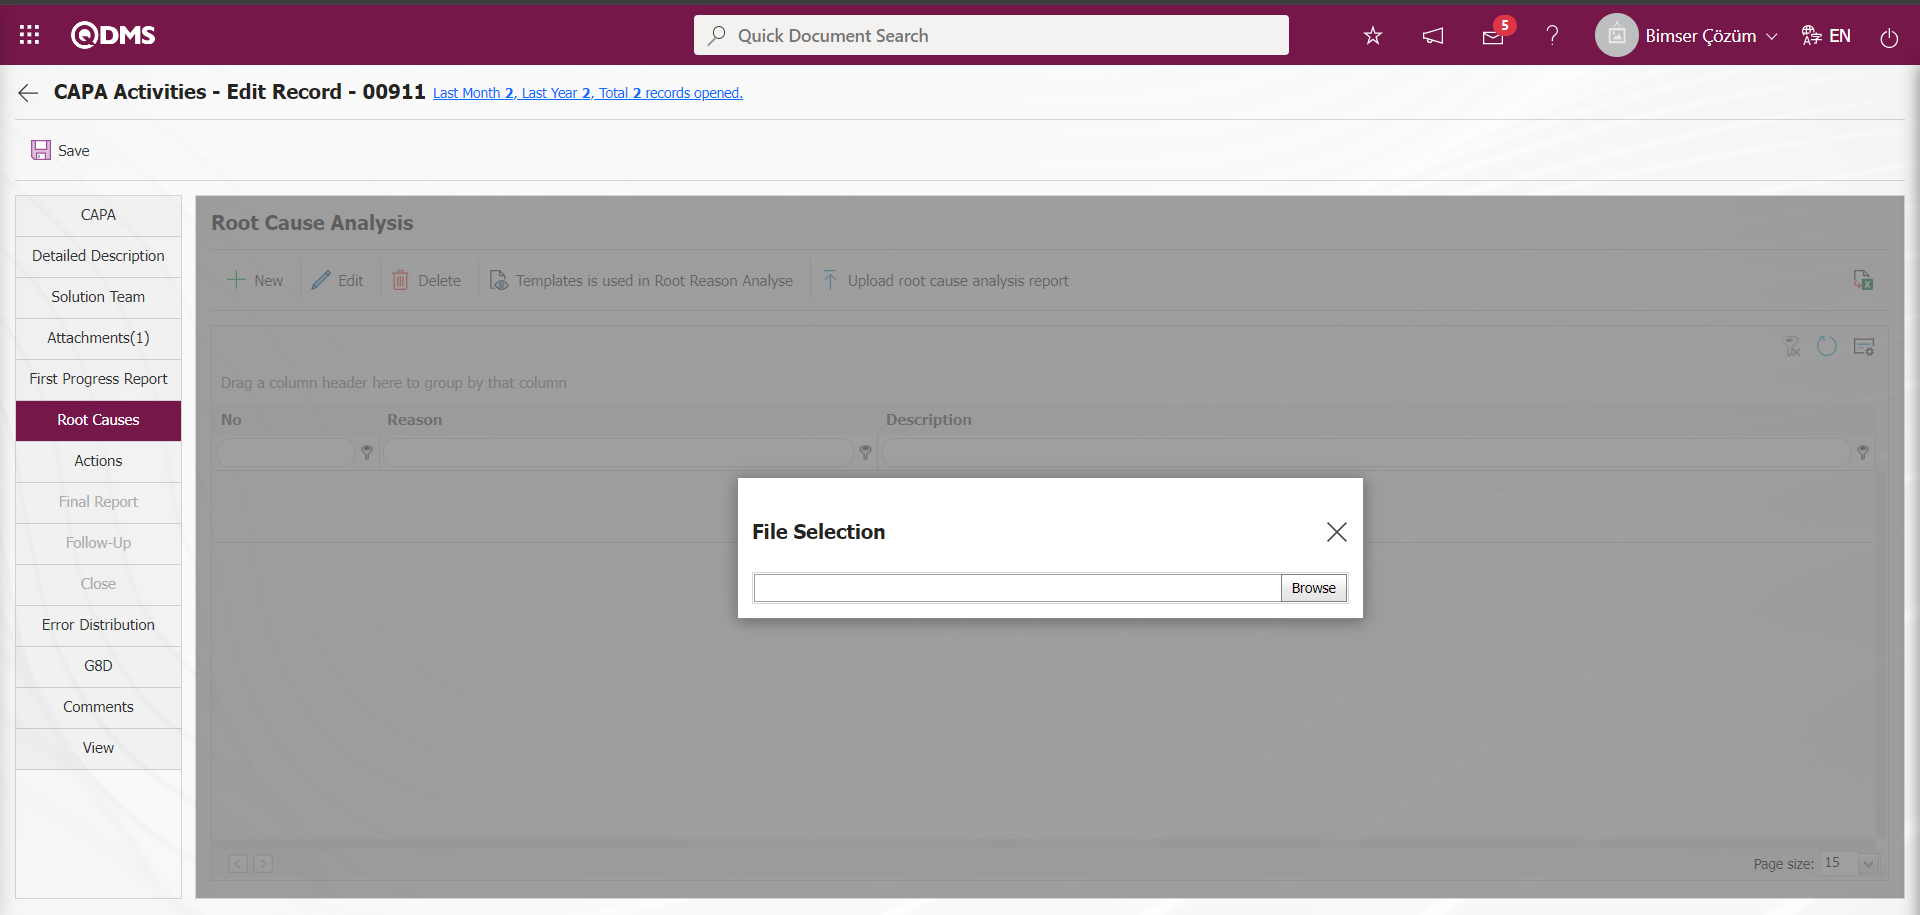
On the Select File screen, click the Browse button and select the downloaded Root Cause Analysis File on the computer and upload it.
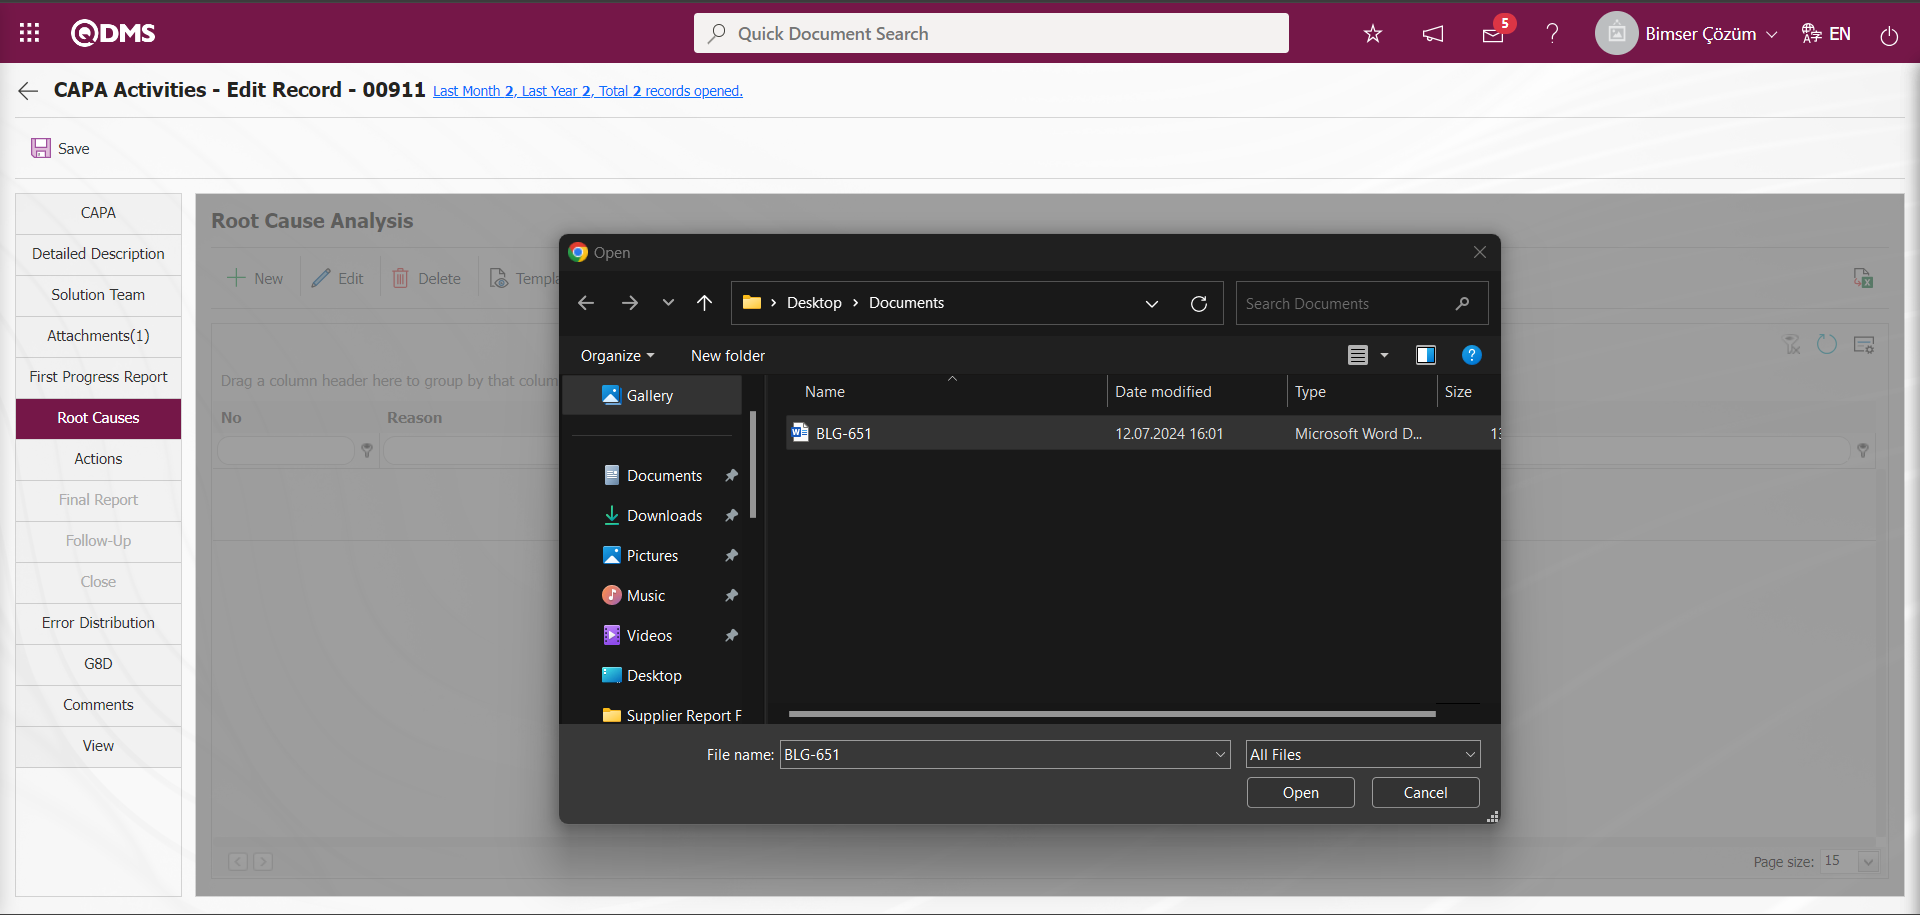
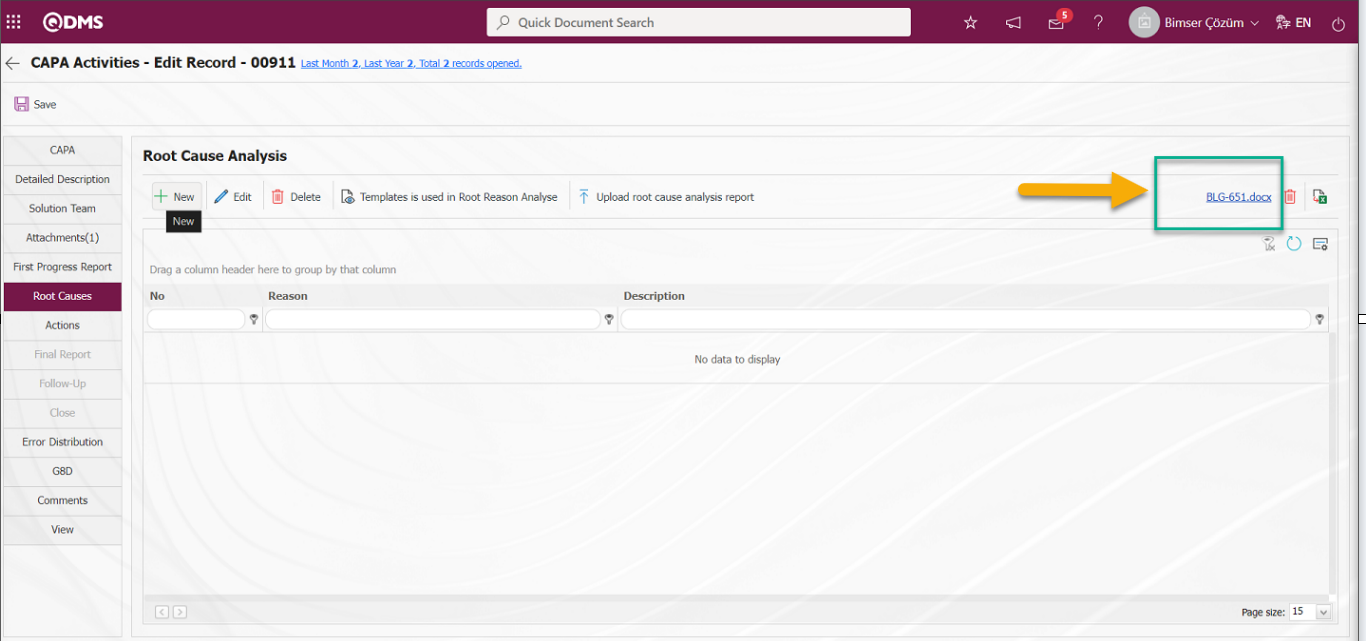
To define a new Root Cause in the Root Cause Analysis tab on the CAPA Activities - New Record screen, click the button to open the Root Cause Analysis screen.
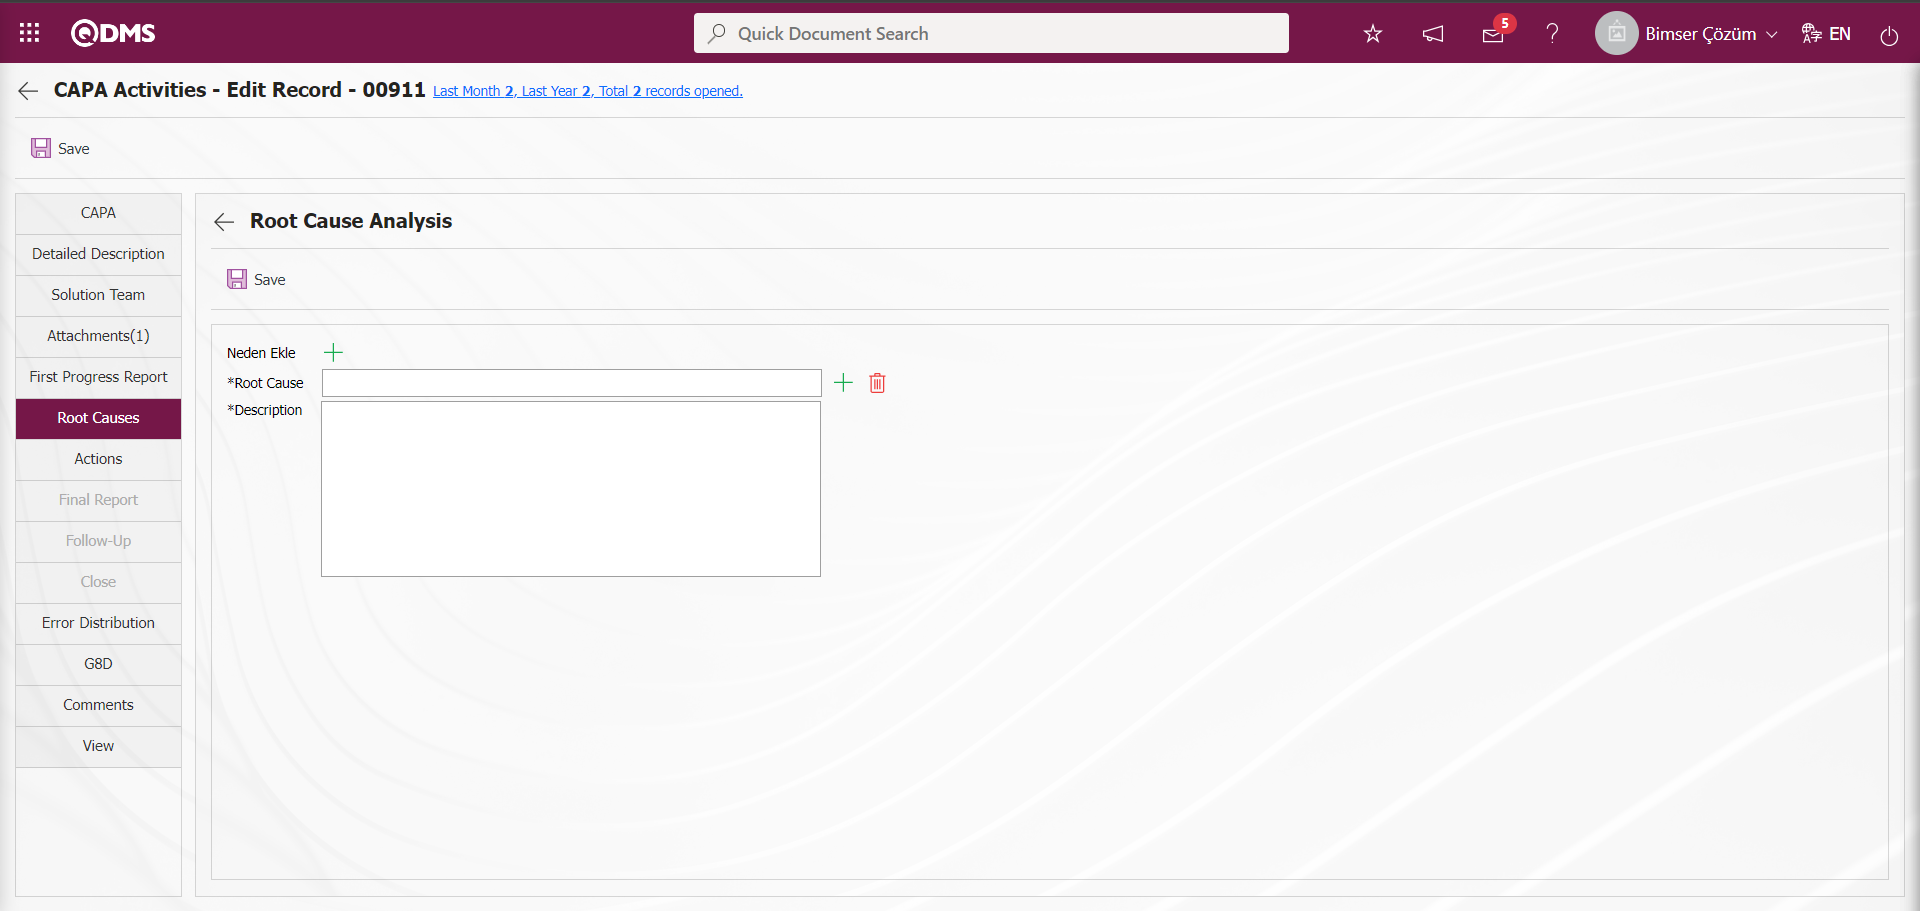
Define the relevant fields on the screen that opens:
Root Cause: This is the field where Root Cause information can be selected on the Root Cause Analysis screen. The selection is made from the Root Cause List defined in the System Infrastructure Definitions/CAPA/CAPA Root Cause Definition screen.
Description: This is the field where the Description information of the Root Cause is entered on the Root Cause Analysis screen.
Add Cause: This is the field where the cause addition operation is performed on the Root Cause Analysis screen. This field is used if detailed (cause-cause) root cause analysis is desired in the root cause identification tab in CAPA actions. It is the field displayed depending on the parameter. The parameter is activated by selecting “Yes” for parameter 155 in the CAPA module parameters.

After the parameter is activated, the Add Cause field is displayed and (cause-cause) Root cause analysis is performed. The minimum level of detailed Root cause analysis is determined according to the value entered in the parameter value of parameter 192 in the Corrective and Preventive Actions module parameters.
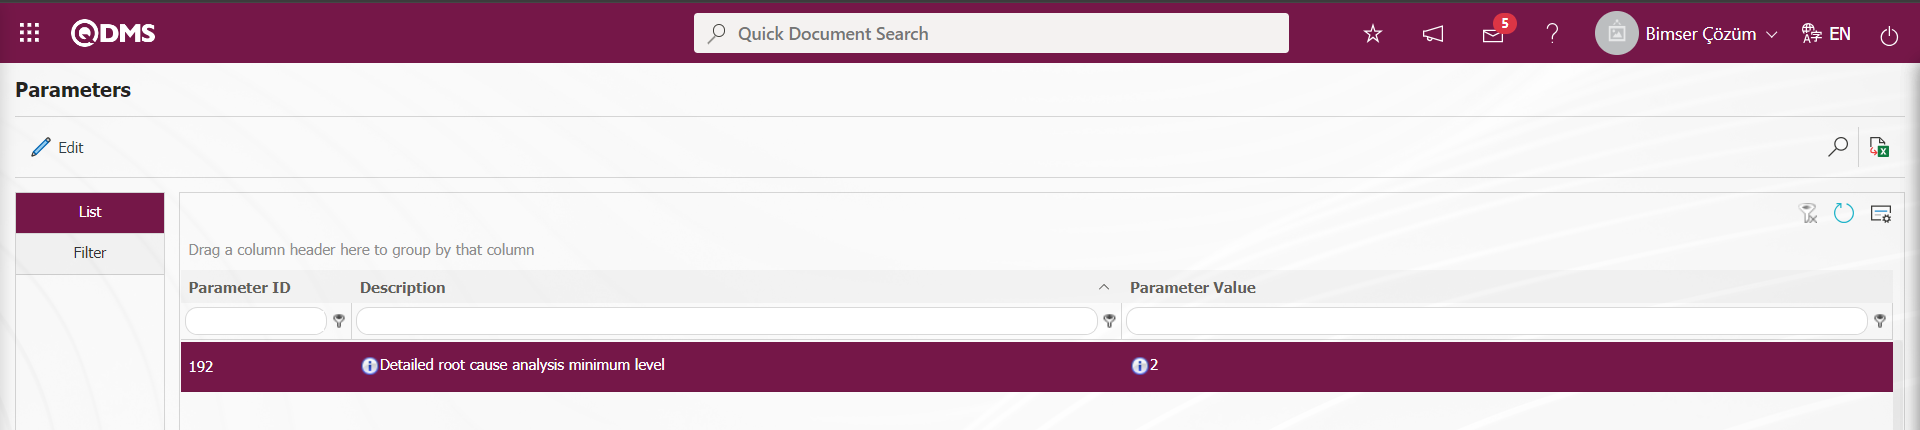
After filling in the required fields on the Root Cause Analysis screen, the root cause analysis is recorded by clicking the button in the upper left corner.
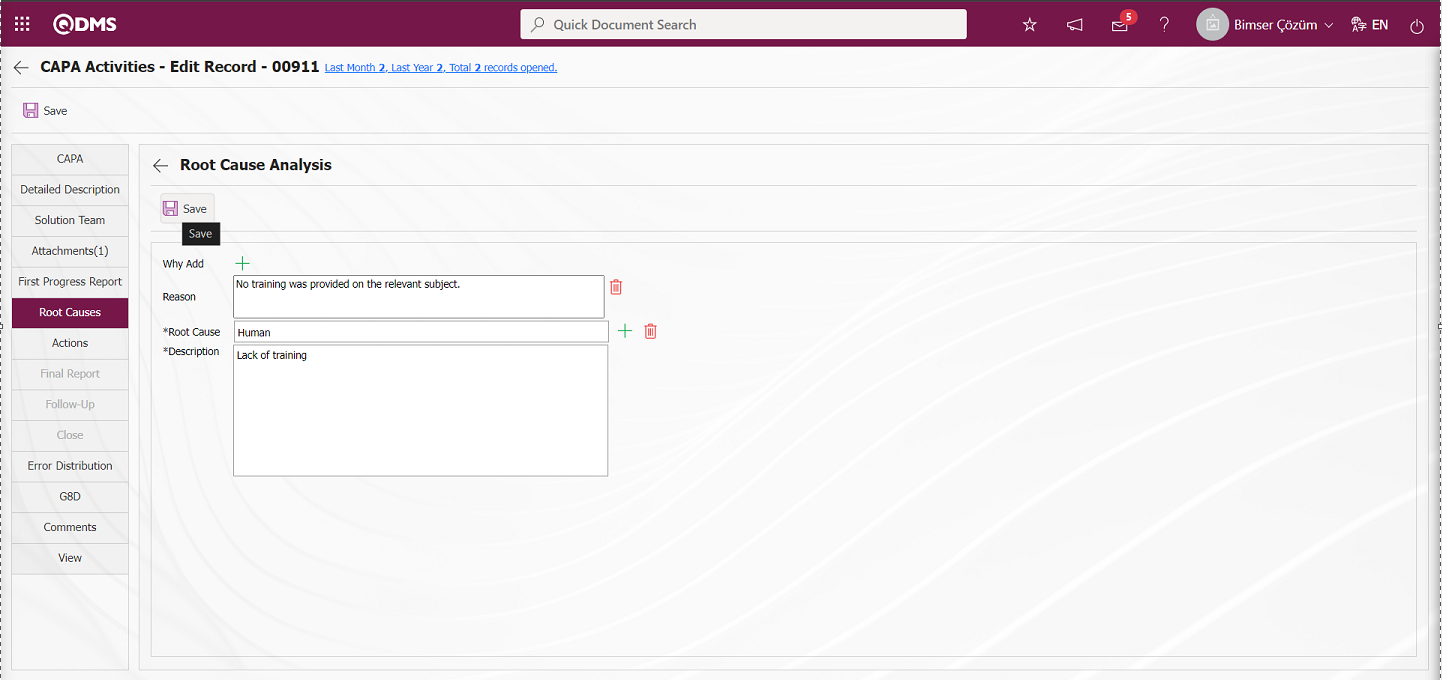
If the minimum level is defined as 2 in the parameter, the system gives a warning message when the root cause analysis level is below the minimum level.
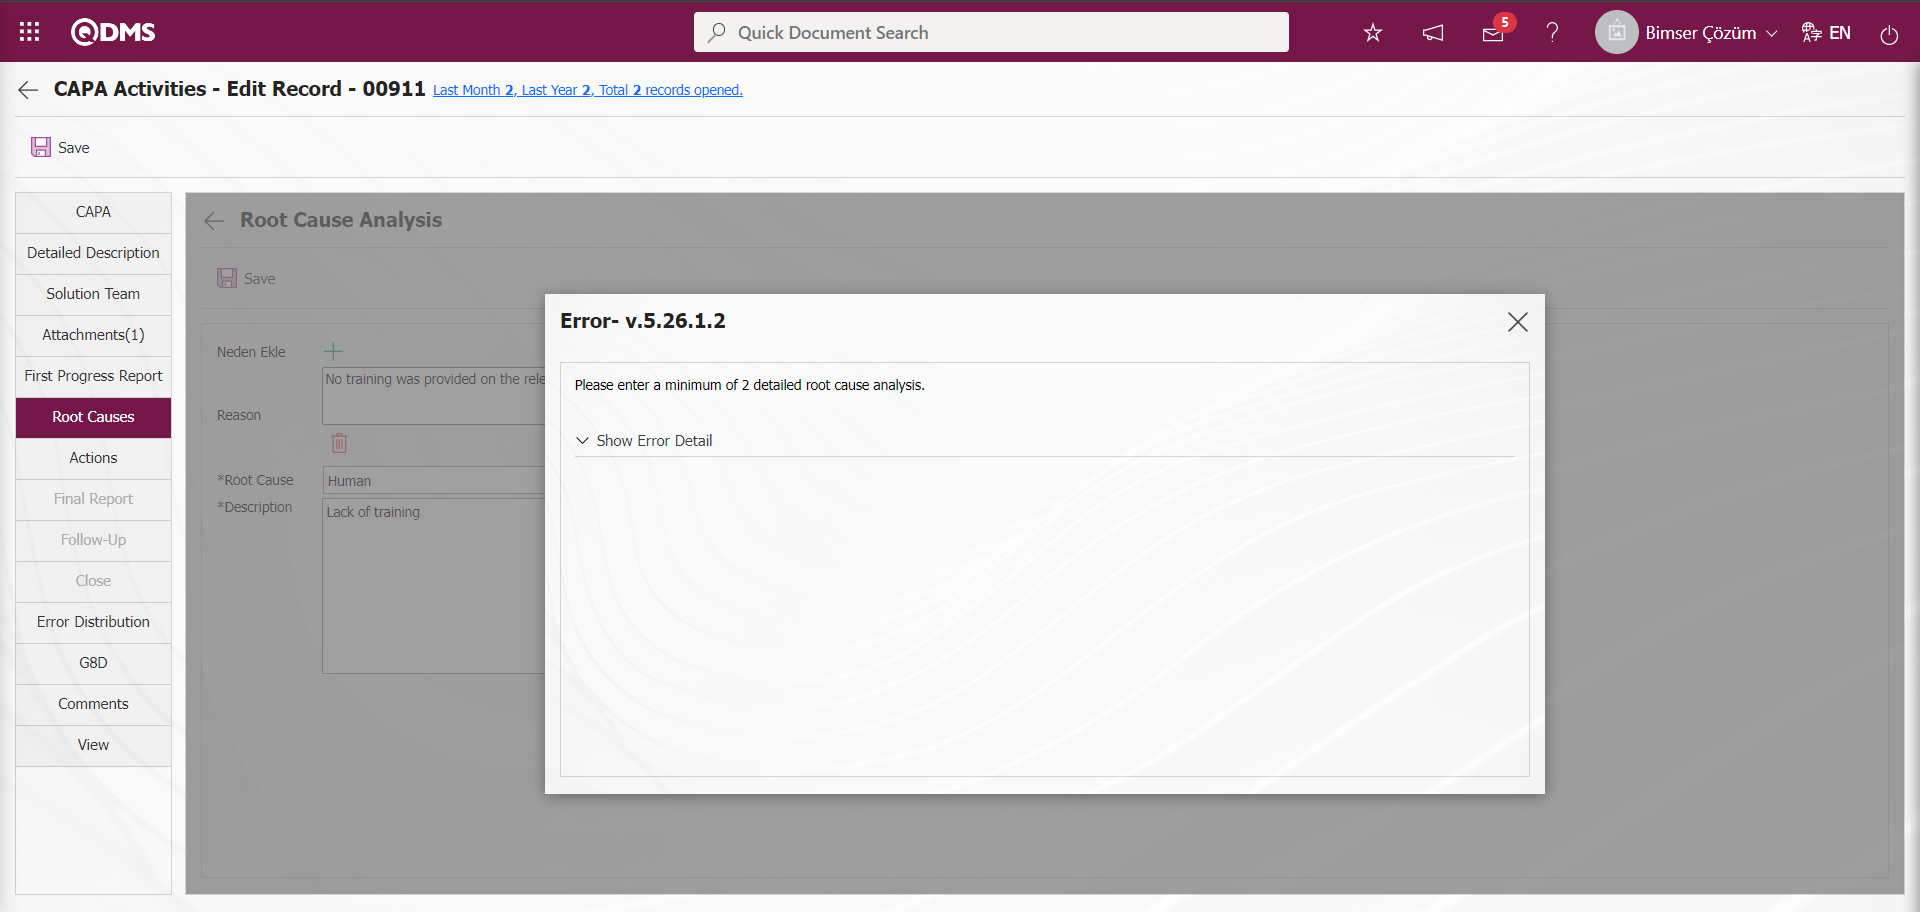
On the Root Cause Analysis screen, minimum detailed root cause analysis information is entered.
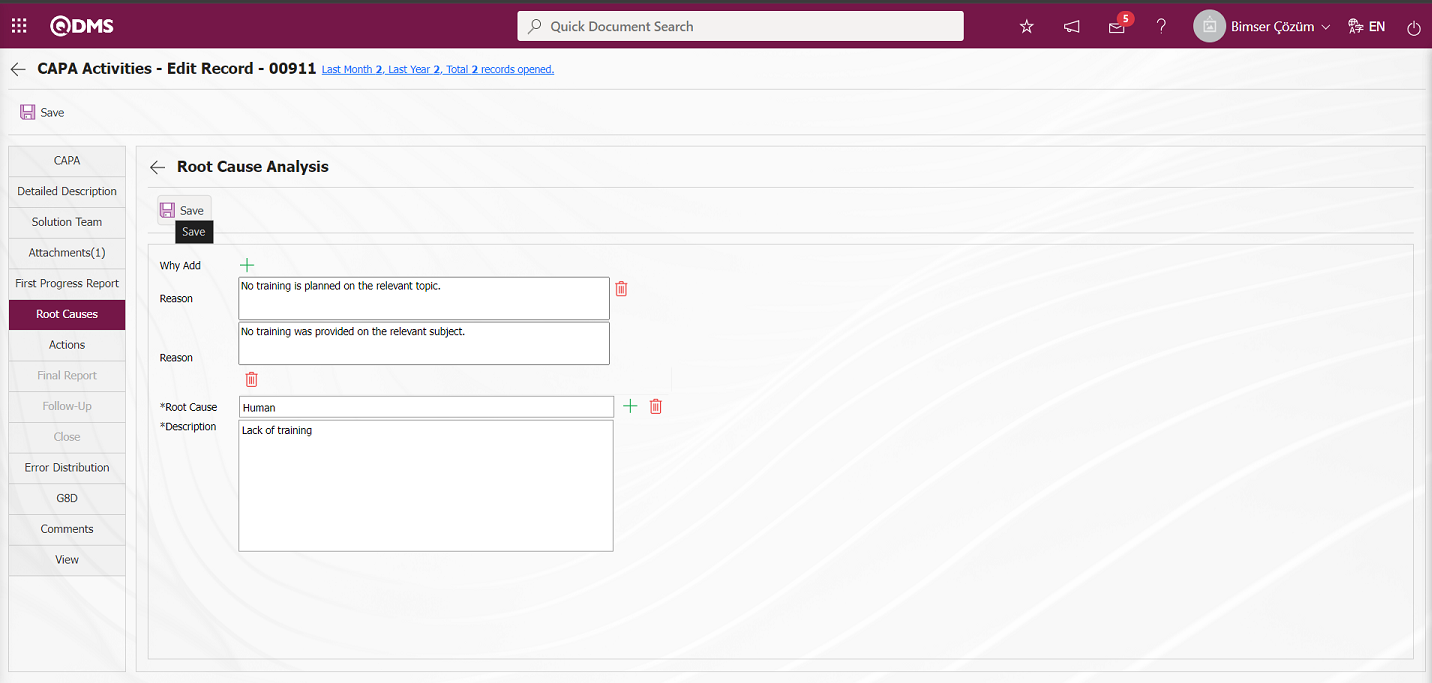
On the screen that opens, previously defined root causes are selected and description information is entered. Detailed cause analysis is made. Then, by clicking the  button, the root cause is saved and the CAPA record is established by determining which root causes occur and the relationship is established. Multiple selection can be made by selecting more than one root cause.
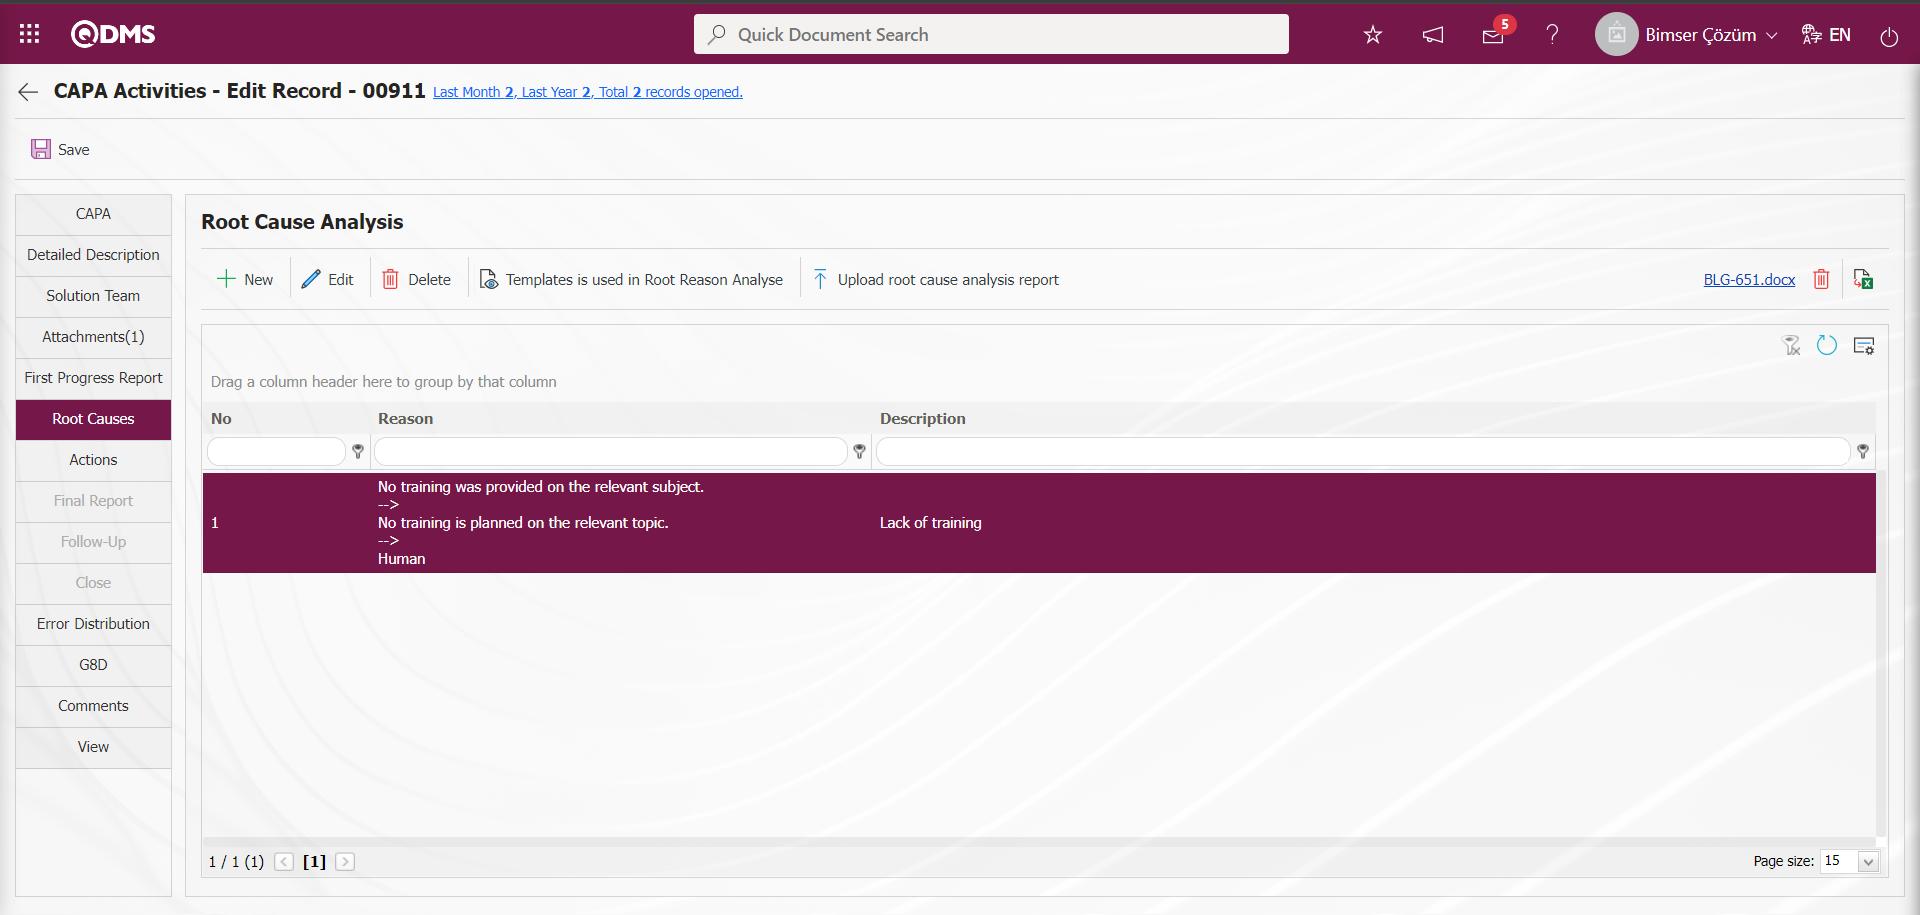
The parameter is activated by selecting “Yes” for parameter 151 in CAPA Module. After the parameter is activated, only the obligation for the team leader to perform root cause analysis is brought in the system.

Important Note: There are 2 save buttons on the screen. The bottom save button saves the root cause. If the upper save button is clicked, the operations performed up to this stage are saved as a CAPA record without saving the root cause.
6.2.1.7. Actions
Team Leader and Team members in the solution team After the root causes are identified, the process is to plan the Actions that will eliminate these root causes. This is the tab where the planning of the Actions that will eliminate the root causes is done. People in the solution team The Team Leader and the Team make Action planning in this tab. It continues with the planning of CAPA Actions. Go to the Actions tab. Here, actions to eliminate the root causes to be created related to CAPA are planned and assigned as a job. While action planning is being done, what the action will be, the person who will take the action and the assignment of the responsible person are also done. The actions taken at this stage are actions outside the scope of the Action Module.
The parameter value of parameter 147 in the CAPA module parameters is activated by selecting “Yes”.
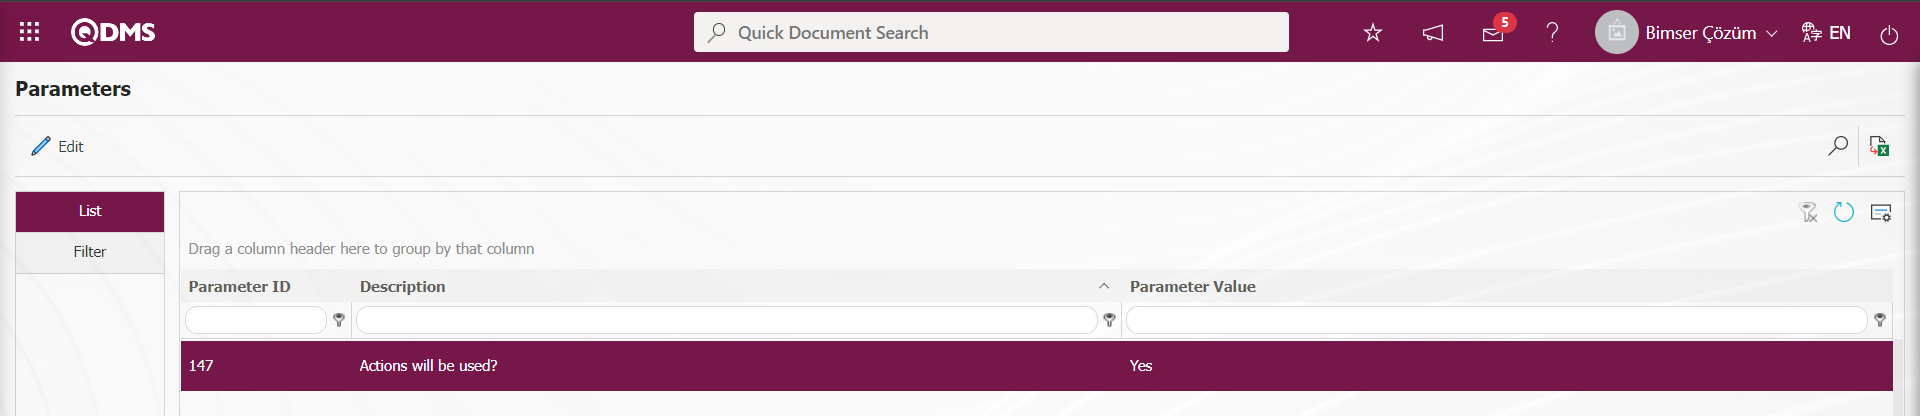
After the parameter is activated, the Actions tab is displayed on the CAPA Activities - Edit Record** screen and the Action planning process related to the CAPA record is performed.
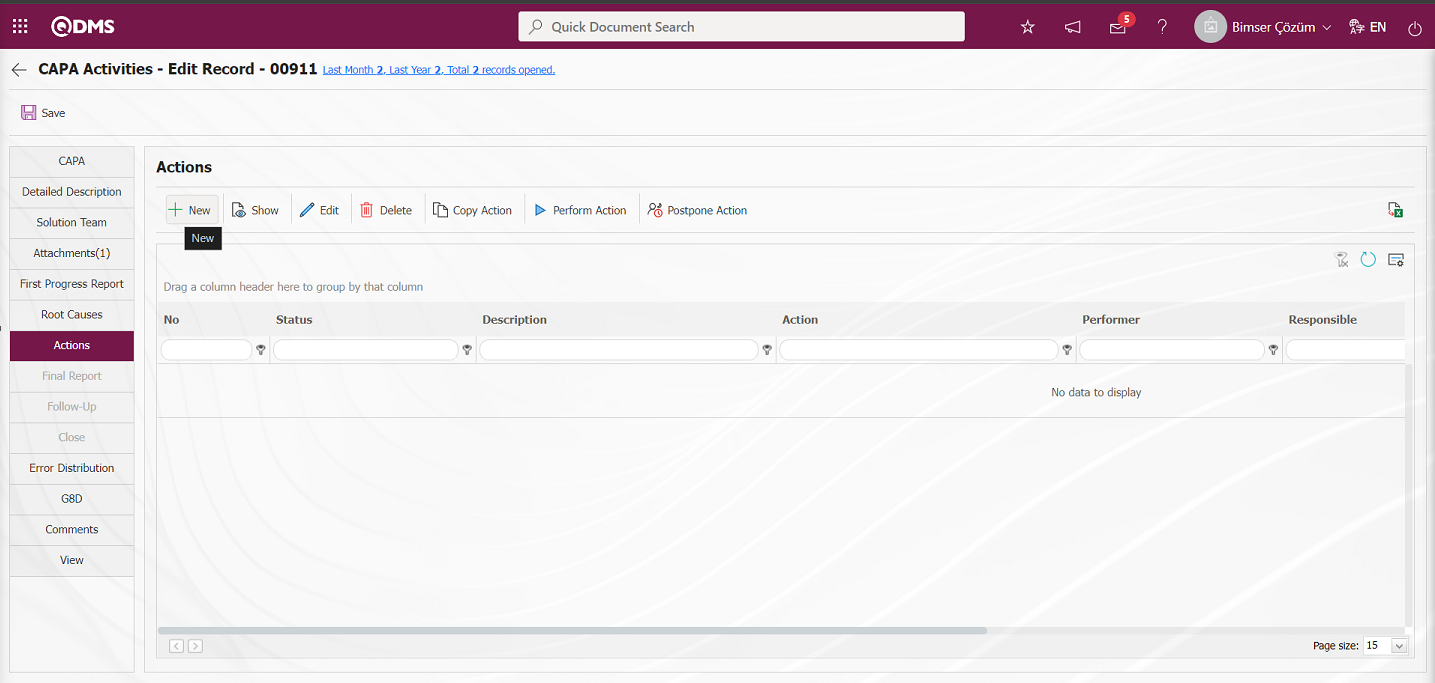
With the help of the buttons on the screen;
 : Adding a new action is done.
 : The content of the action information selected in the list is displayed.
 : Changes/edits/updates are made on the Action information selected in the list.
 : Copy the Action information selected in the list.
 : Realization of the Action selected in the list is performed.
 : Delay the deadline of the planned action selected in the list. It is the button displayed depending on the parameter. The parameter value of parameter 23 of the CAPA module parameters should be activated by selecting “Yes”.

After the parameter is activated , the button is displayed in the Actions tab on the CAPA Activities - Edit Record screen and the Action delay operation is performed by clicking this button.
: The data is transferred to Excel. (The report of the Action list in the list on the Actions screen is taken in Excel format).
: The data remaining in the filter fields in the grid where the search criteria on the menu screens are searched are cleaned.
: The menu screen is restored to its default settings.
: User-based designing is done on the menu screen with the show-hide feature, that is, the hiding feature of the fields corresponding to the columns on the menu screens.
To add a new Action in the Actions tab on the CAPA Activities - Edit Record screen, click on the button in the upper left corner of the screen to open the Action Definition / New Record screen.

Related fields are defined on the screen that opens:
Responsible: This is the field where the responsible person information of the action can be selected in the Personnel list defined in the system opened by clicking the  (Select) button on the Actions-New Record screen.
Action Performer: This is the field where the person who will do the work of the action on the Actions-New Registration screen can be selected from the Personnel list defined in the system that opens by clicking the (Select) button.
Action: This is the field where the action information is entered in the Actions Tab.
Planned End Date: It is the field where the planned end date of the action is determined in the calendar field on the Actions-New Record screen.
Management System Items Number: This is the field where the relevant Standard Item Number associated with the Action on the Actions-New Registration screen can be selected from the list of Item Numbers defined in the system that opens by clicking the (Add) button.
Document: It is the field where the relevant Document information can be selected from the Document list defined in the system opened by clicking the (Select) button on the Actions-New Record screen.
Root Reason: This is the field where the related root cause information is associated with the root cause or root causes selected as the root cause in the Root Cause tab opened by clicking the (Add) button on the Actions-New Record screen.
Documents to be revised: This is the field where the document to be revised on the Actions-New Record screen is selected in the Document list opened by clicking the (Add) button.
The parameter is activated by selecting the parameter value “Yes” for parameter 183 in the CAPA module parameters.
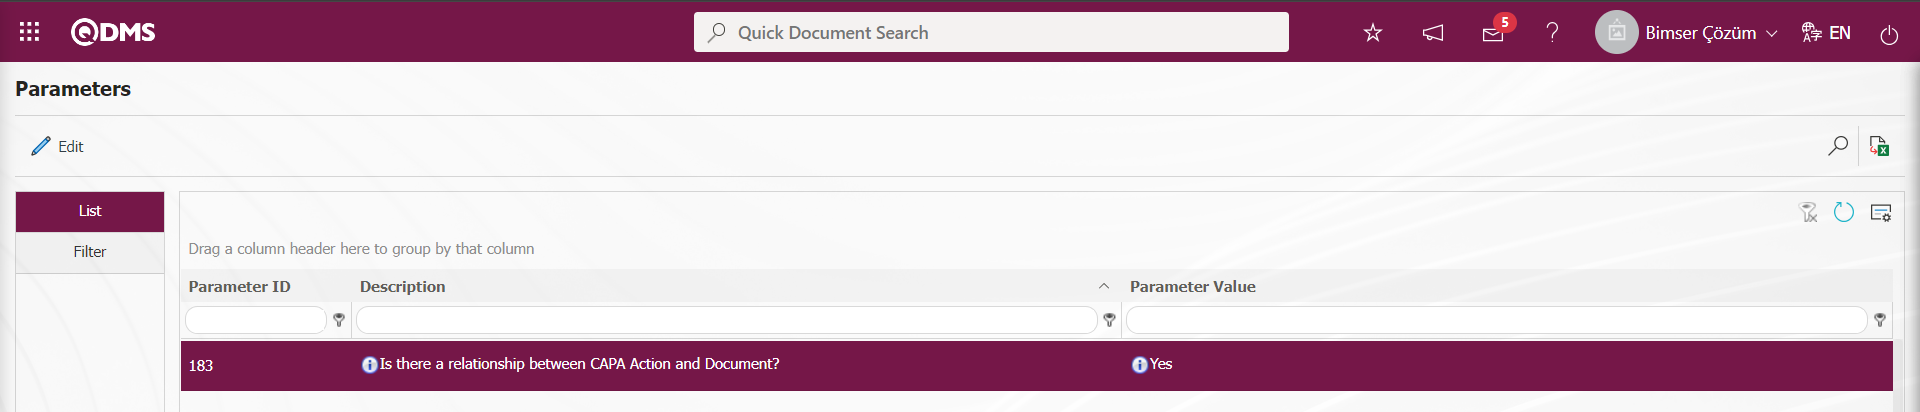
After the parameter is activated, a revision request related to the document is sent in the Document Management Module. The revision process is initiated in the Document Management Module by clicking on the Document Revision Requests task. The revision process is sent to the users in the document distribution matrix as a reading task by passing through the opinion, control and approval stages, if any, in the document module. After these stages are done, it is informed that the document is published in the work done section in the Actions tab. If the document revision request is not made, the system does not allow the realization of the action. A warning message is given on the system side. After the revision process is done in the document and the document is published, the Action realization process is performed in the Actions tab in the CAPA Record.
Additional Files: At this stage in the Actions tab, additional files such as evidence documents, photos, etc. related to this Action are uploaded with the help of the buttons.
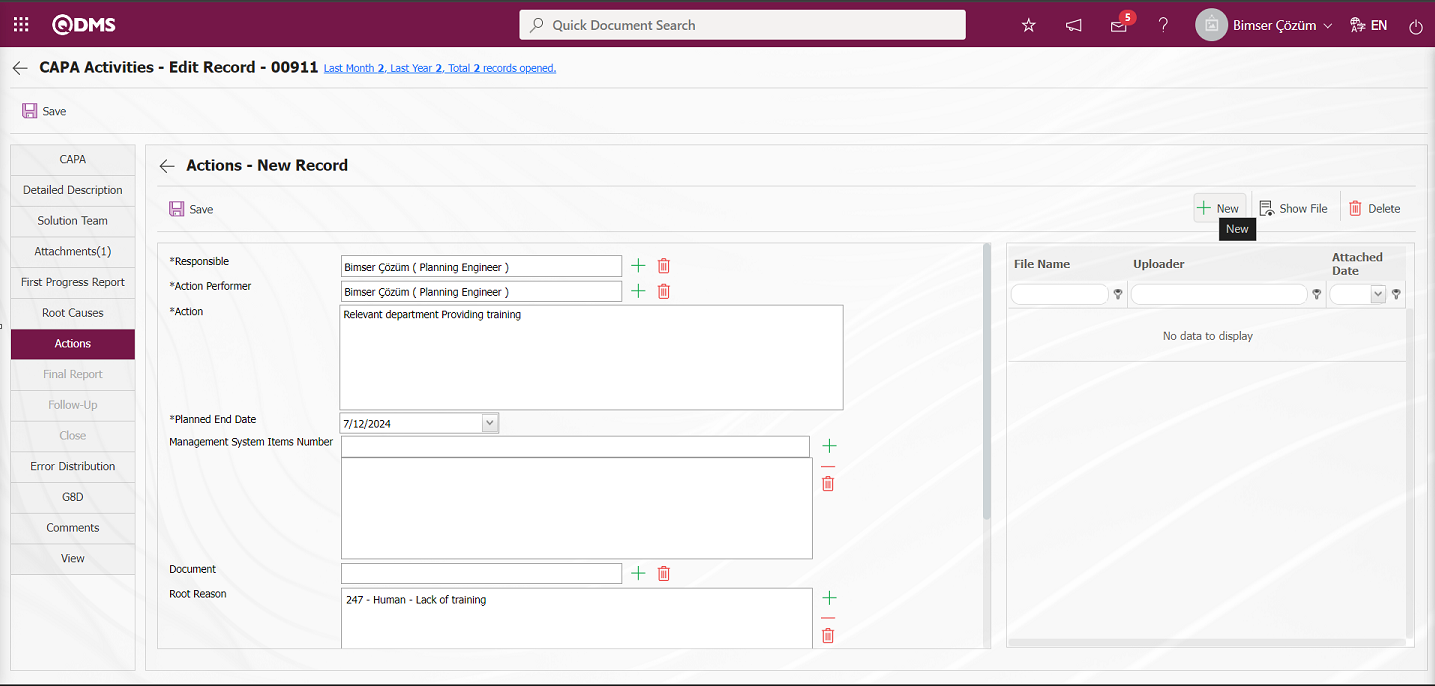
With the help of the buttons on the screen;
: The additional file is uploaded to the system.
: The uploaded additional file information is displayed.
: Uploaded attachment file information is deleted
 button to add an additional file to the CAPA record at the Actions stage. Multiple additional files can be added.

On the Actions-New Record screen, the person responsible for the action and the person who will take the action are selected from the list, action information is entered, the planned end date of the action is determined, standard item numbers related to the action can be added, reference documents and root causes related to the action are added. Again, if desired, additional files, documents, etc. related to the action can be added from the Additional Files section.
After filling in the required fields on the Actions - New Record screen, the action is planned by clicking the button in the upper left corner and the action is sent to the approval person for approval. If a flow has been set up for CAPA Action Opening approval, it is sent to the approval of the relevant role. If the flow is not set up, it is sent to the person who will do it for realization.
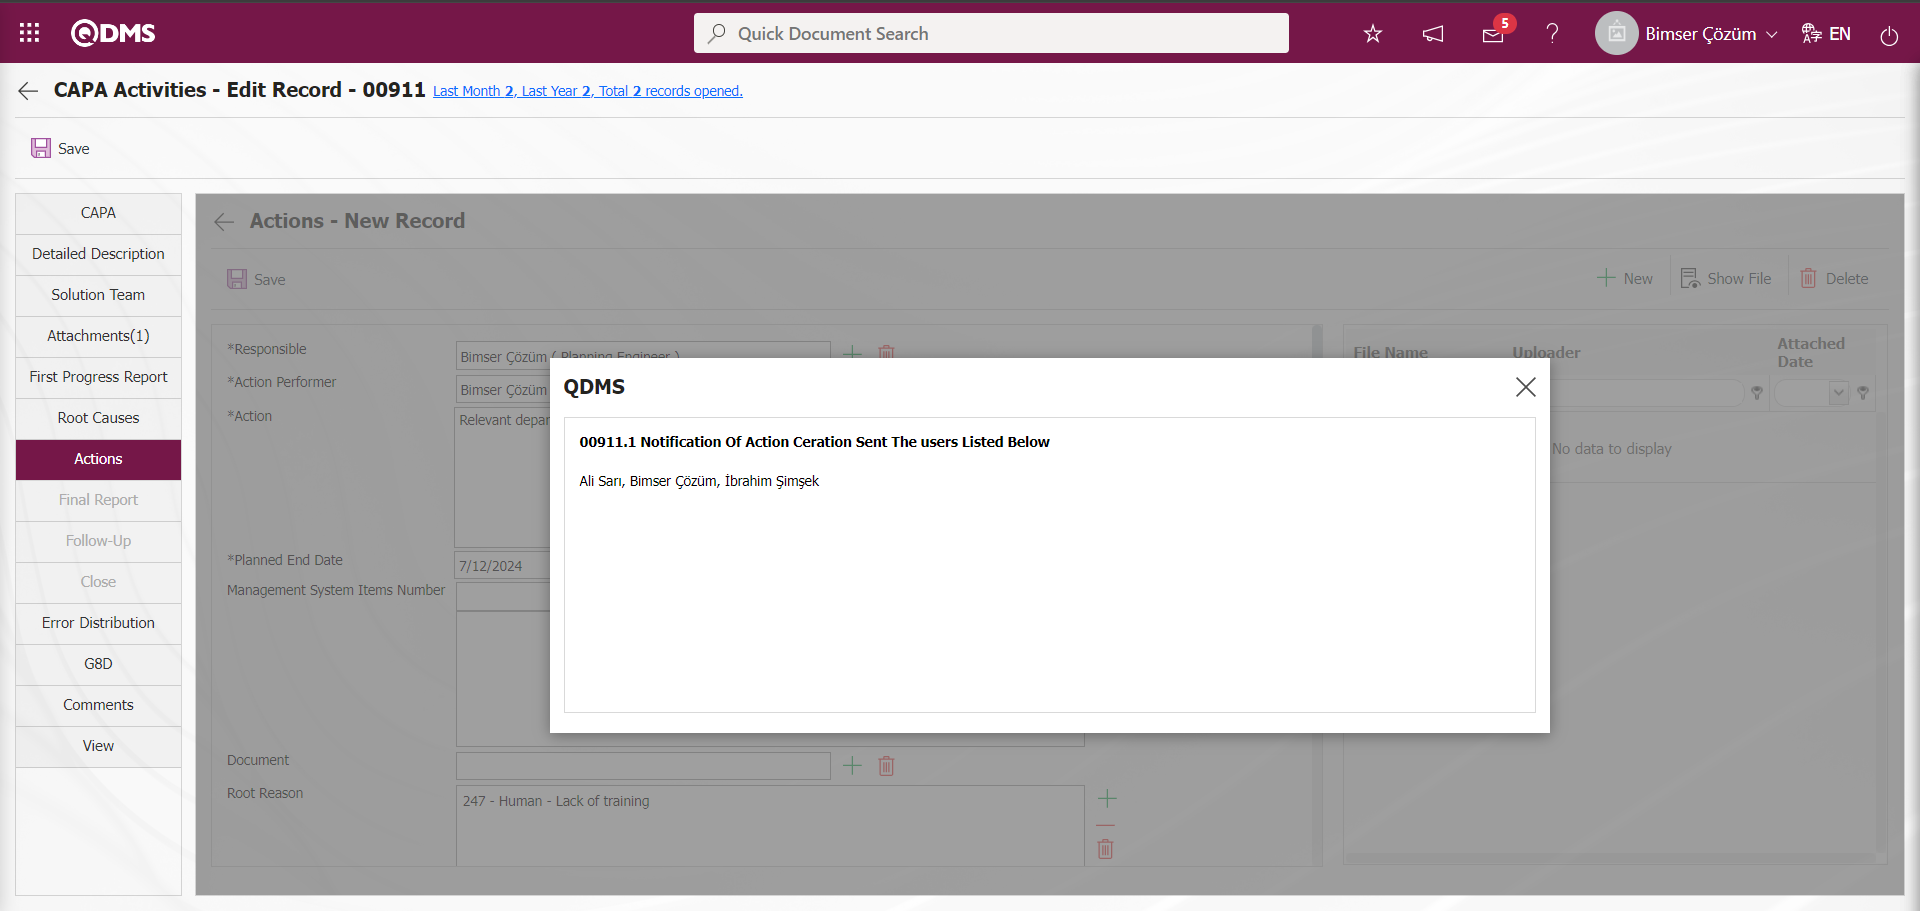
6.2.1.9. Actions to be performed
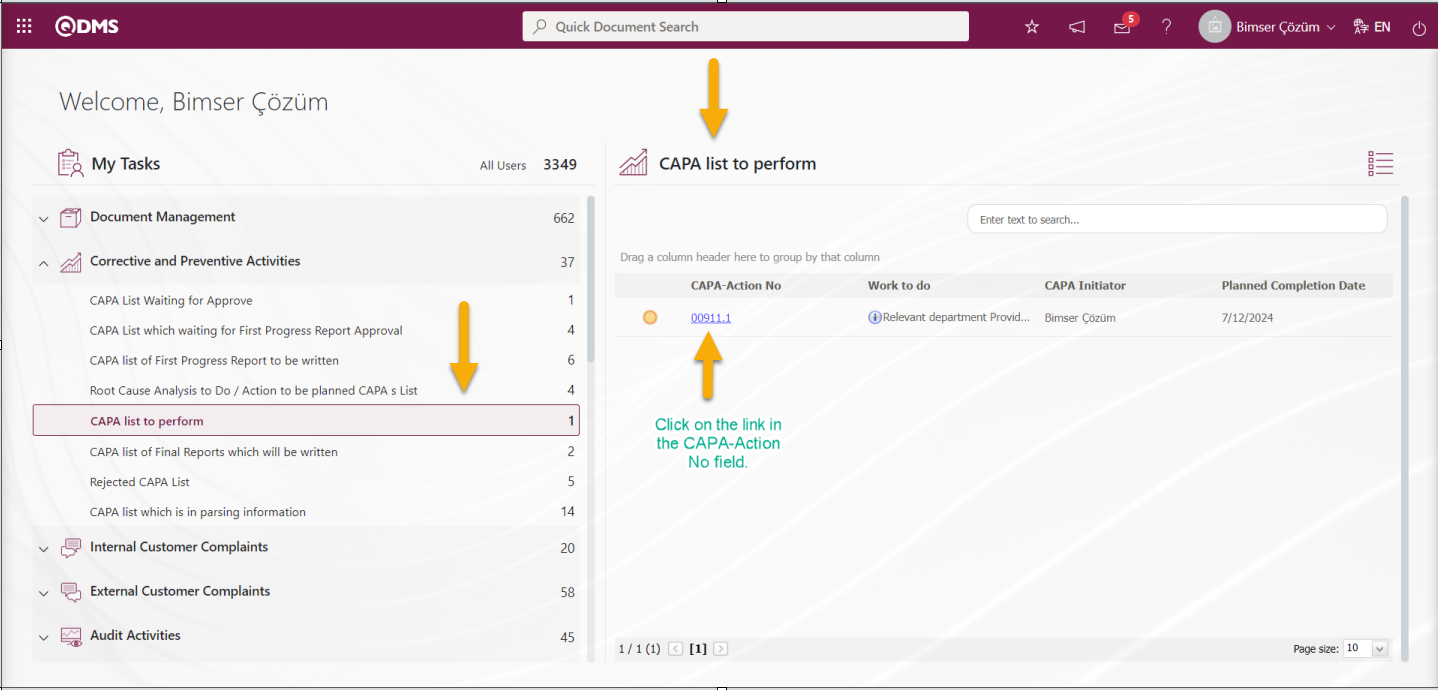
Scroll down to “CAPA list to perform” and click on CAPA-Action No. The CAPA information screen is accessed.
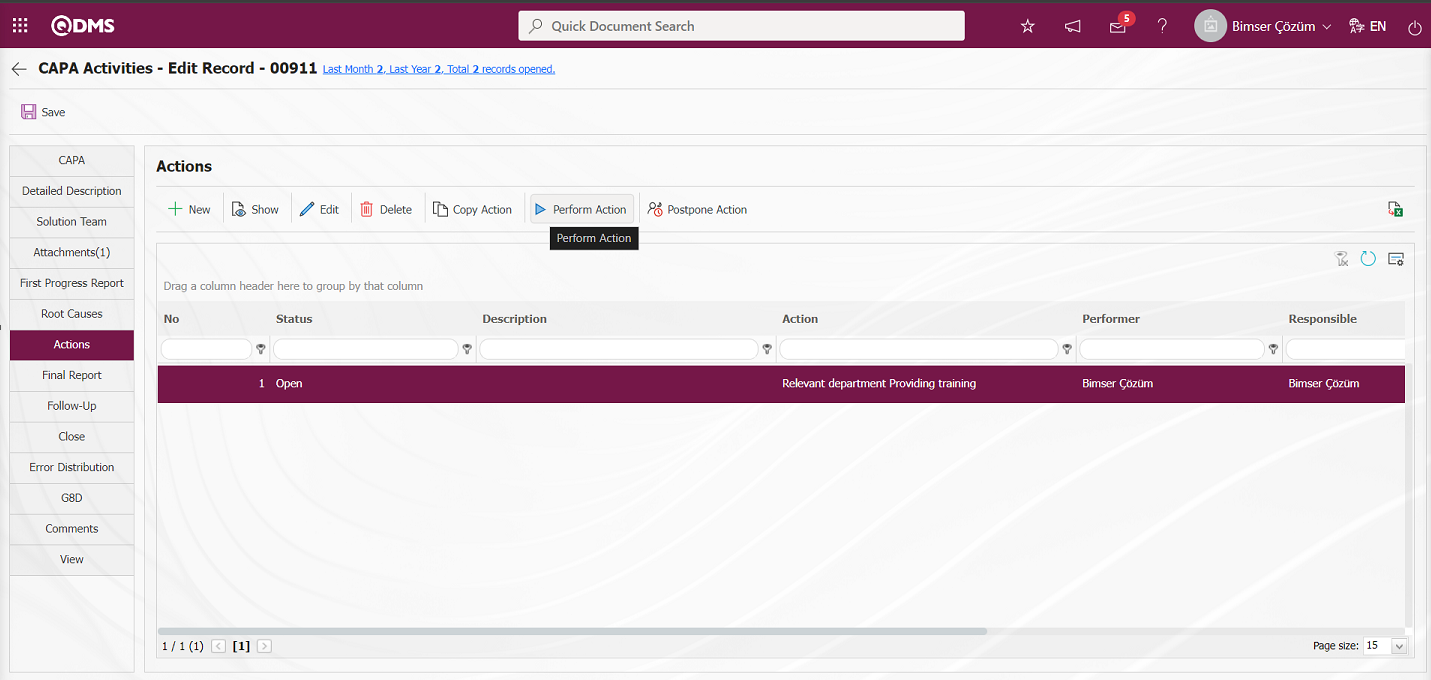
With the help of the buttons on the screen;
: Adding a new action is done.
 : The content of the action information selected in the list is displayed.
 : Changes/edits/updates are made on the Action information selected in the list.
 : Copy the Action information selected in the list.
 : Performing the action selected in the list.
 : Delay the deadline of the planned action selected in the list.
: Data is exported to Excel. (The report of the Action list in the list on the Actions screen is taken in Excel format).
 : The data remaining in the filter fields in the grid where the search criteria search operation on the menu screens is performed is cleaned.
: The menu screen is restored to its default settings.
 : User-based designing is done on the menu screen with the show-hide feature, that is, the hiding feature of the fields corresponding to the columns on the menu screens.
On the CAPA Activities - Edit Record - screen, click the button on the Actions tab.
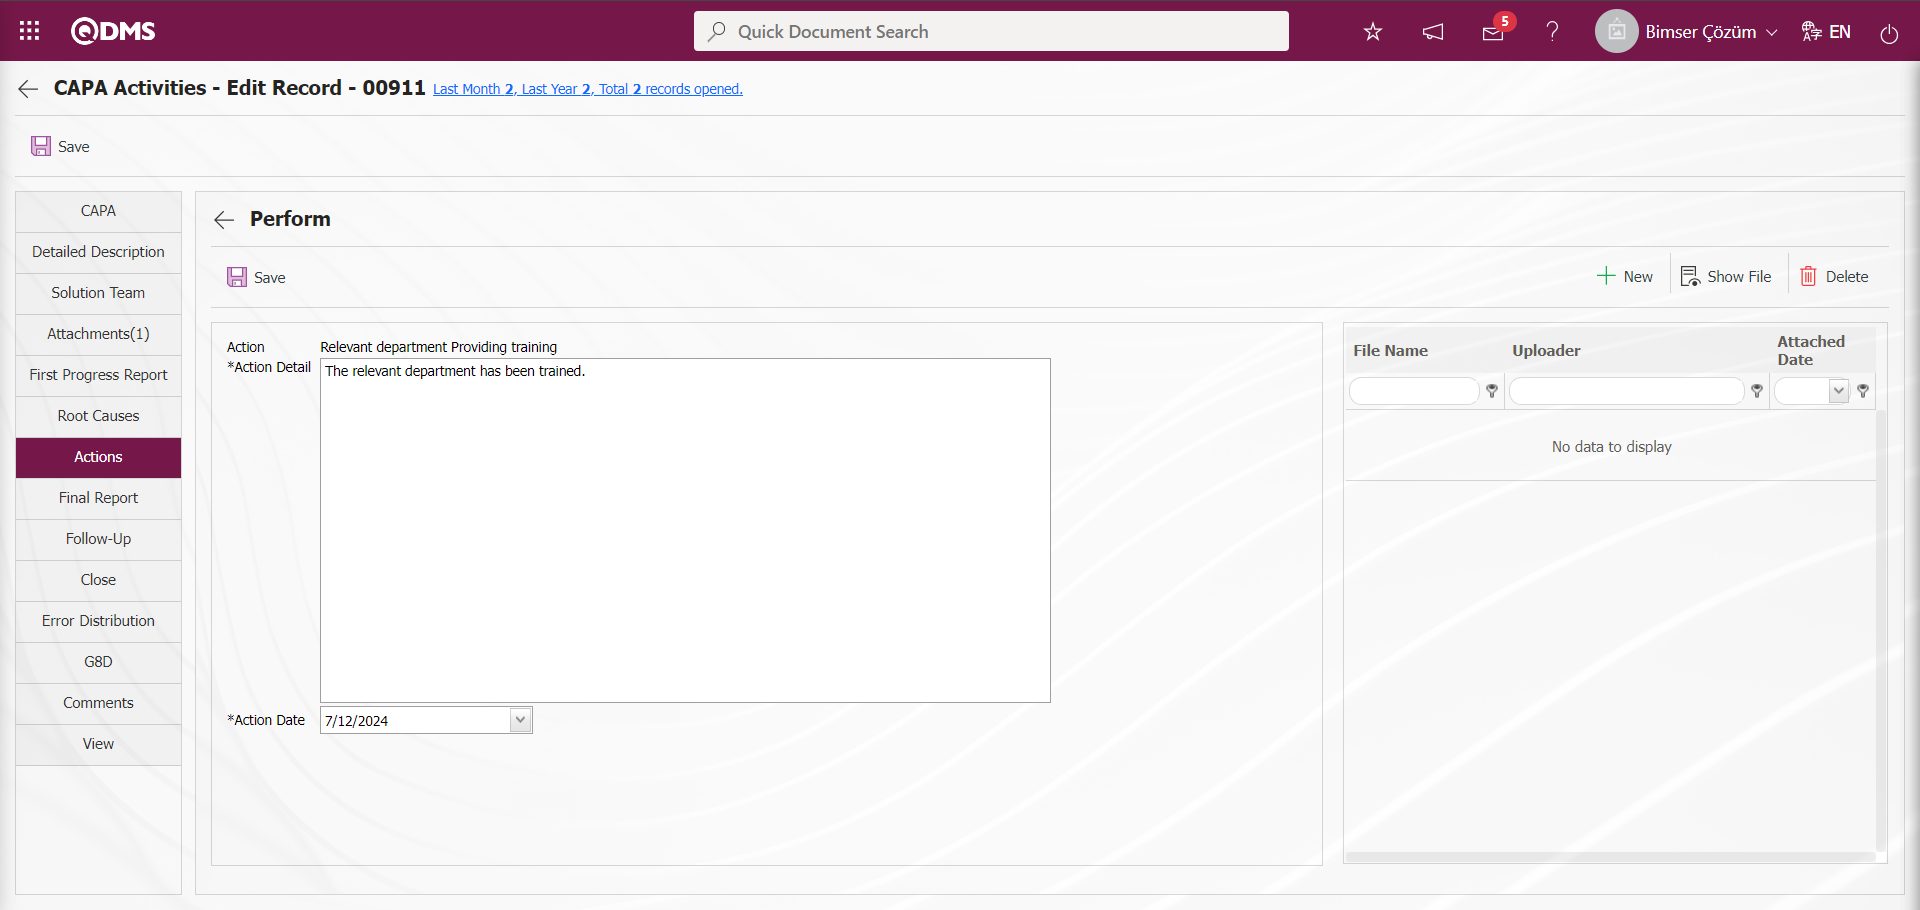
Related fields are defined on the screen that opens:
Action Detail: This is the field where the job description information is entered in the actions perform screen.
Action Date: It is the field where the Action Realization Date is determined in the Actions perform screen.
Additional Files: Actions perform At this stage on the screen, if any, additional file uploading process such as evidence documents, photographs related to this Action is done with the help of the buttons.
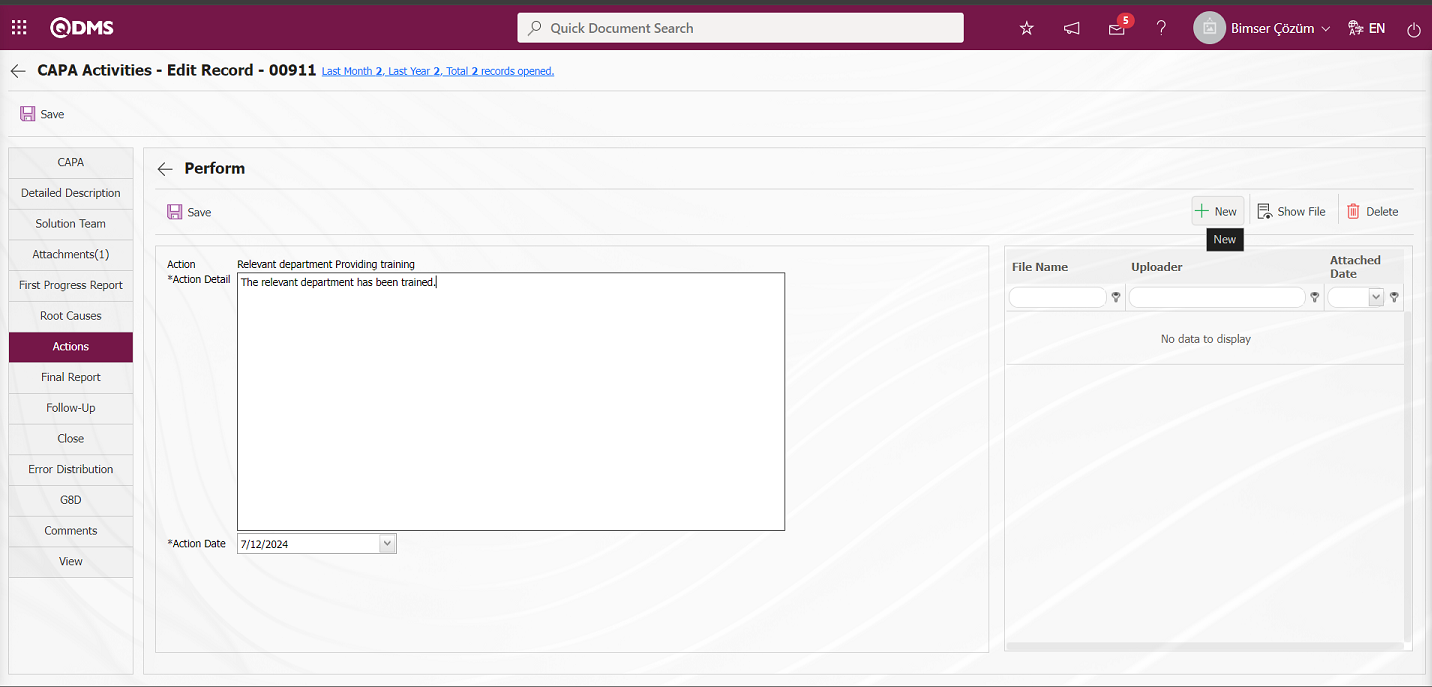
With the help of the buttons on the screen;
: The additional file is uploaded to the system.
: The uploaded additional file information is displayed.
: Uploaded attachment file information is deleted
button to add an additional file to the CAPA record at the Actions stage. Multiple attachment files can be added.
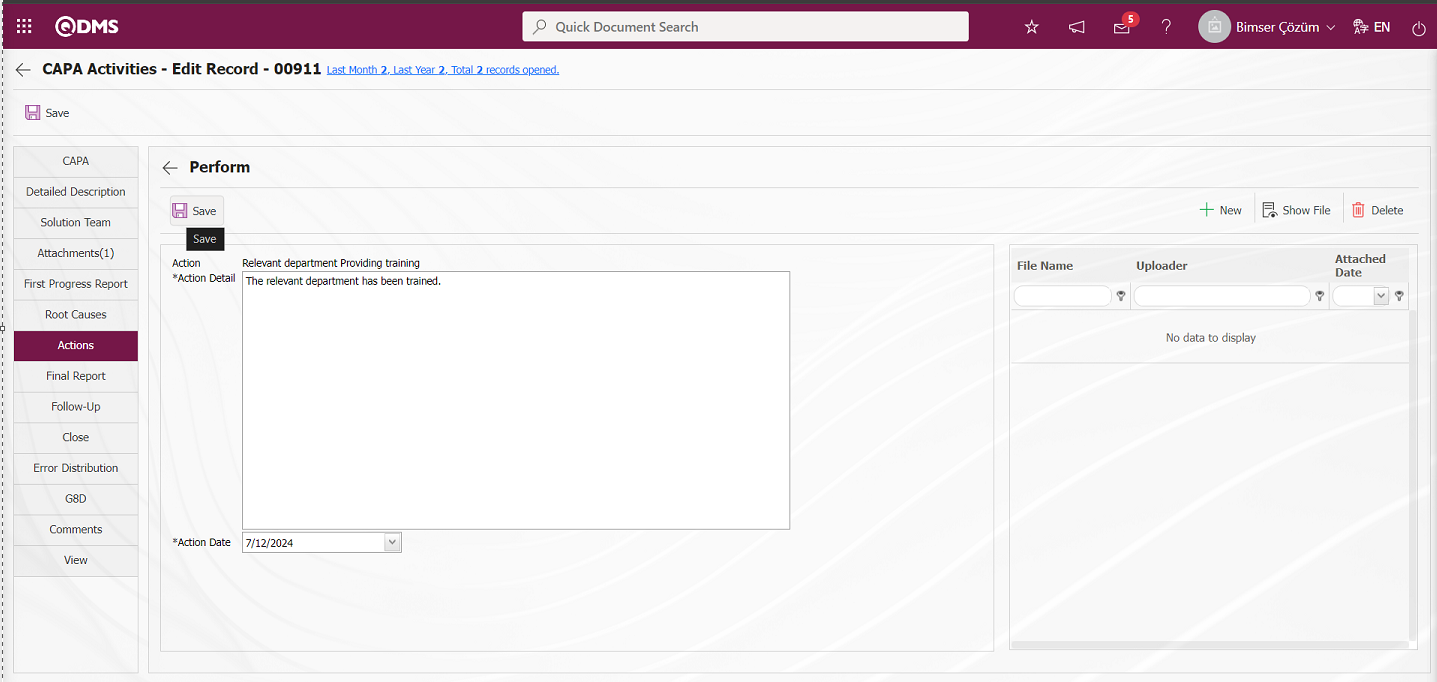
On the Action Perform** screen, the execution information and execution date of the action are entered. In addition, if desired, additional files can be added to the perform stage of the action. After the work done and the additional file, if any, is added, the action is realized by clicking the  button in the upper left corner after filling in the required fields. If a flow has been set up for CAPA Actions waiting for realization approval, it is sent to the approval of the relevant role. If the approval is not set up, it is sent to the Pending Work of the Team Leader / Team member to write a final report.
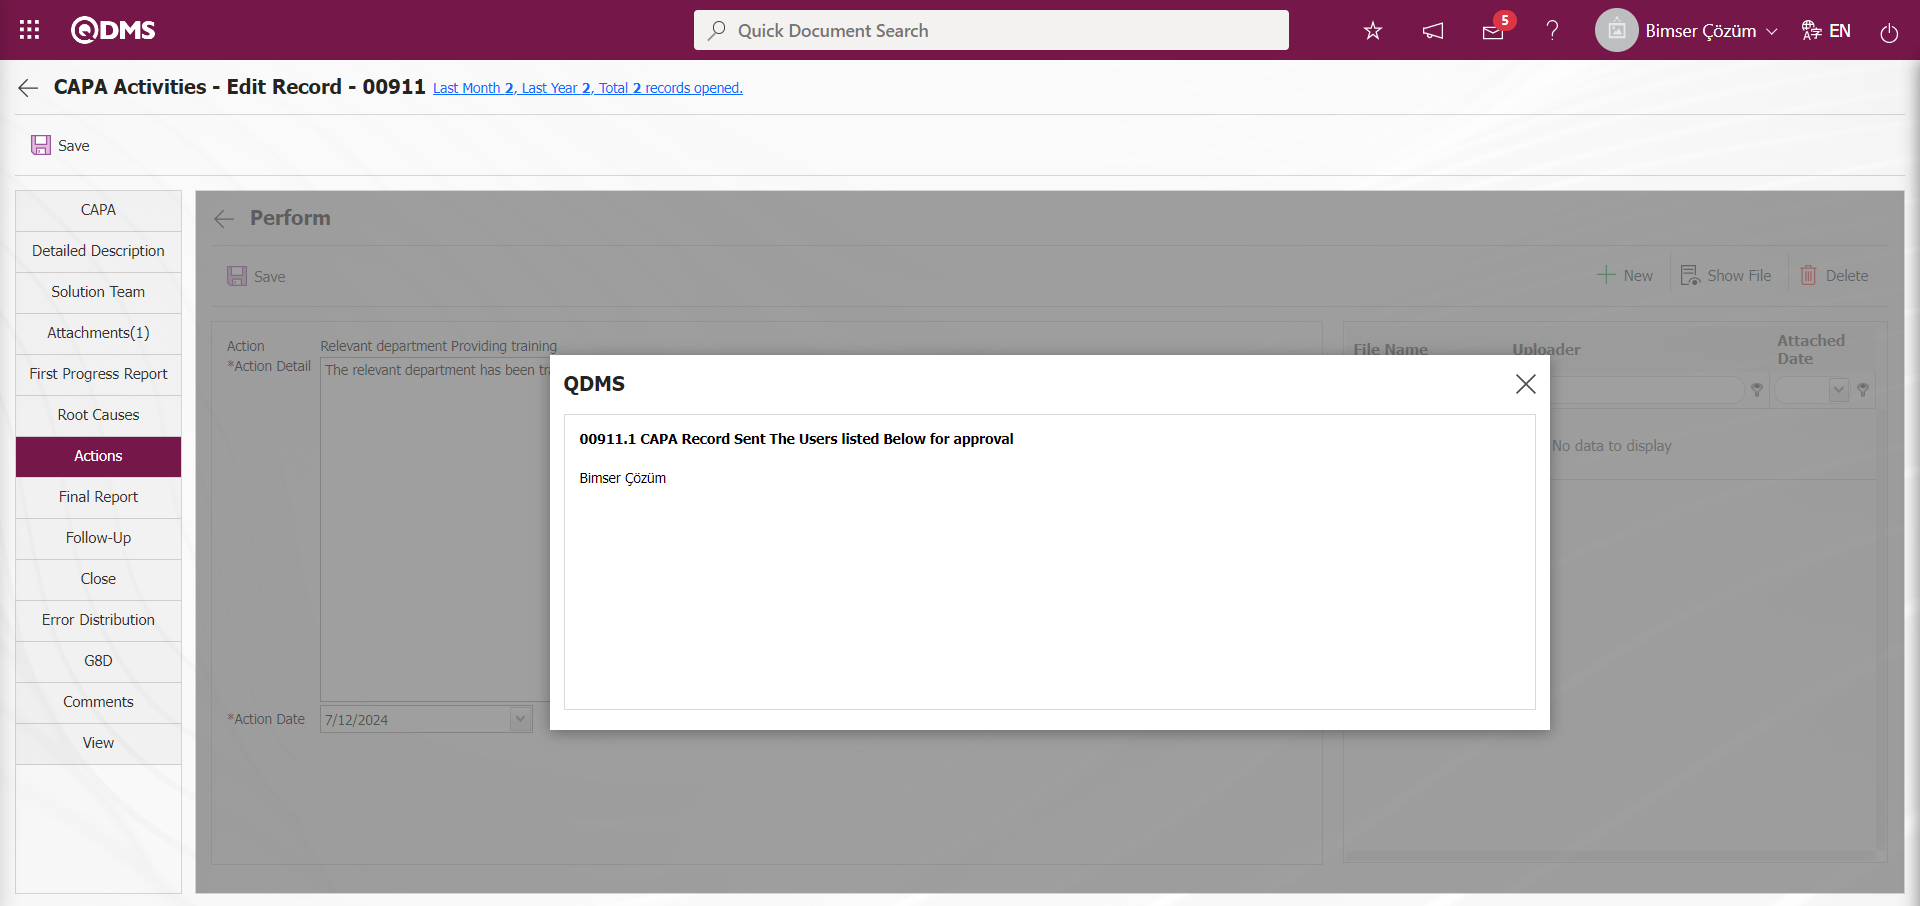
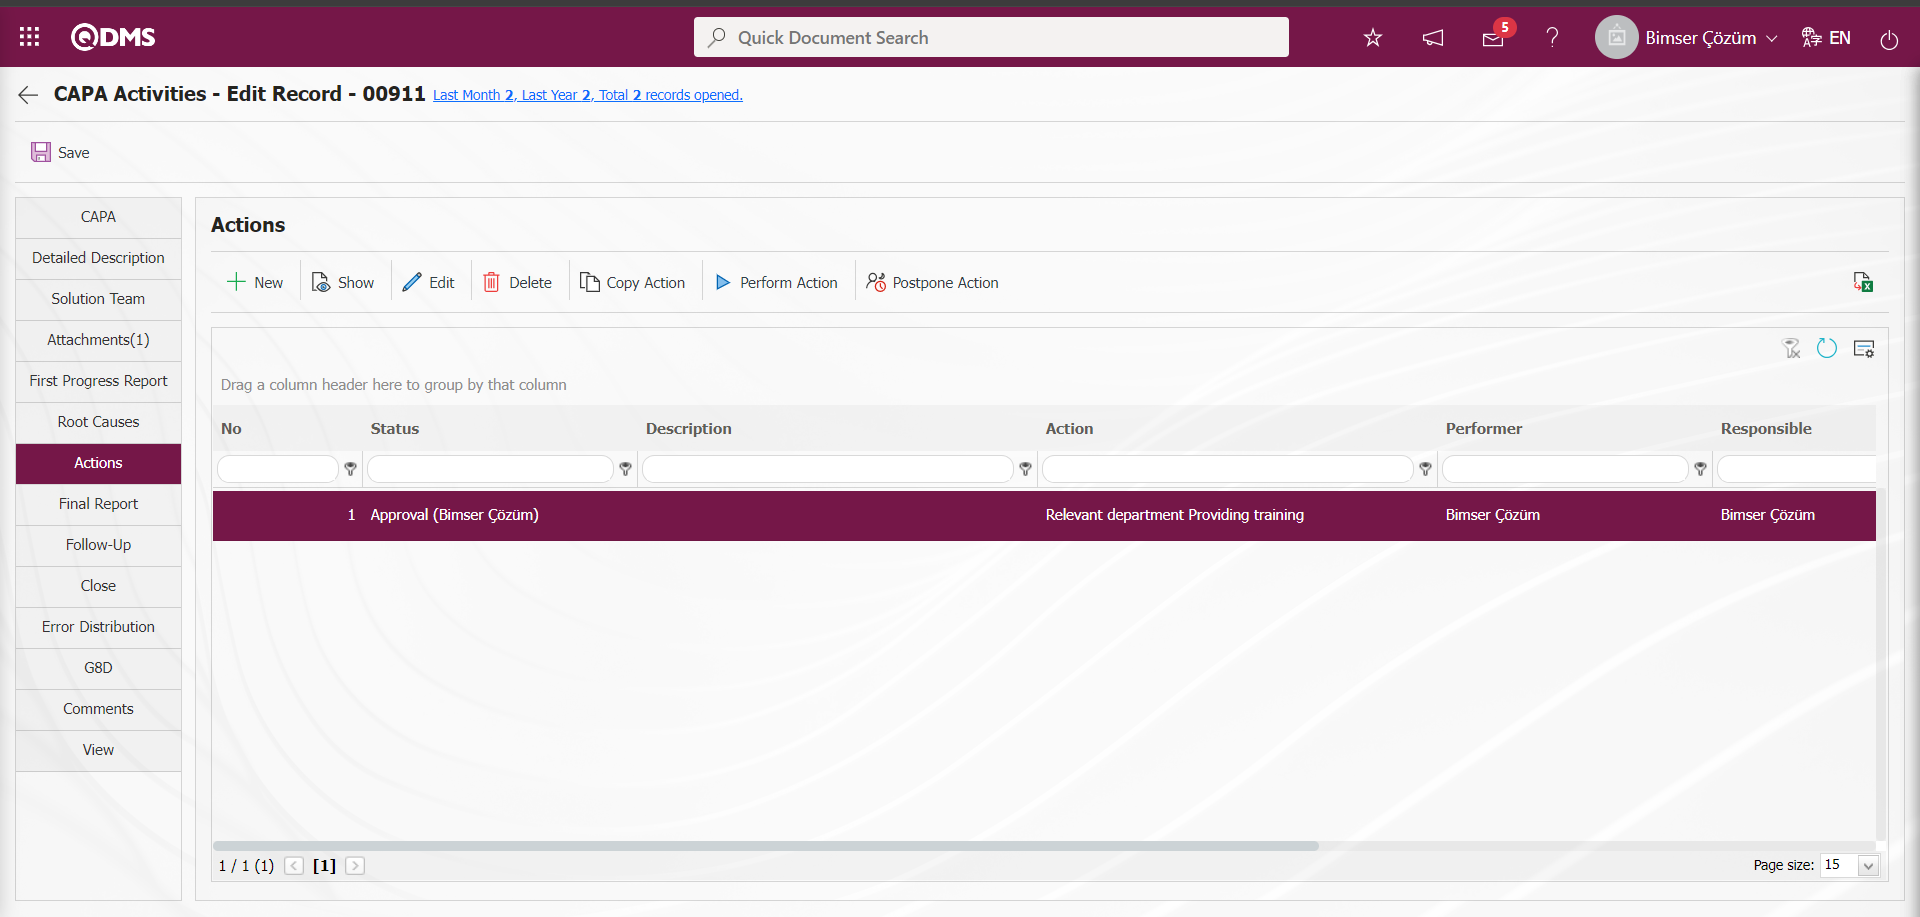
6.2.1.10. List of CAPA Actions Pending Implementation Approval
Since the flow is designed for CAPA Actions Pending Realization Approval for CAPA record, while the system sends an e-mail to the approval person, at the same time, it assigns a task to the pending jobs as “CAPA list which is waiting for approval to perform” job.
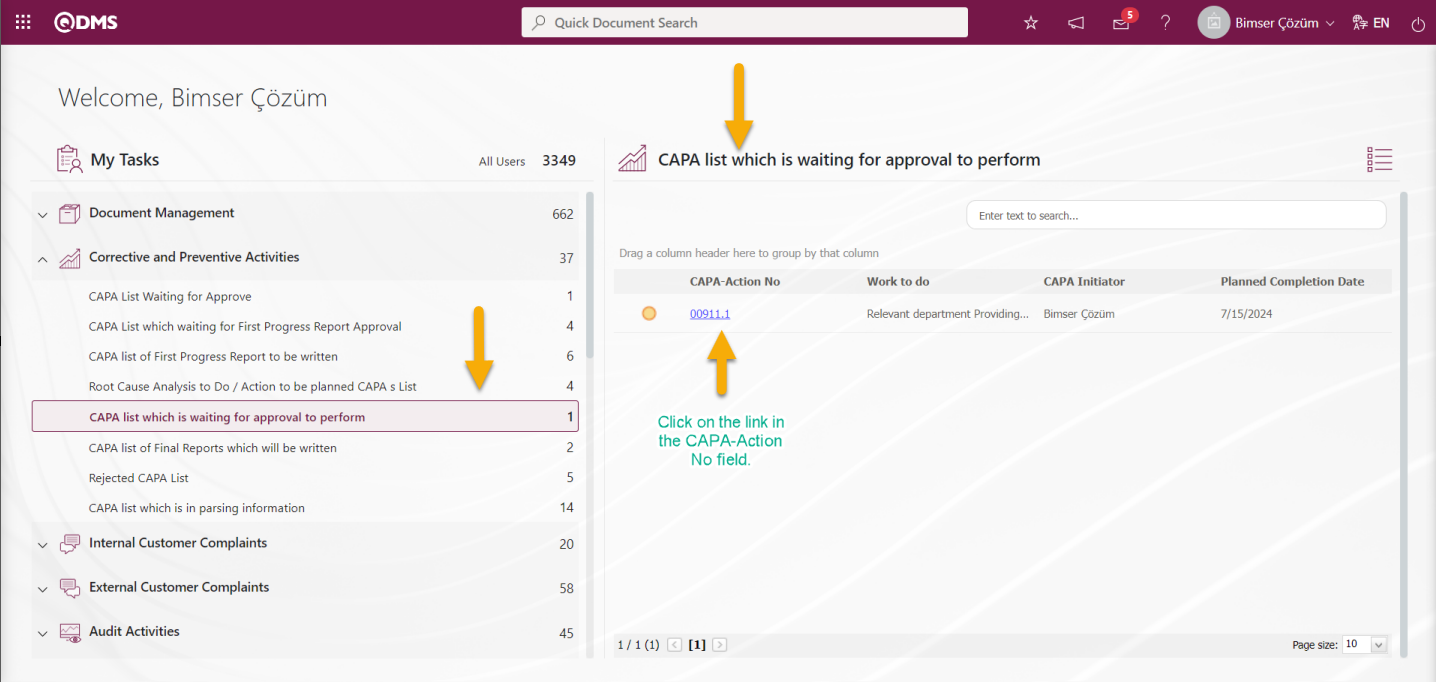
After the CAPA Action is performed, the relevant person comes to the Pending Actions and sees the CAPA, which are CAPA Actions Waiting for Approval to Perform under the name “CAPA list which is waiting for approval to perform”. The “CAPA List, Waiting For Approval” screen is displayed by clicking the CAPA-Action code link in the CAPA -Action No field.
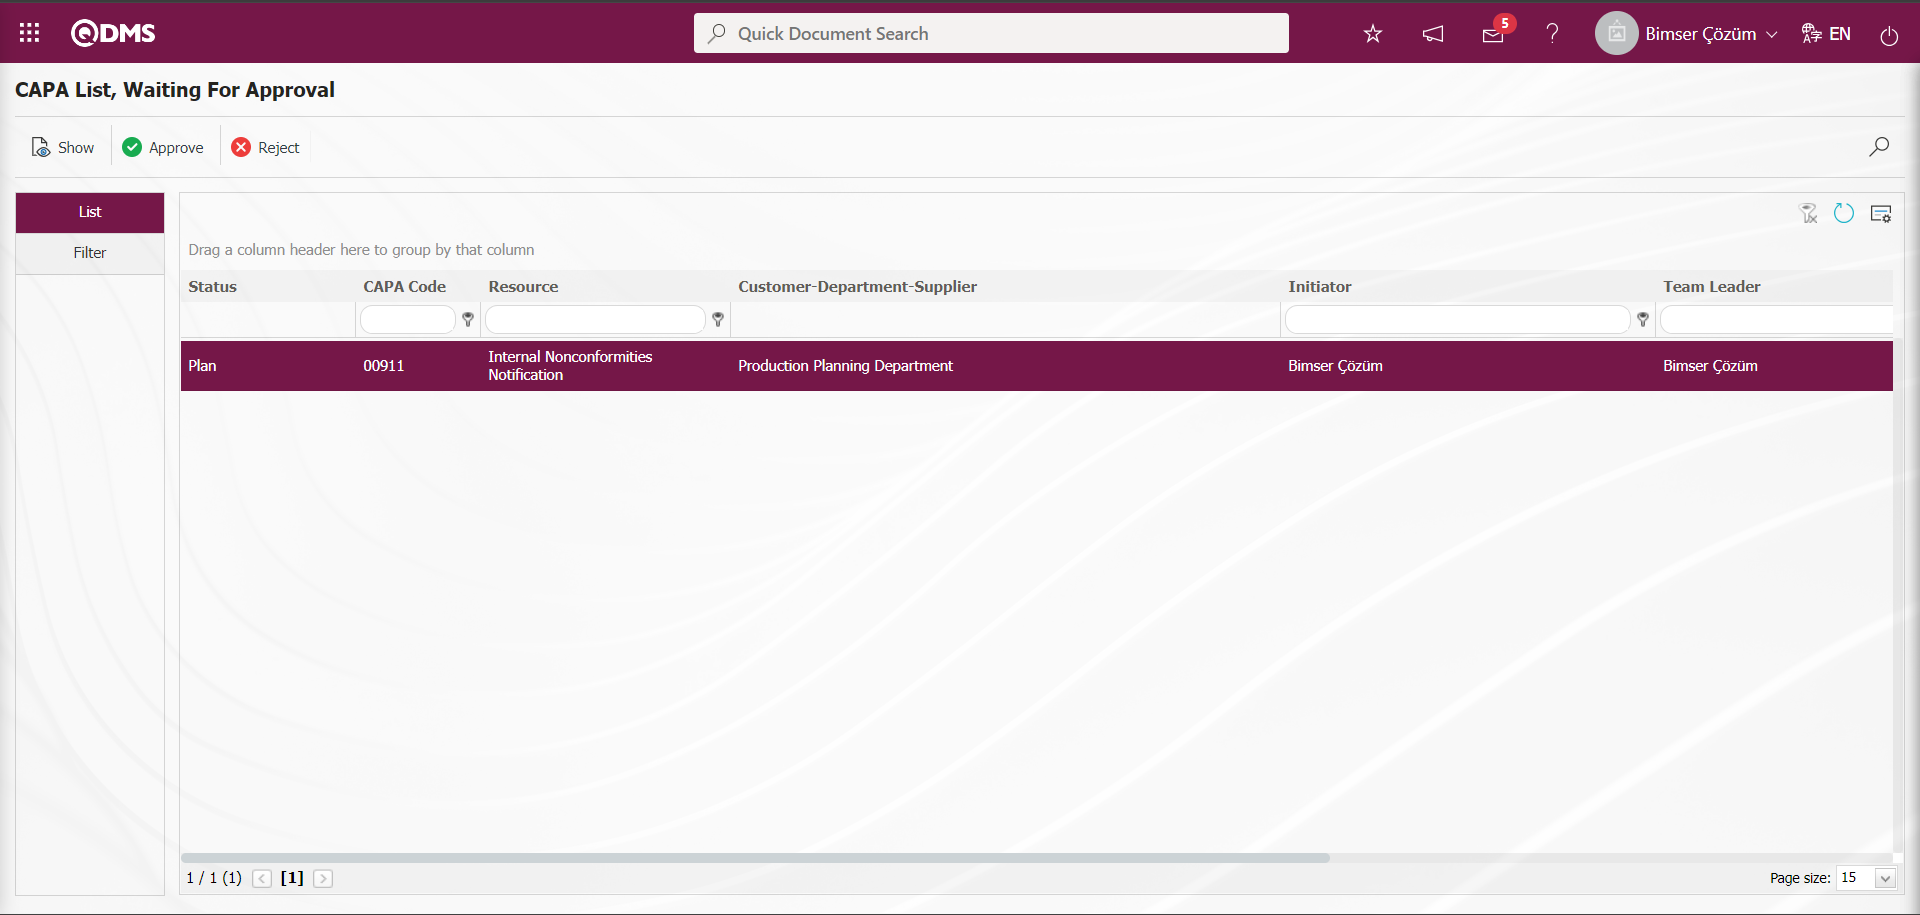
With the help of the buttons on the screen;
: The related CAPA record is displayed.
: It is used if it is requested to make changes with the related CAPA record. If it is the CAPA opened from the request, the system will not allow us to make the approval process without filling in the mandatory fields.
: It is used to make the CAPA approval process. After the approval process, the relevant CAPA record will fall in front of the Team leader.
: Used to reject the CAPA if the information entered in the CAPA is not appropriate.
: It is used when you want to search by filtering the information from the filter option in case there are too many CAPAs that need to be approved.
: It is used to clear the data remaining in the filter fields in the grid where the search criteria on the menu screens are searched.
: The menu screen is restored to its default settings.
: User-based designing is done on the menu screen with the show-hide feature, that is, the hiding feature of the fields corresponding to the columns on the menu screens.
Click the button on the CAPAs Waiting for Approval screen.
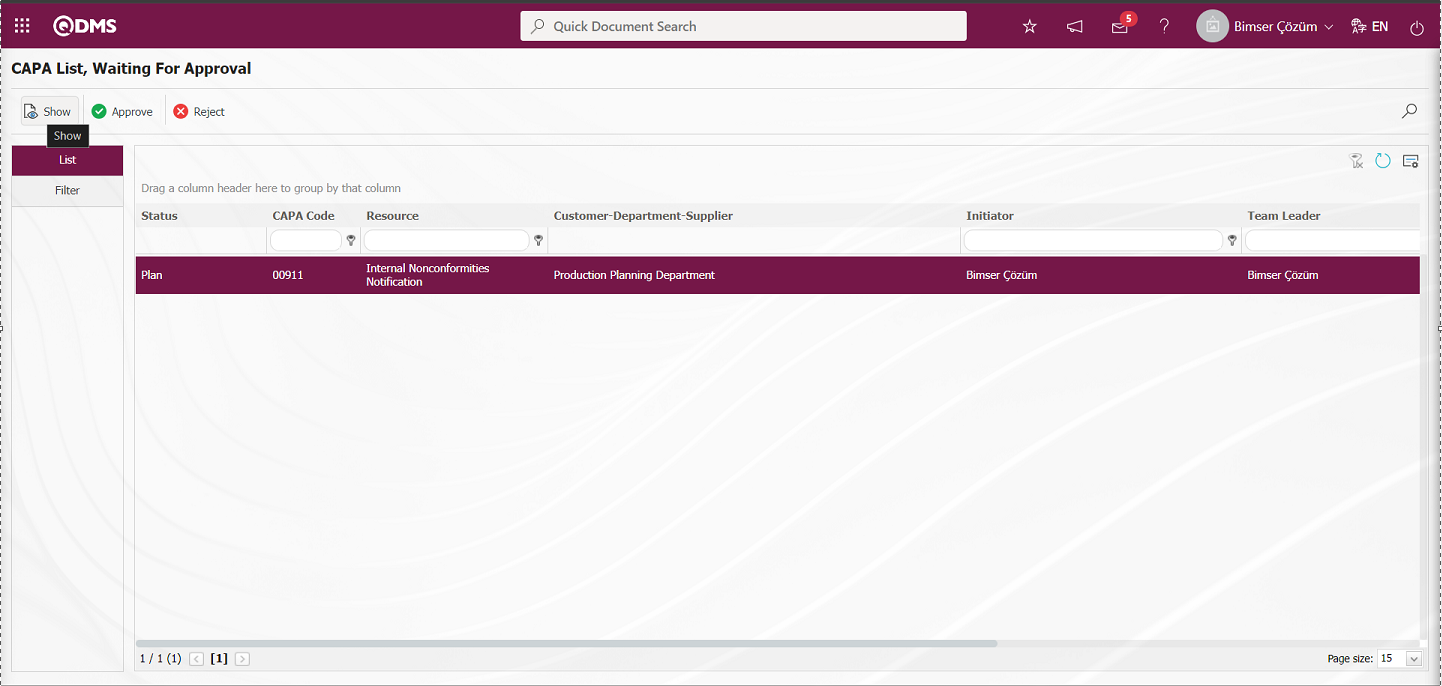
On the Display screen, click on the tabs related to the CAPA record and view the detail information. Click the  button on the display screen of the CAPA record.
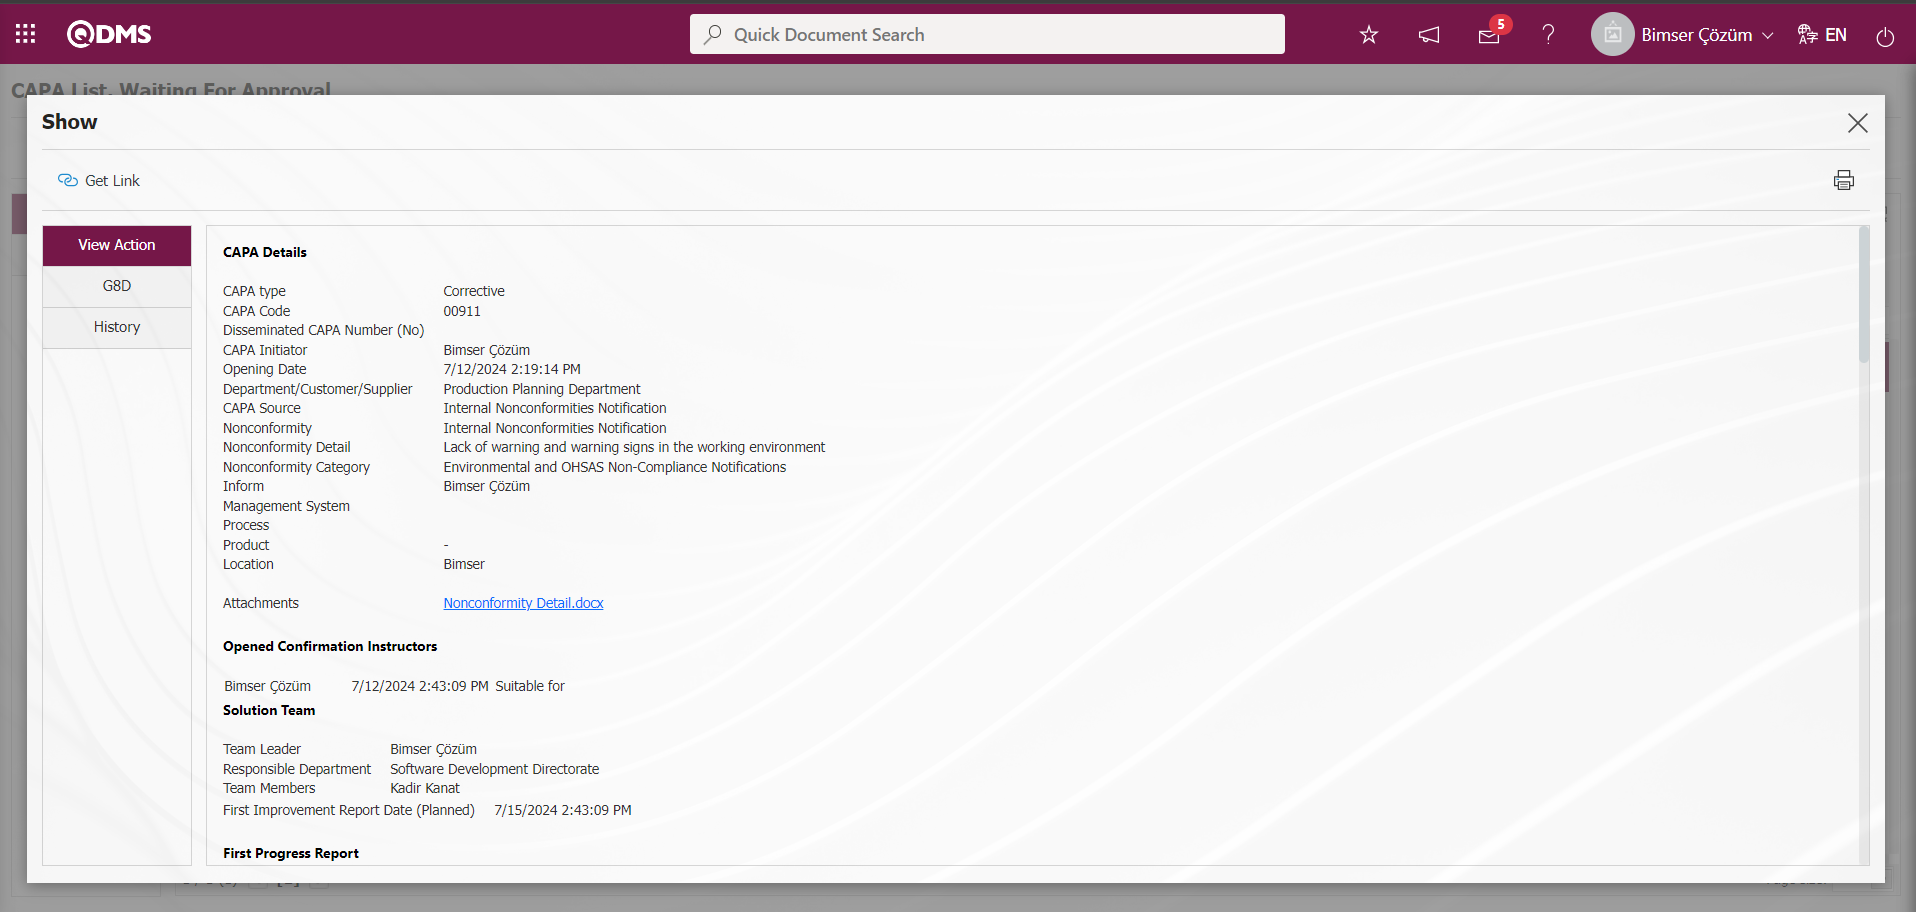

The link related to the CAPA Record is displayed on the screen. Right-click/copy-paste methods or copy-paste shortcut keys (Ctrl+C-Ctrl+V) are used to view the CAPA Record and share it to the relevant people.
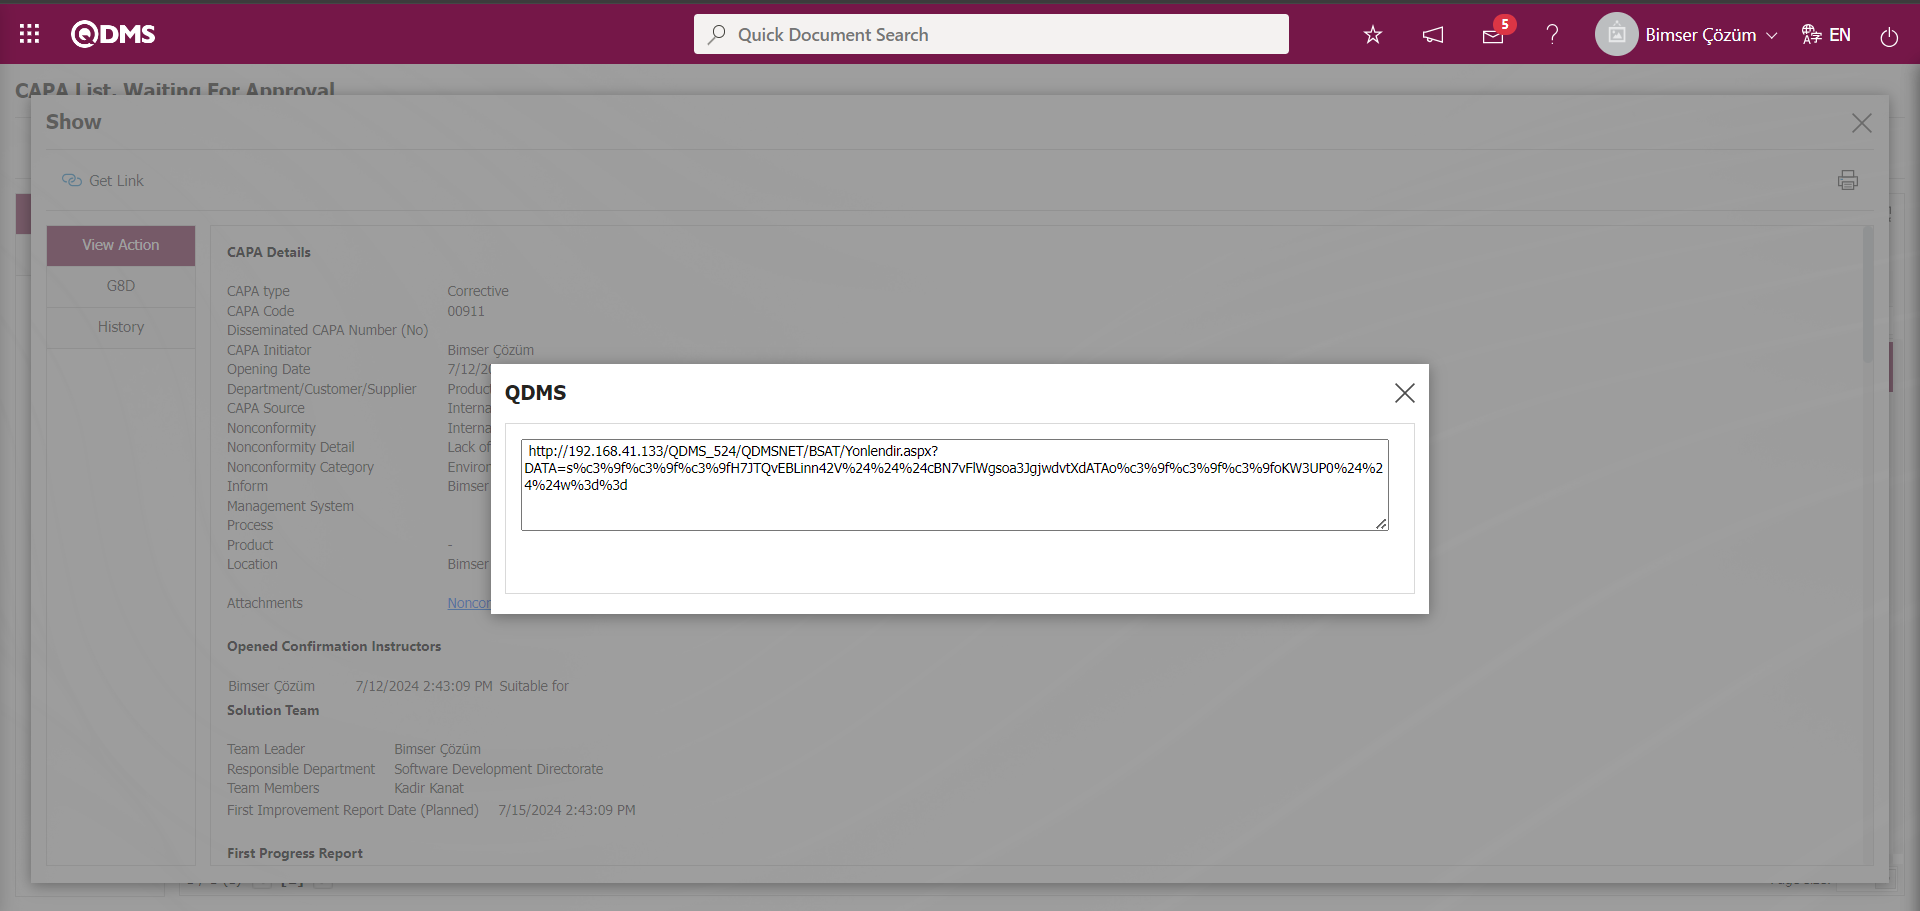
In the G8D report tab, G8D report detail information is displayed.
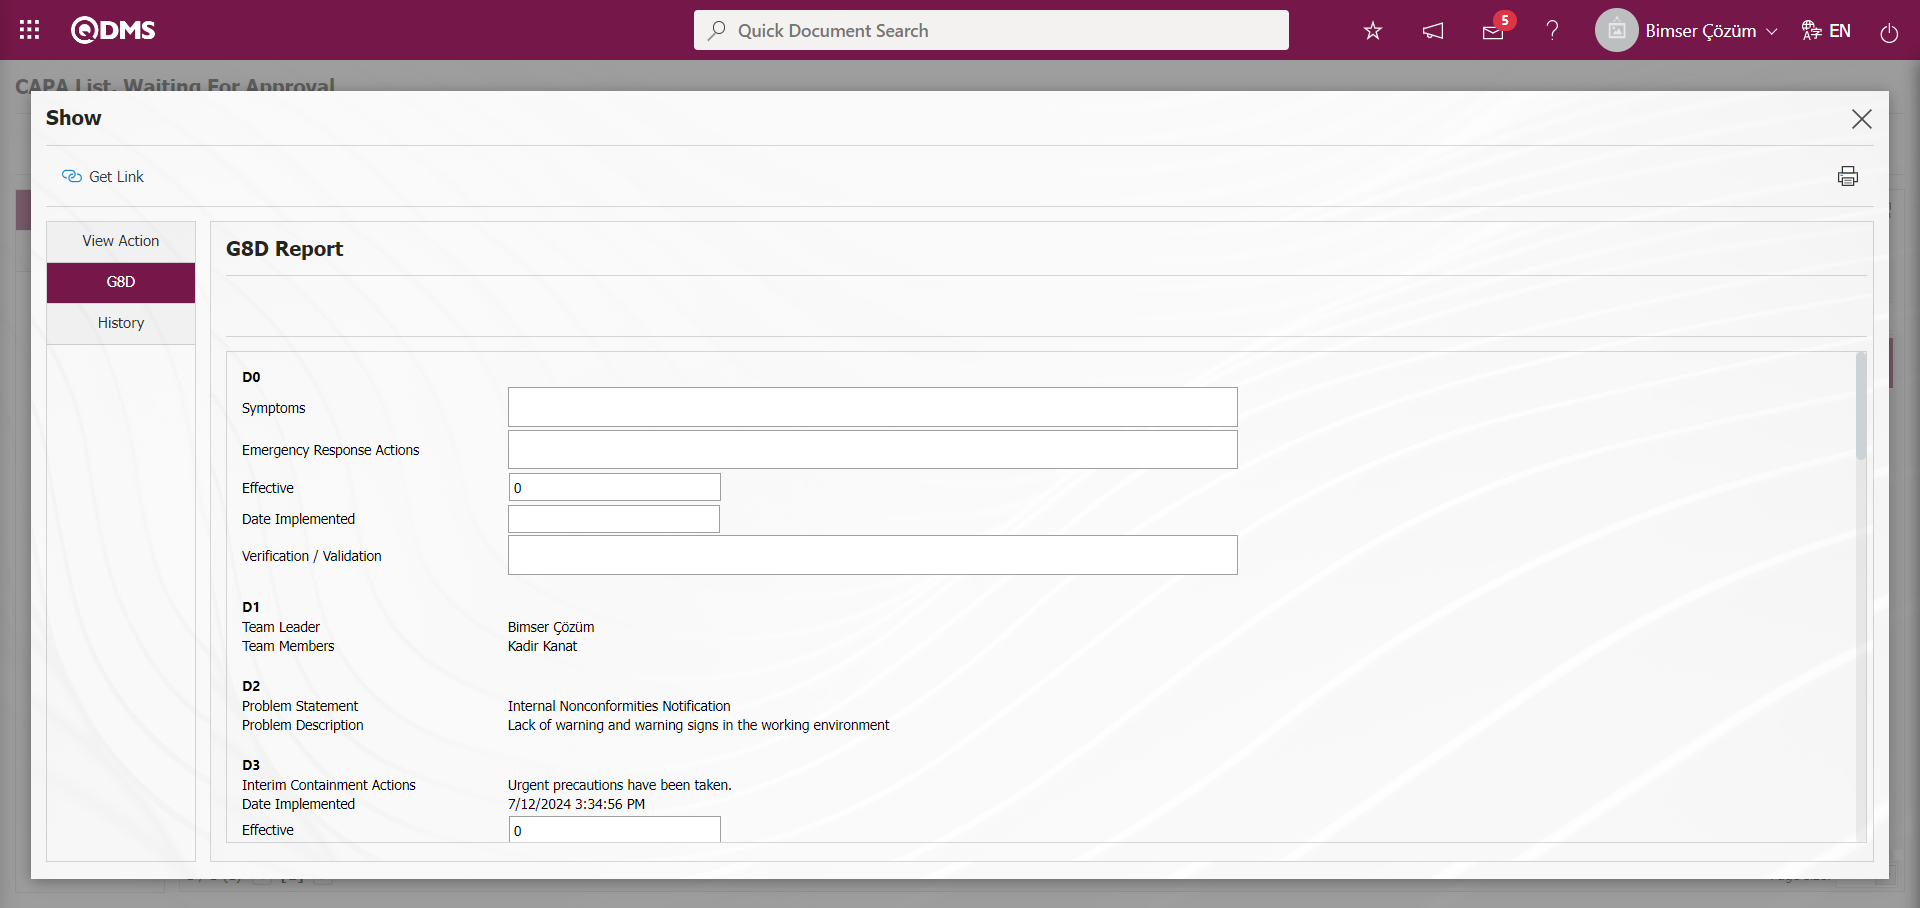
In the History tab, the information of the approval history list of the CAPA record such as CAPA opening approval, CAPA First Progress report, CAPA Action Opening, CAPA Action Realization is given. The CAPA record is rejected by clicking the  button on the CAPAs Pending Approval screen and entering the Reason for Rejection.
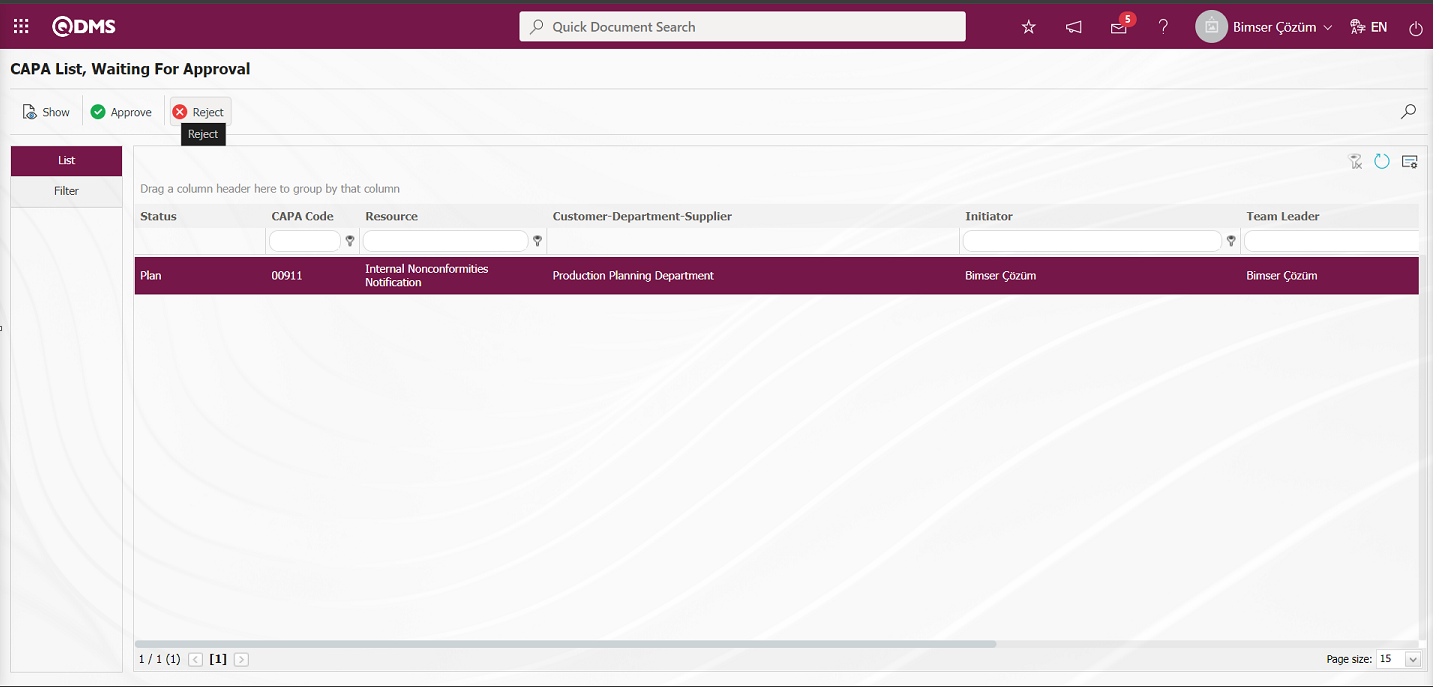
On the Rejected CAPAs** screen, the CAPA record is rejected by clicking the  button and entering the Reject reason.
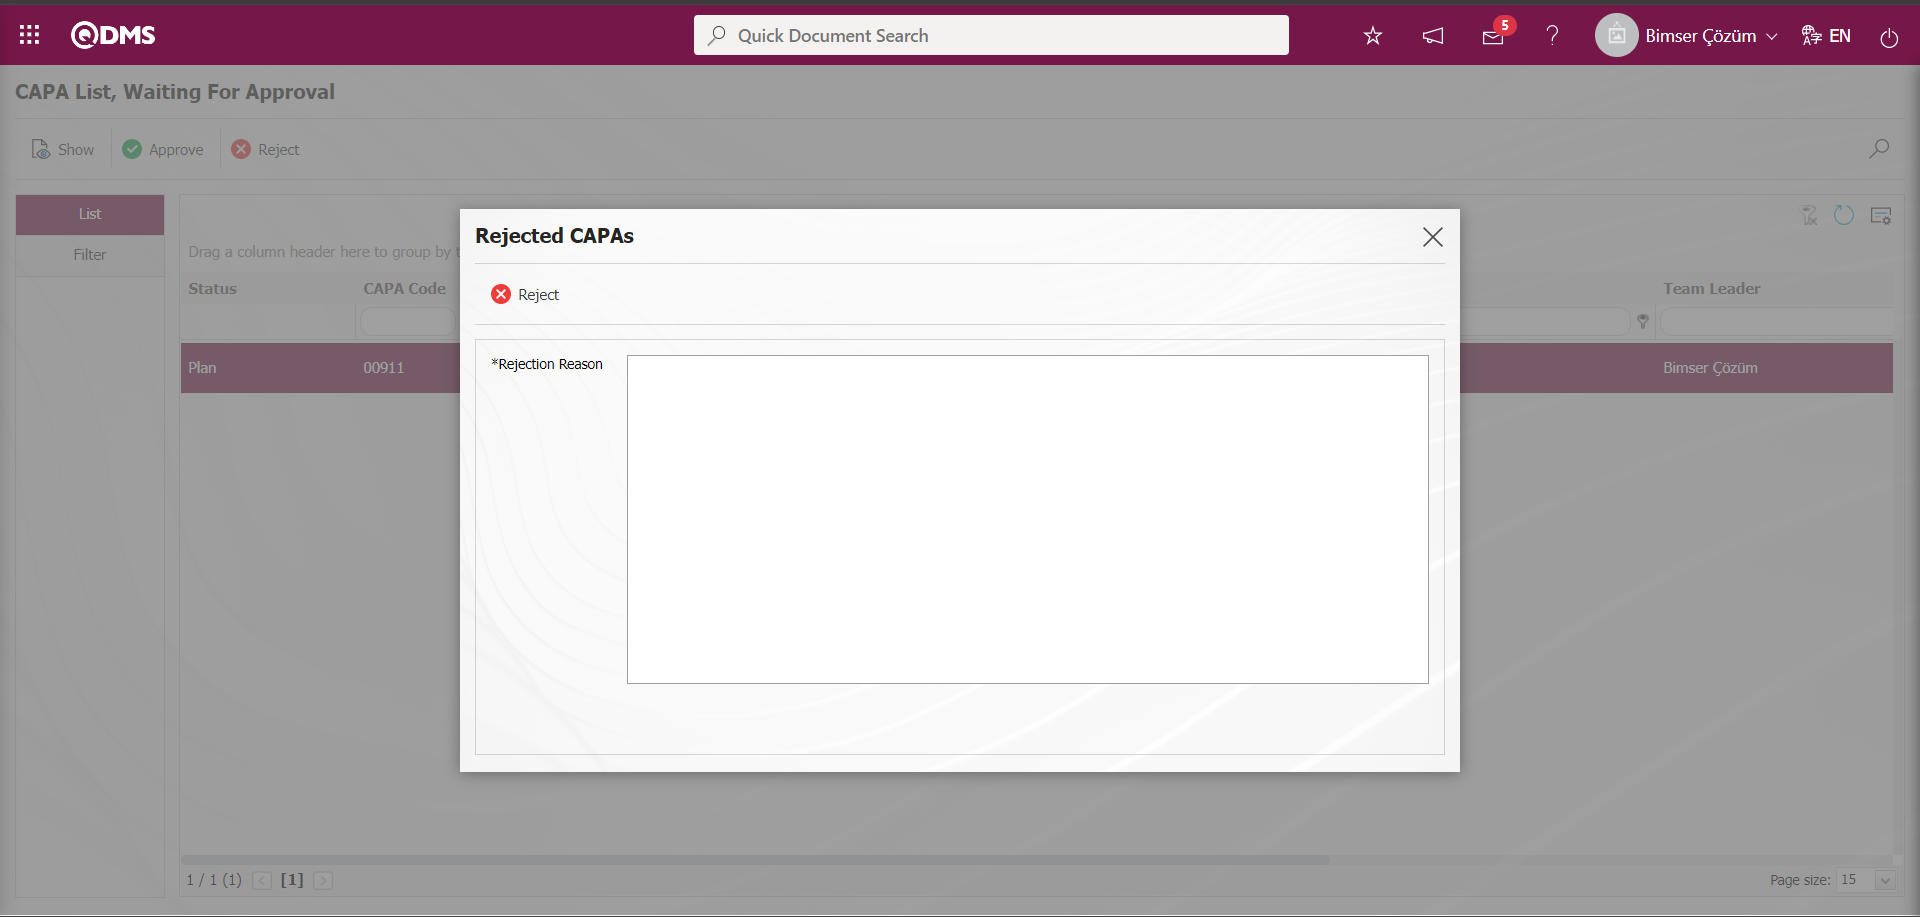
Click  button on CAPA List, Waiting For Approval screen.

Confirmation Notes on the CAPA Approval** screen Confirmation Notes information is written in the field and the CAPA record is confirmed by clicking the  button.

Approval note information when approving CAPA The parameter is activated by selecting the parameter value “Yes” in parameter 154 in the CAPA module parameters. After the parameter is activated, Confirmation Notes field is displayed on CAPA Confirmation screens and CAPA confirmation is done by entering Confirmation Notes information. After the actions are planned, realized and approved, the stage of CAPA Registration passes through the Final Report stage.
6.2.1.11. Final Report
After the actions are planned and realized, the process continues with the writing of the result report. The Team Leader/Member is assigned the task of “CAPA list of Final Reports which will be written” in Pending Work.

After the CAPA Action has been planned, realized and sent for approval, the Team/Team can go to the Pending Work and see the CAPA for which a Final Report will be written under “CAPA list of Final Reports which will be written”. By clicking the CAPA code link in the CAPA-No field, the Final Report tab is displayed on the CAPA Activities - Edit Record** screen. The parameter value of parameter 79 in CAPA parameters is activated by selecting “Yes”.

After the parameter is activated, the Result Report tab is displayed on the CAPA Activities - Edit Record screen and the Result Report stage is used in the CAPA record. The Conclusion Report is a report containing the final measures taken regarding the CAPA and the solution suggestions. The Conclusion Report is a summary report of the steps taken up to this stage to eliminate the nonconformity. The Final Report is also written by the Team leader who forms the Solution Team. CAPA Activities is the final report prepared for the person who will approve the closure, summarizing all the actions taken during the closure.
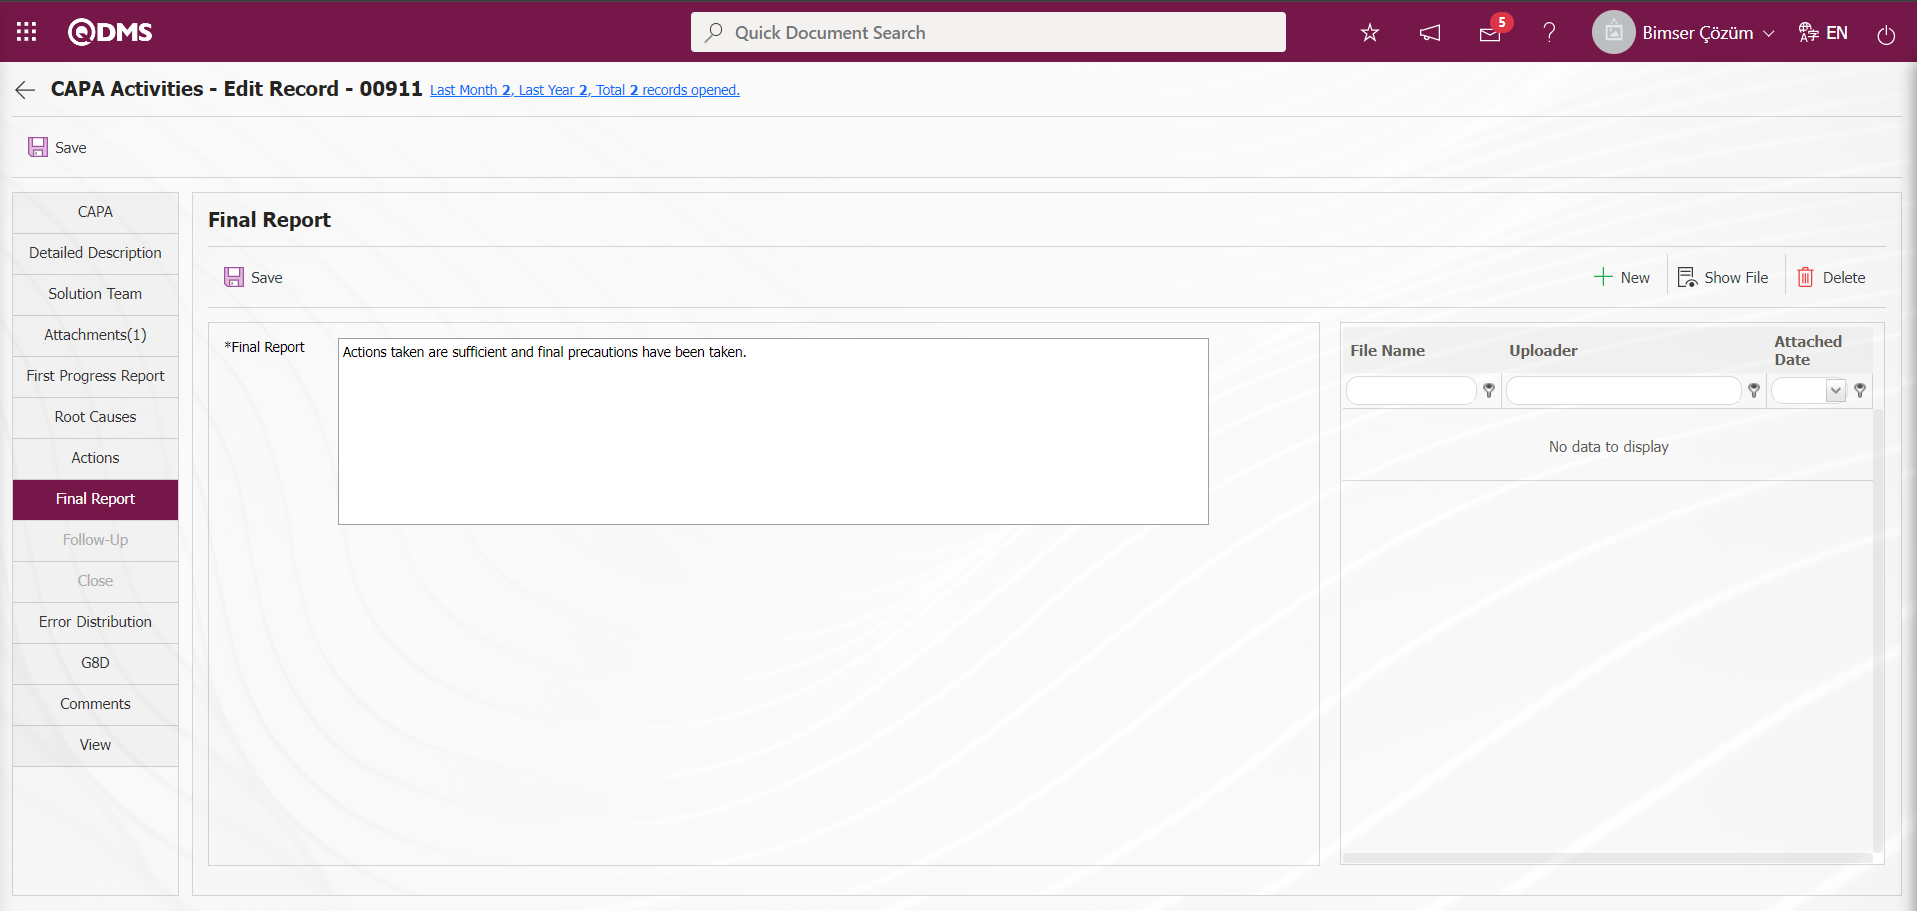
Define the relevant fields on the screen that opens:
Final Report: In the Final Report tab, this is the field where the description information of the Final Report is entered.
Additional Files: In the Final Report tab, additional files such as evidence documents, photographs, etc. related to this final report are uploaded with the help of the buttons. For the process of making the additional file upload process mandatory at the result report stage, the parameter value of parameter 214 in the CAPA module parameters is activated by selecting “Yes”.

When the parameter is activated, the final report registration process is not performed without additional file uploading at the final report stage.
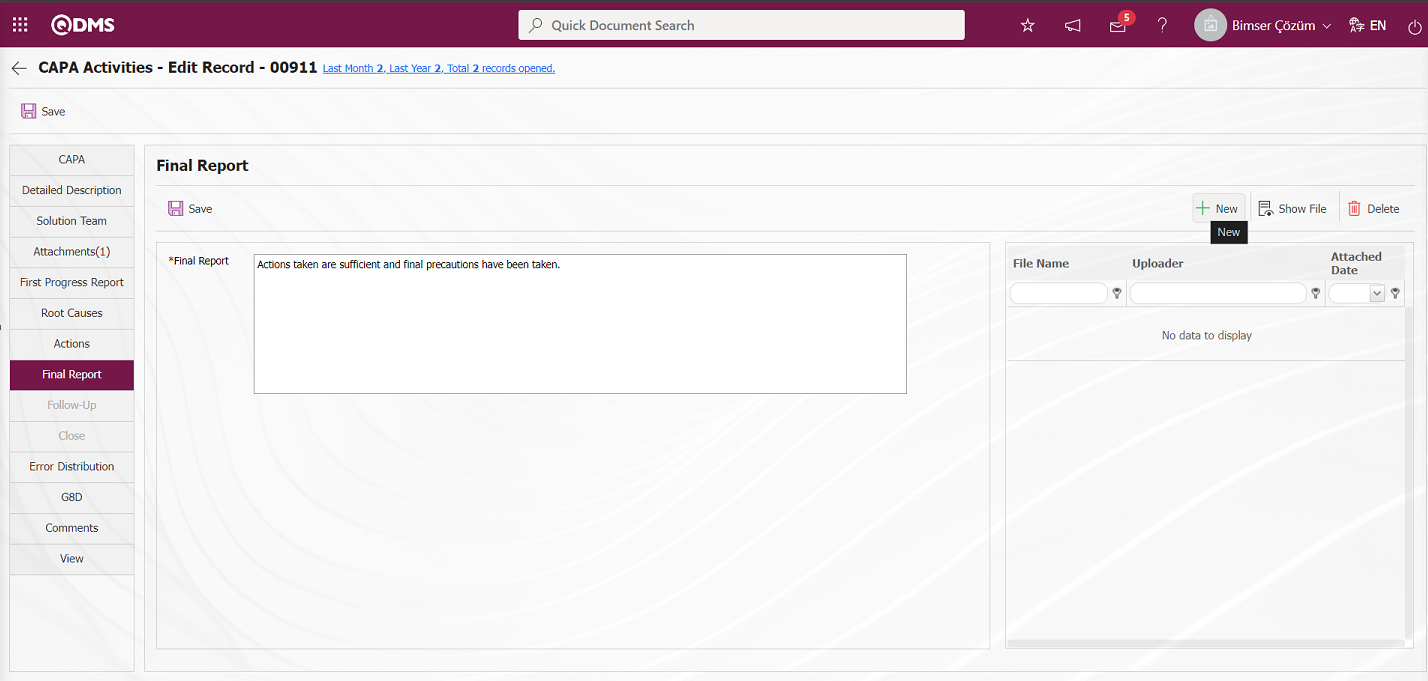
With the help of the buttons on the screen;
 : The additional file is uploaded to the system.
 : The uploaded additional file information is displayed.
 : Uploaded attachment file information is deleted
button is clicked to add an additional file to the CAPA record at the Final Report stage. More than one additional file can be added.
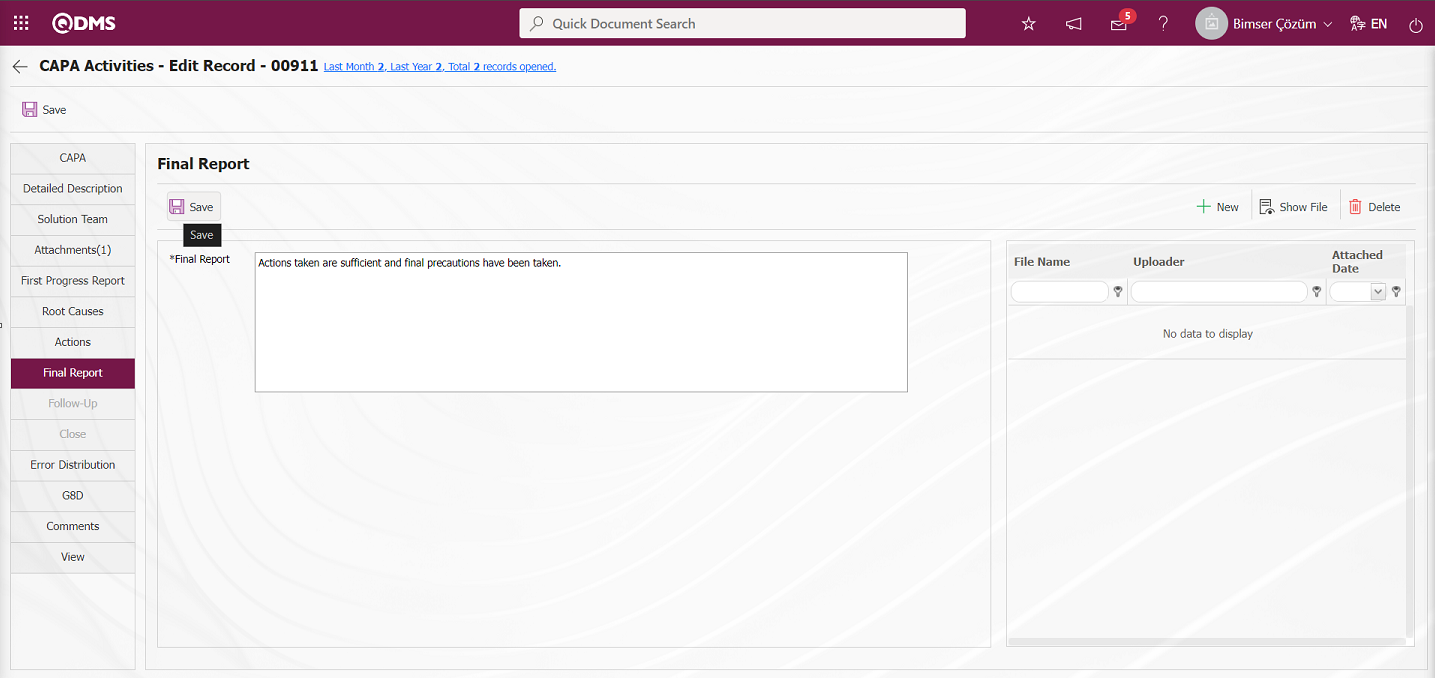
Type the Final Report on the screen that opens. Additional files, if any, can be added to the Final Report. After entering the relevant information in the required fields, the Final Report is saved by clicking the  button in the upper left corner of the screen and CAPA goes to closure approval.
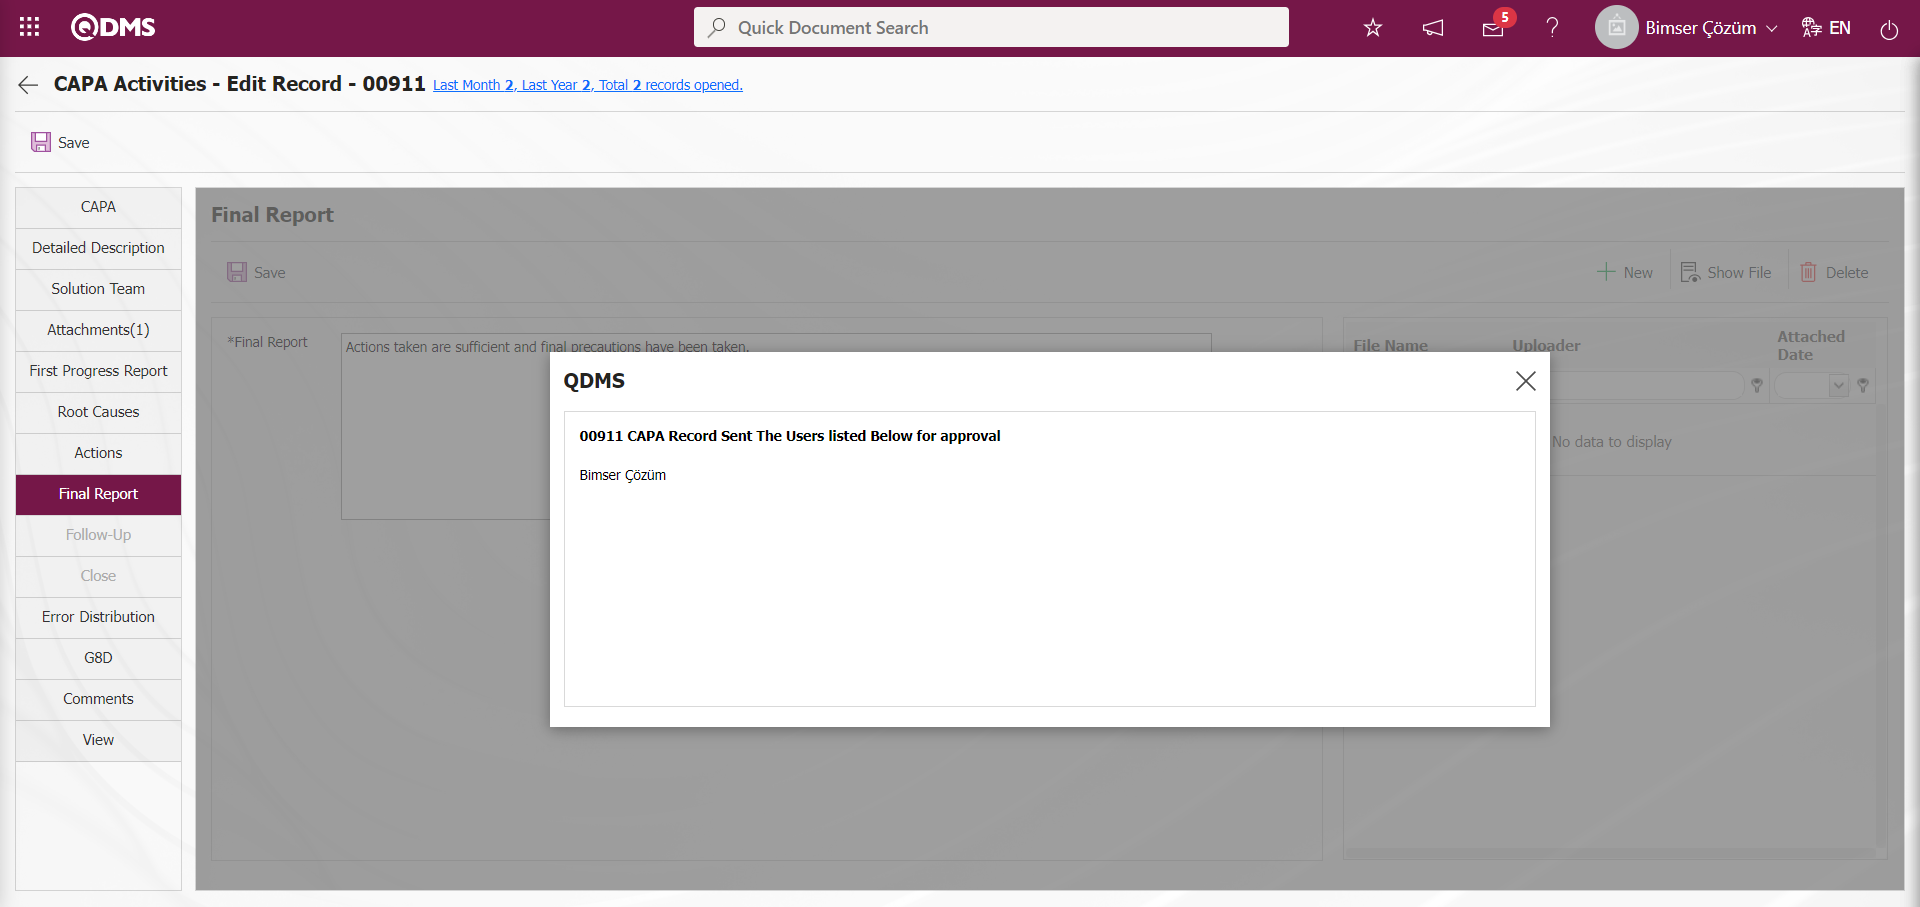 Once the process of writing the final report has been saved, the predetermined CAPA closure responsible will be assigned to the pending jobs as "CAPA List which will be closed ” job.
6.2.1.12. Follow-up
During the CAPA closure phase, sometimes CAPA is not closed and can be put on monitoring to see if the same problem will be encountered until a certain date interval. Follow-up is the process in which a task is assigned to the monitoring officer for a certain period of time in order to check whether the nonconformity continues or not. The follow-up responsible checks whether the nonconformity continues on the specified dates due to the task assigned to him/her. It performs report writing by monitoring the adequacy, effectiveness or proper execution of the actions taken with this assigned task.
After the CAPA Record final report stage, the task falls as “CAPA List which will close” in the pending jobs of the CAPA Closure responsible.
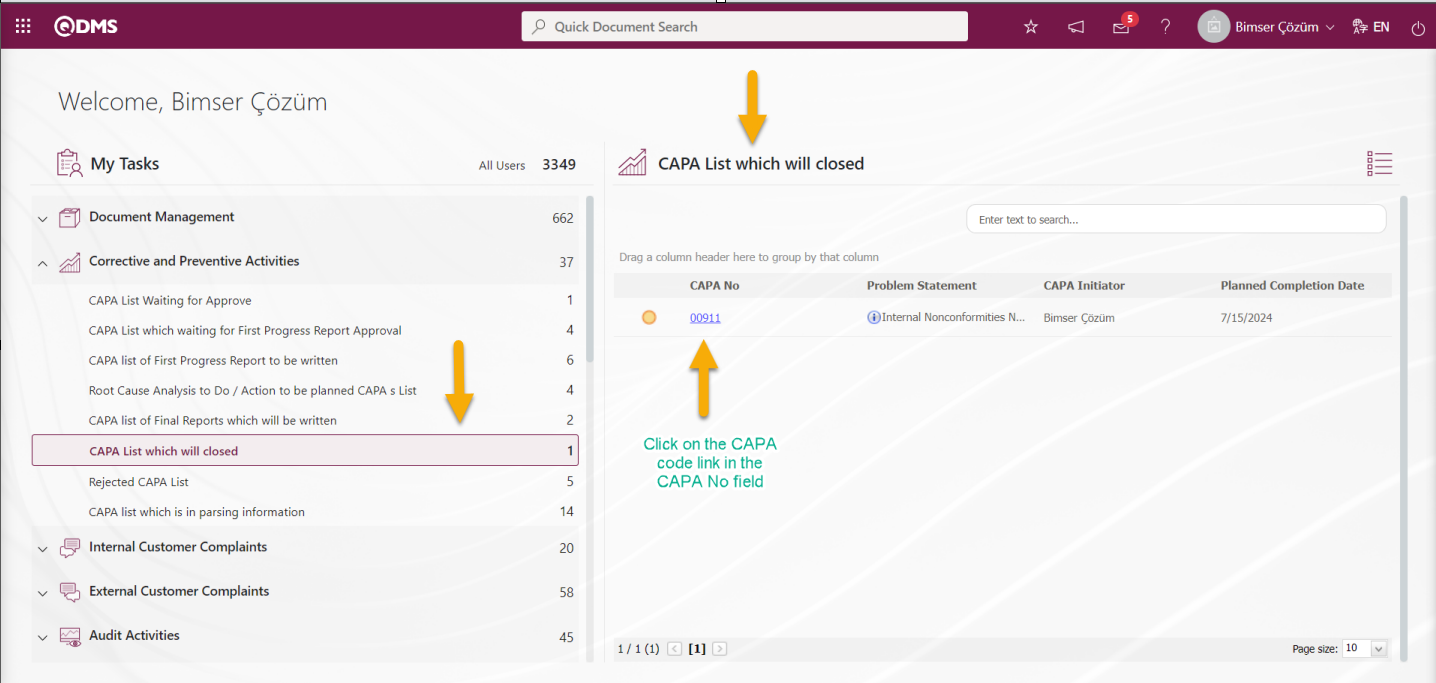
Click on the CAPA code link in the CAPA No field of the relevant task.

With the help of the buttons on the screen;
 : View all information about CAPA.
 : When the person who will give closure approval decides that the actions taken are not sufficient, the process of defining the missing actions is done.
 : The process of assigning the task of writing a report by monitoring the adequacy, effectiveness or proper execution of the actions taken by a different person.
 :Close The CAPA record is closed by entering the approval and qualification information.
: It is used when you want to search by filtering the information from the filter option in case there are too many CAPAs that need to be approved.
: The data remaining in the filter fields in the grid where the search criteria on the menu screens are searched is cleaned.
: The menu screen is restored to its default settings.
: User-based designing is done on the menu screen with the show-hide feature, that is, the hiding feature of the fields corresponding to the columns on the menu screens.
On the CAPA List, Waiting For Approval screen, click the  button to perform the Monitoring operation.
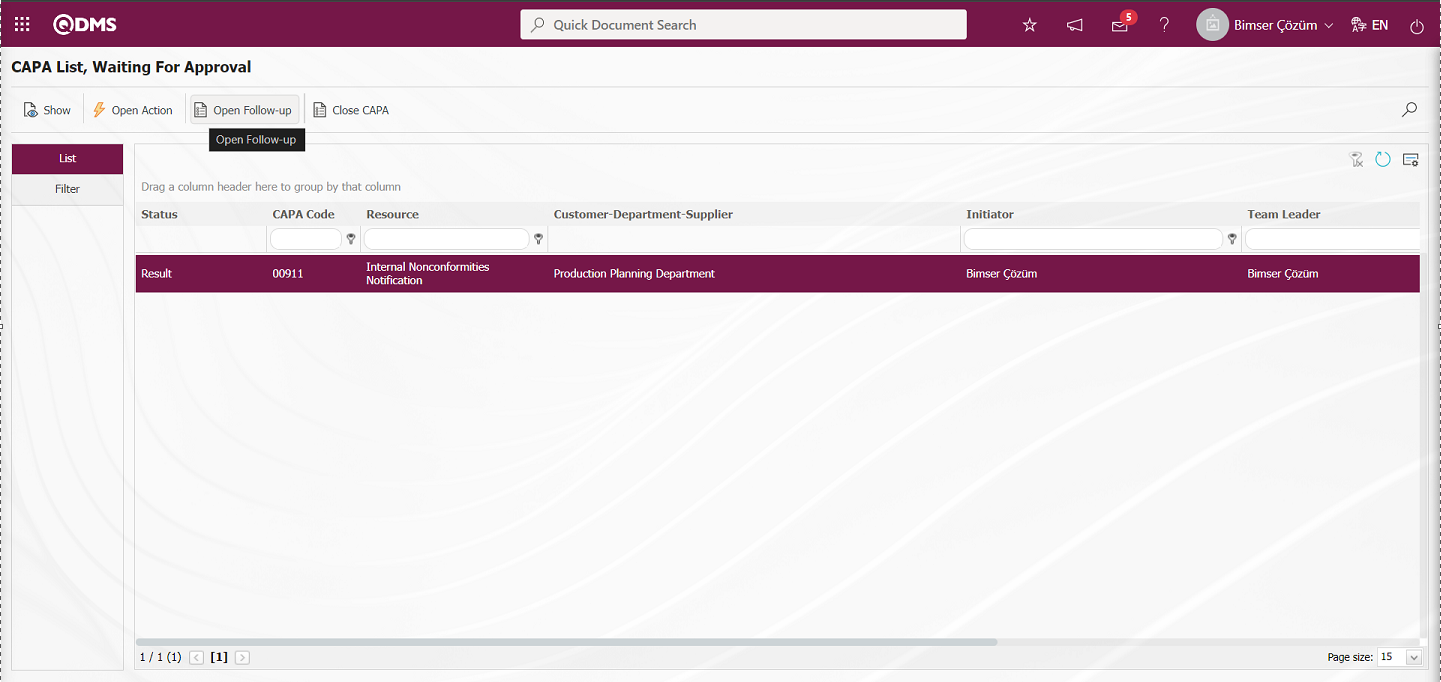
When parameter 98 “Yes” is selected in the CAPA module parameters, the CAPA monitoring tab is not displayed in the CAPA record.
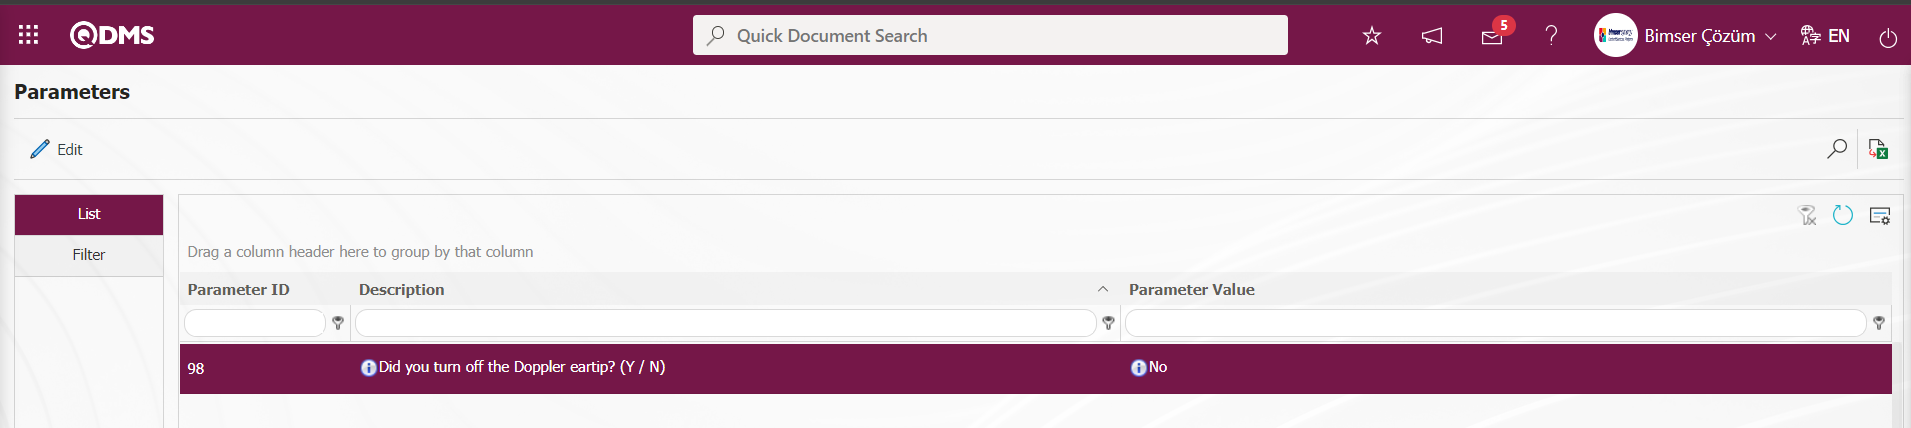
When the parameter value is “No”, the CAPA Follow-up tab is displayed in the CAPA record.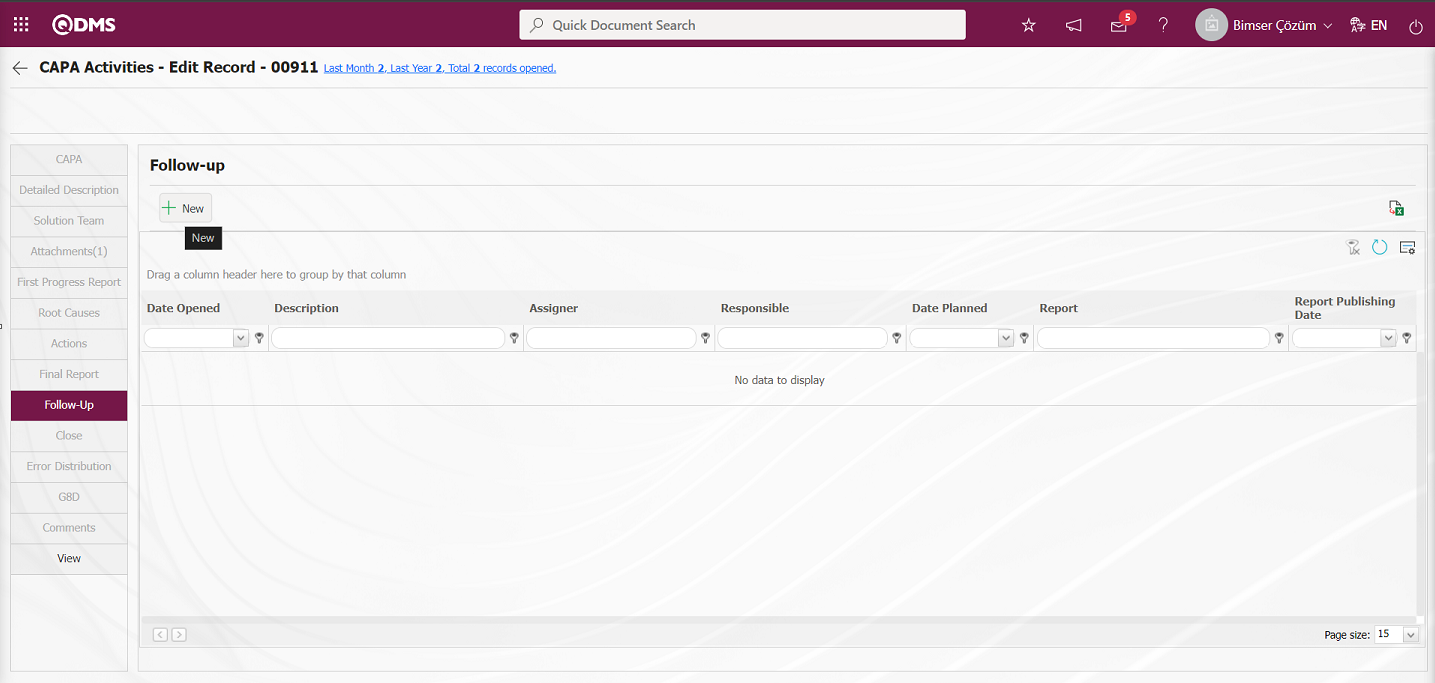
With the help of the buttons on the screen;
 : A new follow-up information is defined.
: Data is transferred to Excel.
: The data remaining in the filter fields in the grid where the search criteria on the menu screens are searched is cleaned.
: The menu screen is restored to its default settings.
: User-based designing of the menu screen is done with the show-hide feature of the fields corresponding to the columns on the menu screens, that is, the hiding feature.
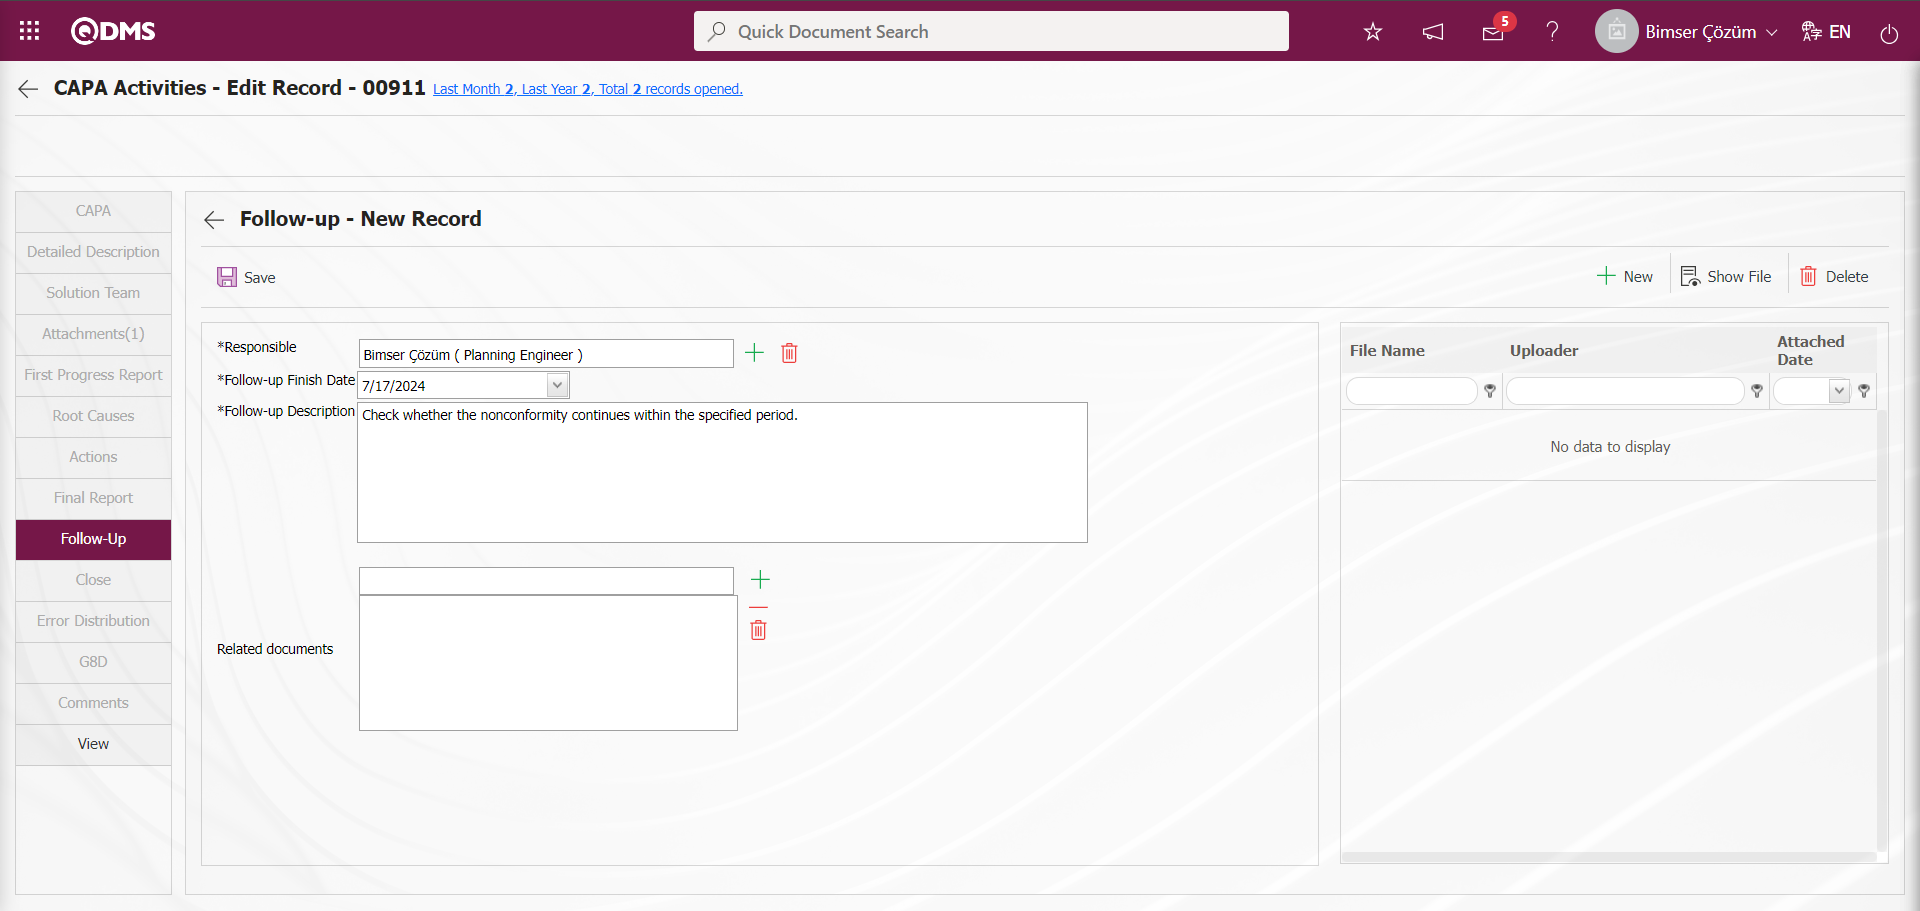
Related fields are defined on the screen that opens:
Responsible: This is the field where the responsible person information can be selected from the Personnel list defined in the system that opens by clicking the  (Select) button on the Follow-up - New Record screen.
Follow Up End Date: This is the field where the Follow Up End Date is selected from the Calendar field opened on the Follow Up - New Registration screen.
Follow up Description: This is the field where the Follow-up description information is entered on the Follow-up - New Registration screen.
Related Documents: This is the field where the related documents can be selected from the system-defined Document list opened by clicking the (Add) button on the Monitoring - New Record screen.
Additional Files: At this stage on the Follow-up - New Record screen, if any, additional files such as evidence documents, photographs related to this follow-up are uploaded with the help of the buttons.

With the help of the buttons on the screen;
: The additional file is uploaded to the system.
 : The uploaded additional file information is displayed.
 : Uploaded attachment file information is deleted
button is clicked to add an additional file to the CAPA record during the monitoring phase. Multiple attachment files can be added.

On the Follow-up - New Record screen, the person responsible for the follow-up is entered, the end date of the follow-up is determined, the follow-up information is entered, if any, additional files, documents, etc. related to the follow-up can be added. After the required fields are filled in, the follow-up record process is realized by clicking the  button in the upper left corner.
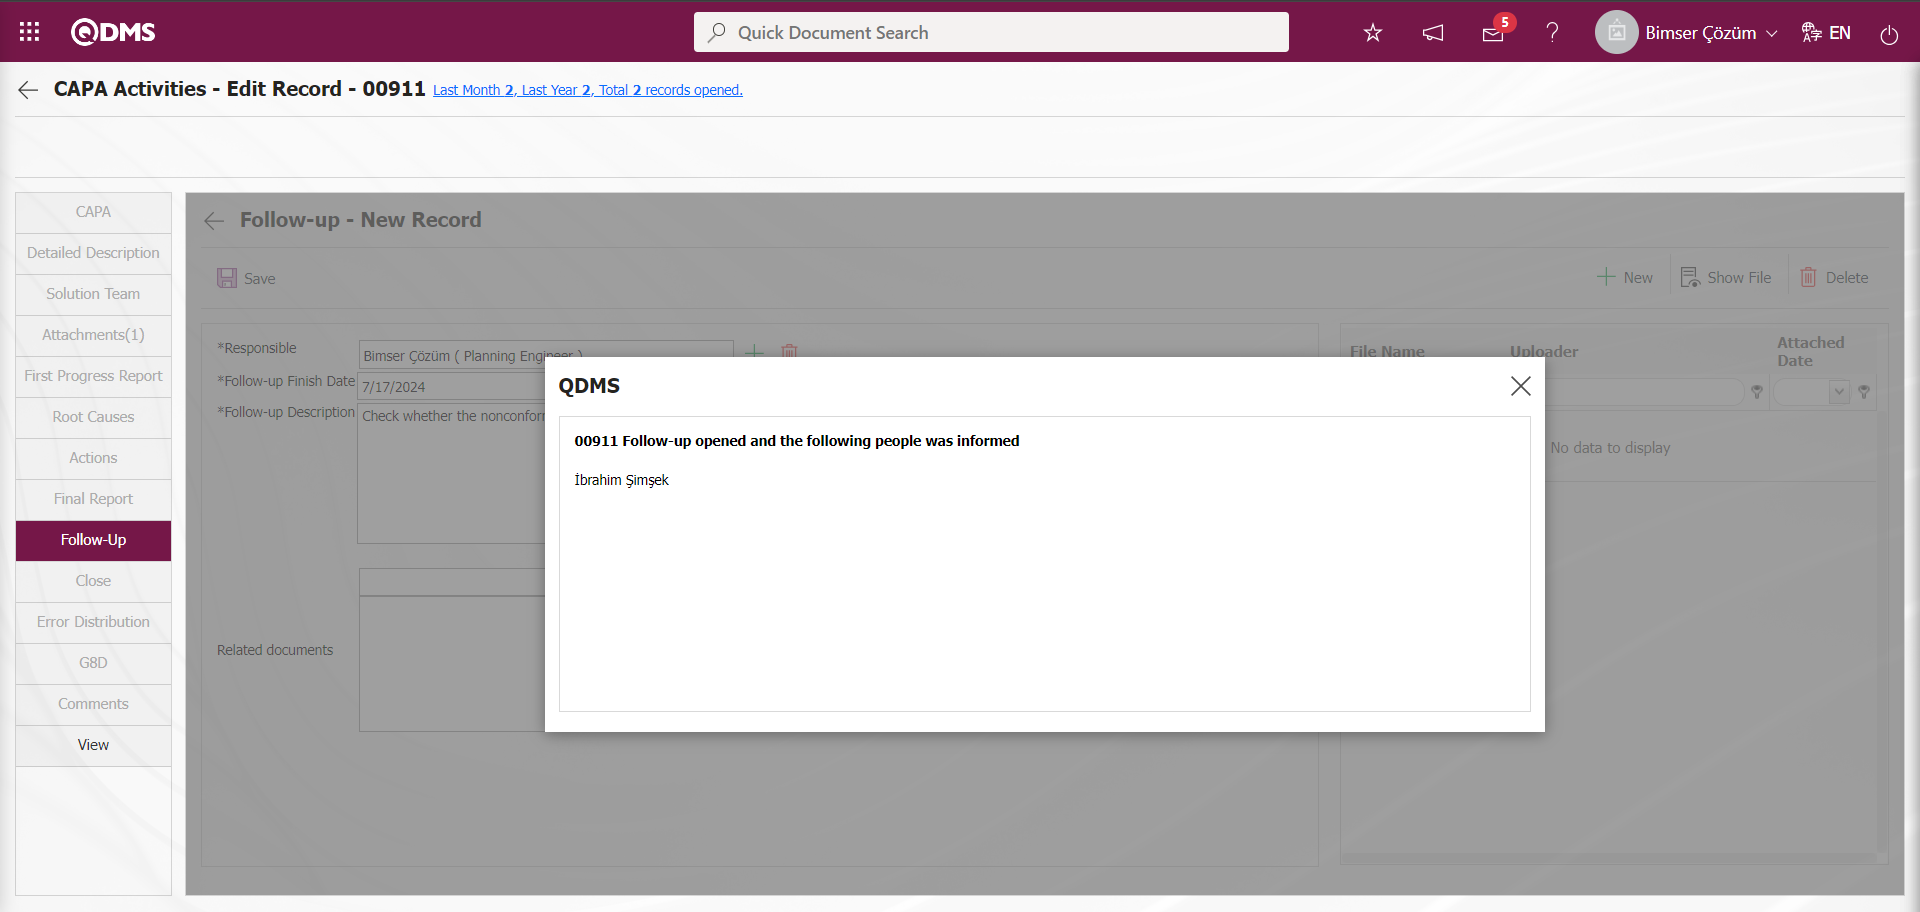
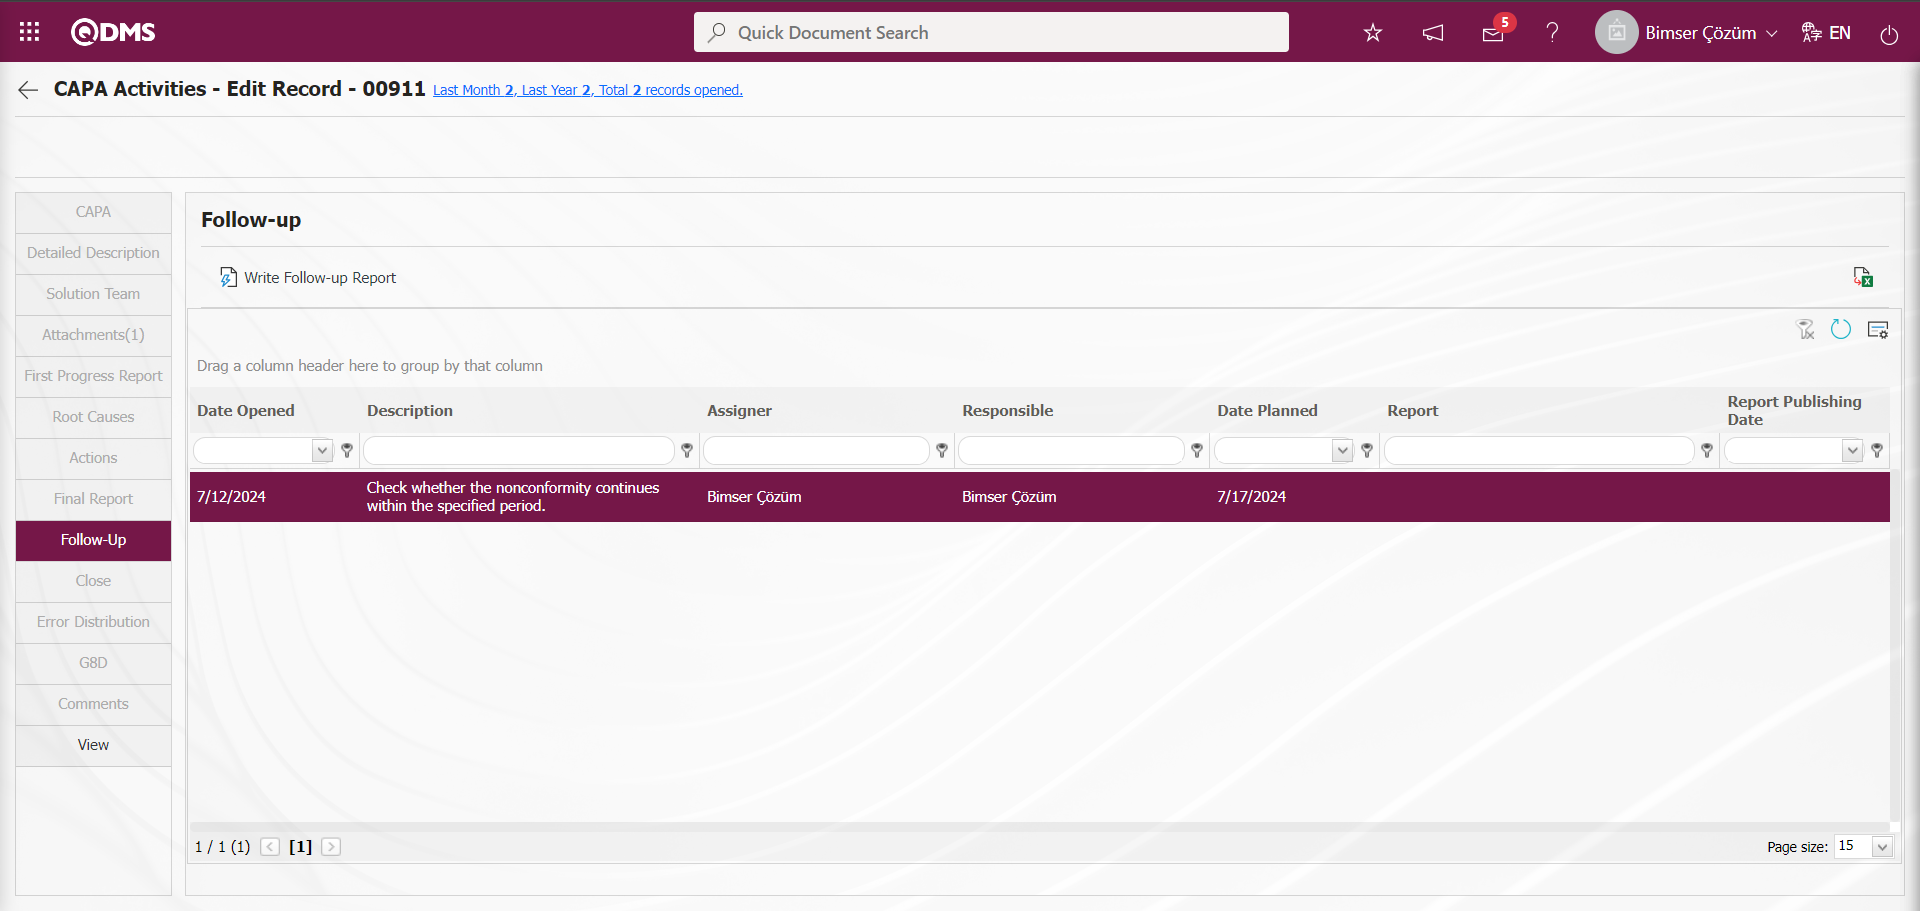
By selecting the value of parameter 137 “Yes” from the CAPA module parameters, the parameter is activated and the Follow-up phase is made mandatory in the CAPA module.

CAPA record is not closed without the follow-up phase in the CAPA record. In CAPA Module parameters, role code is defined in parameter 139.

This defined Role code is taken from the role definitions listed by selecting the CAPA module as the module in the System Infrastructure Definitions/BSID/Configuration Settings/Role Definition menu. In the Follow-up Task assignment process, the system automatically defaults the person in this role code defined in the parameter in the Follow-up Responsible field.
After the assignment of the follow-up task, the task falls as the “CAPA list which will written Follow-up Report” job in the Pending Jobs of the Monitoring Responsible.
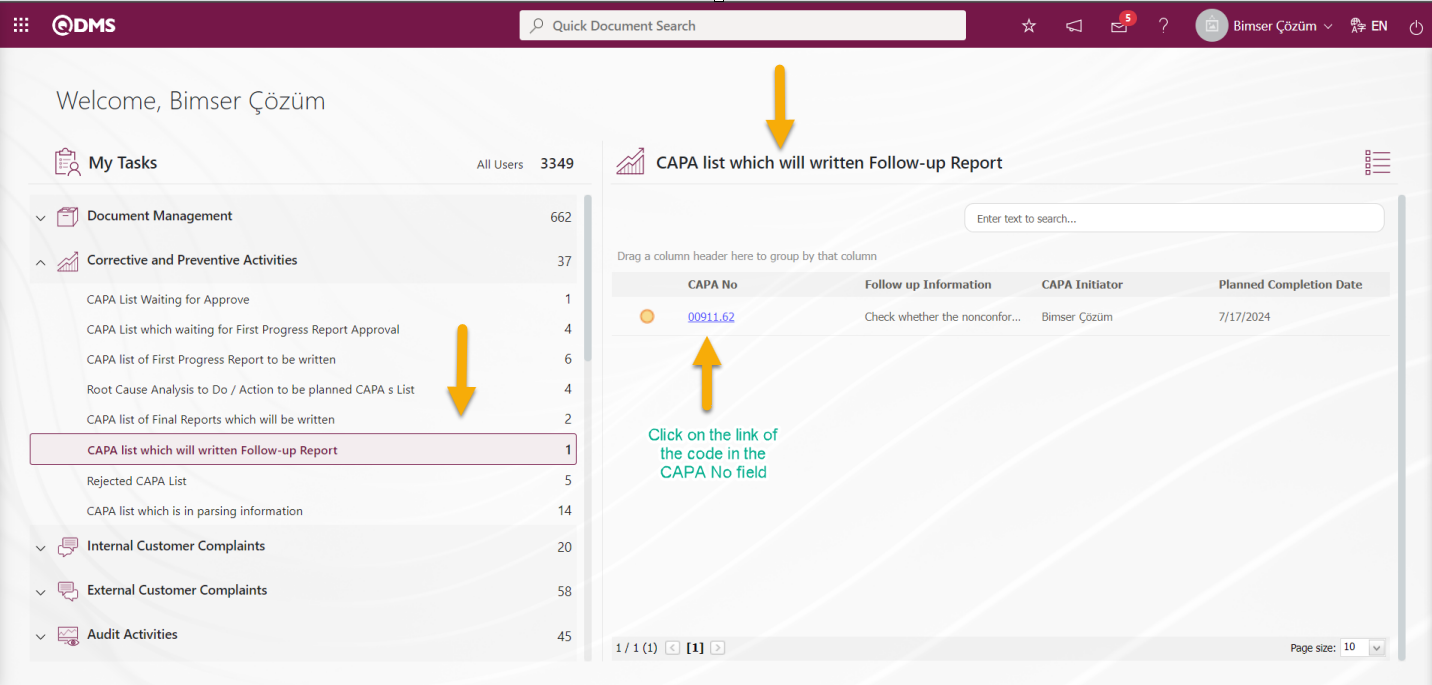
Follow-up Responsible by clicking on the CAPA code link in the CAPA No field in the relevant task Displays the Follow-up tab on the CAPA Activities - Edit Record** screen.
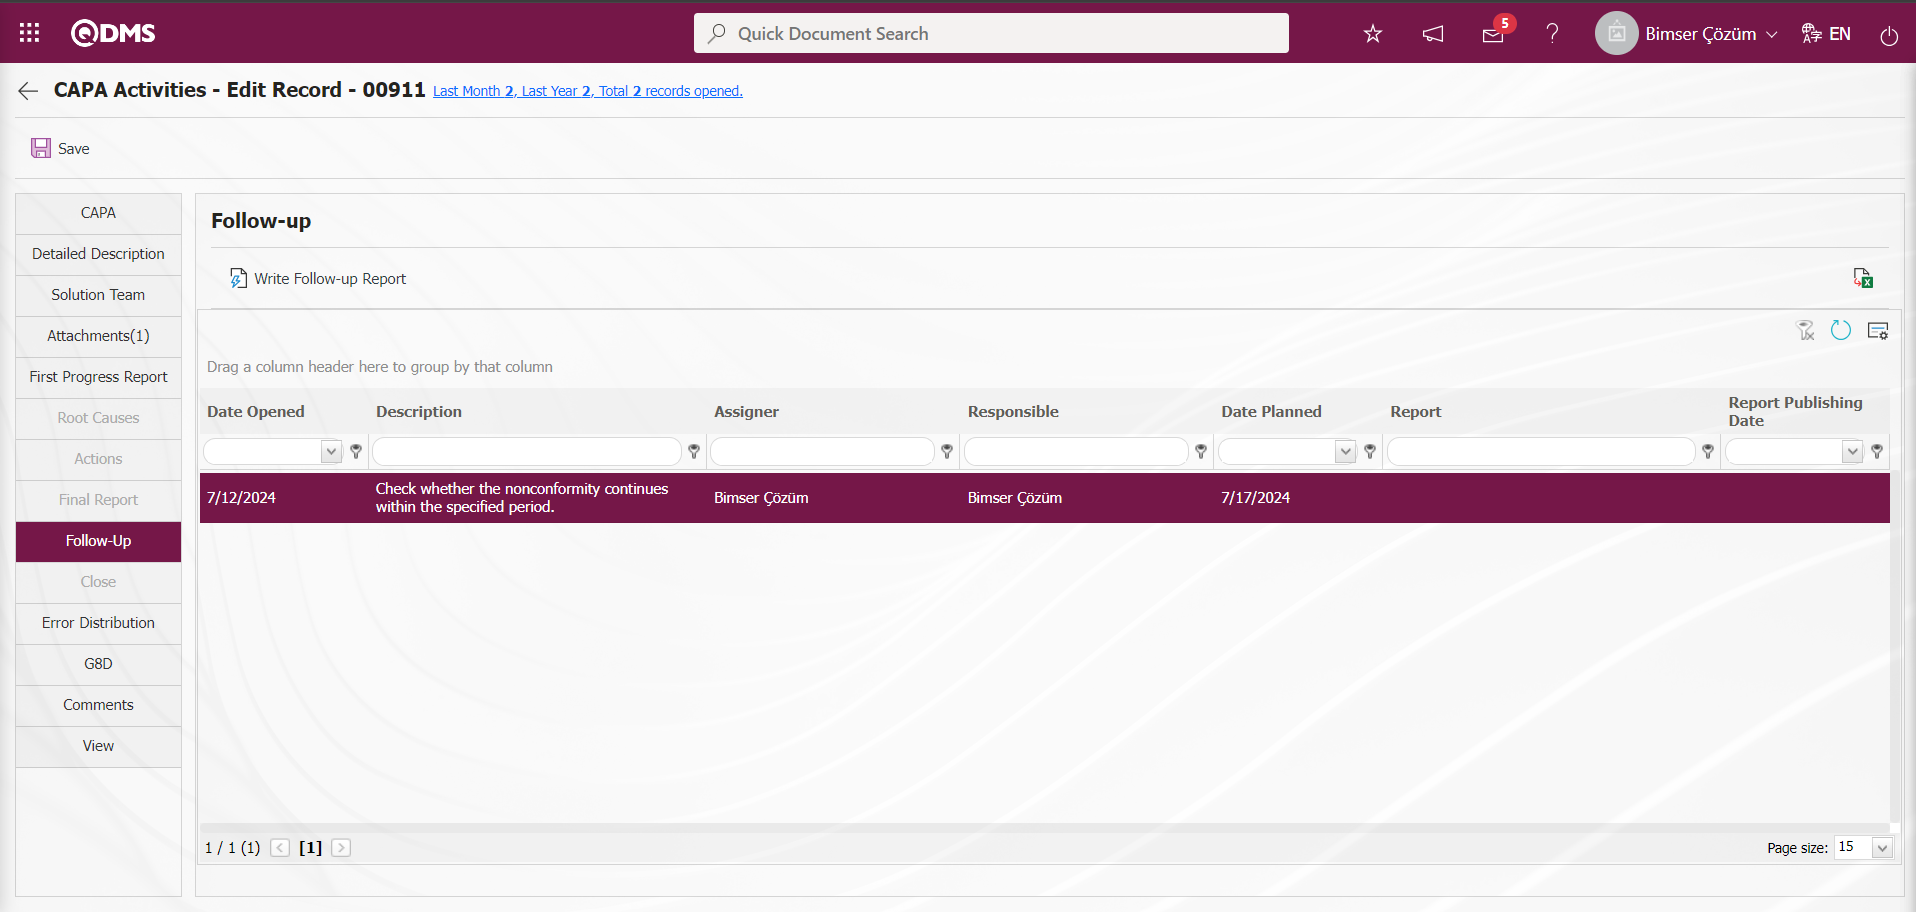
With the help of the buttons on the screen;
 : The process of writing the Follow-up Report is done.
: Data is transferred to Excel.
: The data remaining in the filter fields in the grid where the search criteria on the menu screens are searched are cleaned.
: The menu screen is restored to its default settings.
: User-based designing of the menu screen is done with the show-hide feature, that is, the hiding feature of the fields corresponding to the columns on the menu screens.
Click button on CAPA Activities - Edit Record screen.
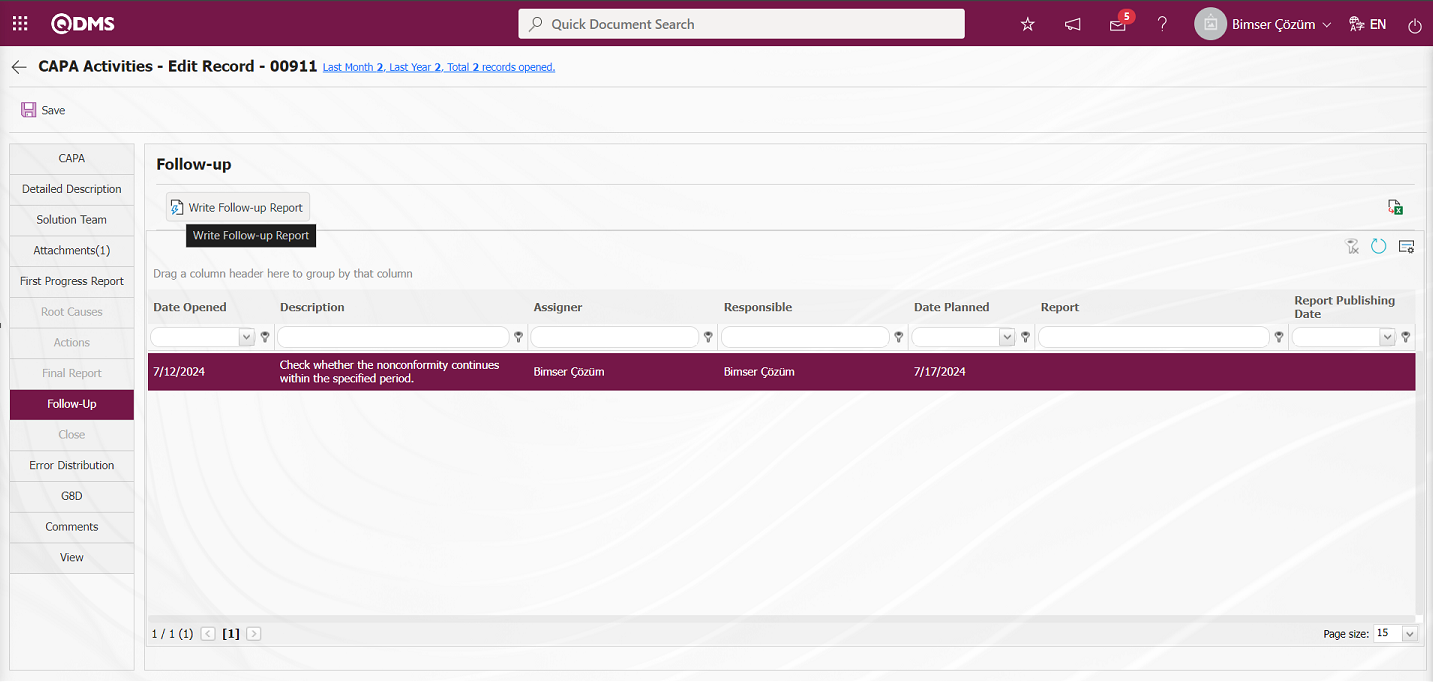
The screen to write a follow-up report opens
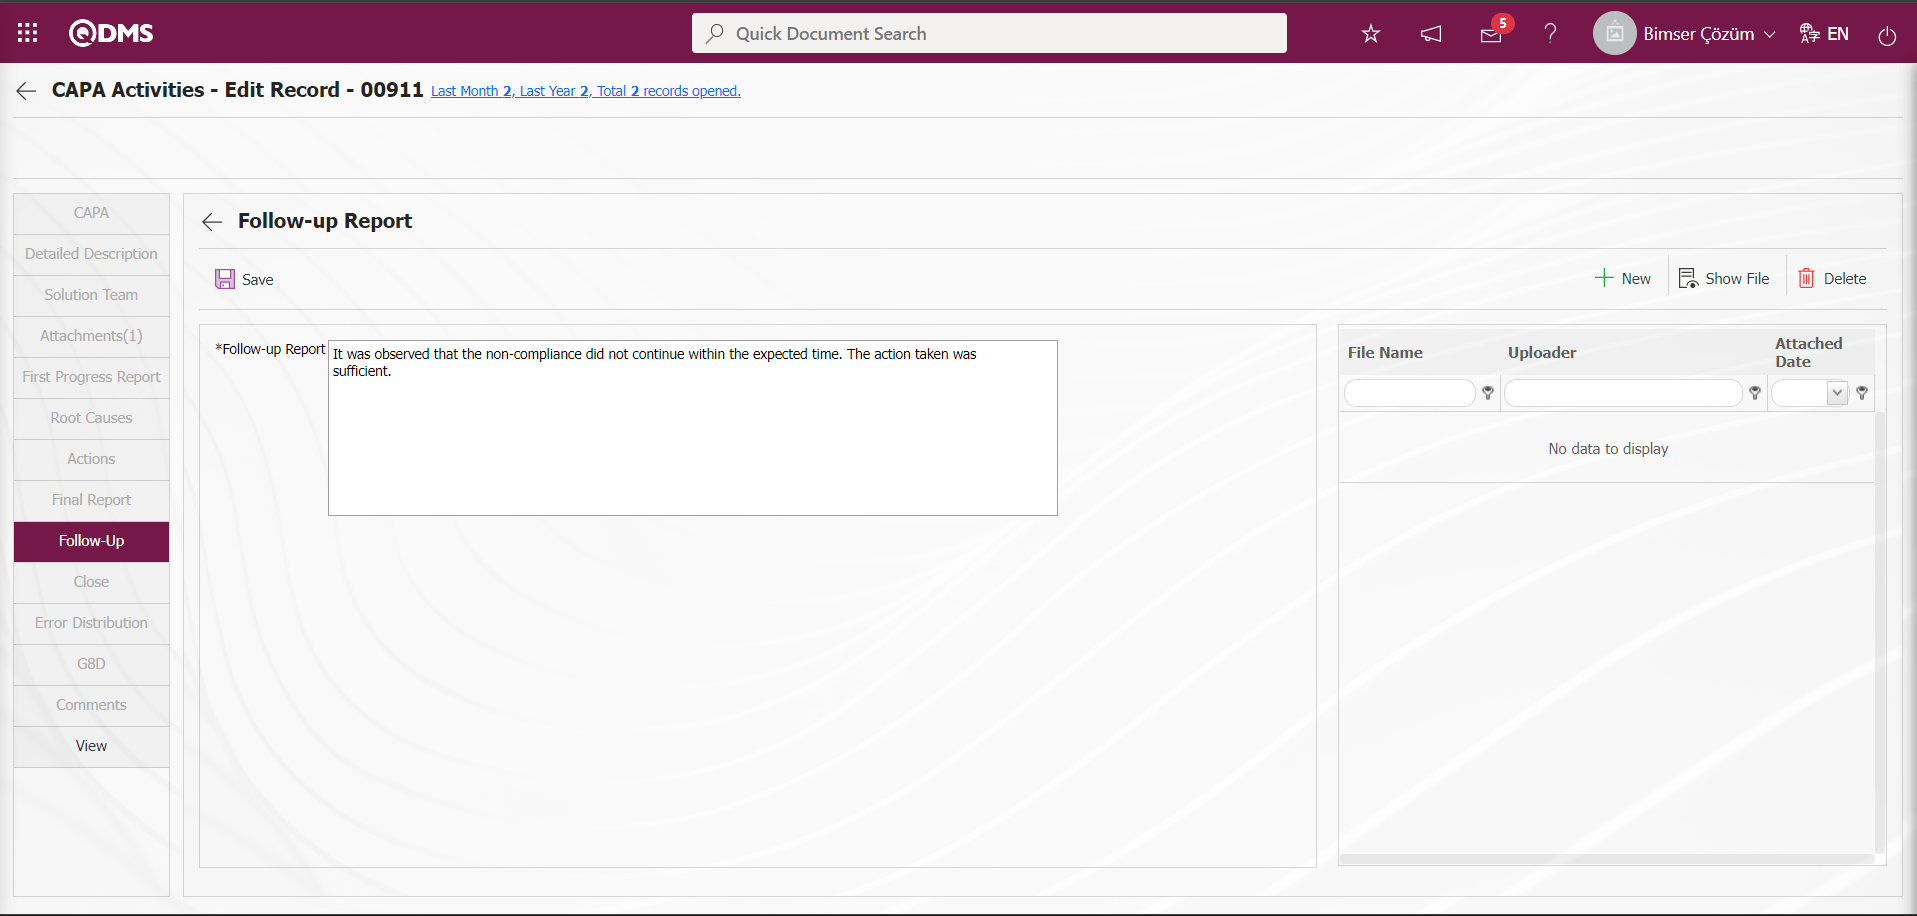
Related fields are defined on the screen that opens:
Follow-up Report: This is the field where the description information of the Follow-up Report is entered on the Follow-up Report screen.
Additional Files: At this stage on the Follow-up Report screen, uploading additional files such as evidence documents, photos, etc. related to this Follow-up Report is done with the help of the buttons.

With the help of the buttons on the screen;
 : The additional file is uploaded to the system.
 : The uploaded additional file information is displayed.
 : The uploaded additional file information is deleted.
If desired, additional file is added to the CAPA record at the Monitoring report stage by clicking the button. Multiple attachment files can be added.
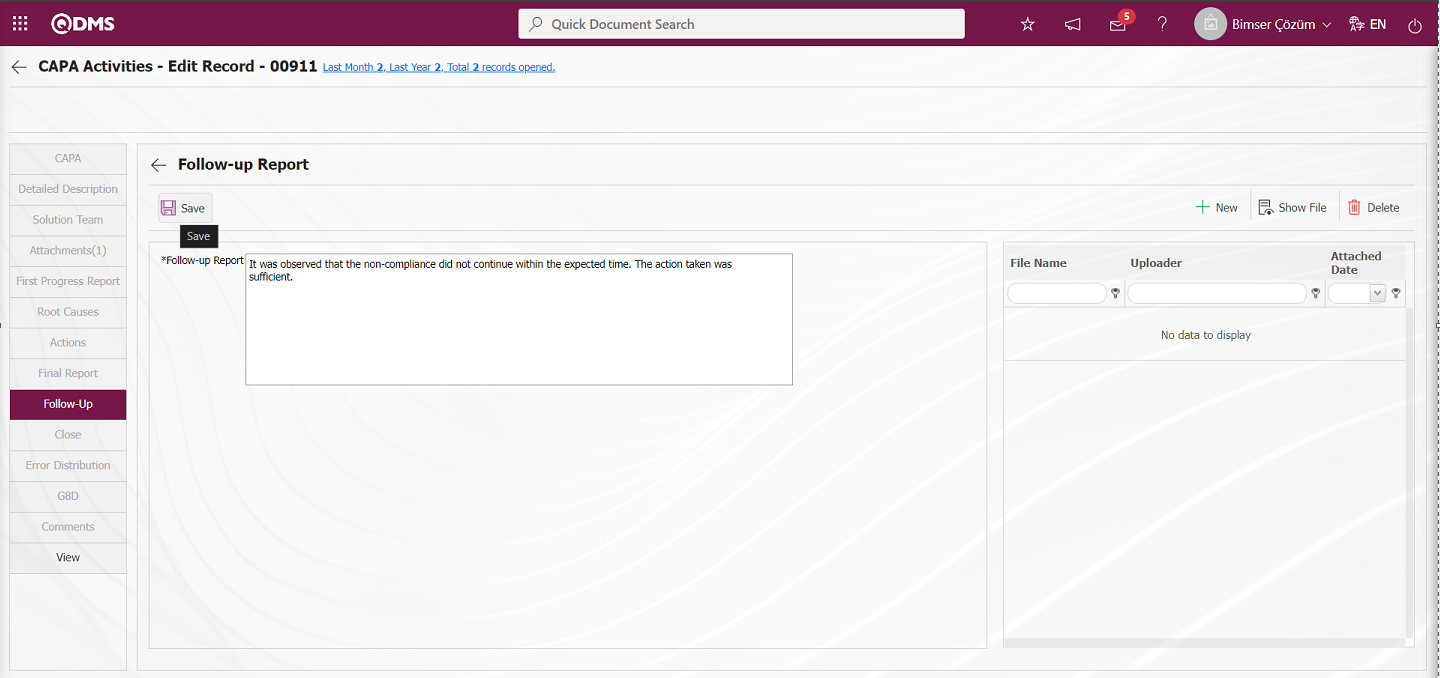
Opened On the CAPA Activities - Edit Record screen, in the Follow-up Report tab, the Follow-up Report information is written and if available, the additional file with the follow-up report is uploaded with the help of the buttons. After the required fields are filled in, the monitoring report registration process is done by clicking the  button in the upper left corner.

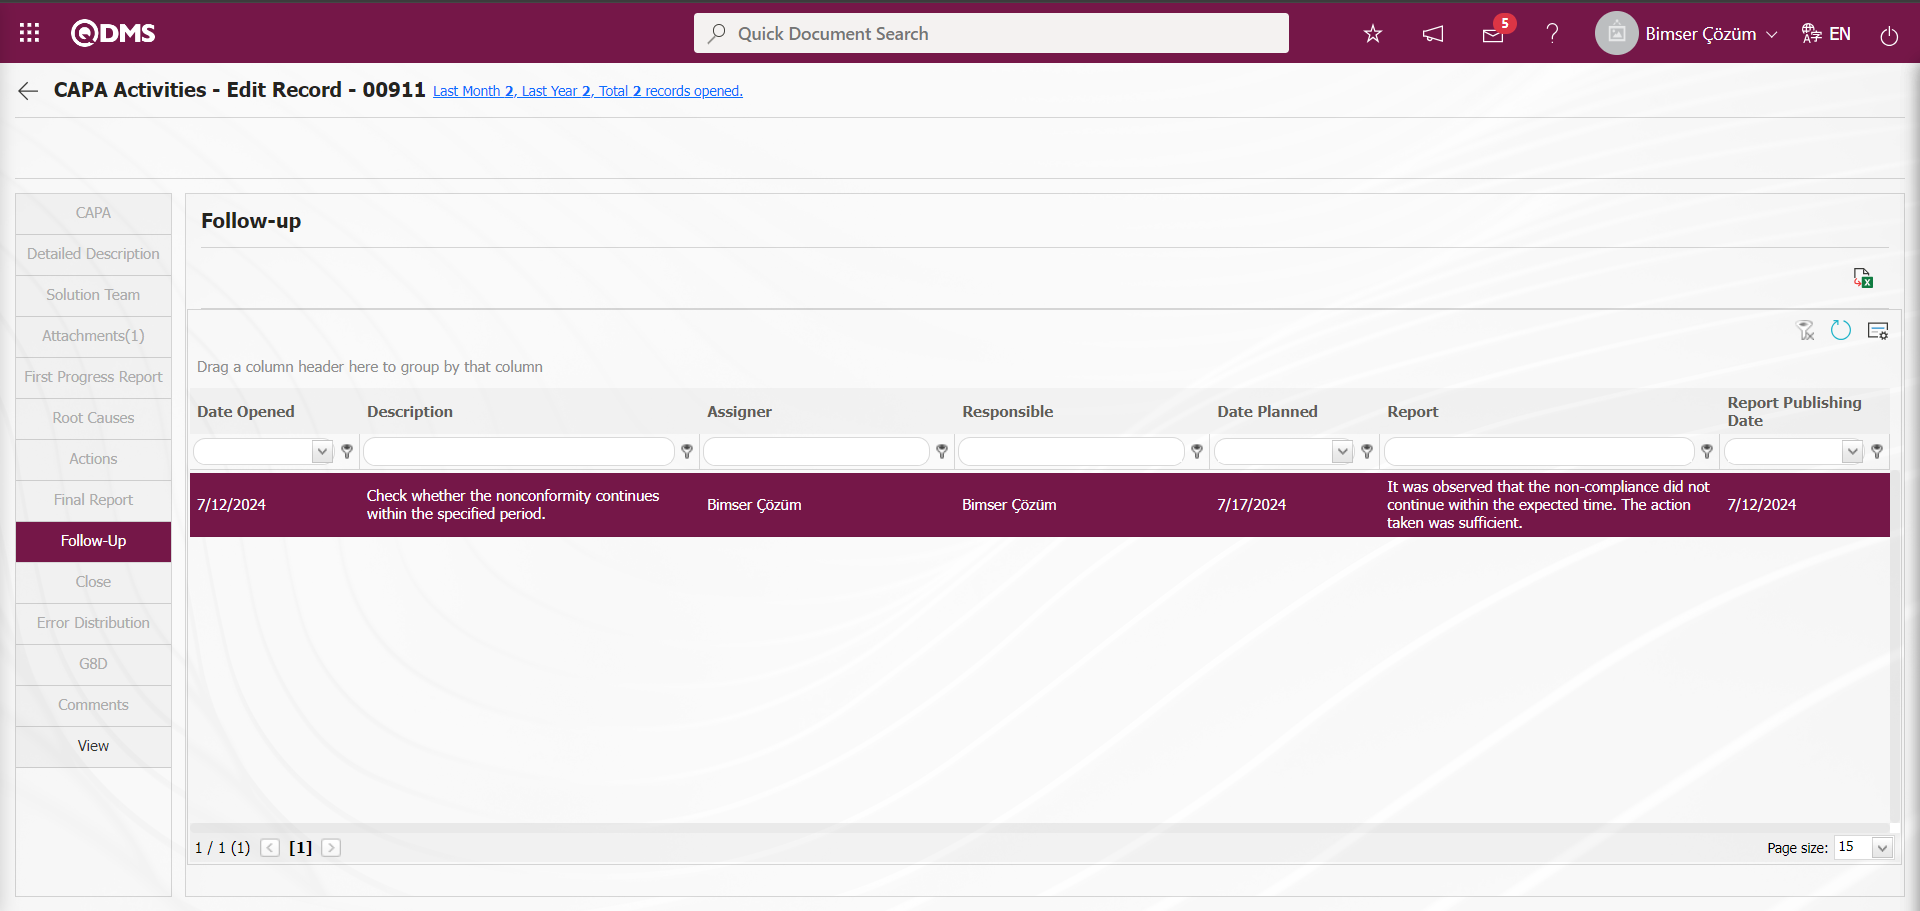
Error Distributions;
It is the tab where the definition of error costs in the CAPA module is made, the amount is calculated, the error distributions according to the departments, personnel, and the percentage rate of the distributions according to the personnel to the departments. Error distributions are generally used in the automotive industry. The parameter value of parameter 26 in the CAPA module parameters is activated by selecting “Yes”.

After the parameter is activated, the Error Distributions tab is displayed on the CAPA Activities - Edit Record screen and the error distributions feature is used. The Error Distributions screen is displayed by clicking the Error Distributions tab on the CAPA Activities - Edit Record** screen. In the error distributions tab, the process of entering the distribution and percentage rates of errors according to personnel and departments is also done. The parameter value of parameter 27 in the CAPA Module parameters is activated by selecting “Yes”.

After the parameter is activated, the Distribution of Errors to Departments field is displayed in the Error Distribution tab on the CAPA Activities - Edit Record screen and this feature is used by entering the percentage rates of the distribution of errors to departments. CAPA Activities - Edit Record In the Error Distribution tab on the Error Distribution screen, the parameter value of parameter 28 is activated by selecting “Yes” for the distribution of errors to personnel.
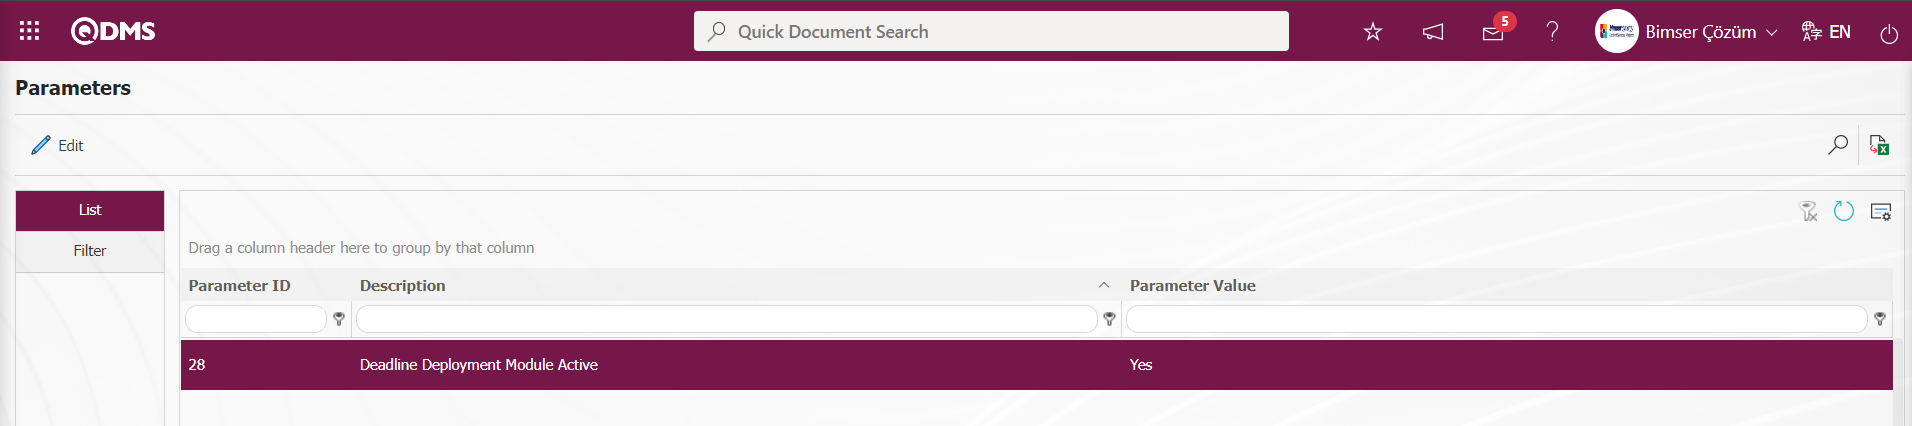
After the parameter is activated On the CAPA Activities - Edit Record** screen, in the Error Distribution tab, the Distribution of Errors to Personnel field is displayed and this feature is used by entering the distribution rates of errors according to personnel.
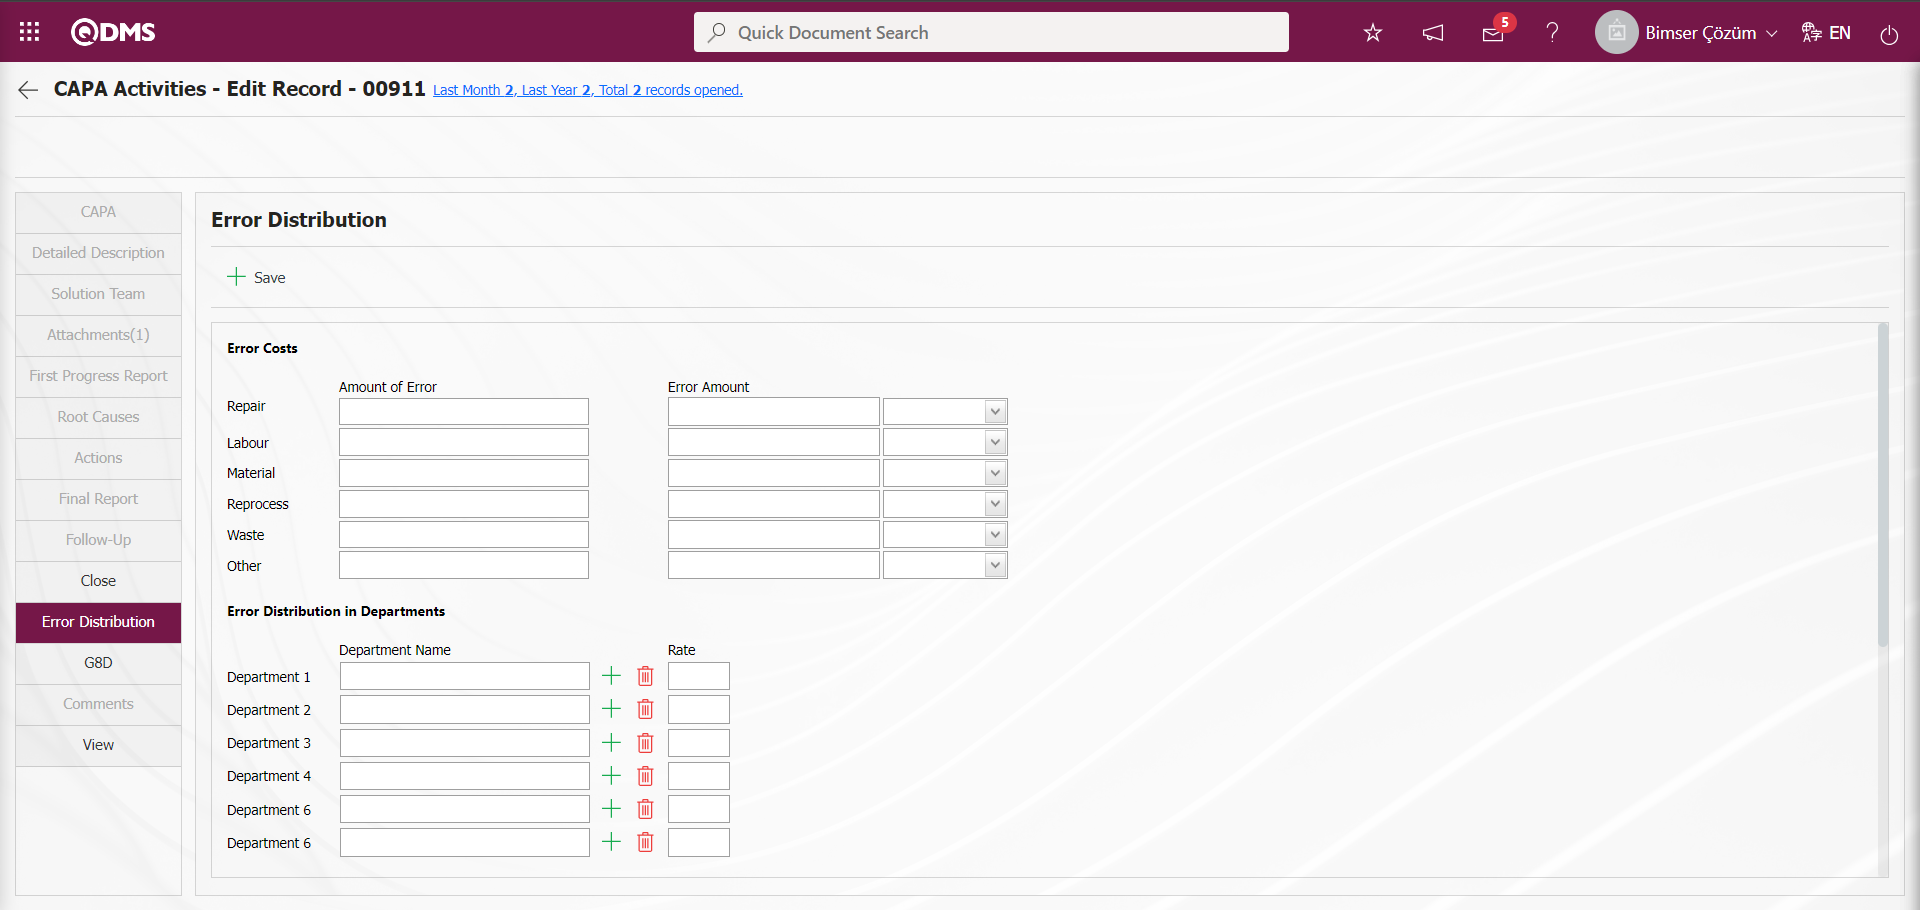
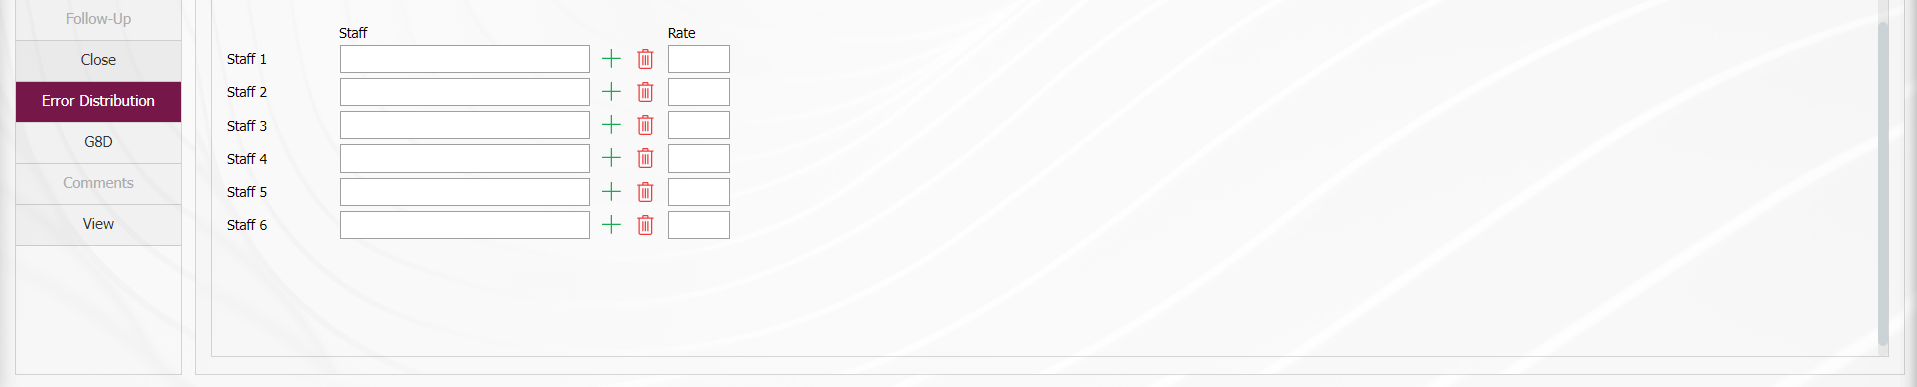
G8D Report;
It is a report that supports the 8-step problem solving and reporting technique that provides step-by-step root cause analysis and solutions from D1 to D8 in the CAPA module and detailed follow-up of the actions to be taken to prevent error recurrence. Using the G8D approach, all kinds of measures are taken to prevent the problem from recurring. The parameter is activated by selecting the parameter value “Yes” for parameter 33 in the CAPA module parameters.

After the parameter is activated The G8D Report tab is displayed on the CAPA Activities - Edit Record screen and this feature is used.
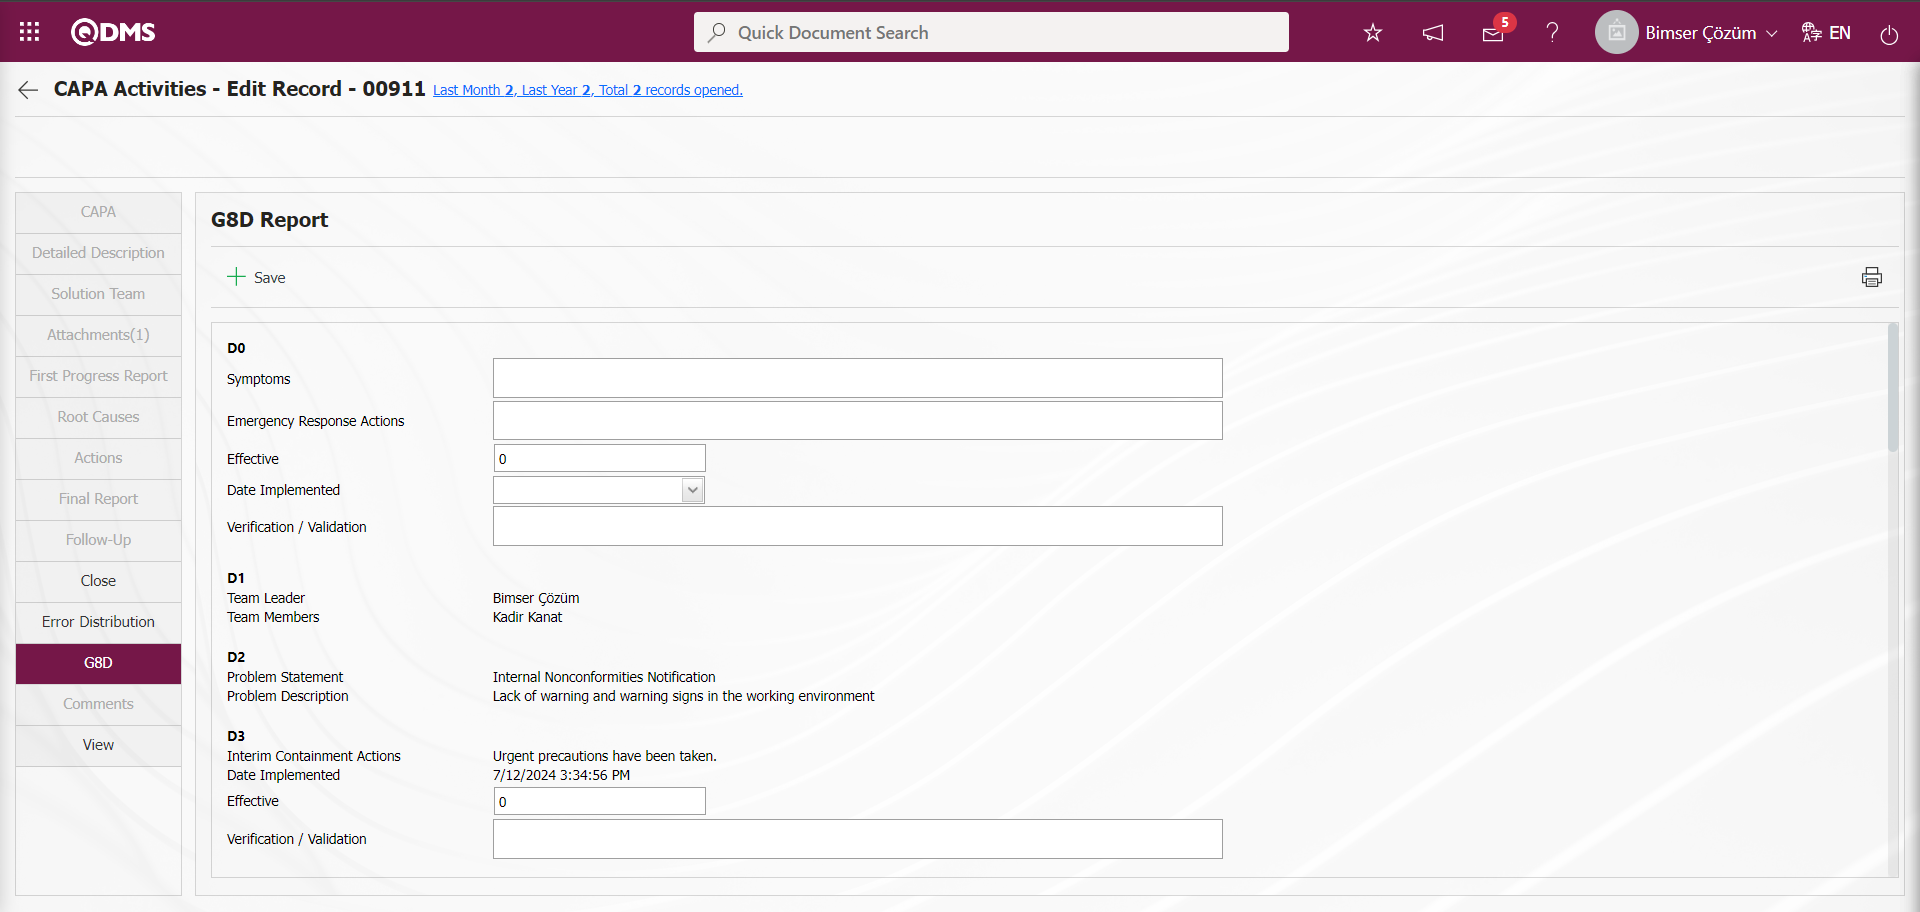
The parameter value of parameter 34 in the CAPA module parameters is activated by selecting “Yes”.
After the parameter is activated, the fields opened by clicking on the G8D Report tab on the CAPA Activities - Edit Record screen must be filled in.
The G8D report is obtained by clicking the  (Print) button on the G8D Report tab on the CAPA Activities - Edit Record screen. The report format must be defined in parameter 69 in the Corrective and Preventive Actions module parameters of the G8D report. For the process of defining the G8D report format to the parameter, the G8D report format should be uploaded to the system by clicking the System Infrastructure Definitions/BSID/ Configuration Settings/Default Report Layouts Arrangement
  button. The name and extension of the G8D report format uploaded to the system in the Default Report Layouts Arrangement menu is copied with the right click/copy method. The name and extension of the copied G8D report format is defined by pasting it to the parameter value of parameter 69 of CAPA Module parameters by right click/paste method.
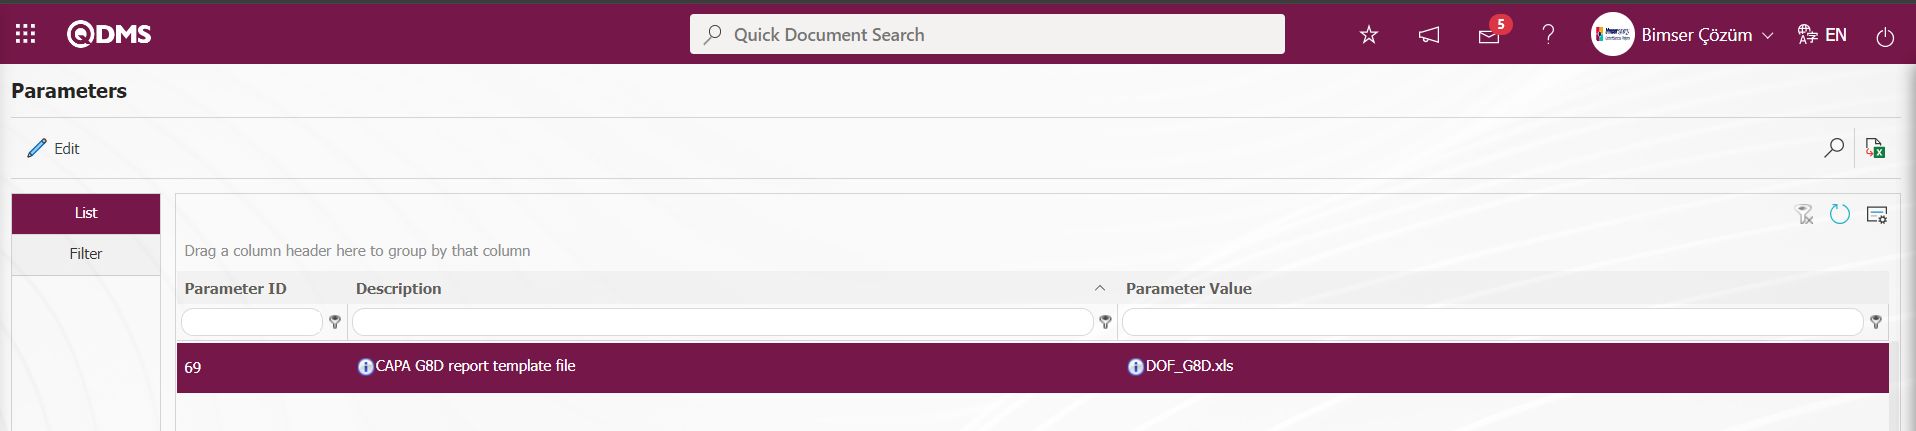
After the identification process is done, the G8D report is obtained by clicking the (Print) button.
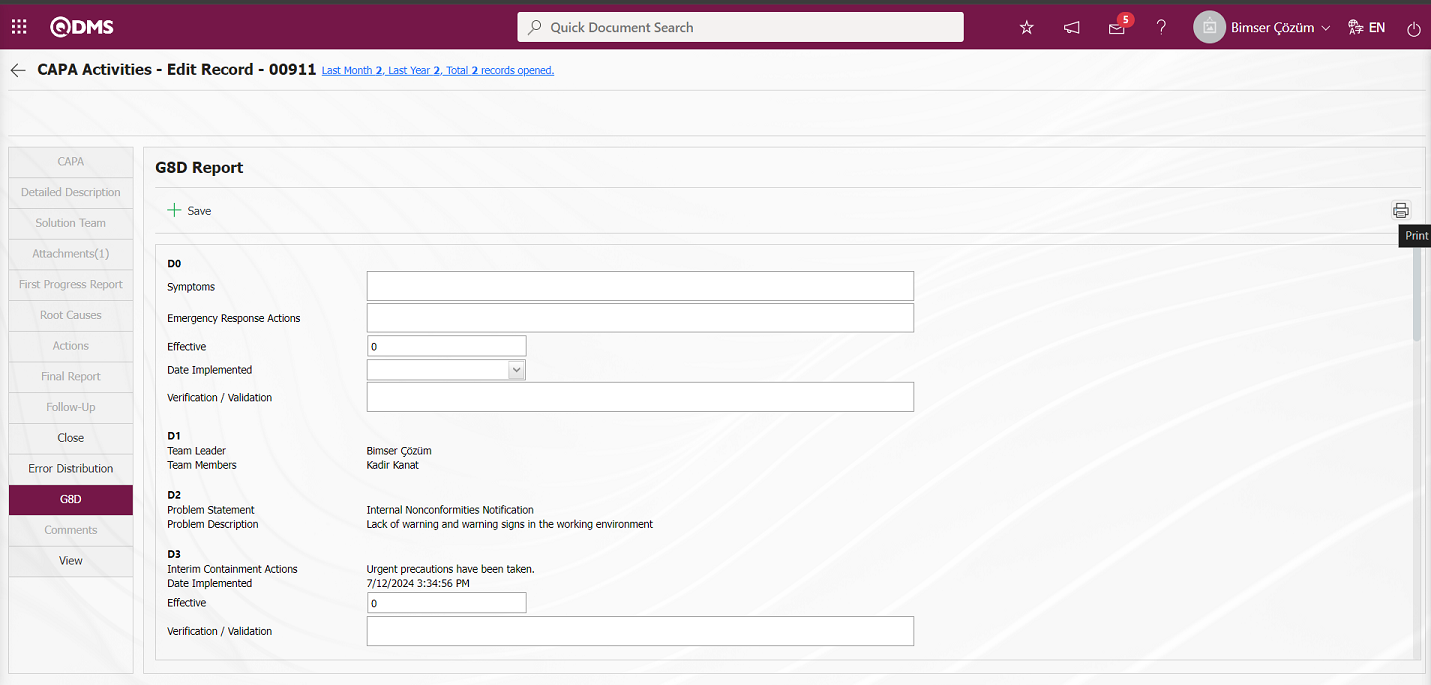
The G8D report is reported in Excel format.
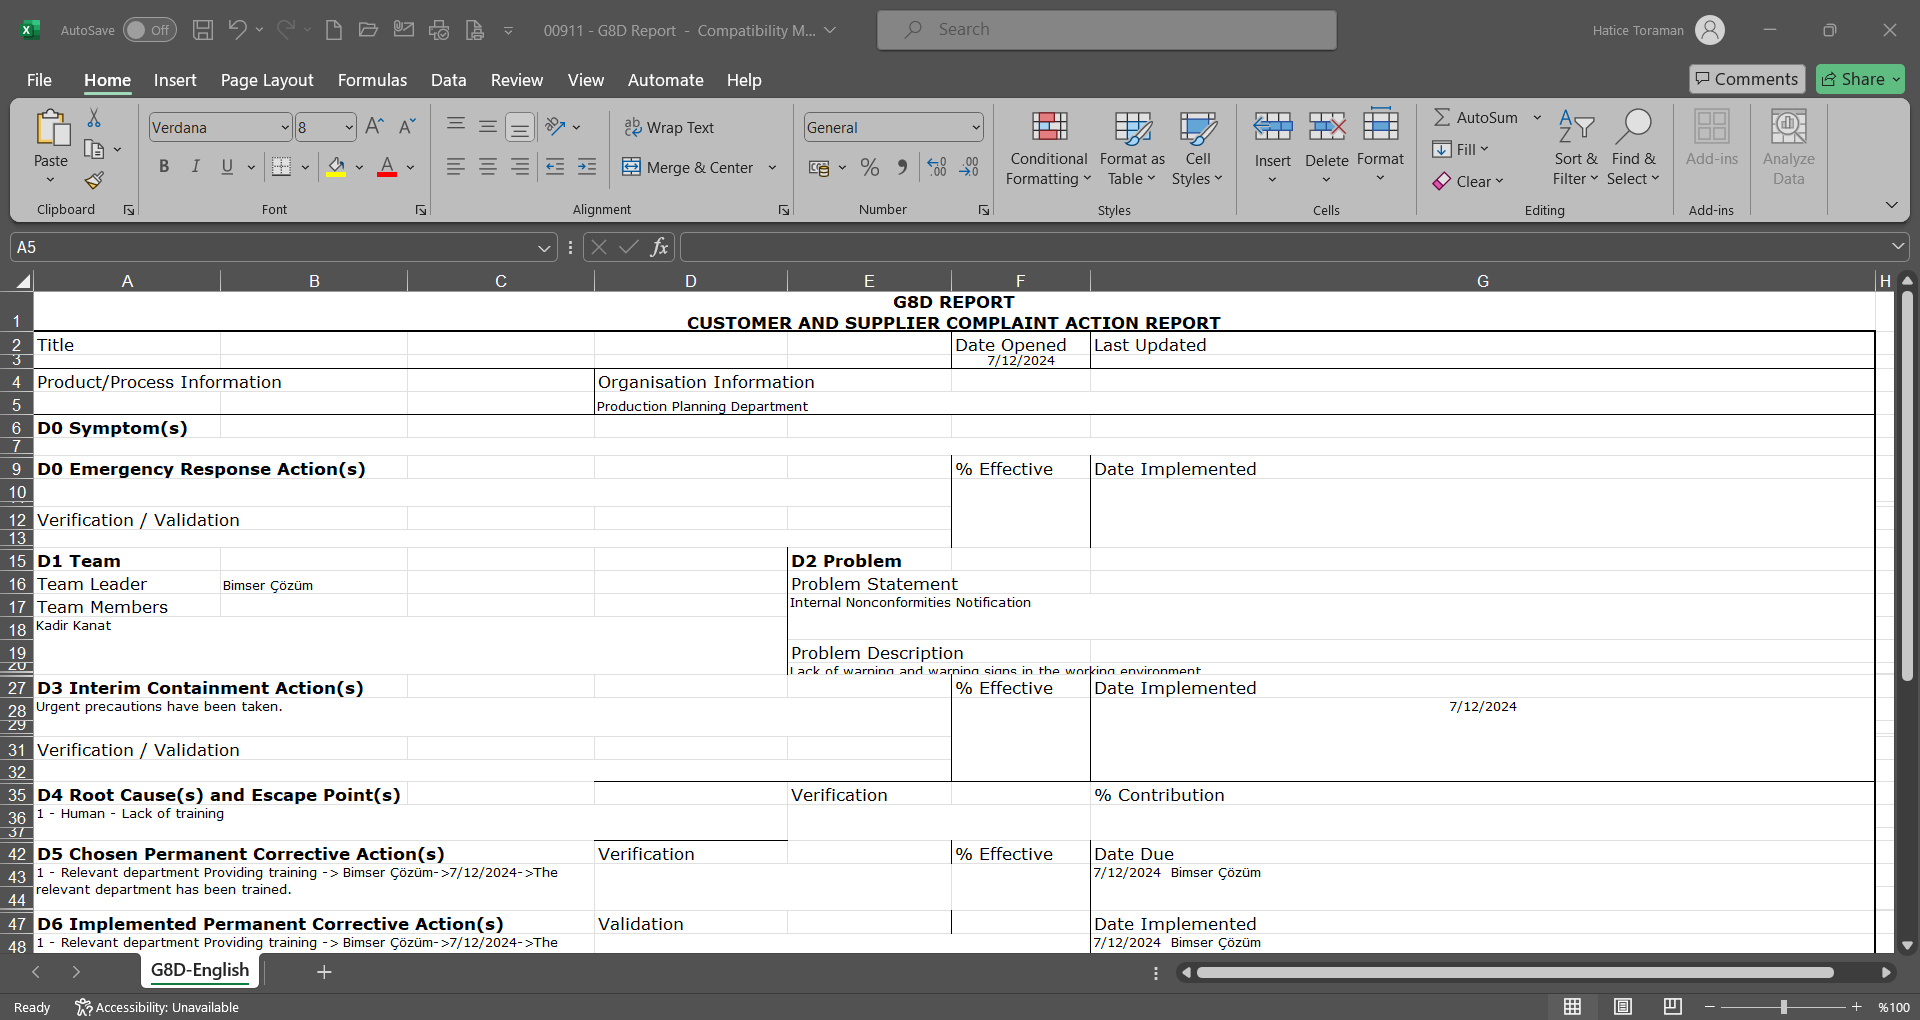
6.2.1.13. Close
After the CAPA Registration monitoring report stage, the CAPA Closure responsible will be assigned the “CAPA List which will closed” job in the Pending jobs.
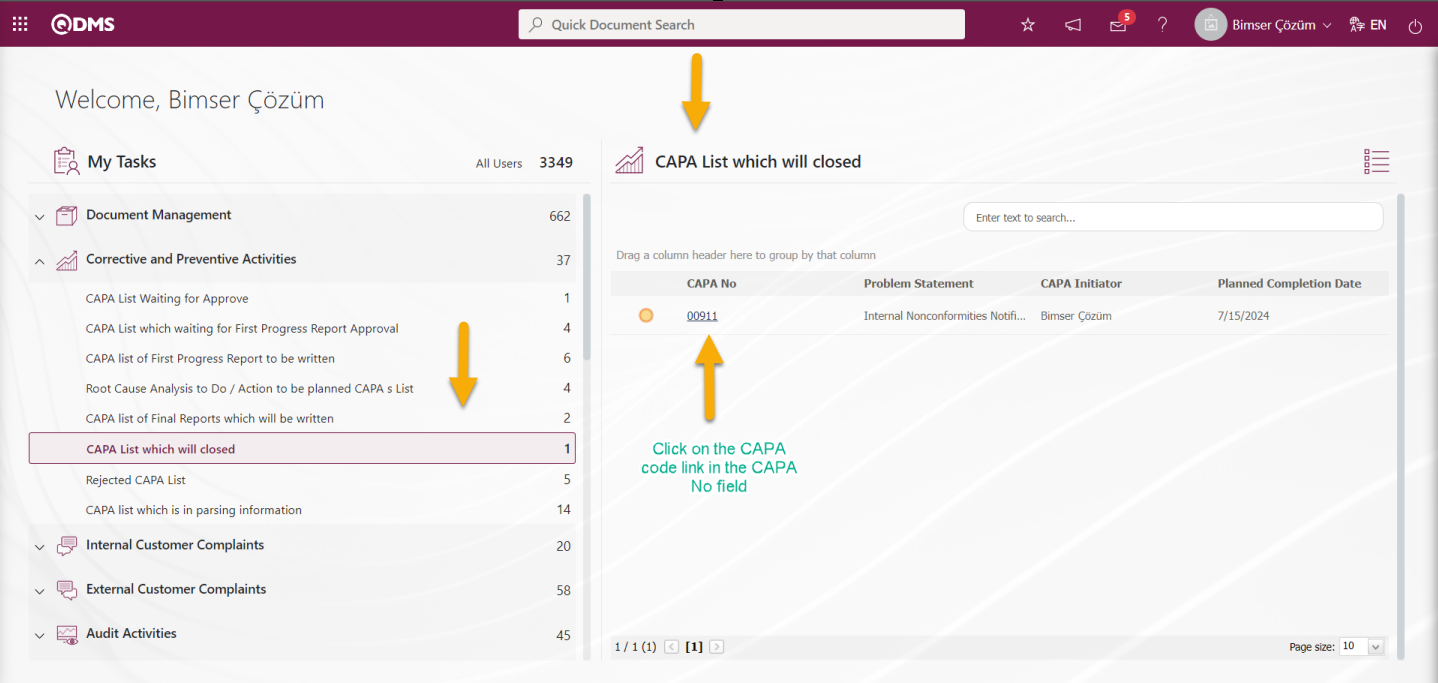
Click on the CAPA Code link in the CAPA No field in the relevant task and display the relevant CAPA. At this stage, when it is seen that the nonconformity is eliminated as a result of the actions taken regarding the nonconformity, the process continues with the closure stage of the CAPA record. By clicking on the CAPA no, it comes to the “CAPA List, Waiting For Approval” screen. At this stage, it displays information with the CAPA record. When the person who will approve the closure decides that the actions taken are not sufficient, he/she can start the process of defining the missing actions. The process continues step by step in the form of planning new actions in the Actions tab and writing the result report in the Result report tab depending on these actions. Follow-up can be opened as another option. The process can continue by assigning a follow-up responsible to check whether the Actions taken are sufficient or not and writing a follow-up report. When it is conclusively reached that the nonconformity has been eliminated, it is decided to close the CAPA.

With the help of the buttons on the screen;
: View all information about CAPA.
: When the person who will give closure approval decides that the actions taken are not sufficient, the process of defining the missing actions is done.
: The process of assigning the task of writing a report by monitoring the adequacy, effectiveness or proper execution of the actions taken by a different person.
:Close The CAPA record is closed by entering the approval and qualification information.
: It is used when you want to search by filtering the information from the filter option in case there are too many CAPAs that need to be approved.
: The data remaining in the filter fields in the grid where the search criteria on the menu screens are searched is cleaned.
: The menu screen is restored to its default settings.
: User-based designing is done on the menu screen with the show-hide feature, that is, the hiding feature of the fields corresponding to the columns on the menu screens.
Click the  button on the screen that opens.

Opens the CAPA Close screen.
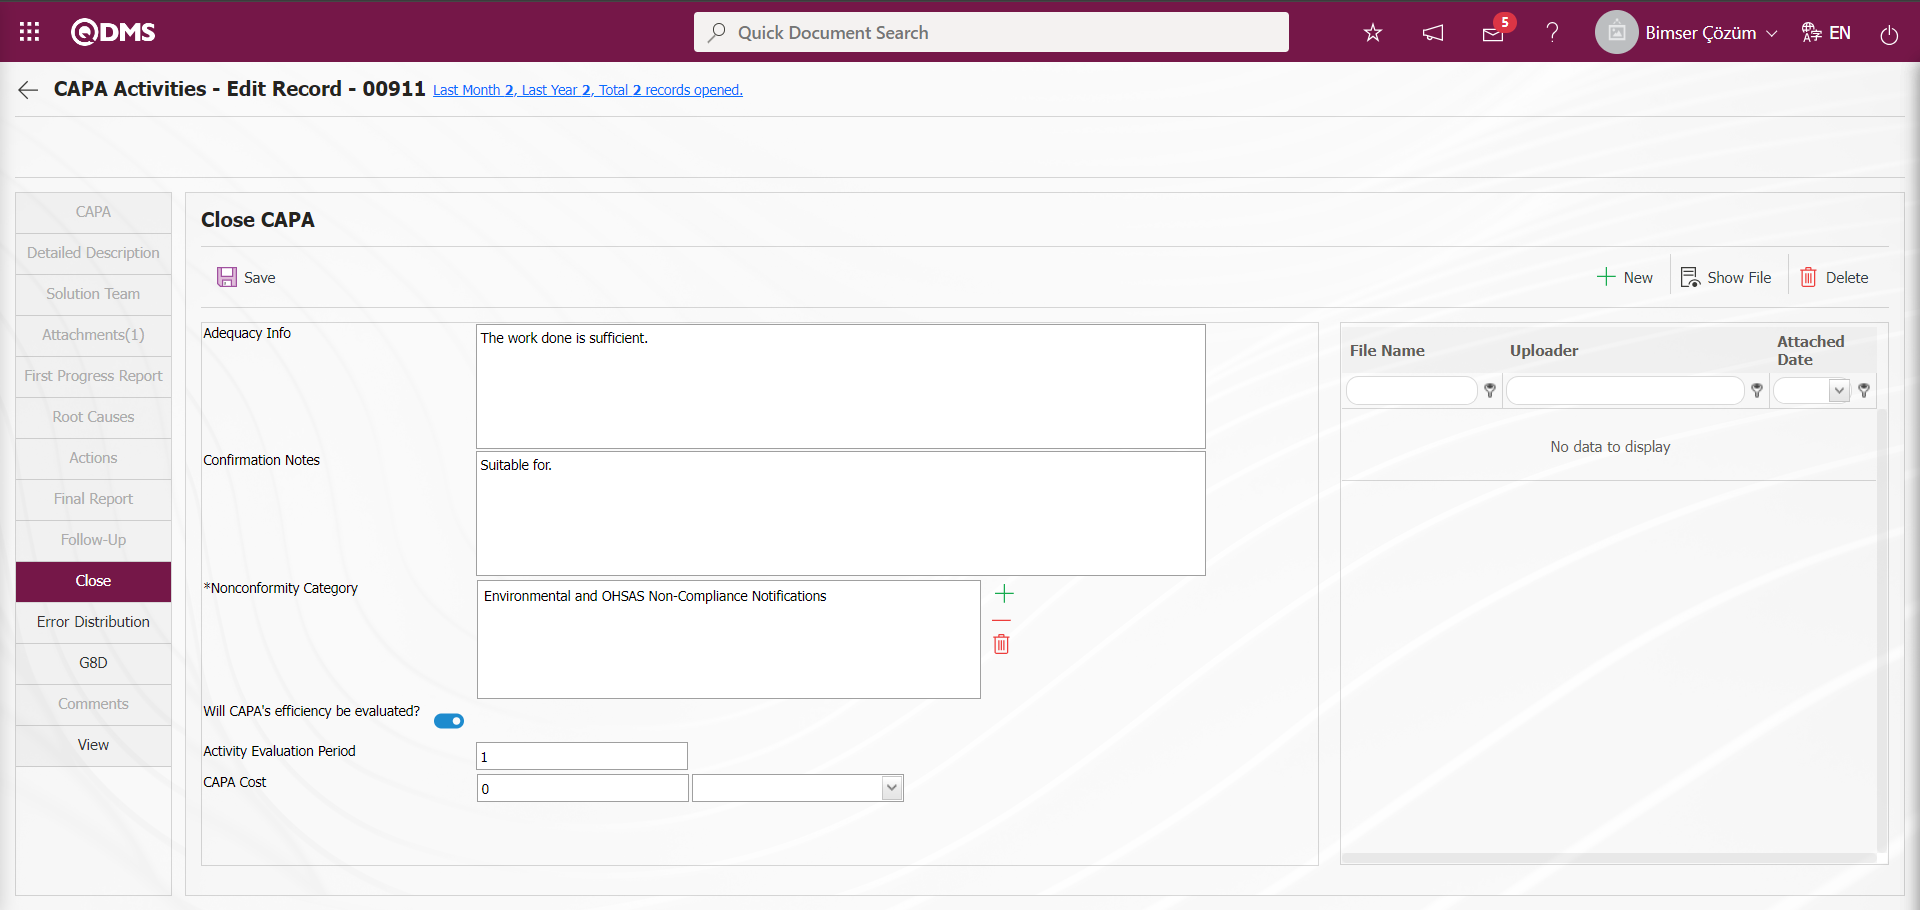
Related fields are defined on the screen that opens:
Adequacy Info: This is the field where the qualification description information is entered in the Closing tab on the CAPA Activities - Edit Record screen.
Confirmation Notes: This is the field where Confirmation Note description information is entered in the Closing tab on the CAPA Activities - Edit Record screen.
Nonconformity Category: This is the field where Nonconformity Category information can be selected from the Nonconformity Category List defined in the system in the Closing Tab on the CAPA Activities - Edit Record screen.
Will CAPA's efficiency be evaluated? :If “Will CAPA's efficiency be evaluated?” will be activated in the Closure tab on the CAPA Activities - Edit Record screen, the relevant check box is checked. It is the field displayed depending on the parameter. The parameter is activated by selecting the parameter value “Yes” of parameter 87 in the Corrective and Preventive Actions Module parameters. After the parameter is activated, the “”Will CAPA's efficiency be evaluated?” field is displayed on the CAPA Operations - Record Update screen. The relevant check box is checked and the CAPA efficiency evaluation process is used in the CAPA module.
CAPA Cost: This is the field where CAPA Cost information is entered in the Closure tab on the CAPA Activities - Edit Record screen.
Additional Files: In the CAPA Activities - Edit Record screen, in the Closing tab, if any, the Additional File is uploaded.
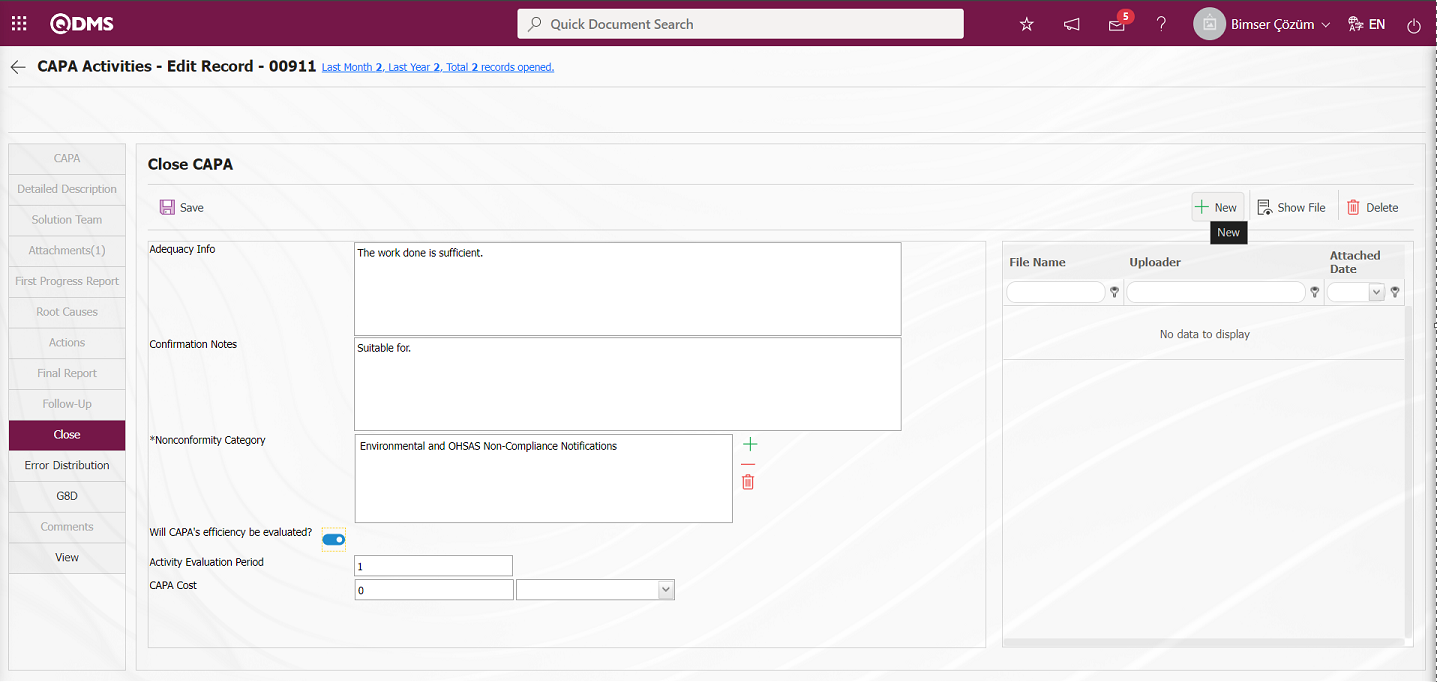
With the help of the buttons on the screen;
: The additional file is uploaded to the system.
: The uploaded additional file information is displayed.
: Uploaded attachment file information is deleted
button is clicked to add an additional file at the defined closing stage. Multiple additional files can be added.
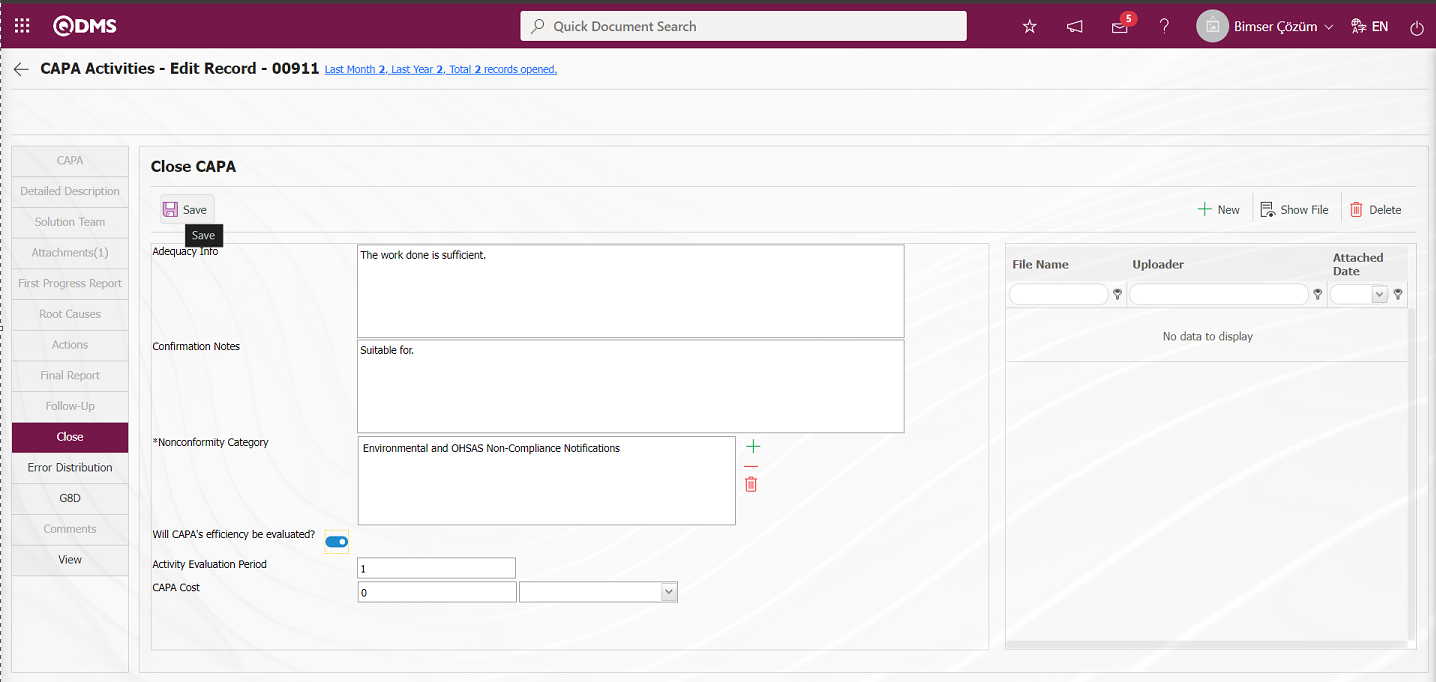
In the CAPA Activities - Edit Record** screen, qualification information is entered in the Closure tab. In addition, if desired, additions can be made to the nonconformity category field. Again, if desired, additional files can be added to the closure phase. After the required fields are filled in, the information is saved by clicking the  button in the upper left corner and CAPA is closed.
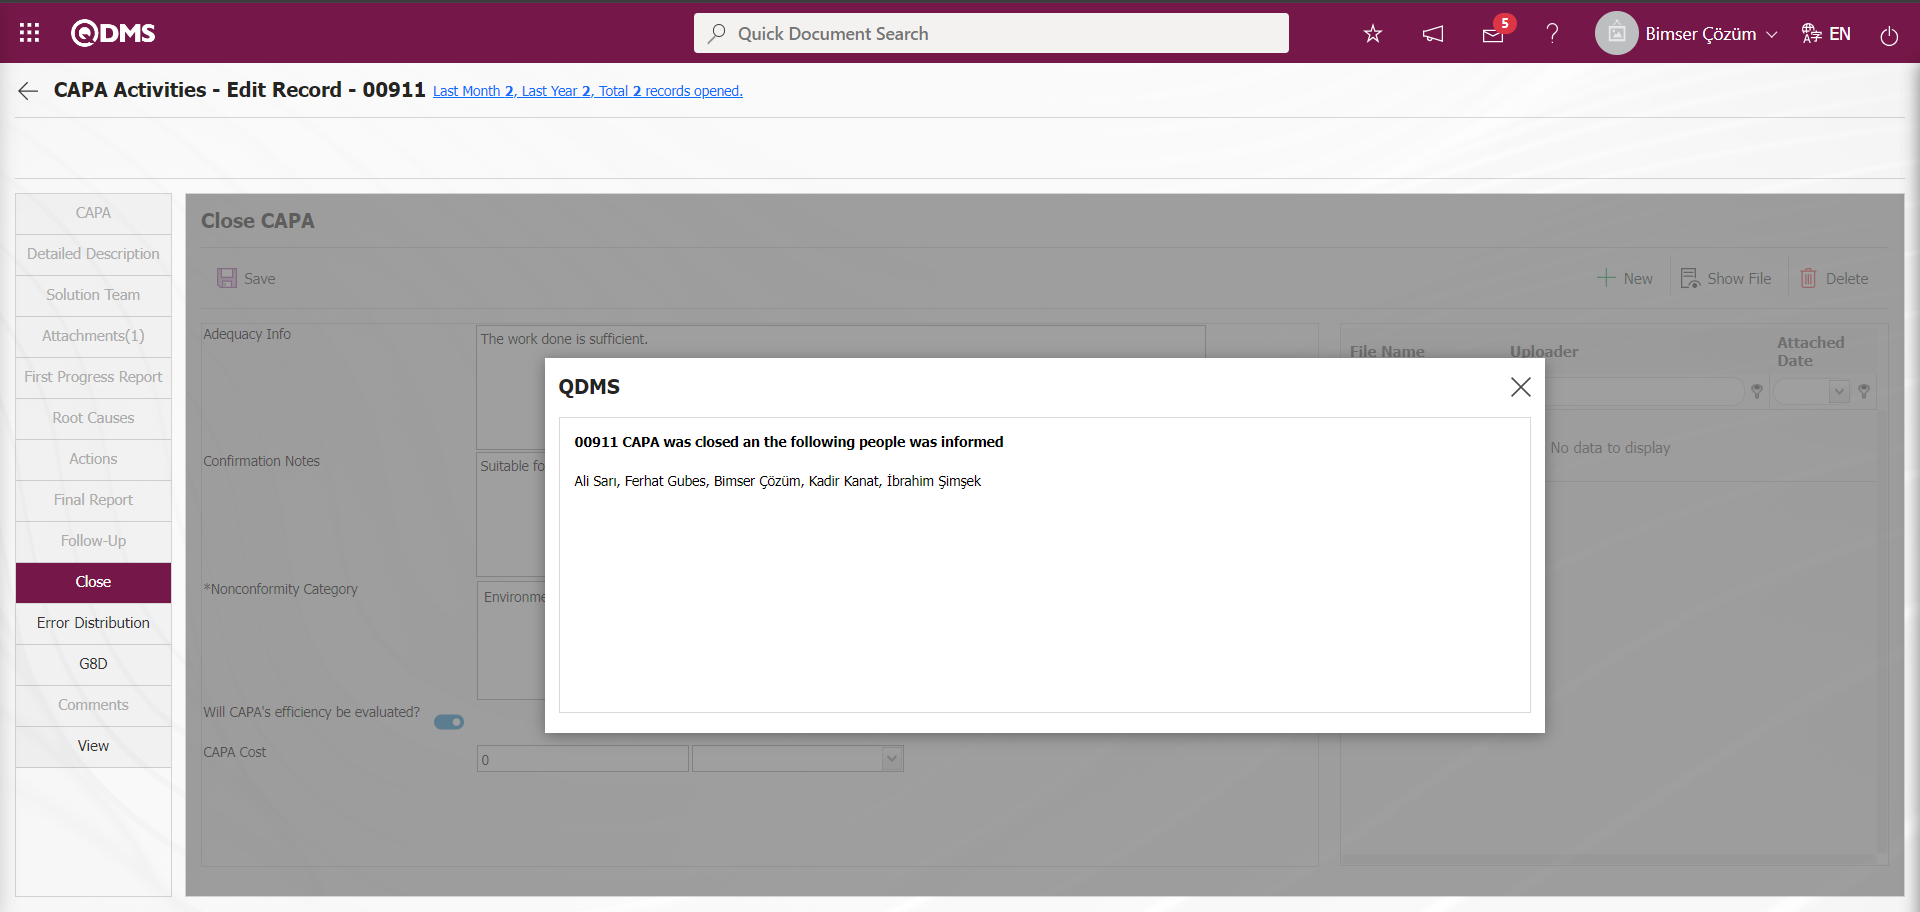
In the CAPA module, according to the value entered in the parameter value in parameter 6, the process of setting how many days after the CAPA Final report is written, CAPA will be closed is done.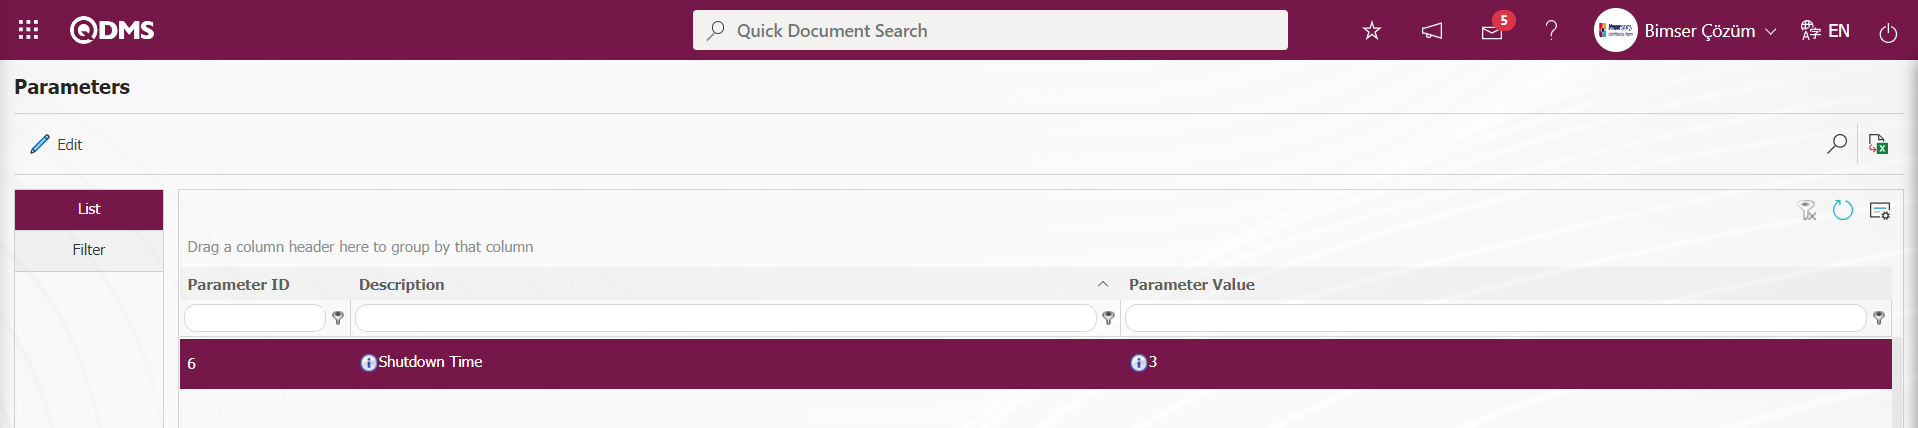
According to this setting in the parameter, this is the maximum waiting time for closing confirmation.
6.2.1.14. Viewing
By clicking the View tab on the CAPA Activities - Edit Record** screen, the details of the CAPA record's step-by-step process steps are viewed.
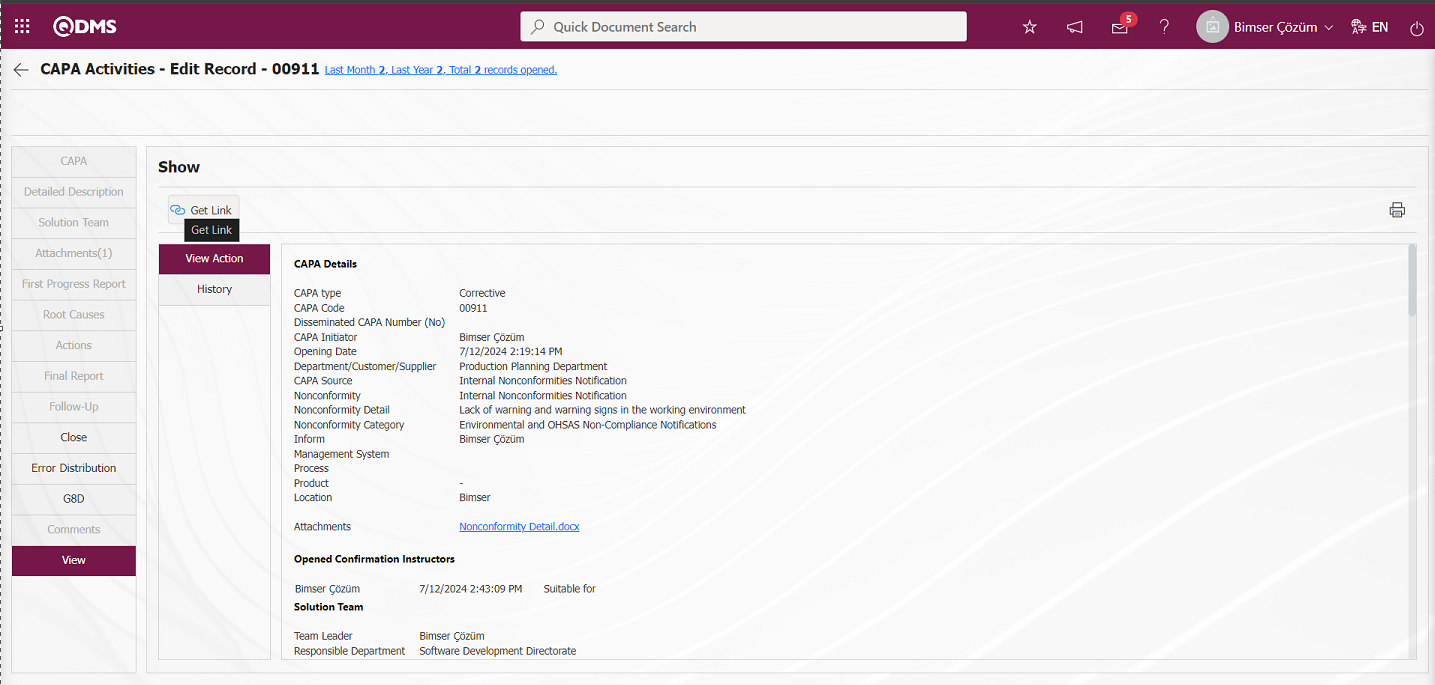
Click on the 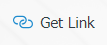 button on the viewing screen of the CAPA record. The link related to viewing is displayed on the screen. Right-click/copy-paste methods or copy-paste shortcut keys (Ctrl+C-Ctrl+V) are used to view the CAPA record and share it to the relevant people.
The History tab displays a list of information related to the approval history of CAPA Registration related jobs such as CAPA opening approval, CAPA First Progress Report, CAPA Action Opening, CAPA Action Performed.
6.2.1.15. CAPA Record Maintenance
The relevant edit/change/update operation is performed on the selected CAPA Record in the list.Users who are authorized to perform Record Maintenance feature operation are authorized to make all kinds of changes on the CAPA record. Even if the CAPA Record is in a closed state, all kinds of changes can be made on the record. In order to perform these operations, the user must be assigned as the CAPA Module module administrator in the System Infrastructure Definitions / BSID / Configuration Settings / Module Administrator menu. The  button is displayed on the screens of the users assigned as module administrator and they can edit the desired information on a CAPA record with the button.
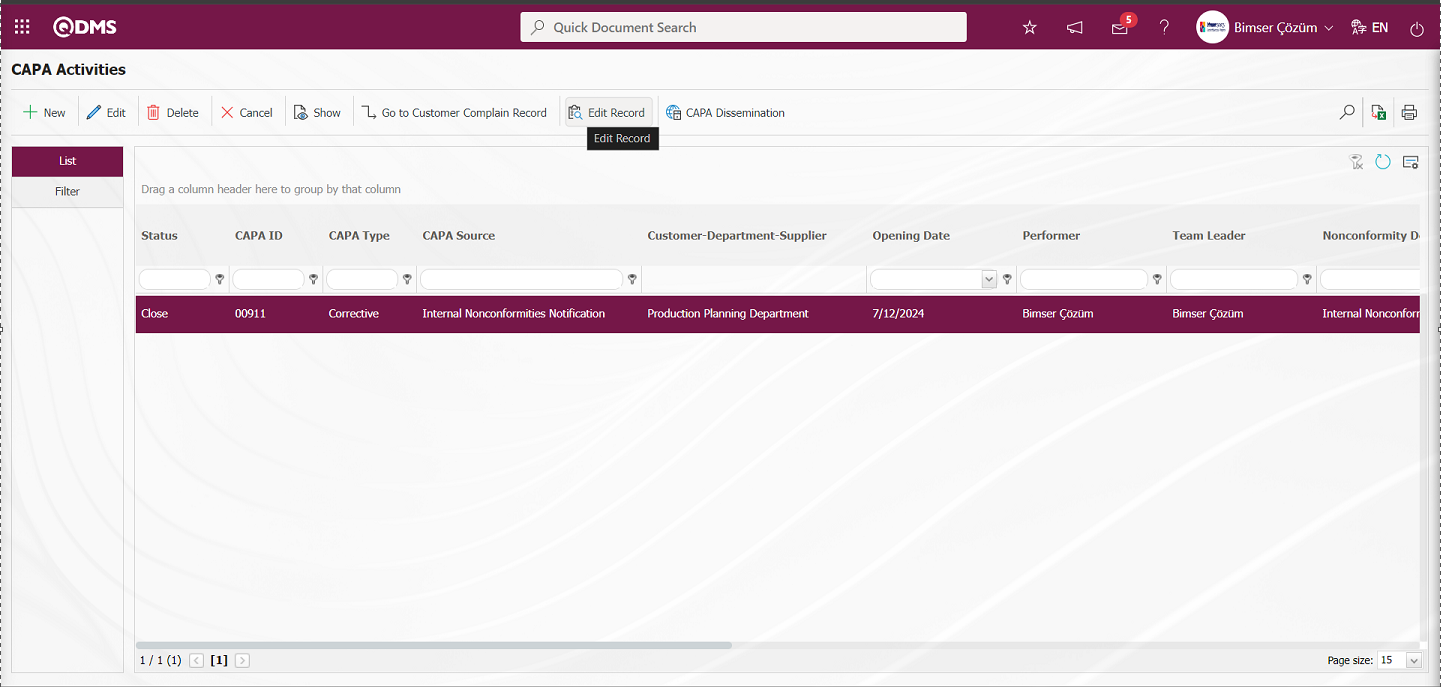
On the CAPA Activities screen, click the button while the CAPA Record with closed status is selected.

With the help of the buttons on the screen;
 :CAPA record is returned to the First Progress Report stage.The CAPA record with closed status starts at the First Progress Report stage.The process in the CAPA record continues with the First Progress Report stage.
 : The CAPA record is returned to the final report stage. The CAPA record with closed status starts at the Final report stage. The process in the CAPA record continues with the Final report stage.
 :The changes made are recorded.
 :The G8D report related to the CAPA record is displayed.
![A screenshot of a computer
Description automatically generated]ref130
On the CAPA Record Maintenance screen,  button is clicked to make changes and edits on the related fields.
  button is clicked to delete the related record.
  button is clicked to return the Action to open status.
  button is clicked to add a new Root Cause in the Root Cause Analysis tab. Using the Record Maintenance feature, editing is performed on the relevant fields in the stages of the CAPA record.
6.2.1.16. CAPA Dissemination
It is the process of applying the opened CAPA record to other locations or departments of the workplace using the CAPA Dissemination feature.
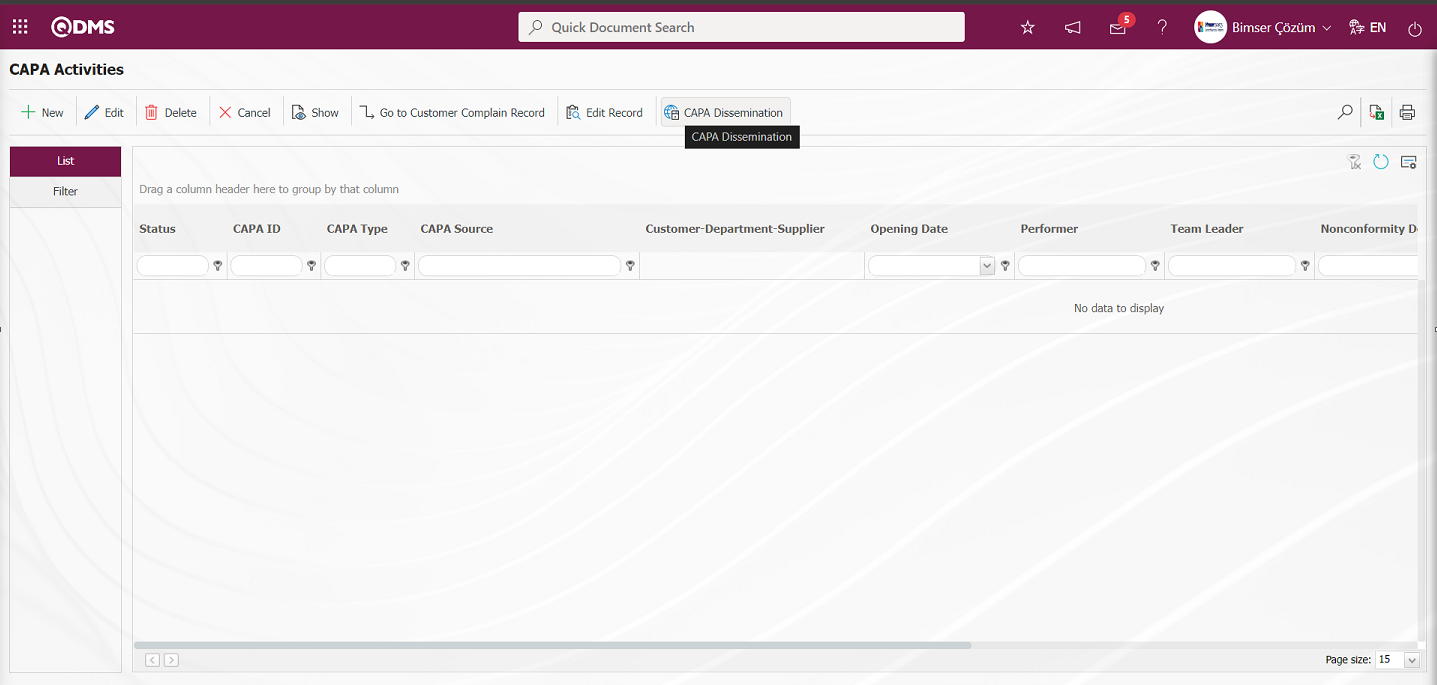
The parameter must be activated by selecting “Yes” for parameter 163 of the CAPA Module parameters.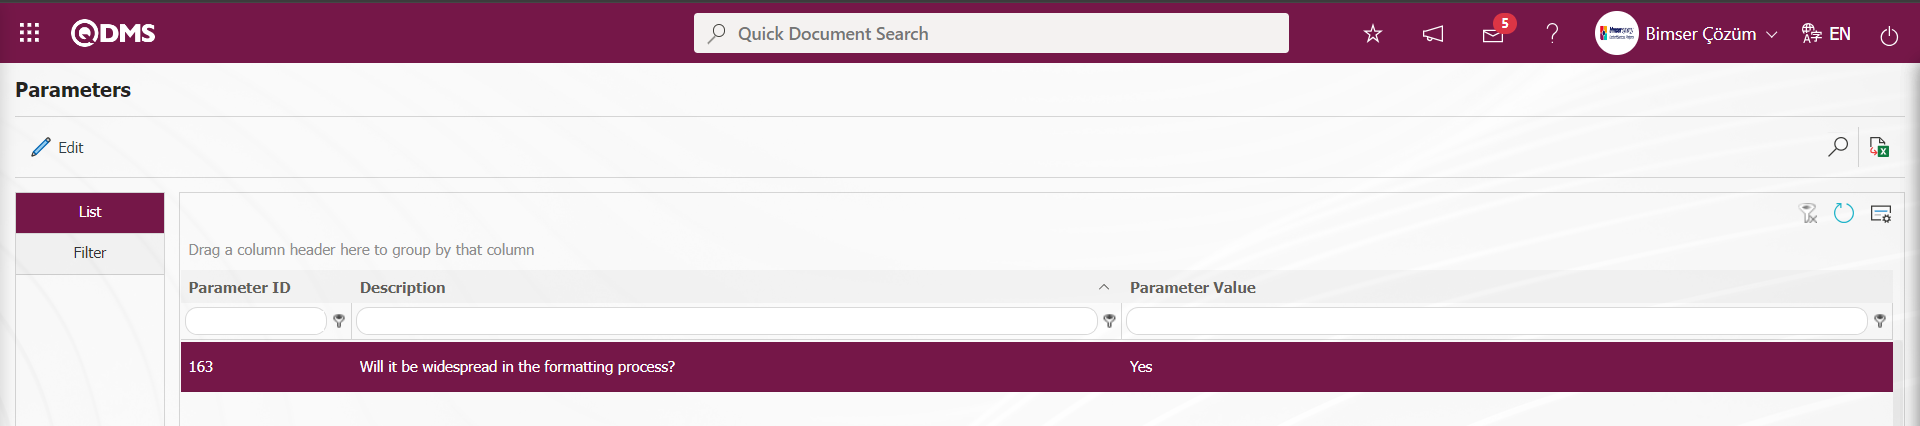
When the parameter is activated, the  button is displayed on the CAPA Activities - New Record** screen and this feature is used.

According to the value entered in parameter 165 in the CAPA Module parameters, it is determined who will perform the dissemination process in the CAPA module.
On the CAPA Activities** screen, click the button while the CAPA Record is selected.
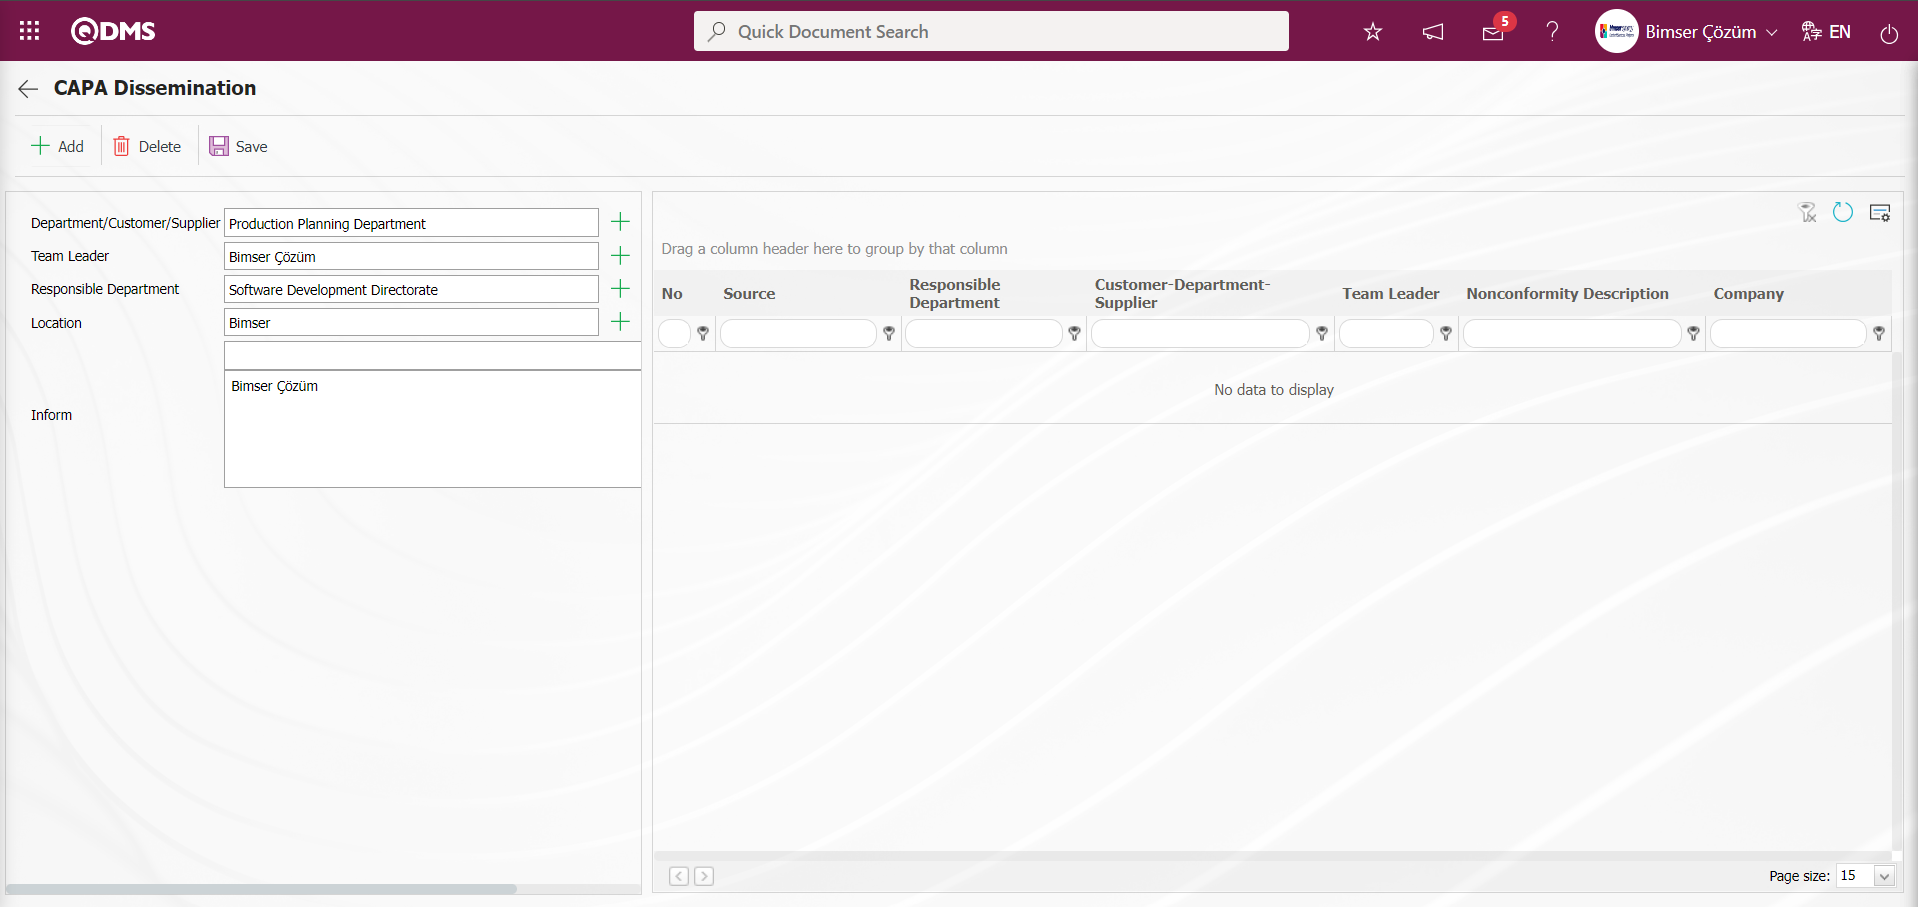
Define the relevant fields on the screen that opens
Department/Customer/Supplier: In the CAPA Dissemination screen, click the  (Select) button and select the Department information to be disseminated in the Department list defined in the system.
Team Leader: It is the field where the Team Leader information is selected if desired in the list of personnel defined in the system opened by clicking the (Select) button on the CAPA Dissemination screen.
Responsible Department: It is the field where the Department information to be disseminated is selected in the department list defined in the system opened by clicking the (Select) button on the CAPA Dissemination screen.
Location: It is the field where the workplace information to be disseminated is selected in the workplace list defined in the system opened by clicking the (Select) button on theCAPA Dissemination screen.
Inform: It is the area where the personnel or user group is added in the personnel or user group list to be added to the Inform field on the CAPA Dissemination screen.
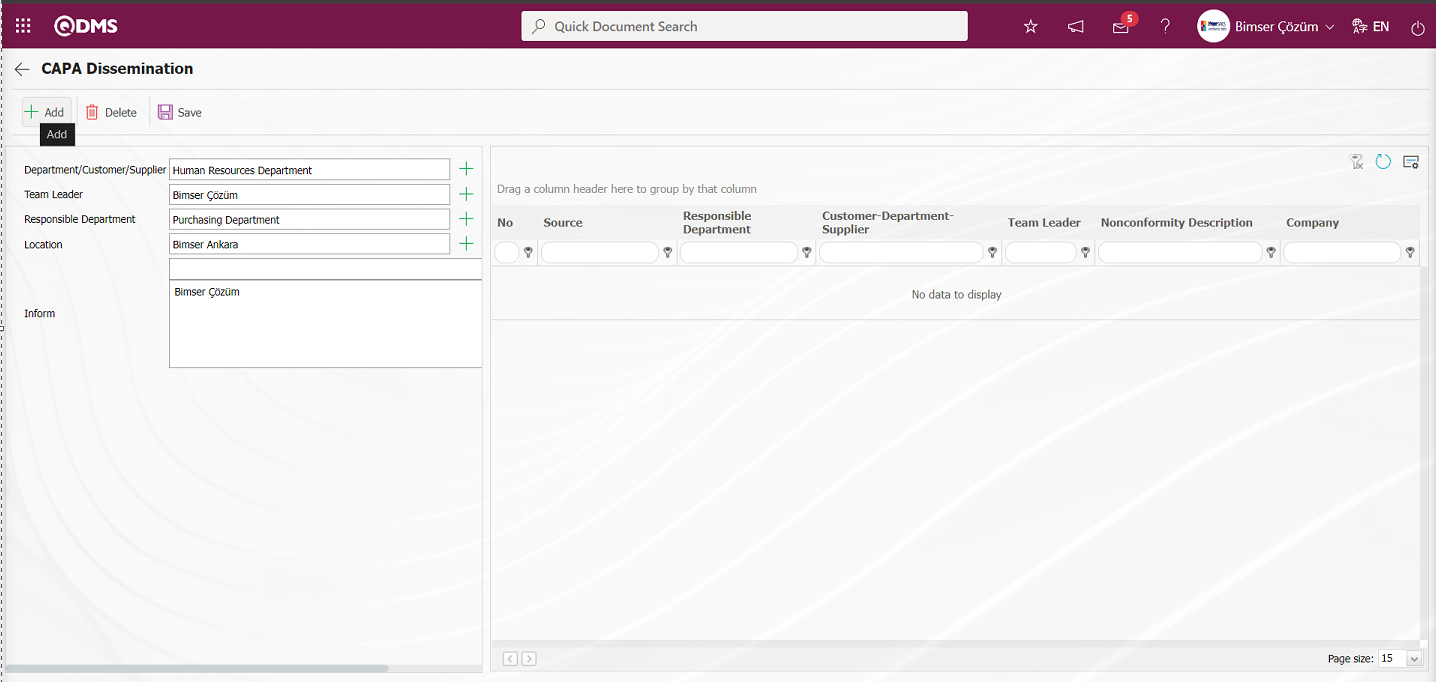
With the help of the buttons on the screen;
 :A new CAPA is added with the dissemination process.
 :The selected CAPA record with dissemination selected in the list is deleted.
 :Registration is done.
On the CAPA Dissemination screen, the department information to be disseminated is selected, if desired, the team leader is selected from the personnel list in the Team leader field. The information in the Workplace list to be disseminated is selected in the Workplace list. After entering the relevant information in the required fields on the CAPA Dissemination screen, the CAPA dissemination process is added by clicking the button.
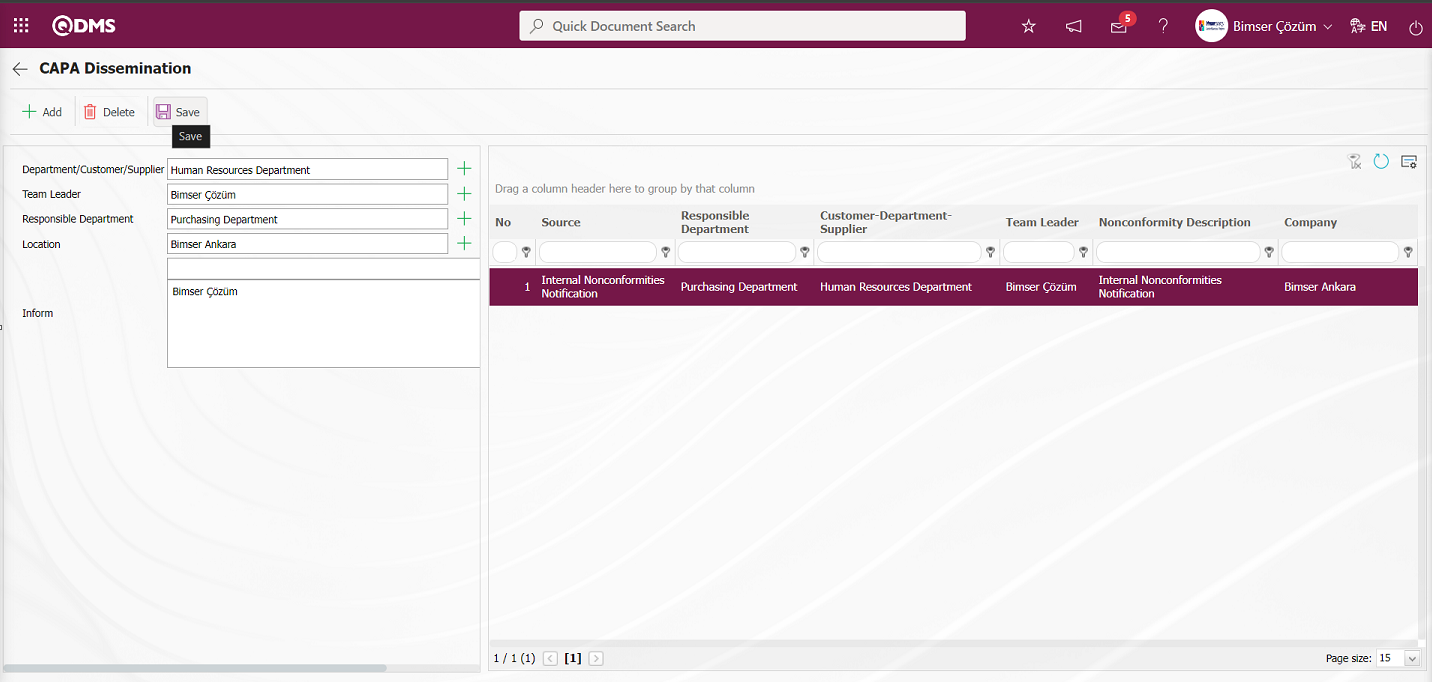
After adding a new CAPA record to the CAPA dissemination list on the CAPA Dissemination screen, the CAPA dissemination registration process is performed by clicking the  button in the upper left corner of the screen.
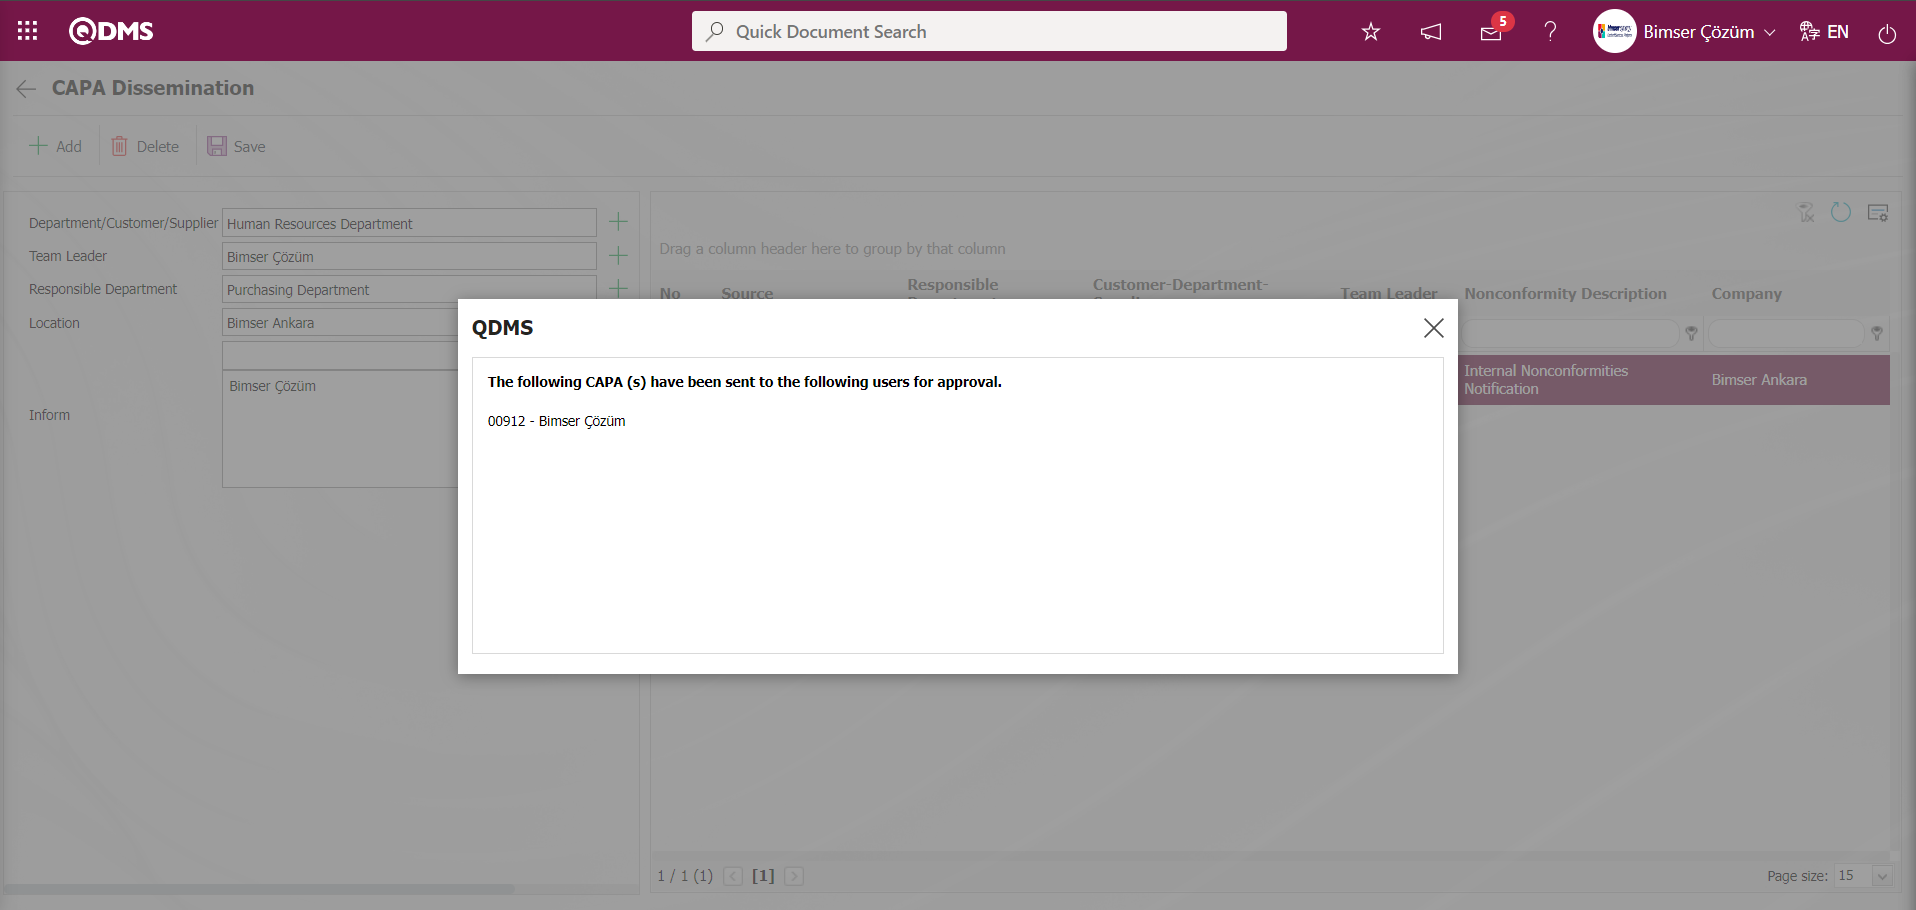
6.2.1.17. CAPA Cancel
The selected CAPA record in the list is canceled. Cancel is a different process from deletion. The CAPA record stops functioning but continues to be registered in the system. It works within the framework of an approval flow.  button is clicked and the cancellation process is done. In the CAPA Cancel screen, the cancellation reason information of the CAPA record is written and the registration process is done. After the registration process, the Cancellation confirmation of the person in the CAPA record flow is sent. For this, the CAPA Cancel Confirmation flow must be set up in the System Infrastructure Definitions/BSID/Configuration Settings/Flow Definition menu and the role in the flow must be assigned. In order to use the CAPA Cancel process, the user must be a module administrator and the parameter value of parameter 95 in the CAPA module parameters is activated by selecting “Yes”.

After the parameter is activated, the Module Manager The button is displayed on the CAPA Activities screen and the cancel function feature is used. On the CAPA Activities screen, in the list tab, select the CAPA Record in the list and click the button.
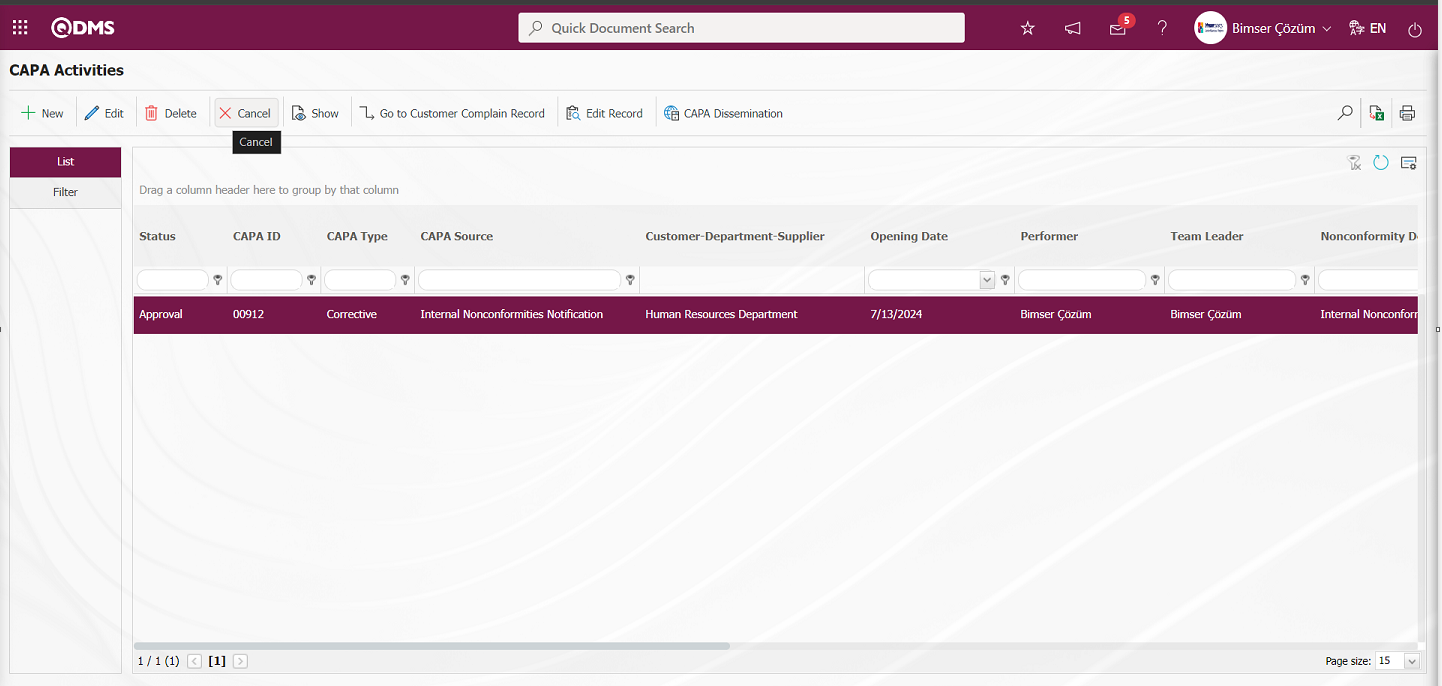
In the CAPA cancel screen, the reason why the CAPA record is canceled is written in the Cancel Reason field.
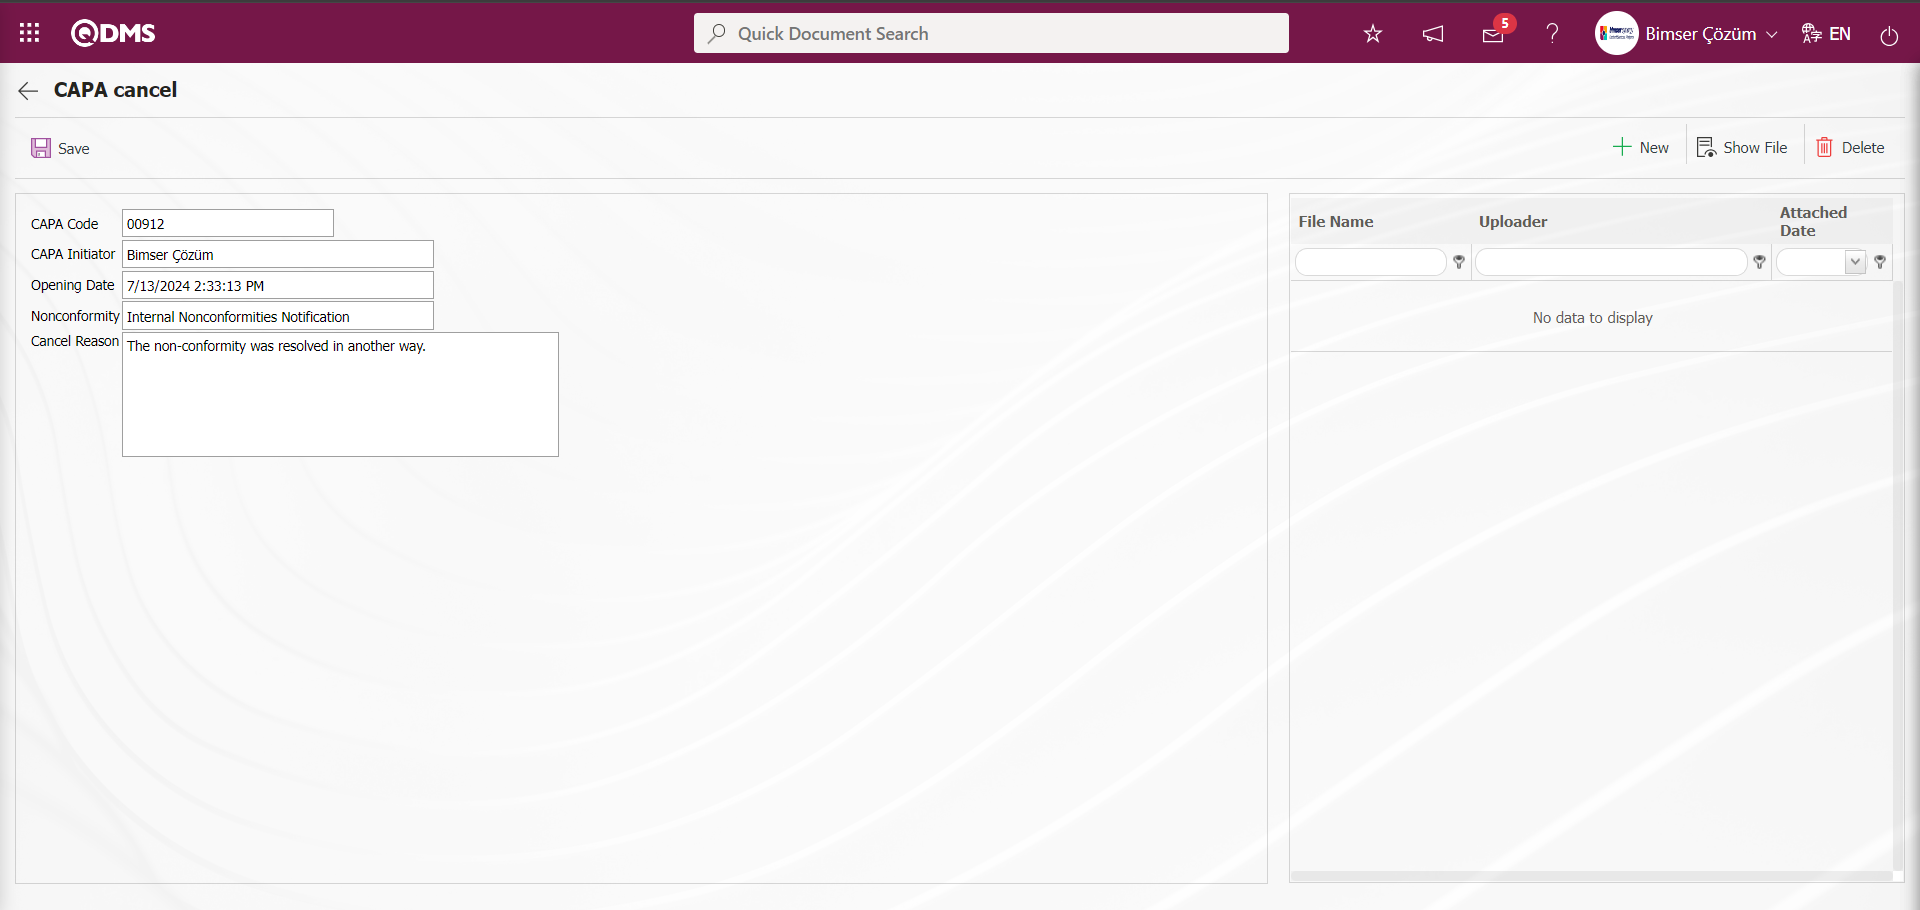
Related fields are defined on the screen that opens:
CAPA Code: This is the field where CAPA code information is automatically provided by the system on the CAPA Cansel screen.
CAPA Initiator: This is the field where CAPA Opener information is automatically provided by the system on the CAPA Cansel screen.
Opening Date: This is the field where the CAPA Opening Date information is automatically given by the system on the CAPA Cansel screen.
Nonconformity Definition: In the CAPA Cansel screen, the Non-Compliance Definition information is automatically given by the system.
Cancellation Reason: It is the field where the information about why the CAPA record is canceled is written on the CAPA Cansel screen.
Additional Files: In the CAPA Cansel screen, if there is any additional file upload process such as evidence documents, photographs related to the cancellation of this CAPA record, if any, is done with the help of the buttons.
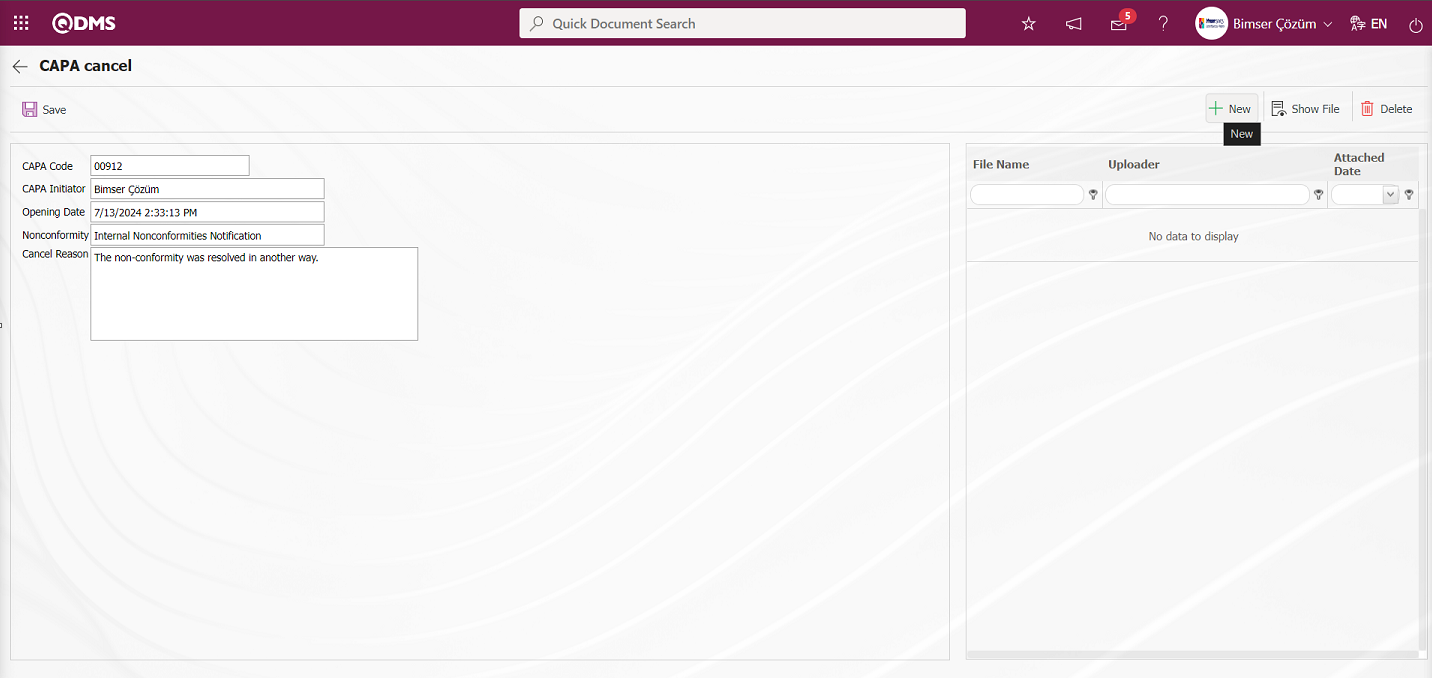
With the help of the buttons on the screen;
 : The additional file is uploaded to the system.
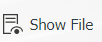 : The uploaded additional file information is displayed.
 : Uploaded attachment file information is deleted
button is clicked to add an additional file to the CAPA record during the cancellation phase. Multiple additional files can be added.
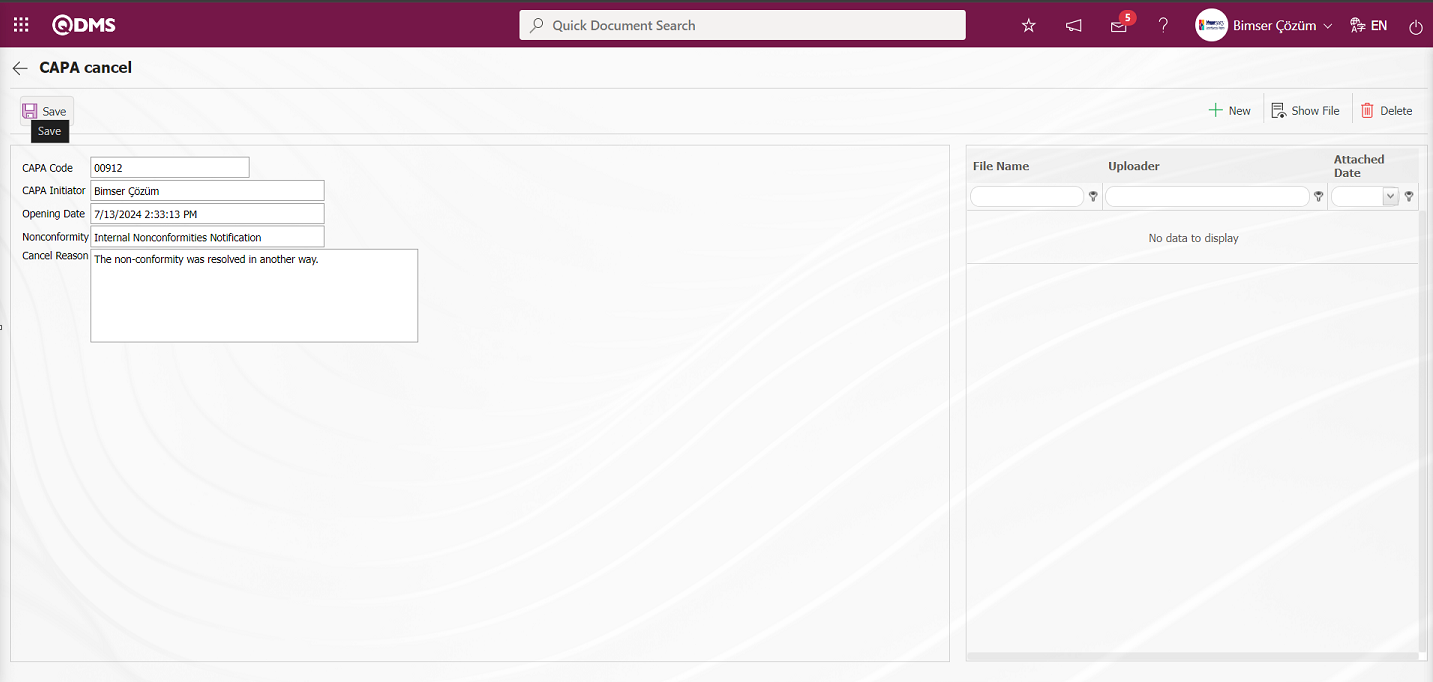
On the CAPA Cansel screen, the reason for the cancellation of the CAPA record is written and the cancellation process is submitted to the approval of the person in the flow by clicking the  button in the upper left corner after the required fields are filled by uploading the Additional File, if any, related to the cancellation reason.
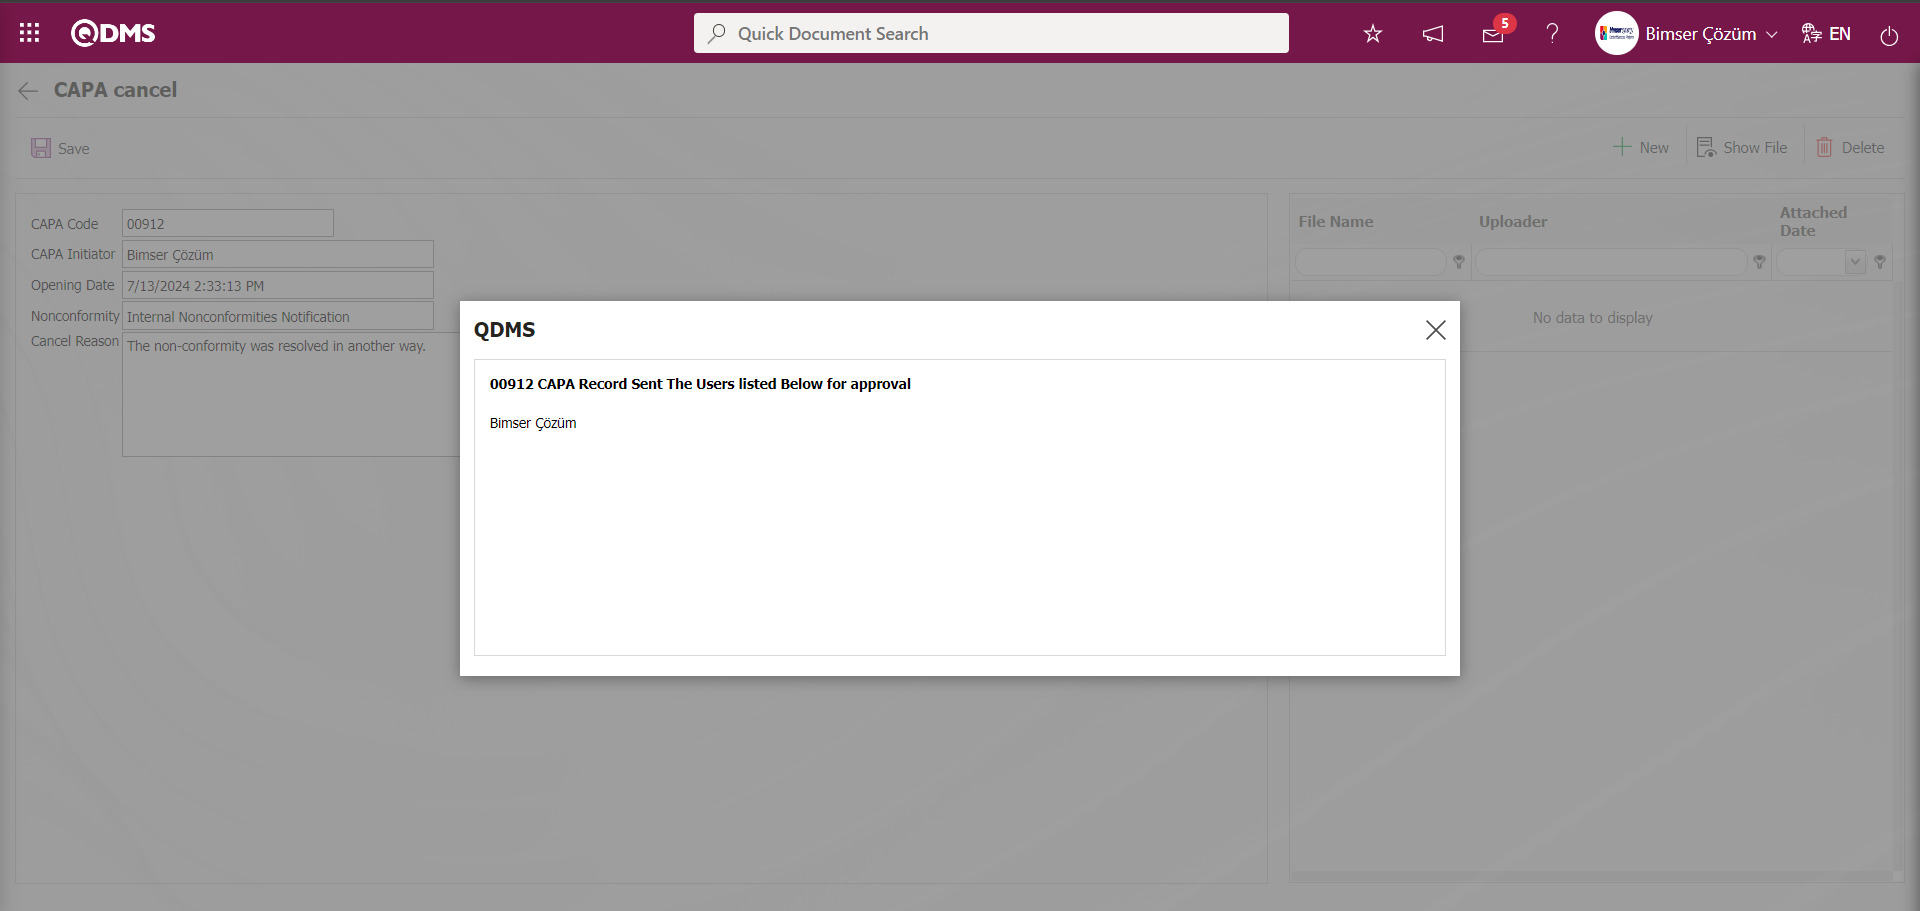
It is assigned as a“CAPAs awaiting for cansel approval” job in the Approved person's Pending Jobs.
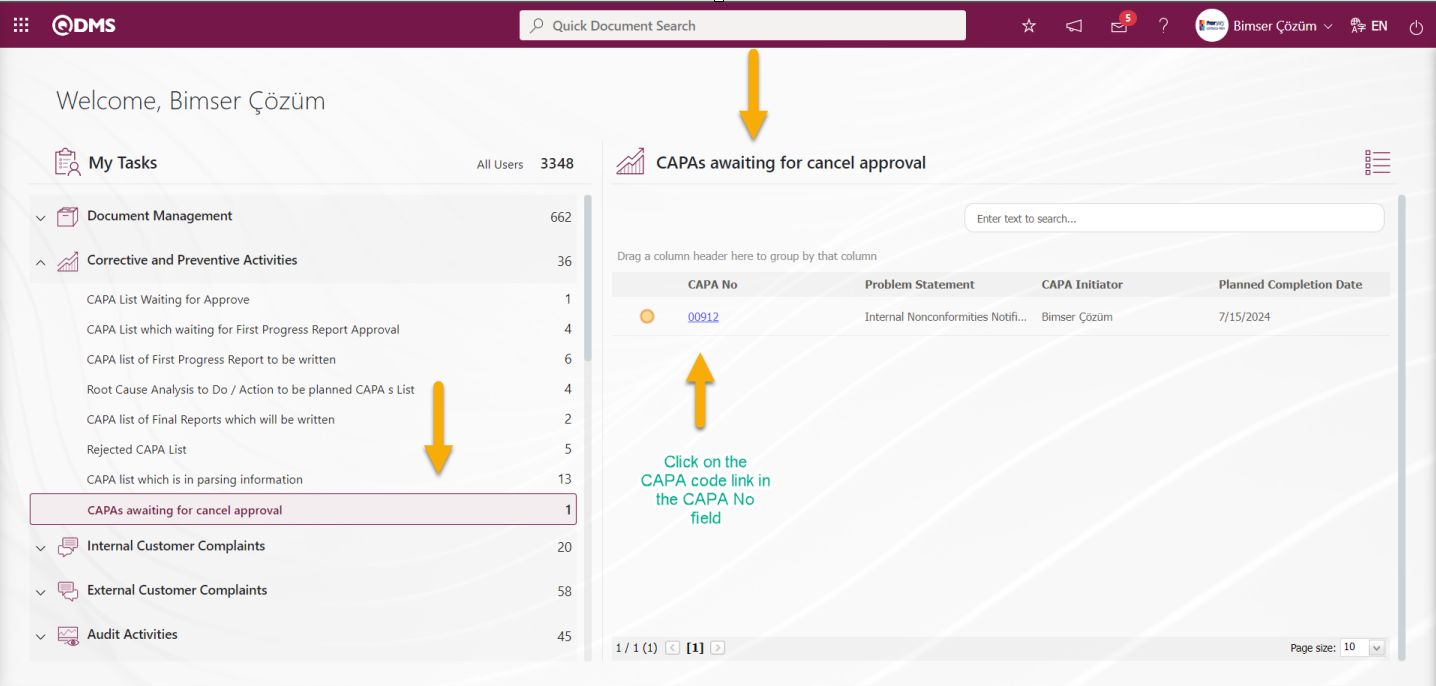
Click on the CAPA code link in the CAPA No field in the relevant task.

With the help of the buttons on the screen;
 : The related CAPA record is displayed.
 : It is used to make the CAPA approval process.
 : If the information entered in the CAPA is not appropriate, it is used to reject the CAPA.
: It is used when you want to search by filtering the information from the filter option in case there are too many CAPAs that need to be approved.
: The search criteria on the menu screens are used to clear the data remaining in the filter fields in the grid where the search operation is performed.
: The menu screen is restored to its default settings.
: User-based designing is done on the menu screen with the show-hide feature, that is, the hiding feature of the fields corresponding to the columns on the menu screens.
Click the  button on the CAPA List, Waiting For Approval screen.

Detail information is displayed by clicking on the tabs related to the CAPA record on the Display screen.
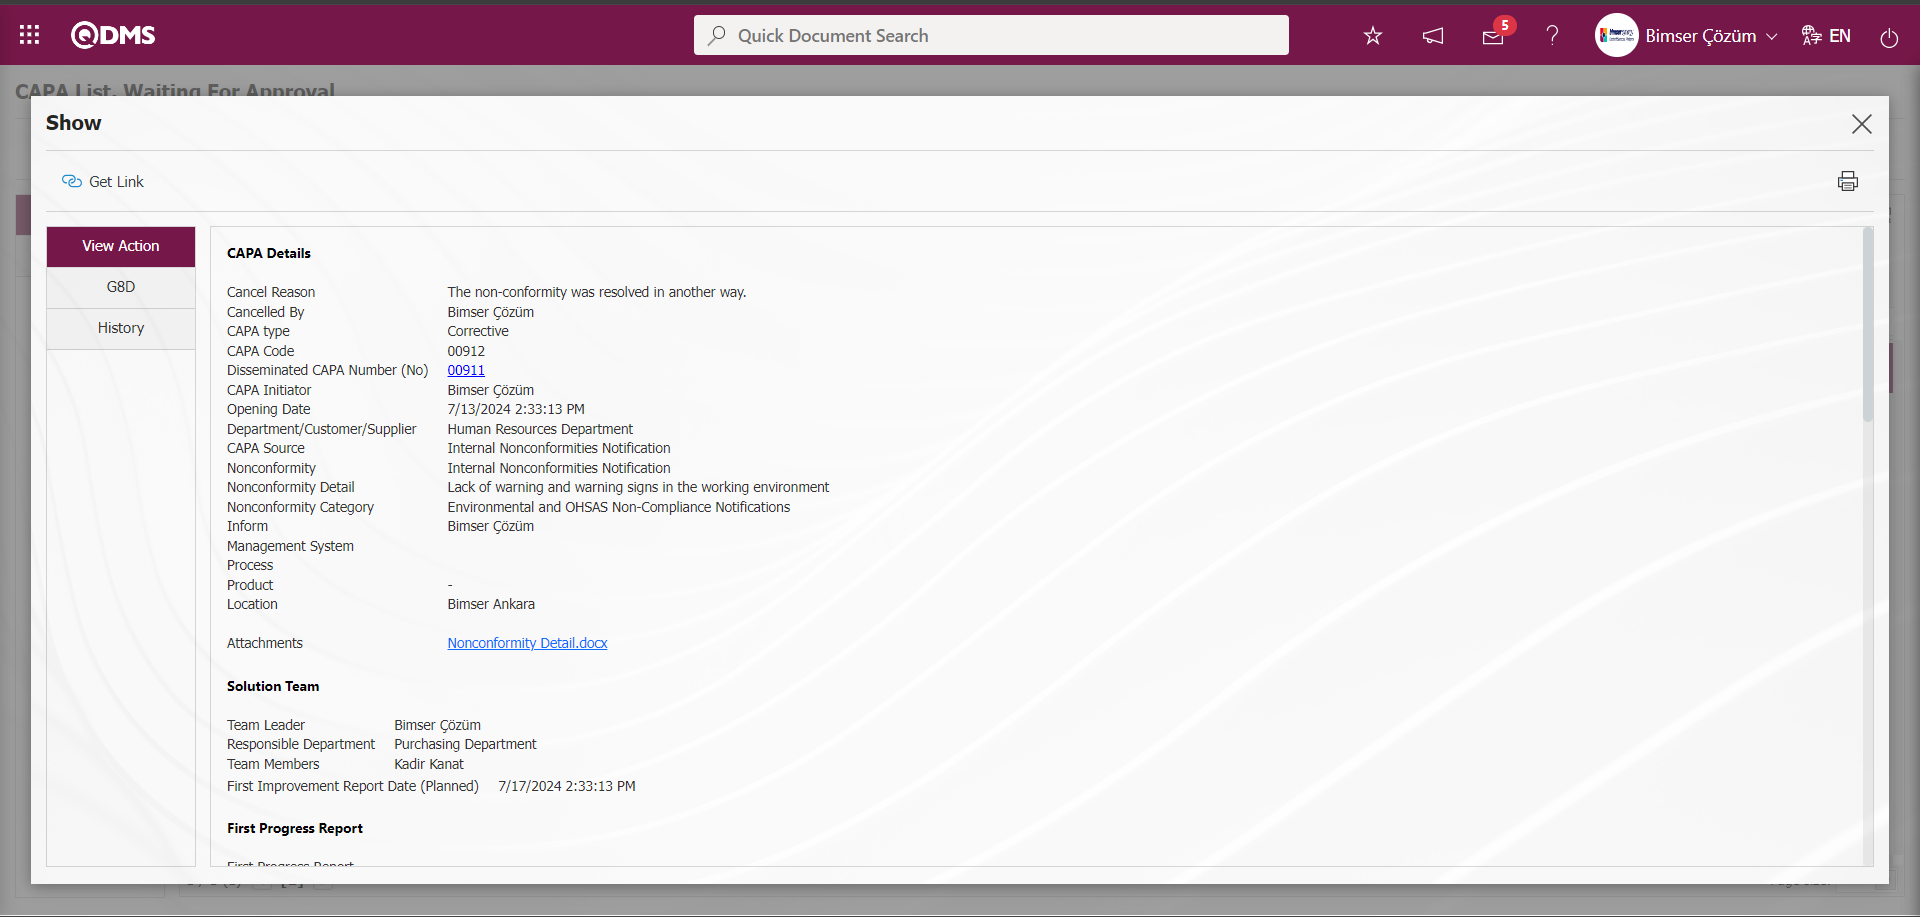
Click the button on the CAPA record display screen.
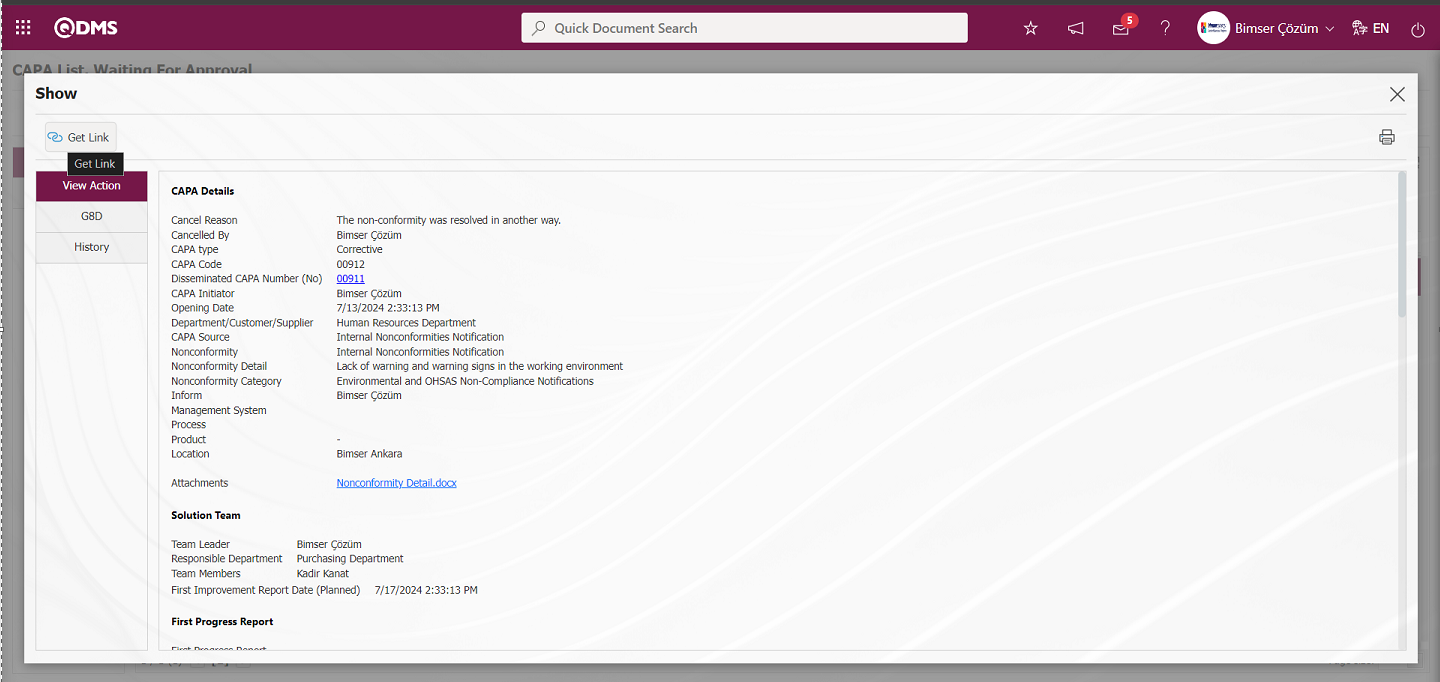
The link related to the CAPA record is displayed on the screen. Right-click/copy-paste methods or copy-paste hotkeys (Ctrl+C-Ctrl+V) are used to view the CAPA record and share it with the relevant people.
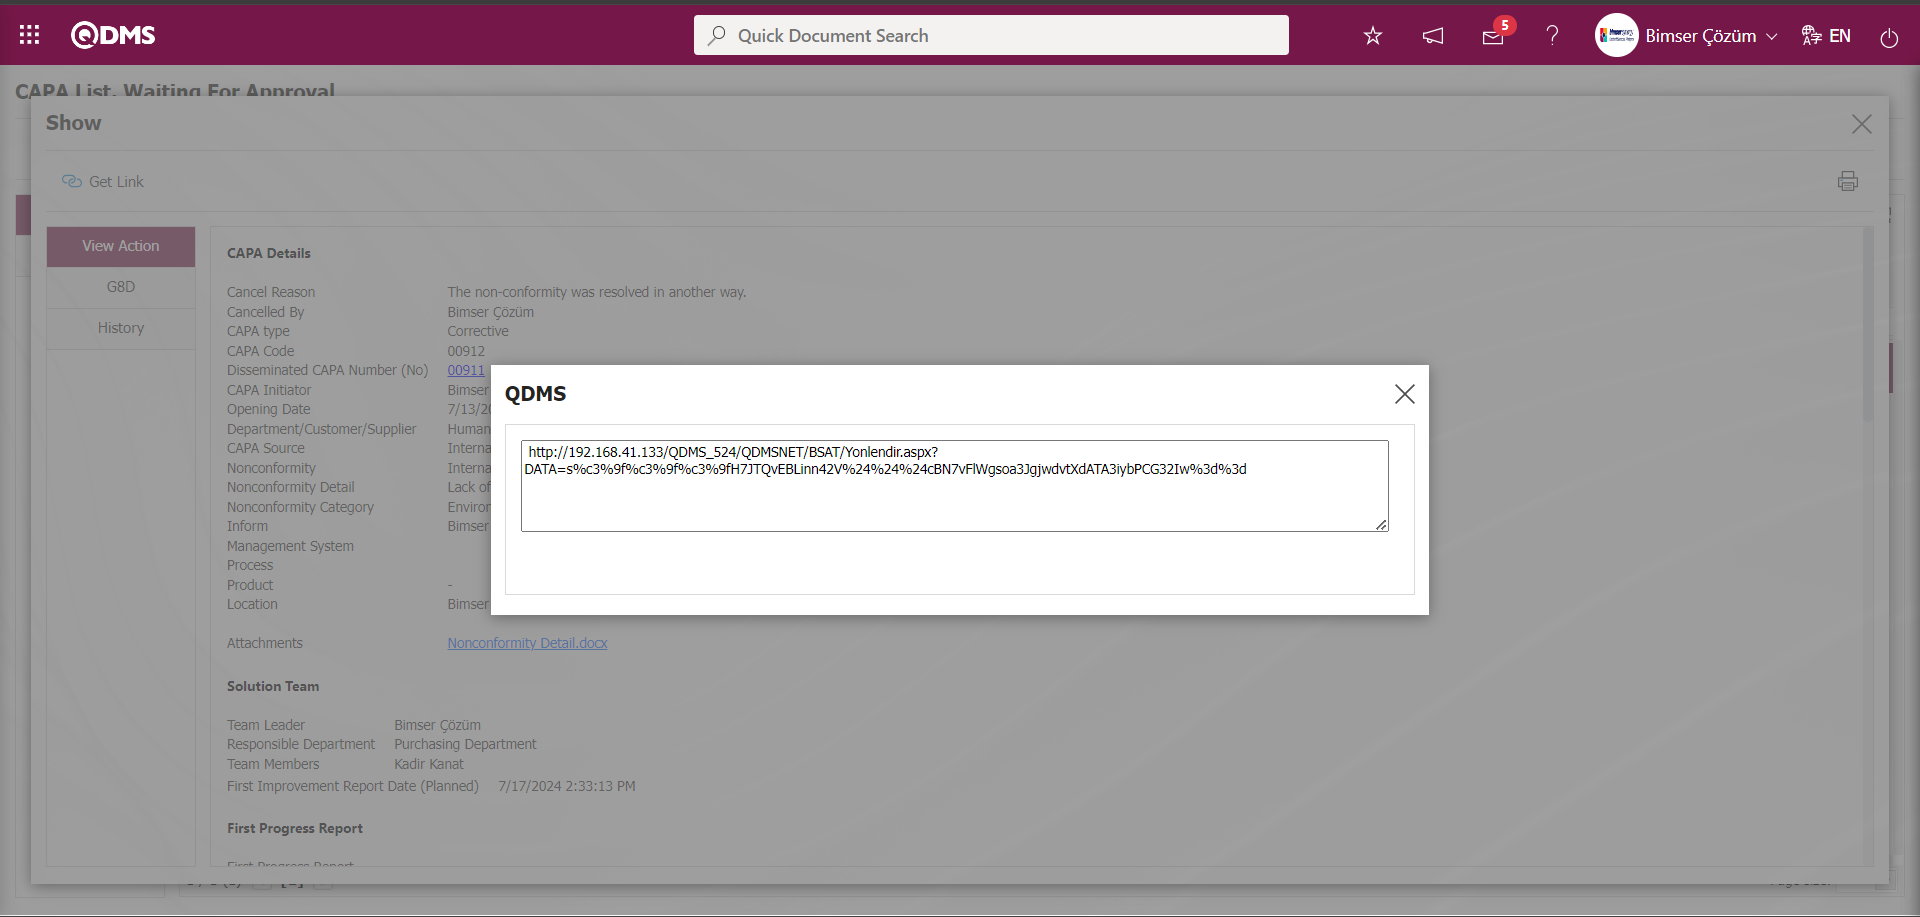
The G8D report is displayed by clicking on the G8D report tab and CAPA information is printed by clicking on the  (Print) button.
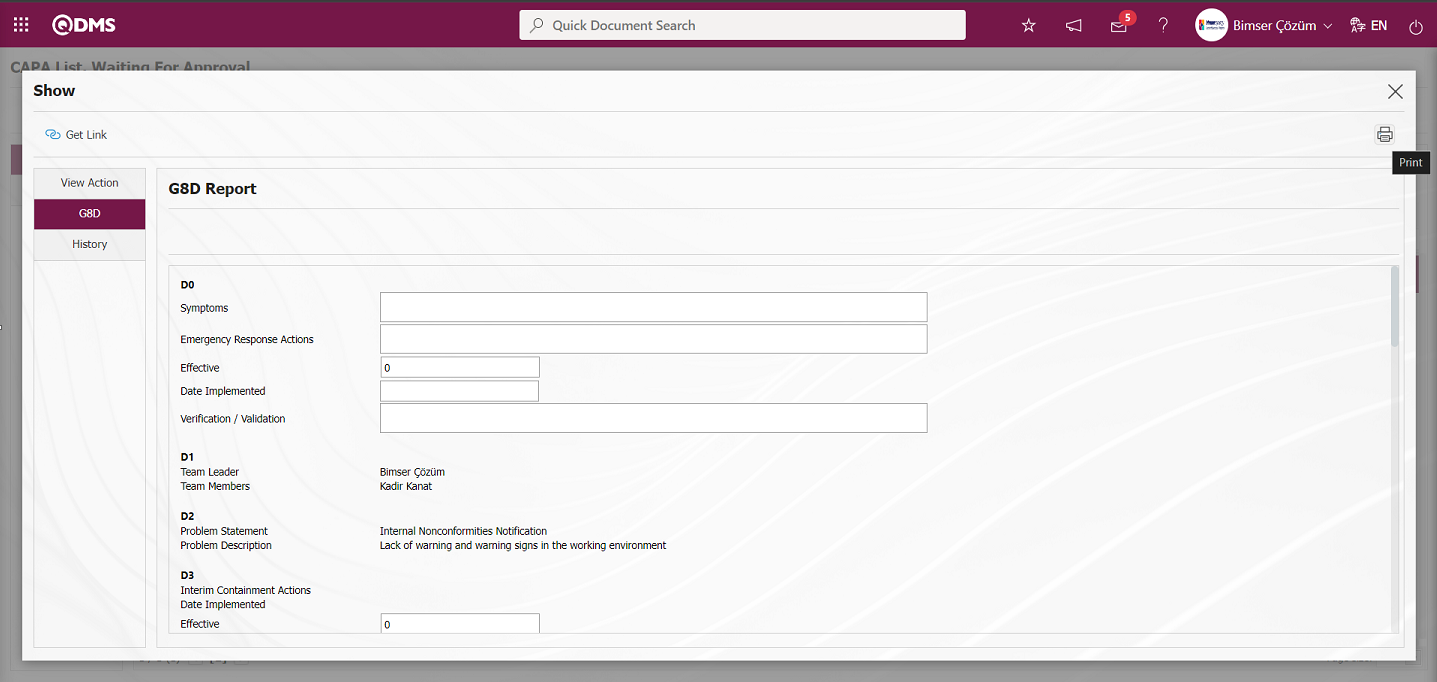
In the History tab, you can access the list of approval history information such as CAPA opening approval, CAPA Cancellation for the works related to the CAPA Record
On the CAPA List, Waiting For Approval screen, click on the  button and enter the Reason for Rejection to reject the cancellation of the CAPA record.
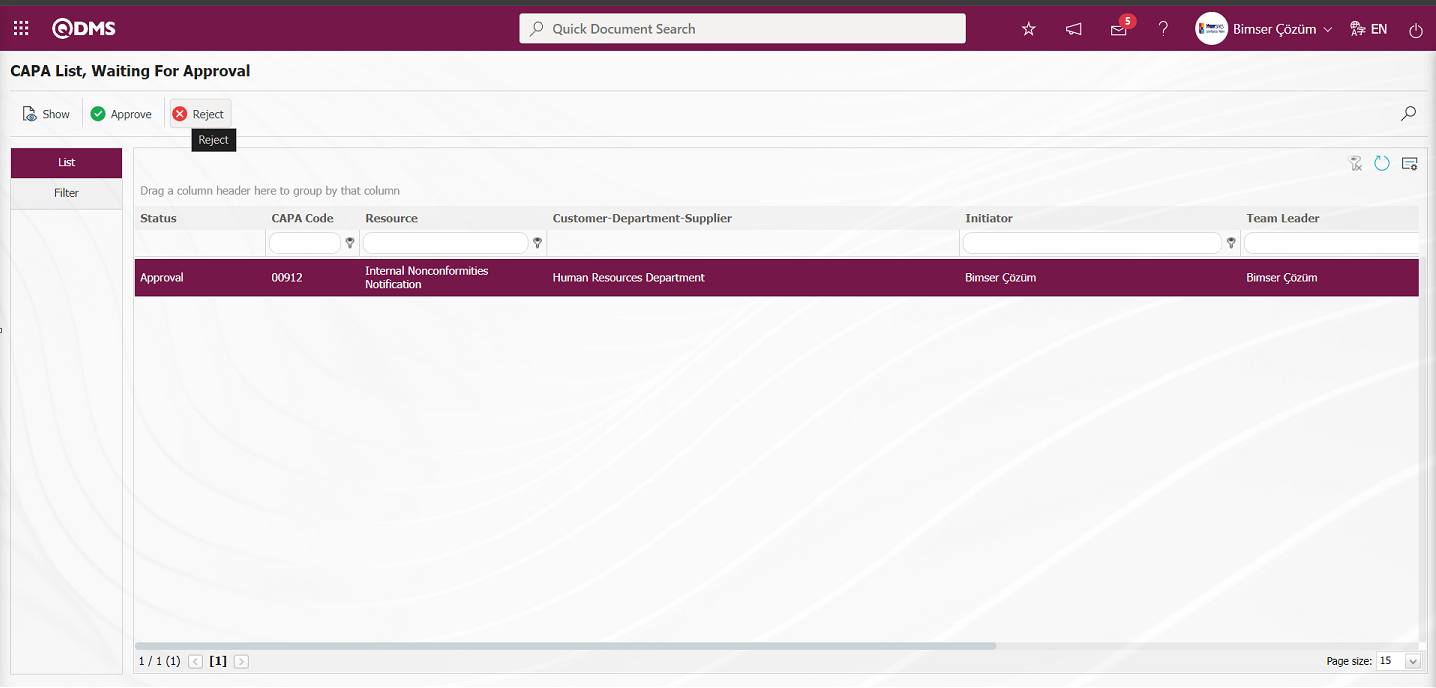
In the Rejected CAPAs screen, the CAPA record is canceled by Rejection and Rejection Reason information must be written.
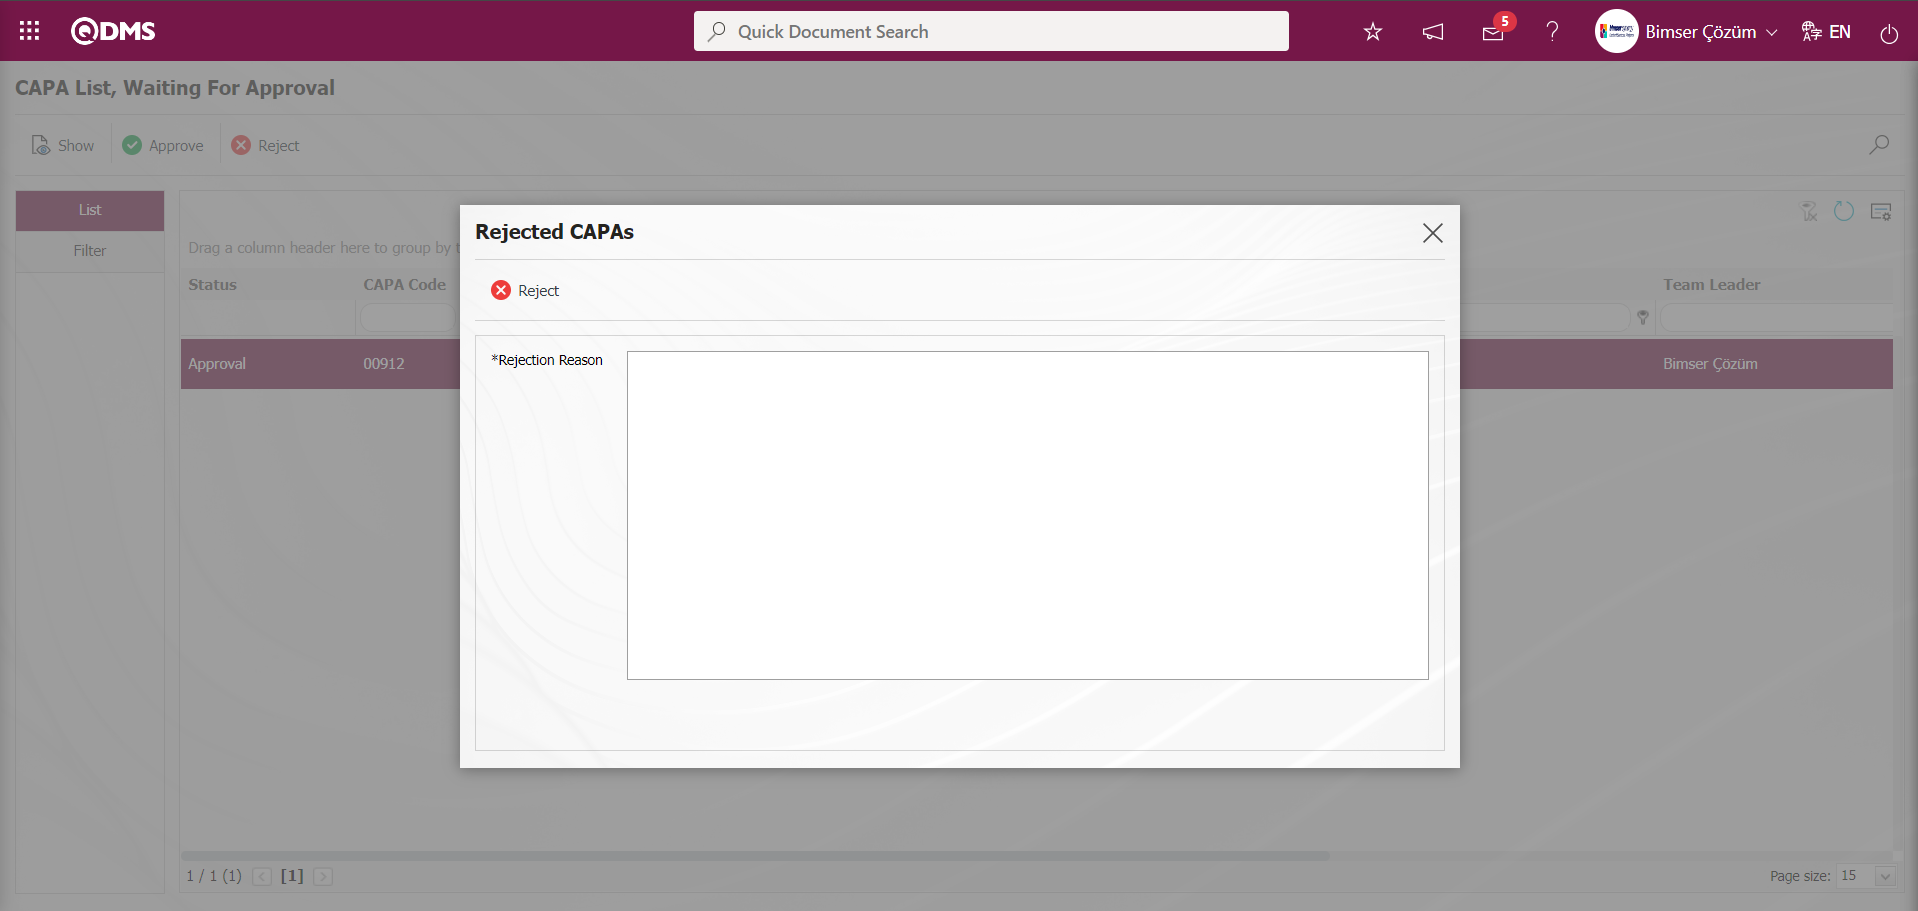
Click the  button on the CAPA List, Waiting For Approval screen.

On the CAPA List, Waiting For Approval** screen, Confirmation Notes information is written in the Confirmation Notes field and the CAPA record cancellation process is approved by clicking the  button.
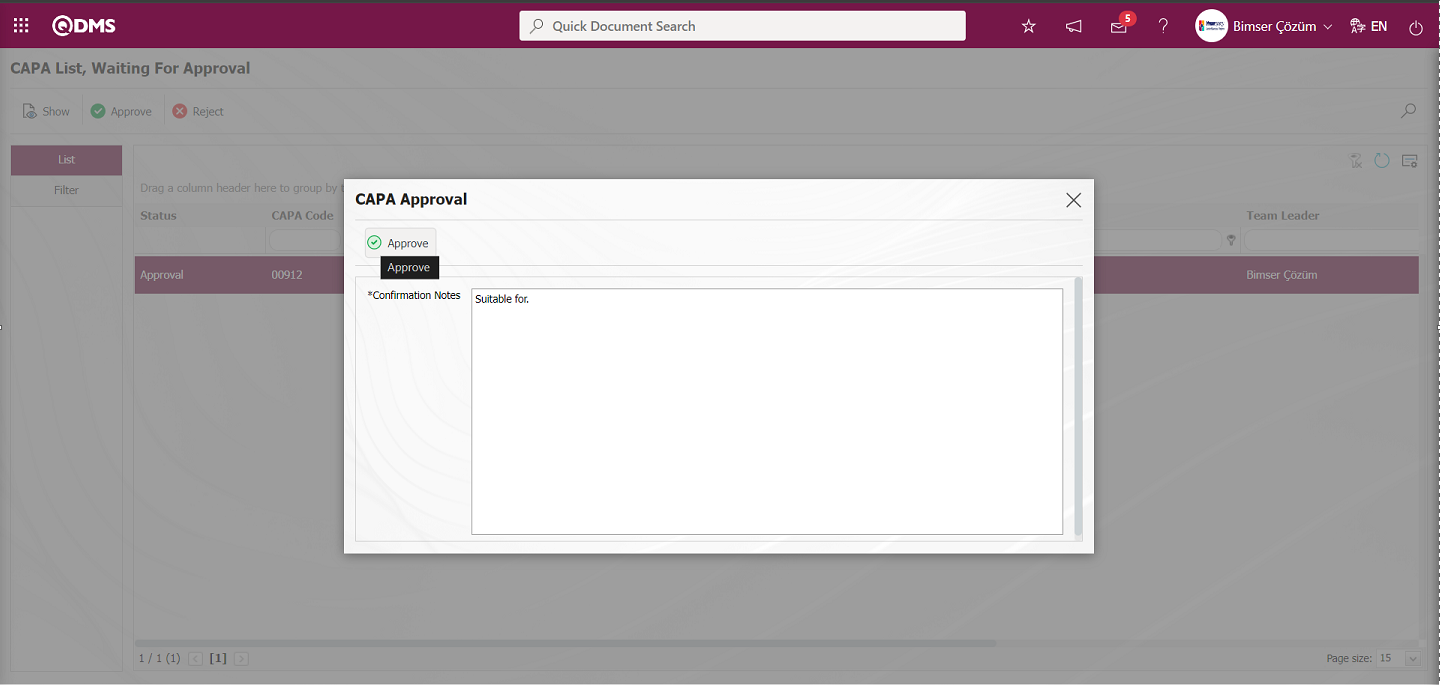
6.2.1.18. Deleting CAPA Registration
On the CAPA Operations screen, on the list tab, the deletion of the selected CAPA Record in the list is made. The user must be defined as the module administrator in order to perform the deletion process. The  button is displayed on the CAPA Operations screen of the user defined as Module Administrator. In the list tab on the CAPA operations screen, the CAPA Record is selected in the list and the CAPA Record is deleted by clicking the button.
Select the CAPA Record in the list in the list tab on the CAPA operations screen and click the button.
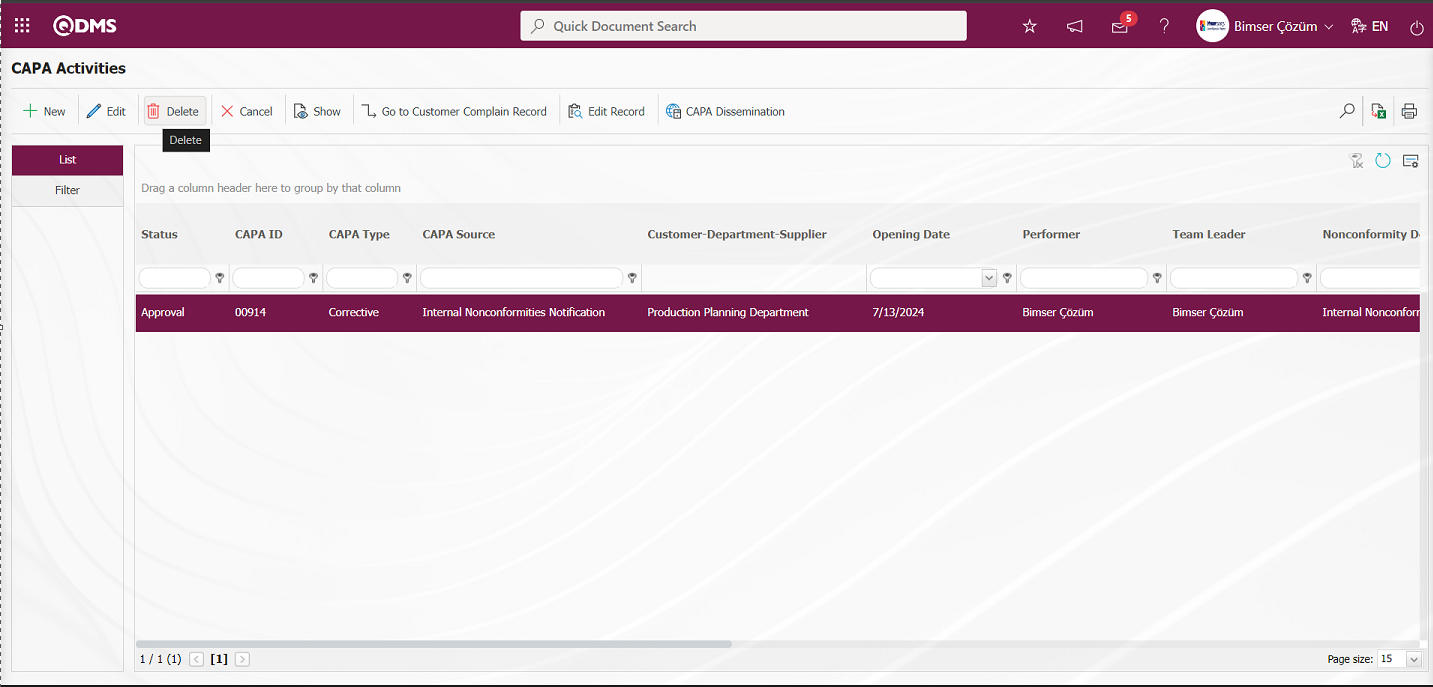
By clicking the “OK” button in the warning message by the system, the CAPA record selected in the list is deleted.
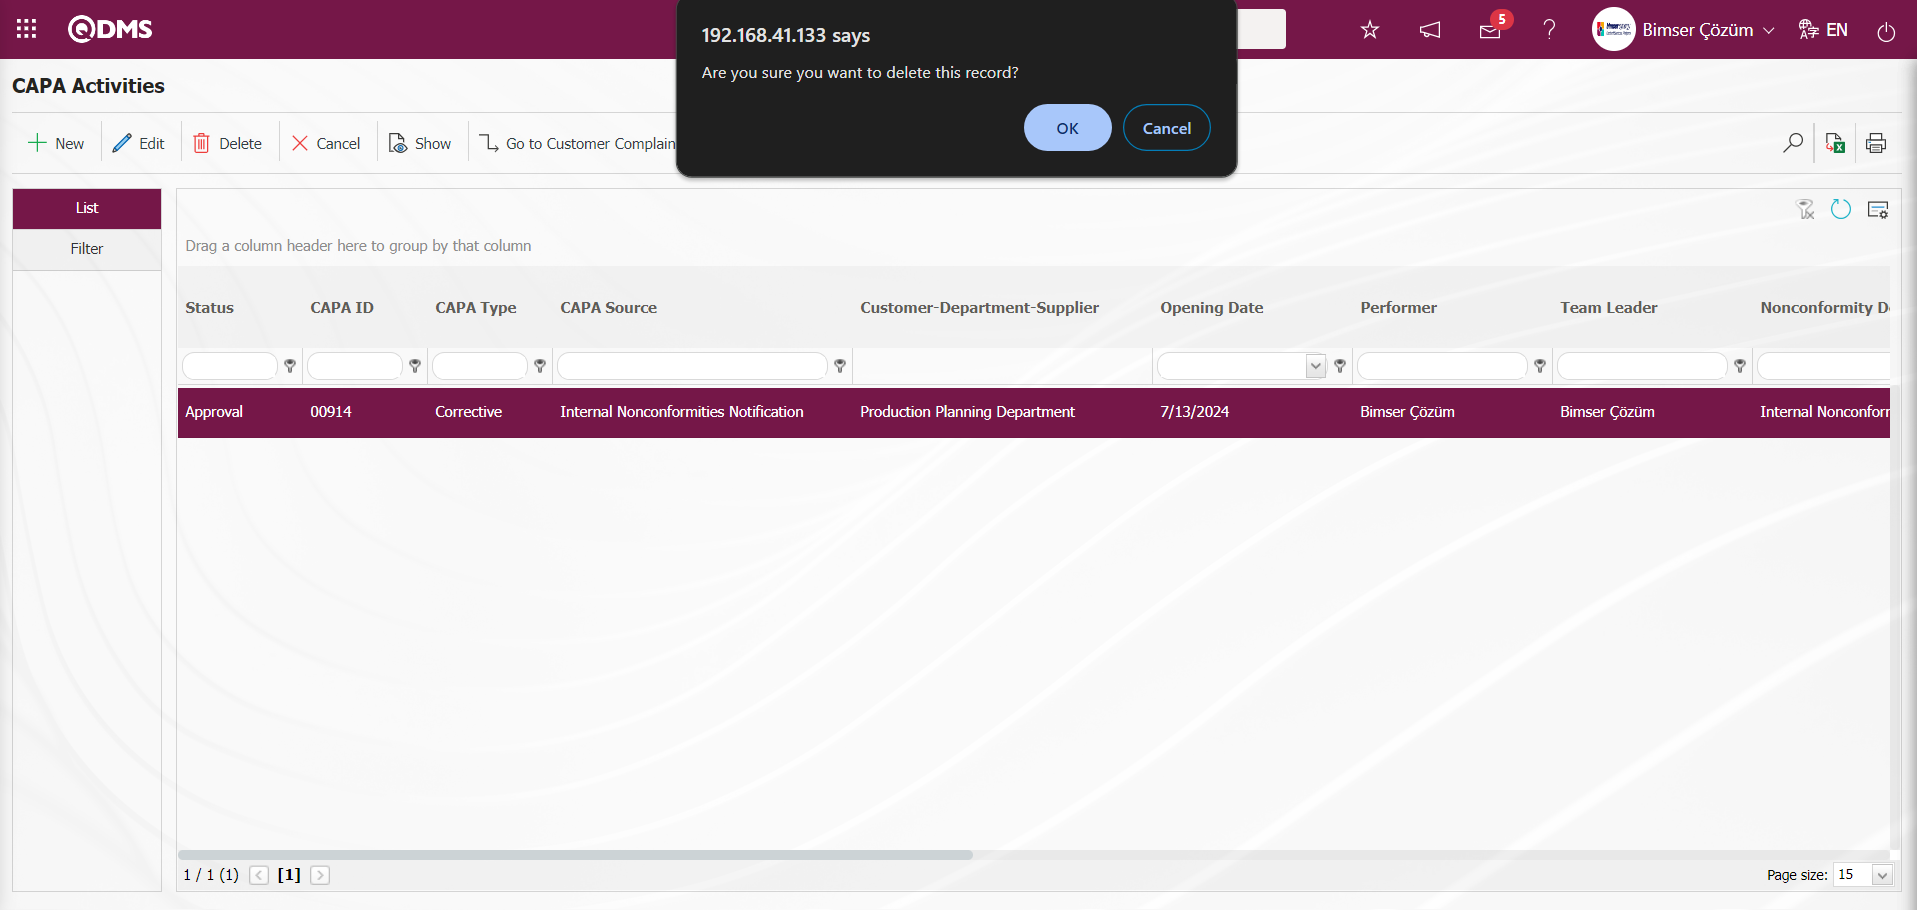
Deleted CAPA records are also deleted from the database and this data is no longer accessible in the system.
6.2.1.19. Sending CAPA Actions for Bulk Approval
In the Actions tab of the CAPA record, CAPA Actions are sent for batch approval. In order to perform this process, the parameter is activated by selecting “Yes” for parameter 186 in the CAPA module parameters.
After the parameter is activated, the  button is displayed in the Actions tab.
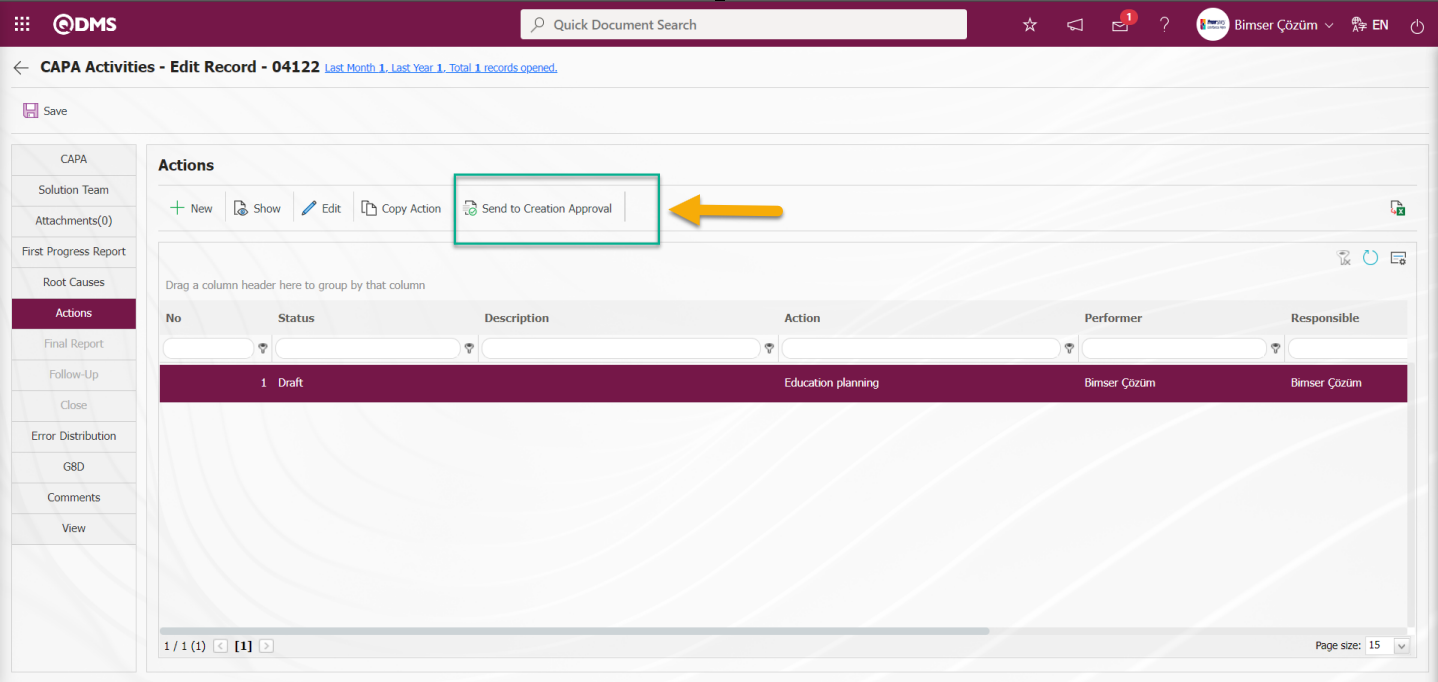
By clicking this button, the Actions defined in the Actions tab in the CAPA records and whose status is in draft status are collectively approved and the status of the Actions is changed to “Open” status.
Click the button on the Actions tab.
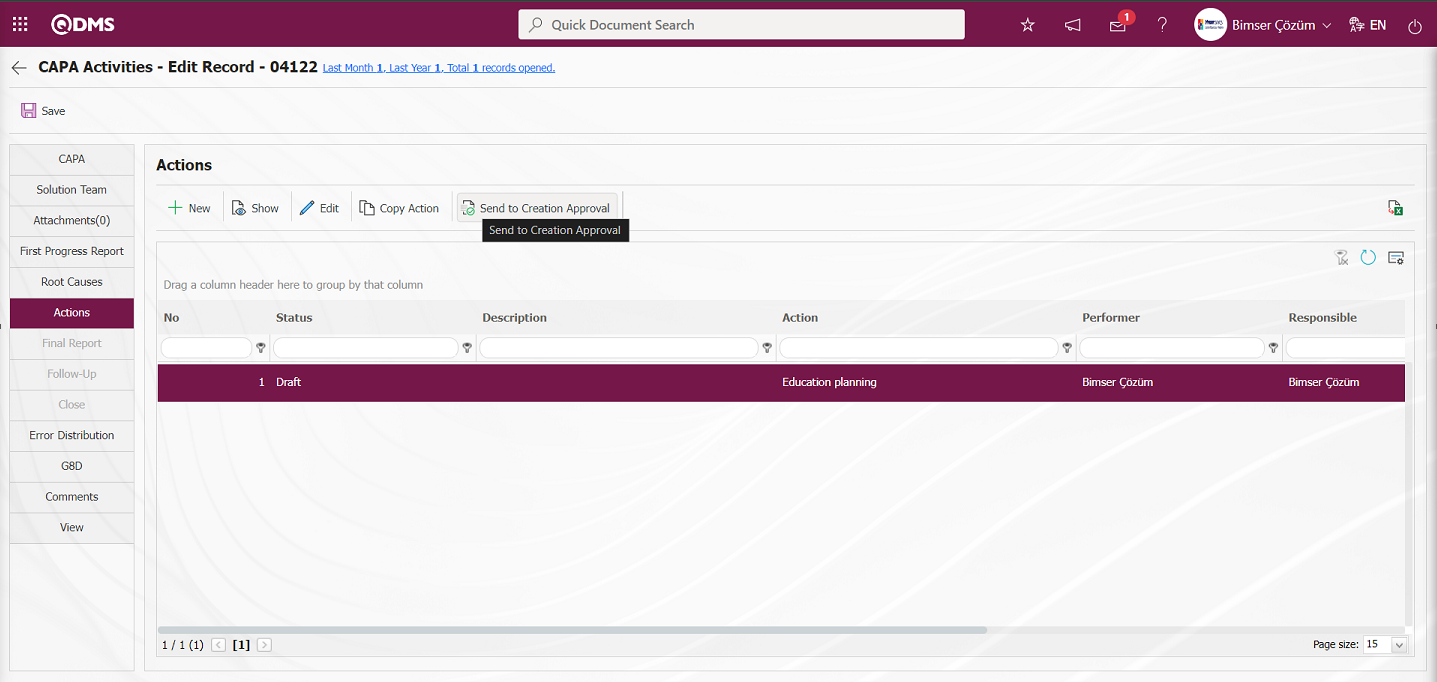
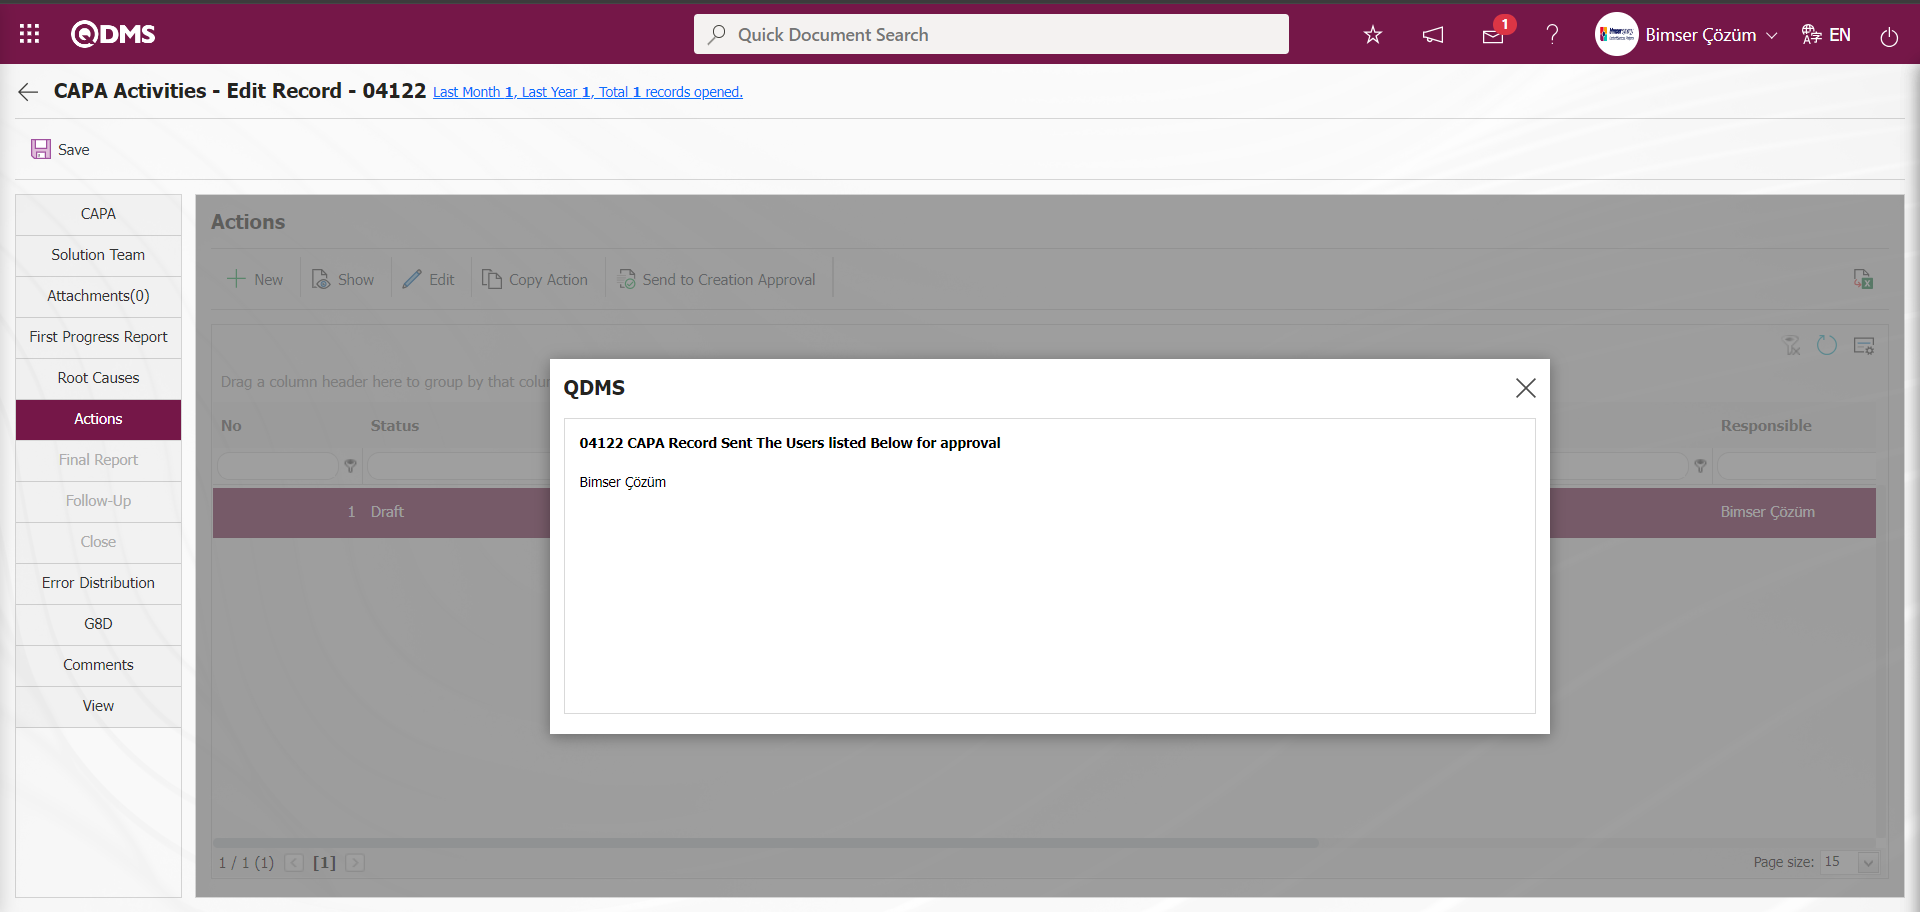
The Actions screen appears.
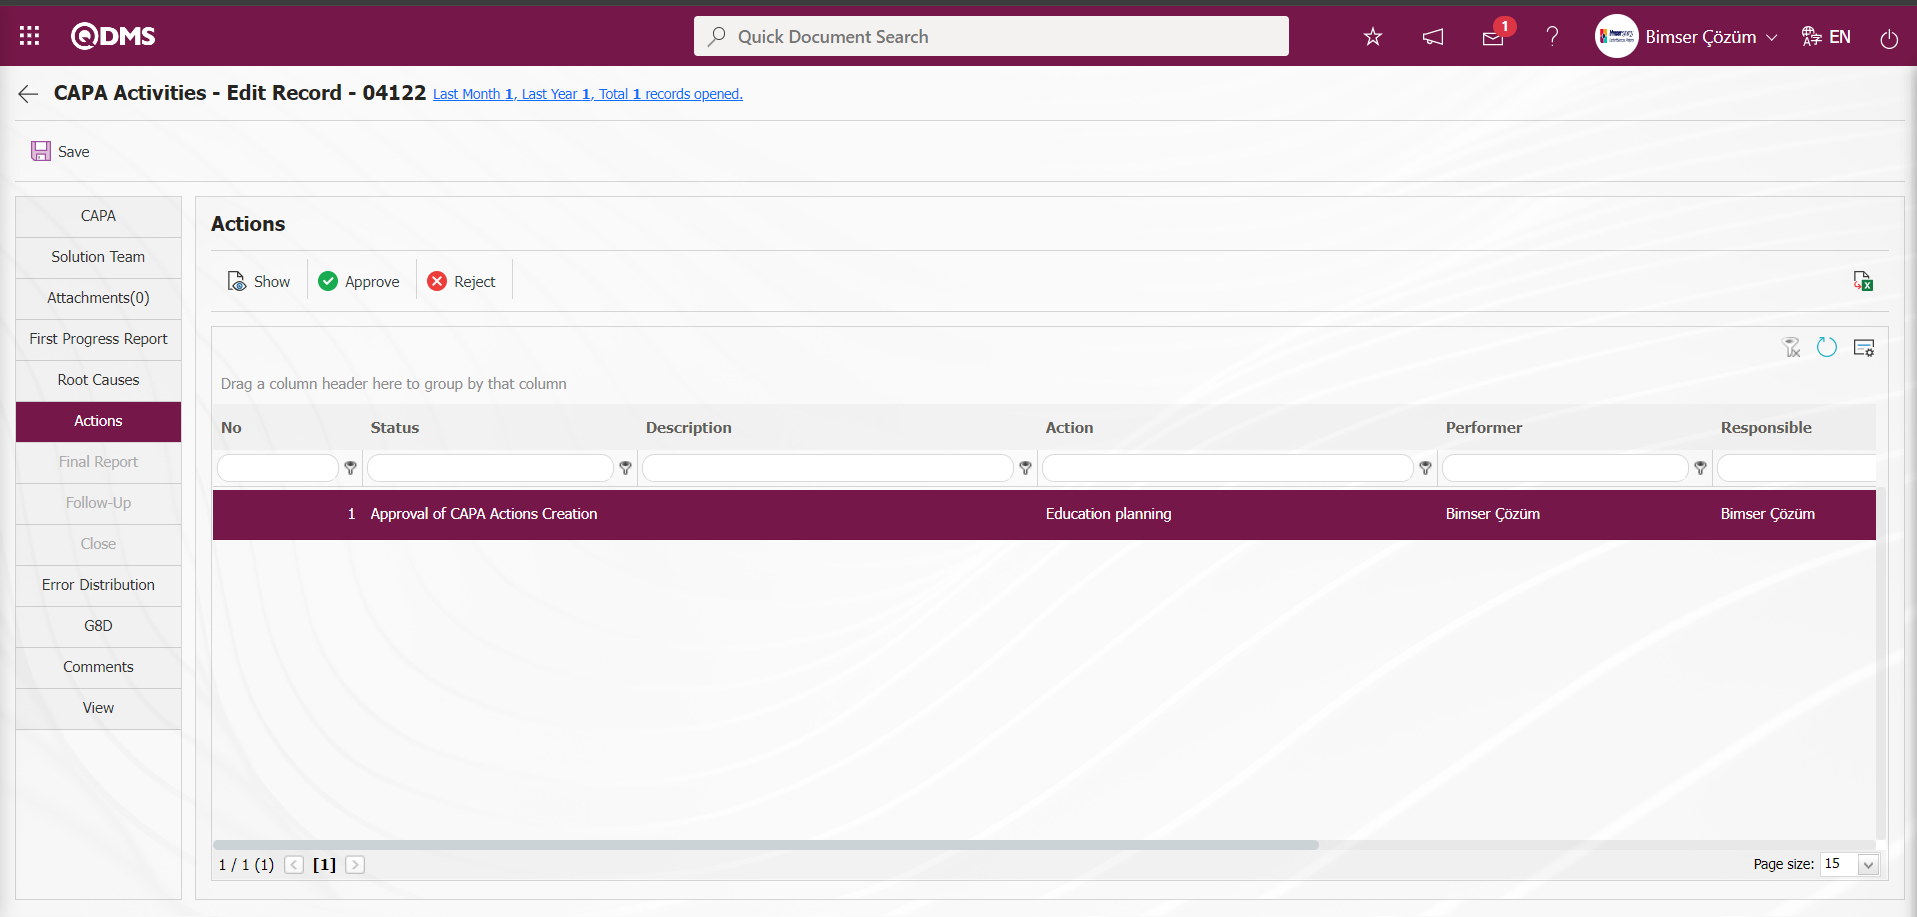
With the help of the buttons on the screen;
 : Display the action information selected in the list.
 : Action approval process is done and after the approval process, the action status becomes open status.
 : In the action approval process, the rejection process is done by writing the rejection reason information.
: Data can be transferred to Excel.
: The data remaining in the filter fields in the grid where the search criteria search operation is performed on the menu screens is cleaned.
: The menu screen is restored to its default settings.
: User-based designing is done on the menu screen with the show-hide feature, that is, the hiding feature of the fields corresponding to the columns on the menu screens.
While the Action is selected on the Actions screen, click the  button.
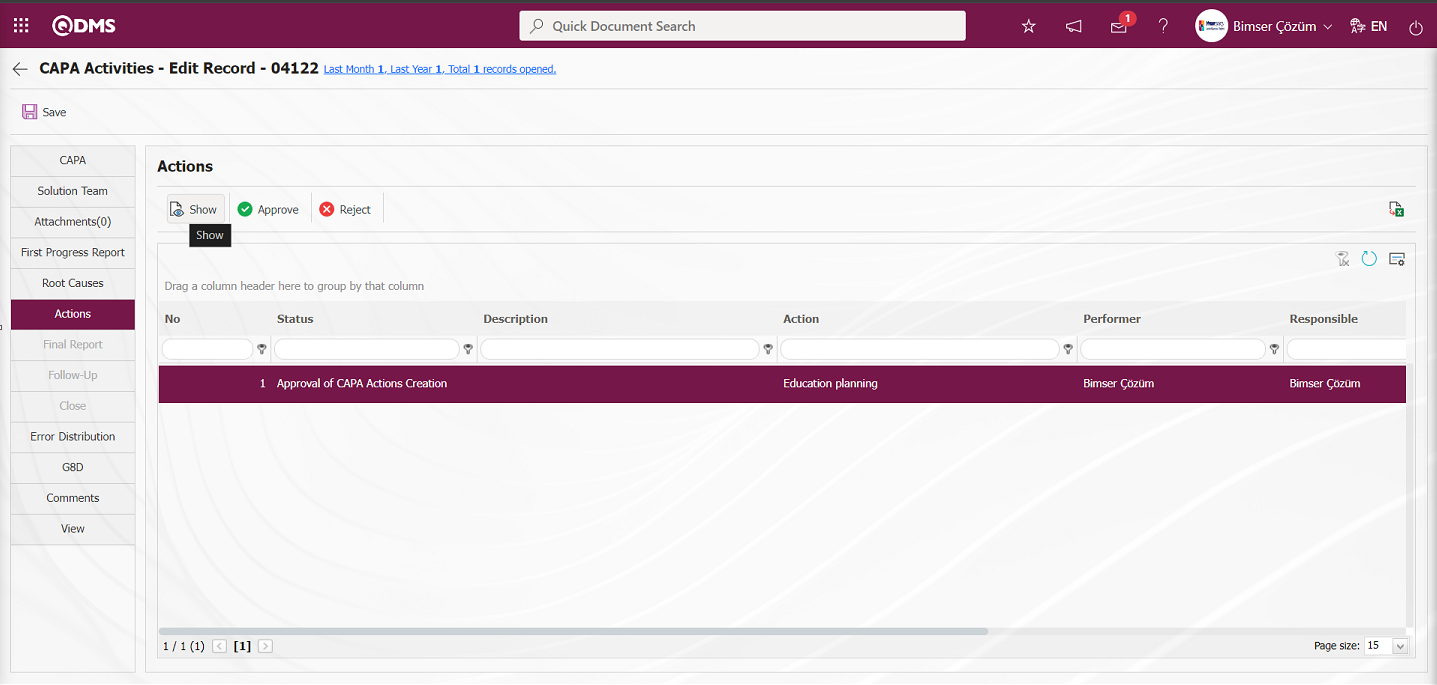
In the Show Action Record screen, the detailed information of the action is displayed.
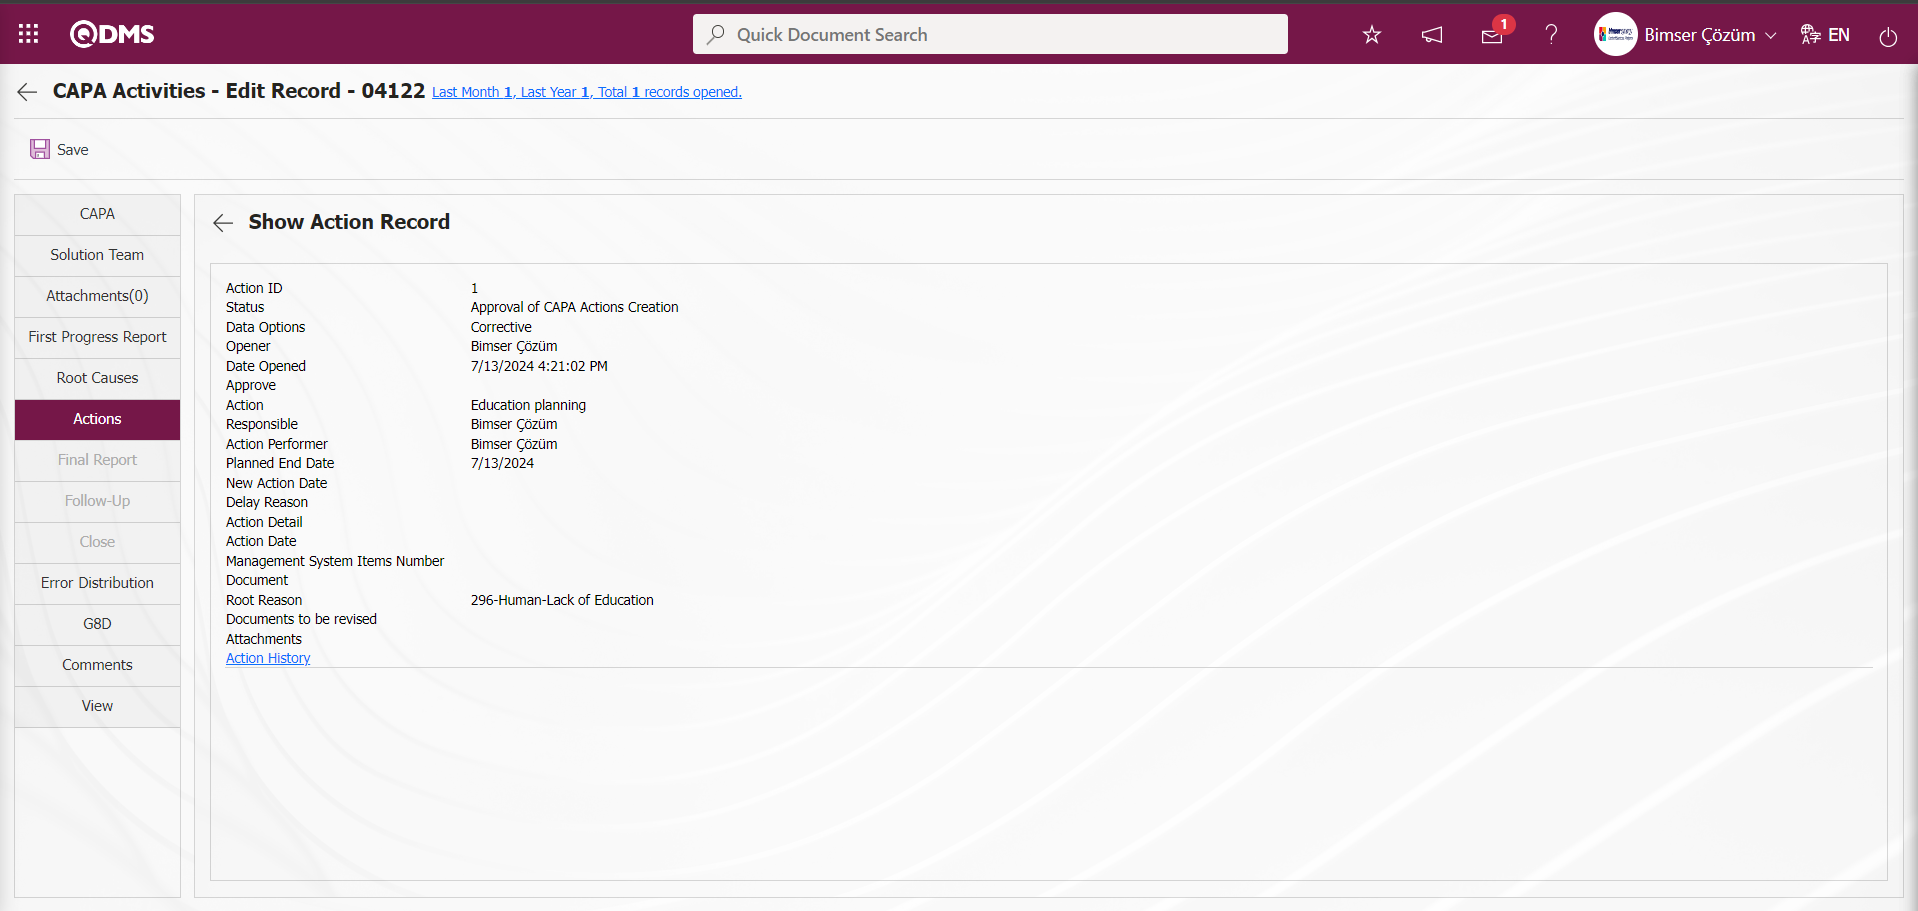
On the Actions screen, the Action is rejected by clicking the  button and entering the reason for rejection.
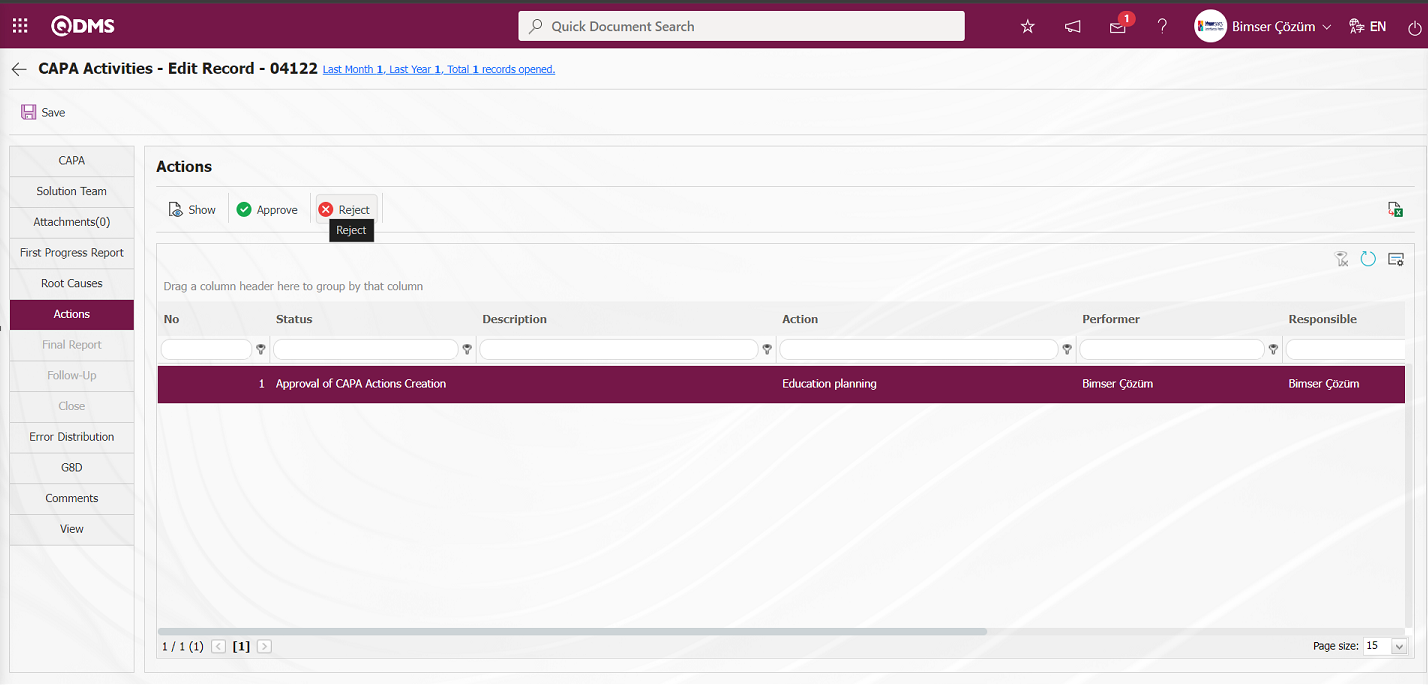
In the Rejected CAPAs screen, Rejection Reason information is written and the Action approval process is rejected.
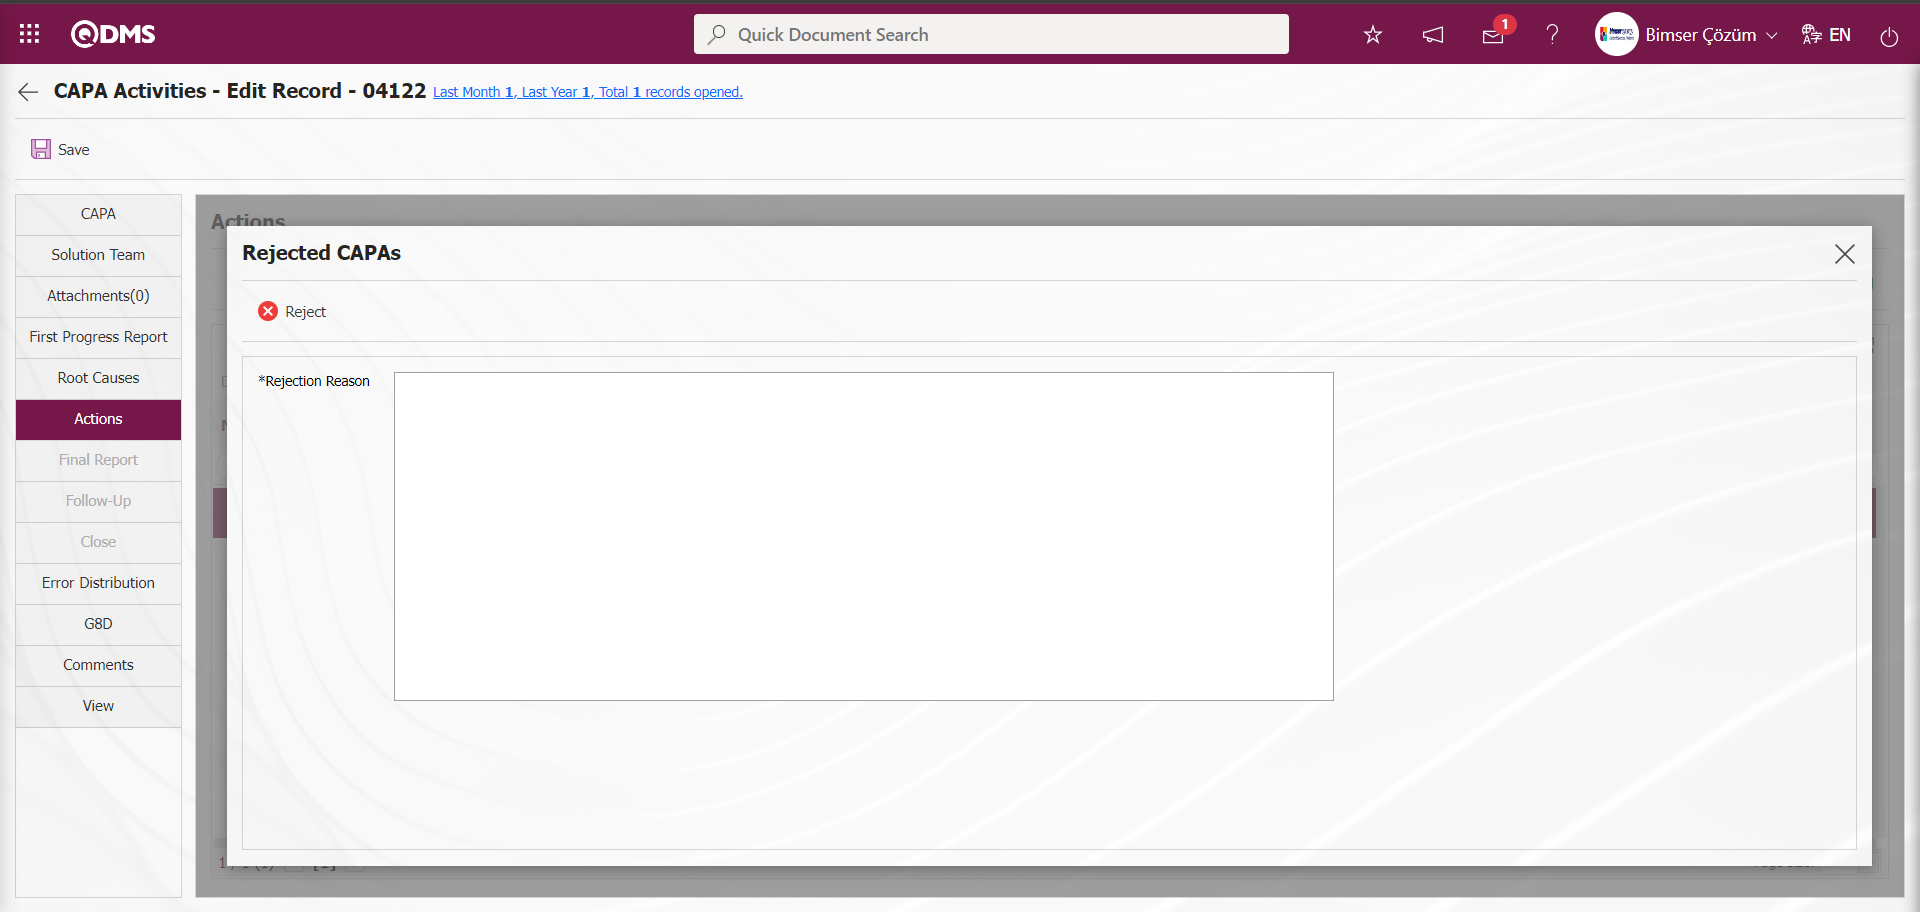
Click the button on the Actions screen.
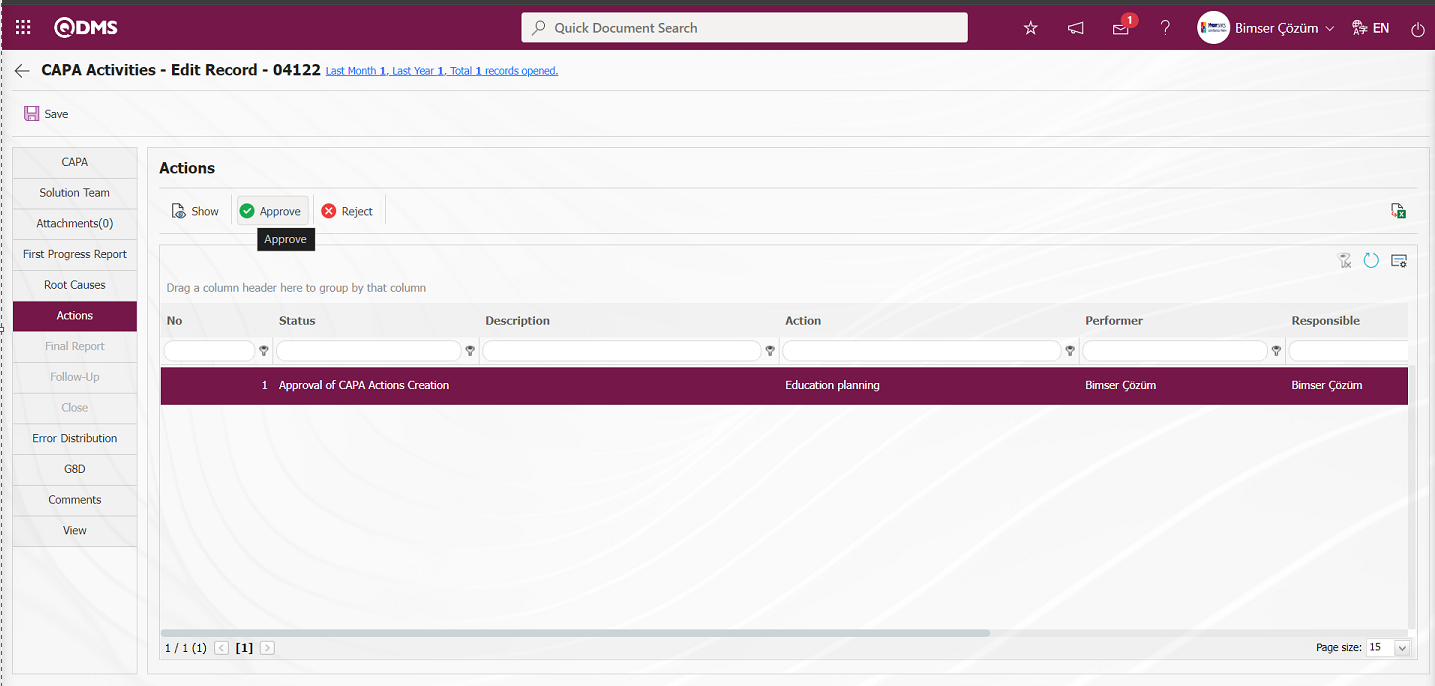
On the Actions screen, the status of the Actions with draft status is changed to “Education planning” status. After the mass approval process on the Actions screen, all Actions with “Education planning” status are changed to open status. In the Actions tab, the realization process of the Actions whose status is open is performed.
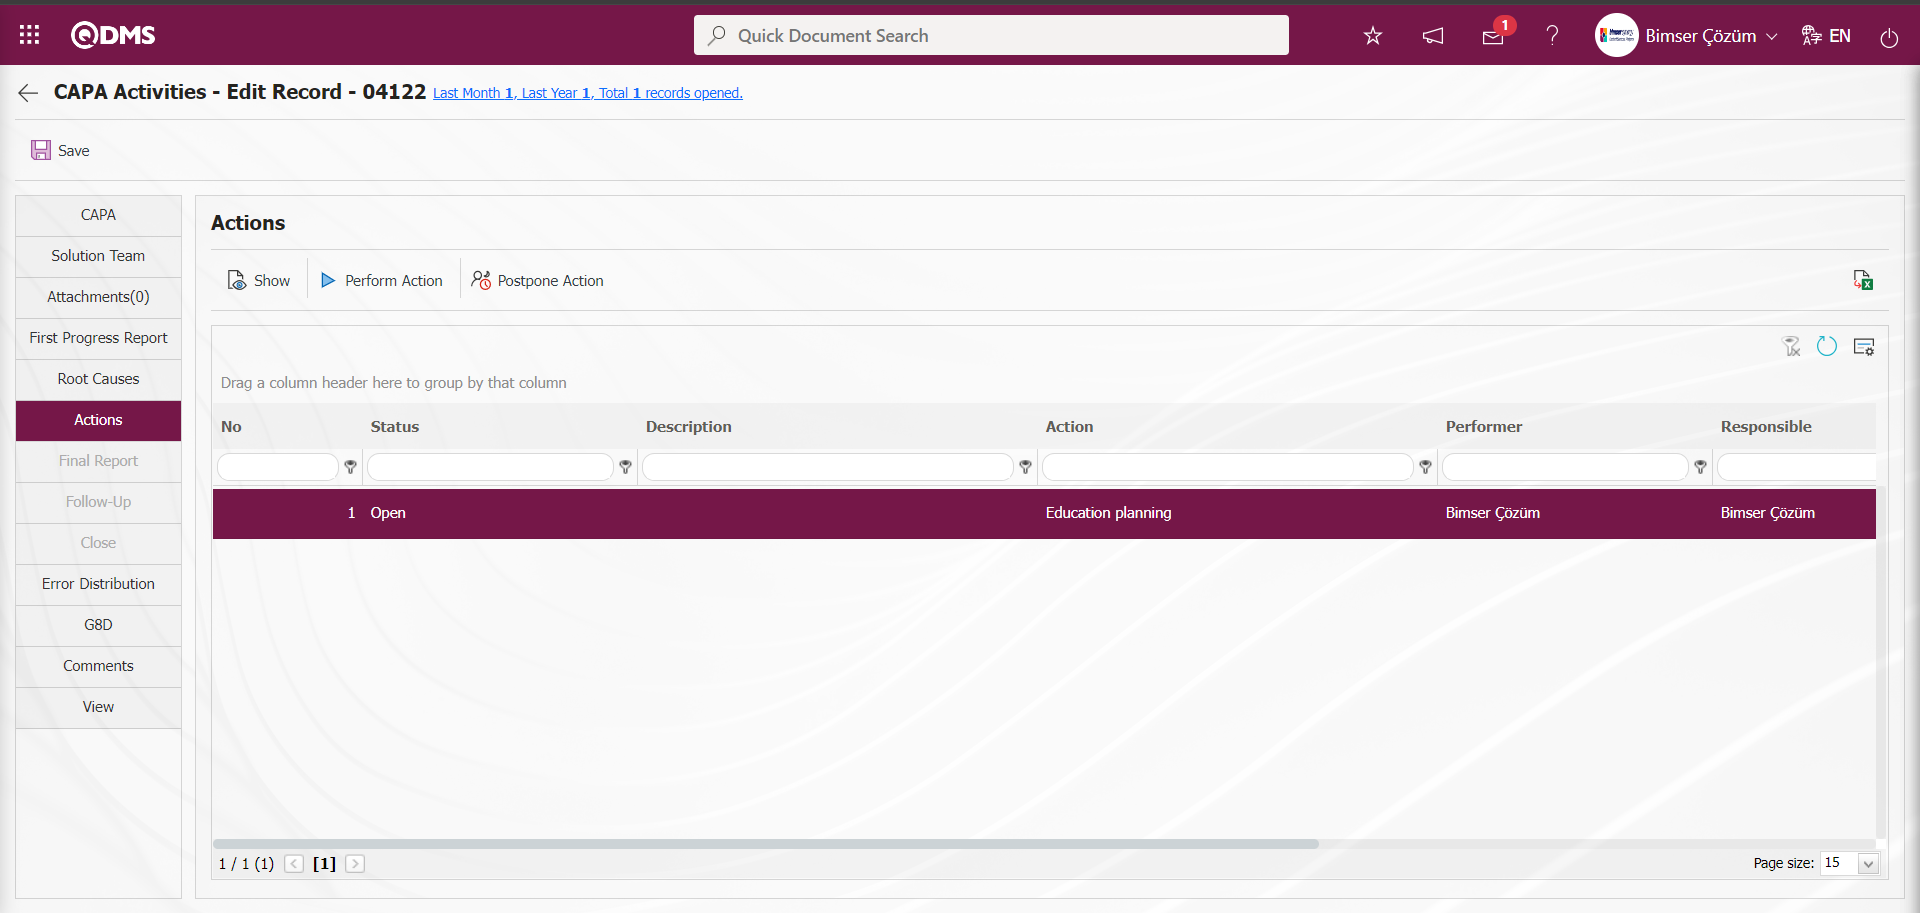
By activating parameter 186 in the CAPA module parameters, the Actions tab is activated and the Actions are brought to open status in a collective manner by sending them for collective approval in this way. The realization process of the Actions brought to open status is performed.
6.2.1.20. Action Compliance Check
In the CAPA module, the action taken during the closure phase is checked for compliance. In order to perform this process, the parameter value of parameter 173 in the CAPA module parameters is selected as “Yes” and the parameter is activated.

After the parameter is activated, on the CAPA Activities - Edit Record** screen, the check box related to the “All Actions Available” field is displayed in the Closure tab during the closure phase of CAPA.
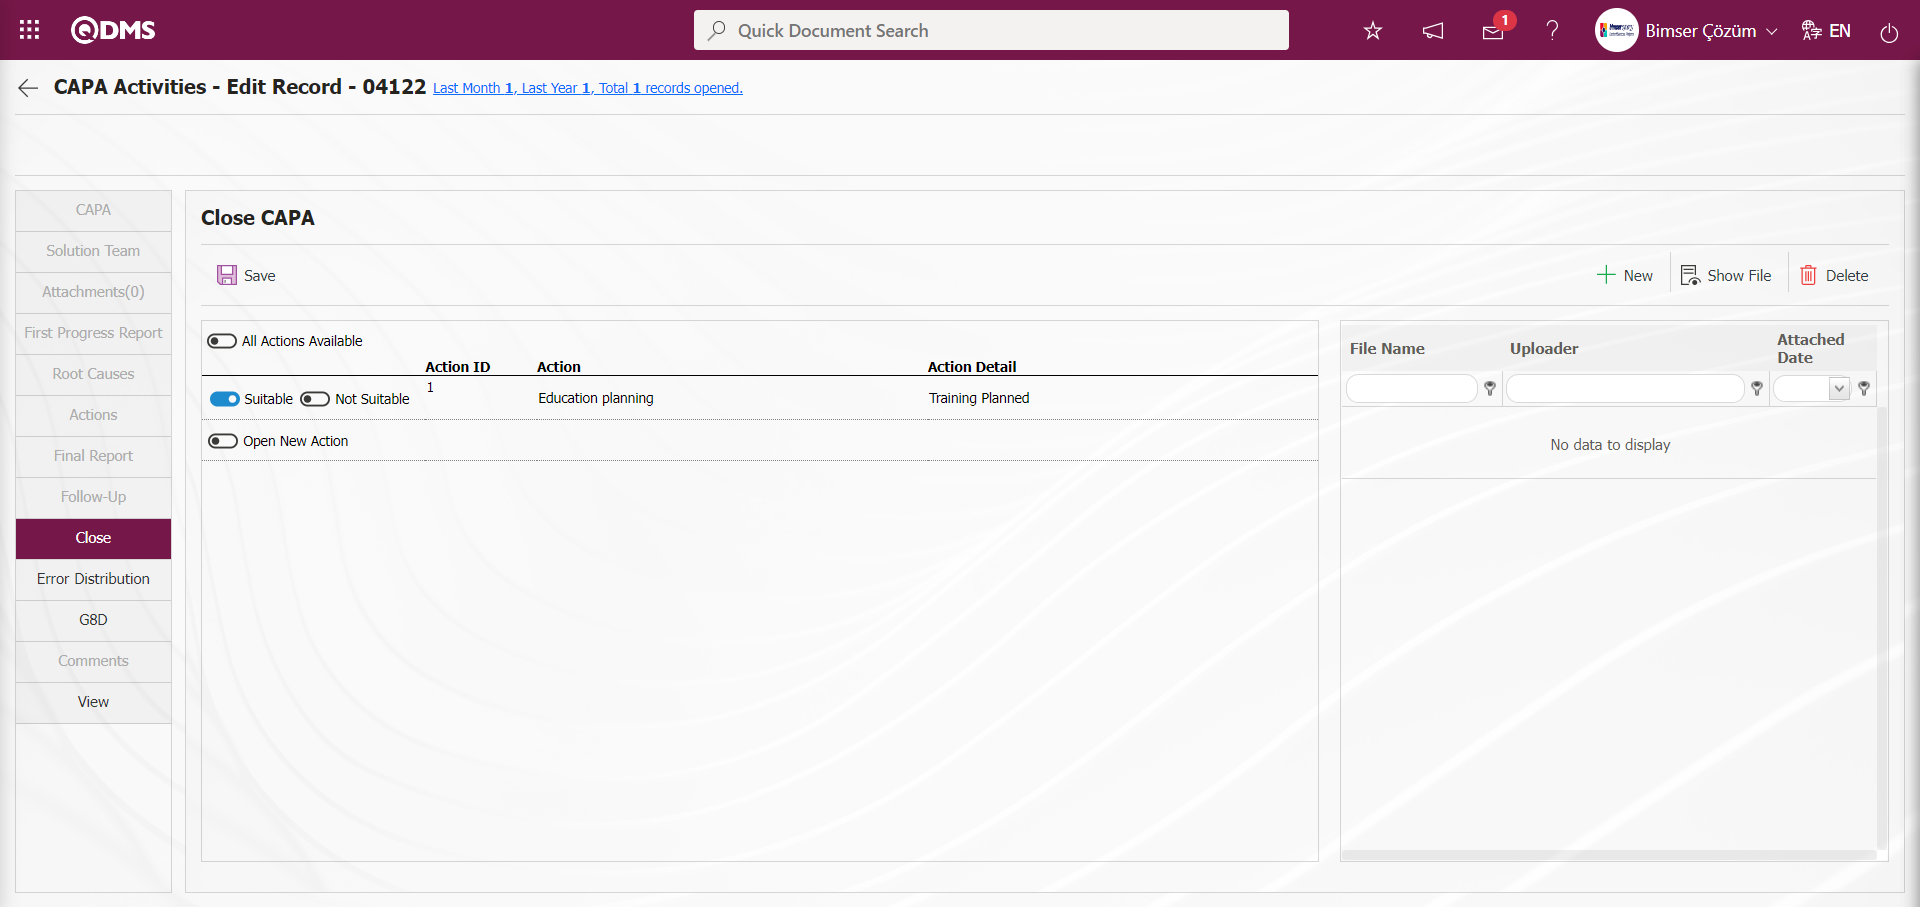
If the relevant check box is checked, the relevant fields for the Closing phase are displayed and the CAPA record is closed by filling in the relevant fields during the closing phase of the CAPA record.
On the CAPA Activities - Edit Record screen, on the Close tab, in the CAPA close phase, when the check box related to the action is checked in the not suitable in the conformity check, the field where the explanation about the non-conformity will be written is displayed. If any, the reason why the action is not appropriate is written in this field.
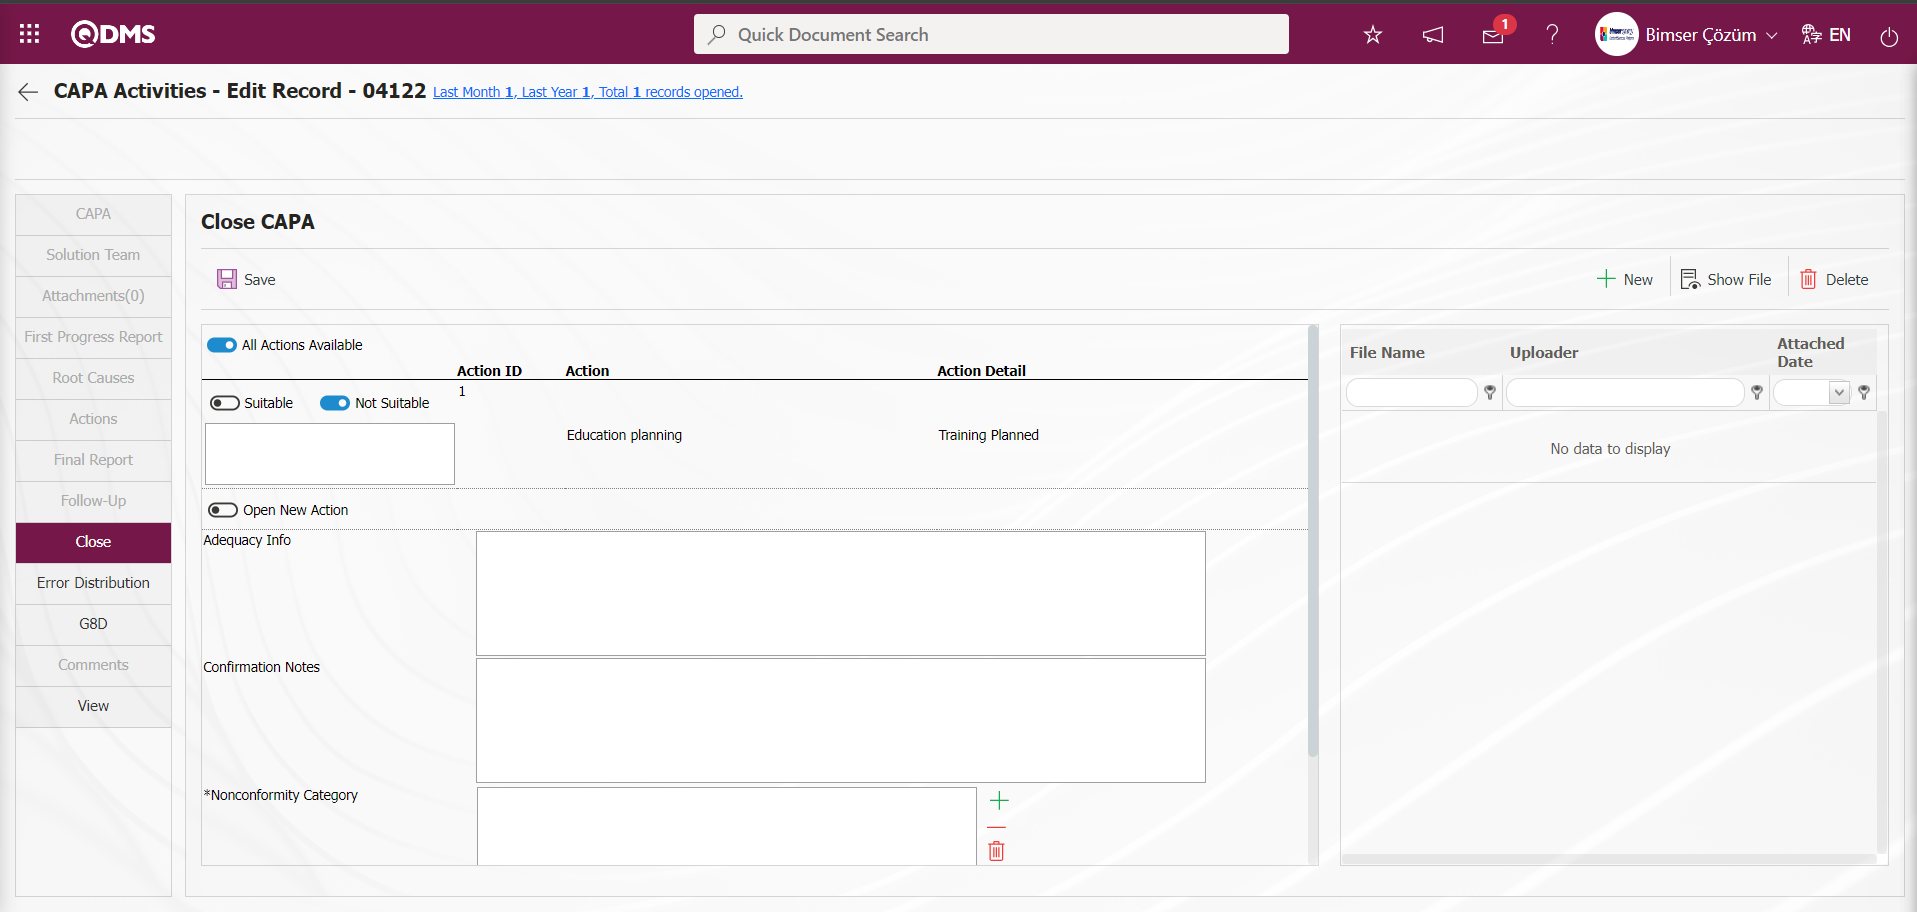
At this stage, it is checked whether it is appropriate or not and a new action is opened by checking the relevant check box in the “Open a new action” field.
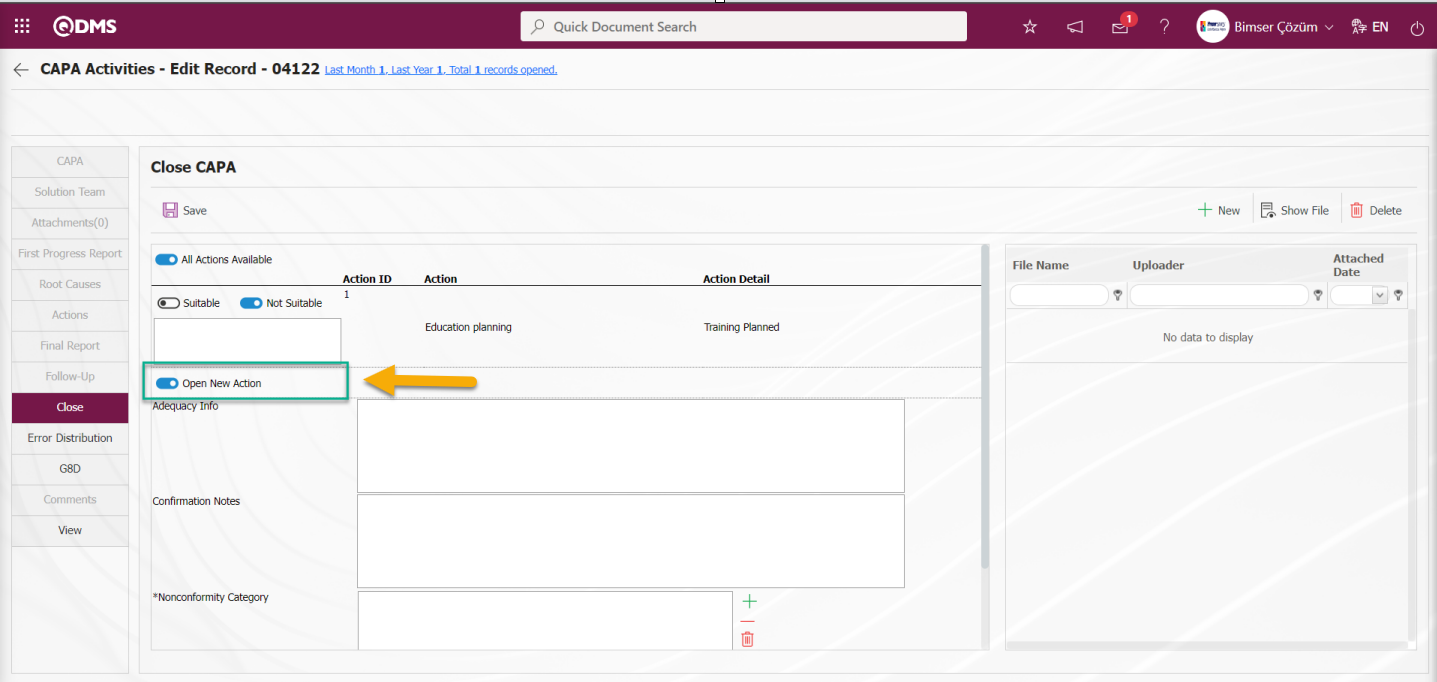
When the relevant check box is checked in the “Open New Action” field at the CAPA Close stage in the CAPA Close tab on the CAPA Activities - Edit Record screen, the system allows the system to define a new action by opening the Actions - New Record screen when the  button is clicked at the top left of the screen.
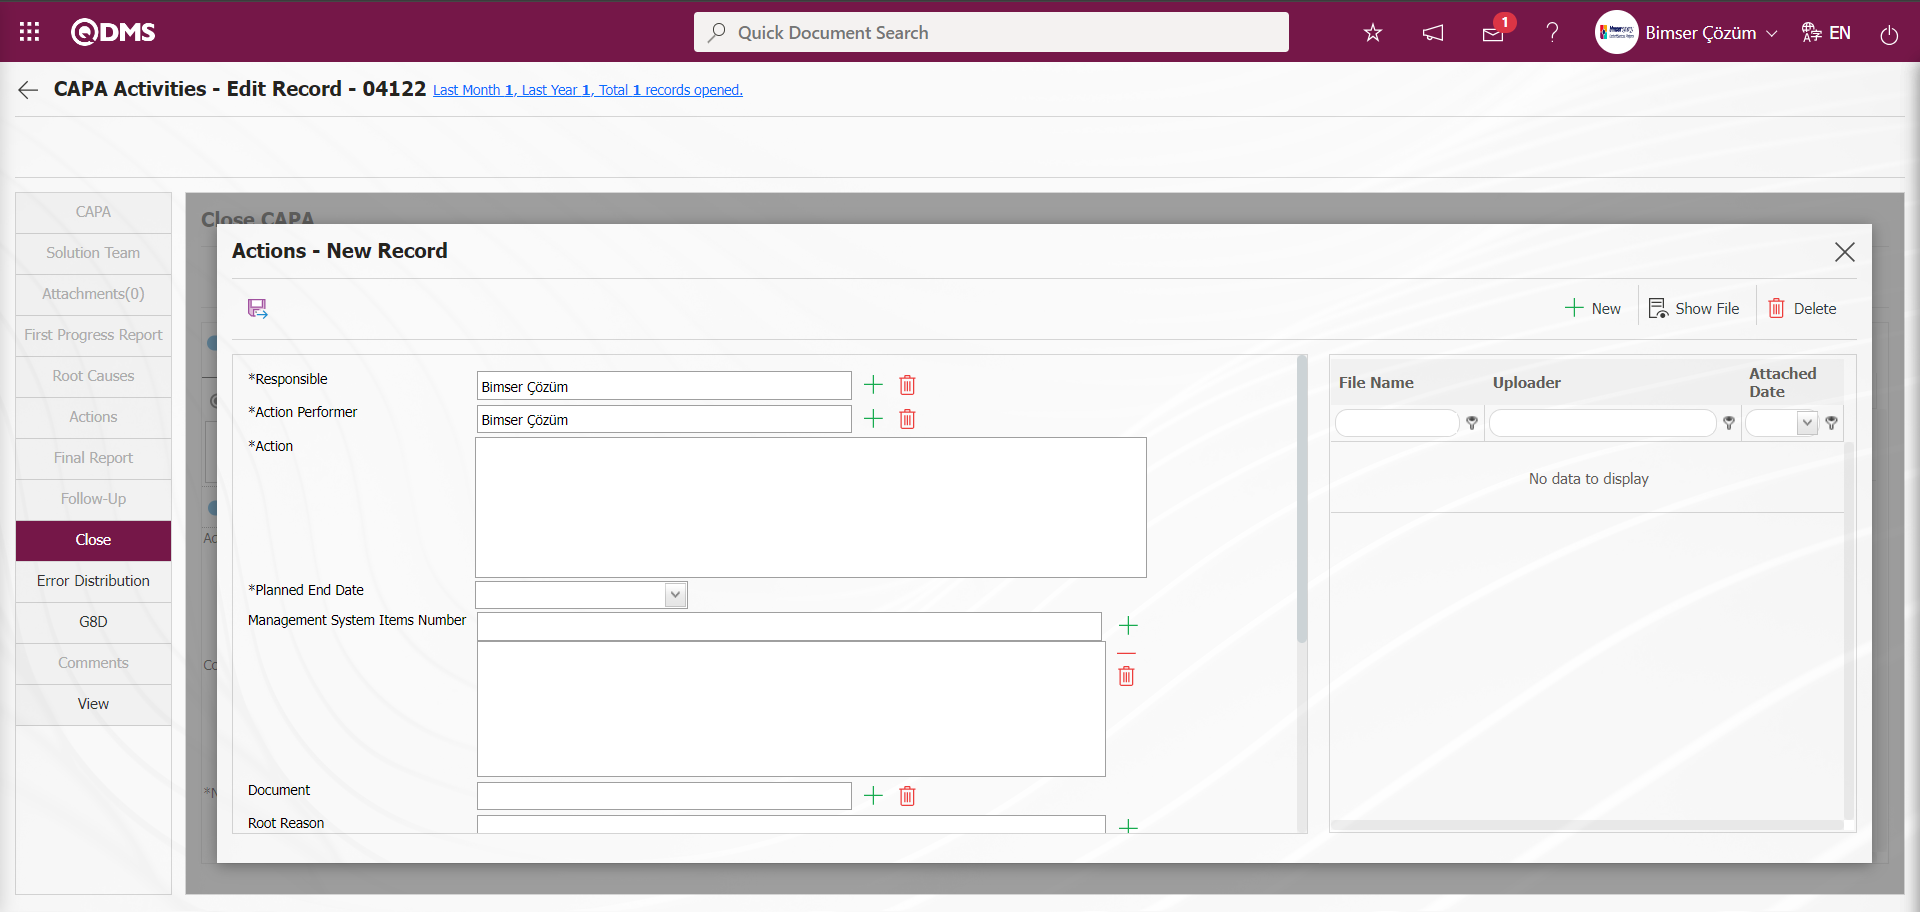
6.2.1.21. CAPA Module Creating a New Area for Common Use
In the CAPA Module, extra fields that are not in the system requested by the company can be defined in the Detailed Information, Progress Report, Root Causes, Actions, Result Report and Closure tabs. These defined fields are valid for all CAPA Module resources. Click on System Infrastructure Definitions/BSID/ Configuration Settings/Language Settings menu. On the Language Settings page, select “Corrective and Preventive Activities” in the Module field and the language definitions related to the Corrective and Preventive Activities Module are displayed on the screen.
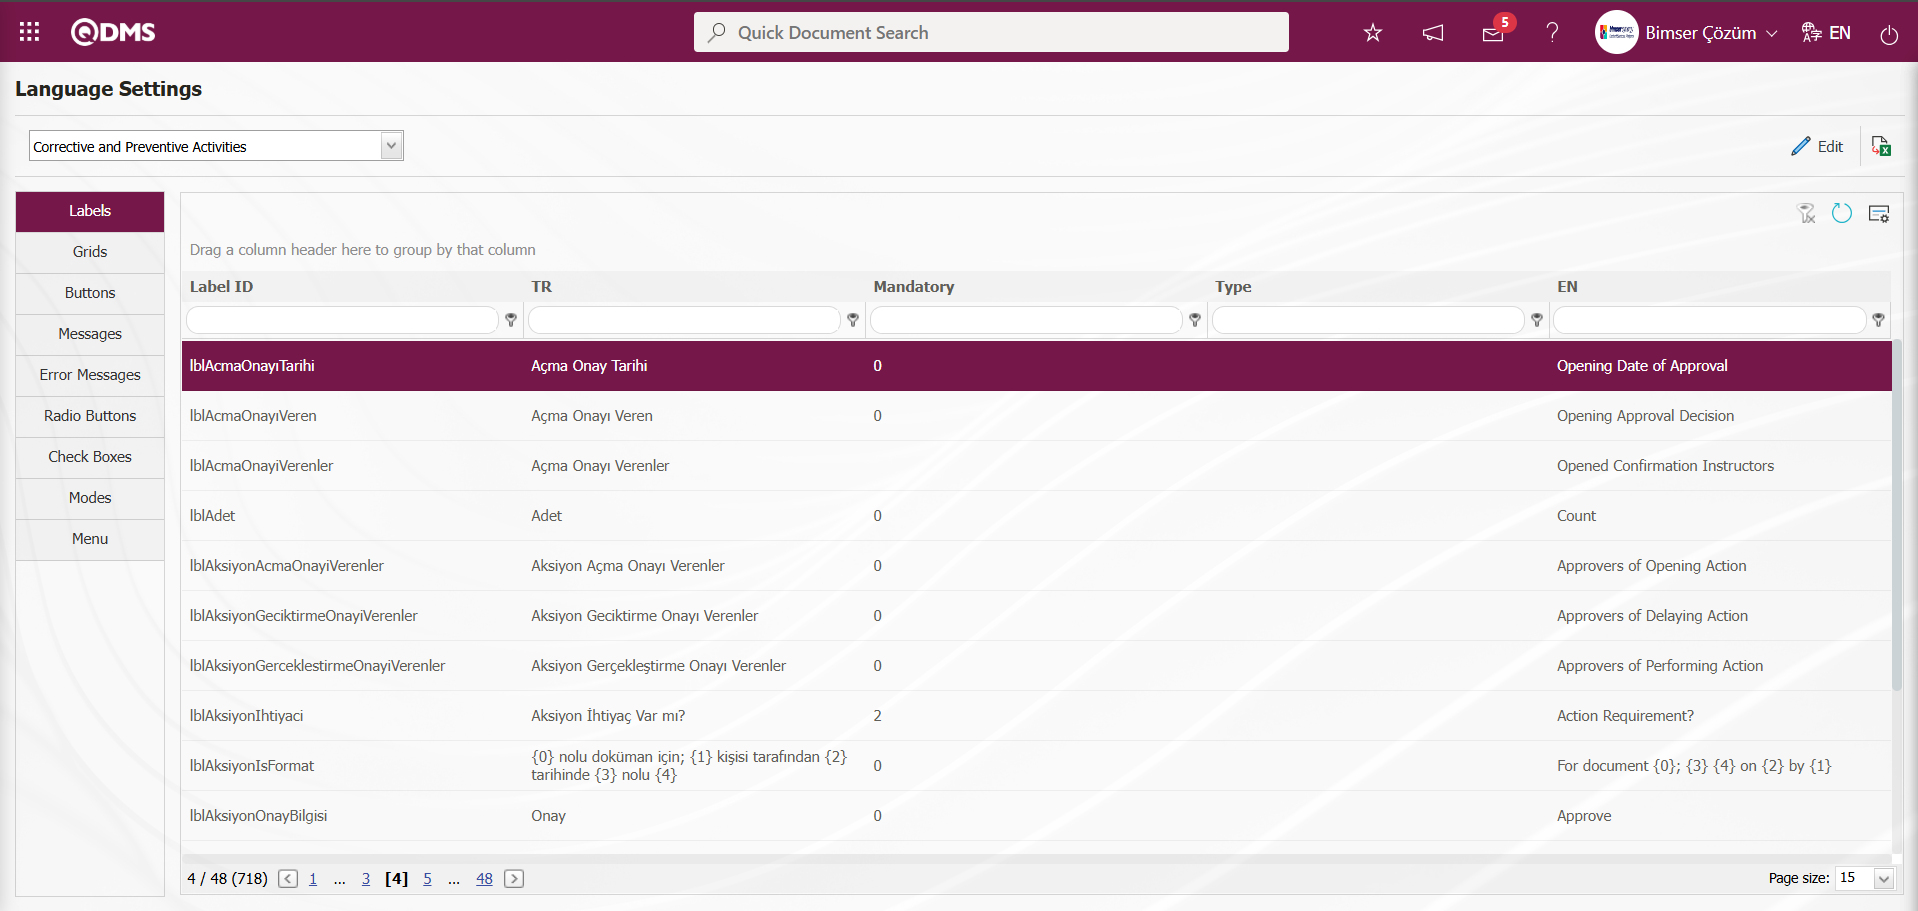
In the Corrective and Preventive Activities Module, parametric type field definition is made in the Language Settings menu in the Detailed Description tab in the CAPA Activities - Edit Record screen that opens when the  button is clicked in the Integrated Management System / CAPA / CAPA Activities** menu. In addition, in the tabs where the Development Report, Root Causes, Actions, Final Report and Closure stages are realized in the CAPA Module, parametric type field definition is also made in the Language Settings menu. In the tabs where these stages are realized, for example, when a parametric type field is defined for the Progress Report, the parametric fields defined in the Progress Report tab, and when a parametric type field is defined for Root Causes, the parametric fields defined in the Root Causes tab are displayed. If a field with parametric type is defined in which tab, the fields with parametric type are displayed in the related tab. At these stages, there are short codes used in parametric type fields. It is possible to distinguish which short codes were used at which stage.
Example: In order to distinguish at which stage the defined Text-Typed parametric-typed fields are in, it is necessary to pay attention to the starting parts of the following shortcodes;
Detailed Description: lblPARAM1 shortcodes are usually Detailed Description
represents the parametric fields displayed in the tab.
First Progress Report: lblG_Param1, shortcodes starting with lblG_ represent fields with parametric type that are usually displayed at the First Progress report stage.
Root Causes: lblKOKPARAM1, shortcodes starting with lblKOK_ usually
Represents parametric-type fields displayed at the Root Causes stage
Actions: lblA_Param1 represents the parametric type fields that are usually displayed in the Actions phase, starting with the short codes lblA _.
Final Report: lblS_Param1, starting with lblS_ shortcodes, usually representing the Final Report
represents fields with parametric type that are displayed in the phase.
Close: lblK_Param1, usually starting with lblK_ shortcodes Close represents fields with parametric type that are displayed in the stage.
Listing of Text Type Parametric Fields in Language Settings in Detailed Description tab
To define a text-type parametric field in the Detailed Description tab of the Integrated Management System/ CAPA/CAPA Activities** menu in the CAPA Module, first select the Corrective and Preventive Activities module in the drop-down module list in the module list in the System Infrastructure Definitions/ BSID/ Configuration Settings/ Language Settings menu and display the language definitions of the selected module.
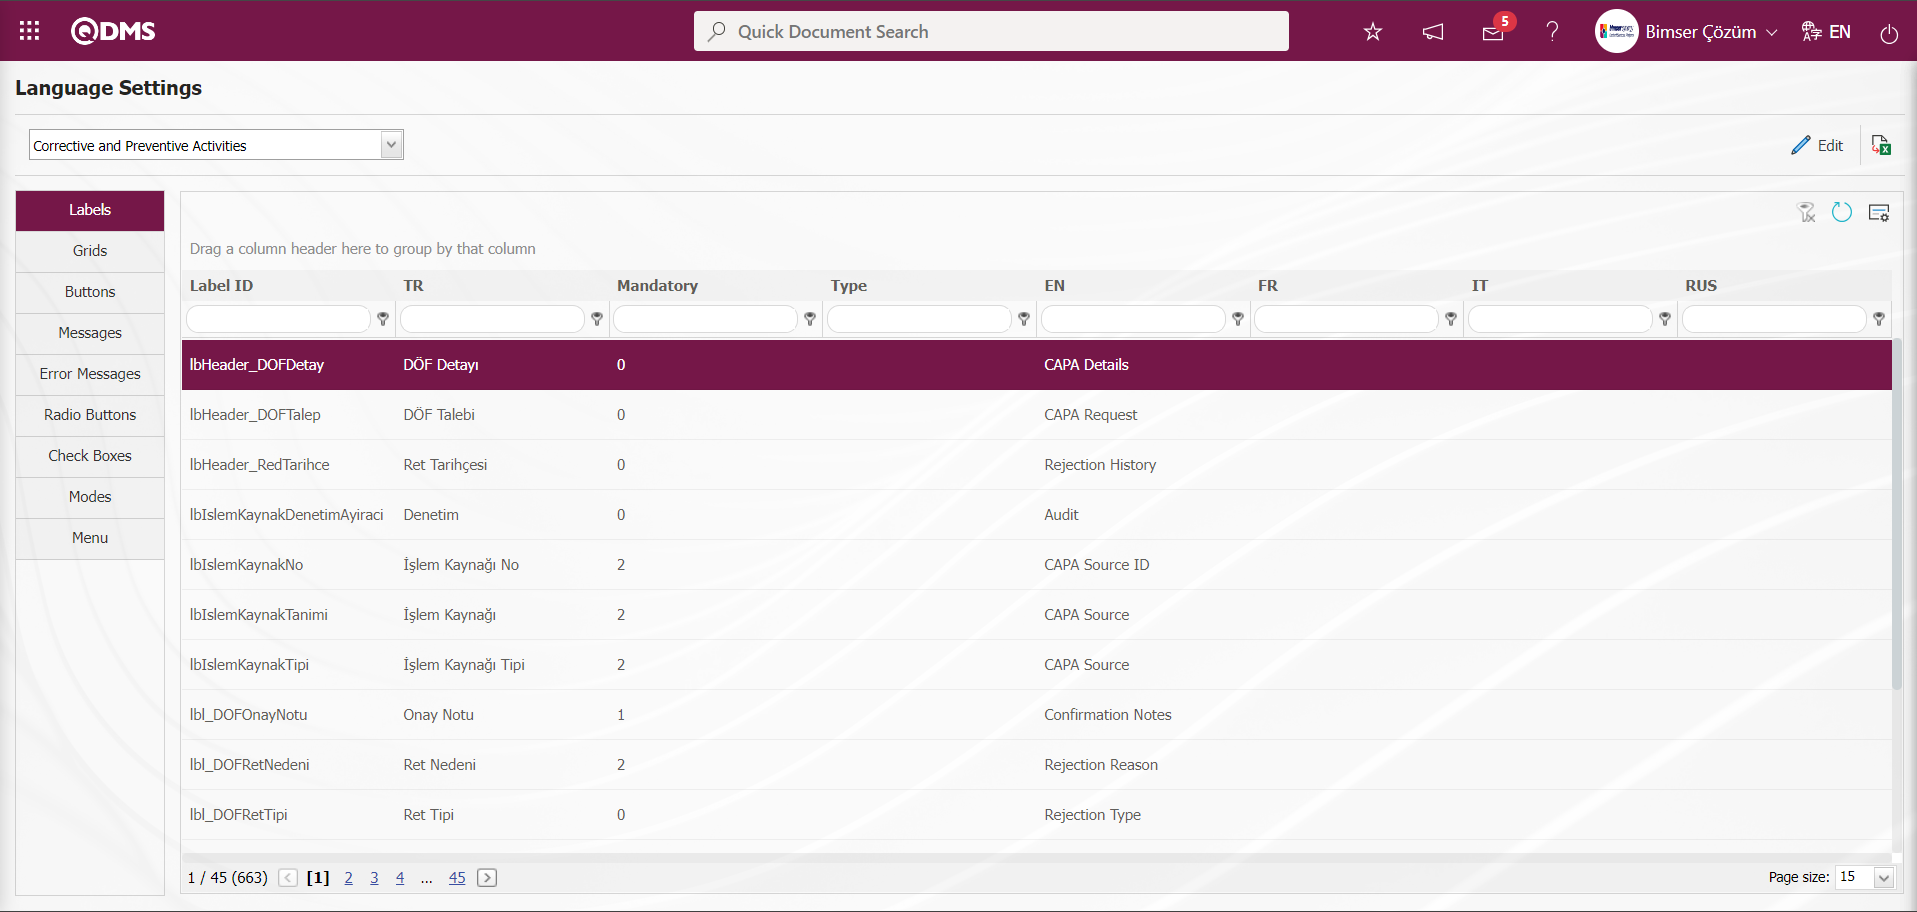
In Language Settings, the grid name field “lblPARAM” and the type field “Text” are written in the grid to list the text type fields in the Corrective and Preventive Activities module related detail information tab.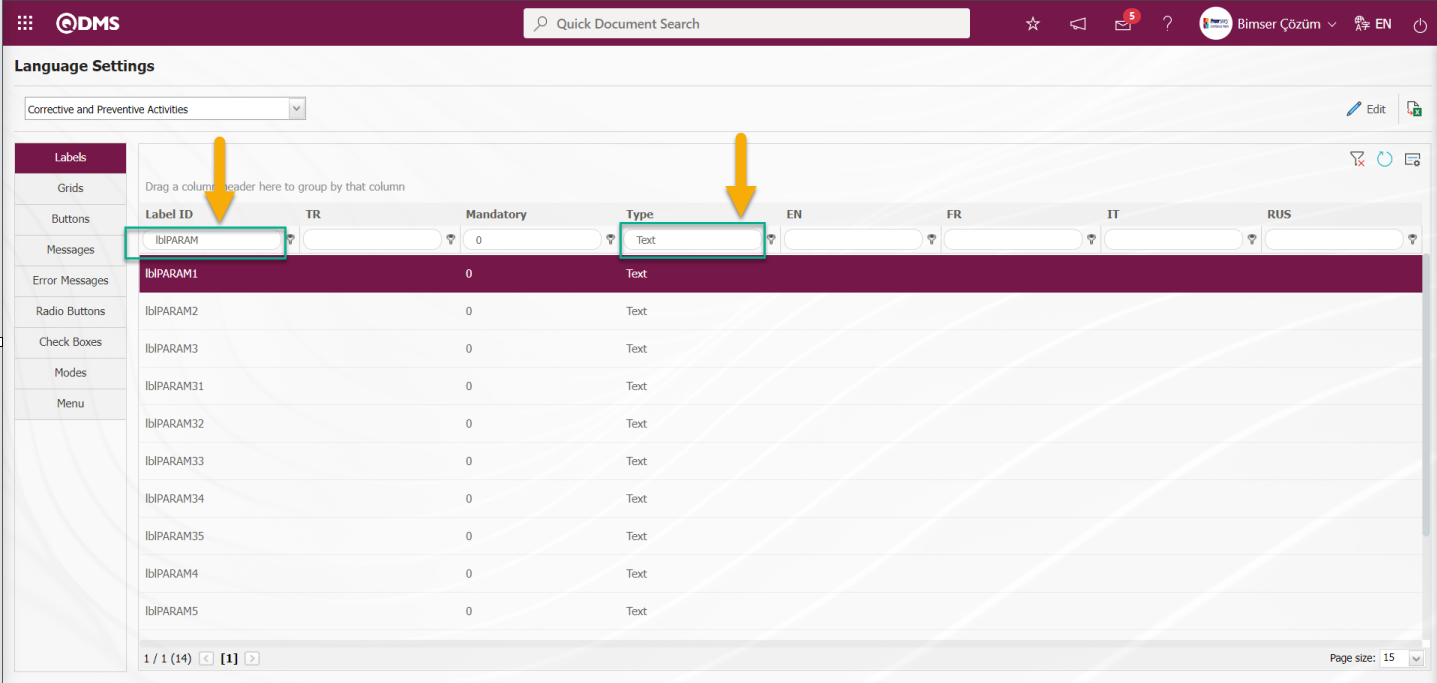
lblPARAM1 Text type parametric is selected and  button is clicked for data entry of the field.
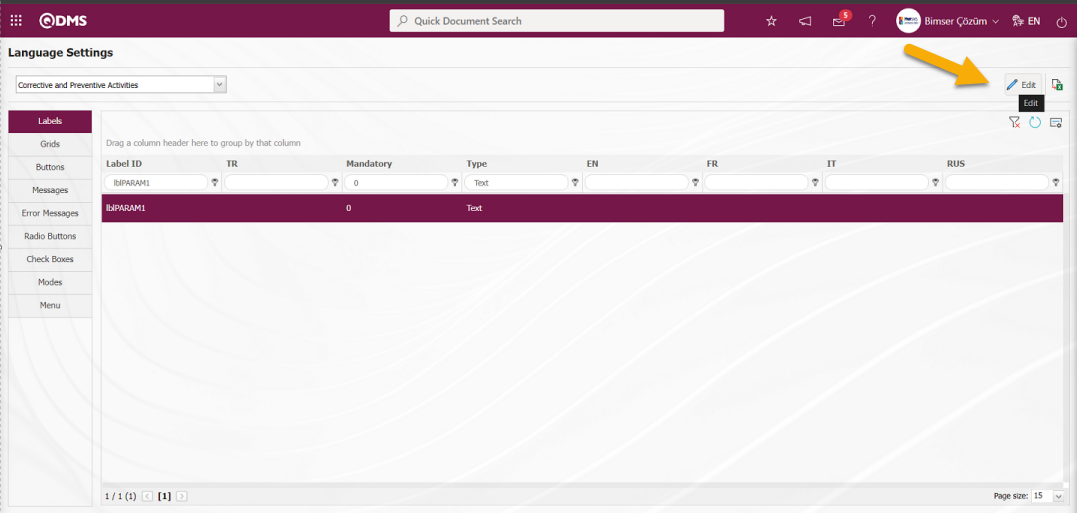
In the Language Settings screen, the definition information of the field to be defined in the value field is written. Header note information, requirement information of the field, transaction source information to be displayed and CAPA Type information are selected. The process of displaying the related field in the Detail Information tab is selected in CAPA Activities - New Record is determined according to the transaction source and CAPA type selected on the screen.
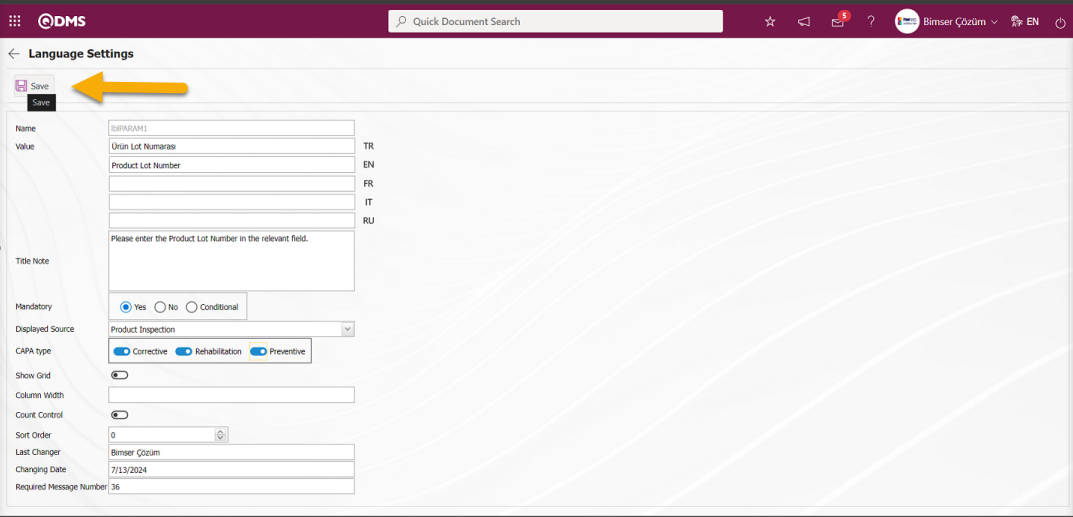
After entering the relevant information in the required fields, the language settings are saved by clicking the  button in the upper left corner of the screen.
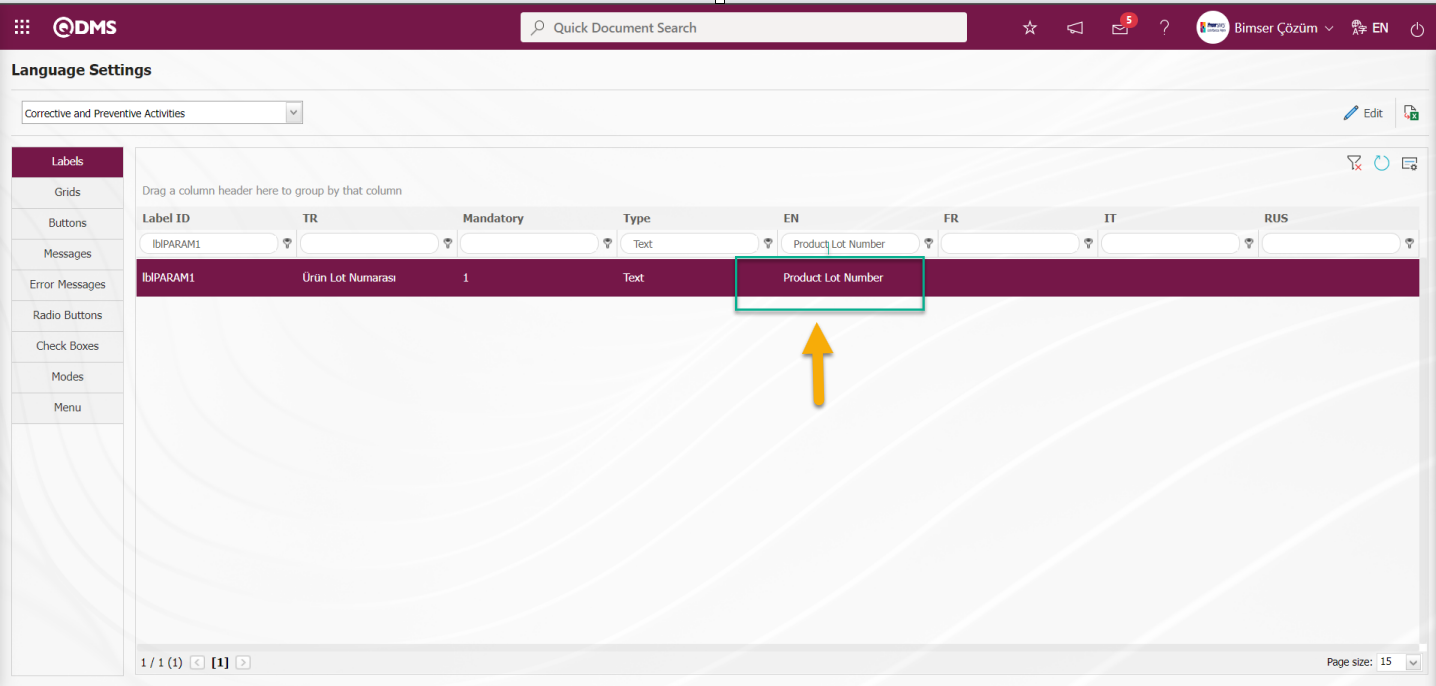
Click on Integrated Management System/CAPA/CAPA Activities menu to display the defined text-typed field. In the screen that opens, the defined text-type field is displayed in the Detailed Description tab by selecting the CAPA type and CAPA Source information selected in the definition field in the CAPA Type field.
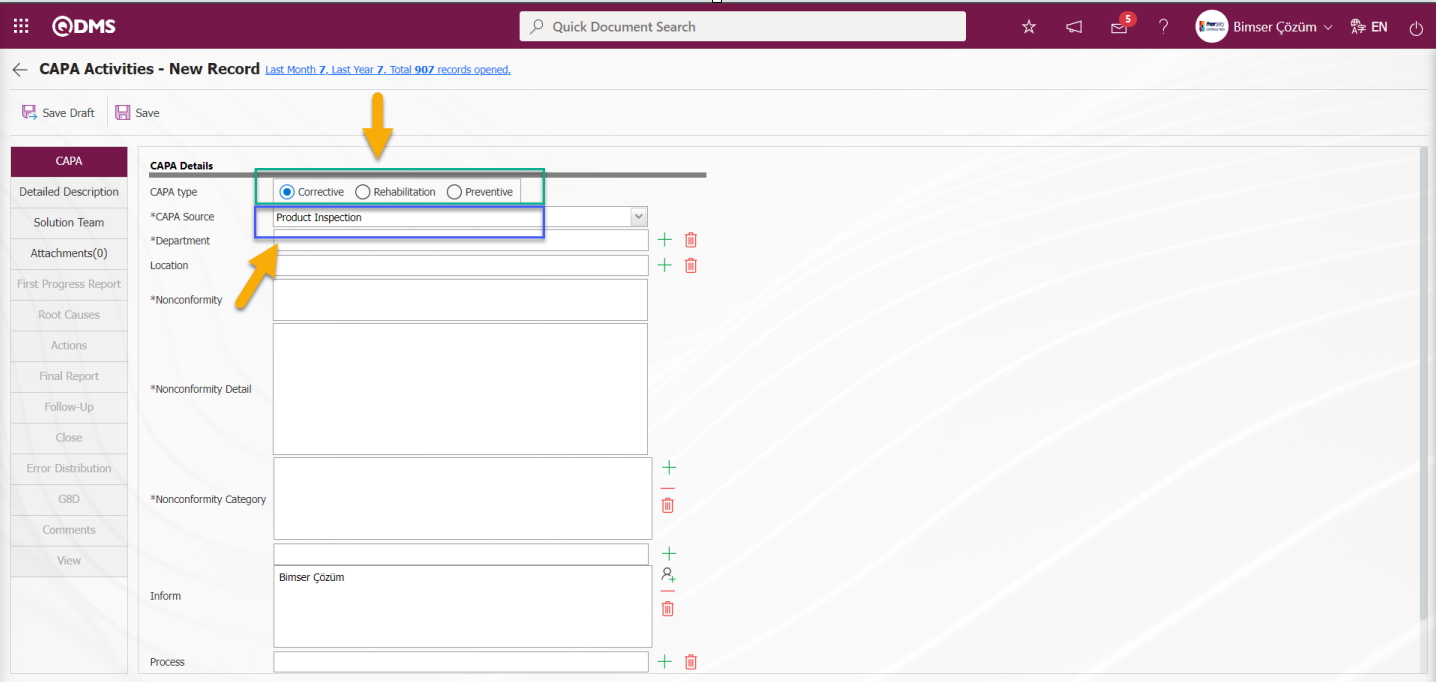
It is seen that the defined field is a mandatory field and when the mouse hovers over it, the title note information is displayed.
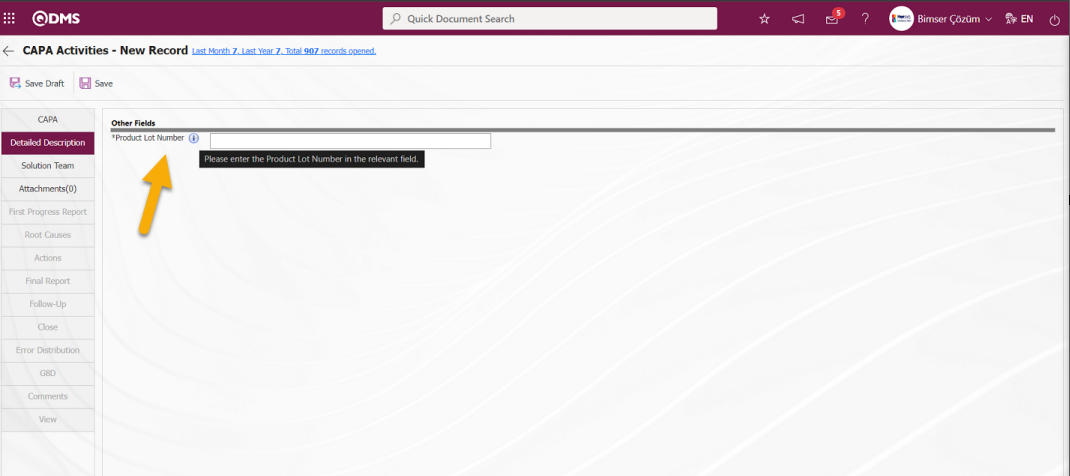
6.2.2. CAPA Request
Menu Name: Integrated Management System/ CAPA/ CAPA Request
This is the menu where the CAPA Request definition process is done.A new CAPA can also be registered to the system with the CAPA Request menu. Only the most basic information is filled in the CAPA opened from the request. This menu is used for users who will not be given CAPA Activities menu authorization, will not take part in any flow of CAPA, and will only have CAPA Request.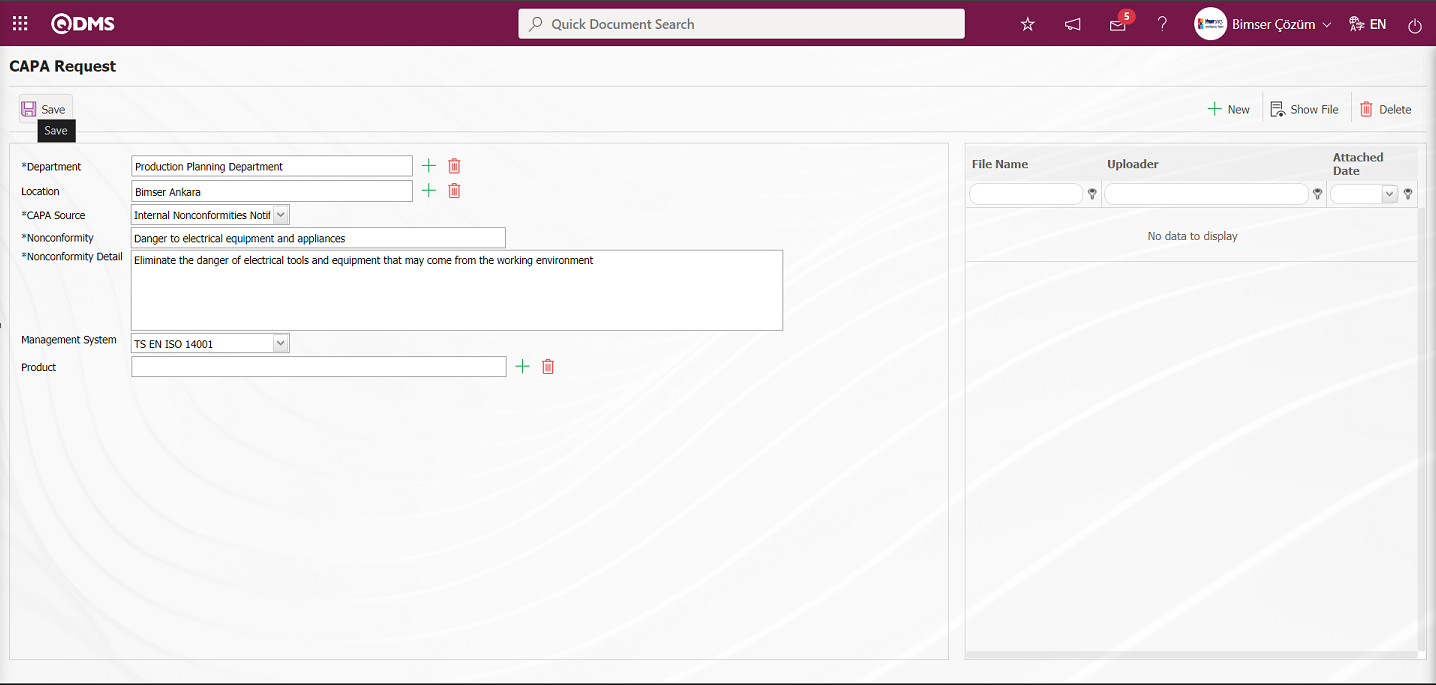
Related fields are defined on the screen that opens:
Department: This is the field where the Department of Non-Compliance on the CAPA Request screen can be selected from the Department list defined in the system opened by clicking the  (Select) button.
Location: This is the field where the location information can be selected from the location list defined in the system that opens by clicking the (Select) button on the CAPA Request screen .
CAPA Source: This is the field where CAPA Source information can be selected from the transaction sources registered in the system by clicking the drop-down liston the CAPA Request screen .
Nonconformity: This is the field where Nonconformity Definition information is entered on the CAPA Request screen .
Nonconformity Detail: This is the field where Nonconformity Detail information is entered on the CAPA Request screen .
Management System: It is the field where the Management System information is associated by selecting the Management System information on the CAPA Request screen by clicking the drop-down list in the list of the defined Management system in the system.
Product: This is the field where the connection of the Product information on theCAPA Request screen can be selected by selecting it in the Product list opened by clicking the (Select) button.
Additional Files:If available on the CAPA Request screen, at this stage, additional files such as evidence documents, photographs, etc. related to the CAPA Request are uploaded with the help of the buttons.

With the help of the buttons on the screen;
: The additional file is uploaded to the system.
: The uploaded additional file information is displayed.
: Uploaded attachment file information is deleted
button to add an additional file at the CAPA Request stage. Multiple additional files can be added.
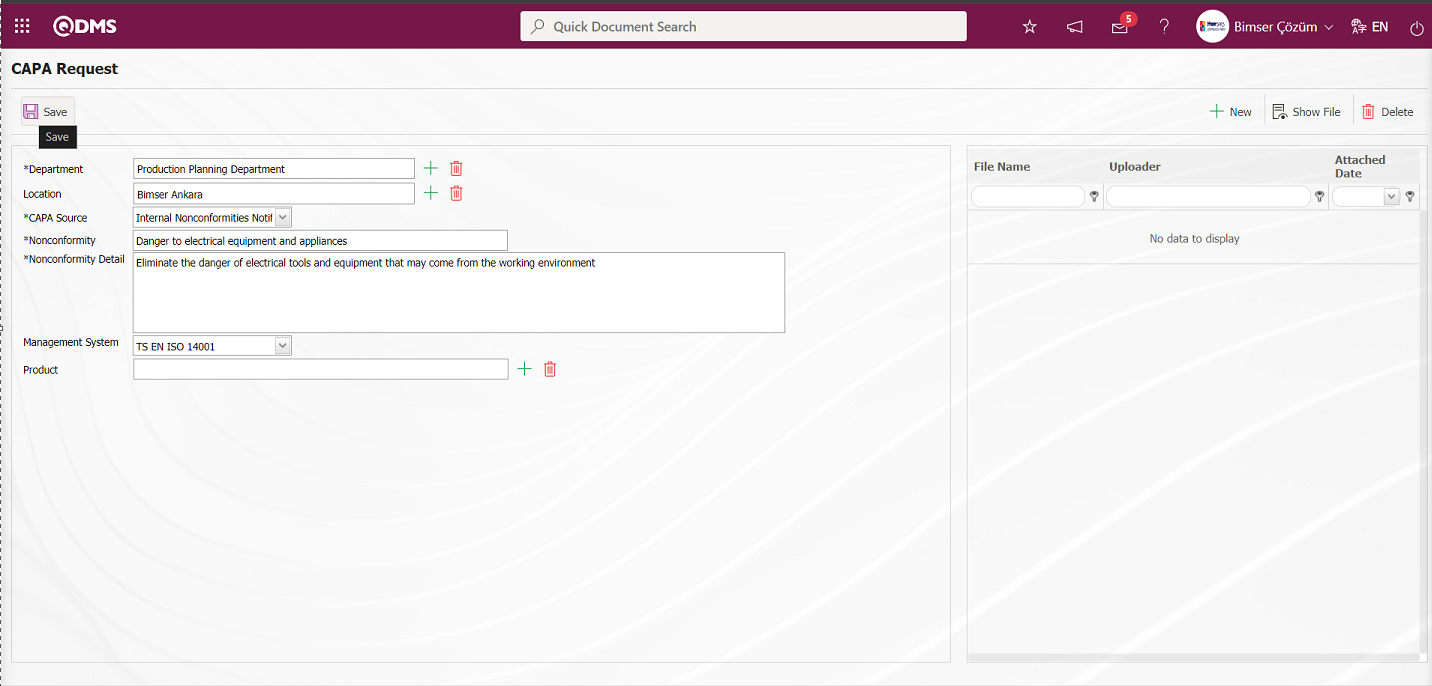
After filling in the required fields on the CAPA Request screen, the system sends the CAPA Request for approval by clicking the  button in the upper left corner.

While the system sends an e-mail to the person on approval, it is also displayed as** “CAPA List Waiting for Approve” to the pending jobs.
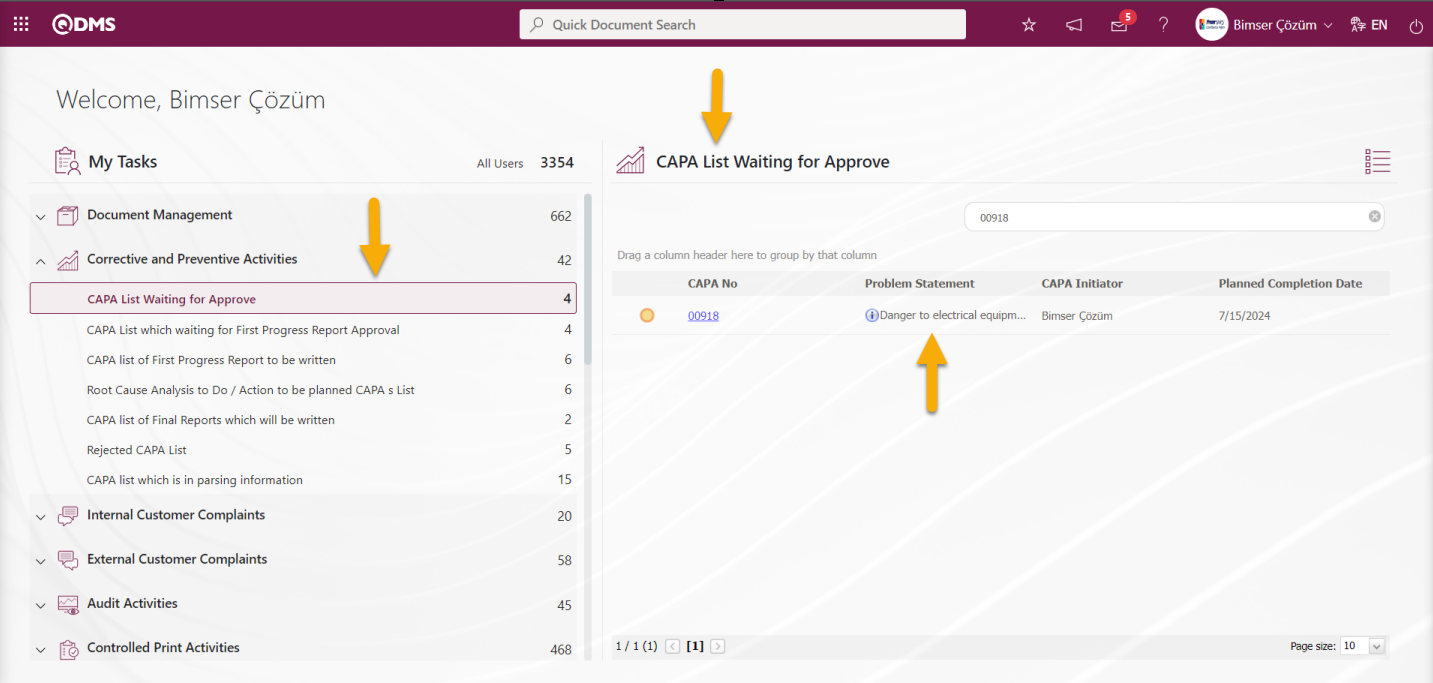
6.2.3. Approve CAPA
Menu Name: Integrated Management System/ CAPA/ Approve CAPA
Approve CAPA is the menu where the process is done. Users who do not want to follow the CAPAs waiting for approval on the task (my pending jobs) can view them on the Integrated Management System Approve CAPA screen. Users with module administrator authorization use the Approve CAPA page to track the status of CAPAs. On the Approve CAPA screen, the status of the CAPA record such as Open, Cancel, First Progress, Follow-up, Result is selected in the status section. In these statuses, CAPA Records are assigned as a task in my pending jobs. The process steps in these related tasks are done on the Approve CAPA screen.
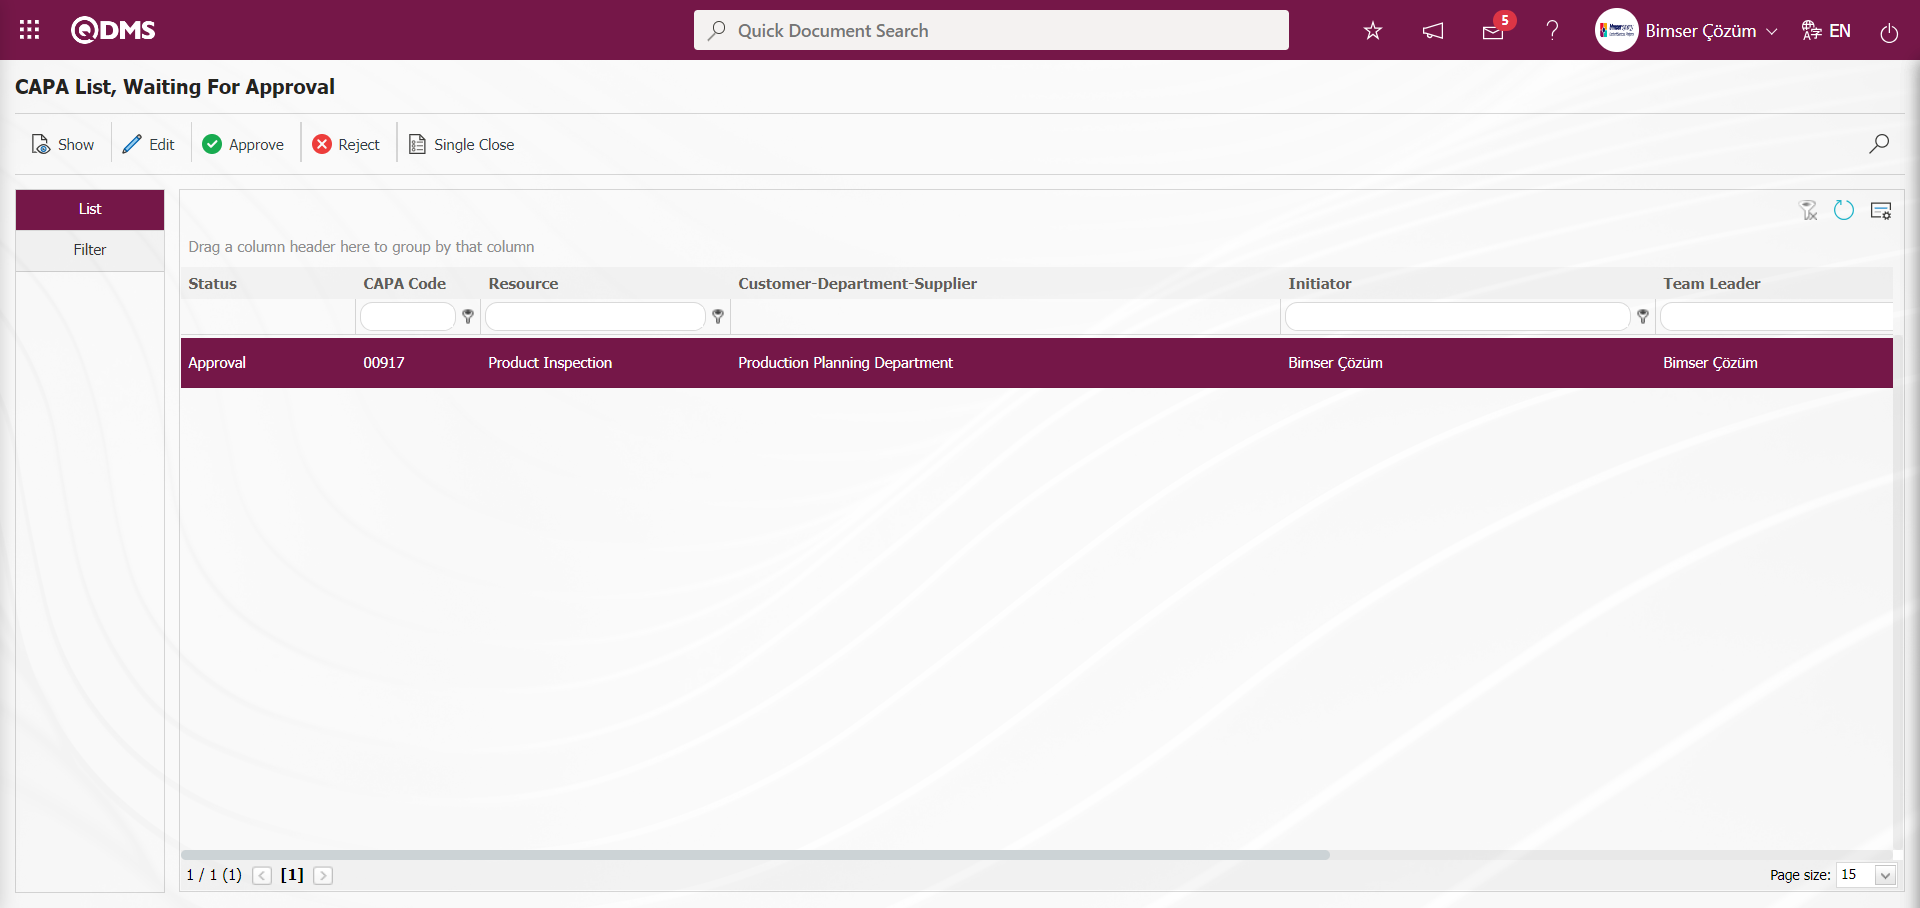
With the help of the buttons on the screen;
 : The related CAPA record is displayed.
 : Making changes/edits/updates with the related CAPA record. If it is a CAPA record opened from the request, the system will not allow us to perform the approval process without filling in the mandatory fields.
 : CAPA approval process is done. After the approval process, the relevant CAPA record falls in front of the Team Leader.
 : If the information entered in the CAPA record is not appropriate, the CAPA record is rejected. The rejected record can be sent to the opener with the reason for rejection. When rejecting, it can be rejected for detailed information or for the cancellation of the record, depending on this, it should select the relevant option.
Single closing operation is performed.
 : It is used when you want to search by filtering the information from the filter option in case there are too many CAPAs that need to be approved.
 : The data remaining in the filter fields in the grid where the search criteria on the menu screens are searched is cleaned.
: The menu screen is restored to its default settings.
: User-based designing is done on the menu screen with the show-hide feature, that is, the hiding feature of the fields corresponding to the columns on the menu screens.
Click the  button on the CAPA List, Waiting For Approval screen.
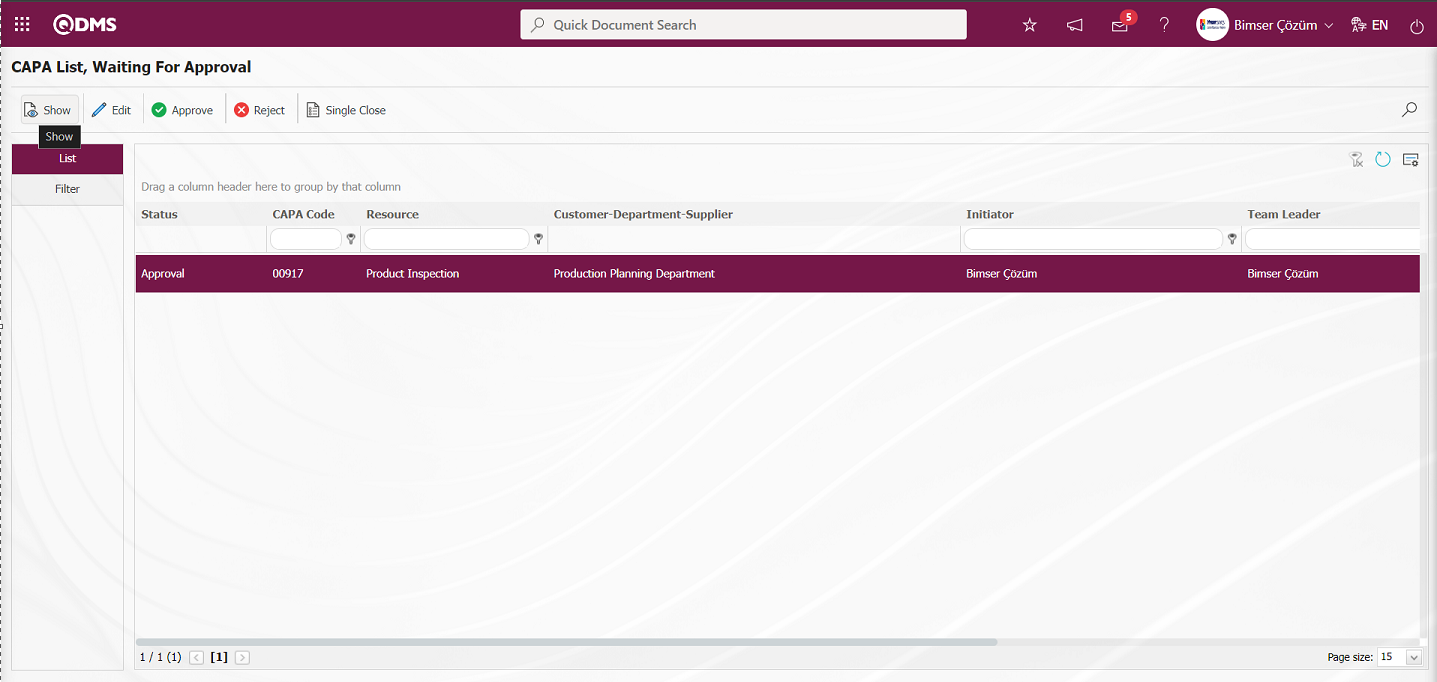
Click on the tabs related to the CAPA record on the Display screen and view the detail information. The  button is clicked on the display screen of the CAPA record.
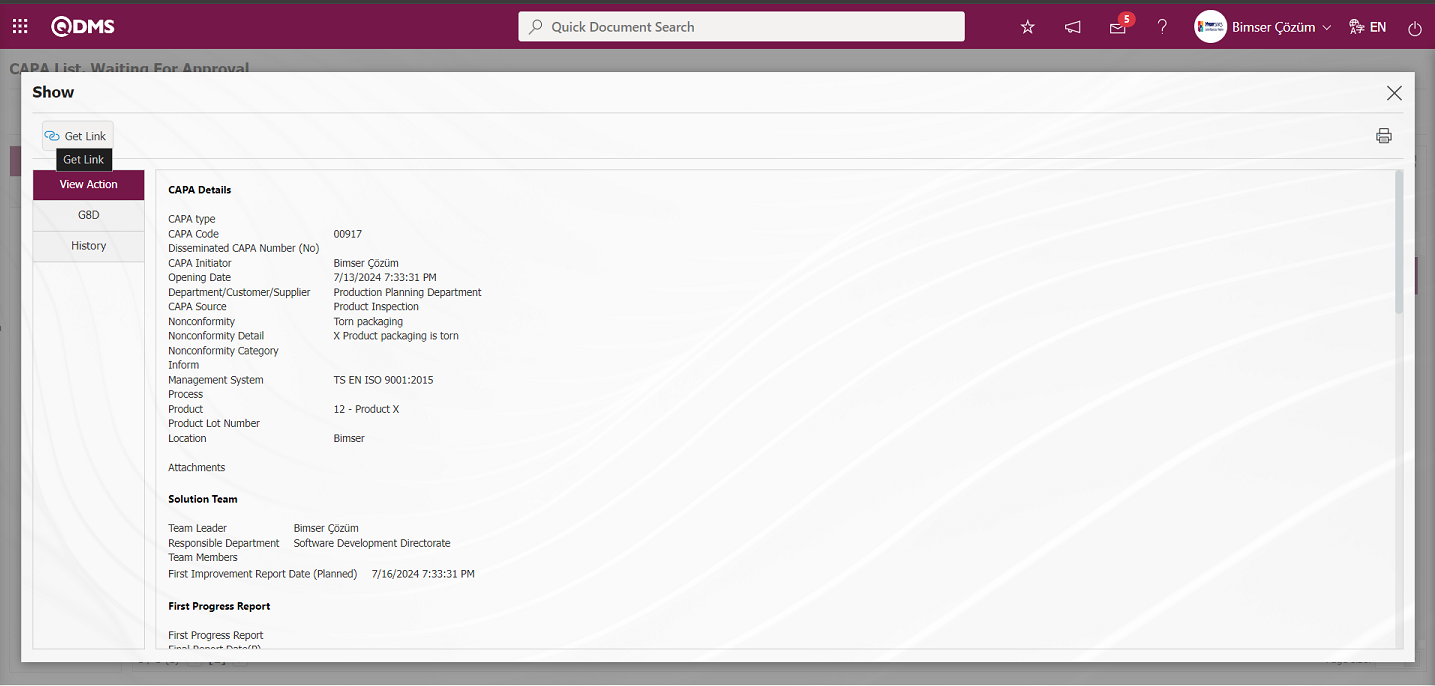
The link related to the CAPA Record is displayed on the screen. Right-click/copy-paste methods or copy-paste shortcut keys (Ctrl+C-Ctrl+V) are used to view the CAPA Record and share it to the relevant people.
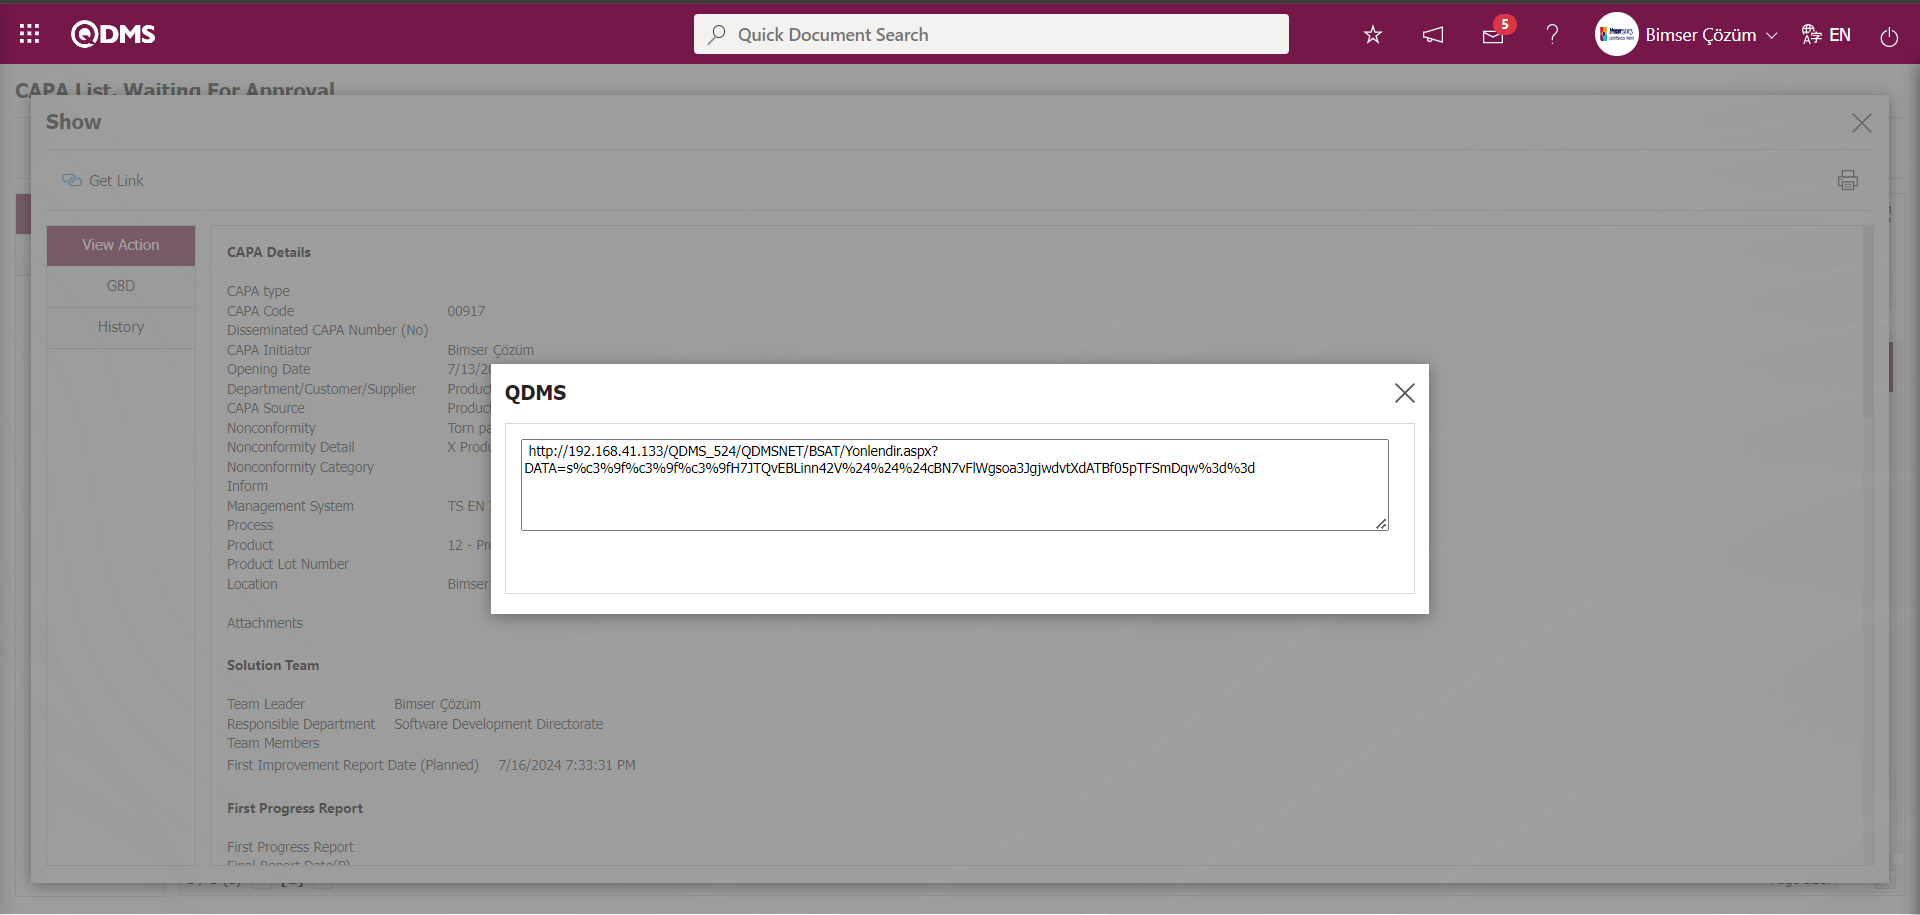
The G8D report is displayed by clicking the G8D report tab and CAPA record information is retrieved by clicking the (Print) button.
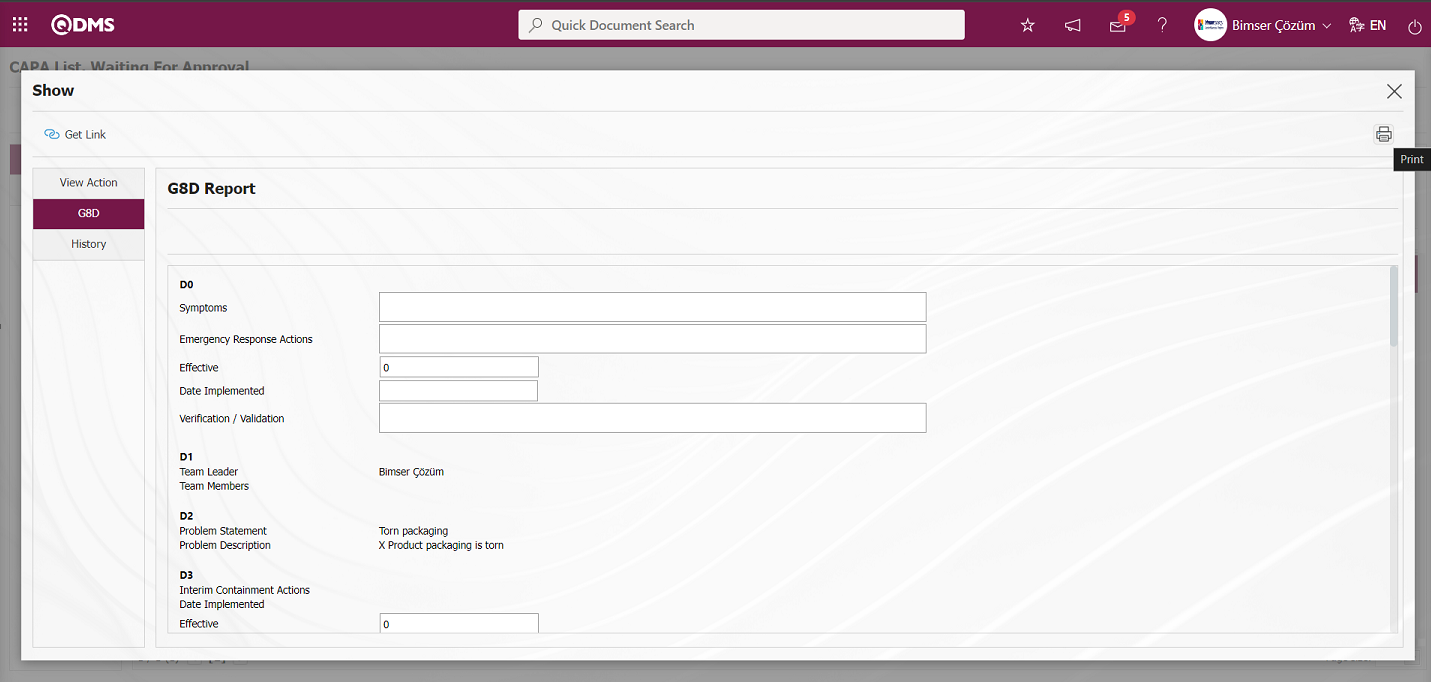
By clicking the History tab, CAPA opening approval, CAPA First Progress Report, CAPA Action Opening, CAPA Action Realization approval history information for the works related to the CAPA record is listed.
On the CAPA List, Waiting For Approval** screen, the CAPA record is rejected by clicking the  button and entering Rejection Reason.
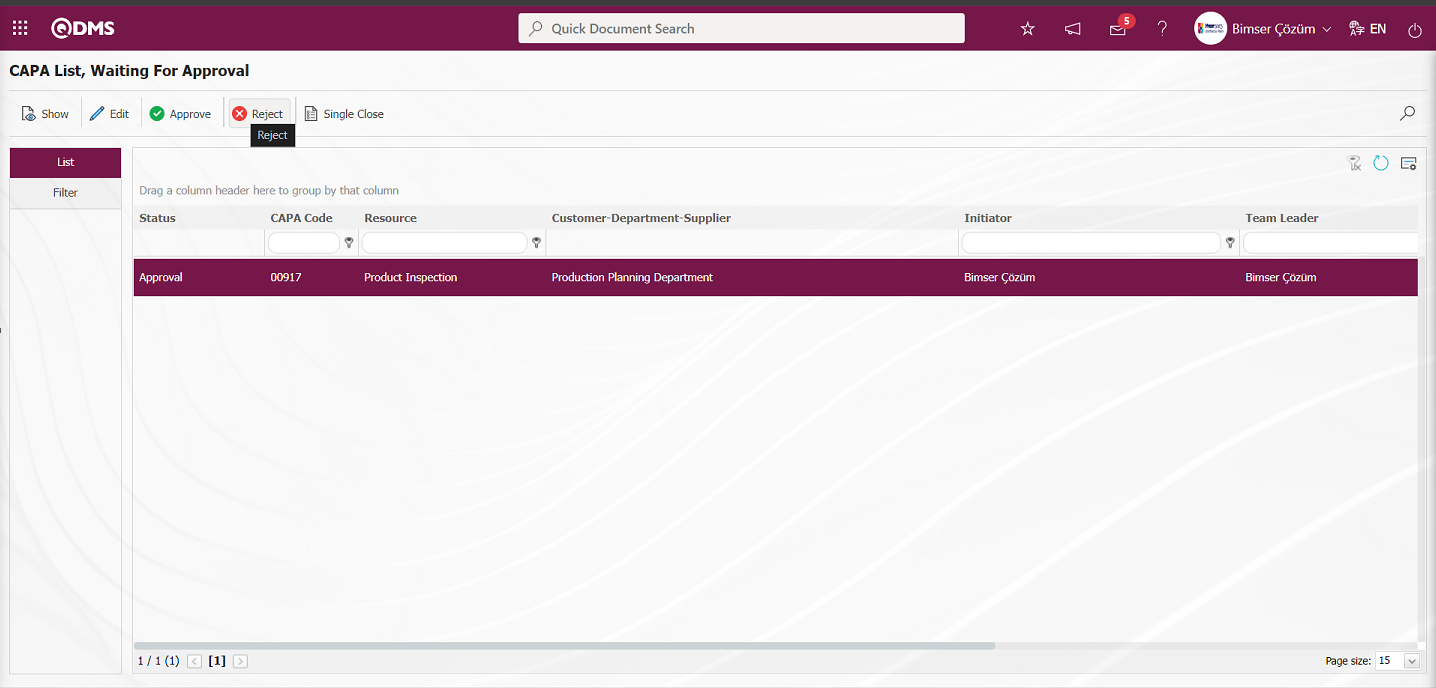
In the Rejected CAPAs screen, CAPA information is checked and when it is seen that it is not suitable, CAPA Rejection is made and Rejection Reason information must be written. It can be sent to the rejected opener together with the reason for rejection. When rejecting, it can be rejected for detailed information or for the cancellation of the record, depending on this, it should select the relevant option.
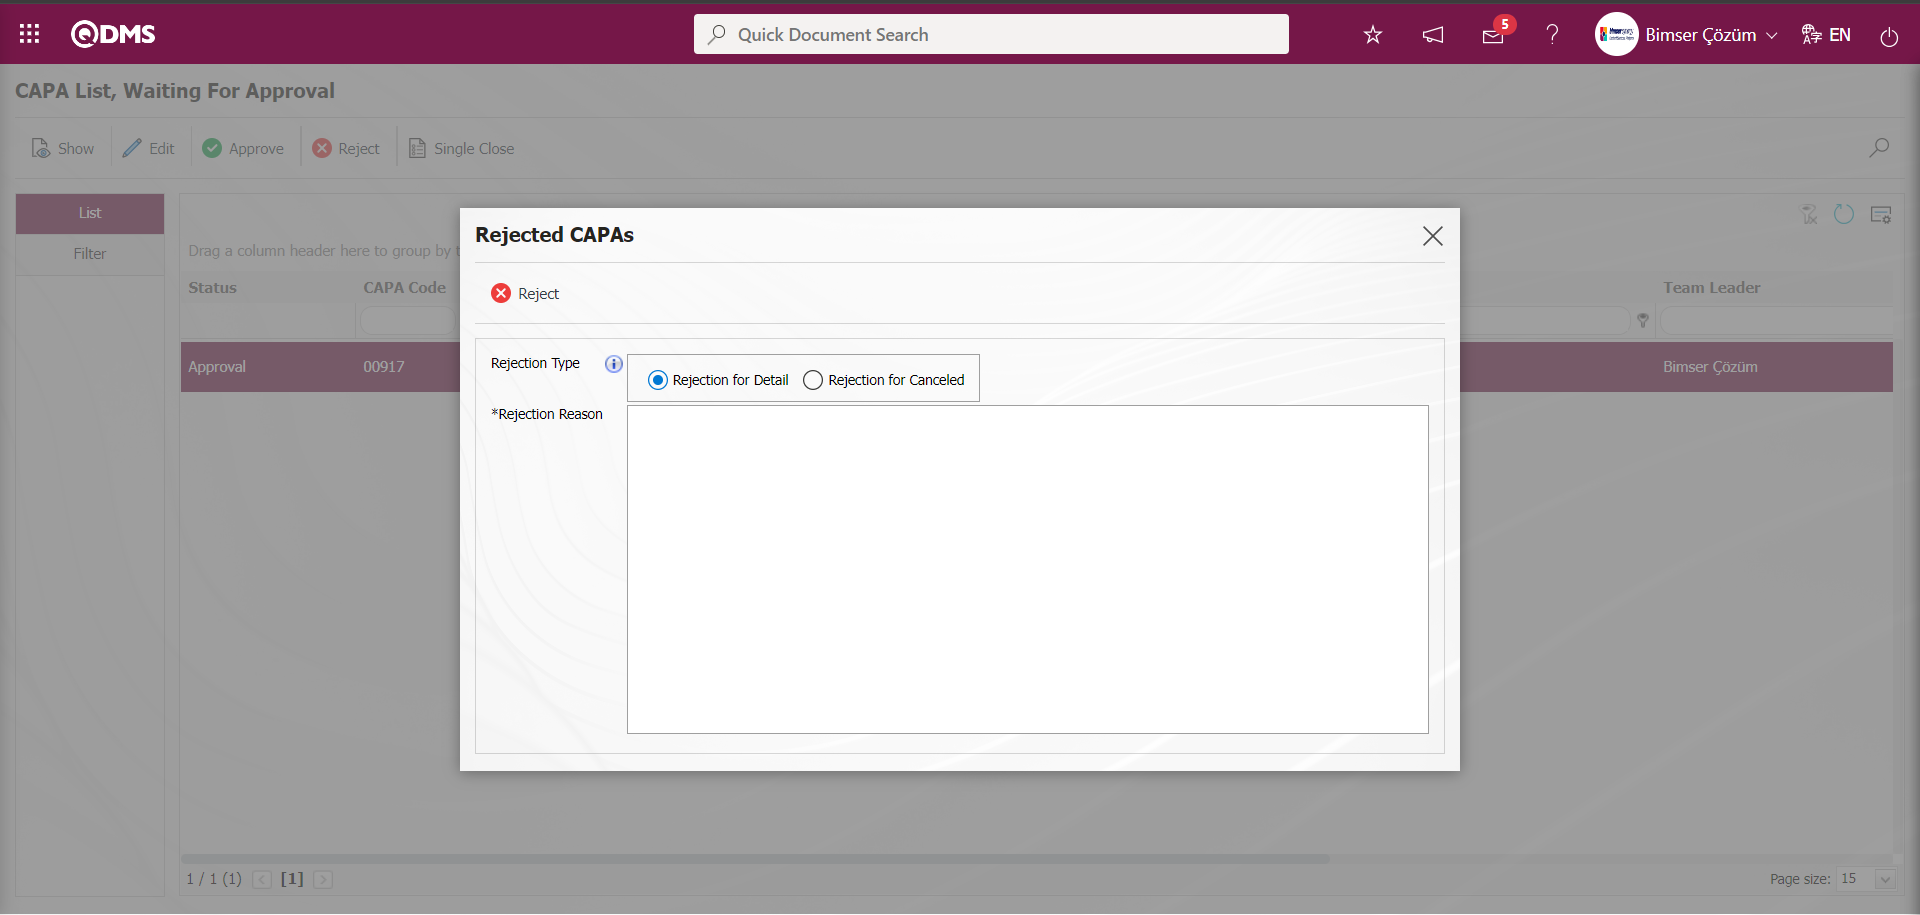
Click the  button on the CAPA List, Waiting For Approval screen.
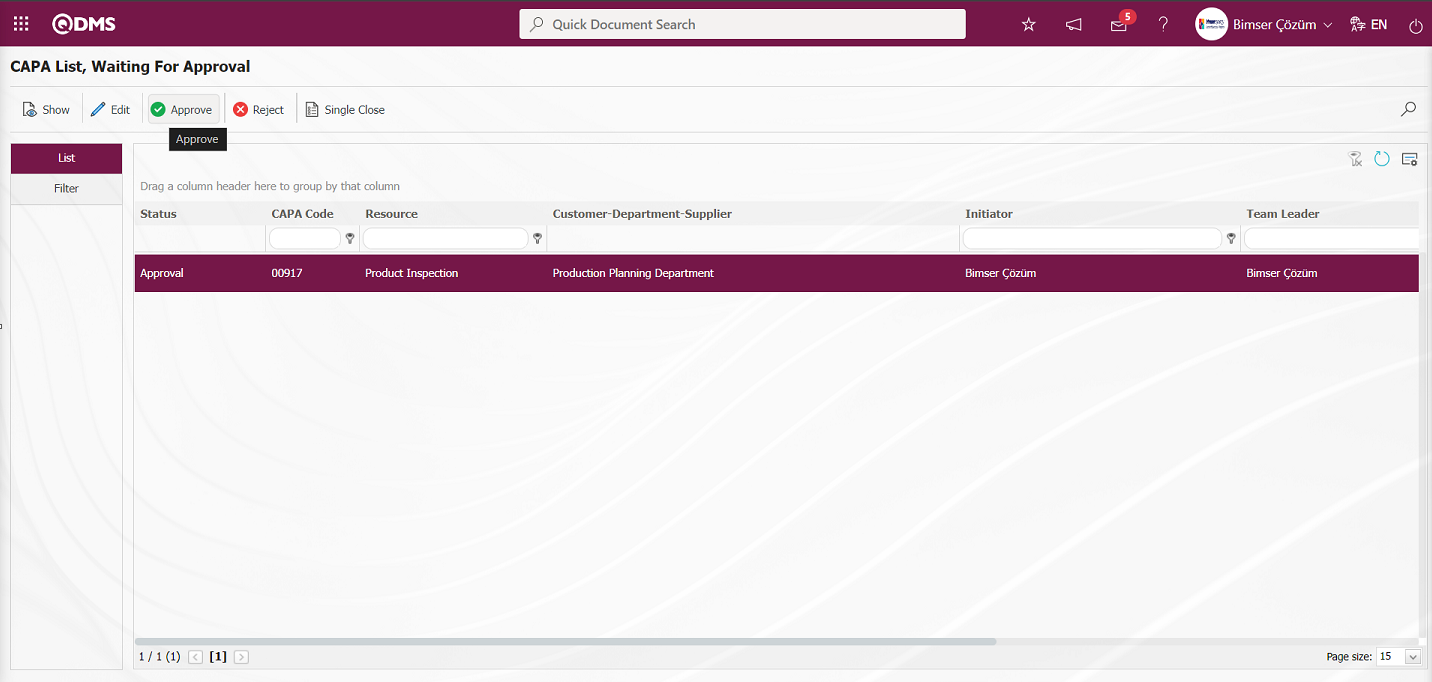
On the CAPA Approval screen, Confirmation Notes information is written in the Confirmation note field and the CAPA record is approved by clicking the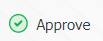 button.
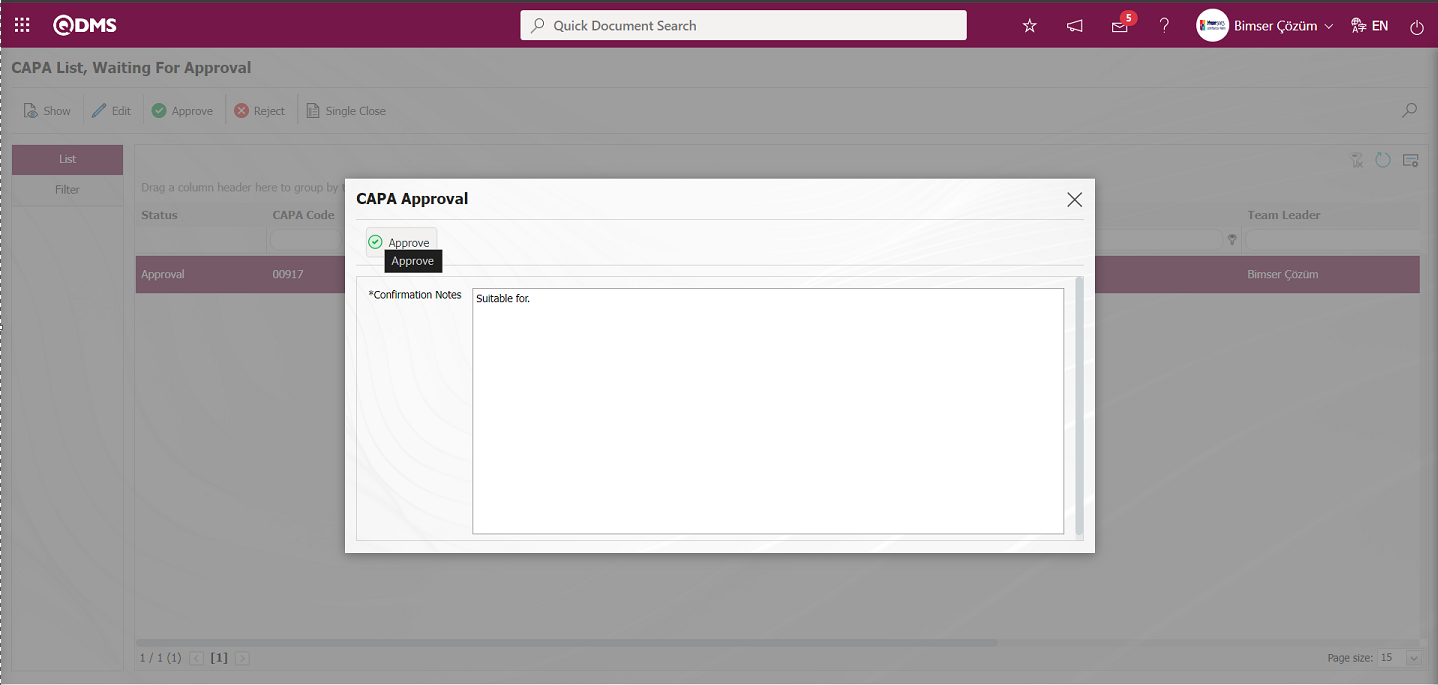
Confirmation note information when confirming CAPA The parameter is activated by selecting the parameter value “Yes” in parameter 154 in the CAPA module parameters.
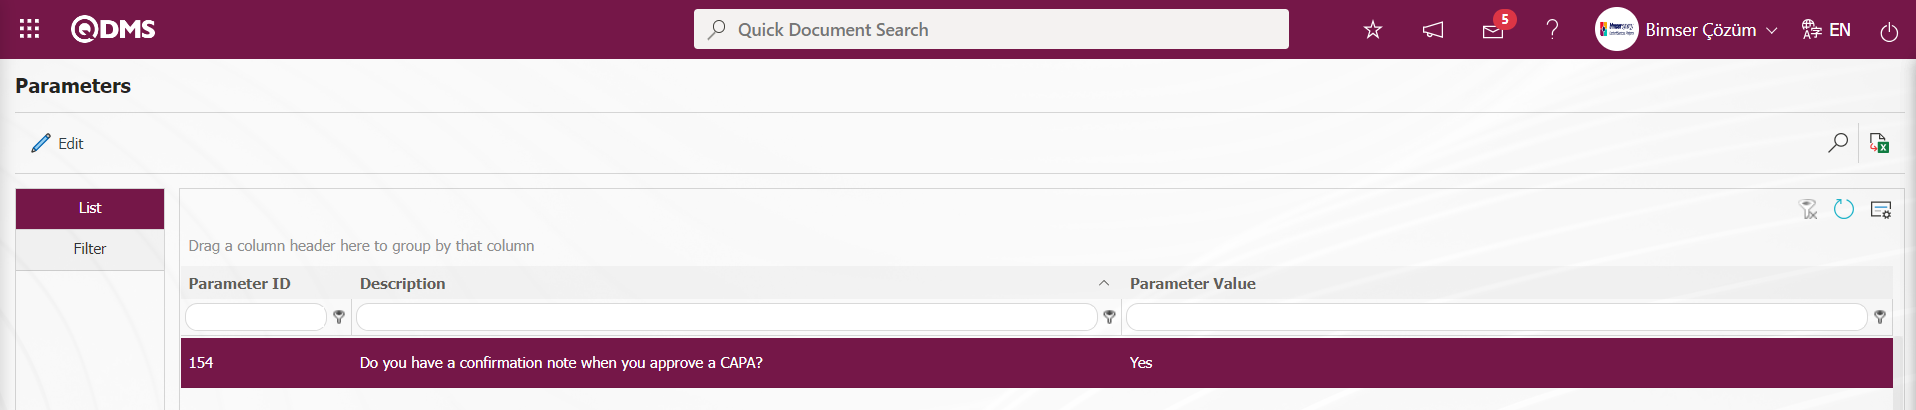
After the parameter is activated, the Approval Note field is displayed on the CAPA Approval screens and CAPA approval is performed by entering the approval note information.
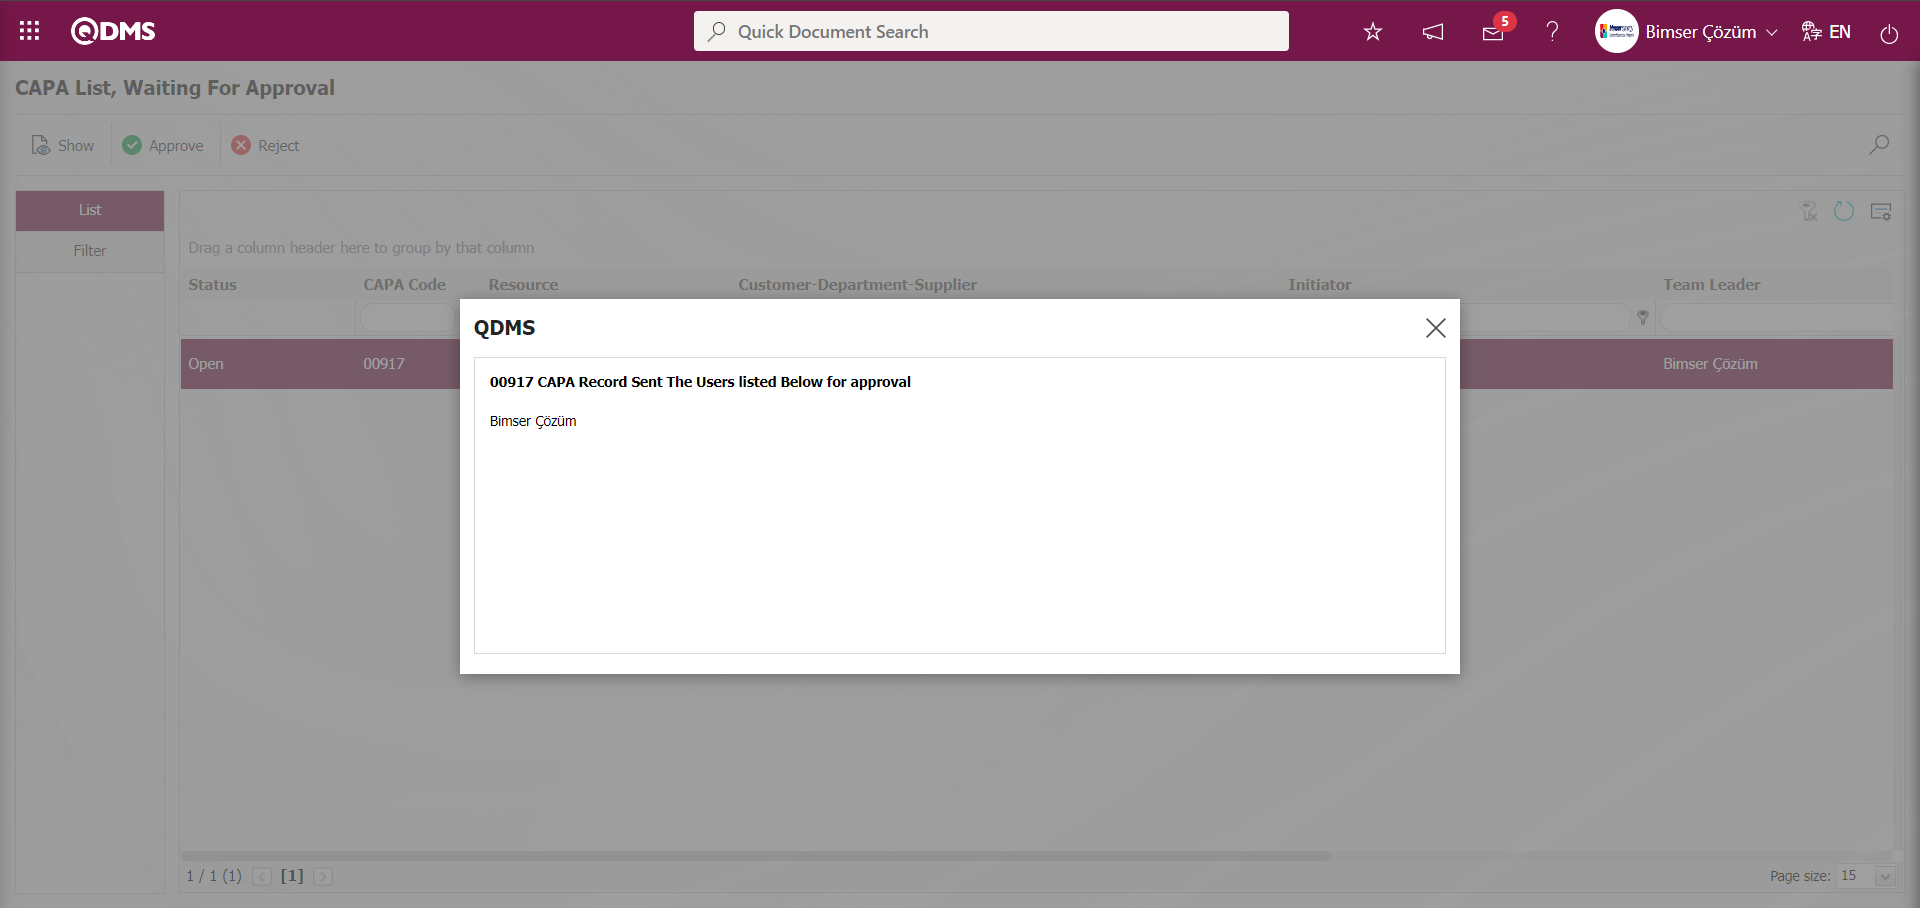
If a flow has been set up for CAPA First Progress Report approval, if the CAPA record for which CAPA approval process has been performed is not set up for the approval of the relevant role, the Team Leader is assigned to write the First Progress Report. On the CAPA Approval screen, when the process steps of the CAPA Record whose status is Final on the CAPA Approval screen are performed, the buttons seen in the Final stage are displayed and the process steps are performed using these buttons. The buttons used at each stage differ as in the CAPA record.
6.2.4. Reports
Menu Name: Integrated Management System / CAPA / Reports
This is the section where reports related to CAPA Module are displayed.
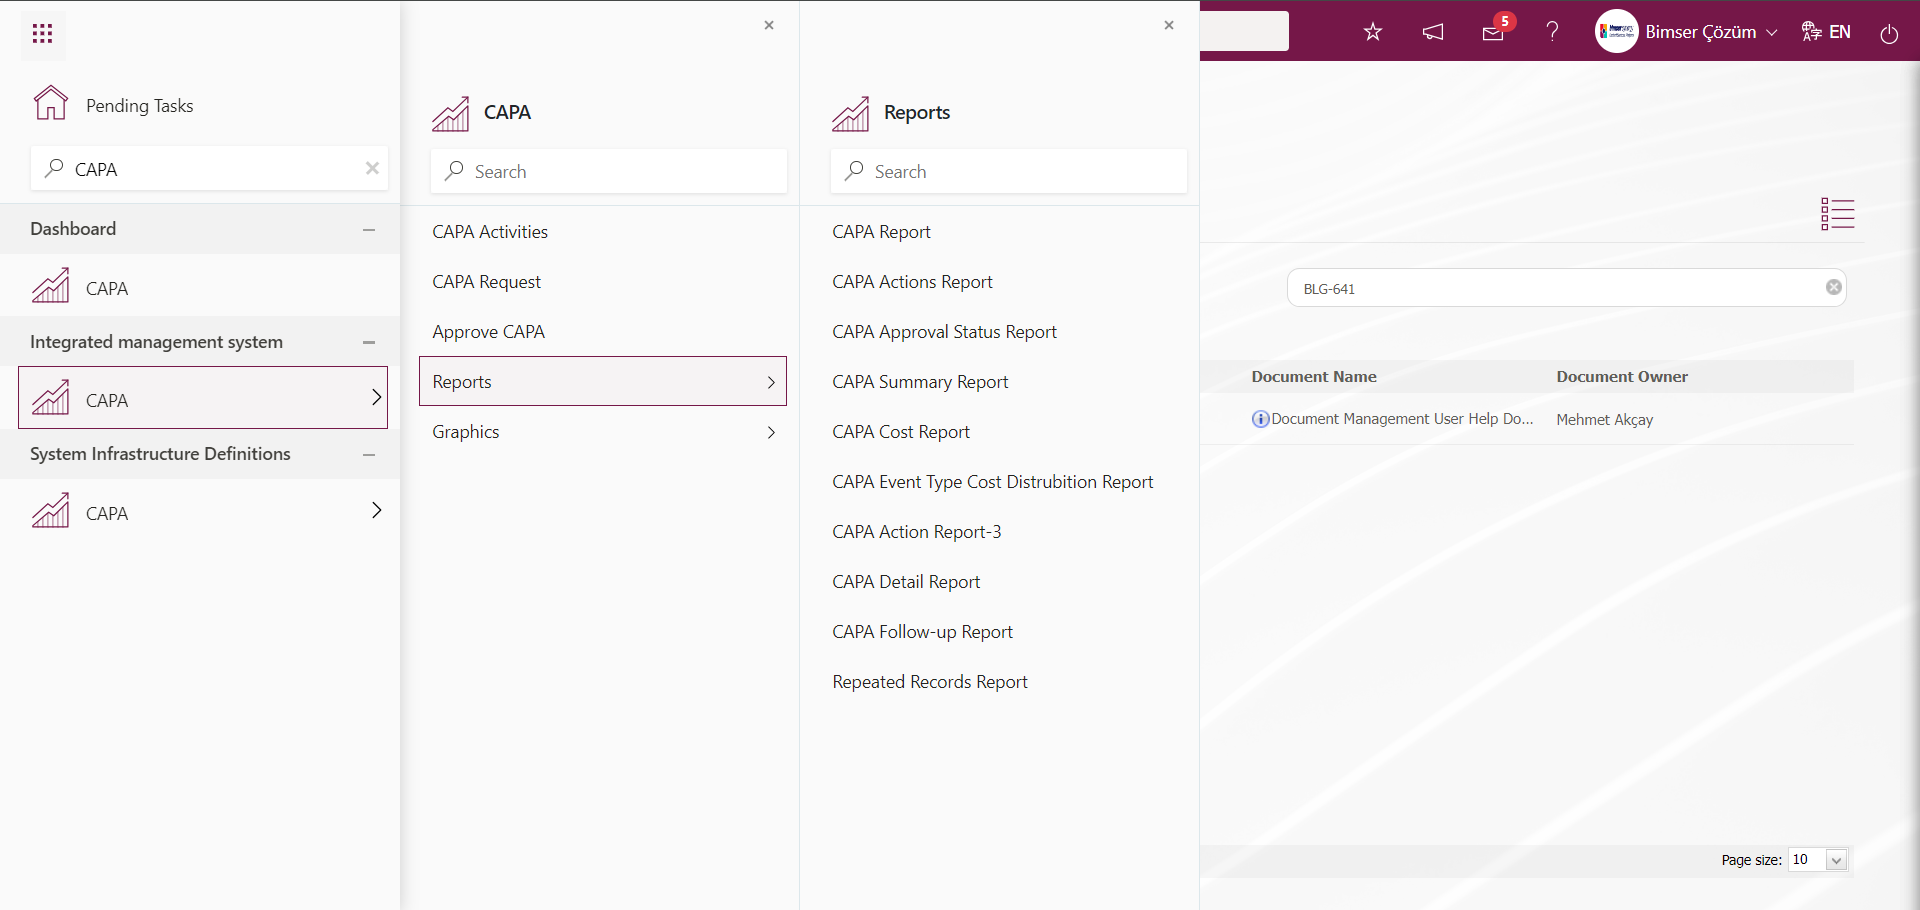
6.2.4.1. CAPA Report
Menu Name: Integrated Management System/ CAPA / Reports/ CAPA Report
This is the screen where all information about Corrective Actions is displayed in general. In the related report, adjustments can be made from company to company. The desired columns can be removed or the CPA information we want to be added can be reflected in this report.
It comes according to the report defined in parameter 72 in the CAPA module parameters.
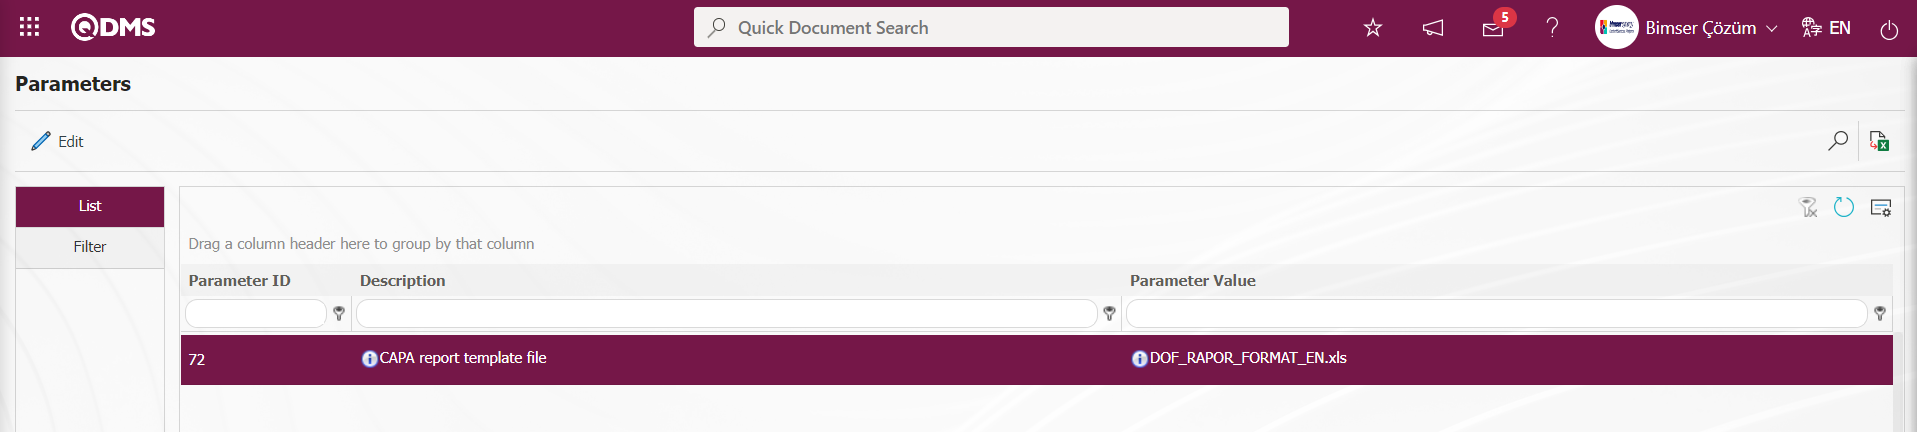
In order to define a report format template for the parameter, first of all, the related report is uploaded by clicking the  button of the report template of interest in the System Infrastructure Definitions/BSID/Configuration Settings/Default Report Layouts Arrangement menu. The name and extension of the report format template uploaded to the Default Report Layouts Arrangement menu is pasted into the parameter value of the relevant parameter with the right click / paste method. By filling in the relevant fields on the CAPA Report screen, the desired criteria are determined and the report is received with the
  (Export to Excel) button. If desired, the fields can be left blank and information about all CAPA activities can be retrieved. There are two tabs on the CAPA Report screen: List and Filter tabs.
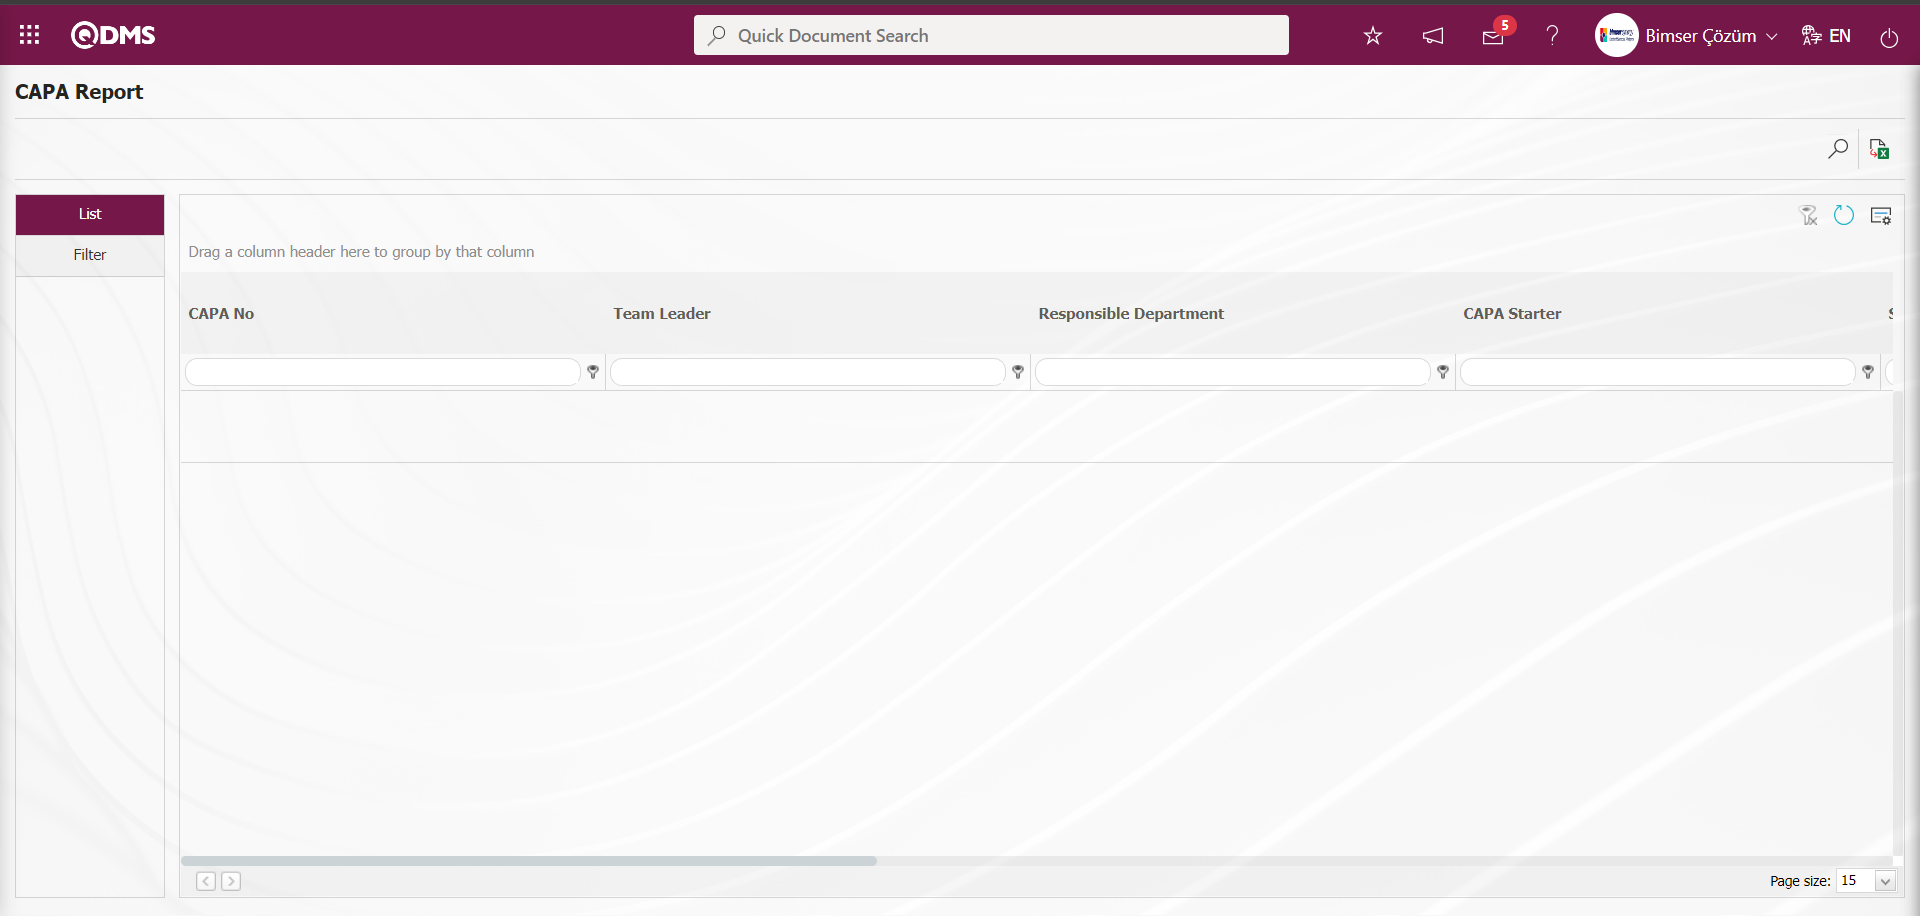
With the help of the buttons on the screen;
: Data is transferred to Excel.
 : Records are filtered and searched.
: The search criteria on the menu screens are used to clean the data remaining in the filter fields in the grid where the search operation is performed.
: The menu screen is restored to its default settings.
: User-based designing of the menu screen is done with the show-hide feature, that is, the hiding feature of the fields corresponding to the columns on the menu screens.
In the CAPA Report Report screen, data entries are made in the fields in the search criteria in the Filter tab and the filtering process is performed by clicking the (Search) button.
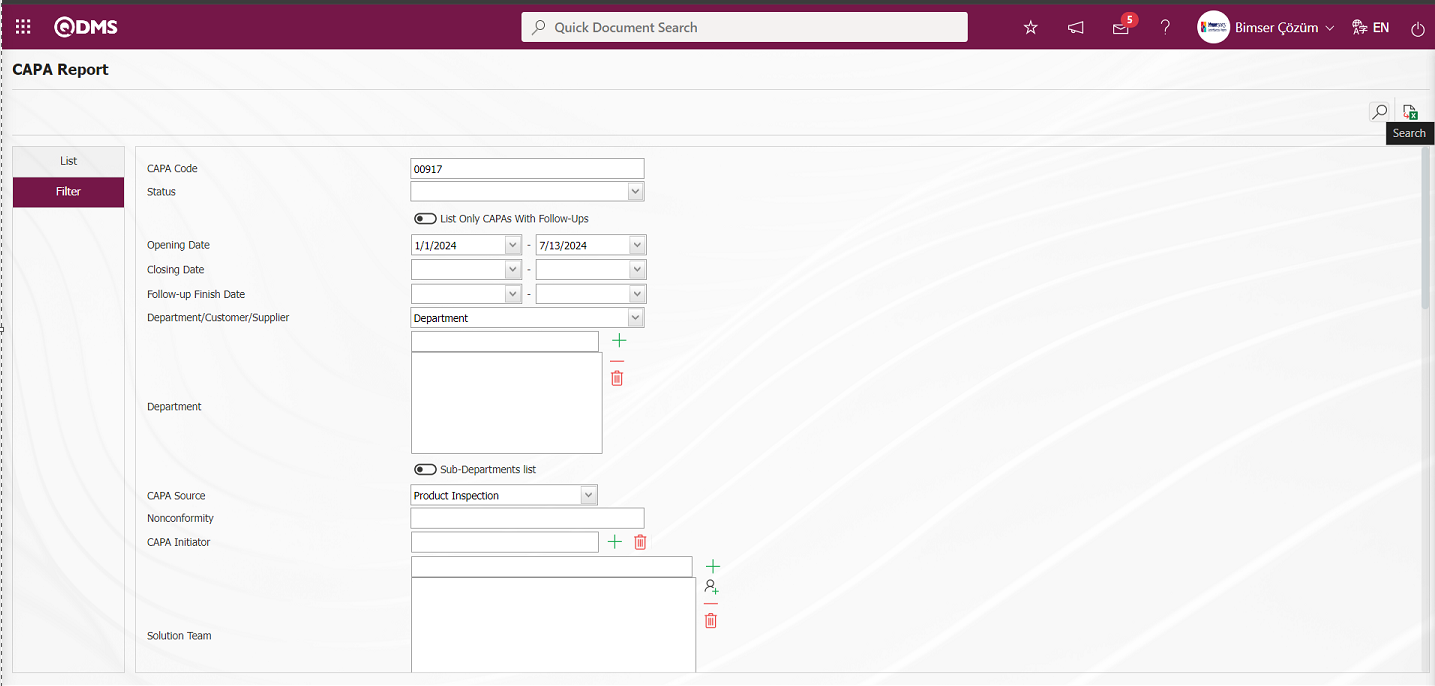
On the CAPA Report screen, the reports of the desired data are displayed according to the filter settings made in the Filter tab in the list on the list tab.
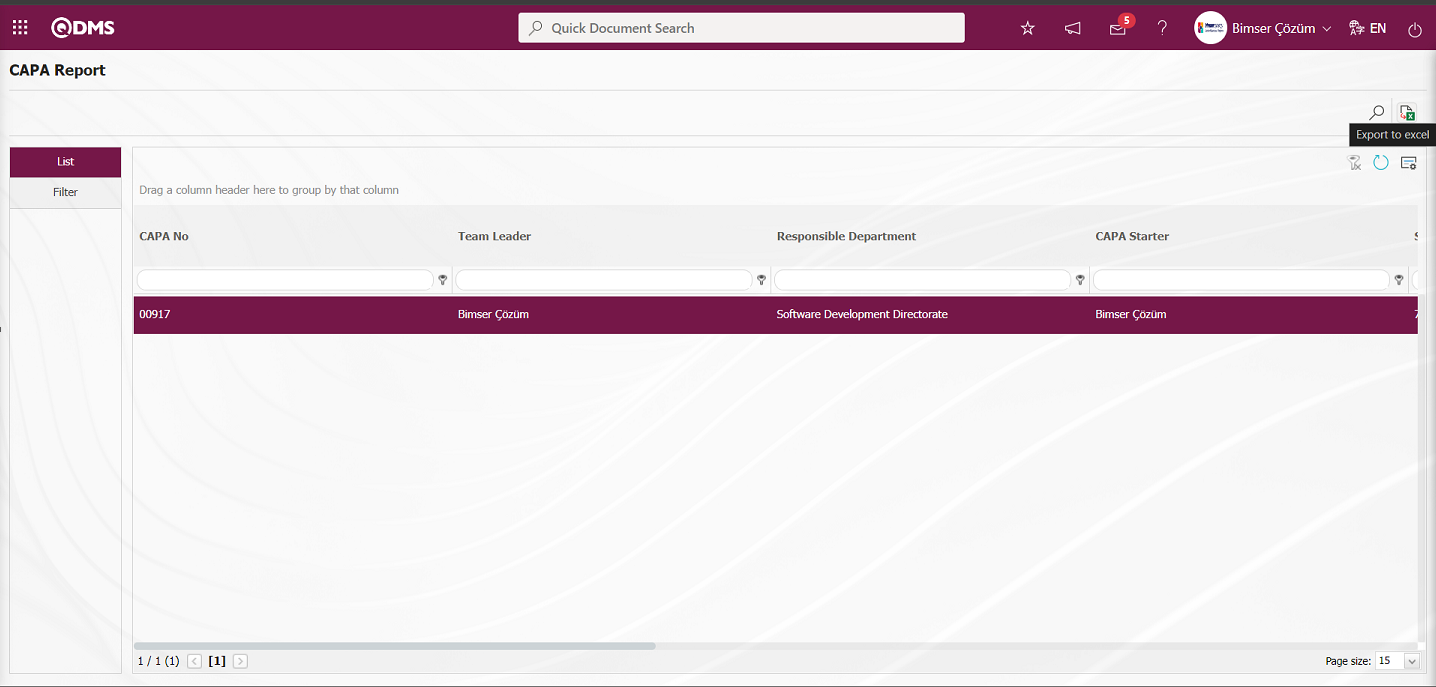
On the CAPA Report screen, the “CAPA Report” is displayed in excel format by clicking the (Export to Excel) button while the CAPA record is selected from the list in the list tab.
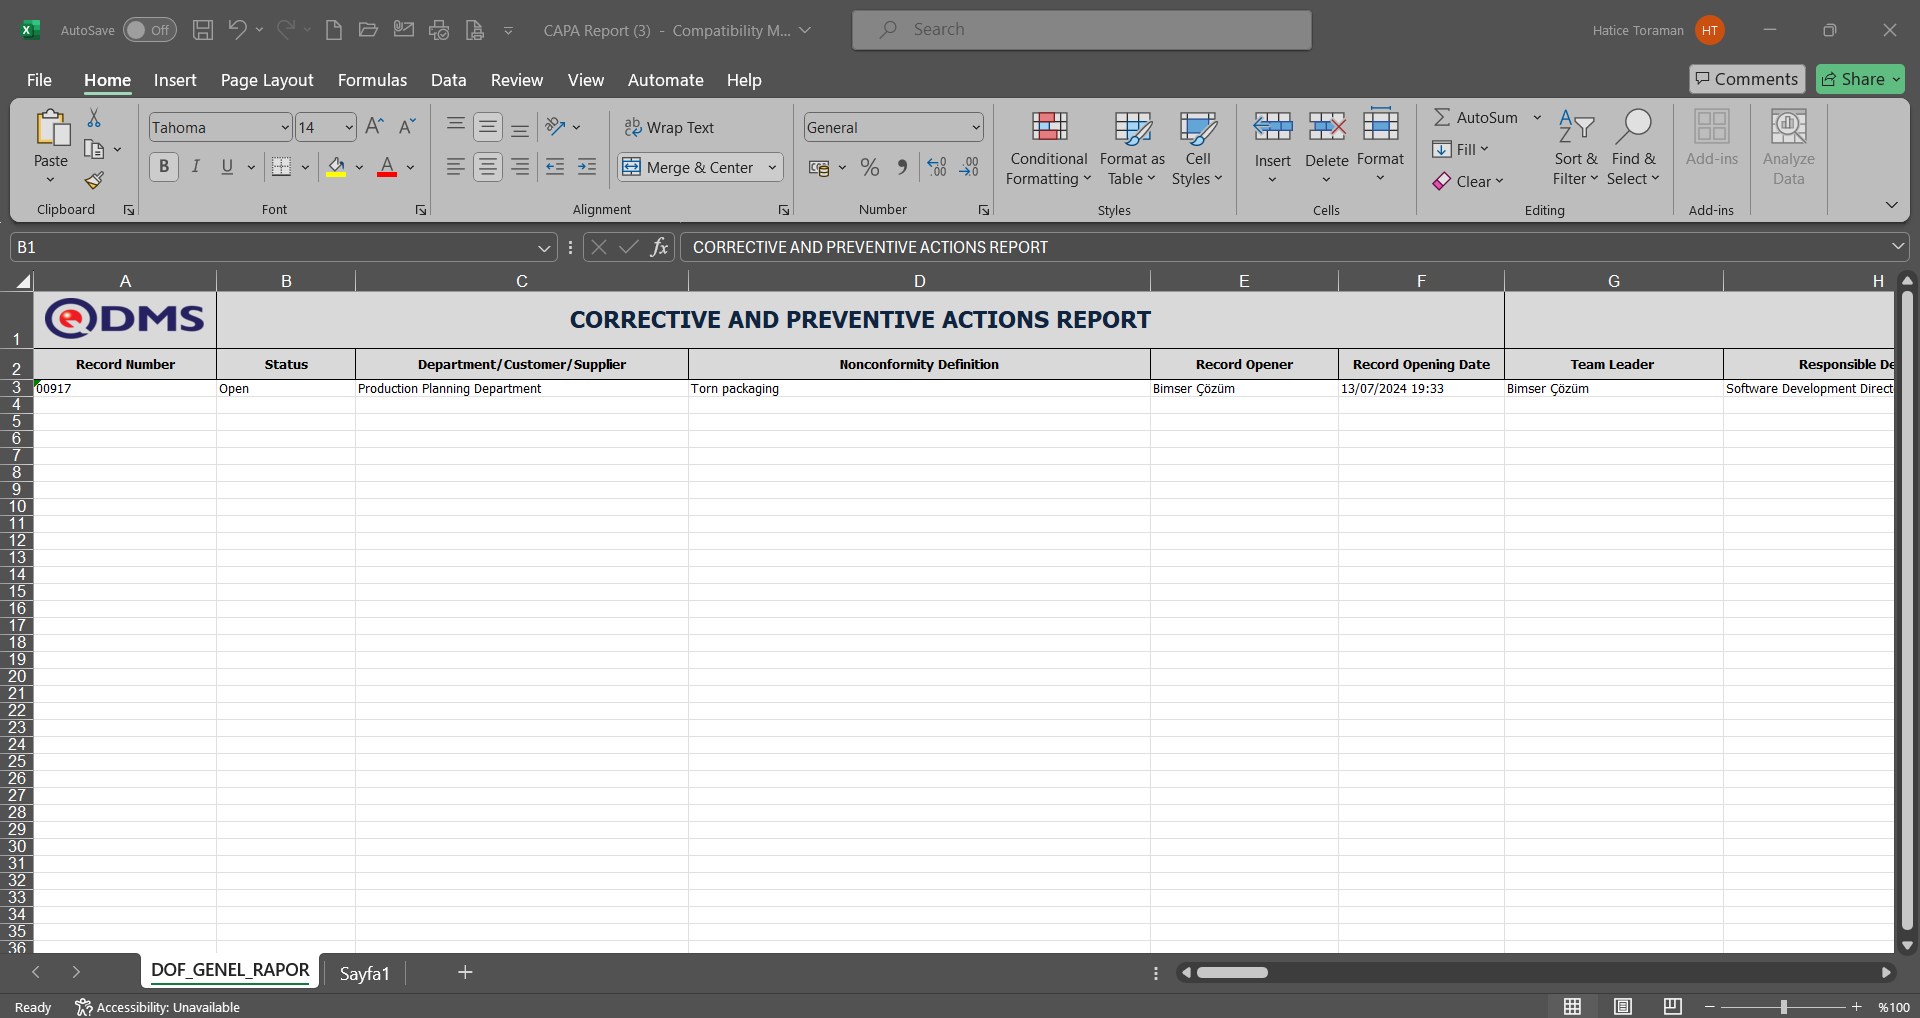
By applying the Grouping feature on the CAPA Report screen, the grouping feature is made on the grids in the Qdms system by dragging the corresponding fields of the columns on the input screen by clicking on the field with the mouse and bringing it to the “Drag a column header here to group by that column” field.
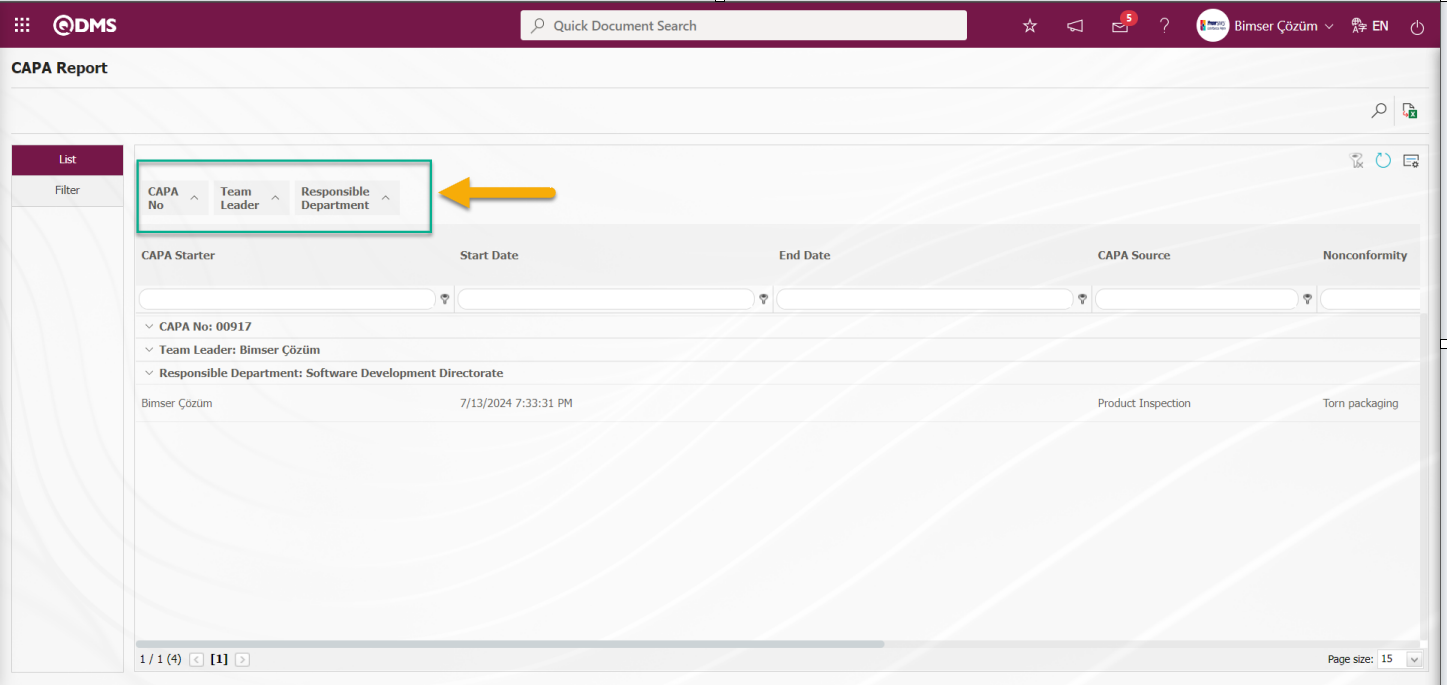
Click the “Column Chooser” button on the CAPA Report screen.
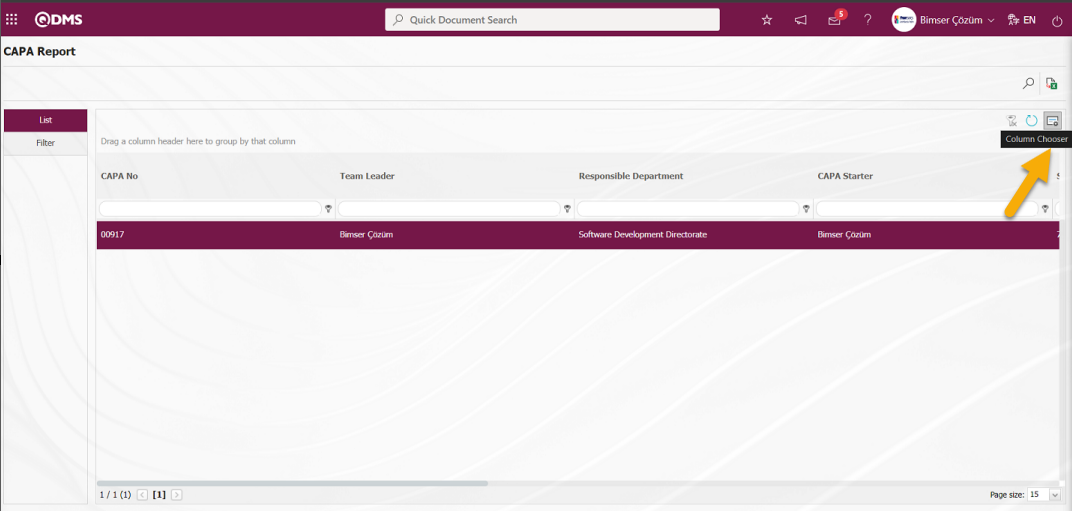
In the field selector screen, the fields that are not wanted to be displayed in the grid of the screen are added to the Column Chooser screen with the mouse hold-and-drag method so that the field is not displayed on the menu screen.
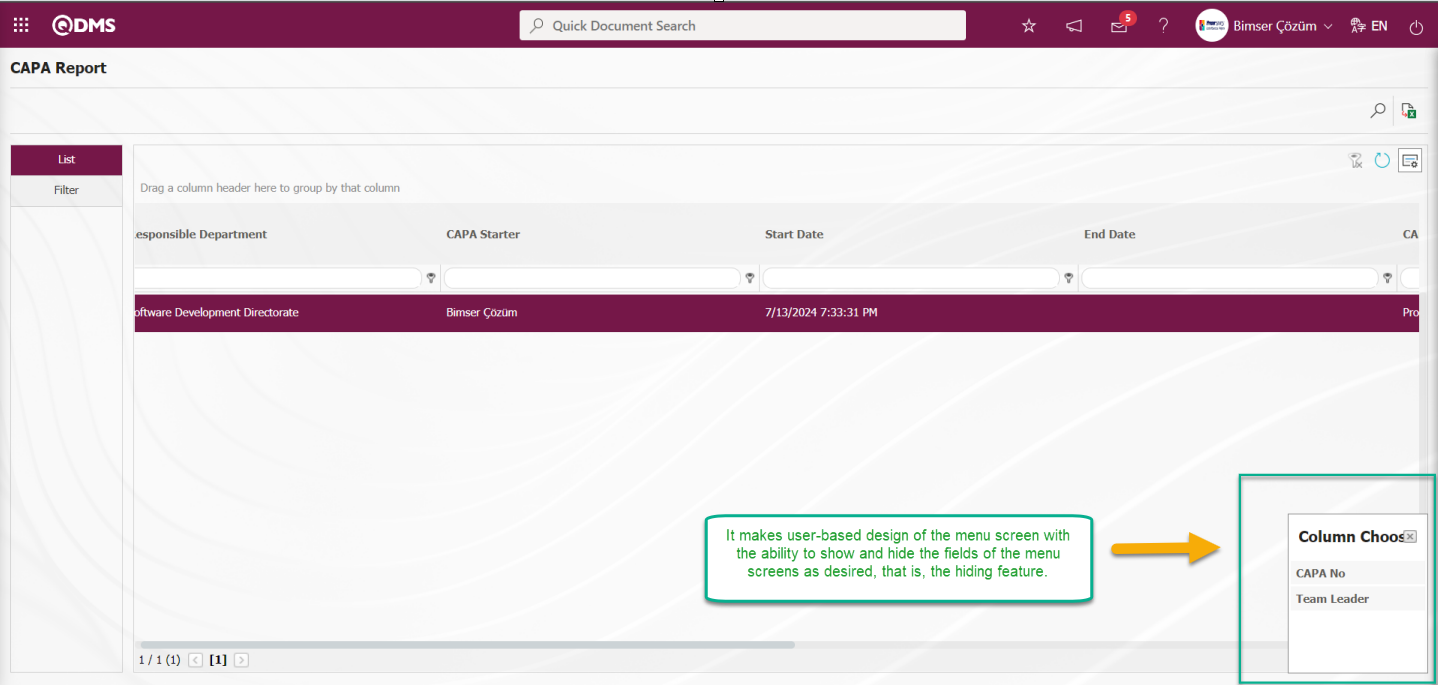
It makes the user-based design of the menu screen with the ability to show and hide the fields of the menu screens as desired, that is, the hiding feature.
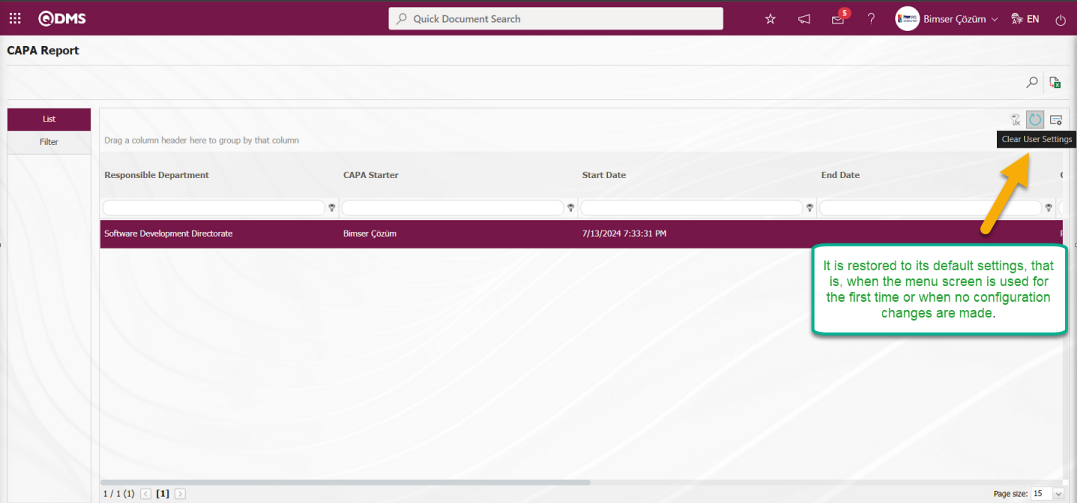
On the CAPA Report screen, click on the  (Clear User Settings) button. After clicking on the (Clear User Settings) button, it is ensured that the menu screen is restored to its default settings, that is, when the menu screen is used for the first time or when no configuration changes are made.

6.2.4.2. CAPA Actions Report
Menu Name: Integrated Management System/ Corrective and Preventive Actions / Reports/CAPA Actions Report
It is the report used when we want to pull the actions in the CAPAs as a single list.It comes according to the report defined in parameter 73 in the CAPA module parameters.

In order to define a report format template for the parameter, first of all, the installation process is done by clicking the related report template button in the System Infrastructure Definitions/BSID/Configuration Settings/Default Report Layouts Arrangement menu. The name and extension of the report format template uploaded to the Default Report Layouts Arrangement menu are pasted into the parameter value of the relevant parameter with the right click / paste method. According to the defined report format template, the relevant report is retrieved from this menu
CAPA Actions Report screen, fill in the relevant fields, set the desired criteria and get the report with the  (Export to Excel) button. If desired, the fields can be left blank and information about all CAPA actions can be retrieved. There are two tabs on the CAPA Actions Report screen: List and Filter tabs.
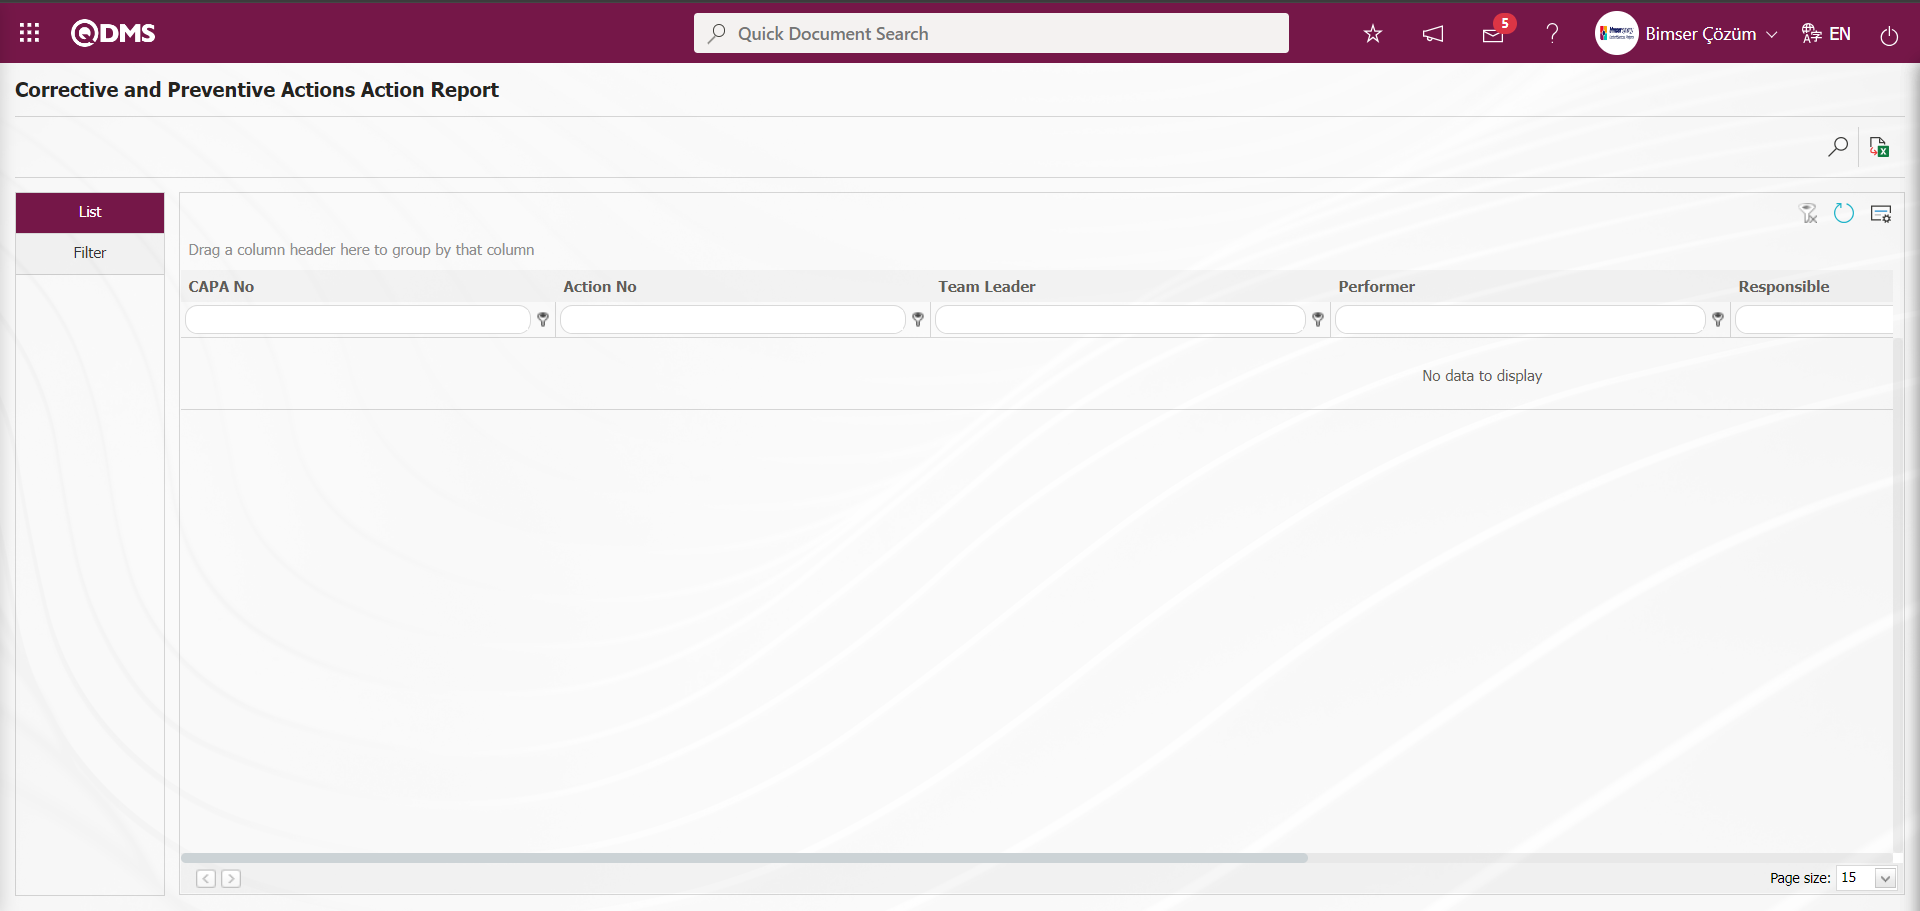
With the help of the buttons on the screen;
: Data is transferred to Excel.
: Records are filtered and searched.
: The search criteria on the menu screens are used to clean the data remaining in the filter fields in the grid where the search operation is performed.
: The menu screen is restored to its default settings.
: User-based designing of the menu screen is done with the show-hide feature, that is, the hiding feature of the fields corresponding to the columns on the menu screens.
On the CAPA Actions Report screen, data entries are made in the fields in the search criteria in the Filter tab and the filtering process is performed by clicking the (Search) button.
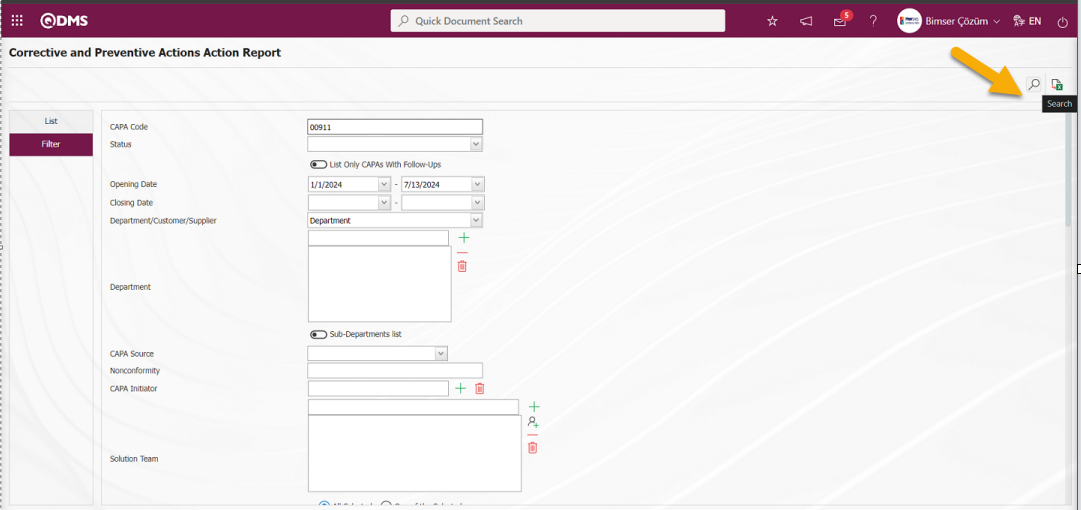
On the CAPA Actions Report screen, the reports of the desired data are displayed according to the filter settings made on the Filter tab in the list on the list tab.
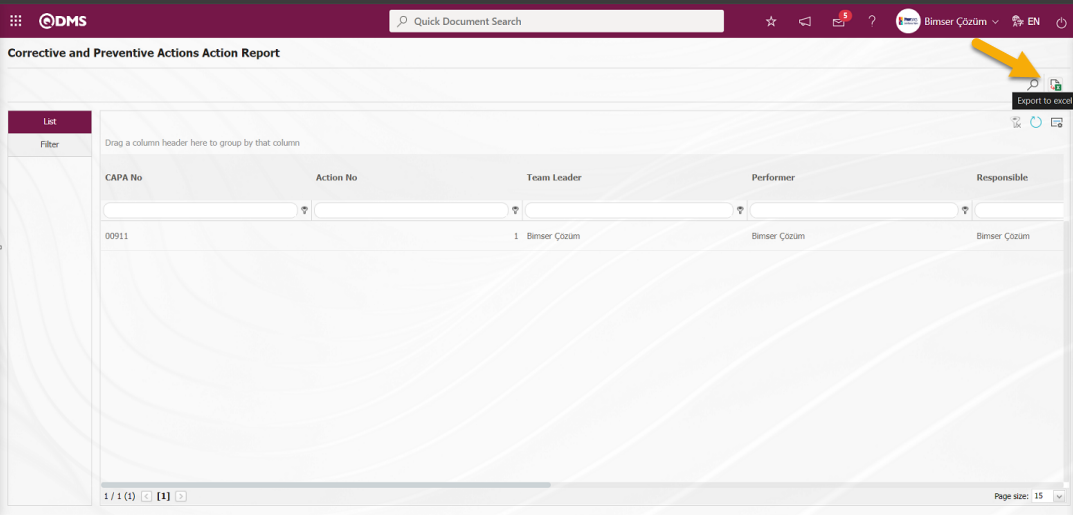
On the CAPA Actions Report screen, the “CAPA Actions Report” is displayed in excel format by clicking the  (Export to Excel) button while the CAPA record is selected from the list in the list tab.
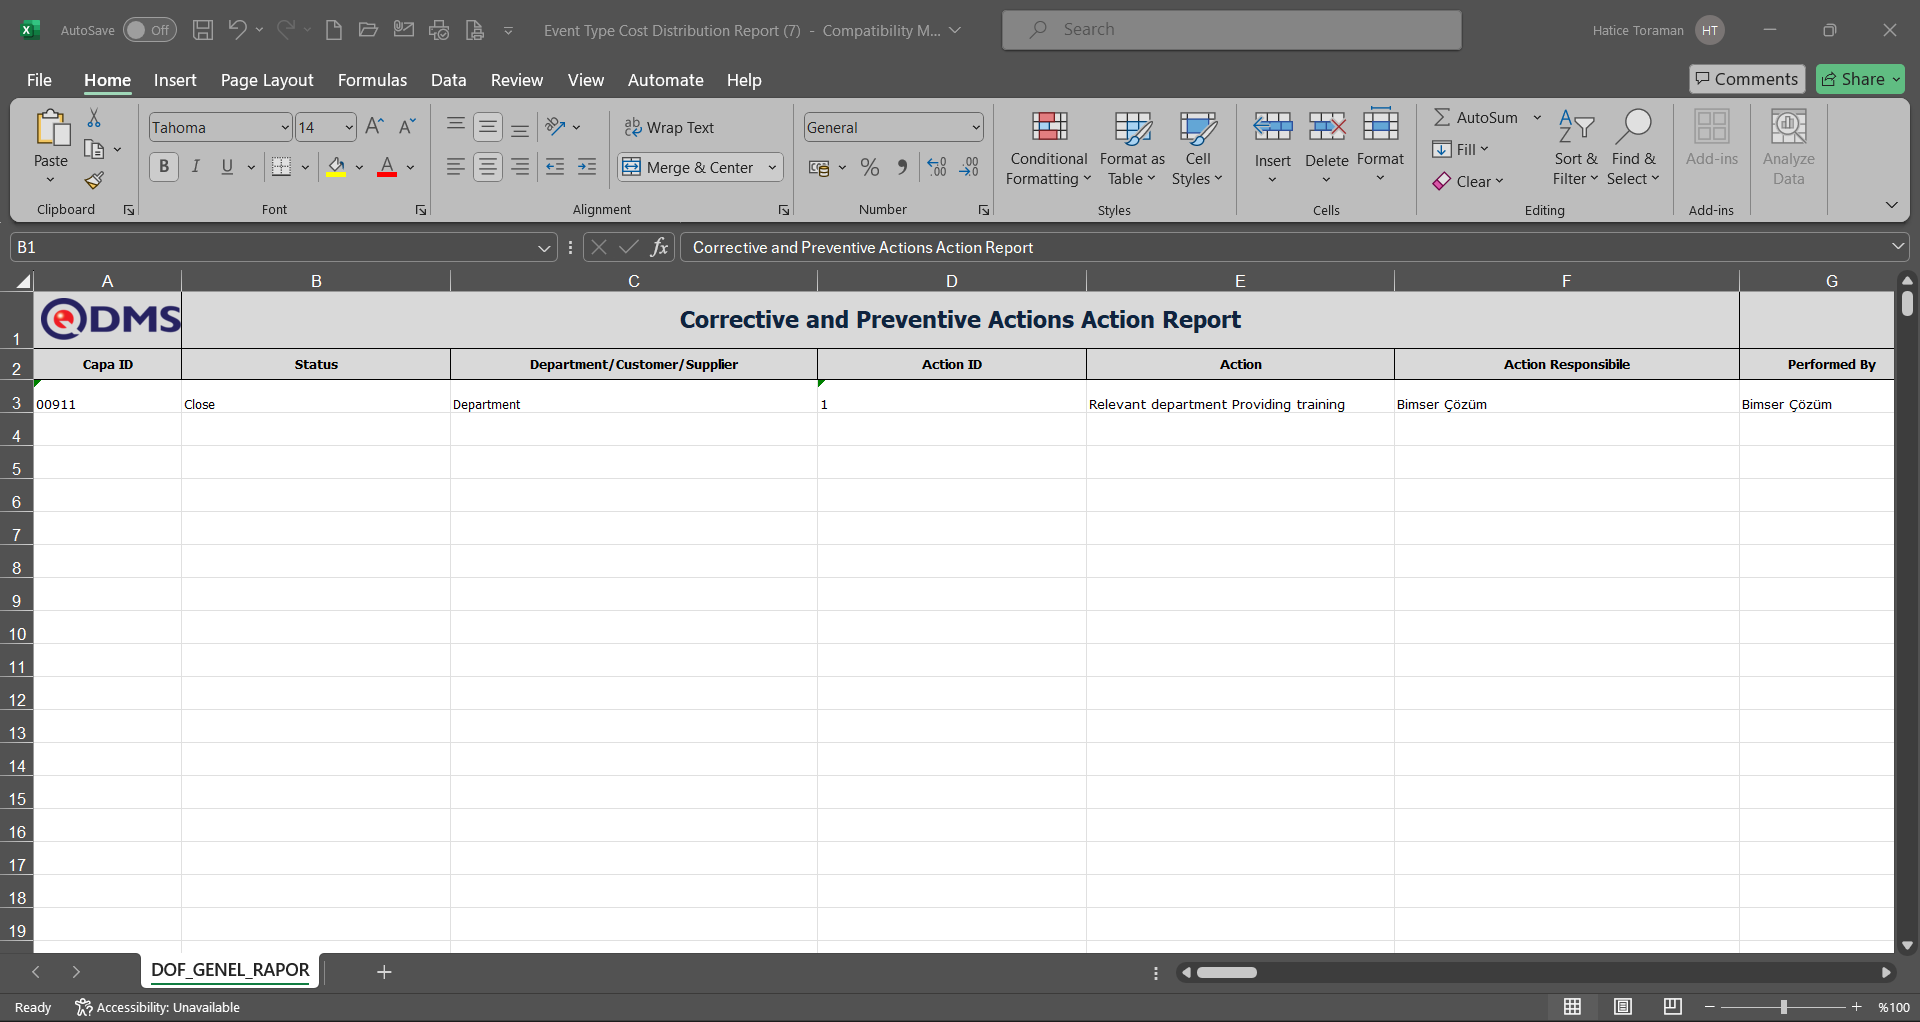
6.2.4.3. CAPA Approval Status Report
Menu Name: Integrated Management System/ CAPA / Reports/CAPA Approval Status Report
Approval mechanisms work at different stages in the CAPA flow, it is the report used to see in which approval the CAPAs are waiting. From the approval type section, it is possible to see at which stage it is waiting such as CAPA Opening, CAPA Closing, Action Opening, Action Closing.
It comes according to the report defined in parameter 217 in the CAPA module parameters.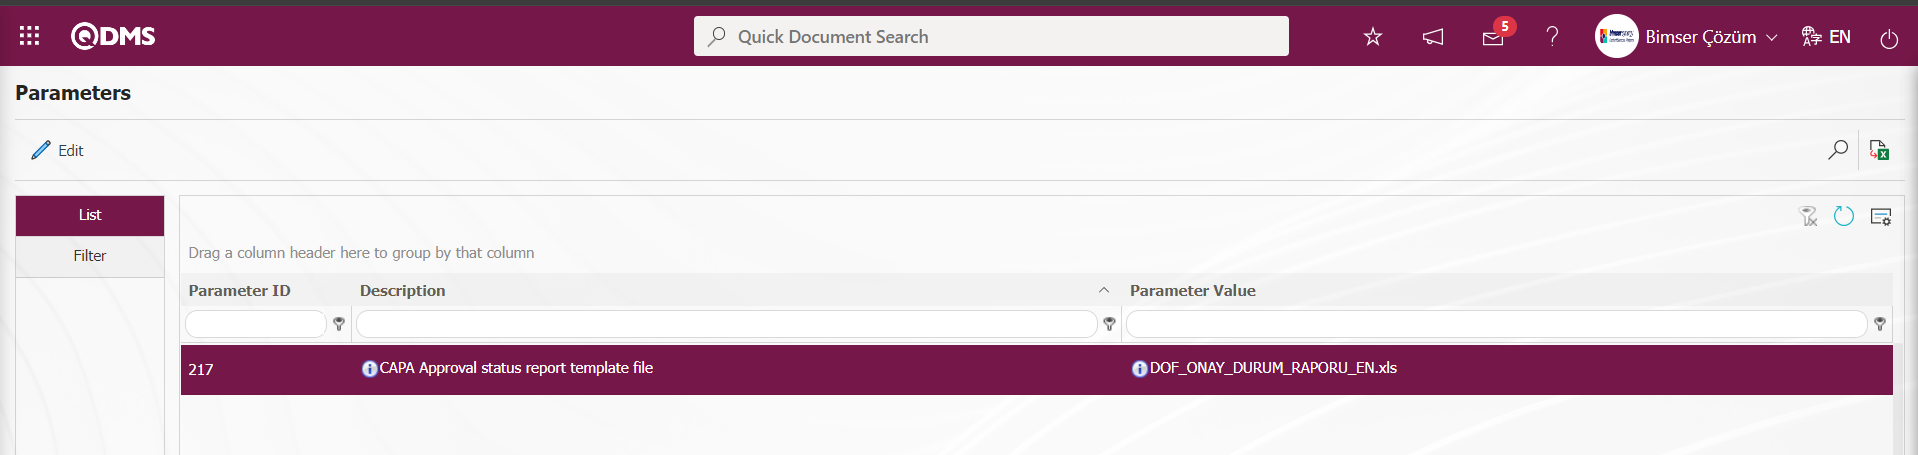
In order to define a report format template for the parameter, first of all, the installation process is done by clicking the related report template button in the System Infrastructure Definitions / BSID / Configuration Settings / Default Report Layouts Arrangement menu. The name and extension of the report format template loaded in the Default Report Layouts Arrangement menu is defined by pasting the name and extension of the report format template loaded in the Default Report Layouts Arrangement menu to the parameter value of the relevant parameter with the right click / paste method. The relevant report is taken from this menu according to the defined report format template.
There are two tabs on the CAPA Approval Status Report screen: List and Filter tabs.
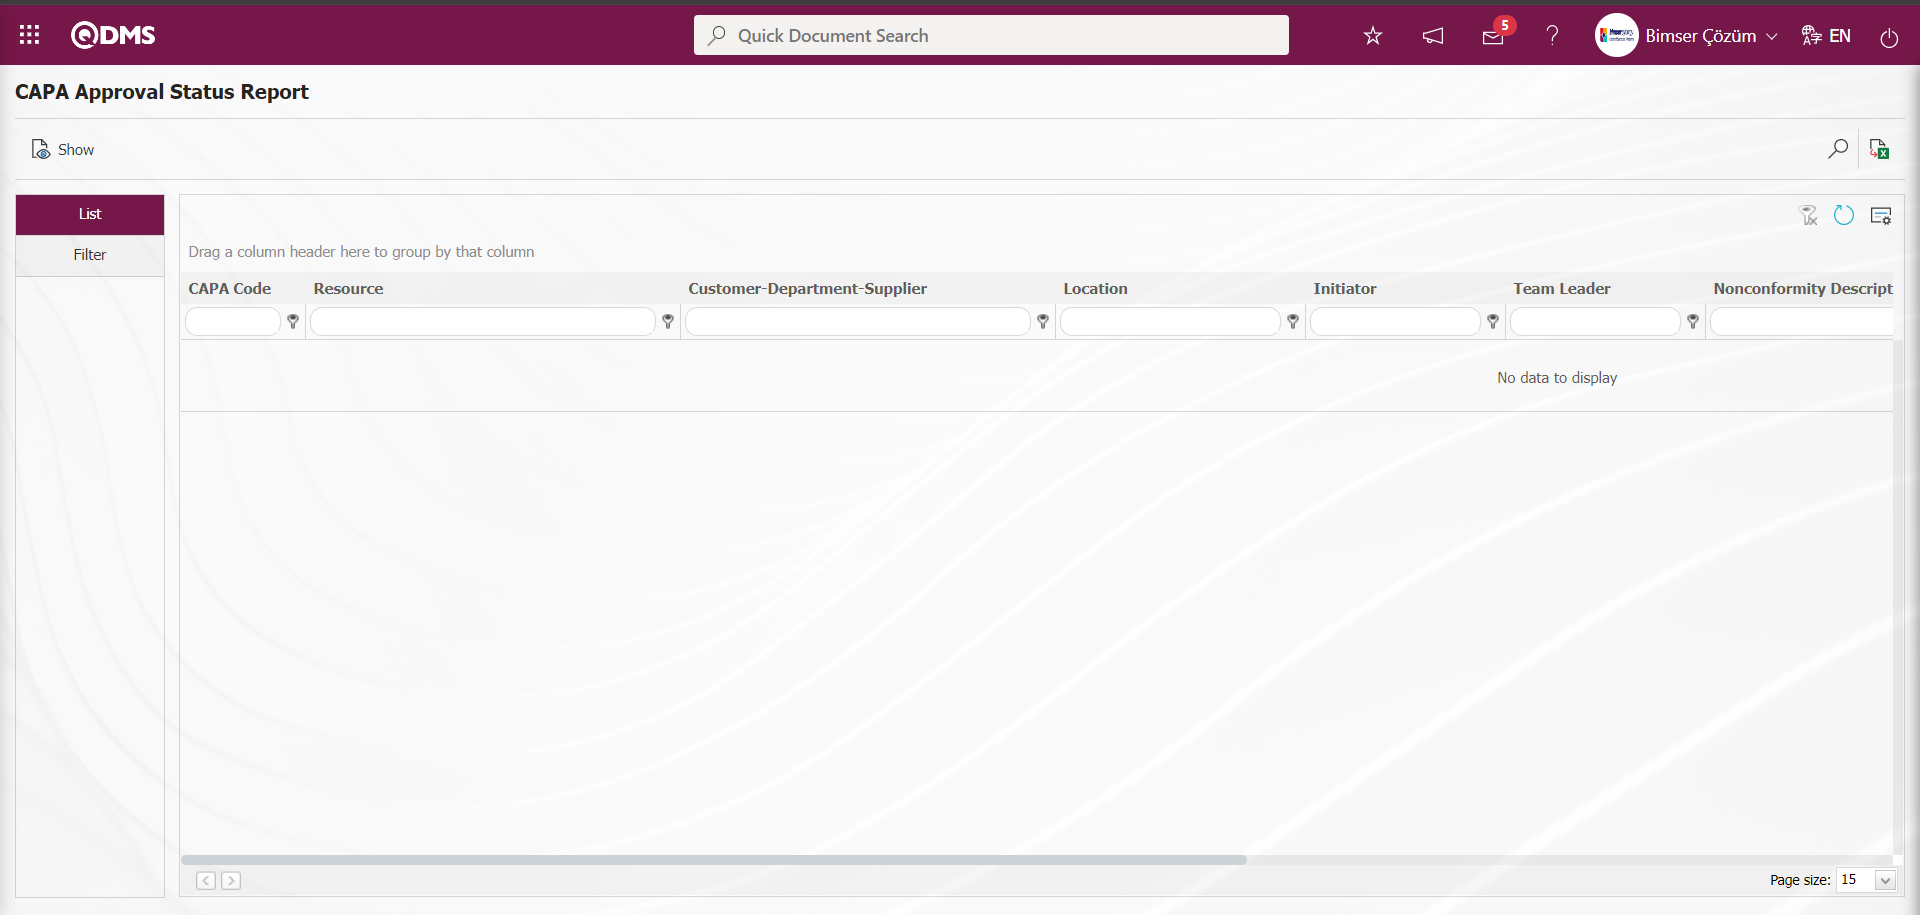
With the help of the buttons on the screen;
: Data is transferred to Excel.
: Records are filtered and searched.
: The search criteria on the menu screens are used to clean the data remaining in the filter fields in the grid where the search operation is performed.
: The menu screen is restored to its default settings.
: User-based designing of the menu screen is done with the show-hide feature, that is, the hiding feature of the fields corresponding to the columns on the menu screens.
On the CAPA Approval Status Report screen, data entries are made in the fields in the search criteria in the Filter tab and filtering is done by clicking the (Search) button.
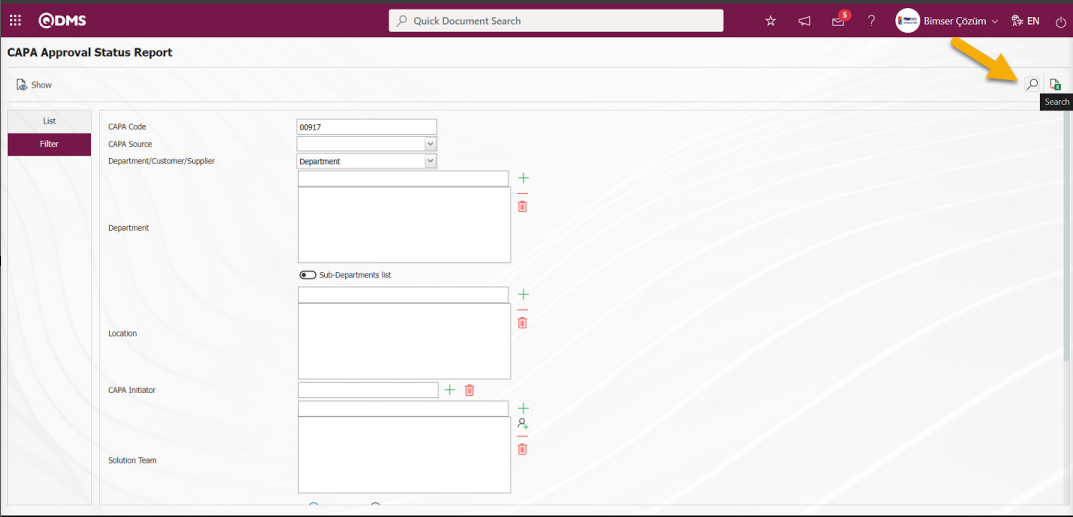
On the CAPA Approval Status Report screen, the reports of the desired data are displayed according to the filter settings made in the Filter tab from the list in the list tab.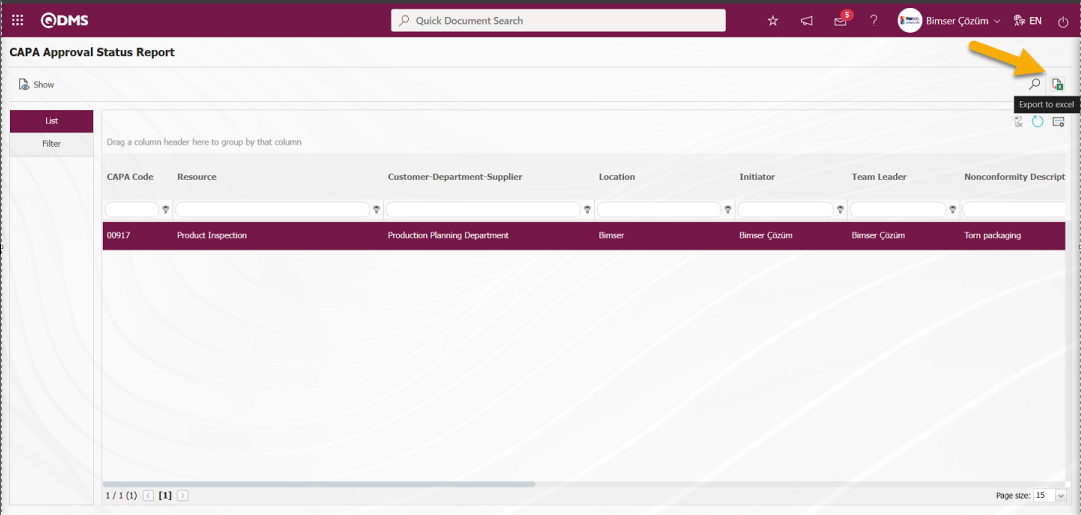
On the CAPA Approval Status Report screen, the “CAPA Approval Status Report” is displayed in excel format by clicking the (Export to Excel) button while the CAPA record is selected in the list tab.
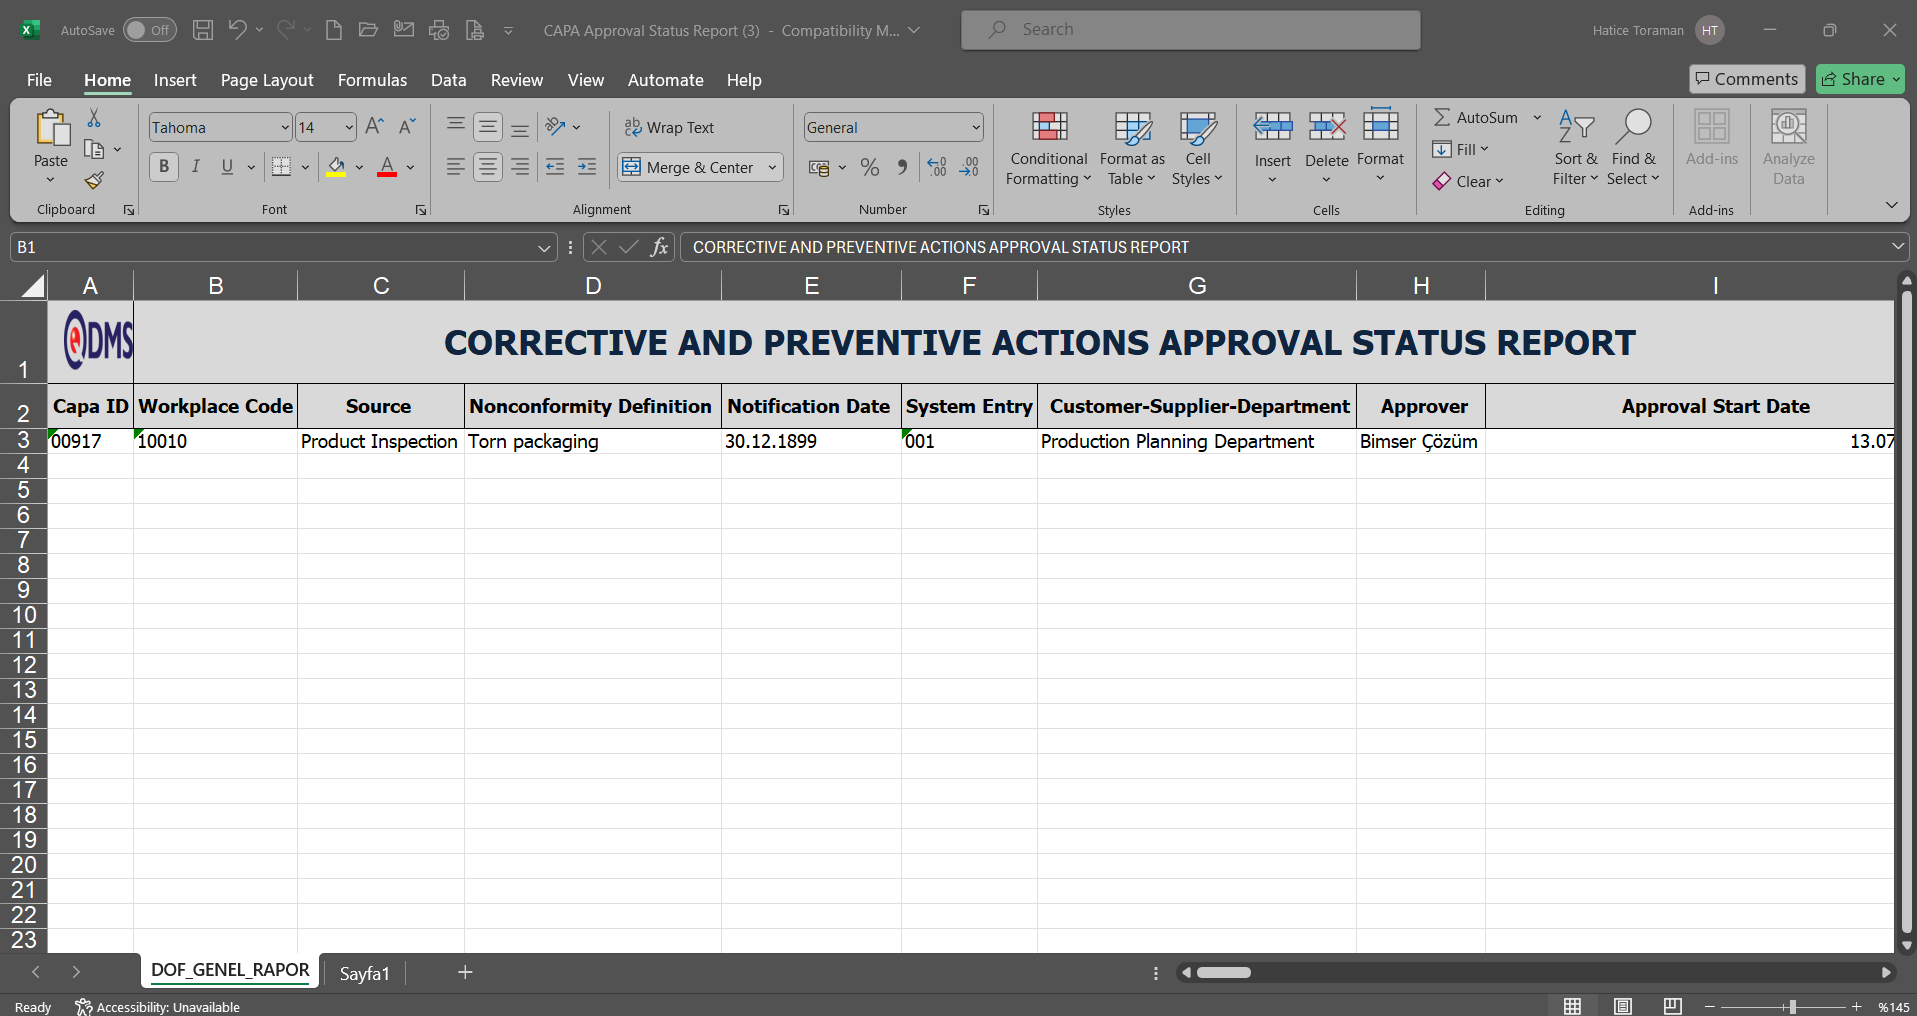
6.2.4.4. CAPA Summary Report
Menu Name: Integrated Management System/ CAPA/ Reports/ CAPA Summary Report
It is the menu where the general information of the CAPAs is transferred to the list and the information about the duration of the CAPA record is reported. It comes according to the report defined in parameter 74 in the CAPA module parameters.
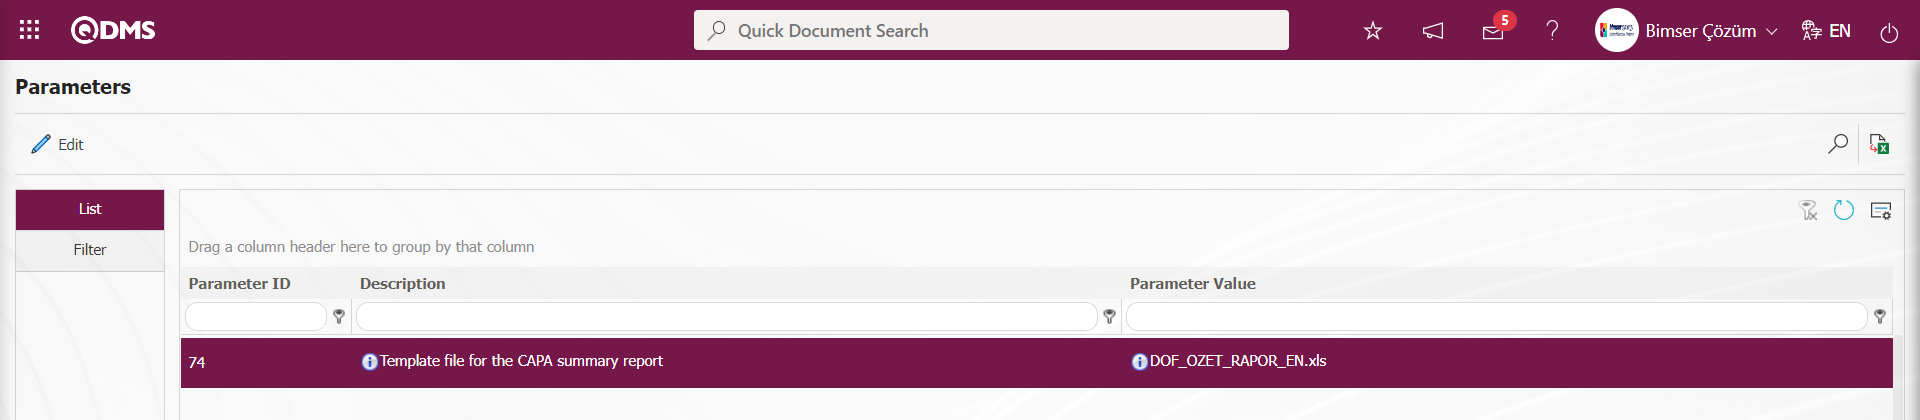
In order to define a report format template for the parameter, first of all, the installation process is done by clicking the related report template  button in the System Infrastructure Definitions / BSID / Configuration Settings / Default Report Layouts Arrangement menu. The name and extension of the report format template loaded in the Default Report Layouts Arrangement menu is defined by pasting the name and extension of the report format template loaded in the Default Report Layouts Arrangement menu to the parameter value of the relevant parameter with the right click / paste method. The related report is taken from this menu according to the defined report format template. By filling in the relevant fields on the CAPA Summary Report screen, the desired criteria are determined and the report is taken with the
  (Export to Excel) button. If desired, all information can be transferred to the CAPA Summary Report by leaving the fields blank. CAPA Summary Report in Pdf format is obtained with the
  (Export to Pdf) button. There are two tabs on the CAPA Summary Report screen: List and Filter tabs.
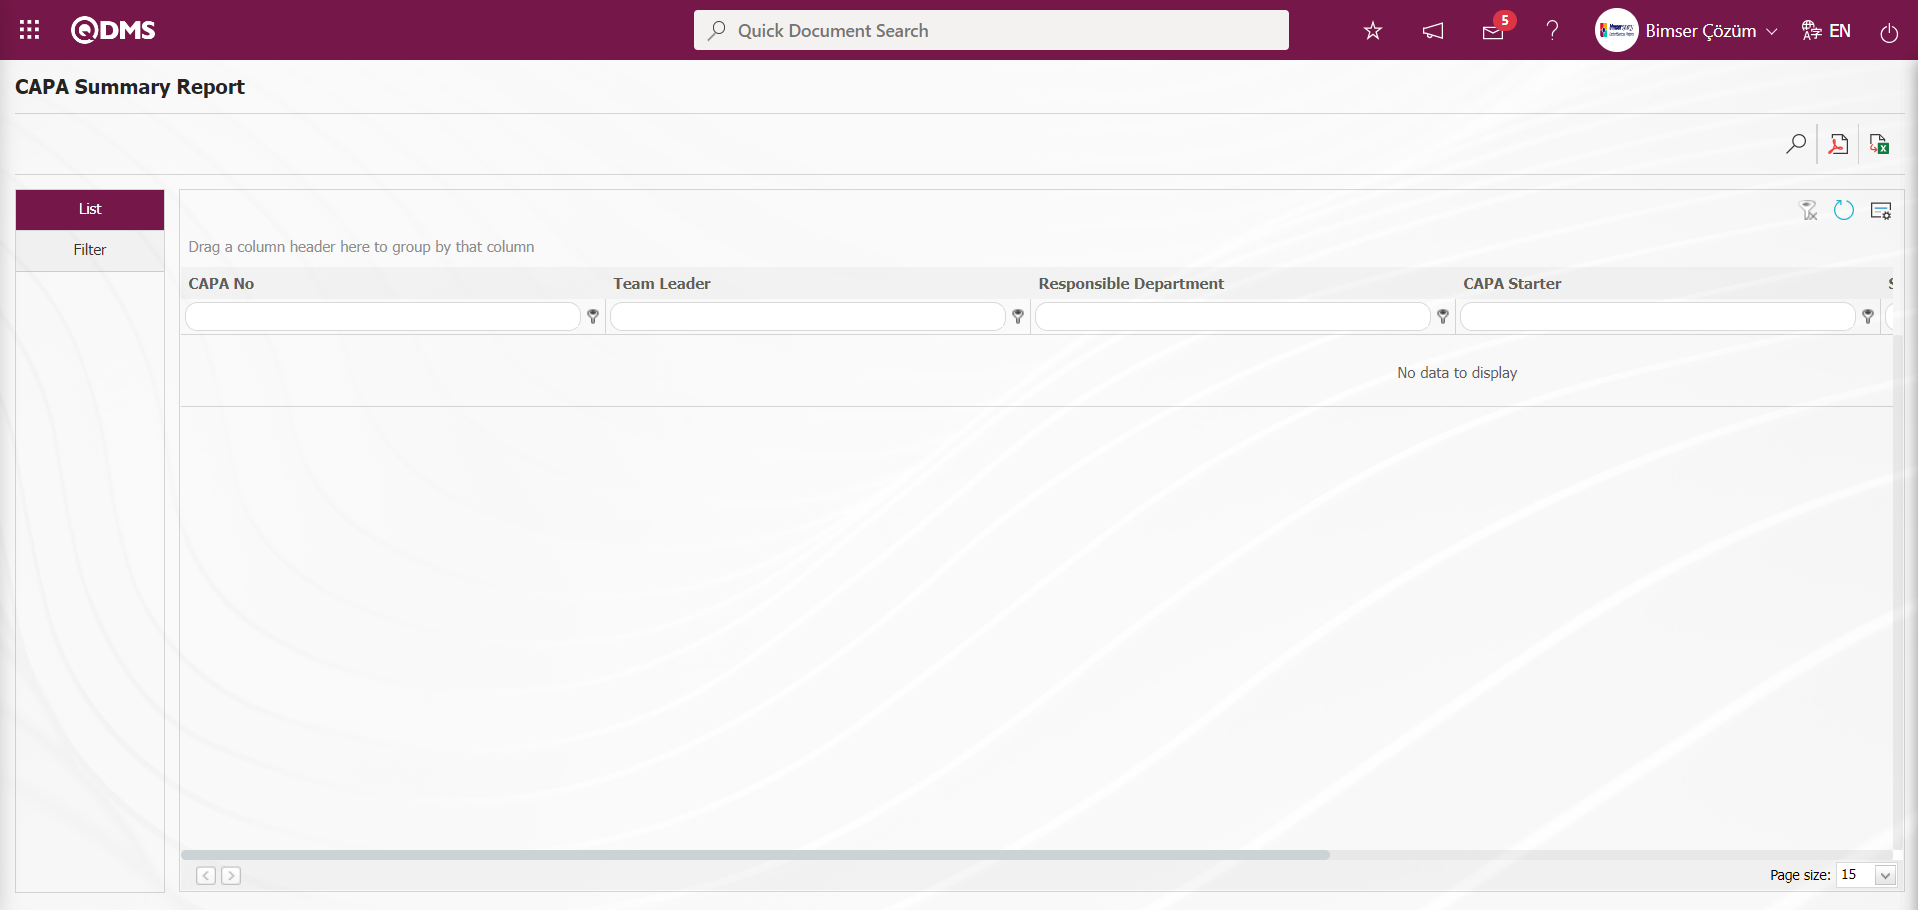
With the help of the buttons on the screen;
: Data is transferred to Excel.
: CAPA Summary Report in pdf format is received.
: Records are filtered and searched.
: The search criteria on the menu screens are used to clean the data remaining in the filter fields in the grid where the search operation is performed.
: The menu screen is restored to its default settings.
: User-based designing of the menu screen is done with the show-hide feature, that is, the hiding feature of the fields corresponding to the columns on the menu screens.
On the CAPA Summary Report screen, data entries are made in the fields in the search criteria in the Filter tab and the filtering process is performed by clicking the (Search) button.
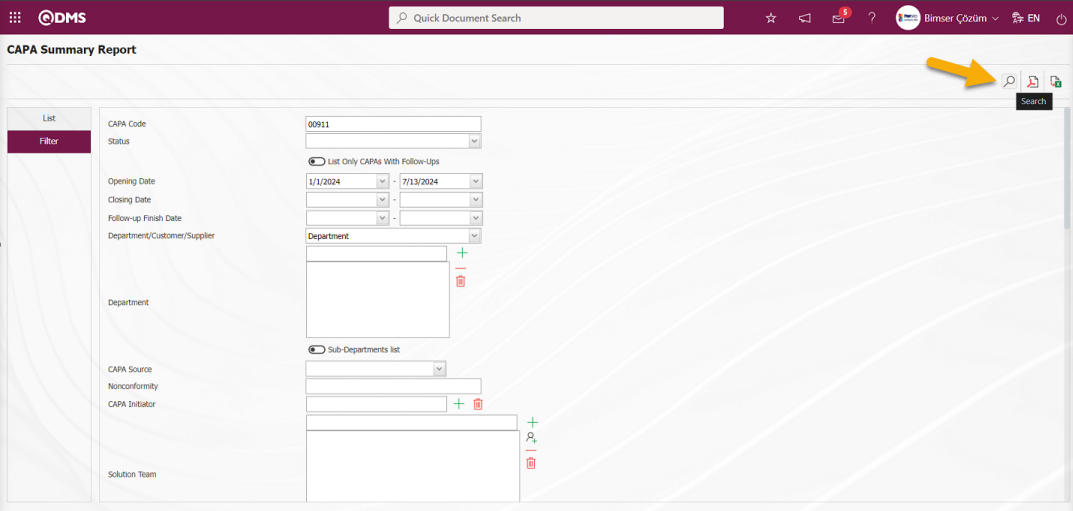
On the CAPA Summary Report screen, the reports of the desired data are displayed according to the filter settings made in the Filter tab from the list in the list tab.
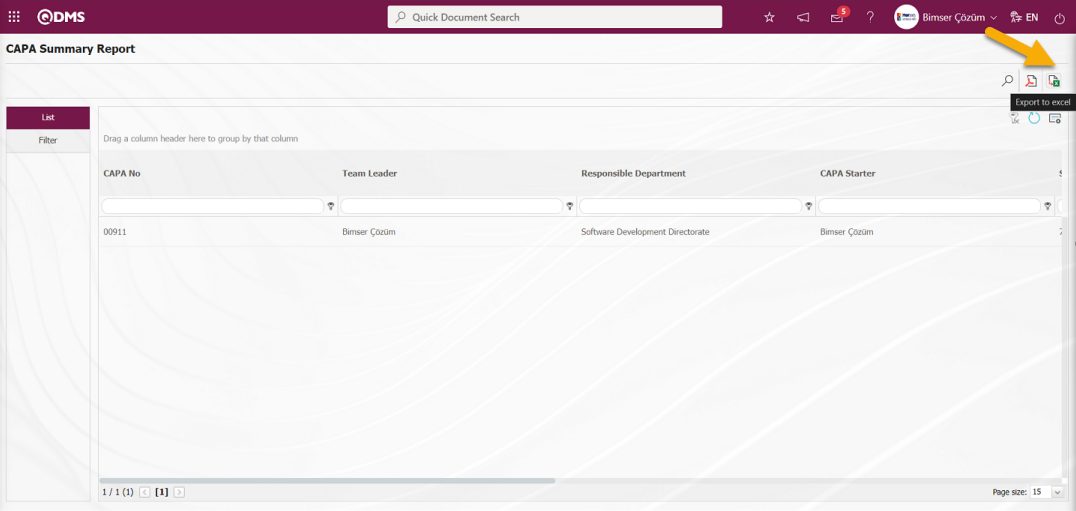
On the CAPA Summary Report screen, the “CAPA Summary Report” is displayed in excel format by clicking the (Export to Excel) button while the CAPA record is selected from the list in the list tab.
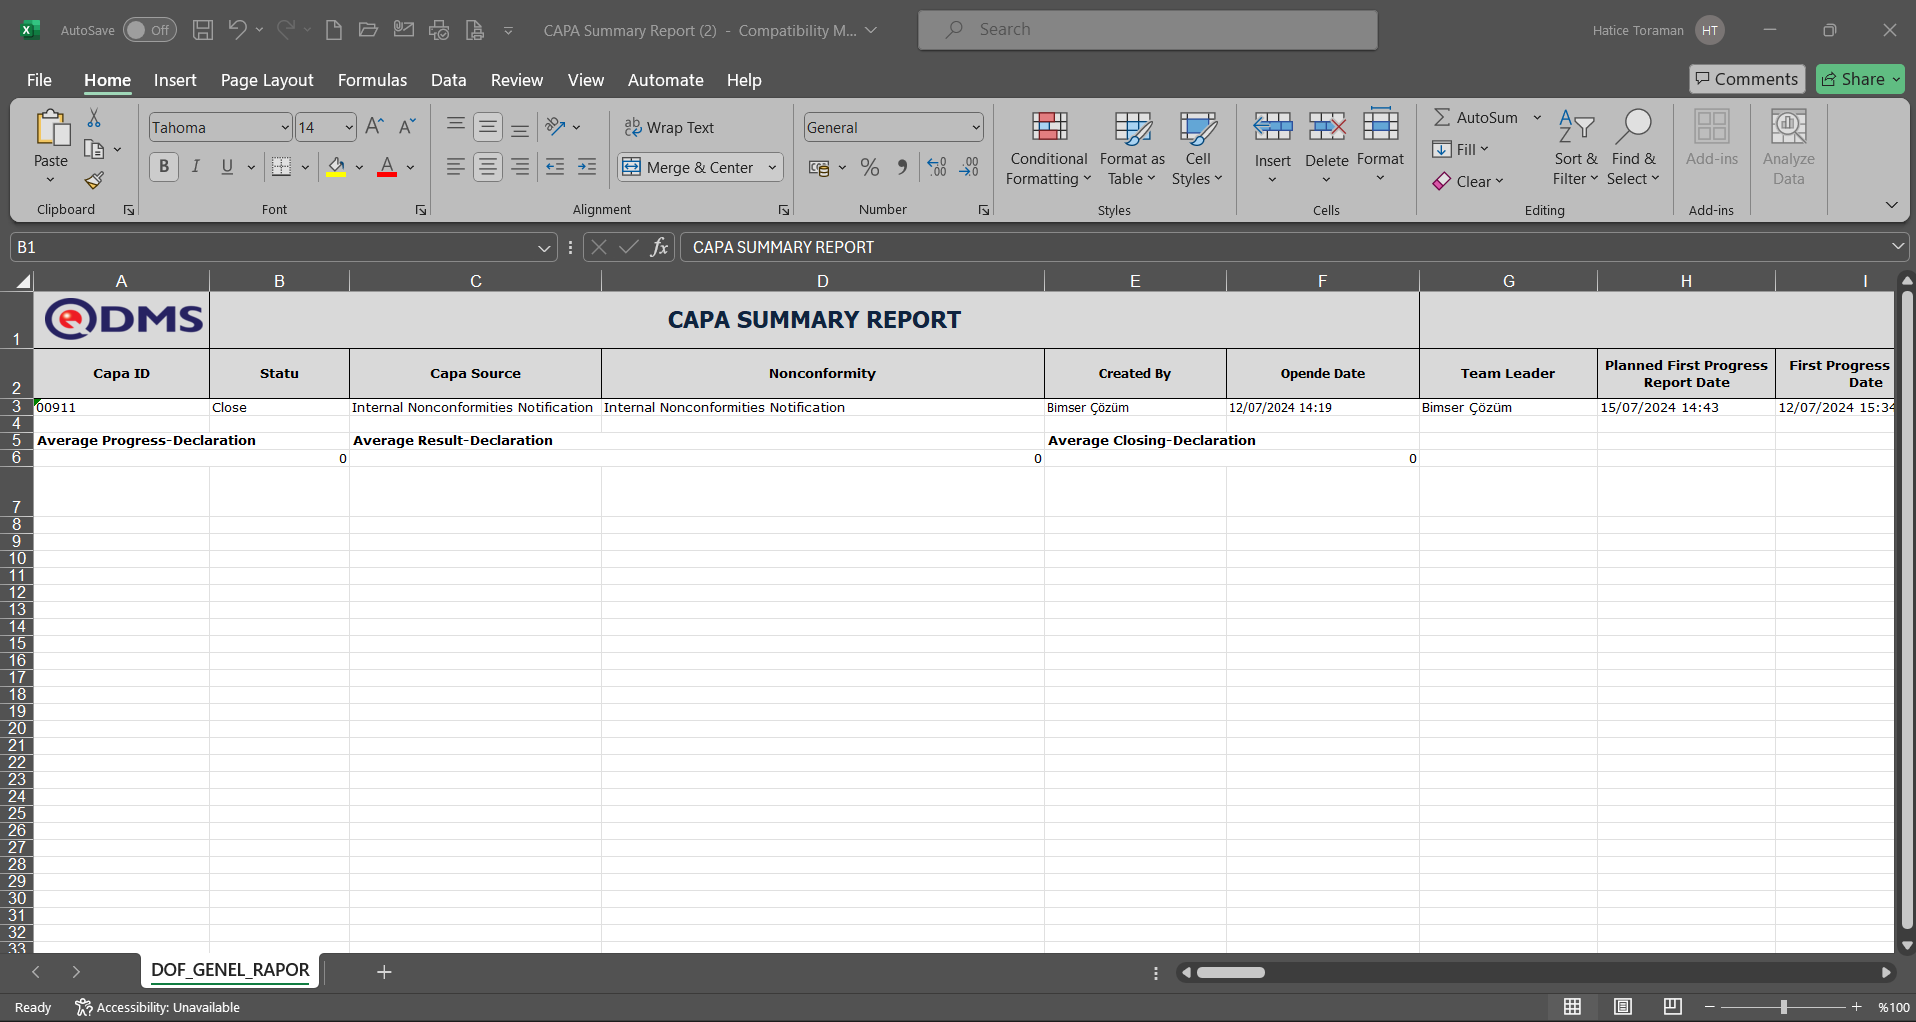
On the CAPA Summary Report screen, click the  (Export to Pdf) button while the CAPA record is selected from the list in the list tab.
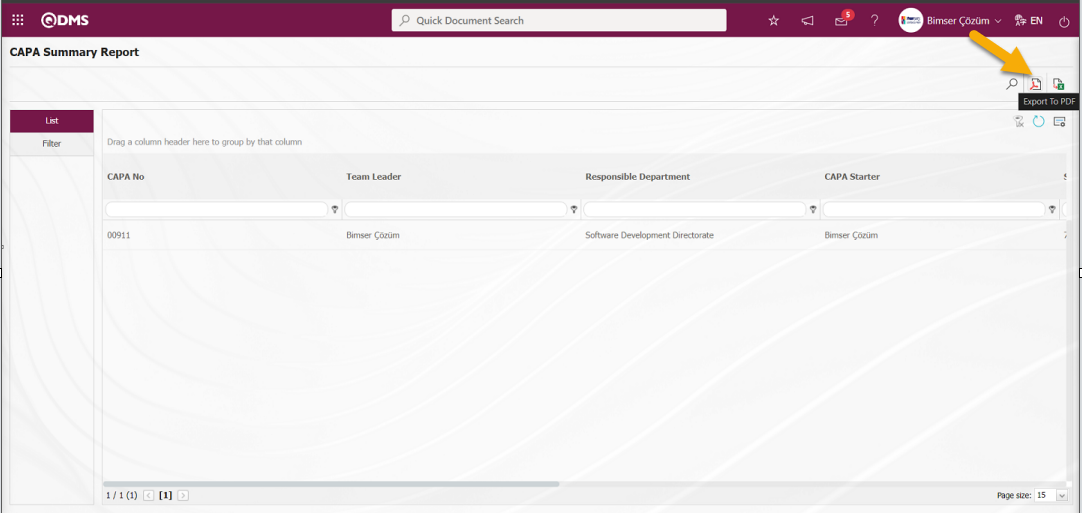
“CAPA Summary Report” is displayed in pdf format.
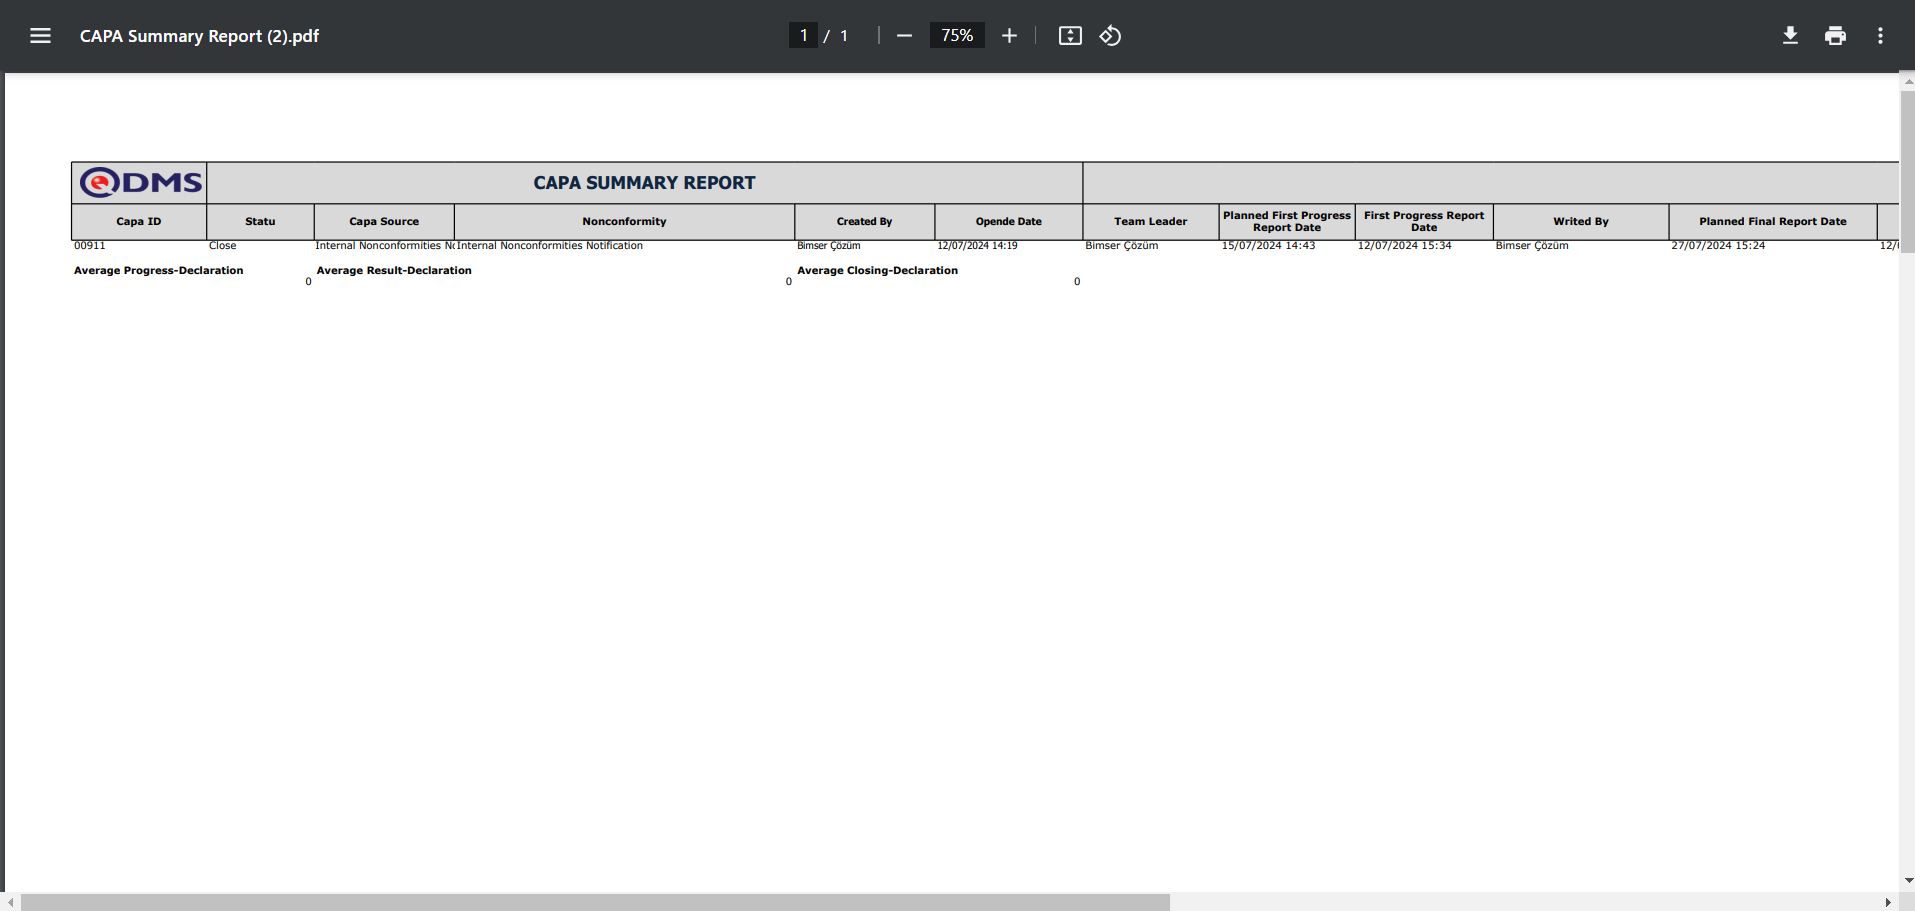
6.2.4.5. CAPA Cost Report
Menu Name: Integrated Management System/ CAPA/ Reports/ CAPA Cost Report
This is the menu where the report of CAPA records for which CAPA Effectiveness Assessment is made is taken. It comes according to the report defined in parameter 86 in the CAPA module parameters.
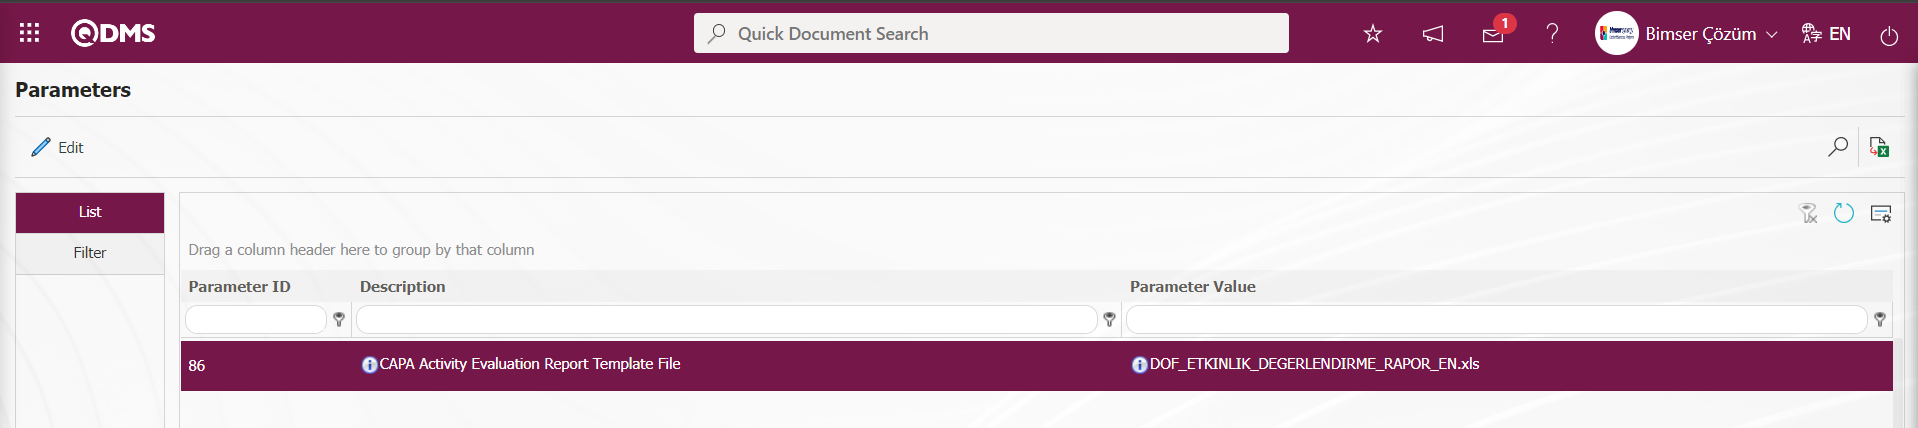
In order to define a report format template for the parameter, first of all, the installation process is done by clicking the related report template button in the System Infrastructure Definitions/BSID/Configuration Settings/Default Report Layouts Arrangement menu. The name and extension of the report format template uploaded to the Default Report Layouts Arrangement menu are pasted into the parameter value of the relevant parameter with the right click / paste method. According to the defined report format template, the relevant report is retrieved from this menu
The desired criteria are determined by filling in the relevant fields on the Report screen and the report is taken with the  (Export to Excel) button. In order for the CAPA Activity Report to work, firstly, the evaluation information according to the activity questions in the Survey defined in the System Infrastructure Definitions/CAPA/Survey Question Lists menu is transferred to the report. In the related report, information such as Activity Evaluators, Activity Evaluation Date and Activity Score are accessed.
On the Activity Assessment Report screen, data entries are made in the fields in the search criteria in the Filter tab and filtering is done by clicking the (Search) button.
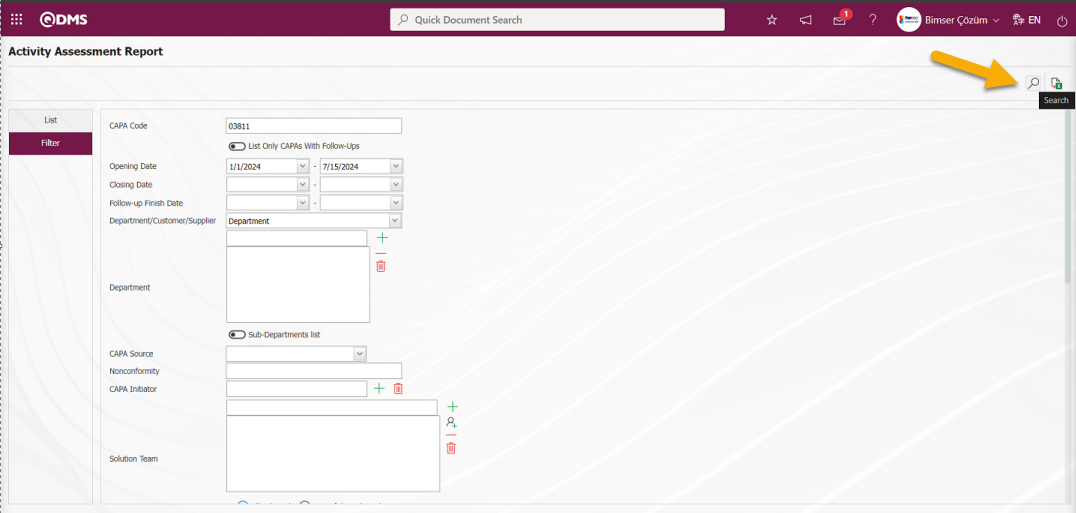
With the help of the buttons on the screen;
: Data is transferred to Excel.
: Records are filtered and searched.
: The search criteria on the menu screens are used to clean the data remaining in the filter fields in the grid where the search operation is performed.
: The menu screen is restored to its default settings.
: User-based designing of the menu screen is done with the show-hide feature, that is, the hiding feature of the fields corresponding to the columns on the menu screens.
On the Activity Assessment Report screen, on the list tab, select the CAPA record from the list and click the (Export to Excel) button.
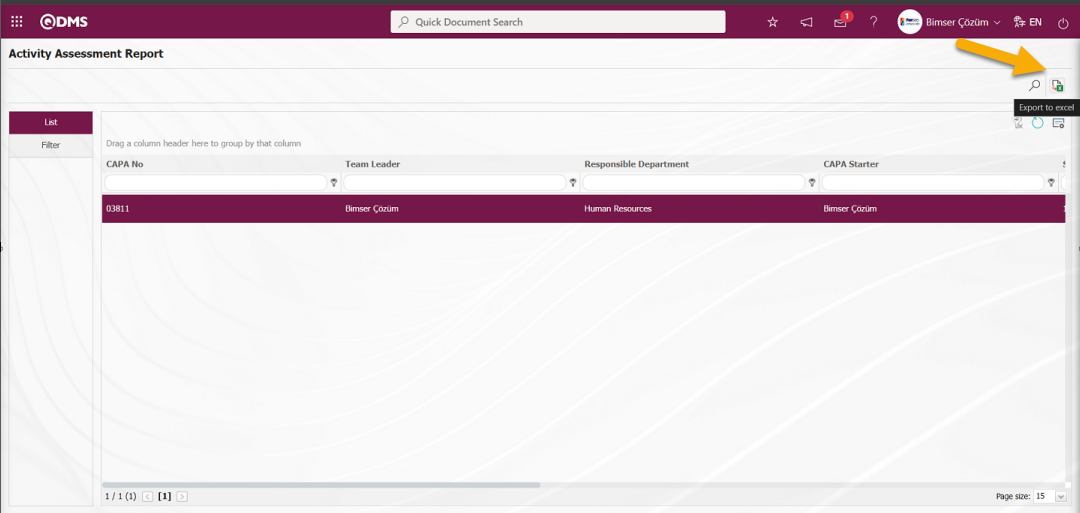
“Activity Assessment Report” is displayed in Excel format.
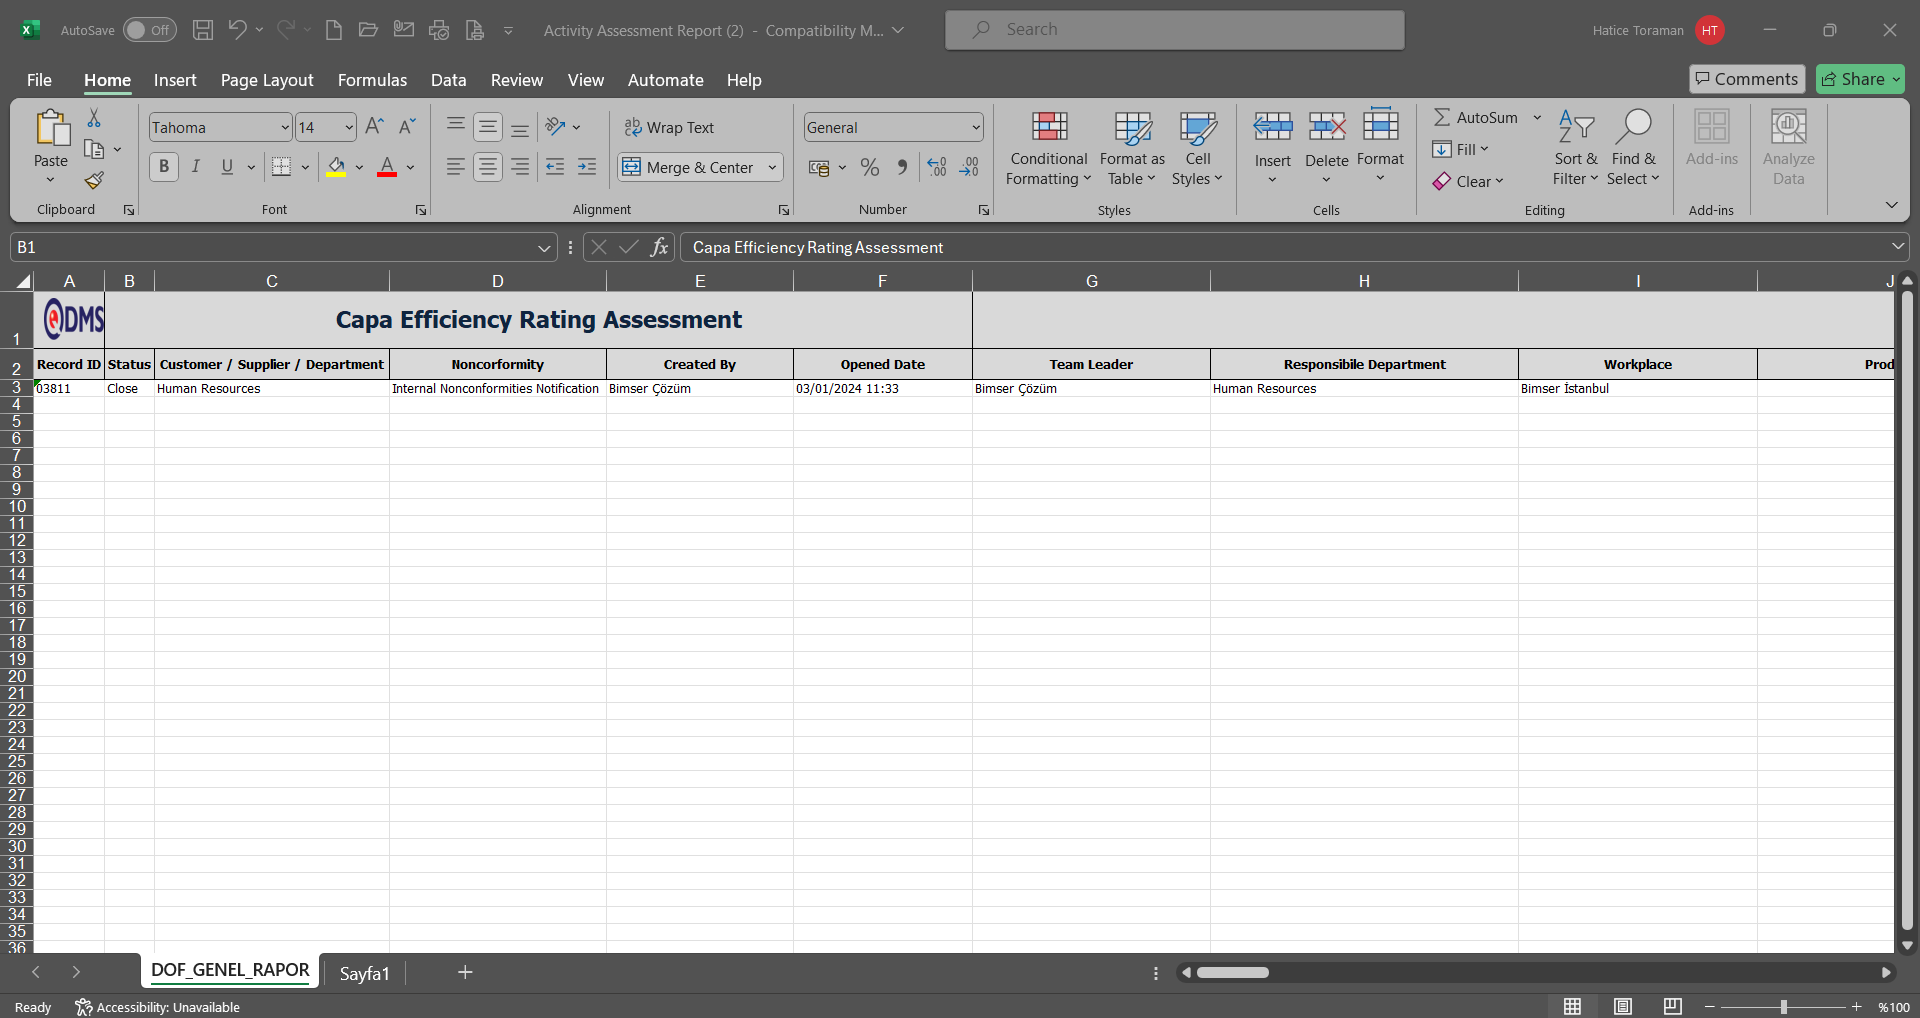
6.2.4.6. CAPA - Action Report (2)
Menu Name: Integrated Management System/ CAPA/ Reports/ CAPA-Action Report (2)
It is a report format that allows reports to be generated using conditional filters. There are two tabs on the Corrective and Preventive Actions Action Report screen: List and Filter tab.
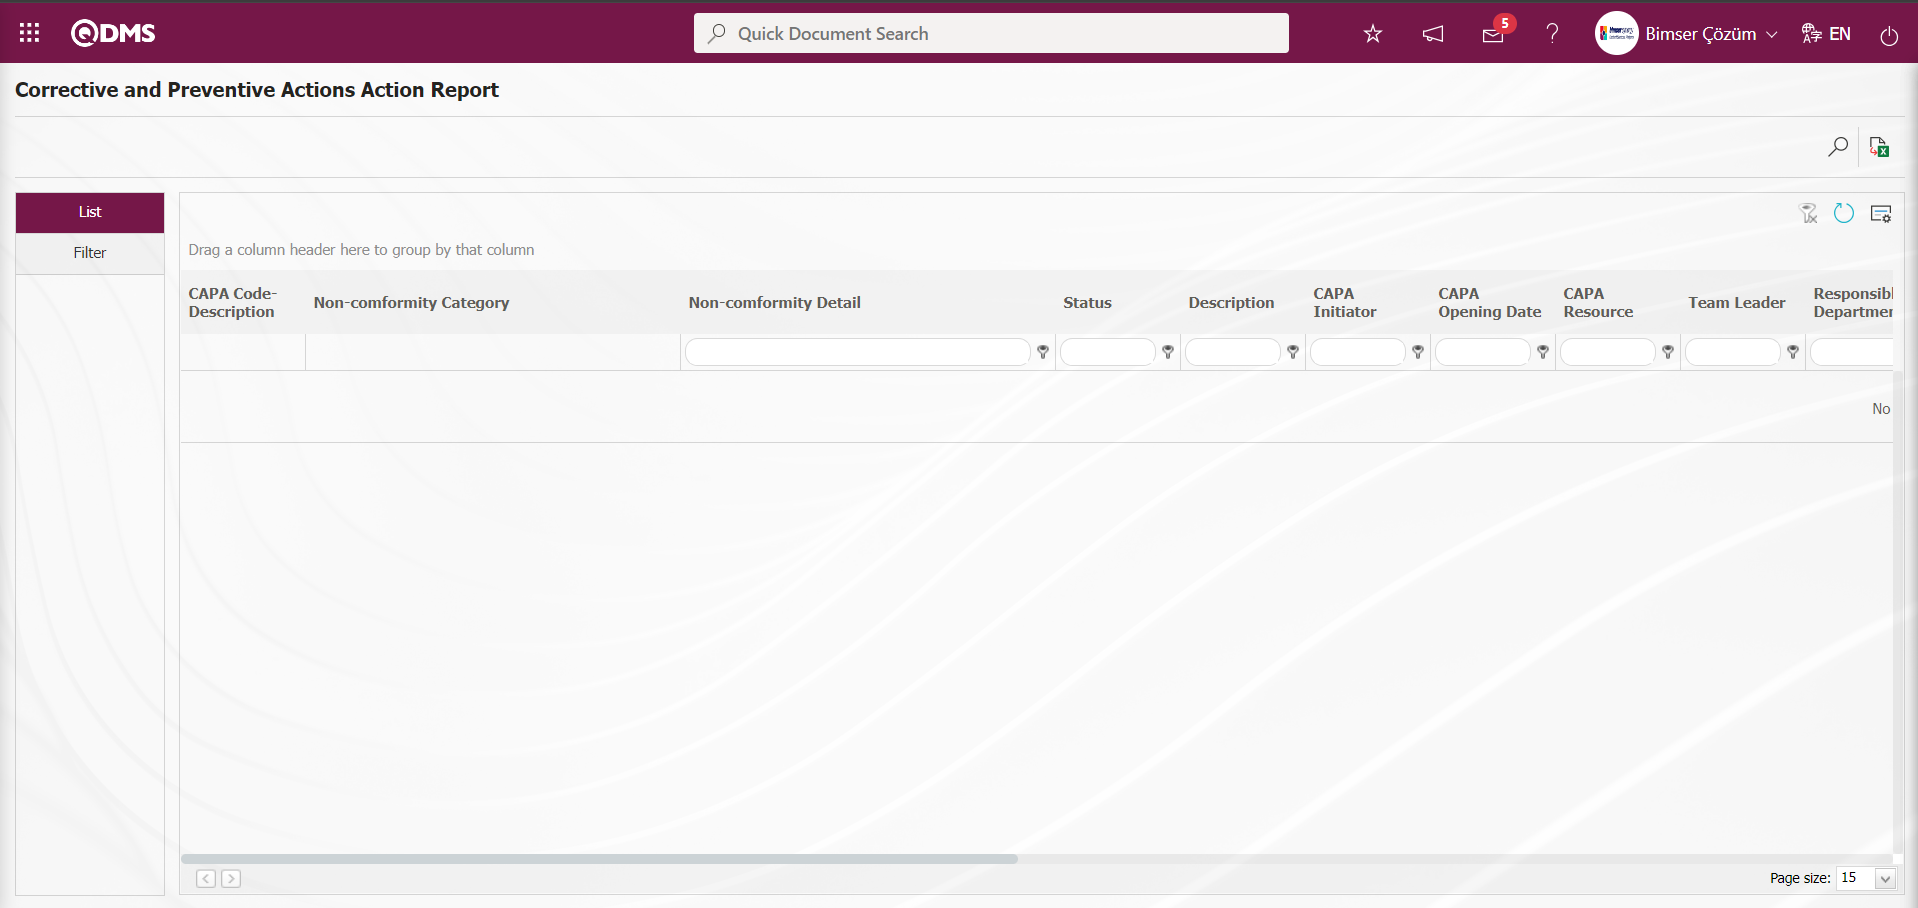
With the help of the buttons on the screen;
: Data is transferred to Excel.
: Records are filtered and searched.
: The search criteria on the menu screens are used to clean the data remaining in the filter fields in the grid where the search operation is performed.
: The menu screen is restored to its default settings.
: User-based designing of the menu screen is done with the show-hide feature, that is, the hiding feature of the fields corresponding to the columns on the menu screens.
On the Corrective and Preventive Actions Action Report screen, data entries are made in the fields in the search criteria in the Filter tab and filtering is done by clicking the (Search) button.
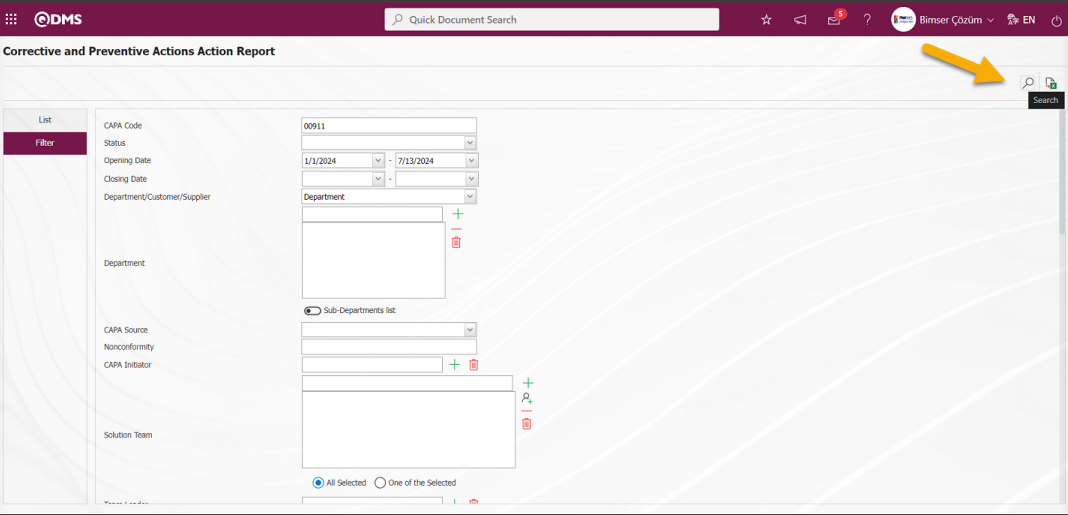
On the Corrective and Preventive Actions Action Report screen, the reports of the desired data are displayed according to the filter settings made on the Filter tab on the list tab.
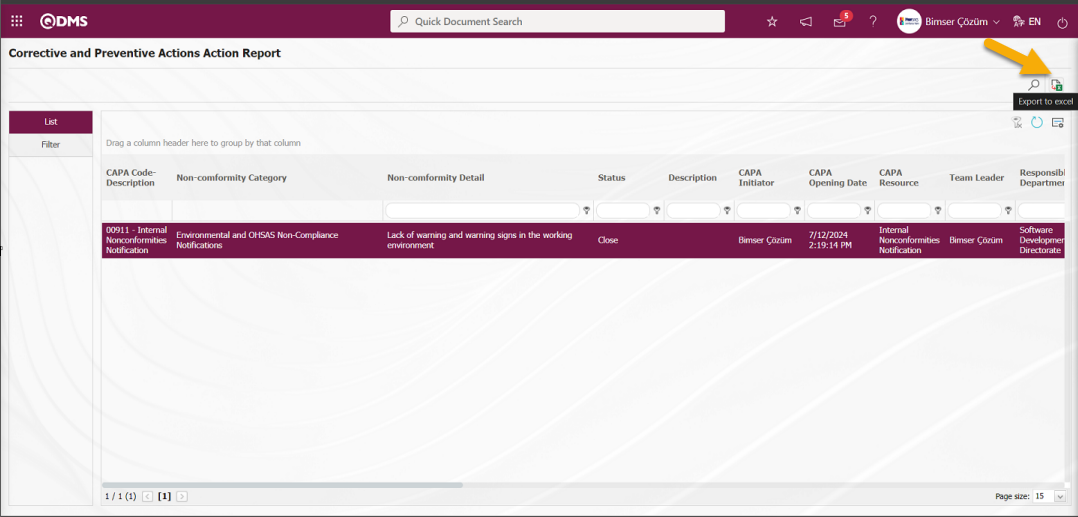
On the Corrective and Preventive Actions Action Report screen, the “Corrective and Preventive Actions Action Report” is displayed in excel format by clicking the (Export to Excel) button while the CAPA record is selected from the list on the list tab.
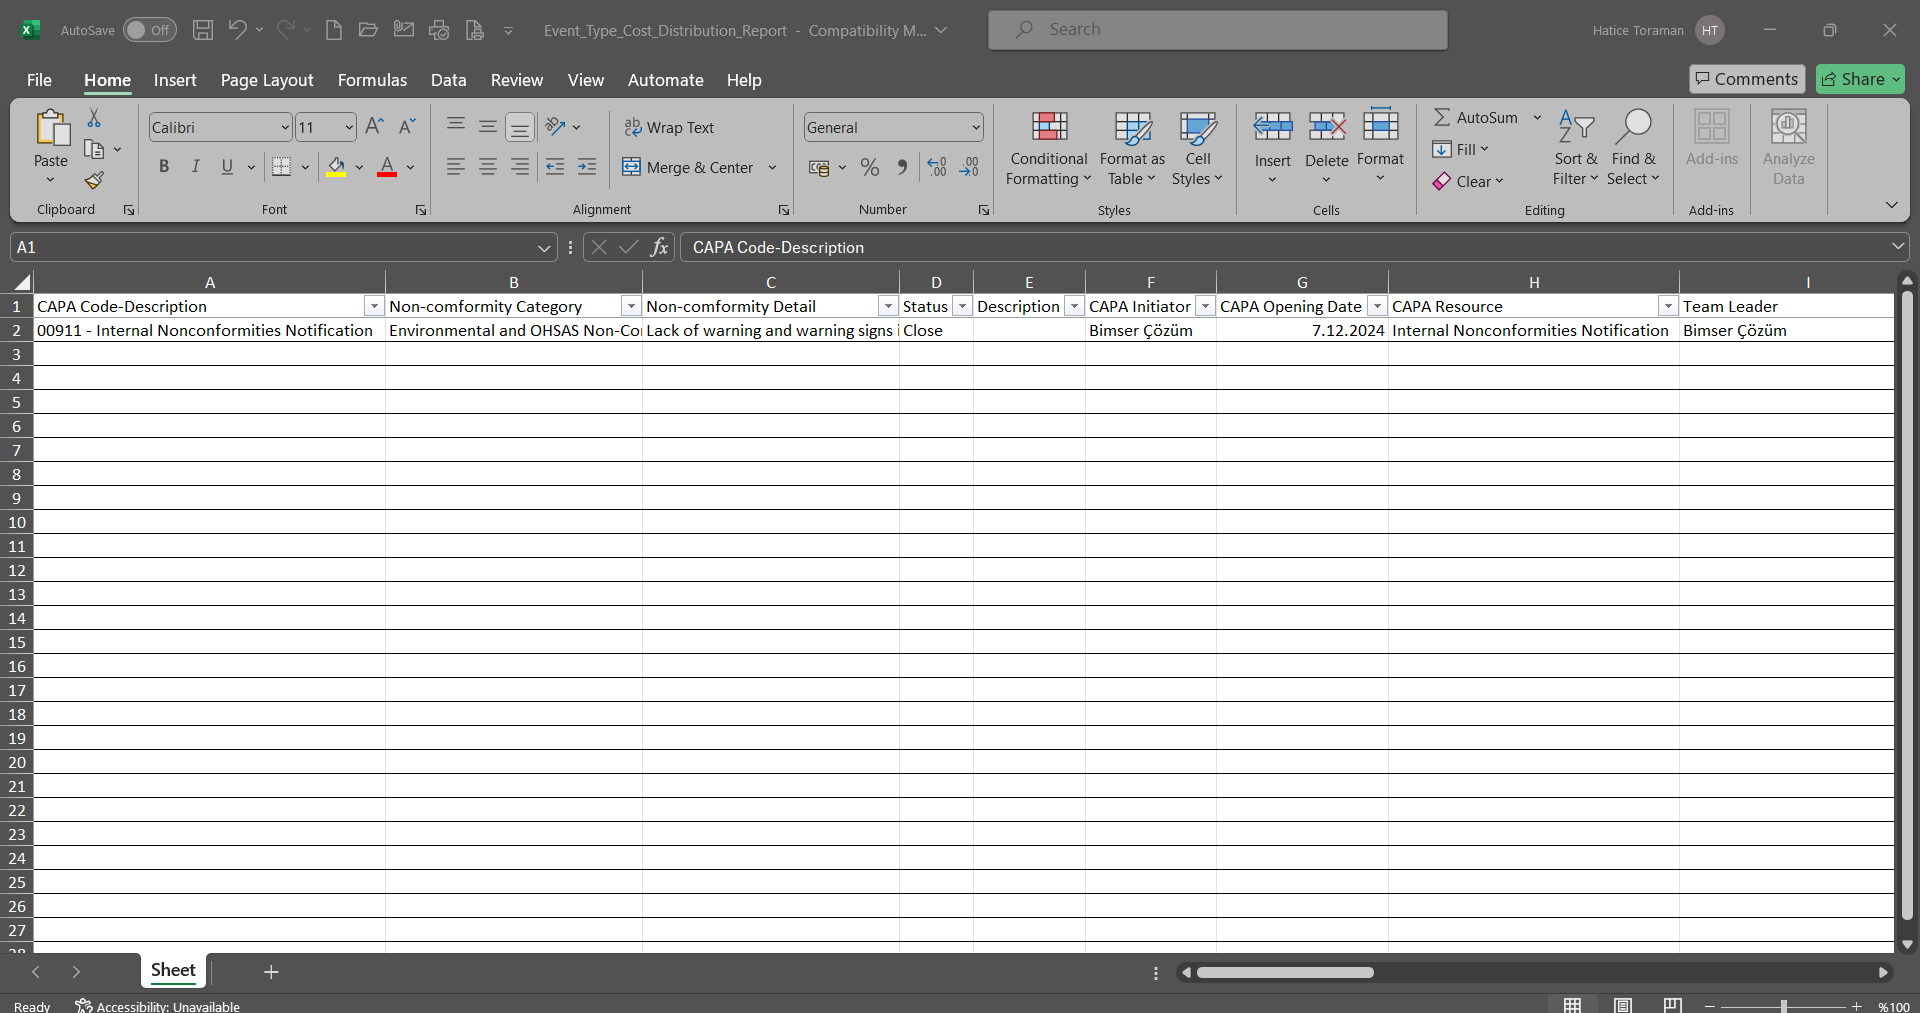
6.2.4.7. CAPA Action Report-3
Menu Name: Integrated Management System/ CAPA/ Reports/ CAPA Action Report-3
CAPA is a report that is given in the form of a tree breakdown of actions in relation to each other. On the Corrective and Preventive Actions Report screen, there are two tabs: List and Filter tab.
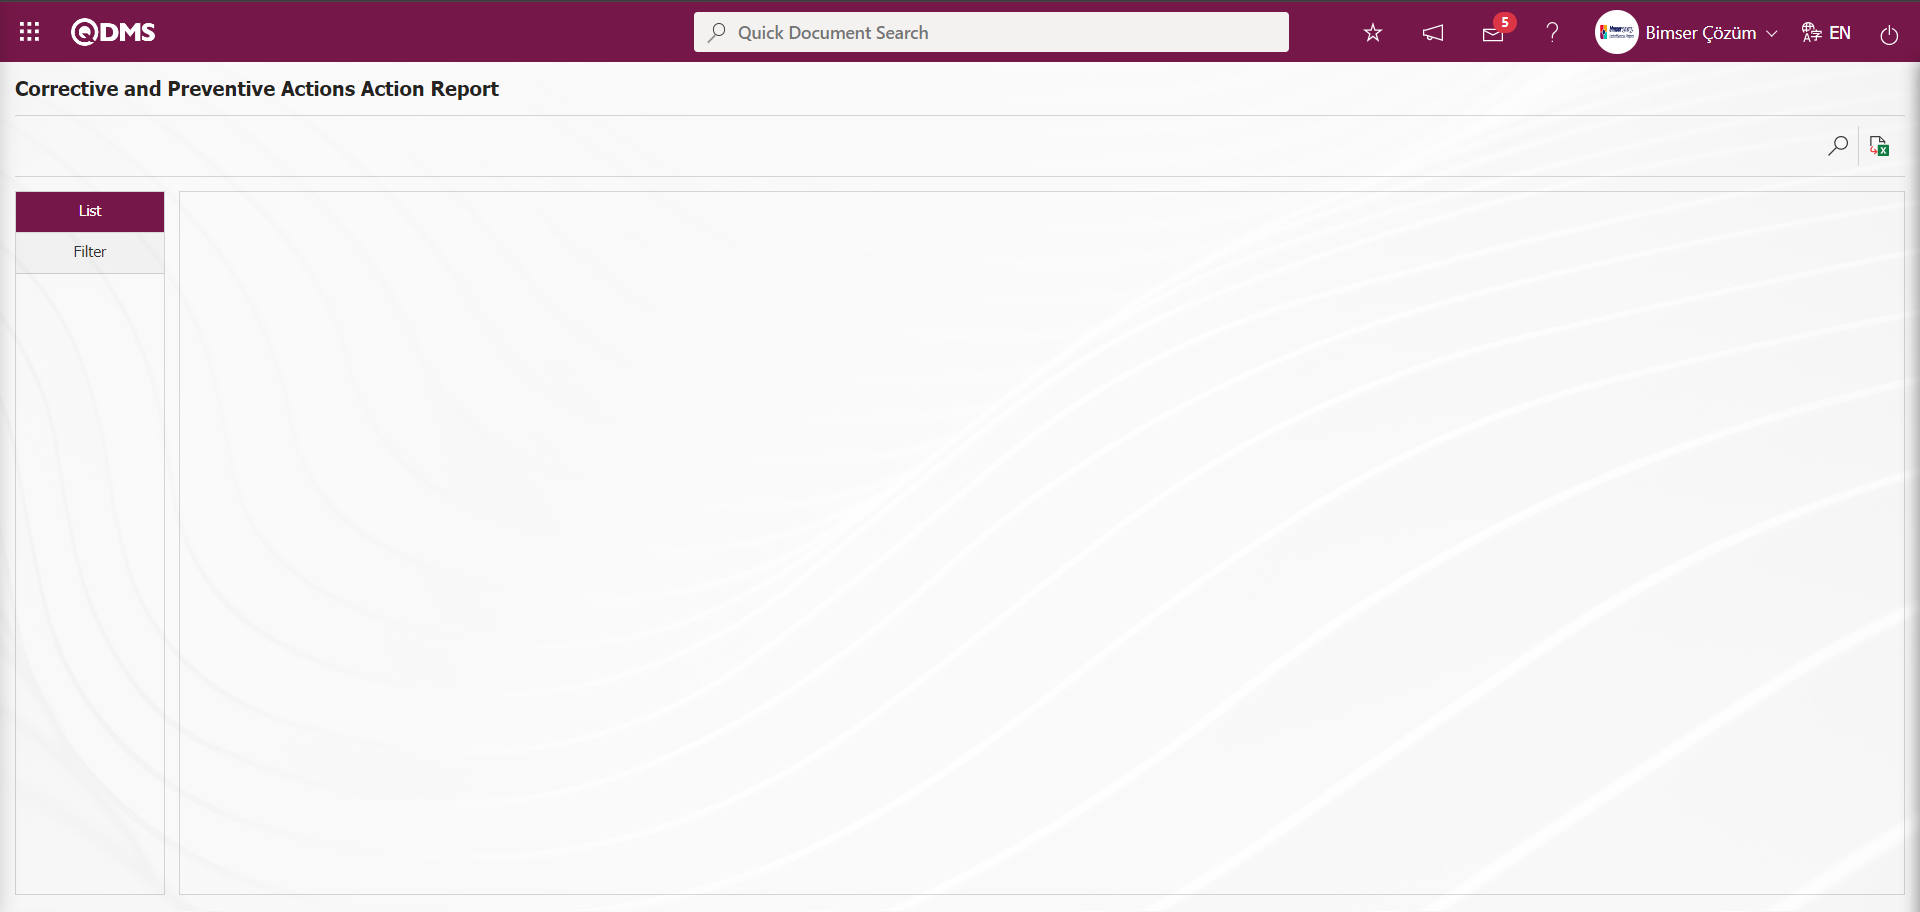
With the help of the buttons on the screen;
: Data is transferred to Excel.
: Records are filtered and searched.
On the Corrective and Preventive Actions Action Report screen, data entries are made in the fields in the search criteria in the Filter tab and filtering is done by clicking the (Search) button.
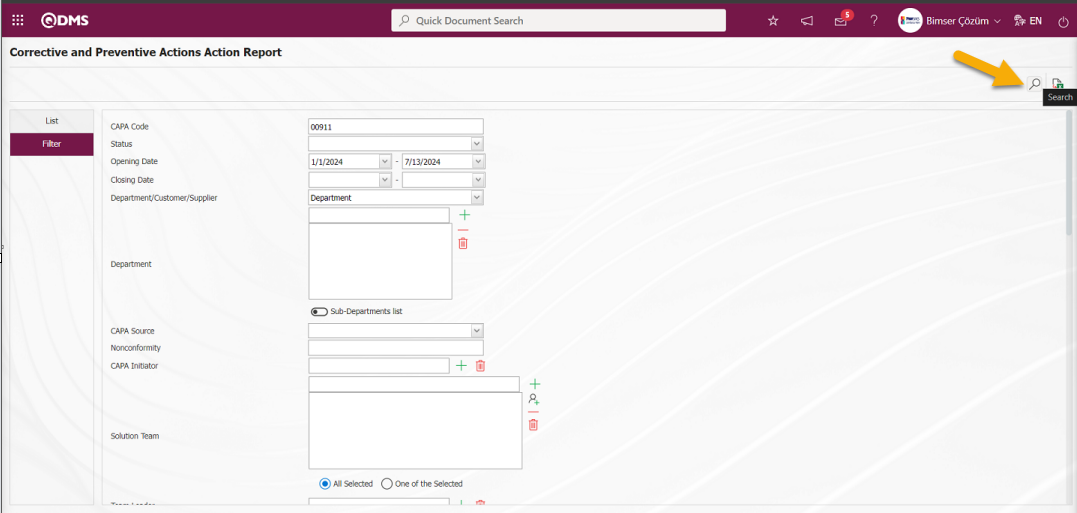
On the Corrective and Preventive Actions Action Report screen, the reports of the desired data are displayed according to the filter settings made on the Filter tab on the list tab.
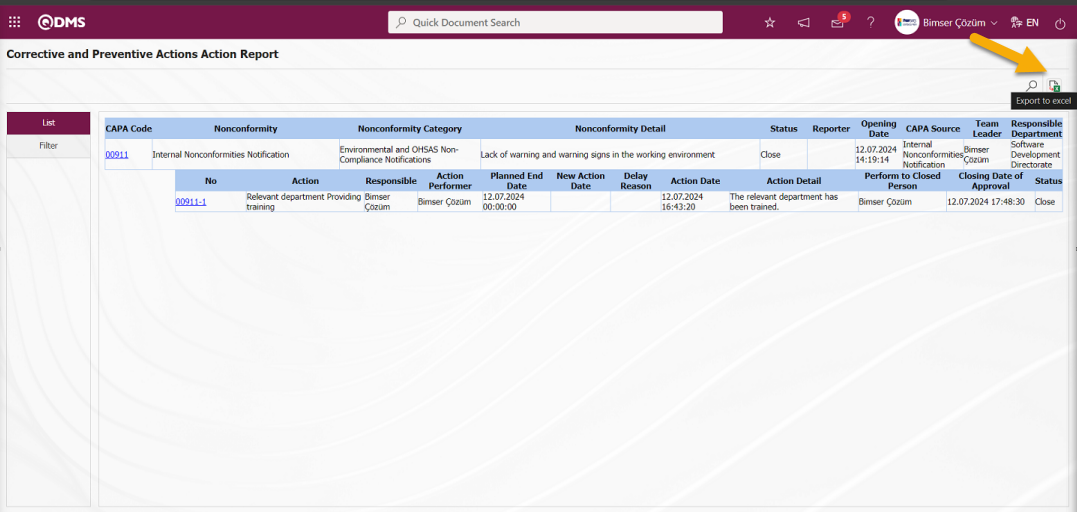
On the On the Corrective and Preventive Actions Action screen, “On the Corrective and Preventive Actions Action” is displayed in excel format by clicking on the (Export to Excel) button in the CAPA records displayed in the form of a tree breakdown from the list in the list tab.
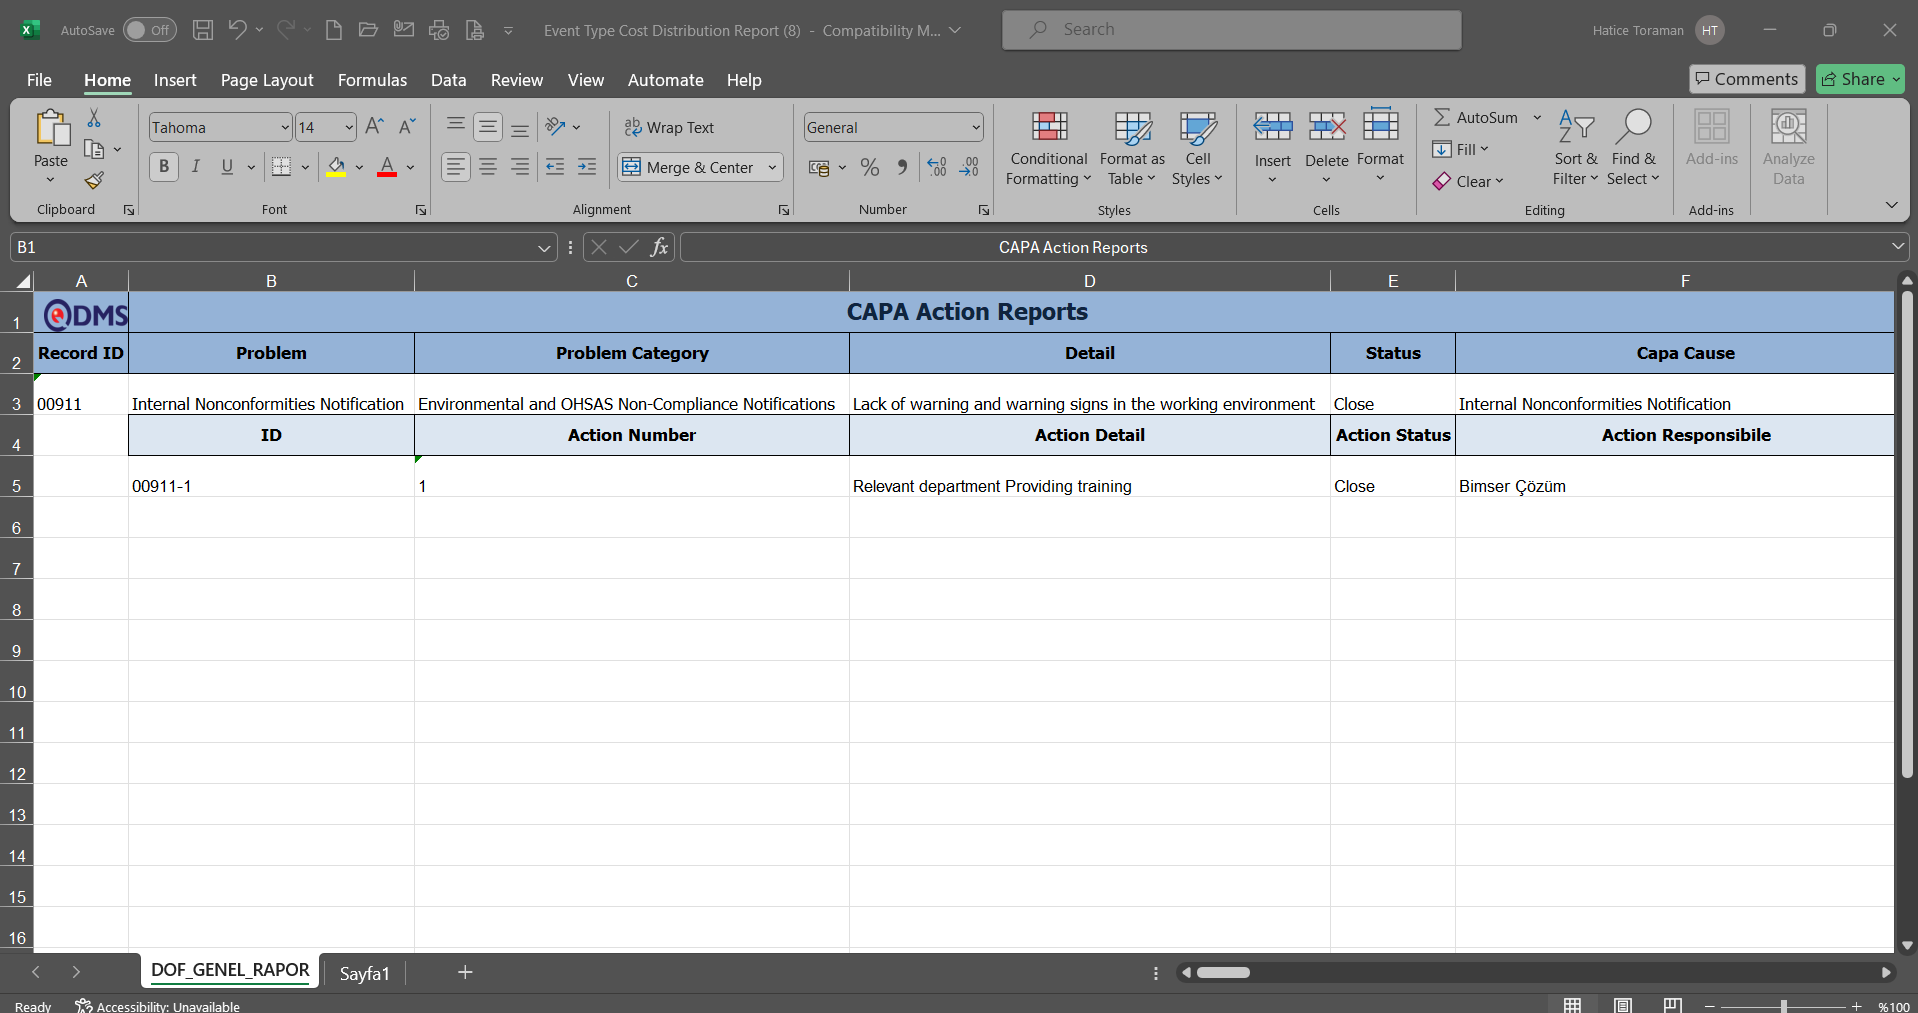
6.2.4.8.CAPA Detail Report
Menu Name: Integrated Management System/ CAPA / Reports/ CAPA Detail Report
This report contains all detailed information about CAPAs.

With the help of the buttons on the screen;
: Data is transferred to Excel.
On the CAPA Detail Report screen, “CAPA Detail Report” is displayed in excel format by clicking the  (Export to Excel) button.

6.2.4.9. CAPA Follow-up Report
Menu Name: Integrated Management System/ Corrective and Preventive Actions Reports/ CAPA Follow-up Report
It is the report where the follow-up information opened to CAPAs is given. On the CAPA Follow-up Report screen, the relevant fields are entered.
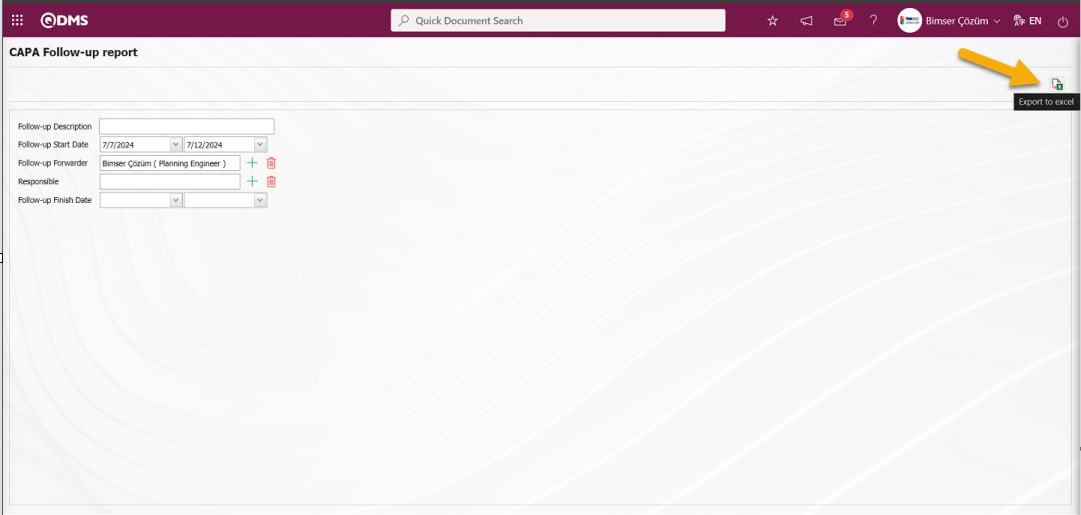
After entering the relevant information in the relevant fields on the CAPA Follow-up Report screen, the CAPA Follow-up Report is received in Excel format by clicking the  (Export to Excel) button.
6.2.5.10. Repeated Records Report
Menu Name: Integrated Management System/ CAPA /Reports/ Repeated Records Report
On the screen that opens, firstly, Repeated Records Report Templates are defined by selecting the fields to be drawn in the report from the Repeated Records Report Template menu. Then the relevant report is accessed from the Integrated Management System / CAPA / Reports / Repeated Records report.
With the help of the buttons on the screen;
: Data is transferred to Excel.
: Records are filtered and searched
Select the relevant report template from the Integrated Management System/CAPA /Reports/Repeated Records report and click the (Search) button.
![A screenshot of a computer
Description automatically generated]ref57
From the Repeated Records Report screen, records are listed in the list tab according to the search criteria in the filter tab.
![A screenshot of a computer
Description automatically generated]ref58
From the Repeated Records Report screen, click on the (Export to Excel) button to get the Repeated Report defined in Excel format.
![A screenshot of a computer
Description automatically generated]ref59
6.2.5. Graphics
Menu Name: Integrated Management System/ CAPA/ Graphics
This is the section where graphics are displayed in the CAPA Module.
6.2.5.1. The most occurrency Analysis(graphics)
Menu Name: Integrated Management System/ CAPA/ Graphics/ The most occurrency Analysis(graphics)
In the Analysis Of The Most Frequent CAPAs** screen, the attributes to be included in the X and Y axes are selected from the Chart Options on the left side. In the Data Options section, it is possible to filter according to many criteria such as CAPA's opening and closing date, transaction source, status, etc. and only CAPAs with these characteristics can be included in the graph.
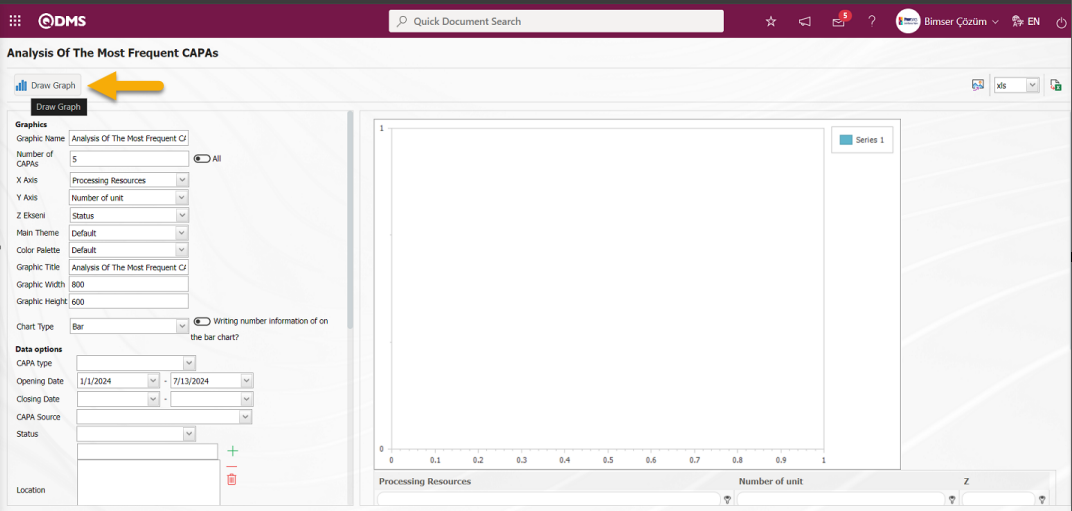
With the help of the buttons on the screen;
 : Draws the graph on the screen according to the specified properties.
: Converts the graph to the format type selected from the drop-down menu (png, jpg, bmp, xls, etc.) and exports it to the external environment.
: Data can be exported to Excel.
There are two separate settings for creating a graph. These are Chart and Data options. As the name suggests, it is the area where adjustments such as the colors, width and height of the graph are made. X axis and Y axis are important in chart settings. From the X axis, we want to query, Transaction source, Nonconformity category, root cause, process, status, etc. It allows us to obtain graphics according to the subjects. From the Y Axis, it is ensured that the graph is obtained according to the number amount or costs of the relevant query. From the Data Options, it is the field used if you want to filter to get a more limited data than the chart settings we have specified. When the check box is checked, the quantity information is displayed on the bar in the graph. After the settings are completed, the graph is created by clicking the button. If you want to export the graph to different formats, after selecting the format from the right (Export Graphic), the graph can be exported to xls, png, jpg. With the (Export to Excel) button, it is enabled to transfer the data to Excel. Graphs in different formats can be created with this data.
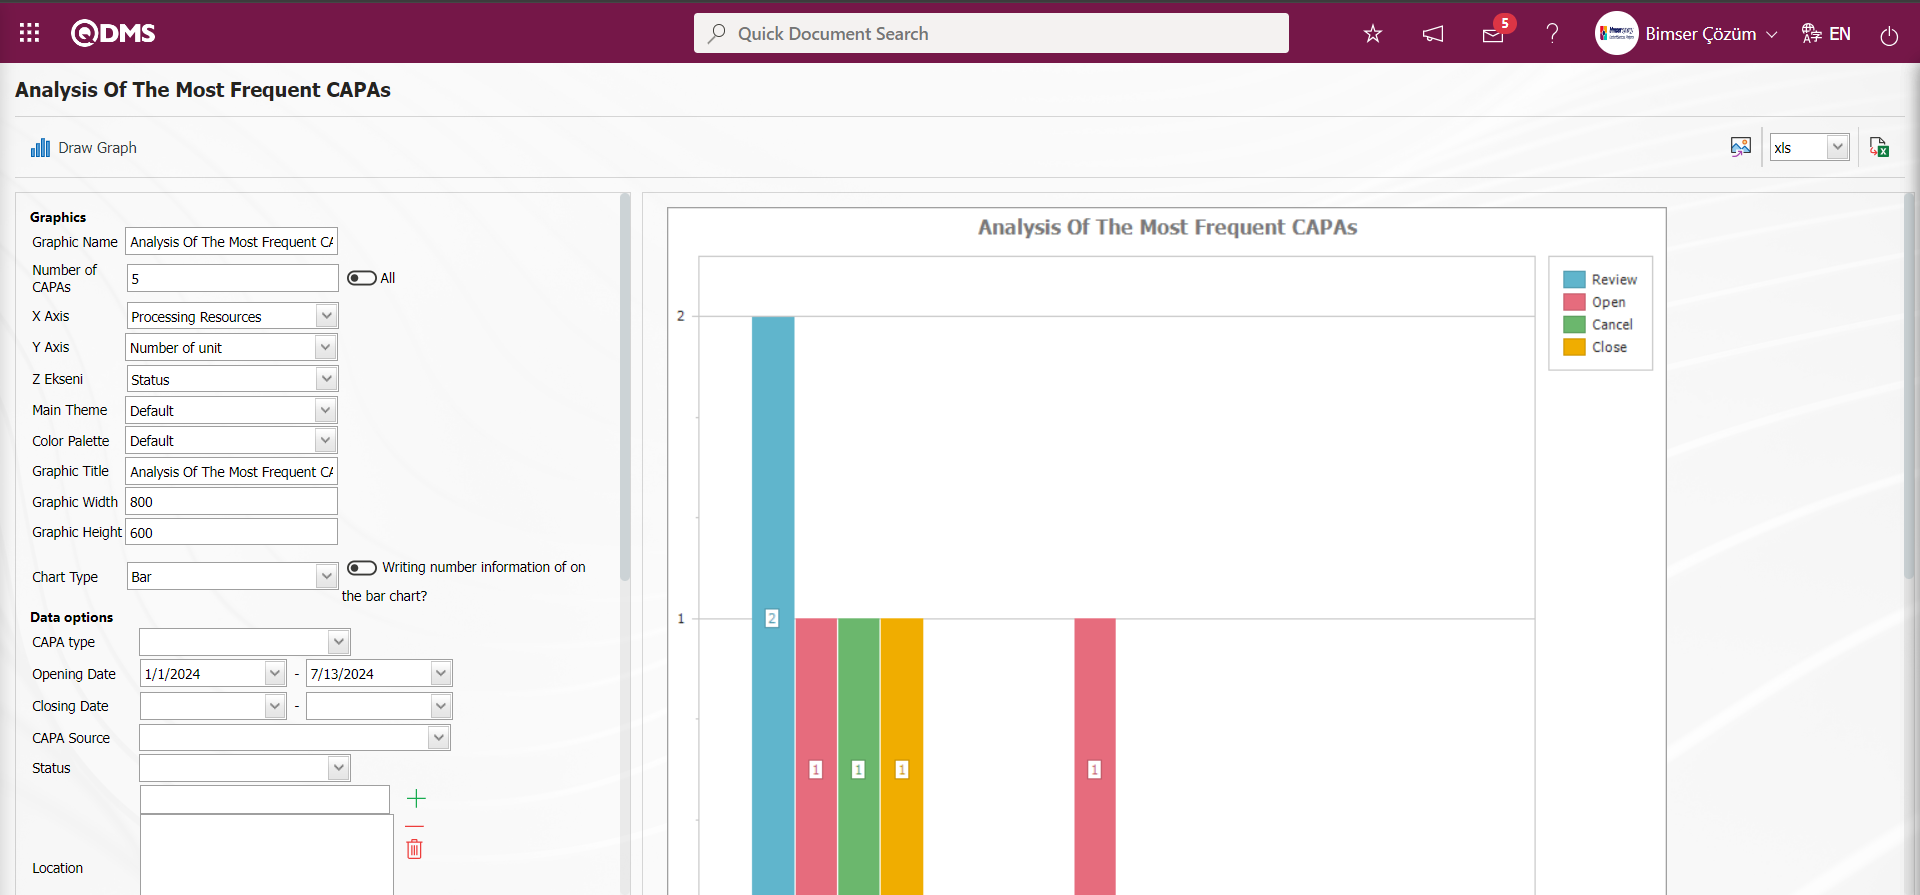
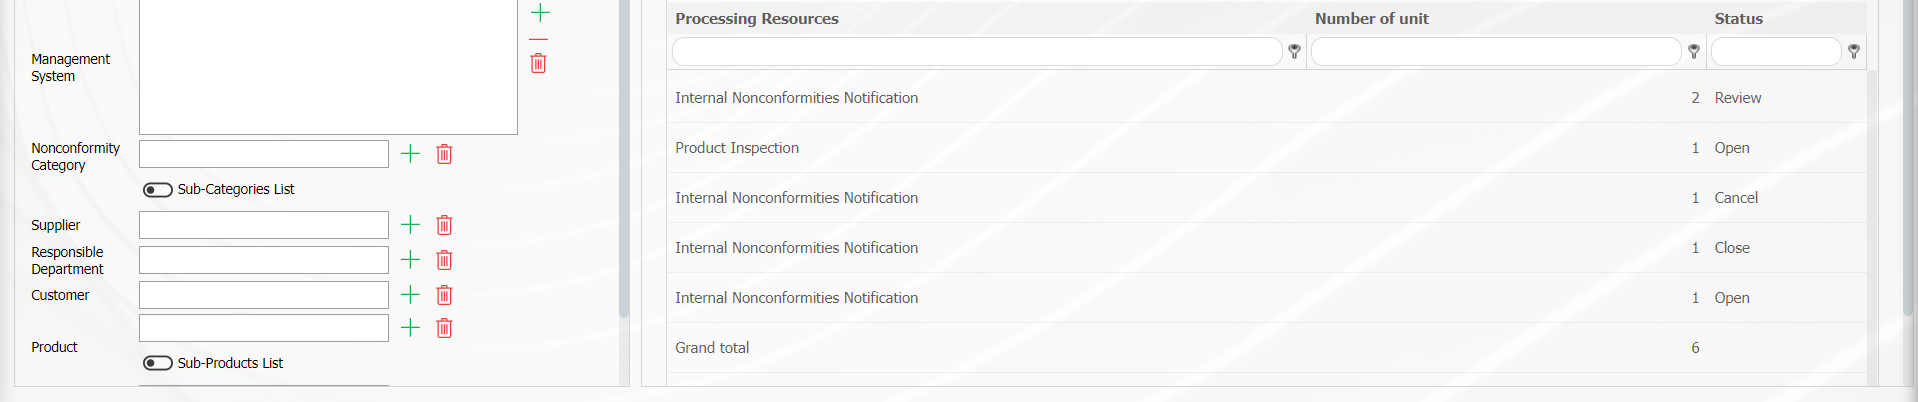
On the Analysis Of The Most Frequent CAPAs screen, click on the (Export to Excel) button to get the Analysis Of The Most Frequent CAPAs in Excel format.
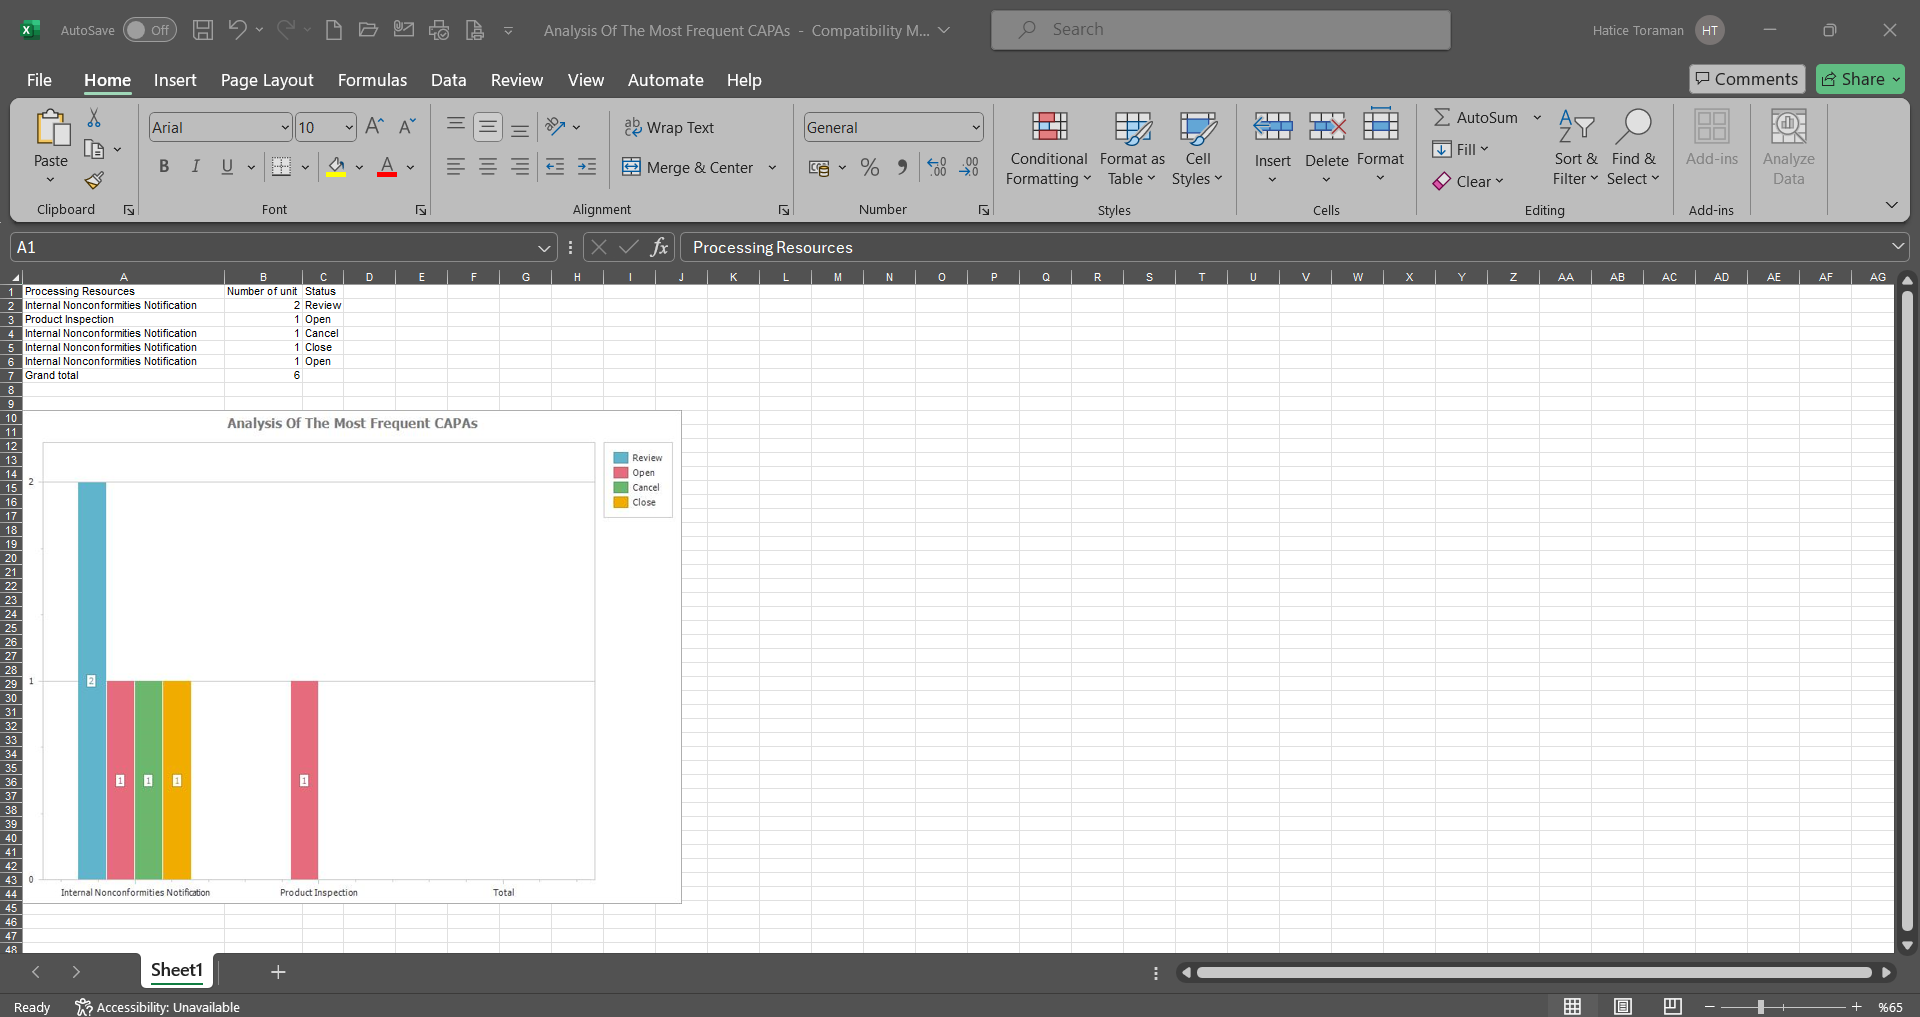
6.2.5.2. CAPA The Timeline Analysis
Menu Name: Integrated Management System/ CAPA / Graphics/ CAPA The Timeline Analysis
It is a report where CAPA records are displayed graphically in time dimension. According to the selected data related to CAPA records, graphs are taken on a monthly basis. According to the value selected in the “X axis” field, a graphical report can be obtained as a pie or bar chart by clicking the button.
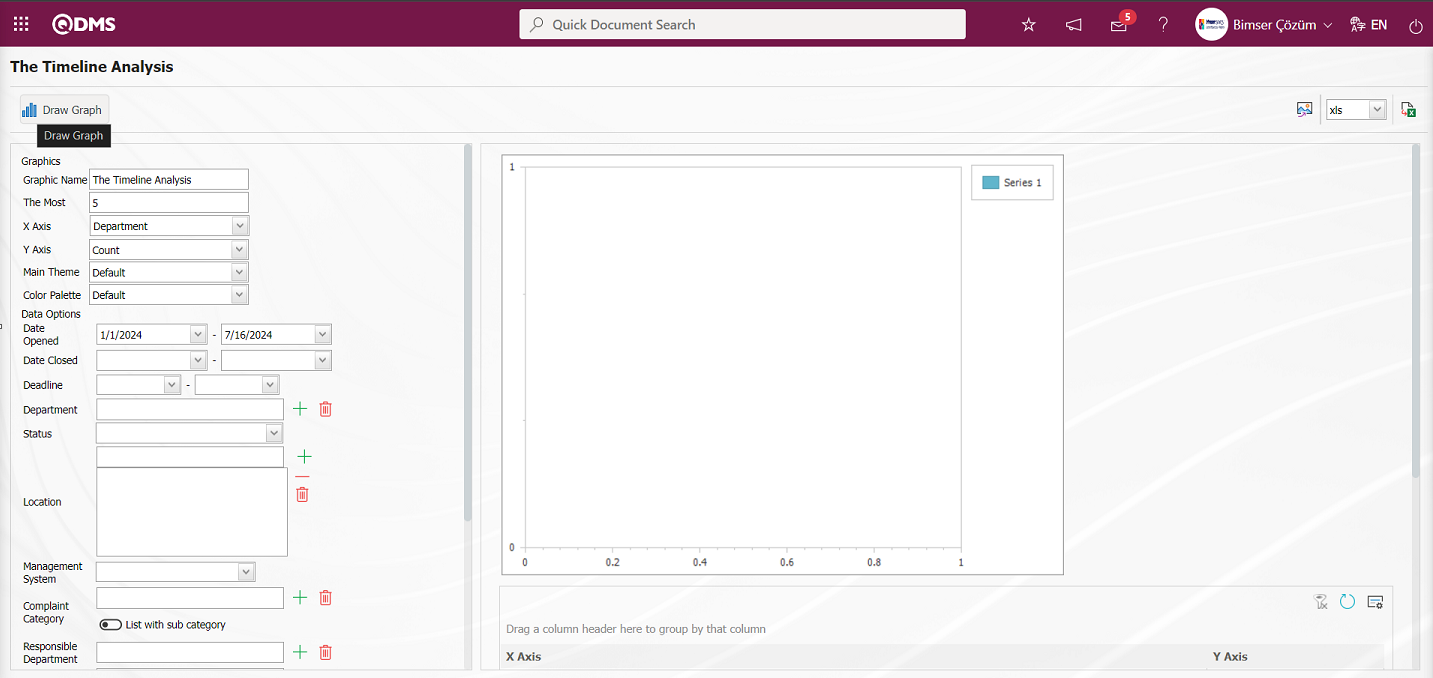
With the help of the buttons on the screen;
: Draws the graph on the screen according to the specified properties.
: Converts the graph to the format type selected from the drop-down menu (png, jpg, bmp, xls, etc.) and exports it to the external environment.
: Data can be exported to Excel.
In The Timeline Analysis report screen, the necessary selections are made in the chart options section. In the Chart Type section, the desired attribute to be placed on the X and Y axis is selected. In the Main Theme, color palette fields, the chart can be customized from the Main theme, color palette features by selecting from the drop-down list options. In the Chart options section, the maximum range desired to be in the chart is determined in the Most field.
After the necessary selections are made in the chart options section on The Timeline Analysis screen, if desired, click the button to create a chart by specifying the Chart title.