System Infrastructure Definitions Module
Information
You can quickly reach the relevant topic with the help of navigation on the right side.
System Infrastructure Definitions Module (v.5.26) User Help Document
Module Version: 5.26
1. INTRODUCTION:
“QDMS SYSTEM INFRASTRUCTURE DEFINITIONS” is the menu where personnel information is defined and the infrastructure required for other modules is set up.
2. PURPOSE:
The purpose of this help manual is to explain the working process of QDMS “System Infrastructure Definitions” Module. Along with the definitions in the System Infrastructure Definitions, it is aimed to implement parametric adjustments and other technical infrastructure work.
3. RESPONSIBILITIES:
QDMS System Administrators
4. ABBREVIATIONS:
QDMS Quality Document Management System “Quality Document Management System”
QDMS Introduction
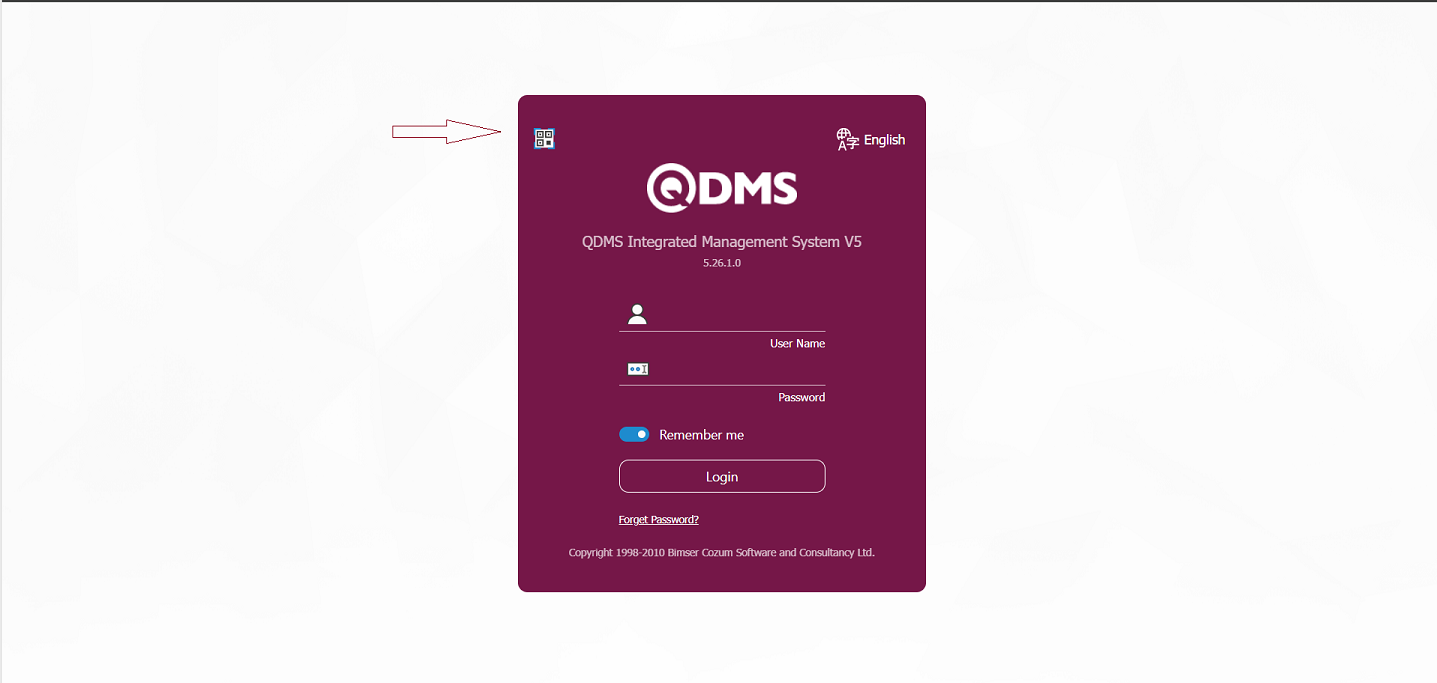
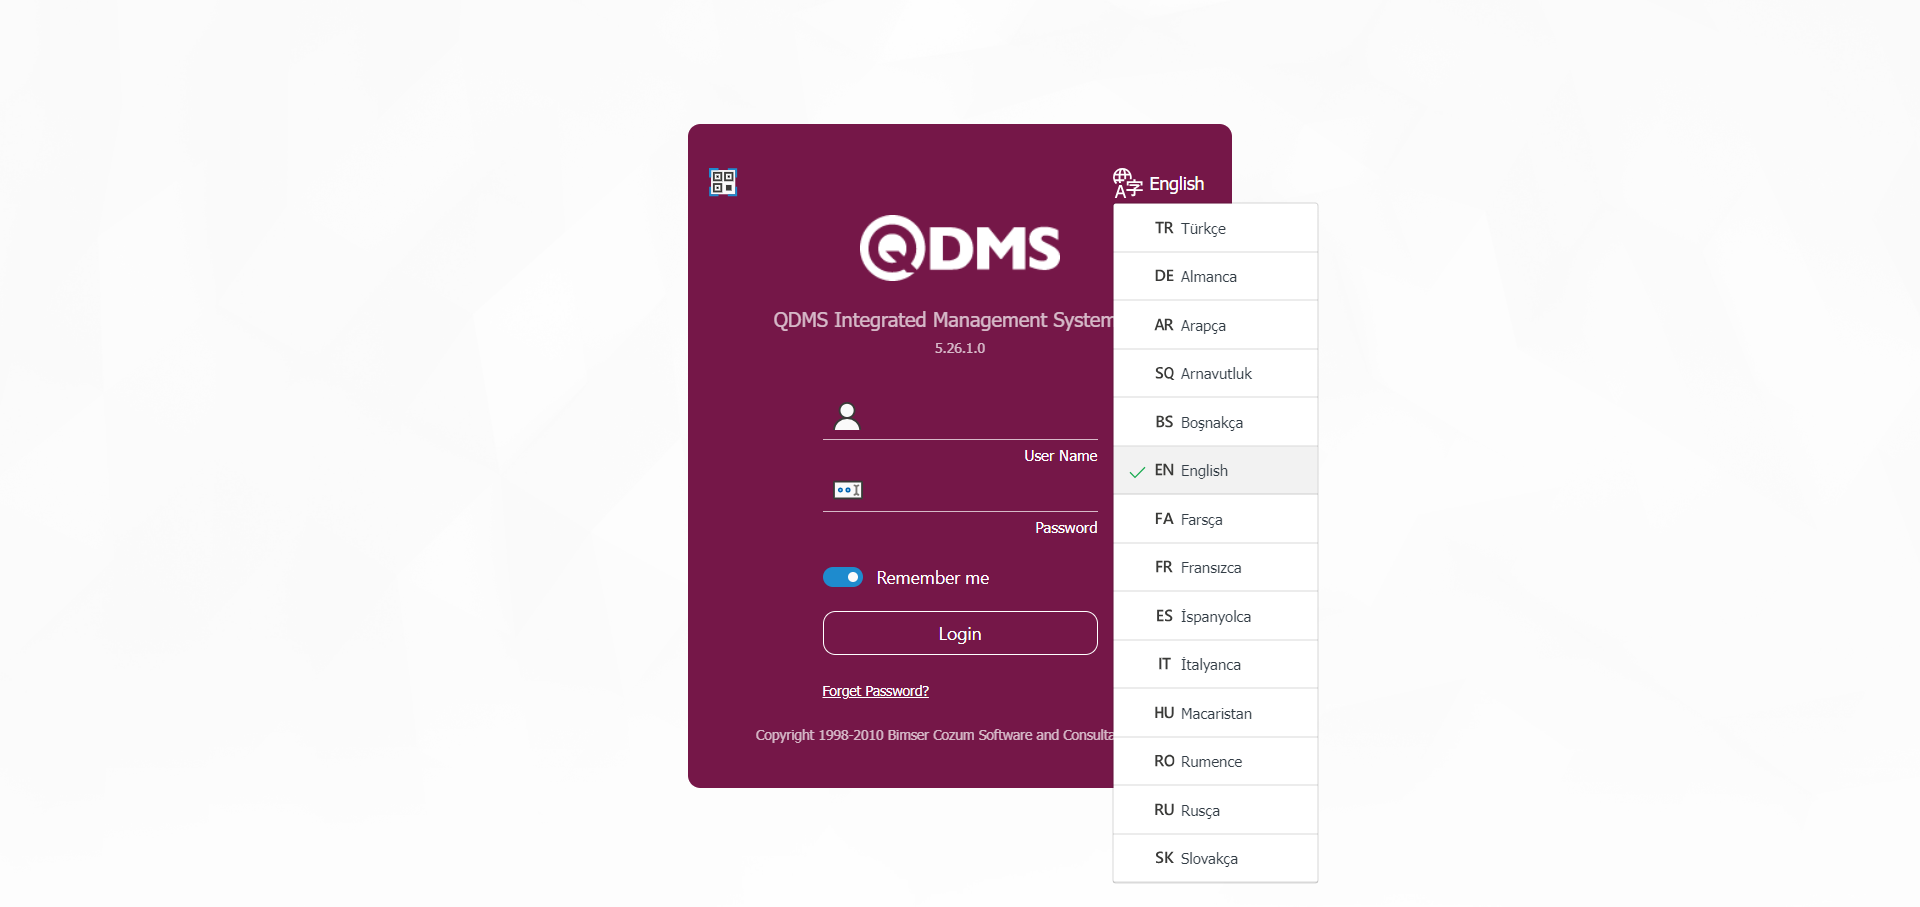
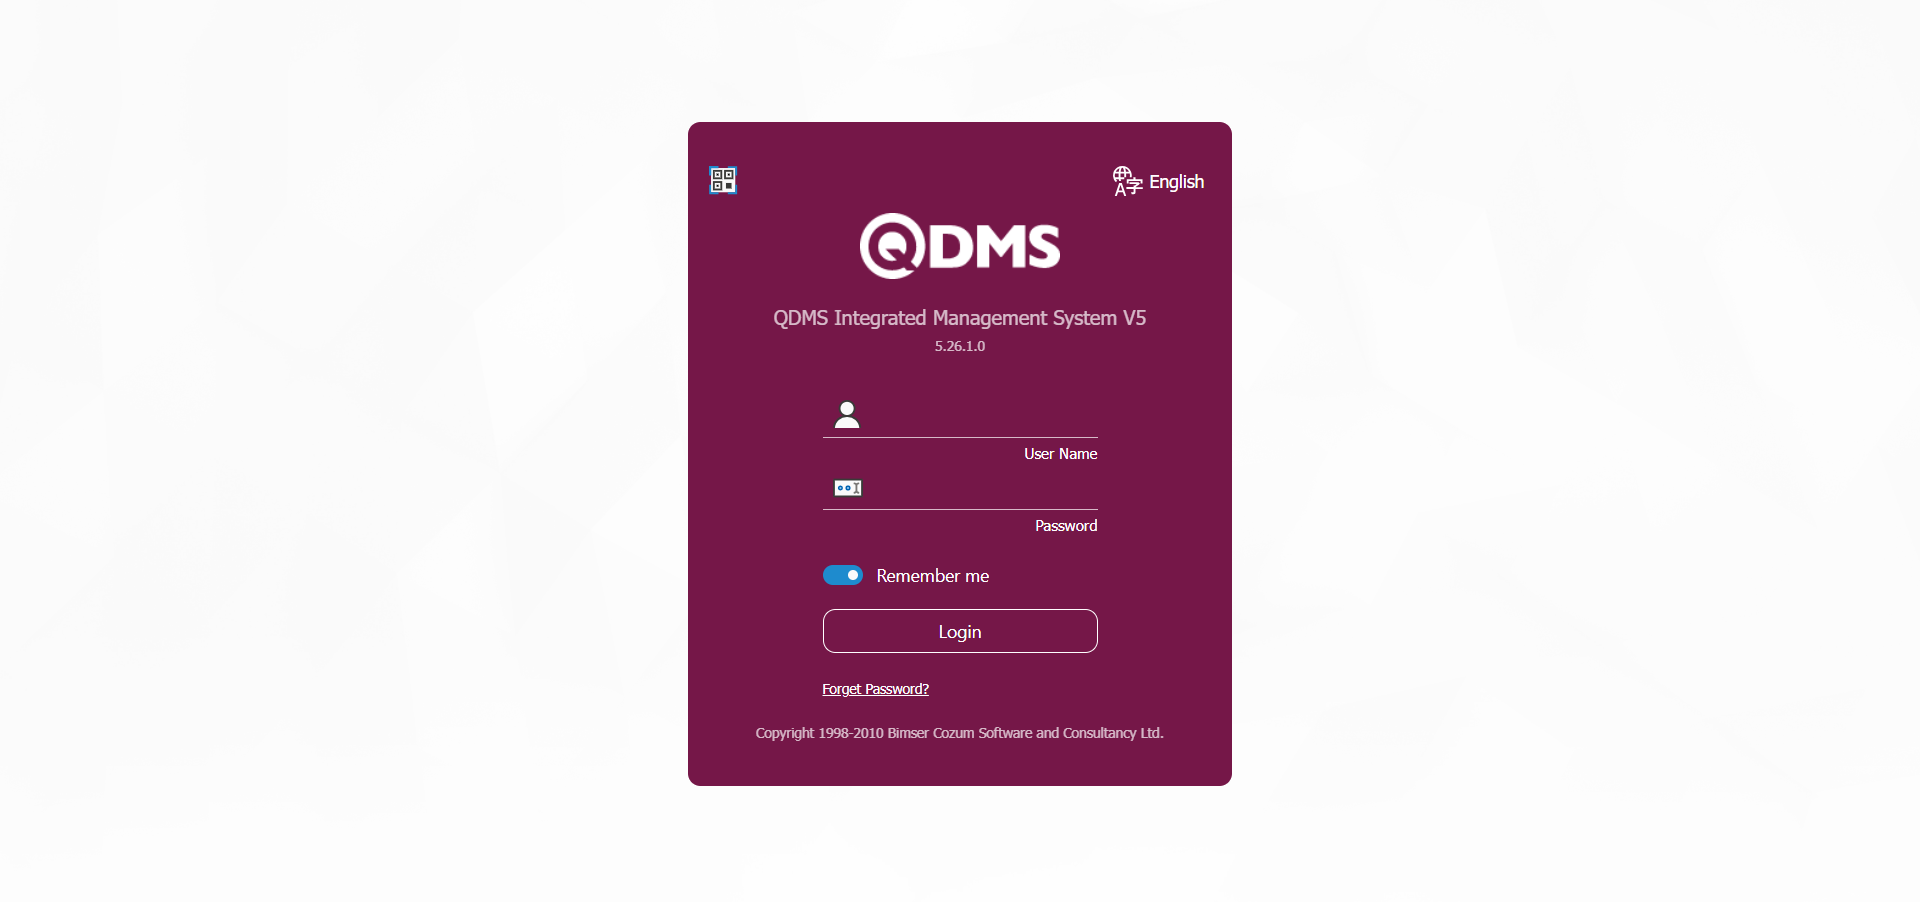
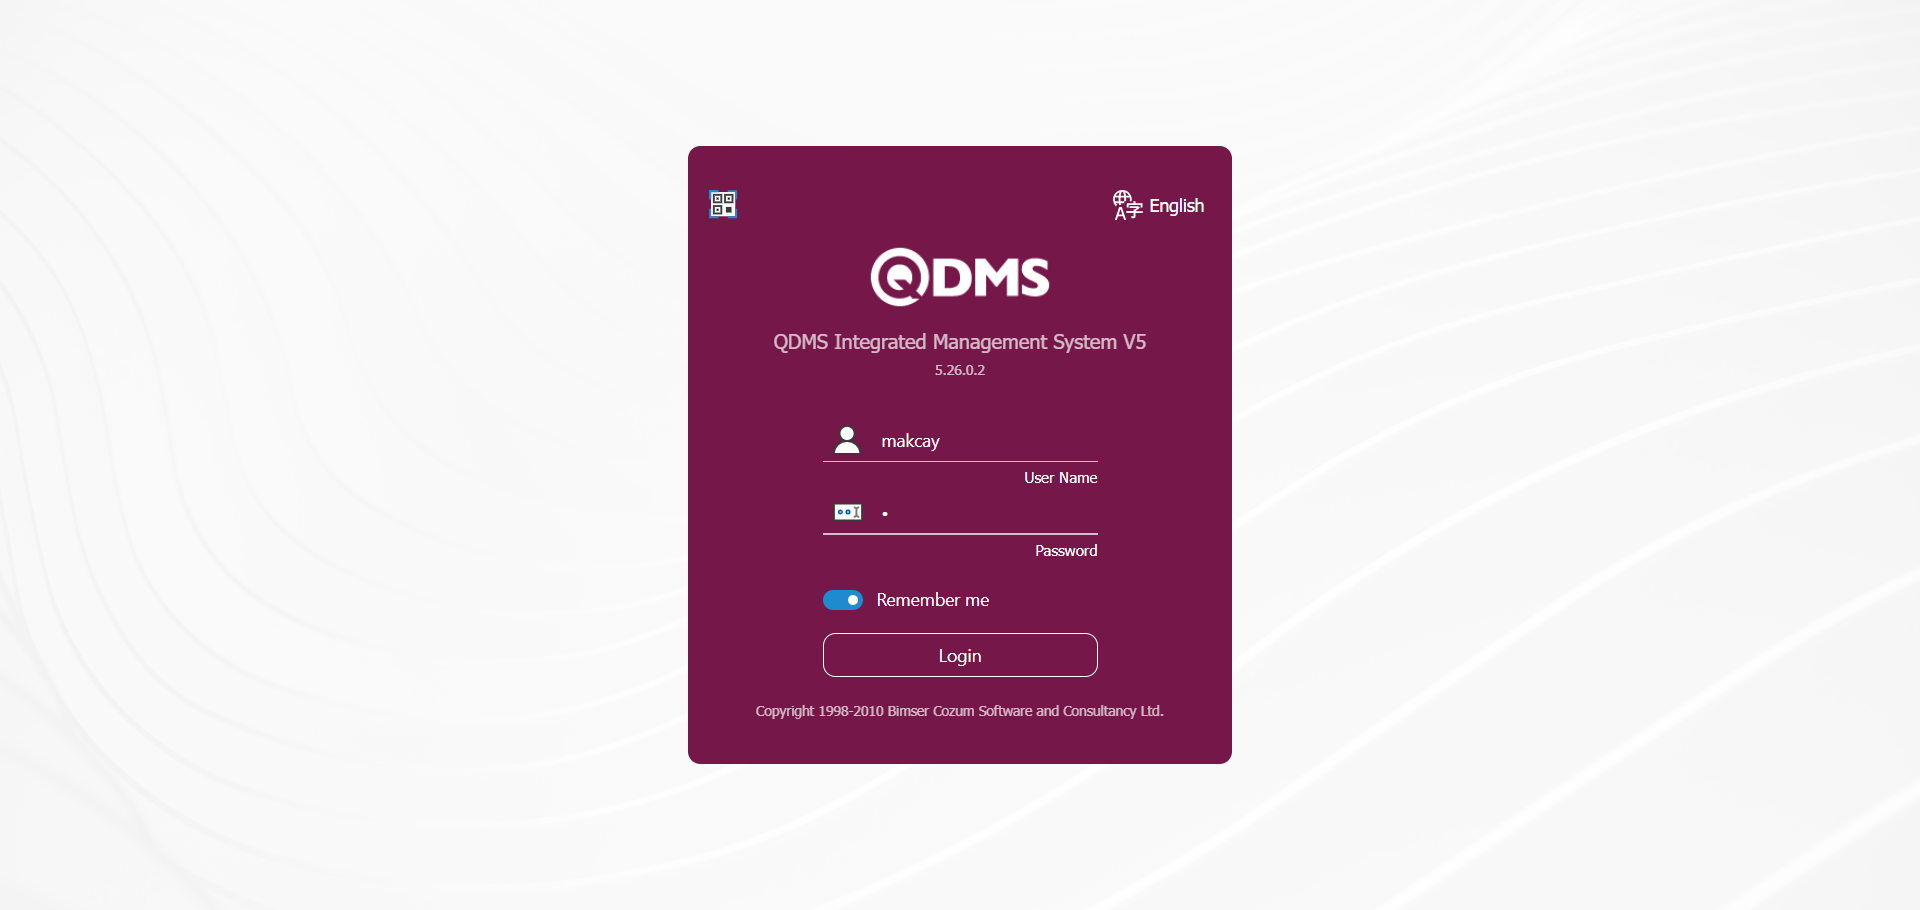
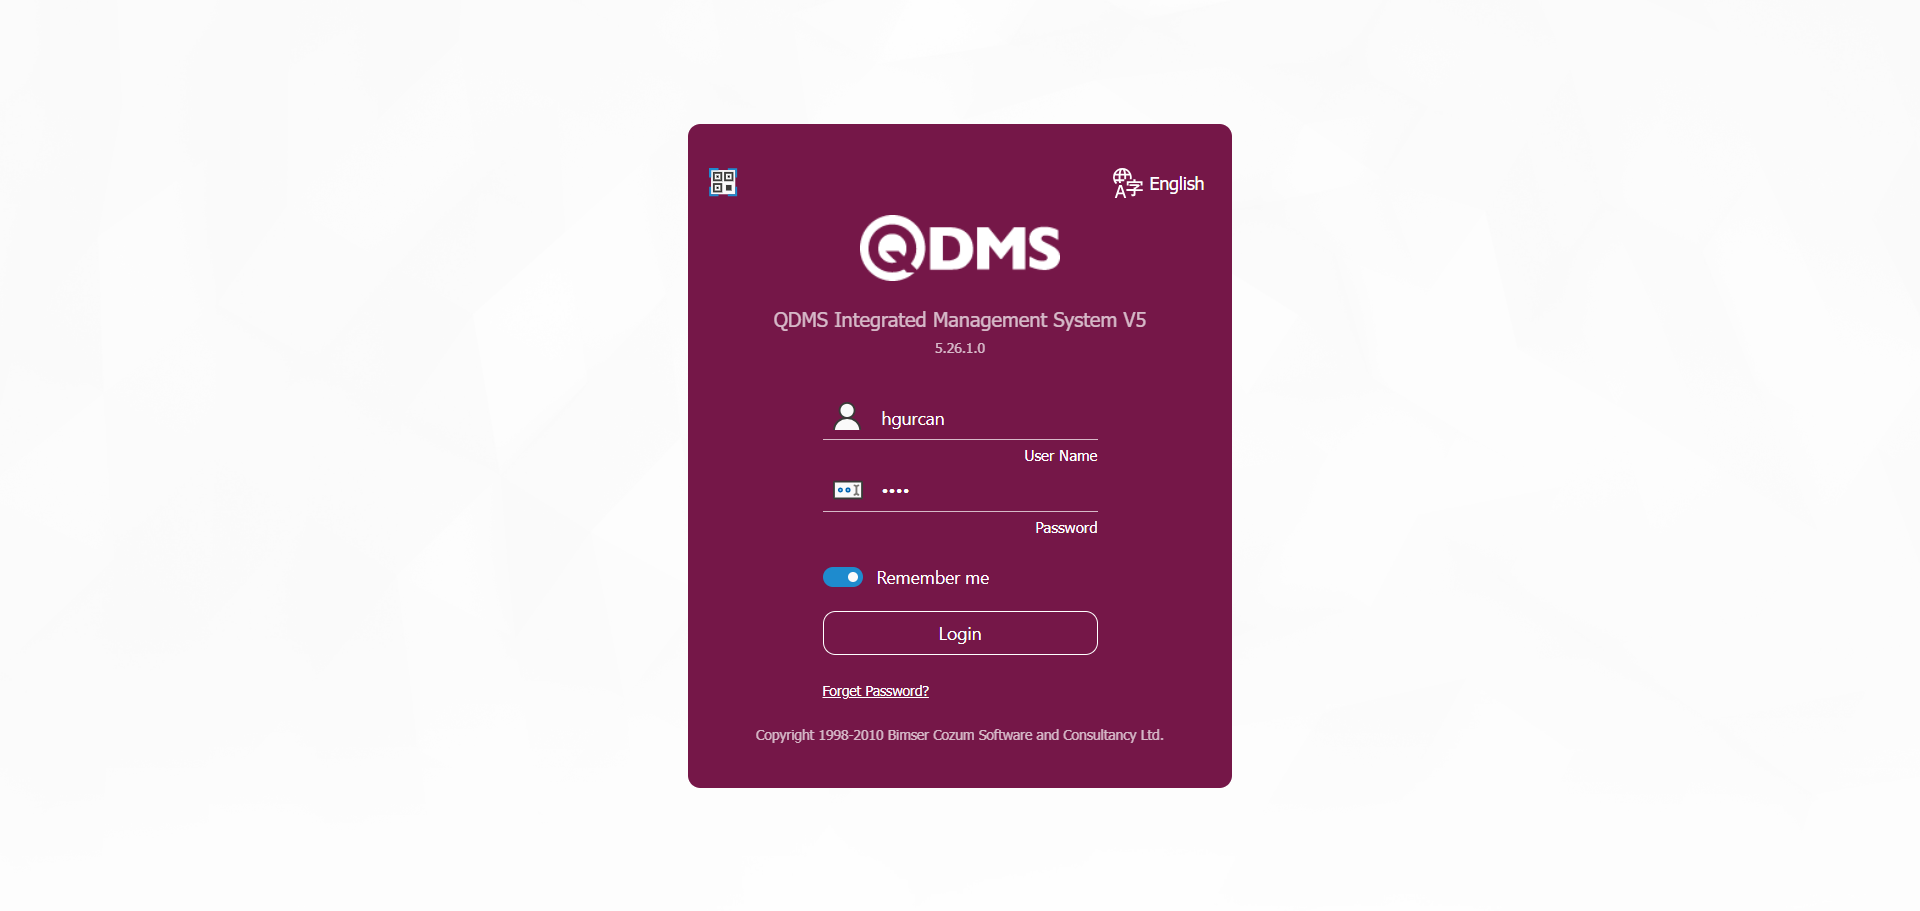
Qdms version information is displayed on the main login screen and the system is logged in with the username and password information. At the first login to the system, personnel use their own registration numbers as username and password. If the personnel want to log in to the system with the username and password they use on their computers, the “Active Directory” feature is activated. In order to activate this feature, Bimser Technical Team should be contacted. On the Qdms main login screen, switching between languages and mobile application is also done. The version information of Qdms in the screenshot is seen as 5.26.0.0.

For the transition to the Mobile Application, the transition is made by clicking the  button on the main login screen.
On the Barcode for Mobile Application screen, the user scans the barcode with the barcode reader on their phone.
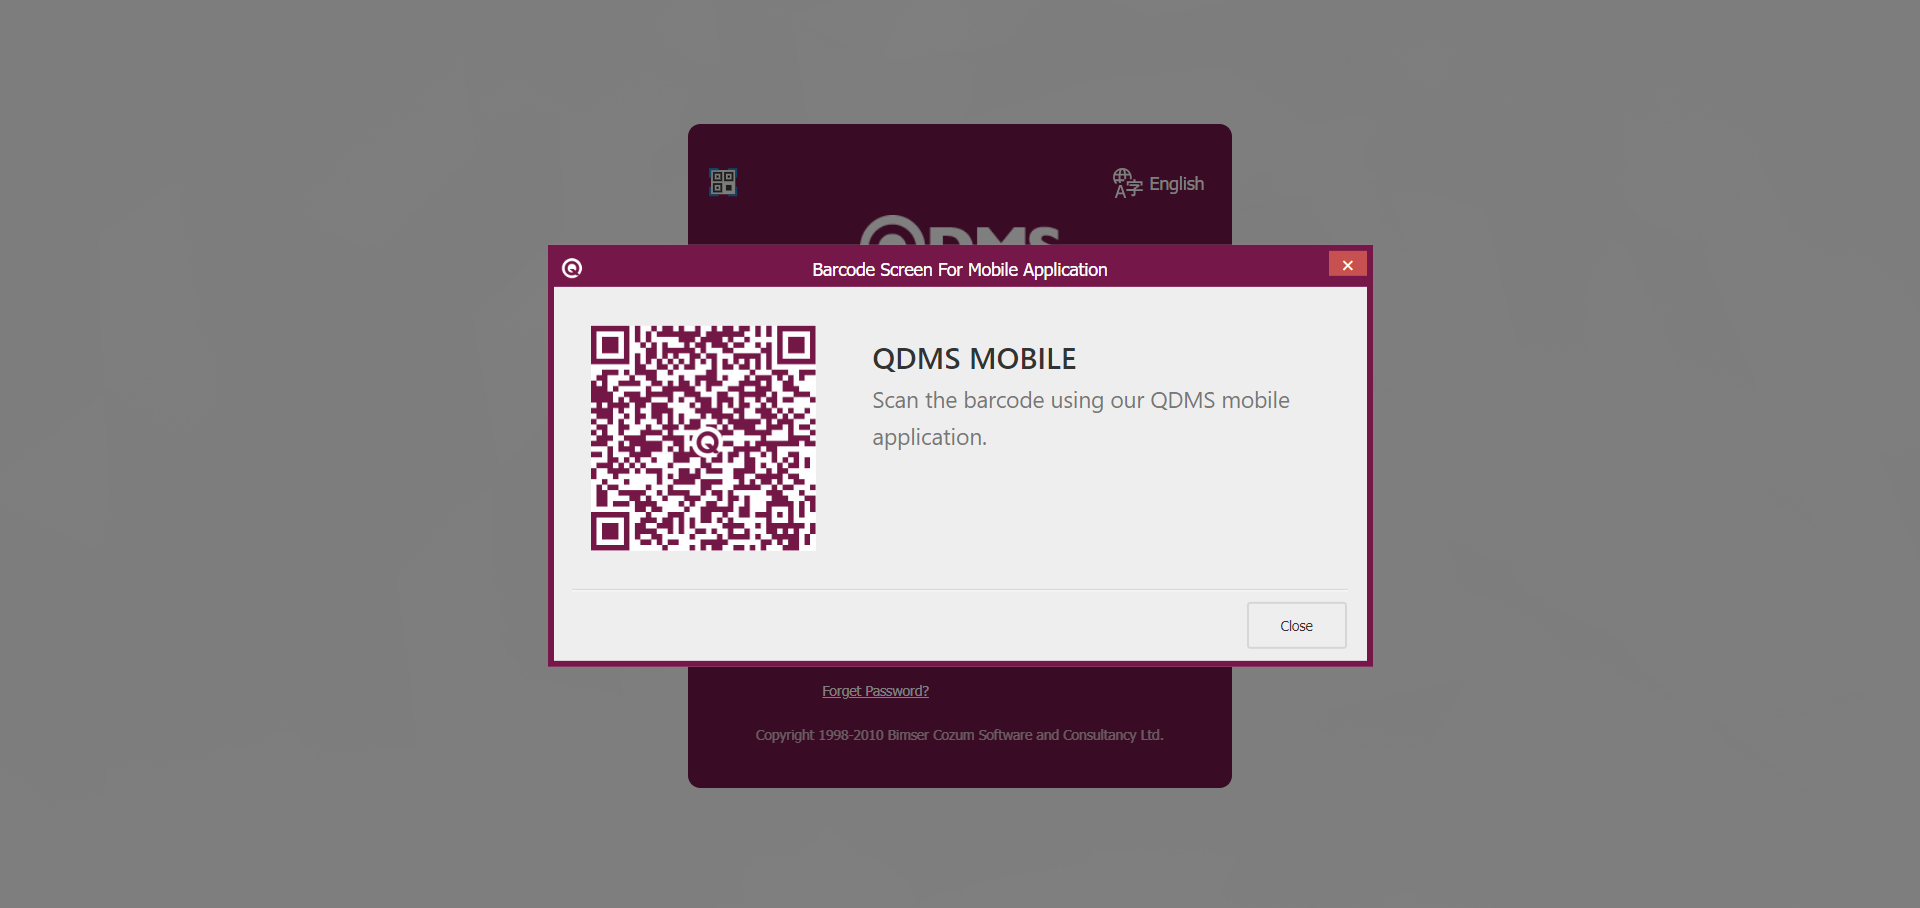
On the Qdms Main login screen, click the  button to switch to the mobile application. On the Settings screen
  button is clicked. On the Qdms main login screen, the barcode is scanned with the QR code scan field on the Barcode for Mobile Application screen. After the server selection process on the Settings screen, the link information of the mobile application will be displayed and the mobile application transition is made by clicking the Save button.
Since there is a multi-language support feature in the Qdms system, the Qdms system structure is provided to run the Qdms system in different languages.Qdms system is installed to run the system in English language. In order to run the Qdms system in other languages, it is necessary to get help from Bimser Technical Support Team to install the multi-language support feature. Click the  button on the main login screen for switching between languages.
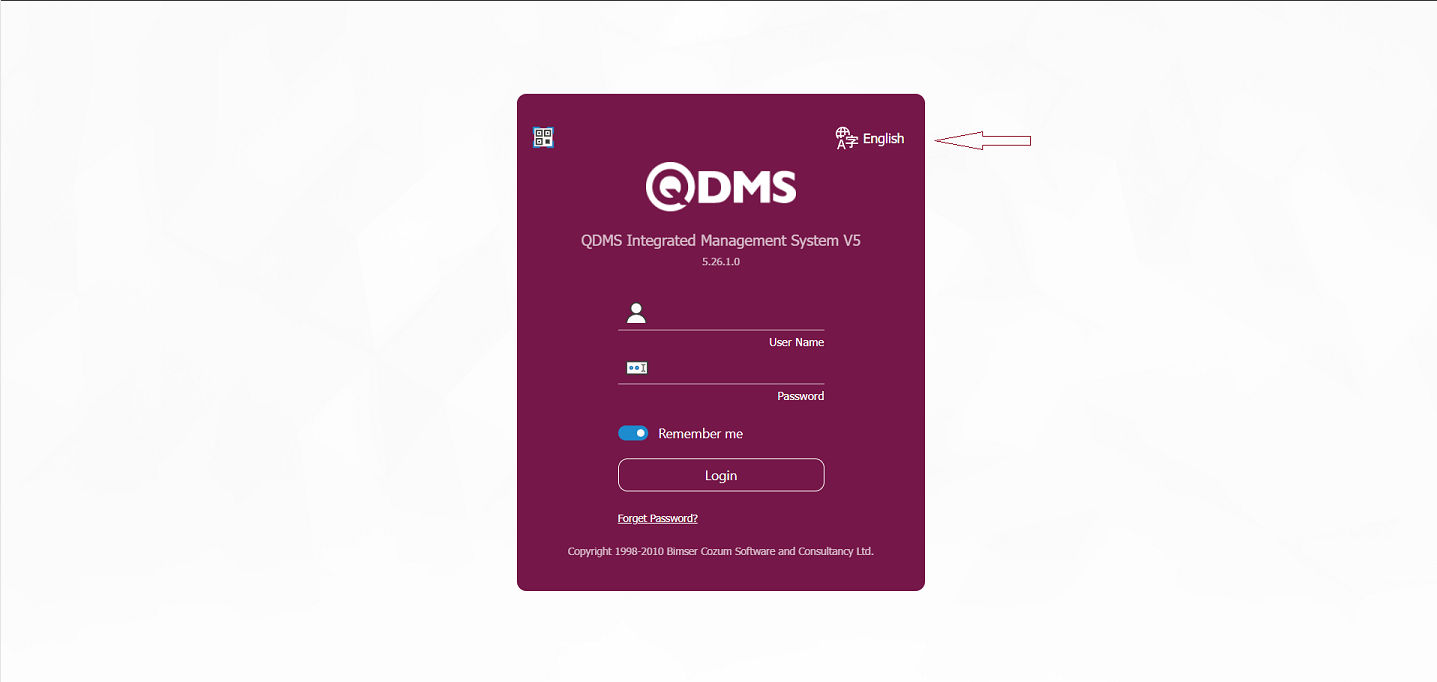
On the Input Settings screen, in the Language field, select English language option in the Language list. The Qdms system is run in English. When the main login screen language option is run in English, the English language equivalents of the fields are displayed.
On the Qdms Pending Jobs page, the relevant fields are displayed in English as in the screenshot.
Within Qdms, the language option of all modules is run in English. As in the document management module, when the system is run in English in other modules, the English language equivalents of all menus are displayed.
QDMS password reminder;
With the “Forgot password” option, the user can get his/her password with his/her registration number, e-mail address and sms.
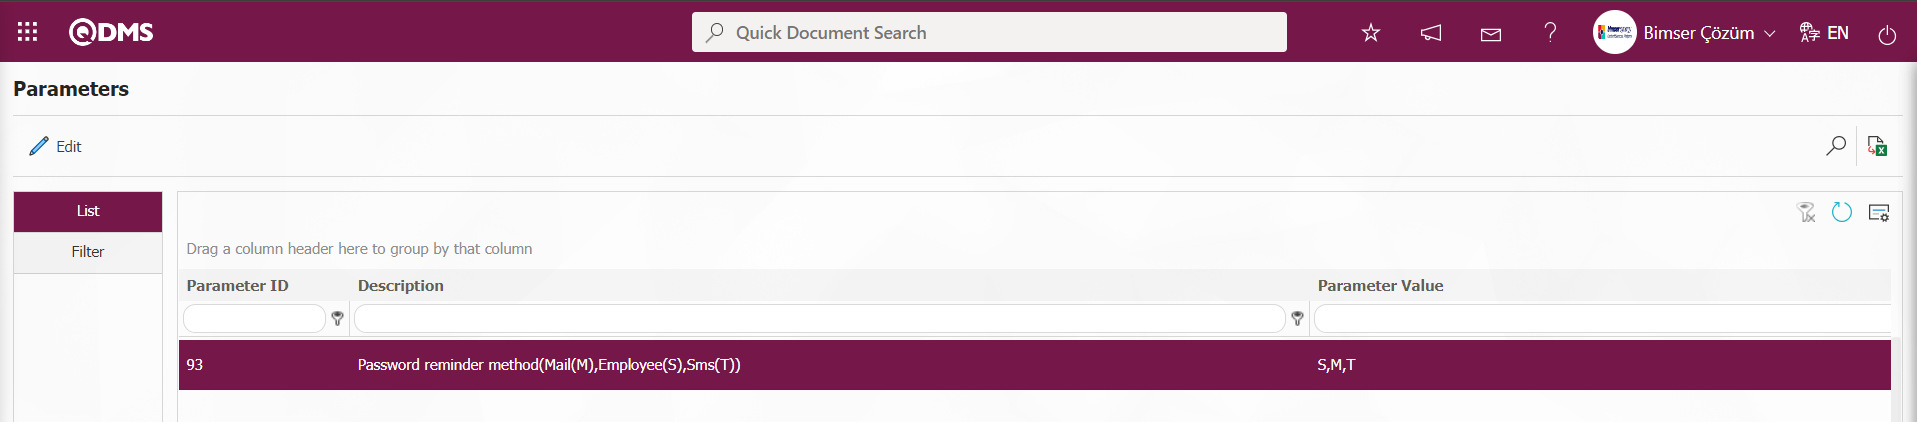
The password reminder method is determined according to the value entered according to the parameter value 93 “Password reminder method(Mail(M),Employee(S),Sms(T))” in the System Infrastructure Definitions parameters. It is the parameter where the reminder method of forgotten passwords is determined. According to the parameter value on the QDMS password reminder screen that opens when the “forgot password” button is clicked on the login screen; Parameter value :M if it is desired to make inquiries only by e-mail, Parameter value :S for inquiries only according to the registration number, Parameter value :T for inquiries according to the sms number Parameter value M, S, T values should be written for all three inquiries.
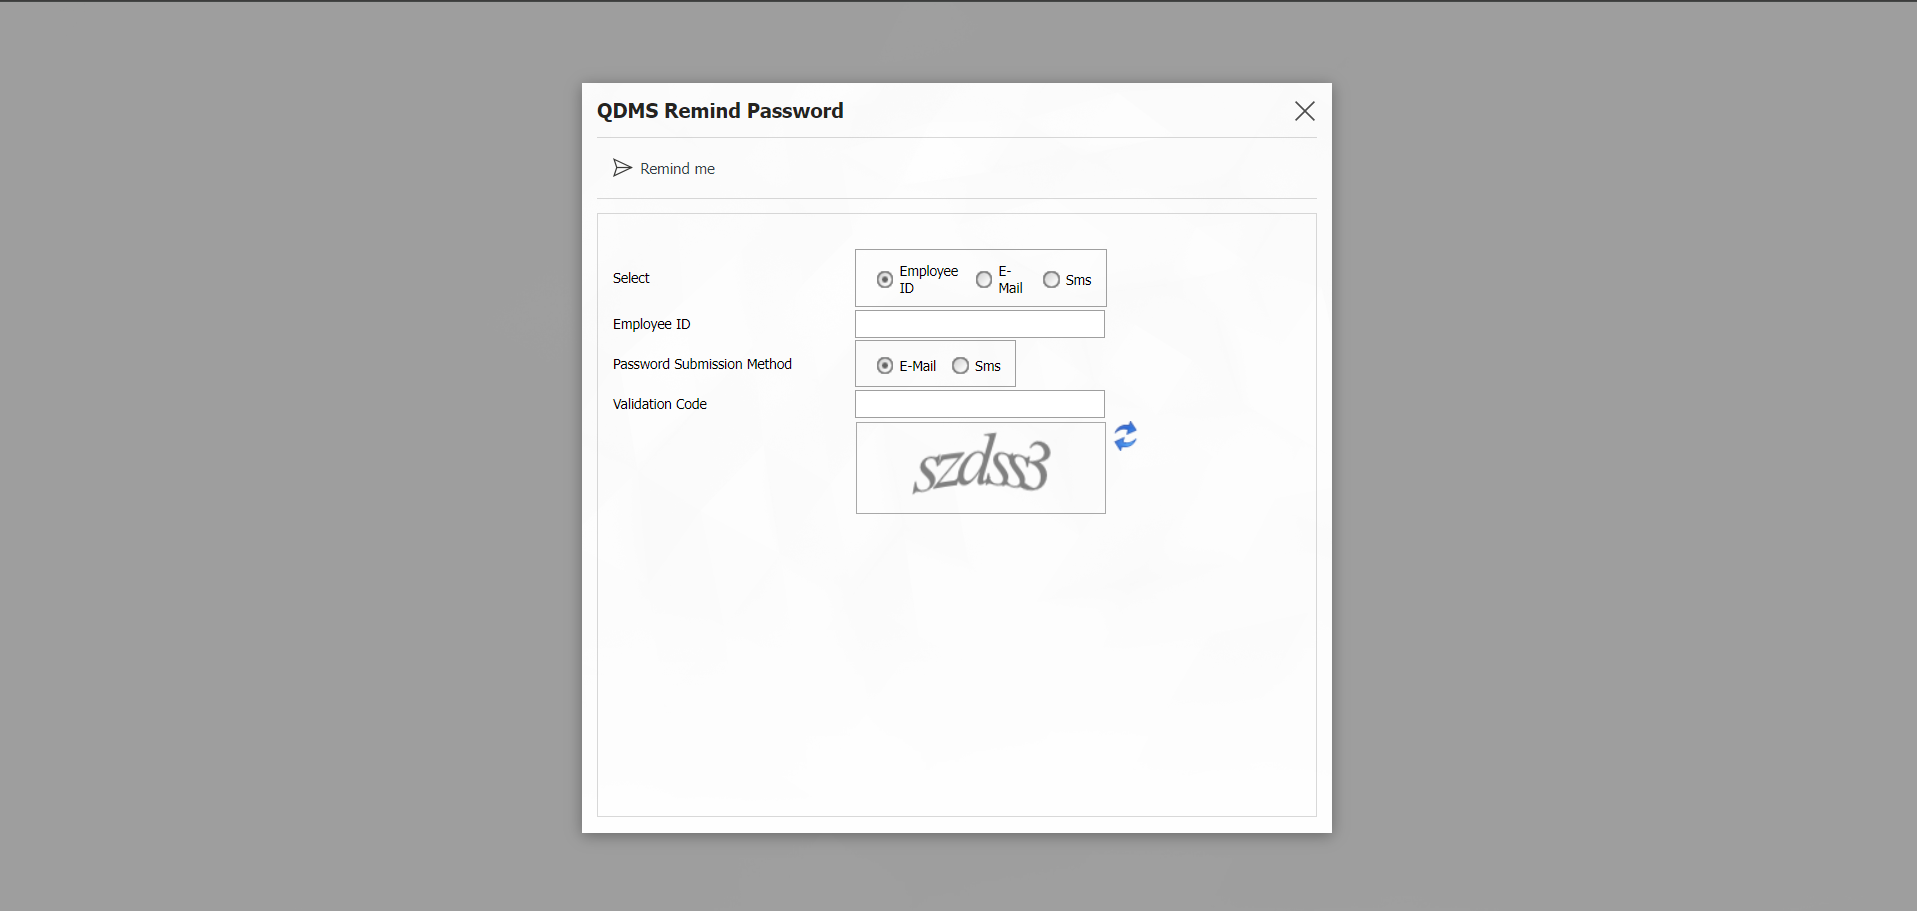
Click on the “Forgot Password” field on the main login screen. In the Qdms Password Reminder screen, a selection is made in the options depending on the parameter. If Registration No is selected in the selection field, the registration number information is written in the Registration No field of the personnel and the password information is sent to the e-mail address defined in the Personnel Definition screen by selecting the E-mail option in the password sending method field and clicking the  button.
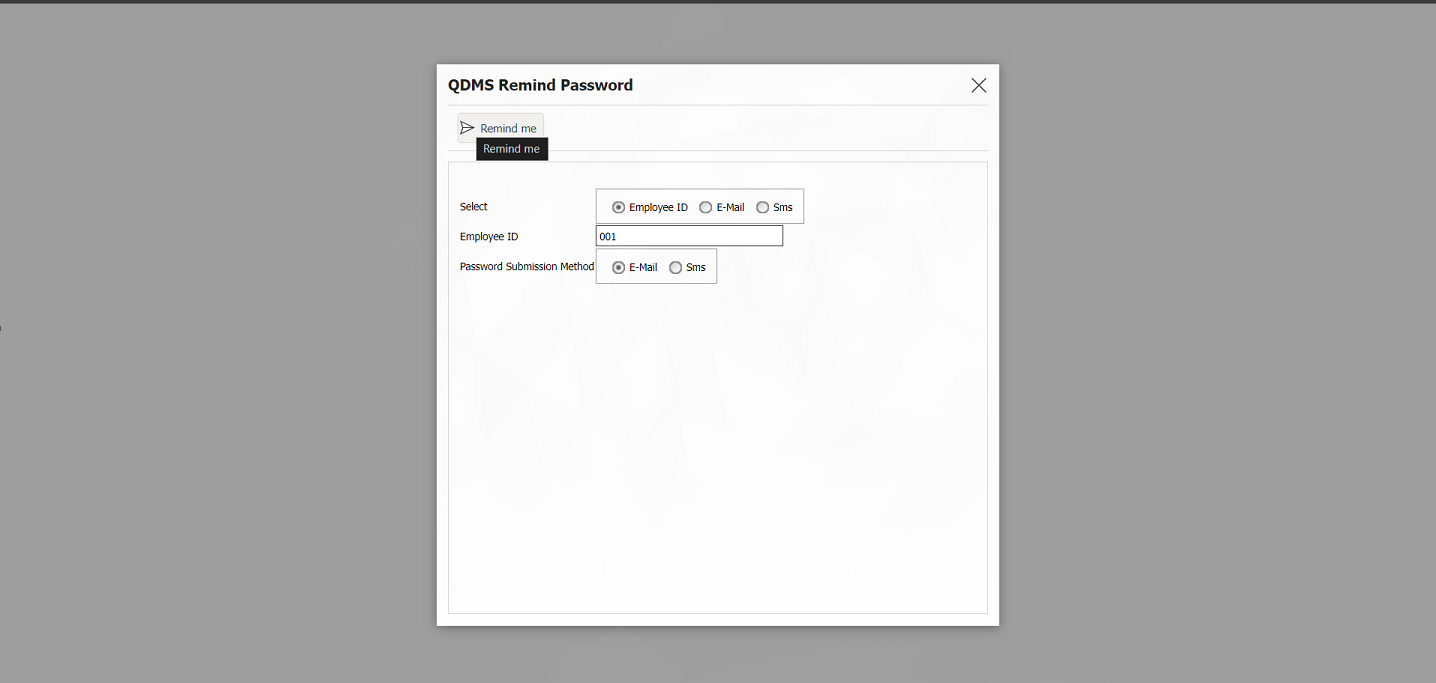
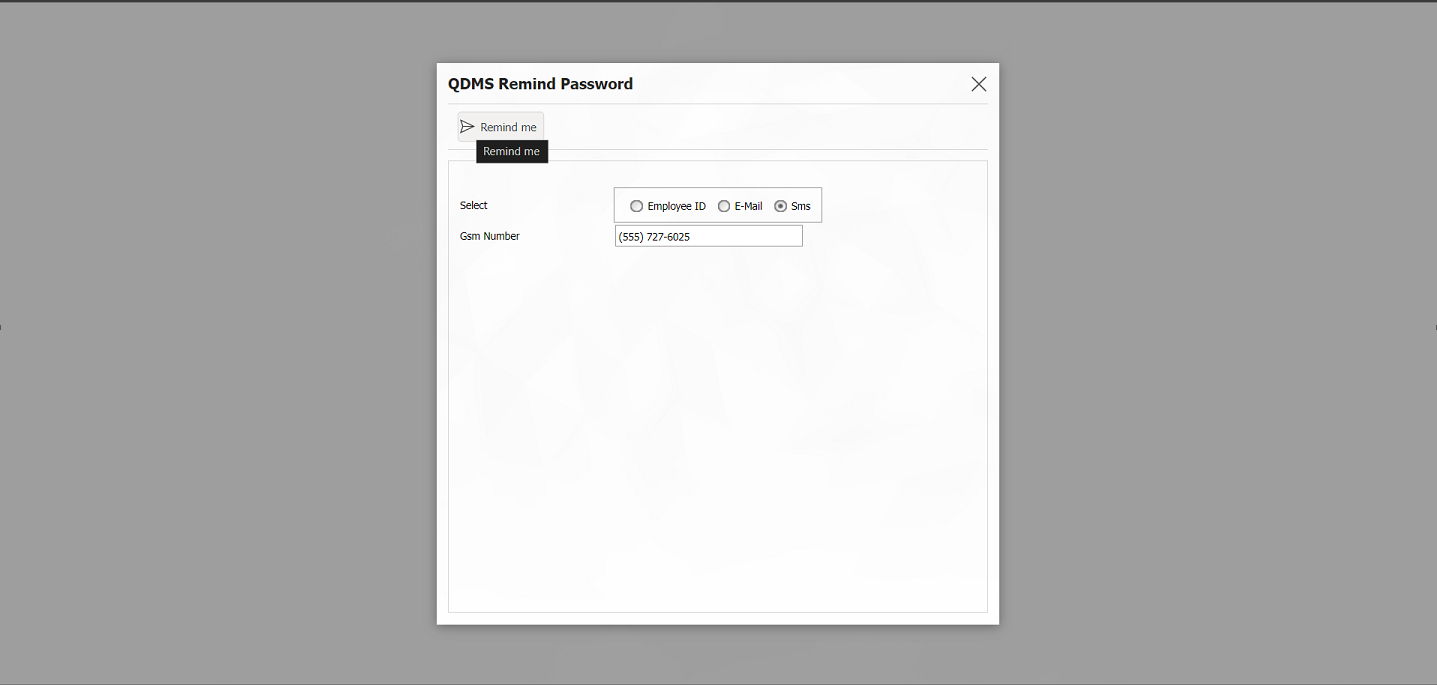
In the same way, the password information is sent to the mobile number defined in the Personnel Identification screen by selecting SMS as the password sending method and clicking the button.
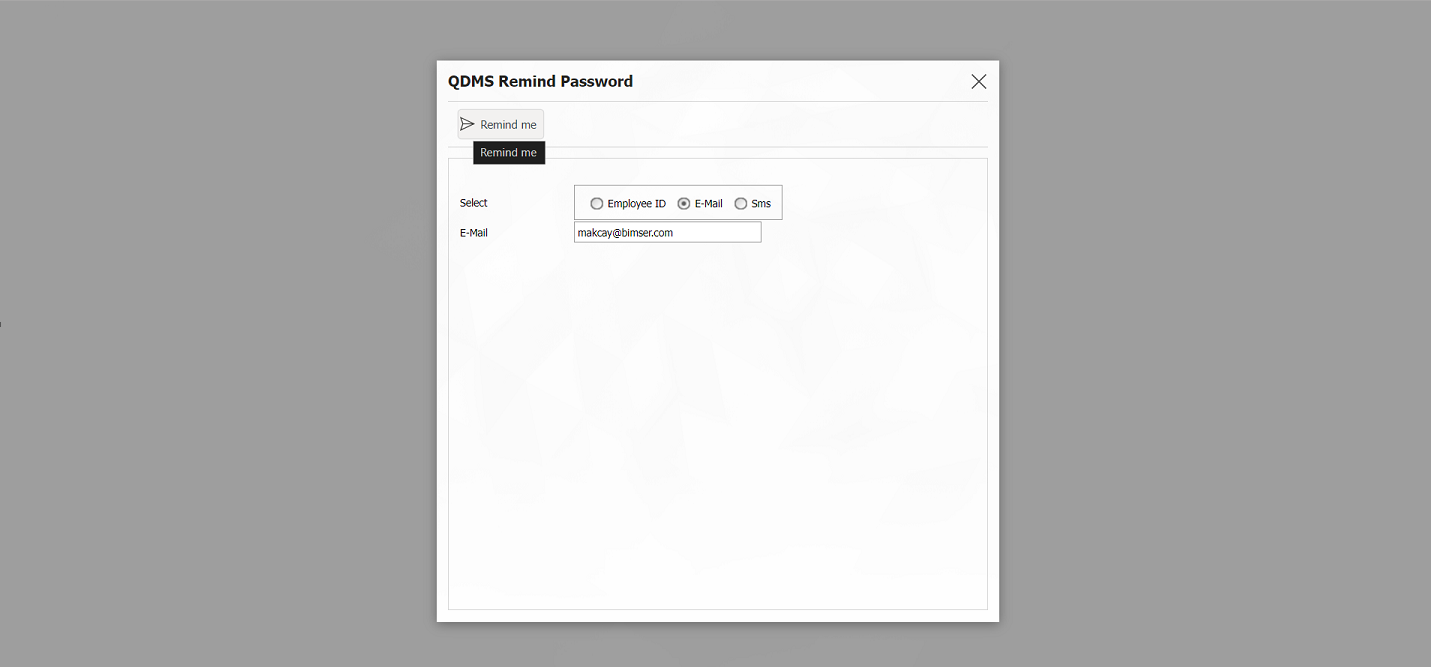
 When E-mail is selected in the selection process on the QDMS Remind Password screen, the E-mail field is displayed and the e-mail address of the personnel is written and the password information is sent to the e-mail address by clicking the button.
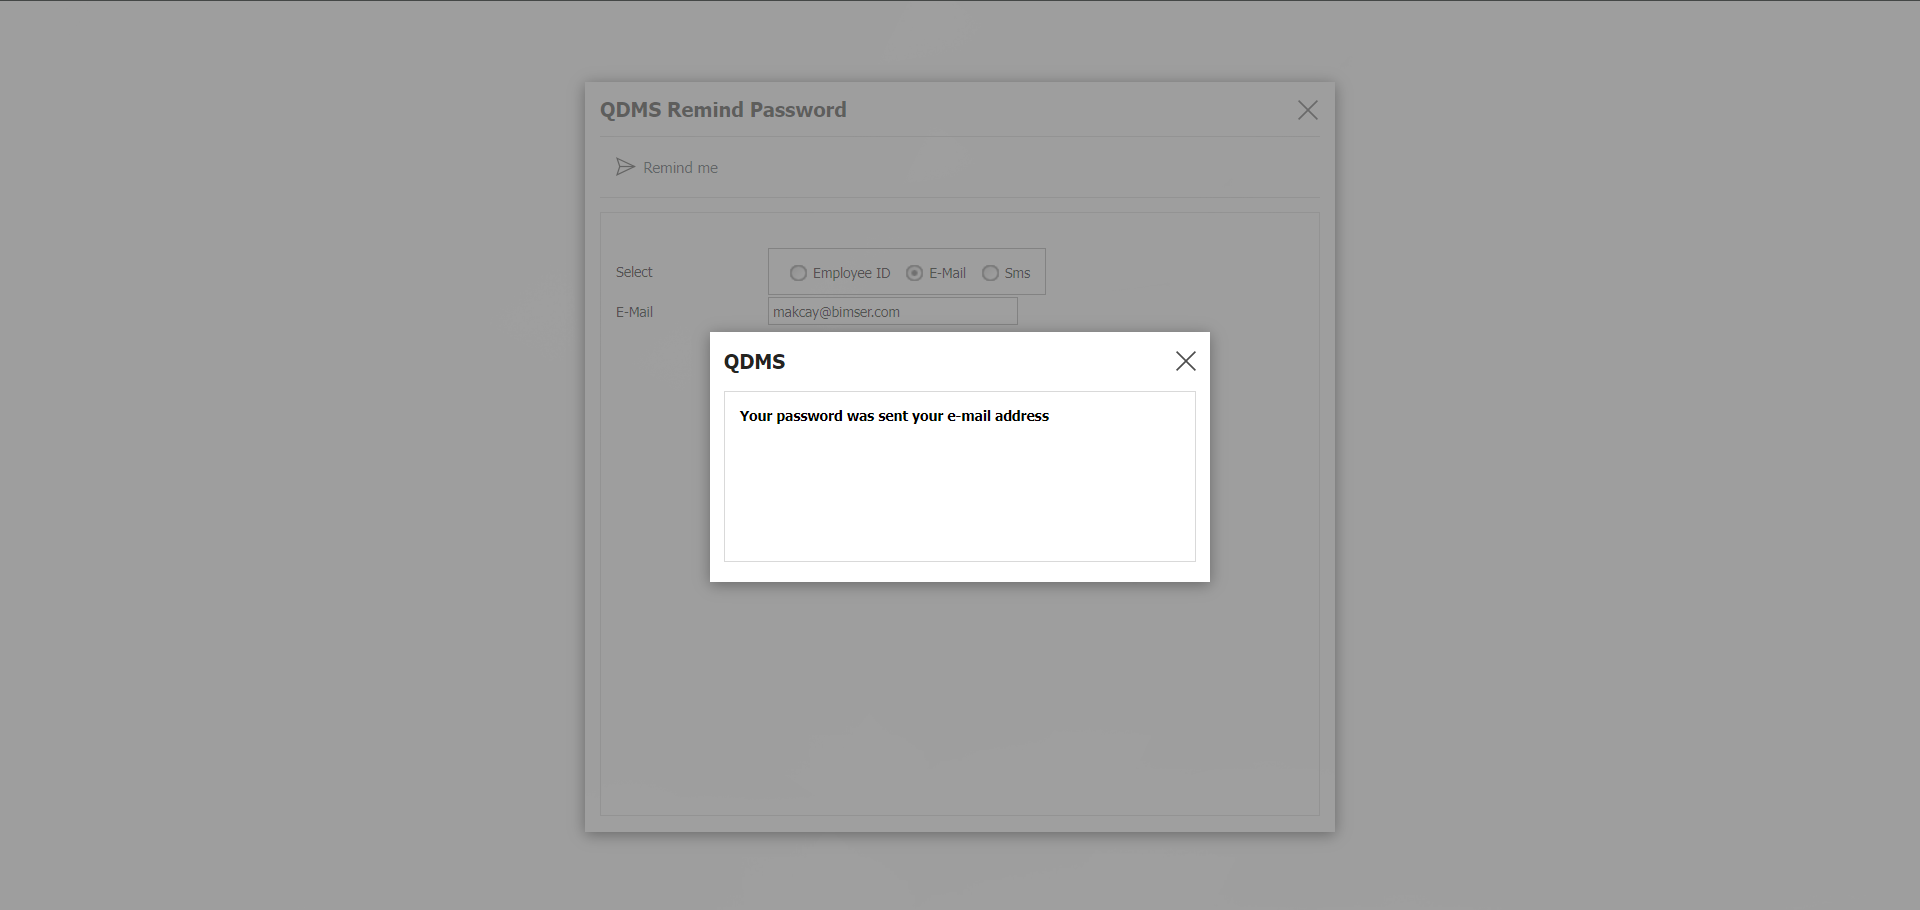
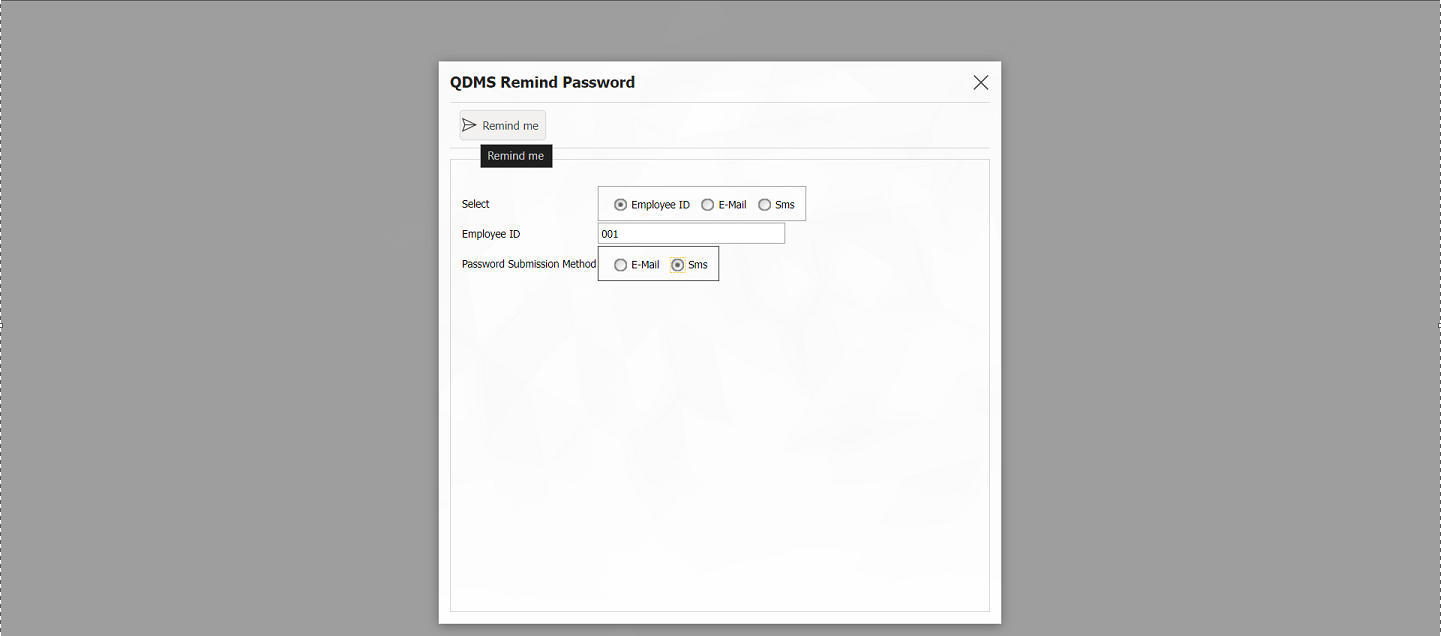
When Sms is selected in the selection process on the QDMS Remind Password screen, the Sms field is displayed and the password information is sent to the e-mail address by typing the mobile number information of the personnel and clicking the button.

In order to perform security code verification on the Qdms Main login screen, the parameter value of the parameter 248 “Use security code verification on Remind Password page?” in the System Infrastructure Definitions parameters is selected as "Yes and the parameter is activated.

After parameter 248 is activated, the Security code field is also displayed for the options of the selection field in the Qdms Password Reminder pop-up. Security code verification is provided on the password reminder page.
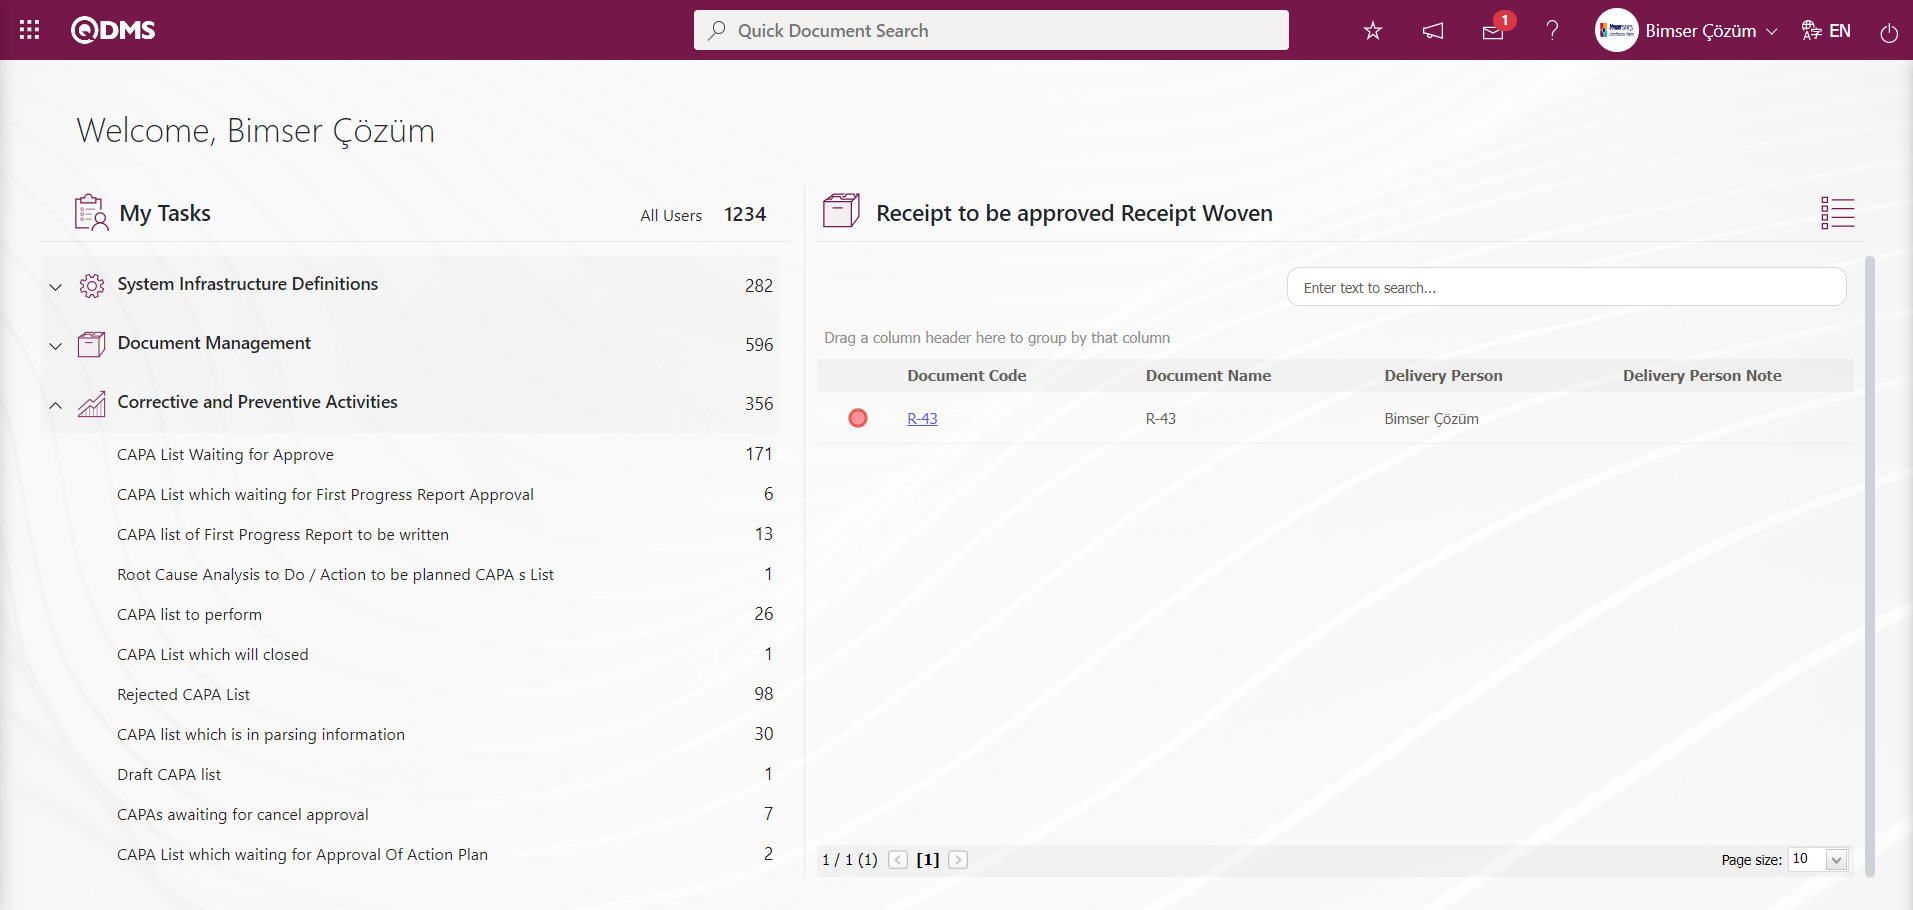
Pending Jobs;
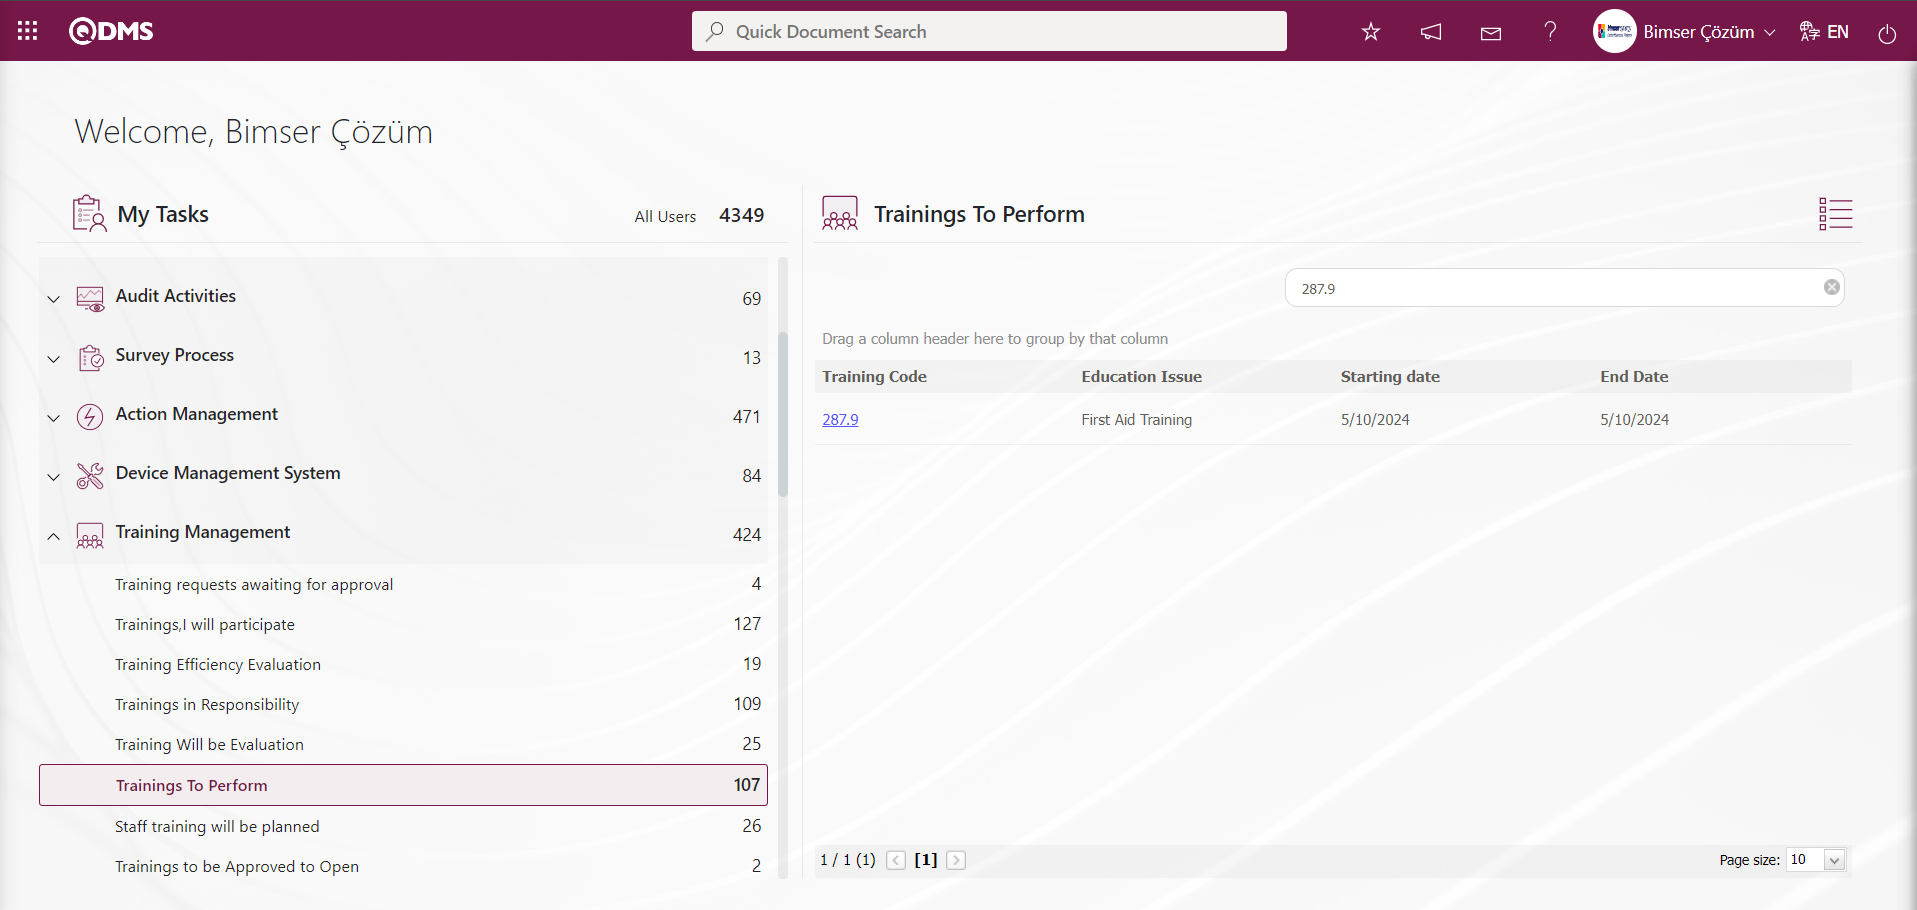
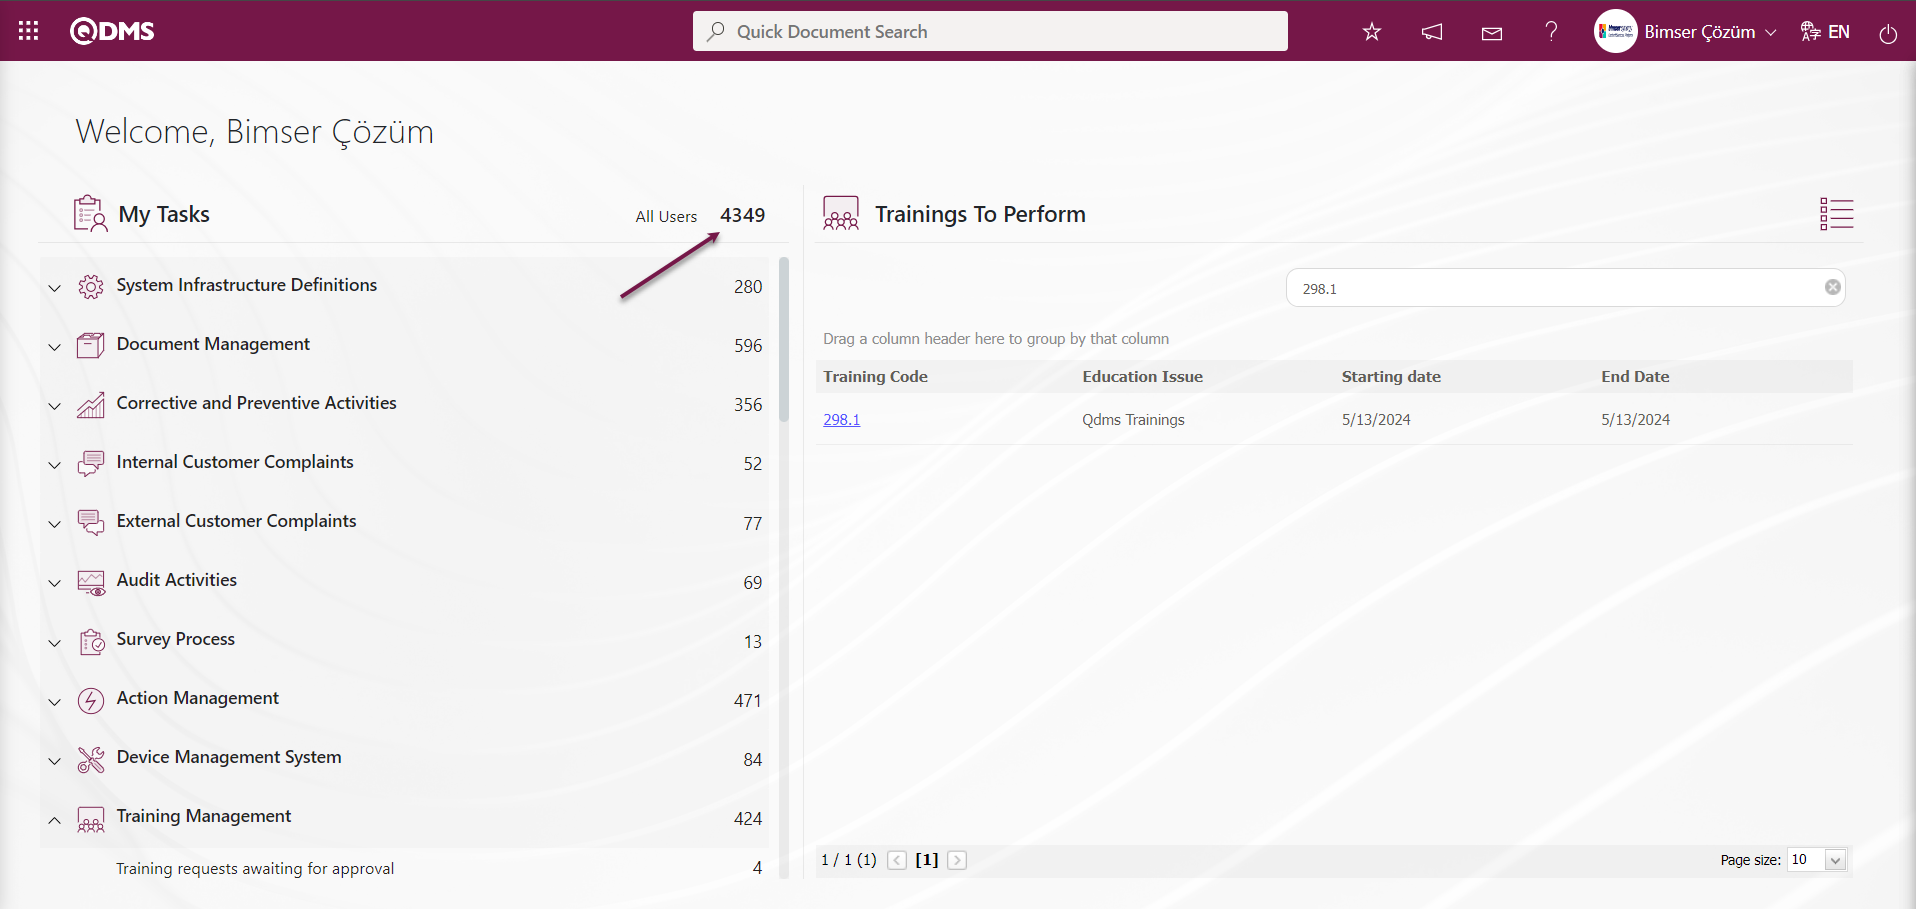
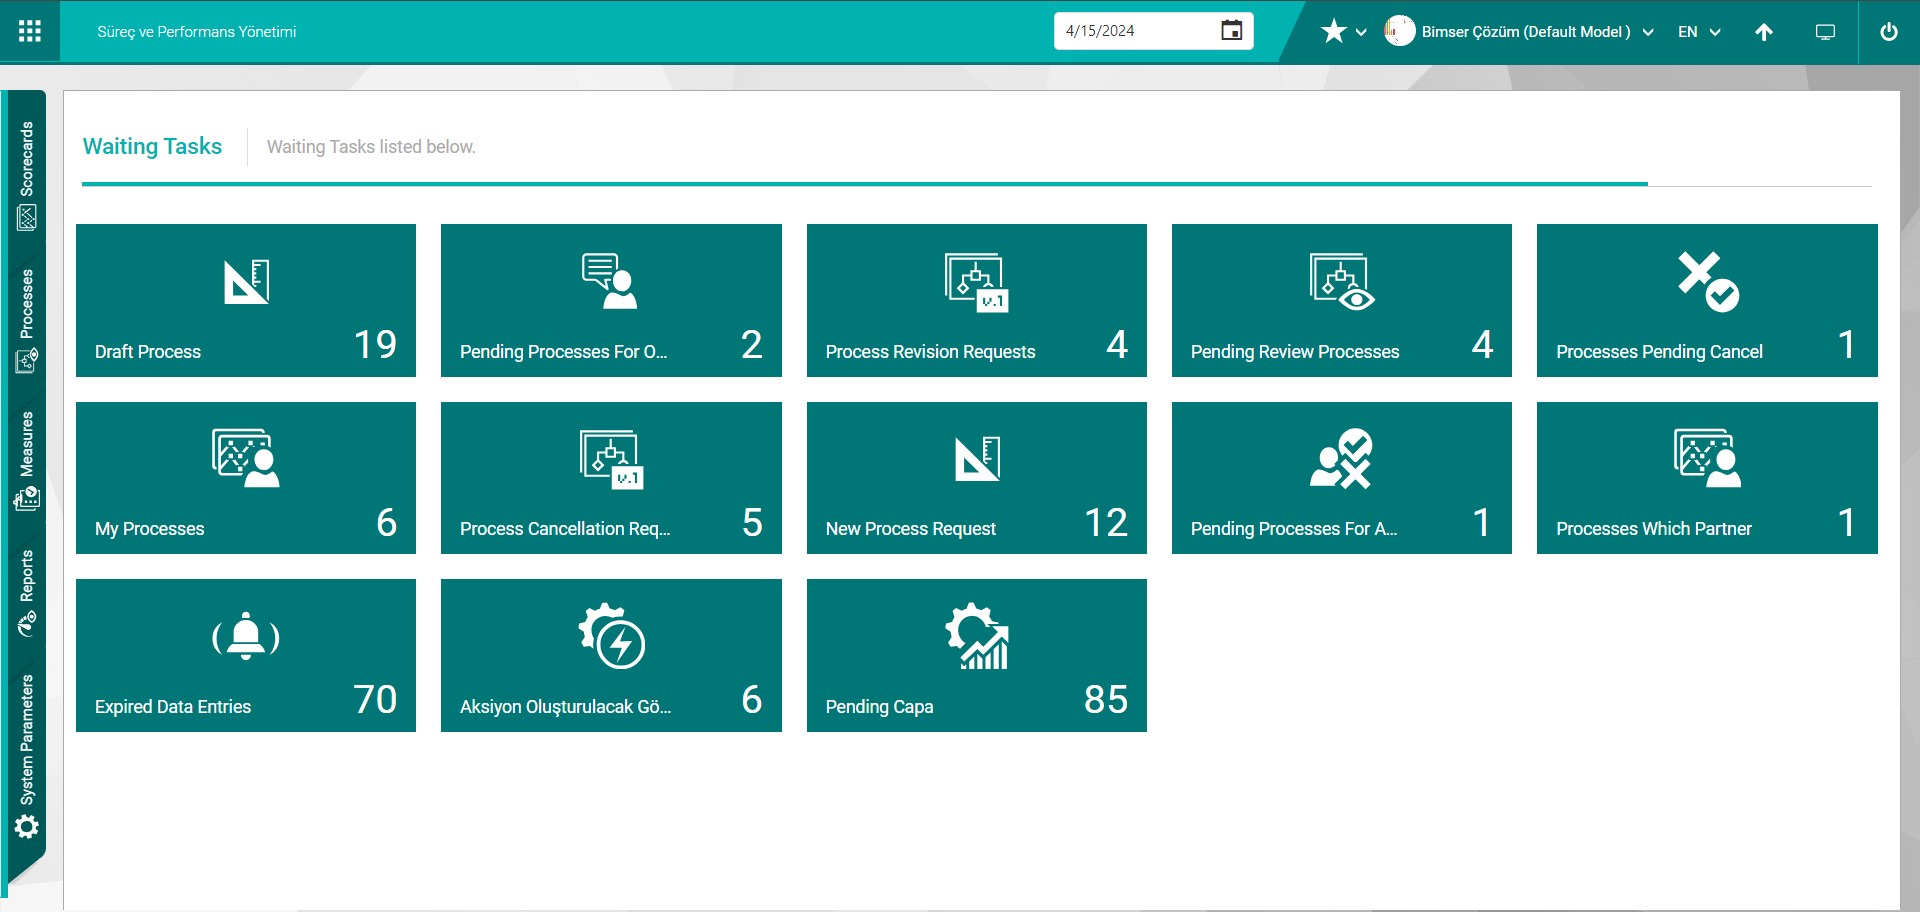
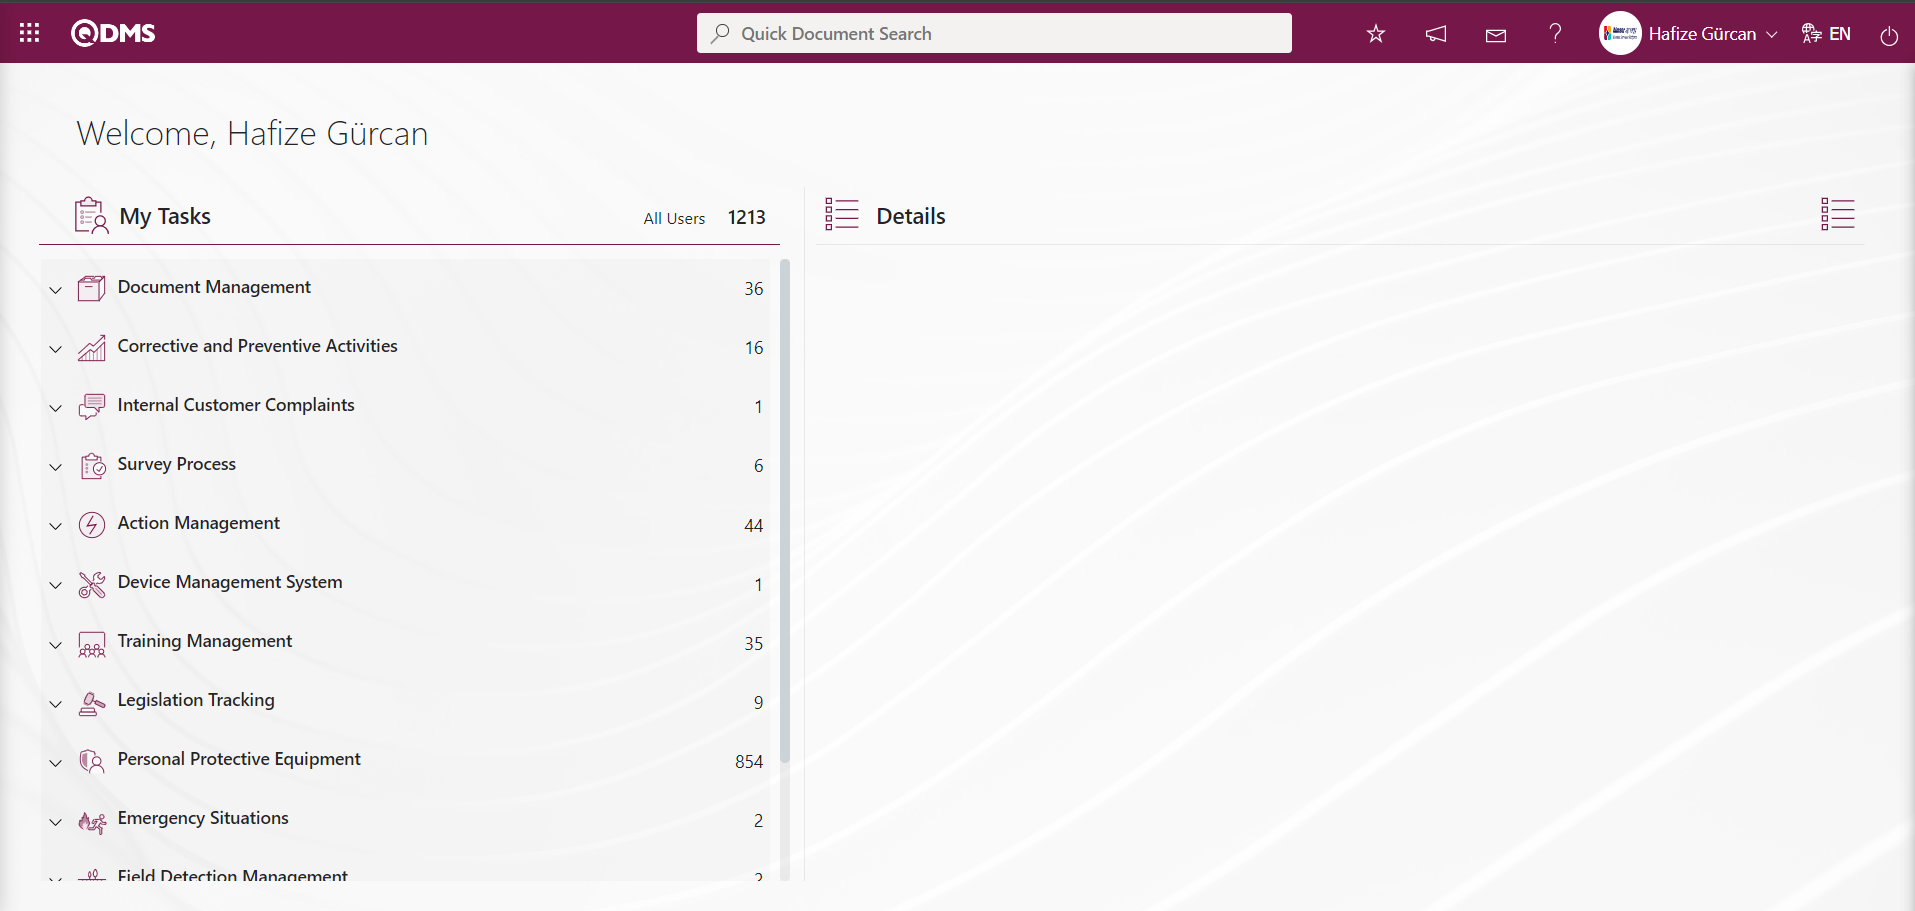
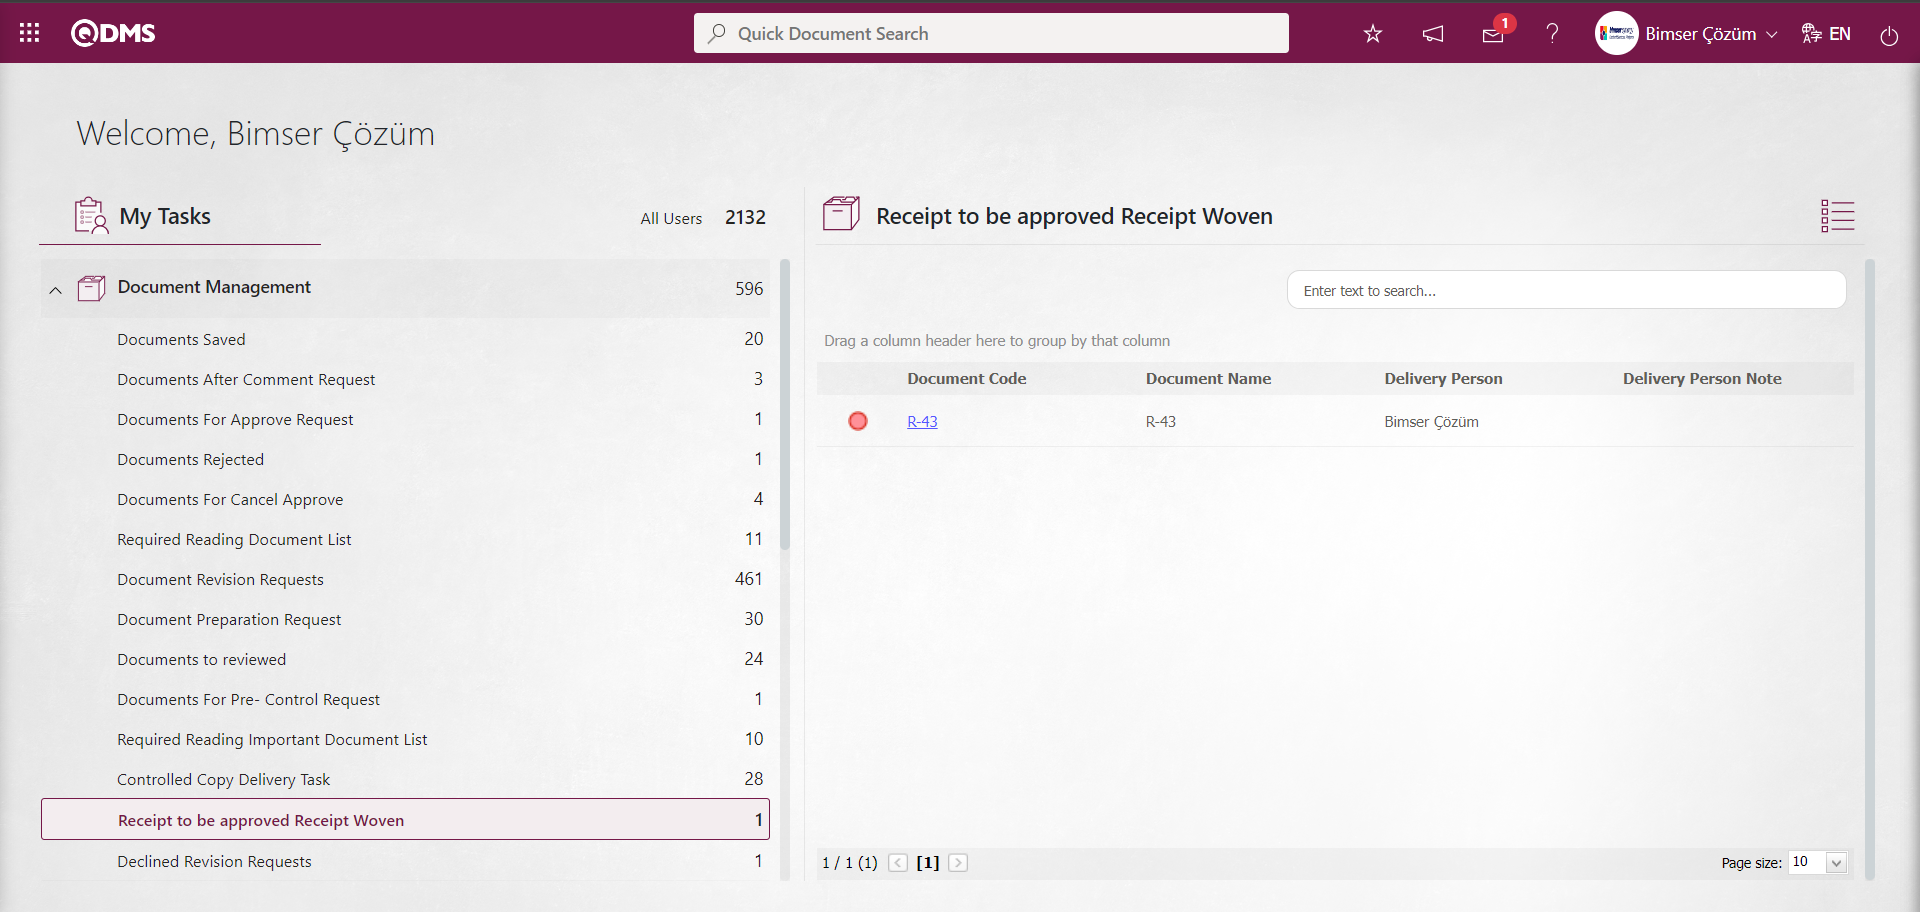
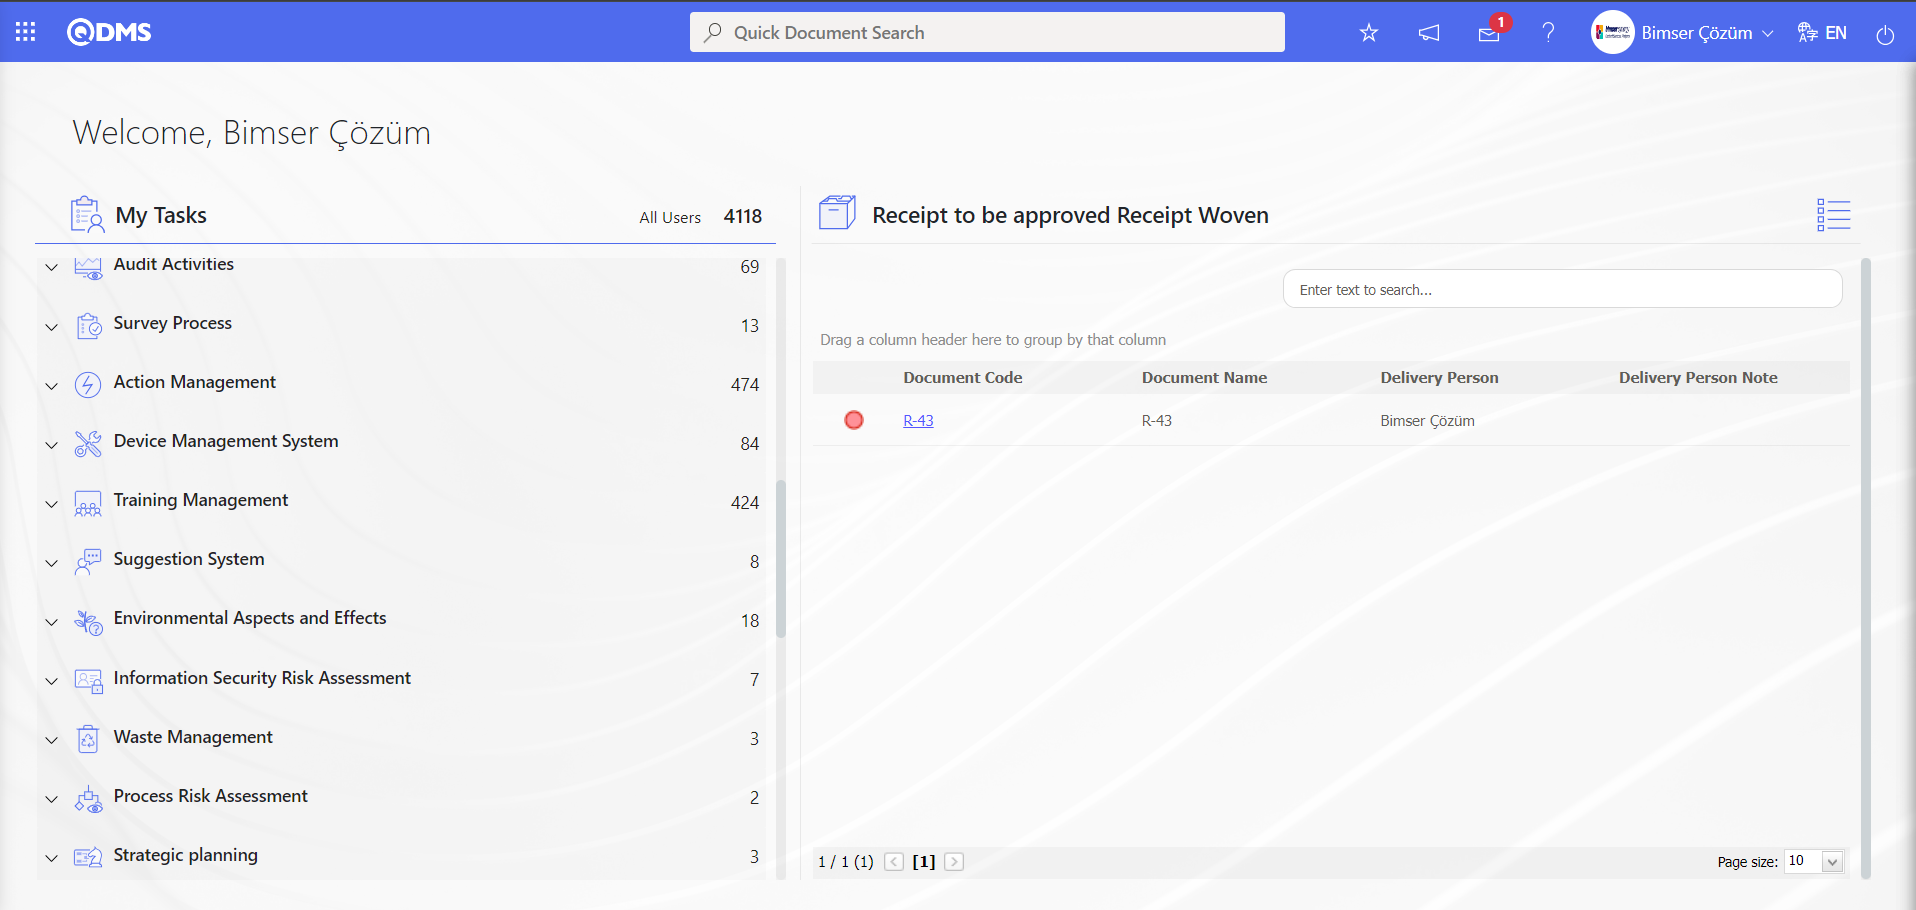
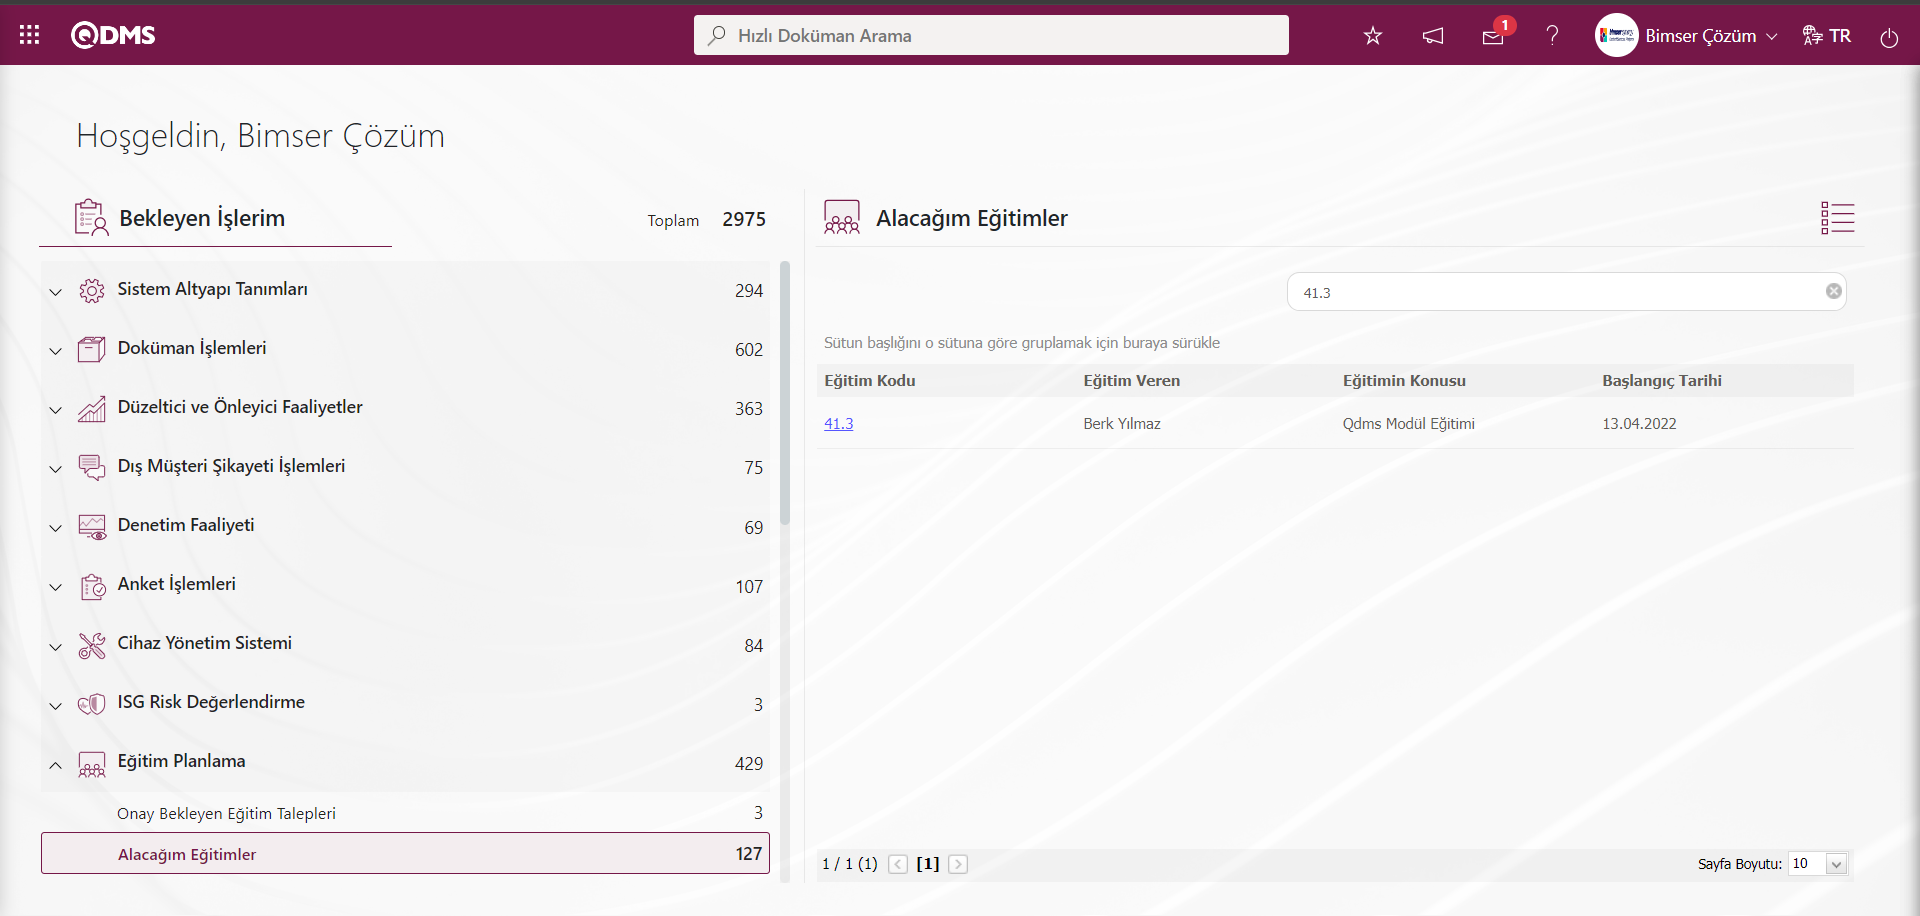
When the staff logs in to the system, the QDMS main screen appears. All pending tasks can be seen on this screen. In the QDMS system, the pending jobs menu is grouped as a module module as in the mobile application. In my pending jobs, in the Total field, the total tasks on the user entering the system, i.e. job information, are displayed.
The icons representing the modules and their names are listed together with the modules in pending jobs.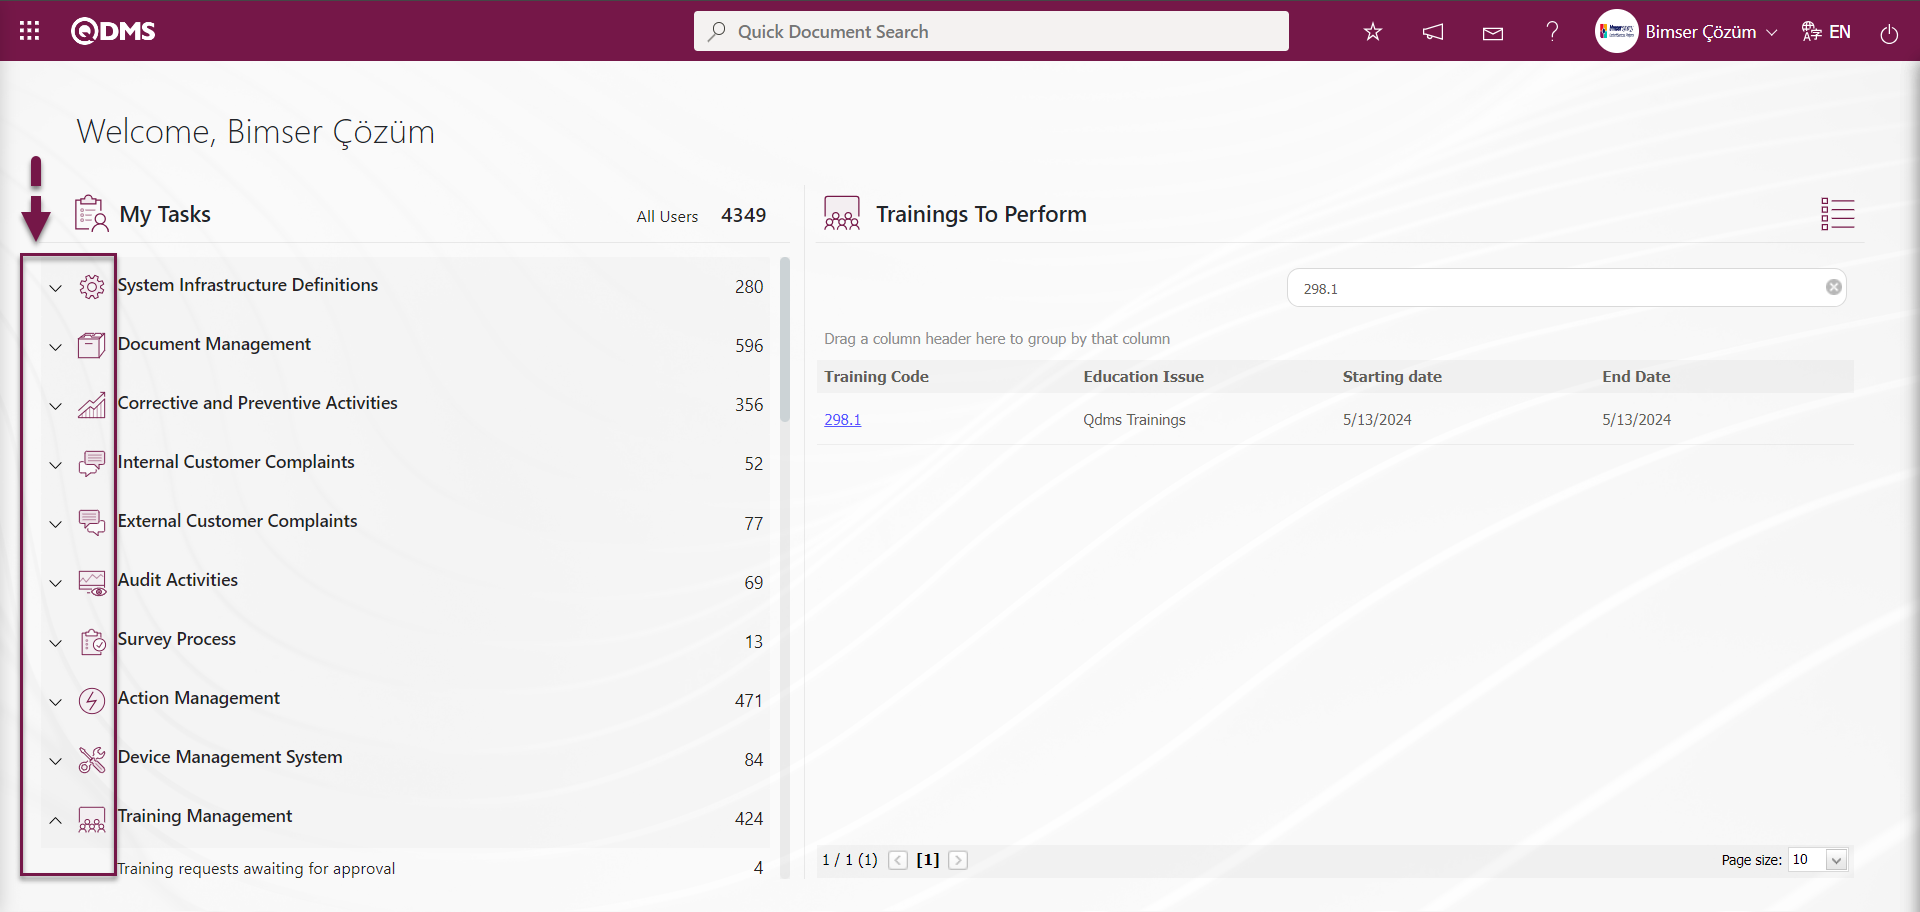
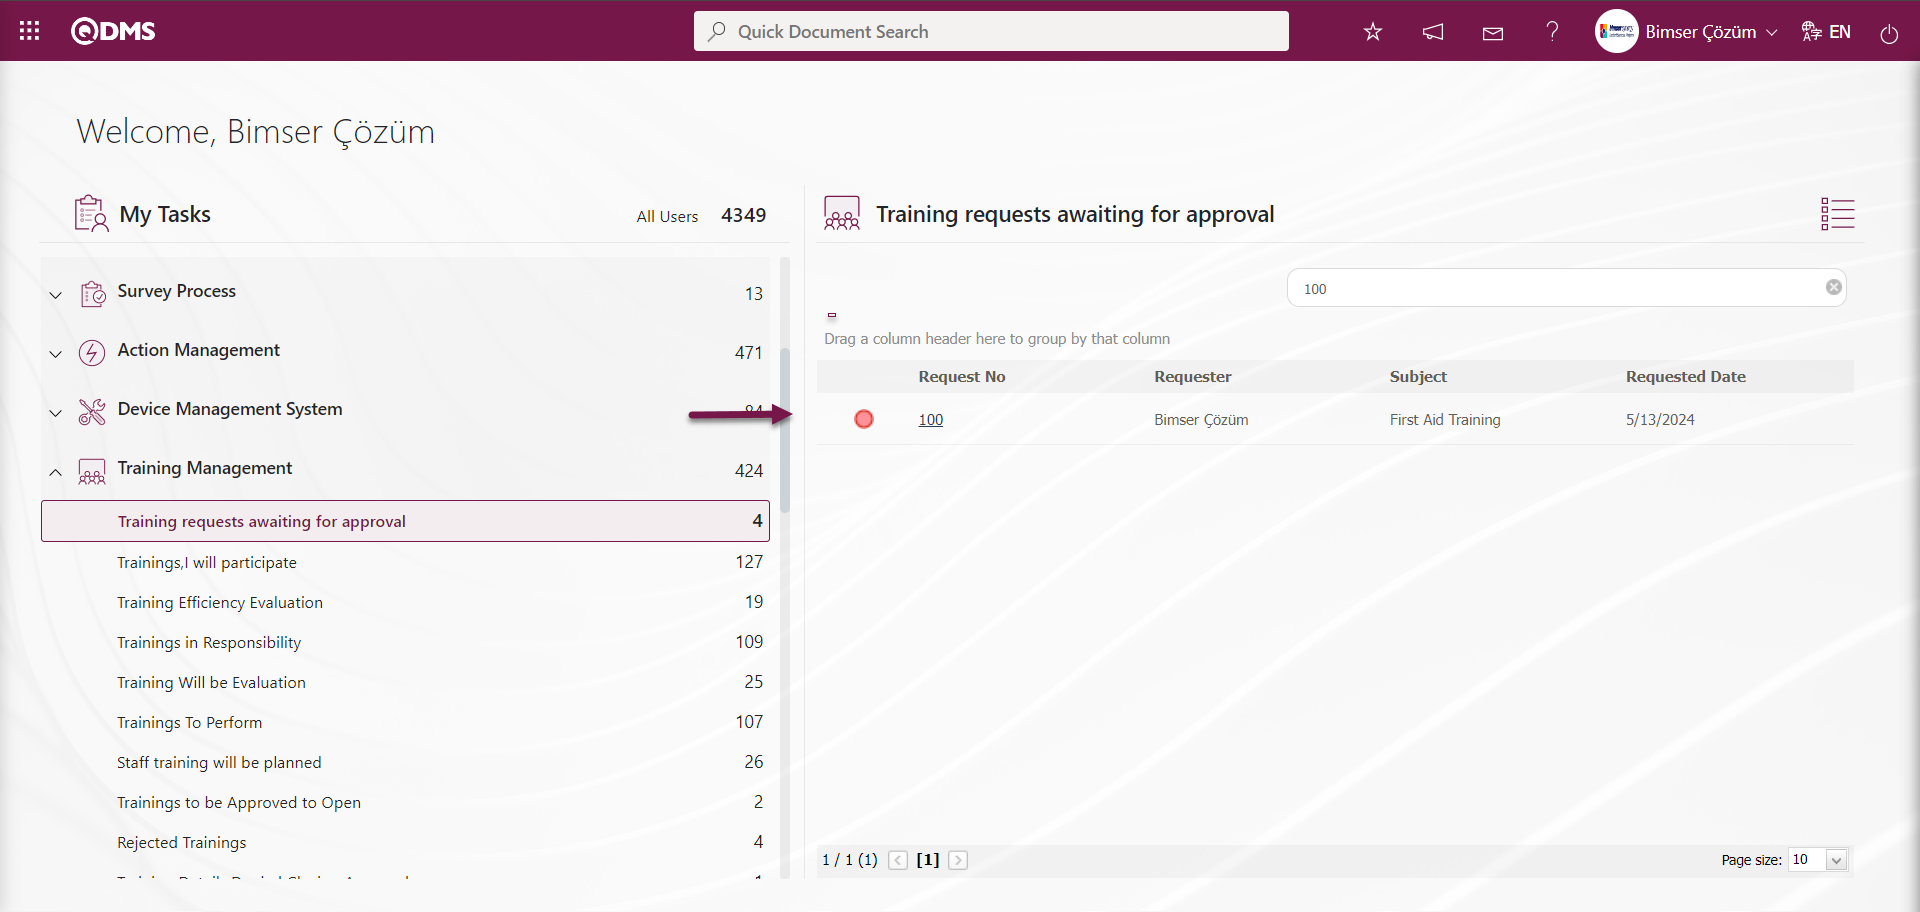
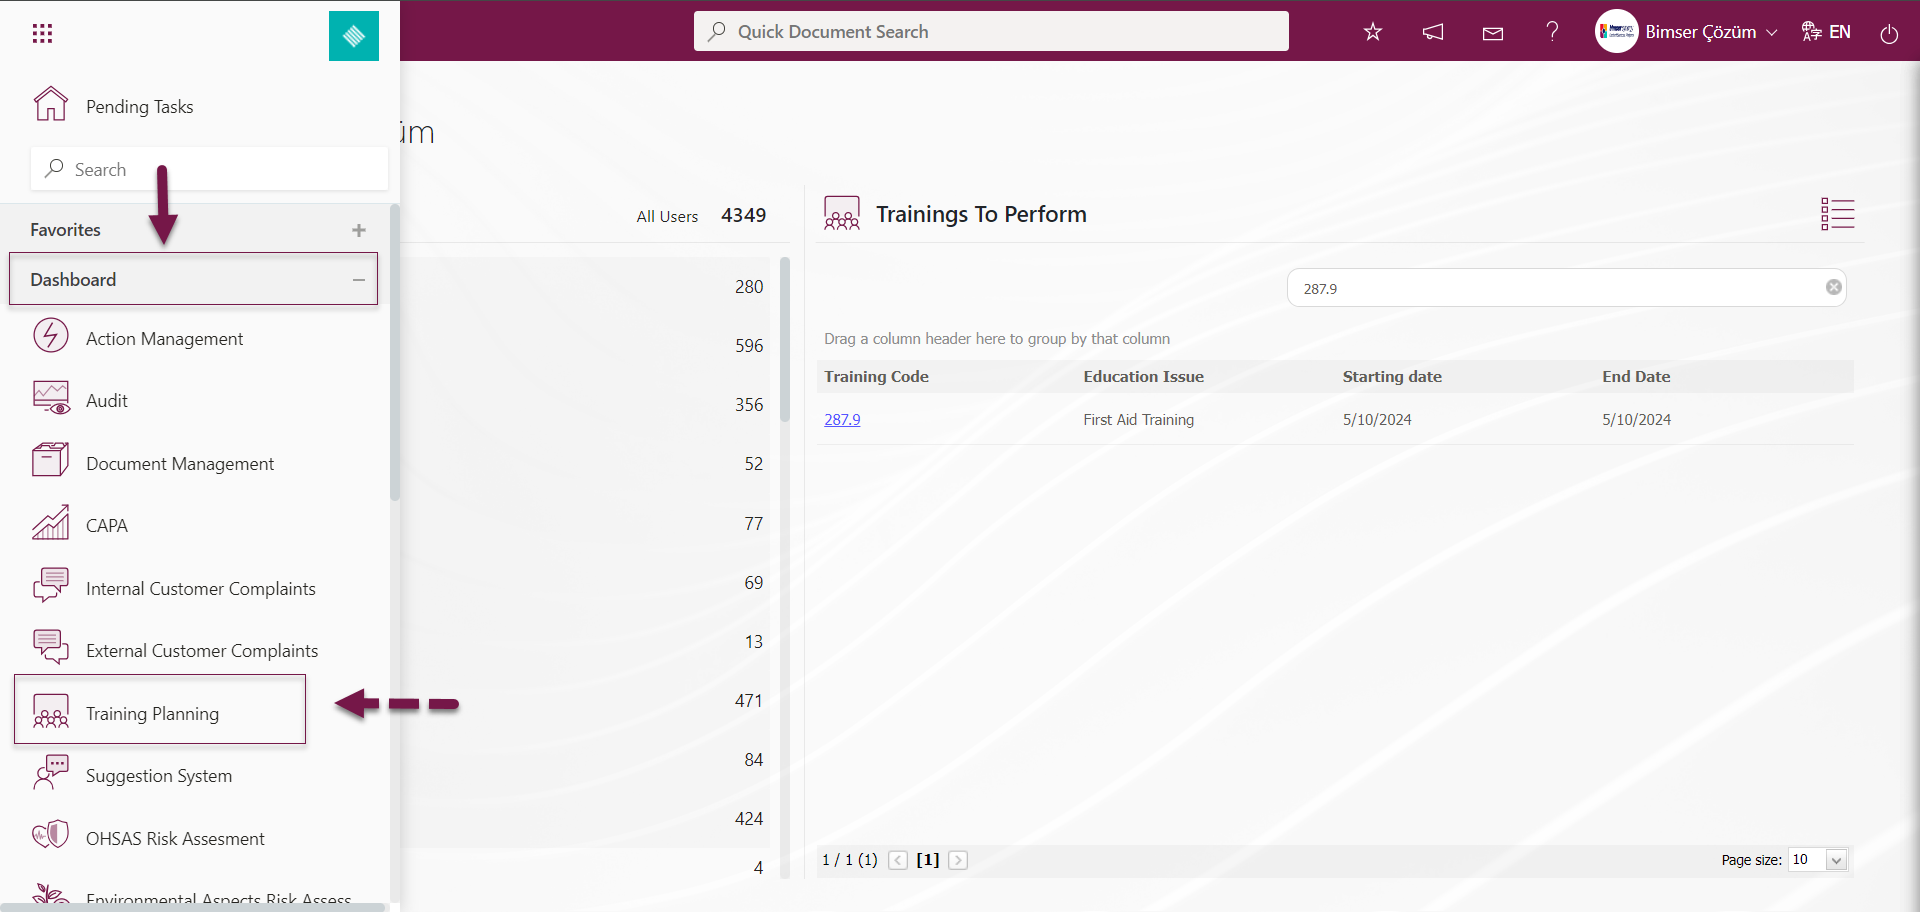
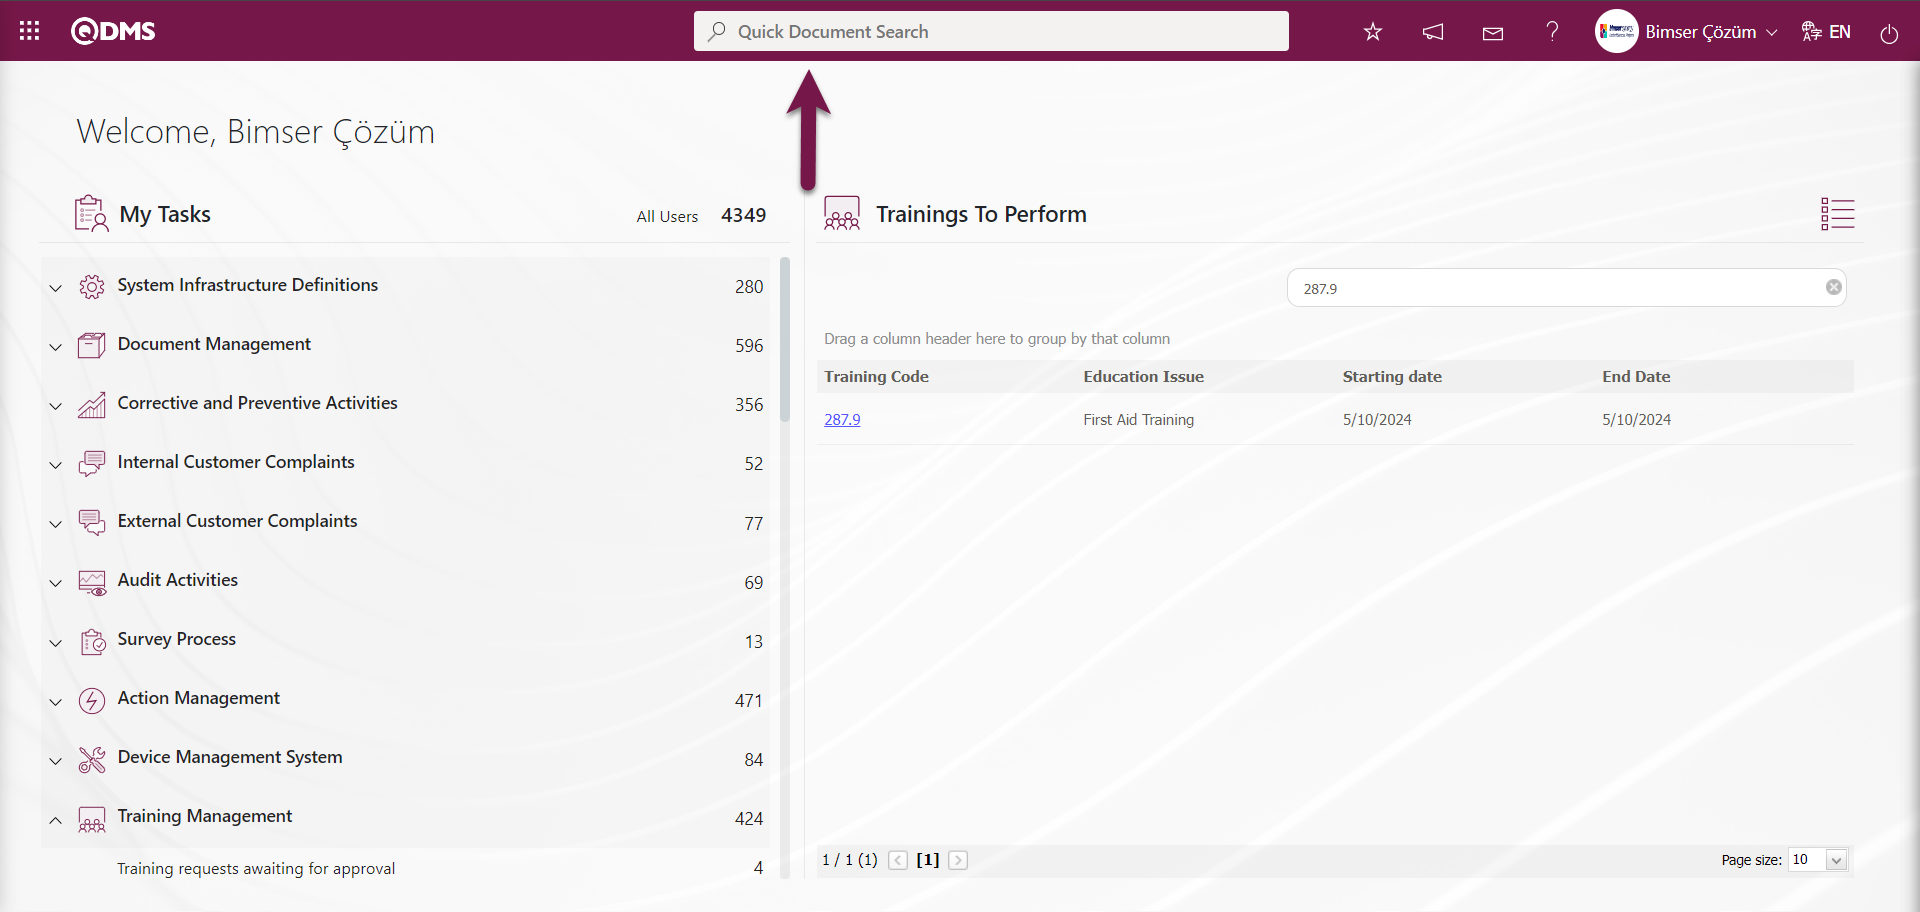
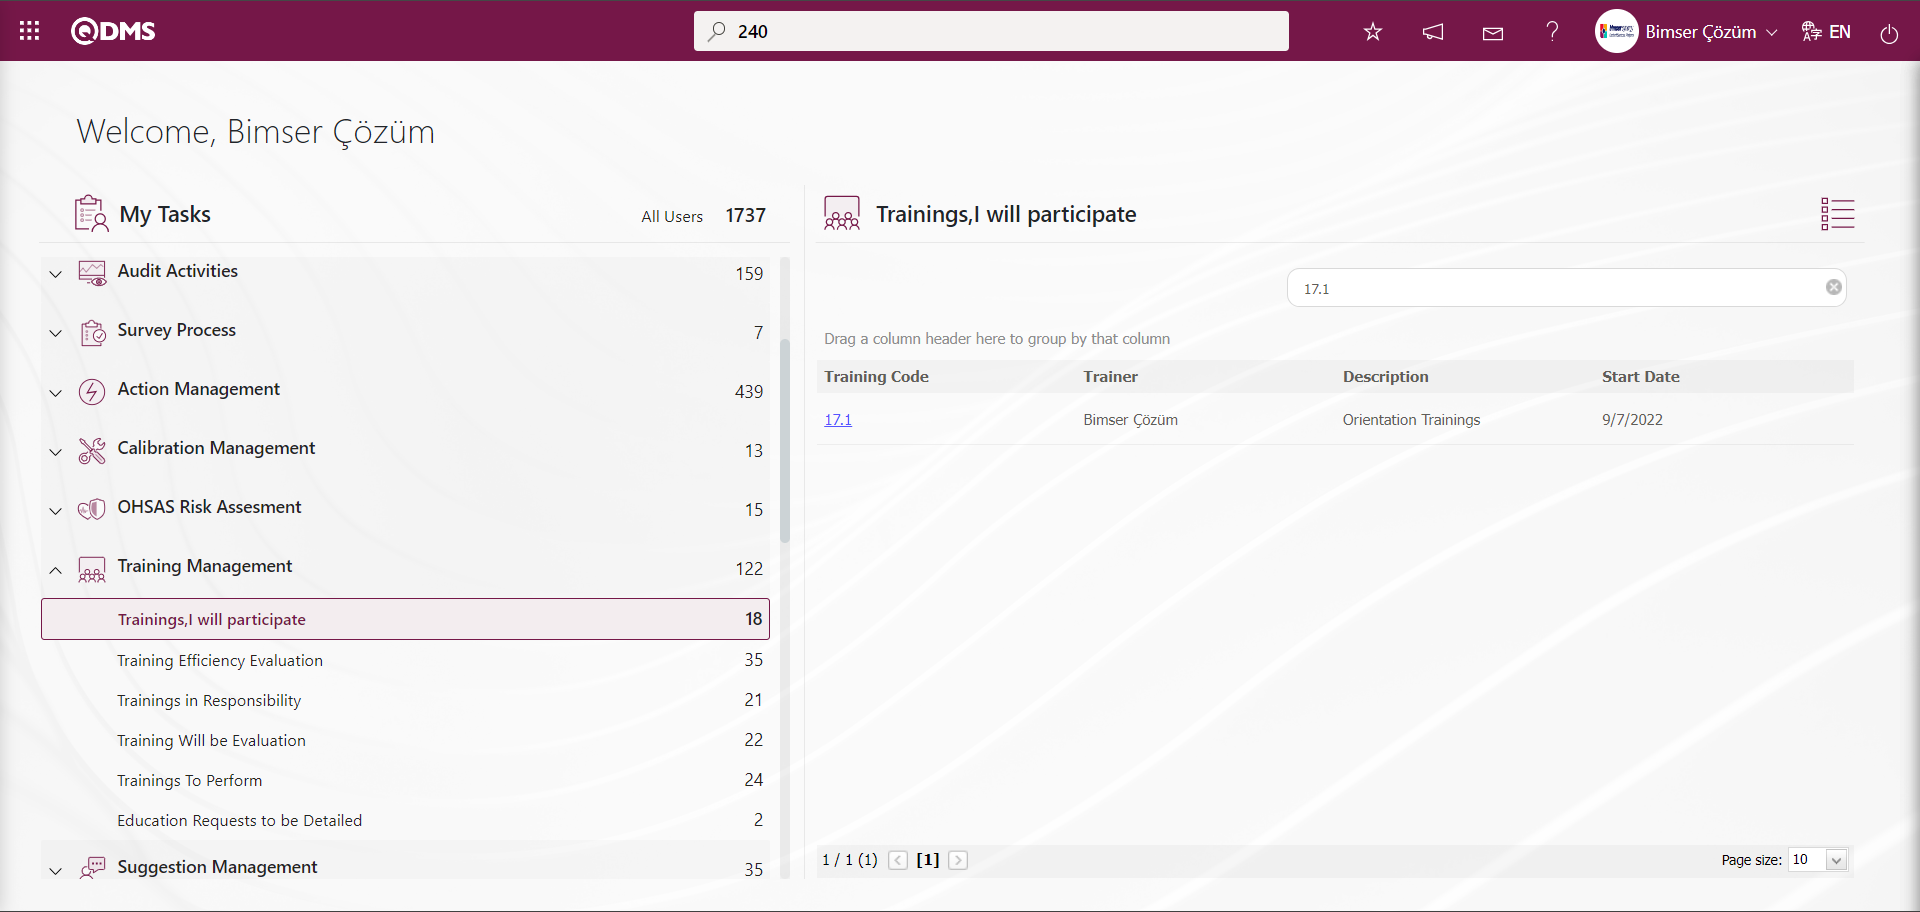
Module Click on the relevant module to see the tasks on the user in any module in the pending jobs grouped by module. By clicking the drop-down list next to the relevant Module icon, the tasks related to those modules on the user are listed. For example, when the drop-down list next to the module icon in the Training Management module is clicked, the tasks on the user related to the Training Planning module are listed and the total number of the task is given opposite.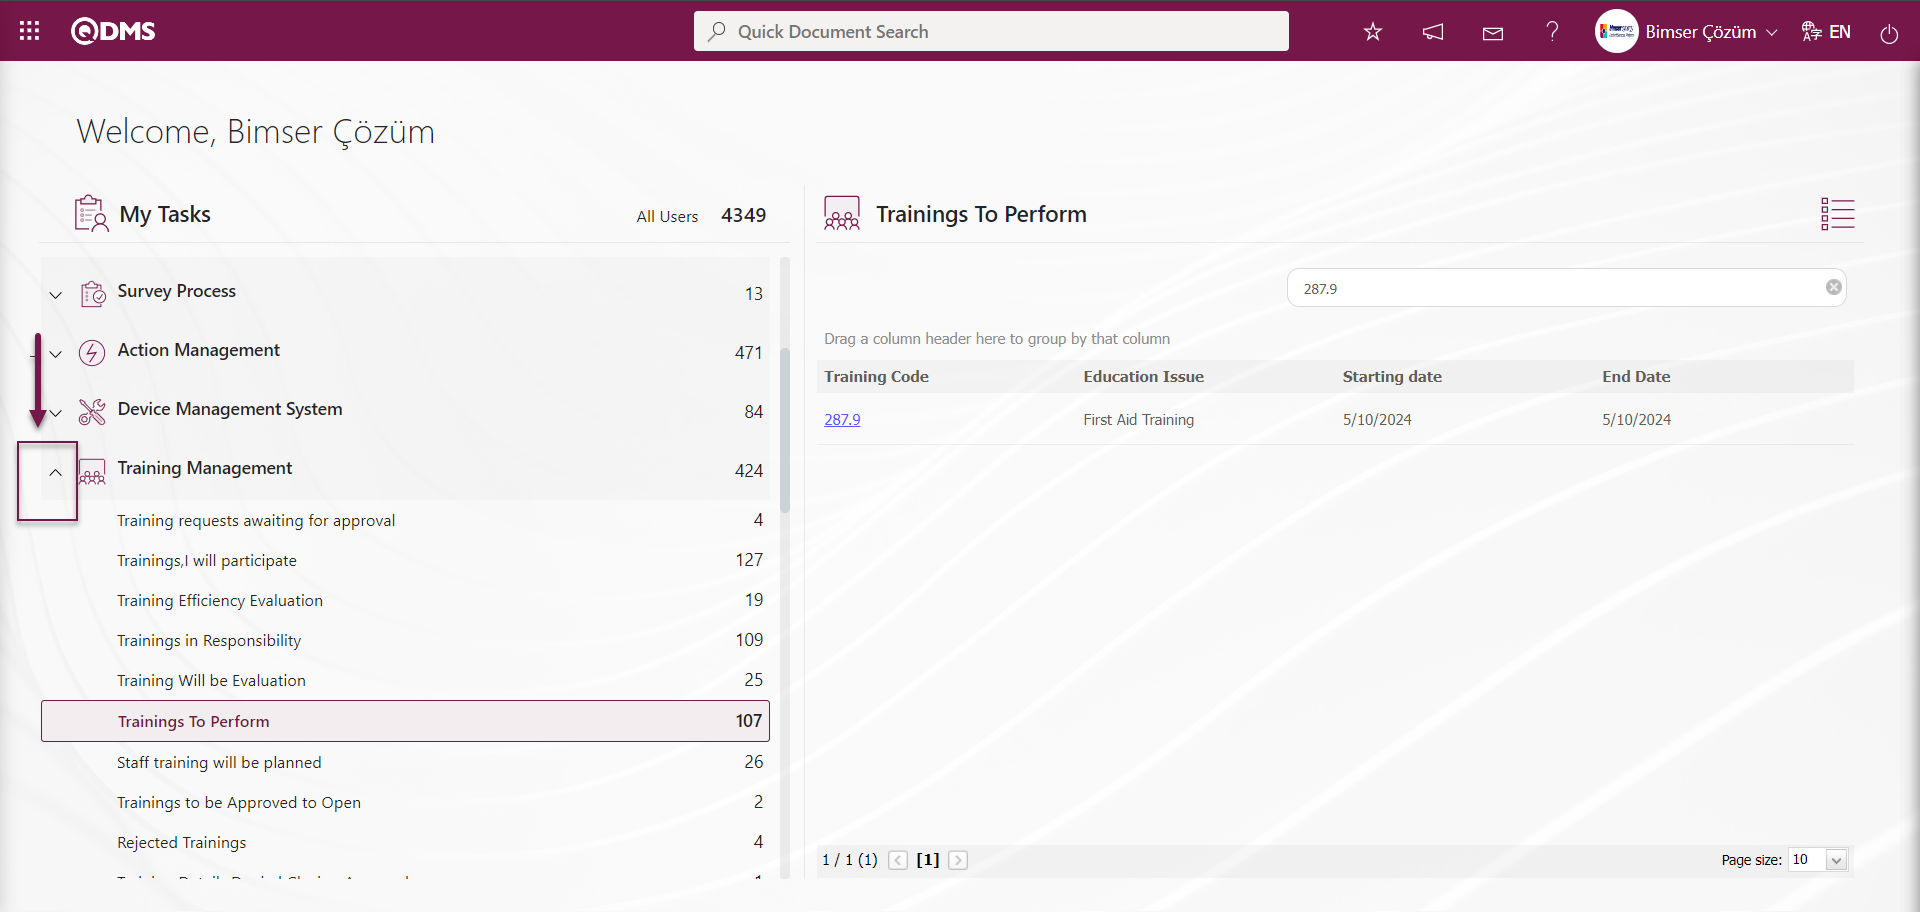
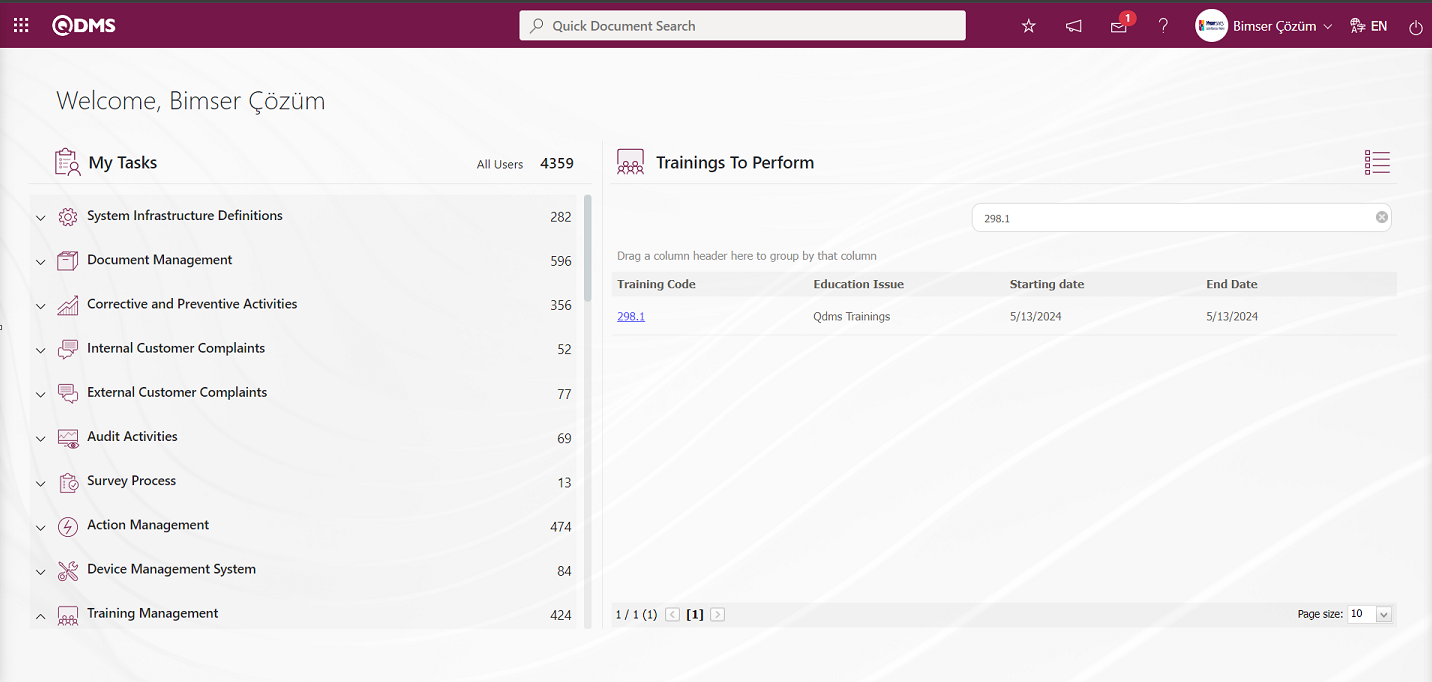
The total number of these tasks listed is located opposite the opened task of the module. Click on the user's “Trainings To Perform” task in the Training Management Module. In the first 4 branches of the related task, the task related fields and information about these fields are displayed.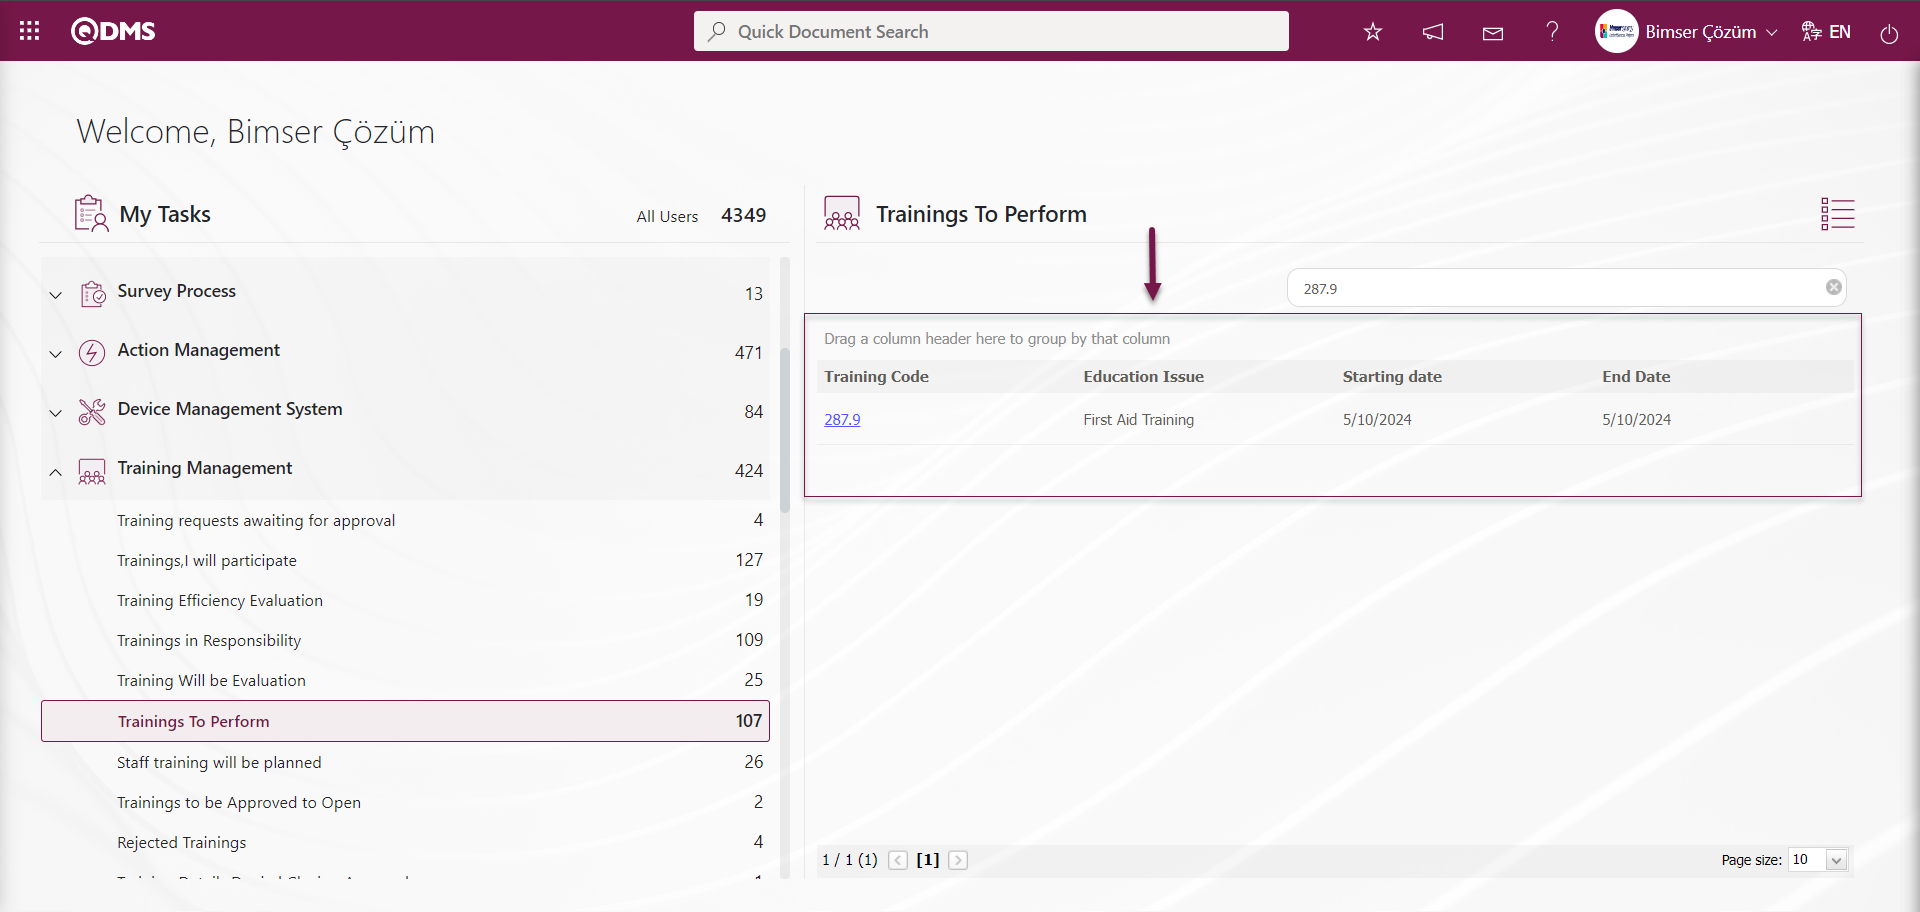
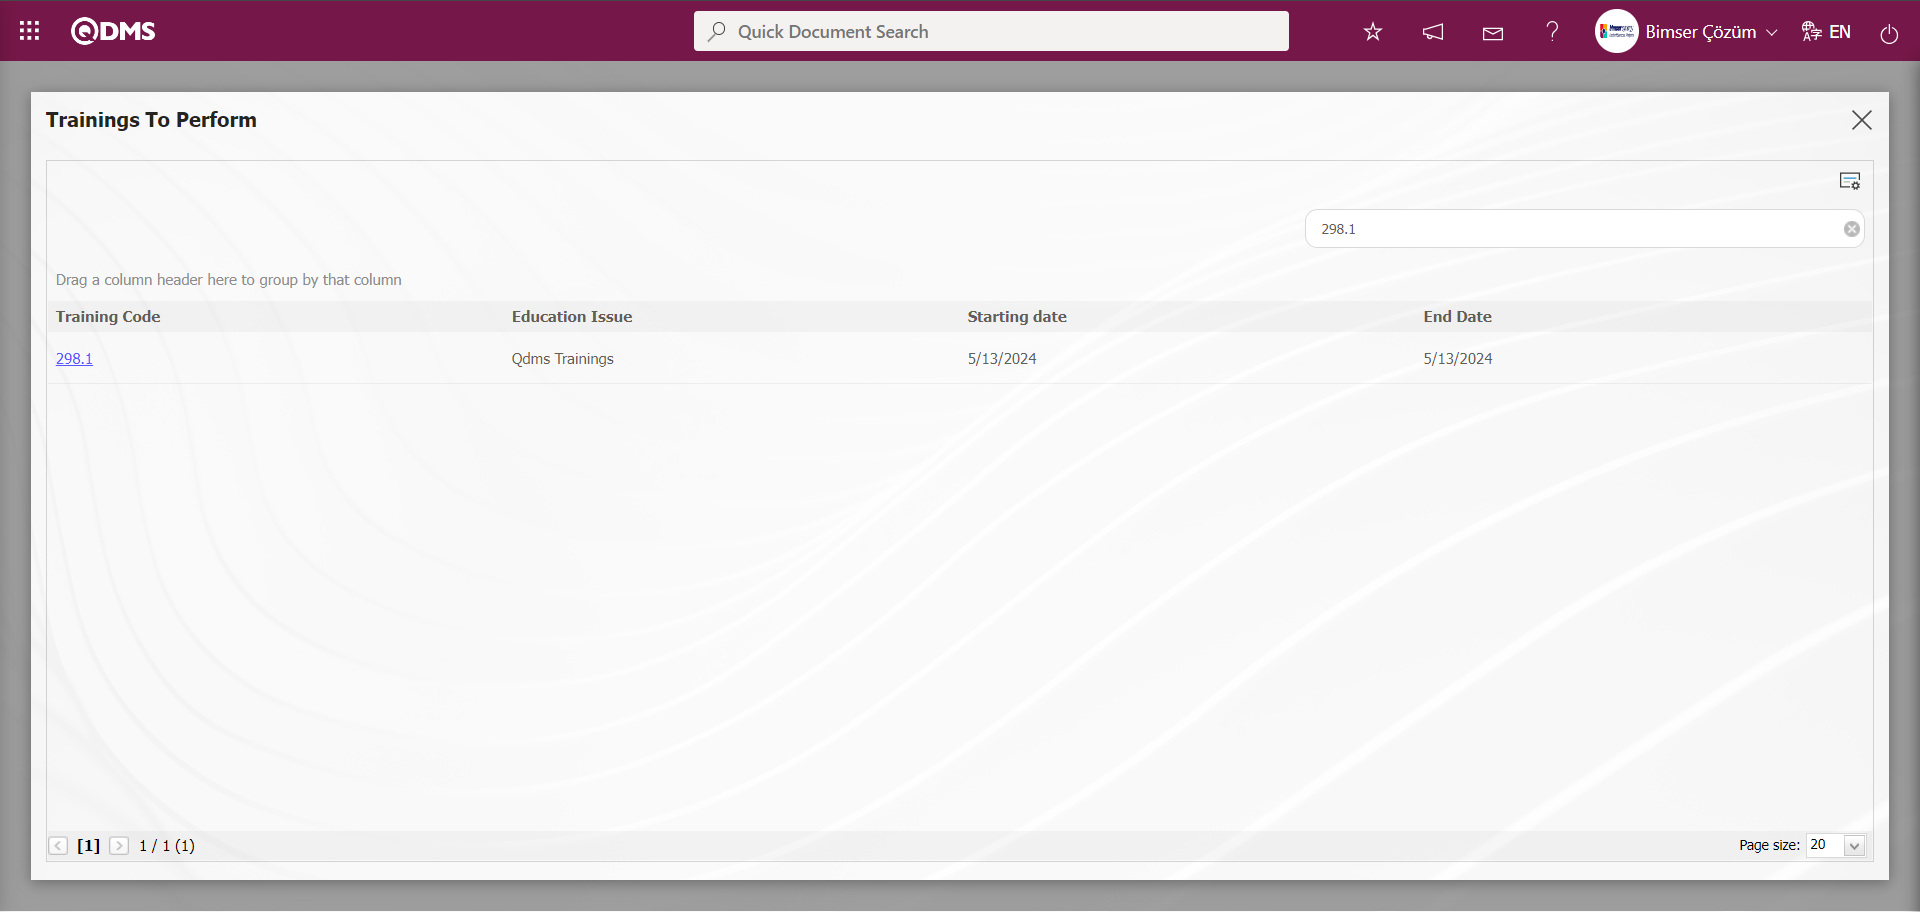
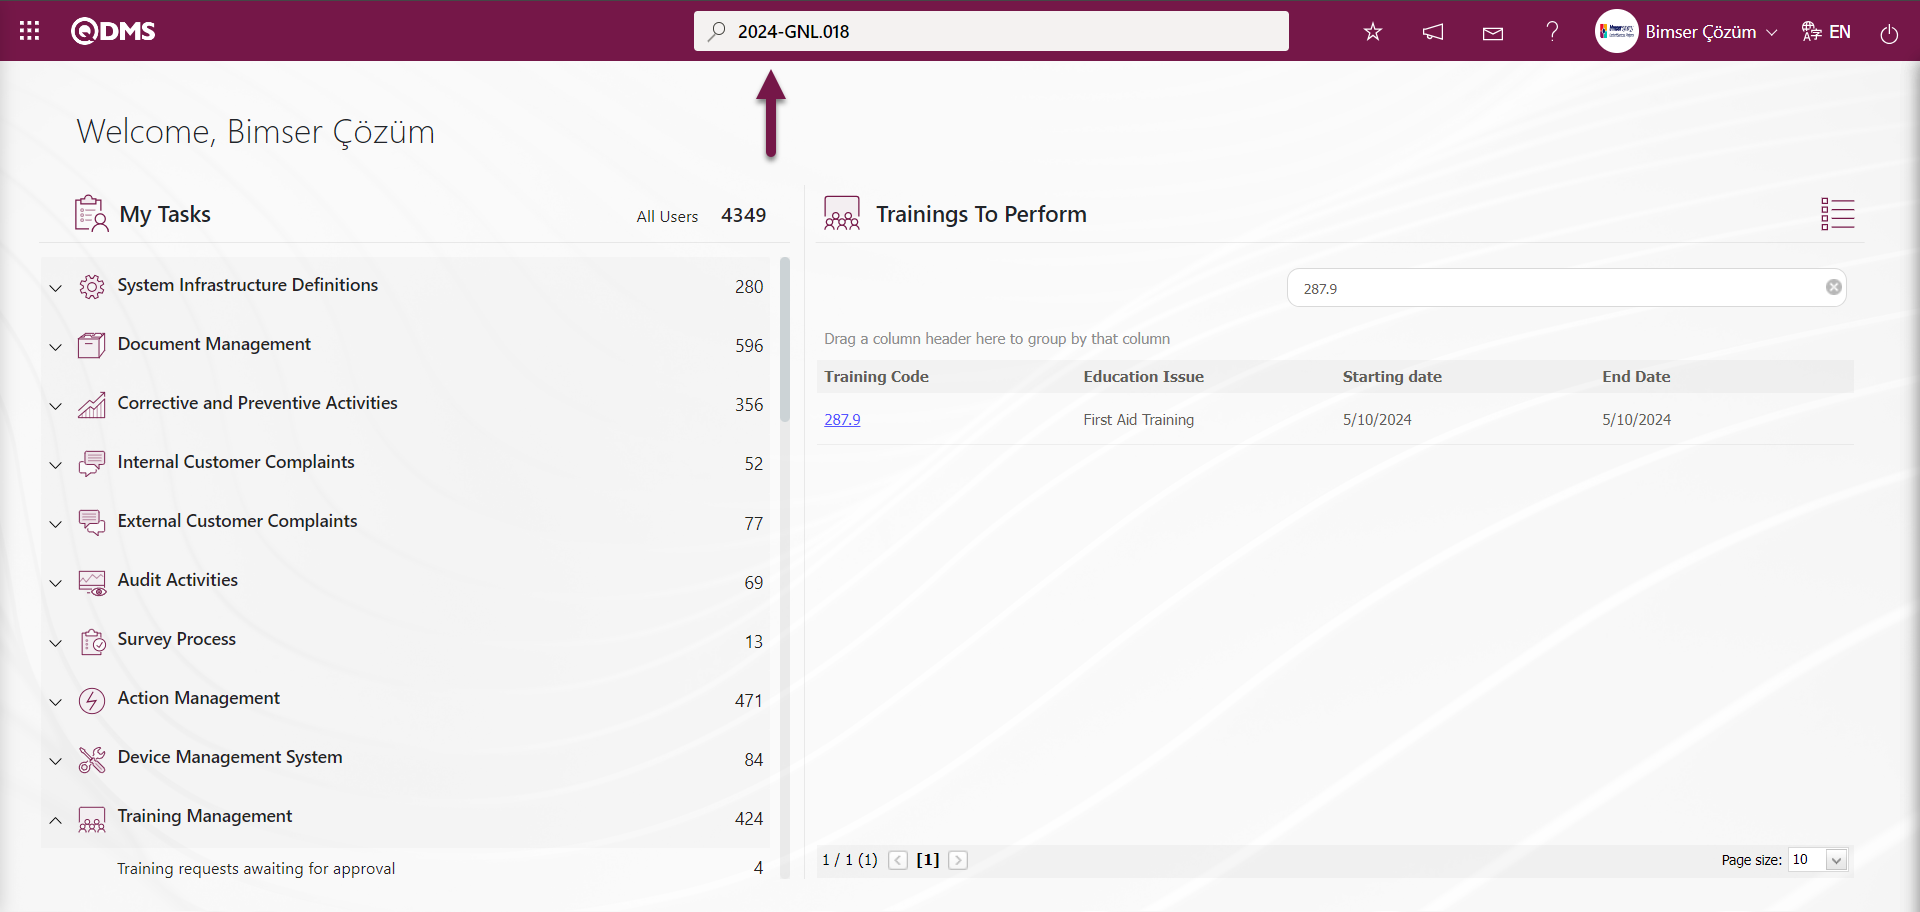
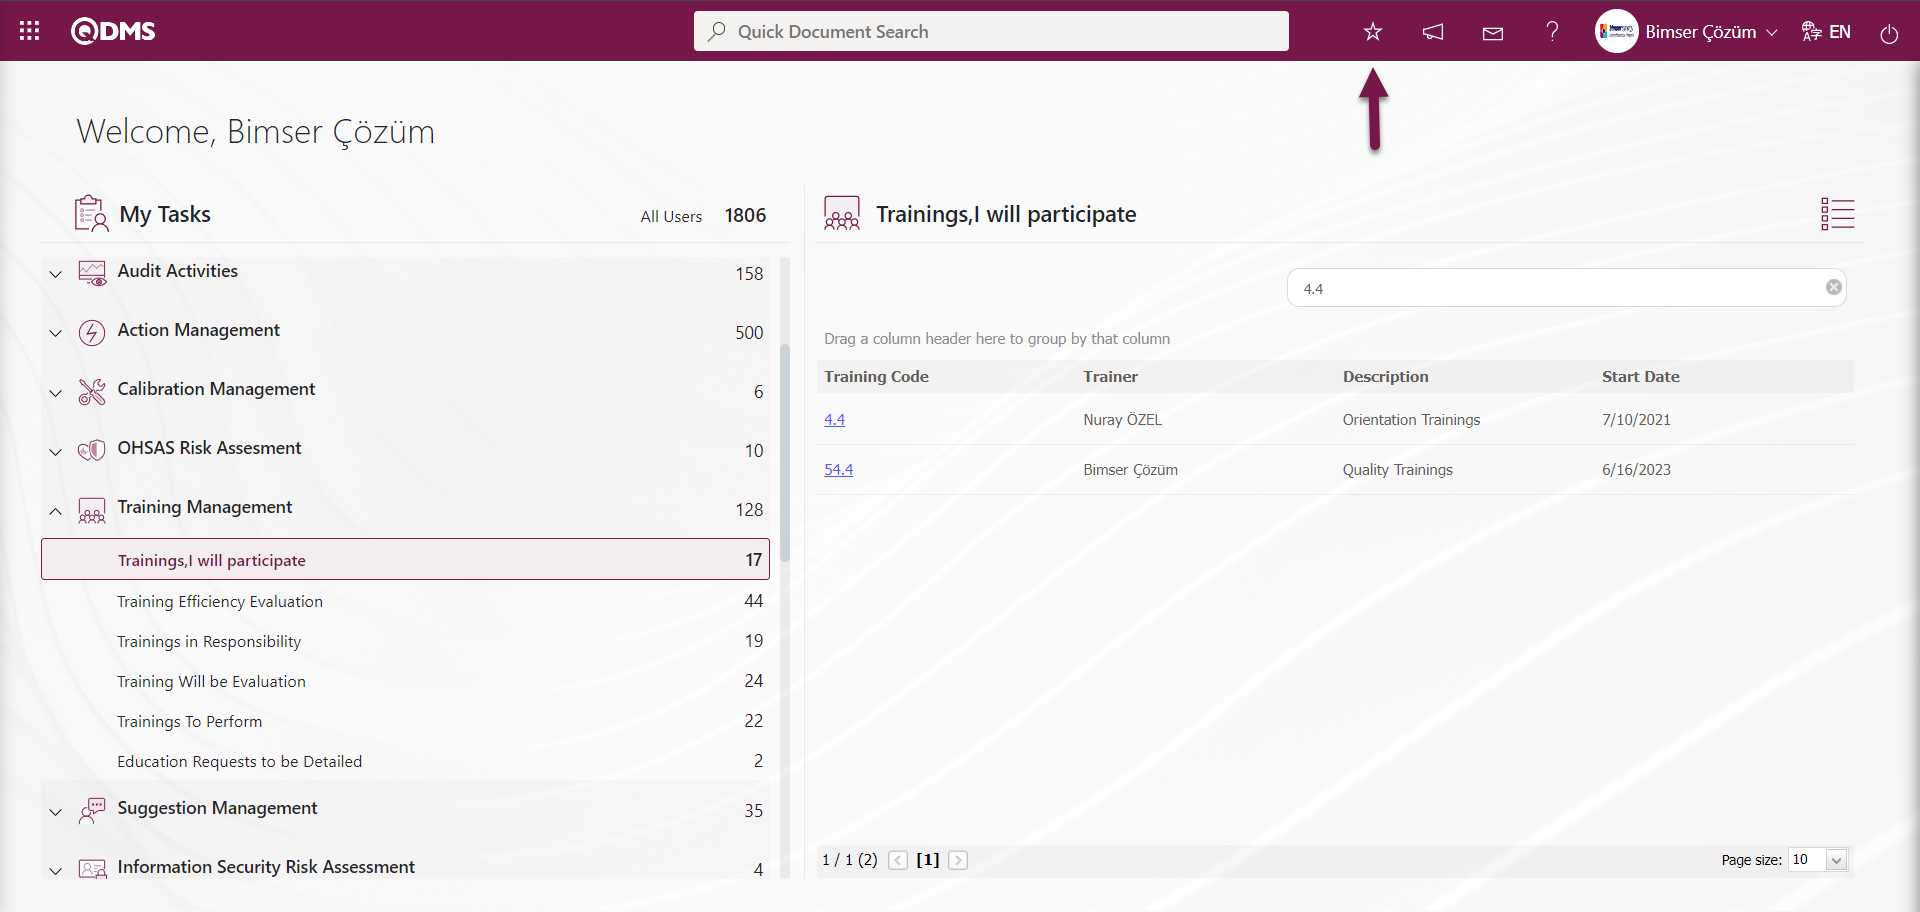
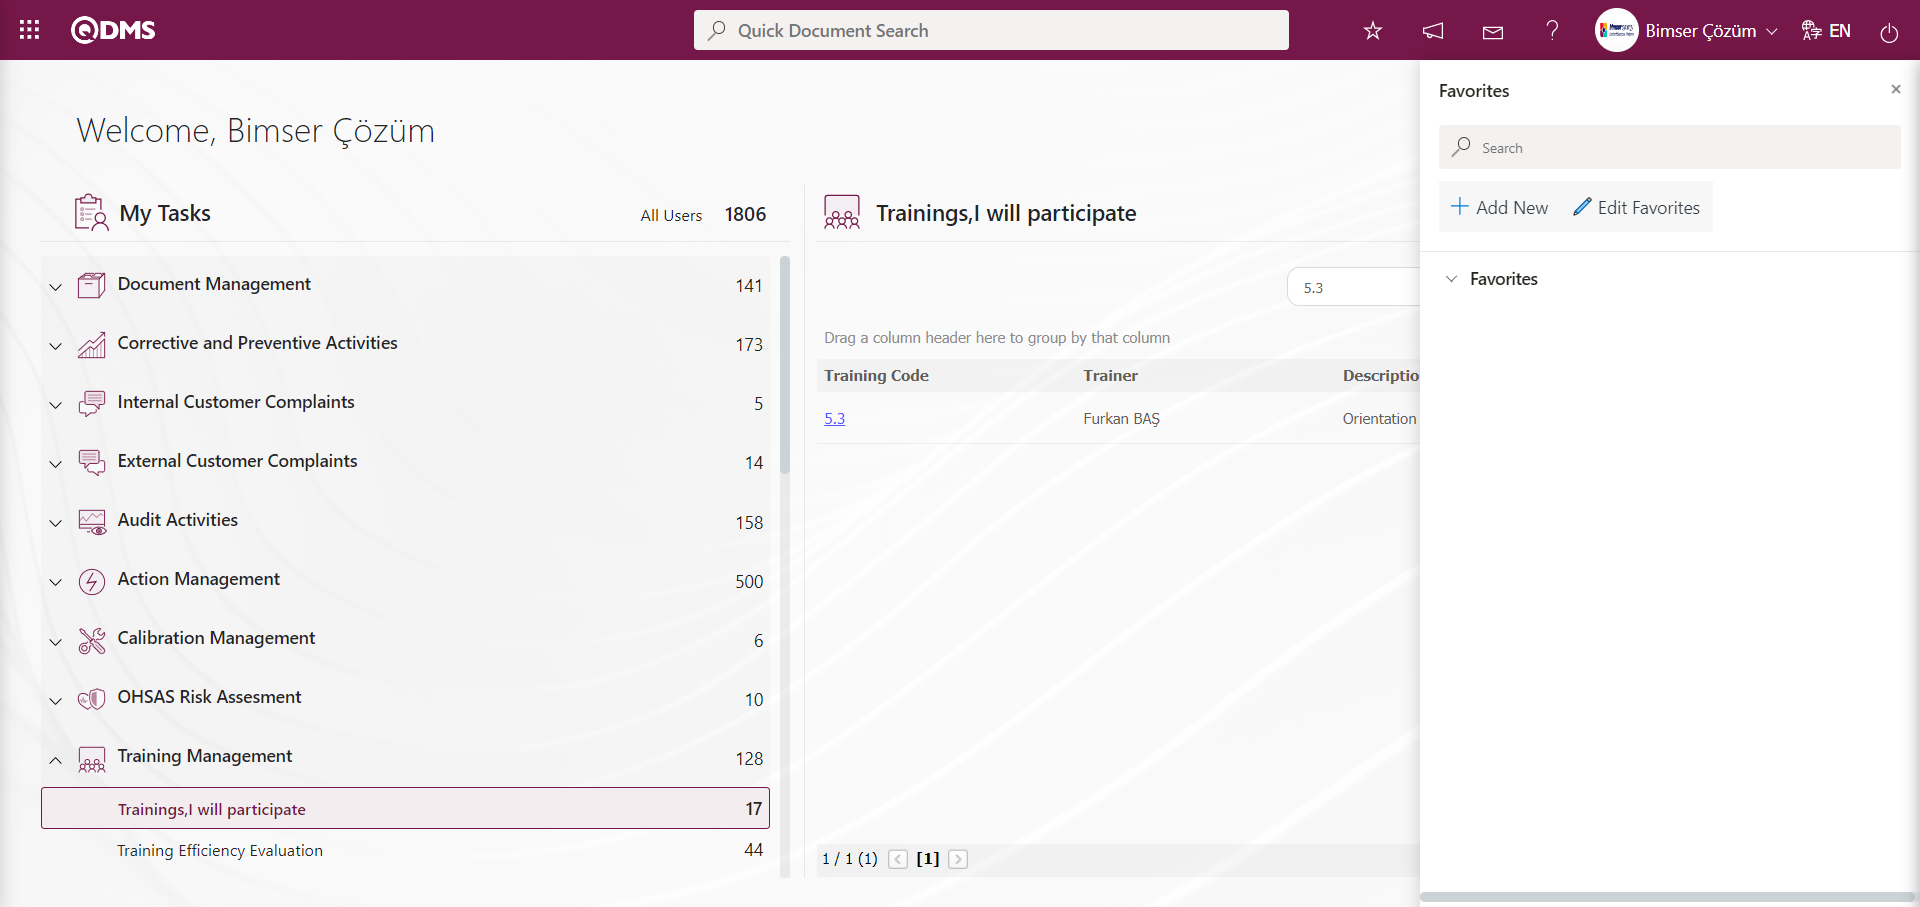
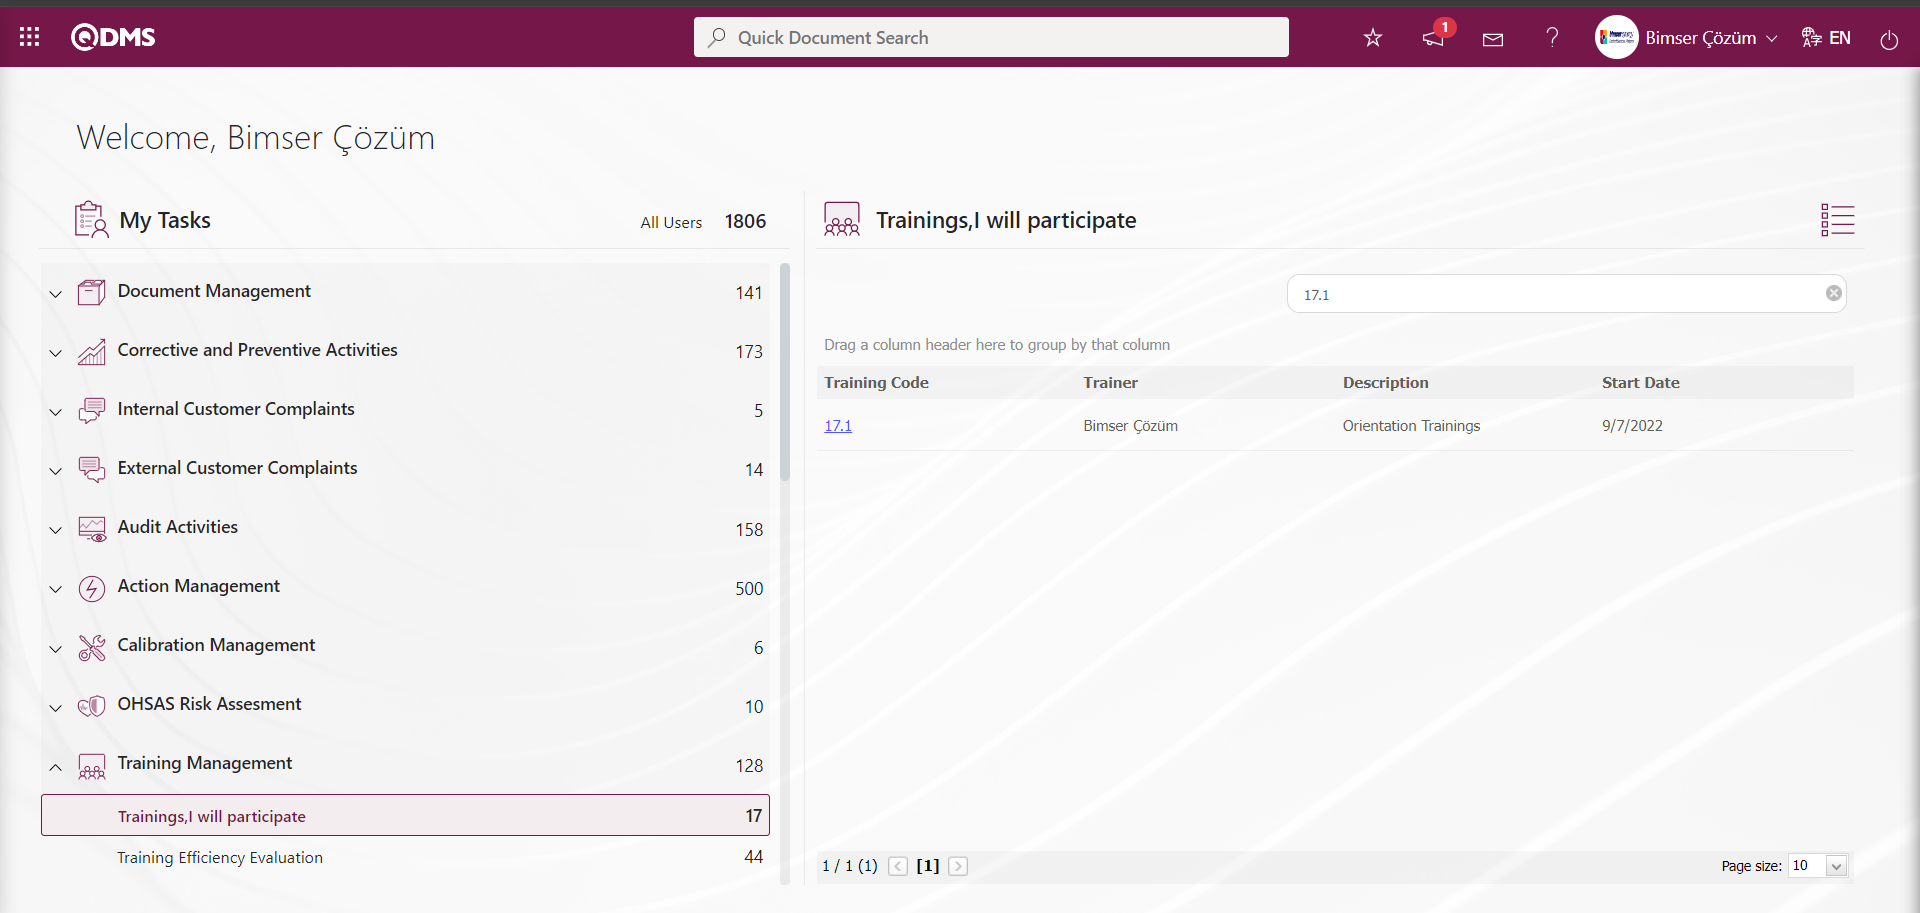
When the list of related tasks is large, by typing the code of the desired task in the task search bar, only the information related to that task is displayed. By typing information such as task related code, text in the task related search bar, only the related task can be listed. In the Training Management module, the code of any task in the “Trainings To Perform” task list is typed in the search bar and only the task is listed. If desired, the task can also be searched by typing text information in the fields in the related columns. To delete the text or code information written in the task search bar, click the  (Delete) button on the right side.
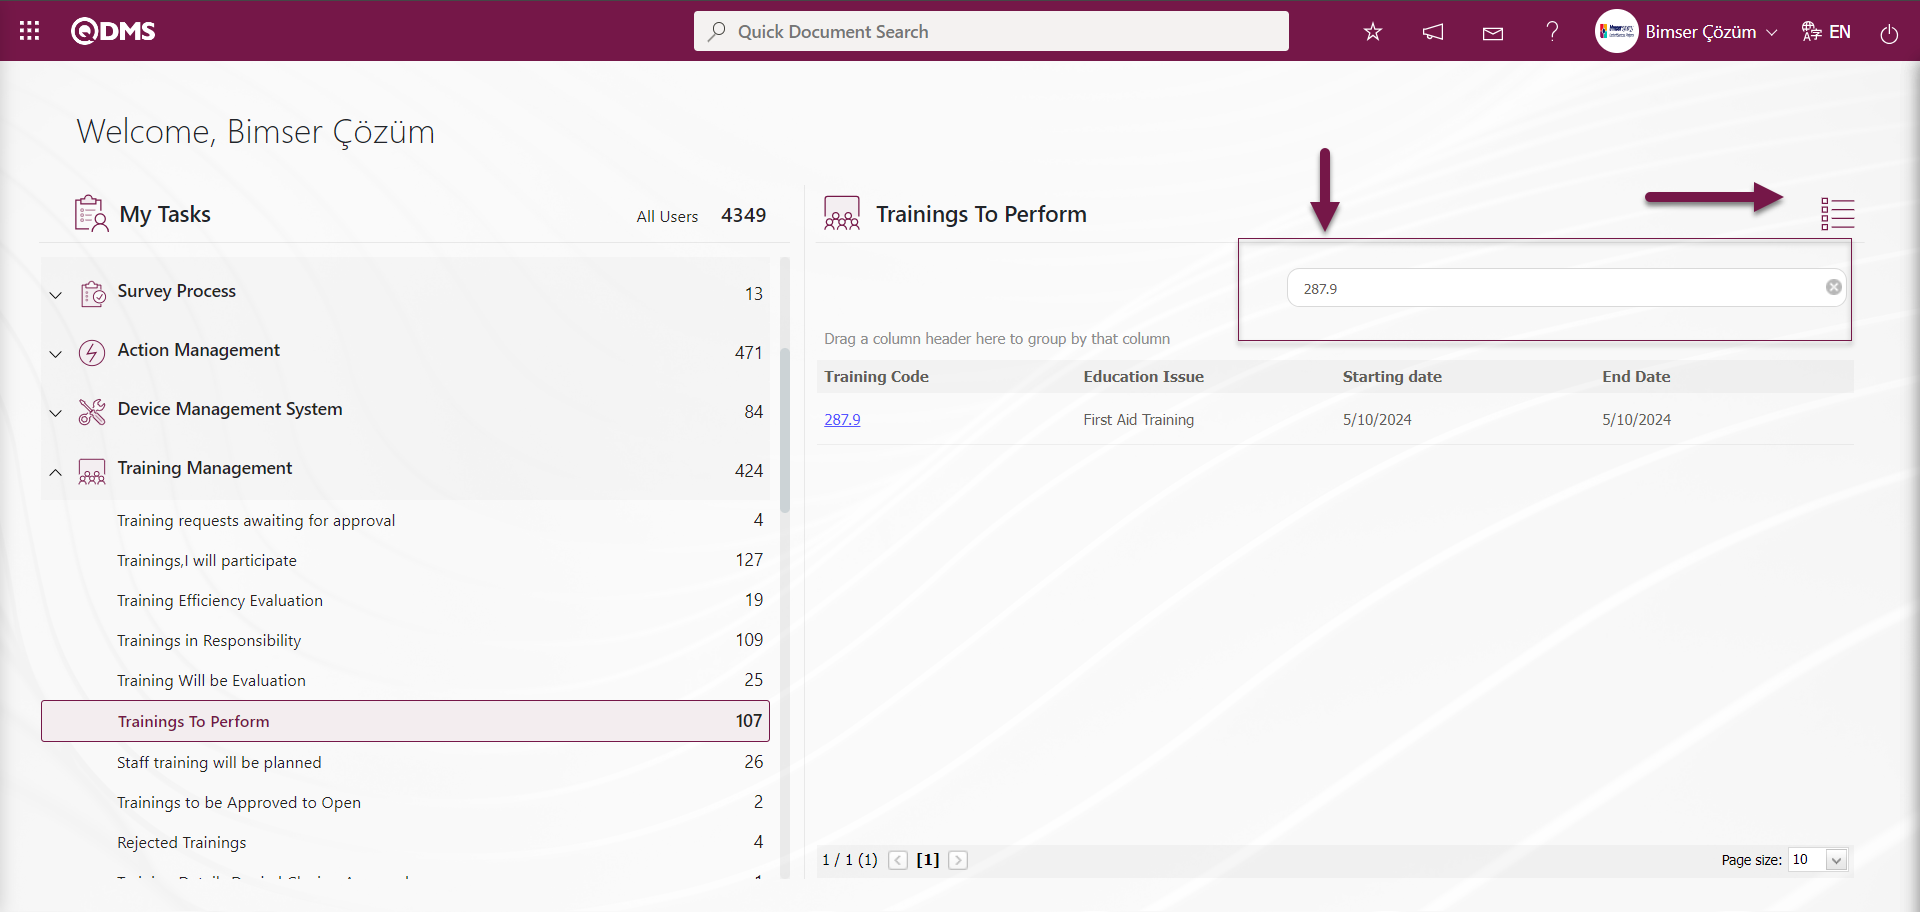
Click on the top right button on the tasks listed in the pending jobs.
By clicking this button, the detailed information of the tasks on the user in the module is displayed in full screen.
In the same way, by clicking the![A checklist with lines and dots
Description automatically generated with medium confidence]ref2 button, the number of columns related to the relevant tasks on the screen that opens increases and the fields in these columns are accessed to detailed information about the relevant tasks. There is a search bar on this screen. When the number of tasks in the related task is too high or when a single task is wanted to be listed, the relevant task code or text is typed into the search bar and the desired task information is displayed and displayed only in the detail information. To exit the full screen where this detailed information task is displayed, click the  button on the top right of the screen.
In pending jobs, whether the tasks are delayed or not is displayed by expressing with colors.
Example; In the pending jobs of the user, the tasks that fall as “Training Requests awaiting for approval” in the Training Management module are indicated by showing the red color that they are not done within the specified time.
Example; In the user's pending jobs, in the Training Management module, “Training Will be Evaluation” is displayed by showing that the task that falls as a job is not delayed in yellow color.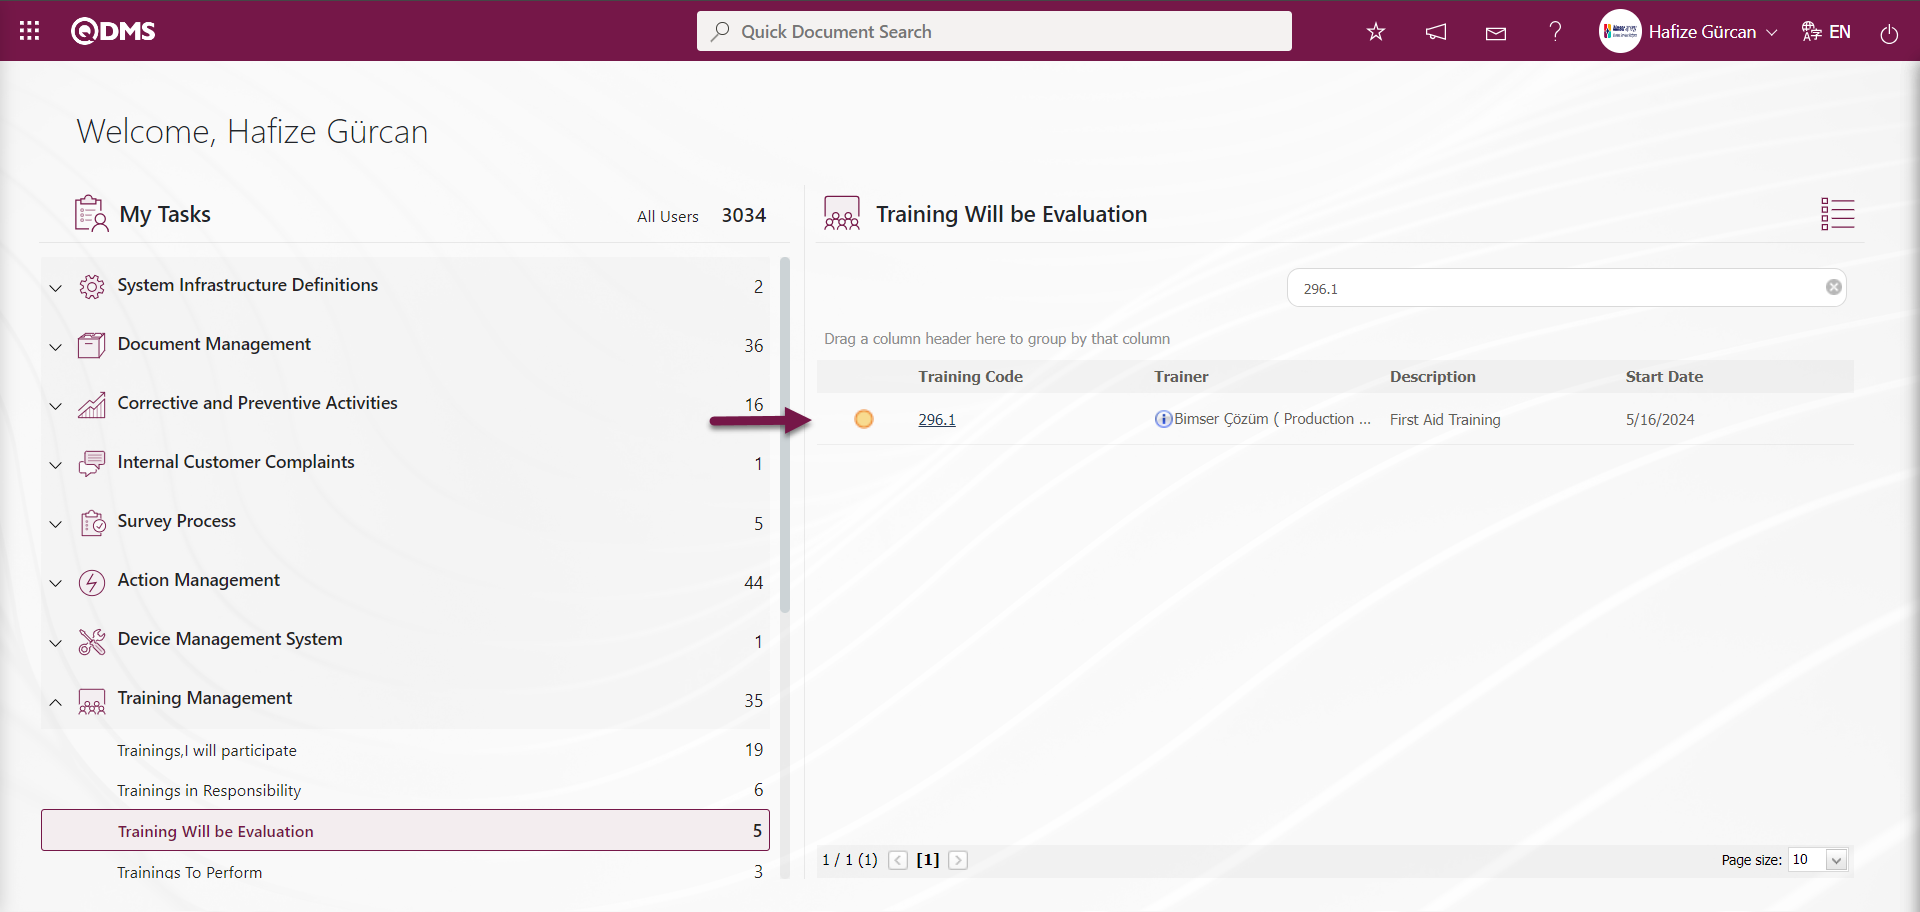
In this way, jobs that are delayed in pending jobs are displayed in red and jobs that are not delayed but are in progress are displayed in yellow, and whether a job is delayed or not is displayed with colors in pending jobs.
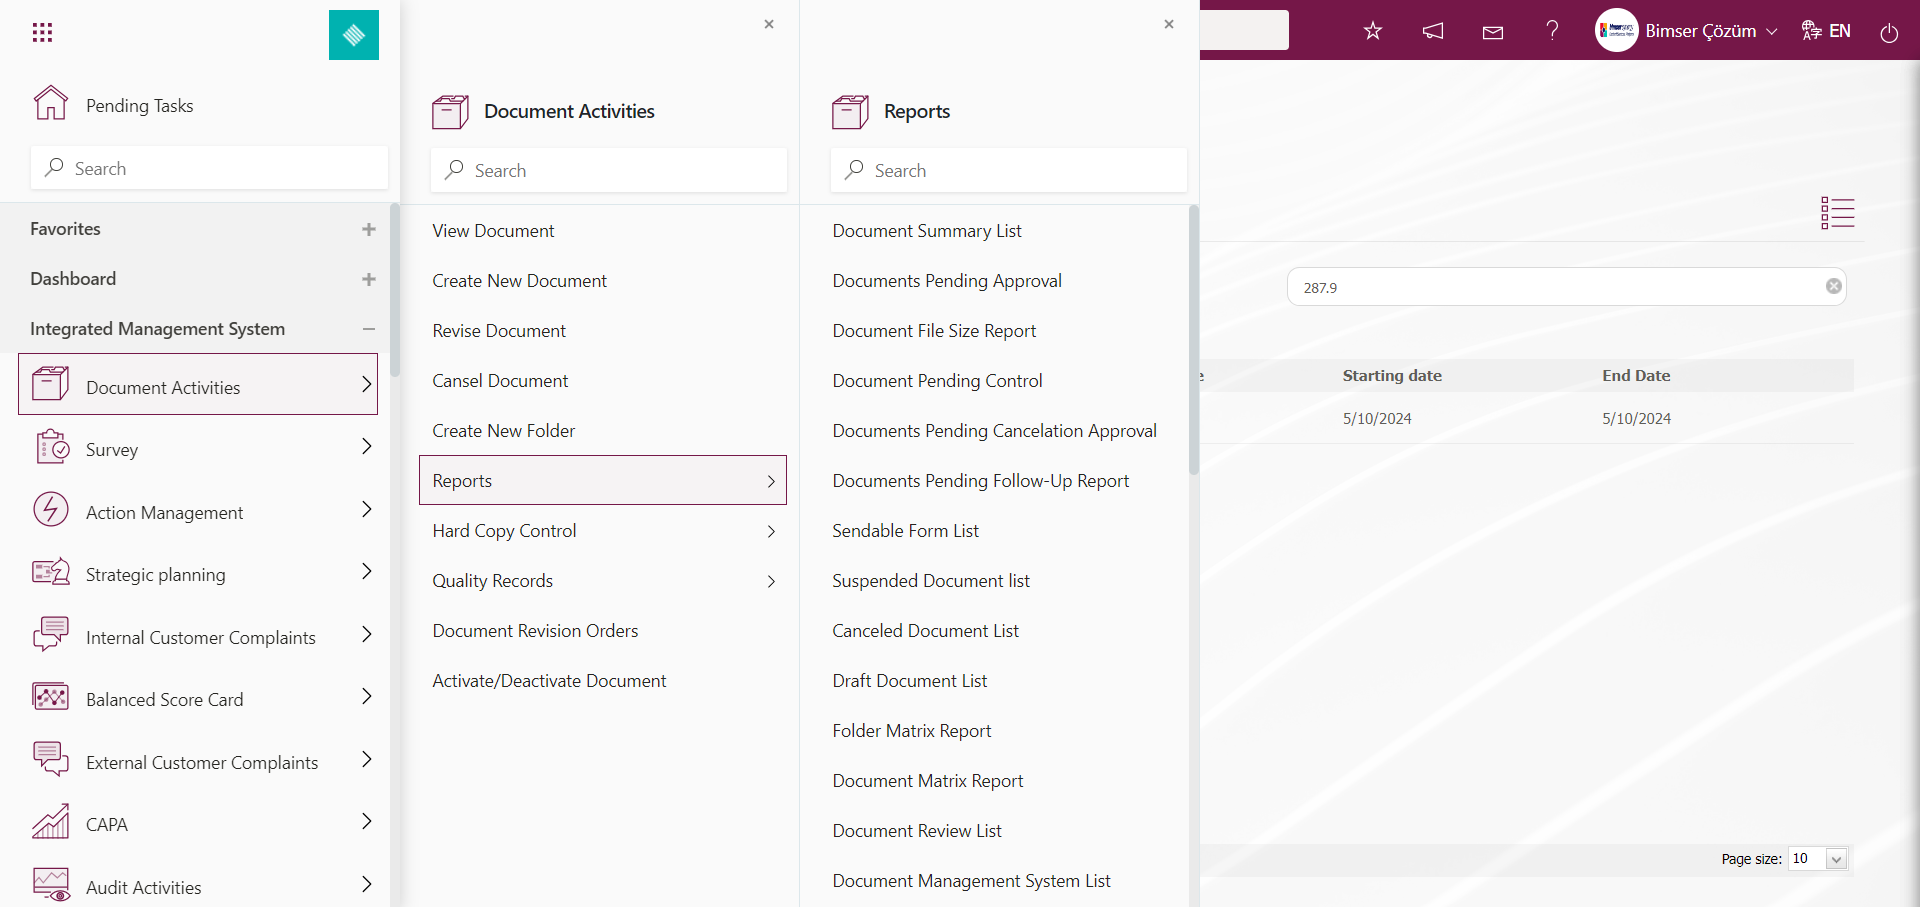
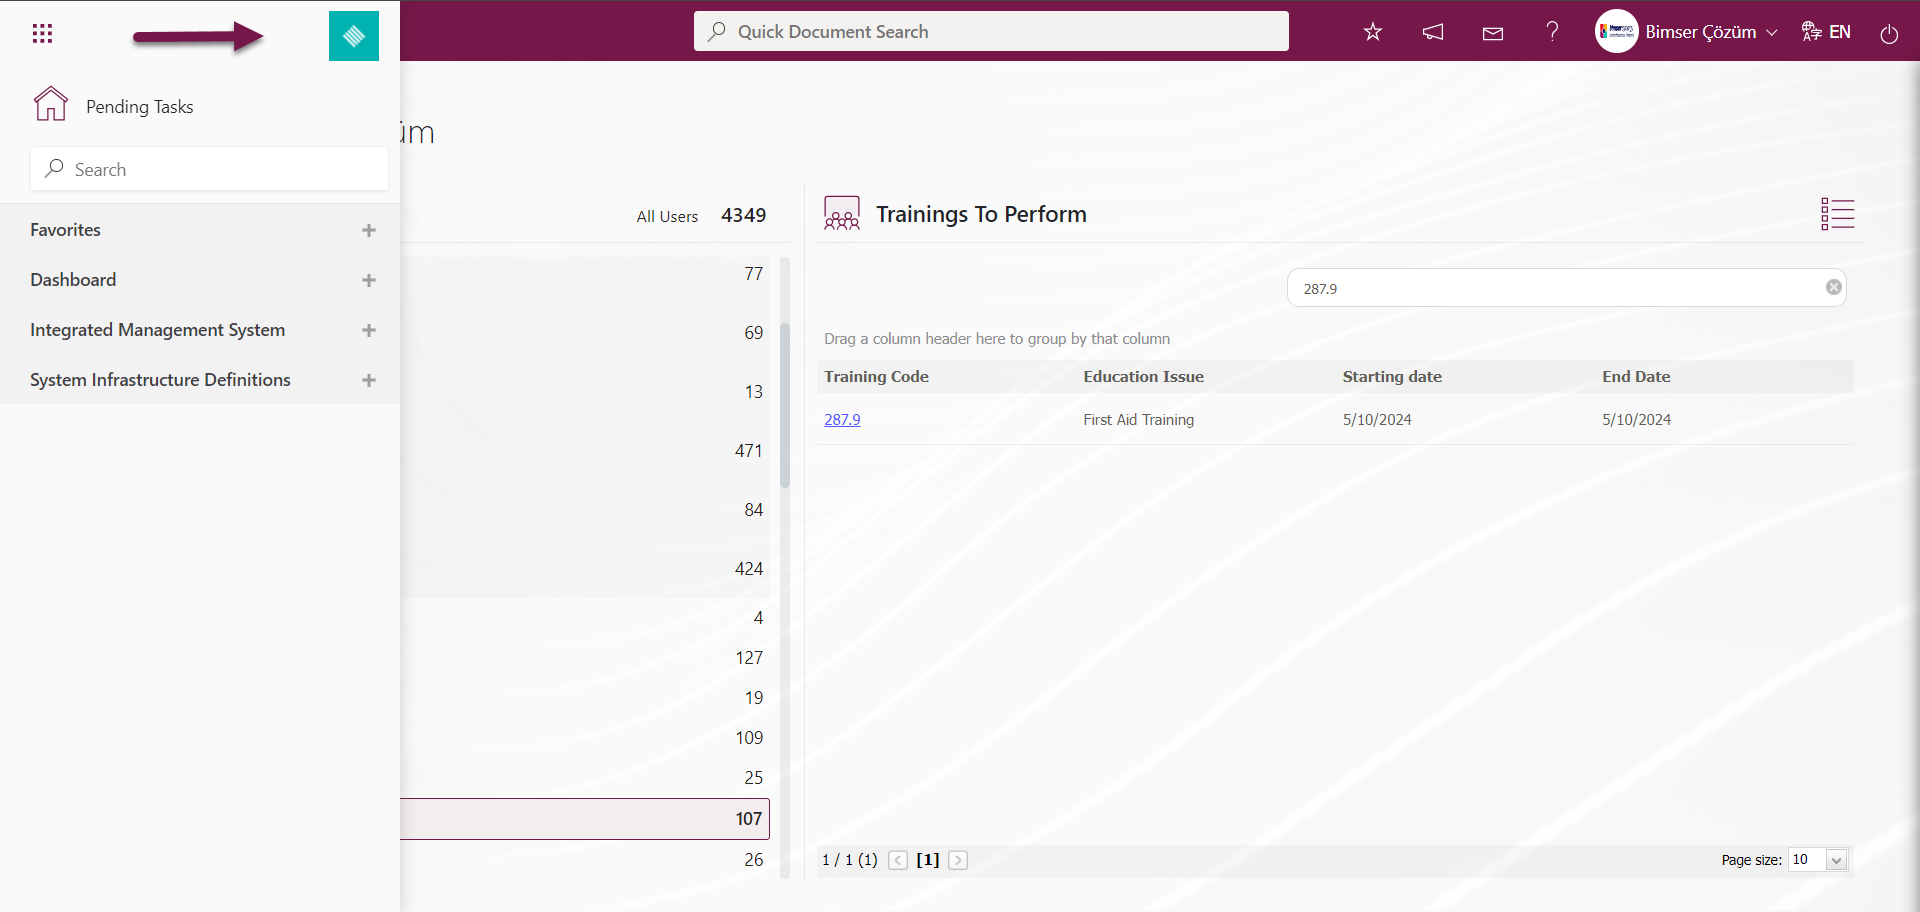
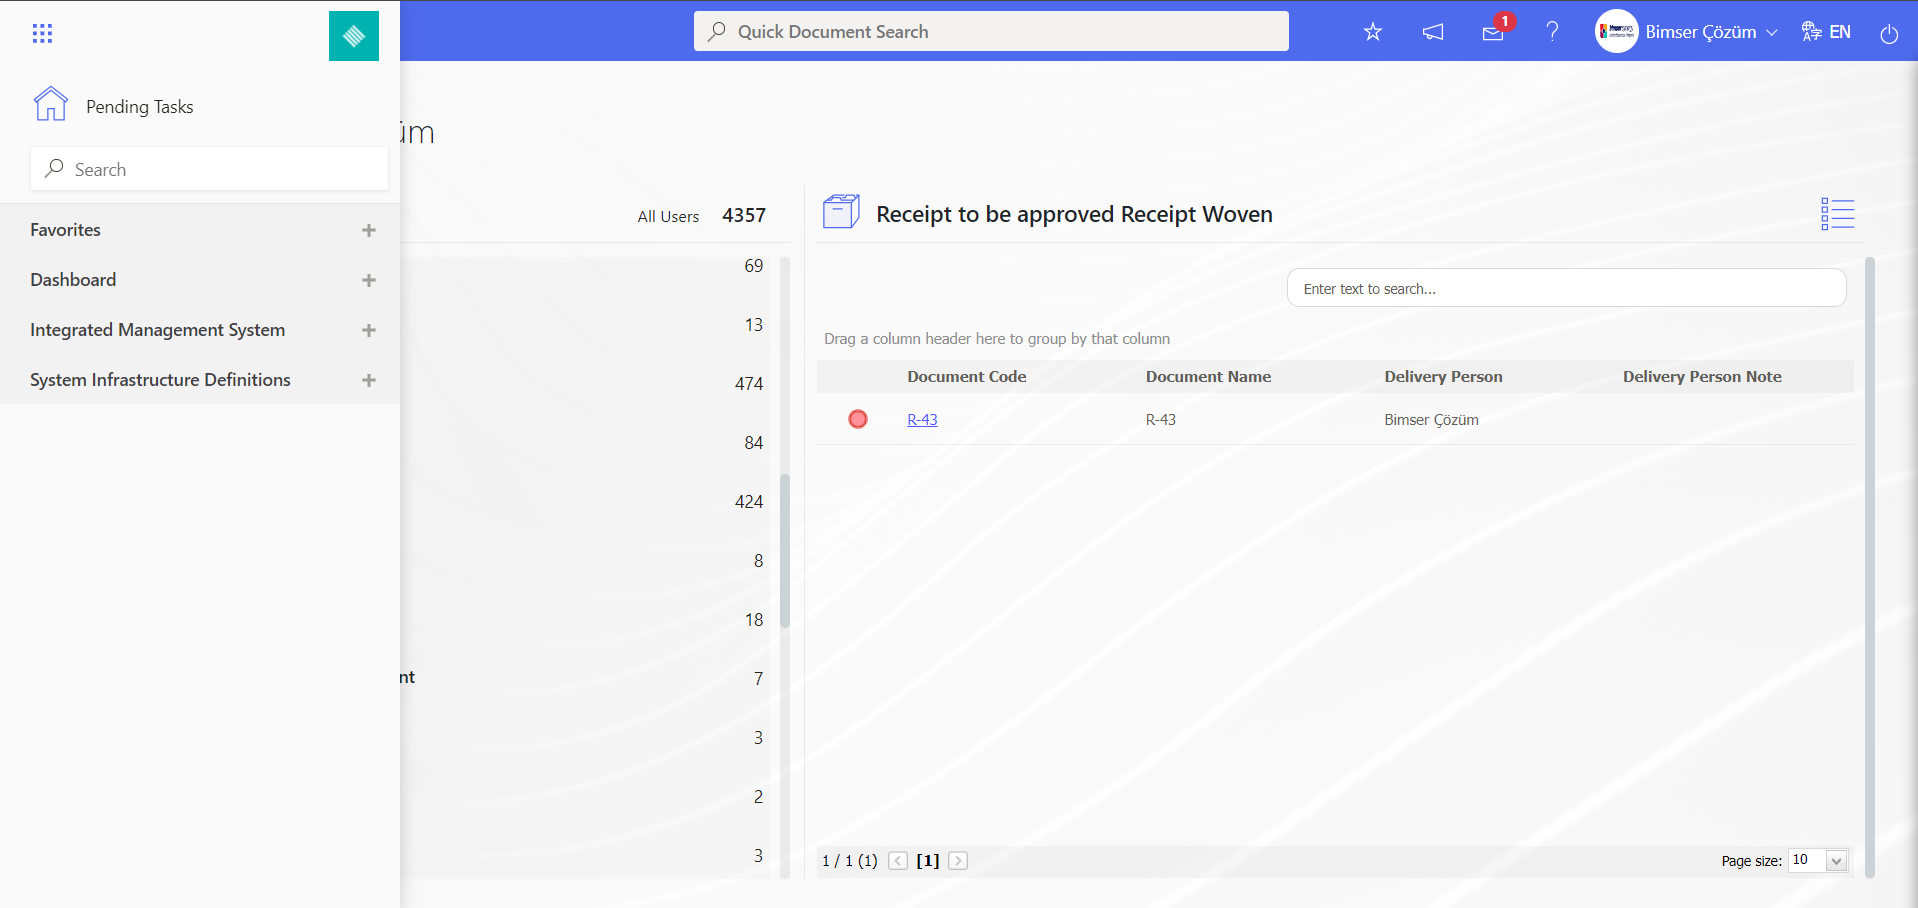
 : In the Qdms system, the transition to the Ensemble program to the Ensemble program by clicking the transition button to the Ensemble program, My Pending Jobs, Favorites, Dashboard, Integrated Management System and System Infrastructure Definitions sections of the modules are the menu button that opens the relevant menus.
 button to switch to Ensemble program.
By clicking My Waiting Tasks, the transition to the My Waiting Tasks page is made in this section. : Related sections are the spacebar that provides quick access to the menus of the modules in the Integrated Management System, System Infrastructure Definitions section. For example: In order to have quick access to the related menus of the Audit Activities module, the name of the Audit Activities Module is typed in the search bar. After typing the module name, the System Infrastructure Definitions and Integrated Management System sections of the module are displayed. Audit Activities Integrated Management section is clicked and the name of the menu is displayed by typing the relevant menu name in the search bar in the menu list that opens.
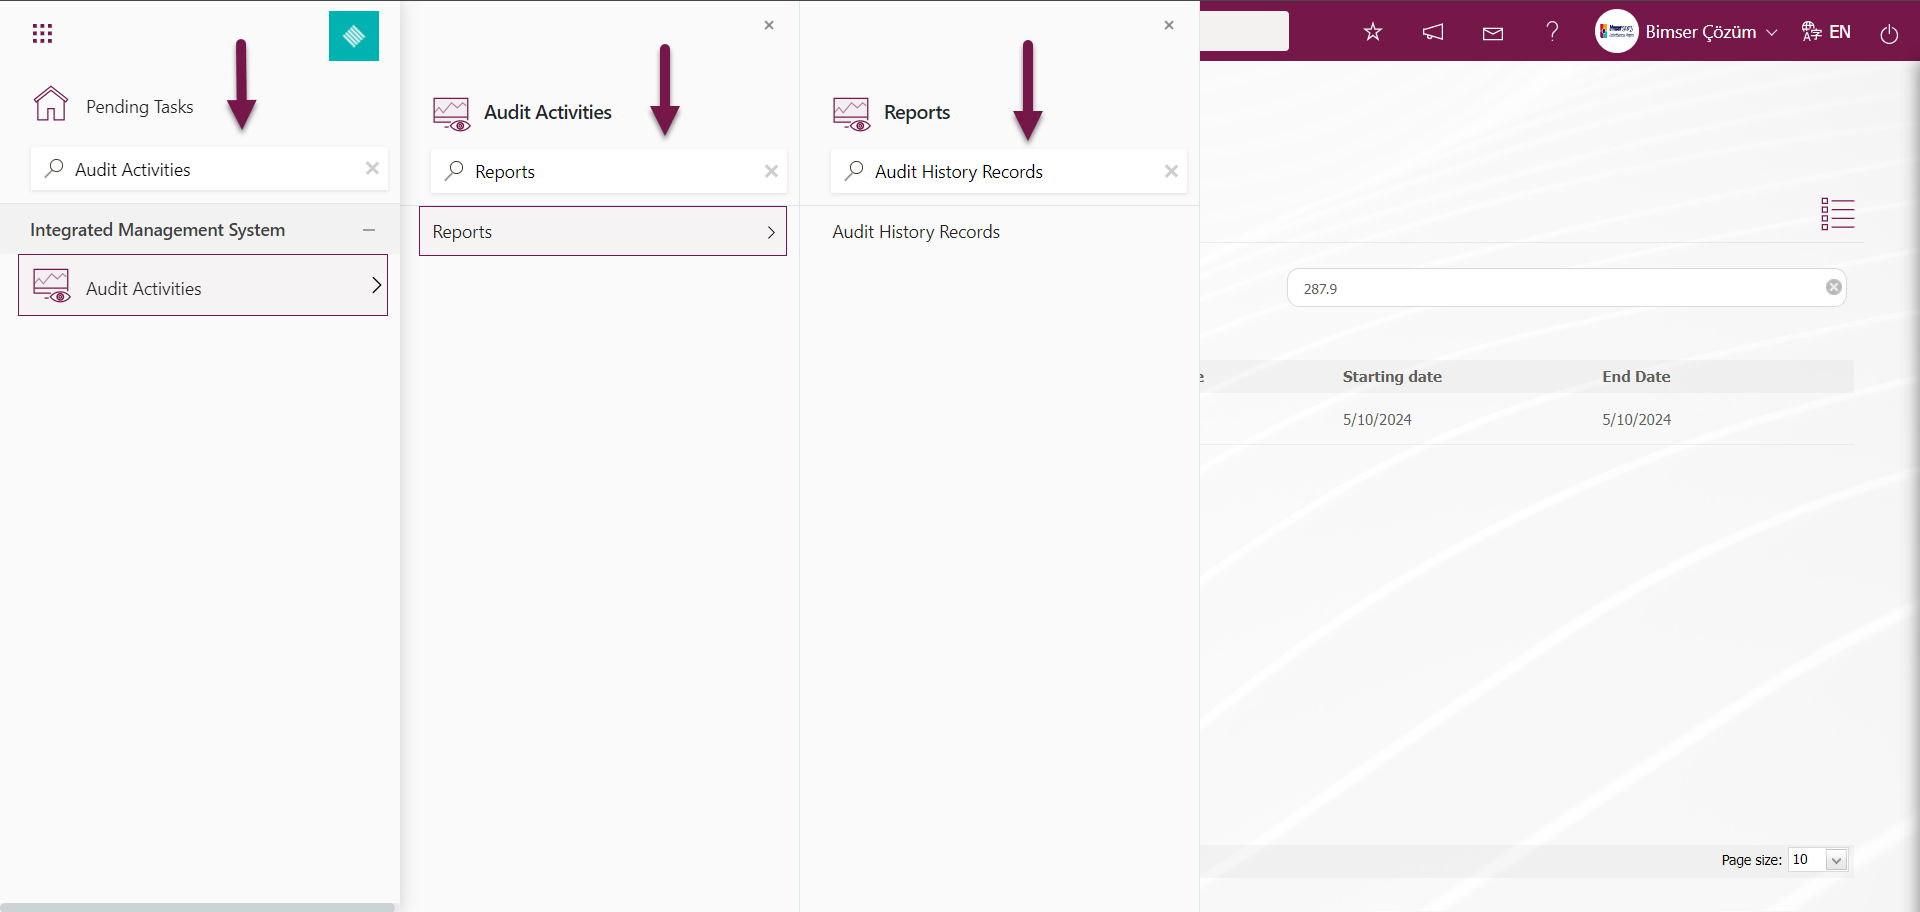
By clicking on the menu name displayed in the list, you can quickly access the menu screen you want to open.
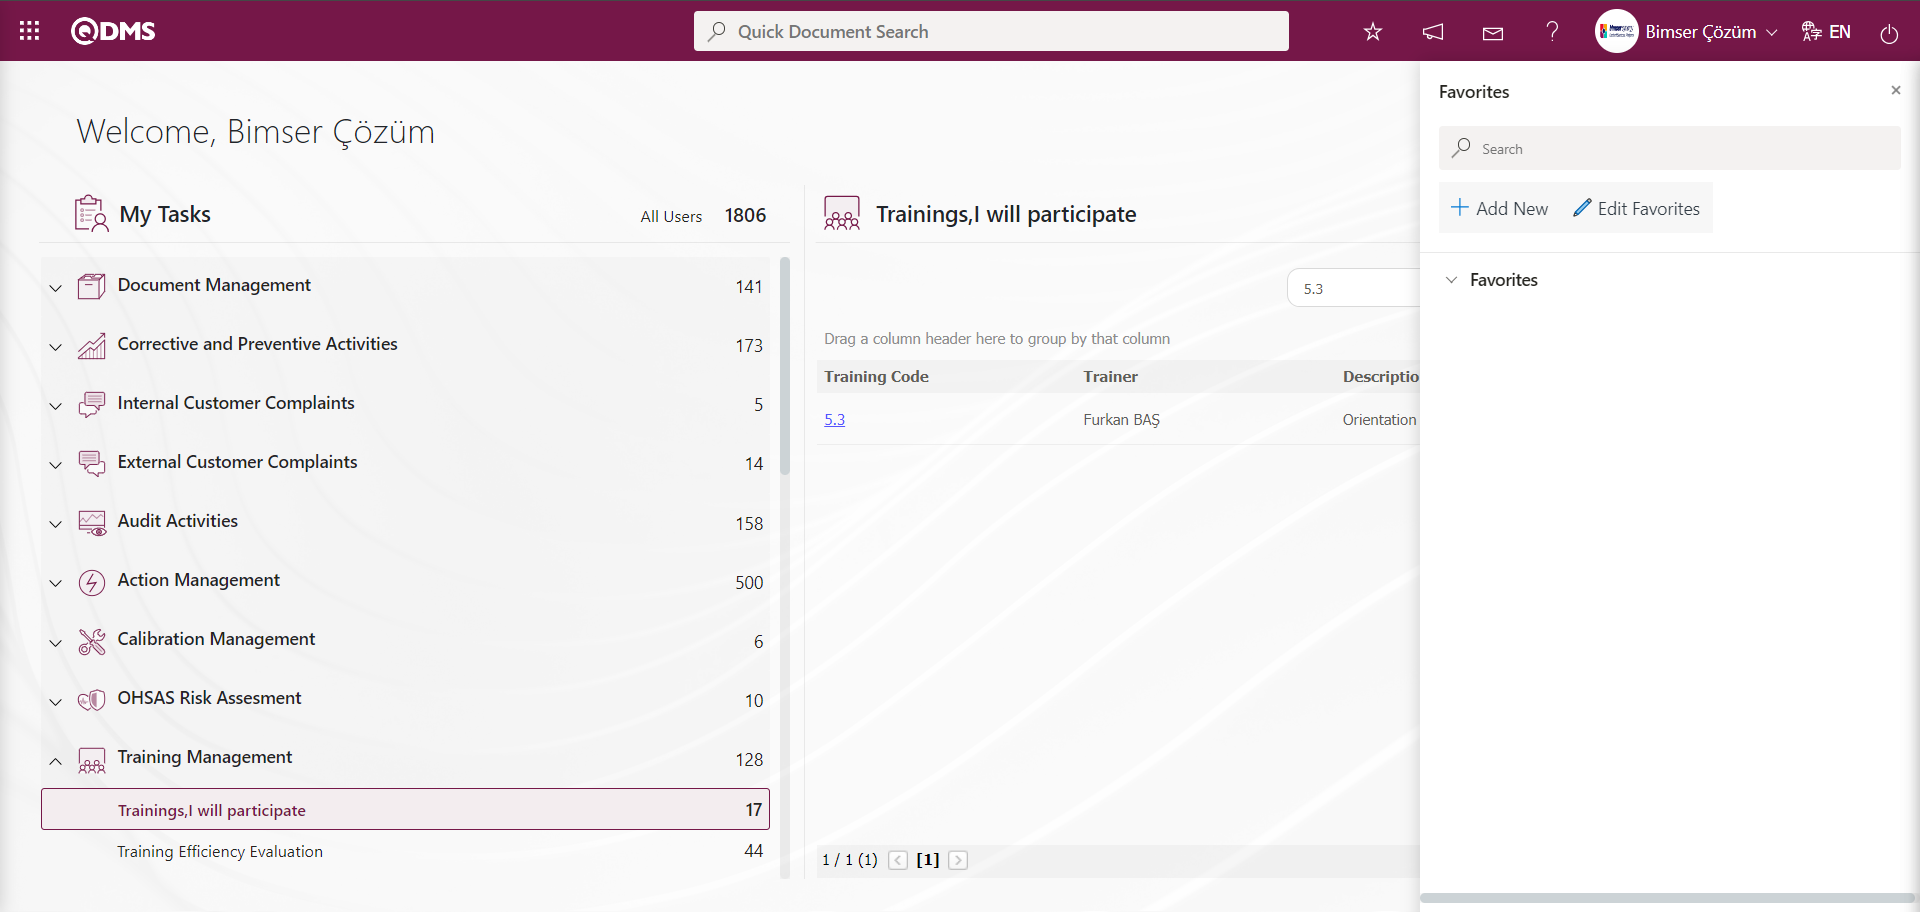
Favorites: This is the section where the name of the menus that the user uses frequently are brought to the list. There is no need to make any settings in this section in Qdms system. The Qdms system automatically brings the 5 menus that the user uses frequently to this section. Since the list of menus that each user uses frequently in the Qdms system is different, the menus in the favorites section also differ. It allows the user to open and process the menu that the user uses frequently in the Qdms system in the Favorites section by providing quick access.
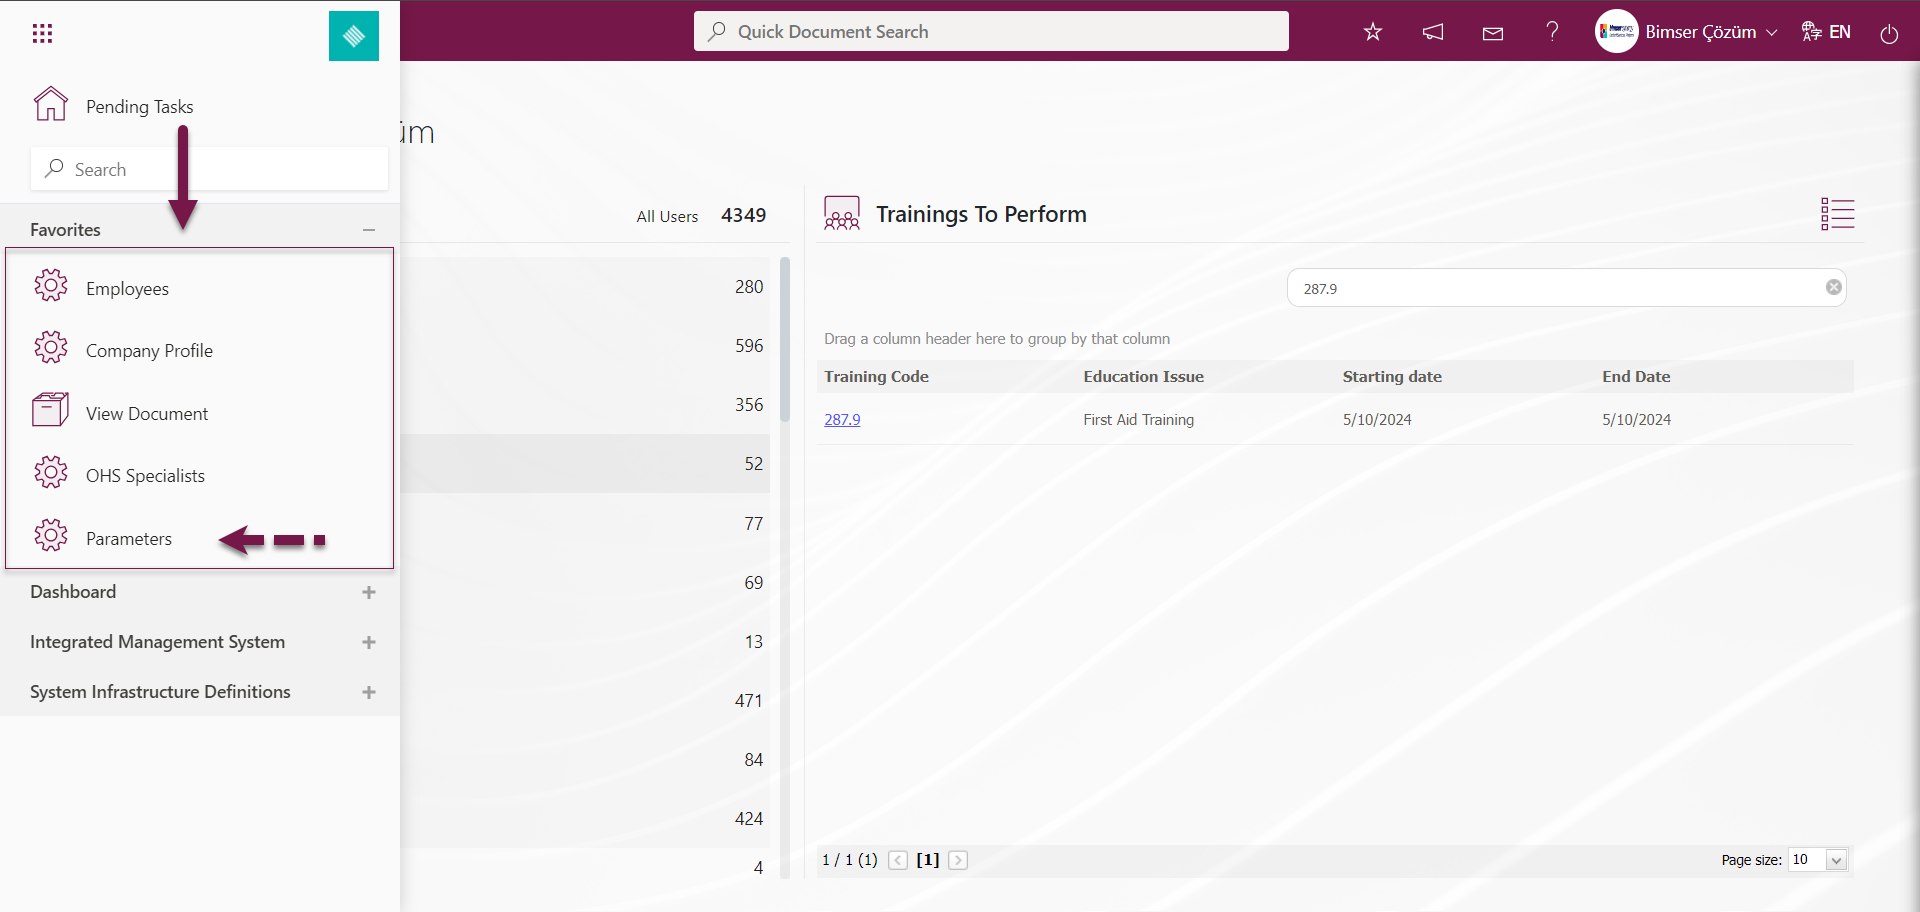
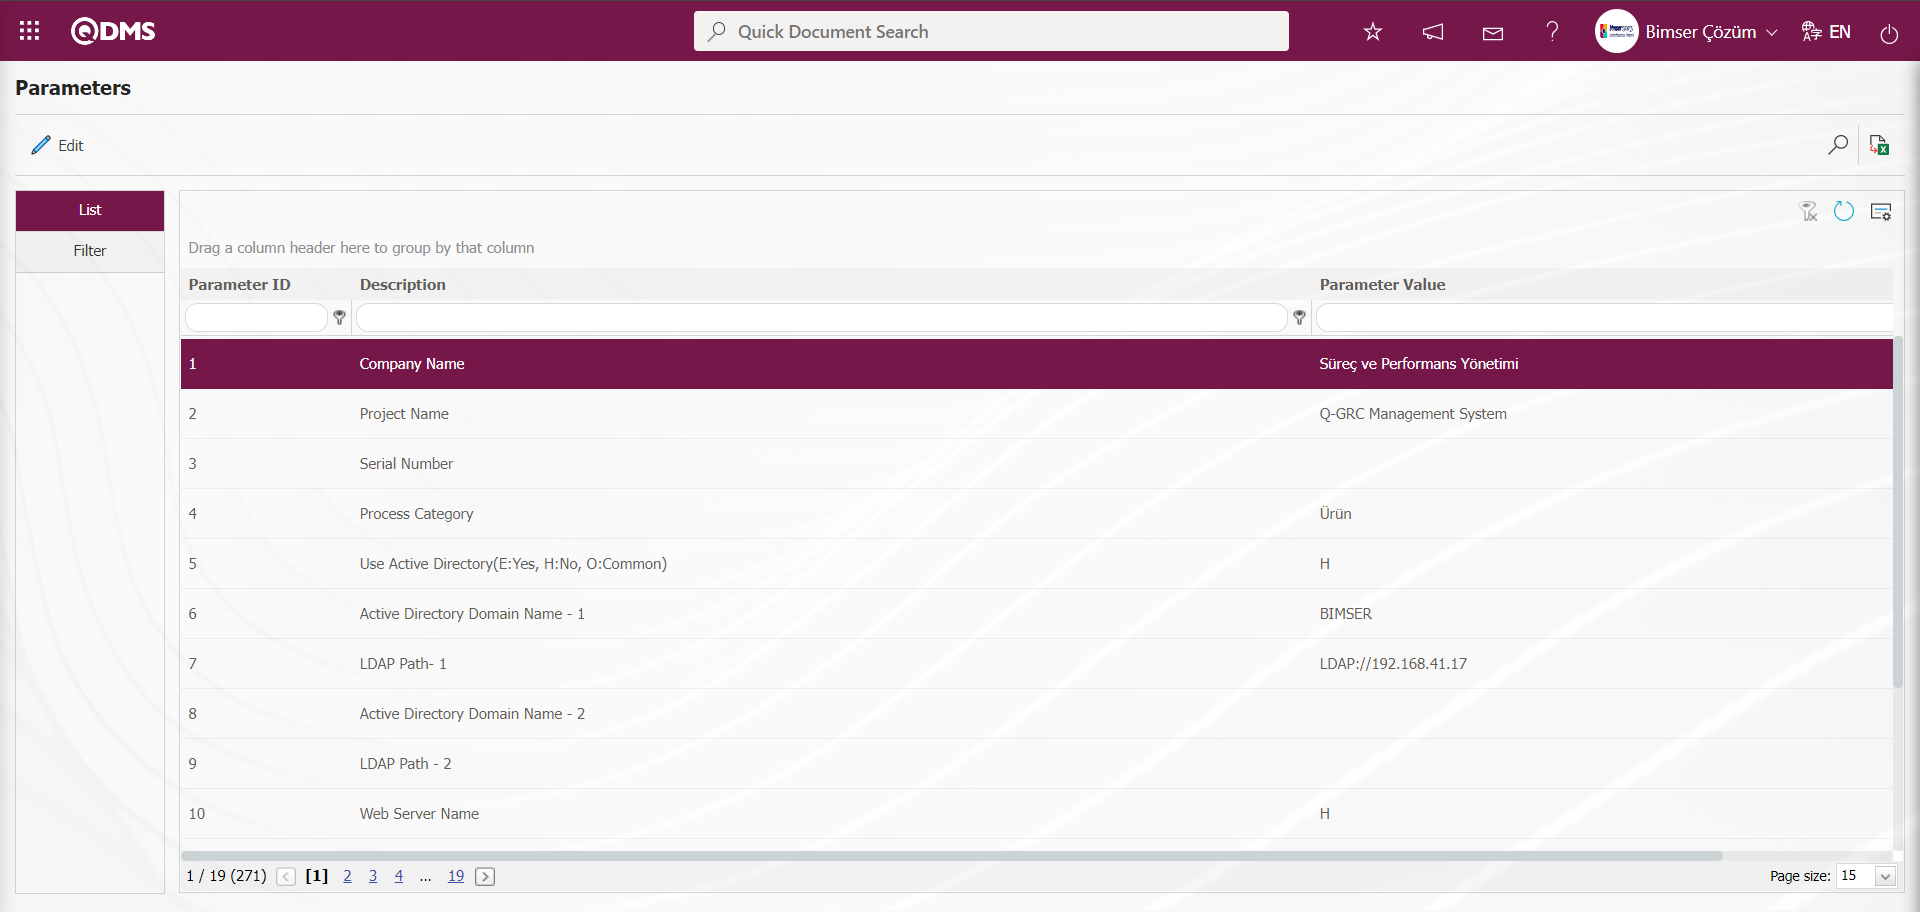
In the favorites list, the Parameters menu is clicked to provide quick access and the necessary action steps are performed in the menu that opens.
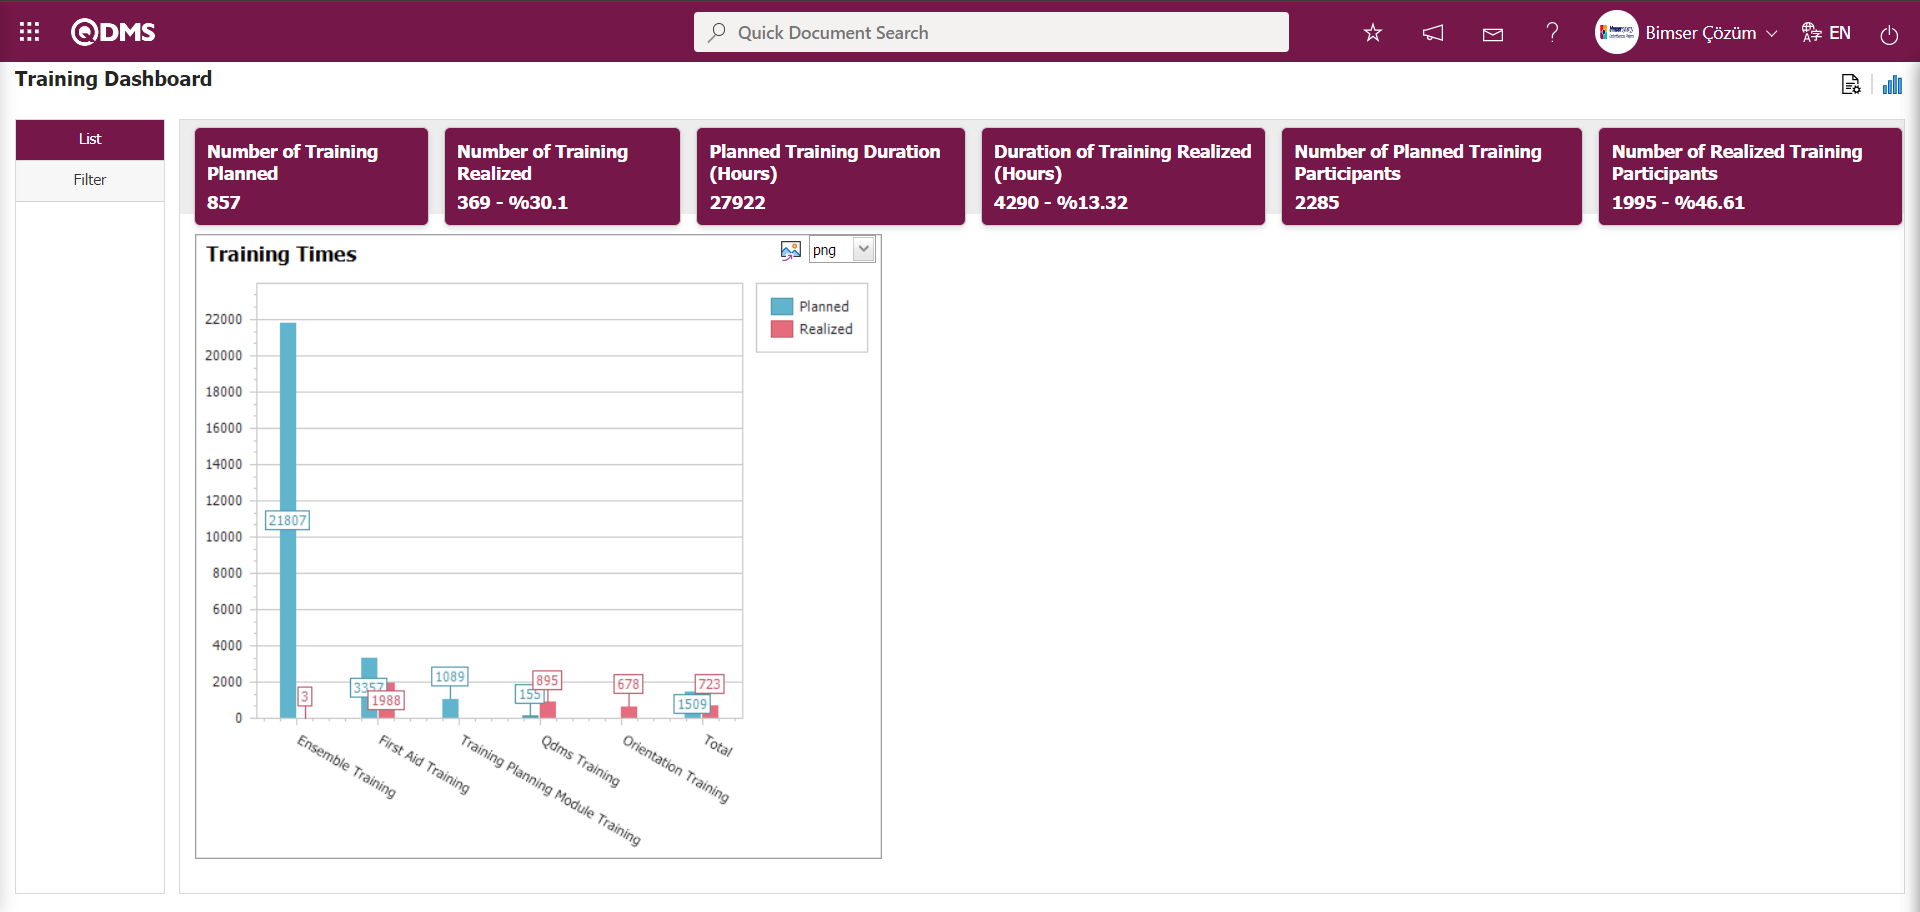
Dashboard: The part of the Qdms system that allows users to view transactions, metrics, graphs and reports on a single screen. Dashboard refers to the display of indicators, dashboards and dashboards used to summarize the flow and/or content of information and to explain a particular situation through graphs and tables. Its purpose is to present the necessary information in the shortest time, with the least interaction and thinking requirements. This feature has been introduced in some of the main modules and risk modules within the scope of the Qdms System.
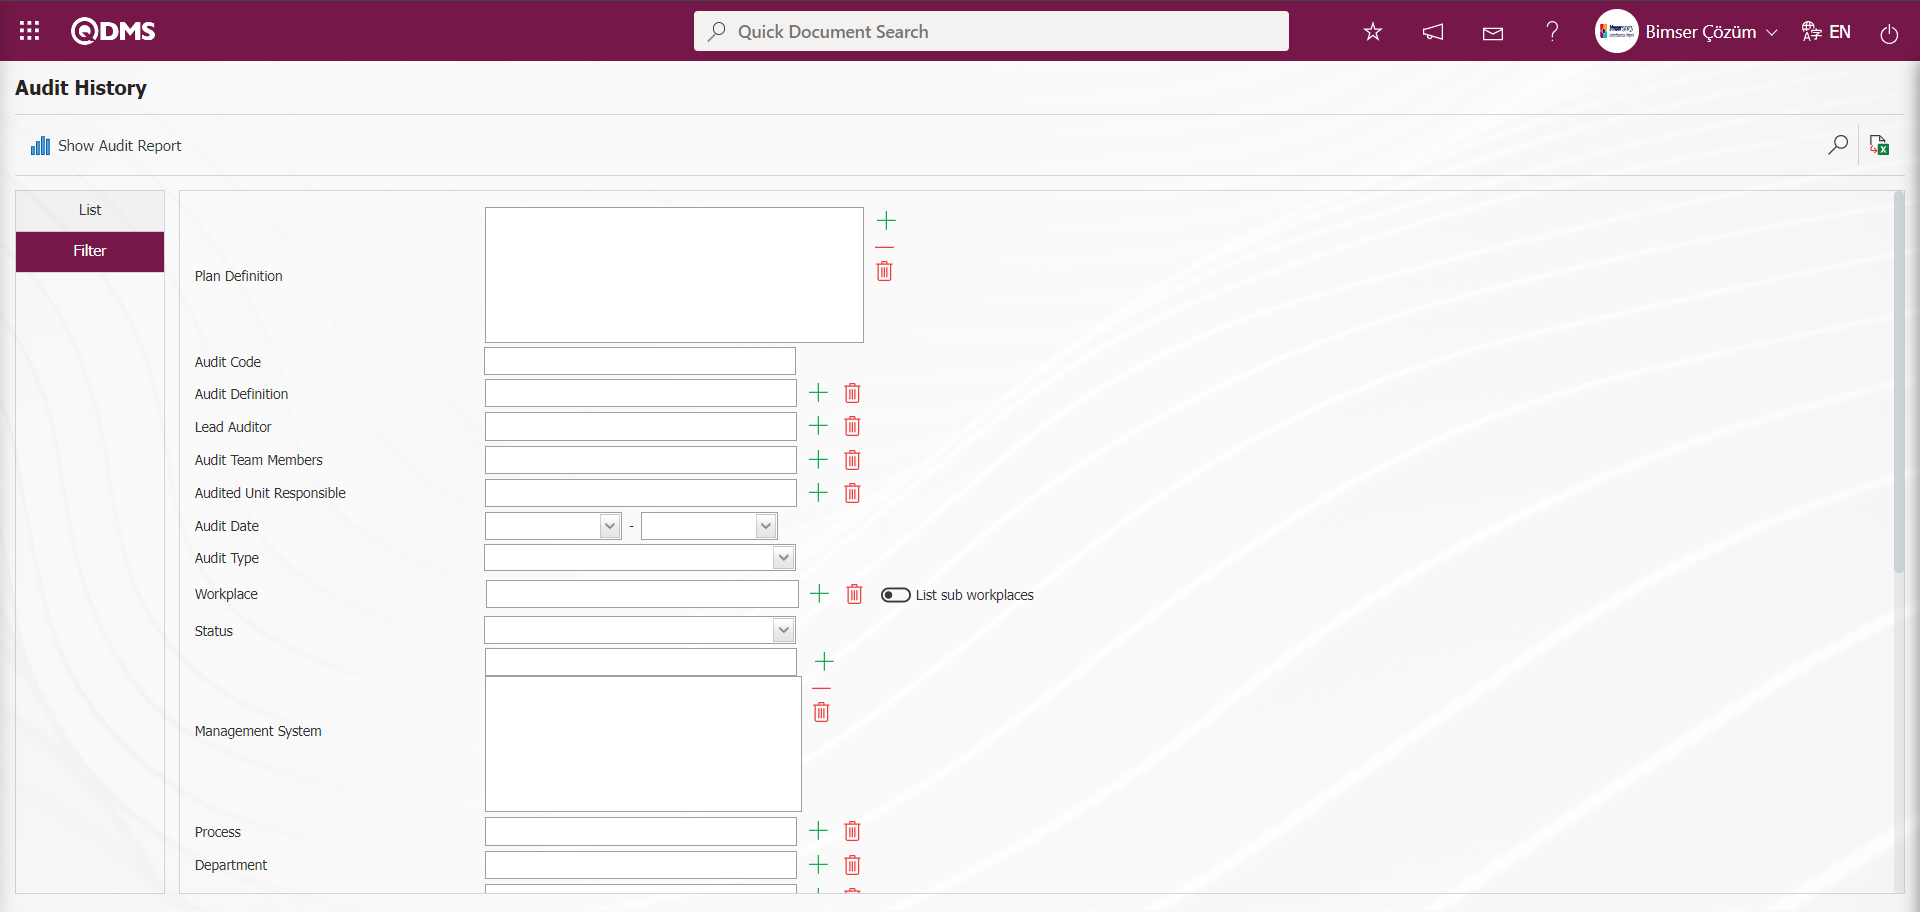
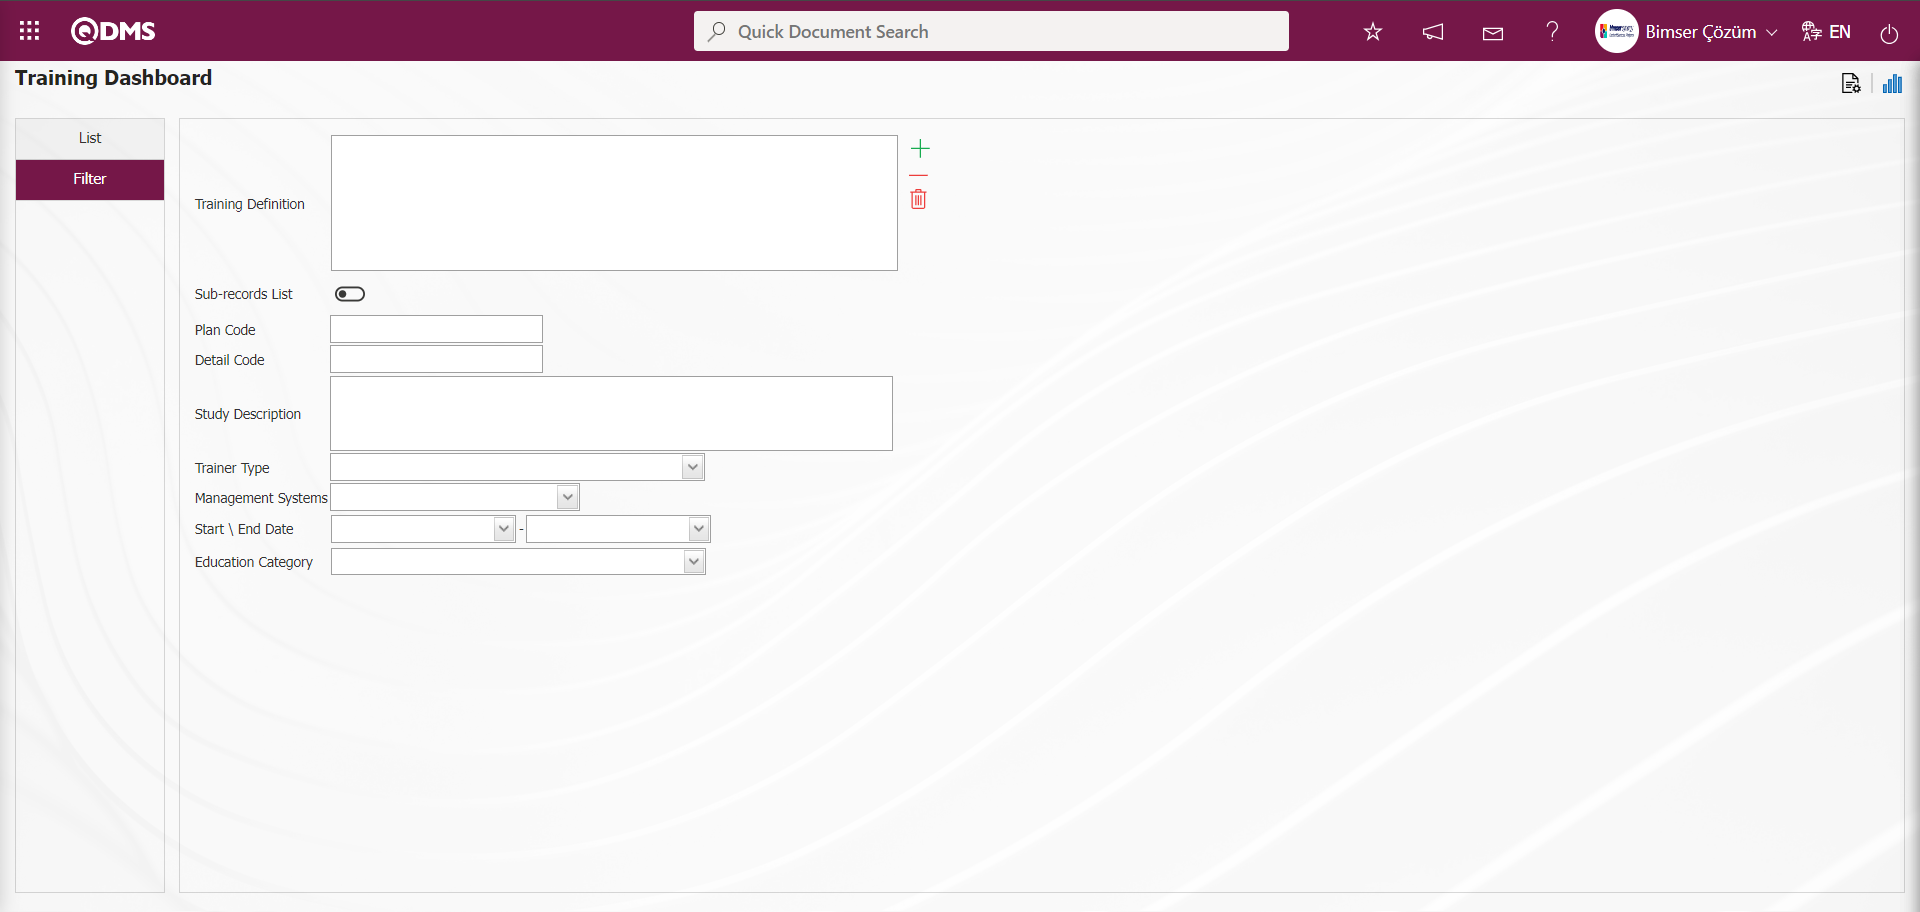
The content of this feature is displayed by clicking the “Training Planning” module in the Dashboard section. When the Dashboard menu is clicked in the Training Planning module, two tabs, list and filter tab, appear.
In the Filter tab, filtering is done according to the search criteria.
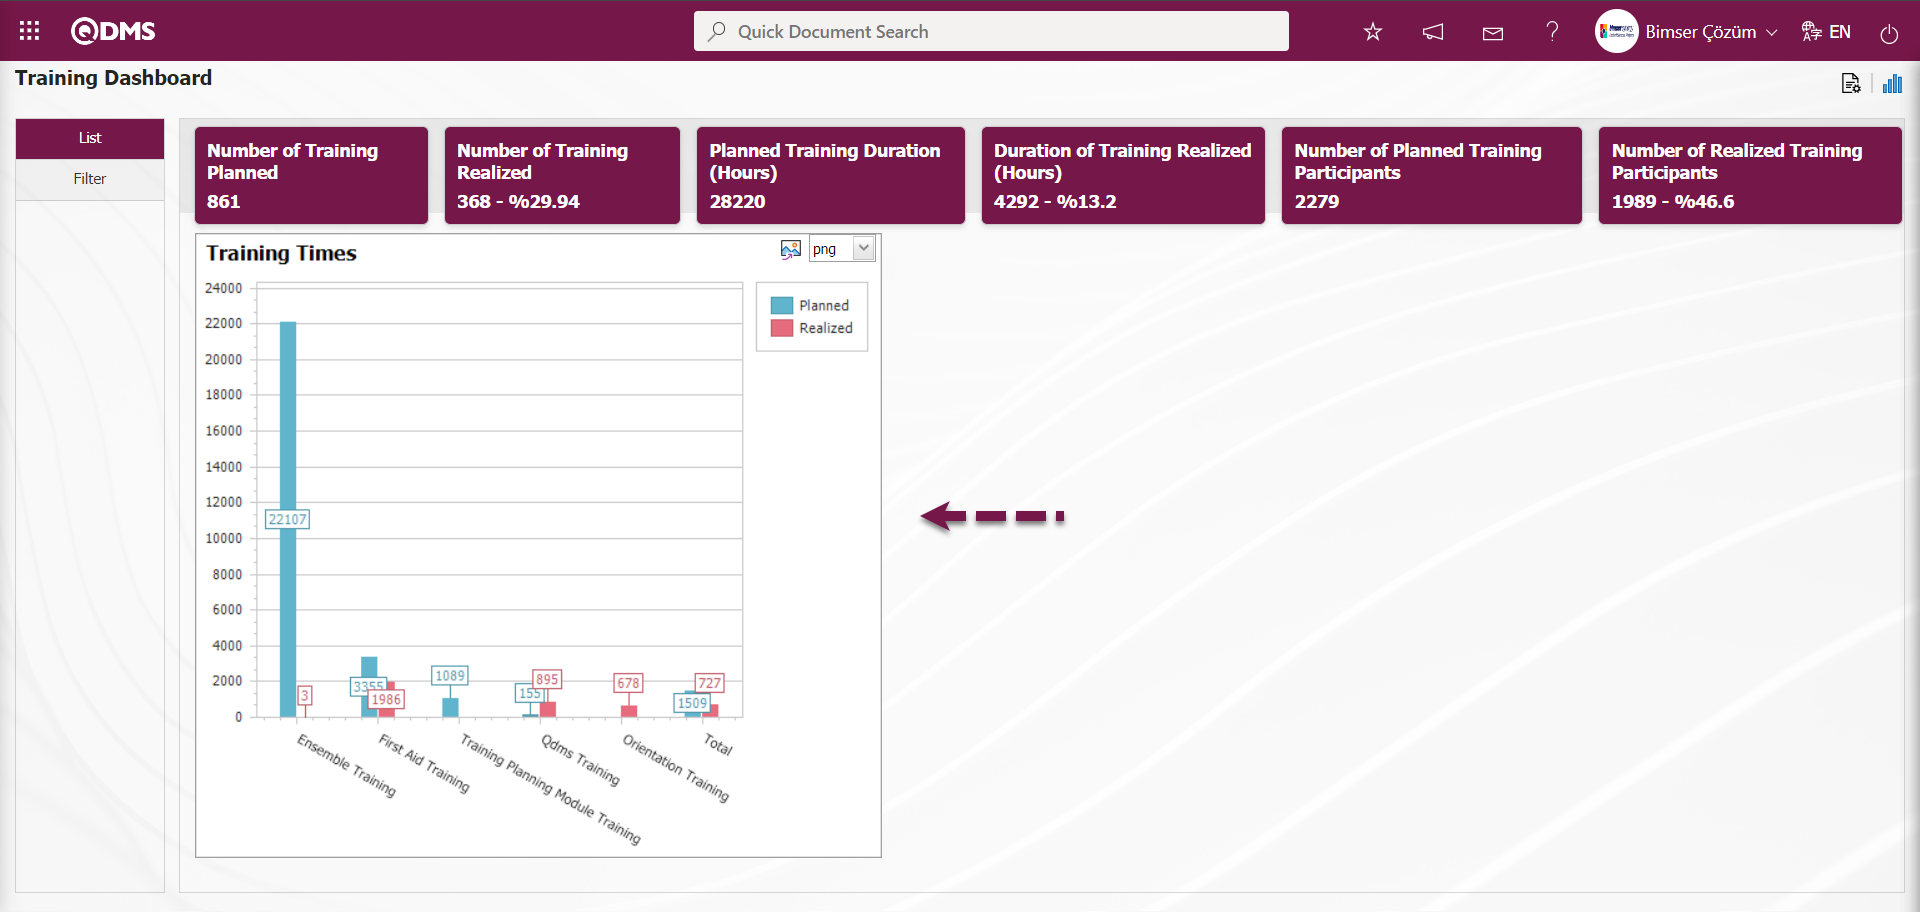
 Number of Training Planned, Number of Training Realized, Planned Training Duration (Hours), Duration of Training Realized (Hours), Number of Planned Training Participants and Number of Realized Training Participants fields are displayed as fixed fields on the List tab on the Dashboard screen in the Training Planning module. In these fixed fields, information is given in total and percentages.
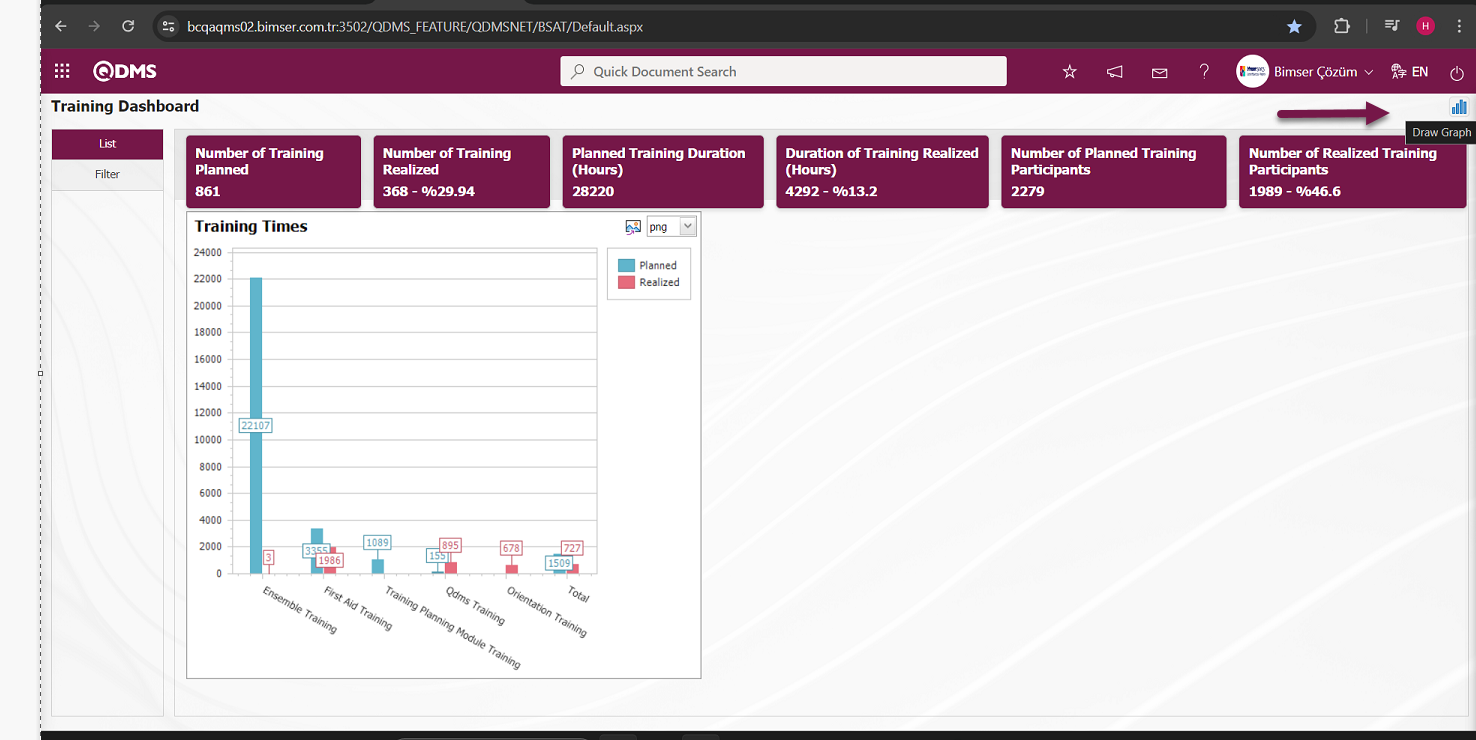
In the Training Planning module, Module administrators can increase the number of graphics by designing the graphics they want. In the Dashboard screen of the Training Planning Module, graphic designing is done with settings such as how many graphics will be on the Dashboard screen, what the name of the graphic will be, what the order of the graphics will be, which areas will be on the Z axis, Y axis, what the graphic length, what the graphic width will be and what the graphic type will be. In order to make these adjustments on the Training Planning Dashboard screen, the user must be defined as the Training Planning Module Administrator. (Module administrator identification is made in the Training Planning Module in the System Infrastructure Definitions/BSID/Configuration Settings/Administrator Identification menu).
When the user is not a Module Administrator in the Training Planning Module, the button in the screenshot below is displayed on the Training Planning Dashboard screen.
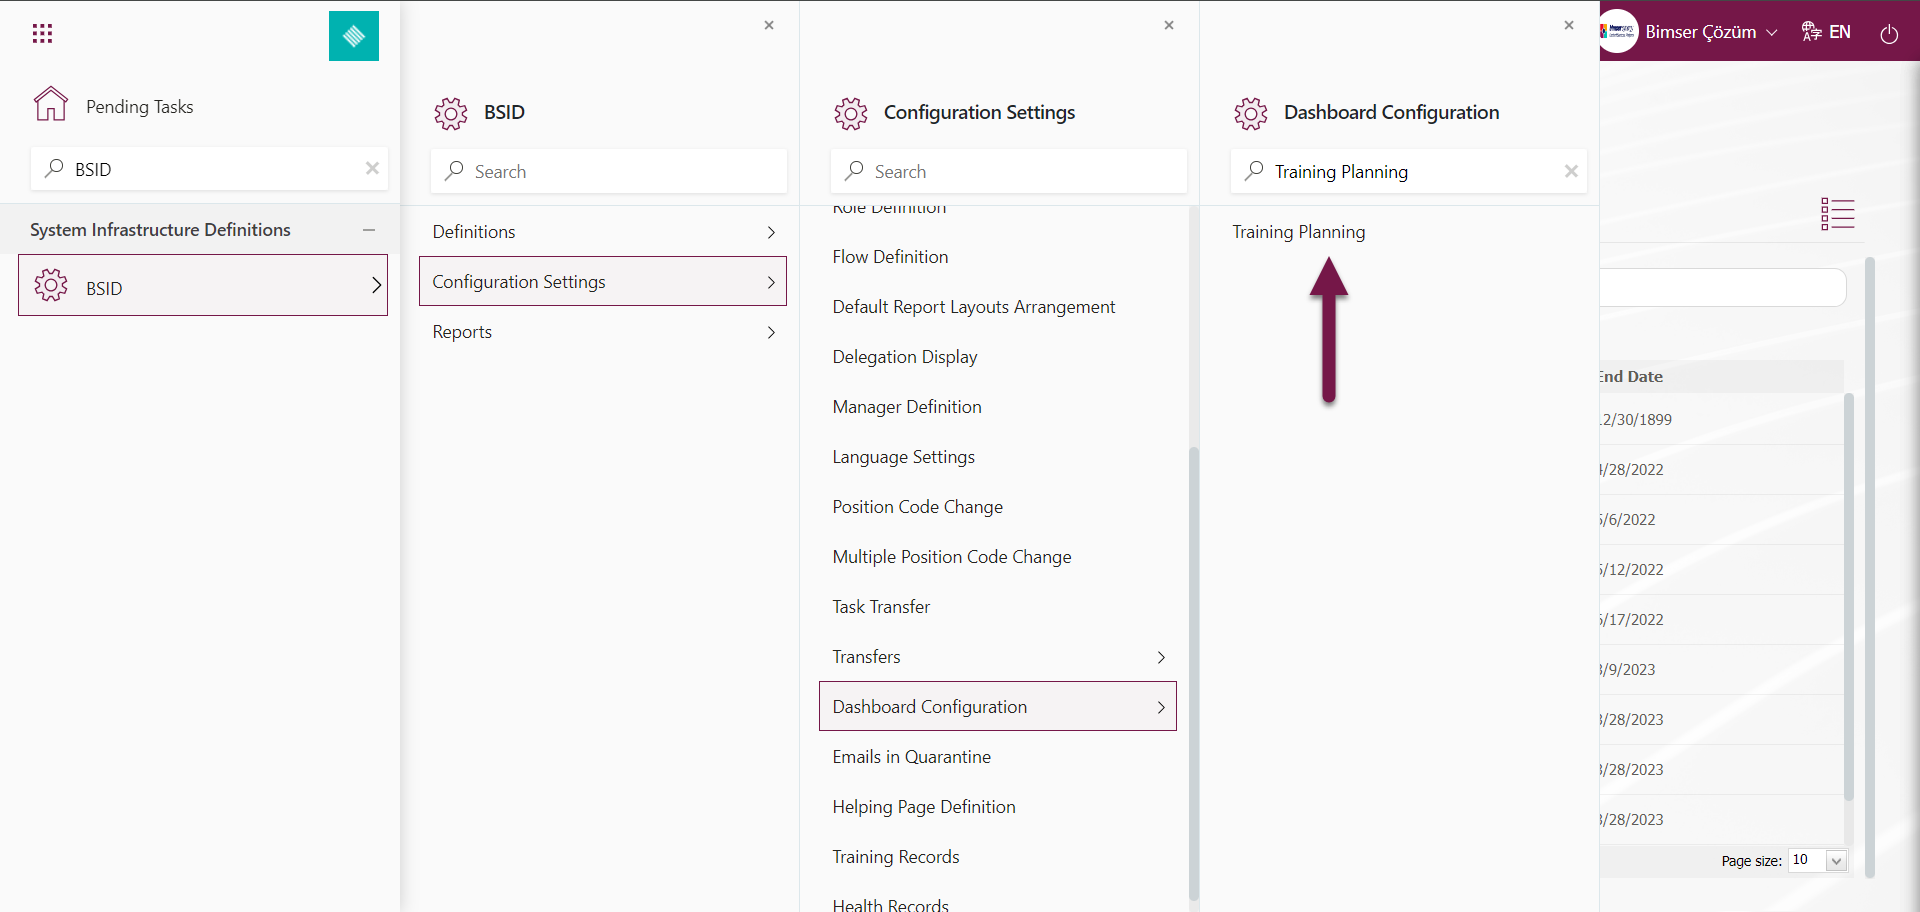
The first button  (Graphic Settings) is displayed on the Training Planning Dashboard screen of the user who is defined as the module Administrator in the Training Planning Module. The user who is the Module Administrator makes the necessary adjustments on the Training Planning Dashboard screen with the help of the (Graphic Settings) button. Users who are not Module Administrators can also make graphic design by making the necessary adjustments in the Dashboard Configuration screen in the System Infrastructure Definitions / BSID / Configuration Settings / Dashboard Configuration / Training Planning menu.
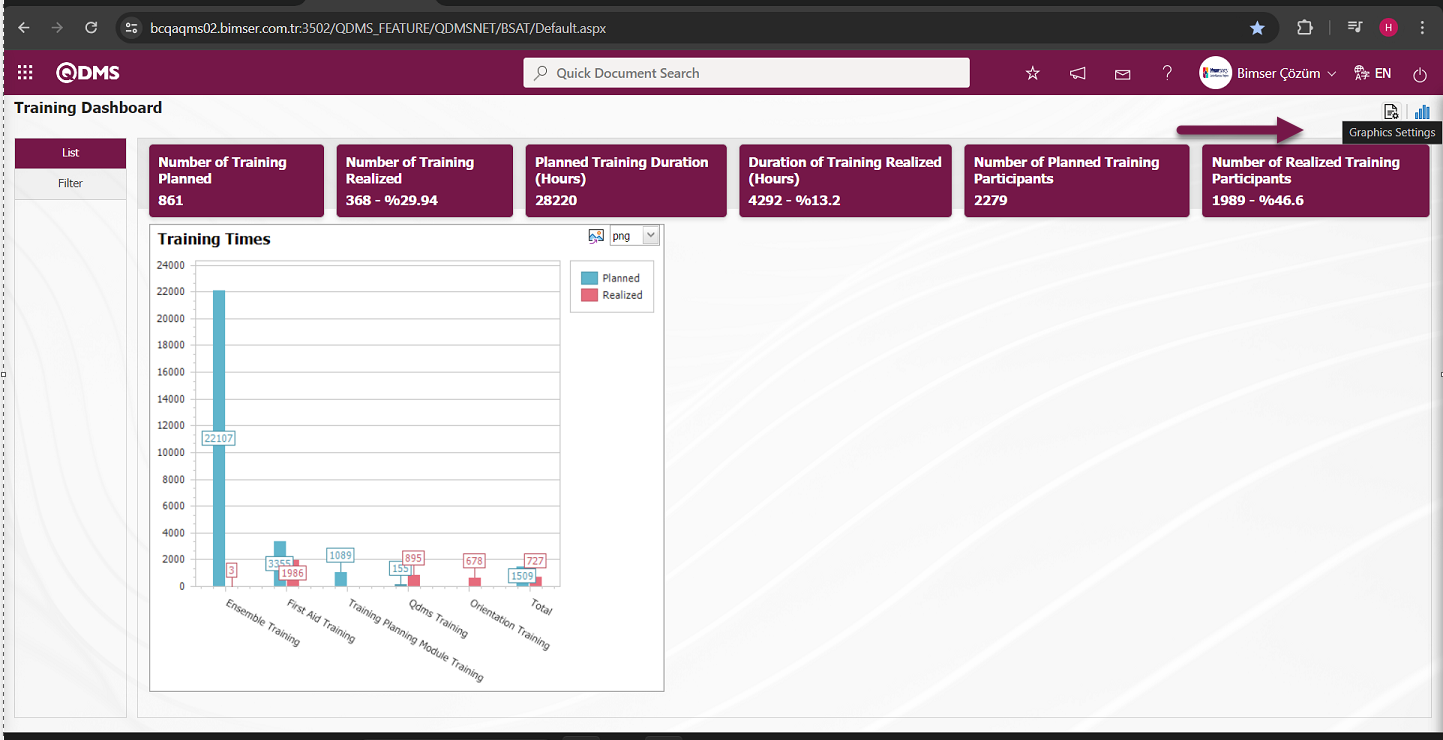
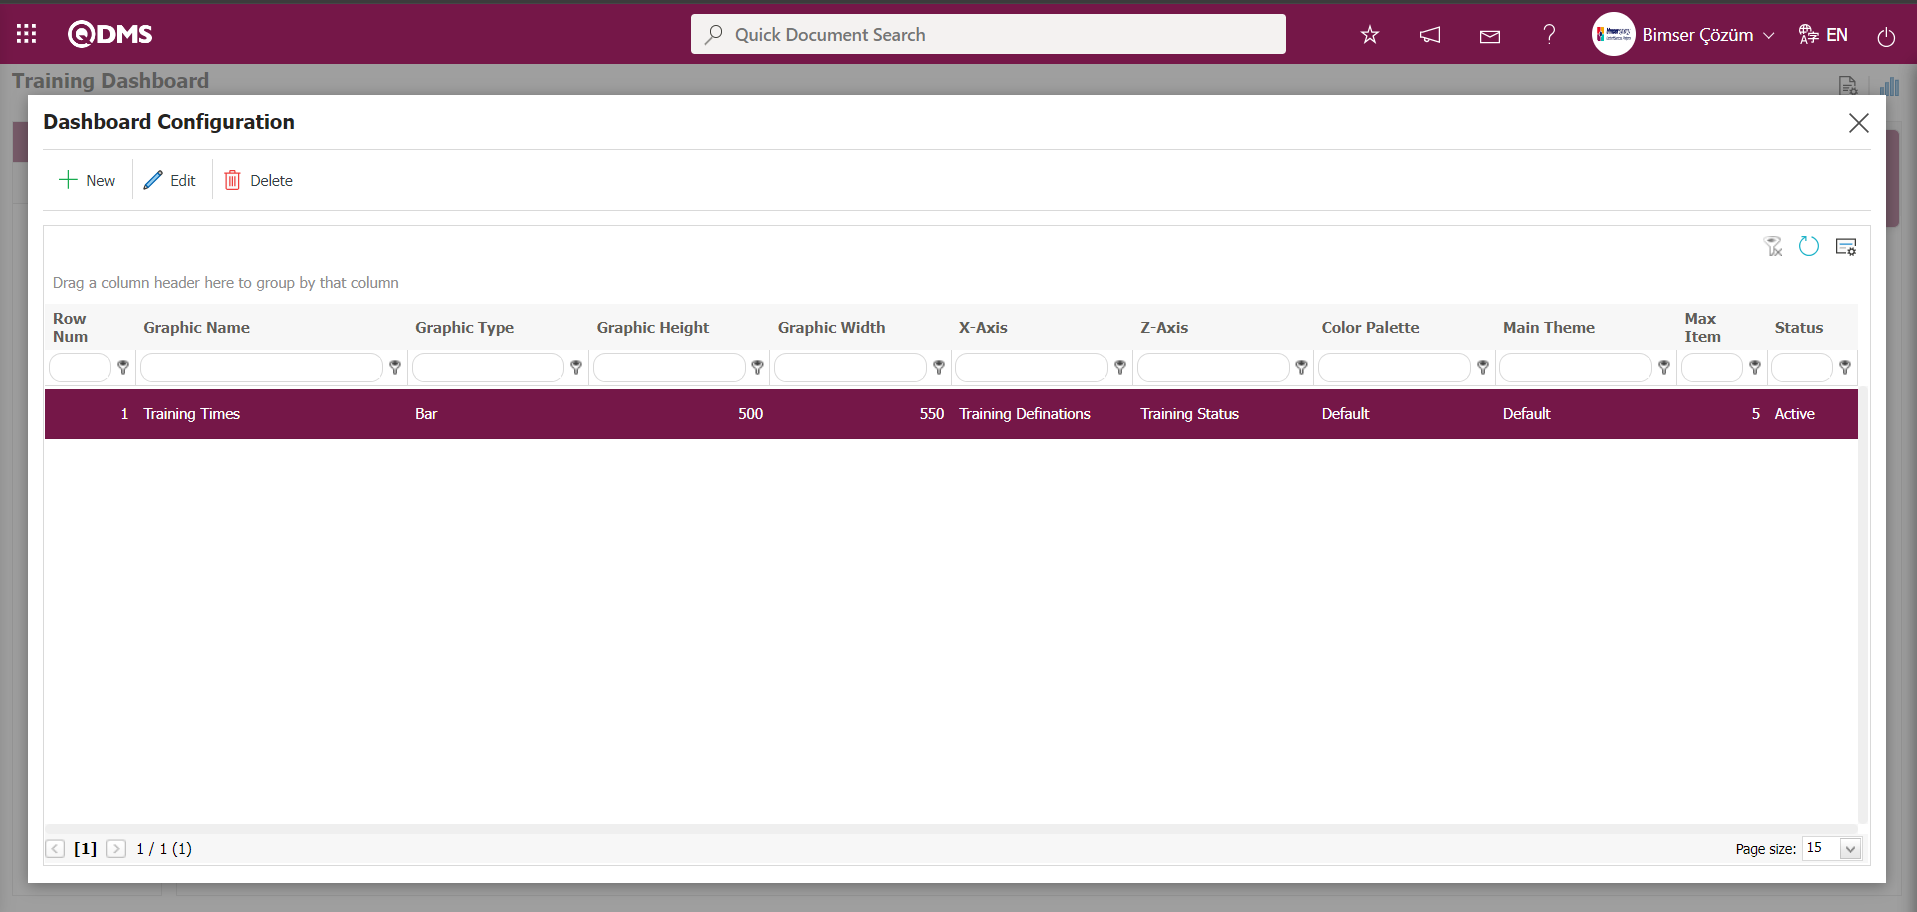
Click on the (Graphic Settings) button to design a graphic in the Training Planning Module, update and delete the selected graphic information in the list.
The Dashboard Configuration screen opens.
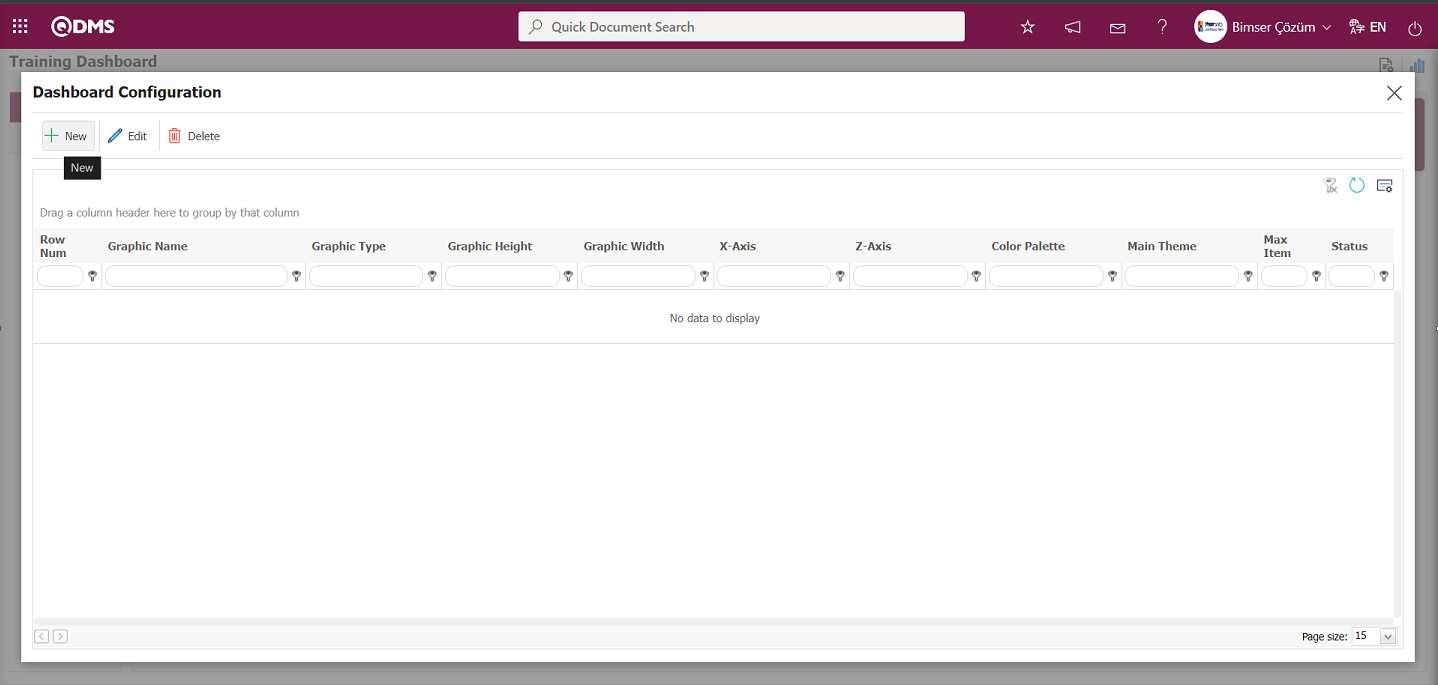
With the help of the buttons on the screen;
 : A new Dashboard is defined.
 : Correction / change / update is made on the Dashboard information selected in the list.
 : The Dashboard information selected in the list is deleted.
- : Dashboard Configuration screen is closed.
Click button to add a new Dashboard in the Education Planning Module
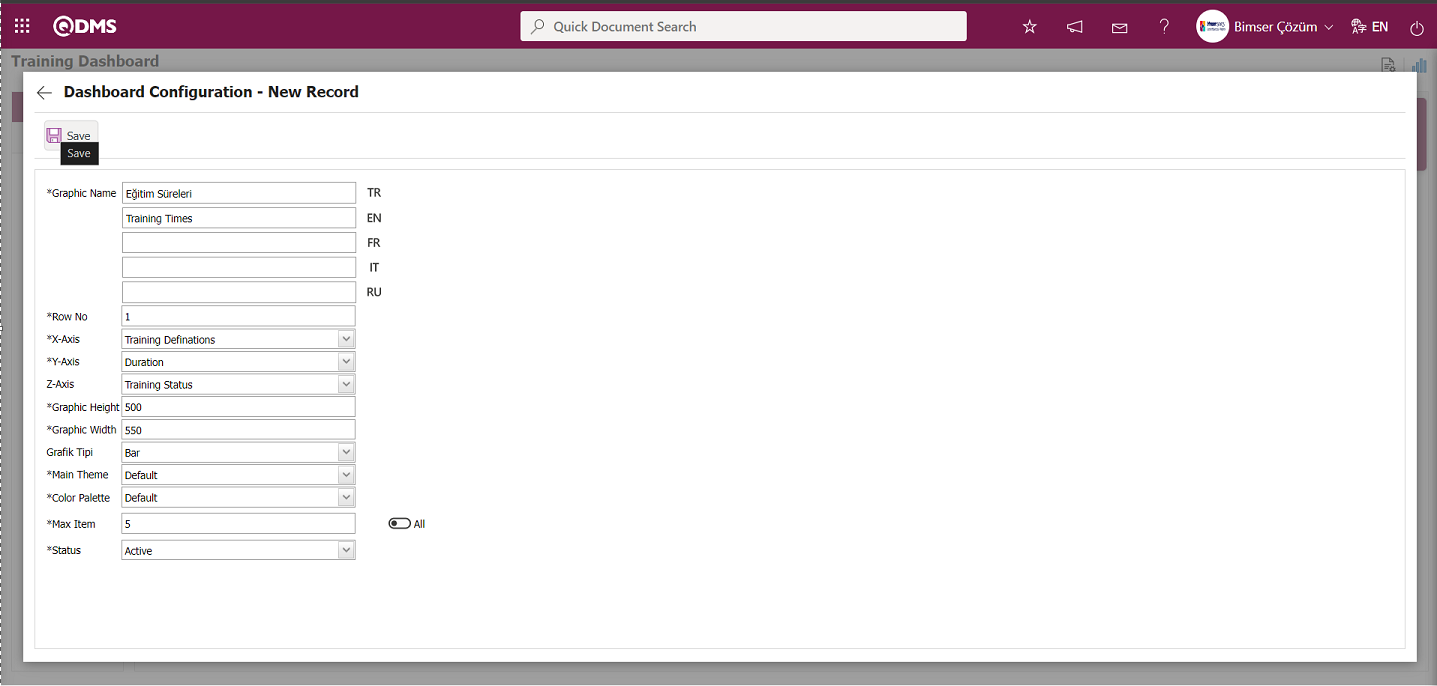
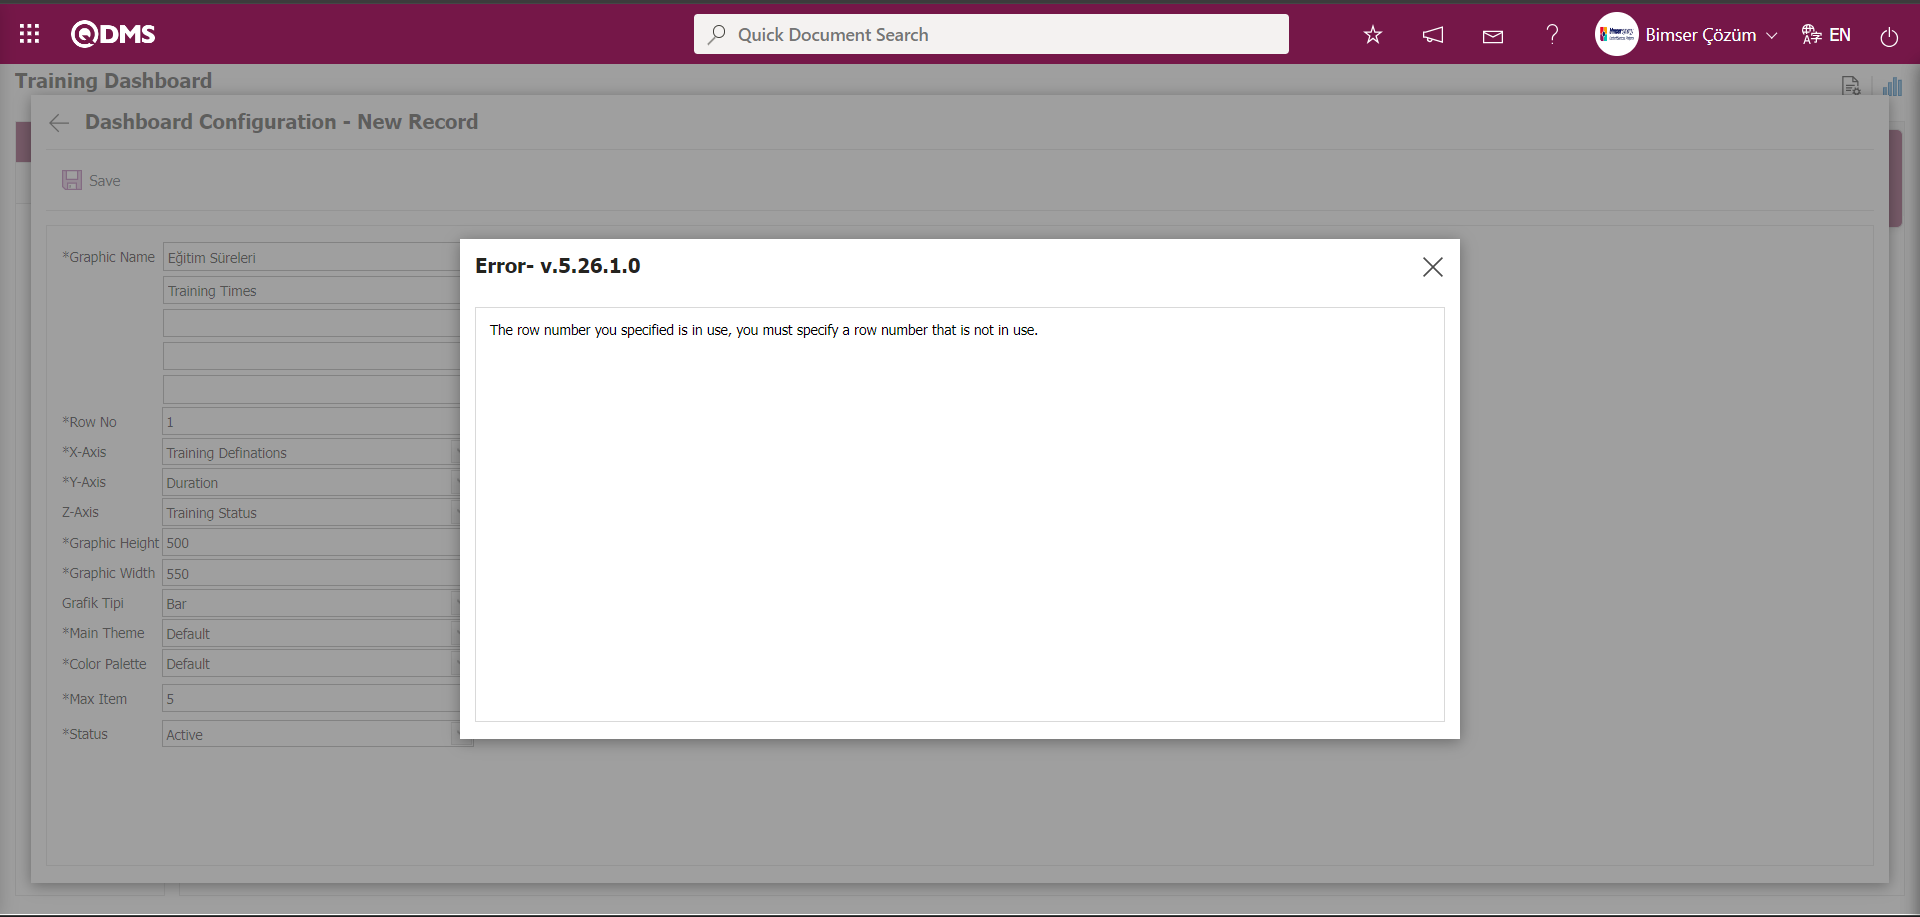
Dashboard Configuration - New Record screen, after filling the required fields with the relevant information, click on the  button on the top left of the screen.
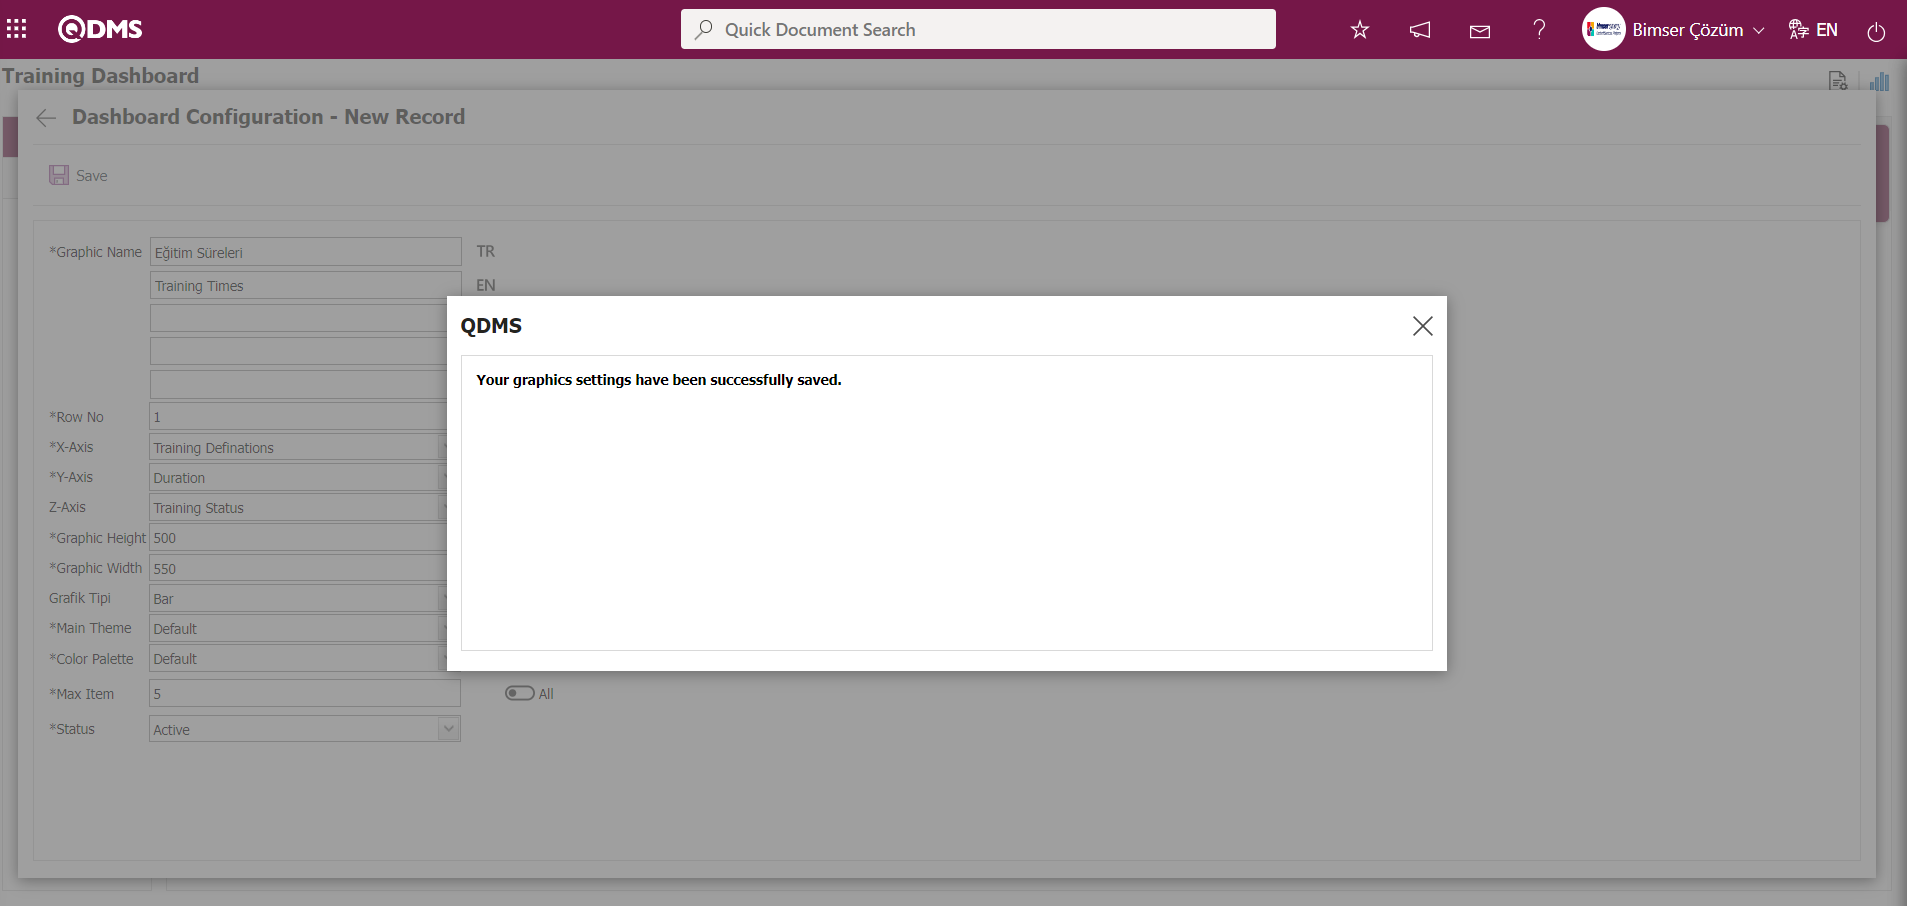
“Your chart settings have been successfully saved.” message is given by the system after the saving process on the Dashboard Configuration - New Record screen.
The Dashboard defined in the Training Dashboard screen is displayed.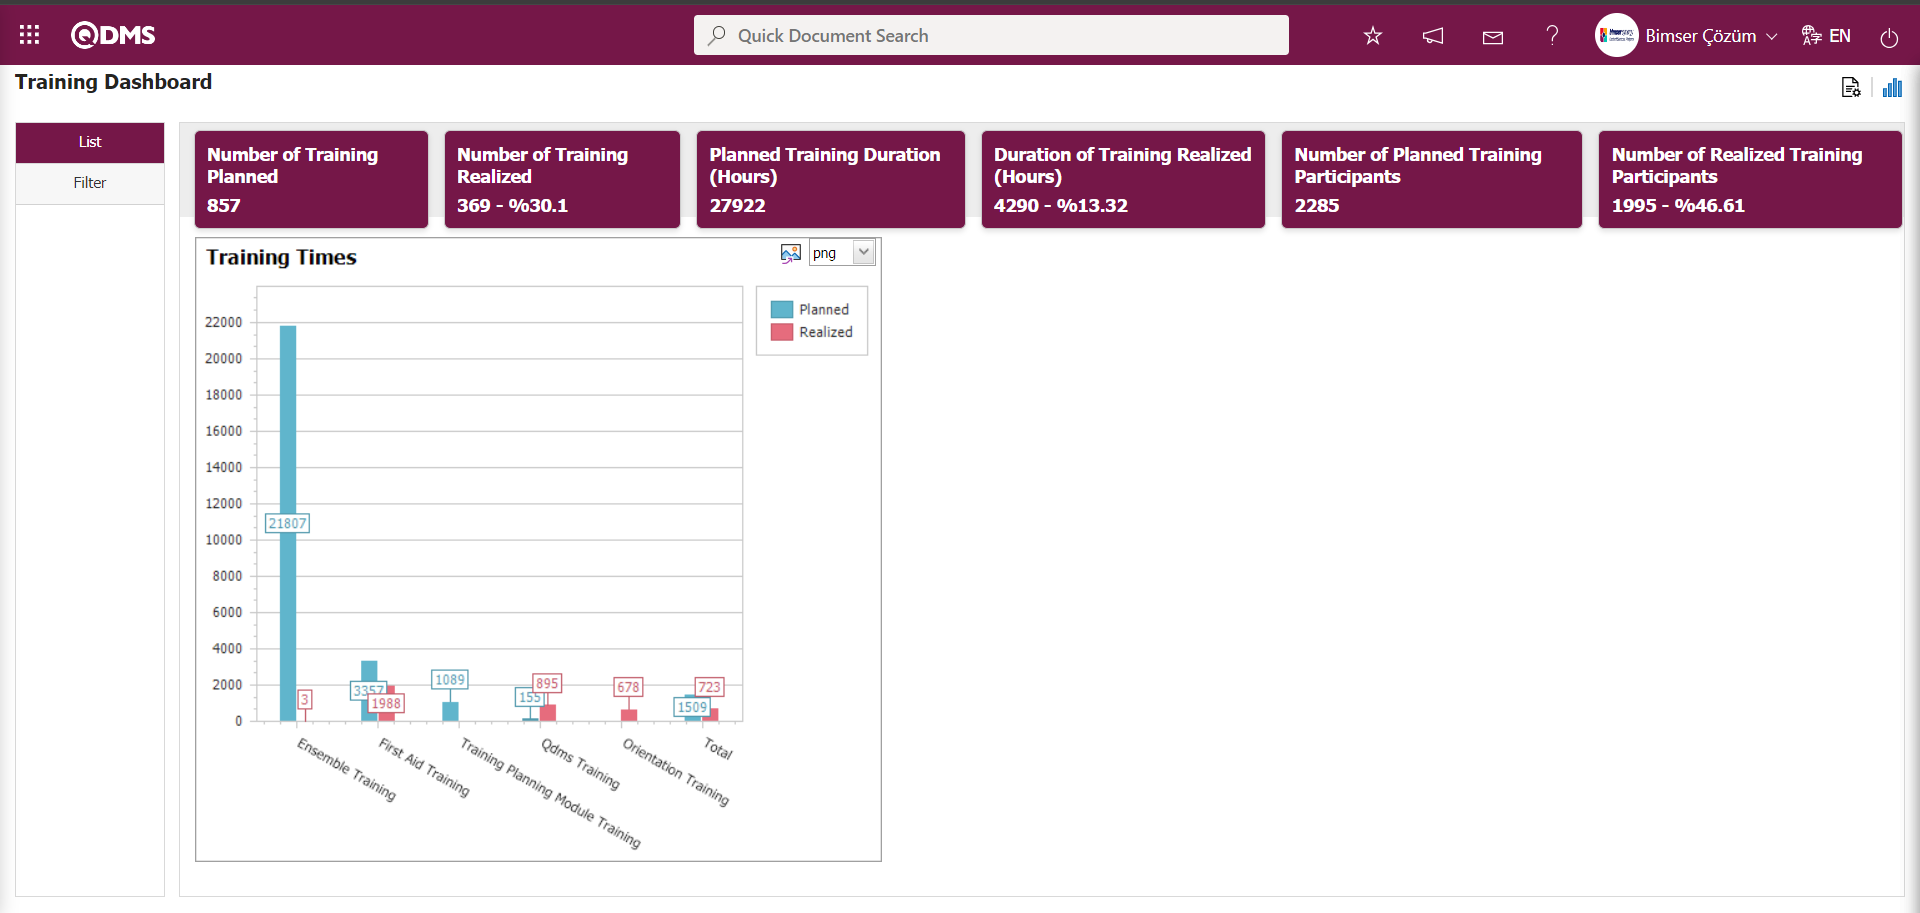
By clicking the  (Export Graphic) button, the graphic can be exported to the external environment by converting it to the format type (png, jpg, bmp, xls, etc.) selected from the drop-down menu.
Graphic Length is limited to a min value of 500 and a maximum of 1000. Graphic Width is limited to a min value of 550 and a max value of 1800. Chart Length and Width should be selected between these values. Dashboard Configuration - If the row number is already used on the New Record screen, an error message “The row number you specified is in use, you must specify a row number that is not in use” is given by the system during the saving phase.
 In this way, a new chart can be added on the screen opened with the Chart Settings button. Editing, updating, changing and deleting operations are performed on the added chart information. The filtering screen for the relevant graphics in the list is defined and set as downloadable.
For users who are not Module Administrators, the Dashboard Configuration screen is opened by clicking on the System Infrastructure Definitions/BSID/Configuration Settings/ Dashboard Configuration/ Training Planning menu and the graphic design process is done by making the necessary adjustments on the screen that opens.
On the Training Planning Dashboard Configuration screen, they can define a new Dashboard by using the same buttons and performing the same steps.

Quick Document Search; In the structure of the Document Management module in the Qdms system, a document installed in the system can be accessed quickly by entering the code, name or a reminder word of the document with the Quick Document search field.
For quick document search, enter the document code information in the Quick Document Search field.
Click on the  button in the Quick Document search field or press the “Enter” key from the keyboard. If the check box related to the “Search with in” option is checked on the Quick Search screen, if a word is written in the quick search field, the documents containing this word are listed.
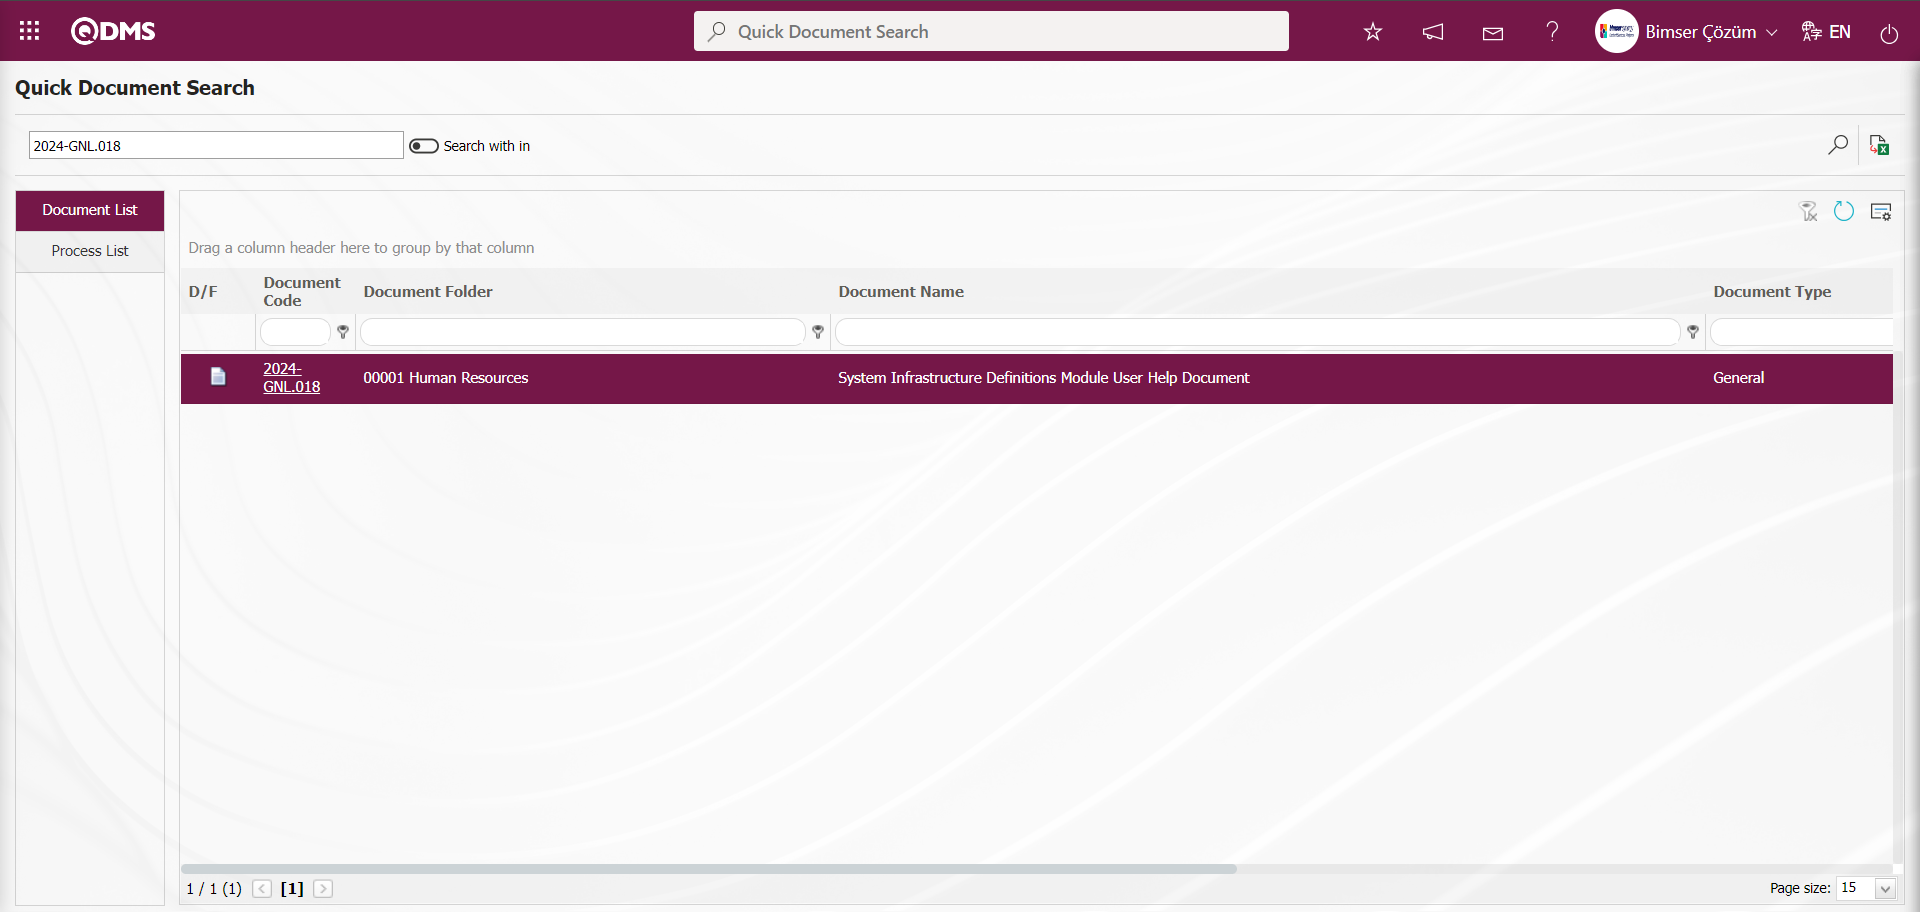
On the Quick Search screen, on the Document List tab, the Document Code link in the Document Code field in the list is clicked and the document is displayed..

To search for Processes on the Quick Search screen, select the “System Infrastructure Definitions” module in the Modules field on the System Infrastructure Definitions/BSID/Configuration Settings/Parameters screen and list the System Infrastructure Definitions module parameters. Among these listed parameters, the parameter value of parameter 216 “Processes be listed in the quick search?” is selected as “Yes” and the parameter is activated.
 After the parameter is activated, the Process List is displayed in the Process List tab on the Quick Search screen. To display the Process list in the Process list tab, the parameter value of the parameter 211 “Should an authorization check be done on the process selection page?” which is the authorization parameter related to the processes from the System Infrastructure Definitions module parameters, must be activated by selecting “Yes”
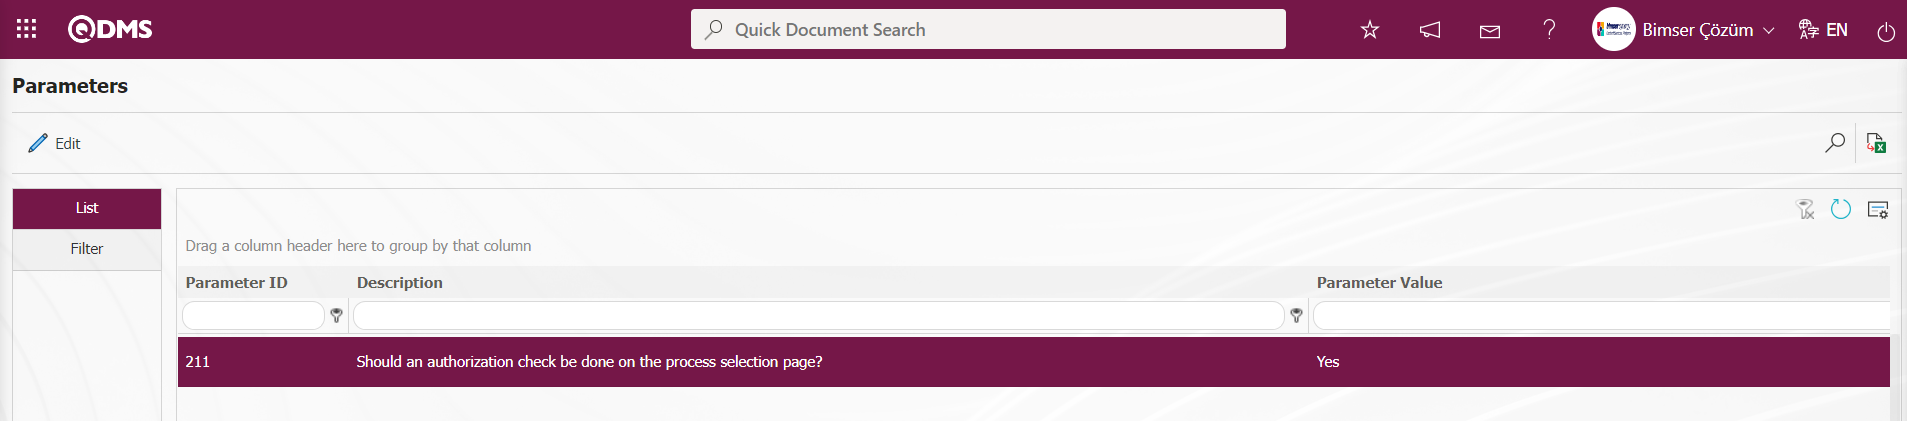
After the parameter is activated, the Process List is not displayed in the Process List tab. Since the authorization parameter is active, the processes can be viewed and acted on within the authorization. When the parameter is inactive, the Process list is displayed in the Process List tab on the Quick Search screen. Users are authorized to view and modify the processes.
In the Qdms system document quick search bar, the code or name of the relevant process is typed and the button is clicked or the “Enter” key is pressed from the keyboard.
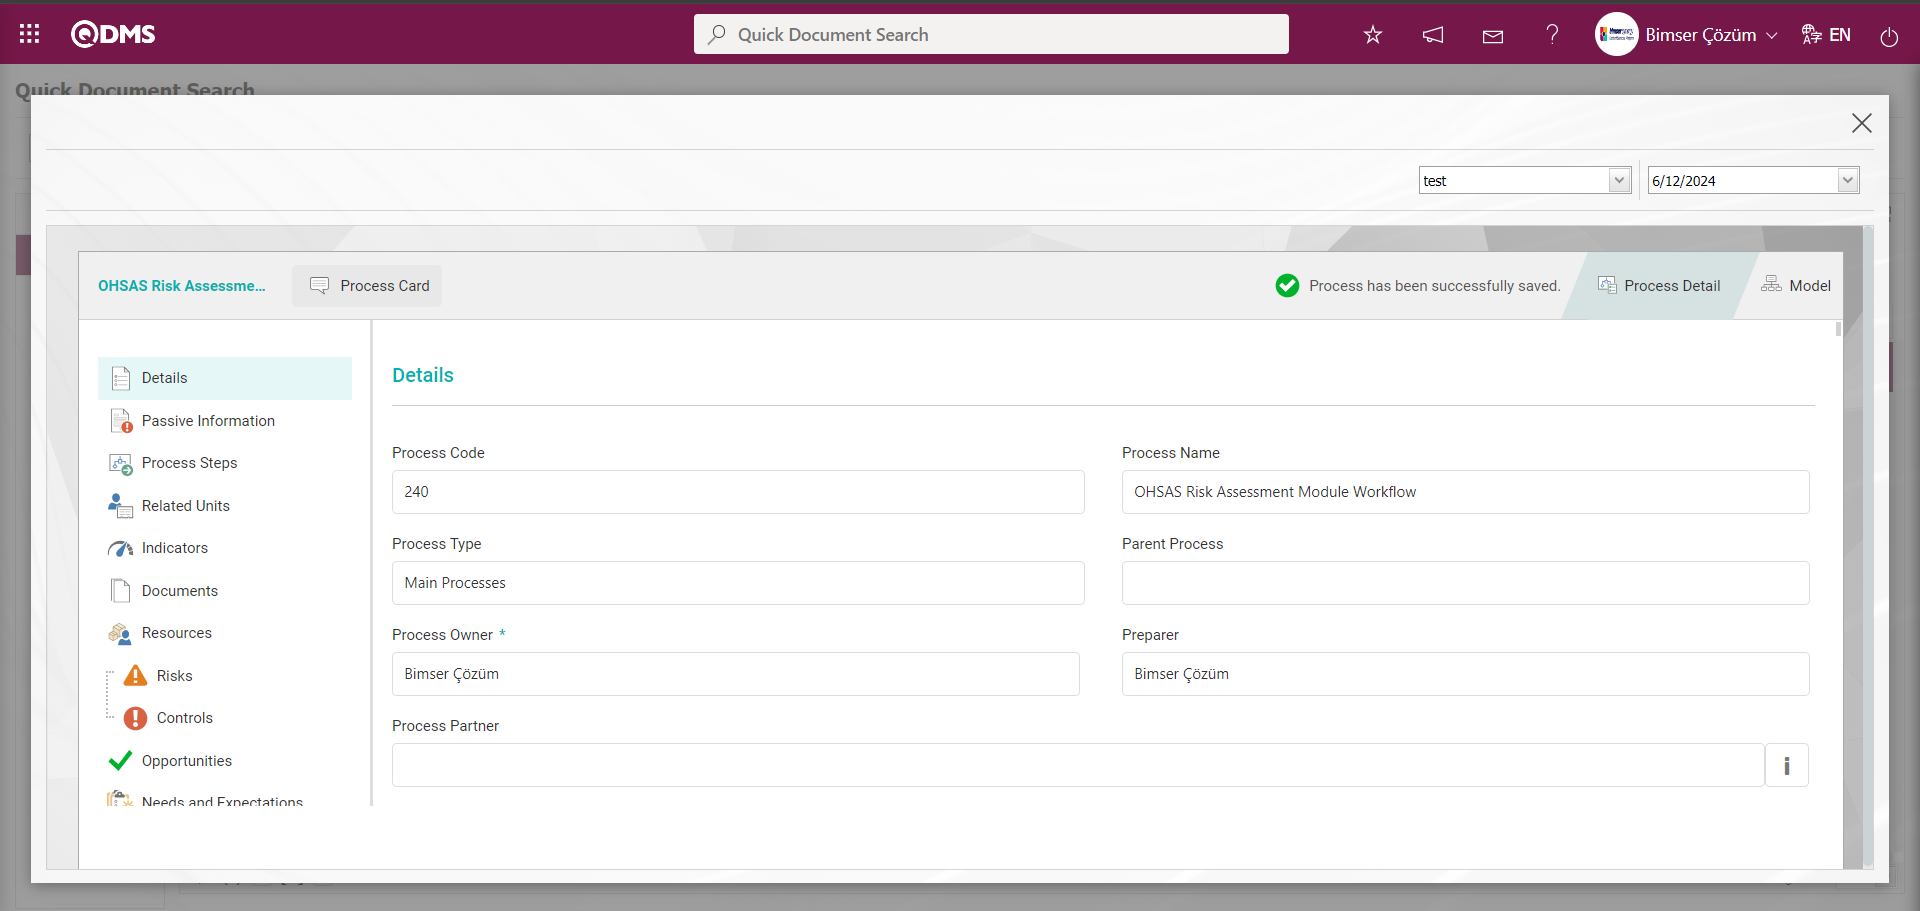
In the Quick Search screen, it is seen that the process searched in the Process List is listed in the Process List tab.
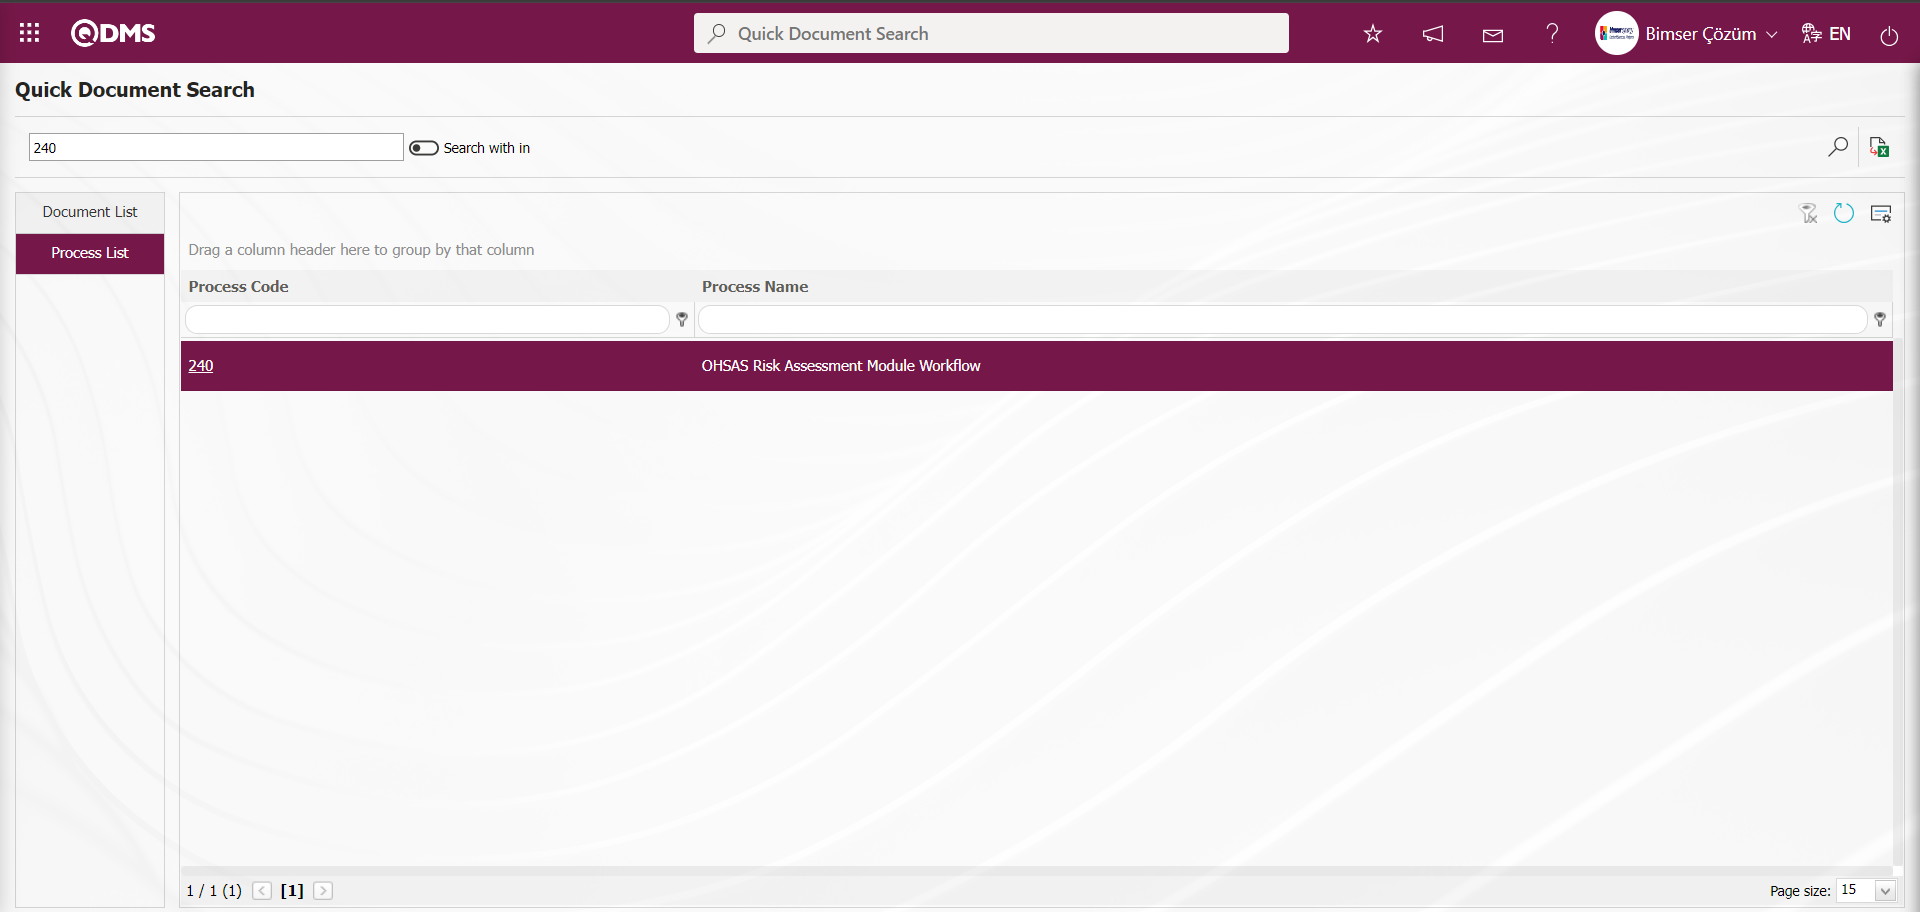
By clicking on the process code link in the Process Code field in the Process List, the process detail screen is displayed.
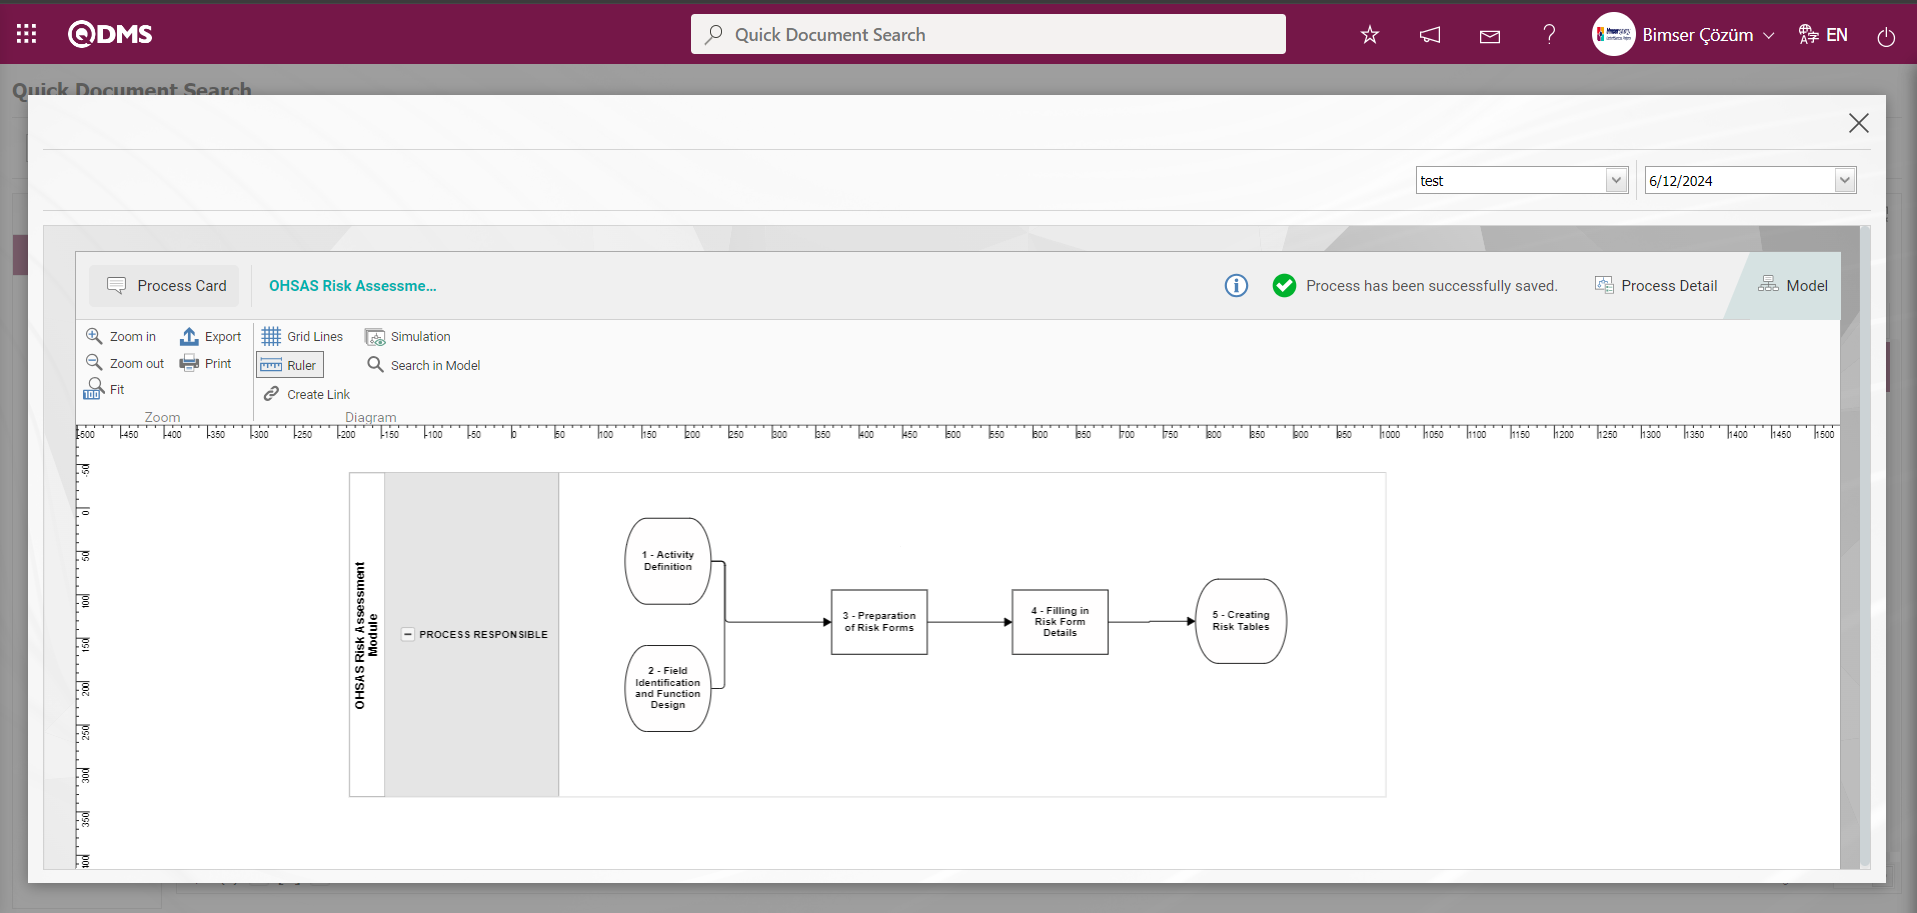
To switch to the visual model of the process on the Process Detail screen, the visual model screen of the process is displayed by clicking the  button.
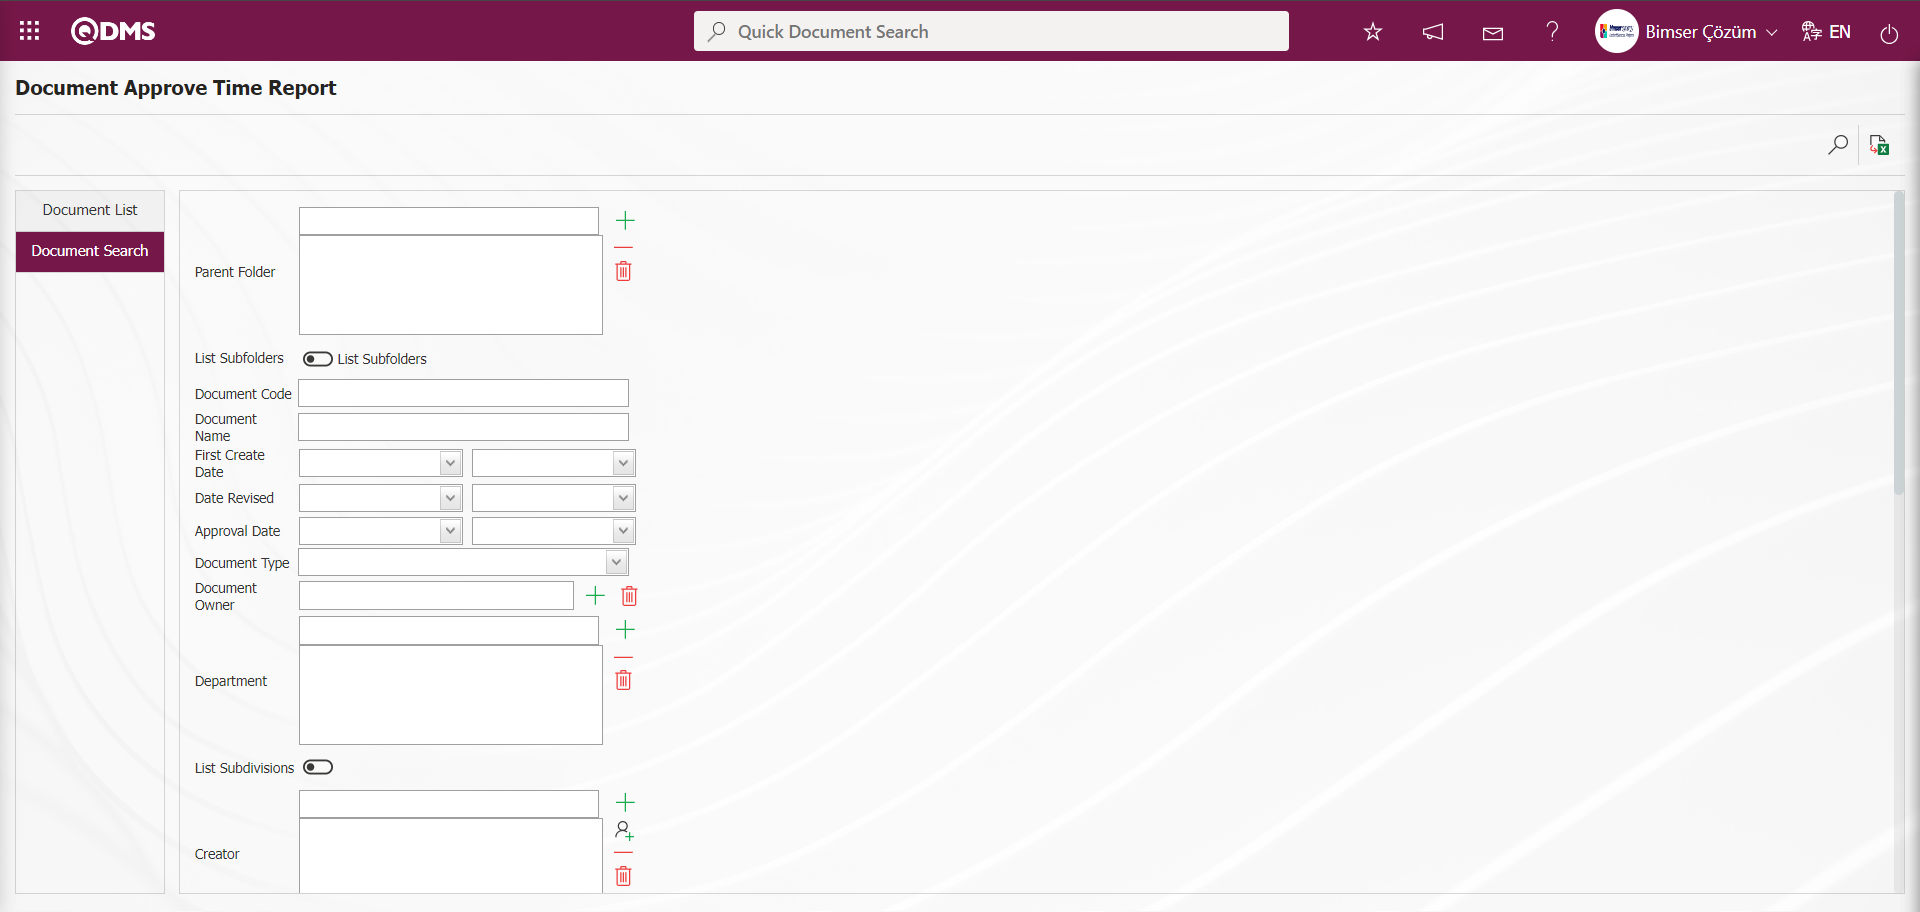
Favorites:This is the section where users can save the screens of the menus they frequently visit on the Qdms system as Favorites. In order to access these menu screens easily, users add them to their favorites with the help of the “Add New” button on the My Favorites screen while the menu screen they want to access is open. The My Favorites menu provides users with quick access to the screens of certain menus in the Qdms system. On the My Favorites page, adding frequently used menus and editing the description section of the added menus can be done. The difference between the Favorites and My Favorites menus is that in the Favorites section, the first 5 menus that the user uses very frequently in the Qdms system are automatically included in this section by the system. In the My Favorites menu, it is possible to add a menu as a favorite, edit the menu defined as Favorite in the list, and delete it according to the user's request.
 Click the
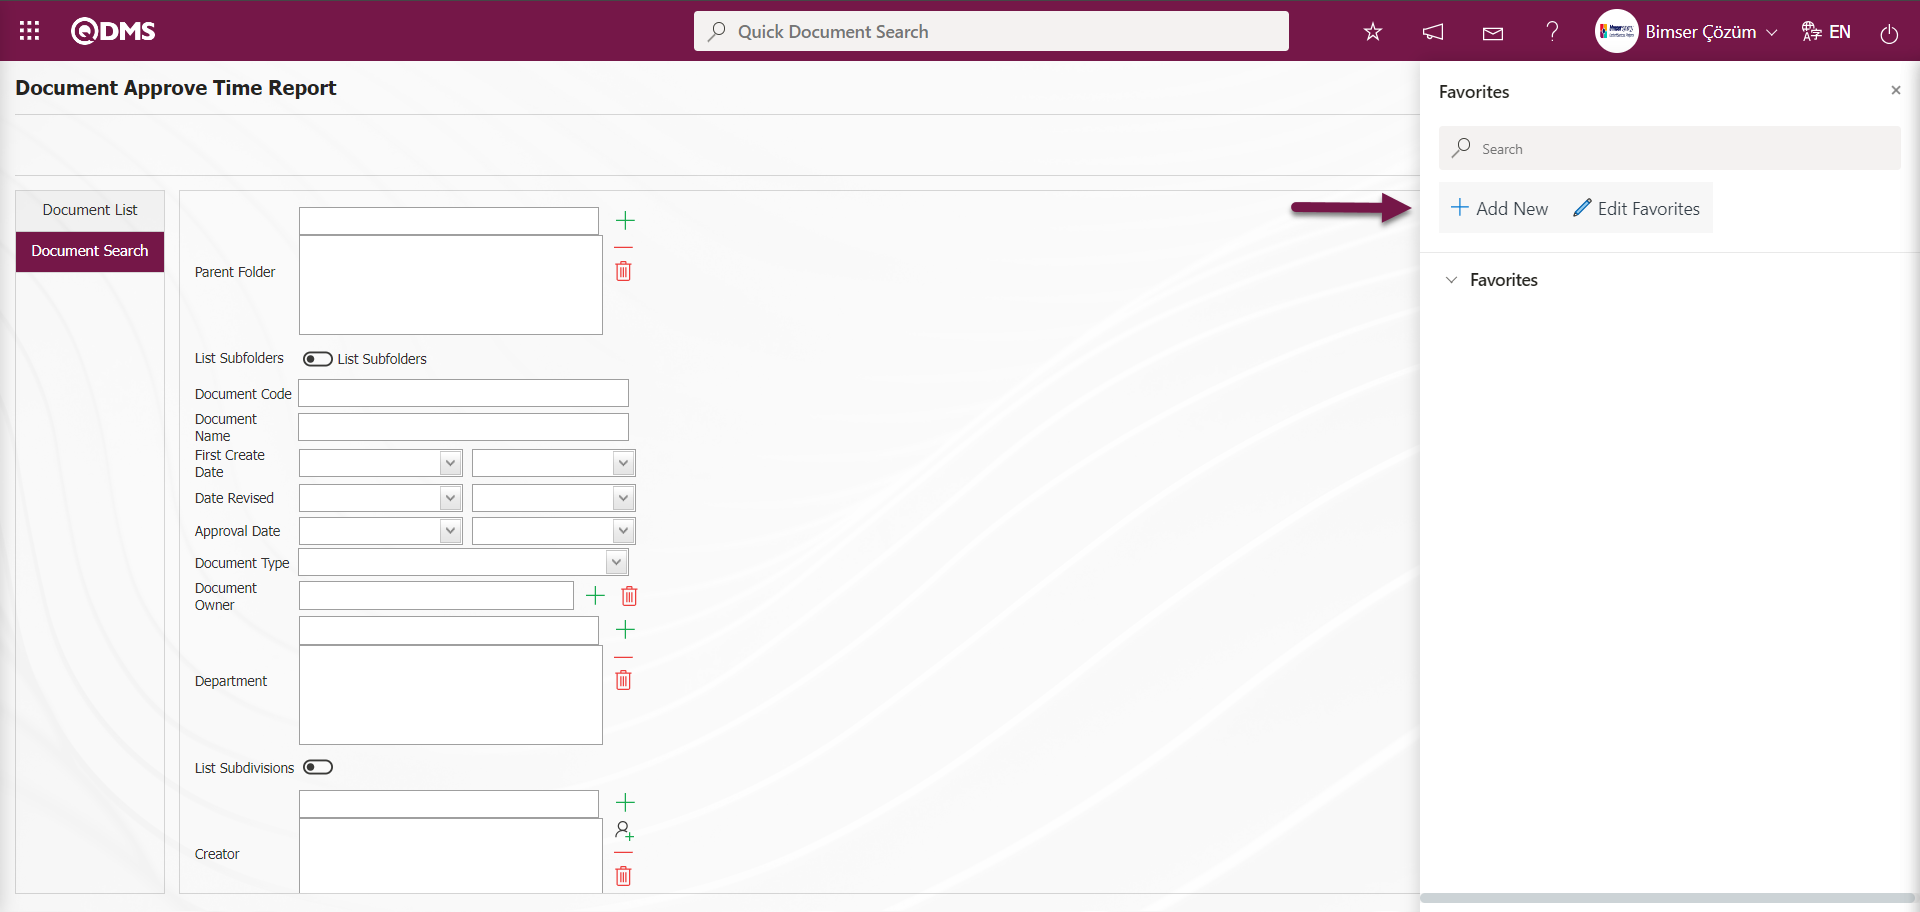
  (Favorites) button on the Qdms main screen. Two buttons appear on the My Favorites screen.
With the help of the buttons on the screen;
 :When the frequently used menu is open in the Qdms system, adding it as a favorite to the My Favorites menu is done.
 :Editing and deleting operations are performed on the description part of the selected Favorite in the My Favorites list.
Example: For the process of adding “Document Approval Times Report” as a favorite in Document Management Module reports;
1. In Stage 1, the Integrated Management System/Document Operations/Reports/Document Approval Time Report menu is opened by clicking.
In step 2, while the relevant menu is open, click the button in the My Favorites menu.
On the Add Favorite screen, type the name of the menu to be added as a favorite in the description field.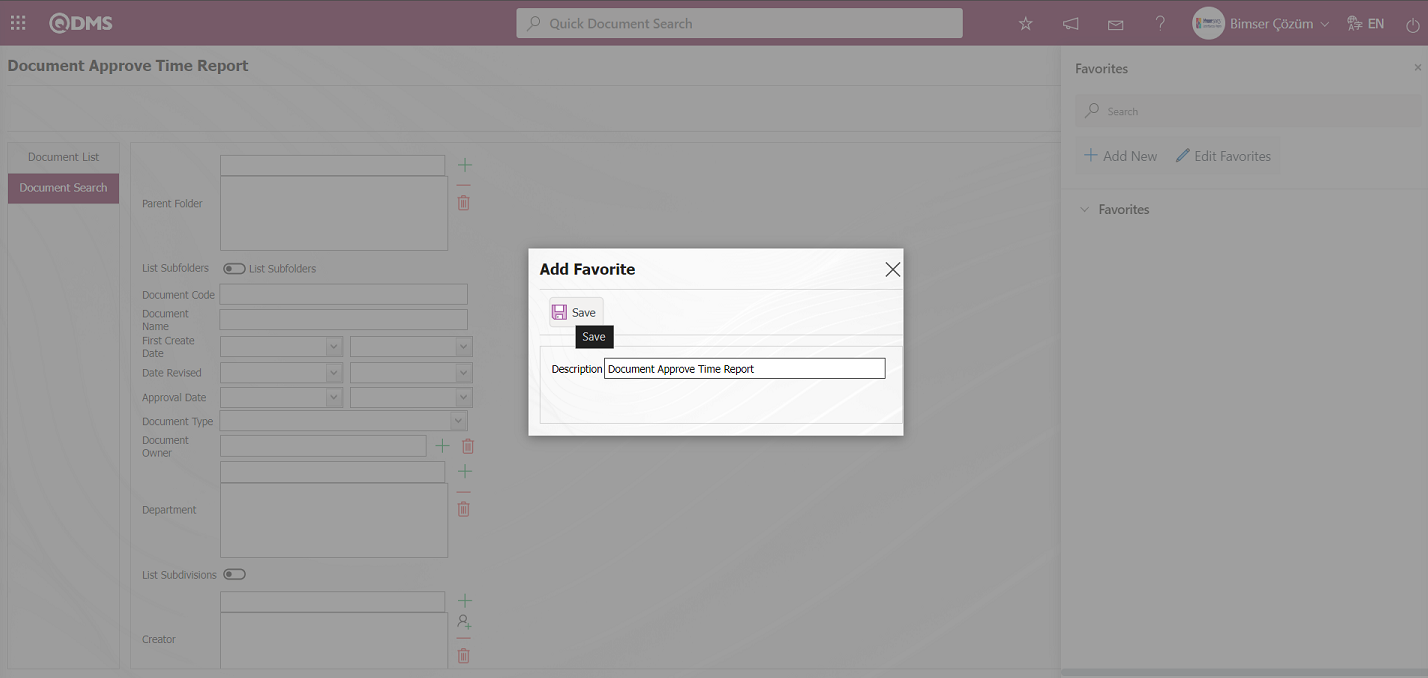
After entering the relevant information in the required fields, the Favorite Registration process is done by clicking the  button.

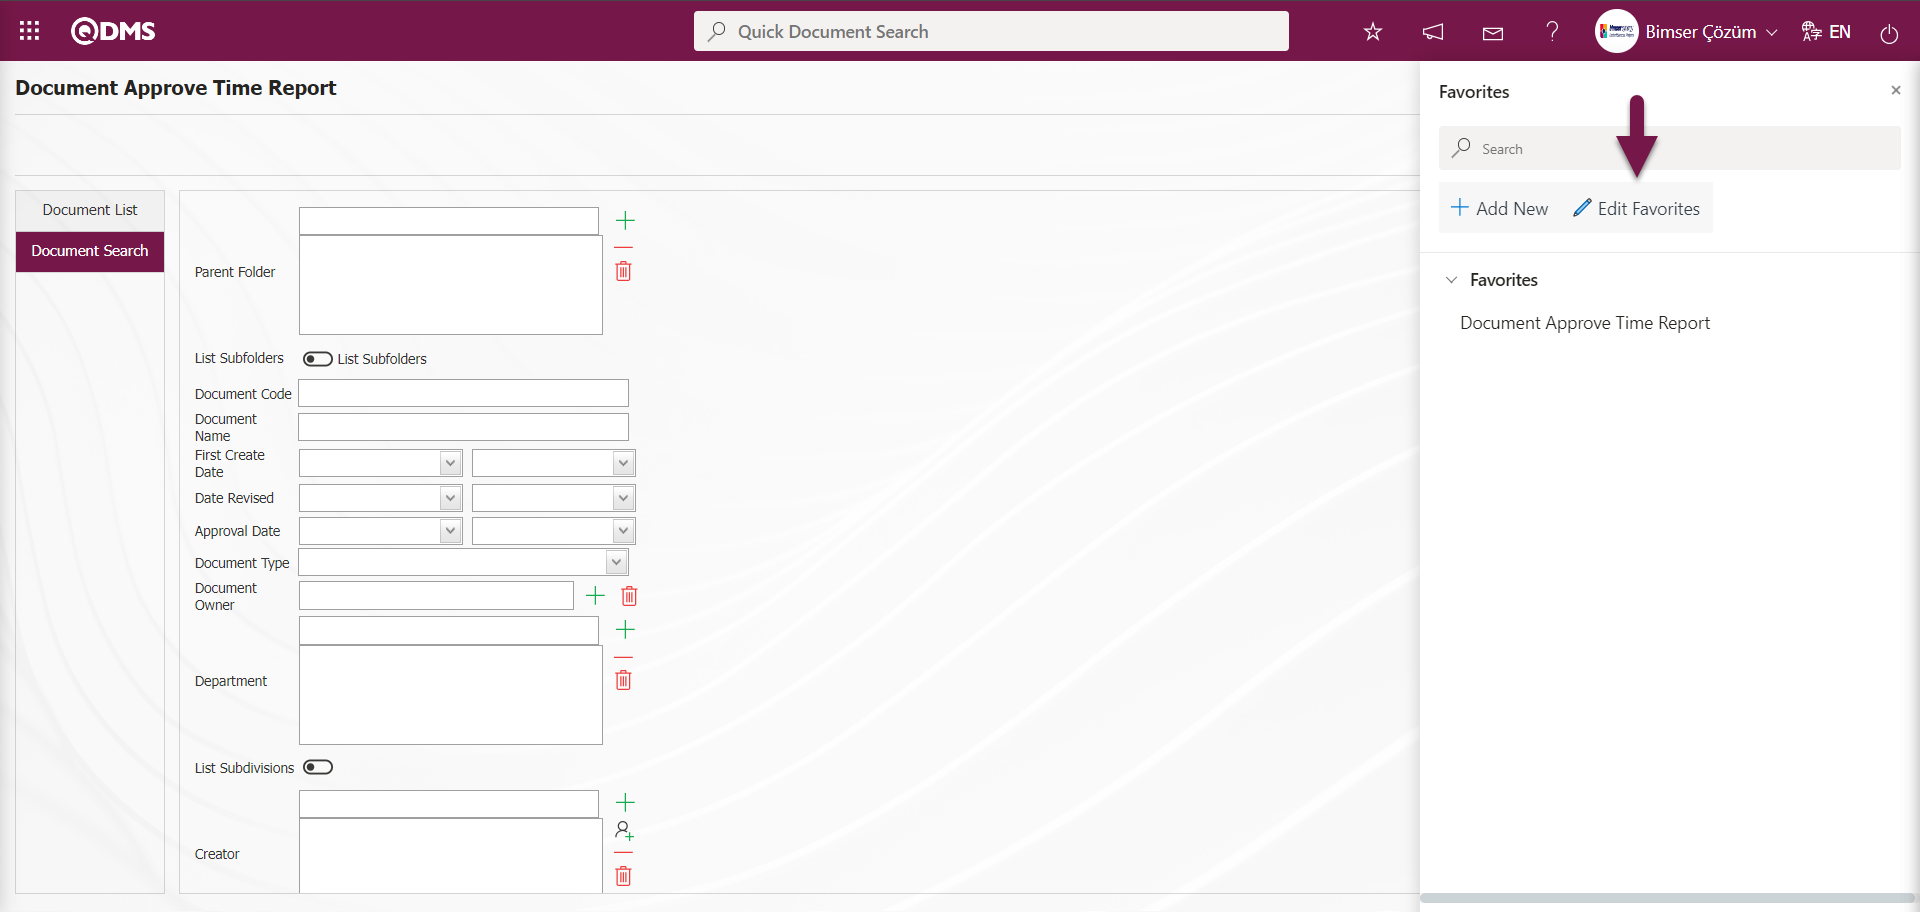
On the My Favorites screen, it is seen that the menu that the user frequently uses in the My Favorites list is included in the list after the Favorite addition process. By clicking the “Document Approval Time Report” favorite from this list, the user can quickly access the menu screen in one step. In the process of opening the menu in several stages, the process of opening the menu screen quickly in a single stage in place of the menu opening process is performed.
![A screenshot of a computer
Description automatically generated]ref17Click the  button to edit the description of the menu saved as Favorite with the Favorites menu.
By clicking the button on the Favorites screen, changes and edits are made on the description field of the menu defined as Favorite.

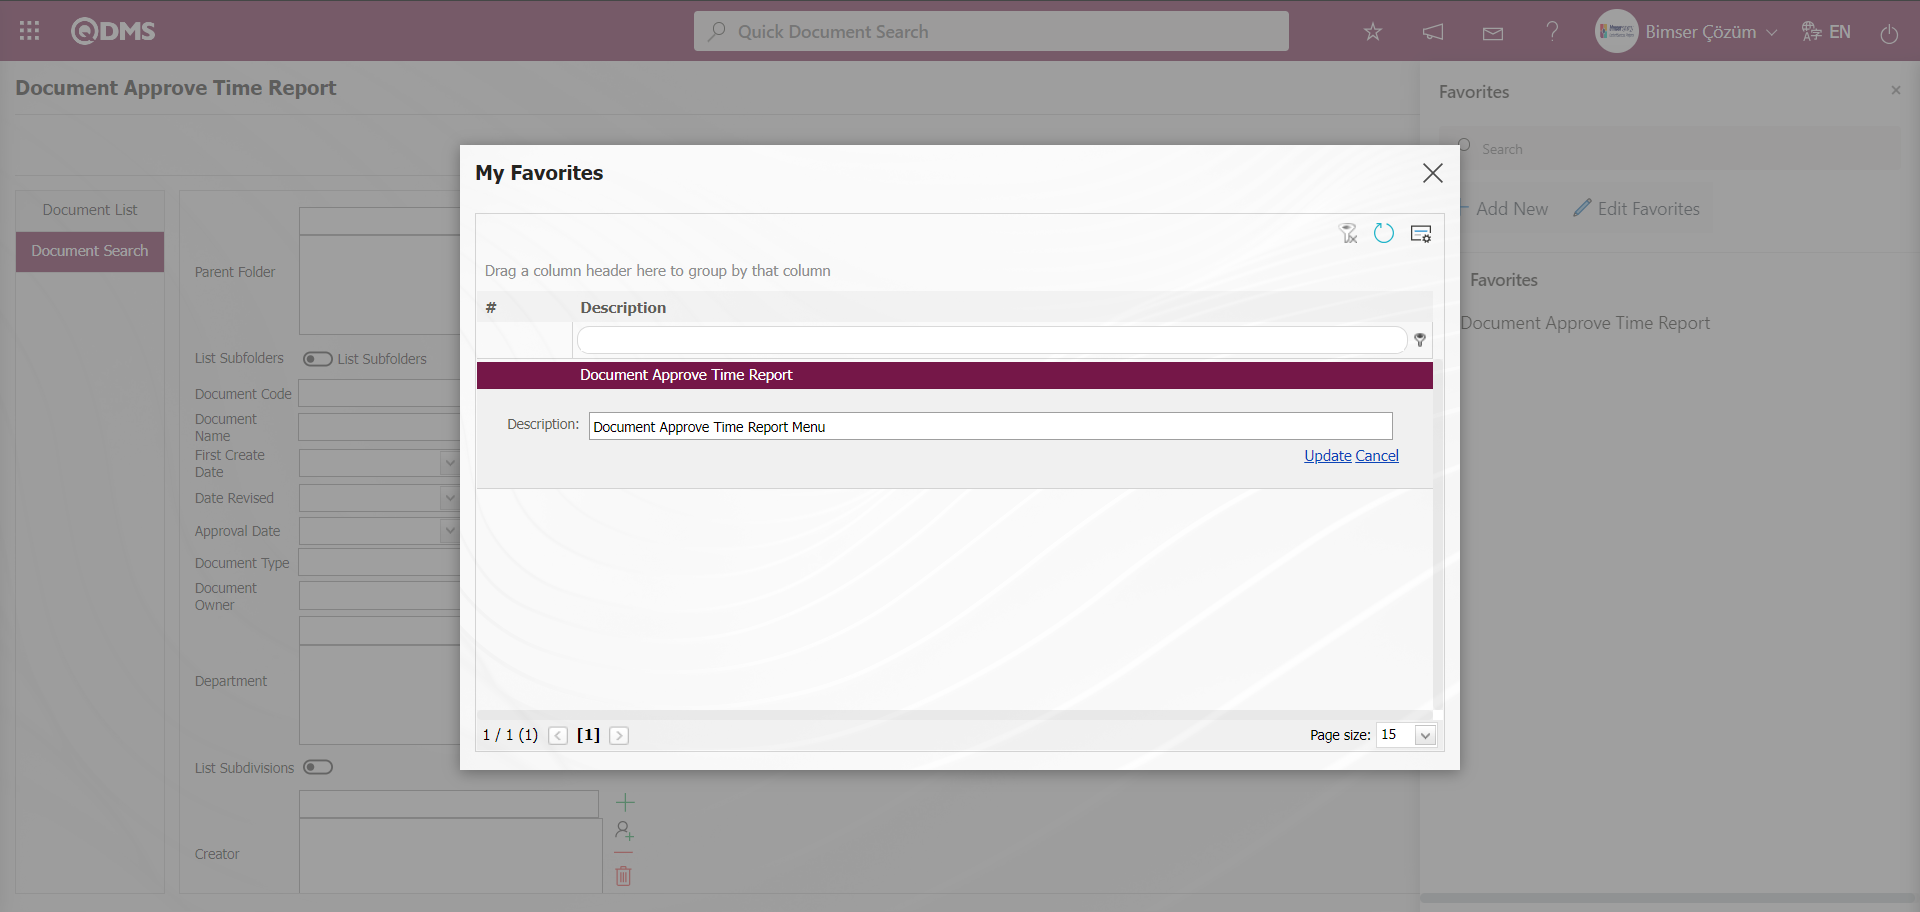
After the change made in the Description field, the favorite update registration process is done by clicking the  button. The
  button is clicked to cancel the operation.

Click the  button to delete the description part of the menu saved as Favorite with the Favorites menu.
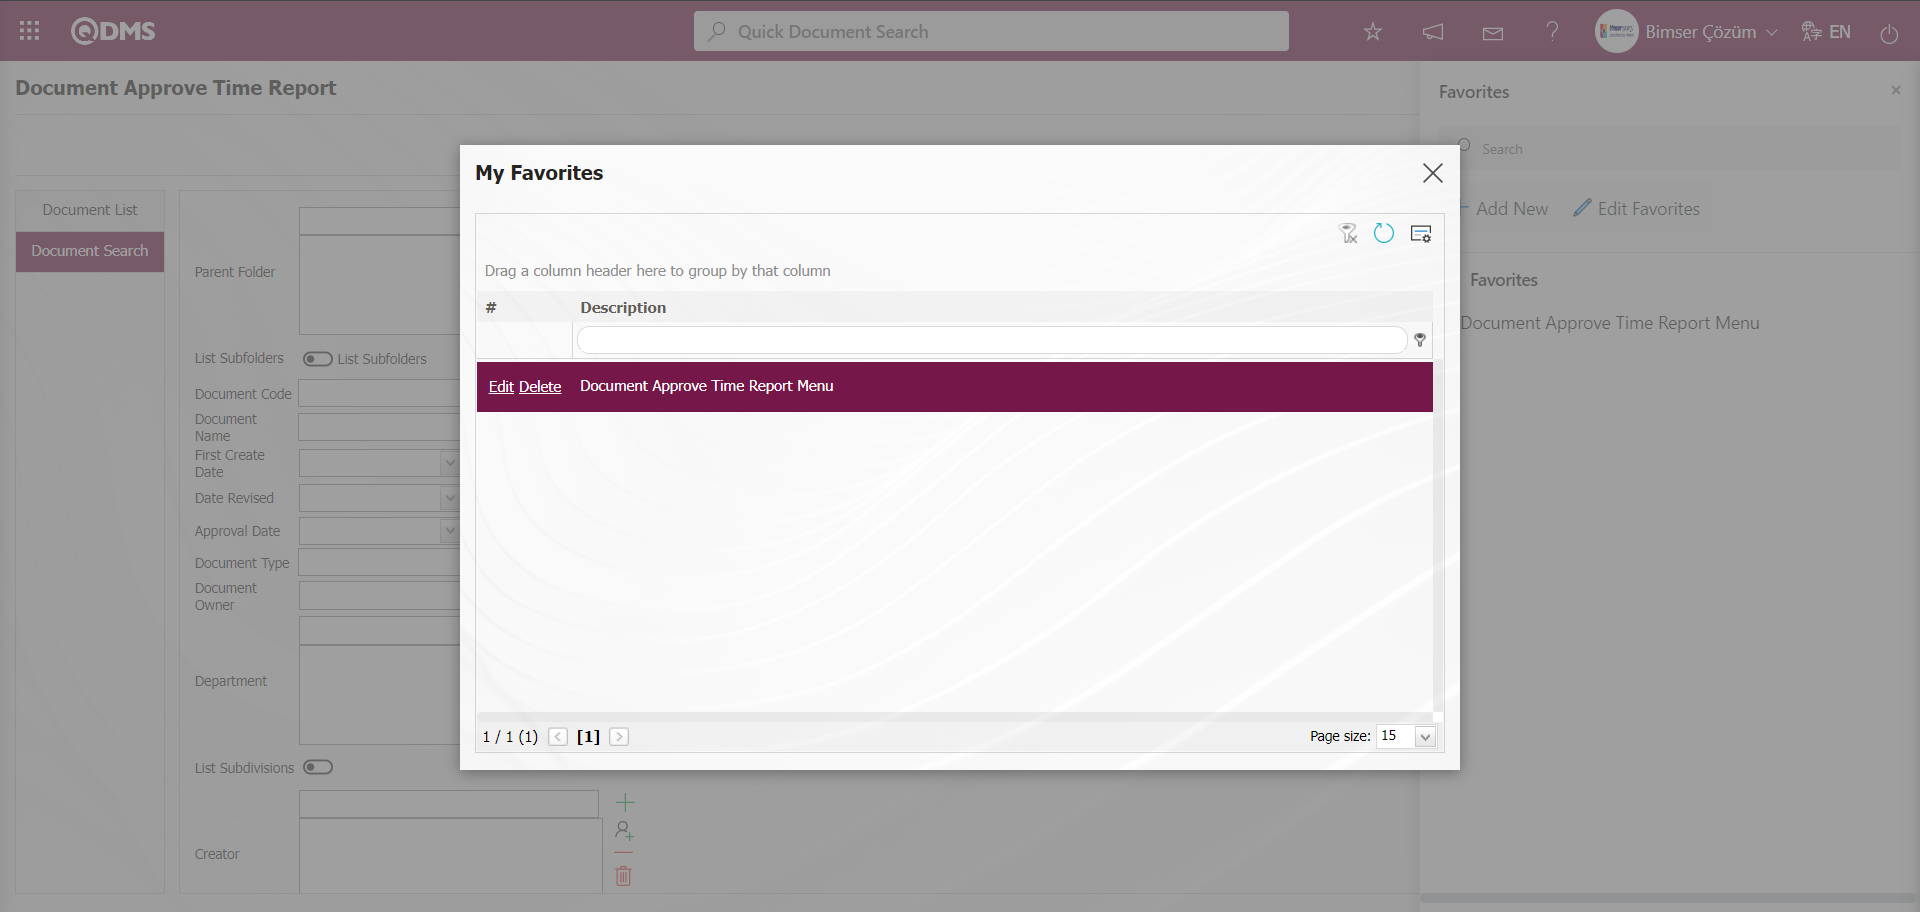
On the Favorites screen, click the  button to delete the added Favorite from the list with the related description field.
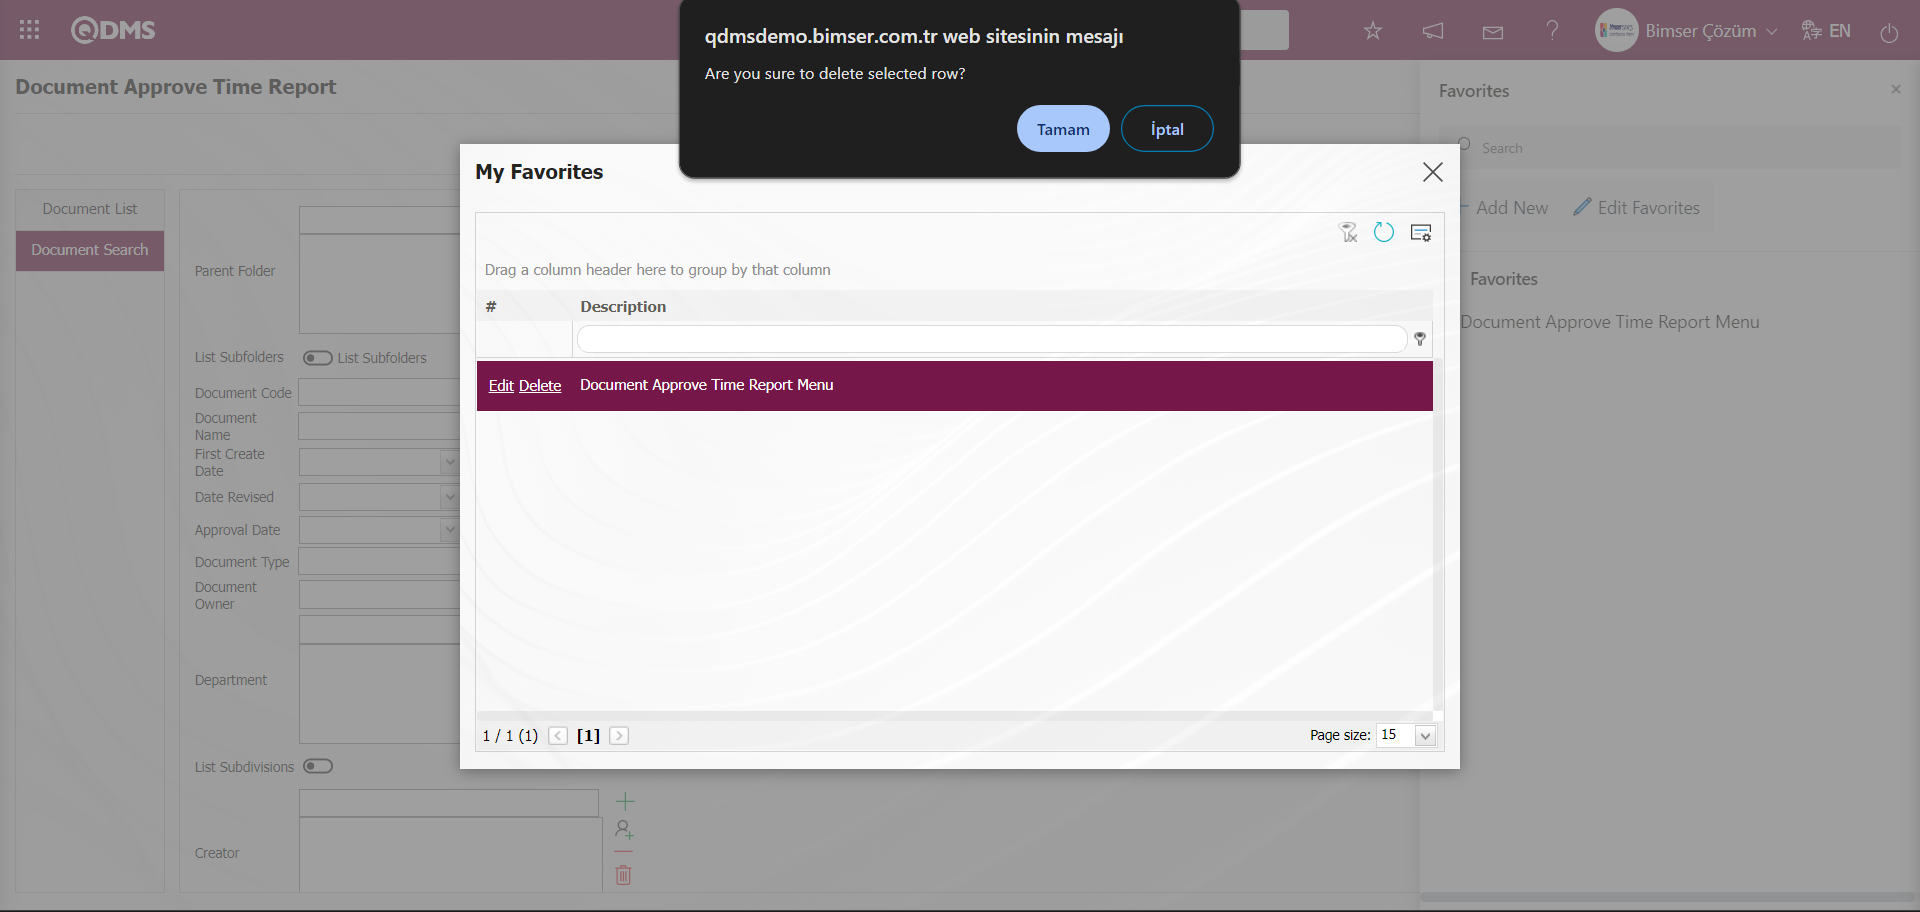
“Are you sure to delete selected row?”message is given by the system and the favorite added in the Favorites list is deleted by clicking the ‘OK’ button.
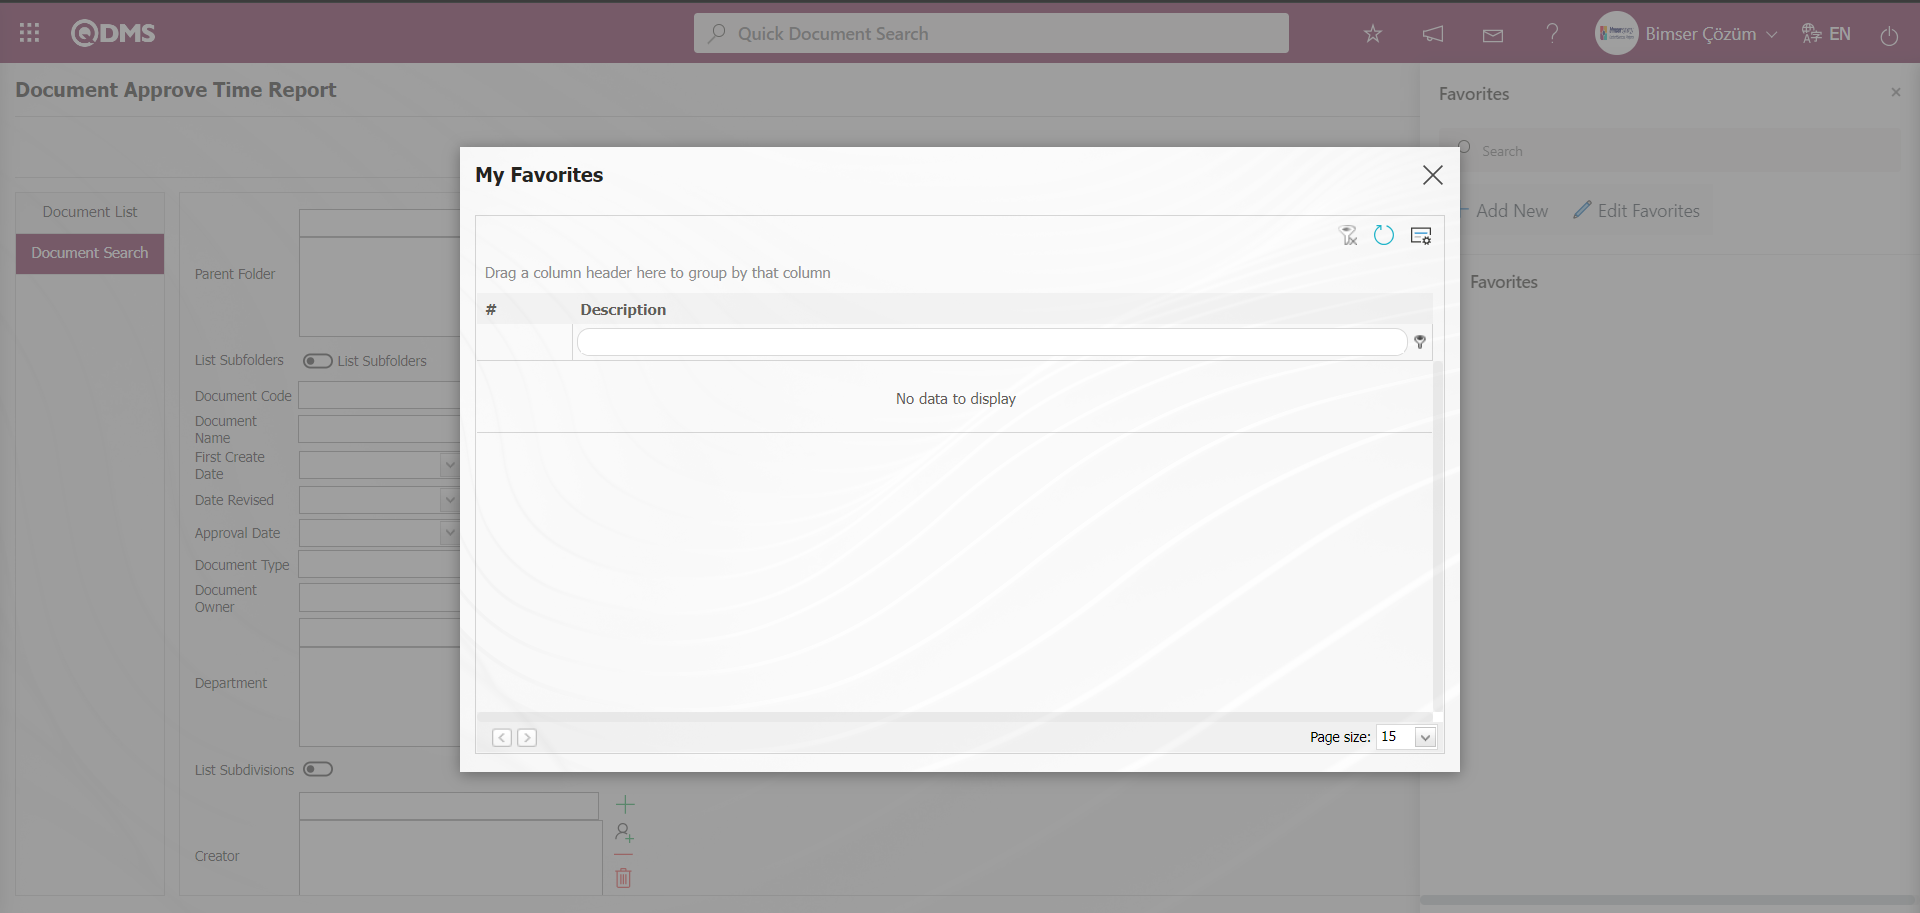
In the Favorites list, the deleted favorite is not displayed in the list.
Announcements;
Click on the  button on the Qdms main screen. It is the button to display the announcements defined in the “Create Announcement” menu in the Qdms system. By clicking this button, the announcements defined in the “Create Announcement” menu are displayed in the system. The numeric value on the button gives the number of defined announcements.
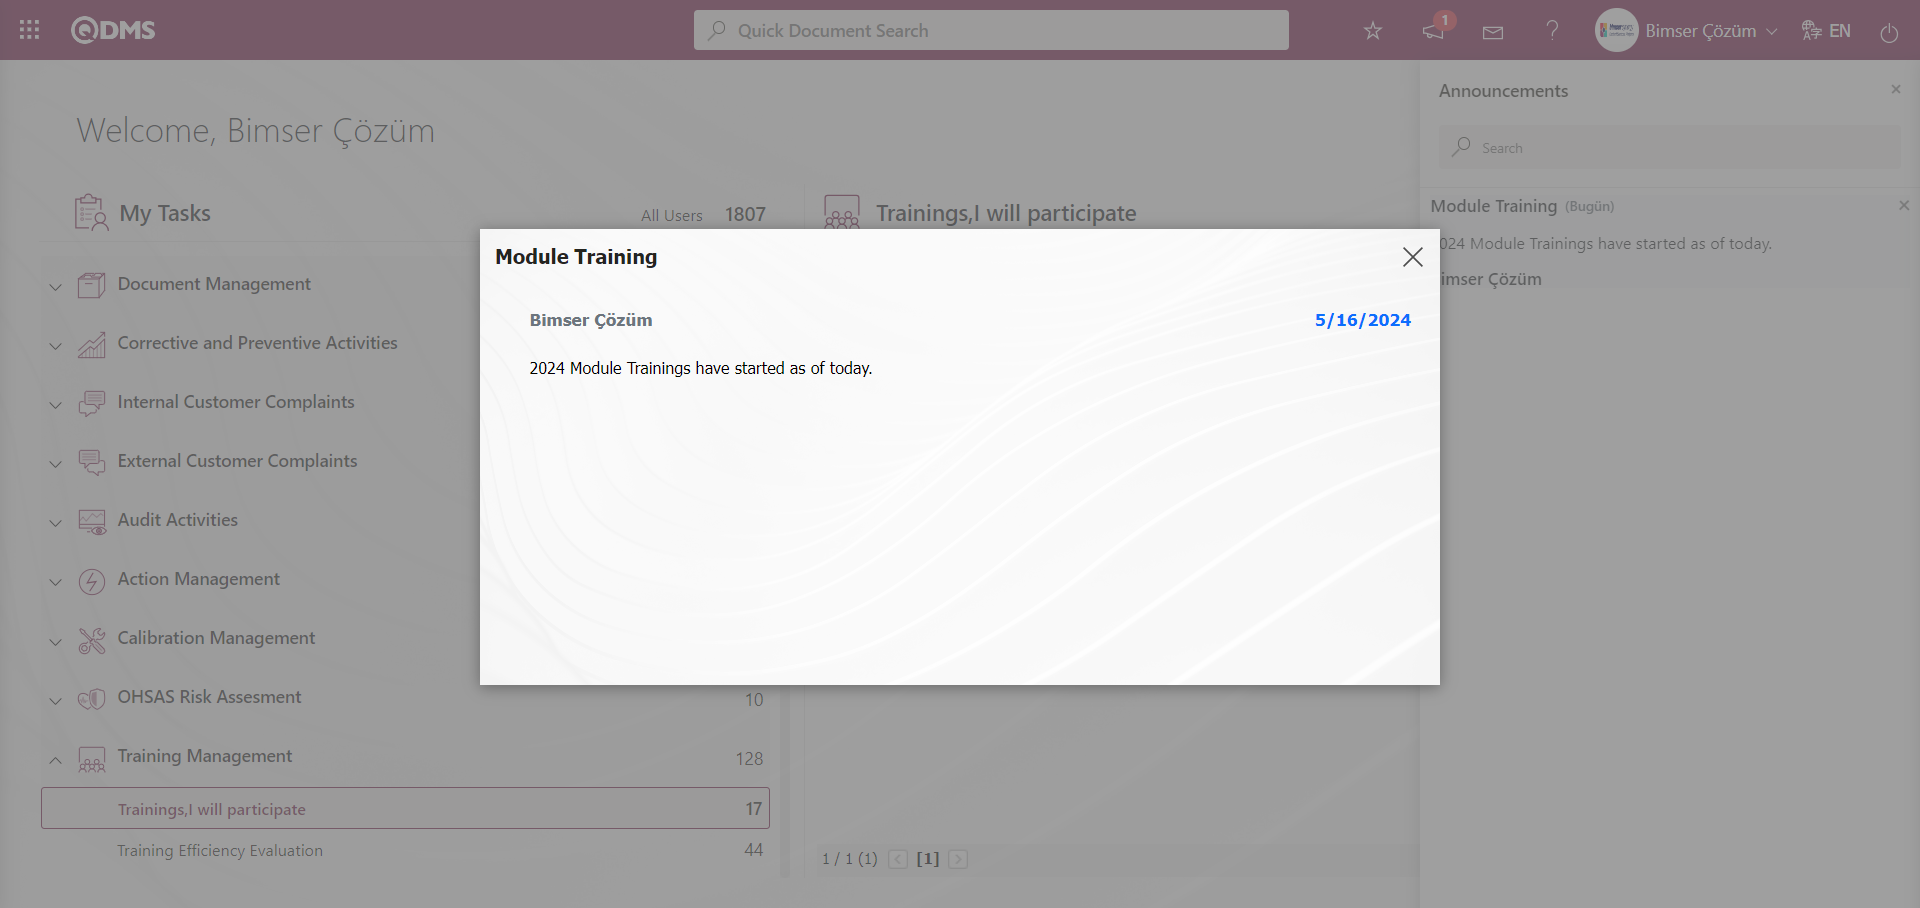
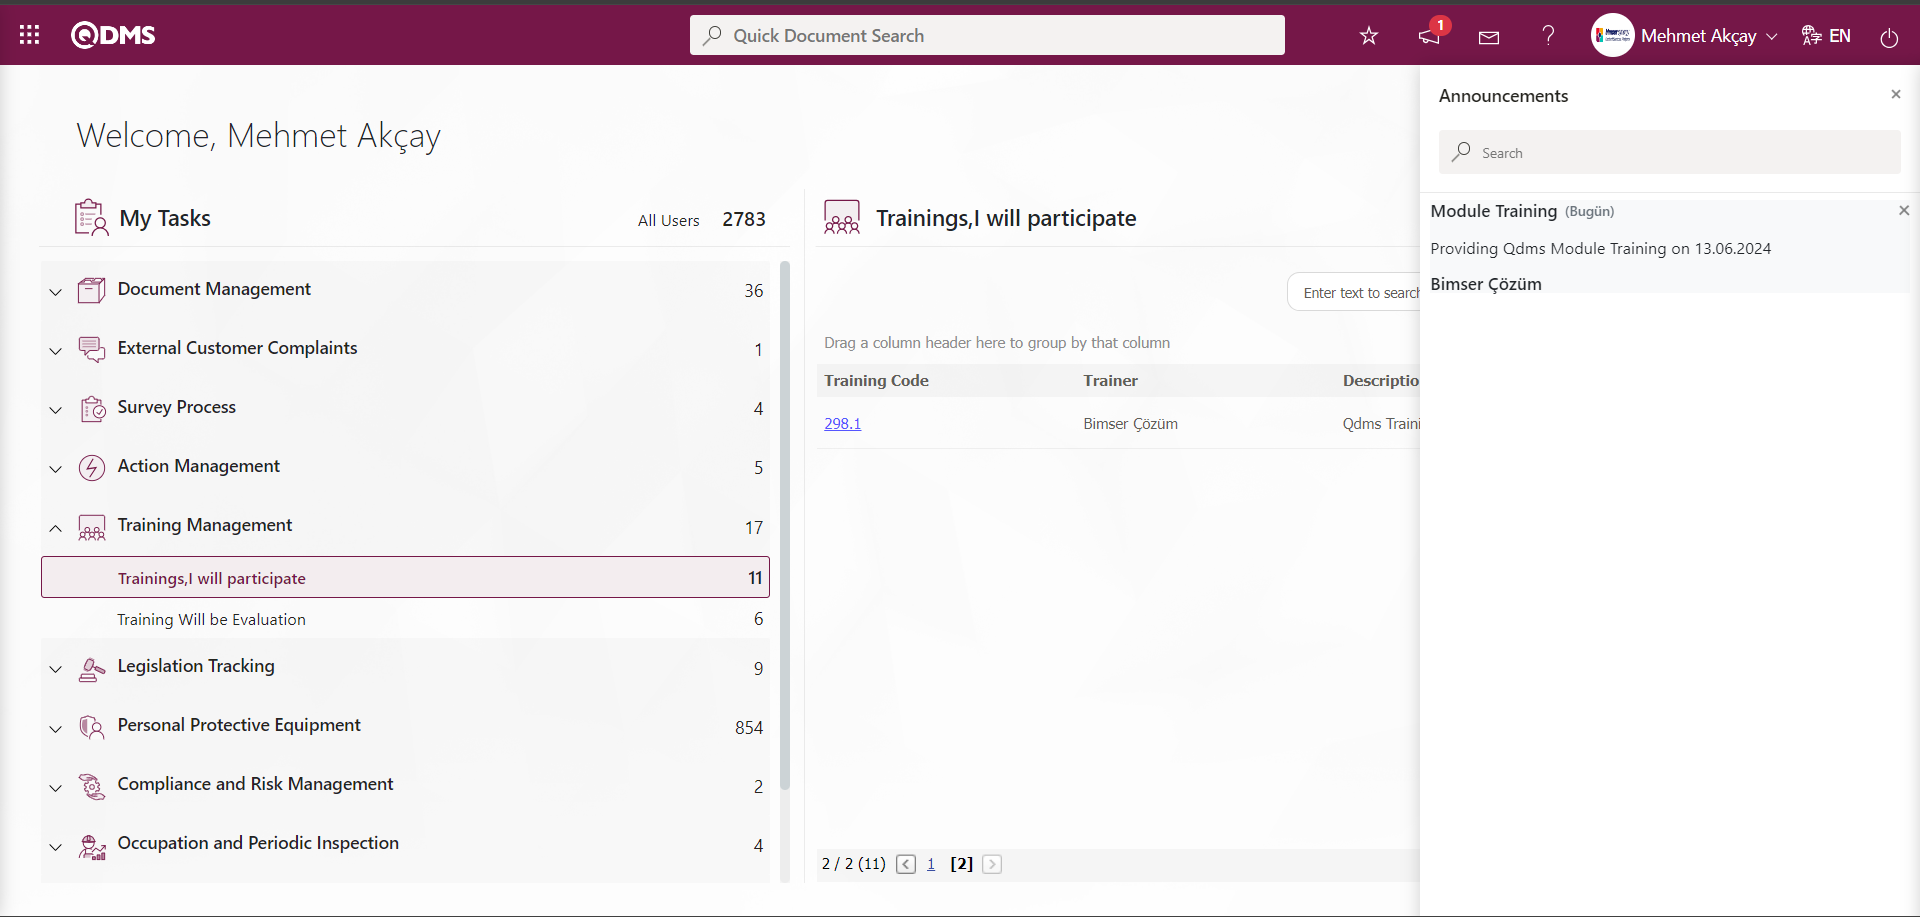
Click the button to view the defined announcement. The list of announcements defined in the system is displayed on the Announcements screen. When there is more than one announcement in the announcements list, a search can be made in the search bar.
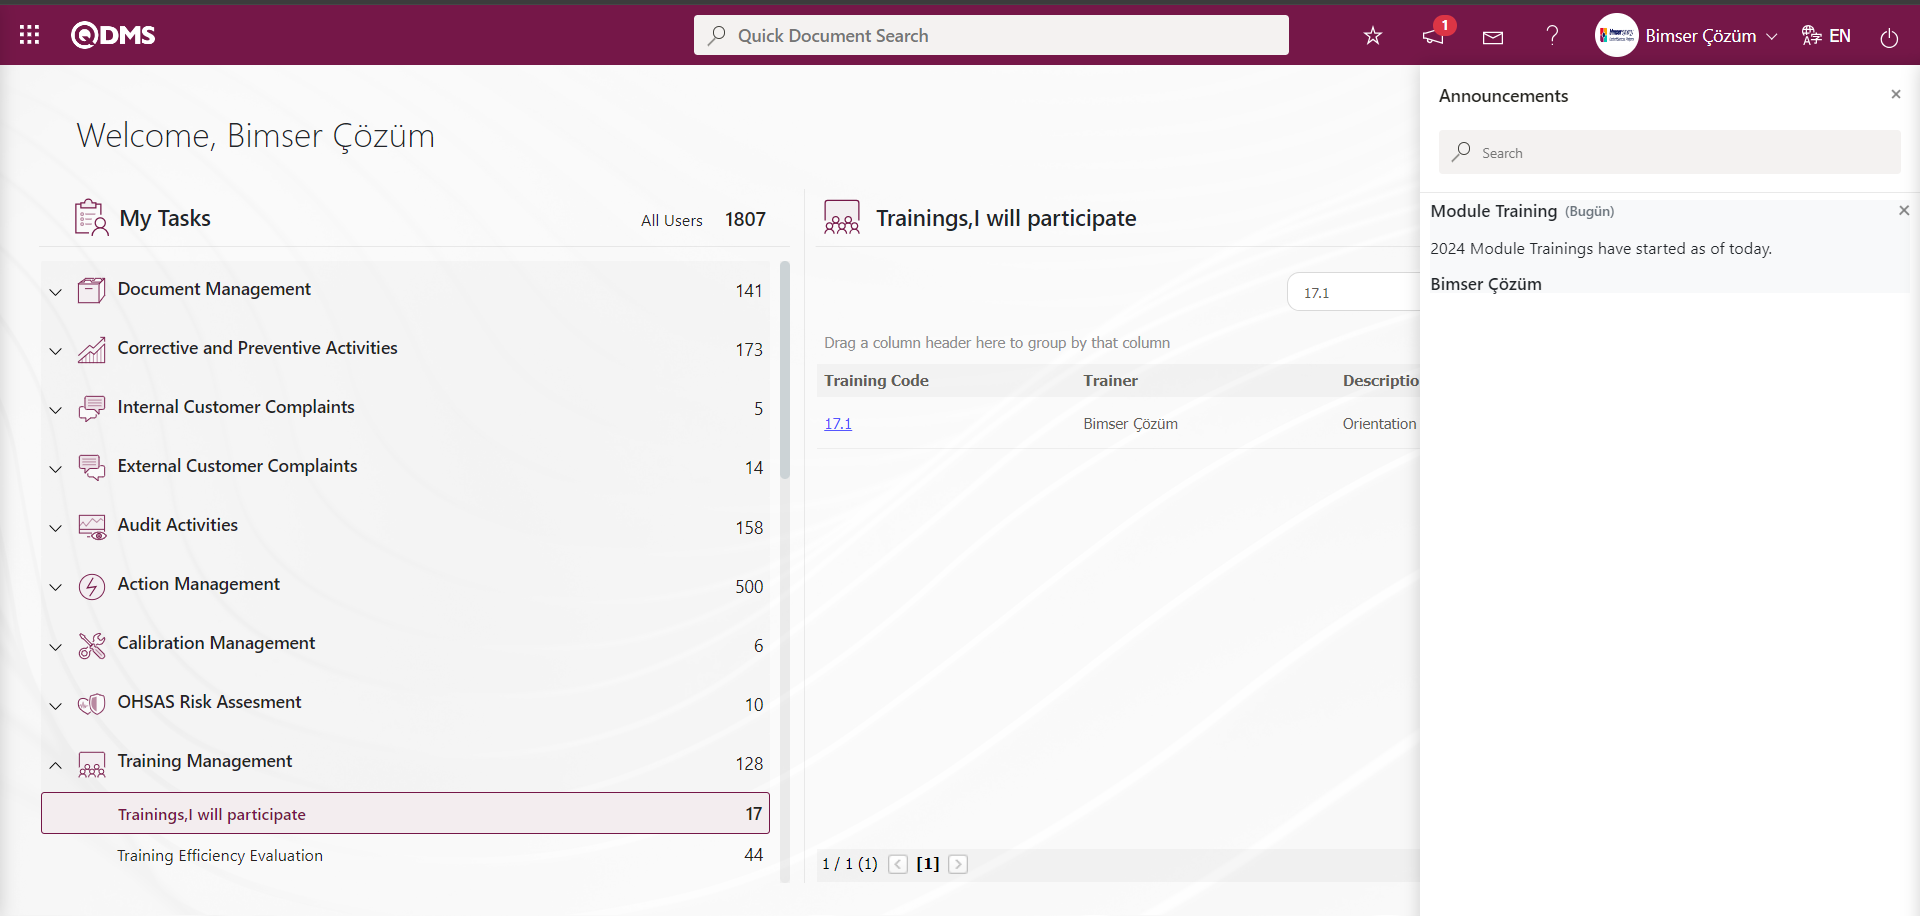
The announcement definition process is defined in the System Infrastructure Definitions / BSID / Definitions / Create Announcement menu. In the System Infrastructure Definitions / BSID / Configuration Settings / Announcement Authorization Matrix menu, authorization is done with the defined Announcements. Users will now be able to make announcements in the areas they are authorized and manage their own announcements. When an announcement is created, an automatic e-mail will be sent to the relevant people and users will be able to see new announcements after opening the system. By clicking on the defined announcement in the announcements list, the announcement can be viewed in detail.
 Posts Click
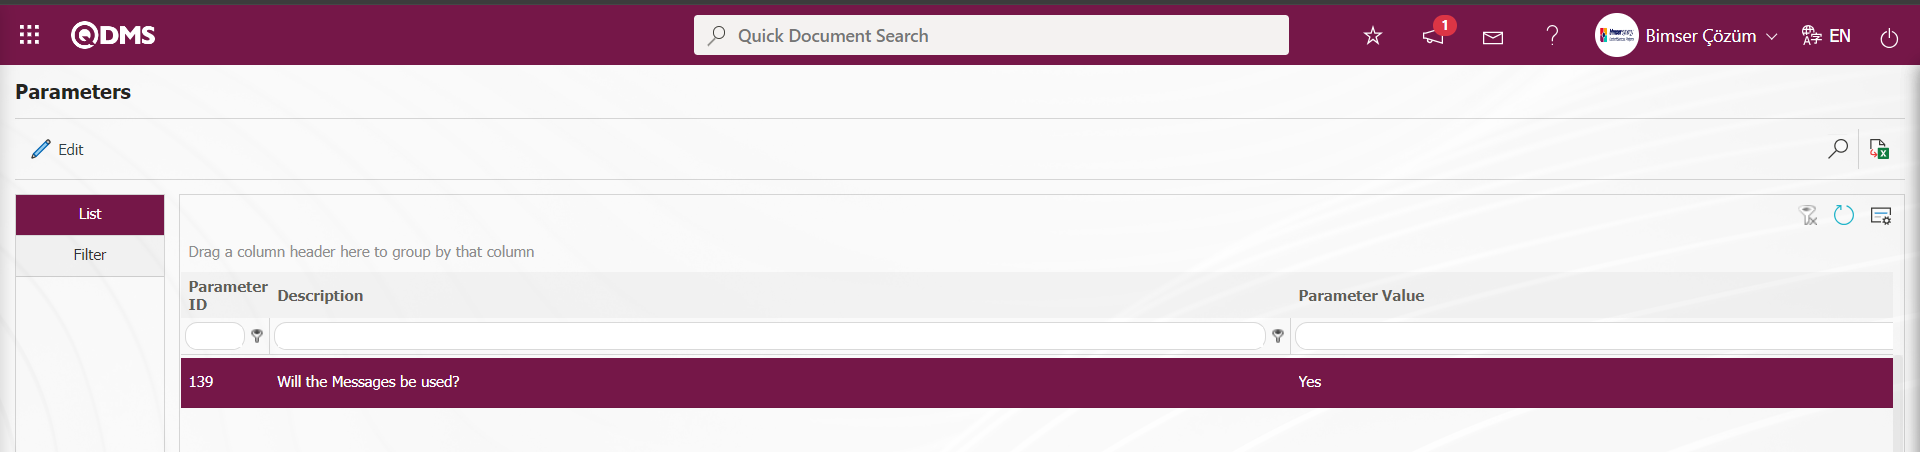
  button on Qdms main screen. When this button is displayed on the Qdms main screen, the parameter value of the parameter 139 “Will the Messages be used?” in the System Infrastructure Definitions module parameters is selected as “Yes” and the parameter is activated.
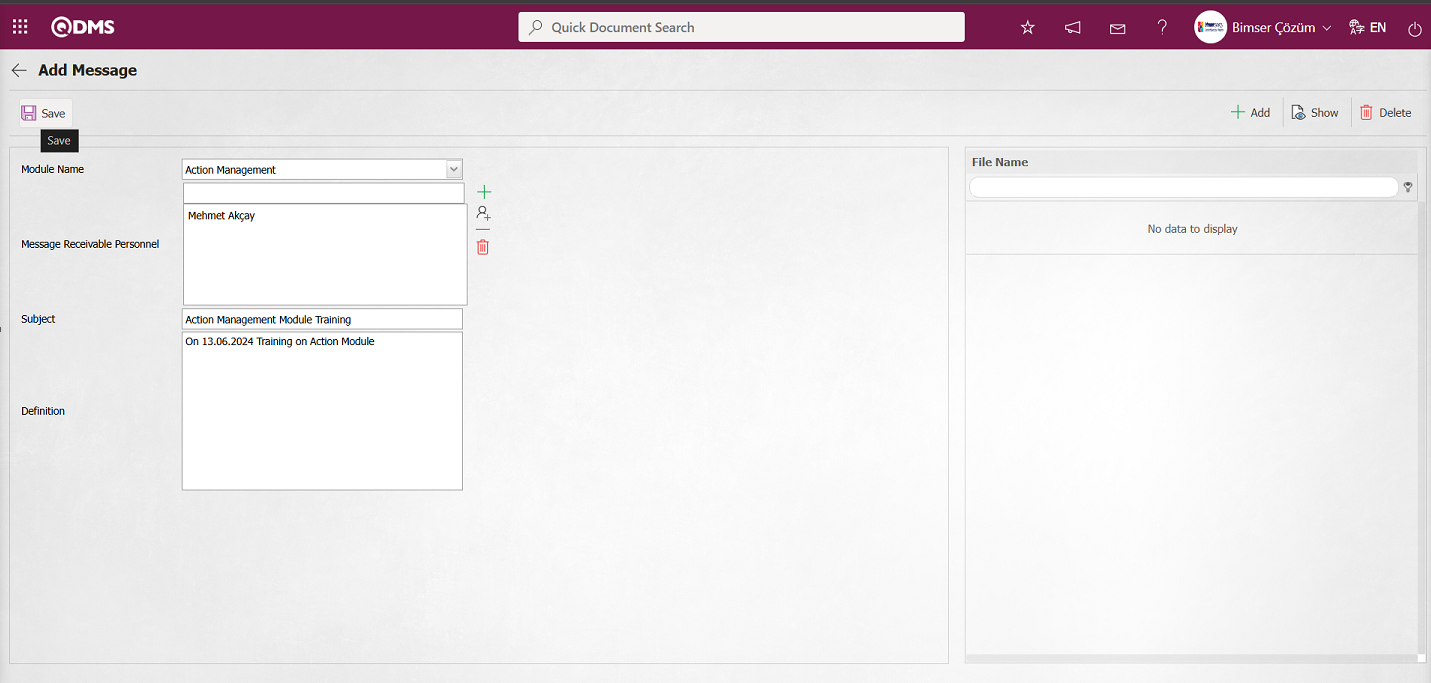
After the parameter is activated, the button is displayed on the Qdms main screen. By clicking this button, the Messages screen is displayed. In the Messages screen, 2 tabs are displayed as Incoming messages and Sent Messages tab. Incoming Messages tab lists incoming messages and Sent Messages tab lists sent messages. In this menu, defining new messages, replying, viewing, deleting and making the message read are done with the help of buttons.

With the help of the buttons on the screen;
 :A new message is defined.
 :Selected messages in the list are deleted.
 :Selected incoming message in the list is answered.
 :Selected message in the list is displayed.
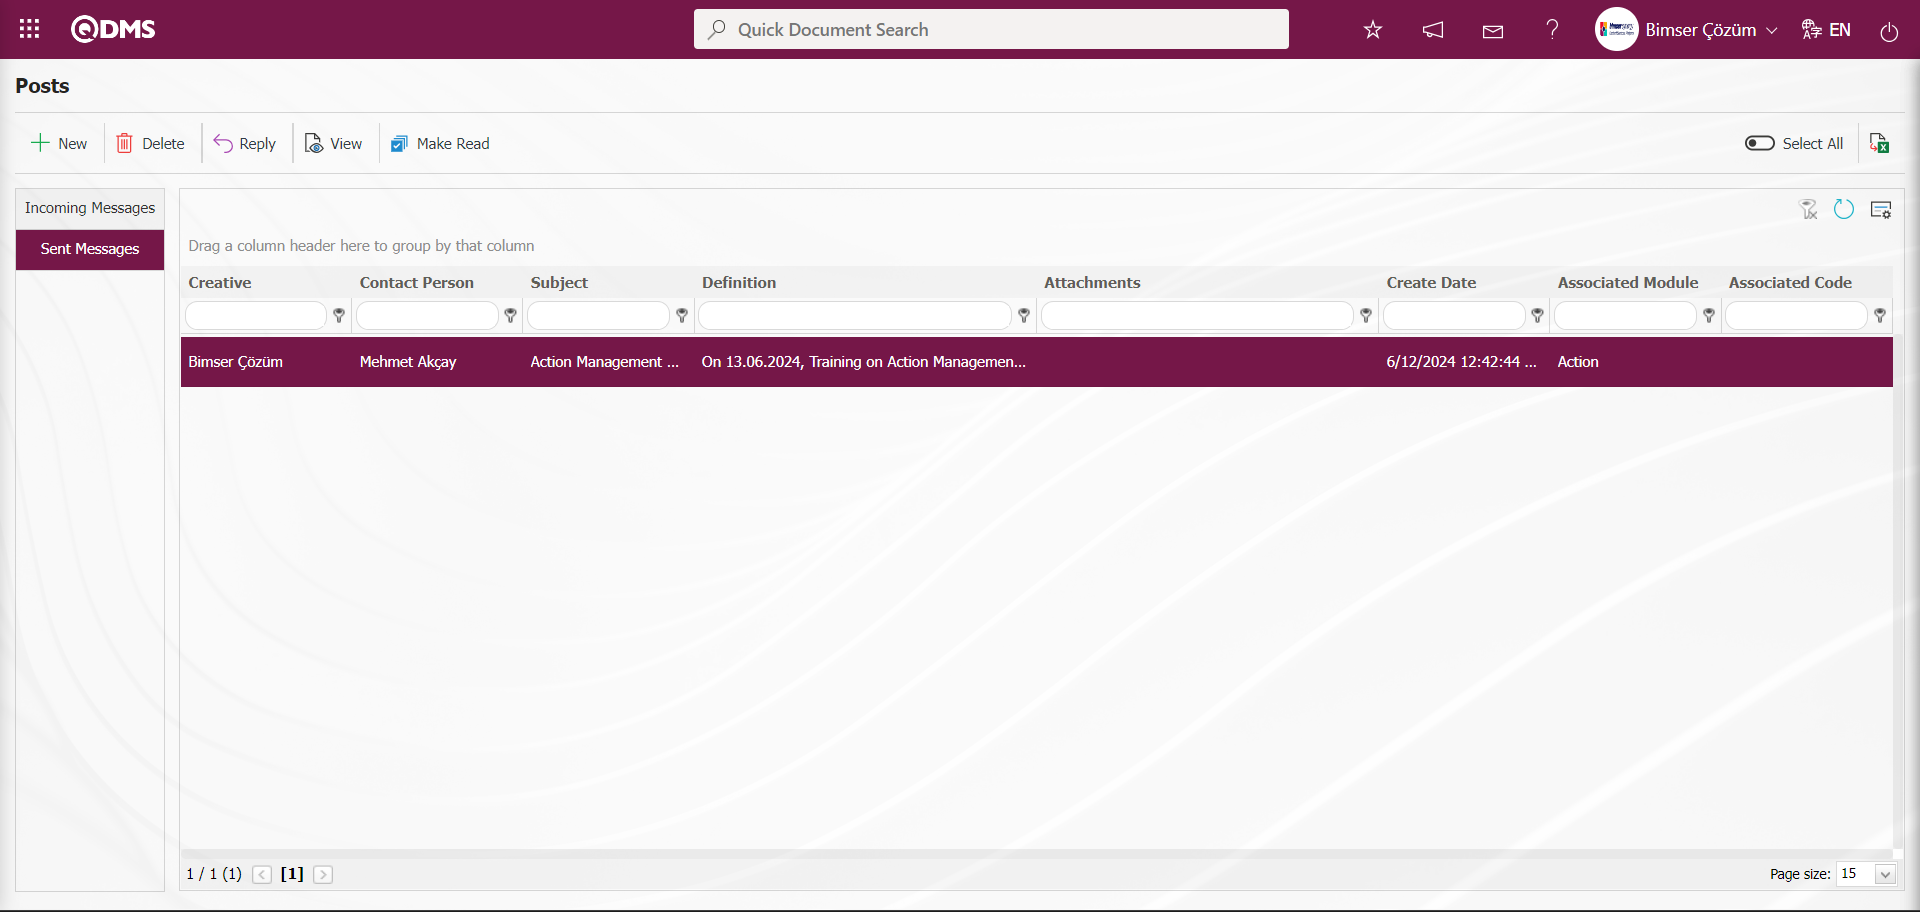
 :The message selected in the list is read.
 : Data is exported to Excel.
 : The data remaining in the filter fields in the grid where the search criteria on the menu screens are searched is cleared.
 : The menu screen is restored to its default settings.
 : User-based designing of the menu screen is done with the show-hide feature, that is, the hiding feature of the fields corresponding to the columns on the menu screens.
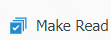
To add a new message to the Posts screen, click on the button at the top right corner of the screen.
 Related fields are defined on the screen that opens:
Module Name: This is the field where the message to be sent on the Add Message screen is selected from the Module list opened by clicking the drop-down list.
Message Receivable Personnel: It is the field where the message to be sent on the Add Message screen is selected from the list of personnel defined in the system by clicking the  (Add) button or from the list of User Group defined in the system opened by clicking the
  (Select) button.
Subject: It is the field where the subject information of the message to be sent on the Add Message screen is written.
Definition: It is the field where the detailed description information, if any, of the message to be sent on the Add Message screen is written.
On the Add Message screen, the personnel to whom the message will be sent are selected in the Personnel list defined in the system opened by clicking the (Add) button. In the Subject field, the subject of the message to be sent is written. In the Description field, the detailed information of the message to be sent is written. If available, the file or document related to the message is uploaded in the Additional file field. The necessary fields are filled with the relevant information and the message addition registration process is realized by clicking the  button.
In the process of adding a message, the personnel to whom the message is sent are logged in with their username and password from the Qdms Main login screen.
After logging in to the Qdms main login screen of the personnel to whom messages are sent, the  button is clicked. The numeric value on the button shows the number of messages received by the user. The list of messages received by the user is displayed in the Incoming messages tab from the Messages screen. At this stage, the user can view, reply and read the incoming message.

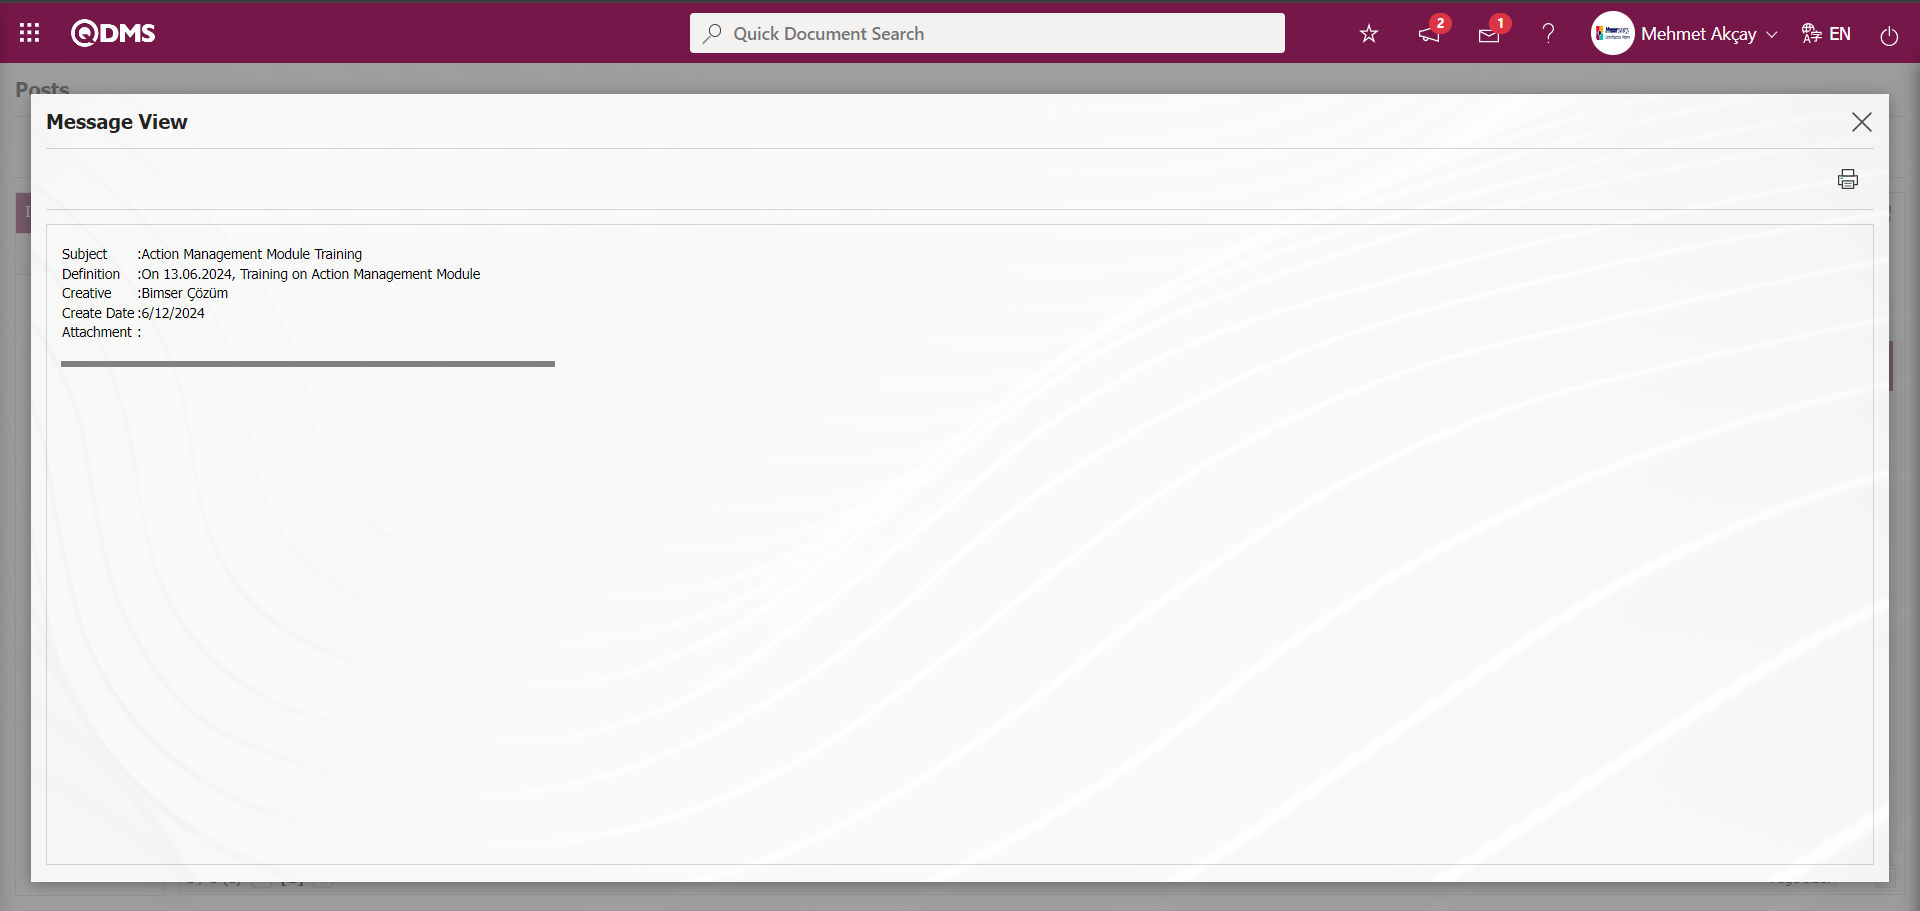
The user can select the incoming message in the list in the Incoming Messages tab on the Posts screen and click the  button to view the content of the incoming message.
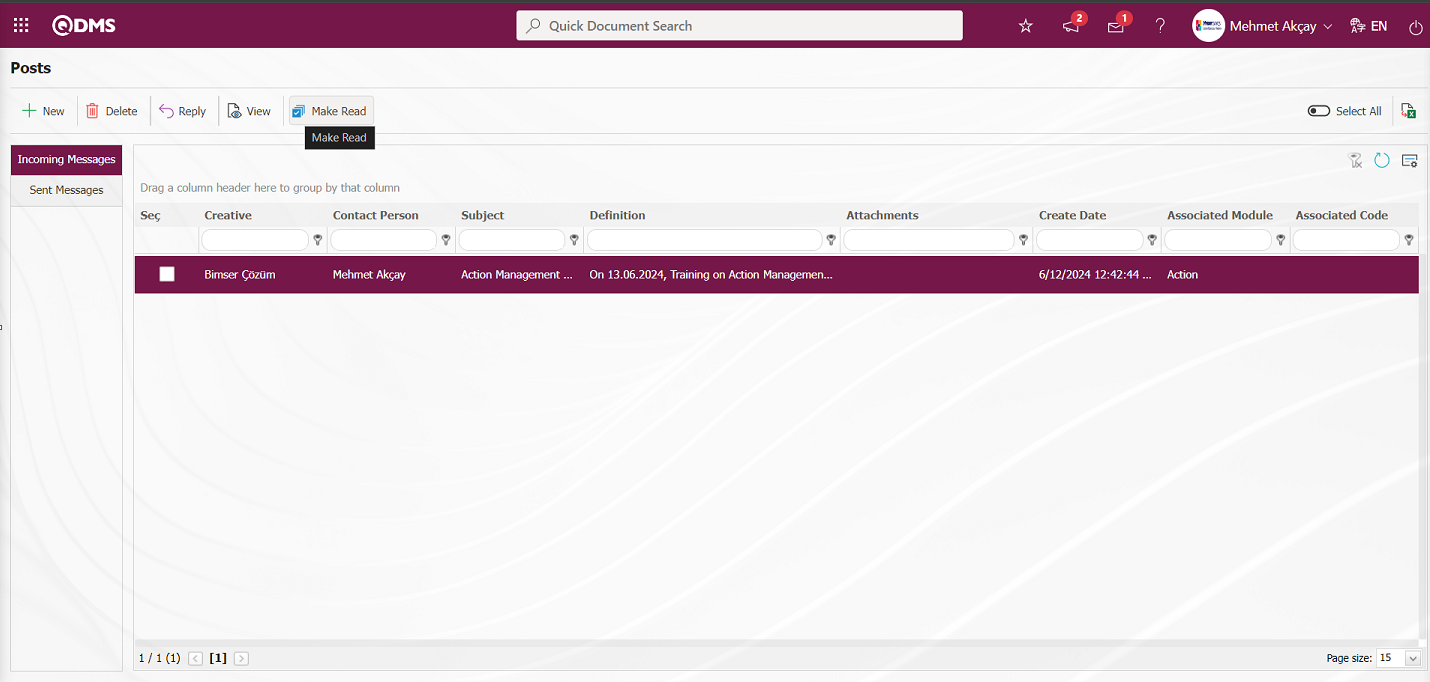
If the user has read the content of the message by selecting the message in the list in the Incoming Messages tab on the Posts screen, he/she makes the message read by clicking the  button.
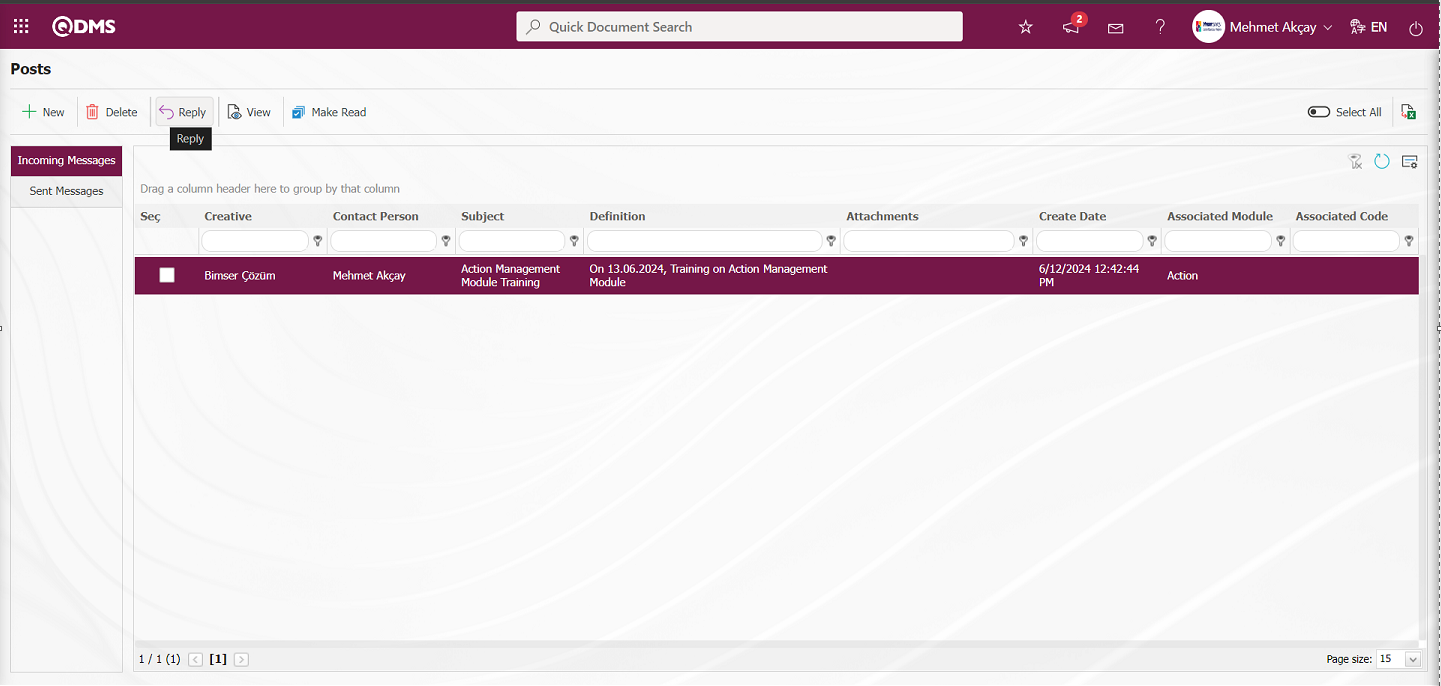
The user selects the message received in the list in the Incoming Messages tab on the Posts screen and clicks the  button to reply to the message.

On the Message View screen, the user examines the content of the incoming message and writes the description information about the message in the Description field and performs message reply registration processing by clicking the  button in the upper left corner of the screen.

Help: Click the  button on the Qdms main screen. In the Help menu that opens, information about the Qdms product is given, user help documents can be viewed and downloaded to your computer, and by clicking the QDMS Support option, users can access the BSS, which is the platform where users can get the fastest and easiest support.
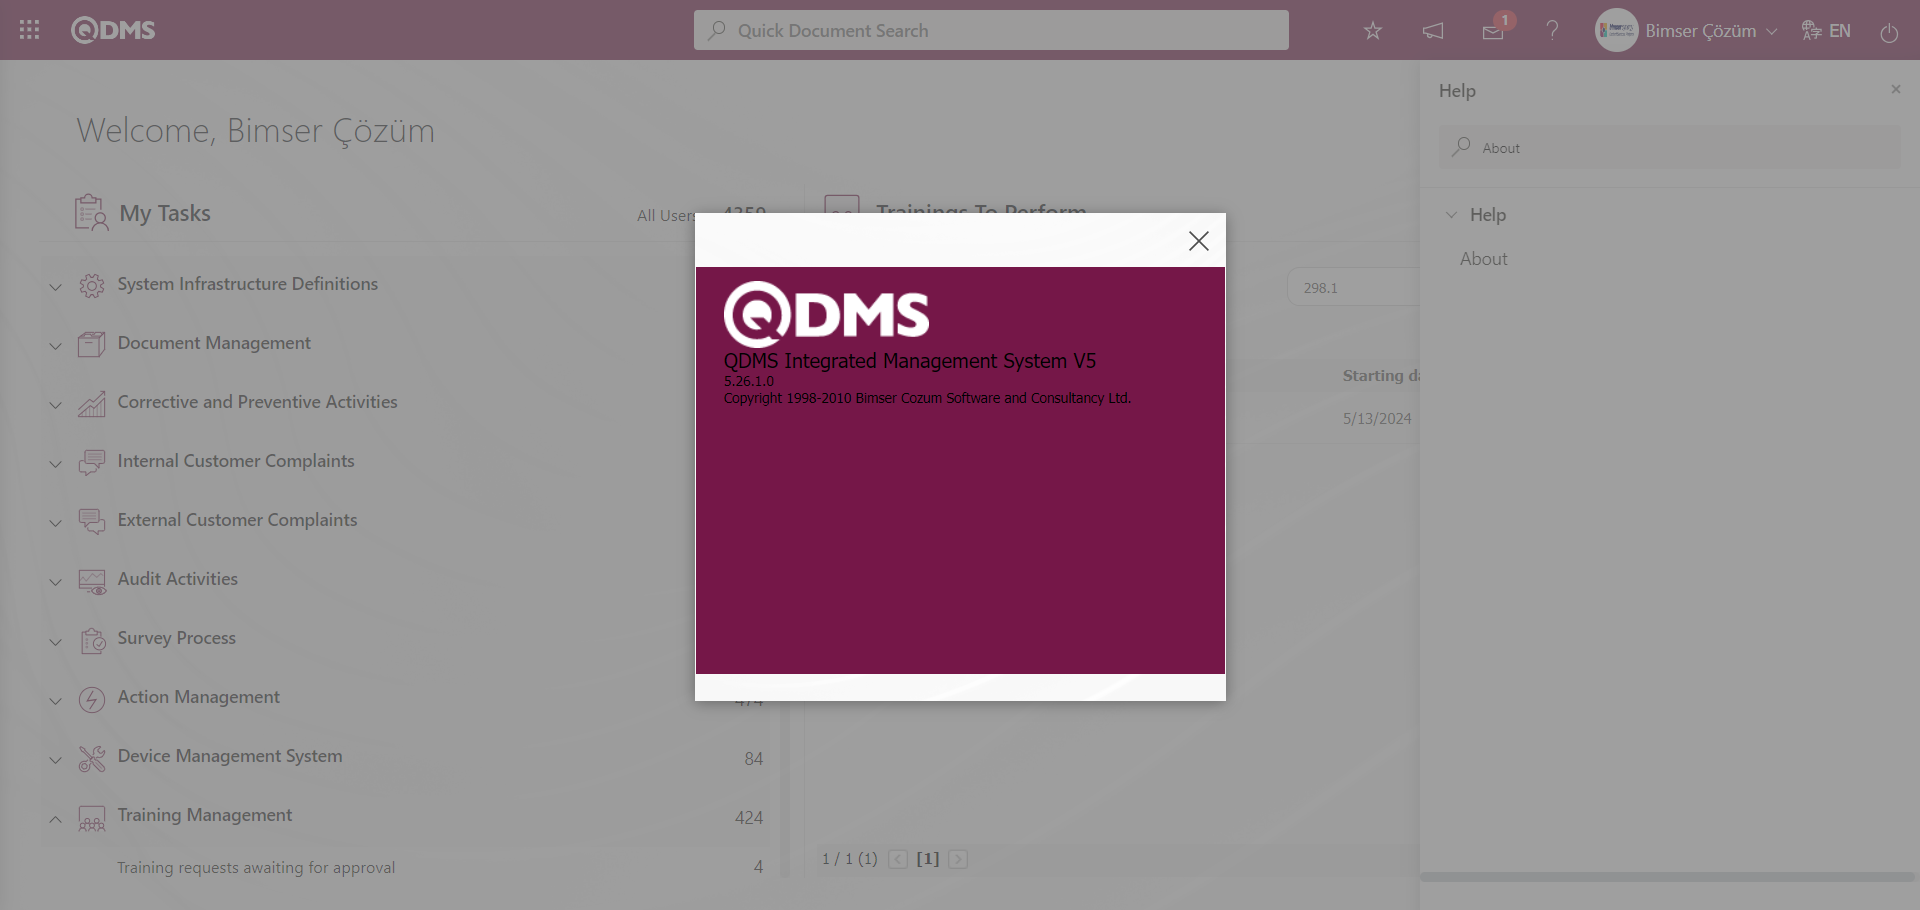
On the Help Menu screen, click on the related option “About”.

On the screen that opens, Qdms system name, version information and the information of the Qdms product belonging to Bimser Çözüm Software*** and Consulting Inc. is the help menu option.
Users can download and use the related module user help document by selecting it from the Help menu. In the search bar of the Help Menu, type the name of the Module User Help Document installed in the help menu to be downloaded.
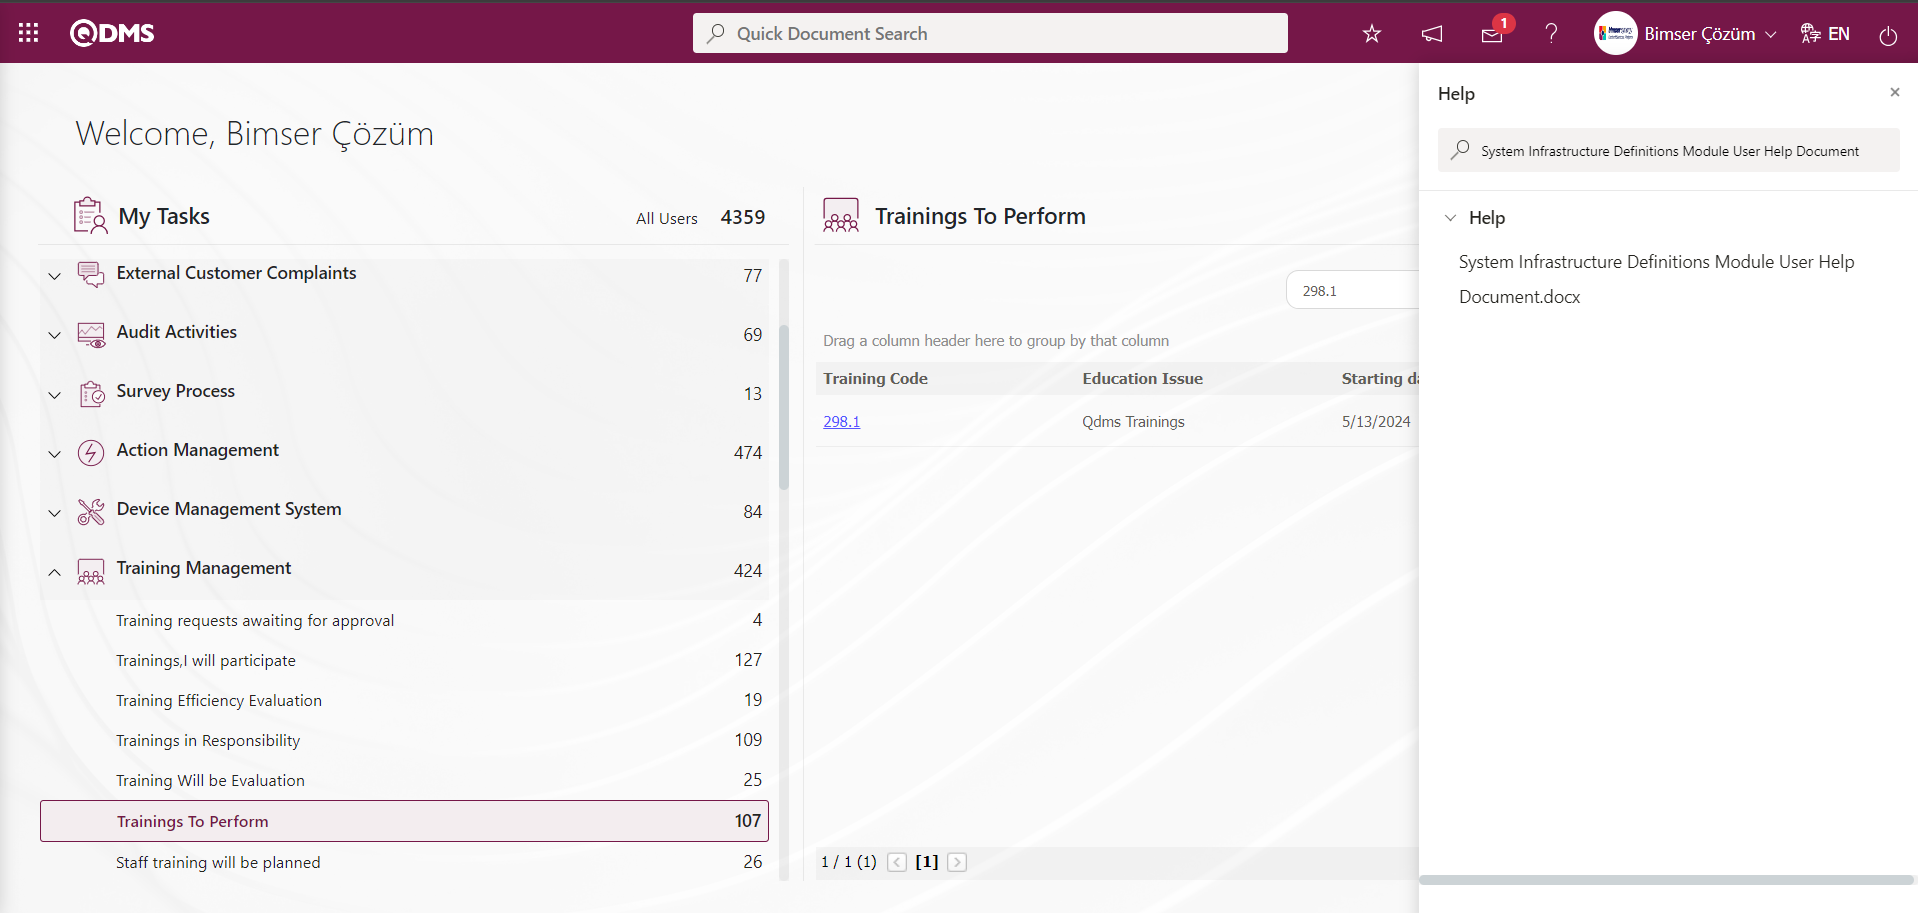
The user help document is downloaded to the computer by clicking on the link with the name of the user help document in the help menu typed in the search bar.
User Help documents explain how modules and systems are used. In these documents, the infrastructure setup is explained in the menus in the System Infrastructure definitions section of the module. The use of menus, reports and graphics within the scope of the Integrated Management System is explained. These sections are presented in the content of the Qdms system supported by screenshots in the documents. With these documents, users can better understand how to use the functions and features of the module and apply them in the Qdms system. The module includes information such as parameters settings and how users can set and customize certain parameters. When users need more information about a specific module or function, they can refer to these documents to solve their problems. This helps to improve the user experience and allows users to use the Qdms system more effectively.
Users can upload the desired User Help document to the help menu as an Attachment File and add the relevant addresses as links via the System Infrastructure Definitions / BSID / Configuration Settings / Help Menu Definition menu. They can make changes and delete the added Additional File and the link information of the related addresses.
QDMS Support: It is the name of the platform where user support is provided for the software produced by Bimser Software and Consultancy Inc. With the BSS-Bimser Support System known as QDMS Support, complaints and requests from users using software products are supported through this platform.
In the Help menu, type QDMS Support option in the search bar.
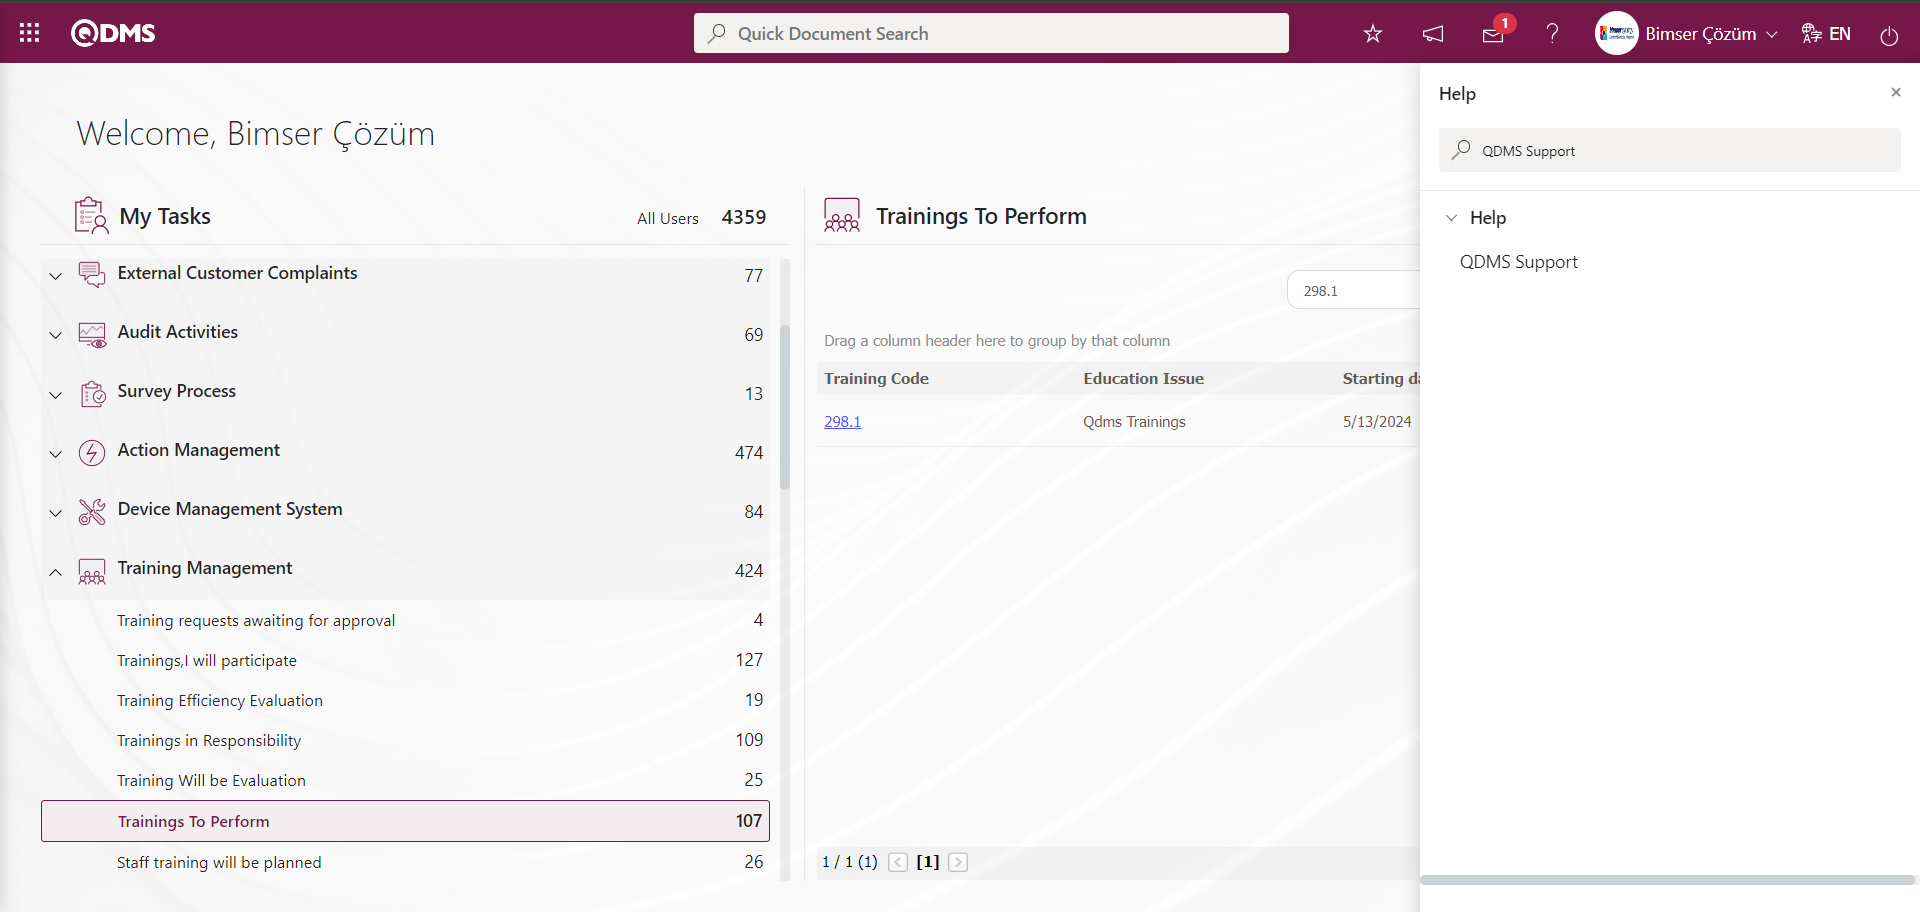
Click on the link with the displayed QDMS Support name to access the BSS-Bimser Support System platform.

Complaints and requests from users of software products are supported through this platform. BSS is the platform where users can get the fastest and easiest support. You can log in to the BSS system via http://bss.bimser.com.tr/ by entering your e-mail address as username and account password as password. The user password is initially given by the expert who created the BSS account. The user can then renew his/her password. For forgotten passwords, the password can be sent to the e-mail address by using the forgot password feature. Support is provided on the BSS platform for the following issues.
They can create a request complaint record: After logging in, Claim-Complaint notifications are made from the Support / New Notification page.
Information Request Records: Records created for the purpose of obtaining information are responded to by support specialist staff within a short time and users are informed.
Complaint Records Evaluation Process: Complaints about applications are first evaluated by the support departmentDevelopment Records Evaluation Process: When it is requested to add new features that do not exist in the application or to change existing features, these records are evaluated as development records.
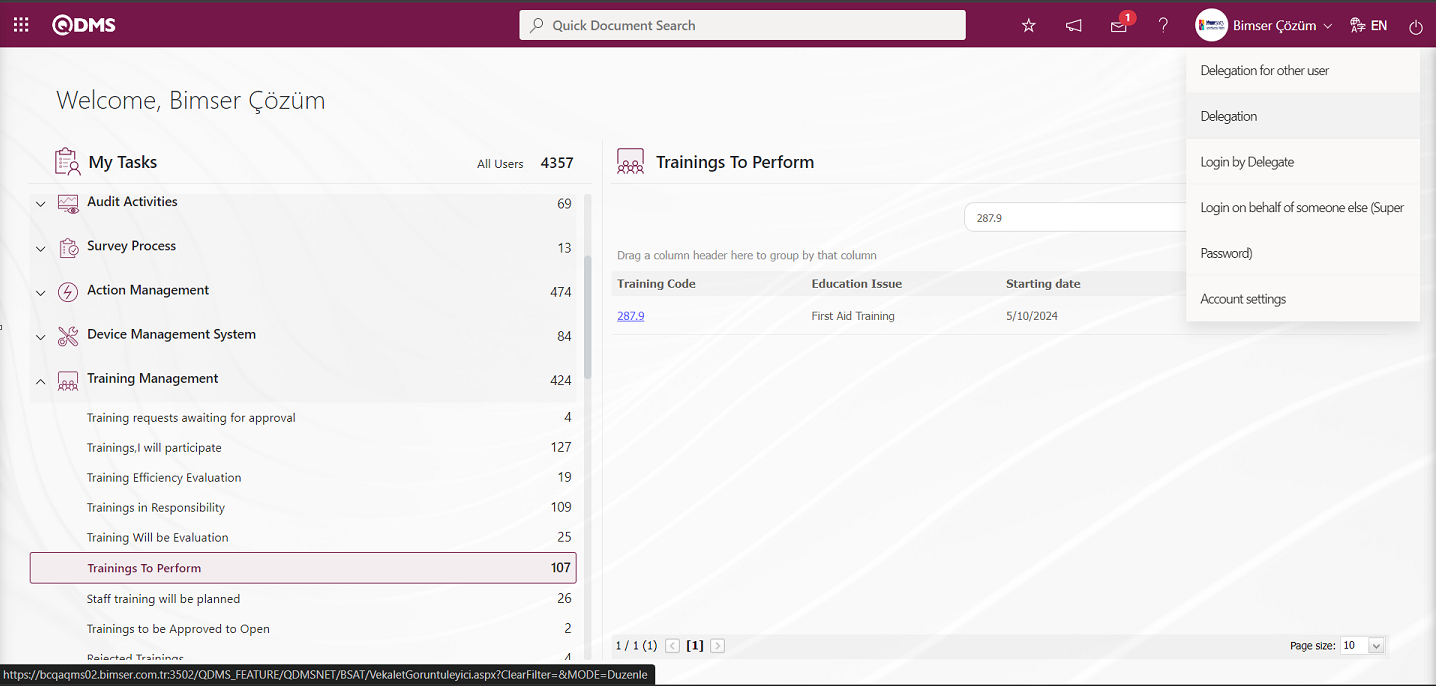
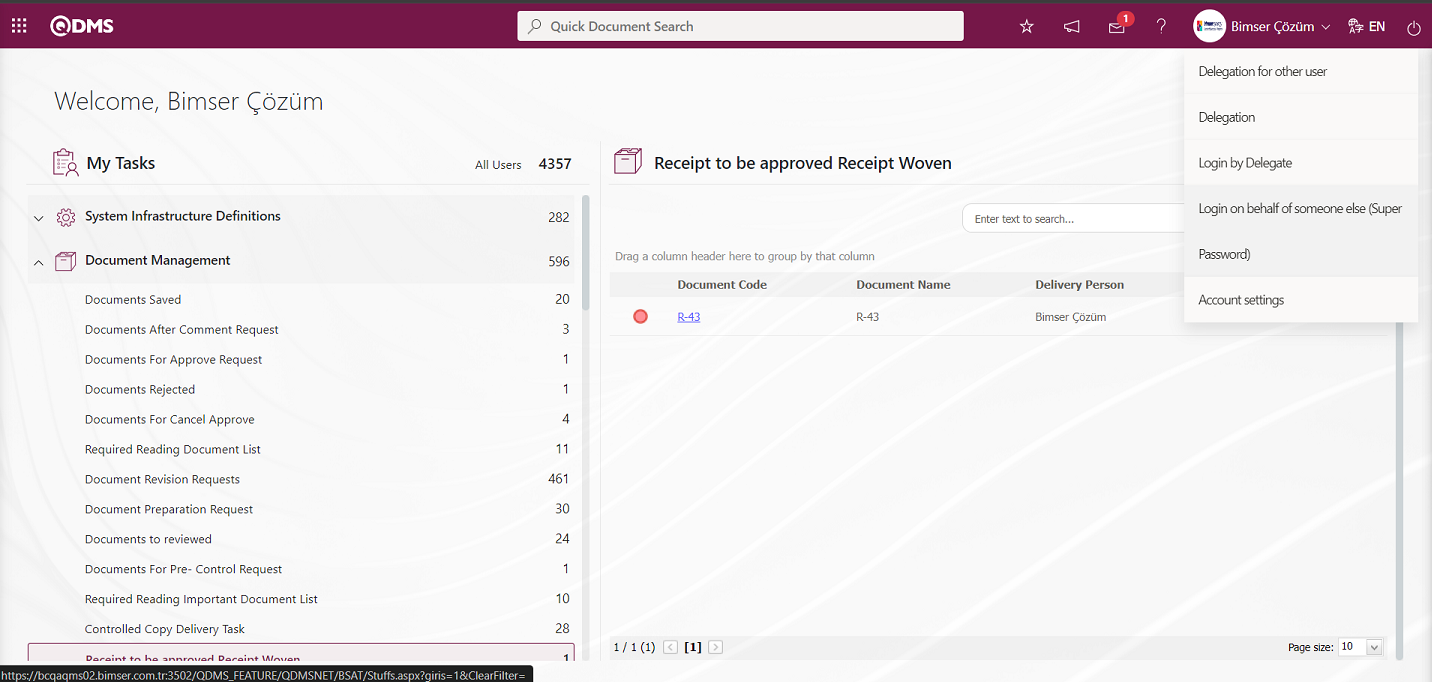
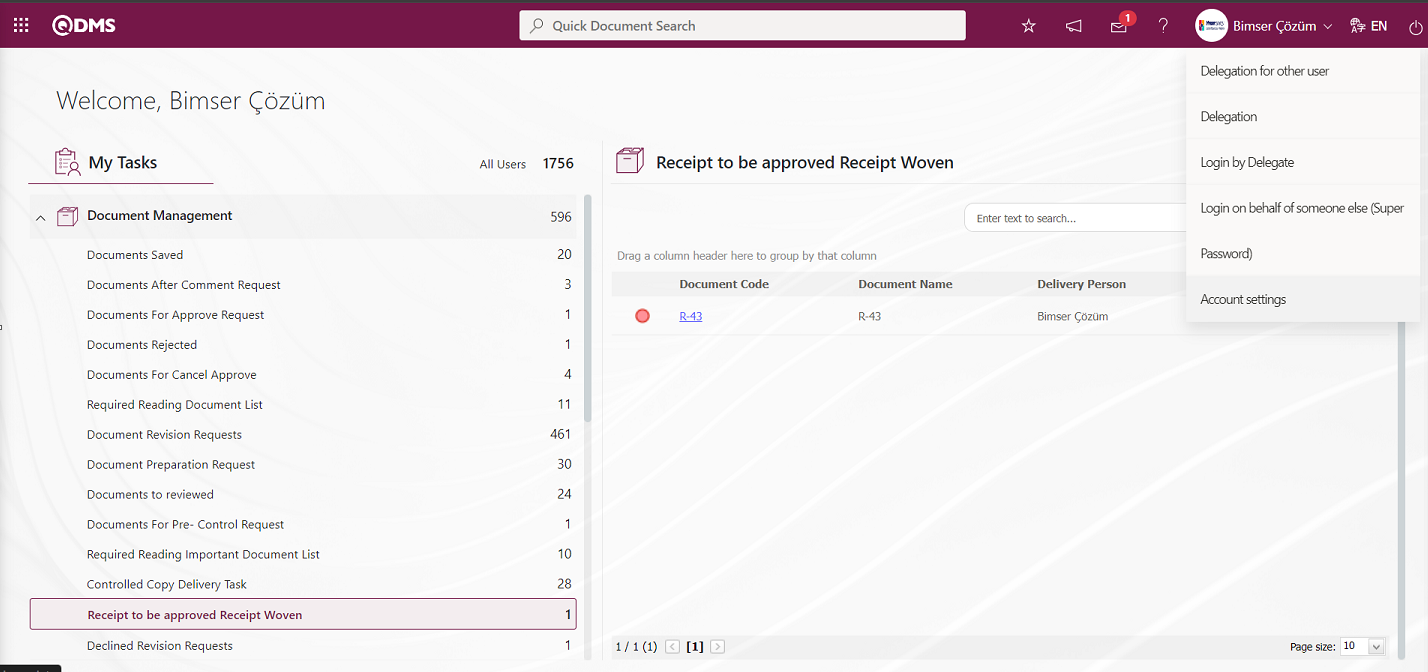
There is User Name and Surname information on the Qdms main screen. When the drop-down list is clicked in the User Name and Surname Information section, you can access the Delegation menu where delegation is made, Delegation entry menu where delegation entry is made, Delegation for other user, Login on behalf of someone else (Super Password) and Account settings menus where features such as the design of the Qdms system are changed.
For Delegation for other user and Login on behalf of someone else (Super Password) menus to appear in the drop-down list, the user must be defined as a module administrator in the System Infrastructure Definitions module. These two menus are not displayed on the screen of users who are not module administrators in the System Infrastructure Definitions module.
For Delegation for other user: It is a menu displayed on the screen of users who are module administrators in the System Infrastructure Definitions module. With this menu, delegation is made on behalf of other users. This menu is generally used by users who are administrators. When users are on leave, out of the company, etc. It is the menu used in order not to delay their pending tasks. In the process of granting proxy, the selection process of the modules to be authorized in the Module list that opens in the Authorized Modules field determines which modules will be authorized. If no module selection is made in the Authorized Modules field, authorization is performed in all modules.
 Related fields are defined on the screen that opens:
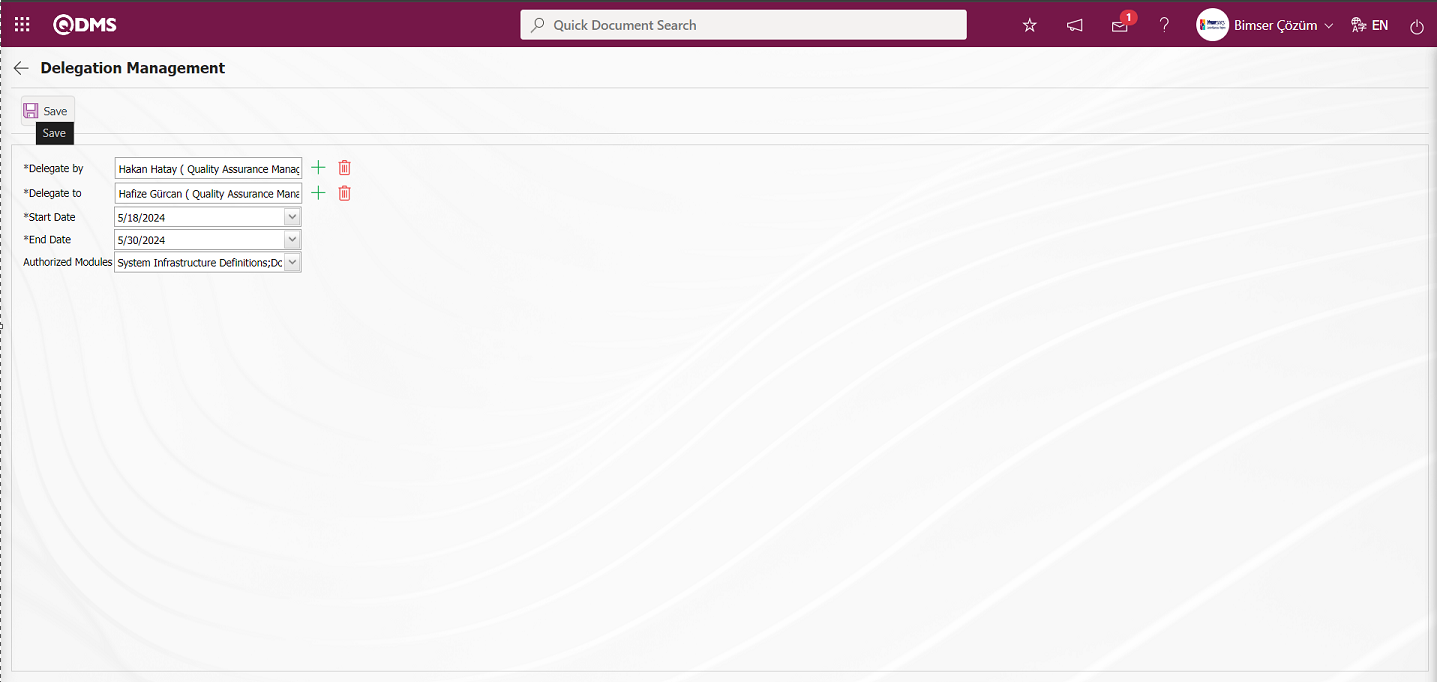
Delegate by: It is the mandatory field where the information of the person who gives power of attorney** on the Delegation Management screen is selected in the Personnel list defined in the system opened by clicking the  (Select) button.
Delegate to: It is the mandatory field where the information of the** person who receives the delegation on the Delegation Management screen is selected in the Personnel list defined in the system opened by clicking the (Select) button.
Start Date: It is the mandatory field where the start date of the** proxy is selected in the calendar field opened on the Delegation Management screen.
End Date: It is the mandatory field where the end date of the mandate is selected in the calendar field on the Delegation Management screen** .
Authorized Modules: In the Delegation Management screen, it is the field where the modules in which the power of attorney will be given are selected in the drop-down module list. If no module is selected in this field, all modules will be authorized.
On the Delegation Management screen, the information about the person giving and receiving the proxy is selected from the personnel list. The start and end date of the delegation is selected in the calendar field. The modules to be delegated are selected from the module list. After entering the relevant information in the required fields, the  button in the upper left corner of the screen is clicked and the registration process of giving proxy on behalf of someone else is done.
The user name password information is entered into the Qdms of the user who receives delegation for other user for the application of the delegation for other user process.
When logging in to the user's local address, the system asks for information about which personnel will log in to the system.
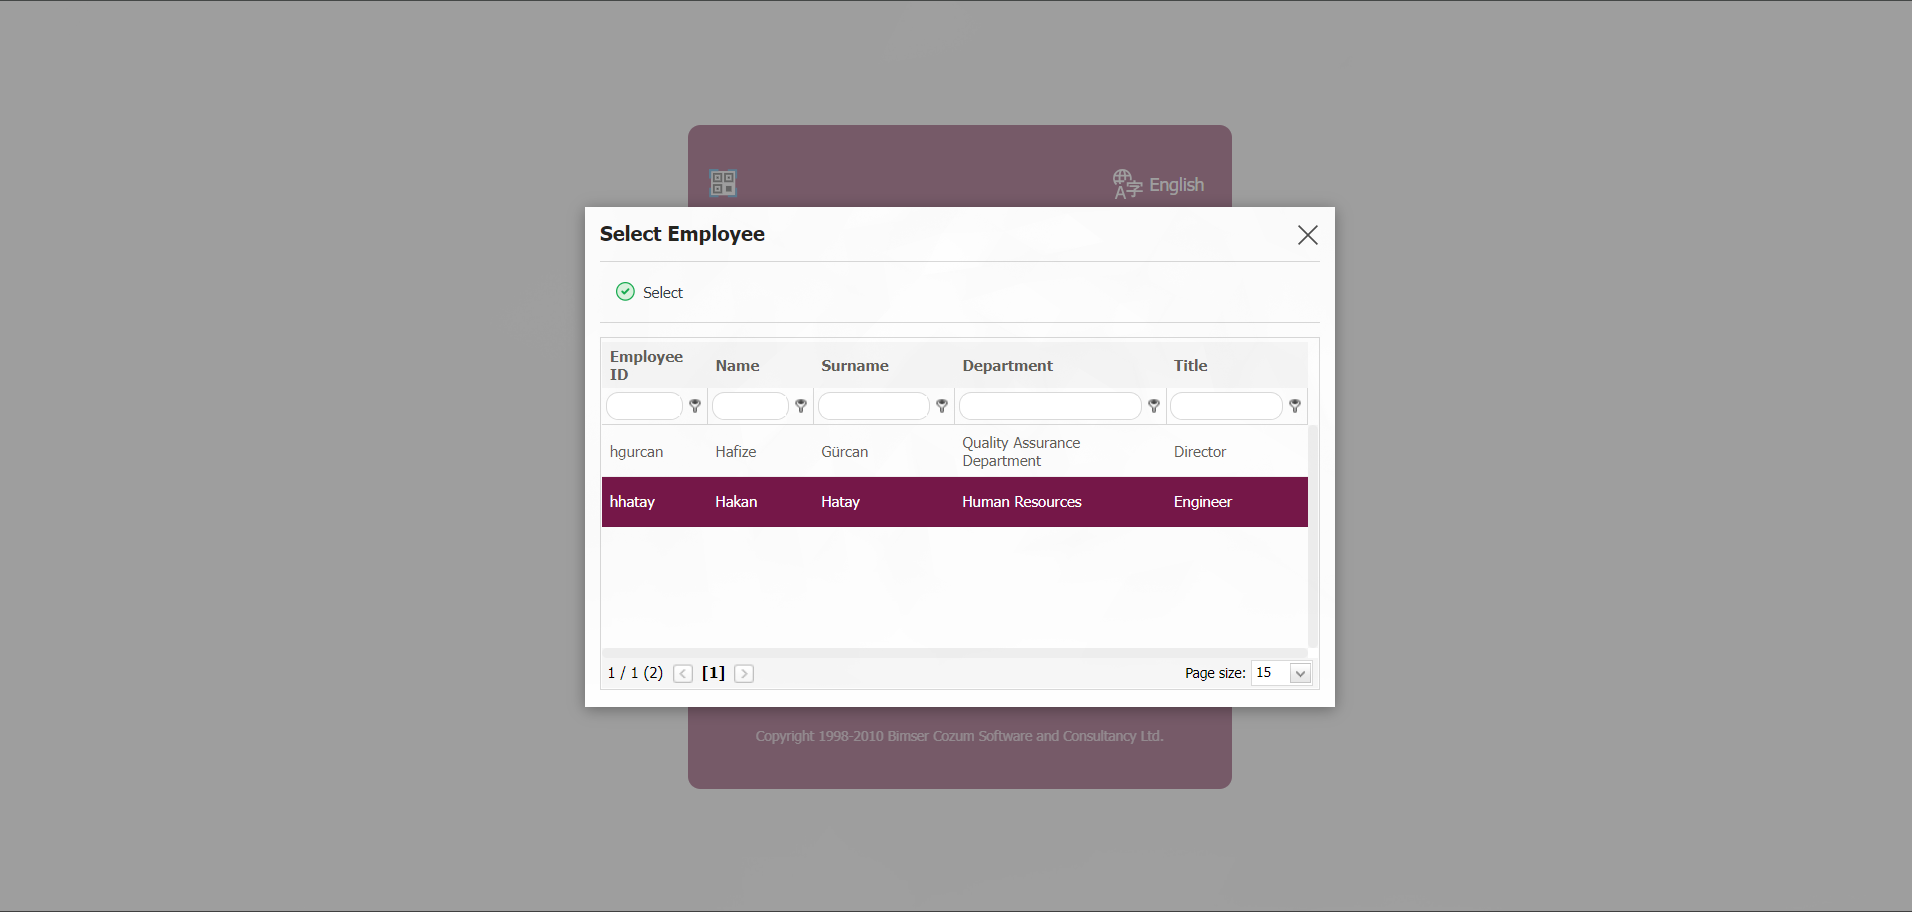
The user whose delegation is given is selected and the user's address is logged in. When logged in to the user address, only the modules authorized for the proxy process are displayed in the proxy process. In the Delegation for other user process, it is seen that Document Management and System Infrastructure Definitions Modules are authorized.
Delegation: With this menu, users can give a delegation to another user when they are on leave, out of the company, etc. in order to prevent delays in their pending tasks.
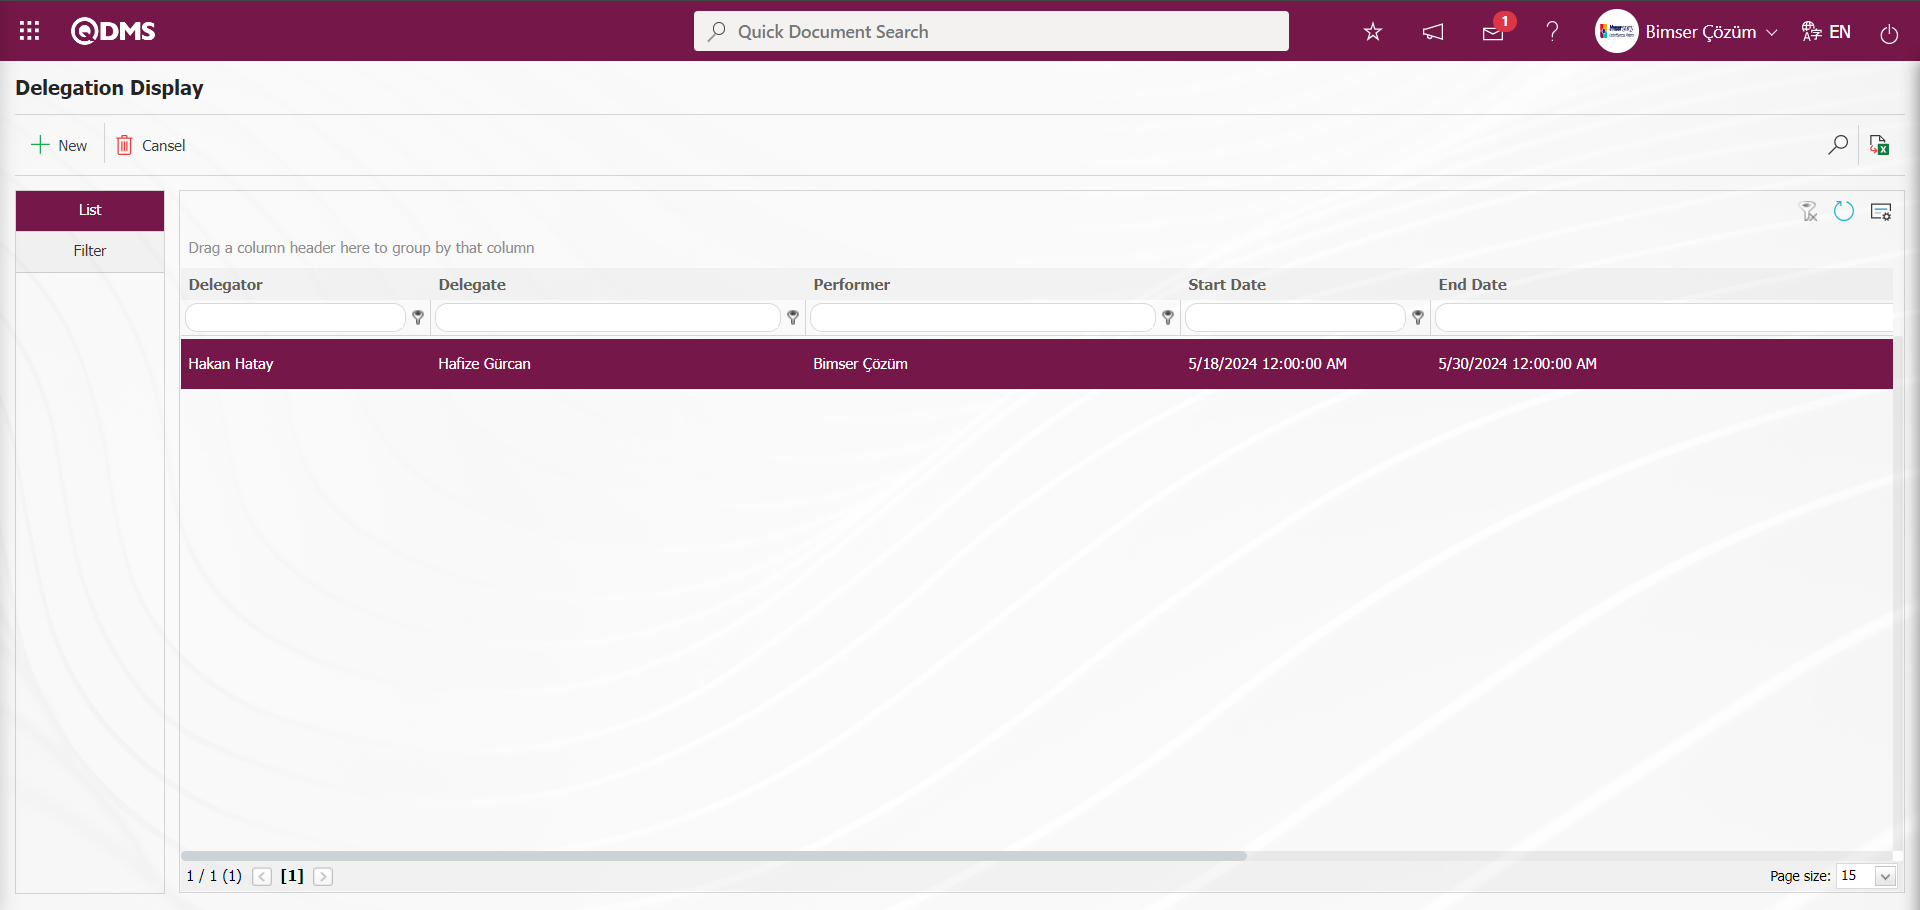
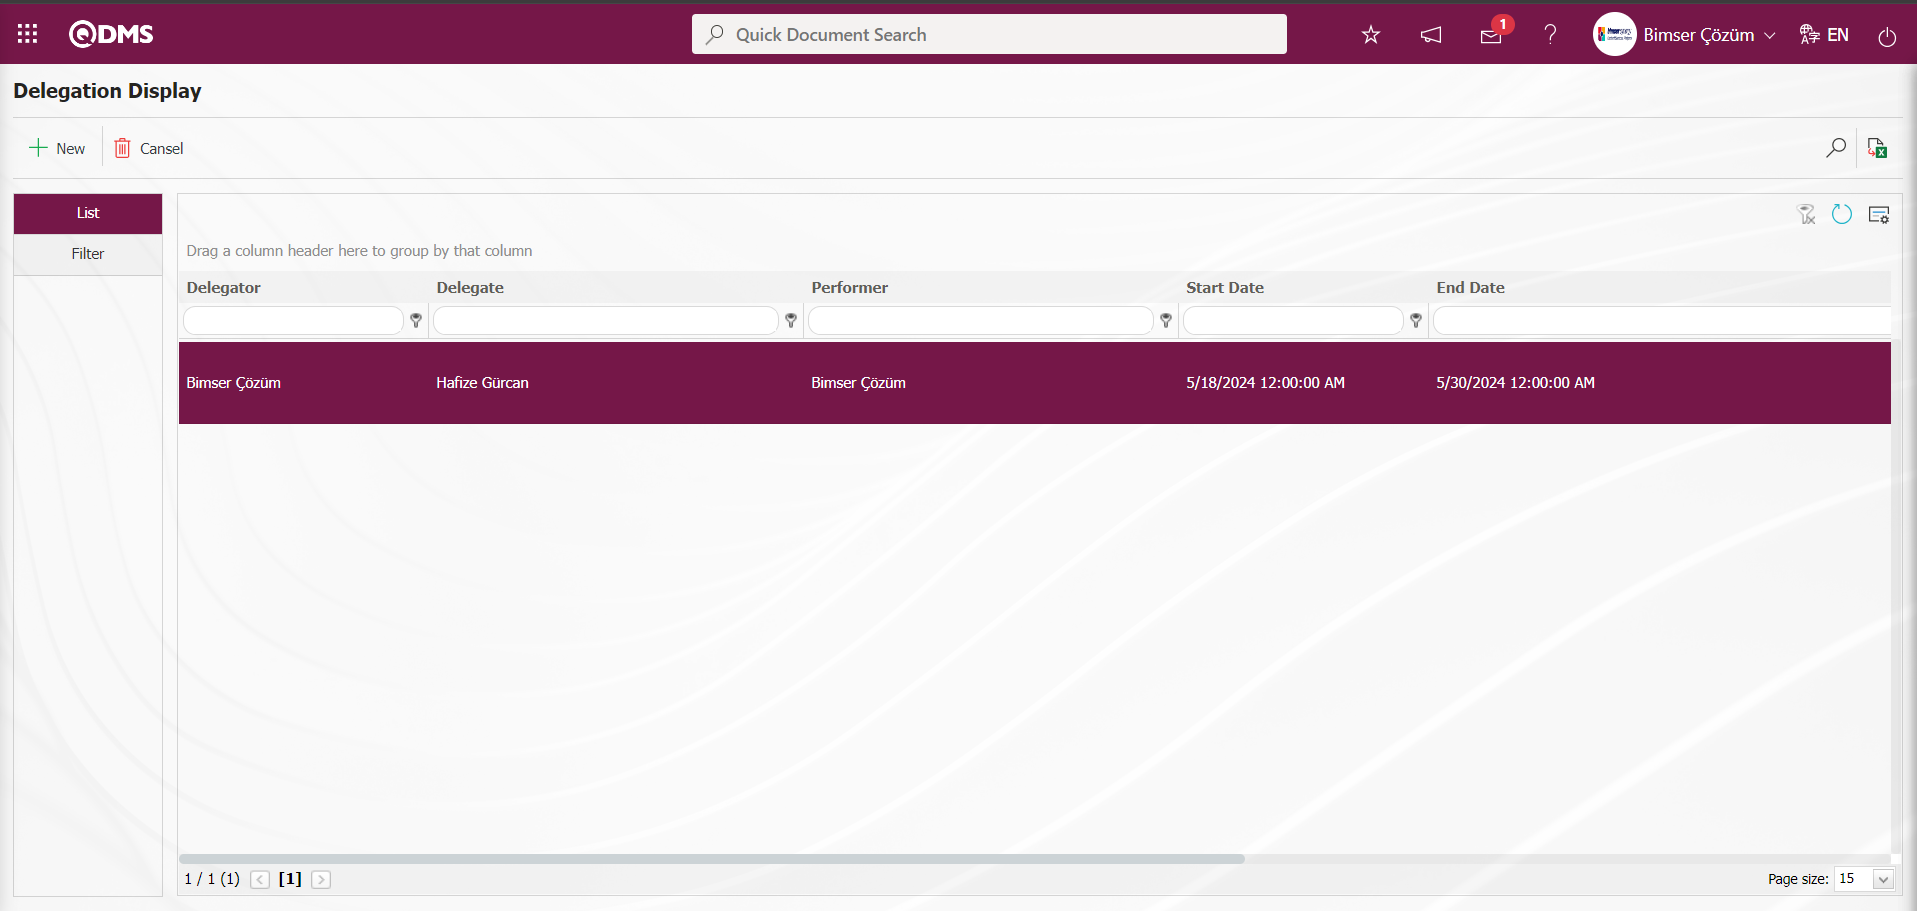
The Delegation Display screen is opened by clicking the Delegation menu in the menu list opened by clicking the drop-down list in the section with the user's Name and Surname information.
With the help of the buttons on the screen;
 : A new Delegation is given.
 : The Power of Delegation information selected in the list is canceled.
 : Records can be searched by filtering.
 : Data is transferred to Excel.
: The search criteria on the menu screens are used to clean the data remaining in the filter fields in the grid where the search operation is performed.
: The menu screen is restored to its default settings.
: User-based designing of the menu screen is done with the show-hide feature, that is, the hiding feature of the fields corresponding to the columns on the menu screens.
A new To perform the delegation process, click on the  button on the top right corner of the screen to open the Delegation Viewer screen.

Related fields are defined on the screen that opens:
Delegate by: This is the field where the system automatically gives the information of the person who gives power of attorney** on the Delegation Management screen. In this field, the name and surname of the user logging in to the system is given.
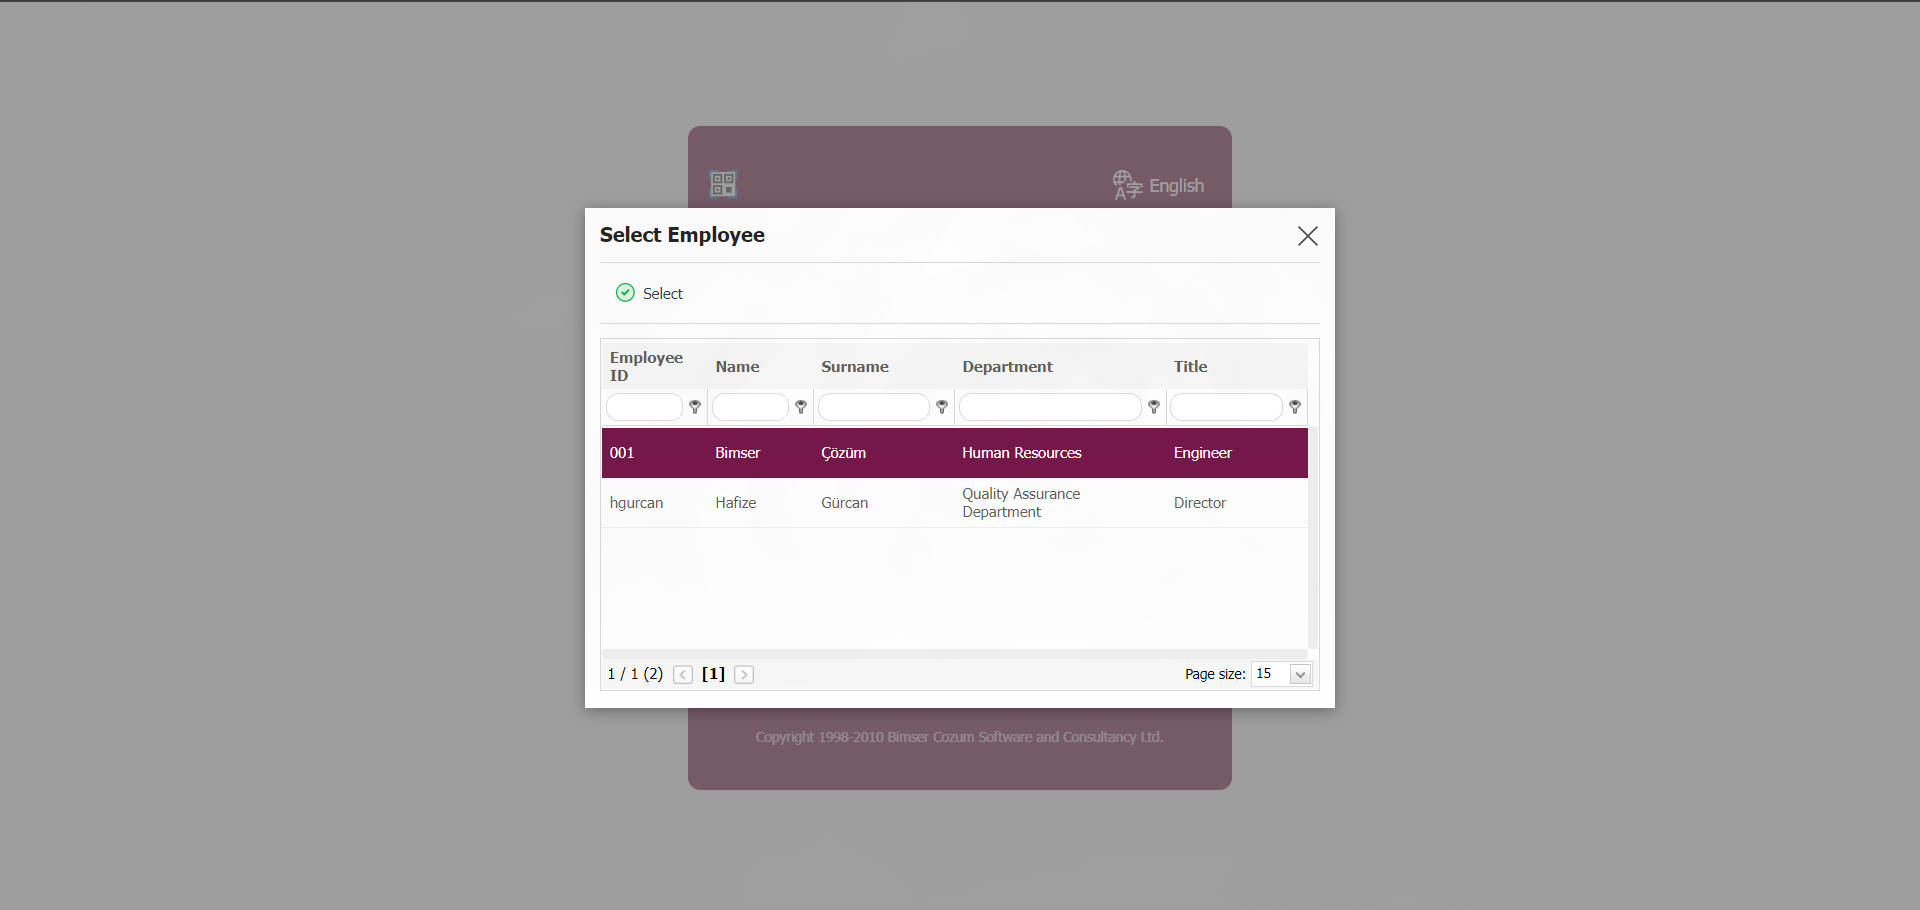
Delegate to: This is the mandatory field where the information of the person who receives the delegation on the Delegation Management screen** is selected in the Personnel list defined in the system that opens by clicking the (Select) button.
Start Date: It is a mandatory field in the Delegation Management screen where the start date of the** proxy is selected in the calendar field that opens.
End Date: It is the mandatory field where the end date of the mandate is selected in the calendar field on the Delegation Management screen** .
Authorized Modules: In the Delegation Management screen, it is the field where the modules in which the power of attorney will be given are selected in the drop-down module list. If no module is selected in this field, all modules will be authorized.
On the Delegation Management screen, the information about the person receiving the delegation is selected from the personnel list. The start and end date of the delegation is selected in the calendar field. The modules to be delegated are selected in the module list. After entering the relevant information in the required fields, the delegation registration process is done by clicking the  button in the upper left corner of the screen.
On the Qdms Main login screen, login to the Qdms system with the user and password of the person receiving the delegation.

After the delegation of power of attorney, the system asks which personnel to log in to the system.
The user who gives delegation is logged in to his/her Qdms by selecting the personnel. When logged in to the user address, only the modules authorized for the delegation process are displayed in the delegation process. It is seen that Document Management, System Infrastructure Definitions and Corrective and Preventive Actions Modules are authorized in the delegation process.
On the Delegation Display screen, while the delegation information is selected in the list, click the  button to cancel it.


According to the value entered in the “Power of attorney period” parameter 249 in the System Infrastructure Definitions module parameters, the maximum Delegation period information is written on a day basis.
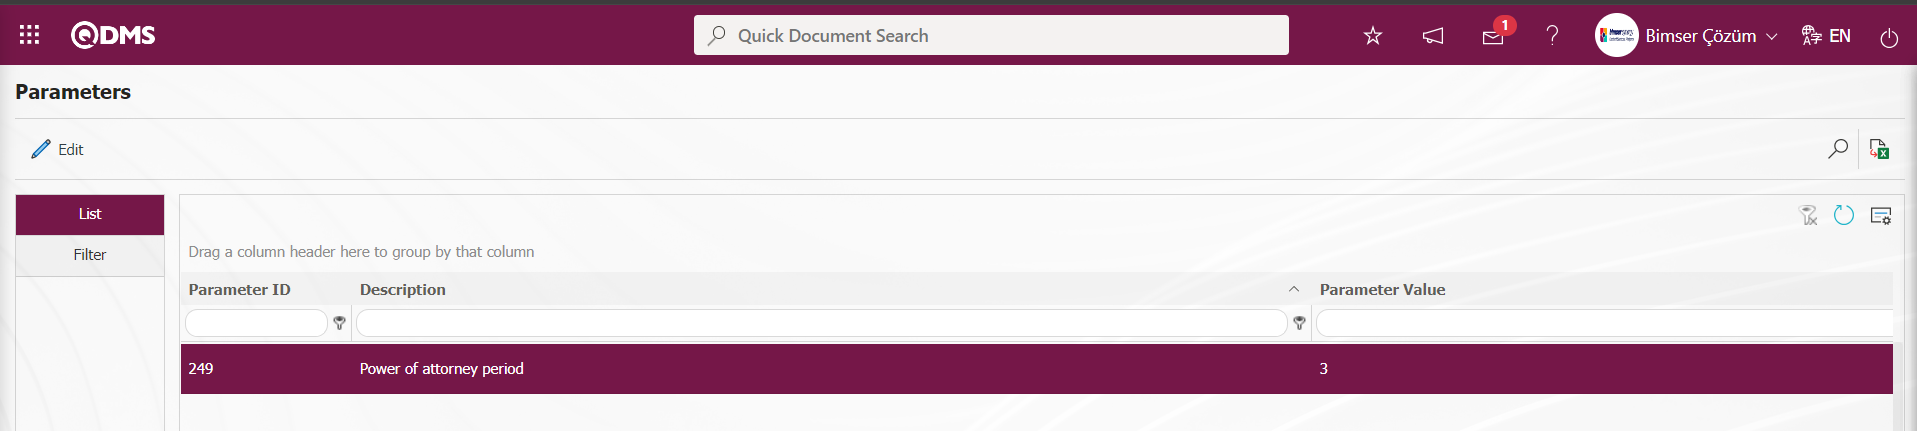
The system gives a warning message when the maximum delegation period defined in the parameter is exceeded on the Delegation screen.
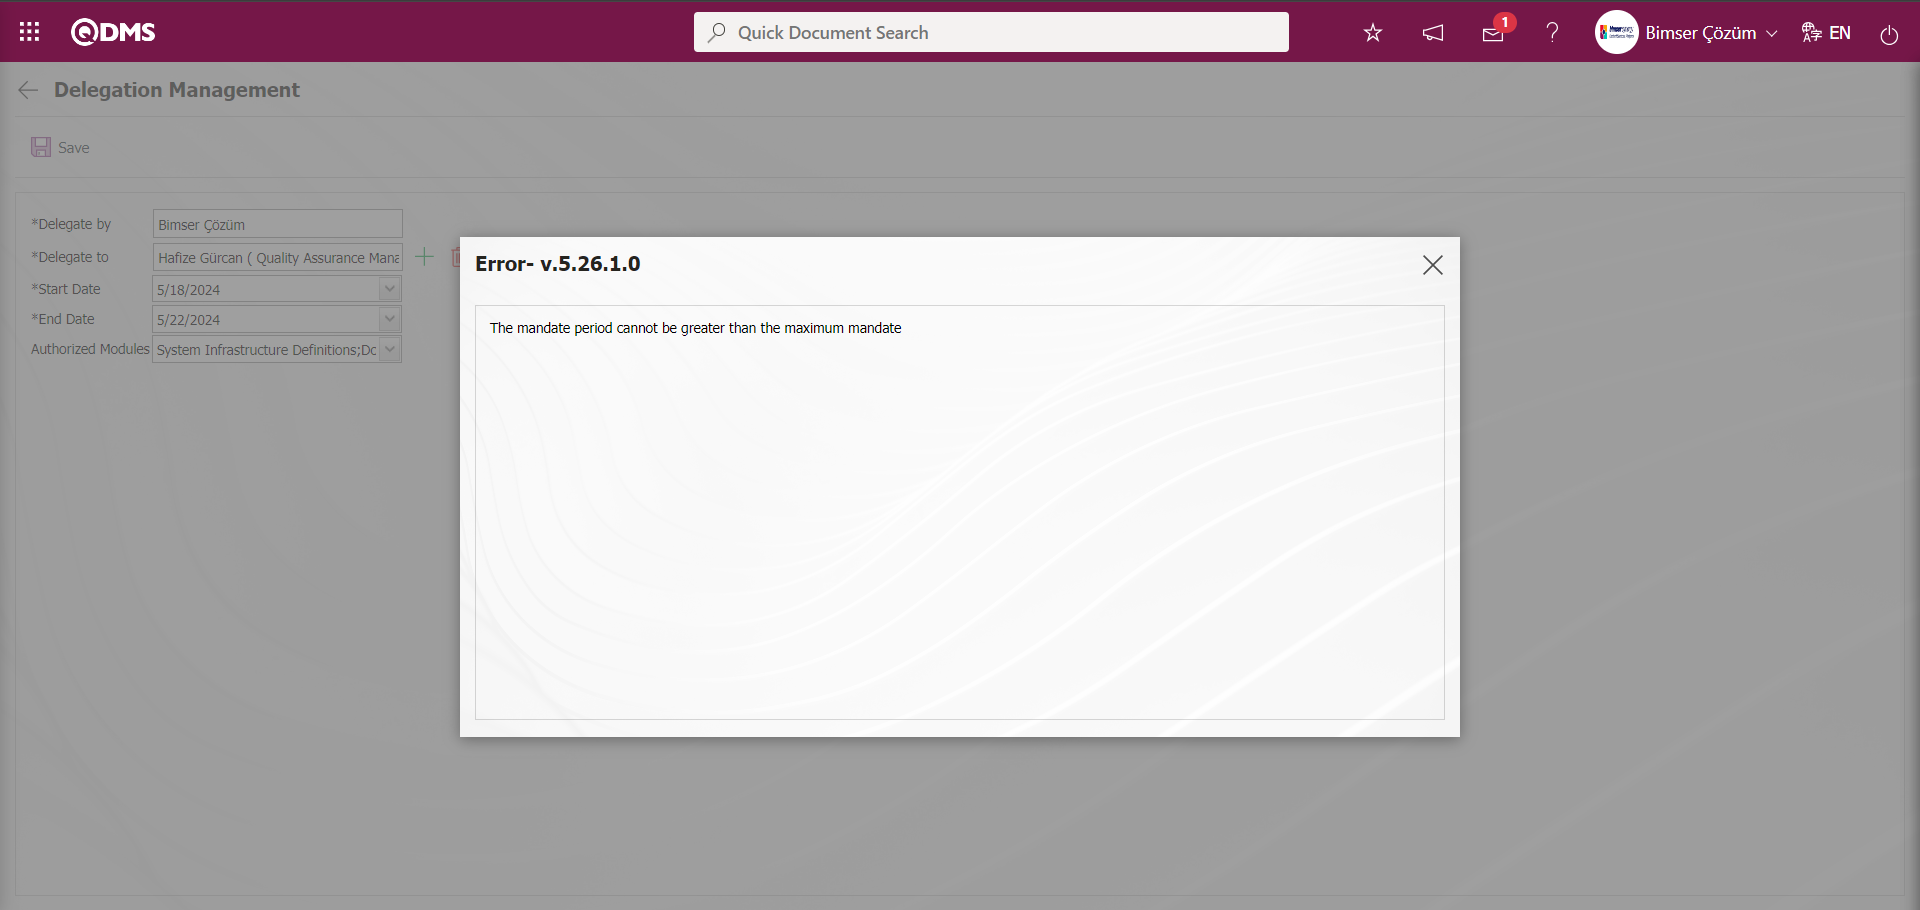
Delegation period is determined according to these values. When this determined Delegation period exceeds the time in the mandate period parameter value, the system gives the warning message “The mandate period cannot be greater than the maximum mandate”. If users wish, they can make parametric adjustments to this parameter by writing the value of the maximum mandate period on a day basis.
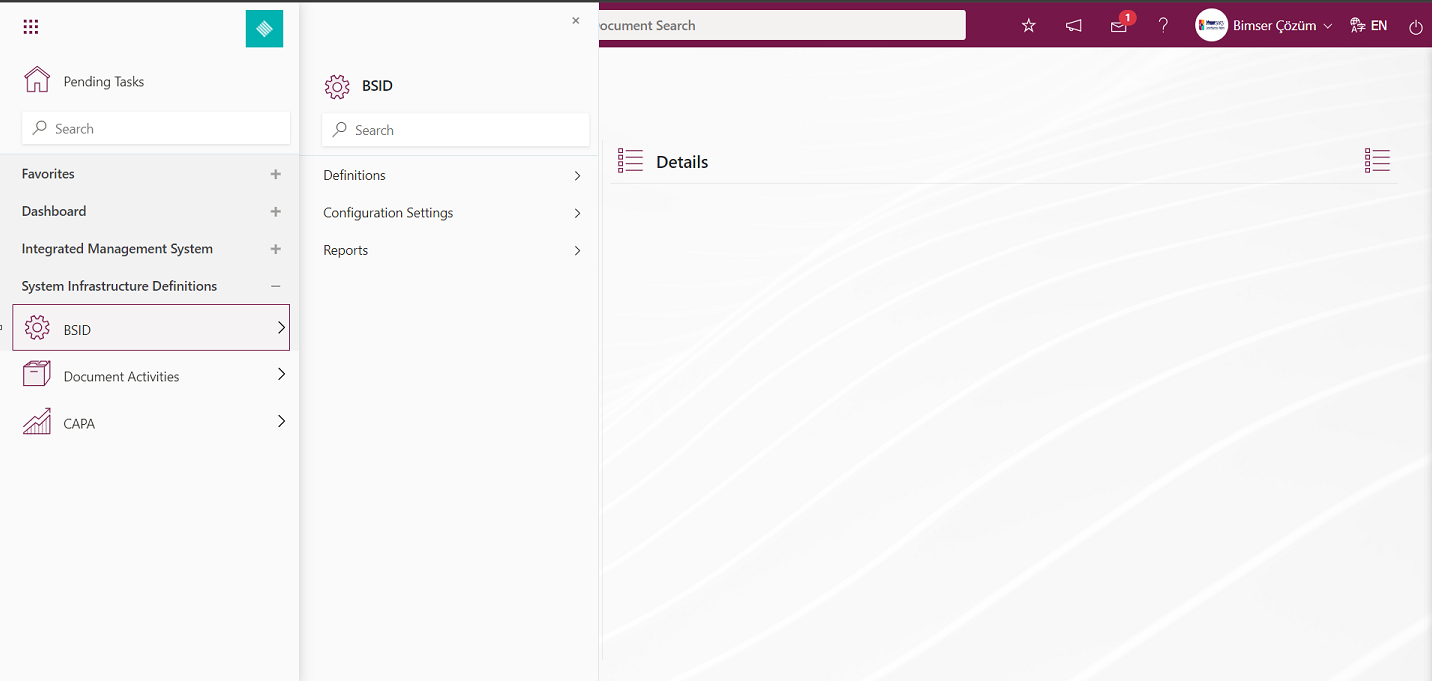
Login by Delegate: It is the menu where the Delegate entry process takes place after the delegation of the power of attorney is made in the Delegate menu.
![A screenshot of a computer
AI-generated content may be incorrect.]ref29
Select the personnel in the personnel list opened by clicking this menu
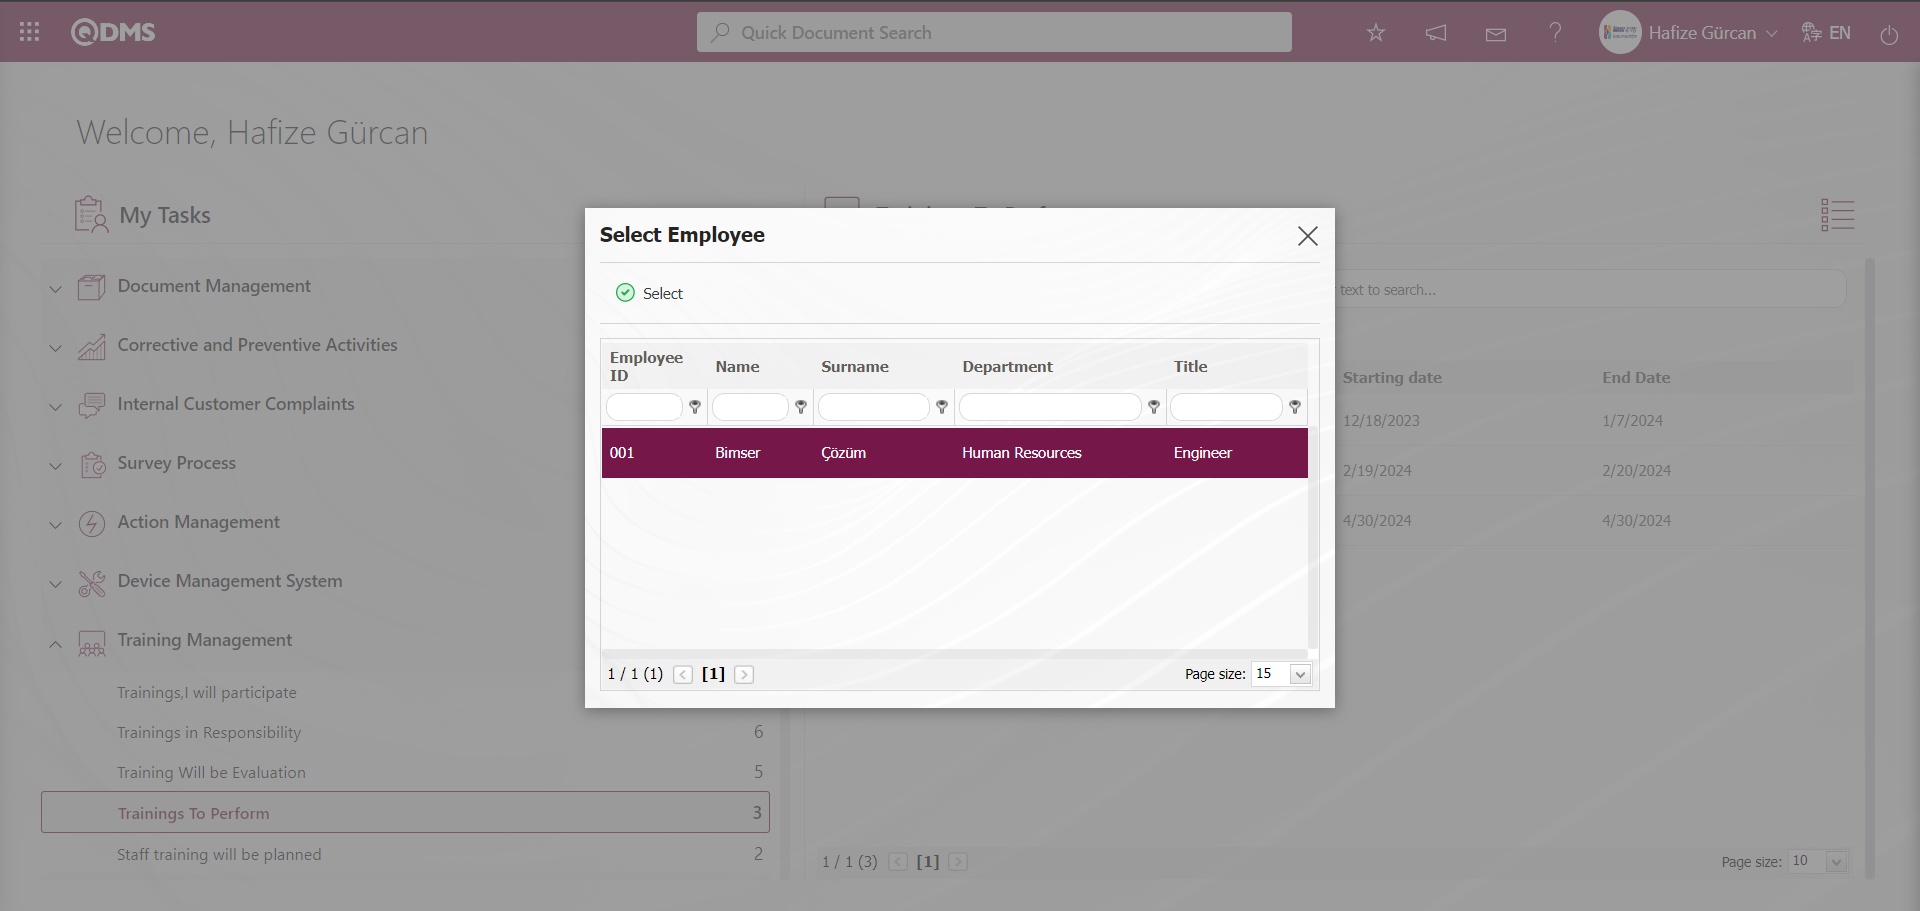
The person to whom delegation is given is logged in at the local address where the authorized modules are given.
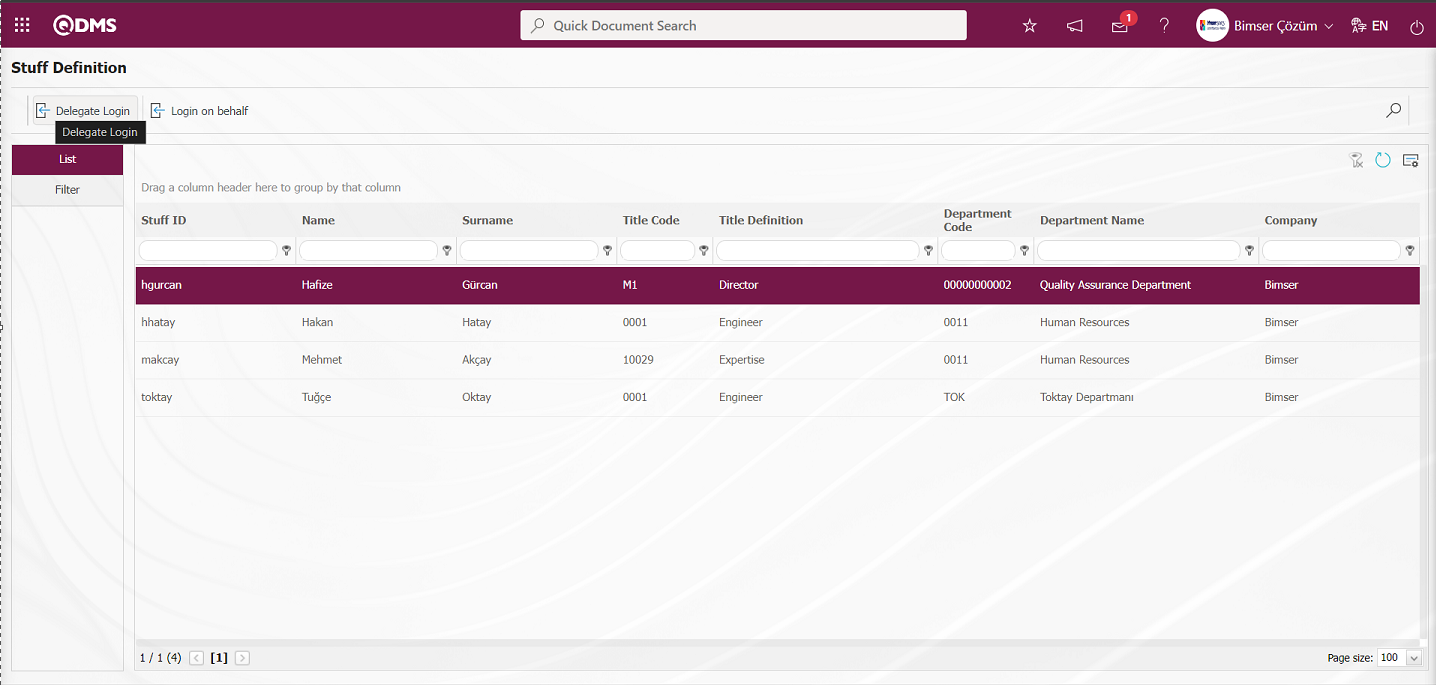
Login on behalf of someone else (Super Password): It is a menu displayed on the screen of users who are module administrators in the System Infrastructure Definitions module.
By clicking this menu, the Stuff Definition screen is displayed. In the Stuff Definition screen, the relevant personnel is selected in the personnel list and “Delegate Login” and “Login on behalf” operations are performed using the buttons.
 With the help of the buttons on the screen;
 : Delegation entry is made for the selected personnel in the list.
 : Login to the system of the selected personnel in the list.
On the Stuff Definition screen, click on the button while the selected personnel is selected in the list.
Login to the Qdms local address of the selected personnel.
 In Delegation login, Delegation login is made to the system and all transactions are made in the system as in Delegation transactions, but the information that Delegation is made in the transactions made in the reports is included.
On the Stuff Definition screen, click the button while the selected personnel is selected in the list.
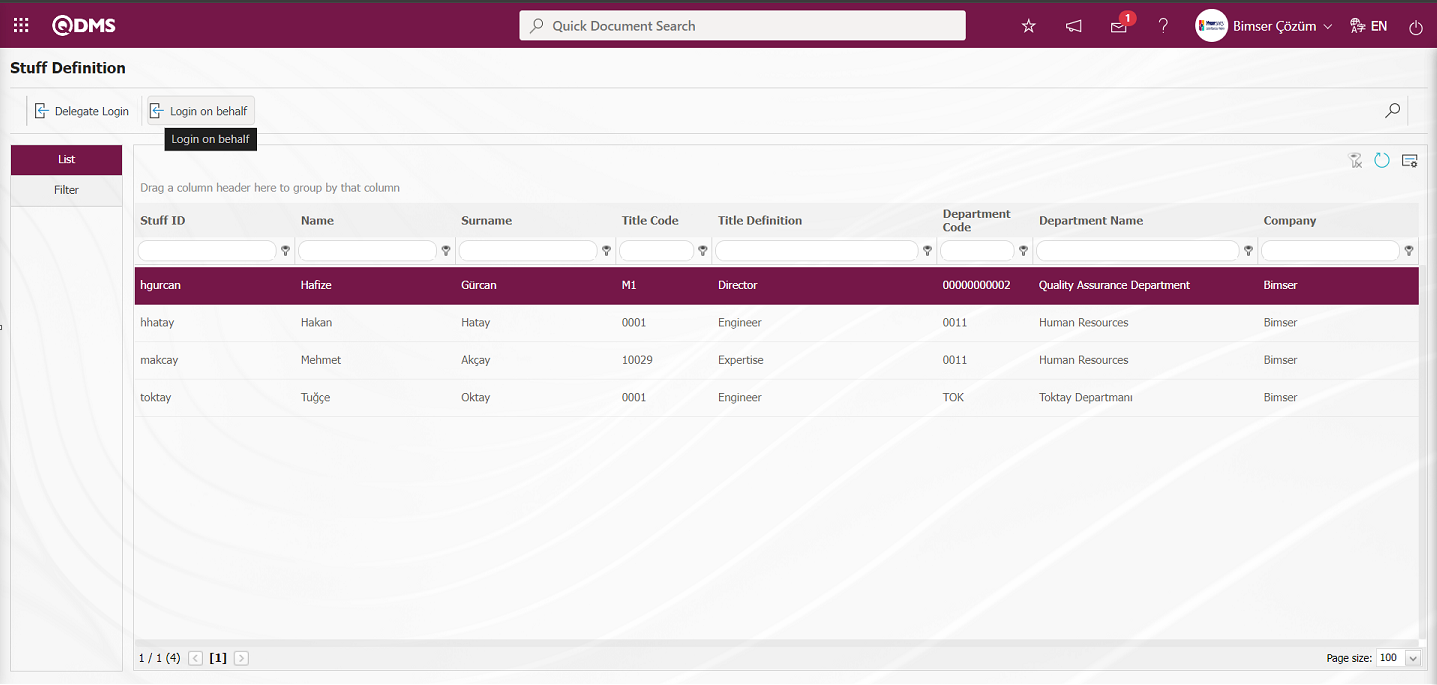
In the Login on behalf operation, the user who logs in to the local address of personnel performs all operations as if the person he/she is logging in for is doing it.
Account settings: This is the section where the user's theme settings, Your Information, Change language and Password menus are located and their settings related to these menus are made, allowing users to personalize the appearance of their computers and customize their visual experience.
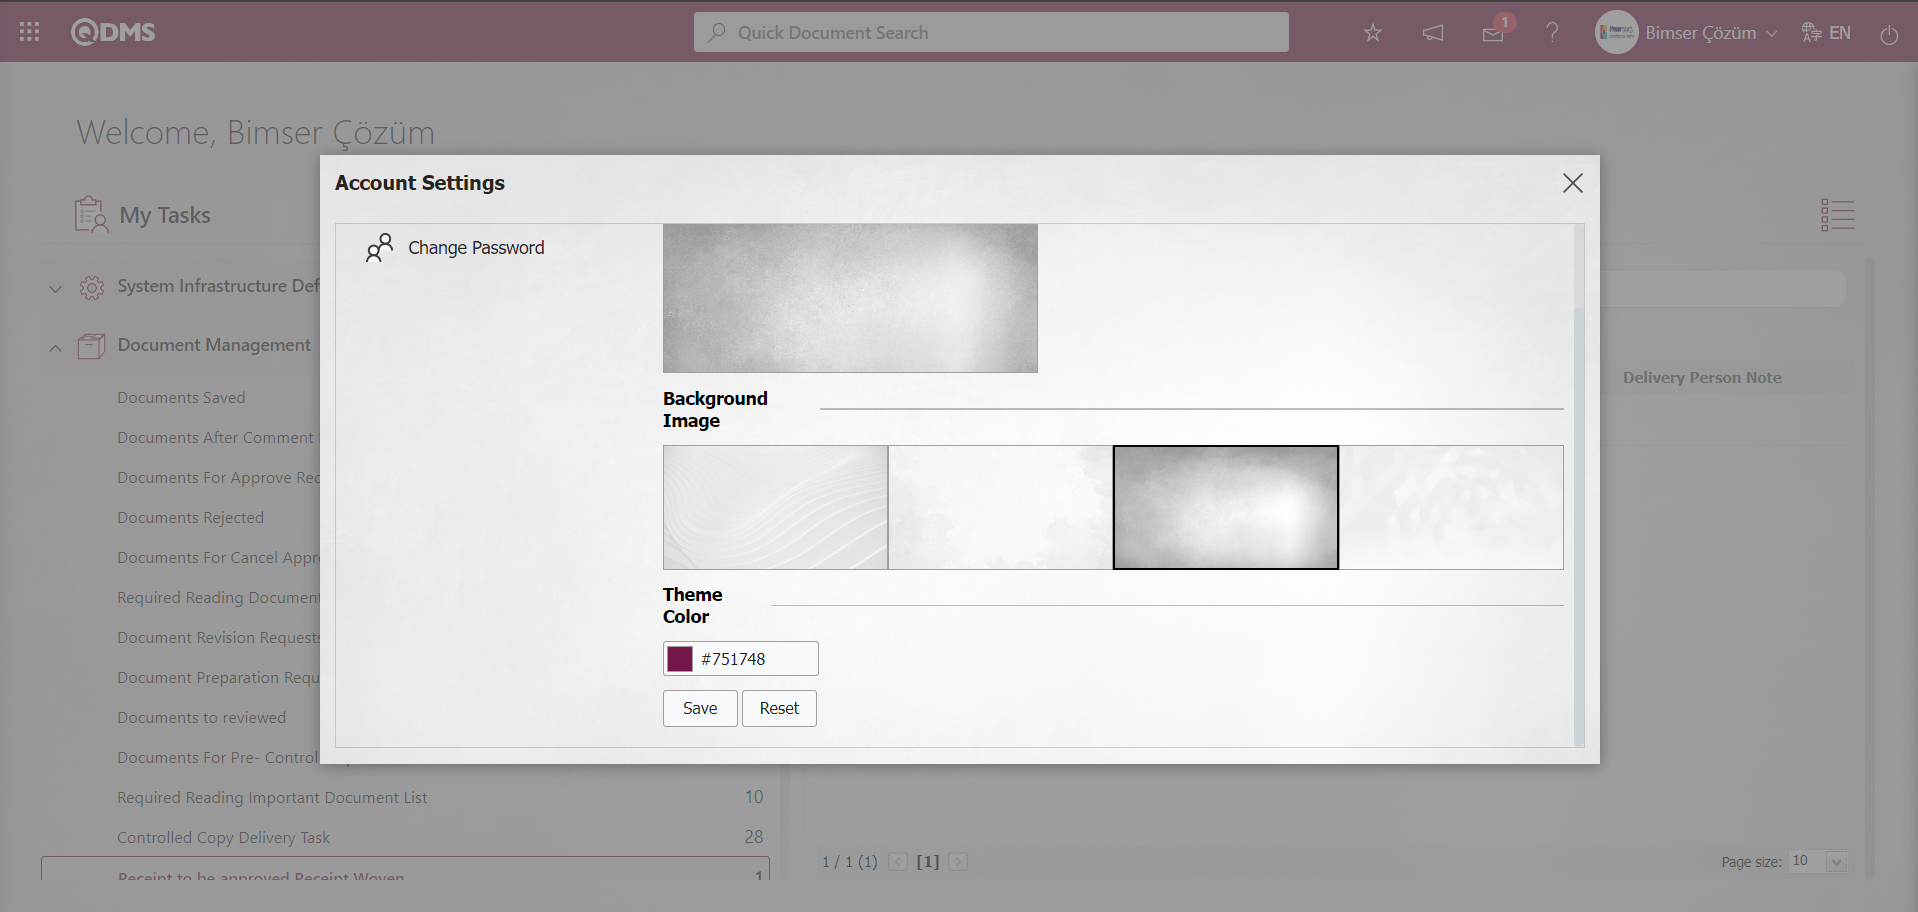
 : This is the part of the Qdms system where the colors of the user interface and the process of changing the background and background color settings are made. In the Qdms system, this menu allows the background background color and image to change according to the user's preferences. On the User Accounts screen, click on the Theme Settings section. On the Theme Settings screen, there are Preview, Background Image and Theme Color fields.
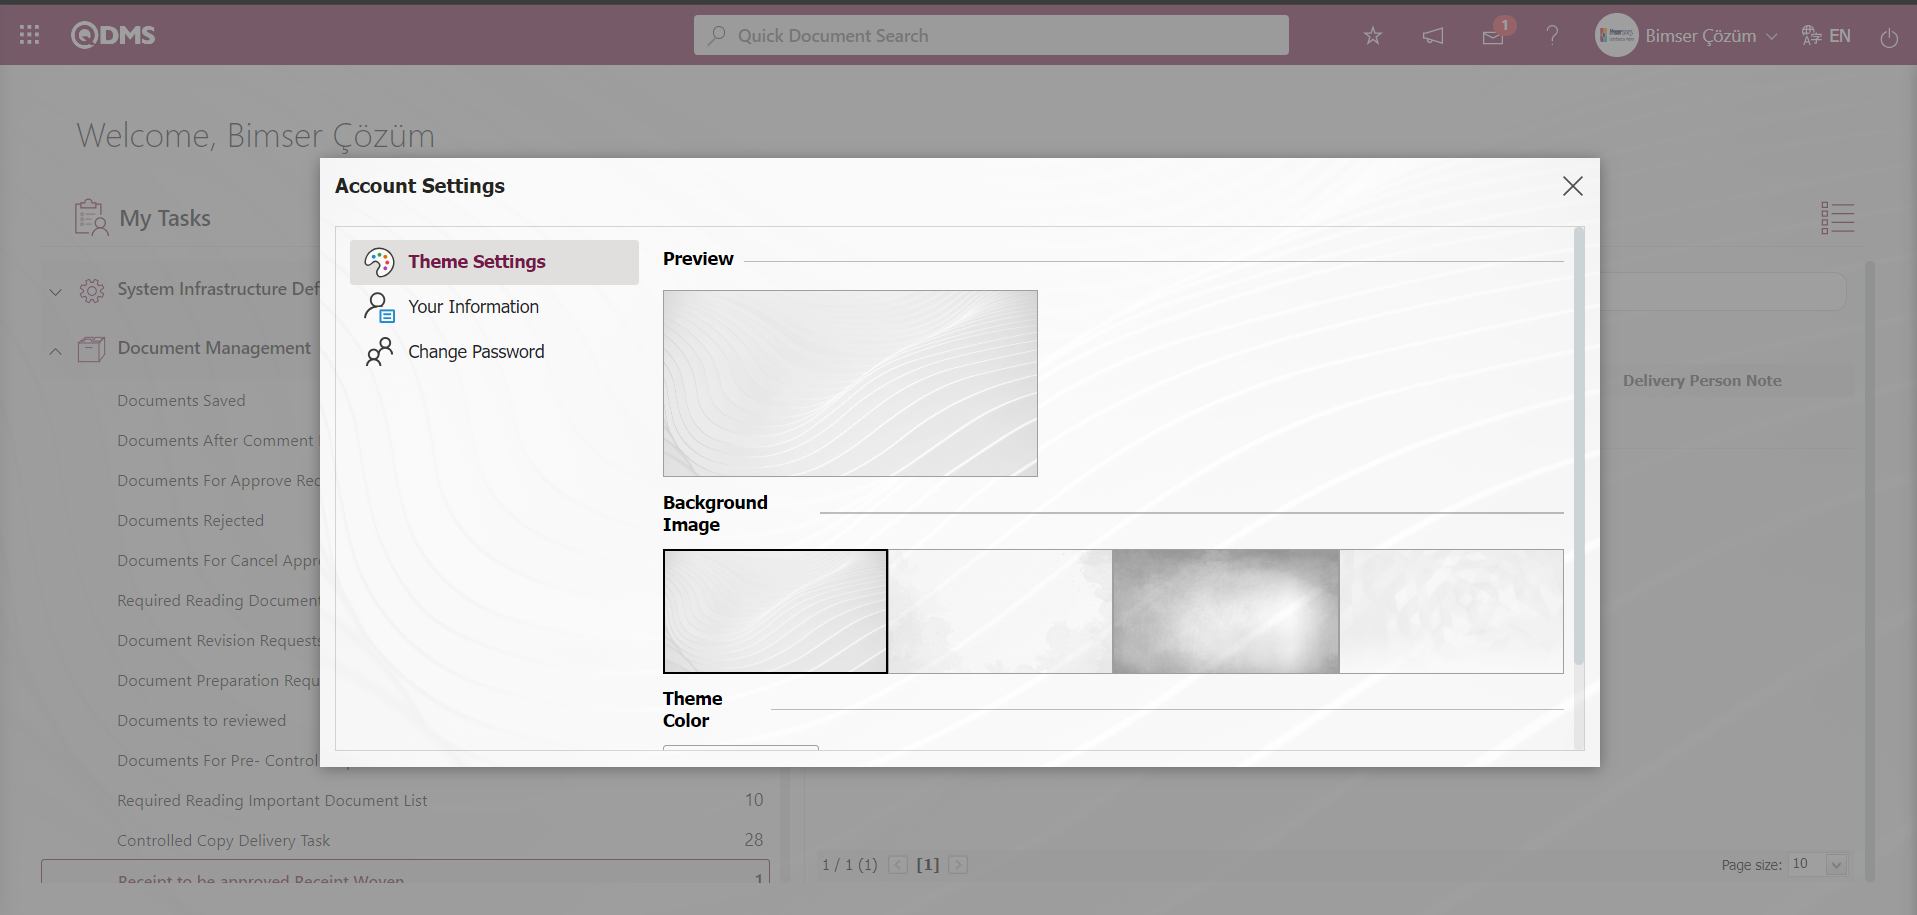
Background Image options selected in the Preview field are previewed in the selection process. Whichever background image option is selected in the Background Image field, that option is included in the preview and its visual appearance is followed and displayed. According to the preview area, this section provides information about which Background Image users will adapt and design in the Qdms system.
Background Image: This is the section where the background background color options are located in the Qdms system. Users make the setting of the background image selection of the appropriate background image in the Qdms system from the relevant 4 options. In the Account Settings /Background Image/ Preview section, the background background selected in the options displays the background background background image and selects the appropriate one.
In the user Qdms system, option 3 is selected in the Background Image field.
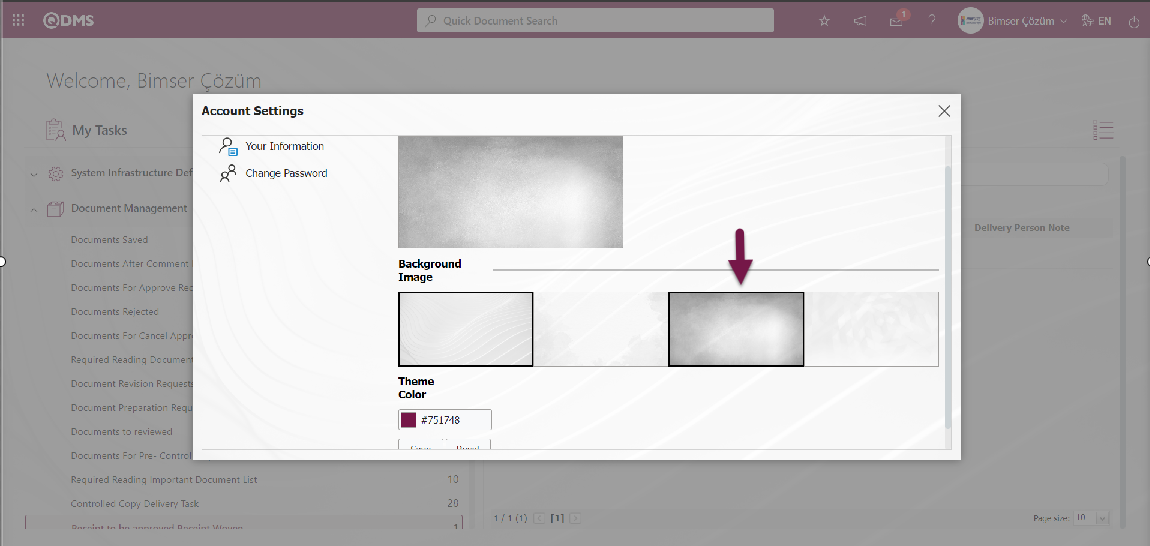
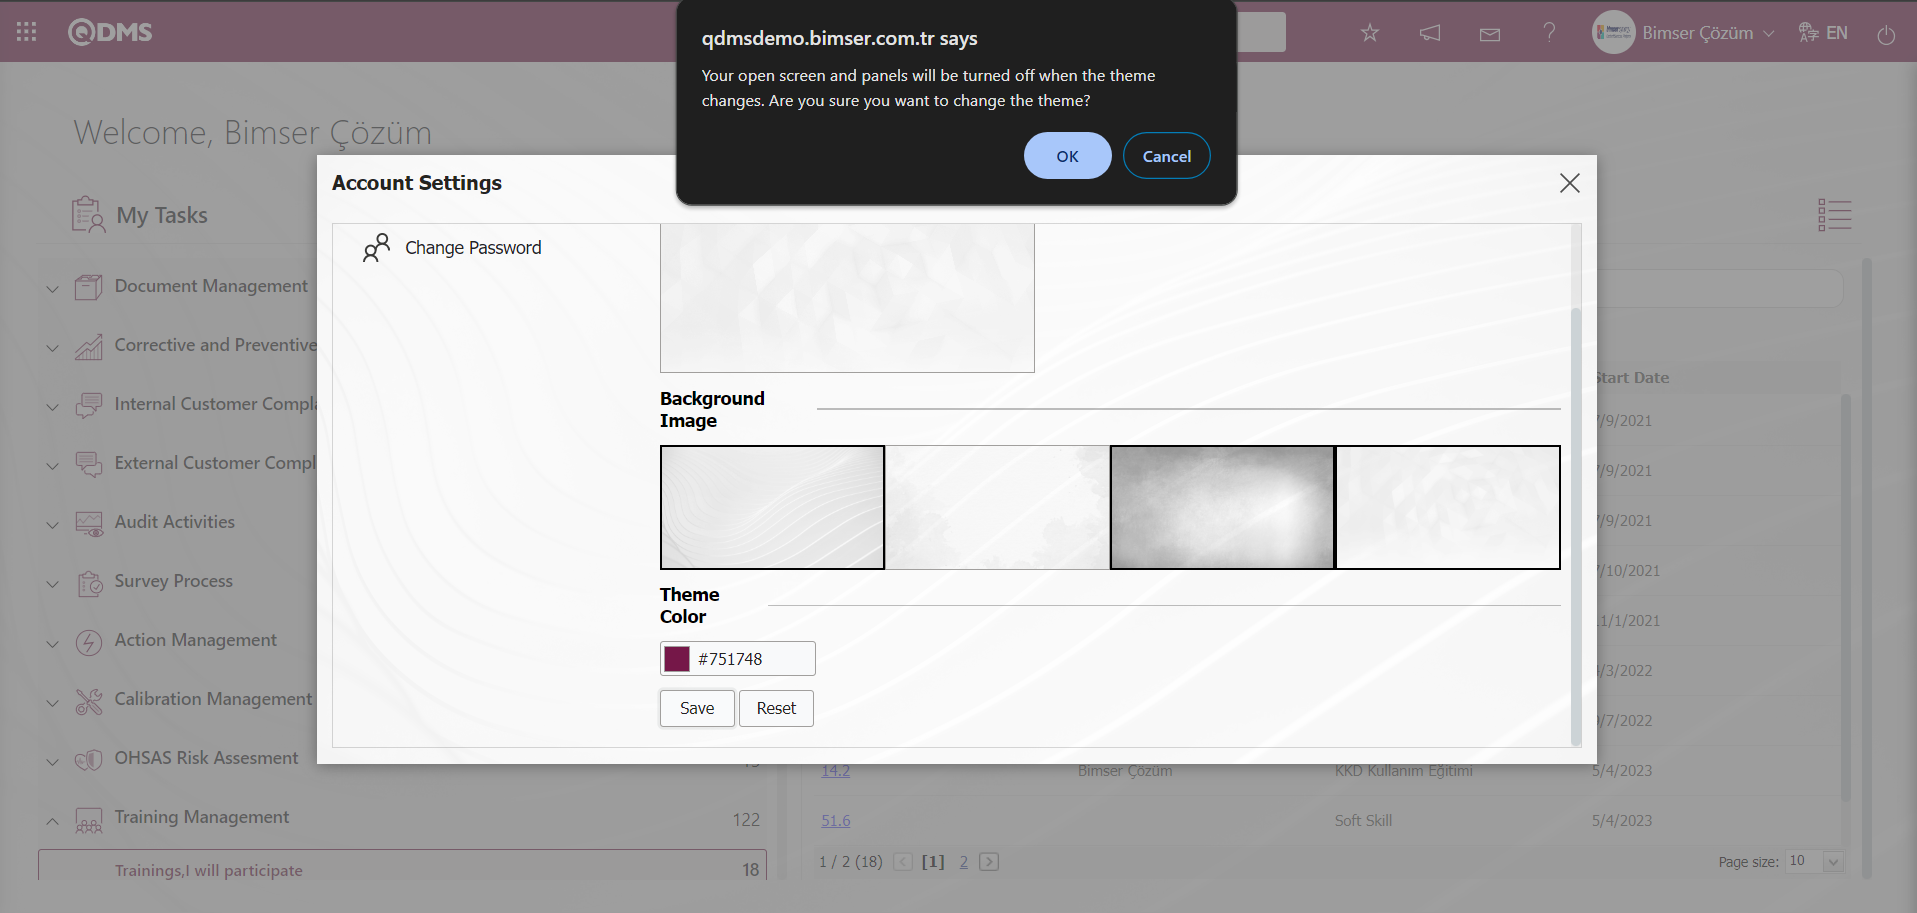
Click the  button to change the background image.
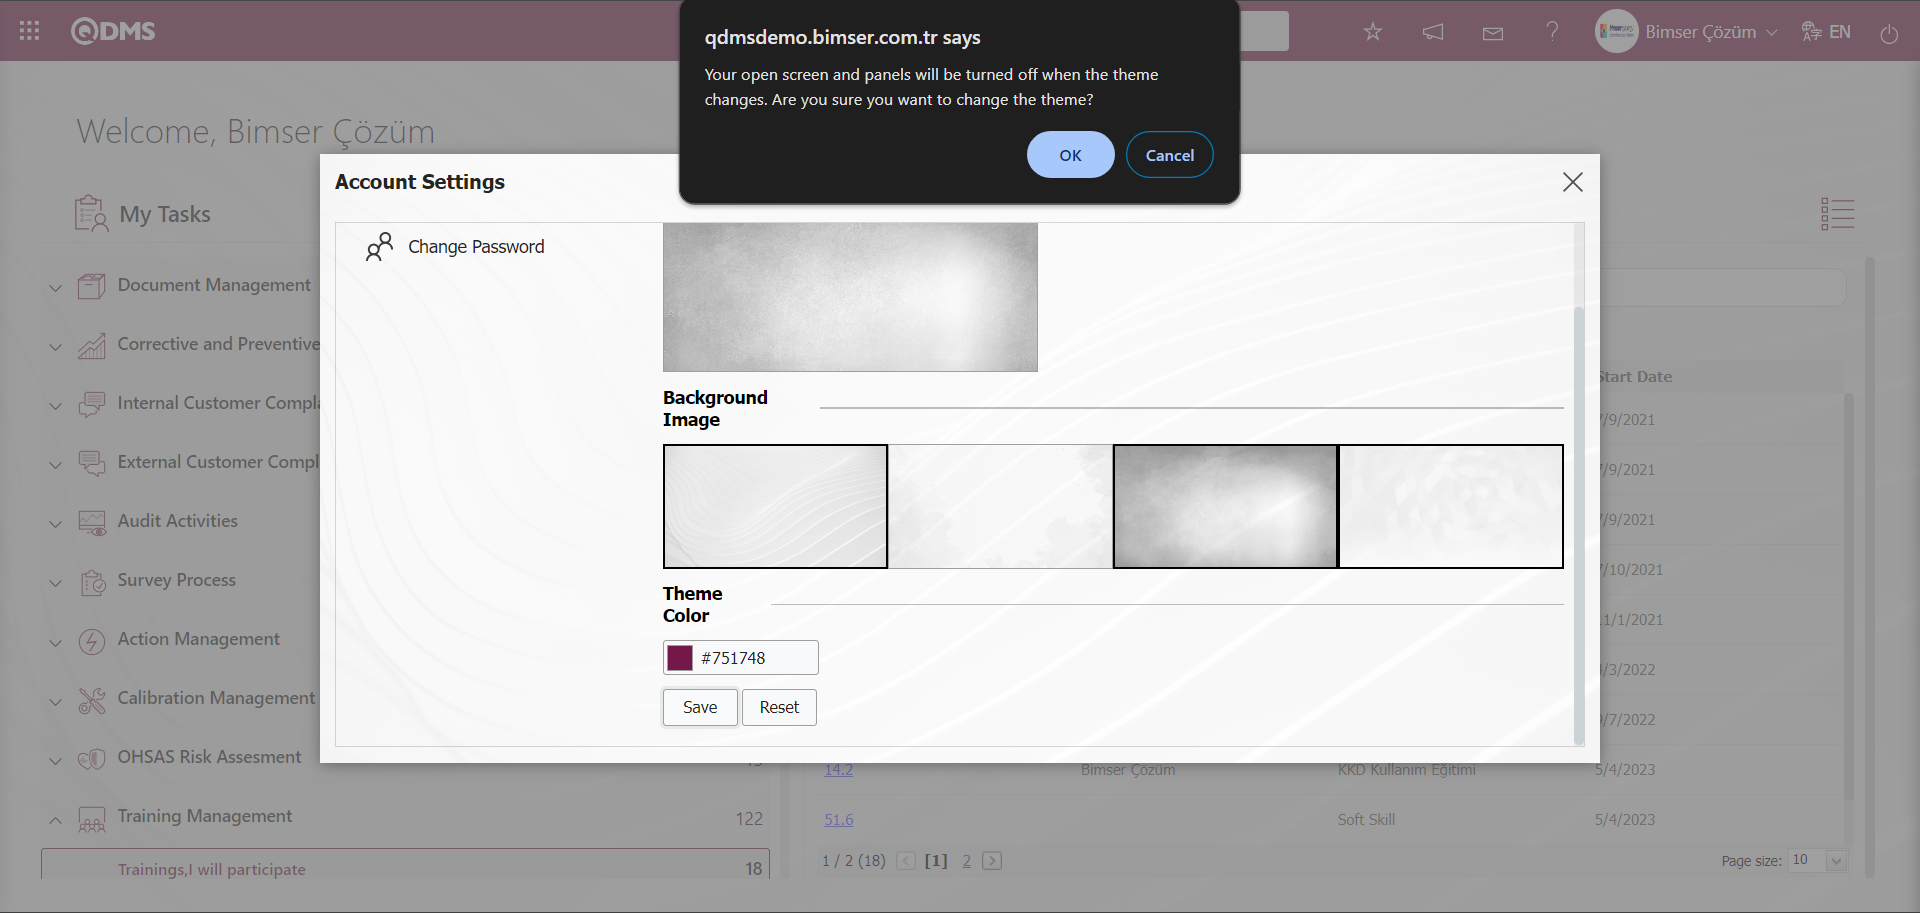
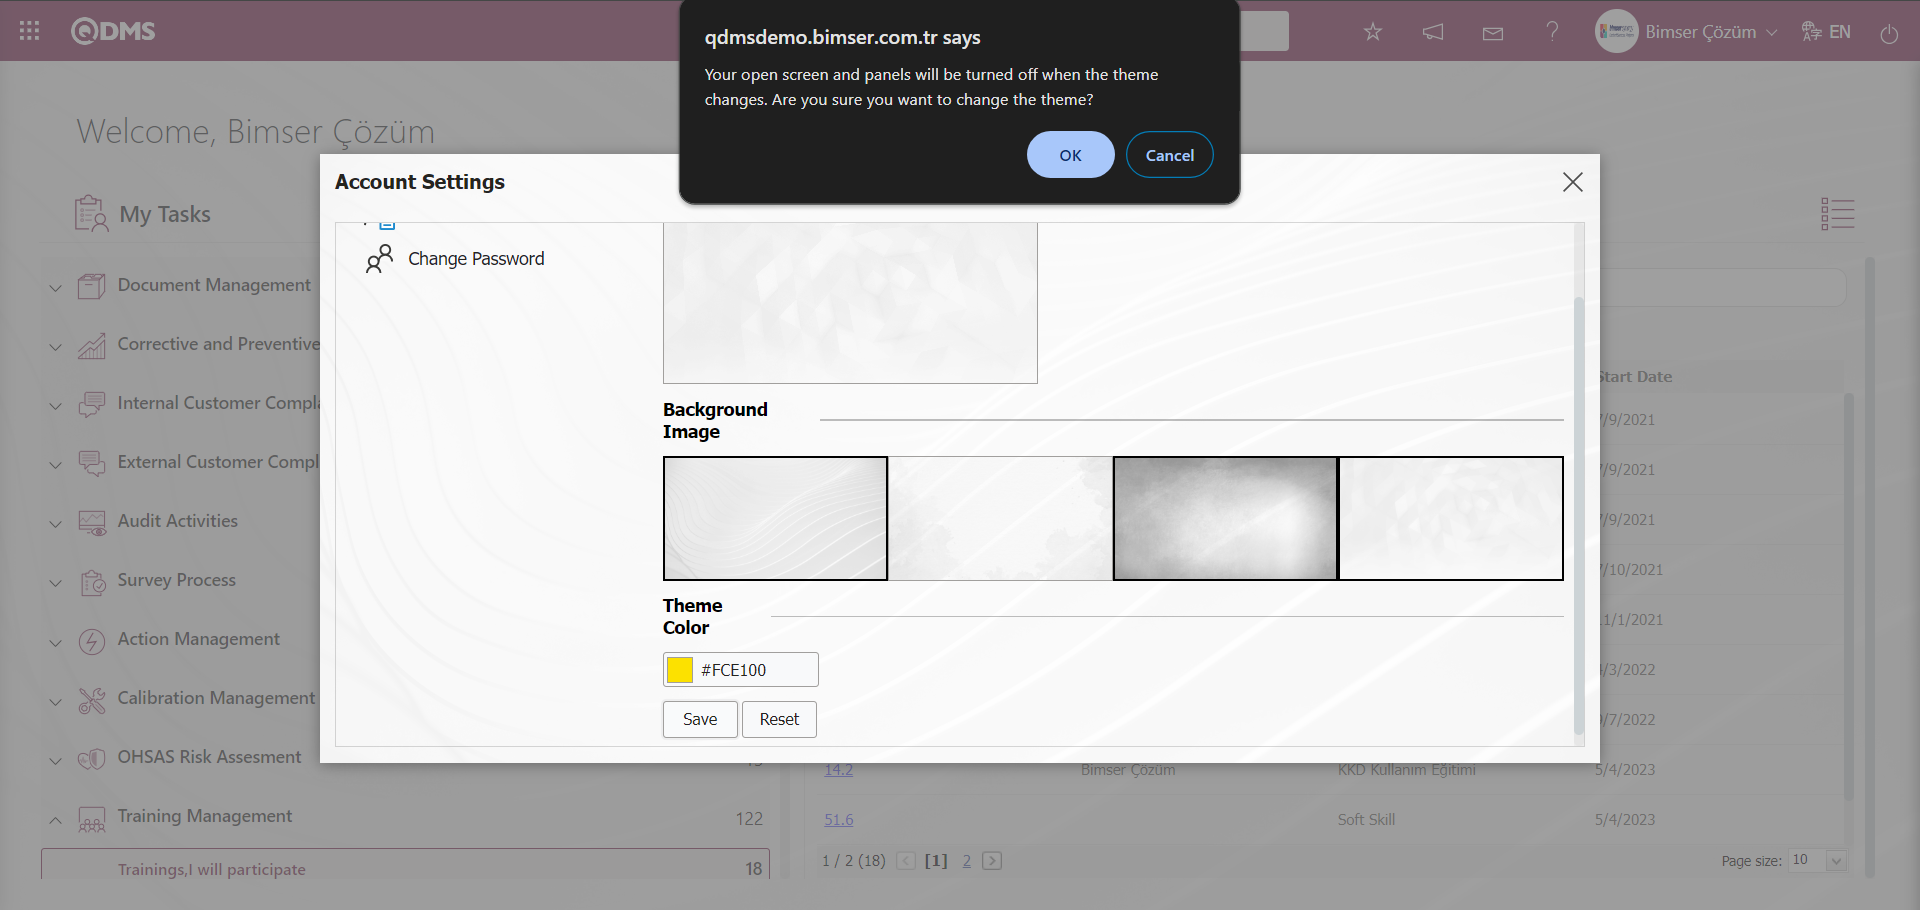
In Qdms system “Your open screen and panels will be turned off when the theme changes. Are you sure you want to change the theme?”, click on the ‘OK’ button and register the floor image. After the background image registration process, the Qdms system takes the appearance of the background image as in the screenshot.
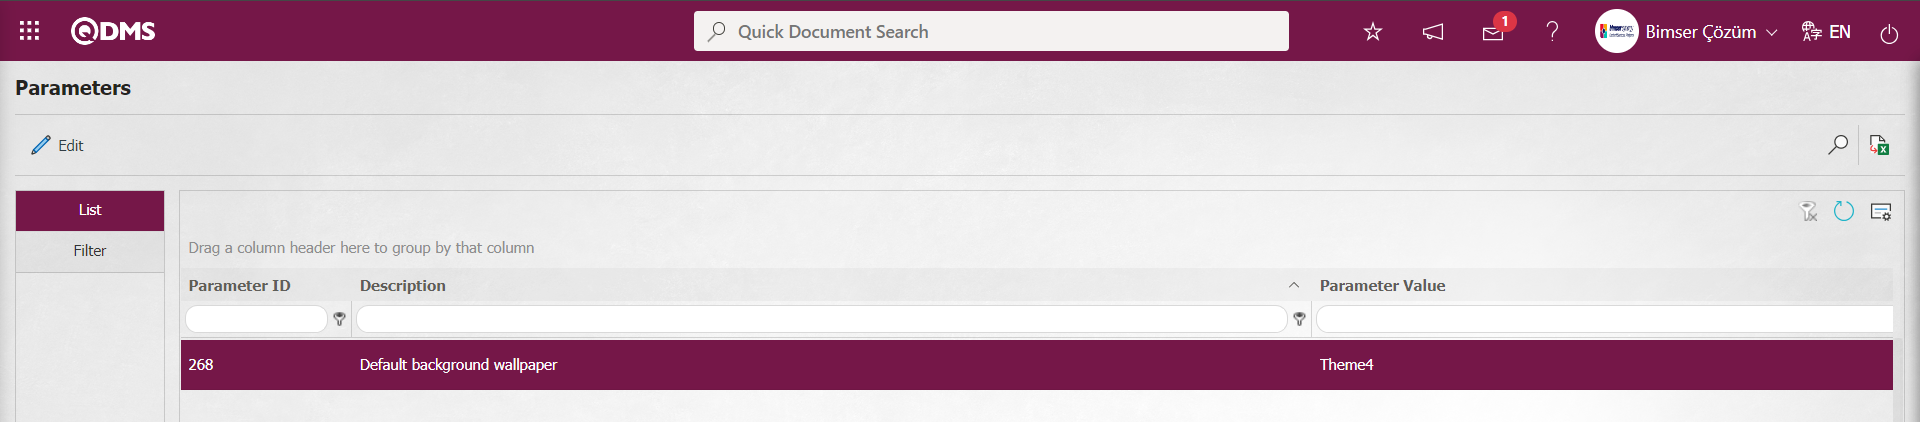
In the System Infrastructure Definitions module parameters, the default background background color is set in the background background color options with the “Default background wallpaper” parameter numbered 268. While parameter 268 “Default background wallpaper” is selected, click  button.
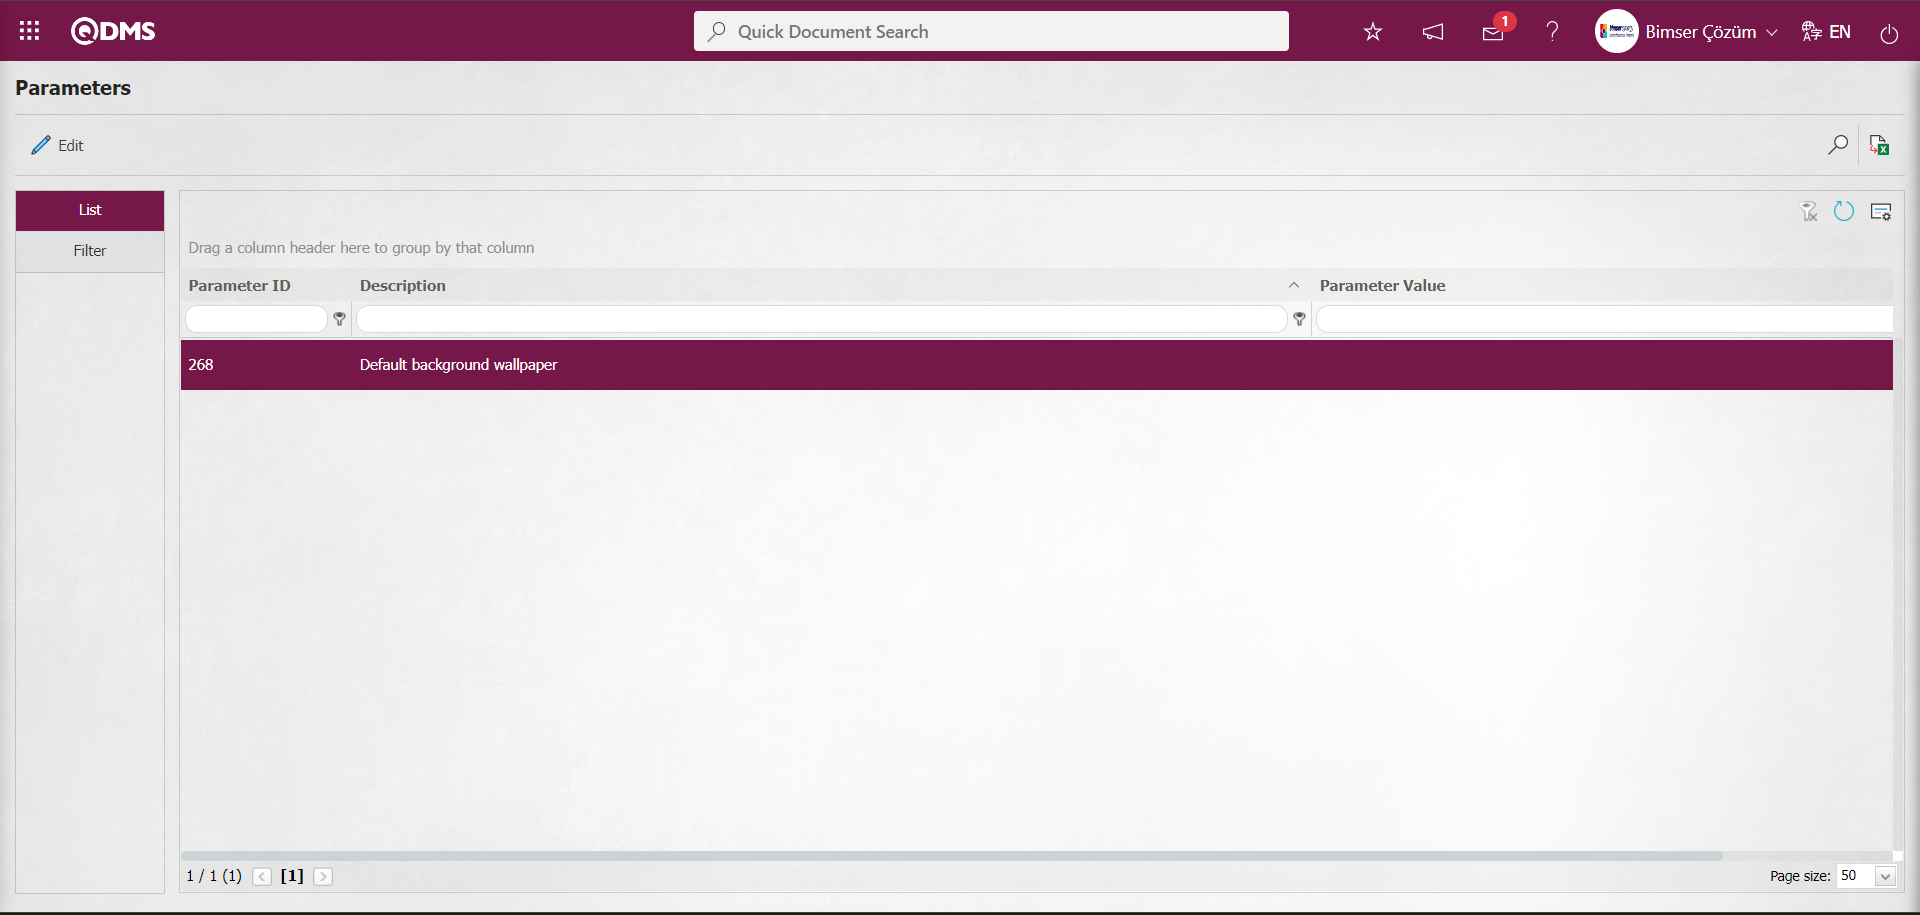
In the Parameters screen, the background background color wallpaper code information is written in the Parameter value.
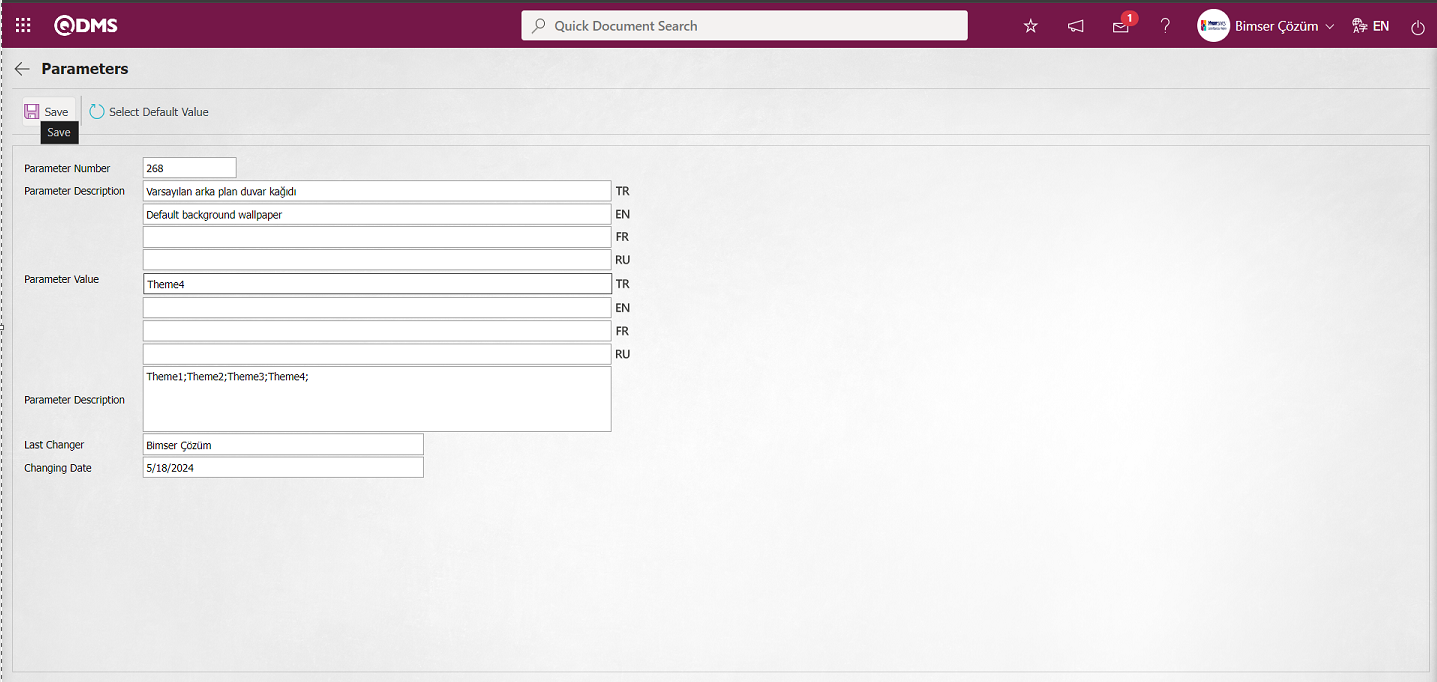
After entering the relevant information in the required fields, the paramete record update process is done by clicking the  button in the upper left corner of the screen. After the registration process, the default background background color is set. Background Wallpaper codes: Theme1;Theme2;Theme3;Theme4; 4 background ground color options are the codes given respectively. Codes are supported in the relevant parameter description field or Bimser Technical Support team.
After setting parameter 268, click the  button in the Theme Settings section of the Account Settings menu to apply the default background image option.
 The system automatically selects the default background background color in the background background color options set in parameter 268.
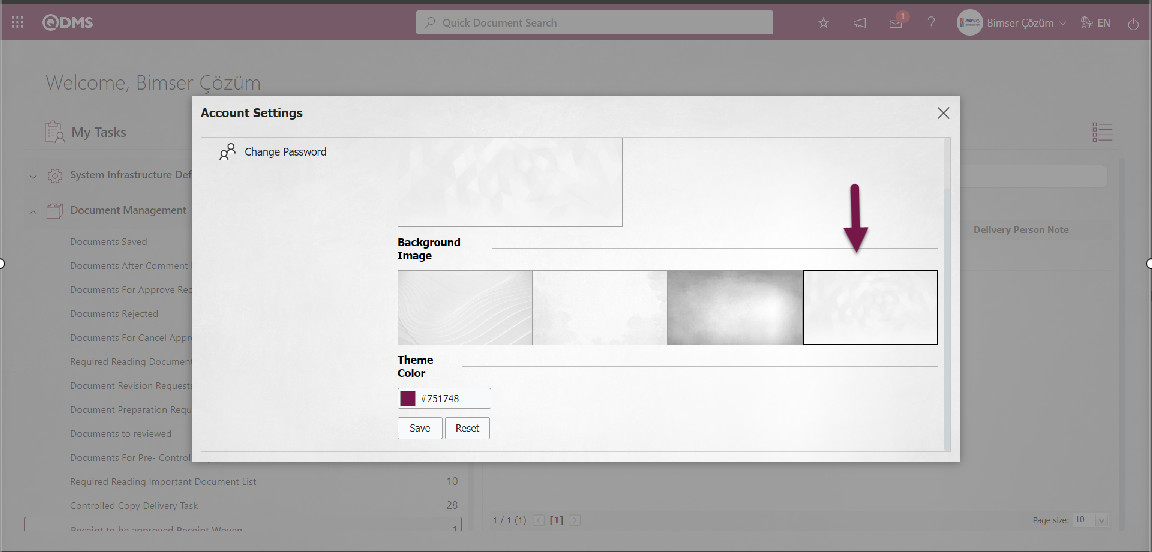
Click the button to apply the default background background color after the selection process.
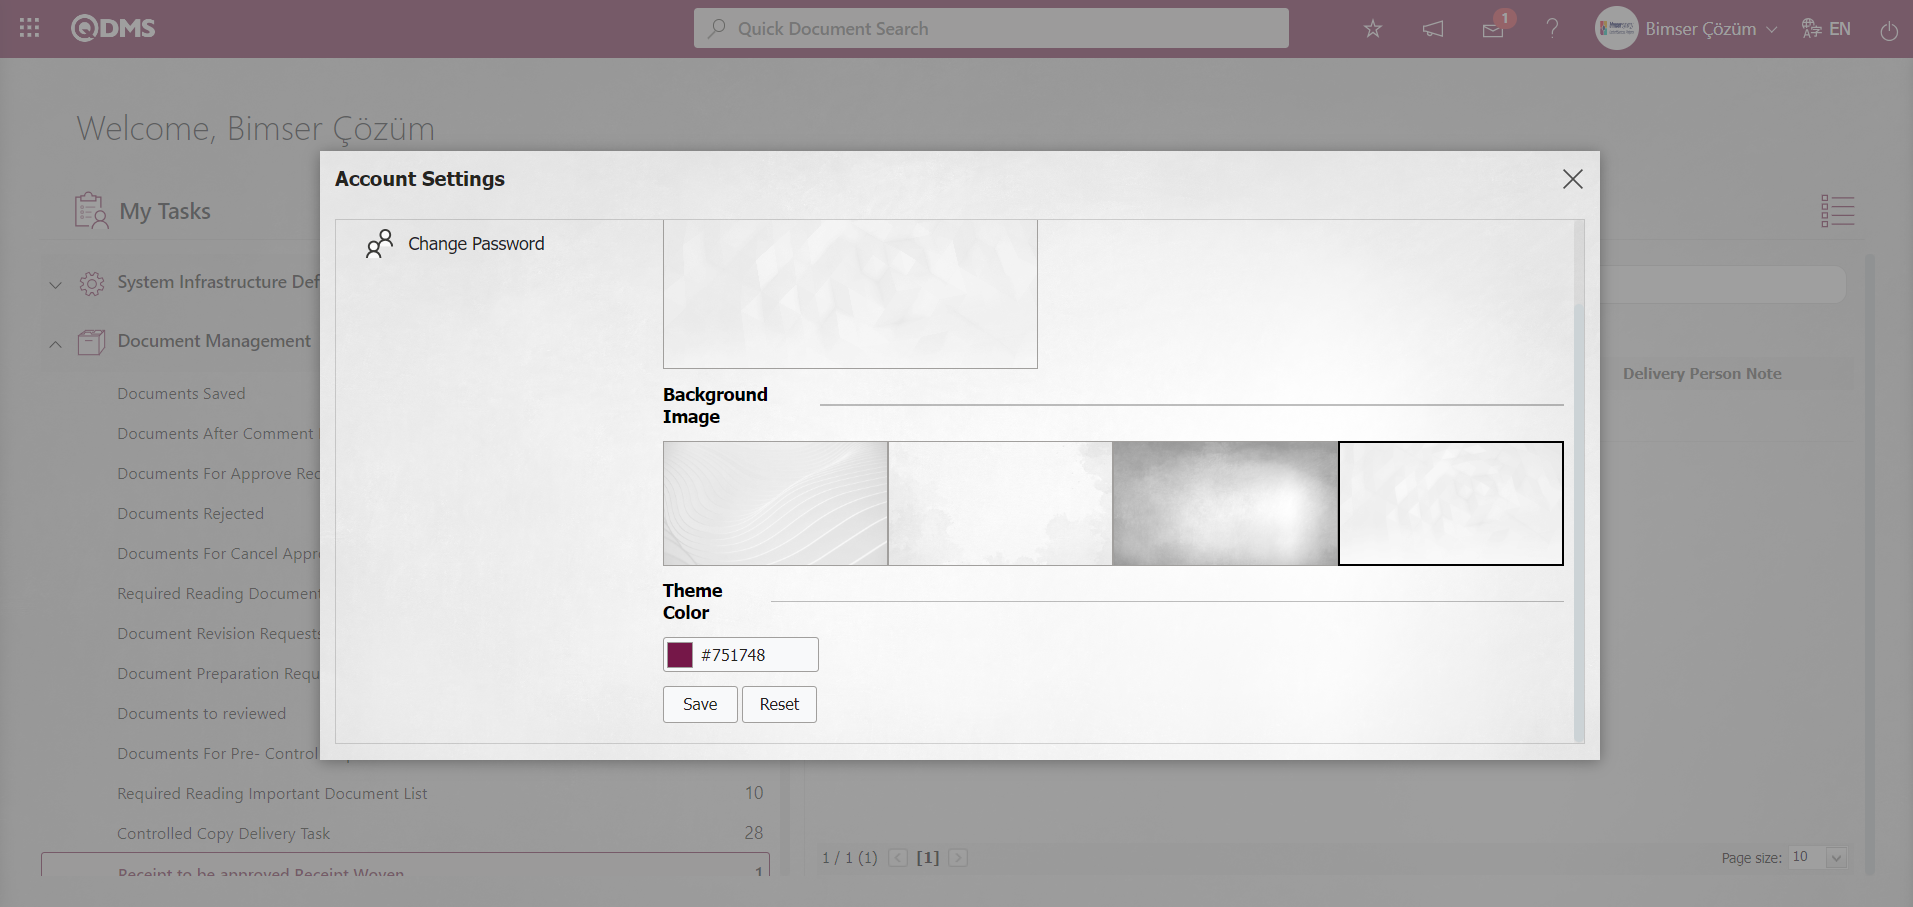
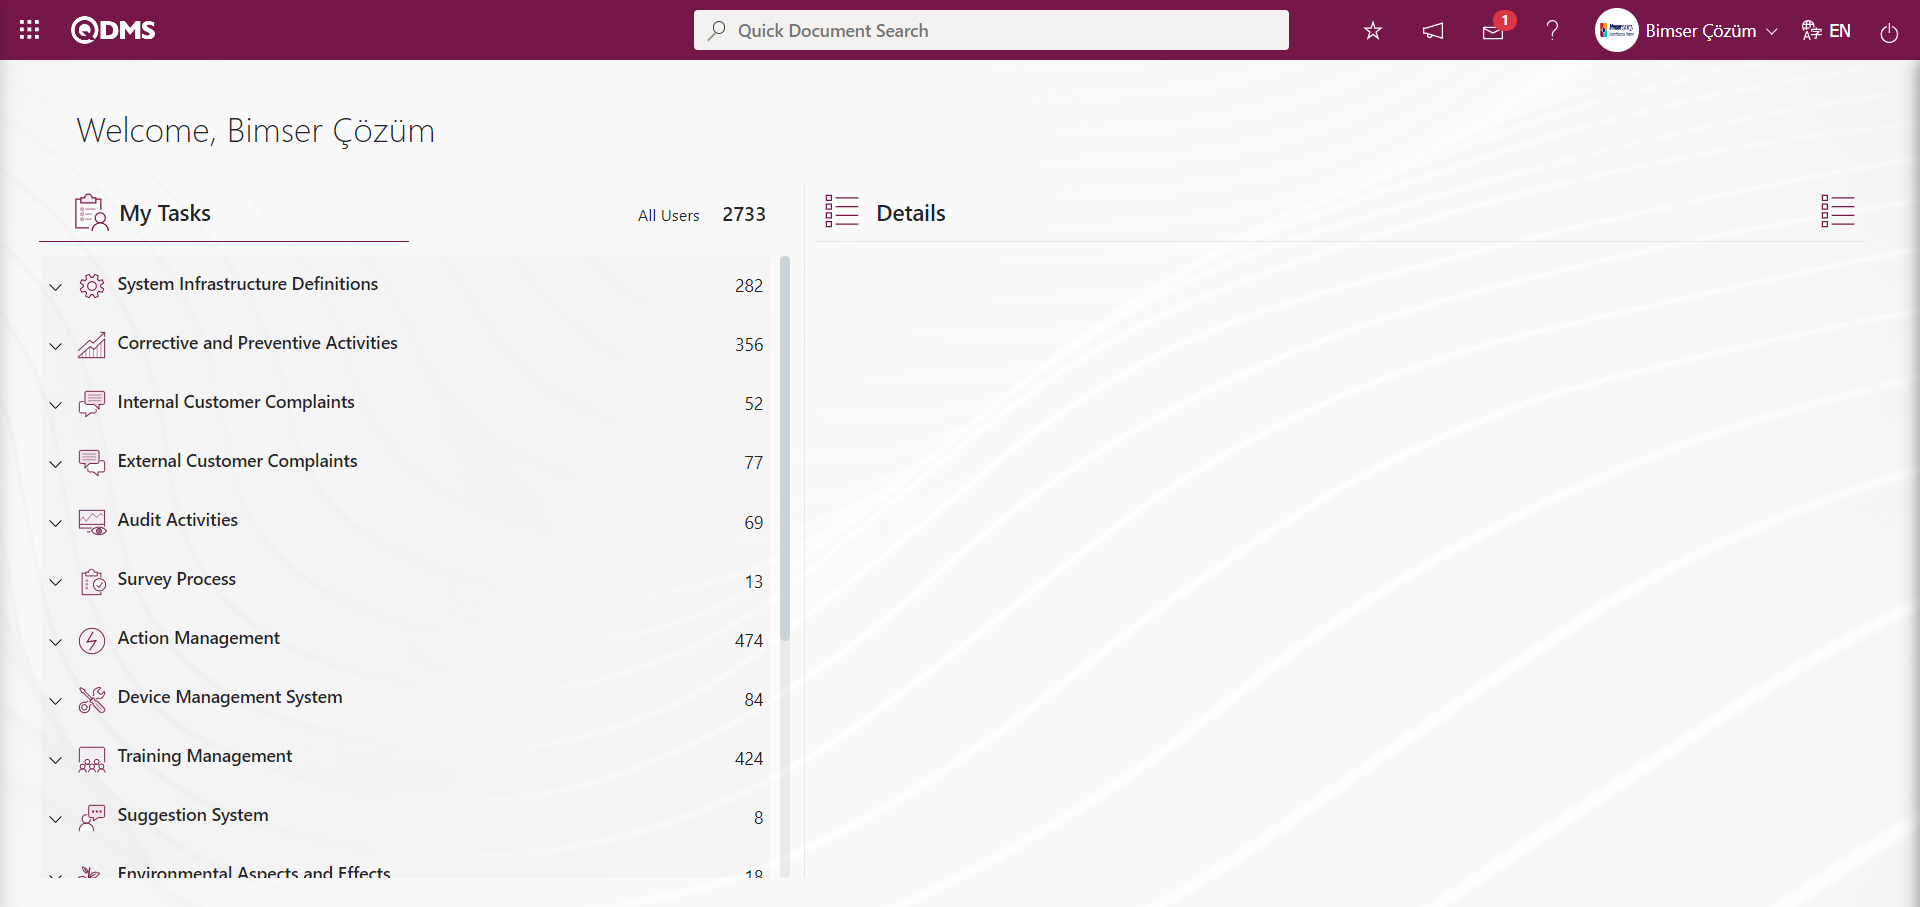
 Qdms system “Your open screen and panels will be turned off when the theme changes. Are you sure you want to change the theme?” After clicking the ‘OK’ button, the default background background image option is adapted to the Qdms system.
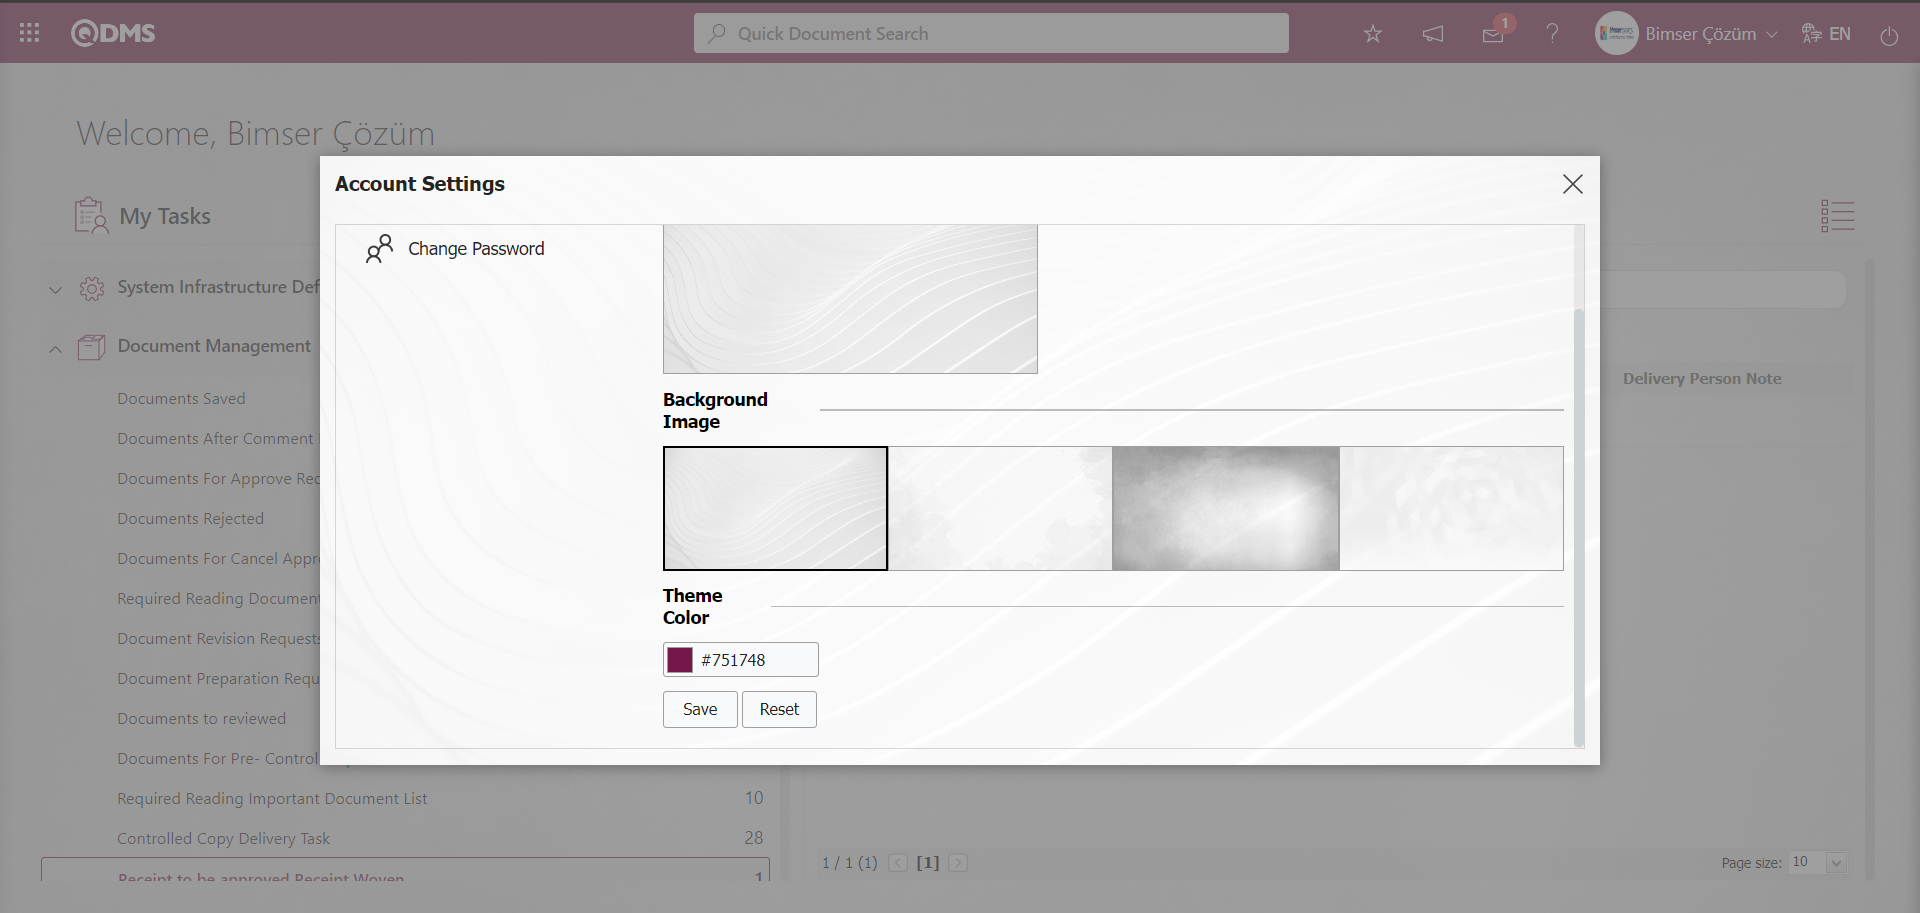
Theme Color: It is the part where the setting of the theme color in the Qdms system is made by selecting the relevant color option in the color palette area. In the Account Settings / Theme Settings / Theme Color field, the process of changing the theme color of the Qdms system is done by selecting the relevant color option in the color palette field.
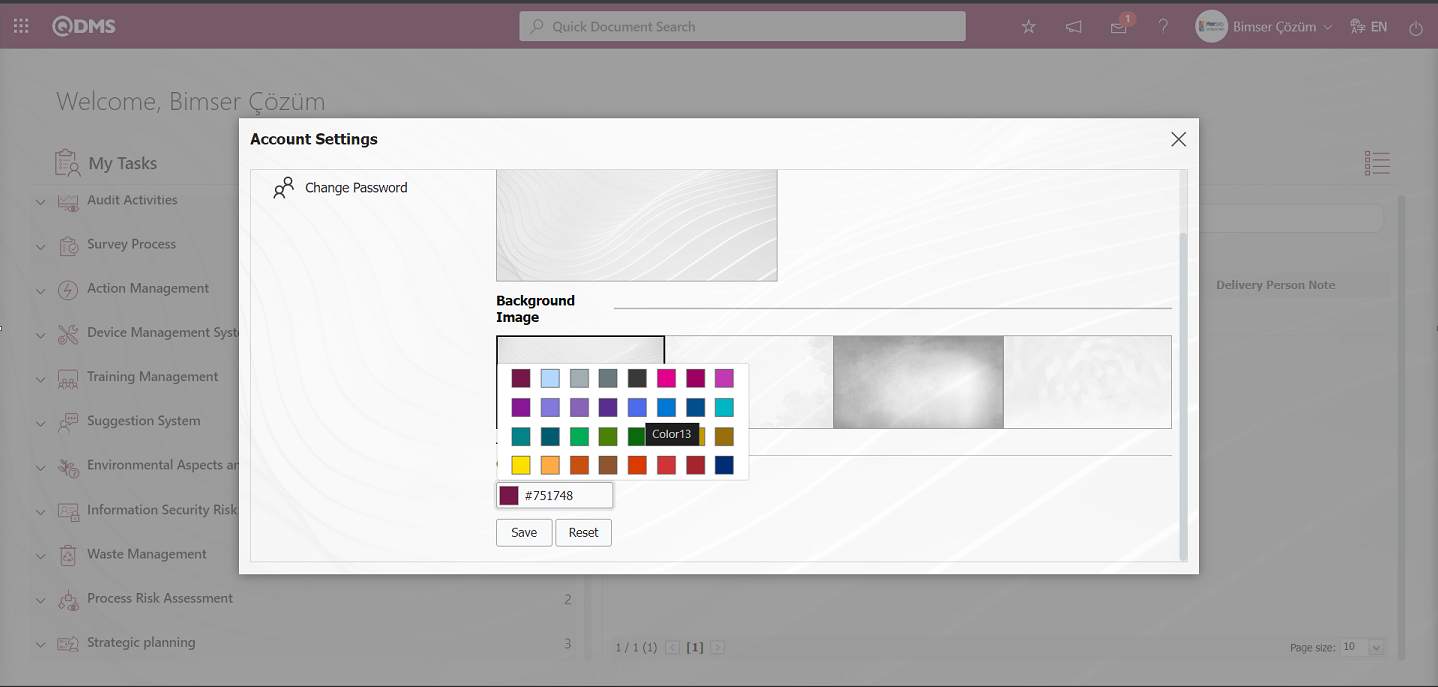 In the Account Settings / Theme Settings / Theme Color field, select the relevant color option in the color palette field of the theme color of the Qdms system.

After selecting the relevant color option in the color palette field, click the  button.
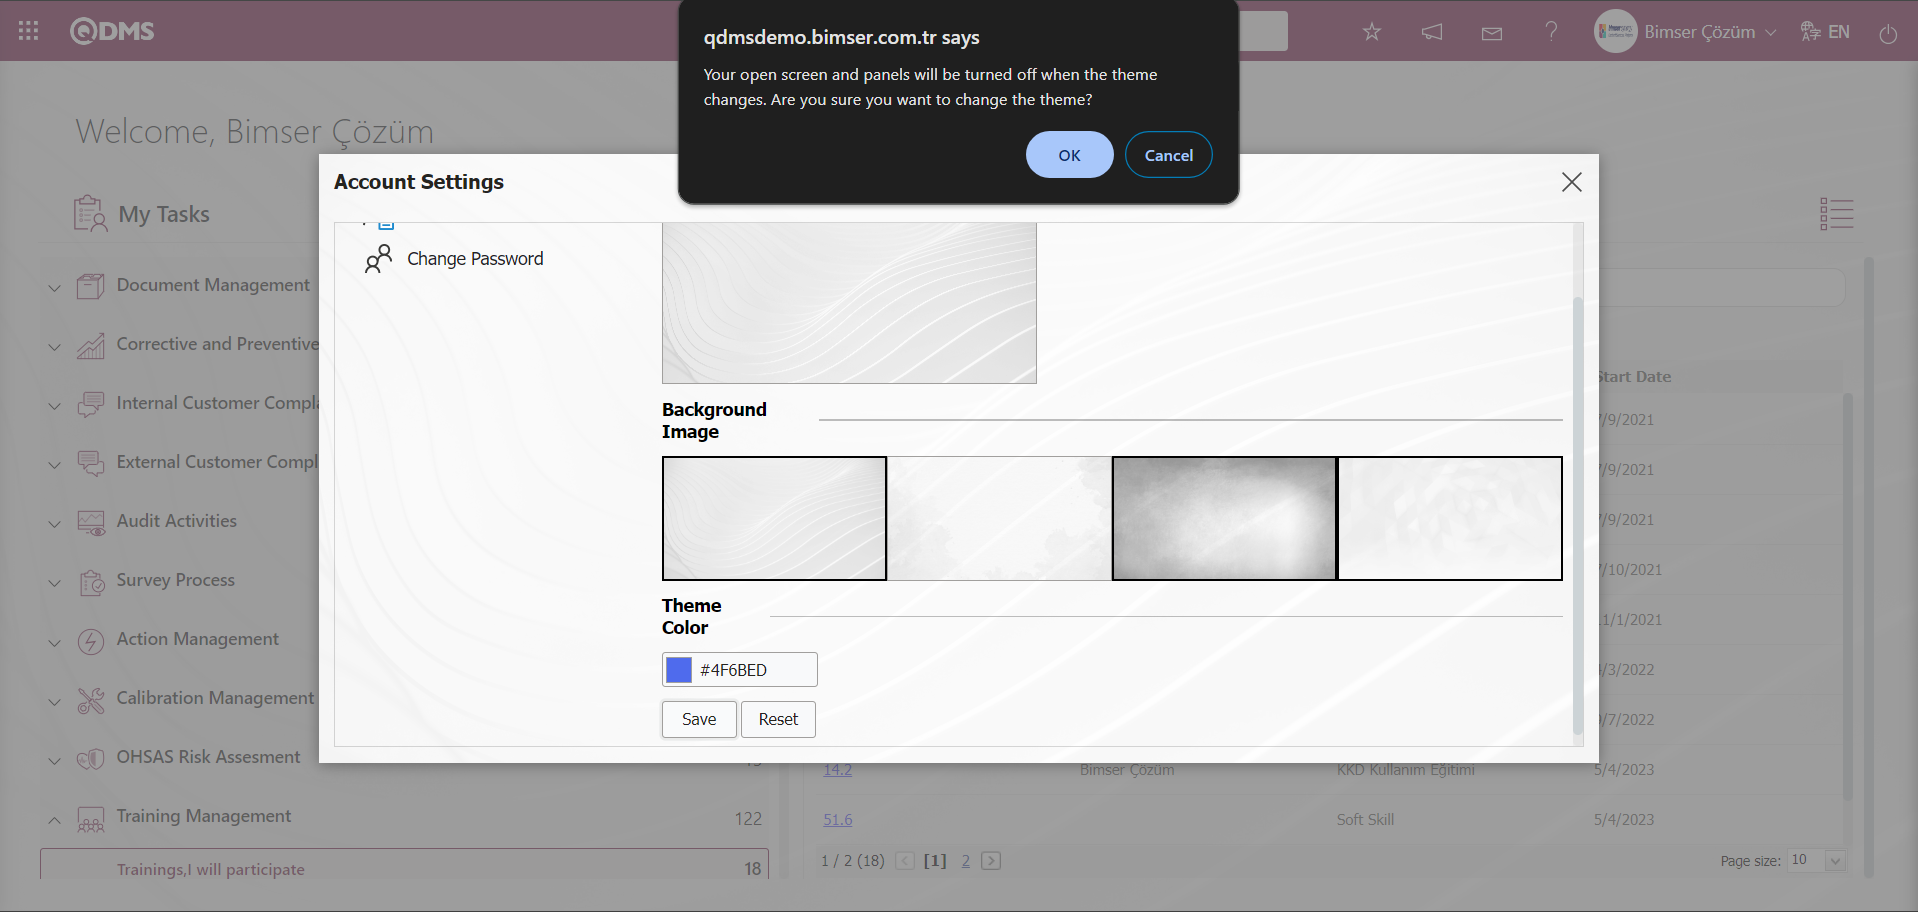
Qdms system “Your open screen and panels will be turned off when the theme changes. Are you sure you want to change the theme?” After clicking the ‘OK’ button in the message of the web site, the theme color change process is done.
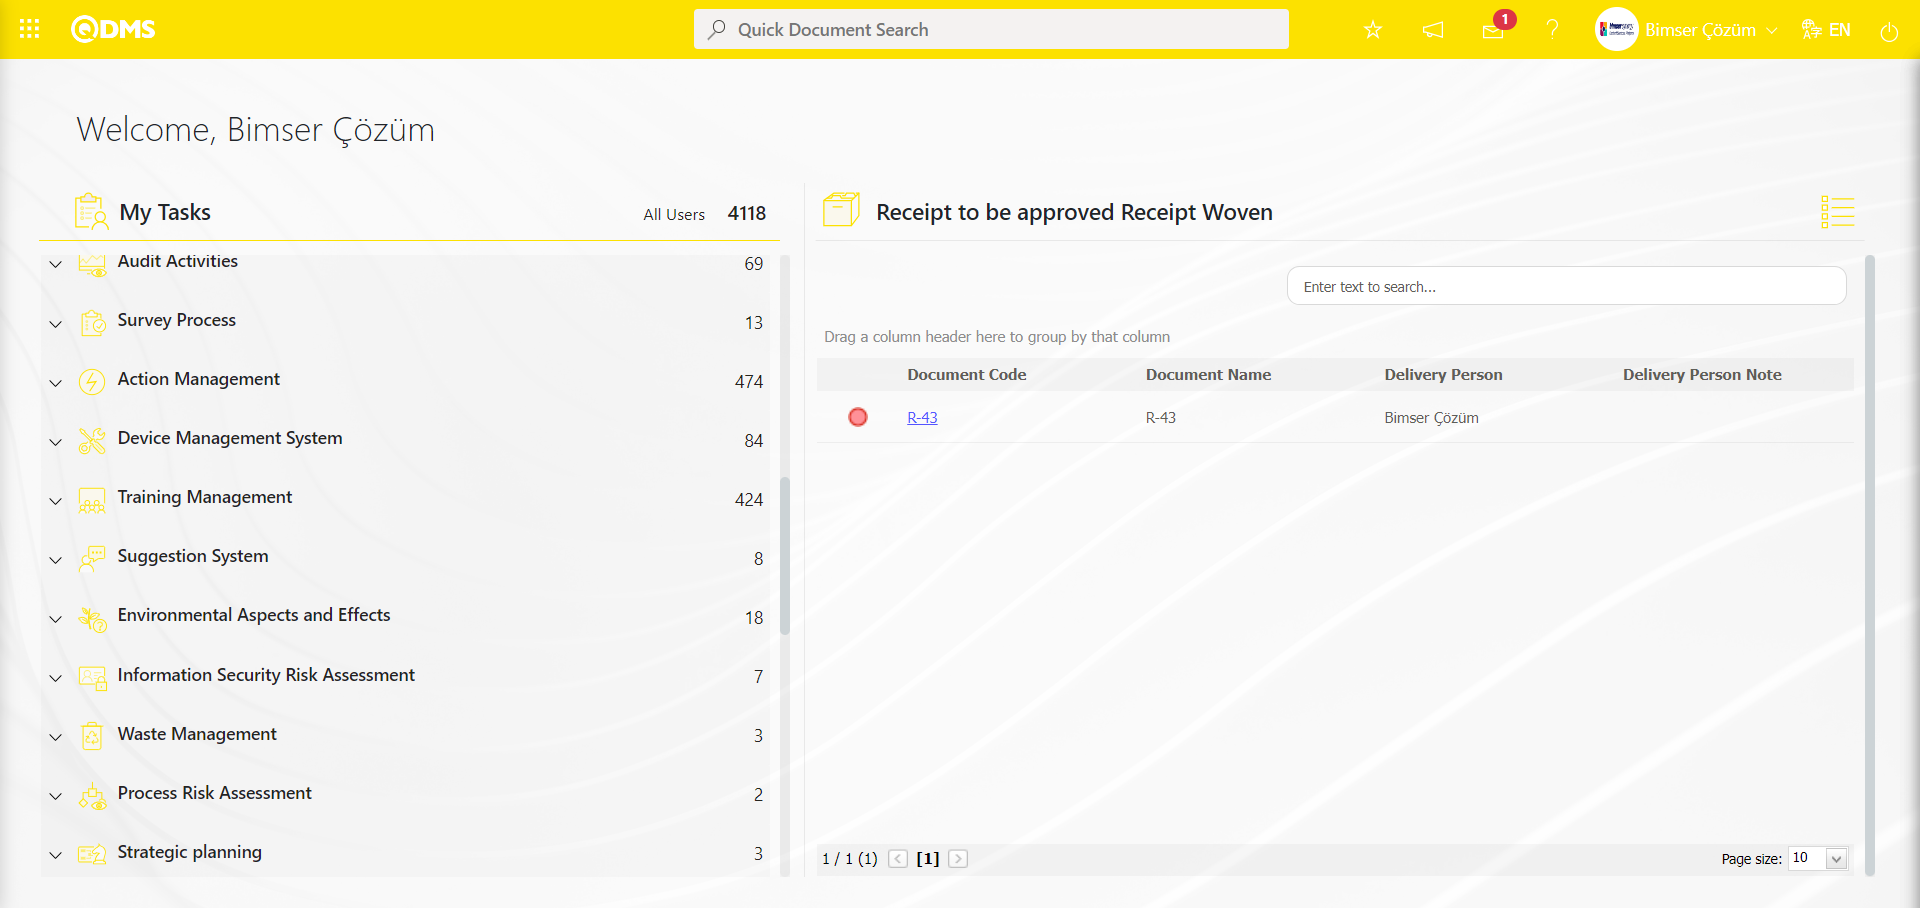
According to the color selected in the Account Settings / Theme Settings / Theme Color field of the Qdms system, the My Pending Jobs section is displayed on the screen.
By clicking the  button in the Qdms system, the visual appearance of the Integrated Management System and System Infrastructure Definitions section of the Modules according to the selected theme color is displayed.
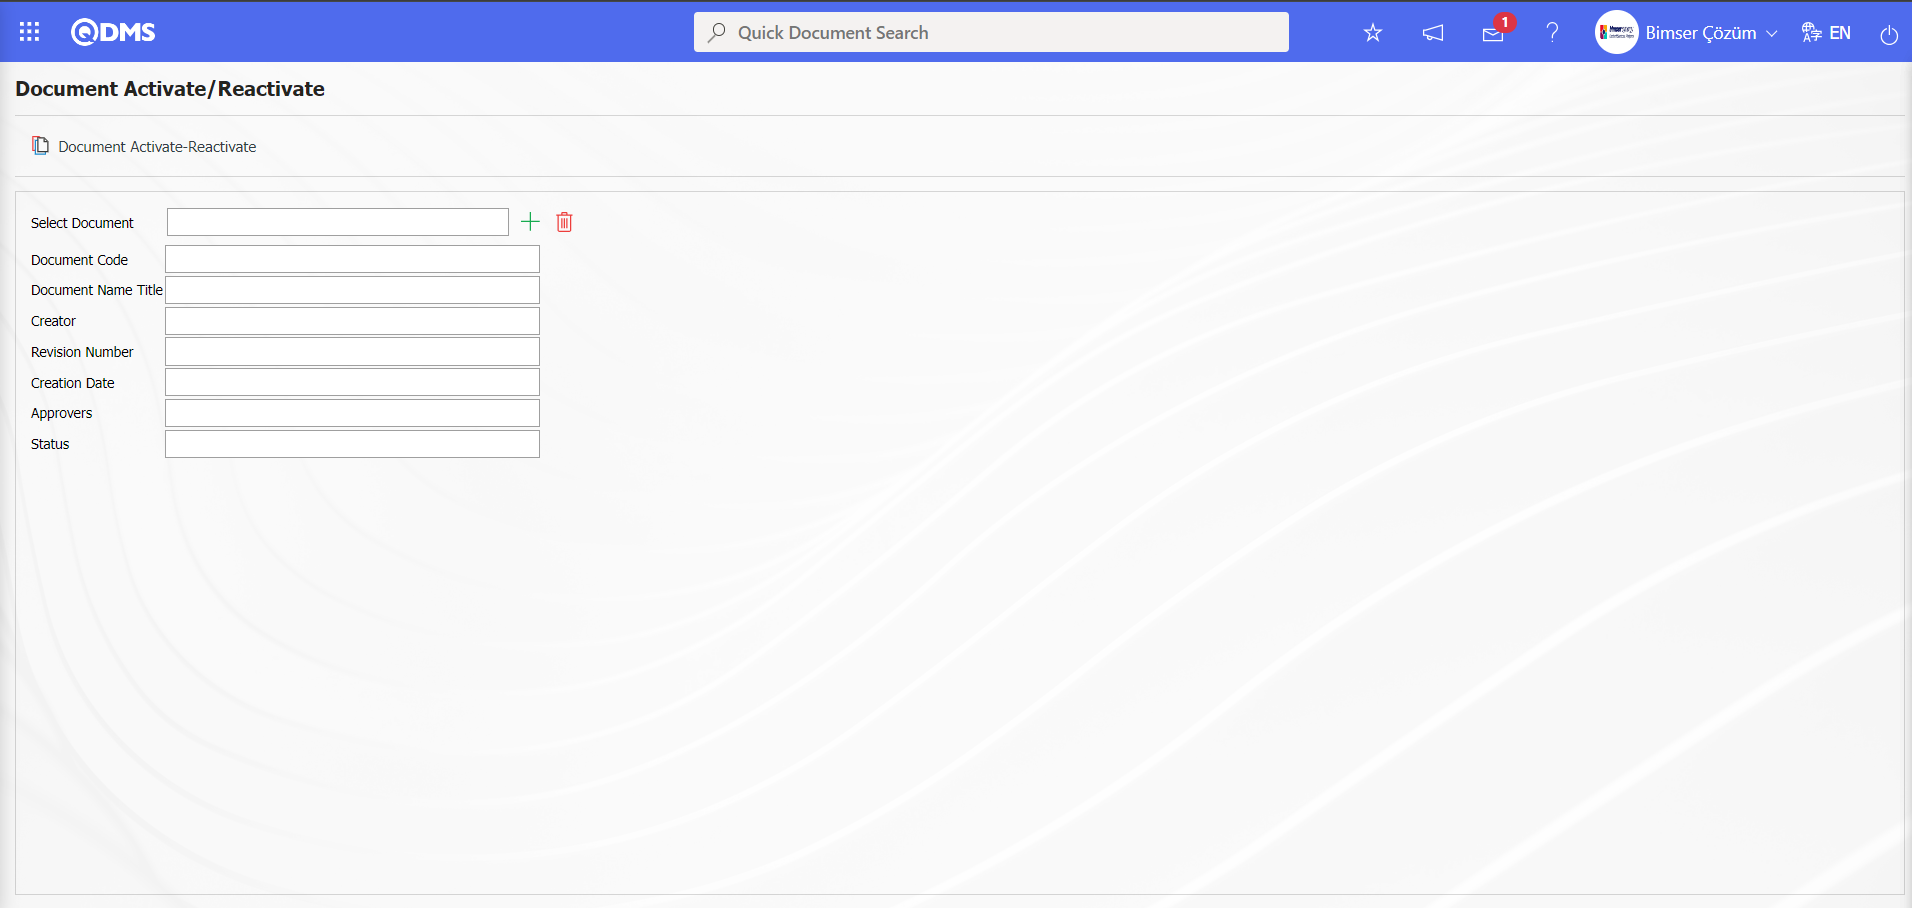
For example, in the Document Management Module, by clicking on the Integrated Management System/Document Operations/ Activate/Deactivate Document menu, the visual appearance of the menu according to the selected theme color is displayed.
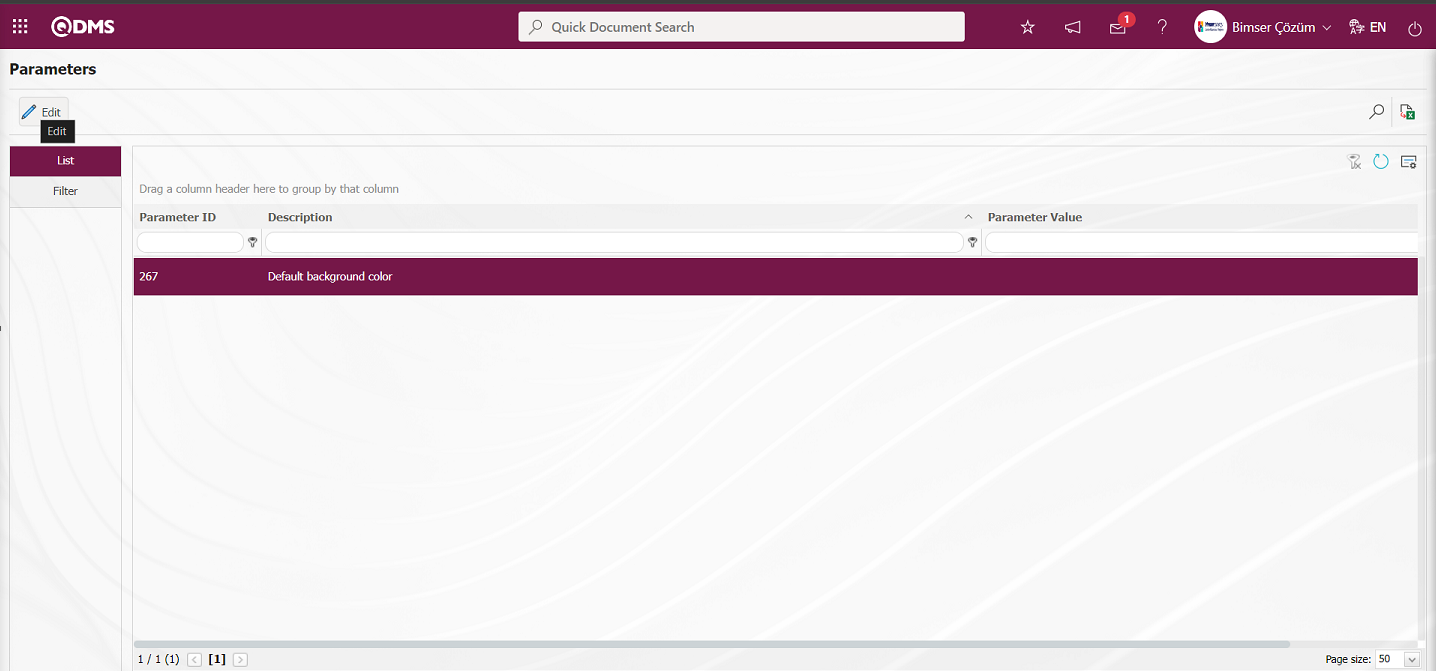
In the Qdms system, the theme color can be changed in the Account Settings / Theme Settings / Theme Color field according to the user's request. In the System Infrastructure Definitions module, the theme color is set as default in the parameters. In the “Default background color” parameter numbered 267 in the System Infrastructure Definitions parameters, the default background color setting process is done by typing the code information of the color in the color plateau on the Account Settings / Theme Settings / Theme Color screen of the desired color by default.
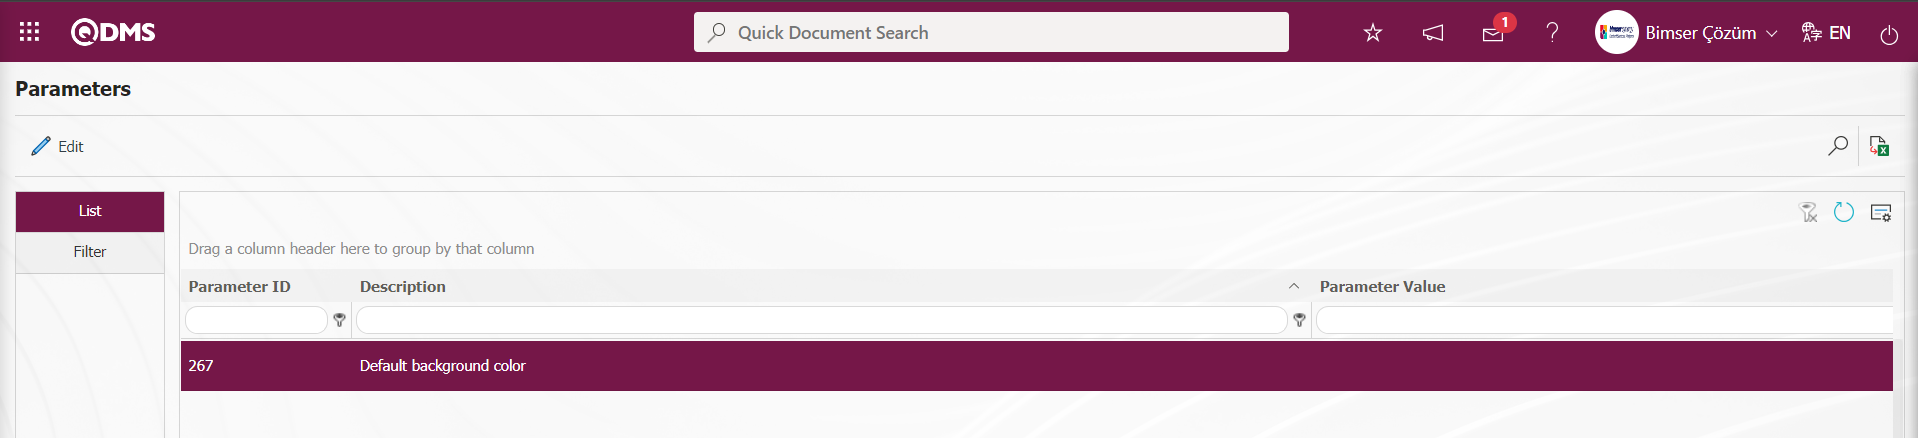
For this operation, click button while "Default background color” parameter 267 is selected.
On the Parameters screen, the code information of the color in the color palette on the Account Settings/Theme Settings/Theme Color screen is written to the parameter value.
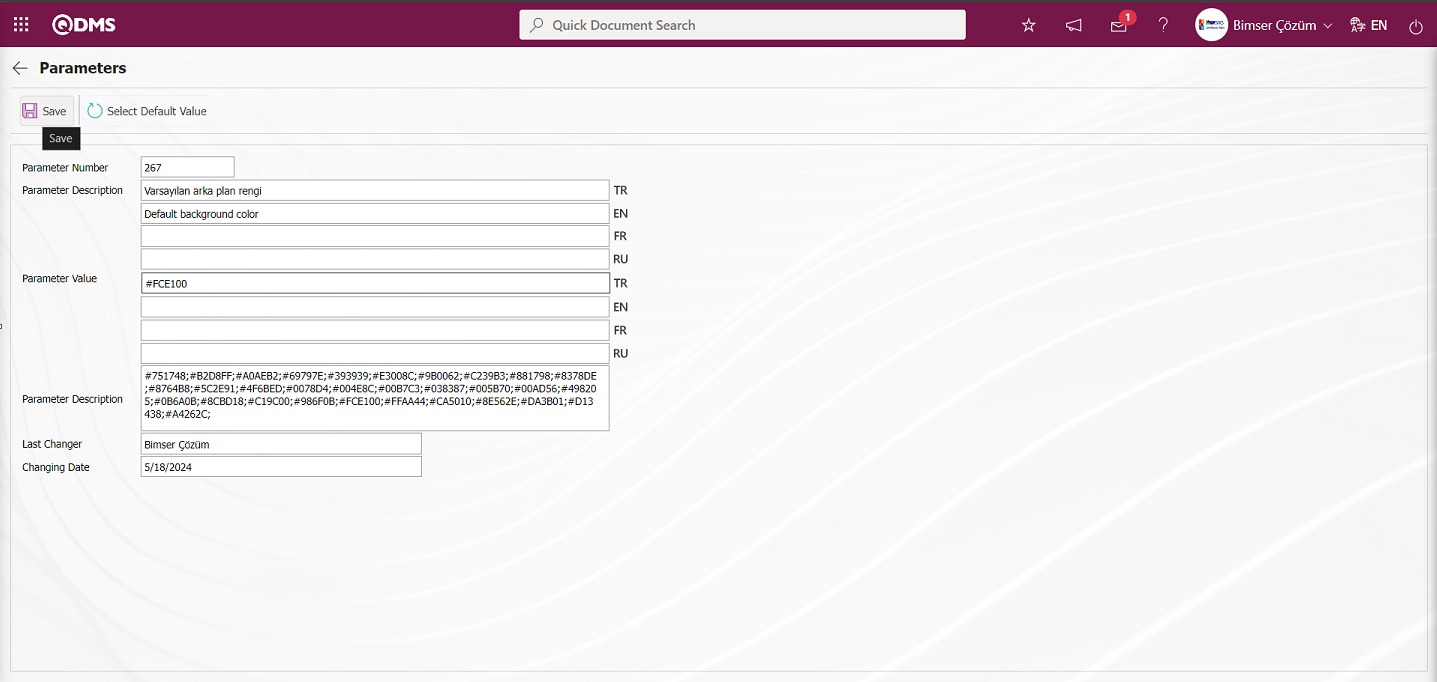
After entering the necessary information in the required fields on the Parameters screen, the parameter record update process is performed by clicking the  button in the upper left corner of the screen.

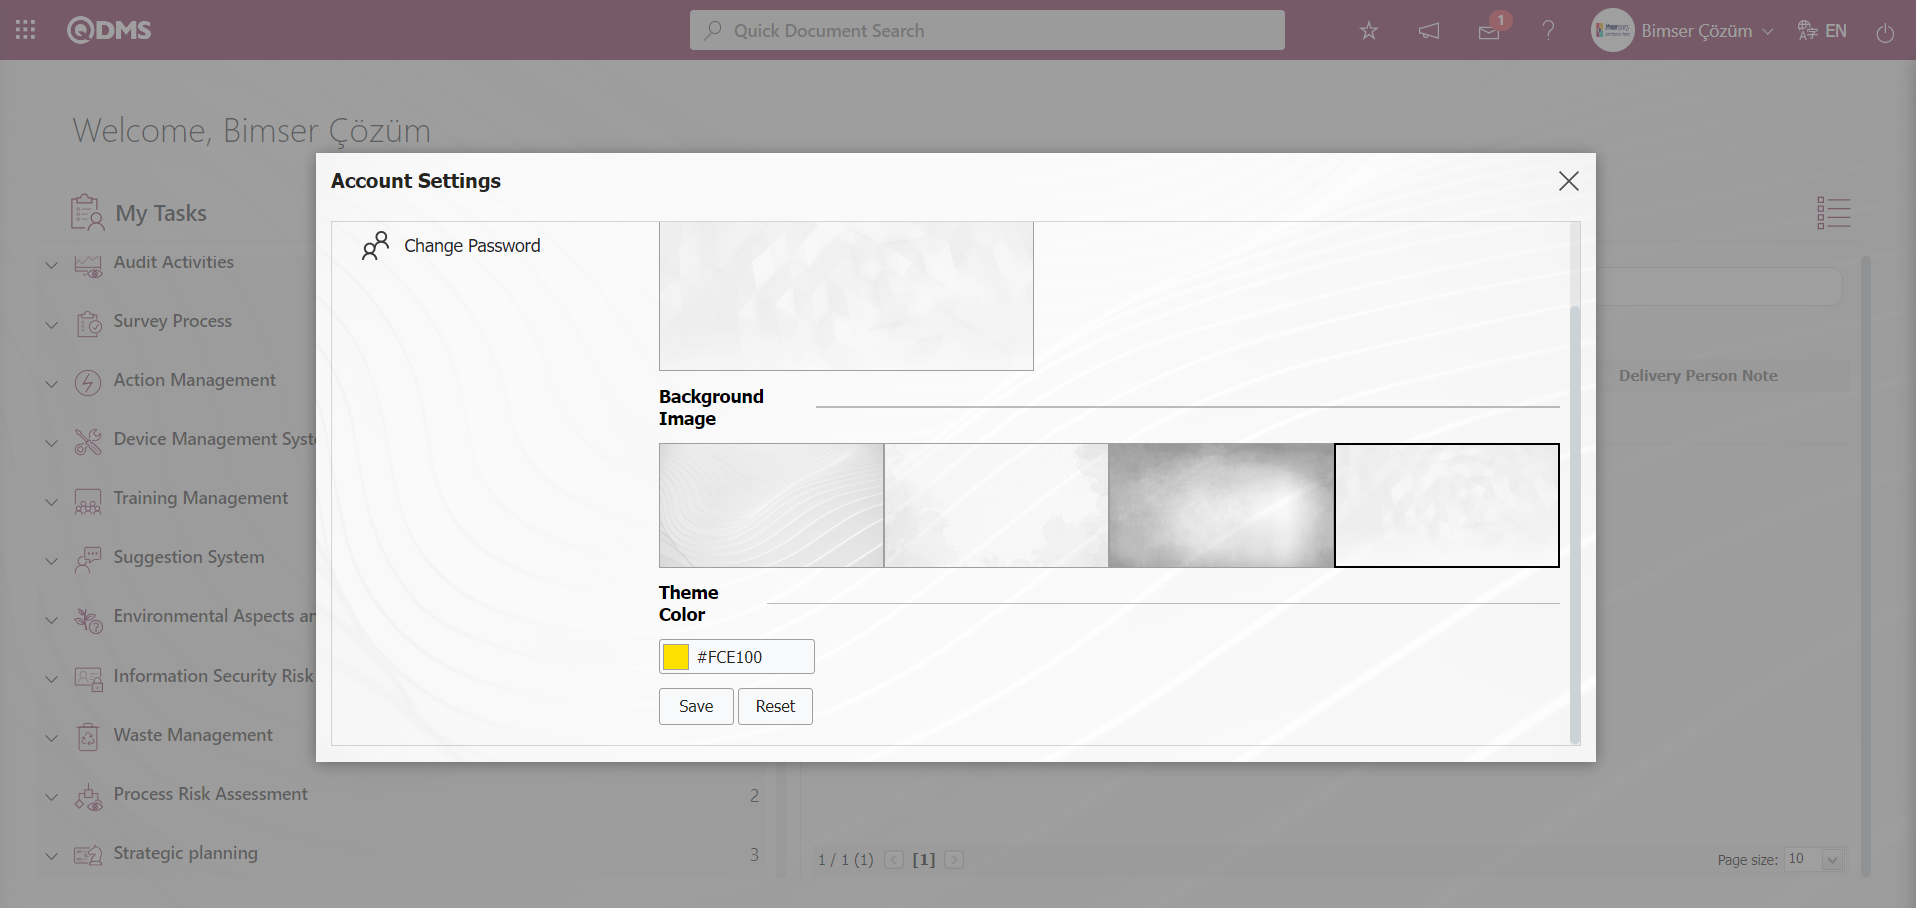
After setting the theme color as default in the parameter, click the  button on the Account Settings/Theme Settings/Theme Color screen.
After the button is clicked, the default background image option and theme color selection process, which are set in the parameters of the System Infrastructure Definitions module, is done automatically by the system.
After the system automatically selects the default background image and theme color, the  must be clicked to apply the operations performed.
Qdms system “Your open screen and panels will be turned off when the theme changes. Are you sure you want to change the theme?” After clicking the ‘OK’ button in the message of the web site, the default background image and theme color is switched. As in the screenshot below, it is seen that the background image option and theme color set by default in the parameter value in the parameter is switched.
 : Profile Information, User Signature Upload and QDMS Usage Counters are the sections where the related adjustments are made.
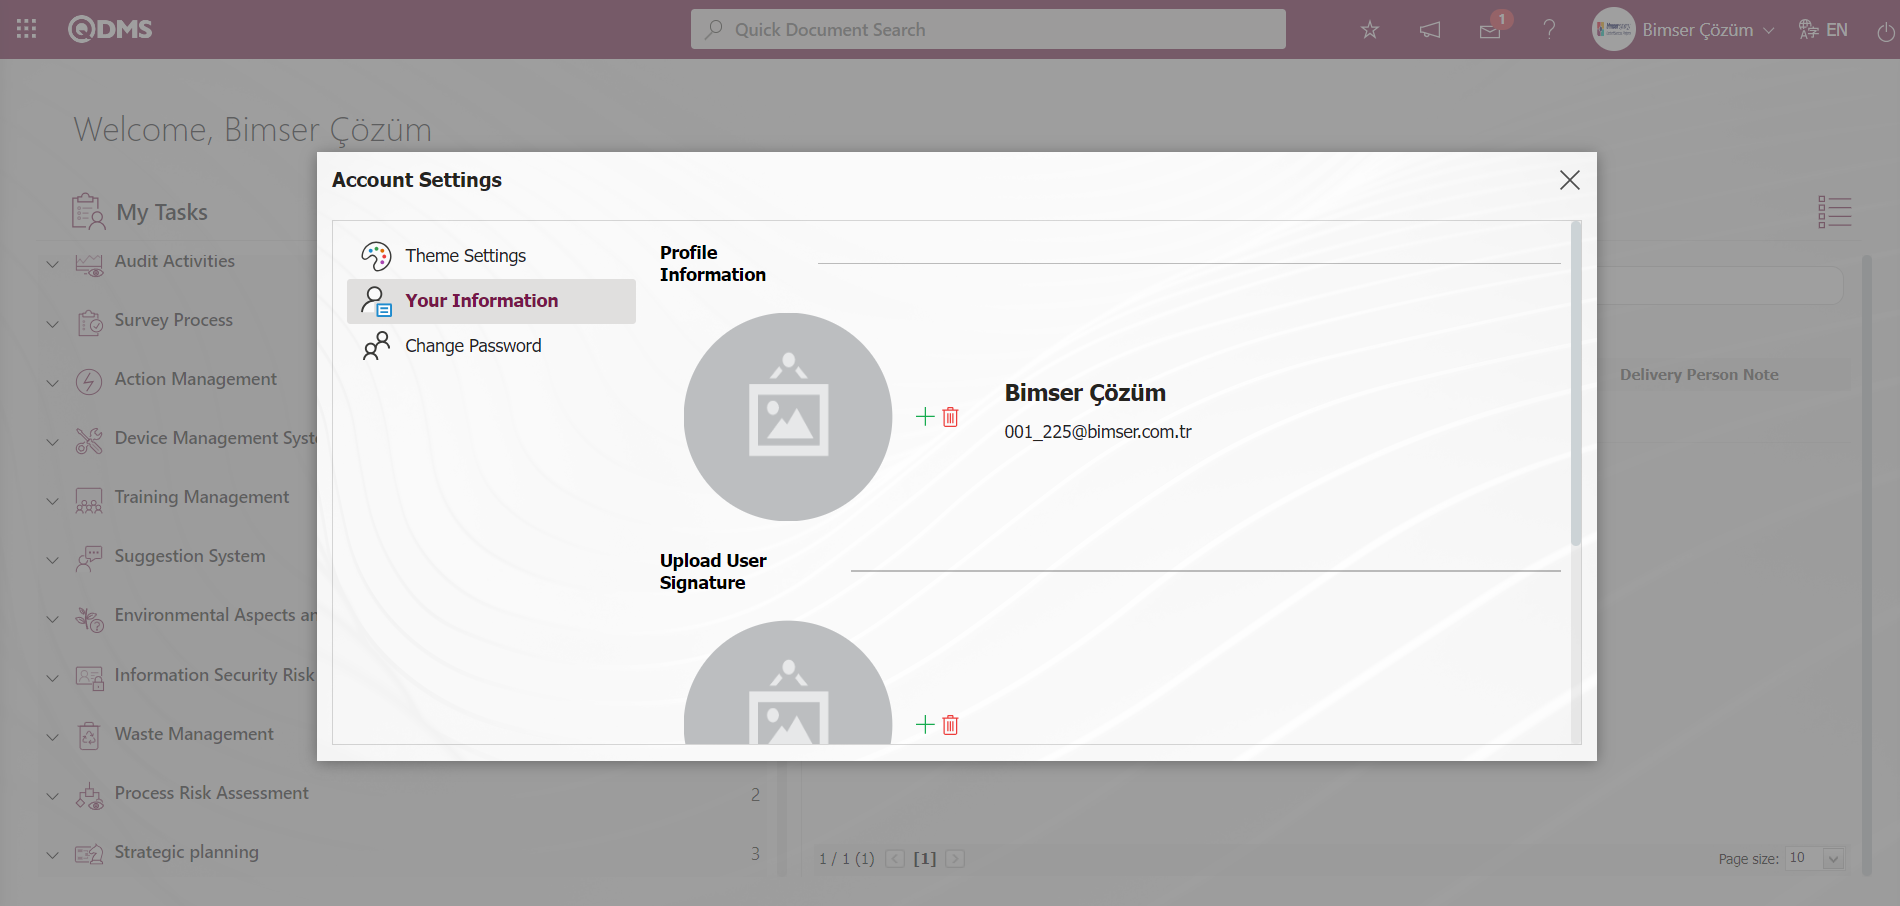 Profile Information: This is the section in the Qdms system where the user's personal information is located and the profile picture can be uploaded if the user wishes. The user's name and surname information, e-mail address information, if any (If the e-mail address is defined in the Personnel Definition menu, it is automatically brought to this section by the system.) is displayed and the profile picture upload process settings are made depending on the user's request.

In the Account Settings/Your Information/Profile Information section, click on the  button to upload a profile picture.
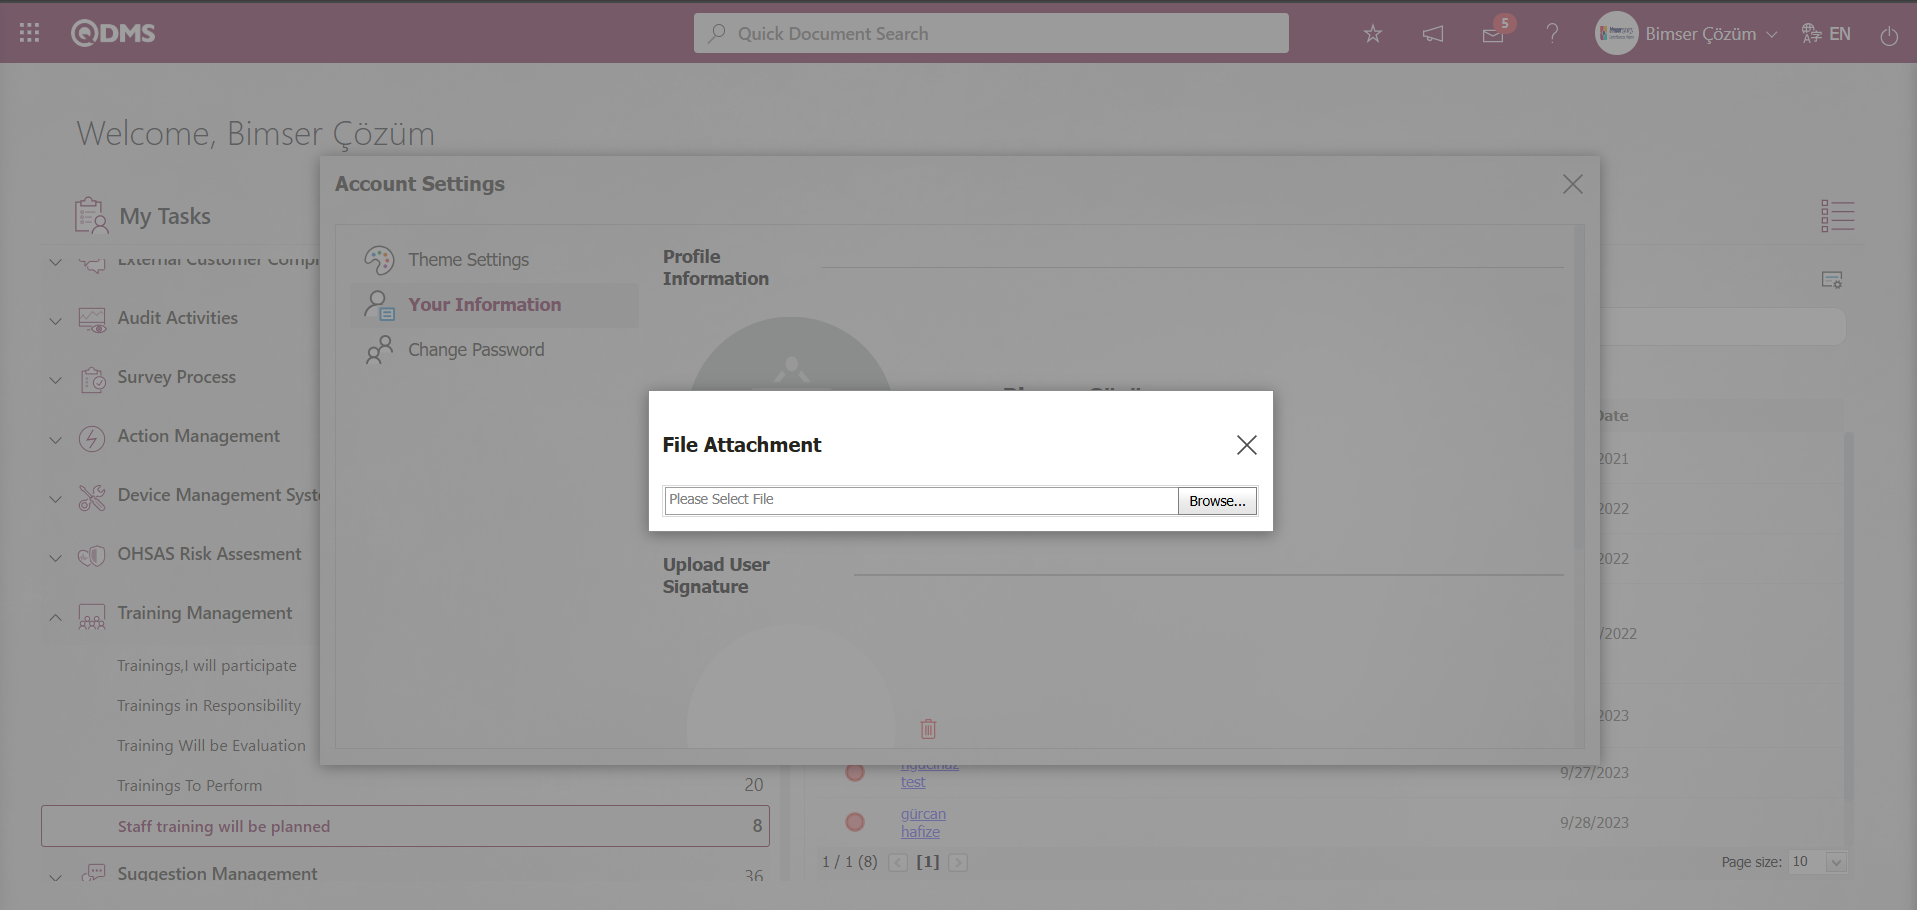
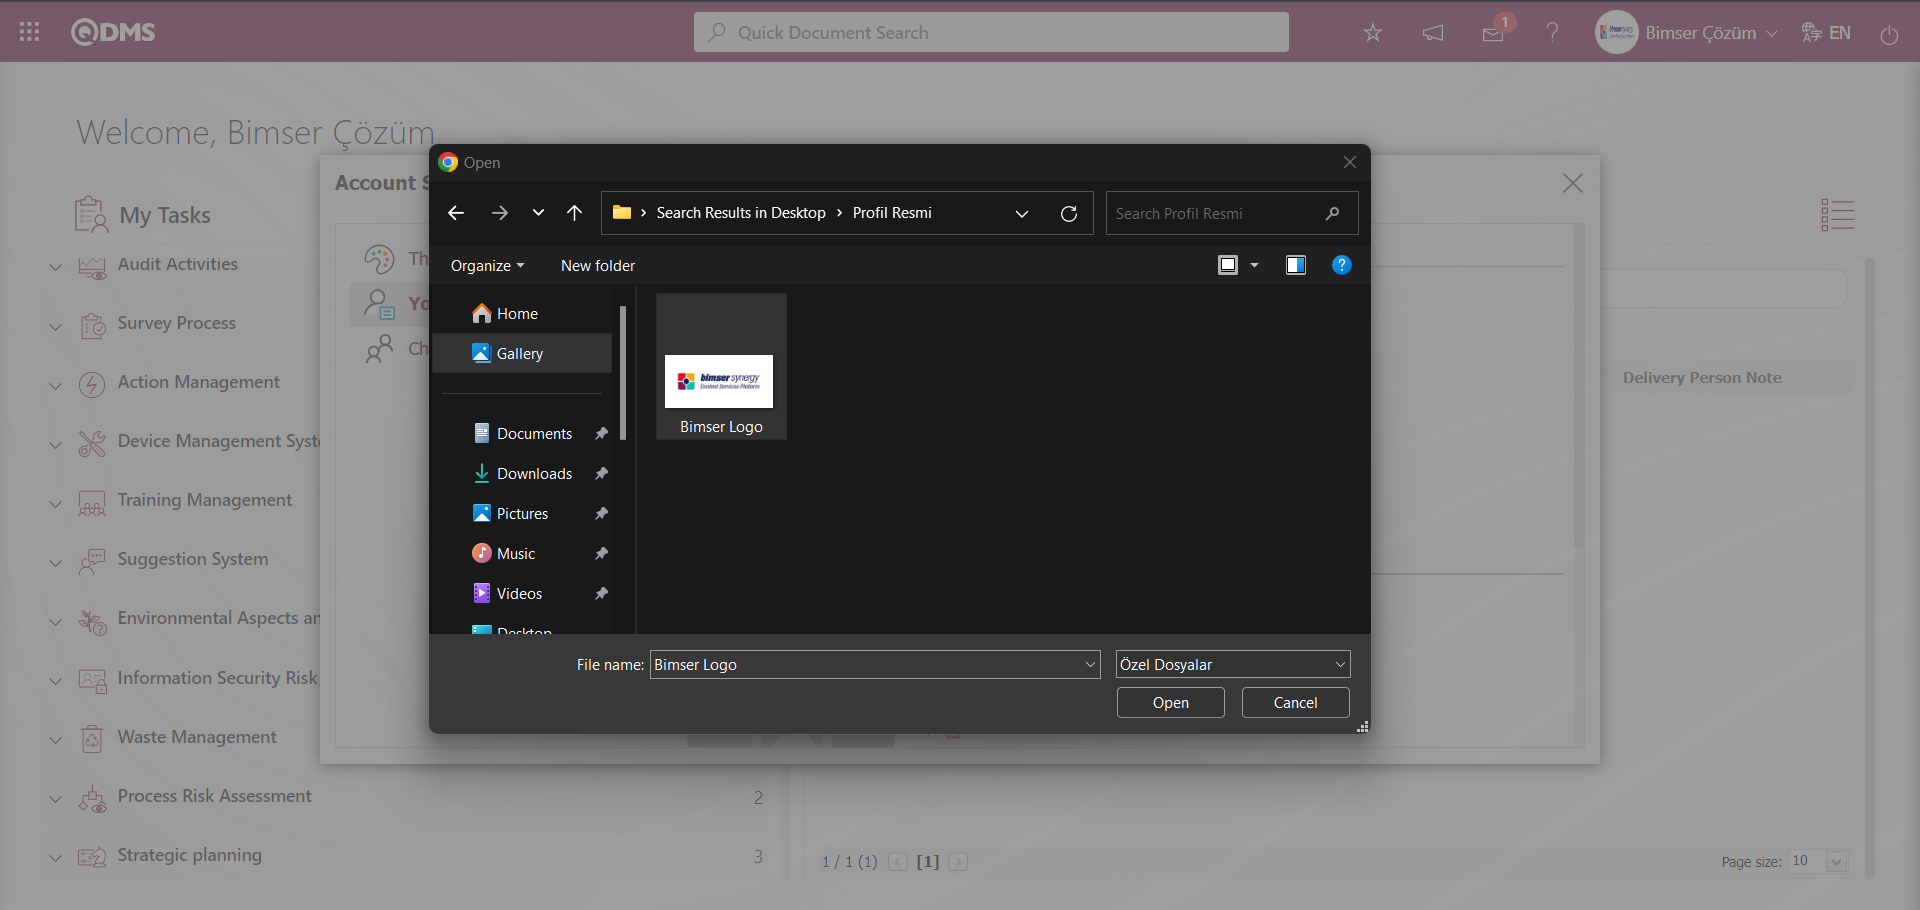
On the File Attachment screen, click on the  button and select the profile picture saved in the computer environment to be selected for the profile picture.
In the Qdms system, the added profile picture is displayed in the section with the user name and surname information. If the user wants to stop uploading the added picture, he/she can cancel the upload process by clicking the  button.
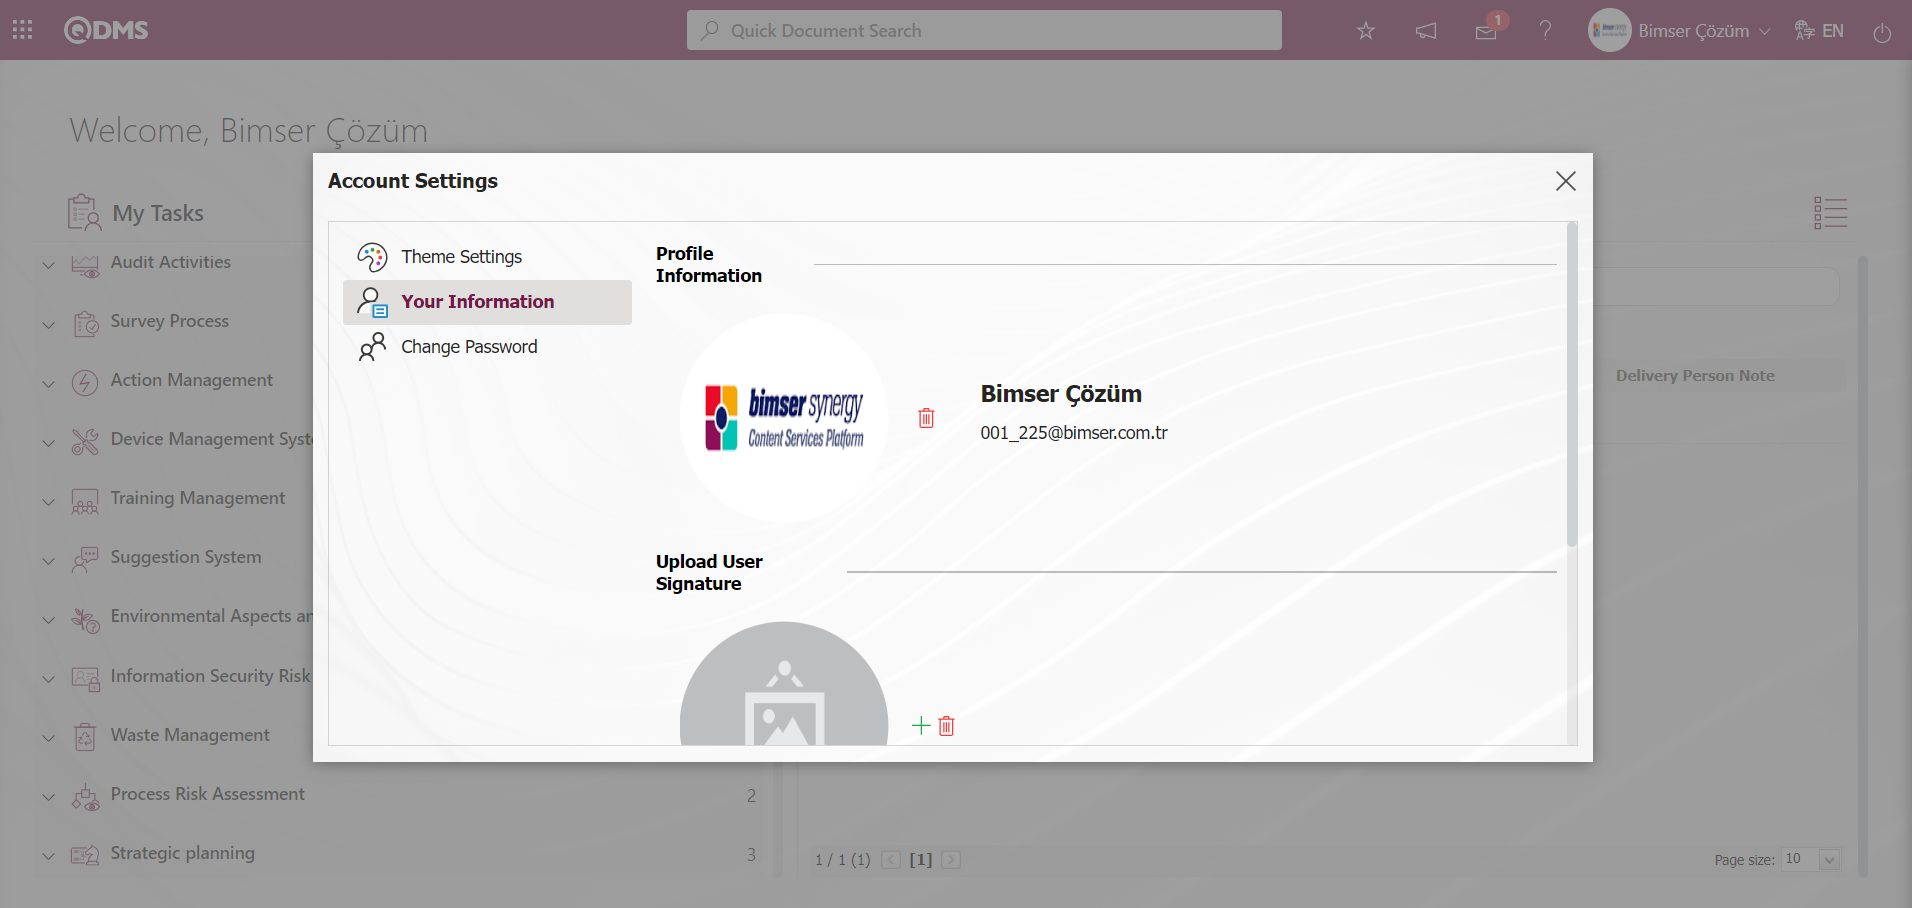
The added Profile picture is located in the Qdms system where the user name and surname information is located.
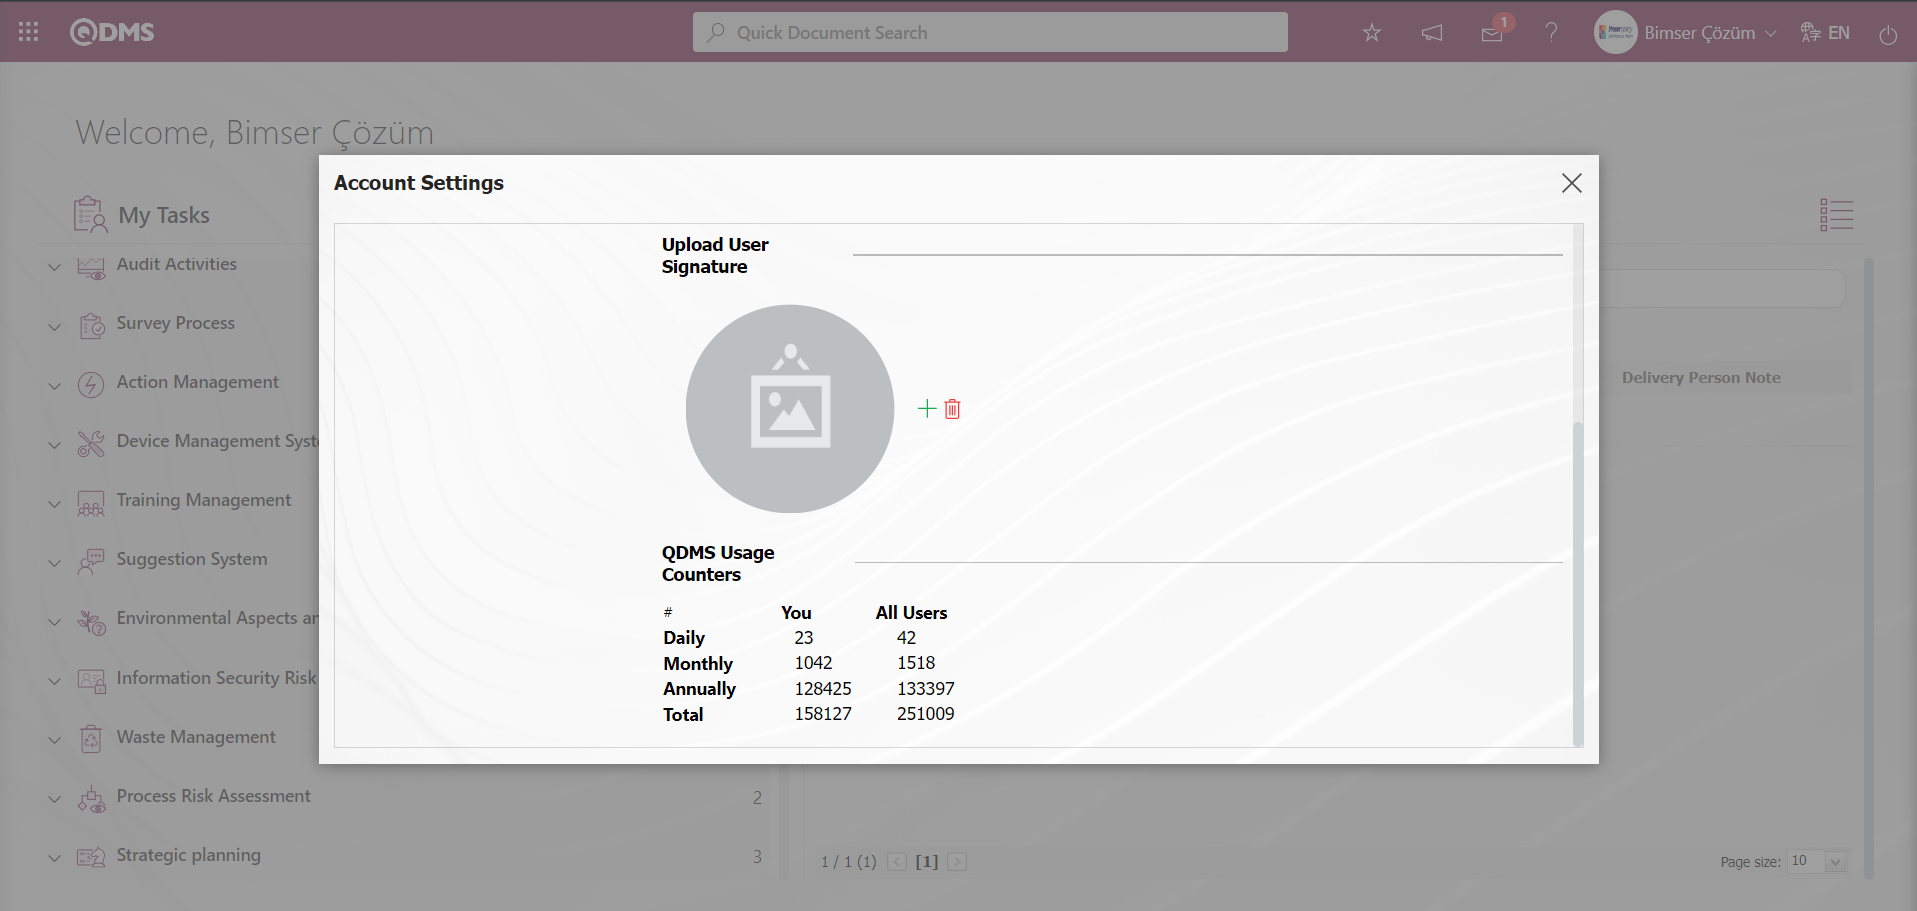
Upload User Signature: The user can upload the user signature in the Qdms system in the computer environment on the Upload File screen opened by clicking the  button in the Account Settings / Your Information / Upload User Signature field.
QDMS Usage Counters: Click on Account Settings/Your Information/ QDMS Usage Counters menu and on the screen that opens, you can see the daily, monthly, yearly number of entries to the QDMS system based on user and total.
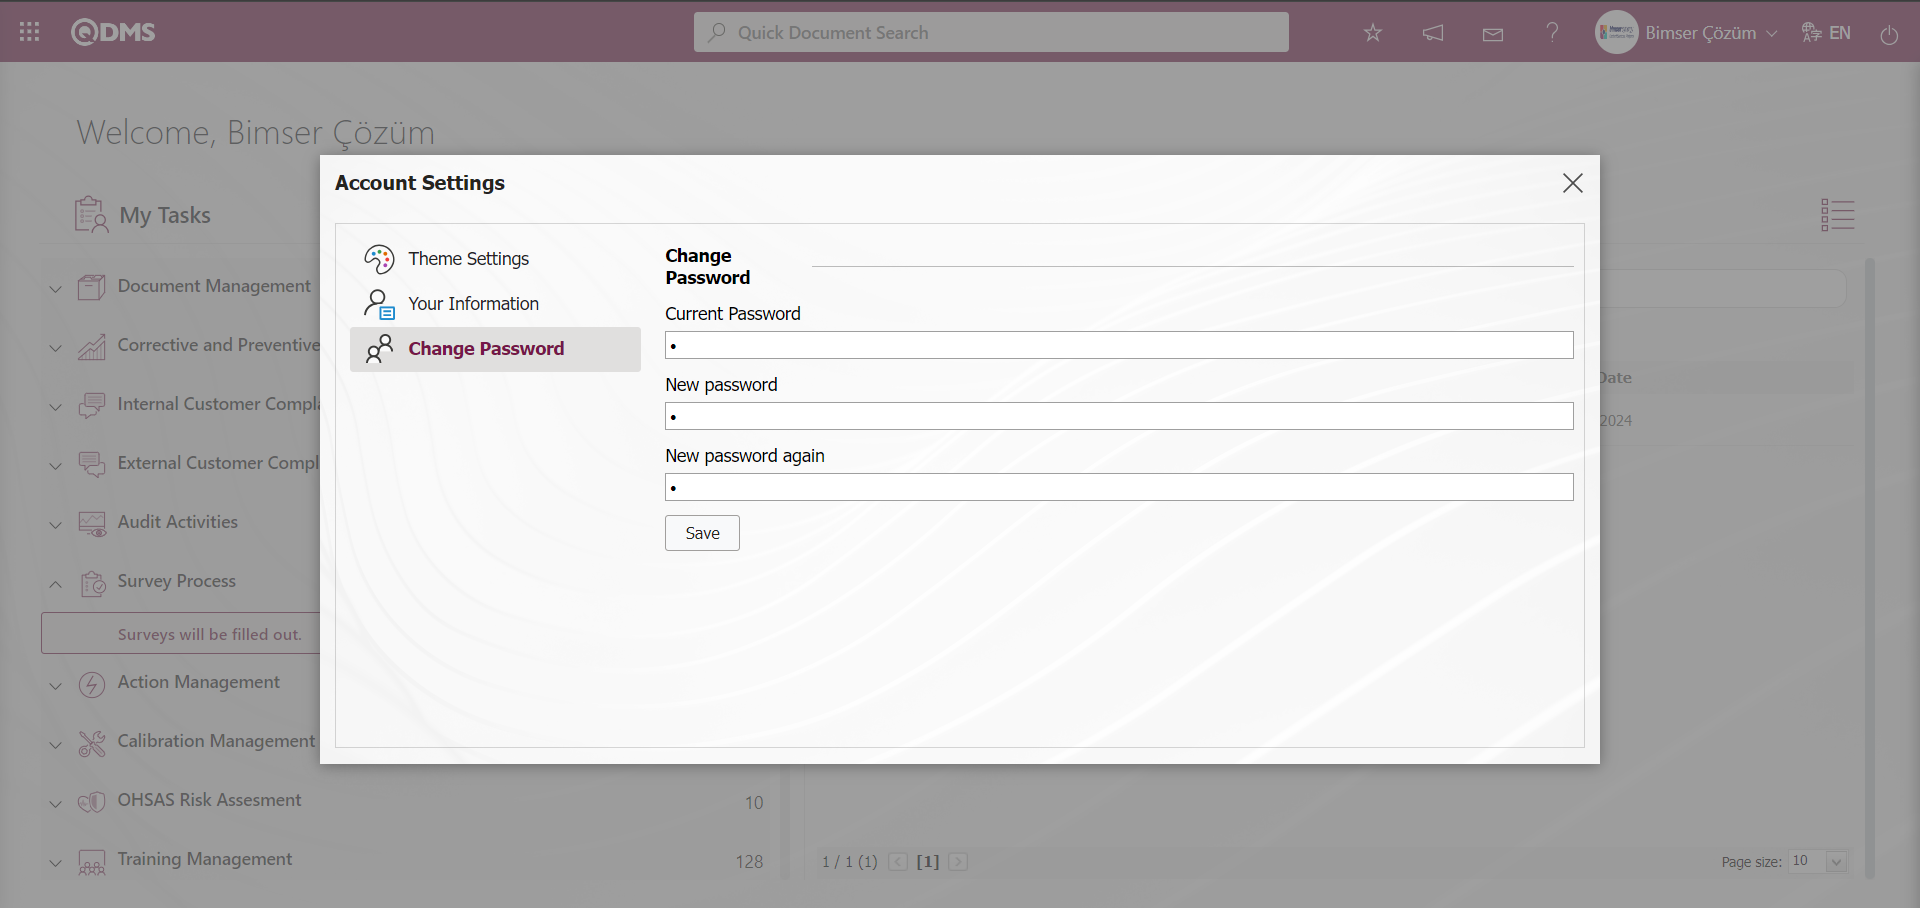
 : This is the menu where the password change process is done. On the Change Password screen, enter the current password information in the current password field. Enter the new password information in the New password field. Enter the new password information again in the New password again field. After filling in the required fields in the Change Password field, click the
  button.
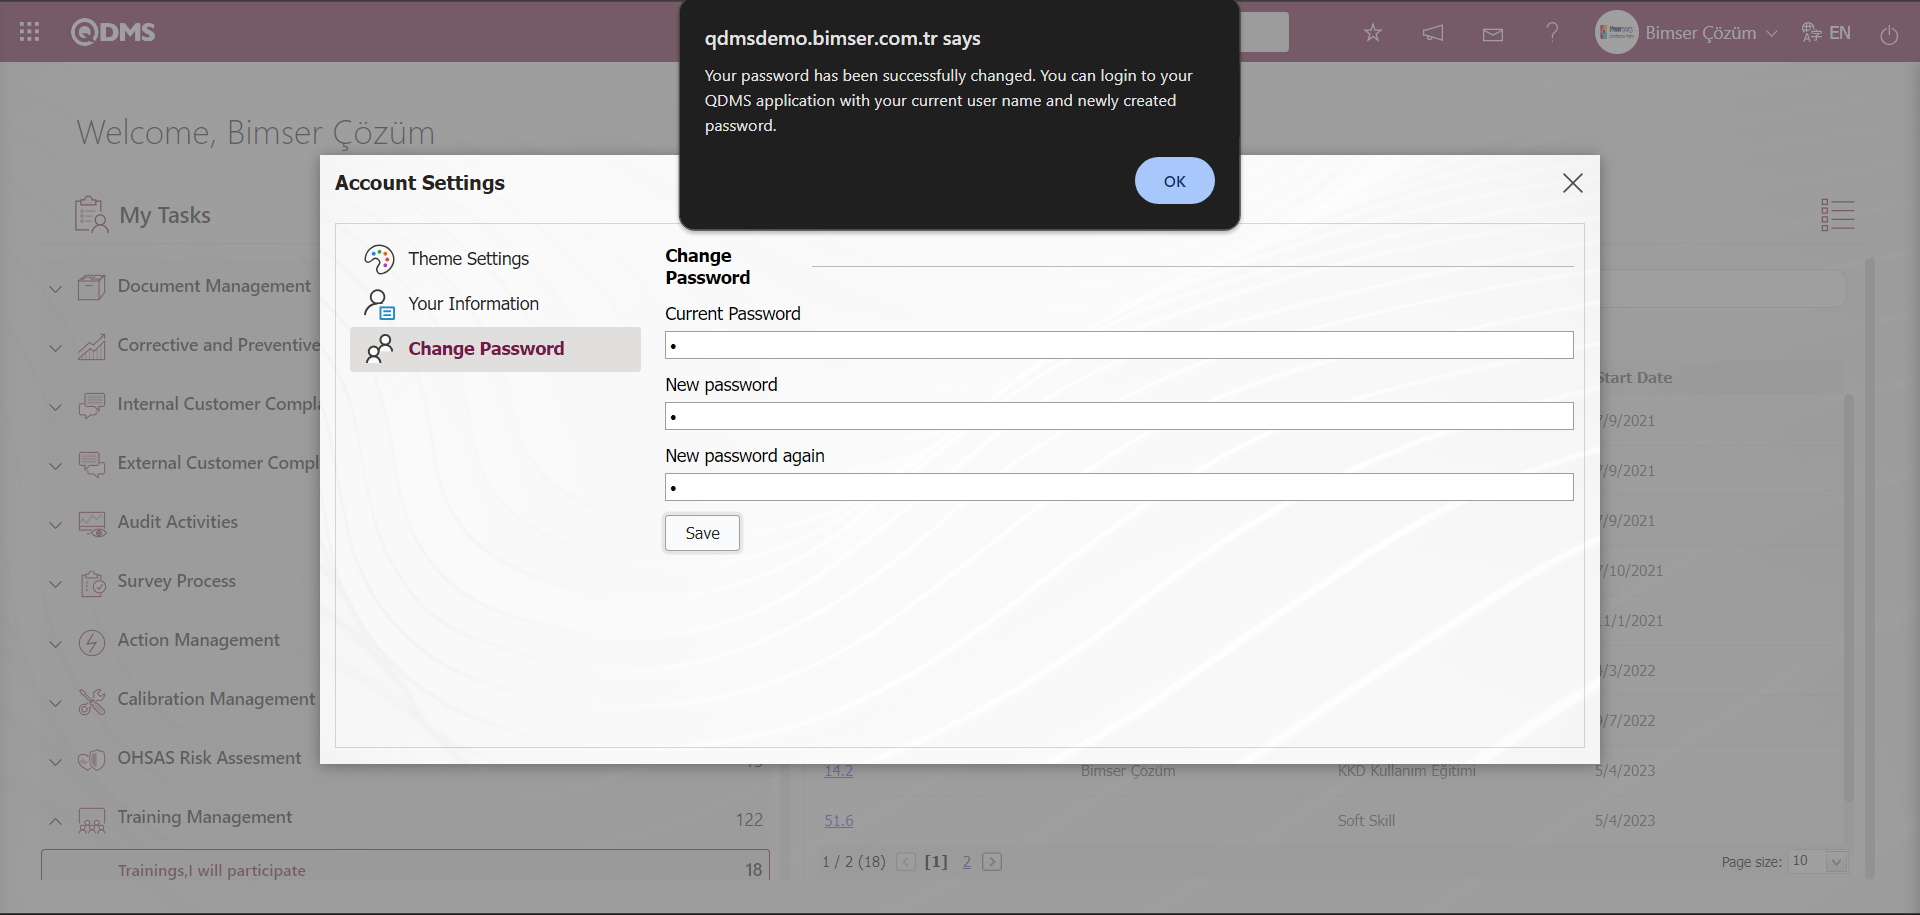
The system will say “Your password has been changed successfully. You can log in to your QDMS application with your current username and the newly created password.” The password change registration process is done by clicking the ‘OK’ button.
If you have active directory, the password is changed during the computer password change, this menu is not used.
 Language: This is the section on the Qdms main login screen where you can switch between the languages used in the system and provide multi-language support. English language option is automatically installed in the system. Other language options are installed in the system according to the needs of the companies. In the language section, select “TR” option in the drop-down language list to run the system in Turkish.
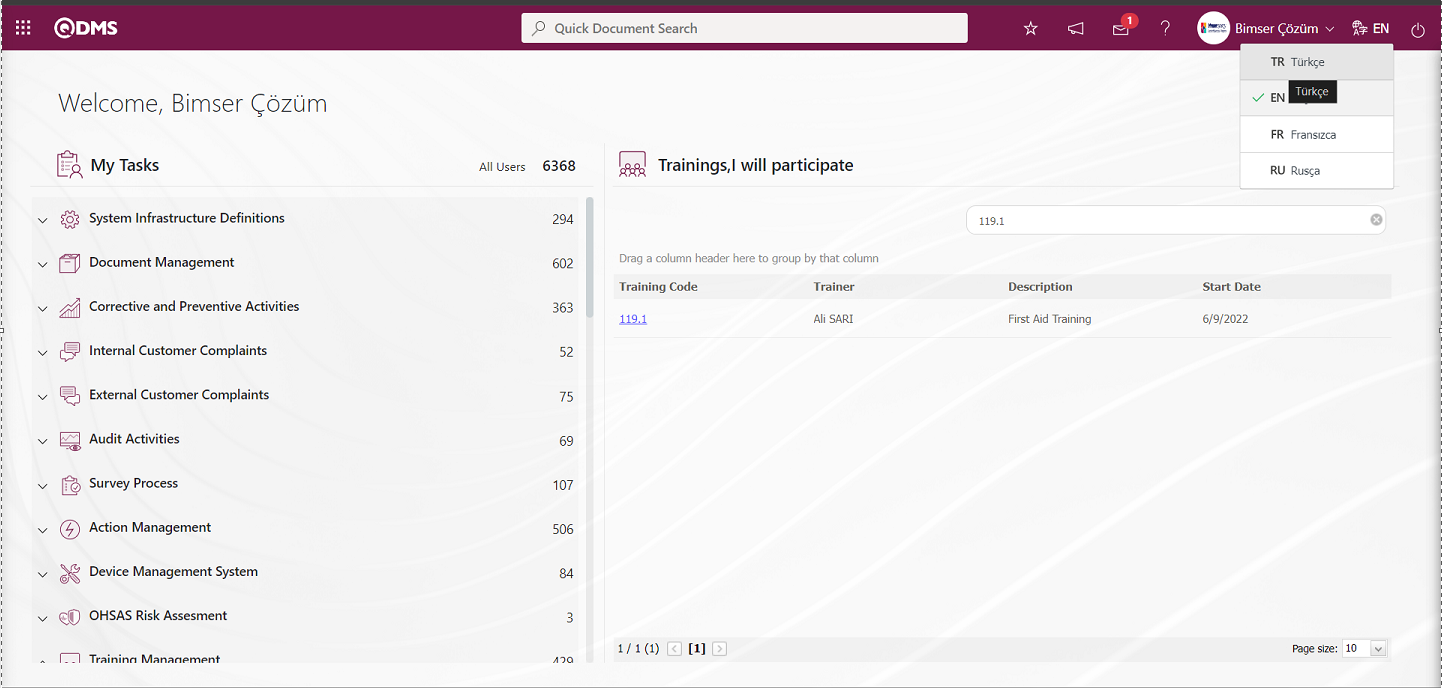
After the language option is selected as “TR”, the Qdms system gives the message “Your open screen and panels will be turned off when the language is changed. Are you sure you want to change the language?”, click the ‘OK’ button and change the program language of the Qdms system to Turkish.

In the Qdms system, the program language is displayed as Turkish in My Pending Jobs and other sections. You can switch between languages with this button on the Qdms main login screen.
Features of Menus in QDMS System;
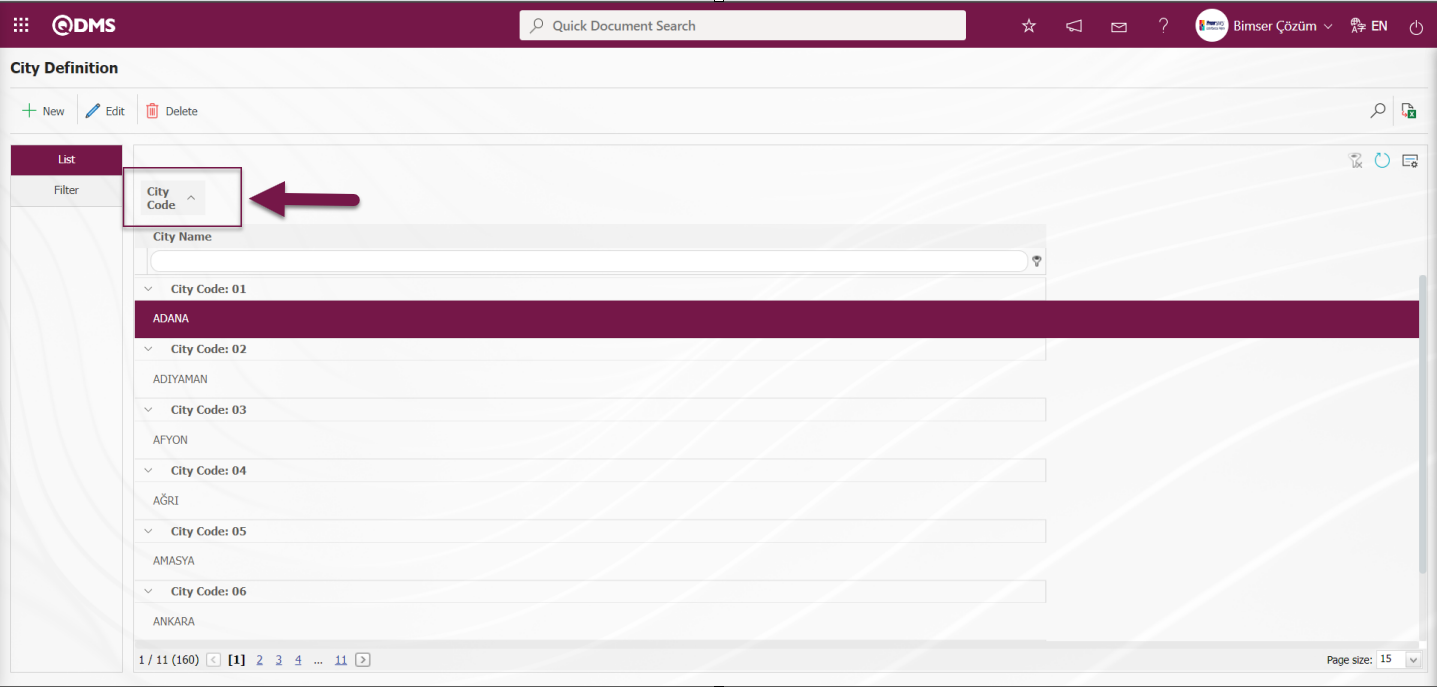
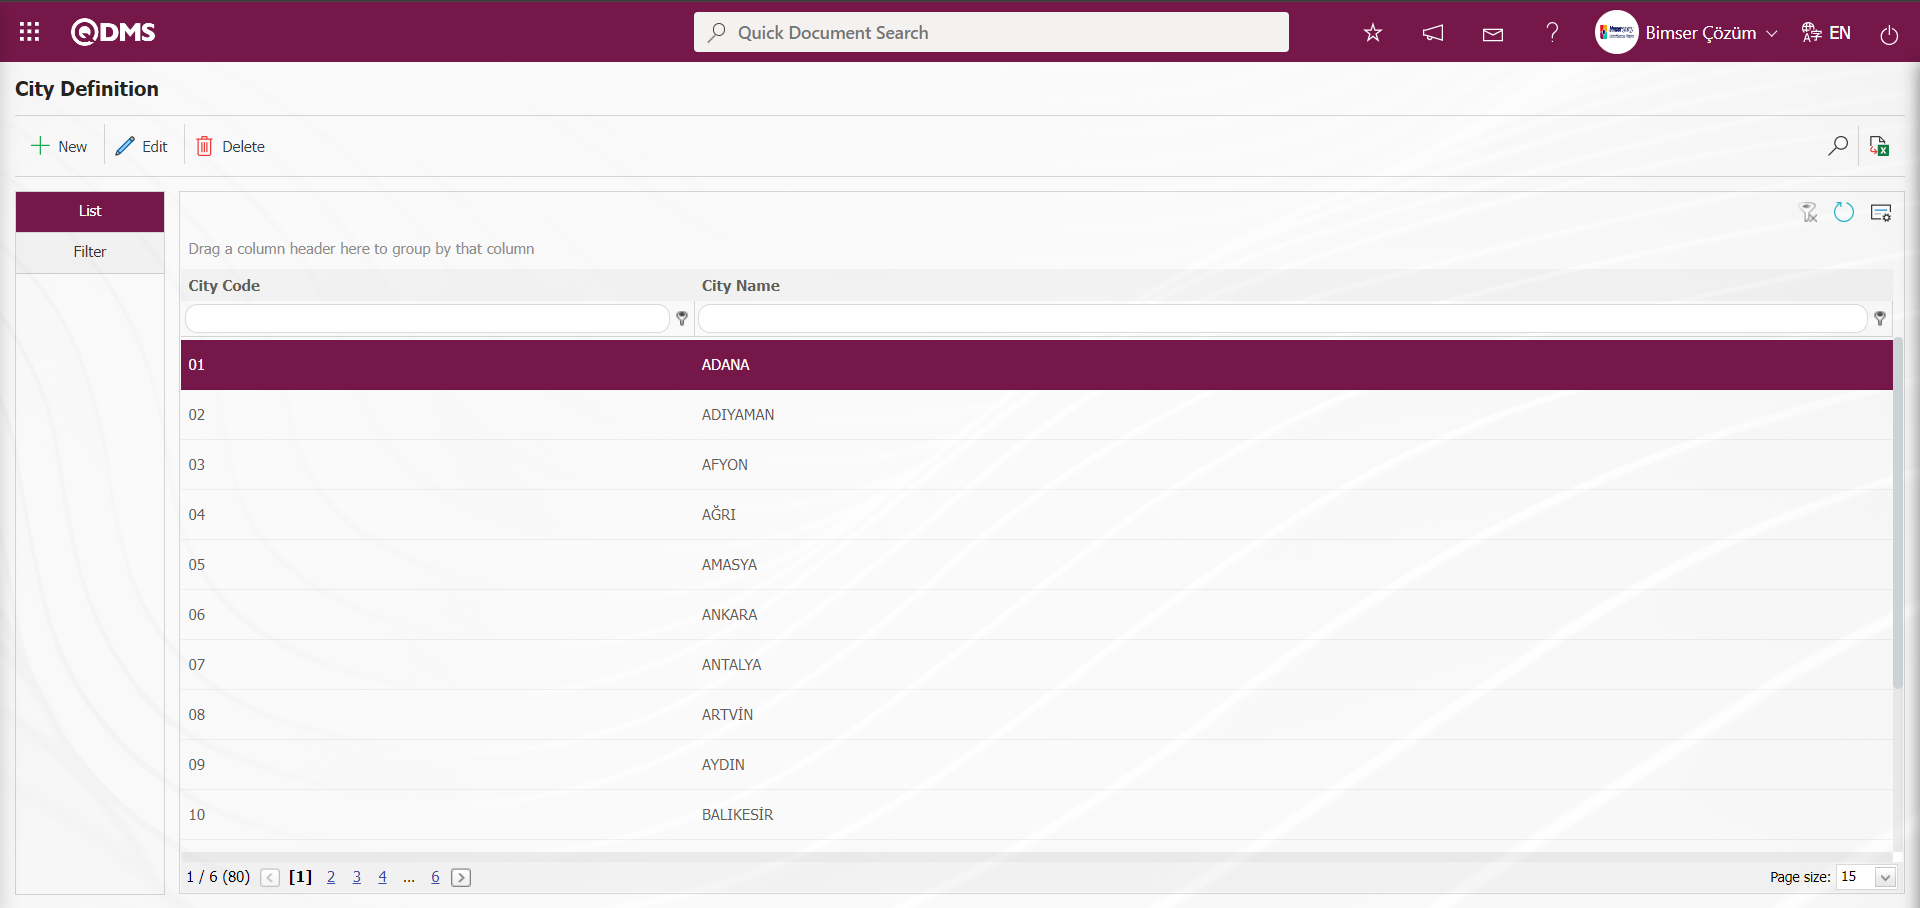
Grid Feature:The feature of Qdms grids has changed with the new version 5.25.1.1 The grouping feature has been introduced in Qdms grids. A field editor has been added to make data management in grids easier and more flexible in the Qdms system, so users can add and remove columns as they wish and personalize the data viewing experience. In addition, grouping by columns is now available in the Qdms system, so users can view data in more organized and meaningful groups and access the information they want faster: In the City Definition menu, the new feature introduced in the grids is displayed.

In order to apply the grouping feature, the grouping feature is made in the grids in the Qdms system by clicking on the field with the mouse for the fields corresponding to the columns on the input screen and dragging it to the “Drag a column header here to group by that column” field.
“Clear Filter” Feature: Clear filter operation is performed on Qdms menu screens. The data remaining in the filter fields in the grid where the search criteria search operation is performed on the menu screens is cleared. With this button, the data written in the filtering operations in the user's filter search criteria is deleted. By adding the  (Clear Filter) button for data filtering operations, users can easily clear the filters and switch to new filters thanks to this button in the Qdms system. For example: In the City Definition menu, the search criteria is written in the City Name field in the grid.
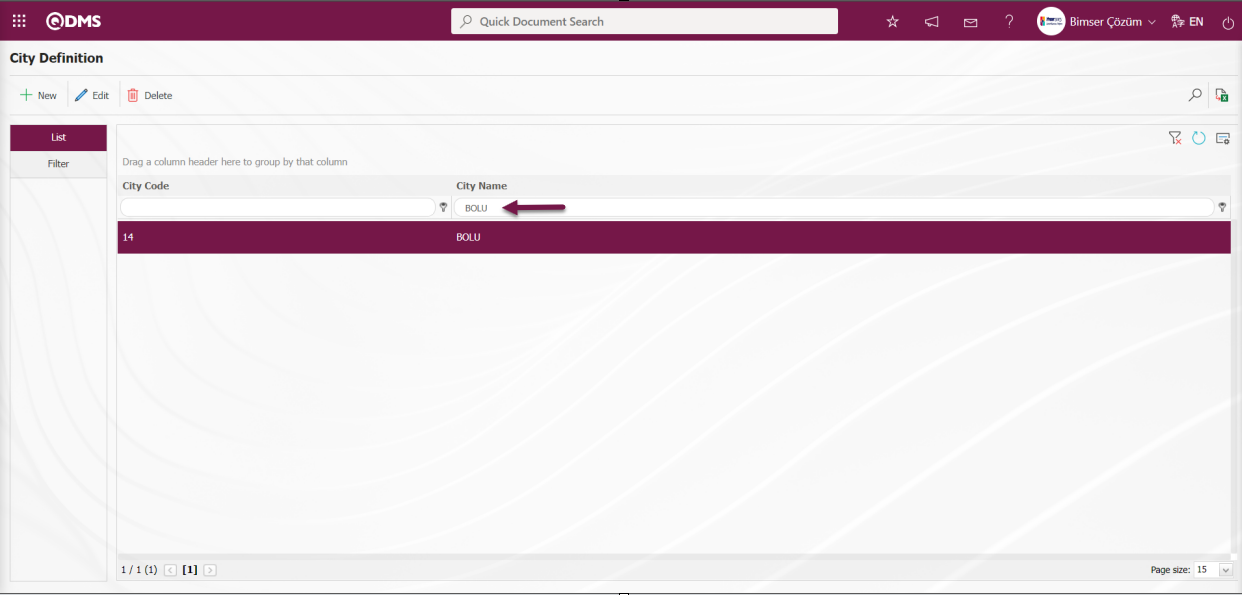
In order to clear the filtering process in the grid on the City Definition screen, the data in the search criteria in the grid is deleted by clicking the (Clear Filter) button.

“Clear User Settings” Feature:It is a feature that allows users to return the menu screen back to the default setting after operations such as filtering, column hiding, grouping feature in the grid. In the Qdms system, the (Clear User Settings) button has been added to reset the users' personal preferences, column sorting and filtering history. Example: Grouping feature in the grid on the City Definition screen
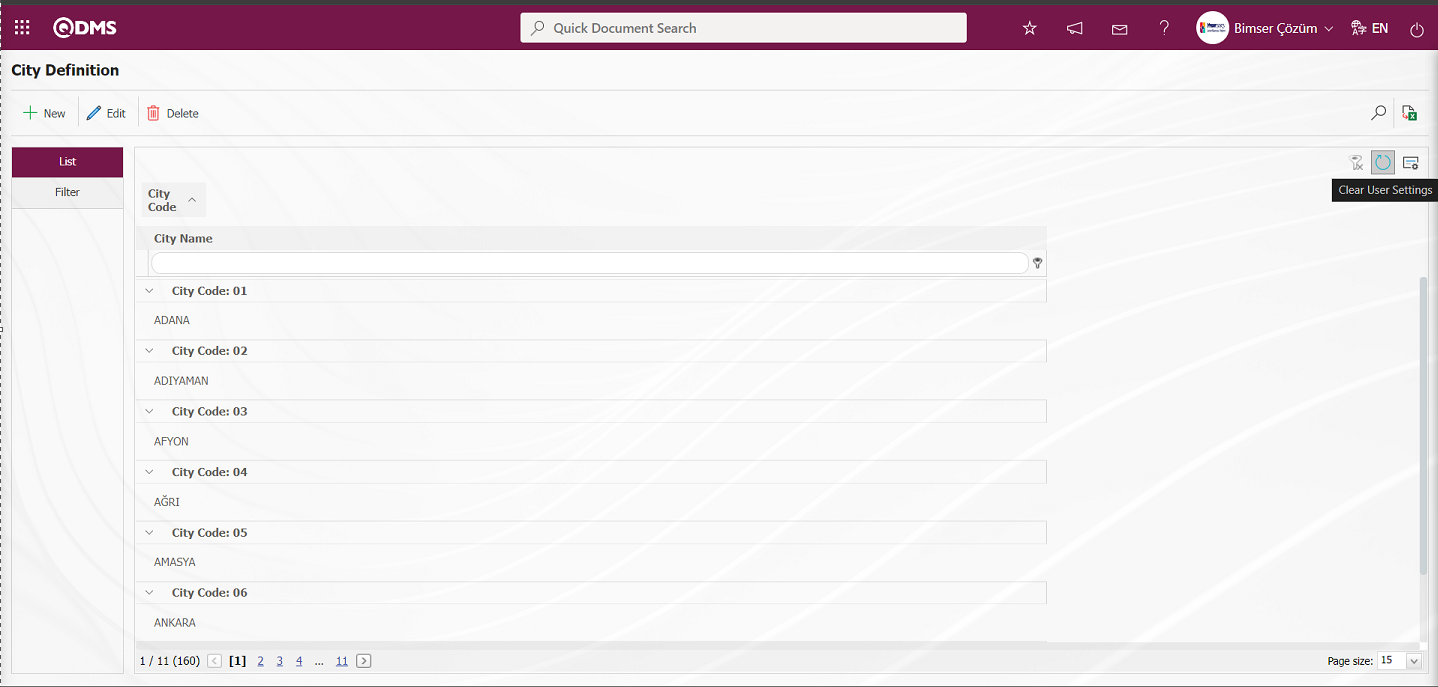
On the City Definition screen, click the  (Clear User Settings) button to bring the menu screen back to its default settings, that is, when the menu screen was first used or when no configuration changes were made. After clicking the button, the menu screen is restored to its default settings.
“Column Chooser” Feature:In the Qdms system menu screens, the process of storing the column equivalent fields on the grid screens is done. To use this feature, the Field selector screen is opened by clicking the  (Column Chooser) button. In the field selector screen that opens, the user makes the process of designing the menu screen according to his request by adding the fields in the grid that he does not want the menu screen to be displayed in the grid of the field selector screen opened in the column selector screen by adding the field selector screen with the mouse hold-and-pull method so that the field is not displayed on the menu screen. It makes the user-based design of the menu screen with the feature of showing and hiding the fields on the menu screens as desired, that is, the hiding feature. With this user-based feature in the Qdms system, each user is enabled to design their own menu screens. For example: In the City Definition menu, the City Code field Field Selector screen is added.
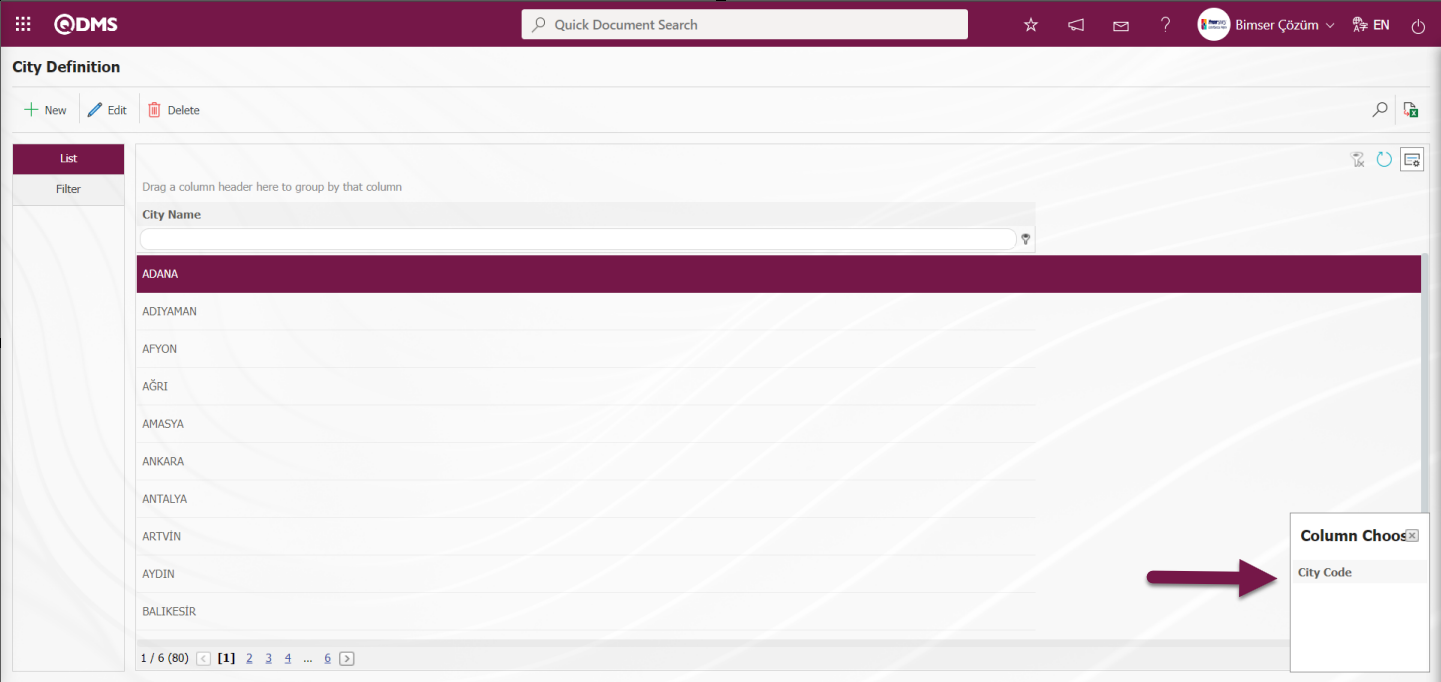
The Column Chooser screen is closed by clicking the  (Close) button on the Column Chooser screen. The user can design the menu screen as desired.

In order to bring the columns hidden with the (Column Chooser) button back to their default settings, the menu screen is restored by clicking the (Clear User Settings) button.

5.System Infrastructure Definitions Module
It is the module where the infrastructure required for other modules in the Qdms system is built. Along with the definitions required for the operation of other modules, it includes various menus such as parameters, general system parameters, title, department, position, personnel, product/service, customer/supplier, workplace, management systems and item number definitions, user groups and authorization groups required for user access authorizations, message definitions required for warning and action mails, report formats that can be changed by the user. All modules in the Qdms structure work in an integrated manner on this module.
5.1. BSID (Bimser System Infrastructure Definitions)/ Definitions
Menu Name: System Infrastructure Definitions/ BSID/ Definitions
This is the section where infrastructure definitions, which are the information required for the use of the Qdms system, such as personnel information, customer information, product information, are defined in the system. Important definitions made from the System Infrastructure Definitions / BSID / Definitions screen are title, department, personnel and position definitions. By providing an integration between Qdms and the program where the personnel data of the company is located (HR Integration), it can be ensured that the personnel data is automatically transferred to the Qdms system. In such a case, there is no need to take any action in the first 4 menus. If Personnel Integration is provided in the company, when a new personnel is added or when a personnel leaves the job, the personnel status is automatically updated with the integration without the need to take any action in the system.
5.1.1.Create Announcement
Menu Name: Menu Name: System Infrastructure Definitions/ BSID/ Definitions/Create Announcement
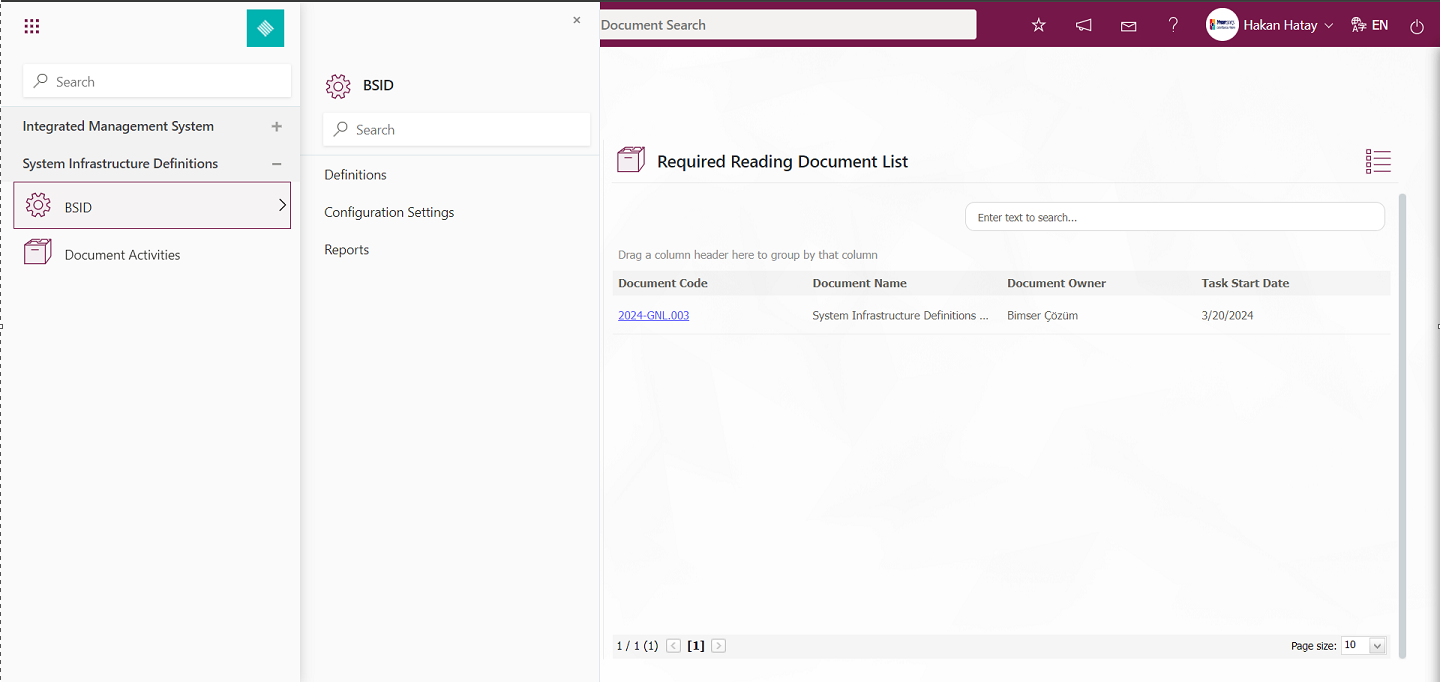
This is the menu where the announcement definition process is done. Update and delete operations of the announcements defined in this menu. The authorization process of the defined announcements is done in the System Infrastructure Definitions / BSID / Configuration Settings / Announcement Authorization Matrix menu. The announcements that are authorized are listed in the list on the Announcements screen opened by clicking the  button on the user's login screen. By clicking on the relevant announcement, detail information is displayed in the content of the announcement.

With the help of the buttons on the screen;
 : A new announcement is defined.
 : Changes/updates are made on the selected announcement information in the list. Code information cannot be updated.
 : Selected announcement information in the list is deleted.
 : Filtering is done according to search criteria.
: The data remaining in the filter fields in the grid where the search criteria on the menu screens are searched is cleared.
: The menu screen is restored to its default settings.
: User-based designing of the menu screen is done with the show-hide feature, that is, the hiding feature of the fields corresponding to the columns on the menu screens.
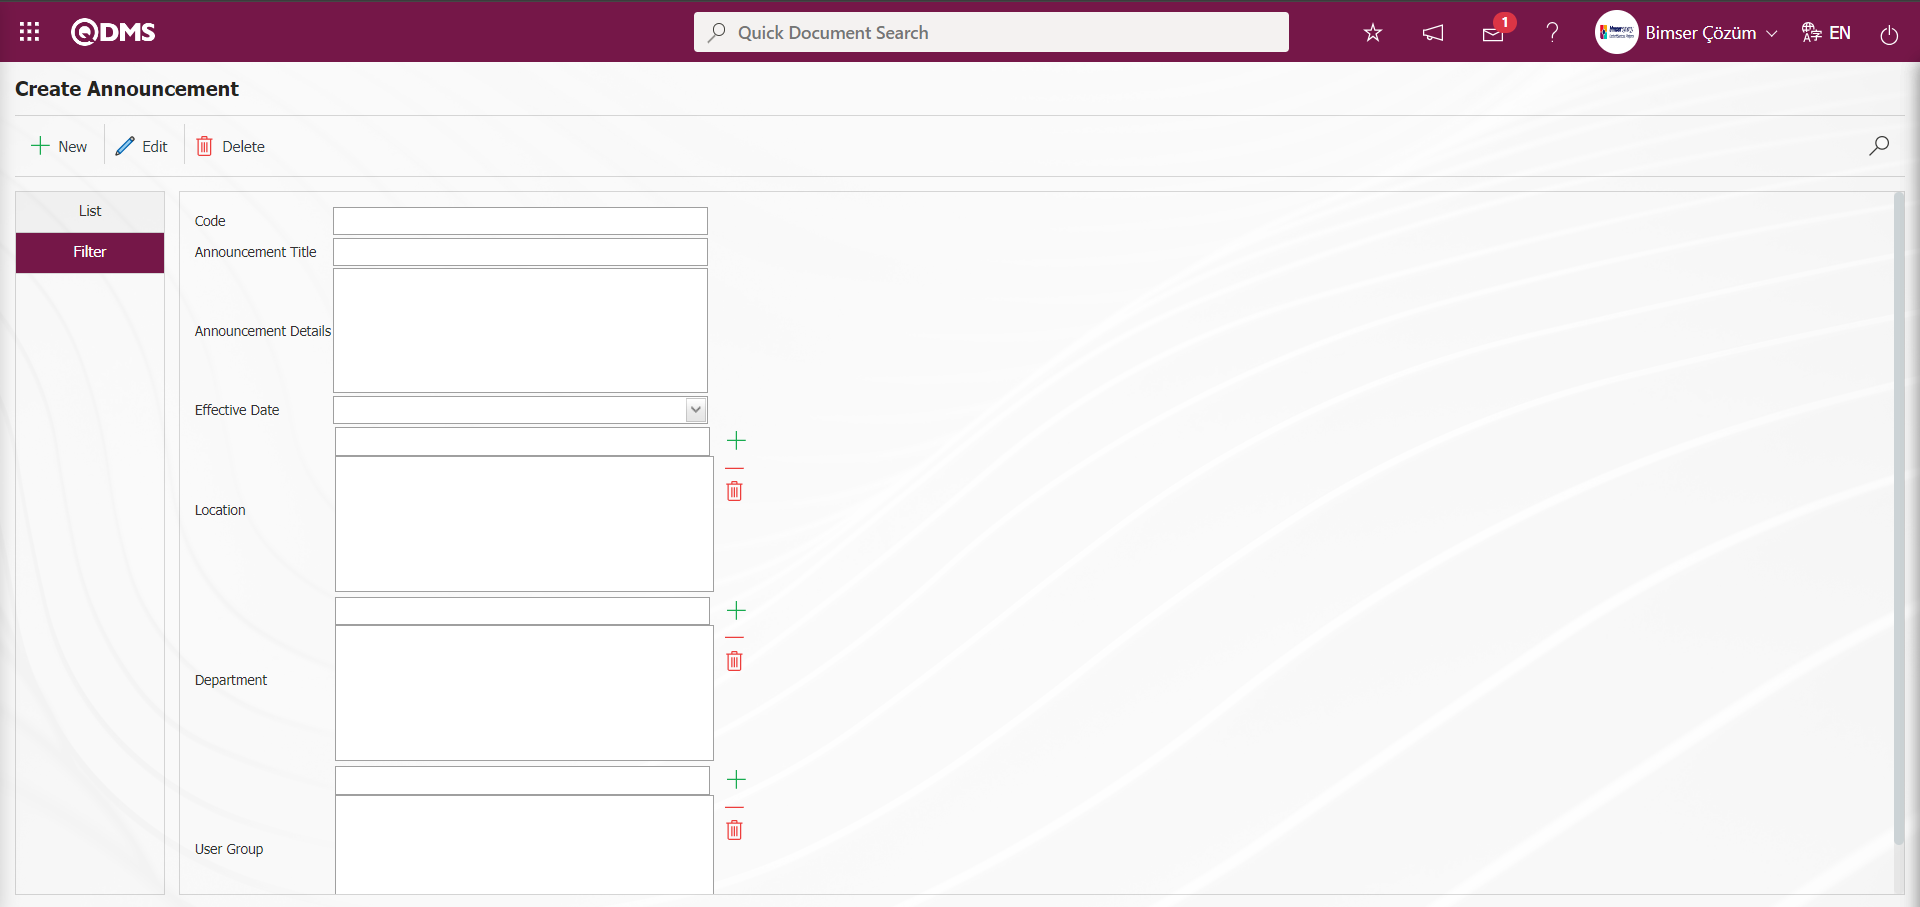
To add a new announcement definition to the Create Announcement screen, click on the )button in the upper left corner of the screen to open the Create Announcement / New Record screen.
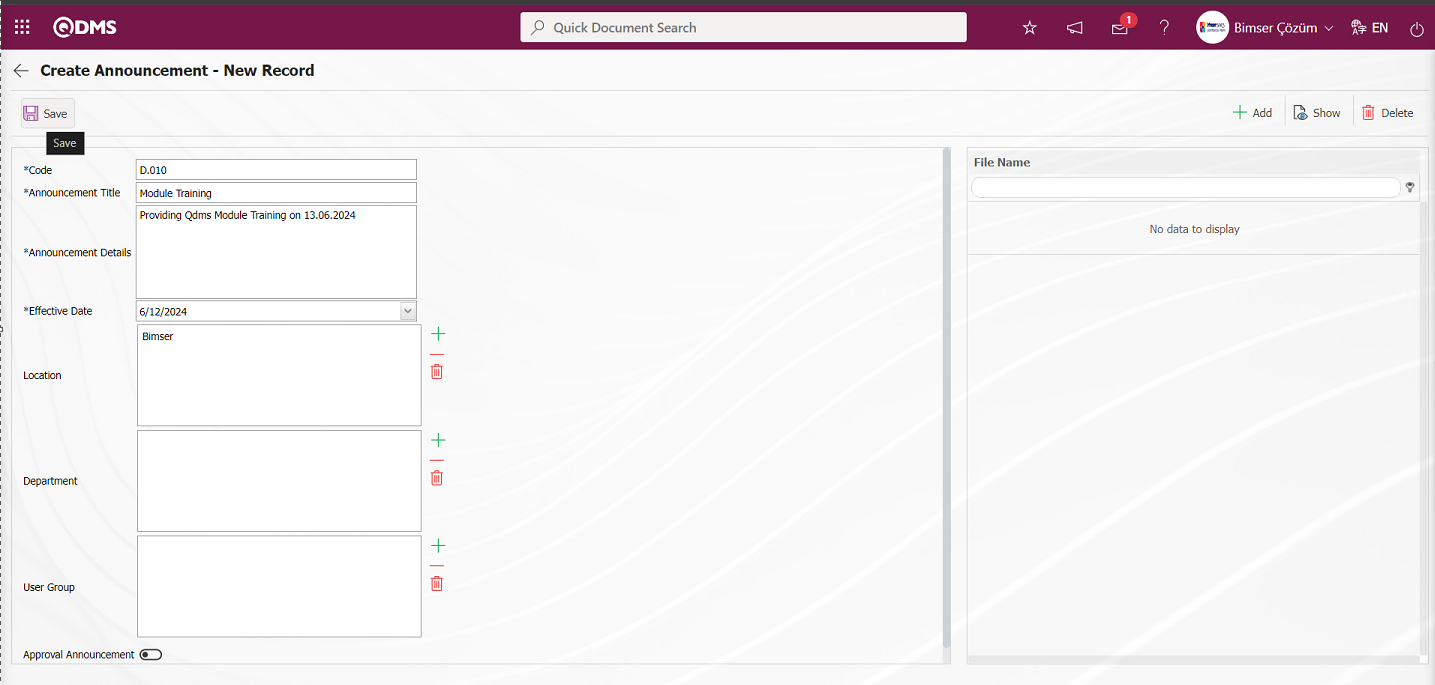 Related fields are defined on the screen that opens:
Code: This is the mandatory field where the code information of the announcement defined on the Create Announcement - New Record screen is written. Code information comes according to the selection in the workplace, Department and User group list.
When the Location is selected, the code given is defined as Location code.
When the department is selected, the code information is defined as the code given - the code of the department.
When User Group selection is made, the given code is defined as User Group code.
Since the Location selection is made, the system makes the code assignment in the form of D.009-001 code - Location code.
Announcement Title: This is the mandatory field where the title of the announcement defined on the Create Announcement - New Record screen is written.
Announcement Detail: This is the mandatory field where the detail information of the announcement defined on the Create Announcement - New Record screen is written.
Effective Date: This is the mandatory field where the effective Date of the announcement defined on the Create Announcement - New Record screen is selected in the calendar field.
Location: It is a mandatory field where the location information of the announcement defined on the Create Announcement - New Record screen** is selected in the location list opened by clicking the  (Add) button. Location list information consists of the locations that are authorized in the System Infrastructure Definitions / BSID / Configuration Settings / Announcement Authorization Matrix menu.
Department: This is the mandatory field where the department information, if any, of the announcement defined on the Create Announcement - New Record screen is selected in the department list opened by clicking the (Add) button. Department list information consists of the Departments that are authorized in the System Infrastructure Definitions / BSID / Configuration Settings / Announcement Authorization Matrix menu.
User Group: This is the mandatory field where the user group information, if any, of the announcement defined on the Create Announcement - New Record screen is selected in the user group list opened by clicking the (Add) button. User group list information consists of user groups that are authorized in the System Infrastructure Definitions / BSID / Configuration Settings / Announcement Authorization Matrix menu.
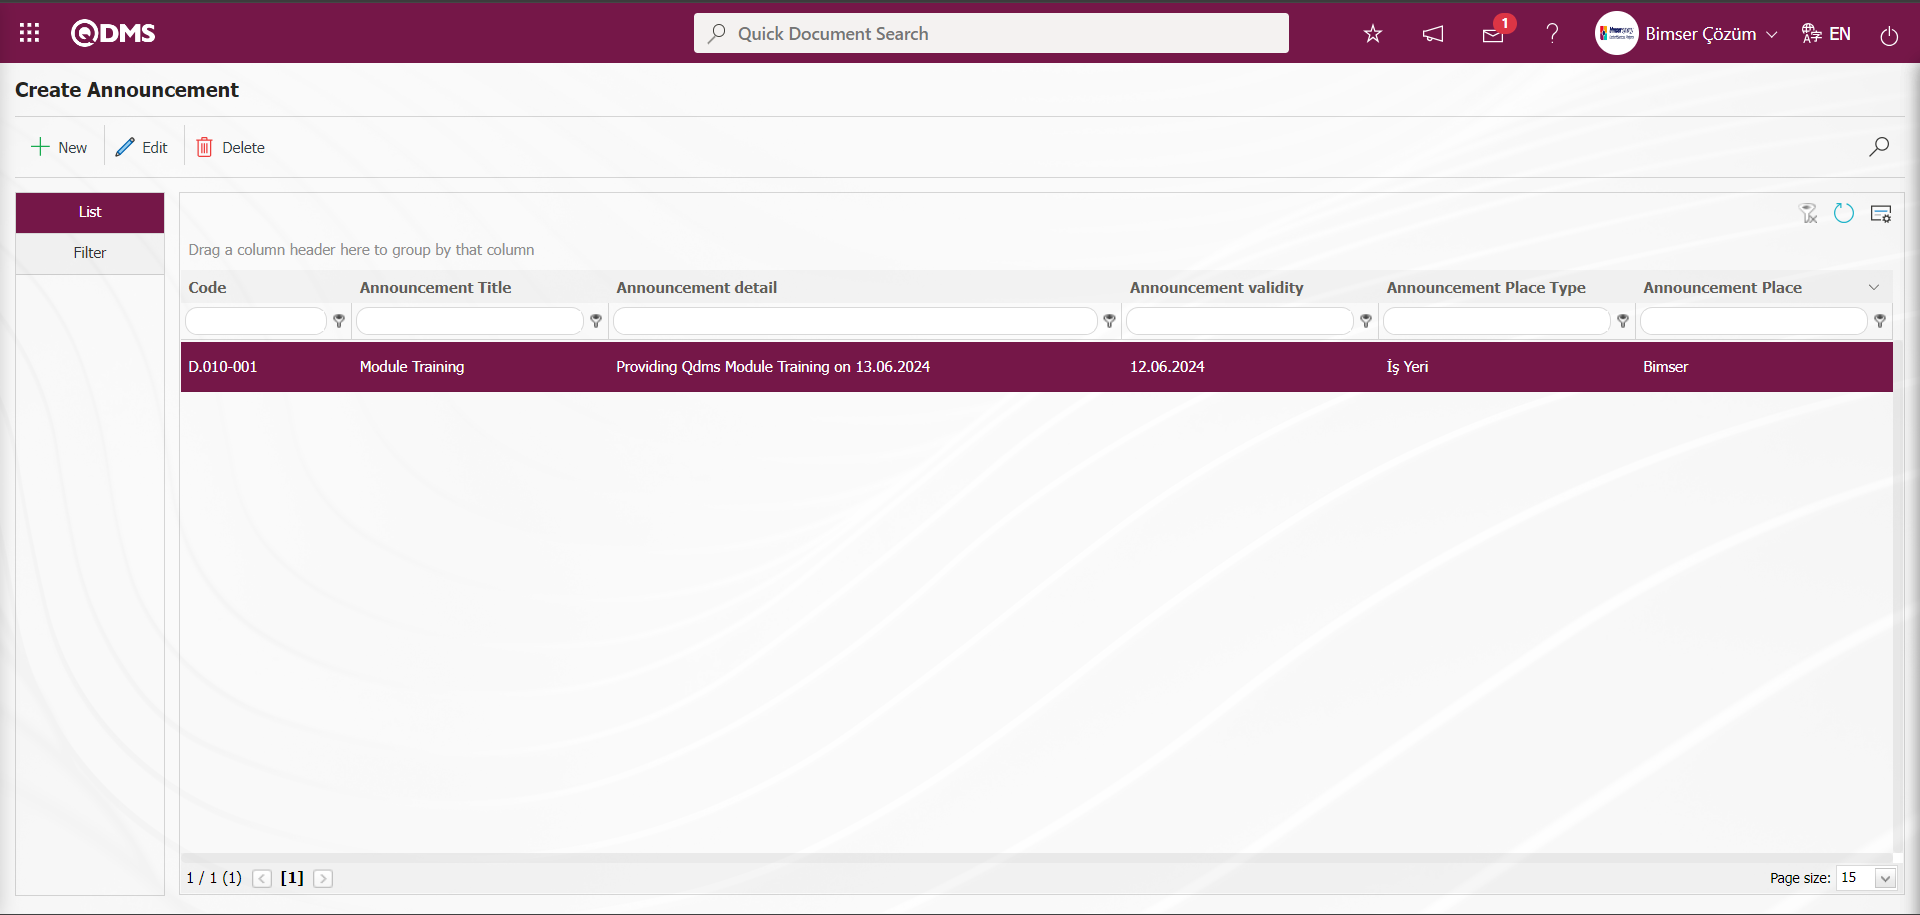
The code, announcement title, announcement detail information of the announcement defined on the Create Announcement - New Record screen is written. Select the location information authorized in the announcement authorization matrix. When the location, department and user group are selected on the Announcement Definition screen, the announcement definition process is defined according to the selection. If department and user group selection is made on the Announcement Definition screen, the system will additionally define the announcement according to these fields.
Code assignment and announcement creation according to the selection on the Announcement Definition screen:
Location: Defines an announcement with a code as defined code - Location Code.
Department: Defines an announcement with a code as defined code- Department code.
User Group:Defines an announcement with a code as defined code-user group code. After entering the relevant information in the required fields, the announcement definition registration process is done by clicking the button in the upper left corner of the screen. Only when the announcement is defined according to the workplace selection, the announcement with the code D.009-001 is defined.
After the announcement definition and authorization operations in the Announcement Authorization matrix, the announcement defined on the user's screen is displayed for the user to approve the announcement. After viewing the announcement, the user can confirm the announcement by clicking the  button.
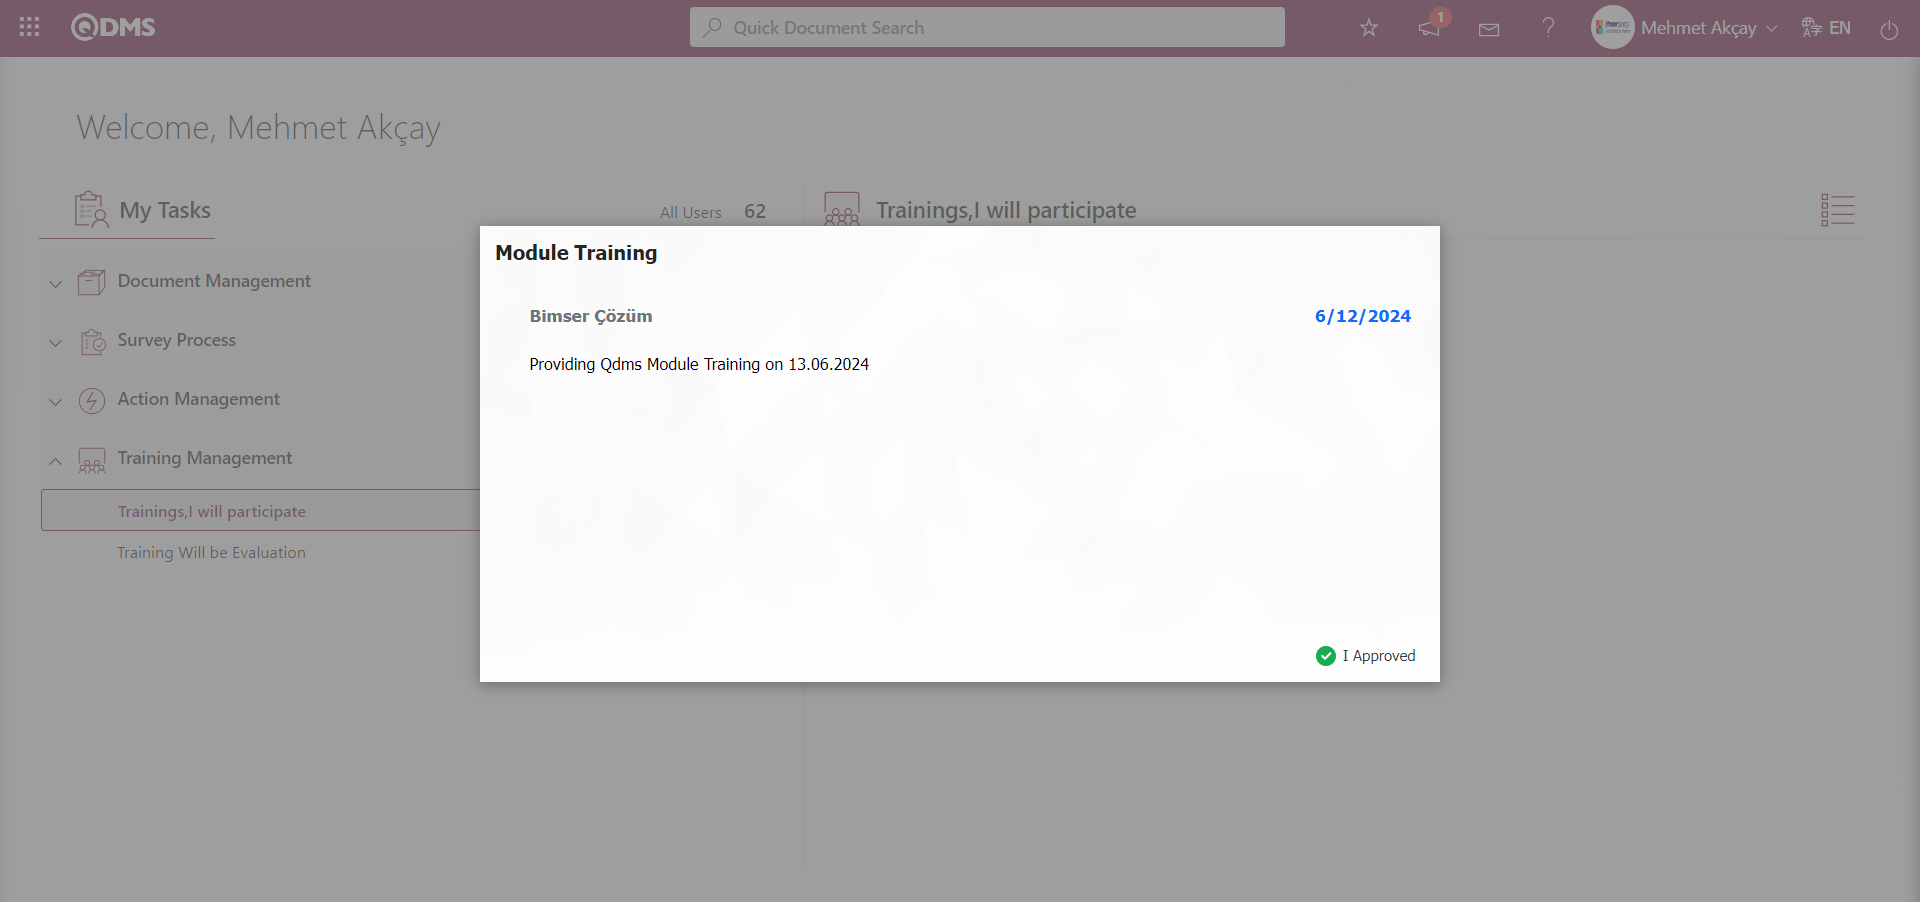
After the announcement approval process, the announcement is displayed by clicking the  button on the Qdms main login screen.
In the Filter tab, data is entered in the fields such as Code, Announcement title, Announcement detail, and filtering is done according to the search criteria by clicking the (Search) button.
5.1.2. Title Definition
Menu Name: System Infrastructure Definitions/ BSID/ Definitions/ Title Definition
This is the menu where the titles required for personnel identification are defined. Titles used within the company are defined, such as Manager, Specialist, Director. If HR Integration is available, all titles are automatically transferred to the Qdms system. Titles are not user-specific, that is, the same title definition is given to more than one user.

With the help of the buttons on the screen;
 : Define a new title.
 : Correction / change / update is made on the title information selected in the list. Code information cannot be updated.
 : The title information selected in the list is deleted. If the selected title information is matched with a personnel on the personnel identification screen, the system does not allow the deletion of this title information.
: Records can be searched by filtering.
: Data is exported to Excel.
: The search criteria on the menu screens are used to clean the data remaining in the filter fields in the grid where the search operation is performed.
: The menu screen is restored to its default settings.
 : User-based designing of the menu screen is done with the show-hide feature, that is, the hiding feature of the fields corresponding to the columns on the menu screens.
To add a new title definition to the Title Definition screen, click on the button in the upper left corner of the screen to open the Title Definition / New Record screen.
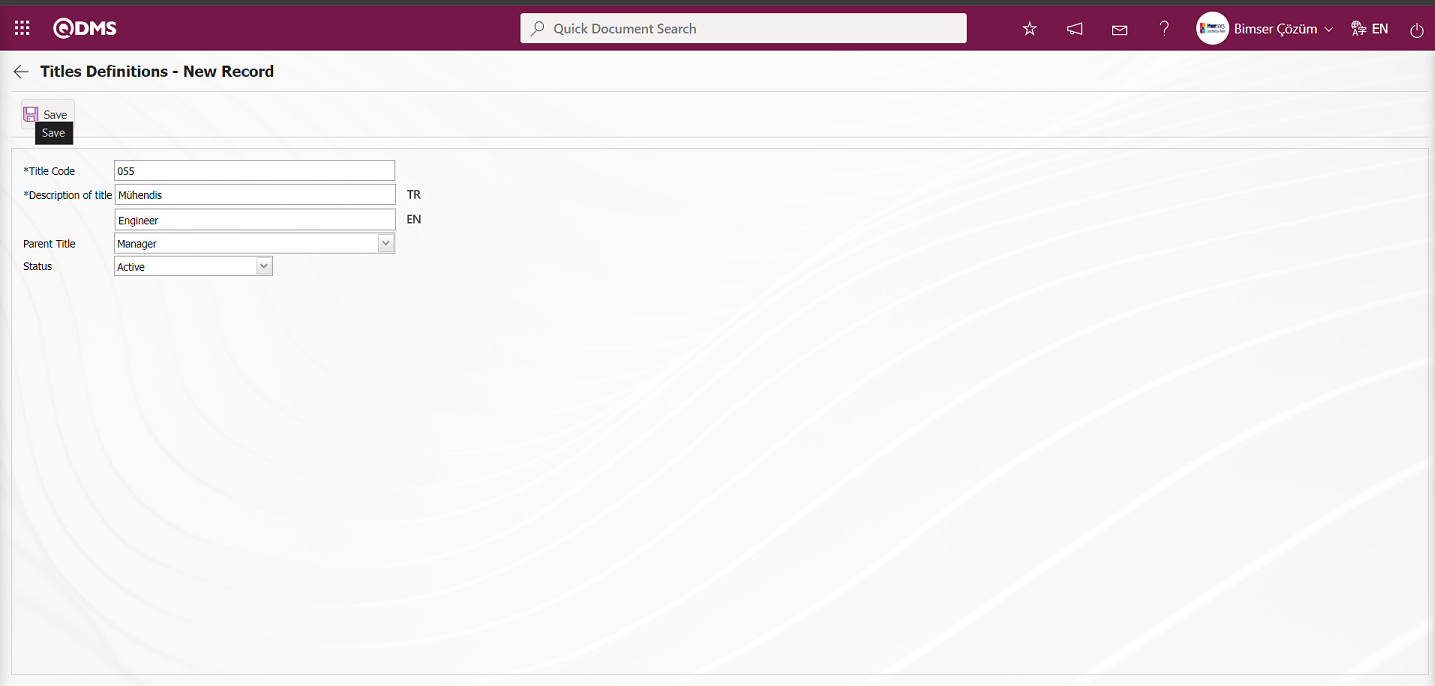
Define the relevant fields on the screen that opens:
Title Code: This is the mandatory field where the Title code information is defined on the Title Definition-New Record screen. It should be defined without using characters such as spaces and Turkish characters, so that it is not the same as the previously defined fields. Ex. '001' , 'RK'
Description of title: This is the mandatory field where the title definition information is defined on the Title Definition-New Record screen. For example; Manager, manager, specialist, engineer, etc. are defined as such. If other language options will be used, the language equivalent of the relevant title definition is written where the relevant flag is located.
Parent Title: On the Title Definition-New Record screen, this is the field where the Parent Title information is selected from the drop-down title list. When defining, start from the Parent Title. In this way, when defining sub-titles, relationships can be established with Parent Title top titles.
Status: This is the field where the “Active” option is selected in the “Active” and “Inactive” options of the Status information on the Title Identification-New Record screen. Inactive status is a sign that the titles are no longer used in the system. To see the unused titles, it is sufficient to search for “Inactive” in the status field in the search criteria from the filter tab. Passive feature works in the same way in the Department Identification, Position Identification menus
On the Title Definition-New Registration screen, the title code, definition, if any, a higher title and the selection of the “Active” option in the status field are made. After filling in the required fields on the Title Definition screen, click on the button in the upper left corner and the Title Definition registration process is realized.
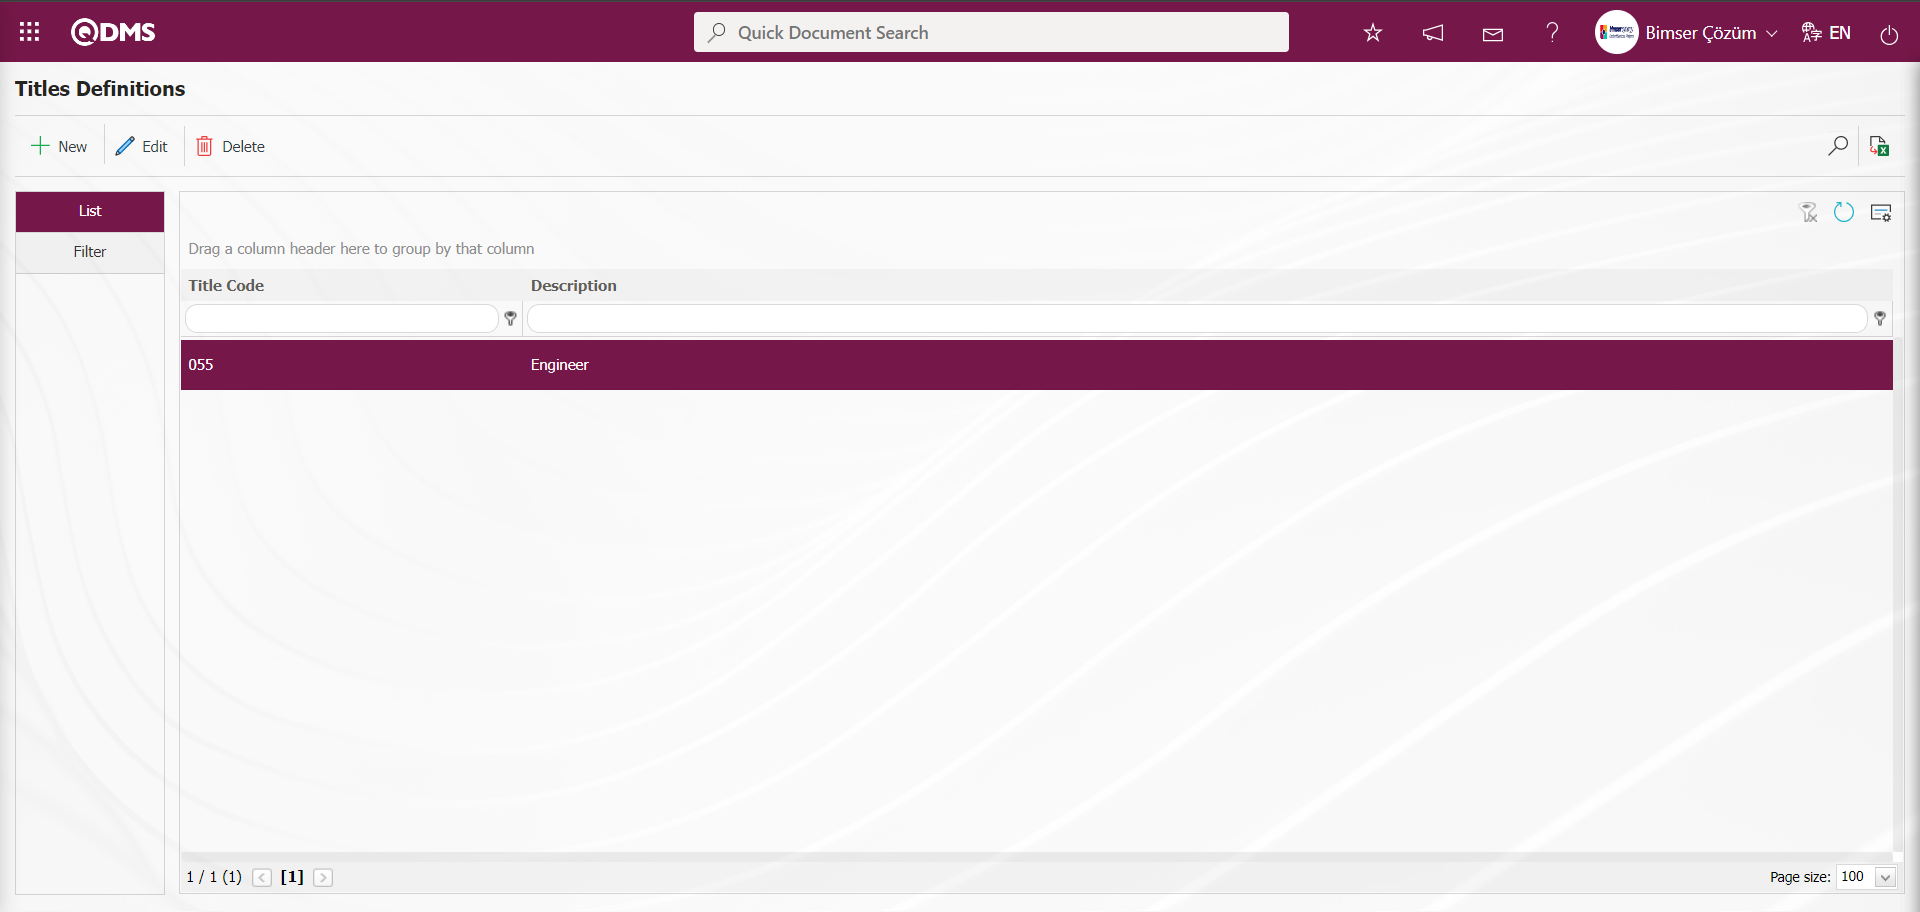
In the Filter tab on the Title Definition screen, data is entered in fields such as Title Code, Title Definition, Status and Workplace, and filtering operations are performed according to the search criteria by clicking the (Search) button.

5.1.3. Department Definition
Menu Name: System Infrastructure Definitions/ BSID/ Definitions/ Departments
The process of defining the departments, which are departments that are separated and created to do a certain job within the company, is done. Such as Production, Marketing, Accounting, R&D (Research and Development). If HR Integration is available, the departments within the company are automatically transferred to the Qdms system.
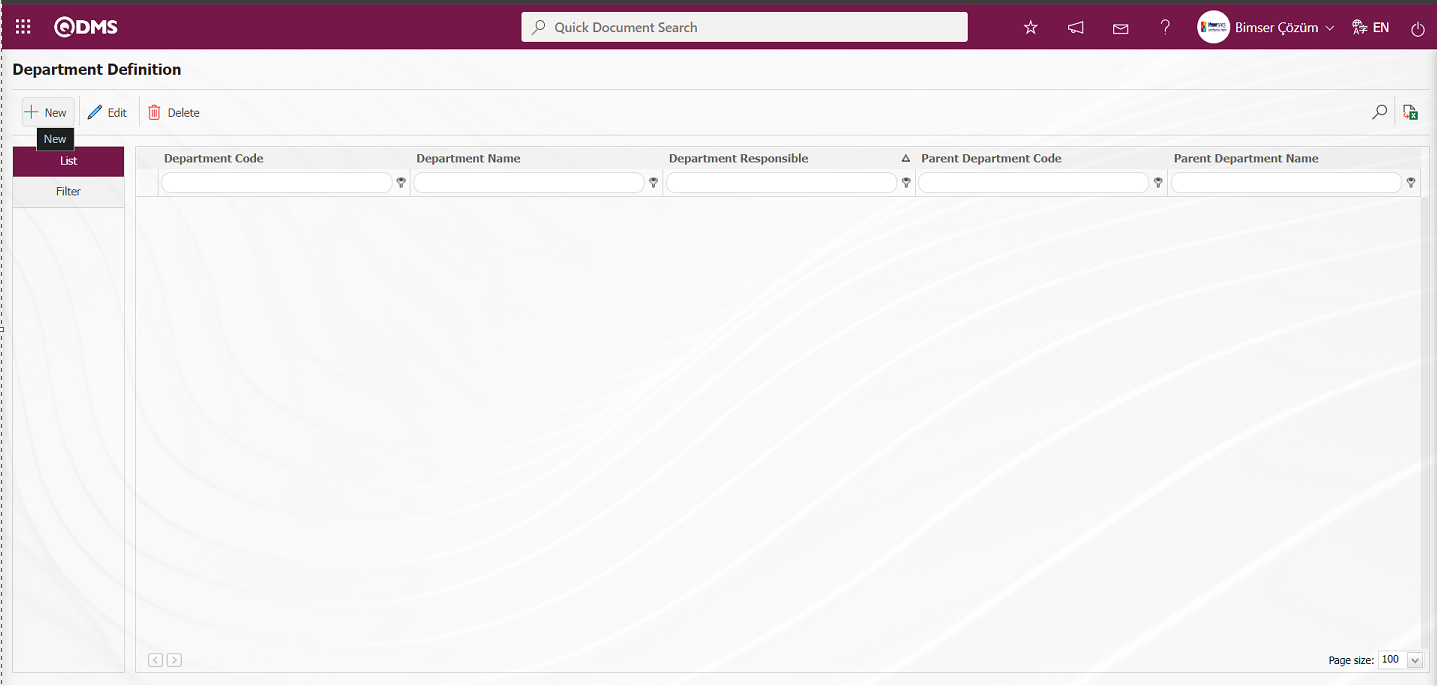
With the help of the buttons on the screen;
: A new department is defined.
: Correction / change / update is made on the department information selected in the list. Code information cannot be updated.
: The department information selected in the list is deleted. If the selected department information is matched with a personnel in the personnel identification screen, deletion of this department information is not allowed by the system.
 : Records are searched by filtering.
: Data is transferred to Excel.
To add a new department definition to the Department Definition screen, click on the button on the upper left corner of the screen to open the Department Definition / New Record screen.
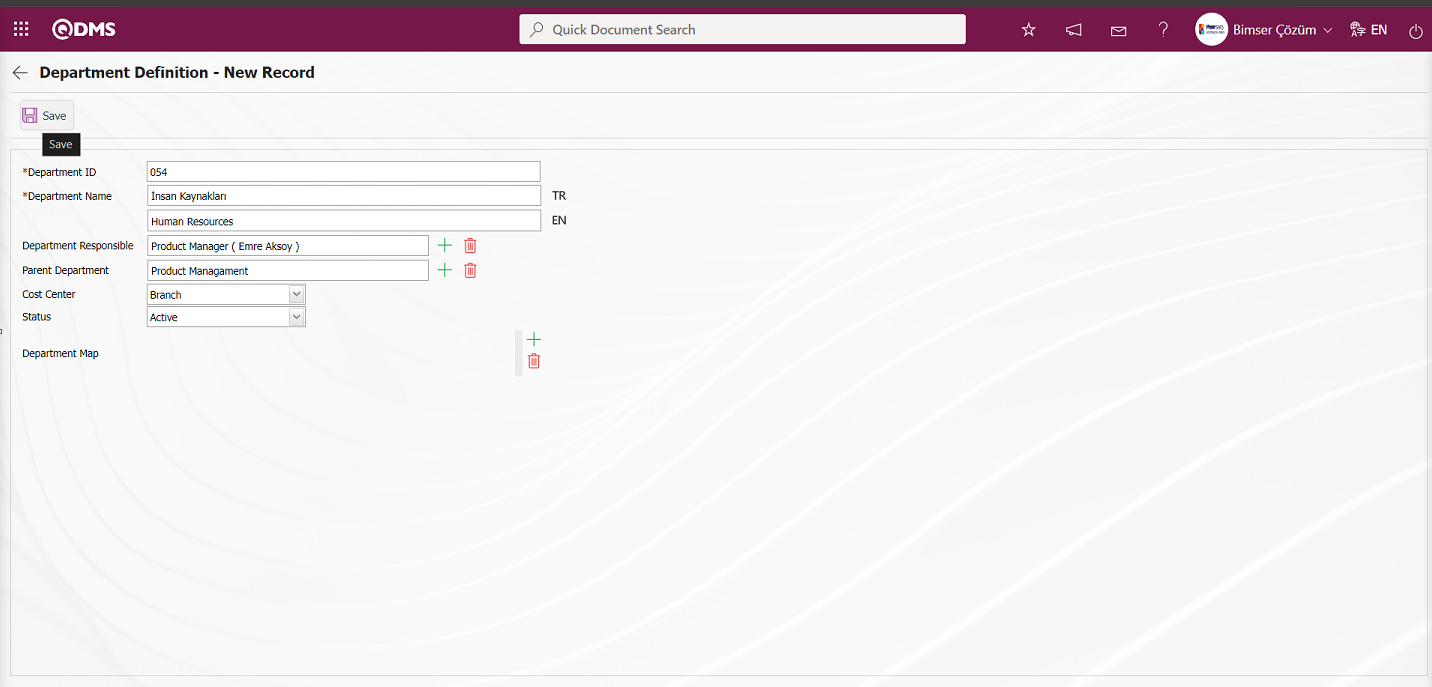
Related fields are defined on the screen that opens:
Department ID: This is the mandatory field where Department ID information is defined on the Department Identification-New Record screen. It should be defined without using characters such as spaces and Turkish characters, so that it is not the same as the previously defined fields. For example. '001' , 'RK'
Department Name: This is the mandatory field where the department definition information is defined on the Department Definition-New Record screen. For example; Marketing, Finance, Accounting, Human Resources, Public Relations, etc. are defined as such. In the fields with the relevant flags, the language equivalents of the department name information are written.
Department Responsible: This field is selected from the list of positions defined in the system opened by clicking the Department Supervisor (Select) button on the Department Identification-New Registration screen. In the Qdms system, department managers can be used in the flow of modules.
Parent Department: This is the field where Parent Department information is selected from the drop-down department list on the Department Definition-New Registration screen.
Cost Center: It is the field where the cost center information is selected in the Cost Center drop-down list on the Department Definition-New Registration screen. Cost center list is defined in System Infrastructure Definitions /BSID/Definitions/Cost Center Definition menu.
Status: This is the field where the “Active” option is selected in the “Active” and “Inactive” options of the Status information on the Department Identification-New Registration screen. Departments with inactive status are a sign that they are no longer used in the system. To see unused departments, it is sufficient to search for “Inactive” in the status field in the search criteria from the filter tab.
Department Map: If there is map information of the department on the Department Identification-New Registration screen, it is the area where it is added by clicking the  (Add) button. It is a field used in the Work Permission module. It is provided to add the map information to work for the Department.
In System Infrastructure Definitions/ BSID/ Configuration Settings/ Language Settings menu, select System Infrastructure Definitions module from the Module list and display the language definitions related to System Infrastructure Definitions. In the Headings tab, “lblDepartmentMap” label code information is written in the grid name field and passive field is selected and  button is clicked.
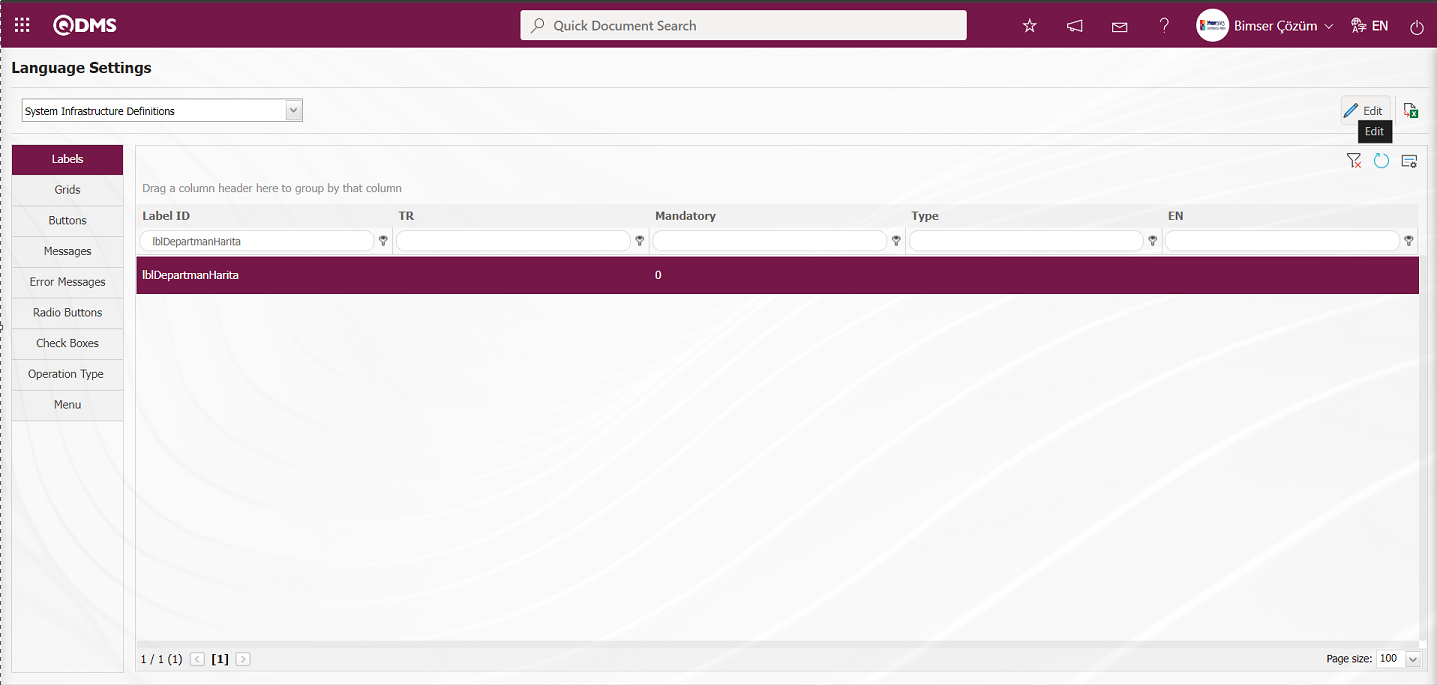
In the Language Settings screen, by typing the name of the field in the value field, the English language equivalent of the field with the relevant flag, whether the field will be mandatory or not is determined. If desired, title note information is written.
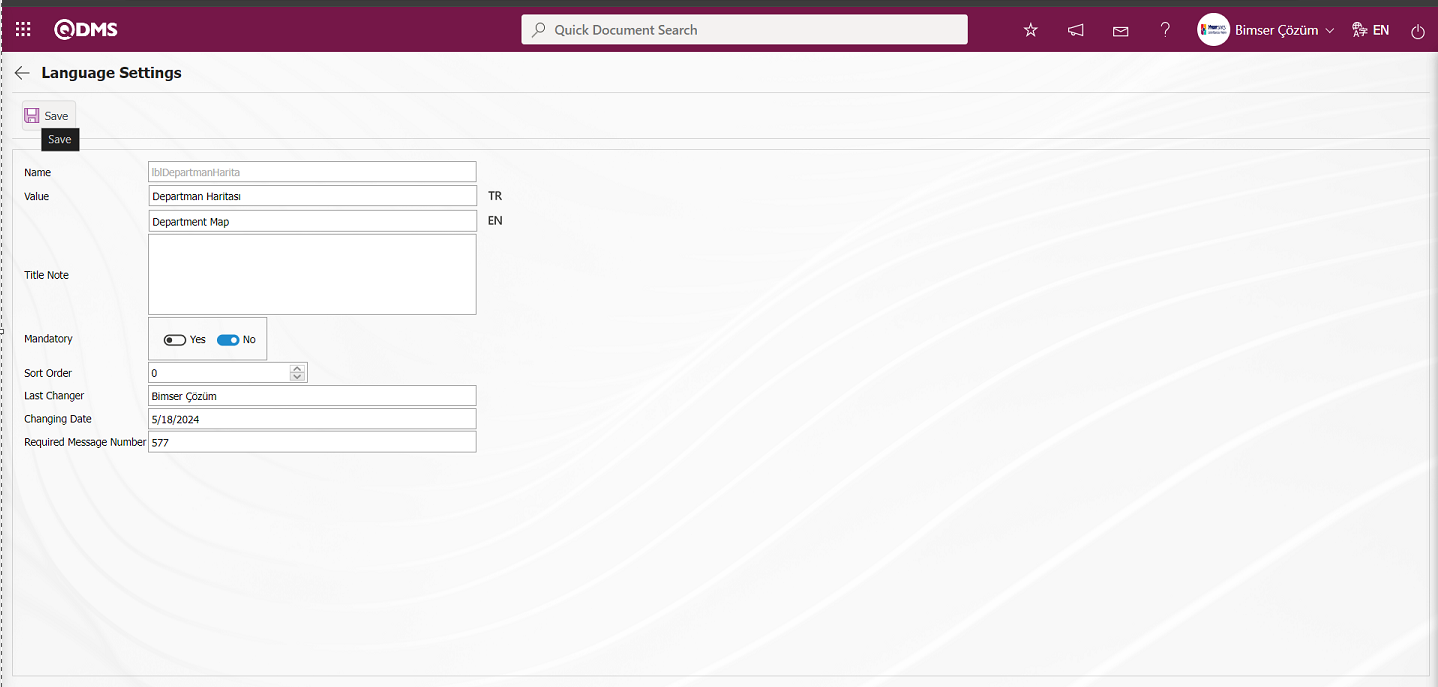
After the required fields are filled in with the relevant information, click on the  button at the top left corner of the screen to register the language settings.
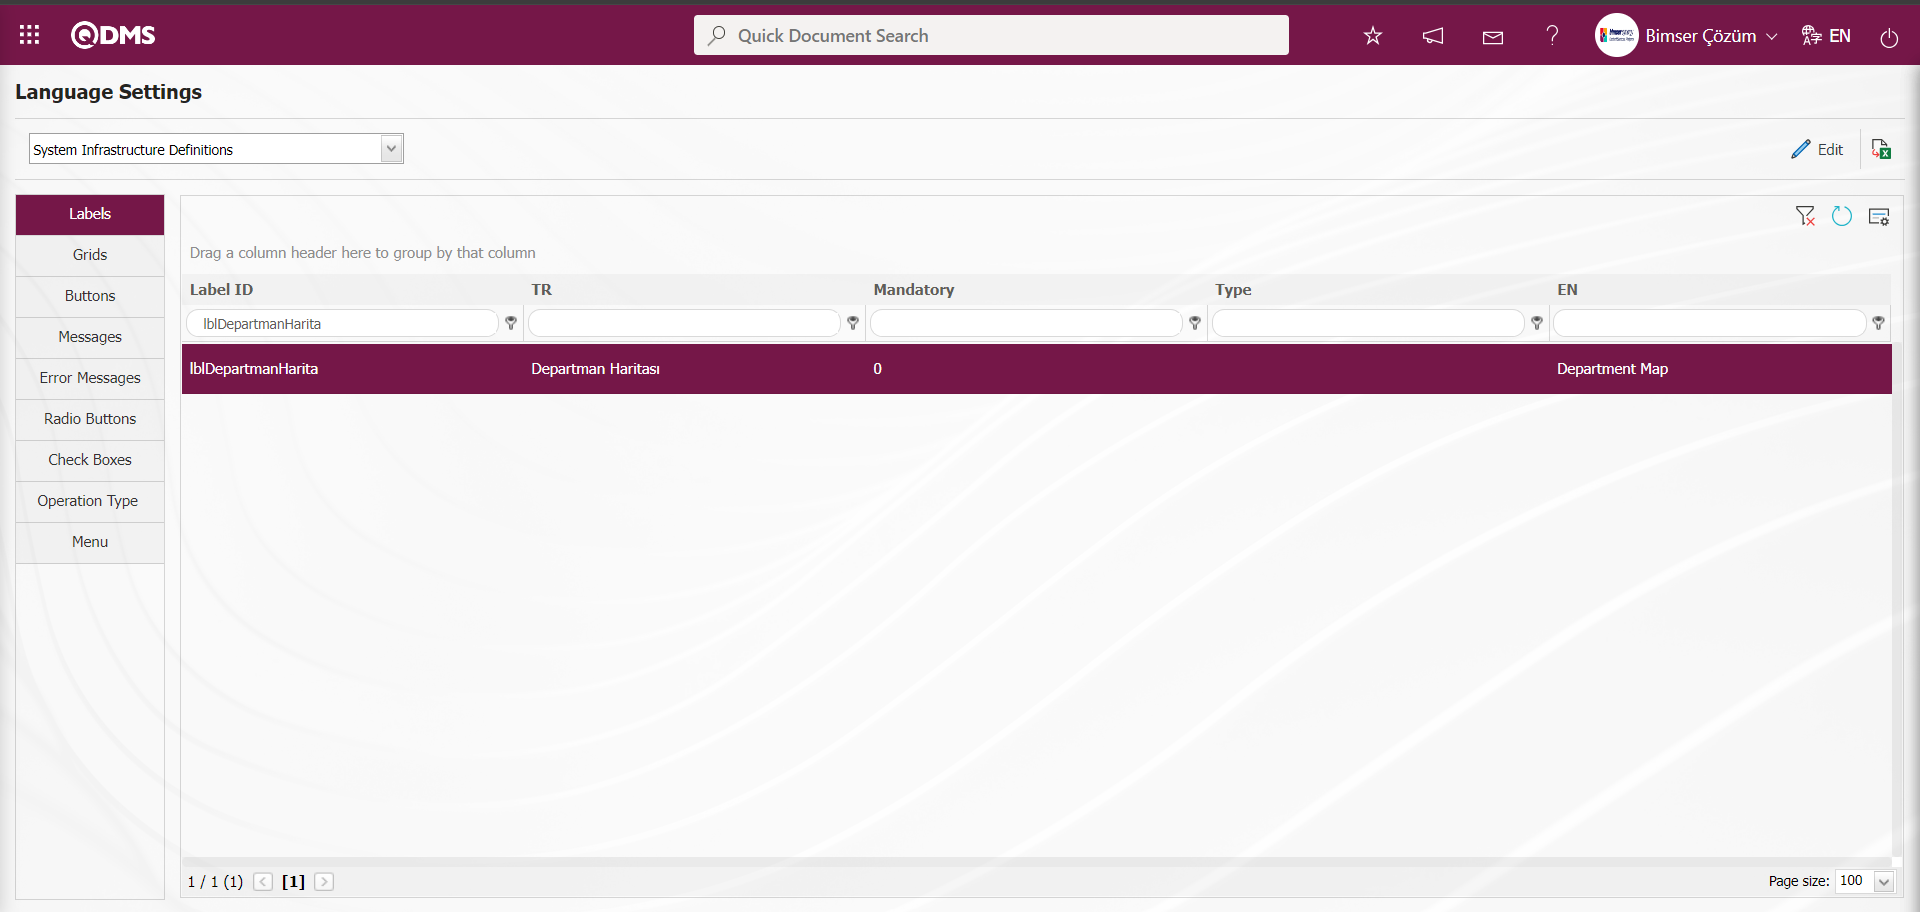
When the map added with the (Add) button in the Department Map field is selected in the process of defining a new form on the Integrated Management System / Work Permission / Work Permission Form Operations screen in the Work Permission Module, the map added on the definition screen in the relevant department is displayed in the map field to be worked on. In the same way, in the Work Permission Module, in the Integrated Management System / Work Permission / Work Permission Form Operations screen, the map added in the department definition screen is displayed in the map area to be studied and the parts to be studied are marked.
On the Department Identification-New Registration screen, enter the Department Code and Department Name. Department Supervisor is selected from the position list defined in the system. If available, the Parent Department information is selected in the drop-down department list. Status information is selected as “Active” option. After the required fields are filled in, the Department Definition registration process is realized by clicking the button in the upper left corner.
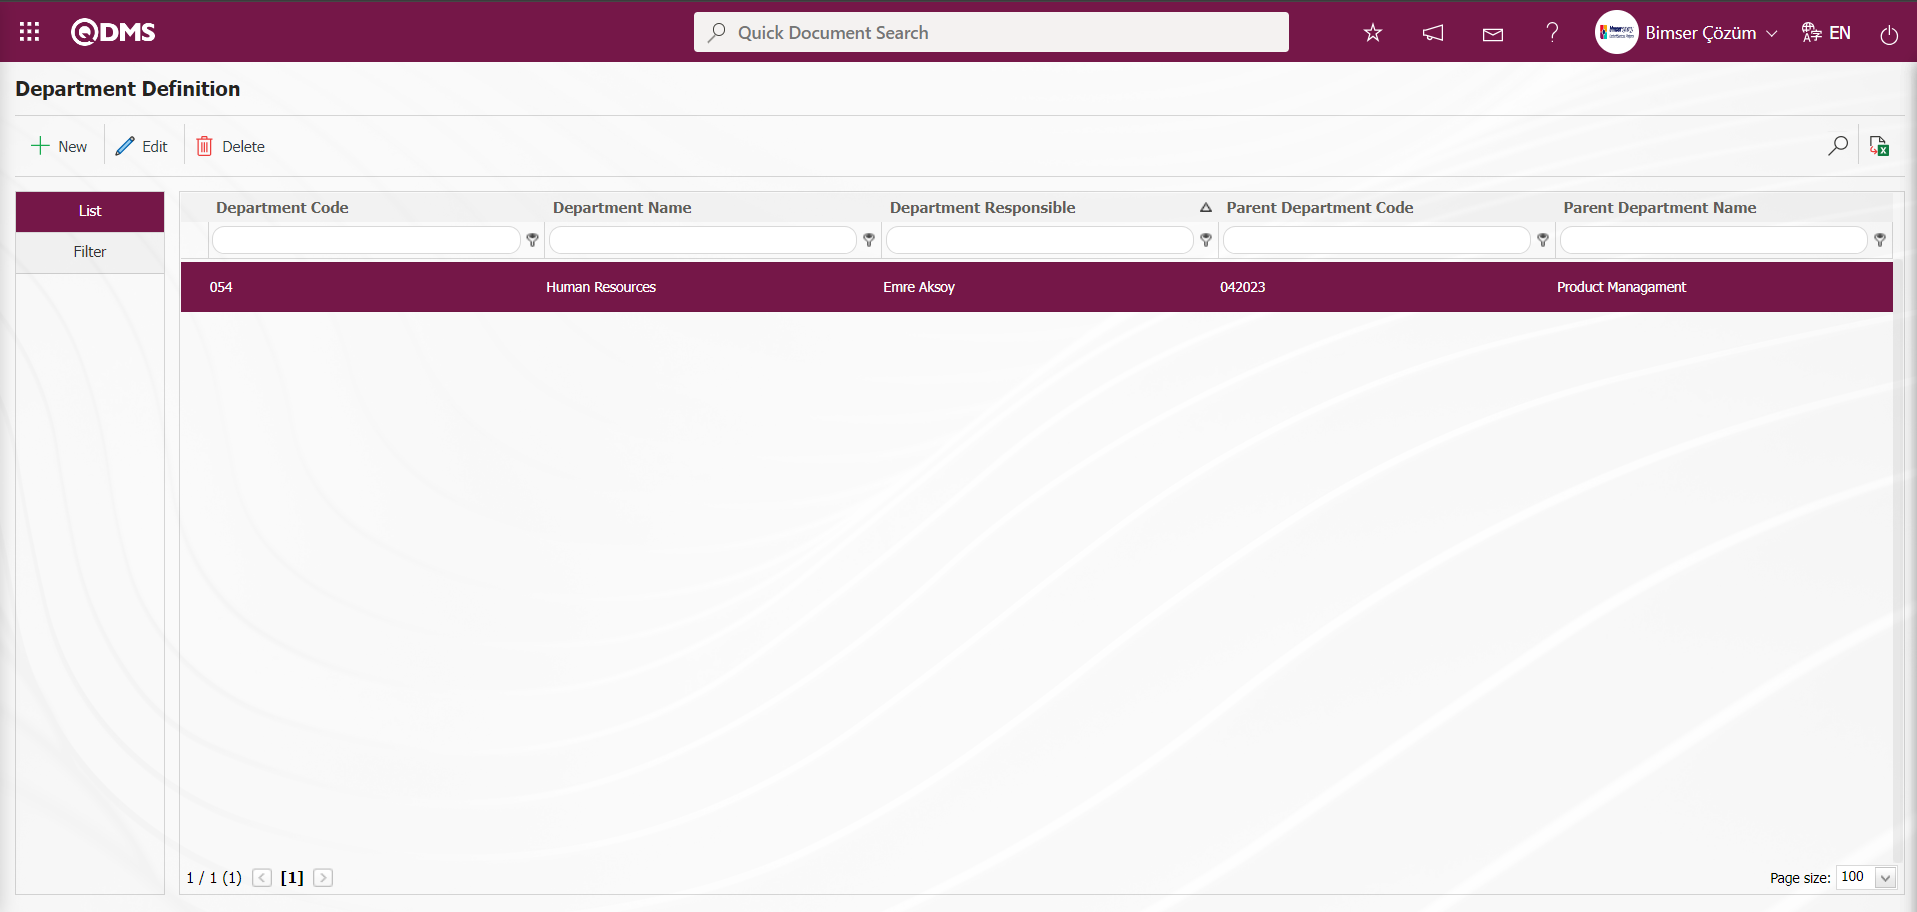
On the Department Definition screen, data is entered in the fields such as Department Code, Department Name, Department Responsible, Status and Workplace with the Filter tab and filtering is done according to the search criteria by clicking the (Search) button.
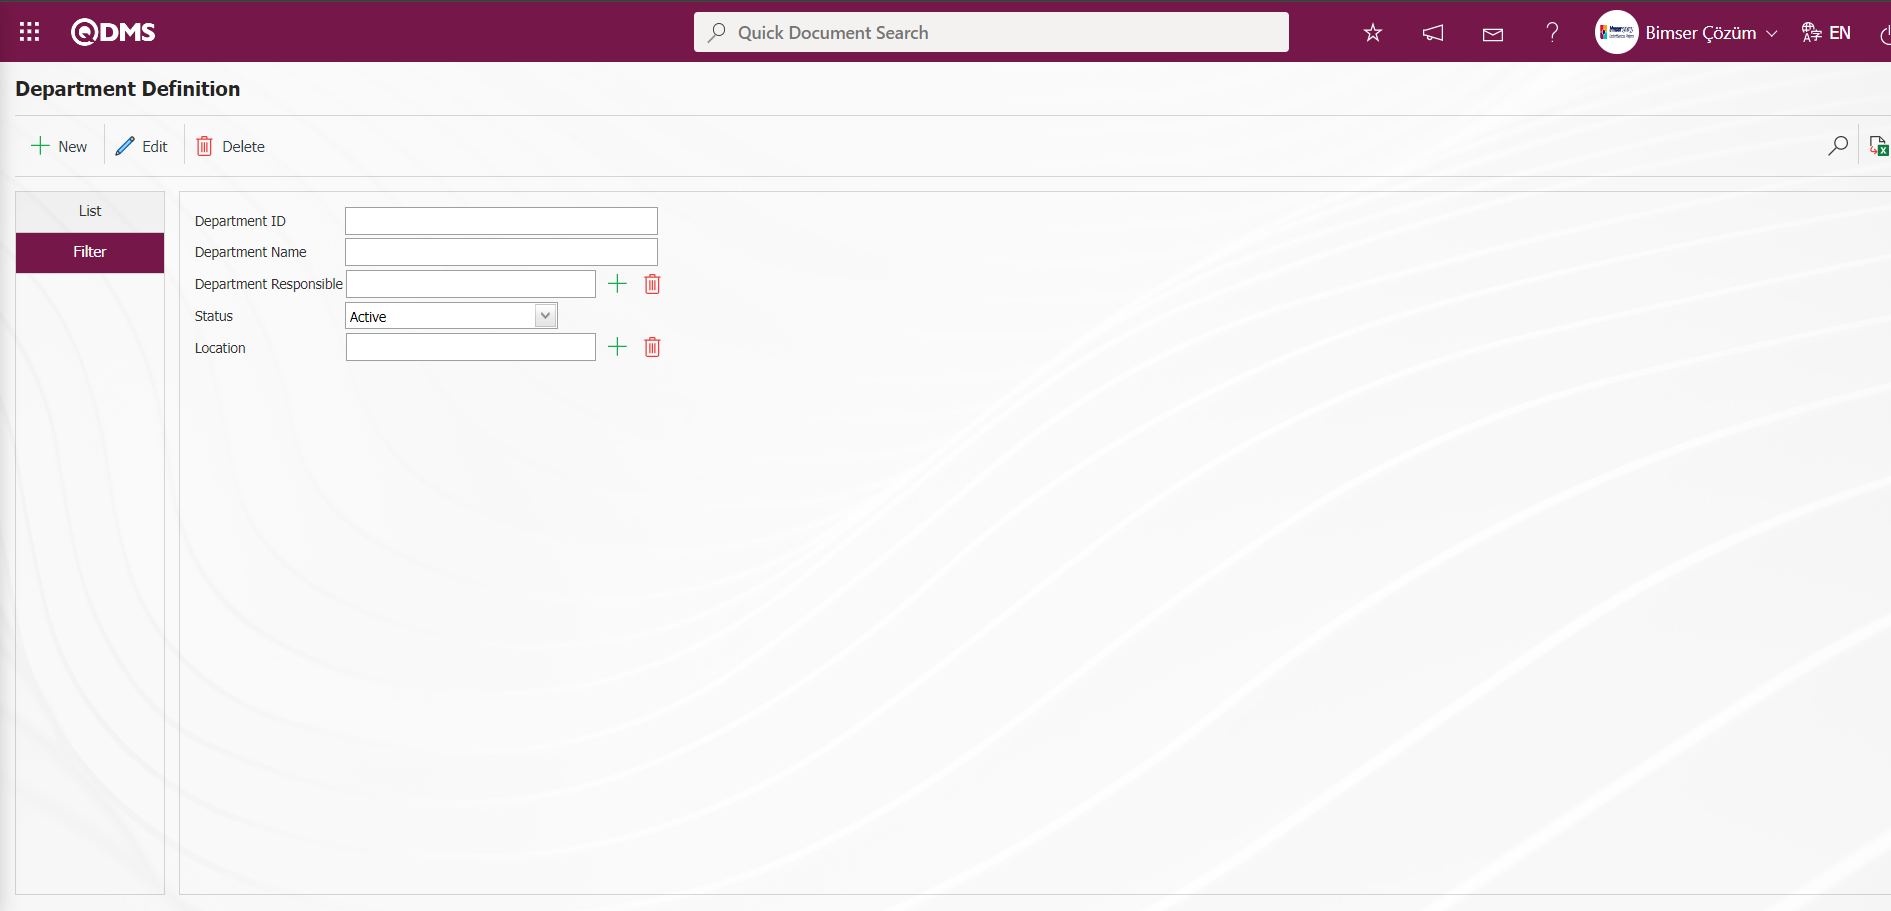
5.1.4. Employees Definition
Menu Name: System Infrastructure Definitions / BSID/ Definitions/ Employees
It is the menu where the personnel working in the company are defined to the Qdms system.
With the help of the buttons on the screen;
: A new personnel is defined.
: Correction / change / update is made on the selected personnel information in the list. Registration No information cannot be changed.
: Selected personnel information in the list is deleted
 : For the personnel selected in the list, additional information such as TR ID No, Gender, Height, Weight are entered. This information is used in the On-the-Job and Periodic Examination and Training Planning modules (The parameter is activated by selecting “Yes” in the “Are Additional Areas Used for Personnel Identification?” parameter number 76 in the System Infrastructure Definitions module parameters.
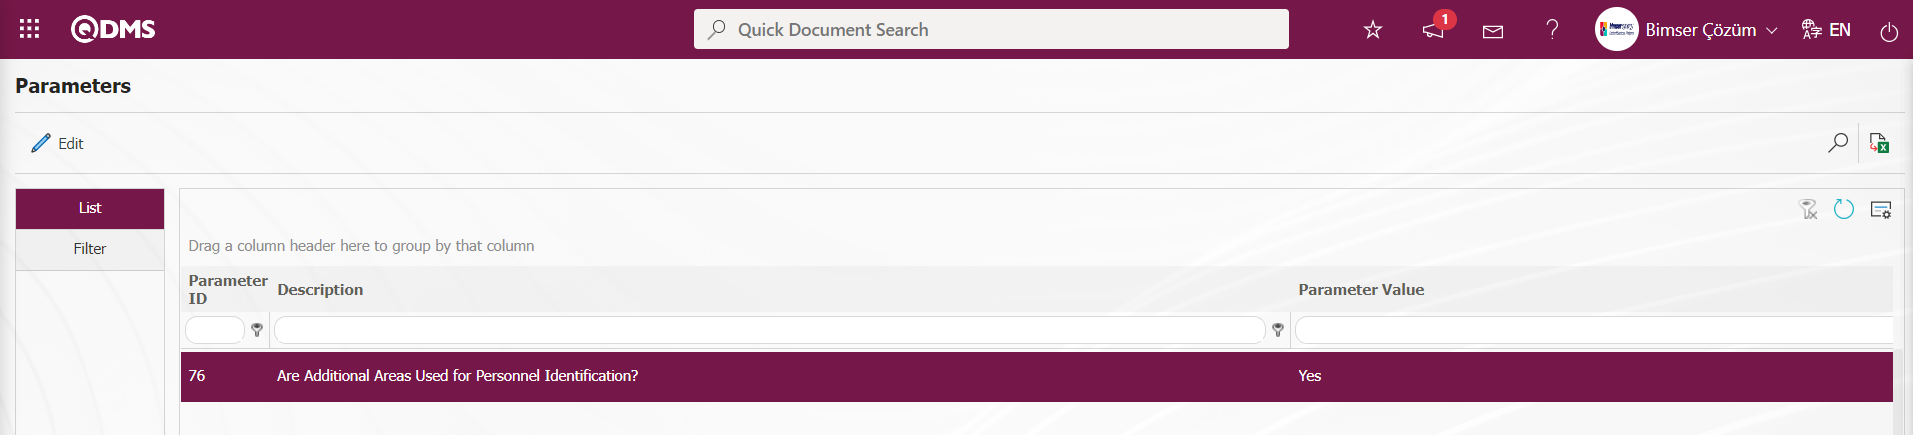
After the parameter is activated, the button is displayed on the Personnel Identification screen.
 :Records are filtered and searched.
 :Data is transferred to Excel.
 : The search criteria on the menu screens are used to clear the data remaining in the filter fields in the grid where the search operation is performed.
 : The menu screen is restored to its default settings.
: User-based designing of the menu screen is done with the show-hide feature, that is, the hiding feature of the fields corresponding to the columns on the menu screens.
To add a new personnel to the Stuff Definition screen, click on the button at the top left corner of the screen to open the Stuff Definition / New Record screen.
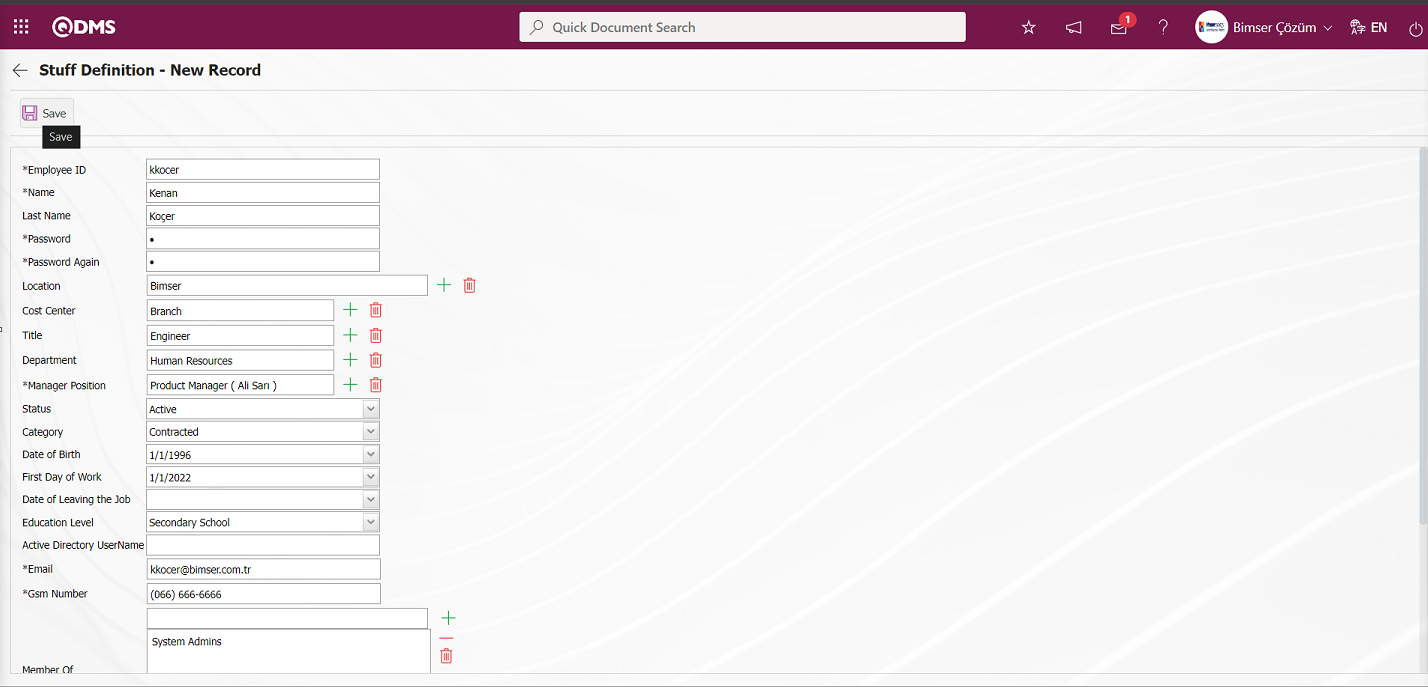
Related fields are defined on the screen that opens:
Registration No: It is the mandatory field where the Employee ID information of the personnel is entered on the Stuff Definition - New Record screen. On the Qdms main login screen, the employee logs in to the Qdms local address by typing Employee ID in the username section and password information in the password section. If Active Directory Integration is provided; the staff can log in to Qdms local address with the username/password information with which they turn on their computer. In order to ensure Active directory integration, support should be obtained from Bimser Technical Staff.
Name: This is the mandatory field where the name of the personnel is defined on the Stuff Definition - New Record screen.
Last Name: It is the field where the last name information of the personnel is defined on the Stuff Definition - New Record screen.
Password: It is the field where the password information of the personnel is defined on the Stuff Definition - New Record screen. With this password defined, the personnel log in to the Qdms local address by typing the password information in the username and password field on the Qdms main login screen.
Password Again: This is the field where the password information defined on the Stuff Definition - New Record screen is repeated.
Location: In the Stuff Definition - New Record screen, it is the field where the location information of the personnel is selected in the list of locations defined in the system that opens by clicking the  (Select) button. Locations List is defined in System Infrastructure Definitions/BSID/Definitions/ Locations Definition menu. If the company is a location with more than one location, the Locations where the personnel work are determined by selecting from the location information defined in the “Defining Locations” menu. Locations must also be defined for locations with a single location. When this distinction is made on the personnel definition screen, a filter can be applied on the basis of locations to enable the personnel to see the tasks opened in their own location. The appearance of the location field on the personnel definition screen depends on the parameter. In the System Infrastructure Definitions module parameters, the parameter value of the “Use Locations” parameter numbered 21 is selected as “Yes” and the parameter is activated.
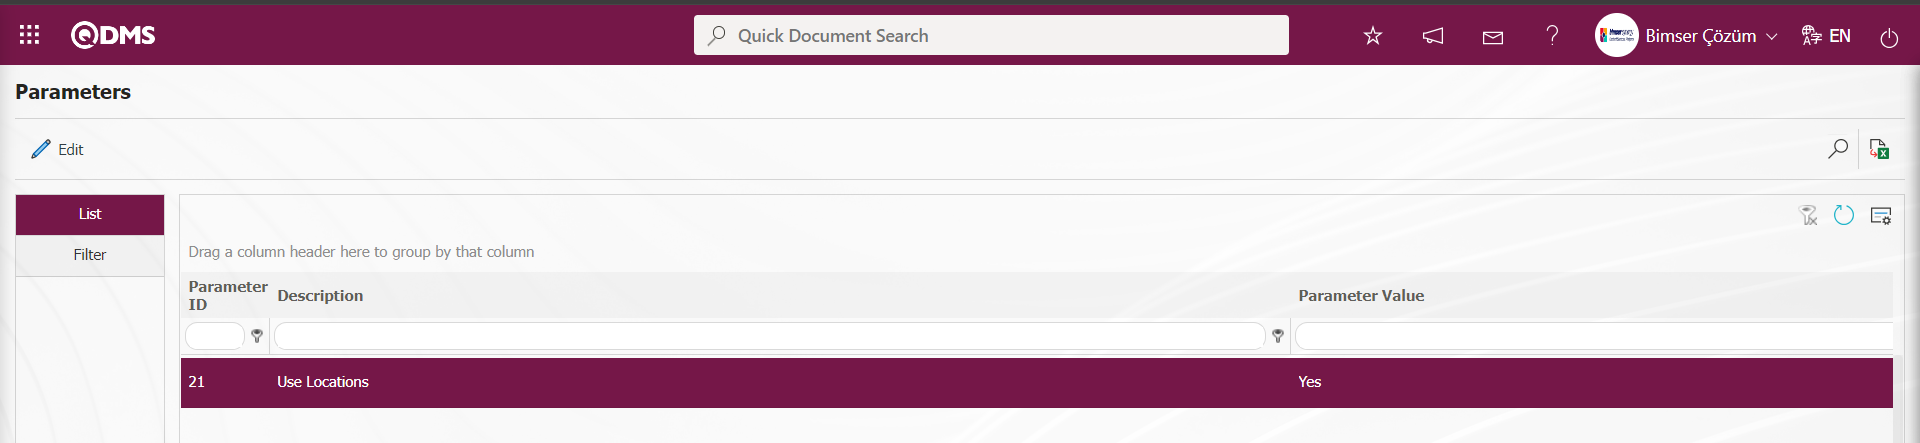
After the parameter is activated, the Location field is displayed on the Stuff Definition - New Record screen and the Location information of the personnel is associated with this field.
Cost Center: In the Stuff Definition - New Record screen, the expense location information of the personnel is selected from the list of expense locations defined in the system that opens by clicking the (Select) button. ( Cost Center list comes as defined in the System Infrastructure Definitions / BSID / Definitions / Cost Center Definition menu).
Title: This is the field where the title information of the personnel on the Stuff Definition - New Record screen is selected from the title information defined in the system that opens by clicking the (Select) button. (Title List comes as defined in the System Infrastructure Definitions / BSID / Definitions / Title Definition menu).
Department: It is the field where the department information of the personnel on the Stuff Definition - New Record screen is selected from the department information defined in the system that opens by clicking the (Select) button. (Department List comes defined in the System Infrastructure Definitions / BSID / Definitions / Department Definition menu).
Manager Position: On the Stuff Definition - New Record screen, it is the field where the personnel the position to which he/she is attached is selected in the position list defined in the system that opens by clicking the (Select) button. (Position List comes defined in the System Infrastructure Definitions / BSID / Definitions / Position Definition menu.) If it is desired to send a notification e-mail to the immediate supervisor when the task in the pending work of the personnel is delayed, the “Position to which the personnel is attached” information must be filled. In this field, the position of the person who is the first supervisor of the personnel should be selected. In addition, this information can be used to send an information mail for the planned jobs in the modules, and in the module approval flows, if the senior supervisor will be used as an approver, it can be used to run the flow.
Status: In the Stuff Definition - New Record screen, the status information of the personnel is selected in the status options defined in the system by clicking the drop-down list. In the “Status” field, the appropriate one is selected from the “Active, Passive, Guest and Job Application” options.

When a staff member leaves his/her job (if there is no integration), the departed staff member is selected from the staff identification screen. While the personnel is selected, using the button, select “Passive” for the relevant personnel from the status field and save it. Then, by selecting the position information of the person in the Position Definition menu, the information of the person who left the job is cleared from the position owner field and the position is saved. If the vacant position holder field is filled in when a new staff member comes to work with the same position or when there is a change in the position, the duties of the departing staff member will be transferred to the new staff member. In cases where HR Integration is provided, personnel entries and exits are realized automatically. Click on System Infrastructure Definitions/BSID/Configuration Settings/Fixtures menu to view the status section options. On the Constants screen, select the System Infrastructure Definitions module as Module in the Modules field in the Filter tab and click the  (Search) button to list the constant values related to the relevant module.

In the list of fixed values listed in the List tab, click the button while the “Status” field is selected.
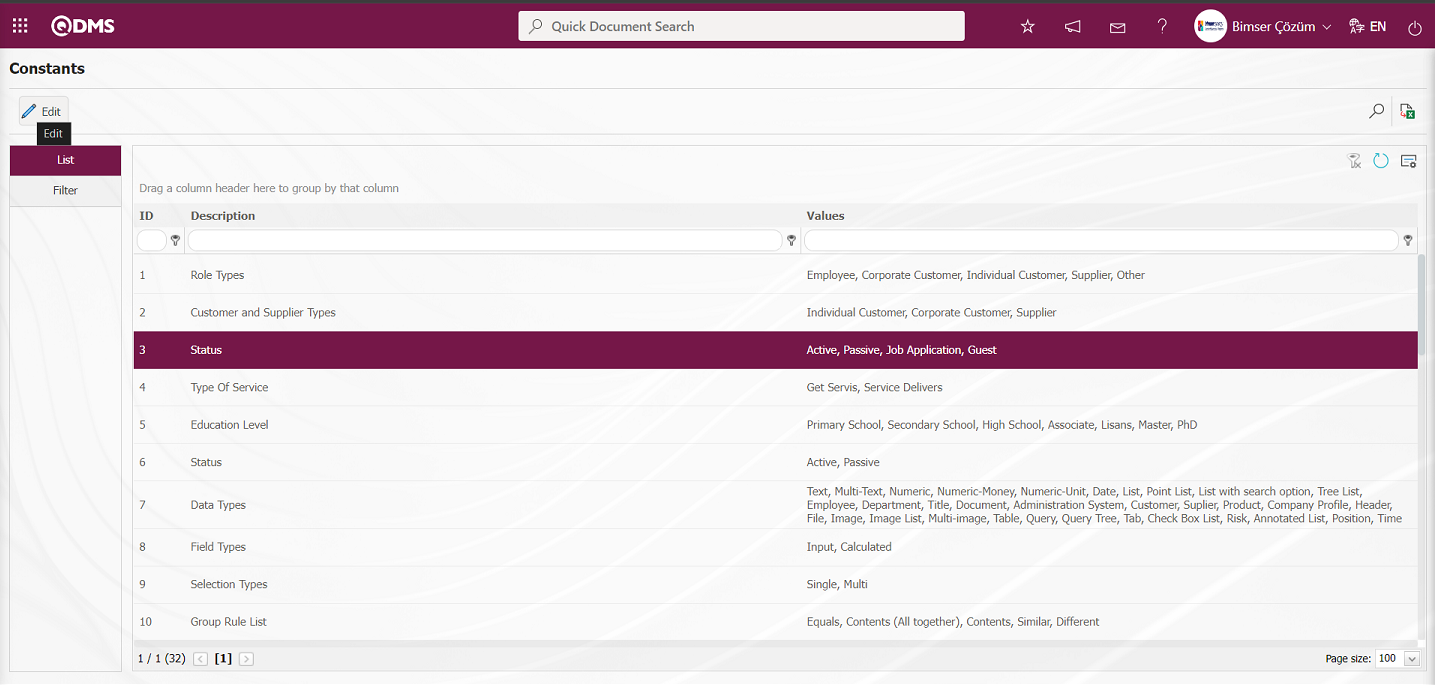
In the Constants screen, click the button while the constant values of the Status field are selected.
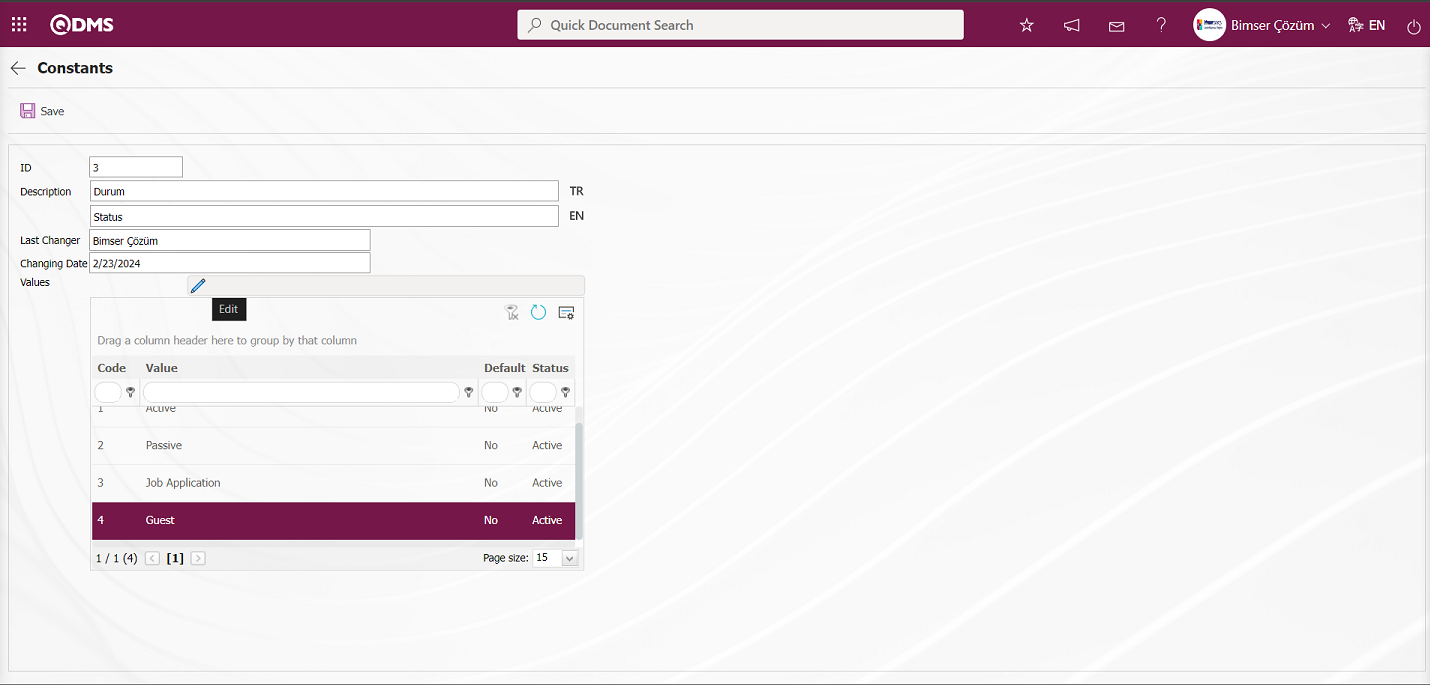
In the Constants Values- Update Record screen, the “Passive” option is selected from the options in the Status field of the constant value. If desired, the Constants value selected as active in the options of the Status field on the Constants screen can be set as default.
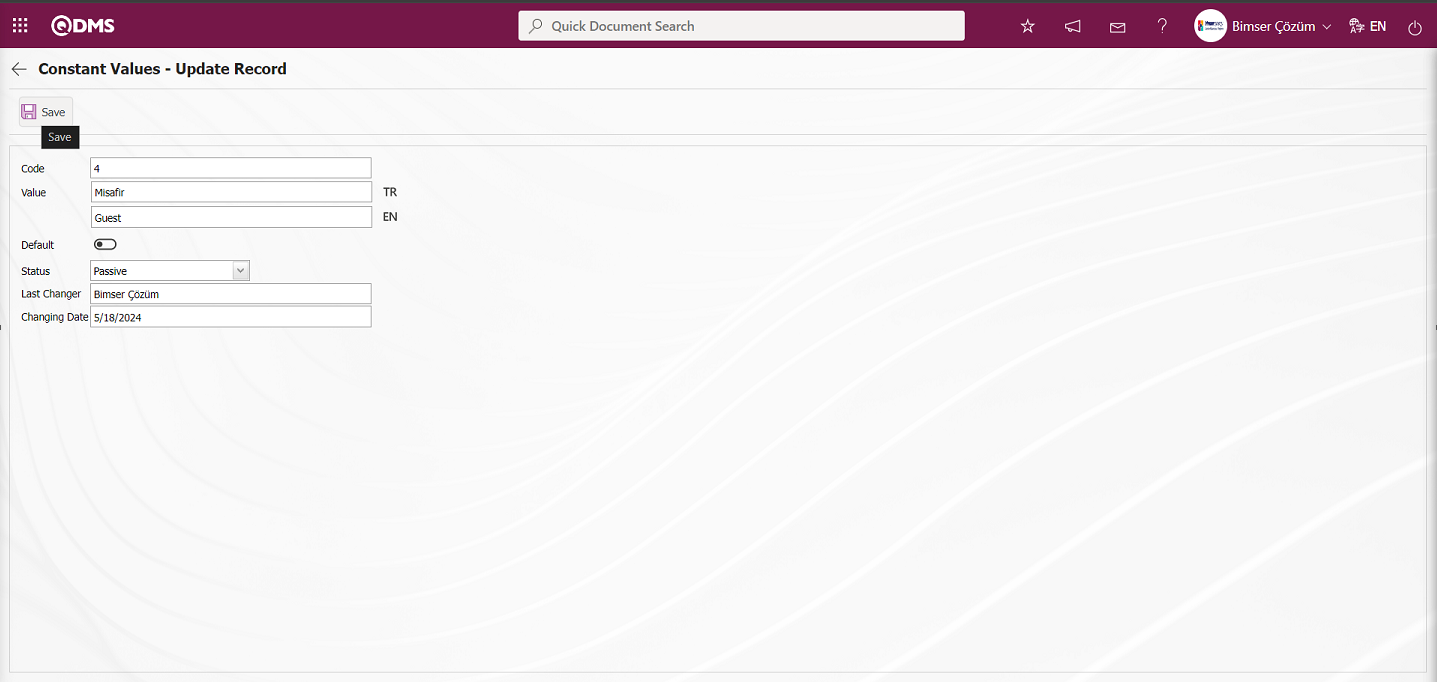
After the change on the status field on the Constant Values - Record Update screen, the constant value record update process is performed by clicking the button in the upper left corner of the screen.
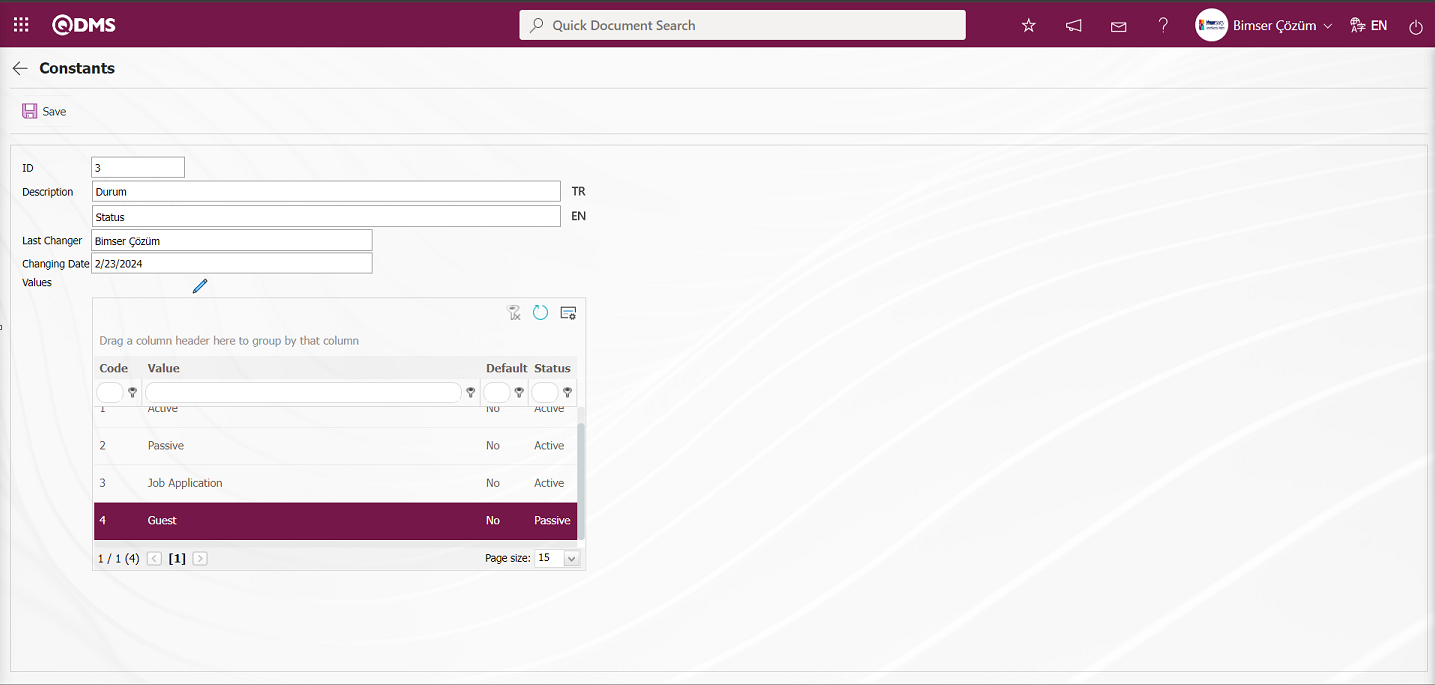
In the Constant Values screen, after the constant value status of the Status field is set to “Passive”, the button in the upper left corner of the screen is clicked and the registration process is performed.
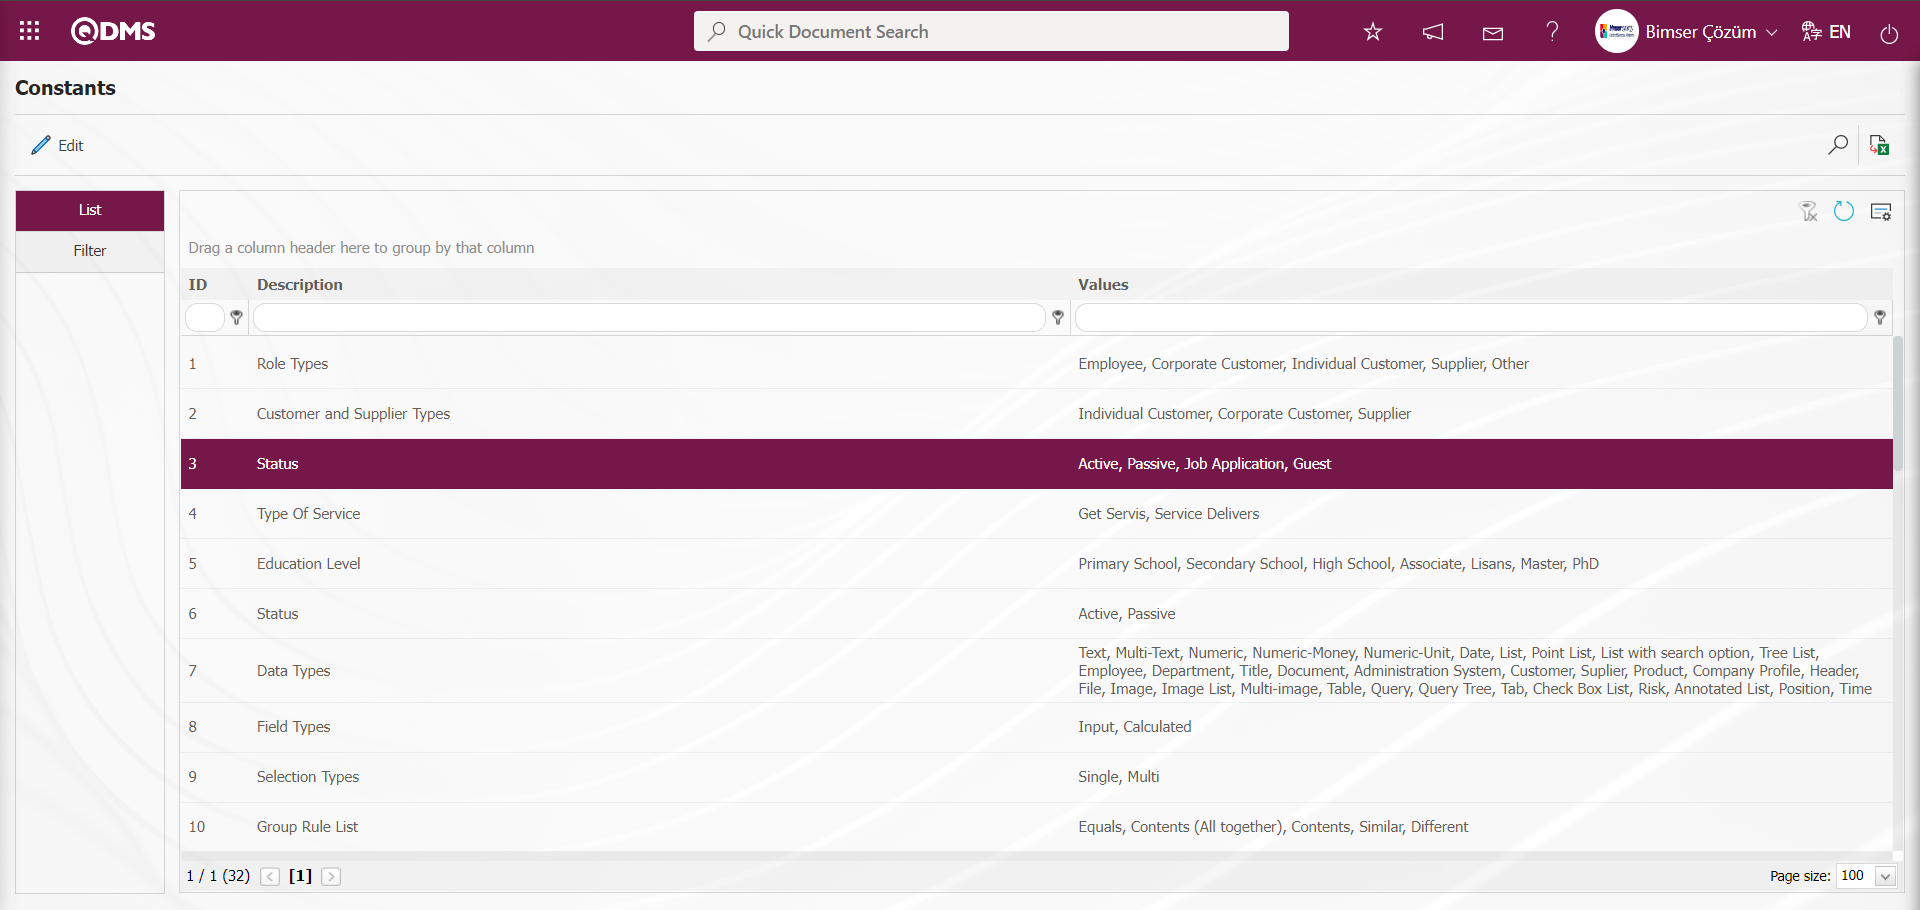
After this registration, it is ensured that the “Guest” option is not displayed in the Status field on the Stuff Definition - New Record screen.
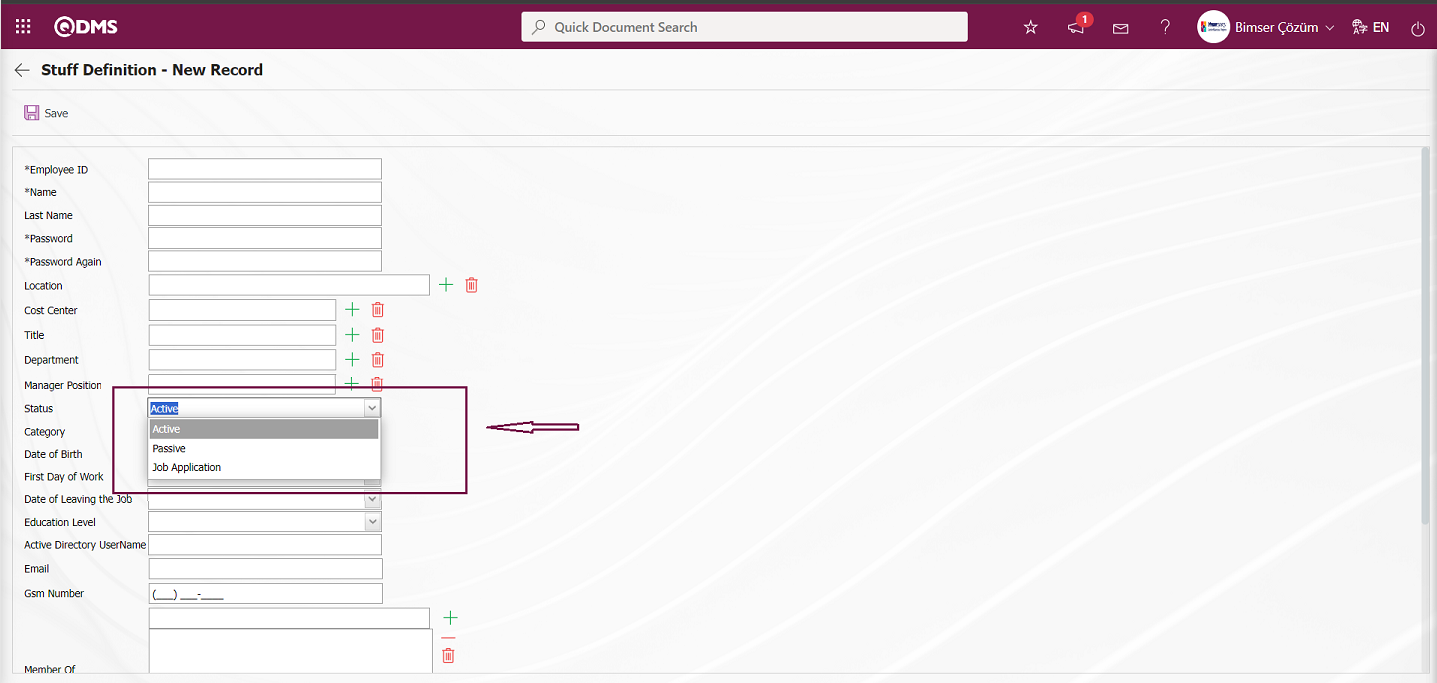
Category: In the Stuff Definition - New Record screen, the category information of the personnel is selected in the category list opened by clicking the drop-down list. In the category field, the working status of the personnel such as in-scope, out of scope, contracted, contractor, transfer is determined. Personnel are automatically defined as in-scope in the system. If it is desired to define personnel in the Qdms system for transactions such as consultancy carried out by outsourcing, these personnel should be defined to the system as out of scope. If there is HR Integration and it is not desired to remove the personnel manually defined in the system (for example; consultant, auditor) from the system as a result of integration, except for the personnel coming from the program from which HR data will be extracted within the scope of the integration realized for the specified periods, the personnel should be recorded as “non-transfer”. In order to perform this operation, the non-transfer feature must be activated first. From the System Infrastructure Definitions / BSID / Configuration Settings / Parameters menu, select the “System Infrastructure Definitions” module in the module list in the modules field in the Filter tab. The parameter number information is written in the Parameter No field and the parameter is displayed and selected by clicking the  (Search) button.

In parameter 30 “Personnel Categories”, “ Out of Transfer” option should be added.
On the Parameters screen, on the list tab, click the button while the “Personnel Categories” parameter numbered 30 is selected.
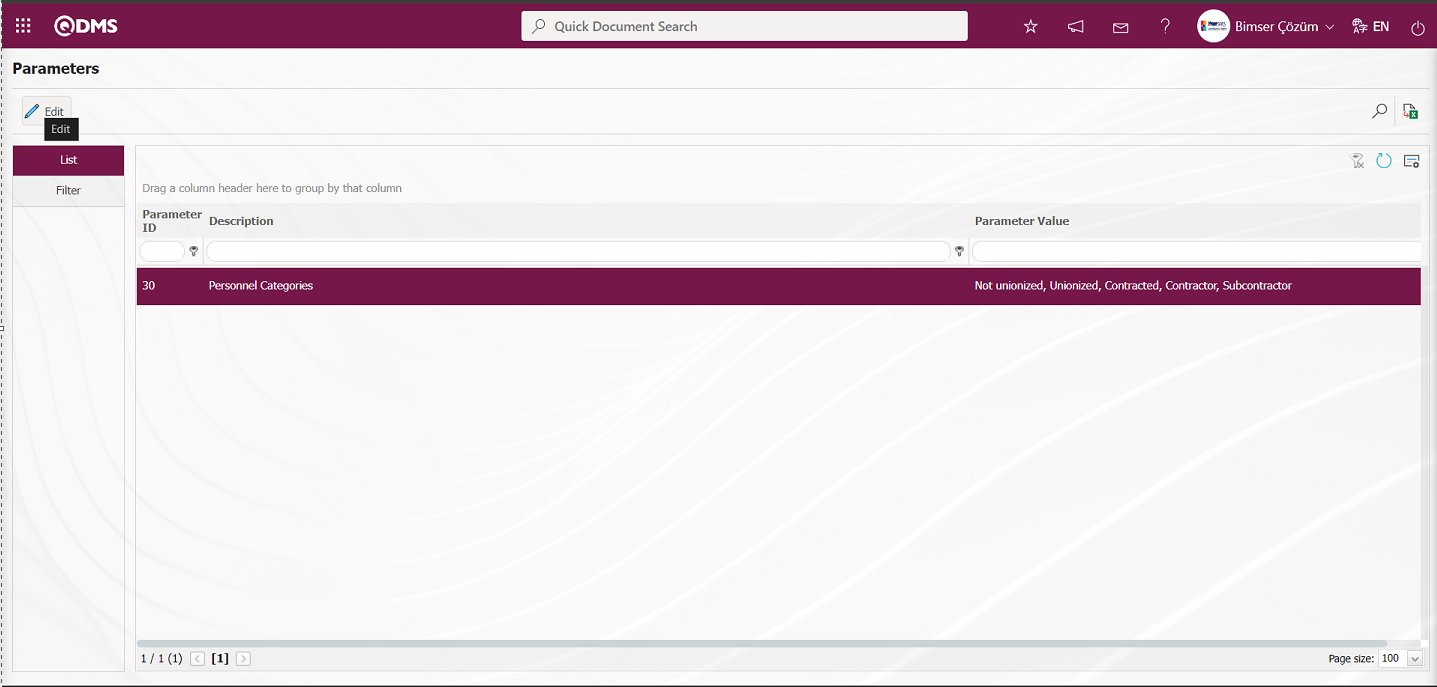
In the Parameters screen, a new category is added by clicking the  button in the Parameter value field.
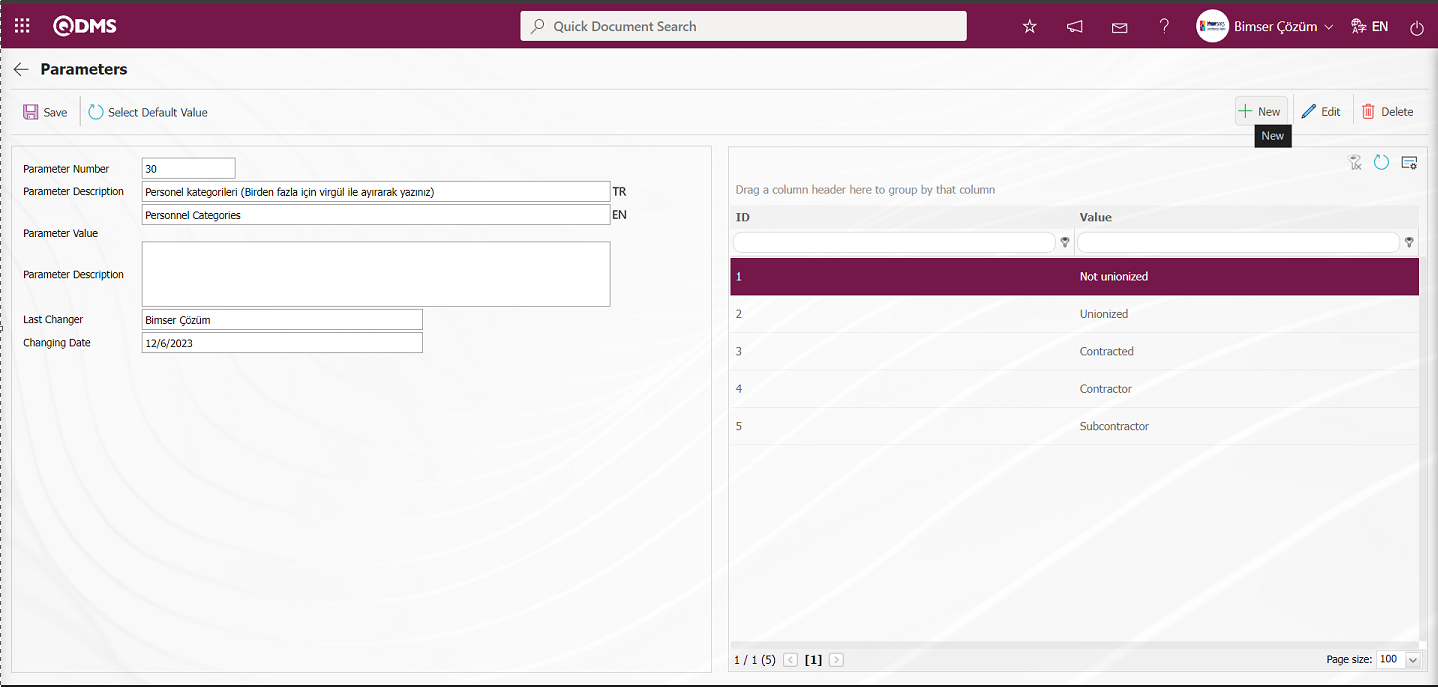
On the Add List - New Record screen, the code and value fields of the category to be defined are entered.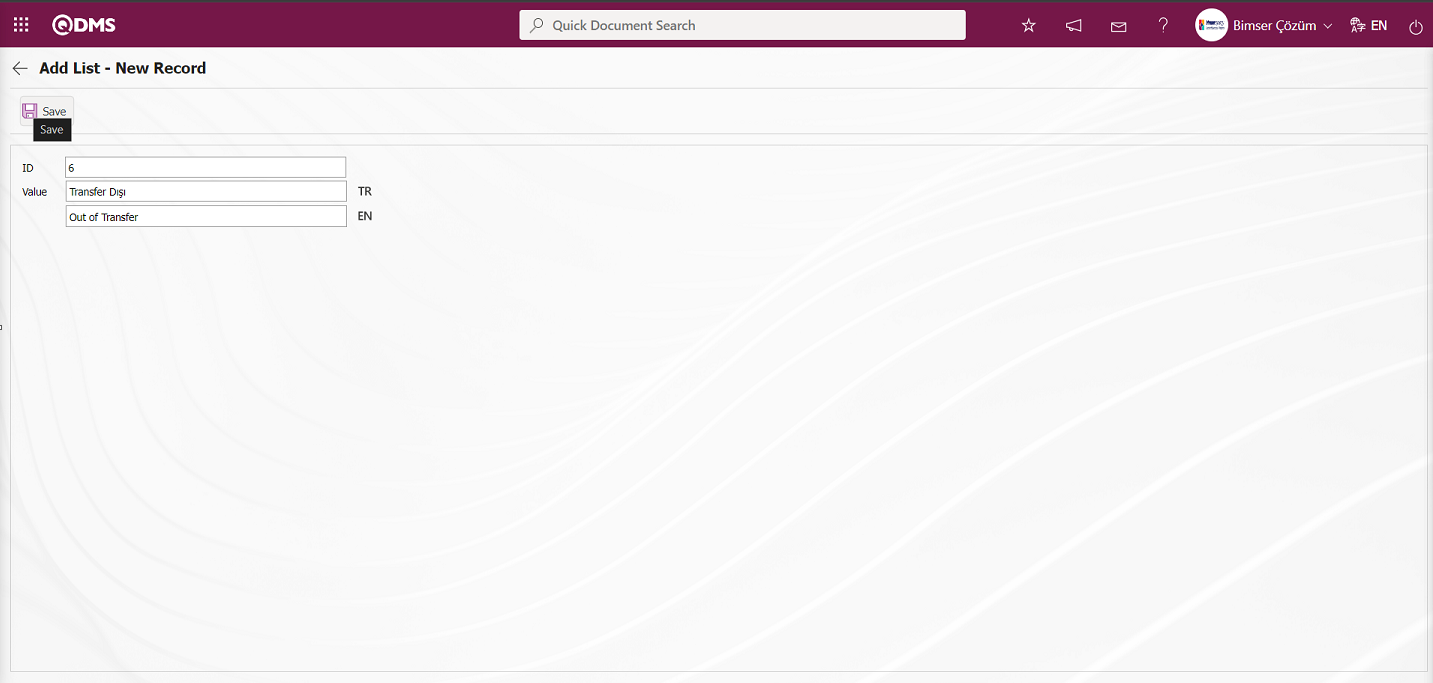
After entering the relevant information in the required fields, the registration process is done by clicking the button in the upper left corner of the screen.
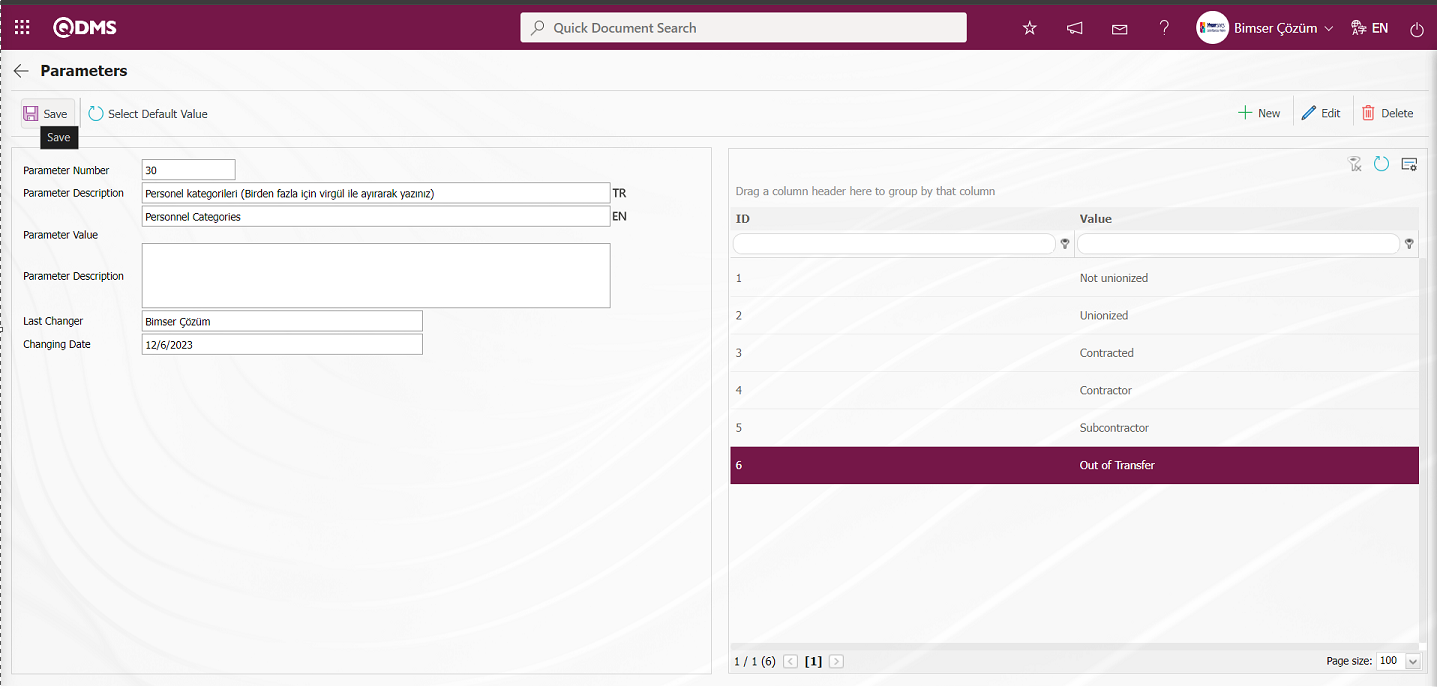
In order to save the changes in the parameters screen, the parameter record update process is performed by clicking the  button at the top left of the screen again.
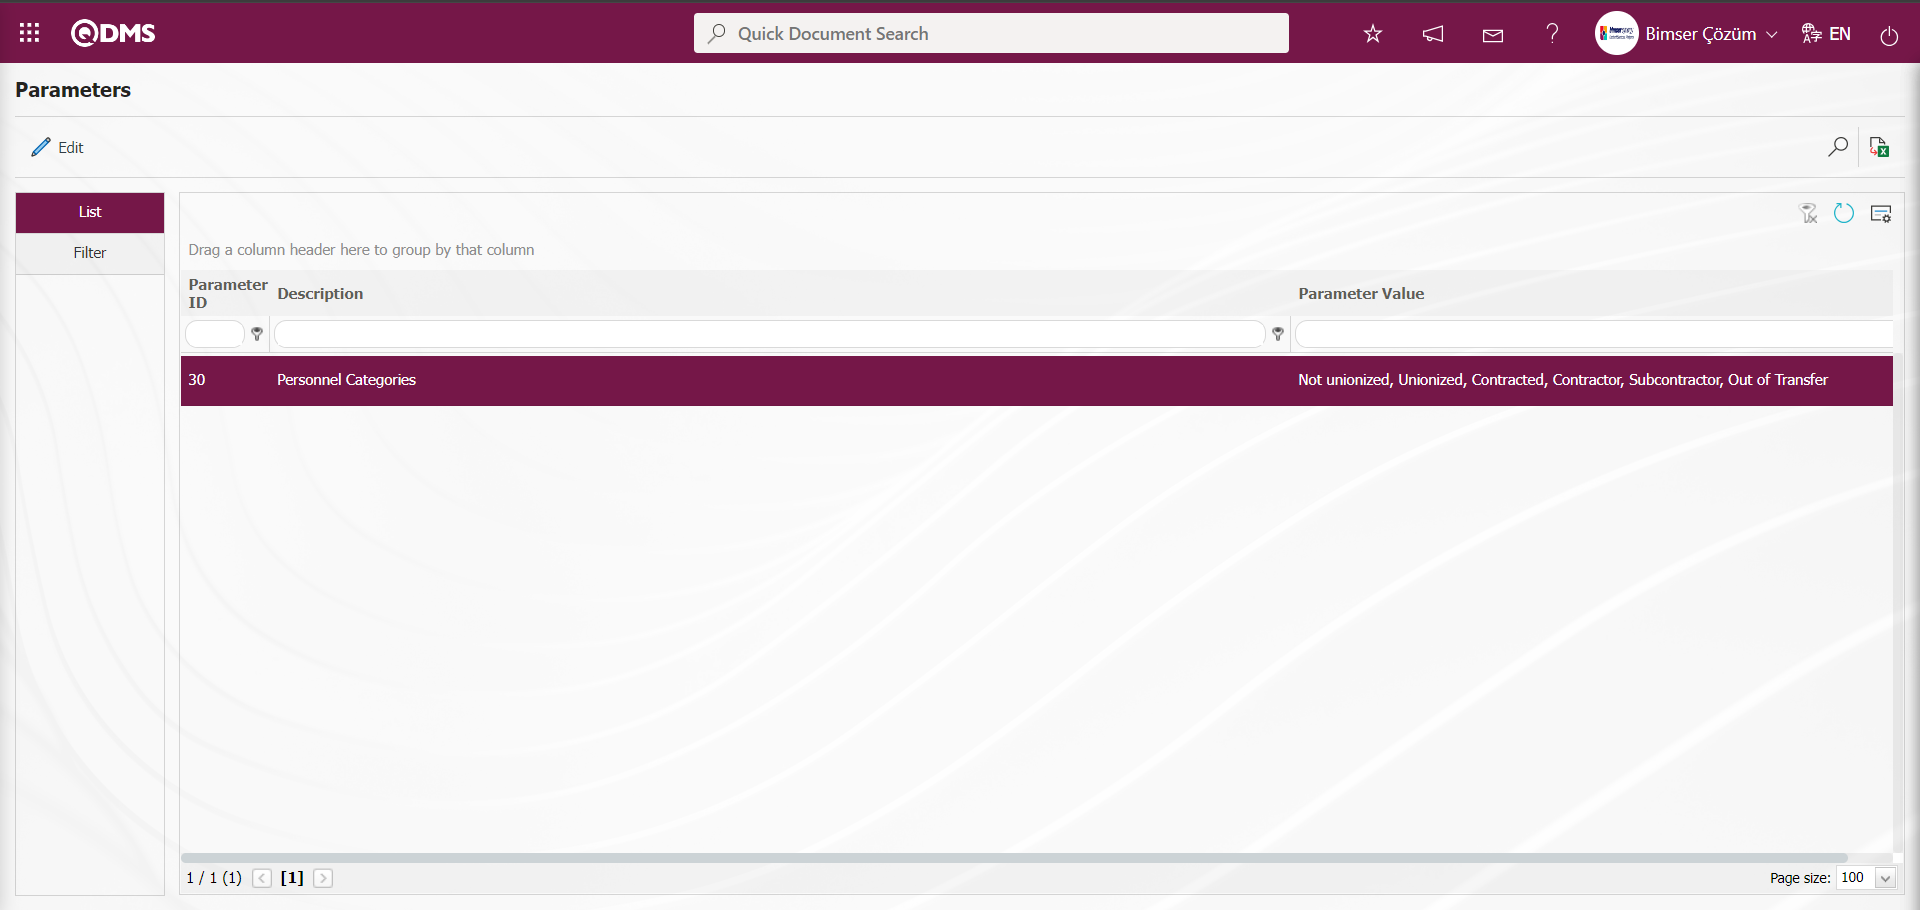 After the Parameter Registration process, it is seen that the “ Out of Transfer” option is included in the options in the Category field on the Staff Definition-New Registration screen.
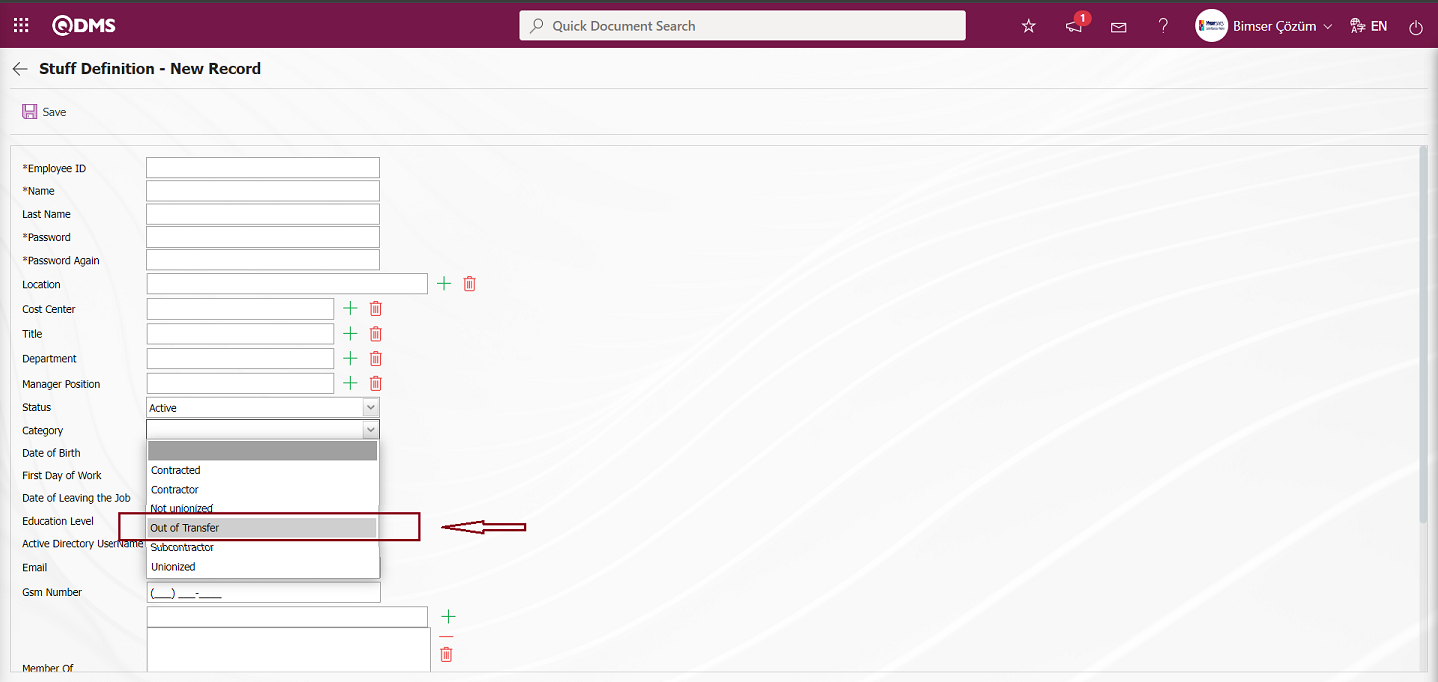
Date of Birth: This is the field where the birth date of the personnel is selected in the Calendar field on the Staff Definition - New Record screen. (If the Training Module will be used and reports such as the personnel training card in this Module will be pulled from the system, this field must be filled in.)
First Day of Work: This is the field where the date of employment of the personnel on the Staff Definition - New Record screen is selected in the Calendar field. (If the Training Module will be used and reports such as the personnel training card in this Module will be pulled from the system, this field must be filled in).
Date of Leaving the Job: This is the field where the Date of Leaving the Job information of the personnel is selected in the Calendar field on the Staff Definition - New Record screen. (If the Training Module will be used and reports such as the personnel training card in this Module will be pulled from the system, this field must be filled in.)
Education Level: This is the field where the education level of the personnel is selected in the education level list opened by clicking the drop-down list on the Staff Identification - New Record screen. (If the Education Module will be used and reports such as the personnel training card in this Module will be pulled from the system, this field must be filled in. )Making changes to the option registered in the education level field is done in the System Infrastructure Definitions / BSID / Configuration Settings / Constants menu. In the Constants menu, in the Filter tab in the Filter tab, by selecting the “System Infrastructure Definitions” module in the modules field and typing the fixed number “5” in the fixed No field and clicking the (Search) button, the “Education Status” constant is displayed and selected.
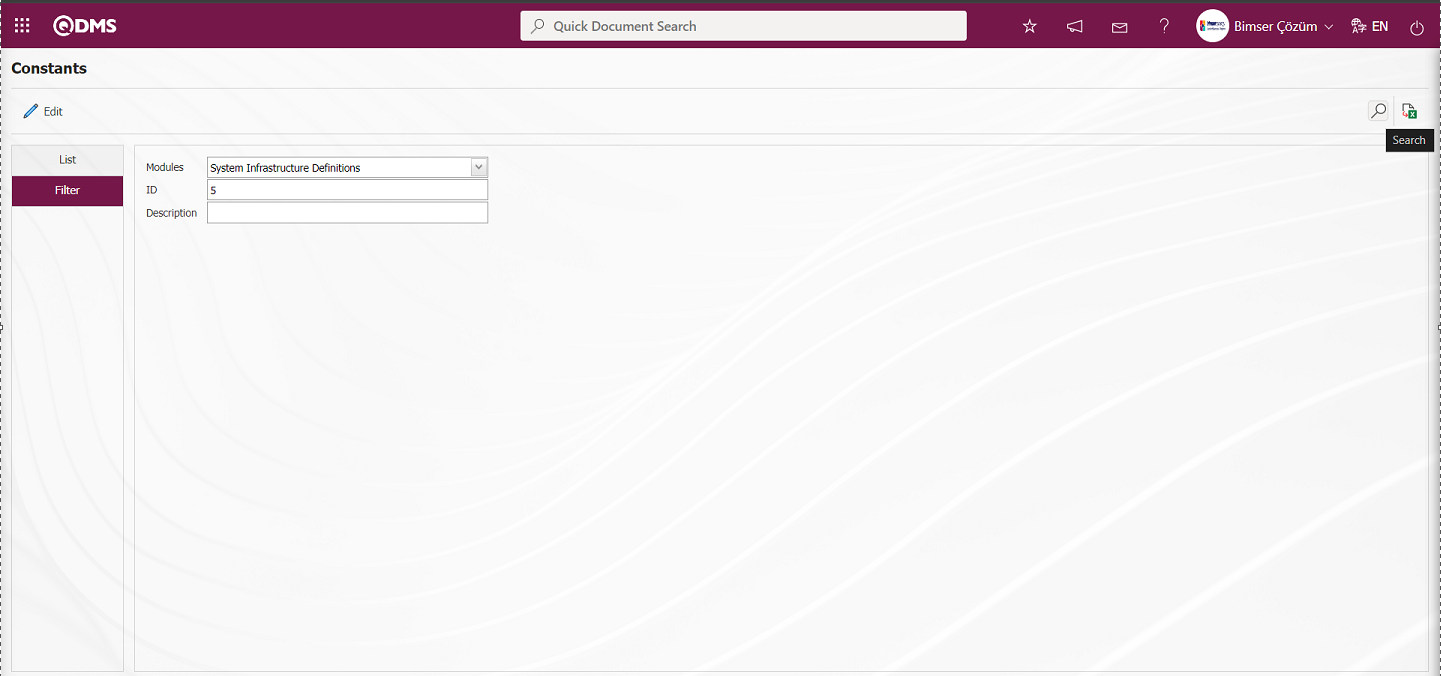
While the “Education Level” constant is selected on the Constants screen, click the button.

While the constant value is selected on the Constants screen, edit/modify/update the constant value by clicking the button.
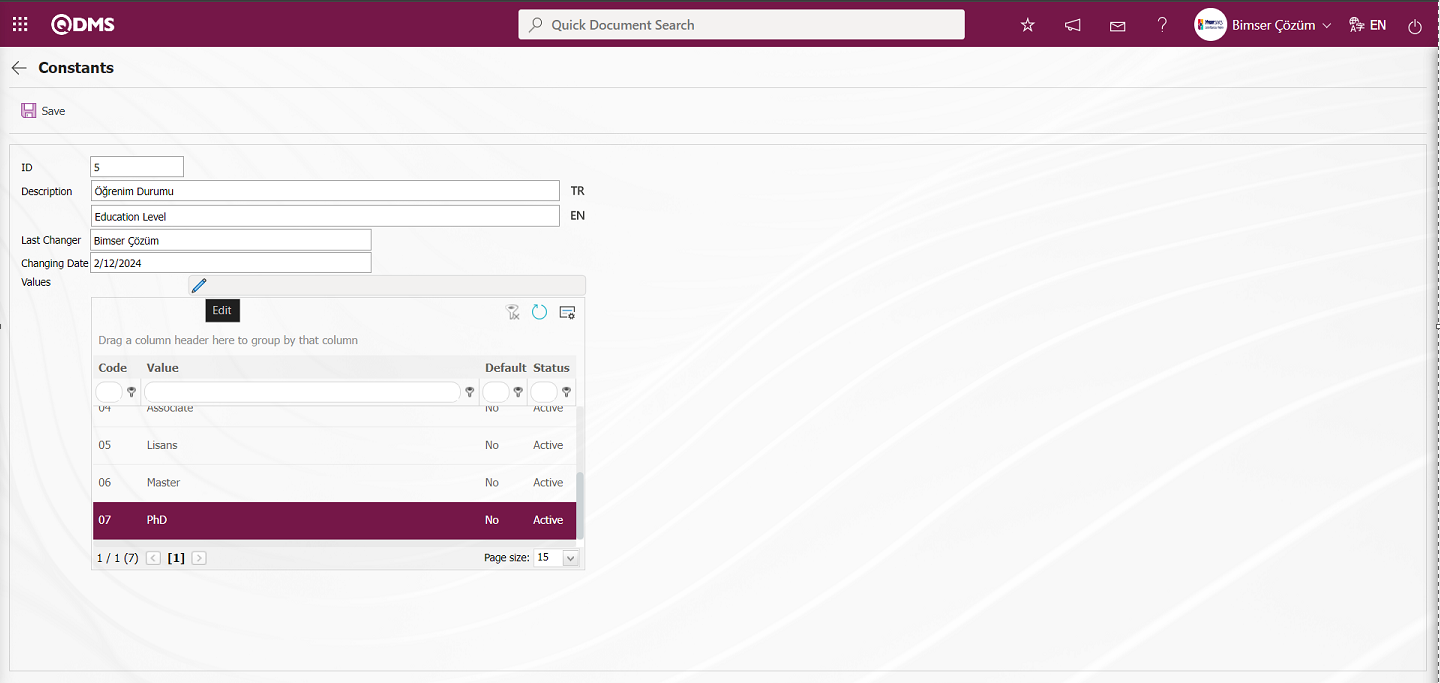
On the Constant Values - Update Record screen, update the value field.
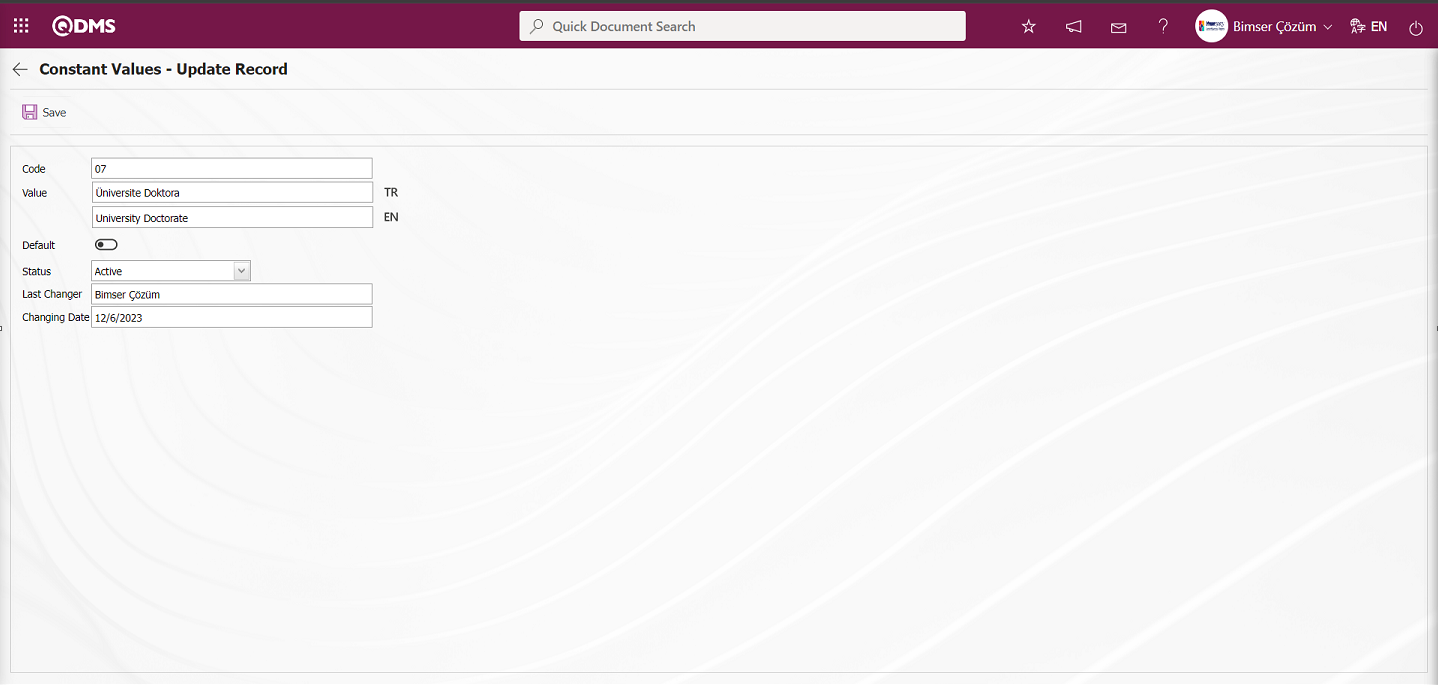
After the required fields are filled in, the  button in the upper left corner is clicked to update the constant value record.
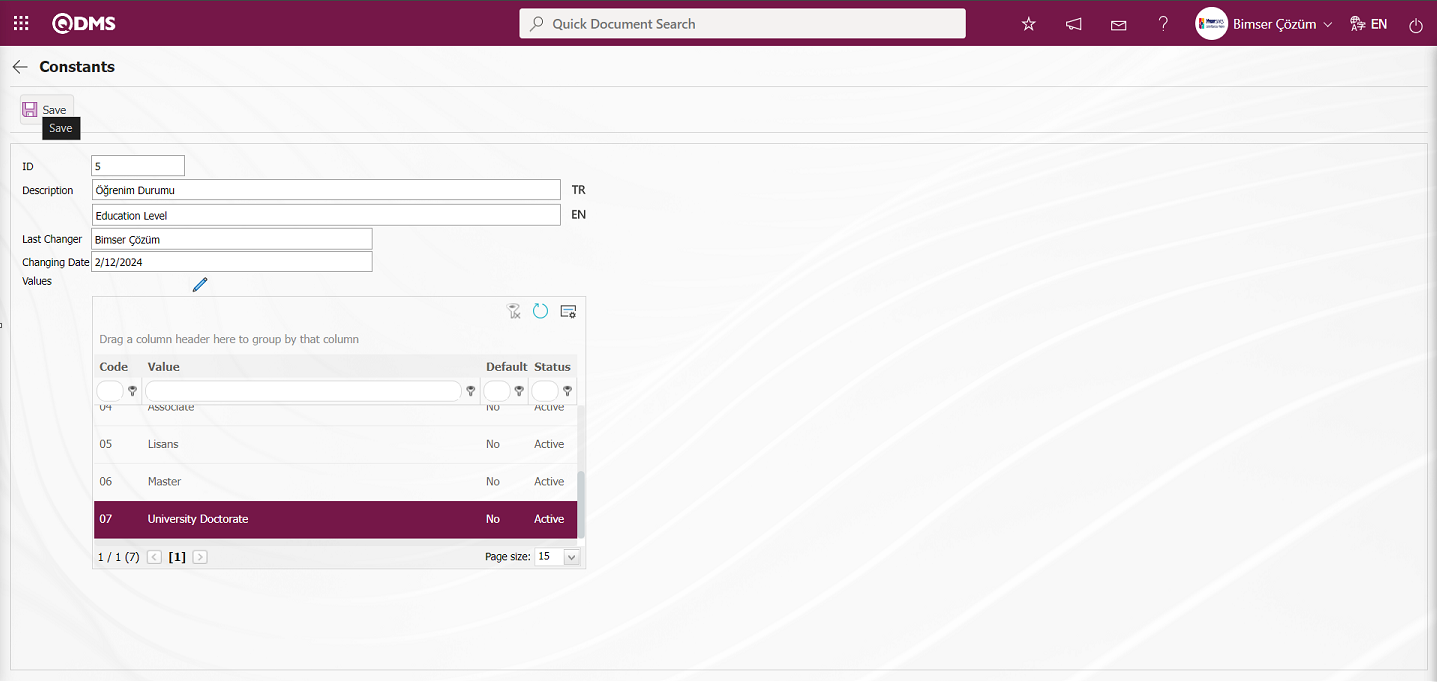
After the changes made on the Constants screen, the constant record update process is performed by clicking the  button on the top left of the screen.

After the constants record update process, it is displayed that changes have been made to the option made in the Education Level field on the Staff Definition-New Record screen.
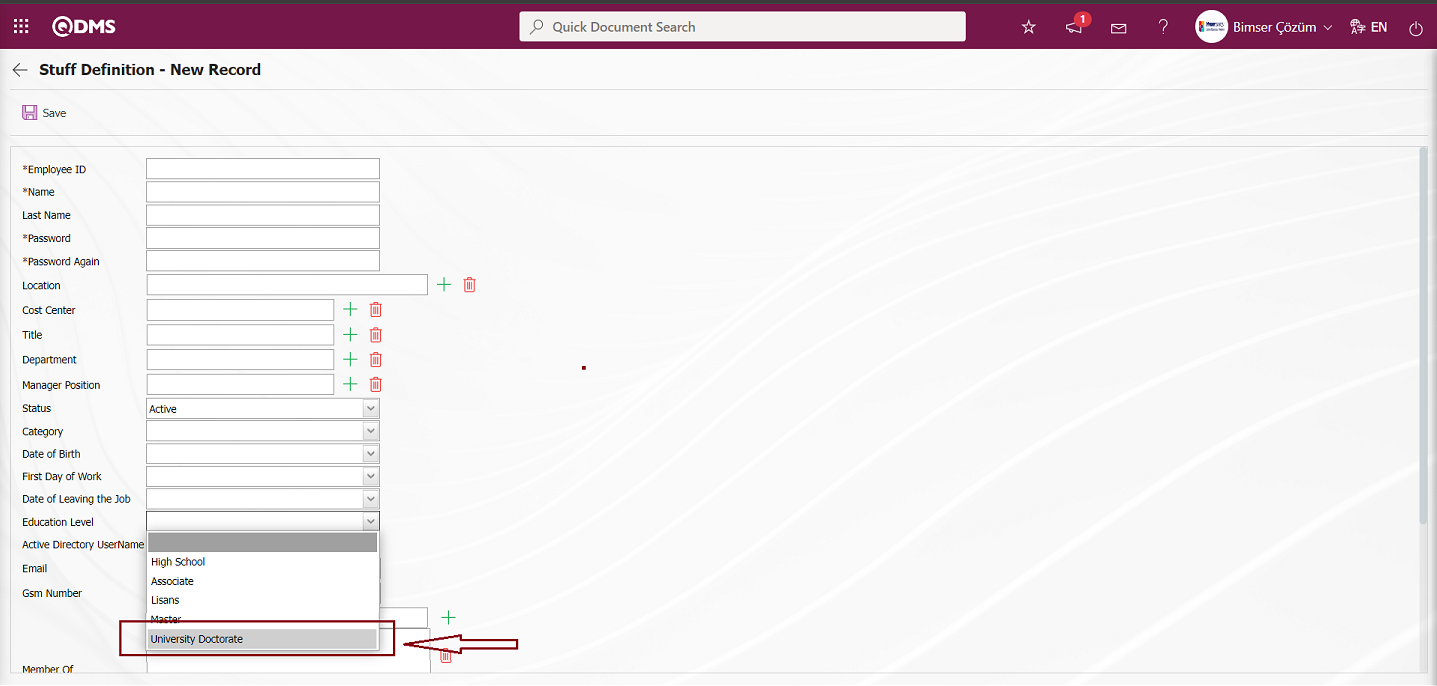
Active Directory User Name: This is the field where the Active Directory User Name of the personnel is defined on the Staff Identification - New Record screen. If Active Directory integration will be provided (if it is desired for the personnel to log in to the Qdms system with the username and password with which they turn on their computer), the “Active Directory User Name” section is defined. In this field, the username information that the personnel enters when turning on the computer is written.
E-mail: This is the mandatory field where the e-mail address of the personnel is defined on the Staff Definition - New Record screen. For the personnel whose e-mail addresses are defined, e-mails from delays are sent, which will ensure the continuity of the flows in the relevant modules. In addition, the tasks assigned to the personnel whose e-mail address is defined are also sent to the person as e-mail.
Gsm Number: This is the field where the mobile phone information of the personnel is defined on the Staff Definition - New Record screen.
Member Of: This is the field where the groups to which the personnel are affiliated on the Staff Definition - New Record screen are selected in the user group list defined in the system that opens by clicking the  (Add) button. (User Group List is defined in the System Infrastructure Definitions / BSID / Definitions / User Group Definition menu.) From the “ Members Of” field, personnel can be defined to the user groups they are related to. If this field is left blank, related personnel can be assigned to user groups from the User Group Definition menu.
Related Employee: If there are people related to the personnel on the Staff Definition - New Record screen, the system automatically displays them in this field. If there are sub-personnel connected to the personnel, they are defined in the “Related Employees” field. No action can be taken in this field. This field is automatically filled by the system as this personnel is assigned as a supervisor to other personnel.
User Locked: When the check box related to the relevant field on the Staff Definition - New Registration screen is checked, the Qdms login screen is locked when the user enters the password incorrectly.
According to the value entered in the parameter value of the parameter 106 “How many times have you mistakenly entered a staff password?” from the System Infrastructure definitions parameters, the Qdms Login screen is locked when the staff enters the password information incorrectly for how many times in a row.
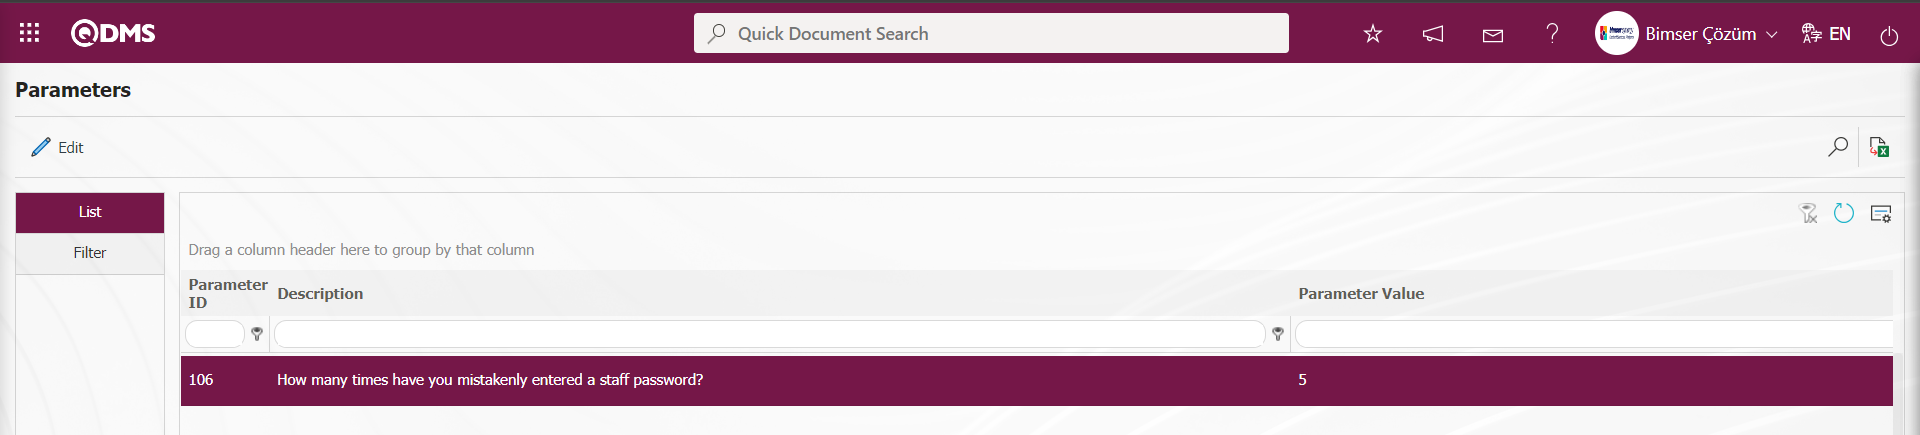
According to the parameter value in the parameter, when the user enters the wrong password information 5 times in a row, the Qdms login screen is locked.
After filling in the required fields on the Personnel Identification - New Registration screen, the Personnel Identification registration process is realized by clicking the button in the upper left corner.

In the Staff Definition screen, the  button that comes by activating the parameter 76 “Should Additional Fields be Used in Staff Definition?” is displayed. By clicking this button, Staff Definition - Additional Information - New Record screen is opened. In the Additional Information tab, personal information of the defined person is entered. The information entered in this tab is used in Work and Periodic Inspection and Training Planning module.
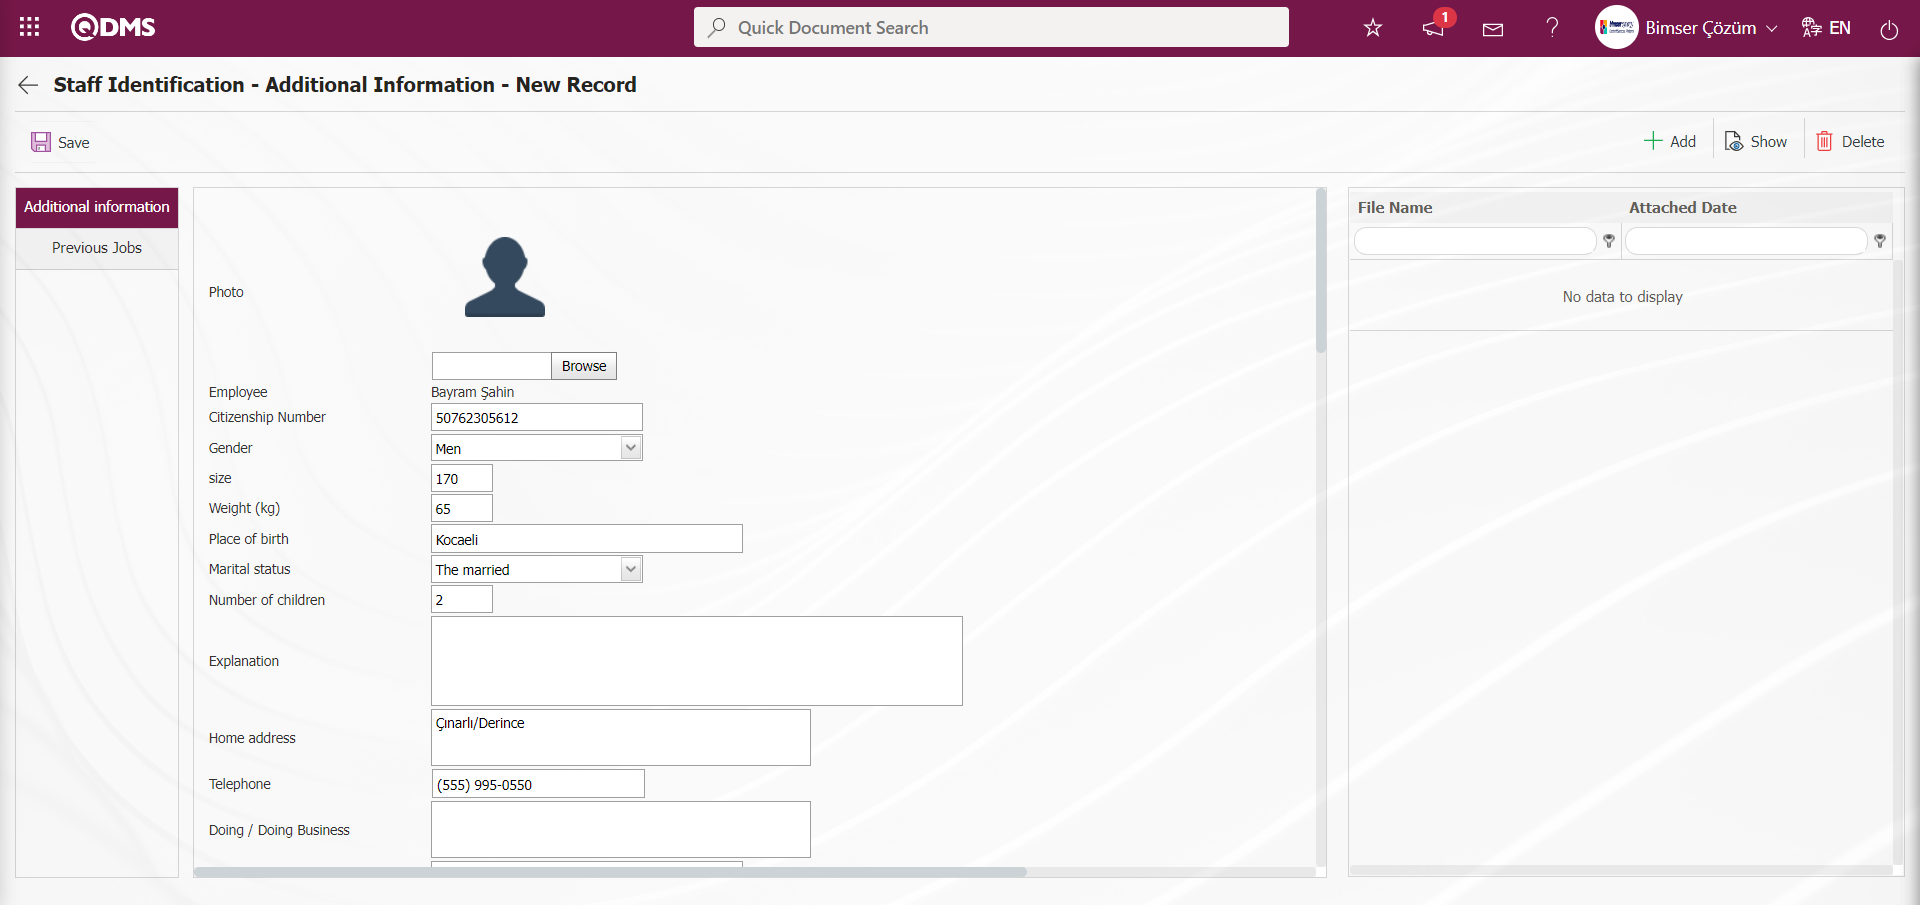
In the Previous Jobs tab, enter the information of the workplaces where the person has worked before.
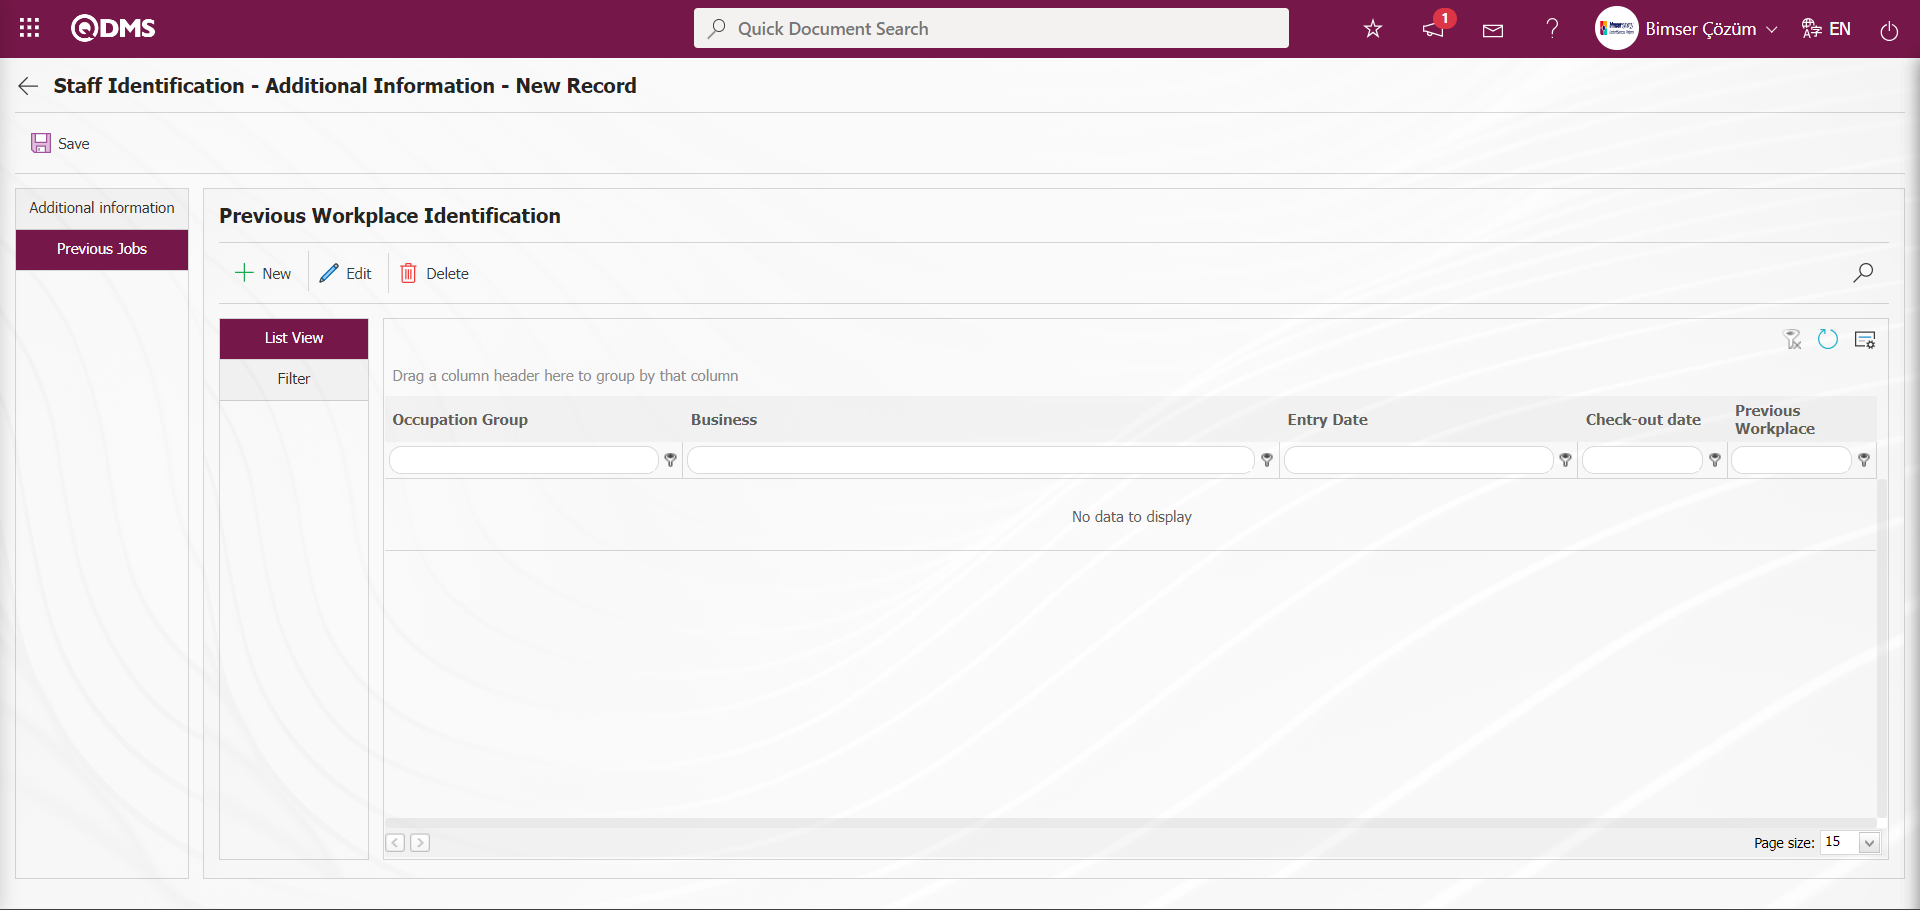
With the help of the buttons on the screen;
:Defining a new workplace is done.
:Selected workplace information in the list is changed.
 :Delete the selected workplace information in the list.
The workplaces defined in these fields are used in cases related to occupational diseases encountered by the personnel. In the Staff Definition - Additional Information - New Record screen, the previous workplaces of the personnel, if any, are defined. Personal information is entered in the Additional Information field. After entering the relevant information in the required fields, the registration process is done by clicking the button in the upper left corner of the screen.
When the system is in the initial establishment phase, the user personnel working in the company are transferred to the QDMS system in bulk with the “ Employee Transfer Template”. For this, the “ Employee Transfer Template” shared by the QDMS Authorized Personnel must be filled in accordance with the format and shared with Bimser Technical Personnel.
An example of the Employee Transfer Template is given below.
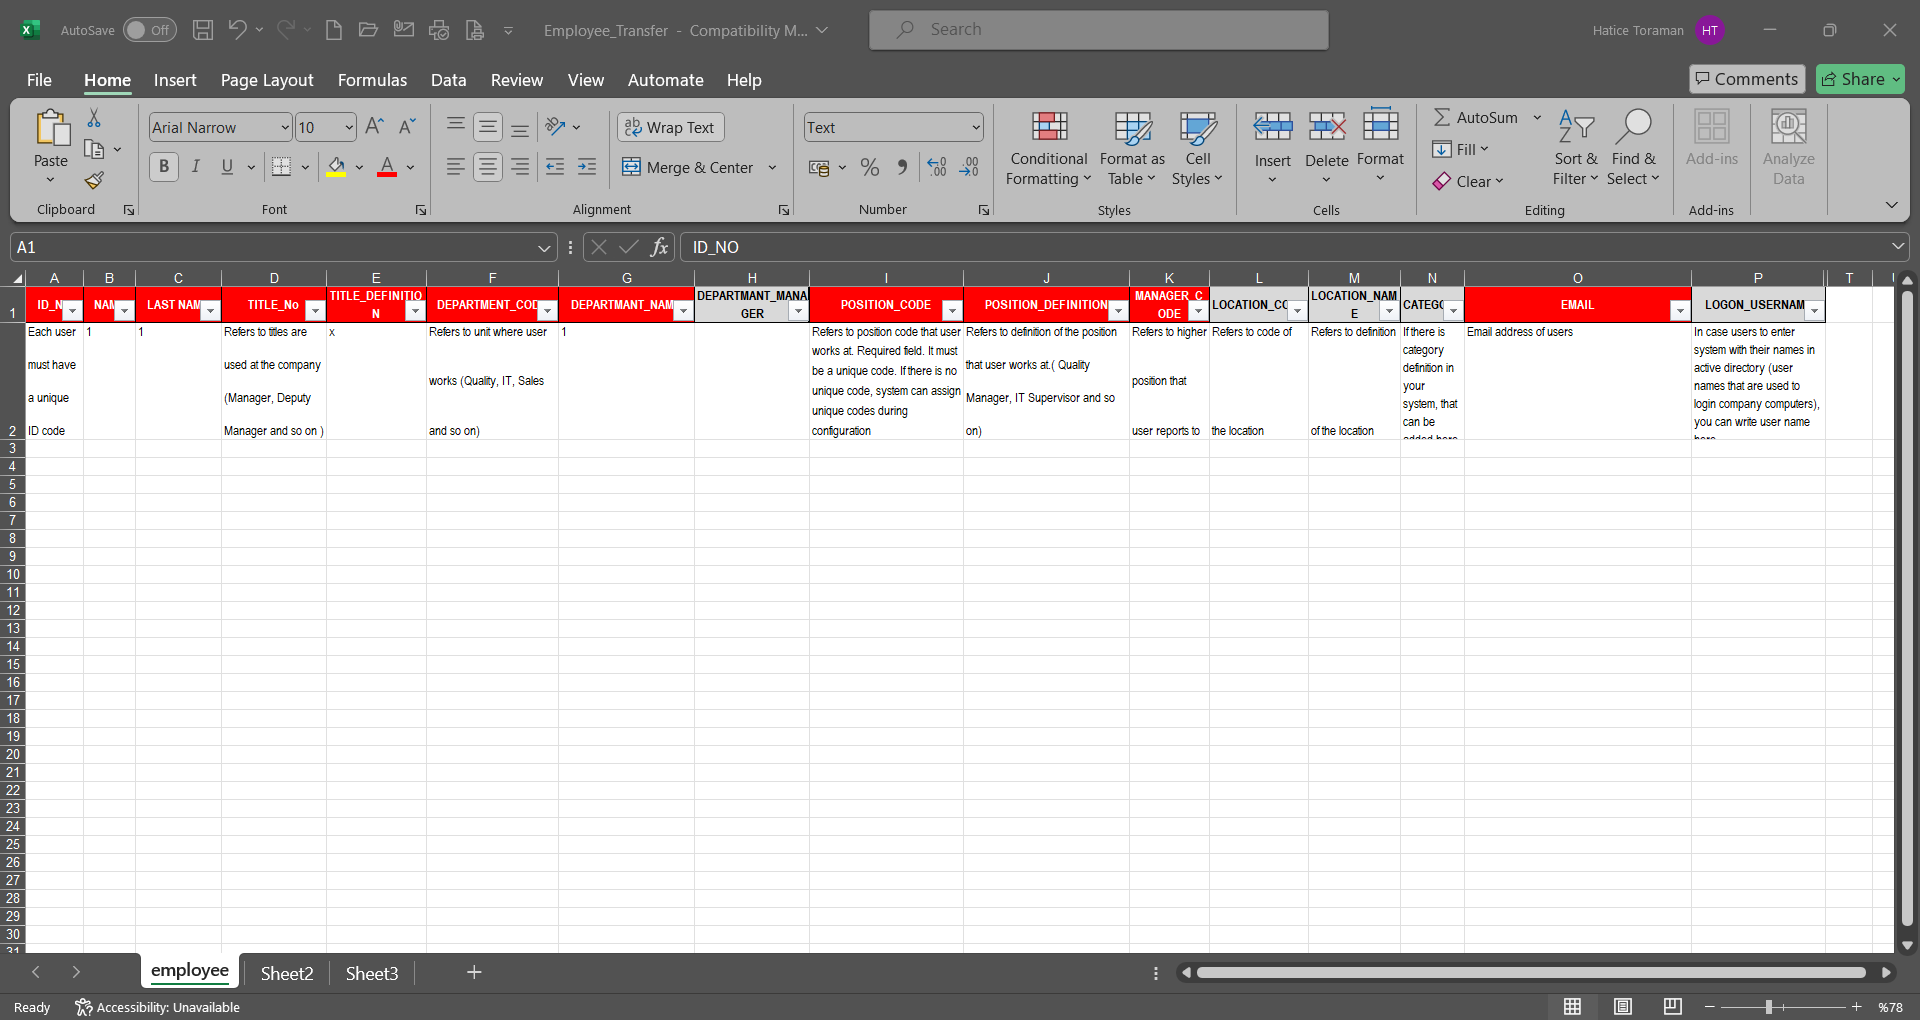
The registration number, name, surname, title code, title description (definition), department code, department name, position code or registration number of the department responsible, position code, position description, senior position code (position code of the first supervisor to whom the personnel reports), workplace code, workplace name, e-mail address are filled in. The headings marked in red in the transfer template are mandatory fields and the headings marked in gray are not mandatory. If Active Directory Integration will be provided, logon username section is filled.
Note: No spaces or Turkish characters should be used in definitions such as Registry No, Code.
With the Filter tab on the Staff Definition screen, data is entered in fields such as Employee's ID number, name, surname, Department, and Title, and filtering is done according to the search criteria by clicking the  (Search) button.
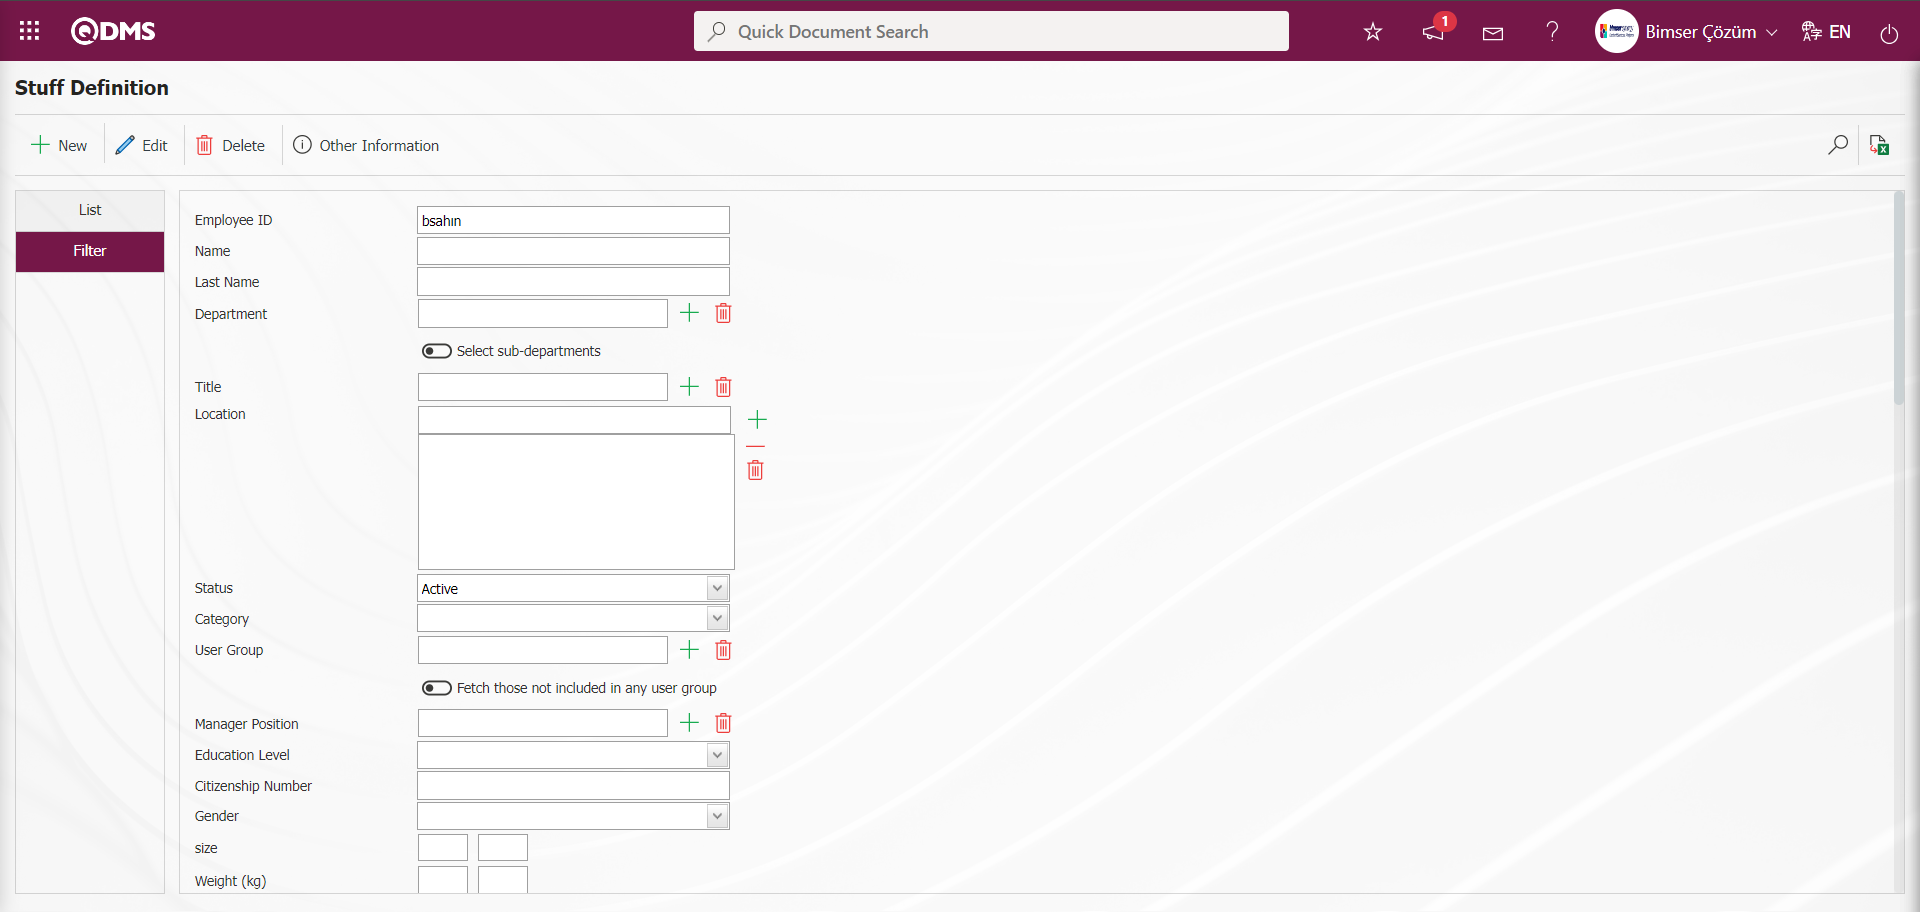
5.1.5. Position Definition
Menu Name: System Infrastructure Definitions /BSID/Definitions/ Positions
This is the menu where all positions within the company are defined. Example positions; IT specialist, human resources manager, production planning engineer, finance chief, etc. The Qdms system is a system based on positions; all delays, notifications, tasks progress according to the upper position to which the personnel is attached. Tasks are assigned according to the position to which the person is attached, not the person. The reason why the system is based on the position and not on the person is to prevent the system from blocking by linking the system to the position and not to the person. Even if the person leaves the job, the tasks are transferred to the new position and the system is prevented from slowing down/stopping.

With the help of the buttons on the screen;
: A new position is defined.
: Correction / change / update is made on the position information selected in the list. Code information cannot be updated.
: The selected position information is deleted. If the position information has not been used in any record, it is deleted, but if the position has been used in any transaction, it is not allowed to be deleted by the system. Instead, it is saved by making its current status passive
:Records are filtered and searched.
:Data is transferred to Excel.
: The search criteria on the menu screens are used to clear the data remaining in the filter fields in the grid where the search operation is performed.
: The menu screen is restored to its default settings.
: User-based designing of the menu screen is done with the show-hide feature, that is, the hiding feature of the fields corresponding to the columns on the menu screens.
To add a new position to the Position Definition screen, click on the () button on the top left corner of the screen to open the Position Definition / New Record screen.

Define the relevant fields on the screen that opens:
Position Code: This is the mandatory field where position code information is defined on the Position Definition - New Record screen. It should be defined without using characters such as spaces and Turkish characters, so that it is not the same as previously defined fields. For example. '001' , 'RK'
Position Desc: Position Definition - This is the mandatory field where the position definition information is defined on the New Record screen. In the fields where the relevant flags are located, the language equivalents of the position definition are written. For example; data processing specialist, human resources manager, production planning engineer, finance chief
Position Owner: This is the field where the Position Owner information is selected from the list of personnel defined in the system that opens by clicking the  (Select) button on the Position Definition - New Record screen. (Personnel List information comes defined in the System Infrastructure Definitions / BSID / Definitions / Personnel Definition menu).
Status: This is the field where the “Active” option is selected in the “Active” and “Inactive” options of the Status information on the Position Definition - New Record screen. Positions with inactive status are a sign that they are no longer used in the system. To see the unused positions, it is sufficient to search for “Passive” in the status field in the search criteria from the filter tab.
Position Definition - New Record screen, the position code and position definition are written. The Position Owner is selected from the list of personnel defined in the system opened by clicking the (Select ) button. Status information is divided into two as “Active” and “Inactive”. Actively defined positions refer to the positions used in the system. If a position definition is no longer used in the system, its status information should be changed to “Inactive”. Thus, both the existing records in the past will not be affected and the inactive position information will not be displayed on the new position selection screens. After the required fields are filled in, click on the button in the upper left corner and the Position Definition registration process is realized.

In the Position Definition screen, data is entered in the fields such as Name, Surname, Position Code, Position Description and Status of the position holder with the Filter tab and filtered according to the search criteria by clicking the (Search) button.

5.1.6. City Definition
Menu Name: System Infrastructure Definitions /BSID/ Definitions/ Cities
It is the menu where city definitions come by default, a new city definition is made and the existing city information is updated. The city information defined with this menu is used in customer/supplier definition screens.
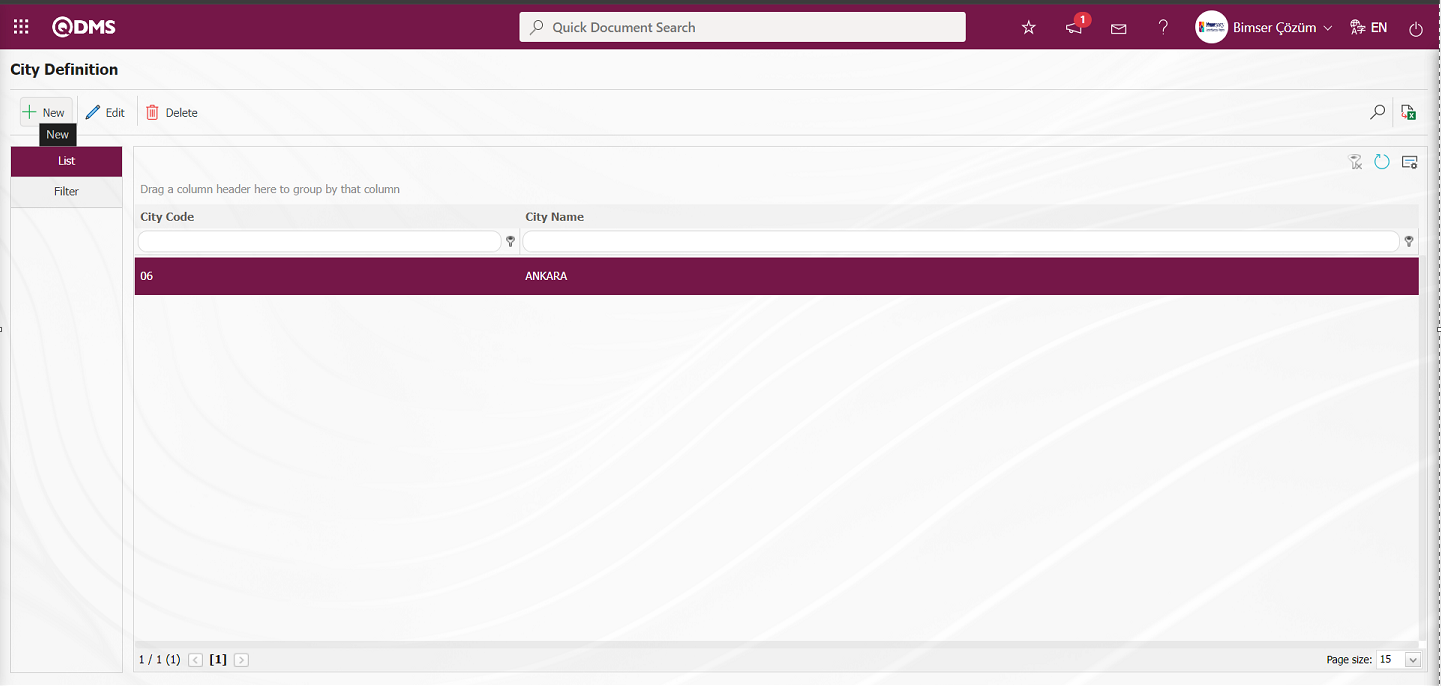
With the help of the buttons on the screen;
: Define a new city.
: Correction / change / update is made for the city information selected in the list. Code information cannot be updated.
: The city information selected in the list is deleted.
:Records are filtered and searched.
:Data is transferred to Excel.
: The search criteria on the menu screens are used to clear the data remaining in the filter fields in the grid where the search operation is performed.
: The menu screen is restored to its default settings.
: User-based designing of the menu screen is done with the show-hide feature, that is, the hiding feature of the fields corresponding to the columns on the menu screens.
To add a new province to the City Definition screen, click on the button at the top left corner of the screen to open the City Definition screen.
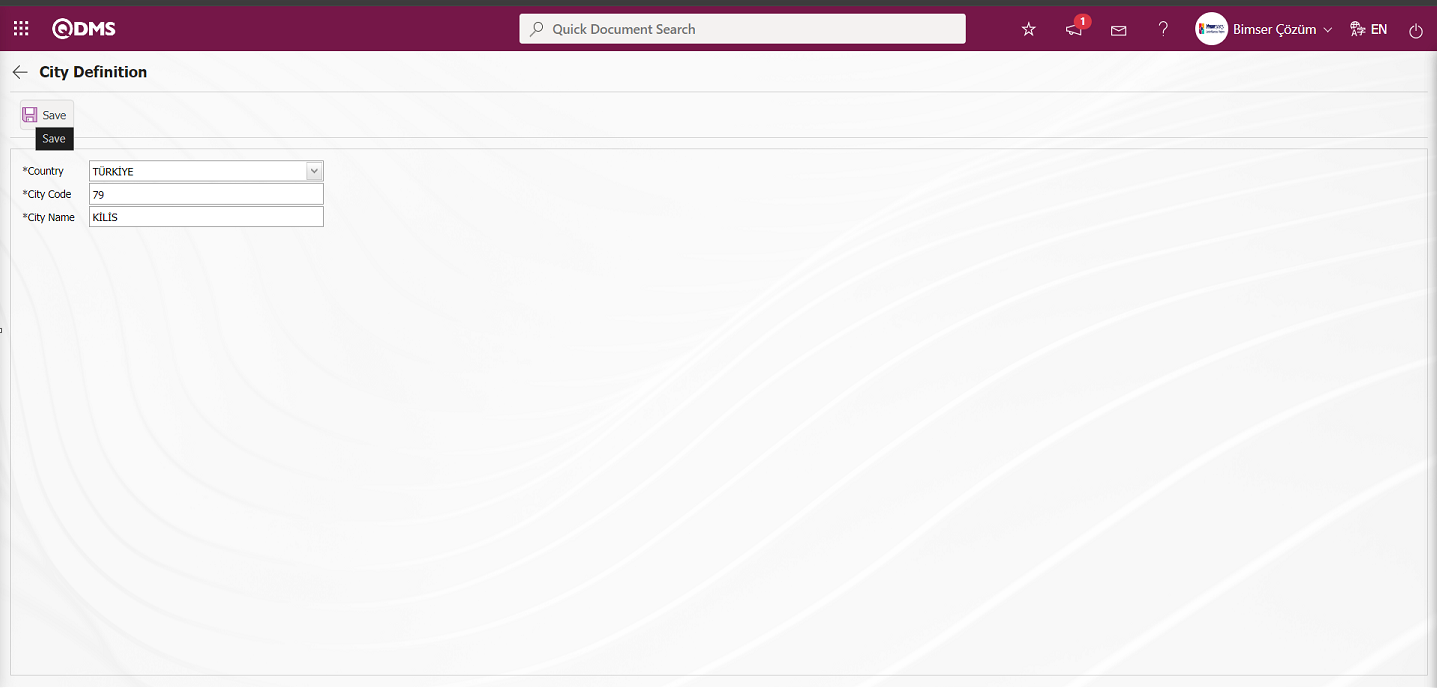
Related fields are defined on the screen that opens:
Country: It is the mandatory field where the country information of the city to be defined on the City Definition screen is selected in the Country list opened by clicking the drop-down list. (Country List information comes as defined in the System Infrastructure Definitions / BSID / Definitions / Country Definition menu).
City Code: This is the mandatory field where city code information is defined on the City Definition screen.
City Name: This is the mandatory field where the city name is defined on the City Definition screen.
The country where the city to be defined on the city definition screen is located is selected from the country list. City Code and City Name information is written. After the required fields are filled in, the City Definition registration process is realized by clicking the button in the upper left corner.
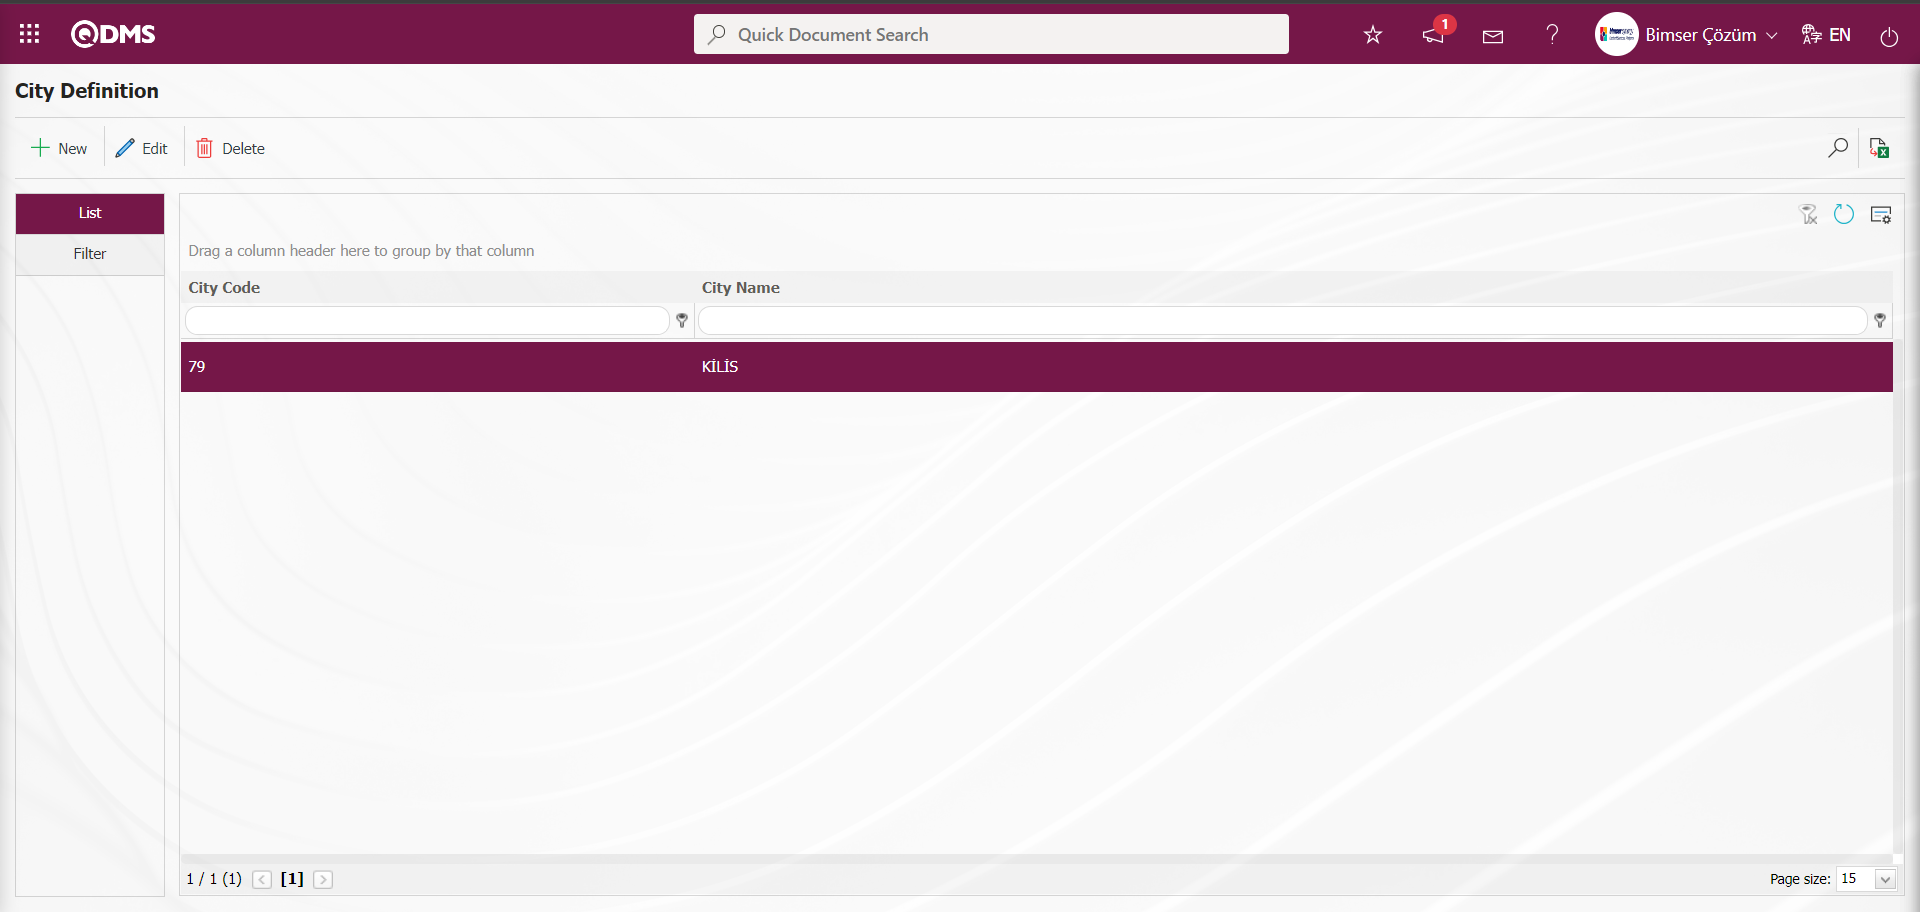
In the City Definition screen, data is entered in the fields such as City Code and City Name with the Filter tab and filtering is done according to the search criteria by clicking the (Search) button.

5.1.7. Country Definition
Menu Name: System Infrastructure Definitions/ BSID/ Definitions/ Countries
It is the menu where country definitions come by default, a new country definition can be made and the existing country definition can be updated. Country information defined with this menu is used in customer/supplier definition screens.

With the help of the buttons on the screen;
: Define a new country.
: Correction / change / update is made for the country information selected in the list. Code information cannot be updated.
: The country information selected in the list is deleted.
:Records are filtered and searched.
:Data is transferred to Excel.
: The search criteria on the menu screens are used to clear the data remaining in the filter fields in the grid where the search operation is performed.
: The menu screen is restored to its default settings.
: User-based designing of the menu screen is done with the show-hide feature, that is, the hiding feature of the fields corresponding to the columns on the menu screens.
To add a new country to the Country Definition screen, click on the button at the top left corner of the screen to open the Country Definition / New Record screen.
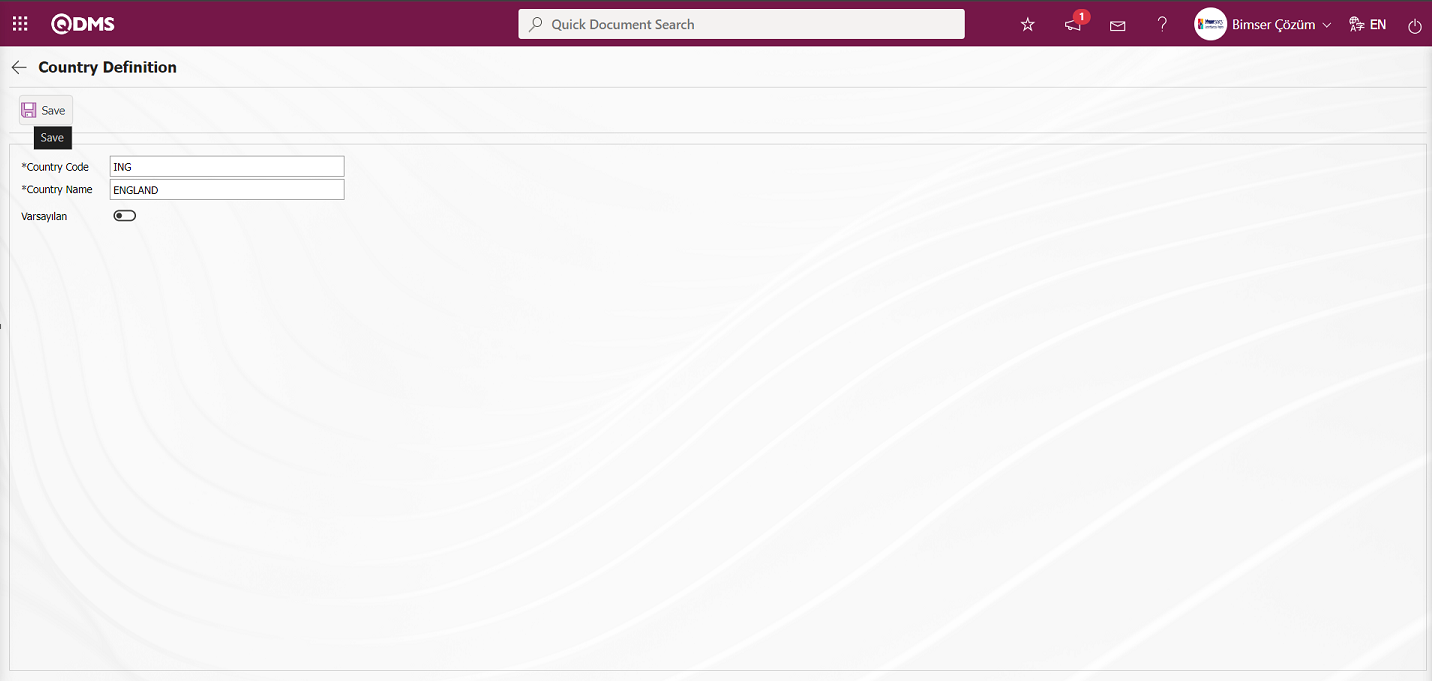
Related fields are defined on the screen that opens:
Country Code: This is the mandatory field where country code information is defined in the Country Definition screen.
Country Name: This is the mandatory field where the country name is defined on the Country Definition screen.
Country Code and Country Name information are entered on the Country Definition screen. After the required fields are filled in, the Country Definition registration process is realized by clicking the button in the upper left corner.

In the Country Definition screen, data is entered in the fields such as Country Code and Country Name with the Filter tab and filtered according to the search criteria by clicking the (Search) button.
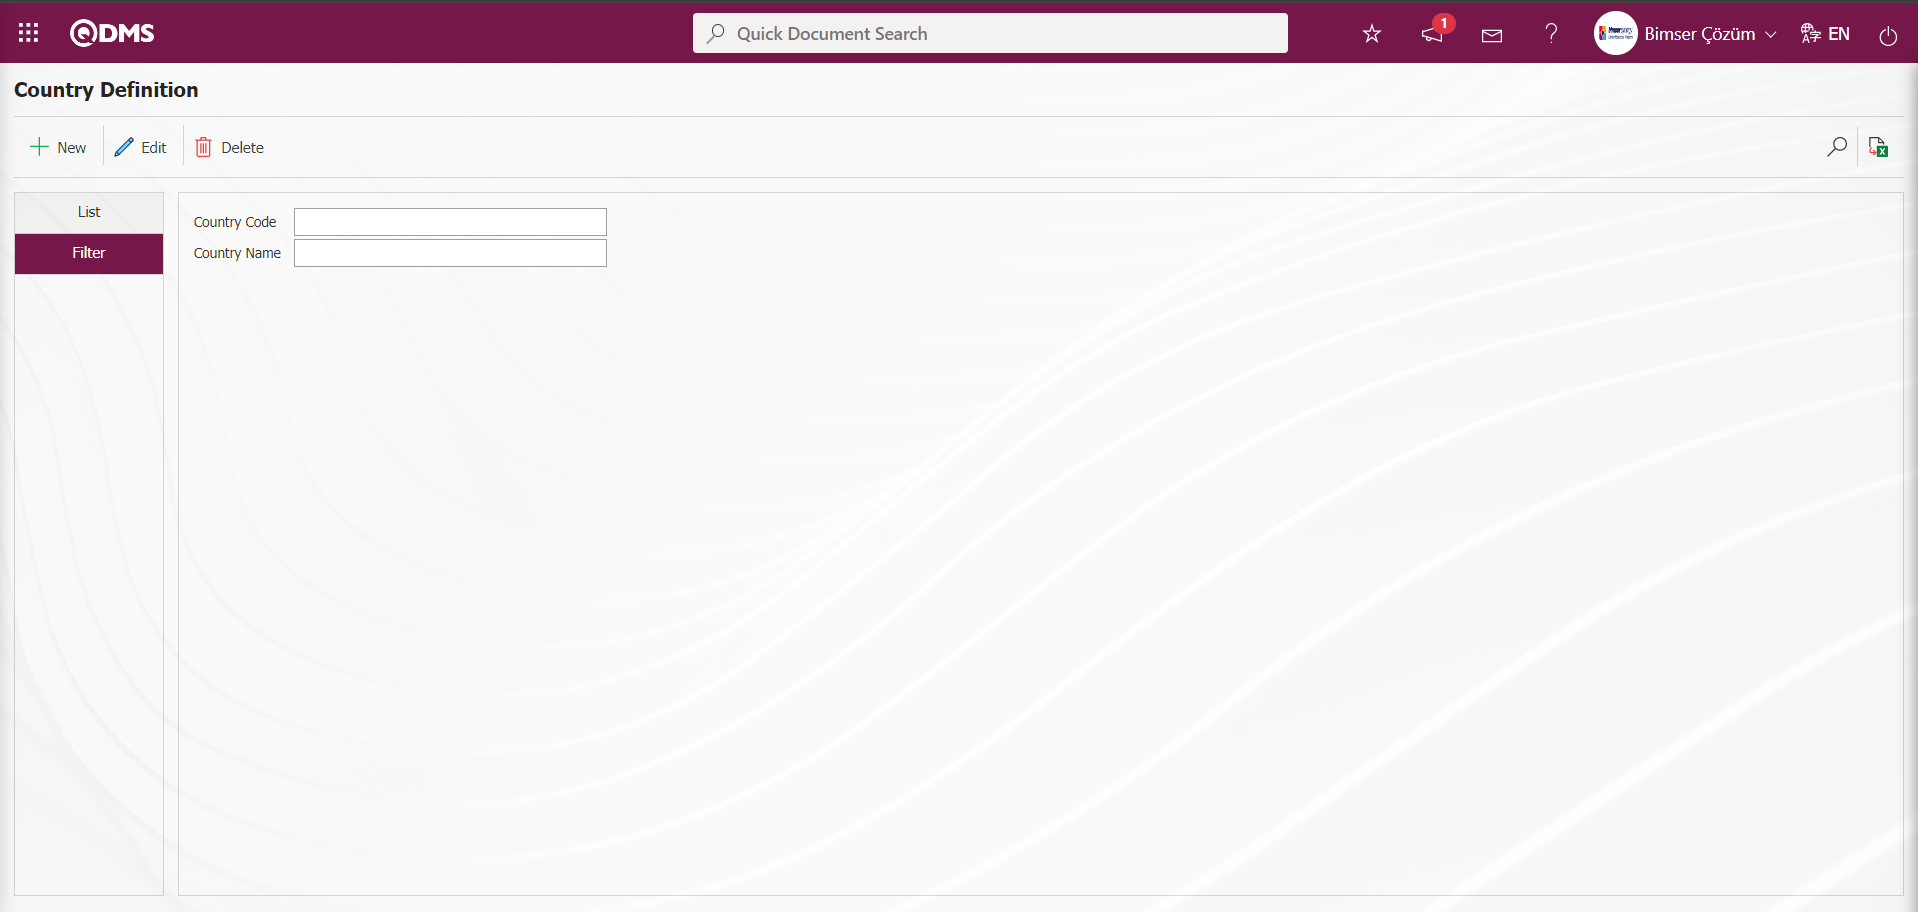
5.1.8.User Groups Definition
Menu Name: System Infrastructure Definitions/ BSID/ Definitions/ User Groups
This is the menu where user groups to be used in the system are defined. User groups provide ease of use in menu authorization processes, easier and more effective use of information areas, grouping personnel with equivalent competencies such as manager / expert / engineer, grouping users in the same workplace / department, defining module-based user groups and flow definitions. One person can be included in more than one group. The system comes with a user group defined as “System Administrators” and “Standard Users” in the first installation. Qdms administrators are included in the “System Administrators” group, while all other users are included in the “Standard Users” group.

With the help of the buttons on the screen;
: Define a new user group.
: Correction / change / update is made for the user group information selected in the list. Code information cannot be changed.
: The user group information selected in the list is deleted.
 : The user group information selected in the list is copied and duplicated. If the people in an existing group will be reused with another group name, the group copy operation is performed with the copy button.
 : Group rules are created in various categories (if HR Integration is available)
 : Personnel information in the User Group is exported to Excel.
:Records are filtered and searched.
:Data is transferred to Excel.
: The search criteria on the menu screens are used to clear the data remaining in the filter fields in the grid where the search operation is performed.
: The menu screen is restored to its default settings.
: User-based designing of the menu screen is done with the show-hide feature, that is, the hiding feature of the fields corresponding to the columns on the menu screens.
To add a new User Group to the User Group Definition screen, click the button on the upper left corner of the screen to open the User Group Definition / New Record screen.
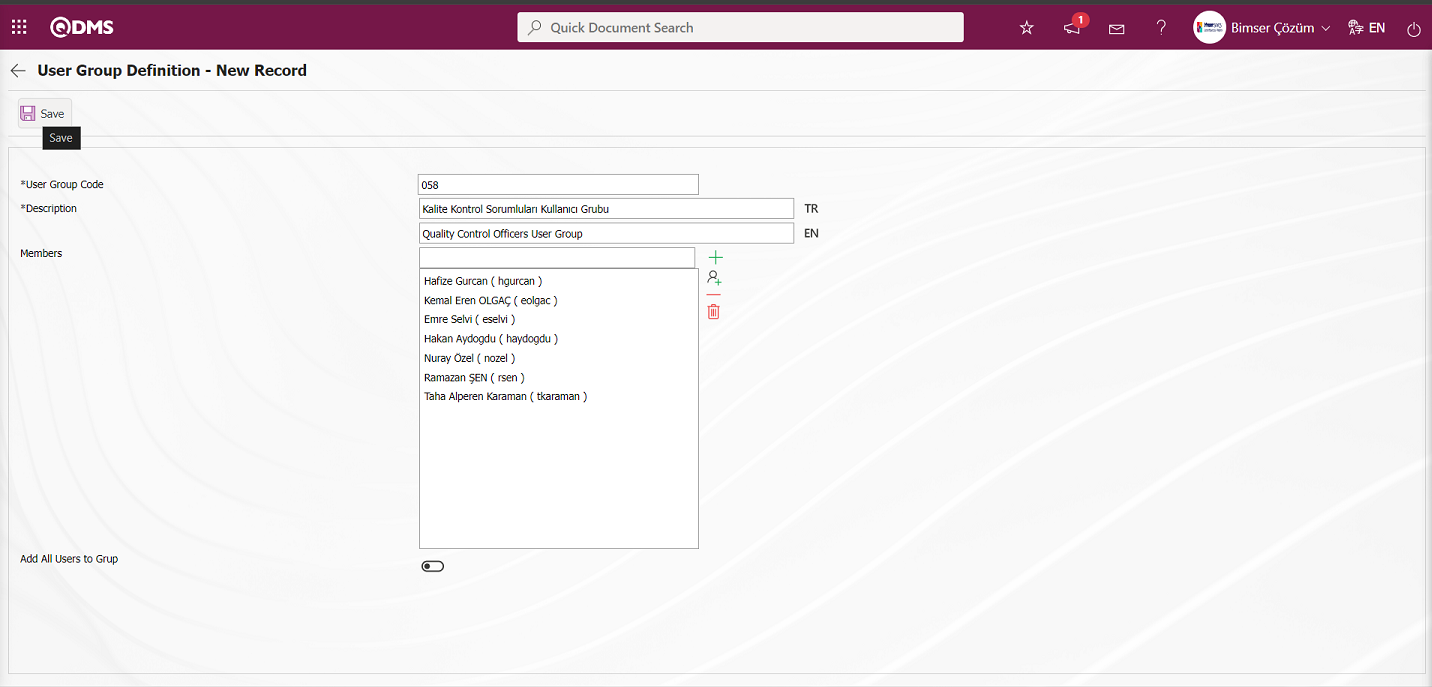
User Group Code: This is the mandatory field where the user group code information is defined on the User Group Definition - New Record screen. It should be defined without using characters such as spaces and Turkish characters, so that it is not the same as previously defined fields. The system automatically defines a code template according to the code template defined in the “User Group auto code template” parameter 113 in the System Infrastructure Definitions parameters.
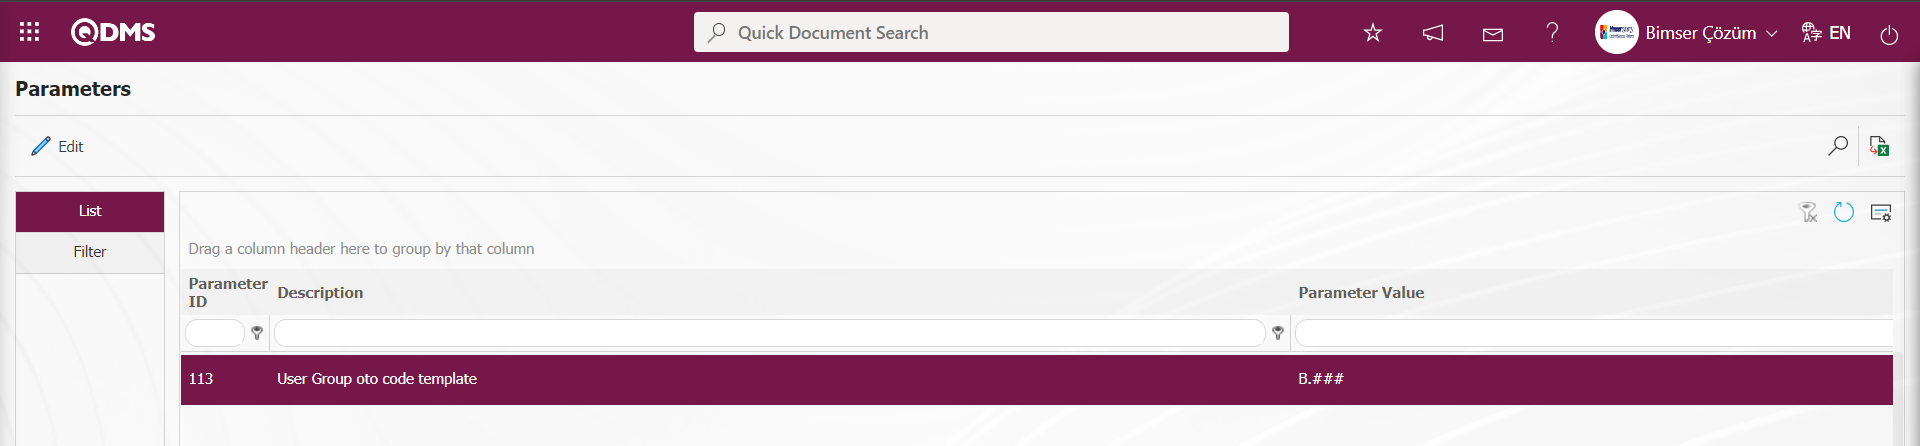
After defining the code template in parameter 113, the code template is started from which value according to the counter value in parameter 114 “User Group auto code counter”.
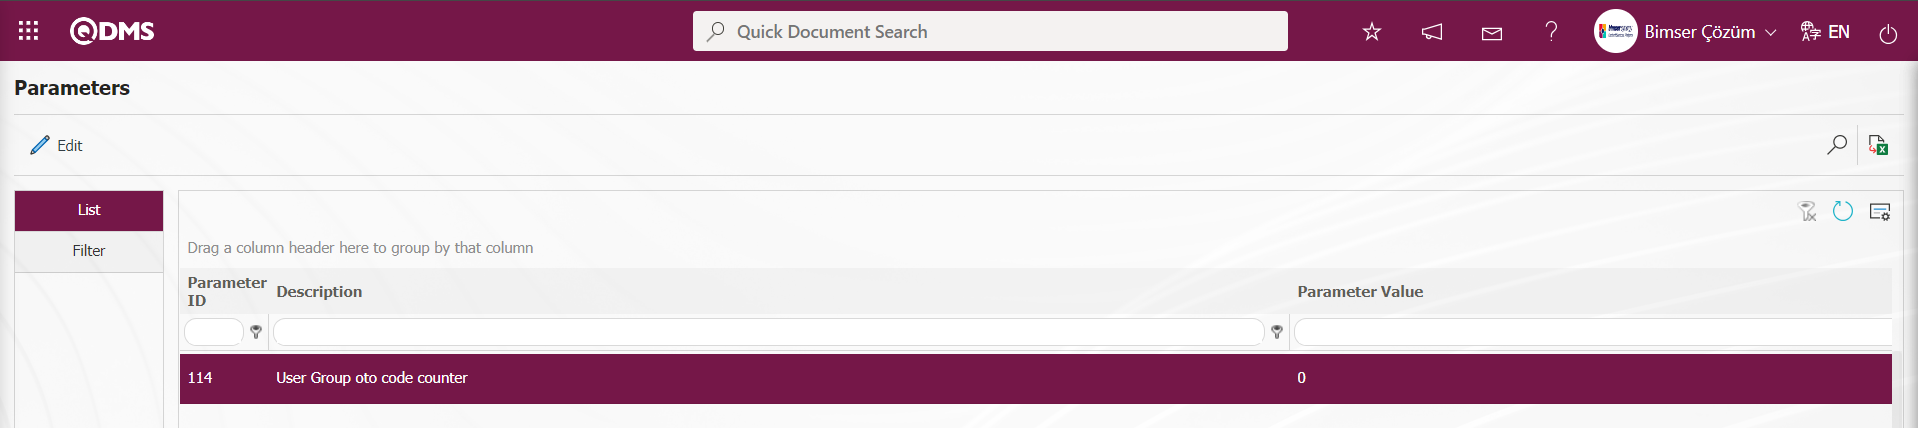
When the counter value in parameter 114 is “0”, the code template in parameter 113 automatically defines the code template as B.001, B.002, B.003 for the user groups defined respectively.
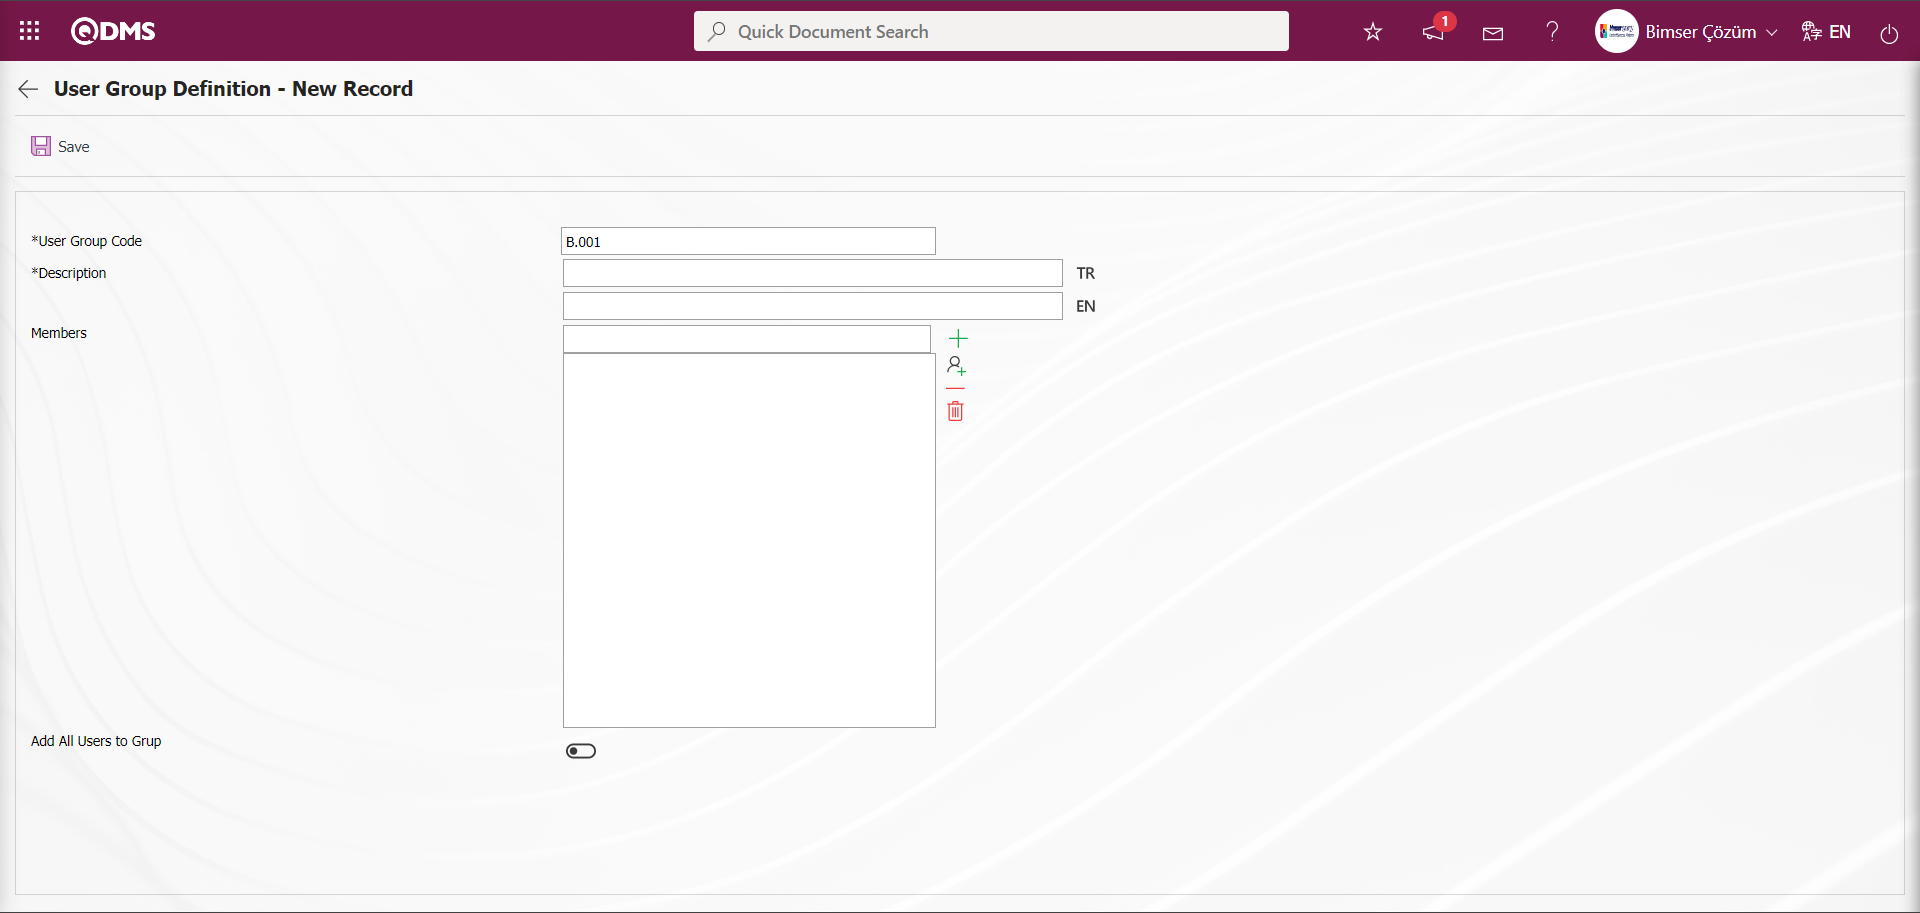
Description: User Group Definition - This is the mandatory field where the definition information of the User Group is defined on the New Record screen. In the fields with related flags, the language equivalents of the description field are written. For example: System Administrators, Standard Users, Action Management Administrators
Members: The group members to be added to the user group on the User Group Definition - New Record screen is the field where the selection is made in the system-defined personnel list opened by clicking the  (Add) button or in the system-defined User Group list opened by clicking the
  (Select) button. In this field, the deletion of the selected personnel is done by clicking the
  (Delete) button or the deletion of all personnel added with the
  (Delete All) button.
Add All Users to the Group: When the check box related to the relevant field is checked on the User Group Definition - New Record screen, it is the field where all personnel are added to the user group.
After filling in the required fields on the User Group Definition - New Record screen, the user group definition registration process is performed by clicking the button in the upper left corner.
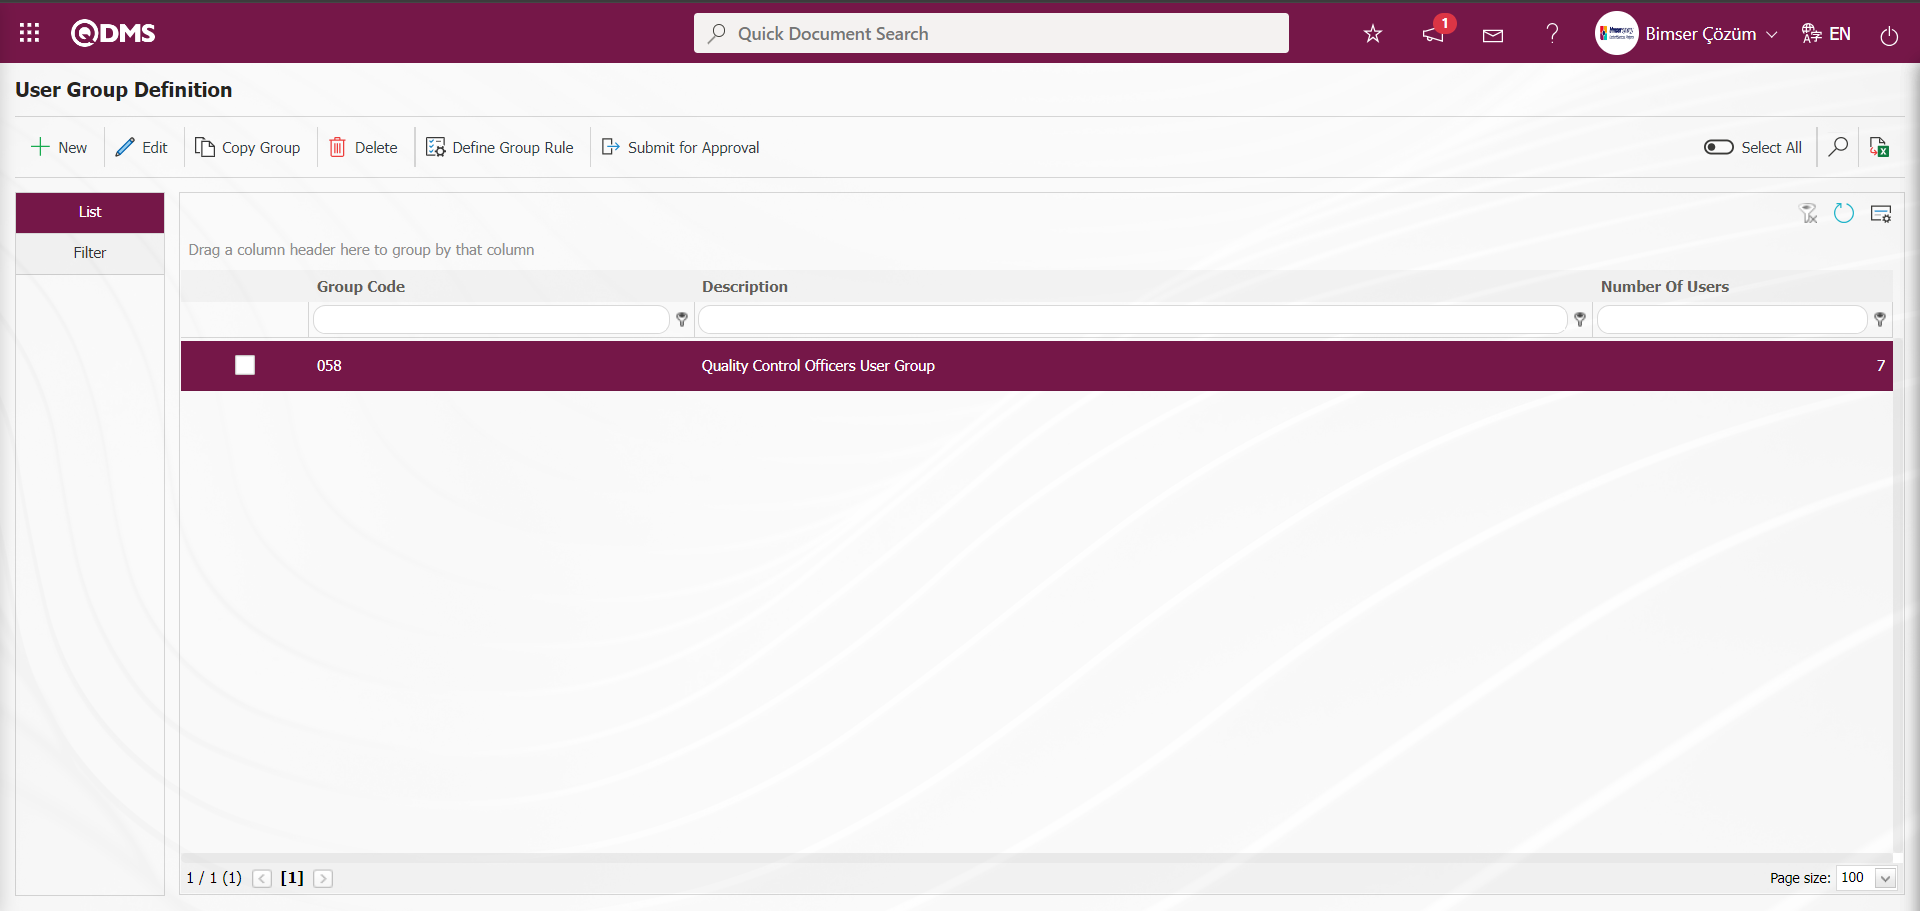
Click the  button while the User Group is selected on the User Group Definition screen.
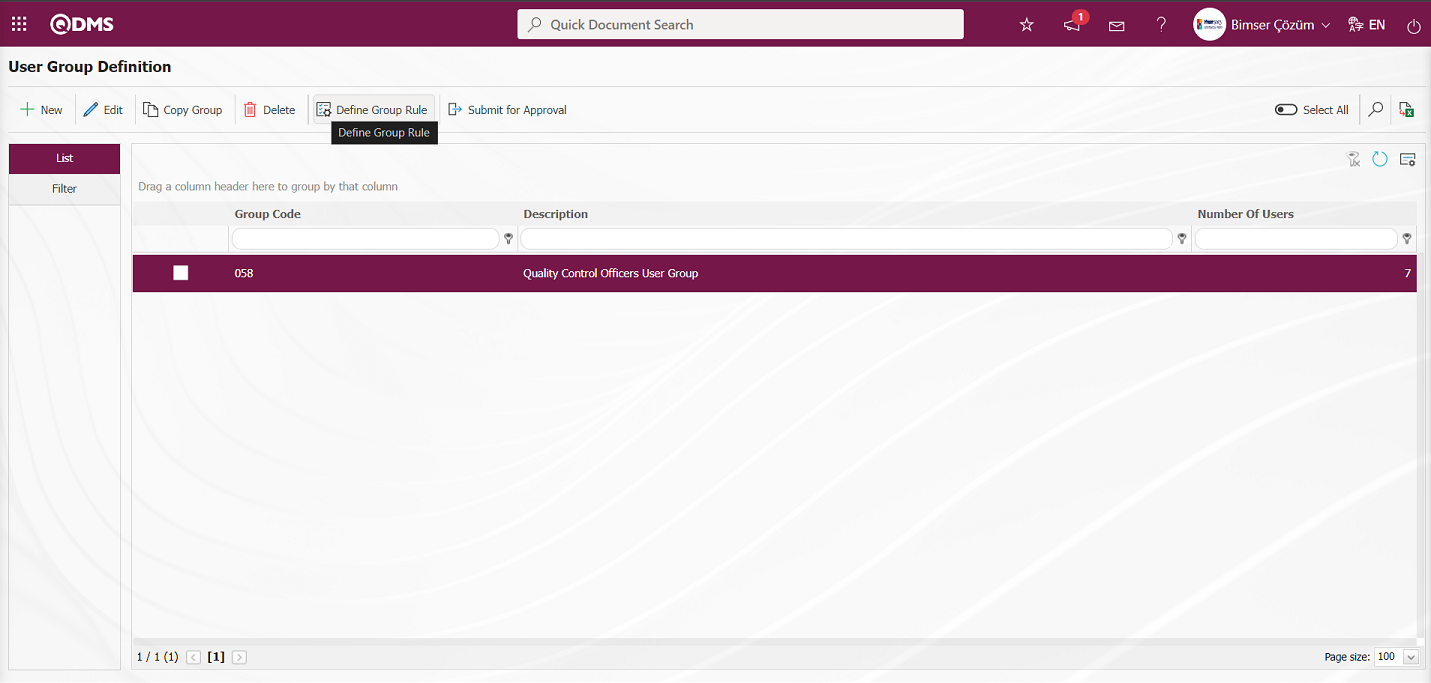
In the user group definition screen, a rule can be defined for the user group with the button in the upper right corner. This rule works when there is HR Integration. When the integration works, the personnel are transferred to the relevant user group according to the rules created on this screen.

As in the example, the rule is defined to automatically add personnel in departments with department codes D.001, D.002 or title code U.002 to this group. By clicking the button in the upper left corner, the Create User Group Rule registration process is performed. When the personnel integration is realized, the personnel are transferred to the relevant user groups according to the group rule applied.
On the User Group Definition - Update Record screen, the system gives the message “A rule applied to this group, any changes on group members will be cancelled when transfer program executed”.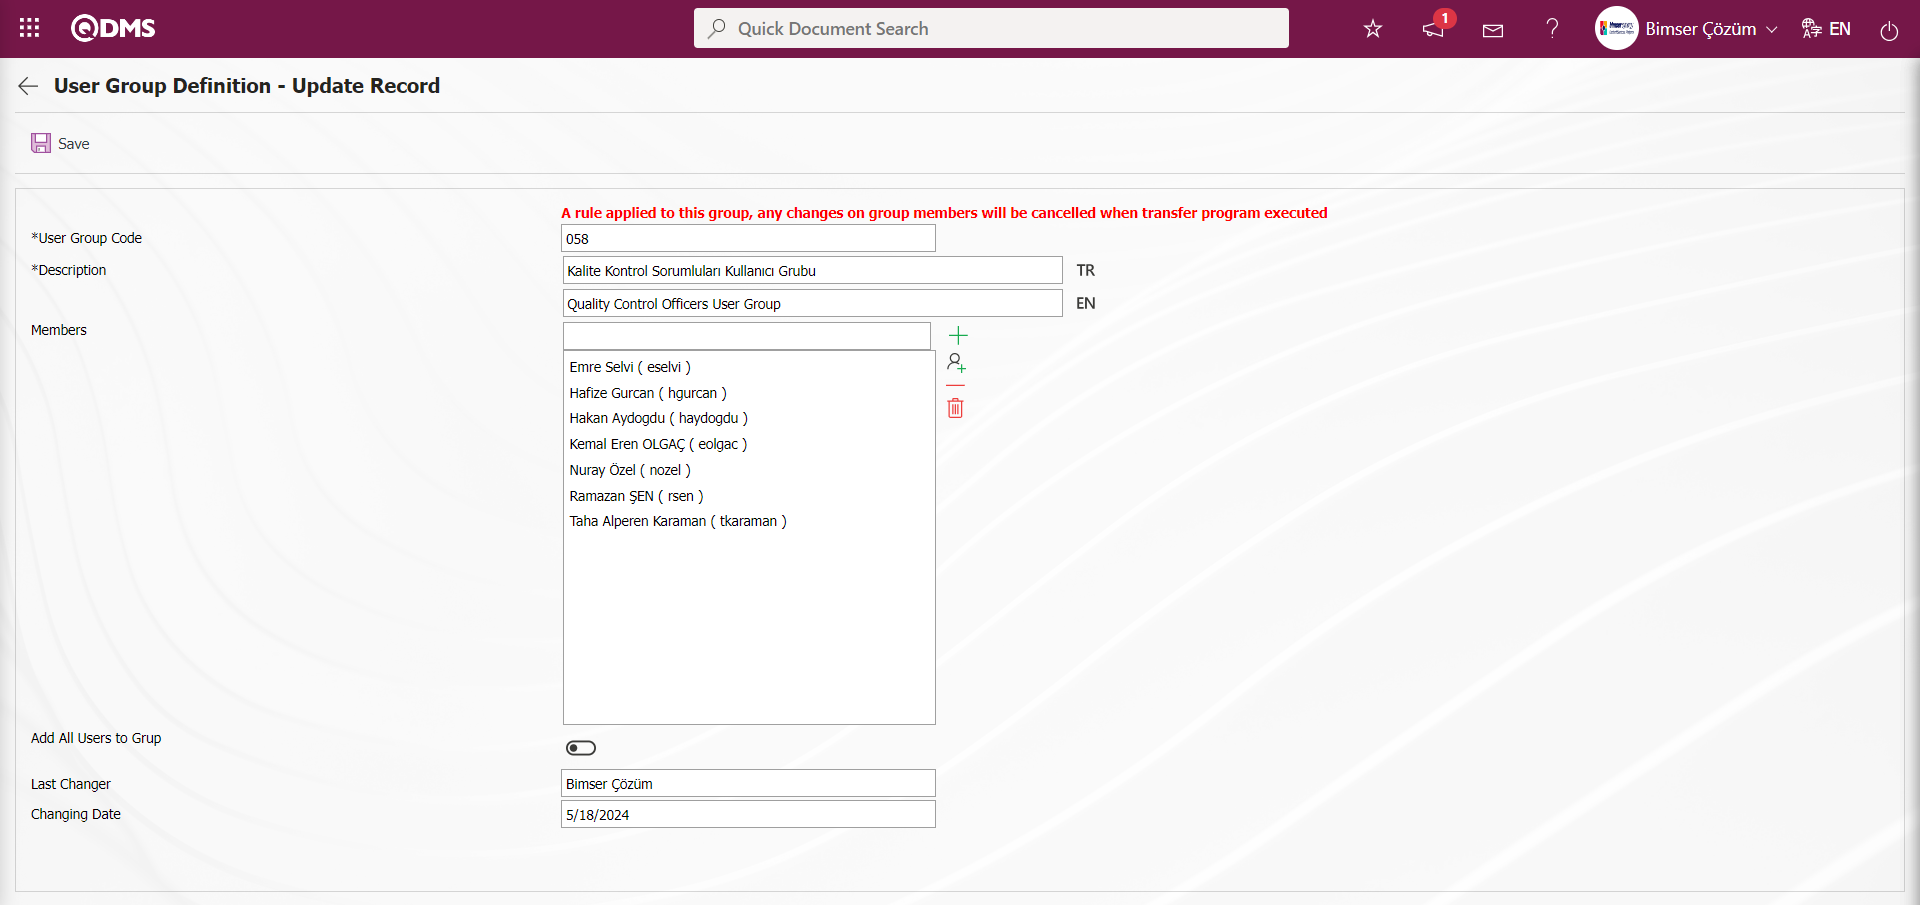
In the option where the rule is specified, if it uses “Similar”, a % sign should be placed at the end of the corresponding code. For example: 50000498-01, 50000498-02, etc. If the rule for those similar to 50000498 is to be set, it should be written as 50000498%.
If it is desired to add everyone who is included in the system to the All Users Group, then 0 (zero) should be written in the relevant field selected Equals from the Category field and saved.
The conjunction “and - or”, which we call Operator, is very important here. When the and conjunction is used; if all the rules are met, personnel are added to the user group. When the conjunction or is used, if only one of the rules is met, personnel are added to the user group.
In the User Group Definition screen, data is entered in the fields such as User Group Code, Description, and Department with the Filter tab, and filtering is done according to the search criteria by clicking the  (Search) button.

5.1.9. Authorization Group Definition
Menu Name: System Infrastructure Definitions/ BSID/ Definitions/ Authorization Groups
This is the menu where users can set which menus they will see on QDMS. Menu authorization is made according to user groups. For example System administrators user groups can see every menu, while standard users can only see which screen of which module under the Integrated Management Systems menu. If the Action Management Administrator team is also required to set up the Action Management infrastructure on Qdms, an authorization group called Action Management Team can be created and all menus belonging to the Action Management Module under the System Infrastructure definitions and all Action Management menu authorizations under the Integrated Management System menu can be selected.
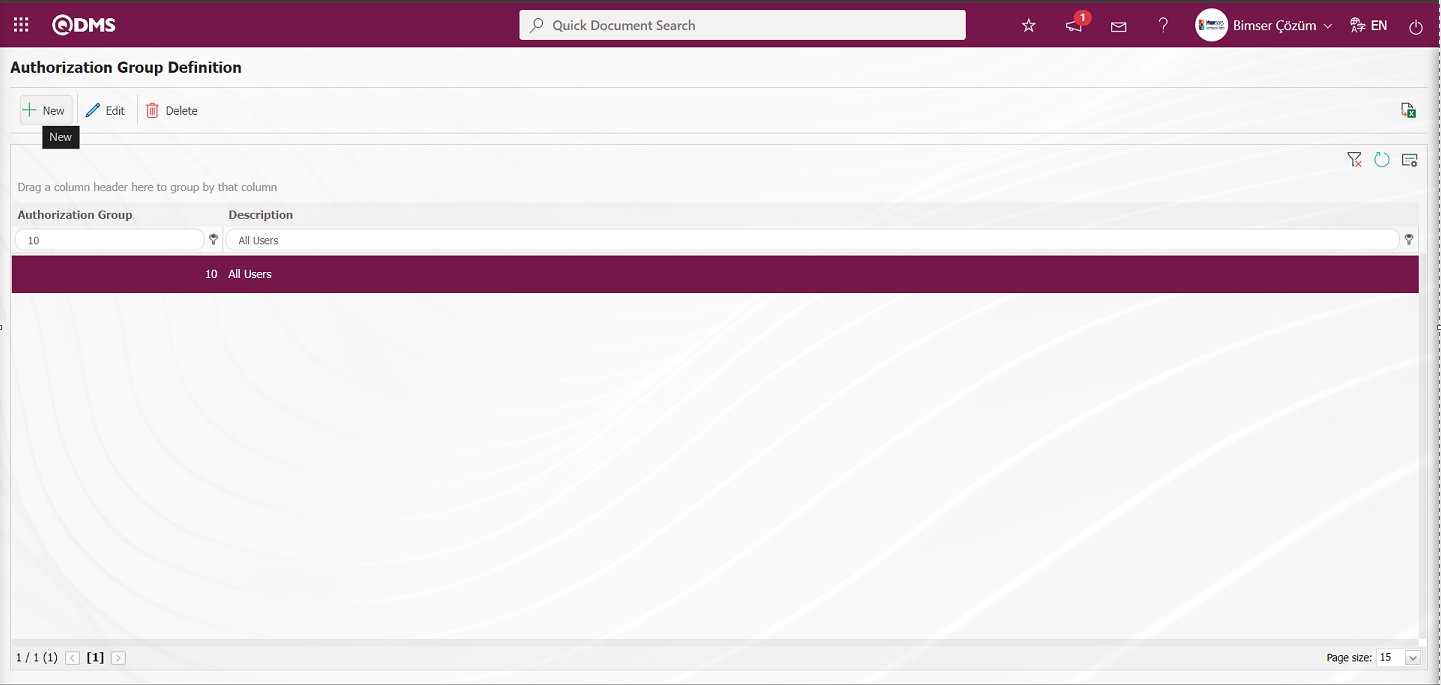
With the help of the buttons on the screen;
 : A new authorization group is defined.
: Correction / change / update is made for the authorization group information selected in the list.
 : The authorization group information selected in the list is deleted.
:Records are filtered and searched.
:Data is transferred to Excel.
: The search criteria on the menu screens are used to clear the data remaining in the filter fields in the grid where the search operation is performed.
: The menu screen is restored to its default settings.
: User-based designing of the menu screen is done with the show-hide feature, that is, the hiding feature of the fields corresponding to the columns on the menu screens.
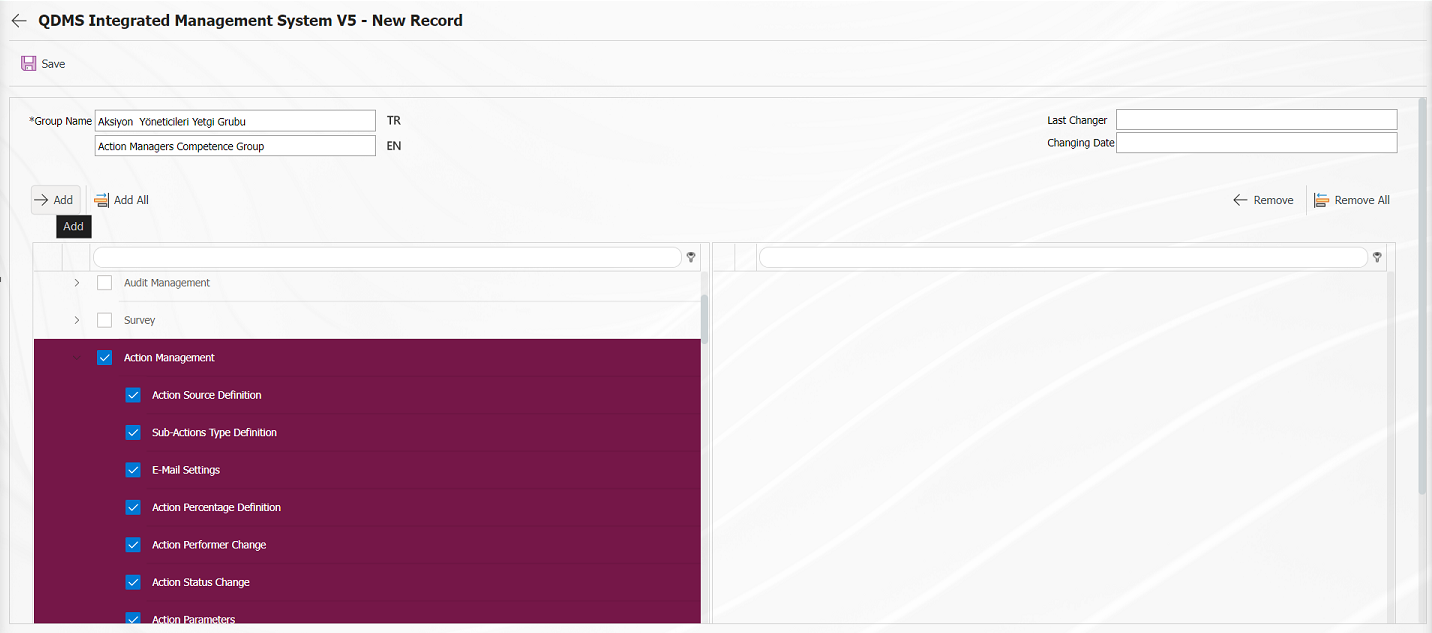
With the help of the buttons on the screen;
 :By adding the menus selected in the relevant module, the menu viewing authorizations are moved to the right side.
 :All menus are added and menu viewing authorizations are moved to the right side.
 :Removing the authorization to see the menu added in the related module is done.
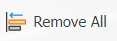 :Removing the menu viewing authorizations in all menus is done.
The menus opened in the System Infrastructure Definitions (BSID) section cover the menus in the relevant modules in the System Infrastructure Definitions section of the Qdms system. In this section, if menu authorization will be made in the relevant modules, the selection process is done. The menus opened in the Integrated Management System (QDMS) section cover the menus in the relevant modules in the Integrated Management System section of the Qdms system. In this section, if menu authorization is to be made in the relevant modules, the selection process is made. The menus of the Ensemble program written in parentheses (ENS.COMMON) in the headings include the menus. If menu authorization operations are to be performed with the Ensemble program, these headings are clicked and the menus are selected in the drop-down list and the relevant buttons are clicked.
For example: In the Action Management module, since the menu viewing authorizations related to the System Infrastructure Definitions and Integrated Management Module will be given in the Action Management module, the menus in these sections in the relevant module are marked and the menu viewing authorizations are given only with the Action Management Module by clicking the button.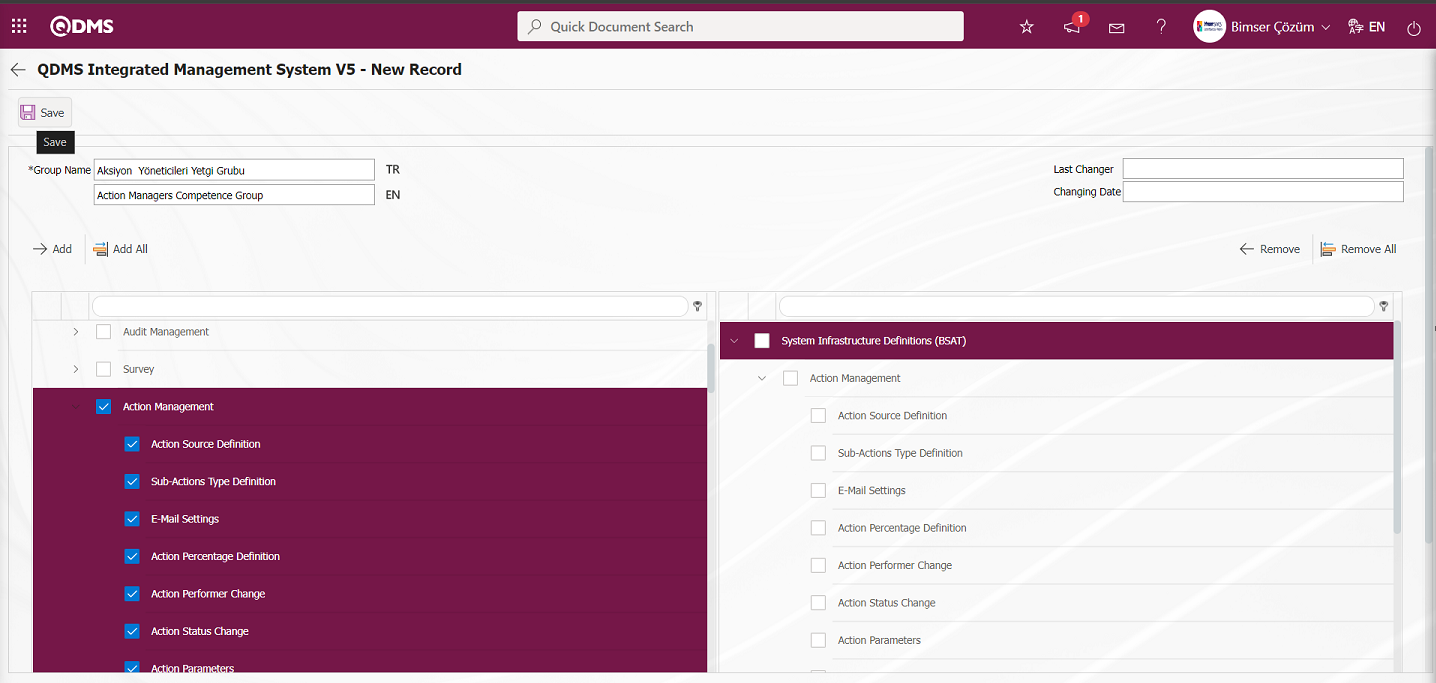
After the action steps with the menu vision authorizations of the Action Management module, the registration process of Defining Authorization Groups is done by clicking the button in the upper left corner of the screen.
5.1.10. User Authorization Definition
Menu Name: System Infrastructure Definitions/ BSID/ Definitions/ User Authorization
This is the menu where user groups and authorization groups are matched. If you want the created user groups to have which of the authorizations specified in the authorization group definition menu, you need to associate the relevant user group with the authorization group. Thus, menu viewing authorization is made for users collectively. In the Qdms system, the process of authorizing users to see the menu is in three stages
- In the first step, a user group is defined for the users who will be authorized to see the menu. Users who will be given menu authorization to this defined user group are added to the list of personnel defined in the system.
- In the second step, it is the step where the menus where users can see which menus are selected. In this step, it is the step made in the Authorization Group definition menu. For example; Action Management Team. (In the Action Management module, authorization was made from the System Infrastructure Definitions and Integrated Management System menus.)
- The third step is the process of matching the user group defined in the User Authorization Definition menu and the Authorization Group Definition menus.
Note: Authorization operations within modules and depending on the parameters can also be in the Qdms system. For example: Authorization in the authorization matrix in Document Management, workplace-based security in the relevant module in the parameters.
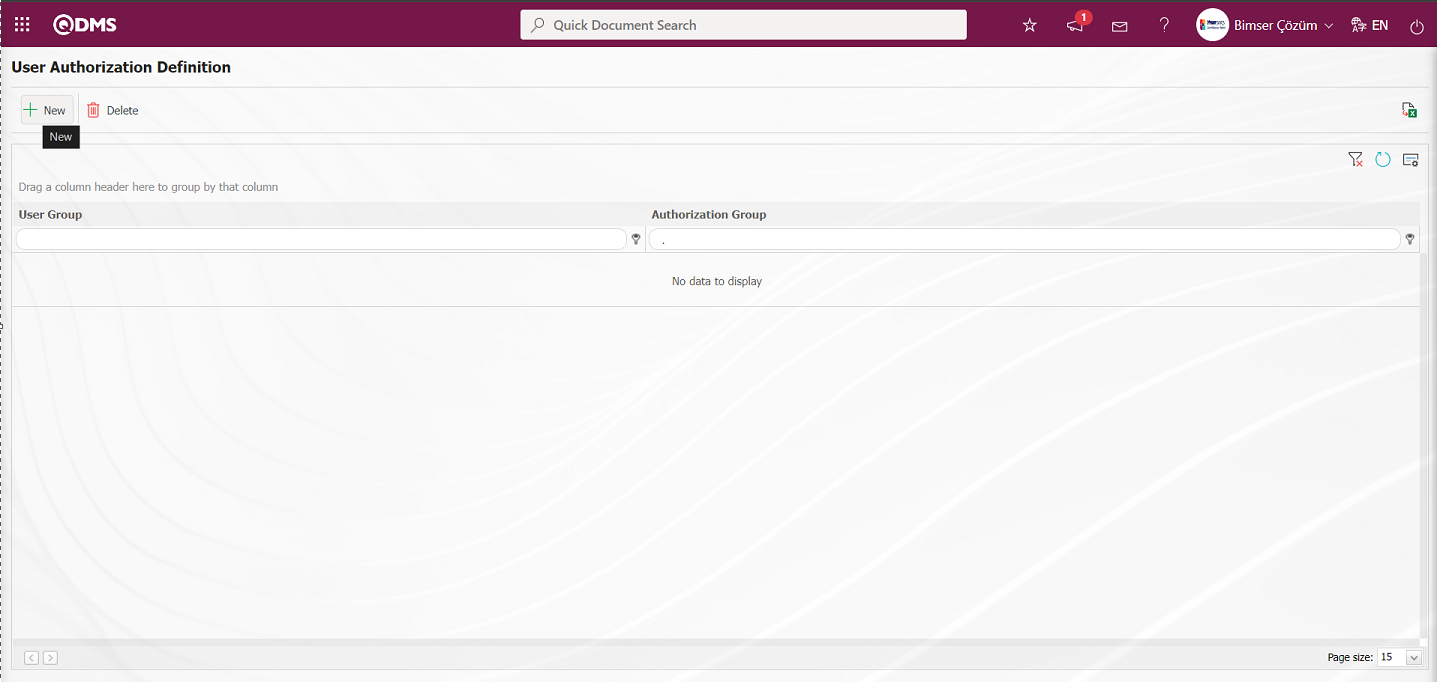
With the help of the buttons on the screen;
: A new user authorization is defined.
: Deletes the user authorization matching selected in the list.
:Records are filtered and searched.
:Data is transferred to Excel.
: The search criteria on the menu screens are used to clear the data remaining in the filter fields in the grid where the search operation is performed.
: The menu screen is restored to its default settings.
: User-based designing of the menu screen is done with the show-hide feature, that is, the hiding feature of the fields corresponding to the columns on the menu screens.
To make a new user authorization mapping on the User Authorization Definition screen, click on the button in the upper left corner of the screen to open the User Authorization Definition screen

Define the relevant fields on the screen that opens:
User Group: This is the mandatory field where User Group selection is made from the User Group list defined in the system opened by clicking the (Select) button on the User Authorization Definition screen.
Group of Authority: It is the field for selecting the Group of Authority from the Group of Authority list opened by clicking the drop-down list on the User Authorization Definition screen.
In the User Authorization Definition screen, user groups and authorization groups are matched and it is determined which user group will have which authorization. After the required fields are selected, the User Authorization Defining registration process is performed by clicking the button in the upper left corner.
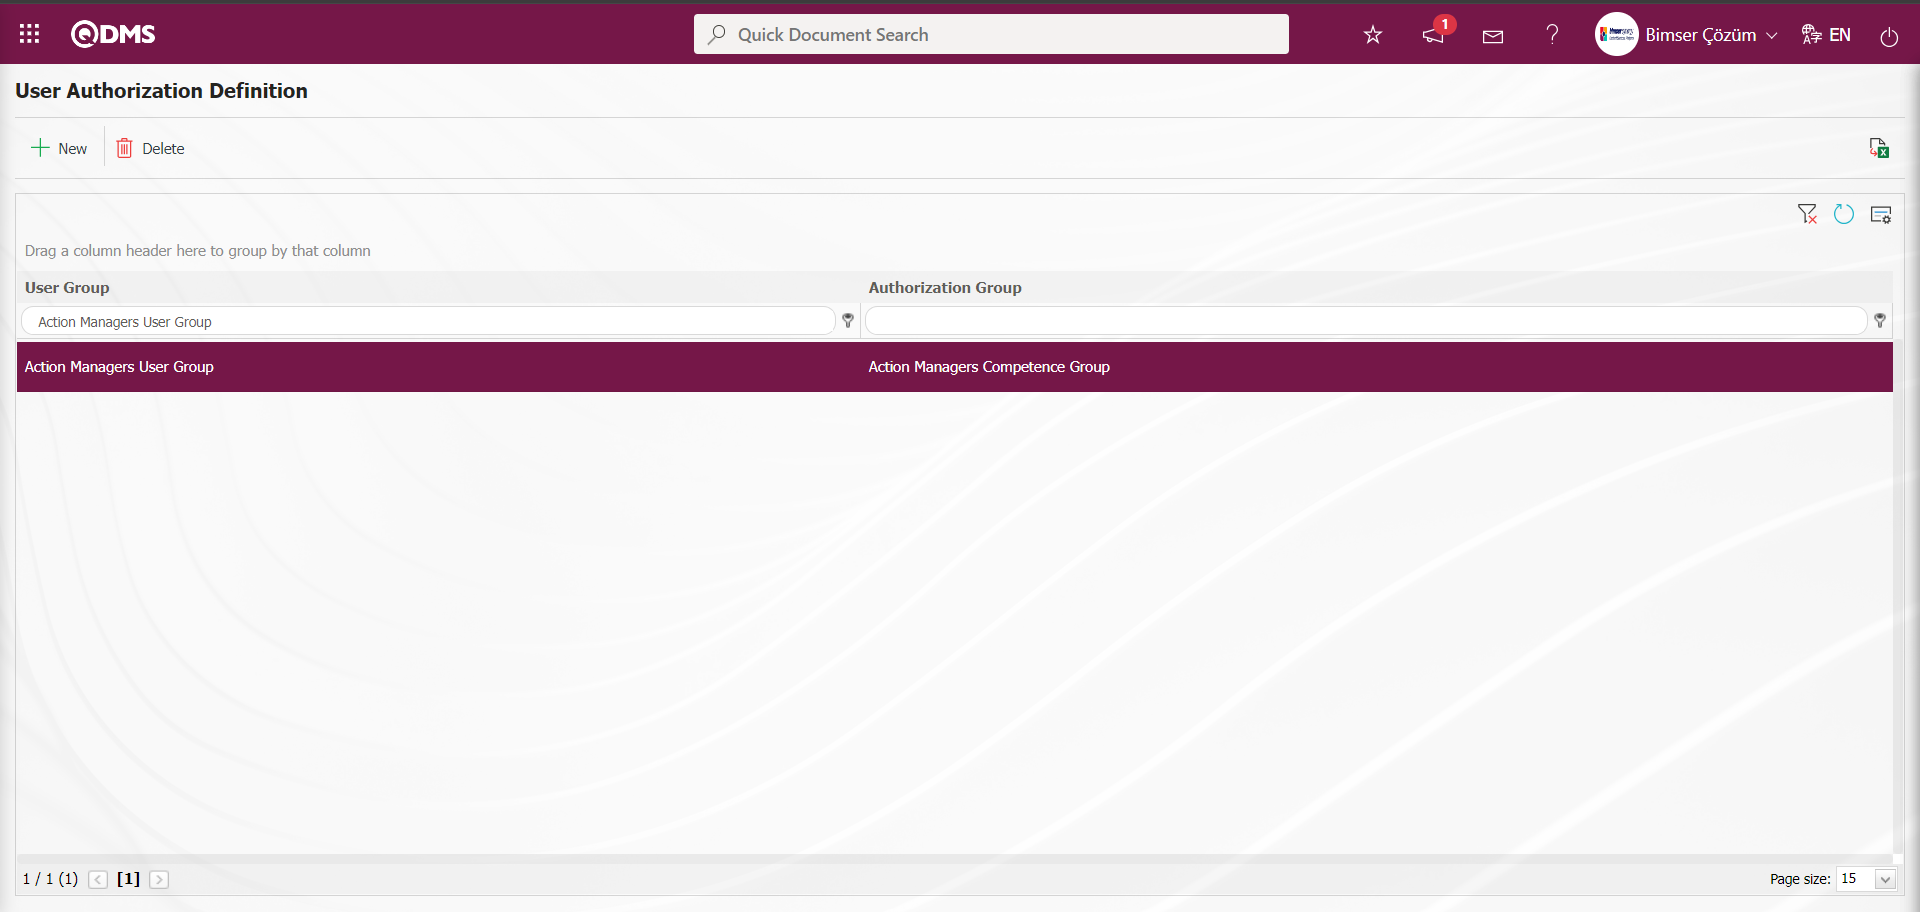
After the User Authorization Definition process, in order to see that the personnel belonging to the relevant user group are authorized to see the menu, the personnel belonging to the user group are logged in with the username and password information to log in to Qdms on the Qdms main login screen.
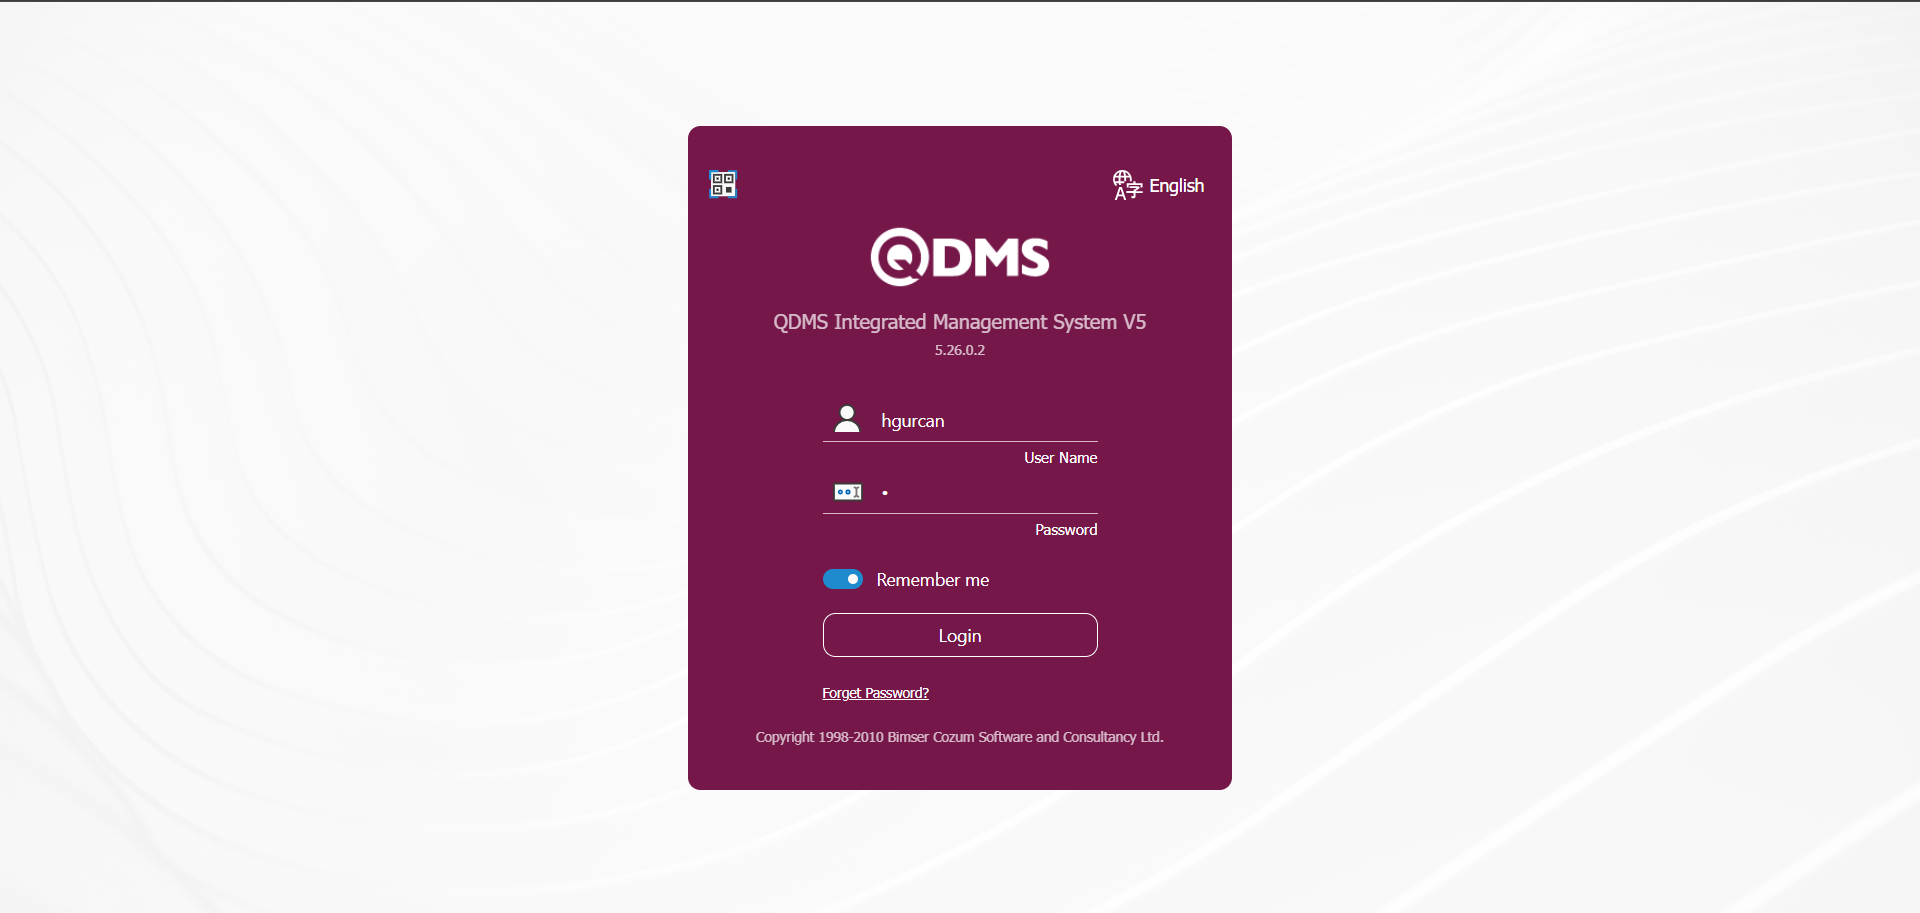
When the Qdms address of the personnel belonging to the User Group is logged in, it is seen that the Action Management Module is only authorized to see the menus in the System Infrastructure Definitions and Integrated Management System section.
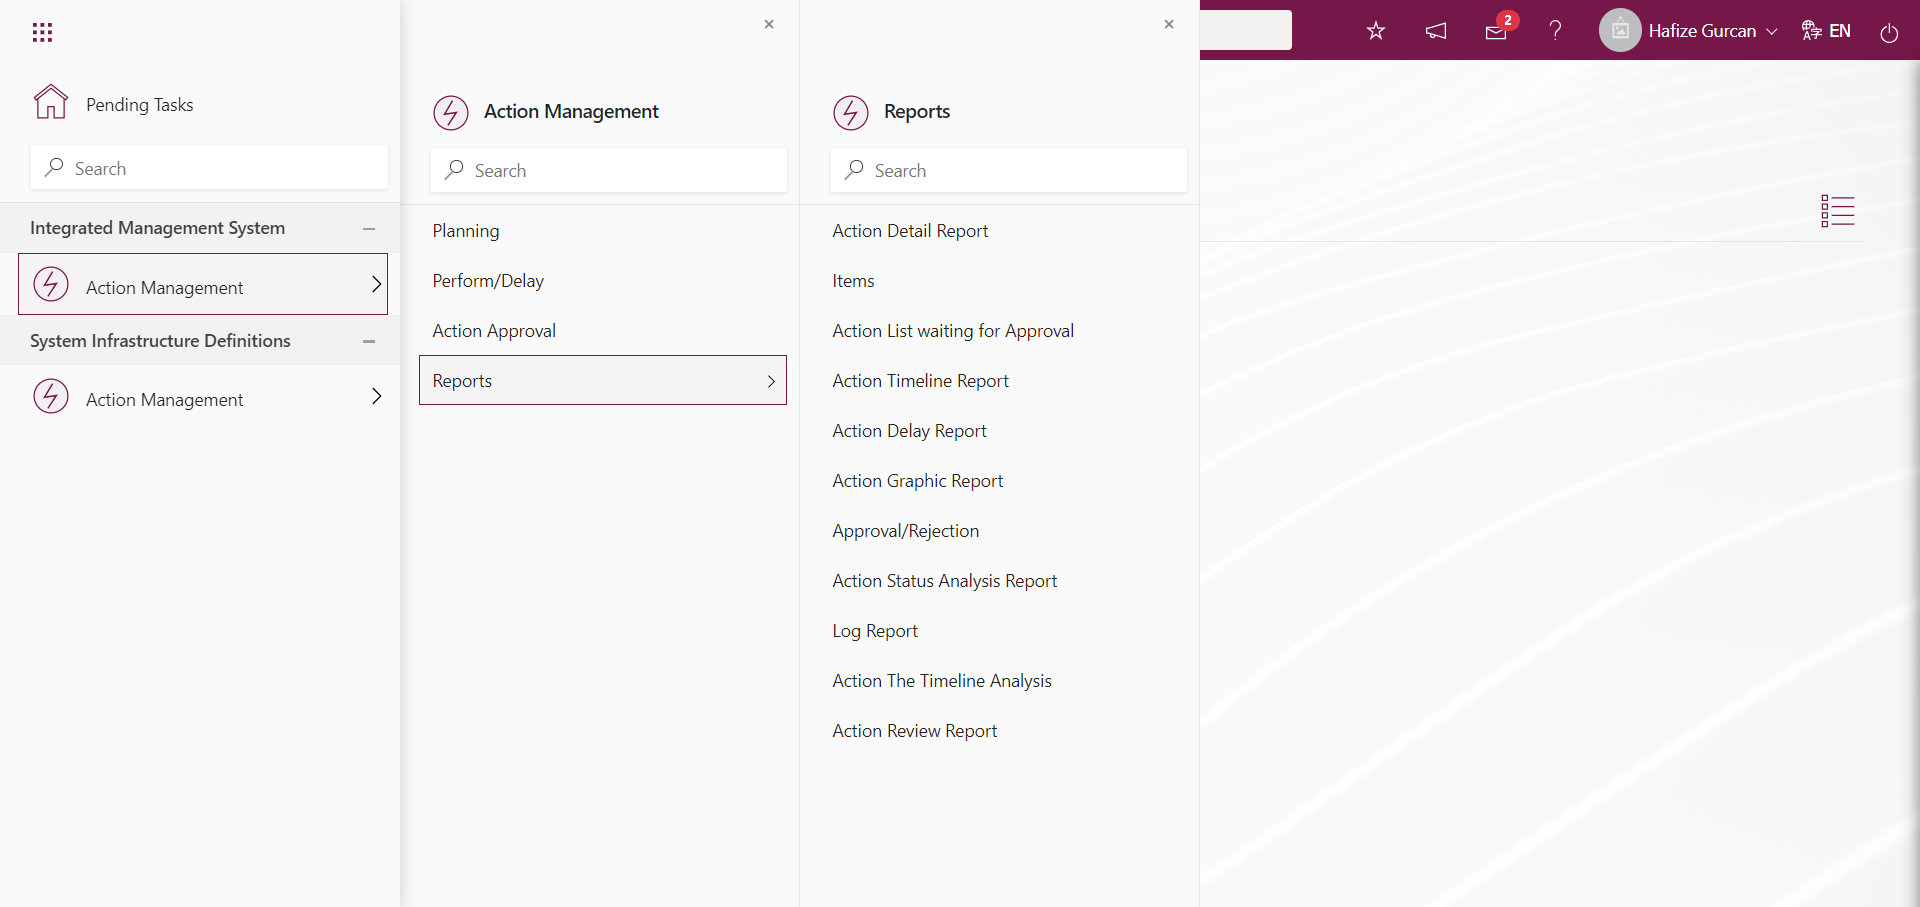
5.1.11. Supplier Groups
Menu Name: System Infrastructure Definitions/ BSID/ Definitions/ Supplier Groups
It is the menu where the suppliers created in the Supplier Definition screen are classified according to the work performed. The defined Supplier Groups are matched with the Supplier Identification screen to determine which supplier is in which supplier group. This data is used in the Supplier Evaluation Module to evaluate suppliers on a group basis.

With the help of the buttons on the screen;
: A new supplier group is defined.
: Correction / change / update is made on the supplier group information selected in the list.
: The supplier group information selected in the list is deleted.
:Records are filtered and searched.
:Data is transferred to Excel.
: The search criteria on the menu screens are used to clear the data remaining in the filter fields in the grid where the search operation is performed.
: The menu screen is restored to its default settings.
: User-based designing of the menu screen is done with the show-hide feature, that is, the hiding feature of the fields corresponding to the columns on the menu screens.
To add a new supplier group to the Supplier Groups Definition screen, click on the button in the upper left corner of the screen to open the Definition of Supplier Groups/ New Record screen
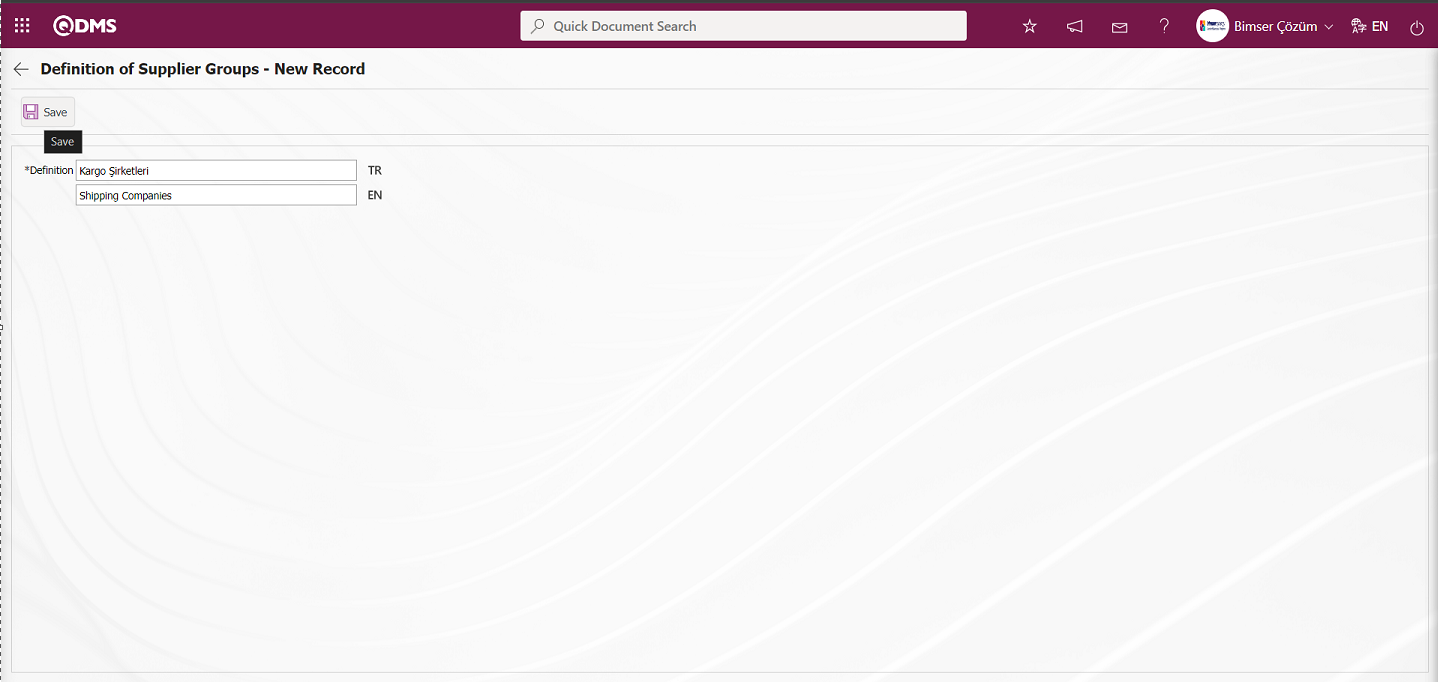
Define the relevant fields on the screen that opens:
Definition: This is the mandatory field where the definition information of the Supplier Group is defined on the Definition of Supplier Groups - New Record screen. The language equivalents of the definition part of the Supplier Group defined in the relevant flags are written
On the Definition of Supplier Groups - New Record screen, enter the Supplier Groups definition information. After filling in the required fields, click on the button in the upper left corner to register the Supplier Groups.
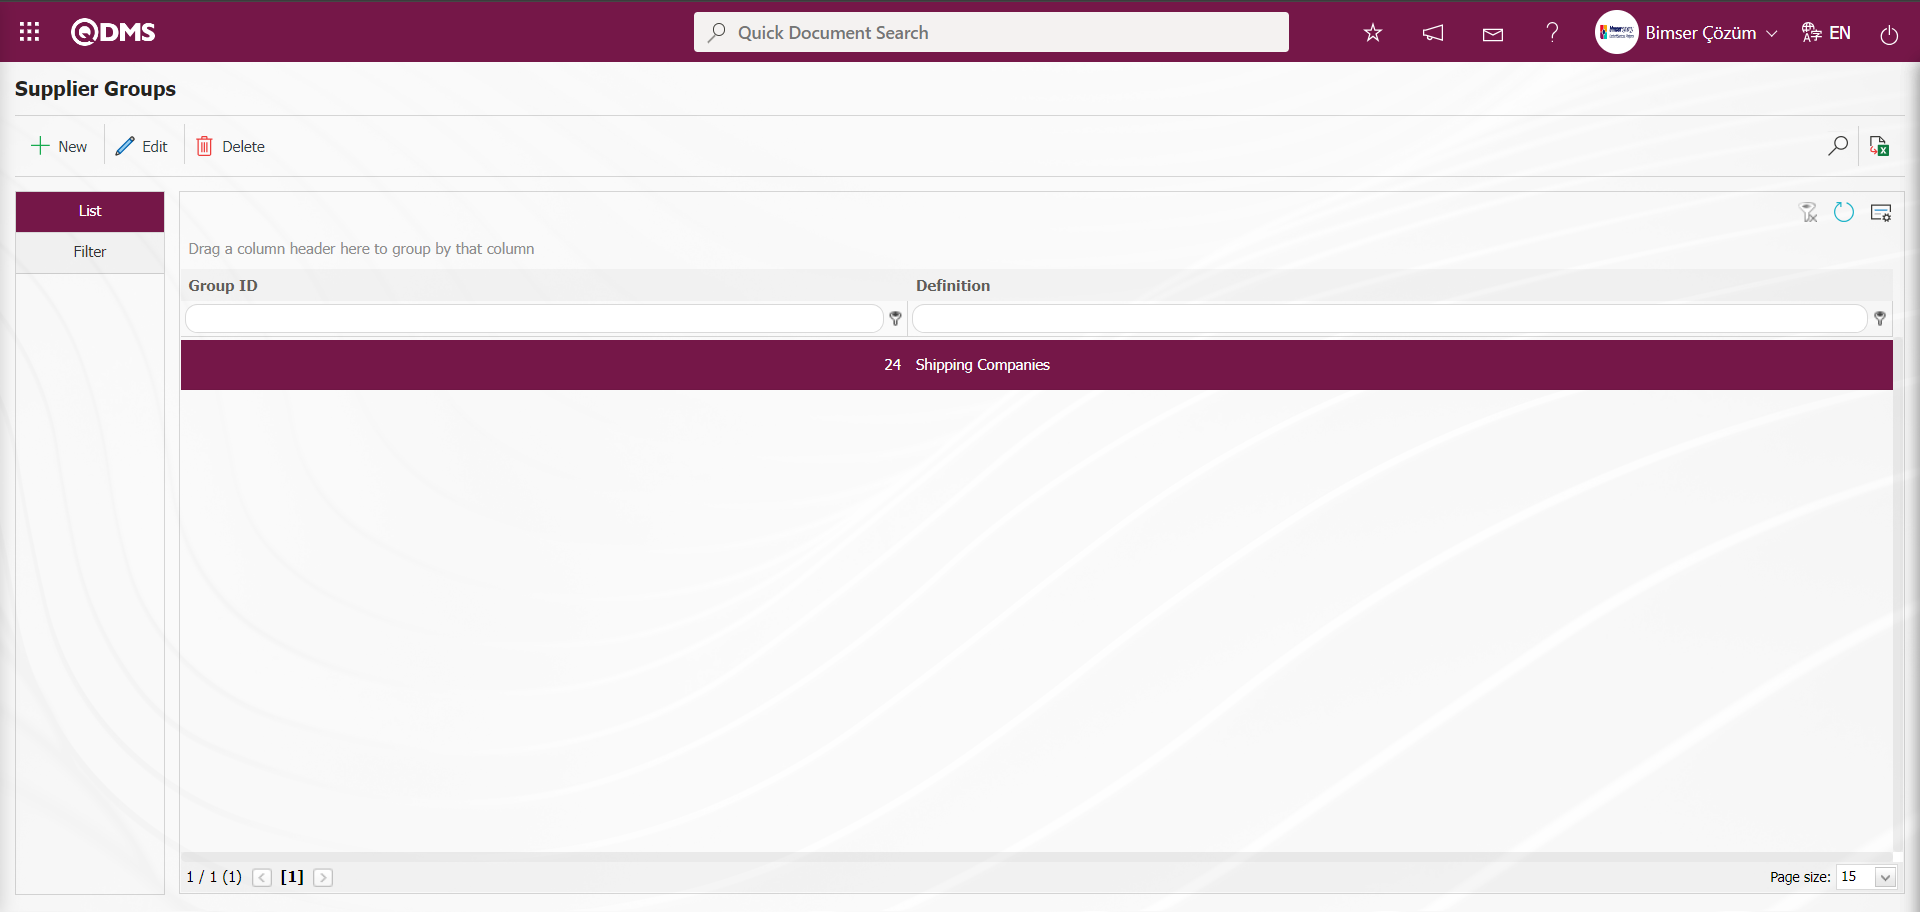
In the Supplier Groups definition screen, data is entered in the fields such as Group ID and Definition, which are the search criteria in the Filter tab, and filtering is done according to the search criteria by clicking the (Search) button.

5.1.12. Customer-Supplier Definition
Menu Name: System Infrastructure Definitions/ BSID/ Definitions/ Customer/Suppliers
It is the menu where the customers and suppliers that the company works with are defined to the system. These definitions are used in modules such as Corrective Actions, Action, Customer Complaints and Supplier Evaluation. Customer / Supplier Definition process can be transferred to the system using 3 ways as in the following items.
- Manual Identification (It is done in the Customer - Supplier Definition menu.)
- Bulk Transfer (in System Infrastructure Definitions/ BSID/ Configuration Settings/ Transfers/ Customer-Supplier Transfer menu)
- Integration Methods (done with the help of Bimser Technical Support Team)

With the help of the buttons on the screen;
: A new customer-supplier information is defined.
: Correction / change / update is made on the Customer-Supplier information selected in the list.
: Customer-Supplier information selected in the list is deleted.
: Records are filtered and searched.
: Data is transferred to Excel.
: The search criteria on the menu screens are used to clear the data remaining in the filter fields in the grid where the search operation is performed.
: The menu screen is restored to its default settings.
: User-based designing of the menu screen is done with the show-hide feature, that is, the hiding feature of the fields corresponding to the columns on the menu screens.
To manually add a new Customer-Supplier to the Customer-Supplier Definition screen, click on the button at the top left corner of the screen to open the Customer-Supplier Definition/New Record screen.
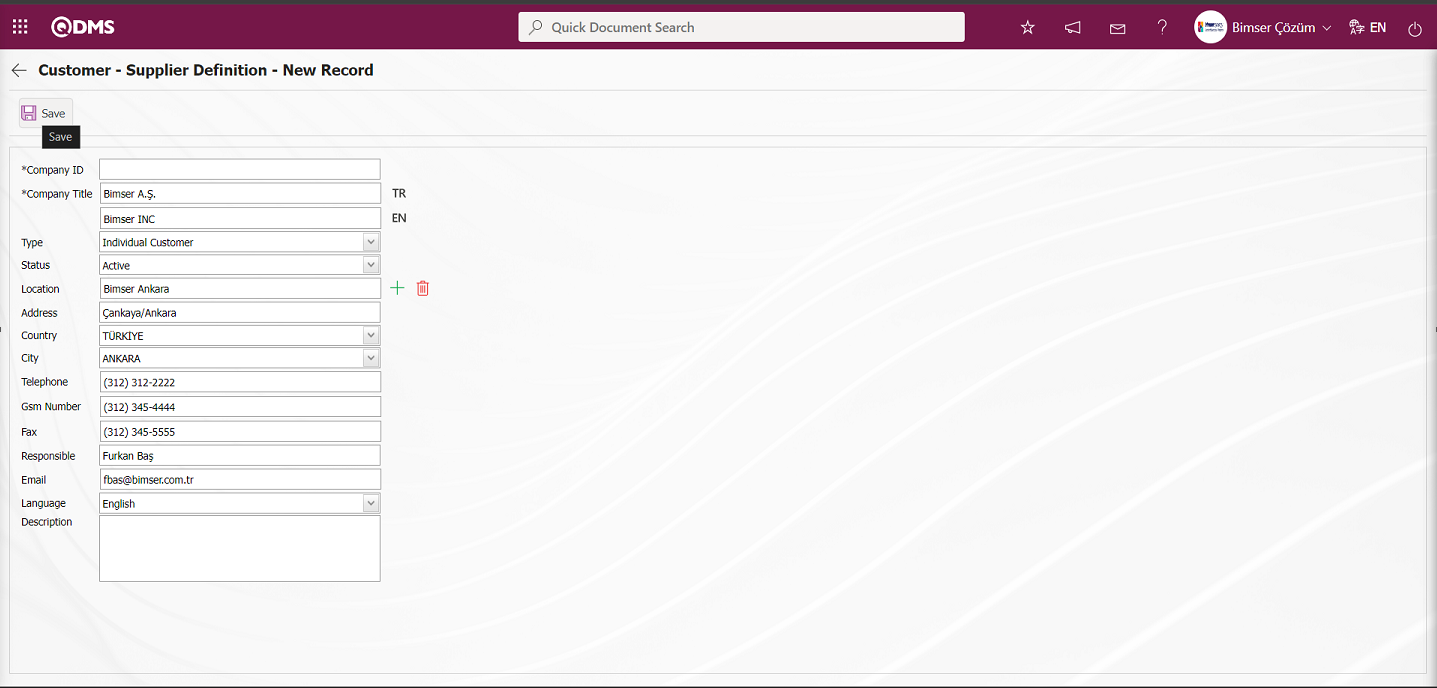
Company Code: This is the mandatory field where Customer - Supplier code information is defined on the Customer - Supplier Definition - New Record screen. It should be defined without using characters such as spaces and Turkish characters, so that it is not the same as previously defined fields. For example. '001' , 'RK'. When the Individual type is selected in the Type field of the Code field, it automatically defines the code template according to the settings made in the parameters and automatically adjusts the system according to the counter value. Depending on the selection of the Individual type of the Customer-Supplier, the “Individual Customer Code Format” template number 33 is defined in the System Infrastructure Definitions module parameters.
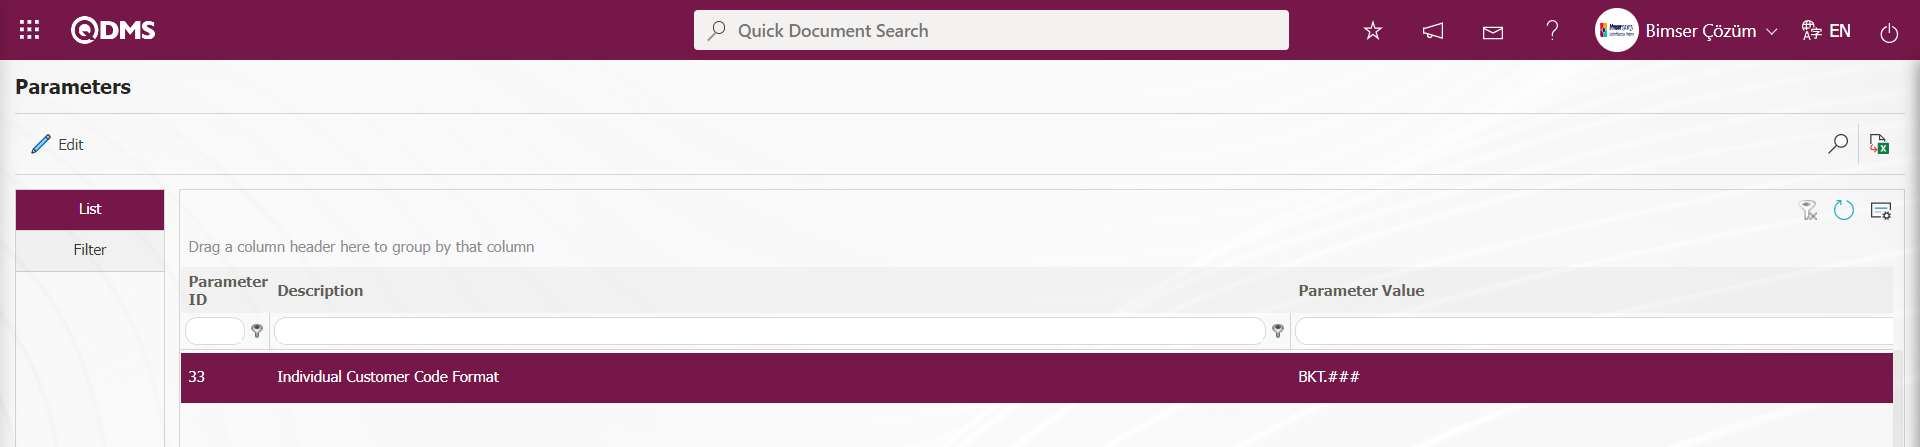 According to the Individual Customer Type, the system will automatically give the code according to the counter value in the parameter value in the parameter 34 “Individual Customer Code Counter”, from which the counter value of the code template defined in the parameter will start.
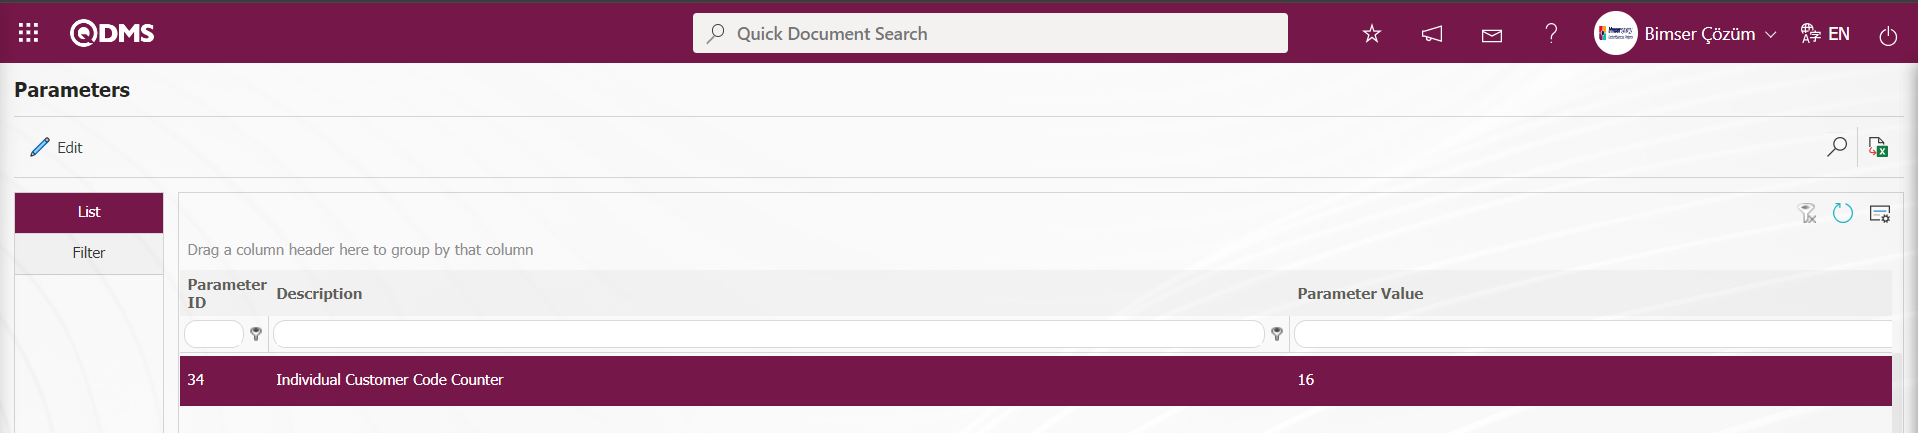
According to parameter 33, Individual Code template “BKT.###” and according to the counter value “16” in parameter 34, the code definition will be made for individual customer type as BKT.016, BKT.017, BKT.018. The system does not allow code definition after this definition in the code field and automatically defines the code for individual customers.
Company Title: Customer - Supplier Identification - This is the mandatory field where Customer - Supplier definition information is defined on the New Record screen. In the section with the related flags, the language equivalent of the Customer-Supplier definition information is written.
Type: Customer - Supplier Definition - This is the field where the type of the Customer - Supplier is selected in the drop-down Type list in the type section on the New Record screen. Corporate, Individual and Supplier type options are selected. This section comes depending on the parameter. In the System Infrastructure Definitions module parameters number 32 “Default type of Customer Definition (K:Institutional,T:Supplier,B:Individual)” parameter, the type defined in the parameter value comes as an option according to the initials of the options.
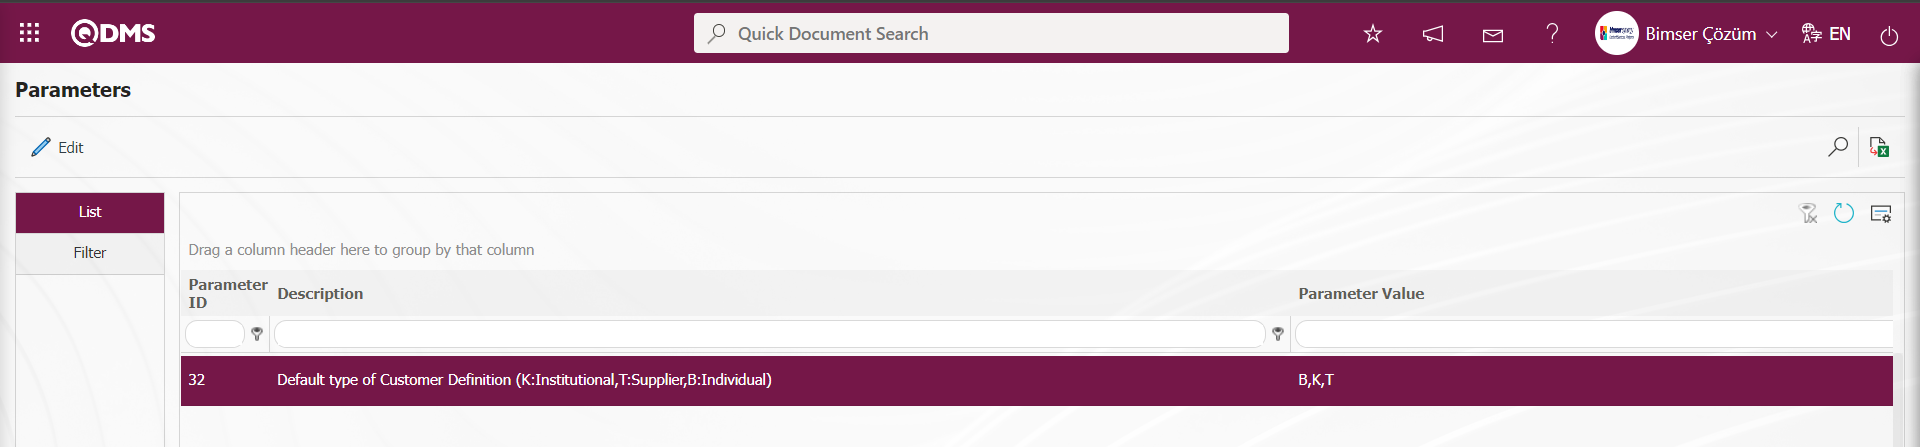
In this parameter, “K” is written to the parameter value for Corporate type, “T” to the parameter value for Supplier type and “B” to the parameter value for Individual Type. For all type options for Customer - Supplier in the type field, all options are displayed in the type field by typing the initials of the customer - Supplier types in the parameter.

Status: Customer - Supplier Definition - New Record This is the field where the “Active” option is selected in the “Active” and “Inactive” options of the status information. Inactive status is a sign that the Customer - Supplier information is no longer used in the system. In order to see the unused Customer - Supplier information, it is sufficient to search as “Inactive” in the status field in the search criteria from the filter tab.
Location: This is the field where the location information of the Customer - Supplier is selected in the list of workplaces defined in the system opened by clicking the (Select) button on the Customer - Supplier Identification - New Registration screen.
Address: This is the field where the address information of the Customer - Supplier is defined on the Customer - Supplier Definition - New Record screen.
City: On the Customer - Supplier Definition - New Record screen, it is the field where the city information of the Customer - Supplier is selected in the drop-down city list.
Country: On the Customer - Supplier Definition - New Record screen, this is the field where the country information of the Customer - Supplier is selected in the drop-down country list.
Telephone: This is the field where the phone information of the Customer - Supplier is defined on the Customer - Supplier Definition - New Record screen.
Gsm Number: This is the field where the Gsm Number of the Customer - Supplier is defined on the Customer - Supplier Definition - New Record screen.
Fax: This is the field where the Fax information of the Customer - Supplier is defined on the Customer - Supplier Definition - New Record screen.
Responsible: This is the field where the responsible information of the Customer - Supplier is defined on the Customer - Supplier Definition - New Registration screen.
E-mail: This is the field where the e-mail information of the Customer - Supplier is defined on the Customer - Supplier Definition - New Record screen.
Language: In the Customer - Supplier Definition - New Record screen, this is the field where the language of the Customer - Supplier is selected in the drop-down language list.
Description: This is the field where the description information of the Customer - Supplier, if any, is entered on the Customer - Supplier Definition - New Record screen. When it is desired to make the Description field mandatory on the Customer - Supplier Definition screen, the parameter “Definition field in Customer Definition is required?” parameter number 35 in the System Infrastructure Definitions Module parameters is selected and the parameter is activated by selecting the parameter value “Yes”
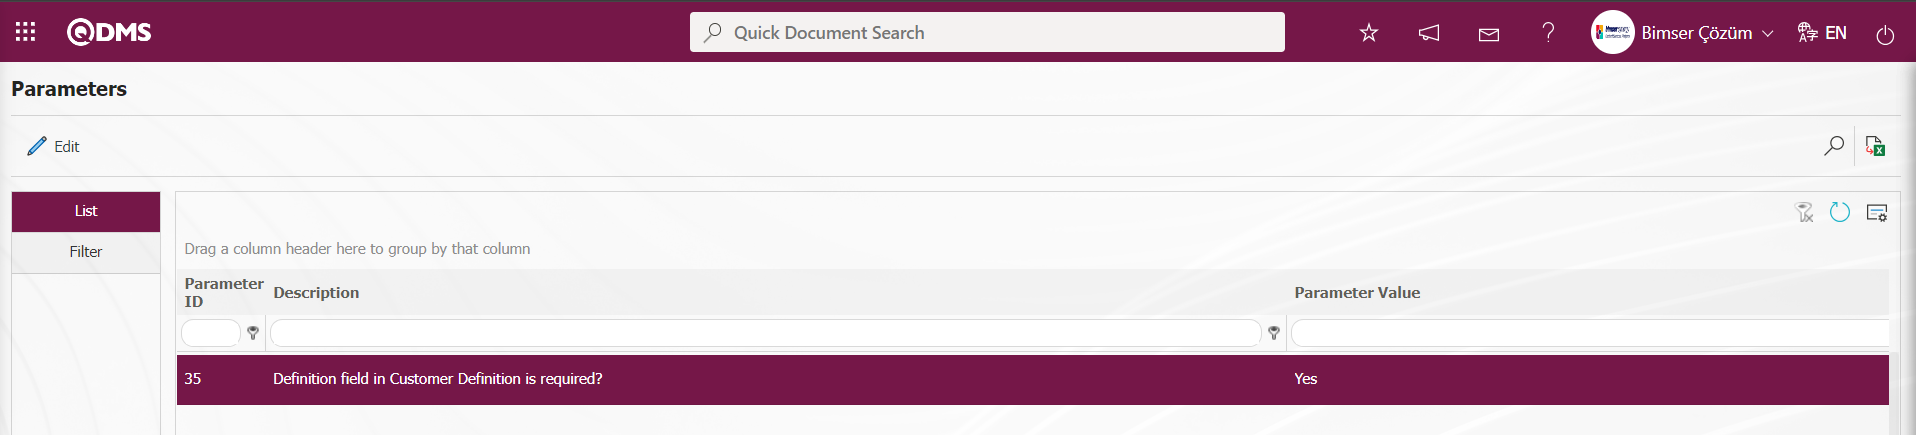
When the parameter is activated, the Description field is entered as a mandatory field when the identification process is performed by selecting Individual Customer in the Type field on the Customer - Supplier Definition - New Record screen.
On the Customer - Supplier Definition - New Record screen, company code, name, type (individual customer, corporate customer, supplier), e-mail address, etc. contact information is defined. If it is desired to send an information mail to the Customer / Supplier about the record opened in the relevant modules, mail definitions should be made. After the required fields are filled in, the Customer-Supplier Identification registration process is realized by clicking the button in the upper left corner.
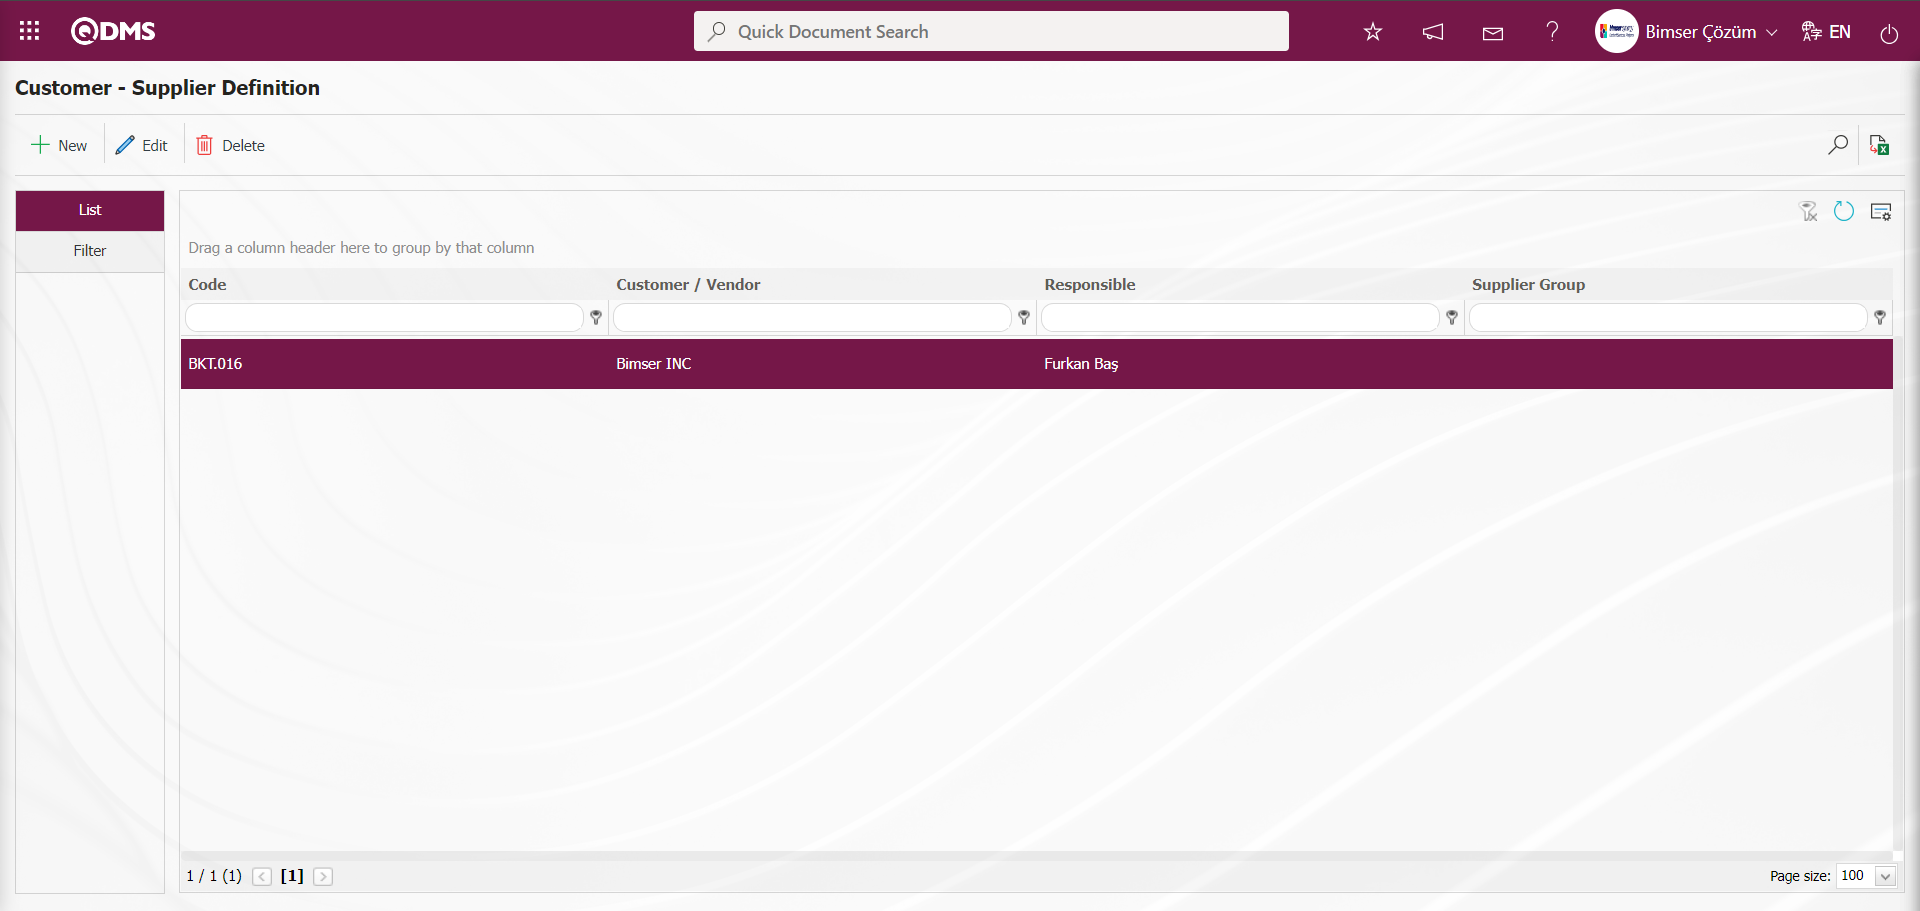
In the Customer-Supplier Definition screen, data is entered in the fields such as Company ID, Company Name and Type with the Filter tab and filtered according to the search criteria by clicking the (Search) button.
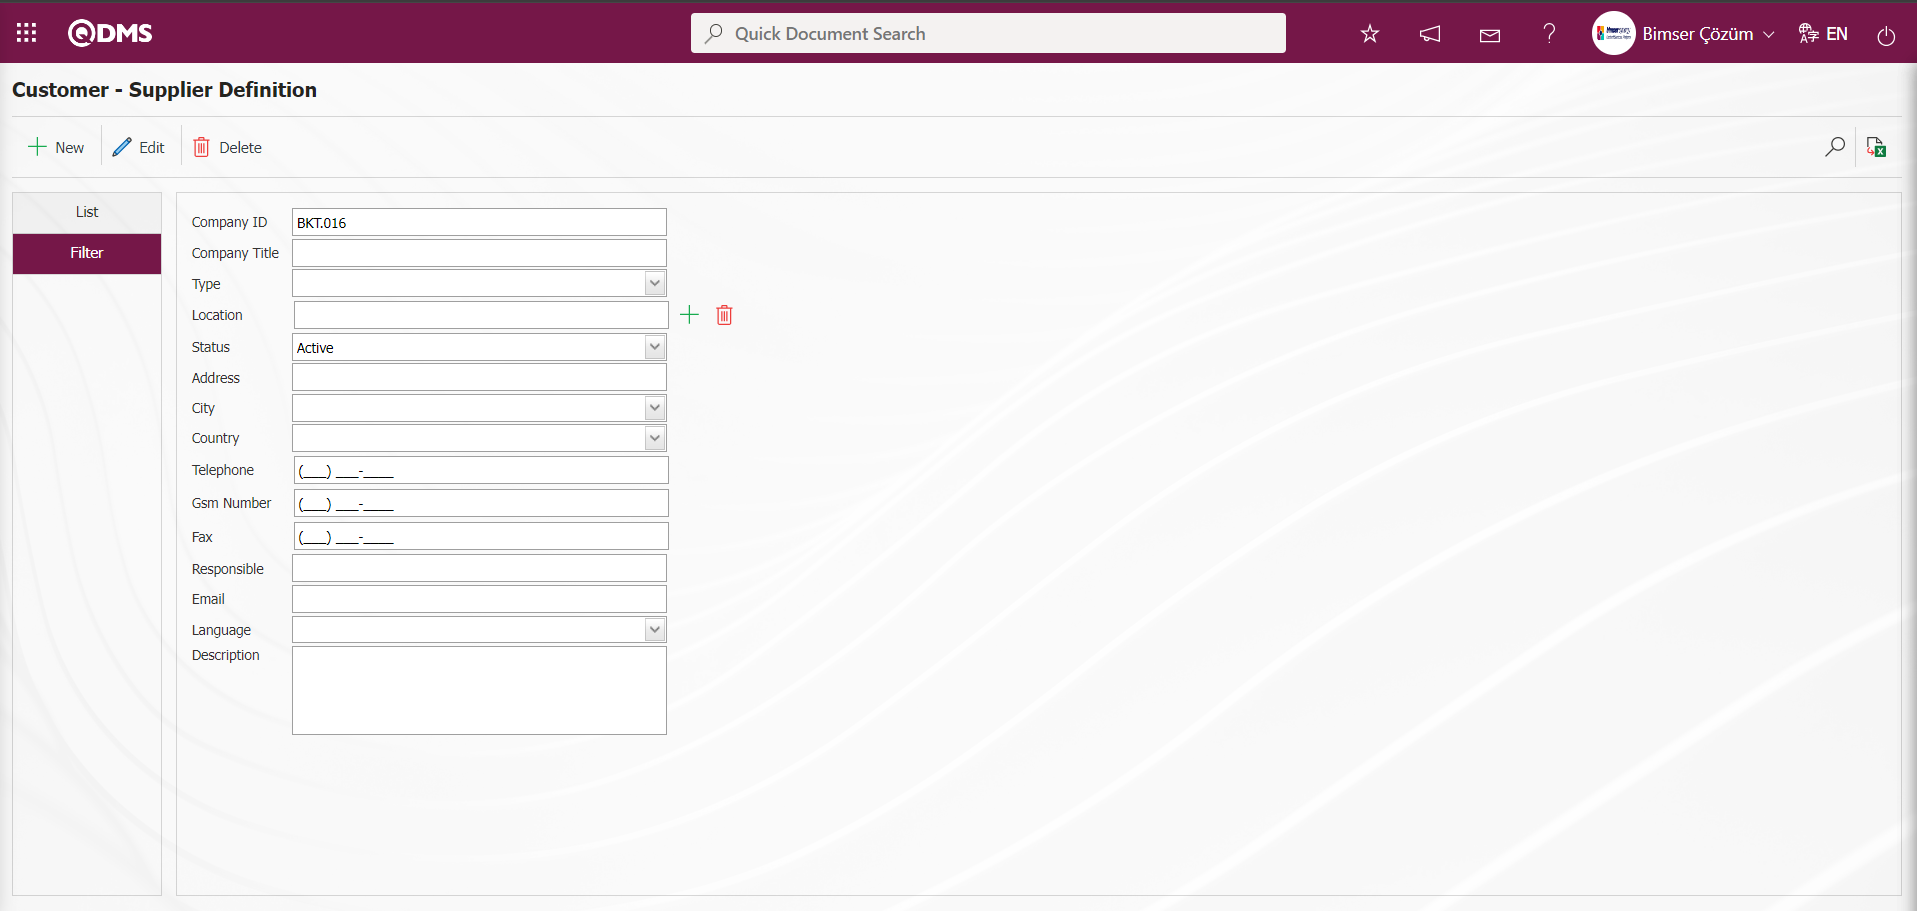
5.1.13. Product Type Definitions
Menu Name: System Infrastructure Definitions/ BSID/ Definitions/ Product Type Definition
This is the menu where product types are defined. For the classification of products, it is useful to define the types of products in order to facilitate filtering and searching. Within the scope of the classification of products, product types are created, such as finished goods, finished products, software products, hardware products.
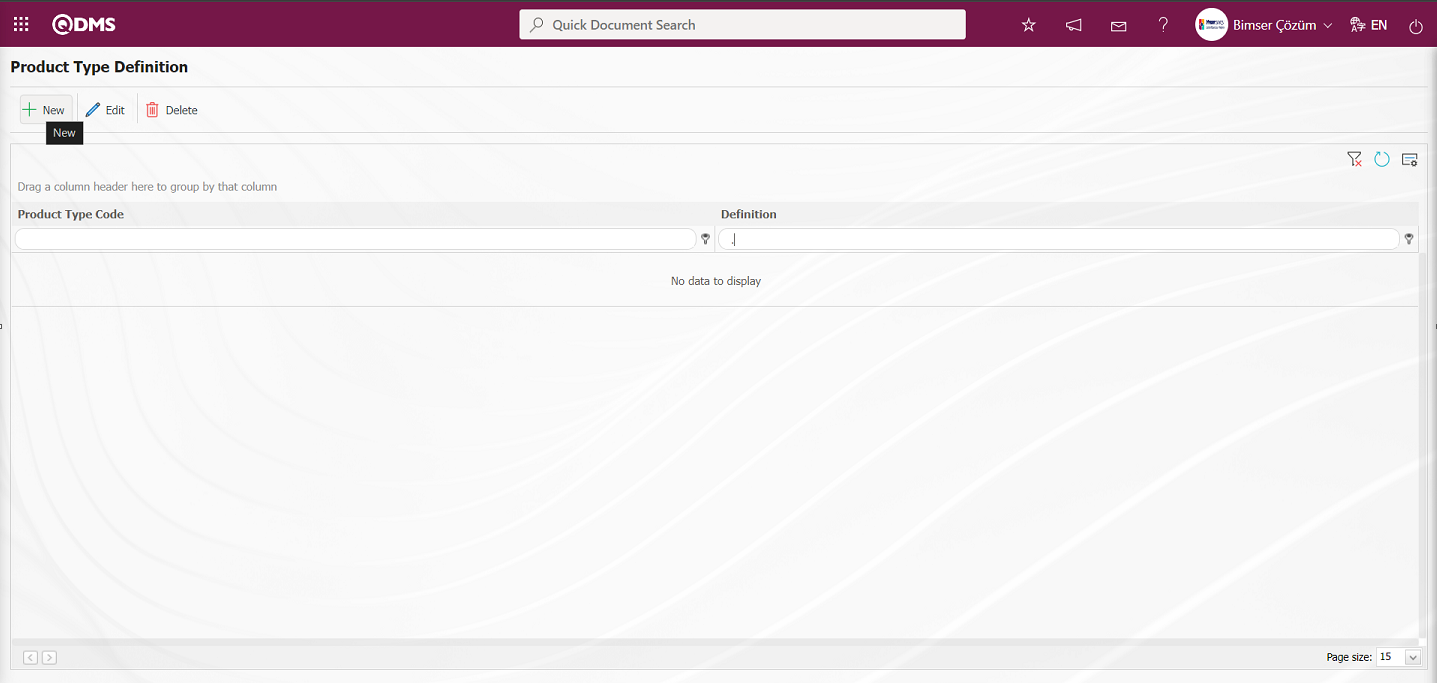
With the help of the buttons on the screen;
: A new product type is defined.
: Correction / change / update is made on the product type information selected in the list. Code information cannot be changed.
: The product type information selected in the list is deleted.
: Records are filtered and searched.
: Data is transferred to Excel.
: The search criteria on the menu screens are used to clear the data remaining in the filter fields in the grid where the search operation is performed.
: The menu screen is restored to its default settings.
: User-based designing of the menu screen is done with the show-hide feature, that is, the hiding feature of the fields corresponding to the columns on the menu screens.
To add a new product type in the Product Type Definition screen, click on the button on the top left corner of the screen to open the Product Type Definition screen.

Define the relevant fields on the screen that opens:
Product Type Code: This is the mandatory field where the code information defined in the Product Type Definition - New Record screen is defined. It should be defined without using characters such as spaces and Turkish characters, so that it is not the same as the previously defined fields. Ex. '001' , 'RK'
Product Type Definition: This is the mandatory field where the Product Type definition information is defined on the Product Type Definition - New Record screen.
On the Product Type Definition - New Record screen, enter the Product Type Code and Product Type Definition information. After the required fields are filled in, the Product Type Definition registration process is realized by clicking the button in the upper left corner.
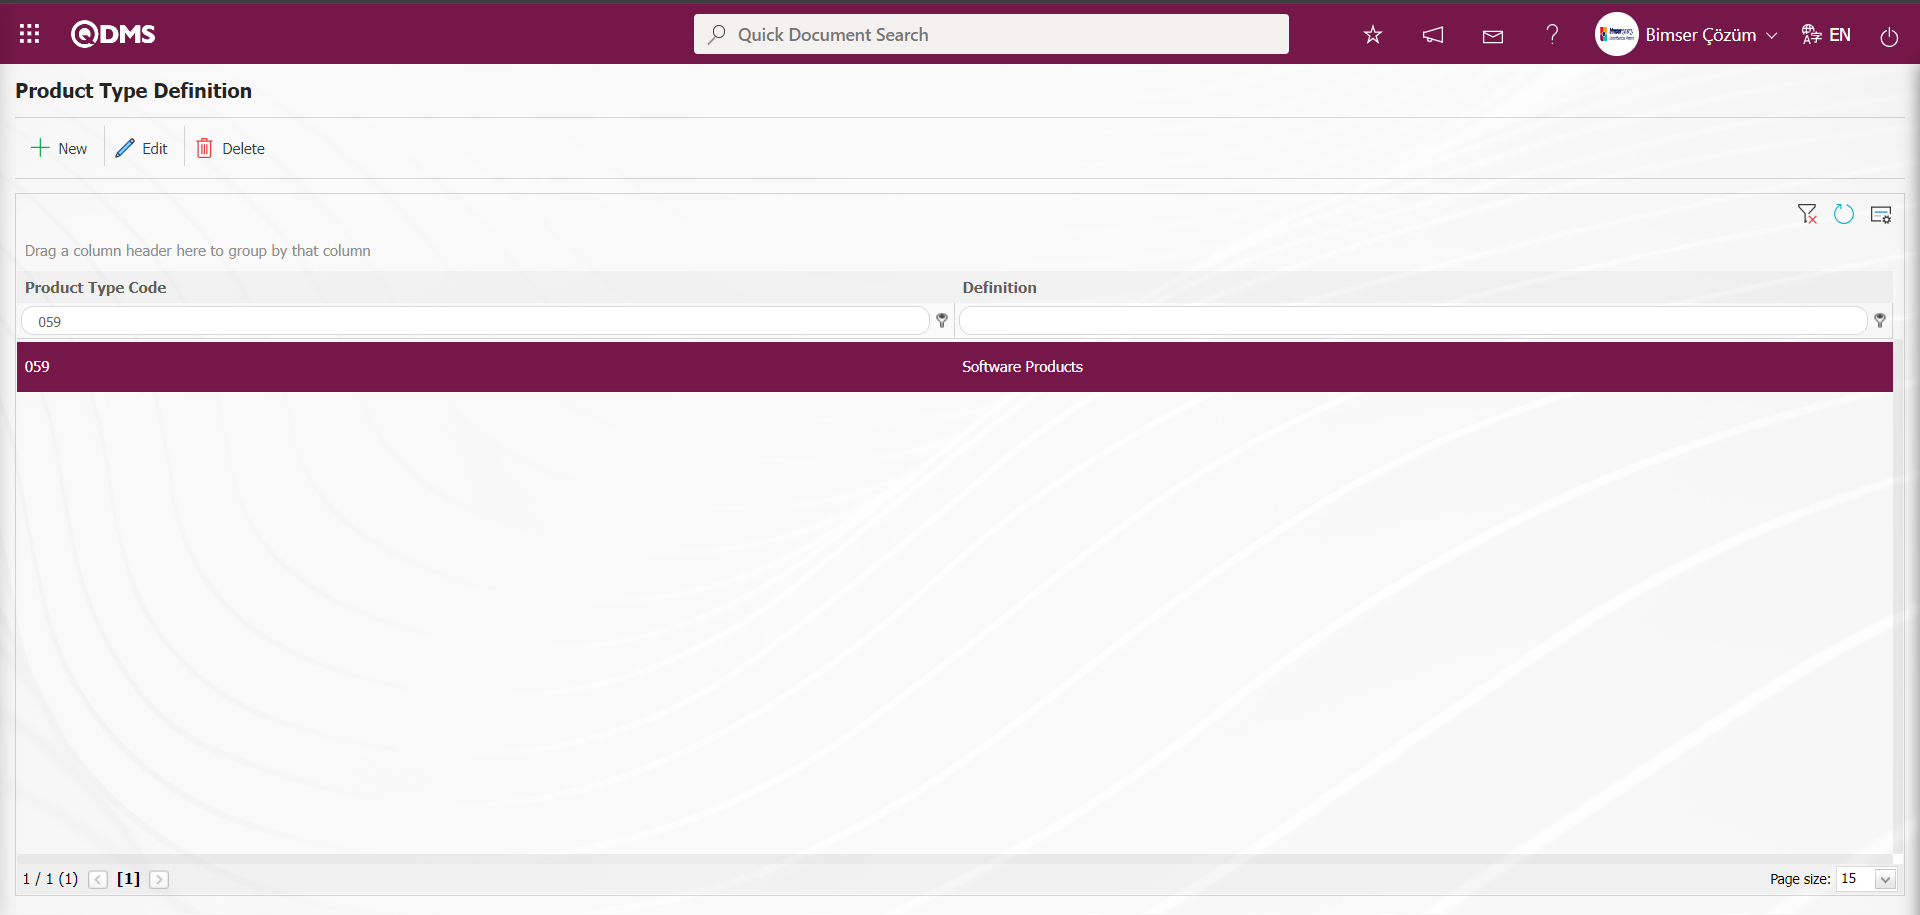
5.1.14. Product/ Service Definition
Menu Name: System Infrastructure Definitions/ BSID/ Definitions / Products/ Services
It is the menu where product definitions are made. It is used within the scope of performing operations related to products in other modules. Product Identification process can be transferred to the system by using it in 3 ways as in the following items.
- Manual definition (done in the Products/ Services Definition menu.)
- Bulk transfer (done in System Infrastructure Definitions/ BSID/ Configuration Settings/ Transfers/QDMS - Product menu)
- Integration methods (done with the help of Bimser Technical Support Team)

With the help of the buttons on the screen;
: A new product is defined.
: Correction / change / update is made on the product information selected in the list. Code information cannot be changed.
: The product information selected in the list is deleted.
: Records are filtered and searched.
: Data is transferred to Excel.
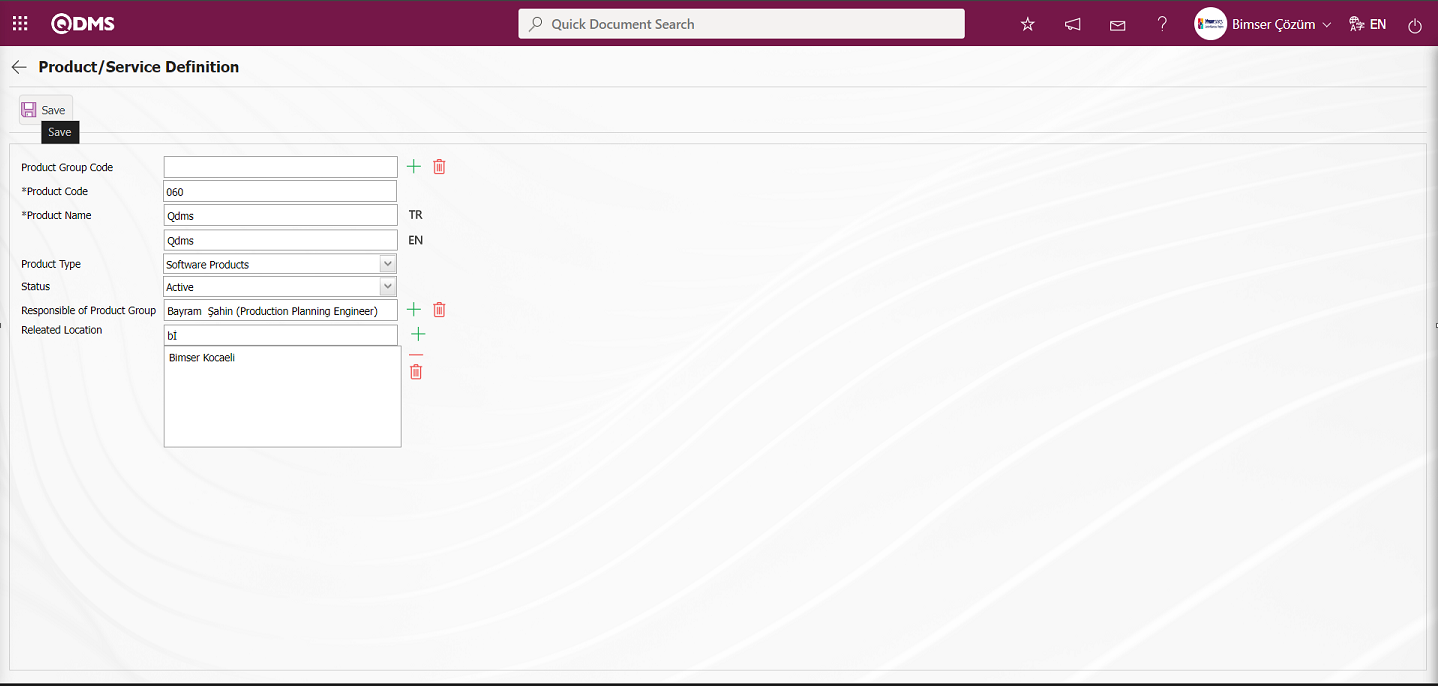
Related fields are defined on the screen that opens;
Product Group Code: If you want to define a new product under a product defined in the system on the Product/Service Definition screen, click the  (Select) button and select from the list of products defined in the system.
Product Code: This is the mandatory field where Product code information is defined on the Product/Service Definition screen. It should be defined without using characters such as spaces and Turkish characters, so that it is not the same as the previously defined fields. Ex. '001', 'RK'
Product Name: This is the mandatory field where the product name information is defined on the Product/Service Definition screen.
Product Type: This is the field where the Product Type information is selected in the Product Type list opened by clicking the drop-down list on the Product/Service Definition screen. (The Product Type list is defined in the System Infrastructure Definitions/BSID/Definitions/Product Type list.)**
Status: This is the field where the “Active” option is selected in the “Active” and “Inactive” options of the Status information on the Product/Service Definition screen. Inactive status is a sign that the products are no longer used in the system. In order to see the unused products, it is necessary to search by selecting the “Inactive” option in the status field in the search criteria from the filter tab.**
Responsible of Product Group: This is the field where the product group responsible is selected from the Personnel list defined in the system opened by clicking the (Select) button on the Product/Service Definition screen. When the product group responsible is associated with the product in the relevant modules, it is used in the information fields when parametric adjustments are made.
Related Location: It is the field where the workplace information related to the product on the Product/Service Definition screen is selected from the system-defined Location list opened by clicking the (Add) button.
On the Product/Service Definition screen, select the Product Group Code from the list of products defined in the system. Enter the Product Code and Product Description. Product Type information is selected from the product types registered in the system. Status information “Active” is selected. After the required fields are filled, the Product Definition registration process is realized by clicking the button in the upper left corner.
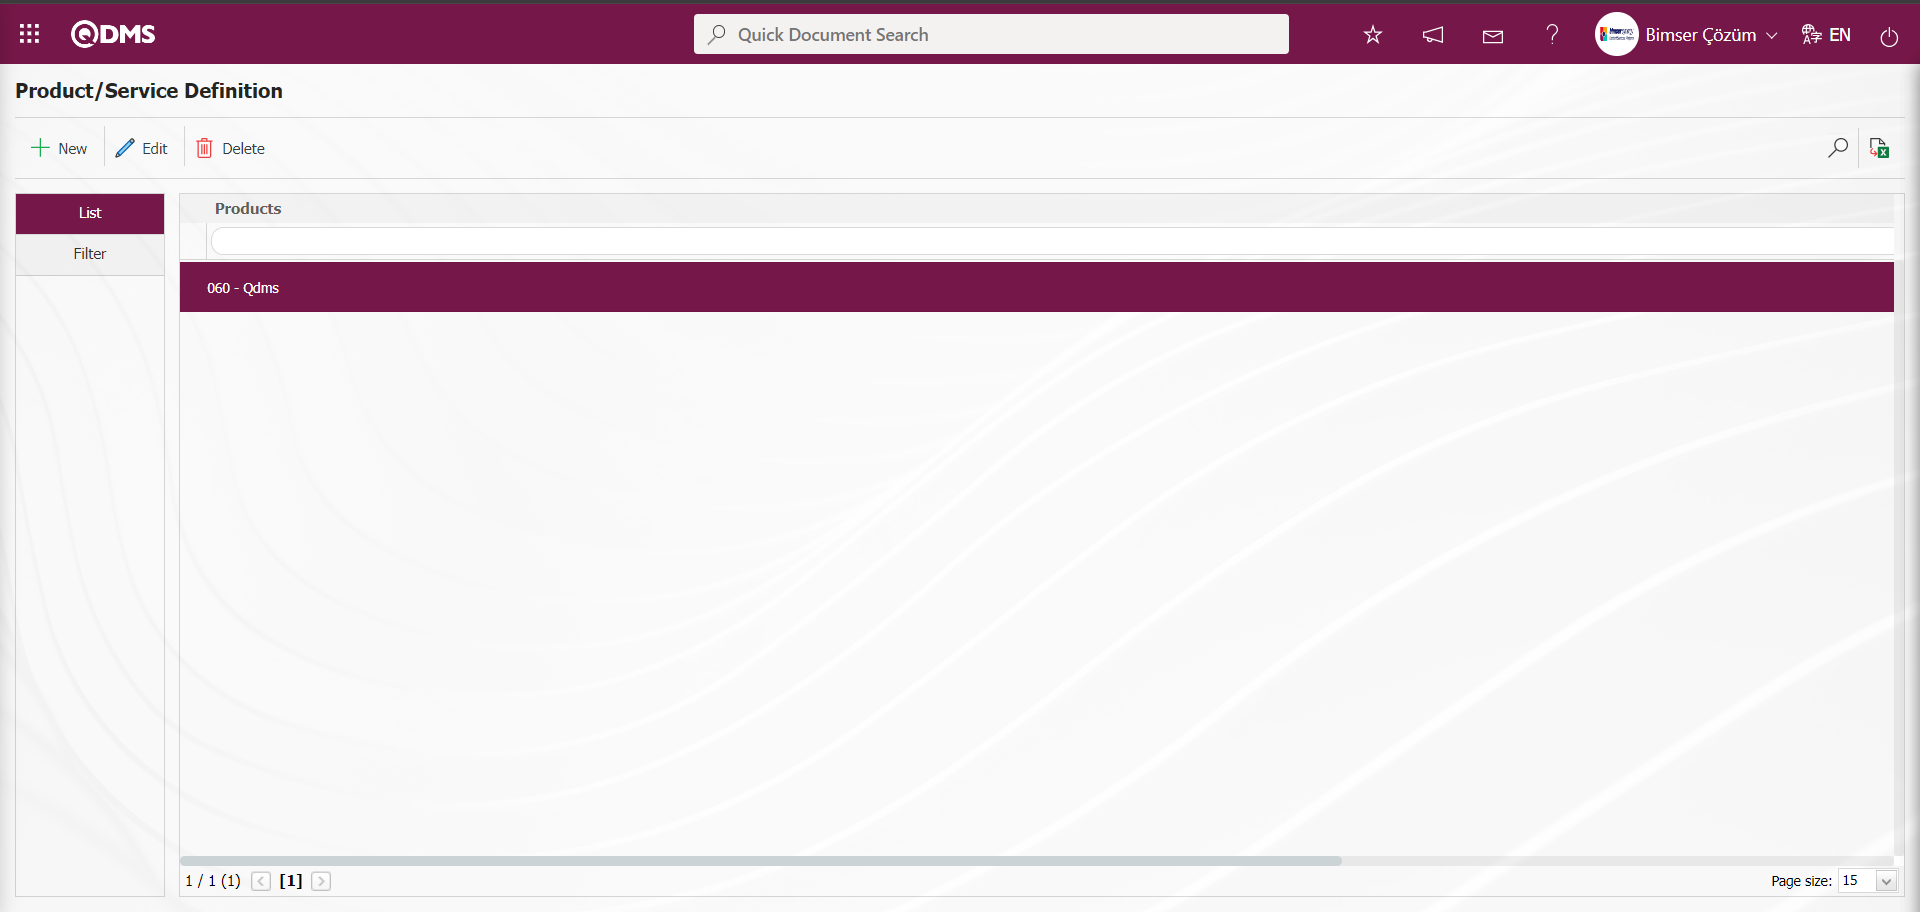
In the Filter tab on the Product Identification screen, data is entered in the fields with search criteria such as Product Code, Product Name and Product Type, and filtering is done according to the search criteria by clicking the (Search) button.

5.1.15. Mail Bodies Definition
Menu Name: System Infrastructure Definitions/ BSID/ Definitions/ Mail Bodies
It is the menu where the contents of the mails that will be sent after the transactions made in the modules are defined. Message bodies are defined in the system, if necessary, mail contents can be updated or new message bodies can be defined.

With the help of the buttons on the screen;
: A new Mail Bodies is defined.
: Correction / change / update is made on the Mail Bodies information selected in the list.
: The Mail Bodies information selected in the list is deleted.
: Records are filtered and searched.
: Data is transferred to Excel.
: The search criteria on the menu screens are used to clear the data remaining in the filter fields in the grid where the search operation is performed.
: The menu screen is restored to its default settings.
: User-based designing of the menu screen is done with the show-hide feature, that is, the hiding feature of the fields corresponding to the columns on the menu screens.
To add a new message body to the Mail Bodies Definition screen, click on the button at the top left corner of the screen to open the Message Body Definition / New Record screen. 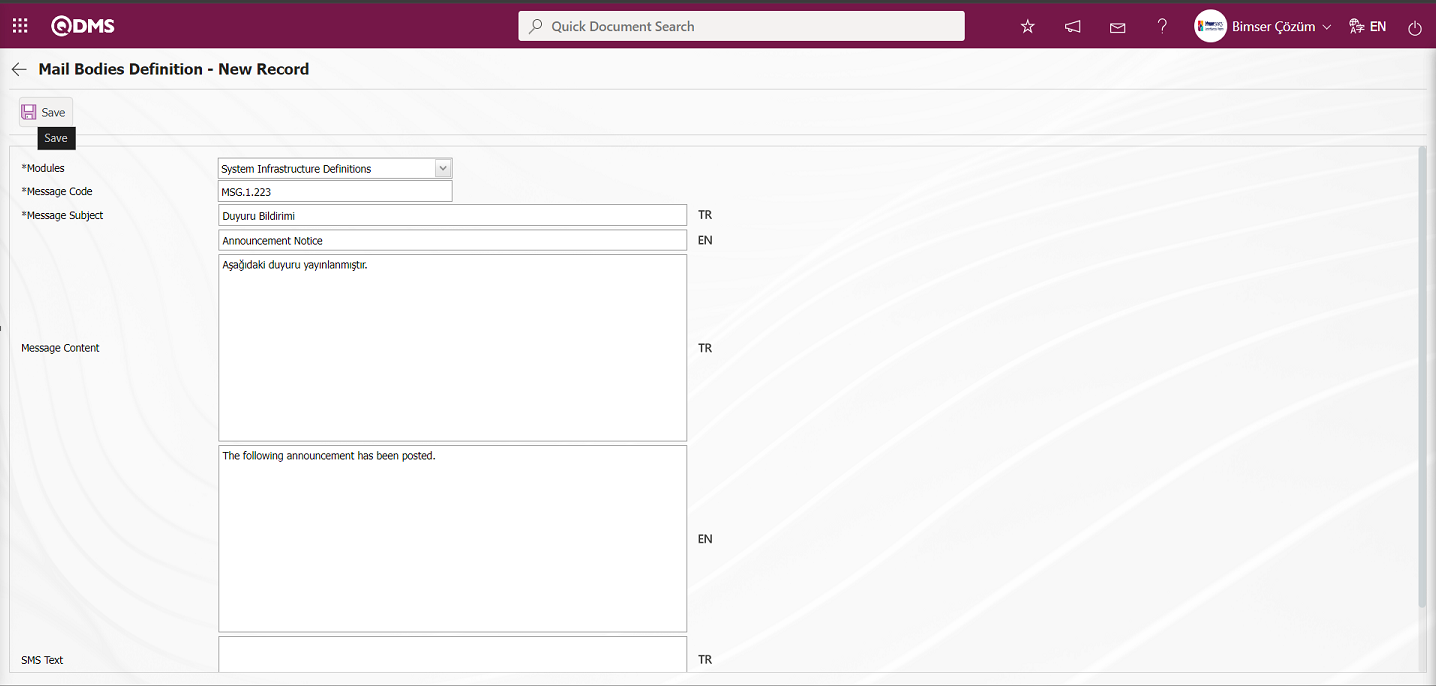
Related fields are defined on the screen that opens;
Modules: Message Body Definition - New Record This is the field where the module to which the message body is related is selected in the Module list opened by clicking the drop-down list in the Modules field on the screen.
Message Code: This is the mandatory field where the Message Body code information is defined on the Message Body Definition - New Record screen. It should be defined without using characters such as spaces and Turkish characters, so that it is not the same as the previously defined fields. Ex. MSG.1.221, MSG.1.222
Message Subject: Message Body Definition - This is the mandatory field where the Message Body definition information is defined on the New Record screen.
Message Content: Message Body Definition - This is the field where Message Content information is defined on the New Record screen. Message Content language equivalent is written.
SMS Text: This is the field where SMS Text information is defined on the Message Body Definition - New Record screen.
Select the relevant module on the Message Body Definition - New Record screen. Message Code and Message Message Subject are written. Message Content is defined. After the required fields are filled in, click on the button in the upper left corner to register the Message Body definition.

In the Filter tab on the Message Body Definition screen, enter data in the fields with search criteria such as Modules, Message Code and Message Subject and click the  (Search) button to filter according to the search criteria.

5.1.16. Location Definition
Menu Name: System Infrastructure Definitions/ BSID/ Definitions/ Locations
It is the menu where the workplaces of the personnel defined in the system are defined. Location information is used in the personnel definition screen as well as in the modules to determine in which location the transaction is performed.

With the help of the buttons on the screen;
: Define a new location.
: Correction / change / update is made on the location information selected in the list.
: The location information selected in the list is deleted.
: Records are searched by filtering.
 : Data is exported to Excel.
To add a new location to the Location Definition screen, click on the button on the top left corner of the screen to open the Location Definition / New Record screen.
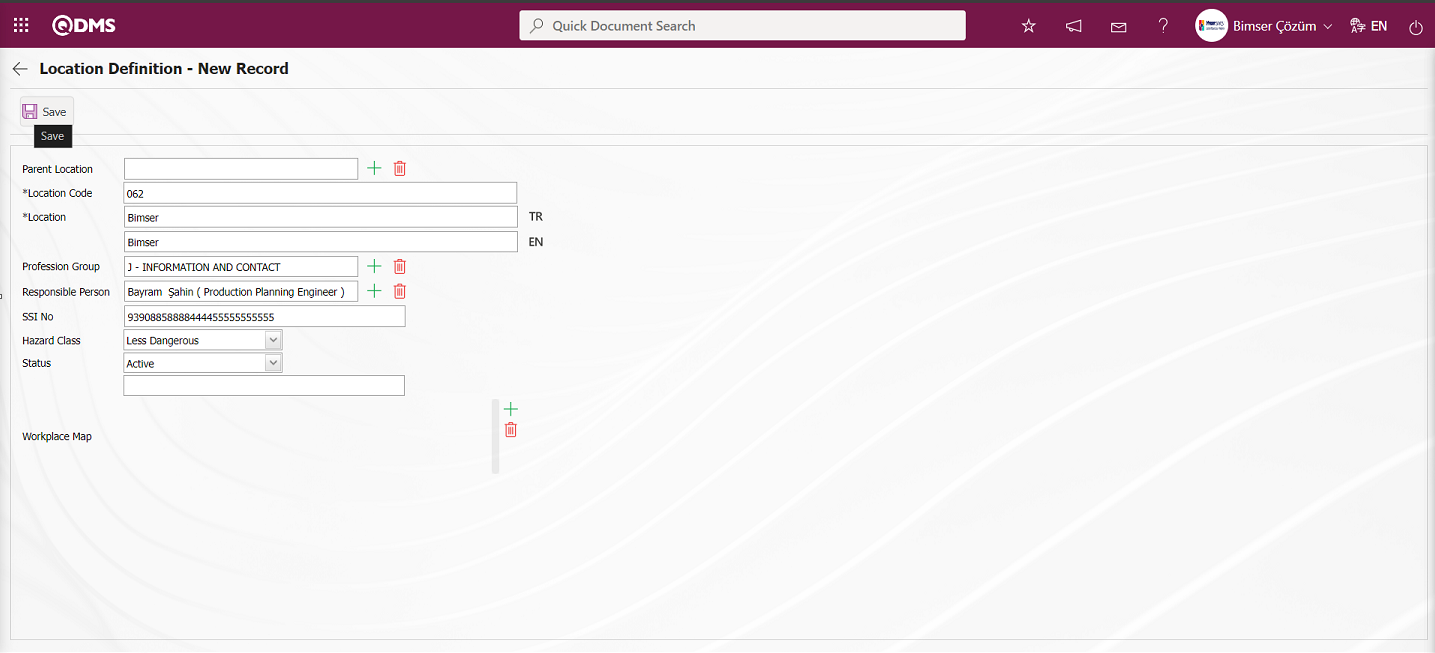
Related fields are defined on the screen that opens;
Parent Location: If it is desired to define a new workplace under a location defined in the system on the Location Definition - New Record screen, that is, if it is desired to create a sub-division, it is the field where the selection process is made from the list of locations defined in the system opened by clicking the  (Select) button.
Location Code: Location on the Location - New Record screen is a mandatory field where code information is defined. It should be defined without using characters such as spaces and Turkish characters, so that it is not the same as previously defined fields. Ex. '001', 'RK'
Location Name: This is the mandatory field where the location information is defined on the New Record screen.**
Profession Group: This is the field where the Occupational Group information is selected from the Occupational Group list defined in the system that opens by clicking the  (Select) button on the Location - New Record screen. (The Occupational Group list comes defined from the System Infrastructure Definitions / BSID / Definitions / Occupational Group Definition menu.)**
Responsible Person: On the Location on the Location - New Record screen, the information of the Location Supervisor is selected from the list of Personnel defined in the system opened by clicking the (Select) button.**
SSI No: This is the field where the SSI No information of the Workplace is entered on the Location on the Location - New Record screen.**
Hazard Class: This is the field where the Hazard Class of the Workplace is selected from the Hazard Class list opened by clicking the drop-down list on the Location on the Location - New Record screen. (Hazard Class list is defined in the System Infrastructure Definitions/BSID/Configuration Settings/Fixes menu. )
Status: This is the field where the “Active” option is selected in the “Active” and “Inactive” options of the Status information on the Location - New Record screen. Inactive status is a sign that the Location is no longer used in the system. To see the unused Location, it is enough to search for “Passive” in the status field in the search criteria from the filter tab.**
Workplace map: This is the field where the workplace map will be added by clicking the (Add) button on the Location - New Record screen. This field is displayed by selecting the System Infrastructure Definitions module as the Module from the Modules field in the System Infrastructure Definitions/BSID/Language Settings/Configuration Settings/ Language Settings menu. In these Language Definitions, “lblIsyeriHarita” label code information is selected in the Name field in the Headings tab.

While Label code information is selected, click the button.
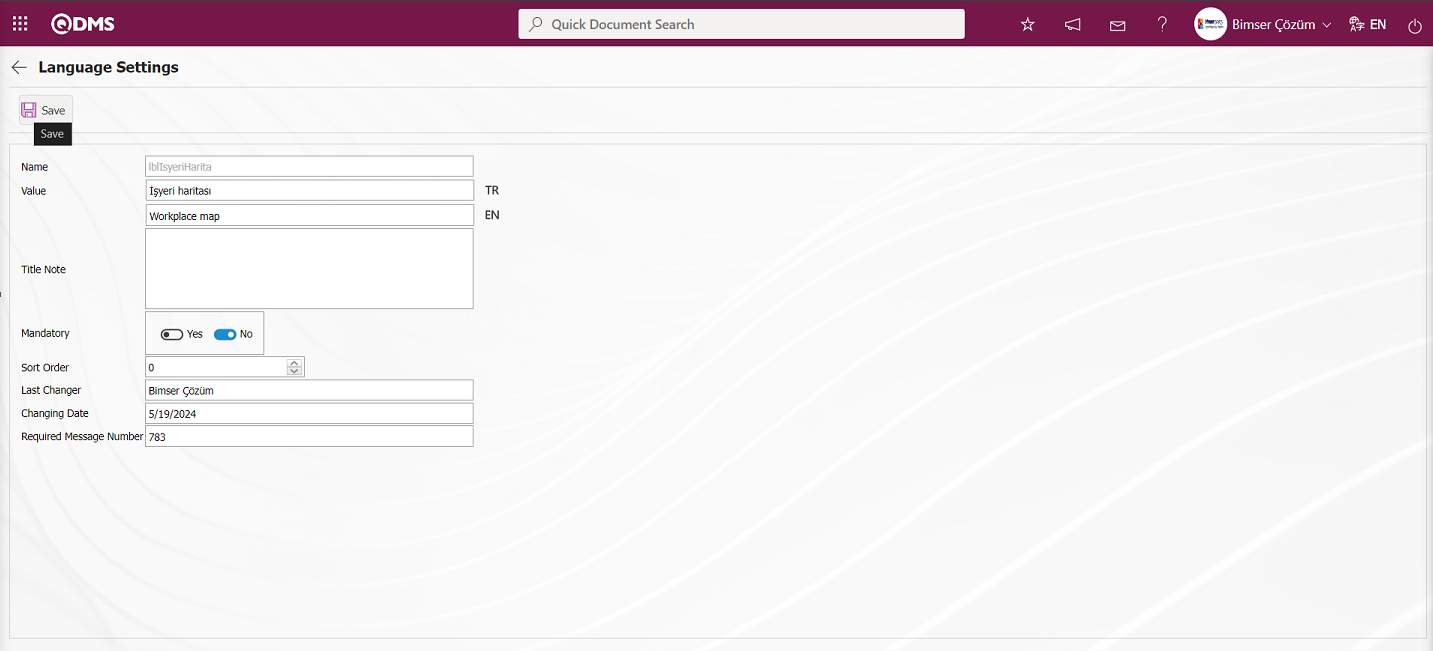
In the Language Settings screen, the definition part of the field is written in the Value section, the language equivalent information, if any, and whether the field will be mandatory or not, and after entering the relevant information in the required fields, the language settings registration process is done by clicking the button in the upper left corner of the screen.
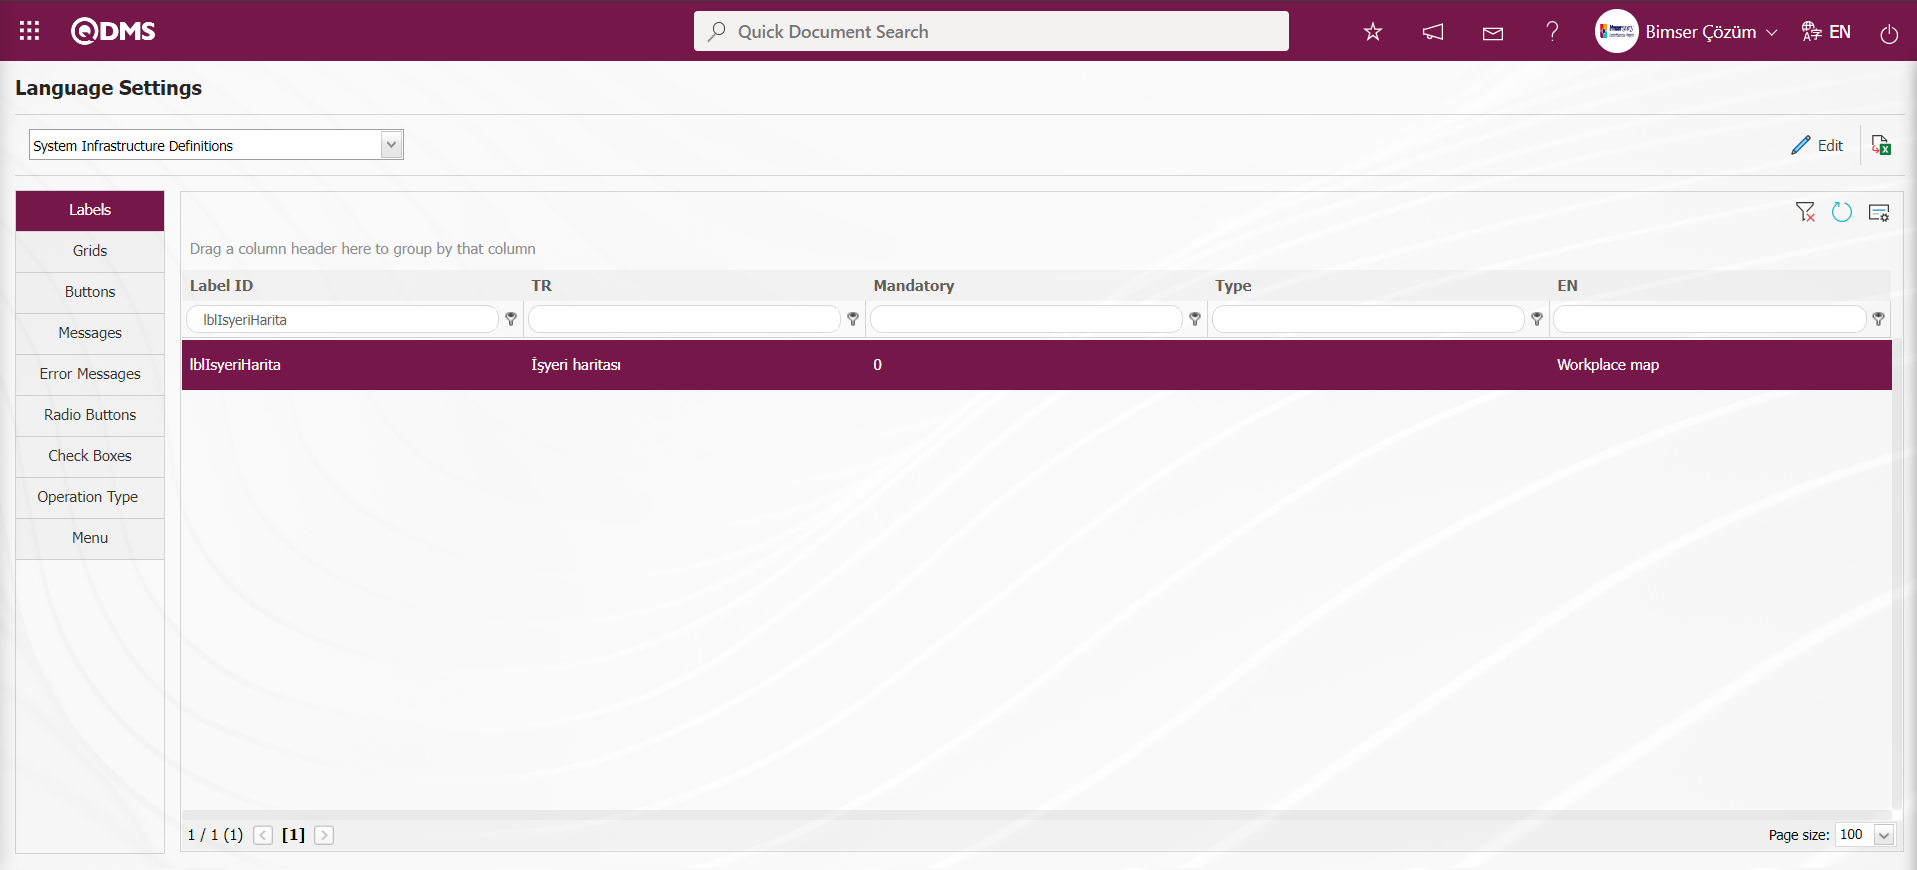
The defined area is displayed on the Workplace Identification screen. When the Requestor Type “Workplace” is selected from the Inside Work Permission Form Operations definition screen in the Inside Work Permission Module, the Map added in this field is displayed in the Map to Work On field and the areas where work is done are marked.
On the Location Definition - New Record screen, enter the Location Name and Location Code. If available, the Parent Location information is selected from the Select Location List defined in the system. Occupational Group is selected from the Select Occupational Group defined in the system and Responsible information is selected from the Personnel Lists defined in the system. After the required fields are filled in, the Location Identification registration process is realized by clicking the button in the upper left corner.
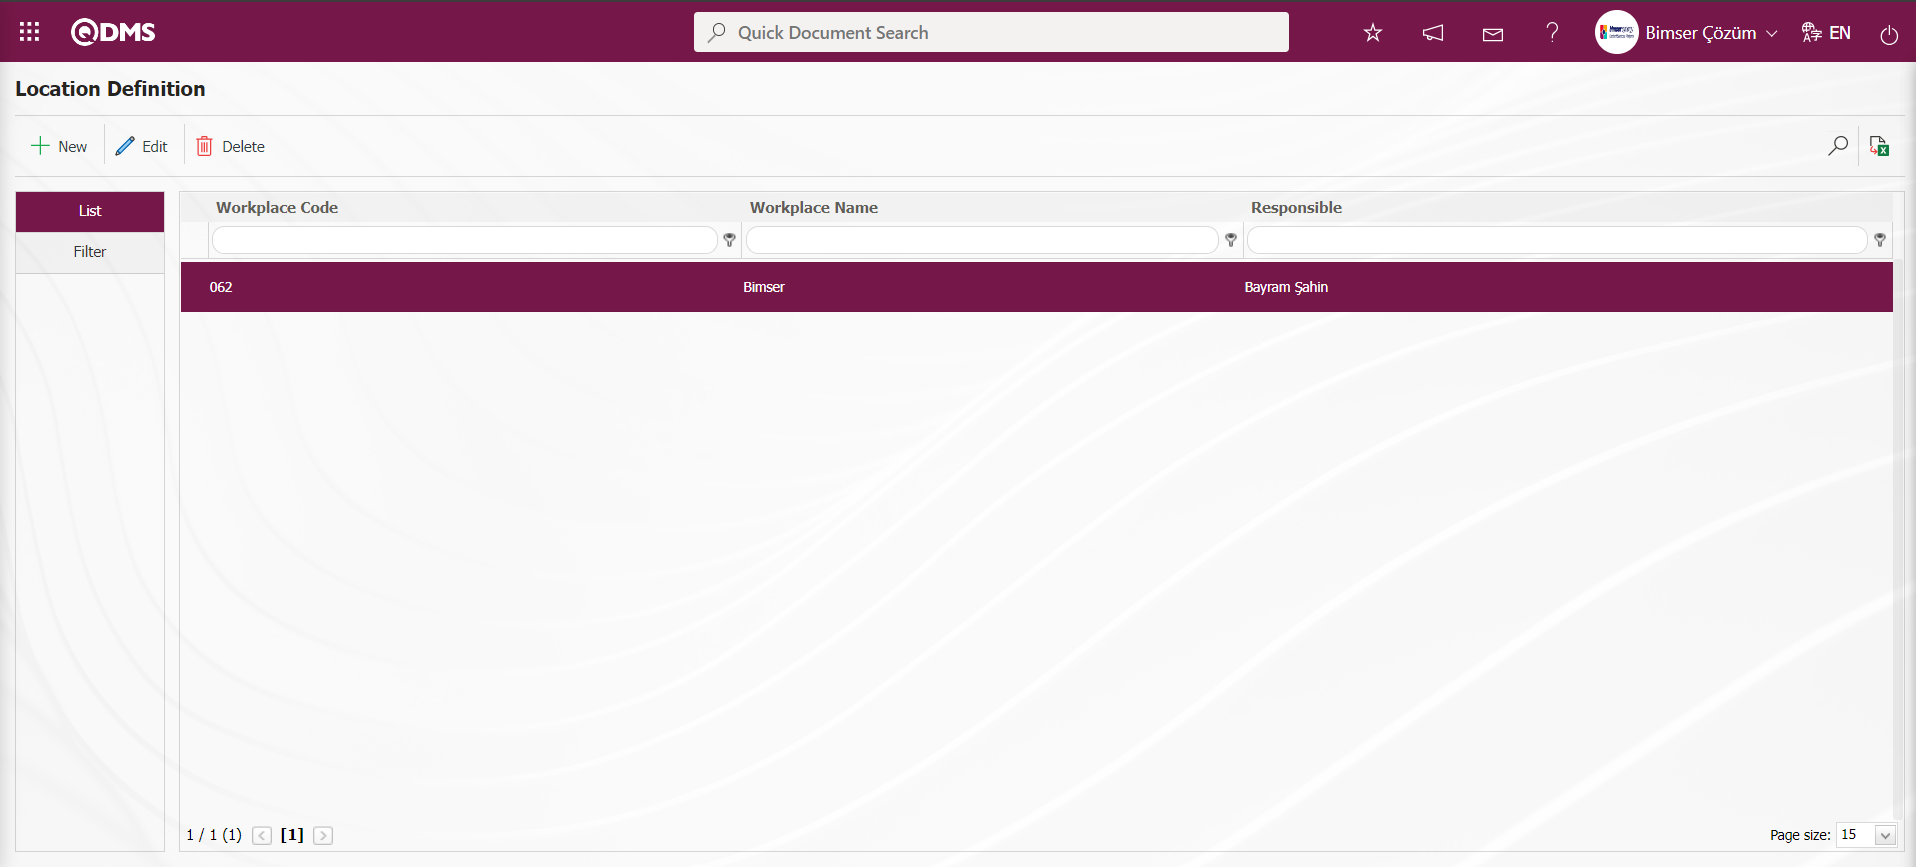
On the Location Definition screen, enter data in the Location Code, Location Name, Responsible and Status fields in the Filter tab and click the (Search) button to filter according to the search criteria.
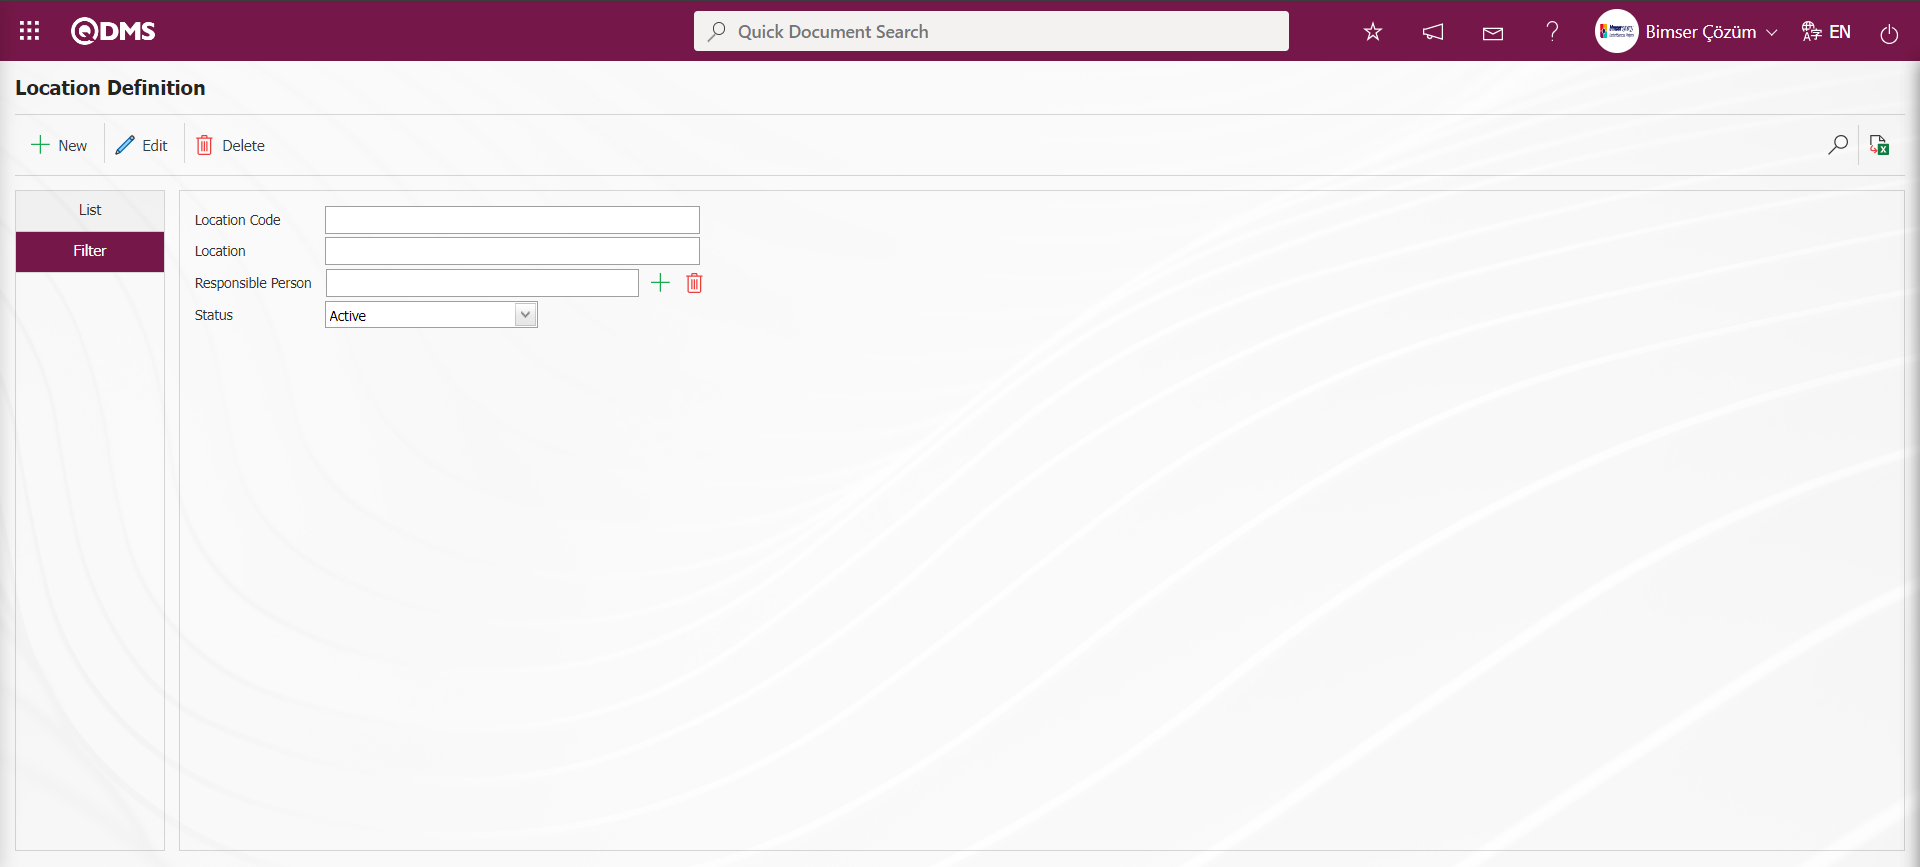
5.1.17. Company Profile Definition
Menu Name: System Infrastructure Definitions/ BSID/ Definitions/ Company Profile
It is the menu where the process of defining the company's location information is realized. It is used in Device Management System, Field Detection Management Modules. Within the scope of the Device Management module, it is used to define the locations where the devices to be calibrated are located in the company. Within the scope of Field Detection Management, it is used to define the sites to be inspected.

With the help of the buttons on the screen;
: Define a new company profile.
: Correction / change / update is made on the company profile information selected in the list. Code information cannot be changed.
: The company profile information selected in the list is deleted.
: Records are searched by filtering.
: Data is transferred to Excel.
To add a new company profile to the Company Profile Definition screen, click on the button on the top left corner of the screen to open the Company Profile Definition / New Record screen.
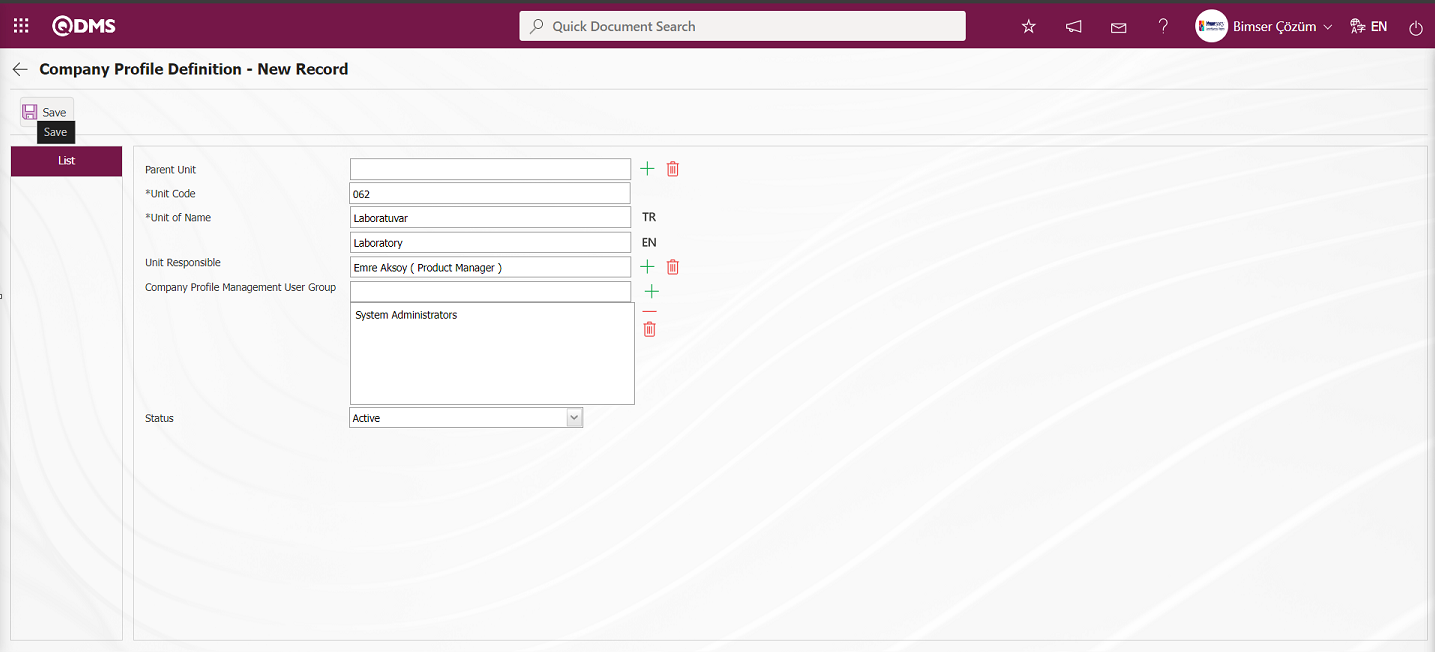
Related fields are defined on the screen that opens;
Parent Unit: Company Profile Definition - New Record screen If you want to define a new Company Profile that is connected to a Company Profile under a Company Profile defined in the system, if you want to create a sub-division, click the  (Select) button and select the Company Profile from the Company Profile list defined in the system.
Unit Code: This is the field where the code information of the company profile defined on the Company Profile Definition - New Record screen is defined. It should be defined without using characters such as spaces and Turkish characters, so that it is not the same as the previously defined fields. Ex. '001' , 'RK'
Unit Name: This is the mandatory field where Company Profile Definition - New Record screen Company Profile definition information is defined.**
Unit Responsible: Company Profile Definition - New Record screen  (Select) is the field where the responsible person of the company profile is selected from the list of personnel defined in the system opened by clicking the button.**
Company Profile Management User Group: Company Profile Definition - New Record screen Company Profile Management User Group (Add) is the field selected in the User Group list opened by clicking the button.
Status: Company Profile Definition - New Record screen This is the field where the “Active” option is selected in the “Active” and “Inactive” options of the status information. Inactive status is a sign that the Company Profile information is no longer used in the system. In order to see unused Company Profile information, it is necessary to search by selecting the “Passive” option in the status field in the search criteria from the filter tab.
In Company Profile Definition - New Record screen, if there is a supercode information in company profile definition, it is selected from the Company Profile list registered in the system. Unit code and unit name definition is written. Unit responsible is selected from the list of Personnel defined in the system Company Profile Management User Group is selected from the list of User Group defined in the system. Status information “Active” is selected. After the required fields are filled in, the Company Profile Definition registration process is realized by clicking the button in the upper left corner.

In the Company Profile Definition screen, data is entered in the fields with search criteria such as Main Unit, Unit Code in the Filter tab and filtering is done according to the search criteria by clicking the (Search) button.
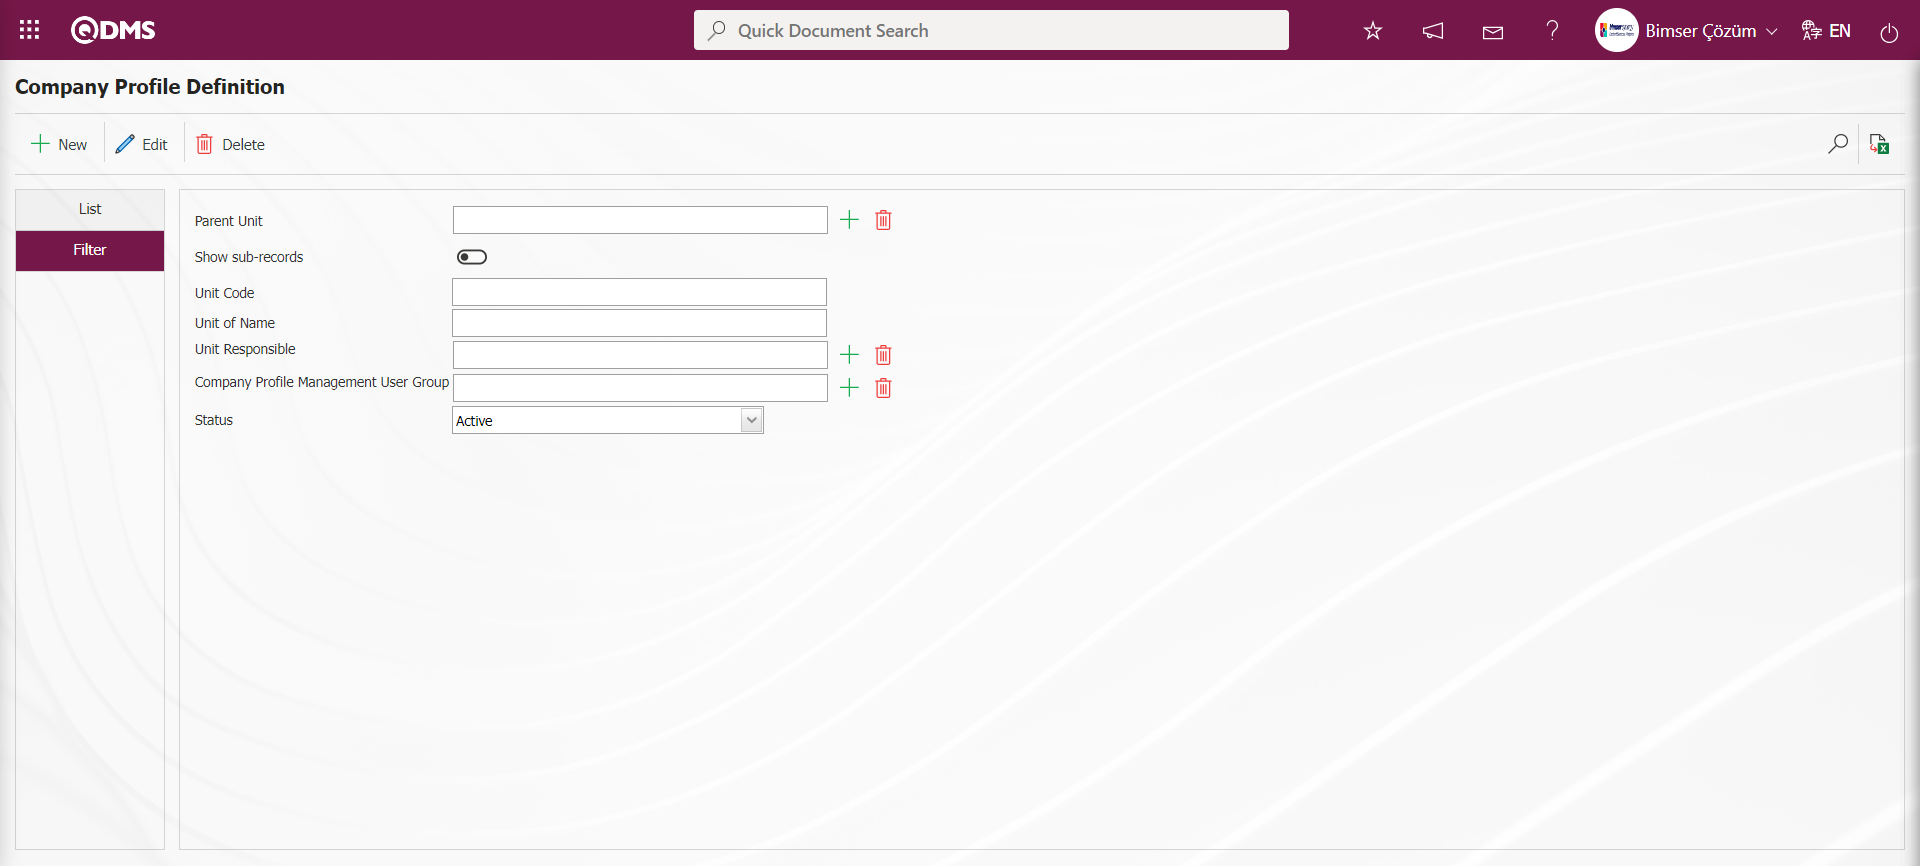
5.1.18. Unit Of Cost Definition
Menu Name: System Infrastructure Definitions/ BSID/ Definitions/ Currency Units
This is the menu where the process of defining currencies is realized. Currencies are displayed by default. Currencies are used in modules such as Corrective Actions, Action Management Customer Complaints (Internal and External Customer Complaints), Device Management System.

With the help of the buttons on the screen;
: Define a new currency.
: Correction / change / update is made on the currency information selected in the list.
: The currency information selected in the list is deleted.
: Records are searched by filtering.
: Data is transferred to Excel.
: The search criteria on the menu screens are used to clear the data remaining in the filter fields in the grid where the search operation is performed.
: The menu screen is restored to its default settings.
: User-based designing of the menu screen is done with the show-hide feature, that is, the hiding feature of the fields corresponding to the columns on the menu screens.
To add a new currency to the Unit Of Cost Definition screen, click on the button on the top left corner of the screen to open the Unit Of Cost Definition / New Record screen.
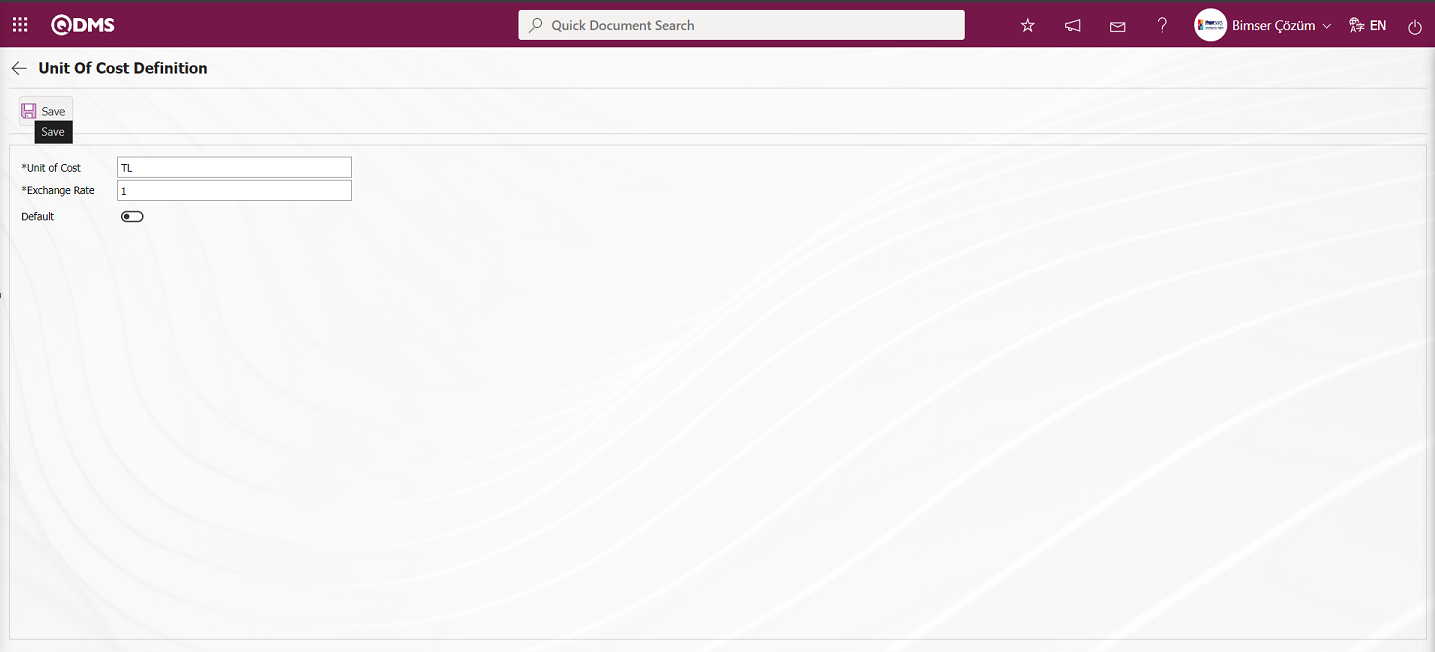
Define the relevant fields on the screen that opens;
Unit of Cost: This is the field where the name of the currency unit defined in the Unit Of Cost Definition screen is written.**
Exchange Rate: This is the field where the exchange rate of the currency unit defined in the Unit Of Cost Definition screen is written.**
Default: When the relevant check box is checked on the Unit Of Cost Definition screen, the definition information is automatically entered into the field by the system.
After entering the information related to the required fields such as the definition of the currency unit on the Unit Of Cost Definition screen, the exchange rate information, and if desired, marking the relevant check box for the definition information to be automatically entered into the field by the system, the currency registration process is performed by clicking the button in the upper left corner of the screen.
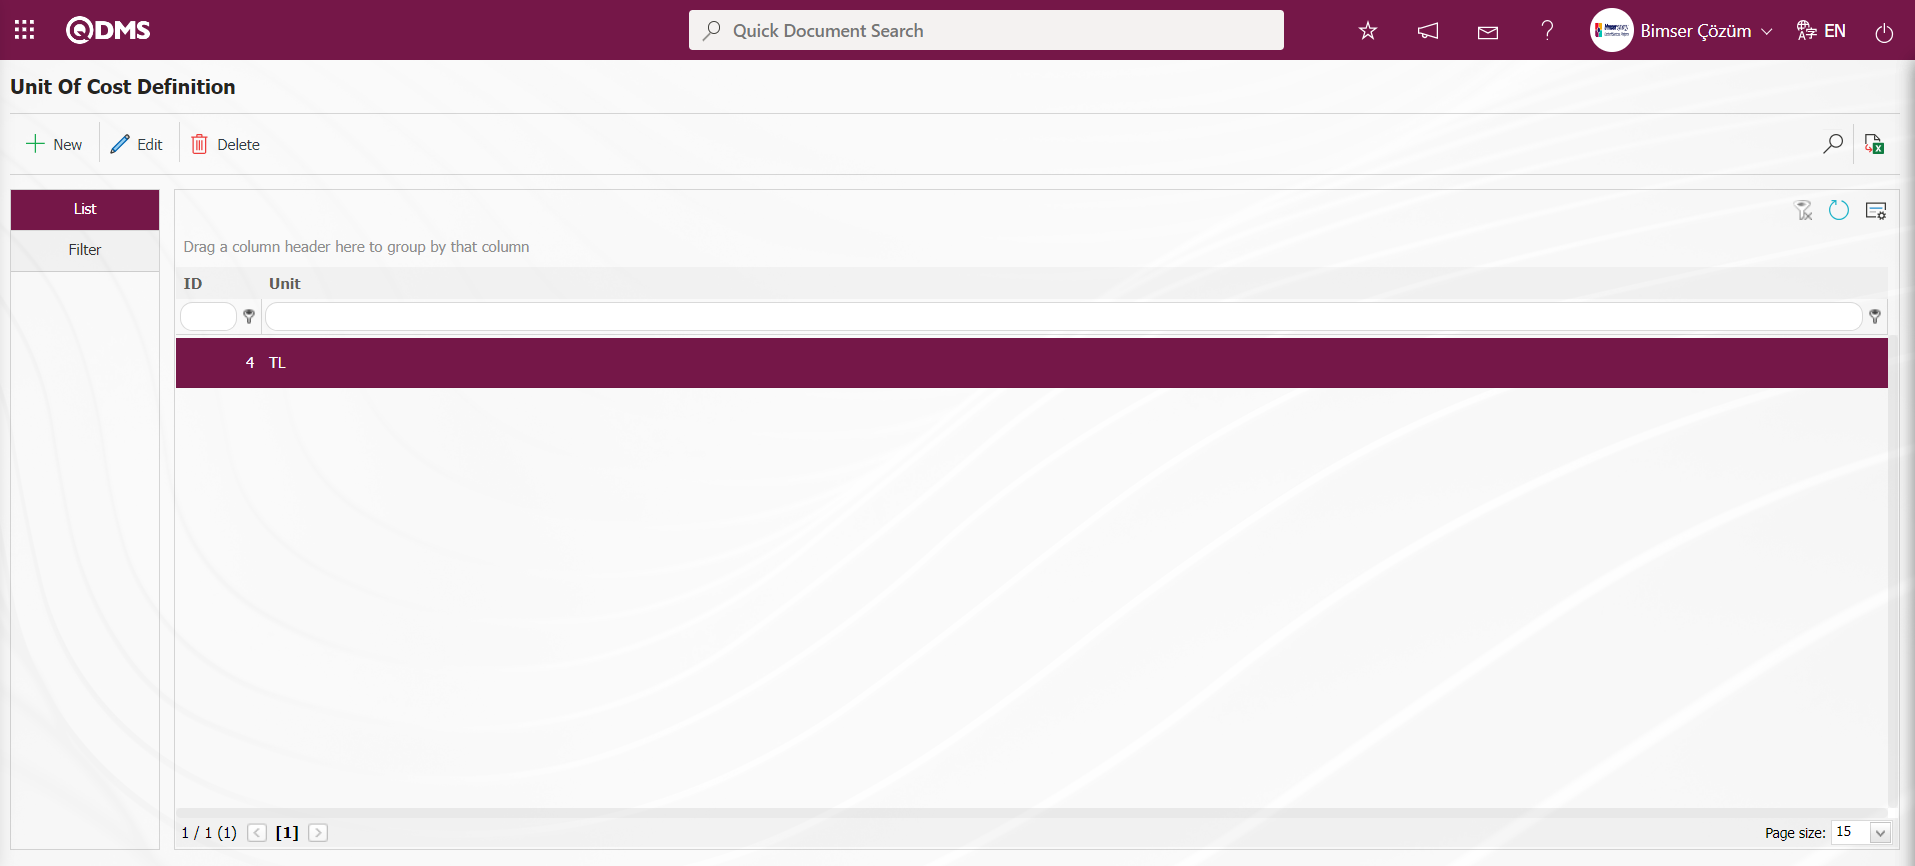
In the Unit Of Cost Definition Filter tab, data is entered in fields such as Id, Unit of Cost and filtering is done according to the search criteria by clicking the (Search) button.

5.1.19. Process Definition
Menu Name: System Infrastructure Definitions/ BSID/ Definitions/ Process Definition
It is the menu where the processes of the company are defined. The defined processes can be associated with many modules. Many modules such as Document Management, Corrective actions, audit, risk modules, event module can be associated with the processes defined in the system. The process definition process is carried out manually or by drawing on the visual model screen in the Ensemble program and entering the relevant information in the relevant fields in the process detail section. If Ensemble Process Management program is used by the company, process definitions are drawn with Ensemble Process Management Program and the list is transferred to the Qdms system in this menu. In the absence of Ensemble program, processes can be defined manually. In this menu, only the code, name and owner of the process are defined and the registration process is performed without drawing in manual definition.

With the help of the buttons on the screen;
: Data is transferred to Excel.
By clicking the (Export to Excel) button on the Process Definition screen, the report of the Process list in Excel format is obtained.
5.1.20. Unit Of Measure Definition
Menu Name: System Infrastructure Definitions/ BSID/ Definitions/ Measurement Units
This is the menu where the process of defining units of measurement is performed. Some of the units of measurement such as pieces, kilograms, liters, meters come defined in the system. Units of measurement are used in modules such as Corrective Actions, Audit Activity, Customer Complaints (Internal and External Customer Complaints), Device Management System, Risk modules (such as OHS Risk Assessment, Corporate Risk Assessment).

With the help of the buttons on the screen;
: Define a new unit of measurement.
: Correction / change / update is made on the unit of measurement information selected in the list.
: Deletes the unit of measurement information selected in the list.
: Records are searched by filtering.
: Data is transferred to Excel.
: The search criteria on the menu screens are used to clear the data remaining in the filter fields in the grid where the search operation is performed.
: The menu screen is restored to its default settings.
: User-based designing of the menu screen is done with the show-hide feature, that is, the hiding feature of the fields corresponding to the columns on the menu screens.
To add a new unit of measure to the Unit of Measure Definition screen, click on the button on the upper left corner of the screen to open the Unit of Measure Definition / New Record screen.
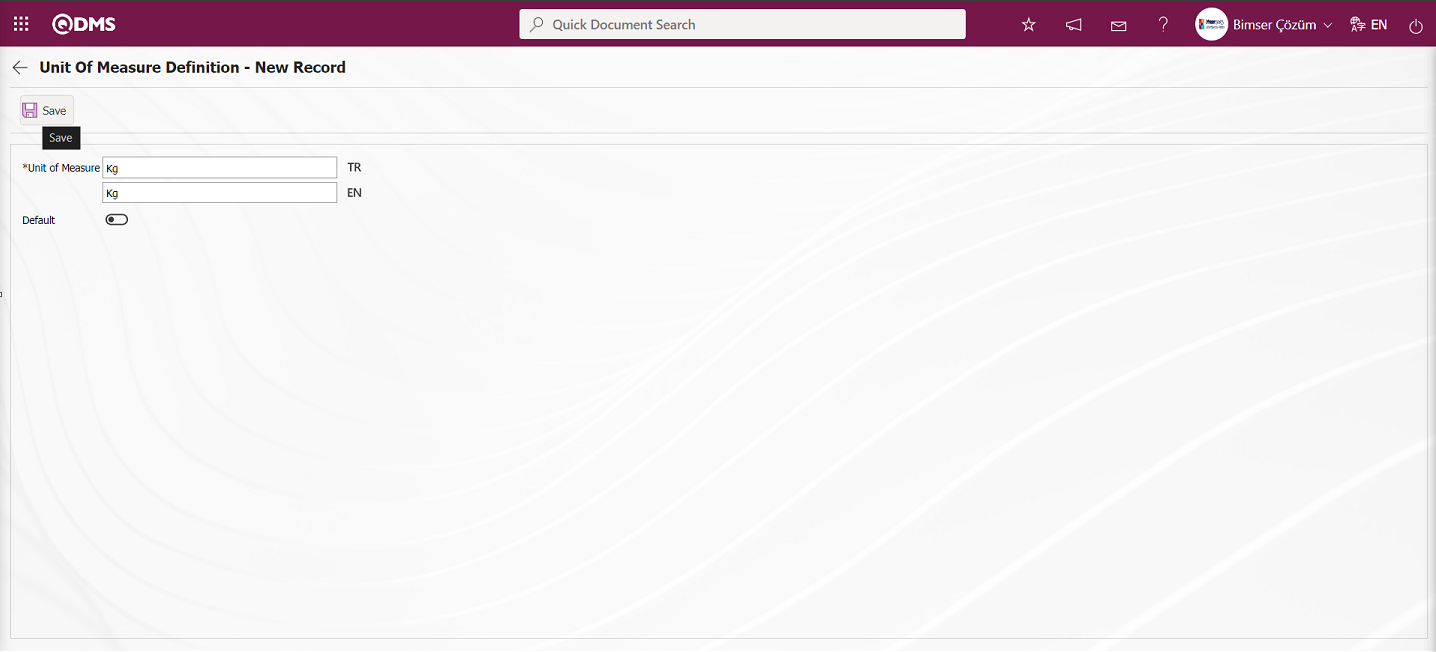
Related fields are defined on the screen that opens;
Unit of Measure: This is the field where the name of the unit of measurement defined in the Unit of Measure Definition screen is written.
Default: When the relevant check box is checked on the Unit of Measure Definition screen, the unit of measurement defined in the field is automatically defined by the system.
On the Unit of Measure Definition - New Record screen, enter the Unit of Measure Name information. If the unit of measure is marked as default when defining the unit of measure, it is ensured that the default selected unit of measure is automatically displayed on the screen by the system when performing transactions in the modules. After the required fields are filled with the relevant information, the Unit of Measure Definition registration process is realized by clicking the button in the upper left corner.
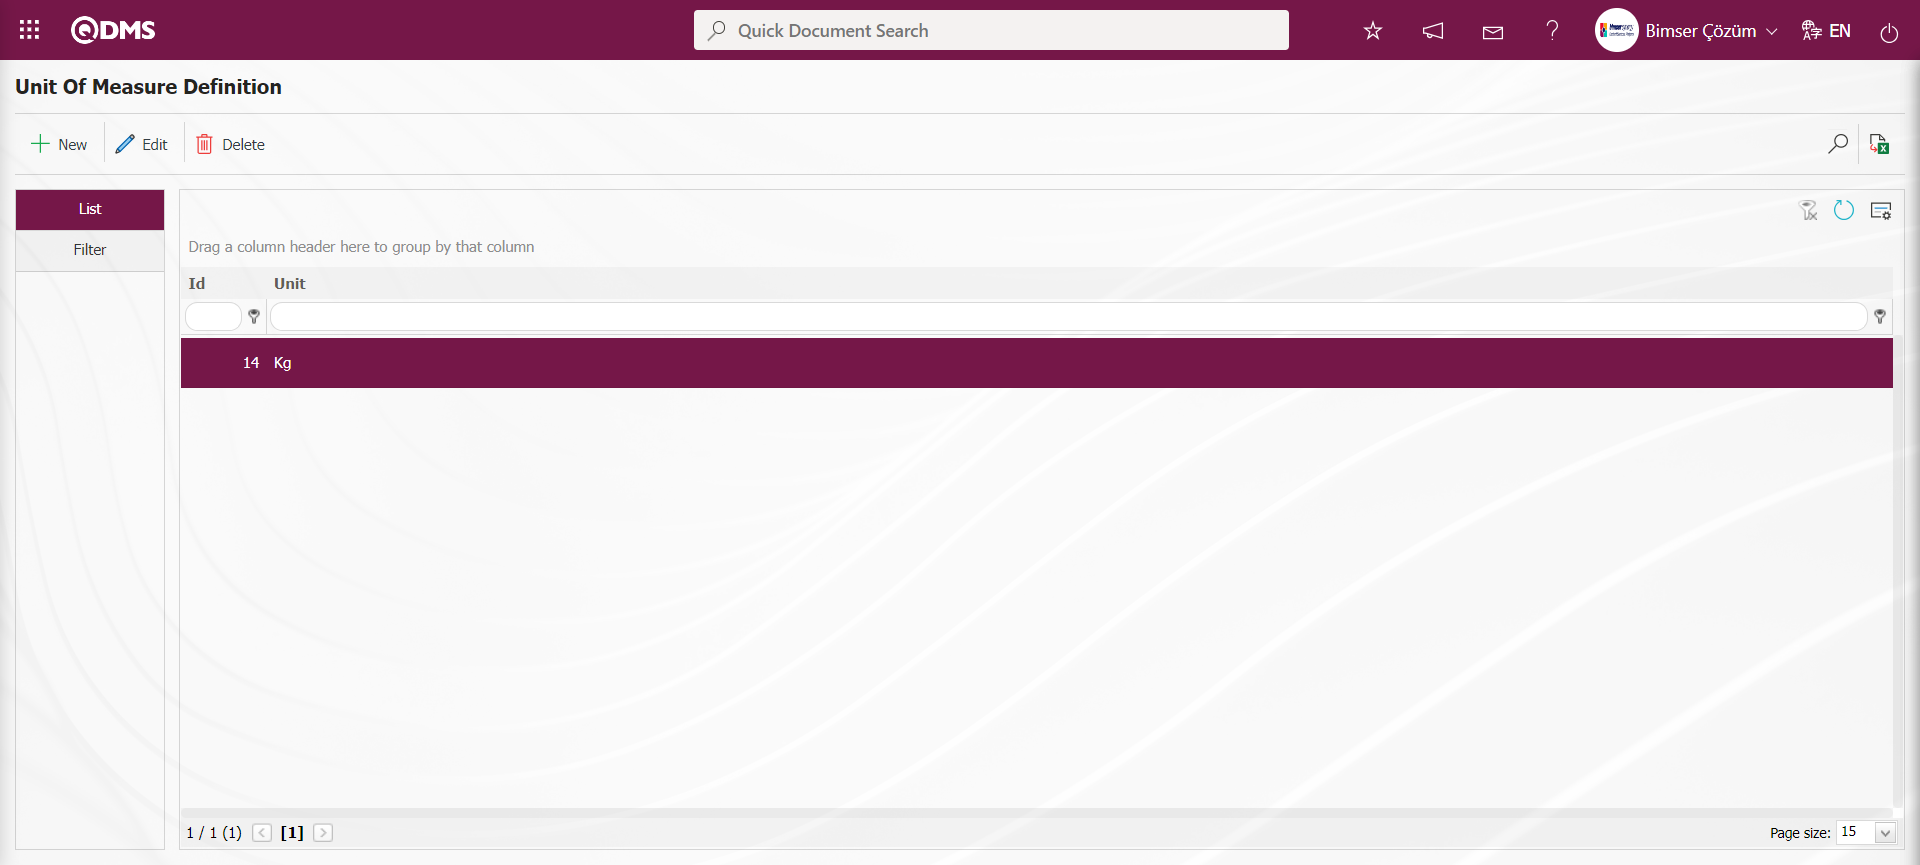
In the Filter tab on the Unit of Measure Definition screen, data is entered in fields such as Measure Id, Unit of Measure , and filtering is done according to the search criteria by clicking the (Search) button.

5.1.21. Management System Definition
Menu Name: System Infrastructure Definitions/ BSID/ Definitions/ Management Systems
This is the menu where management systems such as ISO 9001, ISO 45001, ISO 14001, ISO 27001 are defined. Management systems such as ISO 9001, ISO 45001, ISO 14001, ISO 27001 are defined in the first installation. Other management systems used by the company are defined from this menu.

With the help of the buttons on the screen;
: Define a new management system.
: Correction / change / update is made on the management system information selected in the list.
: The management system information selected in the list is deleted.
: Records are searched by filtering.
: Data is transferred to Excel.
: The search criteria on the menu screens are used to clear the data remaining in the filter fields in the grid where the search operation is performed.
: The menu screen is restored to its default settings.
: User-based designing of the menu screen is done with the show-hide feature, that is, the hiding feature of the fields corresponding to the columns on the menu screens.
To add a new management system to the Management System Definition screen, click on the button at the top left corner of the screen to open the Management System Definition screen.
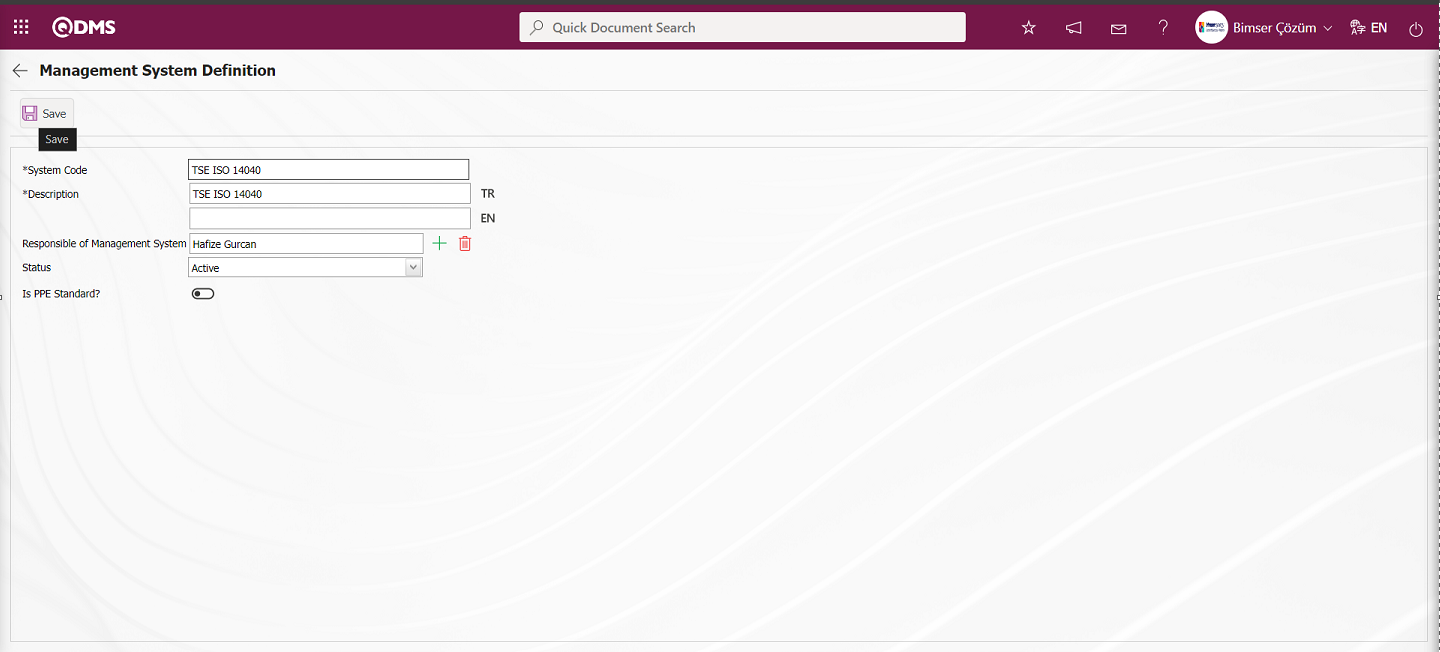
Define the relevant fields on the screen that opens;
System Code: This is the mandatory field where the code system code information is defined on the Management System Definition screen. It should be defined without using characters such as spaces and Turkish characters, so as not to be the same as previously defined fields. For example: 9001, 14001, 27001
Description: This is the mandatory field where the definition information of the management system is defined on the Management System Definition screen. In the fields with related flags, the language equivalent of the description field is written.
Responsible of Management System: It is the field where the Responsible of Management System information is selected from the list of personnel defined in the system opened by clicking the  (Select) button on the Management System Definition screen.
Status: This is the field where the “Active” option is selected in the “Active” and “Inactive” options of the Status information on the Management System Definition screen. Management Systems whose status is inactive are a sign that they are no longer used in the system. To see the unused Management Systems, it is sufficient to search for “Inactive” in the status field in the search criteria from the filter tab.
Is PPE Standard?: On the Management System Identification screen, if Personal Protective Equipment is standard, the relevant check box is marked: Hand Arm Protective Equipment Standards; TS EN 388: Gloves produced to protect against mechanical risks, TS EN 407: Protective gloves produced against thermal risks. When this standard is defined in the system, the relevant check box is marked because PPE is a standard.
On the Management System Definition screen, enter the System Code and the name of the management system in the description field. If the defined management system uses PPE as Standard, the relevant check box is checked. The status section “Active” is selected. After the required fields are filled in, the Management System registration process is realized by clicking the button in the upper left corner.
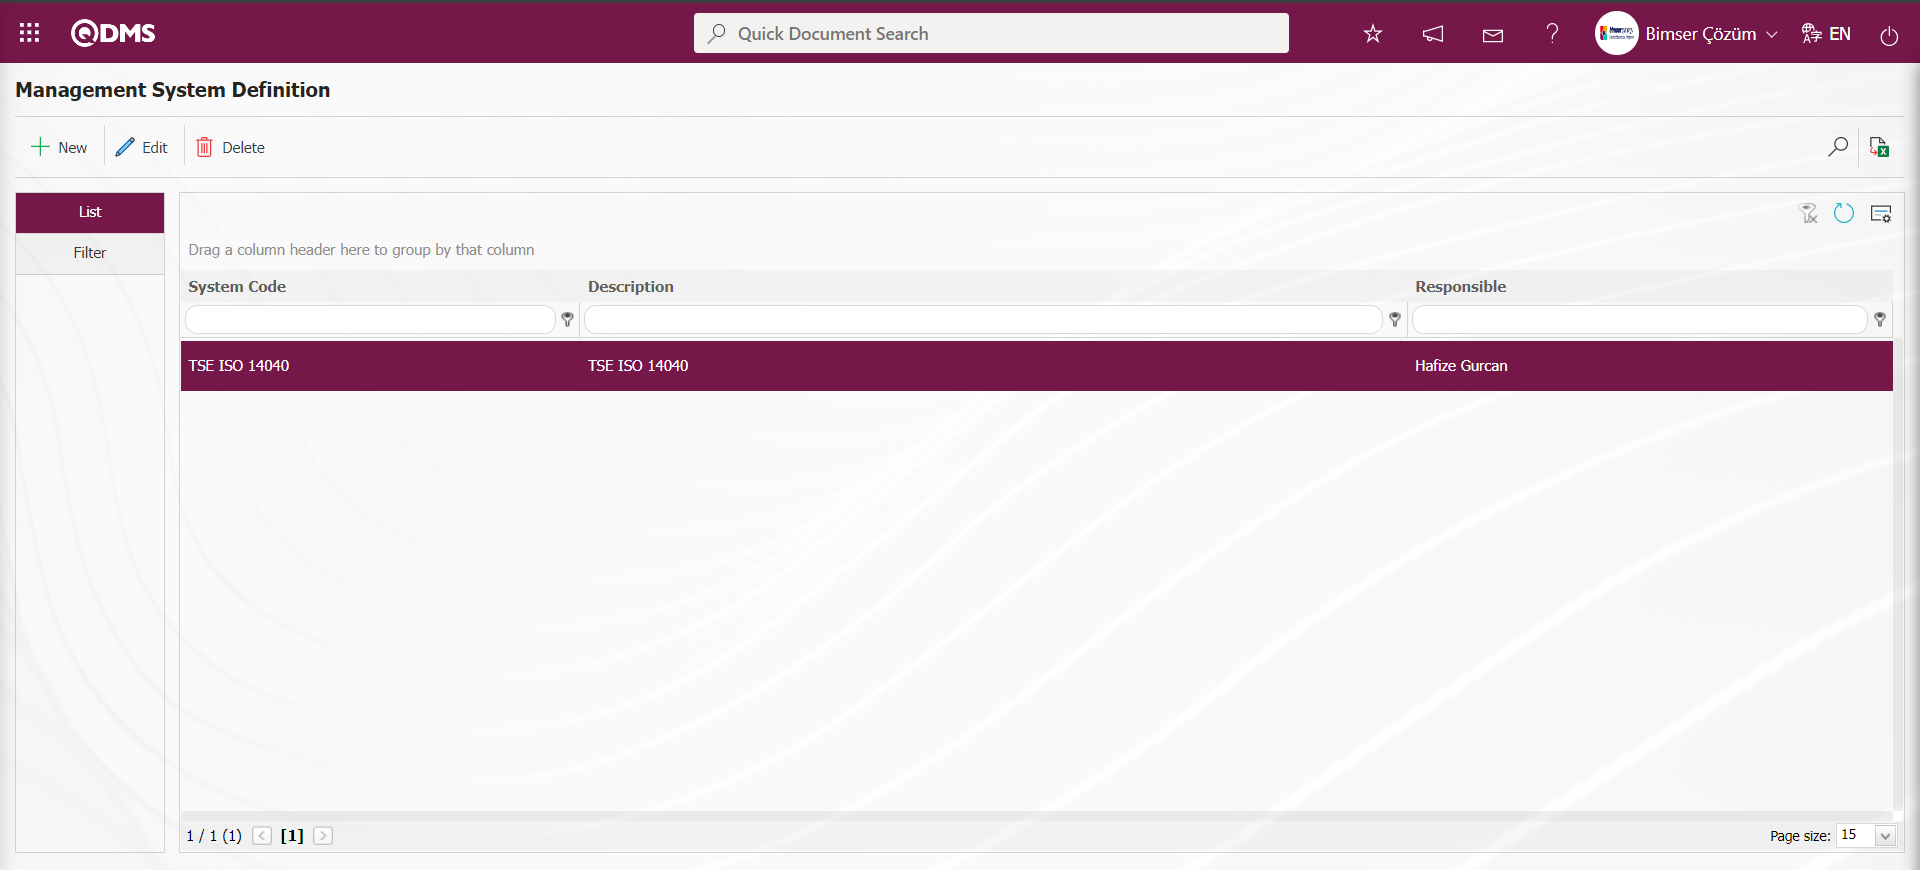
In the Filter tab on the Management System Identification screen, data is entered in the fields such as System Code, Description, Responsible of Management System and Status, and filtering is done according to the search criteria by clicking the  (Search) button.

5.1.22. Management System Clause Number Definition
Menu Name: System Infrastructure Definitions/ BSID/ Definitions/ Manegement System Clause Number
This is the menu where the standard item numbers of Management Systems are defined. In the first system installation, the relevant standard item numbers of management systems such as ISO 9001, ISO 45001, ISO 14001, ISO 27001, which come defined in the Management Systems menu, also come defined. The item numbers of other management systems used by the company are also defined from this menu. In the System Infrastructure Definitions/BSID/ Configuration Settings/Transfers/Item No Transfer And Mass Deactivation menu, mass transfer and mass deactivation of item numbers can also be done.

With the help of the buttons on the screen;
: A new managememt system clause number is defined.
: Correction / change / update is made on the managememt system clause number information selected in the list.
: The managememt system clause number information selected in the list is deleted.
: Records are searched by filtering.
: Data is transferred to Excel.
: The search criteria on the menu screens are used to clear the data remaining in the filter fields in the grid where the search operation is performed.
: The menu screen is restored to its default settings.
: User-based designing of the menu screen is done with the show-hide feature, that is, the hiding feature of the fields corresponding to the columns on the menu screens.
To add a new managememt system clause number to the Managememt System Clause Number Definition screen, click the button in the upper left corner of the screen to open the Managememt System Clause Number Definition / New Record screen.
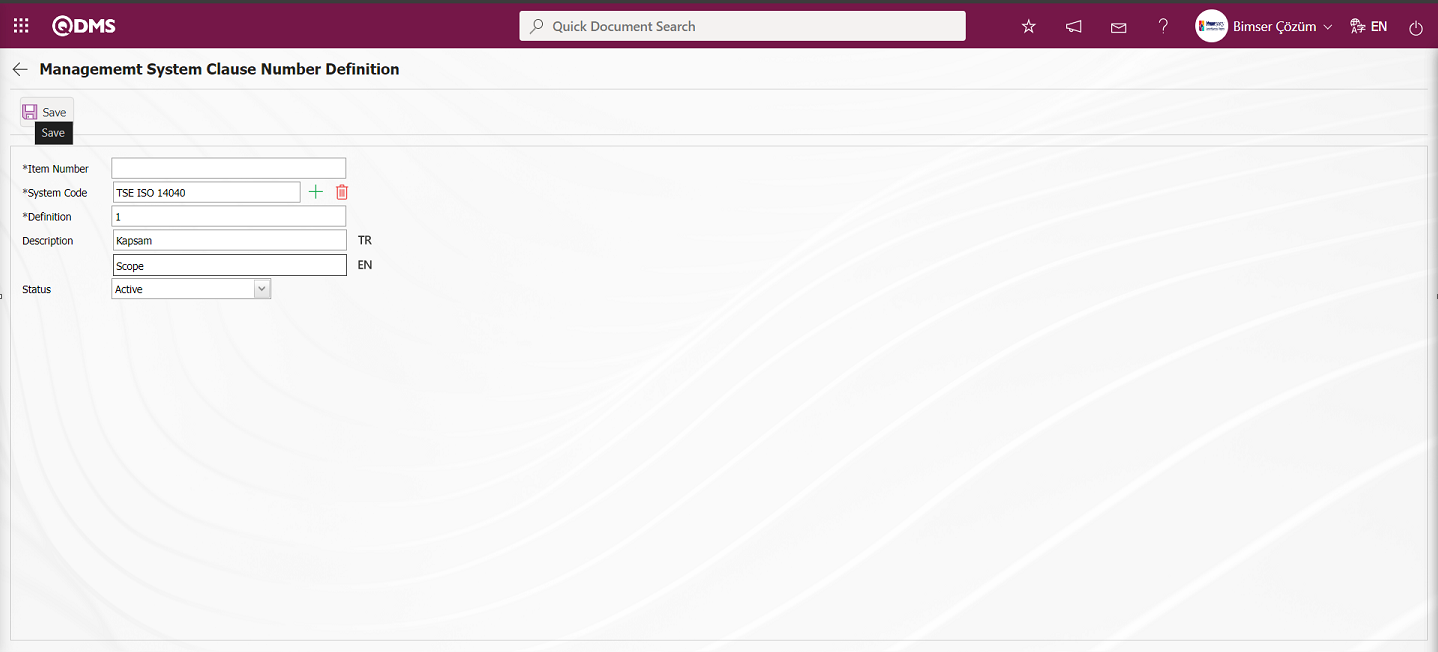
Related fields are defined on the screen that opens;
Item Number: In the Managememt System Clause Number Definition screen, the item number information is automatically given by the system.
System Code: This is the field where the System Code information is selected from the list of the Management System defined in the system opened by clicking the  (Select) button on the Managememt System Clause Number Definition screen.
Definition: This is the mandatory field where the clause number definition information is defined on the Managememt System Clause Number Definition screen.
Description: This is the field where the Clause No description information is entered on the Managememt System Clause Number Definition screen. In the fields with the related flags, the language equivalents of the clause number description information of the management system are written.
Status: This is the field where the “Active” option is selected in the “Active” and “Inactive” options of the Status information on the Managememt System Clause Number Definition screen. Clause Numbers whose status is inactive are a sign that they are no longer used in the system. To see the unused Item Nos, it is sufficient to search for “Inactive” in the status field in the search criteria from the filter tab.
In the Managememt System Clause Number Definition screen, the Clause No information is given automatically by the system. System Code information is selected from the Management System List defined in the system. Standard Clause Number information is written in the Definition section. Clause description information is entered. Select “Active” in the Status section. After the required fields are filled in, the Managememt System Clause Number Definition registration process is realized by clicking the button in the upper left corner. In this way, the definition of all clause numbers of the relevant management system is done manually.
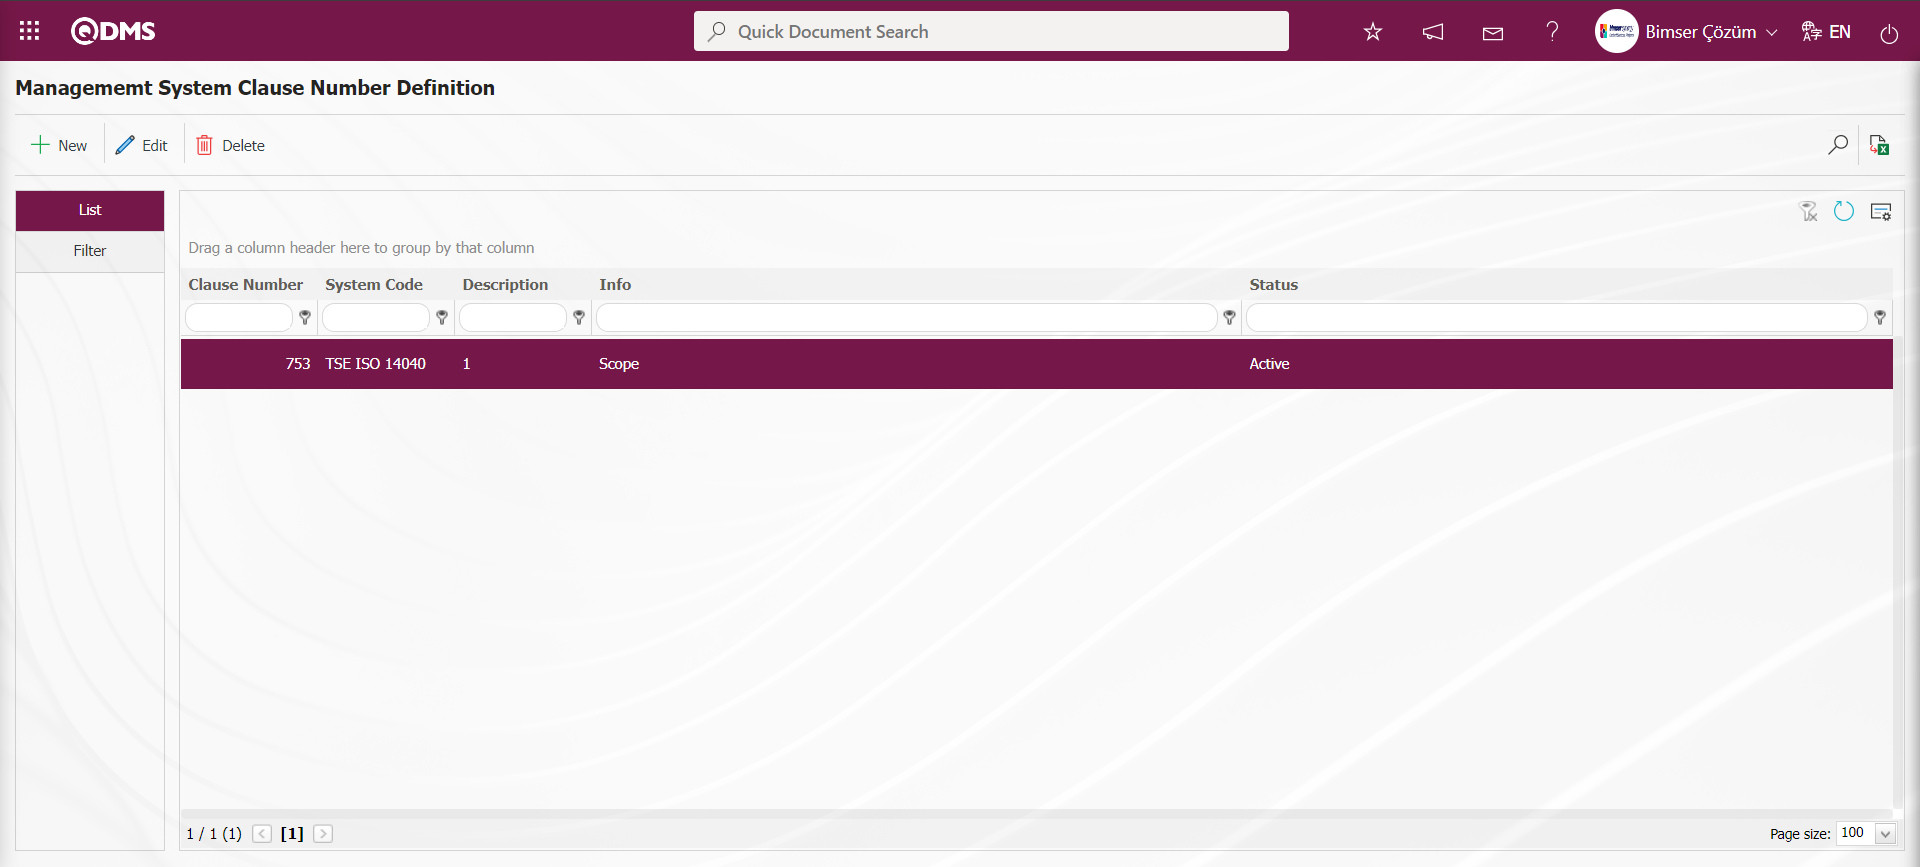
On the Managememt System Clause Number Definition screen, data is entered in the fields such as Management System, Clause Number, Definition and Description in the Filter tab, and filtering is done according to the search criteria by clicking the (Search) button.
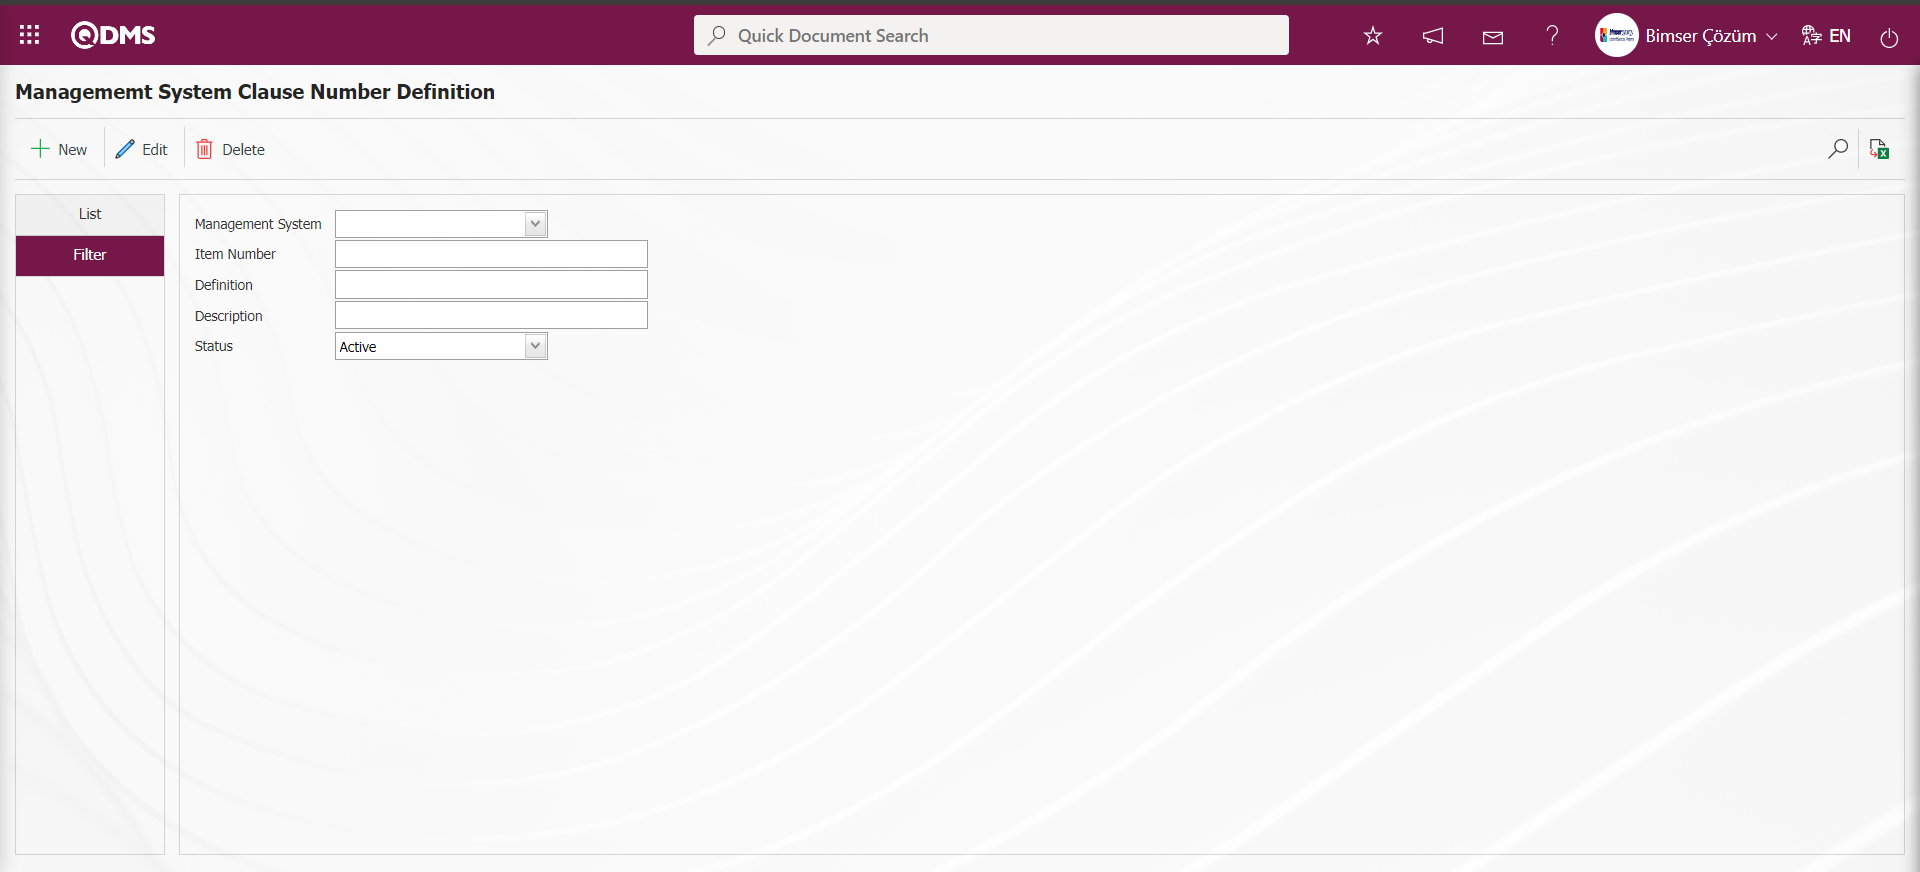
5.1.23. Holiday Definition
Menu Name: System Infrastructure Definitions/ BSID/ Definitions/ Identification Holidays
It is the menu where national and religious holidays are introduced and holidays are specified. On the holidays defined in the system, task transfers made through QDMS are transferred to the days after the holidays. Delay mails are sent based on the first working day after the holiday for the company's delayed works and transactions that cannot be done, and delay mails are prevented from going on holidays.

With the help of the buttons on the screen;
 : A new holiday is defined
 : Correction / change / update is made on the selected holiday information in the list.
 : Deletes the selected holiday information in the list.
: Records are searched by filtering.
: Data is transferred to Excel.
: The search criteria on the menu screens are used to clear the data remaining in the filter fields in the grid where the search operation is performed.
: The menu screen is restored to its default settings.
: User-based designing of the menu screen is done with the show-hide feature, that is, the hiding feature of the fields corresponding to the columns on the menu screens.
To add a new holiday to the Holidays Definition screen, click the button on the upper left corner of the screen to open the Holidays Definition / New Record screen.

Define the relevant fields on the screen that opens;
Holiday: It is the field where the date of the holiday defined in the Define Holidays screen is selected in the calendar field.
Description: It is the field where the name of the holiday defined on the Define Holidays screen is written.
On the screen that opens, enter the holiday date and description information. After the required fields are filled in, the Define Holidays registration process is realized by clicking the button in the upper right corner.

On the Holidays Definition screen, enter data in the fields such as Holiday and Description with the Filter tab and filter according to the search criteria by clicking the (Search) button.
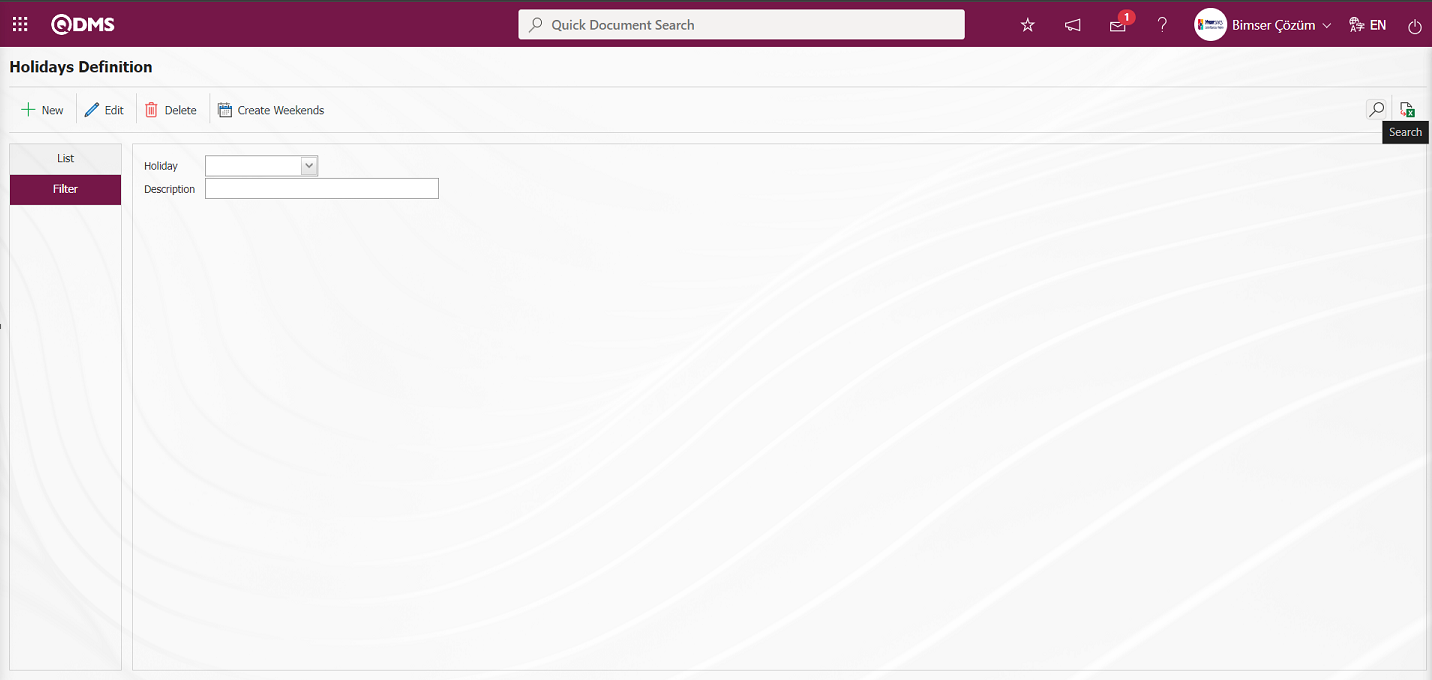
5.1.24. Expense Center Definition
Menu Name: System Infrastructure Definitions/ BSID/ Definitions/ Define Expense Center
The Expense Center to which the personnel are connected is defined. The Expense Center created while defining the personnel is associated. It is used to determine which Expense Center is connected to which personnel. It is also a menu used within the scope of the Strategic Planning module.

With the help of the buttons on the screen;
: A new cost center is defined
: Correction / change / update is made on the cost center information selected in the list.
: The cost center information selected in the list is deleted.
: Records are searched by filtering.
: Data is transferred to Excel.
: The search criteria on the menu screens are used to clear the data remaining in the filter fields in the grid where the search operation is performed.
: The menu screen is restored to its default settings.
: User-based designing of the menu screen is done with the show-hide feature, that is, the hiding feature of the fields corresponding to the columns on the menu screens.
To add a new cost center to the Cost Center Description screen, click on the button at the top left corner of the screen to open the Cost Center Description screen.
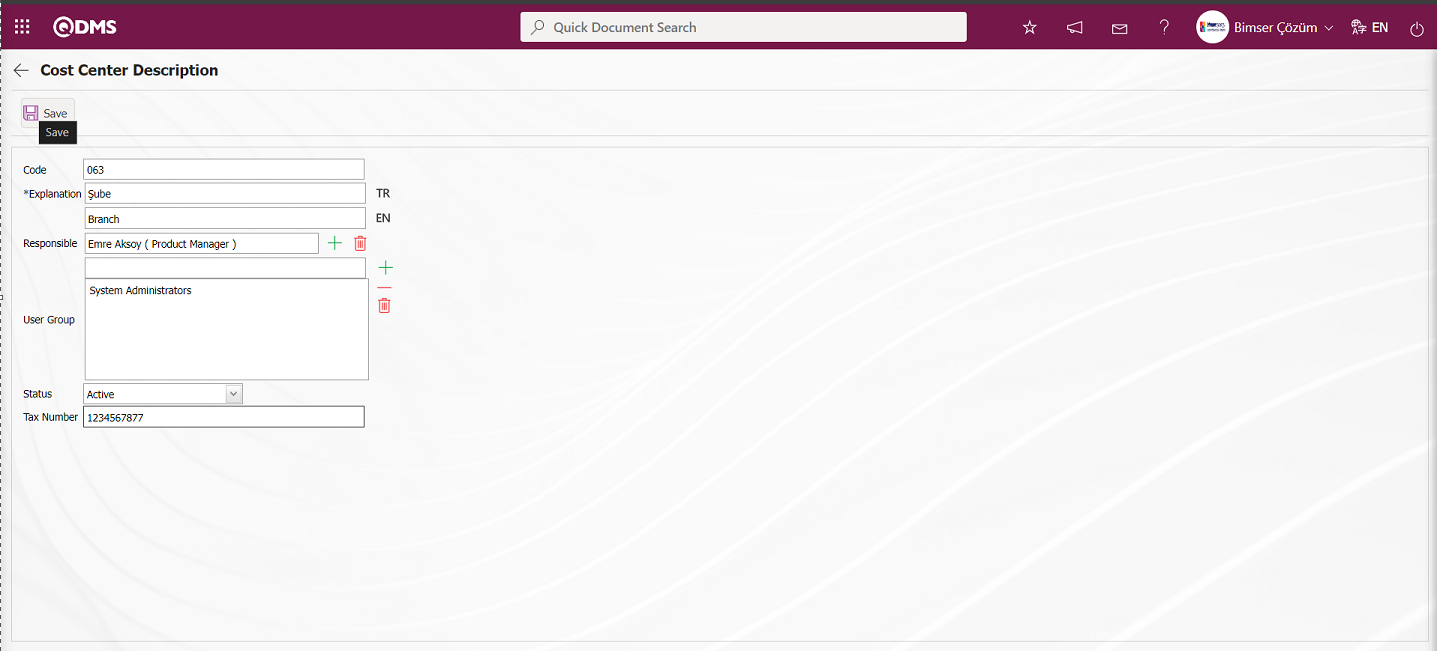
Related fields are defined on the screen that opens;
Code: This is the mandatory field where Cost Center code information is defined on the Cost Center Description screen. It should be defined without using characters such as spaces and Turkish characters, so that it is not the same as the previously defined fields. For example: '001' , 'RK'
Description: This is the mandatory field where Cost Center description information is defined on the Cost Center Description screen.
Responsible: It is the field where the Cost Center responsible is selected from the list of personnel defined in the system opened by clicking the  (Select) button on the Cost Center Description screen.
User Group: It is the field where the Cost Center Responsible User Group is selected from the User Group list defined in the system opened by clicking the (Add) button on the Cost Center Description screen.
Status: This is the field where the “Active” option is selected in the “Active” and “Inactive” options of the Status information on the Cost Center Description screen. Inactive status is a sign that Cost Center information is no longer used in the system. To see the Cost Center information that is not used, it is sufficient to search for “Inactive” in the status field in the search criteria from the filter tab.
Tax No: This is the field where the Cost Center tax number is defined on the Cost Center Description screen.
In the Cost Center Description screen, Cost Center Code and Description information is entered. Cost Center Responsible is selected from the Personnel List defined in the system. Status section is “Active”. Tax ID information is entered. After the required fields are filled in, the Cost Center Description registration process is performed by clicking the button in the upper left corner.

In the Filter tab on the Cost Center Description screen, enter data in the fields such as Code, Description, Responsible and Status and click the (Search) button to filter according to the search criteria.

5.1.25. User Identification Verification Transfer
Menu Name: System Infrastructure Definitions/ BSID/ Definitions/ User Verification Transfer
In the approval mechanism, it is the menu where the process of transferring the approval process from the original approver to another user is performed. The approval task of a user on a record can be transferred from that user to another user. While the authorization of the whole menu is given in the proxy process, only the approval authority is transferred with the approval mechanism transfer menu.

With the help of the buttons on the screen;
: A new User Verification Transfer is defined.
: The User Verification Transfer information selected in the list is deleted.
: Records are searched by filtering.
: Data is transferred to Excel.
: The search criteria on the menu screens are used to clear the data remaining in the filter fields in the grid where the search operation is performed.
: The menu screen is restored to its default settings.
: User-based designing of the menu screen is done with the show-hide feature, that is, the hiding feature of the fields corresponding to the columns on the menu screens.
To add a new User Verification Transfer information to the User Identification Verification Transfer screen, the User Identification Verification Transfer / New Record screen is opened by clicking the button in the upper left corner of the screen.

Related fields are defined on the screen that opens;
User: In the User Identification Verification Transfer screen, it is the field where the User information is selected from the list of personnel defined in the system opened by clicking the  (Select) button. The personnel list includes the personnel with the status of Resigned.
User Transfer: This is the field where the Transferred User is selected from the list of personnel defined in the system opened by clicking the (Select) button in the Transferred User field on the User Identification Verification Transfer screen. Personnel with Active status are included in the personnel list.
Authorized Modules: In the User Identification Verification Transfer screen, the modules to be authorized are selected in the drop-down module list in the modules field.
On the User Identification Verification Transfer screen, the first field contains the original user and the second field contains the transferred user. On the screen that opens, the original user information is selected from the list of personnel leaving the job and the Transferred User information is selected from the list of personnel defined in the system. After the required fields are filled in, the User Identification Verification Transfer Identification registration process is performed by clicking the button in the upper left corner.
On the User Identification Verification Transfer screen, filtering is done according to the search criteria by clicking the  (Search) button such as User, Transferred User on the Filter tab.
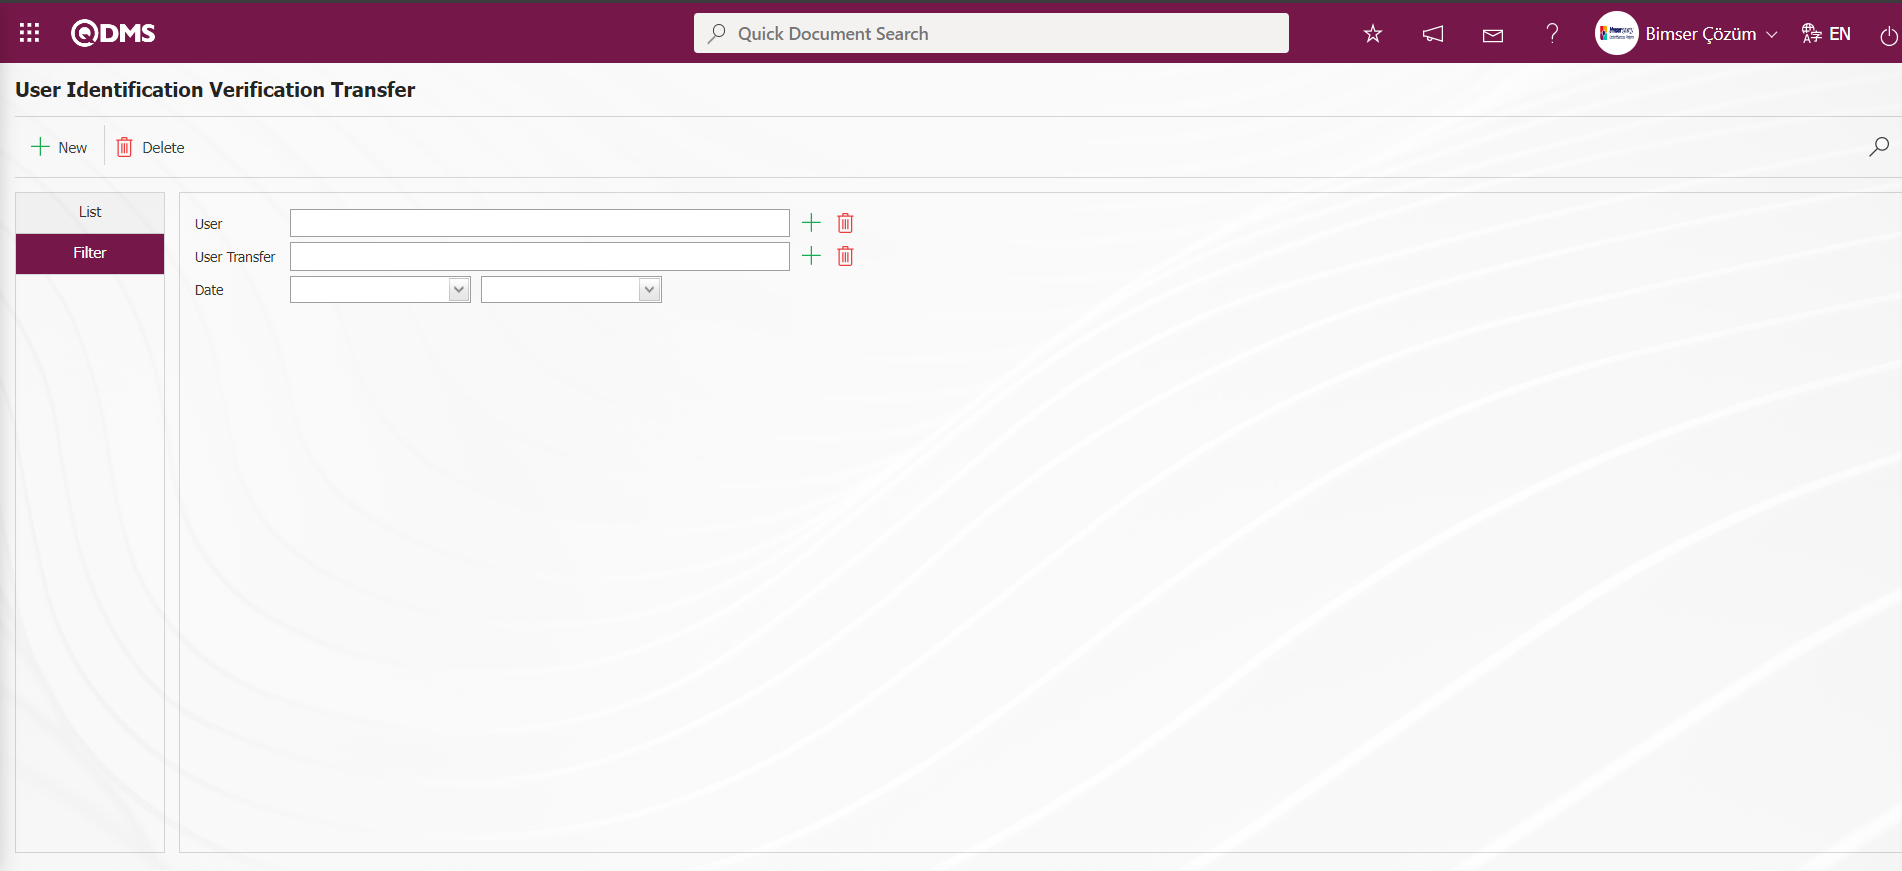
5.1.26. OHS Specialists Definition
Menu Name: System Infrastructure Definitions/ BSID/ Definitions/ OHS Specialists
It is the menu where the OHS Specialist within the company is defined to the system. In the Training Module, it is used during the submission of the trainings within the scope of HIMS (Occupational Health and Safety Information Management System) to the Ministry.

With the help of the buttons on the screen;
 : Define a new OHS Specialist
 : Correction / change / update is made on the OHS Specialist information selected in the list.
 : The OHS Specialist information selected in the list is deleted.
: Records are searched by filtering.
: Data is transferred to Excel.
: The search criteria on the menu screens are used to clear the data remaining in the filter fields in the grid where the search operation is performed.
: The menu screen is restored to its default settings.
: User-based designing of the menu screen is done with the show-hide feature, that is, the hiding feature of the fields corresponding to the columns on the menu screens.
To add a new OHS Specialist to the OHS Specialist Identification screen, click on the button at the top right corner of the screen to open the Identification of OHS Specialists / New Record screen.
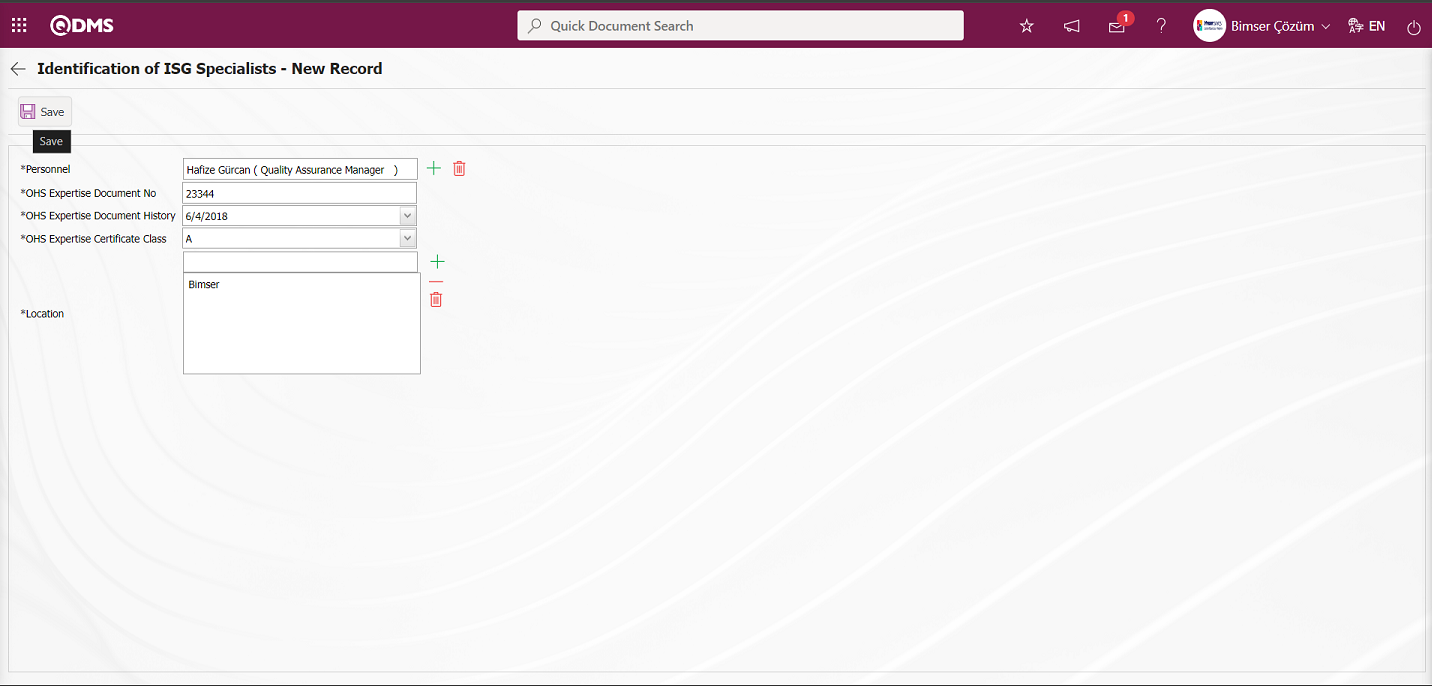
Related fields are defined on the screen that opens;
Personnel: On the Identification of OHS Specialists - New Record screen It is the mandatory field where the Personnel information of the OHS Expert is selected from the list of personnel defined in the system opened by clicking the (Select) button.**
OHS Expertise Document No: This is the mandatory field where the OHS Expertise Document No of the OHS Expert is written on the Identification of OHS Specialists - New Record screen.
OHS Expertise Document History: This is the mandatory field where the OHS Expertise Document History of the OHS Specialist is selected in the Calendar field on the Identification of OHS Specialists- New Record screen.
OHS Expertise Certificate Class: Identification of OHS Specialists- New Record screen, this is the mandatory field where the OHS Expertise Certificate Class of the OHS Expertise is selected from the drop-down list. According to the OHS Expertise document class;
Class A: They can work in very dangerous workplaces.
Class B: They can work in less dangerous and dangerous classes.
Class C:They can work in Less Hazardous workplaces.
The class of the OHS Expertise is determined according to the options in the Hazard Class field on the Workplace Identification screen.
Location: In the Identification of OHS Expertise - New Record screen, the Location information to which the OHS Expertise is affiliated is the mandatory field to be selected in the Location list opened by clicking the (Add) button.
On the Identification of OHS Expertise - New Record screen, the Personnel information is selected from the list of personnel defined in the system. OHS Expertise Document No, OHS Expertise Document Date and OHS Expertise Document Class information are entered. The location information to which the Expertise affiliated is selected from the list of location defined in the system. After the required fields are filled in, the appointment approval process is started by clicking the button in the upper left corner.

After the registration process on the Identification of OHS Expertise - New Record screen, click the “OK” button in the website message given by the system “Are you sure to send approval for assigment?”.assigment?”.
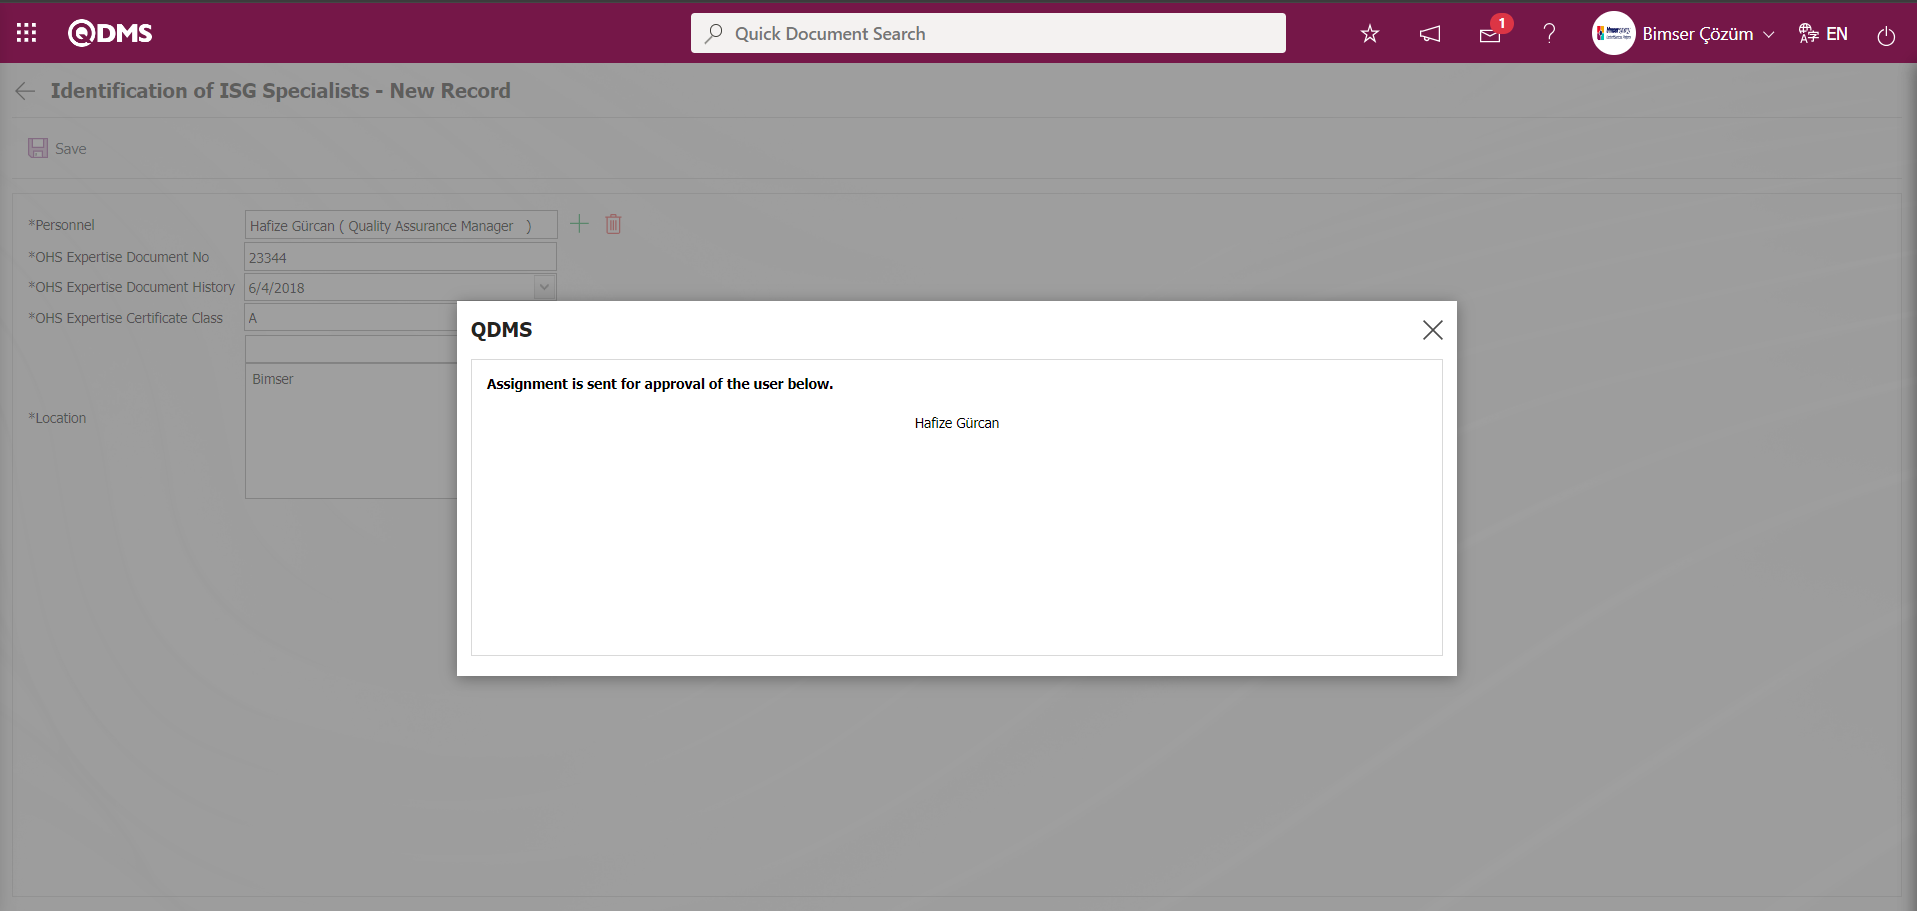
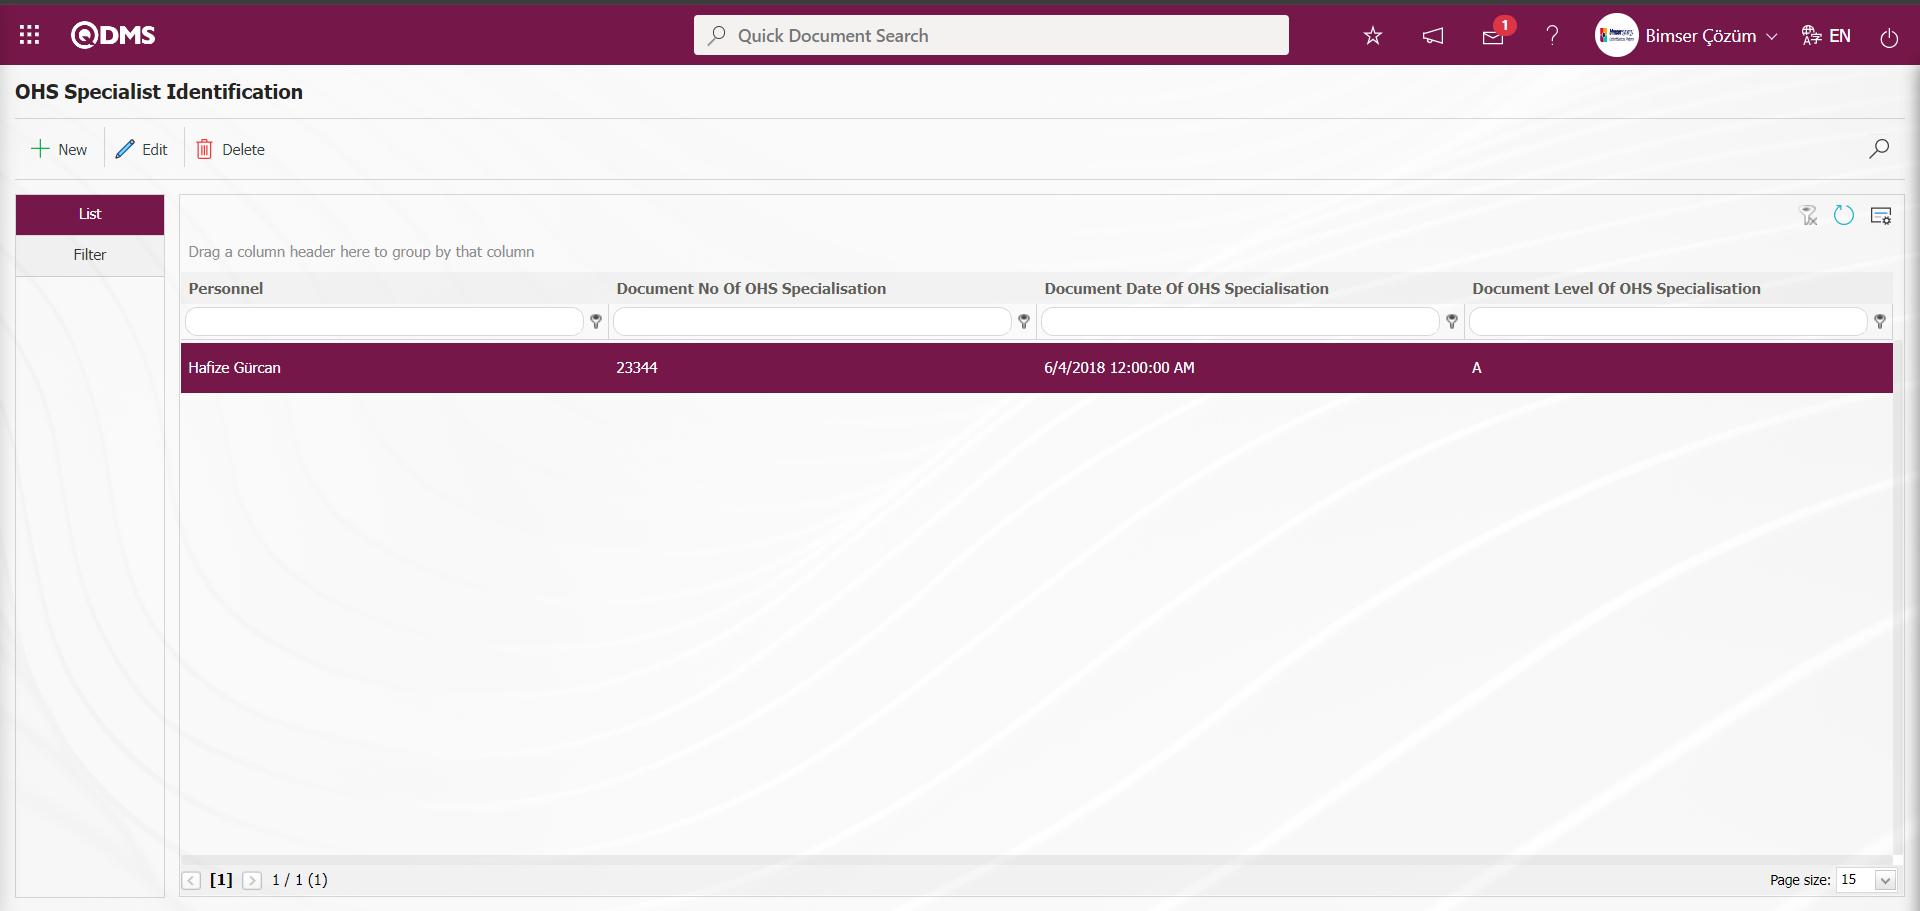
In order to approve the Assignment Approval Request, the user defined for the approval of the Assignment Approval Request is logged in to the Qdms address by typing the user name and password on the Qdms Main login screen.

Pending Jobs of the assigned user will be assigned as a job in the “Approval Pending Assignments List”.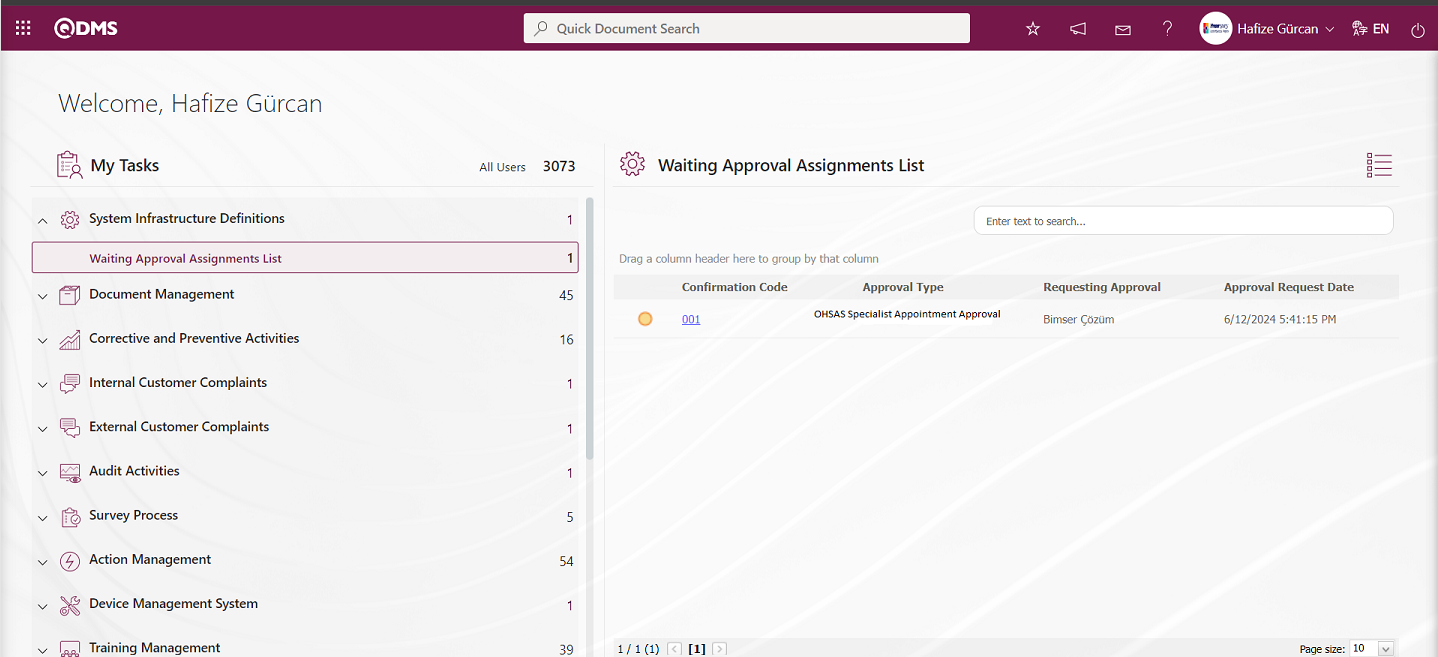
Click on the approval code link in the Approval code field in the relevant task. On the screen that opens, the process of approving or rejecting the assignment is done.
5.1.27. Workplace Contract Definition
Menu Name: System Infrastructure Definitions/BSID/Definitions/Workplace Contract Definition
Within the scope of HIMS (Occupational Health and Safety Information Management System), it is the menu used to notify that it has a contract with the software company to send inspection and training records to the ministry. On the Contract Entry screen, in the Contract Start Date field, the start date of the contract is selected in the drop-down calendar field and the relevant workplaces are selected in the list in the list tab and the result is seen in the contract status section in the list by clicking the  button. On the Contract Entry screen, in the Contract End Date field, the end date information of the contract is selected in the drop-down Calendar field and the related workplaces are selected in the list in the list tab and the service is deleted by clicking the
  button. Before the contract is sent, the examination records in the Health Records menu and the training records in the Training Records are not sent to the ministry.
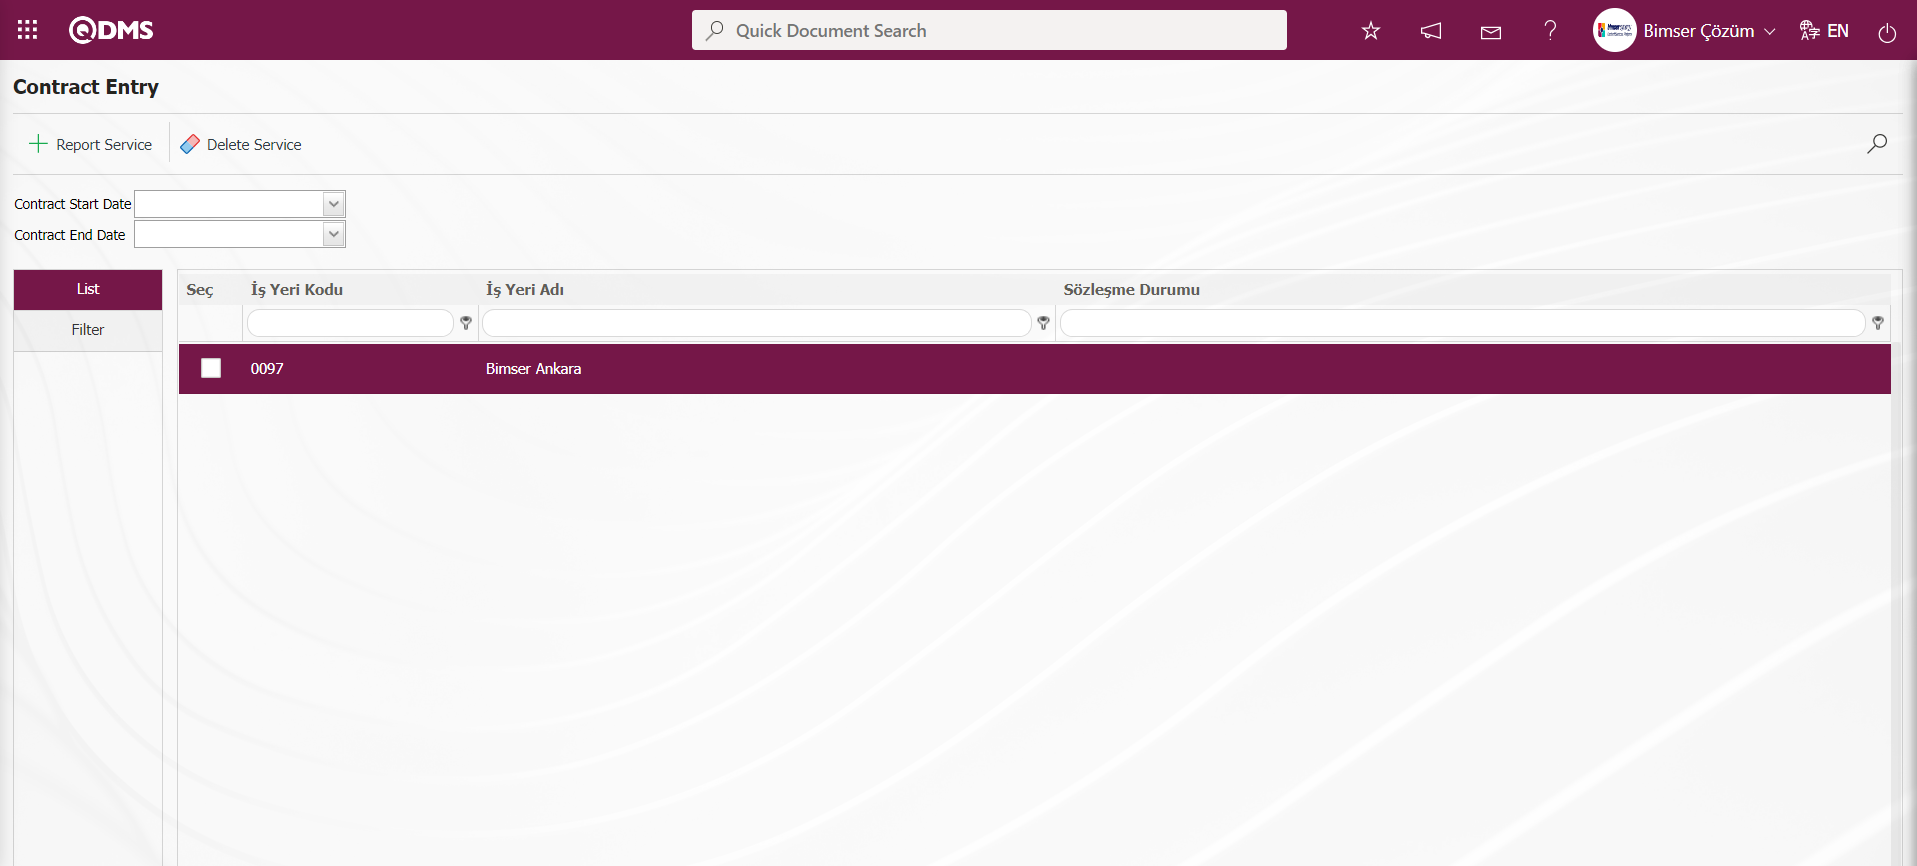
With the help of the buttons on the screen;
 : Notification is made by selecting the contract start date of the contract related to the workplace.
 : Deletion is made by selecting the end date of the contract related to the workplace.
5.1.28. Create Qr
Menu Name: System Infrastructure Definitions/ BSID/ Definitions/ Create Qr
In the System Infrastructure Definitions Module, it is the menu where the Qr code is obtained in the related menus of the modules. In the Create Qr menu, select the menu in the drop-down menu list in the menu area. After getting the Qr code in the menu, the Qr code reader application or camera on your smartphone opens. By pointing your phone at the Qr code, you can still access the necessary information no matter which angle you hold the camera towards the code. The data will instantly appear on your screen; Qr codes can store a lot of data. But no matter how much data they contain, Qr codes allow the user to access the information instantly when scanned, which is why they are called Quick Response codes.

With the help of the buttons on the screen;
 : Get the Qr code of the selected menu.
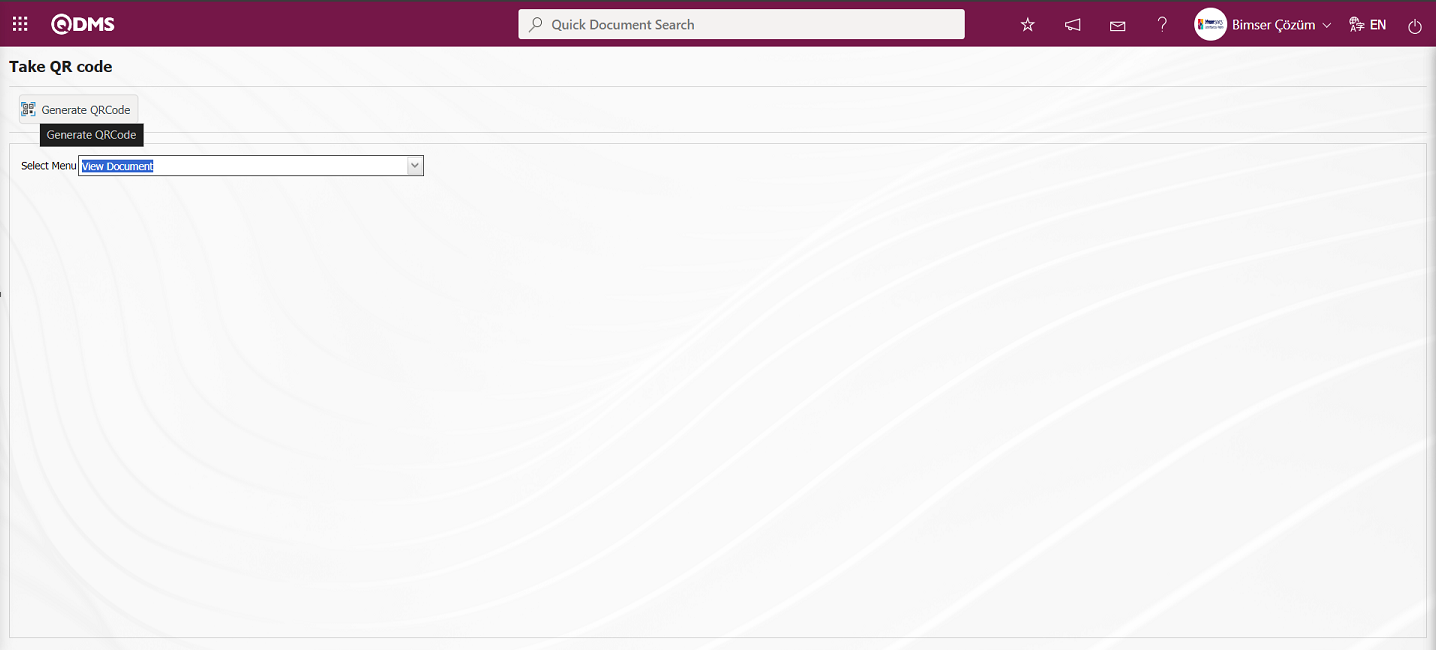
For example: Document Viewing menu is selected as the menu. After selecting the Document Viewing menu as the menu on the Take QR code screen, the Qr code of the menu is obtained by clicking the button on the top right of the screen.
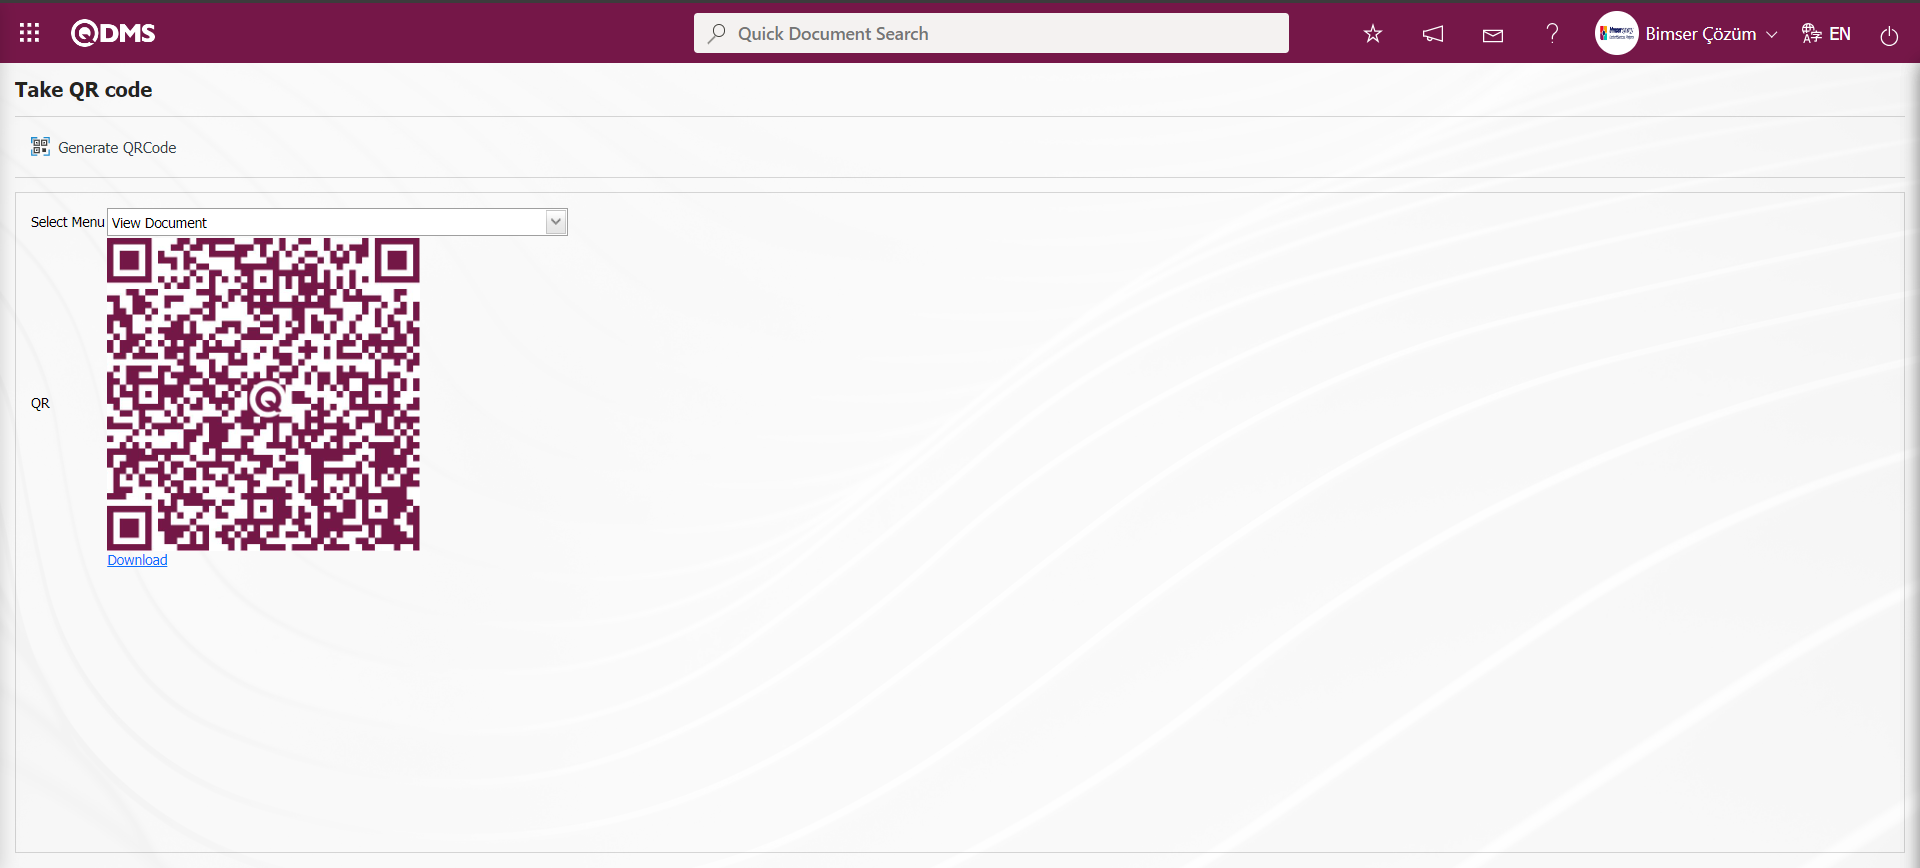
After receiving the QR code in the menu, the Qr reader application or camera on your smartphone is opened. By scanning the Qr code on your phone, the link of the selected menu is displayed. By clicking on the link, the screen of the selected menu, the Document Viewing menu, is displayed. In the Document Viewing menu opened by reading the QR code, the desired document viewing operations are performed. In other menus in the menu, the Qr code is taken and the menu is opened by reading the Qr code and the process steps related to the menu are made.
5.1.29. Occupation Group Definition
Menu Name: System Infrastructure Definitions/ BSID/ Definitions/ Occupation Group Definition
On the occupation group definition screen, there are occupational classes according to the nace codes where the activity / facility is located. These definitions are defined in the system. “ Occupation Group Definition” is for information purposes, it is used to specify the occupation group to which the workplace belongs on the workplace identification screen and to select the occupation group to which the former workplace of the personnel belongs from the additional fields on the personnel identification screen.
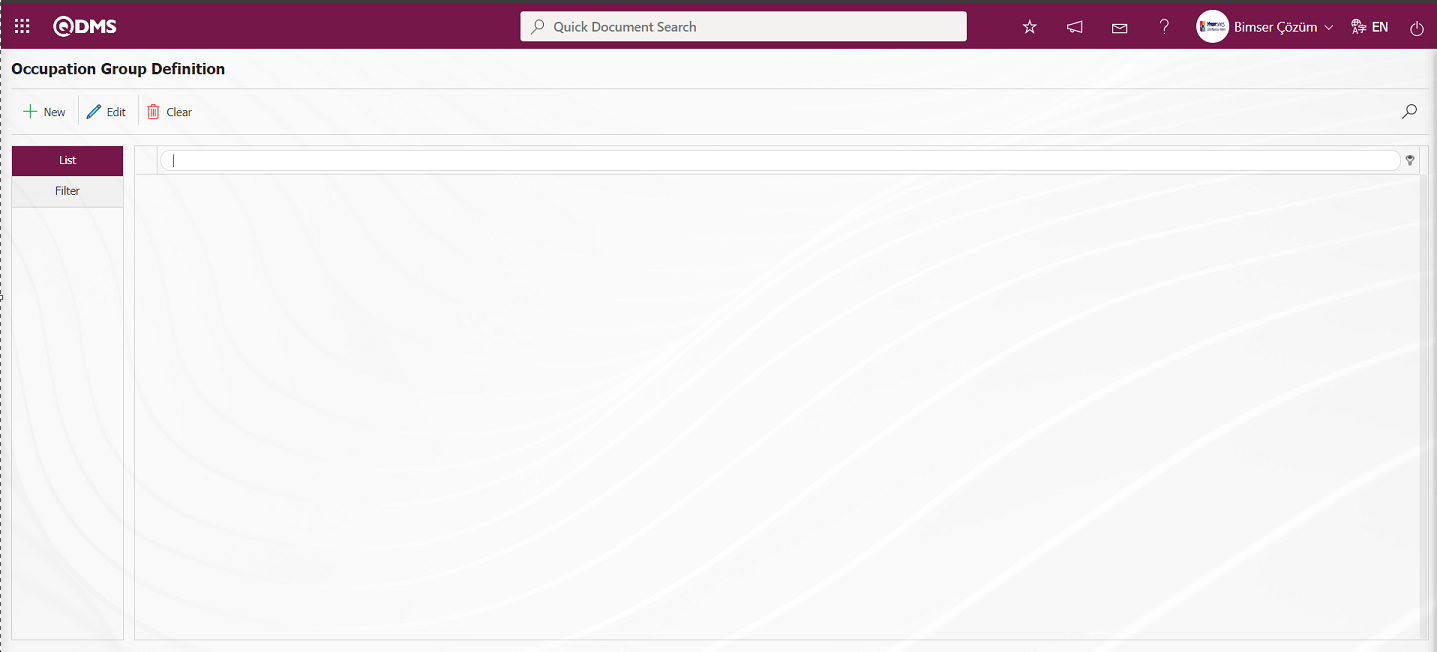
With the help of the buttons on the screen;
: Define a new occupation group.
: Correction / change / update is made on the occupation group information selected in the list.
: The occupation group information selected in the list is deleted.
 : Data is transferred to Excel.
 : Records are filtered and searched.
 : The search criteria on the menu screens are used to clean the data remaining in the filter fields in the grid where the search operation is performed.
 : The menu screen is restored to its default settings.
: User-based designing of the menu screen is done with the show-hide feature, that is, the hiding feature of the fields corresponding to the columns on the menu screens.
To add a new Occupation Group to the Occupation Group Definition screen, click on the button on the top right corner of the screen to open the Occupation Group Definition / New Record screen.
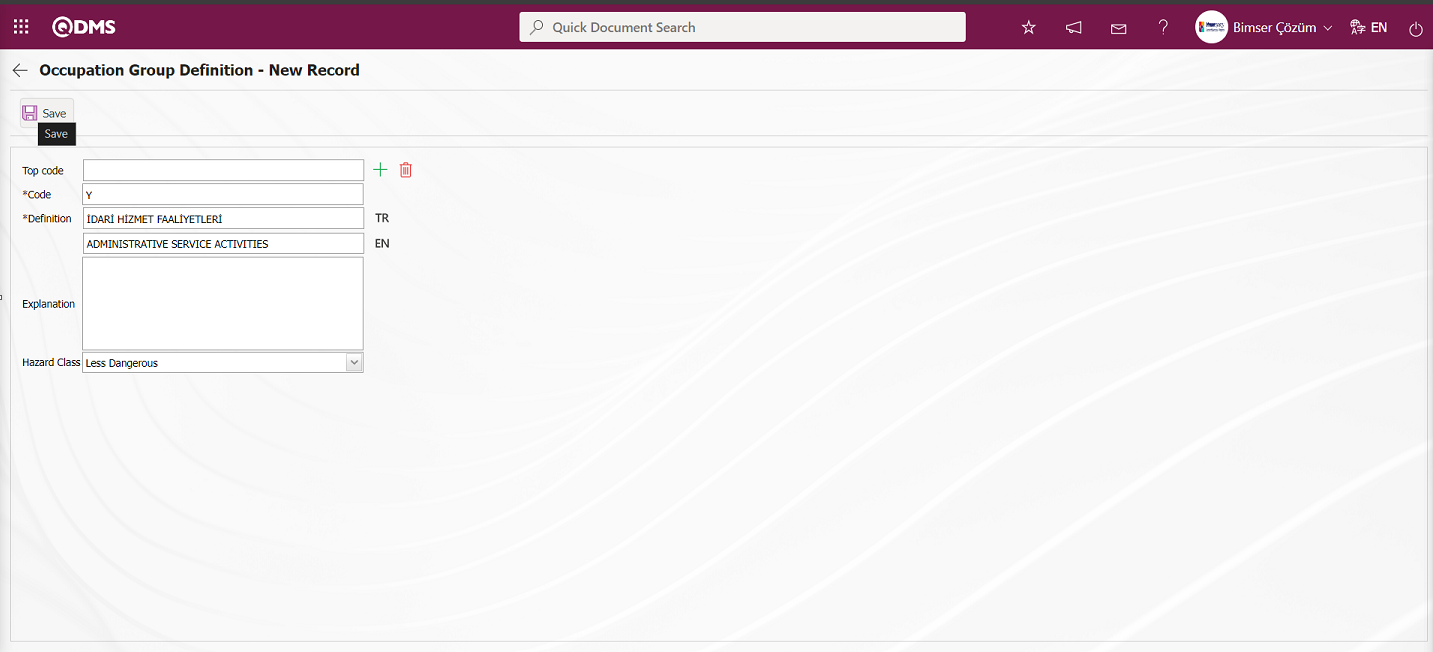
Related fields are defined on the screen that opens;
Top code: If you want to define a new occupational group under an occupational group defined in the system on the Occupation Group Definition - New Record screen, select “Top occupational group”.
Code: This is the mandatory field where the occupational group code information is defined on the Occupation Group Definition - New Record screen. It should be defined without using characters such as spaces and Turkish characters, so as not to be the same as previously defined fields. For example: '001' , 'RK'
Definition: This is the mandatory field where the Occupation Group definition information is defined on the Occupation Group Definition - New Record screen. In the fields with the relevant flags, the information of the English language equivalent is written.
Explanation: This is the field where the explanation information is defined if there is an Occupation Group on the Occupation Group Definition - New Record screen.
Hazard Class: In the Occupation Group Definition - New Record screen,** is the field where the Hazard Class information of the Occupational Group is selected in the drop-down Hazard Class list.
In the Occupation Group Definition - New Record screen, the supercode of the occupational group, if any, is selected. Enter the Code, Definition and Explanation of the Occupational Group. Hazard class information is selected from “Less Hazardous, Hazardous and Very Hazardous” options. After the required fields are filled in, the “Occupational Group Identification” registration process is realized by clicking the button in the upper left corner.
On the Occupation Group Definition screen, in the Filter tab, enter data in fields such as Top Code, Code, Description and Description and click the (Search) button to filter according to the search criteria.

5.1.30. Employment Medical Exam Finalization
Menu Name: System Infrastructure Definitions/BSID/Definitions/Employment Medical Exam Finalization
This is the menu where the temporary registration number given by the Qdms system after the recruitment examination is made for a new personnel who is recruited to the company but not defined in the company system is replaced with the real registration number given after the personnel is registered in the company system.
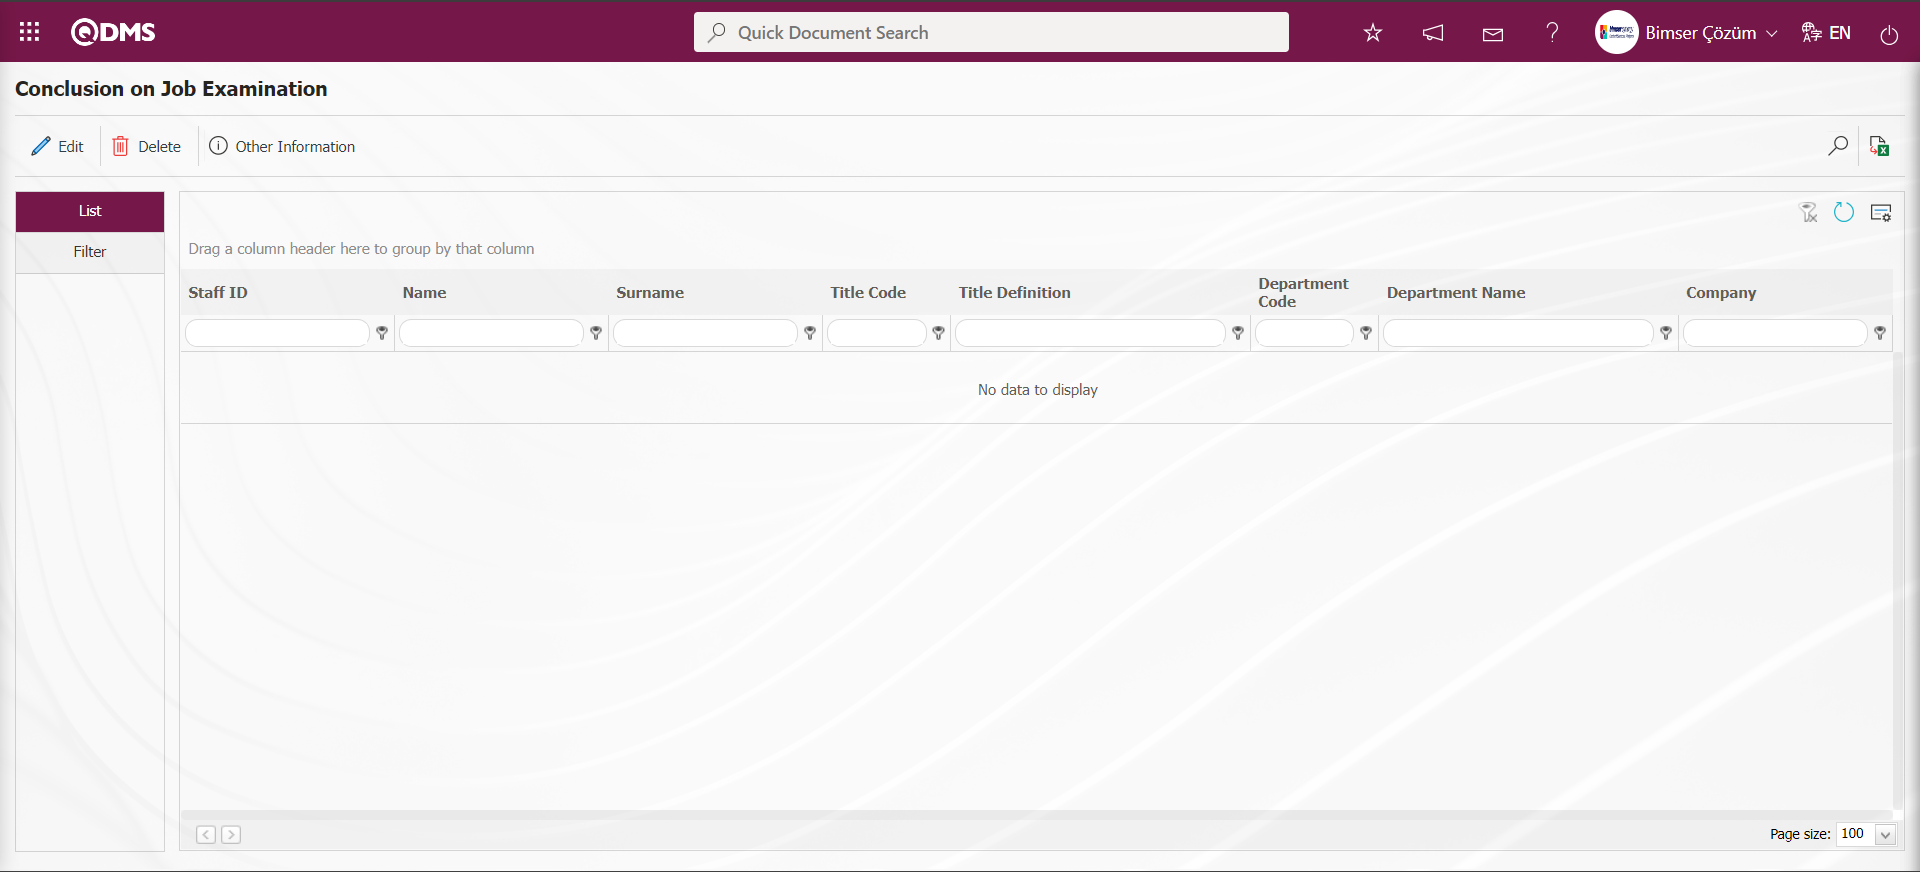
With the help of the buttons on the screen;
 : Correcting/changing/updating the selected personnel information in the list.
: The selected personnel information selected in the list is deleted.
 : Additional information of the selected personnel is defined.
: Data is transferred to Excel.
: Records are filtered and searched.
: The search criteria on the menu screens are used to clean the data remaining in the filter fields in the grid where the search operation is performed.
: The menu screen is restored to its default settings.
: User-based designing of the menu screen is done with the show-hide feature, that is, the hiding feature of the fields corresponding to the columns on the menu screens.
In the Work and Periodic Inspection module, in the Integrated Management System/Work and Periodic Inspection/ Job Application Examination menu, the personnel's employment examination registration process is performed.

On the Job Application Examination screen, a temporary registration number is assigned to the employee.
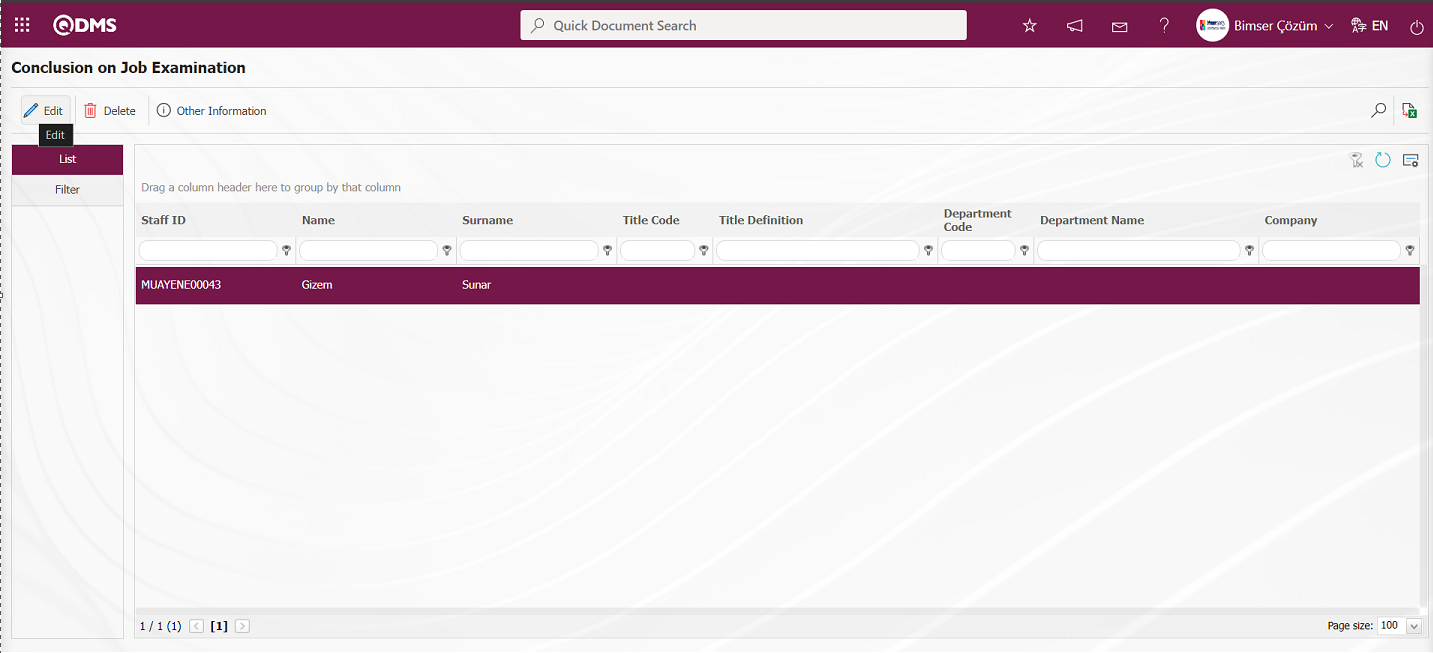
While the personnel is selected on the Conclusion on Job Examination screen, the Staff Definition / Record Update screen is opened by clicking the  button. If the personnel is registered in the Qdms system, it is sufficient to select and save the real personnel information defined in the system by saying “Select From Registered Personnel”.
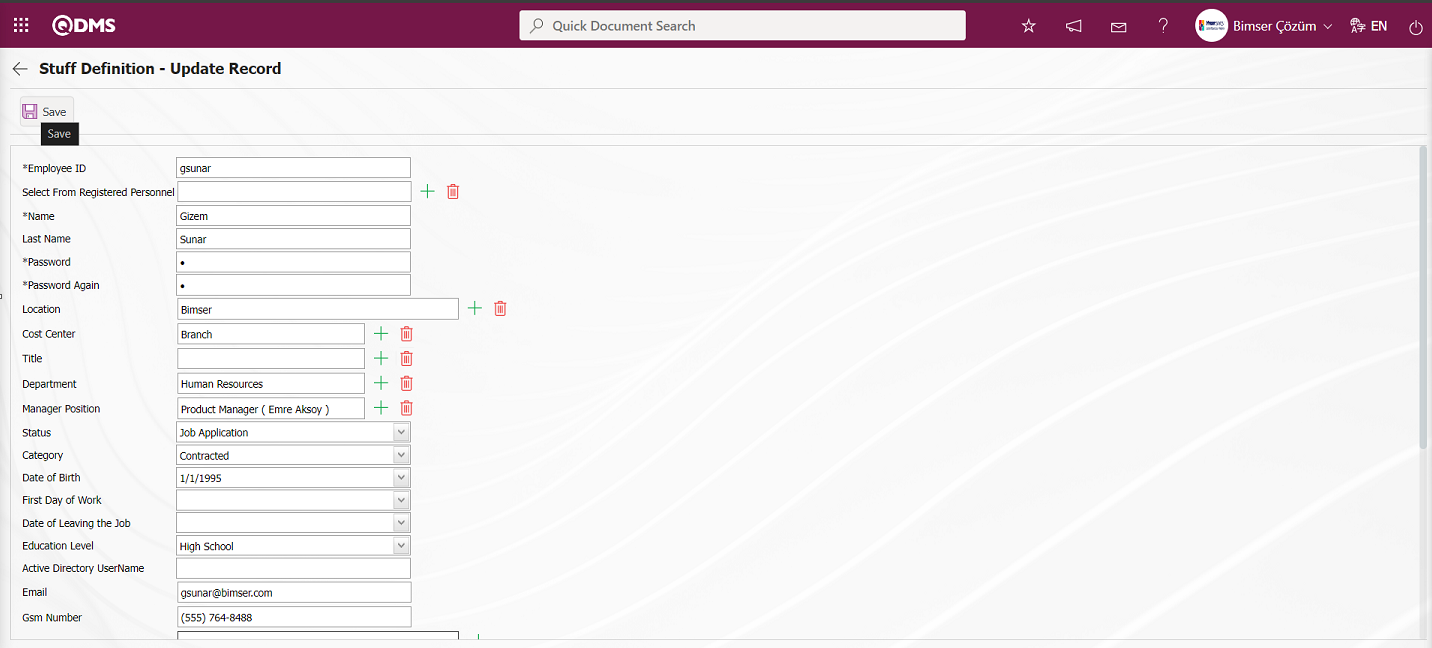
Related fields are defined on the screen that opens:
Employee ID: This is the mandatory field where the Employee ID information of the personnel is entered on the Staff Definition - Update Record screen. On the Qdms main login screen, the employee logs in to the Qdms local address by typing Employee ID in the username section and password information in the password section. If Active Directory Integration is provided; the staff can log in to Qdms local address with the username/password information with which they turn on their computer. In order to ensure Active directory integration, support should be obtained from Bimser Technical Staff.
Name: This is the mandatory field where the name of the personnel is defined on the Staff Definition - Update Record screen.
Last Name: This is the field where the last name of the personnel is defined on the Staff Definition - Update Record screen.
Password: This is the field where the password information of the staff is defined on the Staff Definition - Update Record screen. With this password defined, the staff logs in to the Qdms local address by typing the password information in the username and password field on the Qdms main login screen.
Password Again: This is the field where the password information defined on the Staff Definition - Update Record screen is repeated.
Location: In the Staff Definition - Update Record screen, this is the field where the location information of the personnel is selected in the location list defined in the system opened by clicking the (Select) button.
Cost Center: On the Staff Definition - Update Record screen, the cost center information to which the personnel belongs is selected from the list of cost centers defined in the system opened by clicking the (Select) button. (Cost Center list comes defined in the System Infrastructure Definitions / BSID / Definitions / Cost Center Definition menu).
Title: This is the field where the title information of the personnel on the Staff Definition - Update Record screen is selected from the title information defined in the system that opens by clicking the (Select) button. (Title List comes defined in the System Infrastructure Definitions / BSID / Definitions / Title Definition menu).
Department: This is the field where the department information of the personnel on the Staff Definition - Update Record screen is selected from the department information defined in the system that opens by clicking the (Select) button. (Department List comes as defined in the System Infrastructure Definitions / BSID / Definitions / Department Definition menu).
Manager Position: In the Staff Definition - Update Record screen, the position information of the personnel is selected in the position list defined in the system opened by clicking the (Select) button.
Status: In the Staff Definition - Update Record screen, the status information of the personnel is selected in the status options defined in the system by clicking the drop-down list.
Category: This is the field where the category information of the personnel is selected in the category list opened by clicking the drop-down list on the Staff Definition - Update Record screen.
Date of Birth: This is the field where the birth date of the personnel is selected in the Calendar field on the Staff Definition - Update Record screen.
First Day of Work: This is the field where the First Day of Work information of the personnel is selected in the Calendar field on the Staff Definition - Update Record screen.
Date of Leaving the Job: This is the field where the Date of Leaving the Job information of the personnel on the Staff Definition - Update Record screen is selected in the Calendar field.
Education Level: This is the field where the education level of the personnel is selected in the education level list opened by clicking the drop-down list on the Staff Definition - Update Record screen.
Active Directory User Name: This is the field where the Active Directory User Name of the staff is defined on the Staff Definition - Update Record screen. If Active Directory integration is to be provided (i.e. if the staff is requested to log in to the Qdms system with the username and password with which they turn on their computer), the “Active Directory User Name” section is defined. In this field, the user name information that the personnel enters when turning on the computer is written.
E-mail: This is the mandatory field where the e-mail address of the personnel is defined on the Staff Definition - Update Record screen. For the personnel whose e-mail addresses are defined, e-mails from delays that will ensure the continuity of the flows in the relevant modules are sent. In addition, the tasks assigned to the personnel whose e-mail address is defined are also sent to the person as e-mail.
Gsm Number: This is the field where the Gsm Number information of the personnel is defined on the Staff Definition - Update Record screen.
Member Of: In the Staff Definition - Update Record screen, it is the field where the groups to which the personnel are affiliated are selected in the user group list defined in the system that opens by clicking the (Add) button. (User Group List is defined in the System Infrastructure Definitions / BSID / Definitions / User Group Definition menu). From the “Member Of” field, the personnel can be defined to the user groups they are related to. If this field is left blank, related personnel can be assigned to user groups from the User Group Definition menu.
Related Employee: If there are people connected to the personnel on the Staff Definition - Update Record screen, the system automatically displays them in this field. If there are subordinate personnel connected to the personnel, they are defined in the “Related Employee” field. No action can be taken in this field. This field is automatically filled by the system as this personnel is assigned as a superior to other personnel.
User Locked: When the check box related to the relevant field on the Staff Definition - Update Record screen is checked, the Qdms login screen is locked when the user enters the password incorrectly.
If the personnel is not defined in the Qdms system and will be defined from the screen that opens, the Employee Definition record update process is performed by filling in the fields such as the personnel's registration number, name, surname, title, department. The location information of the personnel is selected from the workplace list defined in the system, the title information is selected from the Title list defined in the system, the department information is selected from the department list defined in the system, the position information is selected from the Position list defined in the system, the Cost Center information is selected from the Cost Center list defined in the system. In the Status section, one of the active, quit, job application, guest options is selected. Active Directory User Name The username and password information used when turning on the computer is entered. Registration No, Name, Password information are mandatory fields. In the “Category” section, the working status of the personnel such as in-scope, out-of-scope, contracted, contractor is determined. After the required fields are filled in the Staff Definition - Record Update screen, the Staff Definition record update process is performed by clicking the button in the upper left corner.
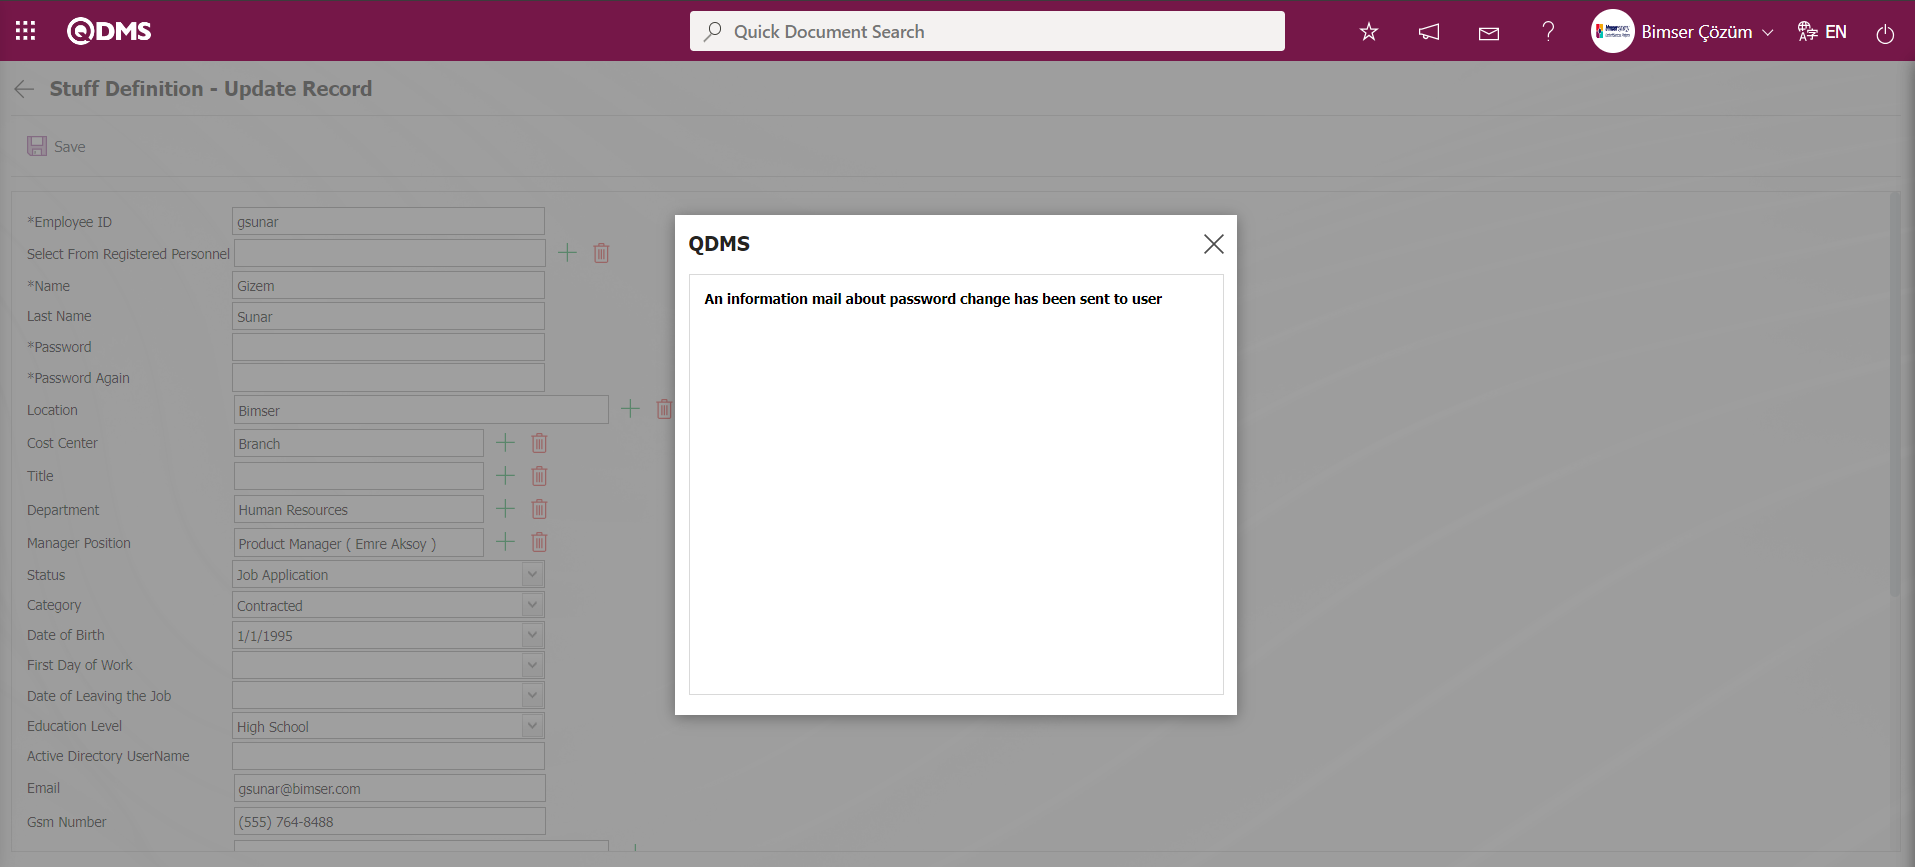
It is seen that the personnel who are given temporary registration on the Staff Definition job entry examination definition screen are replaced with the real registration number given after the personnel are registered in the company system on the Employment Examination Finalization screen.
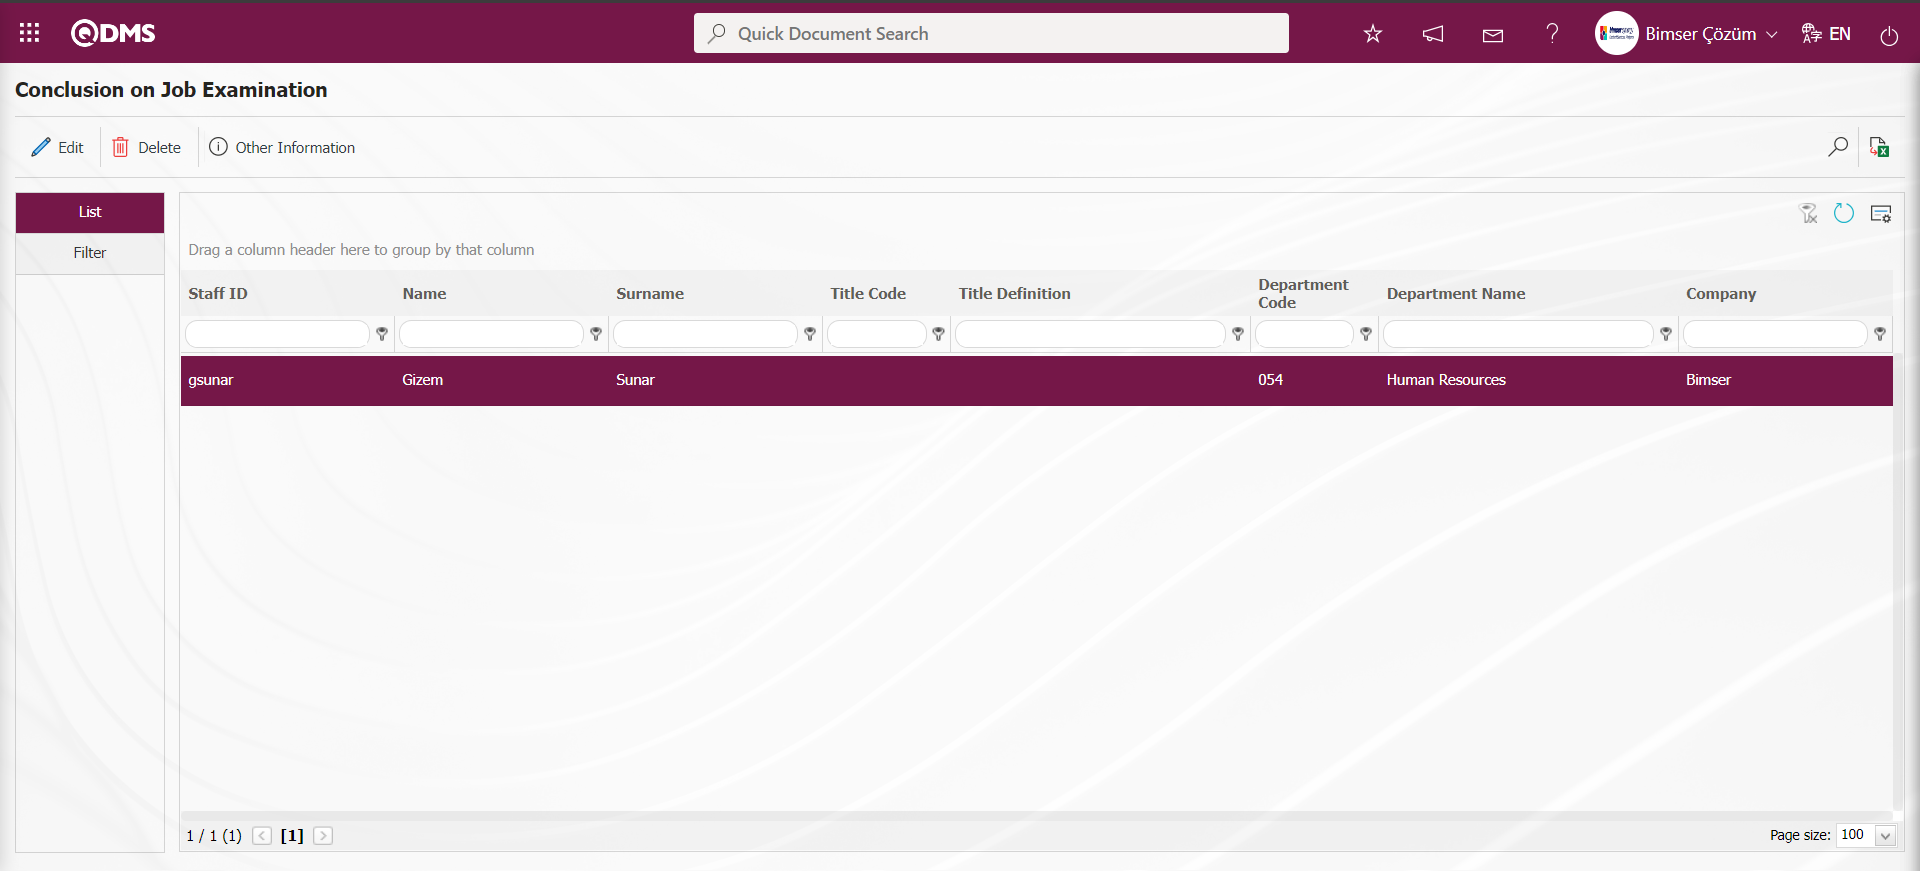
In the Filter tab on the Recruitment Examination Finalization screen Enter data in fields such as Employee ID, First Name, Last Name, Department and click the (Search) button to filter according to the search criteria.
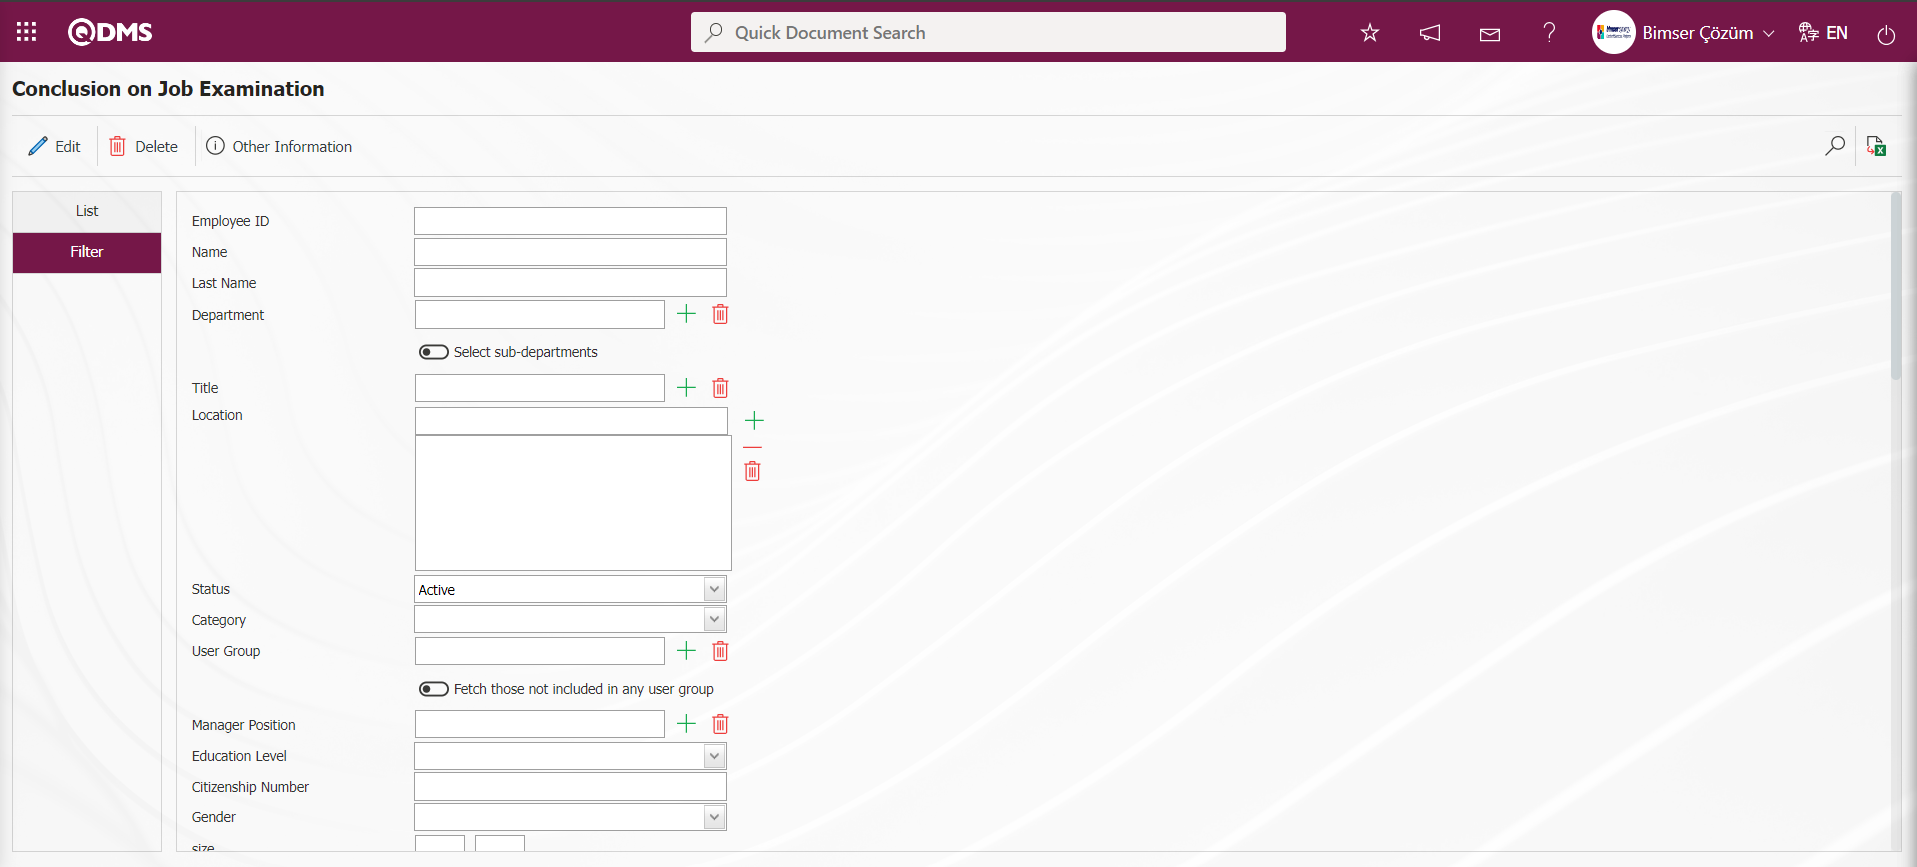
5.2. Configuration Settings
Menu Name: System Infrastructure Definitions/ BSID/ Configuration Settings
These are the menus where special settings are made in the Qdms system. The settings made in these menus are common settings that apply to all Qdms users.
5.2.1. Service Credentials Definition
Menu Name: System Infrastructure Definitions/ BSID/ Configuration Settings/ Service Credentials Definition
It is a menu where the username & password to be used to run QDMS Web services are defined and the web services written from the Qdms background for each module. Module experts of QDMS Support team are authorized to operate in this menu. For example: The user name & password to be used in the CDSA.Client program used in the Document Batch Transfer program in Document Management is defined from this menu.
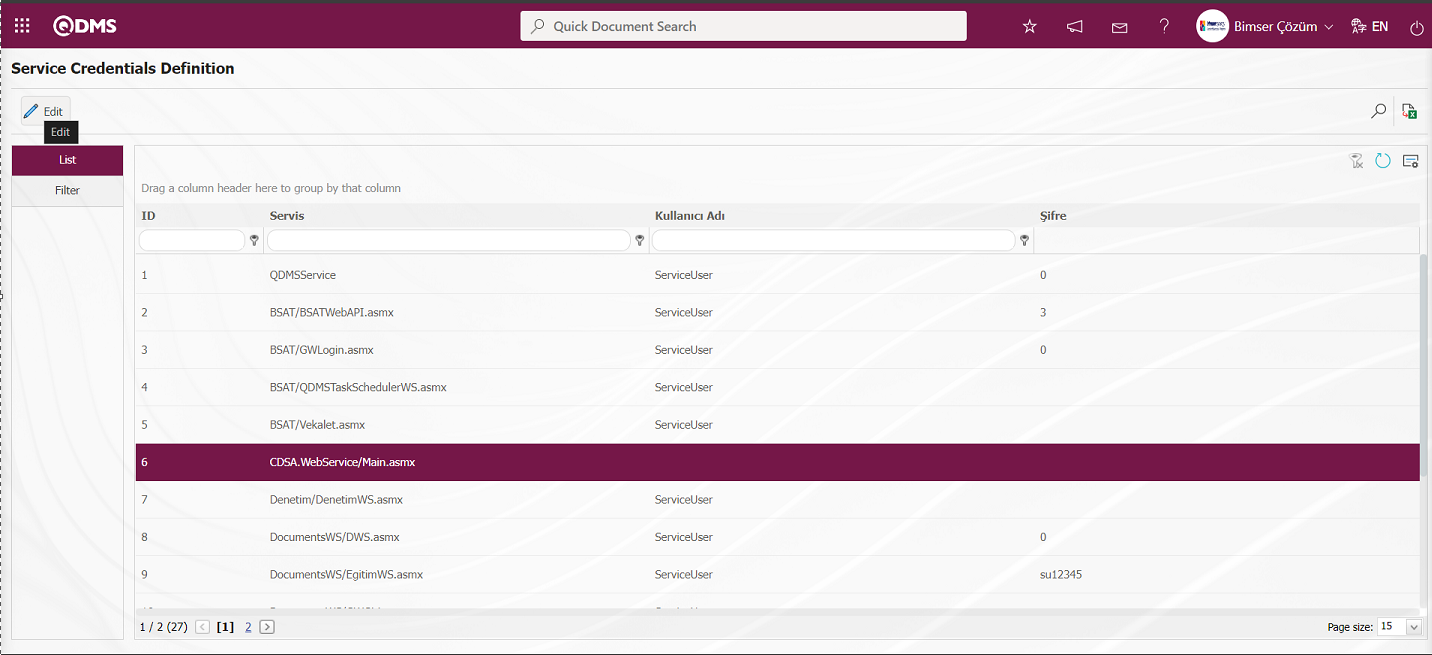
With the help of the buttons on the screen;
 : Correction / change / update is made on the service entry information selected in the list.
: Data is transferred to Excel.
: Records are filtered and searched.
: The search criteria on the menu screens are used to clean the data remaining in the filter fields in the grid where the search operation is performed.
: The menu screen is restored to its default settings.
: User-based designing of the menu screen is done with the show-hide feature, that is, the hiding feature of the fields corresponding to the columns on the menu screens.
In the Service Credentials Definition** screen, while CDSA.WebService/Main.asmx is selected in the list, click on the button.

After filling in the required fields on the Service Credentials Definition screen, the Service Credentials Definition record update process is performed by clicking the  button in the upper right corner.

In the Filter tab on the Service Credentials Definition** screen, data is entered in fields such as Service and User Name, and filtering is done according to the search criteria by clicking the (Search) button.

5.2.2. Announcement Authority Matrix
Menu Name: System Infrastructure Definitions/ BSID/ Configuration Settings/ Announcement Authority Matrix
This is the menu where authorization is made for the announcement creation menu. By selecting the user and user group, authorization is made for related workplaces, related departments and related user groups. In the Announcement Authority field, the user with announcement authorization is authorized to create announcements for the selected workplace, department and user group.

With the help of the buttons on the screen;
 : A new announcement authorization is defined.
: Deletes the selected announcement authorization information in the list.
: Records are filtered and searched.
: The search criteria on the menu screens are used to clean the data remaining in the filter fields in the grid where the search operation is performed.
: The menu screen is restored to its default settings.
: User-based designing of the menu screen is done with the show-hide feature, that is, the hiding feature of the fields corresponding to the columns on the menu screens.
To add a new announcement authority to the Announcement Authority Matrix** Definition screen, click on the button at the top left of the screen to open the Announcement Authority Matrix - New Record screen.
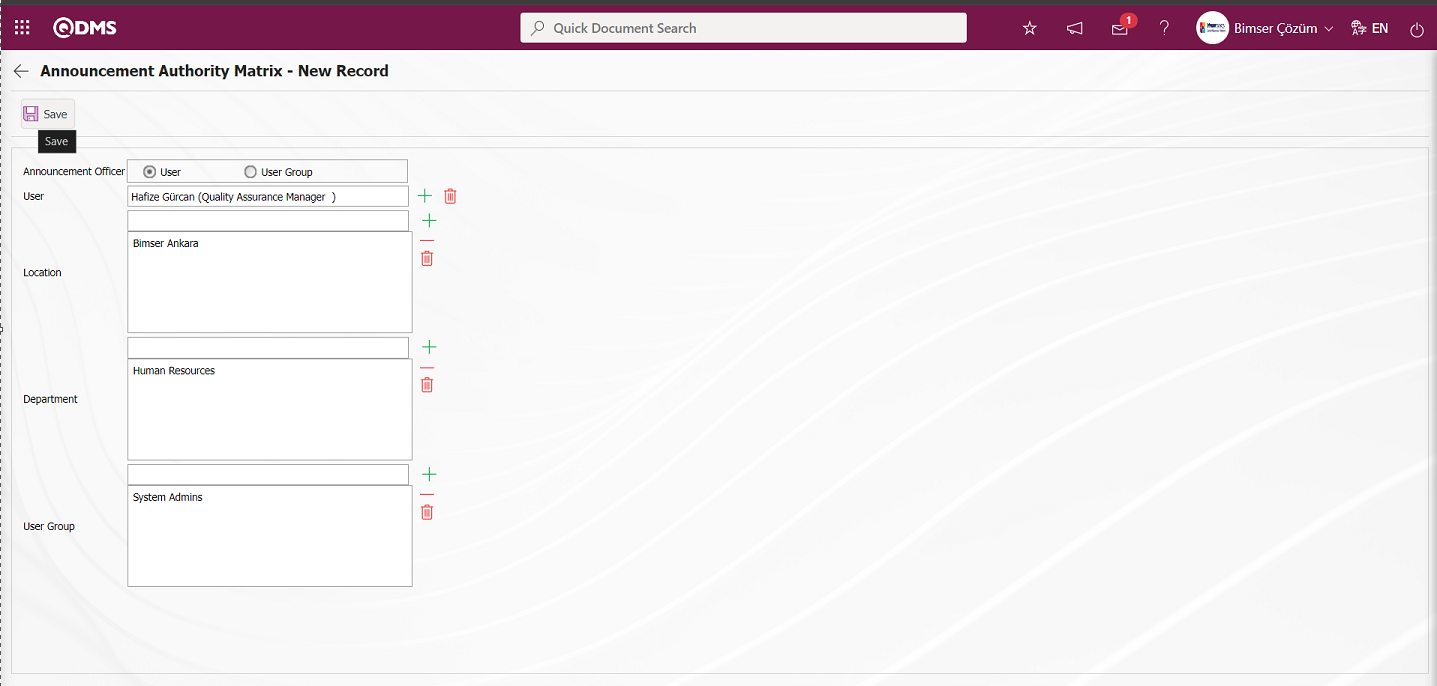
Related fields are defined on the screen that opens;
Announcement Officer: Announcement Authority Matrix - New Record is the field where the announcement authority is selected from user and user group options. If the selected announcement authority option is User, the User field, which is the User selected field, is displayed and personnel selection is made in the list of personnel defined in the system. If the selected announcement authorized option is User Group, the User Group field is displayed and the user group selection process is performed in the user group list defined in the system.
User: It is the field that is displayed according to the user option in the announcement authority field on the Announcement Authority Matrix - New Record screen and the selection is made in the list of personnel defined in the system.
Location: Announcement Authority Matrix - New Record is the field where the location to be authorized with the announcement depending on the announcement authority option on the New Record screen is selected from the system-defined location list opened by clicking the  (Add) button. The announcement is sent to the selected location personnel.
Department: On the Announcement Authority Matrix - New Record screen, depending on the** announcement authority option, it is the field where the departments to be authorized with the announcement are selected from the list of departments defined in the system opened by clicking the (Add) button. Announcements are sent to the personnel in the selected departments.
User Group: Depending on the announcement authority option on the Announcement Authority Matrix - New Record screen, the user group to be authorized with the announcement is selected from the list of users defined in the system opened by clicking the  (Add) button. The announcement is sent to the personnel in the selected user group.
On the Announcement Authority Matrix - New Record screen, the announcement authority option is selected as user and the locations, departments and user groups to be authorized to create announcements are selected from the list defined in the system. After entering the relevant information in the required fields, click the  button in the upper left corner of the screen and the Announcement Authority Matrix definition registration process is done.

5.2.3. Parameters
Menu Name: System Infrastructure Definitions/ BSID/ Configuration Settings/ Parameters
System Infrastructure Definitions module is the menu where various systemic adjustments can be made according to the user's wishes and needs and parameters are determined accordingly. The changes made in the parameters cover all Qdms users. There are two tabs on the Parameters screen: List and Filter tabs. In the List tab, all parameters related to the System Infrastructure Definitions Module are listed.
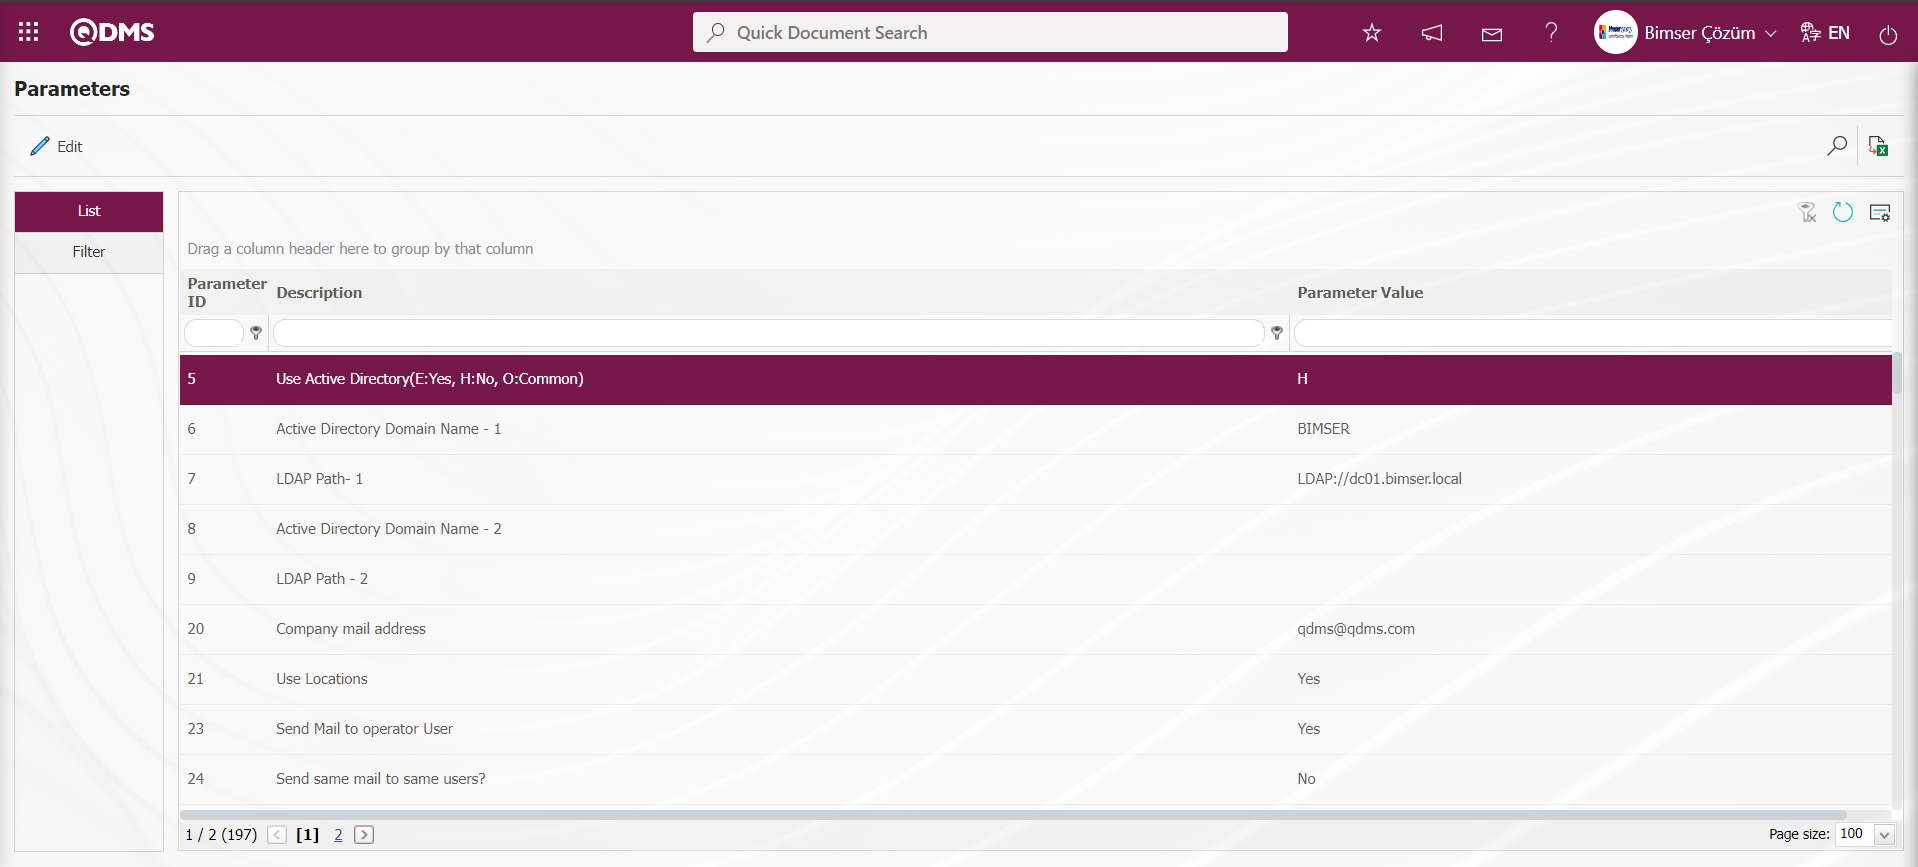
With the help of the buttons on the screen;
 : Edit/change/update the parameter information selected in the list.
: Data is transferred to Excel.
: Records are filtered and searched.
: The search criteria on the menu screens are used to clean the data remaining in the filter fields in the grid where the search operation is performed.
: The menu screen is restored to its default settings.
: User-based designing of the menu screen is done with the show-hide feature, that is, the hiding feature of the fields corresponding to the columns on the menu screens.
In the Filter tab on the Parameters screen, data is entered in fields such as Parameter No and Parameter Definition, and filtering operations are performed according to the search criteria by clicking the (Search) button.
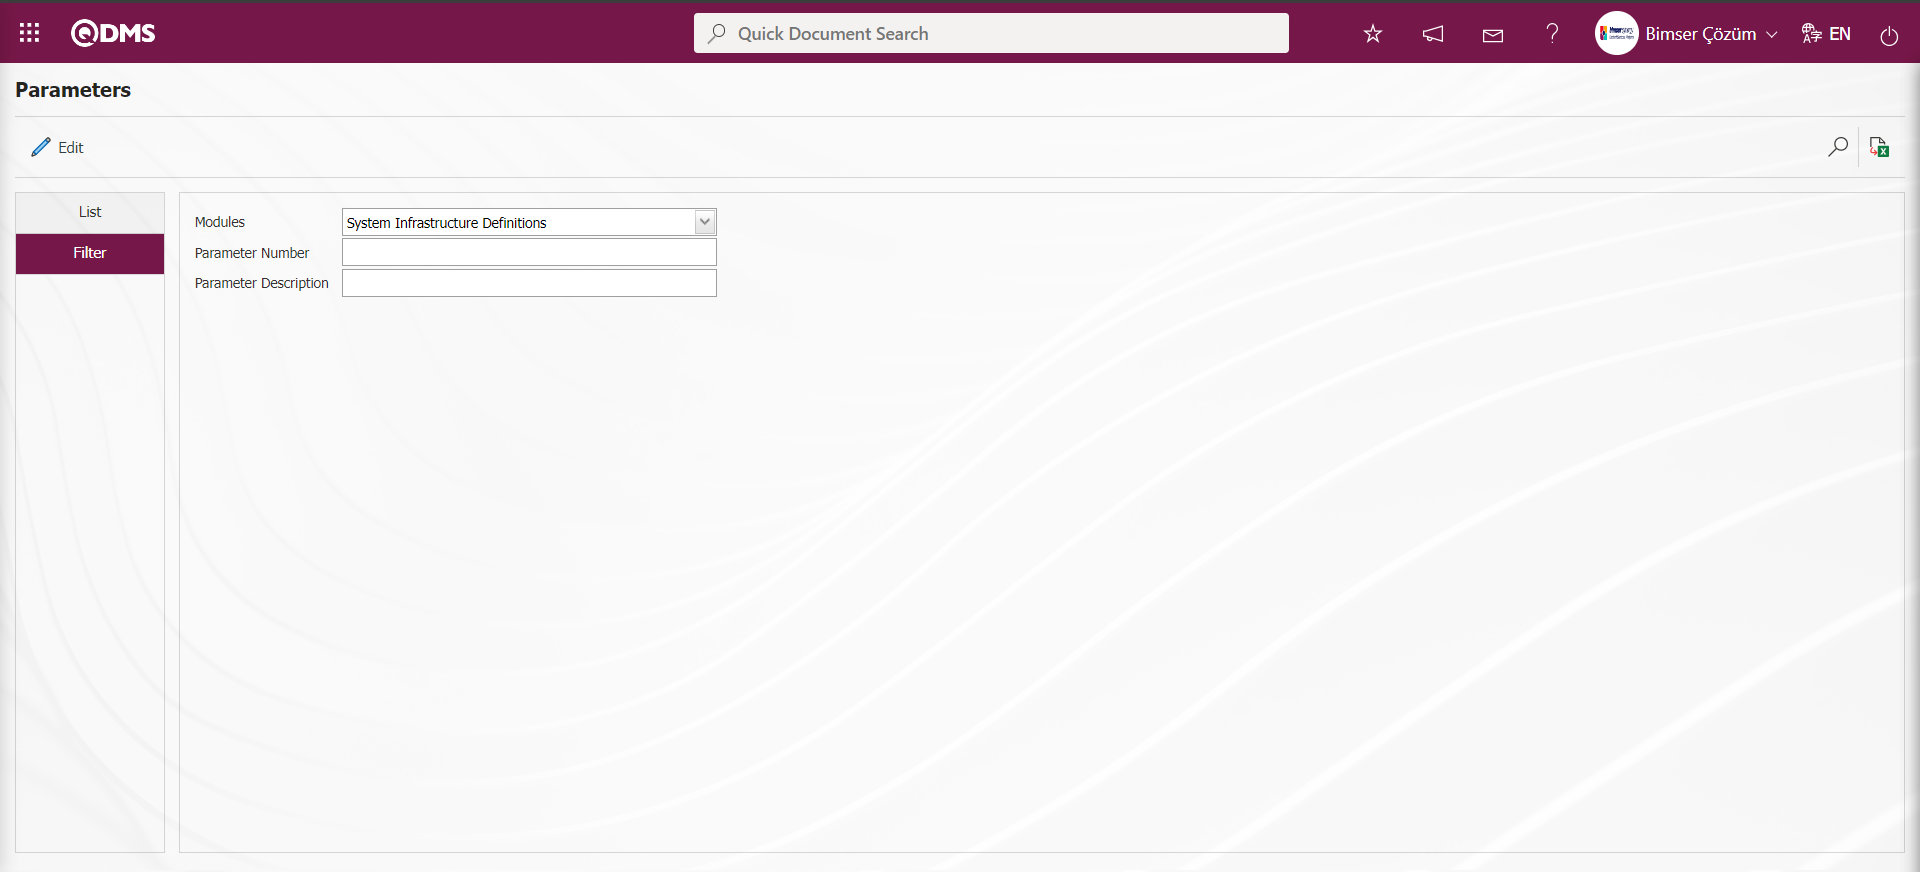
In the System Infrastructure Definitions Module parameters, the number 100 “Waiting time for mails on system (Day)” parameter is selected by typing its number in the parameter no field in the Filter tab on the parameters screen and clicking the  (Search) button.
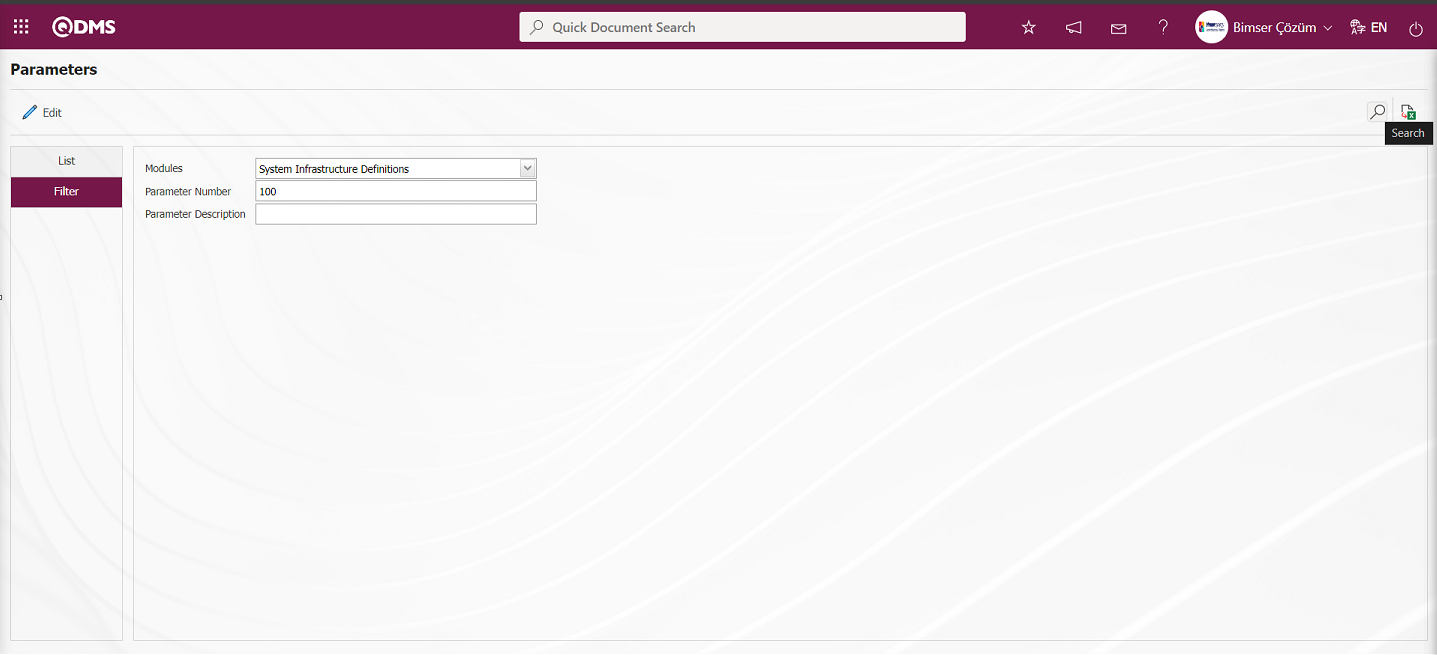
For the search operation, it is used in the fields corresponding to the columns in the grid in the list tab on the Parameters screen. If the parameter number is not known, the parameter can also be searched by typing a key word in the parameter in the Description field in the grid on the parameter list tab. Or if the parameter number is known, the parameter number can be searched by typing the parameter number in the parameter No field in the grid.

After selecting the parameter, click on the  button. In the parameters screen that opens, enter the new value information that you want to change the parameter value.

After the new value information entered in the parameter value on the Parameters screen, the parameter record update process is performed by clicking the  button in the upper left corner of the screen.
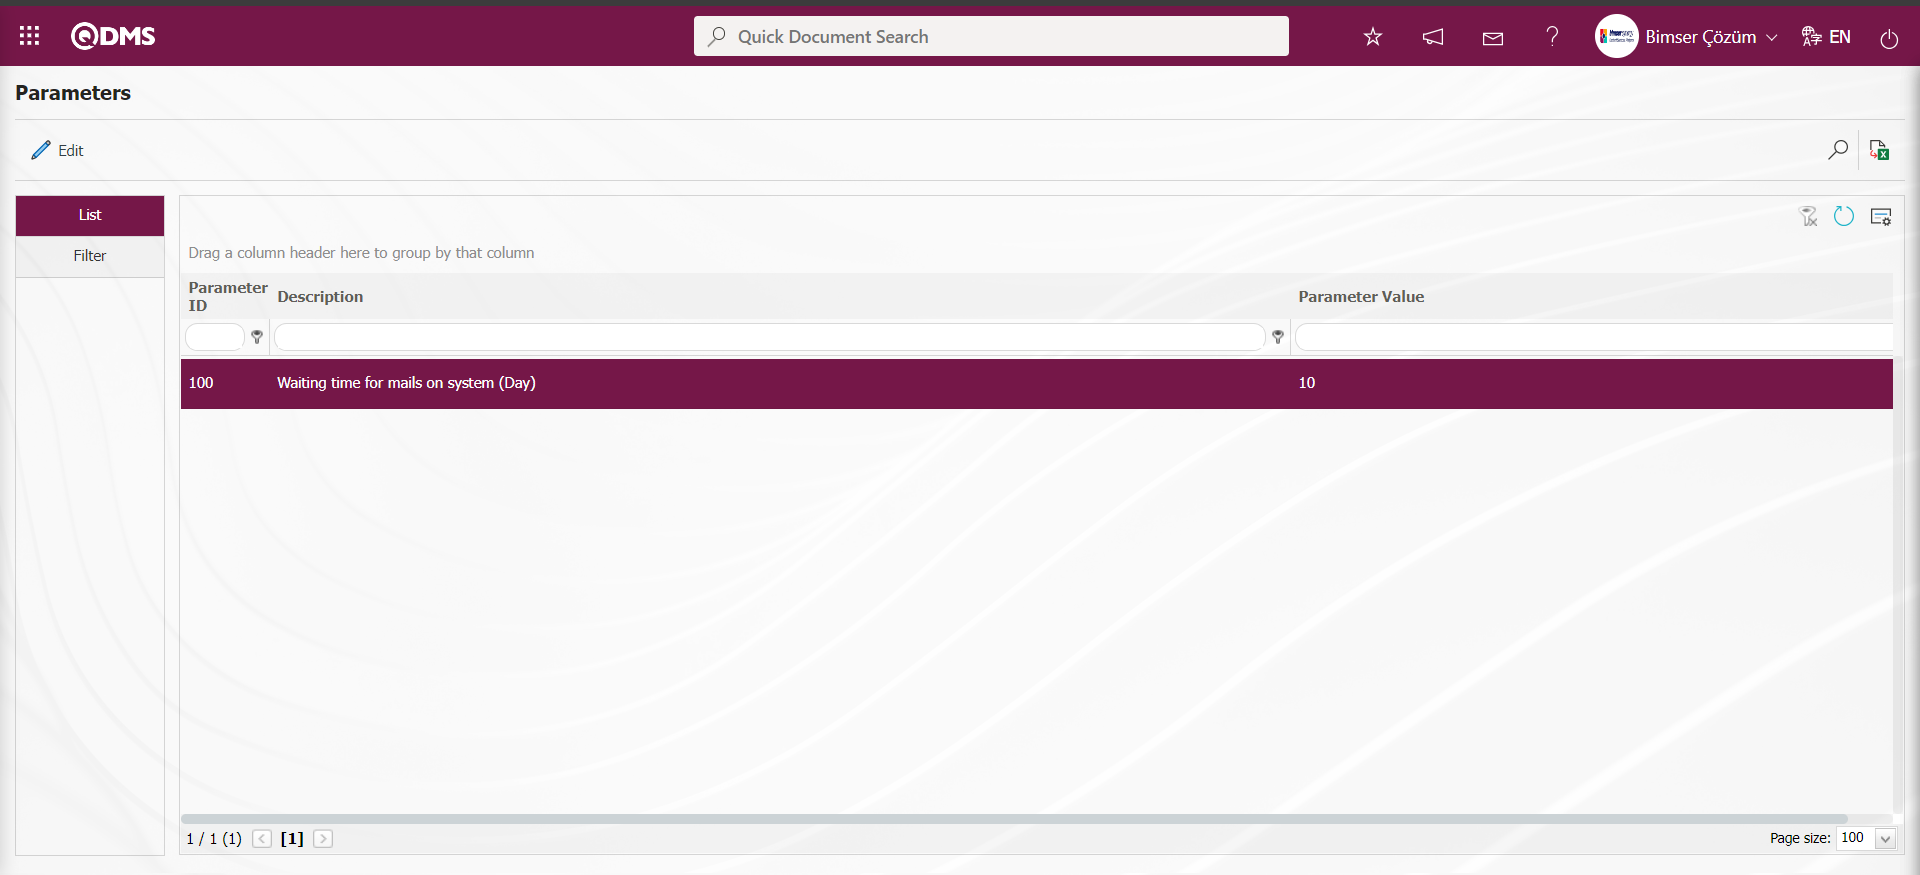
In the System Infrastructure Definitions Module parameters, the parameter number 24 “Send same mail to same users?” is selected by typing the parameter number in the parameter no field in the Filter tab on the parameters screen and clicking the  (Search) button.
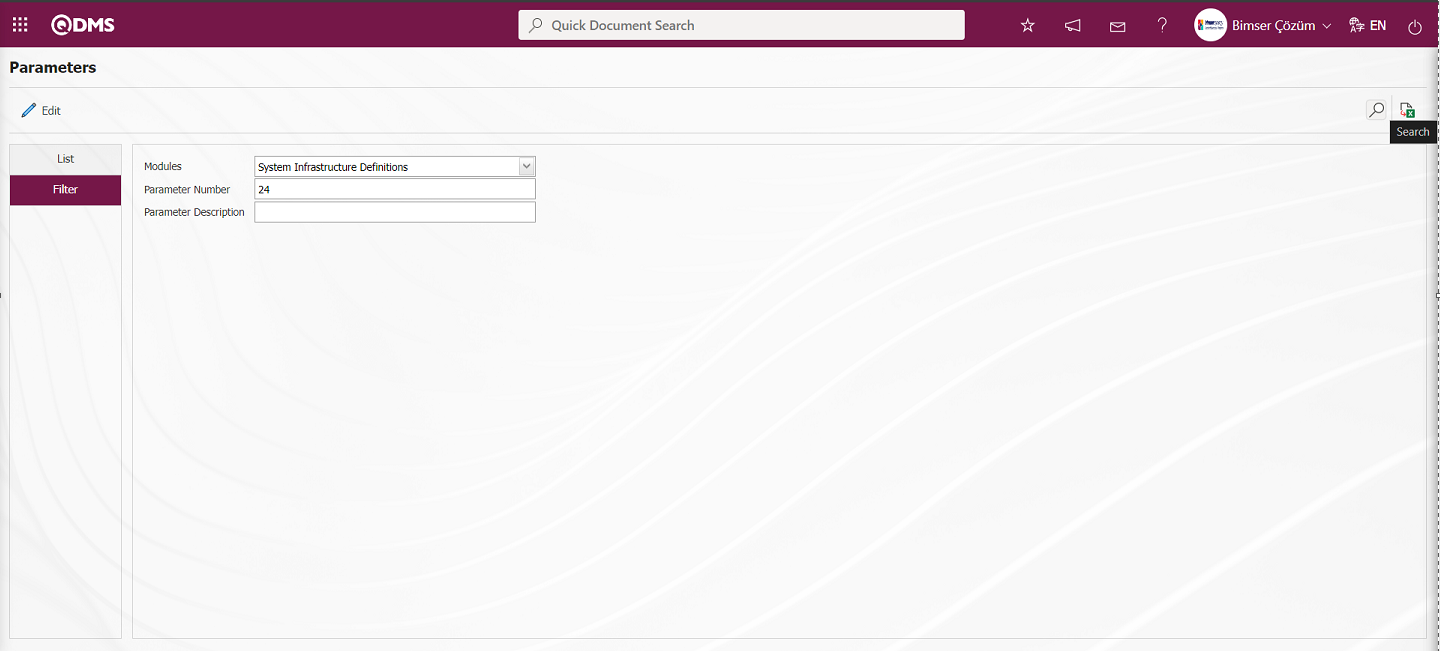
After selecting the parameter, click the  button.
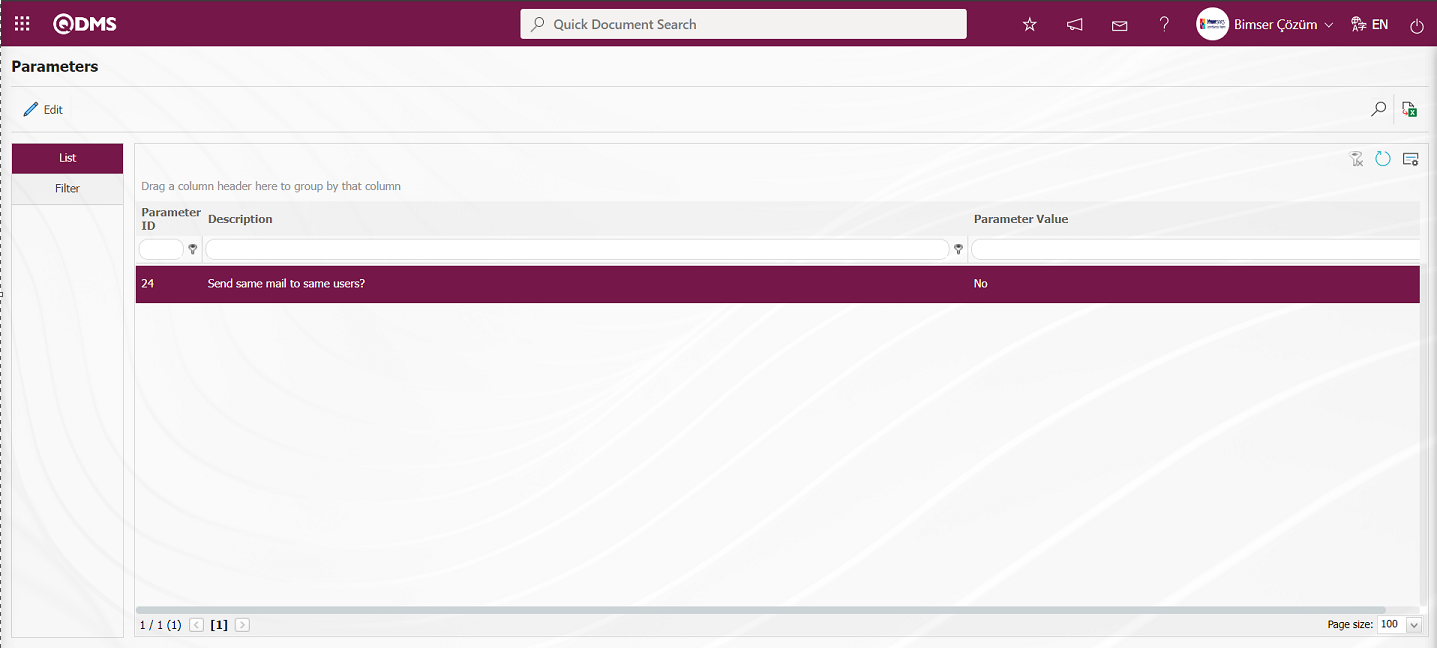
In the parameters screen, select the relevant check box “Yes” in the parameter value options.
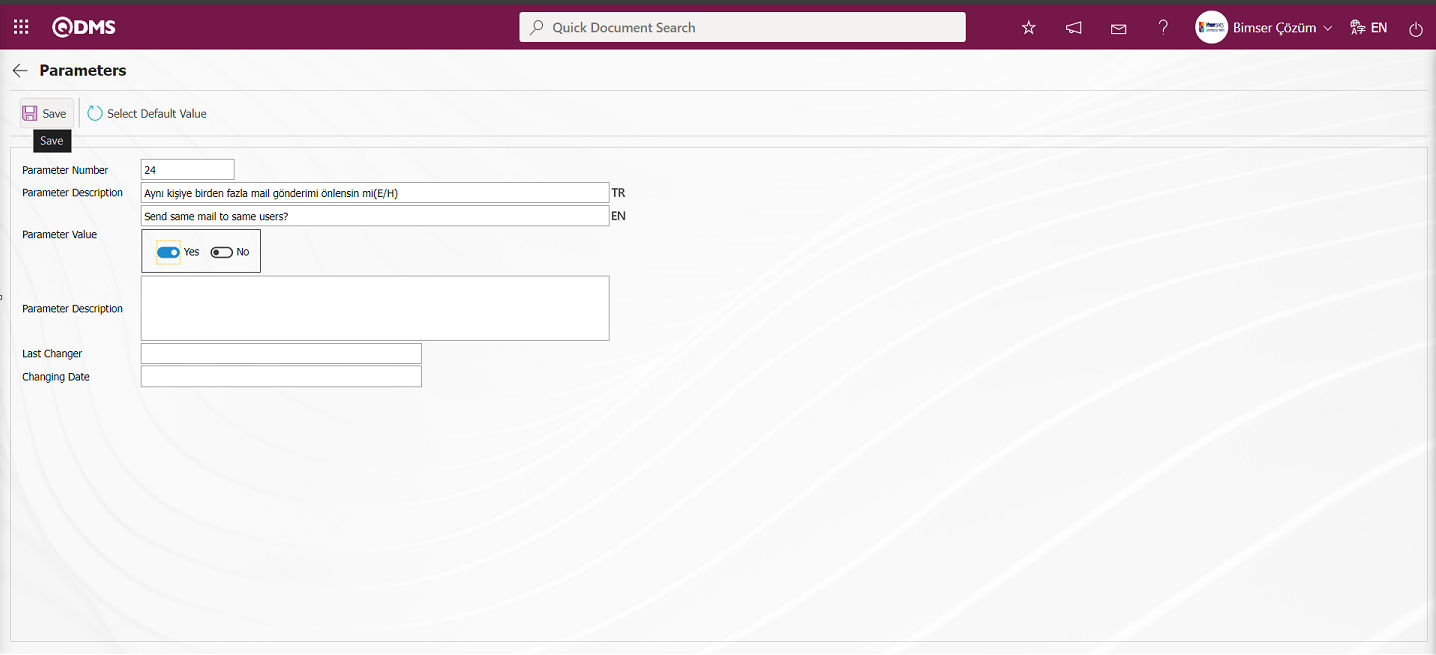
After selecting the parameter value “Yes” on the Parameters screen, the parameter activation registration process is done by clicking the  button in the upper left corner of the screen. After the parameter activation process, sending more than one mail to the same person is prevented
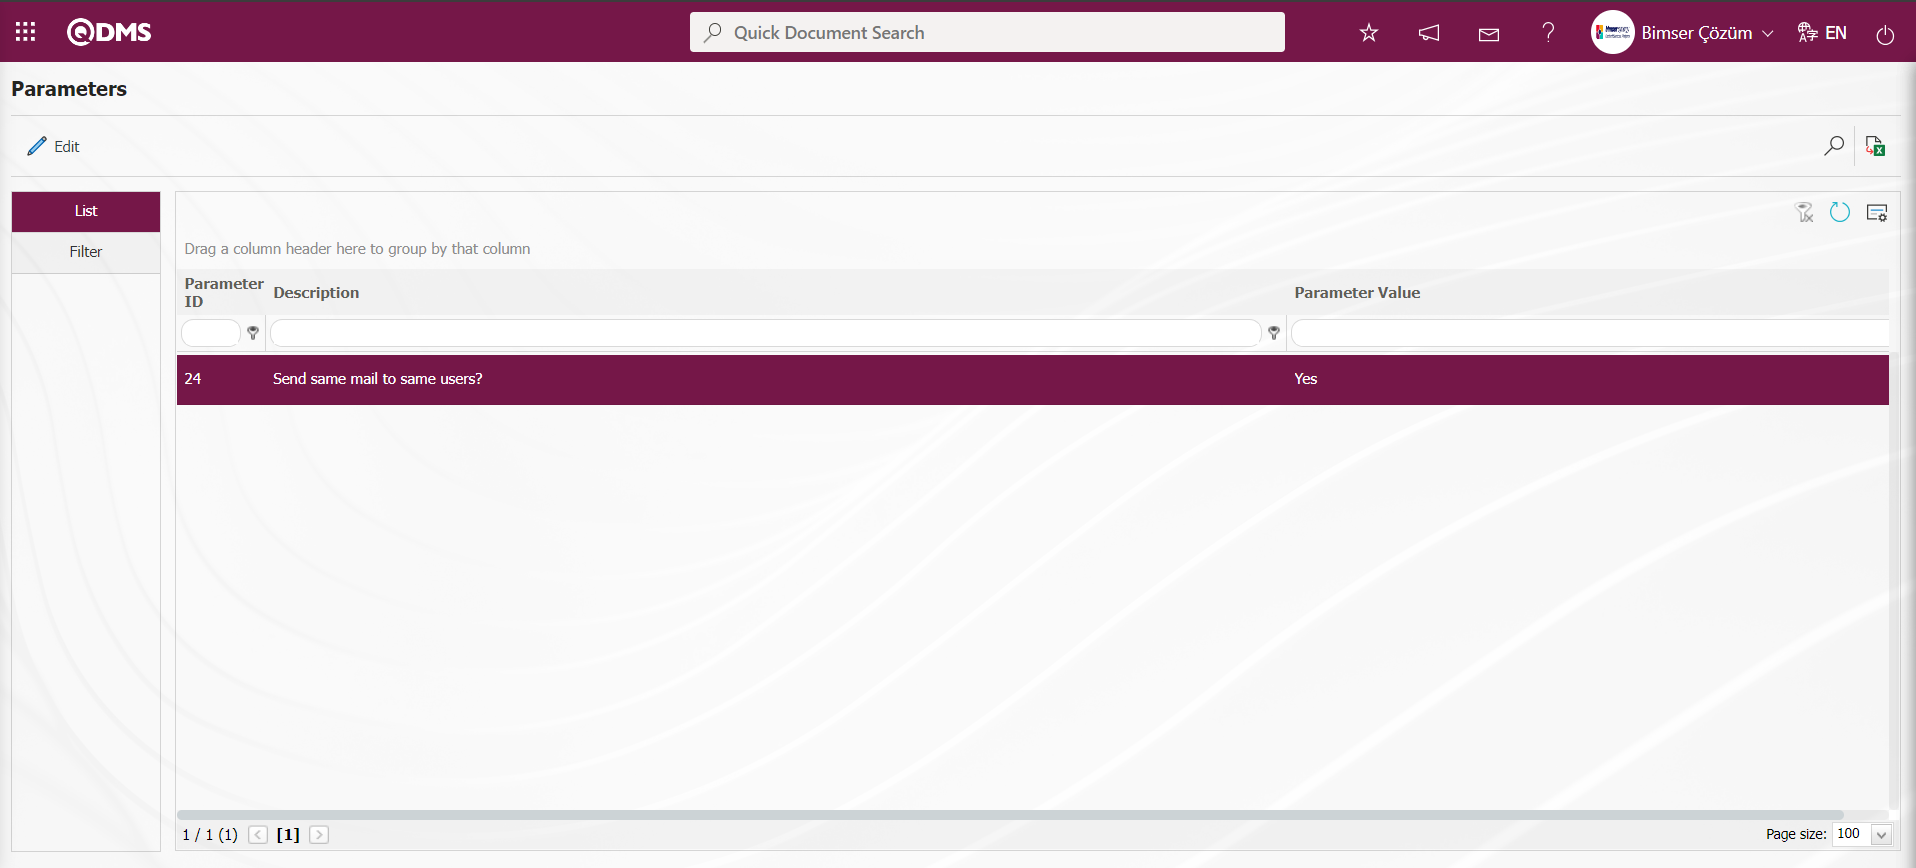
By performing the same steps, the parameter in the active state is deactivated by selecting the parameter value “No”. In this way, the selected parameter on the parameters screen is displayed by clicking the button and the parameter in the passive state is activated, the parameter in the active state is deactivated and the parameter value of the parameter is changed.
5.2.4. Constants
Menu Name: System Infrastructure Definitions/ BSID/ Configuration Settings/ Constants
It is the menu where the fixed list elements in the menus are organized. In the Filter tab, select the appropriate module in the Modules field and click the (Search) button. The list of constants related to the selected module is listed in the List tab. In the list of listed constants, the constant to be edited in the list of constants is selected from the list of constants to be edited by selecting the constant from the list and clicking the button and in the Constant values field on the Constants screen opened by clicking the button, the status is selected from the active and passive options and the activation and deactivation process is performed. The constant value whose status is Inactive is not displayed in the system.
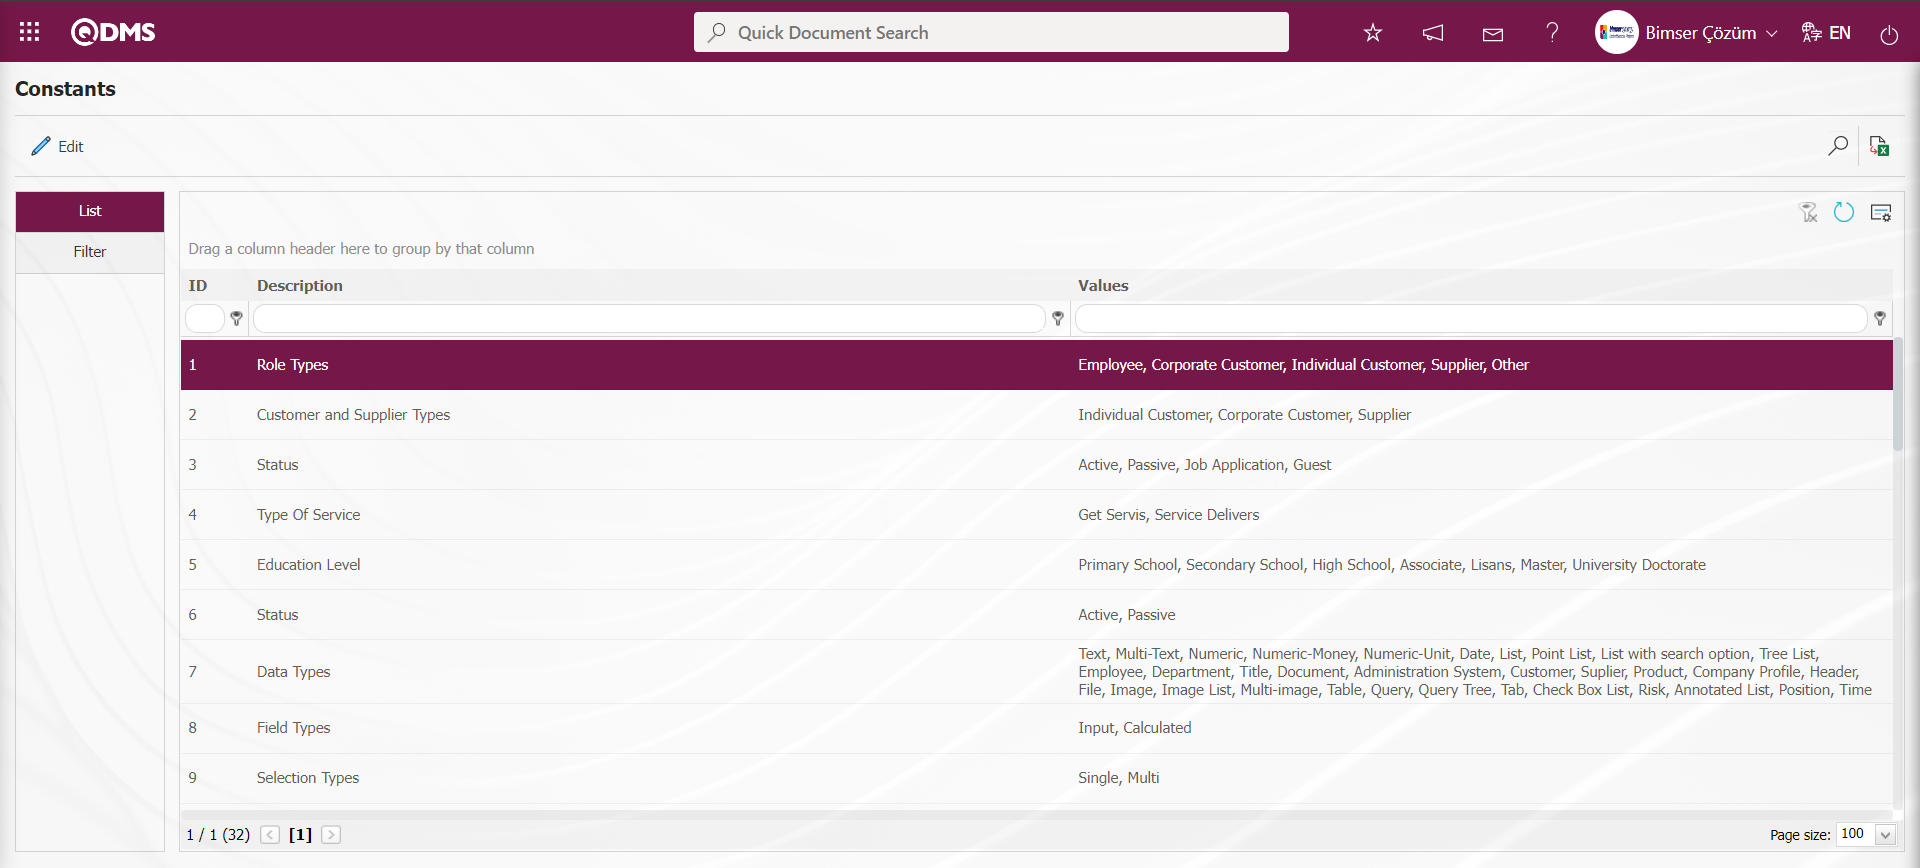
With the help of the buttons on the screen;
: Correction / change / update is made on the constant information selected in the list.
: Data is transferred to Excel.
: Records are filtered and searched.
: The search criteria on the menu screens are used to clean the data remaining in the filter fields in the grid where the search operation is performed.
: The menu screen is restored to its default settings.
: User-based designing of the menu screen is done with the show-hide feature, that is, the hiding feature of the fields corresponding to the columns on the menu screens.
For example; On the Constants screen, select the Corrective and Preventive Actions module in the drop-down Module list in the Modules field on the Filter tab and click on the (Search) button.
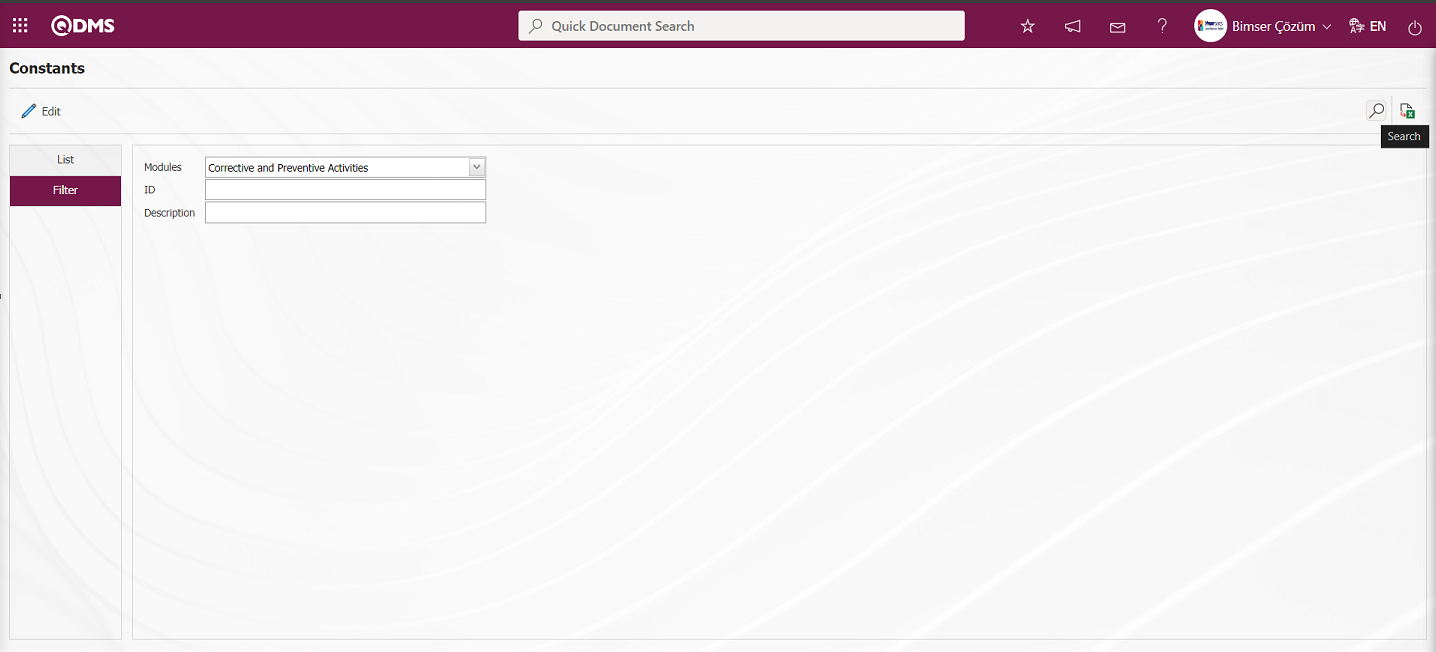
On the Constants screen, in the List tab, the constants defined in the Corrective and Preventive Actions module related system are listed. In the constant 1 definition, there is a transaction source type. In the System Infrastructure Definitions/CAPA/CAPA Source Definition menu, process source types appear. Select the 1st fixed definition “ Process Source Type” and click on the button.
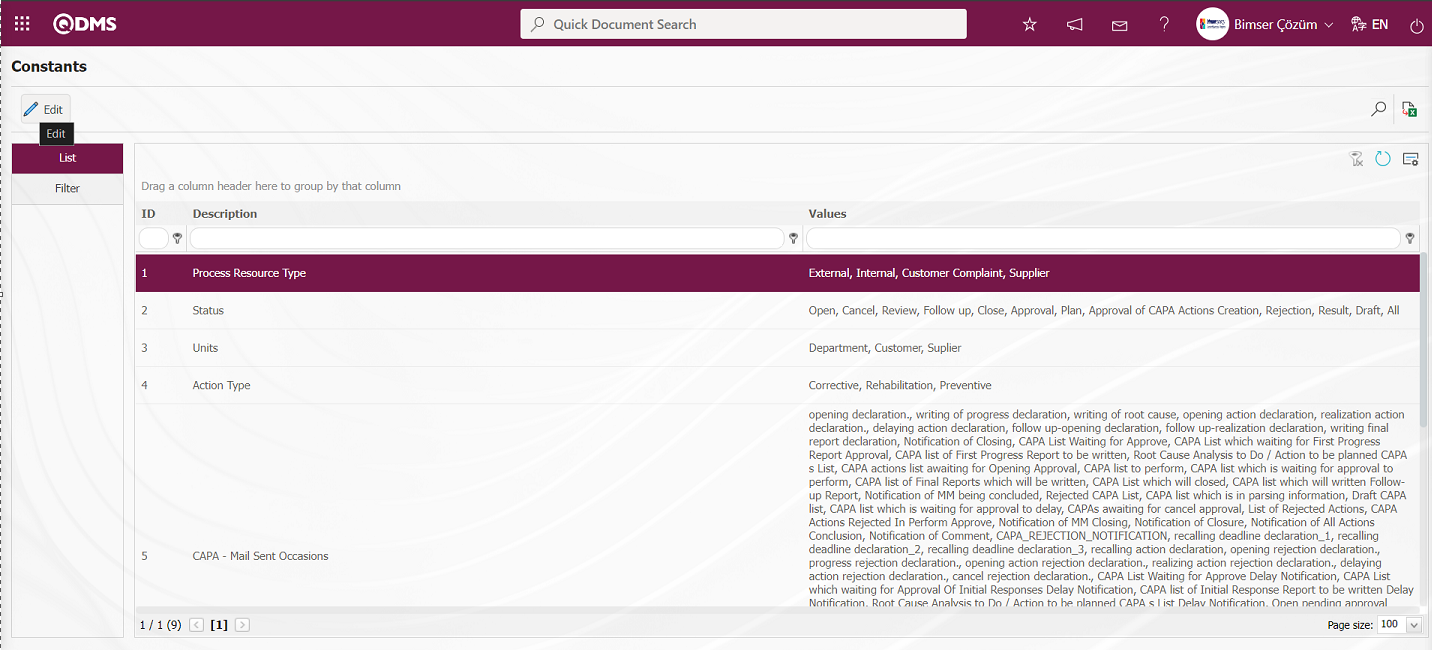
In the Constants screen, select the Constant value of the Constant Values field and click the button.
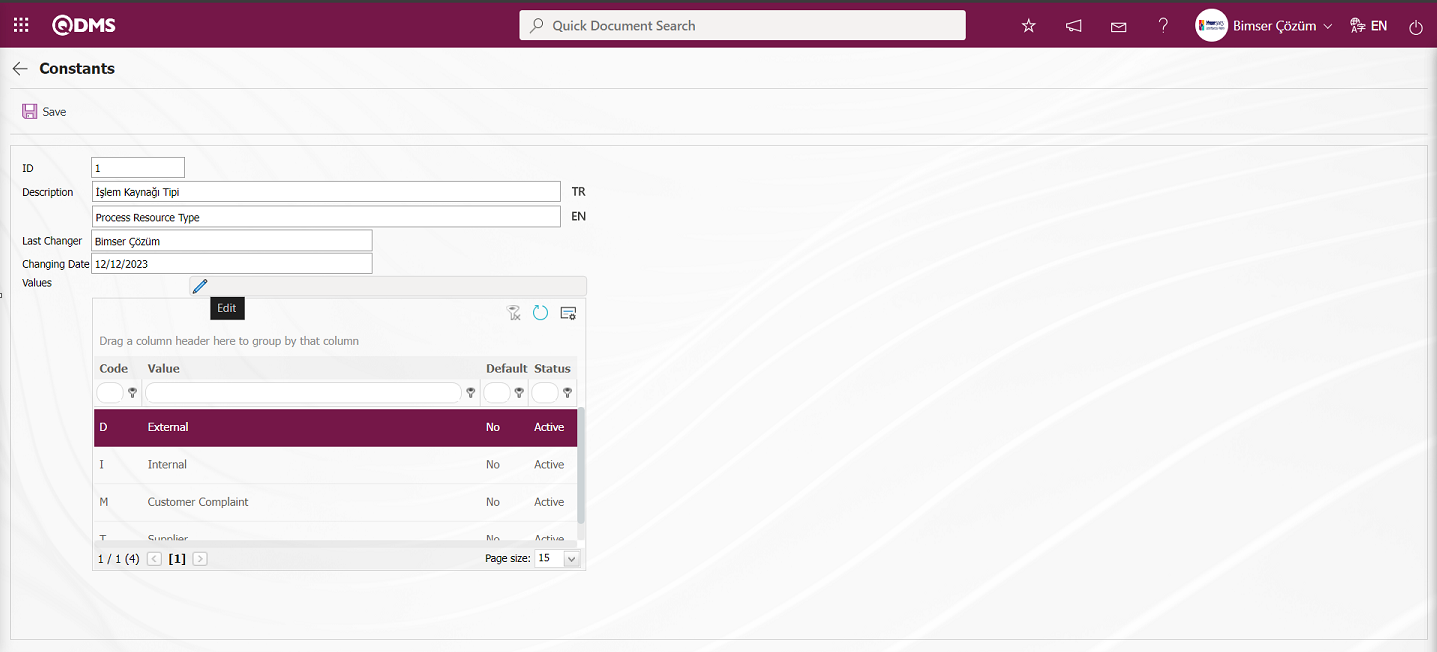
In the Constants screen, click the  button while the constant value is selected from the list in the Constant Values section.

On the Constant Values - Update Record screen, the status of the constant value Status field is deactivated and the Constant values record update process is performed by clicking the button.
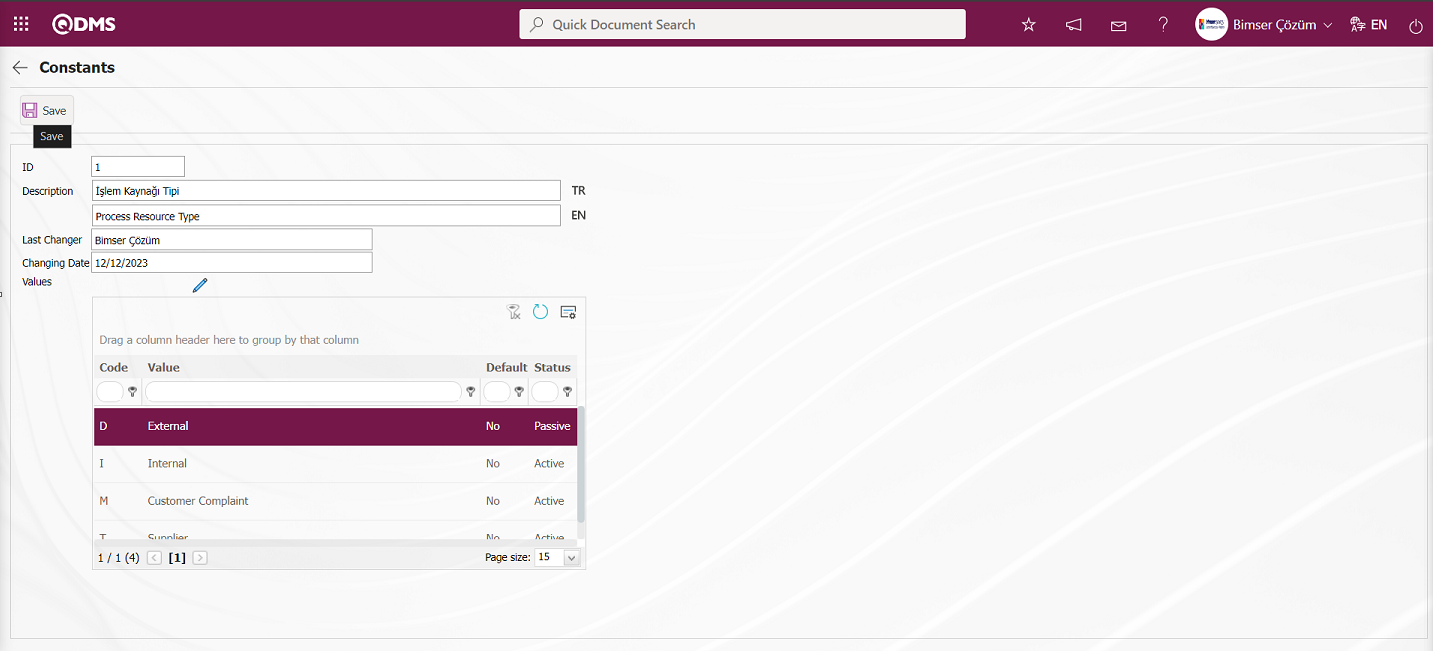
On the Constants screen, the Constants record update process is performed by clicking the button at the top left of the screen.
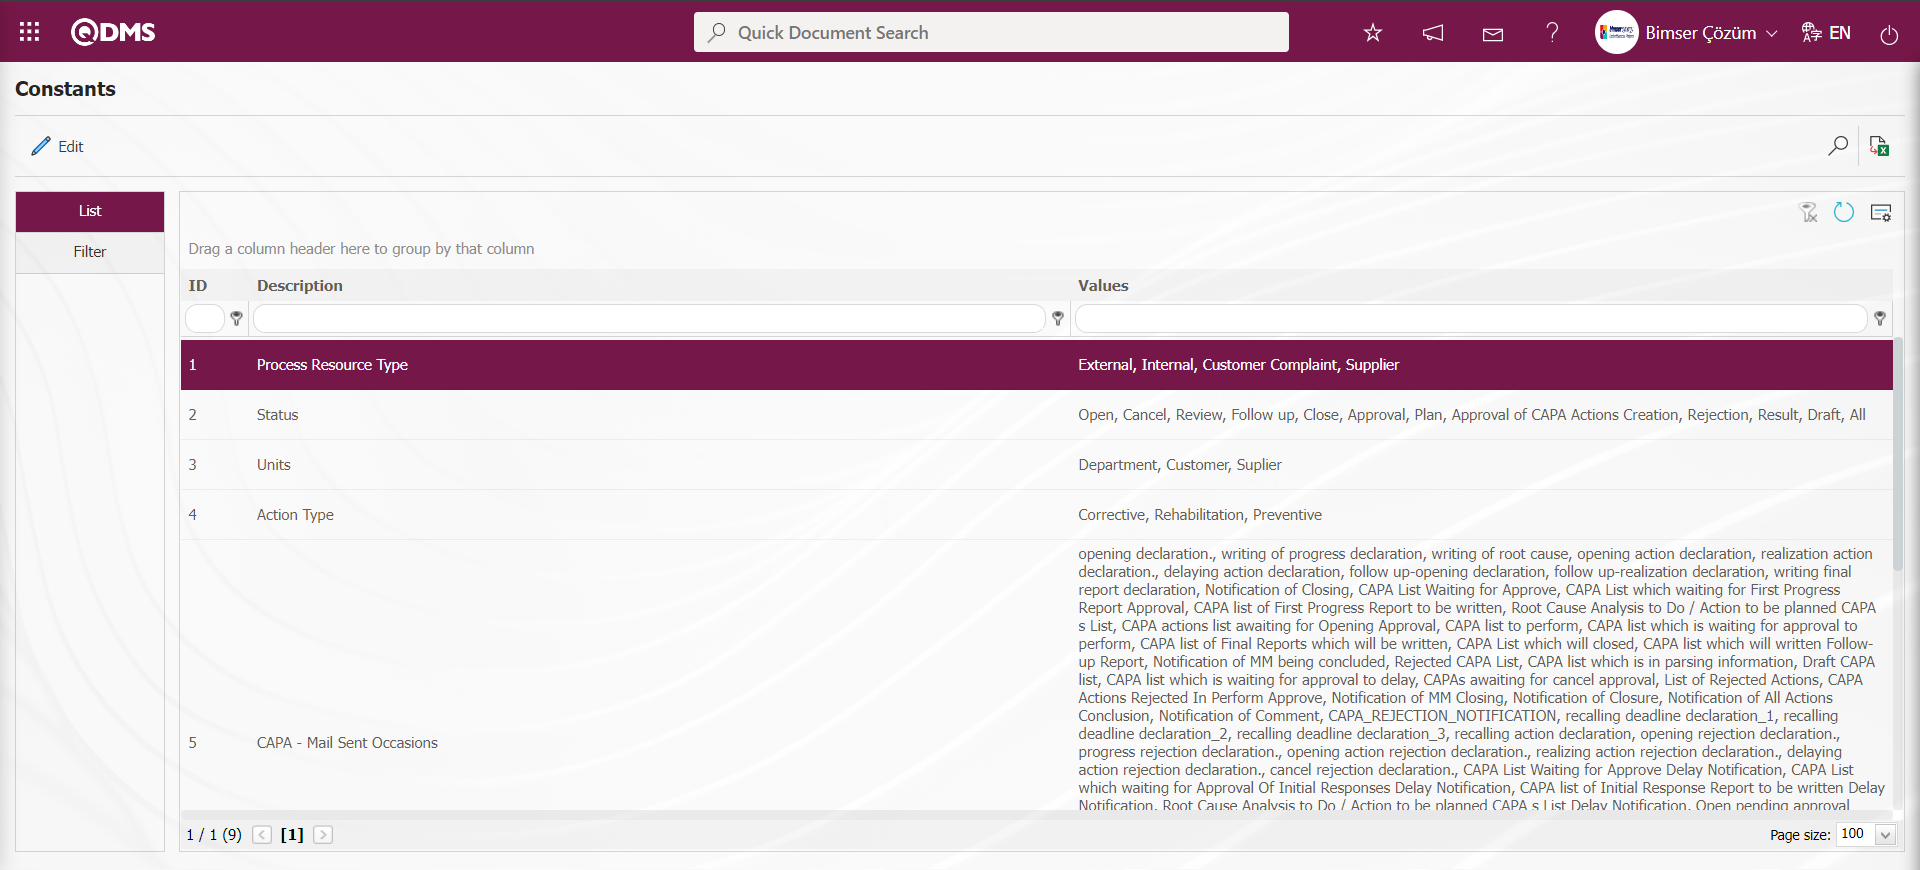
In the CAPA Source Definition screen opened by clicking the button in the System Infrastructure Definitions/CAPA/CAPA Source Definition menu, the “External” constant value, which is inactive in the Constants menu, is not displayed in the Transaction Source Type field. In the same way, by performing the same process steps, Fixed values in the Constants menu are activated in the status field on the Record update screen and displayed in the Transaction source Type field in the system.
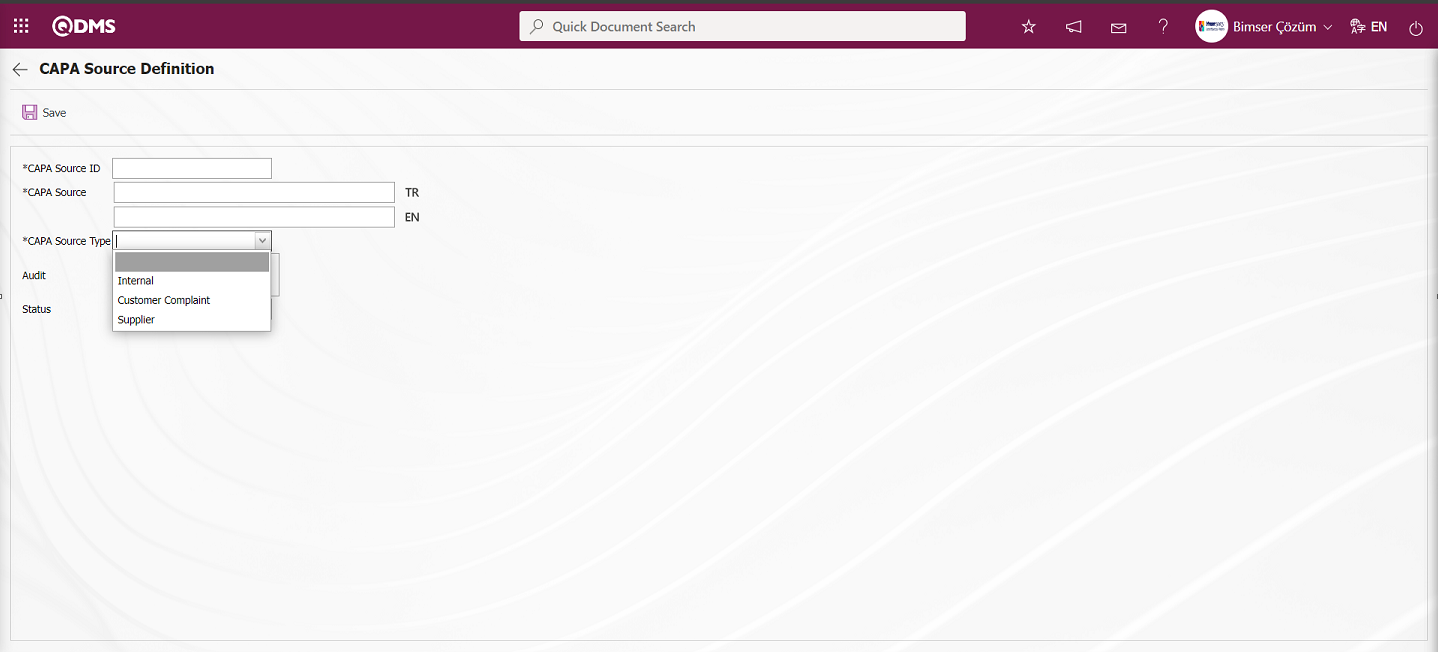
For the system-defined constants of the modules in the Qdms system, the process of activating and deactivating the status of the constant values on the Constants screen is done in the same process steps.
5.2.5. Module Definition
Menu Name: System Infrastructure Definitions/ BSID/ Configuration Settings/ Module Definition
Modules defined in the Qdms system are included. All Module definitions to be used by the company are not defined by Bimser in this field. A new module definition cannot be made by users. Only module definitions can be modified in this menu. These module definitions are displayed in the drop-down module list opened in the modules field in the menus.
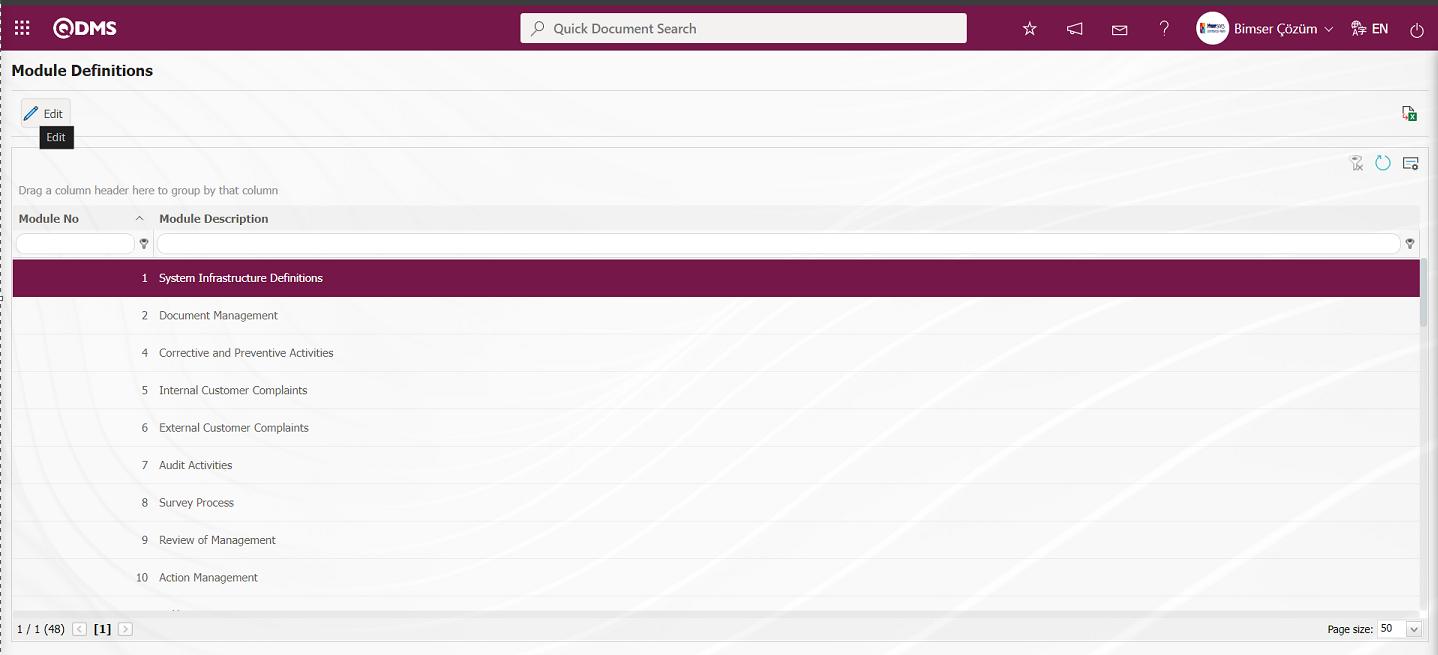
With the help of the buttons on the screen;
 : Correction / change / update is made for the module definition selected in the list.
: Data is transferred to Excel.
: The search criteria on the menu screens are used to clean the data remaining in the filter fields in the grid where the search operation is performed.
: The menu screen is restored to its default settings.
: User-based designing of the menu screen is done with the show-hide feature, that is, the hiding feature of the fields corresponding to the columns on the menu screens.
On the Module Definitions screen, click the button while the Module Definition is selected in the list.

Changes are made in the module definition field on the Module Definitions screen. English language equivalent is written in the field where the relevant flags are located. After making changes to the information in the required fields, the registration process is done by clicking the button in the upper left corner of the screen.
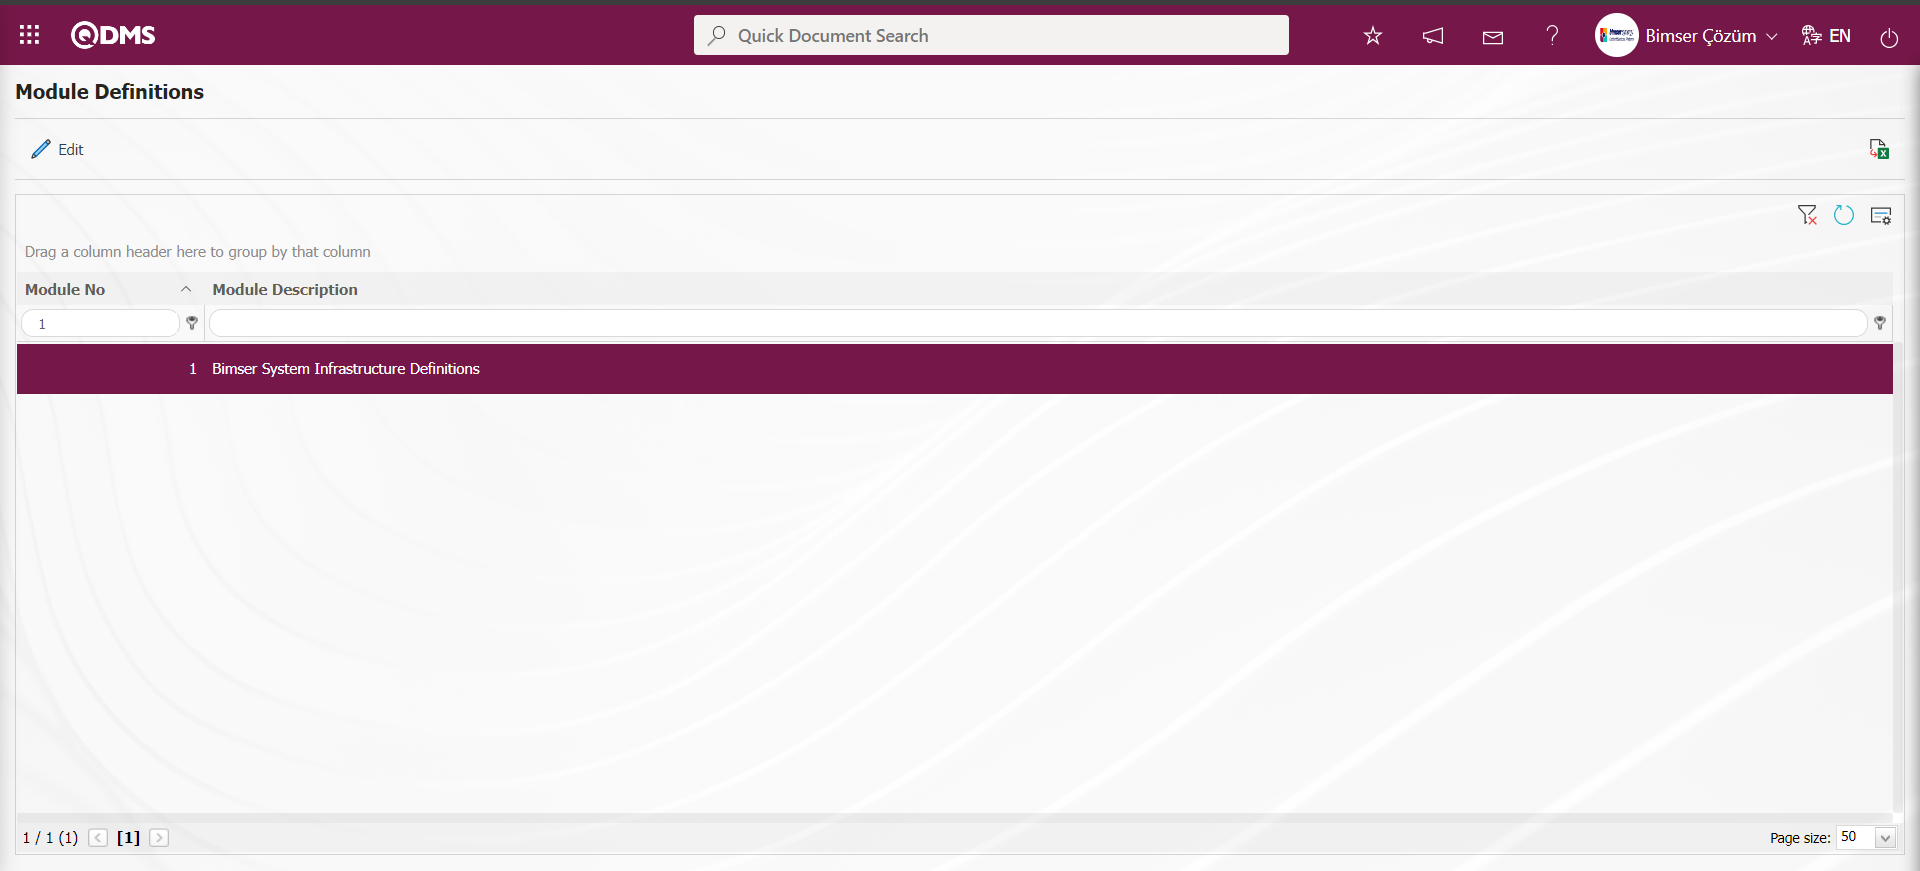
After the Module Definition process, the definition information of the module that has been modified in the drop-down Module list opened in the Modules field opened in the menus is included in the list in its edited form. For example: Parameters menu.
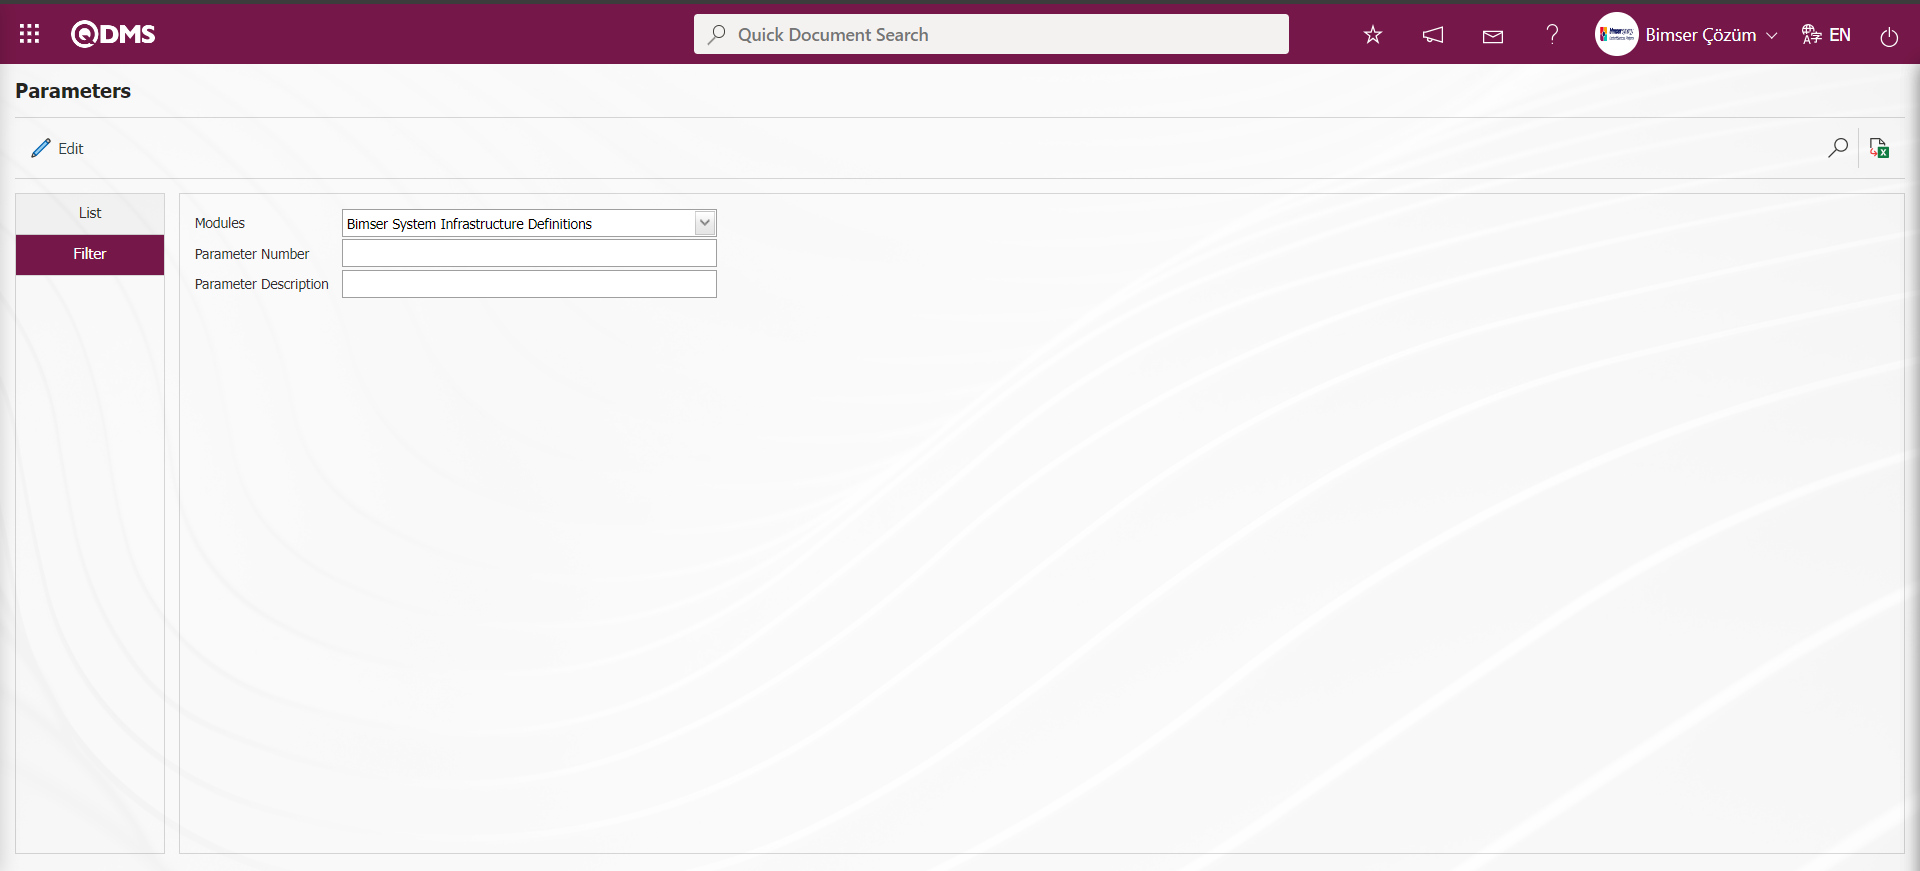
5.2.6. Parametric Field
Menu Name: System Infrastructure Definitions/ BSID/ Configuration Settings/ Parametric Field
This is the menu where extra fields that are not available in the Qdms system but companies want to see in the Personnel Identification, Department Identification, Workplace Identification, Control Definition, Customer-Supplier Definition, Company Profile Definition, Product Definition and Position Definition menus are defined.
5.2.6.1. Field Definition
Menu Name: System Infrastructure Definitions/ BSID/ Configuration Settings/ Parametric Field/ Field Definition
The definition of the desired parametric fields to be seen on the Personnel, Department, Workplace, Control, Customer-Supplier, Company Profile and Product Identification screens is realized using this menu.
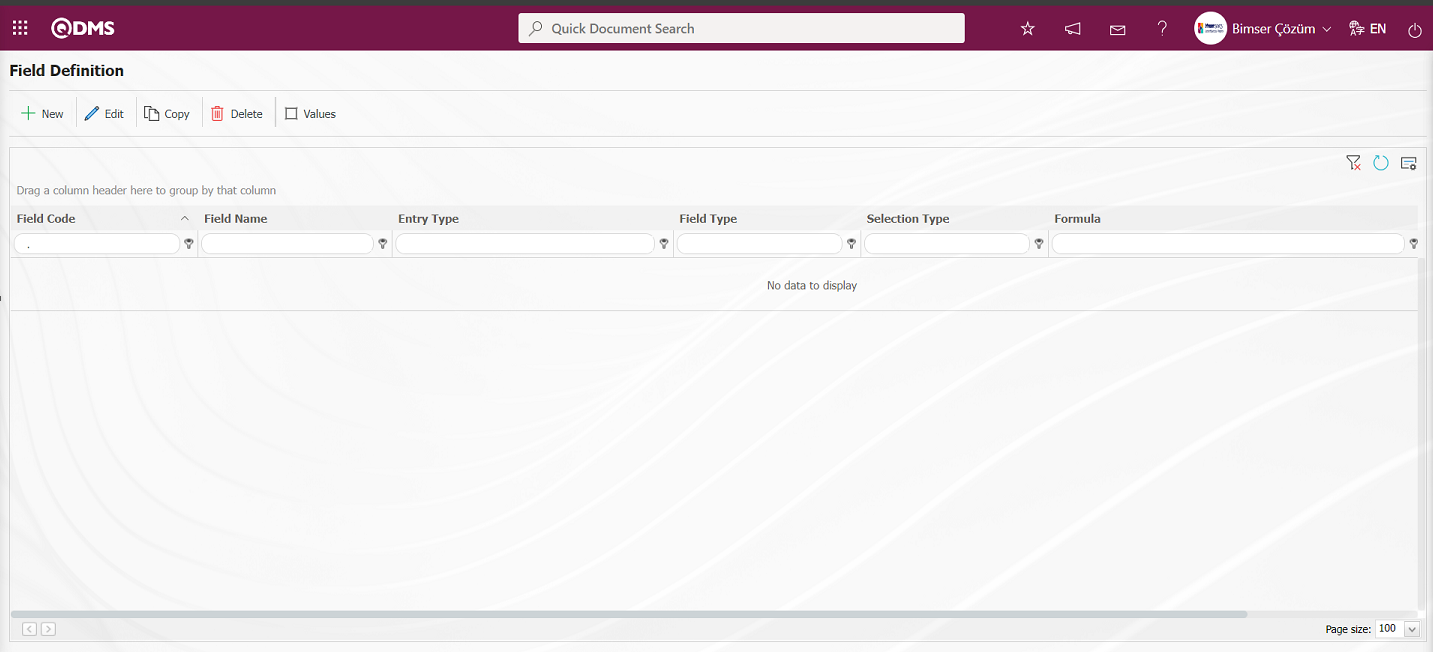
With the help of the buttons on the screen;
: Add a new field.
: Correction / change / update is made on the field information selected in the list. Code information cannot be updated.
 : The field information selected in the list is copied.
: The field information selected in the list is deleted.
 : Values of the field are defined.
: The search criteria on the menu screens are used to clean the data remaining in the filter fields in the grid where the search operation is performed.
: The menu screen is restored to its default settings.
: User-based designing of the menu screen is done with the show-hide feature, that is, the hiding feature of the fields corresponding to the columns on the menu screens.
To add a new field to the Field Definition screen, click on the button at the top left corner of the screen to open the Field Definition\ New Record screen
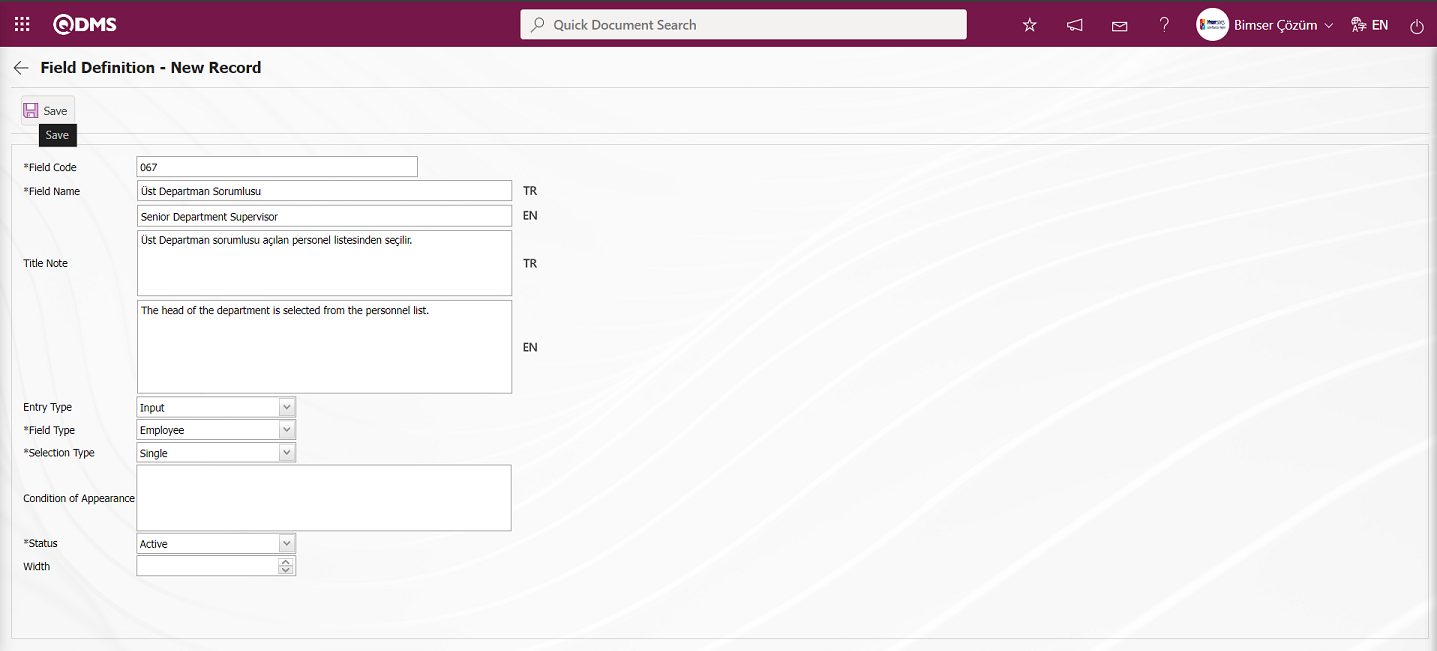
Related fields are defined on the screen that opens;
Field Code: This is the mandatory field where the Field Code information is entered on the Field Definition-New Record screen. It should be defined without using characters such as spaces and Turkish characters, so that it is not the same as previously defined fields. Ex. '001' , 'RK'
Field Name: This is the field where the Field Name information is entered on the Field Definition-New Registration screen.
Title Note: This is the field where the note information containing explanatory information about the data entry of the field on the Field Definition-New Registration screen is entered. It is the information displayed when hovering over the field with the mouse.
Entry Type: It is the field where the entry type can be selected as Calculated or Data Entry type on the Field Definition-New Record screen. Entry Type option shows whether the created field will be determined manually by data entry or by calculation method. For example; Data Entry.
Field Type: It is the field where the field type information can be selected on the Field Definition-New Record screen. Field Type indicates which type of the created field is text, numeric, date, list, etc. In the Field Type field, personnel type parametric field selection process is performed. For example; Employee
Selection Type: It is the field where the selection type of the field defined on the Field Definition-New Record screen is selected from single and multiple options. For example: Single option is selected.
Condition of Appearance: This is the field where the Condition of Appearance information is entered on the Field Definition-New Record screen. If a field will be seen depending on the condition of another field, the condition of appearance is used. It allows the field created according to the values of the list-type field to be displayed. Its usage is [ALANKODU]=ALAN_DEĞERİ etc. (For example, Is there an opportunity? Field's field code is 01 and Opportunity field's field code is 02. If the “Opportunity” field should be seen if the “Yes” value with value code 100 is selected from the options in the “Is there an opportunity?” field, the formula should be written as follows in the “Opportunity” field's appearance condition section with the number 02: [01]=100)
Status: This is the field where the status can be selected as “Active” or “Inactive” on the Field Identification-New Registration screen.
Width: It is the field where the width information is entered on the Field Definition-New Record screen.
Field Identification-New Record field code and field name information is entered. Select Input Type data entry and field type employee. Single selection type is selected in the Selection Type field. Status is selected as Active. After the required fields are filled in the Field Definition screen, the Field Definition registration process is realized by clicking the button in the upper left corner.
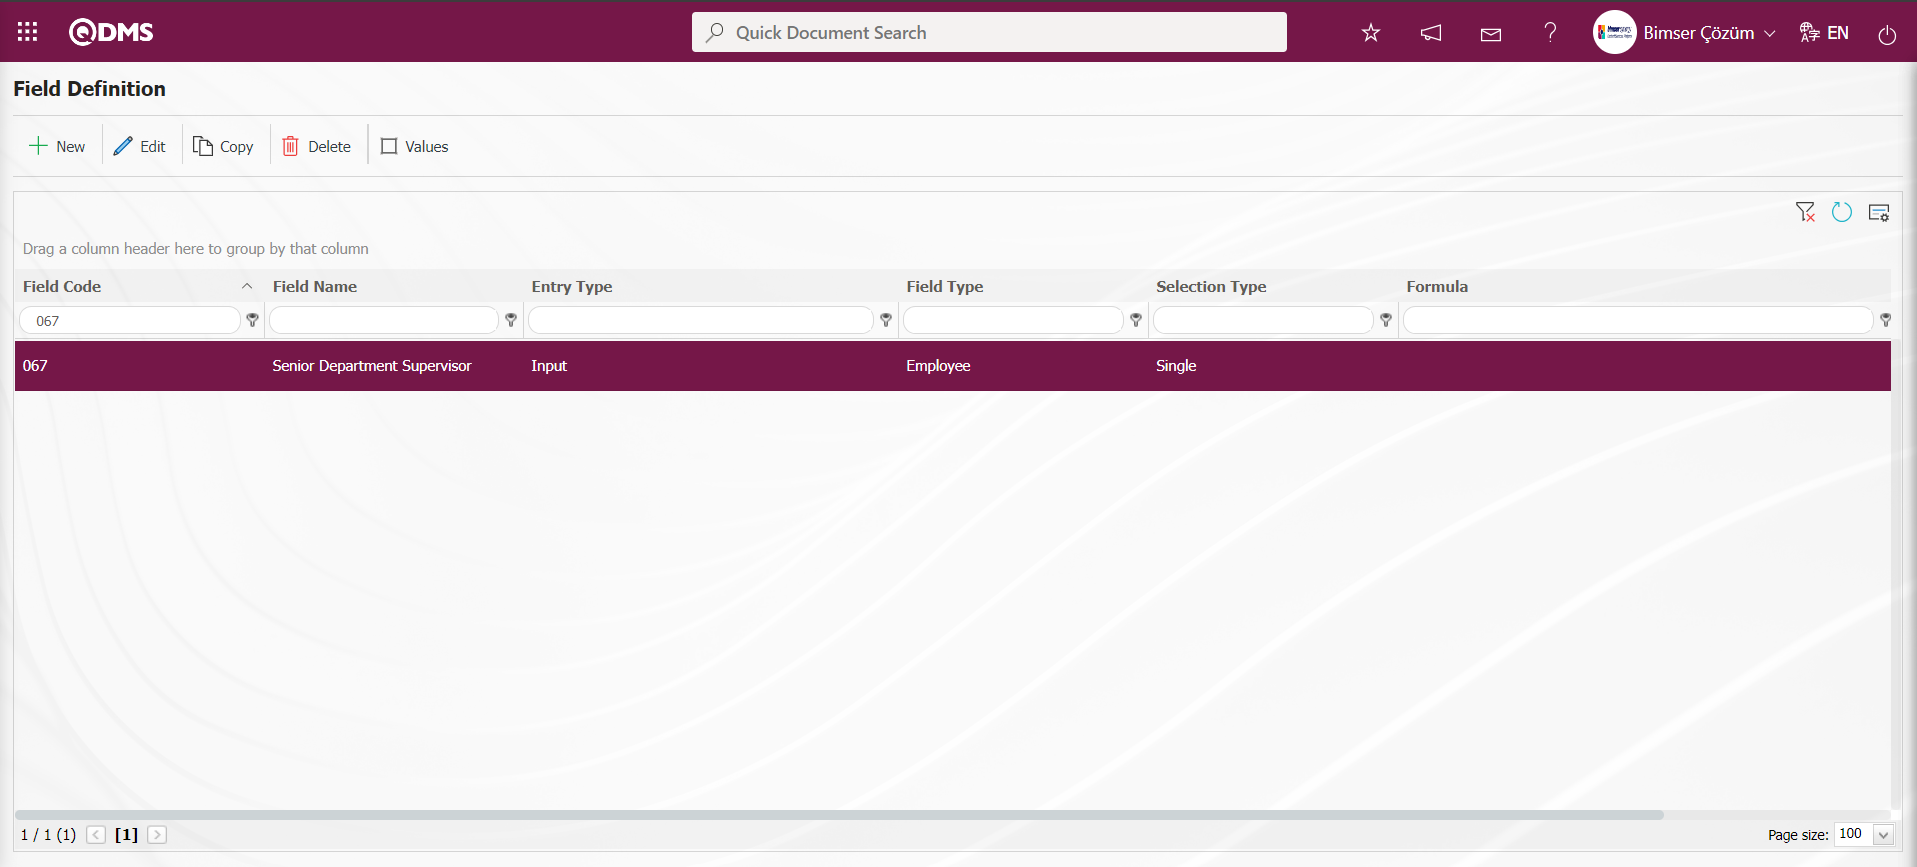
The field definition process to be displayed on the screen in the menus related to the System Infrastructure Definitions module is done in this way and added to the field pool.
The full list of field types available in the system is given below;
- Text: Adds a text box that allows manual typing.
- Text Multiline: Adds a multi-line text box with no character limit for manual typing.
- Numeric: Enables numeric data entry.
- Numeric-Monetary: Enables numeric entry as monetary value.
- Numeric-Unit: Makes numeric entry as unit.
- Date: Adds a calendar field.
- List: Makes a single selection from multiple elements.
- Scored List: Makes a selection from the drop-down menu, list elements have point values.
- List with Search: Allows single and/or multiple selections from multiple elements with a wide search function.
- Tree List: Allows selection from more than one element with a tree breakdown in a way that can be searched with a wide search function.
- Personnel: Allows to select a person from QDMS personnel database.
- Department: Allows the selection of department information from the QDMS department database.
- Title: Allows to select title information from QDMS title database.
- Document: Allows you to select a document from the QDMS document database.
- Management System: Allows to select management system information from QDMS management system database.
- Customer: Allows to select customer information from QDMS customer database.
- Supplier: Allows the selection of supplier information from the QDMS supplier database.
- Product: Allows product information to be selected from the QDMS product database.
- Company Profile: Allows to select company profile information from QDMS company profile database.
- Title: Adds a title field to the forms to be written in bold letters.
- File: Will bring the appropriate field for file attachment**
- Image: Will bring available space for image attachment
- Image List: Allows selection from a list of images.
- Multiple Image: Allows to select multiple images.
- Table: Allows the creation of a table type field. (After adding this type of field, new field definitions must be made as field values.)
- Query: It is a field type that can be defined in order to make a selection from the main data in QDMS/Ensemble databases. (It should only be defined by Bimser Support Team) Single and multiple selections can be made.
- Query Tree: It is the type of field that can be defined in order to make a selection from the tree-delimited master data in QDMS/Ensemble databases. (It should only be defined by Bimser Support Team) Single and multiple selections can be made.
- Tab: Creates a new tab in which the fields can be seen in the existing risk assessment form by establishing a relationship, except for the tab containing the fields.
- Checkbox List: It is a list type field that can be used for single or multiple selection according to the request.
- Risk: It enables the selection of values from risk-based modules. After adding this type of field, it is necessary to select from which module the values will come from on the field definition screen.
- Annotated List: It is a field type that allows you to write a description next to the selected list value. When defining field values in the Field Definition menu, it is necessary to select whether the description box will be active for each value. According to the selection made here, when the relevant selection is made in the menu where this field will be seen under the Integrated Management System menu, the box is opened for the user to write a description next to the field value.
- Position: It allows to select position information from QDMS position database.
- Clock: Adds a clock type field.
5.2.6.2.Function Dizanyer
Menu Name: System Infrastructure Definitions/ BSID/ Configuration Settings/ Parametric Field/ Function Design
With this menu, it is determined in which of the Personnel Identification, Department Identification, Workplace Identification, Control Definition, Customer-Supplier Definition, Company Profile Definition, Product Definition and Position Definition screens the fields created in the Field Definition menu will be displayed. In the Function Design screen, wherever the field will be used, select from Personnel Identification, Department Identification, Workplace Identification, Control Definition, Customer-Supplier Definition, Company Profile Definition, Product Definition and Position Definition functions and click on the  button and this field will be displayed on the pages of the related function.
Since the “Senior Department Supervisor” personnel type field is defined for the Department Definition menu in the Field Definition menu, the Department Definition menu, which is the function number 2 in the Function Design menu, is selected and the button is clicked.
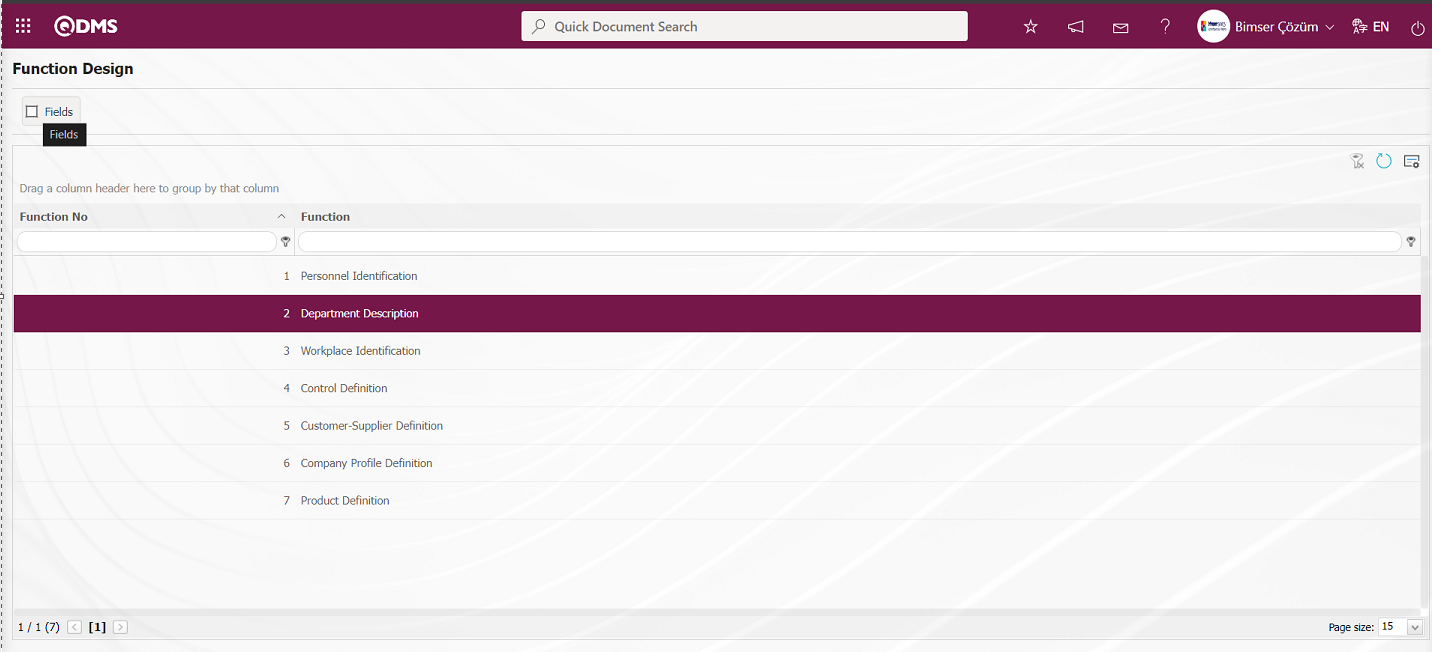
In the Function Design - Fields - Department Identification screen, the fields to be used in the function selected on the screen opened with the button are determined by clicking the  button

With the help of the buttons on the screen;
: A new field is added to the selected function in the list.
 : Changes / edits / updates are made on the field information added to the selected function in the list.
: Delete the field information added to the function selected in the list.
: The search criteria on the menu screens are used to clean the data remaining in the filter fields in the grid where the search operation is performed.
: The menu screen is restored to its default settings.
: User-based designing of the menu screen is done with the show-hide feature, that is, the hiding feature of the fields corresponding to the columns on the menu screens.
In the Function Design - Fields - Deparmant Description screen, the fields to be used in the selected function are determined by clicking the button.

Related fields are defined on the screen that opens:
Field Name: This is the field where the field selection is made from the fields defined on the Field Definition - Functions - New Record screen.
Is Required?: Field Definition - Functions - New Record screen determines whether data entry is mandatory for the selected field. When “Yes” option is selected, data entry is mandatory for the field.
Message: This is the field where the Mandatory Message information is entered for the field selected on the Field Definition - Functions - New Record screen. The warning message information to be given when the mandatory fields are not filled is written.
Sort Order: It is the field where the sequence number of the field is determined on the Field Definition - Functions - New Record screen.
Default Role: For the field selected on the Field Definition - Functions - New Record screen, it is the field where the information about which role on the role definition screen will be approved is entered.
Default value is read only : If the default value of the field selected on the Field Definition - Functions - New Record screen is not desired to be changed, the relevant check box is checked.
Show in Grid: Field Definition - Functions - If the field selected on the New Record screen is desired to be displayed on the list grid screen, the relevant check box is checked.
Row Count: This is the field where the number of rows for the field selected in the Field Definition - Functions - New Record screen is determined.
Column Width: It is the field where the column width information is determined for the field selected on the Field Definition - Functions - New Record screen.
After filling in all required fields on the Field Definition - Functions - New Record screen, click on the button on the top left corner of the screen.
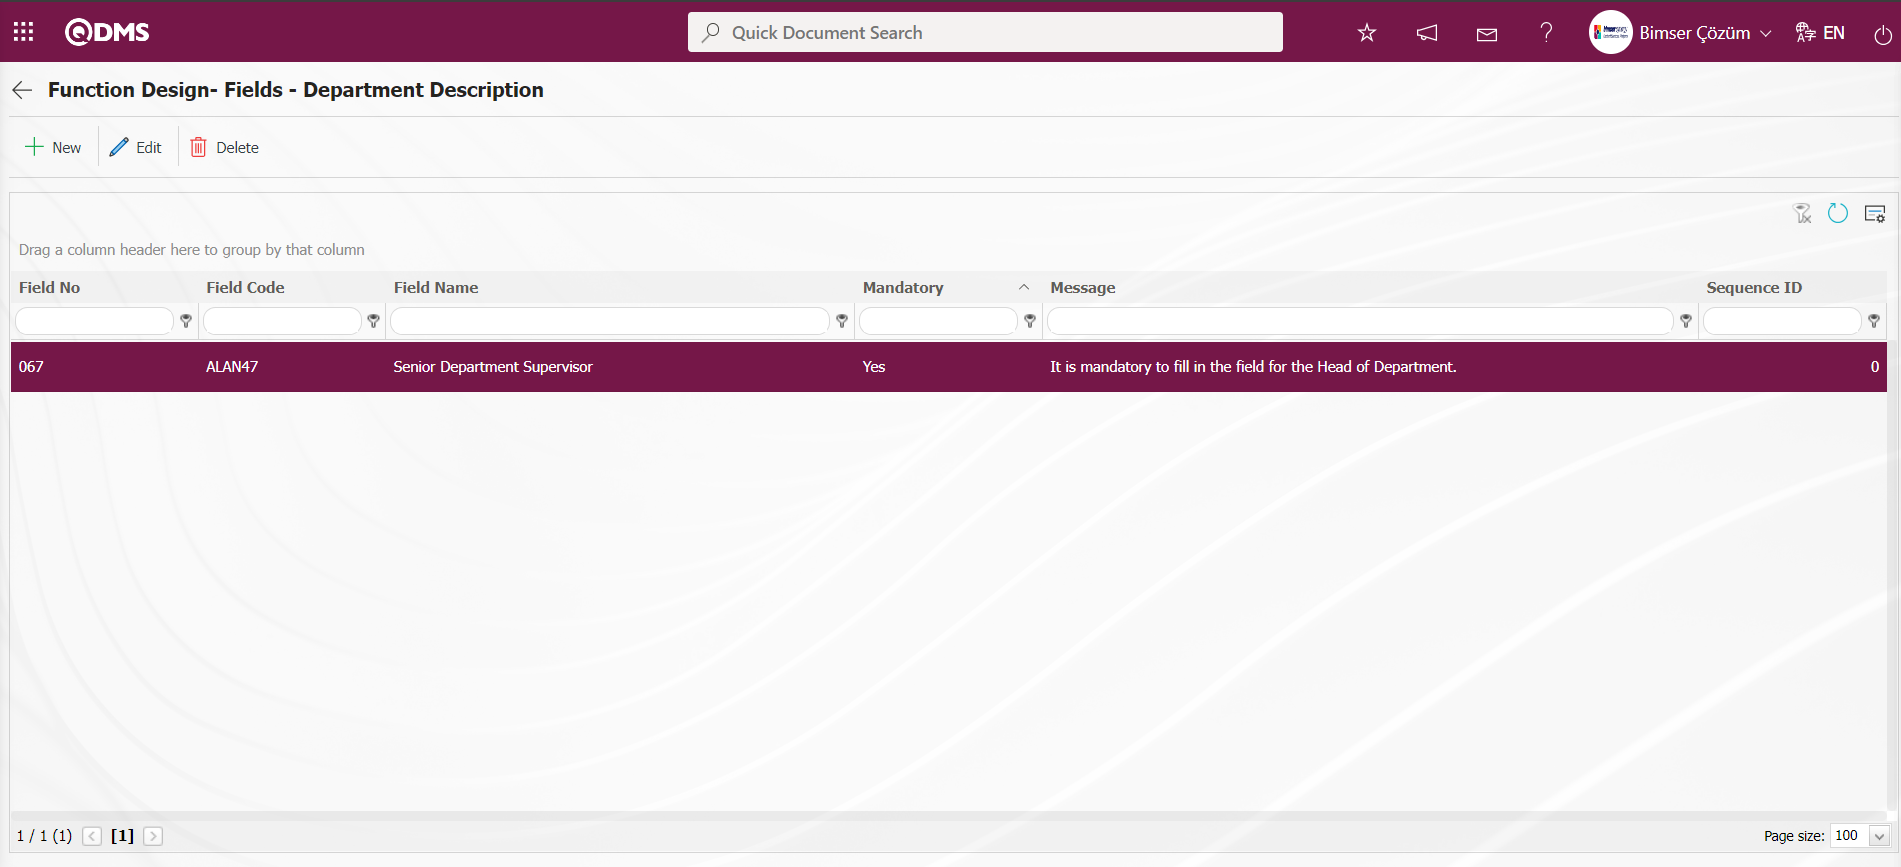
The defined personnel type field is displayed on the Department Definition-New Record screen opened by clicking the  button on the Department Definition screen. When the defined personnel type field is hovered over with the mouse, the title note information is displayed.

After entering the information in the relevant fields on the Department Definition-New Record screen, the system does not allow the registration process if the defined personnel is not filled in the mandatory field, and indicates that the field must be filled in with the mandatory message information.
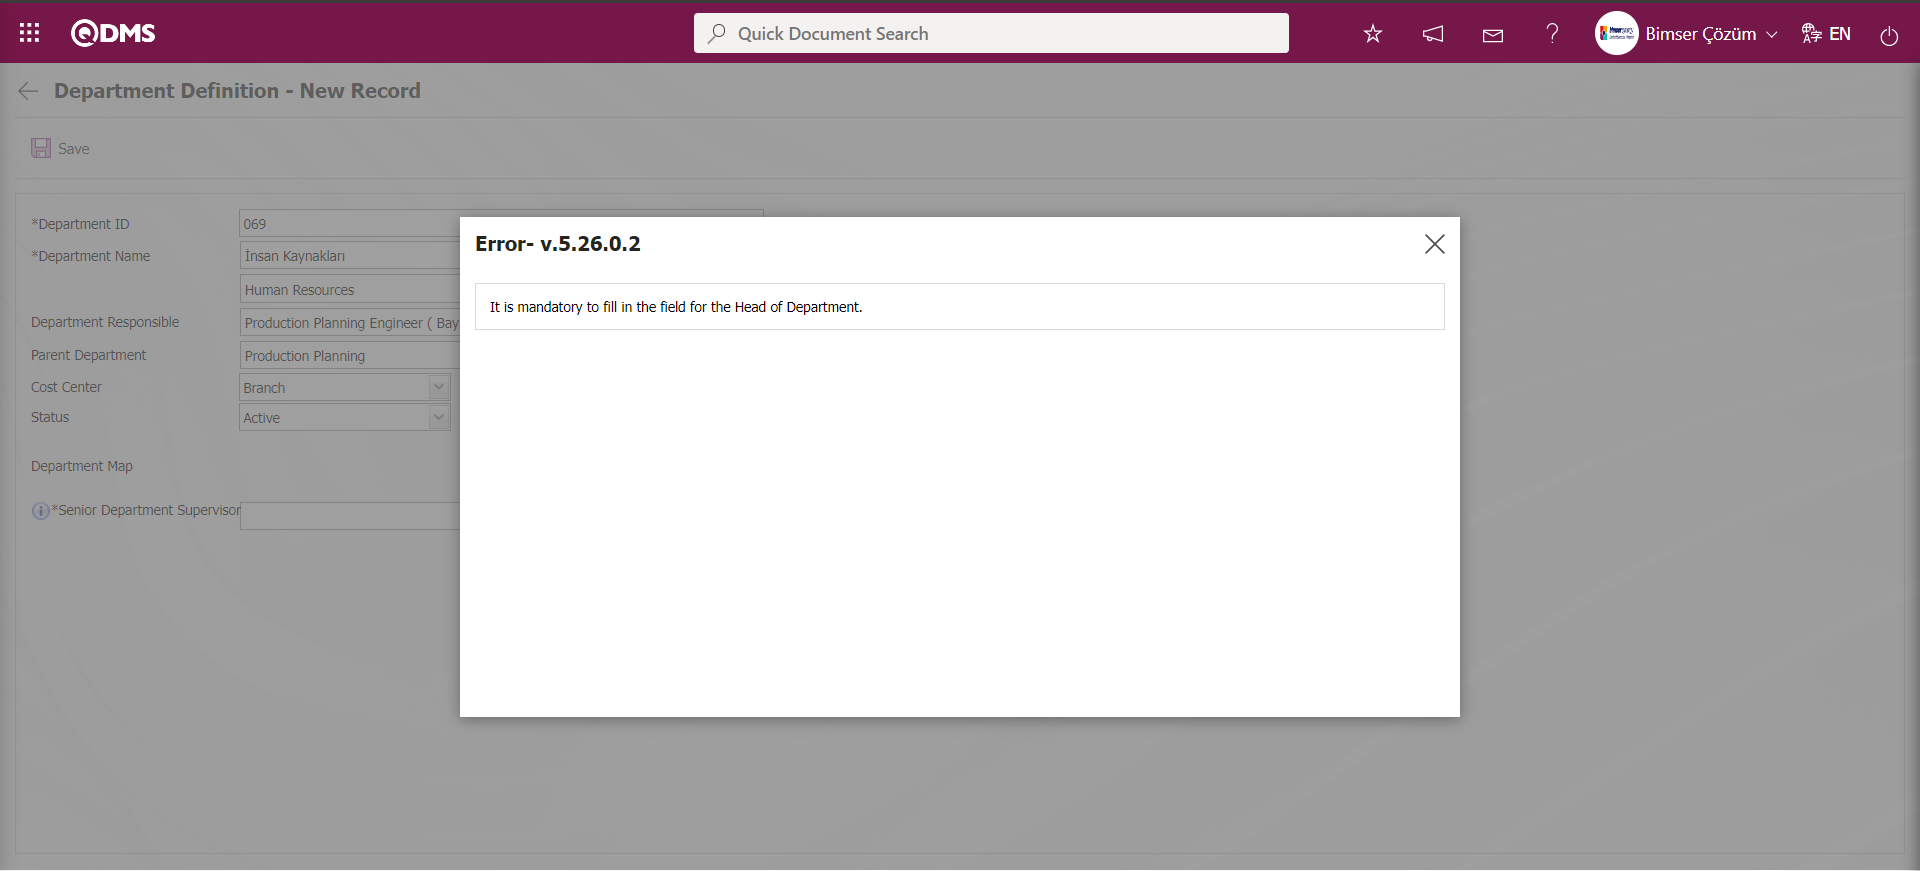
In the System Infrastructure Definitions Module, the process of defining fields in the related functions and associating them with the pages of the function is done in the same way. However, the field definition process in the Personnel Definition screen is done differently from other functions. When the association process of the defined field of the related function is performed, the field depending on the options in the Use In field is displayed on the Field Definition - Functions - New Record screen.
The selection of the use of the related field in the Work and Periodic Inspection Module and System Infrastructure Definitions Module pages is determined. When the Inspection is selected in the Place to use field, the field defined in the Inspection Tracking Main tab screen of the Work and Periodic Inspection Module is displayed. When Personnel is selected in the Use In field, the field defined in the Personnel Identification-Additional Information-Record update screen opened by clicking the  button displayed depending on 76 parameters is displayed.
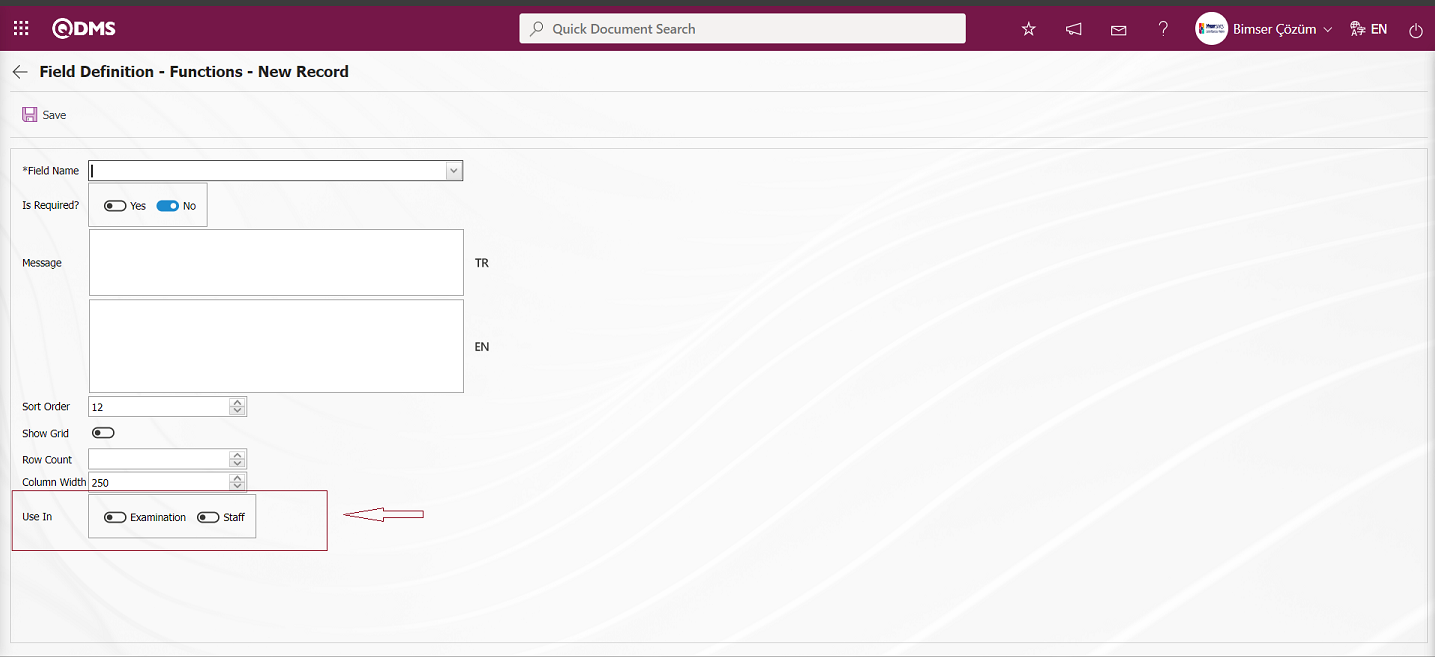
5.2.7. Sub-Module Definition
Menu Name: System Infrastructure Definitions/ BSID/ Configuration Settings/ Sub-Module Definition
It is the menu where the flows used for opening, performing, delaying, closing approvals existing in the modules are introduced to the modules; approval request, notification and rejection messages are associated.
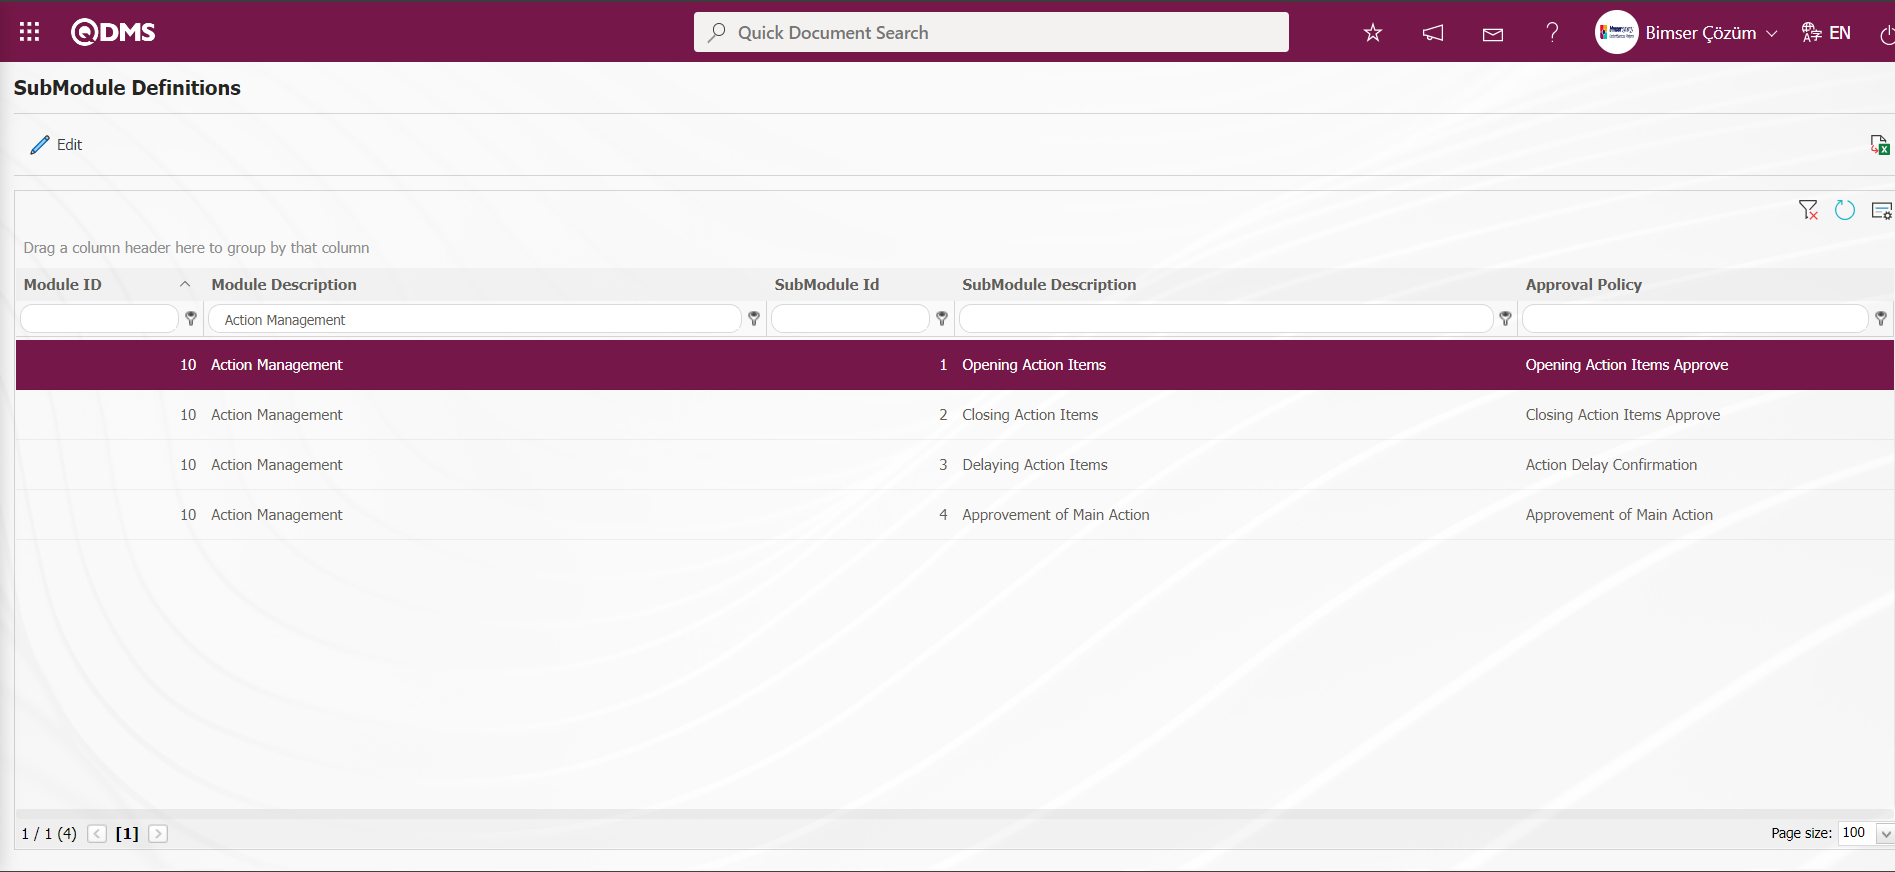
With the help of the buttons on the screen;
: Correction / change / update operations are performed on the sub-module information selected in the list.
: Data is transferred to Excel.
: The search criteria on the menu screens are used to clean the data remaining in the filter fields in the grid where the search operation is performed.
: The menu screen is restored to its default settings.
: User-based designing of the menu screen is done with the show-hide feature, that is, the hiding feature of the fields corresponding to the columns on the menu screens.
On the Sub-Module Definition screen, search for Sub-Module Definitions by typing the name of the relevant Module in the Module Definition field in the grid.
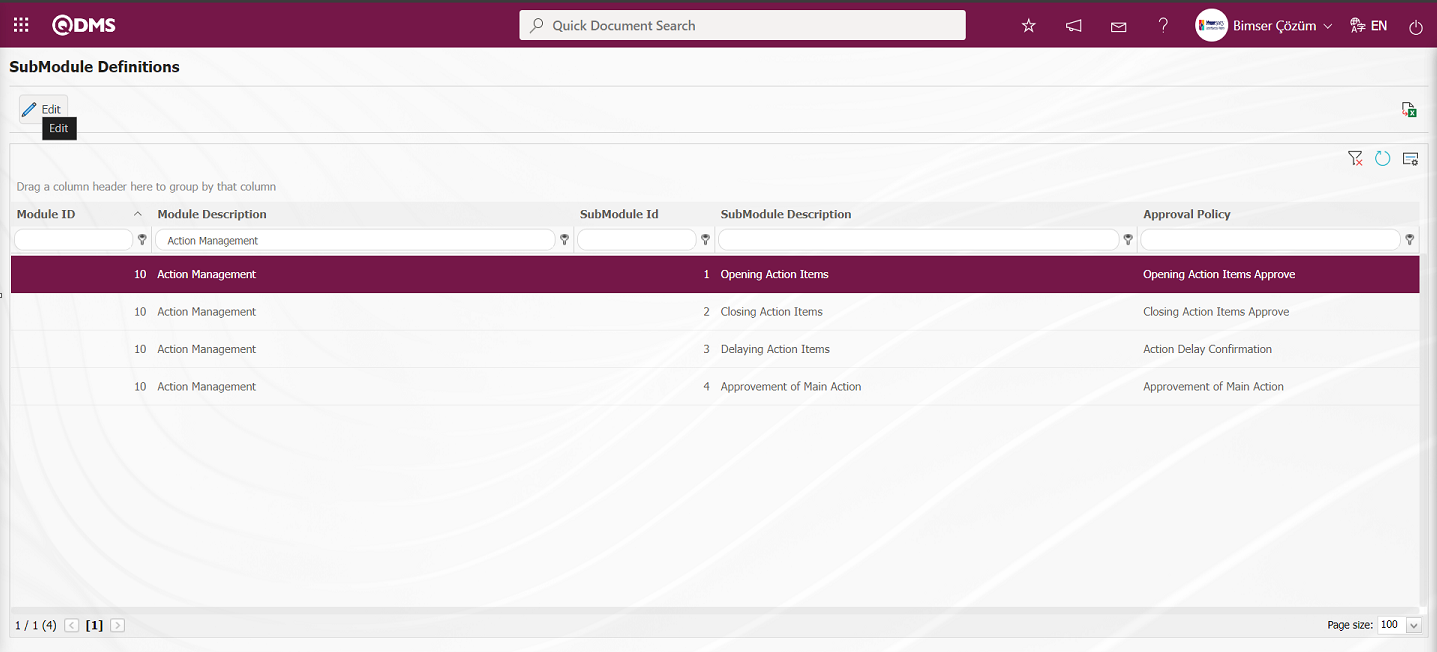
After searching the related Module definitions, click the button while the Module Definition is selected.
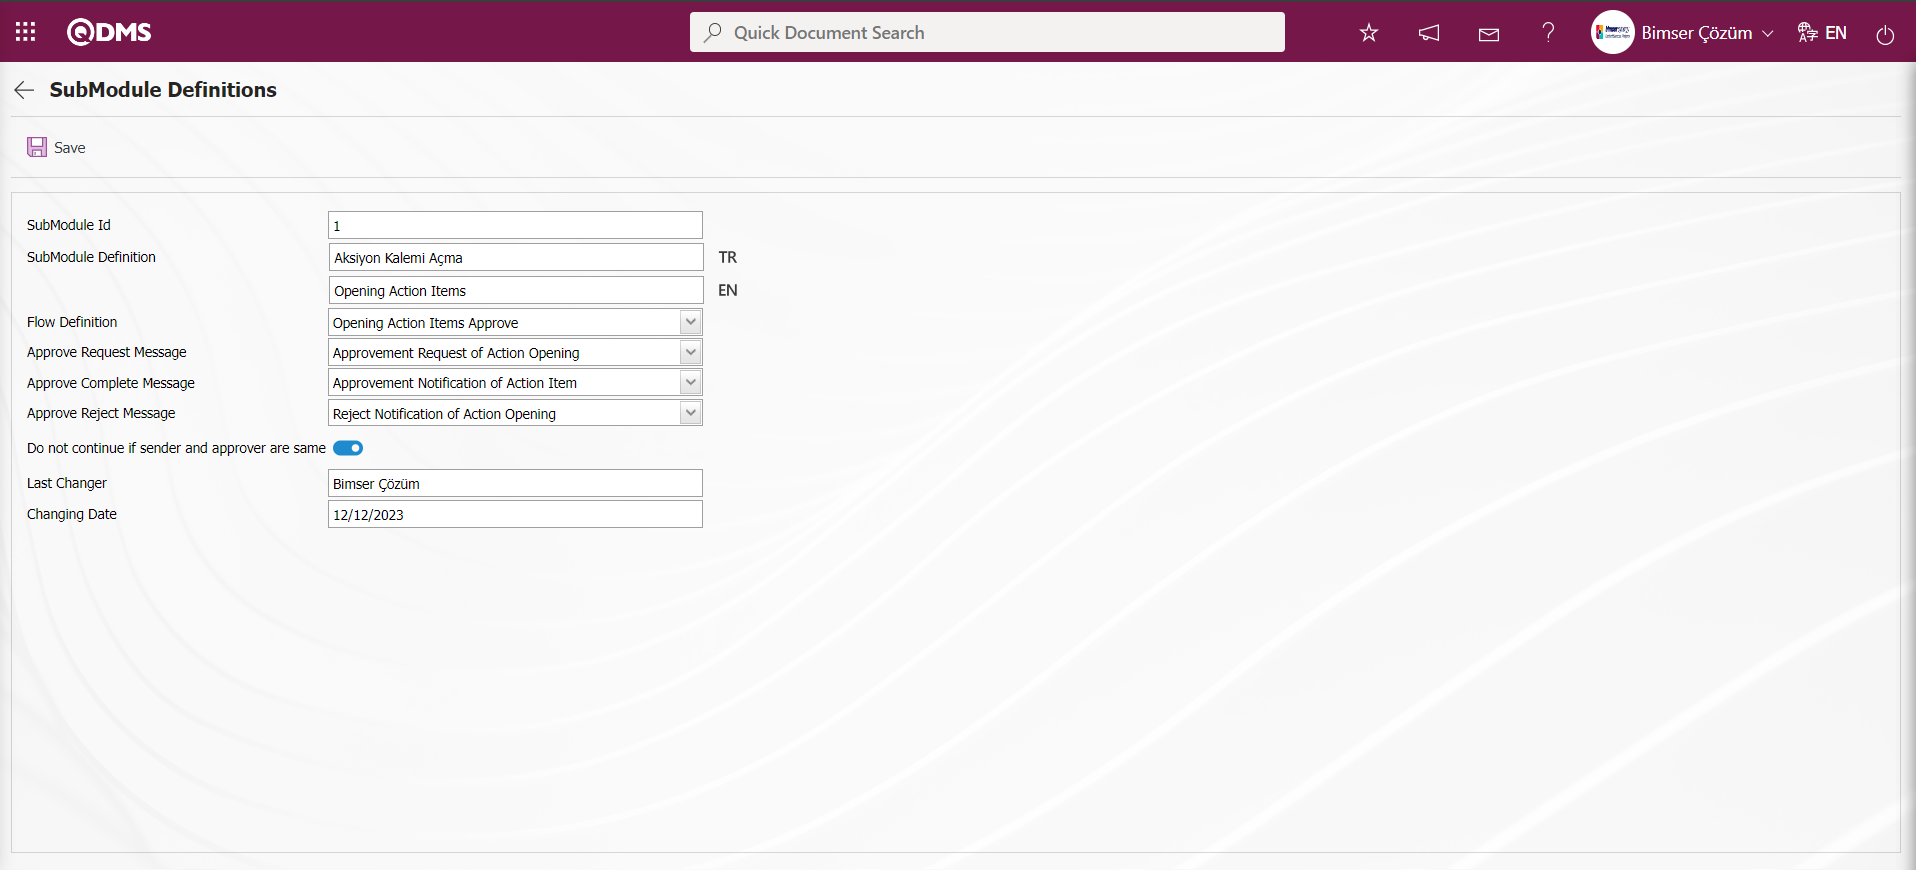
Related fields are defined on the screen that opens:
SubModule Id: This is the field where the SubModule Id information is given by the system in the SubModule Definition screen.
Sub Module Definition: This is the field where the Sub-Module Definition information is given by the system on the Sub-Module Definition screen. The system allows the system to change and edit the related field.
Flow Definition: It is the field where the Flow Definition information is selected from the Flow Definition list opened by clicking the drop-down list on the Sub-Module Definition screen. (It is defined from the Flow Definitions defined in the System Infrastructure Definitions / BSID / Configuration Settings / Flow Definition menu.)
Approval Request Message: This is the field where Approval Request Message information is selected from the Approval Request Message list on the Sub-Module Definition screen. (Message Body list is defined in the System Infrastructure Definitions / BSID / Definitions / Message Body Definition menu).
Approval Completion Message: This is the field where the Approval Completion Message information is selected in the Approval Completion Message list on the Sub-Module Definition screen on the Sub-Module Definition screen. (Message Body list comes as defined in the System Infrastructure Definitions/BSID/Definitions/Message Body Definition menu).
Approval Rejection Message: This is the field where the Approval Rejection Message information is selected in the Approval Rejection Message list on the Sub-Module Definition screen on the Sub-Module Definition screen. (Message Body list comes as defined in the System Infrastructure Definitions / BSID / Definitions / Message Body Definition menu).
Do not continue if sender and approver are the same: If the check box related to “Do not continue if sender and approver are the same” is checked on the Sub-Module Definition screen, if the personnel who enters data into the system and sends it for approval is the approver, it is the field that allows the approval process to skip the approval process and continue the flow process and proceed to the next step.
After coming to the Sub-Module definition menu, the flow definition, approval request message, approval completion message, approval rejection message associations are made by clicking the button on the relevant module definition. If the “Do not continue if sender and approver are the same” box is checked, if the personnel who enters data into the system and sends it for approval is the approver, it allows the flow process to continue to the next step by skipping the approval process.
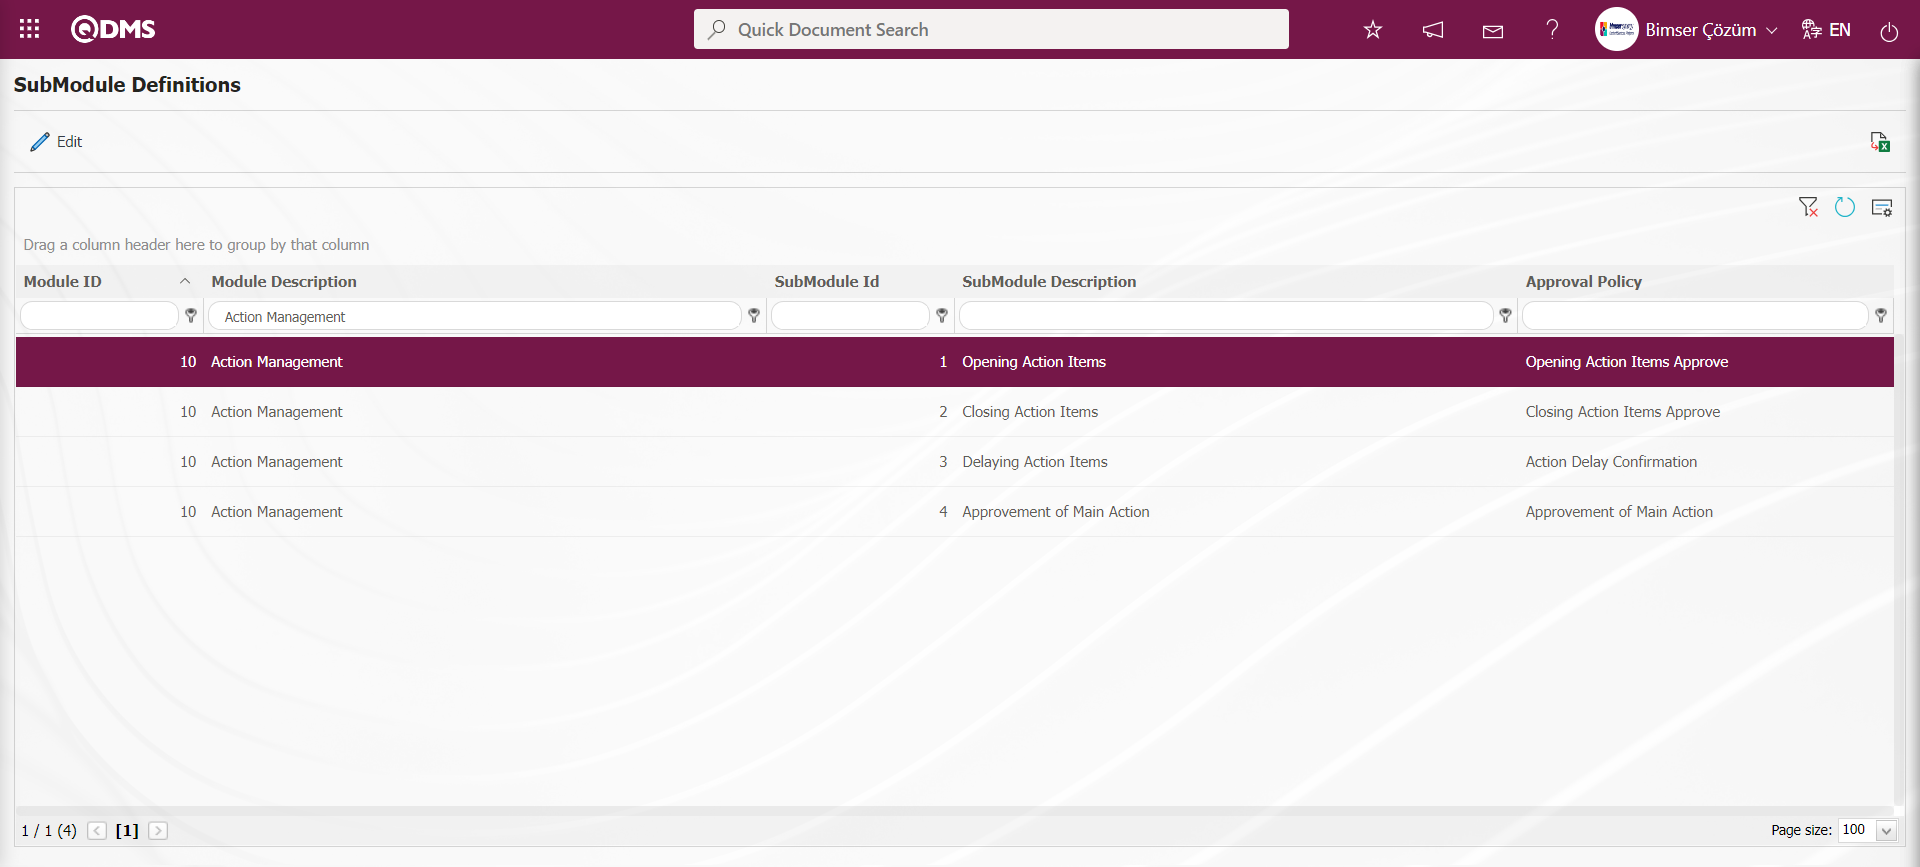
5.2.8. Role Definition
Menu Name: System Infrastructure Definitions/ BSID/ Configuration Settings/ Role Definition
It is the menu where the information about which role will go as the approver for the approval flows used in the modules is defined. There are role definitions for each module in the system. If deemed necessary, new role definitions are made for modules such as risk modules, event modules. When you want to change roles or define a new role, support can be obtained from Bimser Solution Team.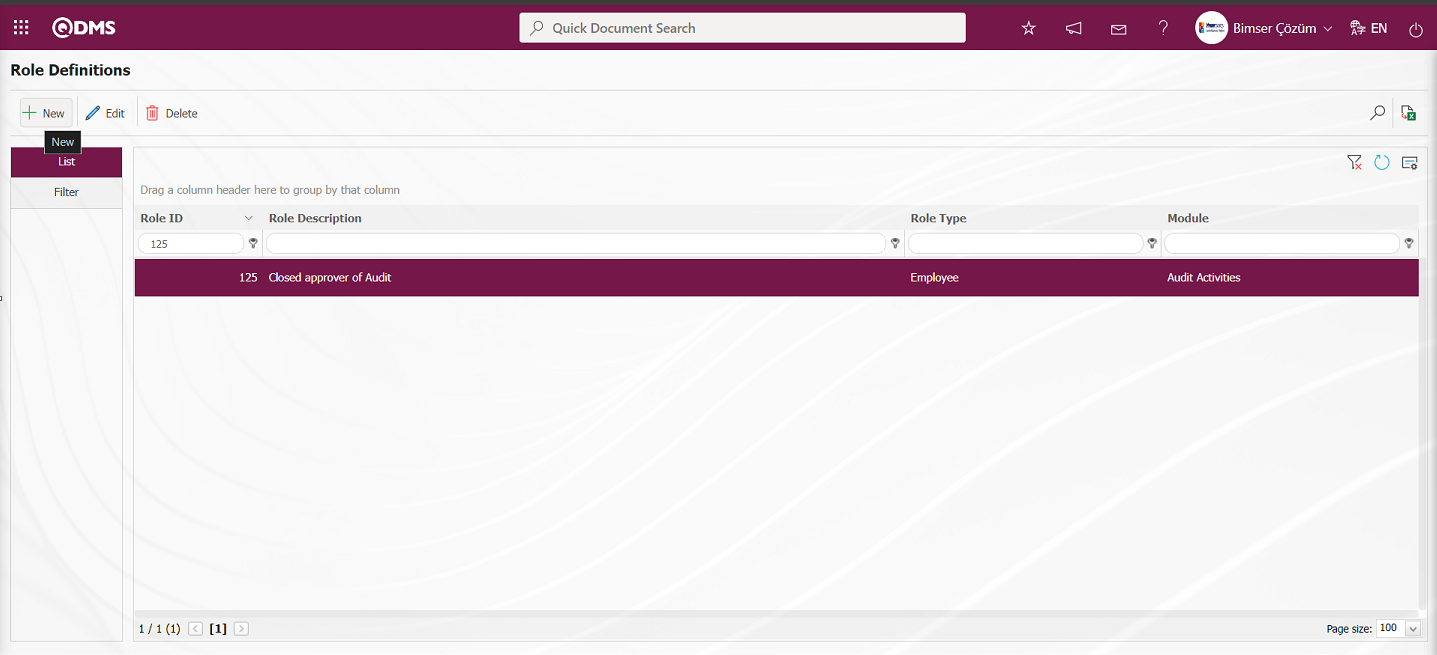
With the help of the buttons on the screen;
: A new role definition is made.
: Correction / change / update is made on the role information selected in the list.
: The role information selected in the list is deleted.
: Data is transferred to Excel.
: Records are filtered and searched.
: The search criteria on the menu screens are used to clean the data remaining in the filter fields in the grid where the search operation is performed.
: The menu screen is restored to its default settings.
: User-based designing of the menu screen is done with the show-hide feature, that is, the hiding feature of the fields corresponding to the columns on the menu screens.
To add a new Role in the Role Definition screen, click on the button on the top left corner of the screen to open the Role Definition / New Record screen.
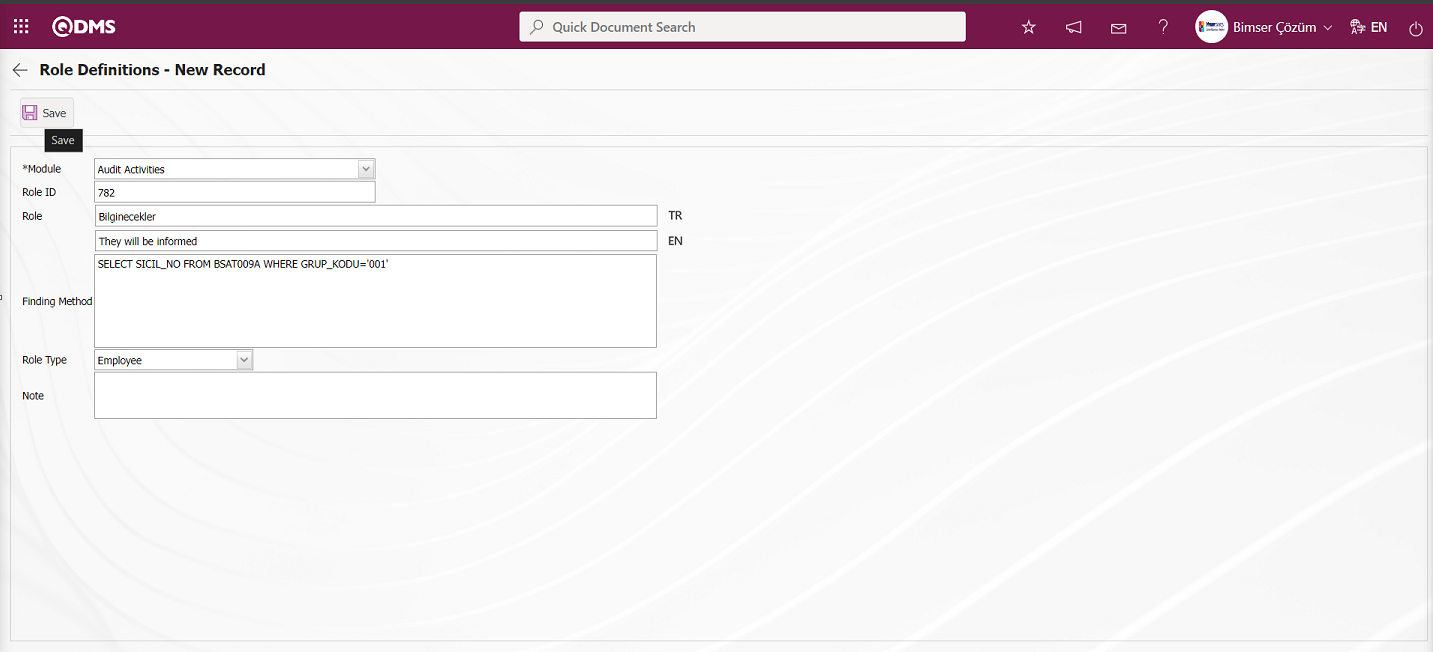
Related fields are defined on the screen that opens:
Module: On the Role Definitions - New Record screen, the module information is selected in the drop-down module list in the module field. Module selection is made in this field for the module to be defined.
Role ID: This is the field where the Role ID information of the role to be defined on the Role Definitions - New Record screen is automatically given by the system.
Role: This is the field where the Role definition information is defined on the Role Definitions - New Record screen.
Find Method: This is the field where the SQL query information of the role to be defined on the Role Definitions - New Record screen is entered;
SELECT SICIL_NO FROM BSAT001 WHERE SICIL_NO='makcay quotation marks are written in the registration number information of the personnel. (The registration number information of the personnel is taken from the System Infrastructure Definitions / BSID / Definitions / Personnel Definition menu).
SQL query as a user group will go;
SELECT SICIL_NO FROM BSAT009A WHERE GROUP_CODE='001' User Group code information is written in quotation marks. (User Group code information is taken in System Infrastructure Definitions / BSID / Definitions / User Group Definition menu.)
Support is provided from Bimser Support Team to define roles based on different SQL queries.
Role Type: It is the field where the type of the role defined on the Role Definitions - New Record screen is selected in the drop-down Role type options.
Note: This is the field where the note information, if any, related to the Role type defined on the Role Definitions - New Record screen is entered.
After filling in the required fields on the Role Definitions - New Record screen, the Role Definition registration process is done by clicking the button in the upper left corner of the screen.

On the Role Definition screen, select the module in the drop-down module list in the Modules field on the Filter tab and click the  (Search) button to filter according to the search criteria. The Role Definitions defined in the system related to the selected Module are displayed on the screen.

5.2.9. Flow Definition
Menu Name: System Infrastructure Definitions/ BSID Settings/ Flow Definition
There are definitions of the approval flows used in the modules. There is a flow definition for each module in the system. When deemed necessary, new flow definitions are made for modules such as risk modules and event modules.
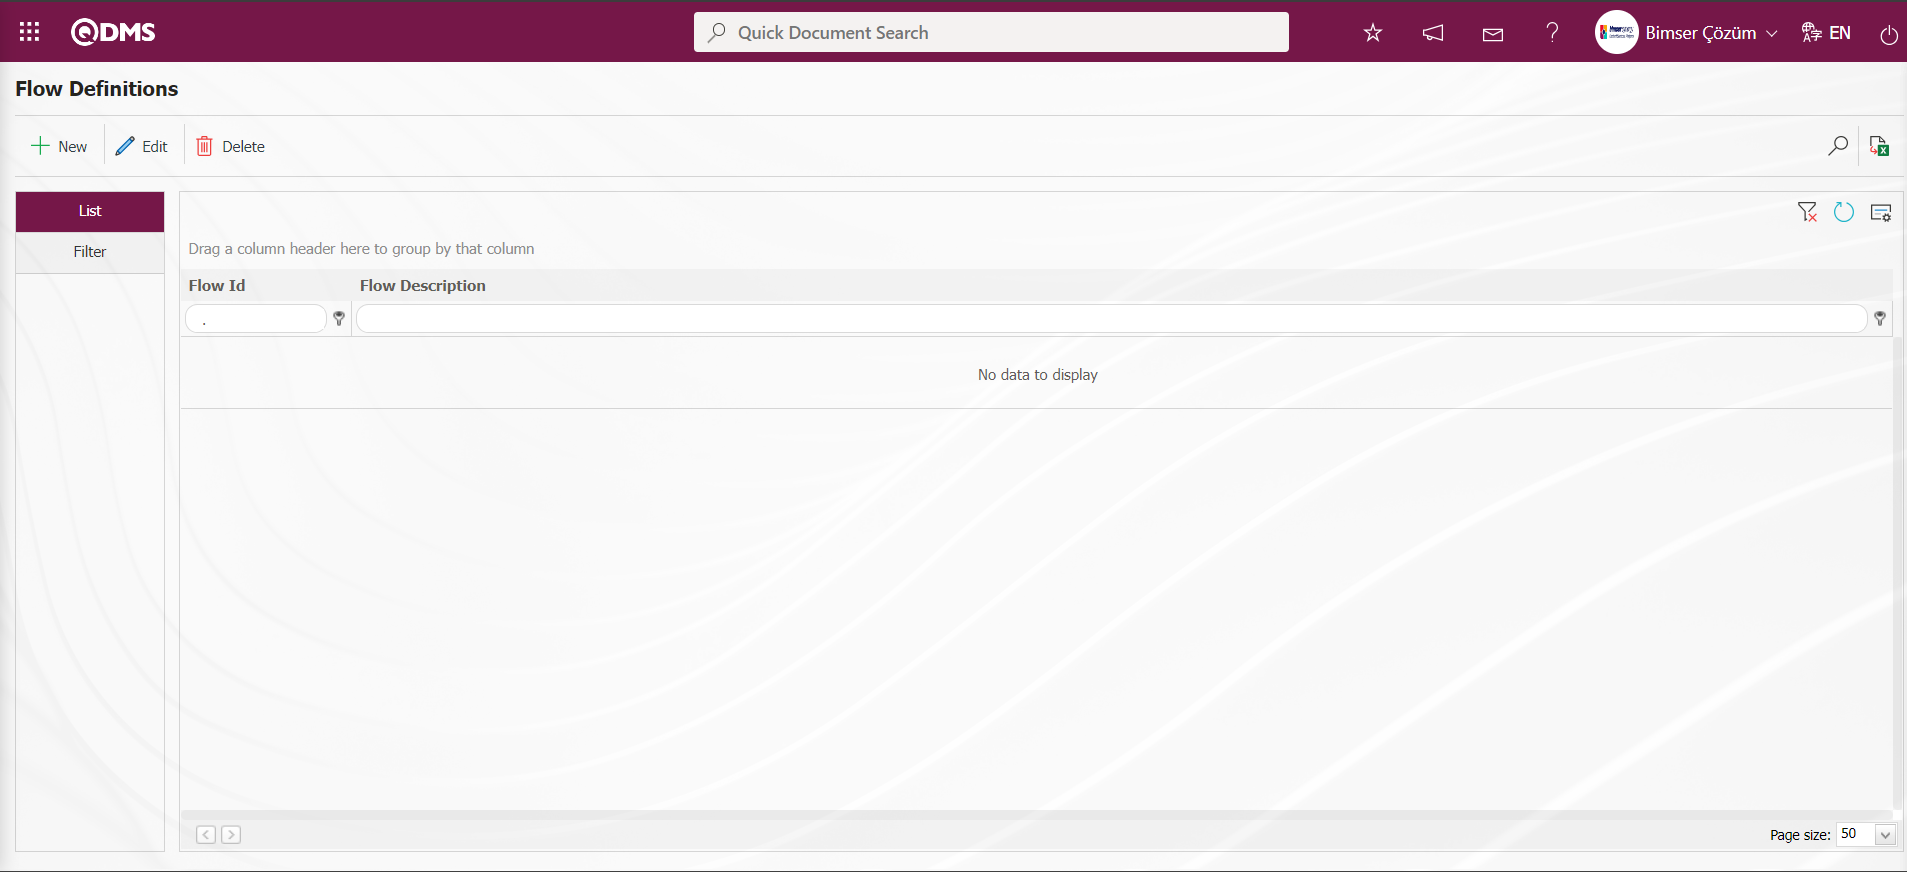
With the help of the buttons on the screen;
: A new flow is defined.
: Correction / change / update is made on the flow information selected in the list.
: The flow information selected in the list is deleted.
: Data is transferred to Excel.
: Records are filtered and searched.
: The search criteria on the menu screens are used to clean the data remaining in the filter fields in the grid where the search operation is performed.
: The menu screen is restored to its default settings.
: User-based designing of the menu screen is done with the show-hide feature, that is, the hiding feature of the fields corresponding to the columns on the menu screens.
For example: If you want to edit the “OHS Risk Assessment Approval Flow” in the OHS Risk Assessment module;
On the Flow Definition screen, select the relevant “OHS Risk Assessment” Module in the drop-down Module list in the Modules field on the Filter tab and click the (Search) button. After clicking the (Search) button on the List tab on the Flow Definition screen, the flows defined in the system related to the relevant Module are listed. Generally, flows are defined by the user in Risk Modules
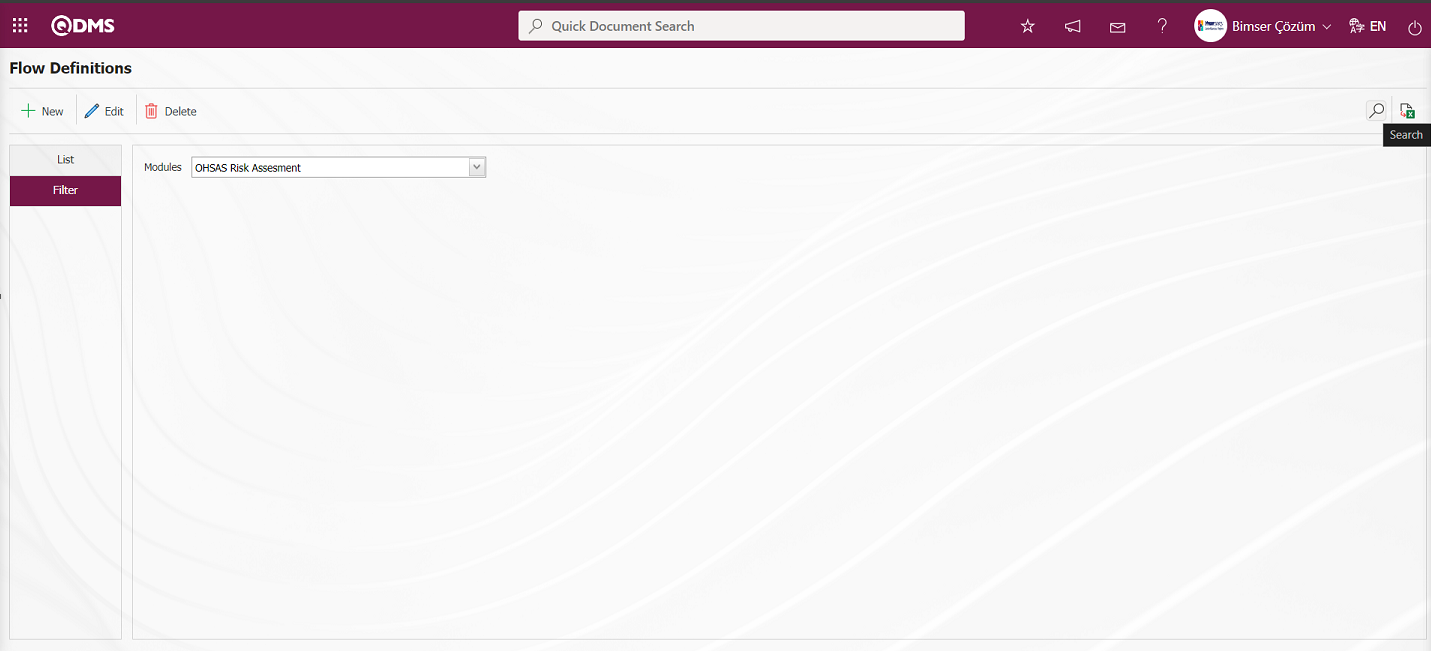
To add a new flow to the Flow Definition screen, click on the button at the top left corner of the screen to open the Flow Definition / New Record screen.
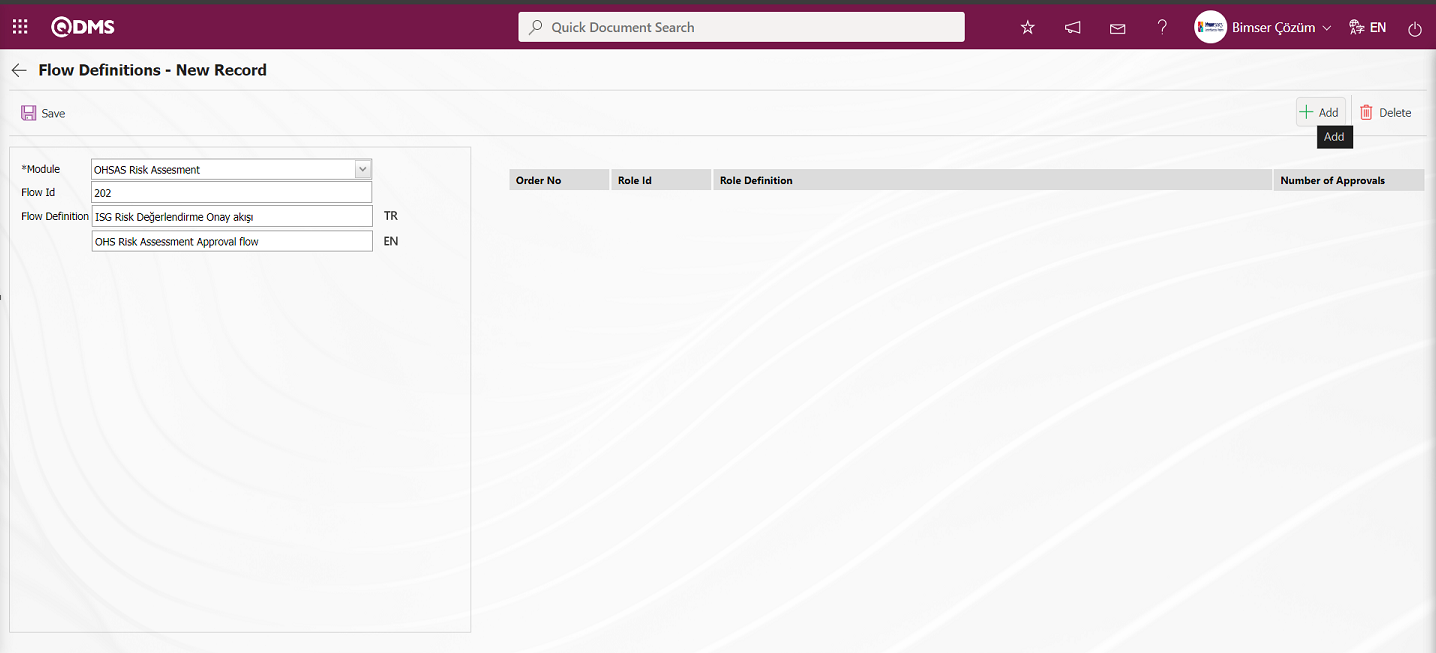
With the help of buttons on the screen;
 : Add a role.
 : Deletes the selected role in the list.
When the button is clicked on the Flow Definition - New Record screen, the list of roles defined in the system related to the relevant module is displayed.
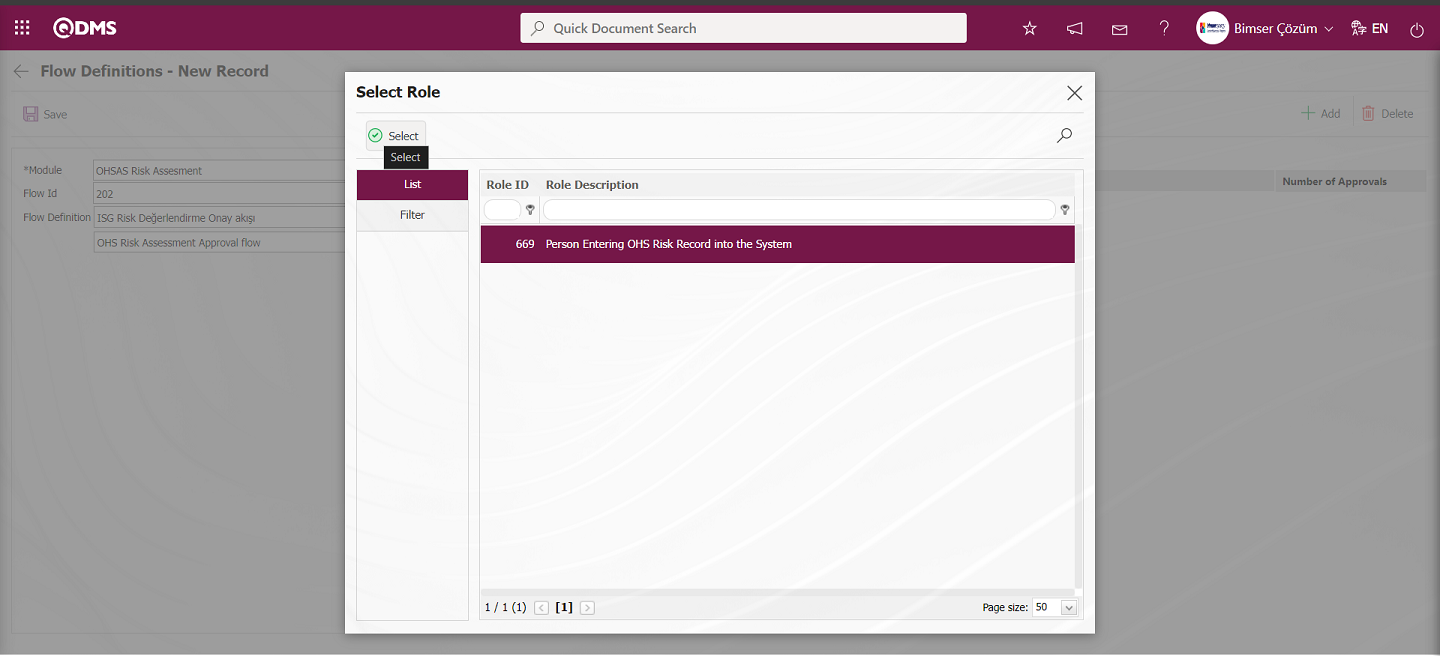
The appropriate role that the defined flow will go to is selected from the list and added to the flow by clicking the  button.
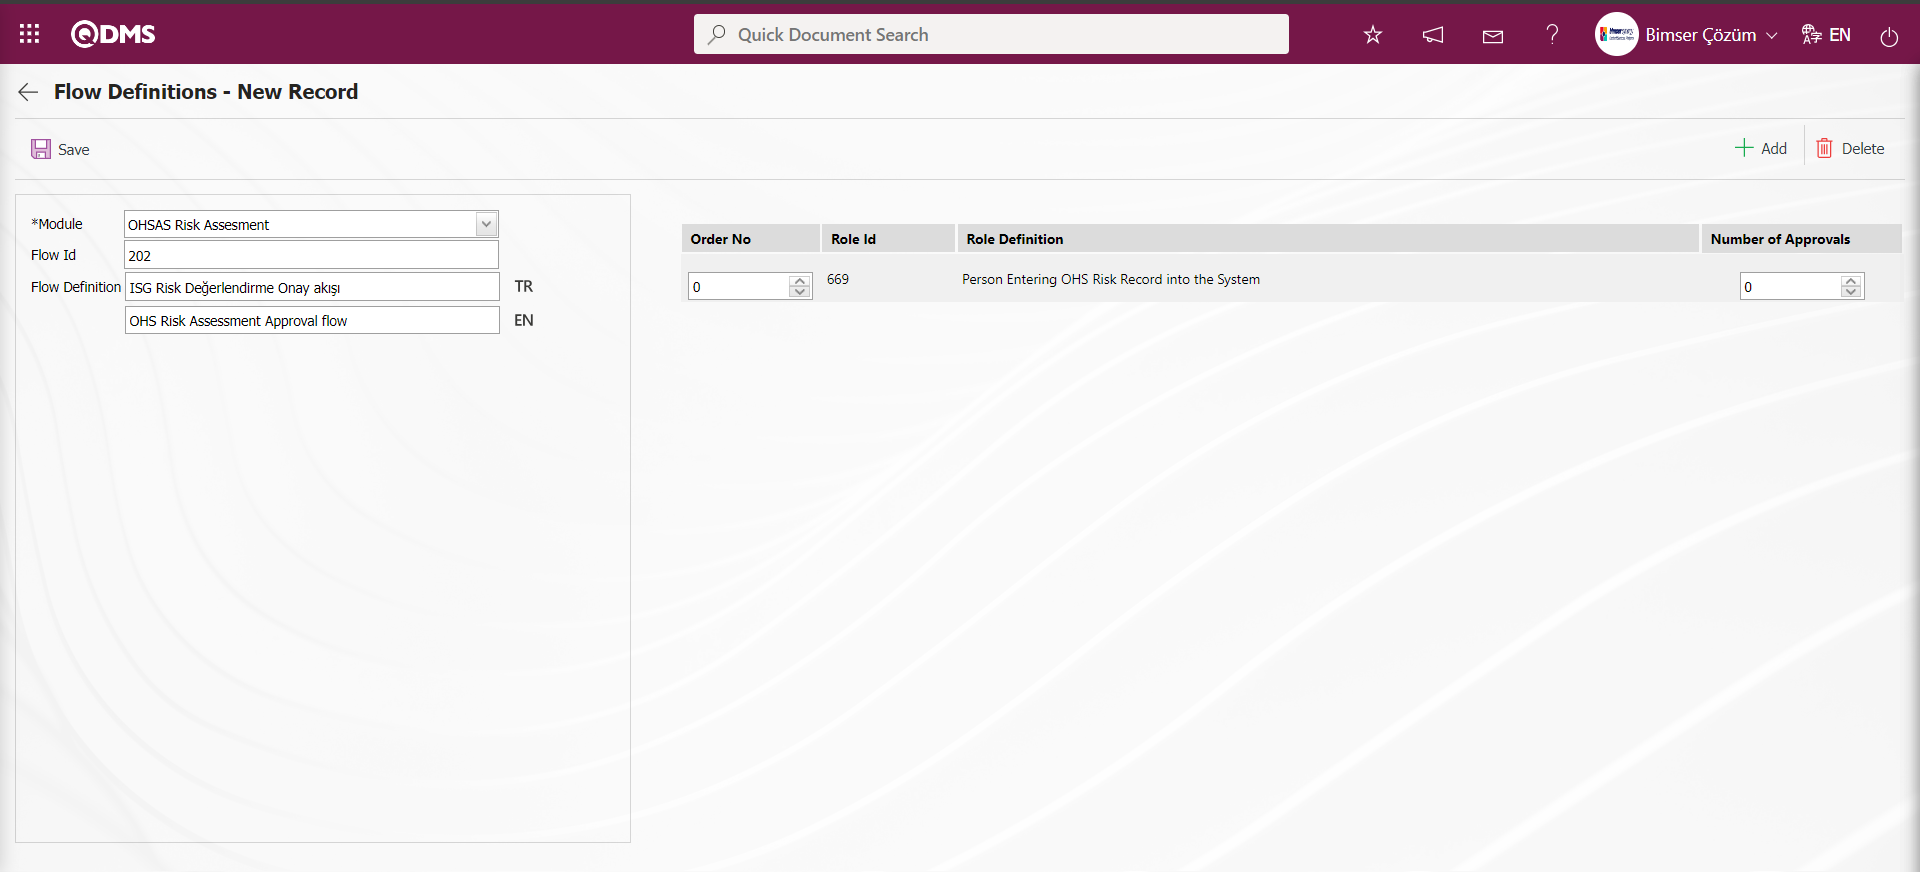
Related fields are defined on the screen that opens:
Module: On the Flow Definitions - New Record screen, click on the drop-down list and select the module that the flow will be defined in the module list.
Flow Id: This is the field where the Flow Id information defined on the Flow Definitions - New Record screen is given by the system.
Flow Definition: This is the field where the name of the flow defined on the Flow Definitions - New Record screen is written.
Flow Definition Approval Process: The person who will approve the “OHS Risk Assessment Approval Flow” as shown in the image is the person in the “OHS Risk Assessment Specialist” role. Multiple Flow approvers can be defined. The sequence number on the screen indicates the order in which the approver will give approval. The number of people to give approval is determined in the Number of Approvers field. If the approving role in the approval flow goes to a user group, all group members in the user group must perform the approval process at the number of approvers “0”. If a certain numeric value is specified in the Number of Approvers field, the user group must go to the approval of as many people as that numeric value. If the number of approvers for the user group is specified as “2” for example, “2” two people in the group must approve. If it is a user in the role, the number “0” has no effect, only the flow to the person in the role goes to approval. As in the approval process in the approval matrix in the Document Management module, this part of the Flow definition works in the same way.
There is more than one approver in the Sequence No field. “0” zero is the last approver. Approval flow works with reverse logic. In the Sequence No section 0,1,2, the approval sequence starts from 2 and goes towards “0”.
In the 1st image, only the relevant role added to the flow goes to the flow approval.

2. Approval goes to the role added to the flow in the image. It does not matter if the number of approvers is “0”.
3. When the number of approvers in the user group added to the flow in the image is “0”, it goes to all group members for approval.

4. When the number of approvers in the user group added to the flow in the image is “3”, only 3 approvals are sufficient for all group members.

5.The roles added to the flow in the image in the number of approvers field first start the approval process from the “1” approvers and the approval flow of the flow continues towards the “0” approvers.
In the 6th visual, the flow goes to the added role at the same time. There is no specific order. Start from the desired role for the approval process. It is a parallel approval process.
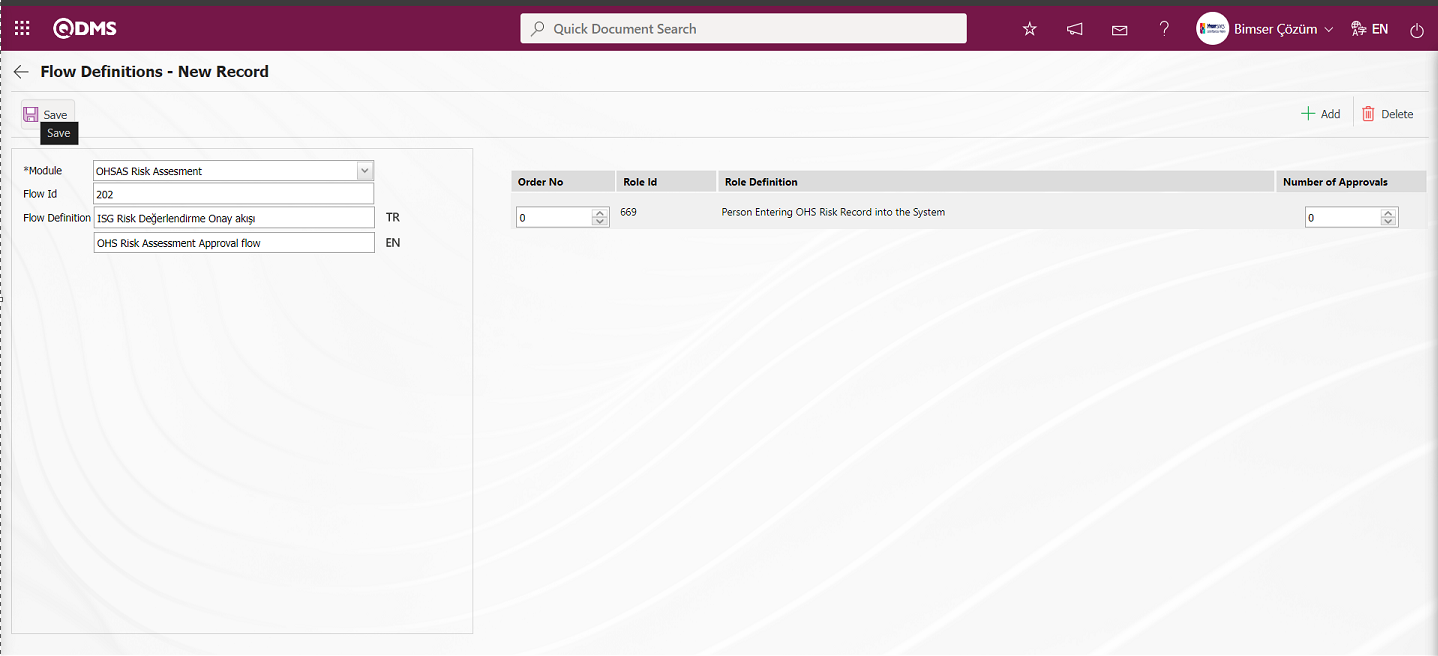
In the Flow Definitions - New Record screen, after entering the necessary information in the required fields, the Flow definition registration process is done by clicking the button in the upper left corner of the screen.
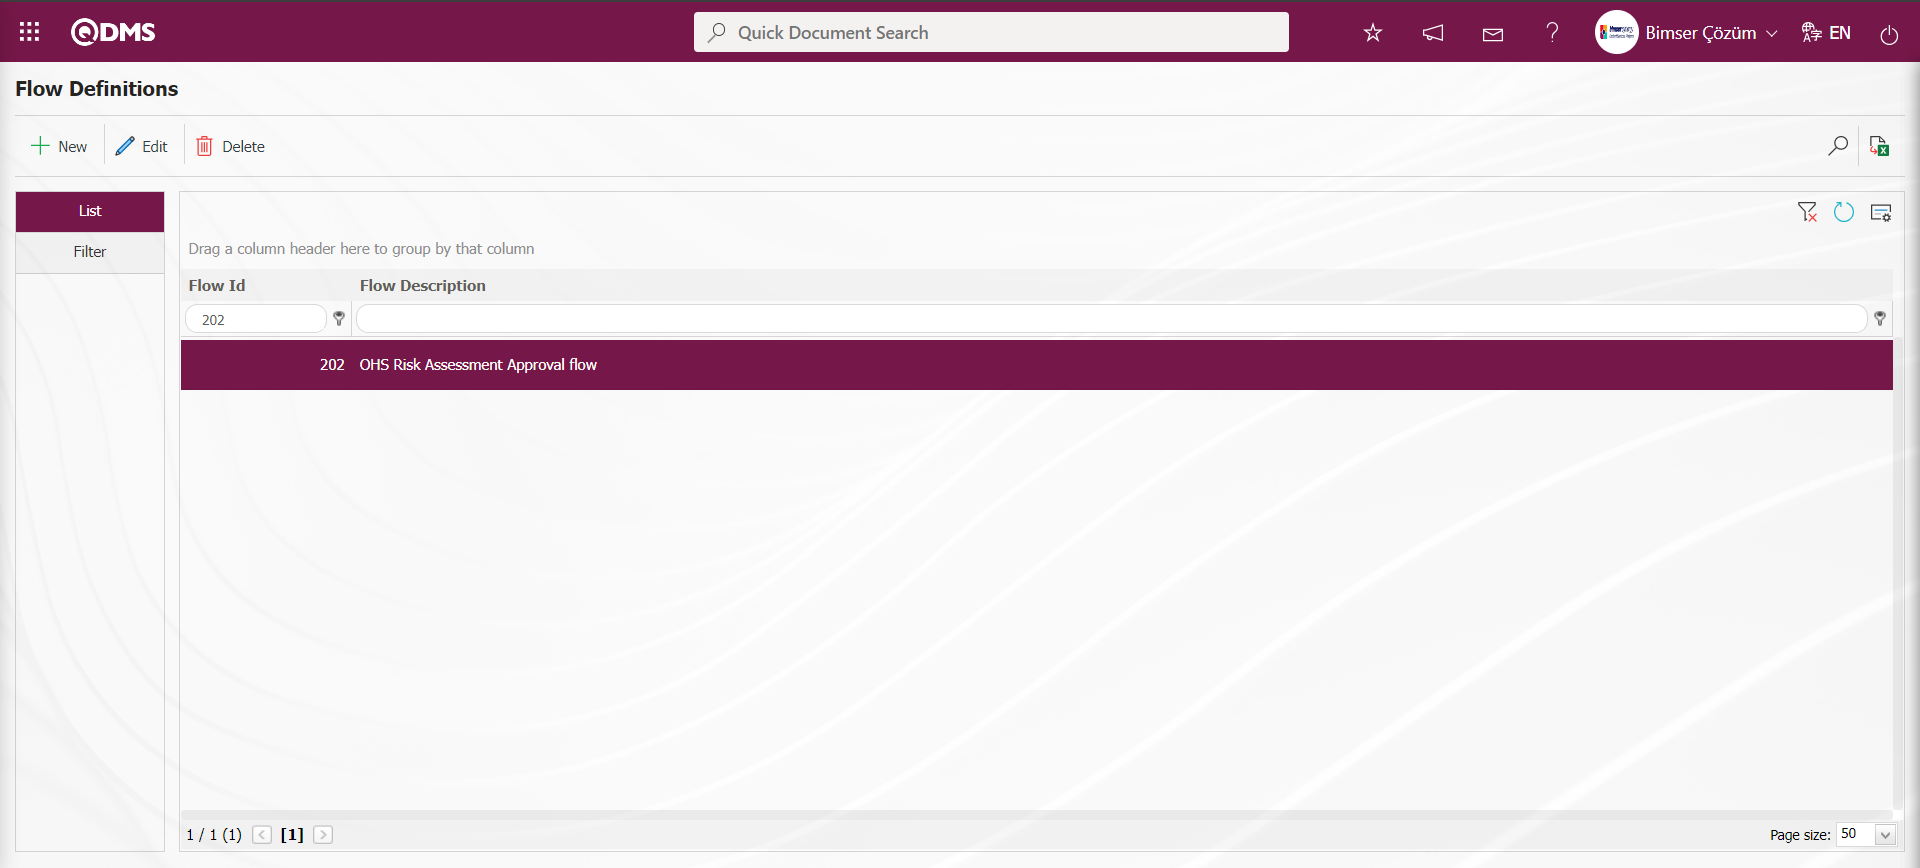
5.2.10. Default Report Layouts Arrangement
Menu Name: System Infrastructure Definitions/ BSID/ Configuration Settings/Default Report Layouts Arrangement
It is the menu where necessary arrangements are made with the report format templates of the reports in the modules, new report format templates are added, uploaded report format templates are displayed and uploaded report format templates are deleted if desired.
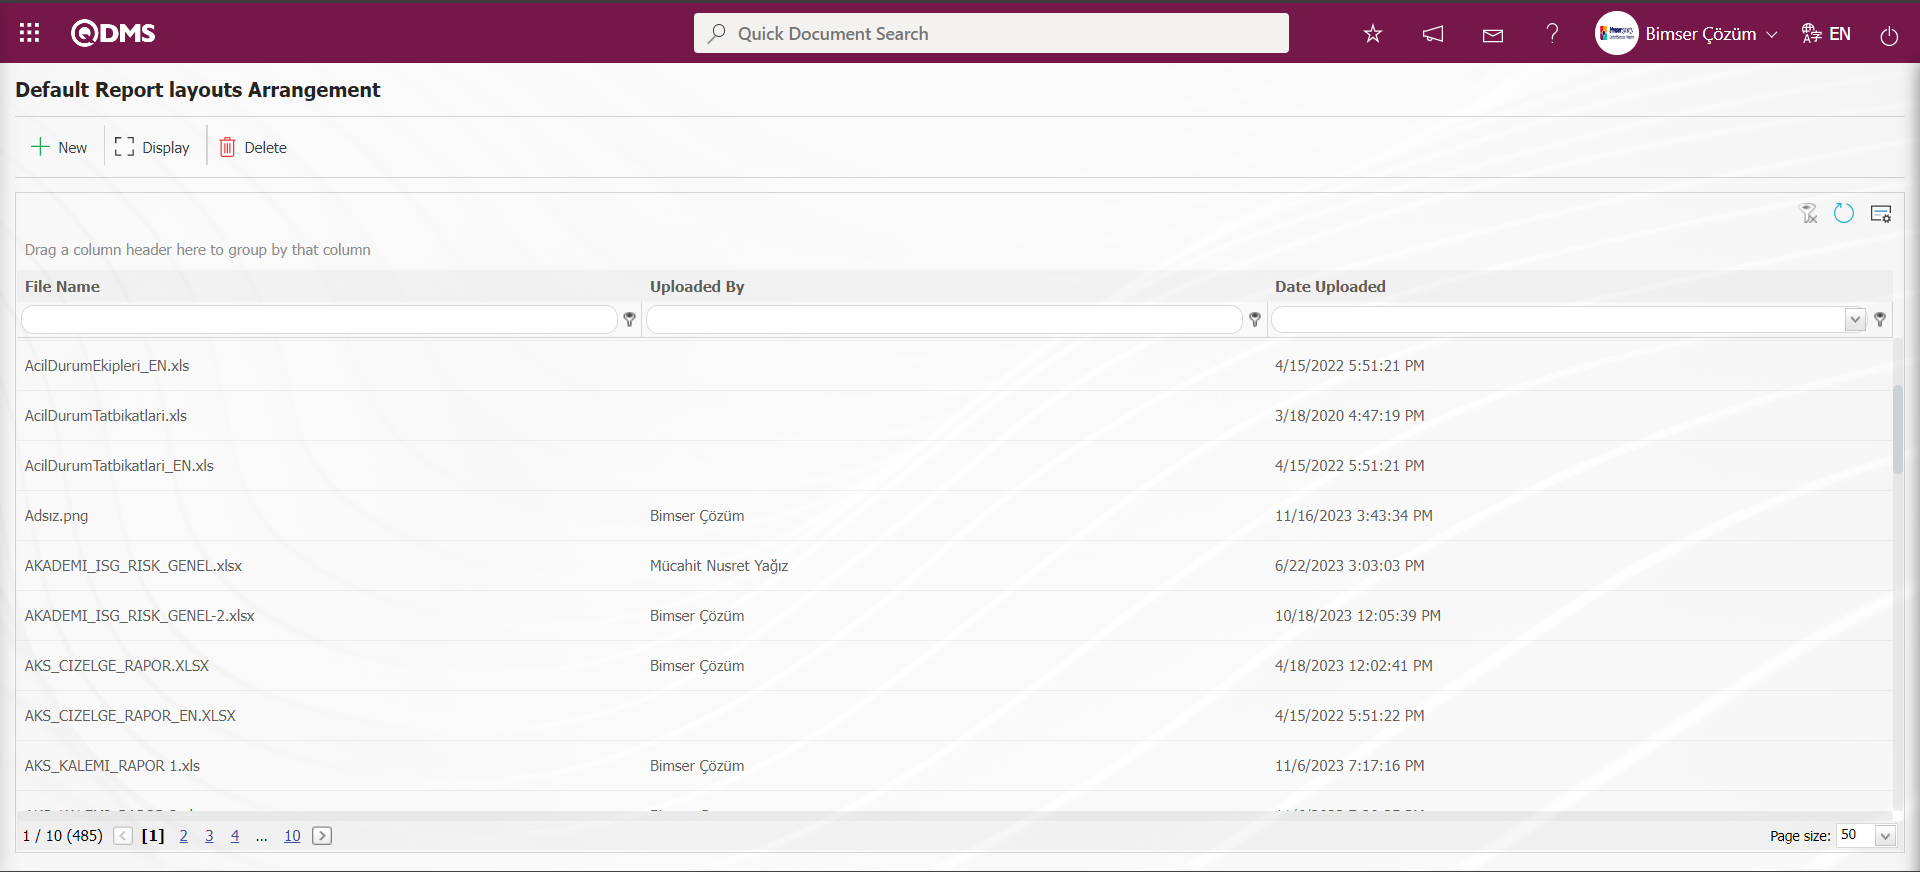
With the help of the buttons on the screen;
: A new report format template is uploaded to the system.
 : The report format template selected in the list is displayed and downloaded.
: The report format template selected in the list is deleted.
On the Default Report Layouts Arrangement screen, click the button to add a new report format to the system. Click the Browse button on the File Upload screen.

On the screen that opens, the report format template to be uploaded to the system is selected.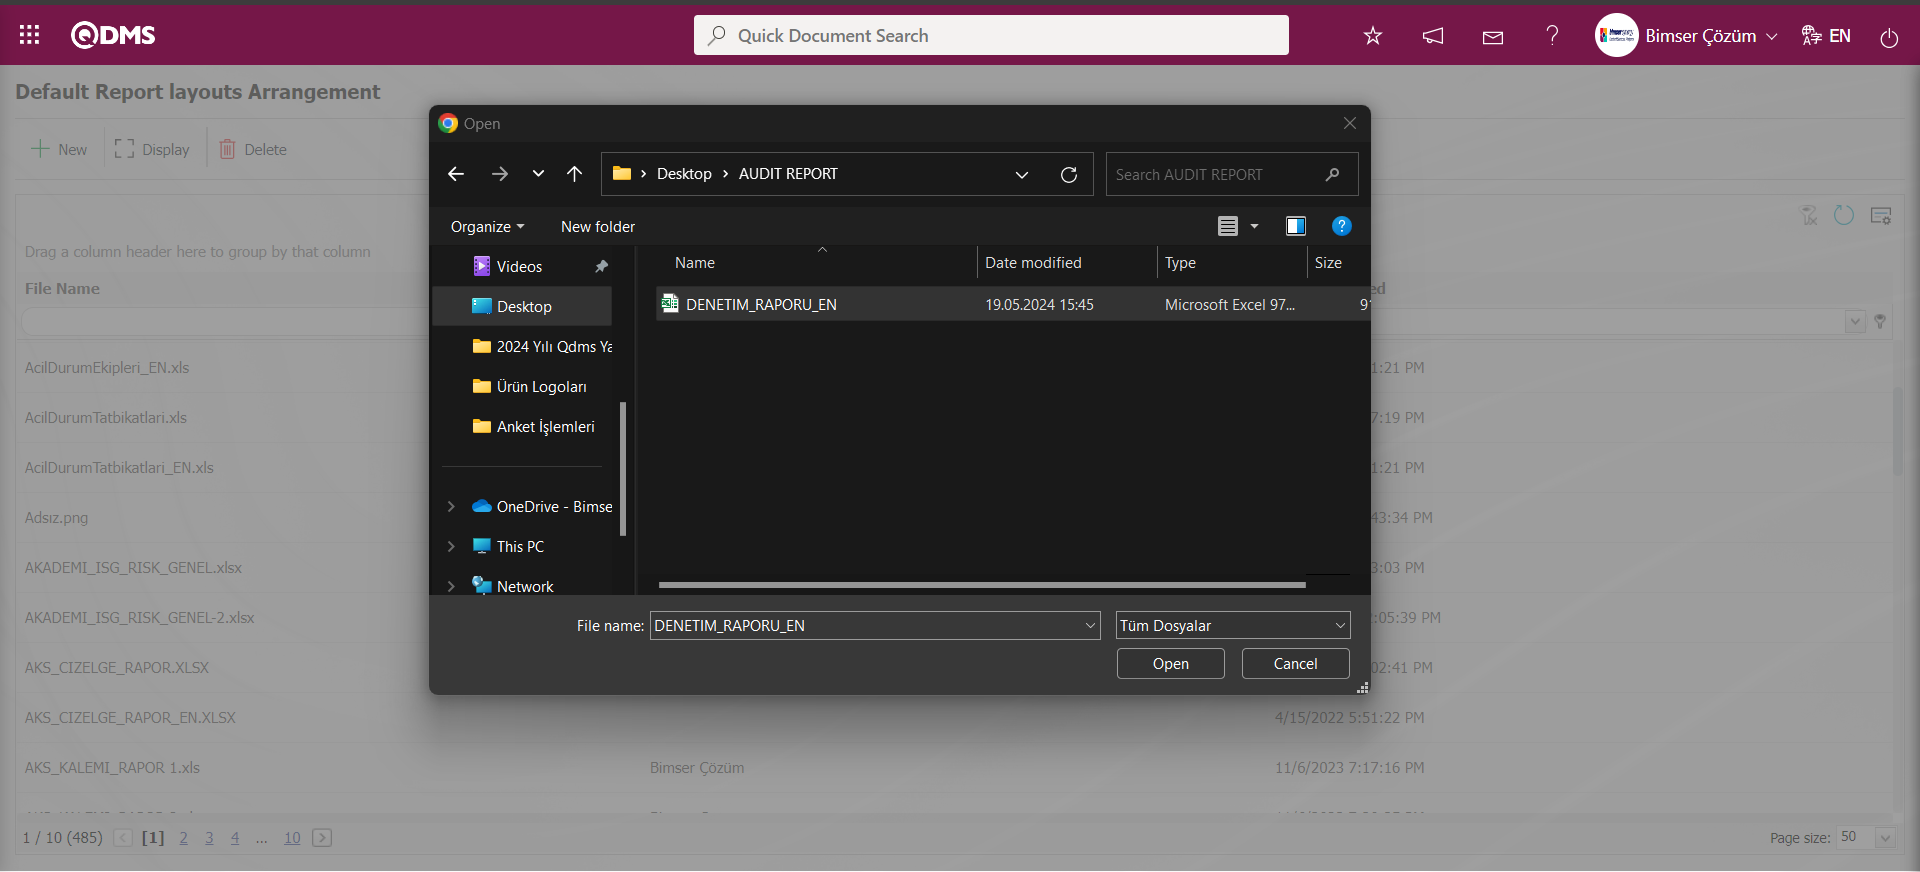
The report format selected in the Default Report Layouts Arrangement** screen is loaded.
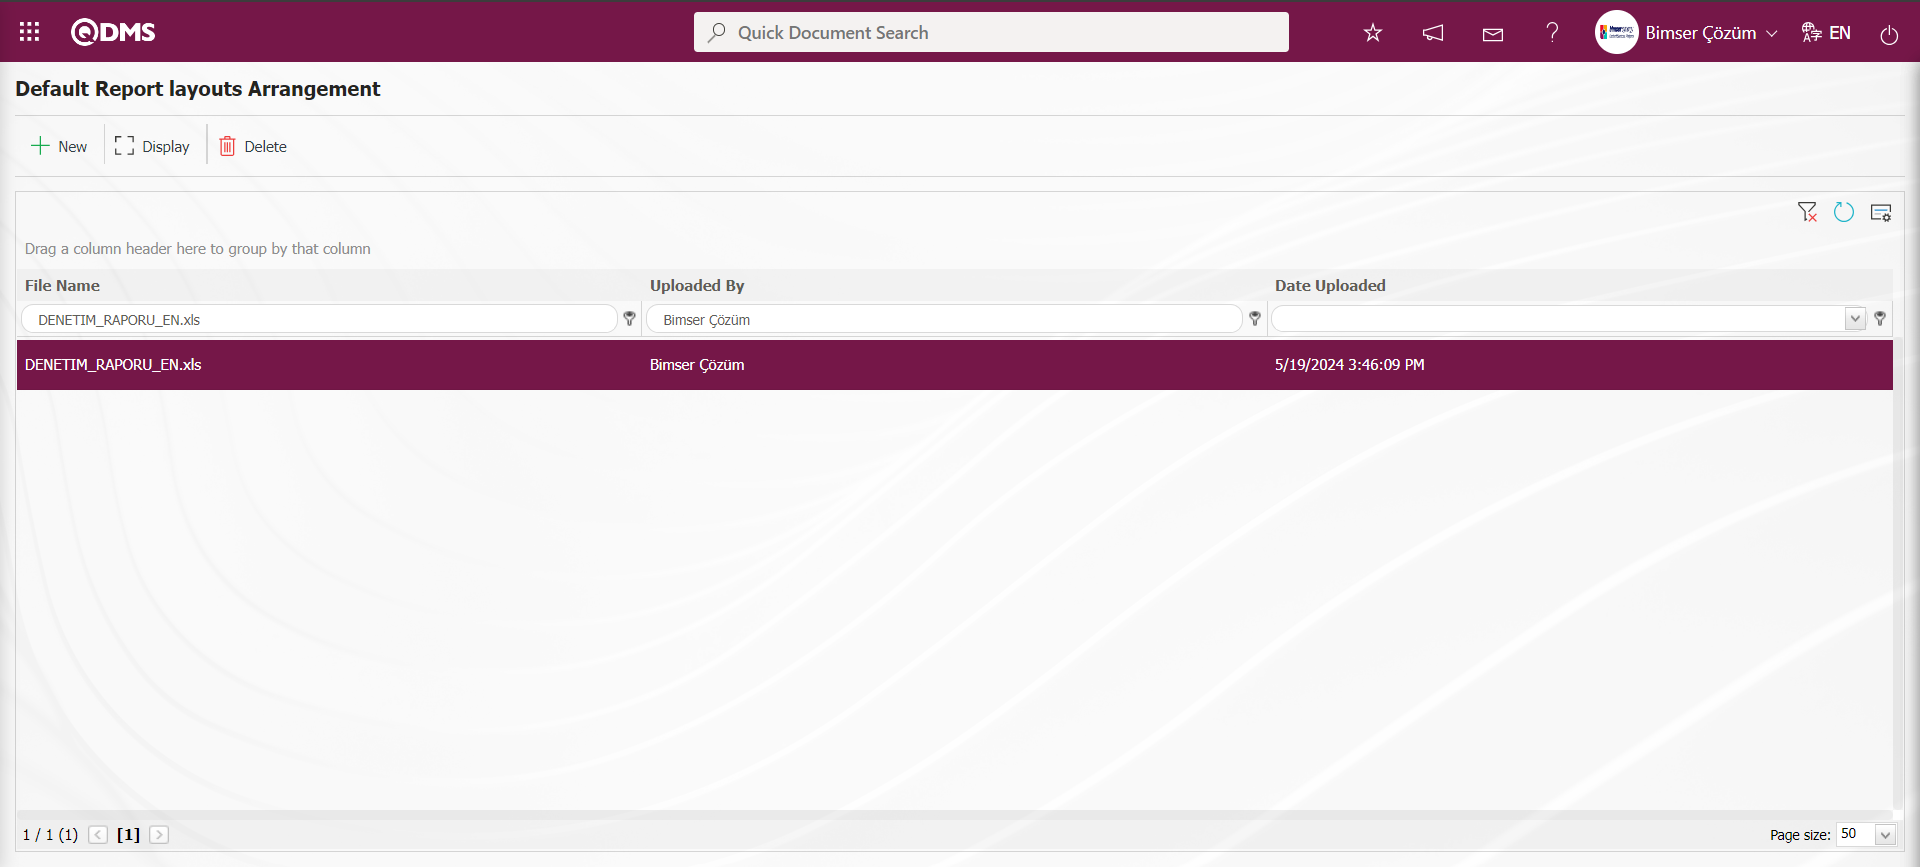
While the selected Report format template is selected in the list, the report format template is displayed by clicking the button.
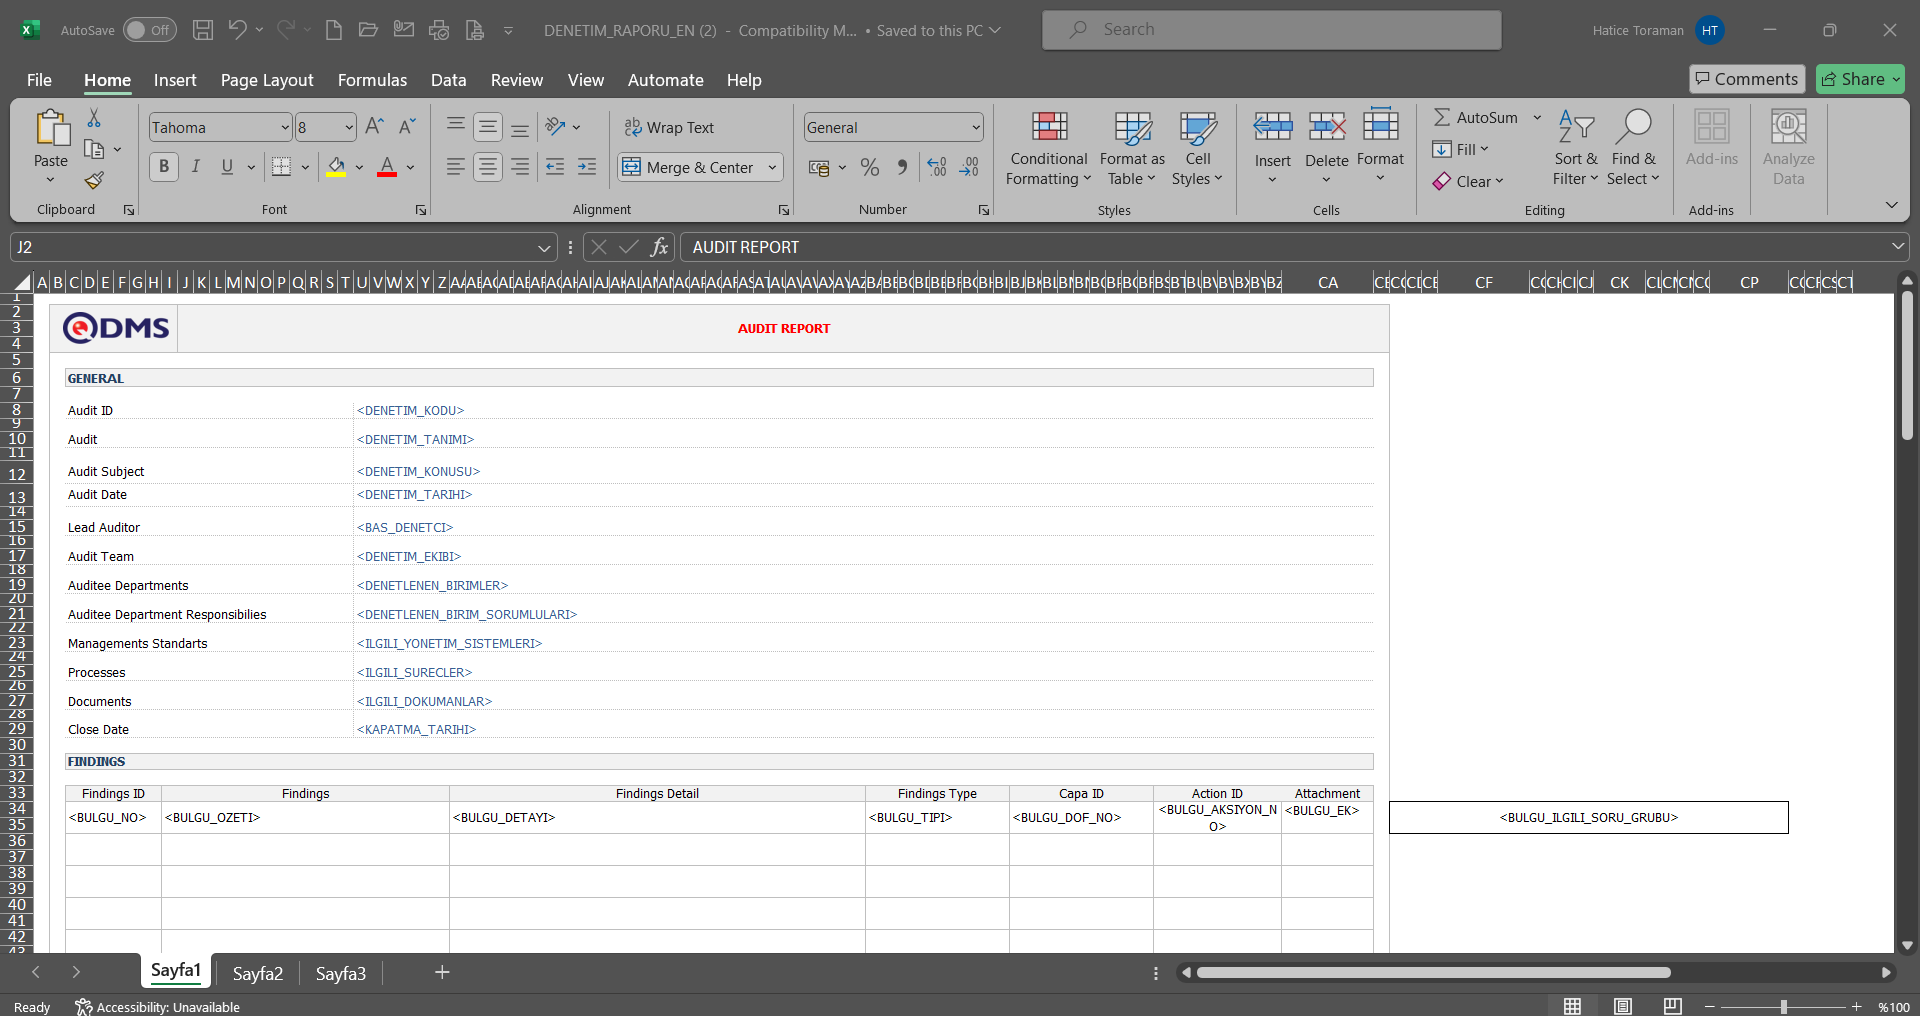
There are tags in the form of < > signs in return for the fields of the Report Format template. When the report format template is loaded into the system and the report is taken from the menu where the relevant report is located, the relevant tags work and give the field information entered in return for the fields. For example: When the tag of the <PLAN_NO> field is typed in the Audit Plan Report format template in return for the Plan No, the plan no information is printed on the Audit Plan report received in the system.
When editing is done on the Report format template available in the system in the Qdms system, the point to be considered in the system upload process of the report should be uploaded in the same way as the installed name and extension of the report format template in the report formats editing menu. Thus, instead of the report format modified in the system, the new report format created is defined. Users can download the report format from this menu with the  button, edit it as they wish, and then click the
  button again to upload the report format to the system with the same name and extension.
5.2.11. Delegation Display
Menu Name: System Infrastructure Definitions/ BSID/ Configuration Settings/ Delegation Display
It is the menu where Delegation transactions performed in the system are displayed and tracked. It is the menu where Delegation giving, Delegation receiving, Delegation performing, Delegation start-end dates, Delegation transaction date, Delegation given modules and Delegation status information are displayed.
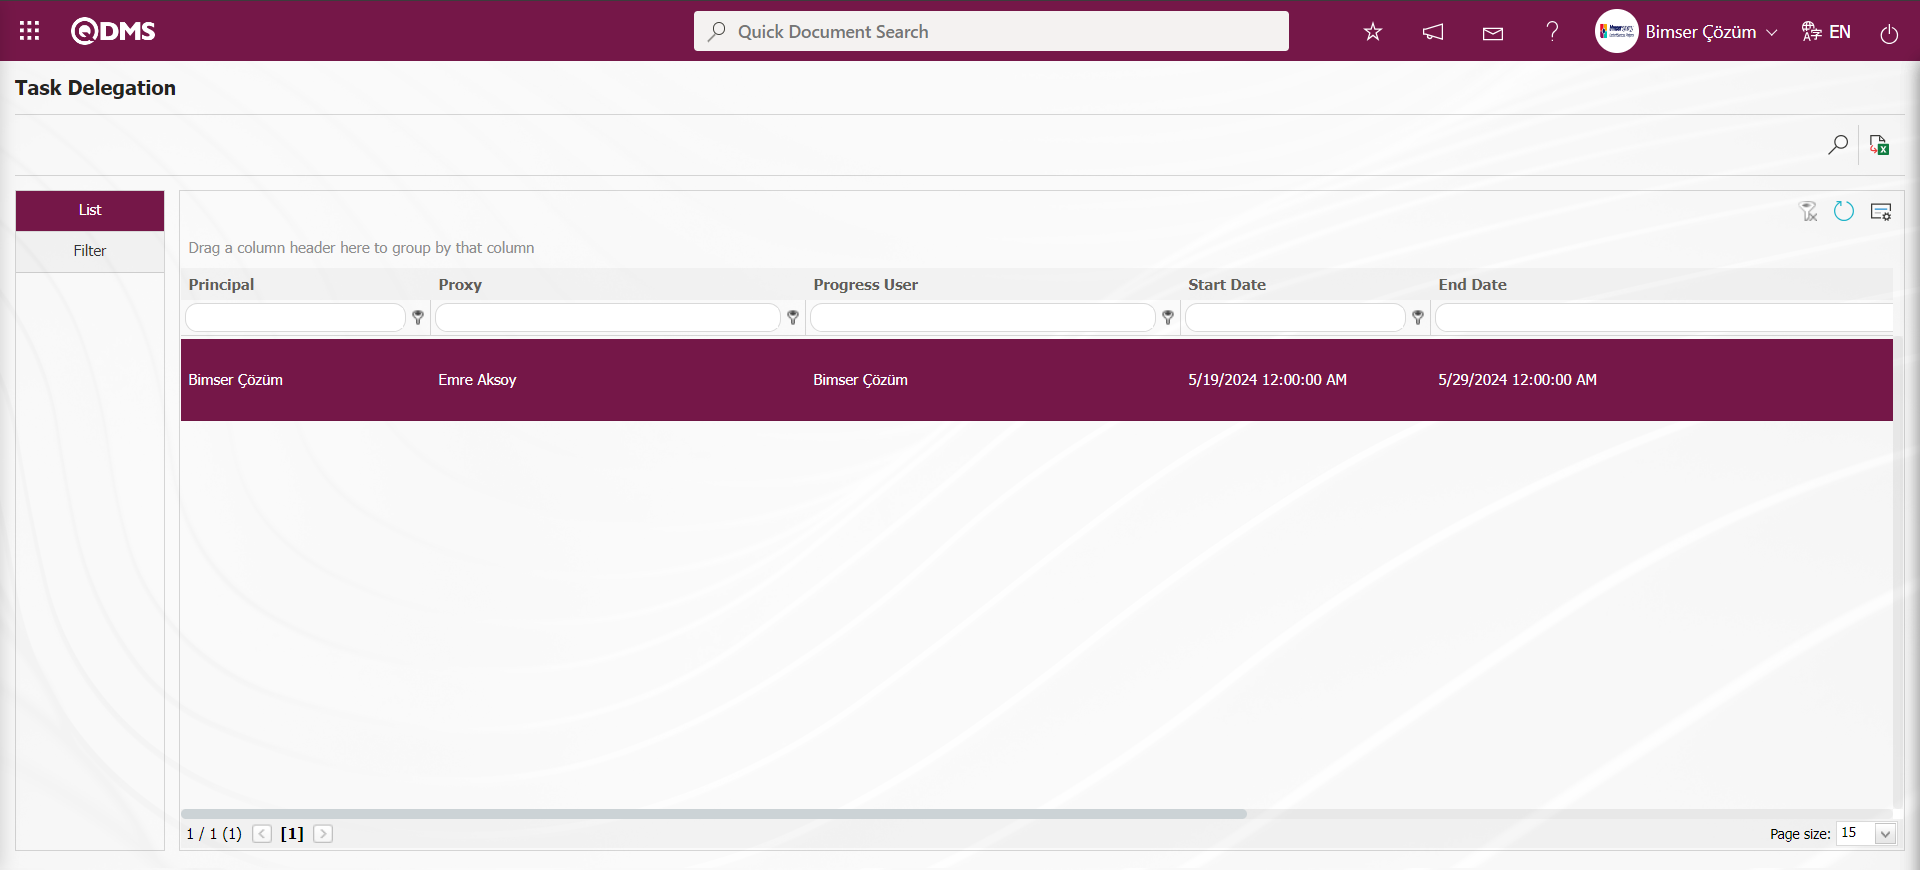
With the help of the buttons on the screen;
: Records are filtered and searched.
: Data is transferred to Excel.
: The search criteria on the menu screens are used to clean the data remaining in the filter fields in the grid where the search operation is performed.
: The menu screen is restored to its default settings.
: User-based designing of the menu screen is done with the show-hide feature, that is, the hiding feature of the fields corresponding to the columns on the menu screens.
On the Task Delegation** screen, enter data in the fields such as Delegation, Delegation By, Delegation To, Delegation To, Delegation in the Filter tab and click the (Search) button to filter according to the search criteria.
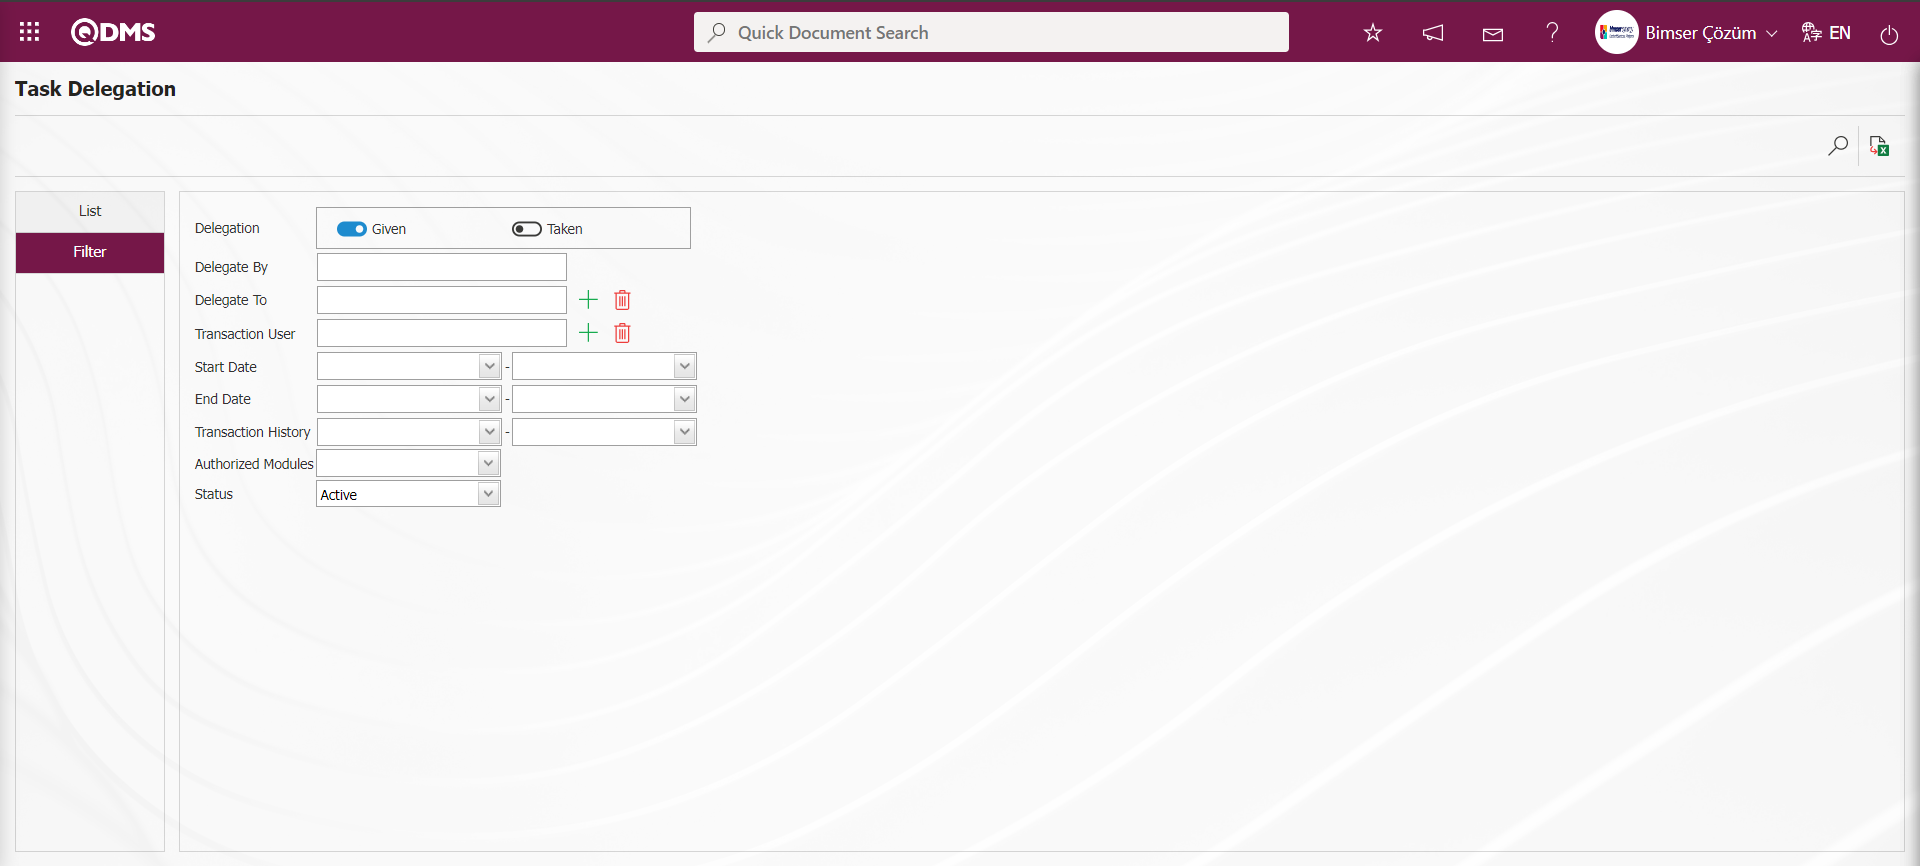
5.2.12. Manager Definition
Menu Name: System Infrastructure Definitions/ BSID/ Configuration Settings/ Manager Definition
This is the menu where module administrators are defined. Personnel who are module administrators, update rights, record maintenance rights, etc. on modules. their authorization to perform operations increases. Module administrators can see hidden buttons and perform related operations such as deleting, record maintenance, changing the approval matrix with these buttons. Although System Administrators can see the menus in all QDMS, they must also be Module Administrators in order to perform special operations in the relevant modules. Different module administrators can be assigned for each module. Module Administrators do not necessarily need to be System Administrators, these special authorizations can be given according to the needs in line with the workflows in the company.

With the help of the buttons on the screen;
 : A new module manager is defined.
 : The module manager selected in the list is deleted.
: Data is transferred to Excel.
: Records are filtered and searched.
: The search criteria on the menu screens are used to clean the data remaining in the filter fields in the grid where the search operation is performed.
: The menu screen is restored to its default settings.
: User-based designing of the menu screen is done with the show-hide feature, that is, the hiding feature of the fields corresponding to the columns on the menu screens.
To add a new module manager to the Manager Definition screen, click on the button on the top left corner of the screen to open the Manager Definition / New Record screen.

On the screen that opens, the relevant module to which the personnel will be assigned as module manager is selected from the “Modules” field. Module manager information is selected from the list of personnel defined in the system. Select the relevant personnel from the “Module Manager” field. Clicking on the button in the upper left corner, the Manager Definition process is performed.

5.2.13. Language Settings
Menu Name: System Infrastructure Definitions/ BSID/ Configuration Settings/ Language Settings
From the language settings menu, the names of the menus and fields seen on QDMS can be changed. New fields can be added to modules. The necessity status of existing fields can be edited. The order in which the fields appear on the screen can be changed.
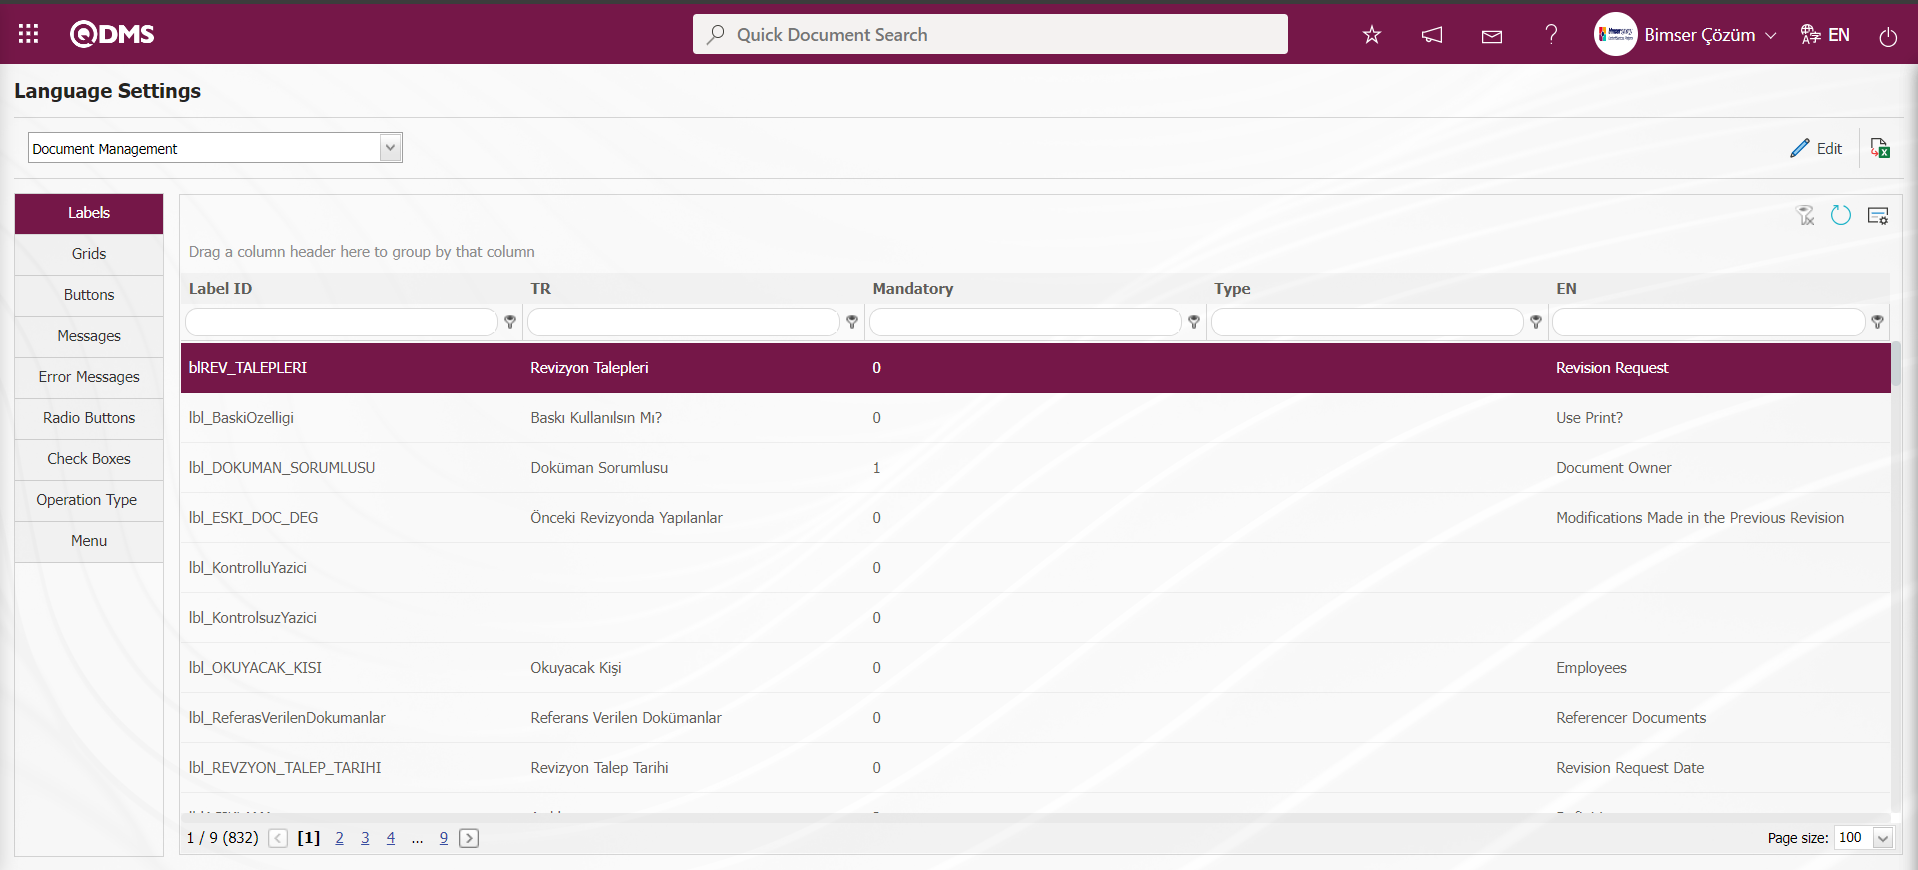
With the help of the buttons on the screen;
 : Changes are made on the selected field information in the list.
: Records are filtered and searched.
: Data is transferred to Excel.
: The search criteria on the menu screens are used to clean the data remaining in the filter fields in the grid where the search operation is performed.
: The menu screen is restored to its default settings.
: User-based designing of the menu screen is done with the show-hide feature, that is, the hiding feature of the fields corresponding to the columns on the menu screens.
Labels Tab;
In the Labels tab, the relevant module is selected and if there are passive fields related to the module, parametric fields are defined. In this tab, defining parametric field types such as text, text (multiple lines), list, date, editing on the defined parametric field name and removing the defined parametric field are performed. When an existing field is desired to be changed, the TR section in the grid in the Labels tab is selected by typing the Turkish language equivalent or label code information in the Name field. The label codes of the fields available in the Language Settings vary according to the modules. In CAPA, Internal Customer Complaints and External Customer Complaints modules, label codes vary according to the tabs within the scope of the modules. In these modules, the tab in which the field of the relevant label code is located is as follows.
| Label By code and abbreviation | Sample Label Code (CAPA Module text-typed parametric field) | Sample Label Code (Customer Complaints Module text type parametric field) | Tab where it appears (CAPA, Internal Customer Complaints and External Customer Complaints) |
|---|---|---|---|
| lblPARAM | lblPARAM1 | lblPARAM1 | Other information tab in CAPA module, Complaint Detail Other Fields in customer complaints modules |
| lblG_ | lblG_Param1 | lblG_Param2 | First Progress Report |
| lblKOK_ | lblKOKPARAM1 | lblKOKPARAM1 | Root Cause Analyse |
| lblA _ | lblA_Param1 | lblA_Param1 | Actions |
| lblS_ | lblS_Param1 | lblS_Param3 | Final Report |
| lblK_ | lblK_Param1 | lblK_Param3 | Close |
In the Document Management module, “ALAN” expression is used in label codes: For example: “lblALAN2” text type parametric field that appears in the Other Information tab. In the Document Management module, the field related to the label code “lblKK_PARAM1” is displayed in the Quality Records display tab.
By selecting the relevant field, the field to be changed (name change, necessity status, etc.) is opened with the button. On the screen that opens, the parts to be changed are changed and saved.
In order to view the list of available parametric field types in the relevant module, the parametric field type name is searched by typing in the Type field in the grid: List type parametric passive fields in Document Management Module. In other Document Management module, parametric fields are searched in the same way and the list is displayed.
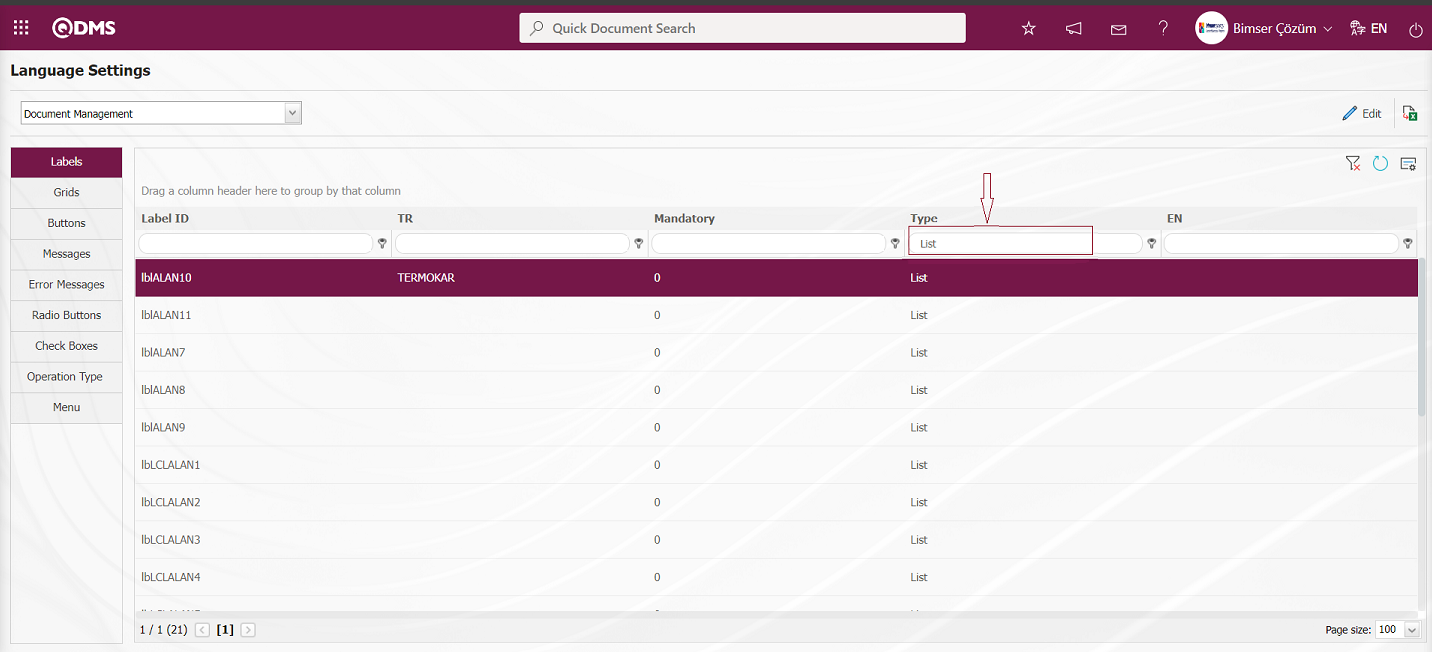
For example; In order to define a List type field in the Other Information tab in the Document Module, firstly the System Infrastructure Definitions / BSID / Configuration Settings / Language Settings menu is opened.

On the Language Settings screen, in the Labels tab, type the parametric field type to be defined in the type field in the grid and list the passive fields related to the parametric field type. For example: List type field in Document Management module.
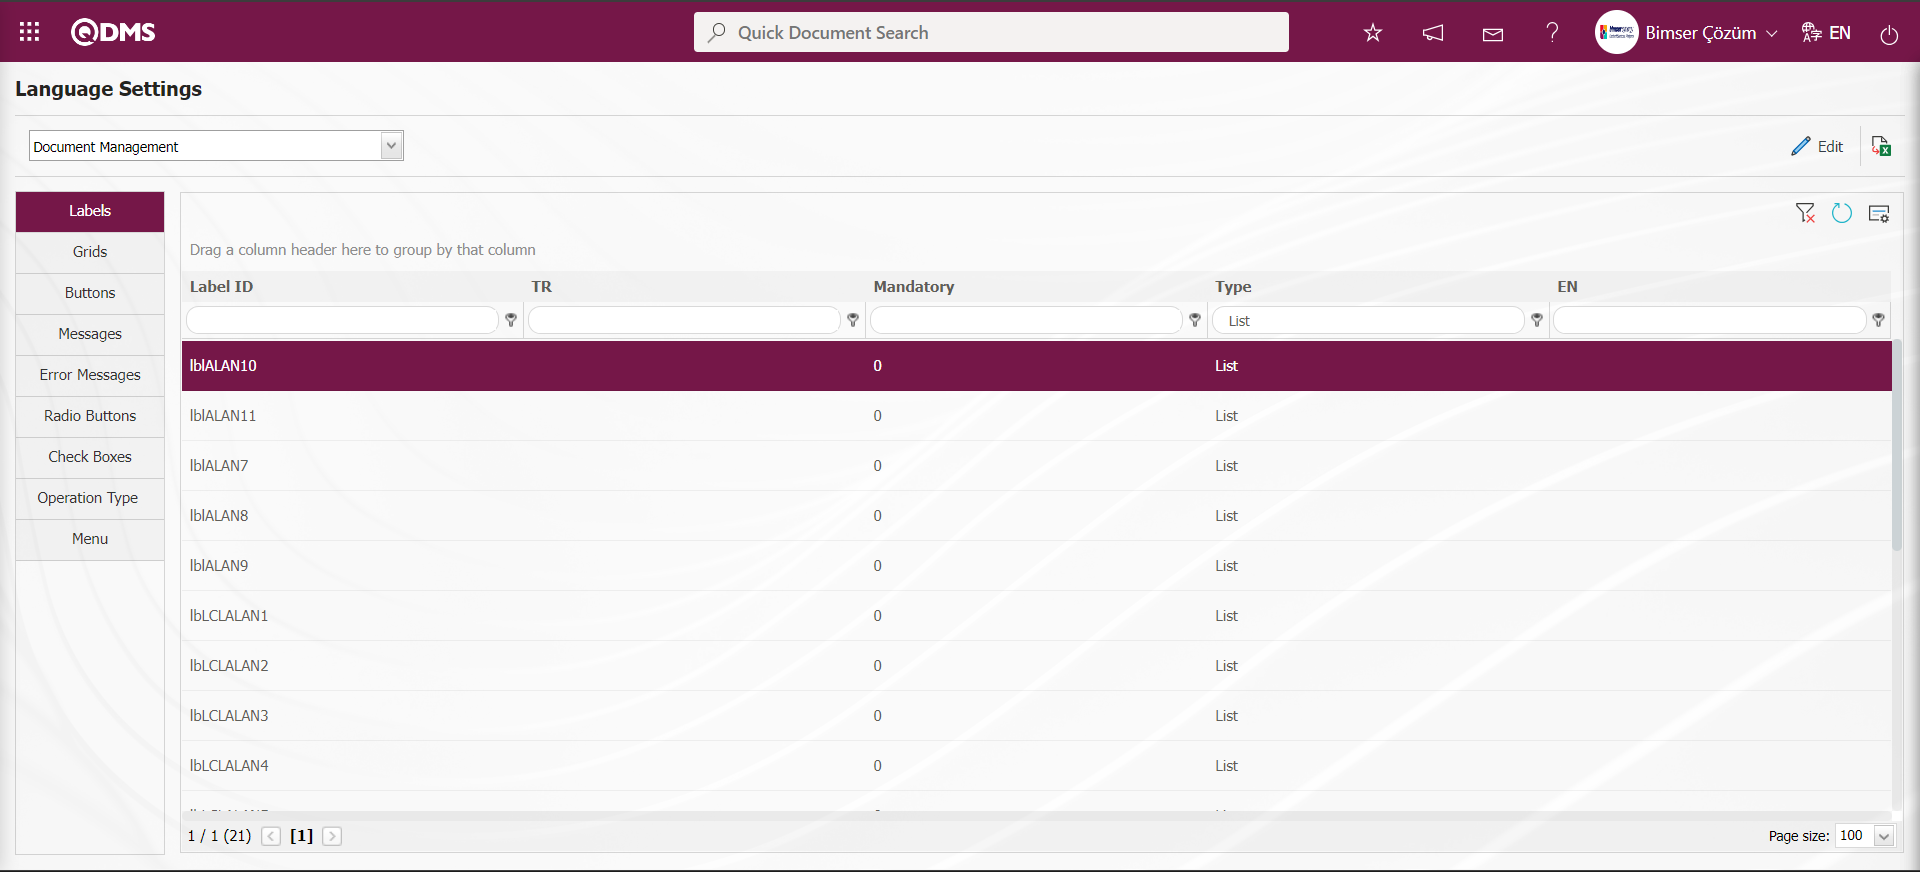
Select the List type field to be defined and click the button.

In the Language settings screen, type the name of the list type field to be defined in the Name field of the list type field to be defined.
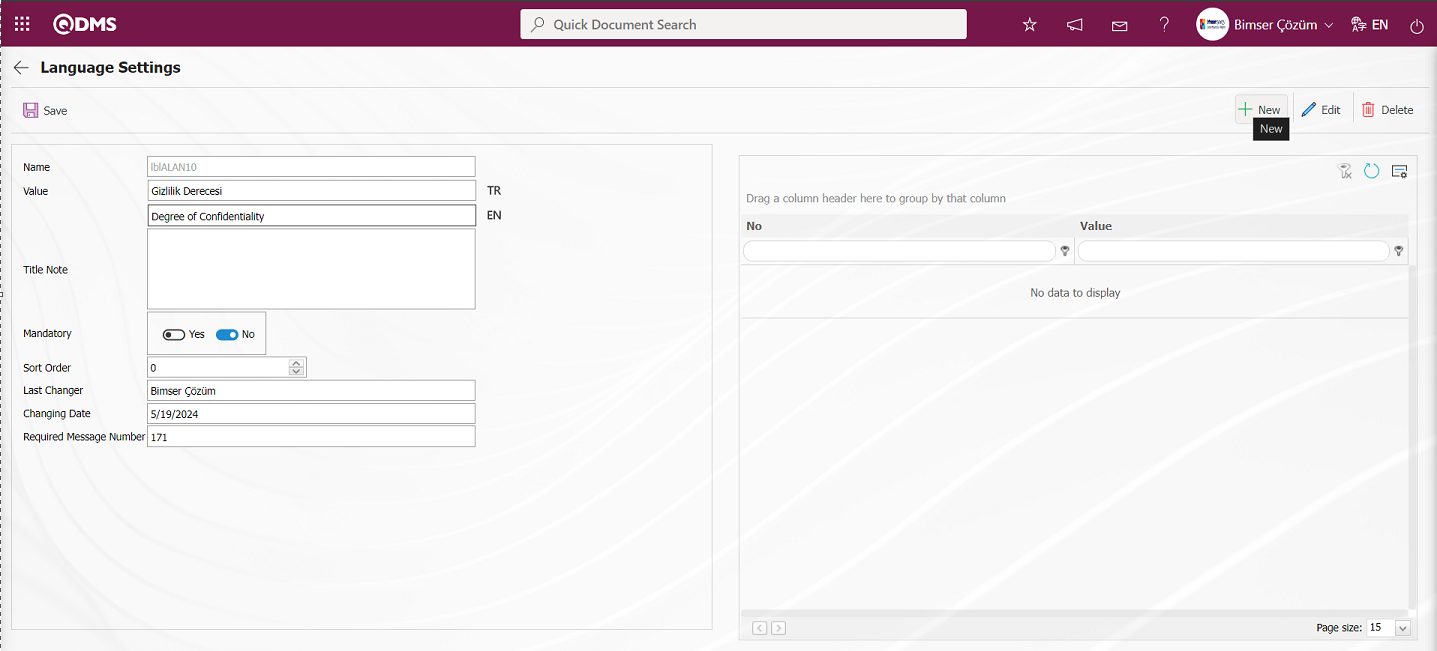
In the language settings screen, click the  button to define the 1st list elements of the list type field.

In the Language Settings-New Record screen, the ID value of the list element and the definition information of the list element in the Value field are written and the 1st list element is registered by clicking the  button in the upper left corner of the screen.
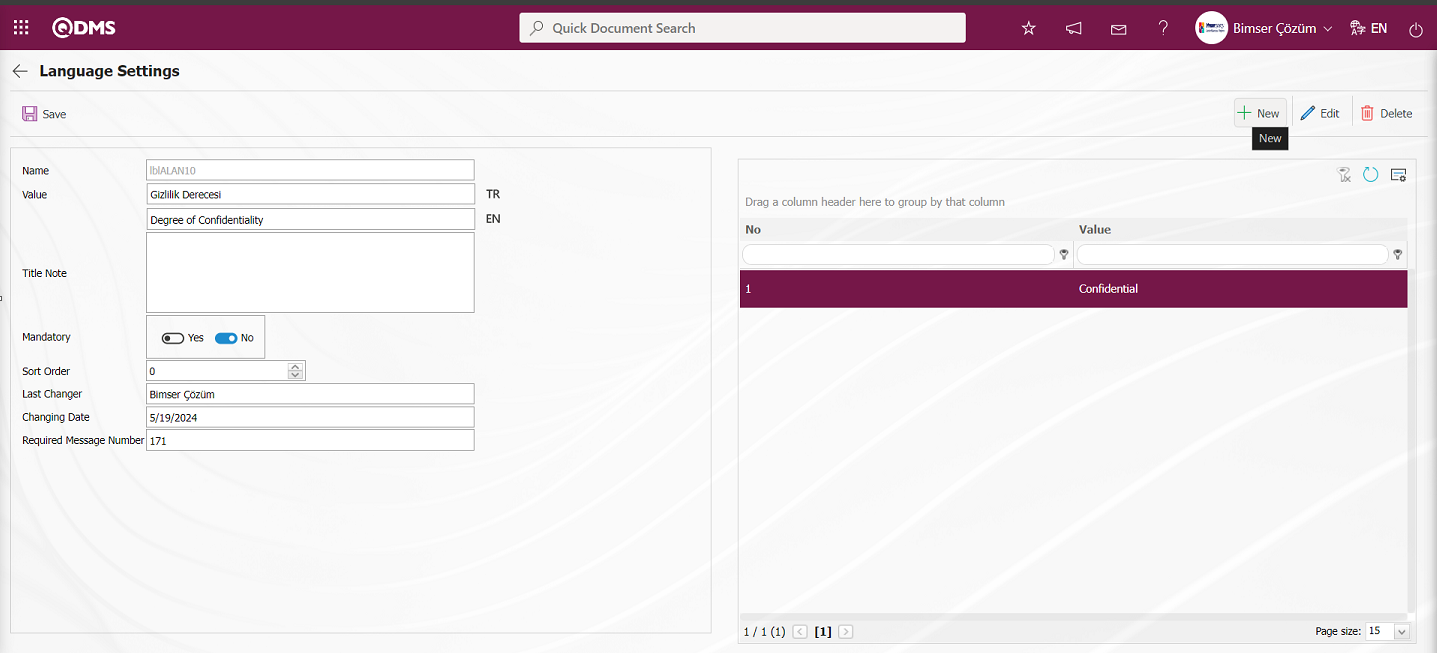
In the language settings screen, click the button to define the 2nd list elements of the list type field.
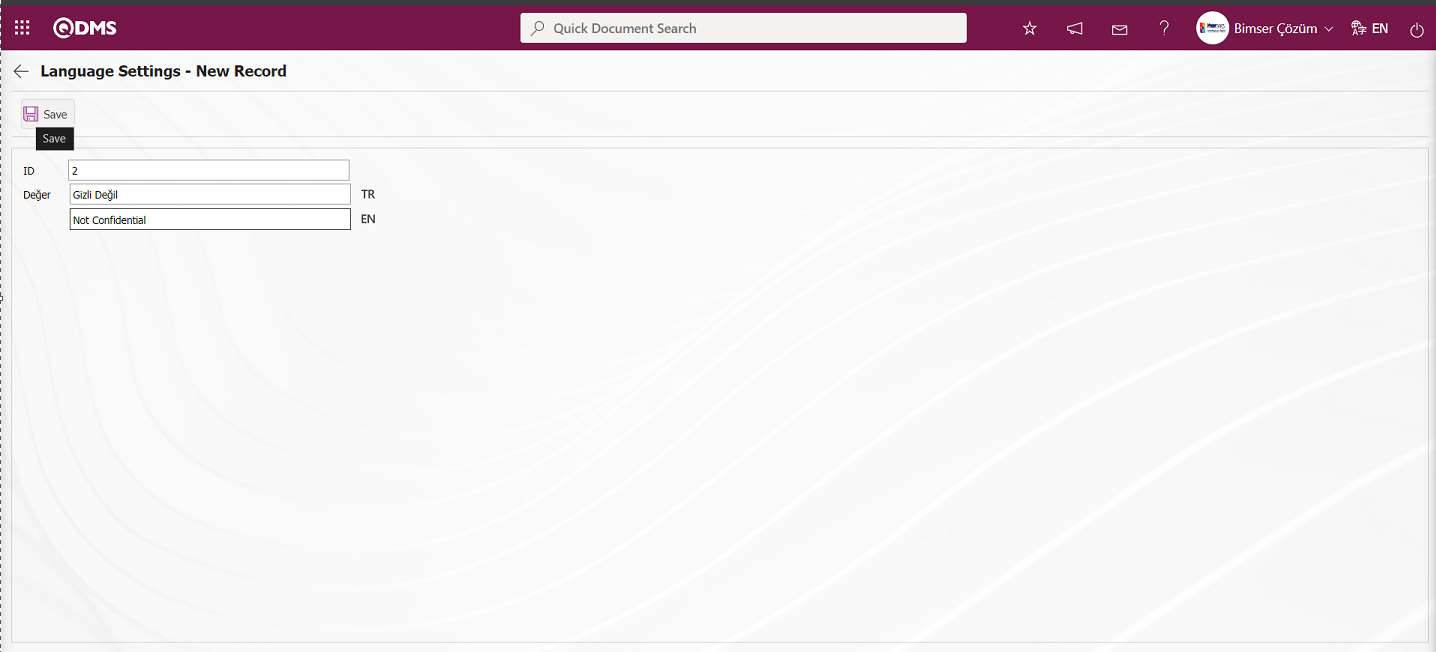
In the Language Settings-New Record screen, the ID value of the list element and the definition information of the list element in the Value field are written and the 2nd list element is registered by clicking the  button in the upper left corner of the screen.
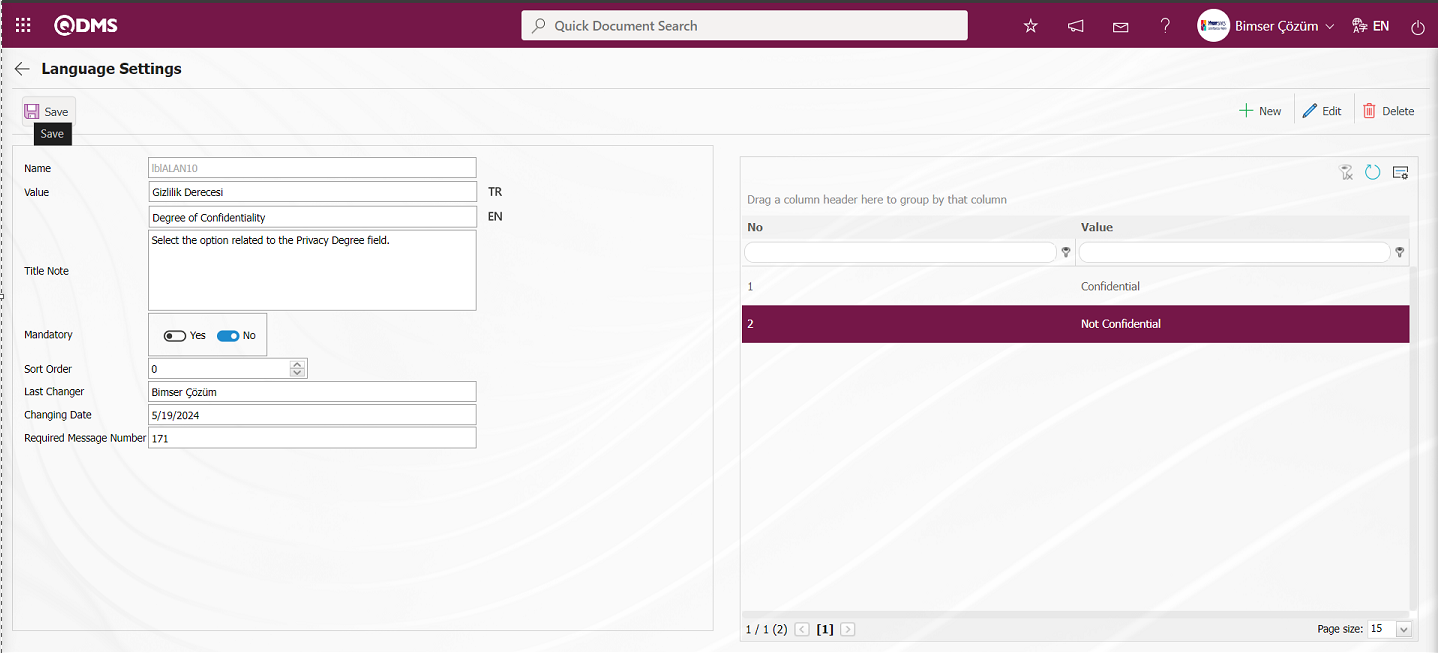
After the definition of the list elements on the language settings screen, in the section where the relevant flags are located, steps are taken to write the language equivalent of the definition if desired, whether the field is mandatory or not, whether it is shown in the grid or not, and if there is a title note information. After entering the necessary information in the required fields, the list-type parametric field definition registration process is done by clicking  button in the upper left corner of the screen.

To view the defined field, click on the Integrated Management System/Document Management/Create New Document menu in the Document Management module. In the Document Creation - Folder Selection screen, select the folder to prepare the document from the list in the list tab and click the 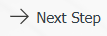 button. In the New Document screen, the list-type parametric field defined in the language settings in the Other Info. tab is displayed. When the mouse hovers over it, title note information, mandatory field and list elements options are displayed by clicking the drop-down list.
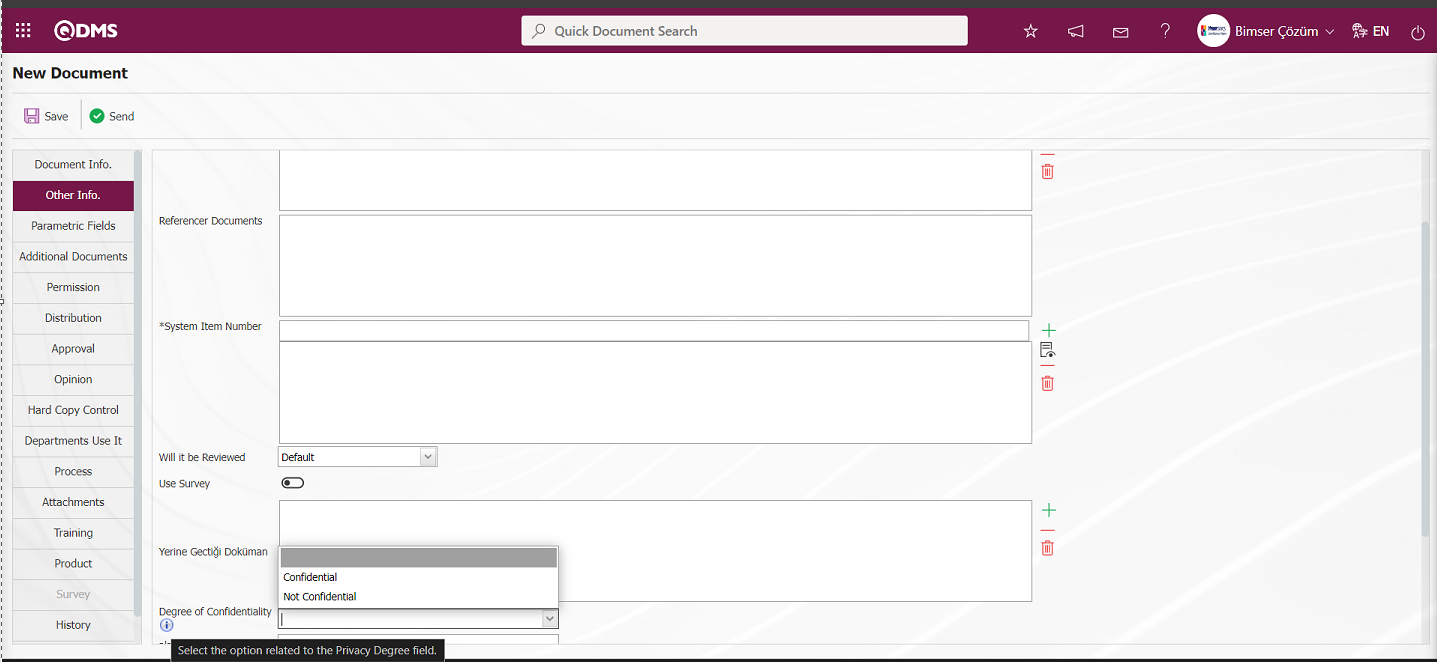 Removing the Field Defined in Language Settings;
In order to remove the list-type parametric field defined in the Document Management module, the list-type parametric field is selected by typing the label code or name information, if known, in the grid in the Labels tab on the language settings screen.
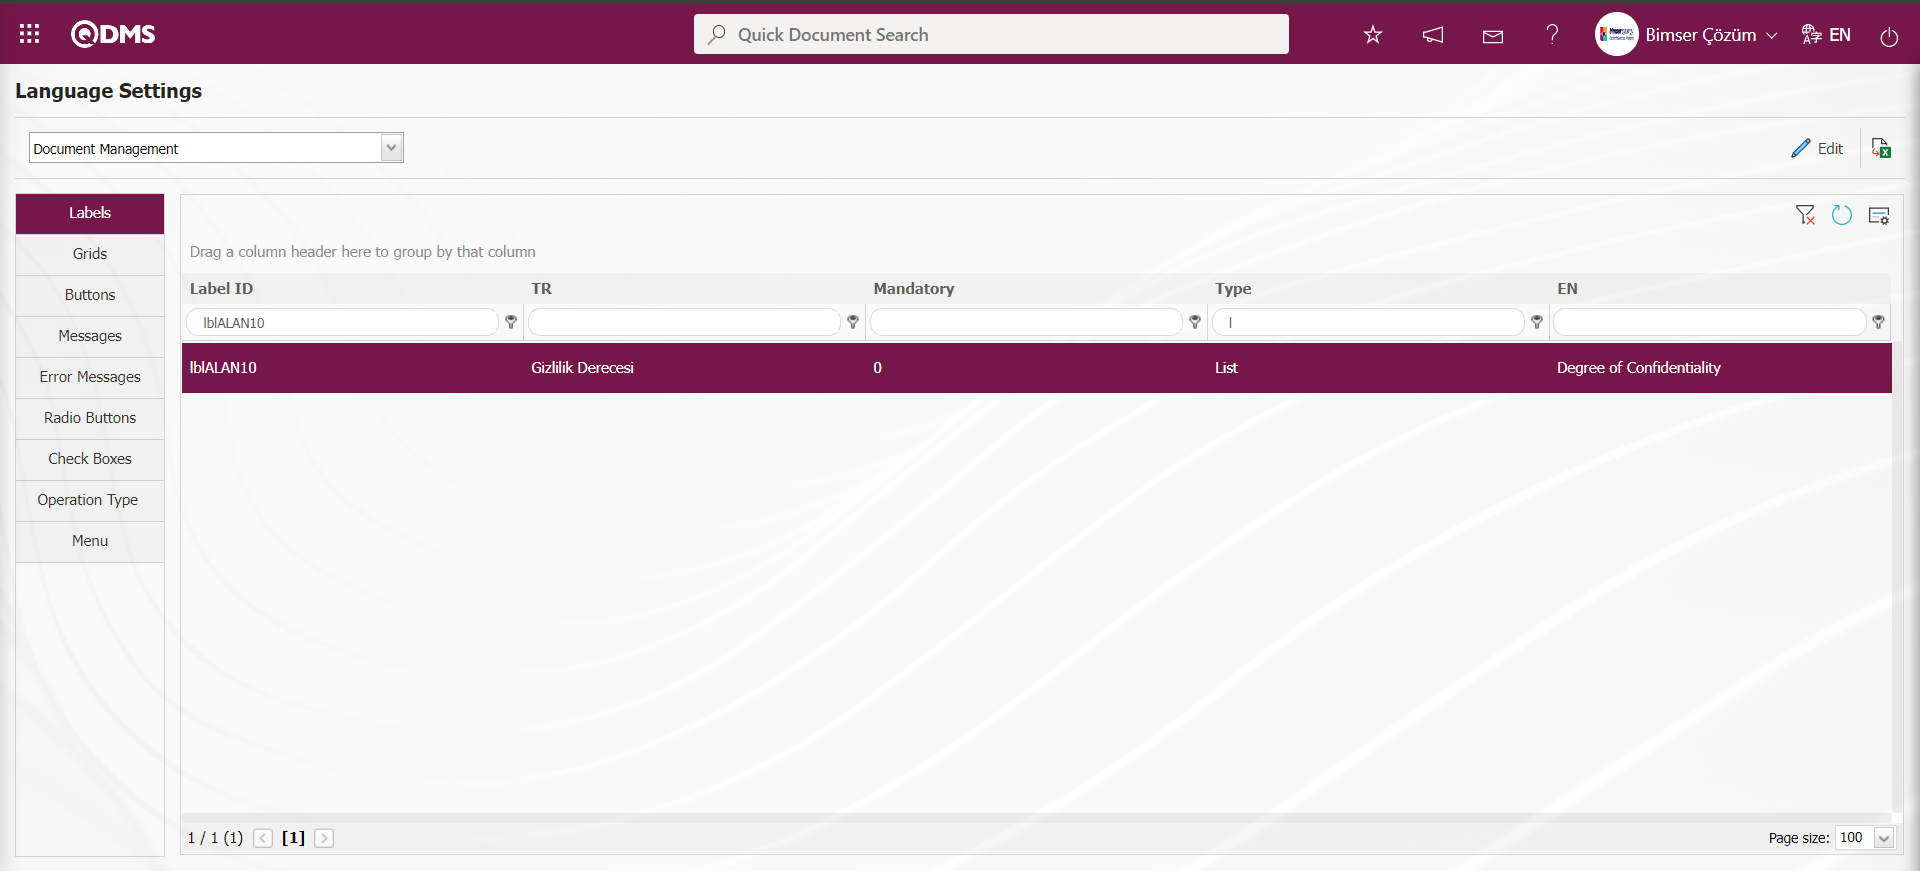
After selecting the list type parametric field, click on the  button.
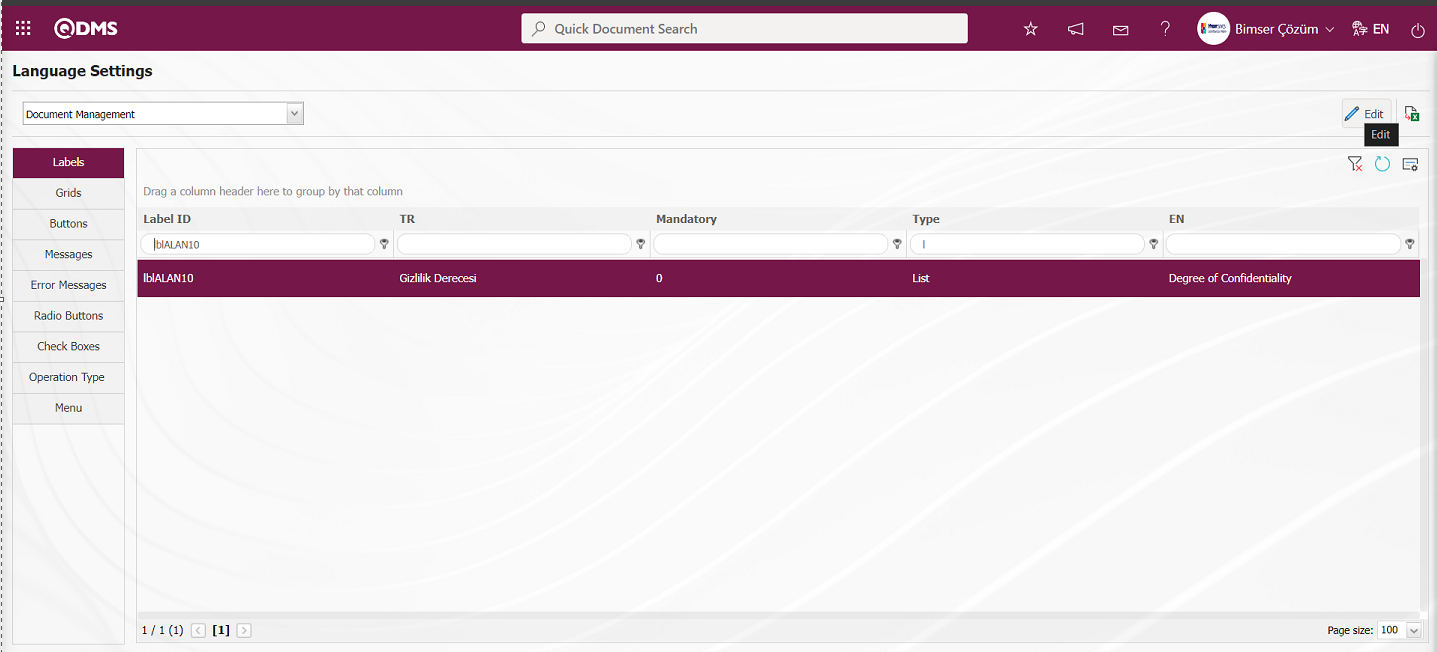 The name and title note information of the list type field defined in the Language Settings screen is deleted. 2. By selecting the list elements and clicking the
  button, the list element of the 2nd list-type field is deleted.
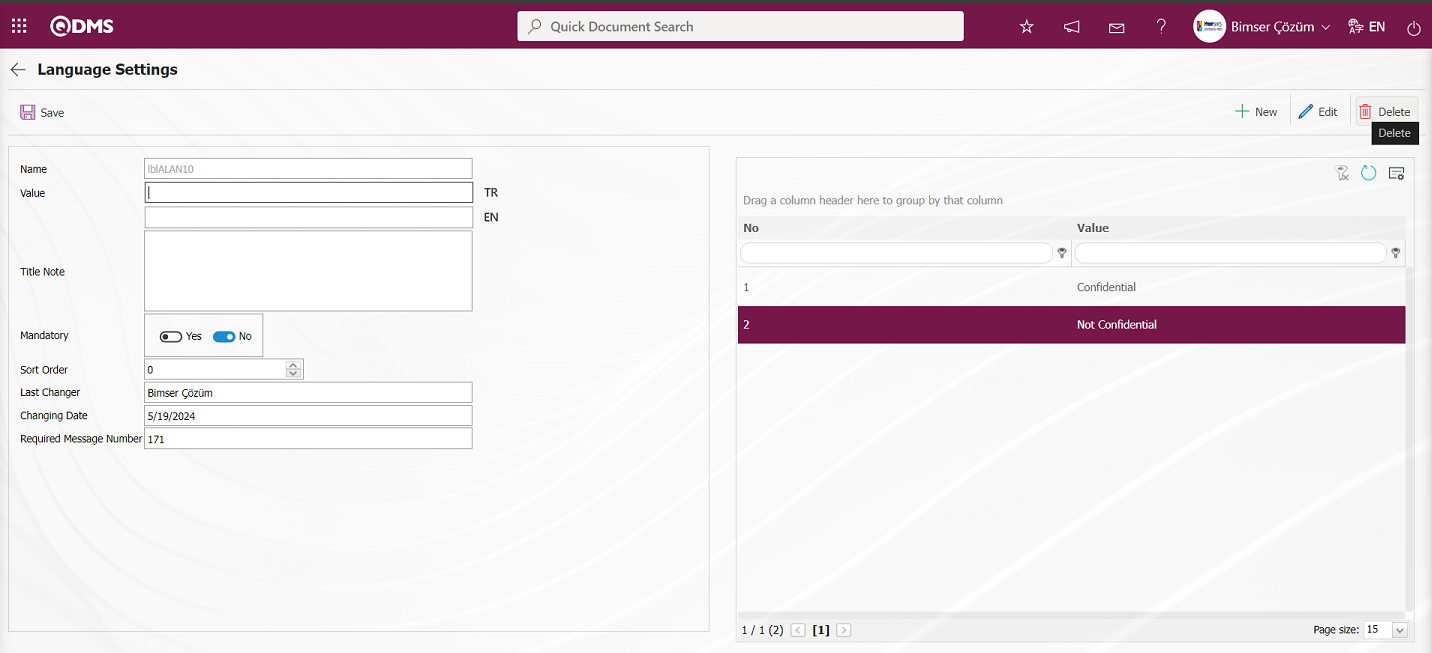
1. By selecting the list elements and clicking the button, the 1st list element of the list type field is deleted.

The required fields, related information and list elements are deleted.
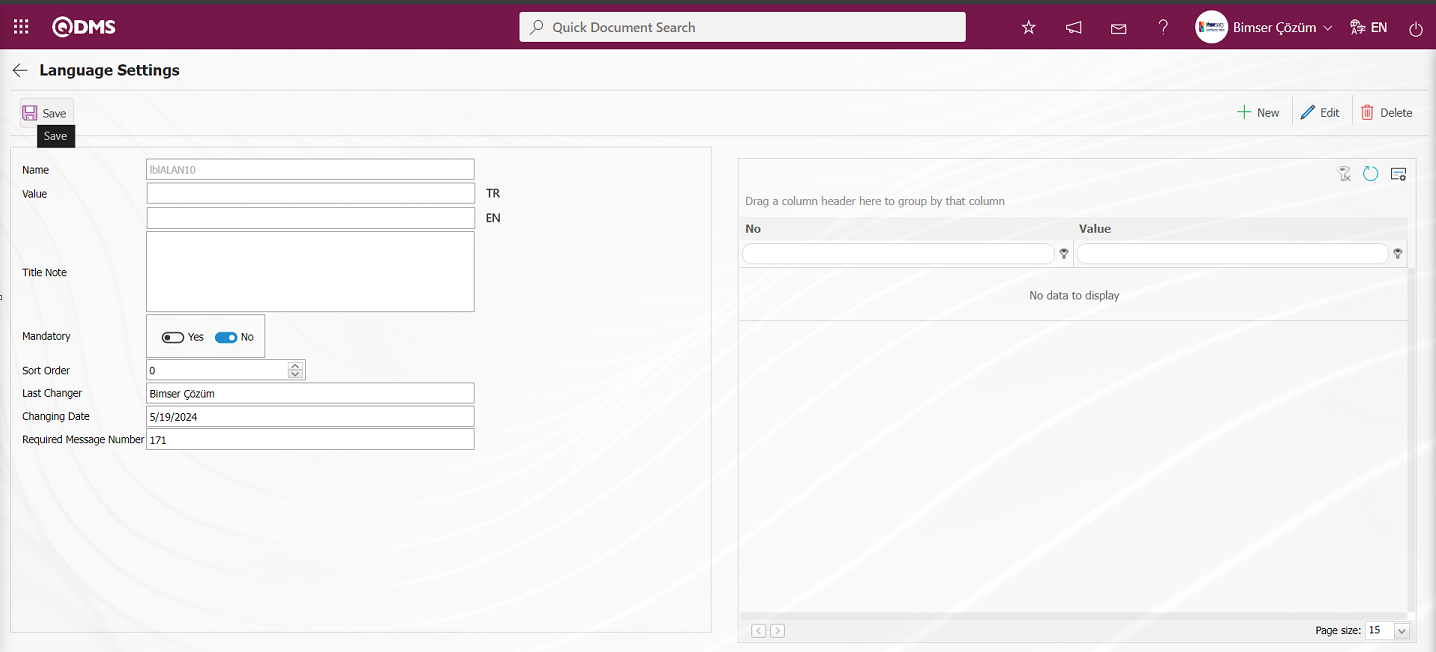
After the process steps, the list-type parametric field is deleted by clicking the button in the upper left corner of the screen.
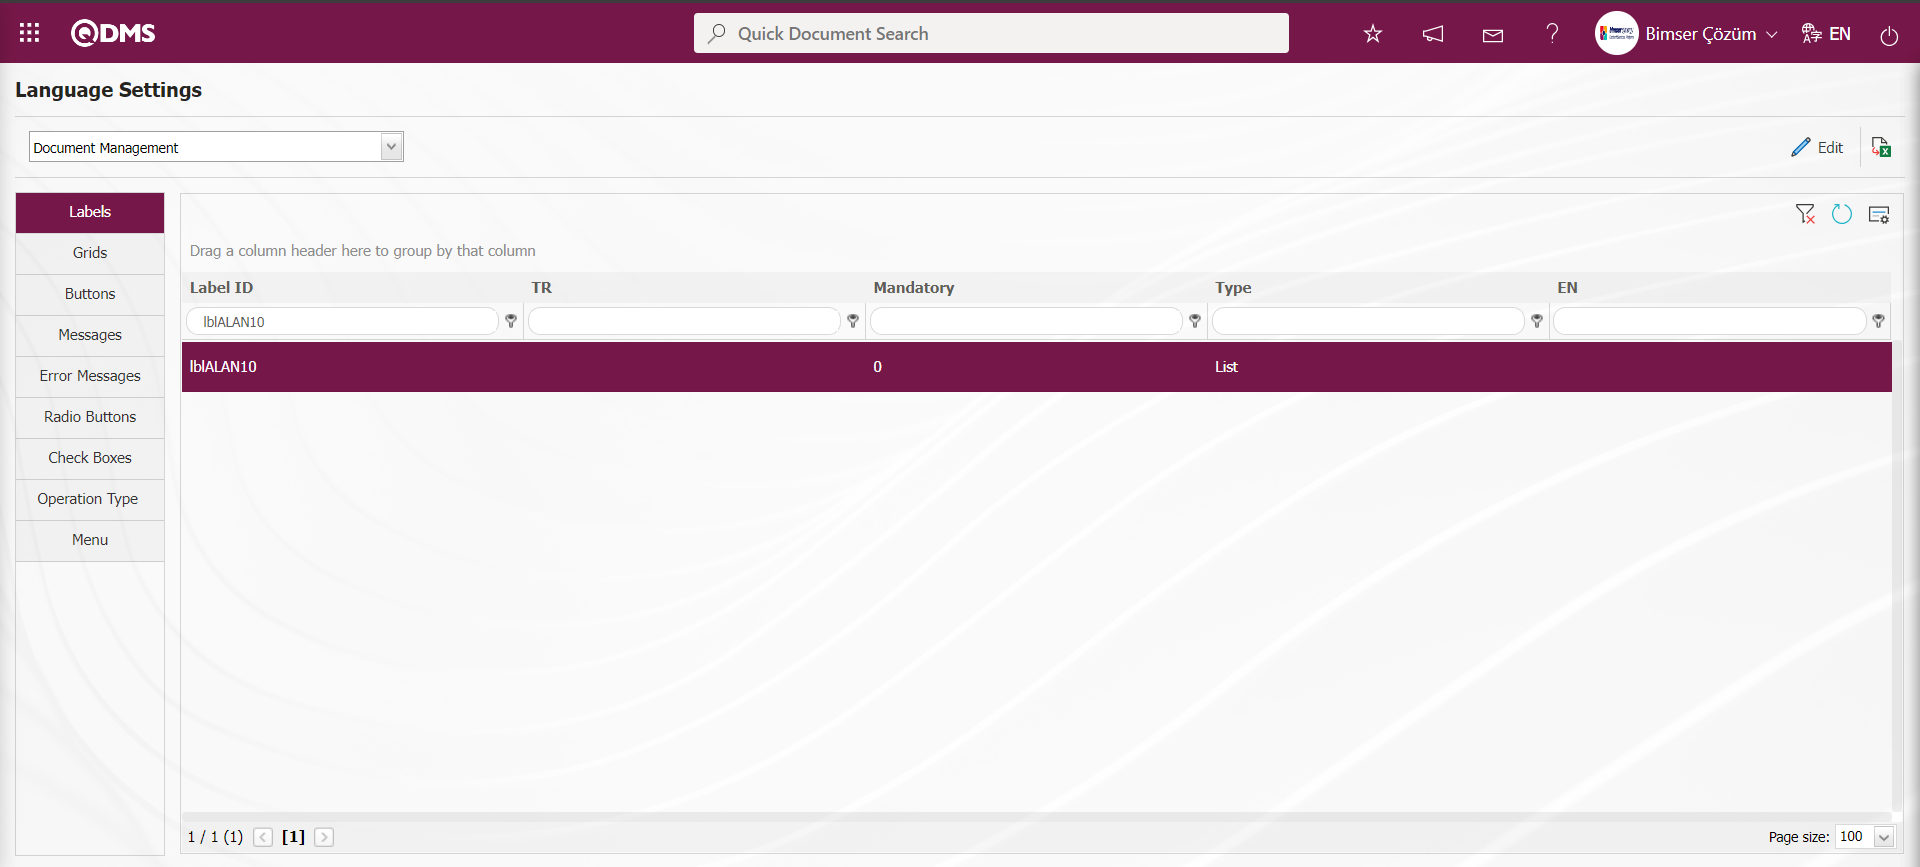
Displaying the code information of the defined parametric type field label
Integrated Management System/Document Management/Create New Document menu in Document Management module is used to display the defined field. On the Document Creation - Folder Selection screen, select the folder where the document will be prepared from the list in the list tab and click on the button. On the New Document screen, in the Other Information tab, the list type parametric field defined in the language settings is displayed In the New Document screen, in the Other Information tab, right click on the list type parametric field in the Other Information tab tab, click “Review” option in the drop-down list opened by right click management and access the label code information of the defined list type parametric field.
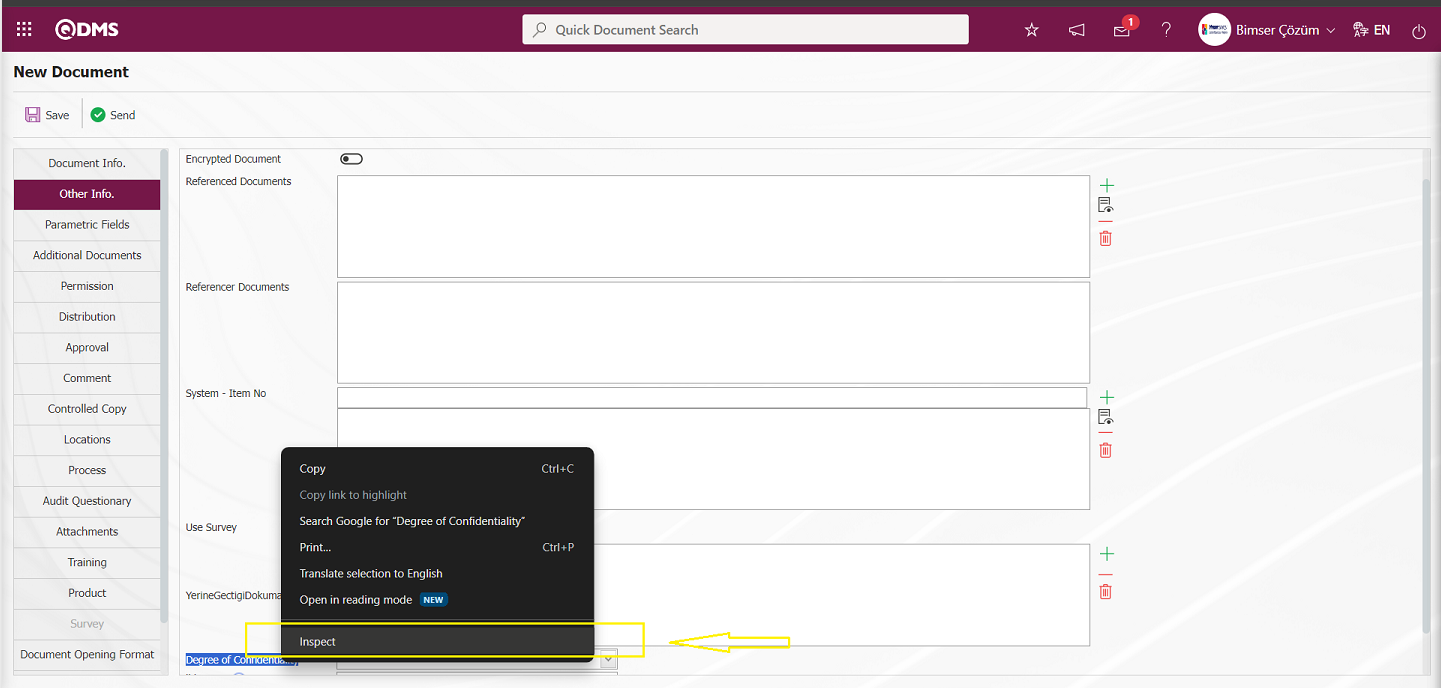
The label code of the defined parametric list type field is displayed on the screen. The label code information of the list type parametric field is seen in the “lblALAN10” screen.
 In this way, the label code information of the parametric field types defined in the relevant modules in the Qdms system is accessed.
Grids Tab;
In this tab, by selecting the relevant module in the Language Settings menu, editing and changing the name information of the tabs defined in the system of the module is done. In the Grids tab, the short code name of the tab is selected and changed by clicking the  button. For example In the CAPA module, “First Progress Report” tab is changed to “Emergency Measure Report” tab in the Grids tab by clicking the drop-down list
  button in the pcDOF table and the list of tabs in the CAPA module is displayed.
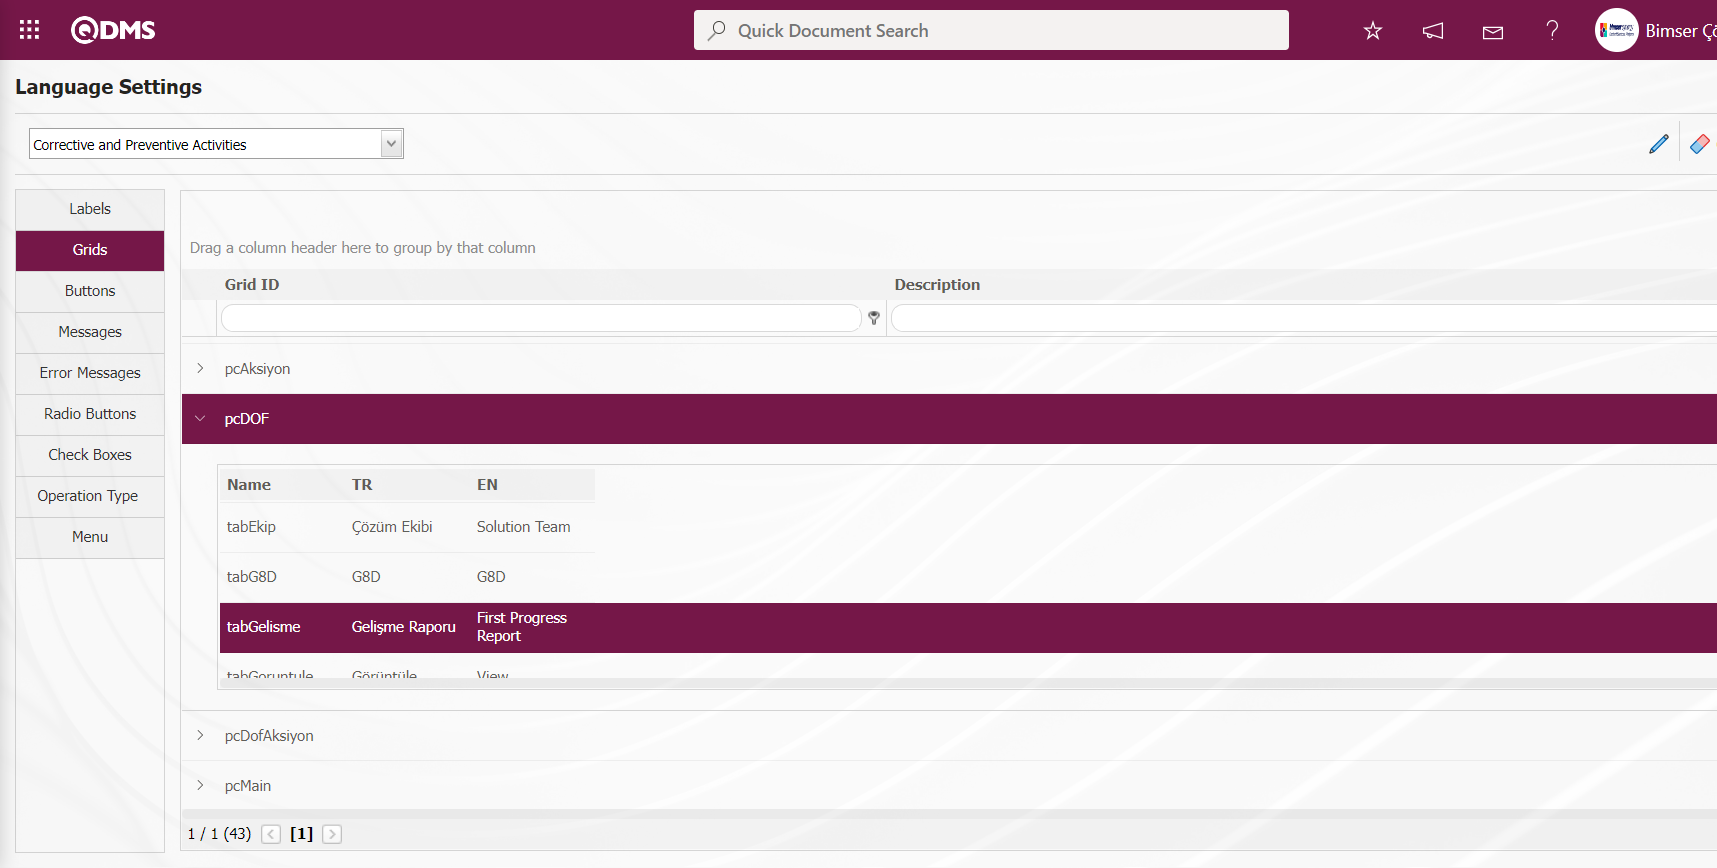
While “tabGelisme” tab is selected in the CAPA module tab list, click the Change button.
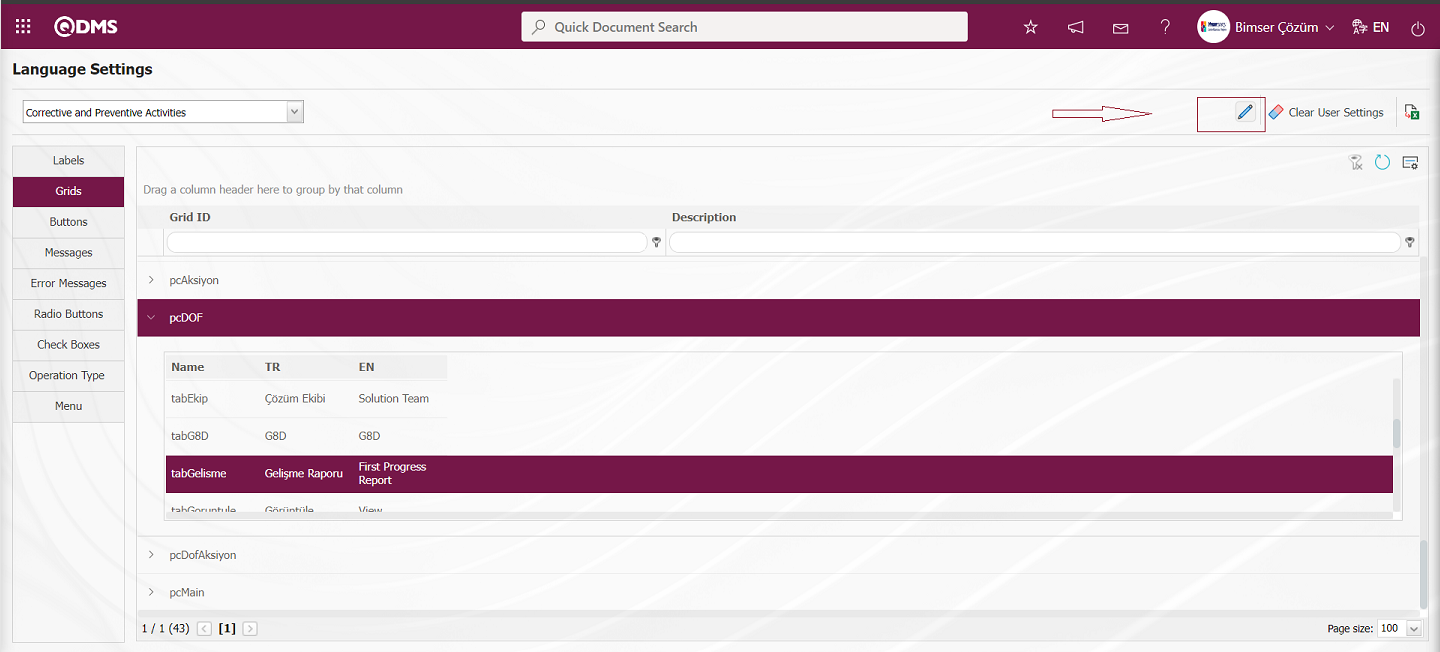
In the Language Settings screen, the name of the First Progress Report tab in the value field is changed to Emergency Measure Report, and the language equivalent of the tab, if any, is written in the fields with the relevant flags.
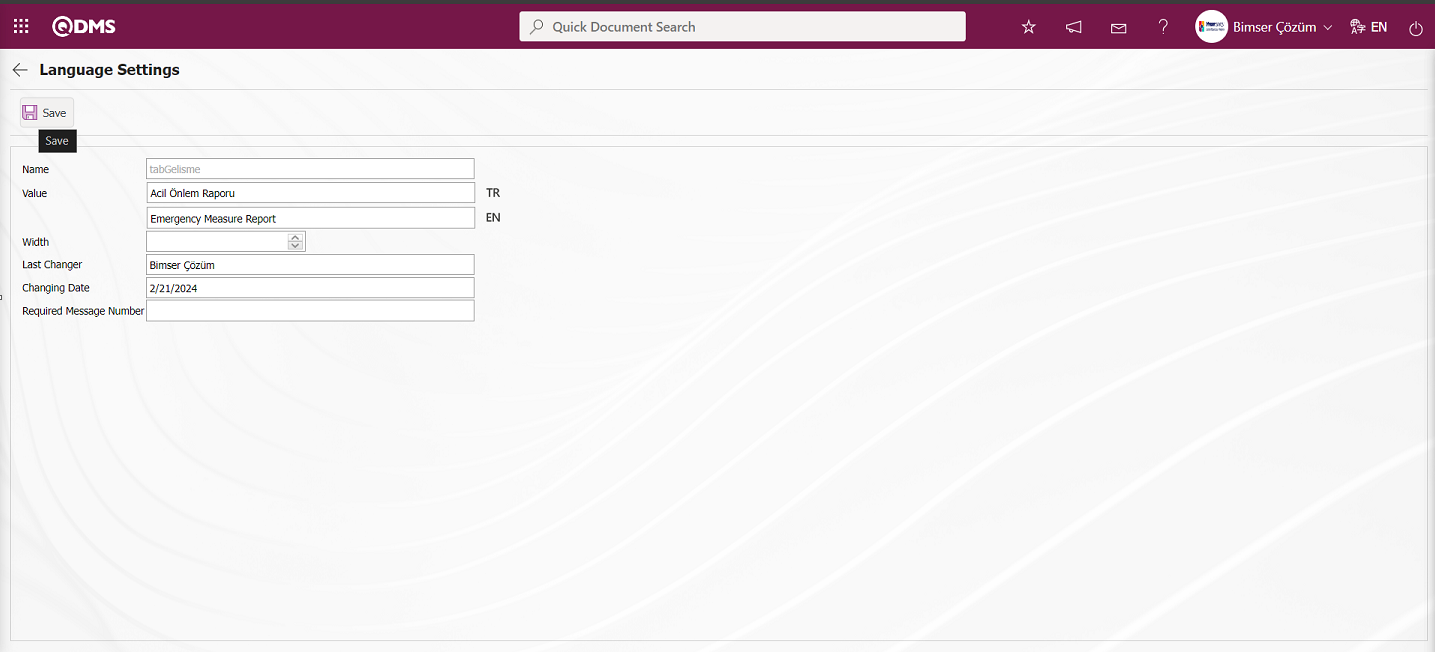
After the necessary fields are edited in the relevant information, the Language Settings record update process is performed by clicking the  button in the upper left corner of the screen.
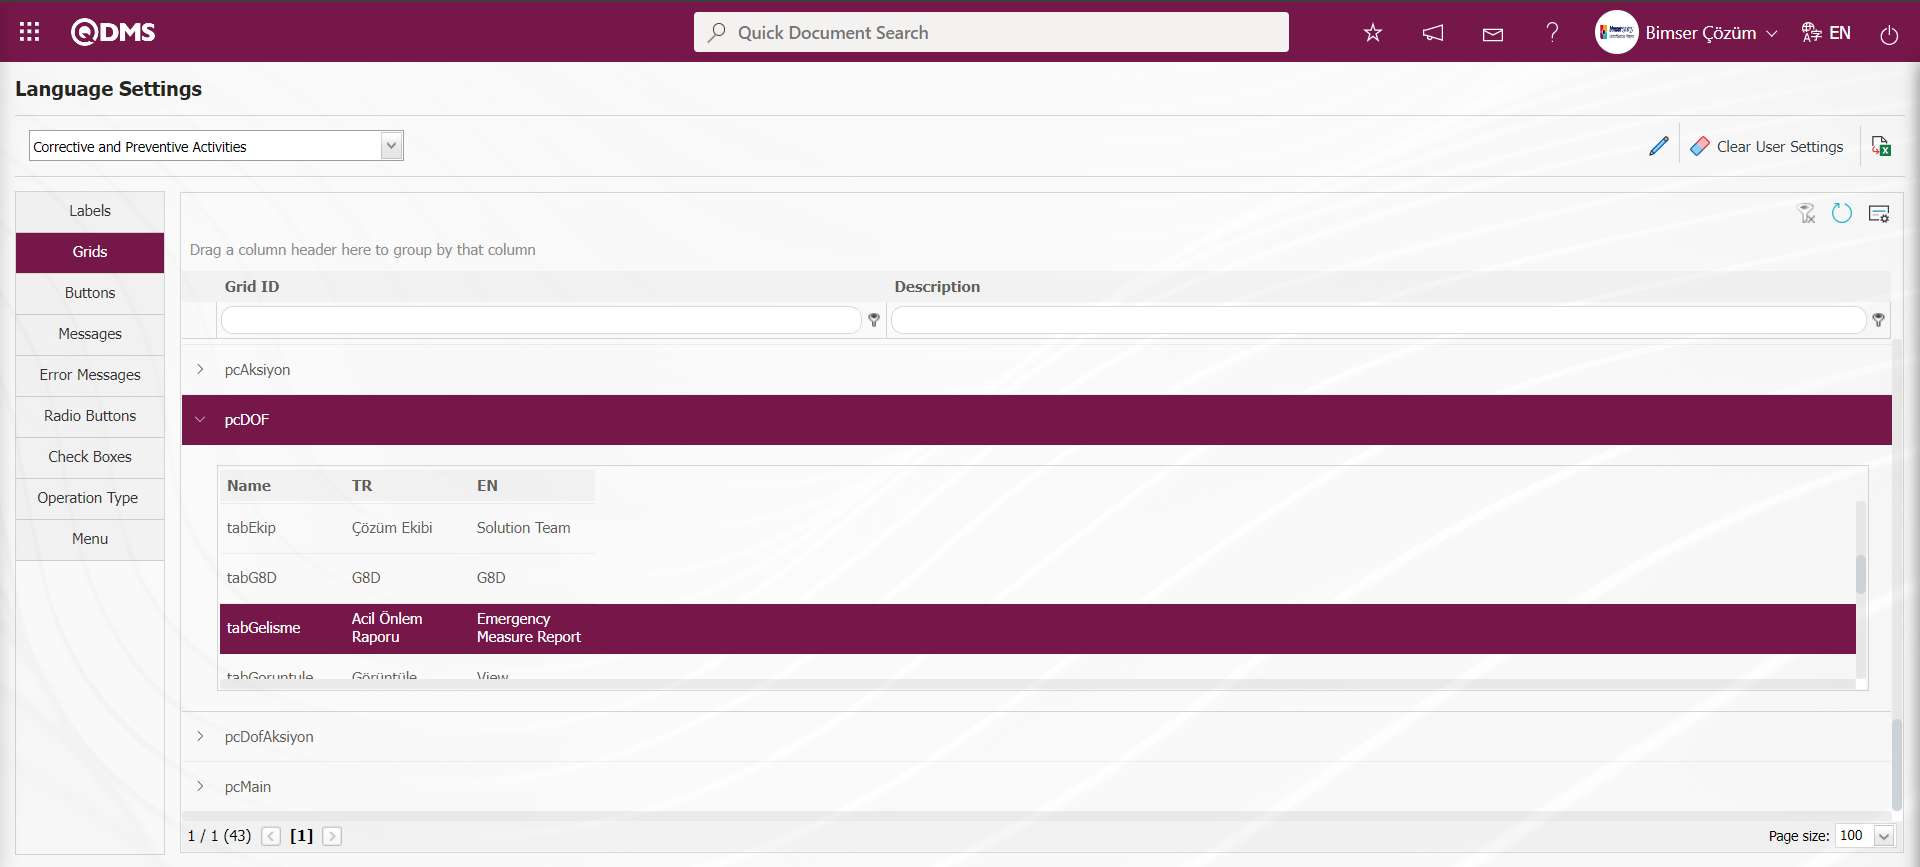
A CAPA Record in the First Progress Report stage is opened to view that the name of the First Progress Report tab of the CAPA module has been changed in the “PcDÖF” field in the Grids tab. In the CAPA record opened, it is seen that the name has changed according to the change made in the First Progress Report Language settings menu.
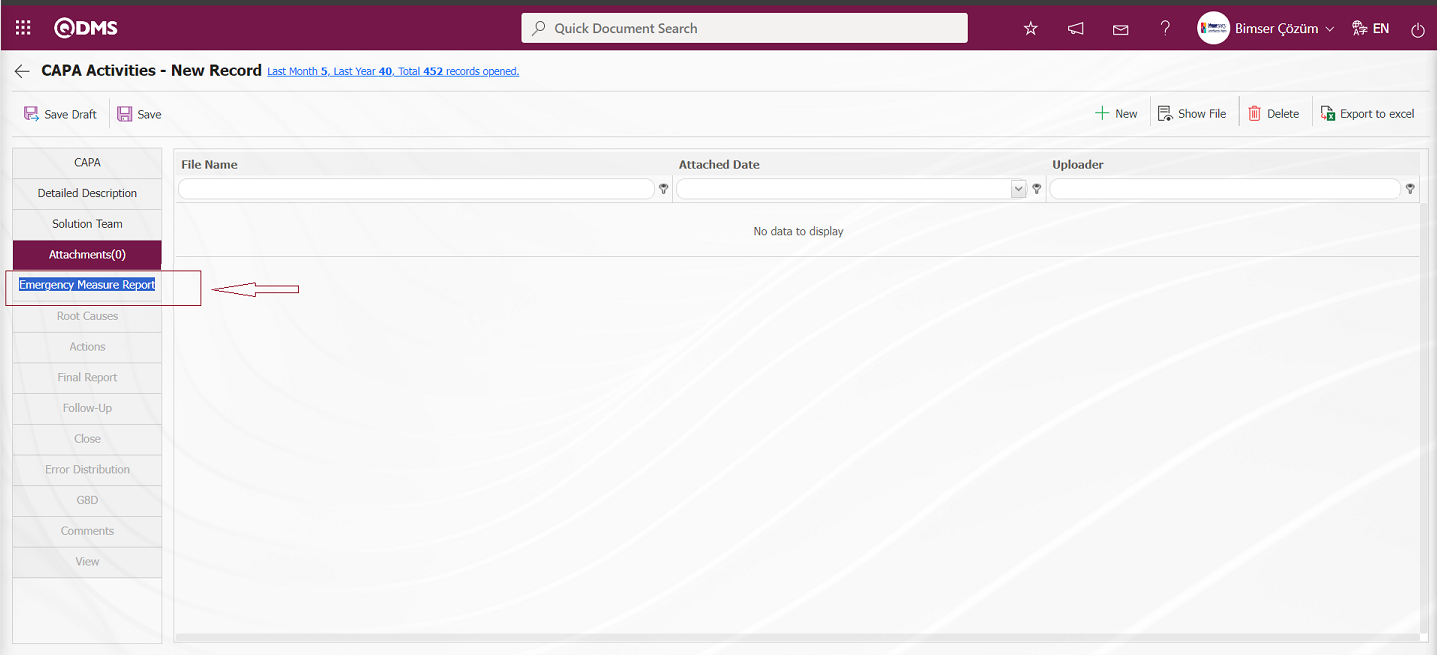 Buttons tab;
In this tab, by selecting the relevant Module in the Modules field in the Language settings menu, the button defined in the system related to the Module is selected and the button names are changed and edited as needed. When the relevant module is selected in the Buttons tab, the button names related to the module defined in the system are listed. For example: By selecting the Action Management module in the Module field, the buttons related to the Action Module within the scope of Qdms are listed.
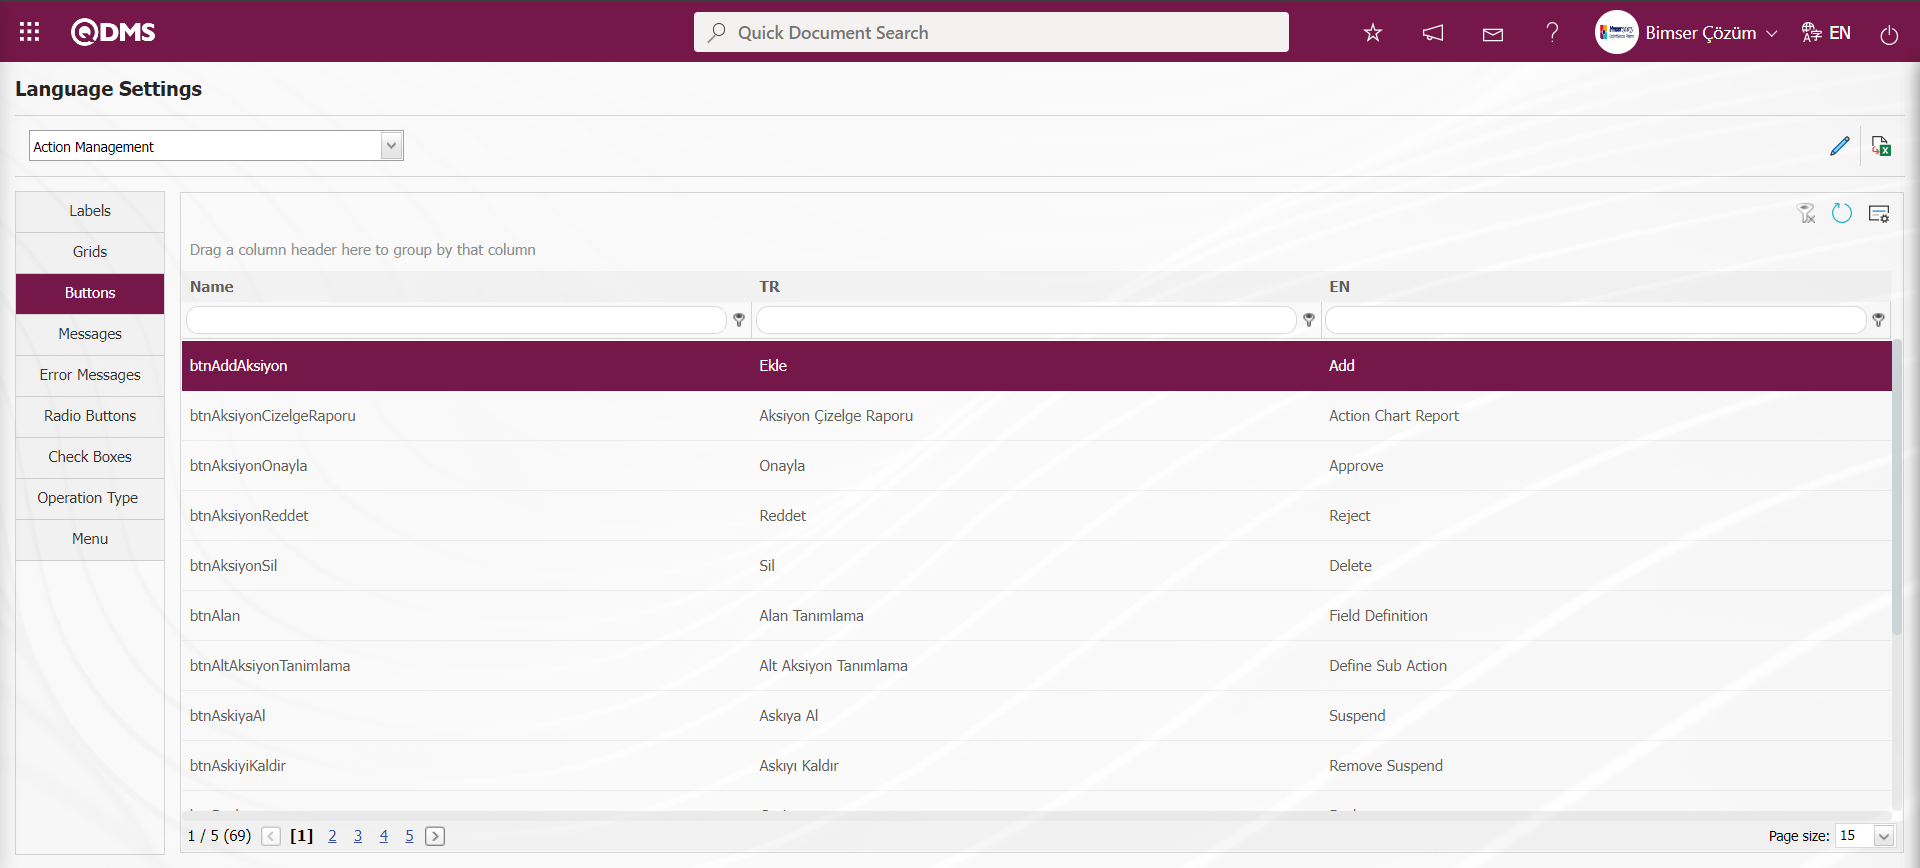
Changing the “ Update” button in the System Infrastructure Definitions/Action/Action Performer Change menu is done in this menu.
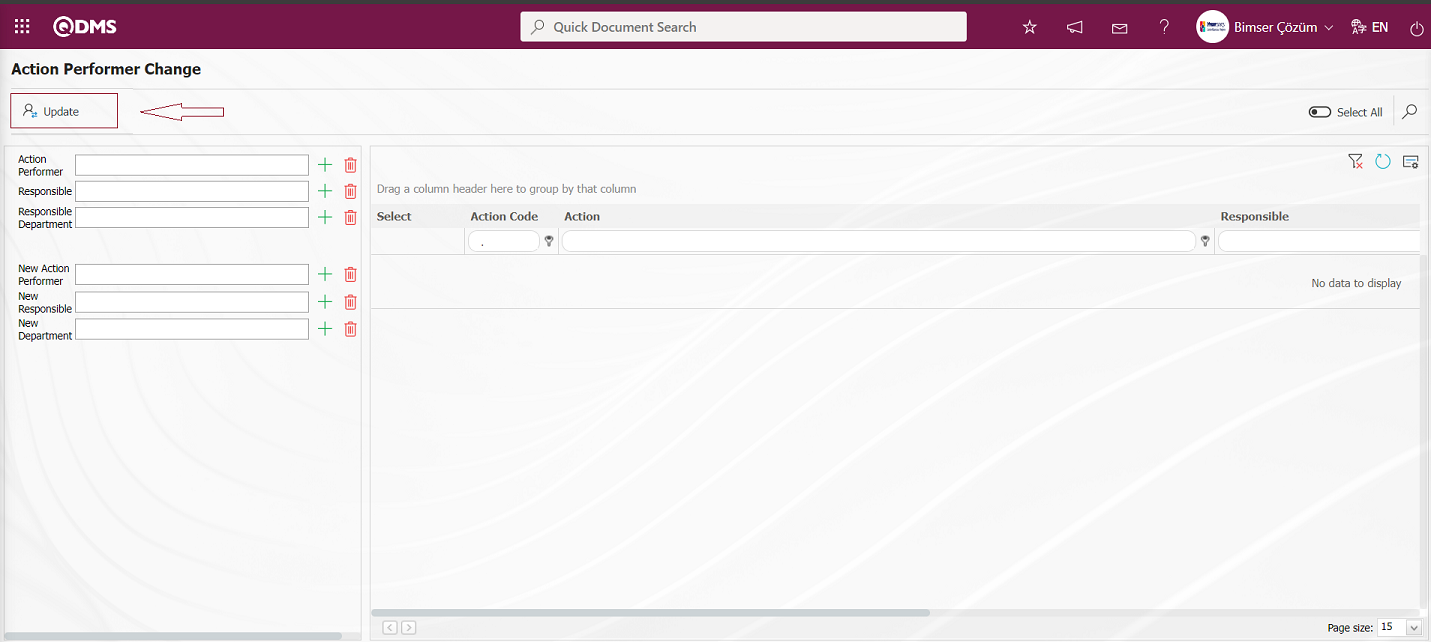
In the Action Management Module, the “Update” button is selected and the content is displayed by clicking the  (Update) button.
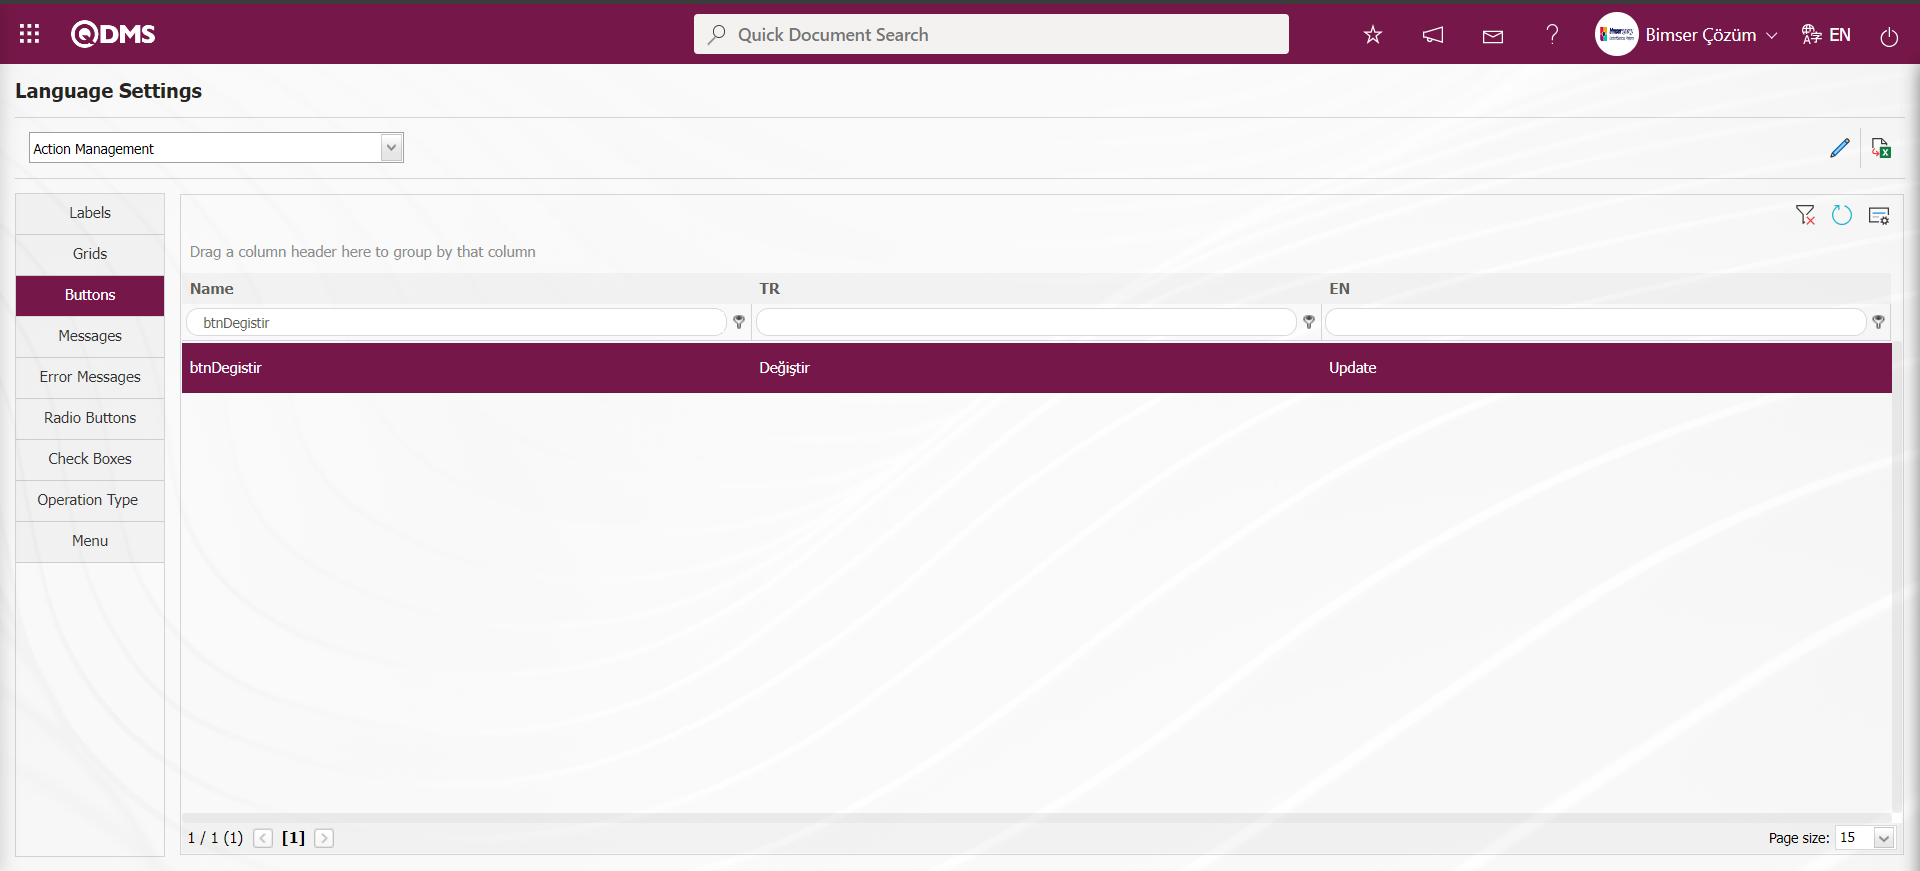
In the Language Settings screen, the English language equivalent of the “Update” button is changed to “Change”.

After the change made on the Language Settings screen, the language settings record update process is performed by clicking the button in the upper left corner of the screen.
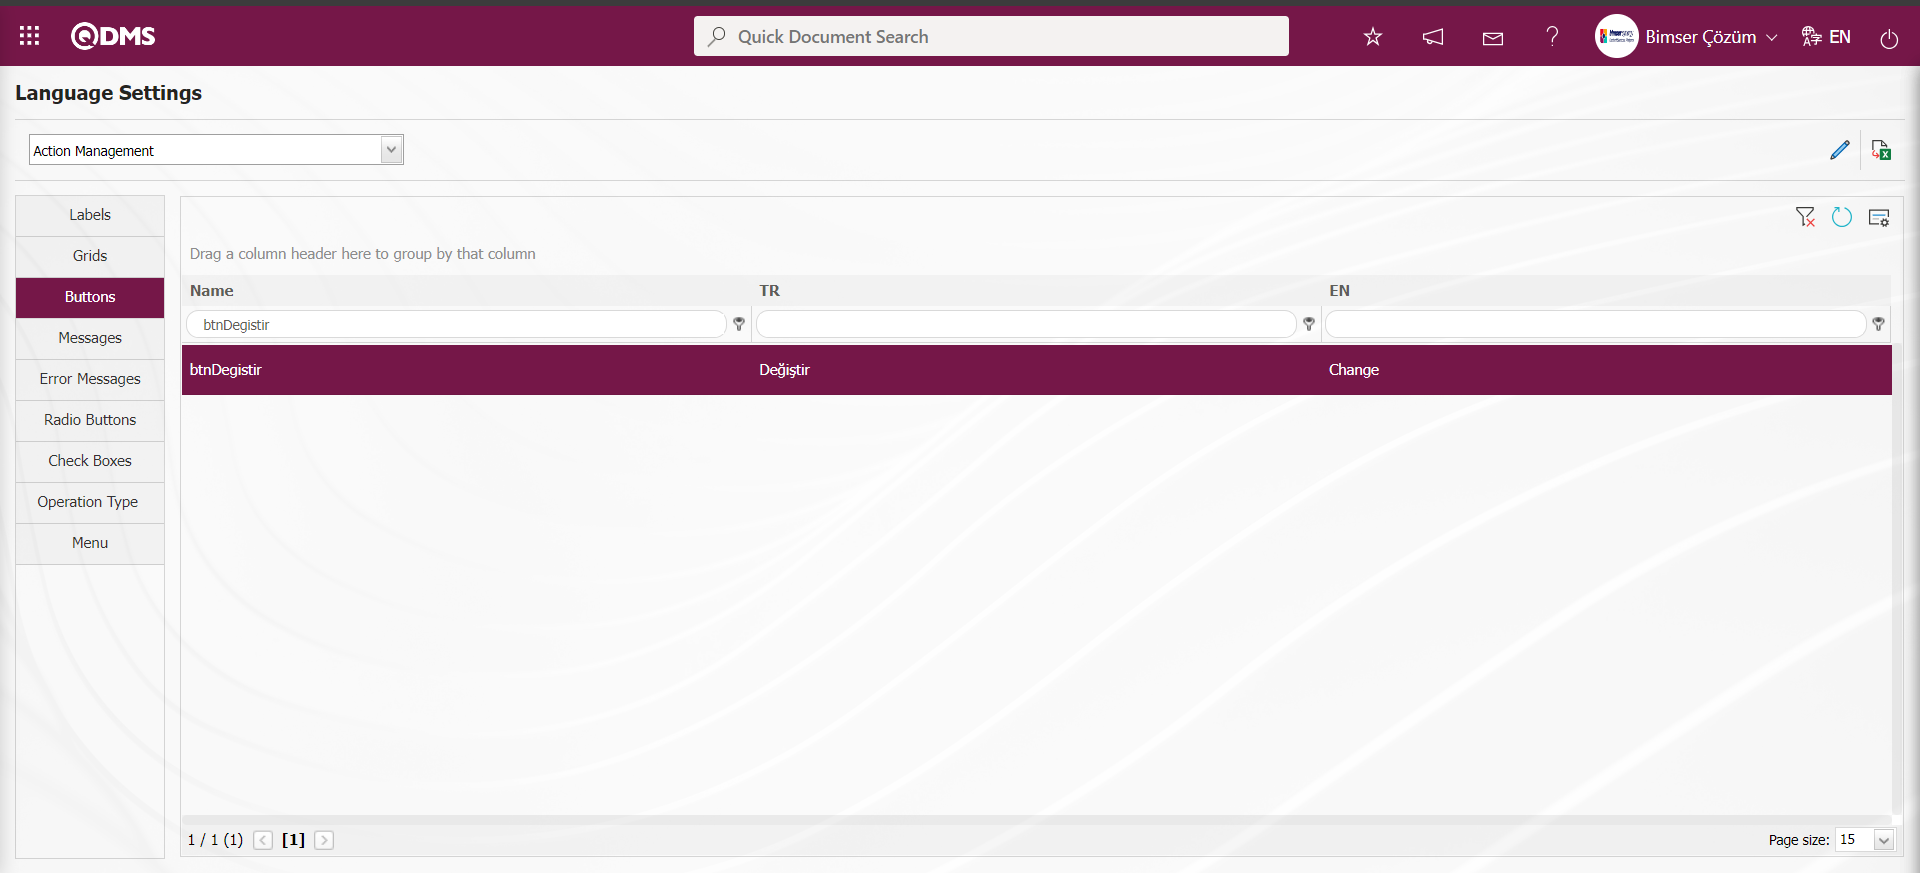
After changing the button name in the language settings, the change is displayed in the menu.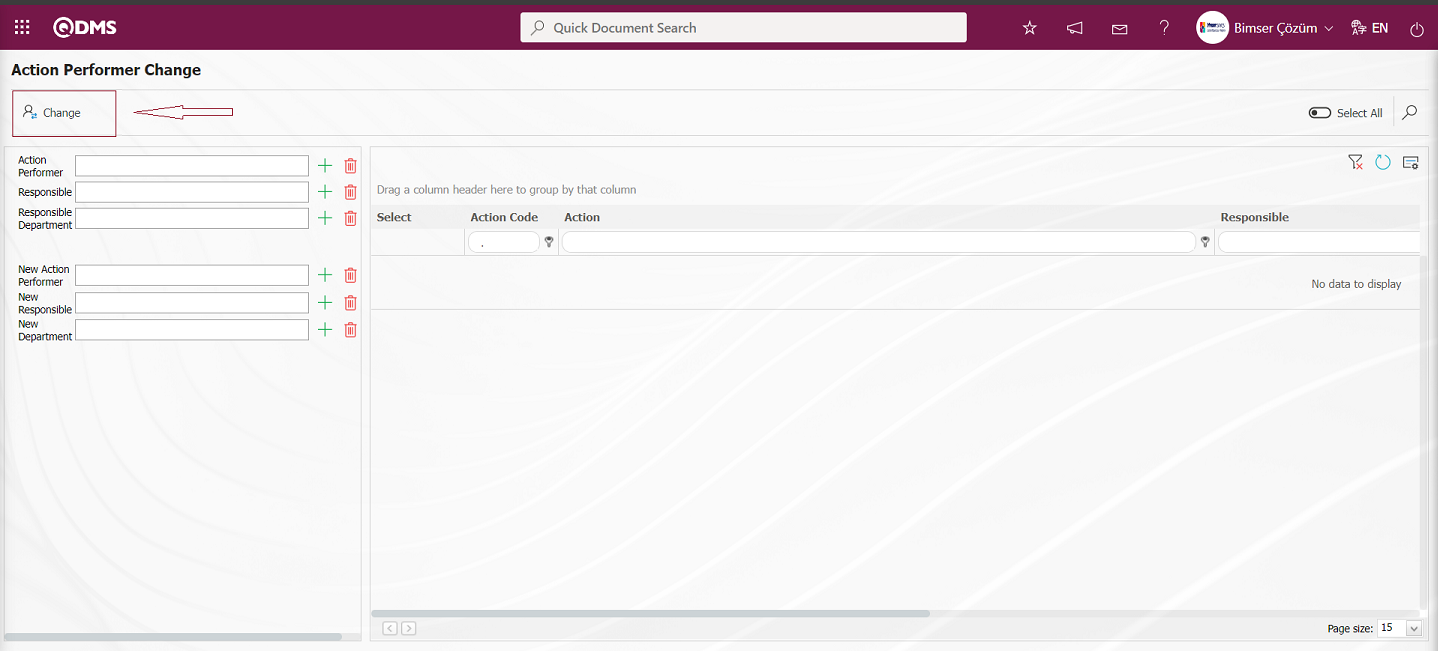
Messages Tab;
In this tab, by selecting the relevant Module in the Modules field in the Language Settings menu, the message definitions defined in the system related to the Module are listed and these messages information is selected and editing and modification operations are performed by clicking the (Change) button.
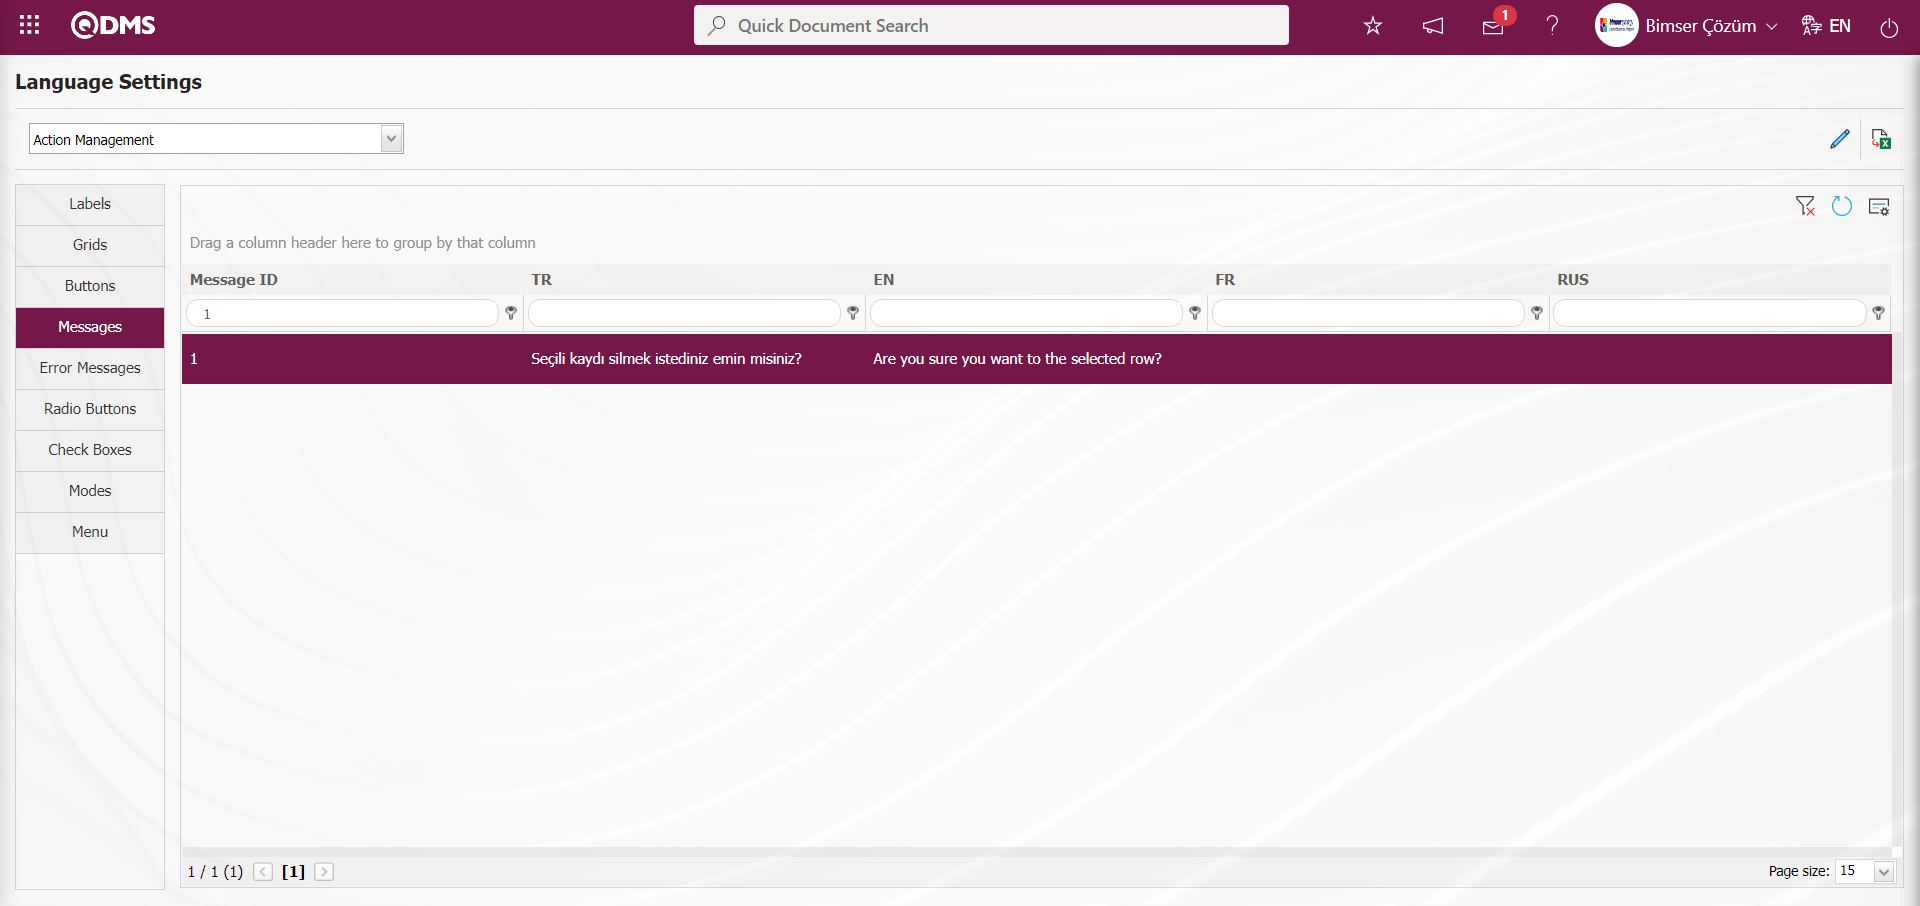
Example: In the Action Management Module, on the Action Item Type Identification screen, an Action Item Type selected from the list is deleted and the misspelled message is edited

To change the content of the misspelled message displayed while deleting in the Qdms System in Language Settings, select the Action module in the module field in Language Settings and the message list related to the Action module is displayed. Select the message to be changed in the Messages tab and click the (Change) button.

In the Language Settings screen, the wrong message content is corrected by editing the message information in the Value field as desired.
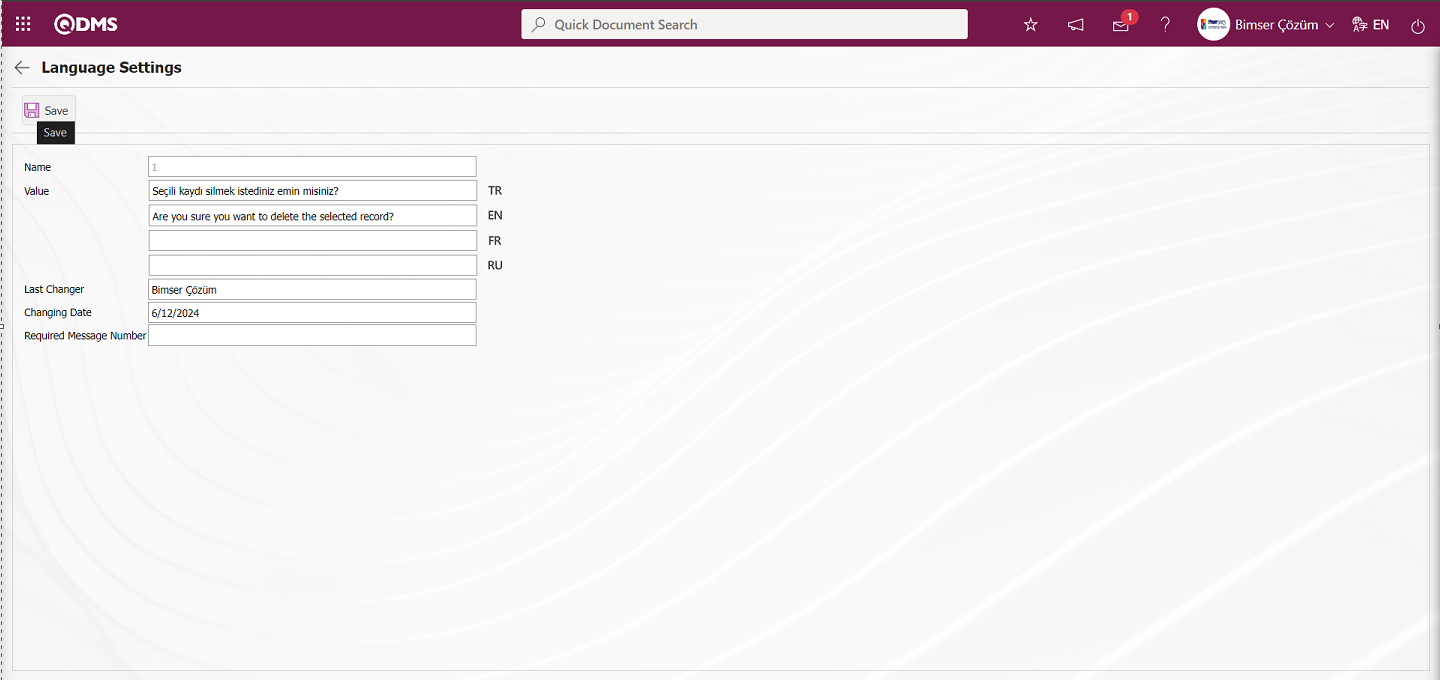
After the necessary editing process on the Language Settings screen, the Message record update process is performed by clicking the  button in the upper left corner of the screen.
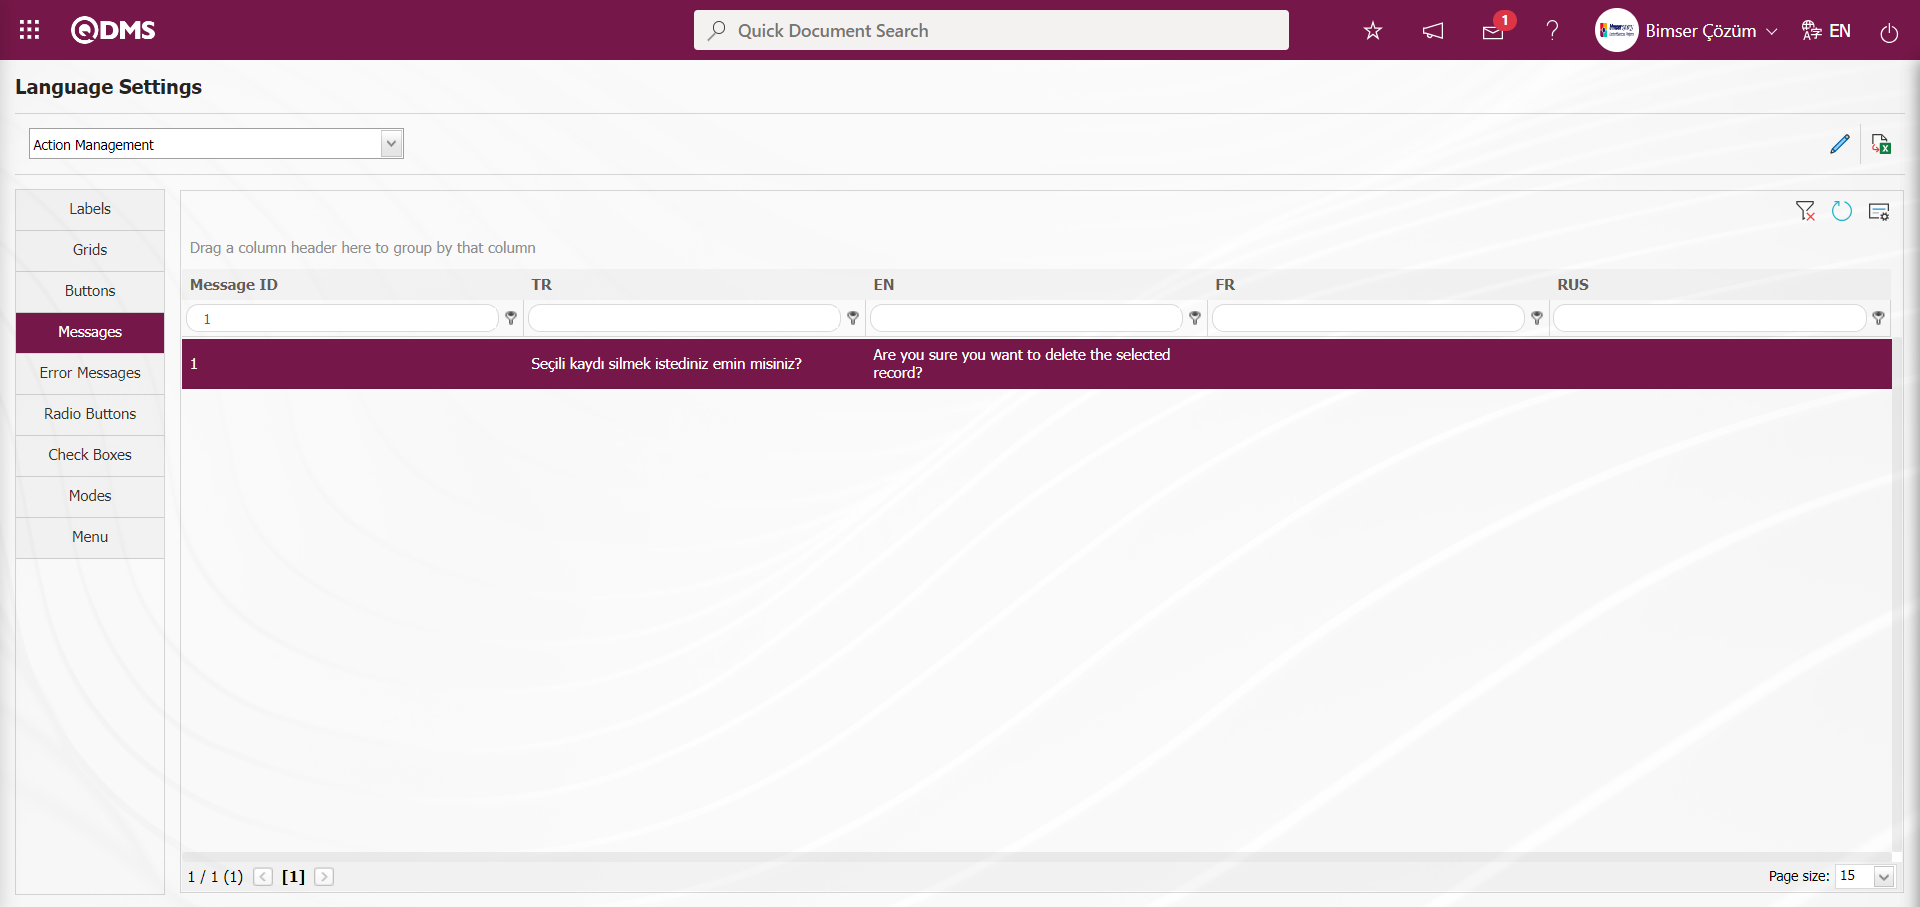
In this way, by selecting the relevant module in the relevant module in the messages tab on the language settings screen, editing, modifying and correcting the incorrectly written messages are made on the selected message information by clicking the  (Change) button in the upper right corner of the screen.
In the Qdms system, if users want to do so, in the Language Settings screen, in the messages tab, select the message information related to the module in the relevant module and click the (Change) button in the upper right corner of the screen to edit and modify the message information. In general, they can edit misspelled messages.
Error Messages Tab;
In this tab, the error message definitions defined in the system related to the Module are listed by selecting the relevant Module in the Modules field in the Language settings menu, and editing and modification operations are performed by selecting the listed error messages information and clicking the ( Change) button.
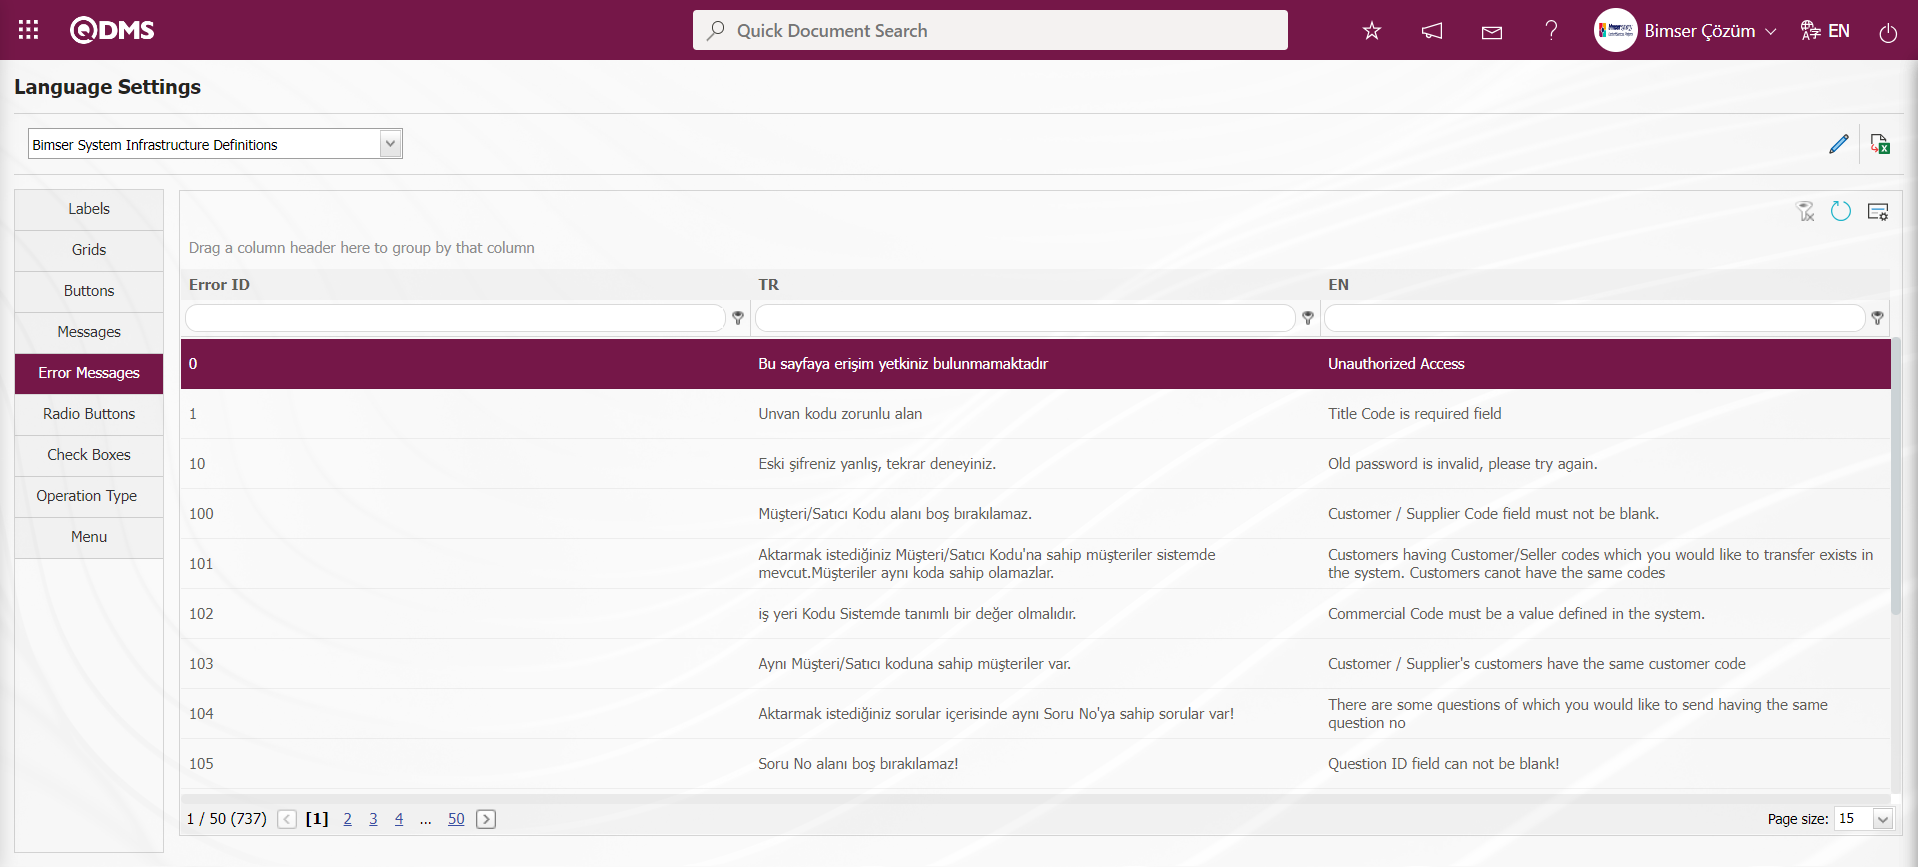
The error message displayed when the user name and password information is typed on the Qdms Main login screen is as follows.
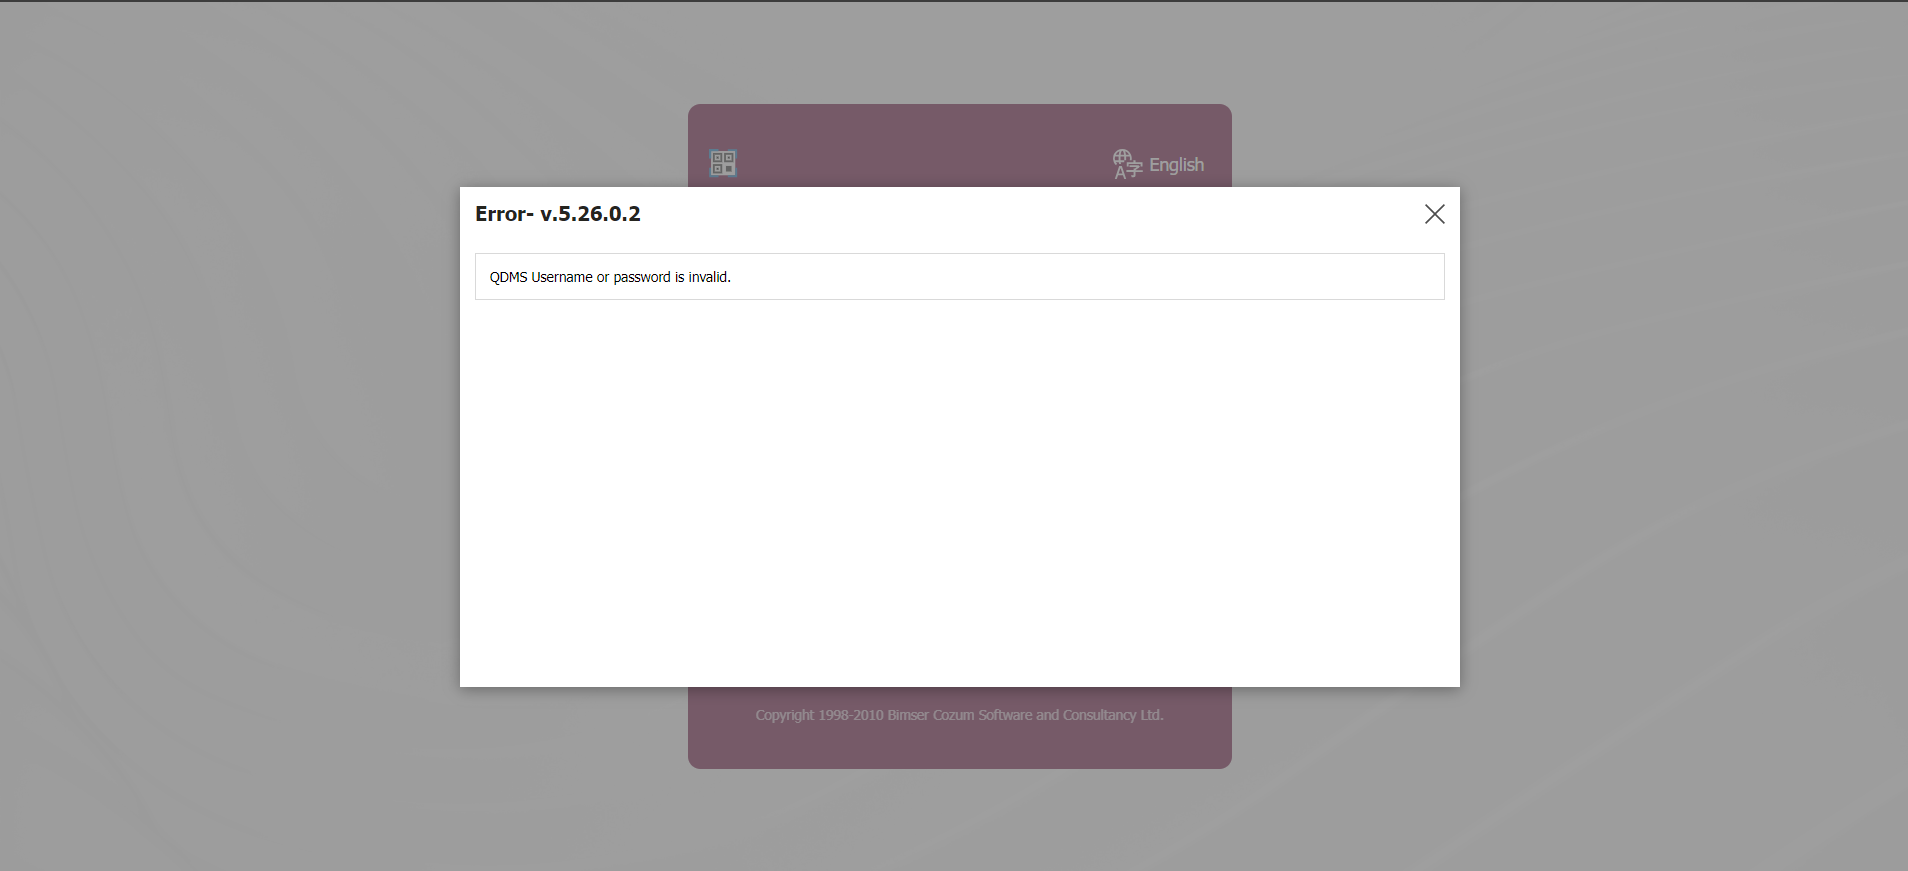
In order to edit and modify this error message, select the System Infrastructure Definitions module as the module on the Language settings screen, click the Error messages tab and select the error message to be modified in the Error messages list.
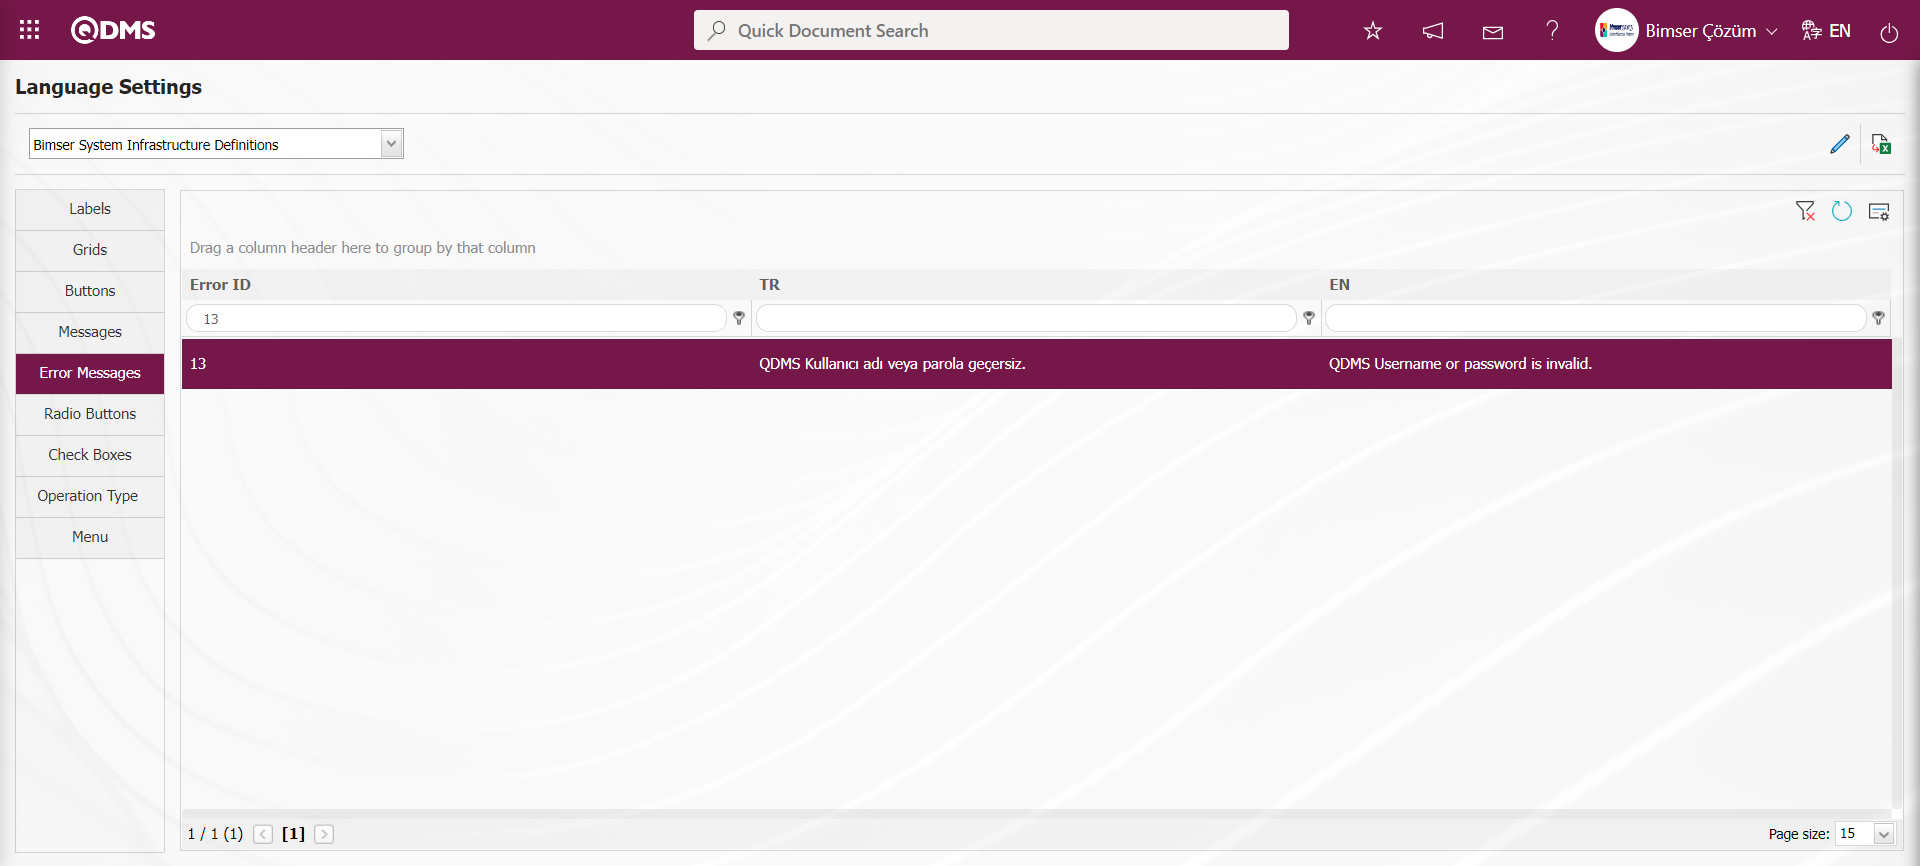
While the error message is selected, click the  (Change) button.
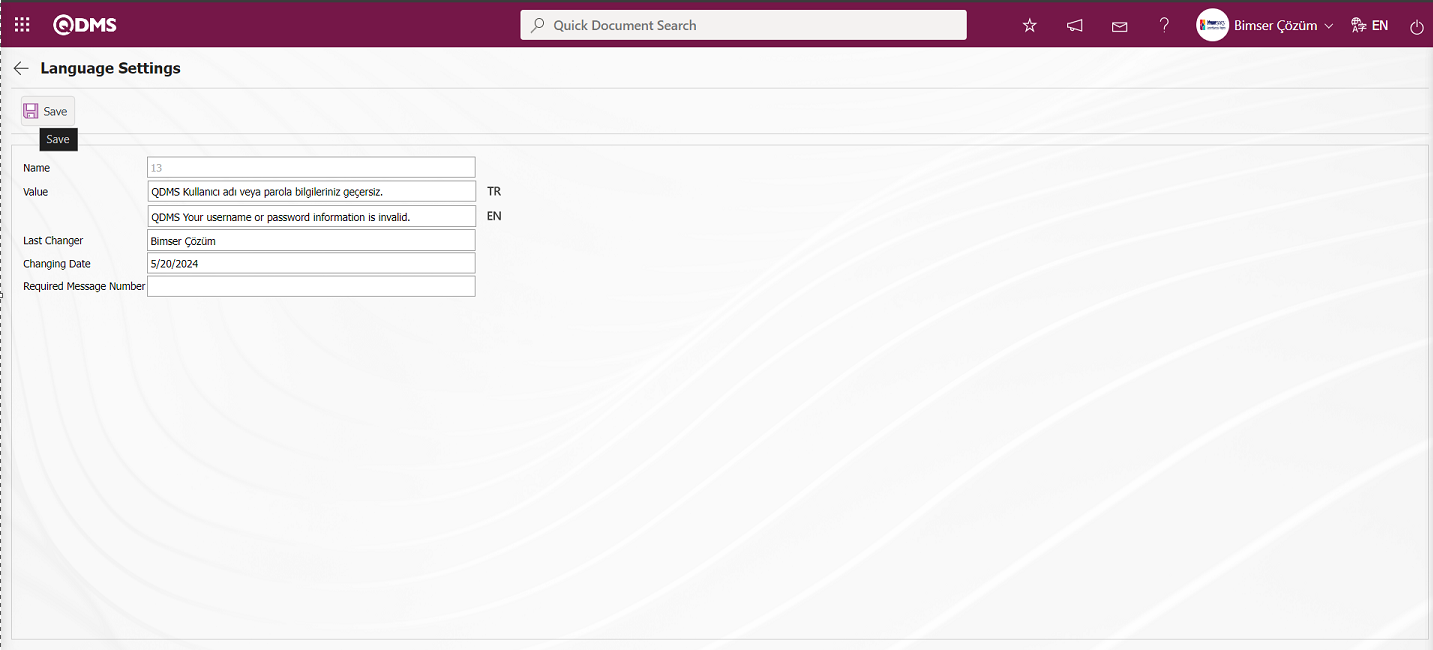
In the Language Settings screen, the name of the error message is changed and edited in the Value field and the language settings record update process is performed by clicking the  button in the upper left corner of the screen.
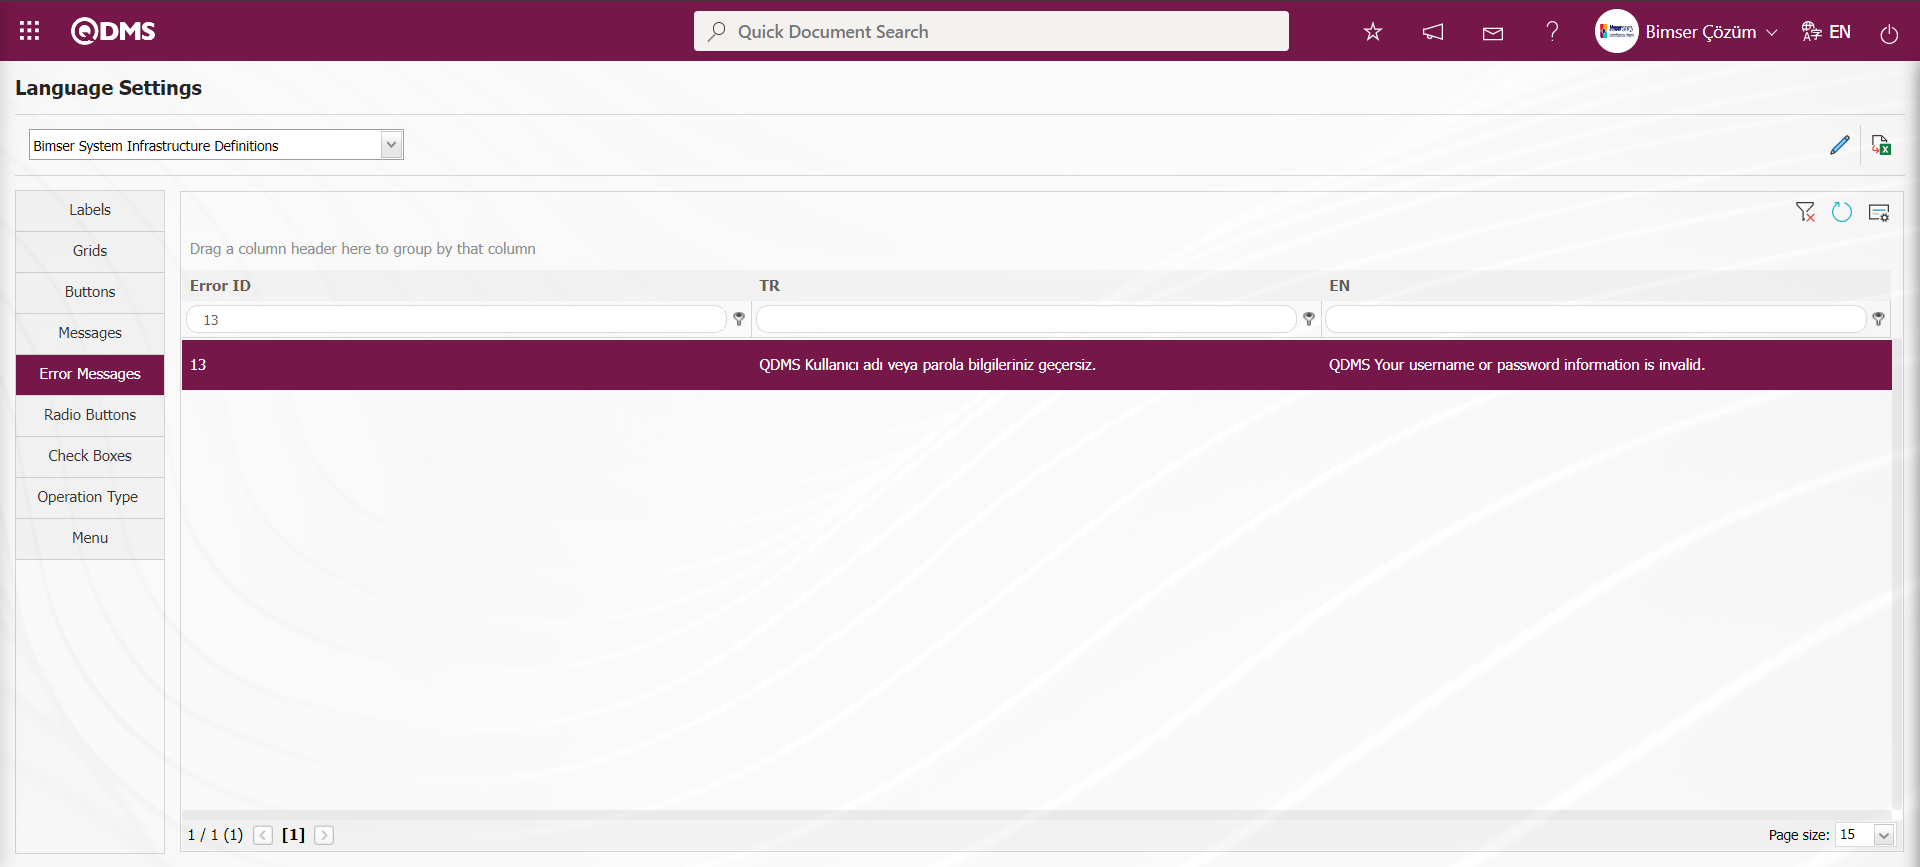
After entering the user name and password information on the Qdms Main login screen, the change made to the selected message information in the list in the Error messages tab on the Language Settings screen is seen.
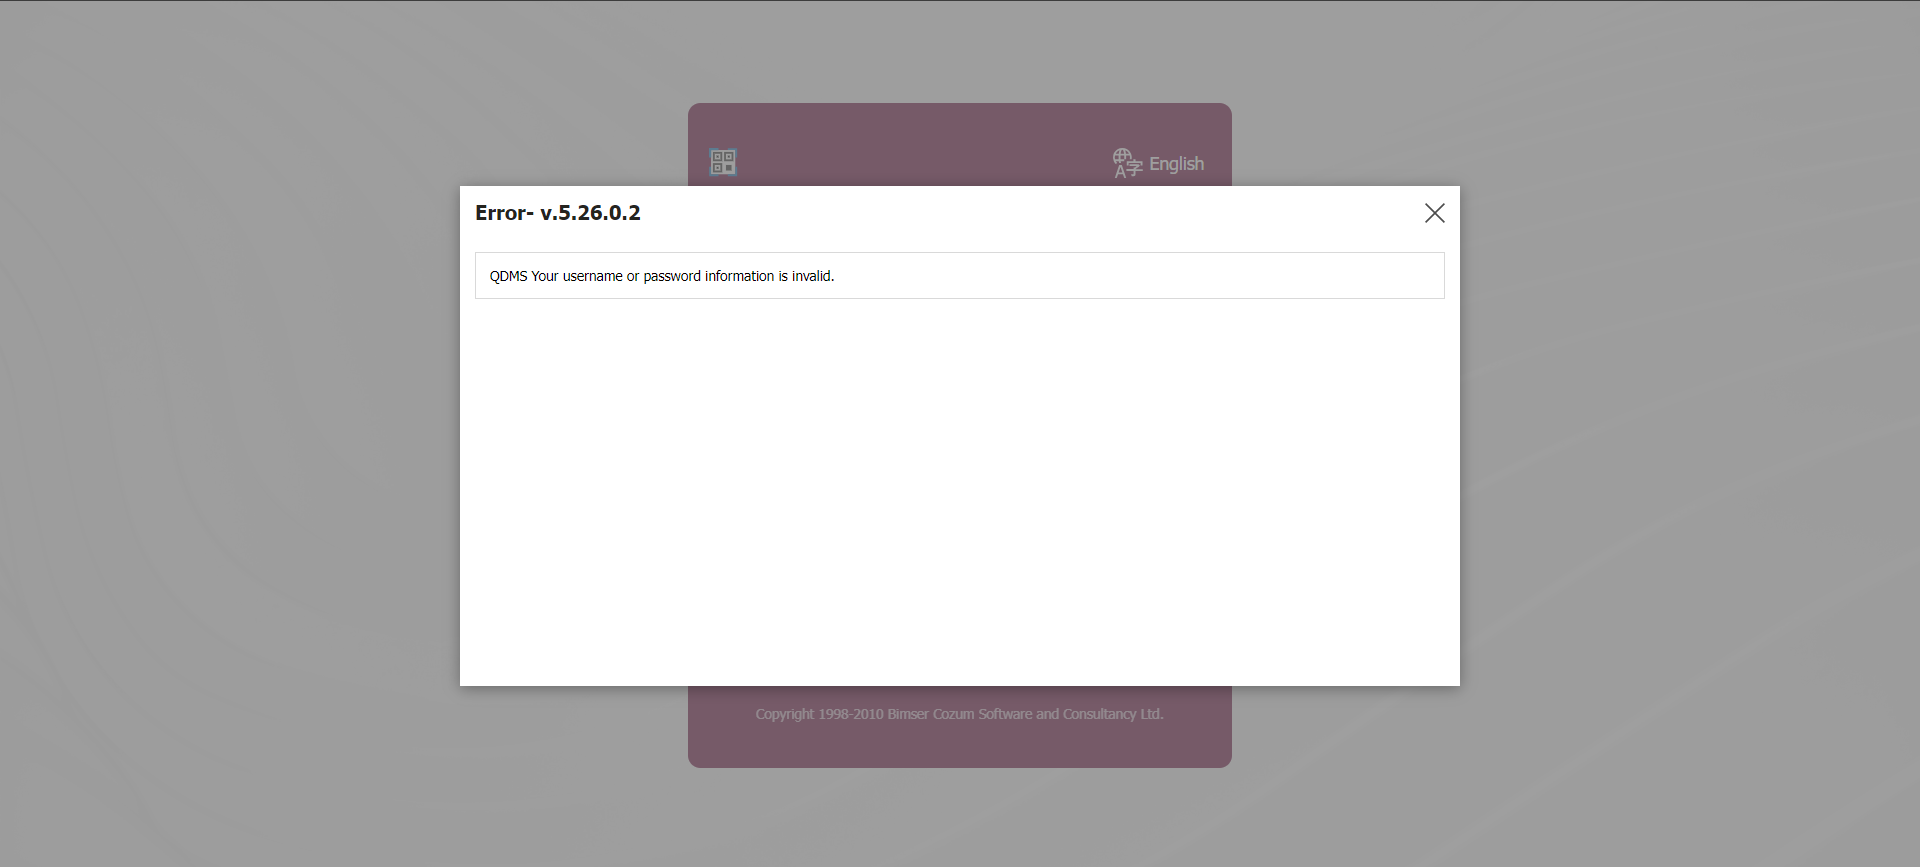
In the Qdms system, it has been ensured that the version information of the application is written in the title of the error pop-ups in the Error messages tab in the Error messages tab in the Language Settings Menu in the relevant modules in the Qdms system, where the error messages are displayed as warning messages from the system.
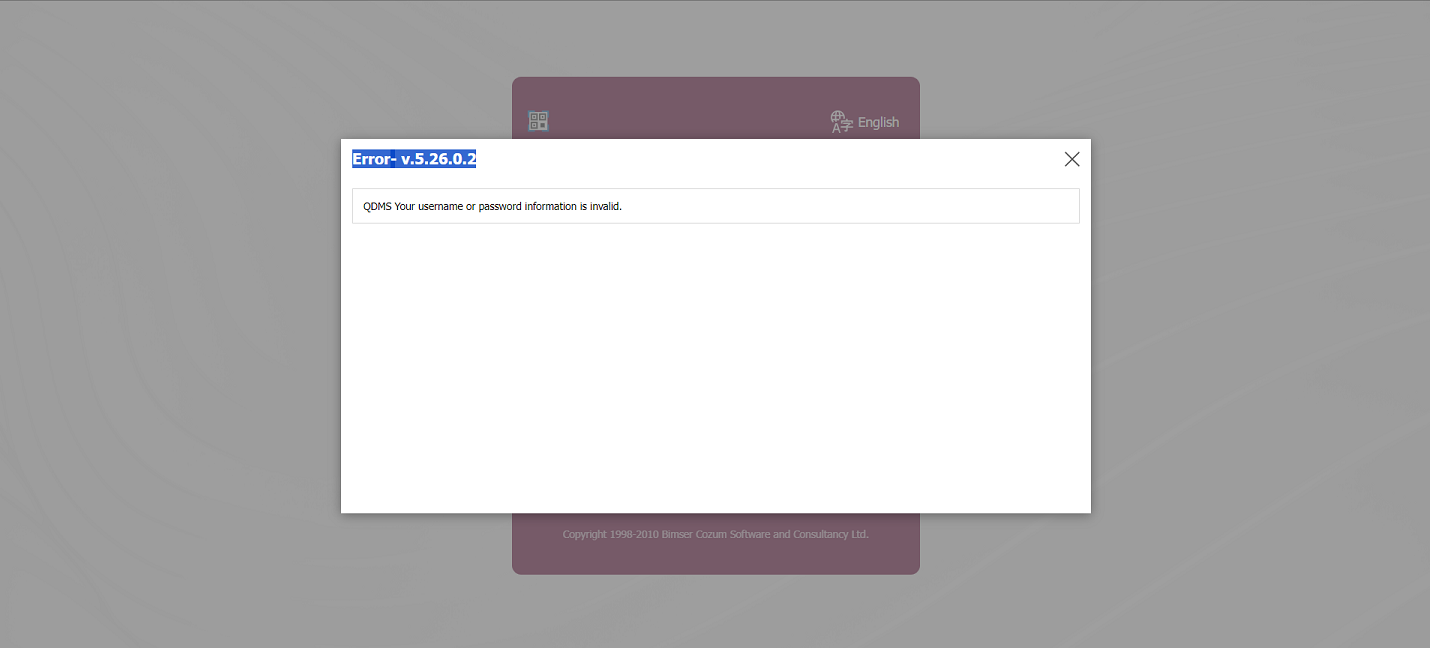
n the Qdms system, users can make changes and edits to the error message information by selecting the error message information related to the module in the Error Messages tab on the Language Settings screen and clicking the (Change) button in the upper right corner of the screen.
Radio Buttons Tab;
In the language settings menu, select the relevant Module in the Modules field and change the definitions of the Radio Buttons defined in the system related to the Module. When the related module is selected in the Radio Buttons tab, Radio Buttons definitions related to the module defined in the system are listed.
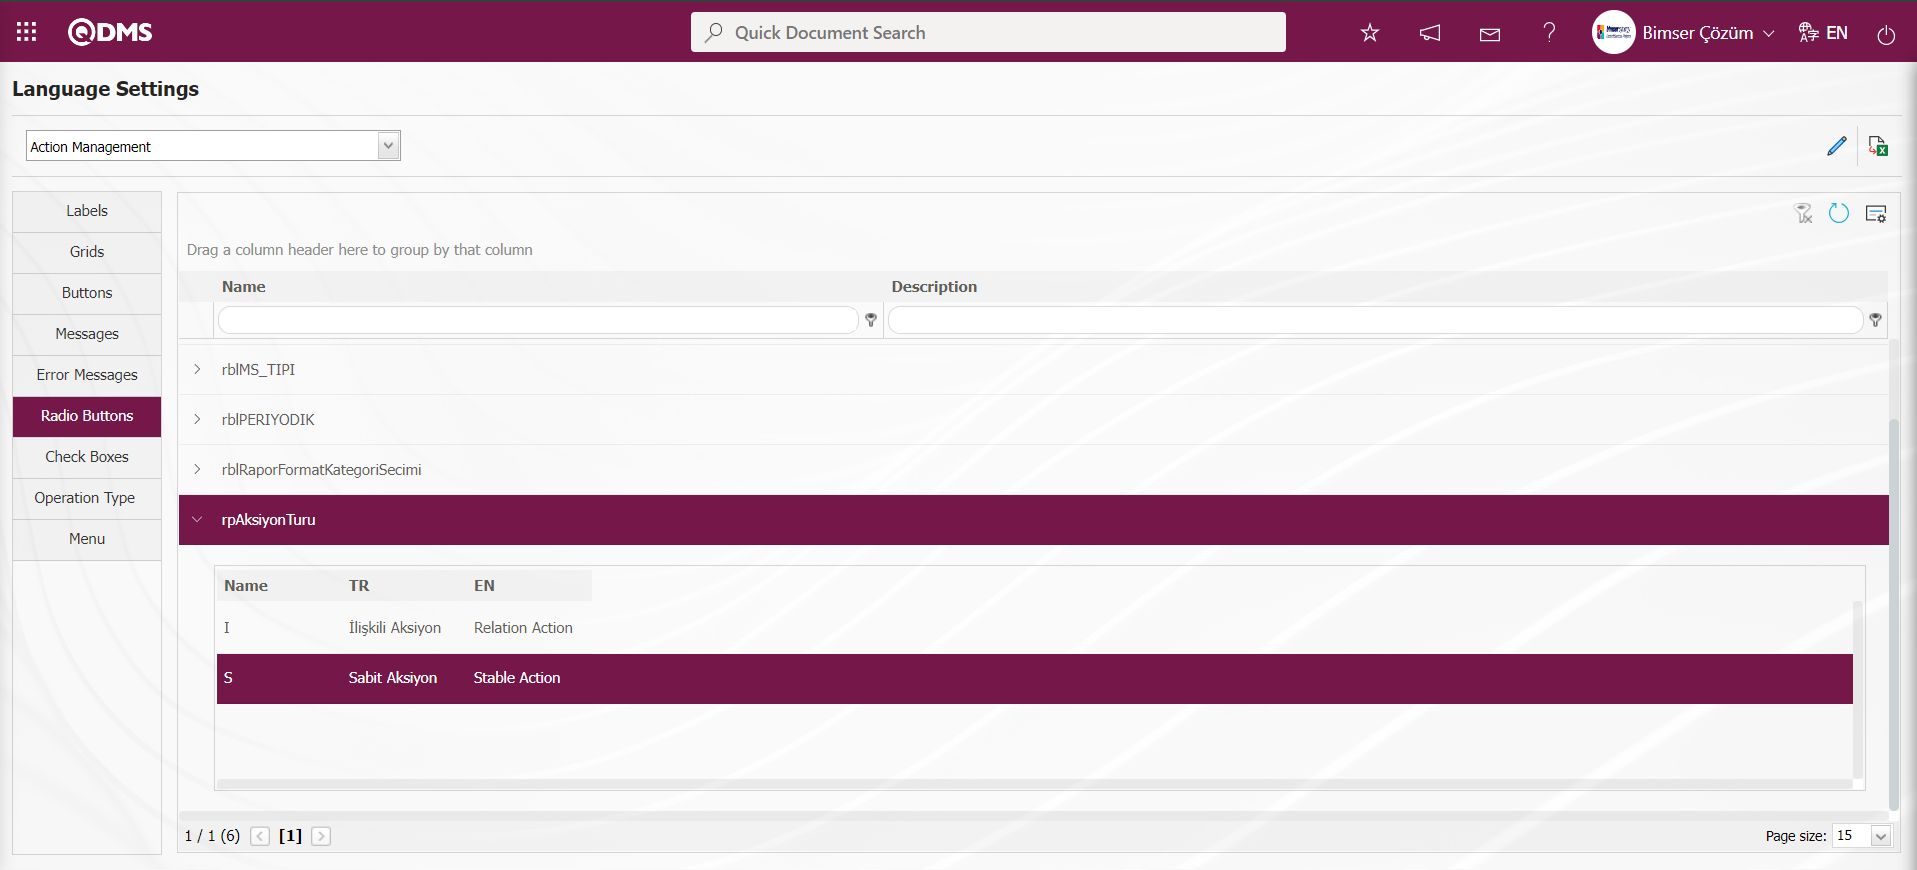
For example, in the Action Management module, in the Action Type field in the Action Management module, editing is done on the radio buttons fields. On the Action Item Planning-New Record screen, the Radio Buttons fields in the Action Type field are as in the screenshot.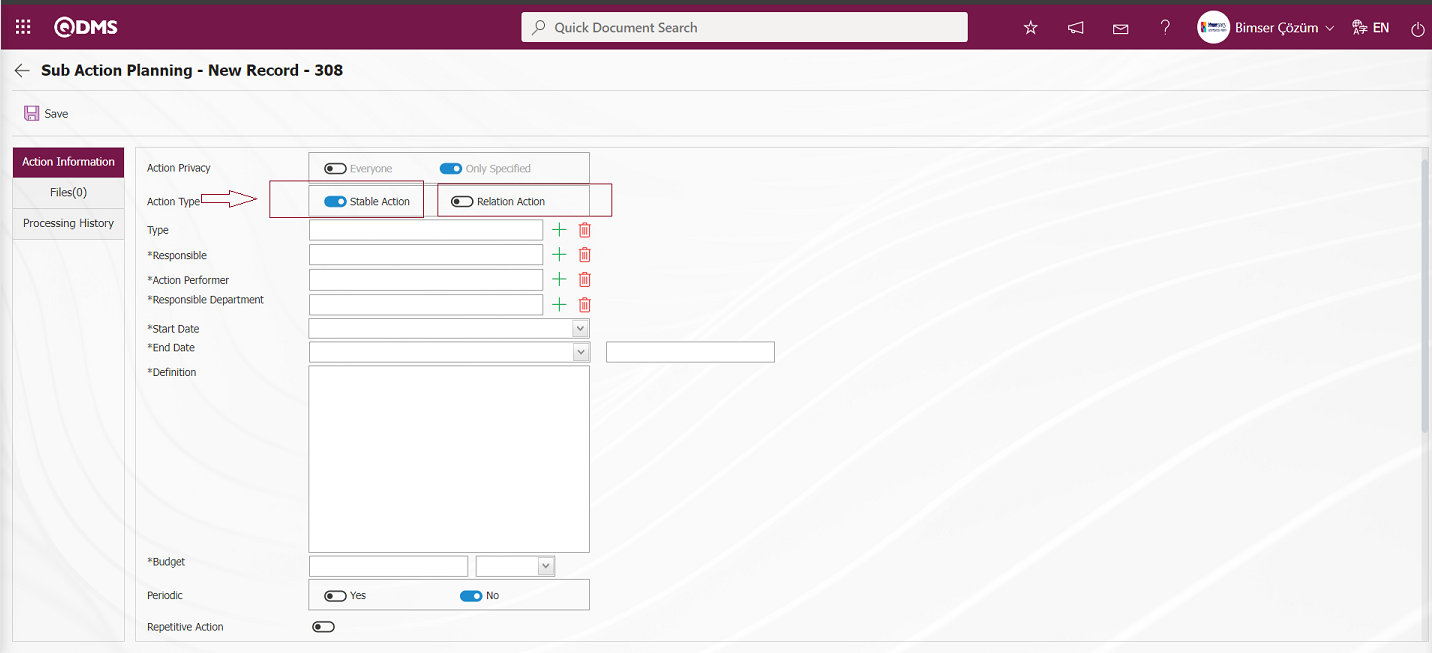
In order to change the names of the radio buttons related to the relevant field in the Radio buttons tab on the Language Settings screen, click the  button in front of the “rpAksiyonTuru” field and the options of the fields of the radio buttons are displayed. While the radio button field to be changed in the radio buttons tab is selected, click the button.
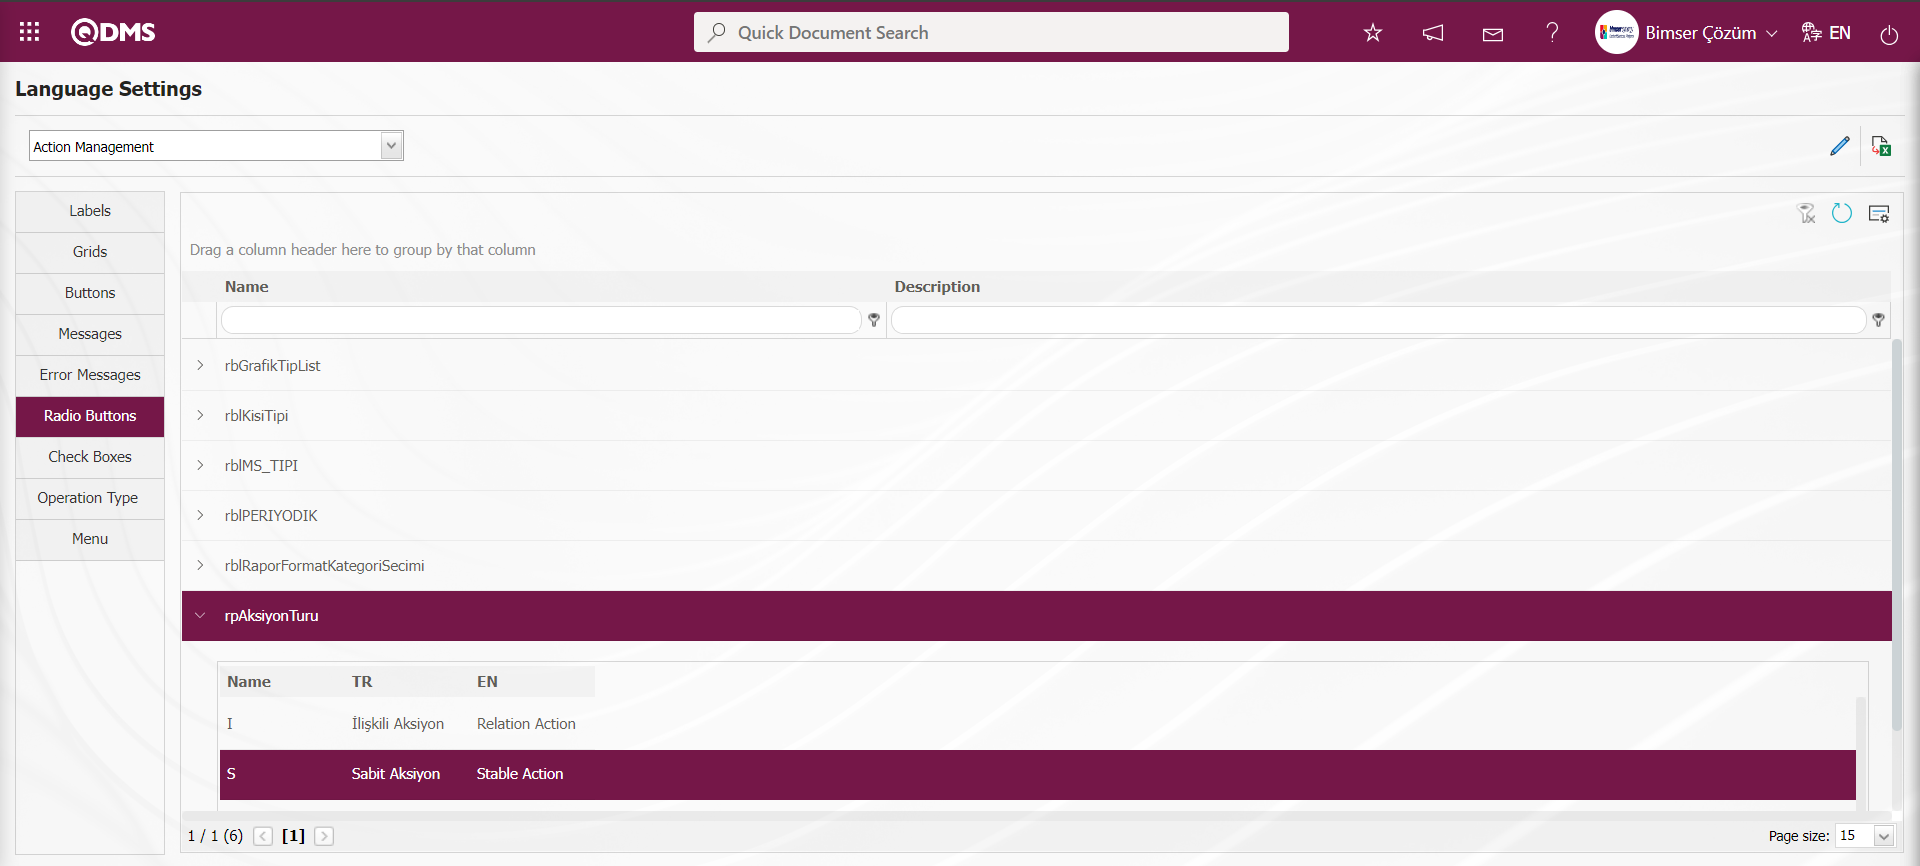
On the Language Settings screen, edit and change the name of the field corresponding to the radio button to be changed in the Value field.
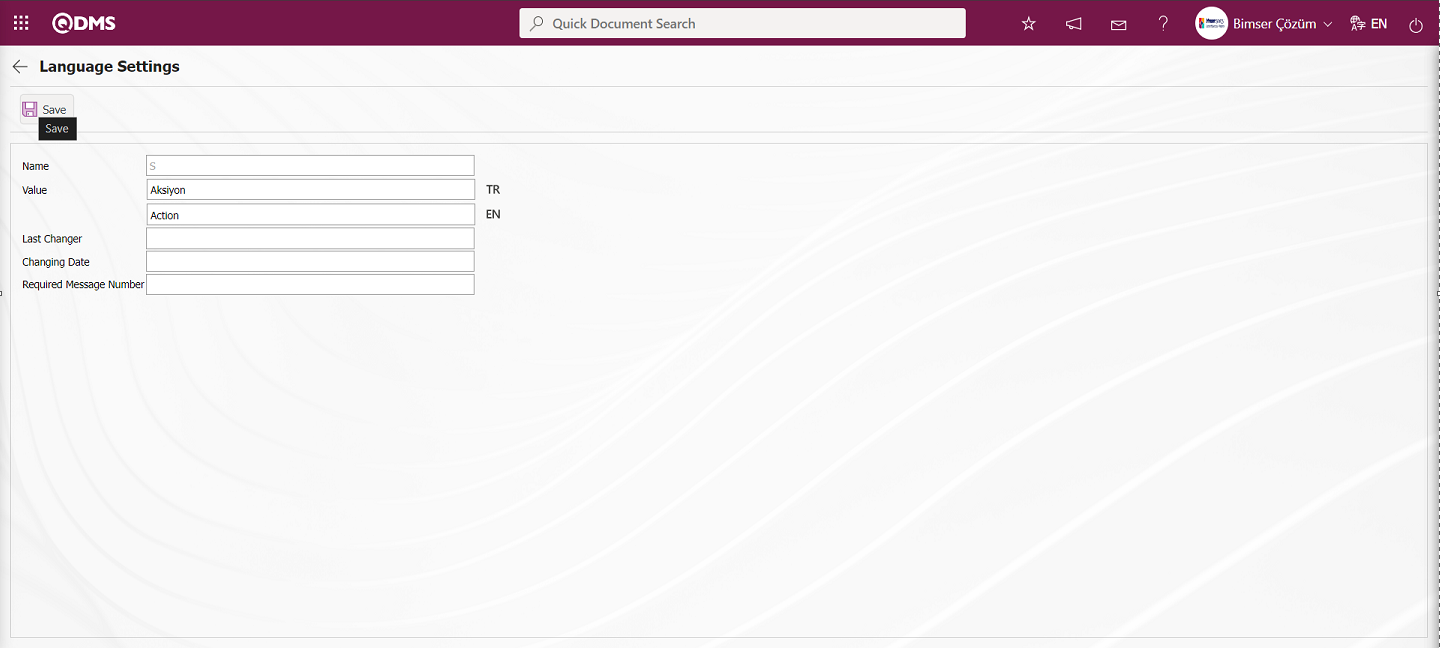
After the change made on the field corresponding to the radio bot on the Language Settings screen, the language Settings record update process is done by clicking the  button in the upper left corner of the screen.
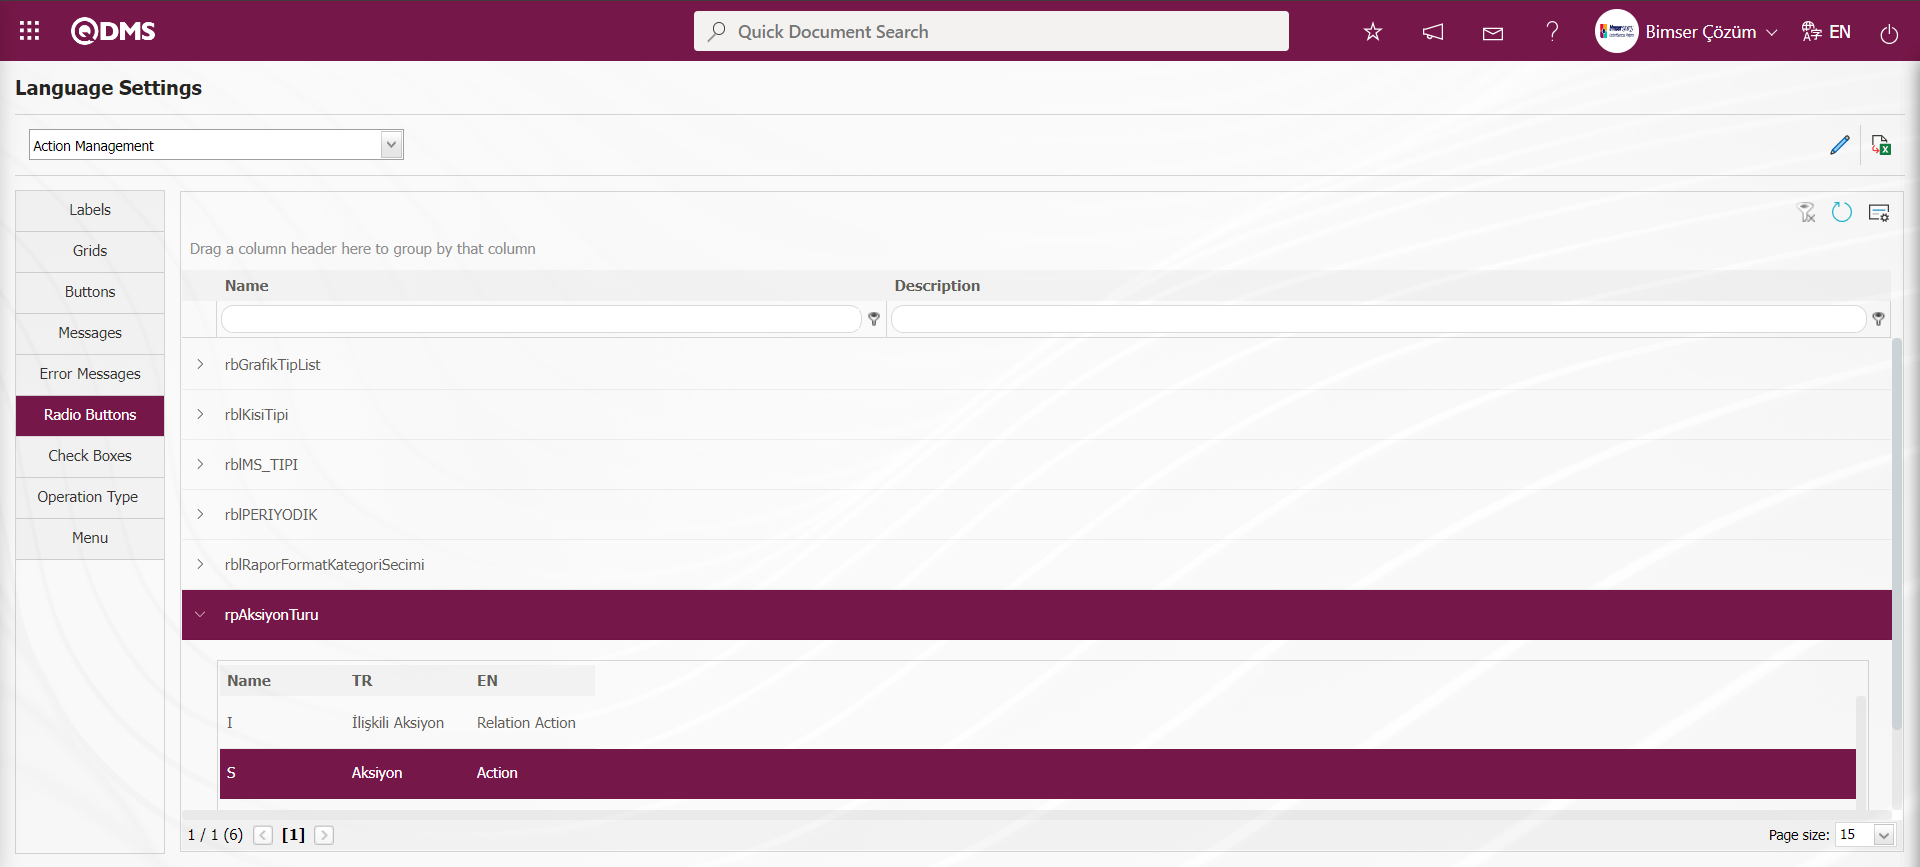
On the Action Item Planning-New Record screen, in the Action Type field in the Action Type field, it is seen that the radio button related to the Action type has been changed in the “rpAksiyonTuru”field related to the Action Management Module in the Radio buttons tab in the Language Settings.
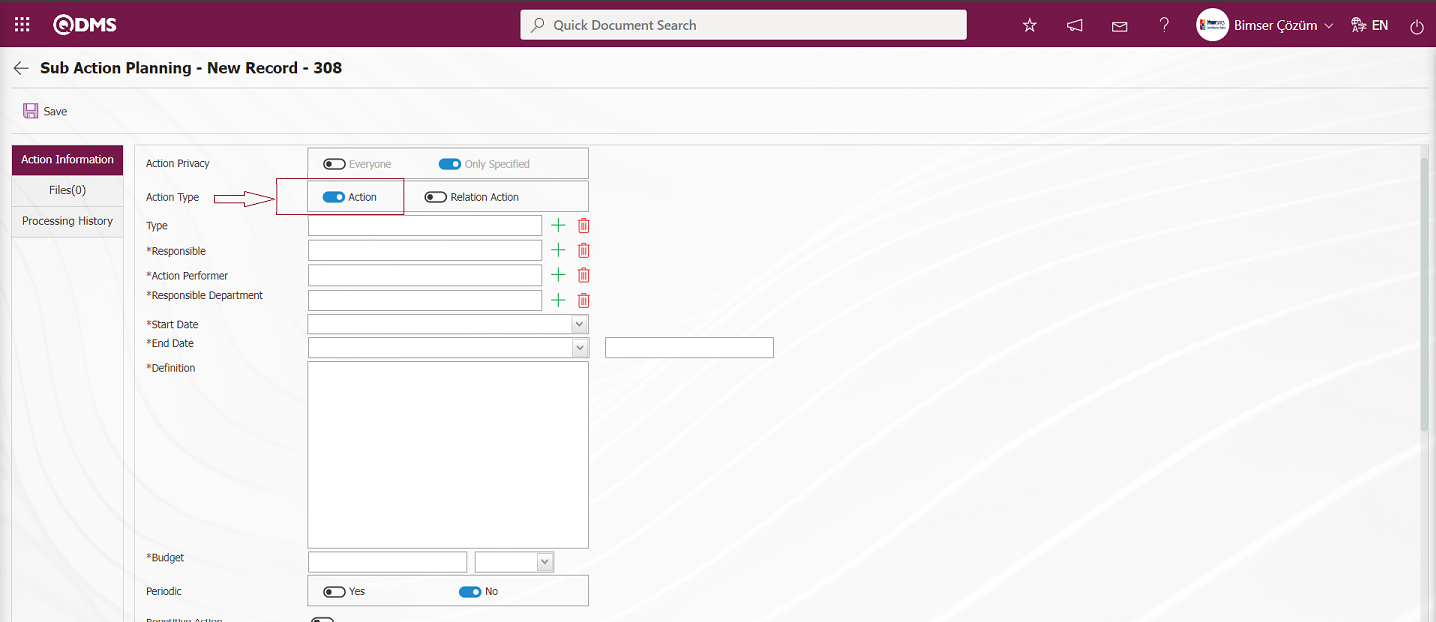
In the Qdms system, if users want to do so, they can make changes and edits on the radio buttons fields information by selecting the fields corresponding to the radio buttons related to the module in the Radio Buttons tab on the Language Settings screen and clicking the (Change) button in the upper right corner of the screen.
Check Boxes Tab;
In the language settings menu, select the relevant Module in the Modules field and change the system-defined Check Boxes definitions related to the Module. When the related module is selected in the Checkboxes tab, the definitions of Checkboxes related to the module defined in the system are listed.
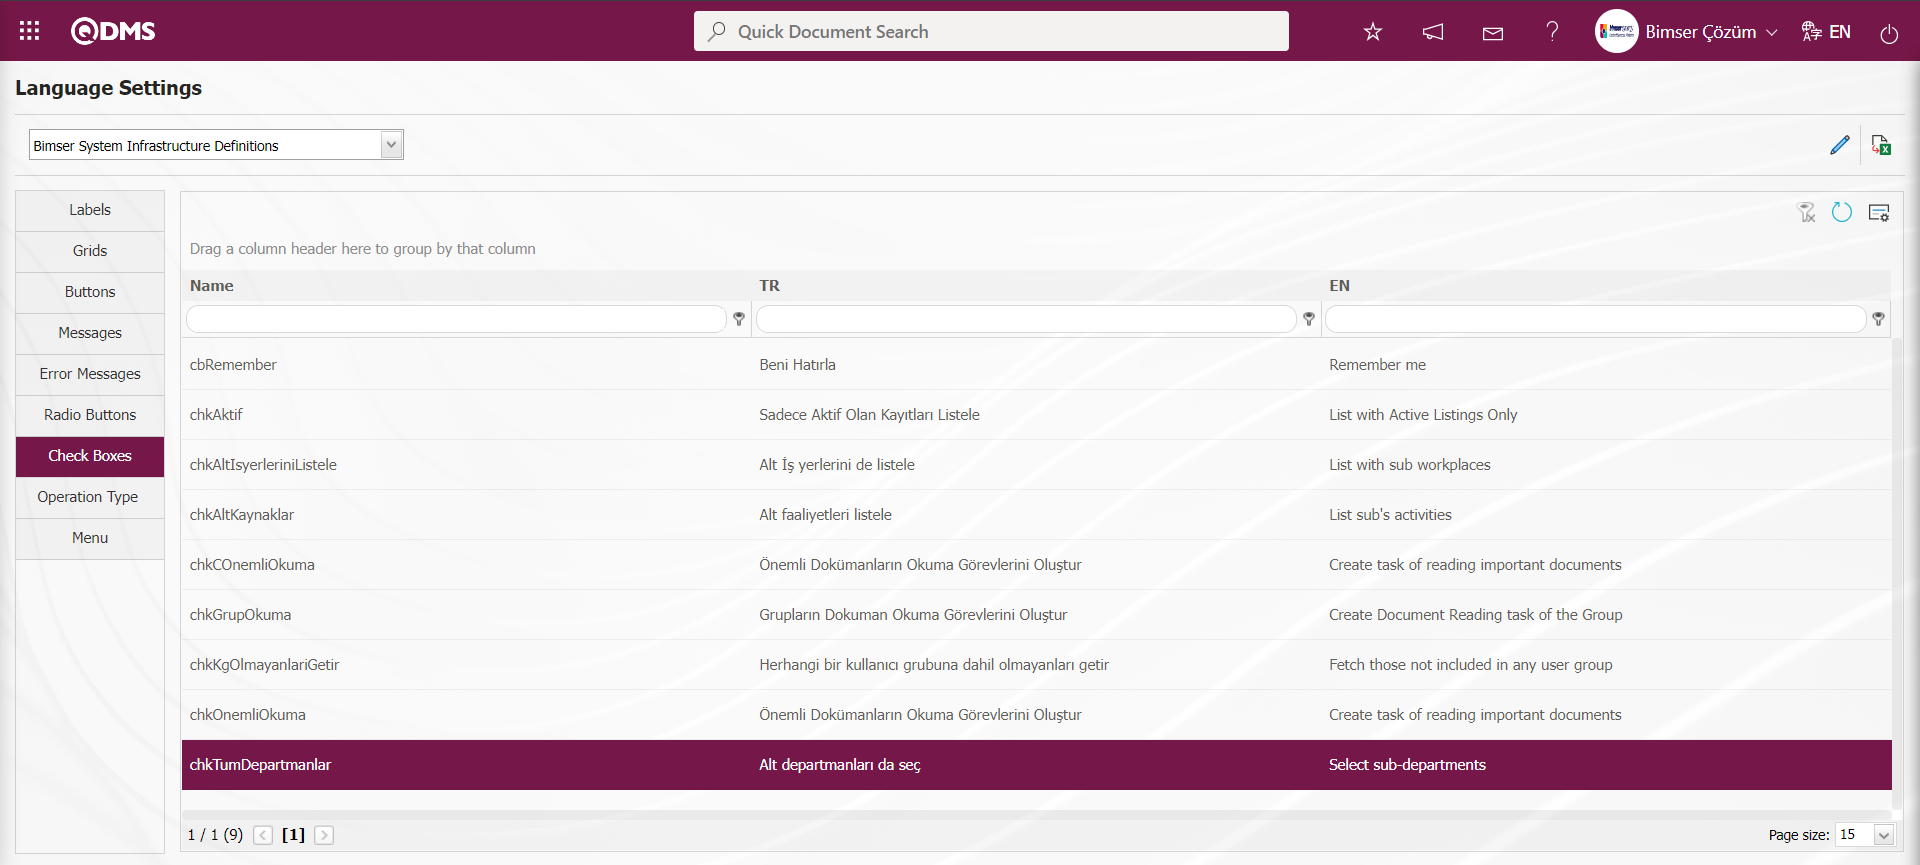
In the Select Department screen opened by clicking the  (Select) button in the Parent department field on the New Record screen, the Checkbox field “Select sub-departments” field is displayed in the Filter tab.
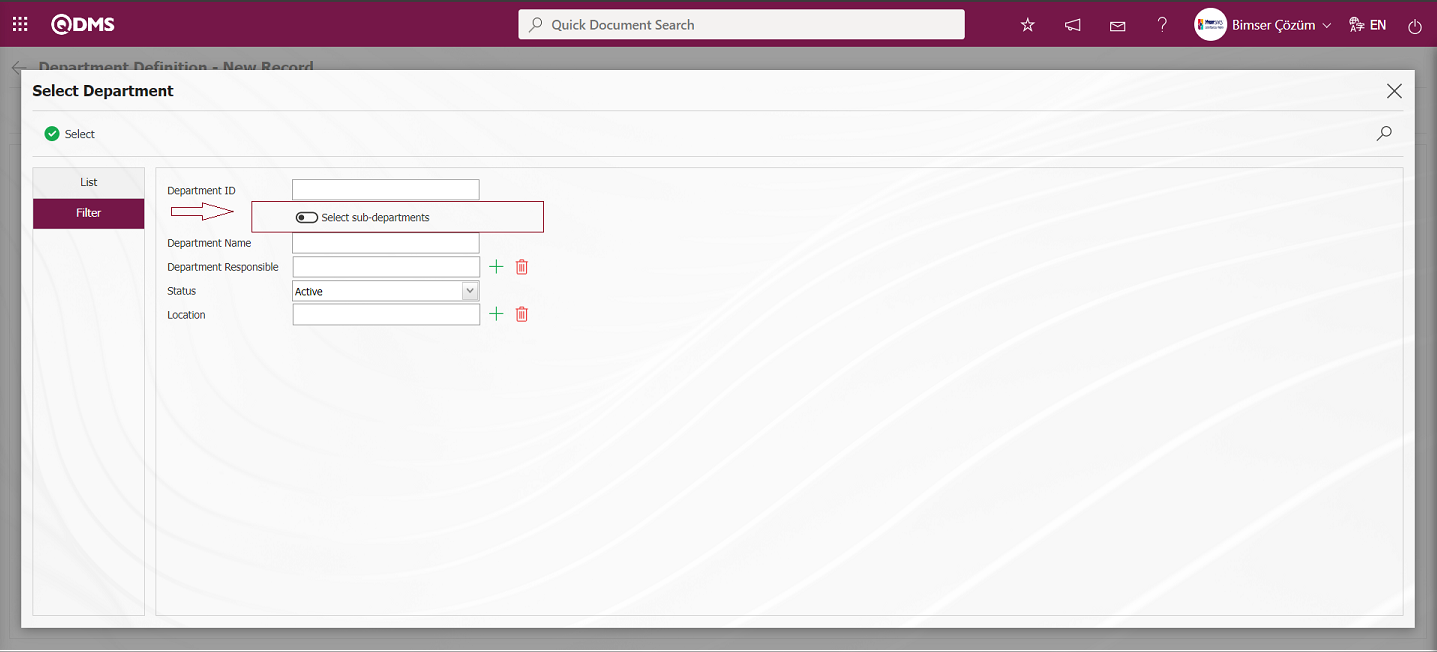
Displayed as “Select sub-departments”, this checkbox field is selected in the list of checkboxes listed in the Checkboxes tab in the Language Settings and the (Change) button is clicked.
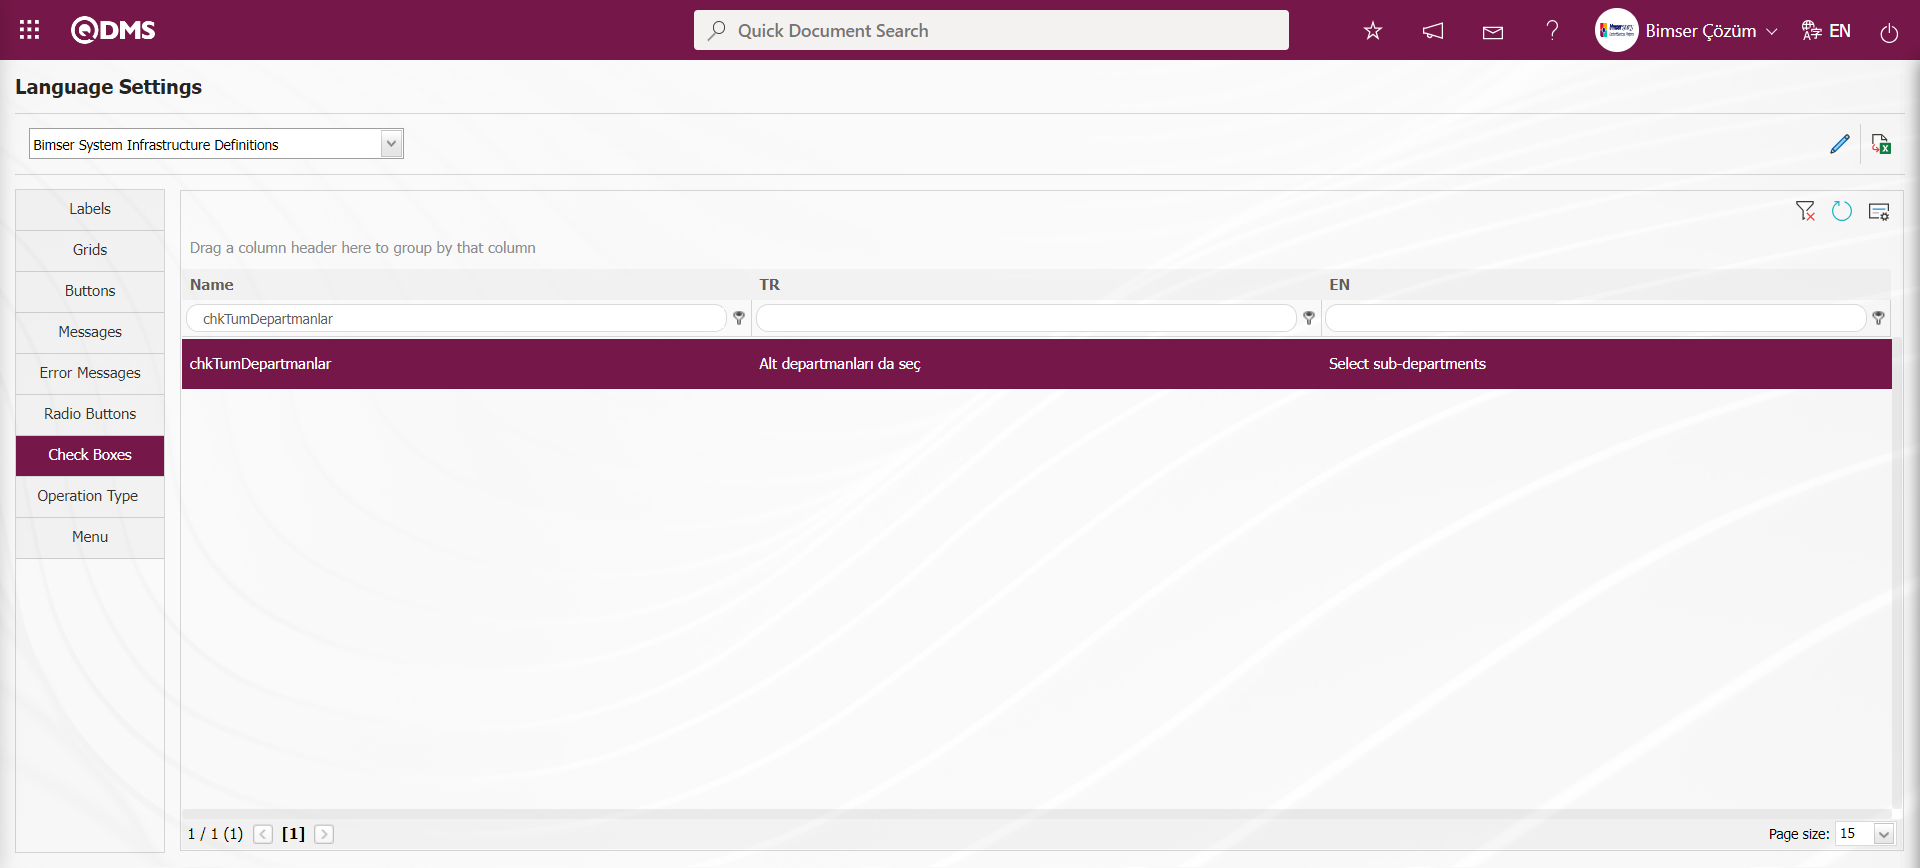
In the Language Settings screen, changes and edits are made on the name information of the field corresponding to the check box of the Name field.
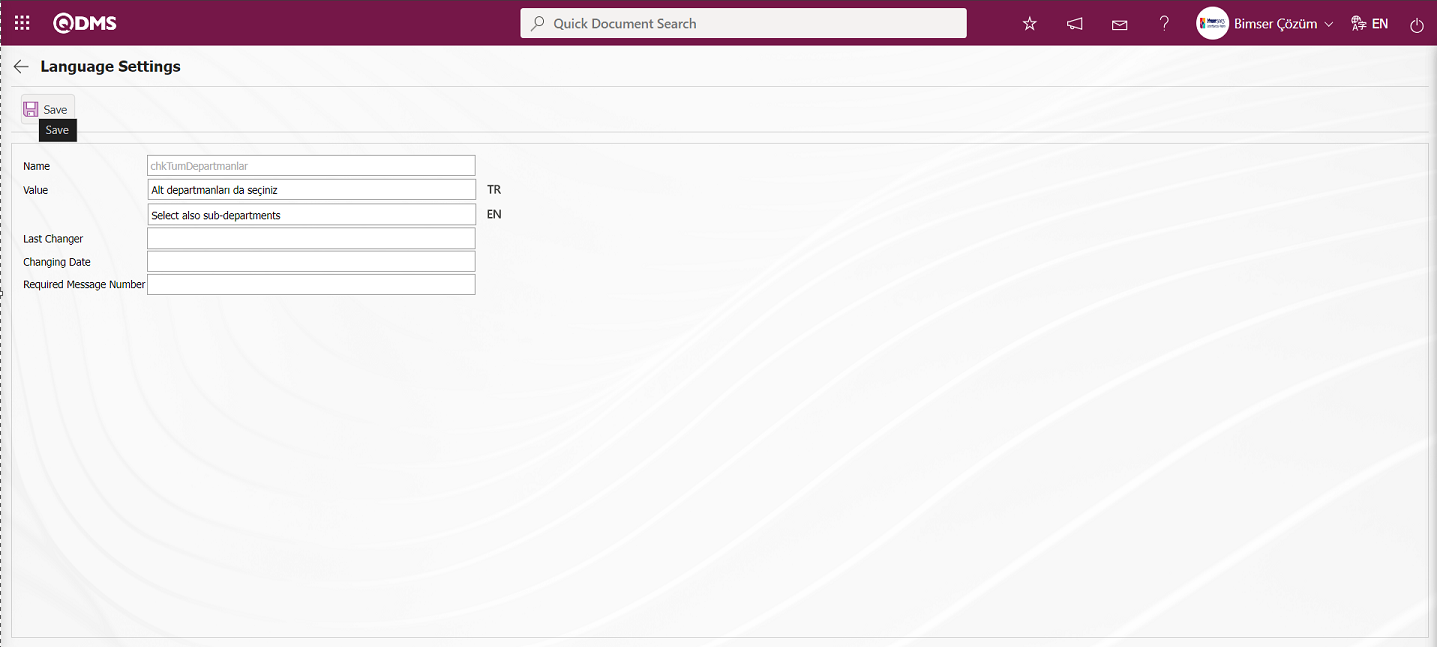
After changing the name of the field corresponding to the check box in the Value field on the Language Settings screen, the Language Settings record update process is performed by clicking the  button in the upper left corner of the screen.

In the Select Department screen opened by clicking the (Select) button in the Parent department field on the Department Identification-New Record screen, the change made on the field corresponding to the checkbox in the Checkboxes tab on the Language Settings screen on the Filter tab is seen.
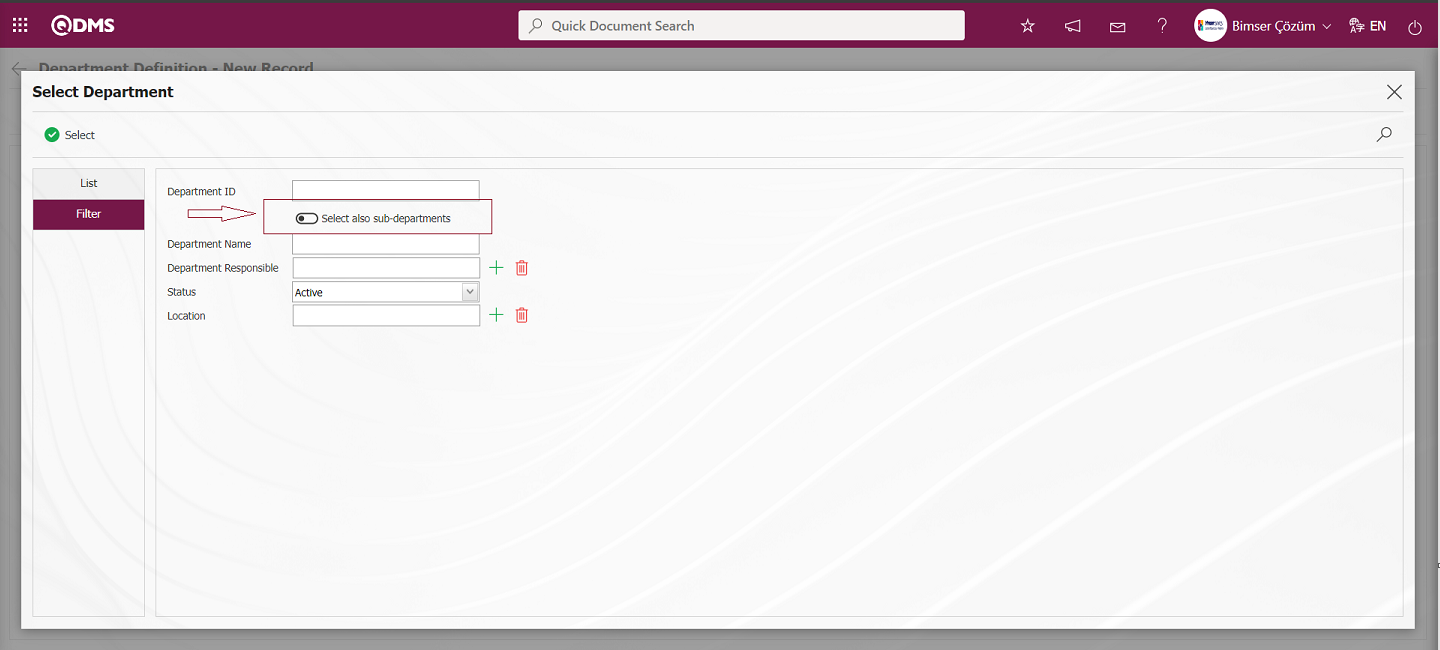
In the Qdms system, if users want to do so, they can make changes and edit the information on the Checkboxes fields by selecting the fields corresponding to the Checkboxes in the relevant module in the Checkboxes tab on the Language Settings screen and clicking the (Change) button in the upper right corner of the screen.
Operation Types Tab;
In the language settings menu, select the relevant Module in the Modules field and change the Operation Types definitions defined in the system related to the Module. When the related module is selected in the Transaction Types tab, the Operation Types definitions related to the module defined in the system are listed.
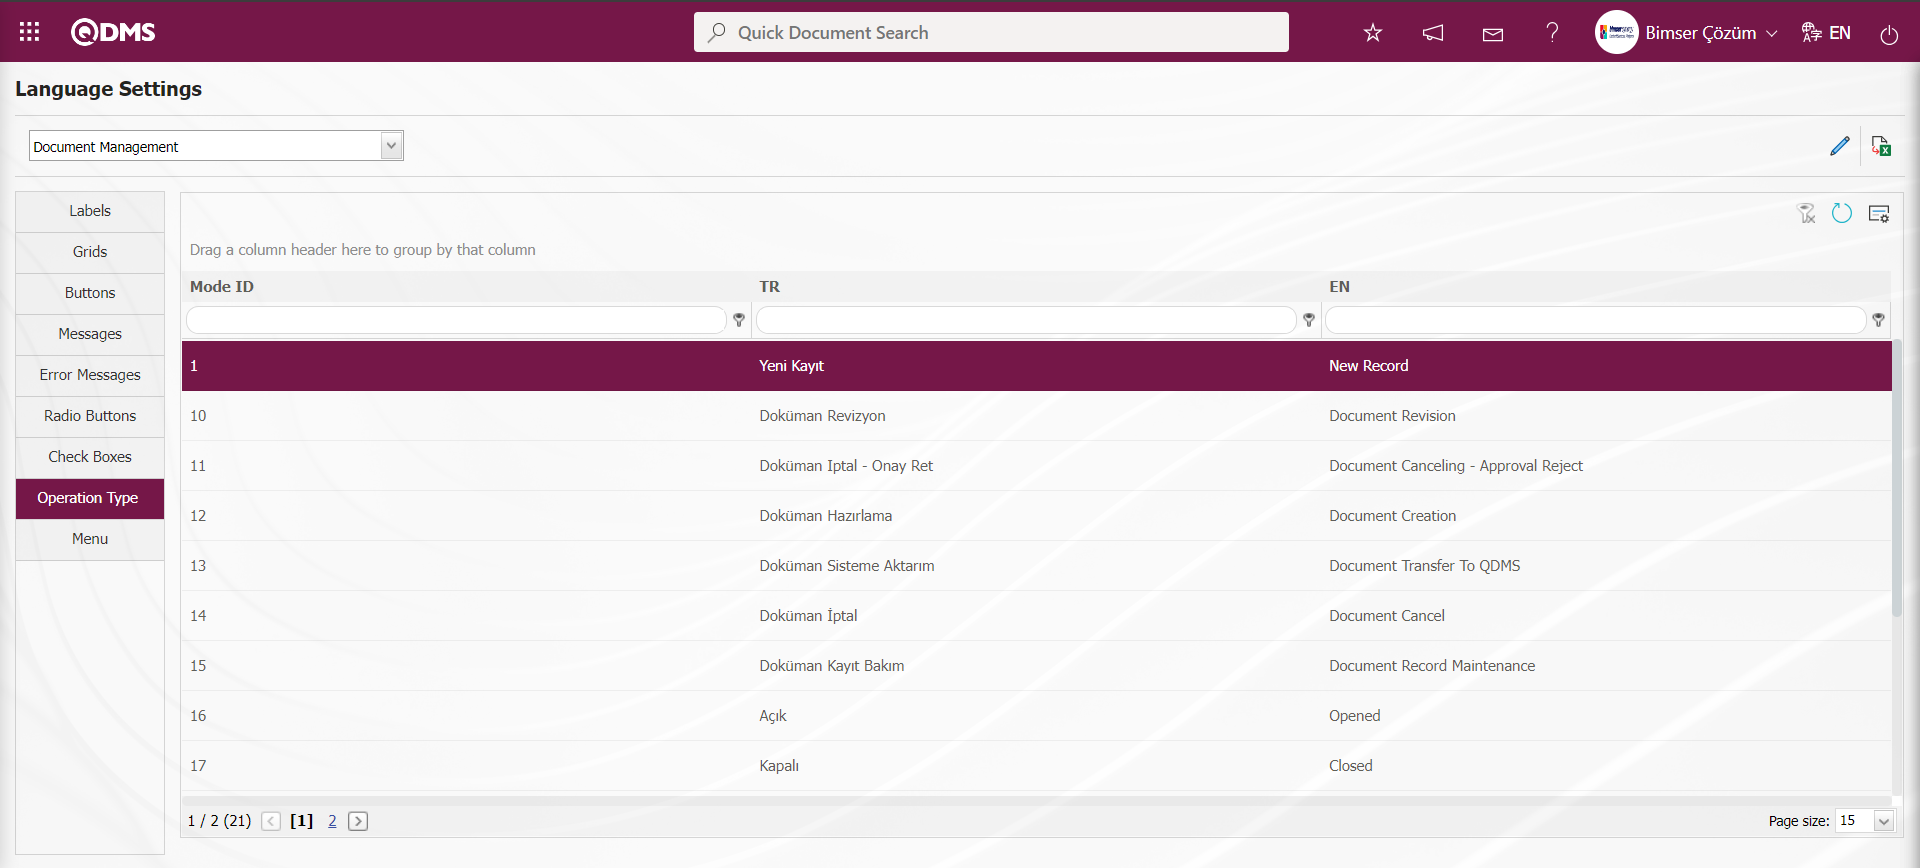
For example: The related transaction type is changed in the Integrated Management System/Document Management/Document Cancellation menu.
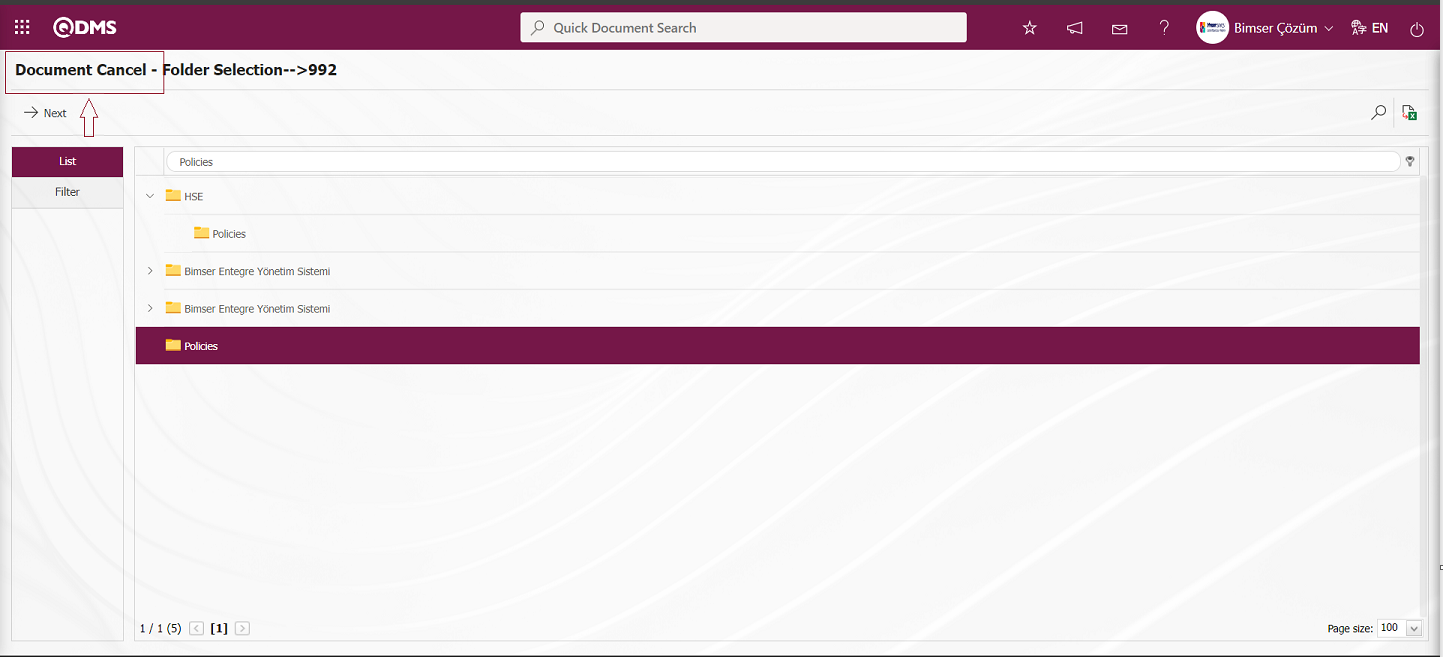
In the Language Settings screen, when you want to change the operation type related to the relevant module, select the module in the module list and click on the Operation Type tab and the list of operation types is listed. Select the transaction type to be changed in the listed operation types and click the  (Change) button.
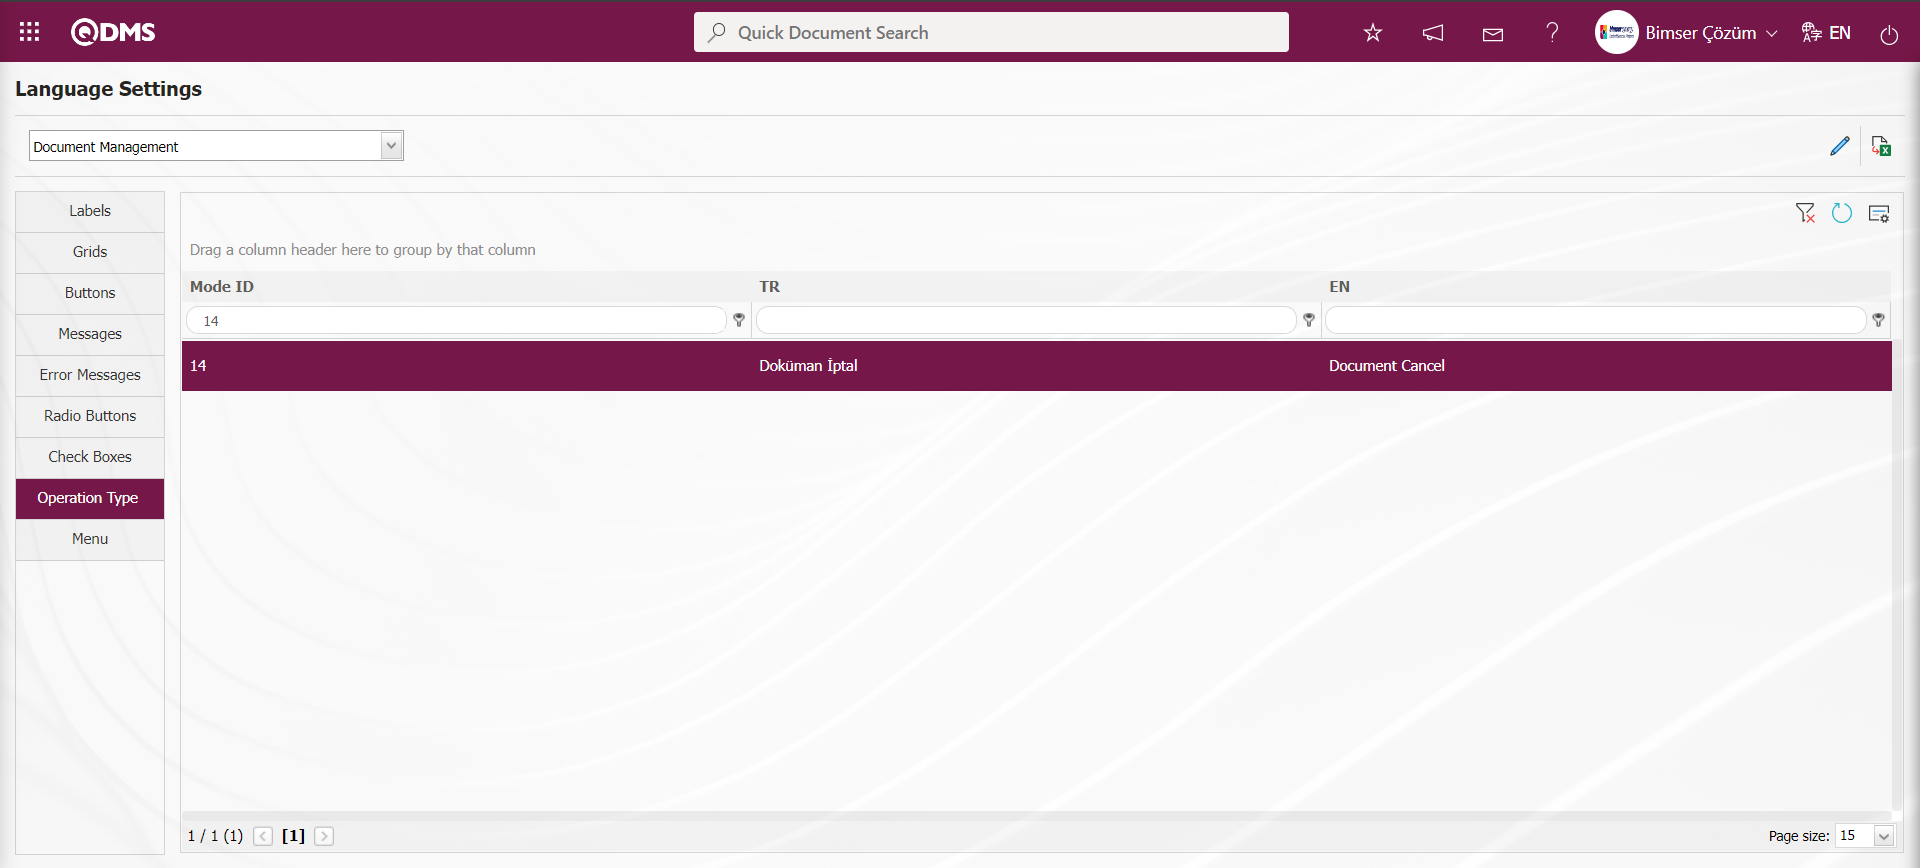
In the Language Settings screen, the information of the operation type to be changed in the Value field is changed.
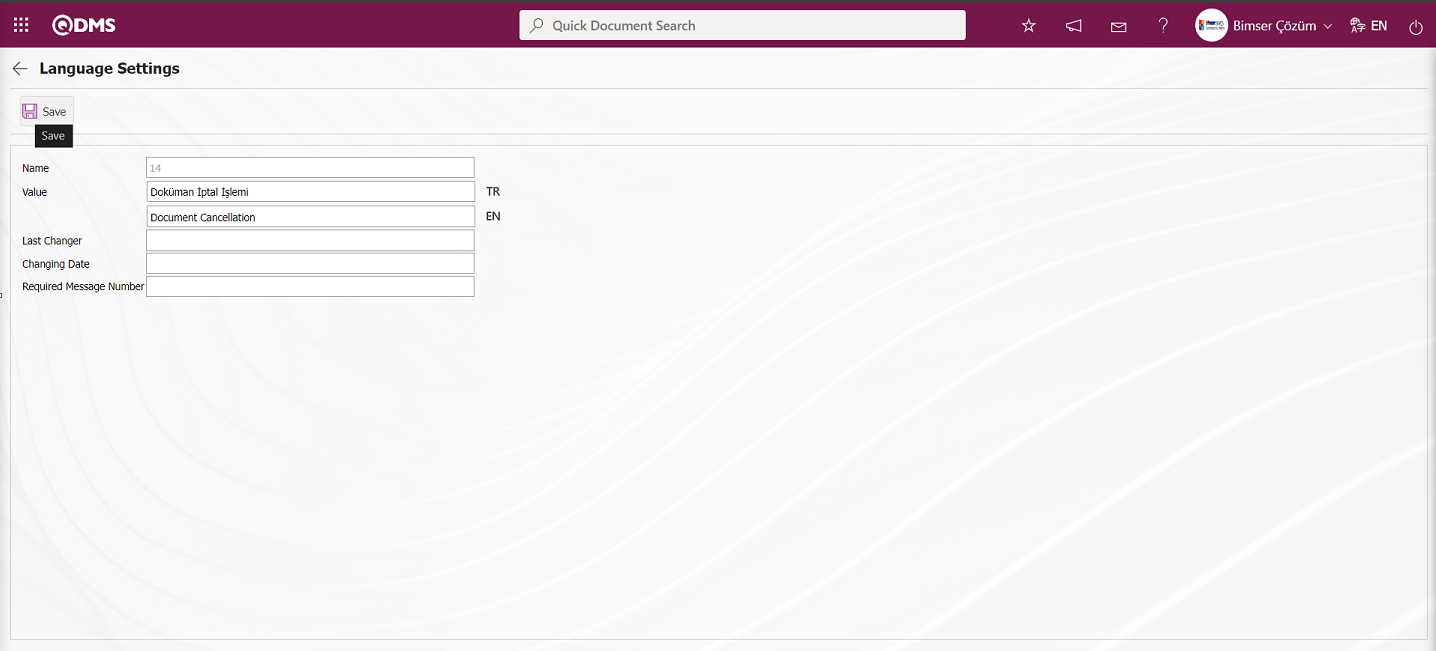
After the necessary editing process is done with the operation type on the Language Settings screen, the Language settings record update process is performed by clicking the  button in the upper left corner of the screen.

In the Integrated Management System /Document Management /Document Cancellation Process menu, on the Language Settings screen on the Operation Type tab, the change on the operation type edited is displayed. It is seen that the “Document Cancellation - Folder Selection” screen has changed to “Document Cancellation - Folder Selection” after the change.
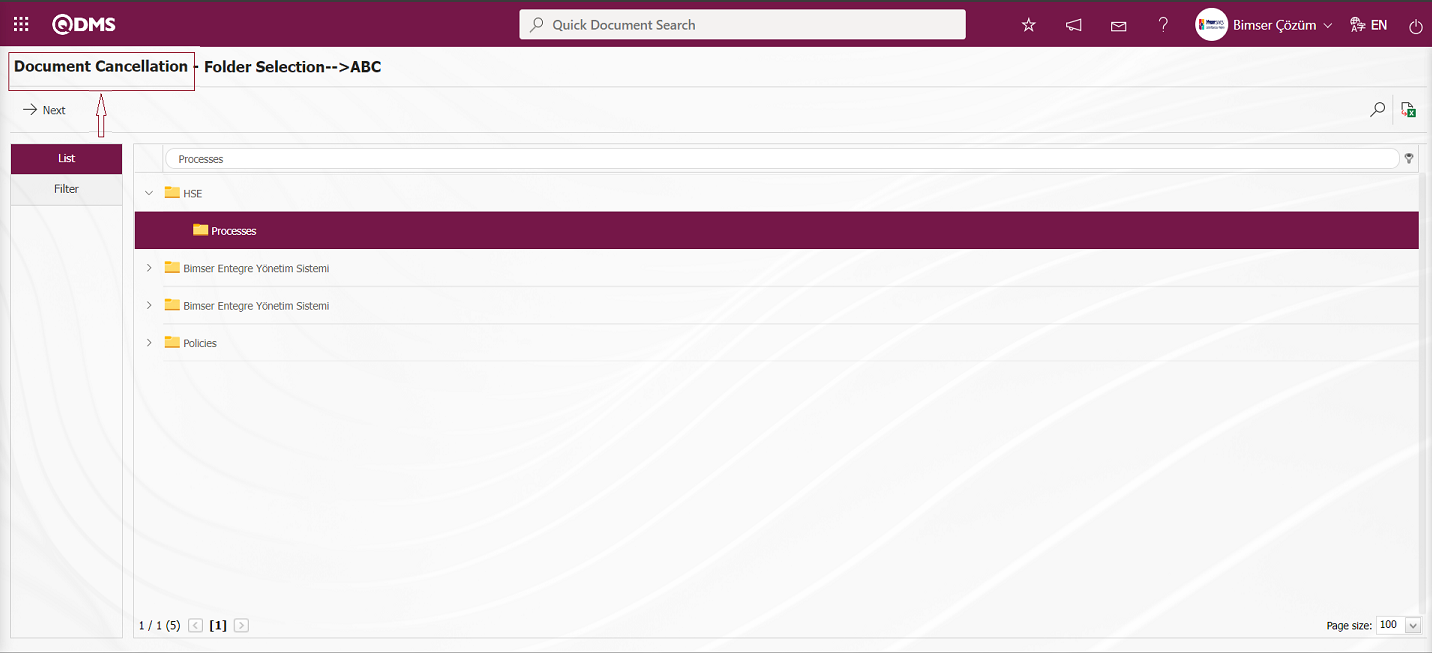
Menu Tab;
It is the tab where the list of menu names related to the modules and modules defined in the Integrated Management System and System Infrastructure Definitions sections in the Qdms system in the language settings menu. In this tab, the names of the menus within the scope of the modules and modules in the Integrated Management System and System Infrastructure Definitions sections in the Qdms system are selected and the  (Change) button is clicked to change and edit the names of the menus within the scope of the module and module. In addition, in this tab, the process of changing the order in which it will be located in the Integrated Management System and System Infrastructure Definitions sections in the Qdms system is also done.

In the menu tab, select the module name to be changed and click the (Change) button. For example Document Management is selected.

In the Language Settings screen, the new name of the value field is written and after editing the required fields, the Language settings record update process is done by clicking the  button in the upper left corner of the screen.
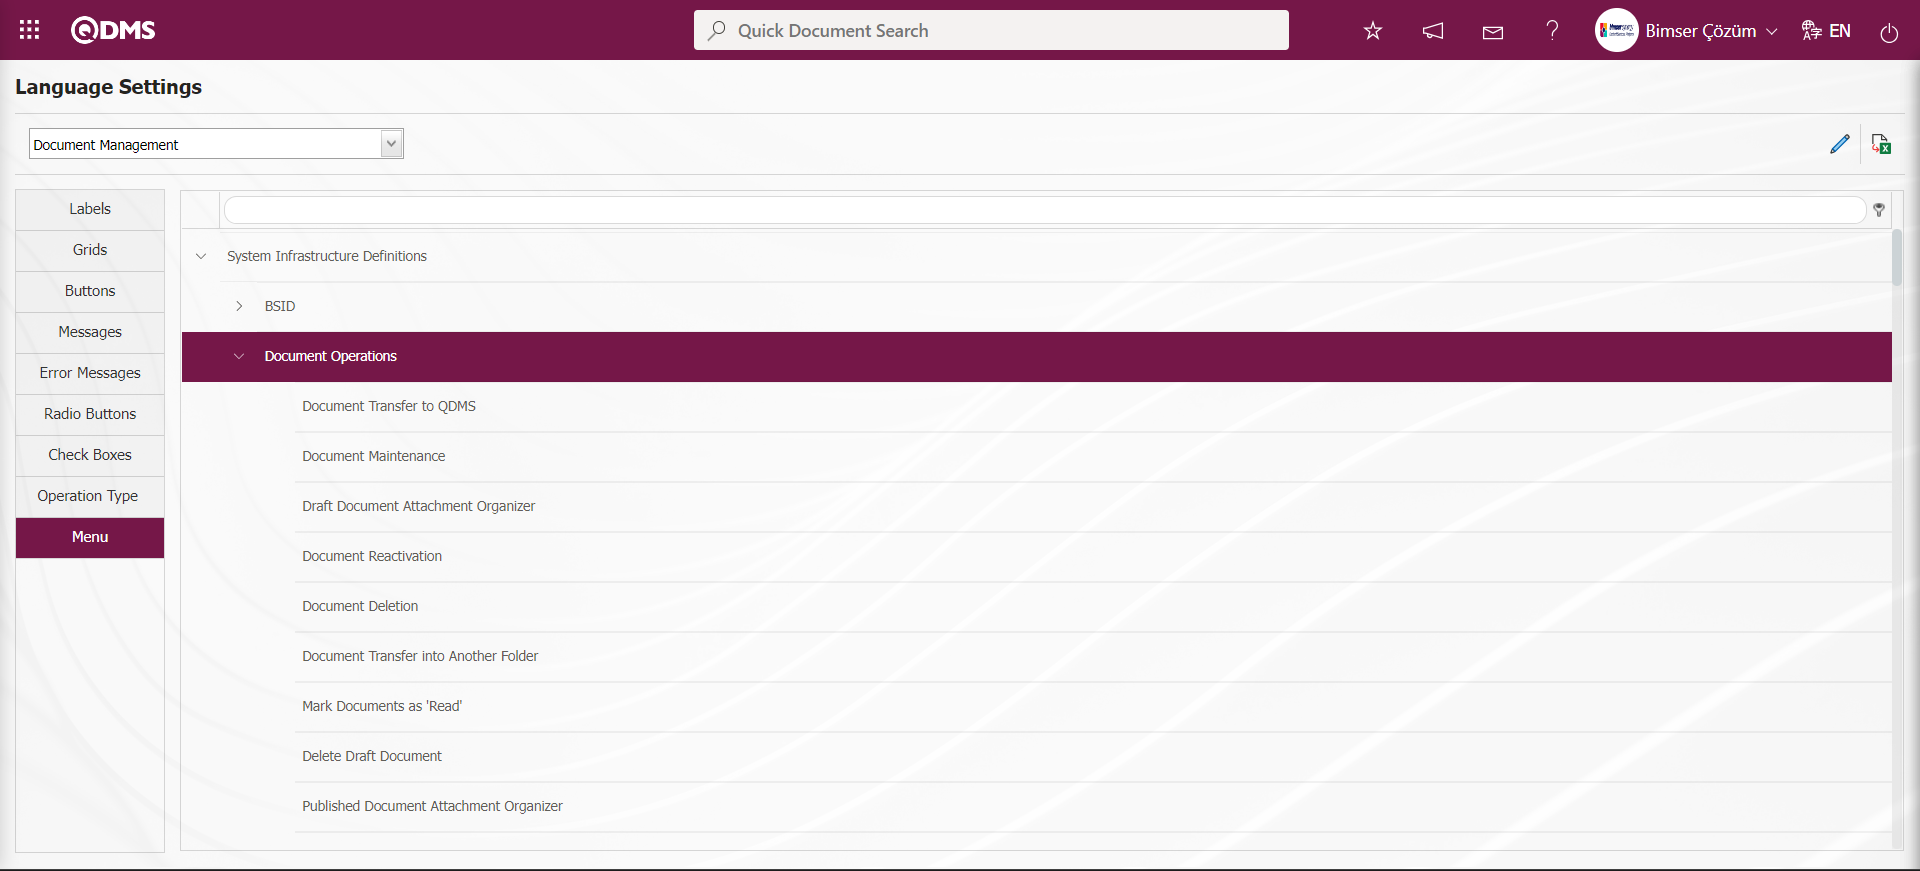
In the menu tab, the order in which the menus will be displayed by sorting in the Integrated Management System and System Infrastructure Definitions section of the relevant modules is set in this tab.
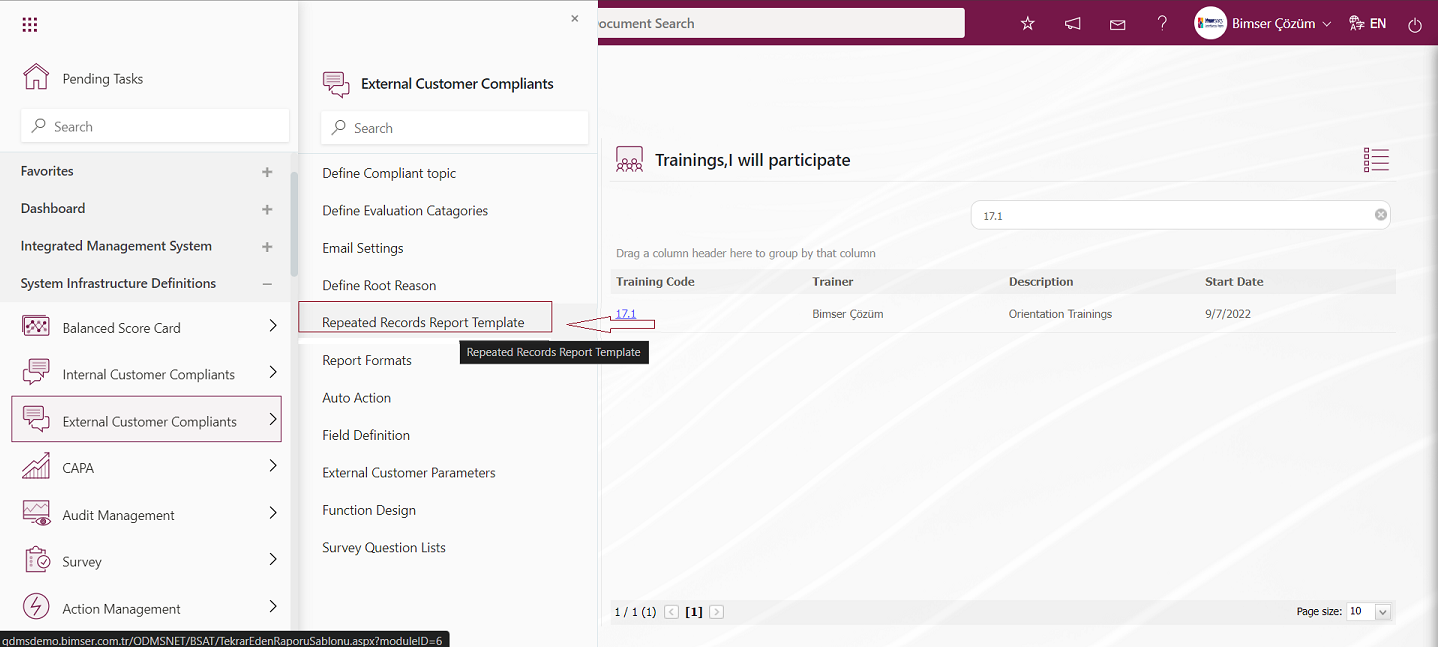 Select the menus in the relevant module in the menu tab and change the order of the menus in the relevant section by changing the order number in the order no field.

After changing the sequence number of the menu in the sequence no field on the Language Settings screen, the language settings record update process is performed by clicking the  button on the upper left corner of the screen.
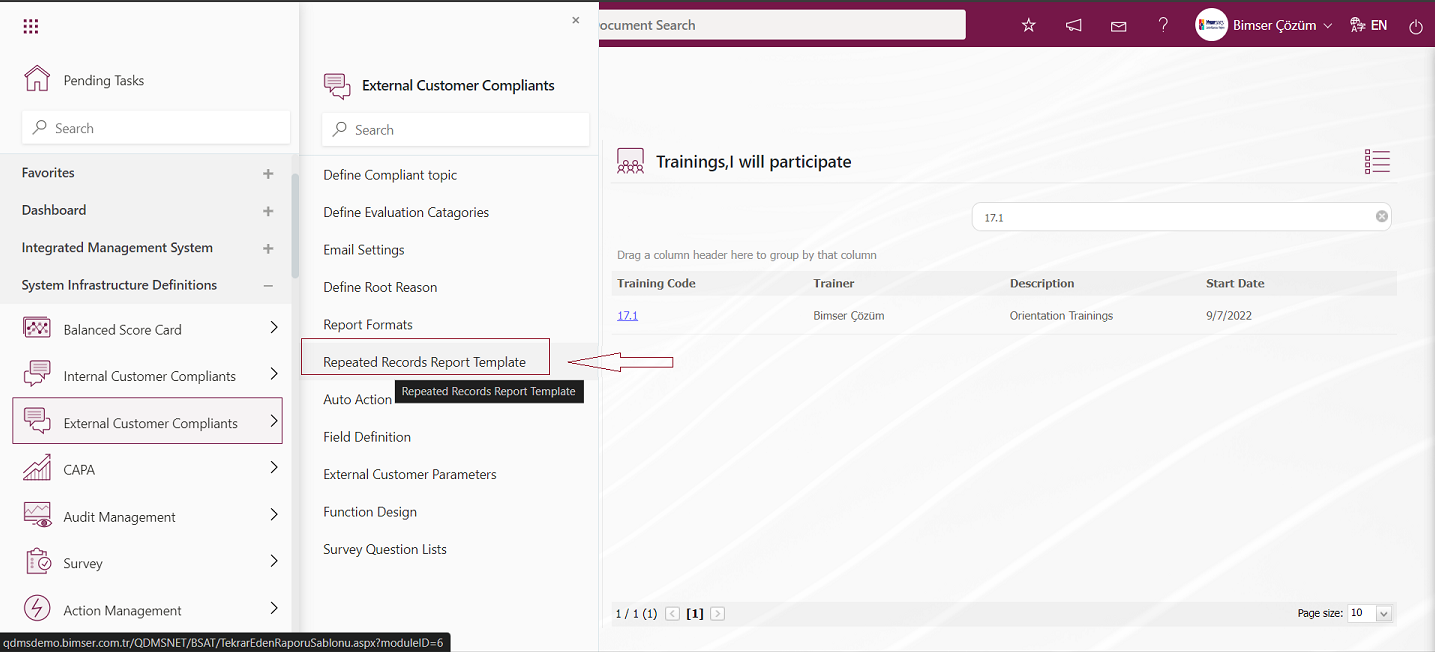
5.2.14. Position Code Change
Menu Name: System Infrastructure Definitions/ BSID/ Configuration Settings/ Position Code Change
Position codes of personnel may have been entered incorrectly or may need to be changed. In such a case, the position code change function is used. The old position code is written, the new position code to be given is also written and the position code is changed by clicking the  button. With this menu, position codes can be changed manually one by one. In companies using HR program, new position codes are given to new personnel. After the personnel is transferred to the system with integration, the code of the position taken over for the new personnel should be changed from this menu.

With the help of the buttons on the screen;
 : The position code is changed.

Related fields are defined on the screen that opens;
Old Position Code: This is the field where the position code information defined in the system is written on the Position Code Change screen. (Position code information is obtained from the System Infrastructure Definitions / Definitions / Position Definition menu)
New Position Code: This is the field where the new position code information of the Position Code Change screen is written.
On the Position Code Change screen, the position code to be changed is written in the Old Position Code field. In the New Position Code field, the new code information to be given to the position is written.  button is clicked.
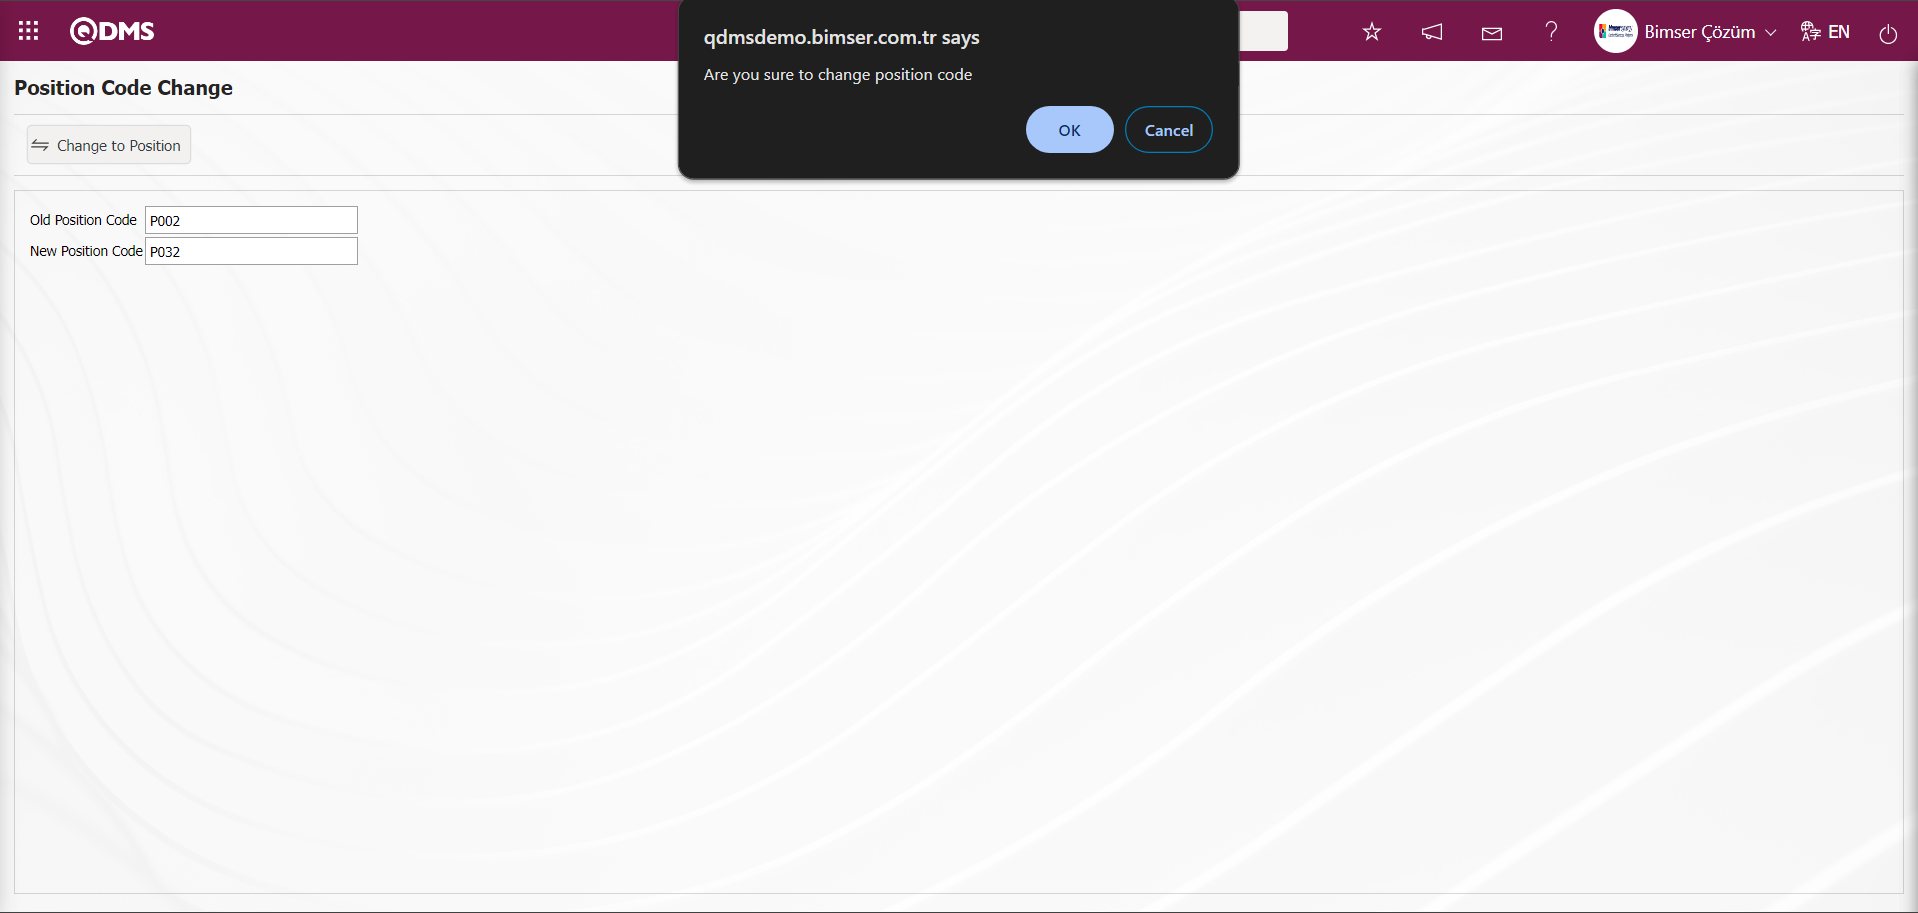
On the Position Code Change** screen, click the “OK” button on the “Are you sure to change position code” warning message given by the system. A message is given by the Qdms system that the position code has been changed
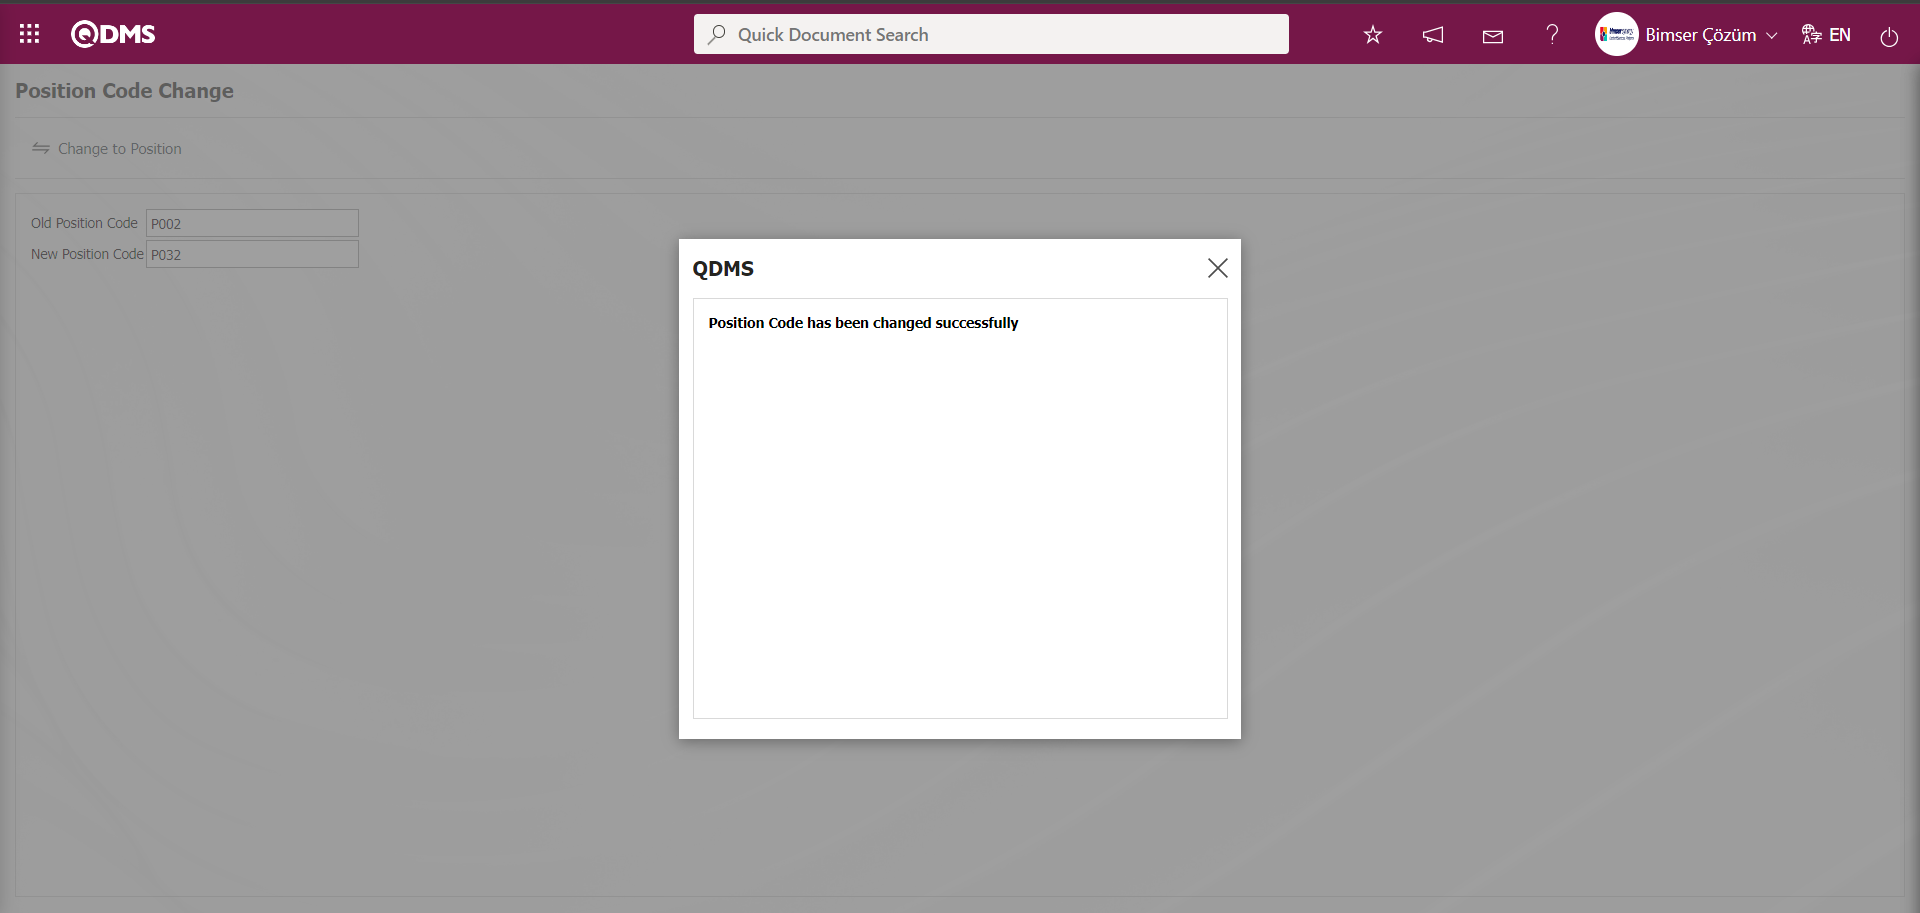
5.2.15. Multiple Position Code Change
Menu Name: System Infrastructure Definitions/ BSID/ Configuration Settings/Multiple Position Code Change
It is the menu where multiple position code information defined in the Position Identification menu in the Qdms system can be changed at the same time. (Old Code, New Code) In order to perform this operation, the Multiple Position Code Change template is filled by writing the old code information defined in the system in the old code information field in the Multiple Position Code Change template downloaded to the computer by clicking the  (Download Template) button and the code information to be changed in the new code field is filled in the Multiple Position Code Change template by writing the new code field. After the information is written in the relevant fields in the Multiple Position Code Change template, the Multiple Position Code Change template is loaded to the menu in the Qdms system by clicking the
  (Upload Template) button. In order to check the information loaded to the menu in the Qdms system, the
  button is used. If the transferred data is suitable for transfer, the transfer is realized through the
  button.
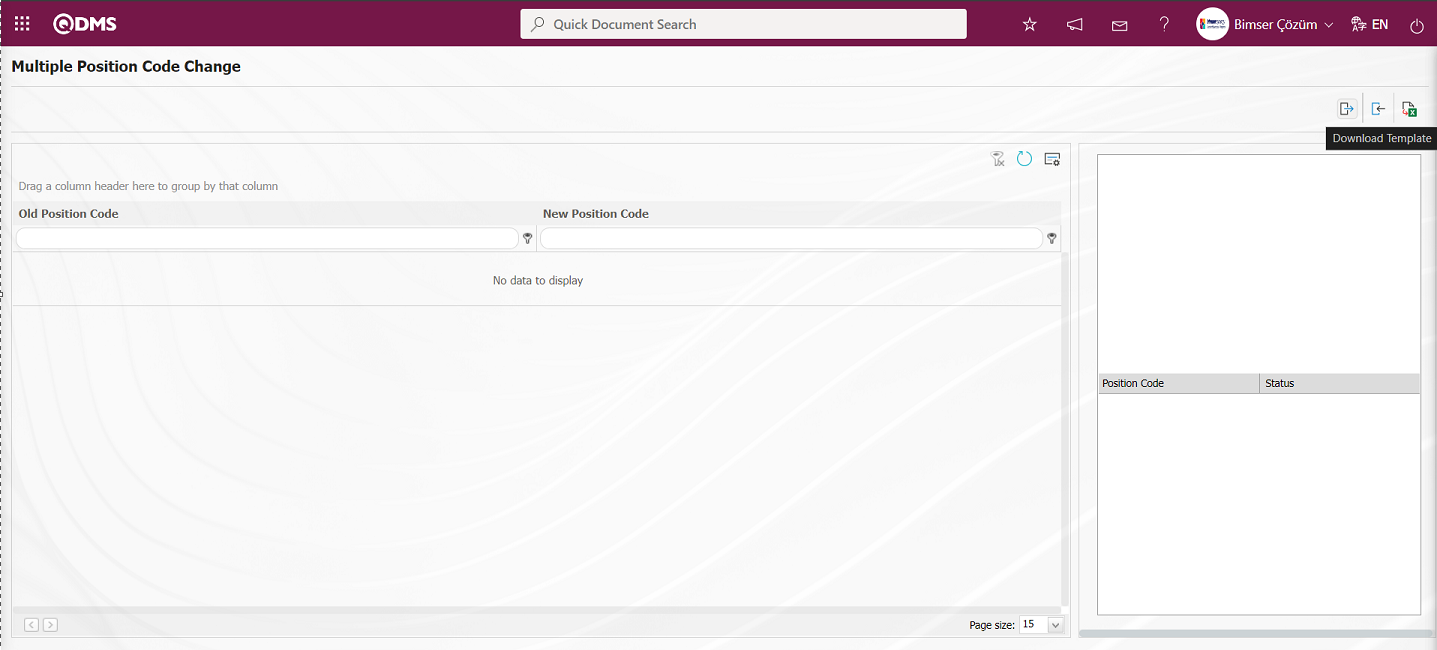
With the help of the buttons on the screen;
: Multiple Position Code Changer template is downloaded to the computer.
: The filled Multiple Position Code Changer template is uploaded to the system.
: Check whether the filled and uploaded Multiple Position Code Changer template gives an error or not.
: The transfer operation is performed.
: Data is transferred to Excel.
On the Multiple Position Code Change** screen, click the (Download Template) button to download the Multiple Position Code Change template to the computer. In the downloaded Multiple Position Code Modifier template, the relevant fields are filled by typing the relevant information and saved to the computer.
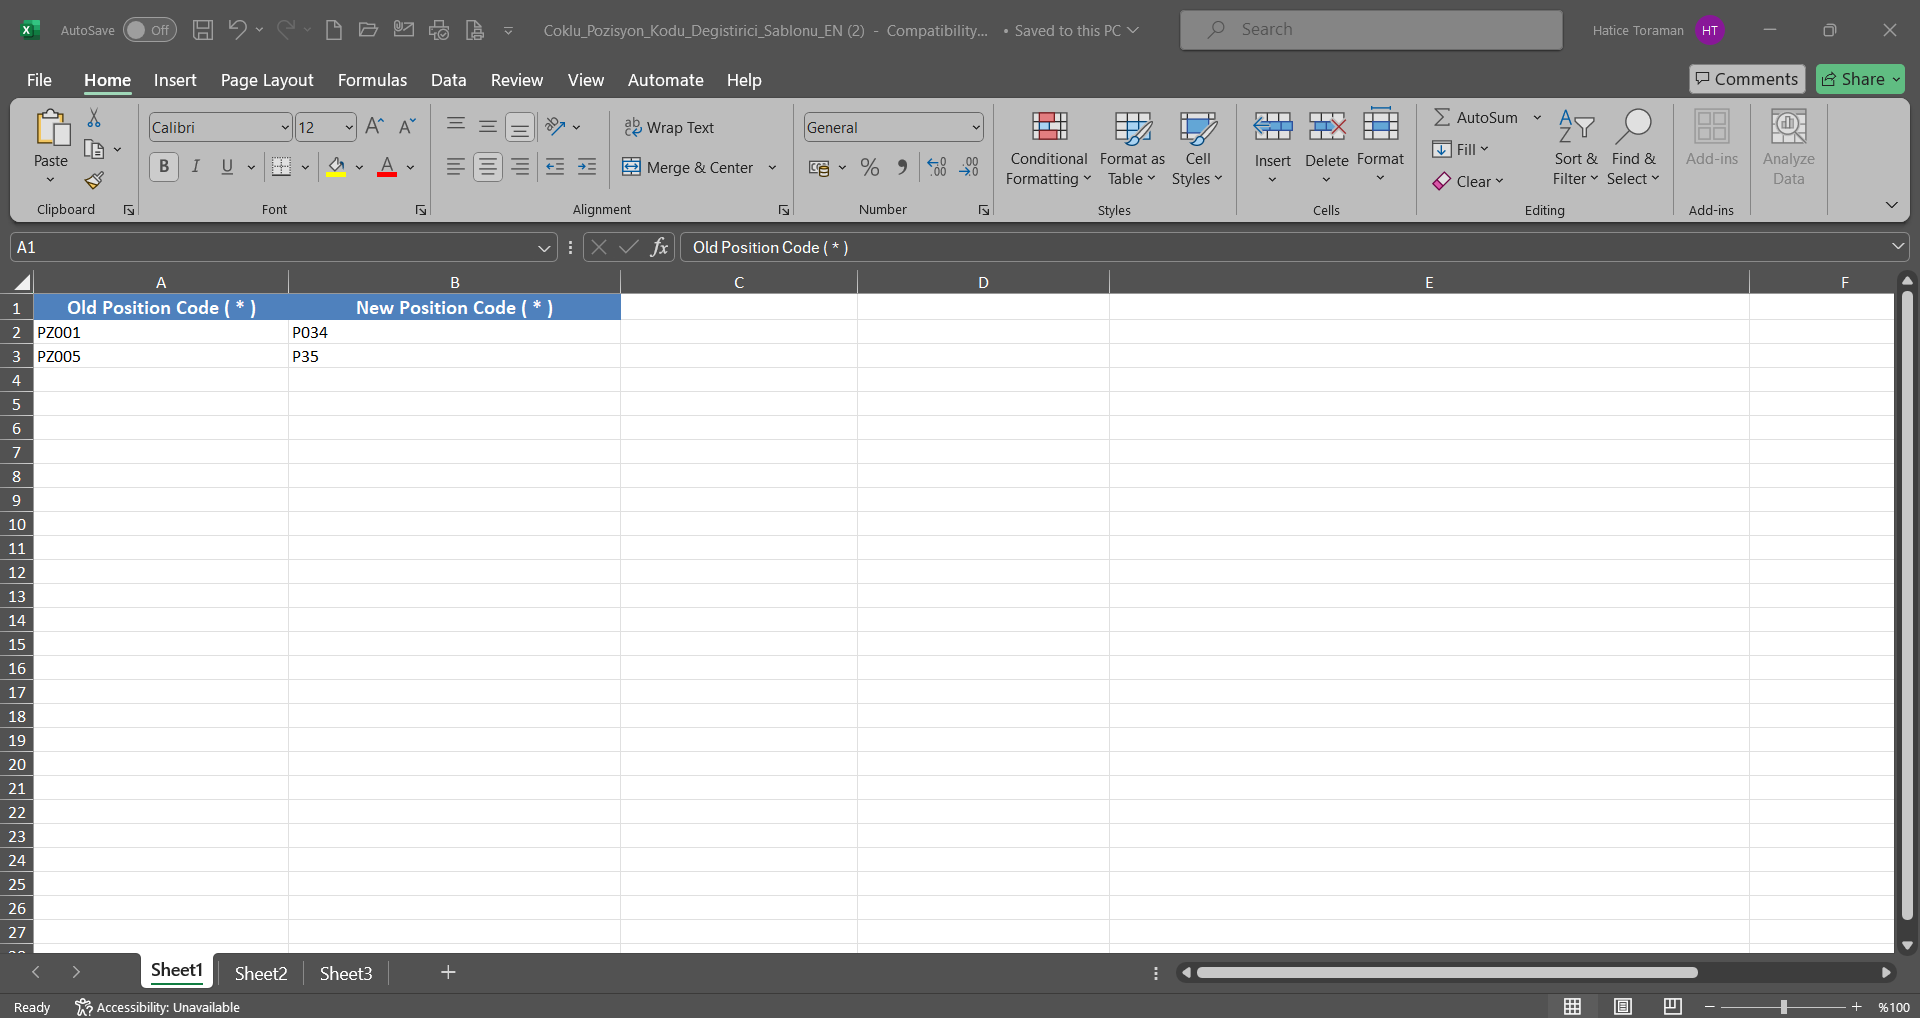
The Multiple Position Code Change template filled in the Multiple Position Code Change screen is uploaded to the system by clicking the (Upload Template) button.
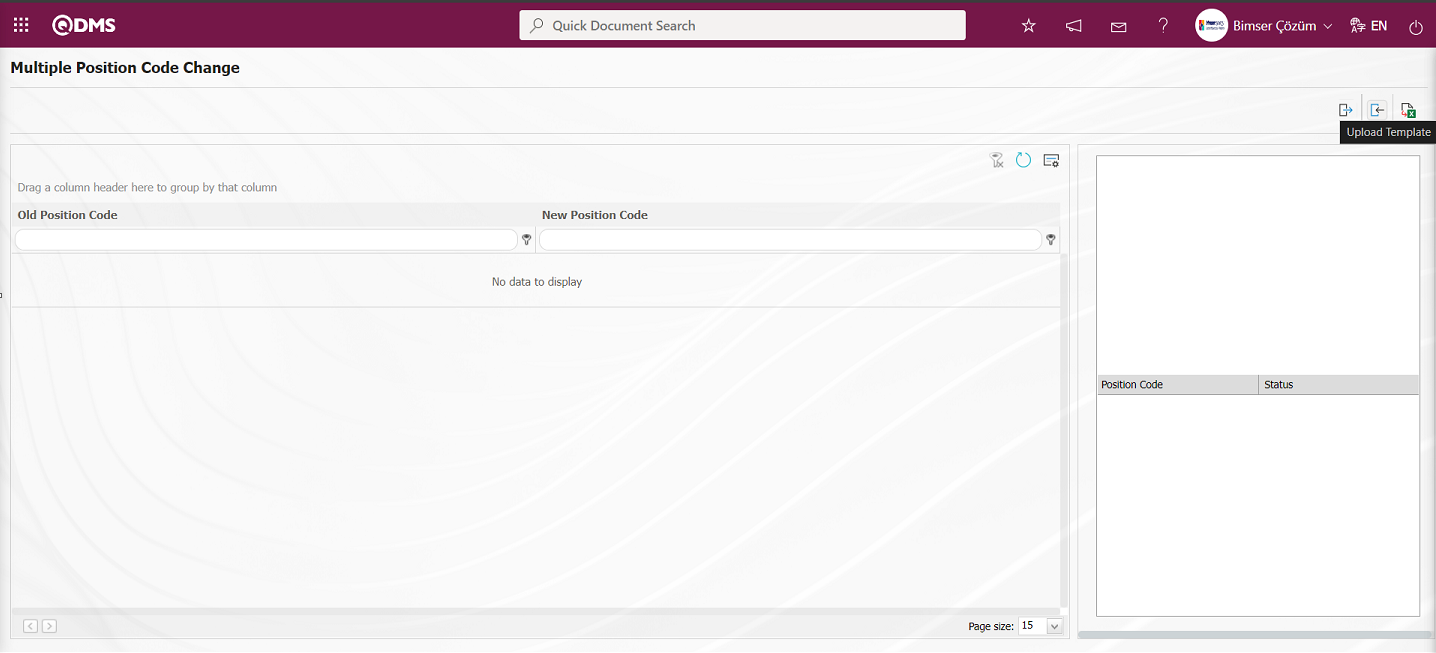
Click the “Browse” button on the Upload File screen.
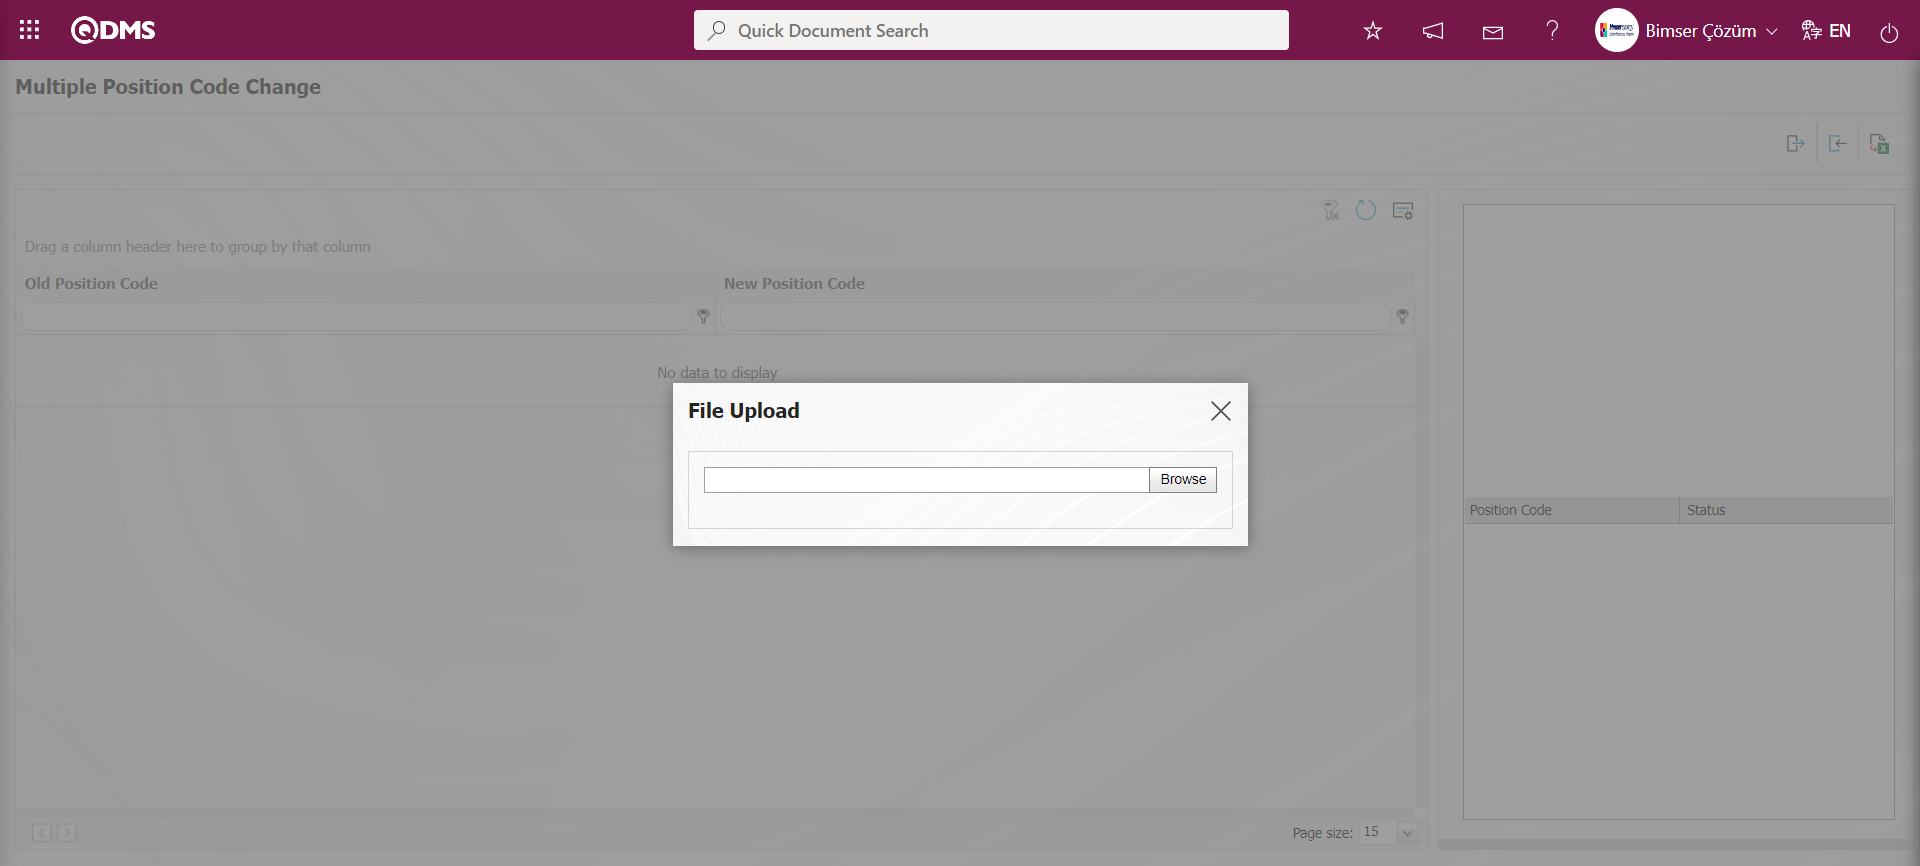
In the screen that opens, the filled Multiple Position Code Change template is selected.
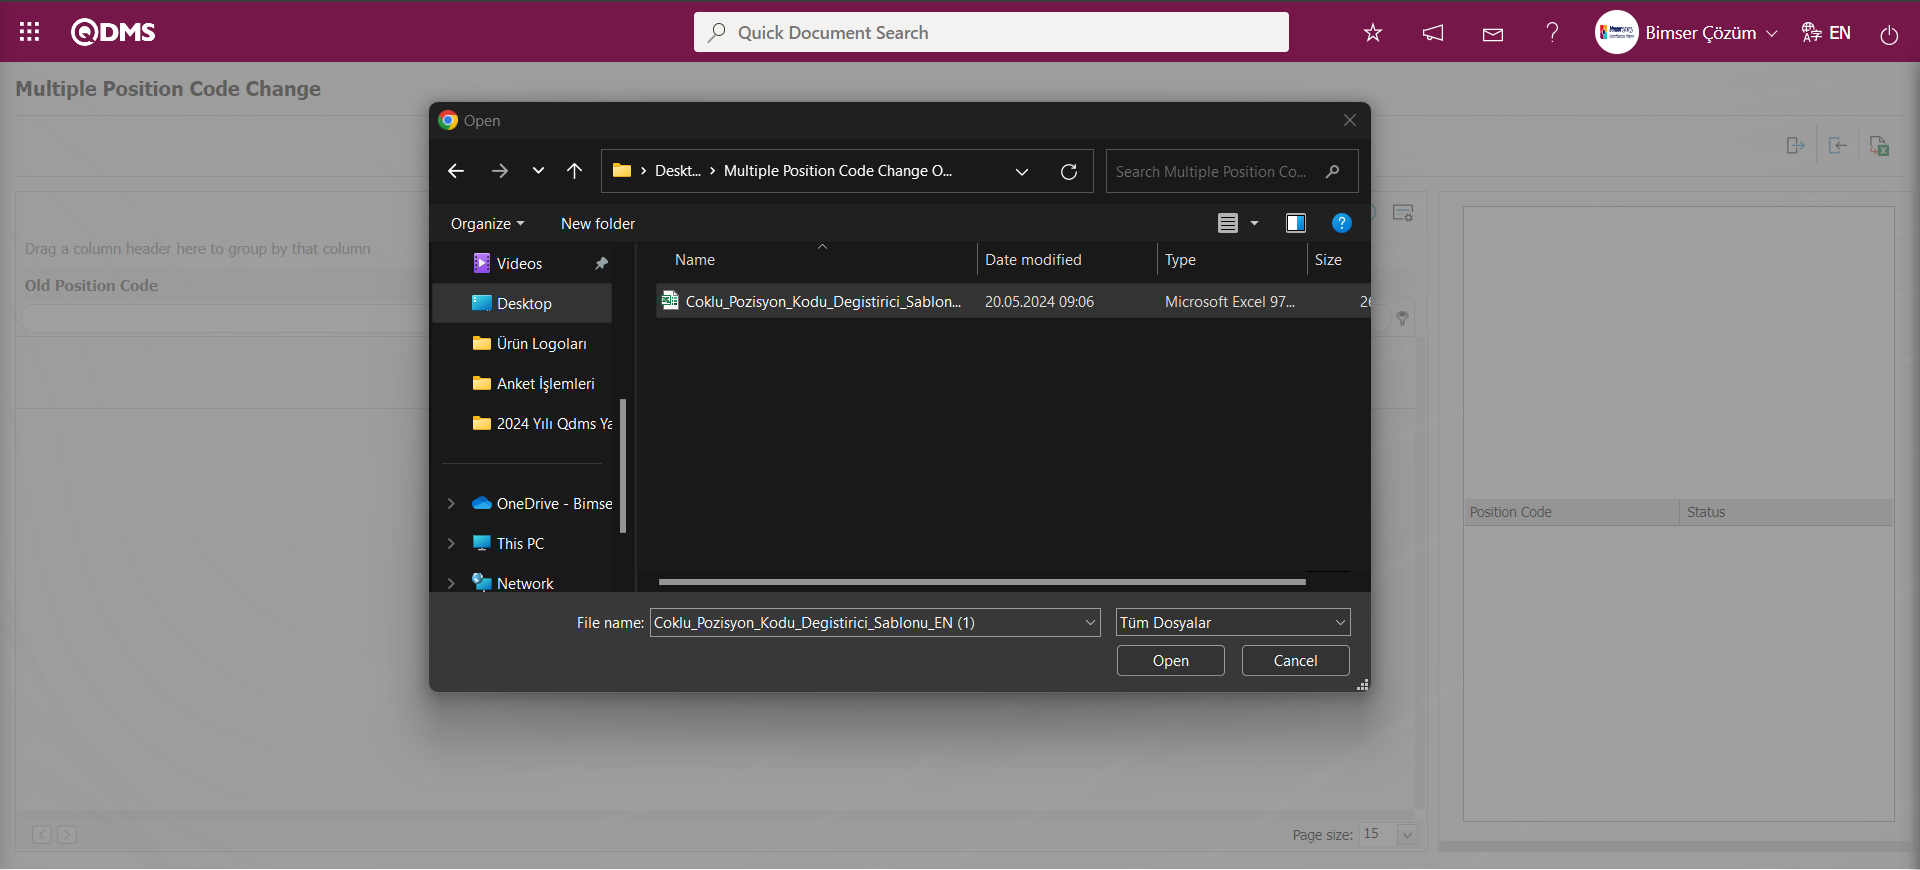
After the filled Multiple Position Code Replacement template is uploaded to the system, a 3rd button, the button is displayed. By clicking this button, it is checked whether the position codes of the data are available in the system and whether they are suitable for replacement. button is clicked.

The error message “Positions are present in the system and are suitable for replacing.” is given by the system.
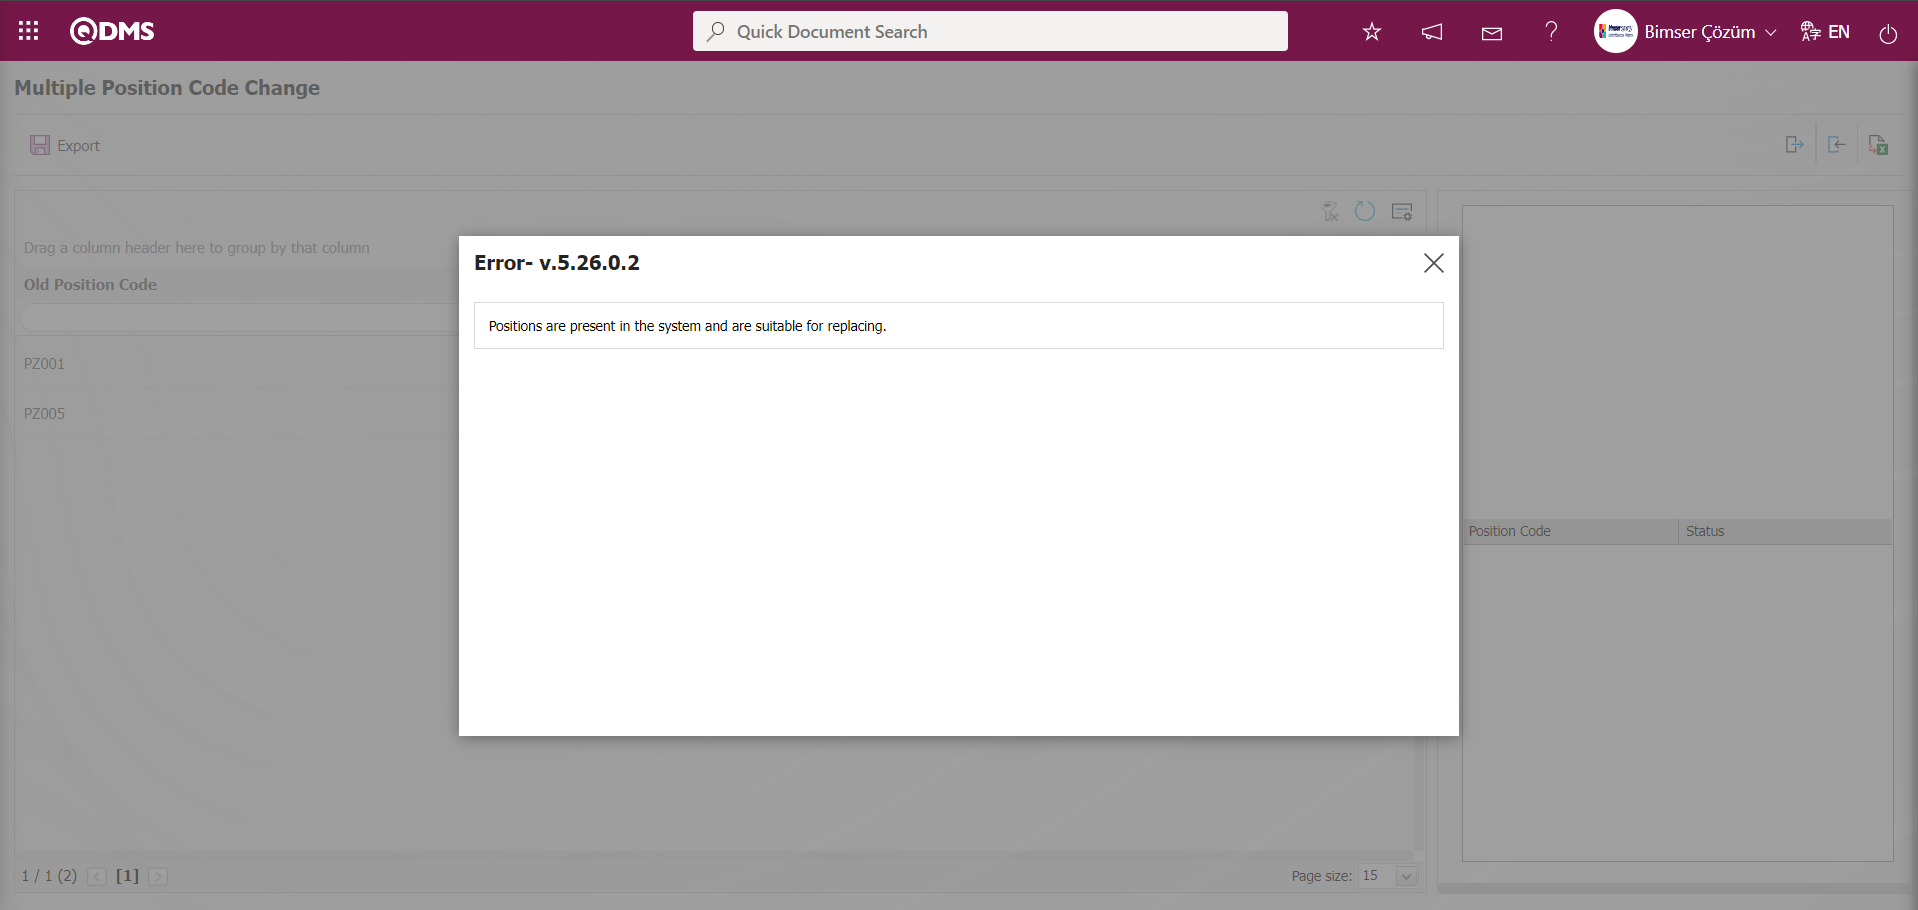
After the data is suitable for transfer, the 4th button  button is displayed. By clicking this button, the old position codes are replaced with new position codes and the system allows the transfer process to be performed.
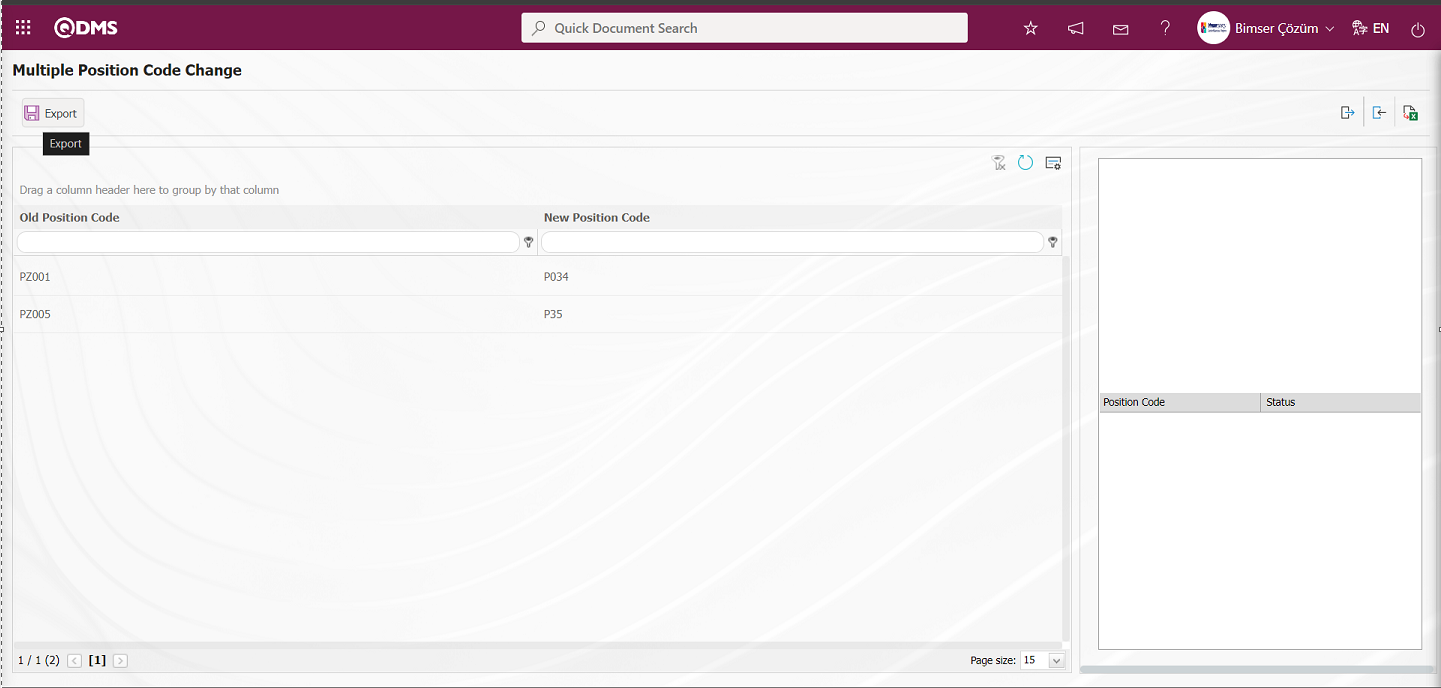
Click the button on the Multiple Position Code Change screen.
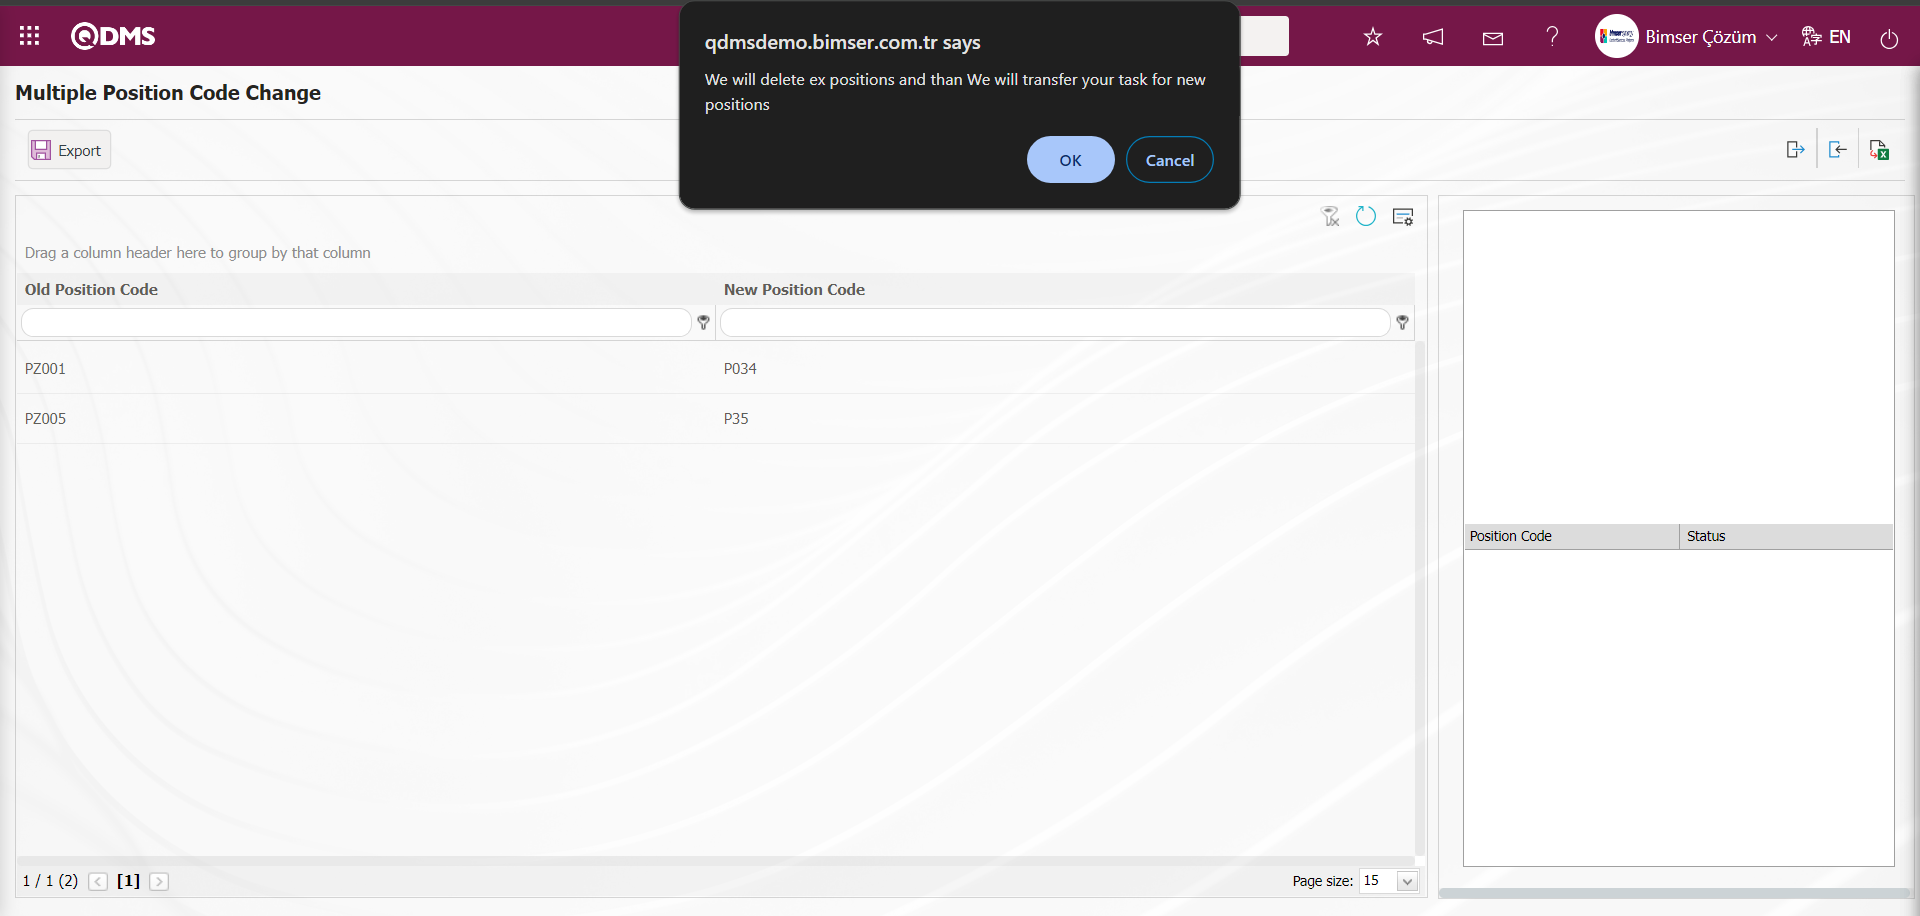
“We will delete ex positions and than We will transfer your task for new positions” message is given by Qdms system and ‘OK’ button is clicked. On the Multiple Position Code Change screen, it is informed that the codes have been changed in the relevant field.
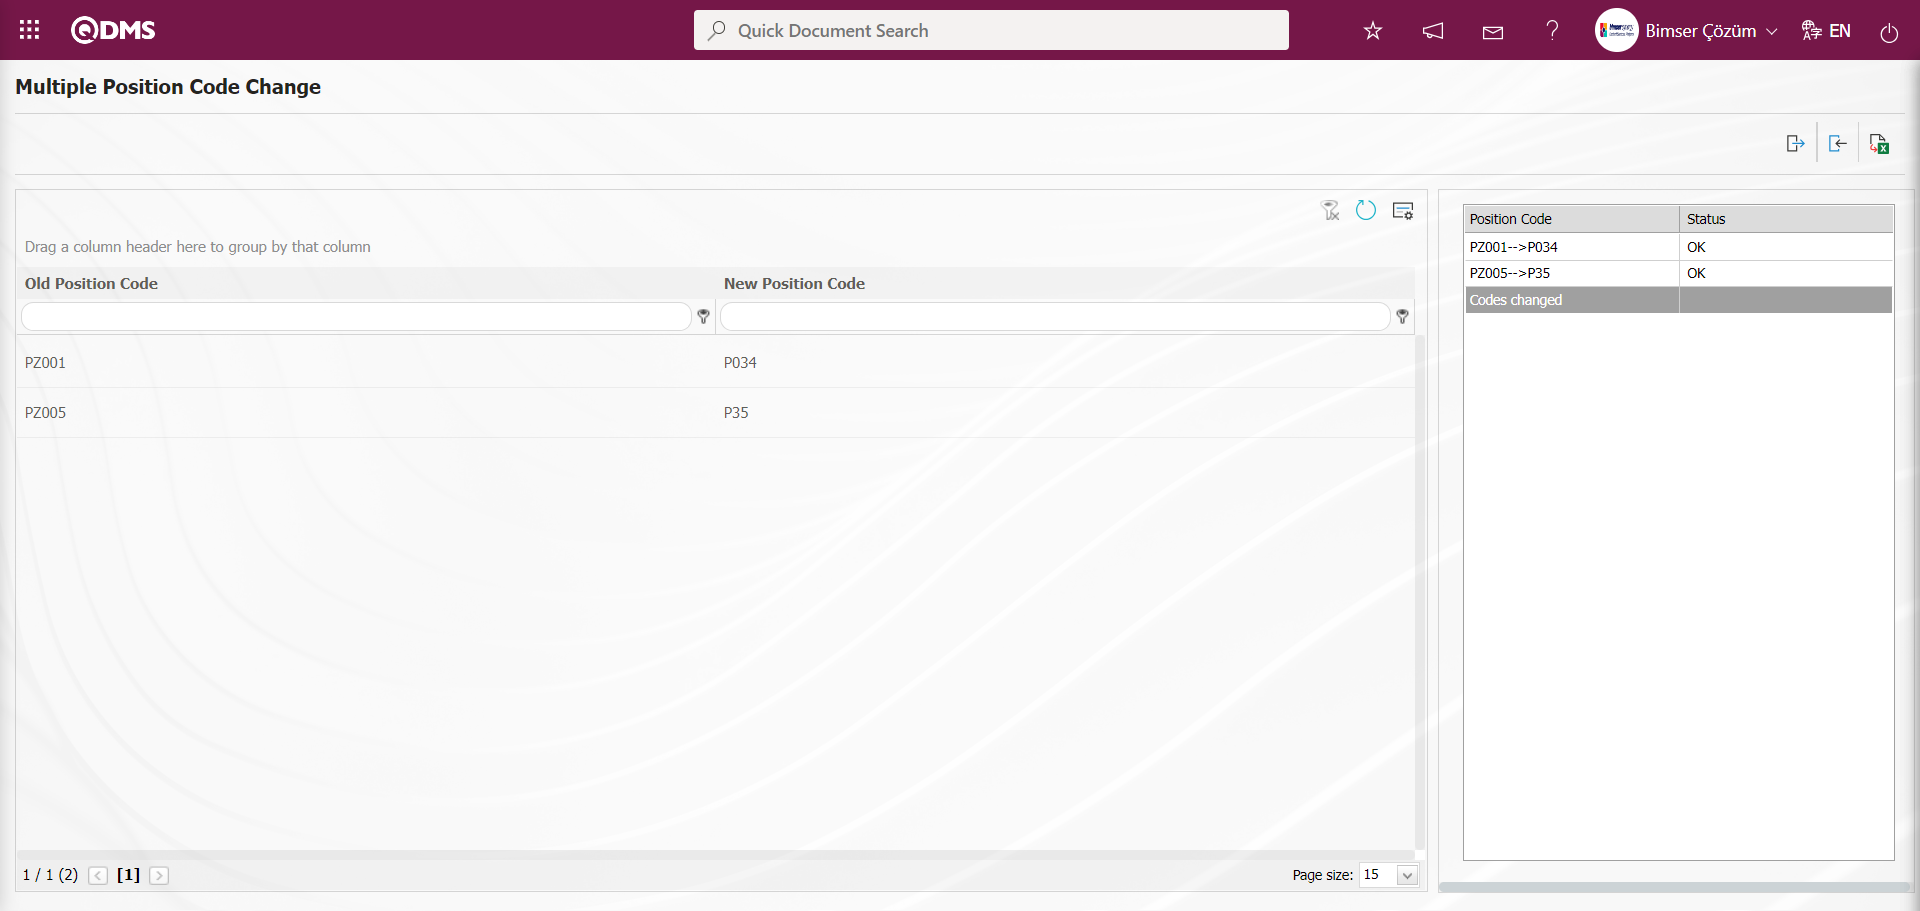
5.2.16. Task Transfer
Menu Name: System Infrastructure Definitions/ BSID/ Configuration Settings/ Task Transfer
This menu is used to transfer the jobs on the departed personnel or the jobs on one personnel to another personnel. The process of transferring the existing jobs on a position to another position is provided. With Task Transfer, operations belonging to all task types such as reading, approving, reviewing, performing actions are transferred to another user, while only the selected approval authorization can be transferred with the approval transfer menu. On the Task Transfer screen, the personnel whose tasks will be transferred in the Person to Do field is selected in the list of personnel defined in the system opened by clicking the  (Select) button and the tasks of the personnel whose tasks will be transferred are listed in the modules within the scope of the Qdms system by clicking the
  button. By selecting the tasks to be transferred in the listed modules, the task transfer process is performed by selecting the position to be transferred in the position list defined in the system defined by clicking the
  (Select) button in the Position field where the tasks will be transferred and clicking the
  button. In this menu, if you want to send an assignment mail with the related tasks, the relevant check box is checked.
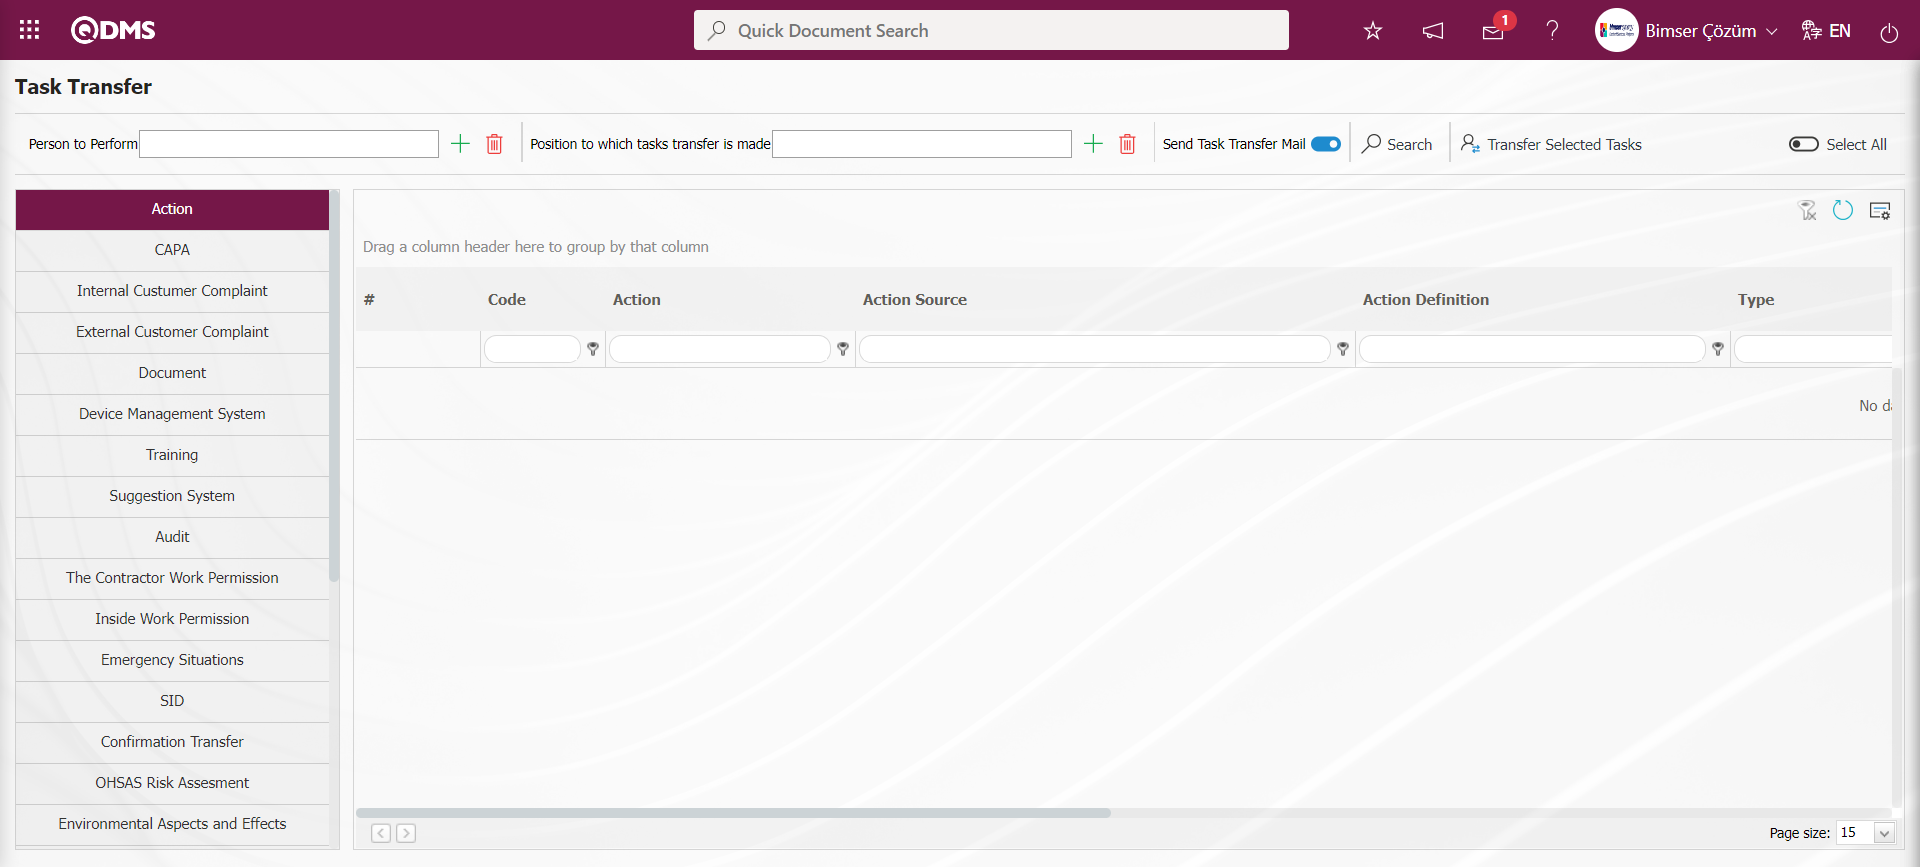
With the help of the buttons on the screen;
: The selected tasks are transferred.
 : Records are filtered and searched.
: Data is transferred to Excel.
: Records are filtered and searched.
: The search criteria on the menu screens are used to clean the data remaining in the filter fields in the grid where the search operation is performed.
: The menu screen is restored to its default settings.
: User-based designing of the menu screen is done with the show-hide feature, that is, the hiding feature of the fields corresponding to the columns on the menu screens.
In the Task Transfer screen, the (Select) button is clicked in the Person to Do field and the Person whose tasks will be transferred is selected in the list of Personnel defined in the system and the button is clicked.
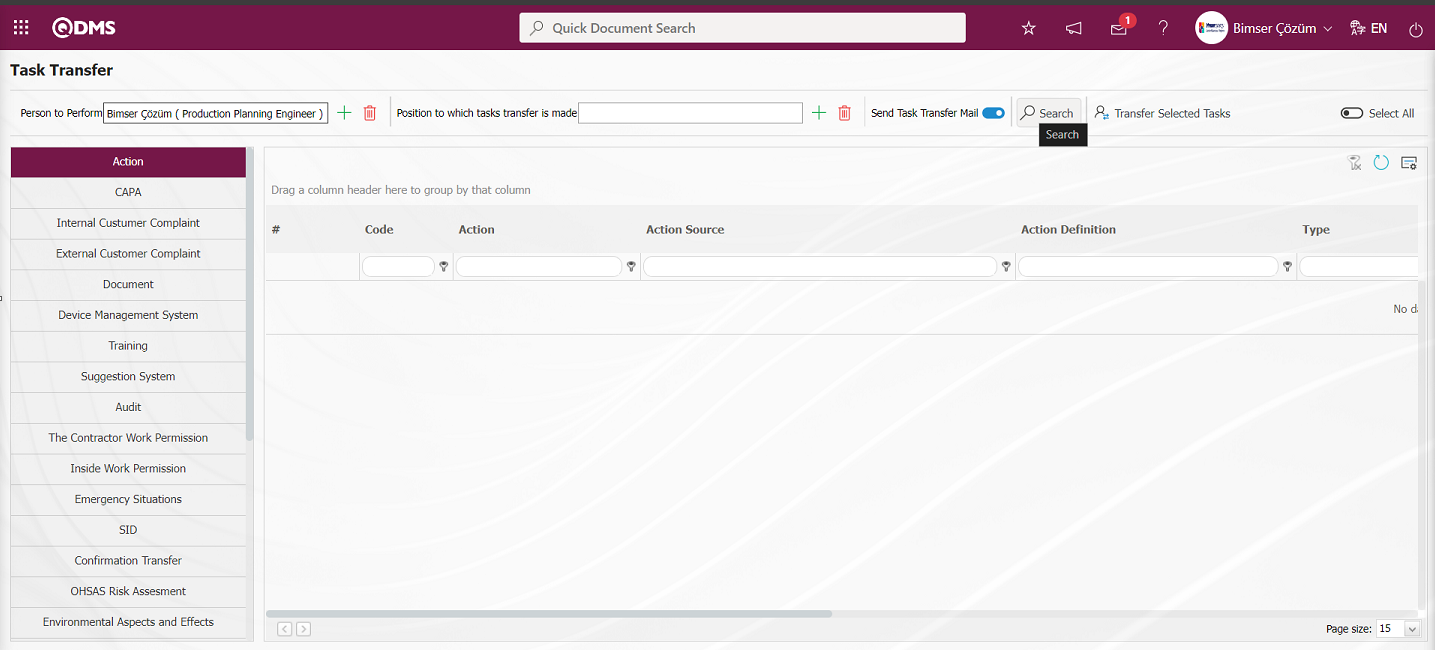
After the button is clicked on the Task Transfer screen, the duties of the relevant personnel, if any, within the scope of the Qdms system are listed.
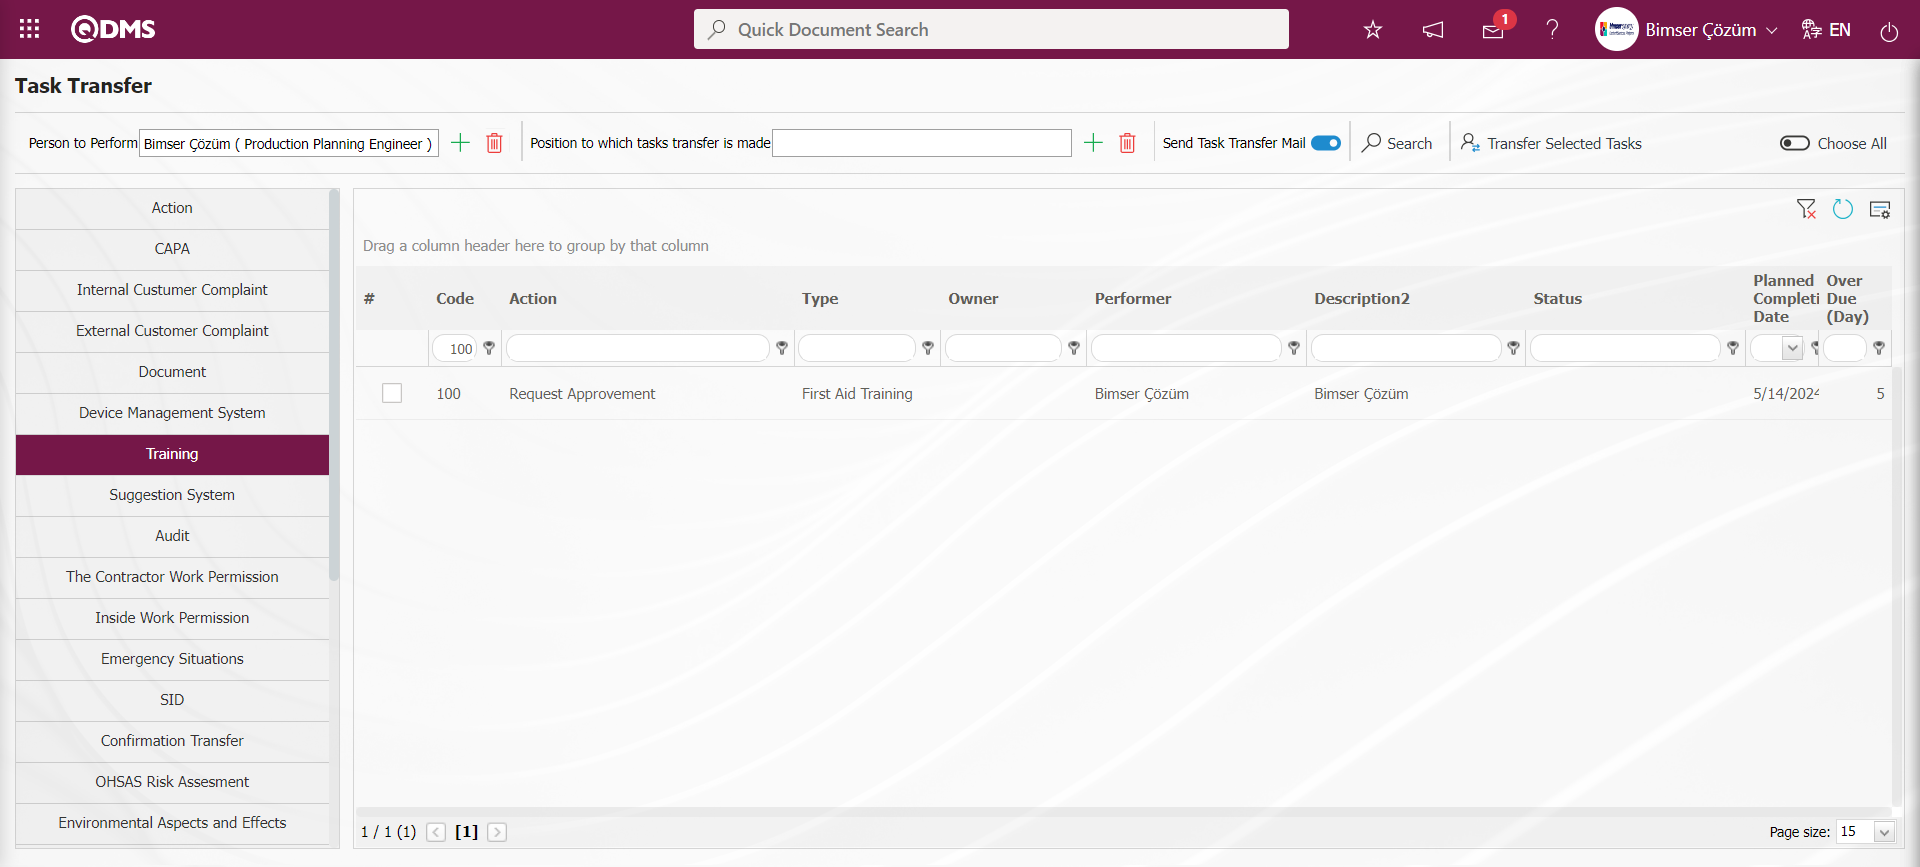
In the listed modules, the tasks to be transferred in the relevant module are selected.
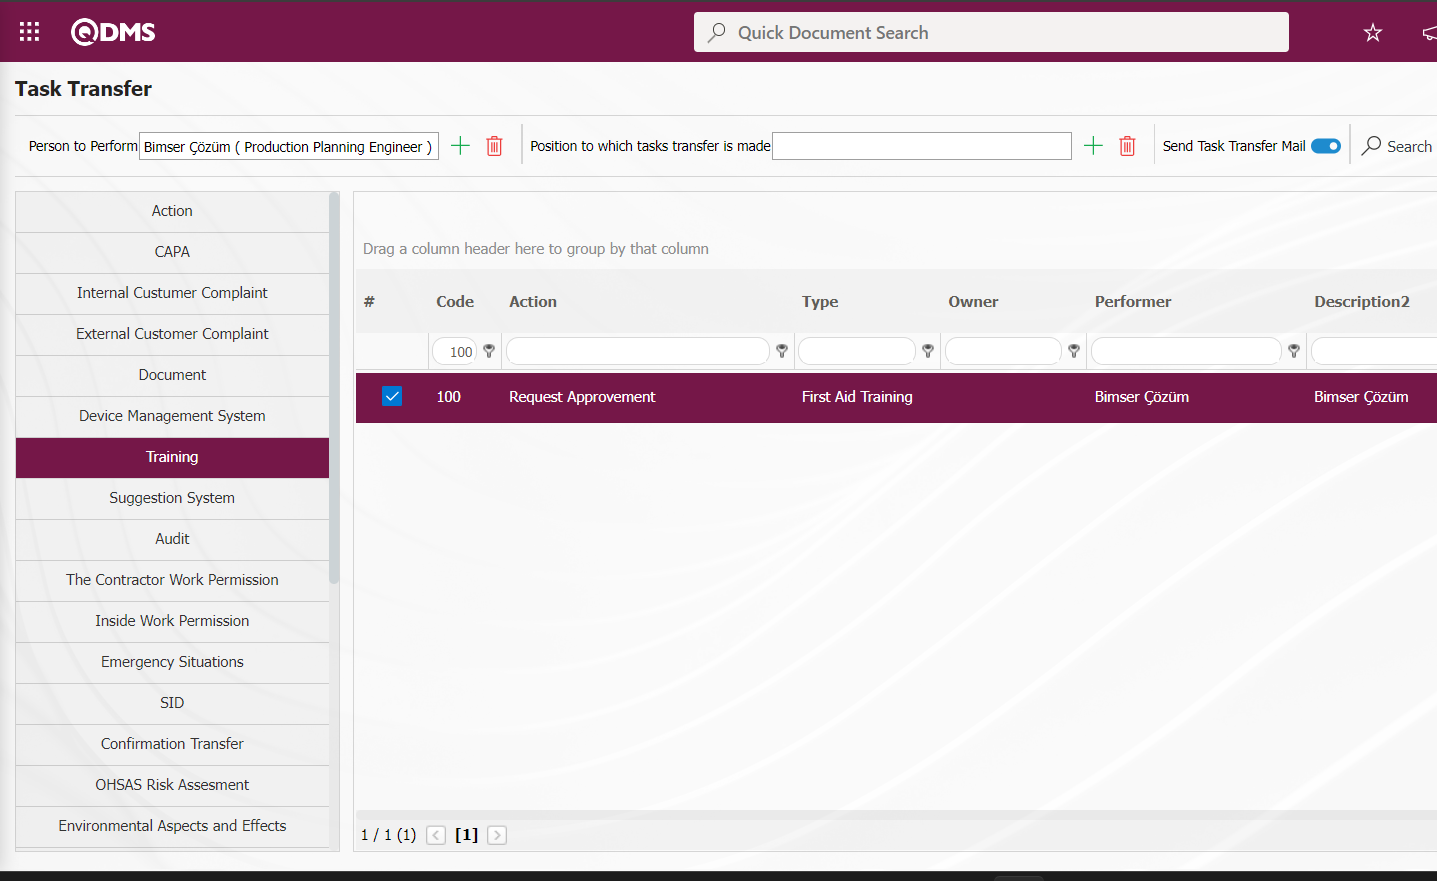
By selecting the tasks to be transferred in the listed modules, the position to be transferred is selected in the position list defined in the system opened by clicking the (Select) button in the Position field where the tasks will be transferred. button is clicked. The check box related to the Approval Assignment mail is checked.
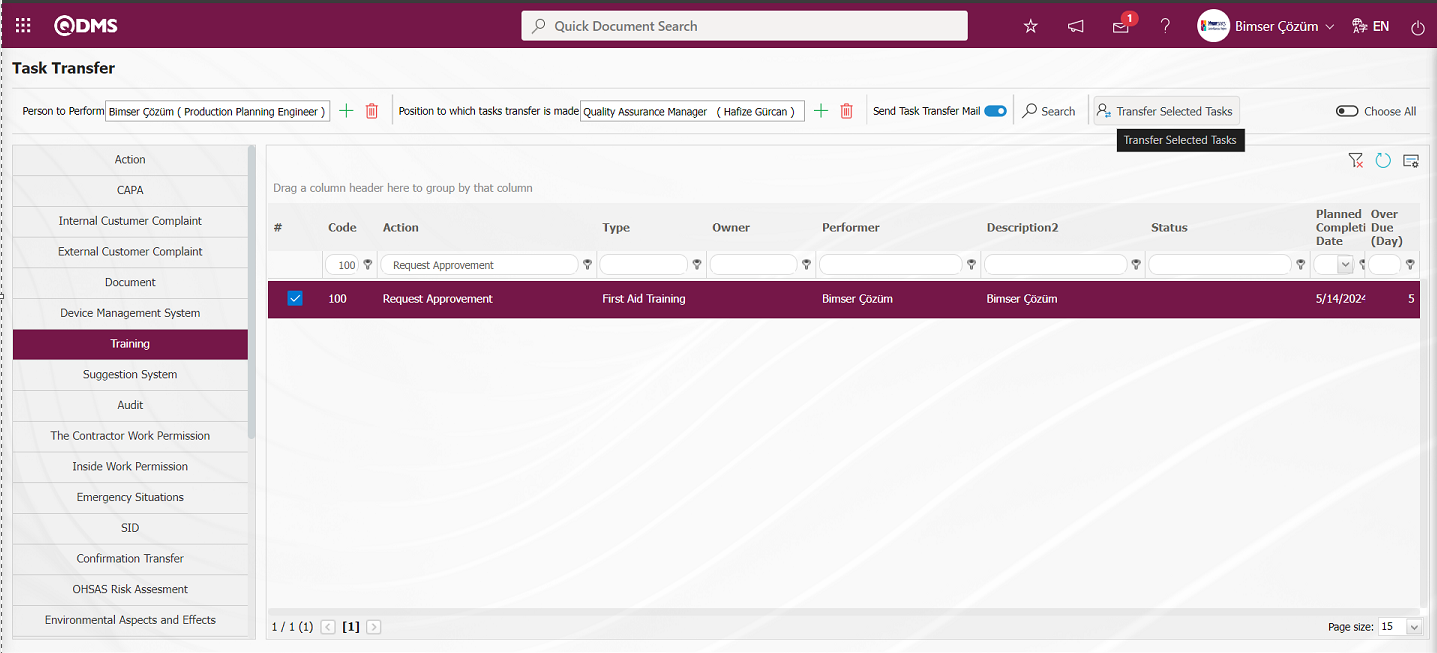
The message “Selected position task transfer is performed successfully” is given by the Qdms system, indicating that the task transfer process has been completed.
5.2.17. Transfers
Menu Name: System Infrastructure Definitions/ BSID/ Configuration Settings/ Transfers
This is the section where the Product, Customer-Supplier, Audit Question, Auditor, Device, Inspection, Control and Field Detection Question, Item No transfer menus are located. In the “Item No Transfer And Mass Deactivation” menu, where the Item No transfer operation is performed in the Transfers section, in addition to the item no transfer operation of the management systems, the mass deactivation of the item numbers installed in the system is performed.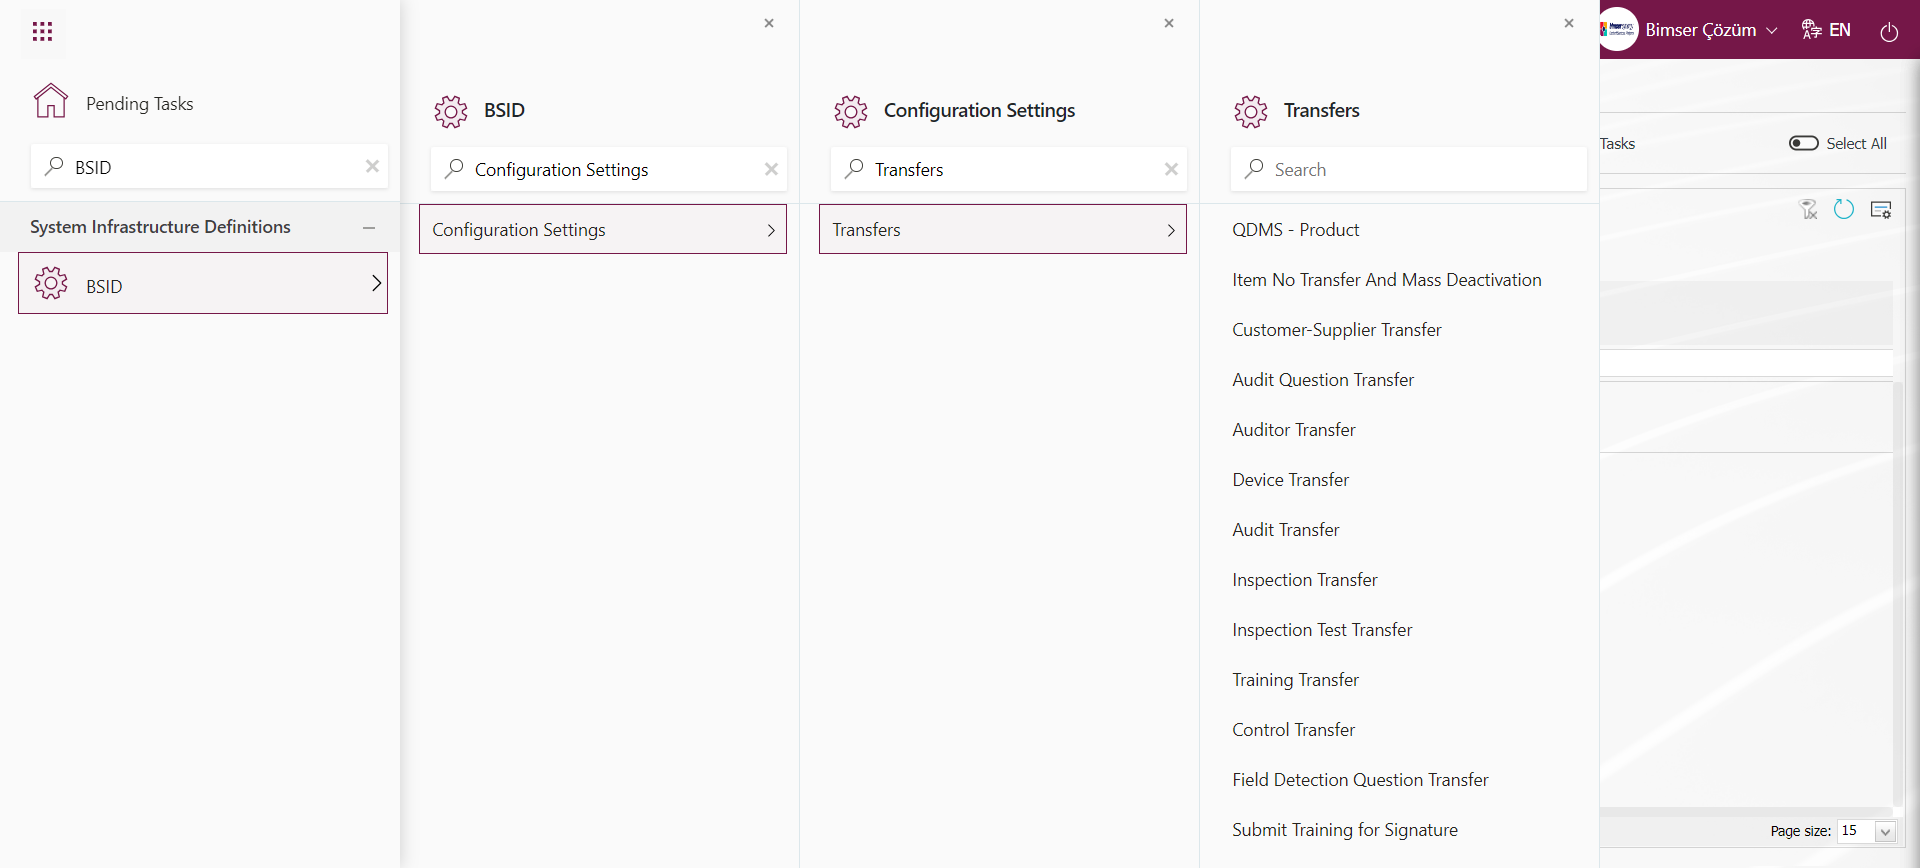
5.2.17.1.QDMS - Product
Menu Name: System Infrastructure Definitions/ BSID/ Configuration Settings/ Transfers/QDMS - Product
It is the menu where the products are transferred to the system in bulk at the same time.
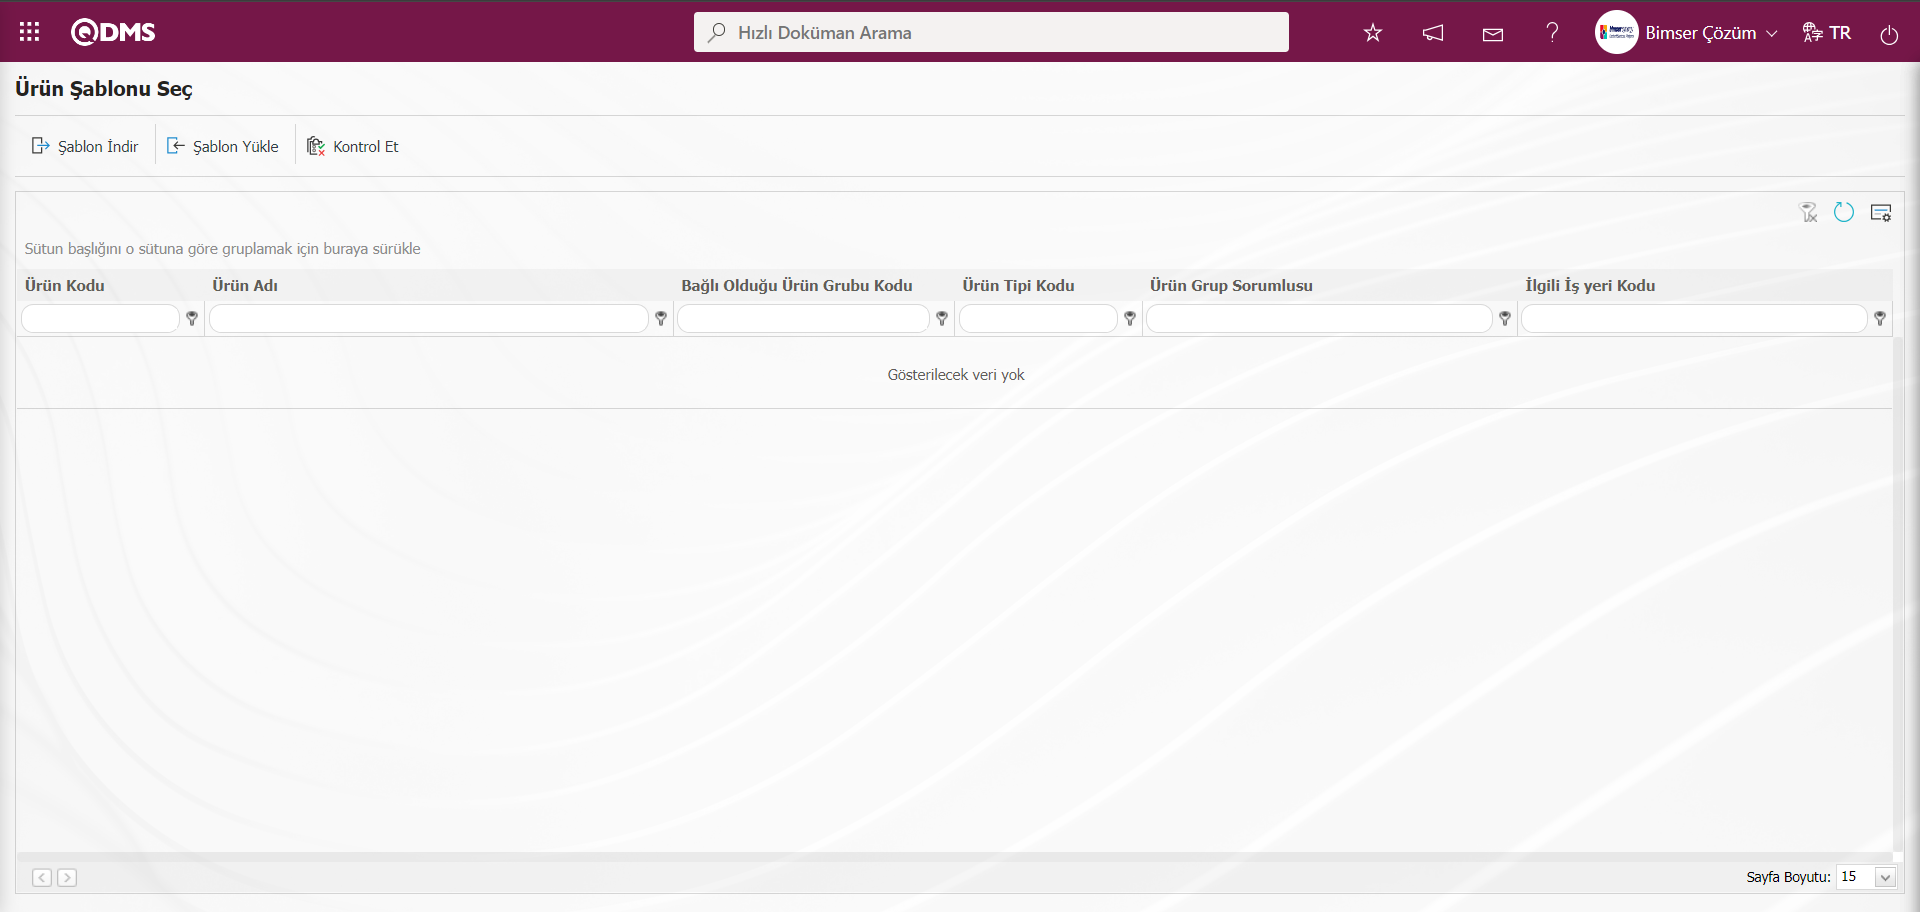
With the help of the buttons on the screen;
 : Product Transfer template is downloaded to the computer.
 : The filled Product Transfer template is uploaded to the system.
 : Check whether the Product Transfer template created and uploaded to the system gives an error or not.
 : The transfer process is performed.
The Product Transfer template is downloaded with the button on the screen, after filling in the necessary information, the Product Transfer template is uploaded to the system with the button. In order to check the entered information, the button is used. If the transferred data is suitable for transfer, the product transfer process is realized via the button.

On the Select Product Template screen, the Product Transfer template is downloaded to the computer with the  button. The relevant fields in the Product Transfer template are saved to the computer by typing the relevant information.
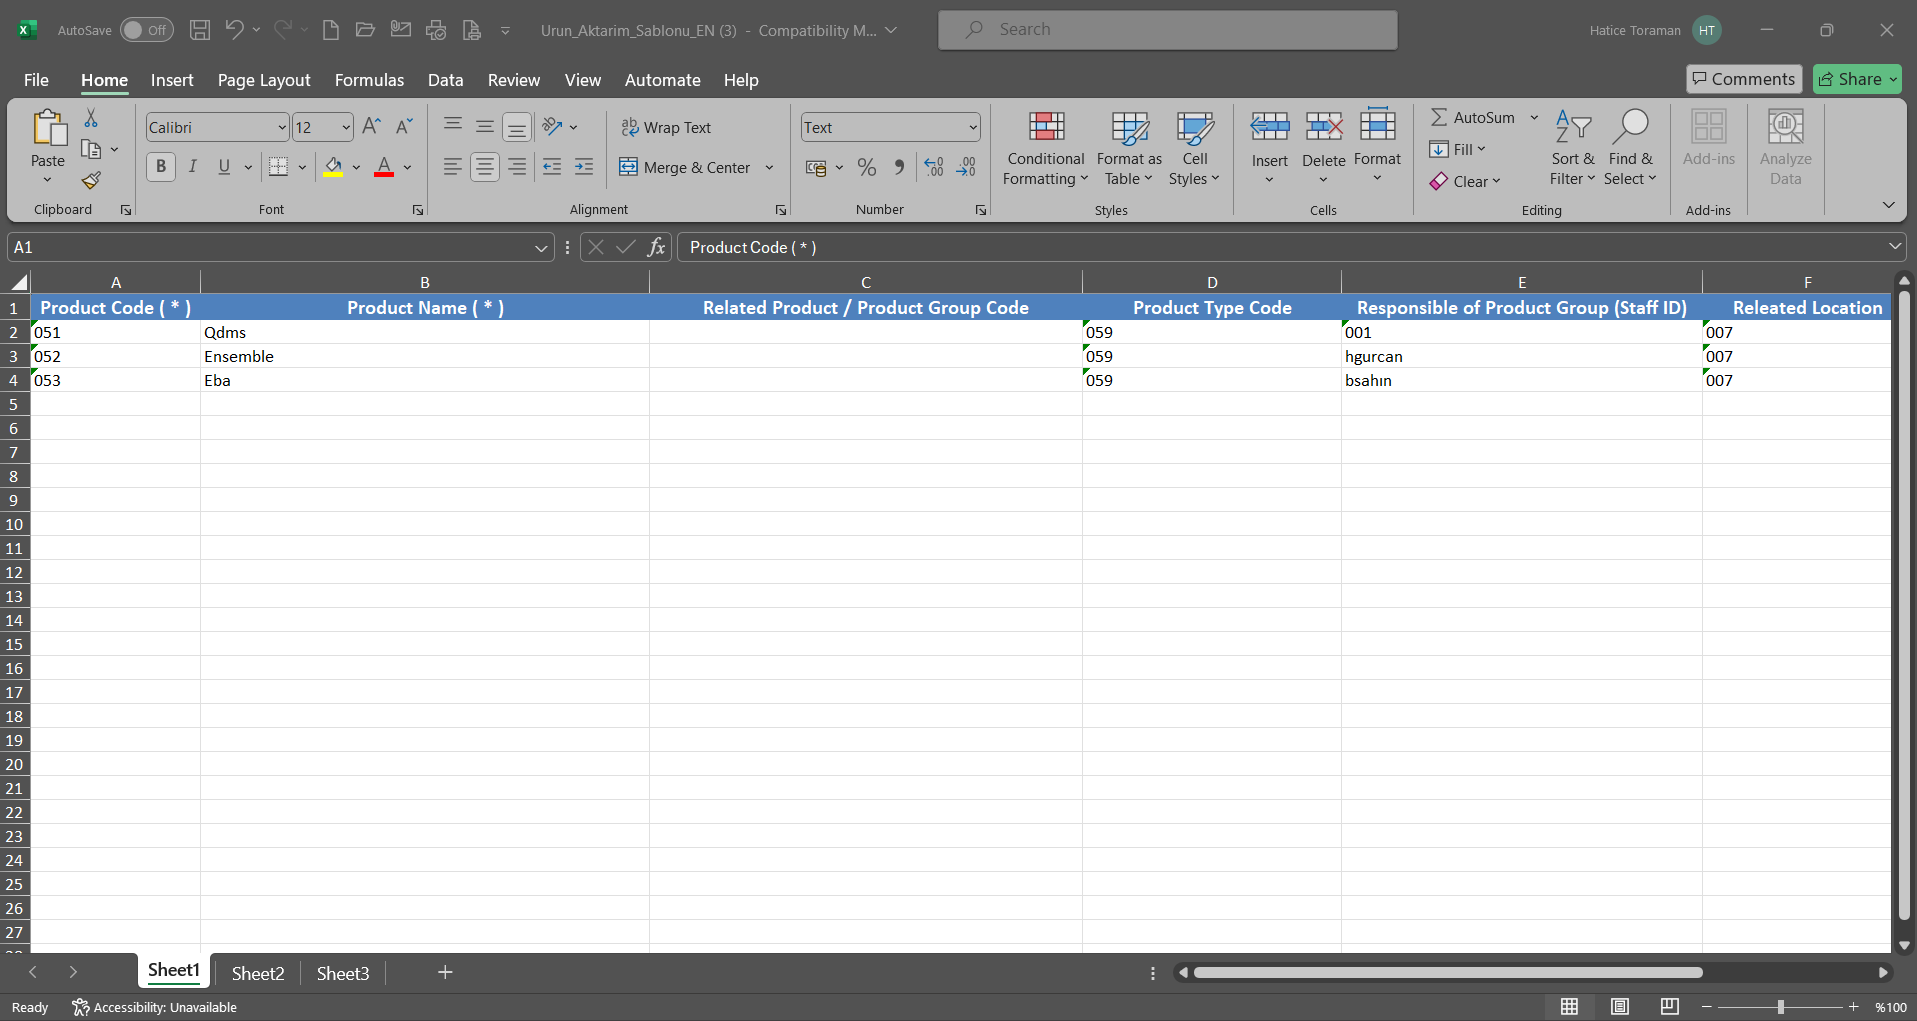
Click the  button on the Select Product Template screen.

Click the “Browse” button on the Upload File screen.

Select the filled Product Transfer template on the screen that opens.

On the Select Product Template screen, click the  button to check whether the template created and uploaded to the system gives an error or not.
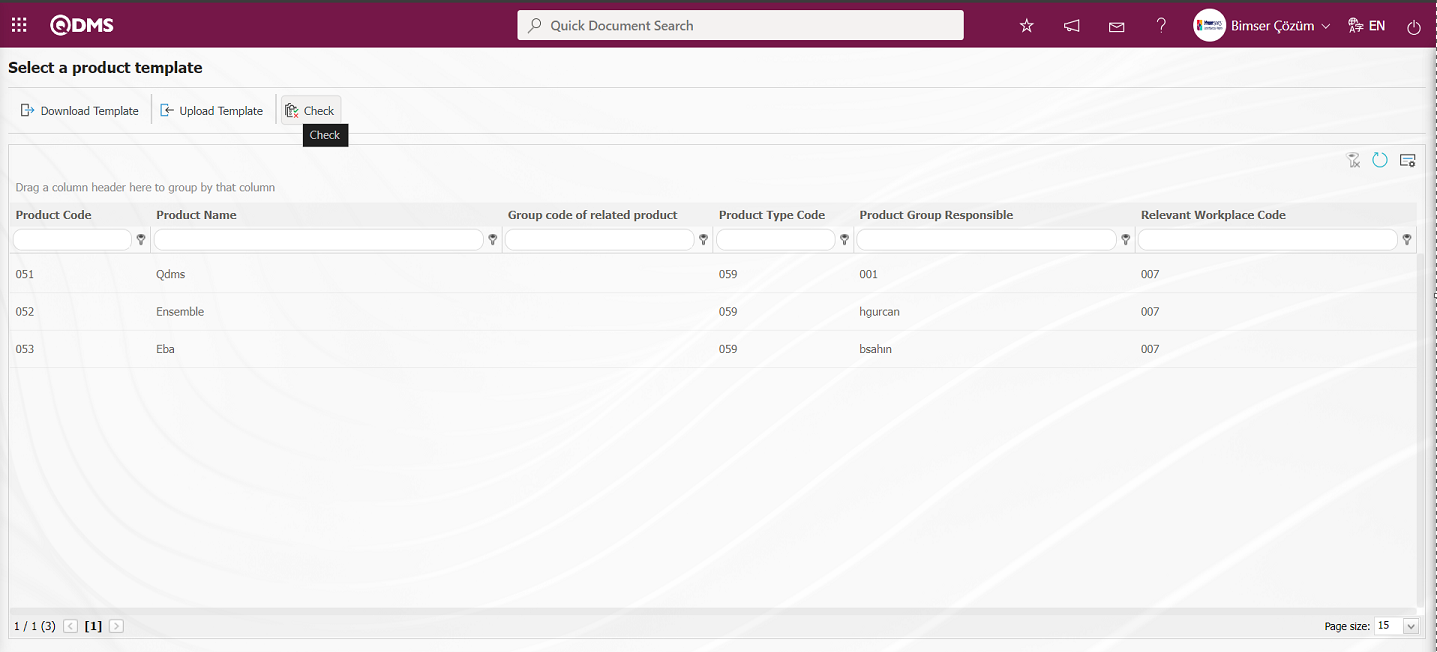
“Data is suitable for transfer” message is given by the system.

On the Select Product Template screen, click the button and perform the Product Transfer operation.
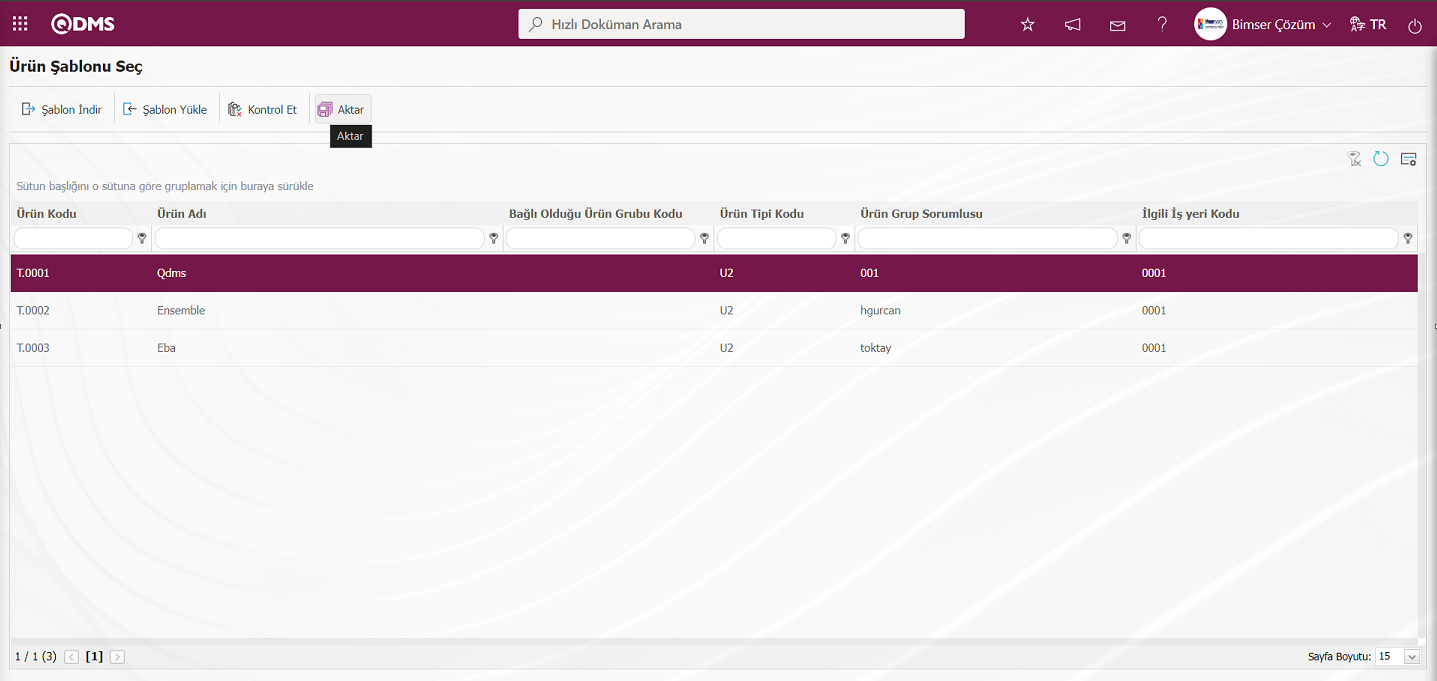
“Products transferred successfully.” It is seen that the number of products transferred is given by giving the message.
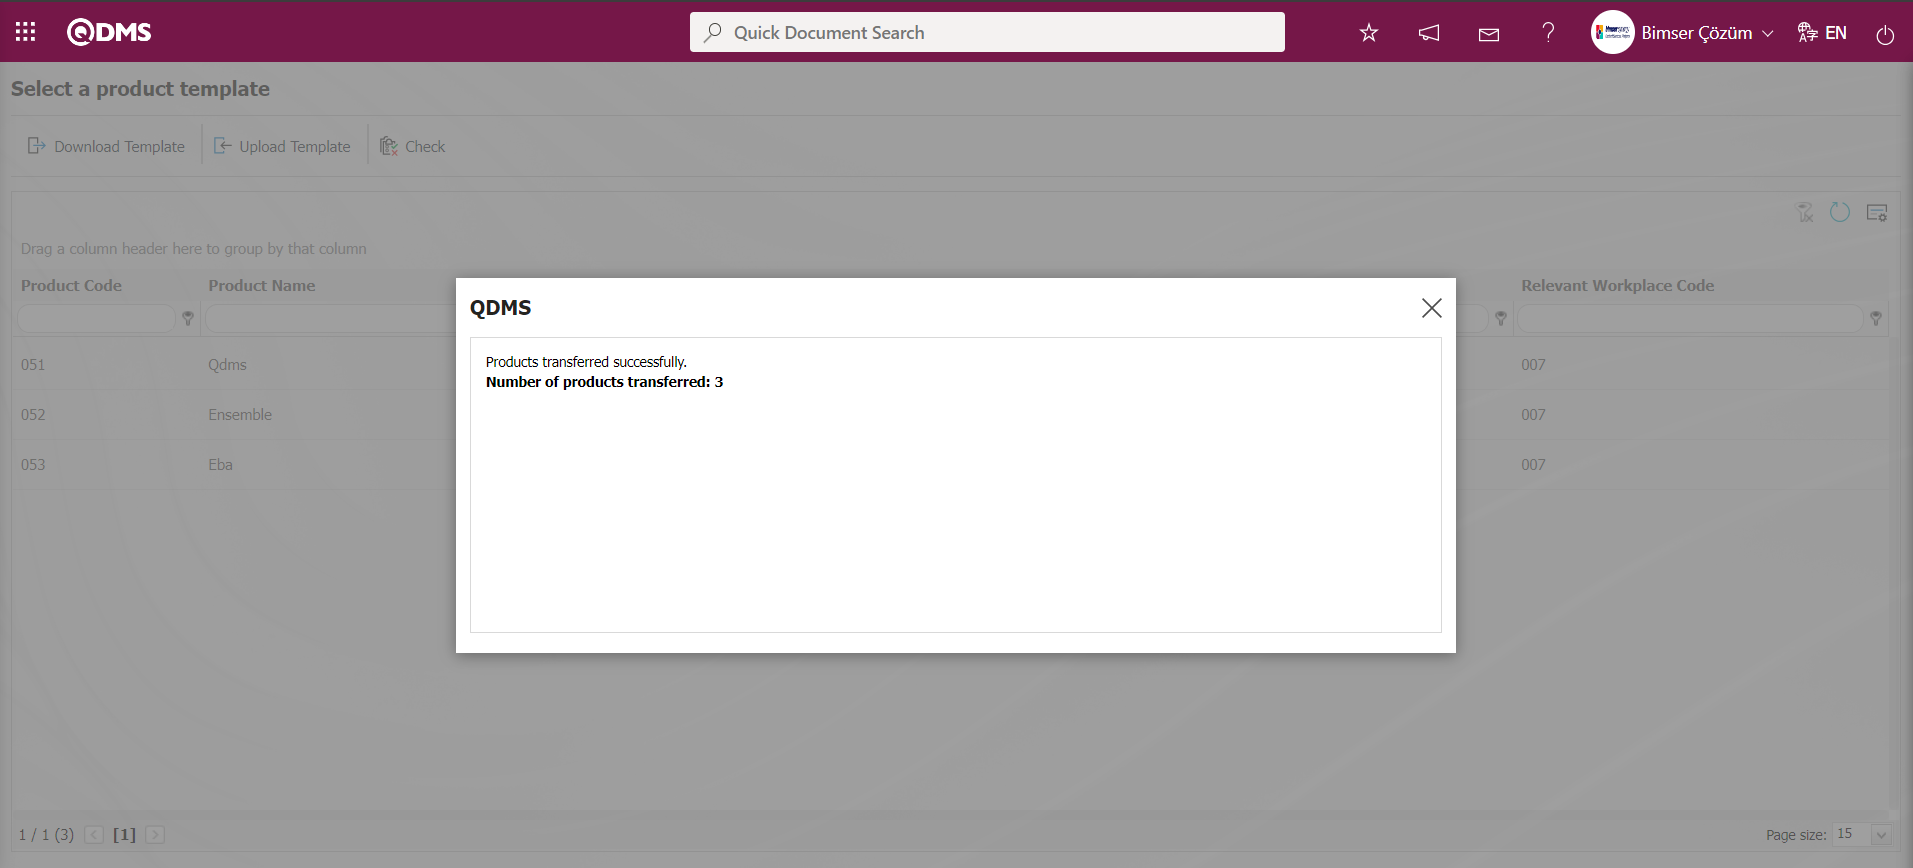
5.2.17.2.Item No Transfer And Mass Deactivation
Menu Name: System Infrastructure Definitions/ BSID/ Configuration Settings/ Transfers/Item No Transfer And Mass Deactivation
In Management Systems, it is the menu where the item numbers are transferred to the system in bulk at the same time and the item numbers installed in the system are collectively deactivated.
Item Number Transfer Process;
On the Item No Transfer and Mass Deactivation** screen, the check box related to the Item Number Transfer field is checked for the transfer of the item numbers related to the management systems.

With the help of the buttons on the screen;
 : Item No Transfer template is downloaded to the computer.
 : The completed Item No Transfer template is uploaded to the system.
 : Check whether the Item No Transfer template created and uploaded to the system gives an error or not.
 : The transfer process is performed.
The item number transfer template is downloaded with the button on the screen, after filling in the required information, the item number transfer template is uploaded to the system with the button. The button is used to check the information entered. If the transferred data is suitable for transfer, the Item No transfer process is realized via the button.

On the Item No Transfer and Batch Deactivation screen, the Item No Transfer template is downloaded to the computer with the  button. The relevant fields in the Item No Transfer template are saved to the computer by typing the relevant information.
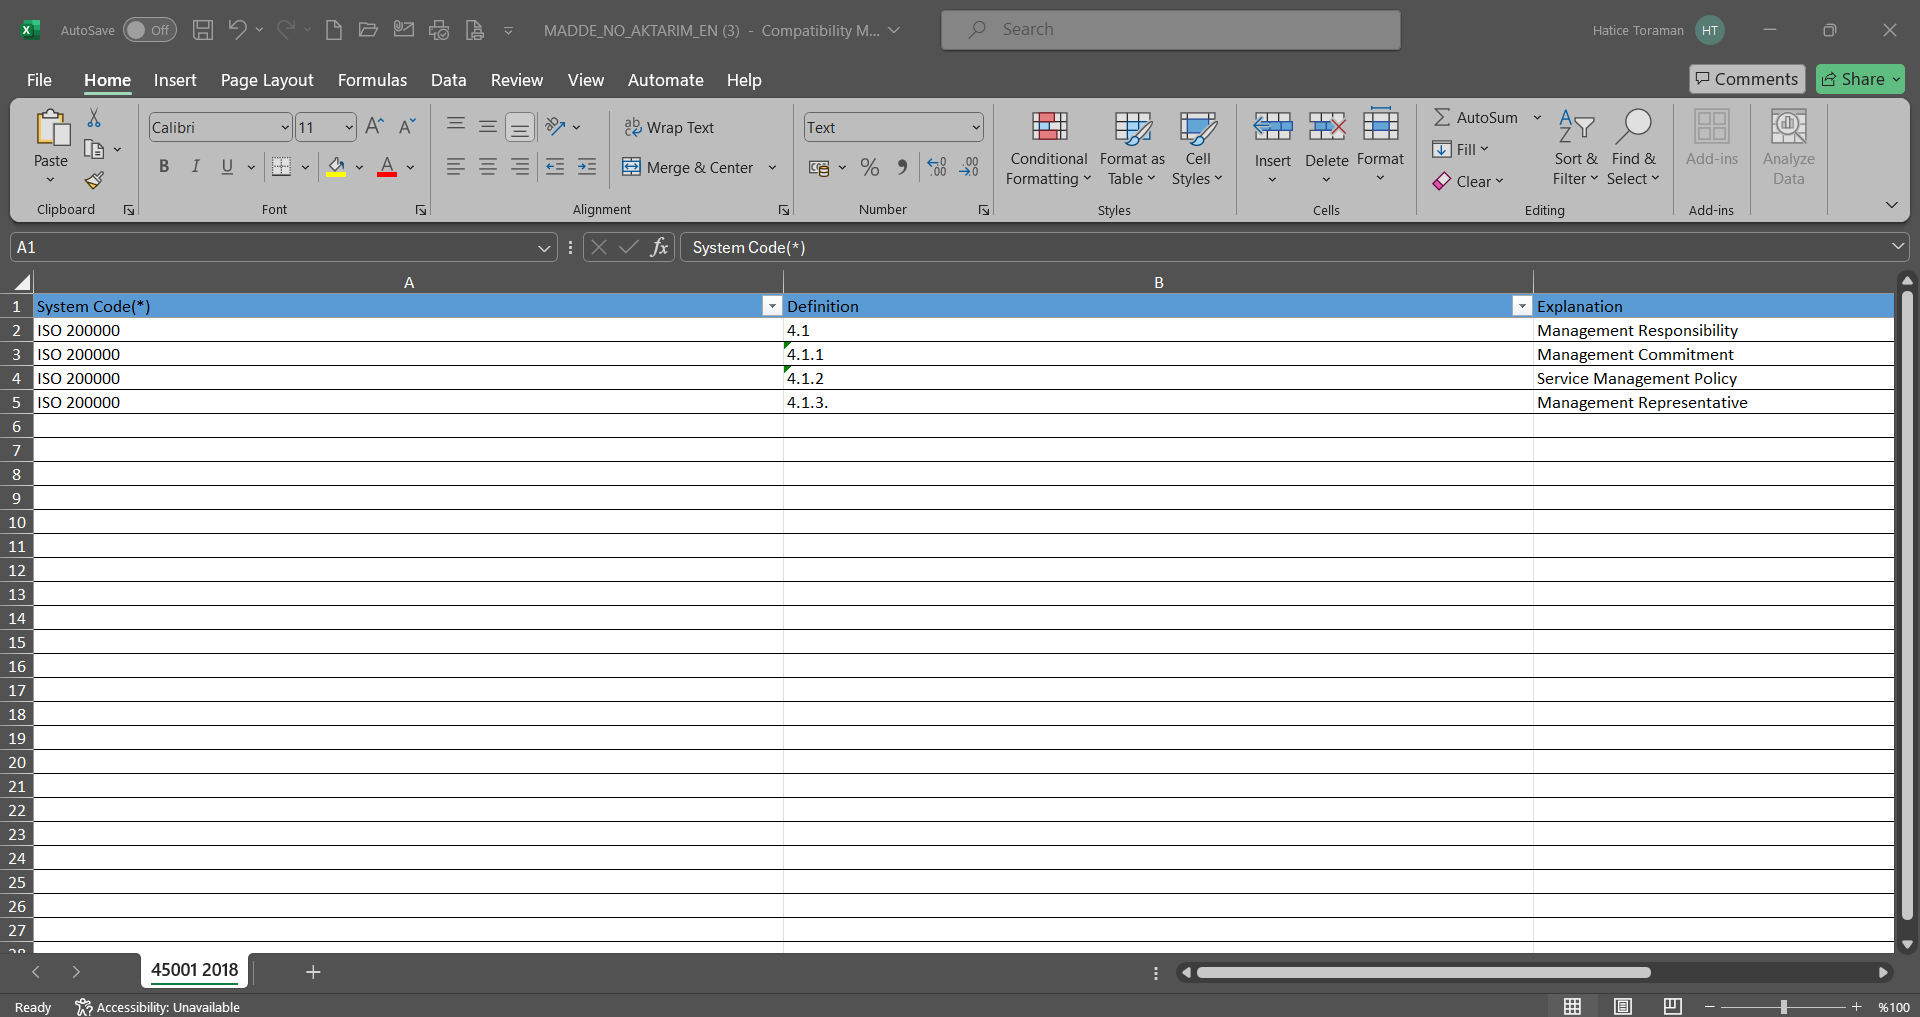
Click the  button on theItem No Transfer and Mass Deactivation screen.
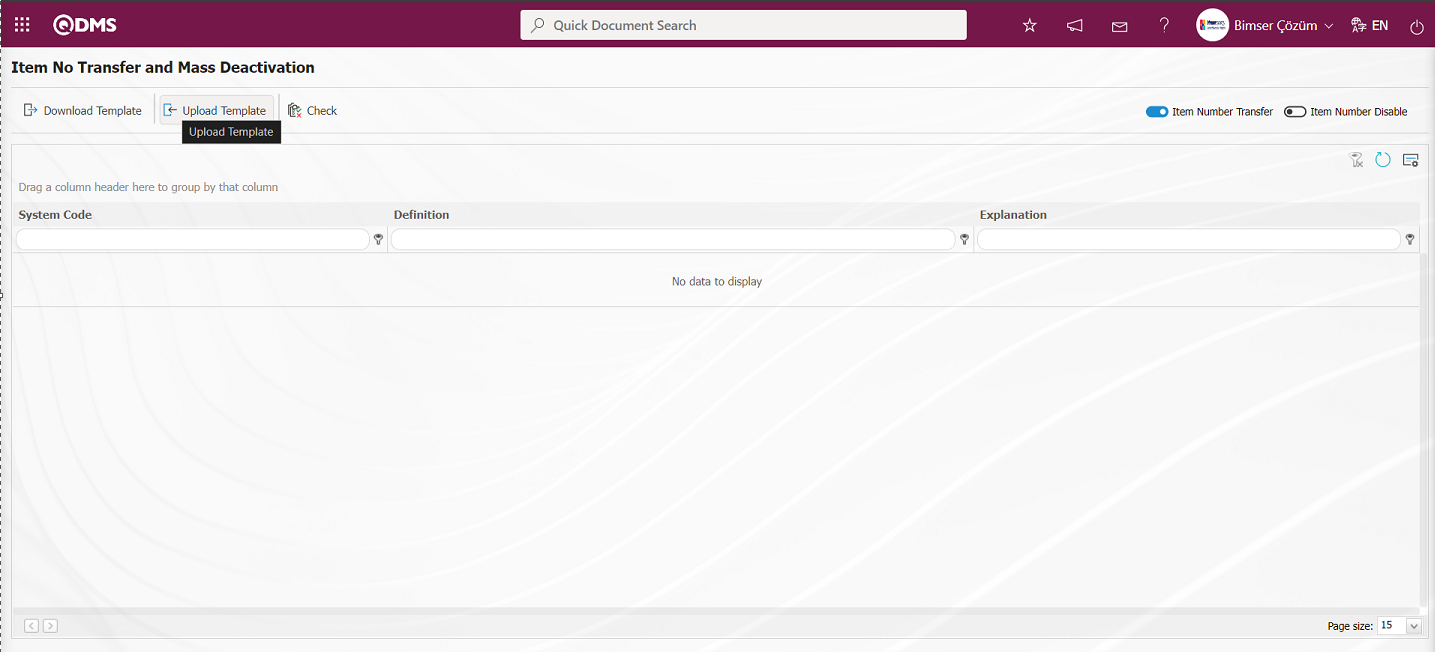
Click the “Browse” button on the Upload File screen.

In the screen that opens, the filled Item No Transfer template is selected.
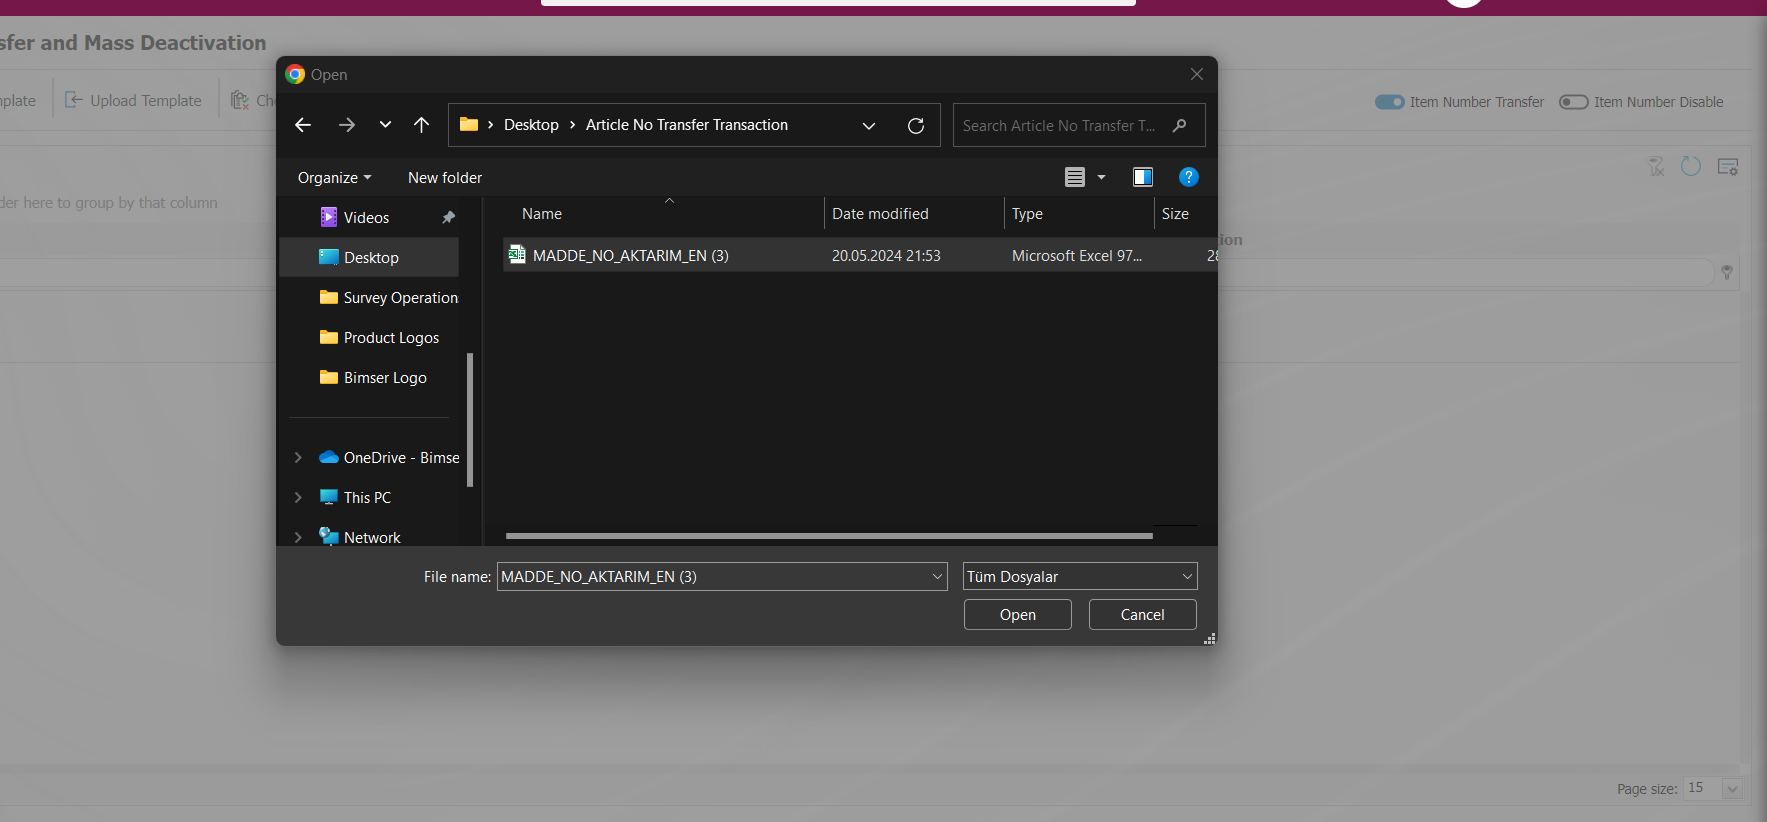
On the Item No Transfer and Mass Deactivation screen, the  button is clicked to check whether the template created and uploaded to the system gives an error.
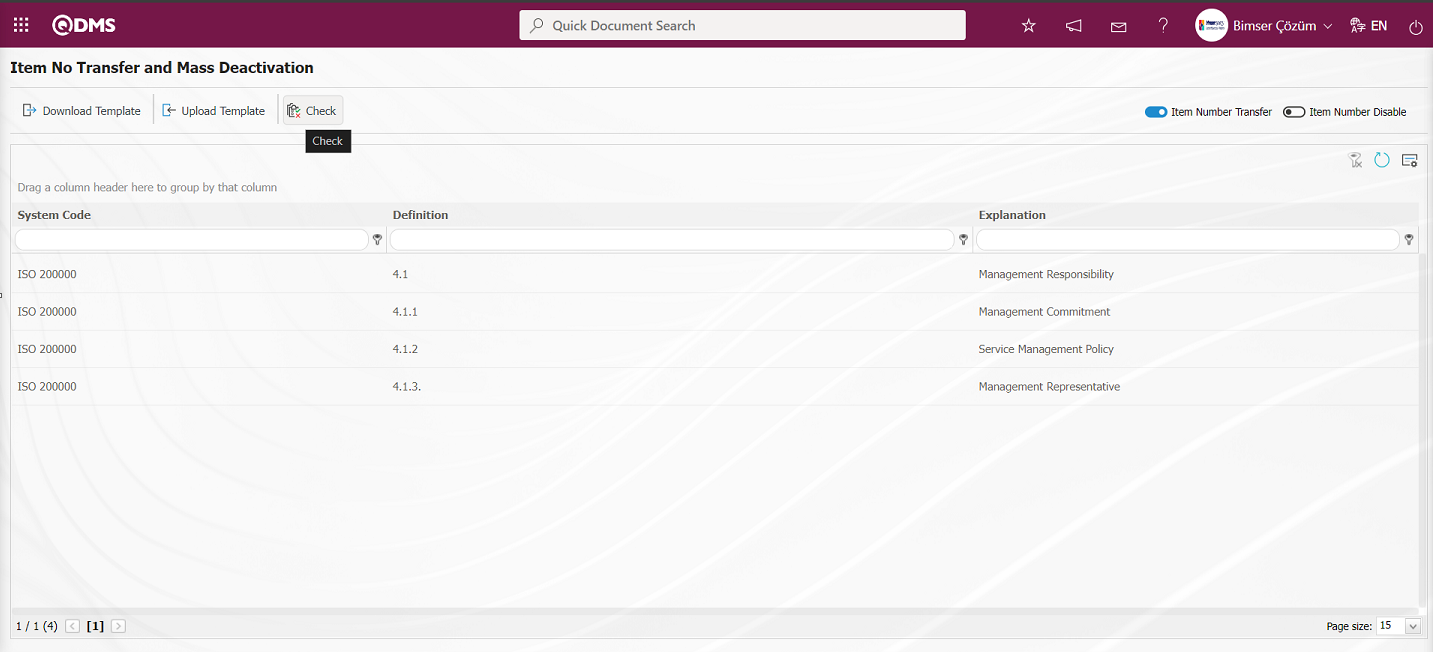
The system displays the message “Data is suitable for transfer”.
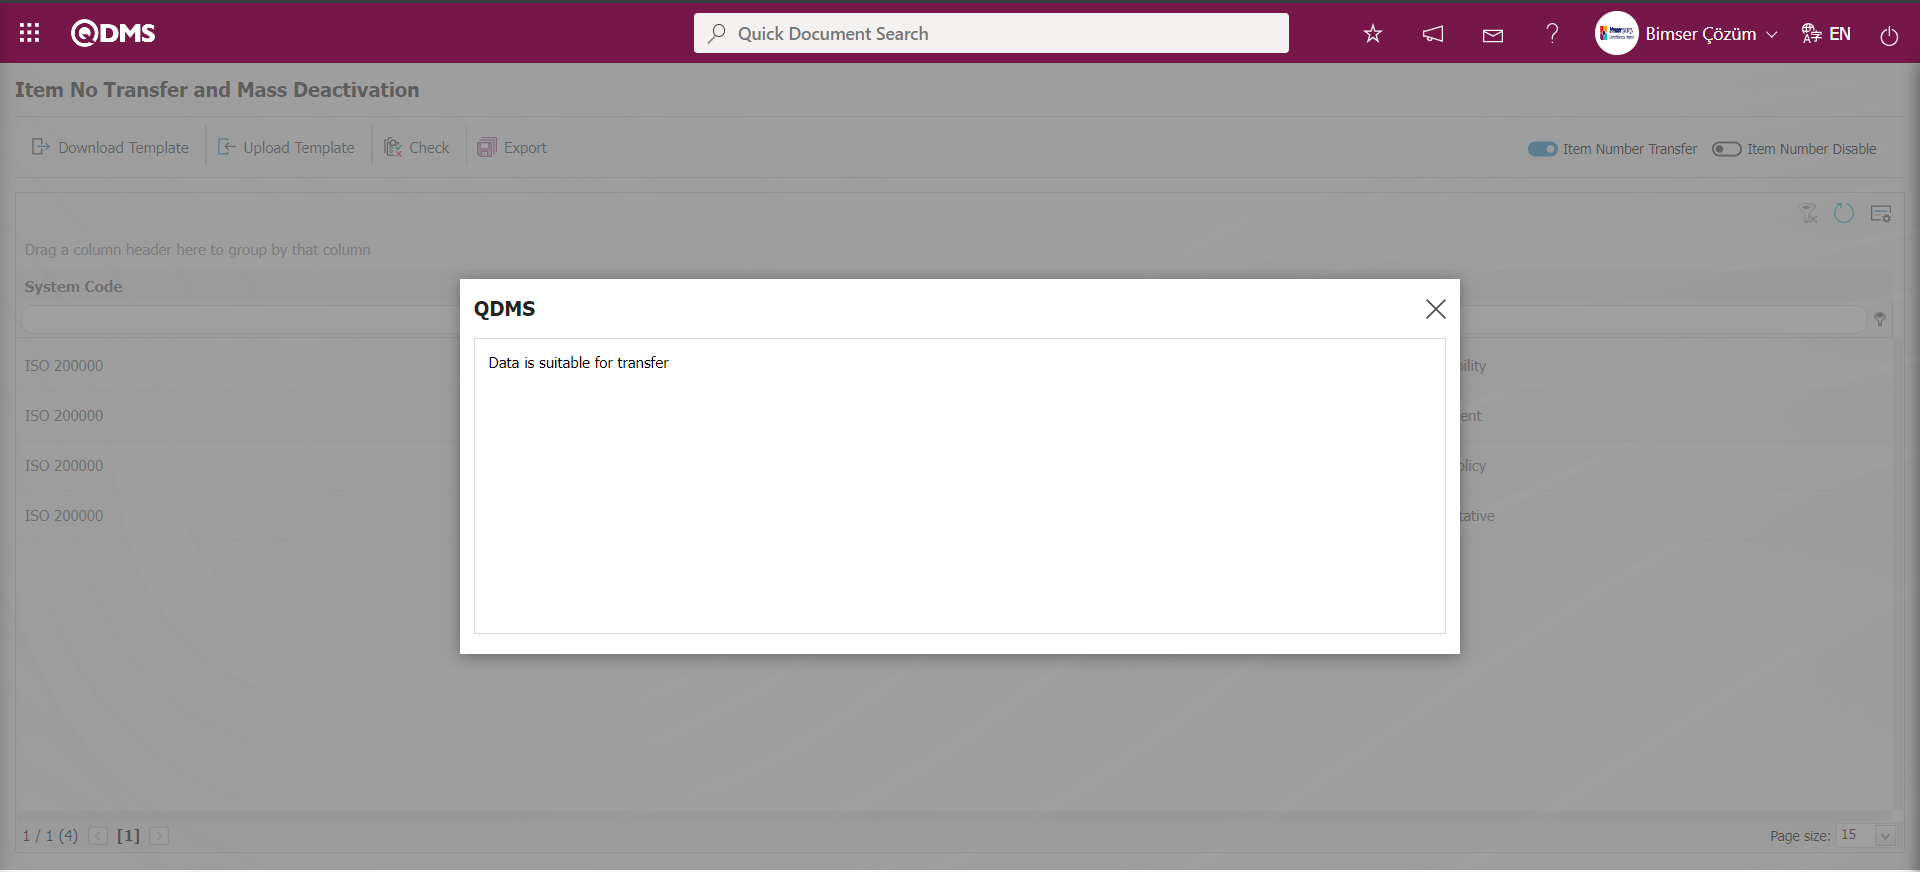
On the Item No Transfer and Mass Deactivation screen, click the button and perform the Item No Transfer operation.
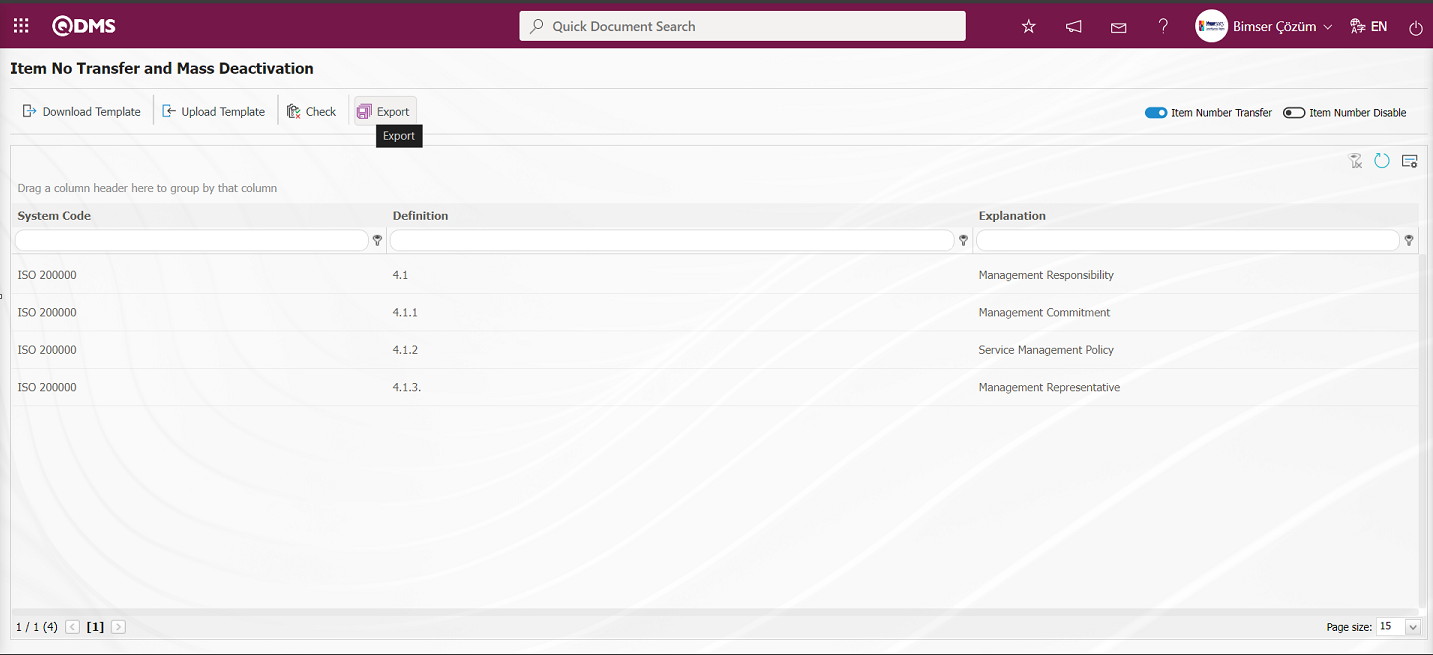
It is seen that the system gives the message “The item No transfer process has been completed successfully.” and gives information about the number of item numbers transferred.
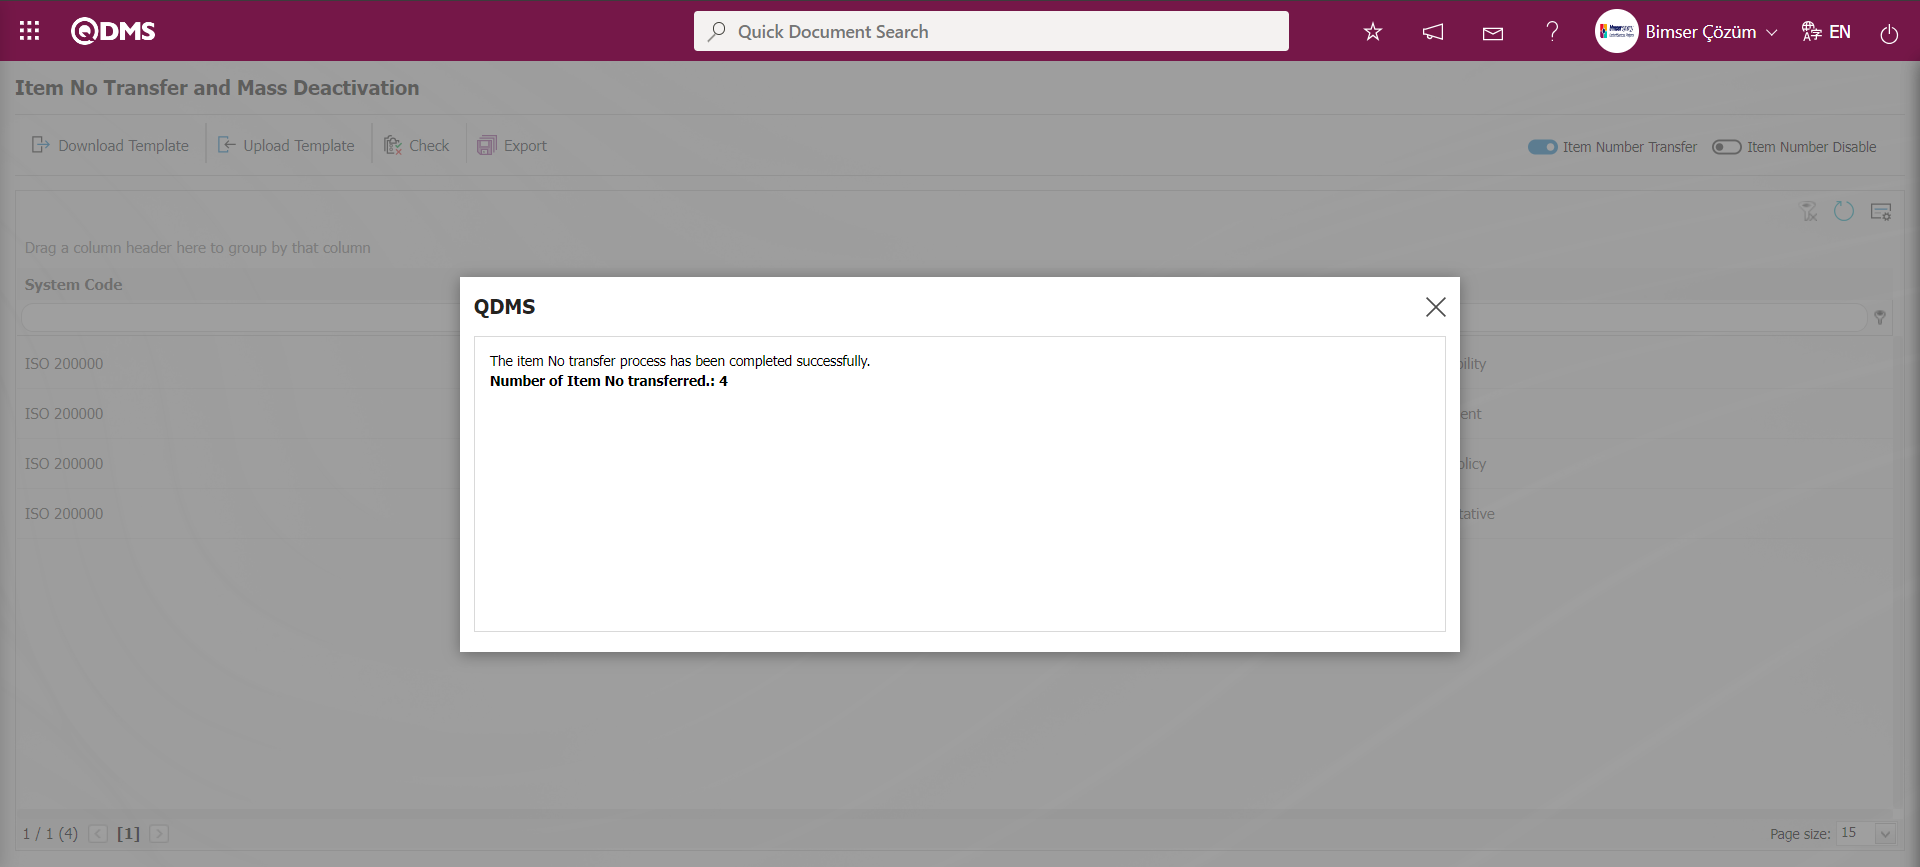
Item No Bulk Disable
By selecting the “Item Number Disable” option in the Item No Transfer And Mass Deactivation menu, the Item No mass deactivation template is downloaded with the button on the screen, as in the Item Number mass Disable process, and after filling in the necessary information, it is uploaded to the system with the button. In order to check the information entered, the button is used. If the transferred data is suitable for transfer, the transfer is realized via the button.
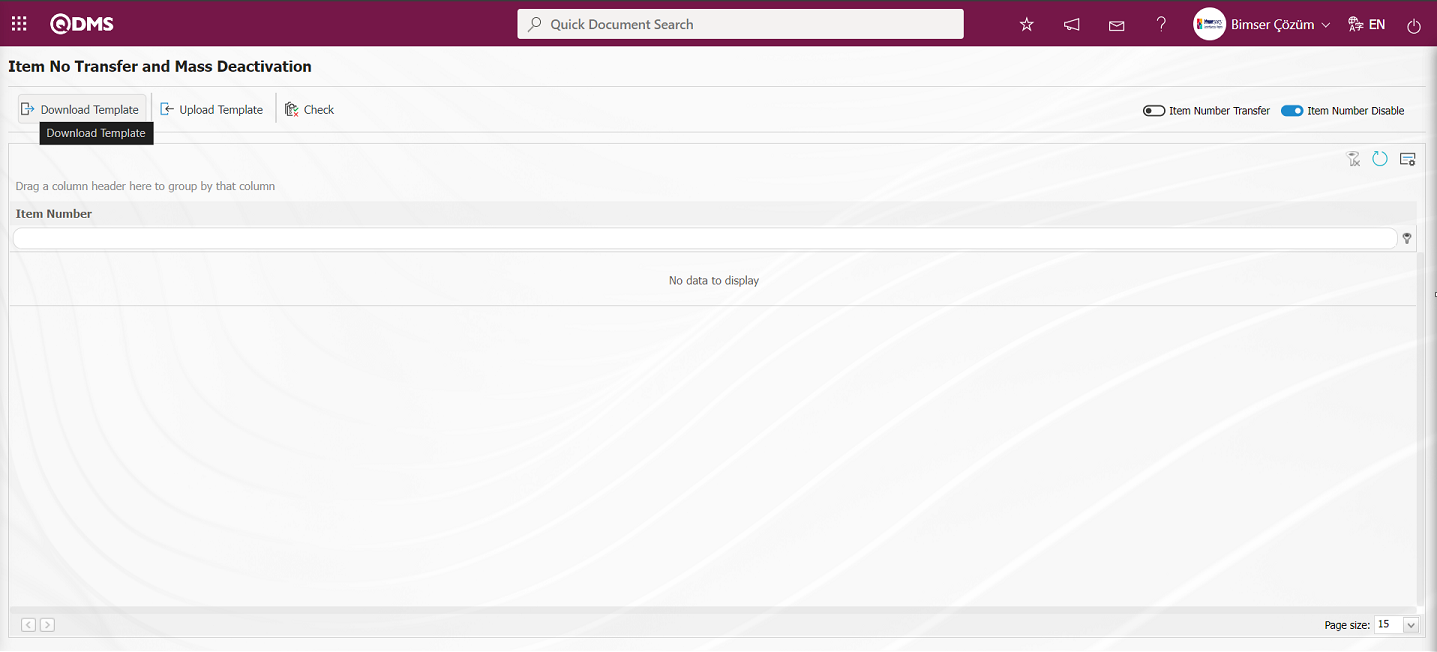
On the Item No Transfer And Mass Deactivation screen, the Item No mass deactivation template is downloaded to the computer with the button. The relevant fields in the Item No mass deactivation template are saved to the computer by writing the relevant information.
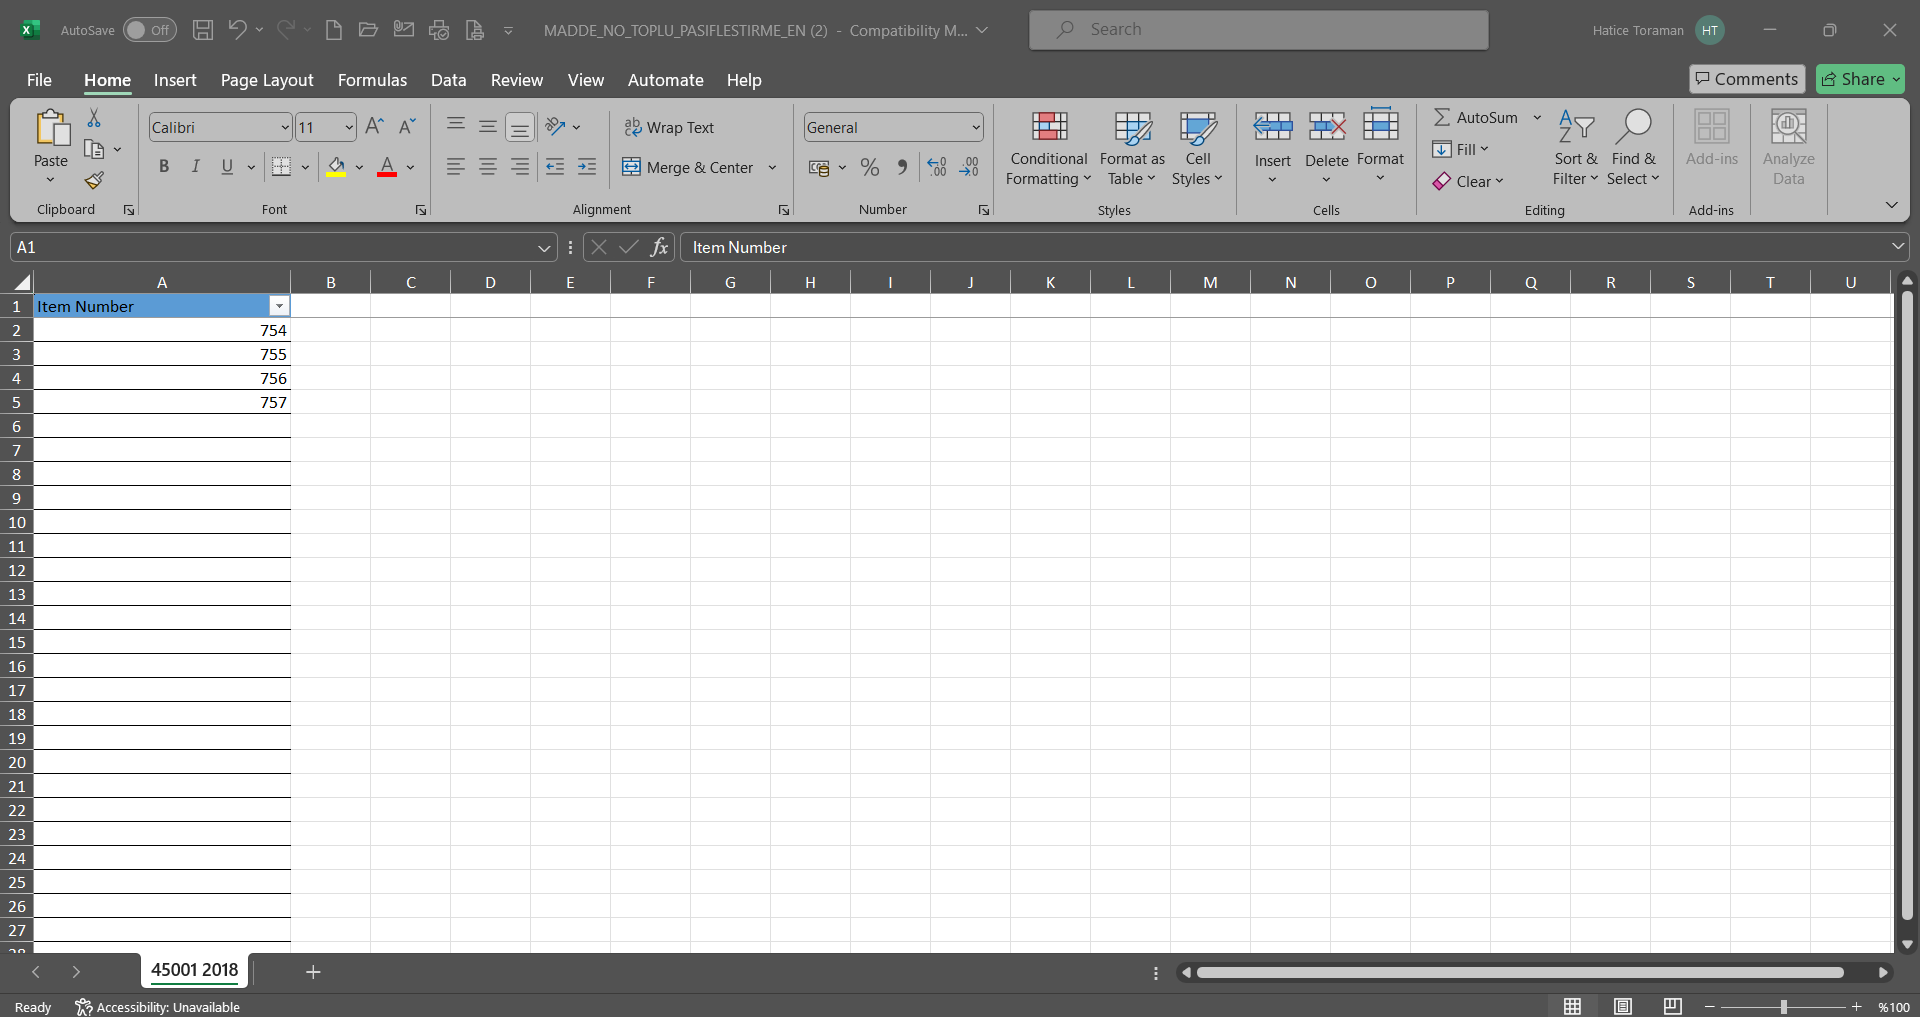
Click the button on the Item No Transfer And Mass Deactivation screen.
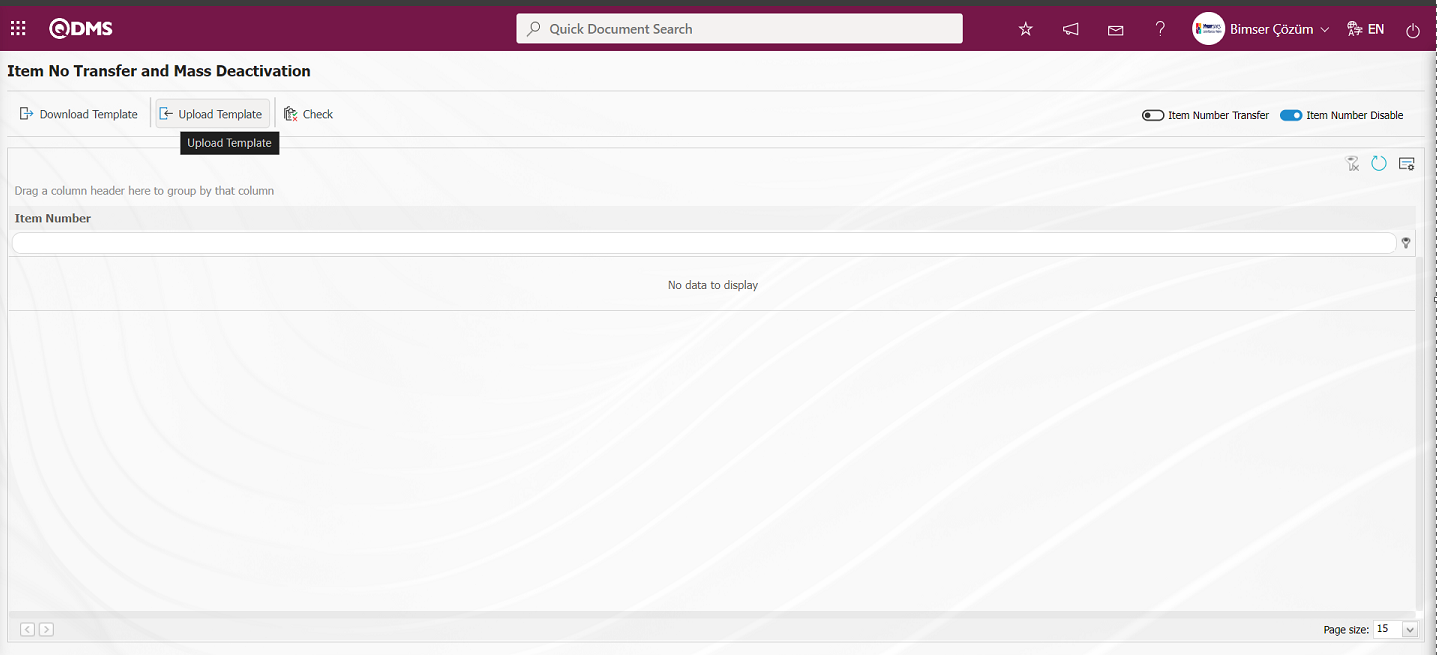
Click the “Browse” button on the Upload File screen.
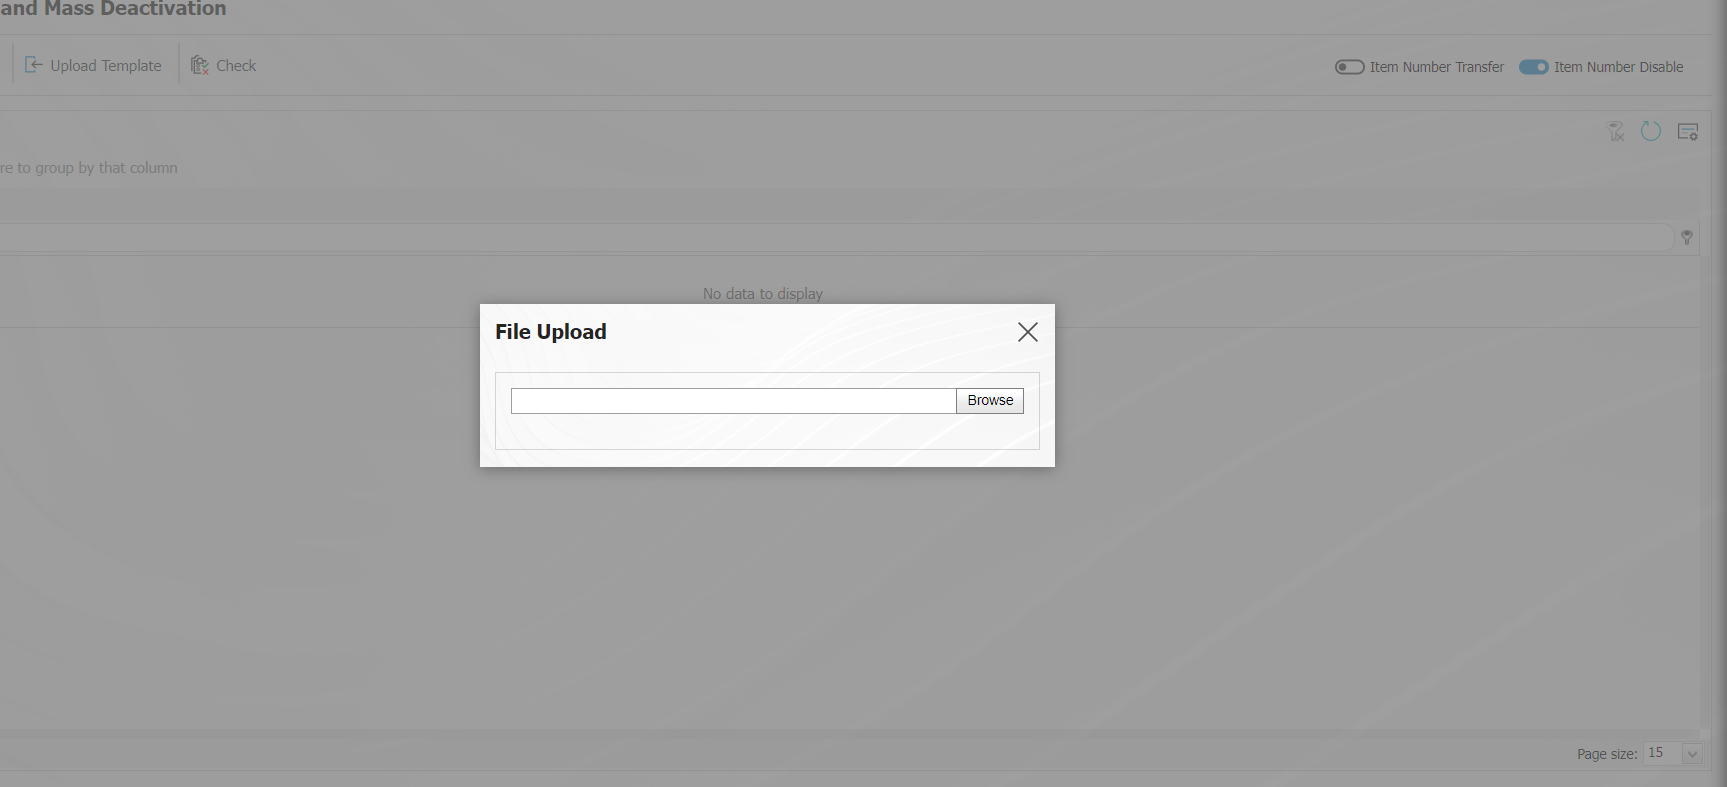
On the screen that opens, select the Item No Bulk deactivation template.

On the Item No Transfer And Mass Deactivation screen, click the button to check whether the template created and uploaded to the system gives an error.
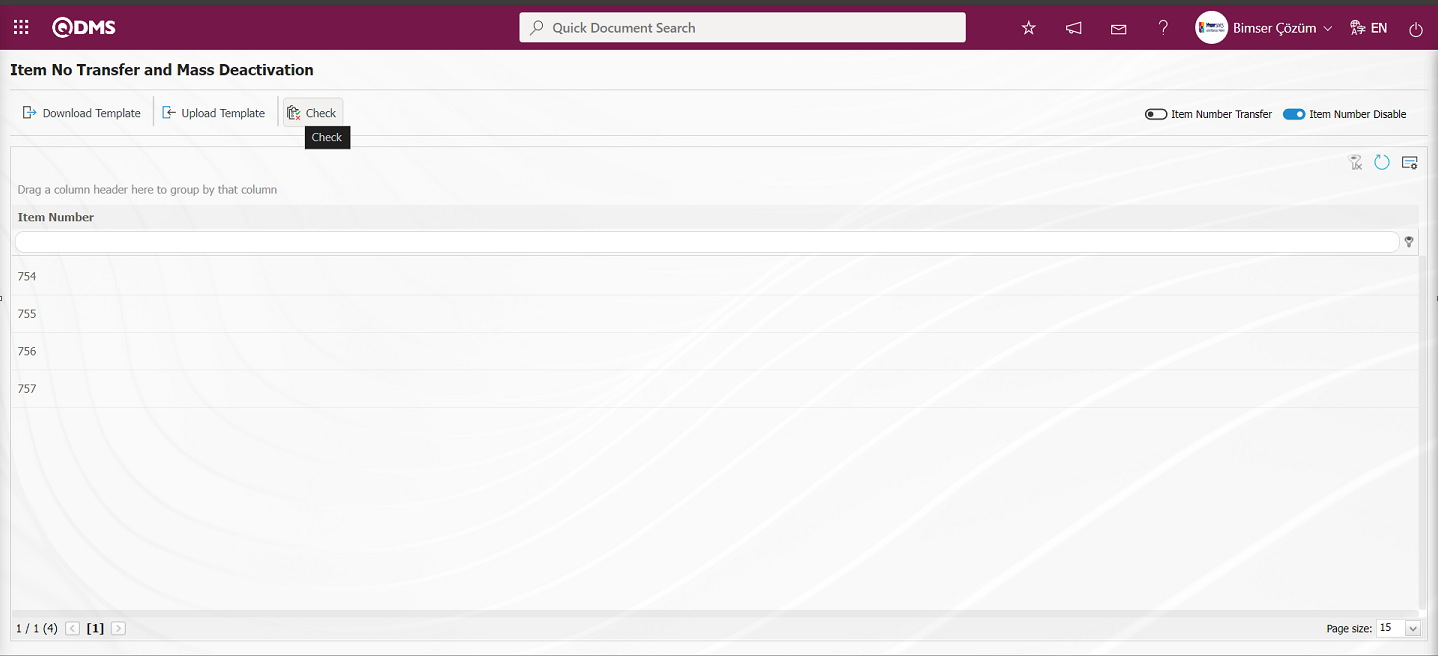
“Data is suitable for transfer.” message is given by the system.

On the Item No Transfer And Mass Deactivation screen, click on the button to perform Item No mass deactivation.
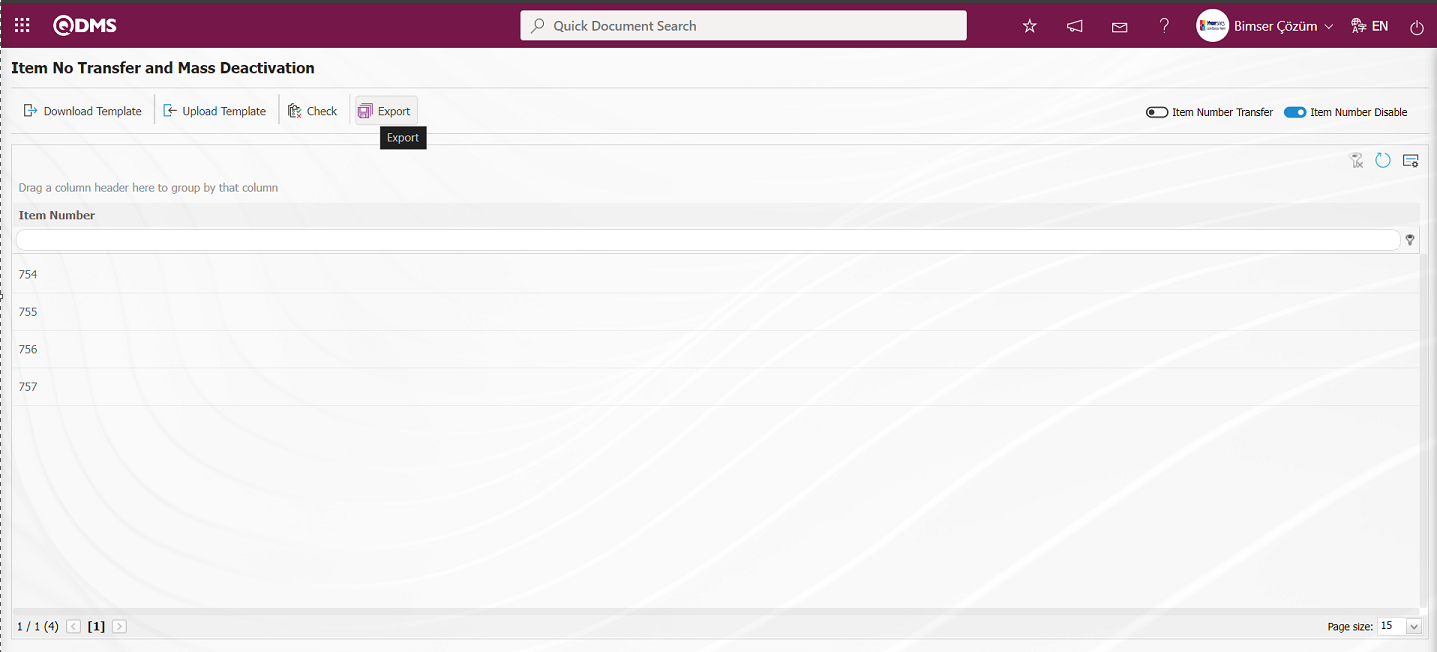
On the system side, the message “Item No passivation process has been completed successfully.” is given and it is seen that the number of item numbers that have been passivated is given.

5.2.17.3. Customer-Supplier Transfer
Menu Name: System Infrastructure Definitions/ BSID/ Configuration Settings/ Transfers/Customer-Supplier Transfer
It is the menu where the Customer-Suppliers are transferred to the system collectively at the same time.
With the help of the buttons on the screen;
: Customer-Supplier Transfer template is downloaded to the computer.
: The filled Customer-Supplier Transfer template is uploaded to the system.
: The Customer-Supplier Transfer template filled and uploaded to the system is checked for errors.
: The transfer process is performed.
The Customer-Supplier Transfer template is downloaded with the button on the screen, after filling in the necessary information, the Customer-Supplier Transfer template is uploaded to the system with the button. In order to check the information entered, the button is used. If the transferred data is suitable for transfer, the Customer-Supplier transfer process is realized via the button.
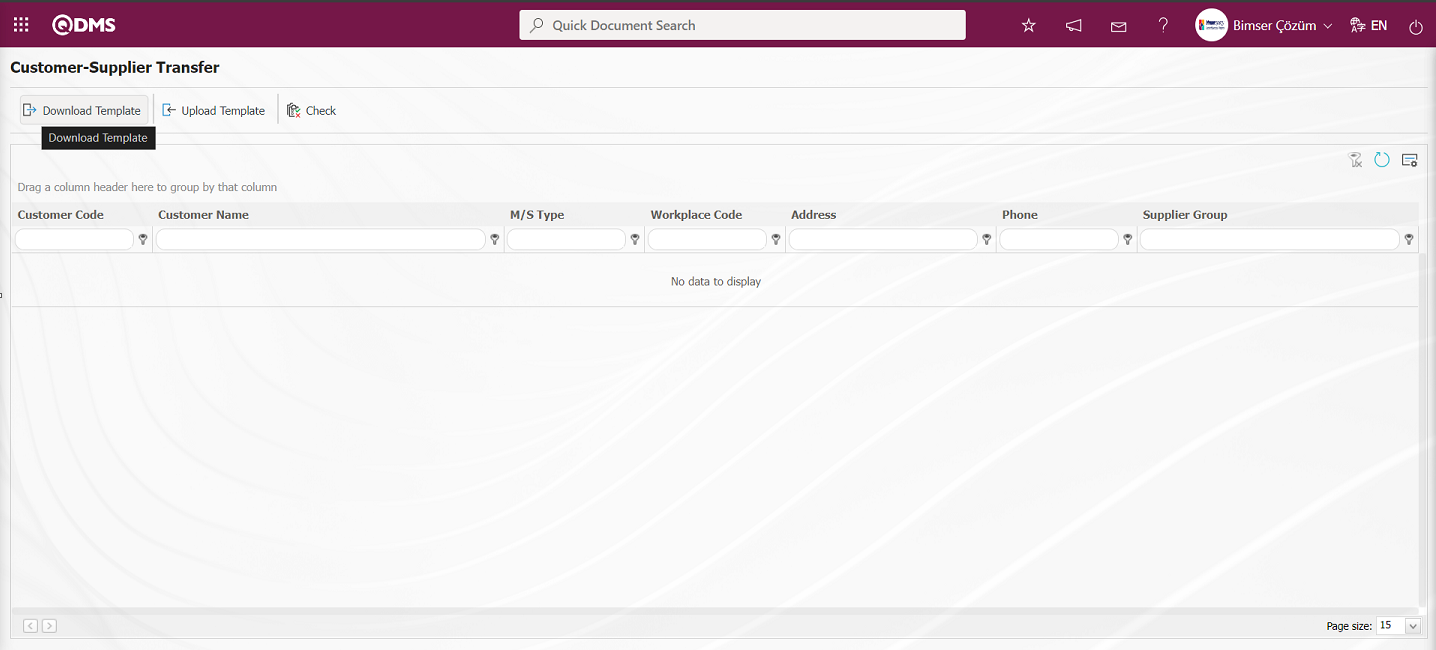
On the Customer-Supplier Transfer screen, the Customer-Supplier Transfer template is downloaded to the computer with the button. The relevant fields in the Customer-Supplier Transfer template are saved to the computer by typing the relevant information. The point to be considered in the transfer template should be written as “M” as the type for the Customer and “S” as the type for the Supplier.
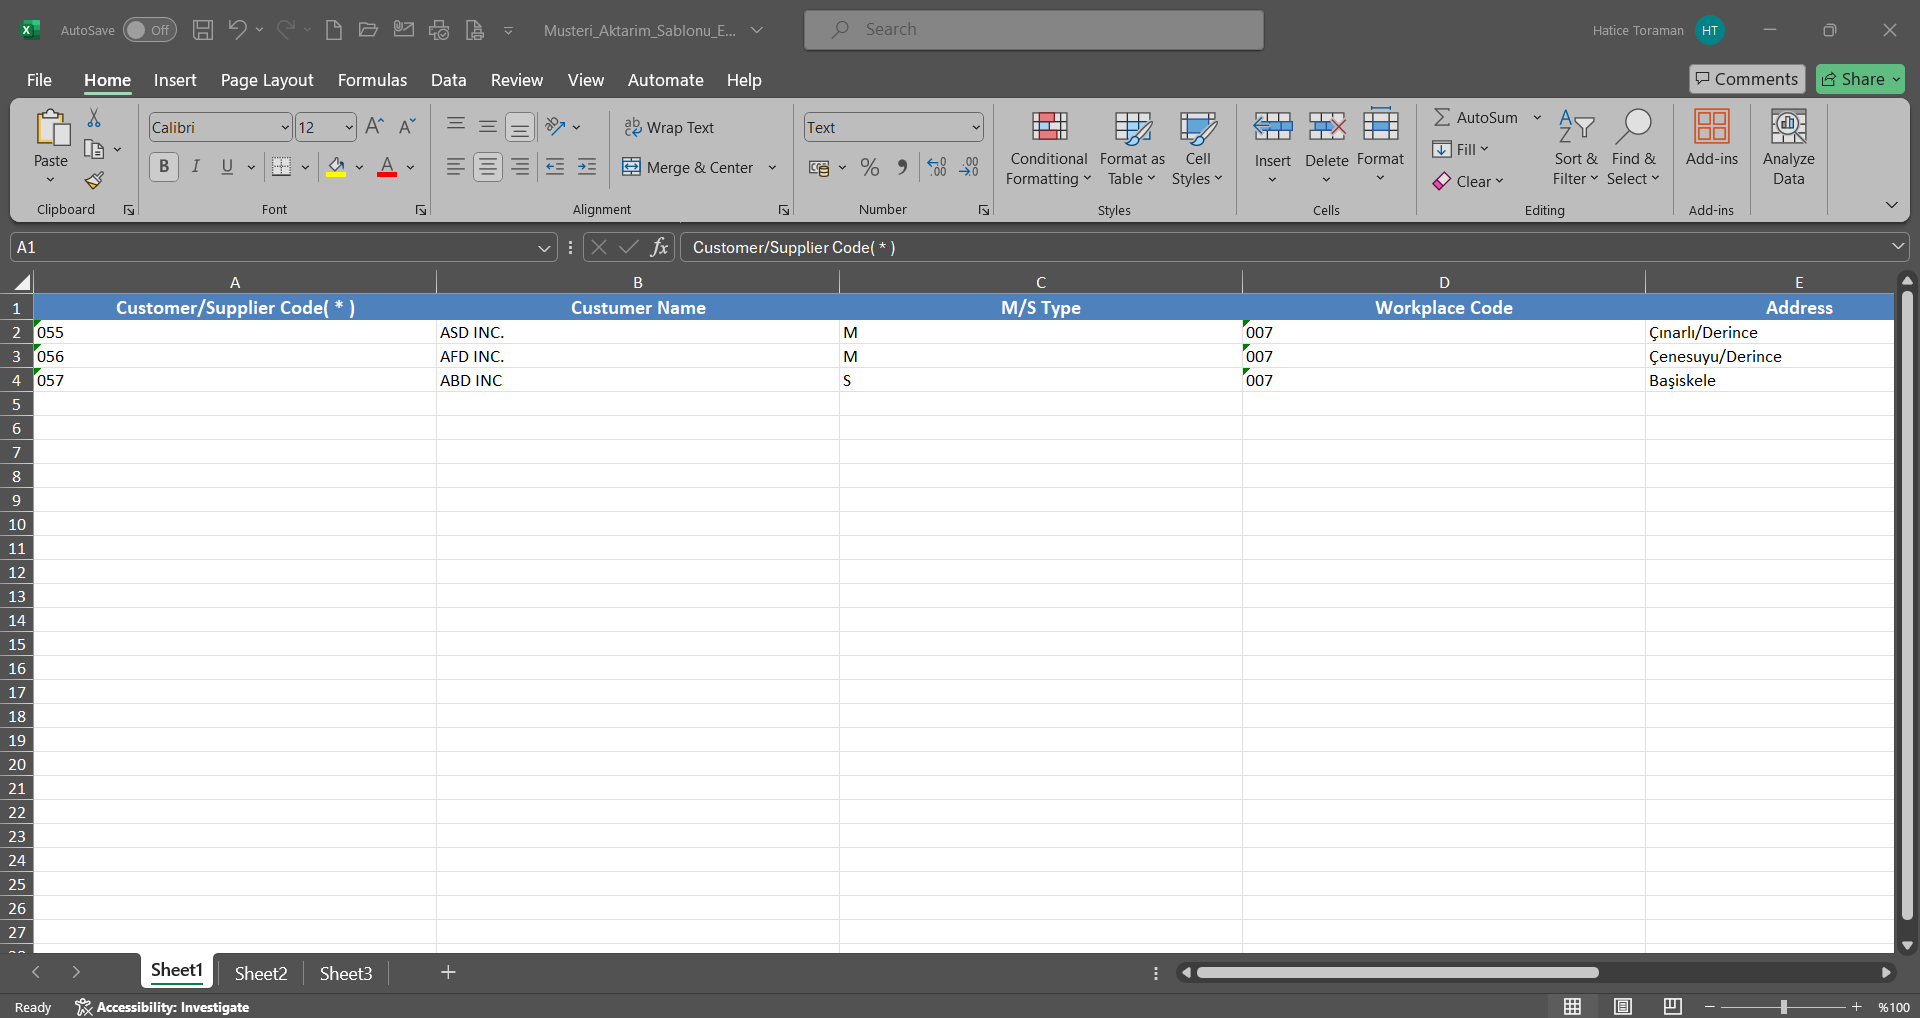
Click the button on the Customer-Supplier Transfer screen.

Click the “Browse” button on the Upload File screen.
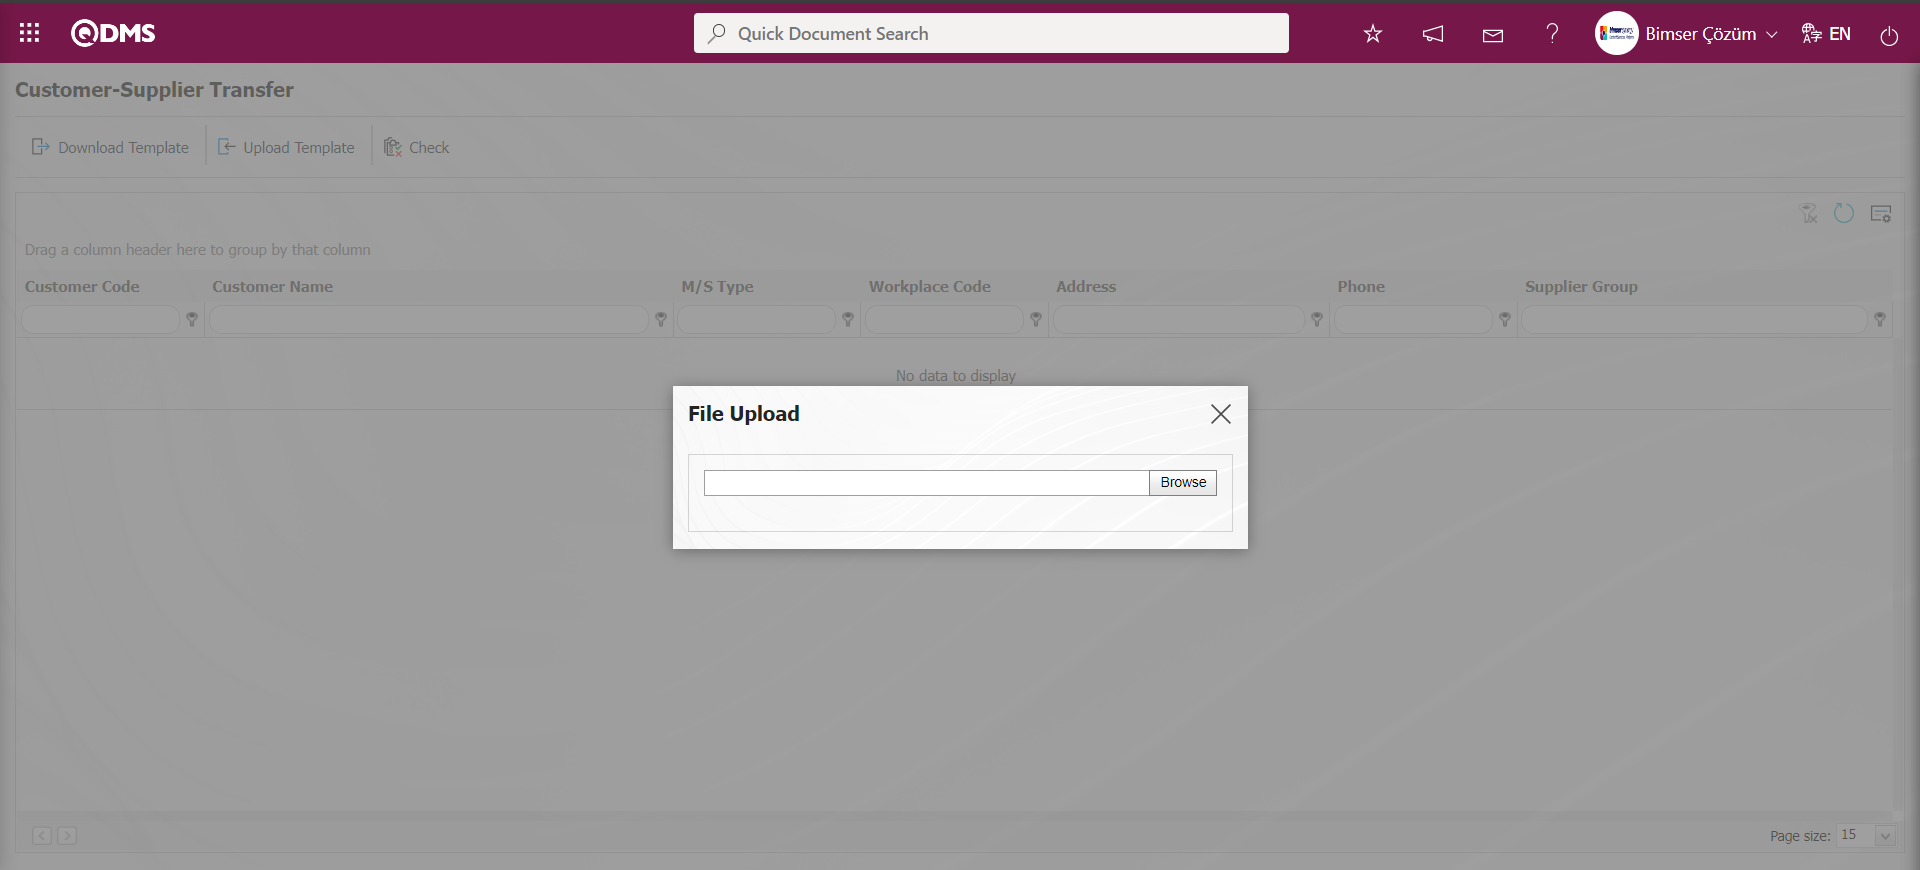
In the screen that opens, the filled Customer-Supplier Transfer template is selected.
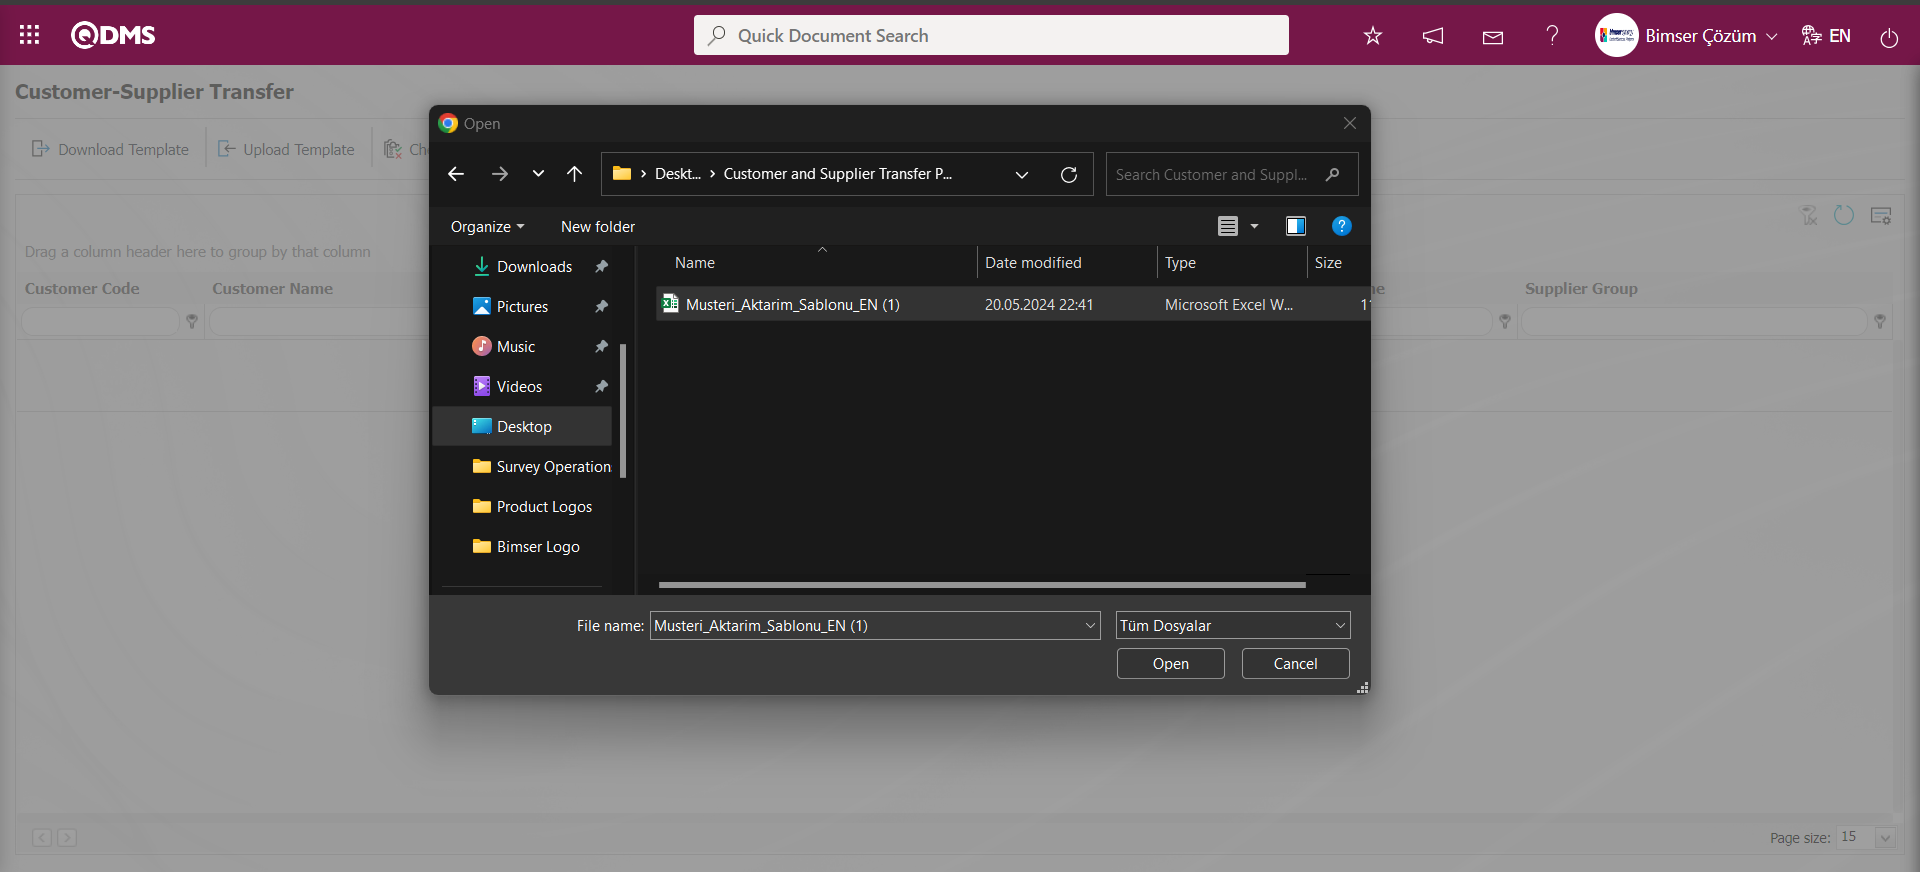
On the Customer-Supplier Transfer screen, the button is clicked to check whether the template created and uploaded to the system gives an error.
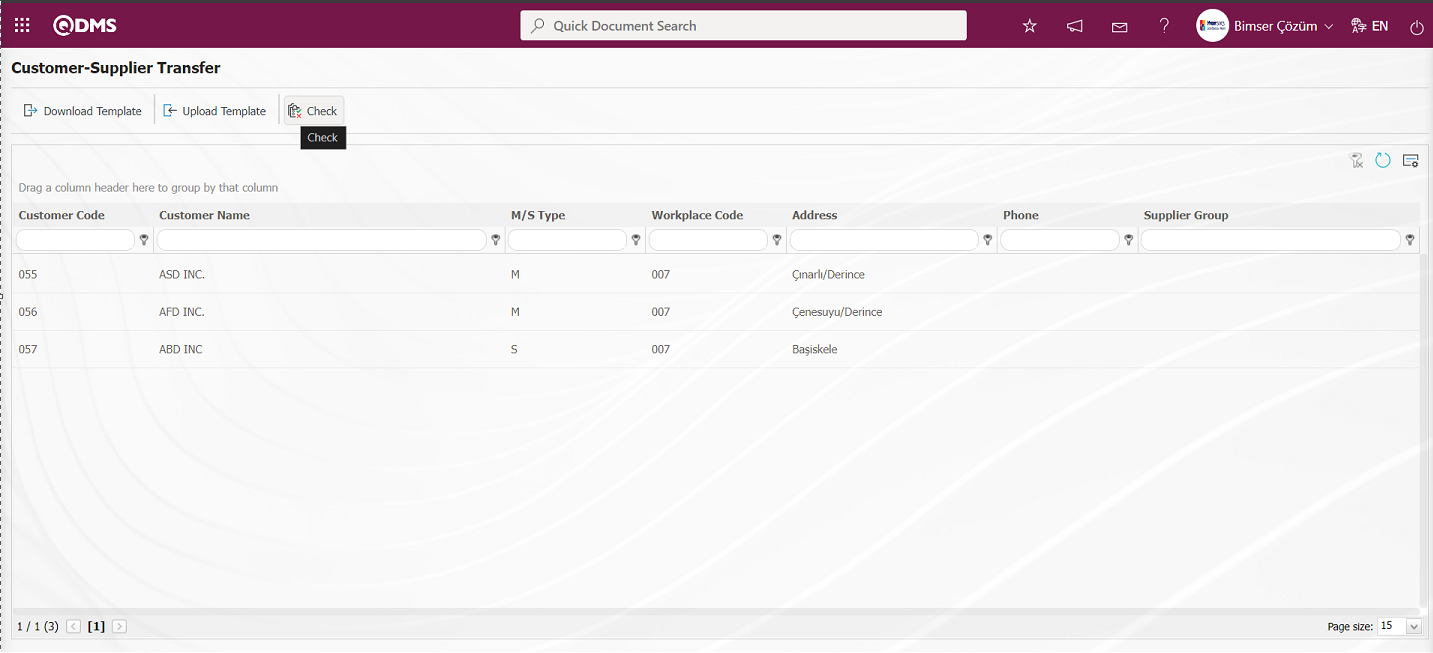
“Data is suitable for transfer” message is given by the system.
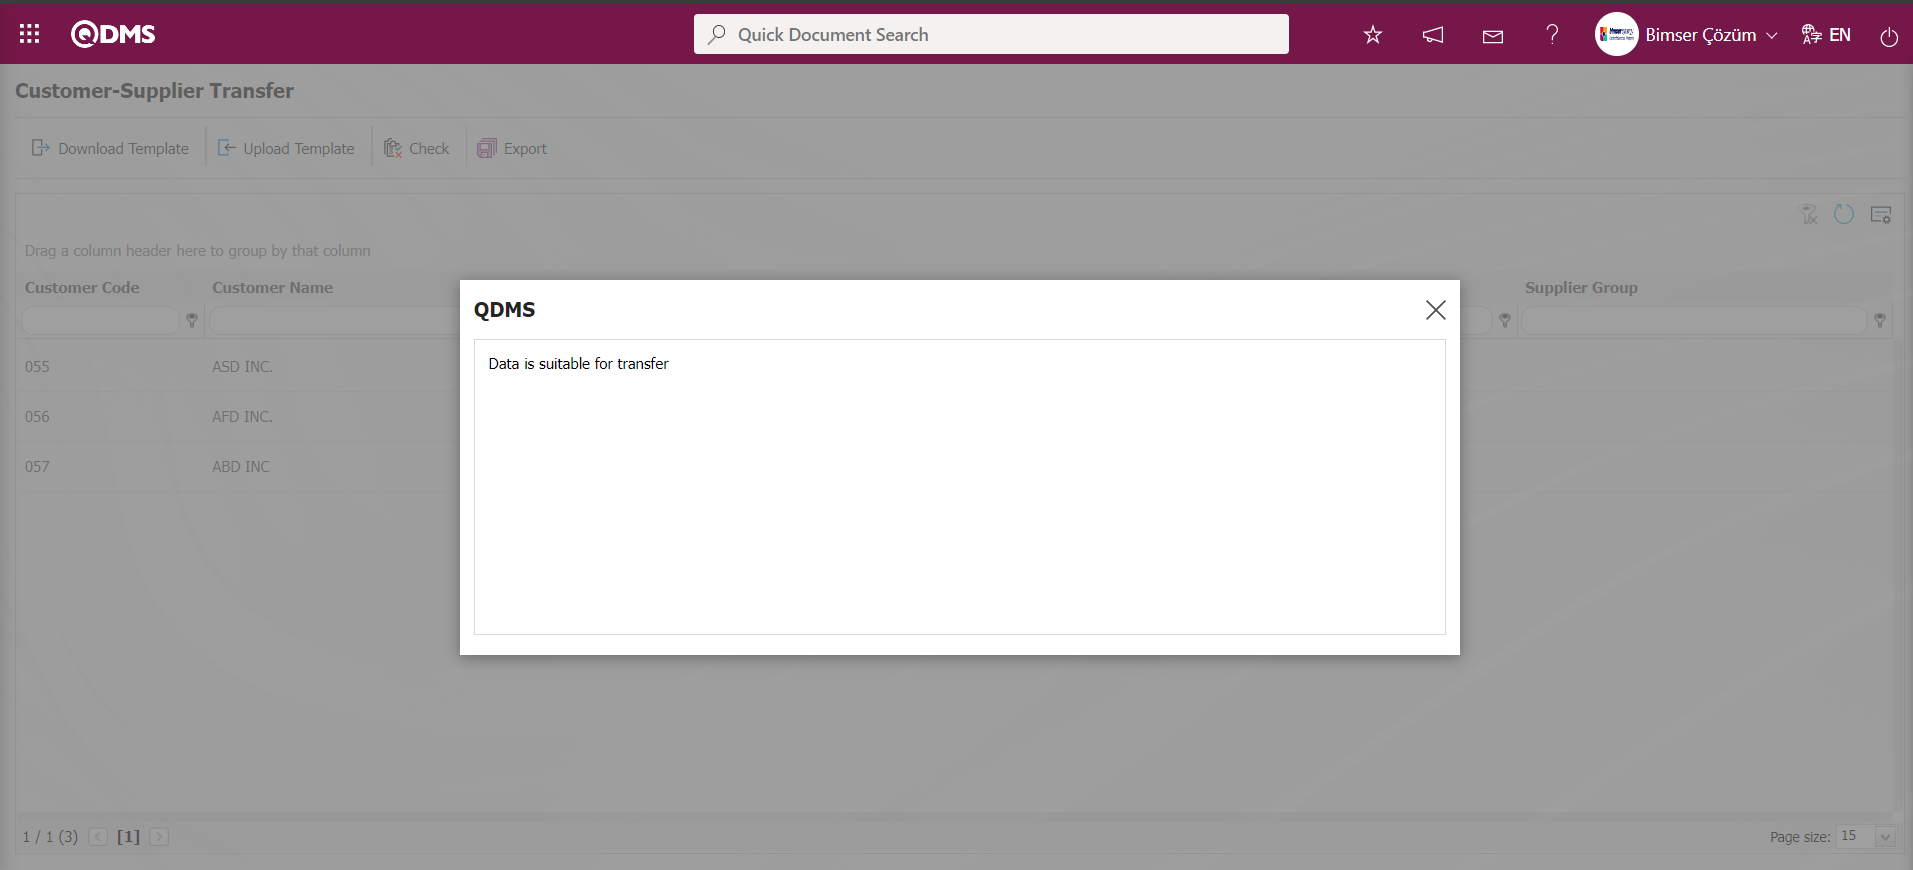
On the Customer-Supplier Transfer screen, the Customer-Supplier transaction is realized by clicking the button.
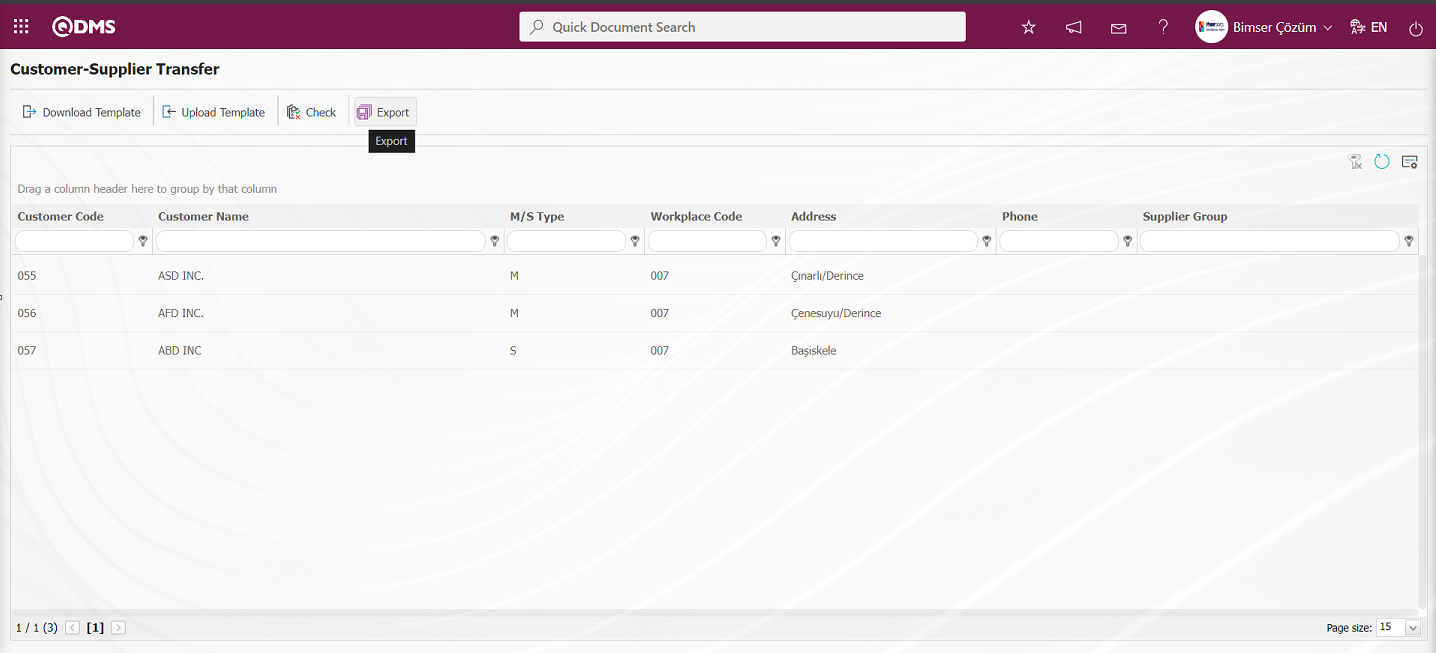
On the system side, the message “Customers have been transferred successfully.” is given and information about the number of customers/suppliers transferred is given.
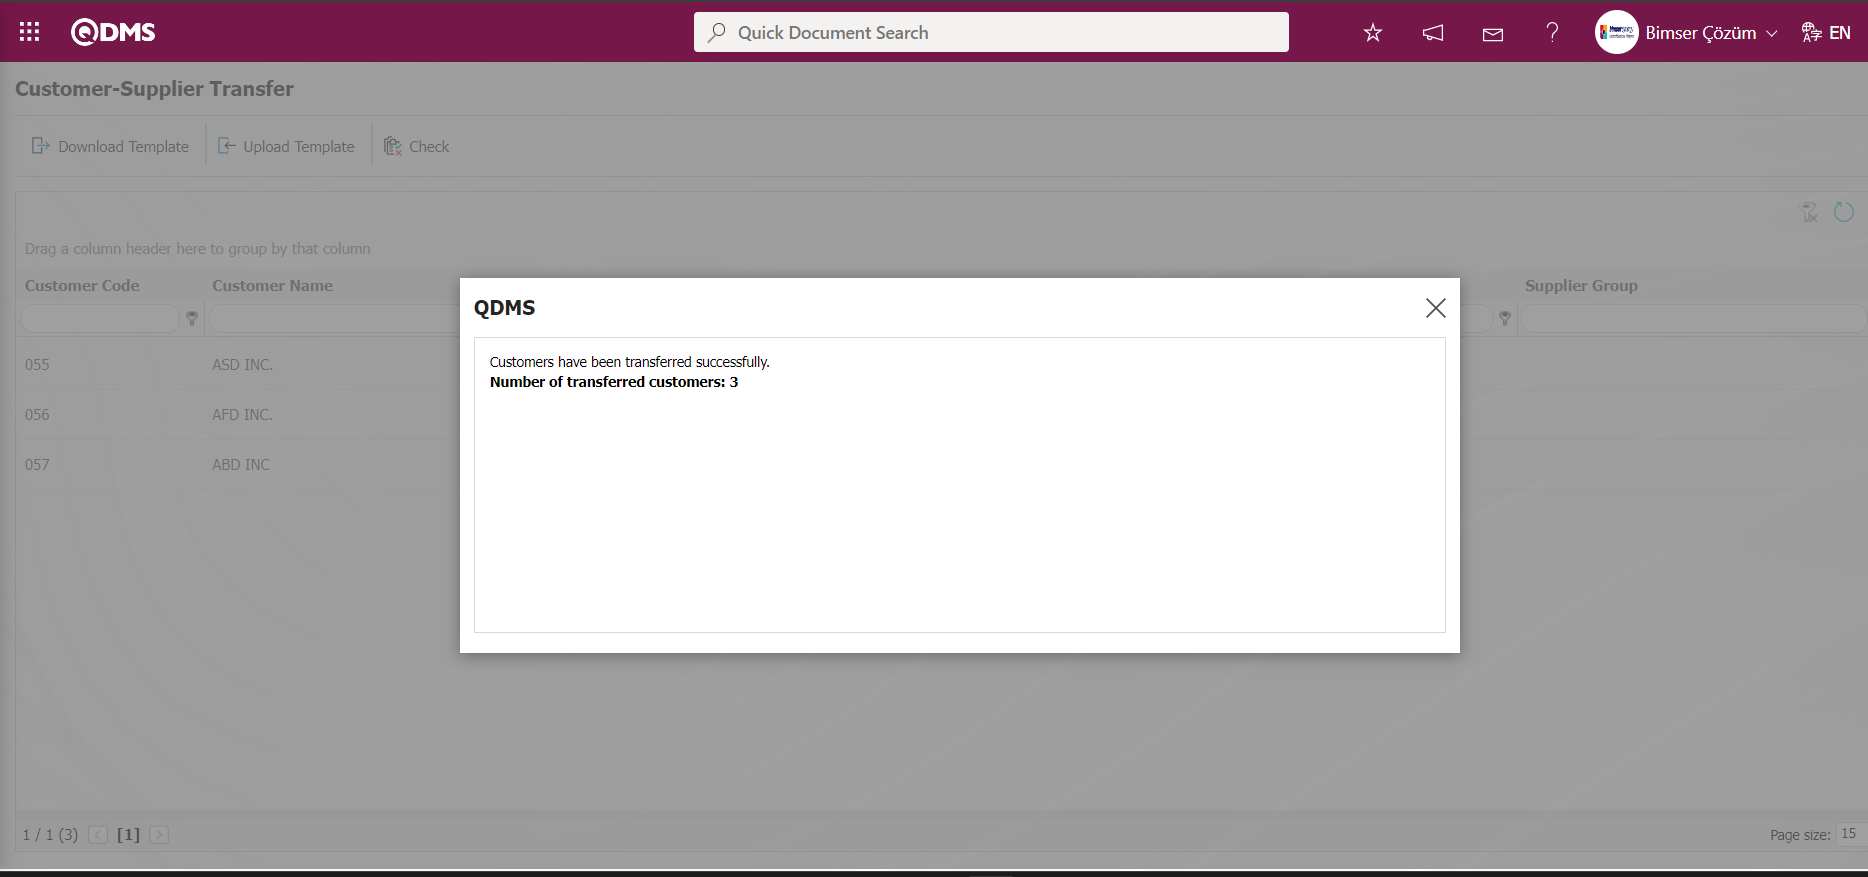
5.2.17.4. Audit Question Transfer
Menu Name: System Infrastructure Definitions/ BSID/ Configuration Settings/ Transfers/Audit Question Transfer
This is the menu where the questions to be asked in the audits are transferred to the system collectively at the same time.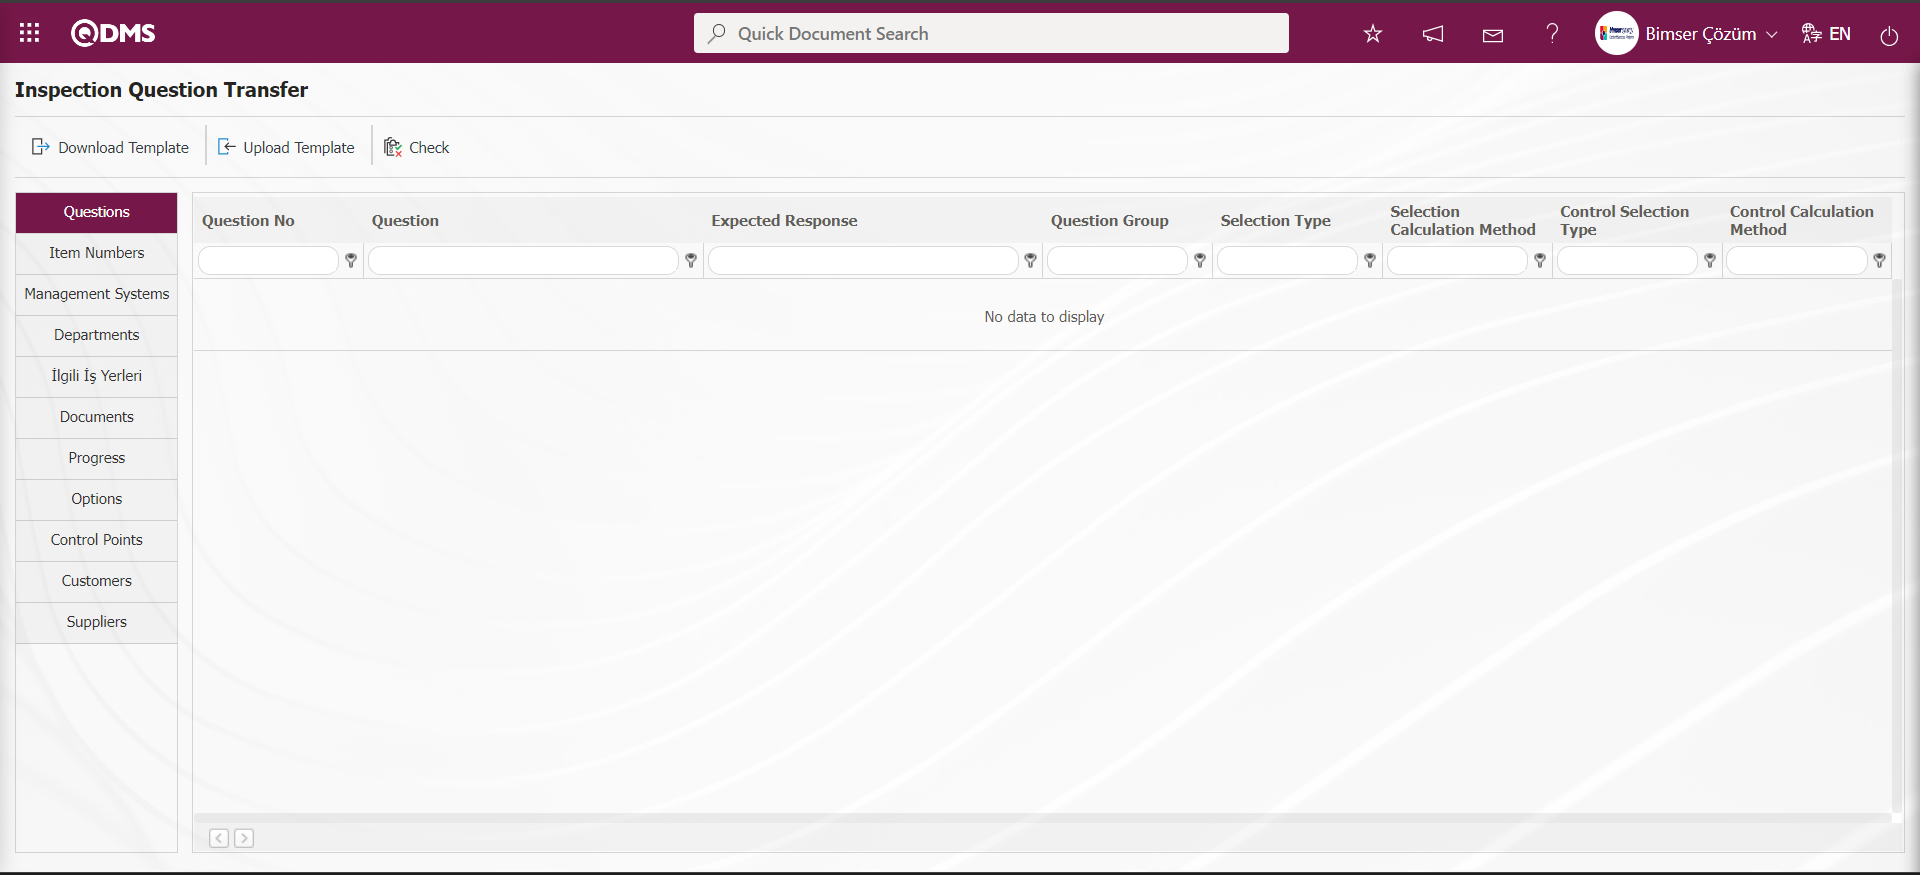
With the help of the buttons on the screen;
: The Audit Question Transfer template is downloaded to the computer.
: The completed Audit Question Transfer template is uploaded to the system.
: Check whether the completed and uploaded Audit Question Transfer template gives an error or not.
: The transfer process is performed.
The Audit Question Transfer template is downloaded with the button on the screen, after filling in the required information, the Audit Question Transfer template is uploaded to the system with the button. In order to check the information entered, the button is used. If the transferred data is suitable for transfer, the Audit Question Transfer process is realized through the button.
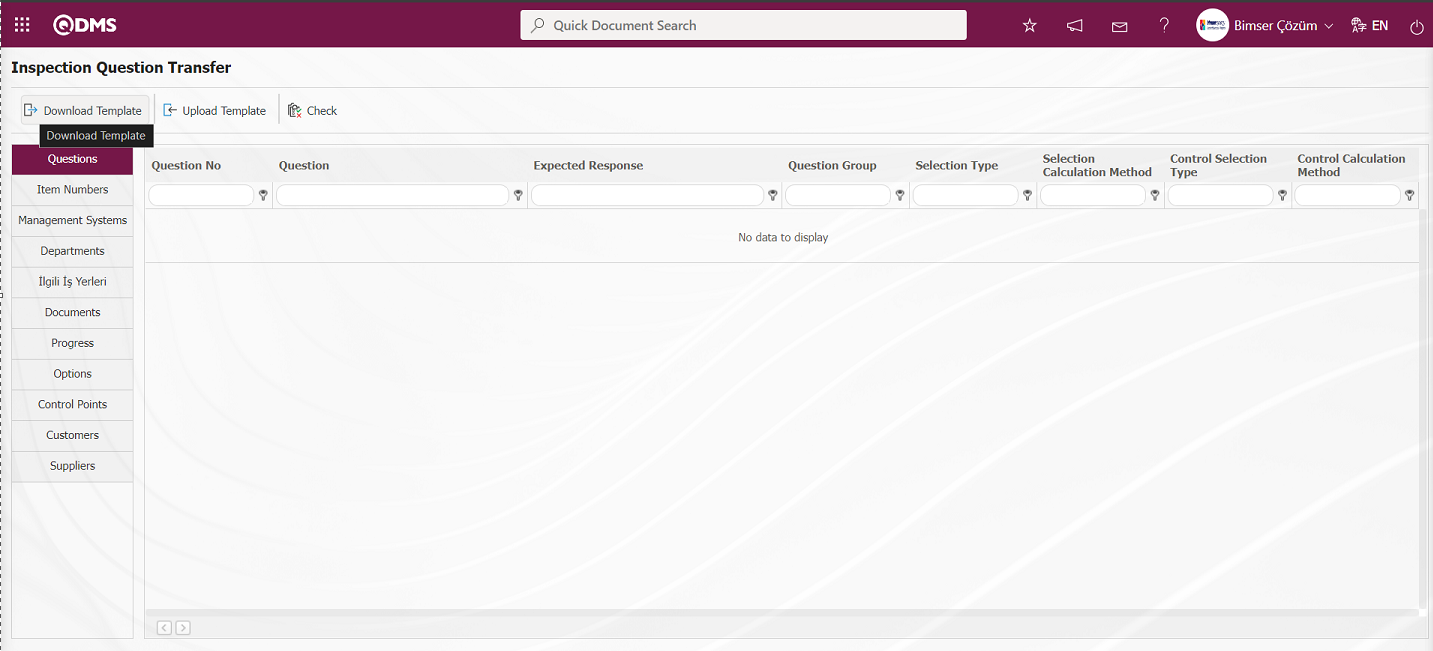
On the Inspection Question Transfer** screen, the Inspection Question Transfer template is downloaded to the computer with the button. The relevant fields in the Audit Question Transfer template are saved to the computer by writing the relevant information. In the Audit Question Transfer process, the Question no field in the Audit Question Transfer template must be written based on the last question number on the System Infrastructure Definitions / Audit Activity / Question Pool screen.
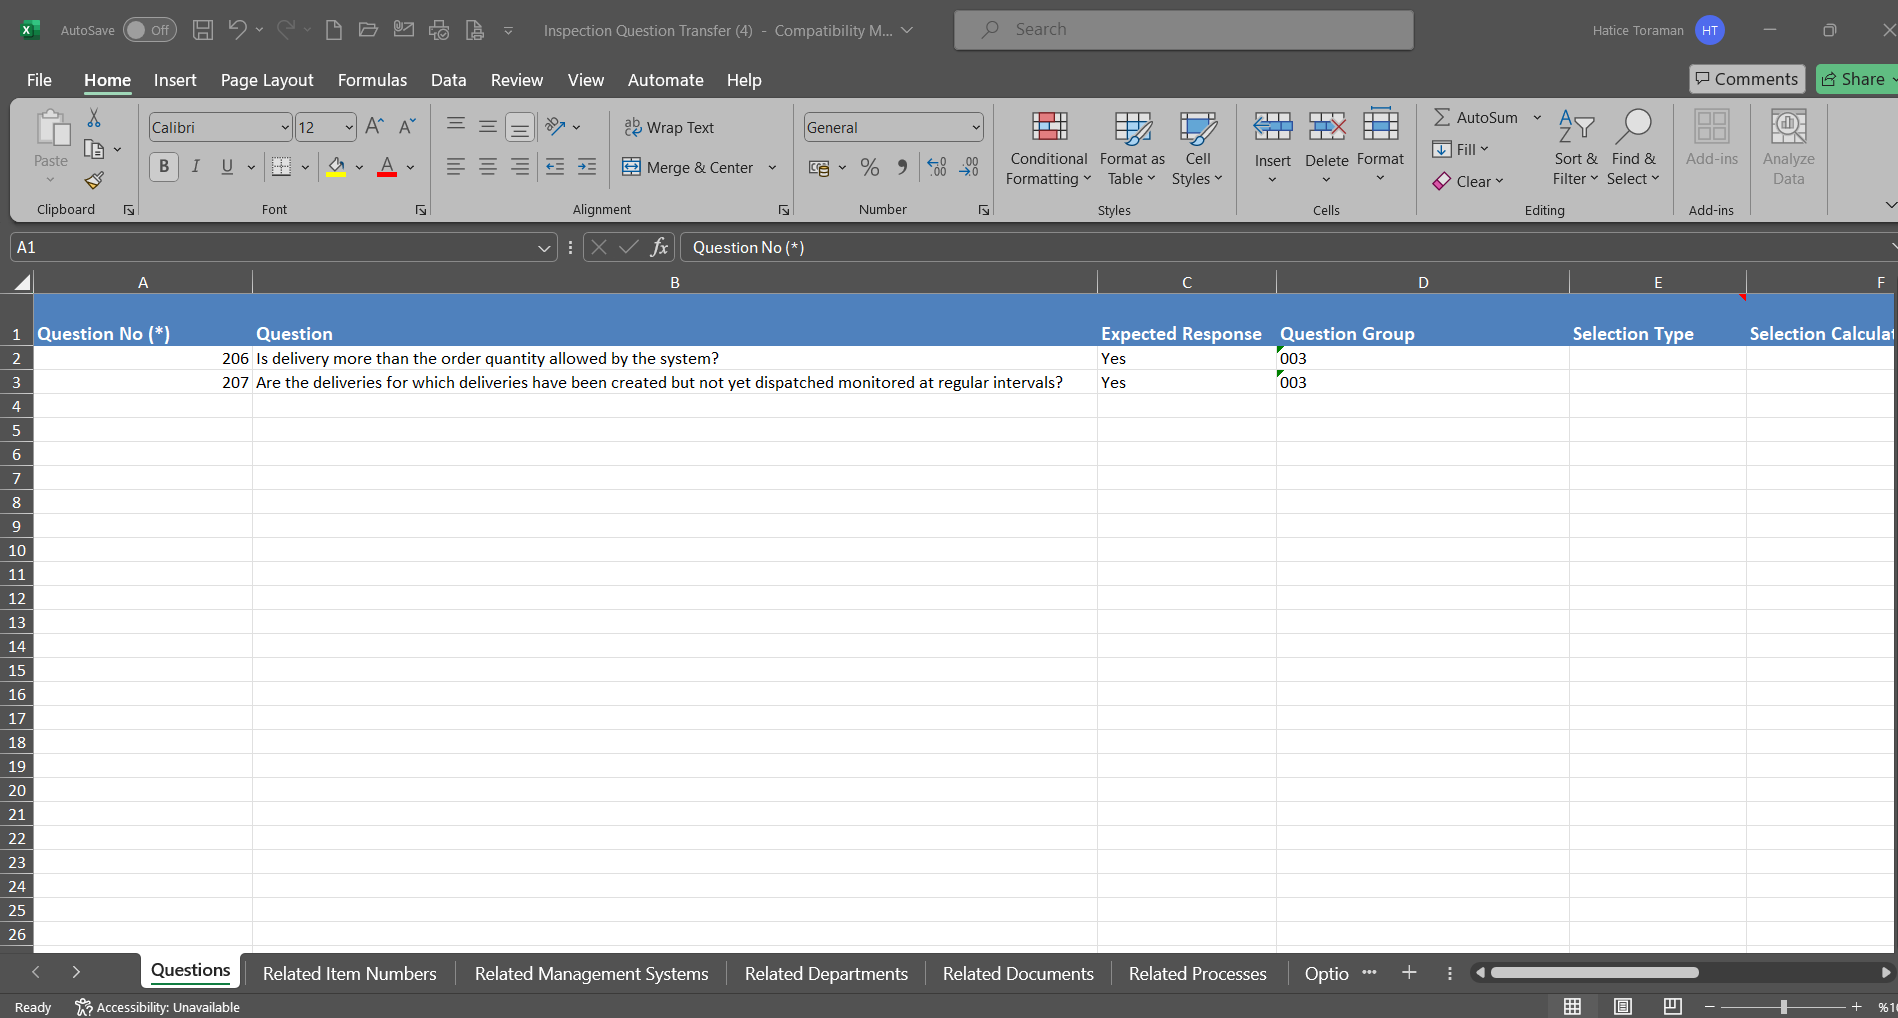
Click the button on the Inspection Question Transfer screen.
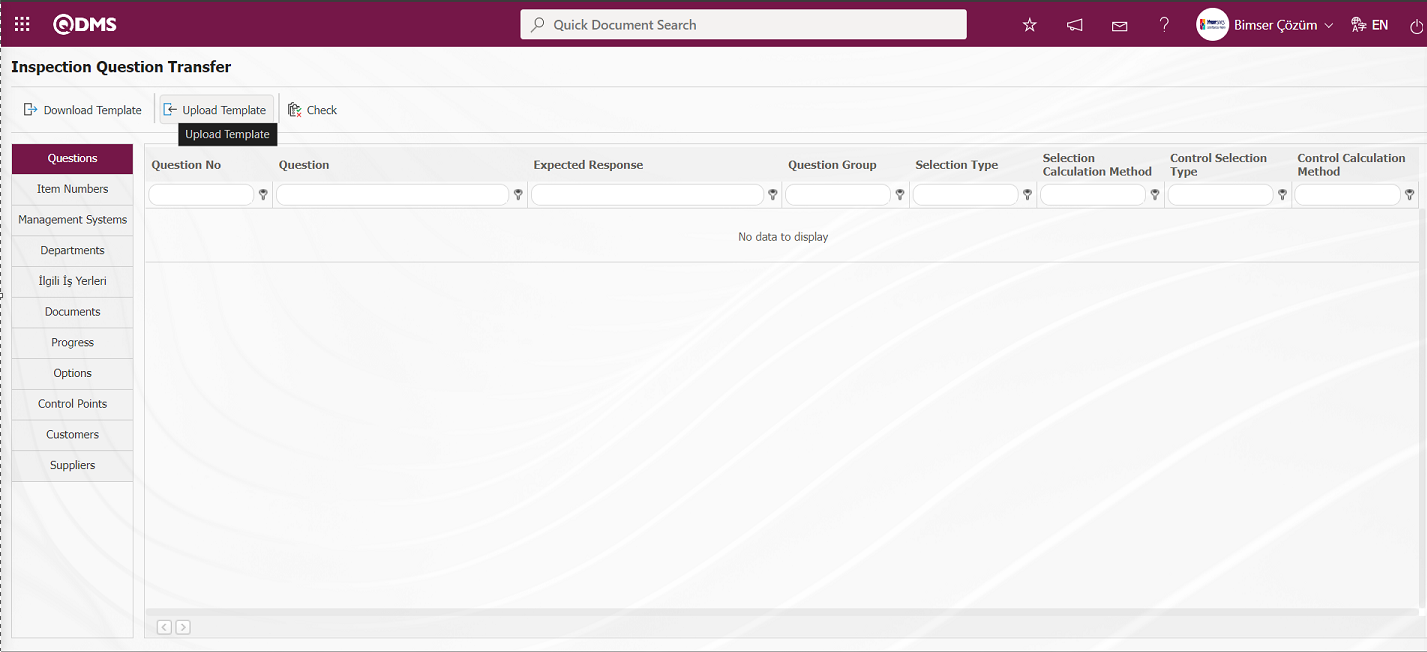
Click the “Browse” button on the Upload File screen.
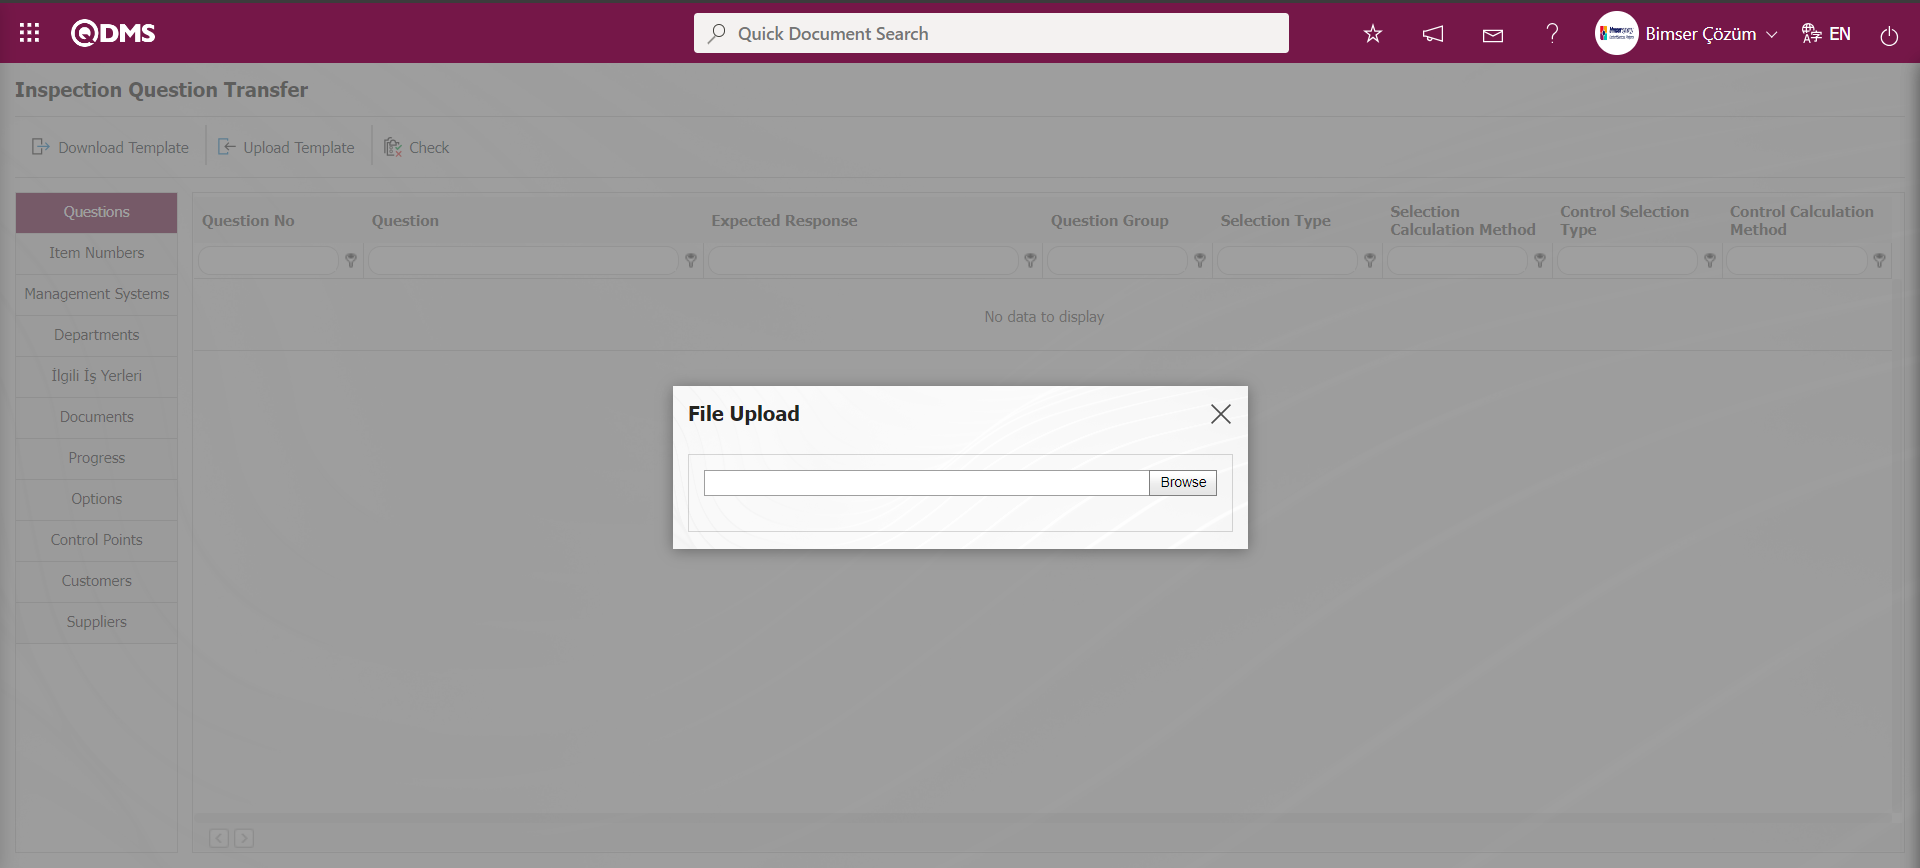
On the screen that opens, the filled Audit Question Transfer template is selected.
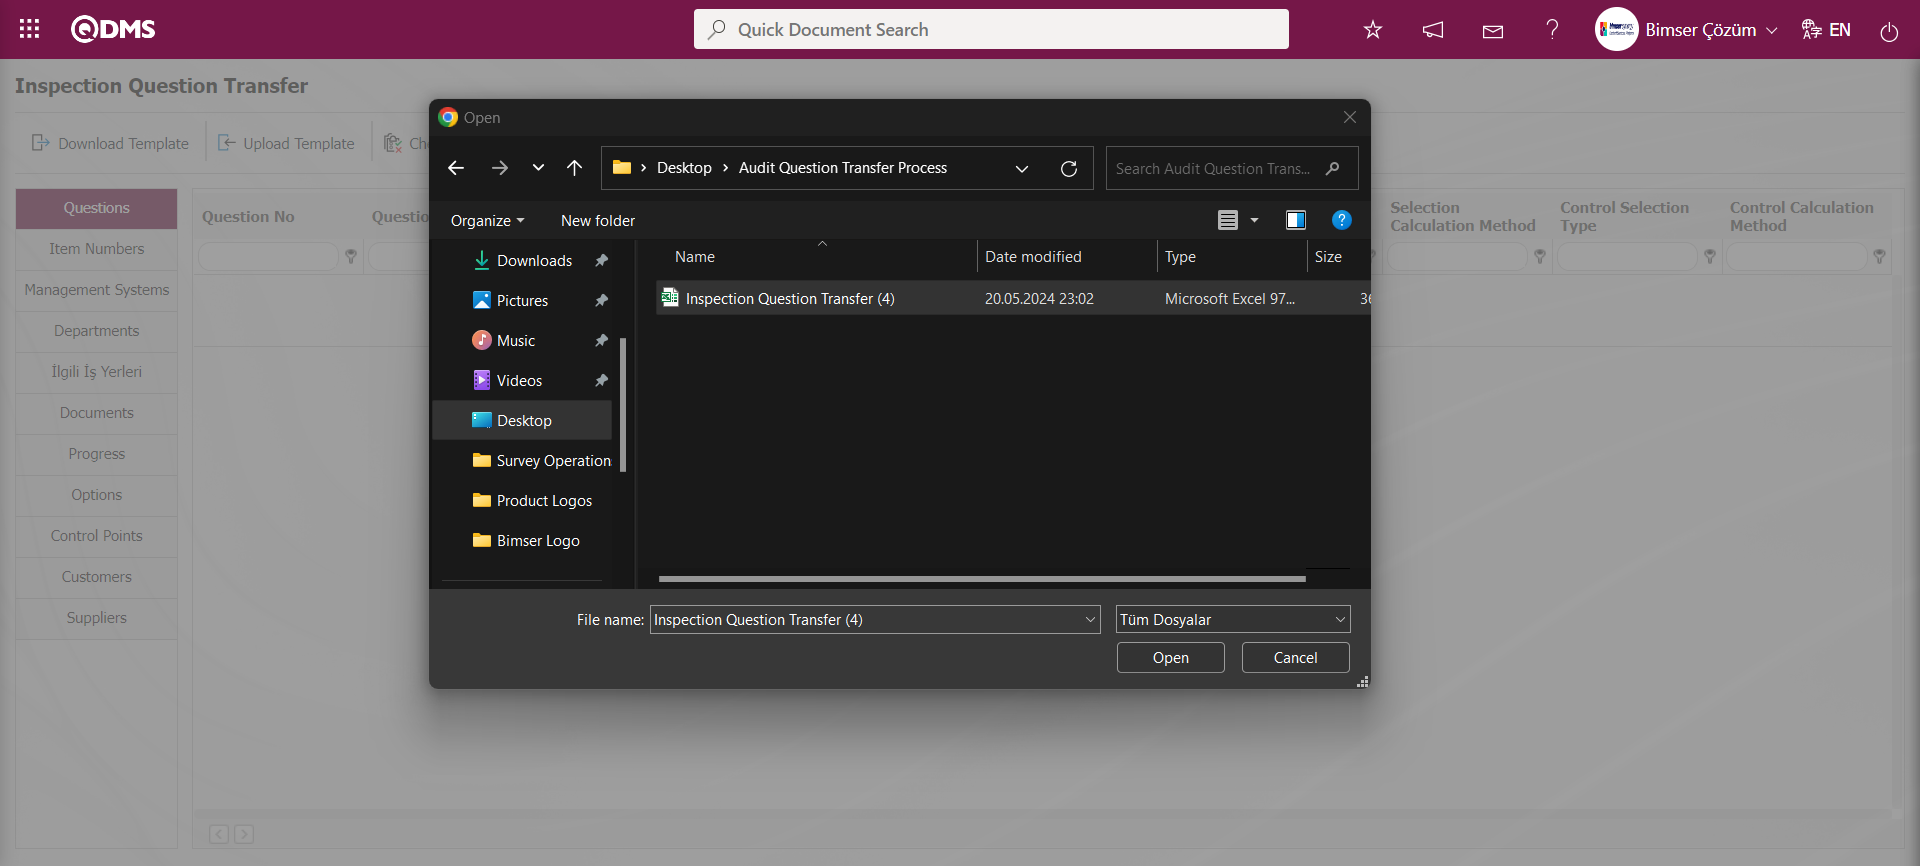
On the Inspection Question Transfer screen, the button is clicked to check whether the template created and uploaded to the system gives an error or not.
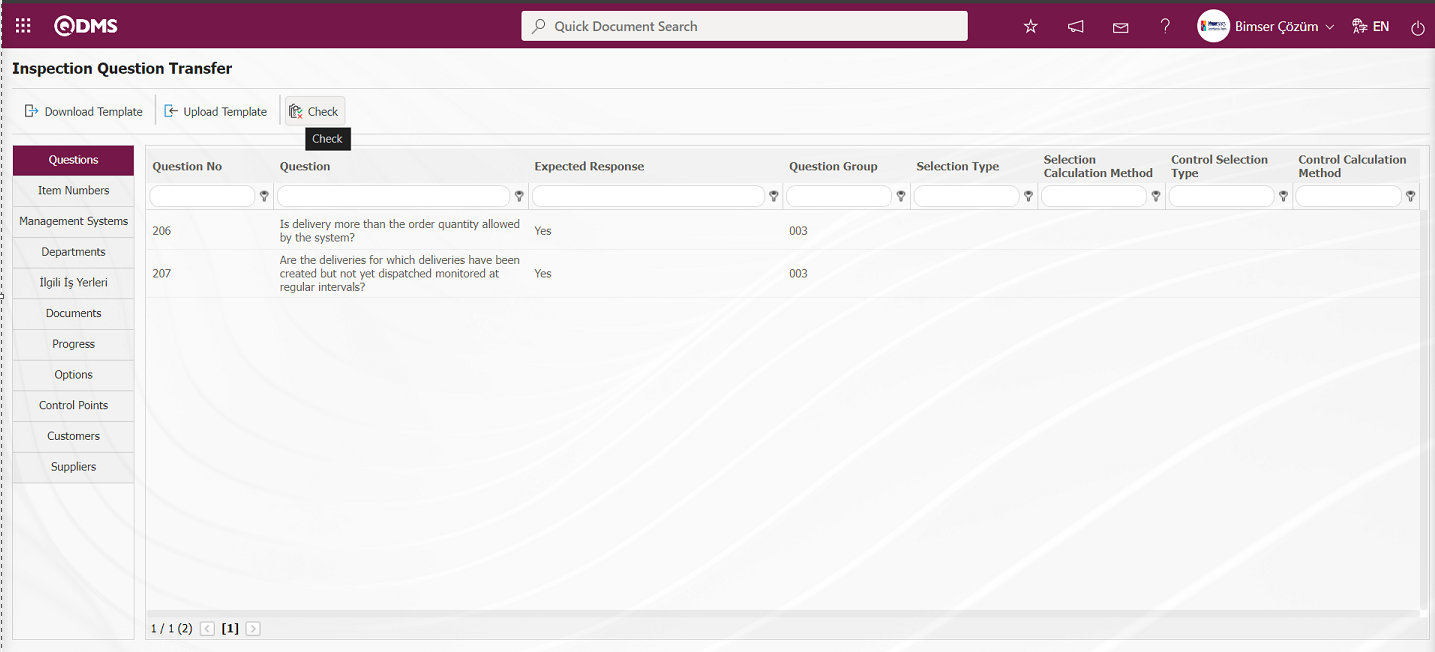
“Data is suitable for transfer” message is given by the system.
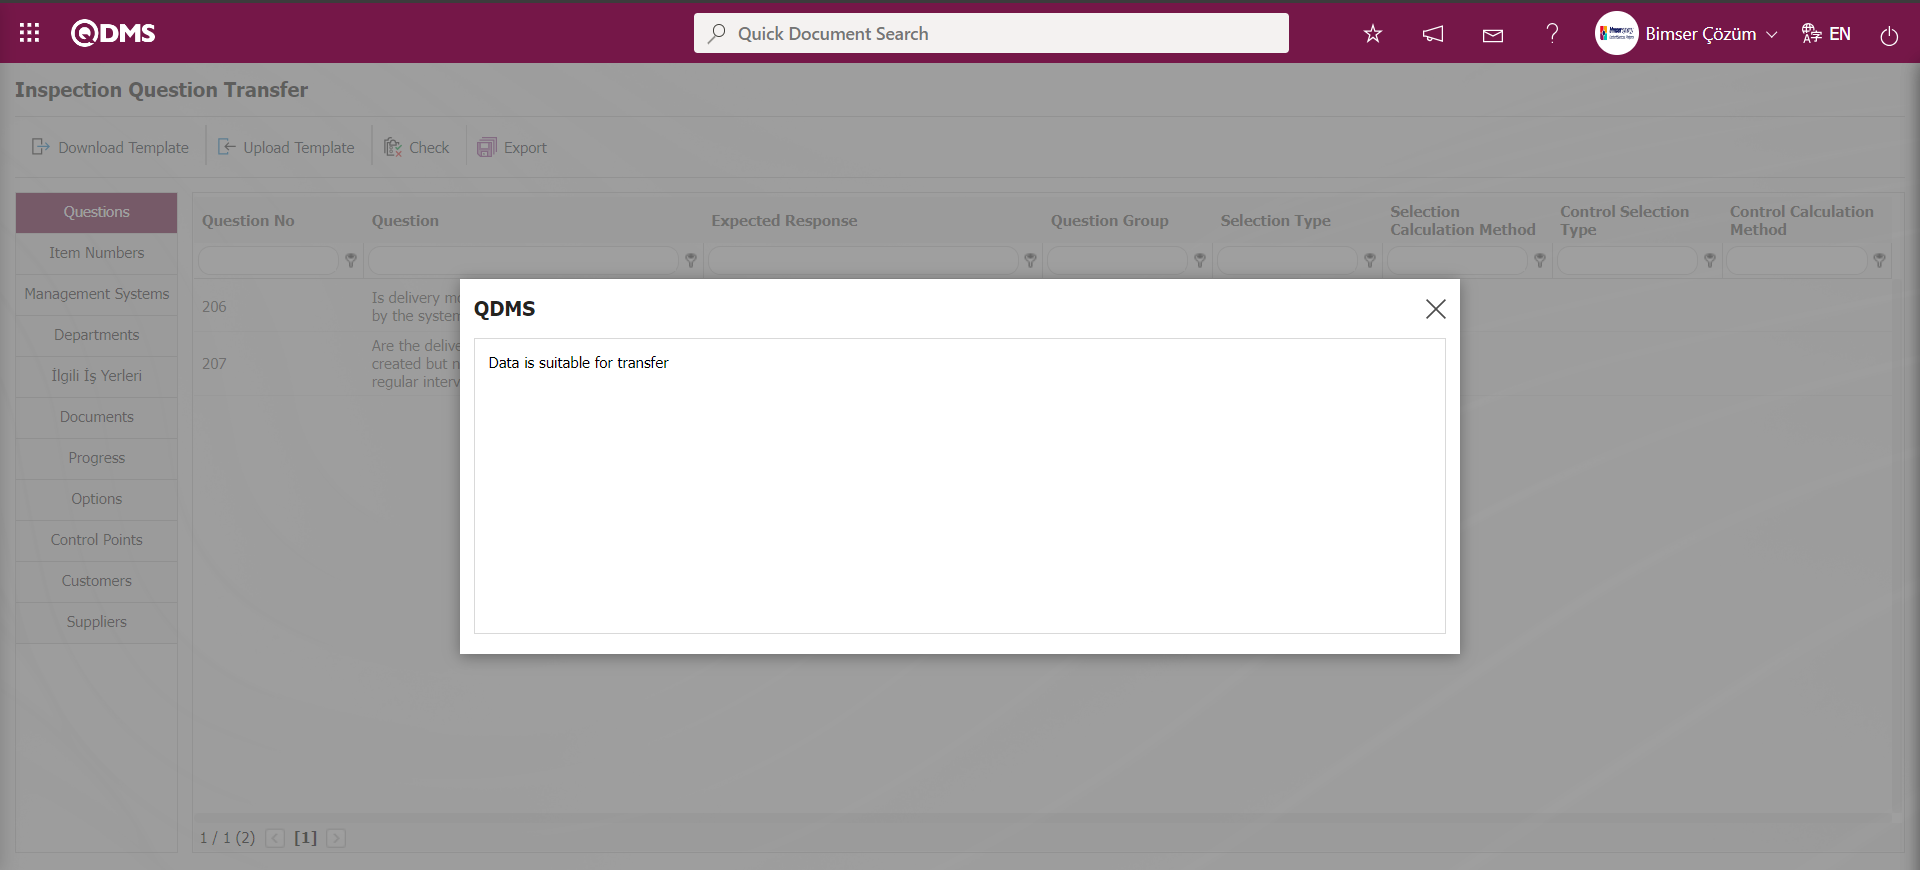
On the Inspection Question Transfer screen, the Inspection Question Transfer process is performed by clicking the button.

On the system side, the message “Audit questions have been successfully transferred.” is given and information on the number of audit questions transferred is given.
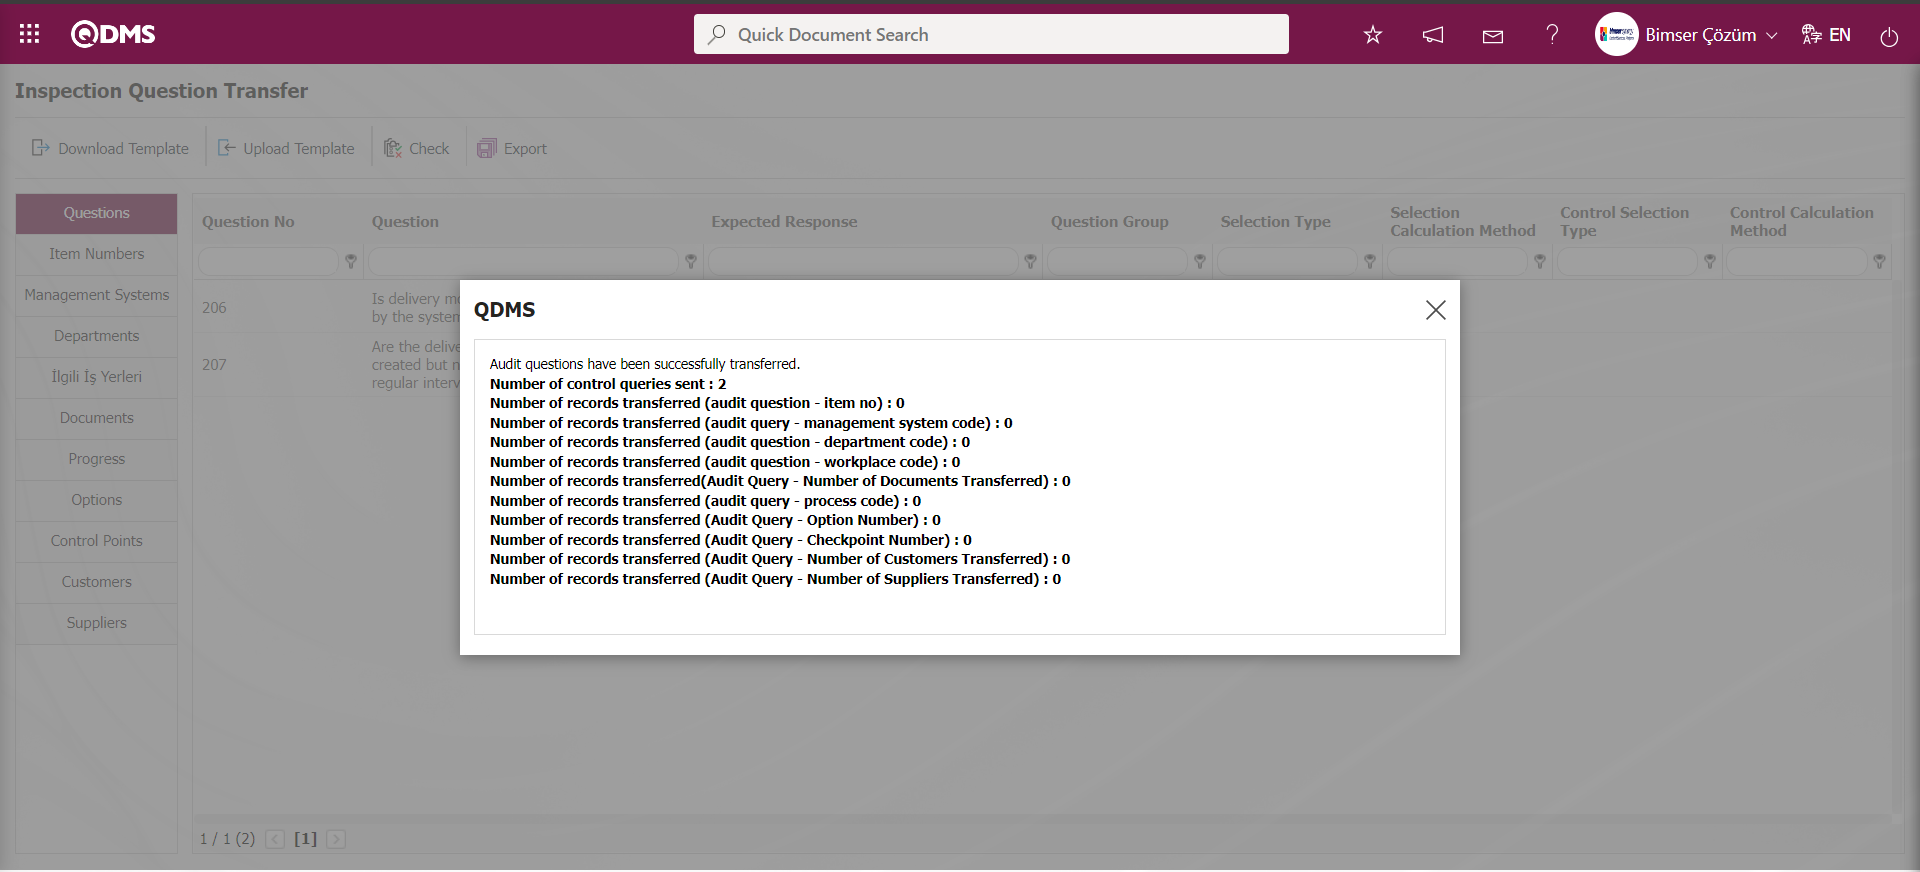
5.2.17.5. Auditor Transfer
Menu Name: System Infrastructure Definitions/ BSID/ Configuration Settings/ Transfers/Auditor Transfer
It is the menu where the auditor pool of the auditors performing audits is transferred to the system collectively at the same time.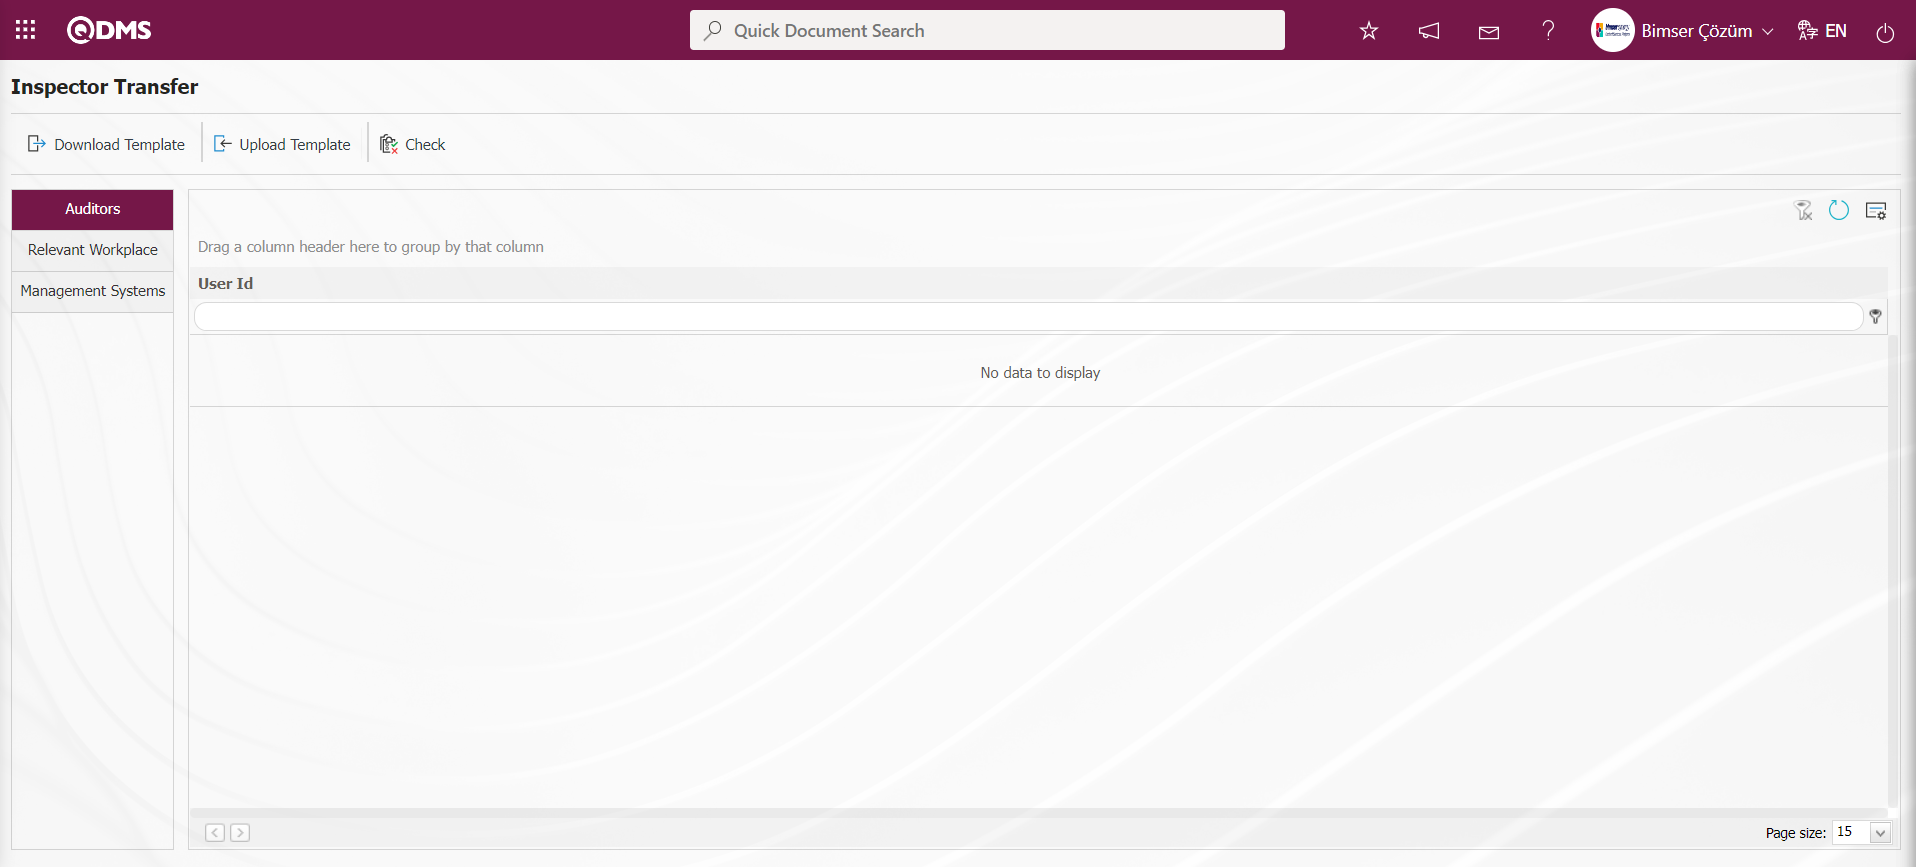
With the help of the buttons on the screen;
: Auditor Transfer template is downloaded to the computer.
: The filled Auditor Transfer template is uploaded to the system.
: Check whether the Auditor Transfer template filled and uploaded to the system gives an error or not.
: The transfer process is performed.
The Auditor Transfer template is downloaded with the button on the screen, after filling in the required information, the Auditor Transfer template is uploaded to the system with the button. In order to check the information entered, the button is used. If the transferred data is suitable for transfer, the Auditor transfer process is realized via the button.
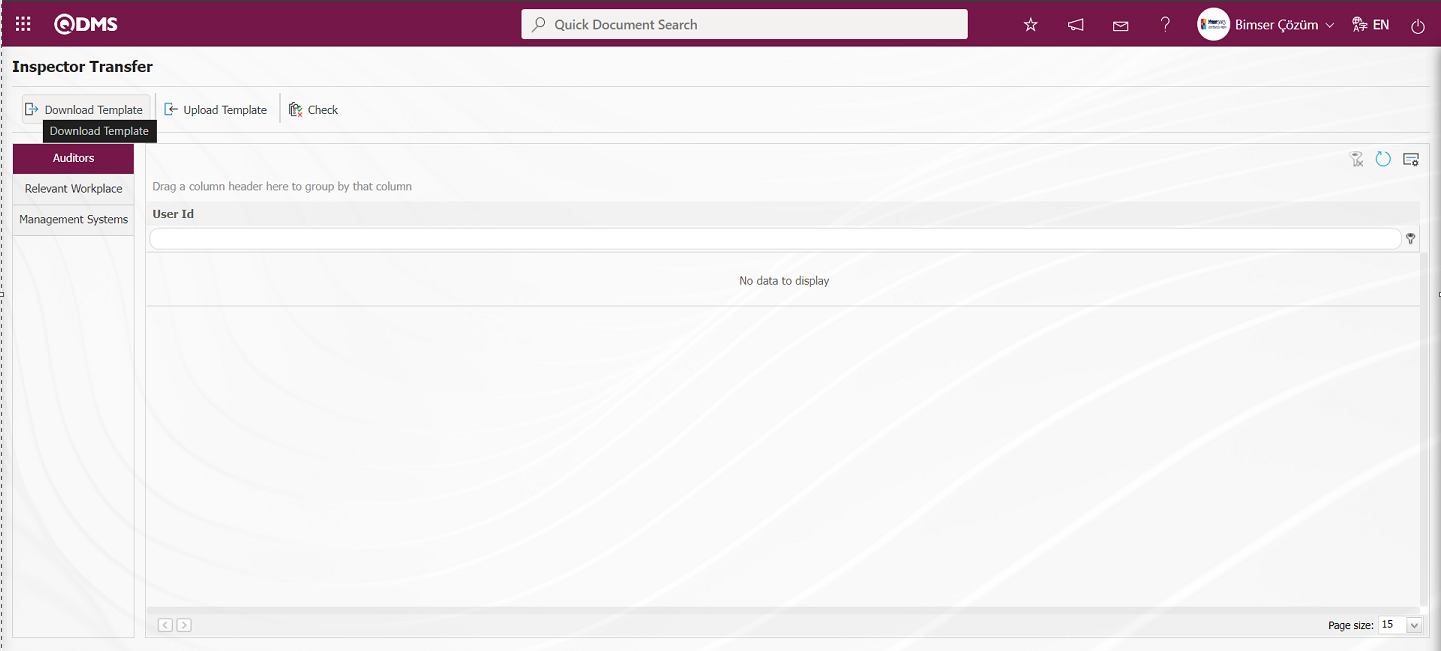
On the Inspector Transfer screen, the Inspector Transfer template is downloaded to the computer with the button. The relevant fields in the Inspector Transfer template are saved to the computer by writing the relevant information.
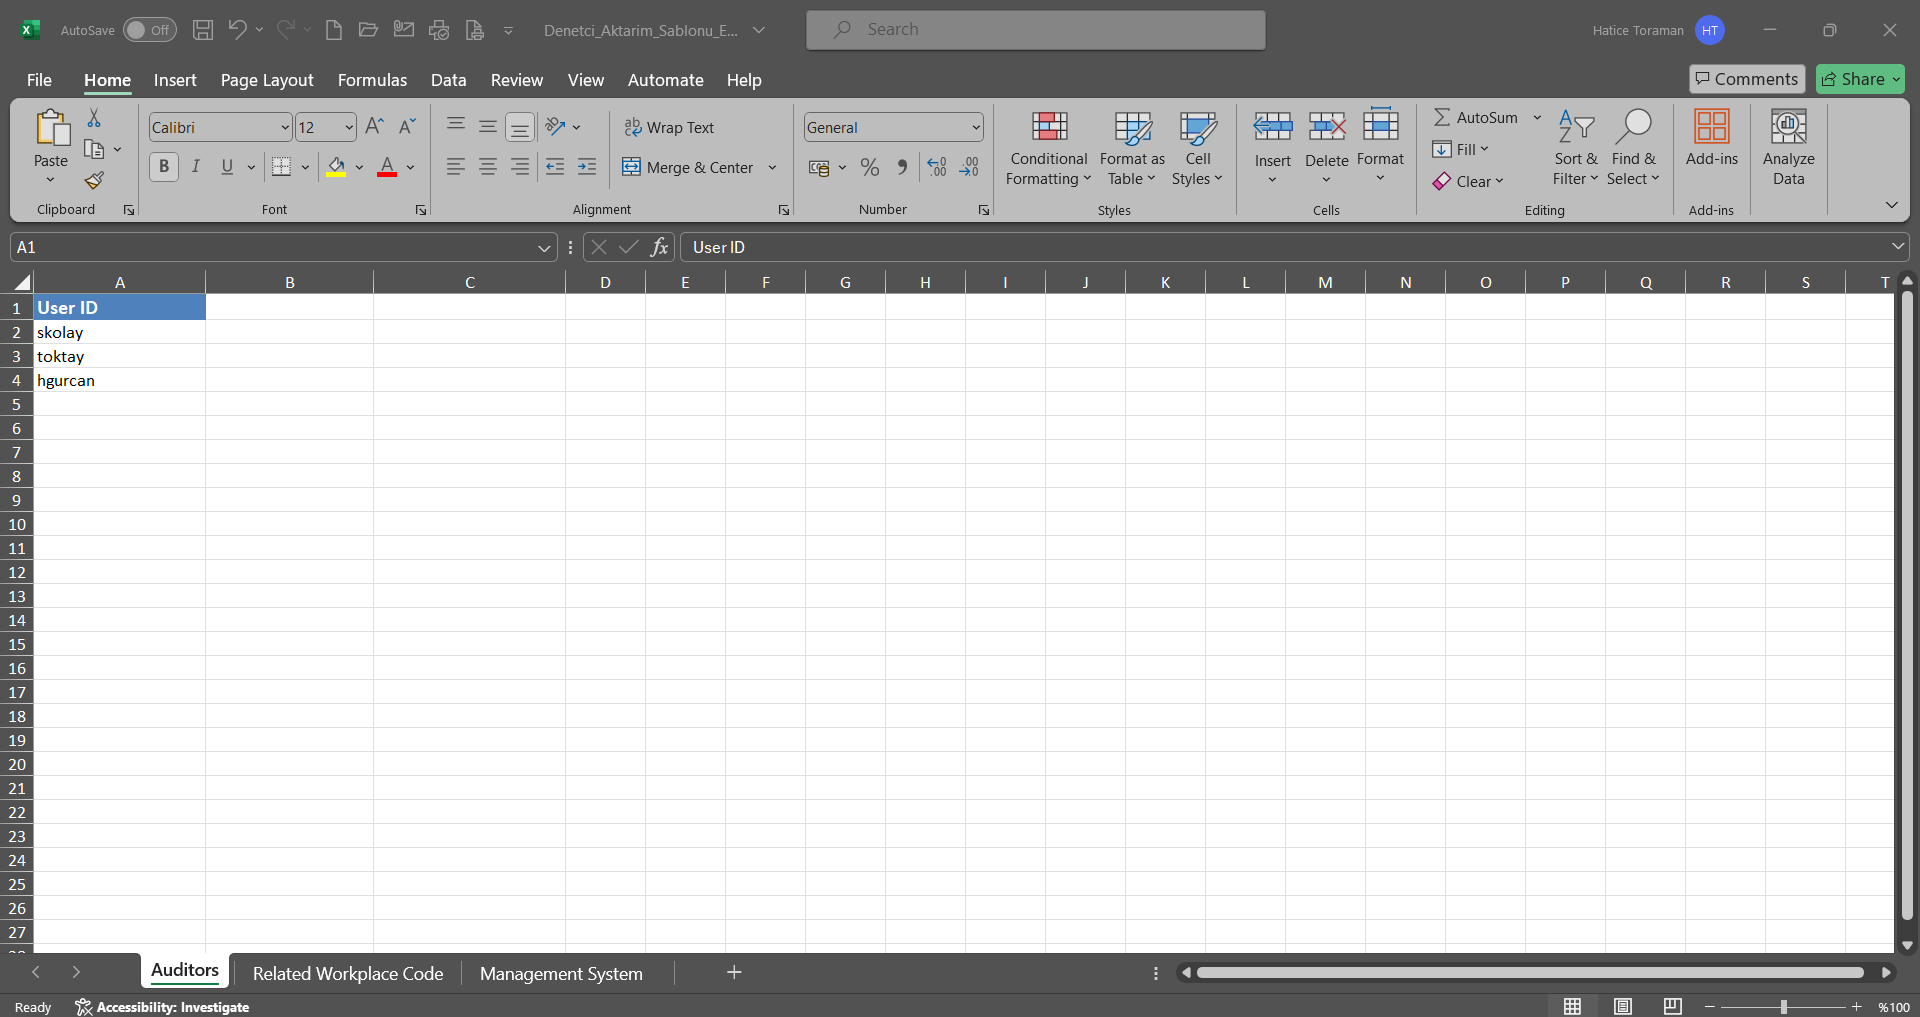
Click the button on the Inspector Transfer screen.

Click the “Browse” button on the Upload File screen.
 In the screen that opens, the filled Auditor Transfer template is selected.
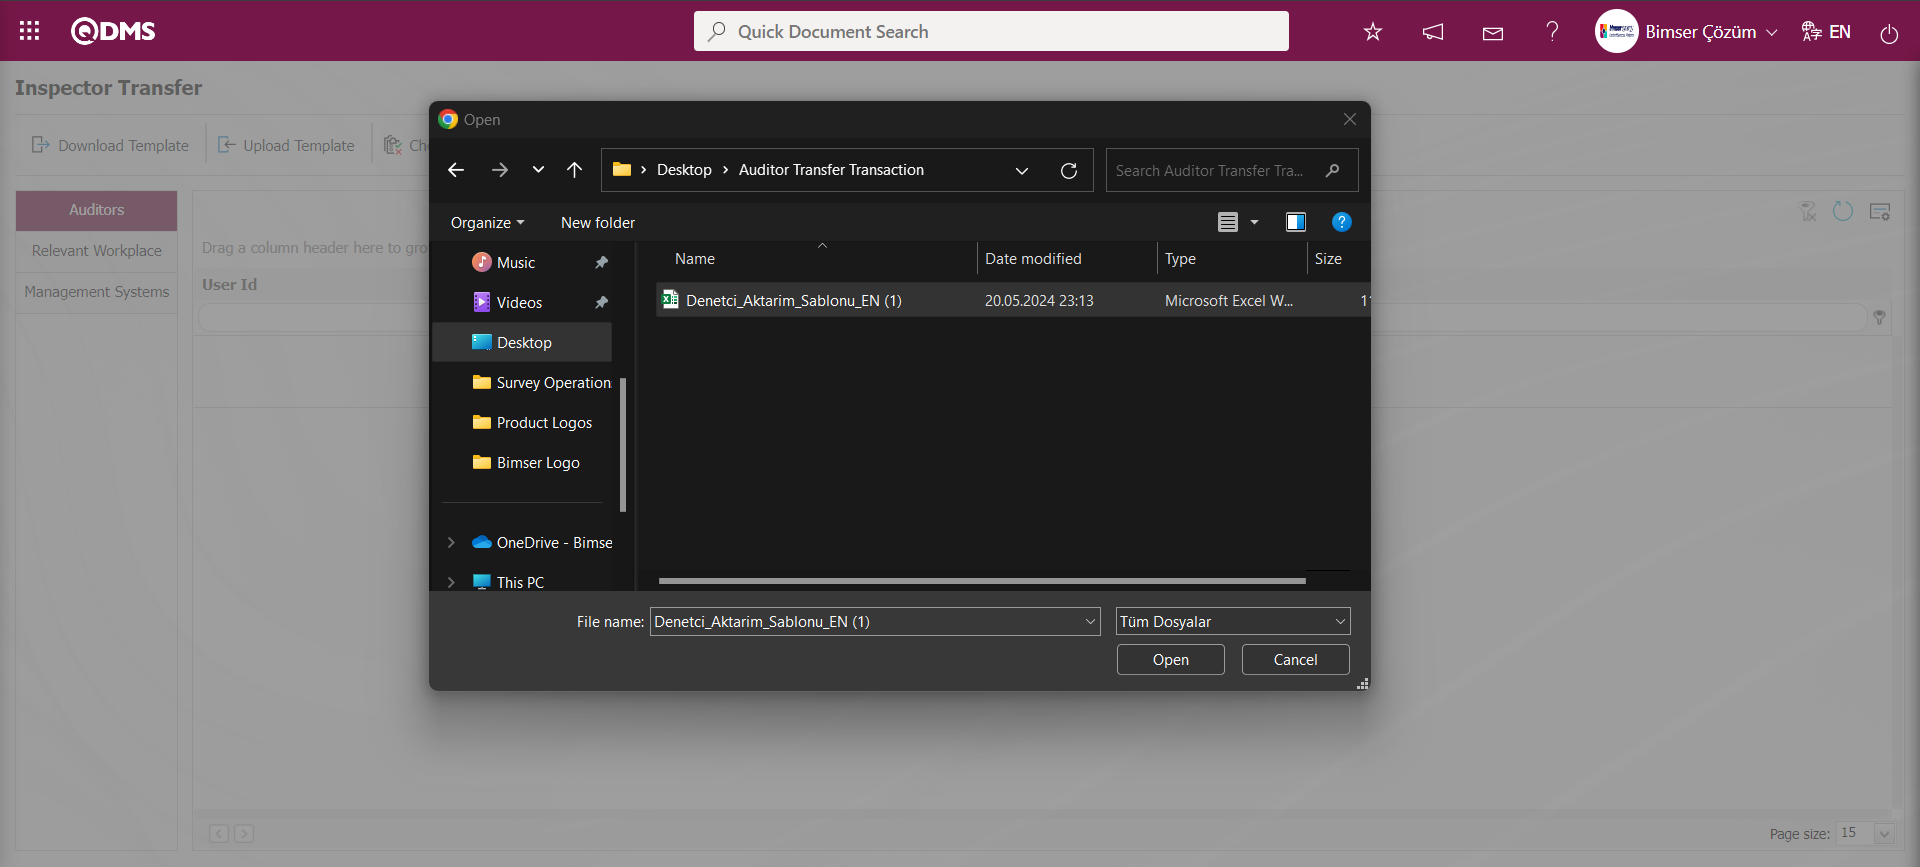
On the Inspector Transfer screen, the button is clicked to check whether the template created and uploaded to the system gives an error or not.
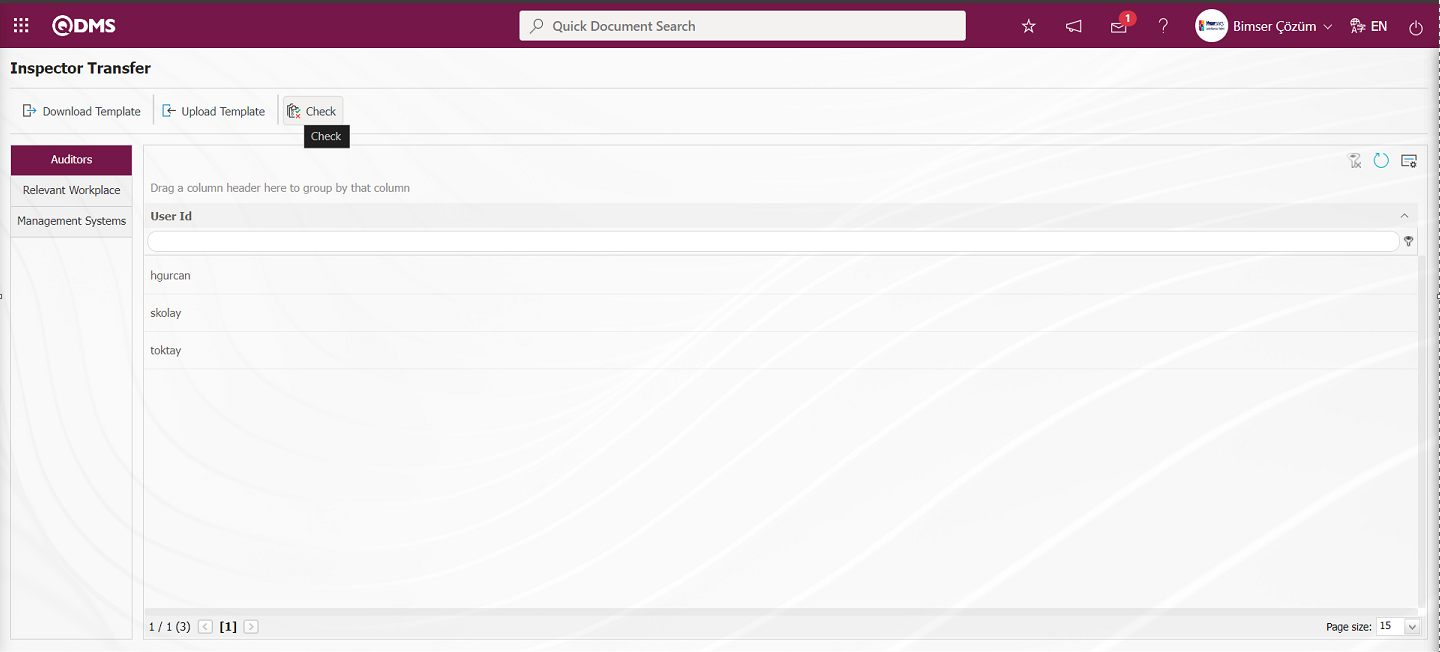
The system displays the message “Data is suitable for transfer”.
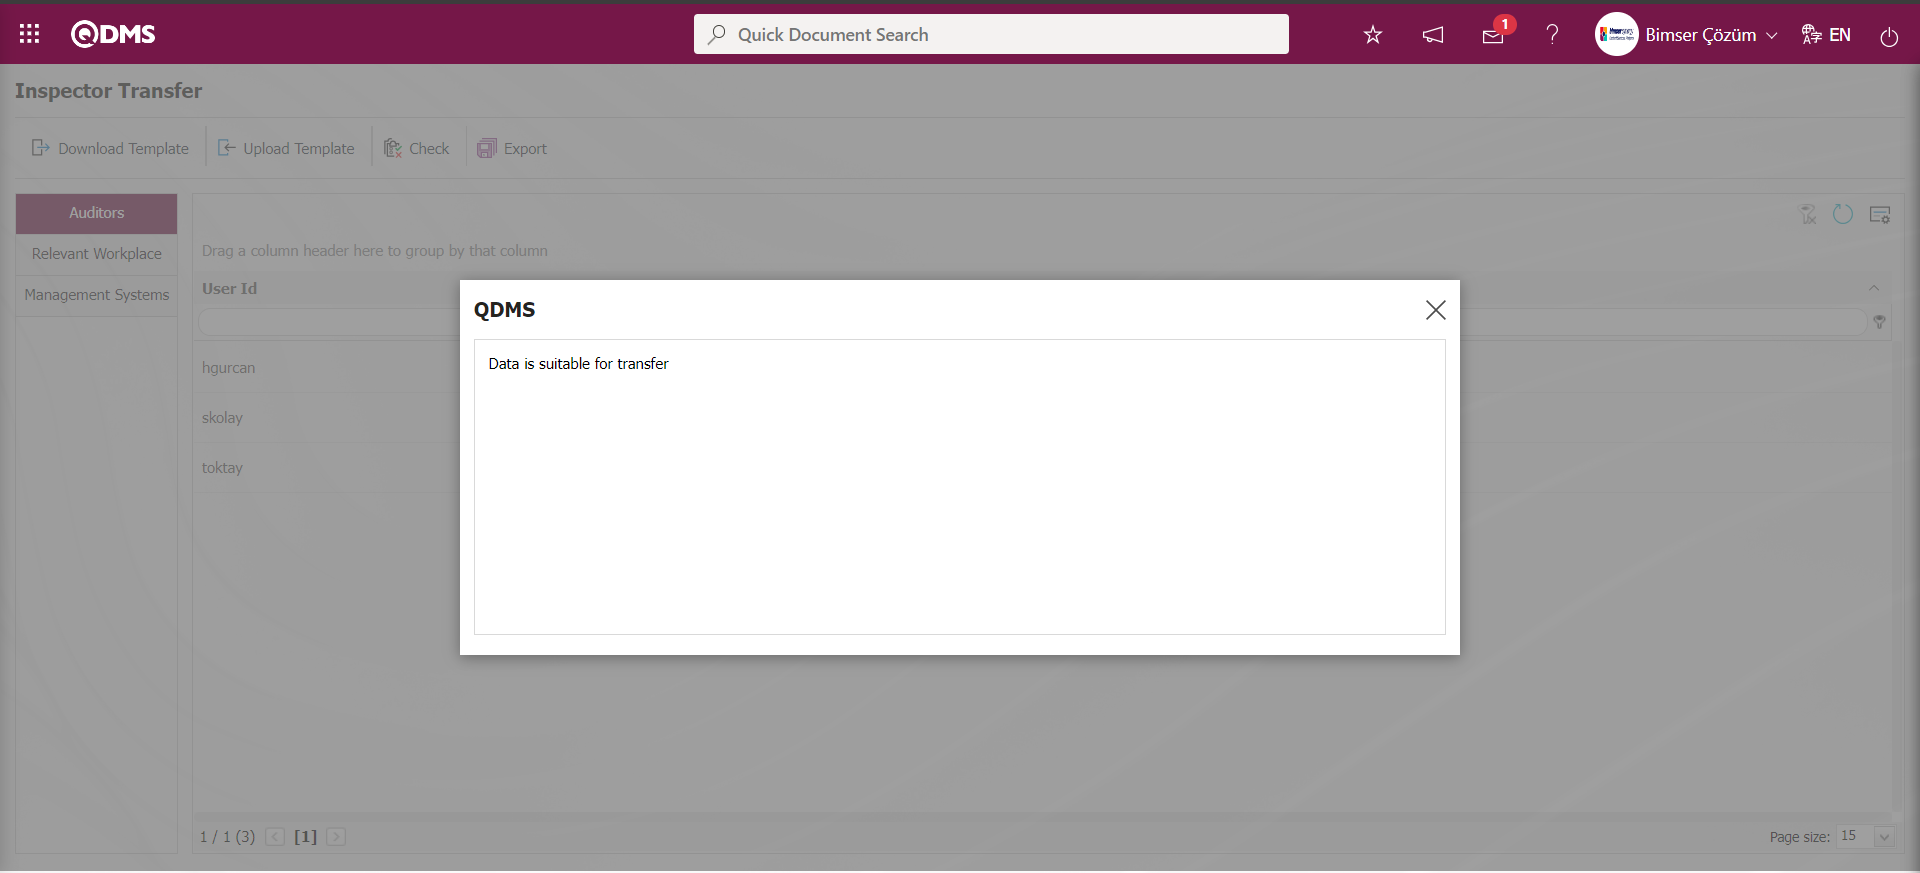
On the Inspector Transfer screen, the Inspector Transfer operation is performed by clicking the button.
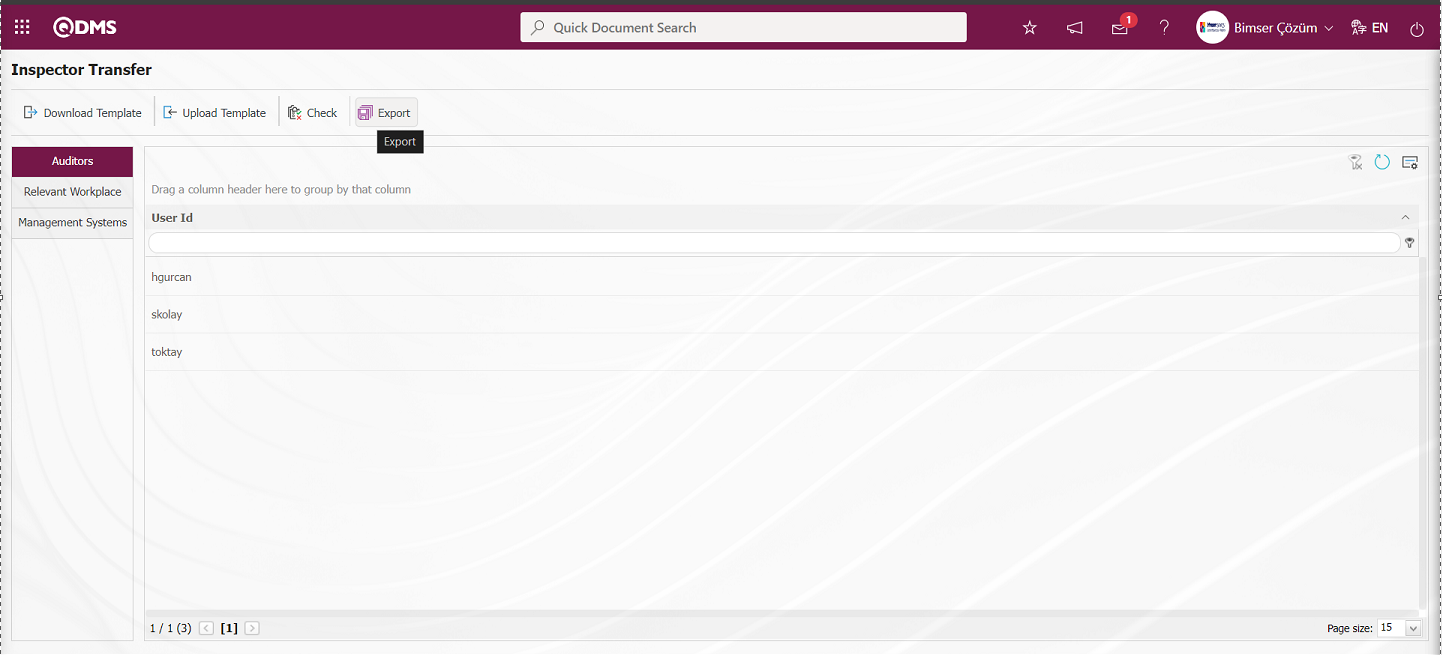
The system gives the message “Auditors have been successfully transferred” and the number of auditors transferred is included in the message.
5.2.17.5.Device Transfer
Menu Name: System Infrastructure Definitions/ BSID/ Configuration Settings/ Transfers/Device Transfer
It is the menu where the devices processed in the Device Management module are transferred to the system in bulk.
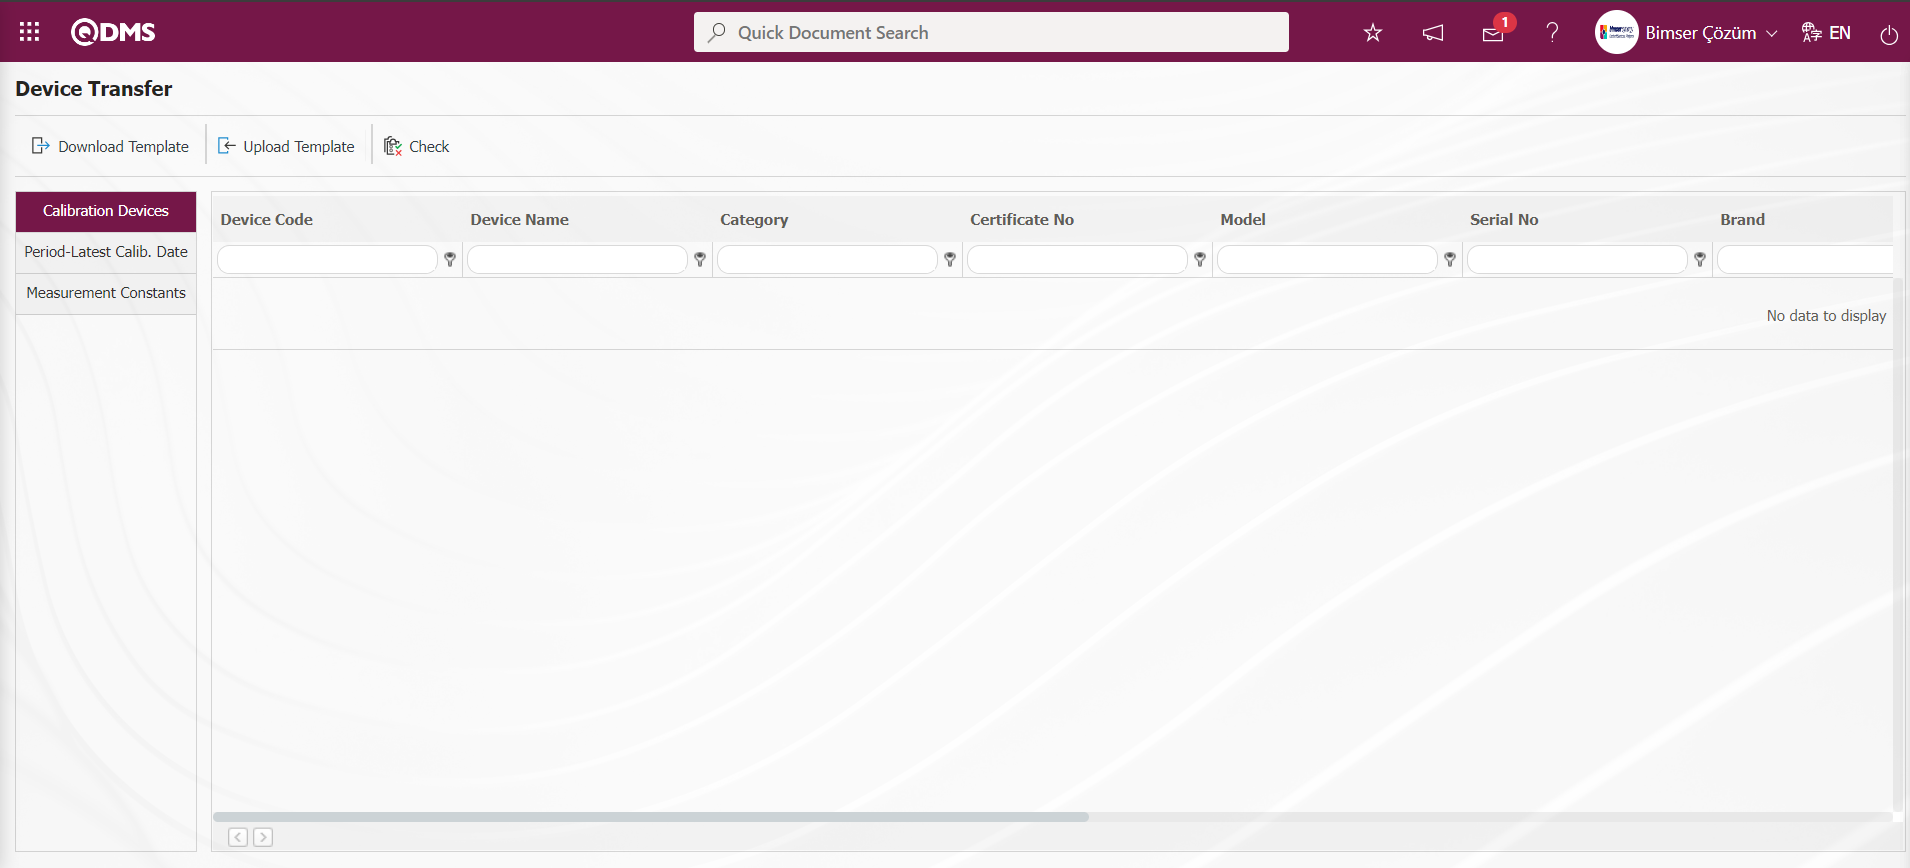
With the help of the buttons on the screen;
: Device Transfer template is downloaded to the computer.
: The filled Device Transfer template is uploaded to the system.
: Check whether the Device Transfer template filled and uploaded to the system gives an error or not.
: The transfer process is performed.
The Device Transfer template is downloaded with the button on the screen, after filling in the necessary information, the Device Transfer template is uploaded to the system with the button. In order to check the entered information, the button is used. If the transferred data is suitable for transfer, the device transfer process is realized via the button.
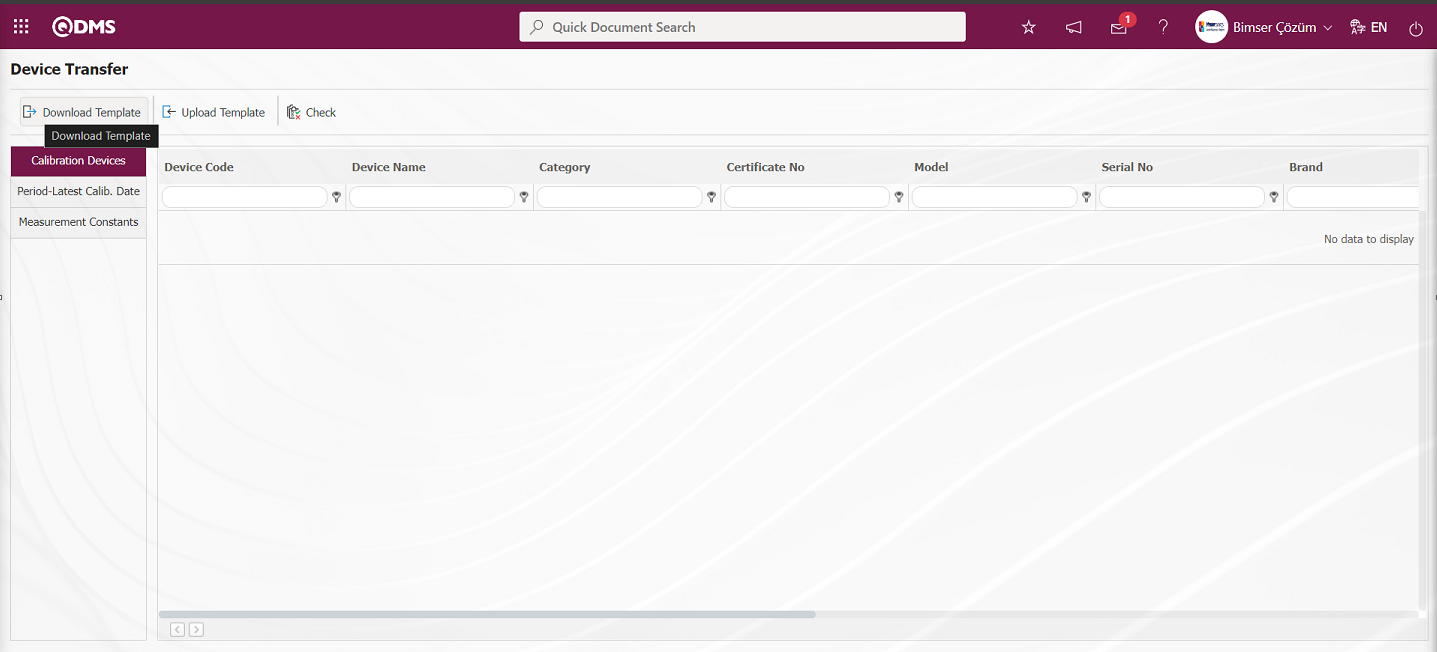
Device Transfer template is downloaded to the computer with the button on the Device Transfer screen. The relevant fields in the Device Transfer template are saved to the computer by typing the relevant information.
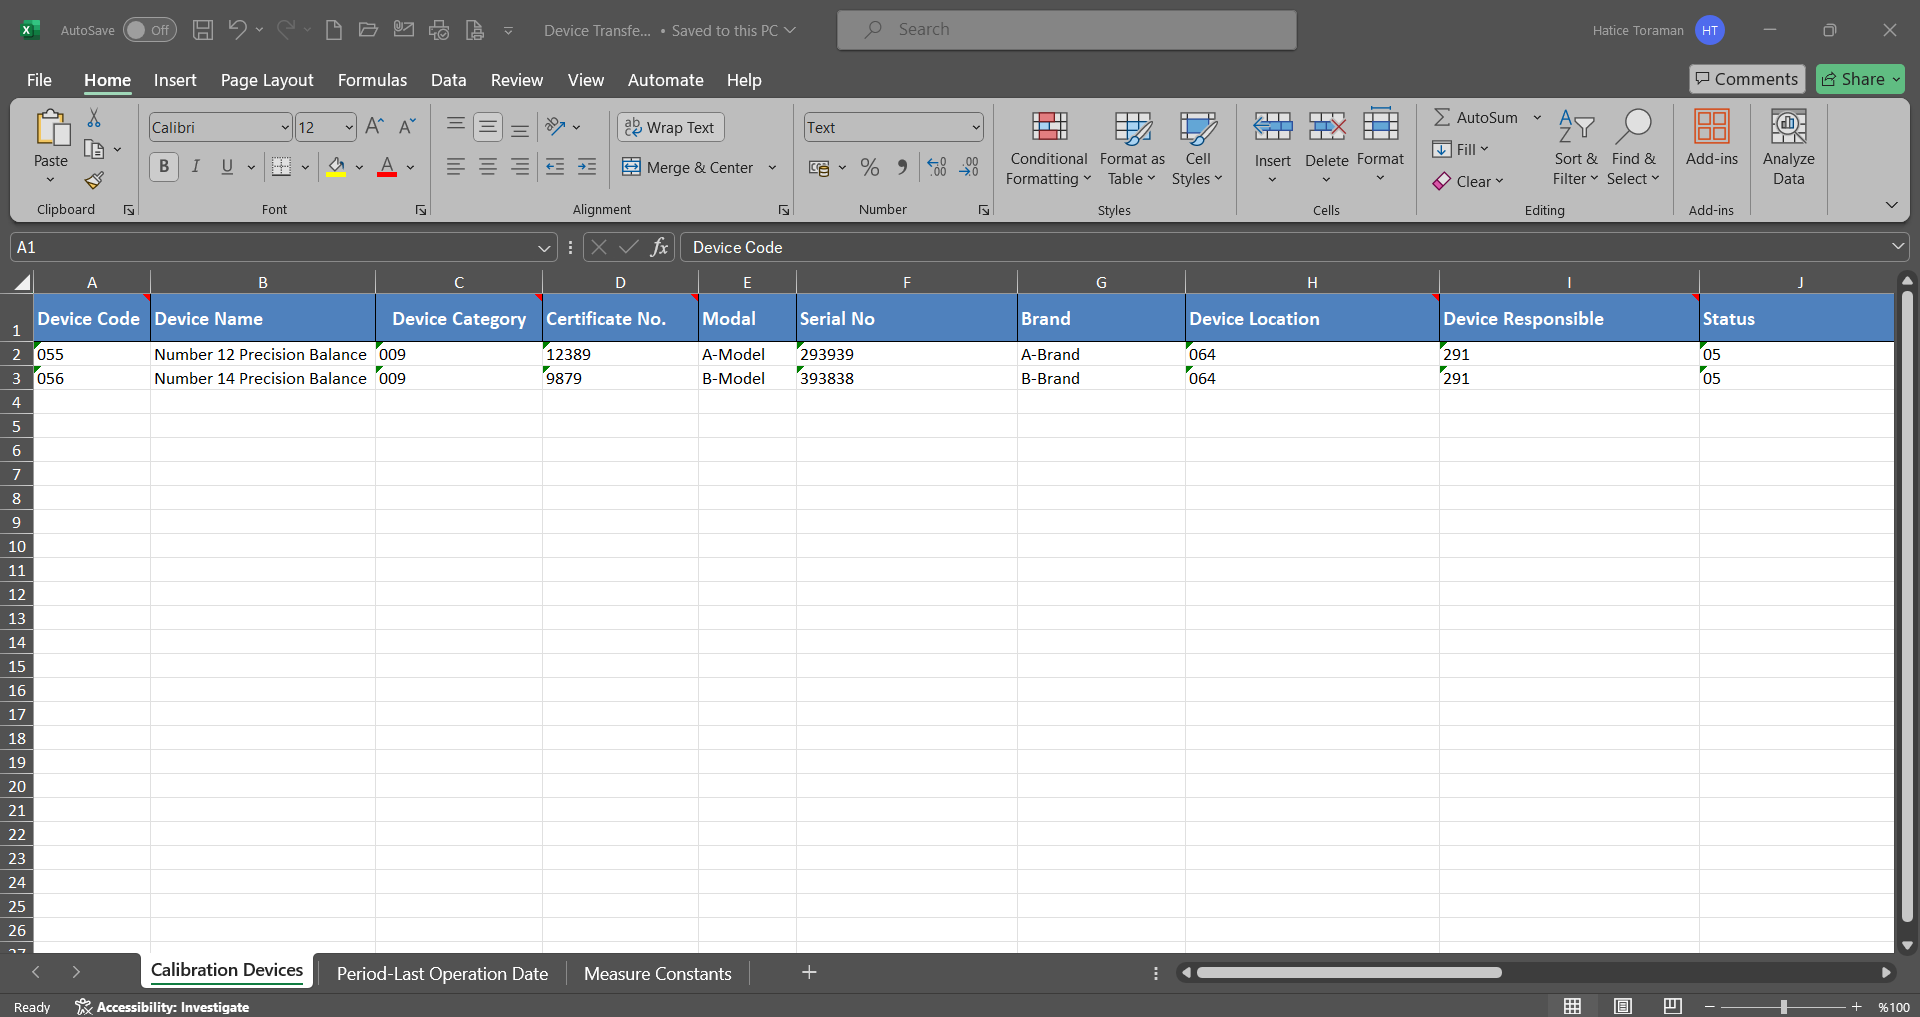
Click the  button on the Device Transfer screen.

Click the “Browse” button on the Upload File screen
. Select the filled Device Transfer template on the screen that opens.

On the Device Transfer screen, the button is clicked to check whether the template created and uploaded to the system gives an error or not.
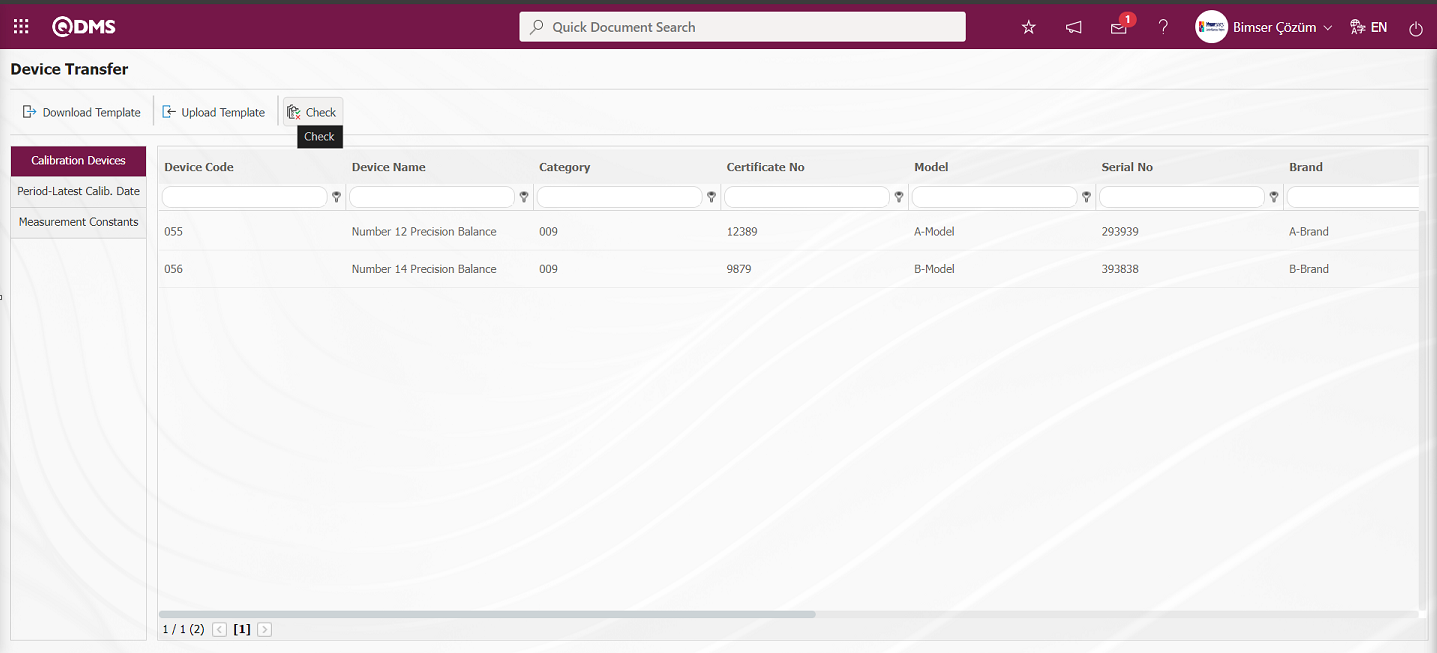
The system displays the message “Data is suitable for transfer”.
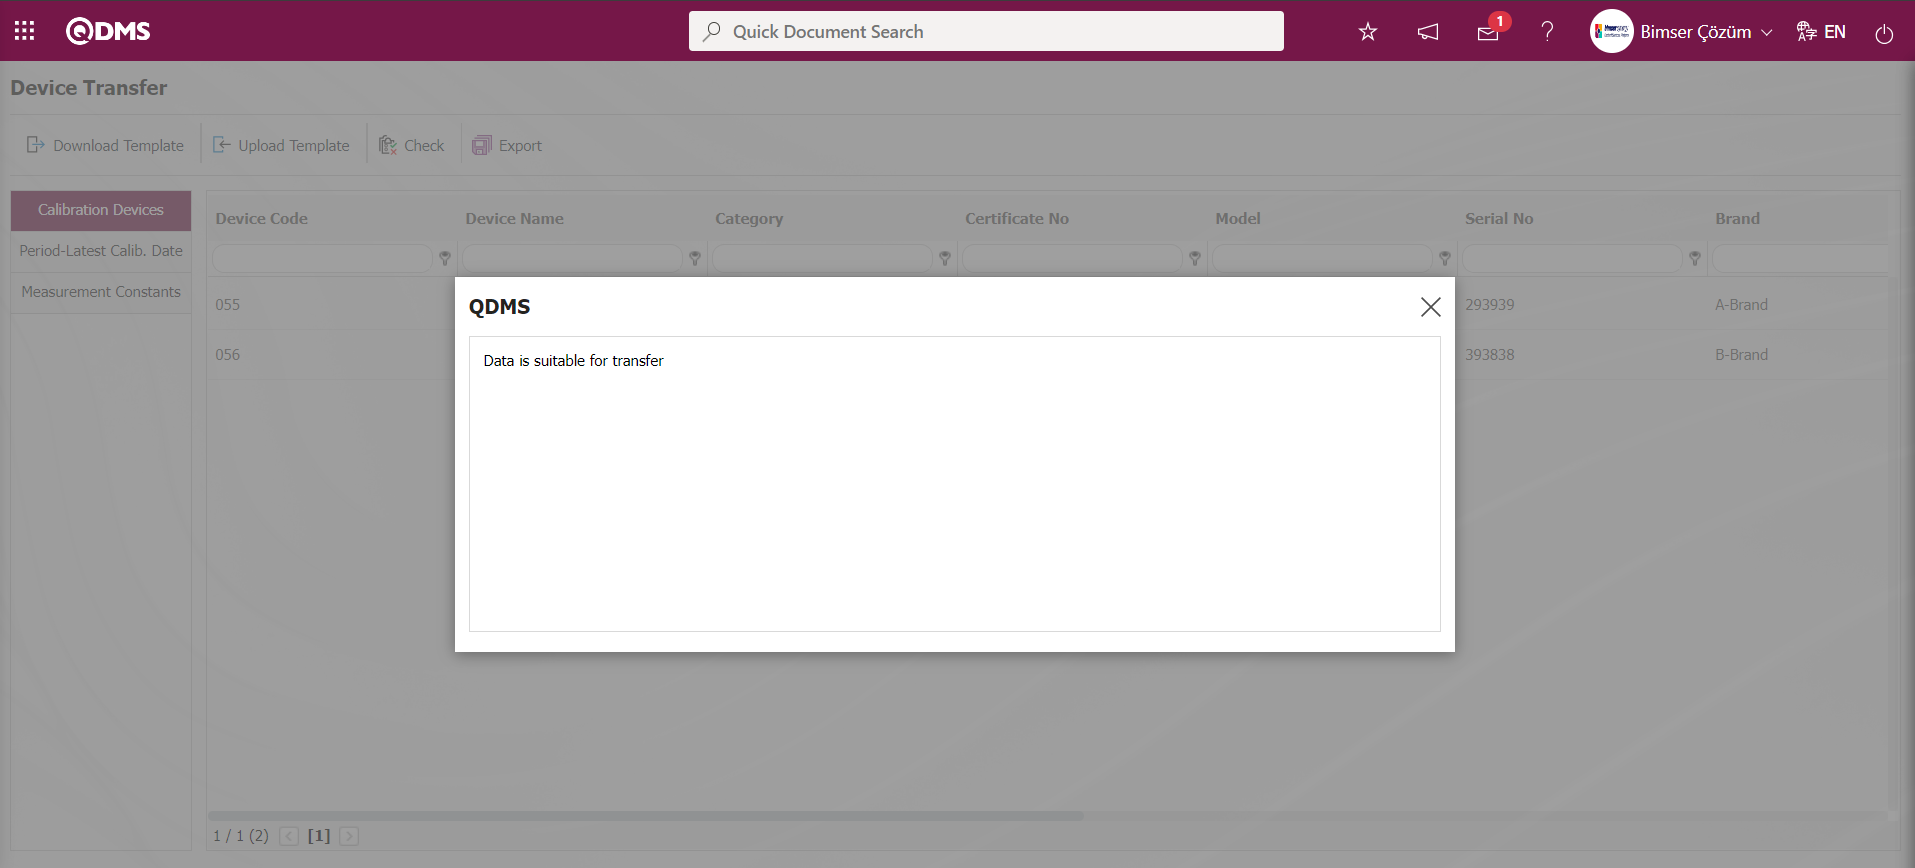
On the Device Transfer screen, the Device Transfer operation is performed by clicking the button.
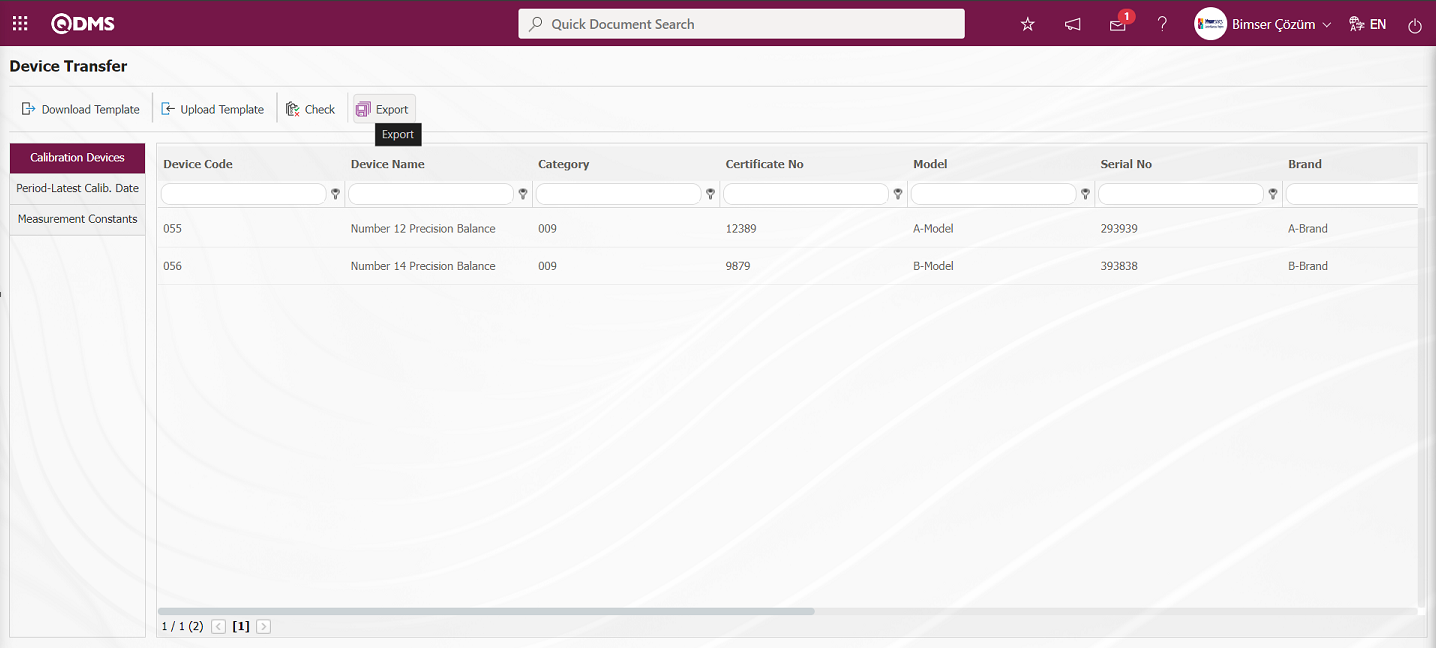
“Calibrations successfully transferred” message is given by the system and the number of devices transferred is included in the message.

5.2.17.6 Audit Transfer
Menu Name: System Infrastructure Definitions/ BSID/ Configuration Settings/ Transfers/Audit Transfer
It is the menu where the audits are transferred to the system in bulk in the Audit Activities module.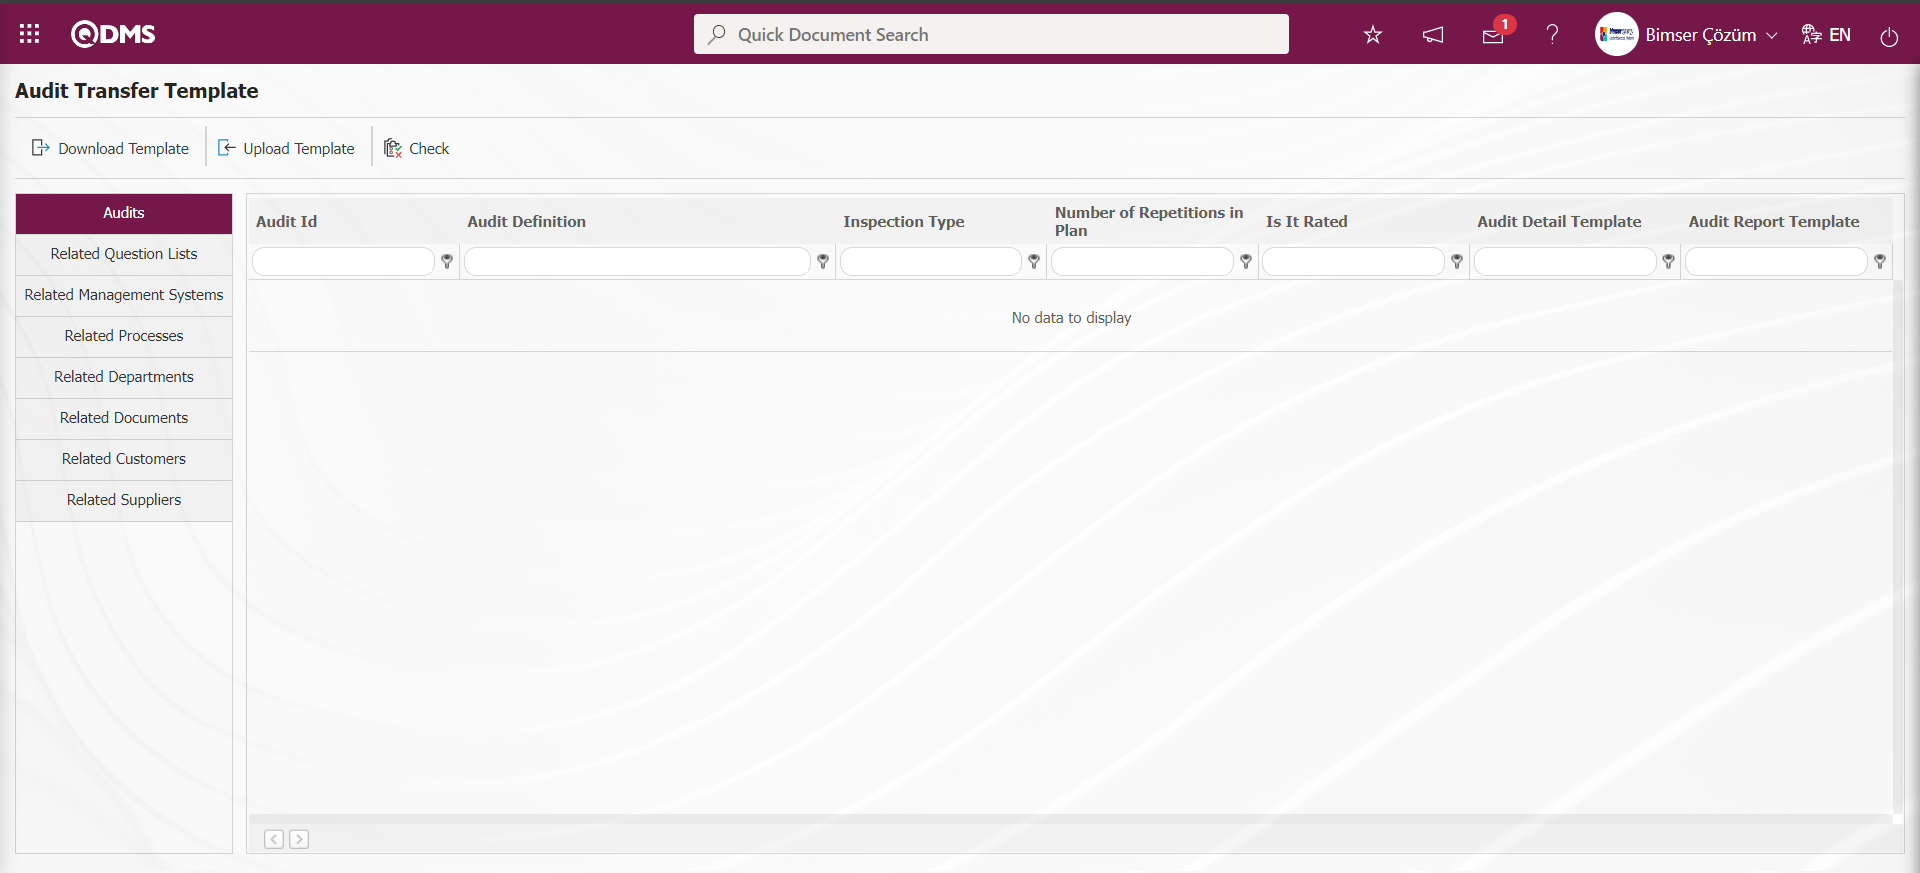
With the help of the buttons on the screen;
 : The Audit Transfer template is downloaded to the computer.
 : The completed Audit Transfer template is uploaded to the system.
 : Check whether the completed and uploaded Audit Transfer template gives an error or not.
: The transfer process is performed.
The Audit Transfer template is downloaded with the button on the screen, after filling in the required information, the Audit Transfer template is uploaded to the system with the button. In order to check the information entered, the  button is used. If the transferred data is suitable for transfer, the Audit Transfer process is realized via the button.
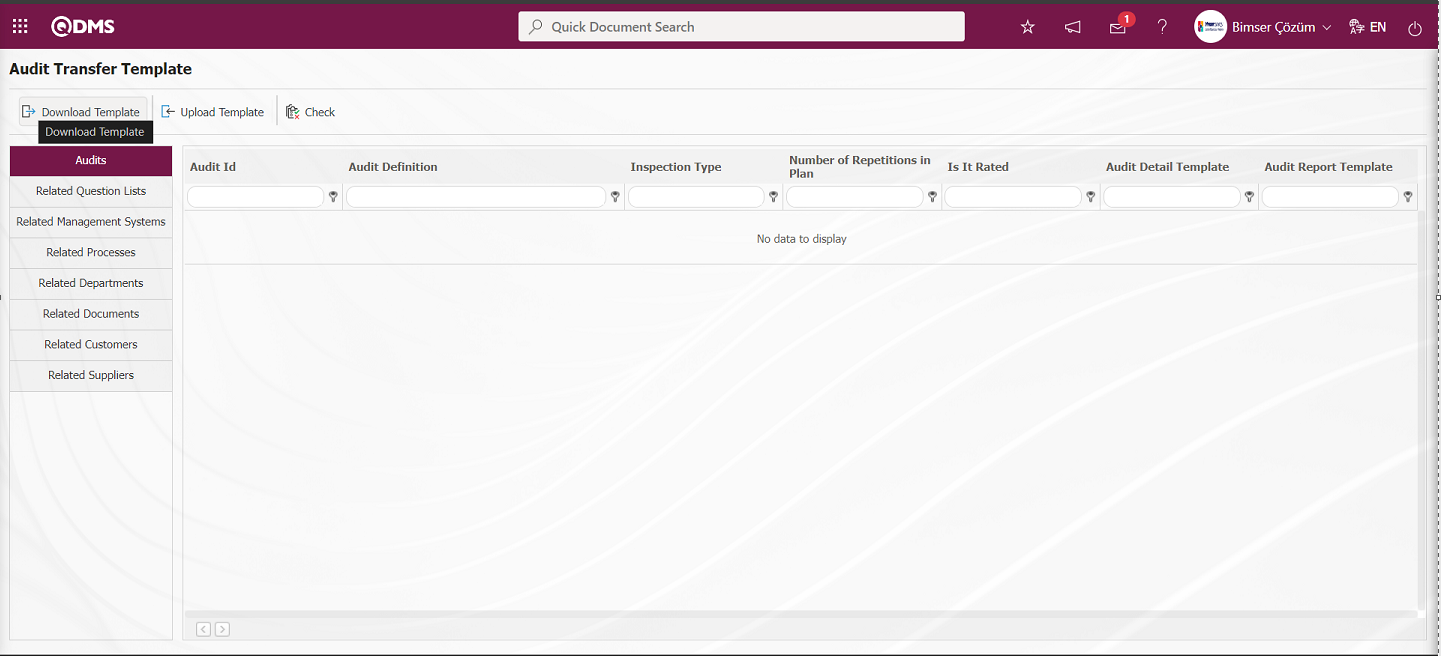
Audit Transfer Template is downloaded to the computer with  button on Audit Transfer Template screen. The relevant fields in the Audit Transfer Template are saved to the computer by typing the relevant information. The point to be considered in the process of filling the downloaded template should be given in the template according to the audit sequence number based on the audit number that will come after the last defined audit number in the Audit List on the System Infrastructure Definitions / Audit Activity / Audit Definition screen.
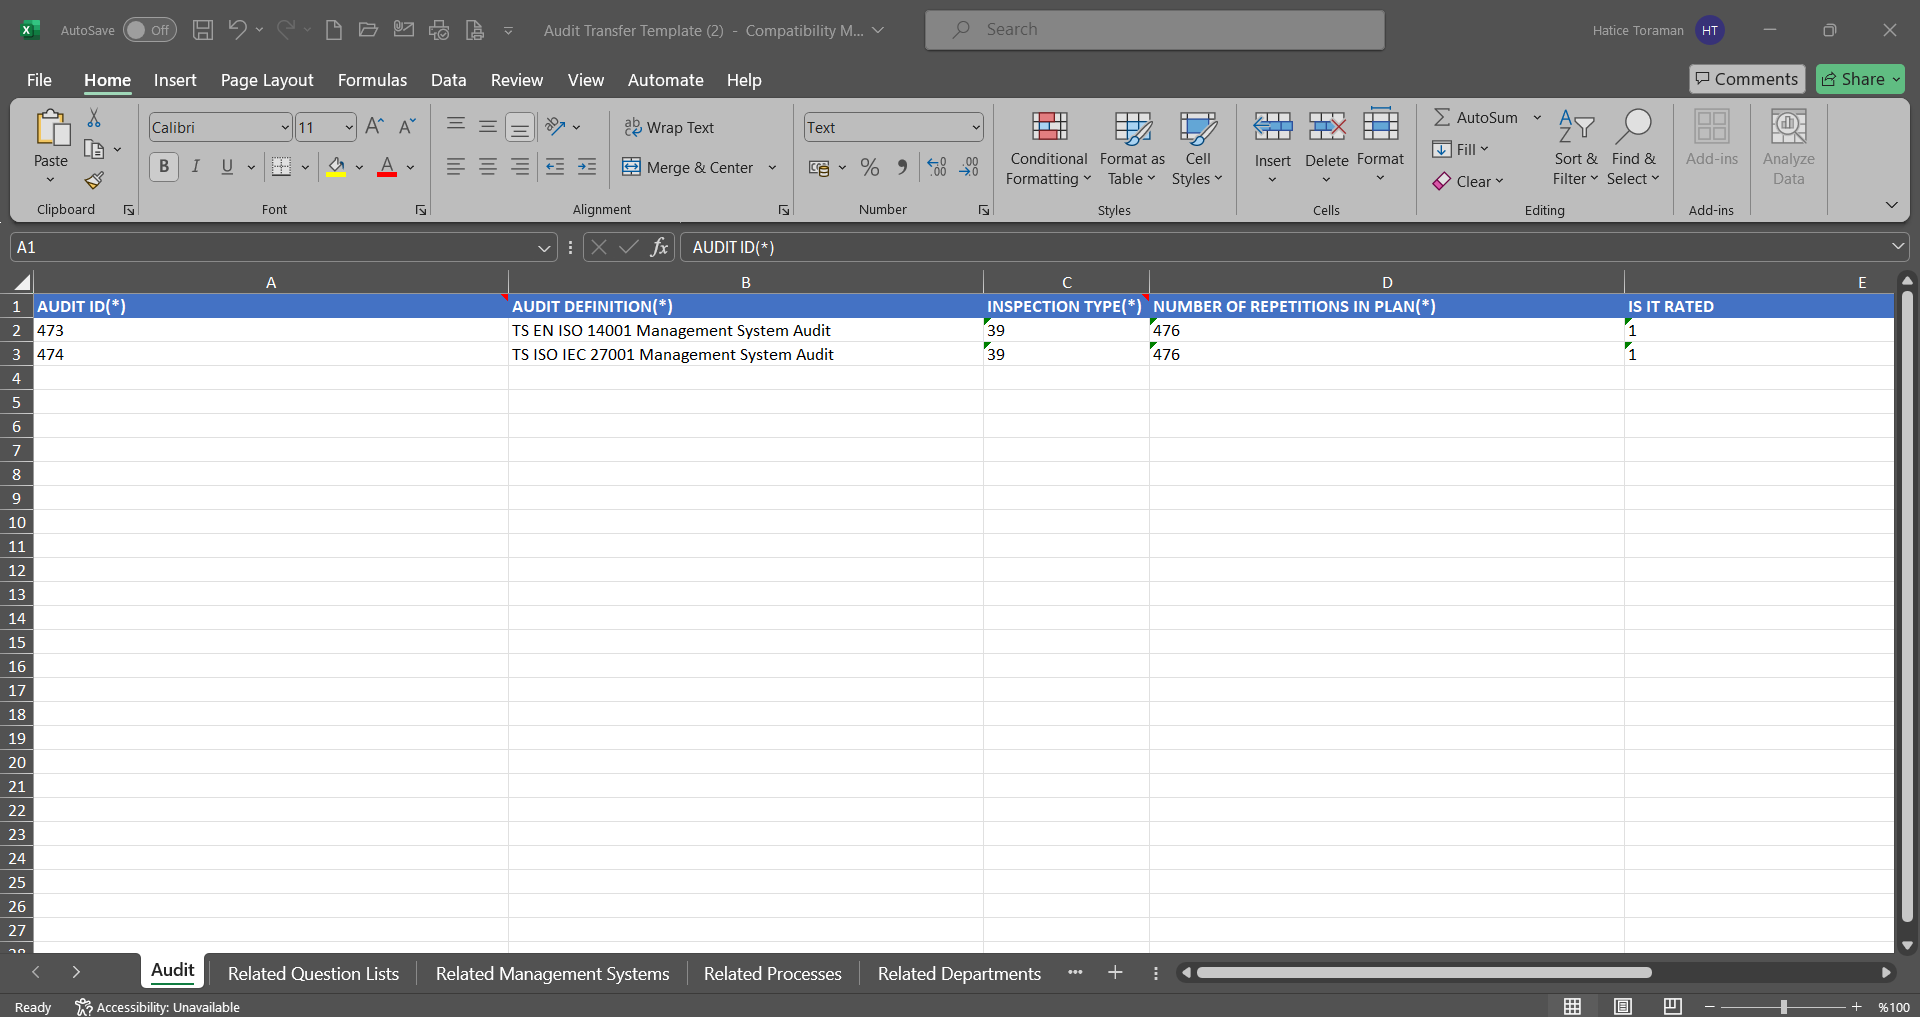
Click  button on Audit Transfer Template screen.
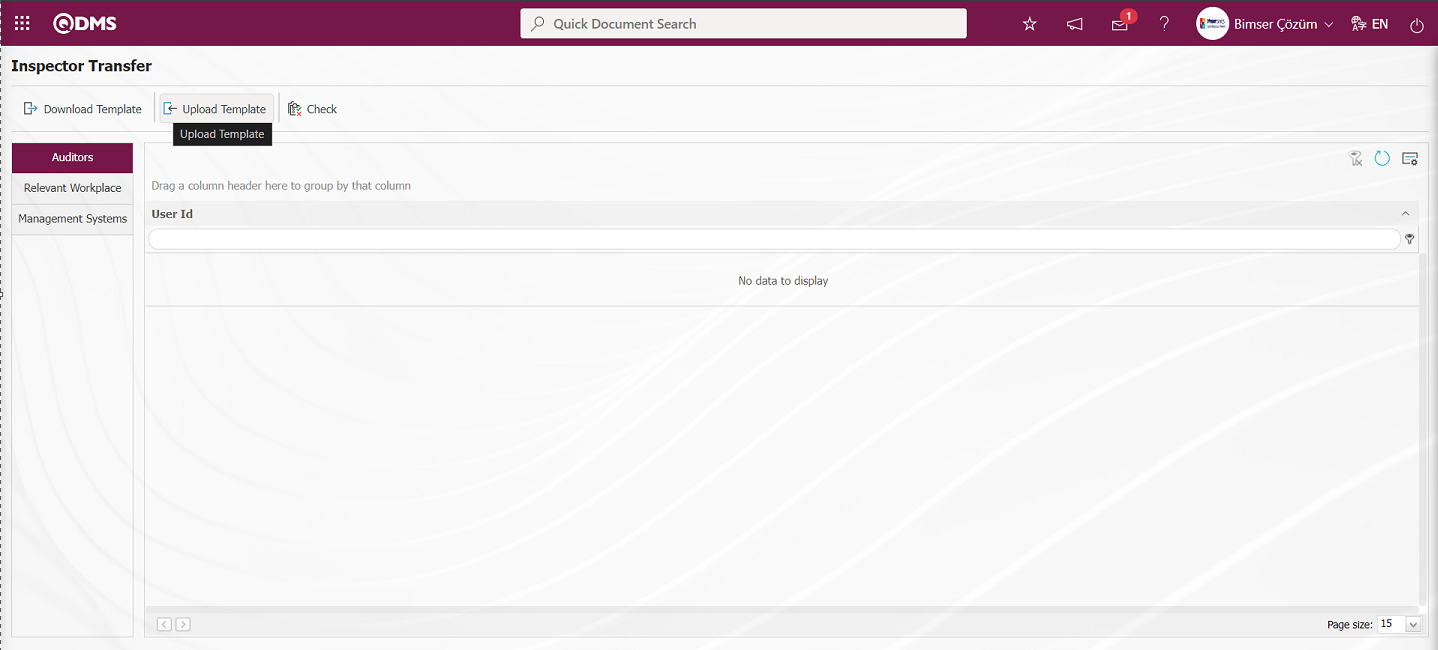
Click the “Browse” button on the Upload File screen.
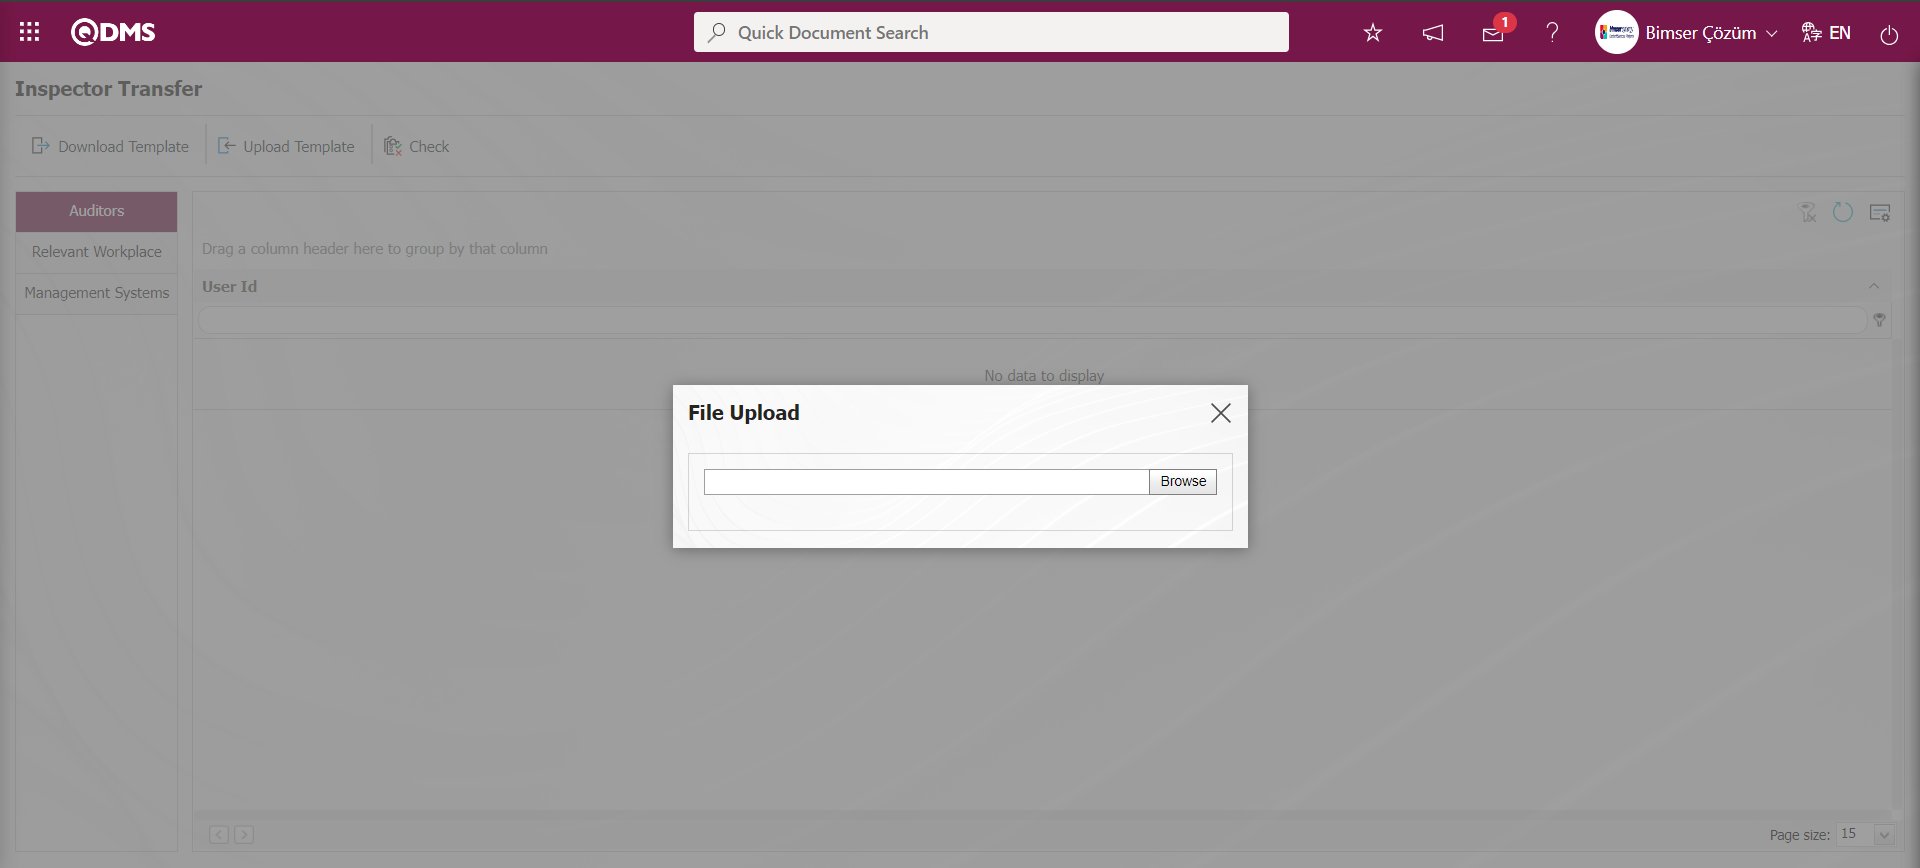 On the screen that opens, the filled Audit Transfer template is selected.
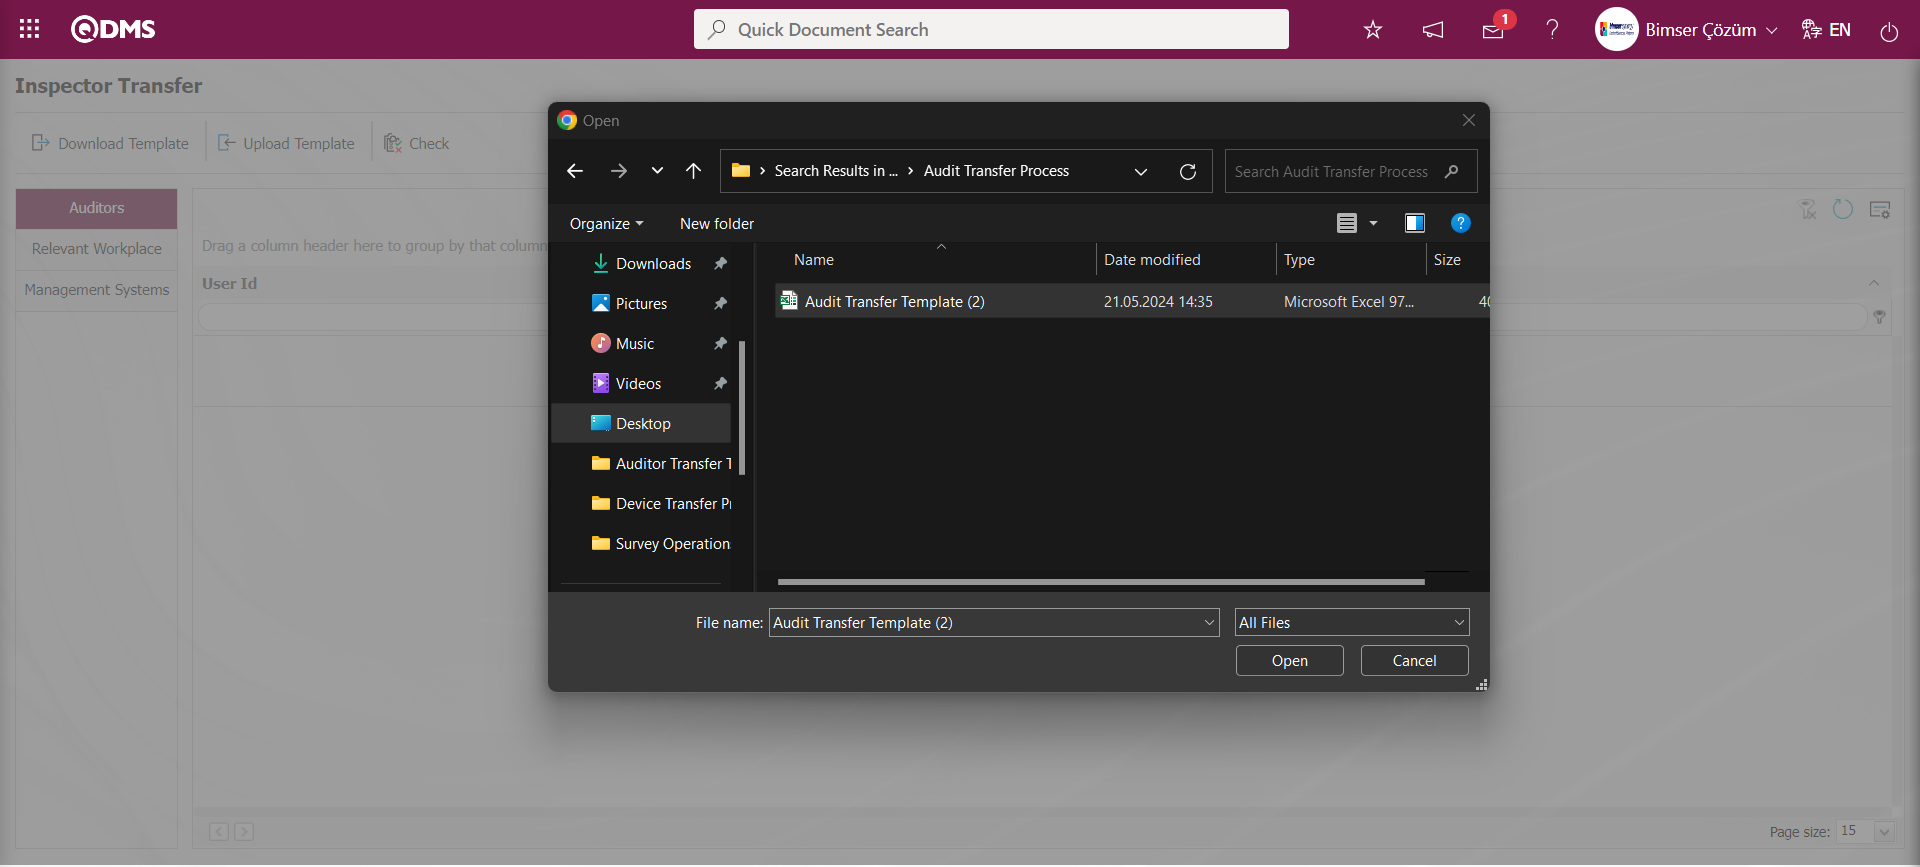
On the Audit Transfer Template screen, click the button to check whether the template created and uploaded to the system gives an error or not.
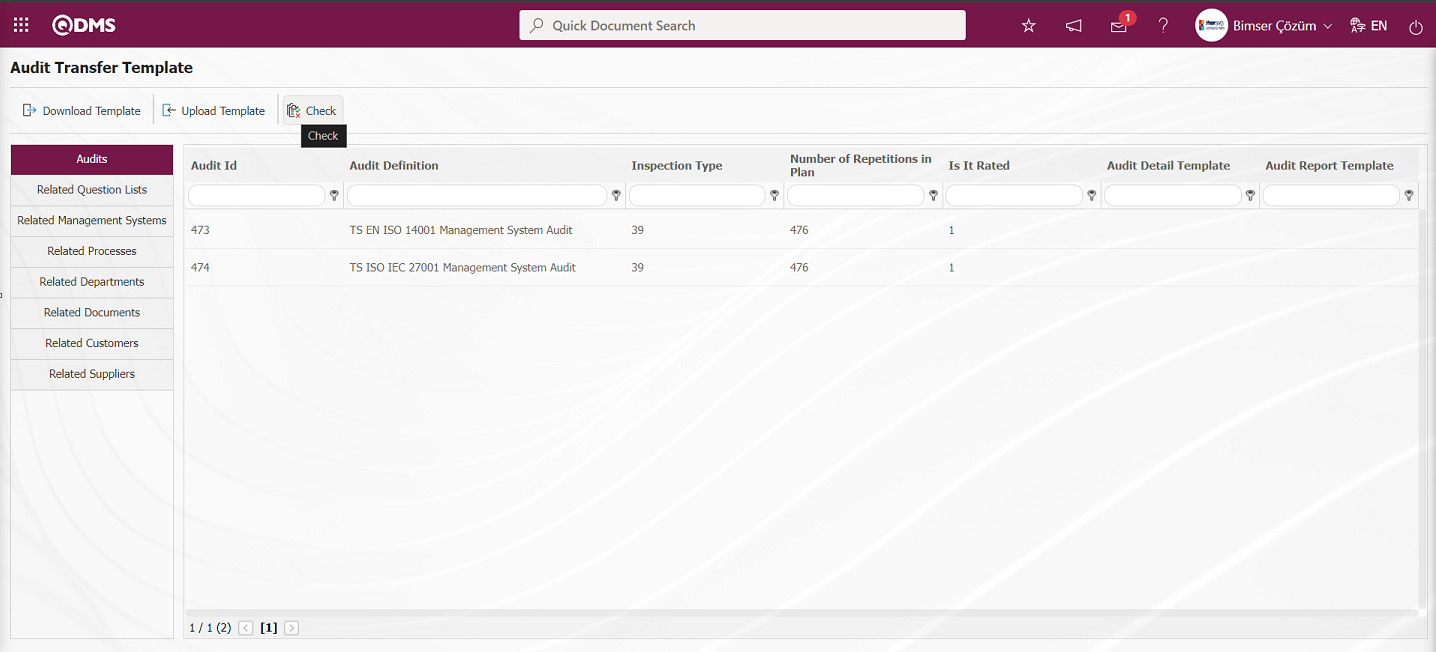
The system displays the message “Data is suitable for transfer”.
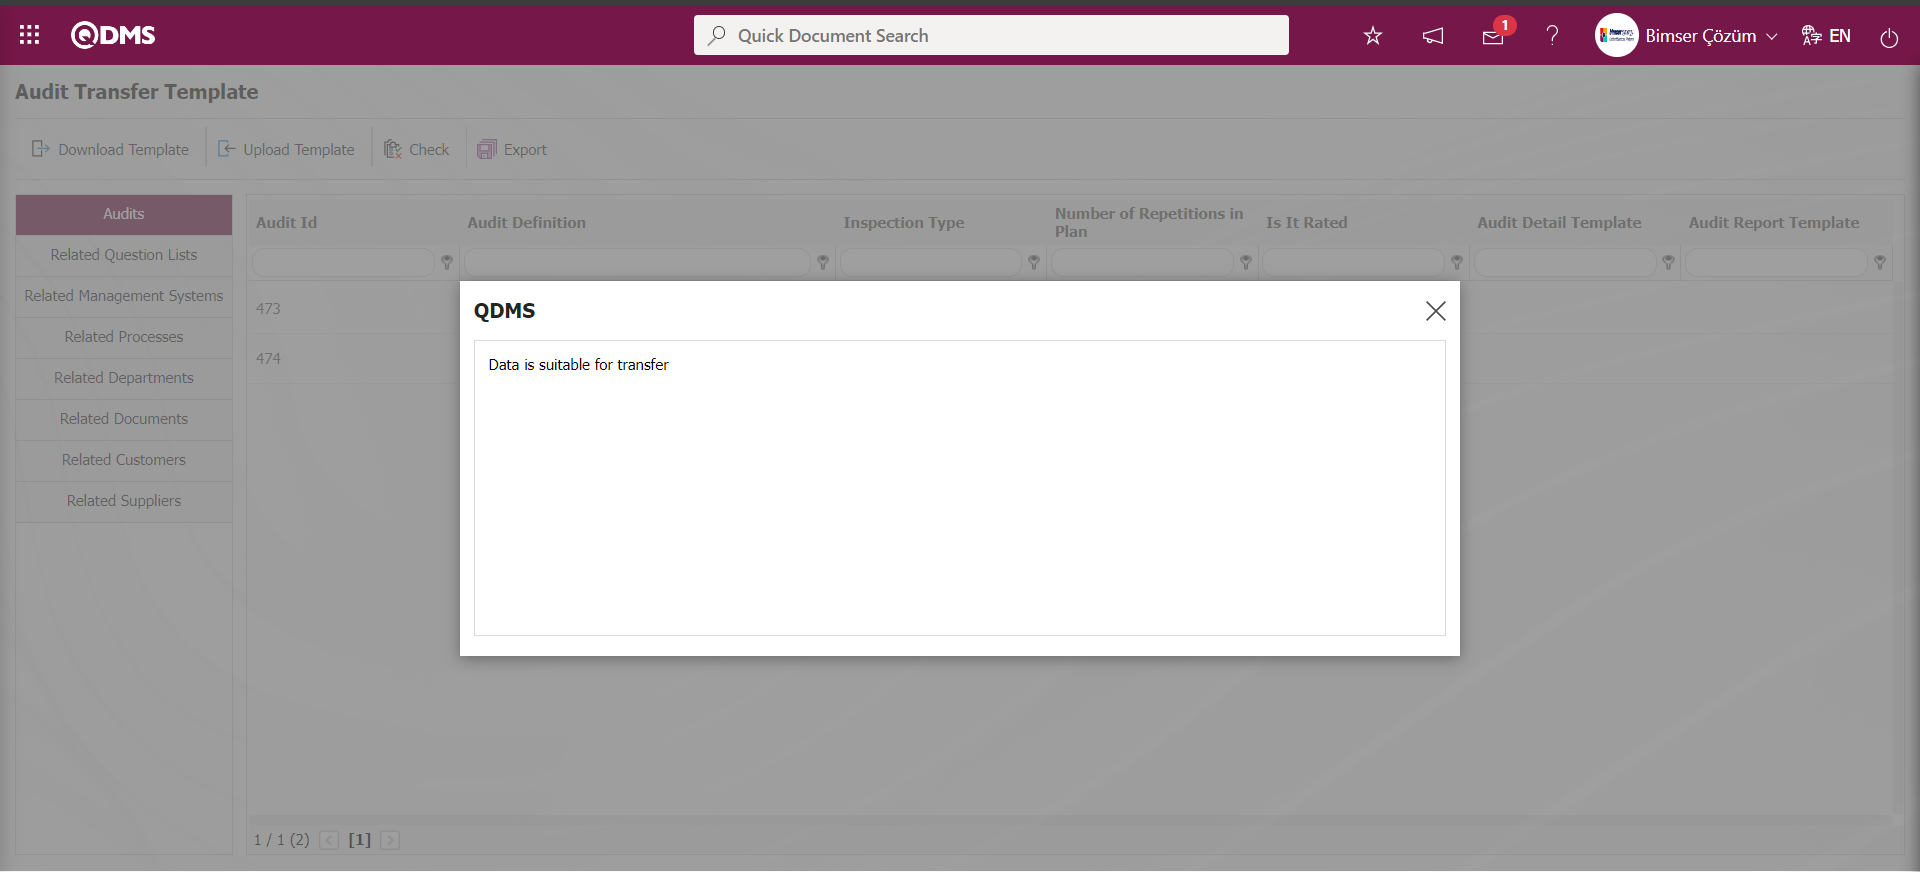
On the Audit Transfer Template screen, click the button and perform the Audit Transfer operation.
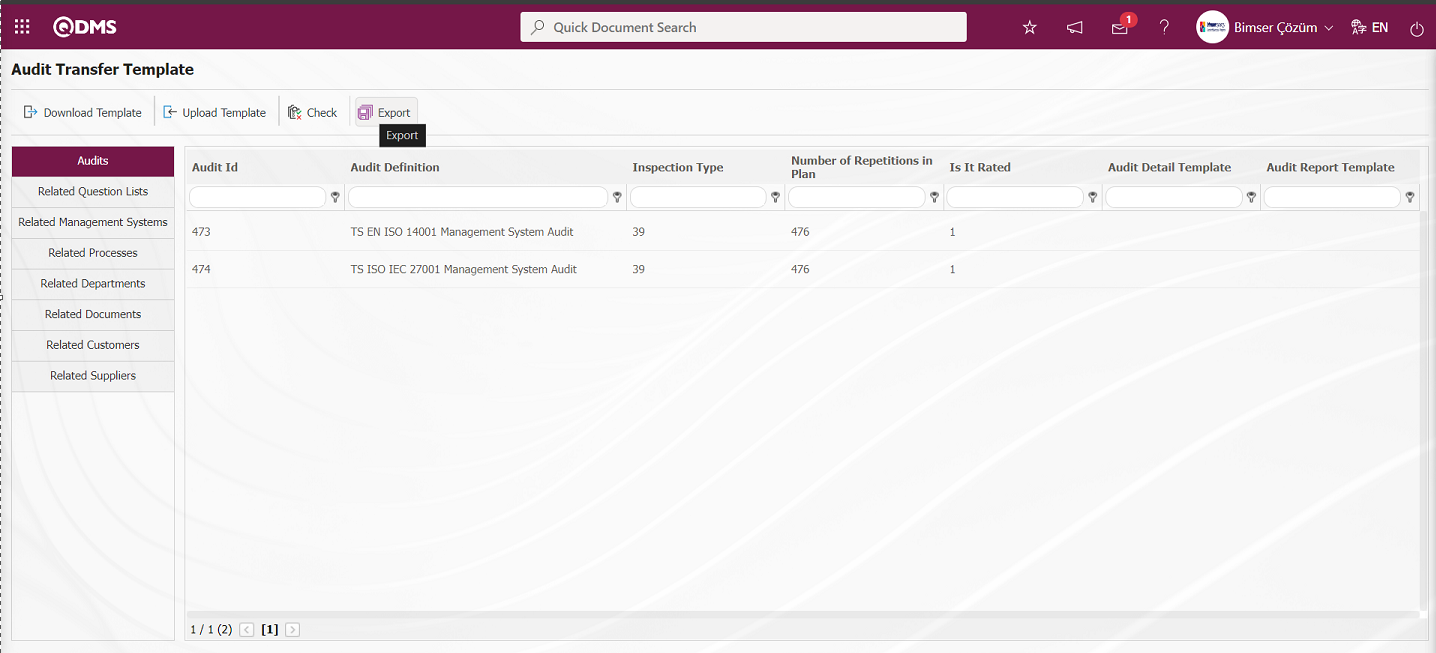
The number of audits transferred by the system with the message “The audit have been successfully transferred” is included in the message.
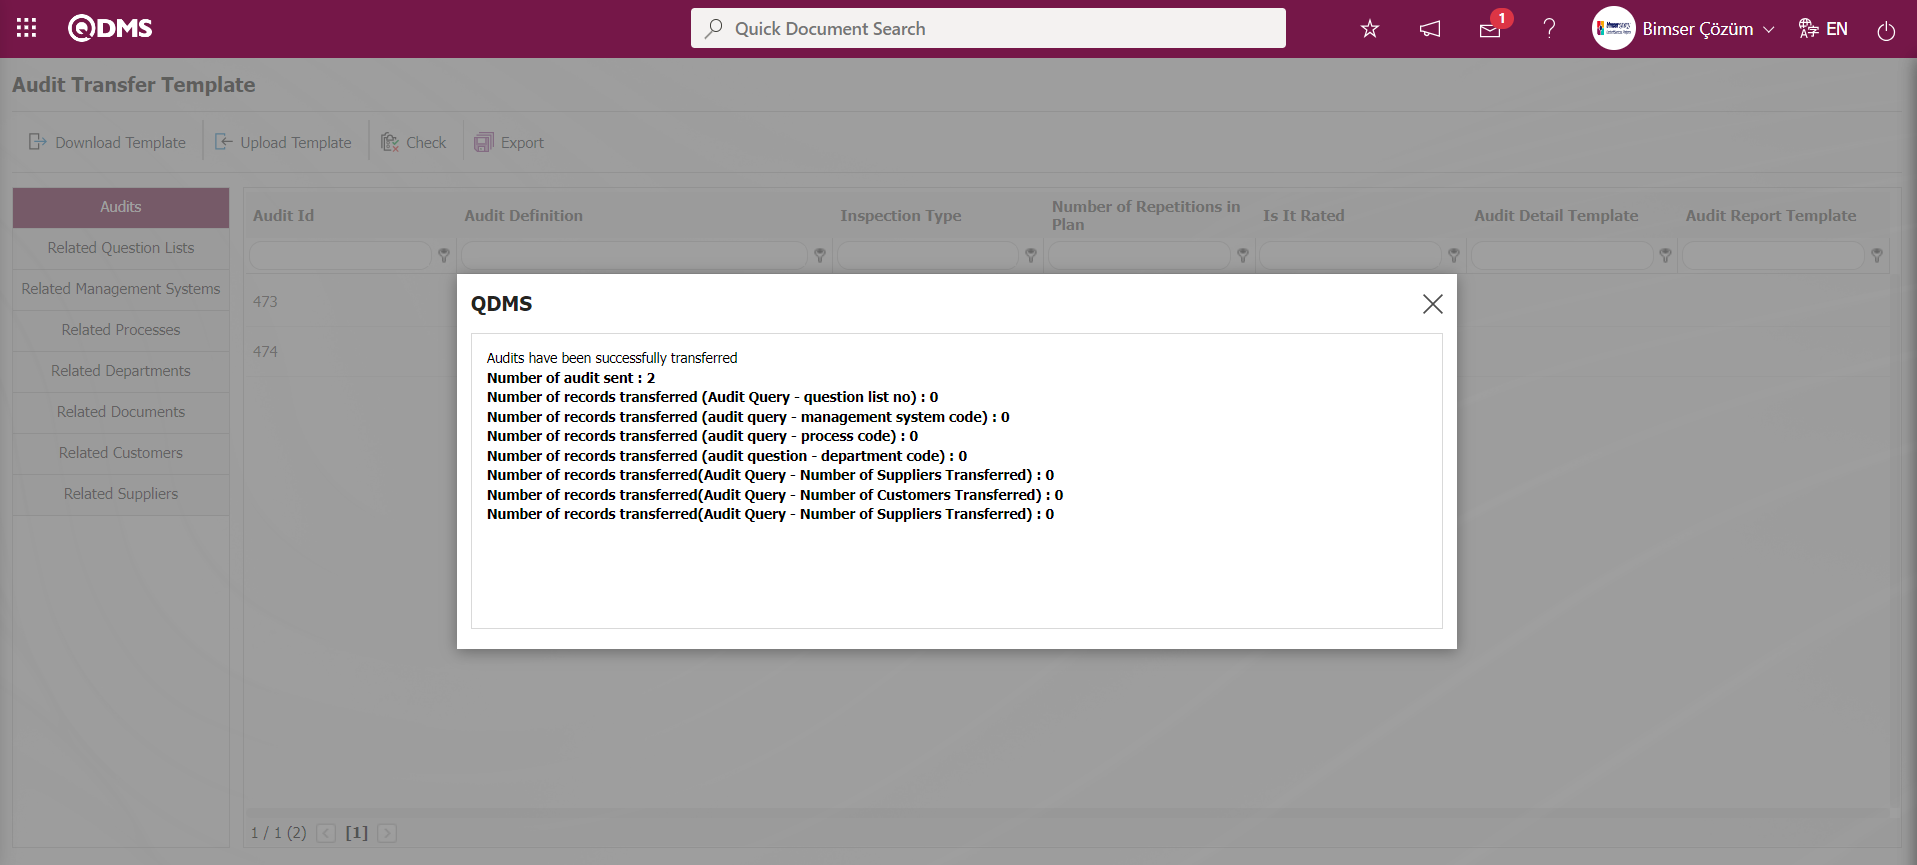
5.2.17.7. Inspection Transfer
Menu Name: System Infrastructure Definitions/ BSID/ Configuration Settings/ Transfers/ Inspection Transfer
This is the menu where the inspection transfer operations such as recruitment inspection, periodic inspection, periodic test, etc. are performed. “Inspection Transfer” menu is used if it is desired to transfer the examinations performed in the company such as recruitment examination, periodic examination, polyclinic examination to the system in bulk.
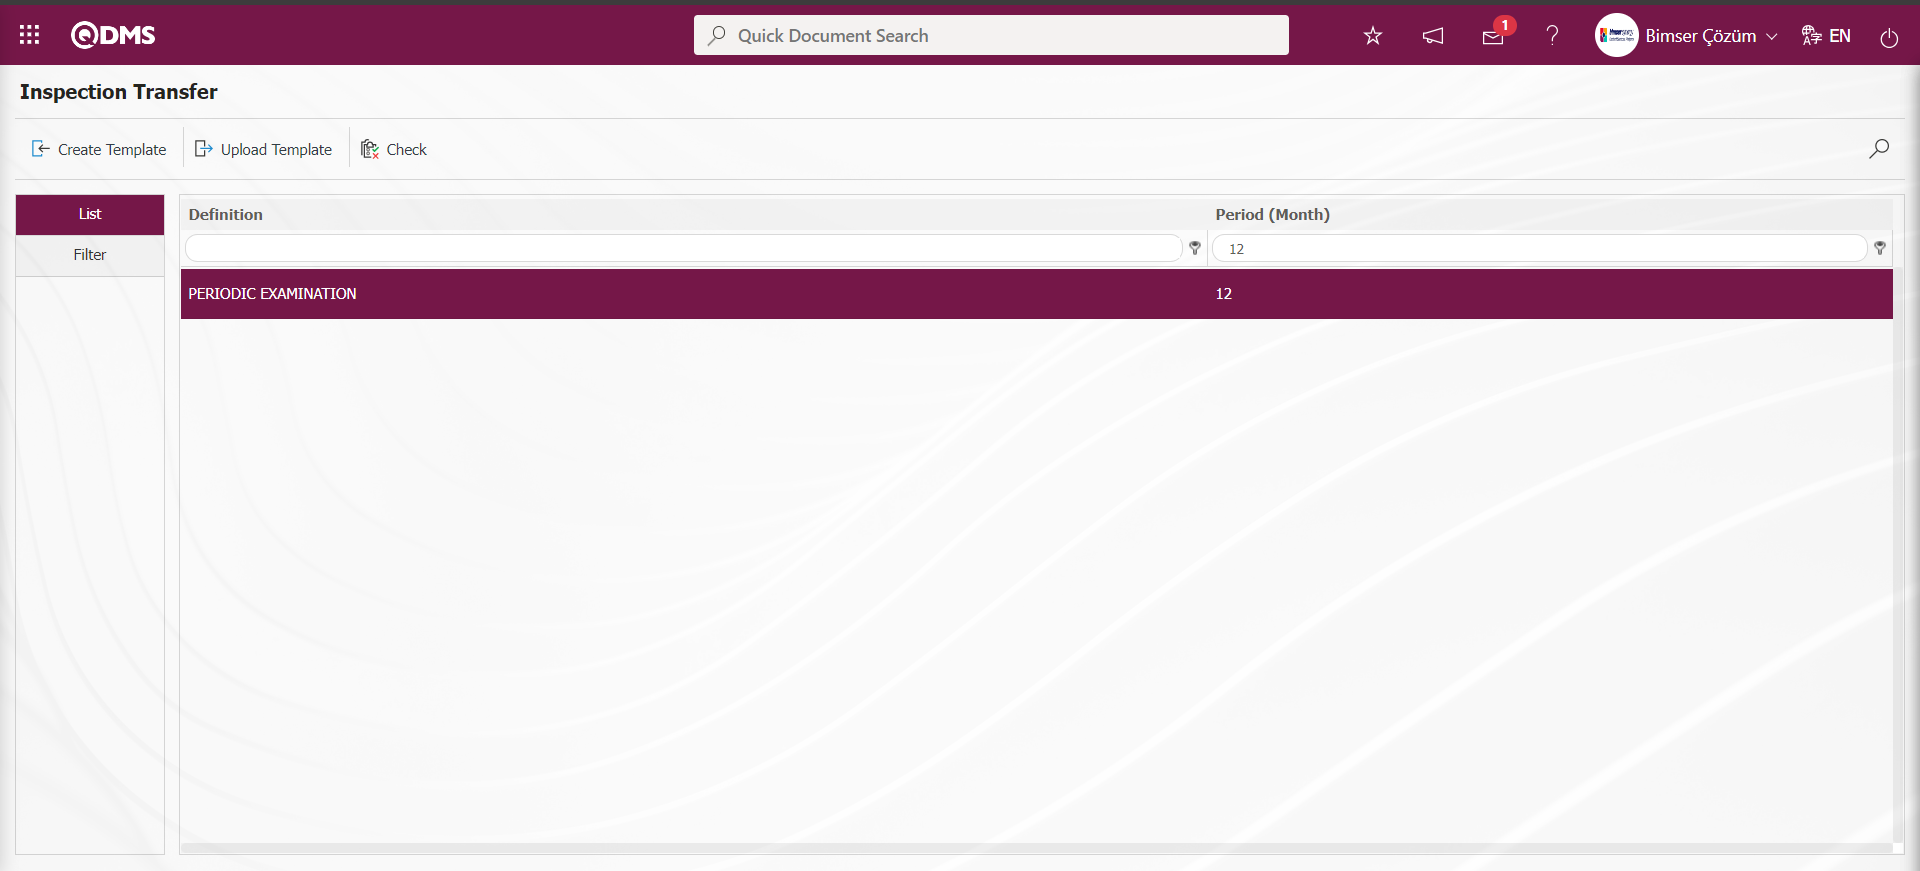
With the help of the buttons on the screen;
 : The Inspection Transfer template is downloaded to the computer.
 : The filled Inspection Transfer template is uploaded to the system.
: Check whether the completed and uploaded Inspection Transfer template gives an error or not.
: The transfer process is performed.
The Inspection Transfer template is downloaded with the button on the screen, after filling in the necessary information, the Inspection Transfer template is uploaded to the system with the button. In order to check the information entered, the button is used. If the transferred data is suitable for transfer, the Inspection transfer process is realized via the button.
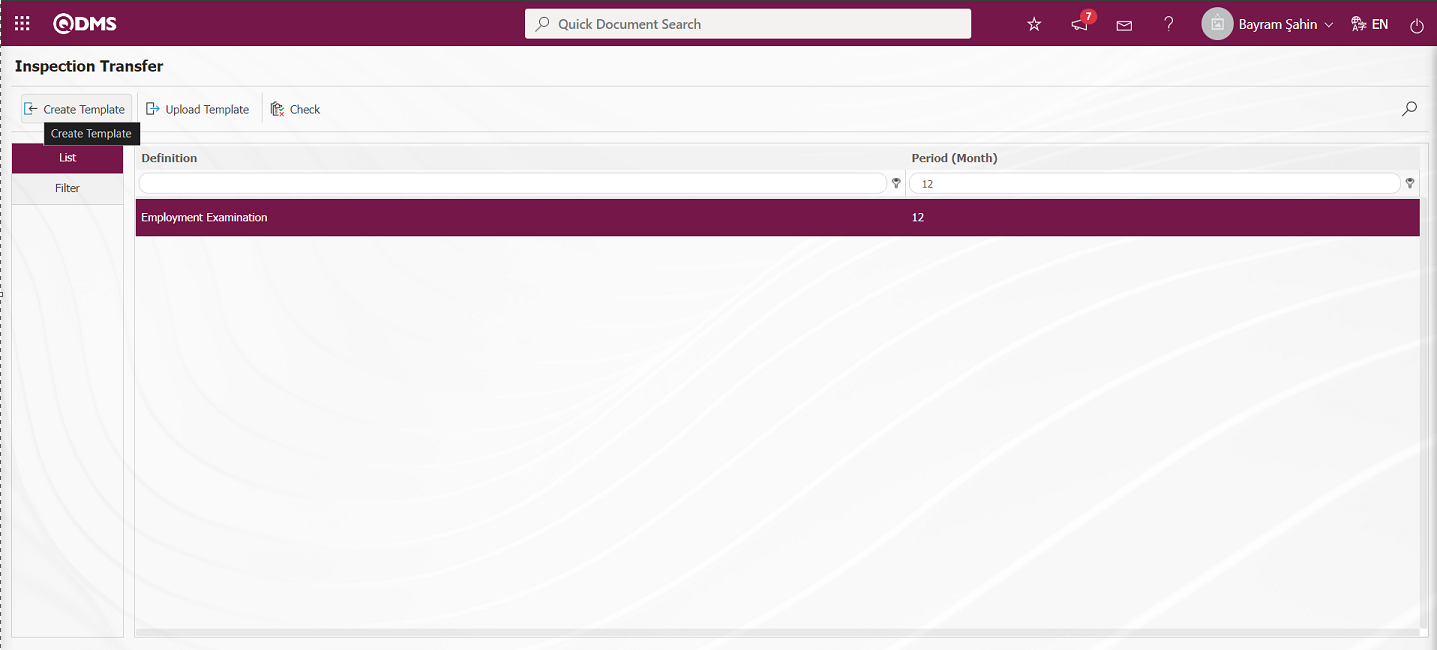
On the Inspection Transfer screen, the inspection type to be transferred is selected from the list and the Inspection Transfer template related to the selected Inspection type is downloaded to the computer with the button. The relevant fields in the Inspection Transfer template are saved to the computer by writing the relevant information.
Click the button on the Inspection Transfer screen.
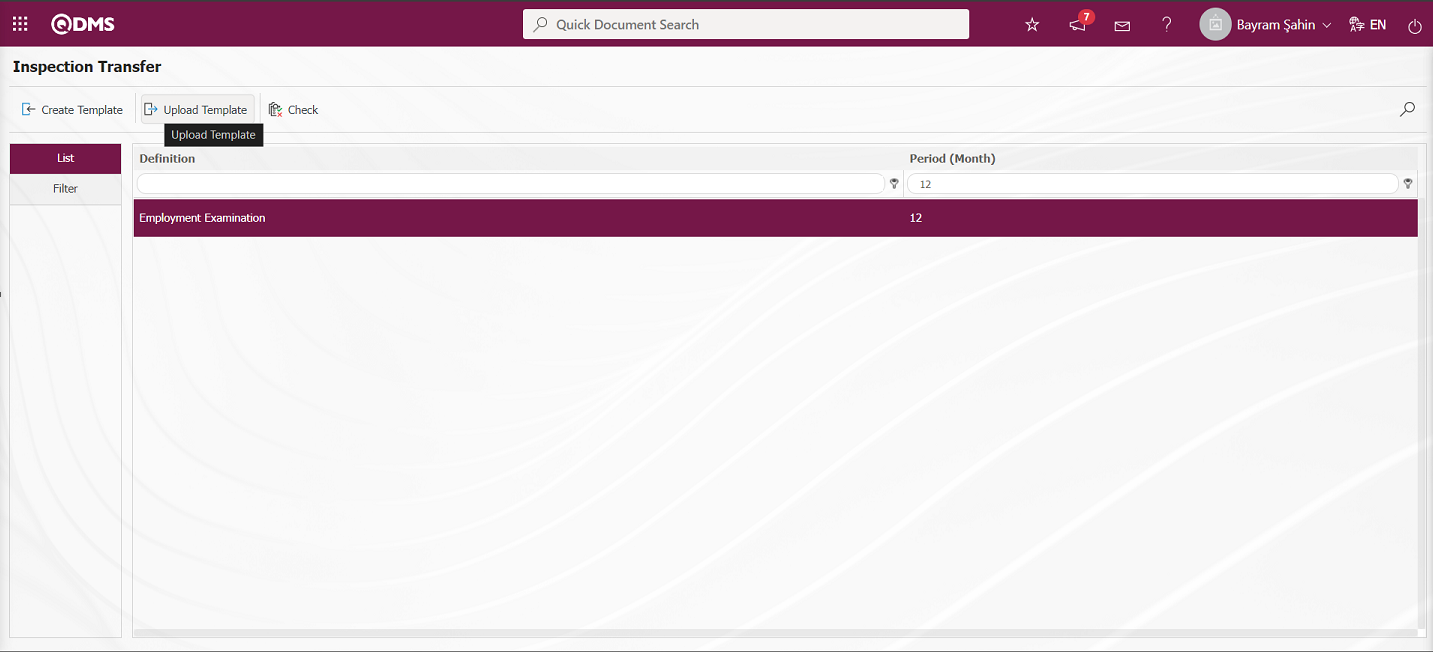
Click the “Browse” button on the Upload File screen.
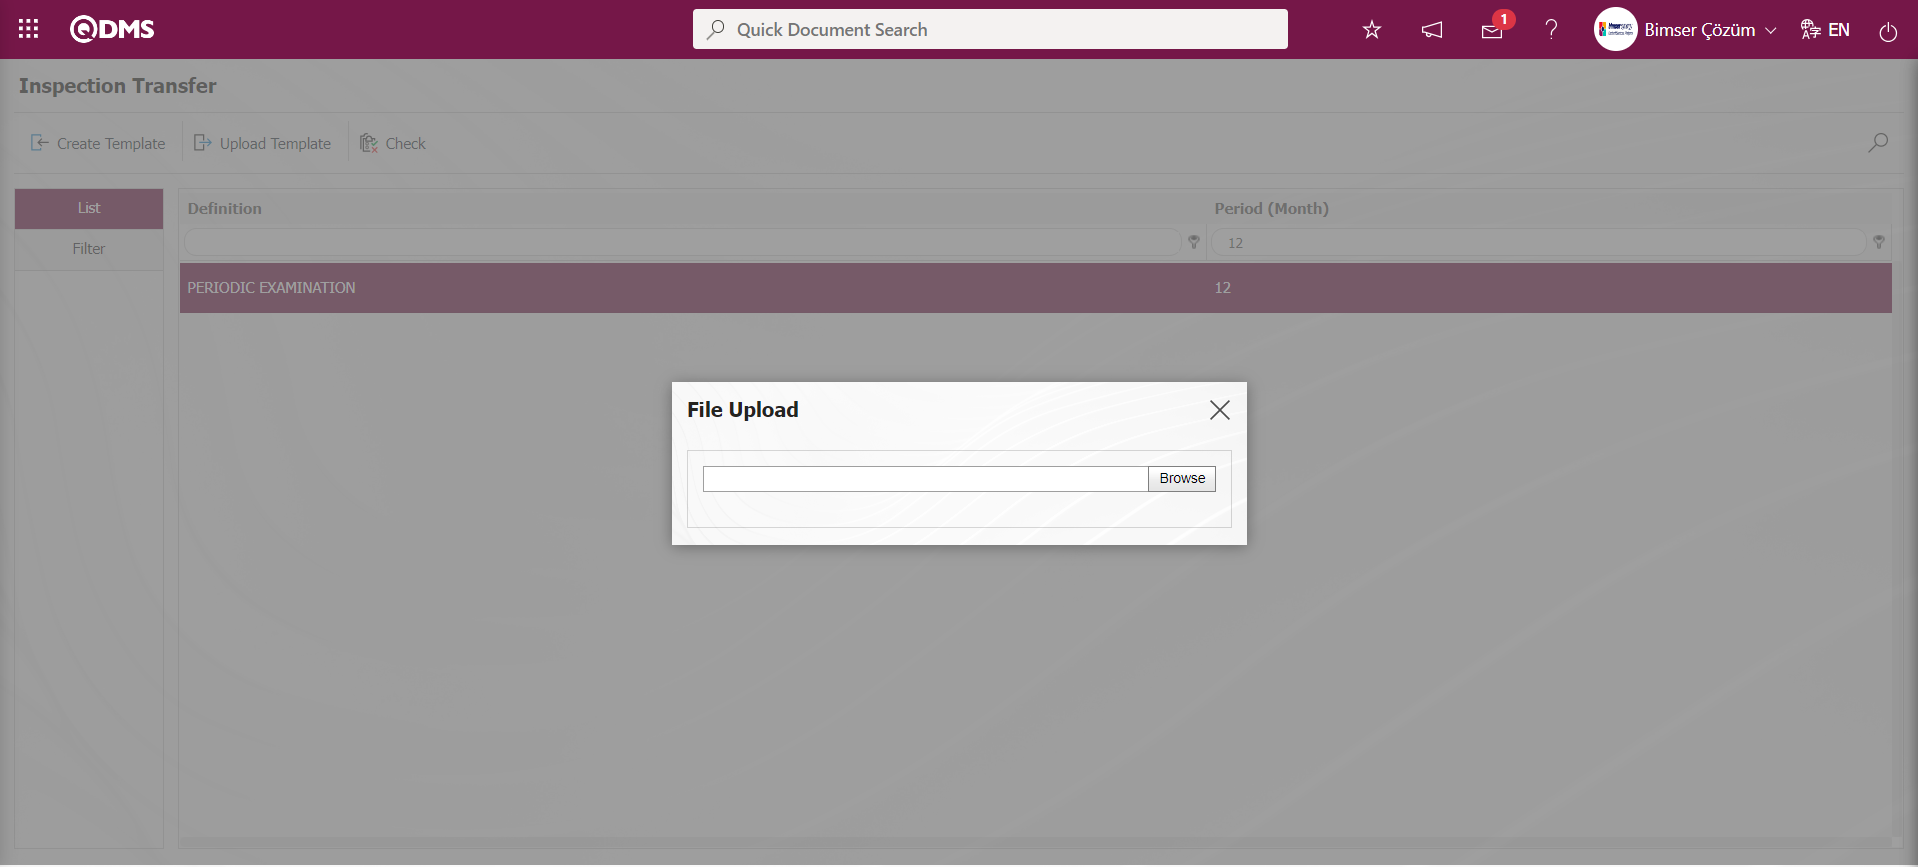
On the screen that opens, the filled Inspection Transfer template is selected.
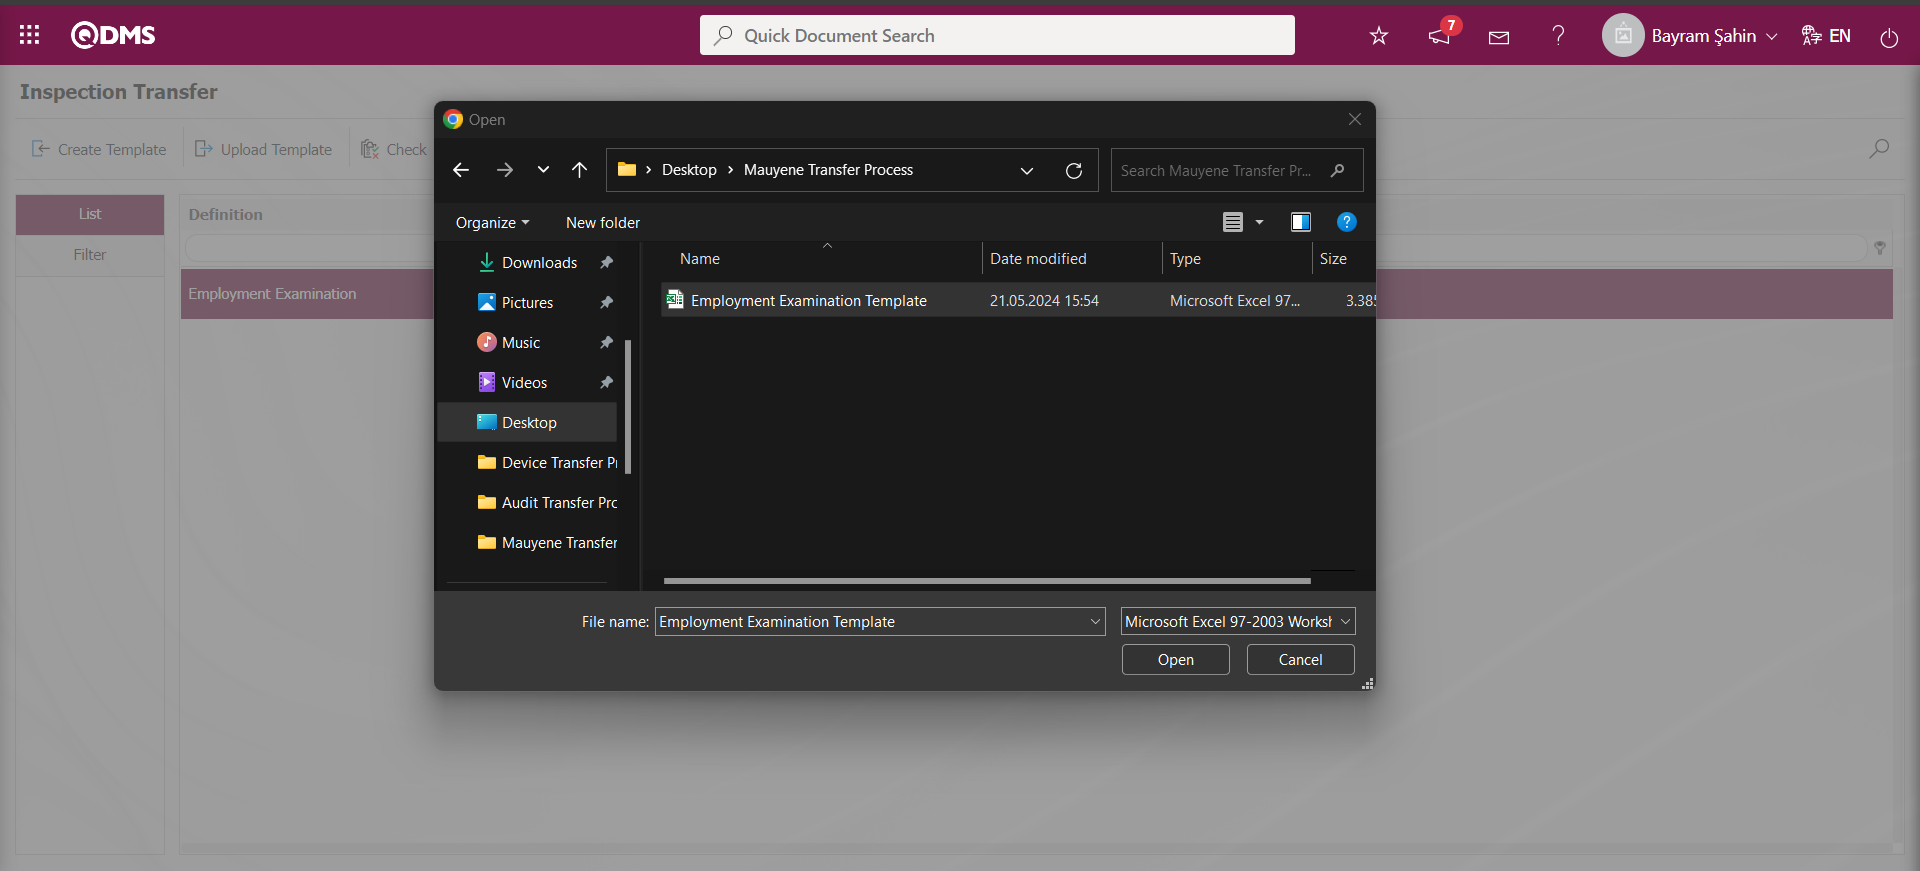
On the Transfer Inspection screen, the  button is clicked to check whether the template created and uploaded to the system gives an error.
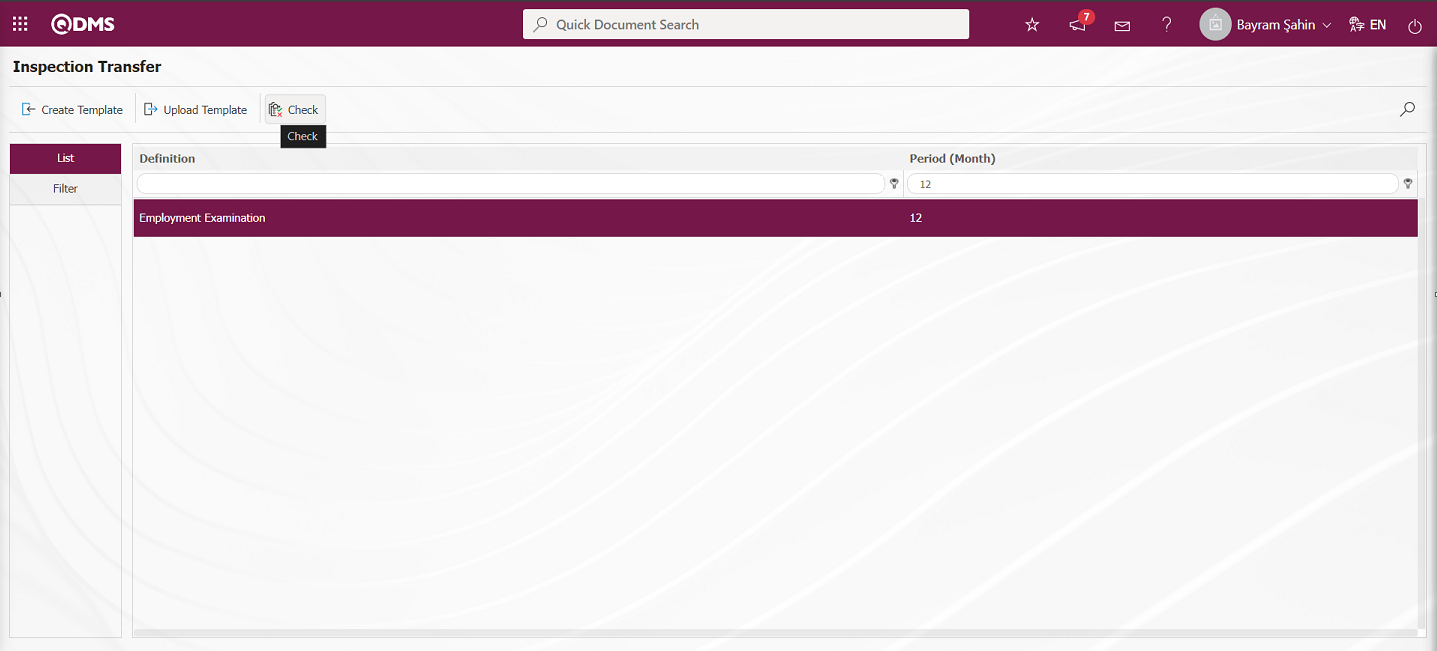
The system displays the message “Data is suitable for transfer”.
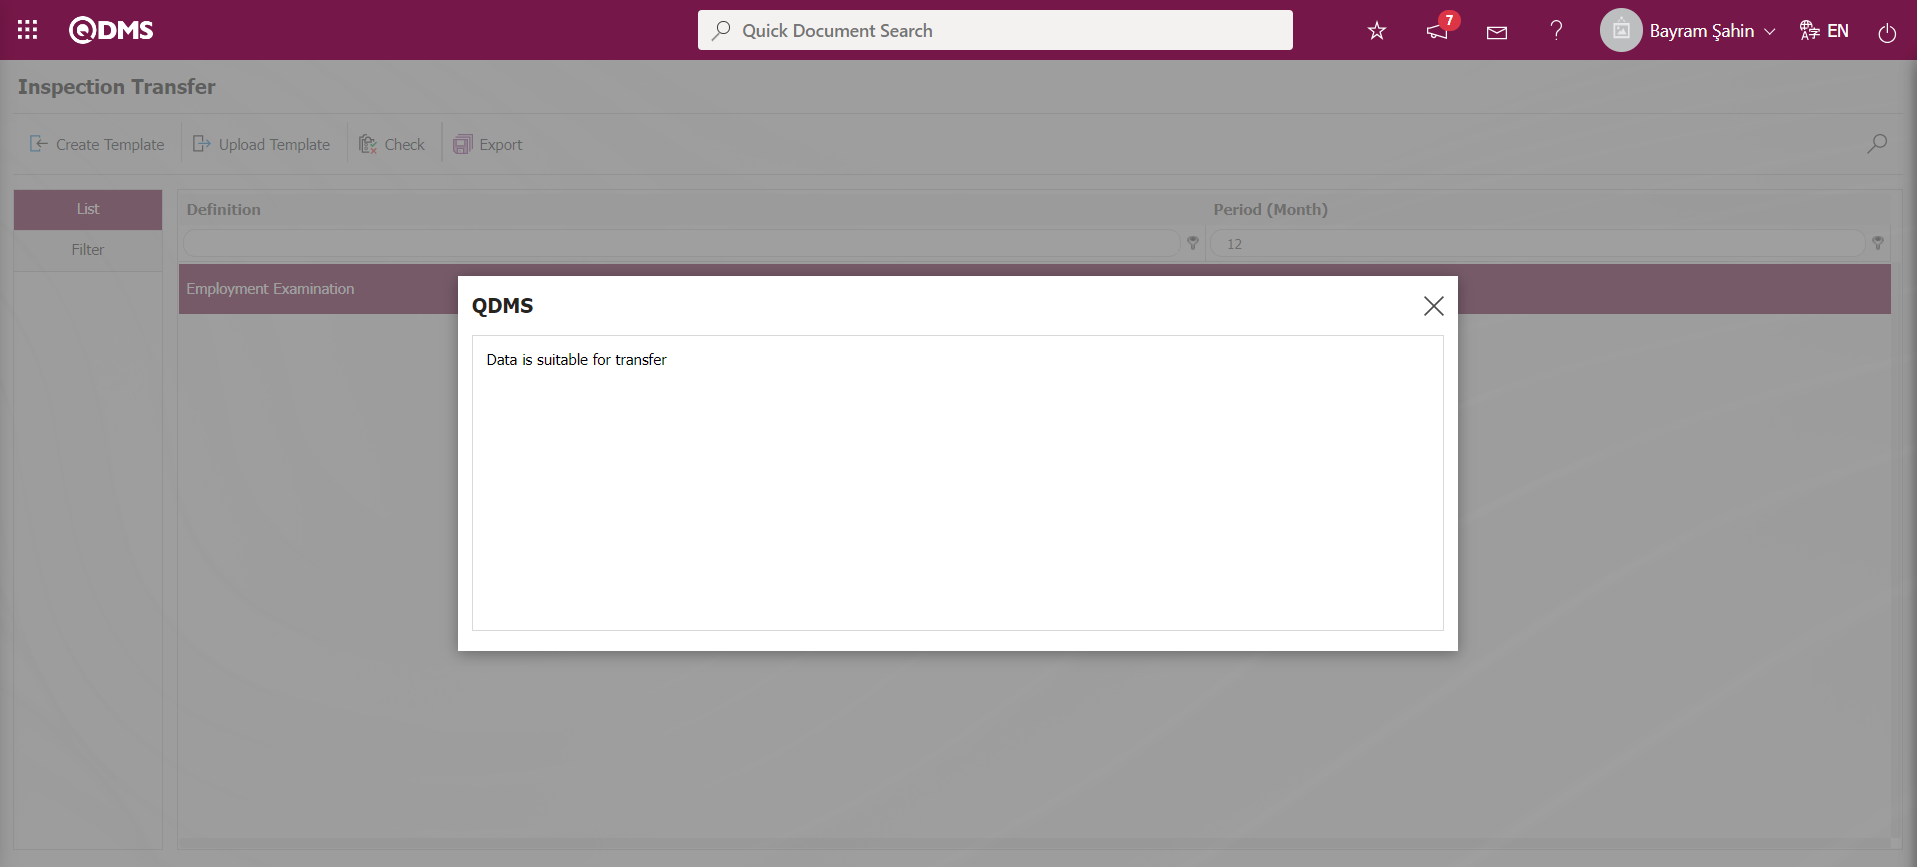
On the Transfer Inspection screen, the Inspection Transfer process is performed by clicking the  button.
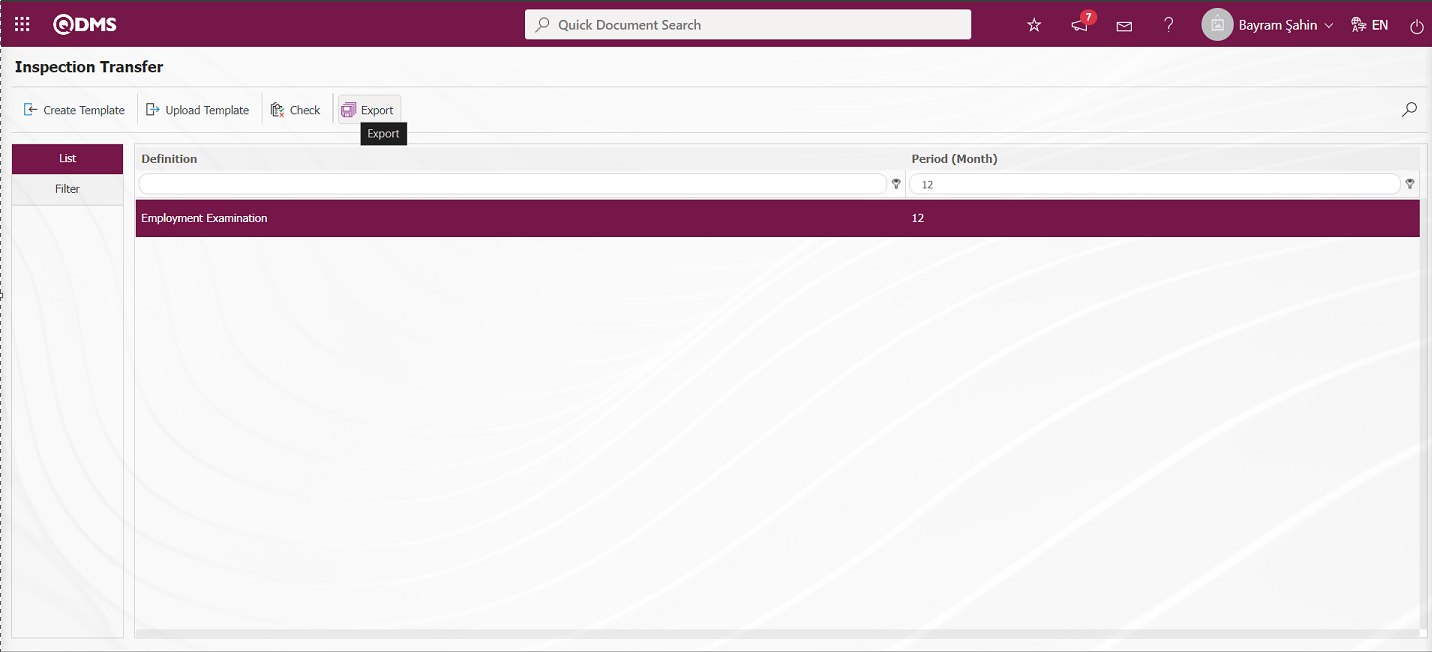
The system gives the message “Transfer is successful” and the inspection transfer process is completed.
5.2.17.8. Training Transfer
Menu Name: System Infrastructure Definitions/ BSID/ Configuration Settings/ Transfers/Training Transfer
In the Training Planning module, it is the menu where the trainings are transferred to the system in bulk.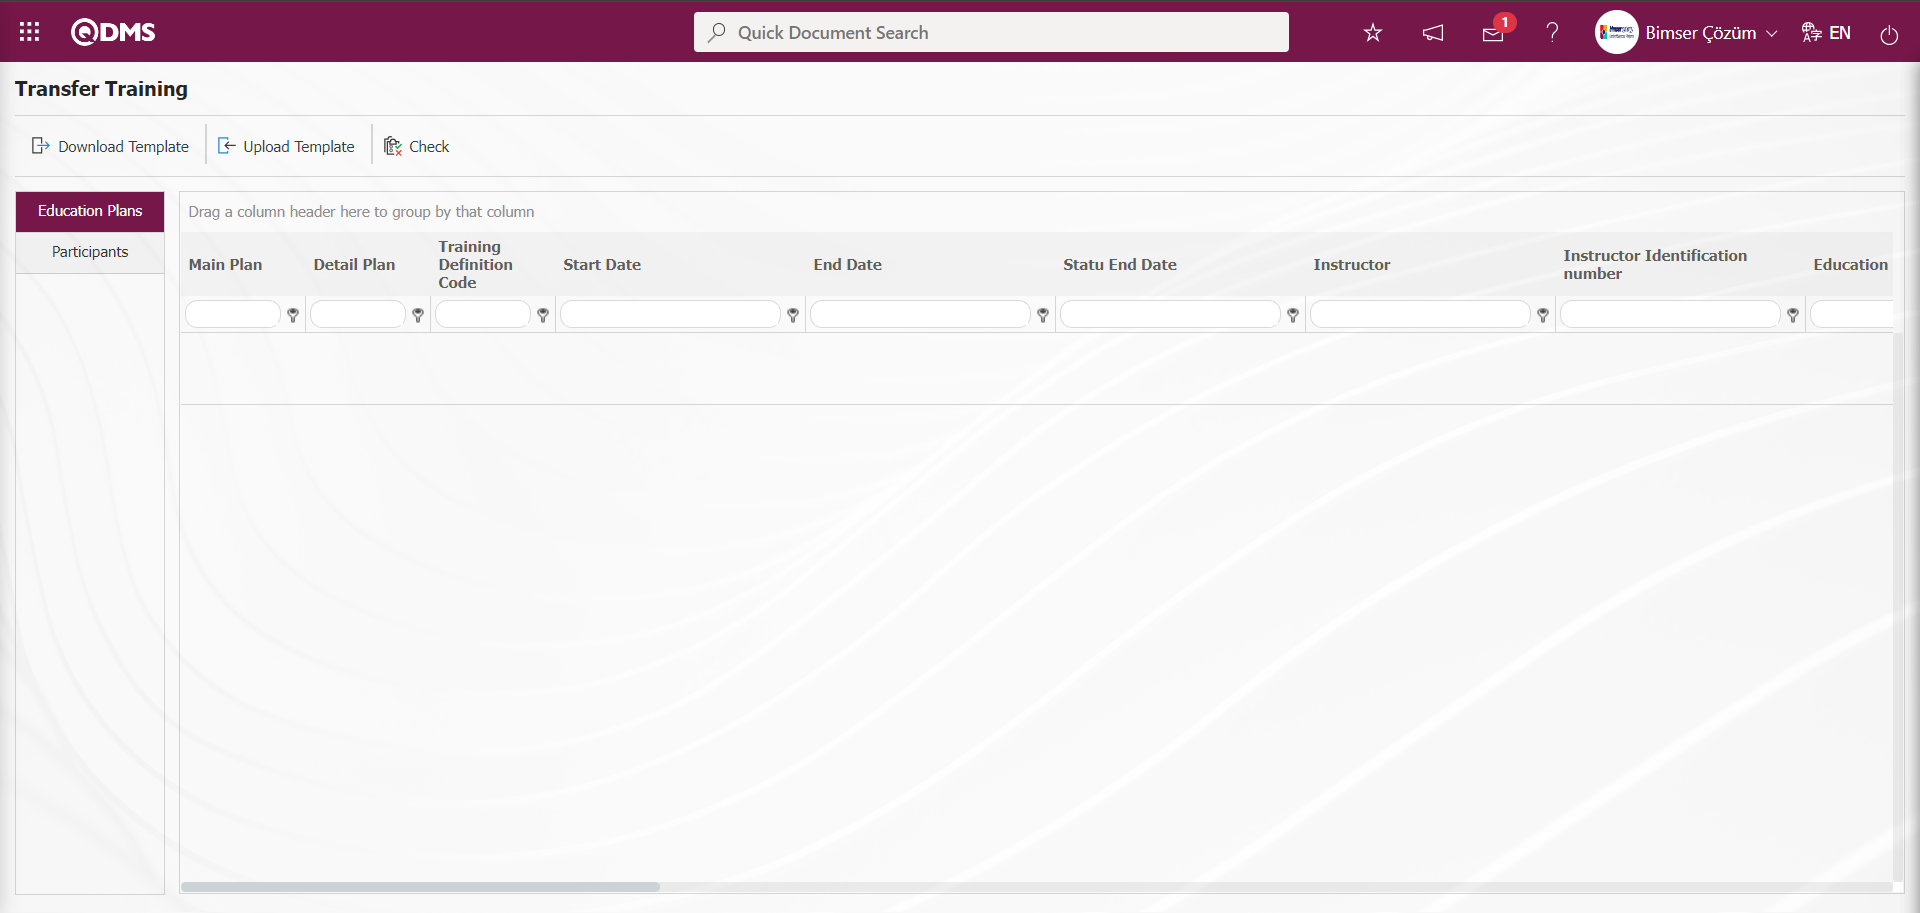
With the help of the buttons on the screen;
 : Training Transfer template is downloaded to the computer.
 : The filled Training Transfer template is uploaded to the system.
 : The training transfer template filled and uploaded to the system is checked to see if it gives an error or not.
: The transfer process is performed.
The Training Transfer template is downloaded with the button on the screen, after filling in the necessary information, the Training Transfer template is uploaded to the system with the button. In order to check the information entered, the button is used. If the transferred data is suitable for transfer, the Training transfer process is realized via the button.

The Transfer Training template is downloaded to the computer with the button on the Transfer Training screen. The relevant fields in the Transfer Training template are saved to the computer by typing the relevant information.
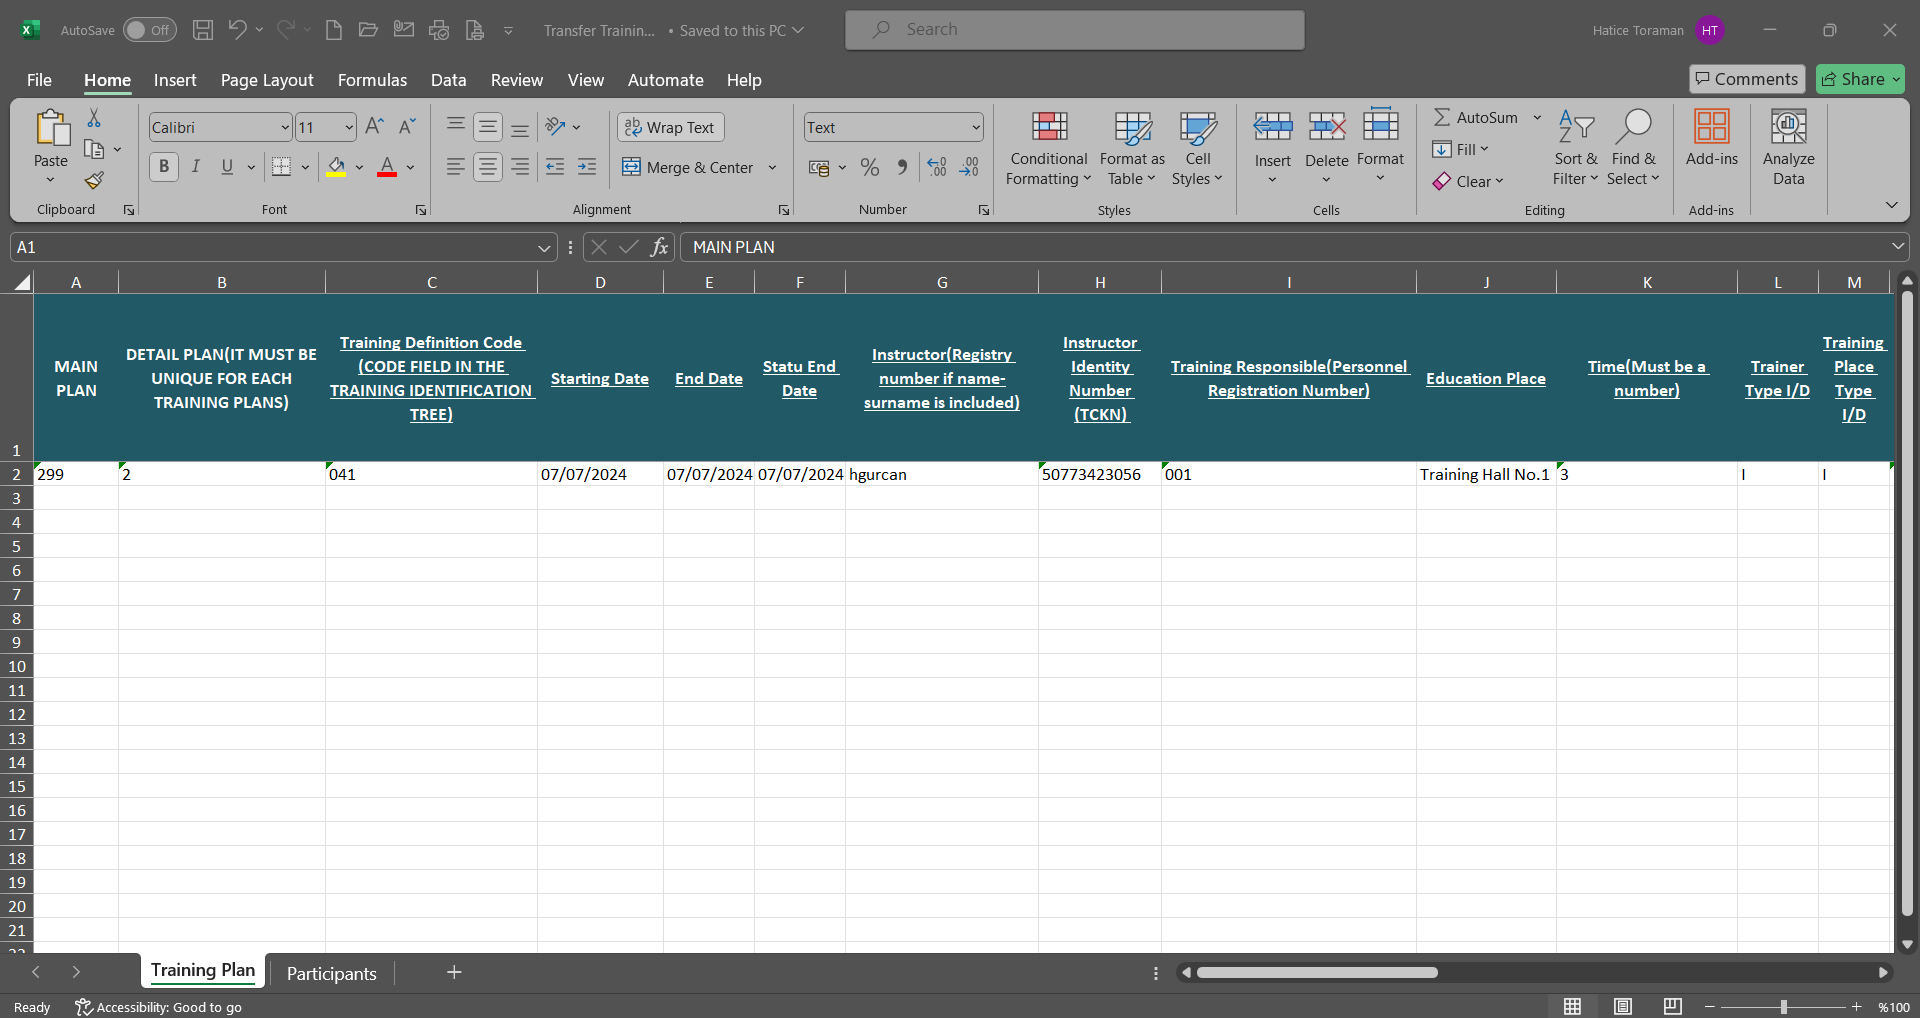
In the Participants tab of the Transfer Training template, the Master Plan and Detail Plan code information is filled in for each participant.

Click the  button on the Transfer Training screen.
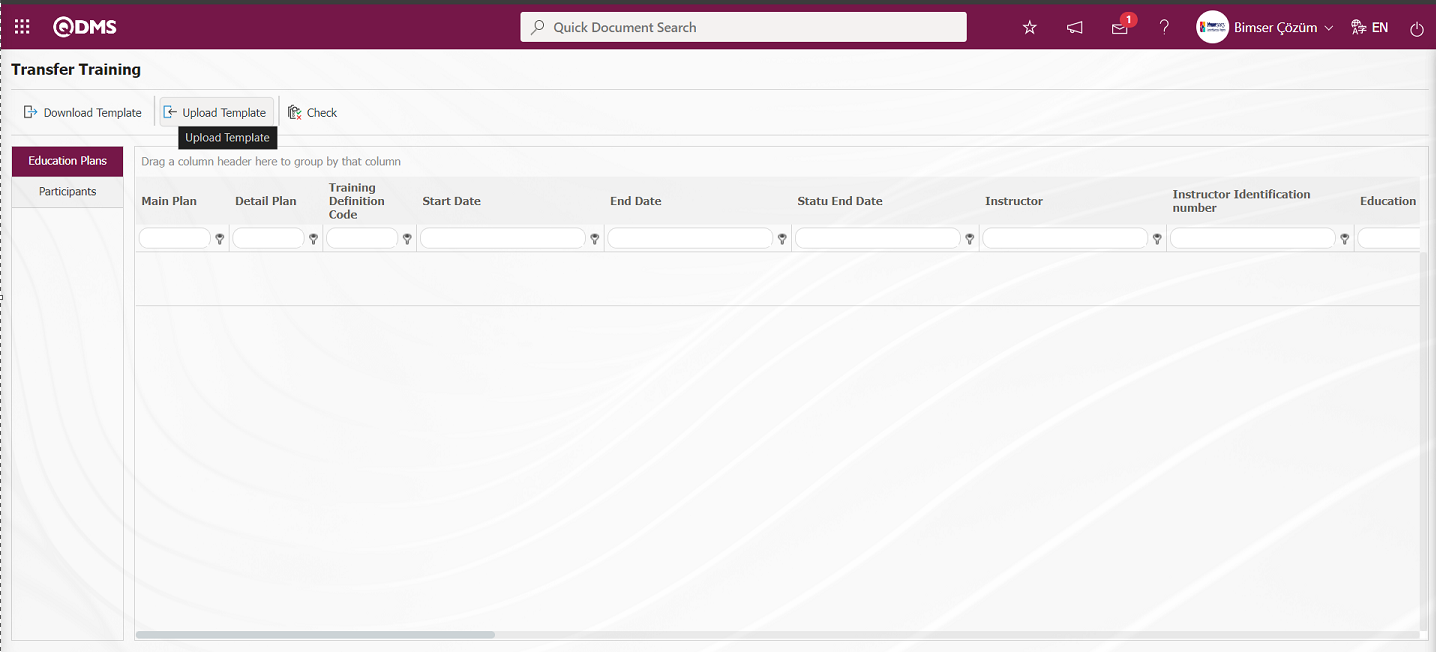
Click the “Browse” button on the Upload File screen.
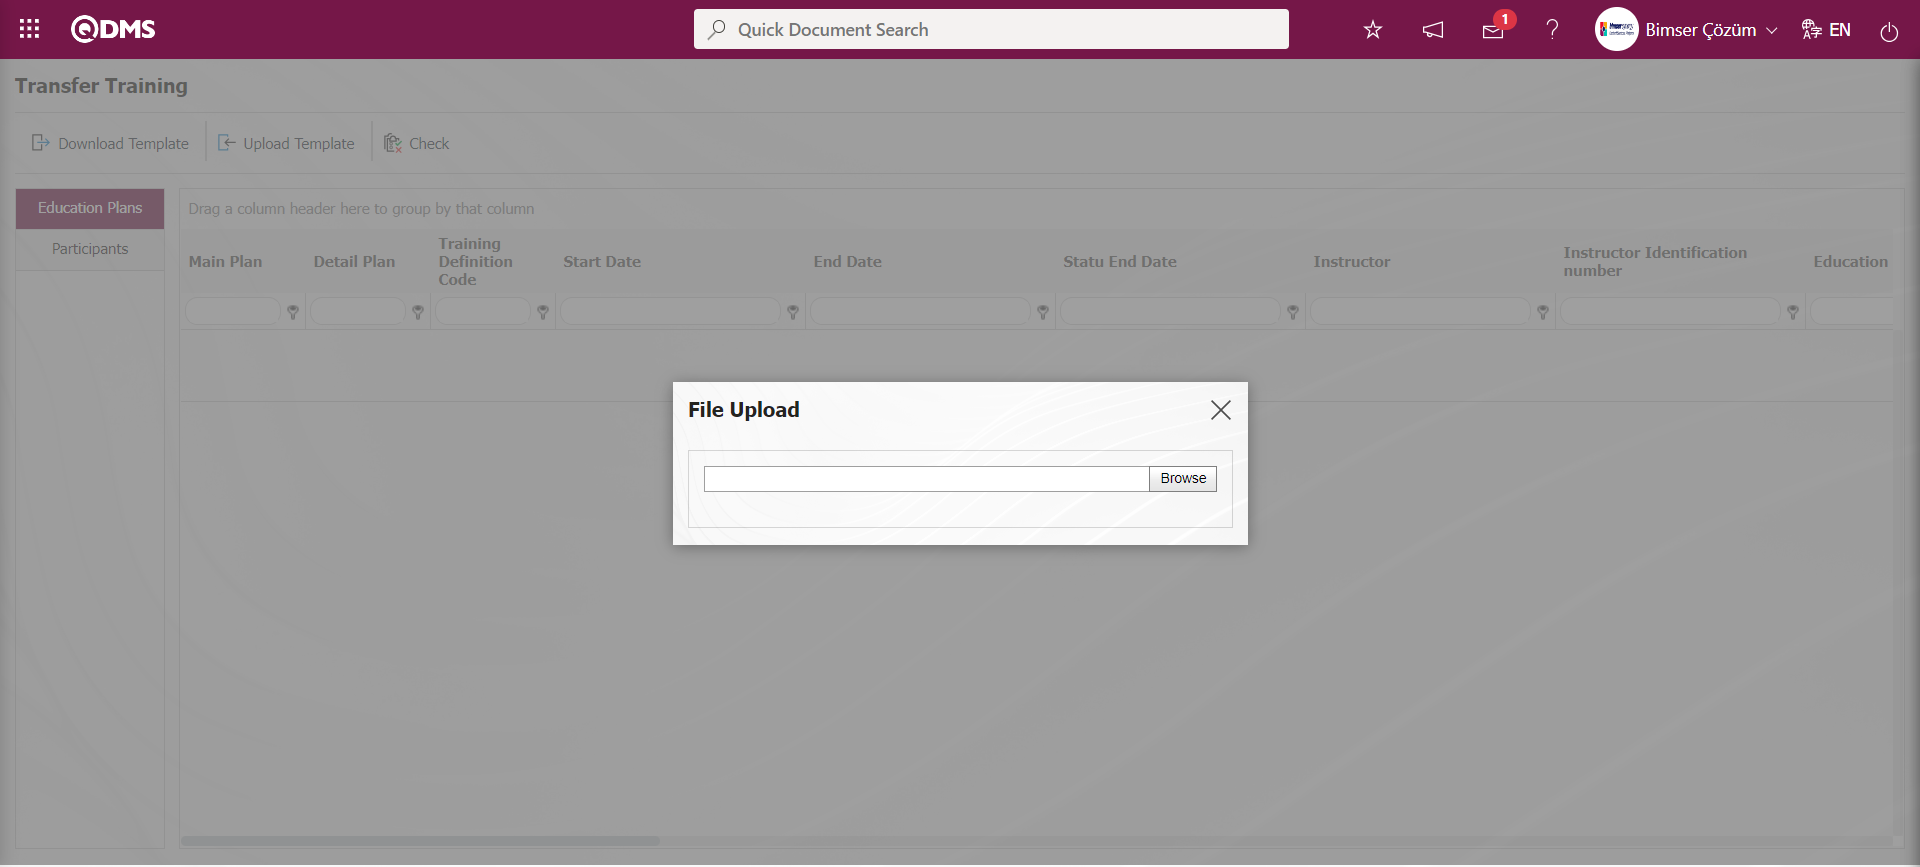 On the screen that opens, the filled Transfer Training template is selected.
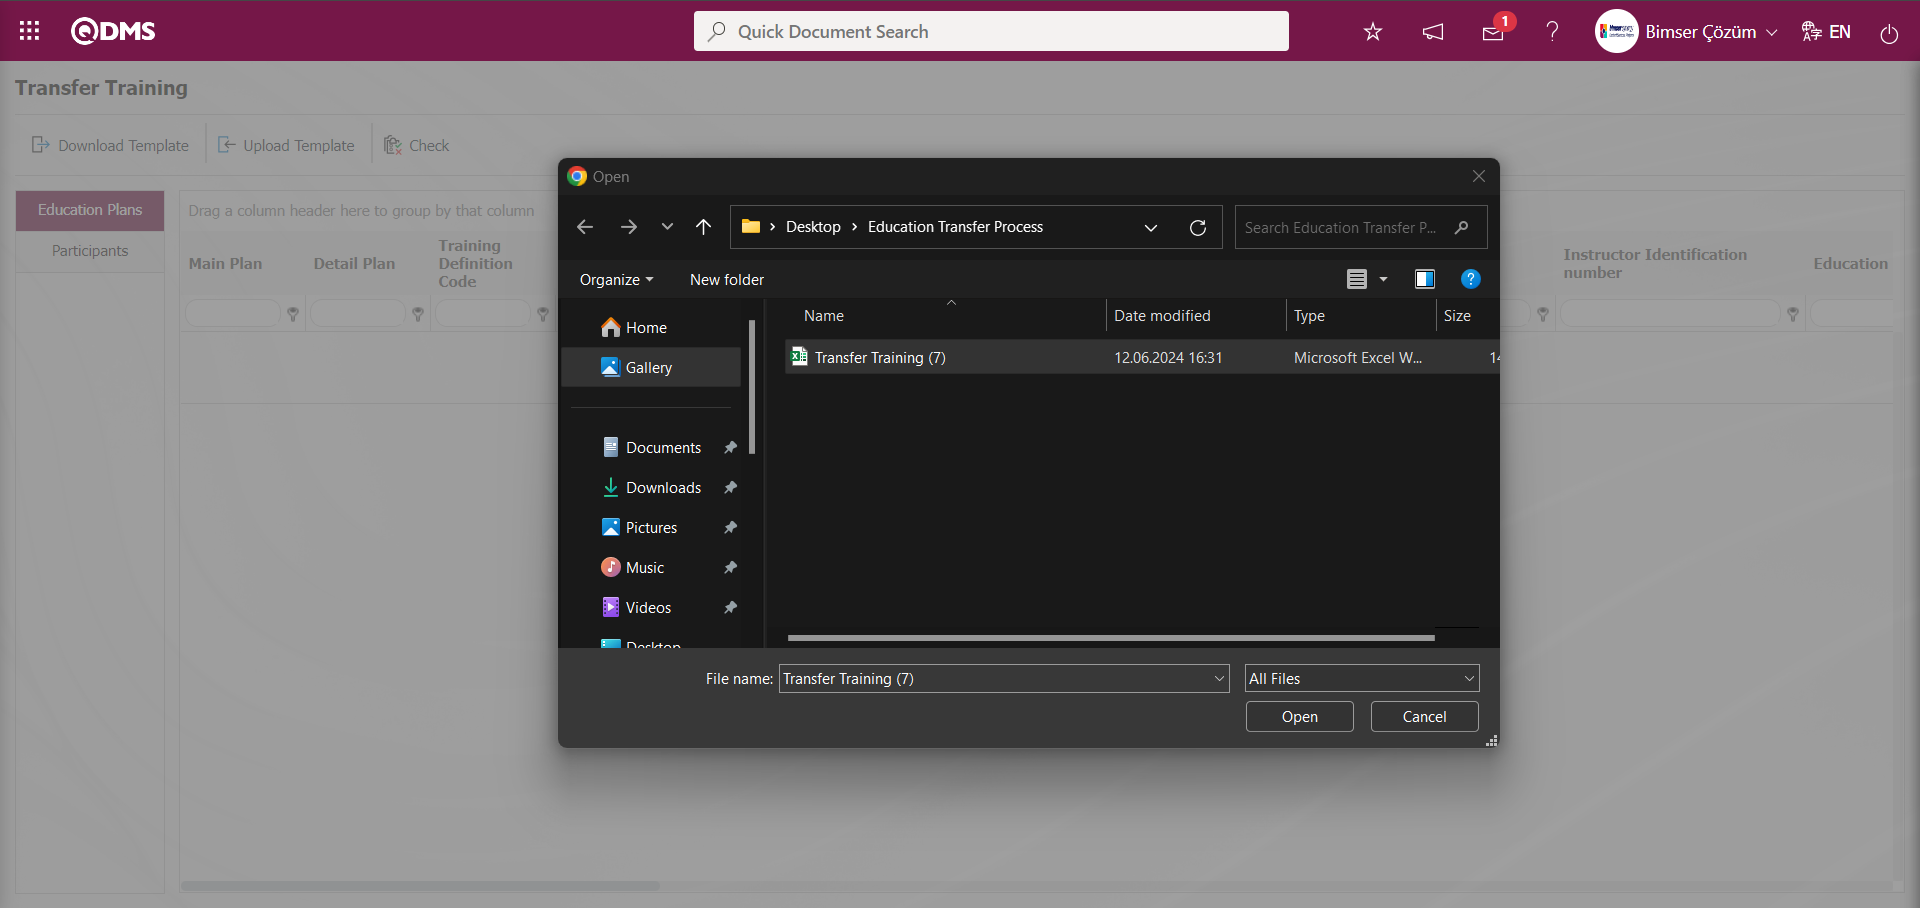
On the Transfer Training screen, the  button is clicked to check whether the template created and uploaded to the system gives an error or not.
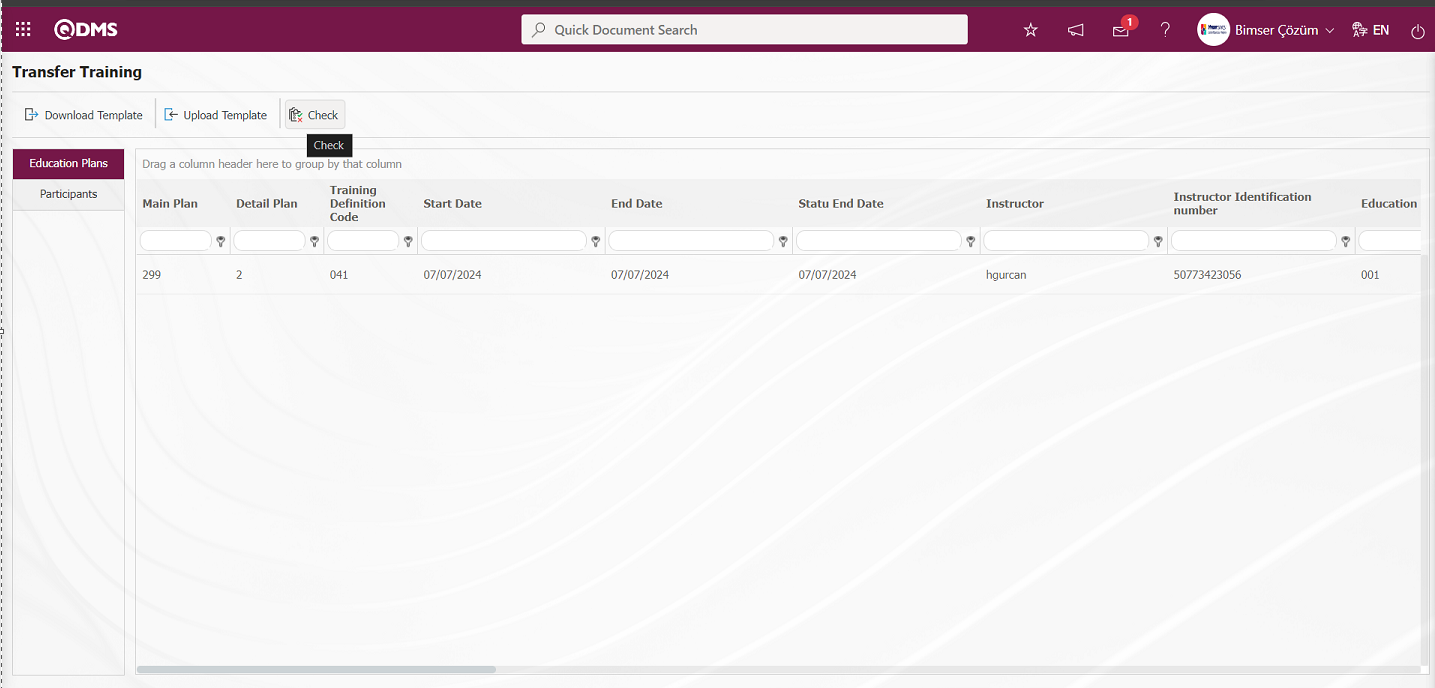
The system displays the message “Data is suitable for transfer”.
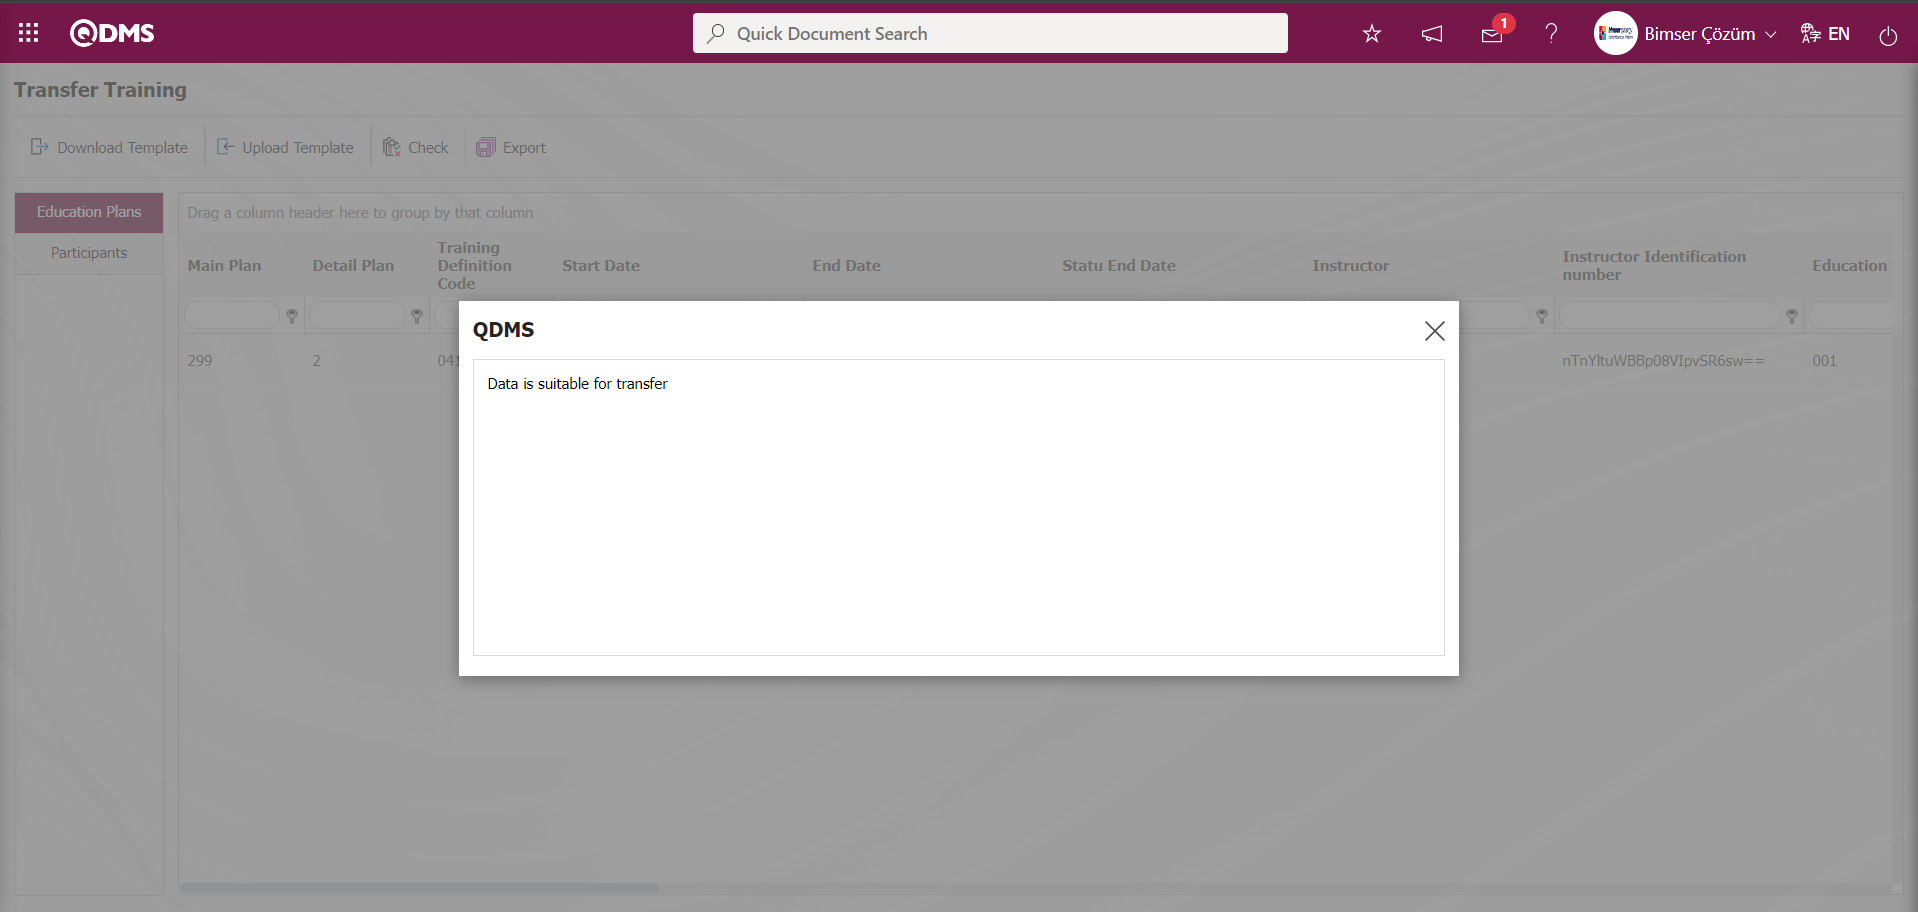
On the Transfer Training screen, click on the button to transfer the training.
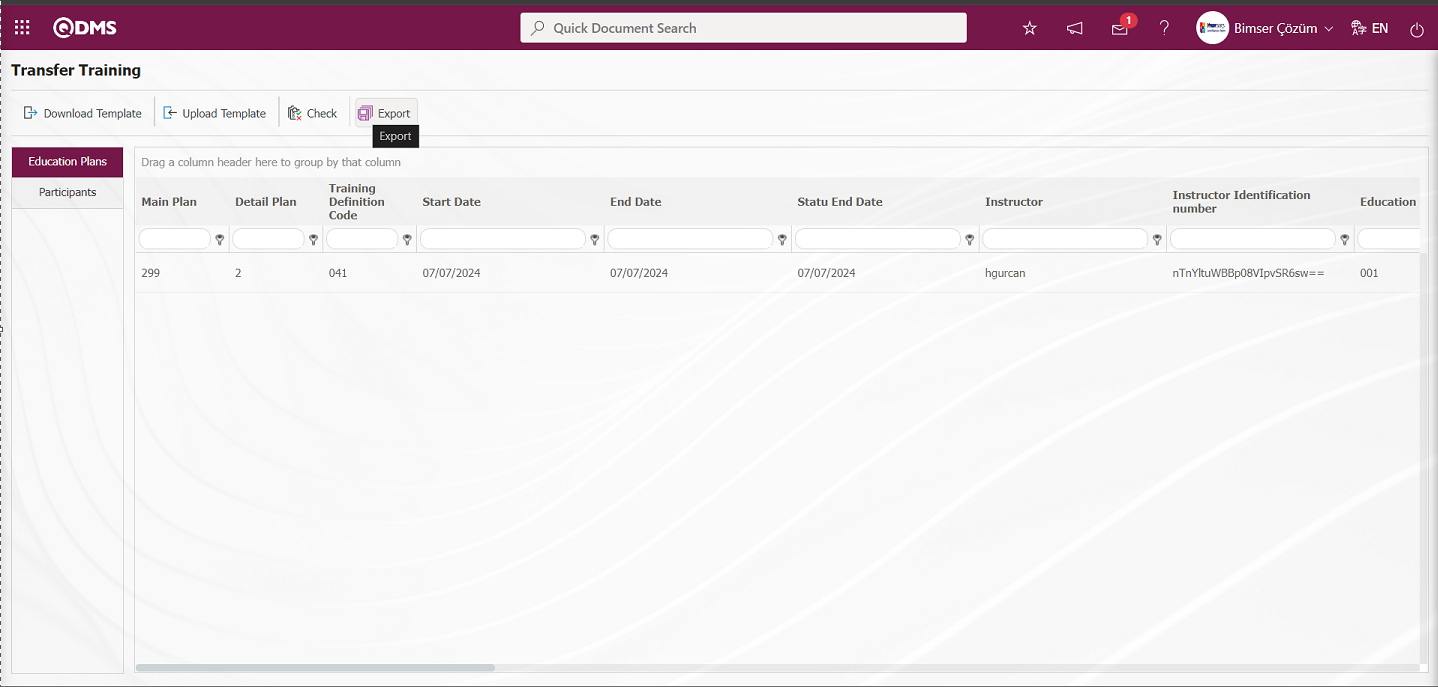
The training transfer process is performed by the system by giving the message “Data Transferred”.
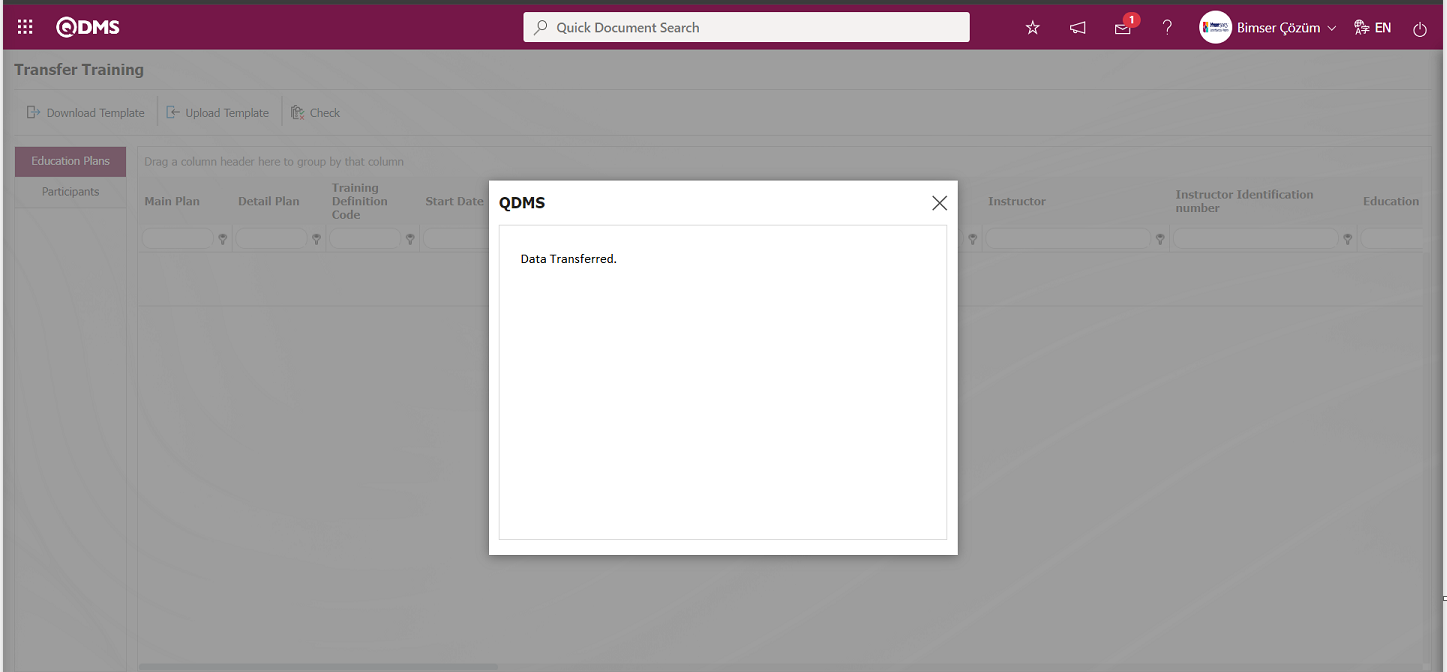
5.2.17.9. Control Transfer
Menu Name: System Infrastructure Definitions/ BSID/ Configuration Settings/ Transfers/Control Transfer
This is the menu where the control transfer process is performed. “Control Transfer” menu is used if it is desired to transfer the ‘EK-A control items within the scope of Information Security or the control items of the company to the system in bulk.
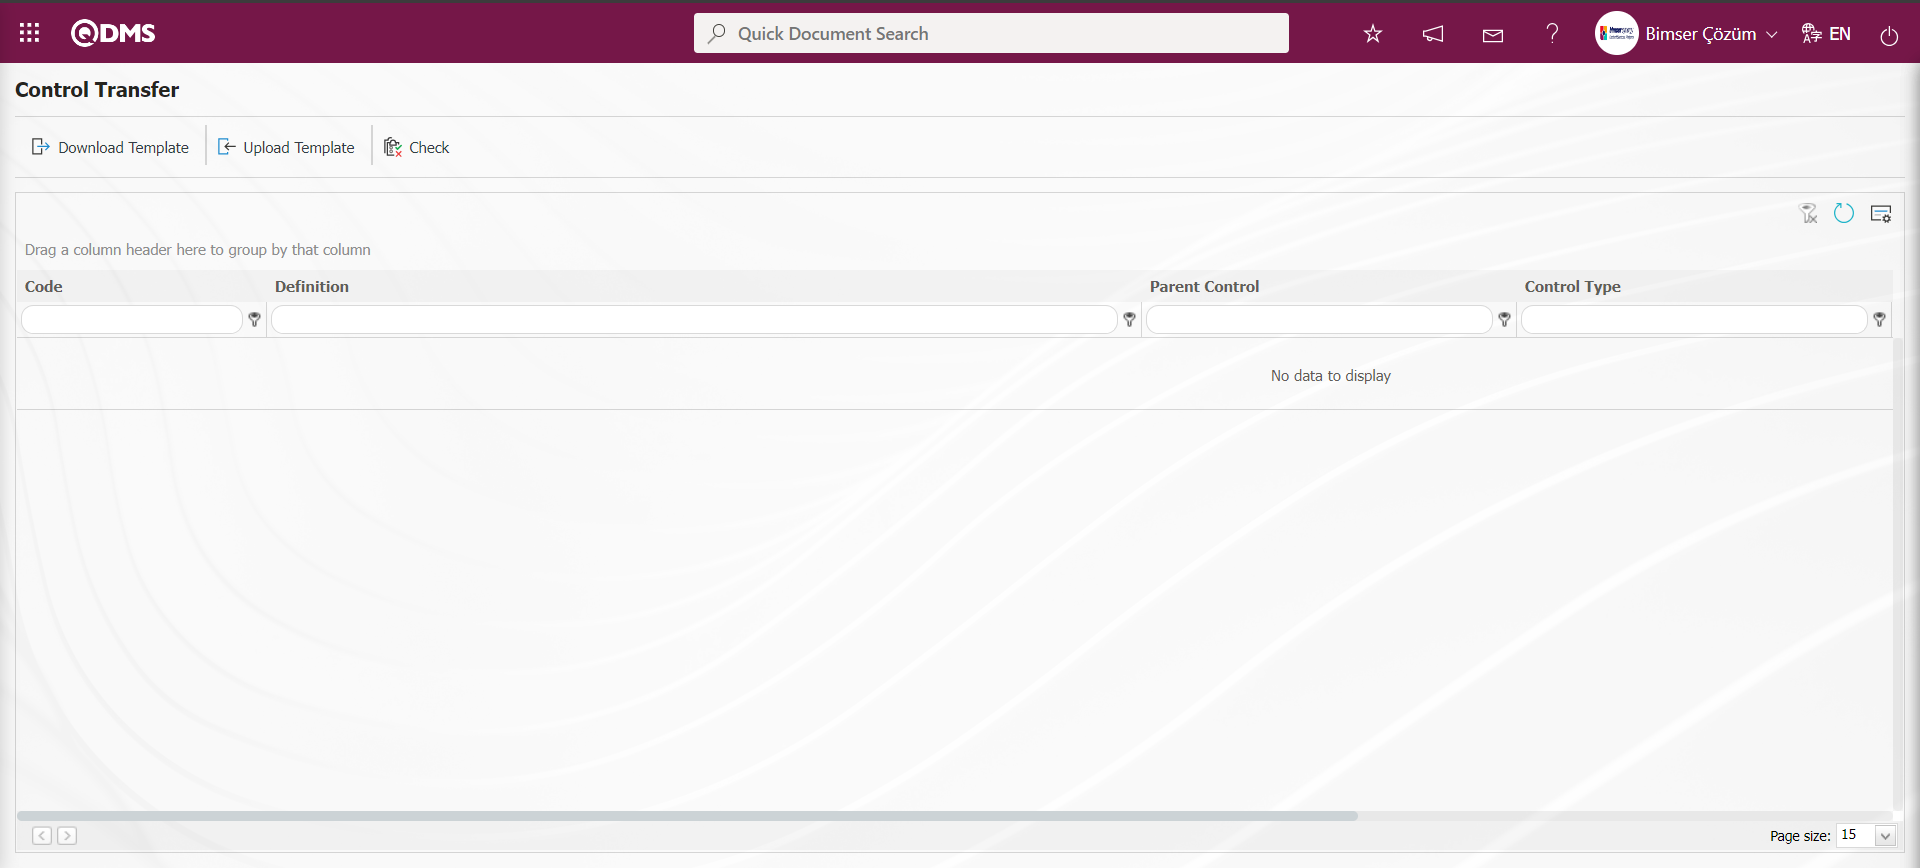
With the help of the buttons on the screen;
 : Control Transfer template is downloaded to the computer.
 : The filled Control Transfer template is uploaded to the system.
 : Check whether the Control Transfer template filled and uploaded to the system gives an error or not.
: The transfer process is performed.
The Control Transfer template is downloaded with the button on the screen, after filling in the necessary information, the Control Transfer template is uploaded to the system with the button. The button is used to check the information entered. If the transferred data is suitable for transfer, the Control transfer process is realized via the button.
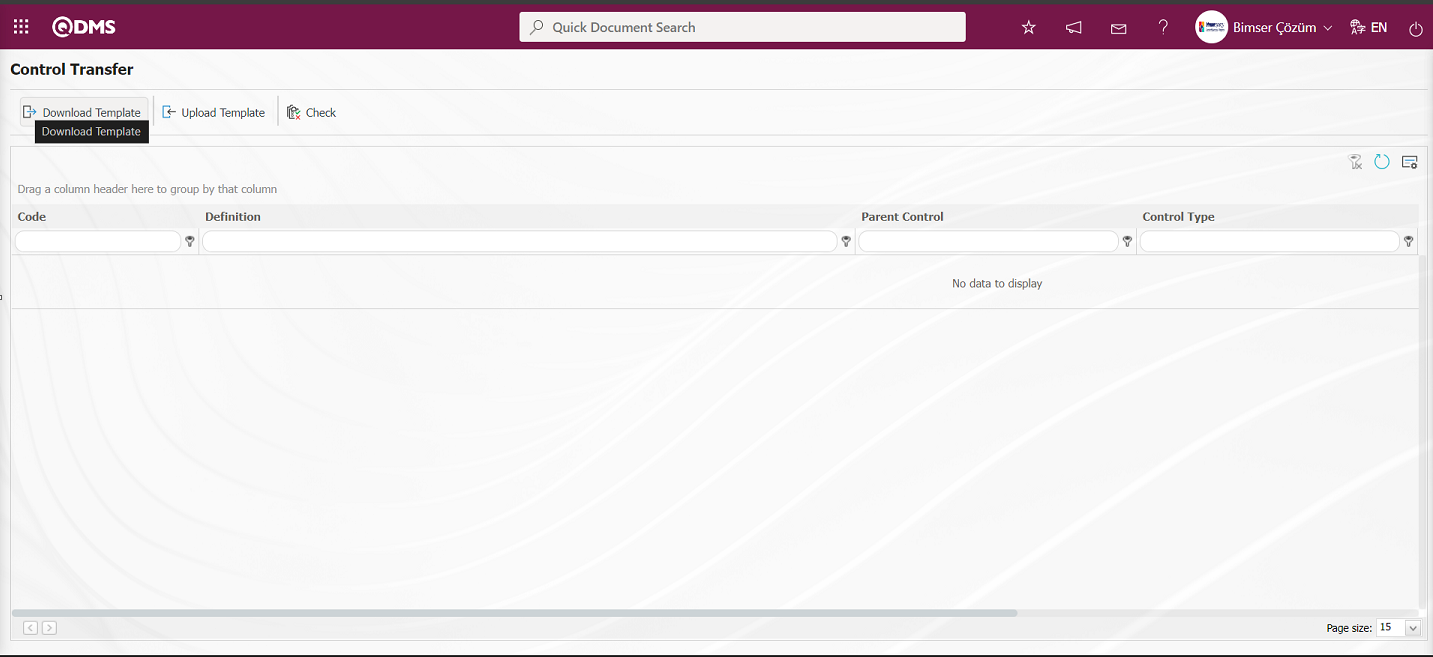
On the Control Transfer screen, the Control Transfer template is downloaded to the computer with the  button. The relevant fields in the Control Transfer template are saved to the computer by writing the relevant information.
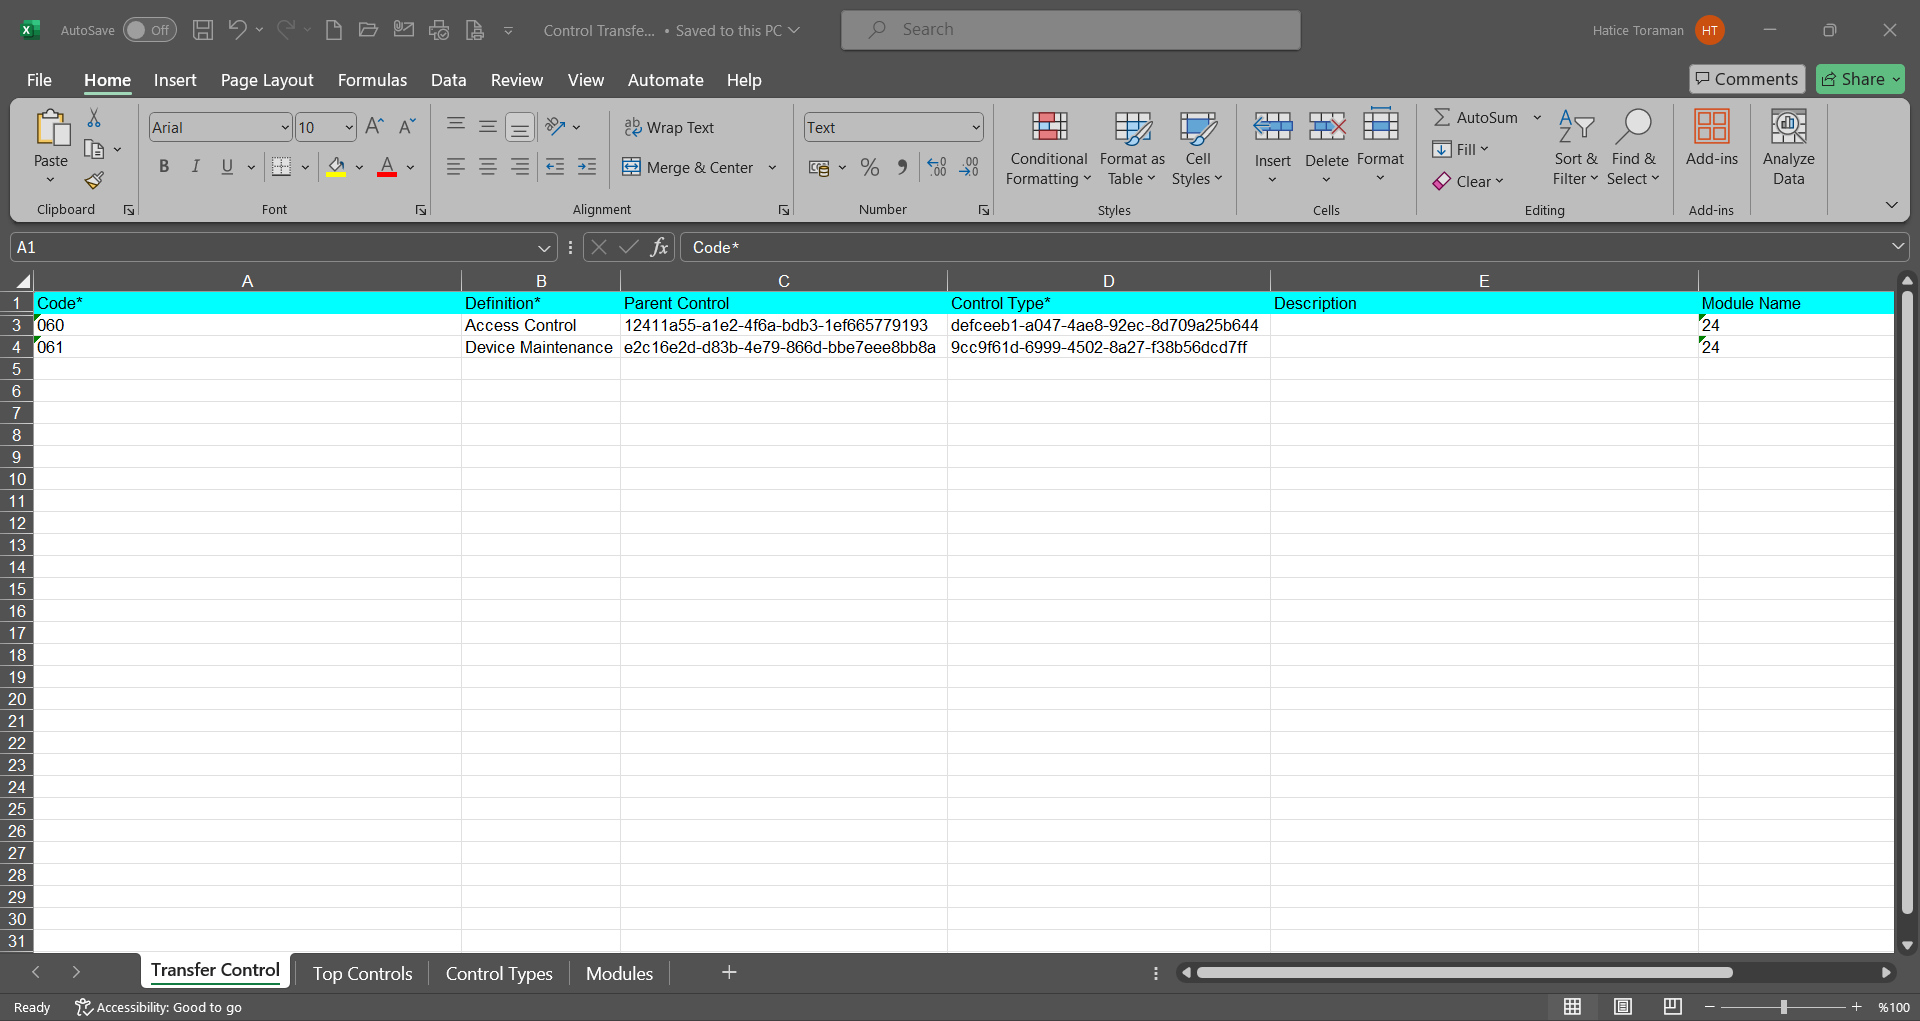
In the Control Transfer template, the code information of the top controls and control types from the Top Controls, Control Types tabs are written in the relevant fields. In the Modules tab, Module Id information is written to the template.
Click the  button on the Control Transfer screen.
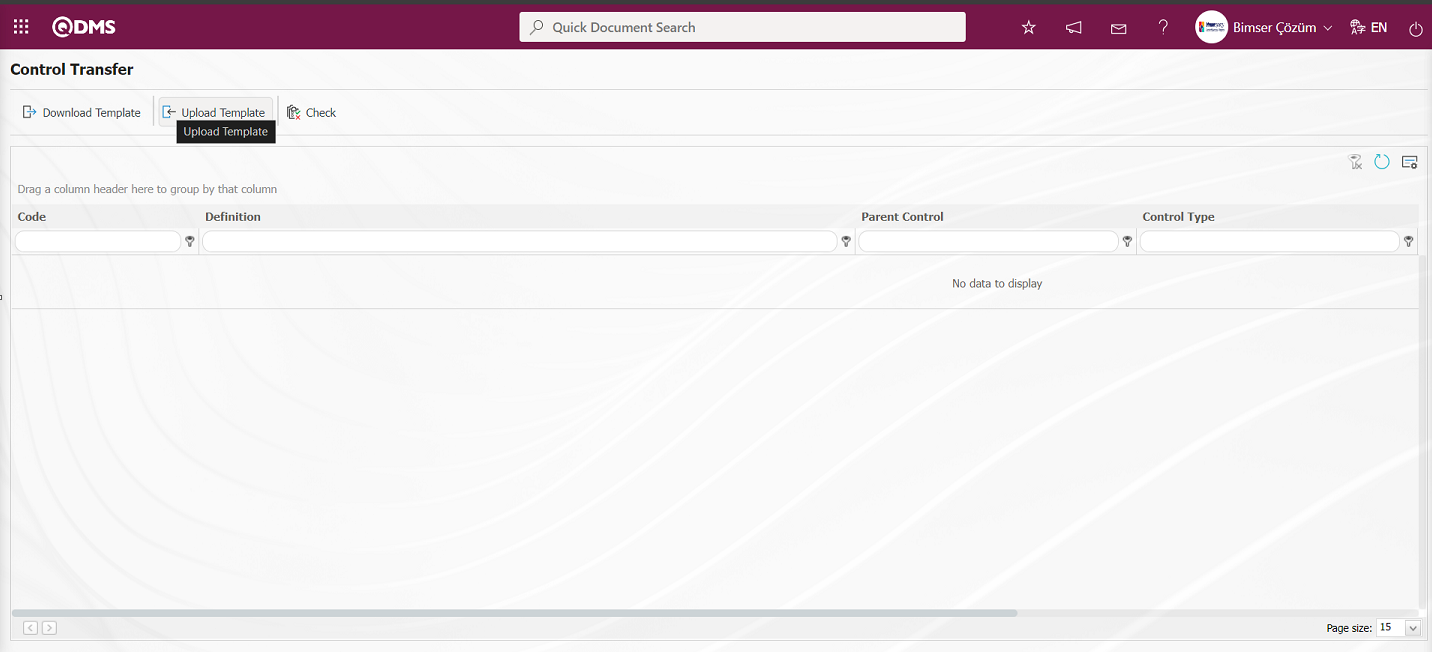 Click the “Browse” button on the Upload File screen
 On the screen that opens, the filled Control Transfer template is selected.
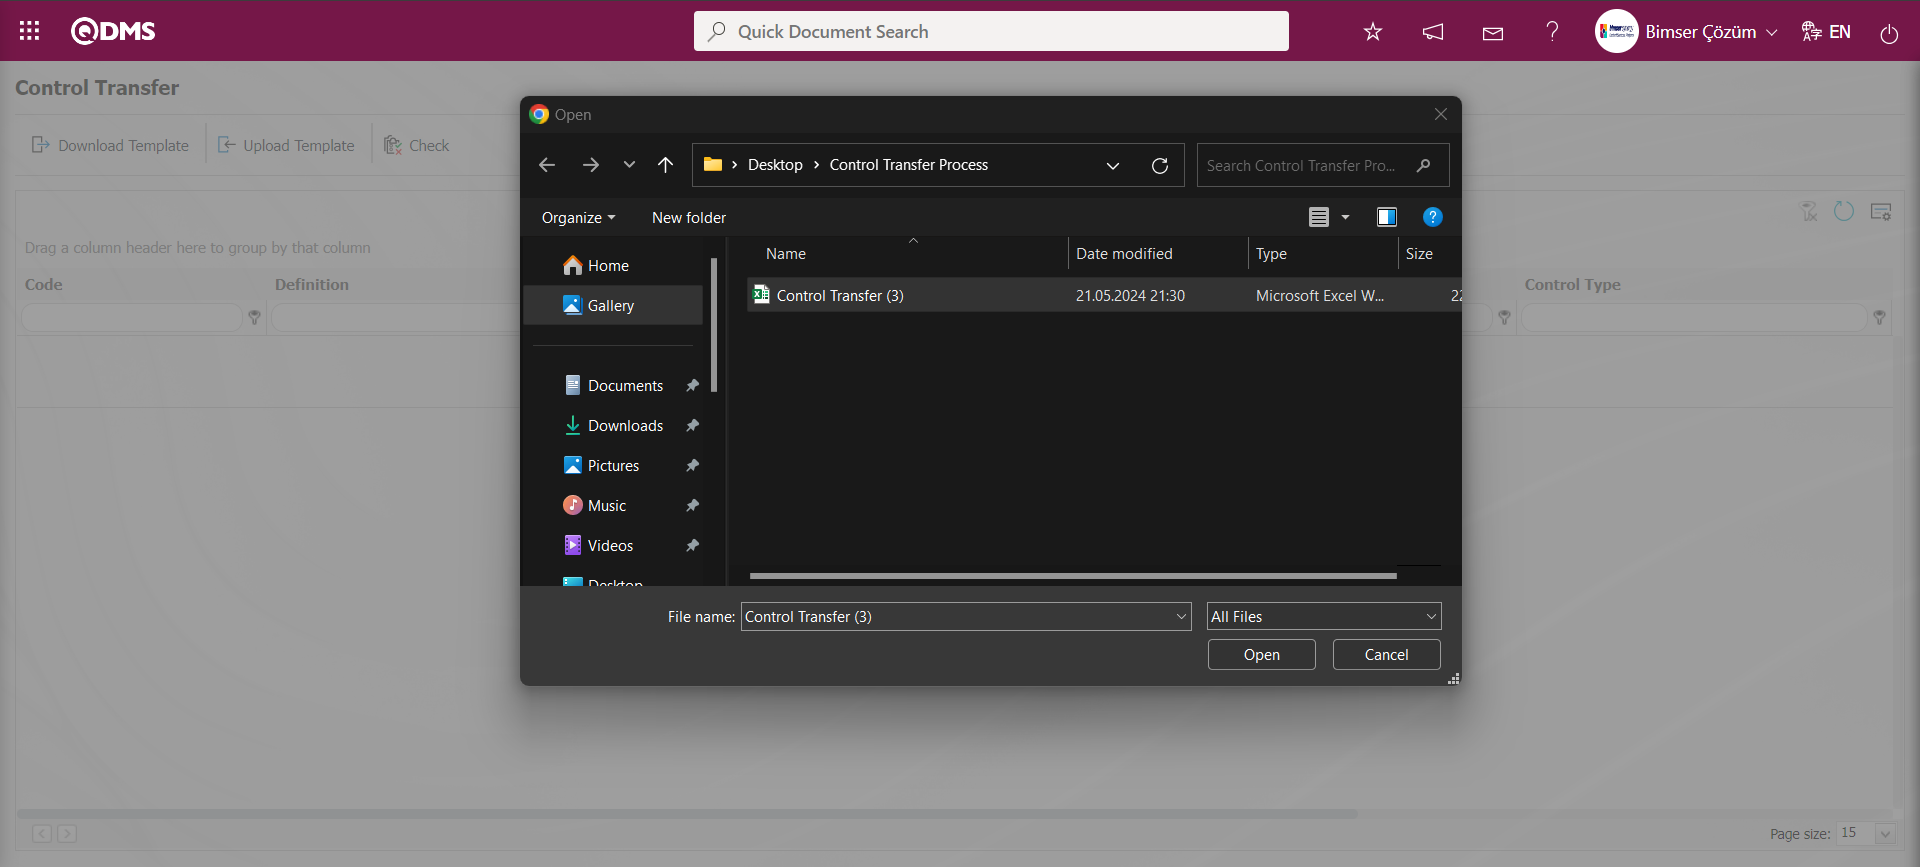
On the Control Transfer screen, the  button is clicked to check whether the template created and uploaded to the system gives an error or not.
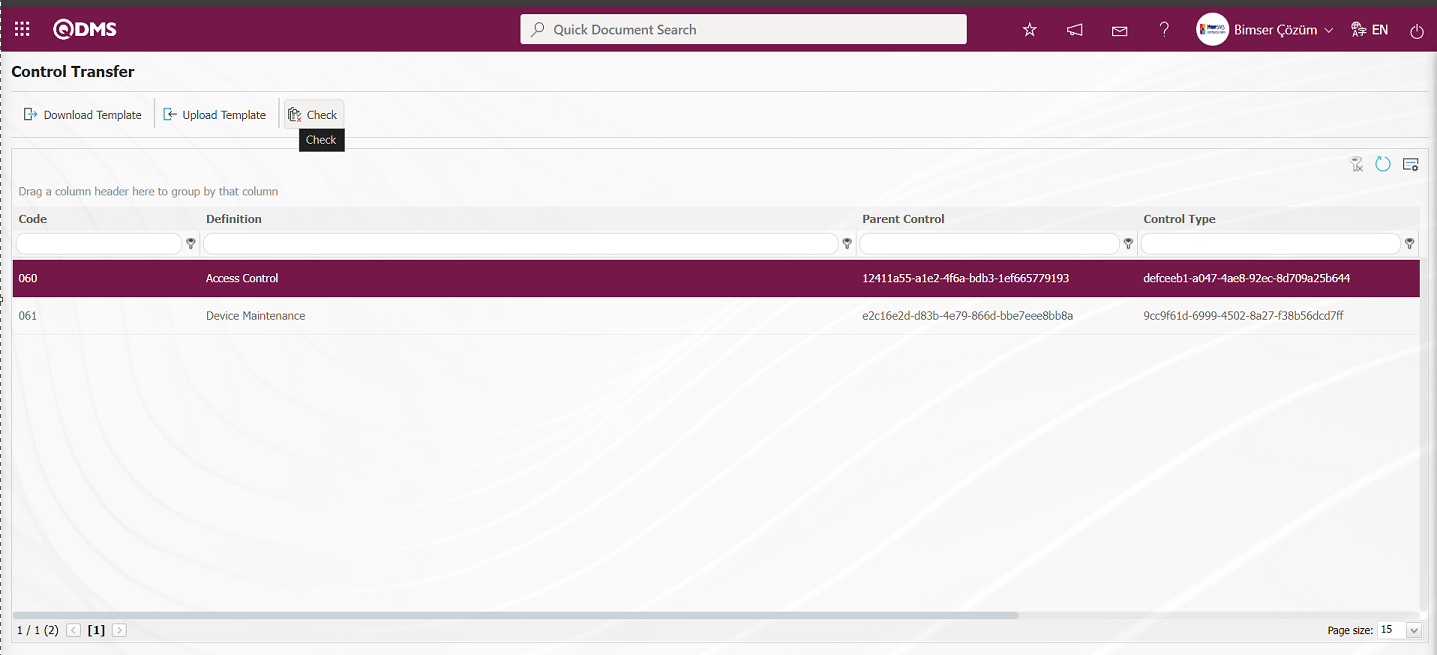
The system displays the message “Data is suitable for transfer”.
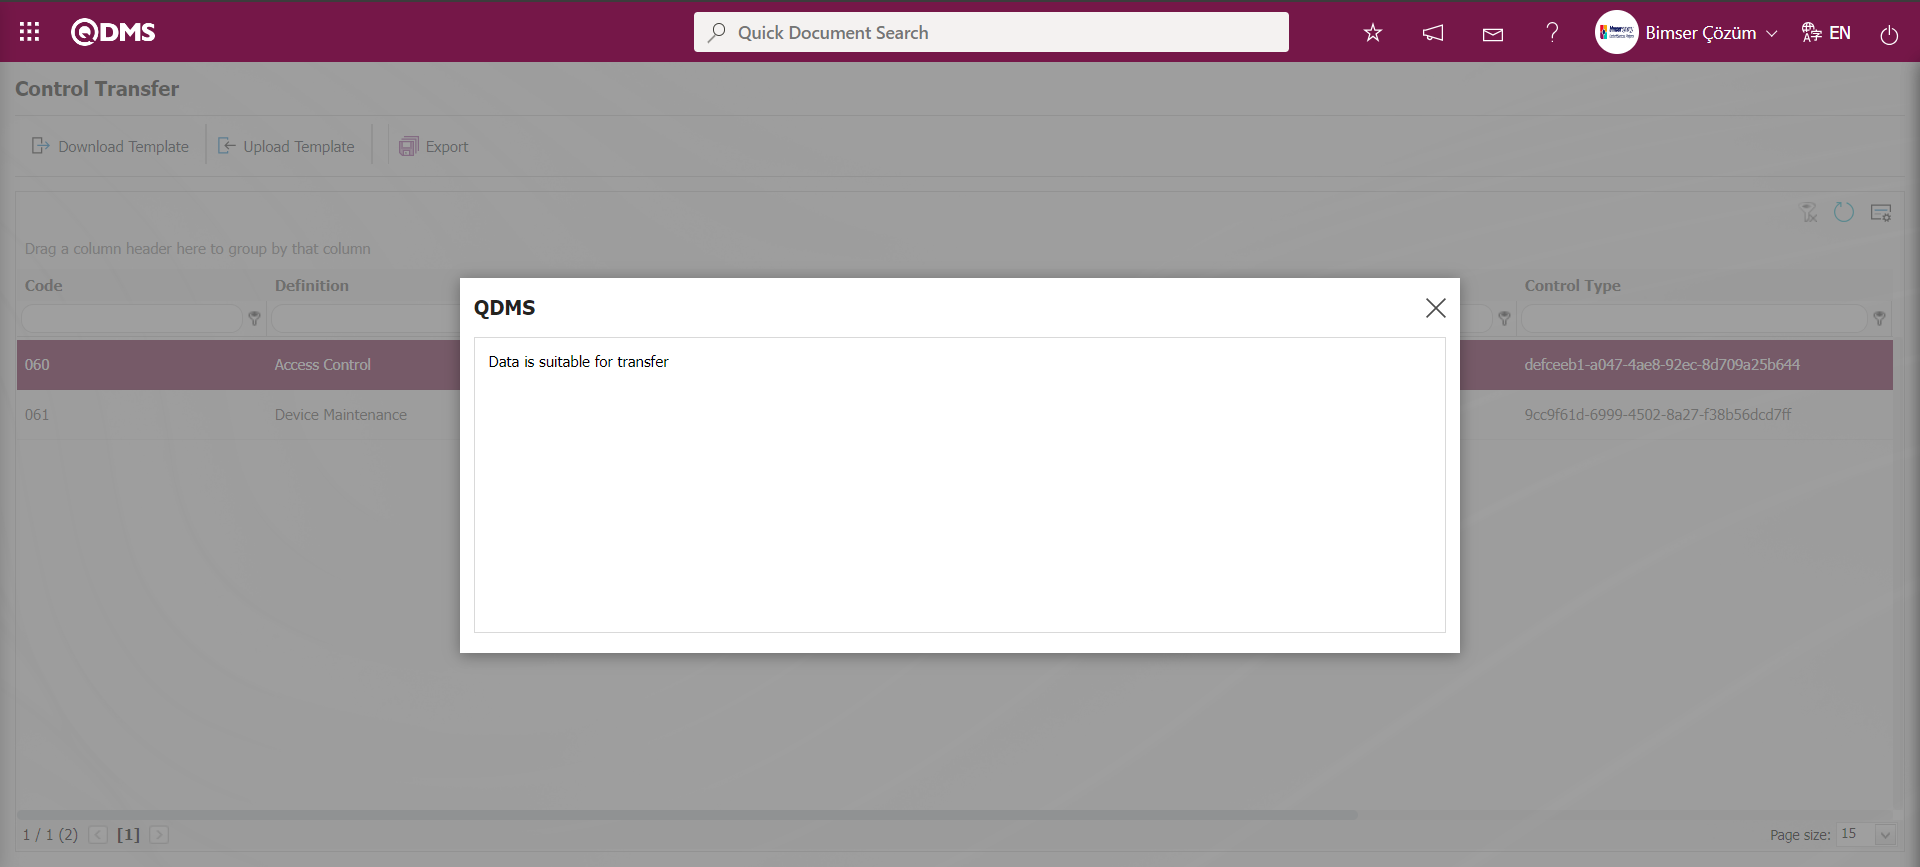
Control Transfer operation is performed by clicking the button on the Control Transfer screen.
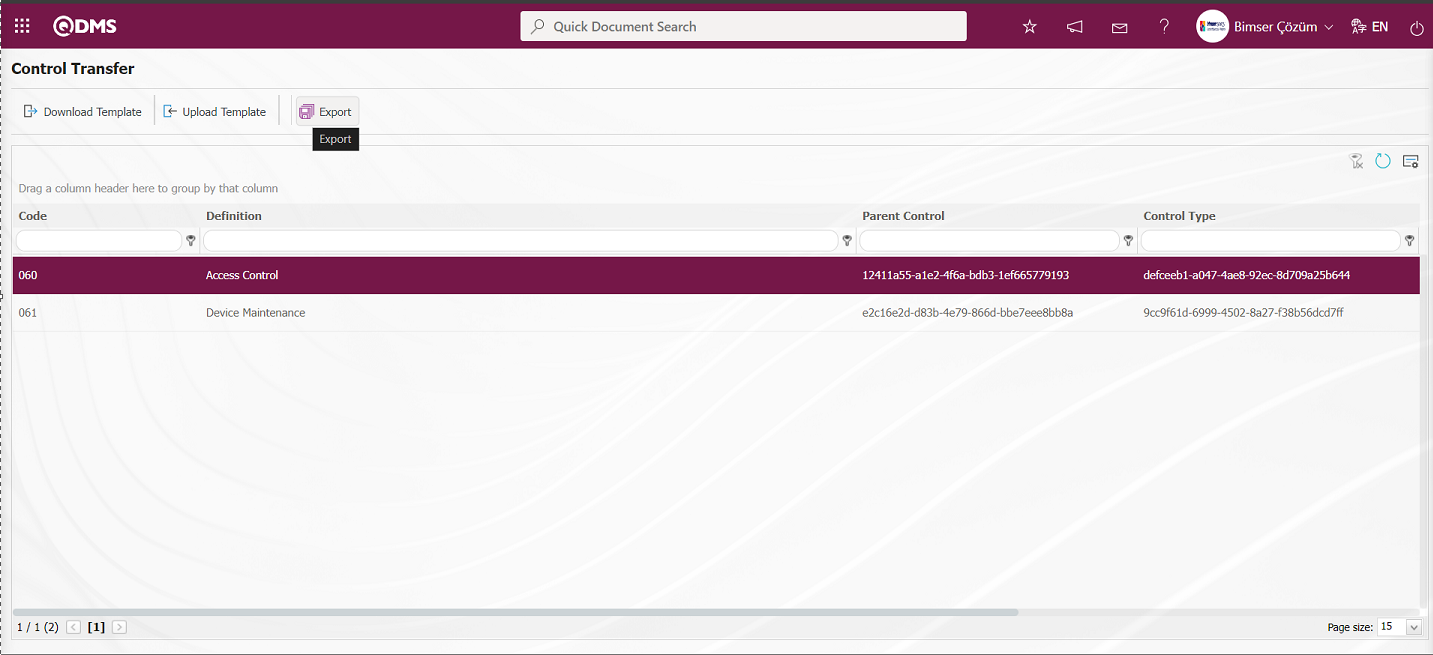
The system gives the message “Controls have been transferred successfully” and the number of Controls transferred is included in the message. The transferred controls are displayed in the Control definition menu of the module written in the transfer template. Since Information Security Assessment Module Id is written as the module, the transferred controls are displayed in the Control Identification menu of this module. Since Information Security Risk Assessment Module Id is written as the module, the transferred controls are displayed in the Control Identification menu of this module.
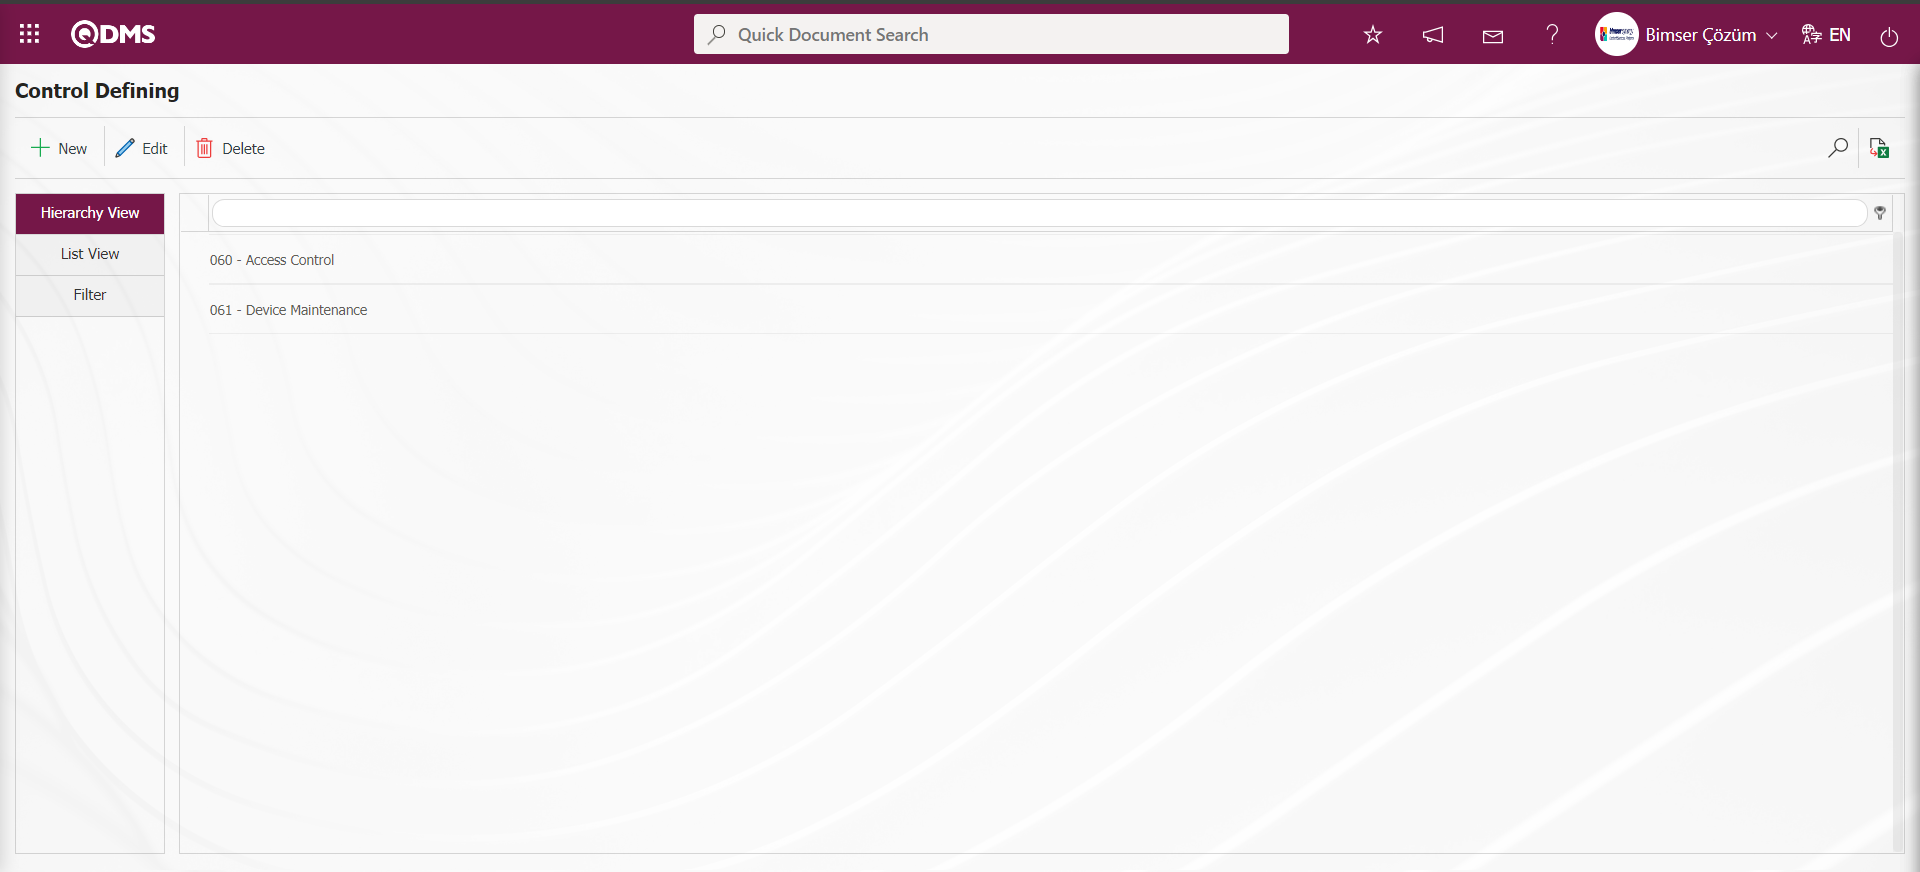
5.2.17.10. Field Detection Question Transfer
Menu Name: System Infrastructure Definitions/ BSID/ Configuration Settings/ Transfers/Field Detection Question Transfer
It is the menu where the questions to be asked in the field audit in the Field Detection Module are transferred in bulk.
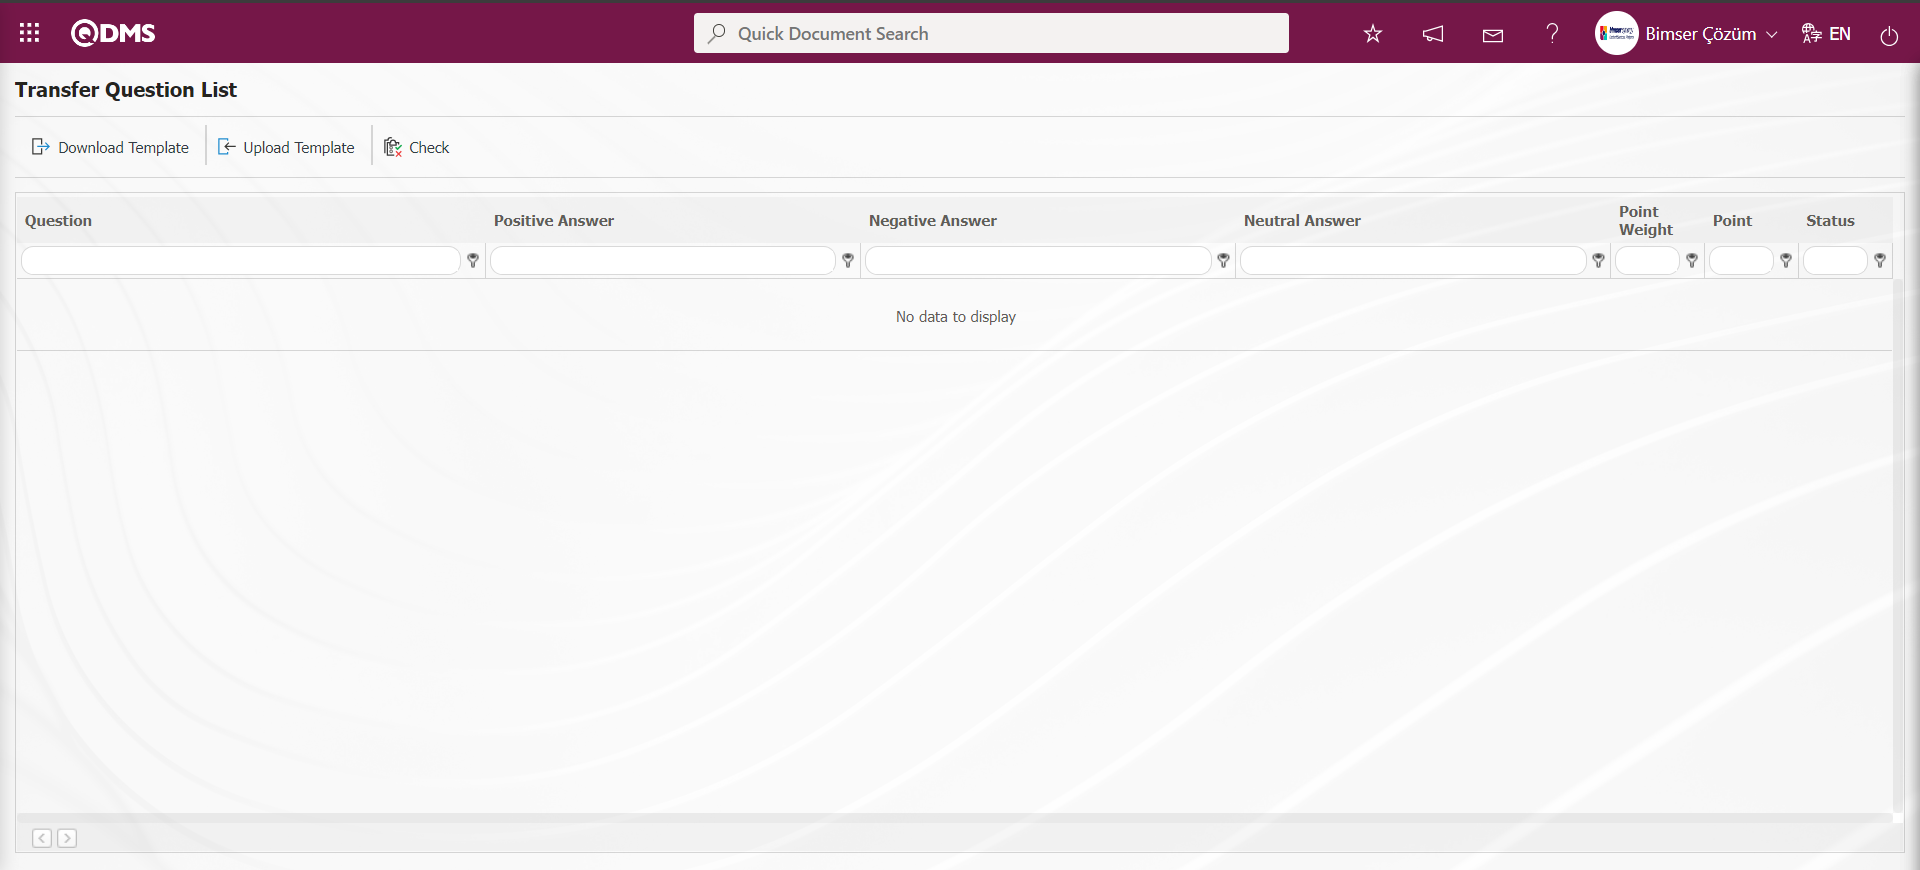
With the help of the buttons on the screen;
: The transfer template is downloaded to the computer.
: The filled Transfer template is uploaded to the system.
: Check whether the Transfer template created and uploaded to the system gives an error or not.
: The transfer process is performed.
The transfer template is downloaded with the button on the screen, after filling in the required information, the transfer template is uploaded to the system with the button. In order to check the entered information, button is used. If the transferred data is suitable for transfer, the question transfer process is realized via the button.

On the Transfer Question List screen, the transfer template is downloaded to the computer with the button. The relevant fields in the transfer template are saved to the computer by writing the relevant information.
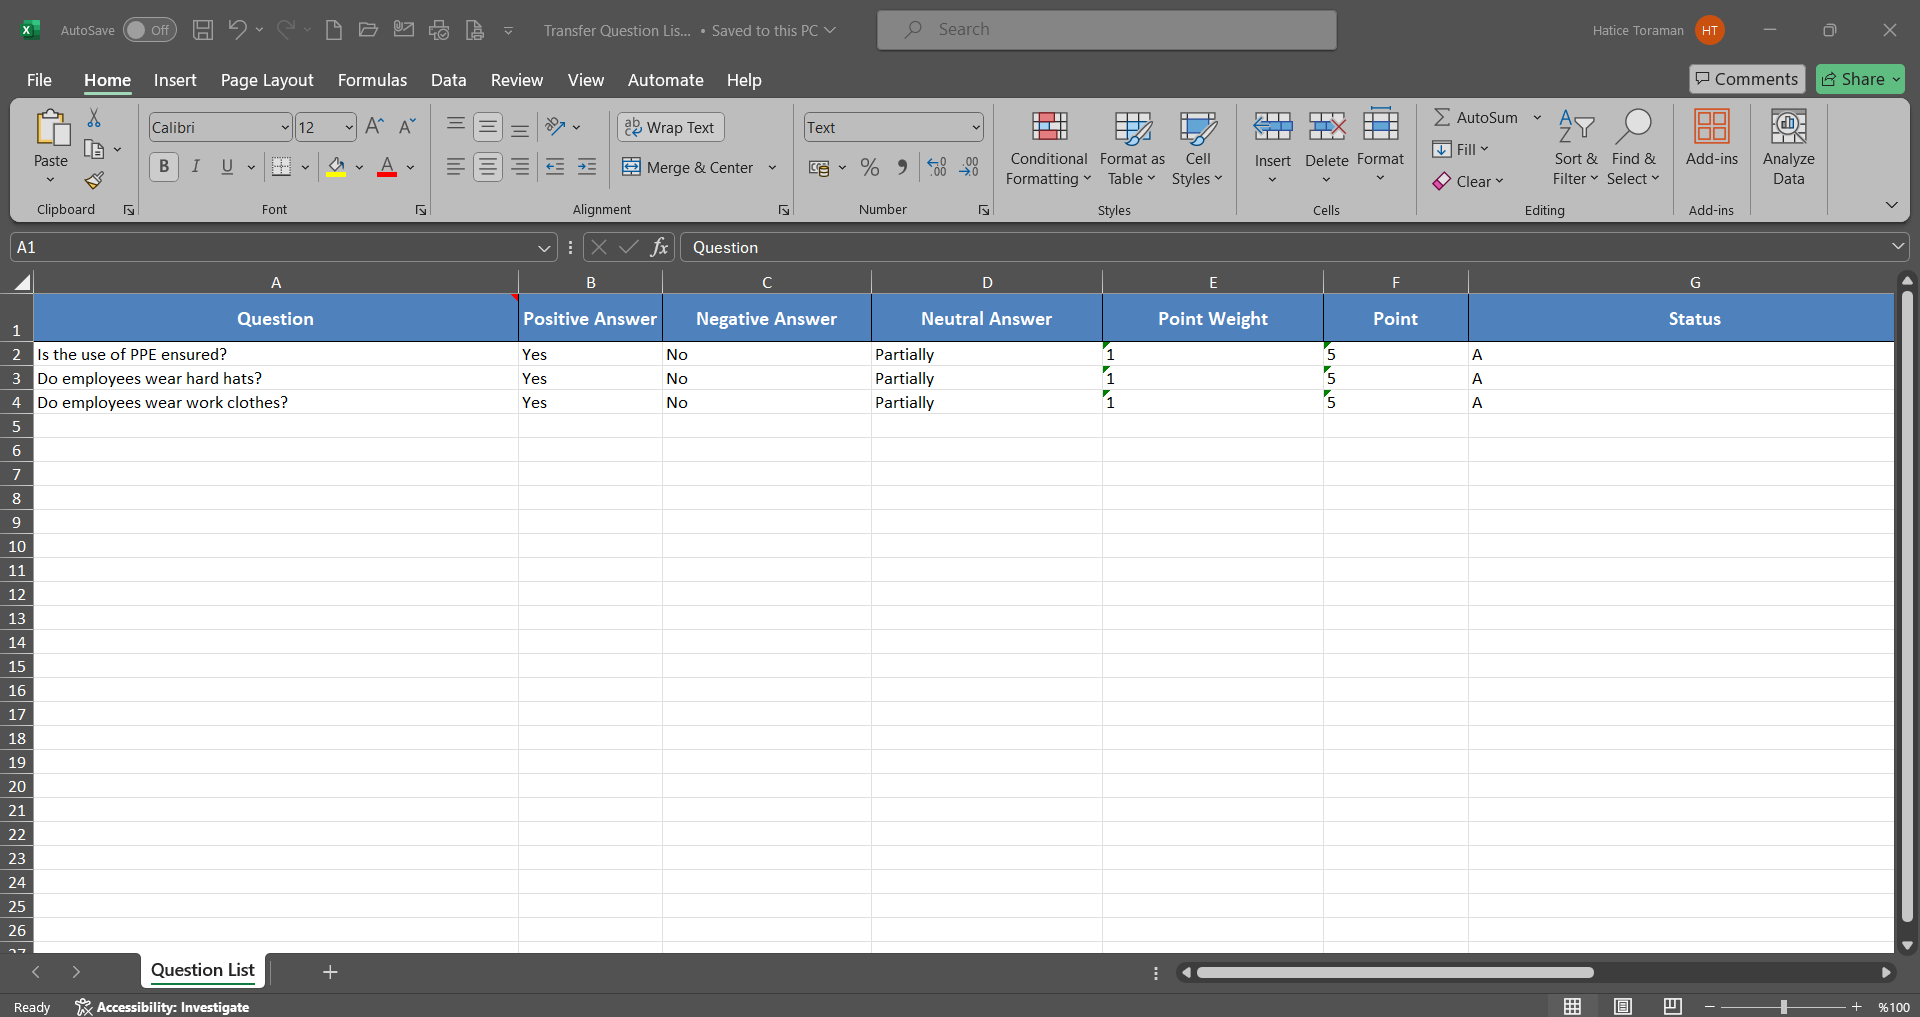
Click the  button on the Transfer Question List screen.

Click the “Browse” button on the Upload File screen.

Select the filled Transfer template on the screen that opens.
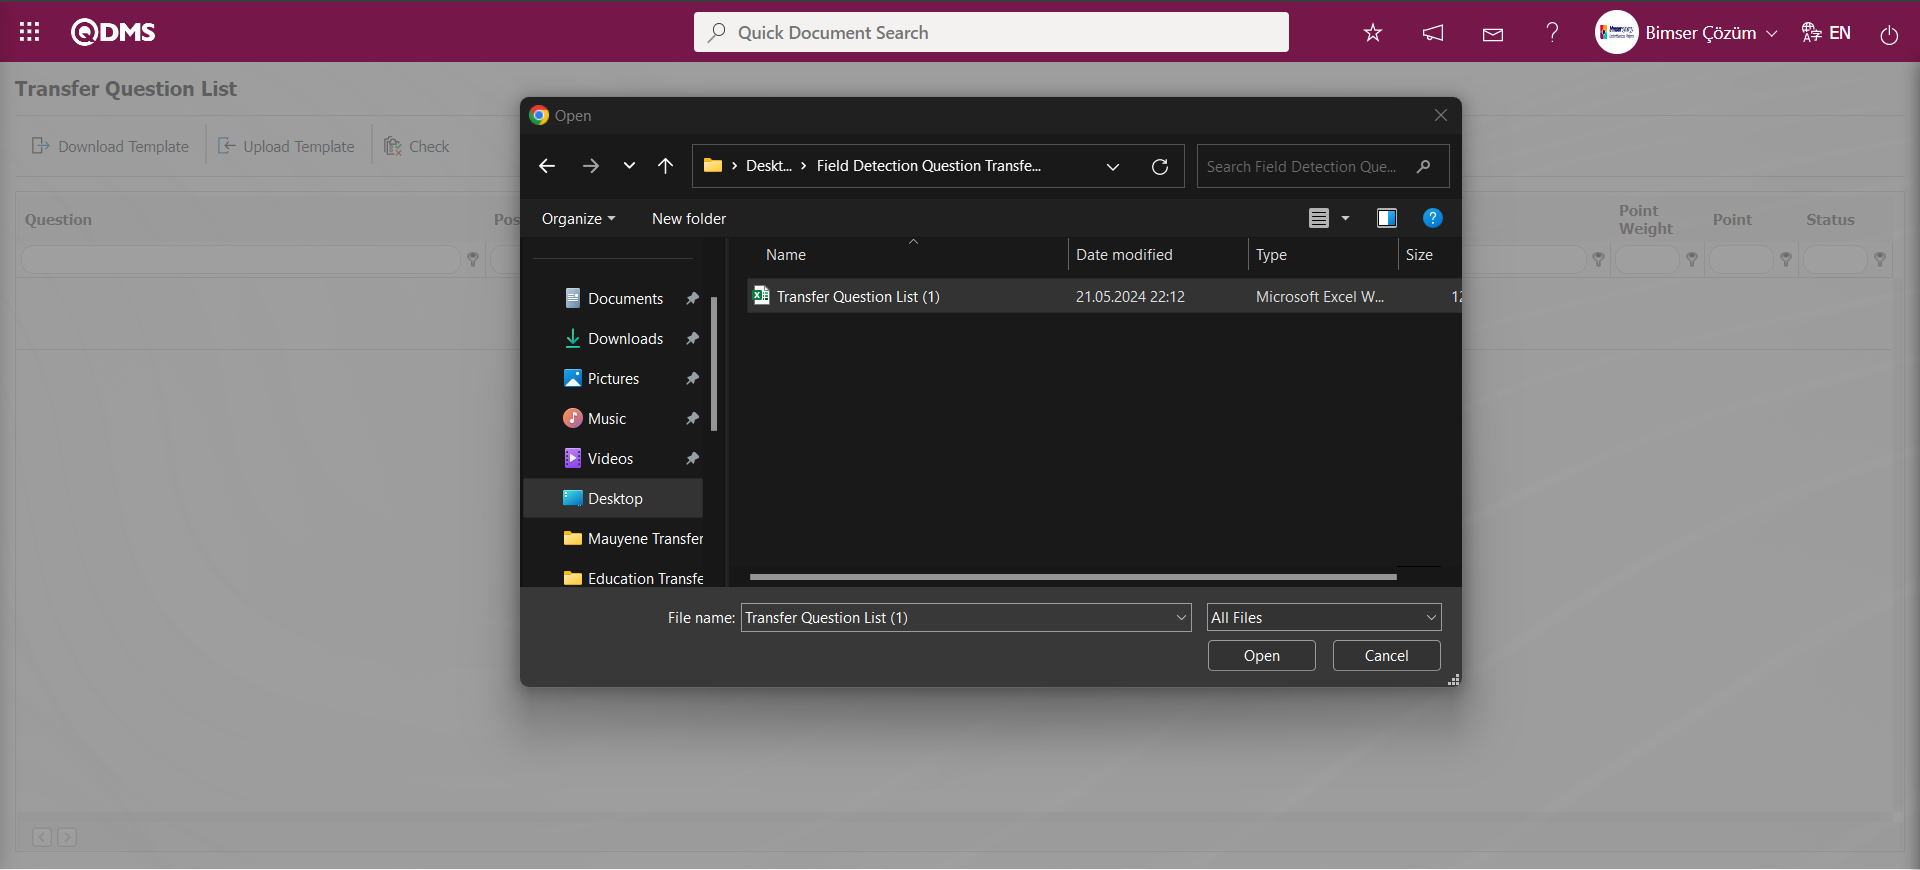
On the Question List Transfer screen, the button is clicked to check whether the template created and uploaded to the system gives an error or not.
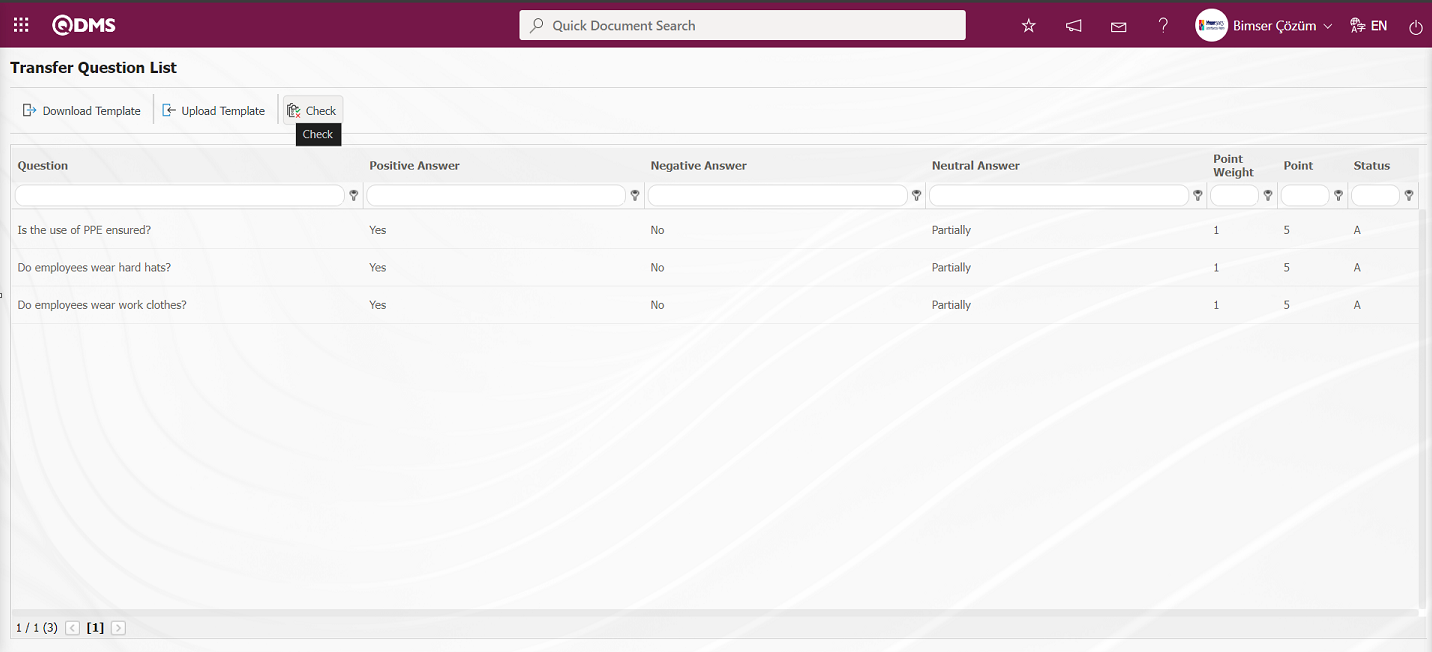
The system displays the message “Data is suitable for transfer”.

Transfer operation is performed by clicking the button on the Transfer Question List screen.
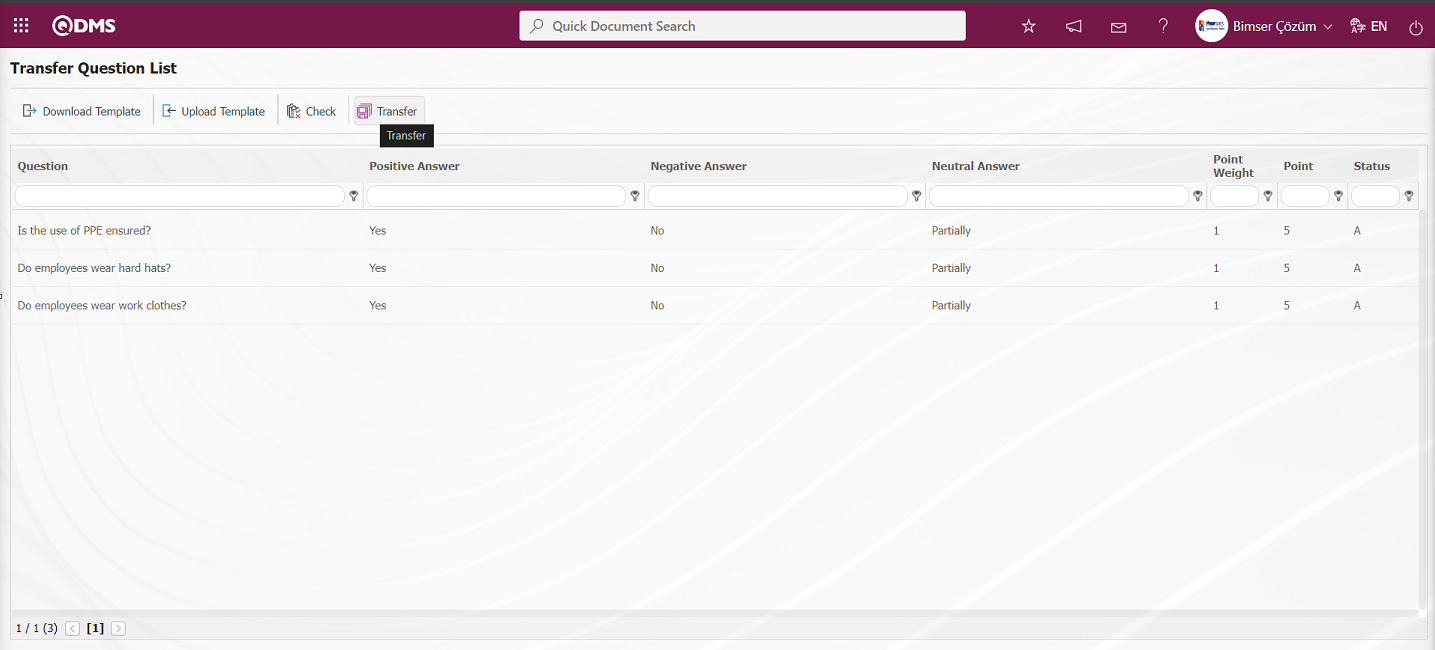
“The transfer process is completed.” message is given.

5.2.17.11. Submit Training for Signature
Menu Name: System Infrastructure Definitions/ BSID/ Configuration Settings/ Transfers/ Submit Training for Signature
This is the menu where the HIMS (Occupational Health and Safety Information Management System) trainings defined in the Training Detail Planning screen opened by clicking the Details button on the Training Planning screen in the Training Planning module and the HIMS trainings defined in the Training Detail Planning screen that are not displayed in System Infrastructure Definitions/BSID/Configuration Settings/Transfers/Training Records menu of the HIMS (Occupational Health and Safety Information Management System) trainings in the finished status that are not displayed in the System Infrastructure Definitions/BSID/Configuration Settings/Training Records menu and the HIMS trainings that are defined in the Training Detail Planning screen and the bulk transfer process is made are displayed in the Training Records menu and made ready to be sent to the ministry. This menu contains the list of these trainings that are not displayed on the Training Records screen within the scope of HIMS in the finished status, and by making single and multiple selections in the list  button is clicked to display them in the Training Records menu and make them ready for submission to the ministry.
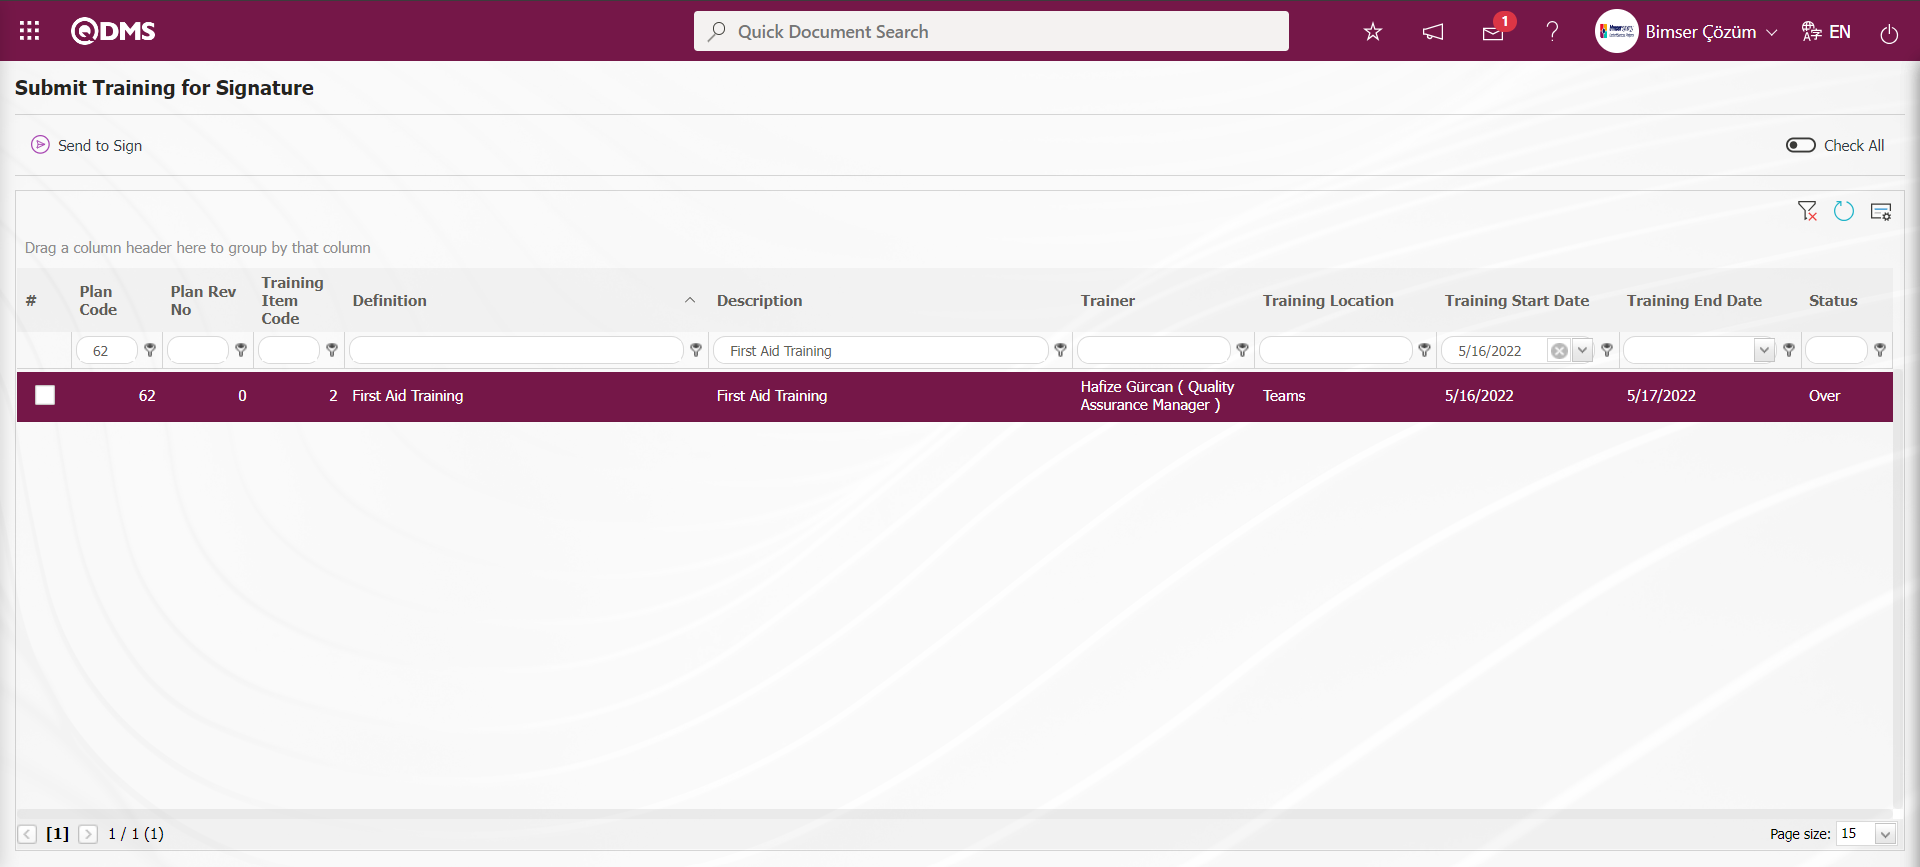
With the help of the buttons on the screen;
: The training selected in the list is sent for signature.
: The search criteria on the menu screens are used to clean the data remaining in the filter fields in the grid where the search operation is performed.
: The menu screen is restored to its default settings.
: User-based designing of the menu screen is done with the show-hide feature, that is, the hiding feature of the fields corresponding to the columns on the menu screens.
In Submit Training for Signature screen, trainings within the scope of HIMS are selected in the list.
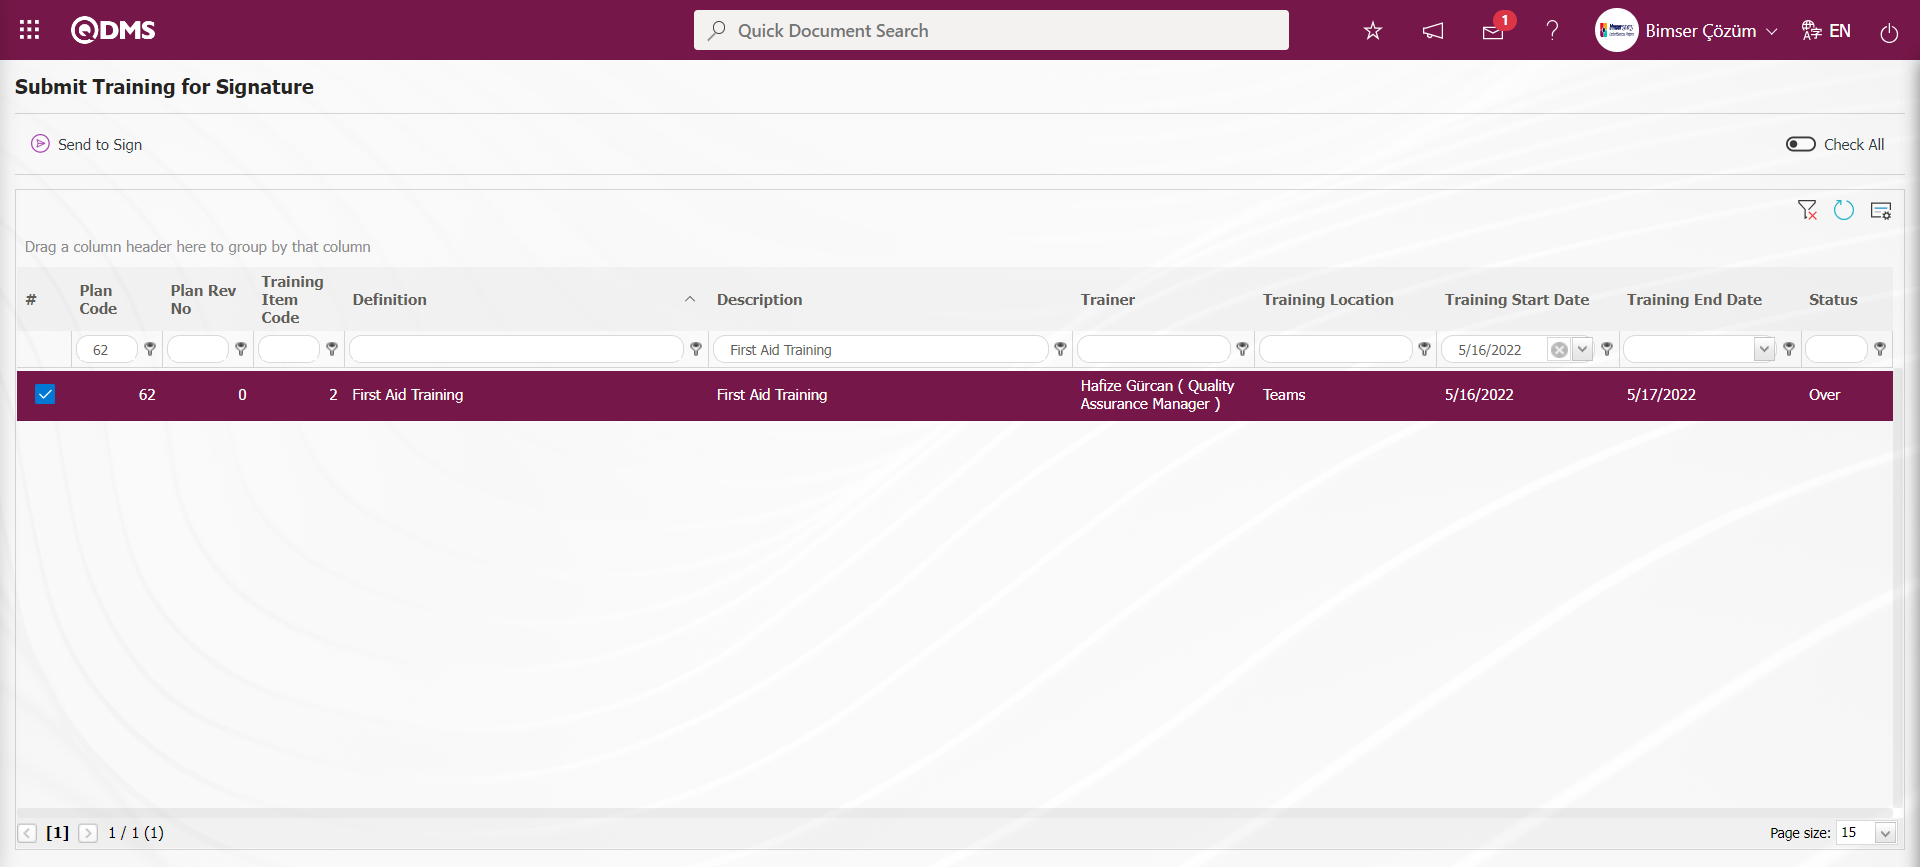
While the trainings are selected within the scope of HIMS, click on the button.
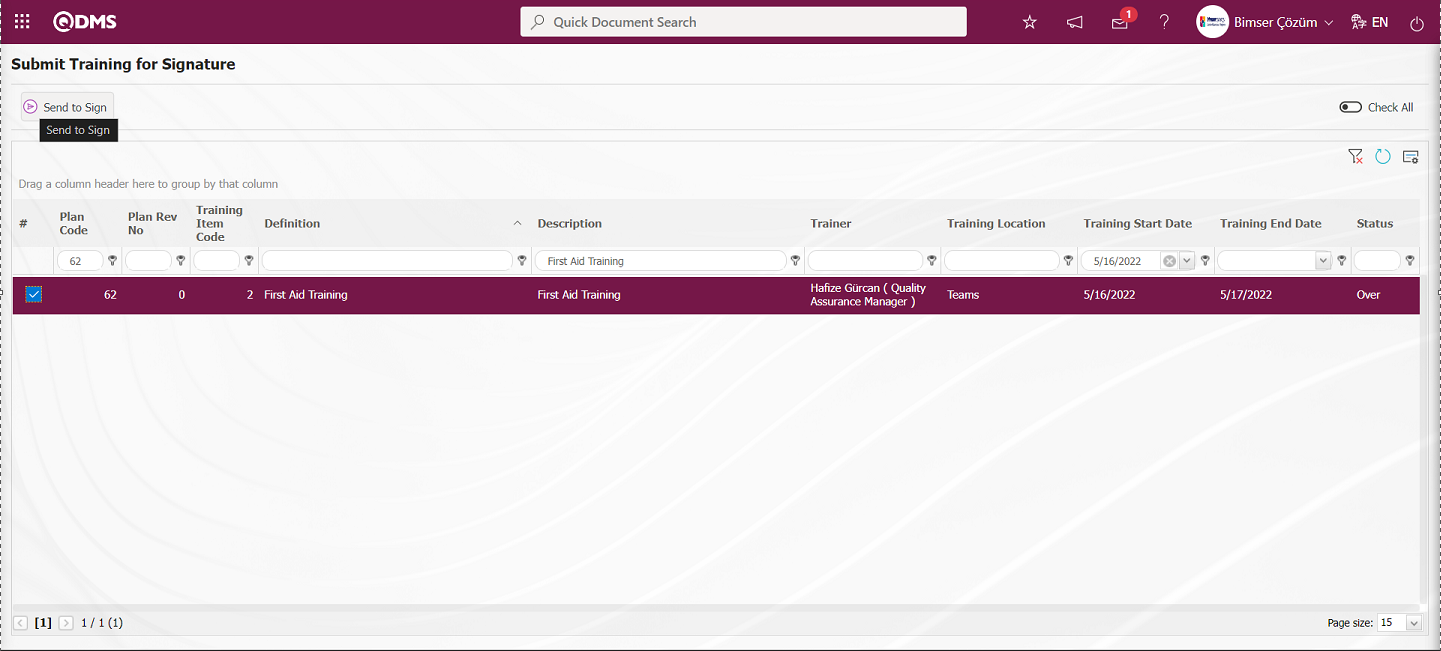
“Training details sent for signature” message is given by the system.

The trainings within the scope of HIMS sent for e-signature are displayed in the System Infrastructure Definitions/BSID/Configuration Settings/Training Records menu and made ready to be sent to the ministry.
5.2.18.Dashboard Configuration
Menu Name: System Infrastructure Definitions/ BSID/ Configuration Settings/ Transfers/Dashboard Configuration
It is the part of the Qdms system that allows users to view transactions, metrics, graphs and reports on a single screen. Dashboard is defined as a display of indicators, a dashboard and a table of indicators used to summarize the flow and/or content of information and to explain a particular situation through graphs and tables. Its purpose is to present the necessary information in the shortest time, with the least interaction and thinking requirements. In general, it is the screen that people in managerial positions frequently use. It is the menu where users who are not Module Administrators make the necessary adjustments in the relevant module using the relevant buttons and perform graphic design. As the graphic design process on the Dashbord screen is done in this menu, it is included in the scope of the relevant modules in the Qdms system structure.

Dashboard Configuration Settings screen is opened by clicking System Infrastructure Definitions/BSID/Configuration Settings/Dashboard/Training Planning menu.
With the help of the buttons on the screen;
: A new Dashboard is defined.
: Correction / change / update is made on the Dashboard information selected in the list.
: The Dashboard information selected in the list is deleted.
- : Dashboard Configuration screen is closed.
Click the button to add a new Dashboard in the Education Planning Module
Dashboard Configuration - After filling in the required fields on the New Record screen, click the button on the top left of the screen.
After the registration process on the Education Dashboard screen, the system gives the message “Your graphics settings have been successfully saved.”
The Dashboard defined in the Training Dashboard screen is displayed.
By clicking the (Export Graphic) button, the graphic can be exported to the external environment by converting it to the format type (png, jpg, bmp, xls, etc.) selected from the drop-down menu.
Graphic Length is limited to a min value of 500 and a maximum of 1000. Graphic Width is limited to a min value of 550 and a max value of 1800. Chart Length and Width should be selected between these values. Dashboard Configuration - If the row number is already used on the New Record screen, an error message “The row number you specified is in use, you must specify a row number that is not in use.” is given by the system during the saving phase.
![A screenshot of a computer
Description automatically generated]ref15 In this way, a new chart can be added on the screen opened with the Chart Settings button. Editing, updating, changing and deleting operations are performed on the added chart information. The filtering screen for the relevant charts in the list is defined and set as downloadable.
5.2.19. Emails in Quarantine
Menu Name: System Infrastructure Definitions/ BSID/ Configuration Settings/ Emails in Quarantine
This menu is used to display the quarantine mails that are not wanted to be mailed.If it is not desired that the tasks, delays, notifications assigned on QDMS are sent to some users via e-mail, it is necessary to edit the parameters of the System Infrastructure Definitions menu. In the System Infrastructure Definitions/BSID/Configuration Settings/Parameters menu, mail is prevented from going to the users within the scope of the user registries defined in the “Quarantine mail list (Registration Number)” parameter value number 55.
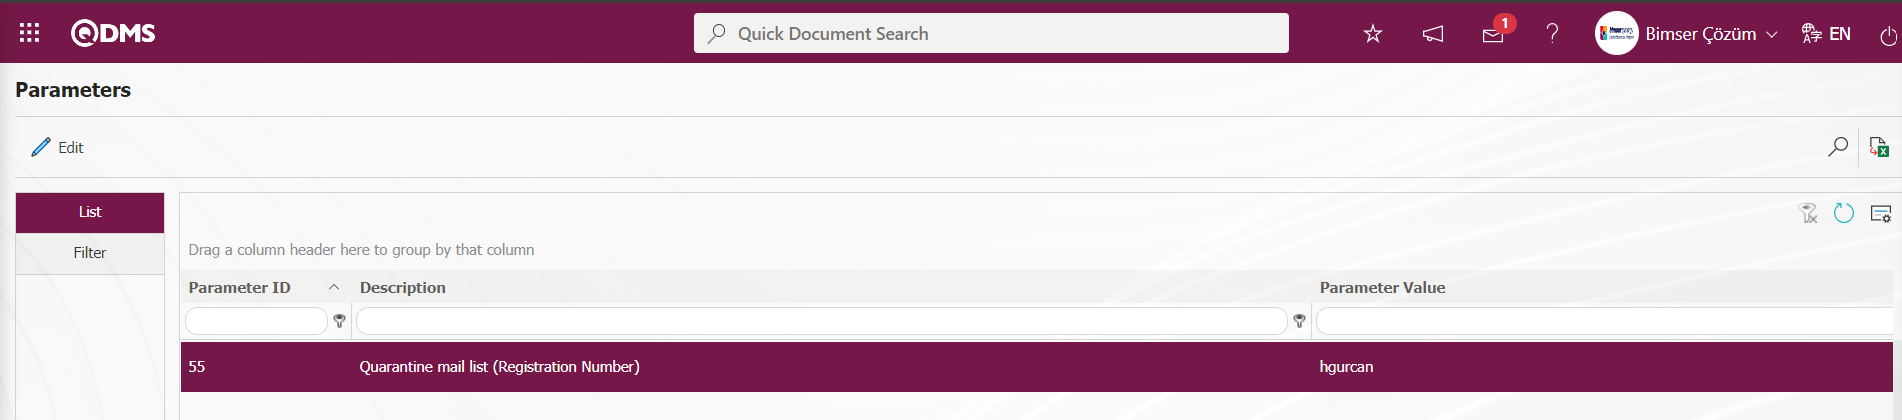
In the System Infrastructure Definitions Module parameters, mail is prevented from going to the group members in the user group defined in the value of parameter 253 “Quarantine user groups (Group Code)”
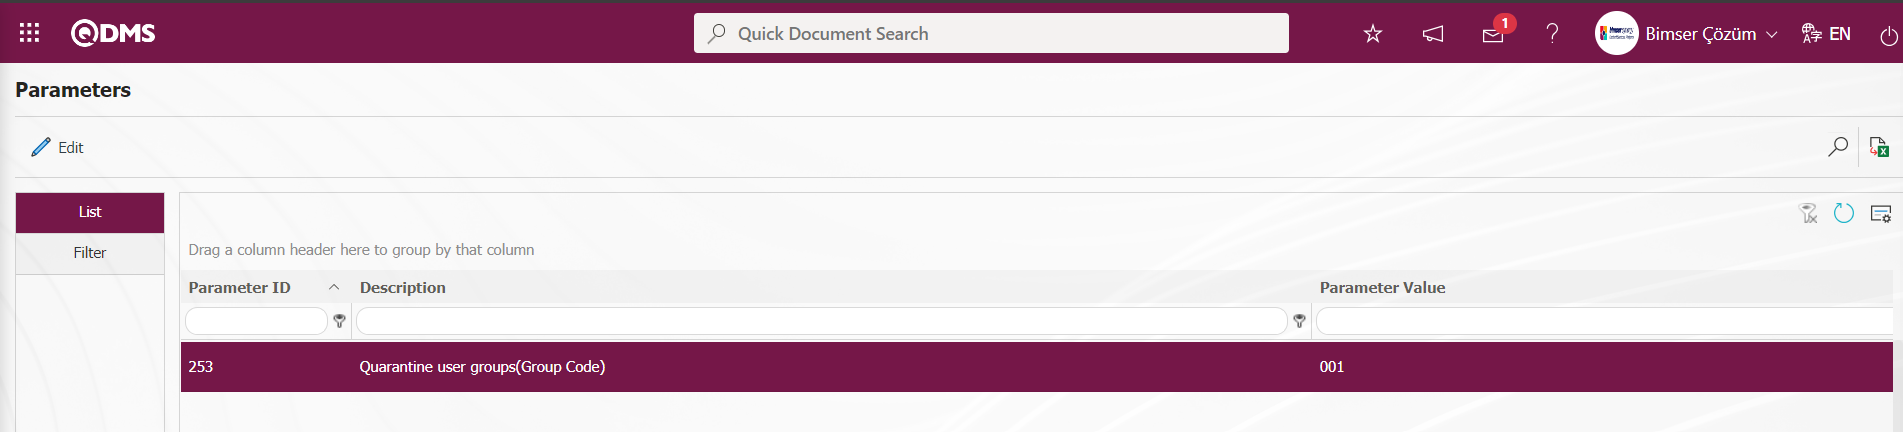
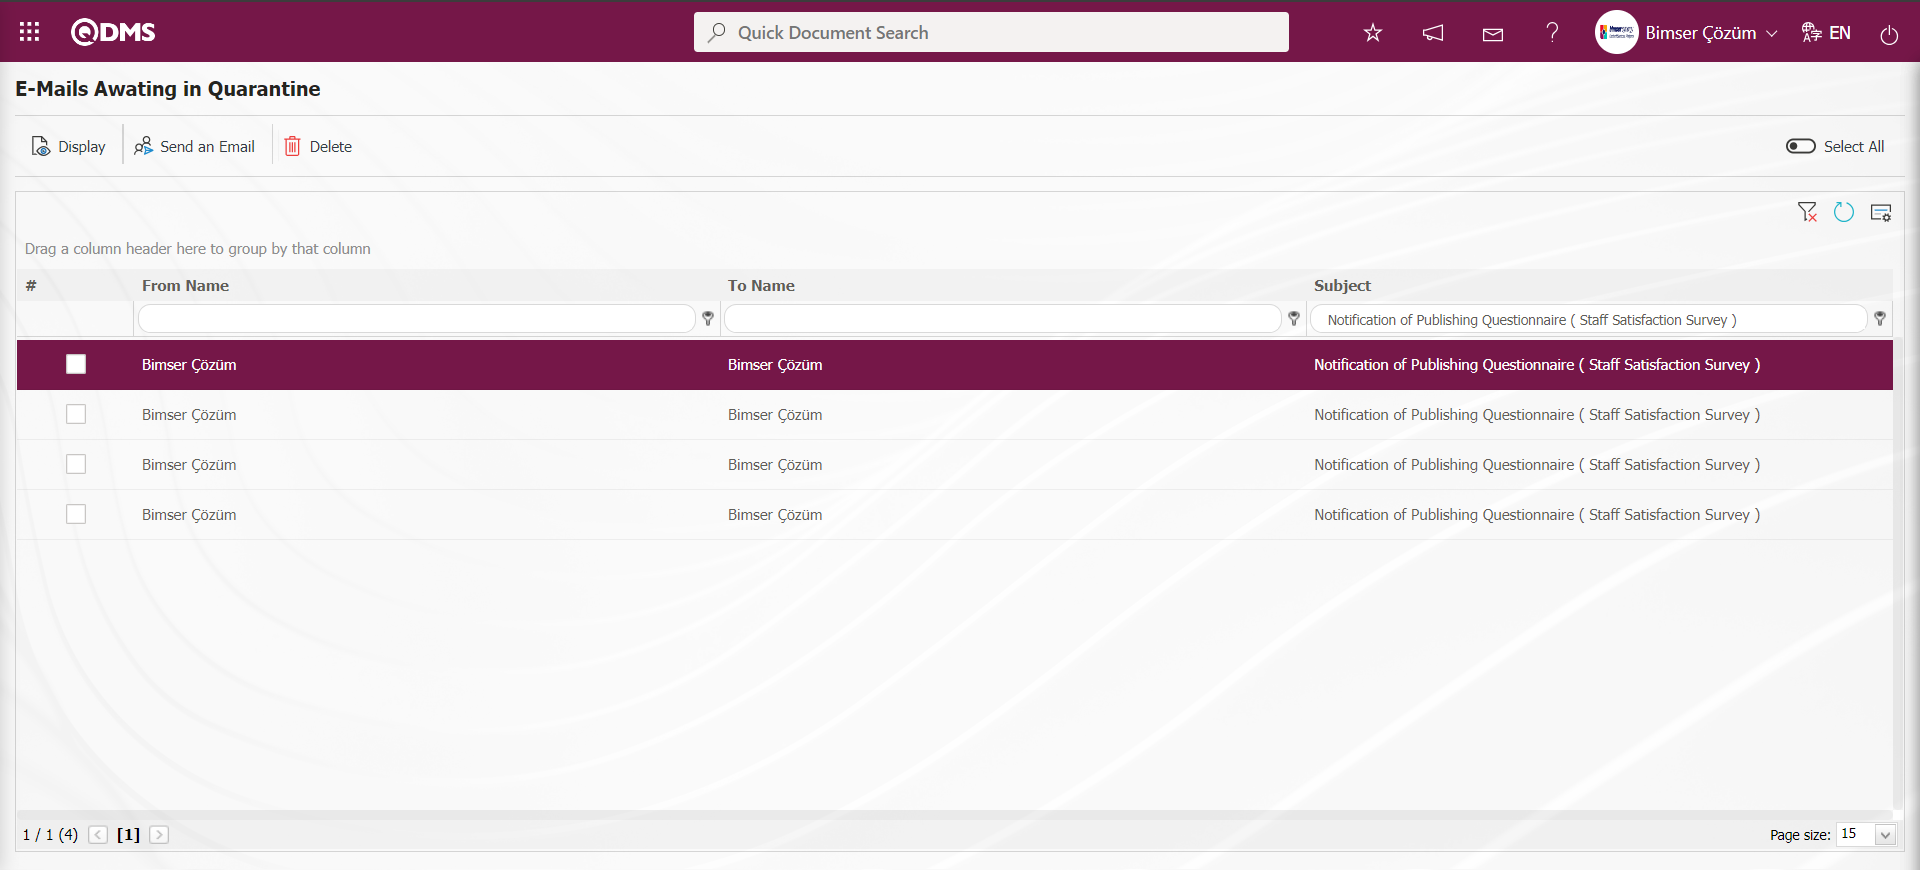
With the help of the buttons on the screen;
 : Used to view the selected quarantine mail in the list.
 : Used to forward the selected quarantine mail in the list.
 : Used to delete the selected quarantine mail in the list.
On E-Mails Awating in Quarantine screen, click button while the mail in quarantine is selected.
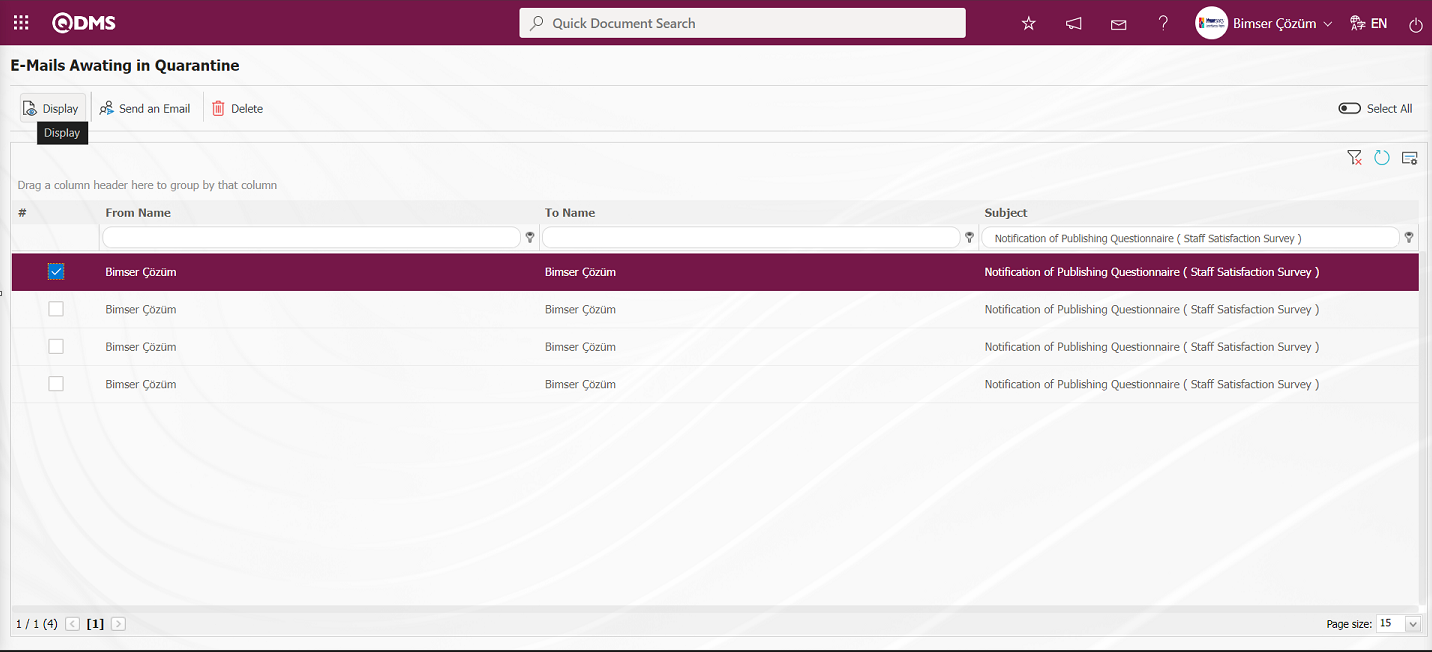
The pop-up will display the content of the mail.
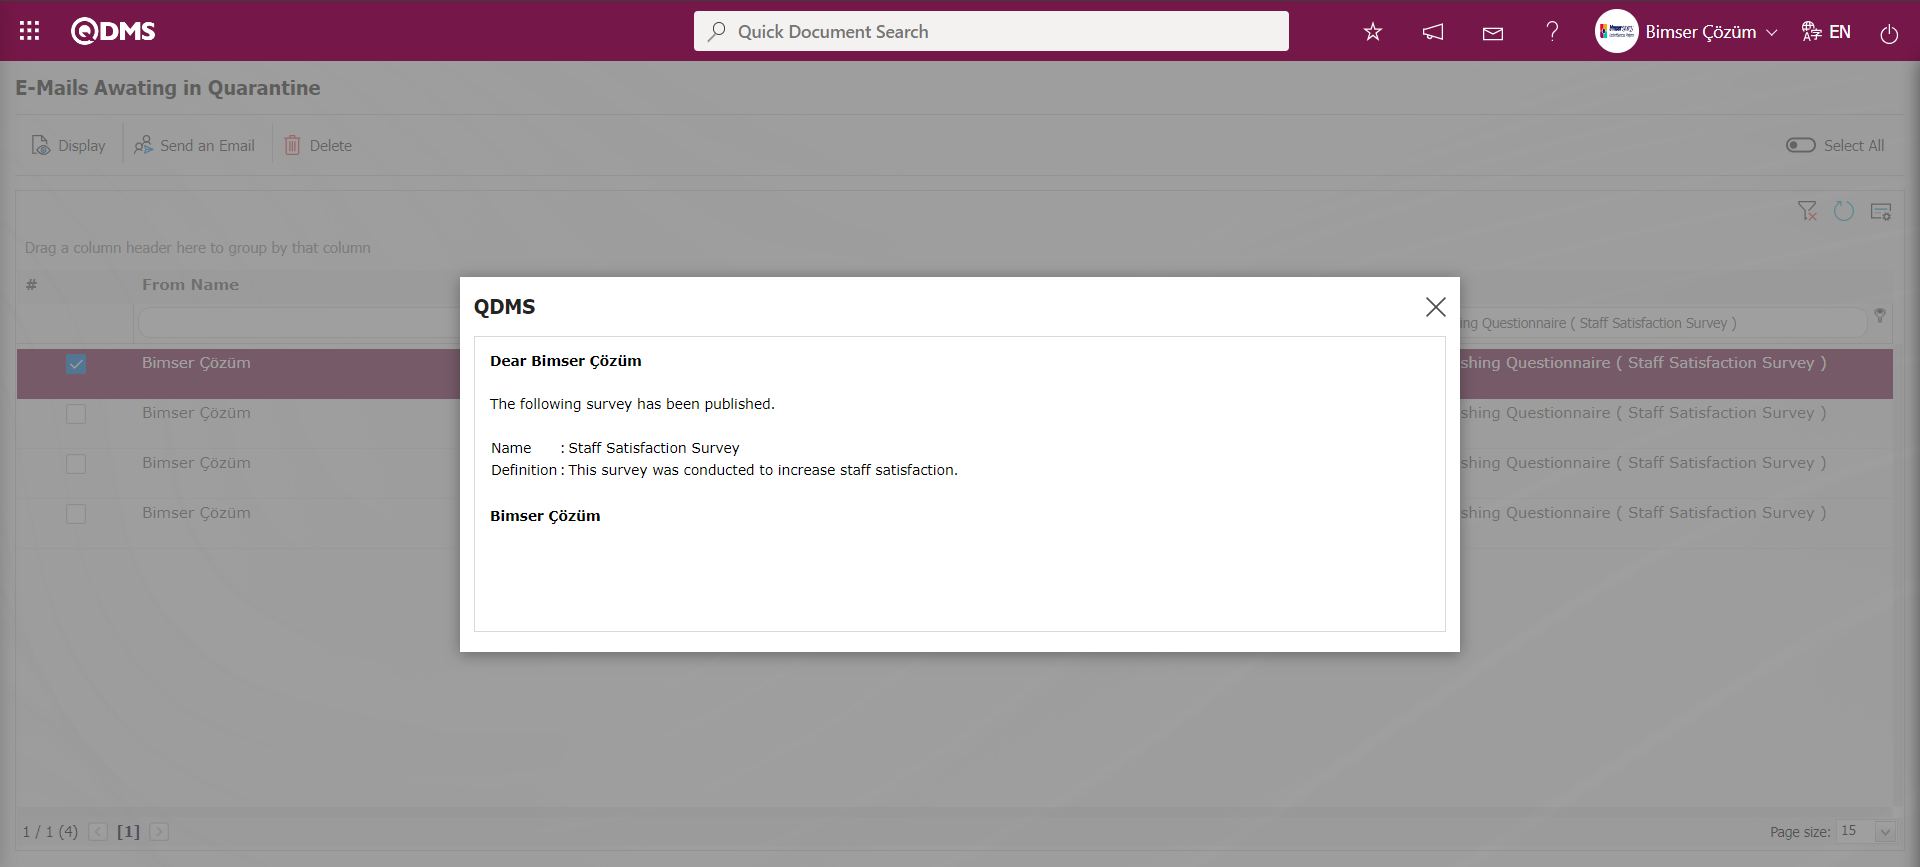
On the E-Mails Awating in Quarantine screen, click the button when the mail in quarantine is selected.
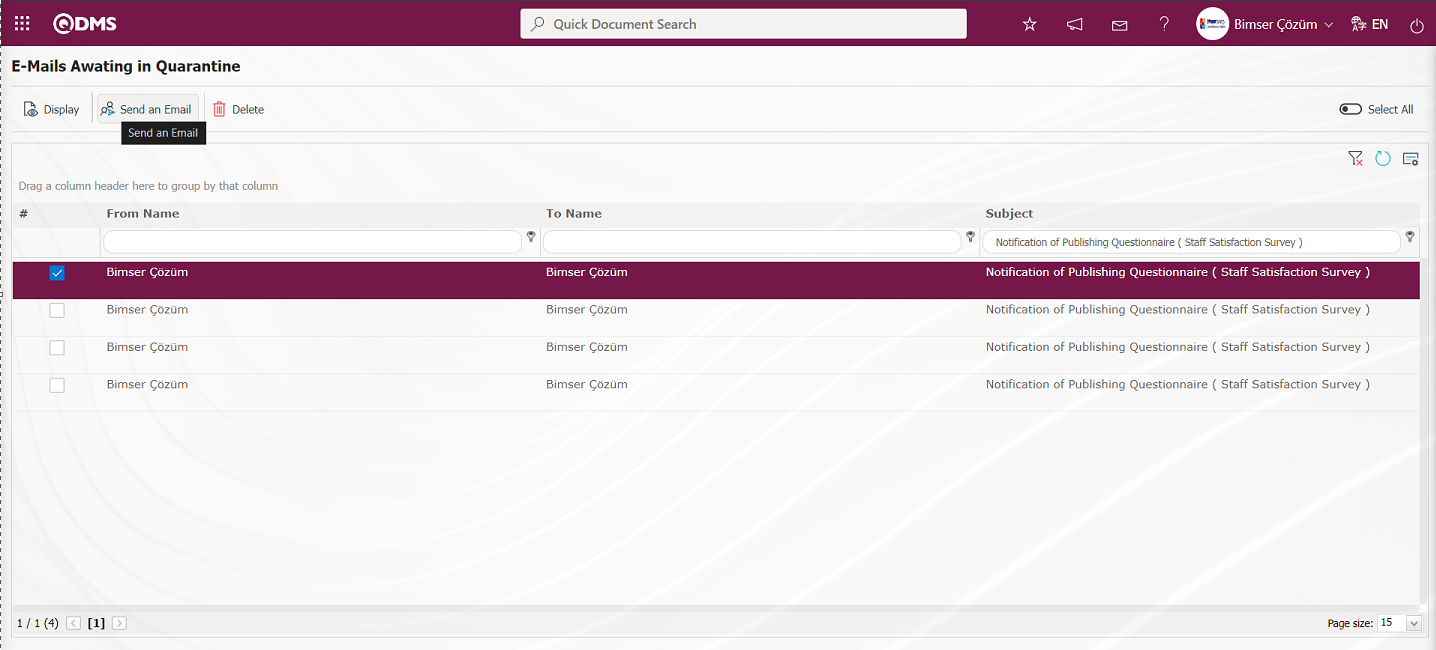
“Are you sure to send the selected email?” message is displayed by the system and the quarantined mail is forwarded by clicking the ‘OK’ button.
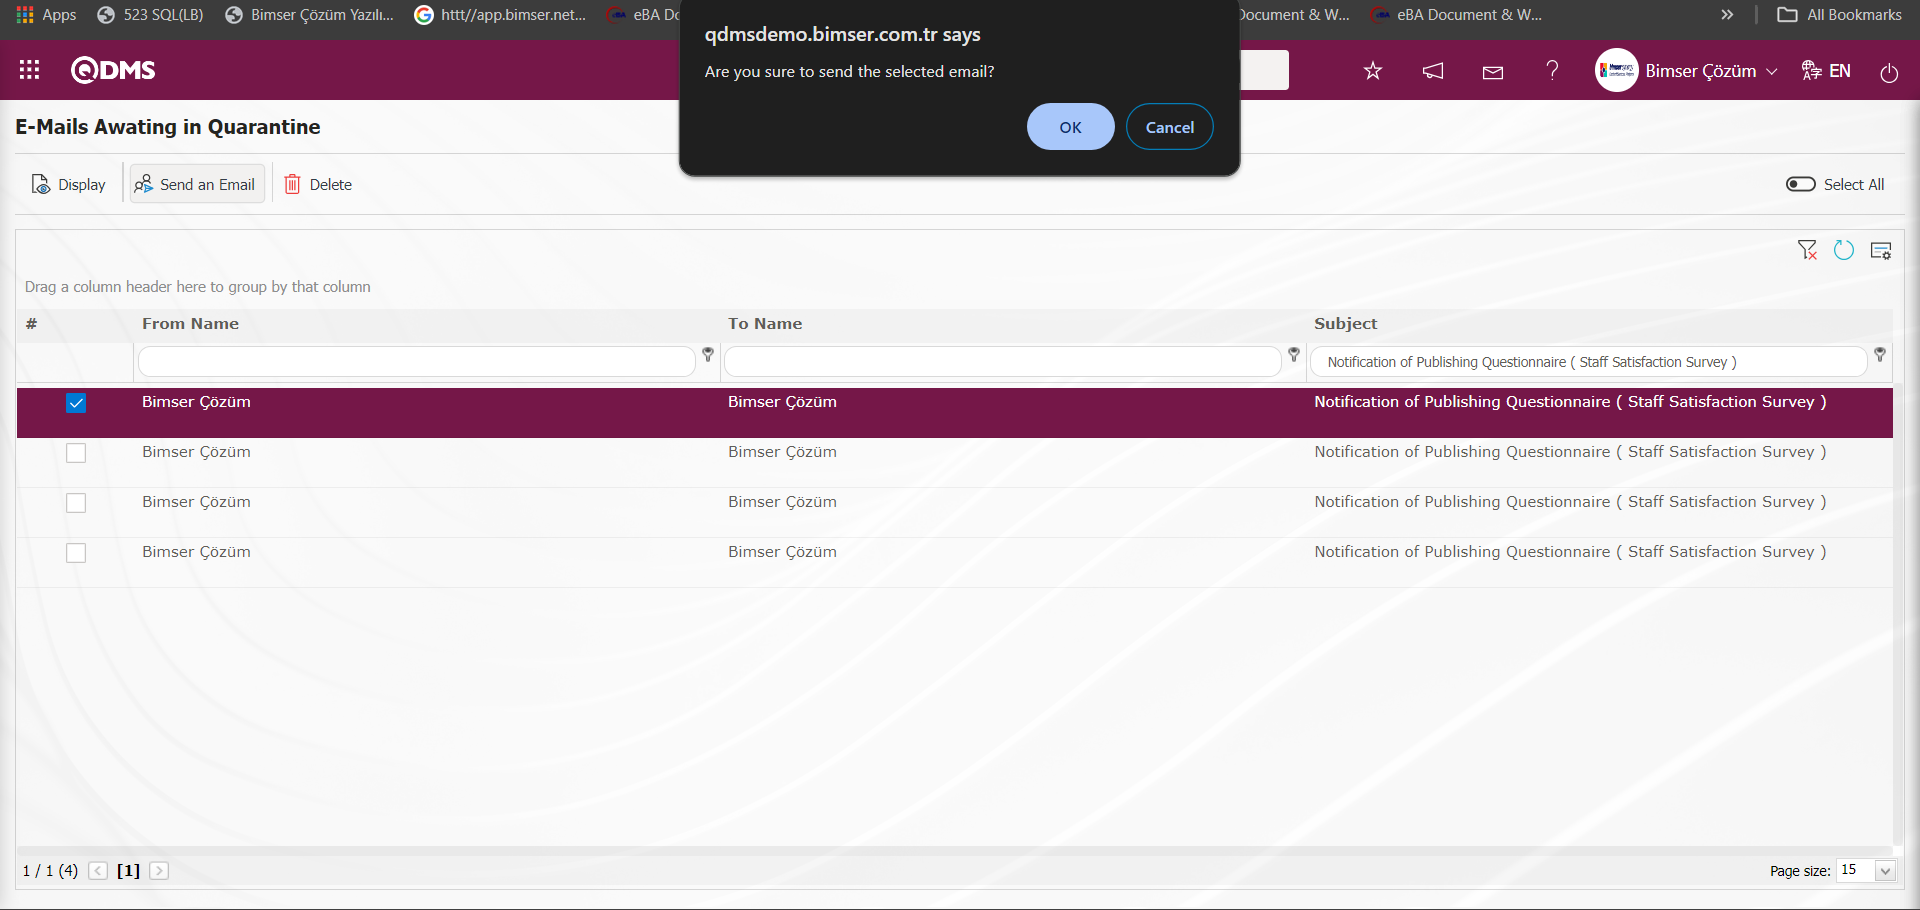
On the E-Mails Awating in Quarantine screen, click the button while the mail in quarantine is selected in the list.

In the message “Are you sure to delete selected row?” by the system, the “OK” button is clicked and the quarantined mail is deleted.
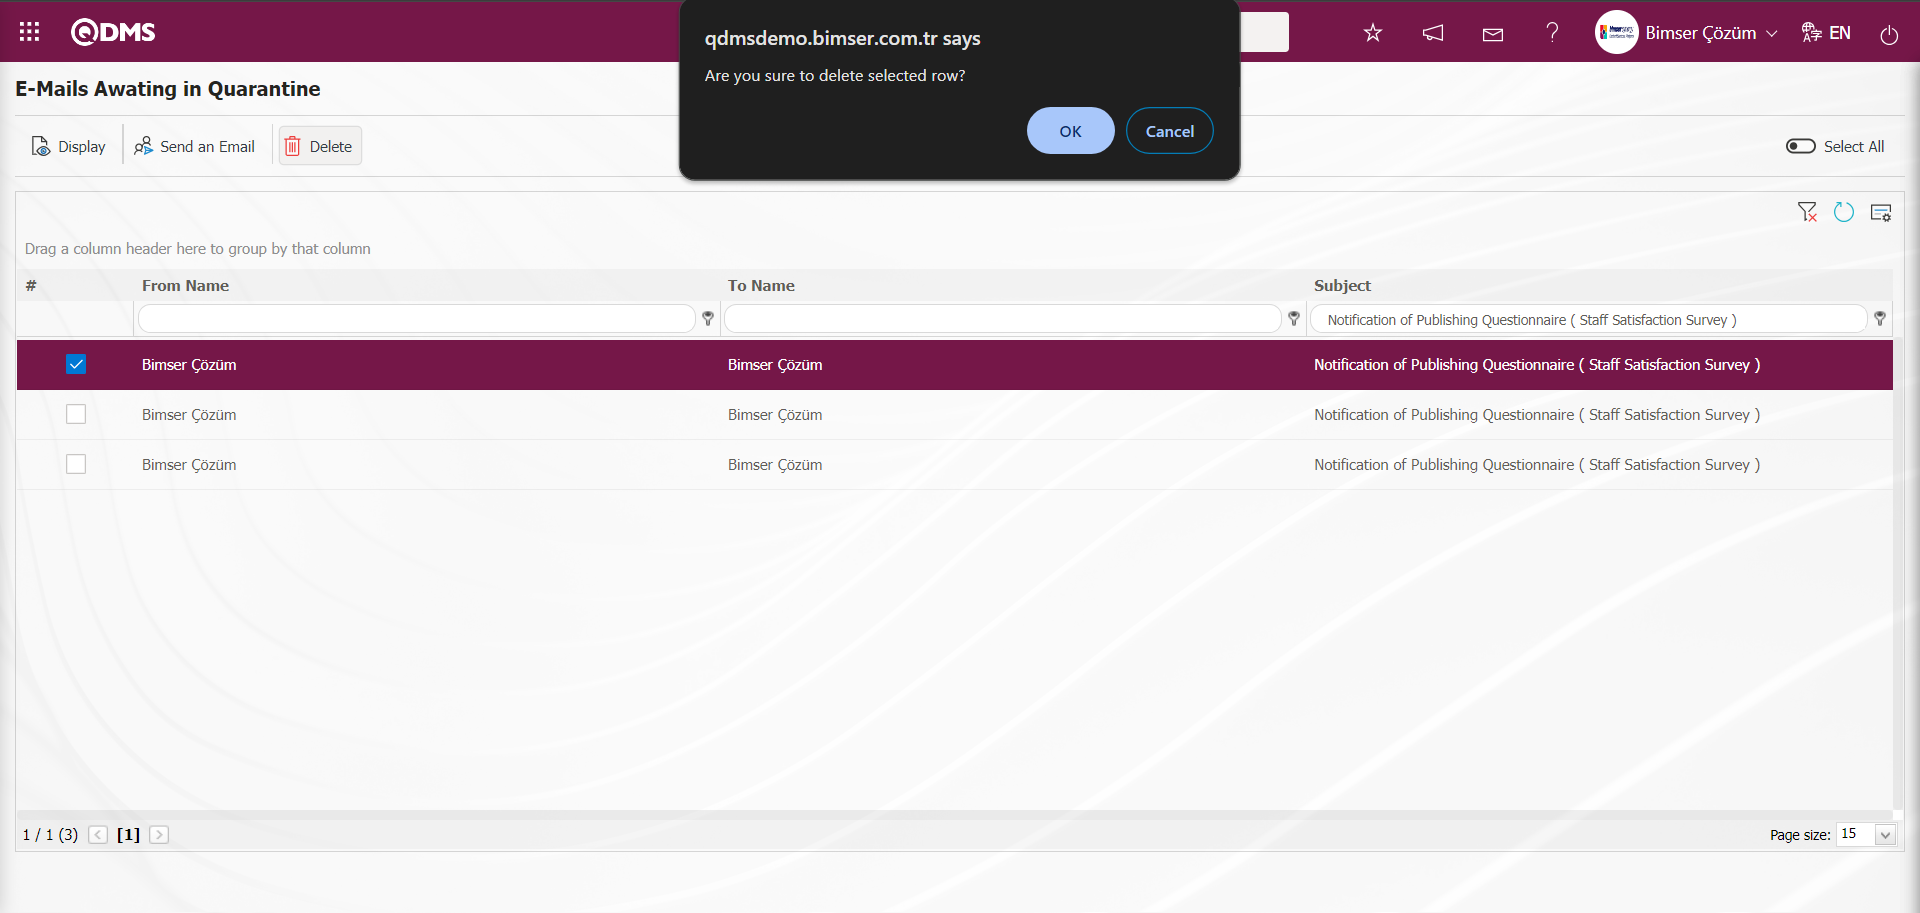
5.2.20. Helping Page Definition
Menu Name: System Infrastructure Definitions/ BSID/ Configuration Settings/ Helping Page Definition
This menu is used to upload user help documents prepared for QDMS to the help menu. It is the menu where the “Link” or “Attachment” related to the help document is added.
With the help of the buttons on the screen;
 : Defines a new link or additional file.
: Correction / change / update is made for the link or additional file selected in the list.
 : Deletes the selected link or additional file in the list.
Adding a link on the Help Menu Definition screen;
To add a link as a new help topic to the Help Menu Definition screen, click on the button at the top left corner of the screen.
The Help Define screen opens.
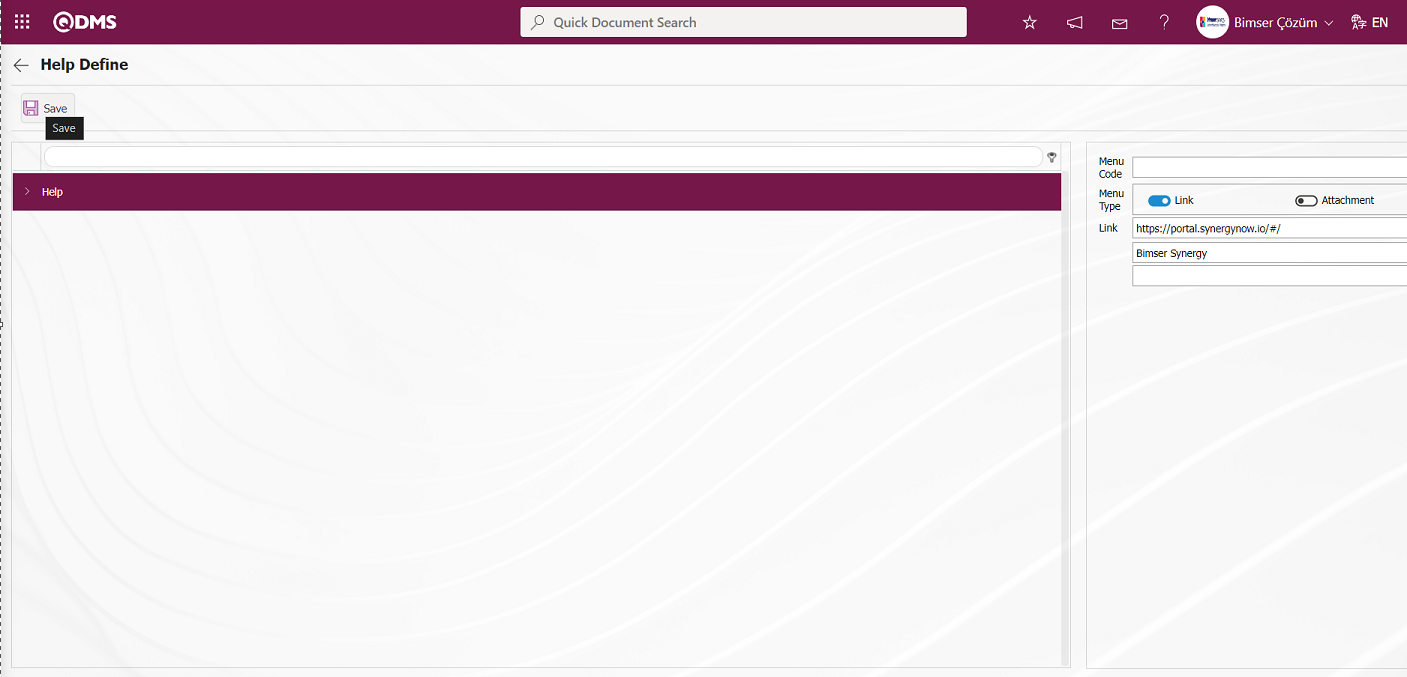
Select Menu Type Link on the Help Define screen. Enter the Link and the Name to be given to the Link. Menu Code is automatically assigned by the system. After filling in the required fields on the Help Define screen, the Help Menu Definition registration process is realized by clicking the  button in the upper left corner.
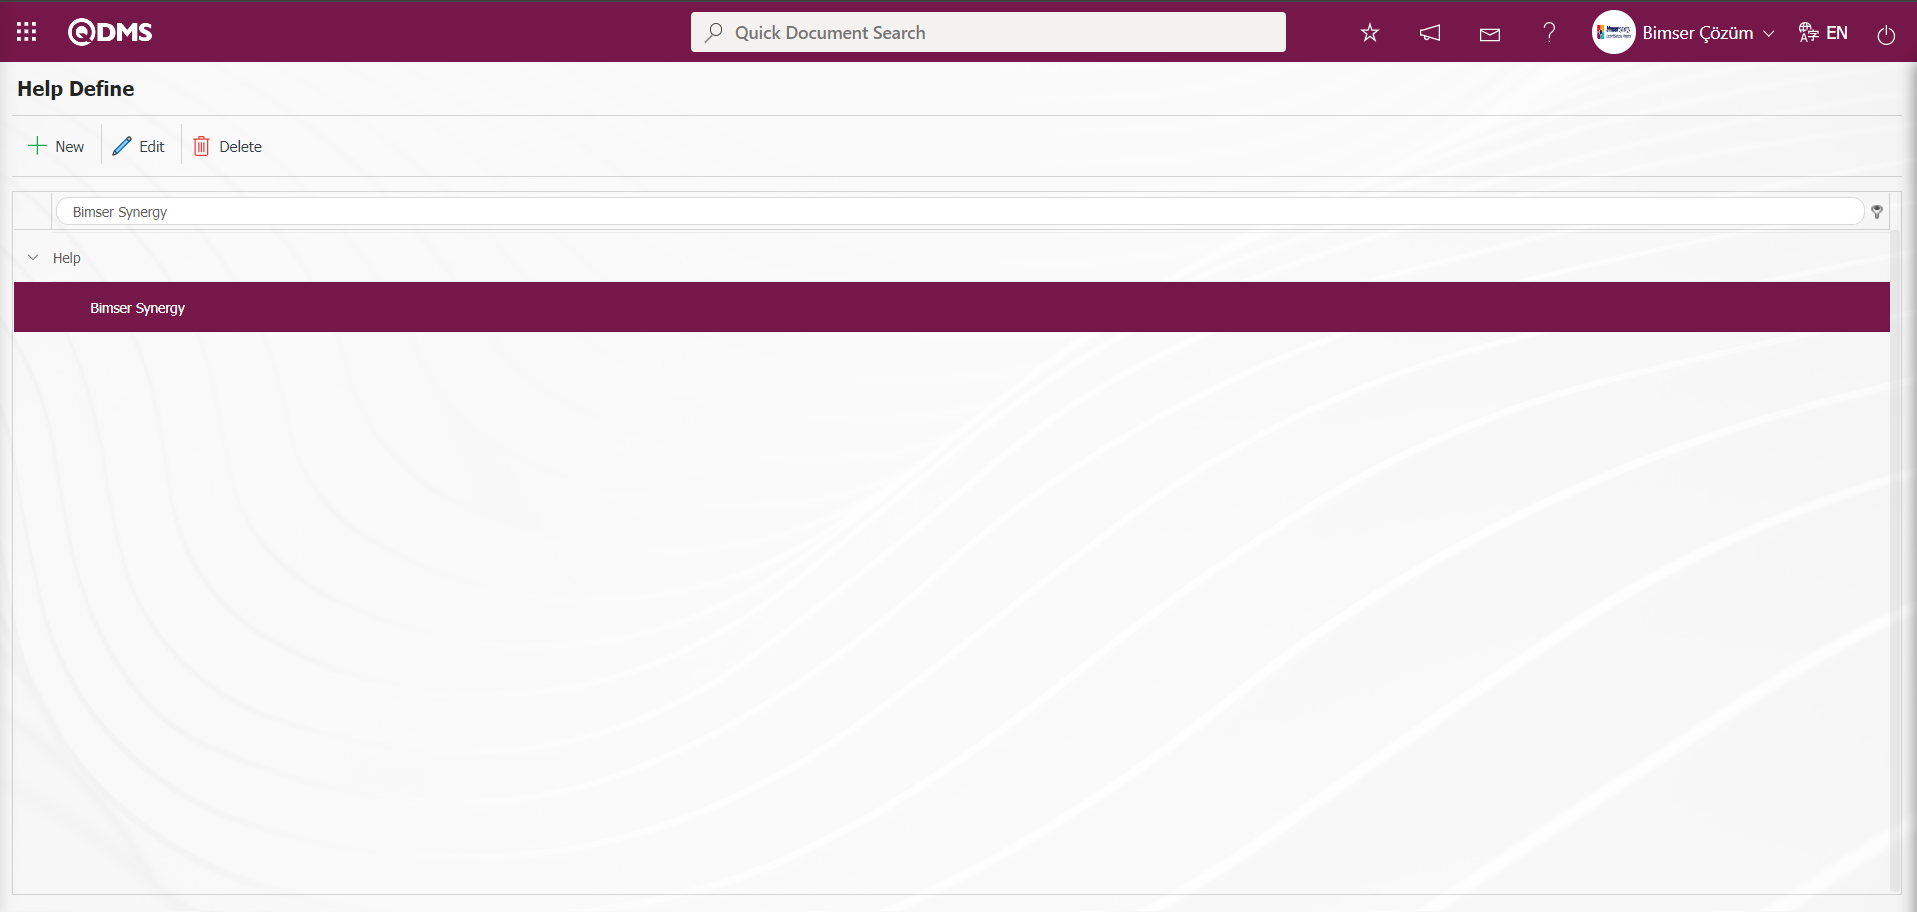
The link saved on the QDMS Home page is available in the help topics under the help menu.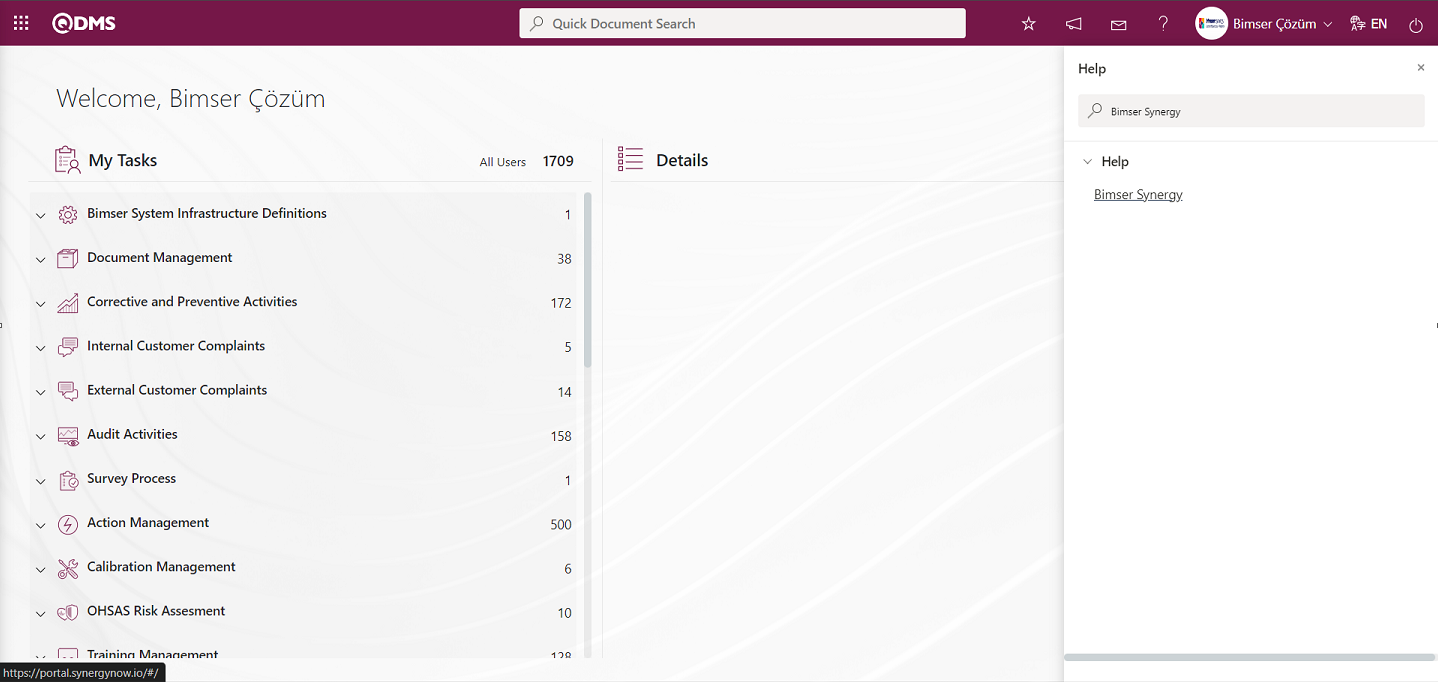
The link saved on the QDMS Home page is available in the help subjects under the help menu.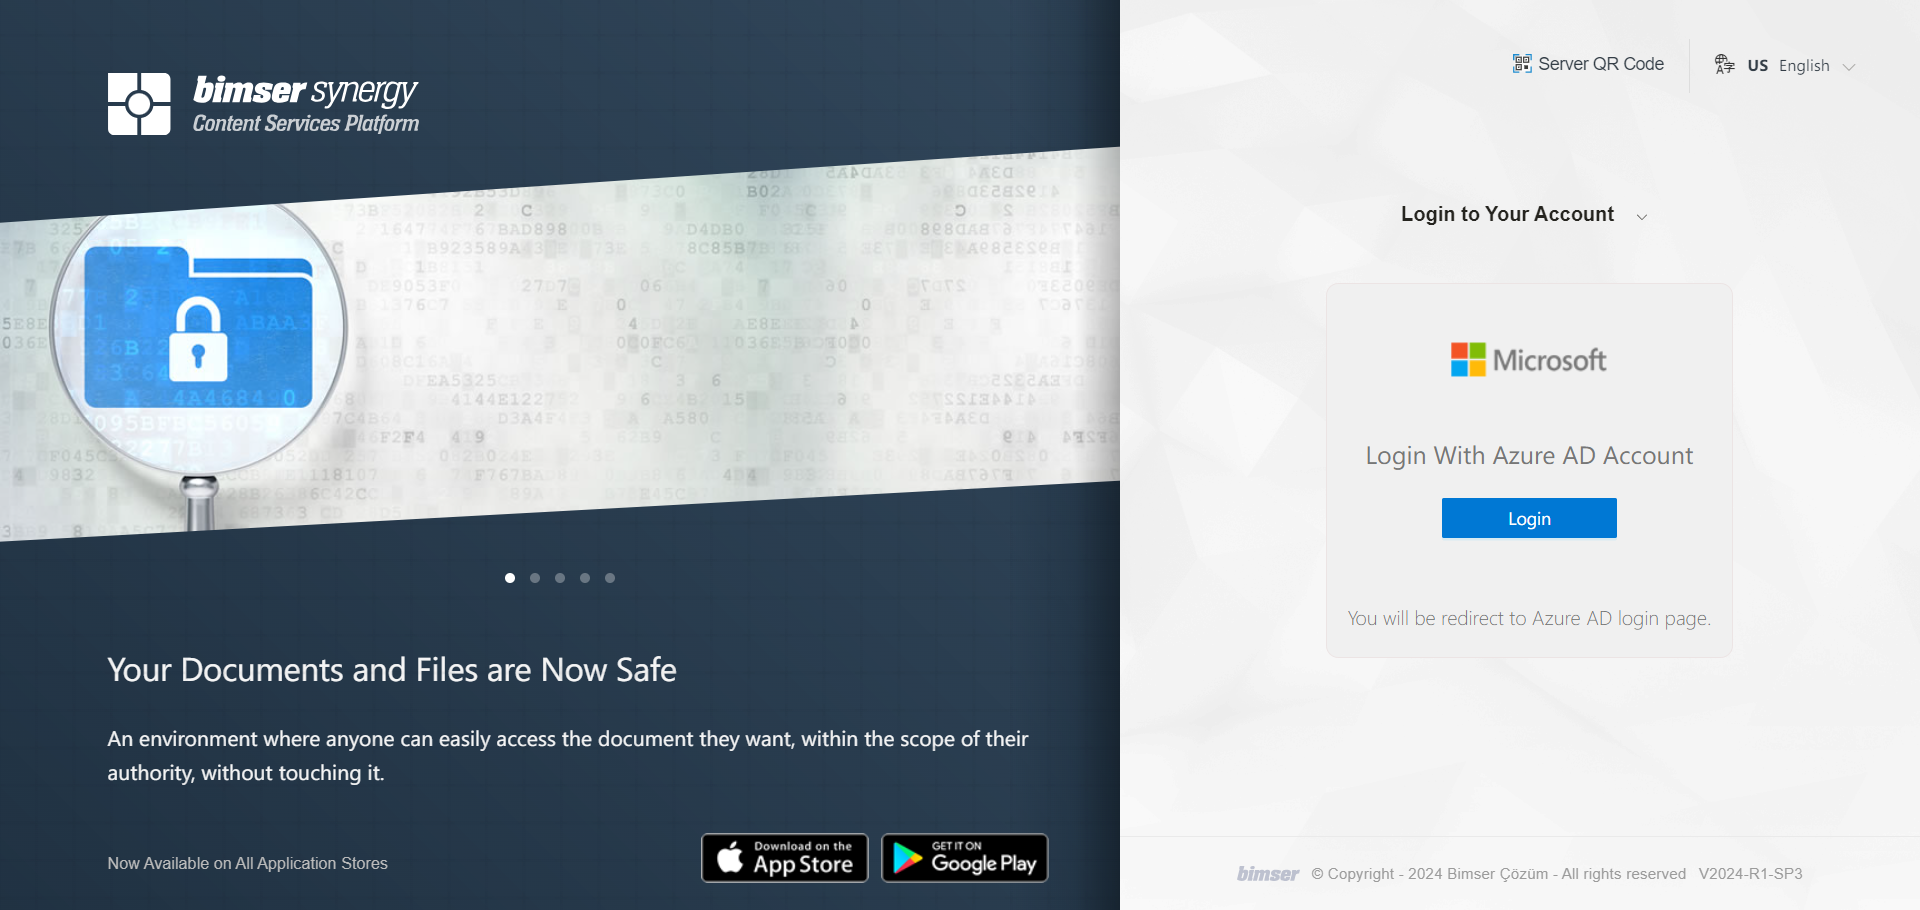
Adding an Additional File in the Help Define Menu screen;
To add a new help menu to the Help Define Menu Definition screen, click on the button at the top left corner of the screen.

The Help Define screen opens.
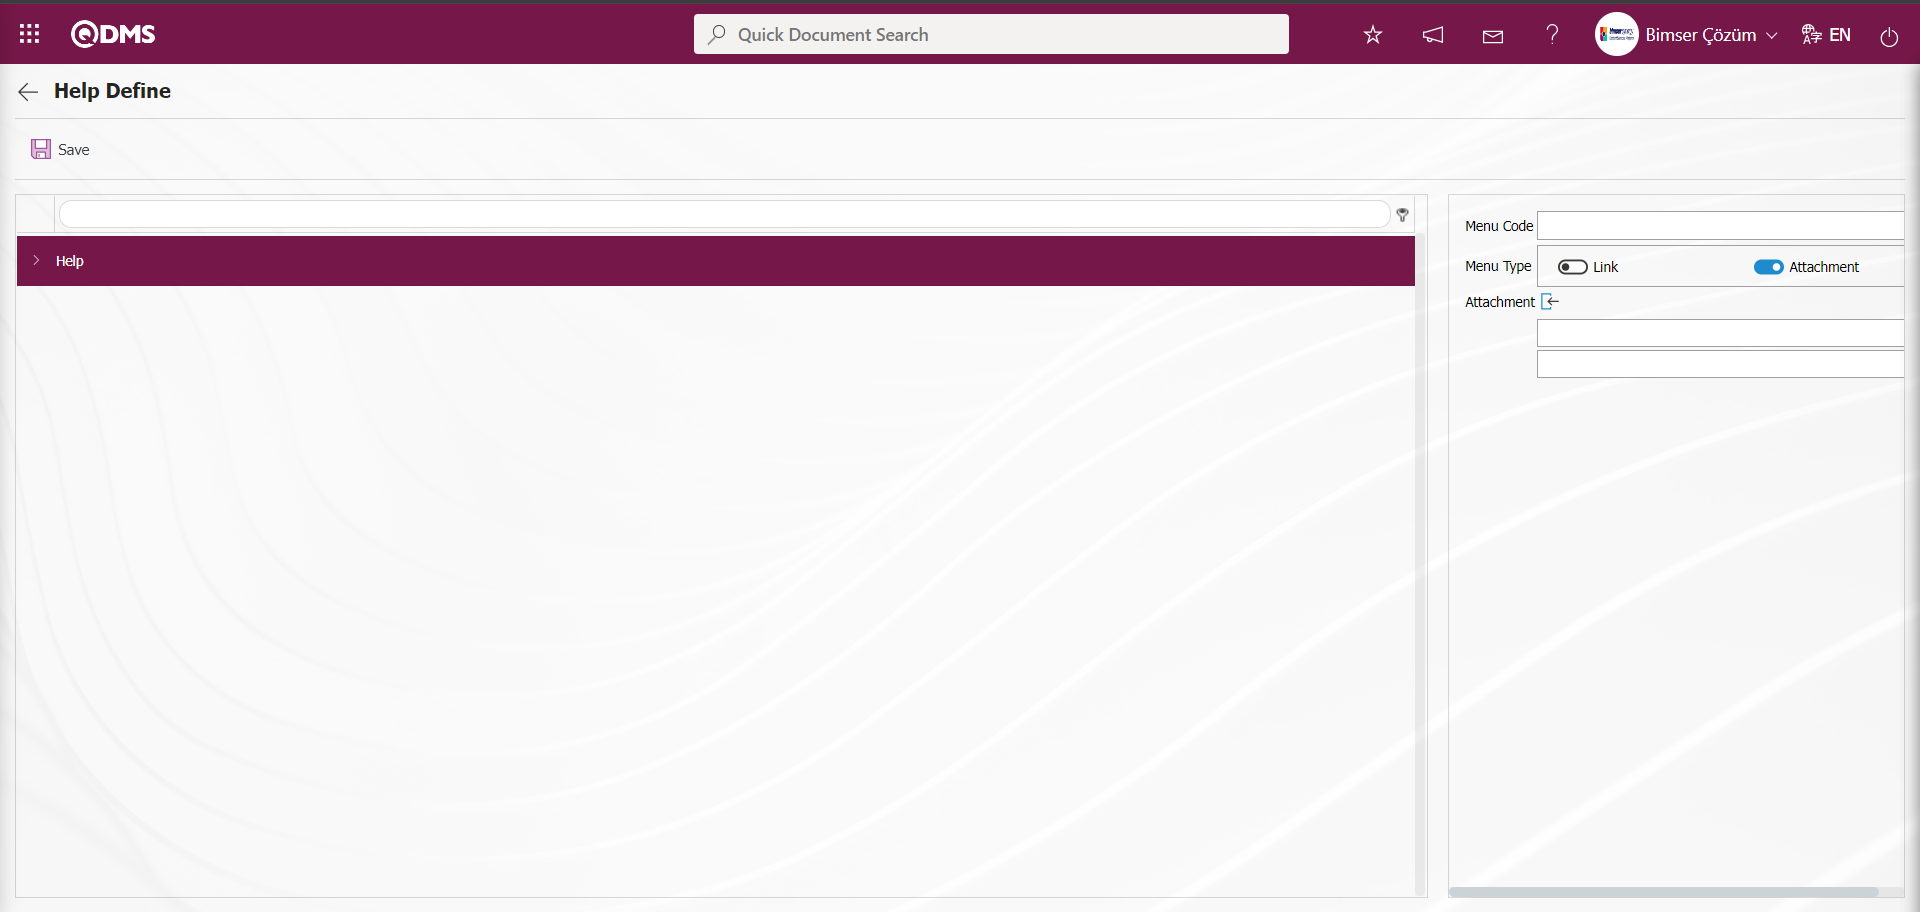
On the screen that opens, select Attachment as Menu Type.  (Attachment) button is used to upload the attachment file to the system.
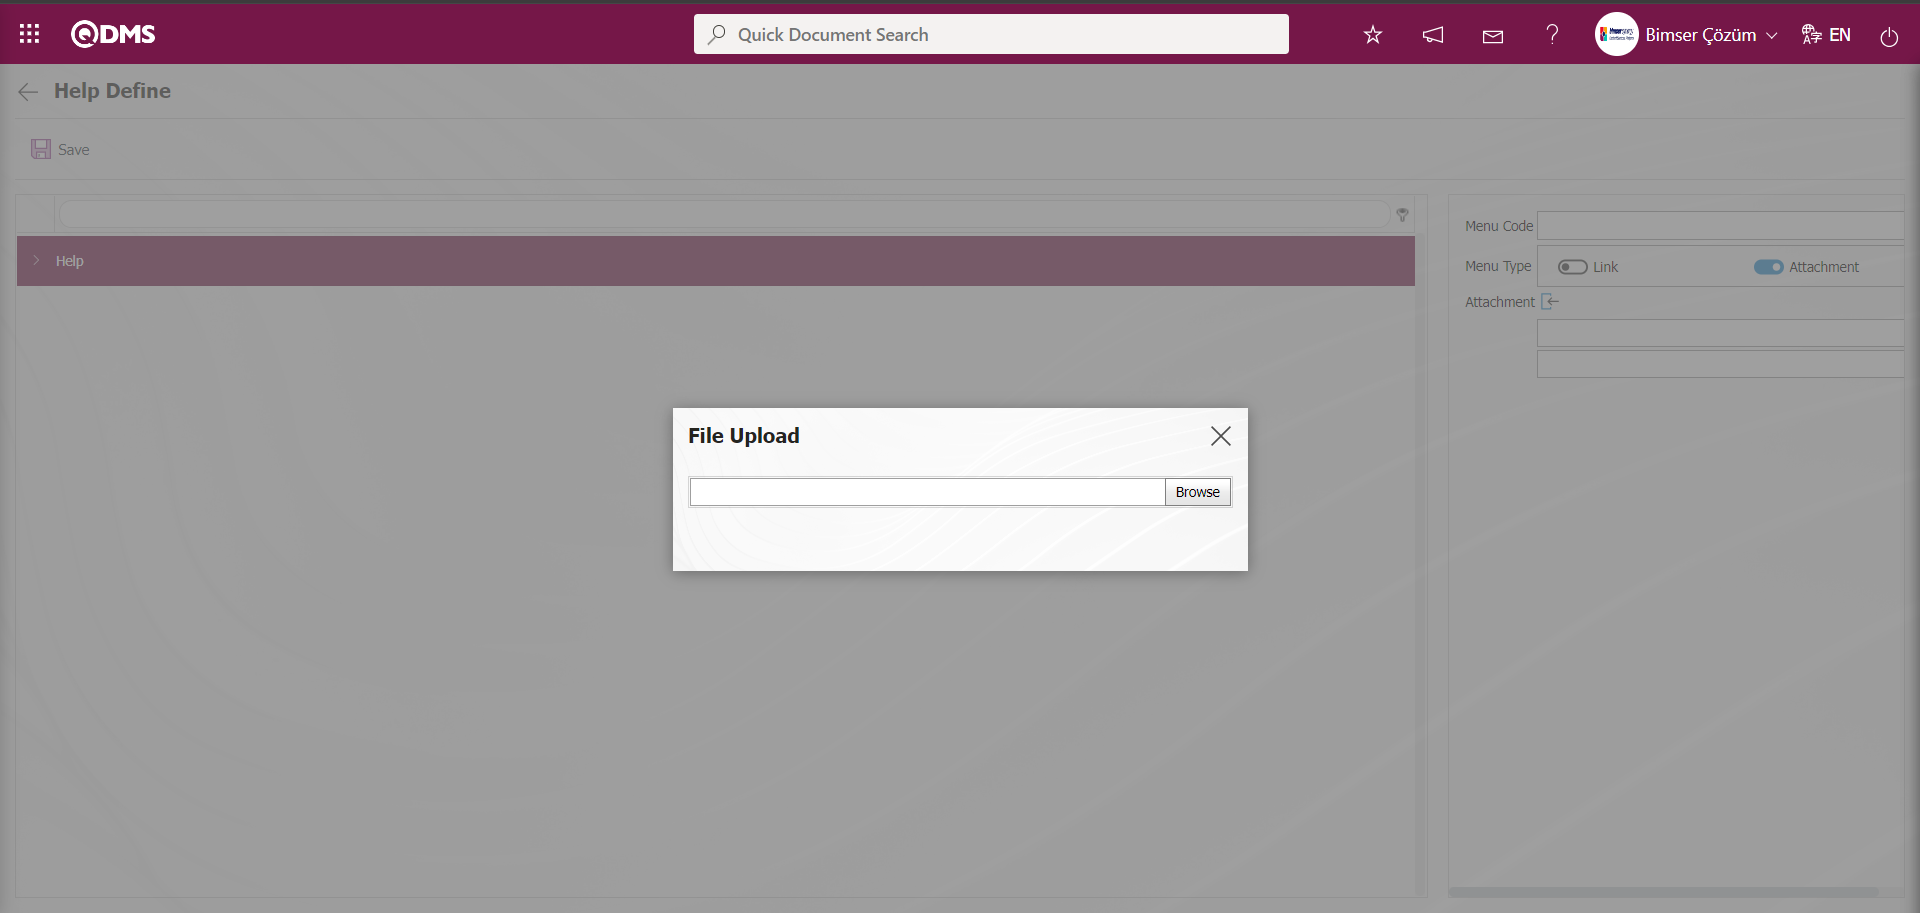
Click the “Browse” button on the Upload File screen. On the screen that opens, select the file to be added to the Help menu.
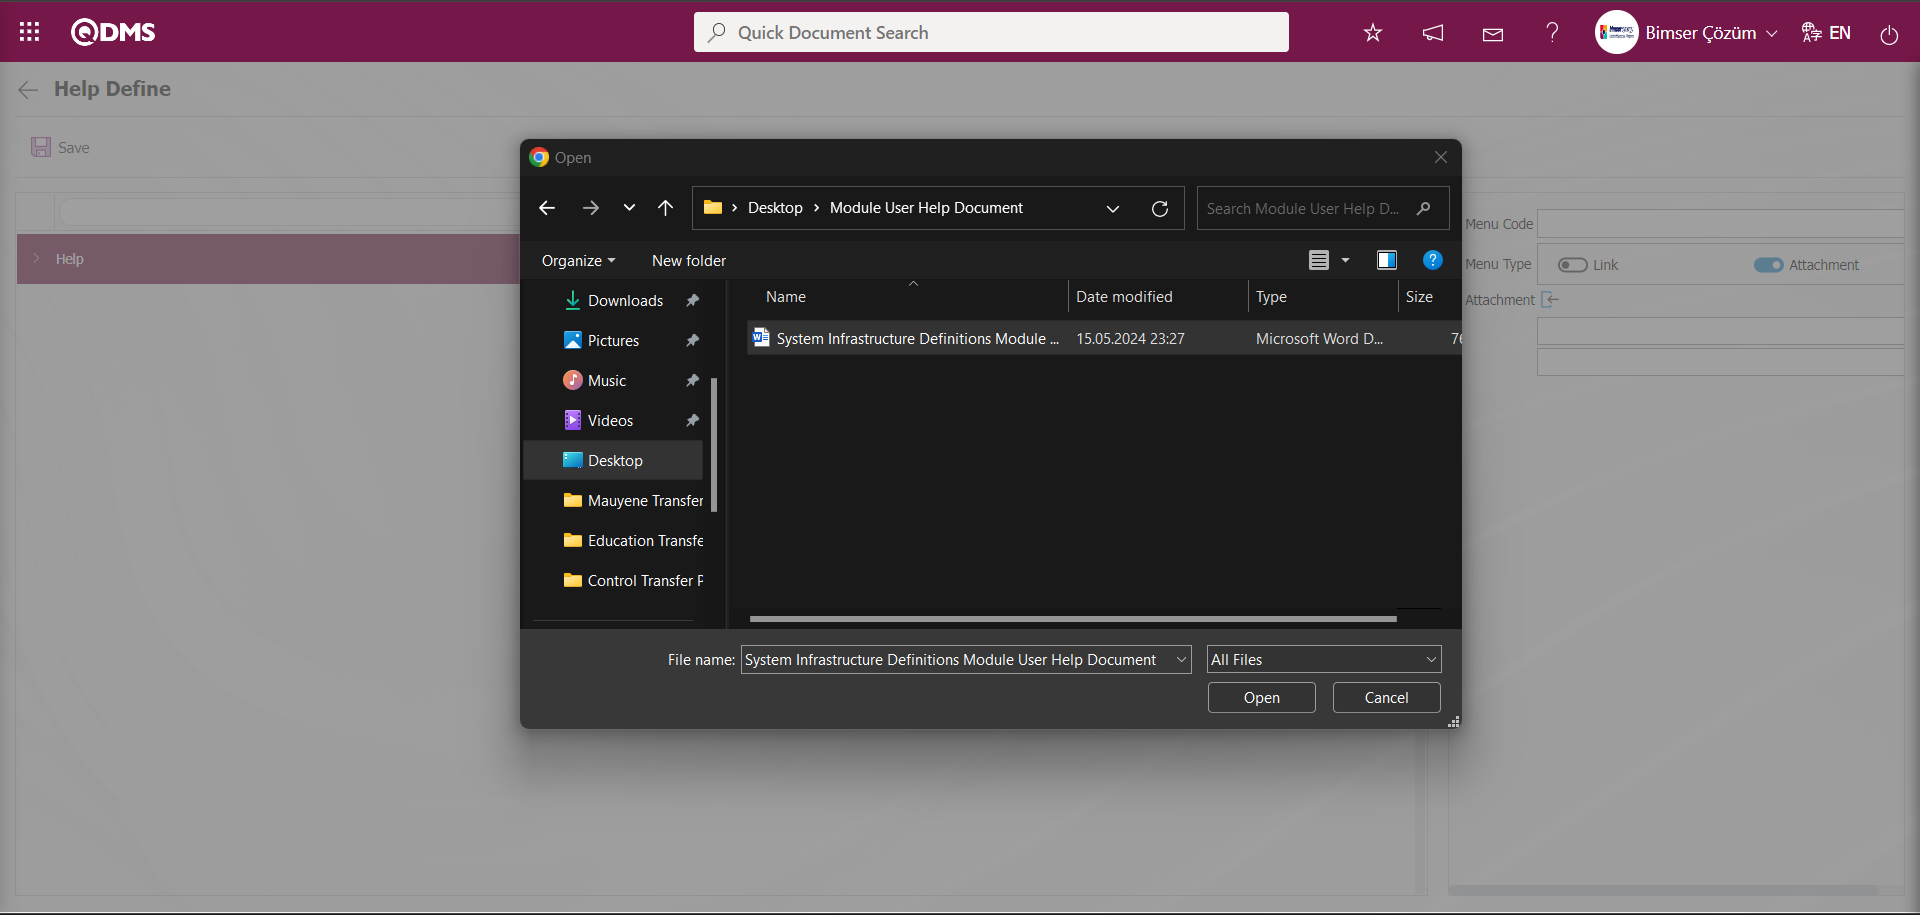
In the User Help Document name field, the name of the uploaded file comes as the name of the uploaded file and can be changed if desired.
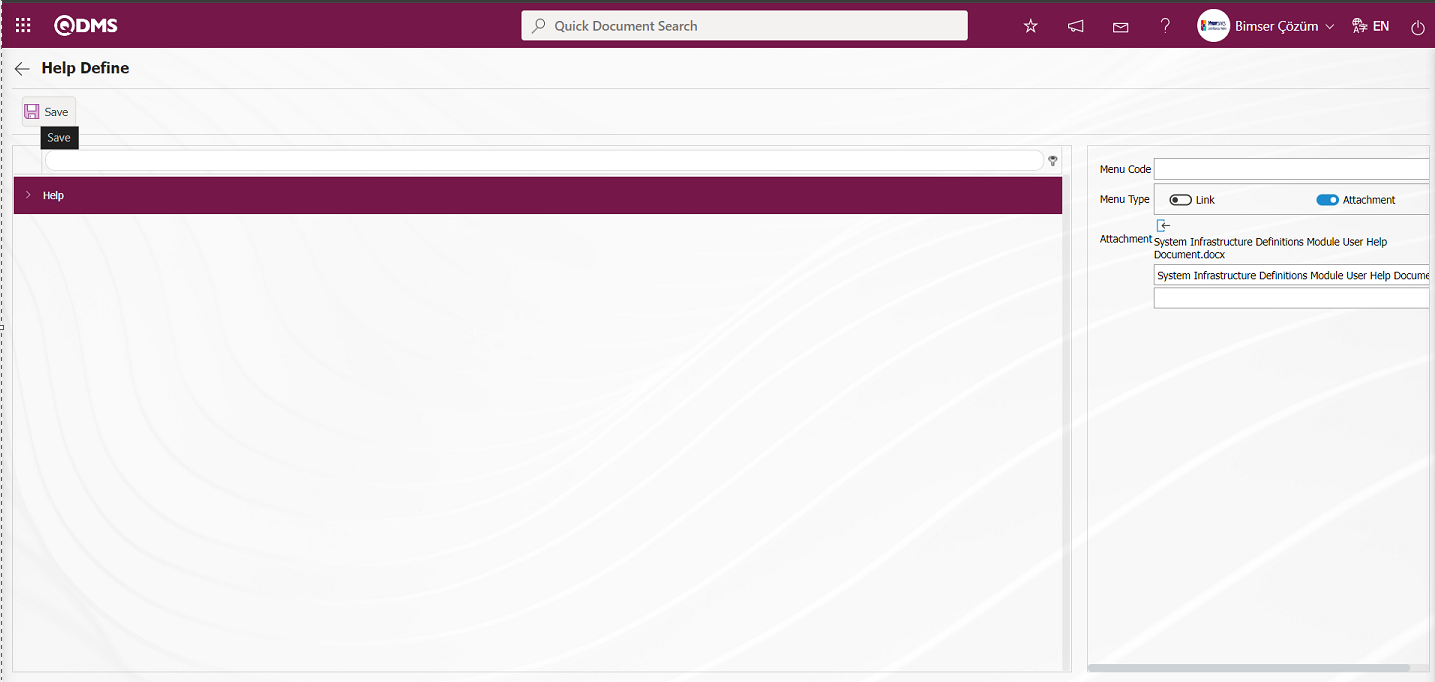
After filling in the required fields on the Help Menu Defining screen, the Help Menu Defining registration process is realized by clicking the  button in the upper left corner.
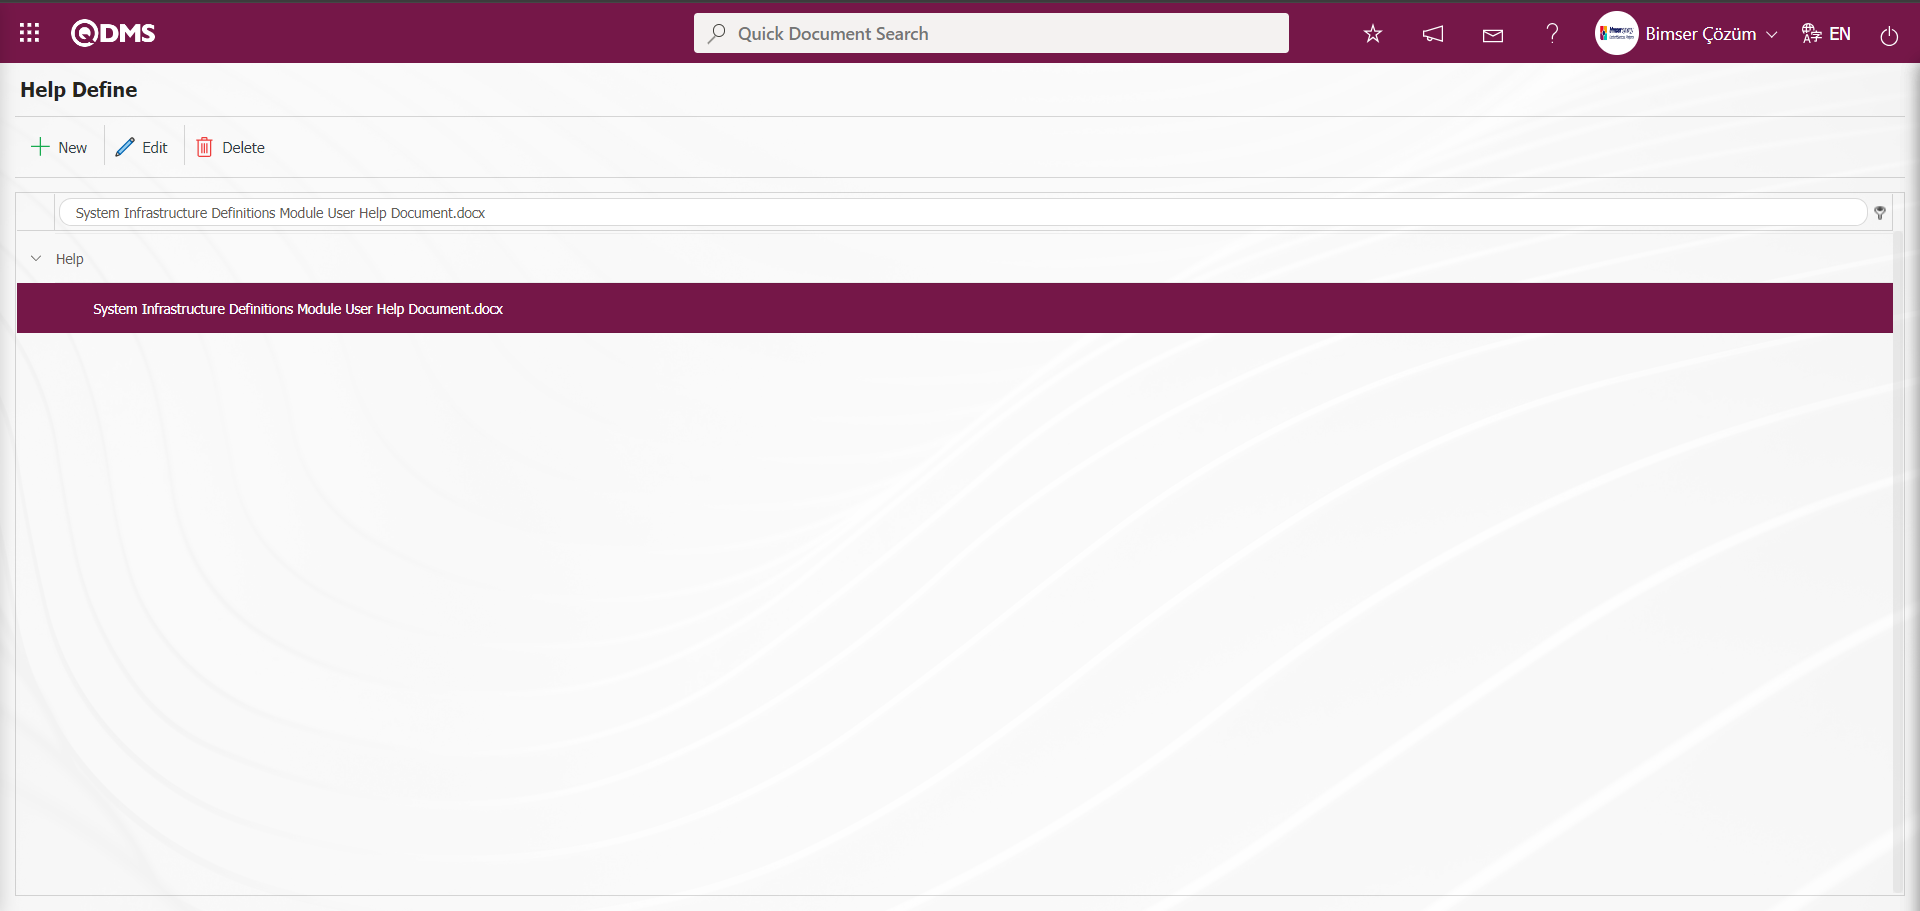
Click on the link of the uploaded Additional File in the Help menu.
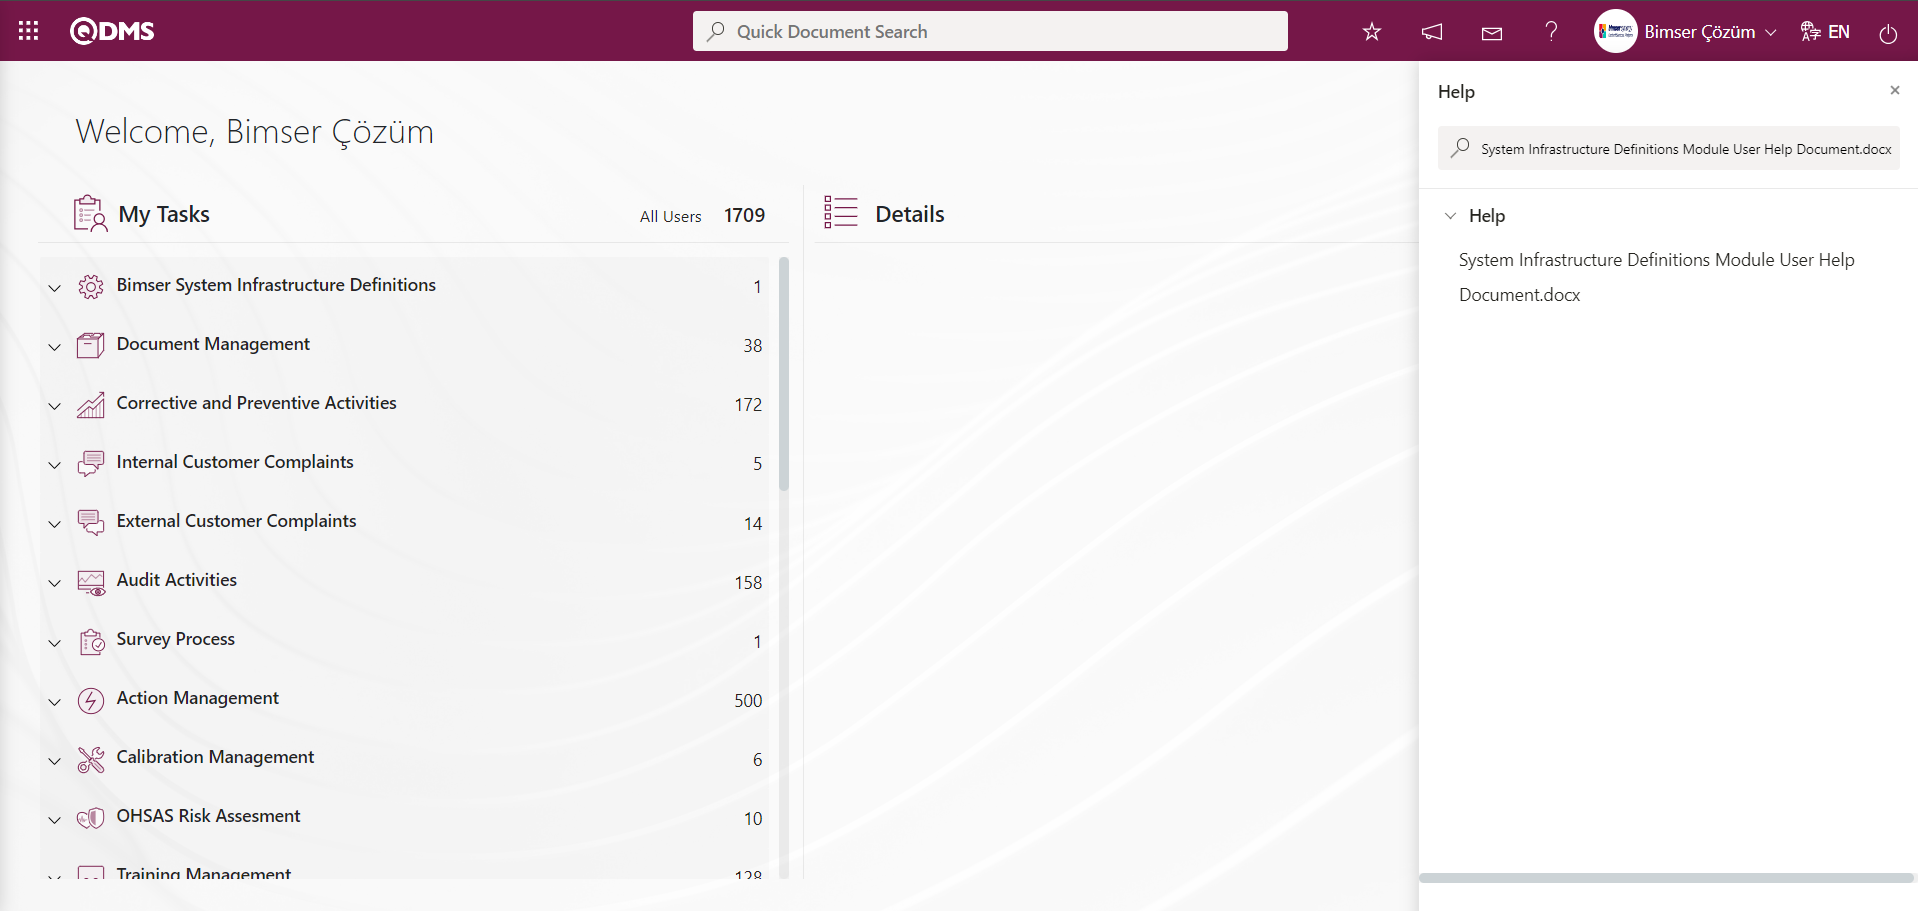
The additional file whose link is clicked is viewed and downloaded to the computer.
5.3. Reports
Menu Name: System Infrastructure Definitions/ BSID/ Reports
It is the menu where all reports related to the System Infrastructure Definitions Module are accessed and these reports are displayed in excel format. These reports are not modular based, they are reports related to the system in general.
5.3.1. BSID Changes Report
Menu Name: System Infrastructure Definitions/ BSID/ Reports/ BSID Changes Report
Provides information about the changing status of users in cases where the HR transfer program is used. In this report, information about how the data of the personnel is updated with the HR transfer and what kind of data they had before is kept. It is a report where follow-up can be provided on issues such as active or inactive characteristics, resignation status, department change, position change, etc. It is the report used to access the information about the last date of the last change in the personnel recruited to the company. With this report, it is possible to access information about when the personnel left the job, in which department they made a change if they made a department change, which position they have if they made a position change, and when the change was made regarding the status and how the new status changed. BSID Changes Report consists of two tabs. These tabs are List and Filter tab. In the list tab, the reports received by filtering according to the desired criteria in the filter tab are listed.

With the help of the buttons on the screen;
: Records are searched by filtering.
: Data is transferred to Excel.
 : The search criteria on the menu screens are used to clear the data remaining in the filter fields in the grid where the search operation is performed.
 : The menu screen is restored to its default settings.
 : User-based designing of the menu screen is done with the show-hide feature, that is, the hiding feature of the fields corresponding to the columns on the menu screens.
In the Filter tab, type the user's name and surname in the First and Last Name field and click the  (Search) button.
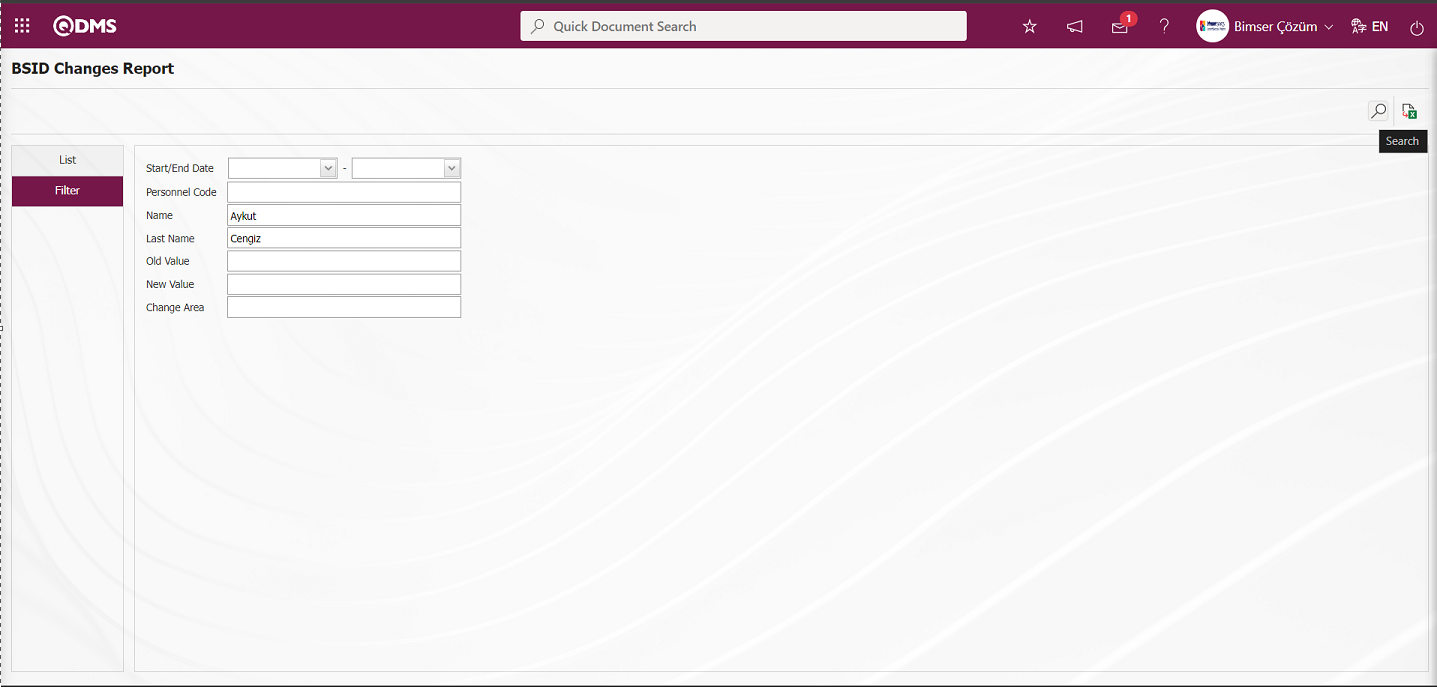
After filtering according to the search criteria, the relevant records are displayed in the list in the list tab.
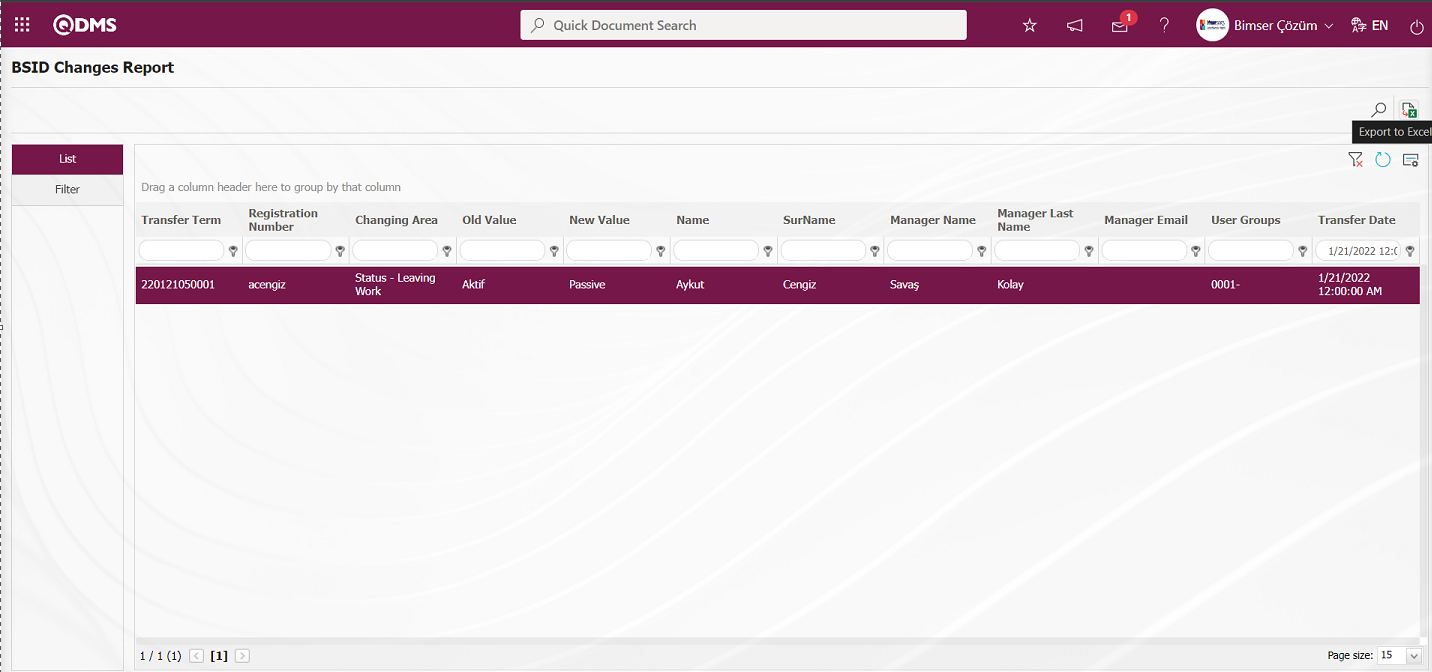
In the BSID Changes Report screen, the system automatically presents the BSID Changes Report to the user in Excel format according to the search criteria in the filter tab configured by clicking the  (Export to Excel) button.
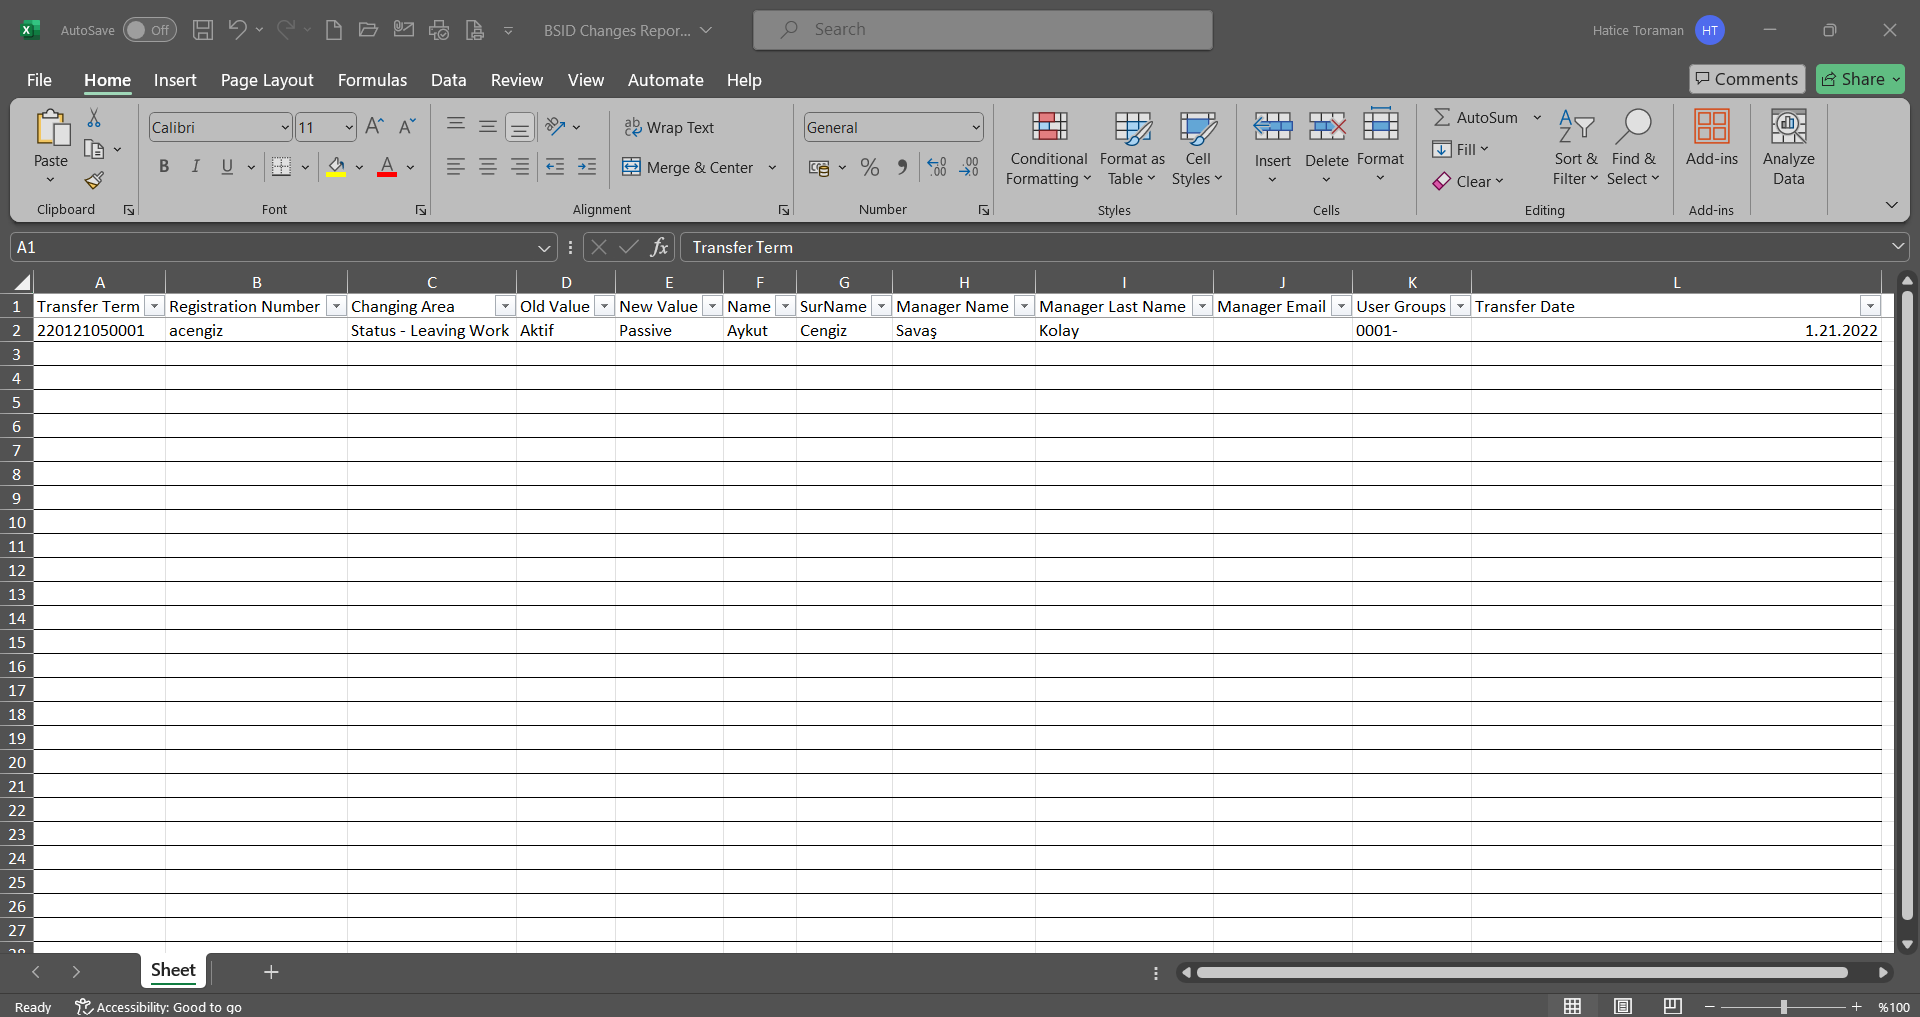
5.3.2. Change Log Report
Menu Name: System Infrastructure Definitions/BSID/Reports/ Change Log
The Change Log report is a report in which the process of recording each transaction made in Qdms Modules, in which table, with which codes and by whom it was changed is displayed. The Change Log report is accessed from which table any data deletion or update was made, from which table it was deleted or updated, and by whom. This report is used, for example, to access information about when and by whom any data was deleted. Change Log Report consists of two tabs. These tabs are List and Filter tab. In the list tab, it is ensured that the Reports received by filtering according to the desired criteria in the filter tab are listed.

With the help of the buttons on the screen;
 : In the selected record in the list, the old value and current value information are compared.
: Records are searched by filtering.
: Data is transferred to Excel.
: The search criteria on the menu screens are used to clear the data remaining in the filter fields in the grid where the search operation is performed.
: The menu screen is restored to its default settings.
: User-based designing of the menu screen is done with the show-hide feature, that is, the hiding feature of the fields corresponding to the columns on the menu screens.
In the Filter tab, the report is obtained by searching according to the information of the fields such as Module name, Table name, Main code, Sub code, Transacting user and working date. In the Filter tab, select the relevant module by clicking the drop-down list in the Module Name field. In the Transaction User field, the selection is made in the personnel list opened by clicking the  (Select) button and the main code is written in the code information related to the relevant field and the filtering process is performed according to the search criteria by clicking the (Search) button.
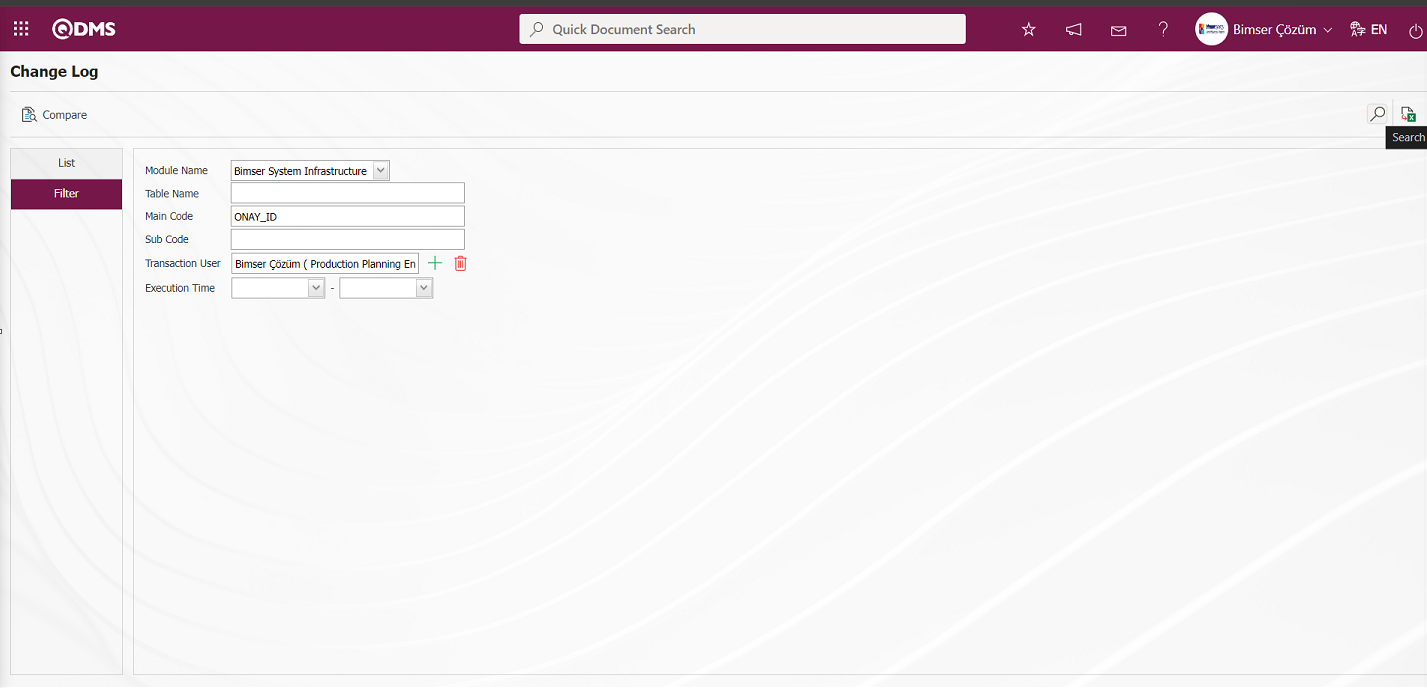
In the list tab, the related records are listed in the list according to the search criteria in the filter tab.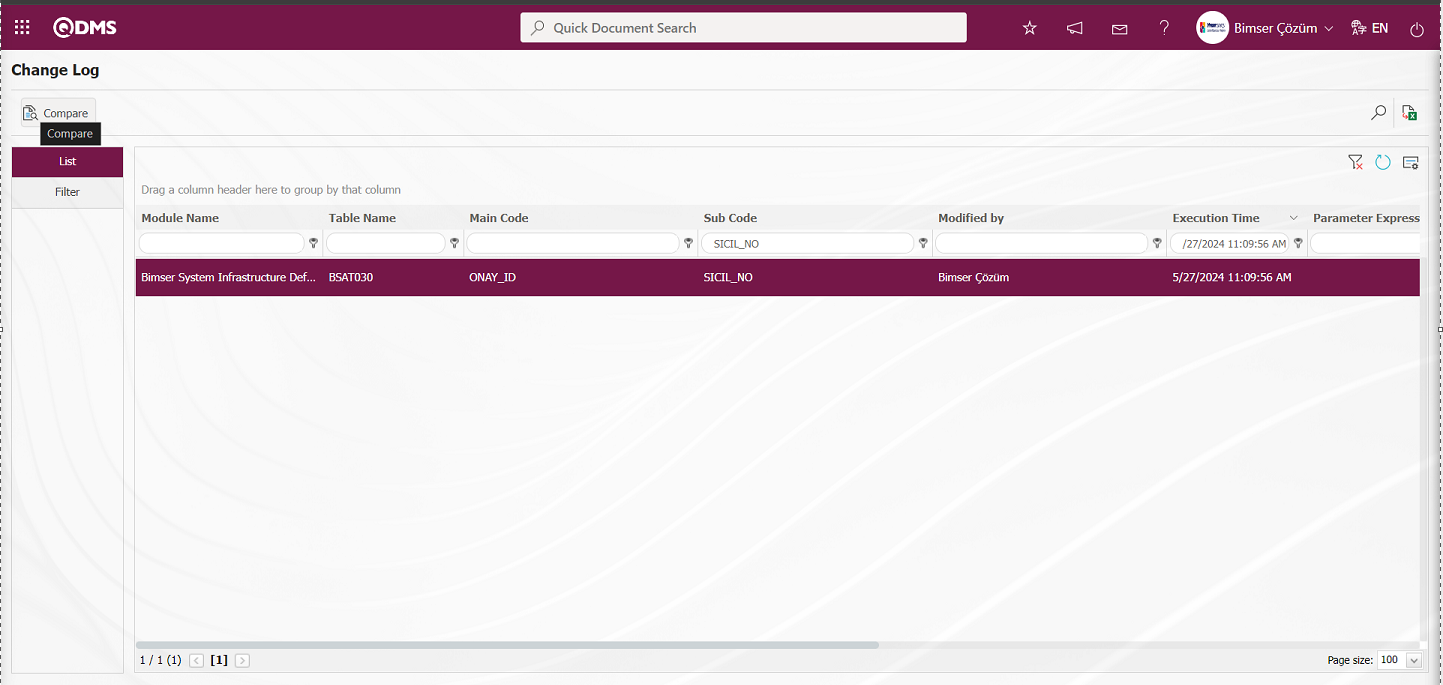
While the record is selected in the list on the Change Log screen, the screen where the Old value and Current value information of the relevant record is compared by clicking the button is displayed.
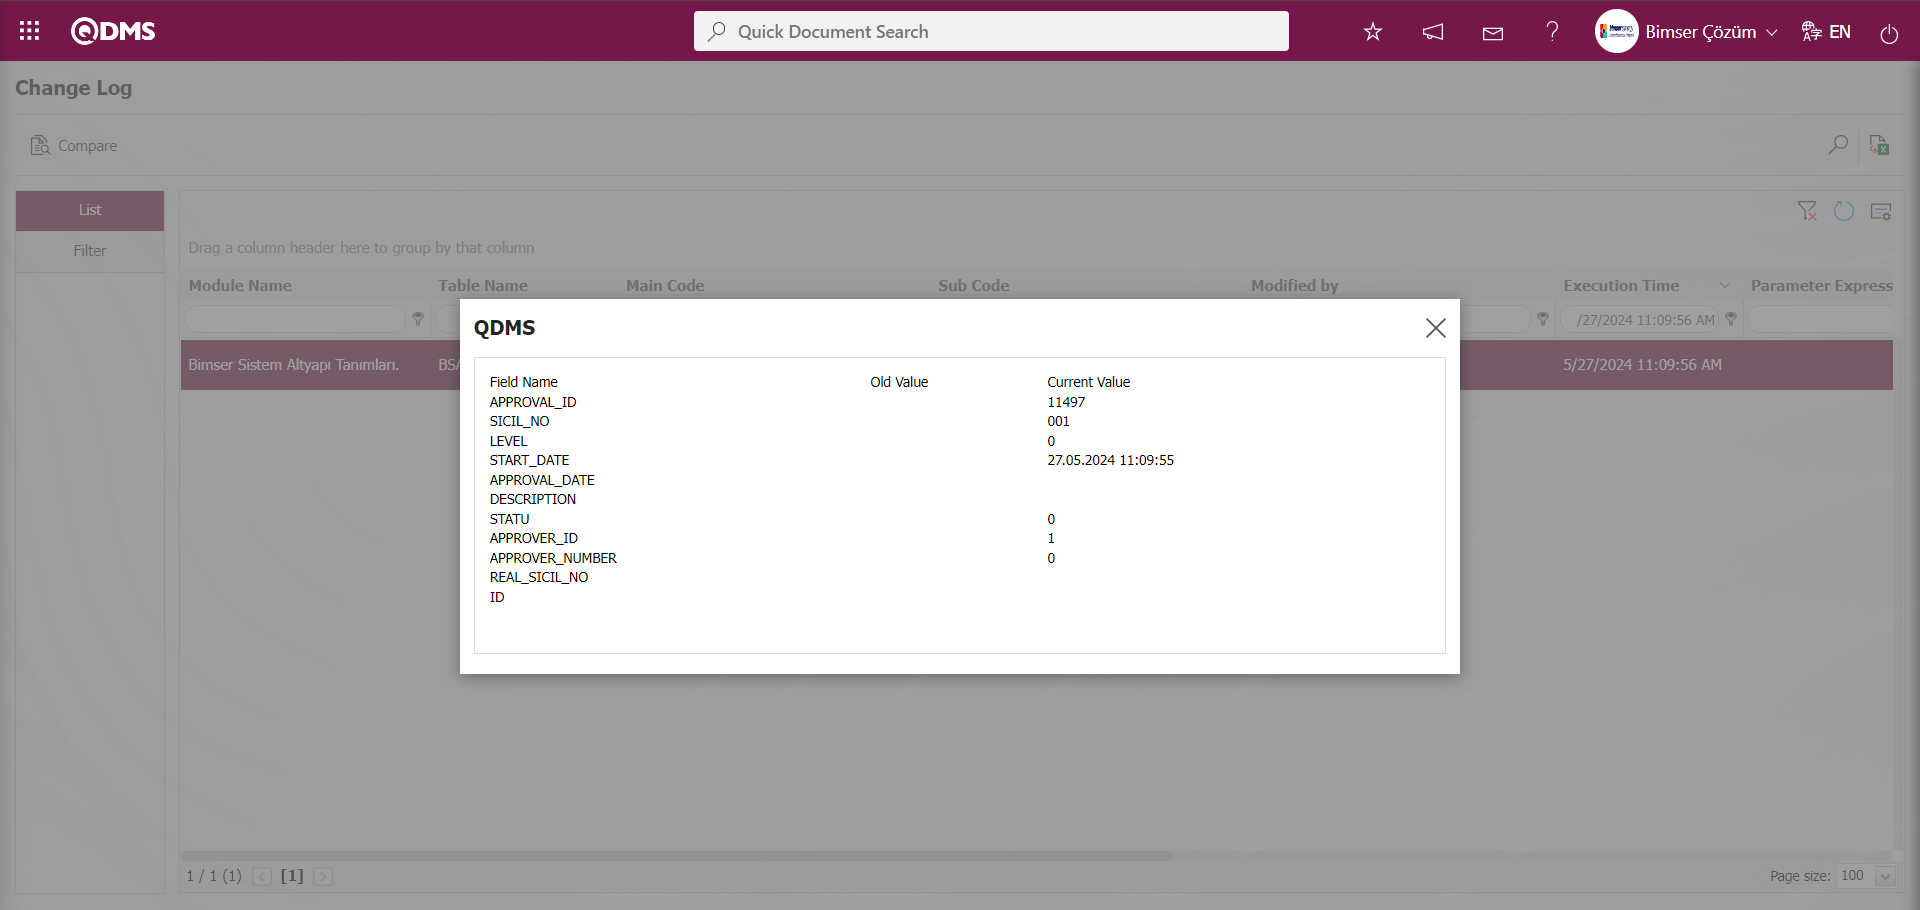
Click the (Export to Excel) button on the Change Log screen.
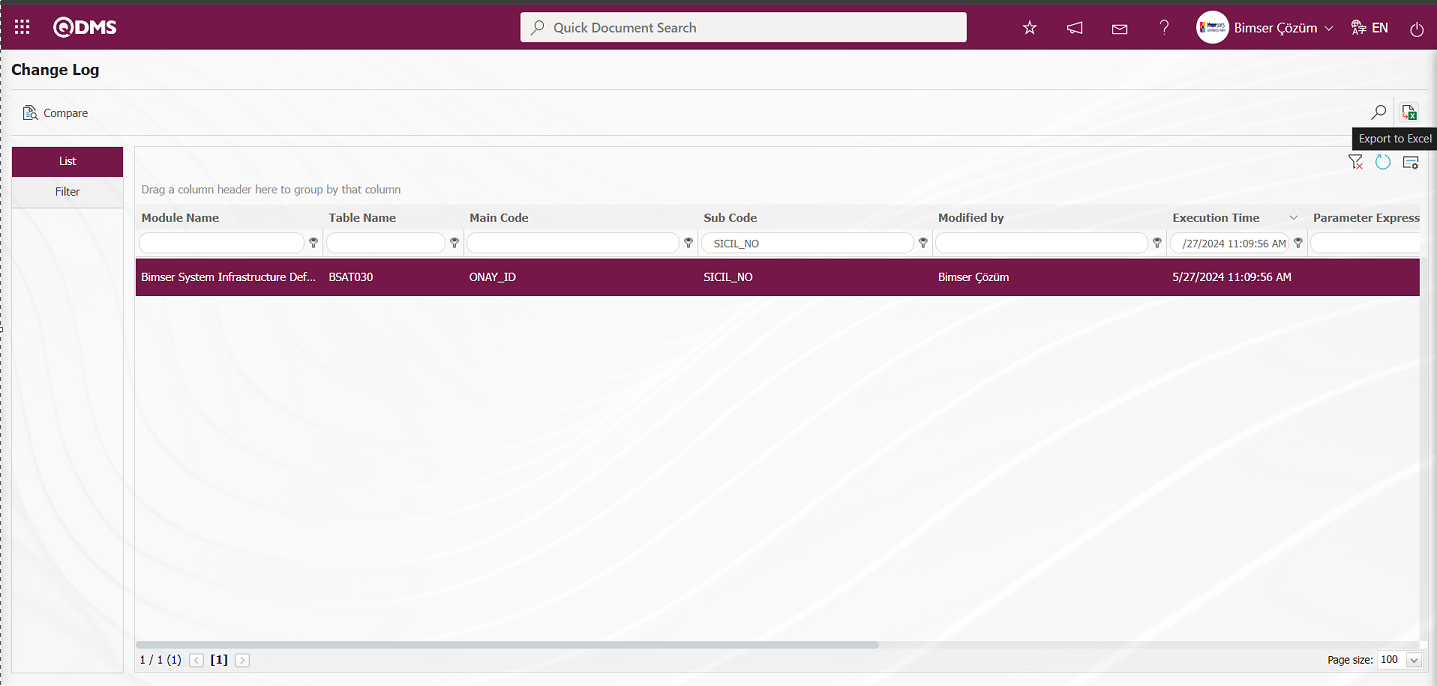
According to the search criteria in the filter made in the filter tab, the system automatically presents the Change Log report to the user in Excel format.
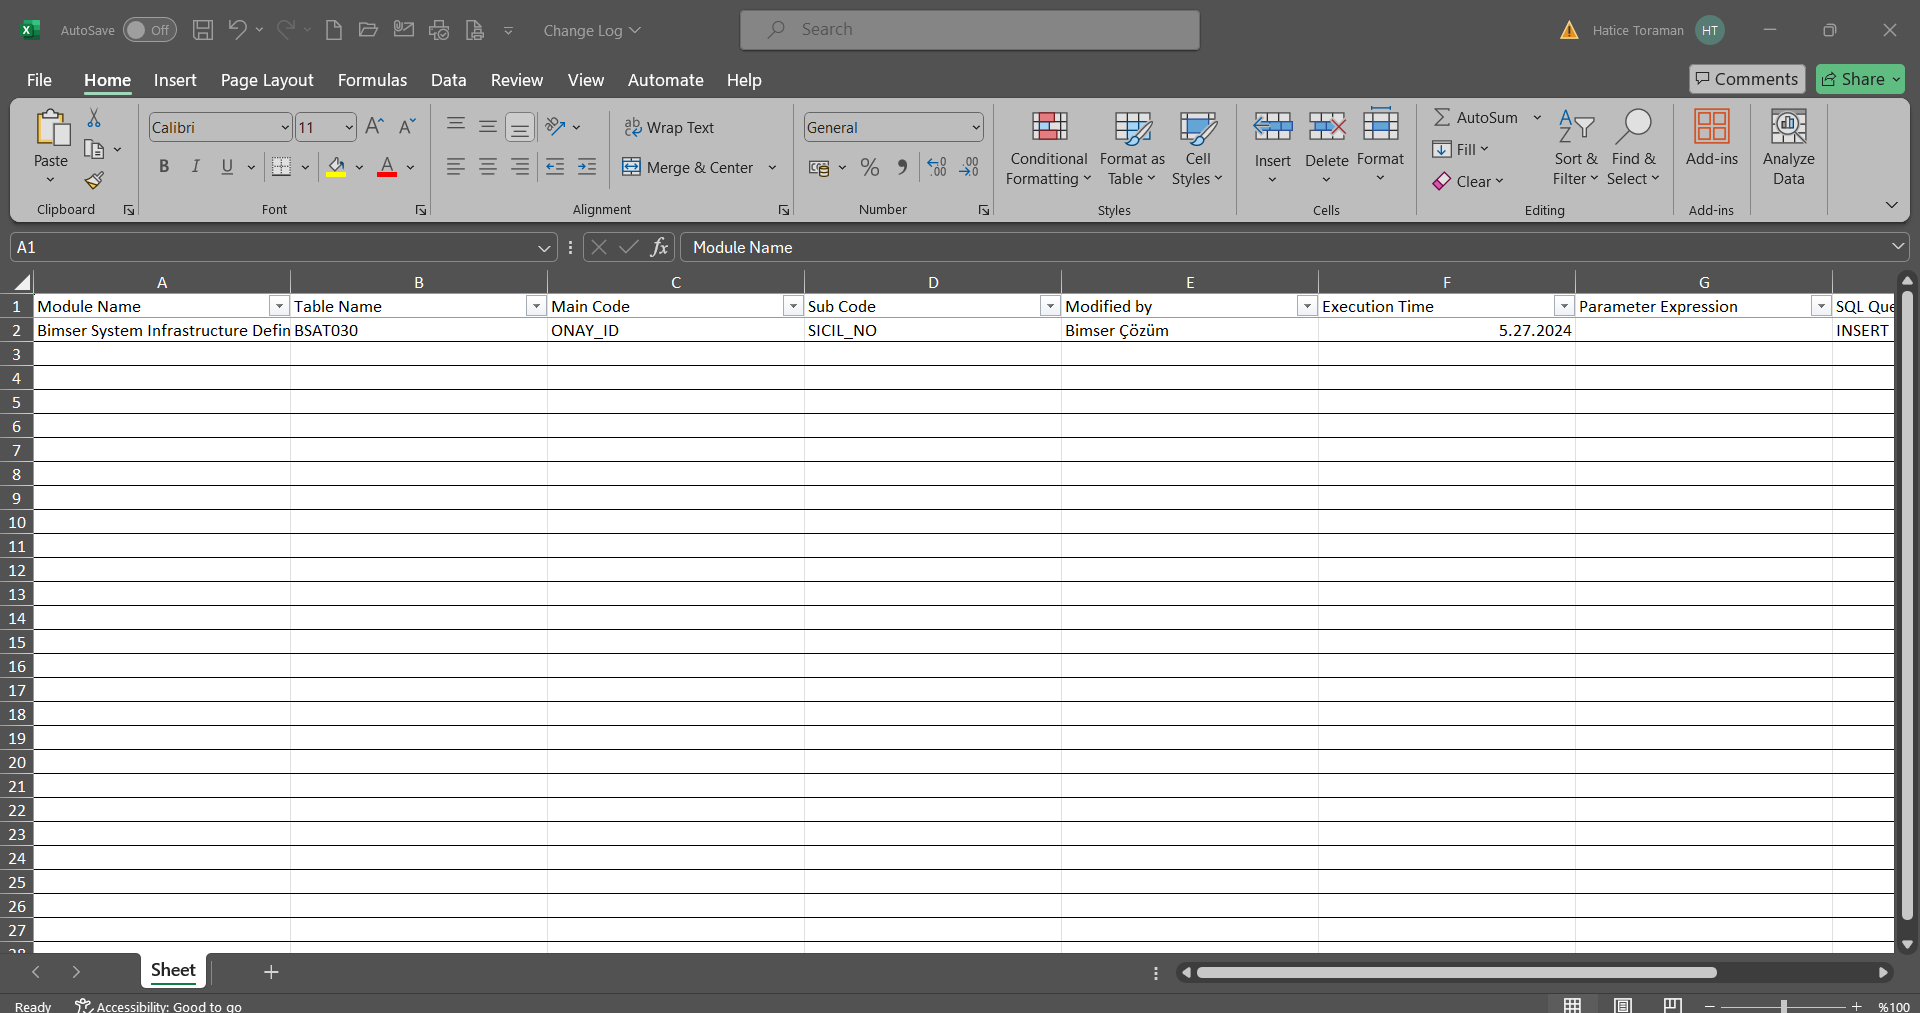
5.3.3. Active User Report
Menu Name: System Infrastructure Definitions/ BSID/ Reports/ Active User Report
It is a report that shows how many users have made transactions in total in which module. When the relevant module is selected in the Module No field, information on how many users have actively used which functions of the module can also be accessed. Active User Report consists of two tabs. These tabs are List and Filter tab. In the list tab, the Reports received by filtering according to the desired criteria in the filter tab are listed.

With the help of the buttons on the screen;
: Records are searched by filtering.
: Data is transferred to Excel.
: The search criteria on the menu screens are used to clear the data remaining in the filter fields in the grid where the search operation is performed.
: The menu screen is restored to its default settings.
: User-based designing of the menu screen is done with the show-hide feature, that is, the hiding feature of the fields corresponding to the columns on the menu screens.
The report is obtained by searching according to the information in the Filter tab Module No, Transaction Date and Status fields. Select Document Management Module in the Module No field and select the date in the transaction date field and click the (Search) button.
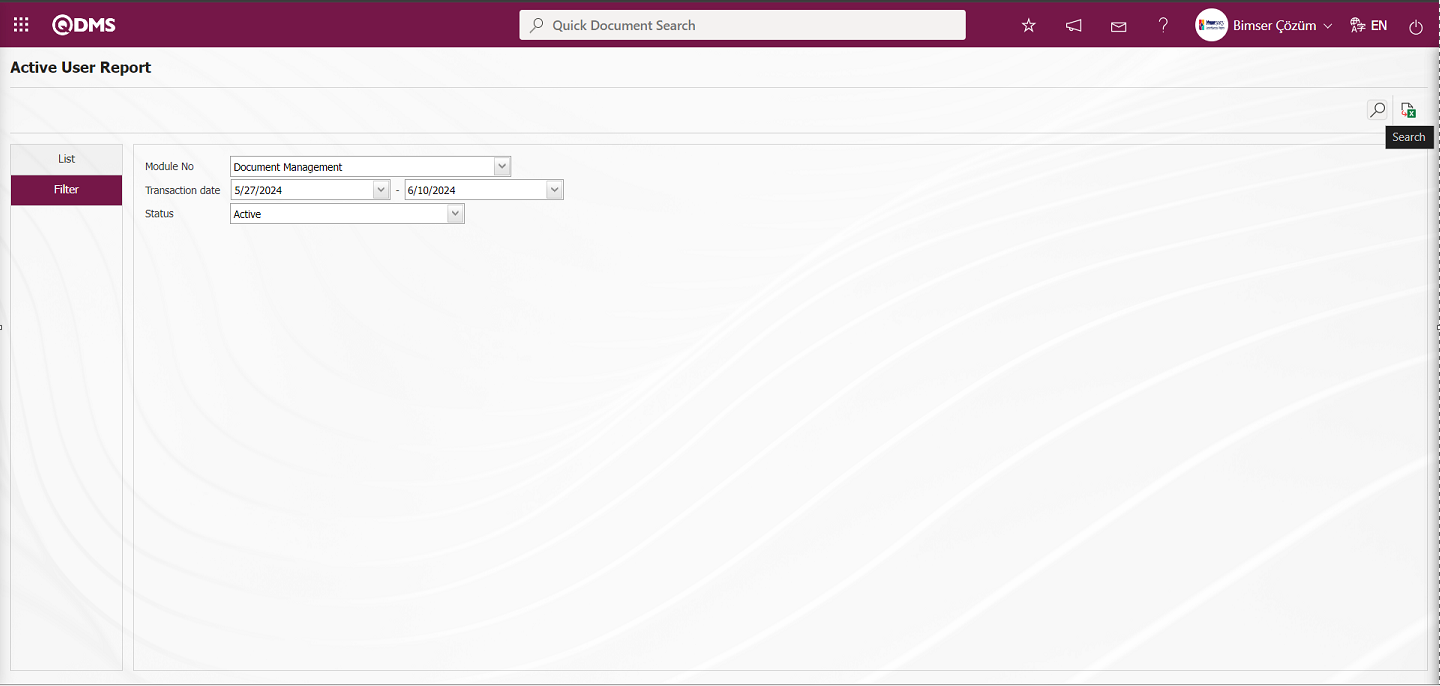
In the list tab, the number of active users using the functions of the module in the selected date range related to the selected Document Management Module is given.
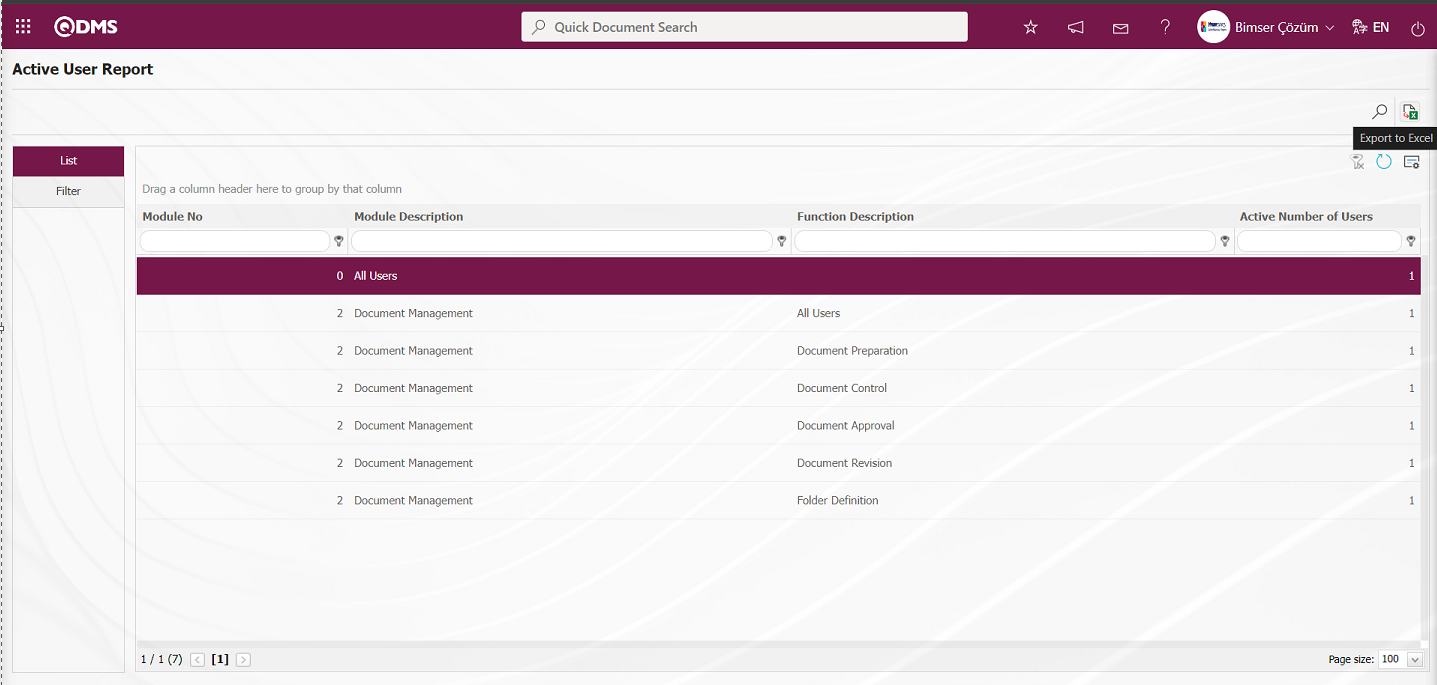
In the Active User Report screen, the system automatically presents the Active User report to the user in Excel format according to the search criteria in the filter tab made by clicking the (Export to Excel) button.
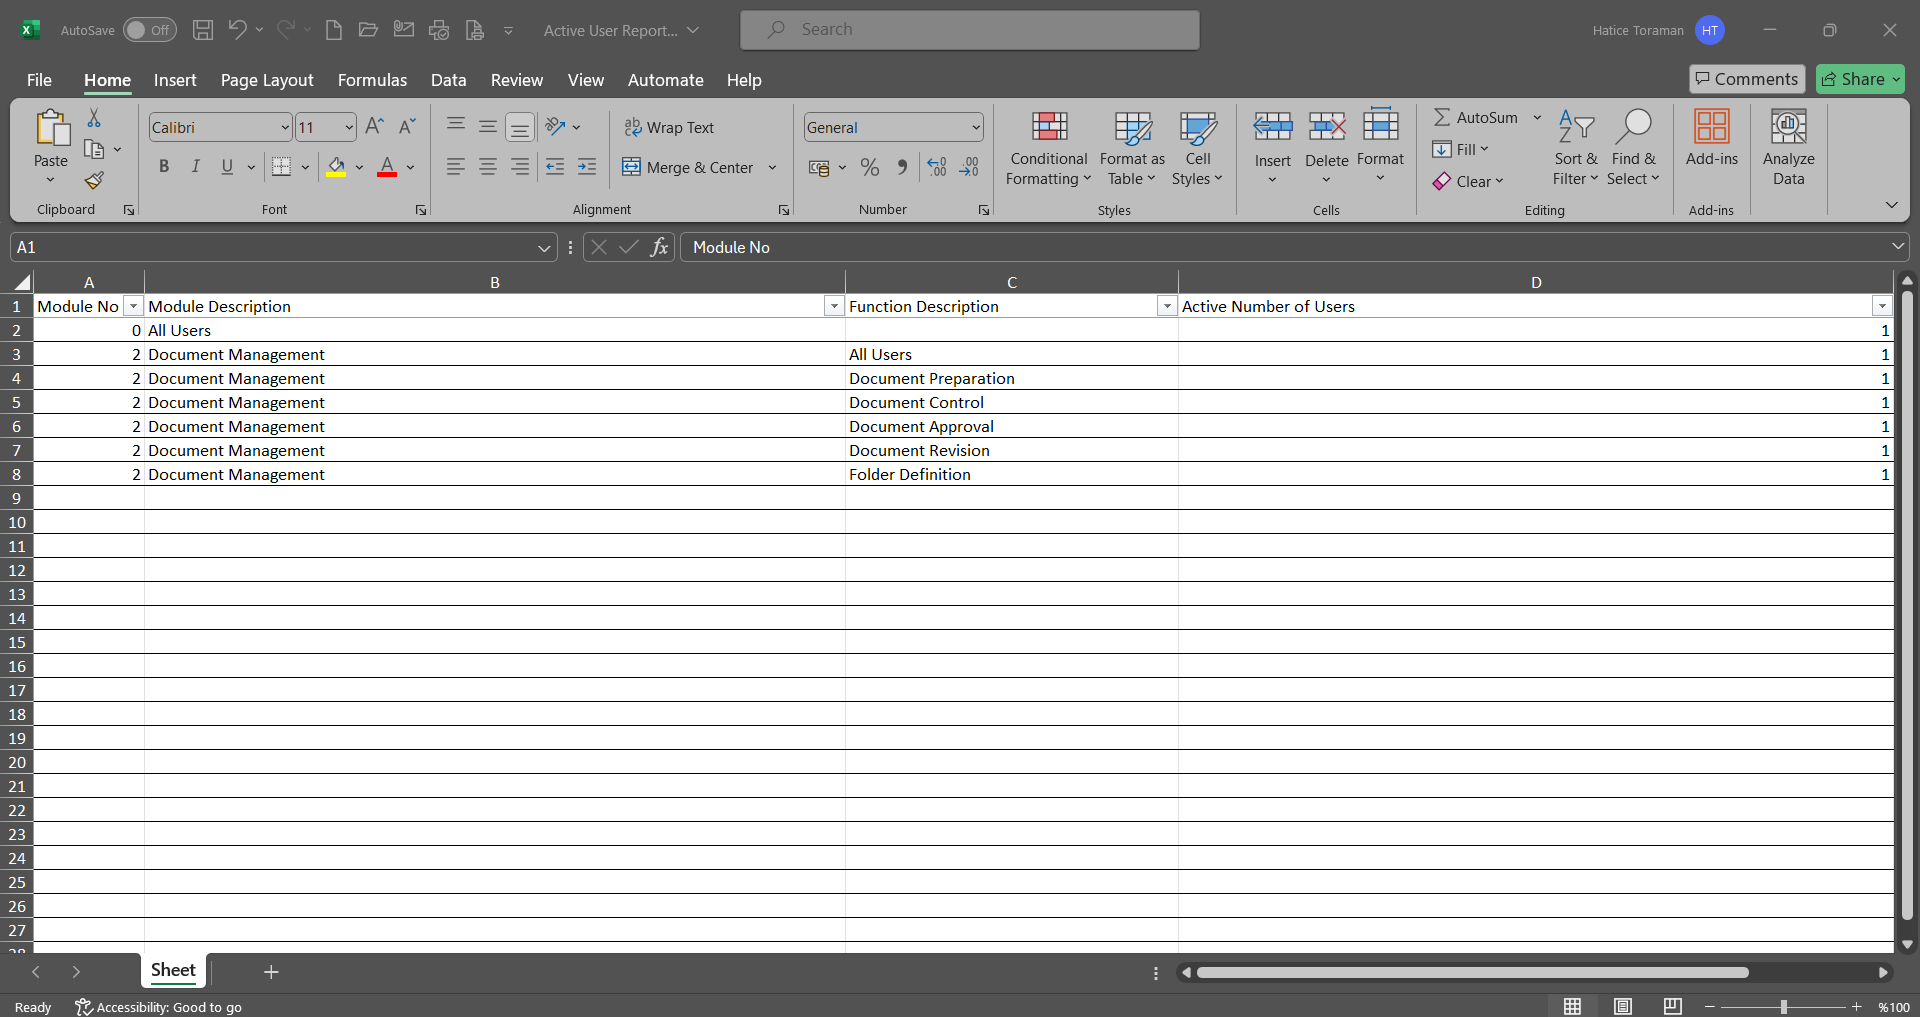
5.3.4. Task Transfer Report
Menu Name: System Infrastructure Definitions/ BSID/ Reports/ Task Transfer Report
In Qdms modules, it is the report where the list of the tasks transferred with the Task transfer and Confirmation transfer menus and the information about the transfer related to the tasks is accessed. In the report, information such as the module to which the tasks were transferred, transaction type, transferred task, user to whom the task was transferred and the user to whom the task was transferred and the date of the transaction are accessed. Task Transfer Report consists of two tabs. These tabs are List and Filter tab. In the list tab, the Reports received by filtering according to the desired criteria in the filter tab are listed.
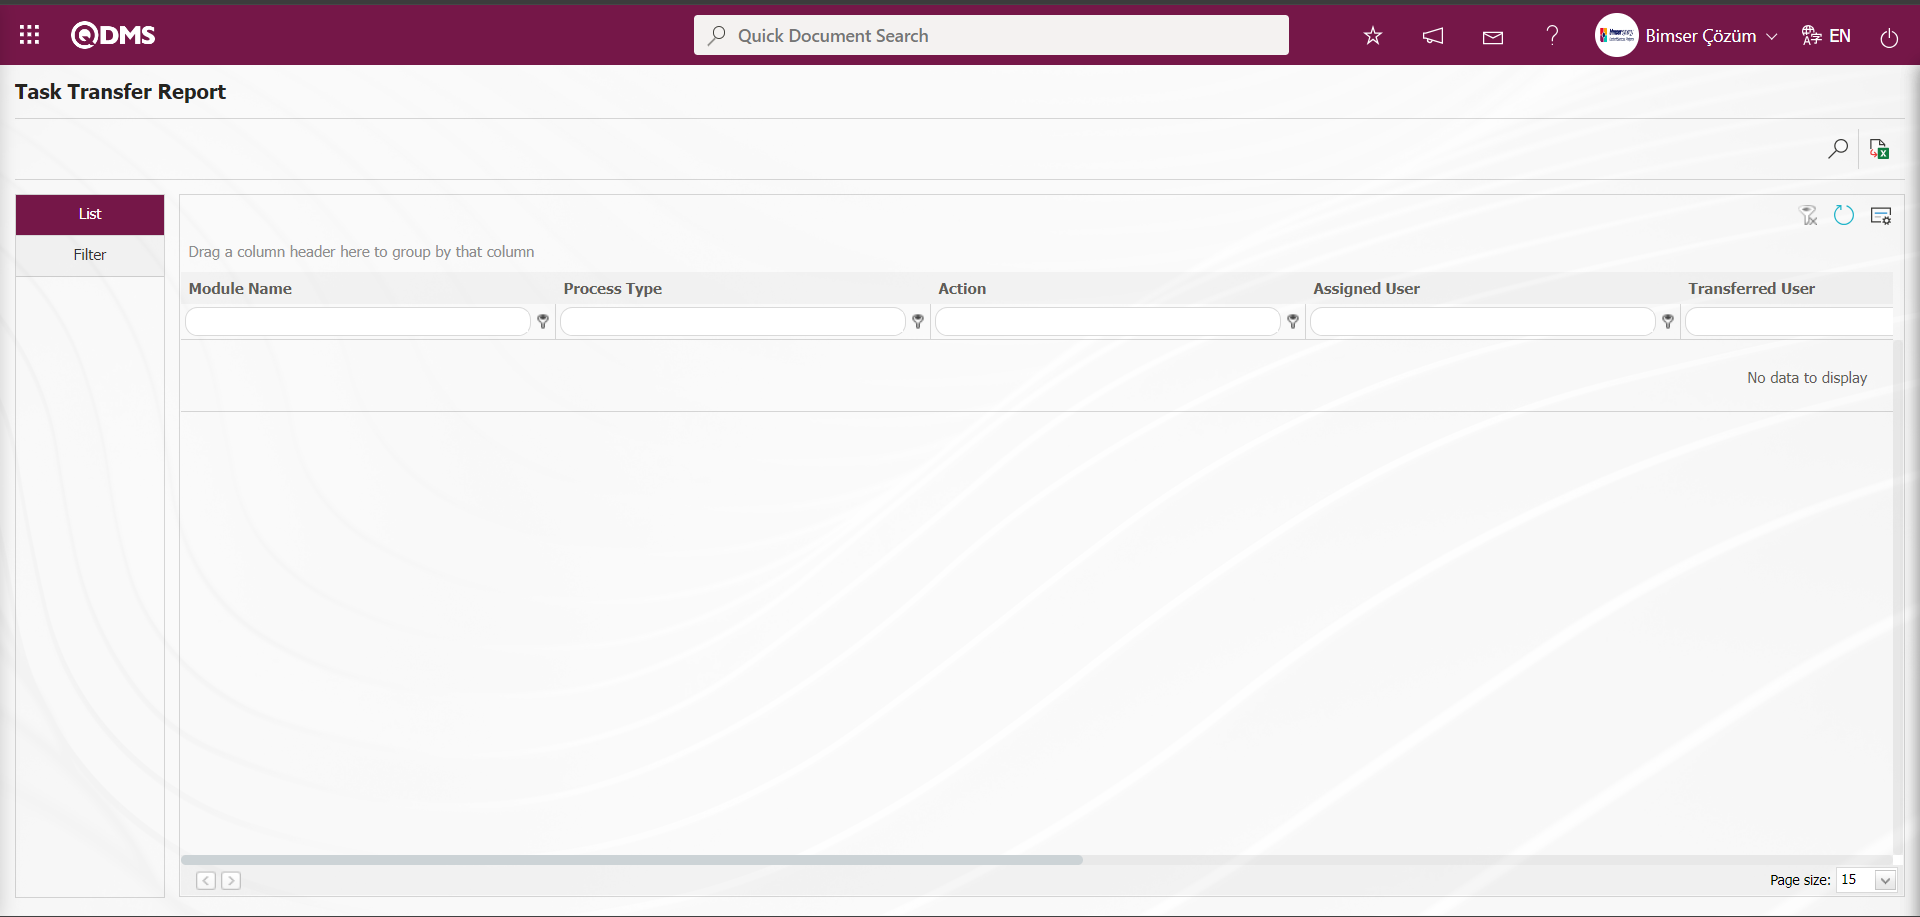
With the help of the buttons on the screen;
: Records are searched by filtering.
: Data is transferred to Excel.
: The search criteria on the menu screens are used to clear the data remaining in the filter fields in the grid where the search operation is performed.
: The menu screen is restored to its default settings.
: User-based designing of the menu screen is done with the show-hide feature, that is, the hiding feature of the fields corresponding to the columns on the menu screens.
In the filter tab, select the relevant module by clicking the drop-down list in the Module field field in the search criteria. Enter data in the fields of the user to whom the task is transferred and the user to whom the task is transferred.
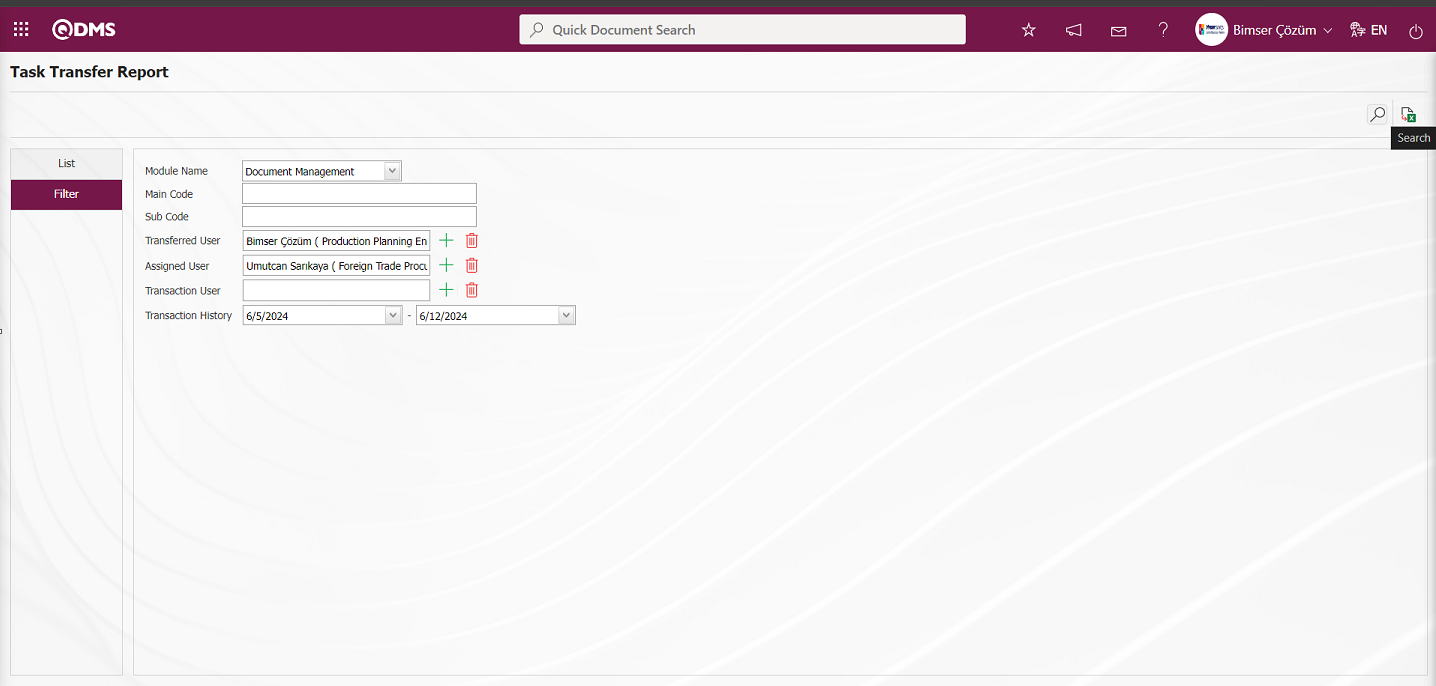
After filtering the search criteria on the Task Transfer Report screen, click the (Search) button to display the records according to the search criteria in the list tab.

According to the search criteria configured by clicking the (Export to Excel) button on the Task Transfer Report screen, the system automatically presents the Task Transfer report to the user in Excel format.
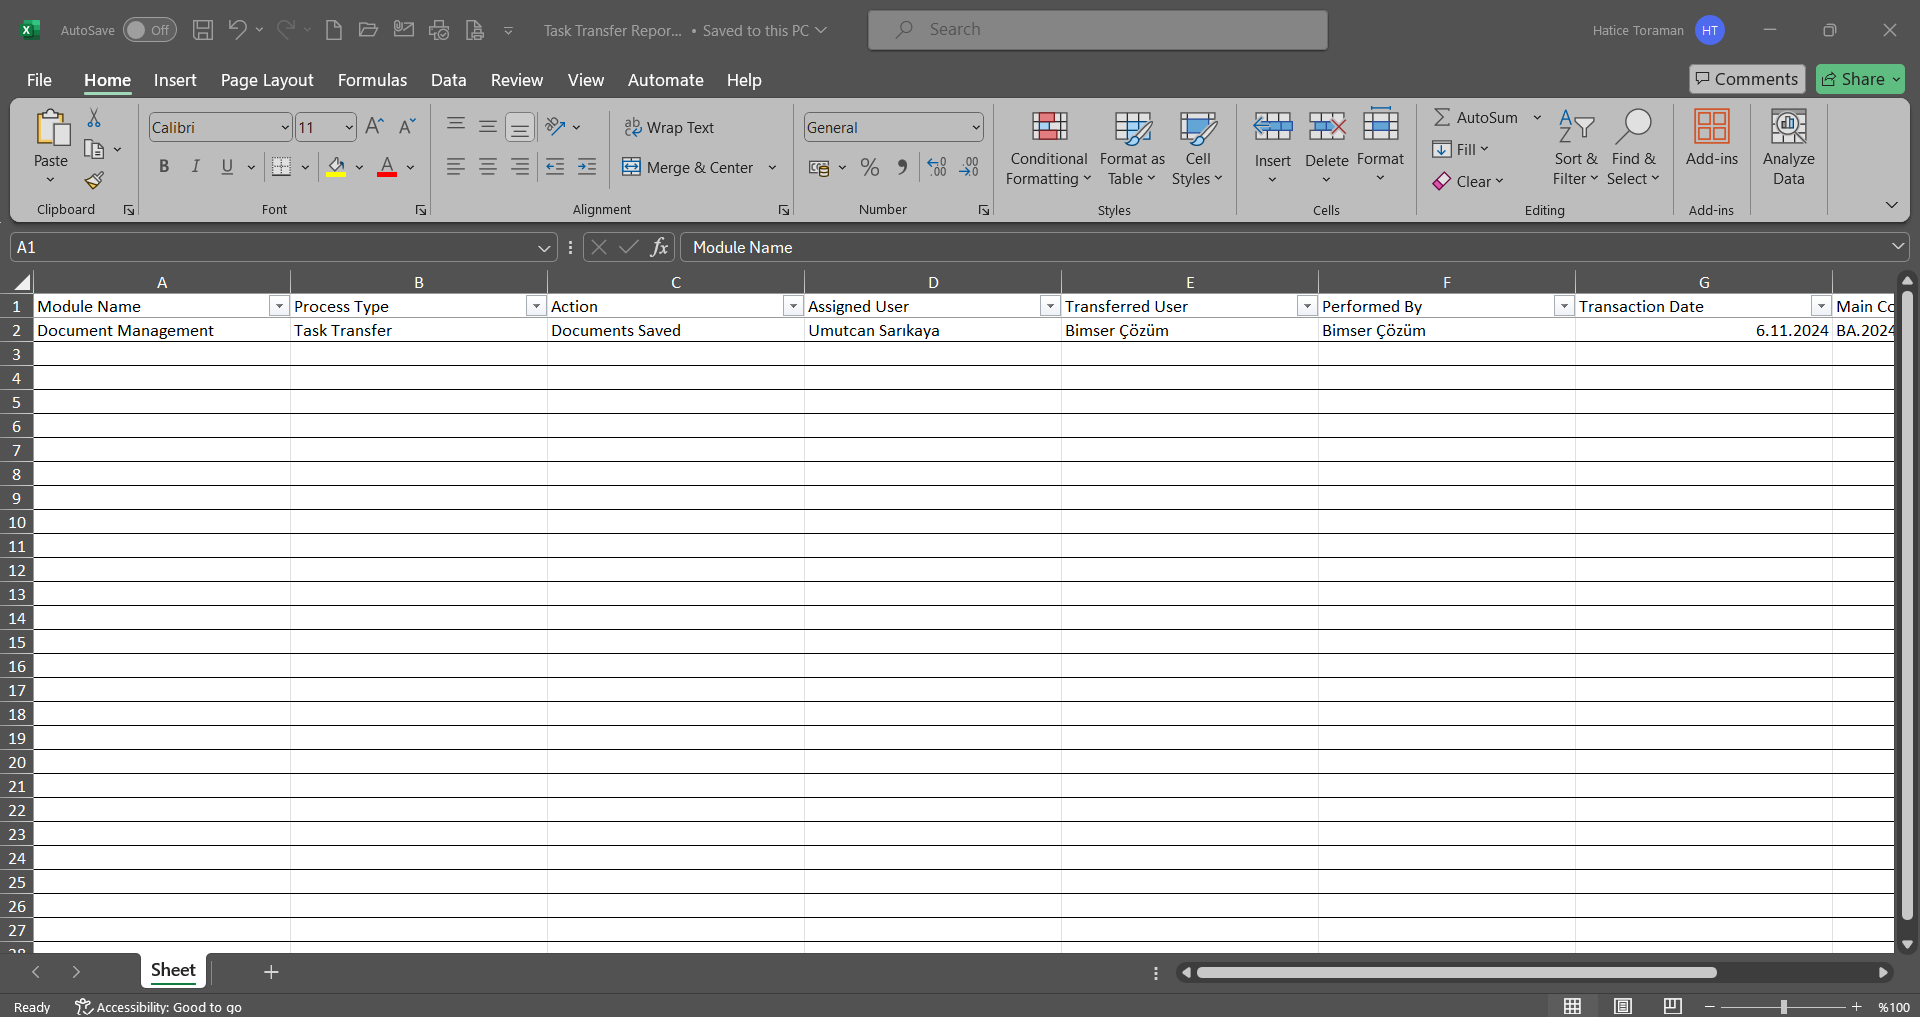
5.3.5. QDMS Usage Report
Menu Name: System Infrastructure Definitions/ BSID/ Reports/ QDMS Usage Report
It is a report where the number of logins to QDMS on the basis of users is kept. It is the report used to access the last login date and time information about how many times the users logged into the system. QDMS Usage Report consists of two tabs. These tabs are List and Filter tab. In the list tab, the Reports received by filtering according to the desired criteria in the filter tab are listed.

With the help of the buttons on the screen;
: Records are searched by filtering.
: Data is transferred to Excel.
: The search criteria on the menu screens are used to clear the data remaining in the filter fields in the grid where the search operation is performed.
: The menu screen is restored to its default settings.
: User-based designing of the menu screen is done with the show-hide feature, that is, the hiding feature of the fields corresponding to the columns on the menu screens.
The report is obtained by searching according to the information of the fields such as Transaction Date, Registration No, Name, Surname, Department. By typing the user's registration number information in the Registration No field and selecting the date in the Calendar field opened in the transaction date field, click the (Search) button.
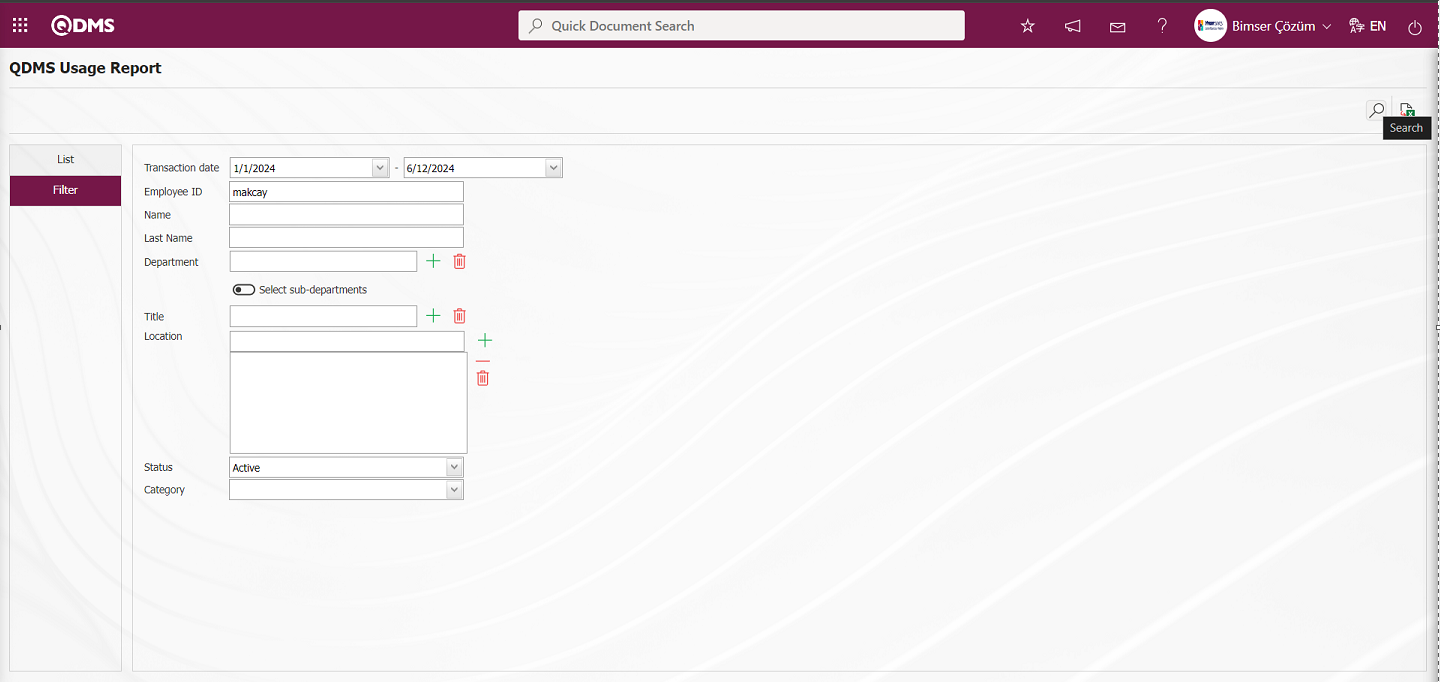
The Qdms entry number, last entry date and time information of the personnel for whom the user's registration number is written in the Registration No field is displayed in the report in the list tab.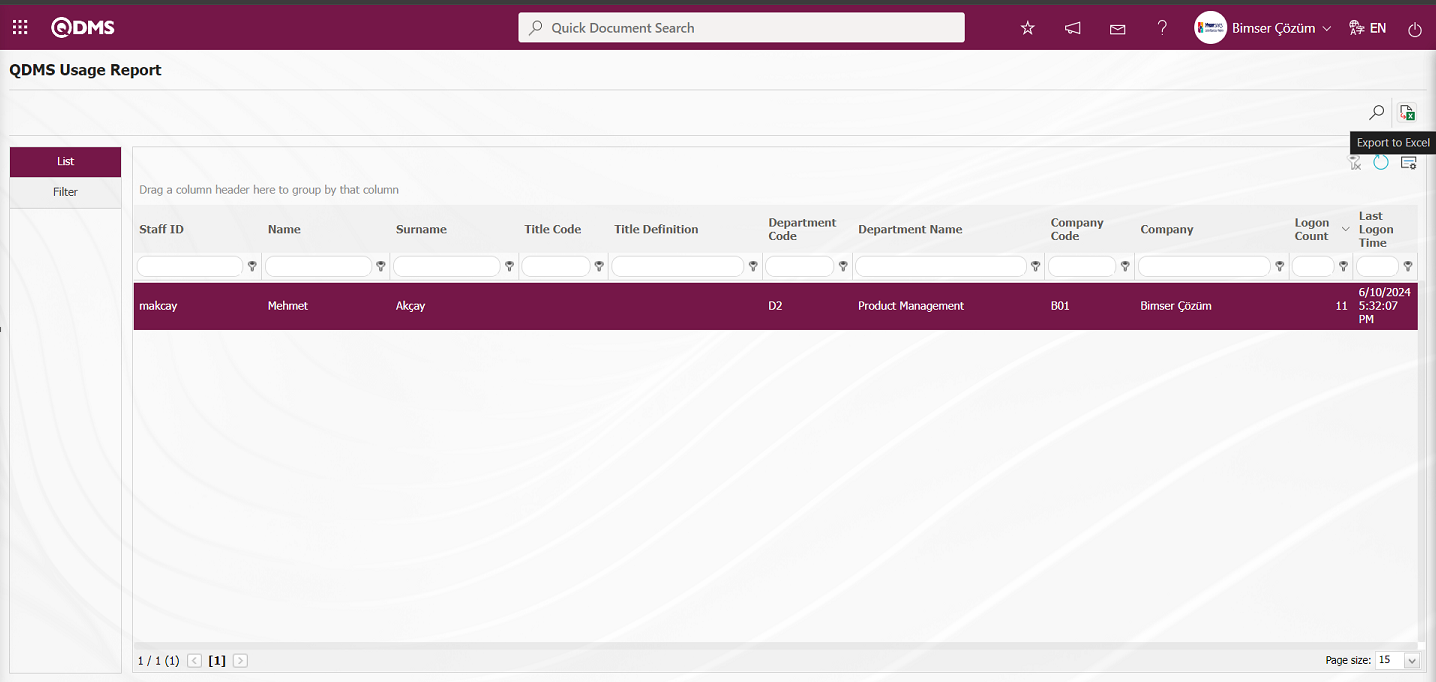
By clicking the (Export to Excel) button on the QDMS Usage Report screen, the system automatically presents the QDMS Usage report to the user in Excel format according to the search criteria configured in the Filter tab.
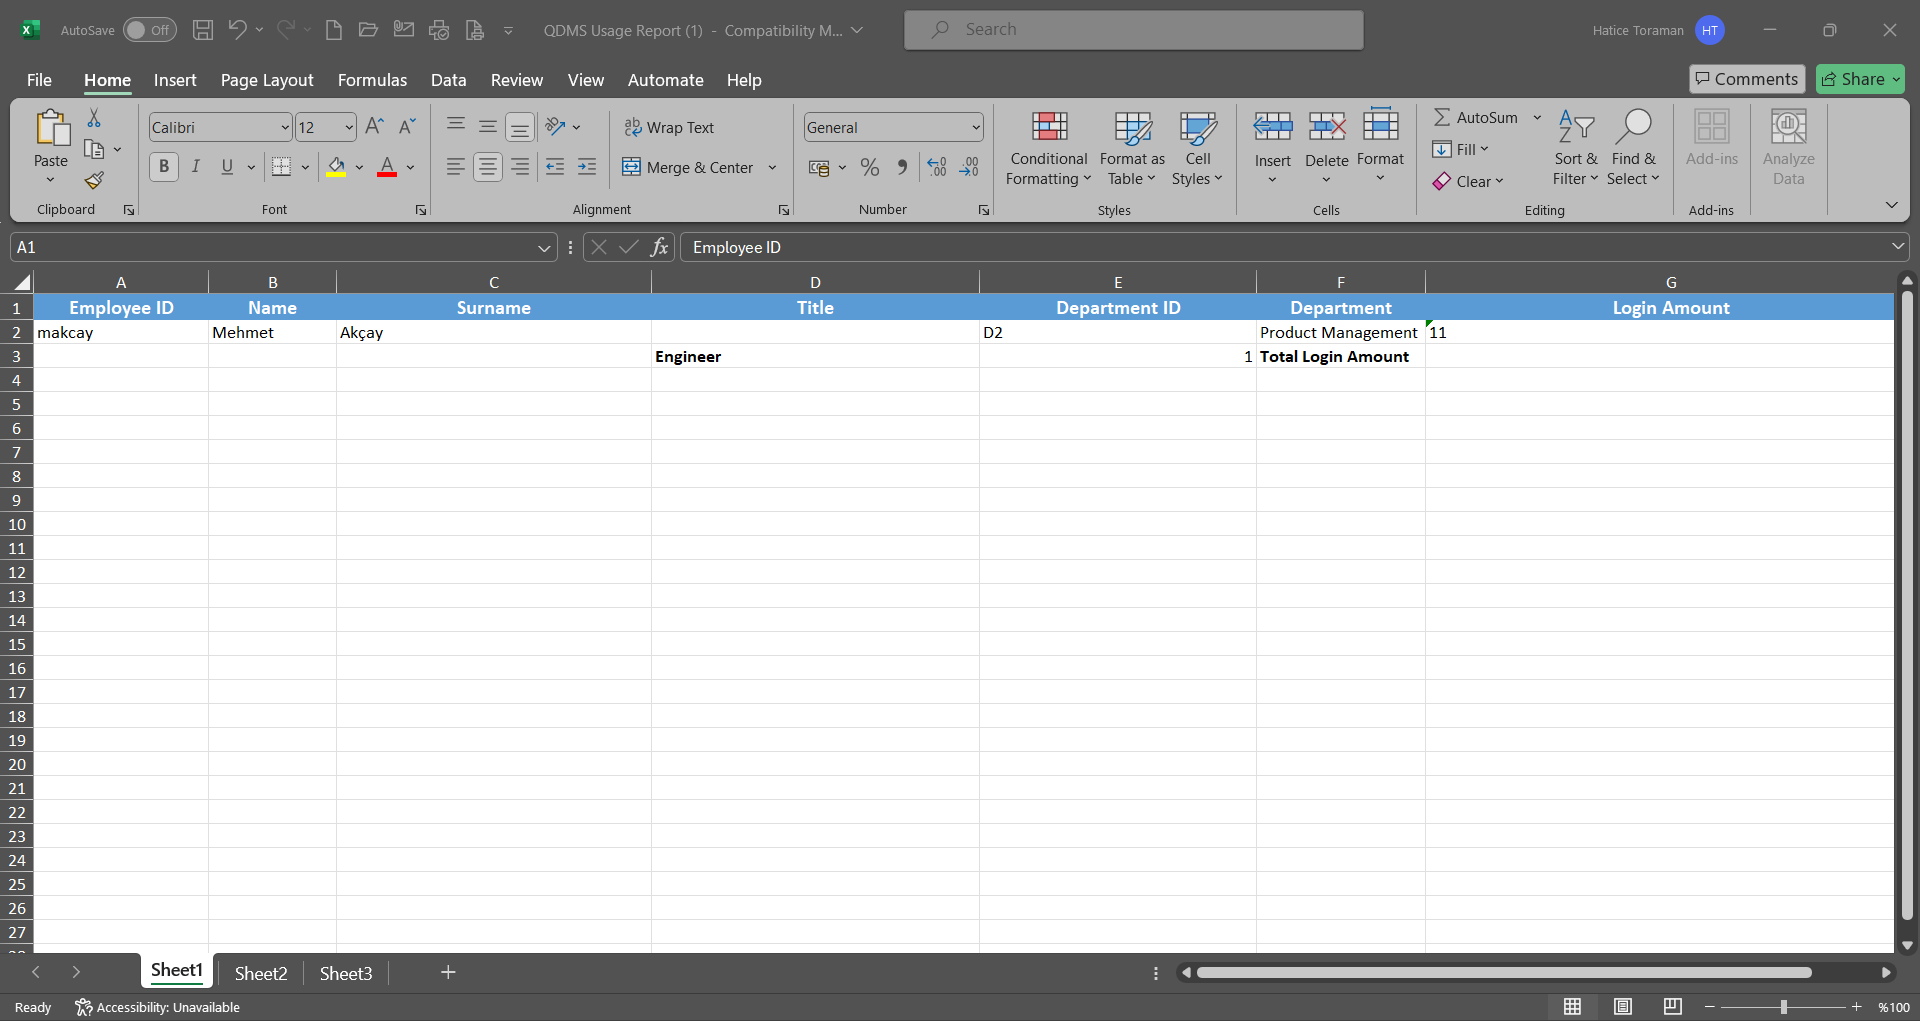
5.3.6. My Department Pending Jobs
Menu Name: System Infrastructure Definitions/ BSID/ Reports/ My Department Pending Jobs
It is the menu where the report of the pending jobs (on the task) of the personnel in the department where the user logged in to Qdms is located is taken. My Department Pending Jobs Report screen consists of two tabs. These tabs are Pending Jobs and Search tab. In the Pending Jobs tab, filtering according to the desired criteria in the filter tab gives information about the jobs on the user and the number of jobs.
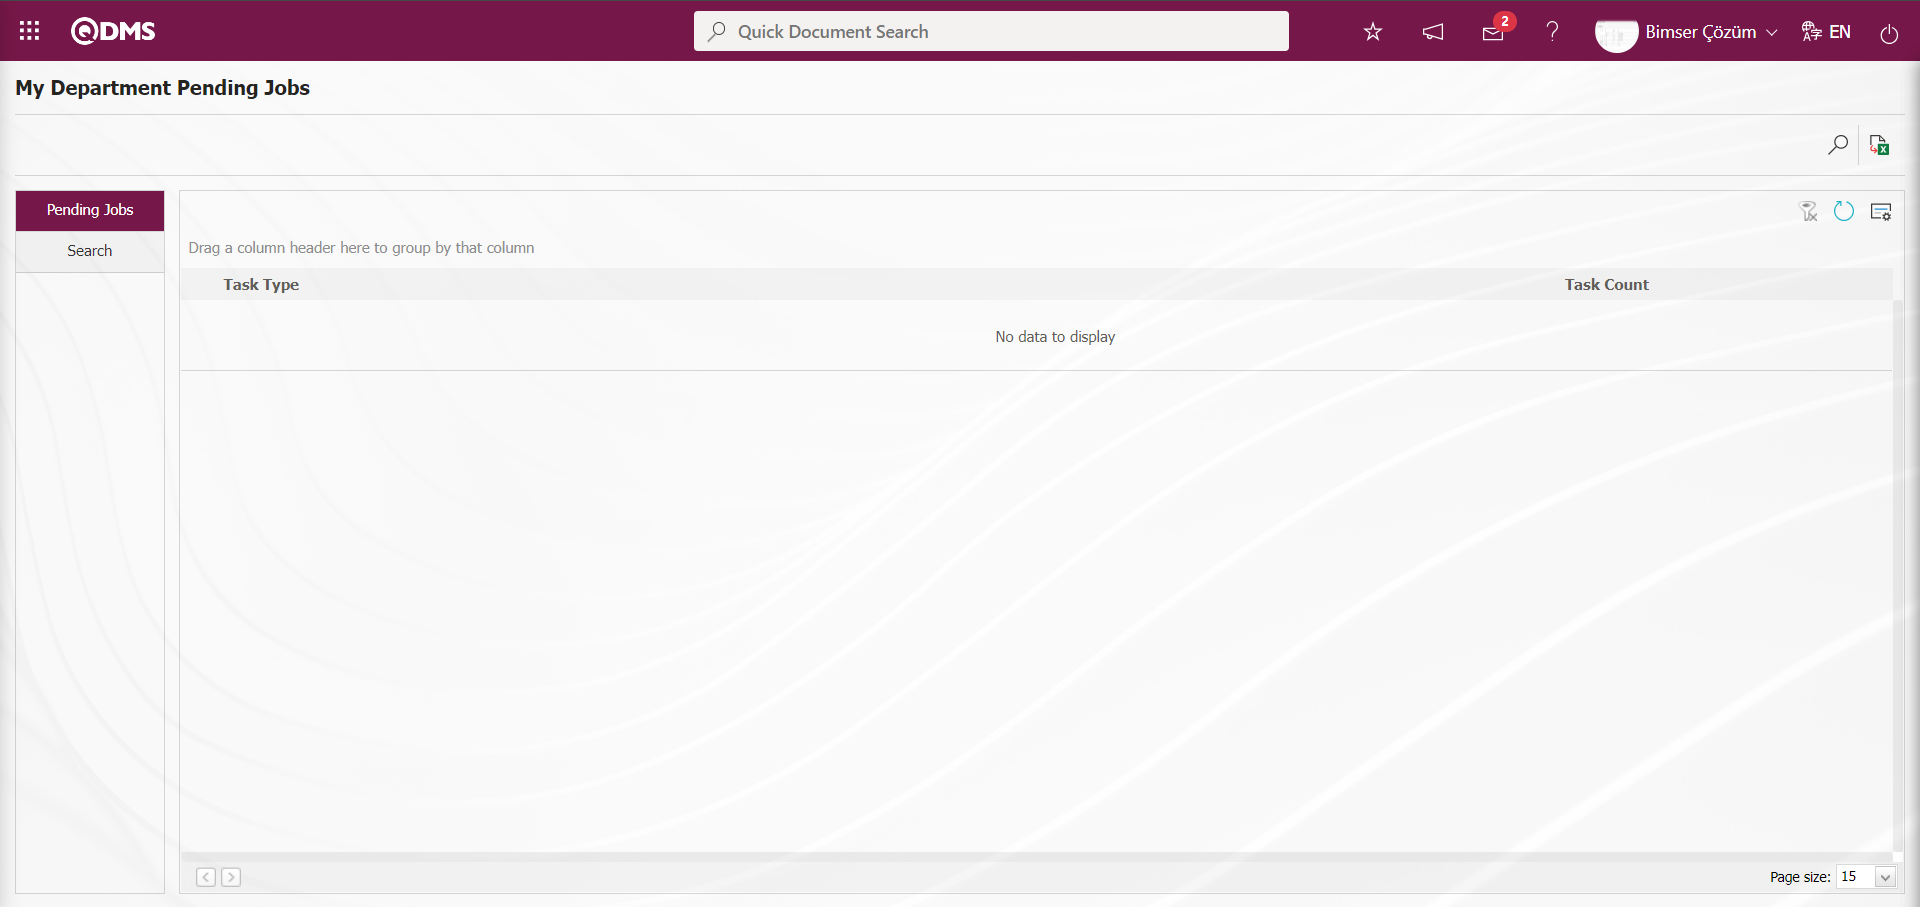
With the help of the buttons on the screen;
: Records are searched by filtering.
: Data is transferred to Excel.
: The search criteria on the menu screens are used to clear the data remaining in the filter fields in the grid where the search operation is performed.
: The menu screen is restored to its default settings.
: User-based designing of the menu screen is done with the show-hide feature, that is, the hiding feature of the fields corresponding to the columns on the menu screens.
In the Search tab, select the By Staff option from the Selection Type field options. In the Position field, select the relevant position from the Position list and click the (Search) button.

After filtering according to the search criteria in the Search tab, all tasks on the relevant personnel are listed in the Pending Jobs tab.
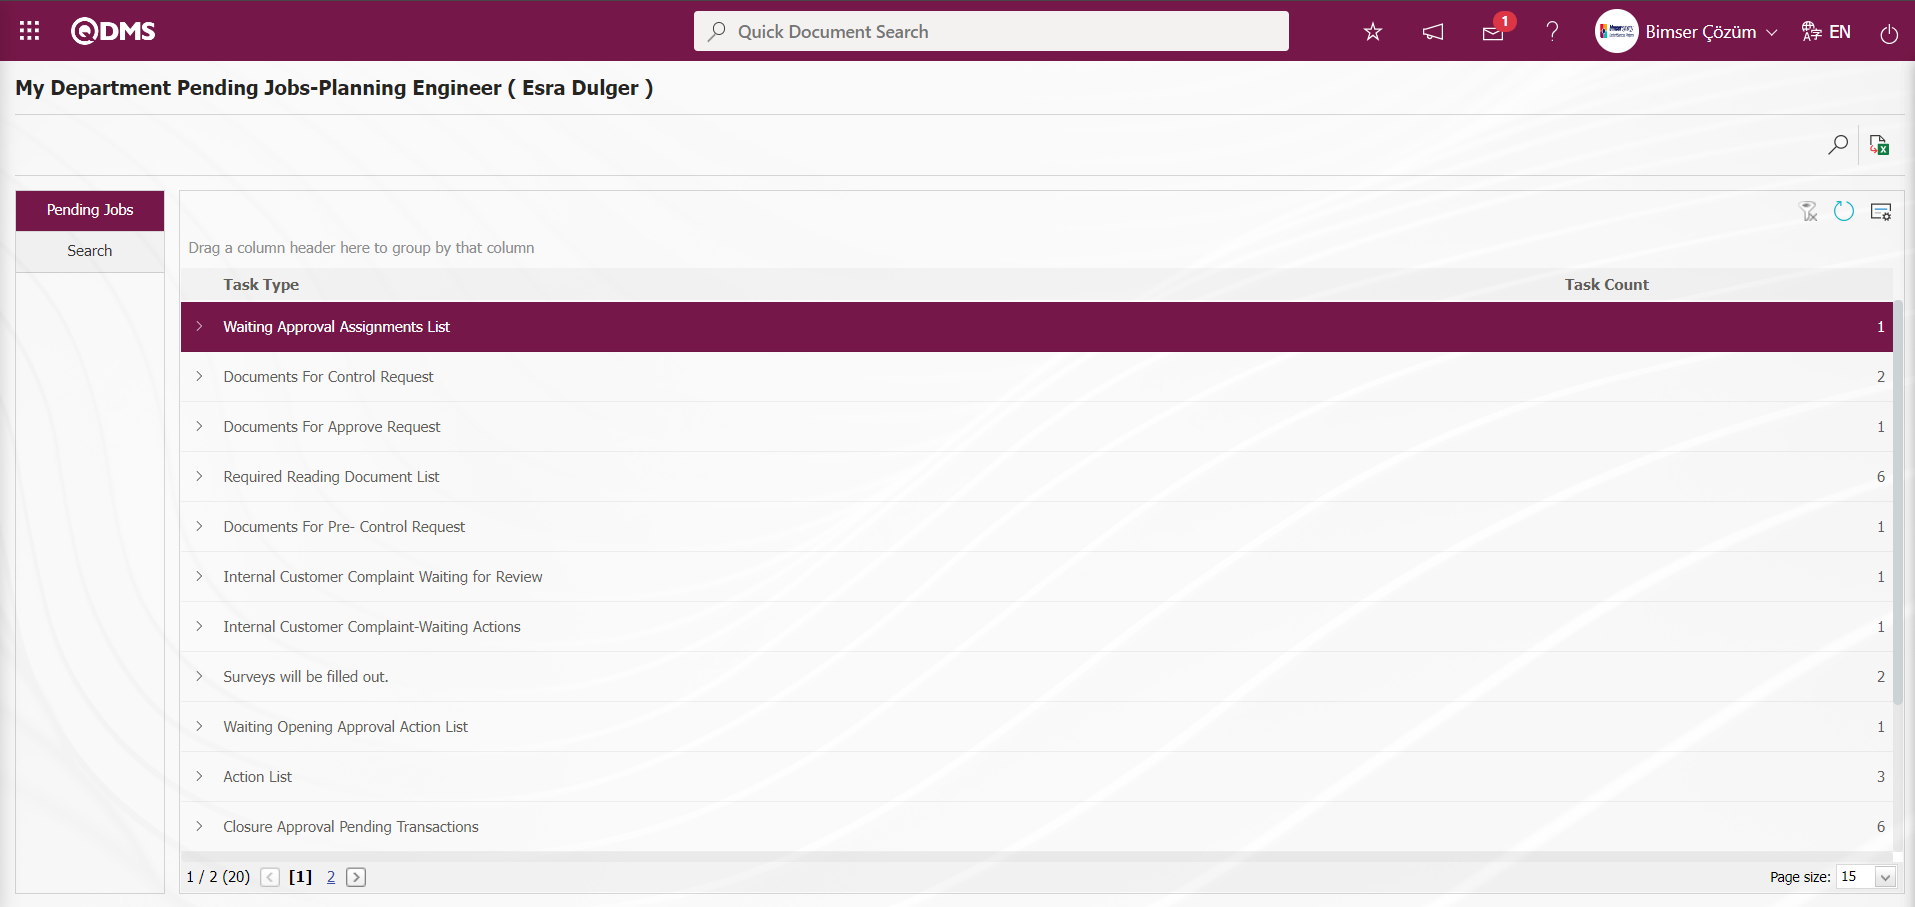
In the Task Type field, detailed information about the task is accessed by clicking the  button next to the task listed on the personnel.
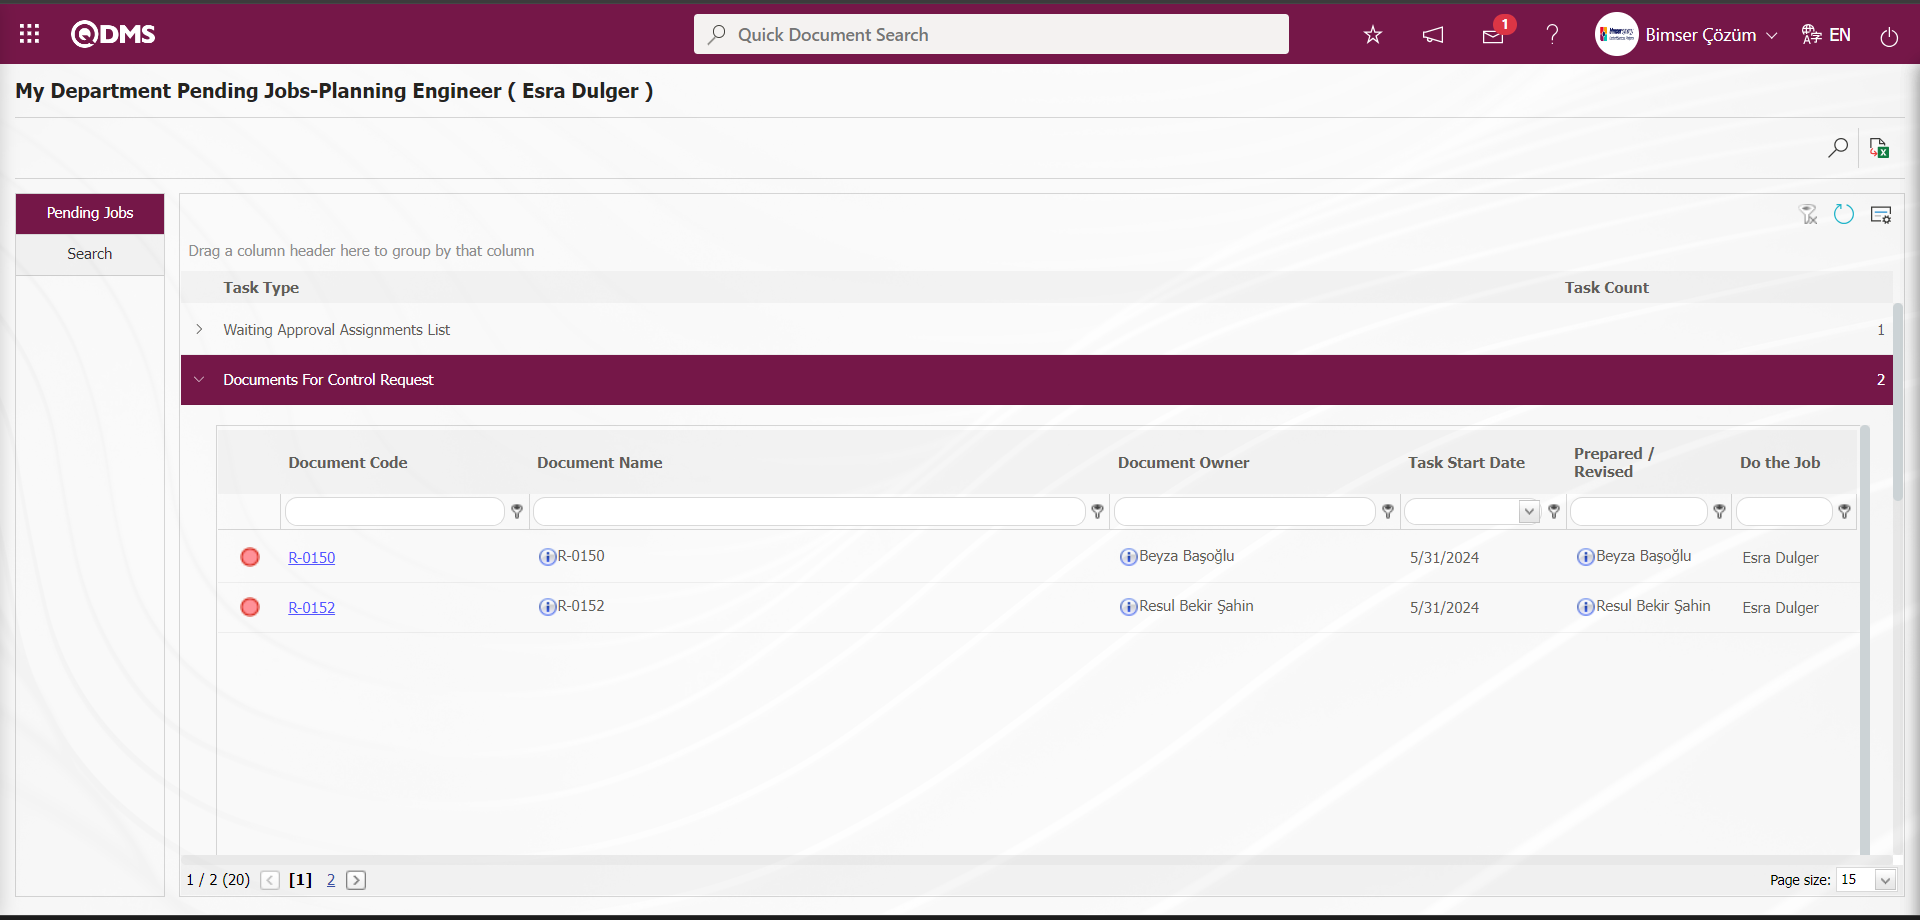
Click the (Export to Excel) button on the My Department Pending Jobs Report screen.
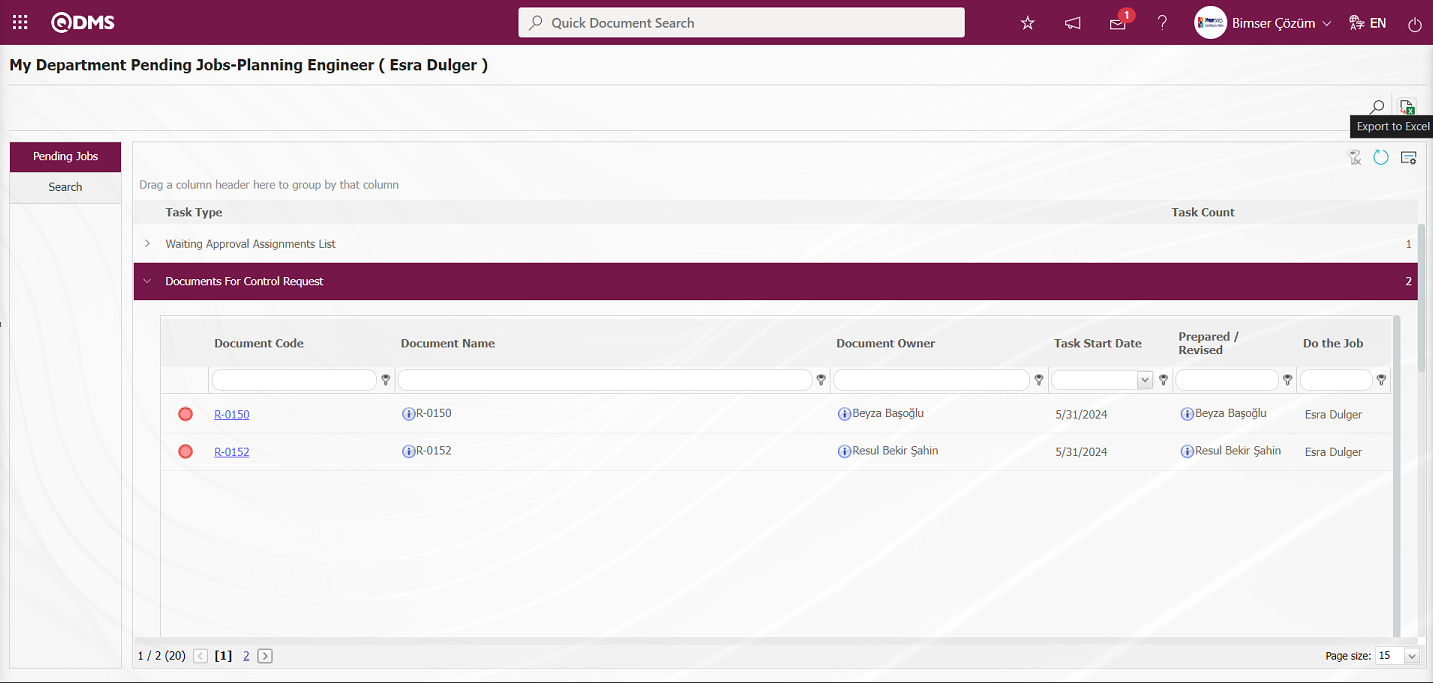
After clicking the (Export to Excel) button on the My Department Pending Jobs Report screen, the system automatically presents the My Department Pending Jobs Report in Excel format to the user.
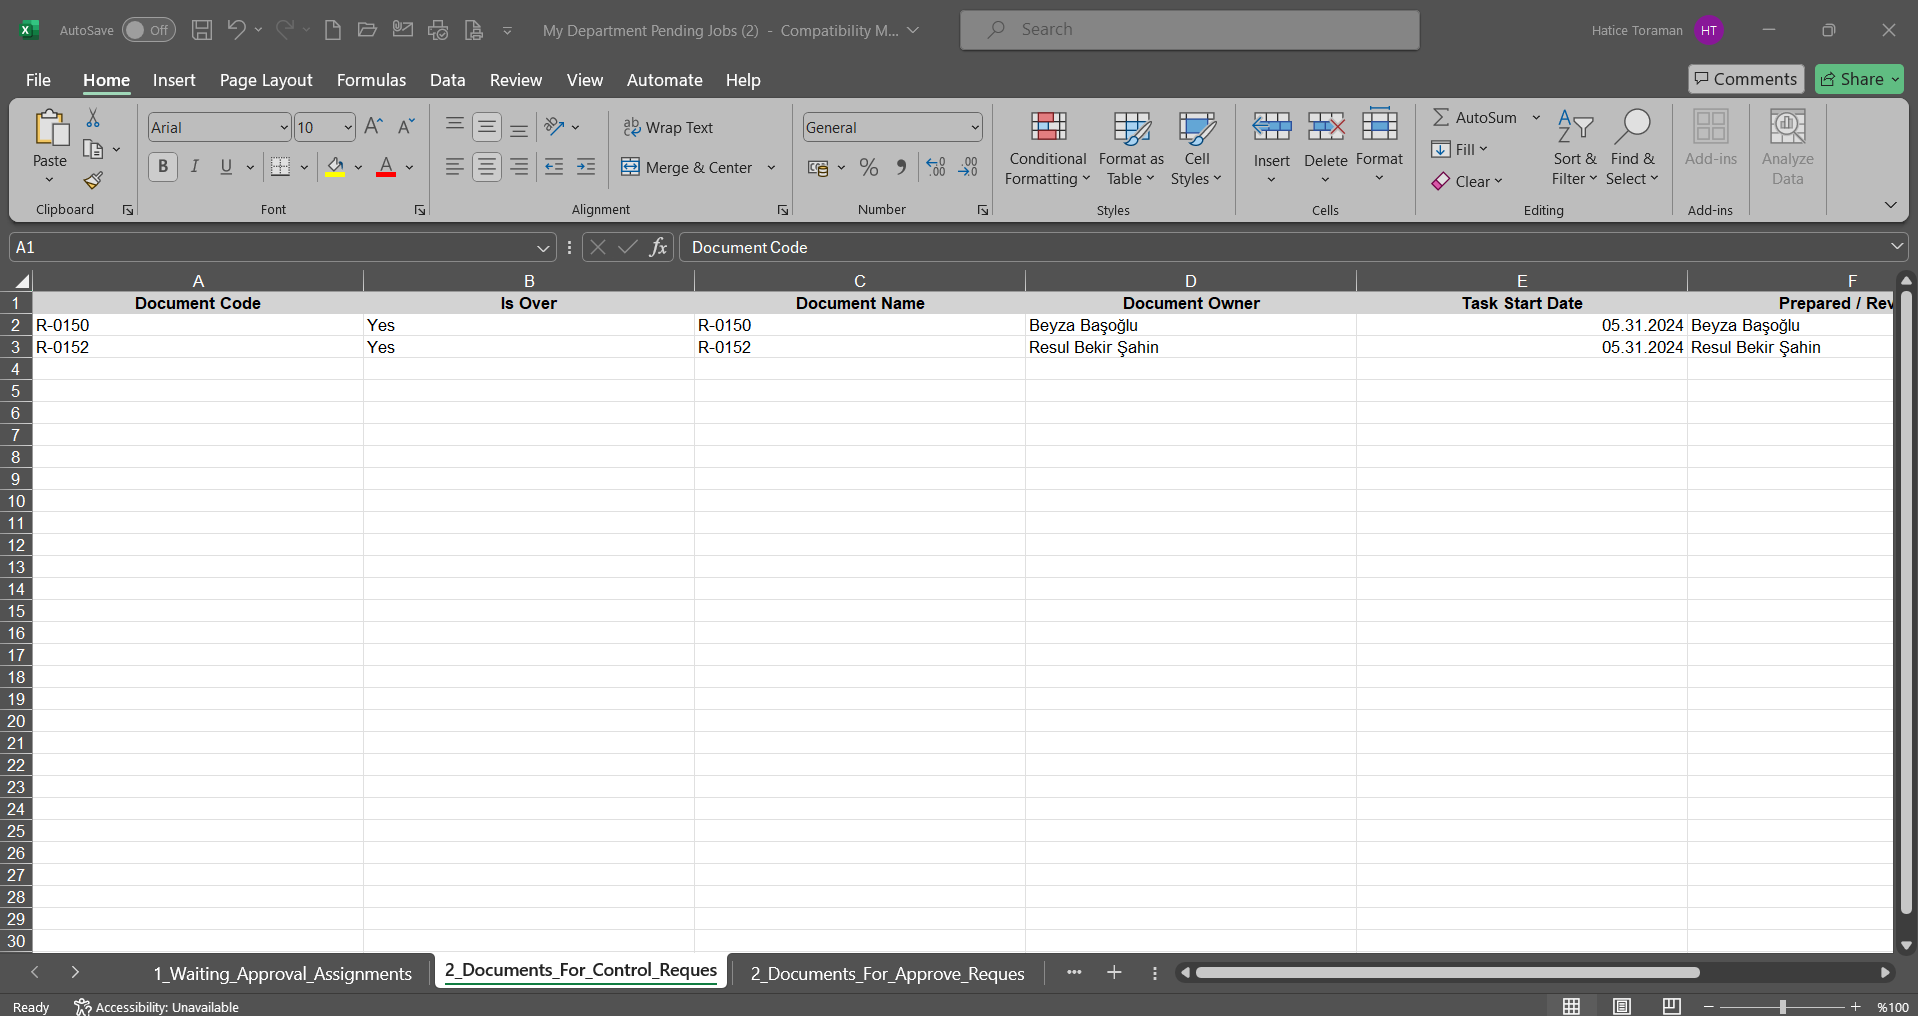
5.3.7. User Authorization Report
Menu Name: System Infrastructure Definitions/ BSID/ Reports/ User Authorization Report
It is the menu where the report of which user group, which authorization the personnel defined in QDMS have, which menu they can access in which module is taken. This is the report where you can see which user has how much authorization in which module. It is a report used to find out which personnel can access where in Qdms and which menu they can see. User authorizations report is used for system administrators to track which menus a user is authorized to access. It is a report used in critical situations such as data loss. User Authorization Report consists of two tabs. These tabs are List and Filter tab. In the list tab, the Reports received by filtering according to the desired criteria in the filter tab are listed.
With the help of the buttons on the screen;
: Records are searched by filtering.
: Data is transferred to Excel.
: The search criteria on the menu screens are used to clear the data remaining in the filter fields in the grid where the search operation is performed.
: The menu screen is restored to its default settings.
: User-based designing of the menu screen is done with the show-hide feature, that is, the hiding feature of the fields corresponding to the columns on the menu screens.
In the filter tab, the report is obtained by searching according to the information of the fields such as Authorization Group, User Group, User Name and Module. In the Filter tab, select Document Transactions as the Module and User Group in the User Group List in the User Group field and click the (Search) button.

Information about which user group the user is connected to, authorization group information, which menus they can access in the authorization type area of the System Infrastructure Definitions and Integrated Management System sections in the Document Operations module.
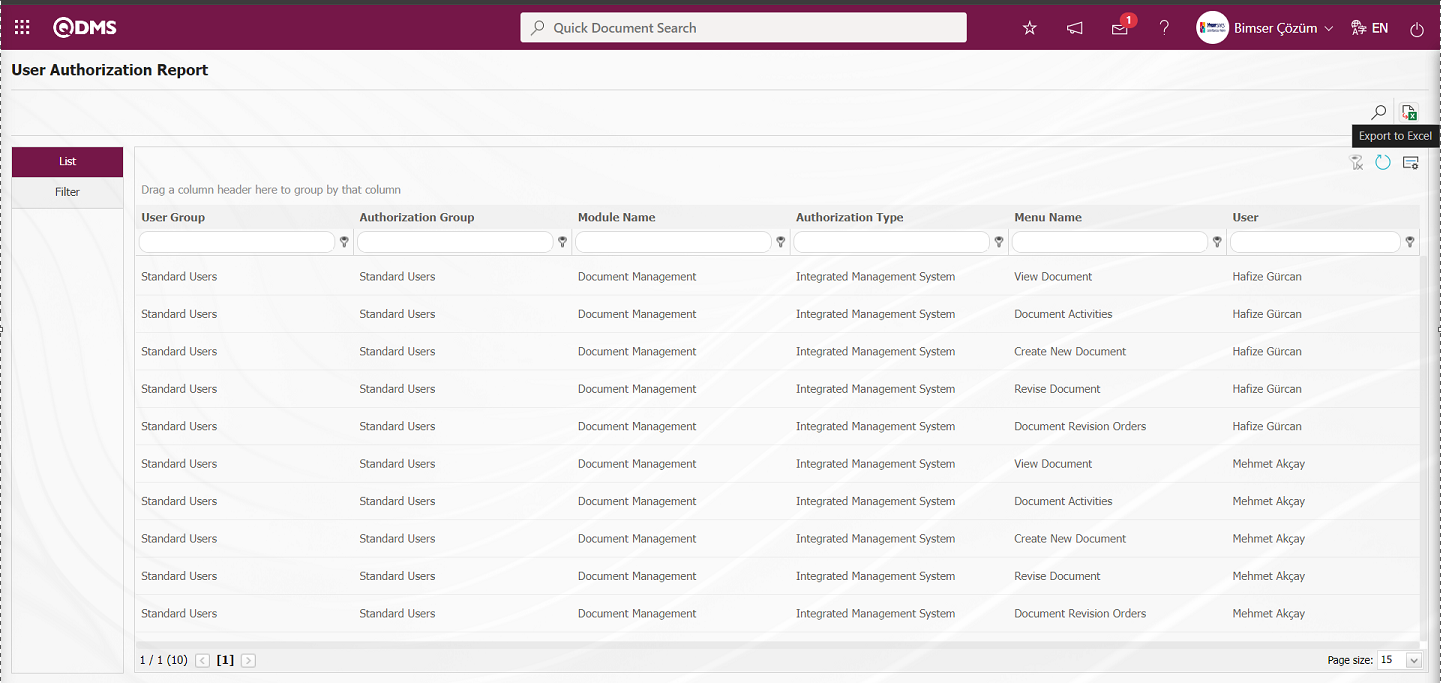
After clicking the (Export to Excel) button on the User Authorization Report screen, the system automatically presents the report of the User Authorization Report in Excel format to the user.
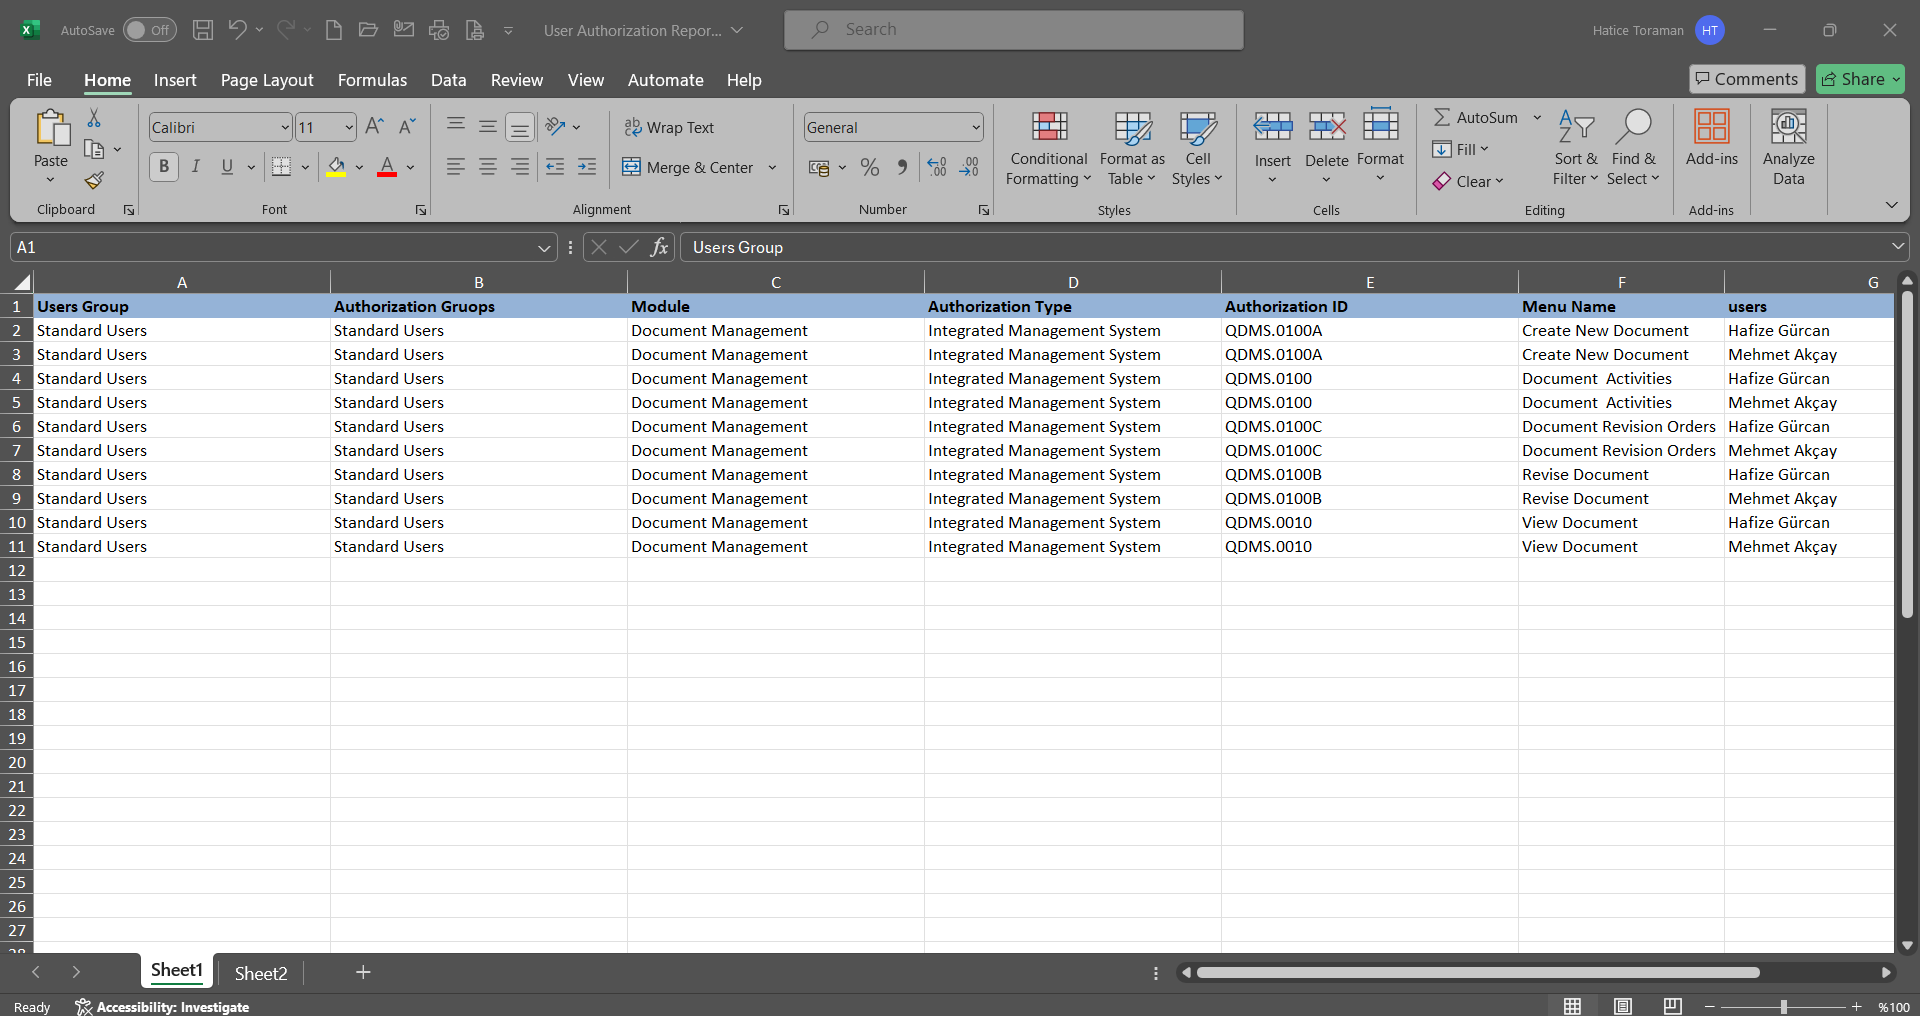
5.3.8. My Draft Documents
Menu Name: System Infrastructure Definitions/ BSID/ Reports/ My Draft Documents
In the Document Operations module, it is the menu where the list of documents waiting in the draft in statuses such as opinion, return from opinion, first control, first control rejection, approval is taken. My Draft Documents Report consists of two tabs. These tabs are Document List and Document Search tab. In the Document List tab, it is ensured that the Reports received by filtering according to the desired criteria in the Document Search tab are listed in the Document List tab.

With the help of the buttons on the screen;
 :The document selected in the list is downloaded and displayed.
: Records are searched by filtering.
: Data is transferred to Excel.
: The search criteria on the menu screens are used to clear the data remaining in the filter fields in the grid where the search operation is performed.
: The menu screen is restored to its default settings.
: User-based designing of the menu screen is done with the show-hide feature, that is, the hiding feature of the fields corresponding to the columns on the menu screens.
In the Document Search tab, the code information of the document is typed in the Document Code field from the search criteria and the (Search) button is clicked to filter the search criteria.
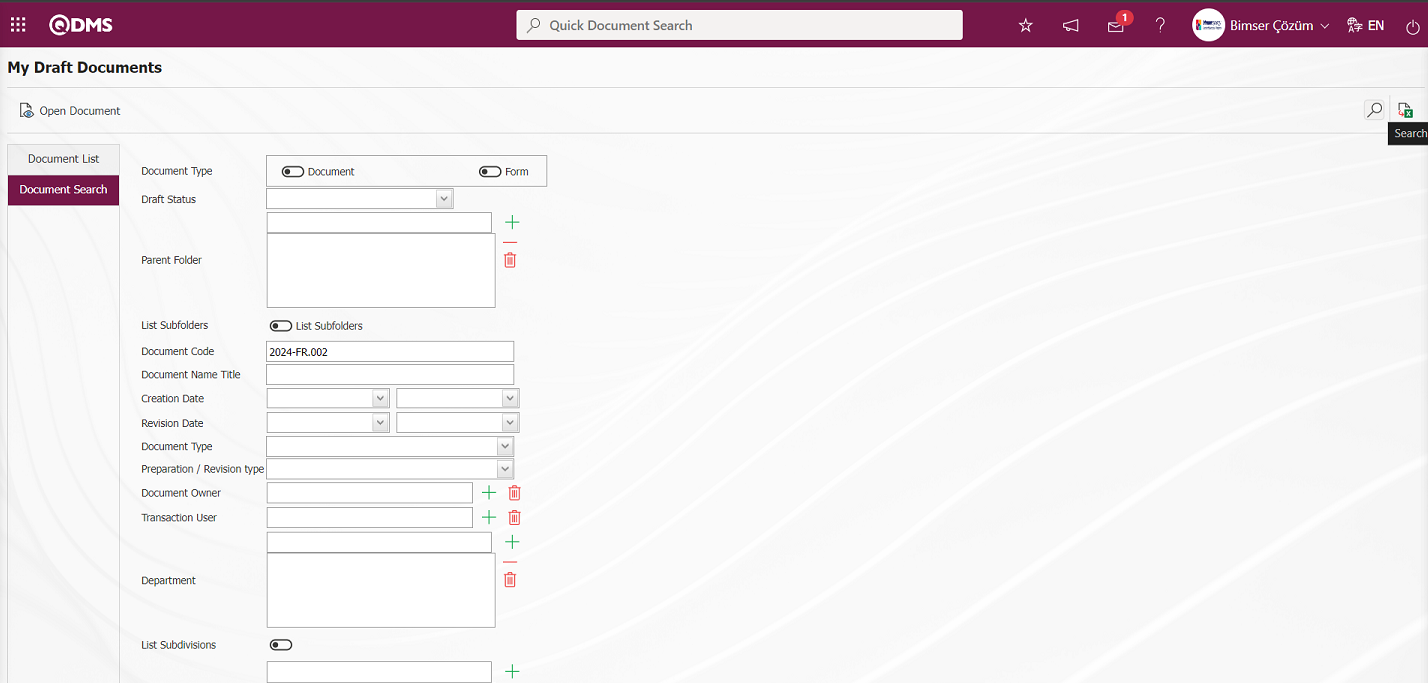
In the Document List tab, the relevant records are listed in the Document List tab according to the search criteria in the document search tab.

After clicking the (Export to Excel) button on the My Draft Documents Report screen, the system automatically presents the report of the My Draft Documents Report in Excel format to the user.
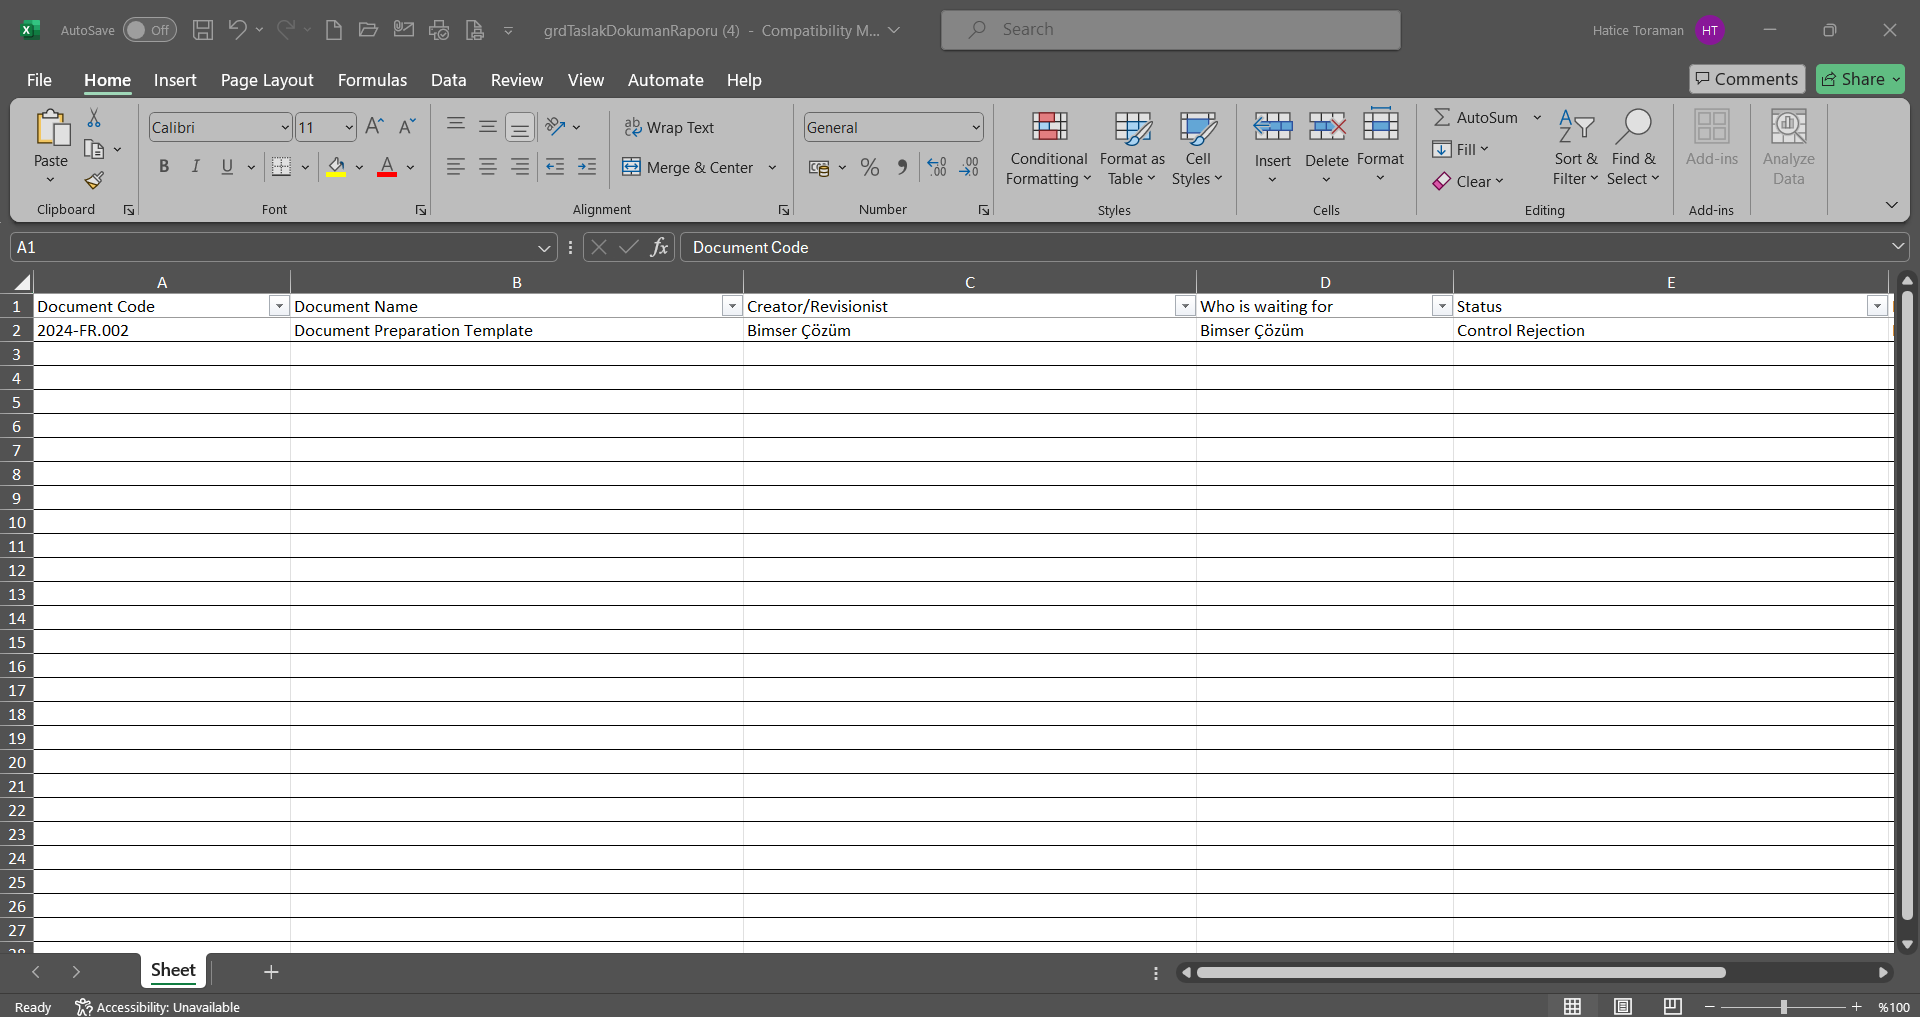
5.3.9. Mail Report
Menu Name: System Infrastructure Definitions/ BSID/ Reports/ Mail Report
It is the menu where the report of the mails sent on the basis of modules is taken. Qdms is a report where information such as which mail was sent in which module, the content of the mail, the creation date of the mail, the mail recipient can be accessed. It is a report used to track the e-mails sent by customers. Mail Report consists of two tabs. These tabs are List and Filter tab. In the list tab, it is ensured that the Reports received by filtering according to the desired criteria in the filter tab are listed.
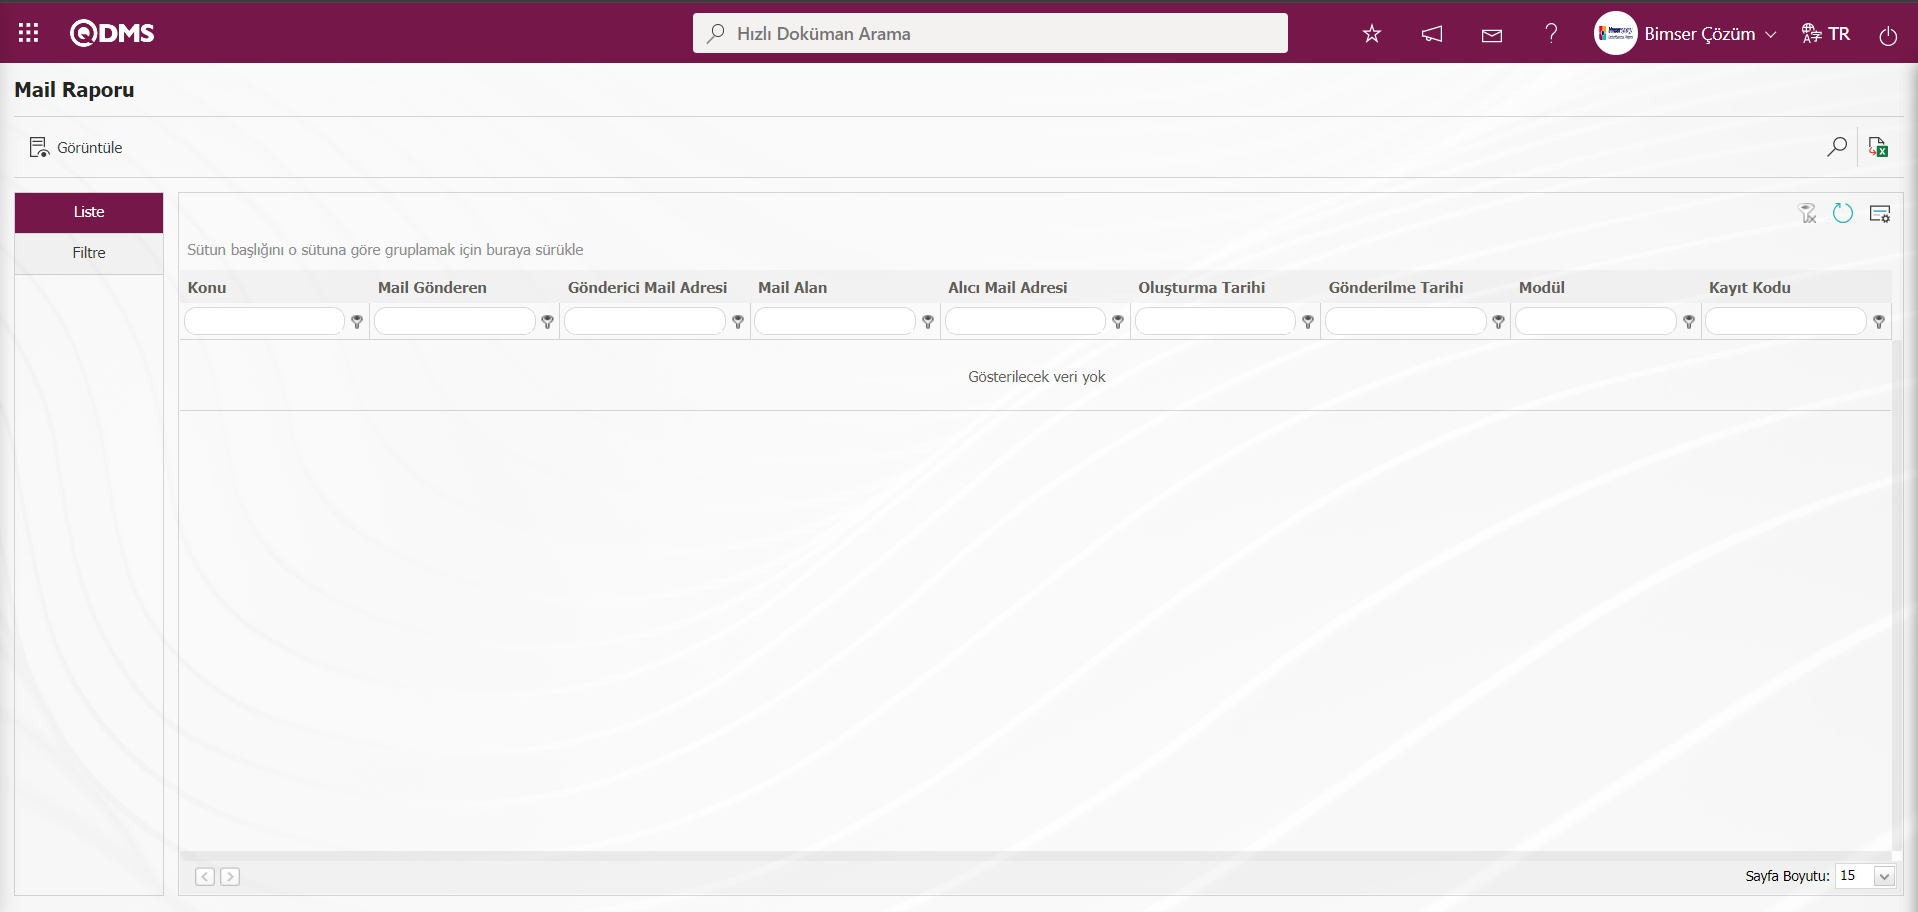
With the help of the buttons on the screen;
 : Detailed information of the selected mail is displayed in the list.
: Records are searched by filtering.
: Data is transferred to Excel.
: The search criteria on the menu screens are used to clear the data remaining in the filter fields in the grid where the search operation is performed.
: The menu screen is restored to its default settings.
: User-based designing of the menu screen is done with the show-hide feature, that is, the hiding feature of the fields corresponding to the columns on the menu screens.
The report is obtained by searching according to the information of the Filter tab, Modules, Subject, Mail Sender, Mail Receiver, Creation Date, Status and Attachment File fields. In the Mail Sender Field section, the name of the relevant user is written and the  (Search) button is clicked.

In the Mail Report screen, records are listed according to the search criteria in the filter made in the list tab.
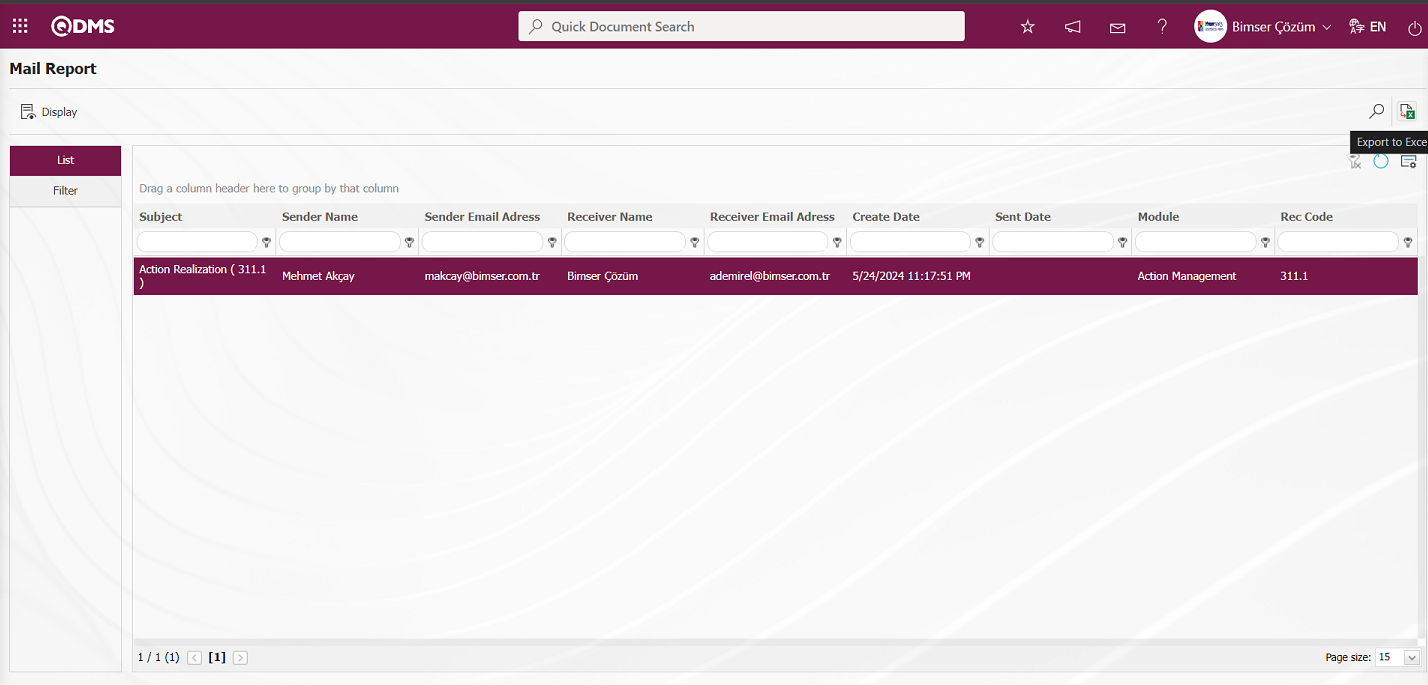
On the Mail Report screen, click the (Export to Excel) button to get the Mail report in Excel format.

On the mail report screen, the button opens the content of the selected sent mails in the list and access the detail information.
5.3.10. QDMS Login Report
Menu Name: System Infrastructure Definitions/ BSID/ Reports/ QDMS Login Report
It is a report that shows the logs of when the relevant user logged into the system and over which IP they logged in. QDMS Login Report consists of two tabs. These tabs are List and Filter tab. When filtering according to the desired criteria in the filter tab in the list tab, the Reports received are listed.
With the help of the buttons on the screen;
: Records are searched by filtering.
: Data is transferred to Excel.
: The search criteria on the menu screens are used to clear the data remaining in the filter fields in the grid where the search operation is performed.
: The menu screen is restored to its default settings.
: User-based designing of the menu screen is done with the show-hide feature, that is, the hiding feature of the fields corresponding to the columns on the menu screens.
In the filter tab, select “Human Resources” department information in the department field and click the (Search) button.

When the users in the Human Resources department logged in to the system and over which IP they logged in, the report is displayed in the list tab.
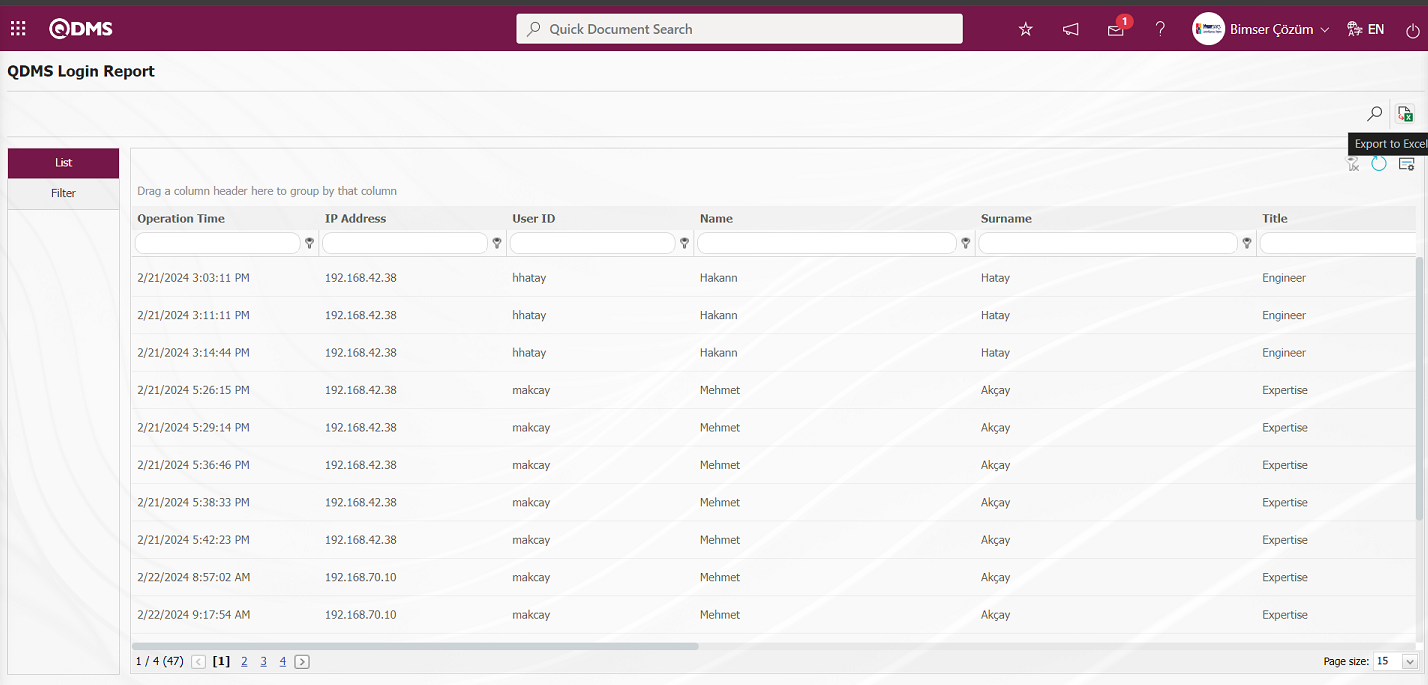
After clicking the (Export to Excel) button on the QDMS Login Report screen, the system automatically presents the QDMS Login Report in Excel format to the user.
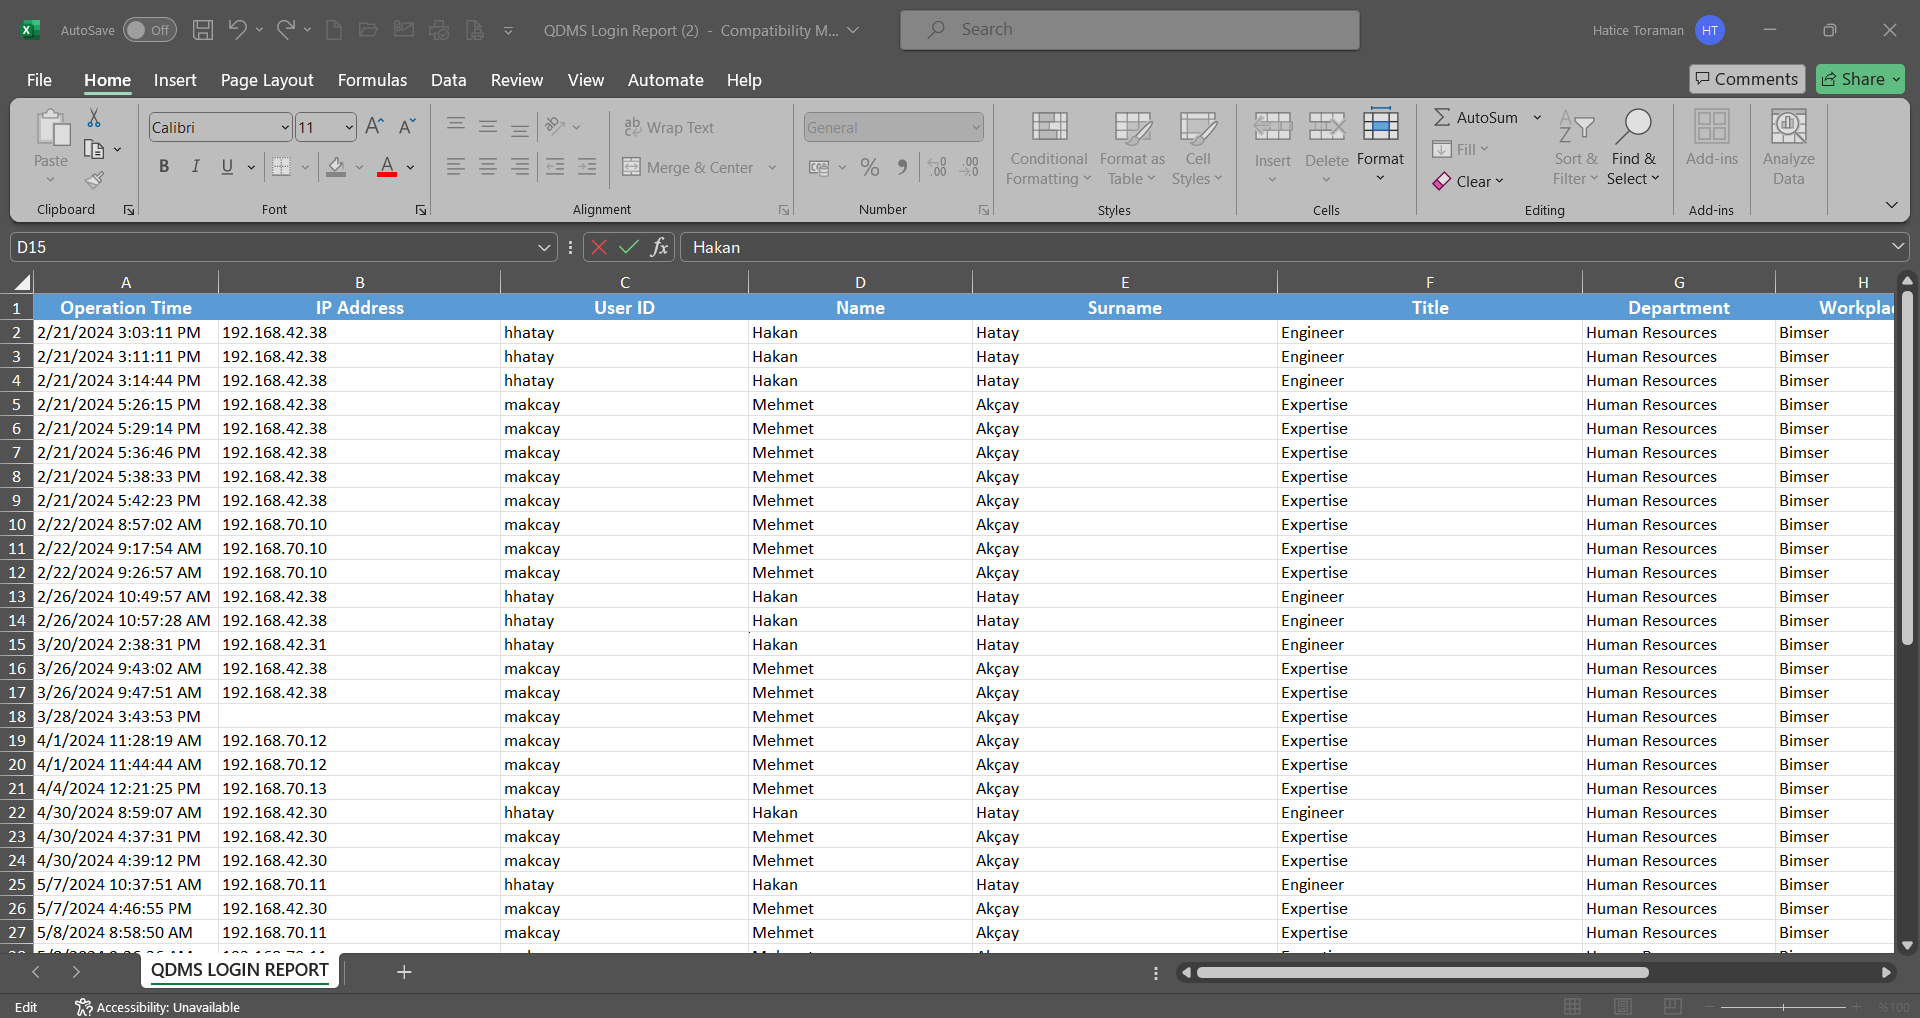
5.3.11. Staff Files
Menu Name: System Infrastructure Definitions/ BSID/ Reports/ Staff Files
It is a report that lists the additional files uploaded to the system and accessed by the personnel in the system. The report lists the additional files added to the personnel working in the company. It is a report made to access the additional files added on the personnel from a single screen. In the System Infrastructure Definitions/BSID/Definitions/Personnel Identification menu, additional files belonging to the personnel are uploaded on the Personnel Identification-Additional Information- Record Update screen opened by clicking the  button displayed in the System Infrastructure Definitions Module parameter 76. This is a report where the uploaded Additional Files of the personnel are accessed and listed. For example, files such as Cv, Criminal Record Record of the Personnel can be accessed from the Staff Files report. It is a report used to access the Personal Files containing special information about the personnel working in the company. It is also a report used to see which personnel has uploaded which additional file to the system.
Staff Files report consists of two tabs. These tabs are Additional File and Filter tab. In the Additional Files tab, the desired criteria in the filter tab are searched according to the registration number, name and surname information. By clicking the (Search) button on the Additional Files tab, all additional files of the personnel are listed.
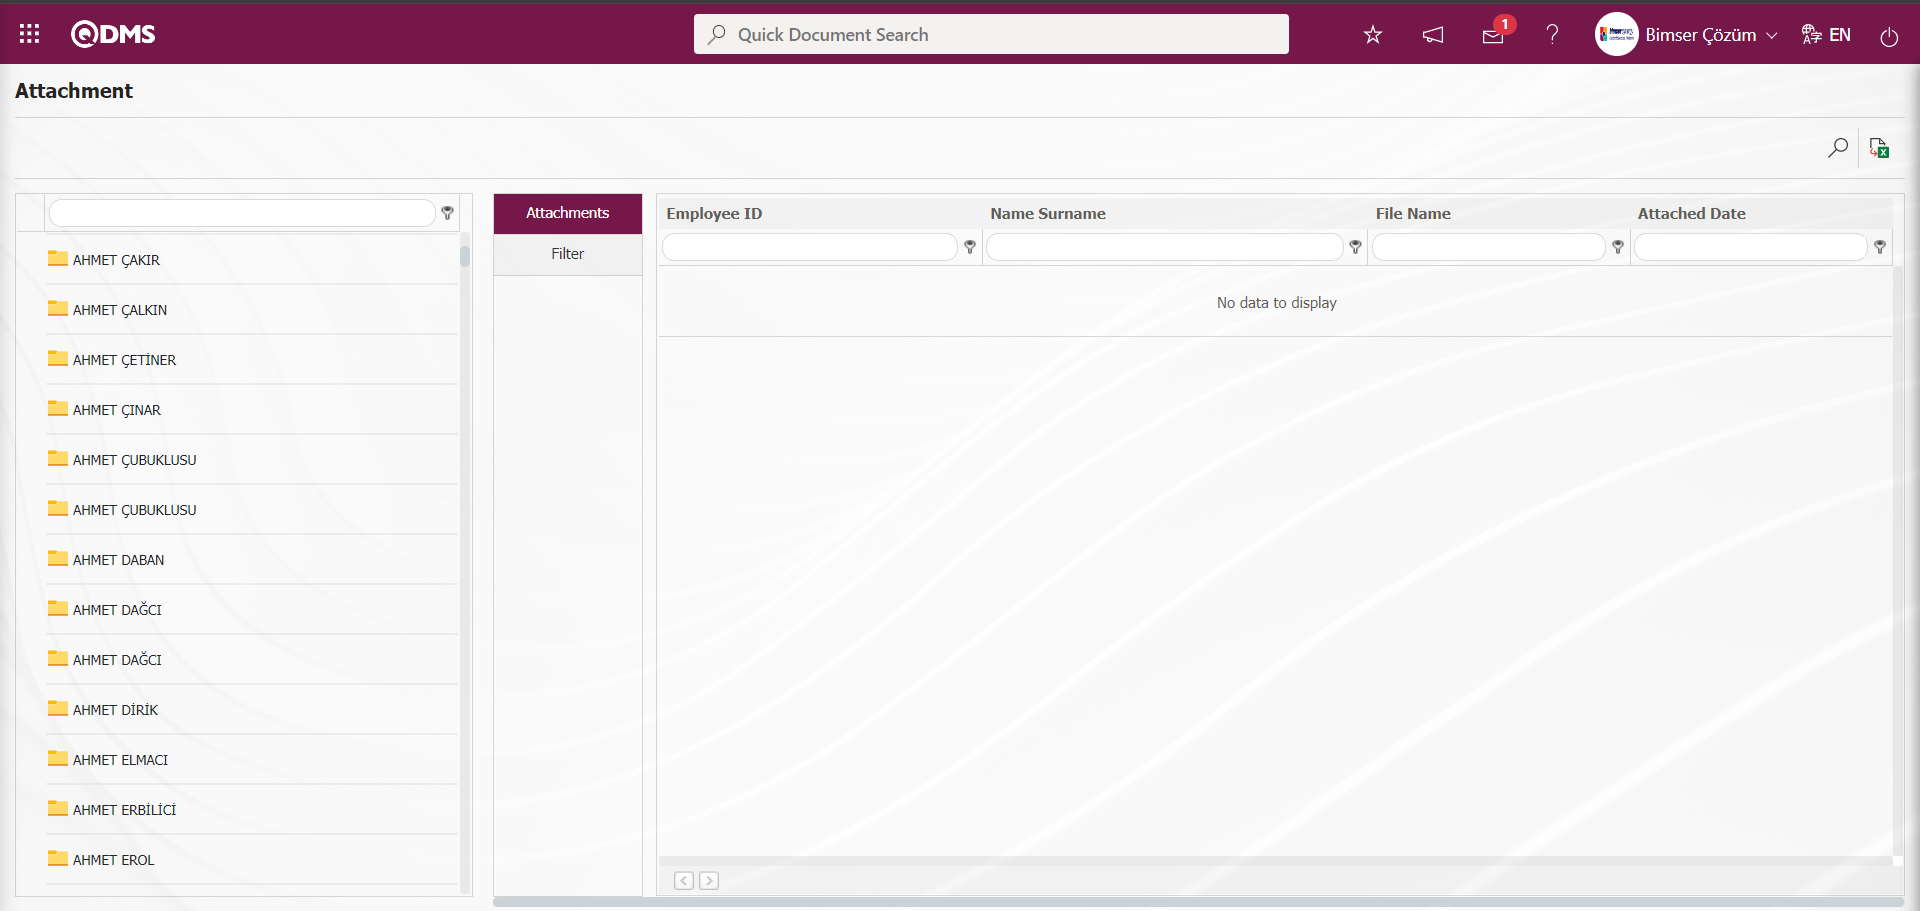
With the help of the buttons on the screen;
: Records are searched by filtering.
: Data is transferred to Excel.
In the Additional Files tab, the folder belonging to the personnel is selected and the installed additional files belonging to the personnel are listed.
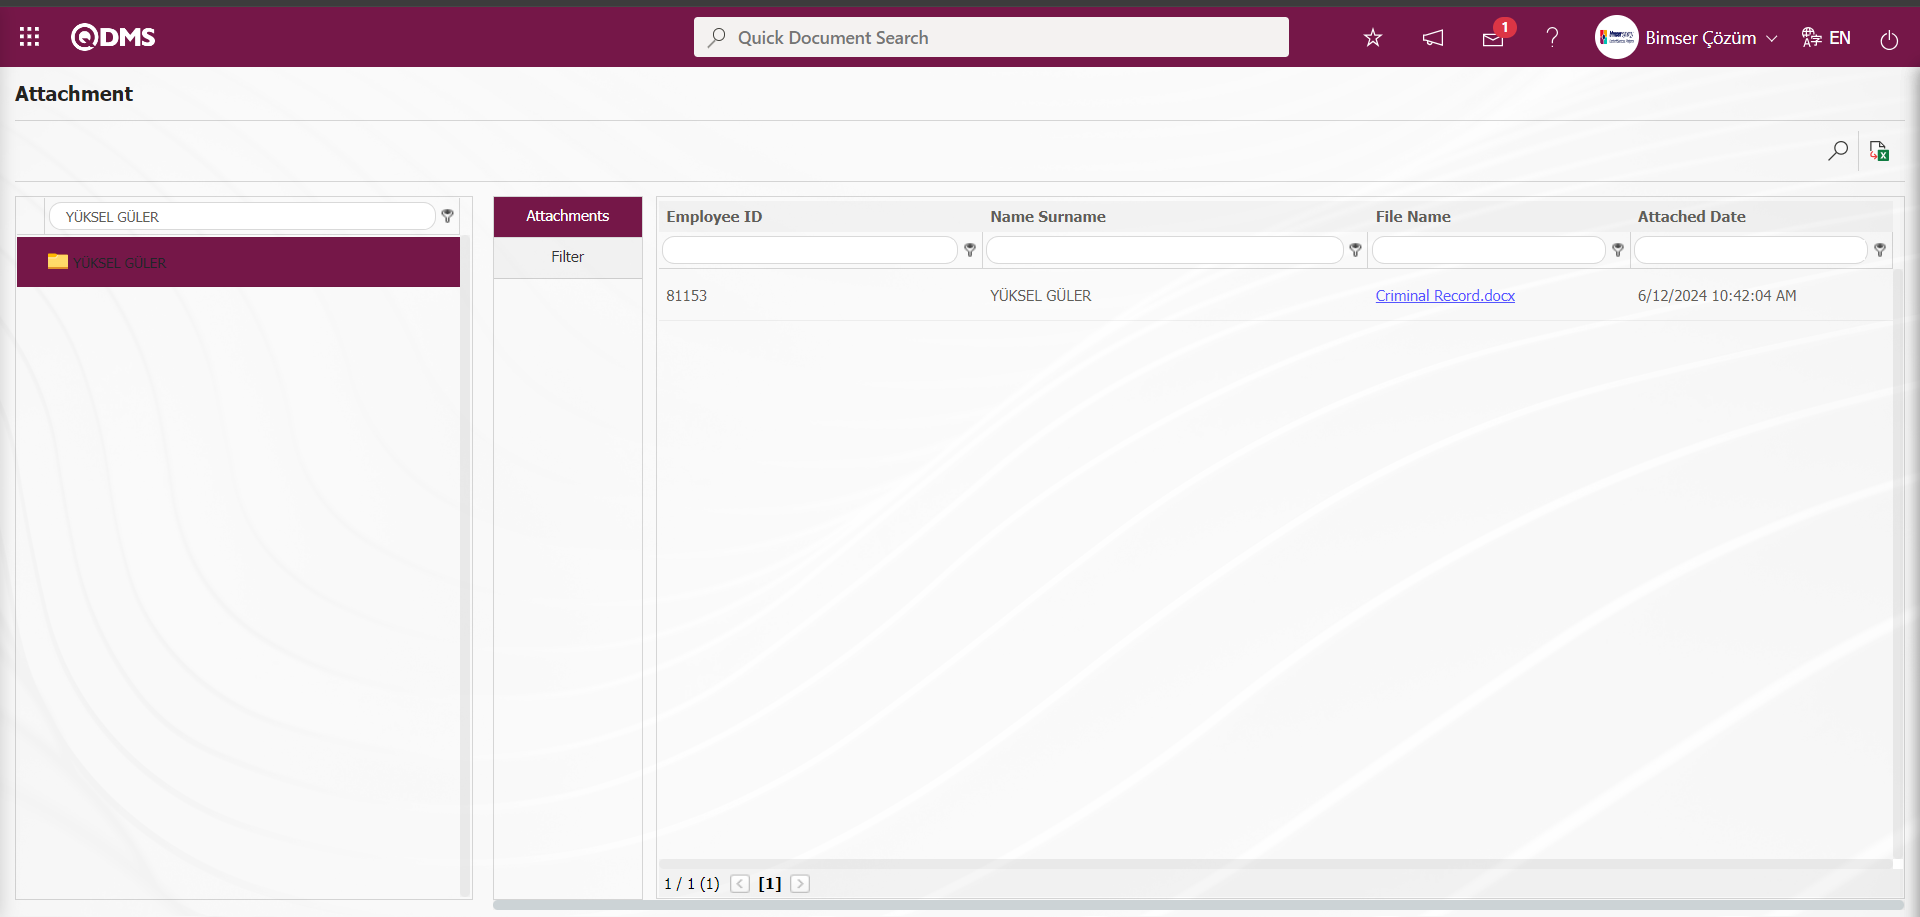
Click on the link in the File name section of the listed attachment files to view the content of the attachment file.
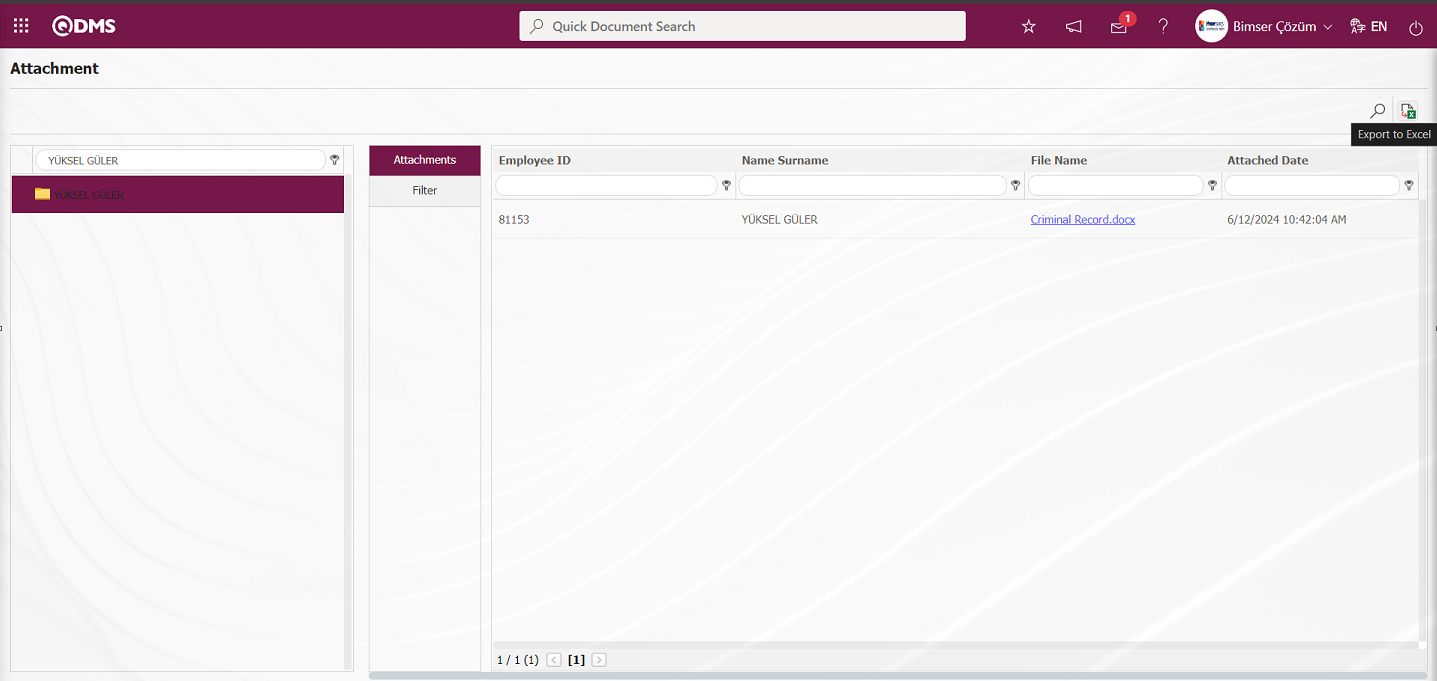
If the  (Export to Excel) button is pressed on the Additional Files screen, the system automatically generates a Staff Files Report and presents it to the user in Excel format.
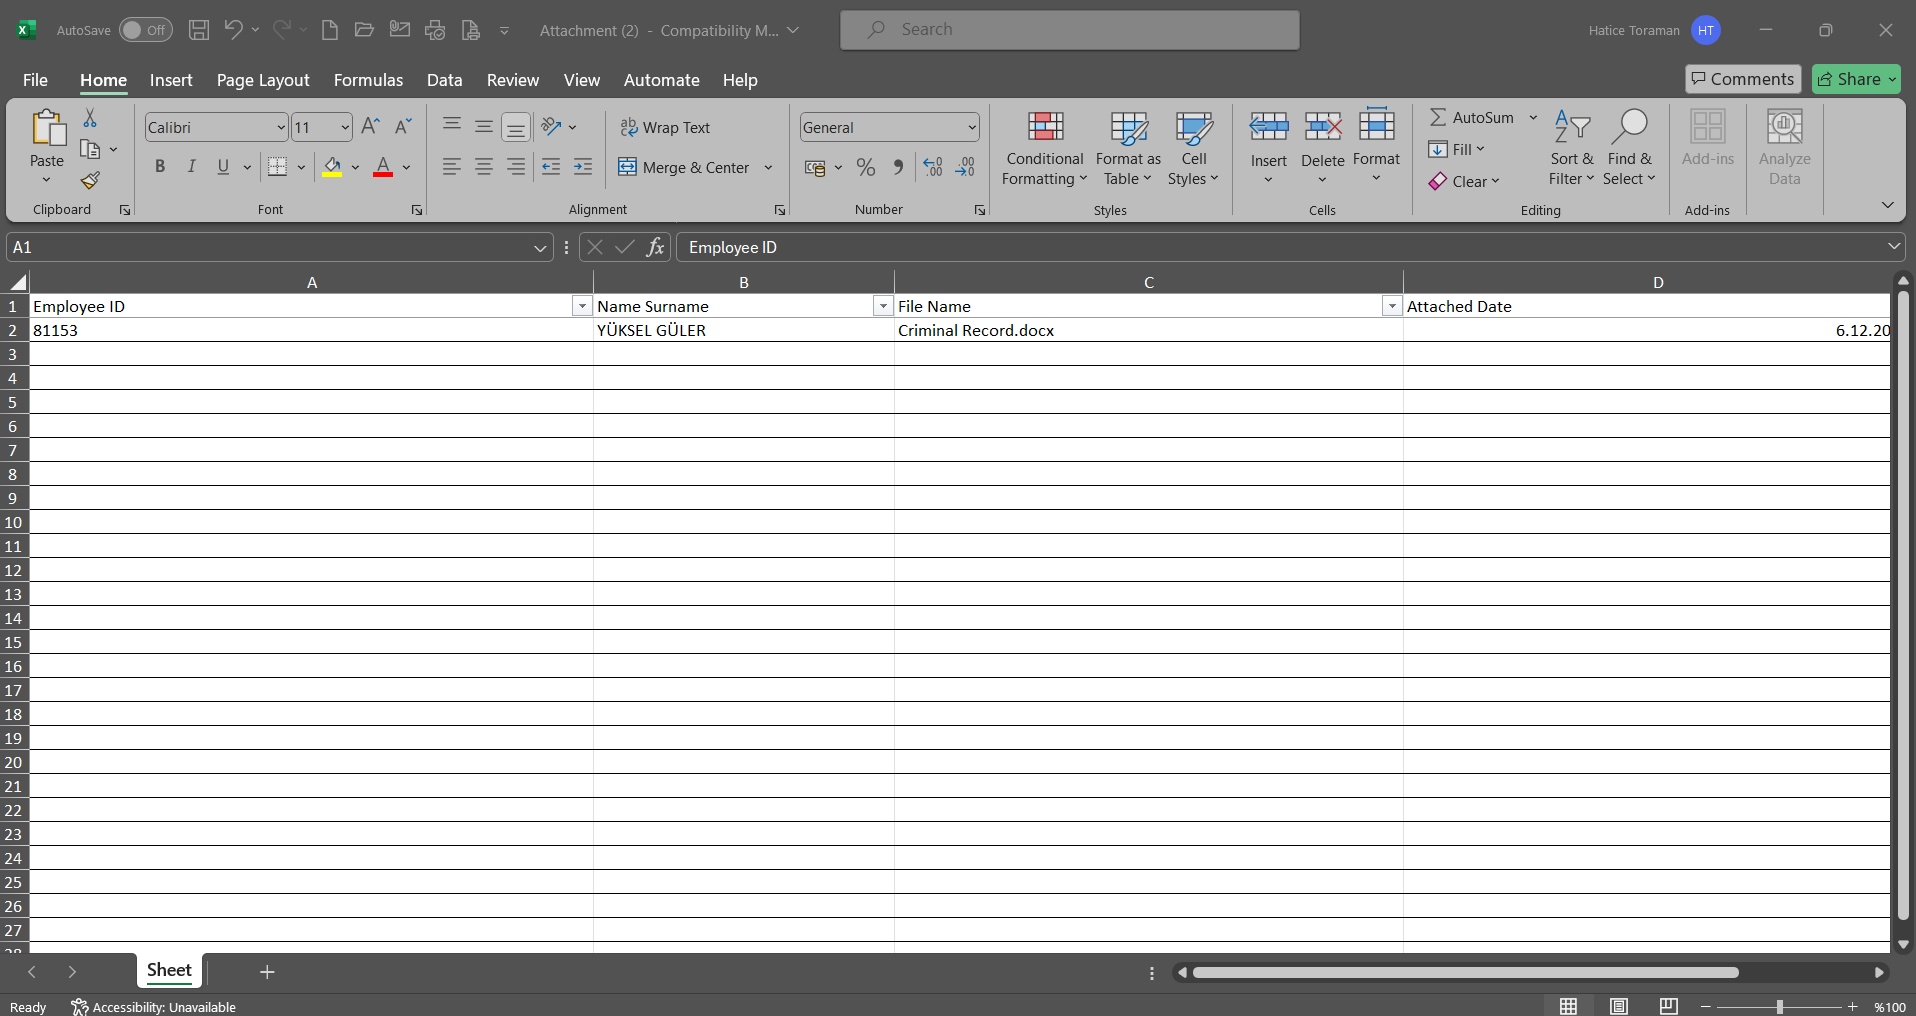
5.3.12.Approval Time Report
Menu Name: System Infrastructure Definitions/ BSID/ Reports/ Approval Time Report
It is a report containing information such as approval start date, approver, status, approval date and approval time of the flows going to approval in Qdms modules. Approval Time Report consists of two tabs. These tabs are Search and Approval Time List tab. In the Search tab, the reports received by filtering according to the search criteria are listed in the list in the Approval Times List tab.
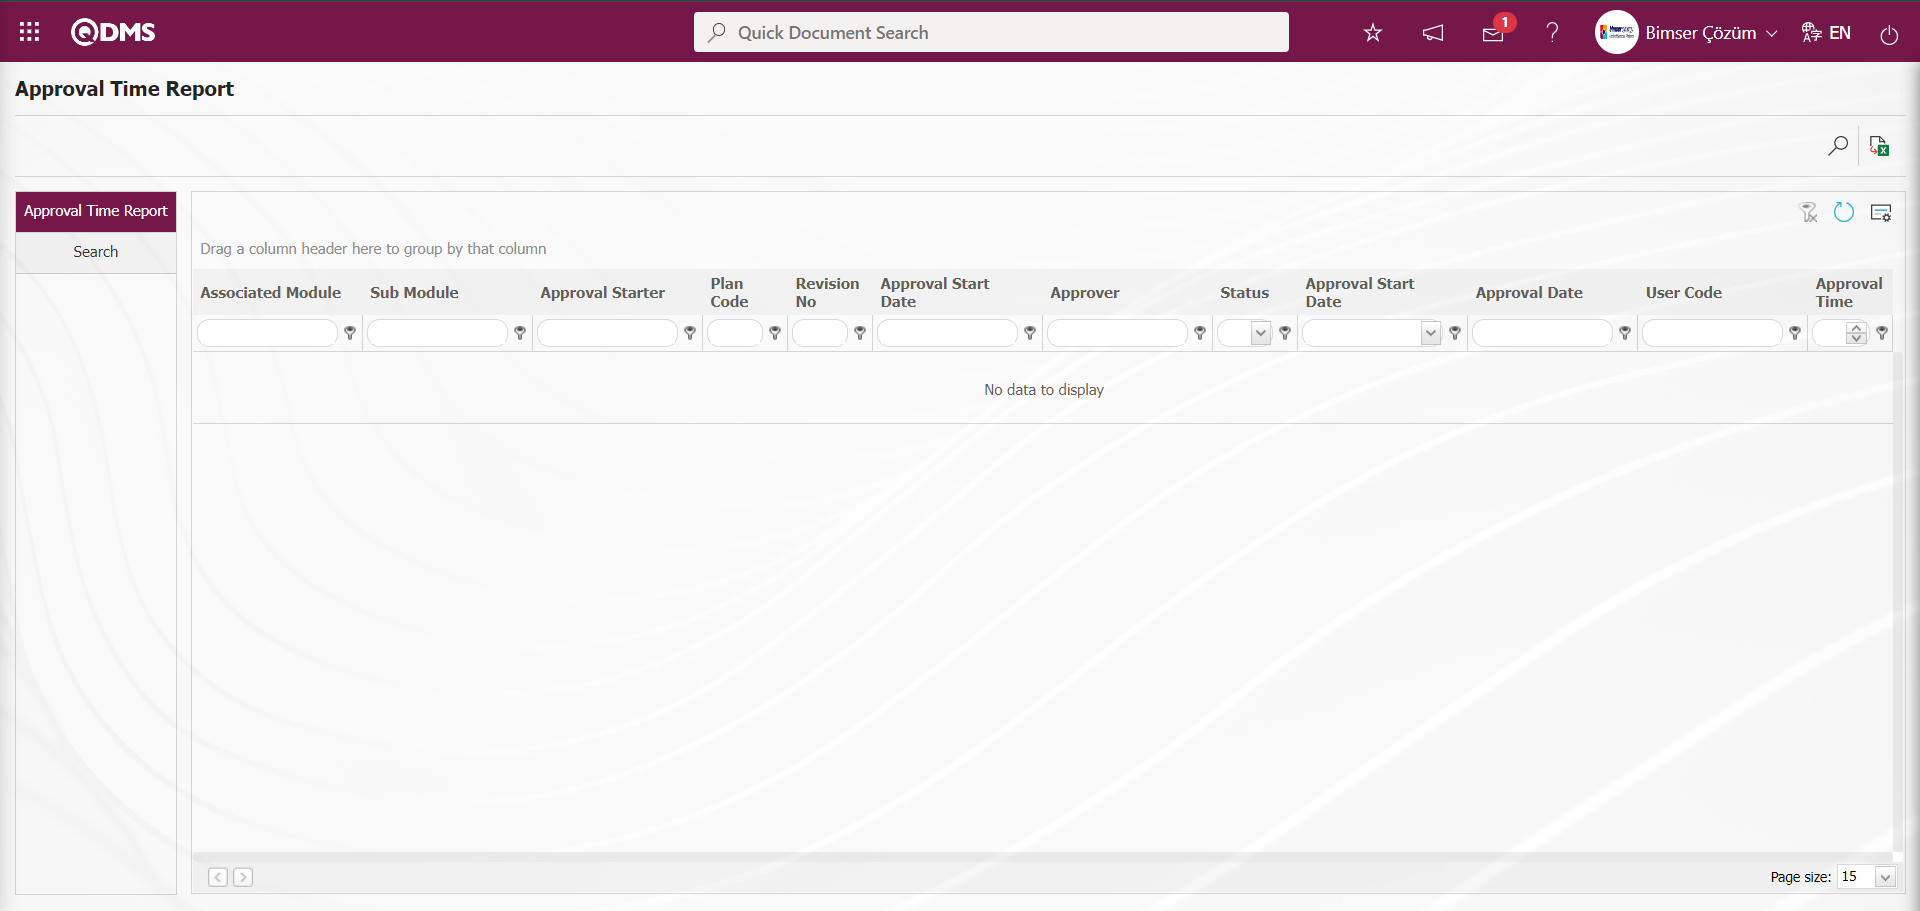
With the help of the buttons on the screen;
: Records are searched by filtering.
: Data is transferred to Excel.
: The search criteria on the menu screens are used to clear the data remaining in the filter fields in the grid where the search operation is performed.
: The menu screen is restored to its default settings.
: User-based designing of the menu screen is done with the show-hide feature, that is, the hiding feature of the fields corresponding to the columns on the menu screens.
In the Search tab, the report is obtained by searching according to information such as Modules, Sub-Module Identification, Approval Initiator. Select “System Infrastructure Definitions” Module by clicking the drop-down list in the Modules field. Select “OHSAS Specialist Appointment Approval” by clicking the drop-down list in the Sub-Module field. Select the approval start date and click the (Search) button.
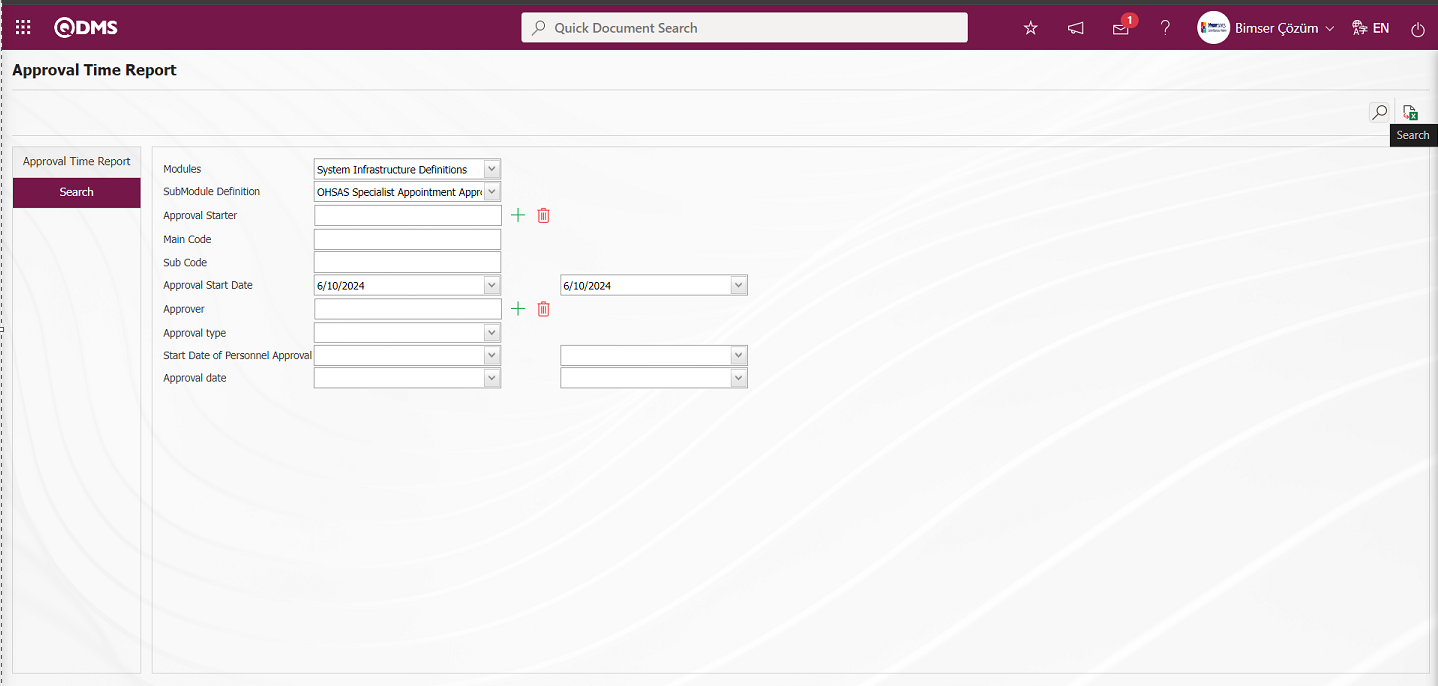 In the Approval Times List tab, the approval initiator, main code, sub code, approver, status (Approval Started, Approval Continued, Approved and rejected) and approval time information about the approval flow in the relevant module are given.
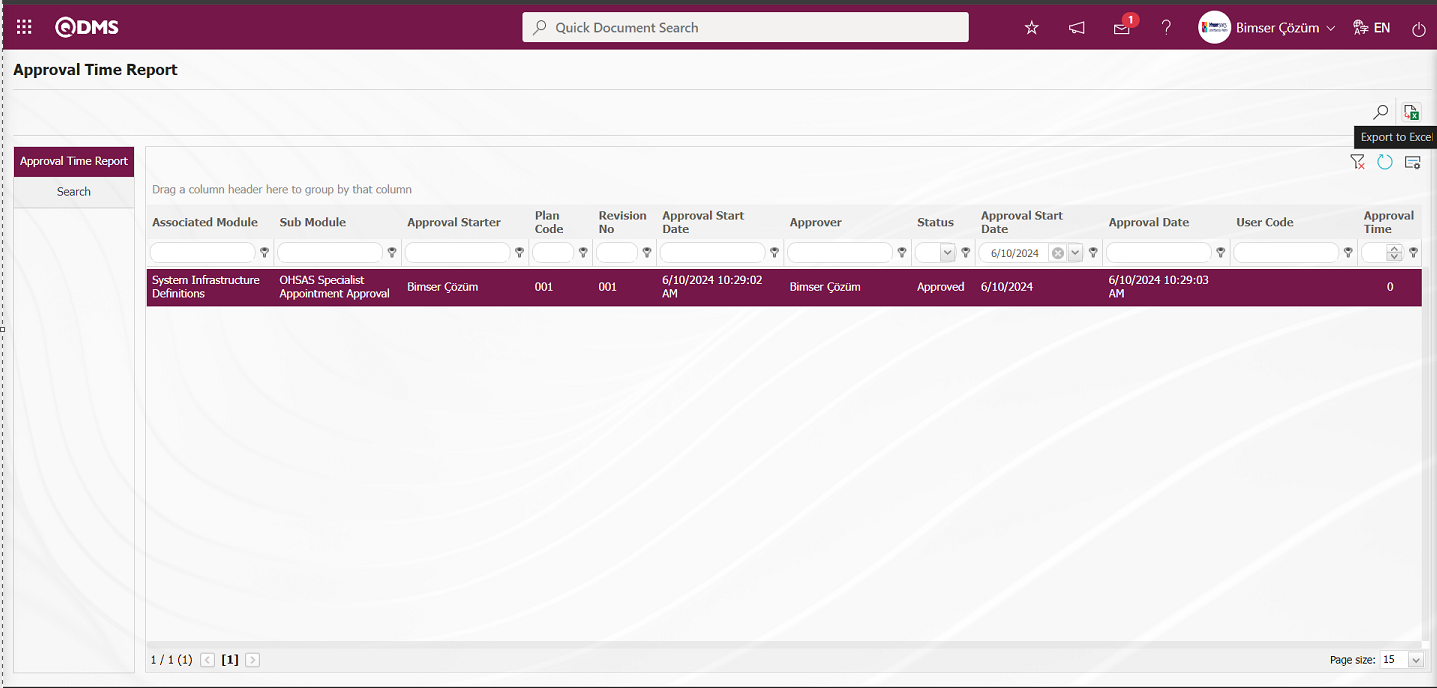
After clicking the (Export to Excel) button on the Approval Time Report screen, the system automatically presents the Approval Time Report in Excel format to the user.