Audit Activities
Information
You can quickly reach the relevant topic with the help of navigation on the right side.
Audit Activities Module (v.5.26) User Help Document
Module Version: 5.26
1. INTRODUCTION:
“QDMS Audit Activities Module” is a module where management systems audits can be planned, published, finalized and reported.
2. PURPOSE:
The purpose of this help guide is to explain the working process of the QDMS “Audit Activities Module”. Along with the definitions in the system infrastructure definitions, the planning of the audit activity in the system, assignment, creating an audit report and the reports received as a result of all activities performed are explained through examples.
3. RESPONSIBILITIES:
QDMS Audit Module Managers, Audit Unit, Auditors, Audited Unit Responsible, Informed Persons
4. ABBREVIATIONS:
QDMS: Quality Documents Management System
5. WORKFLOW:
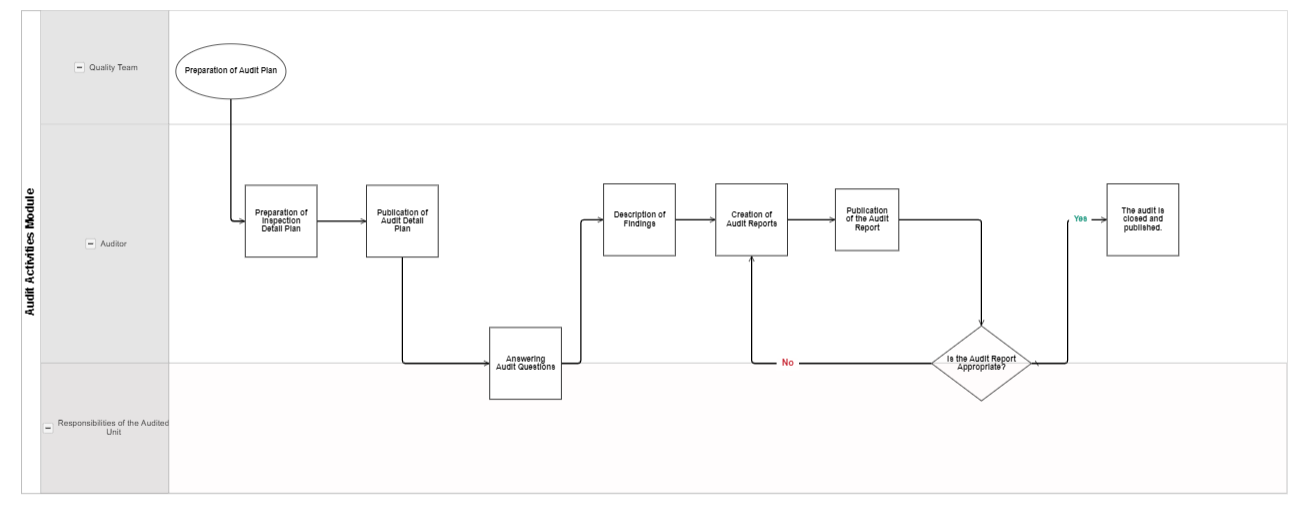
6. Audit Activities Module
It is a module that enables you to initiate the resolution process by opening CAPA/Action for your findings, monitor the results of actions of previous audits, plan the workload distribution of auditors, define audit plans and view them as a timeline, create dynamic question lists, inform auditors and audited unit managers before and after the audit, and create automatic audit reports.Bu modül içeriğinde aşağıdaki özellikleri kapsamaktadır.
- Performing all kinds of planned and unplanned audits such as internal audit and external audit
- In all kinds of planned and unplanned audits in Internal Audit, the risks that are not considered in advance within the organization and that may have devastating consequences within the organization should be identified in advance and the necessary prevention studies should be carried out and the negativities that such negativities may create should be minimized.
- Monitoring whether all kinds of planned and unplanned audits in Internal Audit are carried out effectively and beneficially in accordance with the procedures, standards, instructions and policies of the organization
- Prevention of losses arising from errors and frauds in the organization through all kinds of planned and unplanned audits in Internal Audit
- Ensuring that the internal controls of the organization are maintained in a healthy manner through all kinds of planned and unplanned audits in Internal Audit
- By creating and defining the question groups and grouping the questions to be asked in the audit in different types, associating the questions added to the question pool with these groups and determining the filtering or use in reports based on these groups
- Defining the questions to be asked in the audit and establishing the relationship between each defined question and the department, management systems, item numbers, related documents, related processes, and question group to be asked
- Categorizing the questions defined in the question pool by creating different “Question List” for different audits such as department, management system, process
- Ability to create your audit questions in the form of scored, non-scored and checklist
- Questions can be assigned a weight score and the audit score is automatically calculated at the end of the audit according to the score of the question weights
- At the audit implementation stage, if the audit will be scored, providing an optical answer key-like appearance in the scored question lists with the “Answer questions on a single page” feature so that the options can be marked more easily
- Defining the competencies of auditors such as lead auditor, auditor, observer
- When defining the auditors, it is determined on which management system basis they can perform related audits and the auditors can open automatic work orders.
- Follow-up of findings such as Major, Minor and observations identified in the audit, initiation of action and corrective preventive action depending on the nonconformity and initiation of the solution process
- Notification via e-mail and SMS
- Performing the audit identification process and associating the audits with the relevant management system, relevant documents, relevant processes and question lists
- An audit report specific to each audit can be defined in the audit definition process and the report is automatically generated by the system at the end of the audit.
- When the “Auditor cannot change questions” feature is selected on the basis of audit identification and audit type identification, the auditor cannot add or remove questions during the audit execution phase.
- Defining audit types such as Internal Audit, External Audit and Product audits to be carried out in the organization
- Defining annual audit plans and publishing the defined audit plan and notifying the relevant persons via e-mail
- Receiving Plan-Joint Audit plan and Audit Schedule reports related to the Audit Plan
- After making the audit plan, multiple selection from the audit pool by adding audits to the plan
- By applying a Qdms control method with the “Check” feature, it is ensured that the auditor cannot audit his own unit and at the same time the auditor cannot be selected as an auditor in another audit on the same day.
- Audits can be included in the Audit plan in bulk through a previously created Excel template
- Authorization control over responsible groups and authorization of the selected group for the plan and plan-related inspections
- Identification of planned inspections as well as identification of unplanned inspections
- Audit Score Report” displays the scored audits and the score values of these audits as a list and can be reported according to the desired criteria with the filter tab
- With the “Audit Options Report By Questions”, the answers given to the questions can be compared on the basis of audits and in this report, which options are selected in which audit for the related question can be displayed.
- With “Findings by Audit”, audits are included in the matrix by the number of finding types, from which audit, which types of findings are opened and the total number of audits at the end of the year can be displayed on the screen and reports can be obtained according to the desired criteria with the filter tab.
- With the “E-Card Audit Planning Report”, the audits that the auditors take part in on a monthly basis are taken as a chart and the workload of the auditors can be easily viewed with this report.
- “The most occurrence Analysis (graphics)” graph and graphical creation of audits on the basis of management system, finding type and question and exporting them in graphic output (jpeg, png, xls) etc. formats
- Defining the parametric field type requested by the company in the screens of the relevant functions of the module for the customer
- Ensuring that different flows such as “Audit Closure Approval Flow” and “Audit Plan Approval Flow” are designed according to the needs
- Performing audit question, auditor and audit transfer operations collectively
6.1. System Infrastructure Definitions / Audit
This is the part where the infrastructure of the Audit Activity module is created and the module infrastructure design where definitions are made. Data appears according to these definitions made in the entries from the Integrated Management System menu.
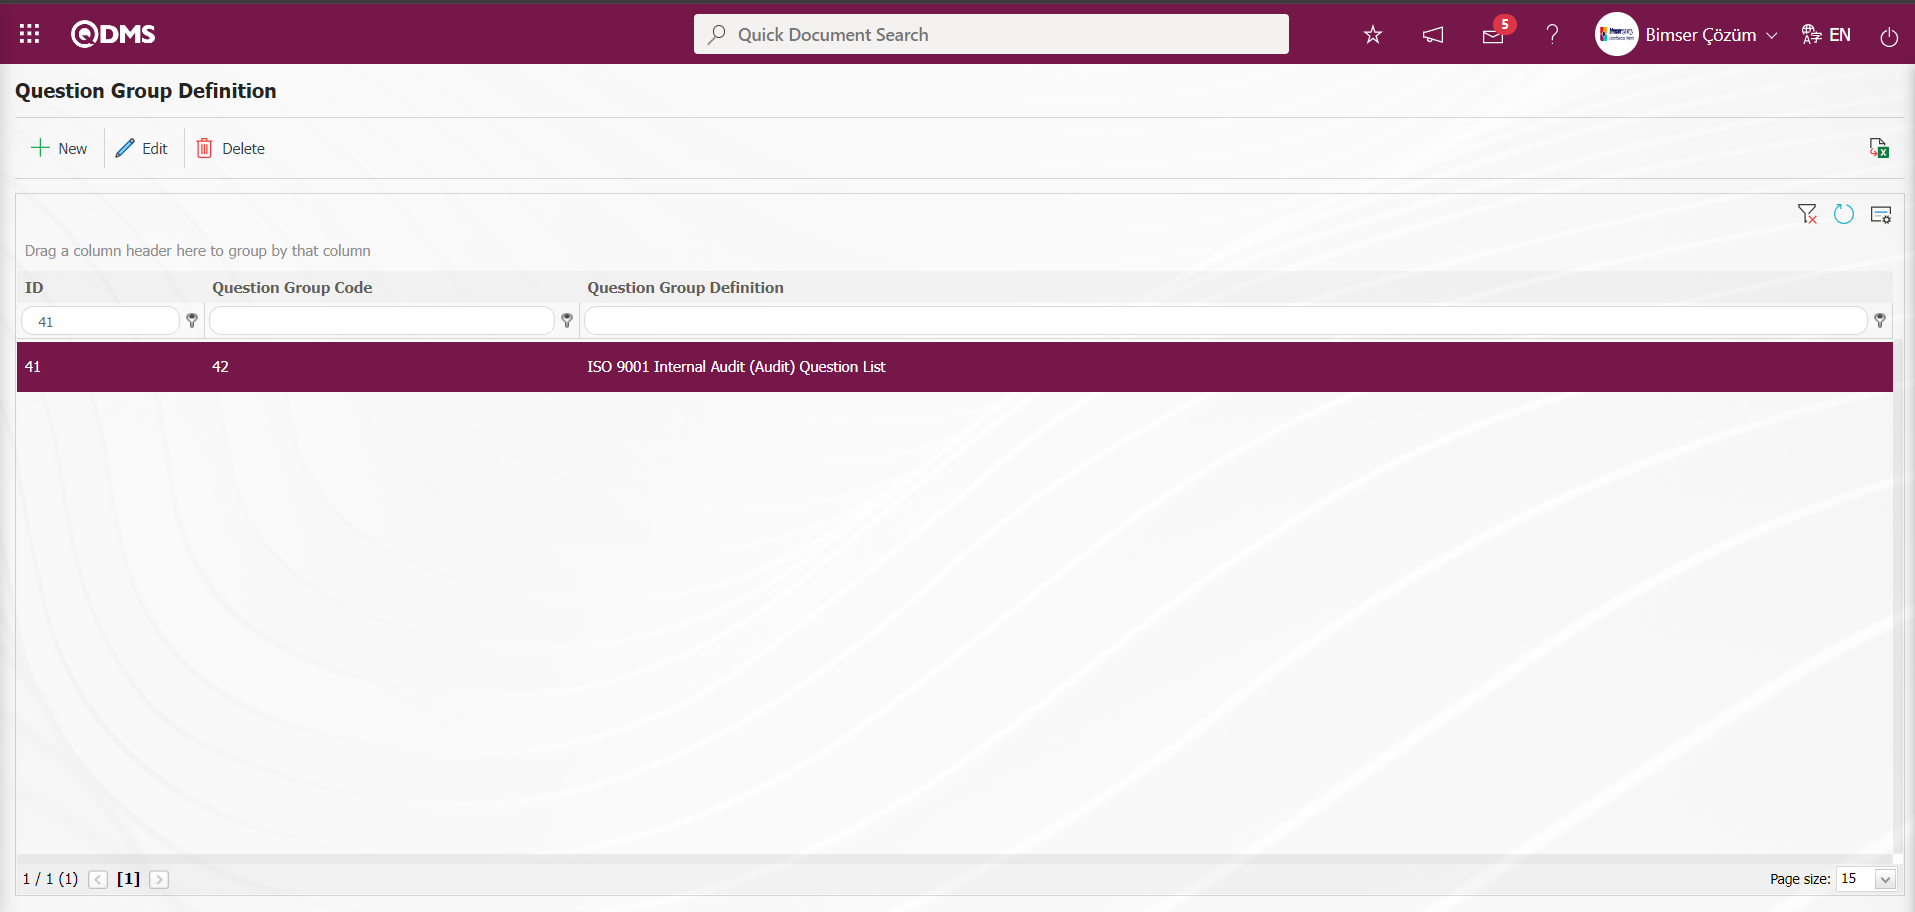
6.1.1. Question Group Definition
Menu Name: System Infrastructure Definitions/ Audit /Question Group Definition
It is the menu where question groups are defined. The purpose of defining the question group is to group the questions to be asked in the audit in different types and to determine the usage status in filtering or reports based on these groups. These determined question groups are associated with the questions added to the question pool. Generally, branch, store, etc. It is beneficial to group questions for audits. Apart from this, when adding questions to the question pool, grouping is used to find it easier than the filter. Question groups are grouped based on management system, process and department.

With the help of the buttons on the screen;
 : Defining a new question group is done.
 : Selected question group information in the list is updated.
 : Delete the selected question group information in the list.
 : Data is transferred to Excel.
 : Records can be searched by filtering.
 : The search criteria on the menu screens are used to clean the data remaining in the filter fields in the grid where the search operation is performed.
 : The menu screen is restored to its default settings.
 : User-based designing is done on the menu screen with the show-hide feature, that is, the hiding feature of the fields corresponding to the columns on the menu screens.
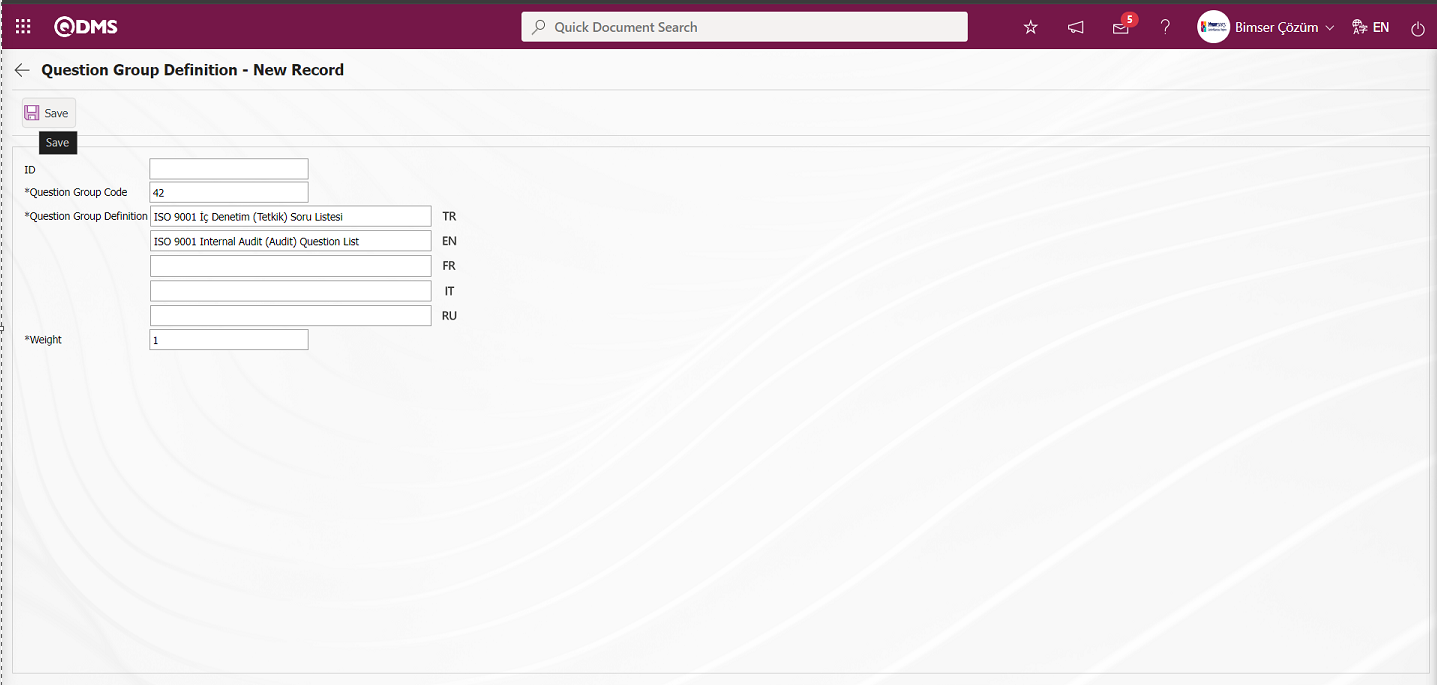
To add a new question group to the Question Group Definition screen, click on the button at the top left corner of the screen to display the Question Group Definition - New Record screen.
Related fields are defined on the screen that opens:
ID: This is the field where the question group ID information is given by the system on theQuestion Group Definition - New Record screen.
Question Group Code: This is the field where the question group code information is written on theQuestion Group Definition - New Record screen. It should be defined without using characters such as spaces and Turkish characters so that it is not the same as the previously defined code information. Ex. '001' , 'RK'
Question Group Definition: Question Group Definition - This is the field where question group definition information is written on theNew Record screen. If other language options will also be used, the language equivalent of the relevant question group is written where the relevant flag is located.
Weight: This is the field where the weight information of the question group is written on theQuestion Group Definition - New Record screen. This field is used for scored audits on the basis of the question group, when the questions should be weighted and their formula-based scores should be calculated. In other cases, there is no harm in leaving it blank.
After filling in the required fields on theQuestion Group Definition - New Record screen, the question group registration process is realized by clicking the  button in the upper left corner.
6.1.2. Question Pool
Menu Name: System Infrastructure Definitions/ Audit/ Question Pool
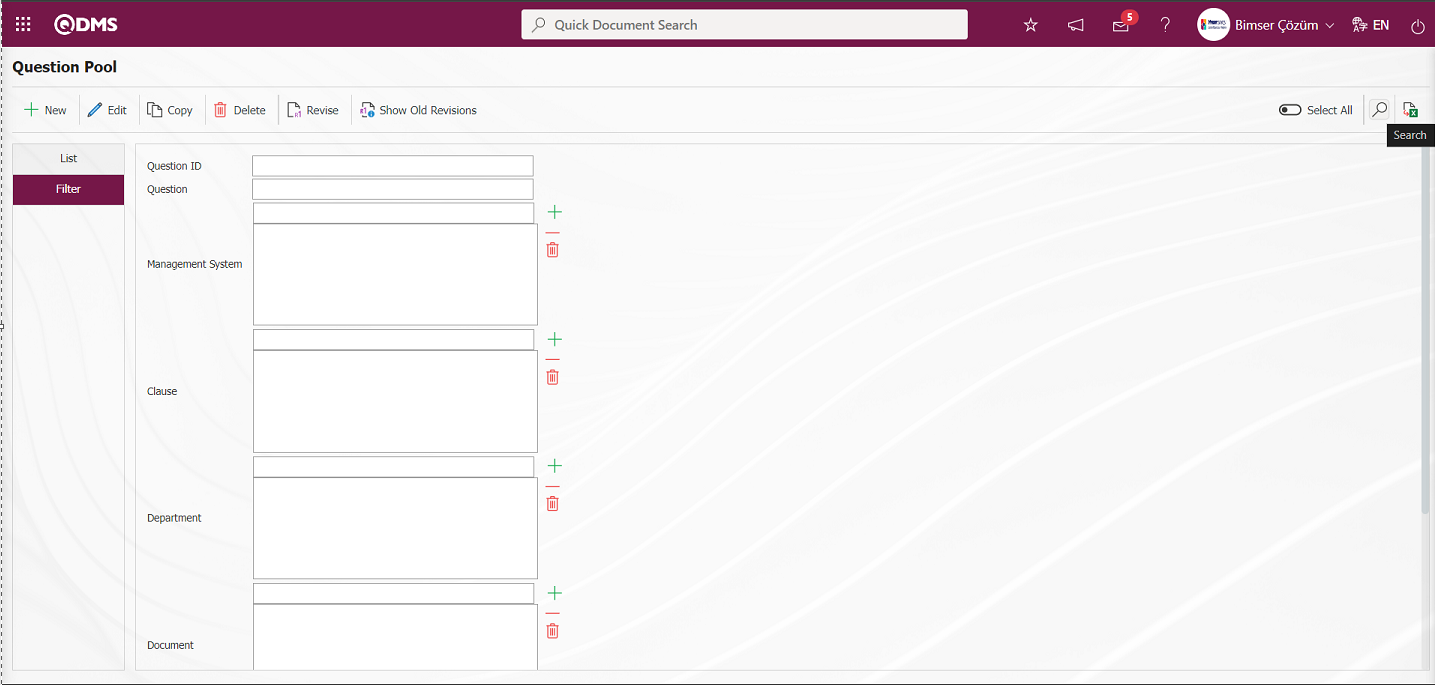
This is the menu where the process of defining the questions to be asked in the audit takes place. Fields such as the department, management systems, item numbers, related documents, related processes and the question group to which each defined question will be asked can be determined. At the same time, the question has an active / passive feature, and the question can be deactivated in cases where the question will not be asked again. Thus, the question will not be lost in the audit records where the question was asked in the past, and will not be included in the active question pool in new audits.

With the help of the buttons on the screen;
: A new question is defined.
: Make any correction, change or update related to the selected question information in the list.
 : The selected question information in the list can be copied.
 : The selected question information in the list can be deleted.
 :Questions are revised.
 : Old revisions of revised questions are displayed.
: Data is transferred to Excel.
: Records can be searched by filtering.
: The search criteria on the menu screens are used to clean the data remaining in the filter fields in the grid where the search operation is performed.
: The menu screen is restored to its default settings.
: User-based designing is done on the menu screen with the show-hide feature, that is, the hiding feature of the fields corresponding to the columns on the menu screens.
To add a new Question to the Question Pool screen, click on the button at the top left corner of the screen to display the Question Pool- New Record screen.
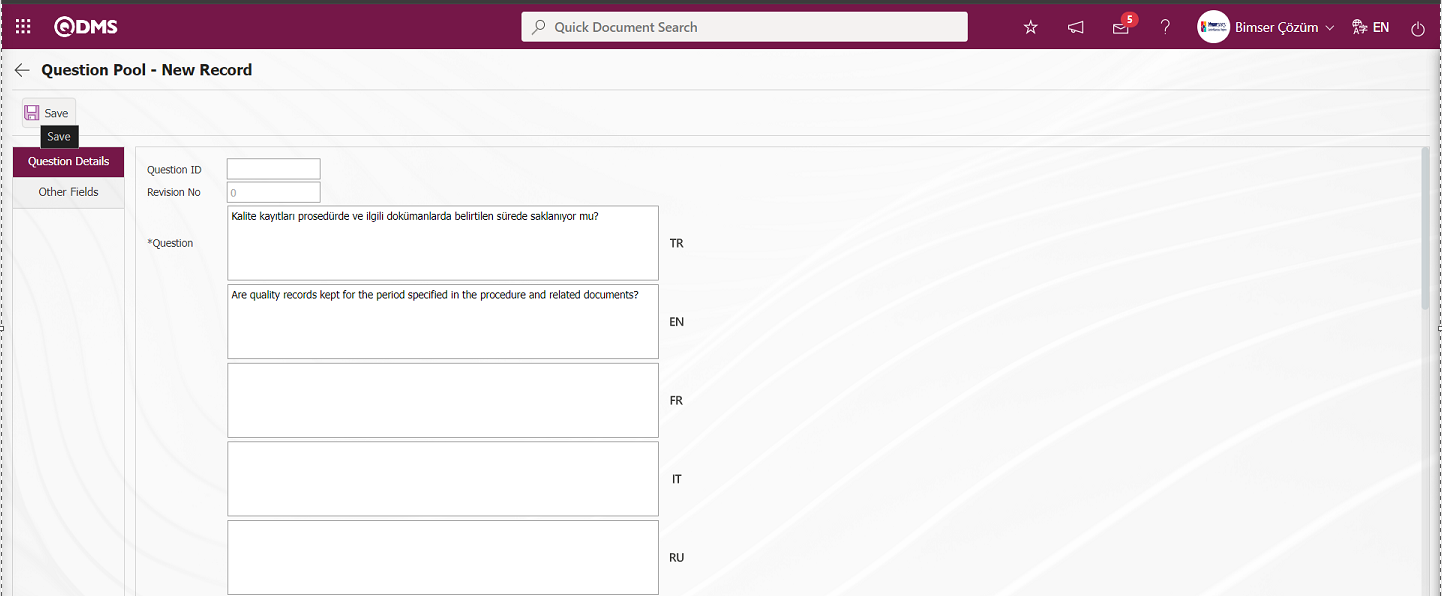
Related fields are defined on the screen that opens:
Question ID: It is the field automatically given by the system on the Question Pool-New Registration screen.
Revision No: This is the field where the revision number is automatically given by the system on the Question Pool-New Registration screen.
Question: This is the field where the definition information of the question is written on the Question Pool-New Registration screen. If other language options will be used, the language equivalent of the relevant question is written where the relevant flag is located.
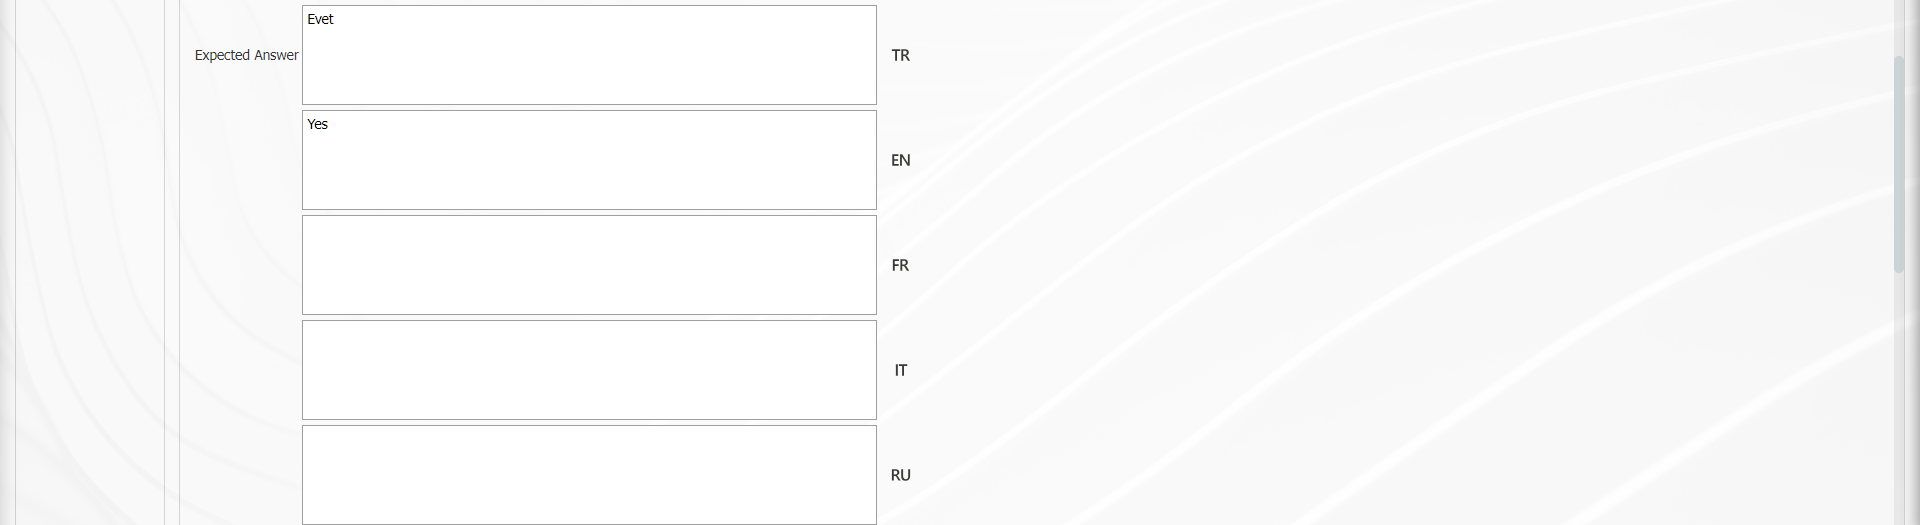
Expected Answer: This is the field where the expected answer information is written on the Question Pool-New Record screen. When the expected answer is entered, the auditor can be evaluated according to the answer that should be given to the question during the audit.
Status: This is the field where the active and passive status of the question is determined on the Question Pool-New Record screen. The question whose status is changed to inactive in this field is not used.
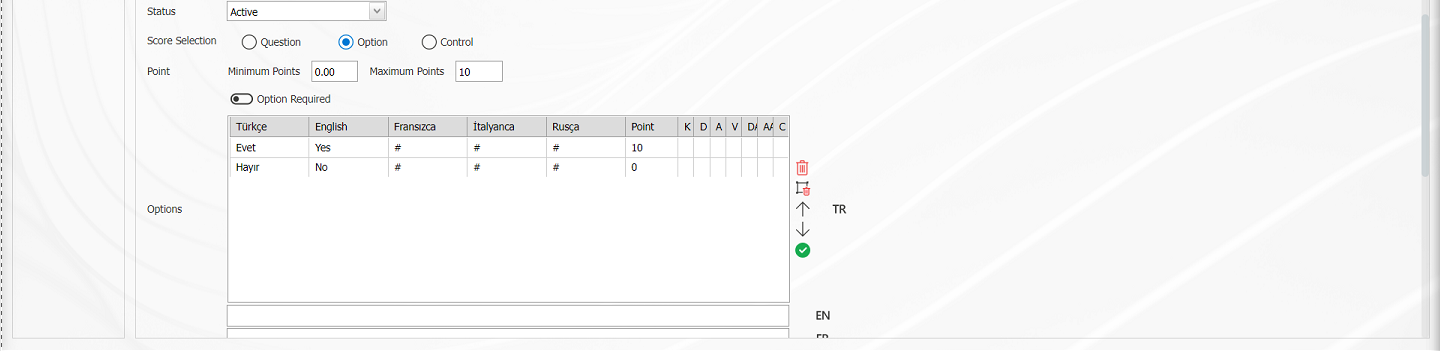
Score Selection: If the audit is a scored audit on the Question Pool-New Record screen, this is the field where it is determined whether the score will be calculated through the question or through the options or through the checkpoints associated with the options.
Score: In the scored audit on the Question Pool- New Record screen, if the audit score is calculated based on the audit score selection, this is the field where the max and min score of the question is determined. The scores written here will be seen while answering the relevant question in the answers tab on the audit realization page. The auditor sees the max and min score and enters the score received from the question based on the answer to the question. When the score selection option is selected, scoring is done depending on the options.
Option Required: It is the field that allows the system to give a warning if there are questions with the “option required?” check box checked and no option selected when closing the audit on the Question Pool- New Record screen.
Option: This is the field where option values of options or control points are entered by clicking the  (Add) button.
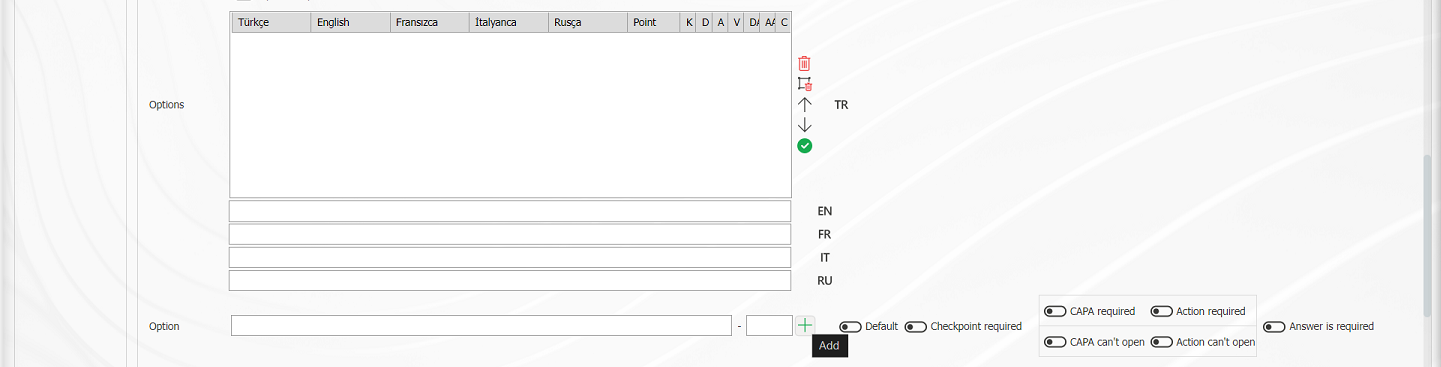
With the help of the buttons on the screen;
 :Delete the selected option in the list in the Options field.
 :Delete all options in the Options field.
 :Move the selected option upwards in the Options field.
 :Move the selected option downwards in the Options field.
 :Edit and change the selected option in the Options field by moving it to the option field.
In the option and checkpoint fields, if the checkpoint, CAPA or action will be mandatory according to the option of the answer given to the question, or if you want CAPA or Action to be opened, the relevant check-boxes must be checked.

If Default is checked, it is ensured that the option defined for that question is automatically selected by default during the audit execution phase.

When defining the option, the option is given a score from the box on the right.
If the correctness of a question is based on the checks, the check-box for mandatory checkpoint should be checked. Then go to the checkpoints field and make the relevant definitions as in option definition. When the “More than one can be selected” option is selected, after the selection type is specified, the calculation method to be used is also selected if a scored audit is to be performed. These calculation methods are Total, Average, Max. Value, Min. Value, Ineligibility Total. It is necessary to determine whether the score calculation will be based on the question, option or checkpoint.
Single: If the option is activated, one of the options and control points defined for the question can be selected.
Multi-Line: If the option is activated, more than one of the options and control points defined for the question can be selected.
Calculate Method: This is the field where the method of calculating the audit score for the options defined in the question is determined. This field is displayed when the “Multi-Line” option is selected.

Select from the drop-down list options in the Calculation Method field.

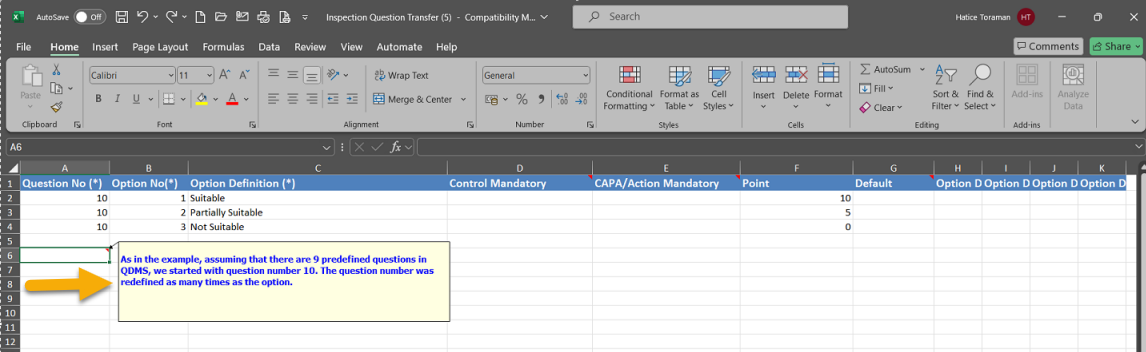
Another issue here is to transfer the questions to be used in the audit to the system. Transfer is done by downloading the relevant template from System Infrastructure Definitions/BSID/Configuration/Transfers/Audit Question Transfer.
If there are audit questions previously registered in the system, they should be numbered as a continuation of the question numbers when making bulk transfer. When associating with the relevant question group, the question group number should be entered. For questions with options, the question number should be entered as many times as there are options. Other fields are associations with related processes, departments, item numbers, etc., which can be easily defined as needed.
Note: In the example below, assuming that there are 9 predefined questions in QDMS, we started with question number 10. The question number is redefined as many times as the option.
The necessary information is accessed by clicking the link related to the Audit Question Transfer process.
Other Fields: On the Question Pool-New New Record screen, management systems, related item numbers, related departments, related processes, related documents related to the question can be associated by selecting them with the (Add) button. At the same time, previously defined question groups can also be associated by selecting from the question group field.
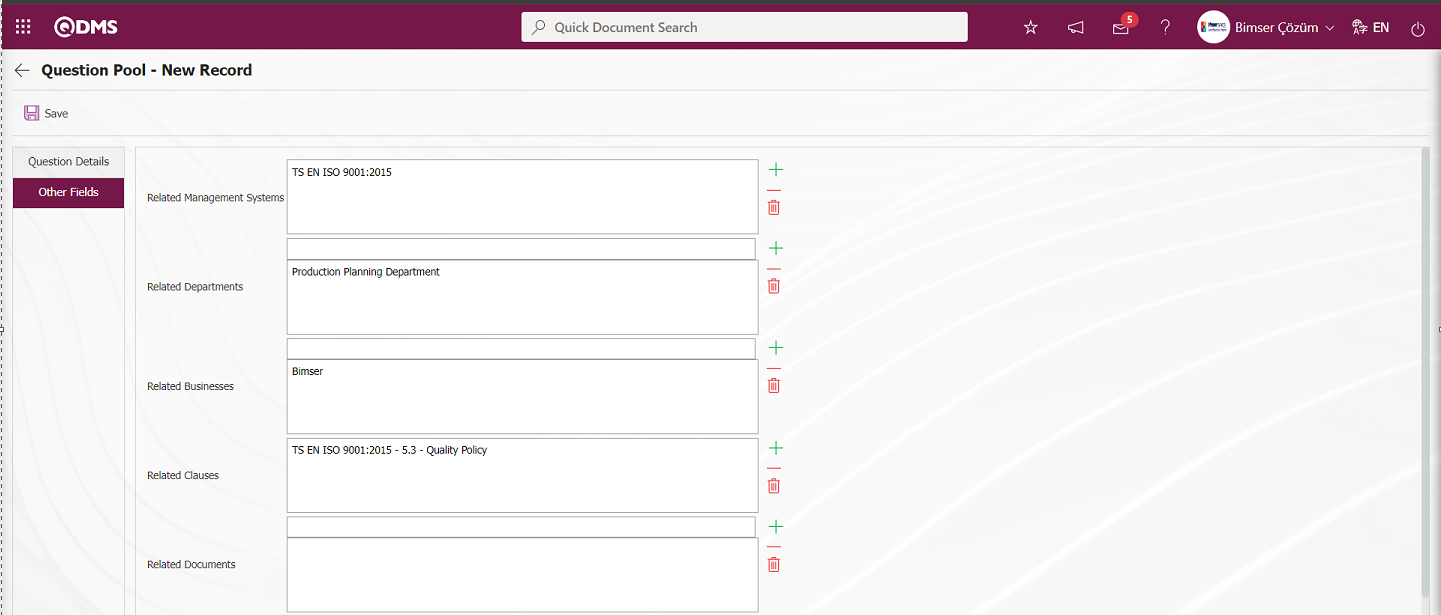

Related Management Systems: This is the field where the management system information related to the question in the Other Fields tab on the Question Pool - New Record screen is selected in the list of the management system defined in the system that opens by clicking the  (Add) button. (Management System list information comes as defined from the management system list defined in the System Infrastructure Definitions / BSID / Definitions / Management System Definition menu.)
Related Departments: This is the field where the department information related to the question in the Other Fields tab on the Question Pool - New Record screen is selected in the list of departments defined in the system that opens by clicking the (Add) button. (Department list information comes as defined from the Department list defined in the System Infrastructure Definitions/ BSID/ Definitions/ Department Definition menu.)
Related Businesses: In the Other Fields tab on the Question Pool - New Record screen, the field where the workplaces related to the question are selected in the list of workplaces defined in the system that opens by clicking the (Add) button. (Workplace list information comes as defined from the Workplace list defined in the System Infrastructure Definitions / BSID / Definitions / Locations menu).
Related Clauses: This is the field where the clause number information related to the question in the Other Fields tab on the Question Pool - New Record screen is selected in the list of clause numbers defined in the system that opens by clicking the (Add) button. (Clause Numbers list information comes as defined from the list of Management System Clause Numbers defined in the System Infrastructure Definitions / BSID / Definitions / Managememt System Clause Number Definition menu).
The parameter is activated by selecting the parameter value “Yes” for parameter 21 in the Audit Activities module parameters.
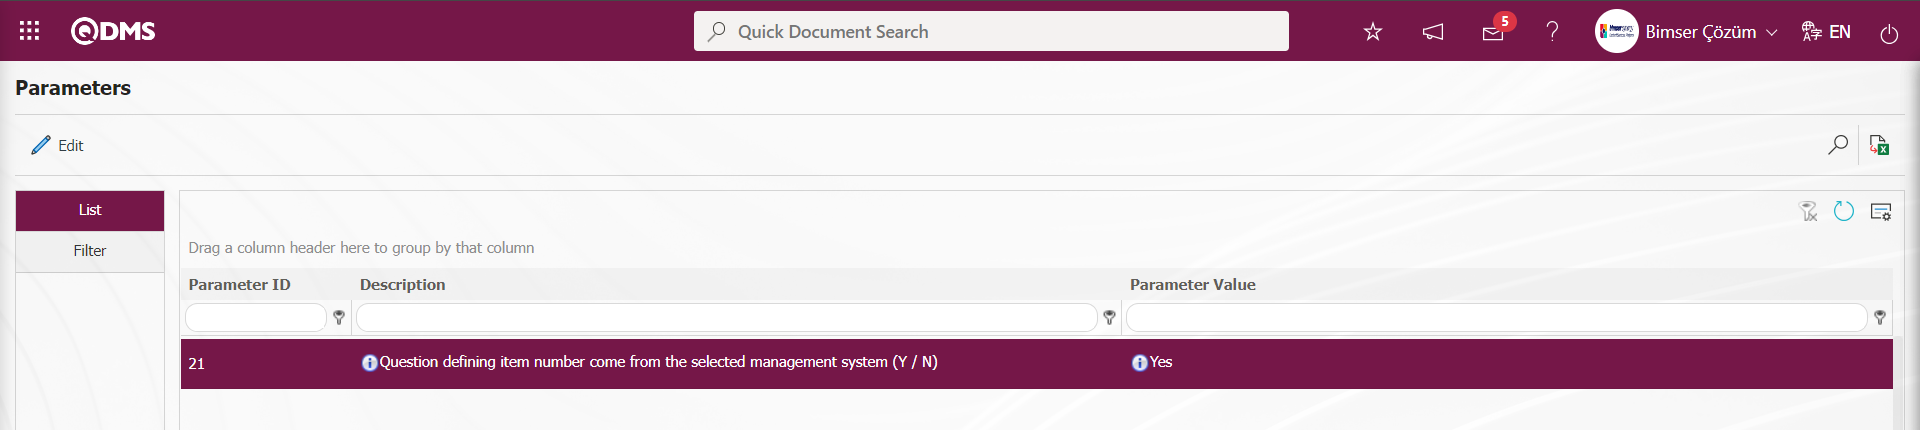
When the parameter is activated and the management system with the question is selected in the Related Management system field, when the item number related to the question is selected in the Related Item number field, the item numbers of the selected management system come to the item number list and selection is made in this item number list.
Related Documents: In the Question Pool - New Record screen, in the Other Fields tab, the field where the documents related to the question are selected in the list of the Management system defined in the system that opens by clicking the (Add) button. (Document List comes from the list of documents installed in the Document Management Module).
Related Processes: This is the field where the process information that the question is related to is selected in the process list defined in the system opened by clicking the (Add) button in the Other Fields tab on the Question Pool - New Record screen. (The process list comes from the process list defined in the Ensemble Process Management program.)
Question Group: It is the field where the question group related to the question in the Other Fields tab on the Question Pool - New Record screen is selected in the question group list opened by clicking the drop-down list. Question Group list information comes as defined in the System Infrastructure Definitions / Audit Activity / Question Group Definition menu.) The necessary information is accessed by clicking the link related to the question group information.
After filling in the required fields on the Question Pool-New Record screen, the question definition registration process is realized by clicking the  button in the upper left corner.

All questions to be asked in the audit are defined in the Question Pool menu. While the question is selected from the list on the Question Pool screen, click the  button.
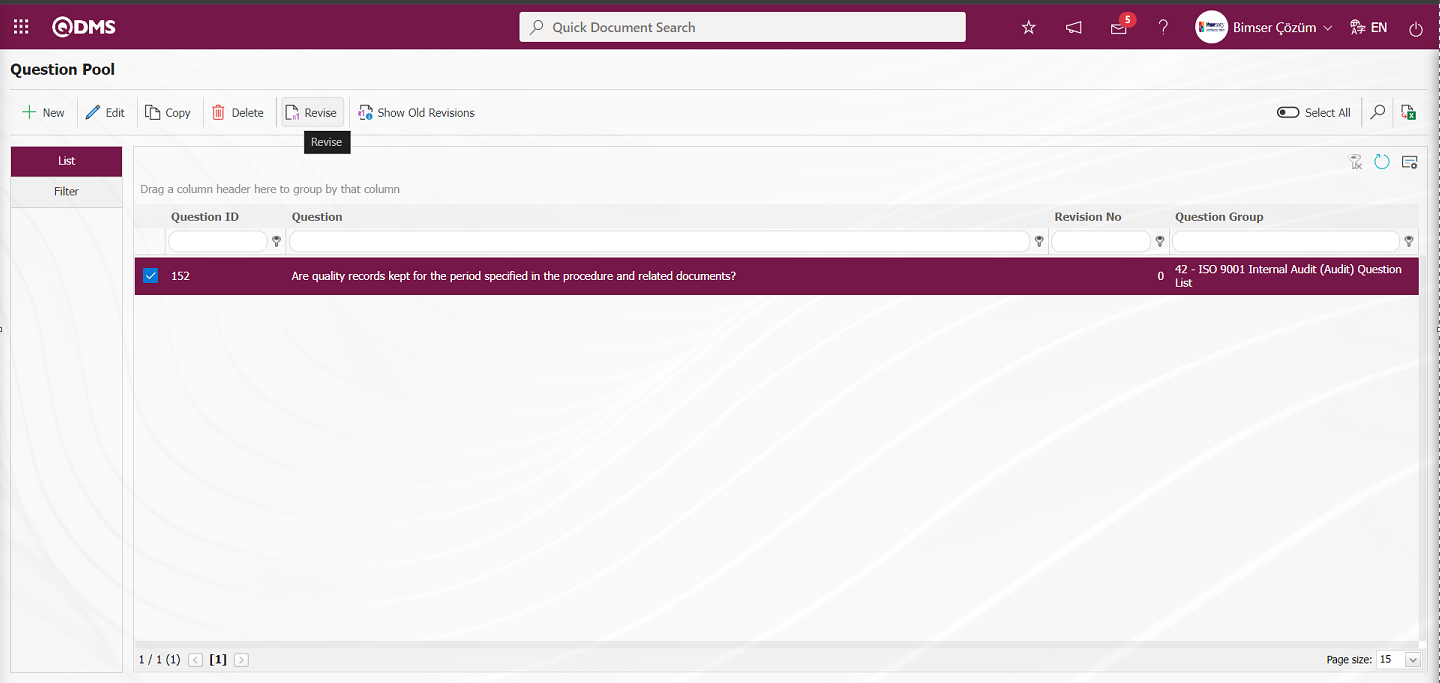
On the Question Pool - Edit Record screen, the question is revised by making changes and edits on the relevant fields on the question. In the revision process related to the question, the revision number of the question is increased by the system and the revision number of the question is given.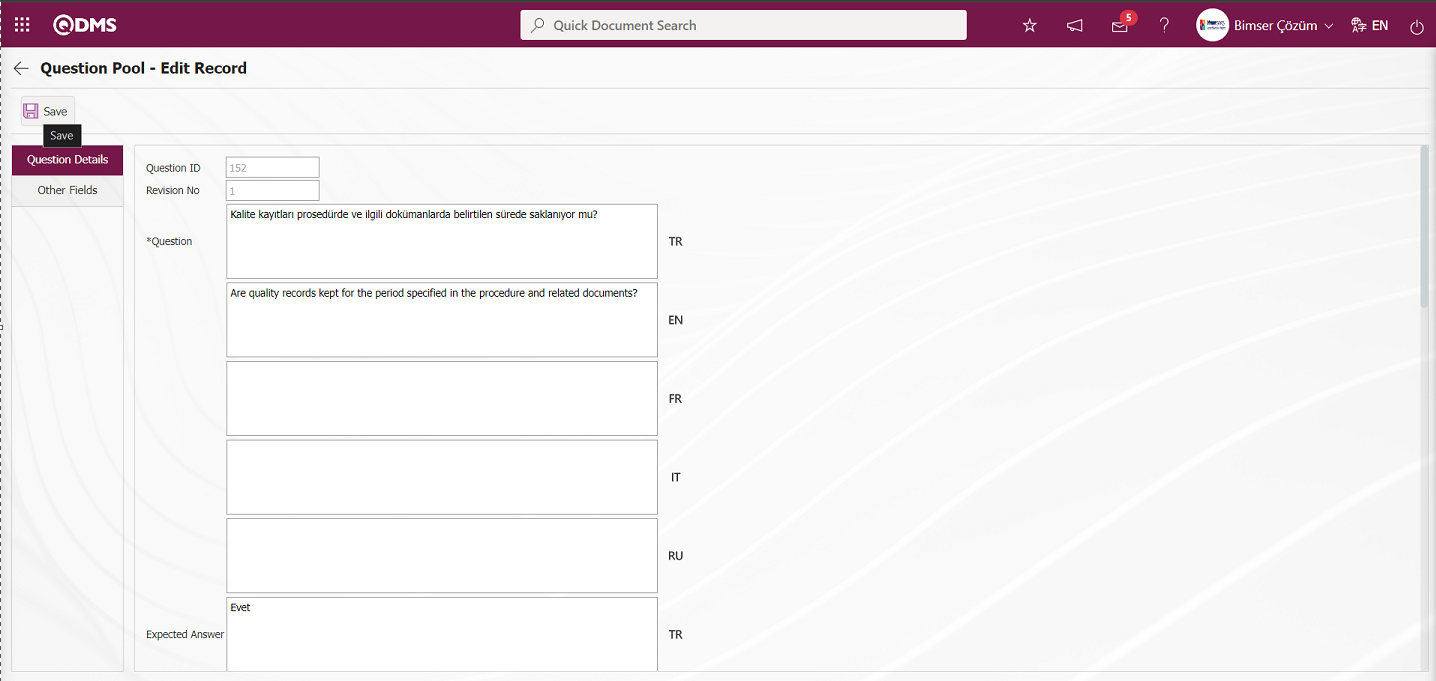
After the revision process is done on the question on the Question Pool - Edit Record screen, the revise question record process is done by clicking the button in the upper left corner of the screen.
On the Question Pool screen, click the  button while the revised question is selected from the list.
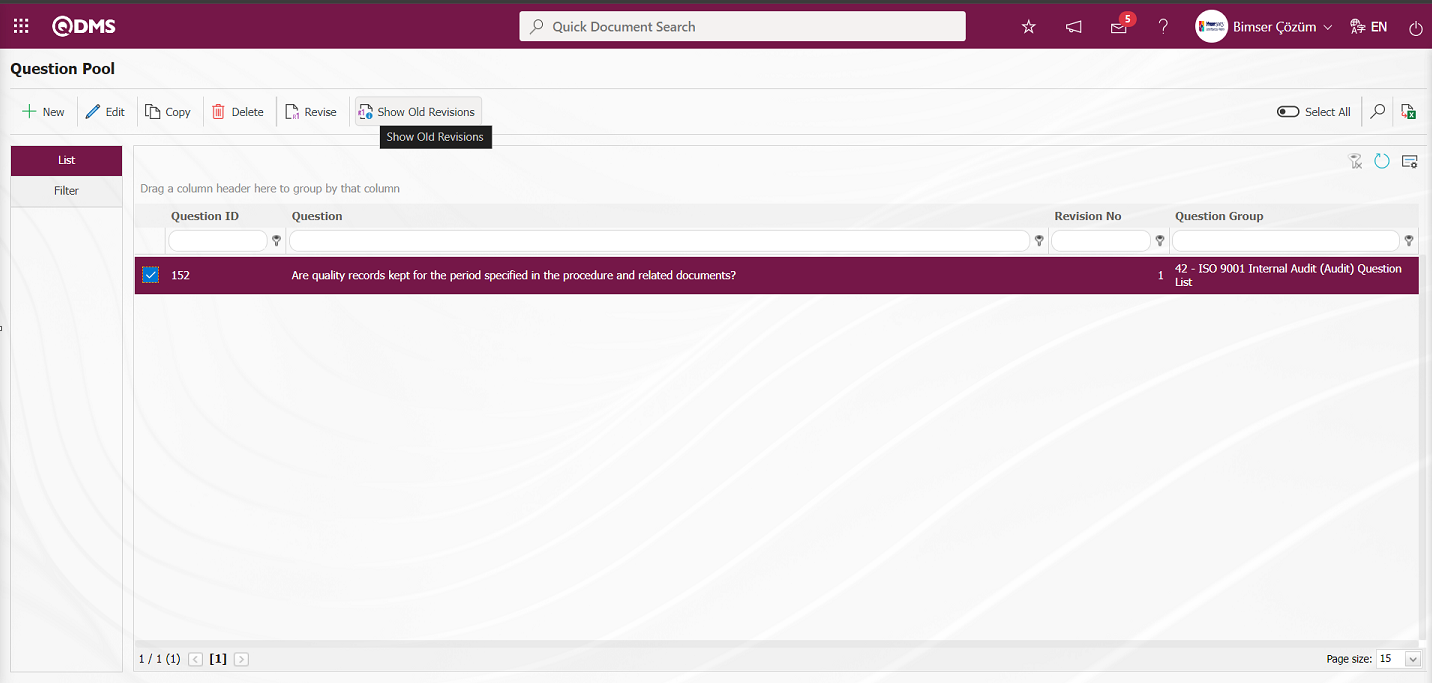
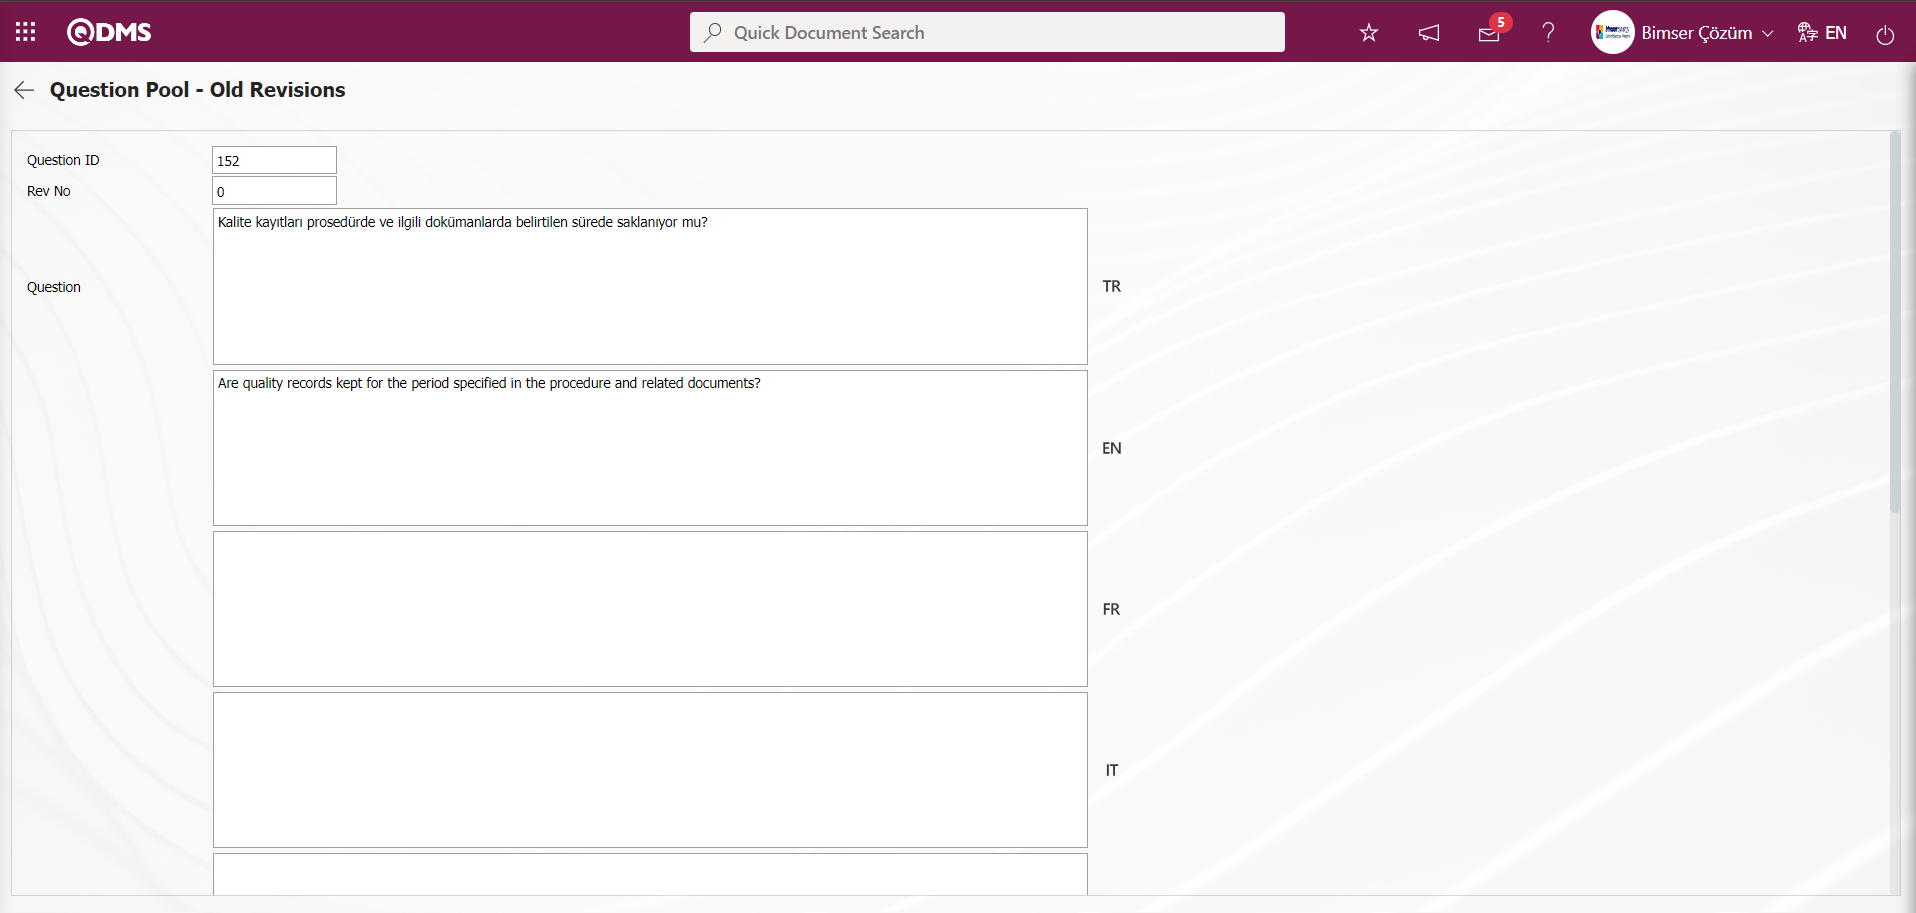
Click the  button on the Question Pool - Old Revisions** screen.
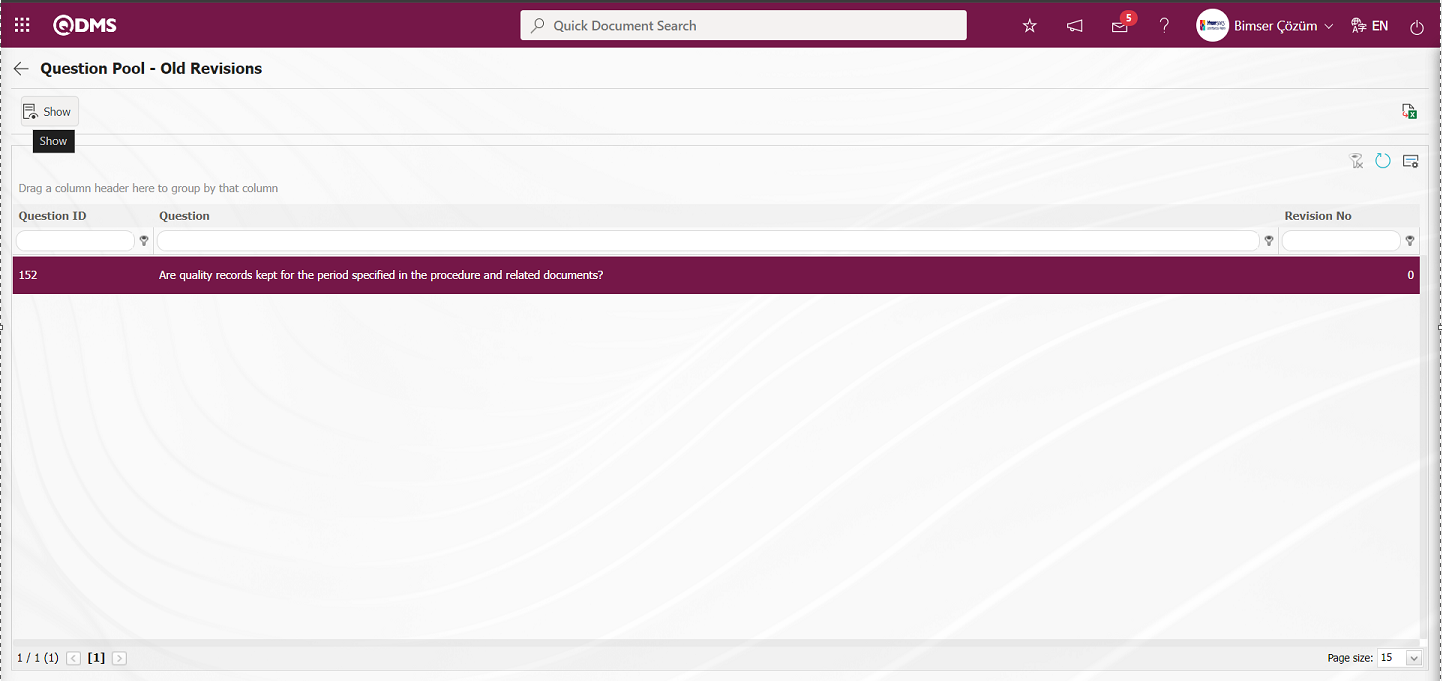
The old revision version of the revised question is displayed.
While the question is selected in the list in the Question Pool menu, the question is copied by clicking the  button if the fields in the relevant question have the same information. If the question is to be deleted in the question pool in the system, the question is selected from the list and the question is deleted by clicking the
  button.
On the Question Pool screen, data is entered in the fields such as Question No, Question, Management System and Item Number with the Filter tab and filtering is done according to the search criteria by clicking the  (Search) button.
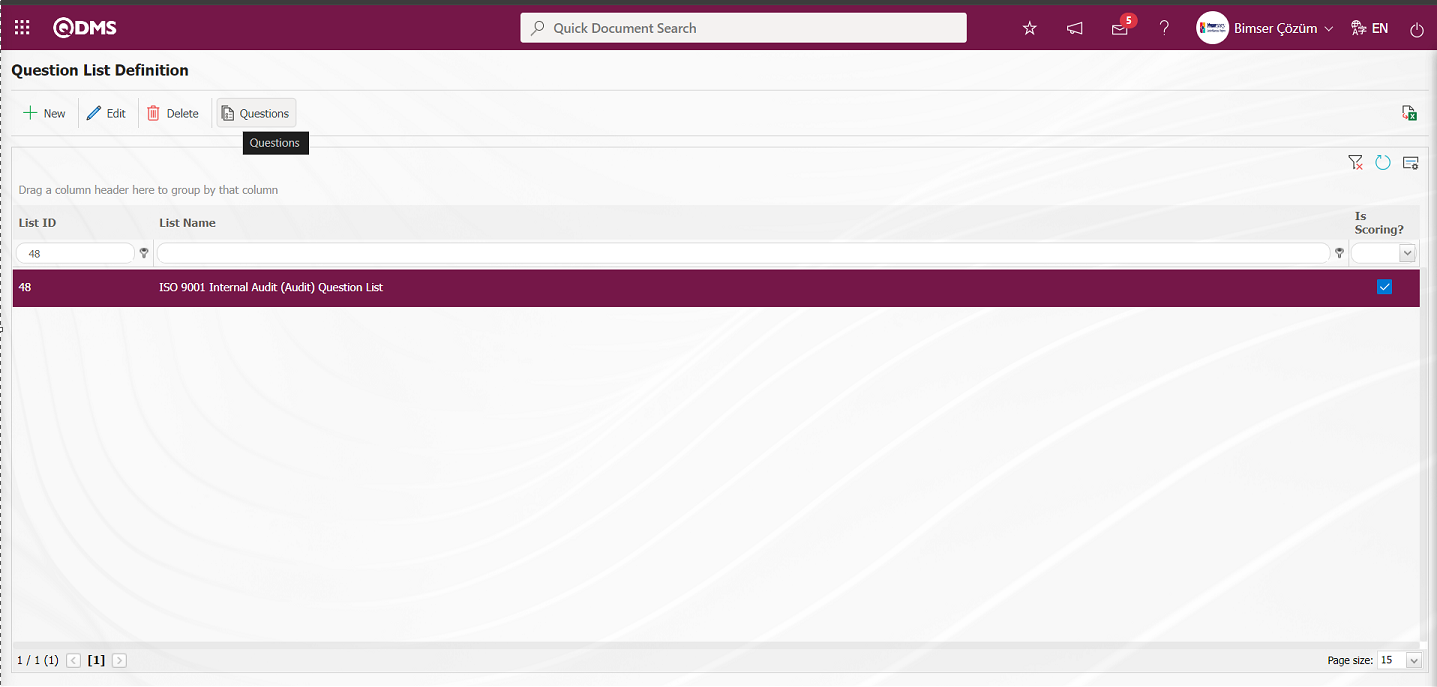
6.1.3. Question List Definition
Menu Name: System Infrastructure Definitions/ Audit Activity/ Question List Definition
This is the menu where the Question List definition process takes place. Questions defined in the question pool can be categorized by creating a department, management system and process based question list. In this menu, it is also determined whether the question list will be scored or not.

With the help of the buttons on the screen;
: New question list is defined.
: Any correction, change or update is made regarding the selected question list information in the list.
: The question list information selected in the list can be deleted.
 : Questions linked to the question list are selected.
: Data is transferred to Excel.
: The search criteria on the menu screens are used to clean the data remaining in the filter fields in the grid where the search operation is performed.
: The menu screen is restored to its default settings.
: User-based designing is done on the menu screen with the show-hide feature, that is, the hiding feature of the fields corresponding to the columns on the menu screens.
To add a new Question List to theQuestion List Definition screen, click the button at the top left corner of the screen. The Question List Definition - New Record screen is displayed.
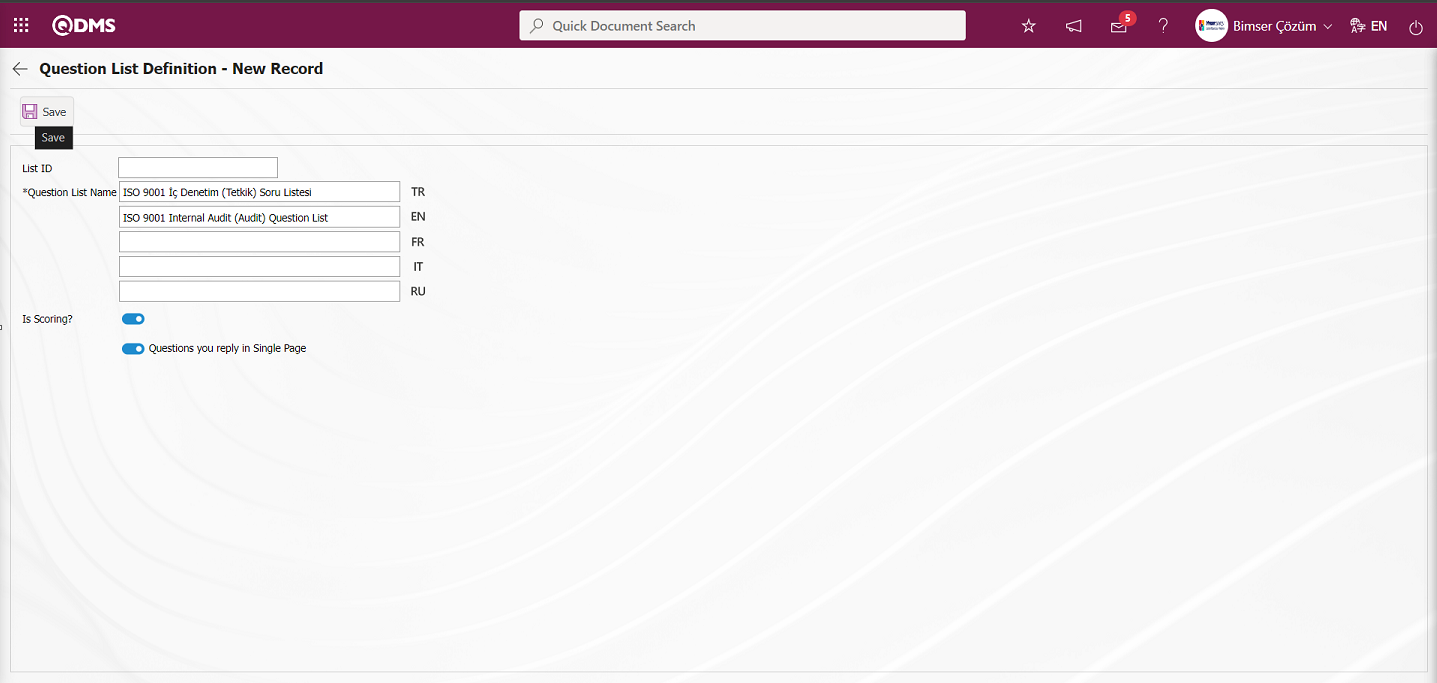
Related fields are defined on the screen that opens:
List ID: Question List Definition - This is the field where the question list number is given automatically by the system on the New Record screen.
Question List Name Question List Definition - This is the field where the definition of the question list is written on the New Record screen. If other language options will be used, the language equivalent of the relevant question list is written where the relevant flag is located.
Is scoring?: On the Question List Definition - New Record screen, it is the field where it is selected whether the question list will be scored or not. If it will be scored in the audit, the check box related to the field “Is scoring?” is checked.
Questions you reply in Single Page: On the Question List Identification-New Record screen, if the audit will be scored, it is marked whether the questions will be answered on a single page. The feature of answering questions on a single page is provided with an optical answer key-like appearance in scored question lists so that the options can be marked more easily. Questions you reply in Single Page is used when all questions have the same option values.
After the required fields are filled in the Question List Definition screen, the registration process is realized by clicking the button in the upper left corner.
After clicking the 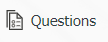 button on the Question List Definition screen, you can add questions for the relevant question list.
With the help of the buttons on the screen;
: Adding a new question to the question list is done.
: Changes/edits/updates can be made on the question information added to the question list. On the screen that opens, the mandatory status of the question, its weight and if the question list is selected with points, its score can be determined.
: The question information added to the question list is deleted.
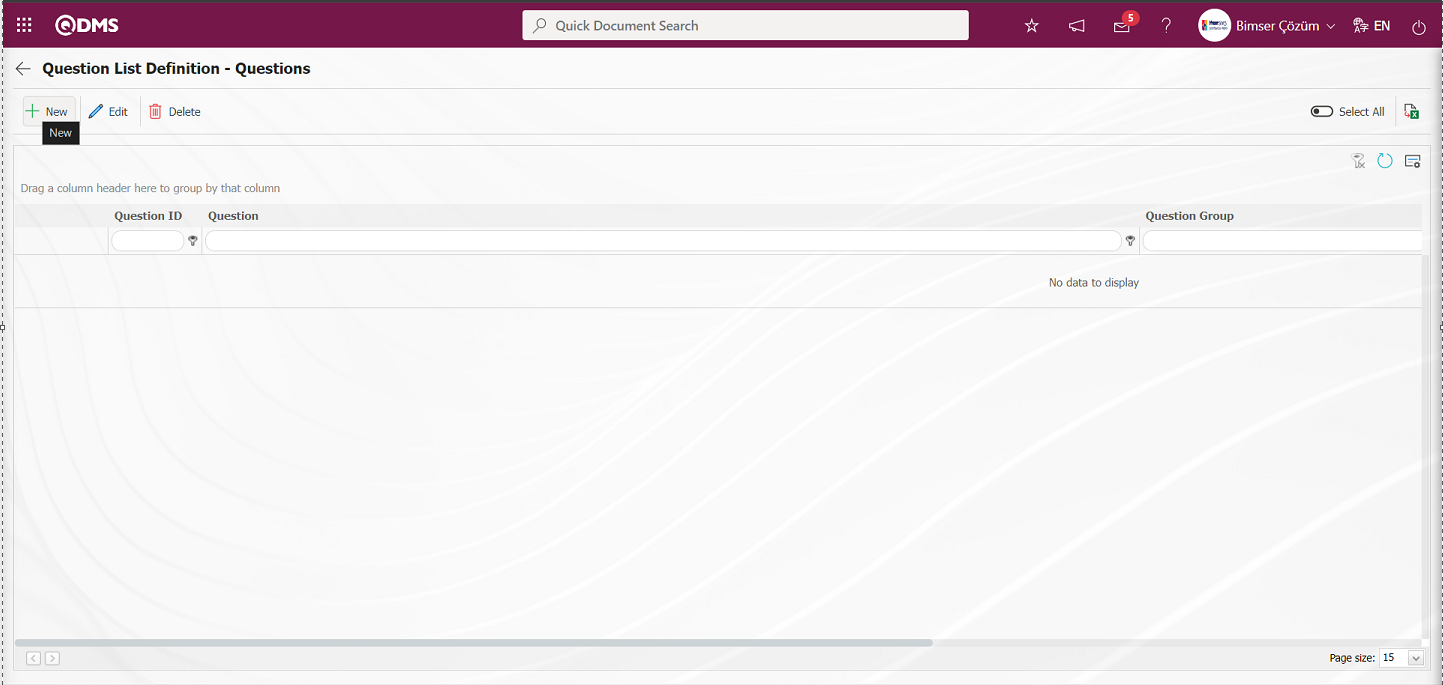
button is clicked. On the Select Question screen, select the questions to be added to the question list from the list of questions defined in the system.
When the options of the added questions are not the same, the answers of the questions in the list are not suitable for answering on a single page.
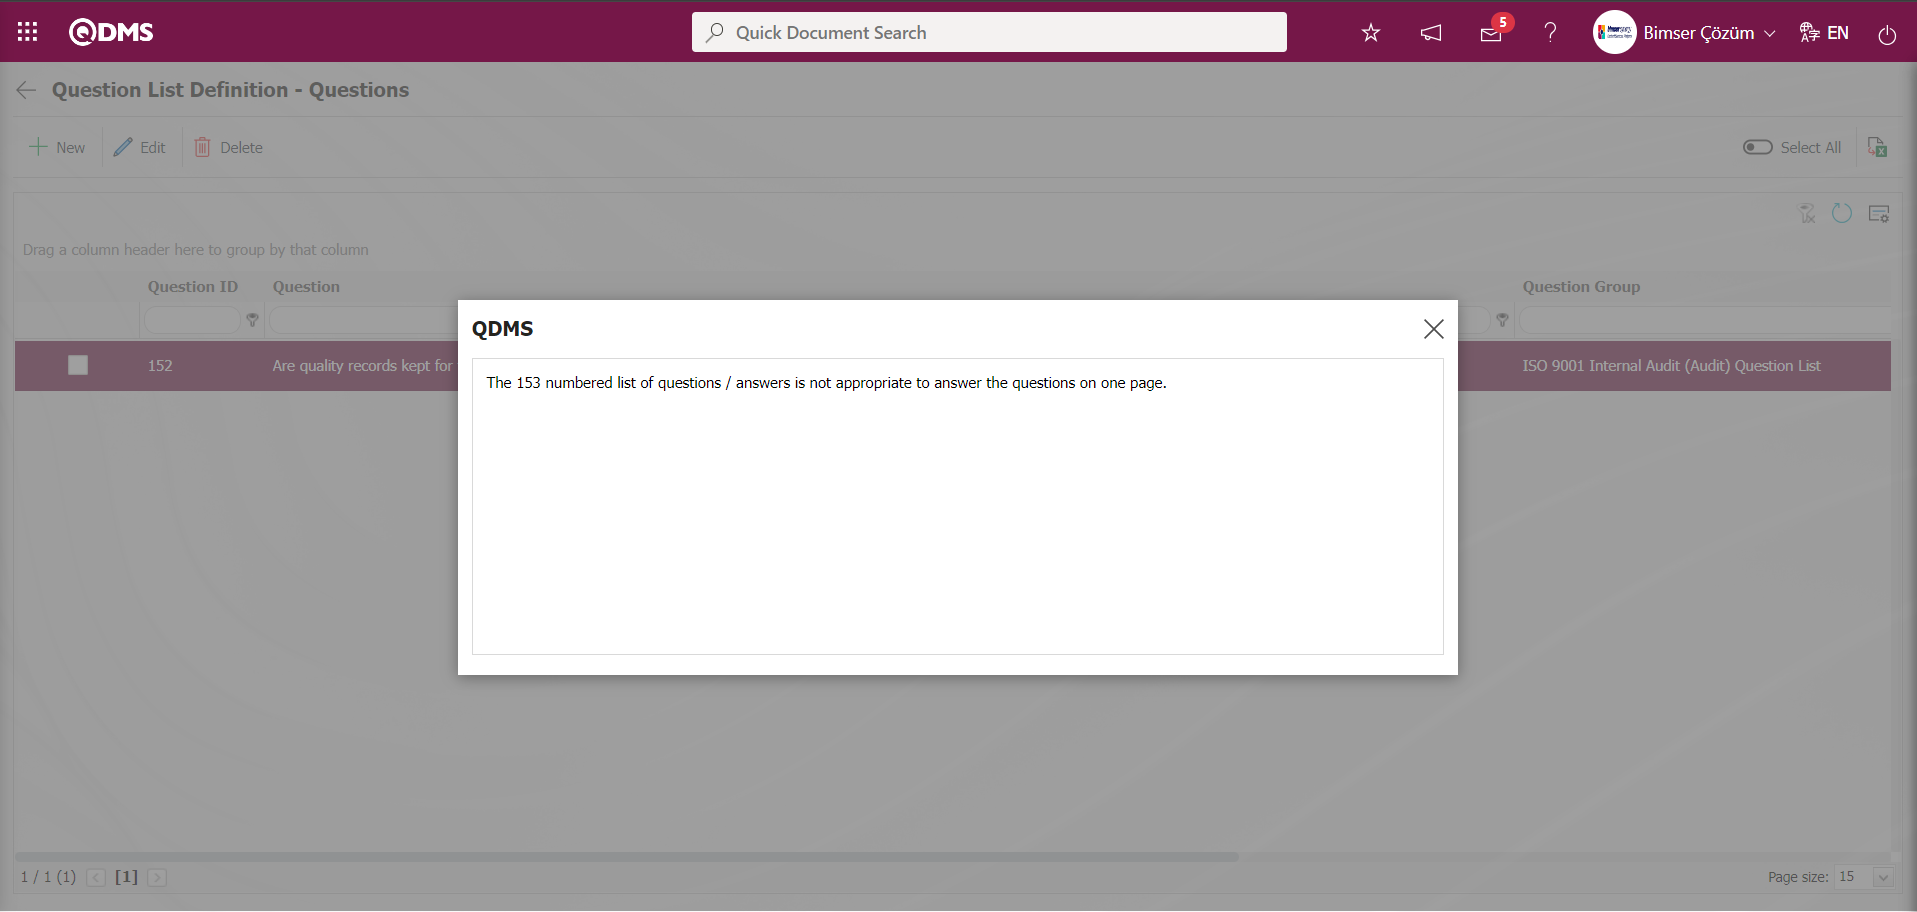
Taking the warning into consideration, the question is updated in the relevant menu and the question is added to the question list in the same way.

Click the repeat button. Opened Select Question The process of adding the edited question to the question list from the question list defined in the system on the screen is done.
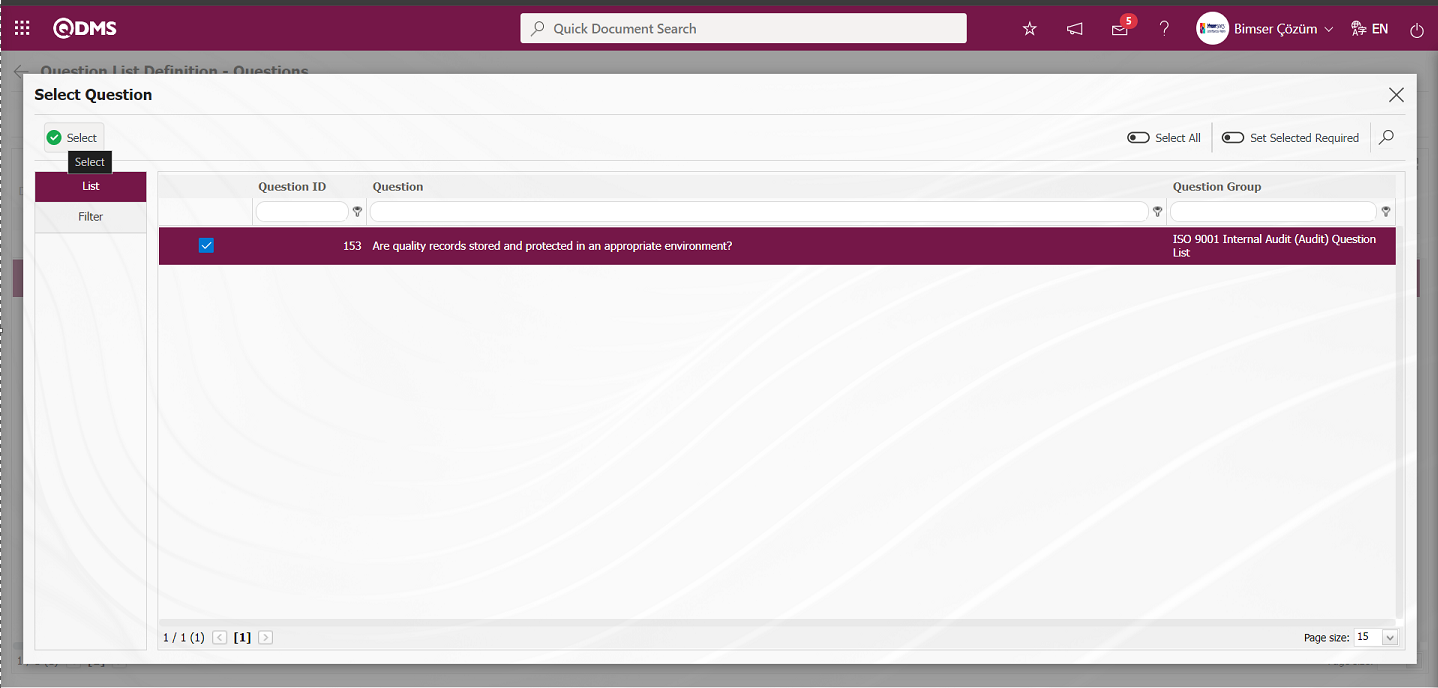
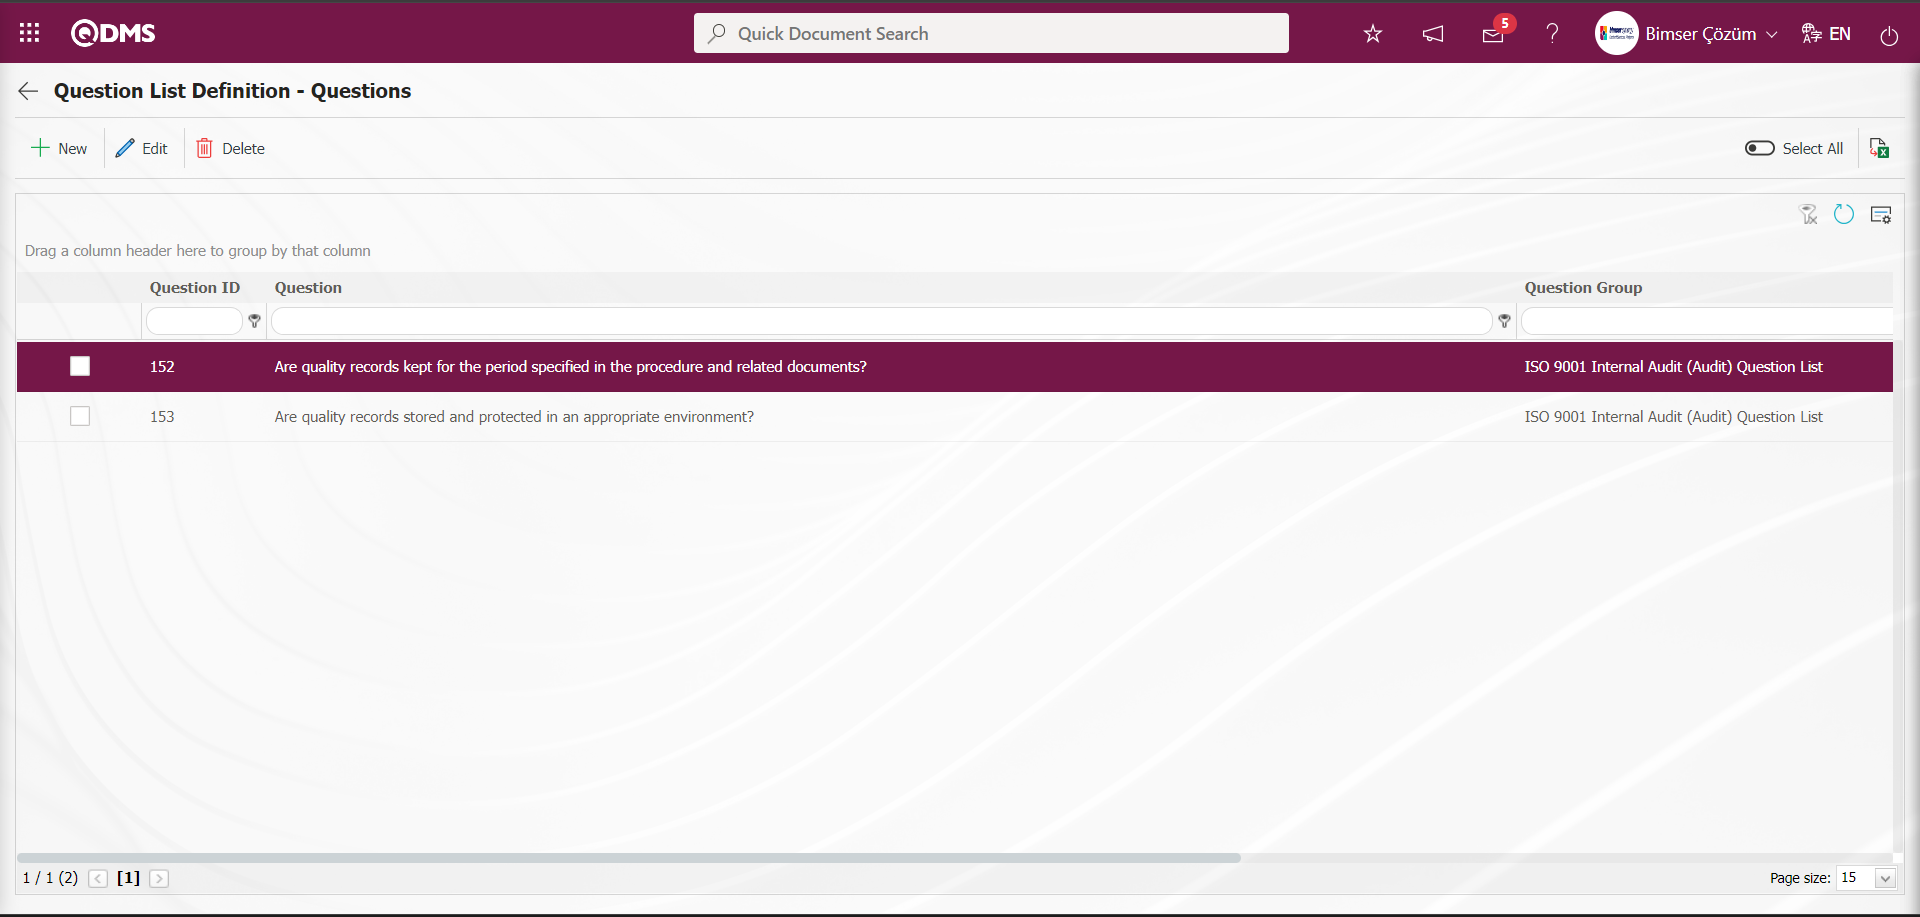
When the options of the questions to be added to the Question List are the same, addition to the question list is made.
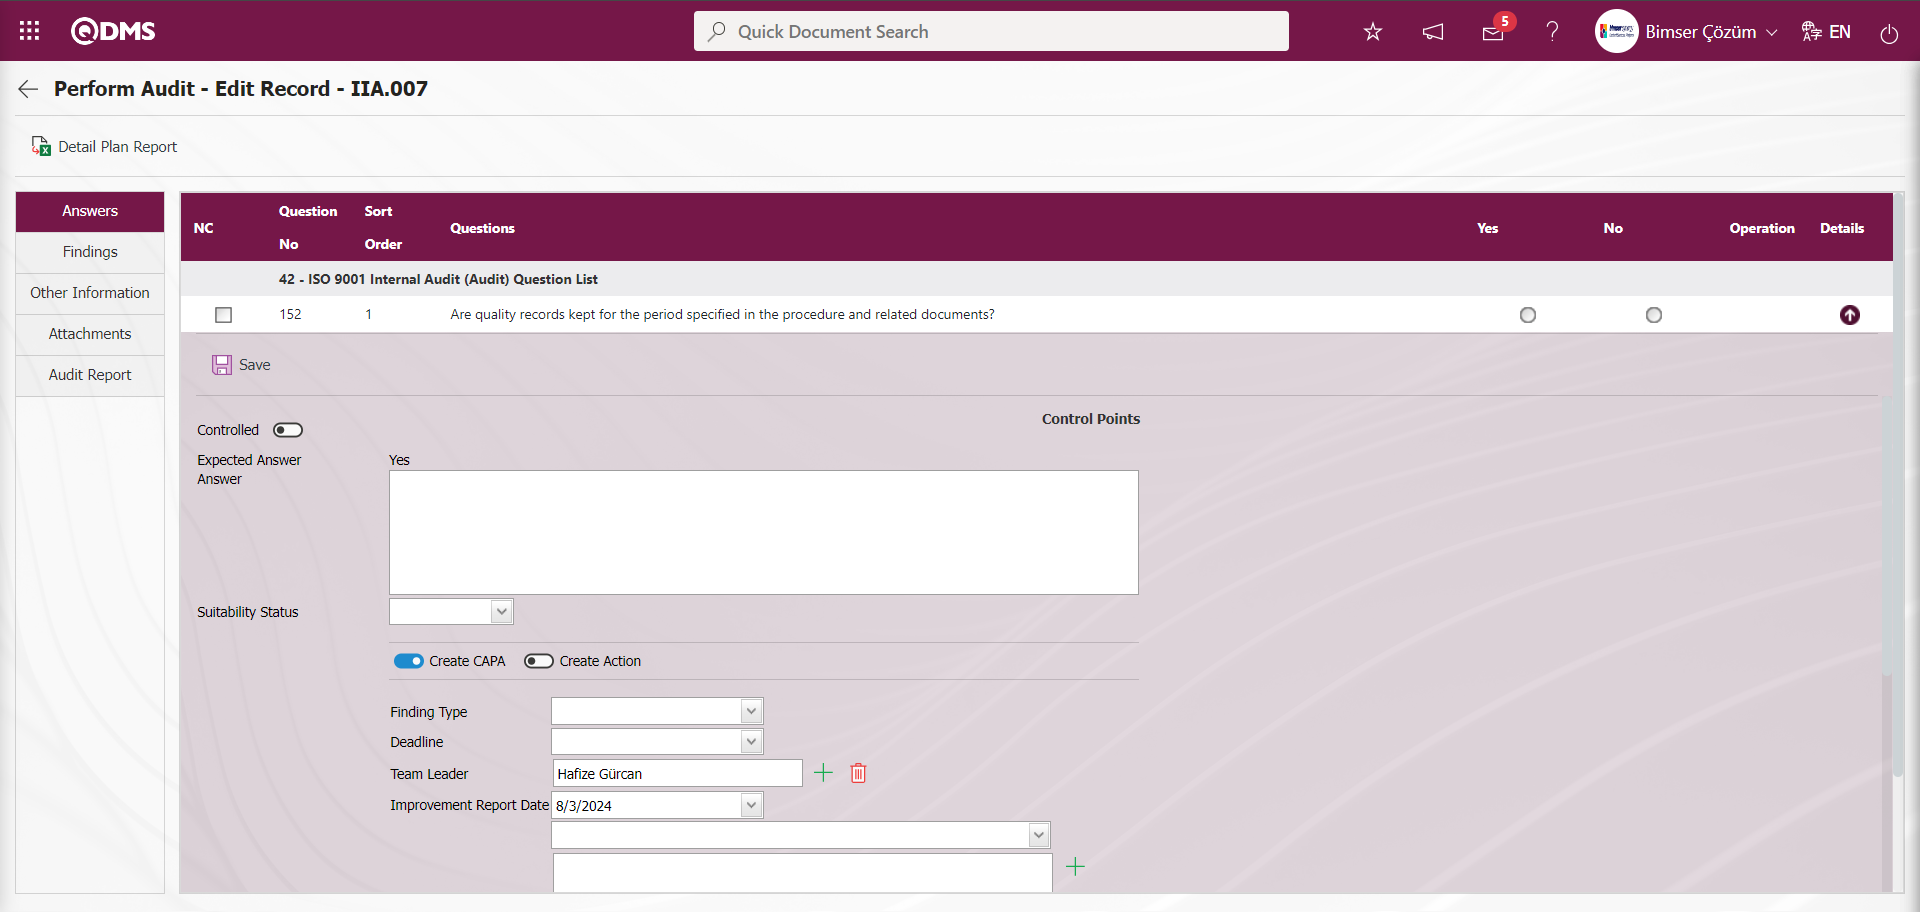
When the “Questions you reply in Single Page” option is checked, the audit execution will be in the following view

"NC" is selected when the question will not be included in the calculation of the audit score.
For the related question, after the answer is given, CAPA or action can be planned from the details field. By checking the check box related to “Create Action”, the relevant fields in Action planning are displayed and the Action planning process is done by filling in the relevant fields.
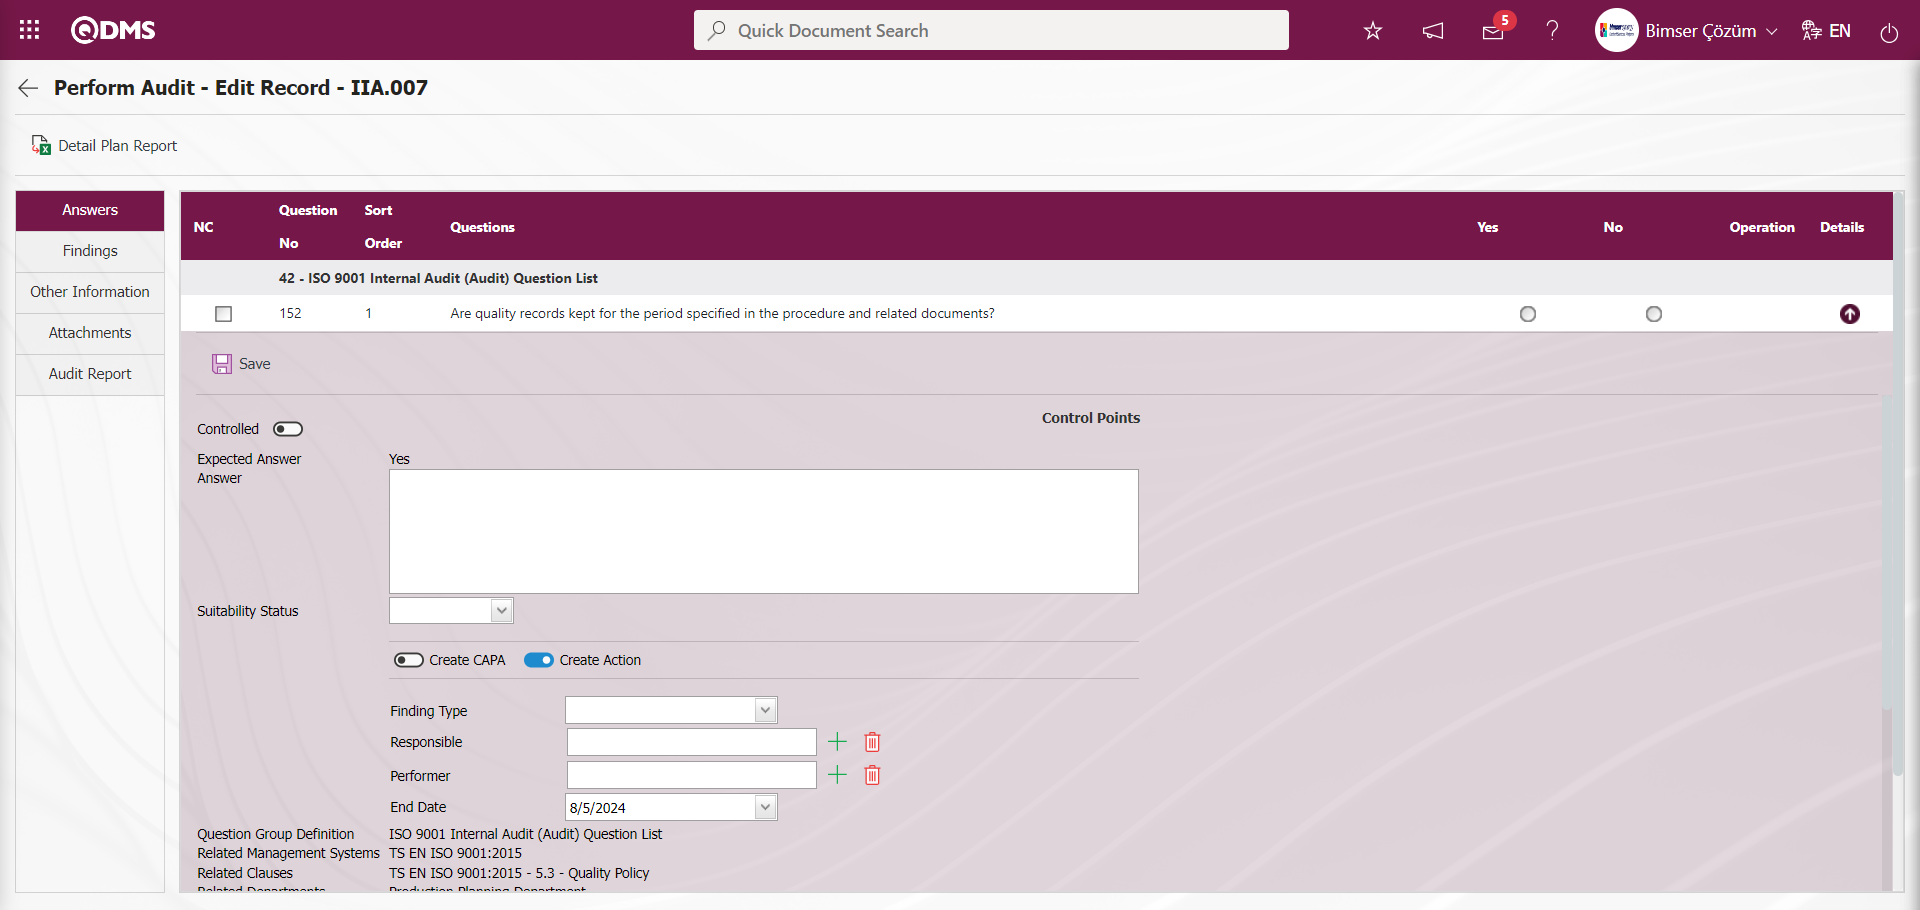
For CAPA, the relevant check box is checked in the “Create CAPA" field and the CAPA record is opened by entering the information of the areas displayed with the CAPA.
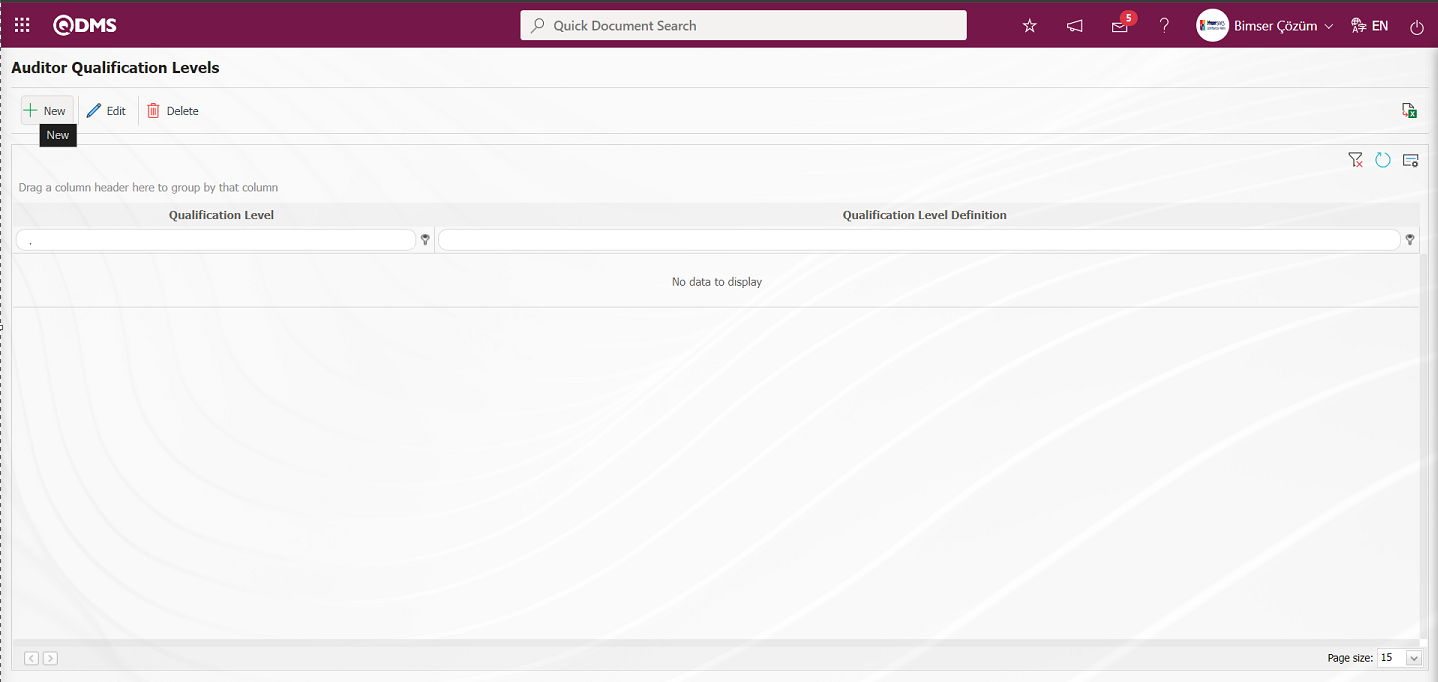
6.1.4. Auditor Qualification Levels
Menu Name: System Infrastructure Definitions /Audit/ Auditor Qualification Levels
This is the menu where auditors' competencies are defined. Competencies such as lead auditor, auditor and observer can be defined. The competency levels defined in this menu are selected for the auditors' related management systems in the auditor identification menu.
With the help of the buttons on the screen;
: A new qualification level is defined.
: Make any correction, change or update related to the selected qualification level information in the list.
: The selected qualification level information in the list can be deleted.
: Data is transferred to Excel.
: The search criteria on the menu screens are used to clean the data remaining in the filter fields in the grid where the search operation is performed.
: The menu screen is restored to its default settings.
: User-based designing is done on the menu screen with the show-hide feature, that is, the hiding feature of the fields corresponding to the columns on the menu screens.
To add a new qualification level to the Auditor Qualification Levels screen, click the button at the top left corner of the screen to display the Auditor Qualification Levels - New Record screen.
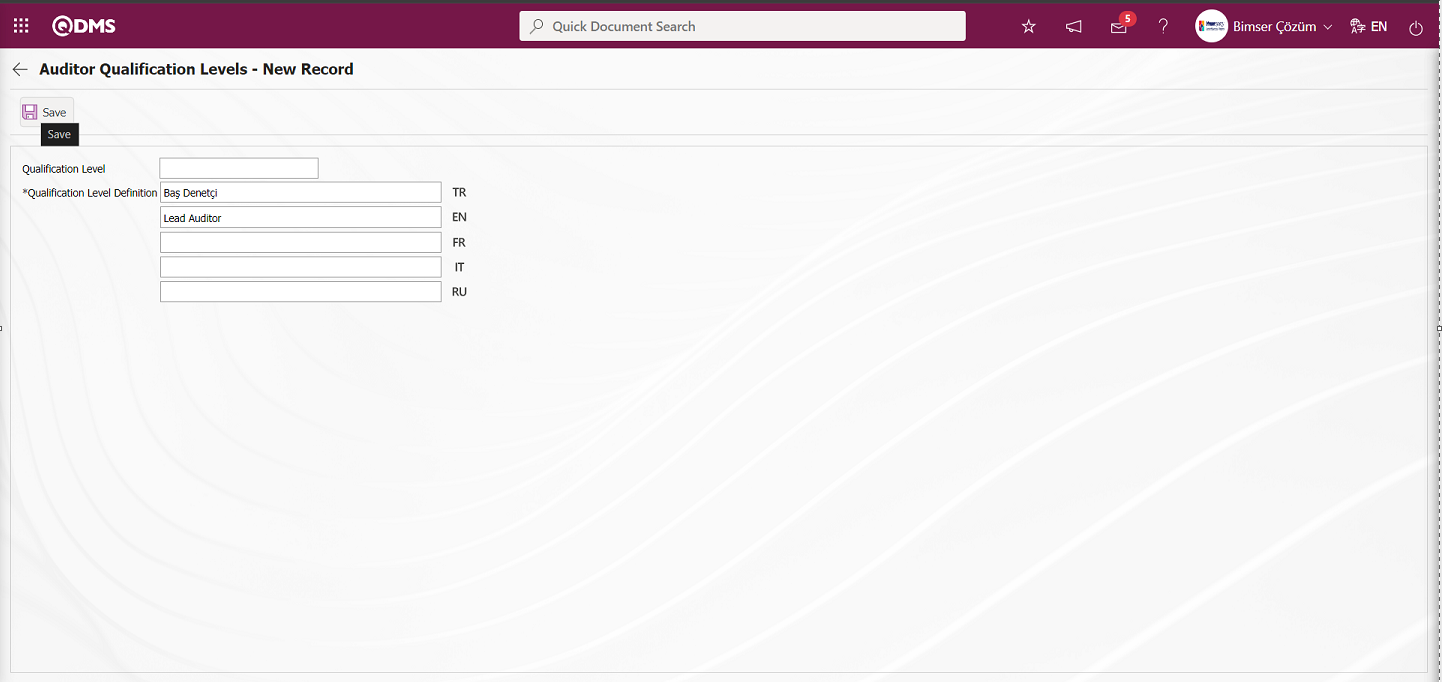
Related fields are defined on the screen that opens:
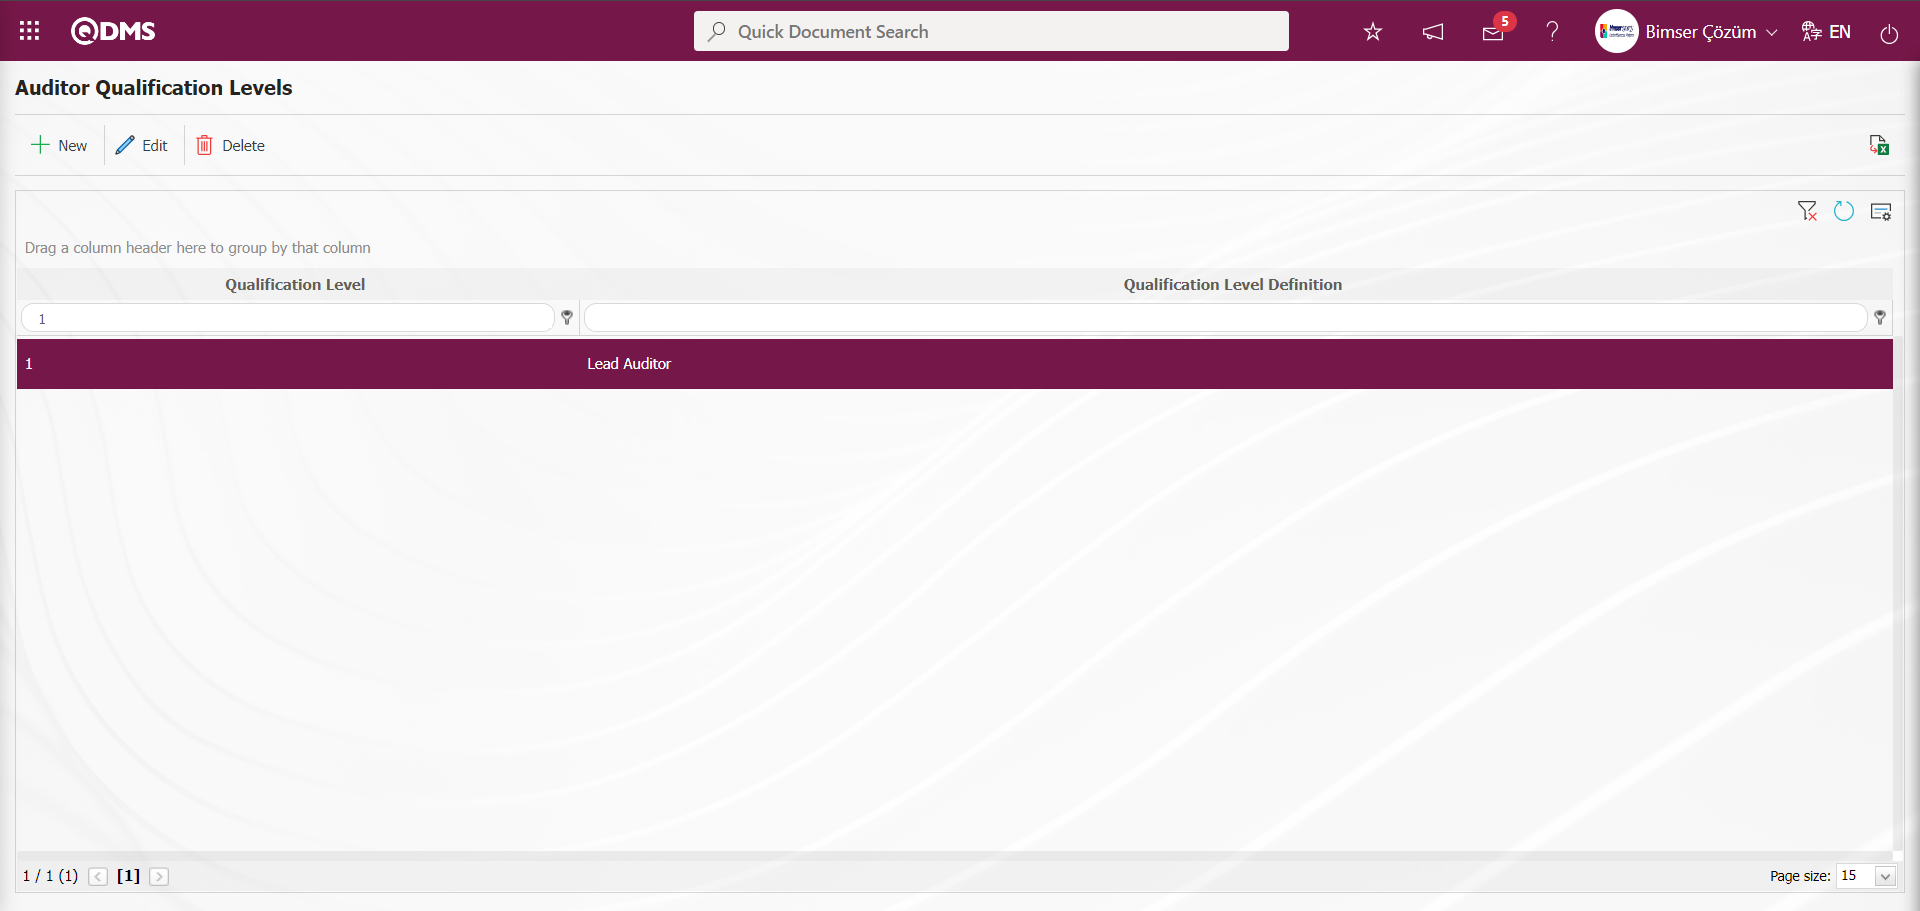
Qualification Level: InAuditor Qualification Levels - New Record screen, the qualification level information is given automatically by the system.
Qualification Level Definition: This is the field where the qualification level definition information is written on theAuditor Qualification Levels - New Record screen.
After filling in the required fields on the Auditor Qualification Levels - New Record screen, the registration process is realized by clicking the button in the upper left corner.
6.1.5. Auditor Definition
Menu Name: System Infrastructure Definitions/ Audit/ Auditors
This is the menu where the process of defining the people who will perform audits in QDMS is realized. When defining the auditors, it is determined in this menu which management system they can audit.

With the help of the buttons on the screen;
: Define a new auditor.
: Make any correction, change or update related to the selected auditor information in the list.
: The selected auditor information in the list can be deleted.
: Data is transferred to Excel.
: Records can be searched by filtering.
: The search criteria on the menu screens are used to clean the data remaining in the filter fields in the grid where the search operation is performed.
: The menu screen is restored to its default settings.
: User-based designing is done on the menu screen with the show-hide feature, that is, the hiding feature of the fields corresponding to the columns on the menu screens.
To add a new auditor to the Auditors screen, click the button in the upper left corner of the screen to display the Auditors - New Record screen.
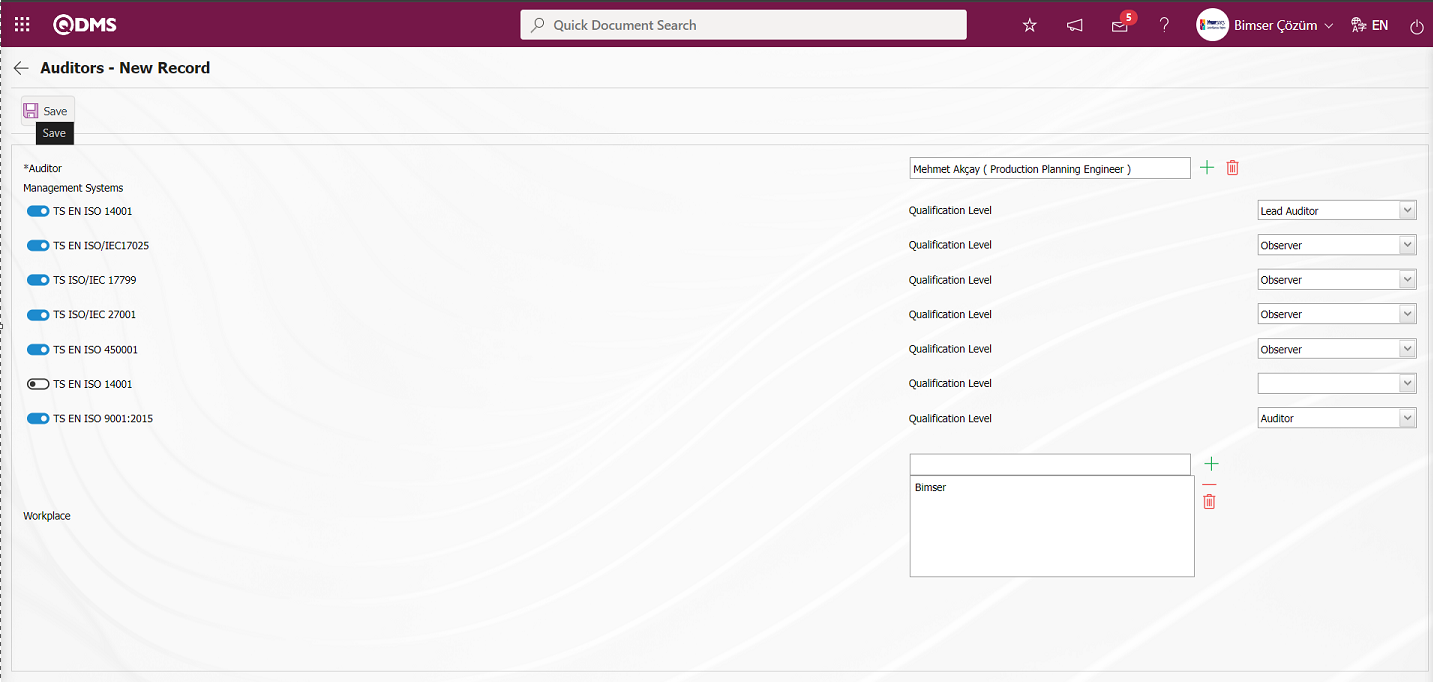
Related fields are defined on the screen that opens:
Auditor: This is the field where the auditor information defined in the Auditors - New Record screen is selected from the list of personnel defined in the system opened by clicking the  (Select) button.
Management Systems: This is the field where the management systems that the auditor is competent in the Auditors - New Record screen are selected. The qualification information that the auditor is competent in the management systems he/she is competent in is selected from the drop-down list in the Qualification Level field. (The list of qualification level information comes from the System Infrastructure Definitions / Audit / Auditor Qualification Levels menu.)
Workplace: In the Auditor Identification-New Registration screen, the workplace information related to the auditor is selected from the list of workplaces defined in the system opened by clicking the  (Add) button. When the workplace information is associated with the auditors' workplaces, it provides convenience in filtering when assigning auditors to the audit for companies with multiple locations.
Auditors - New Record After entering the relevant information in the required fields on the screen, the auditor identification registration process is done by clicking button in the upper left corner of the screen.
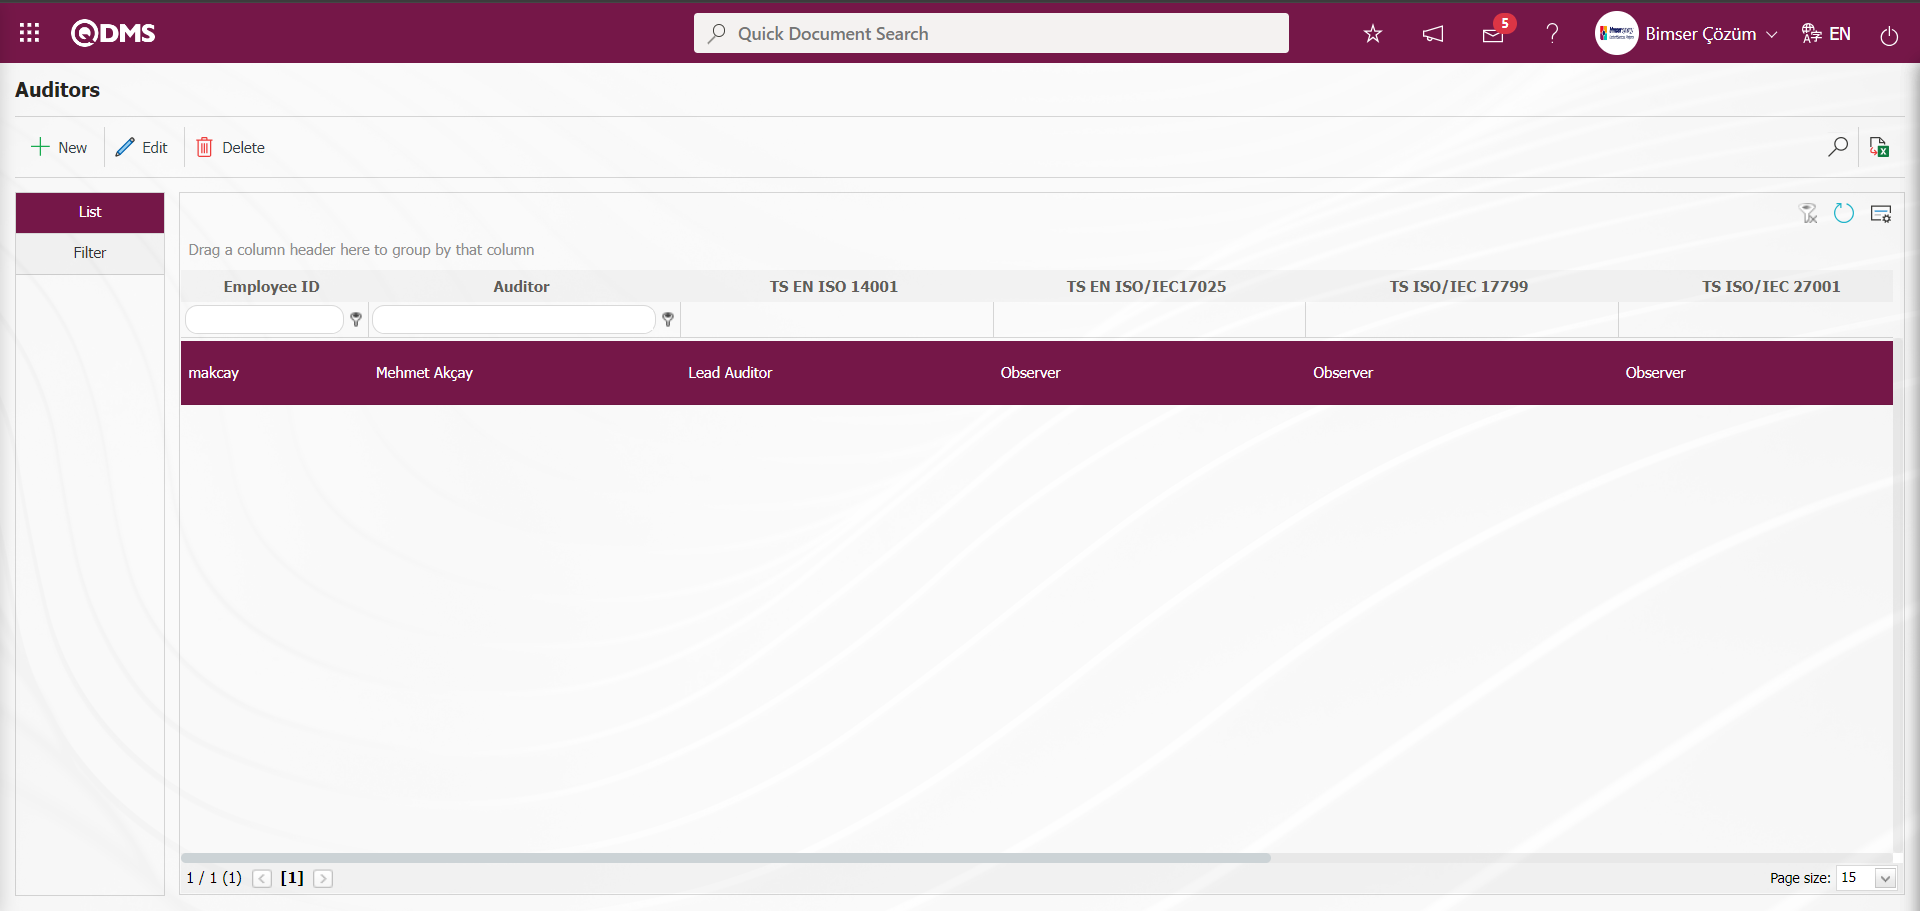
From the Filter screen on the Auditors screen Enter data in the fields such as User ID, Auditor and Related Management System and filter according to the search criteria by clicking the (Search) button.

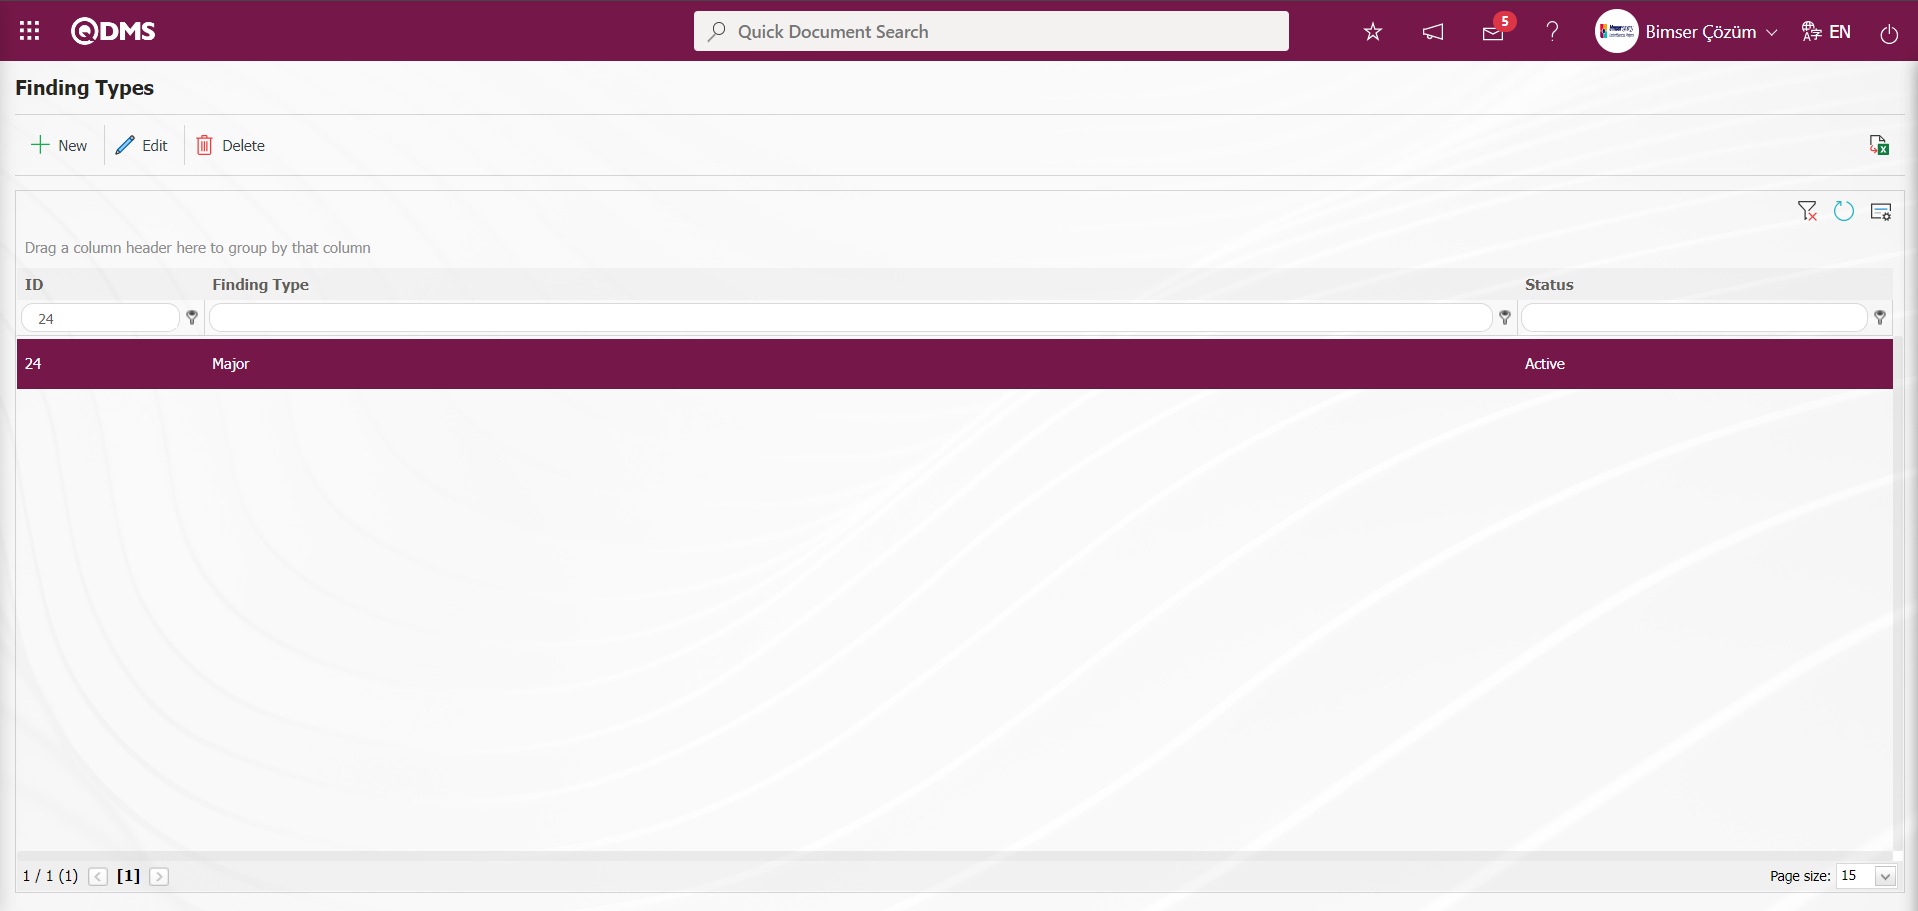
6.1.6. Finding Types Definition
Menu Name: System Infrastructure Definitions/ Audit/ Finding Types
This is the menu where the types of findings detected in the audit are defined. Major, minor, observation and recommendation/ Suggestion etc. definitions can be made. CAPA or action can be opened according to the identified finding types or it can be user selected. In a defined finding type, if the action type is user-selected, it is not mandatory to open CAPA or Action for the related finding. However, if a finding type is associated with CAPA or action, the auditor is required to open CAPA or action during the audit execution phase. For these purposes, the relevant finding types are defined. In defining a Major finding type, it is generally appropriate to open a CAPA and in defining a Minor finding type, it is generally appropriate to plan an Action.

With the help of the buttons on the screen;
: A new finding type is defined.
: Make any correction, change or update related to the selected finding type information in the list.
: The selected finding type information in the list can be deleted.
 :Data can be exported to excel.
: The search criteria on the menu screens are used to clean the data remaining in the filter fields in the grid where the search operation is performed.
: The menu screen is restored to its default settings.
: User-based designing is done on the menu screen with the show-hide feature, that is, the hiding feature of the fields corresponding to the columns on the menu screens.
To add a new finding type to the Finding Type definition screen, click the button at the top left corner of the screen to display the Finding Types - New Record screen.
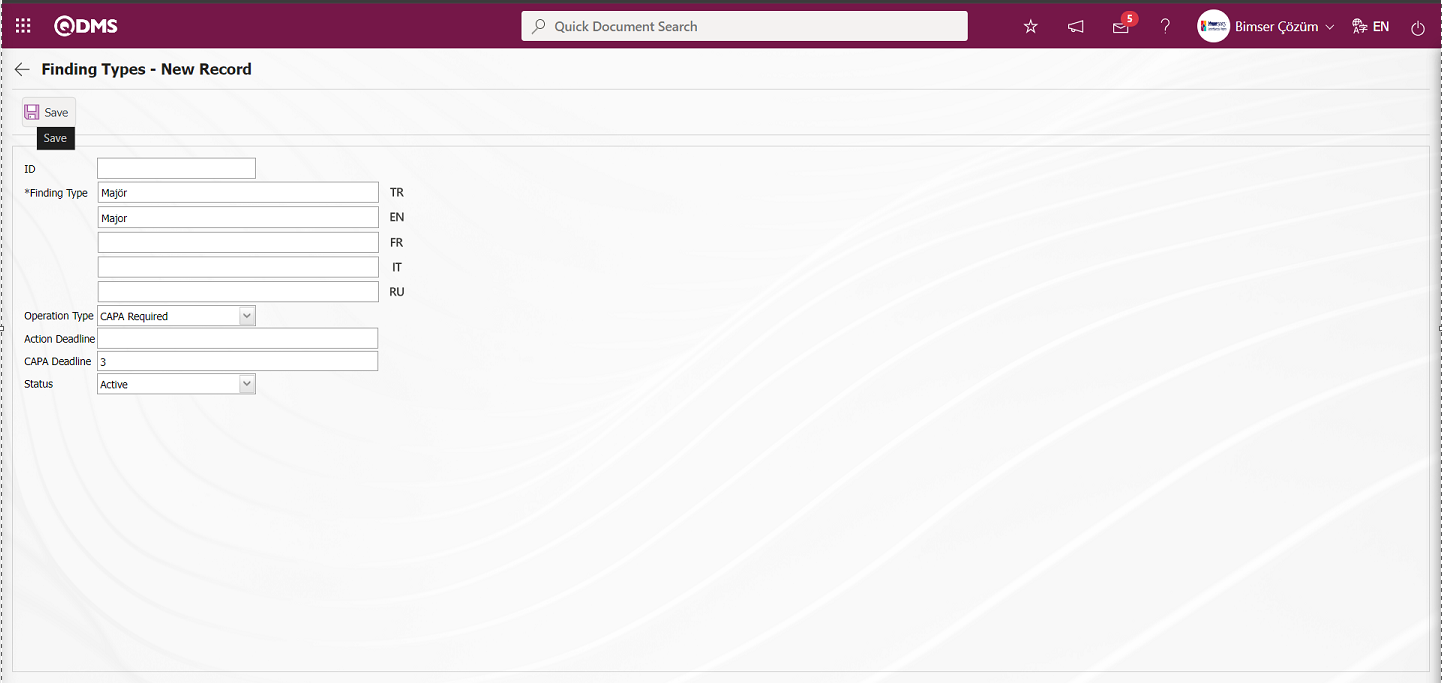
Related fields are defined on the screen that opens:
ID: In Finding Types - New Record screen, the finding ID information is given automatically by the system.
Finding Type: This is the field where the finding type definition information is written on theFinding Types - New Record screen. If other language options will also be used, the language equivalent of the relevant finding type is written where the relevant flag is located.
Operation Type: Defining Finding Type - This is the field where the transaction type options are selected on the New Record screen. The defined finding type is associated with one of the Action/CAPA Will Not Be Opened, Selectable by user, CAPA Required and Action Required transaction type options.
Action/CAPA Will Not Be Opened: When this transaction type is selected in the defined finding type, no Action and CAPA are opened by the system in this finding type selected during the audit realization phase.
Selectable by user: When this operation type is selected in the defined finding type, the system does not require the system to open Action and CAPA in this finding type selected during the audit realization phase. The system leaves the opening of Action and CAPA to the user.
CAPA Required: When this transaction type is selected in the defined finding type, the system makes it mandatory for the system to open a CAPA in this finding type selected during the audit realization phase.
Action Required: When this operation type is selected in the defined finding type, the system makes it mandatory to open an Action for this finding type selected during the audit realization phase.
Action Deadline: When the transaction type is associated with action, it is the field where the deadline of the actions to be opened is determined.
CAPA Deadline: When the transaction type is associated with CAPA, this is the field where the deadline period of the CAPAs to be opened is determined. It is activated by selecting the parameter value of parameter 117 of the CAPA module parameters as “Yes”.
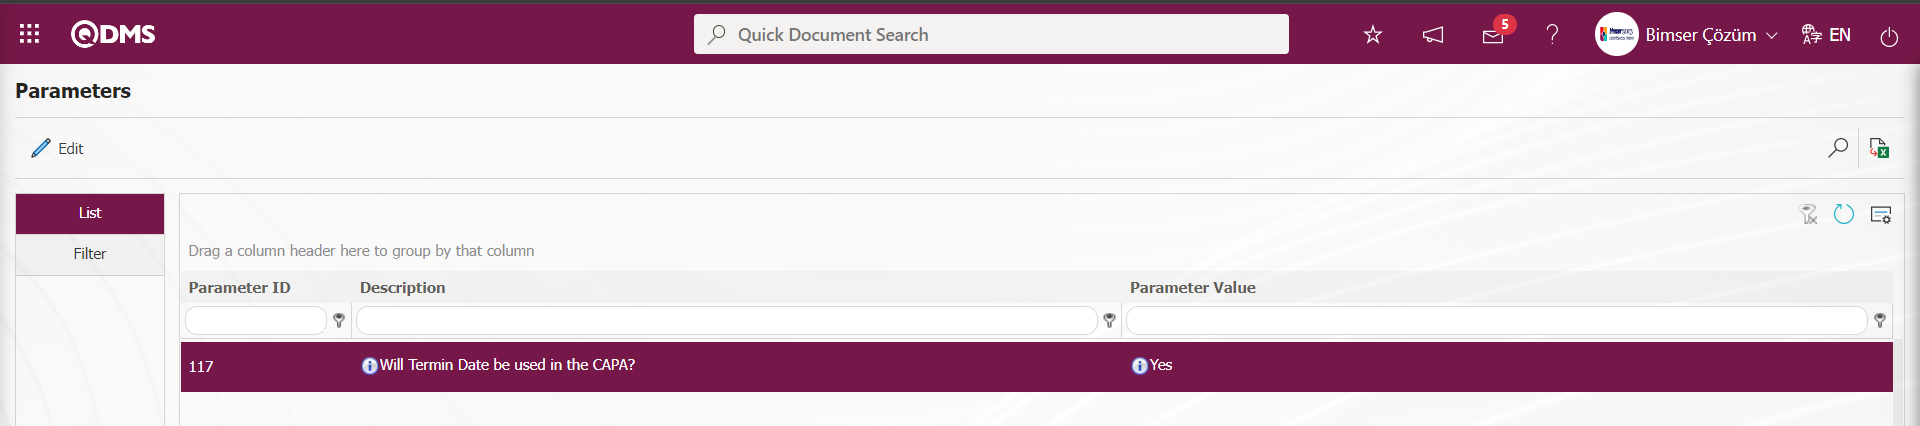
When the parameter is activated, the “CAPA Deadline” field is displayed on the Finding Type - New Record screen. When the parameter is disabled by selecting the parameter value “No”, the relevant field is not displayed on the Finding Type - New Record screen.
On the Finding Type - New Record screen, after entering the relevant information in the required fields, the Finding Type registration process is performed by clicking the button in the upper left corner of the screen.
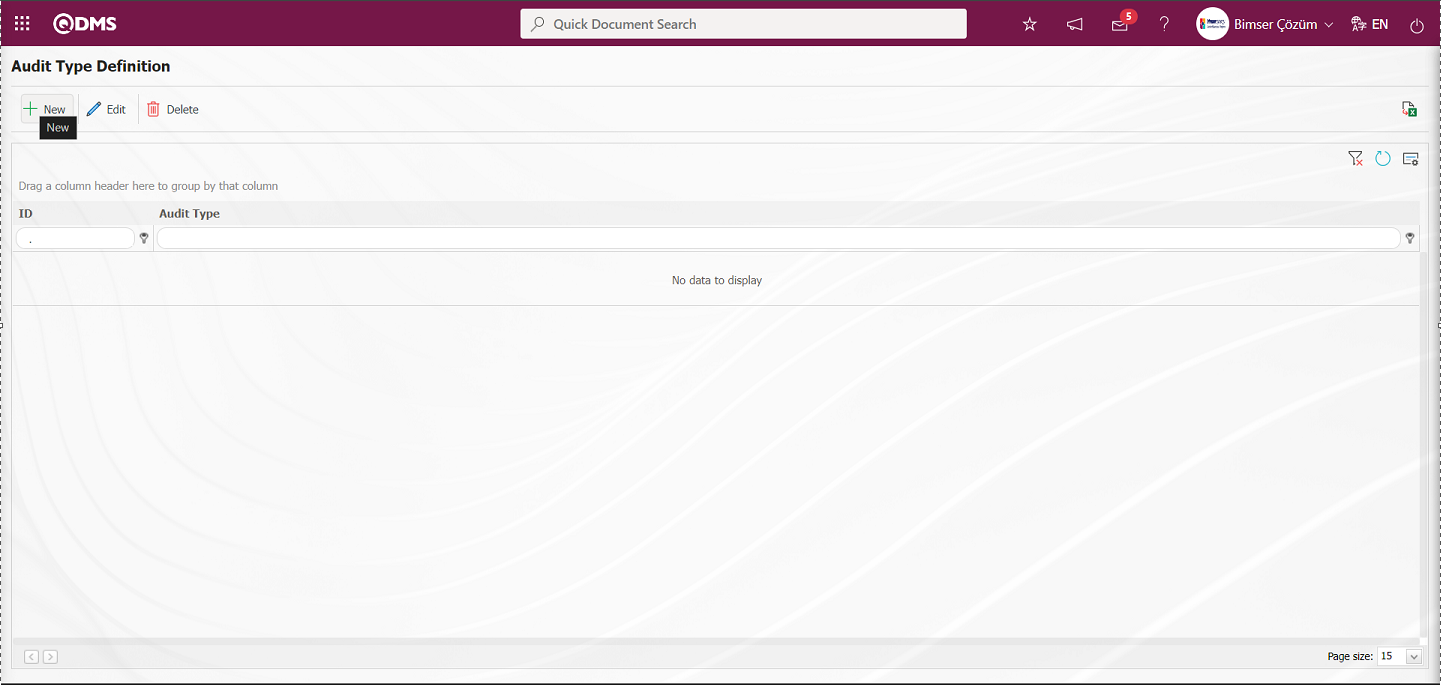
6.1.7. Audit Type Definition
Menu Name: System Infrastructure Definitions/ Audit/ Audit Type Definition
It is the menu where the types of audits performed in the organization are defined. Internal Audit, External Audit, Product Audit, Process Audit.
With the help of the buttons on the screen;
: Define a new audit type.
: Make any correction, change or update related to the selected audit type in the list.
: The selected audit type information in the list can be deleted.
: Data is transferred to Excel.
: The search criteria on the menu screens are used to clean the data remaining in the filter fields in the grid where the search operation is performed.
: The menu screen is restored to its default settings.
: User-based designing is done on the menu screen with the show-hide feature, that is, the hiding feature of the fields corresponding to the columns on the menu screens.
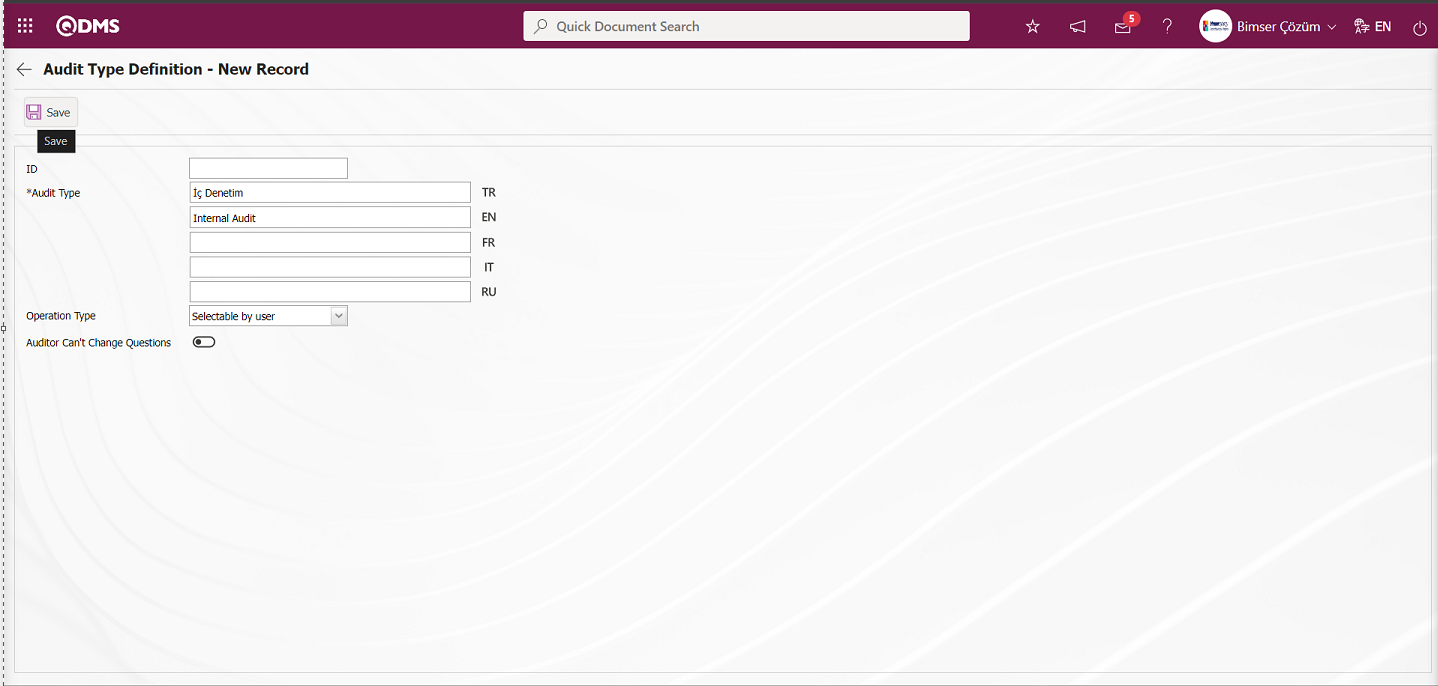
To add a new audit type to the Audit Type Definition screen, click the button at the top left corner of the screen to display the Audit Type Definition-New Record screen.
Açılan ekranda ilgili alanlar tanımlanır:
ID: This is the field where the ID information of the audit type defined in the Audit Type Definition - New Record screen is given by the system.
Audit Type: This is the field where the definition information of the audit type is written on the Audit Type Definition - New Record screen. If other language options will be used, the language equivalent of the relevant audit type is written where the relevant flag is located.
Operation Type: This is the field where the operation type of the audit type defined in Audit Type Definition - New Record screen is selected. The defined Audit type is associated with one of the Action/CAPA Will Not Be Opened, Selectable by user, CAPA Required and Action Required operation type options.
Action/CAPA Will Not Be Opened; When this transaction type is selected in the defined Audit type, Action and CAPA will not be opened by the system in this Audit type selected during the audit realization phase.
Selectable by user; When this operation type is selected in the defined Audit type, the system is not required to open Action and CAPA in this Audit type selected during the audit realization phase. The system leaves the opening of Action and CAPA depending on the user.
CAPA Required;When this transaction type is selected in the defined Audit type, the system requires CAPA to be opened in this Audit type selected during the audit realization phase.
Action Required; When this operation type is selected in the defined Audit type, the system makes it mandatory to open an Action in this Audit type selected during the audit realization phase.
Auditor Can't Change Question: When the check box related to “Auditor Can't Change Question” is checked on the Audit Type Definition - New Registration screen, the auditor cannot add questions on the screen opened by clicking the Questions button on the My Pending Audits screen during the audit realization phase.
After entering the necessary information in the required fields on the Audit Type Definition - New Record screen, the audit type registration process is done by clicking the button in the upper left corner of the screen.

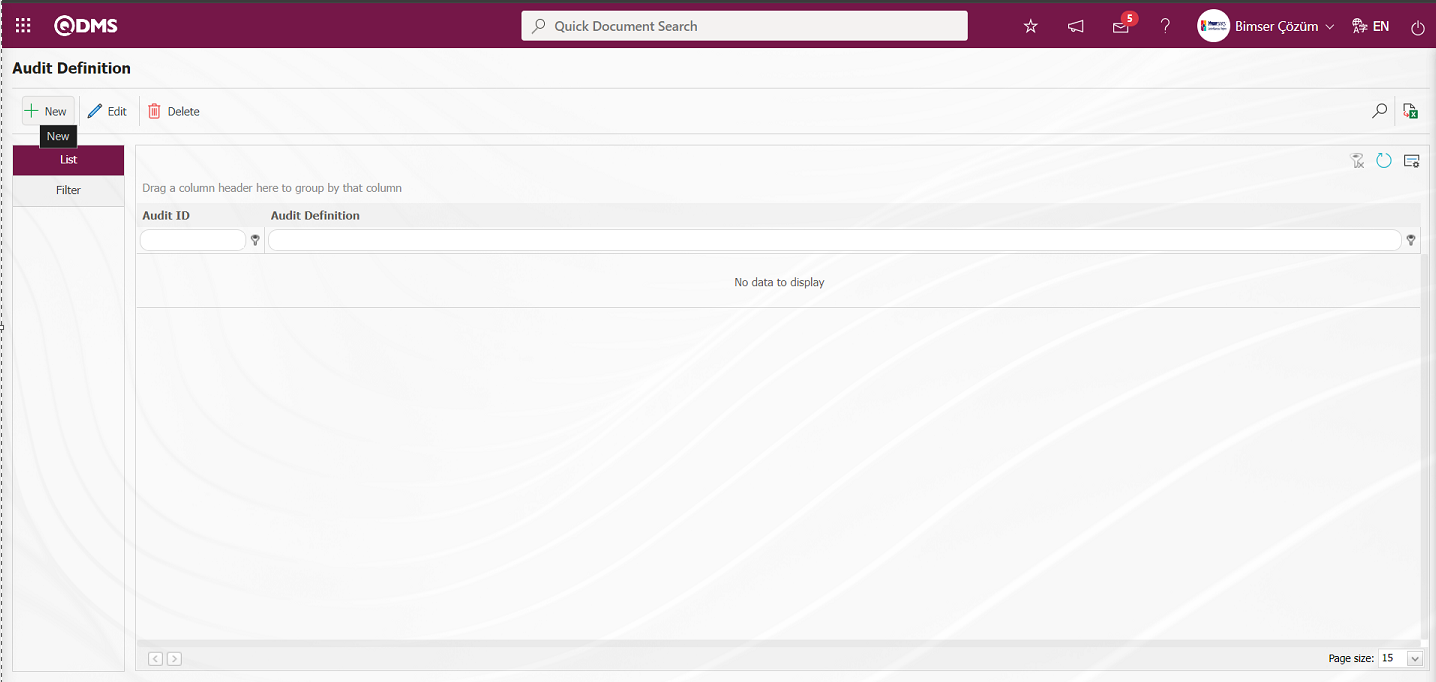
6.1.8. Audit Definition
Menu Name: System Infrastructure Definitions/ Audit/ Audit Definition
This is the menu where the audit definition process takes place. In this menu, audits are associated with question lists and other options.
With the help of the buttons on the screen;
: A new audit is defined.
: Make any correction, change or update related to the selected audit information in the list.
: The selected audit information in the list can be deleted
: Data is transferred to Excel.
: Records can be searched by filtering.
: The search criteria on the menu screens are used to clean the data remaining in the filter fields in the grid where the search operation is performed.
: The menu screen is restored to its default settings.
: User-based designing is done on the menu screen with the show-hide feature, that is, the hiding feature of the fields corresponding to the columns on the menu screens.
To add a new audit to the audit definition screen, click the button on the top left corner of the screen to display the Audit Definition-New Record screen.
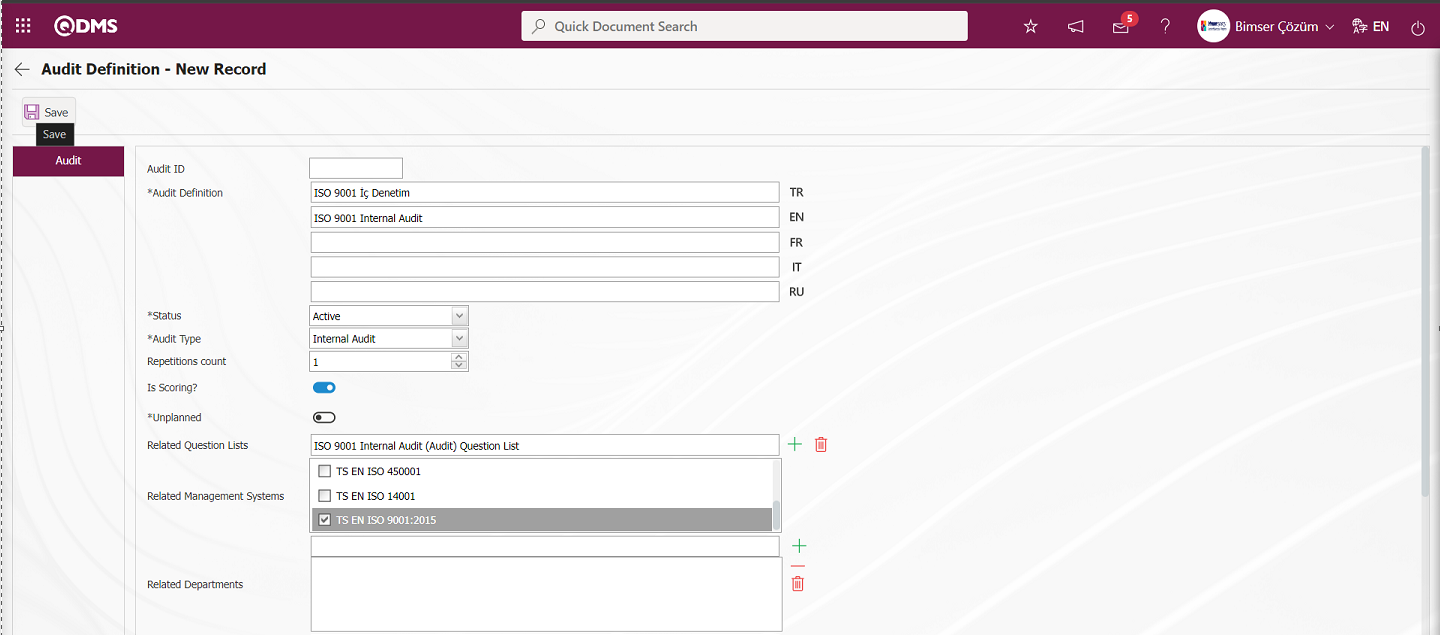
Related fields are defined on the screen that opens:
Audit ID: This is the field where the Id of the audit defined in the Audit Definition - New Record screen is given automatically by the system.
Audit Definition: This is the field where the definition information of the audit defined in the Audit Definition - New Record screen is written. If other language options will be used, the language equivalent of the relevant audit definition is written where the relevant flag is located.
Status: This is the field where the active or passive information of the audit defined in the Audit Definition - New Record screen is determined. Passed audits are not displayed in the selection phase in the audit list.
Audit Type: This is the field where audit type information can be selected on the Audit Definition - New Record screen. The audit type list comes as defined in the System Infrastructure Definitions / Audit/ Audit Type definition menu. For example External Audit, Internal Audit, Process Audit, etc.
Repetitions count: In the Audit Identification - New Record screen, it is the field where the information about how many times the audits will be added to the plan is written.
Is Scoring?: When the "Is Scoring?" option is checked on the Audit Defination - New Record screen, scored question lists are displayed in the relevant question list field and this is the field where the selection is made if a scored audit will be performed from this displayed question list.
Unplanned: If unplanned audit will be performed on the Audit Definition - New Record screen, this is the field where the check box related to the “Unplanned?” field is checked. When the check box related to the “Unplanned?” field is checked, the relevant audit is displayed in the Unplanned Audits list on the Integrated Management System / Audit Activity / Unplanned Audits screen, and unplanned audit is performed by selecting these unplanned audits displayed. In order to perform an unplanned audit, the plan code of the plan where the unplanned audit will be performed must be defined in parameter 100 in the Audit Activity module parameters.

Related Question Lists: This is the field where the related question list is selected for scored and non-scored question options on the Audit Definition - New Record screen. When the scored option is selected, the scored question list defined in the system is displayed in this field and if a scored audit will be performed from this list, the scored question list selection process is performed. In the opposite case, when it is not selected, the non-scored question lists are displayed in this field and if a non-scored audit will be performed in this displayed question list, the selection process is performed from the non-scored question list. The list of question lists is defined in the System Infrastructure Definitions / Audit / Defining Question Lists menu.
Related Management System: It is the field where the audit defined in the Audit Definition - New Record screen is associated with the management systems defined in the system by selecting from the list.
Related Department: It is the area where the audit defined in the Audit Definition - New Record screen is associated with the departments defined in the system.
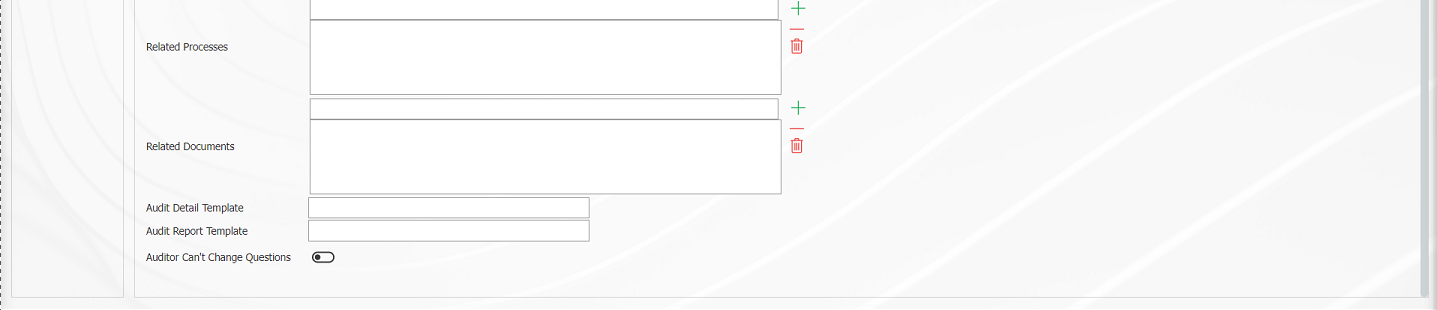
Related Processes: It is the field where the audit defined in the Audit Definition - New Record screen is associated with the processes defined in the system.
Related Document: This is the field where the related document information of the audit defined in the Audit Definition - New Registration screen can be selected from the document list defined in the system.
Audit Detail Template: QDMS provides audit detail plan templates in standard format. This is the area where detail plan templates in different audit-based formats are defined in the report formats definition menu. In order to define an Audit Detail Plan template, the Audit Detail Plan Template must first be uploaded by clicking the button in the System Infrastructure Definitions/BSID/Configuration Settings/Default Report Layouts Arrangement menu. The name and extension of the Audit Detail Plan template uploaded to the report formats editing menu is copied with right click/copy management. The Audit Detail Plan Template, whose name and extension are copied, is defined by pasting it into this field with the right click/paste method. When the file name and extension of the detail template to be used for the relevant audit is typed from the report formats editing menu, it is ensured that the detail plan can be output in the format defined for that audit.
Audit Report Template: QDMS provides audit report templates in standard format. Report templates in different audit-based formats can be defined in the report formats definition menu. In order to define an Audit Report template, first of all, the Audit Report Template must be loaded by clicking the button in the System Infrastructure Definitions/BSID/Configuration Settings/ Default Report Layouts Arrangement menu. The name and extension of the Audit Report template uploaded to the report formats arrangement menu is copied with right click/copy management. The Audit Report Template, whose name and extension are copied, is defined by pasting it into this field with the right click/paste method. When the file name and extension of the audit report template to be used for the relevant audit are typed from the report formats editing menu, it is ensured that the audit report can be output in the format defined for that audit.
Auditor Can't Change Question: When the check box related to the "Auditor Can't Change Question" field is checked on the Audit Definition - New Record screen, the auditor cannot add or remove questions during the audit execution phase.
Record screen, the audit definition registration process is done by clicking the button in the upper left corner of the screen.

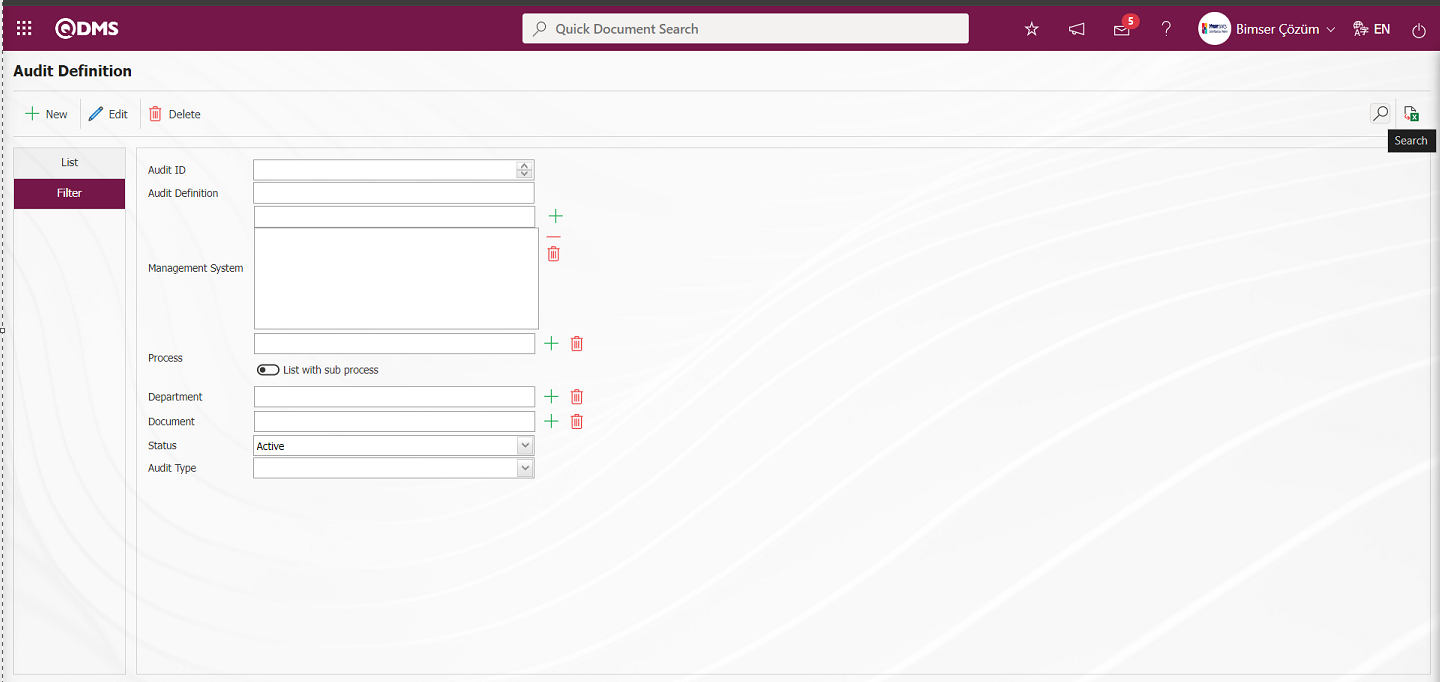
On the Audit Definition screen, enter data in the fields such as Audit ID, Audit Definition and Management System with the Filter tab and filter according to the search criteria by clicking the (search) button.
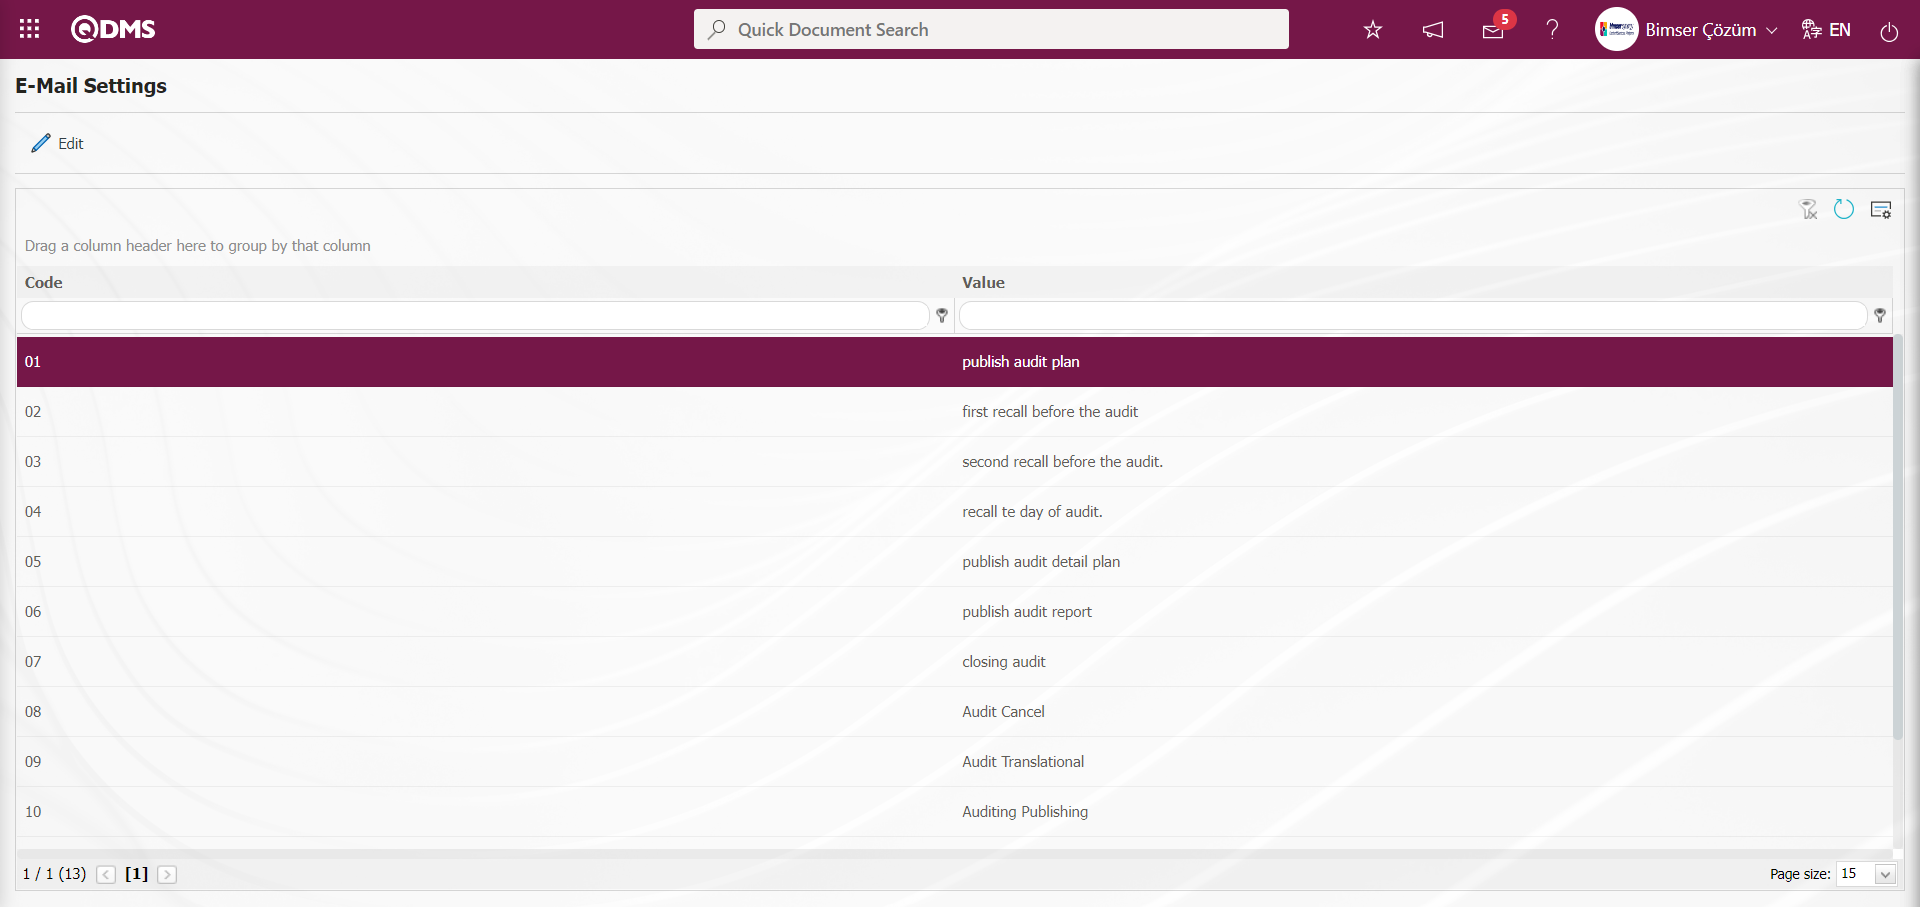
6.1.9. E-Mail Settings
Menu Name: System Infrastructure Definitions/ Audit/ E-Mail Settings
In the Audit Activities module, it is the menu where the e-mails / sms sent by the system are determined to whom and at which stage they should go.
With the help of the buttons on the screen;
 : Editing/changing/updating is done on the value of the e-mails selected in the list.
: Clearing the data remaining in the filter fields in the grid where the search criteria search operation on the menu screens is performed
: The process of returning the menu screen to its default settings is done.
: User-based designing of the menu screen is done with the show-hide feature, that is, the hiding feature of the fields corresponding to the columns on the menu screens.
If SMS notification will be used in E-mail Settings;
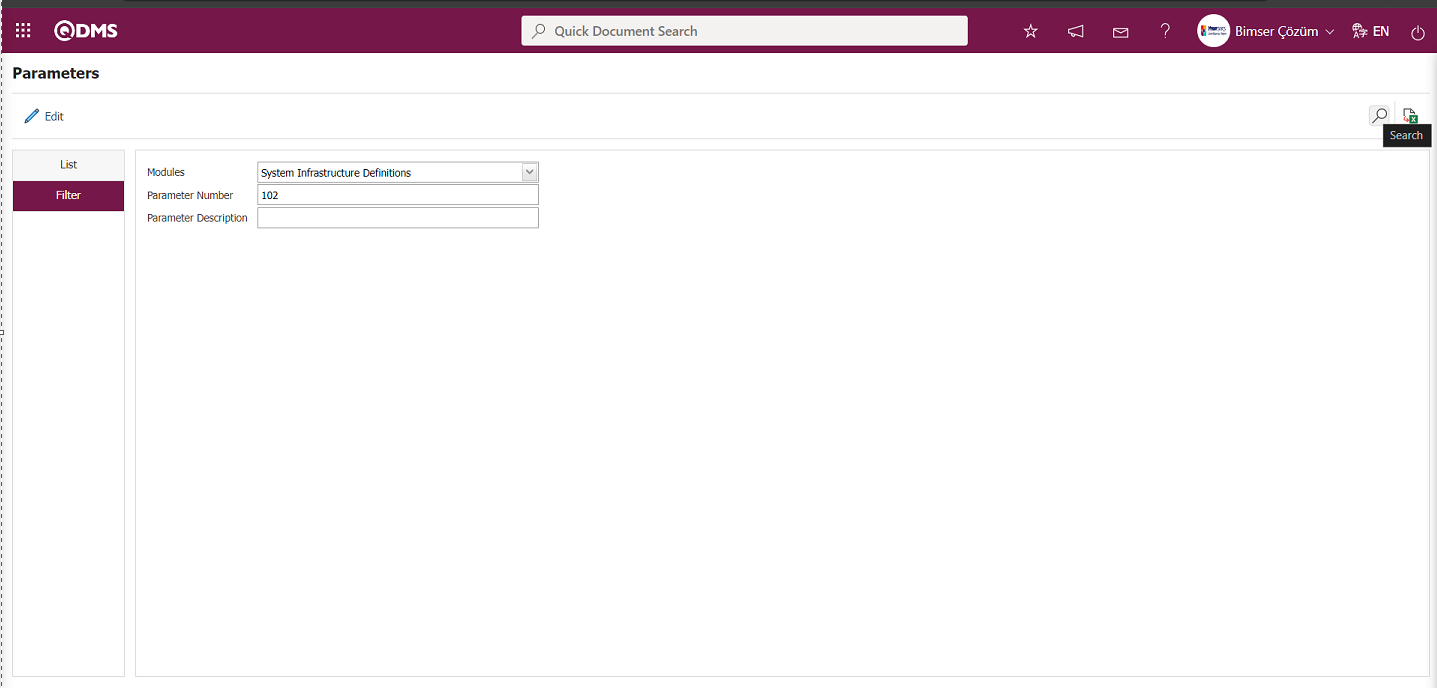
Click on System Infrastructure Definitions/BSID/Configuration Settings/ Parameters menu. In the parameters of the System Infrastructure Definitions module parameters listed on the Parameters screen, the parameter number 102 “Will using SMS notification?” is selected by typing the parameter number in the parameter no field in the Filter tab on the parameters screen and clicking the  (Search) button.
After selecting parameter 102 “Will using SMS notification? ” in System Infrastructure Definitions module parameters, click  button.
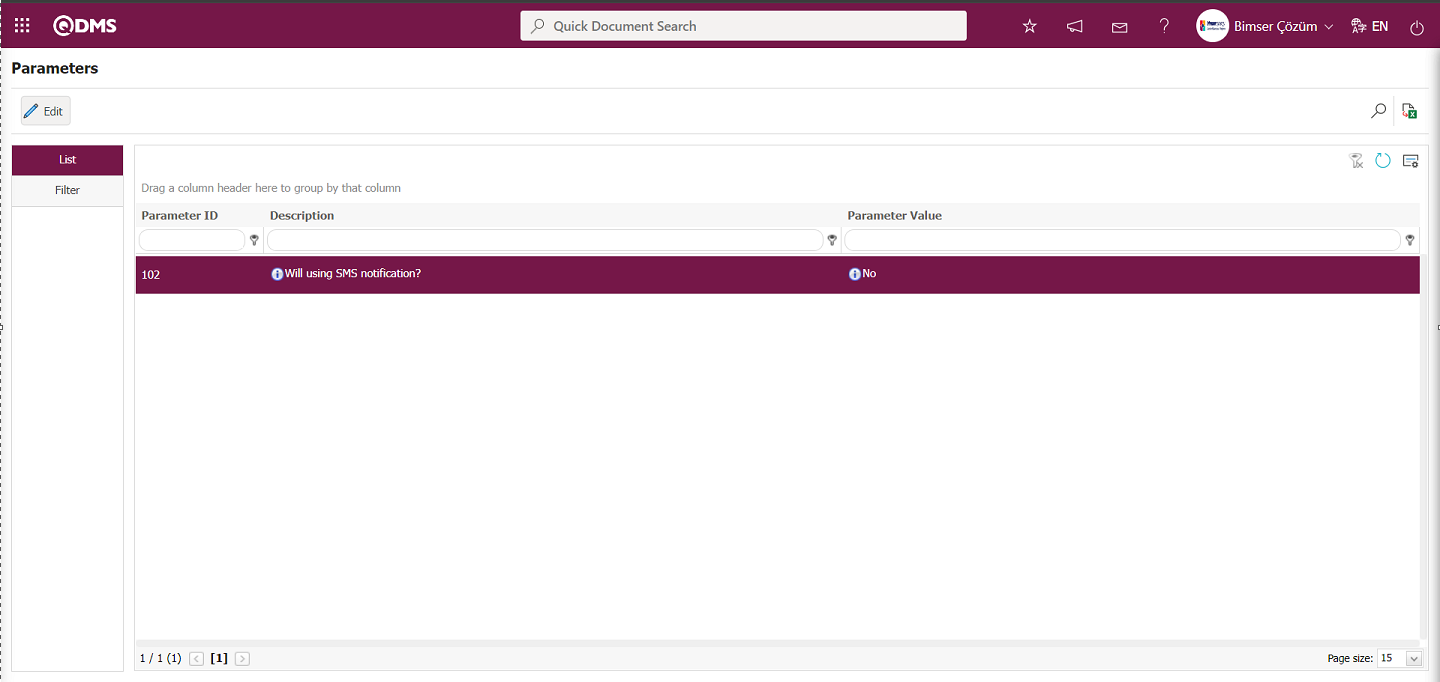
Select the parameter value ‘Yes’ on the parameters screen.

After selecting the parameter value ‘Yes’ on the Parameters screen, the  button on the top left of the screen is clicked and the parameter is activated.

After the parameter is activated, the check box related to the “Send SMS” field related to the use of SMS notification is displayed on the E-Mail Settings screen. By checking the relevant check box, SMS notification is used in E-Mail settings.
Select which step you want to send e-mail/message and click the button.
For example: Select the step “publish audit plan” and click the button.
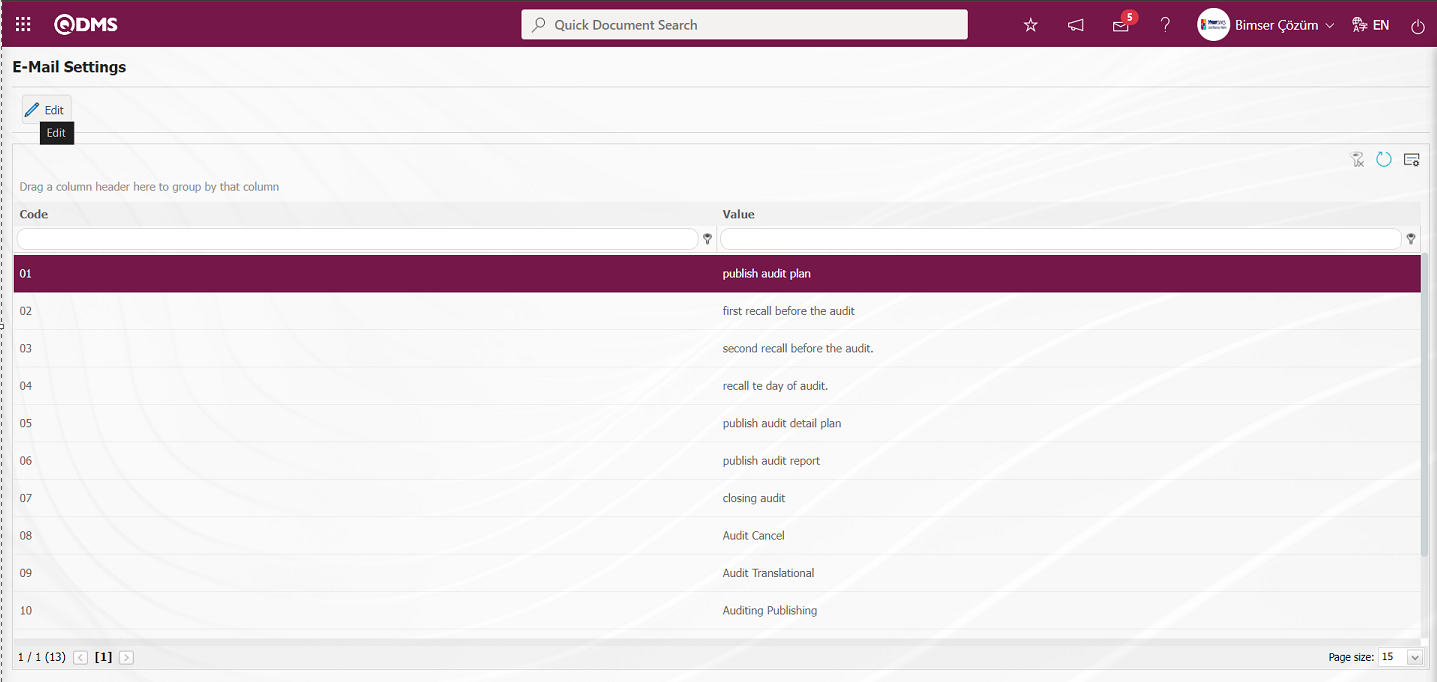
The E-Mail Settings/ publish audit plan screen is displayed. The Roles section shows the role to which my e-mail and message notification will go.
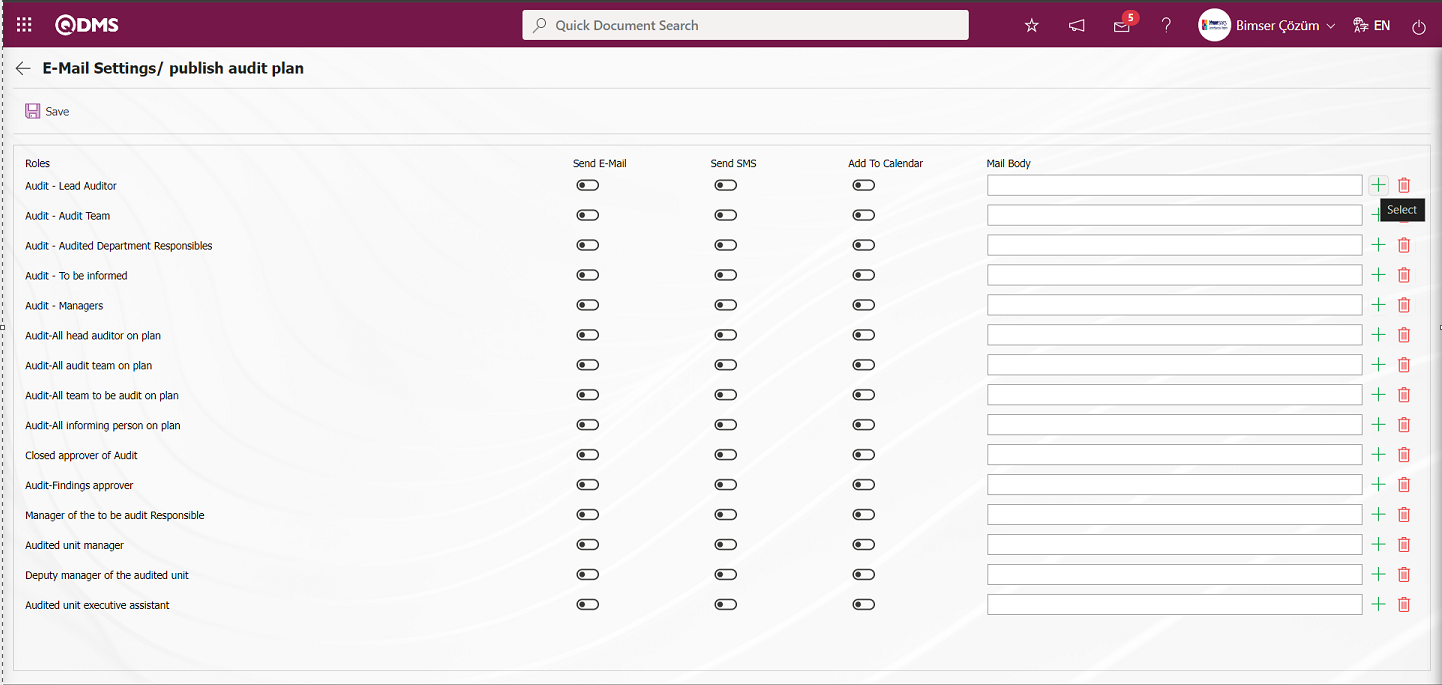
On the E-Mail Settings / publish audit plan** screen, click the  (Select) button and select the message body to be sent from the list of the message body defined in the system. To delete an incorrectly added message body, the
  (Delete) button is used.
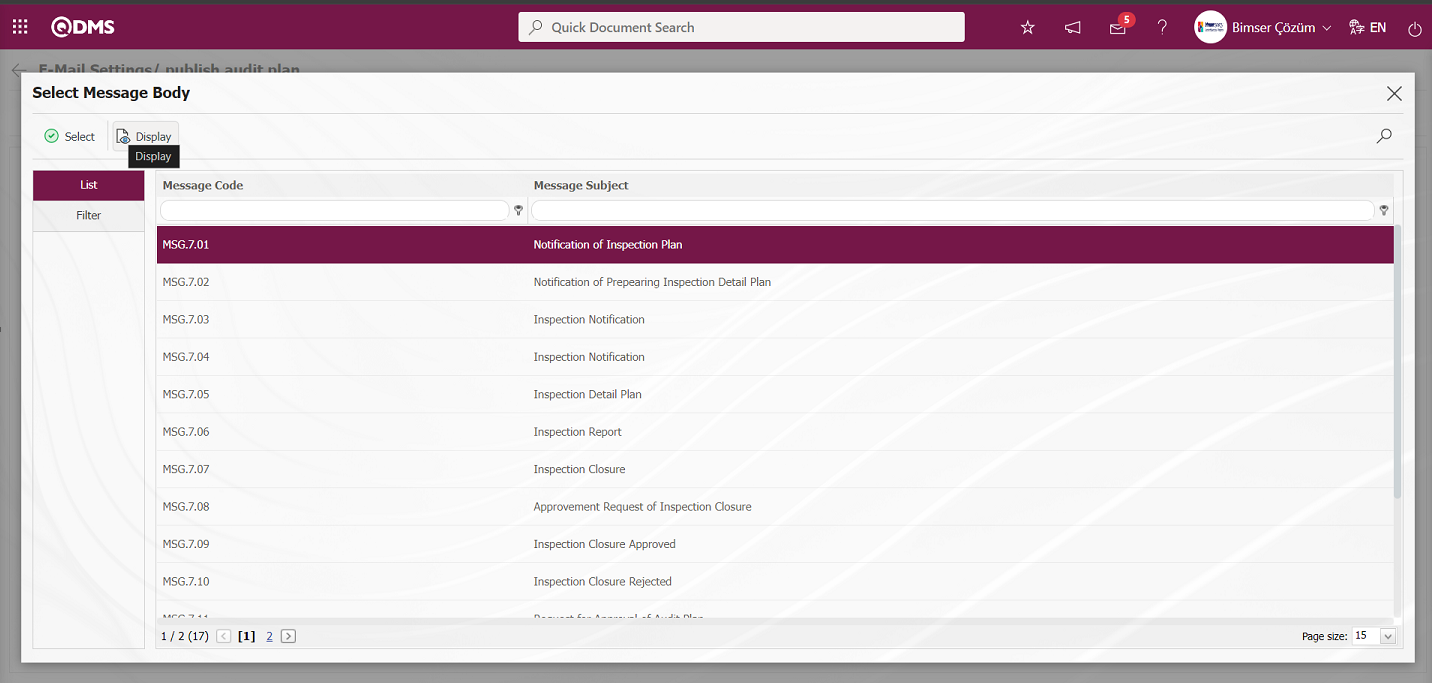
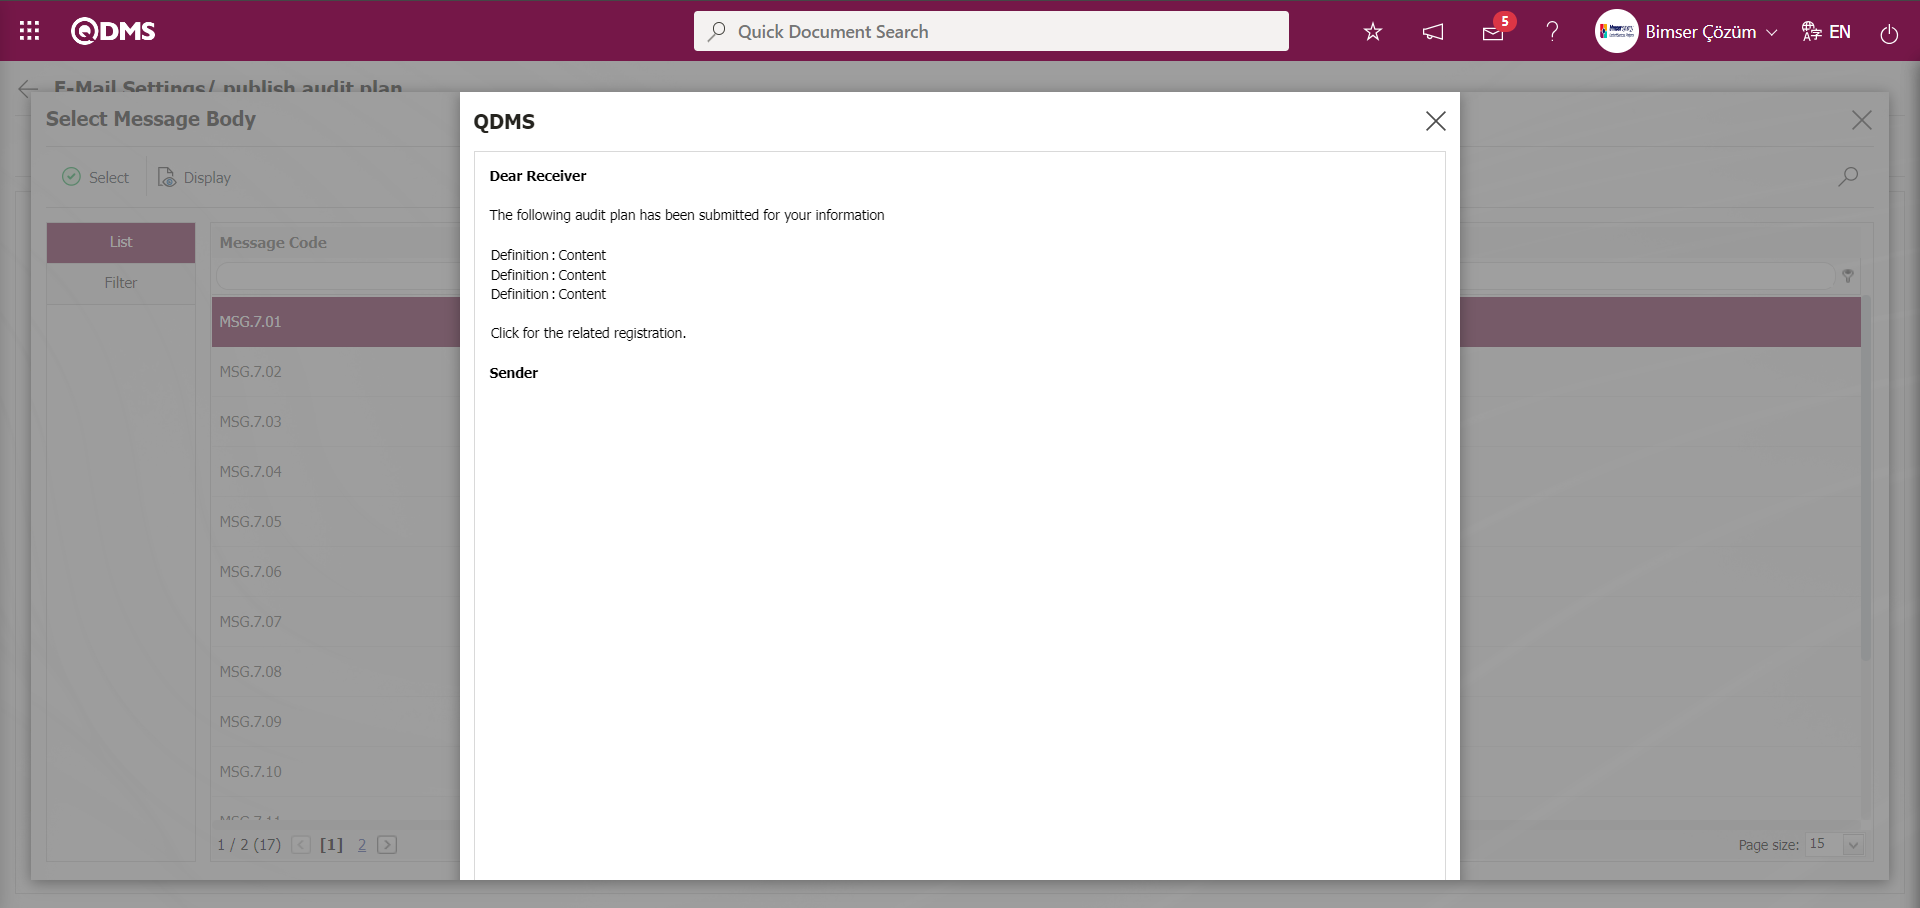
The  button displays the content of the Message Body in detail.
The Message Body selected in the Message Body list is selected by clicking the  button.

If you want to send an e-mail to whom, the “Send E-Mail / Send SMS” check box related to that role is checked. In the relevant roles, the check box related to the “Add To Calendar” field is checked and the audit is processed to the outlook calendar. In order to send a message, the mobile phone number of the person defined in the role must be defined on the personnel definition screen.
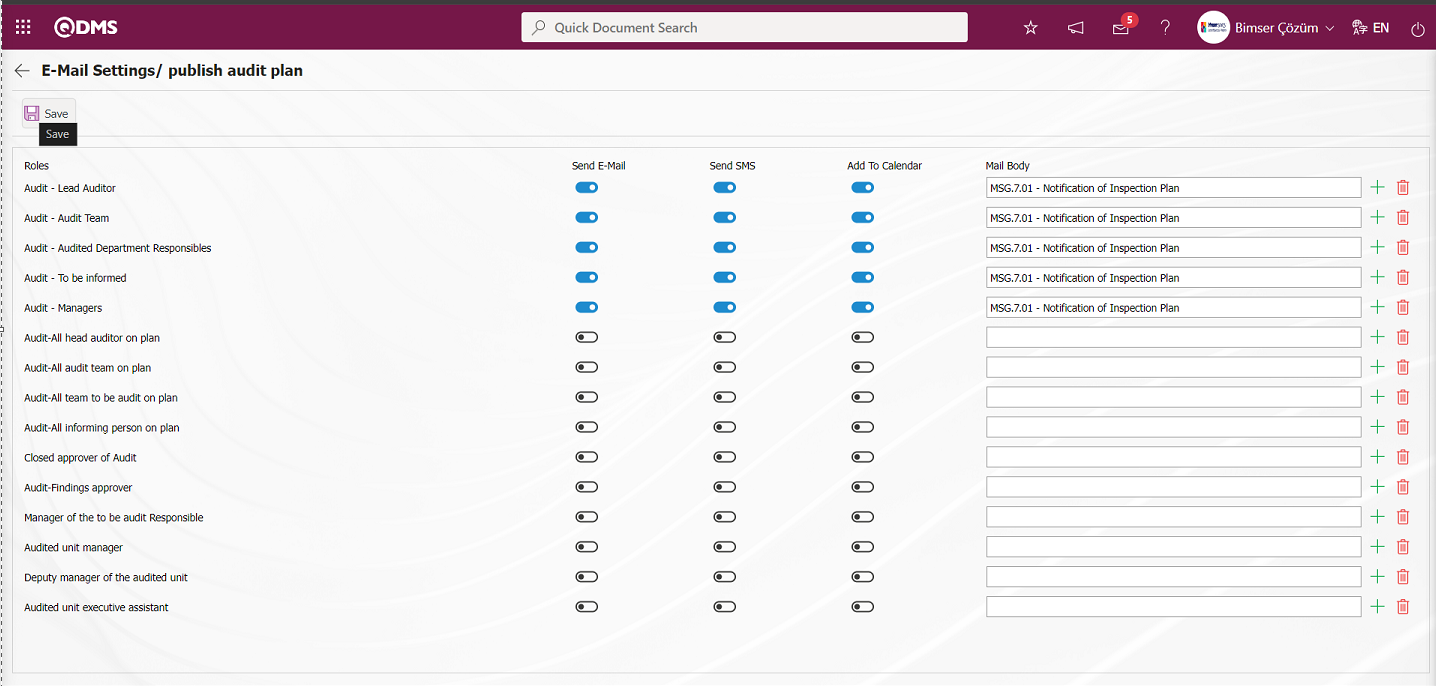
On the E-Mail Settings/ publish audit plan screen, after the “Send E-Mail / Send SMS” check box related to the roles to send e-mail is checked, the E-Mail Settings registration process is performed by clicking the  button in the upper left corner of the screen.
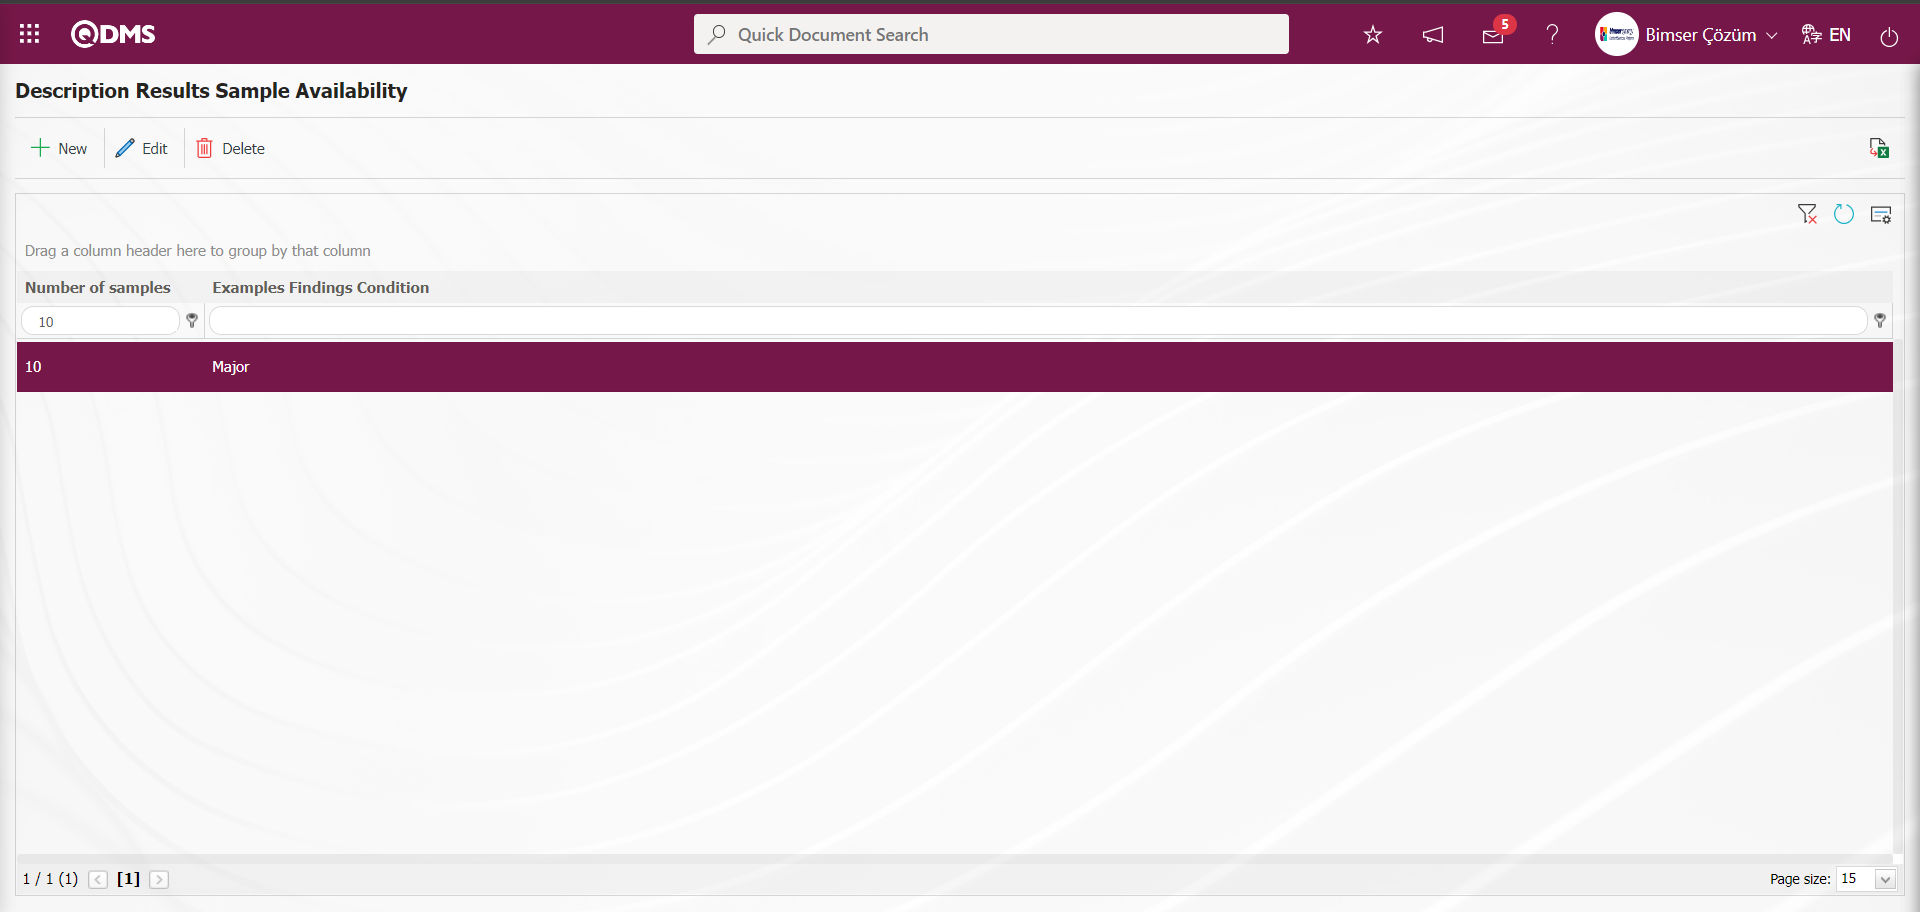
6.1.10. Description Results Sample Availability
Menu Name: System Infrastructure Definitions/ Audit/ Description Results Sample Availability
This is the menu where the sampling pool of findings from previous audits is created.

With the help of the buttons on the screen;
 : Define a new sample finding status.
 : Make any correction, change or update related to the selected sample finding status information in the list.
 : The sample finding status information selected in the list can be deleted
: Data is transferred to Excel.
: The search criteria on the menu screens are used to clean the data remaining in the filter fields in the grid where the search operation is performed.
: The menu screen is restored to its default settings.
: User-based designing is done on the menu screen with the show-hide feature, that is, the hiding feature of the fields corresponding to the columns on the menu screens.
To add a new Sample Finding Status to the Description Results Sample Availability** screen, click the button in the upper right corner of the screen to display the Description Results Sample Availability - New Record screen.
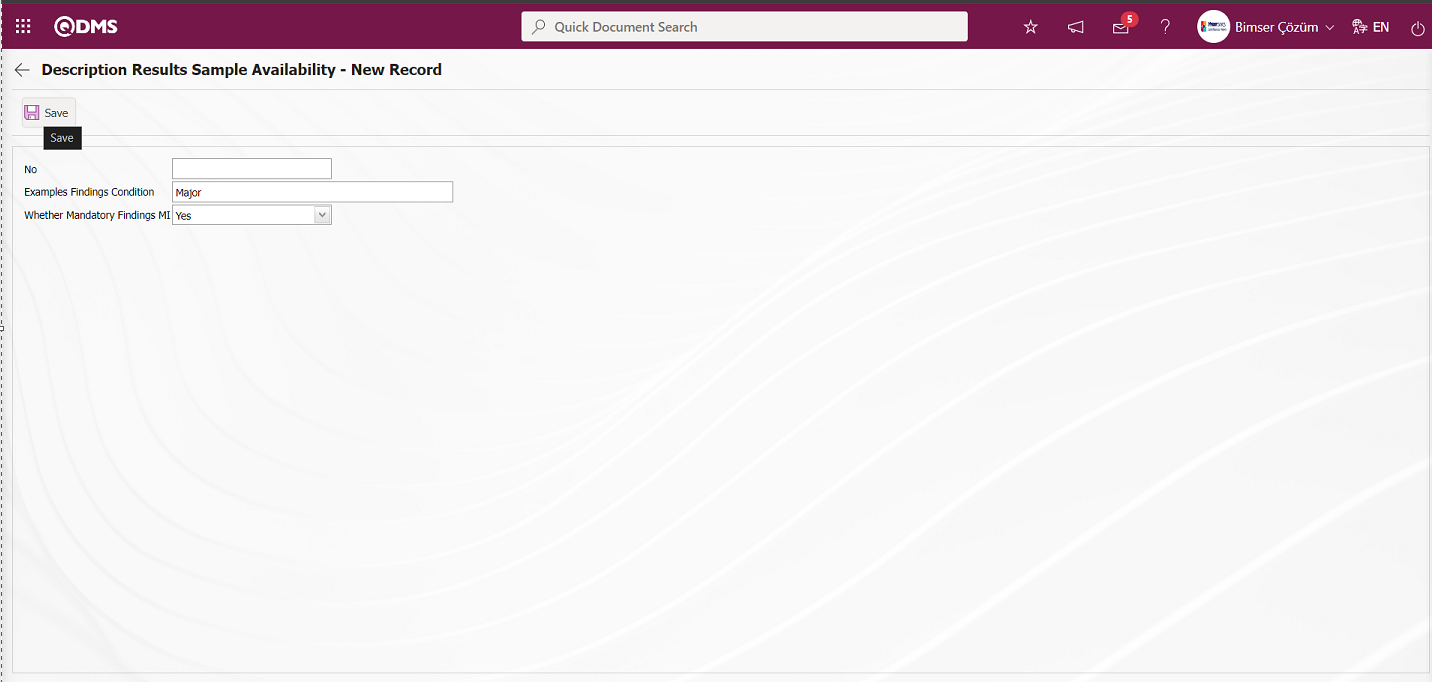
Related fields are defined on the screen that opens:
No: This is the field where Results Sample Availability number is given automatically by the system.
Examples Findings Condition: This is the field where Results Sample Availability definition information is written.
Whether Mandatory Findings MI: It is the field where the necessity of the finding is determined by selecting the relevant options.
Description Results Sample Availability - After entering the necessary information in the required fields on the New Record screen, the Results Sample Availability registration process is done by clicking the  button in the upper left corner of the screen.
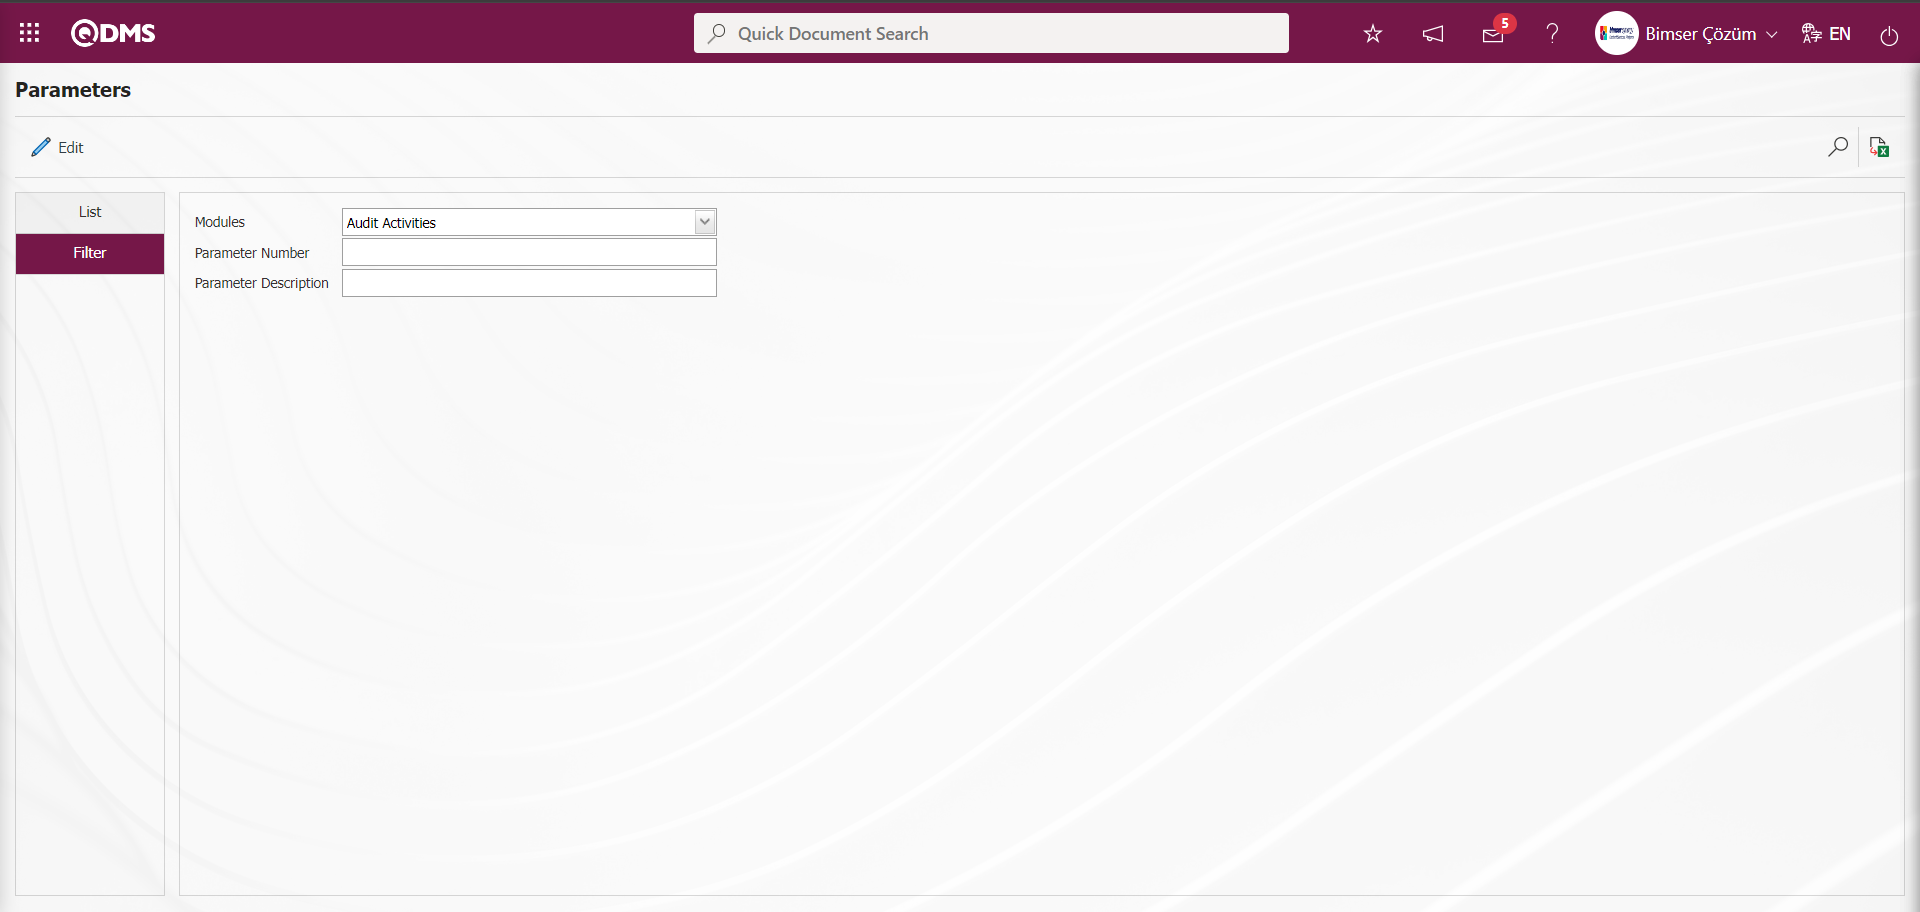
6.1.11. Audit Parameters
Menu Name: System Infrastructure Definitions/ Audit/ Audit Parameters
It is the menu where various adjustments can be made for the Audit Activity Module according to the user's wishes and needs and the parameters can be determined  (selected) accordingly. In the system, the adjustments made in this menu only cover the content of the Audit Activity module and the changes made in this menu cover all Qdms users. On the Parameters screen, we see two tabs, List and Filter tabs. In the List tab, all parameters related to the Audit Activity are listed.
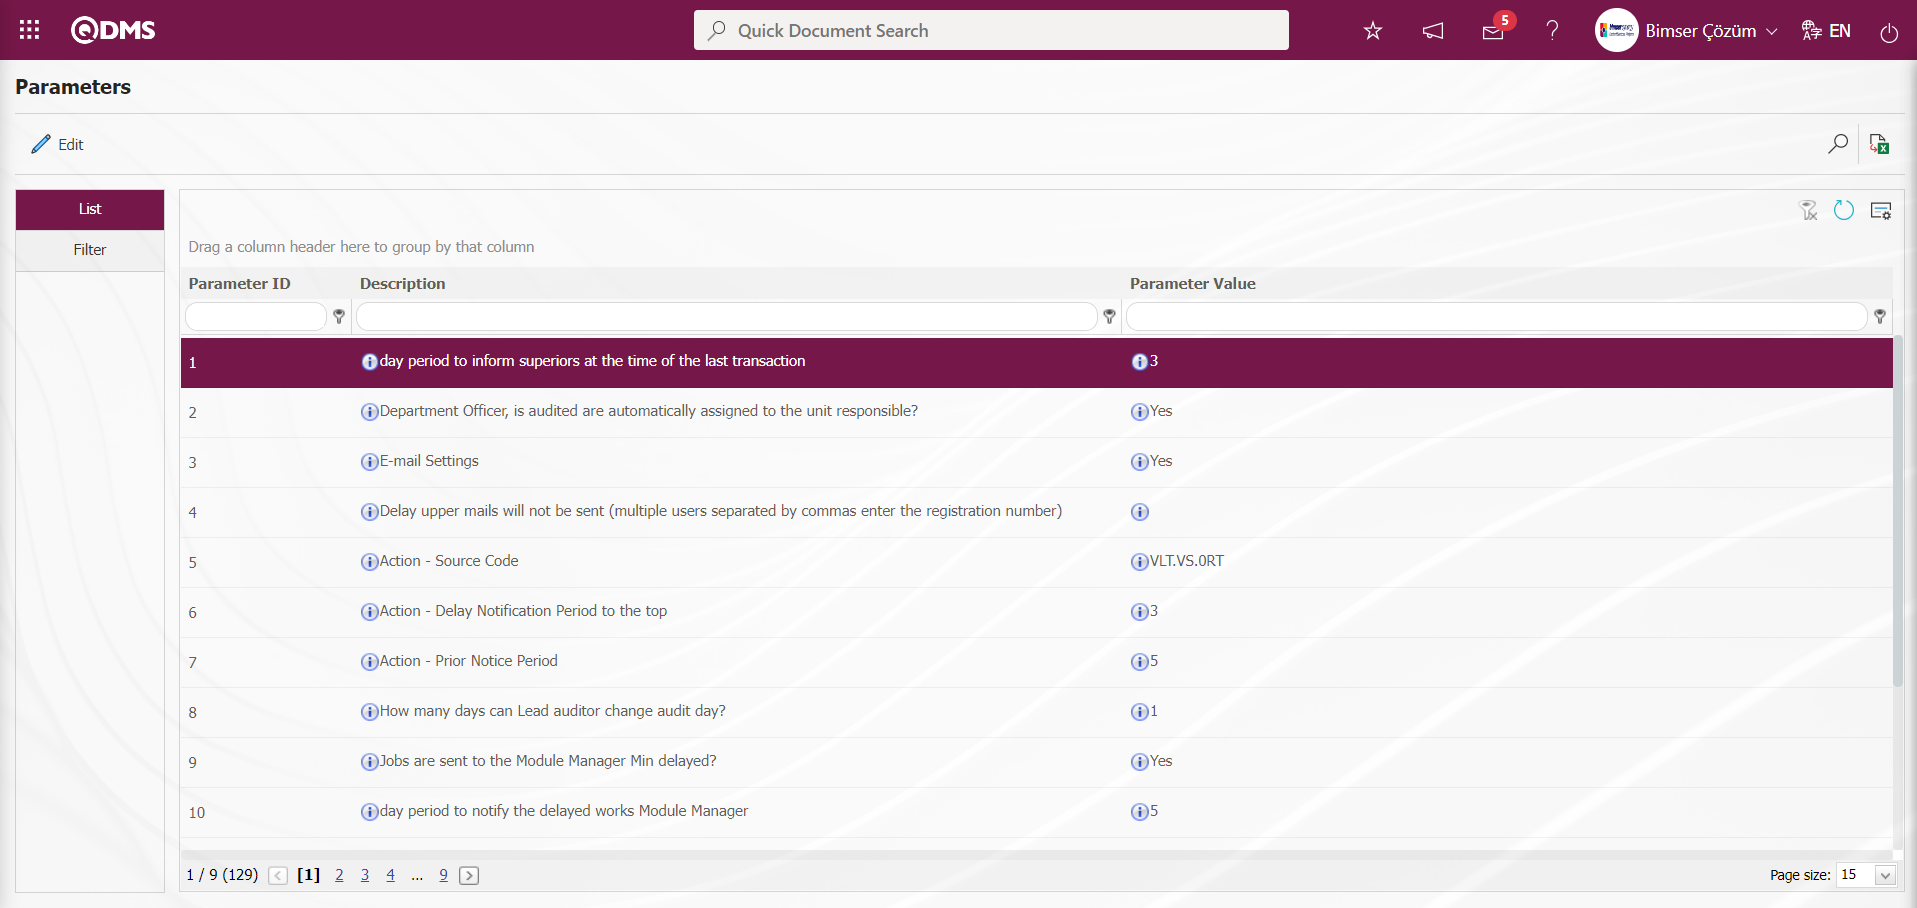
With the help of the buttons on the screen;
 : Edit/change/update the parameter information selected in the list.
 : Data is transferred to Excel.
 : Records are filtered and searched.
 : The search criteria on the menu screens are used to clean the data remaining in the filter fields in the grid where the search operation is performed.
 : The menu screen is restored to its default settings.
 : User-based designing of the menu screen is done with the show-hide feature, that is, the hiding feature of the fields corresponding to the columns on the menu screens.
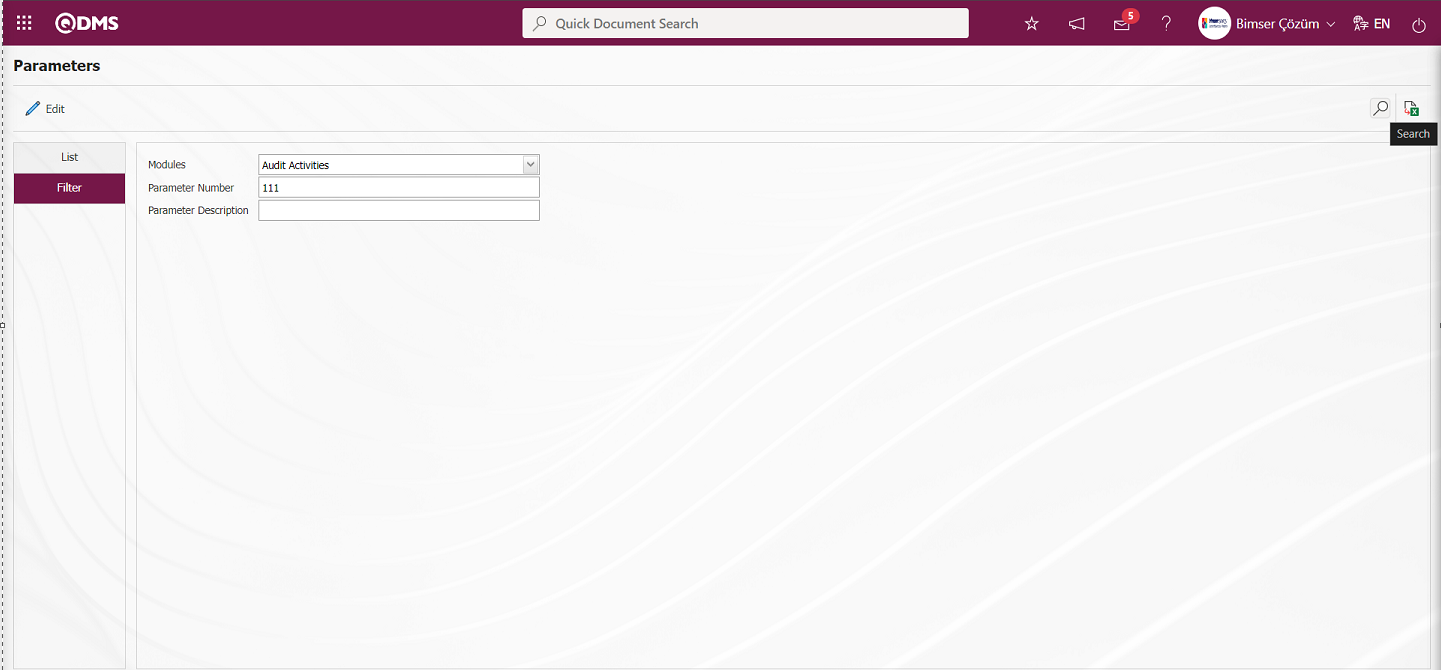
In the Filter tab on the Parameters screen, data is entered in fields such as Parameter No and Parameter Definition, and filtering operations are performed according to the search criteria by clicking the (Search) button.
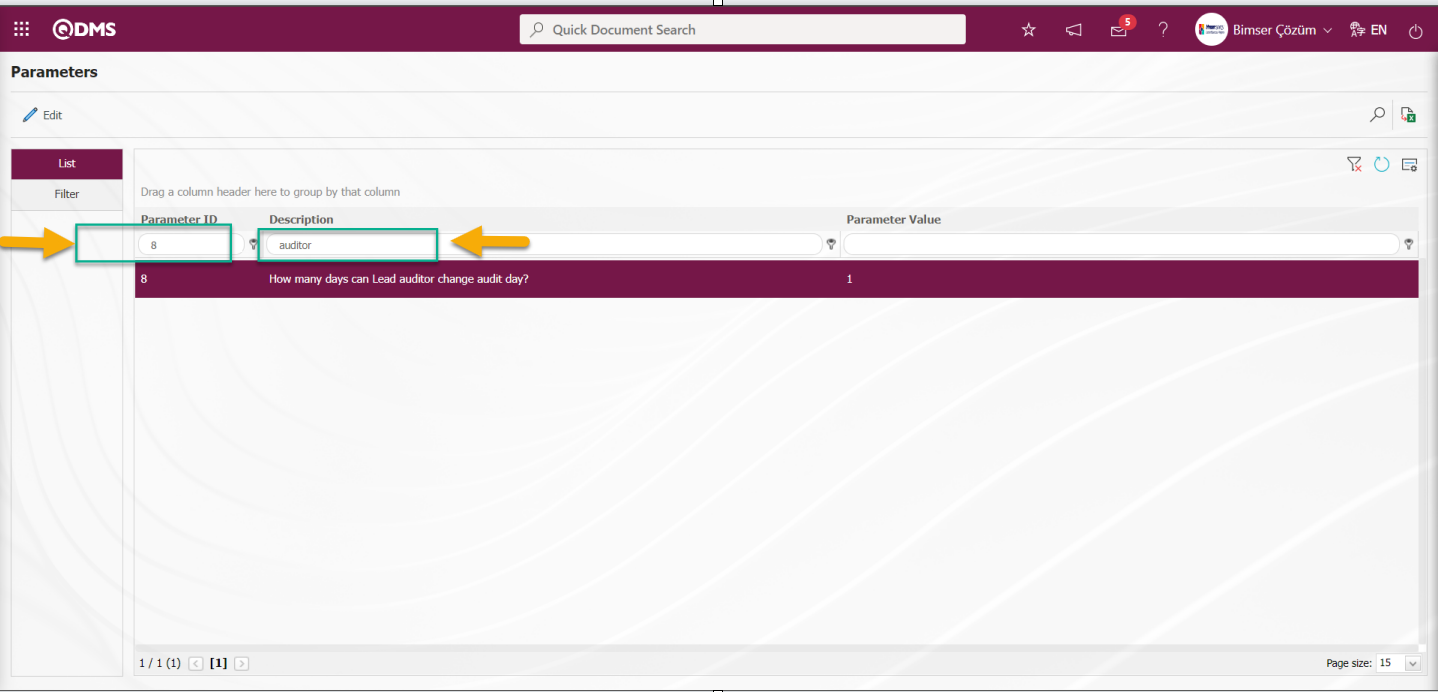
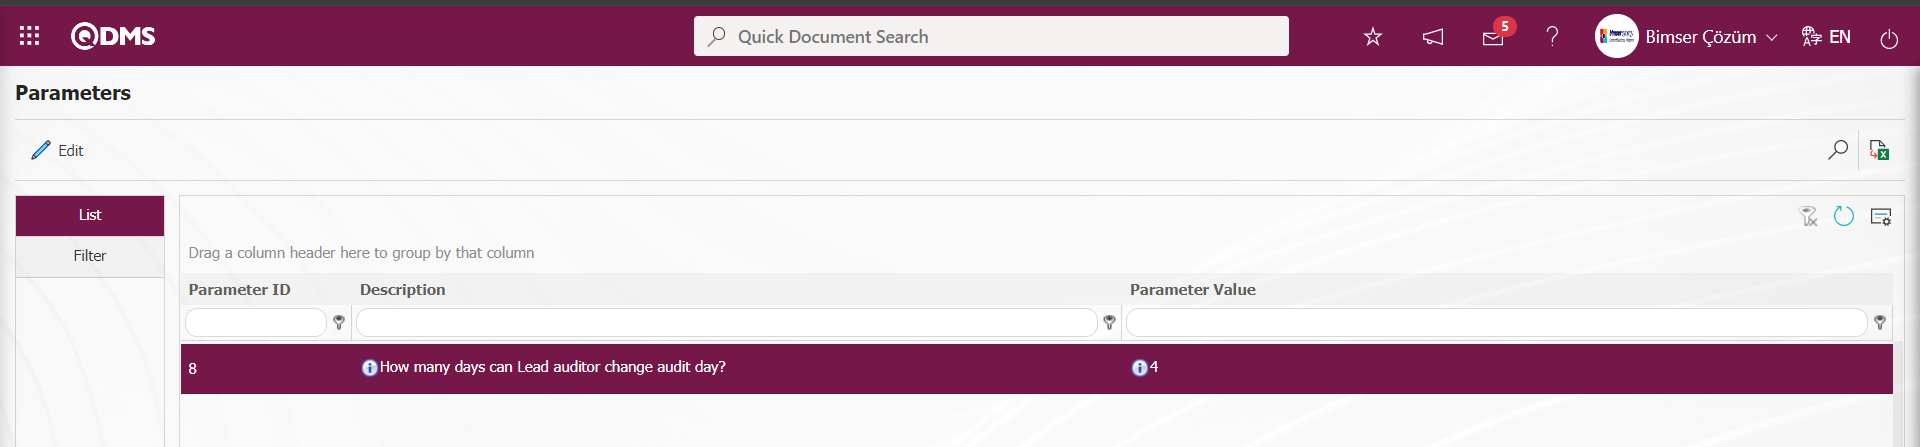
In the Audit Activities Module parameters, the parameter number 8 “How many days can Lead auditor change audit day?” is selected by typing the number in the parameter no field in the Filter tab on the parameters screen and searching by clicking the  (Search) button.

For the search operation, it is used in the fields corresponding to the columns in the grid in the list tab on the Parameters screen. If the parameter number is not known, the parameter can also be searched by typing a key word in the parameter in the Description field in the grid on the parameter list tab. Or if the parameter number is known, the parameter number can be searched by typing the parameter number in the parameter No field in the grid.
After selecting the parameter, click on the button. In the parameters screen that opens, enter the new value information that you want to change the parameter value.
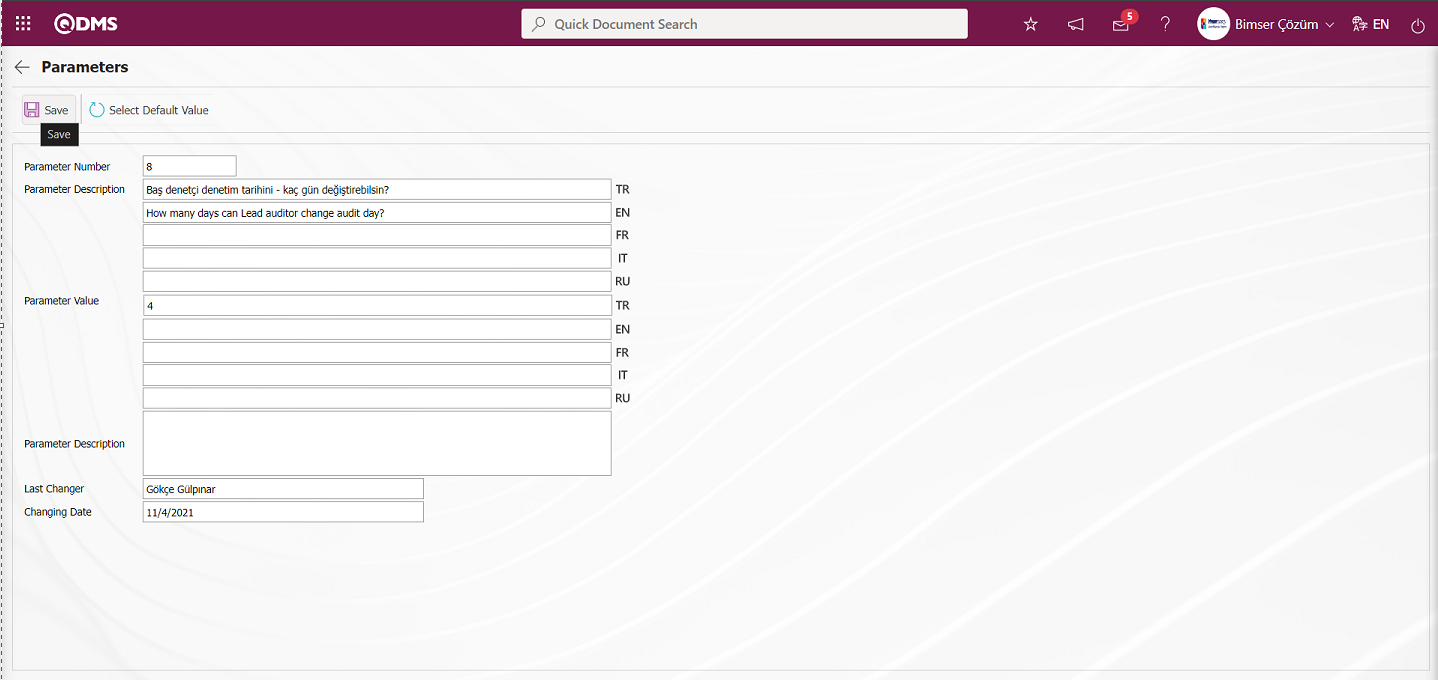
After the new value information entered in the parameter value on the Parameters screen, the parameter record update process is performed by clicking the button in the upper left corner of the screen. The newly entered parameter value determines how many days the user selected as the lead auditor can make changes on the date specified on the audit.
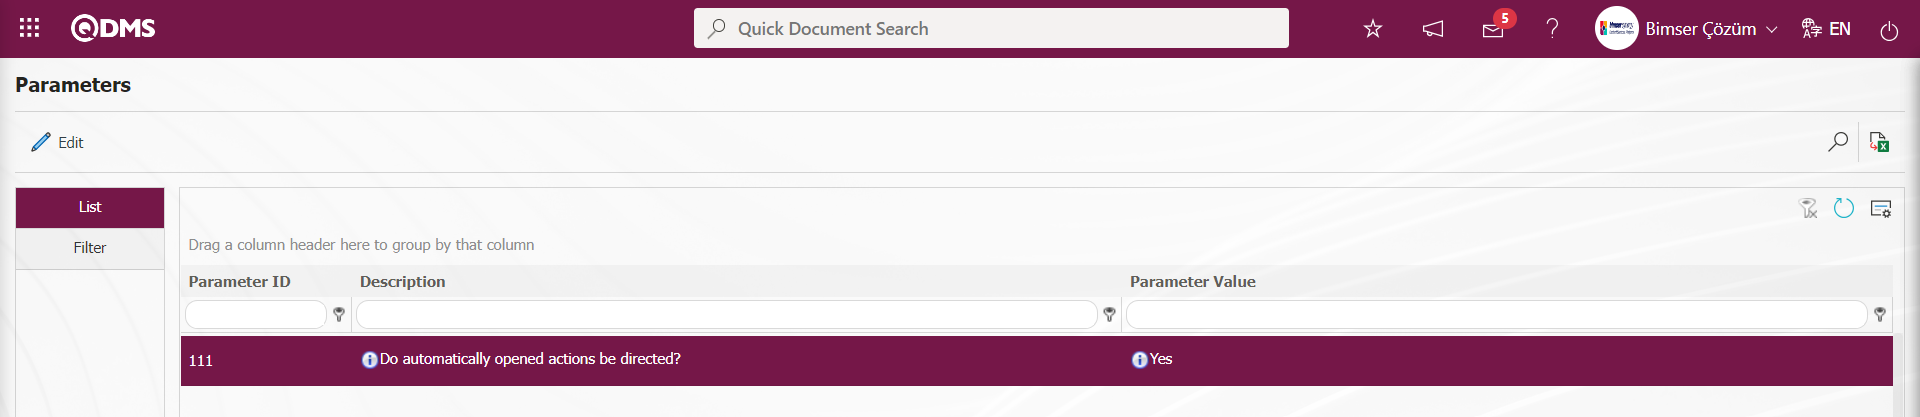
In the Audit Activity module parameters, the parameter 111 “Do automatically opened actions be directed?” is selected by typing the parameter number in the parameter no field in the Filter tab on the parameters screen and clicking the  (Search) button.
After selecting the parameter, click the button.

In the parameters screen, select the relevant check box “Yes” in the parameter value options.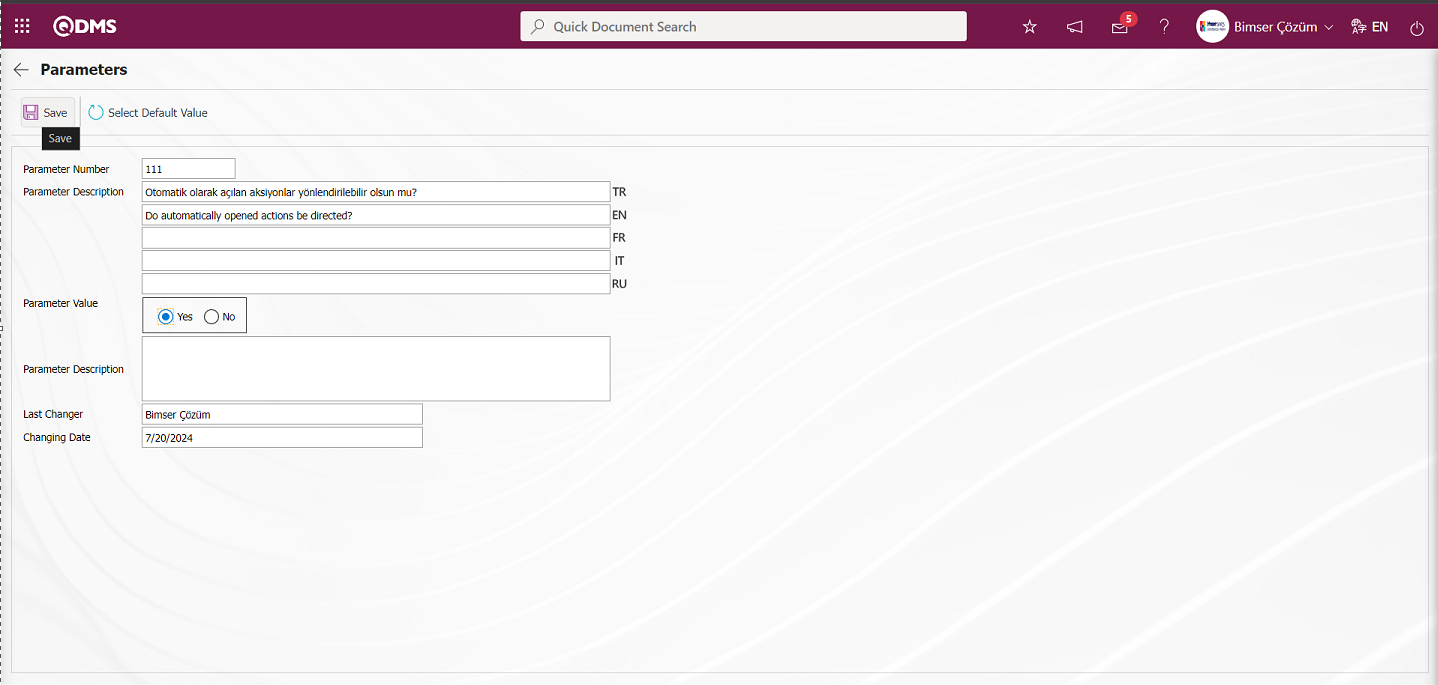
After selecting the parameter value “Yes” on the Parameters screen, the parameter activation registration process is done by clicking the button in the upper left corner of the screen. After the parameter is activated, it is ensured that the routable feature is used in the actions that are automatically opened on the Perform Audit screen in the Audit Activities module.
In order to list the parameters related to CAPA in the list tab in the Audit Activities module, type “CAPA” related keywords in the Parameter Definition field in the Filter tab or in the grid and click the (Search) button.
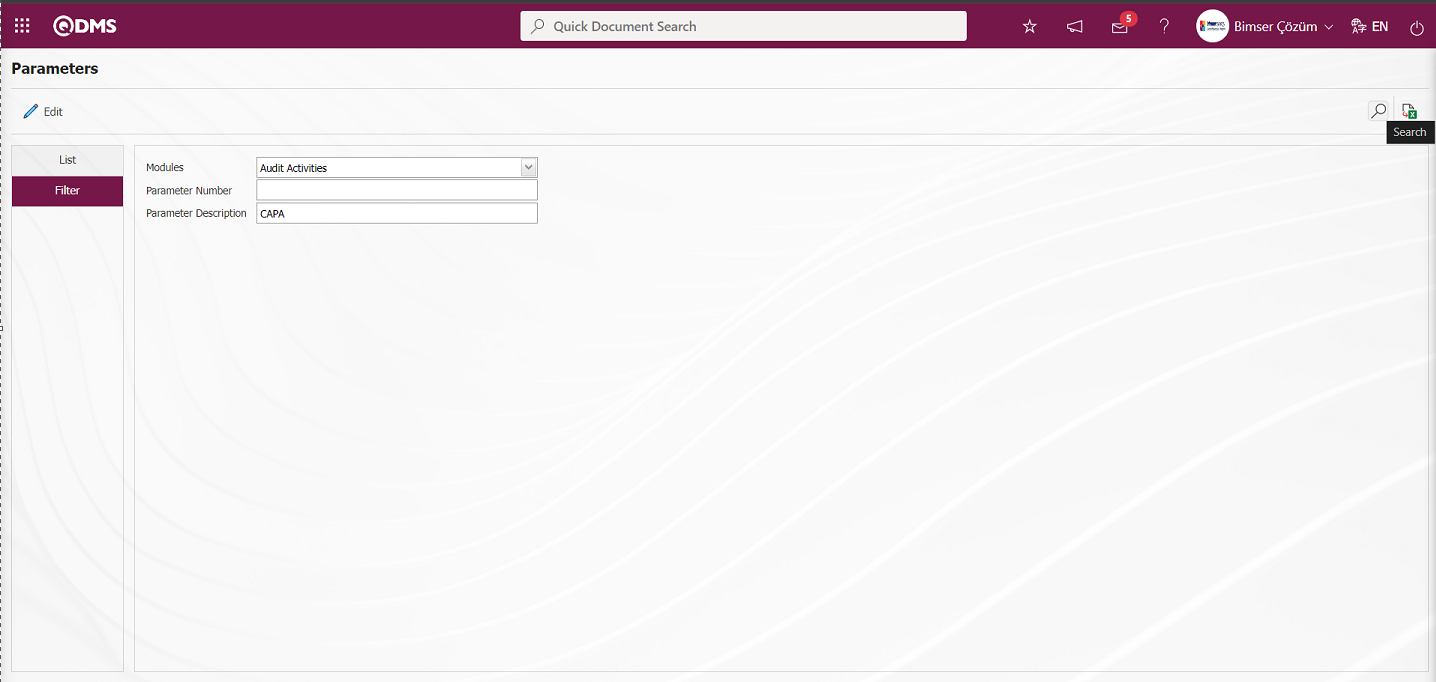
It is provided to list the CAPA related parameters that are mentioned in the content of the CAPA definition.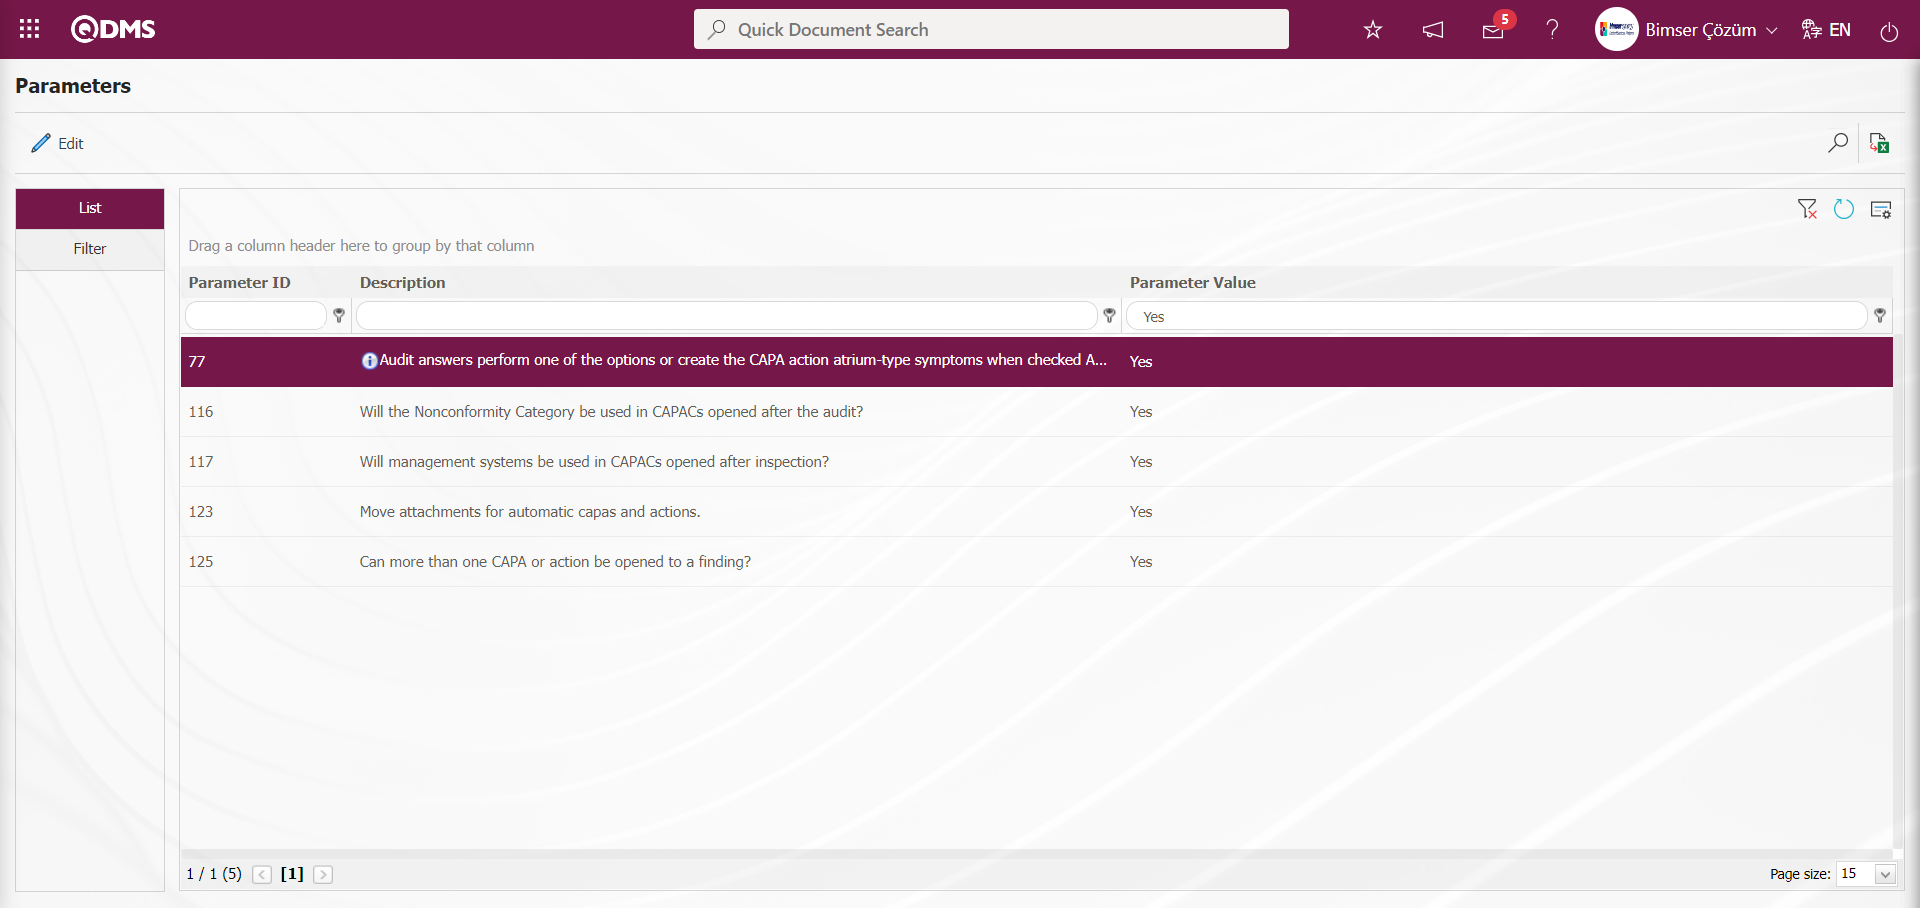
In this way, by using the fields with search criteria in the filter tab and the fields in the grid in the list tab on the parameters screen, the related parameter is searched and operations such as activating the parameter whose content is displayed by clicking the button, deactivating the activated parameter or changing the value of the parameter are performed.
6.1.12. Field Definition
Menu Name: System Infrastructure Definitions/ Audit/ Field Definition
Adding Findings, Audit Definition, Auditor Definition and Defining Audit Plan is the menu where the definition process is performed in case there are customer-specific fields that are desired to be included in the screens of the functions. The fields defined in this menu are added to the field pool. The fields added to the field pool are added to the pages of the relevant functions of the Audit Activity module by clicking the  button while the function is selected in the Function Indexer menu.

With the help of the buttons on the screen;
: Add a new field.
 : Correction / change / update is made on the field information selected in the list. Code information cannot be updated.
 : The field information selected in the list is copied.
: The field information selected in the list is deleted.
 : Values of the field are defined.
: The search criteria on the menu screens are used to clean the data remaining in the filter fields in the grid where the search operation is performed.
: The menu screen is restored to its default settings.
: User-based designing of the menu screen is done with the show-hide feature, that is, the hiding feature of the fields corresponding to the columns on the menu screens.
To add a new field to the Field Definition screen, click on the button at the top left corner of the screen to open the Field Definition-New Record screen
Related fields are defined on the screen that opens;
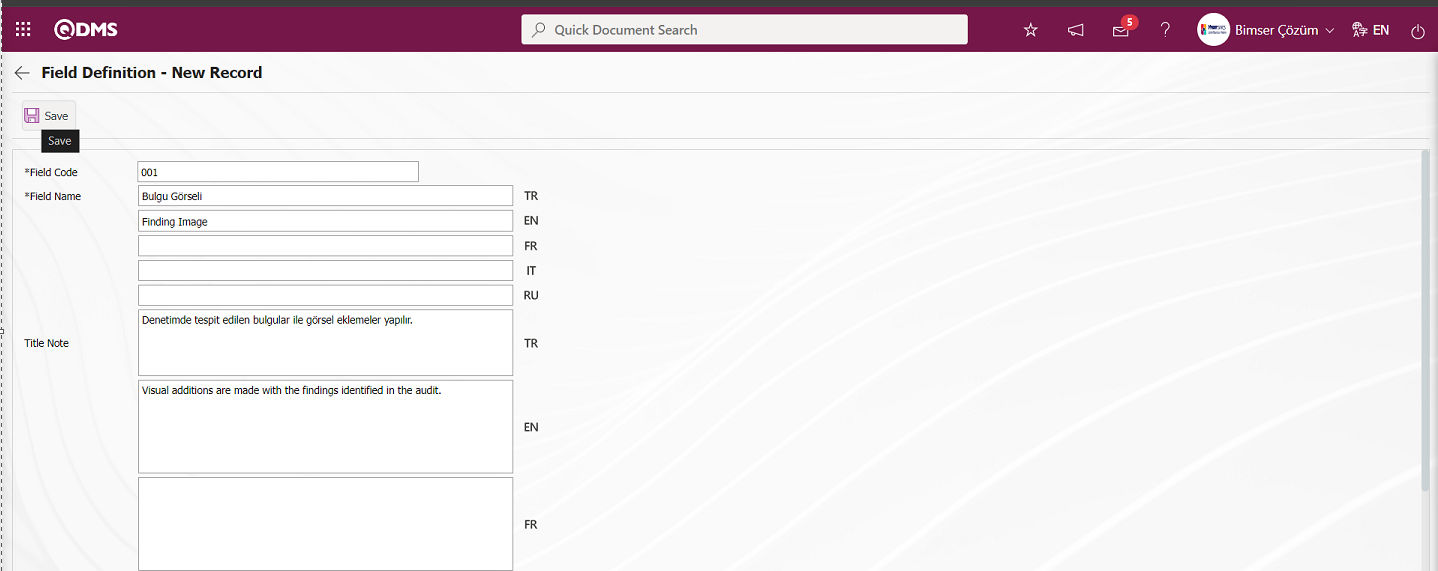
Field Code: This is the mandatory field where the Field Code information is entered on the Field Definition-New Record screen. It should be defined without using characters such as spaces and Turkish characters, so that it is not the same as previously defined fields. Ex. '001' , 'RK'
Field Name: This is the field where the Field Name information is entered on the Field Definition-New Registration screen.
Title Note: This is the field where the note information containing explanatory information about the data entry of the field on the Field Definition-New Registration screen is entered. It is the information displayed when hovering over the field with the mouse.
Entry Type: It is the field where the entry type can be selected as Calculated or Data Entry type on the Field Definition-New Record screen. Entry Type option shows whether the created field will be determined manually by data entry or by calculation method. For example; Data Entry.
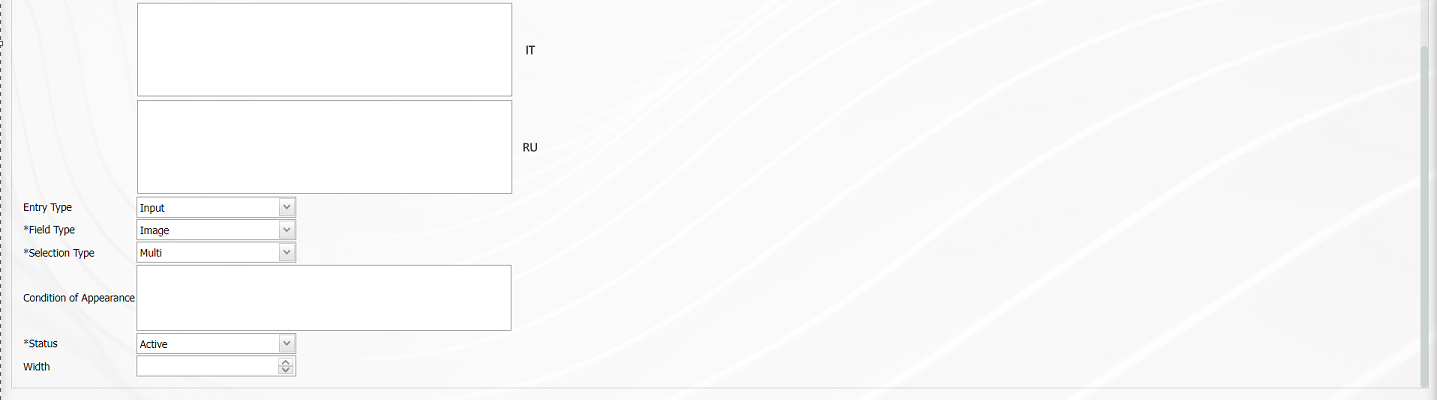
Field Type: It is the field where the field type information can be selected on the Field Definition-New Record screen. Field Type indicates which type of the created field is text, numeric, date, list, etc. In the Field Type field, personnel type parametric field selection process is performed. For example; Image.
Selection Type: It is the field where the selection type of the field defined on the Field Definition-New Record screen is selected from single and multiple options.
Condition of Appearance: This is the field where the Condition of Appearance information is entered on the Field Definition-New Record screen. If a field will be seen depending on the condition of another field, the condition of appearance is used. It allows the field created according to the values of the list-type field to be displayed. Its usage is [ALANKODU]=ALAN_DEGERI etc. (For example, Is there an opportunity? Field's field code is 01 and Opportunity field's field code is 02. If the “Opportunity” field should be seen if the “Yes” value with value code 100 is selected from the options in the “Is there an opportunity?” field, the formula should be written as follows in the “Opportunity” field's appearance condition section with the number 02: [01]=100)
*Status: This is the field where the status can be selected as “Active” or “Inactive” on the Field Identification-New Registration screen.
Width: It is the field where the width information is entered on the Field Definition-New Record screen.
Field Definition-New Record field code and field name information is entered. Input Type data entry and field type image is selected. Select multiple selection type in the Selection Type field. Select Status as Active. After the required fields are filled in the Field Definition screen, the Field Definition record process is realized by clicking the  button in the upper left corner.

The full list of field types available in the system is given below;
- Text: Adds a text box that allows manual typing.
- Text Multiline: Adds a multi-line text box with no character limit for manual typing.
- Numeric: Enables numeric data entry.
- Numeric-Monetary: Enables numeric entry as monetary value.
- Numeric-Unit: Makes numeric entry as unit.
- Date: Adds a calendar field.
- List: Makes a single selection from multiple elements.
- Scored List: Makes a selection from the drop-down menu, list elements have point values.
- List with Search: Allows single and/or multiple selections from multiple elements with a wide search function.
- Tree List: Allows selection from more than one element with a tree breakdown in a way that can be searched with a wide search function.
- Personnel: Allows to select a person from QDMS personnel database.
- Department: Allows the selection of department information from the QDMS department database.
- Title: Allows to select title information from QDMS title database.
- Document: Allows you to select a document from the QDMS document database.
- Management System: Allows to select management system information from QDMS management system database.
- Customer: Allows to select customer information from QDMS customer database.
- Supplier: Allows the selection of supplier information from the QDMS supplier database.
- Product: Allows product information to be selected from the QDMS product database.
- Company Profile: Allows to select company profile information from QDMS company profile database.
- Title: Adds a title field to the forms to be written in bold letters.
- File: Will bring the appropriate field for file attachment
- Image: Will bring available space for image attachment
- Image List: Allows selection from a list of images.
- Multiple Image: Allows to select multiple images.
- Table: Allows the creation of a table type field. (After adding this type of field, new field definitions must be made as field values.)
- Query: It is a field type that can be defined in order to make a selection from the main data in QDMS/Ensemble databases. (It should only be defined by Bimser Support Team) Single and multiple selections can be made.
- Query Tree: It is the type of field that can be defined in order to make a selection from the tree-delimited master data in QDMS/Ensemble databases. (It should only be defined by Bimser Support Team) Single and multiple selections can be made.
- Tab: Creates a new tab in which the fields can be seen in the existing risk assessment form by establishing a relationship, except for the tab containing the fields.
- Checkbox List: It is a list type field that can be used for single or multiple selection according to the request.
- Risk: It enables the selection of values from risk-based modules. After adding this type of field, it is necessary to select from which module the values will come from on the field definition screen.
- Annotated List: It is a field type that allows you to write a description next to the selected list value. When defining field values in the Field Definition menu, it is necessary to select whether the description box will be active for each value. According to the selection made here, when the relevant selection is made in the menu where this field will be seen under the Integrated Management System menu, the box is opened for the user to write a description next to the field value.
- Position: It allows to select position information from QDMS position database.
- Clock: Adds a clock type field.
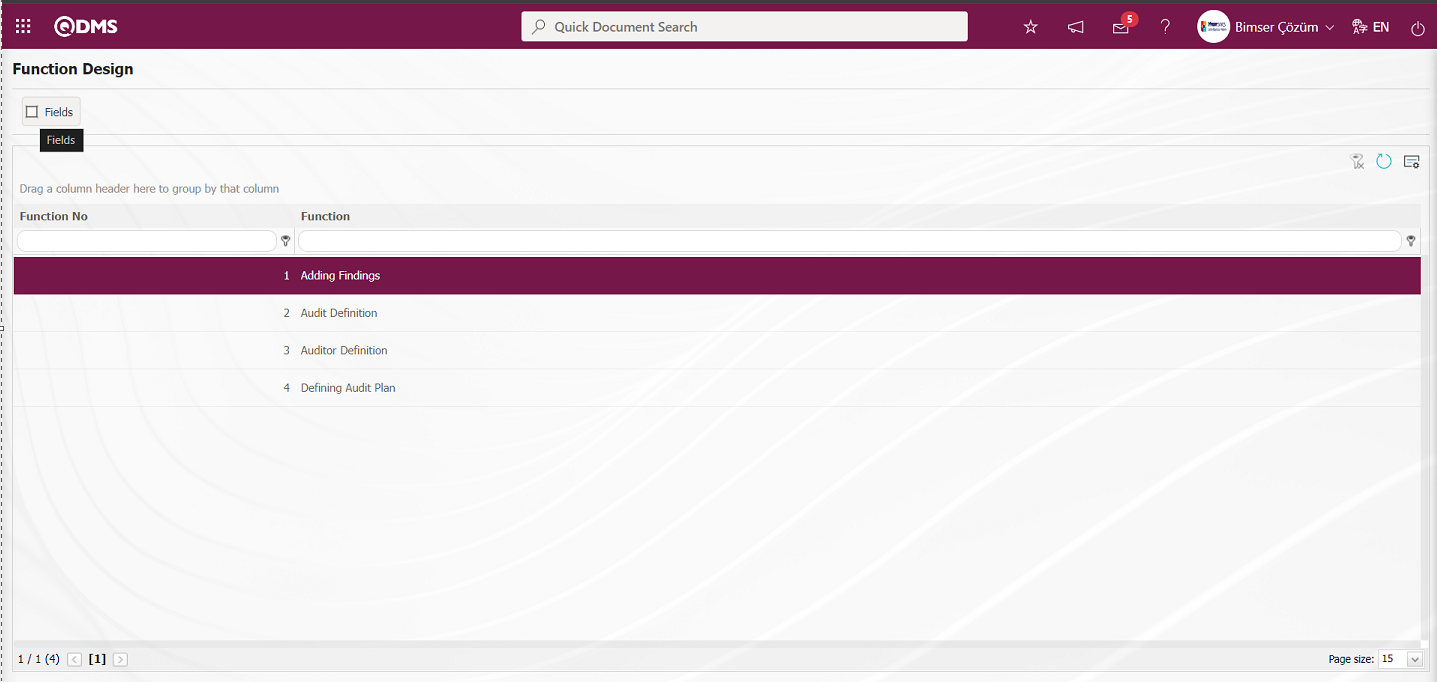
6.1.13. Function Designer
Menu Name: System Infrastructure Definitions/ Audit/ Function Designer
The fields added to the field pool in the field definition menu are associated with the pages of the related functions displayed in this menu and displayed on the screens of the related functions. The functions with which the fields added to the field pool in the Function Indexer menu are associated are Adding Findings, Audit Definition, Auditor Definition and Defining Audit Plan functions. By clicking the fields  button in the related menu, the fields are associated with the related function and displayed on the screens of the related function.
With the help of the buttons on the screen;
 : Fields are associated with functions.
: The search criteria on the menu screens are used to clean the data remaining in the filter fields in the grid where the search operation is performed.
: The menu screen is restored to its default settings.
: User-based designing of the menu screen is done with the show-hide feature, that is, the hiding feature of the fields corresponding to the columns on the menu screens.
On the Function Design screen, click the button while “Adding Findings” function number 1 is selected.
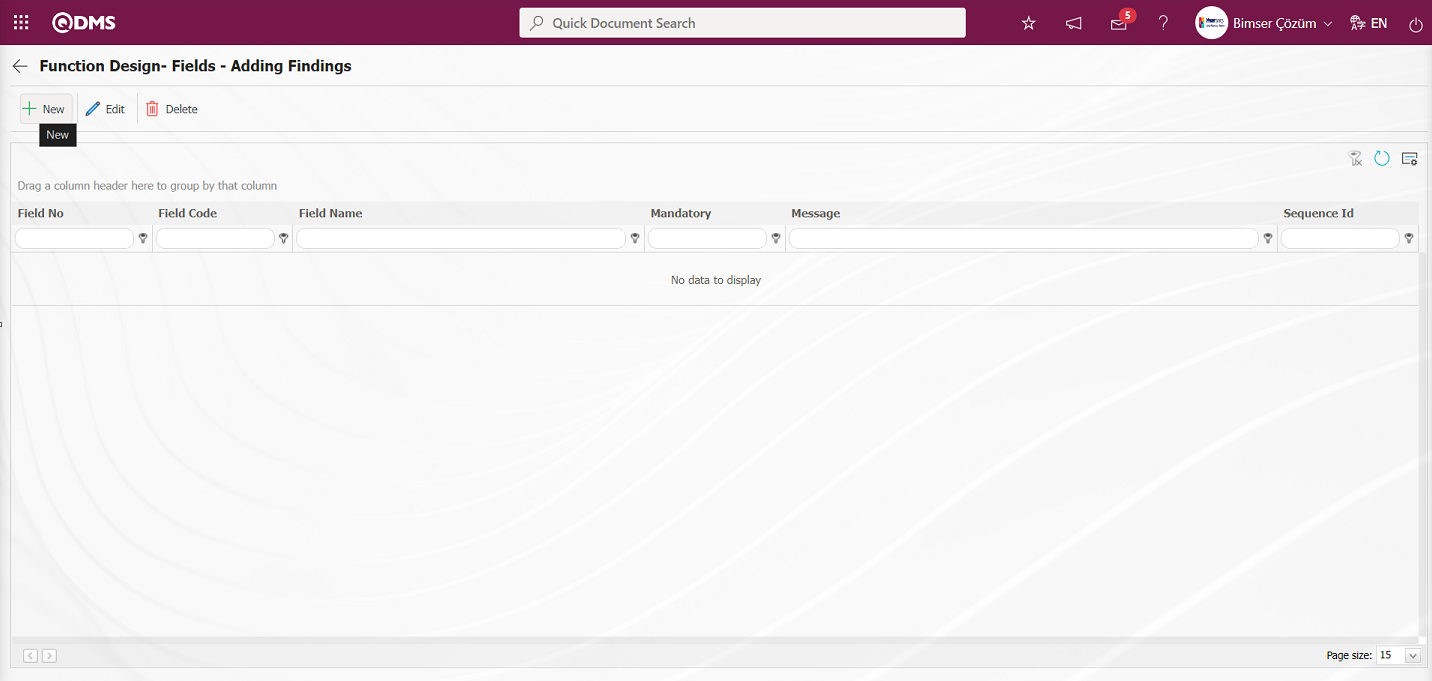
With the help of the buttons on the screen;
 : A new field is added to the selected function in the list.
 : Changes / edits / updates are made on the field information added to the selected function in the list.
: Delete the field information added to the function selected in the list.
: The search criteria on the menu screens are used to clean the data remaining in the filter fields in the grid where the search operation is performed.
: The menu screen is restored to its default settings.
: User-based designing of the menu screen is done with the show-hide feature, that is, the hiding feature of the fields corresponding to the columns on the menu screens.
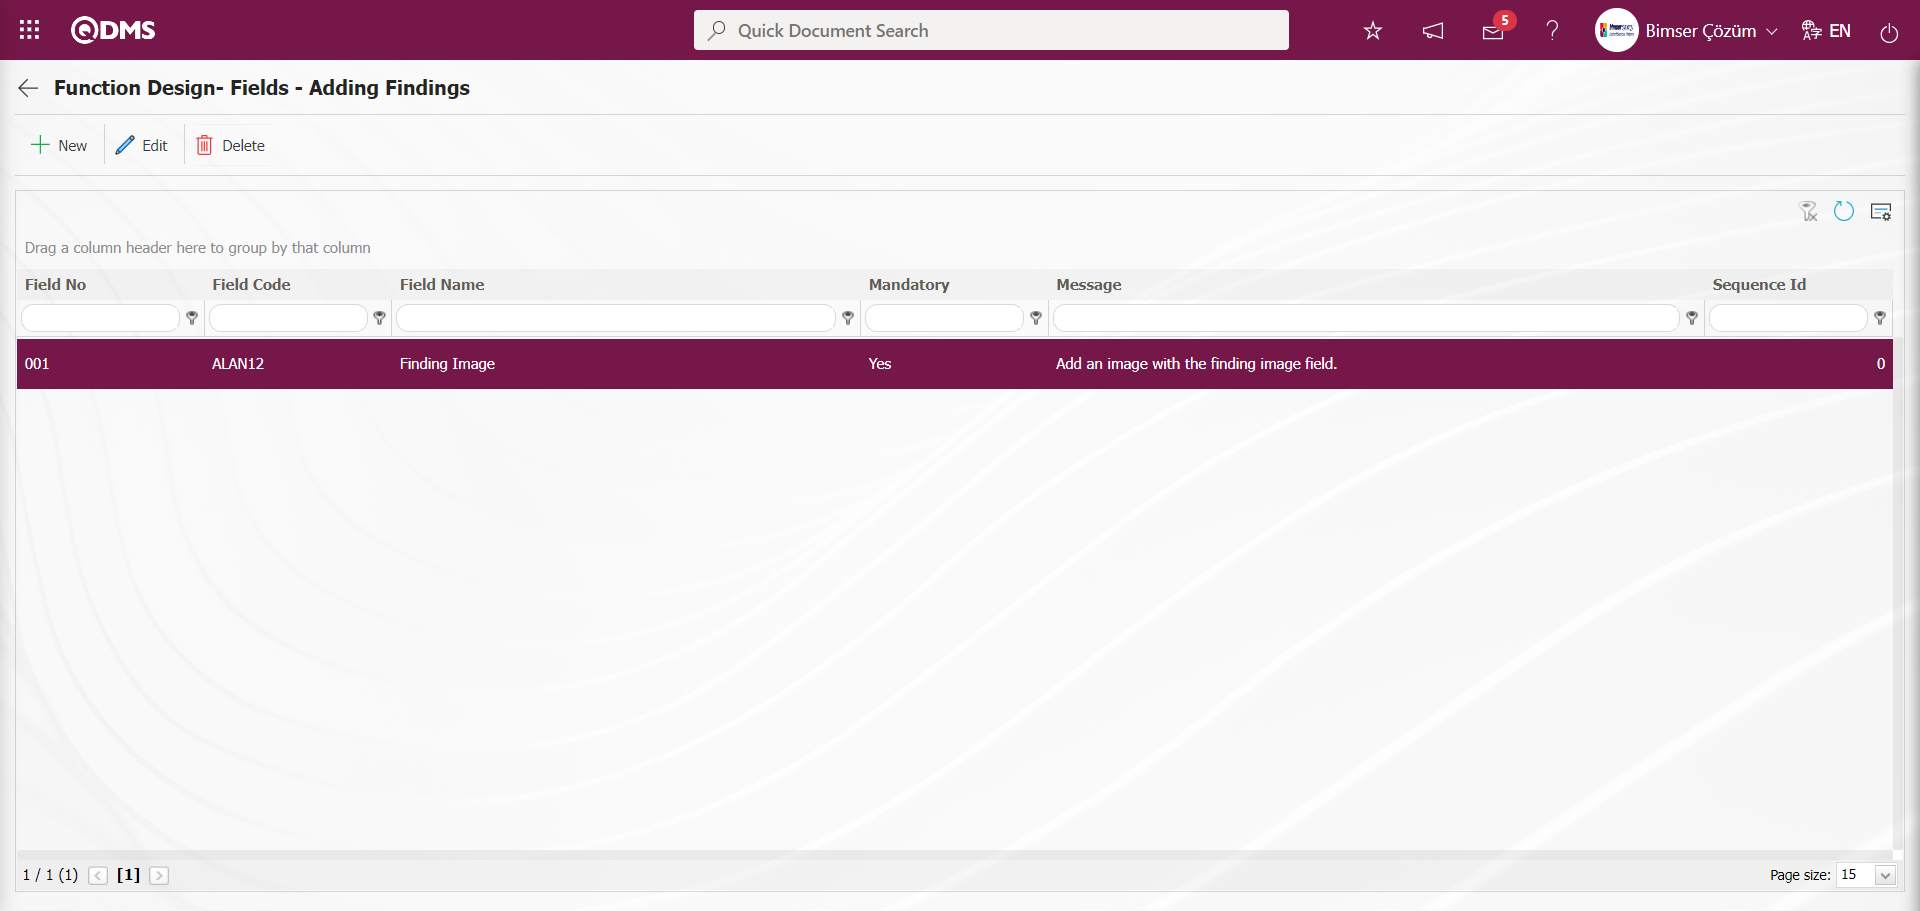
In the Function Design- Fields - Adding Findings** screen, the fields to be used in the selected function are determined by clicking the button.
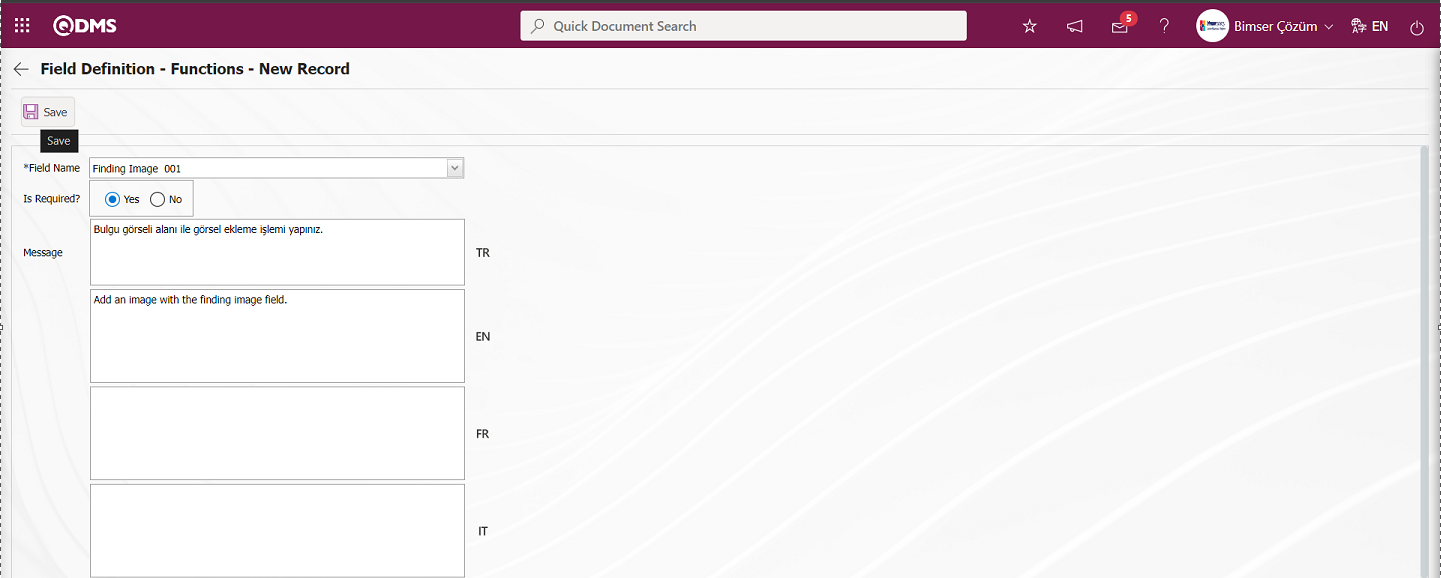

Related fields are defined on the screen that opens:
Field Name: This is the field where the field selection is made from the fields defined on the Field Definition - Functions - New Record screen.
Is Required?: Field Definition - Functions - New Record screen determines whether data entry is mandatory for the selected field. When “Yes” option is selected, data entry is mandatory for the field.
Message: This is the field where the Mandatory Message information is entered for the field selected on the Field Definition - Functions - New Record screen. The warning message information to be given when the mandatory fields are not filled is written.
Sort Order: It is the field where the sequence number of the field is determined on the Field Definition - Functions - New Record screen.
Show in Grid: Field Definition - Functions - If the field selected on the New Record screen is desired to be displayed on the list grid screen, the relevant check box is checked.
Row Count: This is the field where the number of rows for the field selected in the Field Definition - Functions - New Record screen is determined.
Column Width: It is the field where the column width information is determined for the field selected on the Field Definition - Functions - New Record screen.
After filling in all required fields on the Field Definition - Functions - New Record screen, click on the  button on the top left corner of the screen to link the field to the Finding Definition function page.
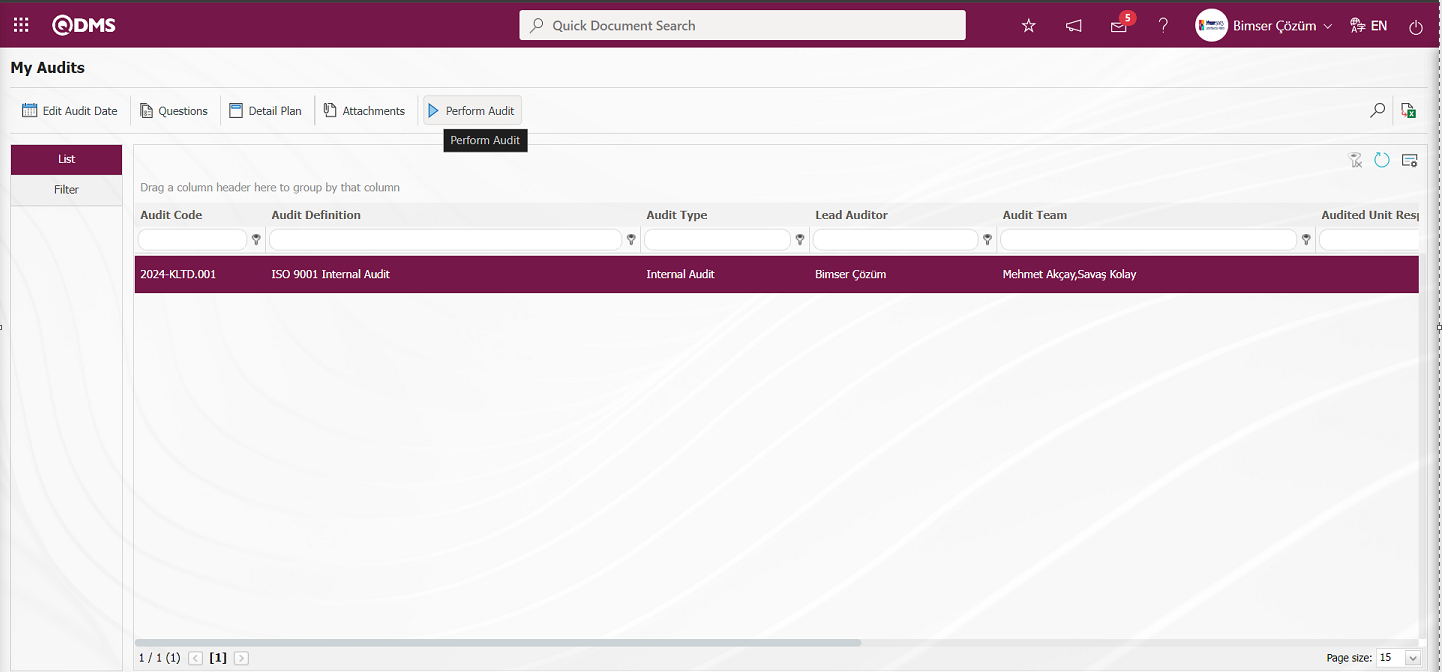
To display the defined field, click the  button while selecting an audit from the list in the Integrated Management System/Audit Activity/Audit Activity (for Auditors Only) menu.
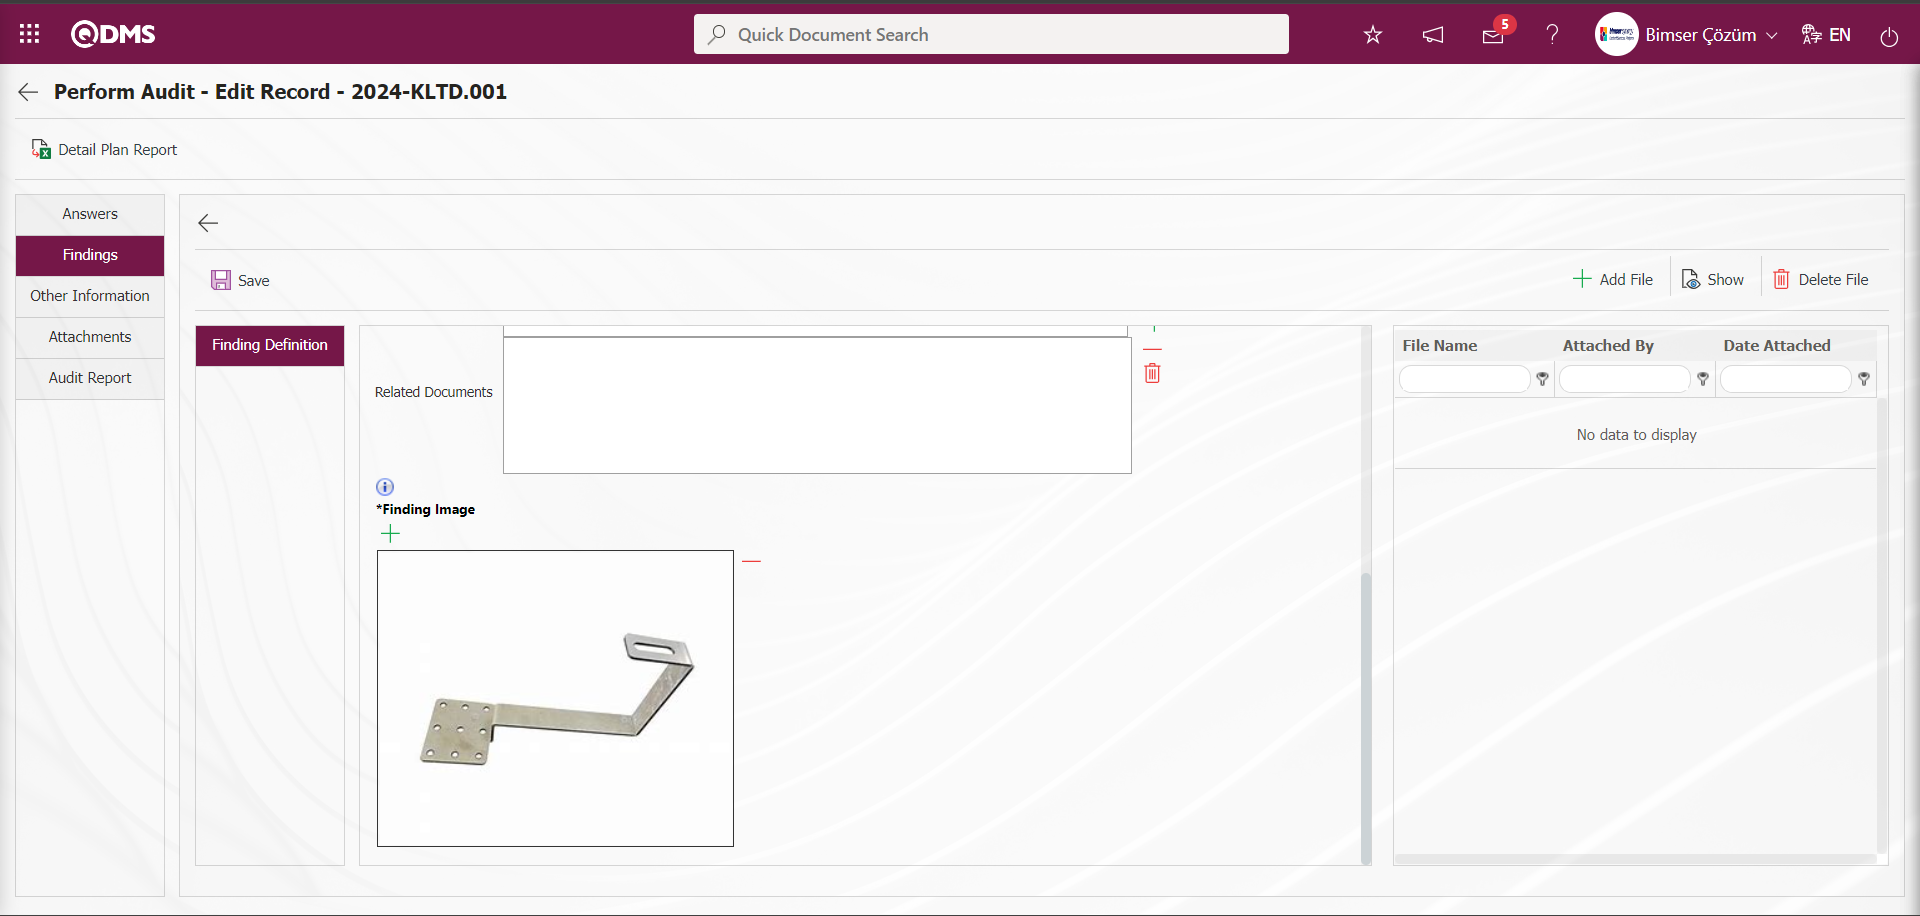
On the Perform Audit - Edit Record screen, click on the Findings tab,

In the Findings tab, click the button to open the Finding Definition screen. In the screen that opens, the field associated with the relevant functions is displayed.
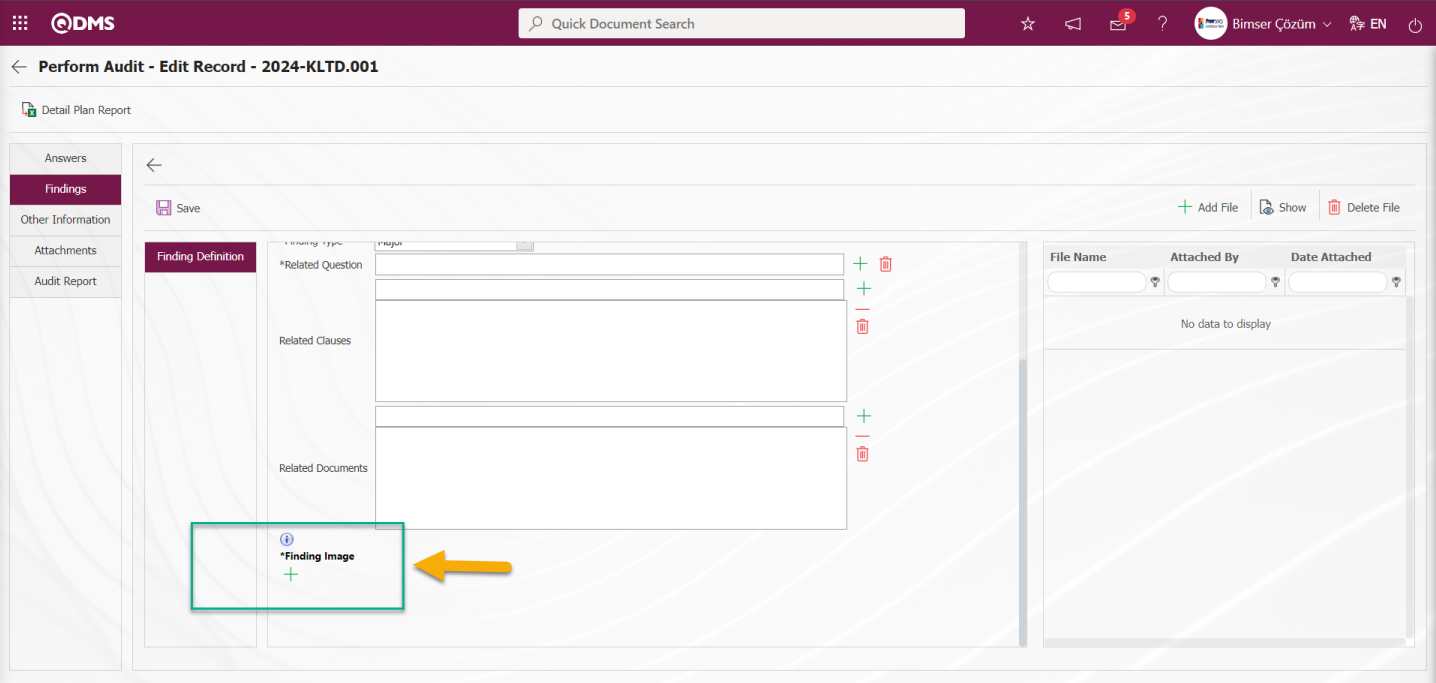
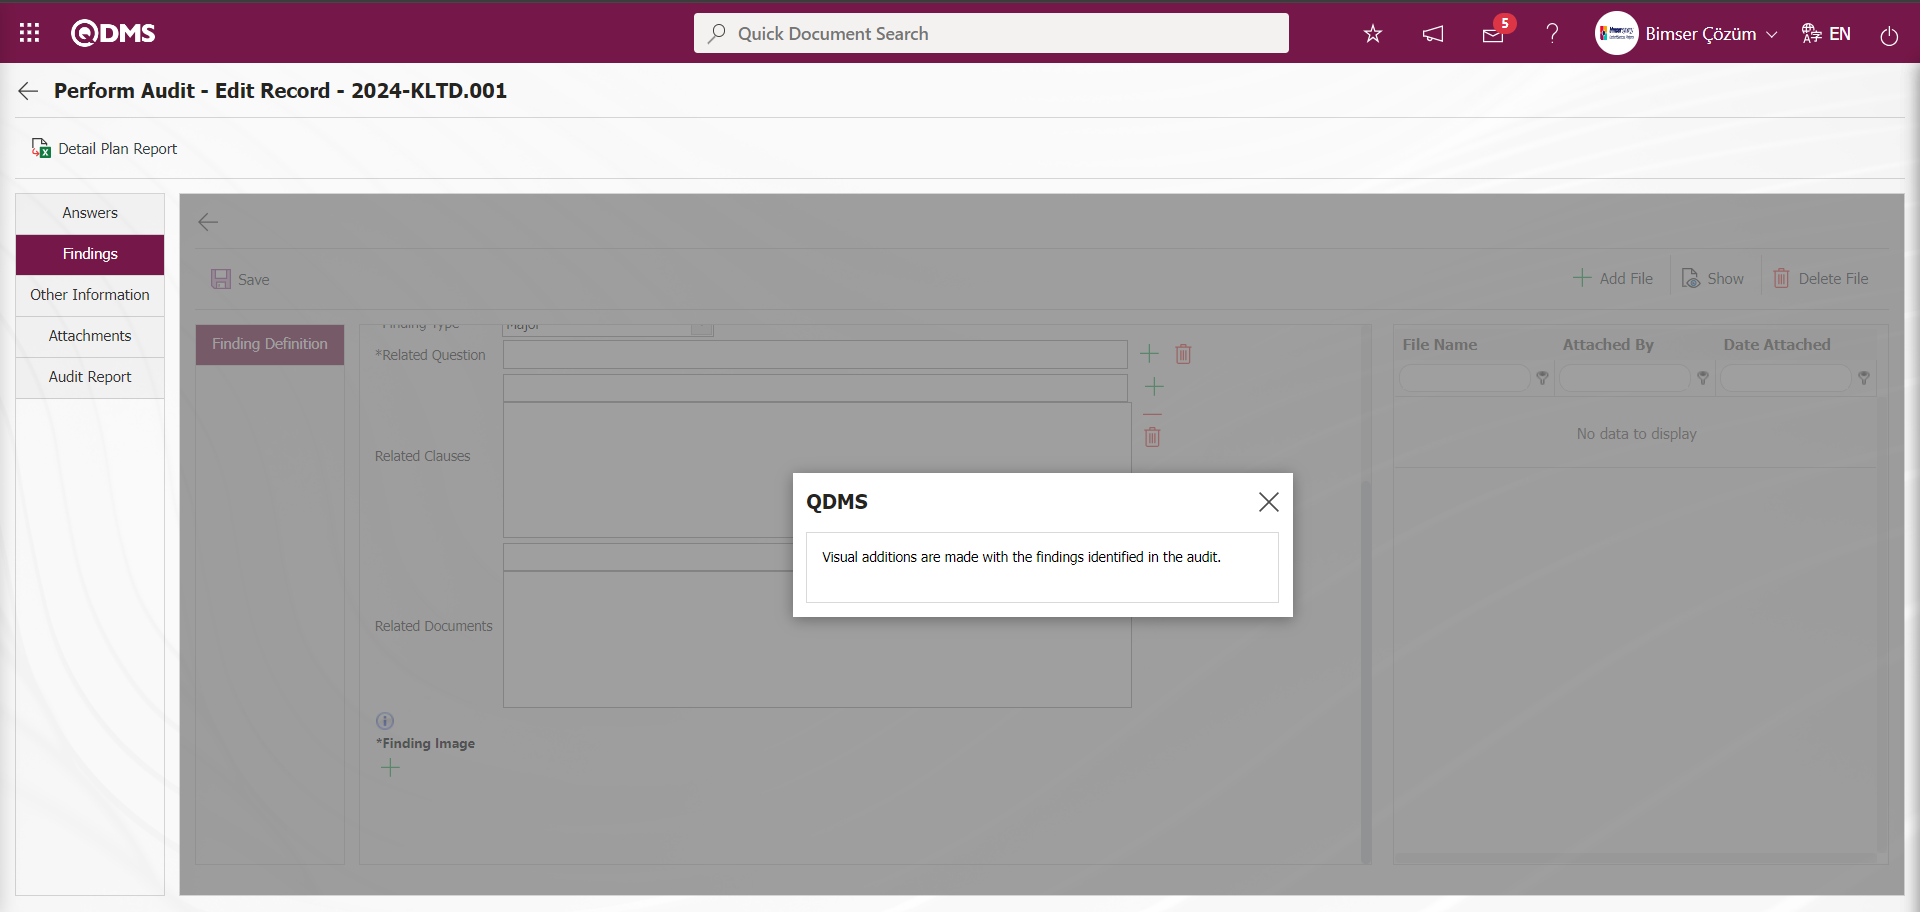
When the mouse hovers over the displayed image-type parametric field, the title note information is displayed.
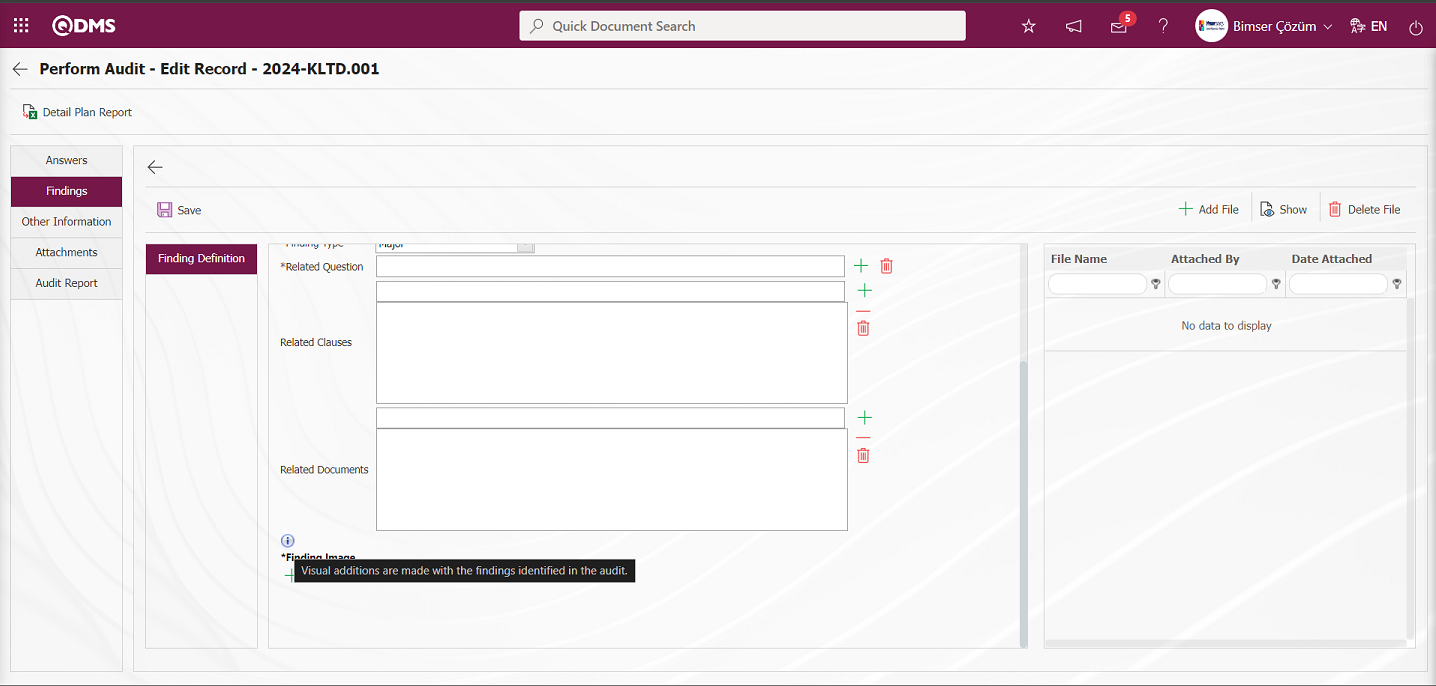
 When the button is clicked, the title note information is given as a message.
In the image type parametric field  button is clicked to add an image to the Finding Definition screen.
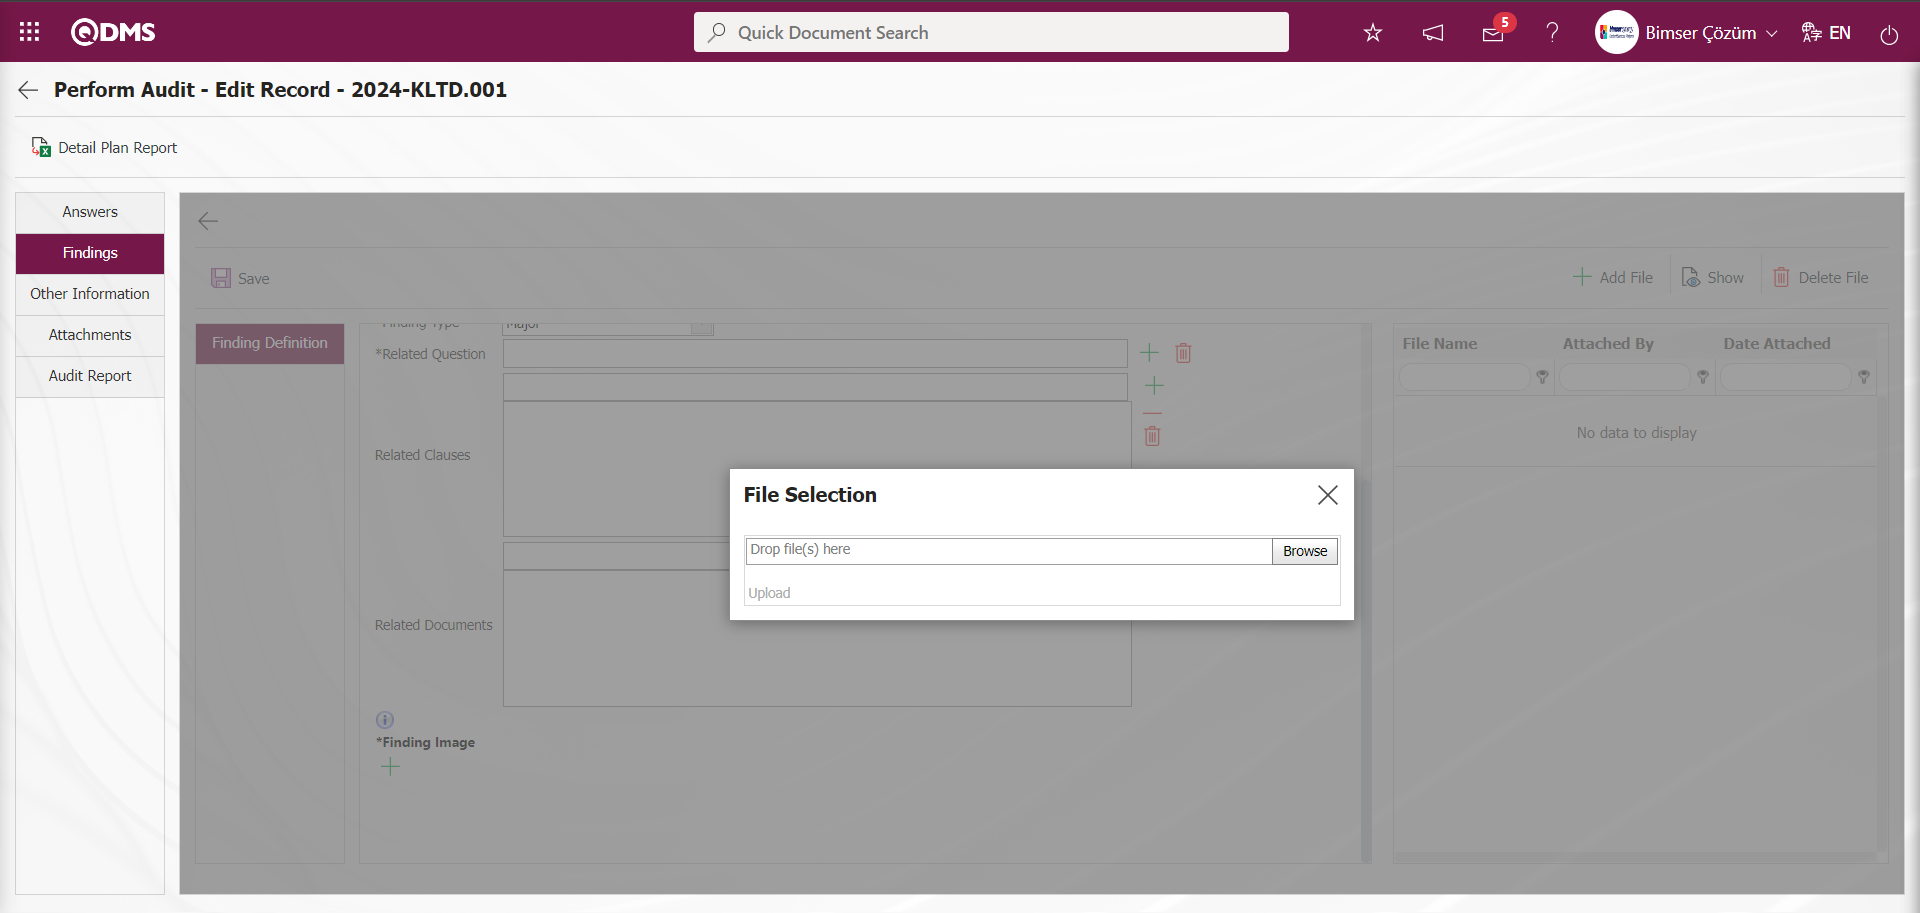
In the Select File field, click the Browse button to add the related image to the finding image.
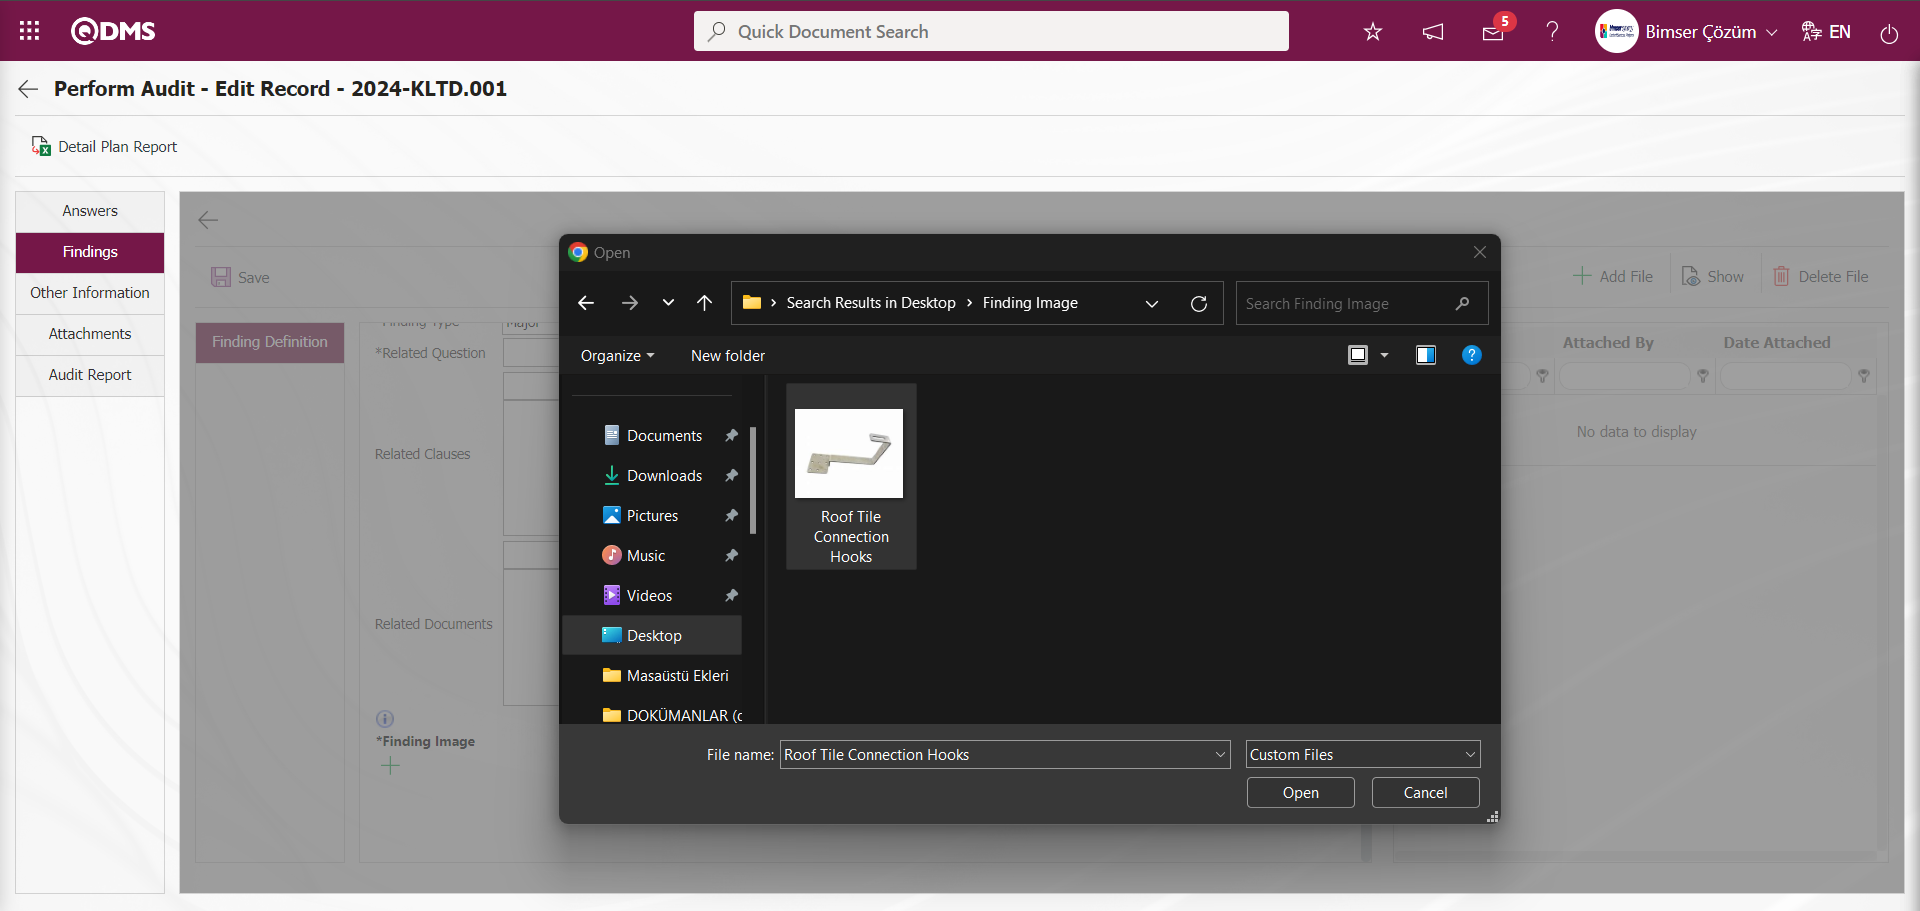
When the Image Type parametric field is selected as multiple selection, adding more than one image in the parametric field is done by clicking the button.
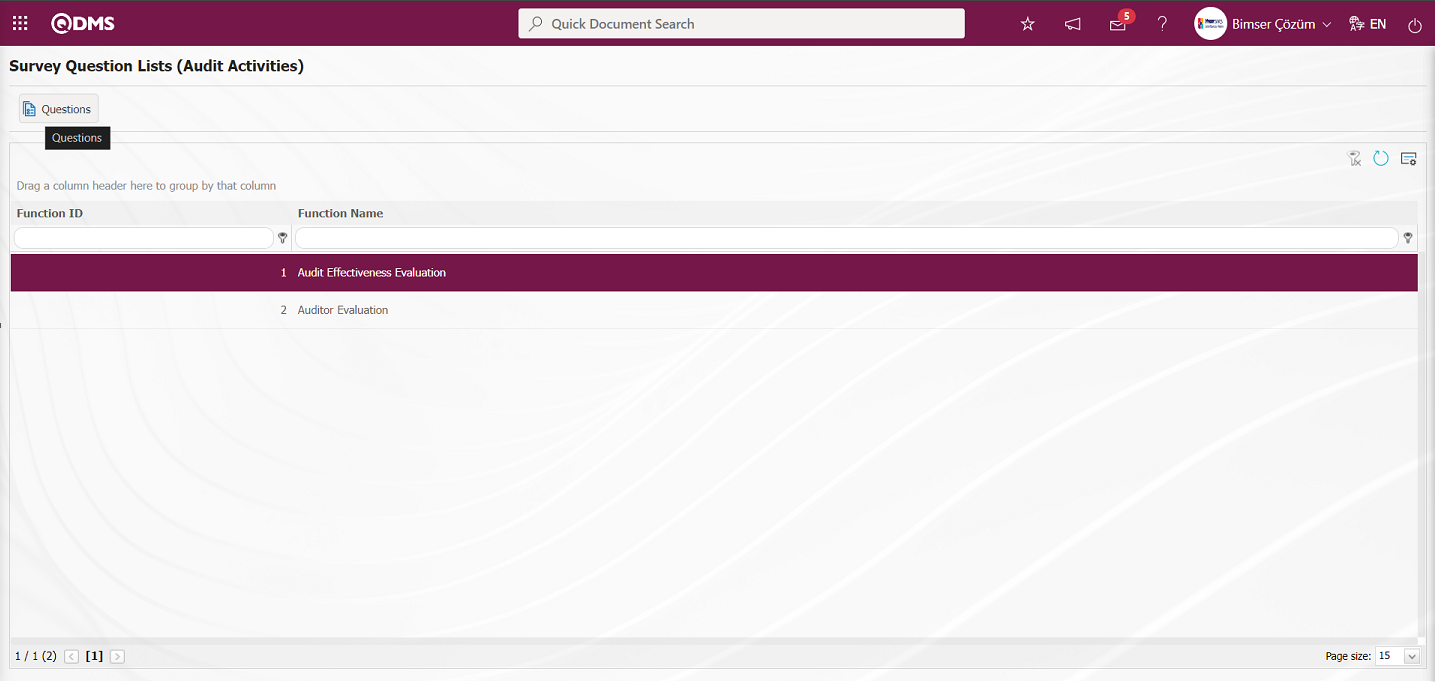
6.1.14. Survey Question Lists
Menu Name: System Infrastructure Definitions/ Audit/ Survey Question Lists
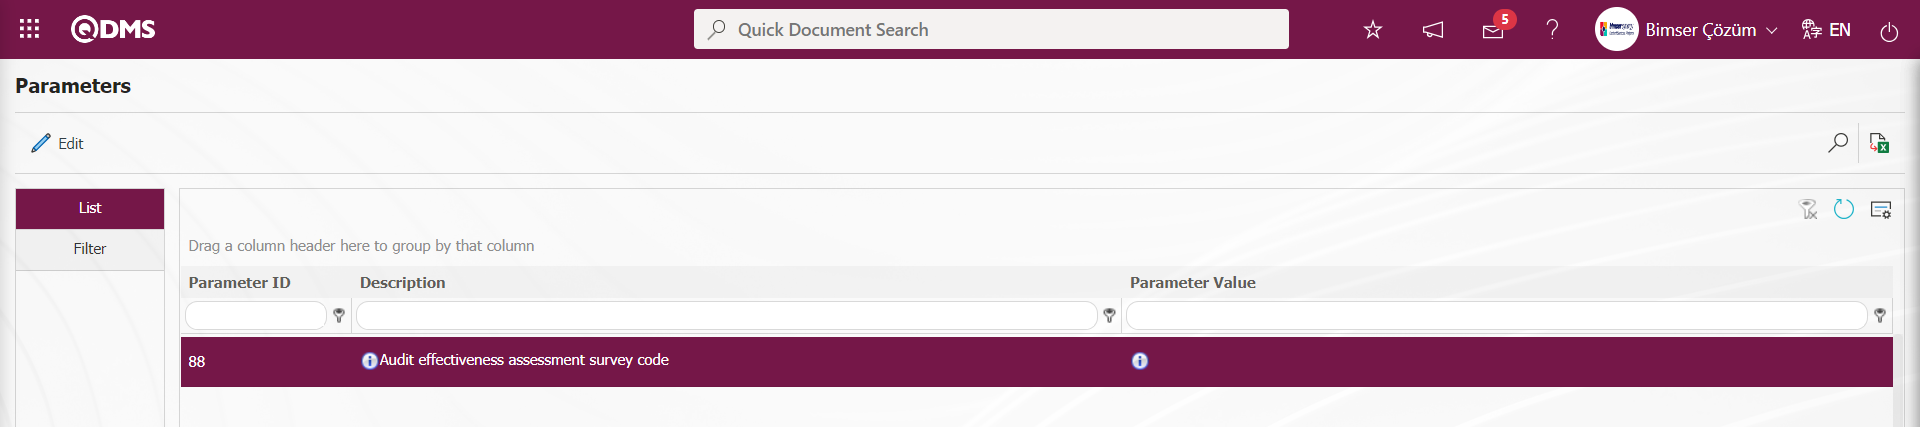
This is the menu where the Survey Question lists for the Audit Activity Module are prepared for the relevant functions. It is used for users who do not have a Survey Operations Module to design a Survey template for the relevant functions in this module, as in the Survey template screen opened in the Survey Operations Module. These functions are “Audit Effectiveness Evaluation” and “Auditor Evaluation”. When the “Audit Effectiveness Evaluation” function is selected as a function on the Survey Question Lists (Audit Activities) screen, the  button on the top left is clicked and template questionnaires are designed and saved in this menu in the system in the logic of the Supplier Evaluation module. After the template surveys are designed, if the parameter value of the parameter 88 numbered “Audit effectiveness assessment survey code”, which is the parameter related to the 1st function of the Audit Activity module, is empty, the system automatically defines the defined survey code to the parameter value after the survey definition process is performed in this menu.
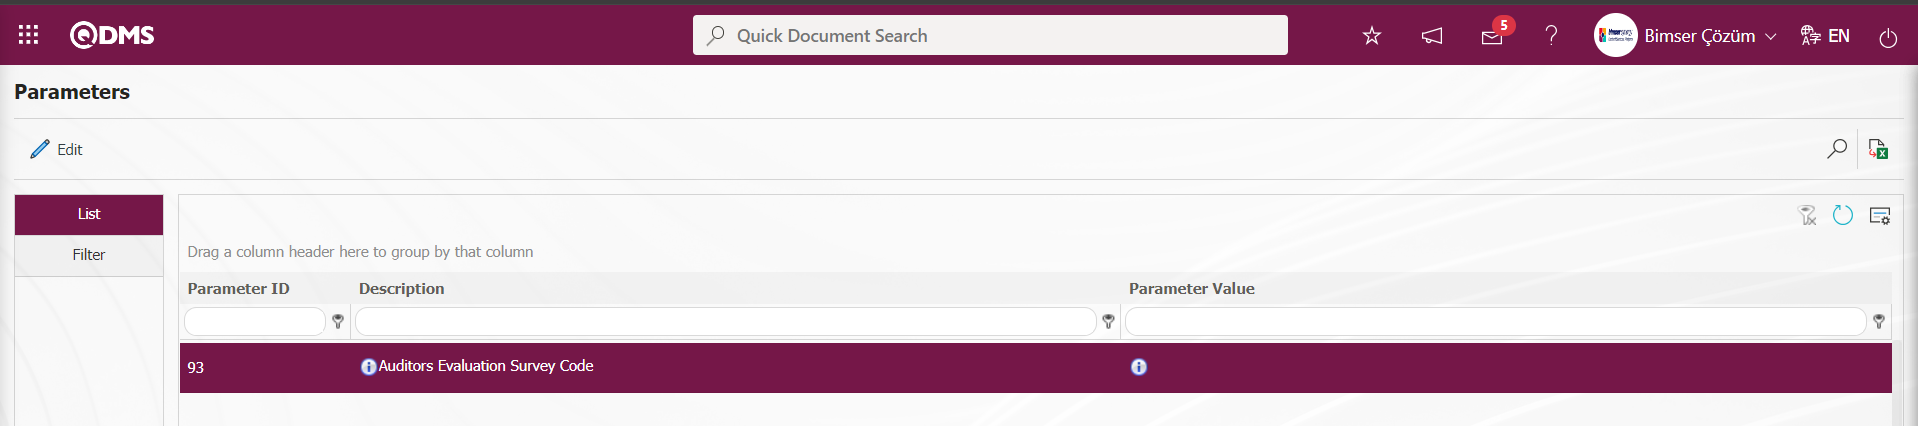
2. If the value of the parameter 93 “Auditors Evaluation Survey Code”, which is the relevant parameter for the function, is empty, after the survey is defined in this menu, the system automatically defines the defined survey code in the parameter.
With the help of the buttons on the screen;
 : Adding questions to the questionnaire to be defined.
 : The data remaining in the filter fields in the grid where the search criteria on the menu screens are searched is cleared.
 : The menu screen is restored to the default settings.
 : User-based designing of the menu screen is done with the show-hide feature, that is, the hiding feature of the fields corresponding to the columns on the menu screens.
Function 1: Audit Effectiveness Evaluation;
By clicking the button, the question addition screen for the relevant function for the Audit Activity module is displayed, such as the screen where the question addition process was done in the structure of the Survey Operations Module, and the question is added from the question options.

When no parameter code is defined in the parameter value of the parameter 88 “Audit effectiveness assessment survey code” of the Audit Activity Parameters, the system displays the warning message “A new survey will be created. Do you approve?” warning message, the survey questions screen is displayed by clicking the OK button.
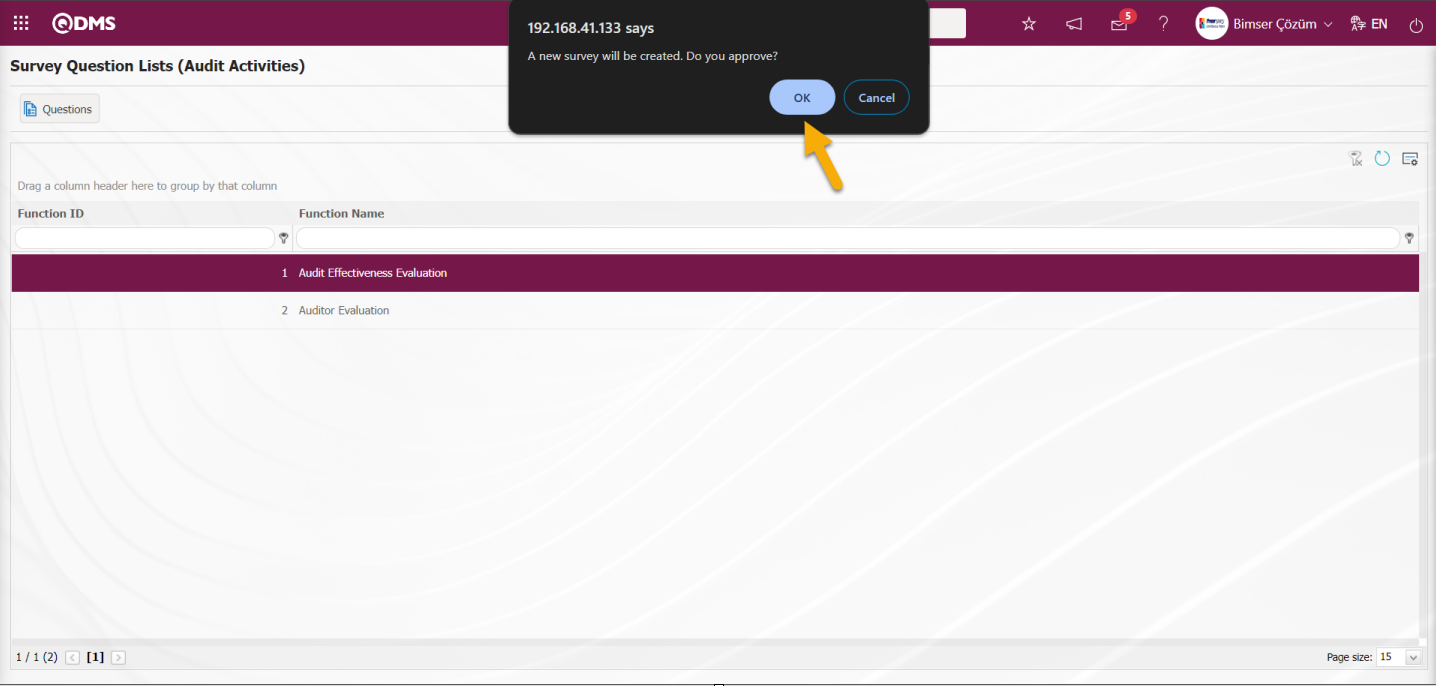
A template survey is designed using the question options on the Survey Questions screen. If a survey code is defined in the system, the questions screen of the defined survey opens in update mode. By opening the Survey Questions screen, the questions are edited and updated.

With the help of the buttons on the screen;
 : It is the button that allows you to print your questions.
 : This button is used if you want to section the questionnaire and add a title. After each title separator, the number of the defined question comes as 1.
 : It is the question type used when the people who fill out the questionnaire are asked questions that require free information.
 : It is used when the answers given are selected from the specified options.
 : It is used when all options of a question are preferred and listed in order of priority. The options are listed from more>less or less>most.
 : If there are too many options in the question to be created and they need to be selected like a check list, a multiple choice list type question can be added.
 : It is the question type to be used in case the question asked is selected as a single answer from the drop-down list.
 : This question type allows the selection of lists from the personnel, customer, department, company profile and product fields defined in Qdms.
 : It is a question type formed in the form of a matrix in which sub-questions are defined under the question text.
 : It is a type of question in the form of a picture matrix in which a picture is added in the question text field and a picture is added in the options.
 :** On the screen opened by clicking, the user can add a question to select a date.
 : Creates an Additional File field for adding additional files to the survey.
 : It is the question type that is selected from the list of question categories defined in the Question Categories screen opened in the Question Pool menu in the Survey Operations module.
Adding Sample Question options;
By clicking the button, the questionnaire is segmented and the title is added.
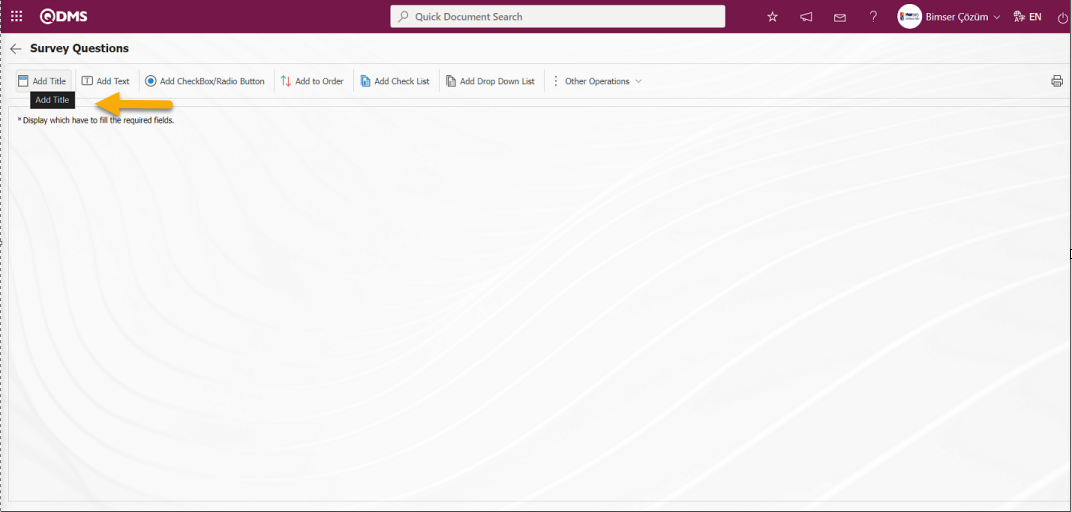
The Title Definition screen opens.
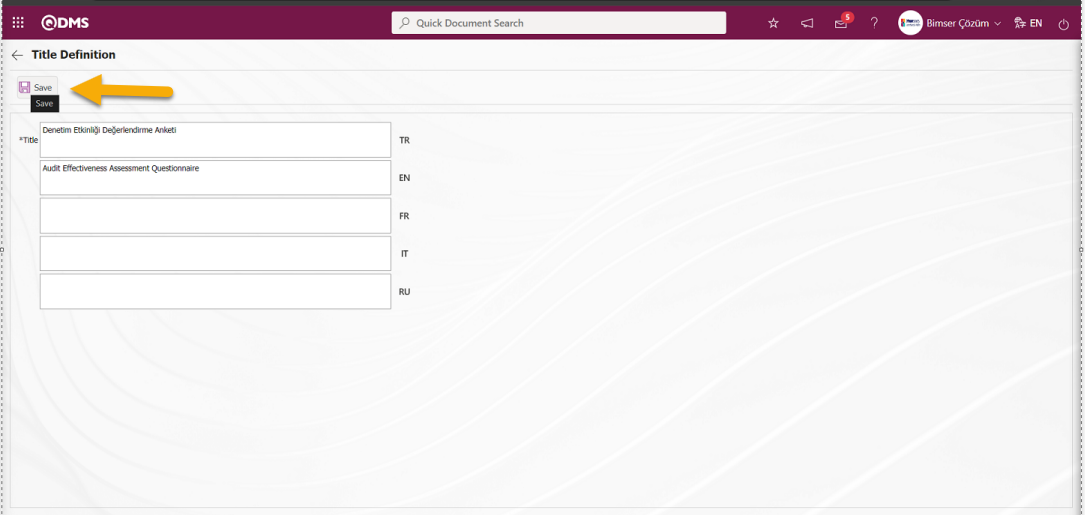

The relevant title is added to the Title Definition** field and the registration process is realized with the  button.
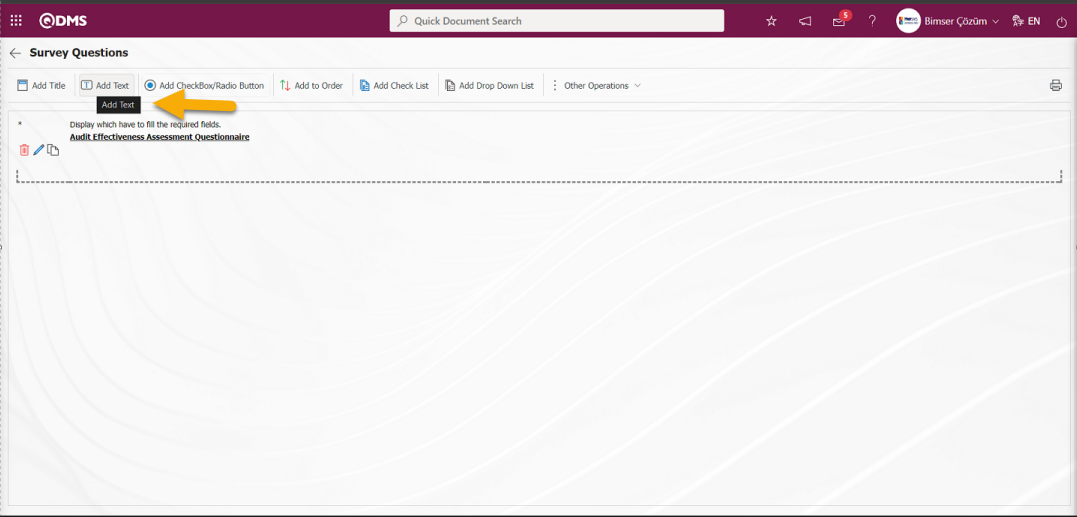
With the help of the buttons on the screen
 : The defined question information is deleted.
 : Editing and updating is done on the defined question information.
 : The defined question information is copied.
 : It is the question type used when people who fill out the questionnaire are asked Click the button to add the defined Text Definition question type. Text Definition screen opens.
Related fields are defined on the screen that opens:
Question : This is the field where the text of the question to be asked on the Add Data Entry screen is written in the Turkish field. In case of use in other languages, the question data to be asked is entered in the field of the relevant languages.
Row Number: This is the field where the number of lines is entered on the Add Information Entry screen. It is used to determine the size of the text. If this field is 0 or 1, the area to be answered is seen as a single line.
It is the field where the obligation to answer the question to be asked is determined. Check boxes related to the relevant field are marked according to whether the question has to be answered or not.
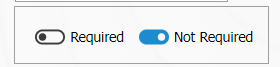
If there is an answer requirement, saving is not allowed when the question is not answered, a warning message is given.In the Add Information Entry screen, Turkish and English language equivalents are written in the Question Text field and the registration process is done by clicking the  button in the upper left corner of the screen.
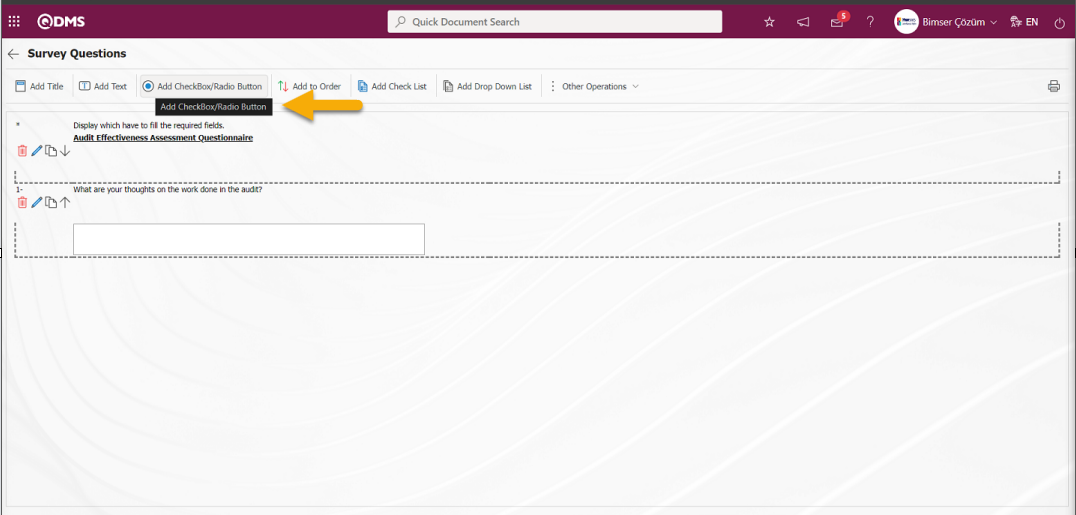
: It is a question type in which the answers given are selected from the specified options. Click the button to add Add CheckBox/Radio Button type to the survey defined in the Survey Questions screen. Add Option** screen opens.
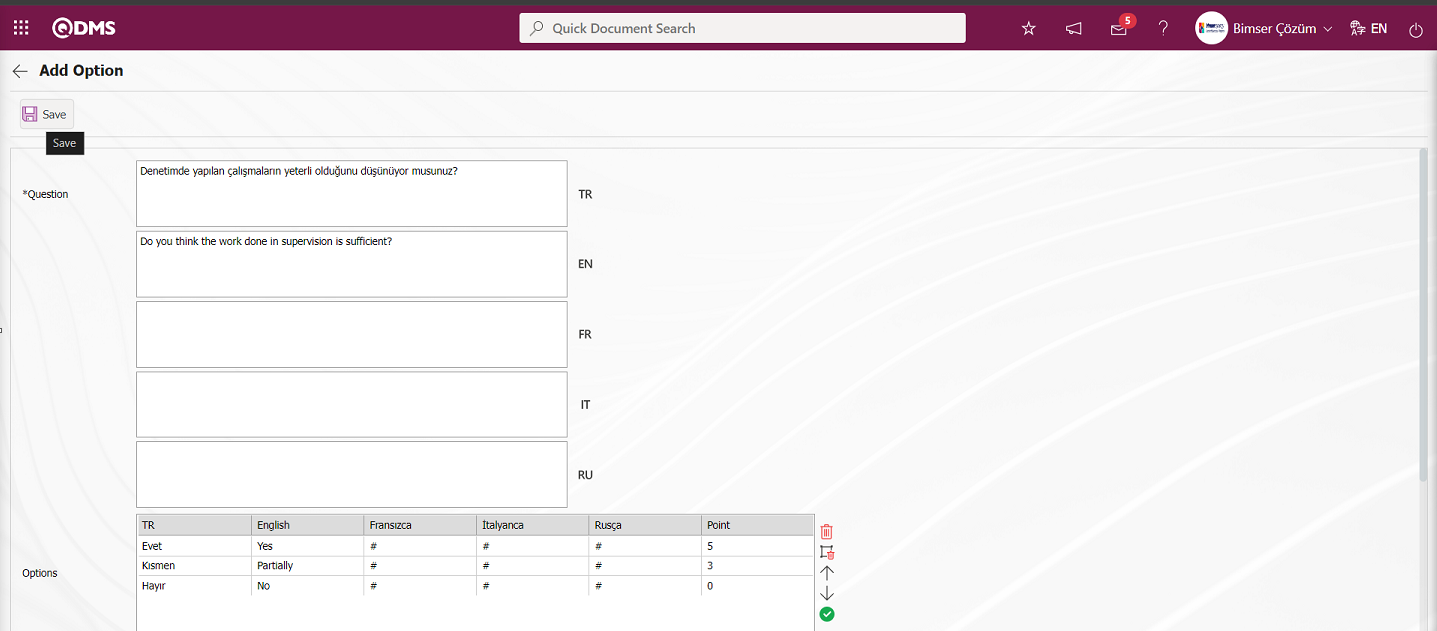

With the help of the buttons on the screen
 (Remove): On the options screen, the selected option is removed from the option list.
 (Delete All): Delete all options on the options screen.
 (Up): In the options screen, the selected option is removed upwards in the option list.
 (Down): In the options screen, the selected option is scrolled down in the option list.
 (Move): Moving the selected option on the Options screen to the Option-Score field allows editing and updating operations.
In the Option-Score field, the option and score information of the question is written and added to the Options list by clicking the  (Add CheckBox/ Radio Button) button.

The obligation to answer the question to be asked is determined from this field. 
Selecting 1 or more than 1 of the options is determined according to the check box in this field. 
The options can be displayed side by side (Single Line) or stacked (Multi-Line). 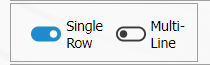
If the multiline option is selected, a field called number of columns will appear and the options of the question will be displayed in as many columns as the specified value. 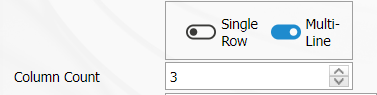
Calculation Method: In the Add Option screen, if the questionnaire is a scored questionnaire, this is the field where the method by which the points given to the options of this question will be calculated is determined. For example; A question in a survey that 10 people will answer has 4 options and each option has its own points. Assuming that the score of the first option is 5, if 10 users choose the first option, it is determined whether these scores are added up (50) or averaged (5) and included in the average score of the survey.

Weighted Score: In the Add Option screen, if the questionnaire is a scored questionnaire, this is the field where the weight of the question in the questionnaire is determined. If all questions are equally weighted, a value of 1 should be entered. If it is written as 0, the survey score is not calculated.

Related Question/Option: This is the field where the question is displayed depending on the option of the defined optional question. By selecting the option of the associated question and question, the associated question is displayed when the option of this question is selected.
After filling in the required fields on the Add Option screen, the registration process is realized by clicking the  button in the upper left corner of the screen
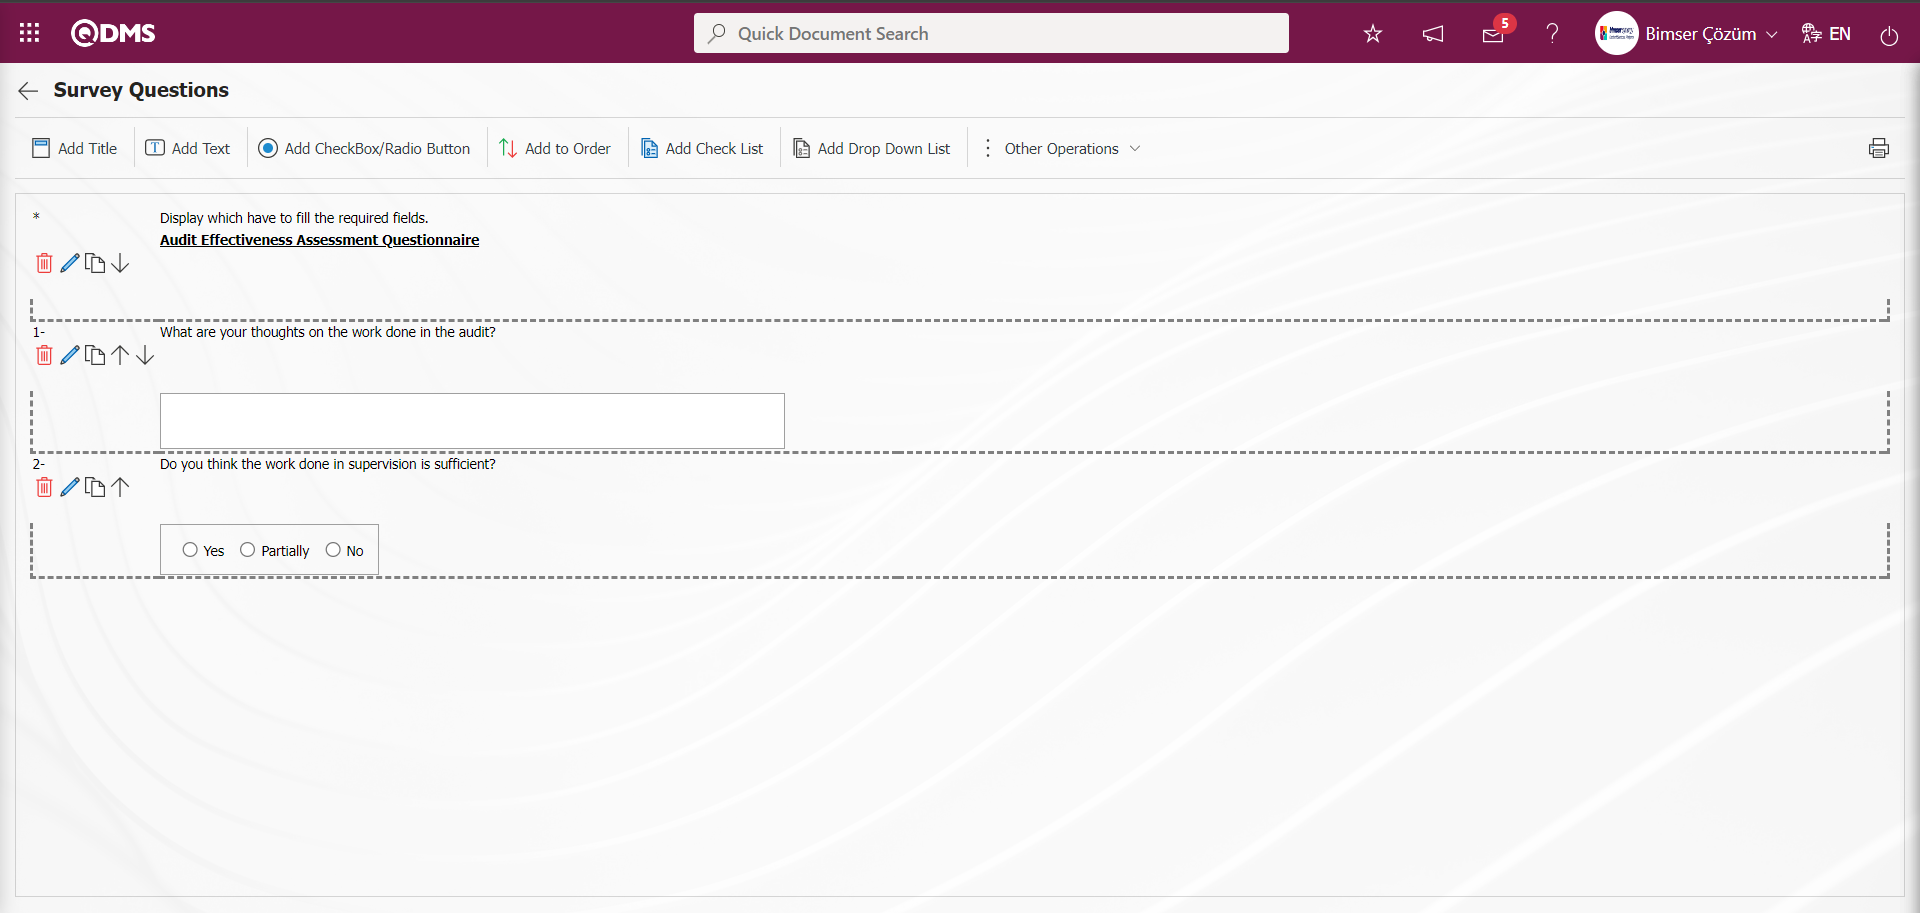
While the relevant function is selected in the Survey Question Lists (Audit Activities) menu, the Survey Question Lists (Audit Activities) identification process is done by defining a few question options as an example on the Survey Questions screen opened by clicking the button. The process of defining other question options is done in the same way on the question definition screen of the Survey Operations Module. The screen that opens is the same as the Questionnaire Operations question definition screen. After the question definition process is done, the system automatically defines the survey code in the parameter 88 “Audit effectiveness assessment survey code”, which is the relevant parameter of the related module of the Survey Question Lists (Audit Activities) menu.

For the "Audit Effectiveness Evaluation" function, which is the 1st function in the Survey Questionnaires (Audit Activities) menu, the necessary adjustments are made in the parameters 87 and 91 in the Audit Activities parameters for the job drop in the My pending jobs menu as "Surveys will be filled out." in the Survey Operations Module.
In the Audit Activities module parameters, parameter 87 “Will a questionnaire be used to assess the effectiveness of the audit?” is activated by selecting “Yes”.

After the parameter is activated, the relevant check box is checked in the “Will Audits be Evaluated?” field on the Audit Plans - Audits - New Record screen where the Audit is added by clicking the button in an Audit plan defined in the system. When the relevant check box is checked, when the relevant function is run in the Agent program, the Audit effectiveness evaluation questionnaire is assigned as a pending Transactions job in the Survey Transactions module.
Validity period of the assessment of the effectiveness of the audit is determined according to the value entered in parameter 91 “Validity period of the assessment of the effectiveness of the audit” in the Audit Activity module parameters.

Function 2: Auditor Evaluation;
In the Audit Activities module, function number 2 is selected from the Survey Question Lists (Audit Activities) screen and the 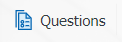 button is clicked.

Survey Operations Like the screen where the question addition process in the structure of the module is done, the question addition screen for the Audit Activity module is displayed for the relevant function and the question addition process is performed from the question options. When no parameter code is defined in the parameter value of the parameter 93 numbered “Auditors Evaluation Survey Code” of the Audit Activity Parameters, the system displays the warning message “A new survey will be created. Do you approve?” warning message, the survey questions screen is displayed by clicking the ‘OK’ button.
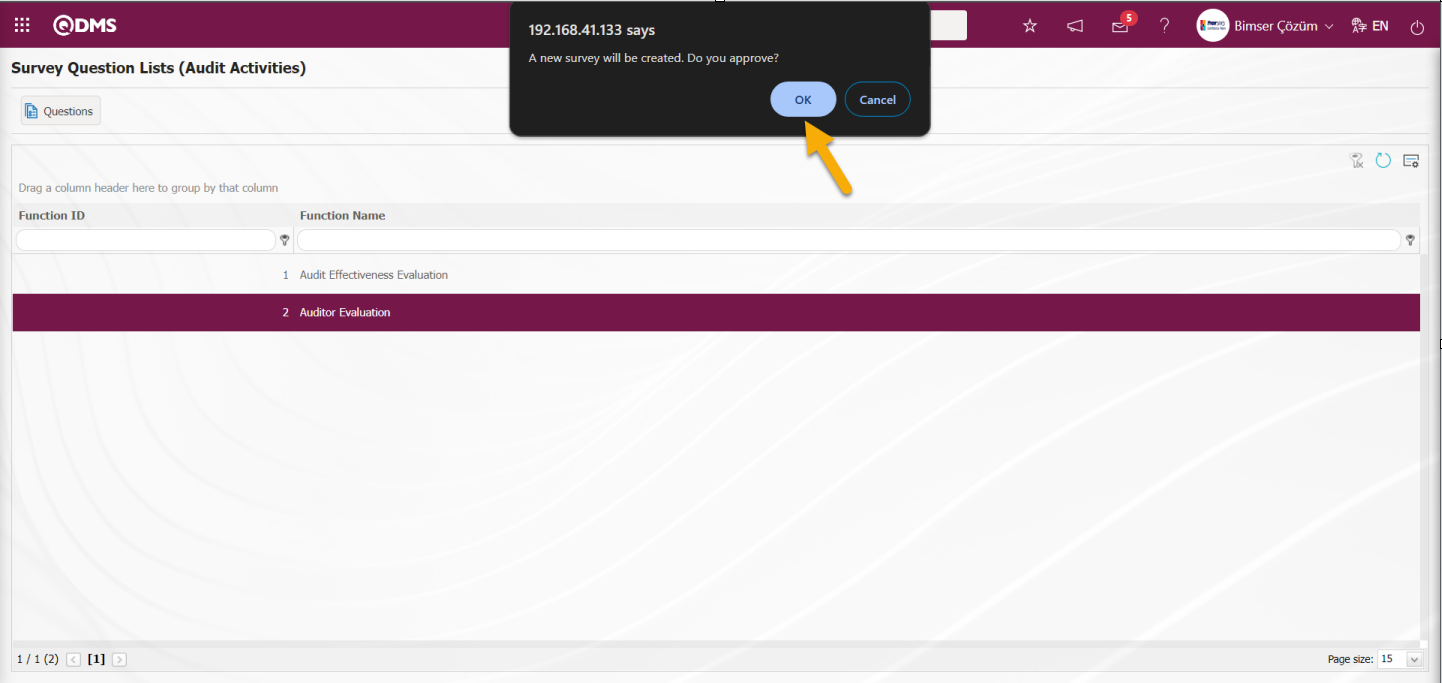
A template survey is designed using the question options on the Survey Questions screen. If a survey code is defined in the system, the questions screen of the defined survey opens in update mode. By opening the Survey Questions screen, the questions are edited and updated.![A screenshot of a computer
Description automatically generated]ref39
With the help of the buttons on the screen;
: It is the button that allows you to print your questions.
: This button is used if you want to section the questionnaire and add a title. After each title separator, the number of the defined question comes as 1.
: It is the question type used when the people who fill out the questionnaire are asked questions that require free information.
: It is used when the answers given are selected from the specified options.
: It is used when all options of a question are preferred and listed in order of priority. The options are listed from more>less or less>most.
: If there are too many options in the question to be created and they need to be selected like a check list, a multiple choice list type question can be added.
: It is the question type to be used in case the question asked is selected as a single answer from the drop-down list.
: This question type allows the selection of lists from the personnel, customer, department, company profile and product fields defined in Qdms.
: It is a question type formed in the form of a matrix in which sub-questions are defined under the question text.
: It is a type of question in the form of a picture matrix in which a picture is added in the question text field and a picture is added in the options.
: On the screen opened by clicking, the user can add a question to select a date.
: Creates an Additional File field for adding additional files to the survey.
: It is the question type that is selected from the list of question categories defined in the Question Categories screen opened in the Question Pool menu in the Survey Operations module.
Adding Sample Question options;
By clicking the button, the questionnaire is segmented and the title is added.
![A screenshot of a computer
Description automatically generated]
The Title Definition screen opens.
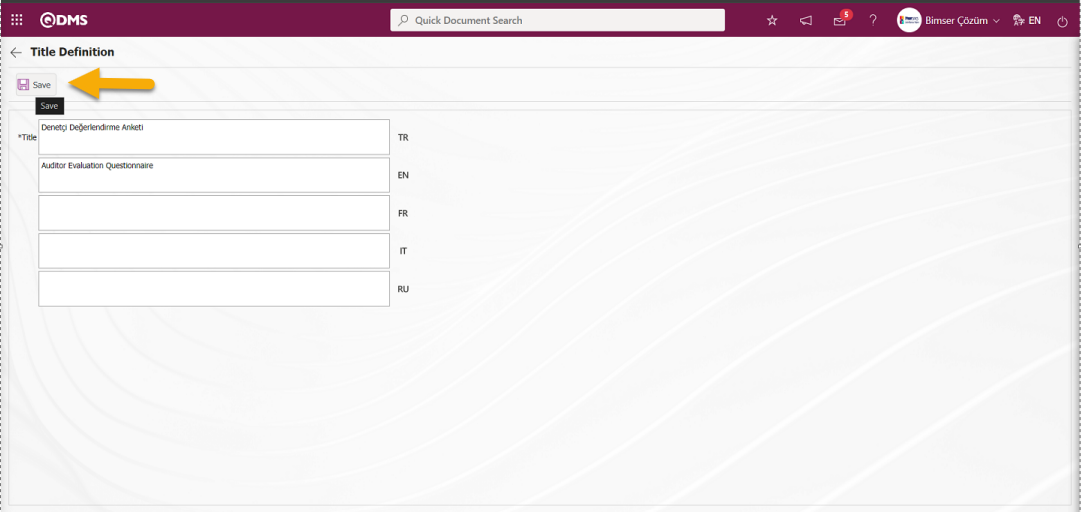
The relevant title is added to the Title Definition** field and the registration process is realized with the button.
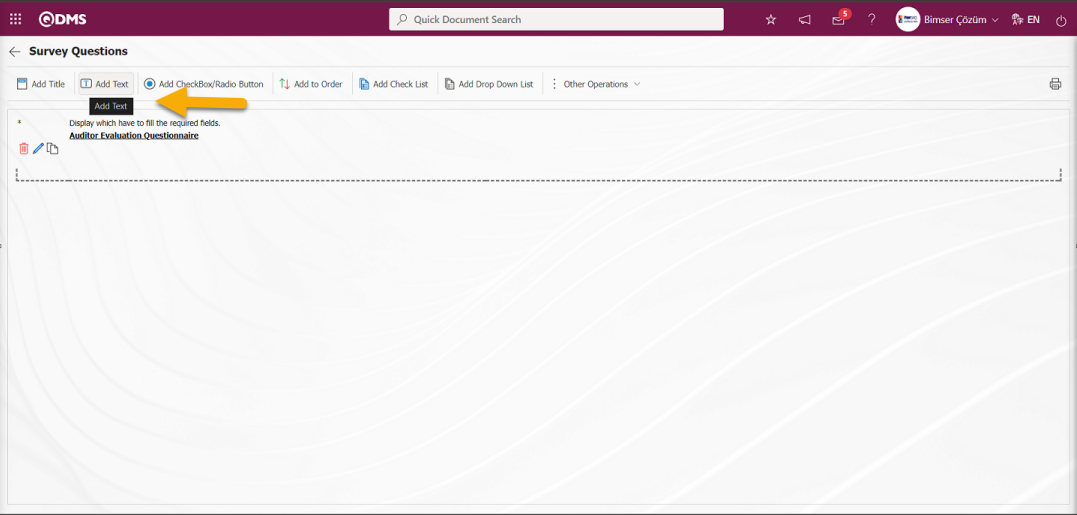
With the help of the buttons on the screen
: The defined question information is deleted.
: Editing and updating is done on the defined question information.
: The defined question information is copied.
: It is the question type used when people who fill out the questionnaire are asked Click the button to add the defined Text Definition question type. Text Definition screen opens.
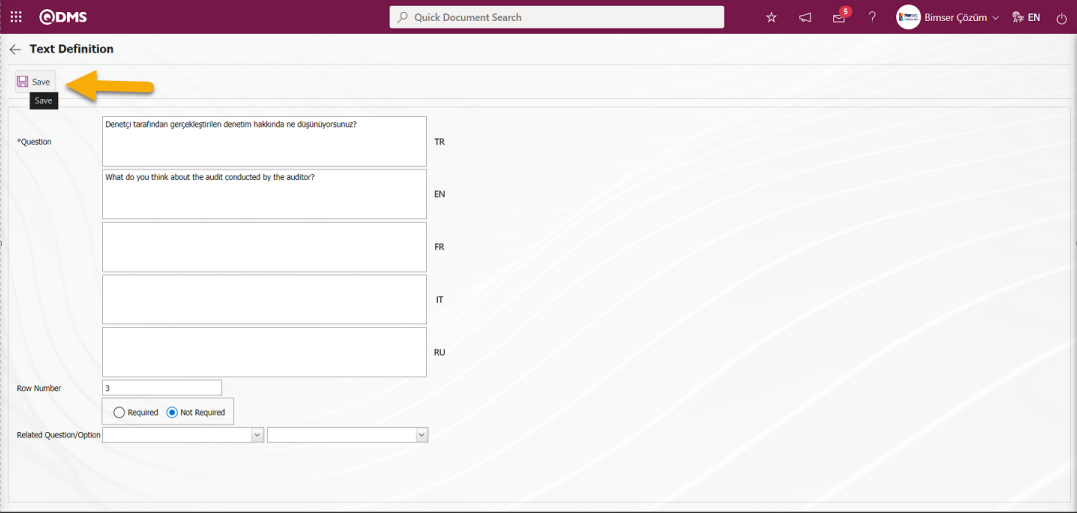
Related fields are defined on the screen that opens:
Question: This is the field where the text of the question to be asked on the Add Data Entry screen is written in the Turkish field. In case of use in other languages, the question data to be asked is entered in the field of the relevant languages.
Row Number: This is the field where the number of lines is entered on the Add Information Entry screen. It is used to determine the size of the text. If this field is 0 or 1, the area to be answered is seen as a single line.
It is the field where the obligation to answer the question to be asked is determined. Check boxes related to the relevant field are marked according to whether the question has to be answered or not.
![A white rectangular sign with blue and black text
Description automatically generated]
If there is an answer requirement, saving is not allowed when the question is not answered, a warning message is given.In the Add Information Entry screen, Turkish and English language equivalents are written in the Question Text field and the registration process is done by clicking the button in the upper left corner of the screen.

: It is a question type in which the answers given are selected from the specified options. Click the button to add Add CheckBox/Radio Button type to the survey defined in the Survey Questions screen. Add Option** screen opens.

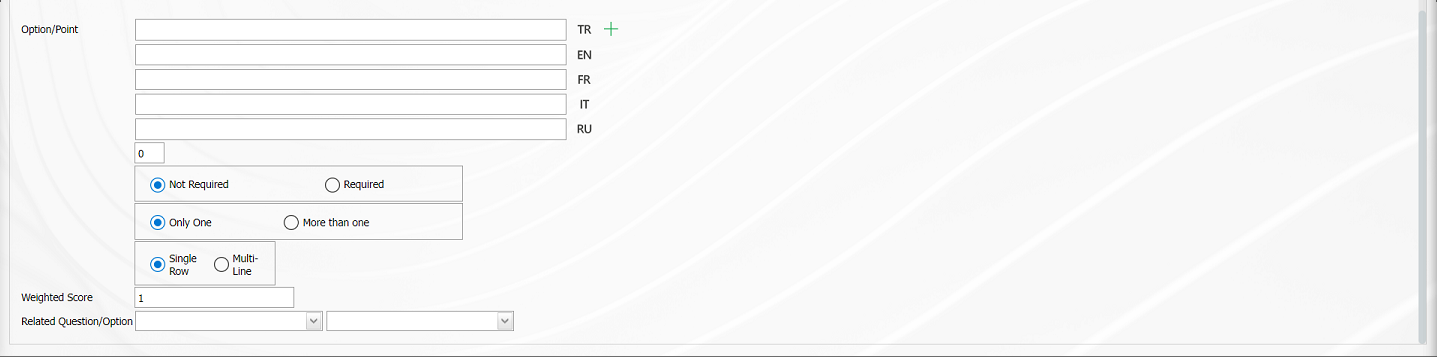
With the help of the buttons on the screen
(Remove): On the options screen, the selected option is removed from the option list.
(Delete All): Delete all options on the options screen.
(Up): In the options screen, the selected option is removed upwards in the option list.
(Down): In the options screen, the selected option is scrolled down in the option list.
(Move): Moving the selected option on the Options screen to the Option-Score field allows editing and updating operations.
In the Option-Score field, the option and score information of the question is written and added to the Options list by clicking the (Add CheckBox/ Radio Button) button.
![A computer screen shot of a computer
Description automatically generated]
The obligation to answer the question to be asked is determined from this field.![A white rectangular object with a black border
Description automatically generated]
Selecting 1 or more than 1 of the options is determined according to the check box in this field.![A white rectangular sign with a black oval and a black circle
Description automatically generated]
The options can be displayed side by side (Single Line) or stacked (Multi-Line).![A white rectangular sign with a black and white text
Description automatically generated]
If the multiline option is selected, a field called number of columns will appear and the options of the question will be displayed in as many columns as the specified value.![A screenshot of a computer
Description automatically generated]
Calculation Method: In the Add Option screen, if the questionnaire is a scored questionnaire, this is the field where the method by which the points given to the options of this question will be calculated is determined. For example; A question in a survey that 10 people will answer has 4 options and each option has its own points. Assuming that the score of the first option is 5, if 10 users choose the first option, it is determined whether these scores are added up (50) or averaged (5) and included in the average score of the survey.
Weighted Score: In the Add Option screen, if the questionnaire is a scored questionnaire, this is the field where the weight of the question in the questionnaire is determined. If all questions are equally weighted, a value of 1 should be entered. If it is written as 0, the survey score is not calculated.
Related Question/Option: This is the field where the question is displayed depending on the option of the defined optional question. By selecting the option of the associated question and question, the associated question is displayed when the option of this question is selected.
After filling in the required fields on the Add Option screen, the registration process is realized by clicking the button in the upper left corner of the screen

While the relevant function is selected in the Survey Question Lists (Audit Activities) menu, the Survey Question Lists (Audit Activities) identification process is done by defining a few question options as an example on the Survey Questions screen opened by clicking the button. The process of defining other question options is done in the same way on the question definition screen of the Survey Operations Module. The screen that opens is the same as the Questionnaire Operations question definition screen. After the question definition process is done, the system automatically defines the survey code in the “Auditors Evaluation Survey Code” parameter number 93, which is the relevant parameter of the Survey Question Lists (Audit Activity) menu related module.

For the “Auditor Evaluation” function, which is the 2nd function in the Survey Question Lists (Audit Activities) menu, the necessary adjustments are made in the parameters 92 and 96 in the Audit Activities parameters for the job drop in the My pending jobs menu as“Surveys will be filled out.” in the Survey Operations Module. In the Audit Activities module parameters, parameter 92 “Will a questionnaire be used to assess auditors?” is activated by selecting “Yes”.
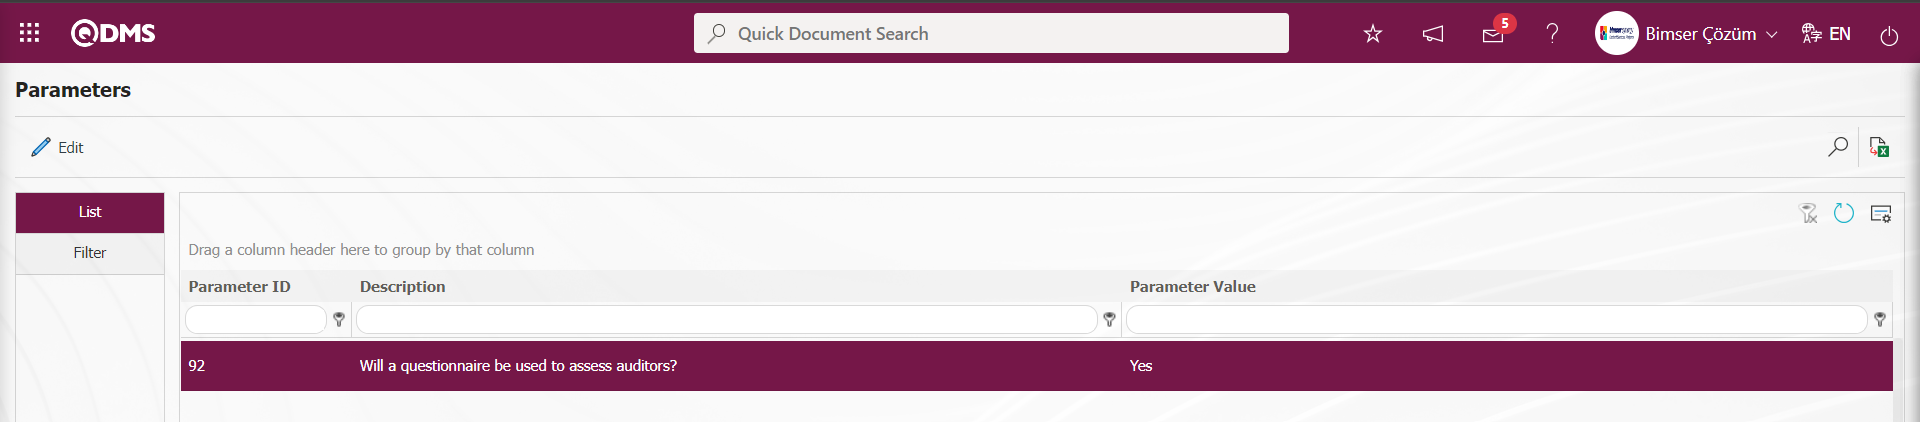
After the parameter is activated, on the Audit Plans - Audits - New Record screen where the Audit is added by clicking the button in an Audit plan defined in the system, the check boxes related to “Will the auditors be evaluated?” and “Create a Survey for Lead Auditor? “ field related check boxes are checked. When the relevant check boxes are checked, when the relevant function is run in the Agent program, the Auditor evaluation and Chief Auditor Questionnaire creation process is assigned as pending Operations in the Survey Operations module.
The duration of the auditor evaluation questionnaire is determined according to the value entered in parameter 96 “Validity period of the auditor evaluation questionnaire” of the Audit Activity module parameters.
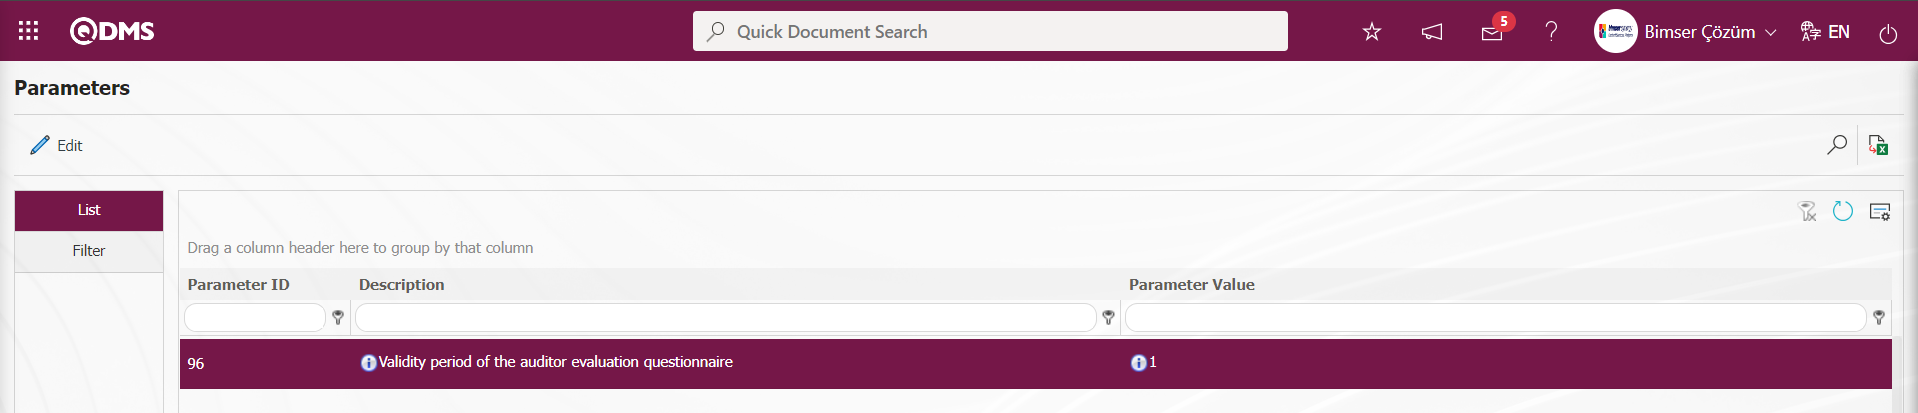
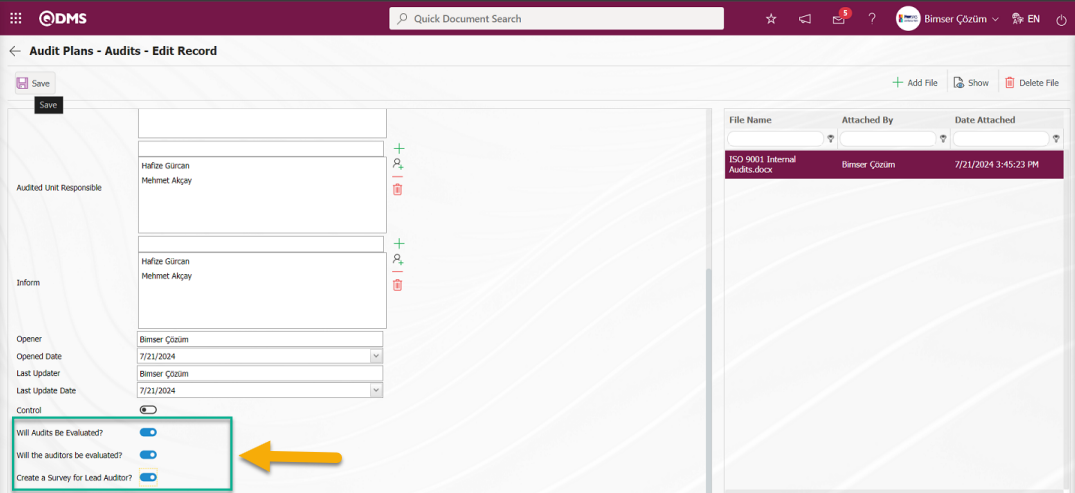
After the registration related to Audit, Auditor and Lead Auditor is closed and the relevant function is run in the agent program, at least 1 day after the process of running the relevant function, these surveys are assigned as“Surveys will be filled out.” in the Survey Operations Module of “My pending jobs”.
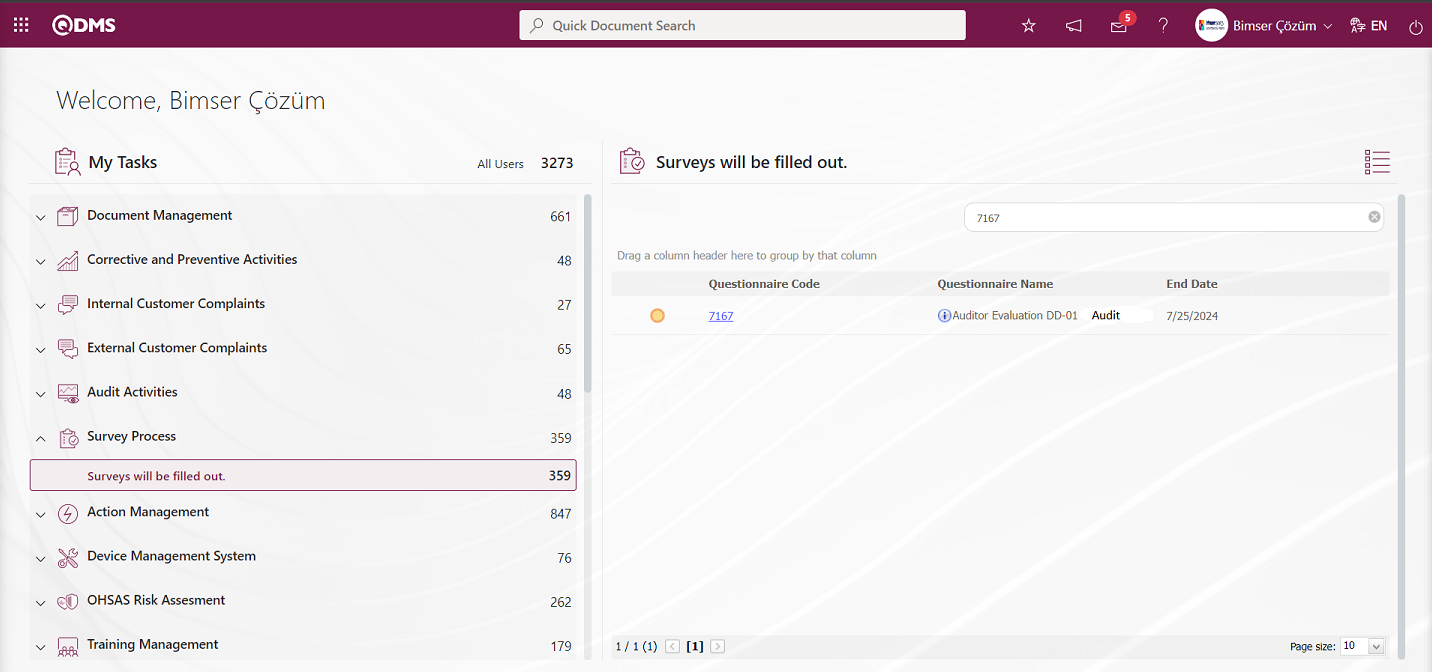
Click on the survey code link in the Survey code field in the relevant task.
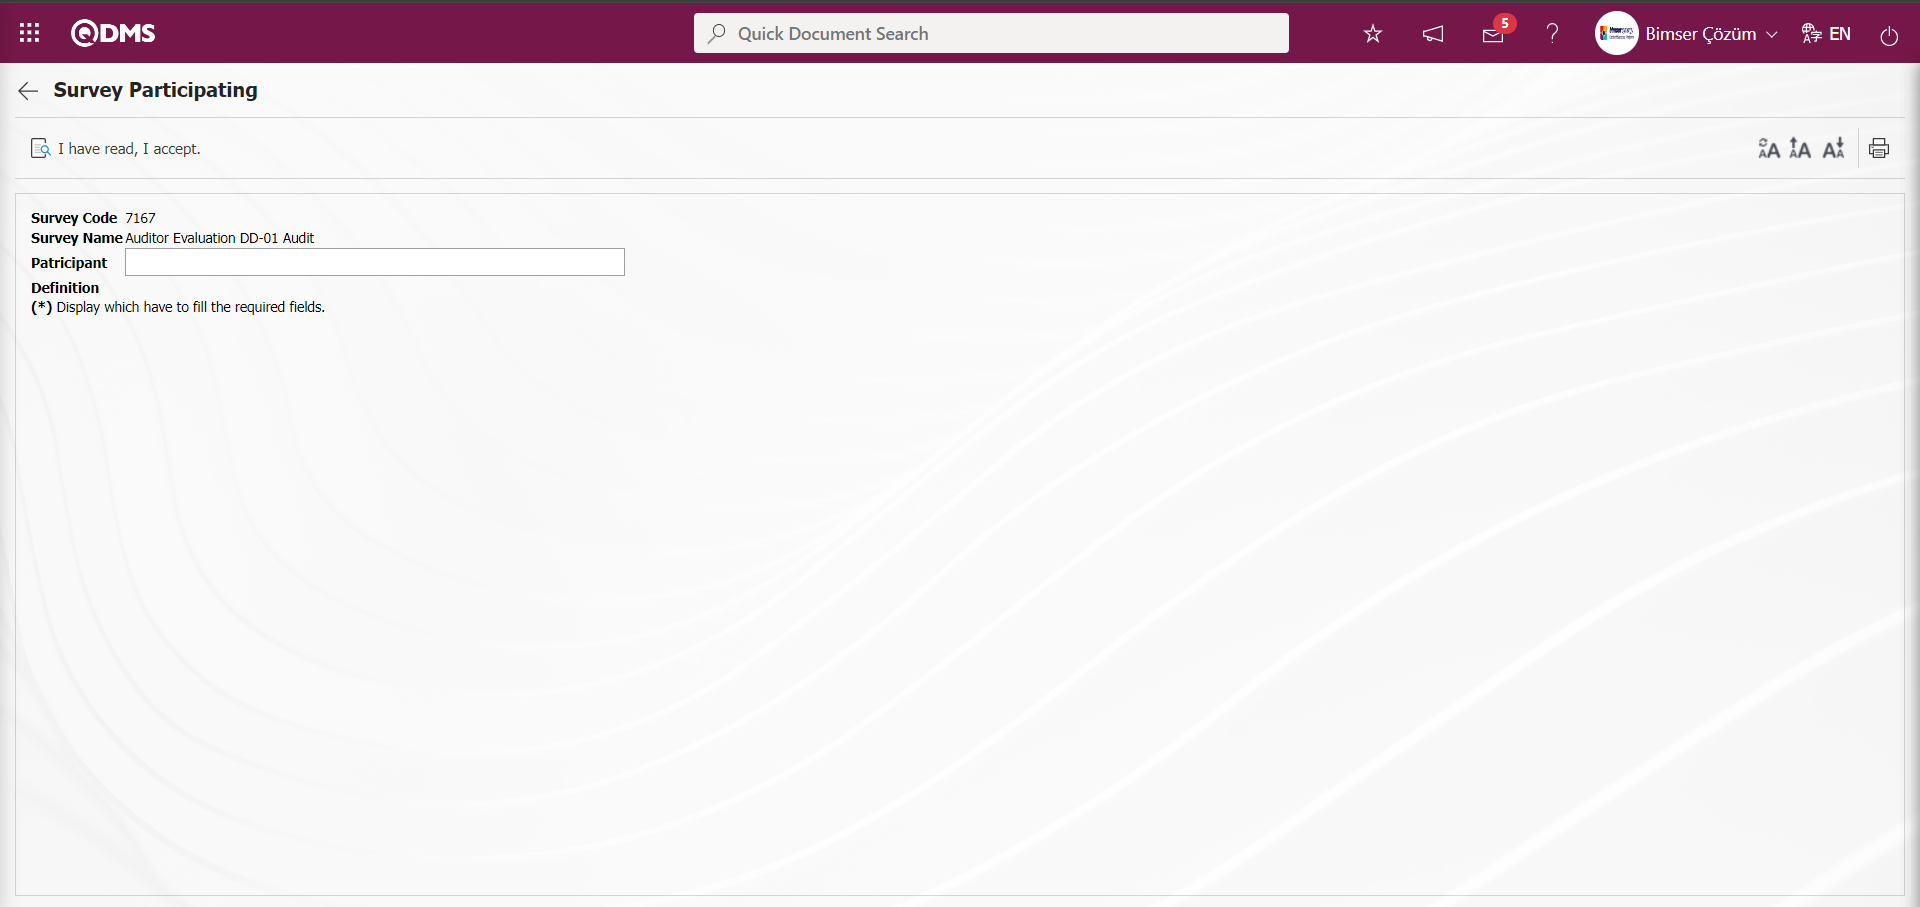
With the help of the buttons on the screen;
 : I have read and accept the questionnaire and the questionnaire is displayed.
The  button is clicked on the questionnaire filling screen.
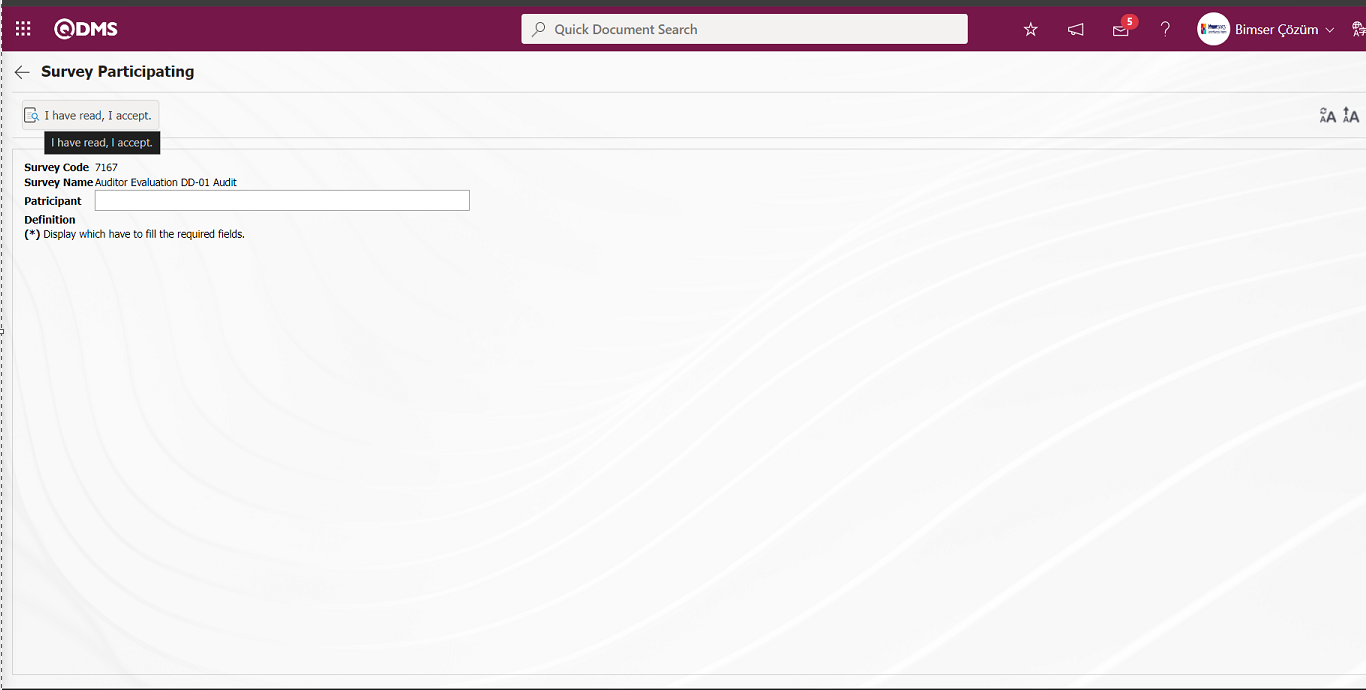
The defined survey is displayed.
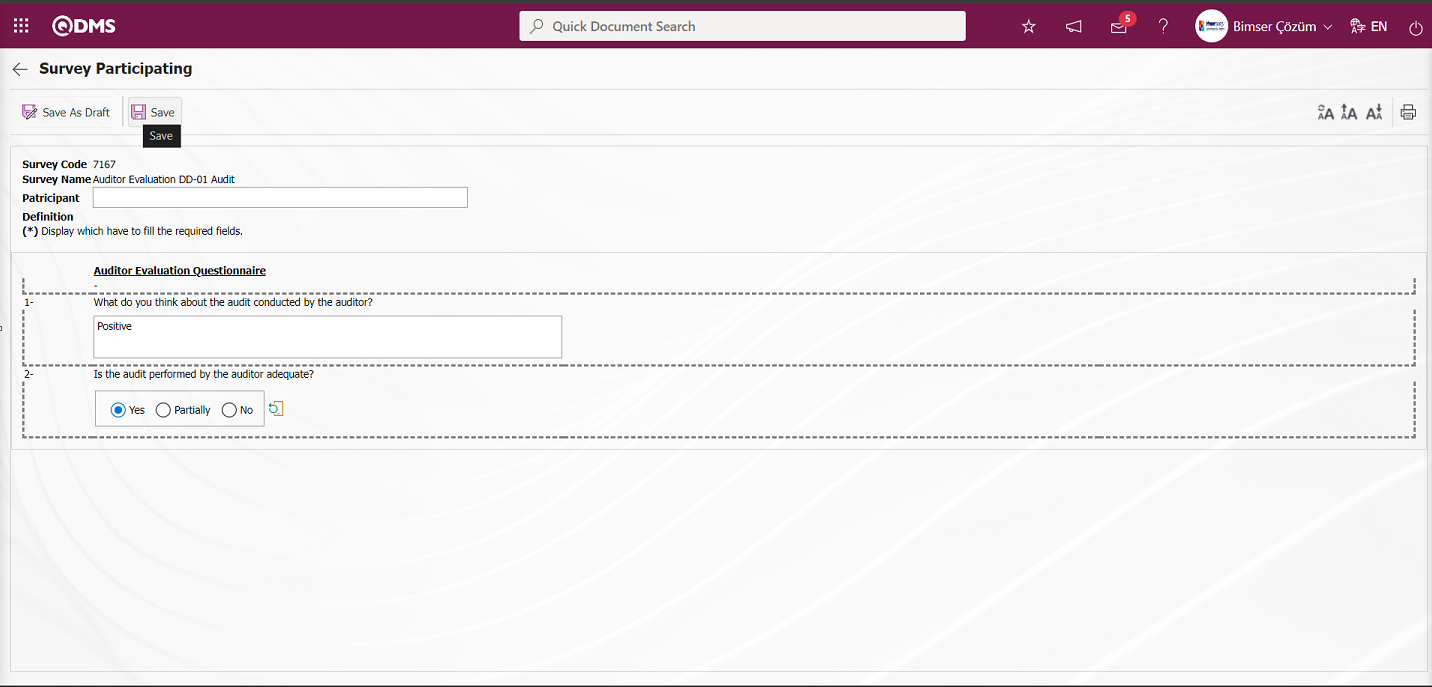
The system displays the message “Your survey saved successfully”.

For the Auditor and Chief Auditor, the same “Pending work” In the Survey Operations Module, “Surveys will be filled out.” is assigned as a job. The** relevant survey code is clicked and the survey questions are answered and saved.
6.1.15. Audit Question Transfer
Menu Name: System Infrastructure Definitions/ BSID/ Configuration Settings/ Transfers/Audit Question Transfer
This is the menu where the questions to be asked in the audits are transferred to the system collectively at the same time.
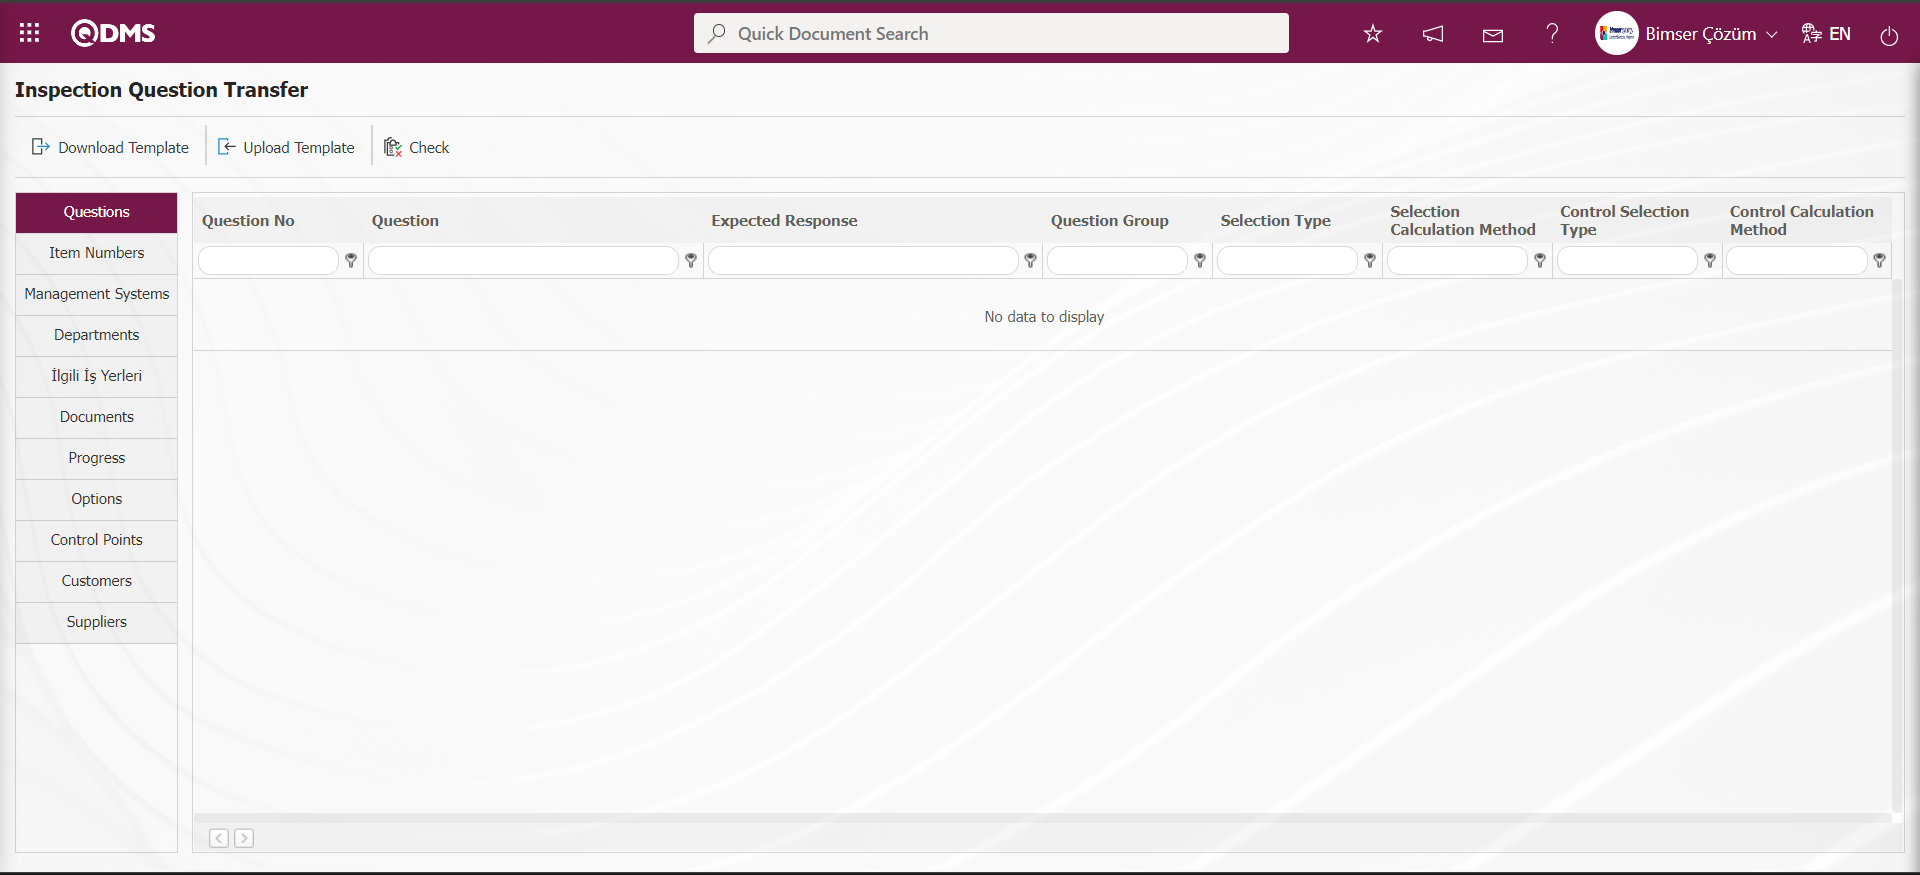
With the help of the buttons on the screen;
 : The Audit Question Transfer template is downloaded to the computer.
 : The completed Audit Question Transfer template is uploaded to the system.
 : Check whether the completed and uploaded Audit Question Transfer template gives an error or not.
 : The transfer process is performed.
The Audit Question Transfer template is downloaded with the button on the screen, after filling in the required information, the Audit Question Transfer template is uploaded to the system with the button. In order to check the information entered, the button is used. If the transferred data is suitable for transfer, the Audit Question Transfer process is realized through the button.
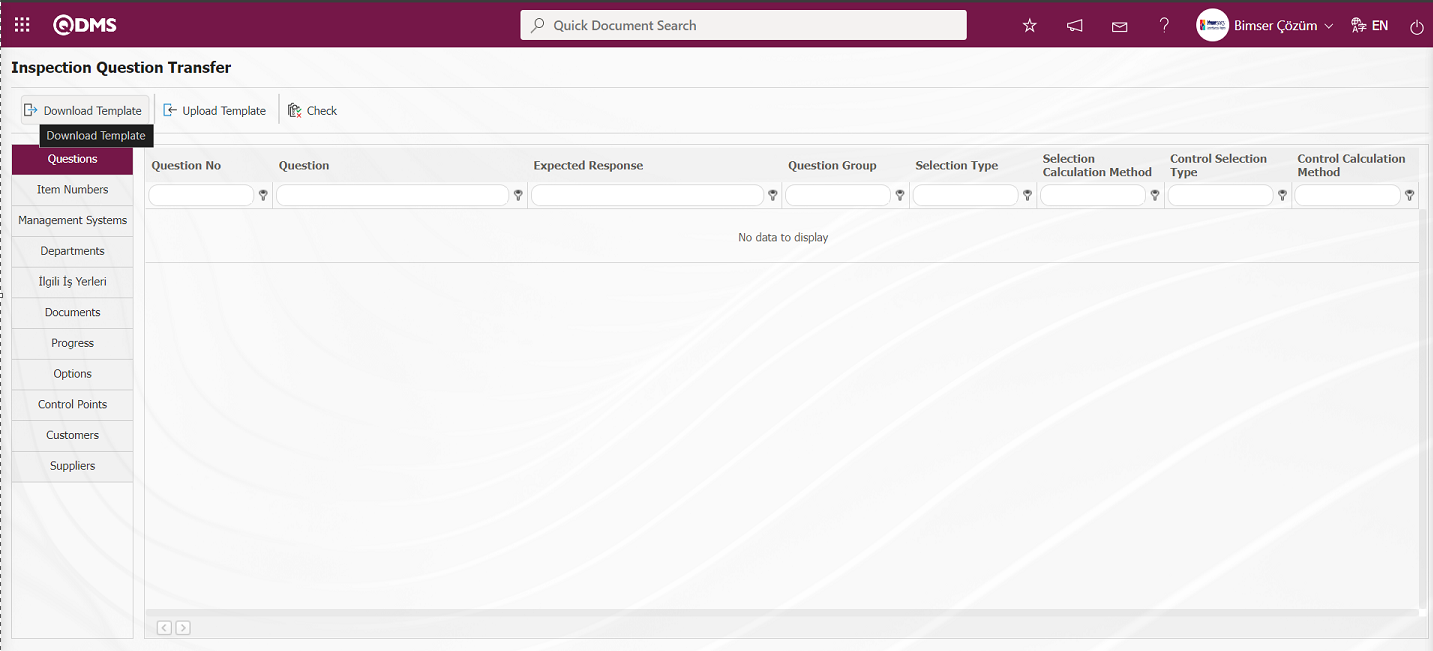
On the Inspection Question Transfer** screen, the Inspection Question Transfer template is downloaded to the computer with the button. The relevant fields in the Audit Question Transfer template are saved to the computer by writing the relevant information. In the Audit Question Transfer process, the Question no field in the Audit Question Transfer template must be written based on the last question number on the System Infrastructure Definitions / Audit Activity / Question Pool screen.
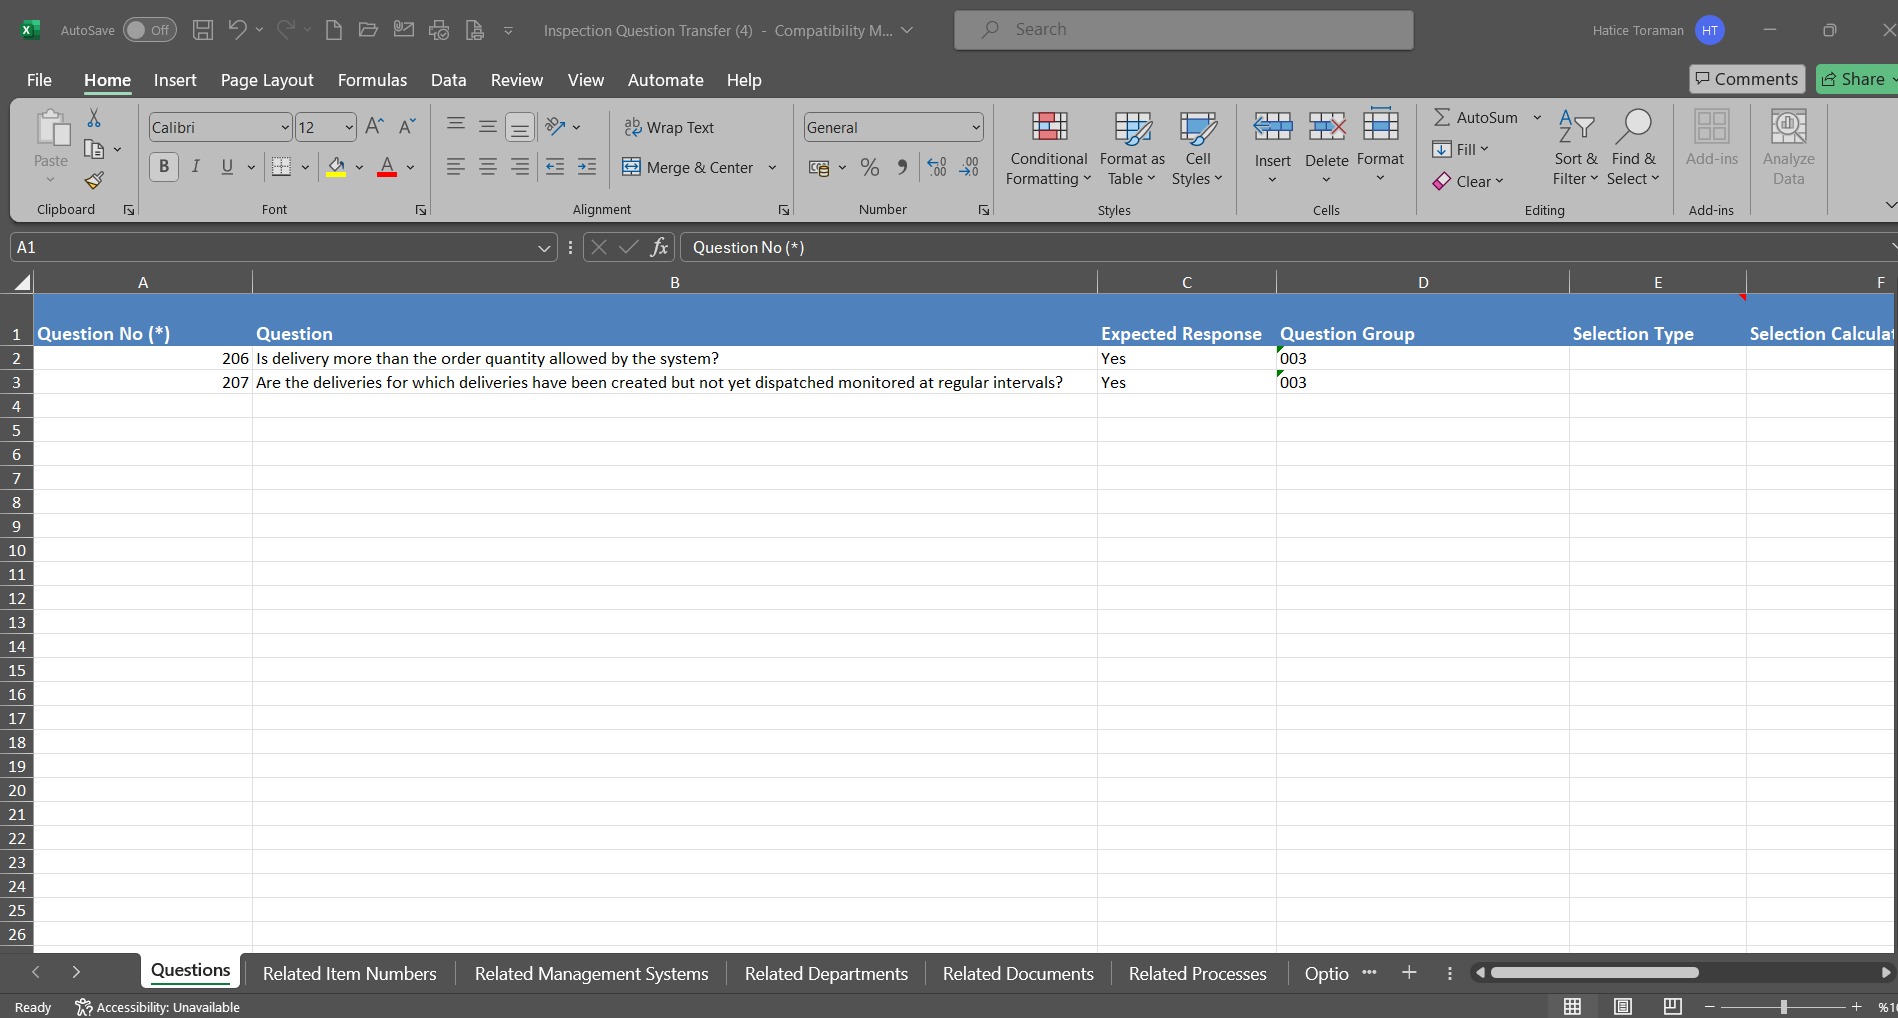
Click the button on the Inspection Question Transfer screen.
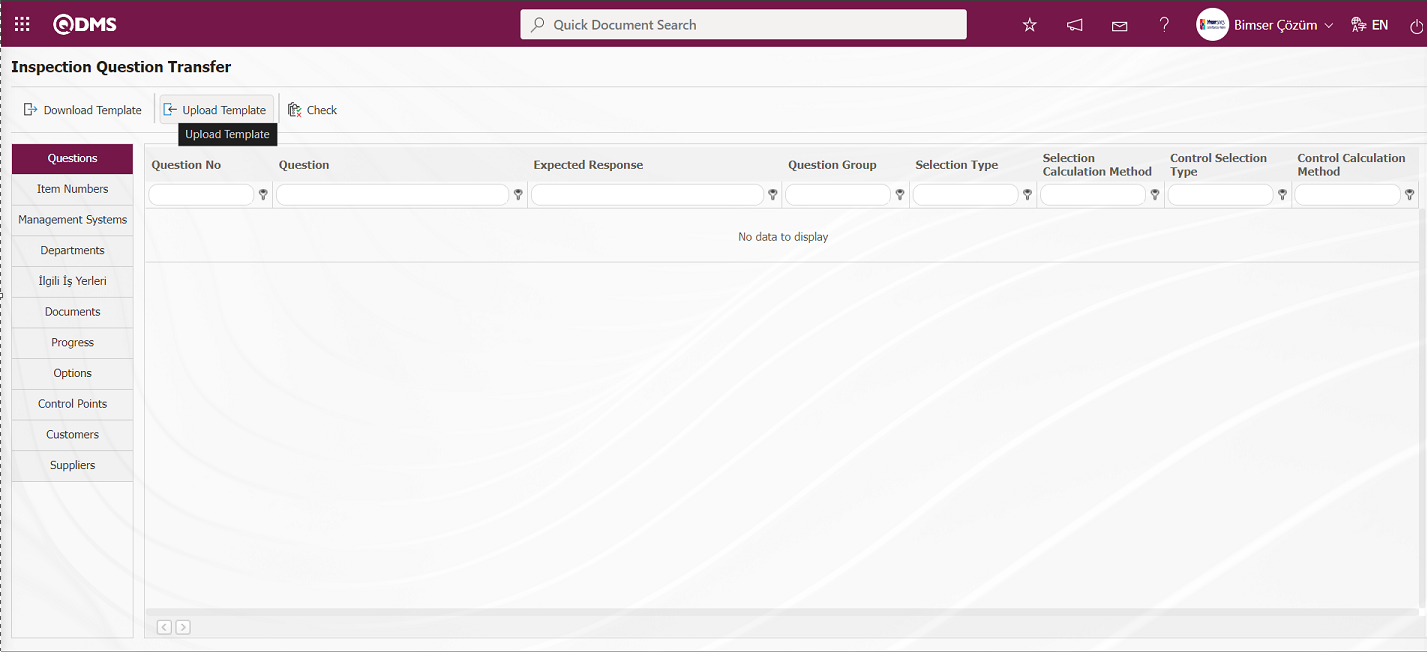
Click the “Browse” button on the Upload File screen.
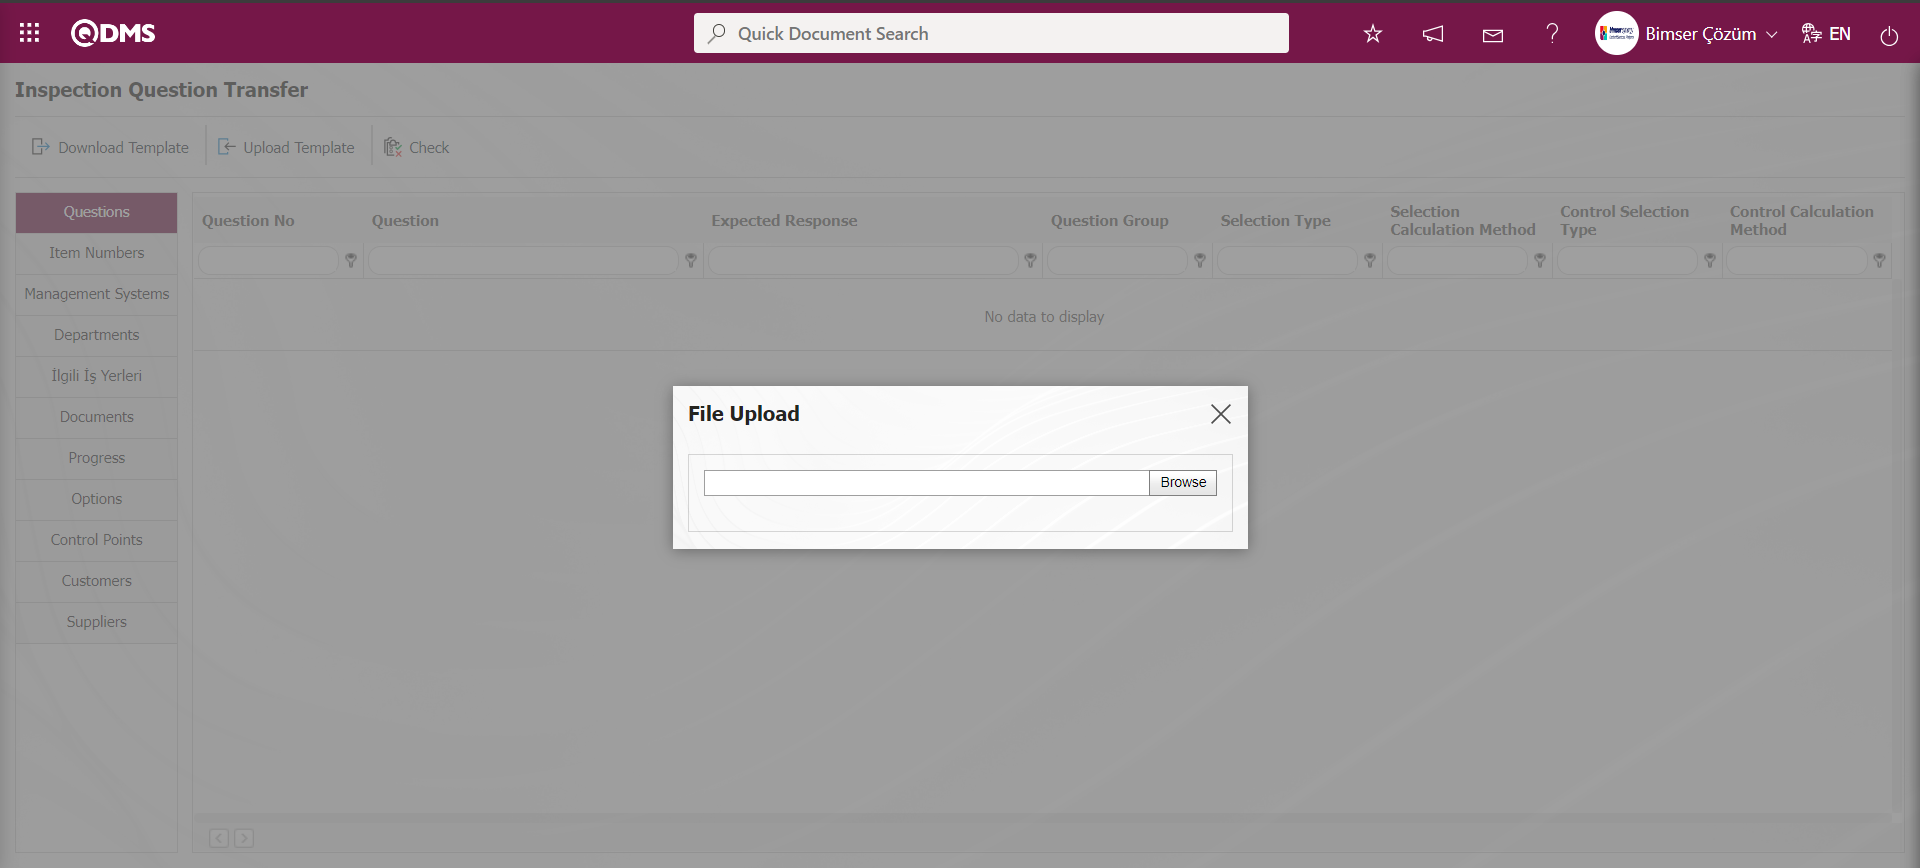
On the screen that opens, the filled Audit Question Transfer template is selected.
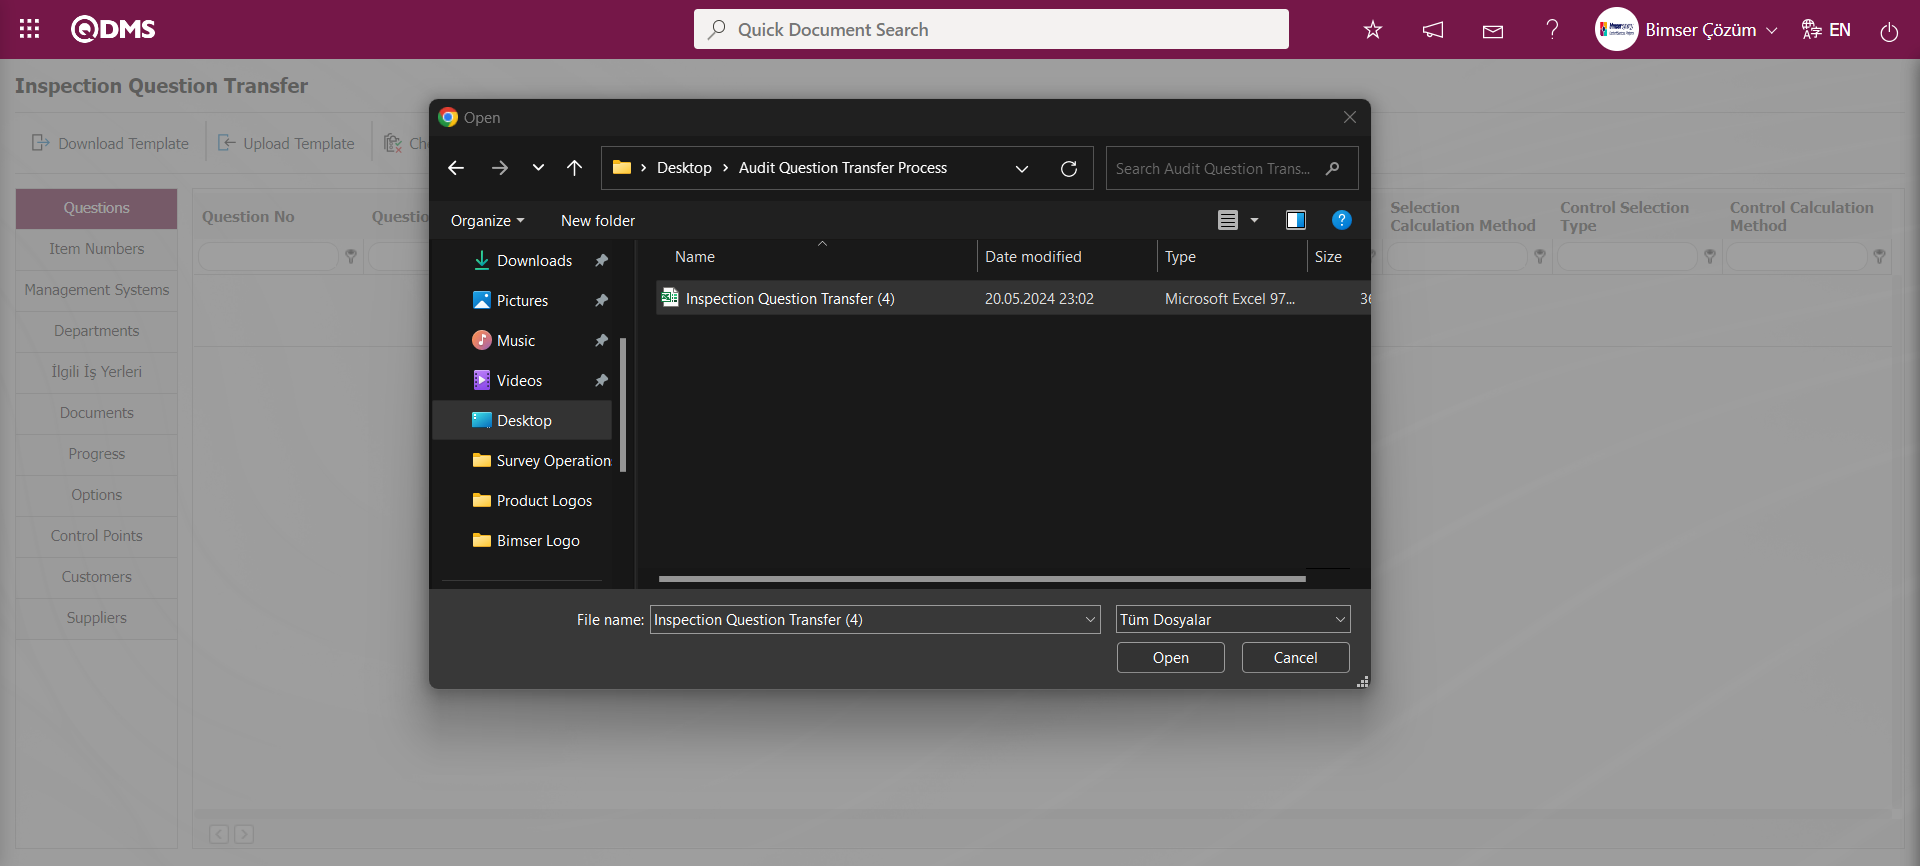
On the Inspection Question Transfer screen, the button is clicked to check whether the template created and uploaded to the system gives an error or not.
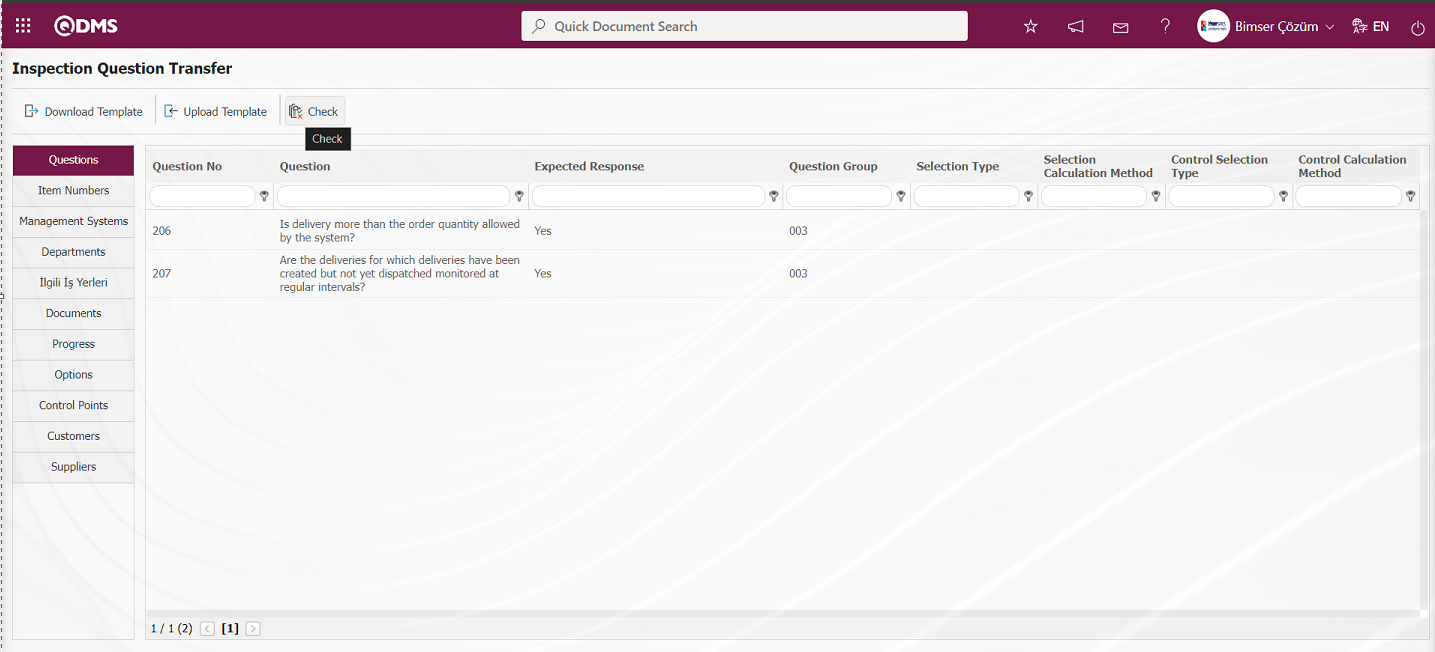
“Data is suitable for transfer” message is given by the system.
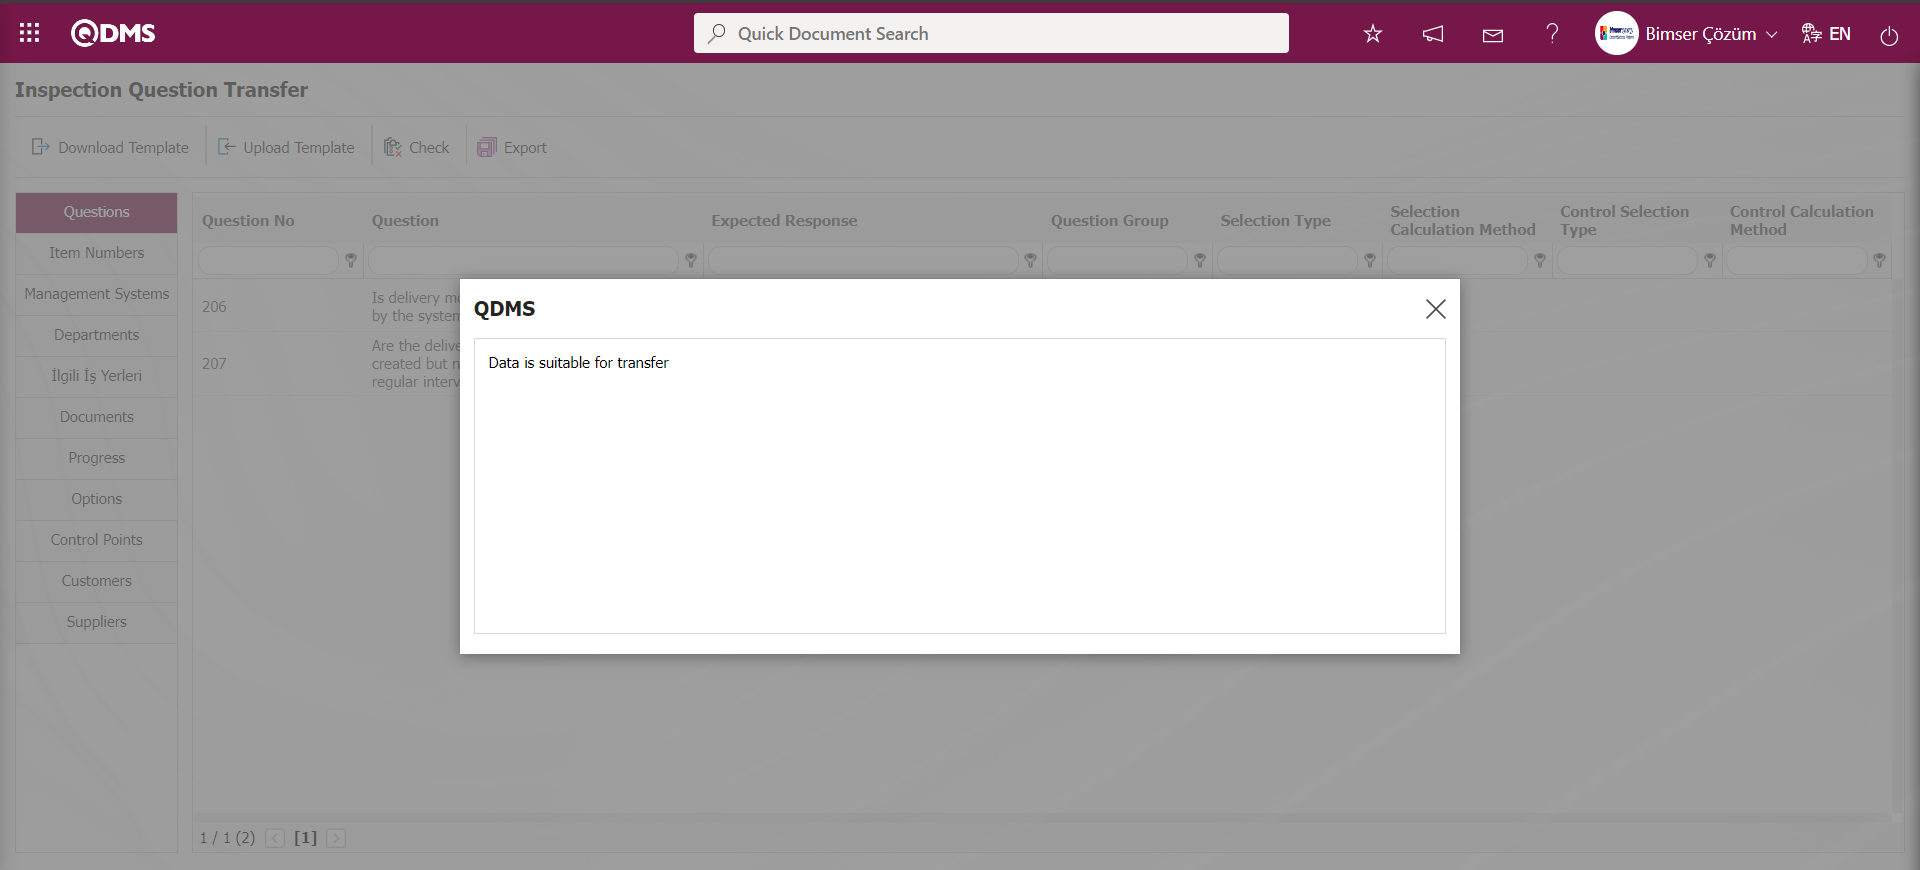
On the Inspection Question Transfer screen, the Inspection Question Transfer process is performed by clicking the button.
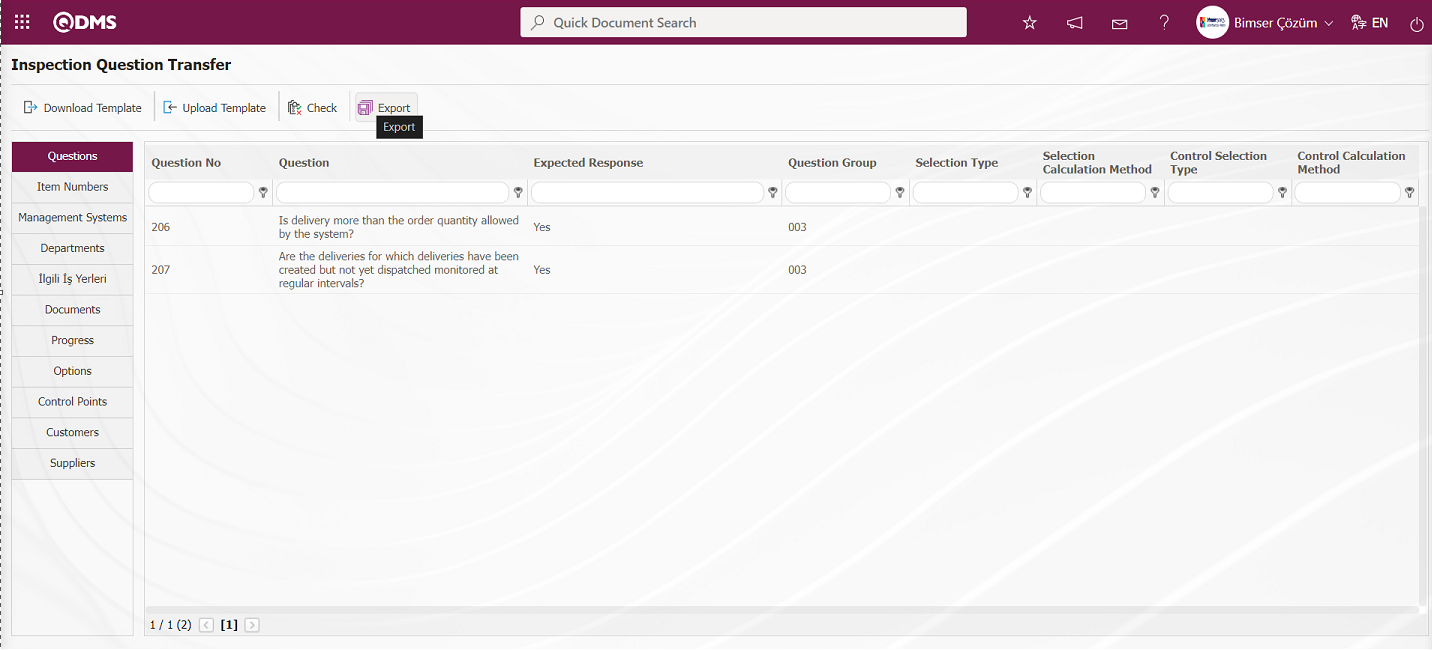
On the system side, the message “Audit questions have been successfully transferred.” is given and information on the number of audit questions transferred is given.
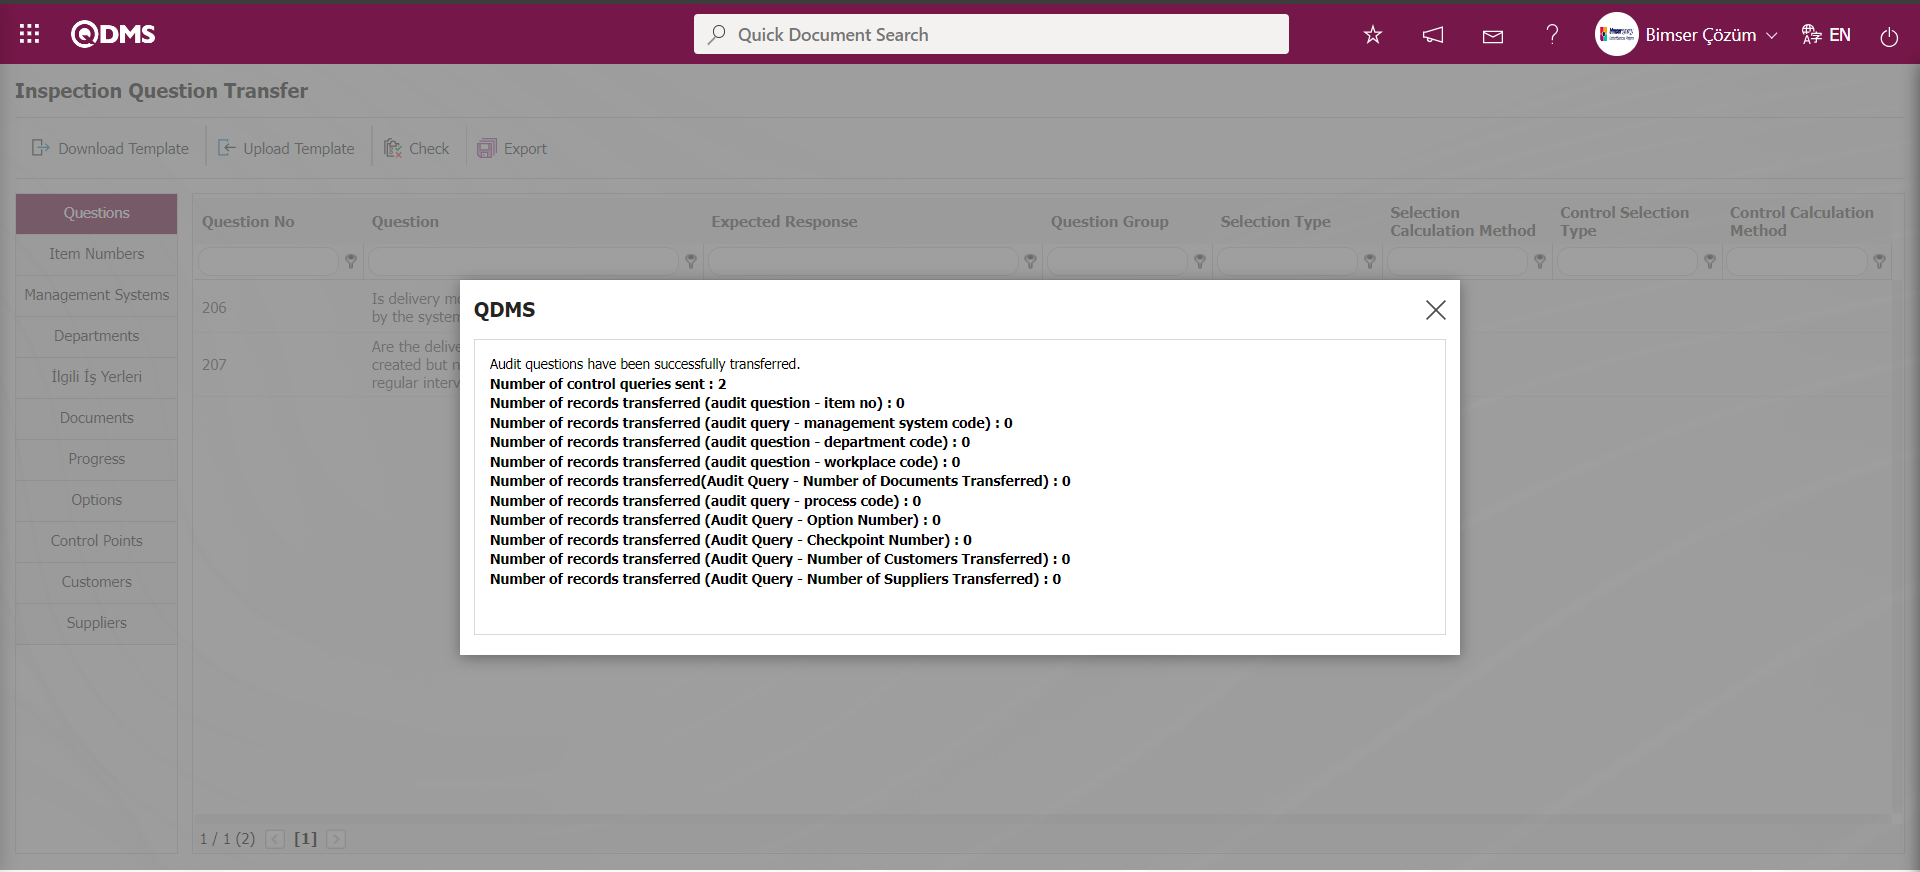
6.1.16. Auditor Transfer
Menu Name: System Infrastructure Definitions/ BSID/ Configuration Settings/ Transfers/Auditor Transfer
It is the menu where the auditor pool of the auditors performing audits is transferred to the system collectively at the same time.
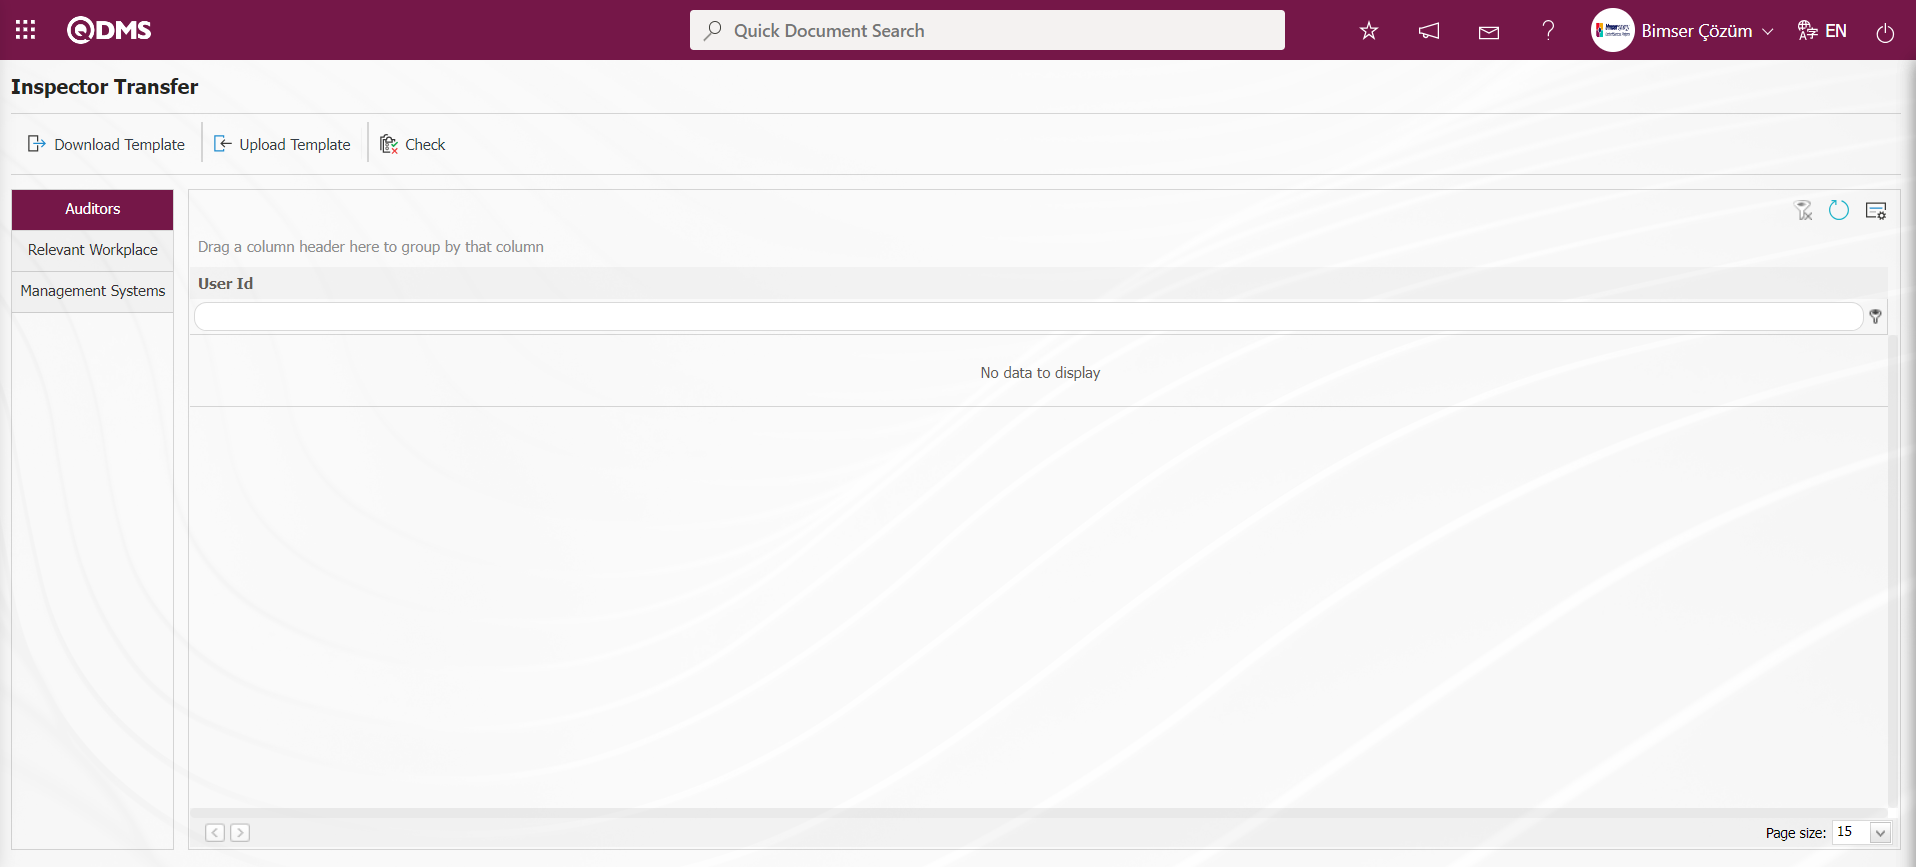
With the help of the buttons on the screen;
: Auditor Transfer template is downloaded to the computer.
: The filled Auditor Transfer template is uploaded to the system.
: Check whether the Auditor Transfer template filled and uploaded to the system gives an error or not.
: The transfer process is performed.
The Auditor Transfer template is downloaded with the button on the screen, after filling in the required information, the Auditor Transfer template is uploaded to the system with the button. In order to check the information entered, the button is used. If the transferred data is suitable for transfer, the Auditor transfer process is realized via the button.
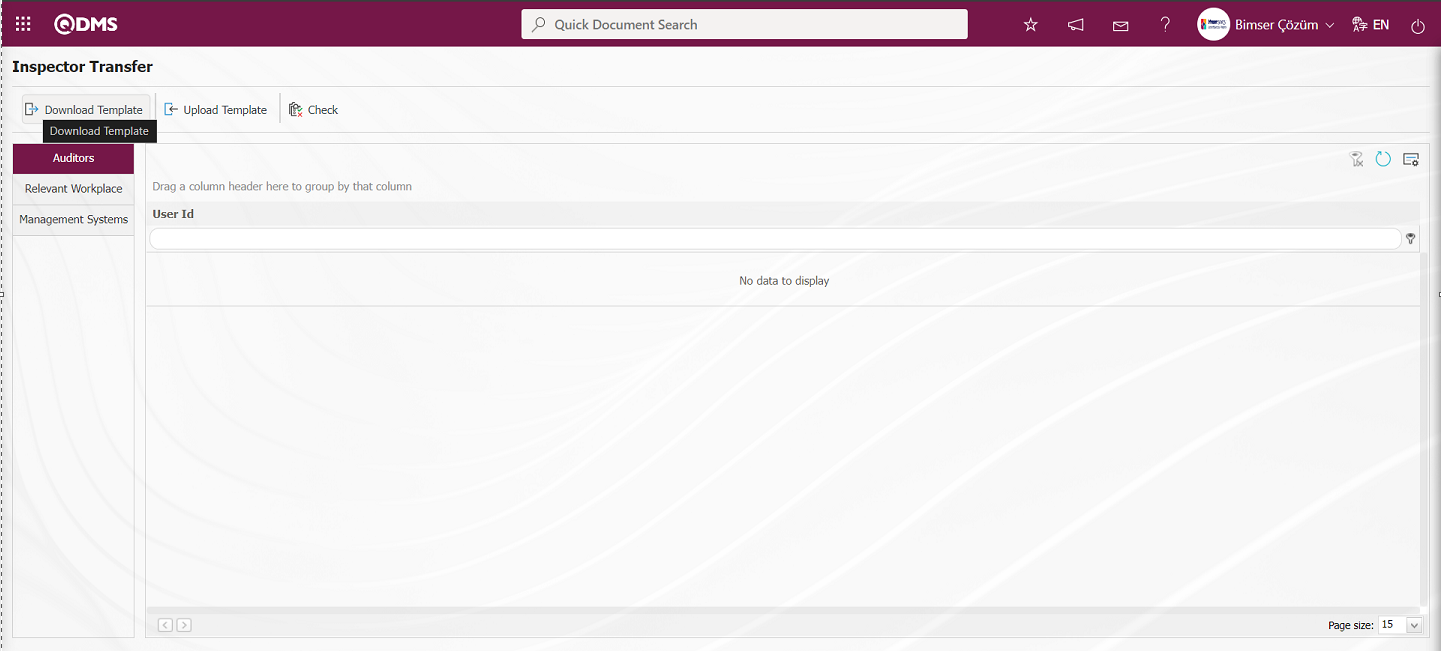
On the Inspector Transfer screen, the Inspector Transfer template is downloaded to the computer with the button. The relevant fields in the Inspector Transfer template are saved to the computer by writing the relevant information.
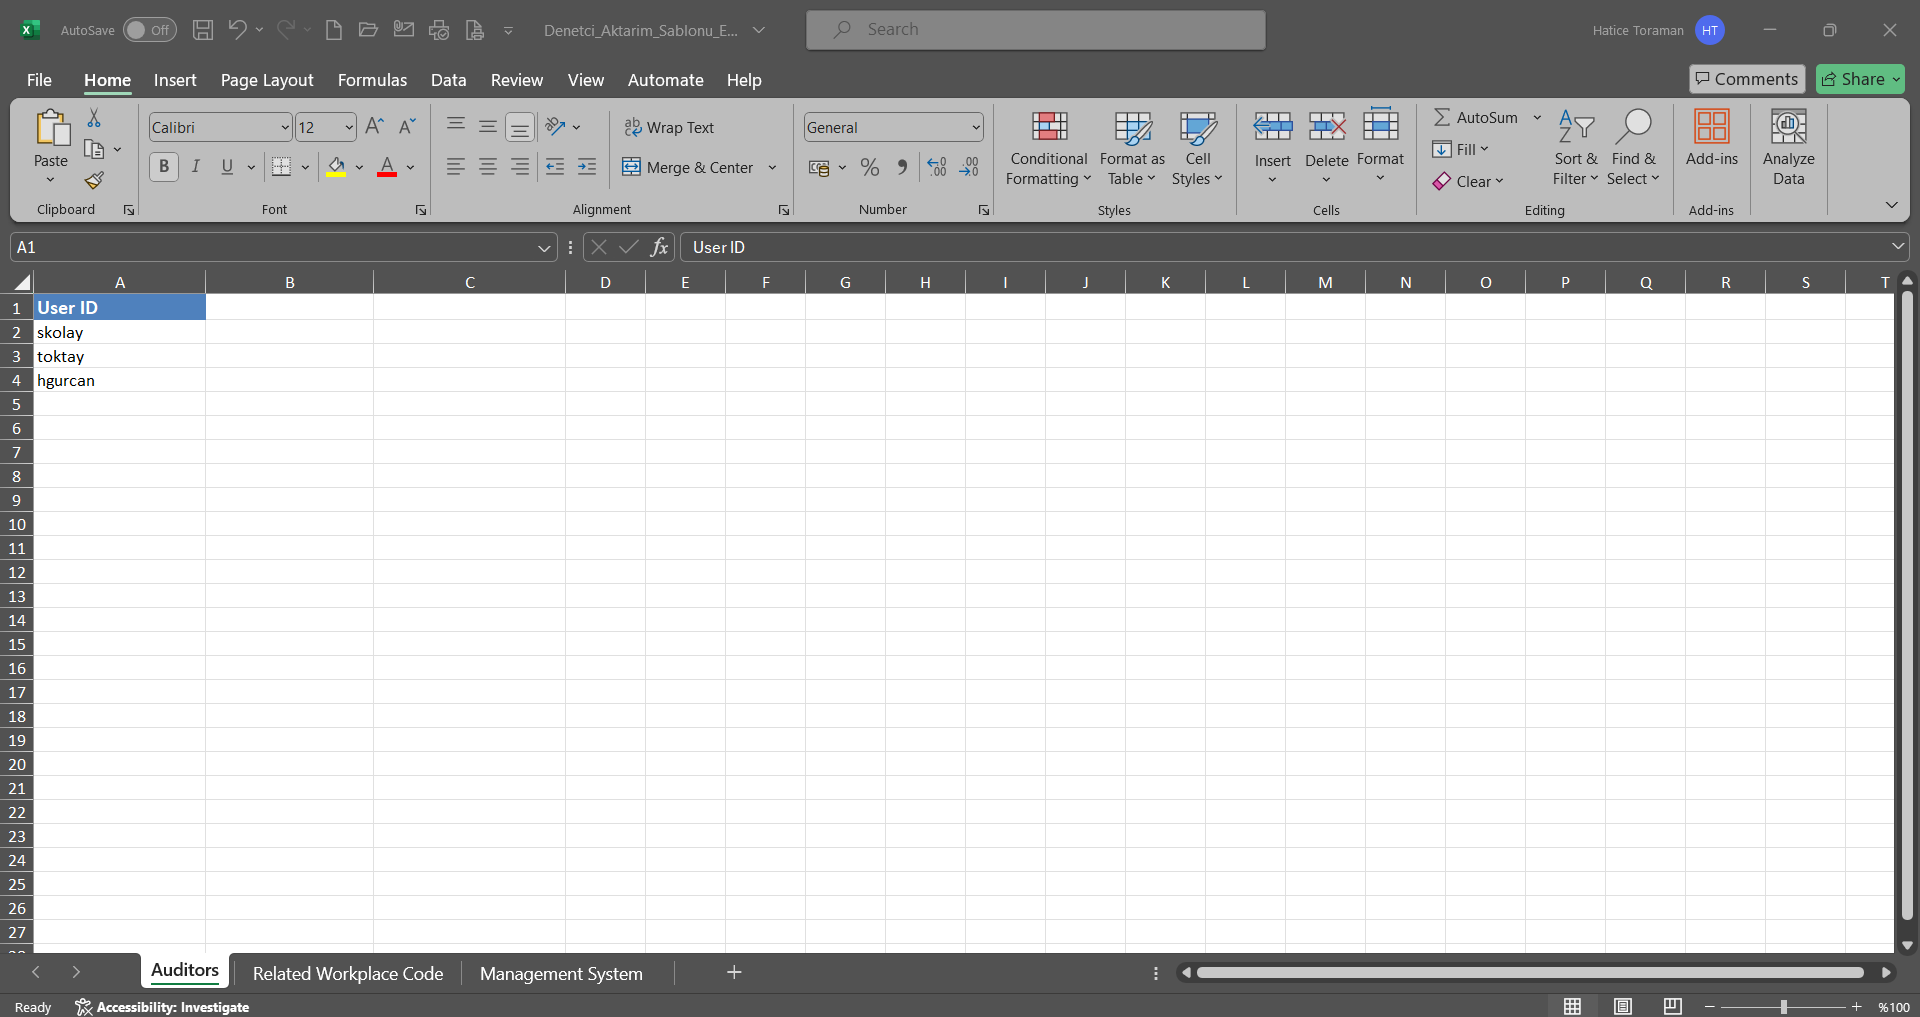
Click the button on the Inspector Transfer screen.
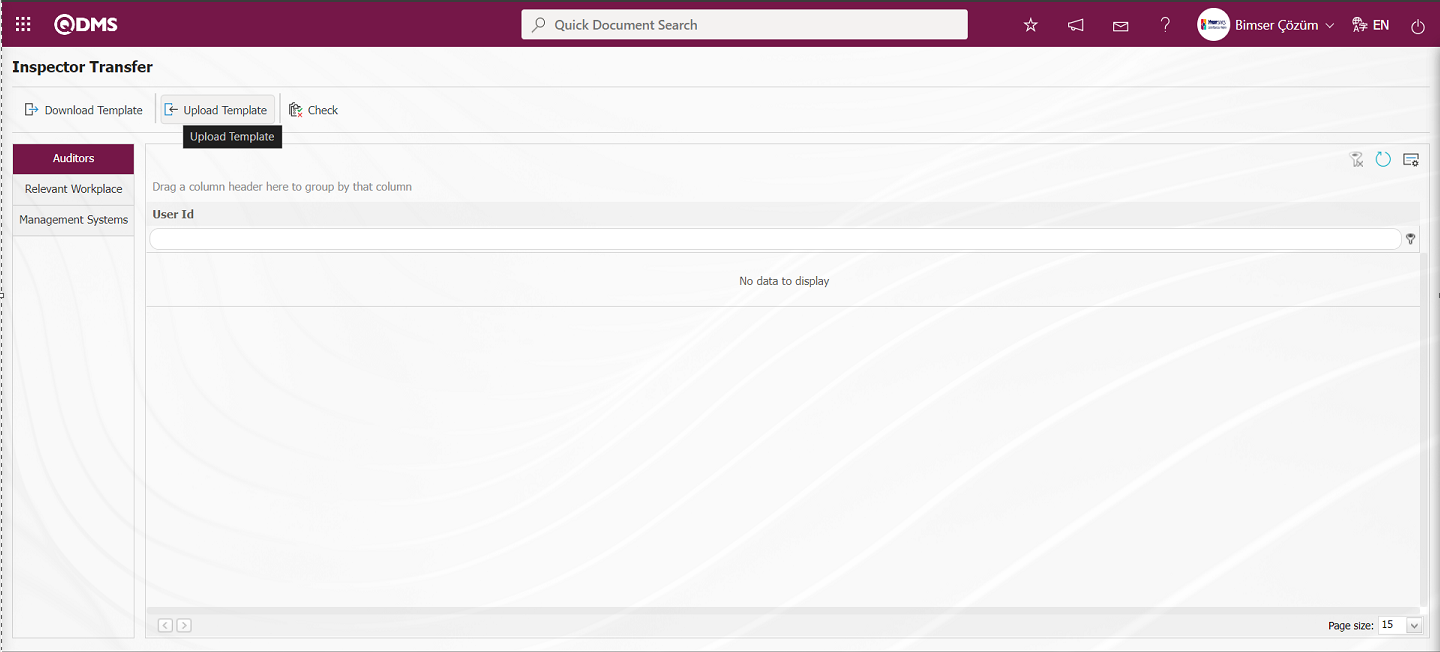
Click the “Browse” button on the Upload File screen.
 In the screen that opens, the filled Auditor Transfer template is selected.
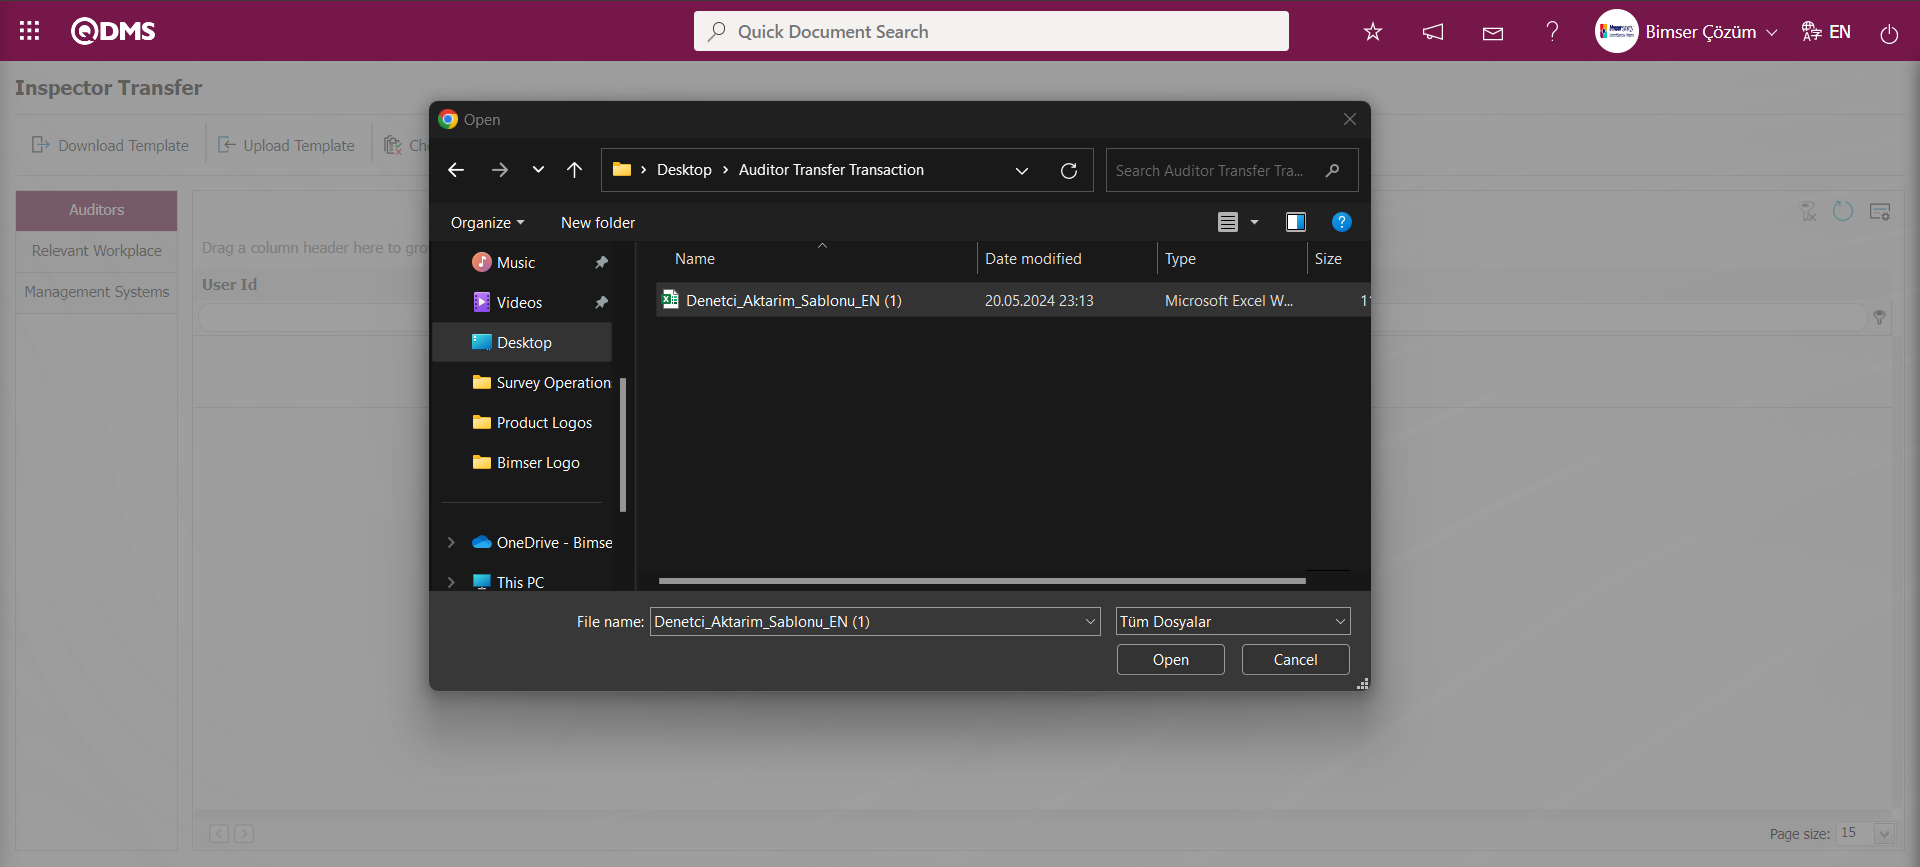
On the Inspector Transfer screen, the button is clicked to check whether the template created and uploaded to the system gives an error or not.
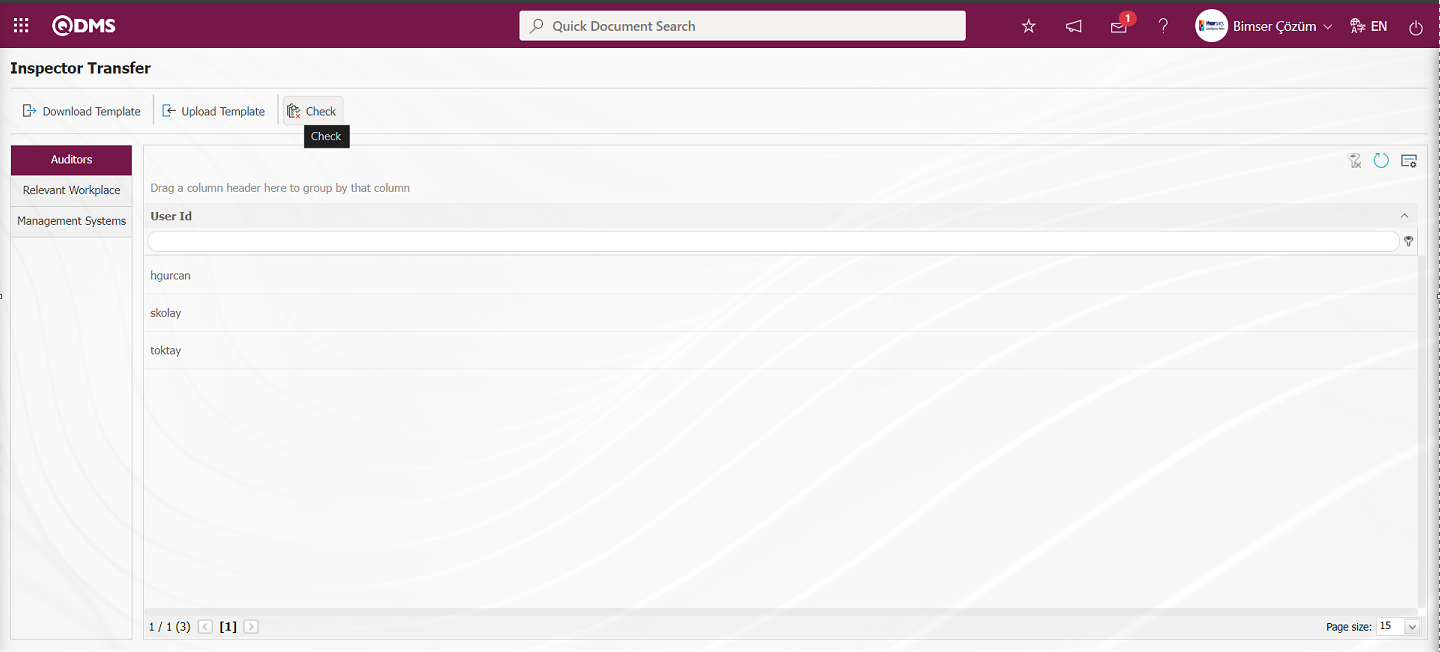
The system displays the message “Data is suitable for transfer”.
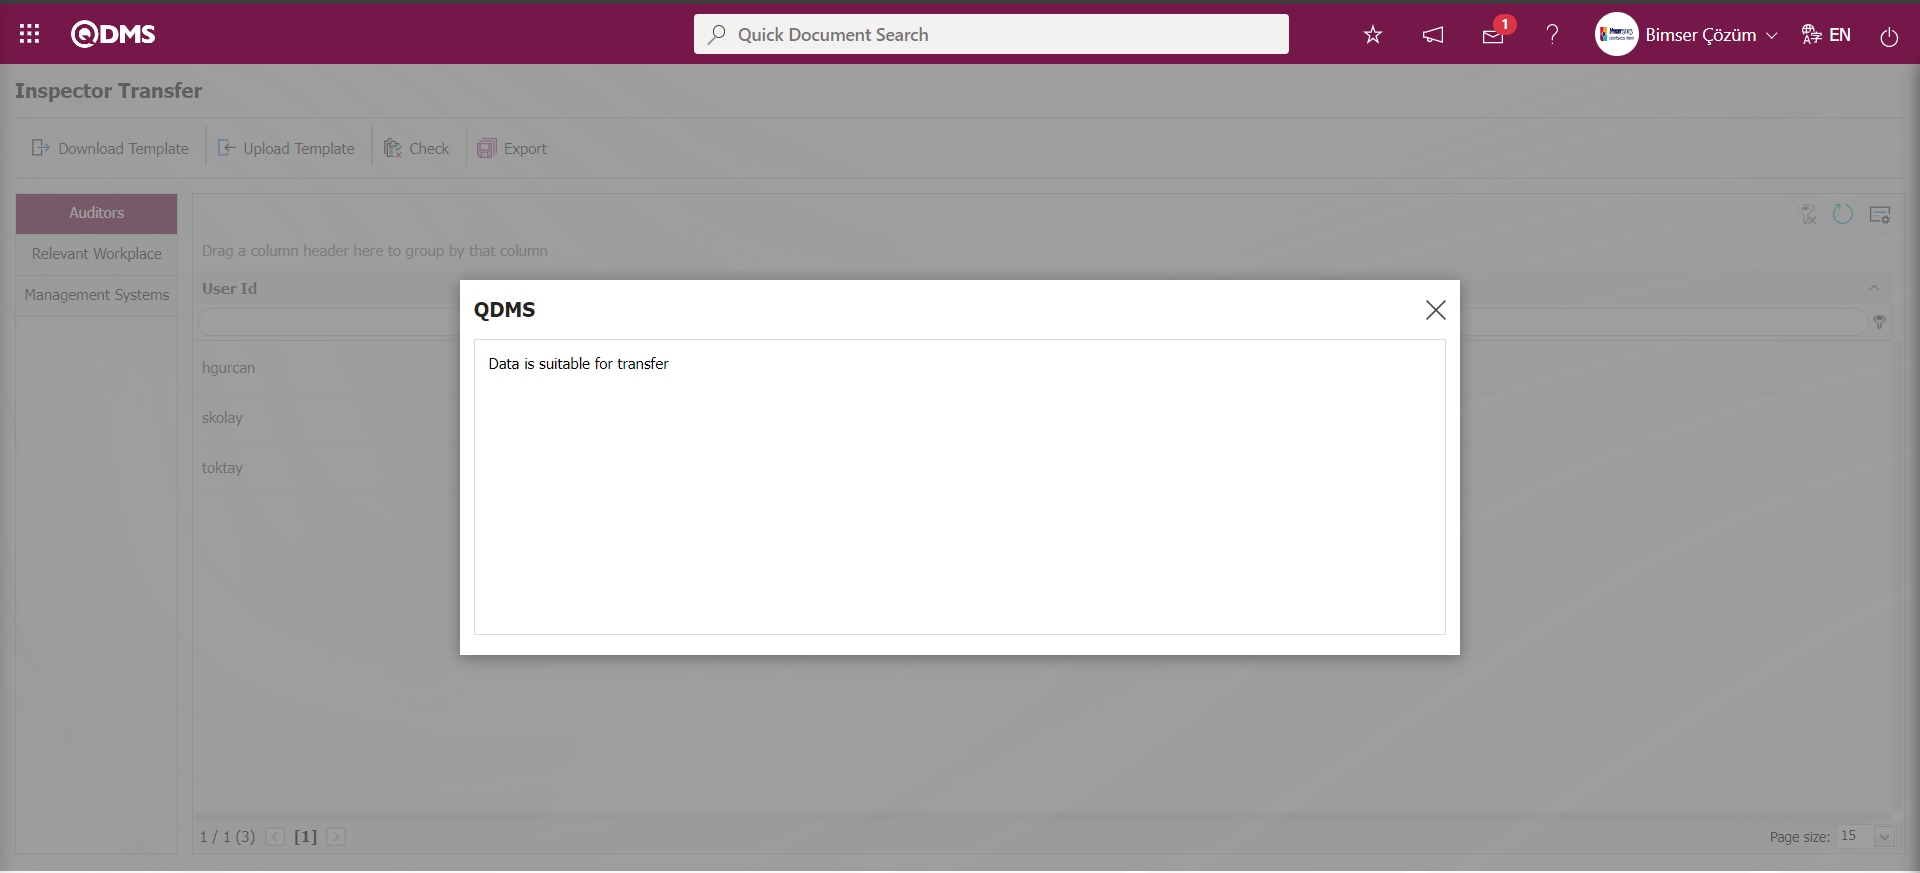
On the Inspector Transfer screen, the Inspector Transfer operation is performed by clicking the button.
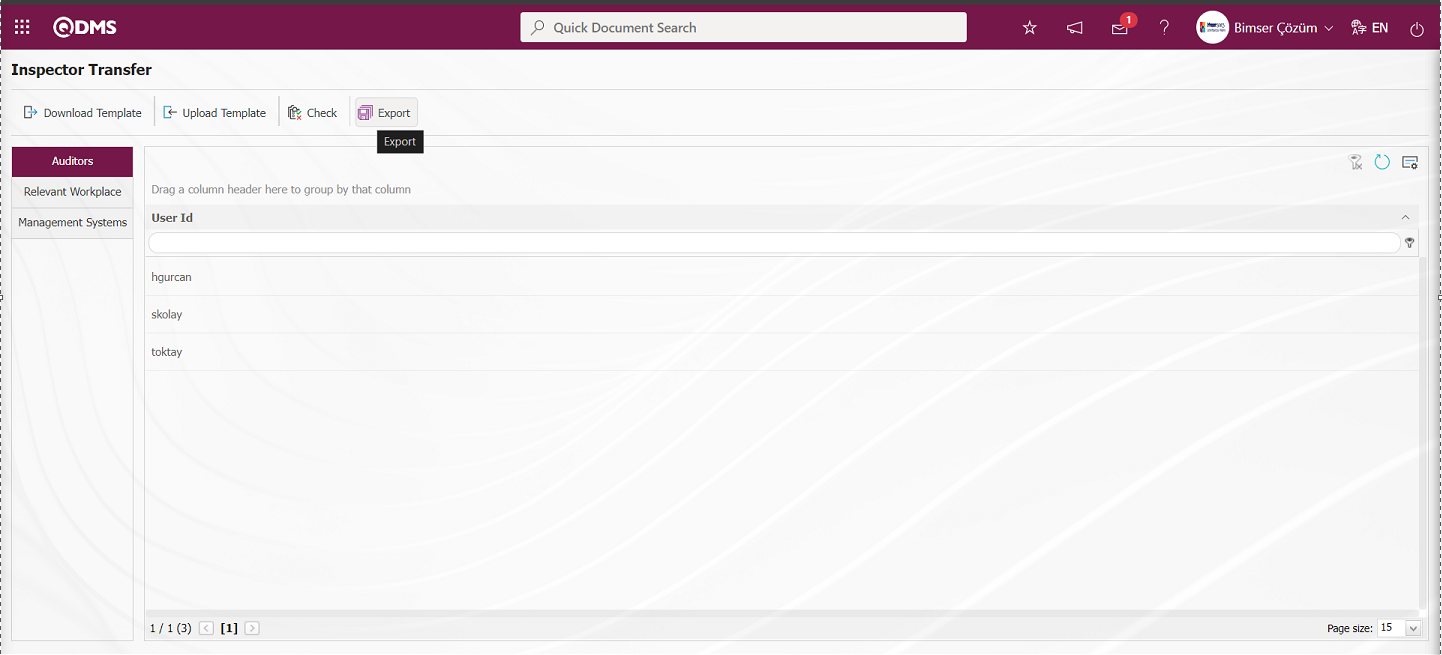
The system gives the message “Auditors have been successfully transferred” and the number of auditors transferred is included in the message.
6.1.17. Audit Transfer
Menu Name: System Infrastructure Definitions/ BSID/ Configuration Settings/ Transfers/Audit Transfer
It is the menu where the audits are transferred to the system in bulk in the Audit Activities module.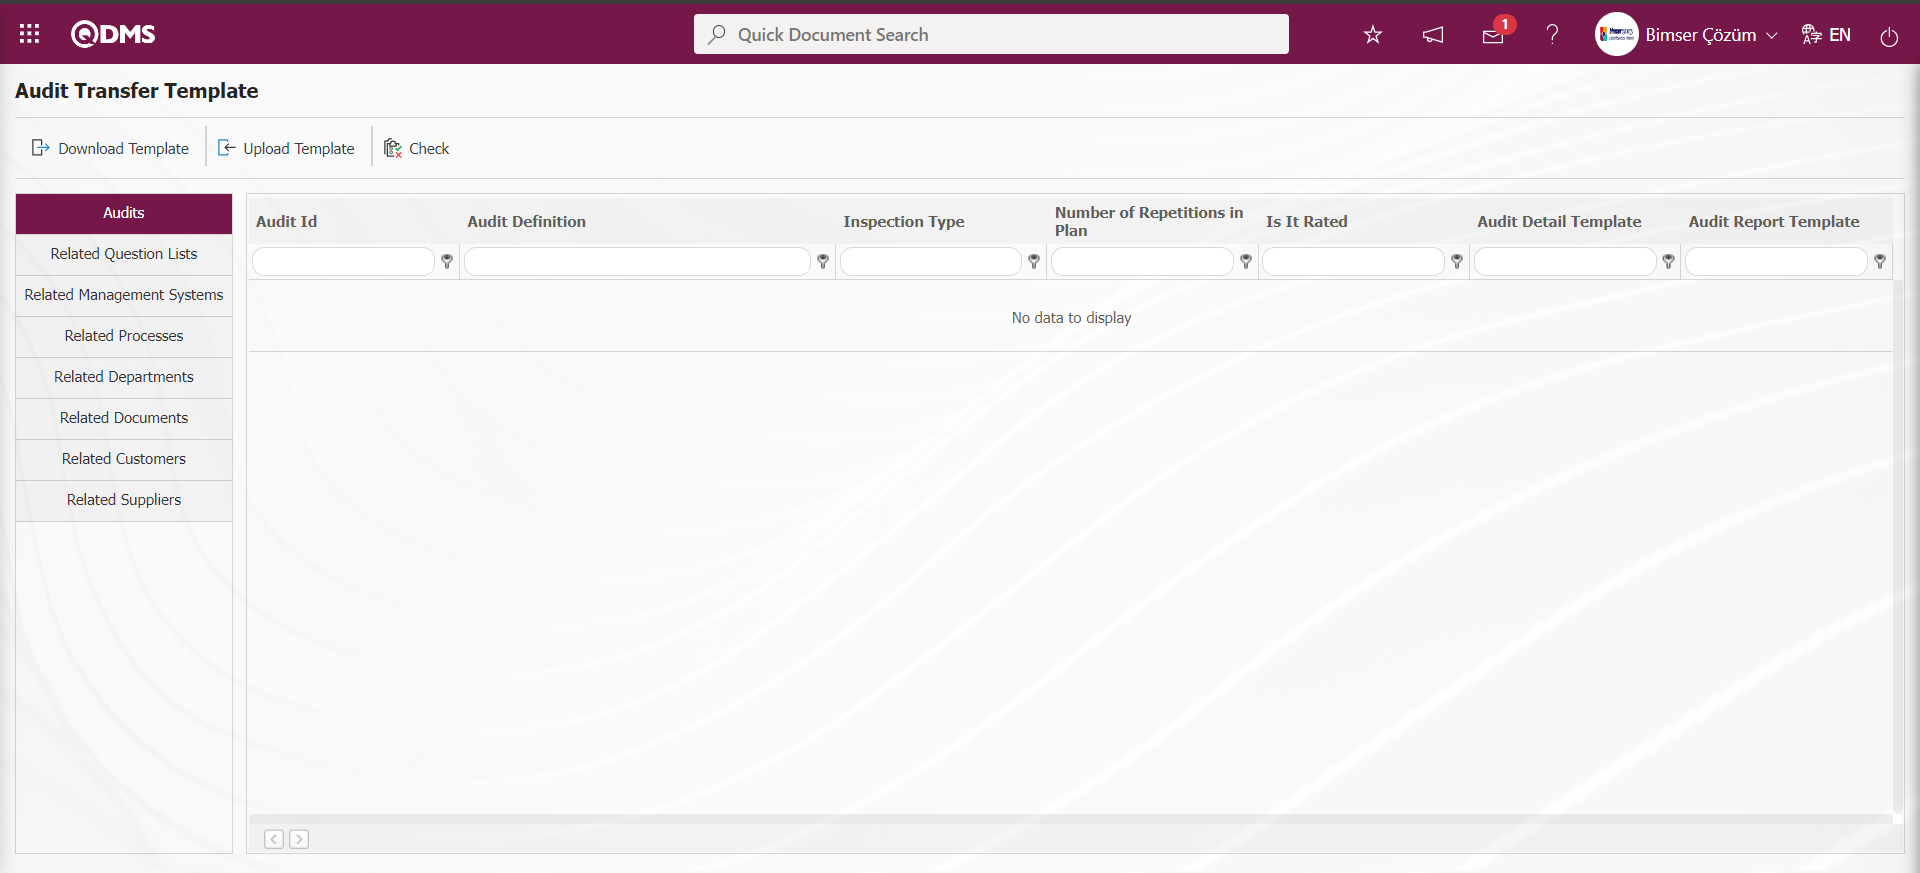
With the help of the buttons on the screen;
 : The Audit Transfer template is downloaded to the computer.
 : The completed Audit Transfer template is uploaded to the system.
 : Check whether the completed and uploaded Audit Transfer template gives an error or not.
 : The transfer process is performed.
The Audit Transfer template is downloaded with the button on the screen, after filling in the required information, the Audit Transfer template is uploaded to the system with the button. In order to check the information entered, the  button is used. If the transferred data is suitable for transfer, the Audit Transfer process is realized via the button.
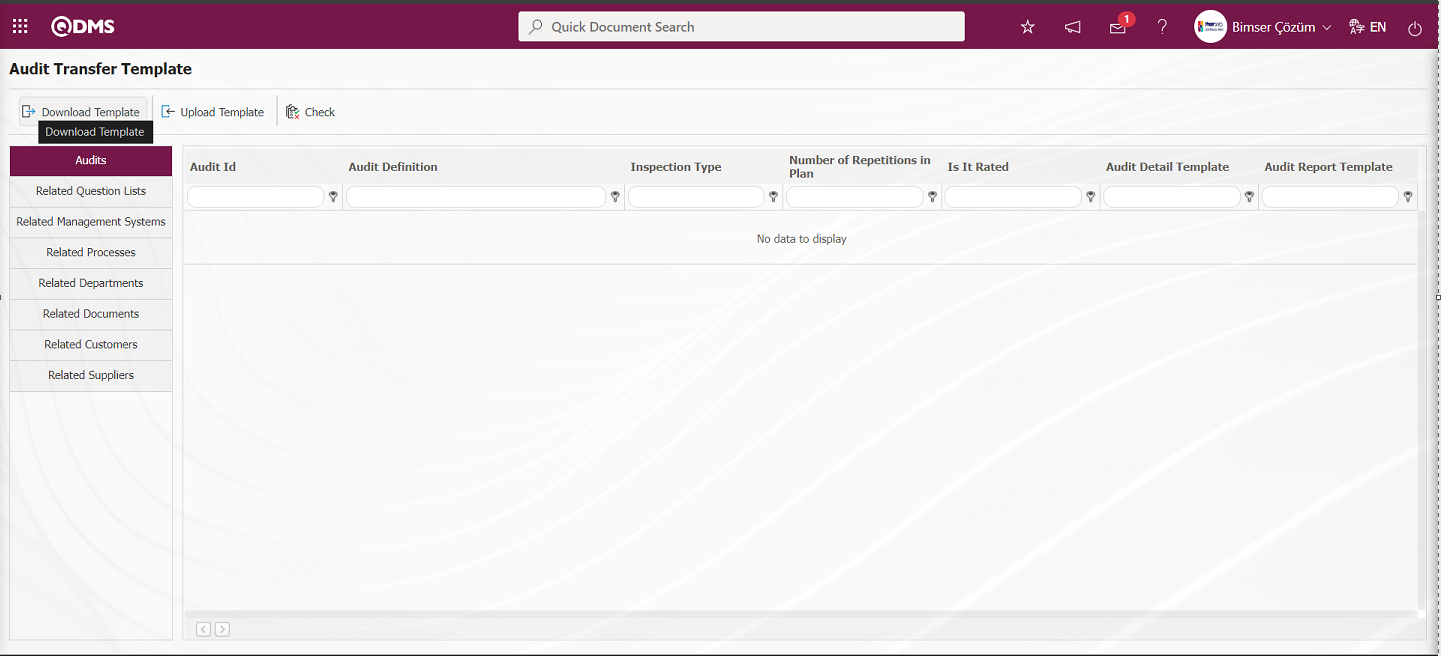
Audit Transfer Template is downloaded to the computer with  button on Audit Transfer Template screen. The relevant fields in the Audit Transfer Template are saved to the computer by typing the relevant information. The point to be considered in the process of filling the downloaded template should be given in the template according to the audit sequence number based on the audit number that will come after the last defined audit number in the Audit List on the System Infrastructure Definitions / Audit Activity / Audit Definition screen.
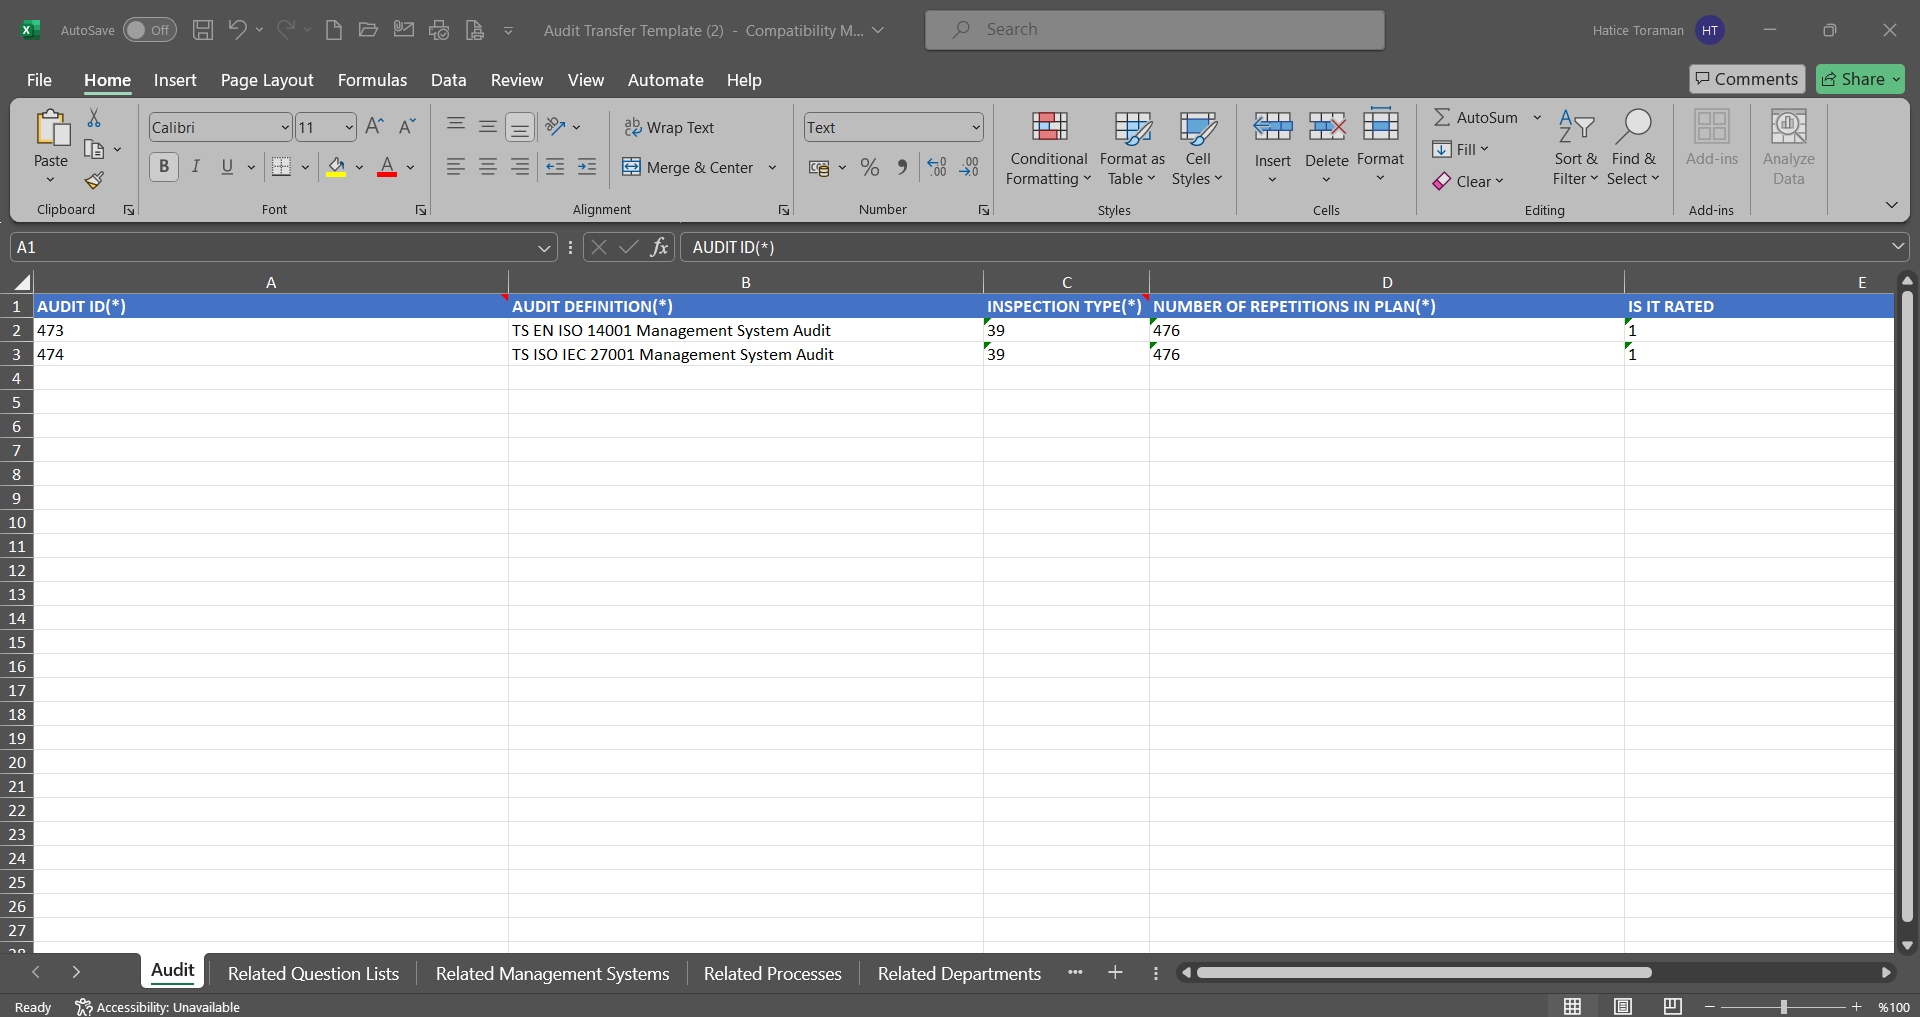
Click  button on Audit Transfer Template screen.

Click the “Browse” button on the Upload File screen.
 On the screen that opens, the filled Audit Transfer template is selected.

On the Audit Transfer Template screen, click the button to check whether the template created and uploaded to the system gives an error or not.
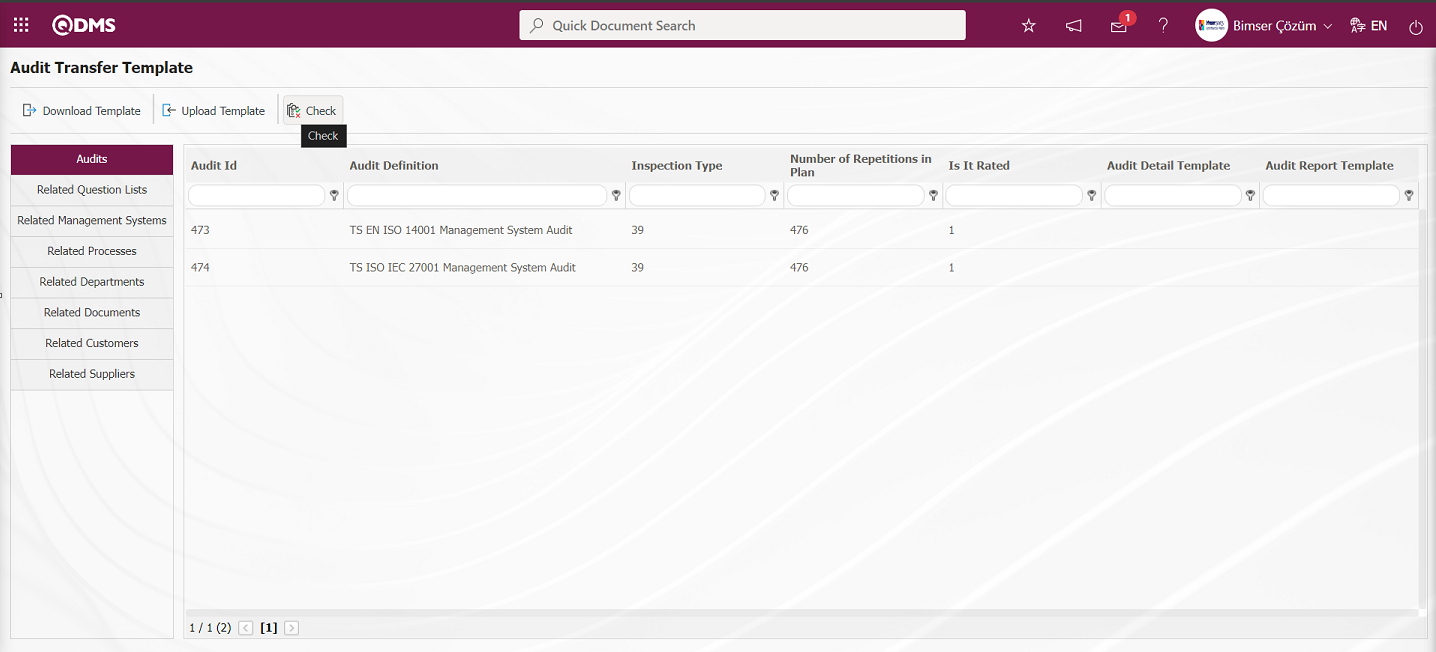
The system displays the message “Data is suitable for transfer”.
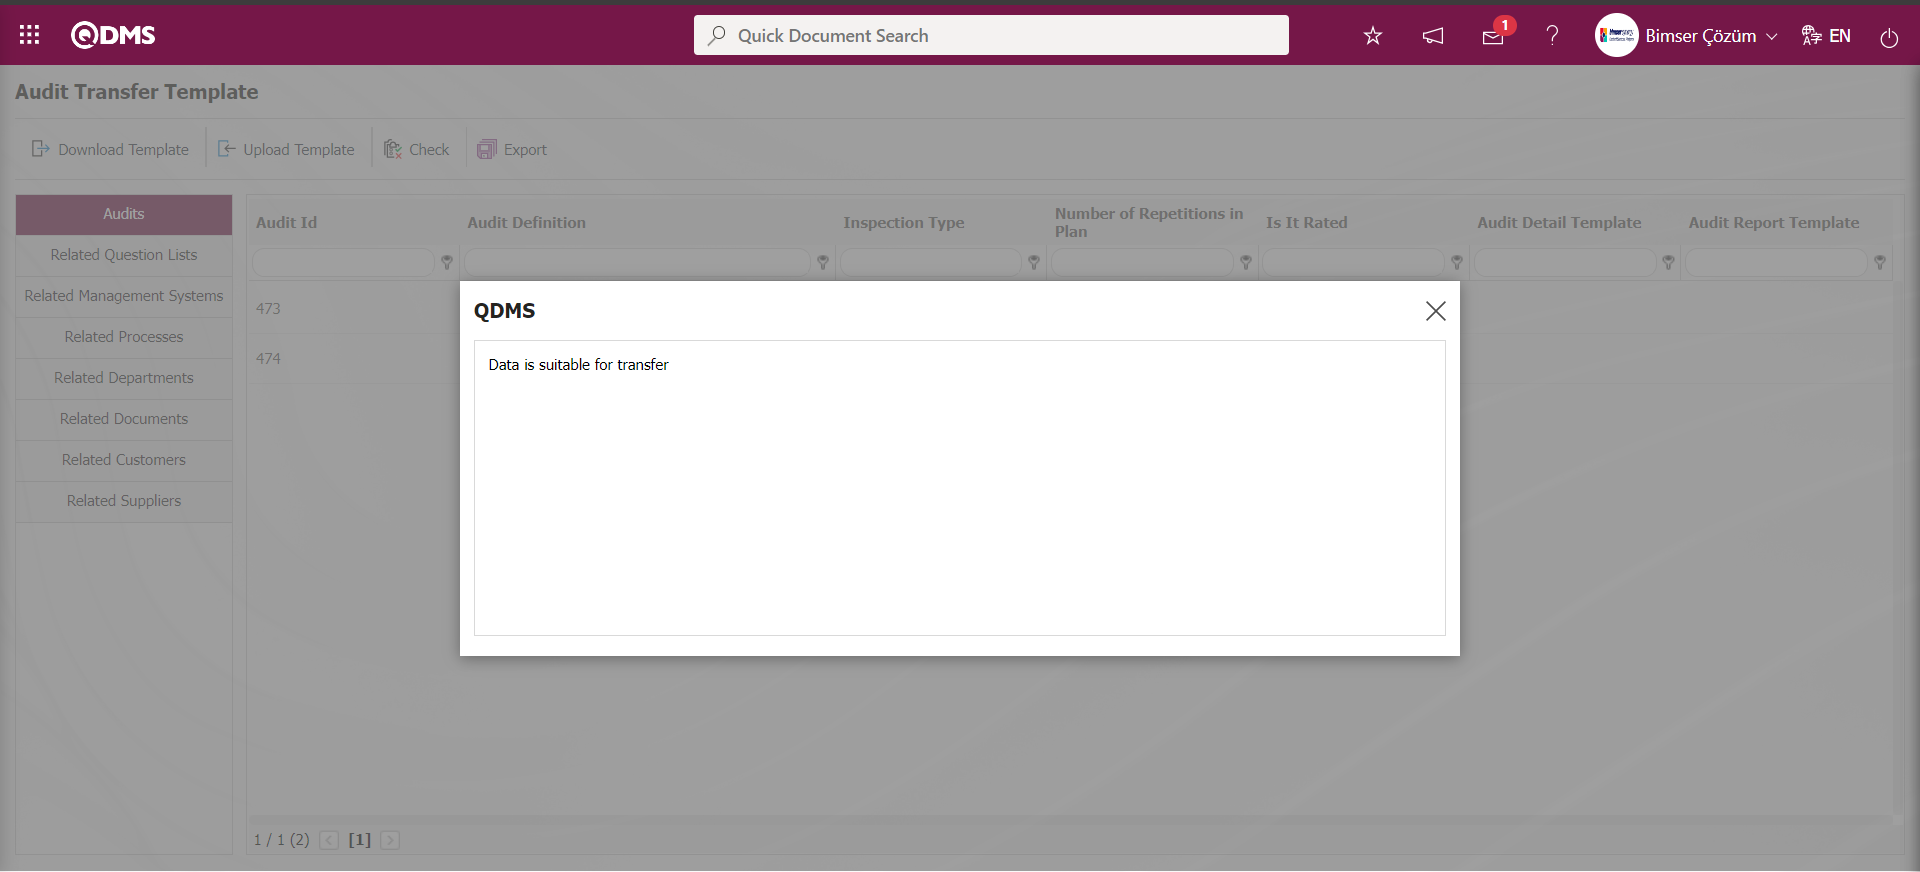
On the Audit Transfer Template screen, click the button and perform the Audit Transfer operation.
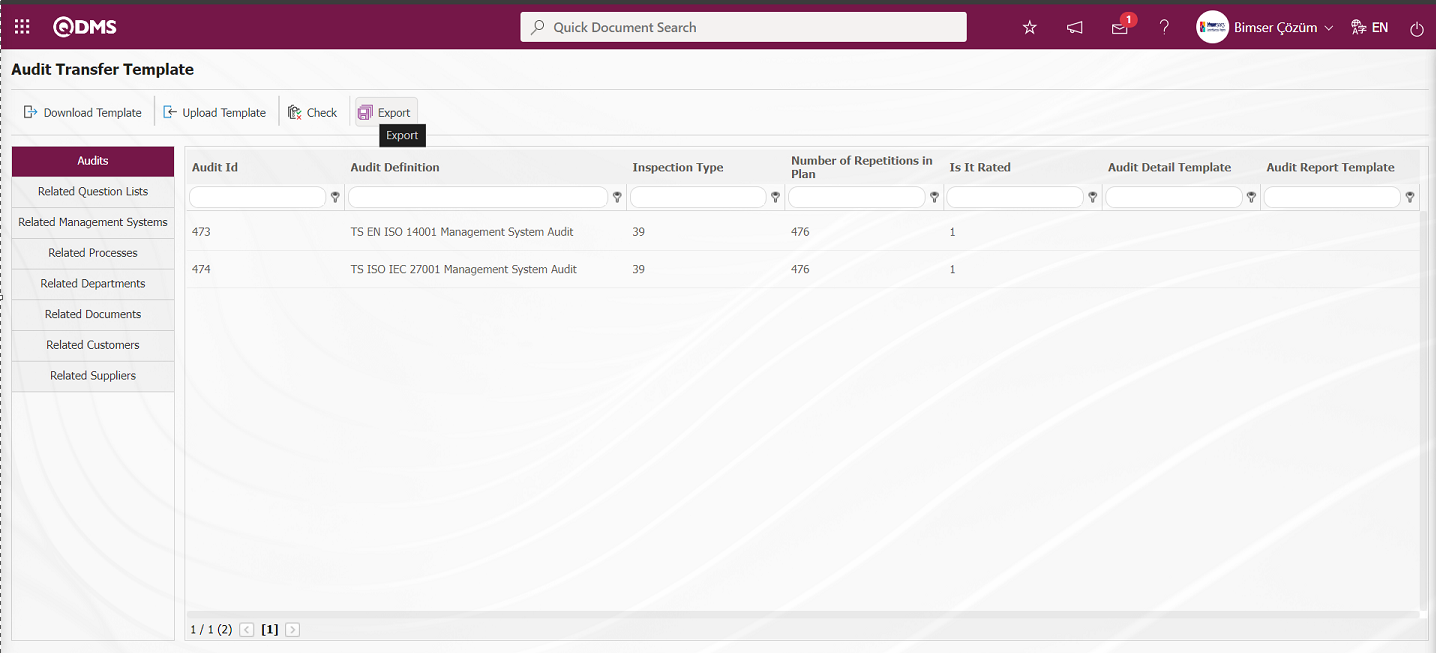
The number of audits transferred by the system with the message “The audit have been successfully transferred” is included in the message.
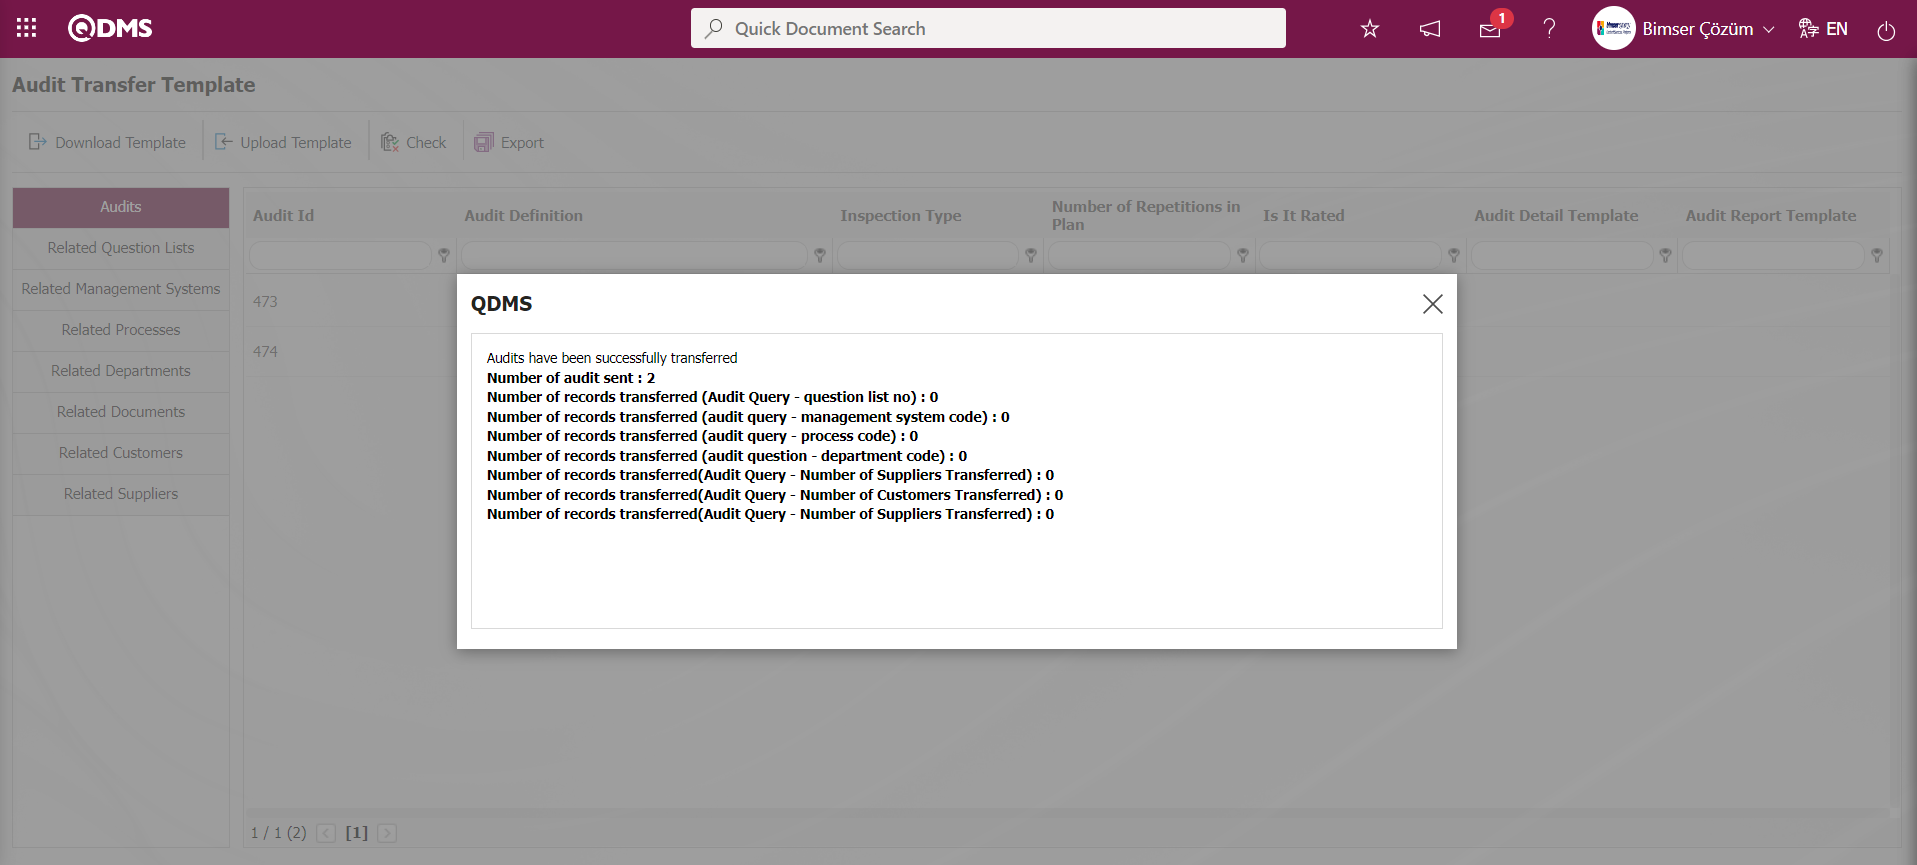
6.2. Integrated Management System/ Audit Activities
This is the section where audit plans are created, planned audits and unplanned audits take place, reports and graphs are displayed
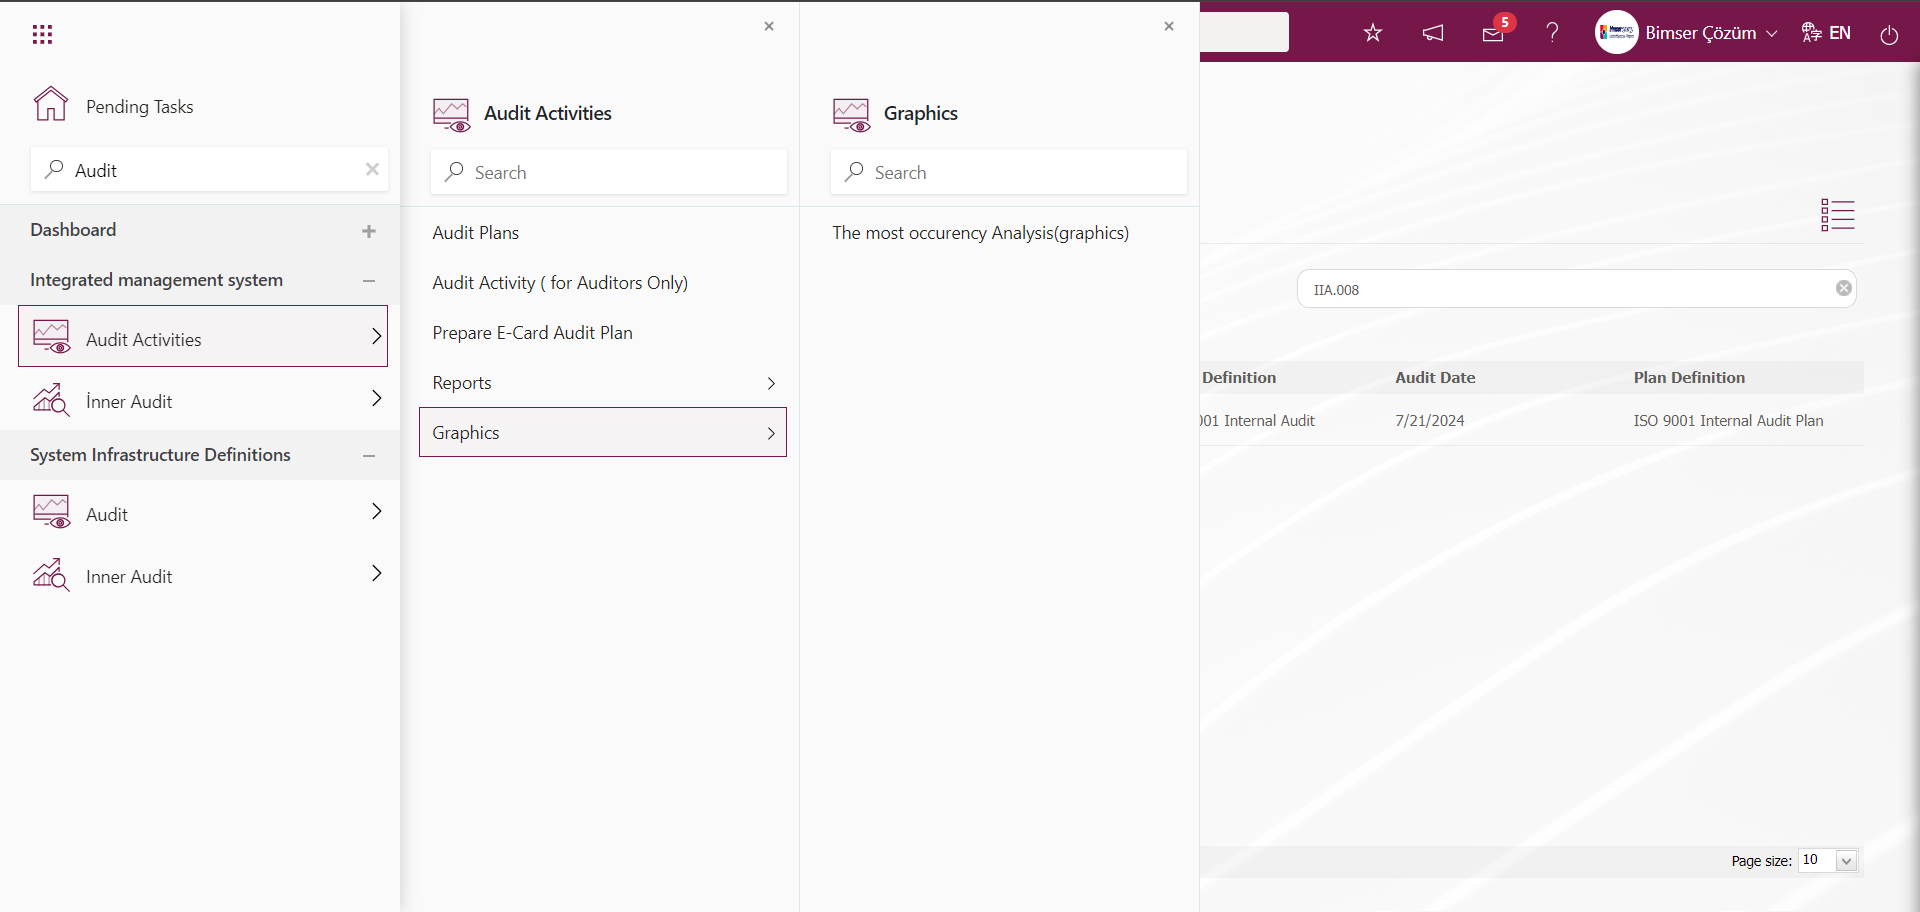
6.2.1. Audit Plans
Menu Name: Integrated Management System/ Audit Activities/ Audit Plans
This is the menu where the annual audit plan is created. After the audit plan is created, audits are added to the plan. Audit plans can be created based on date or audit type.

With the help of the buttons on the screen;
: A new plan is defined.
 :Updates the selected plan information in the list.
 : A new plan is created by copying the selected plan record in the list.
 :Delete the selected plan record in the list.
 :The audits in the audit plan are determined.
 : Displays Plan-Common audit plan.
 :The audit schedule of the audit plan is displayed.
 : The audit plan is published and notified by e-mail.
 :Records can be searched by filtering.
 : Data can be exported to excel.
: Allows the audit plan screen to be transferred to the table.
: The search criteria on the menu screens are used to clean the data remaining in the filter fields in the grid where the search operation is performed.
: The menu screen is restored to its default settings.
: User-based designing is done on the menu screen with the feature of showing and hiding the fields corresponding to the columns on the menu screens, that is, the hiding feature.
To add a new audit plan to the Audit Plans screen, click the button at the top left corner of the screen and the Audit Plans - New Record** screen is displayed.

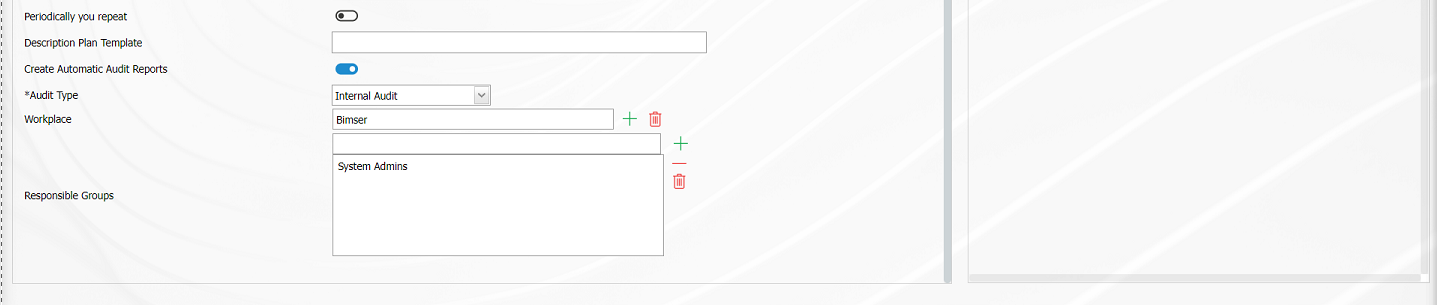
Related fields are defined on the screen that opens:
Plan ID: This is the field where the Plan ID information is given automatically by the system on the Audit Plans - New Record screen.
Plan Definition: It is the field where the definition information of the plan is written on the Audit Plans - New Record screen.
Plan Start Date: It is the field where the start date of the plan is selected from the calendar field on the Audit Plans - New Record screen.
Plan End Date: It is the field where the end date of the plan is selected from the calendar field on the Audit Plans - New Record screen. Audits cannot be added to the plan except for the selected start and end dates. The parameter is activated by selecting “Yes” for parameter 29 in the Audit Activity parameters.

After the parameter is activated, audits are added to the plan except for the selected start and end dates.
How many days in advance will the auditors be notified via email?: This is the field where it is determined how many days in advance the auditors should be notified via email on the Audit Plans - New Record screen.
How many days in advance will the auditors be notified via email?: This is the field where it is determined how many days in advance the auditees will be notified via email before the audit date on the Audit Plans - New Record screen.
Audit shut down time expire: On the Audit Plans - New Record screen, it is the field where the audit shut down time information is determined.
Inform:It is the field where the personnel and user groups to be informed about the audit plan on the Audit Plans - New Record screen are determined. The personnel to be informed about the audit plan is selected in the list of personnel defined in the system by clicking the (Add) button. The user group to be informed about the audit plan is selected in the user group list defined in the system by clicking the  (Select) button.When the audit plan is published, the process of announcing by e-mail to the people and user groups to be informed is done.
Informed that they reflect all the controls in the plan: When the check box related to the relevant field is checked on the Audit Plans - New Record screen, all of the added informants are displayed in the informant field of all controls in the plan.
Audit Code Template: Audit Plans - This is the field where the audit code template is written on the New Record screen. If it is desired to give audit codes automatically, the format of the code structure is defined in this field. Ex: 2020.###
Audit Code Count: This is the field where the number from which the audit code will start on the Audit Plans - New Record screen is written. When the counter value is “0” in the audits created in the plan, the system automatically assigns the code as 2020.001, 2020.002 according to the audit code template.
Create Automatic Audit Reports: If the relevant check is checked on the Audit Plans - New Record screen, the audit report is automatically generated by the system without the need to click the button to generate the audit report in the audit closure menu.
Audit Type: On the Audit Plans - New Record screen, the audit type of the plan is selected in the audit type list opened by clicking the drop-down list.
Workplace: In the Audit Plans - New Record screen, the workplaces that the plan is related to are selected from the list of workplaces defined in the system opened by clicking the (Add) button. The parameter value of parameter 38 in the Audit Activities module parameters is activated by selecting “Yes”.
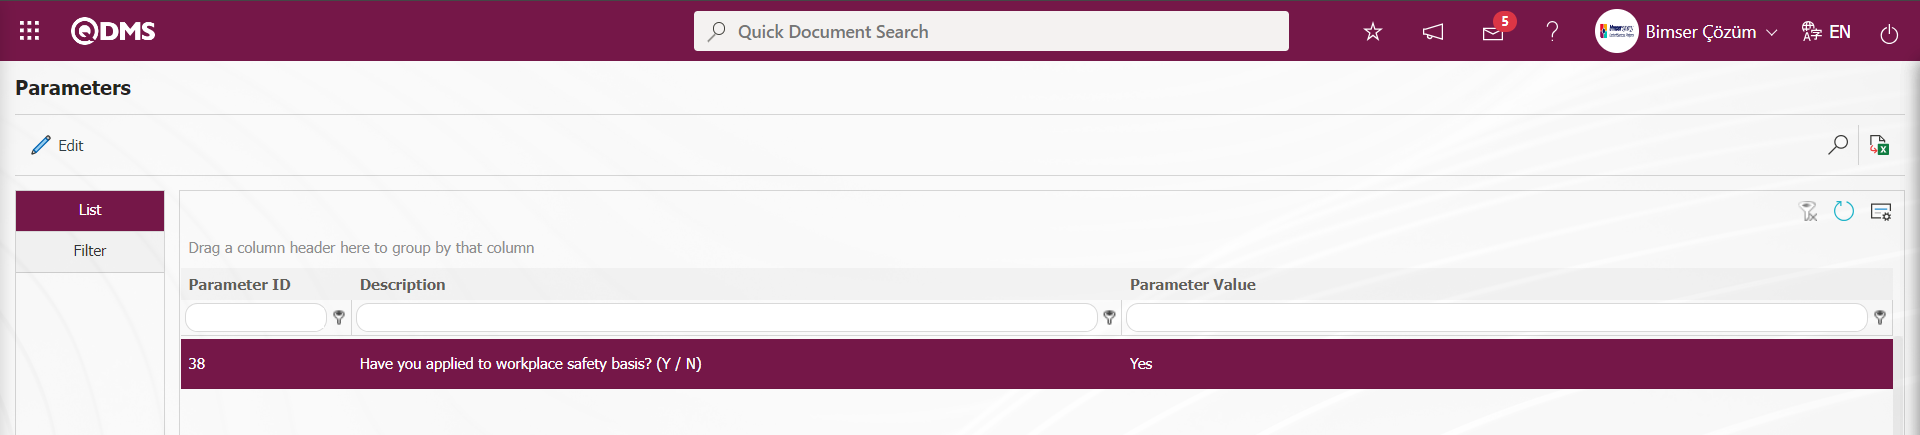
After the parameter is activated, whichever workplace is selected while creating the audit plan, auditors will be able to see their own audits only according to their workplaces.
Responsible Groups: This is the field where the user group defined in the system is selected by clicking the (Add) button on the Audit Plans - New Record screen. The selected group is authorized for the plan and audits of the plan. Only the responsible groups are authorized to view, edit and make changes to the plan and the audits belonging to the plan. The parameter is activated by selecting the parameter value “Yes” of parameter 42 in the Audit Activity parameters.
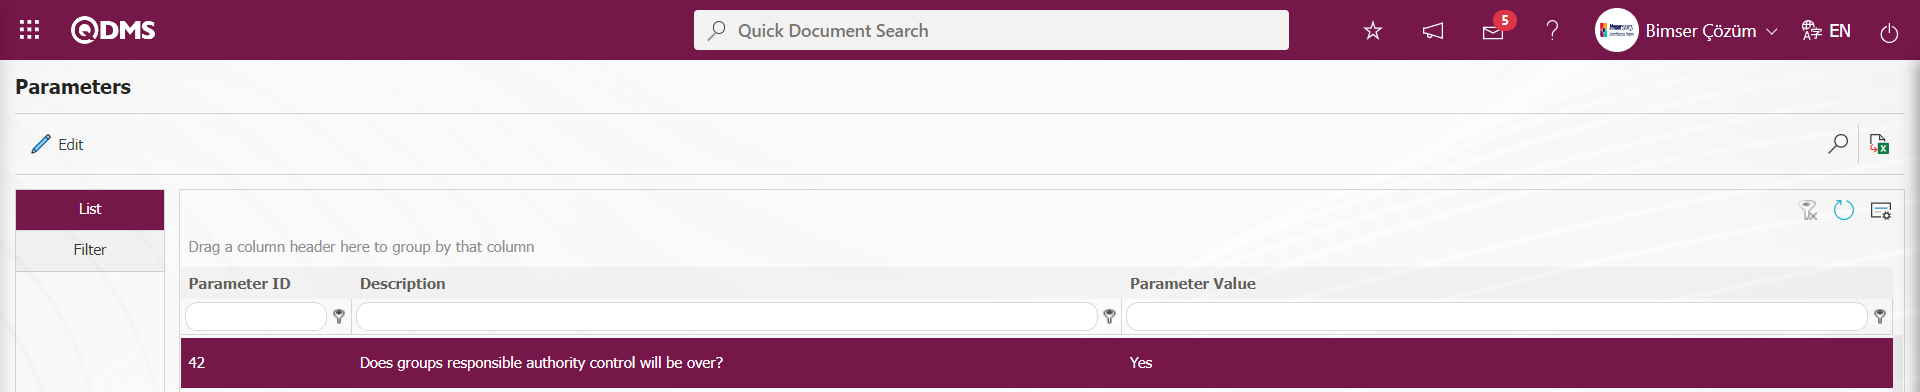
After the parameter is activated, the Responsible Groups field is displayed on the Audit Plans - New Record screen.
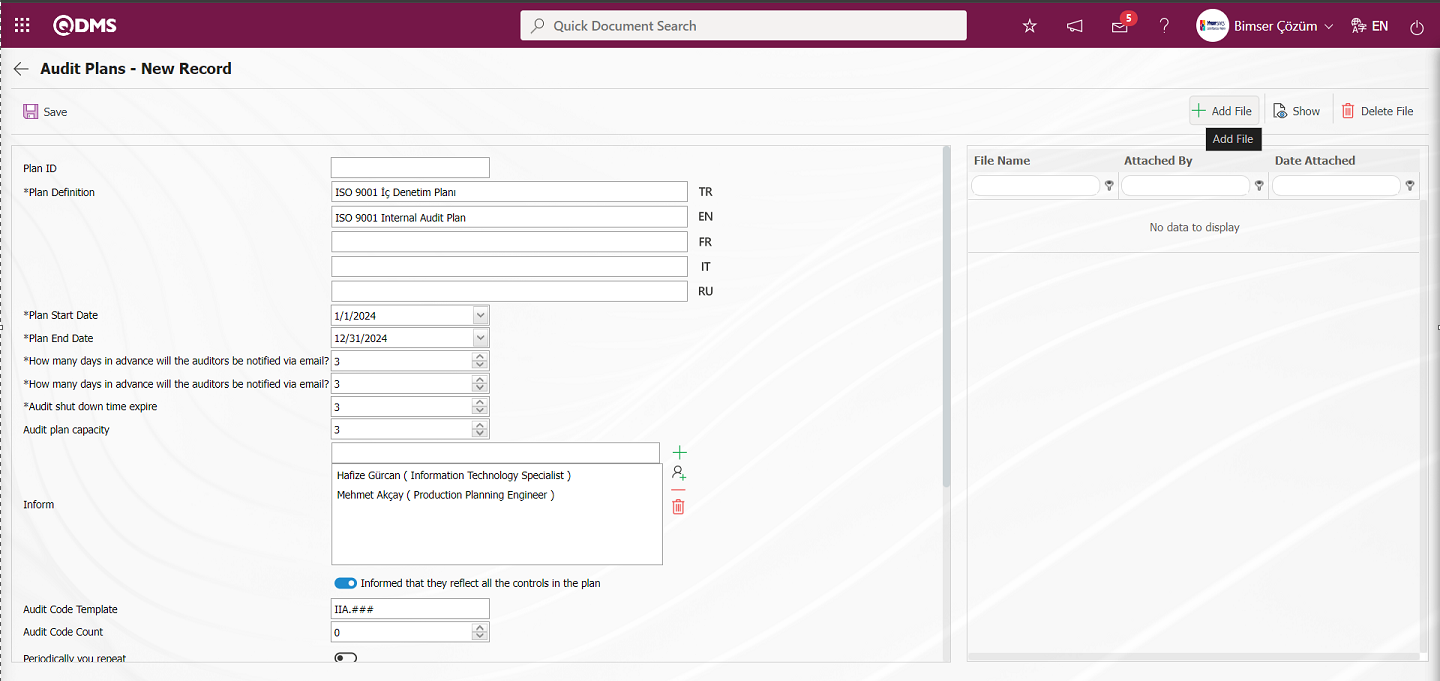
With the help of the buttons on the screen;
 : The additional file is uploaded to the system.
 : The uploaded additional file information is displayed.
 : The uploaded additional file information is deleted.
If desired, an additional file is added to the Audit Plan by clicking the button in the Additional files tab on the Audit Plans - New Record screen. Multiple attachment files can be added.
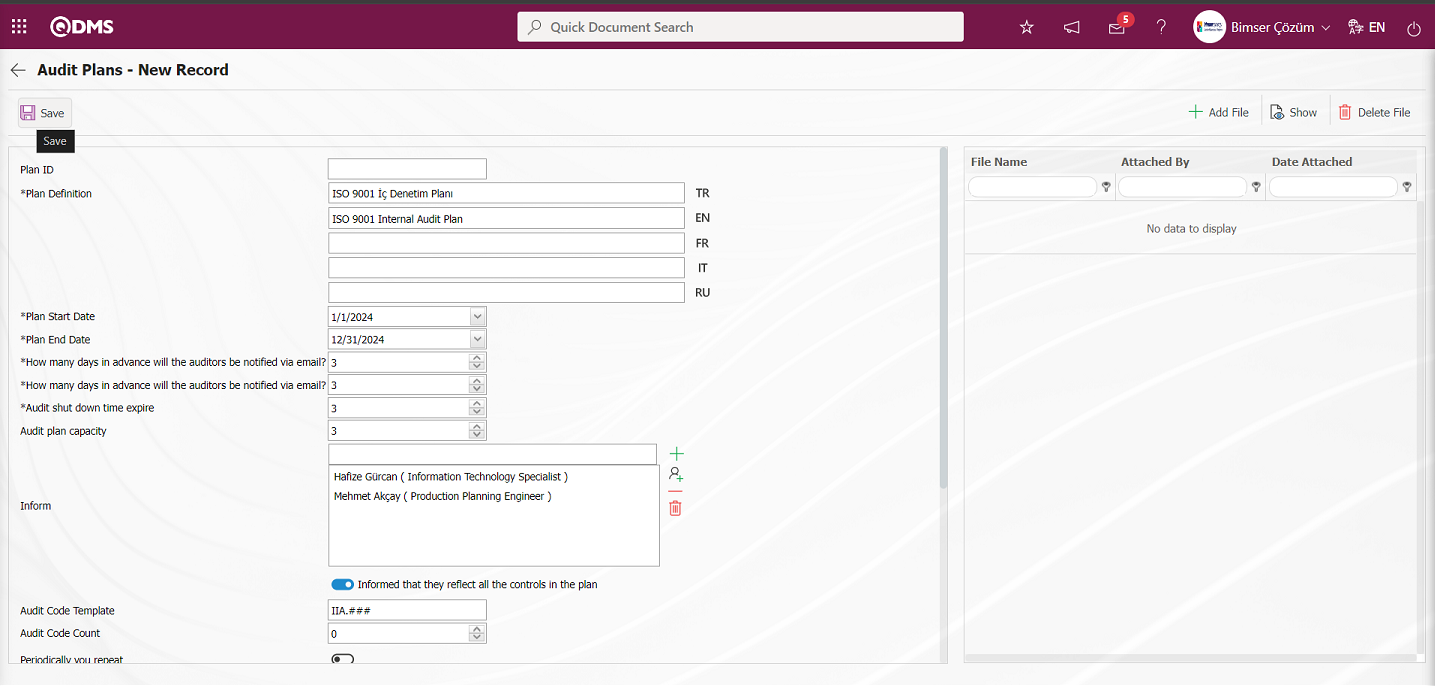
After entering the required information in the required fields on the Audit Plans - New Record screen, the Audit Plan registration process is done by clicking the  button in the upper left corner of the screen.
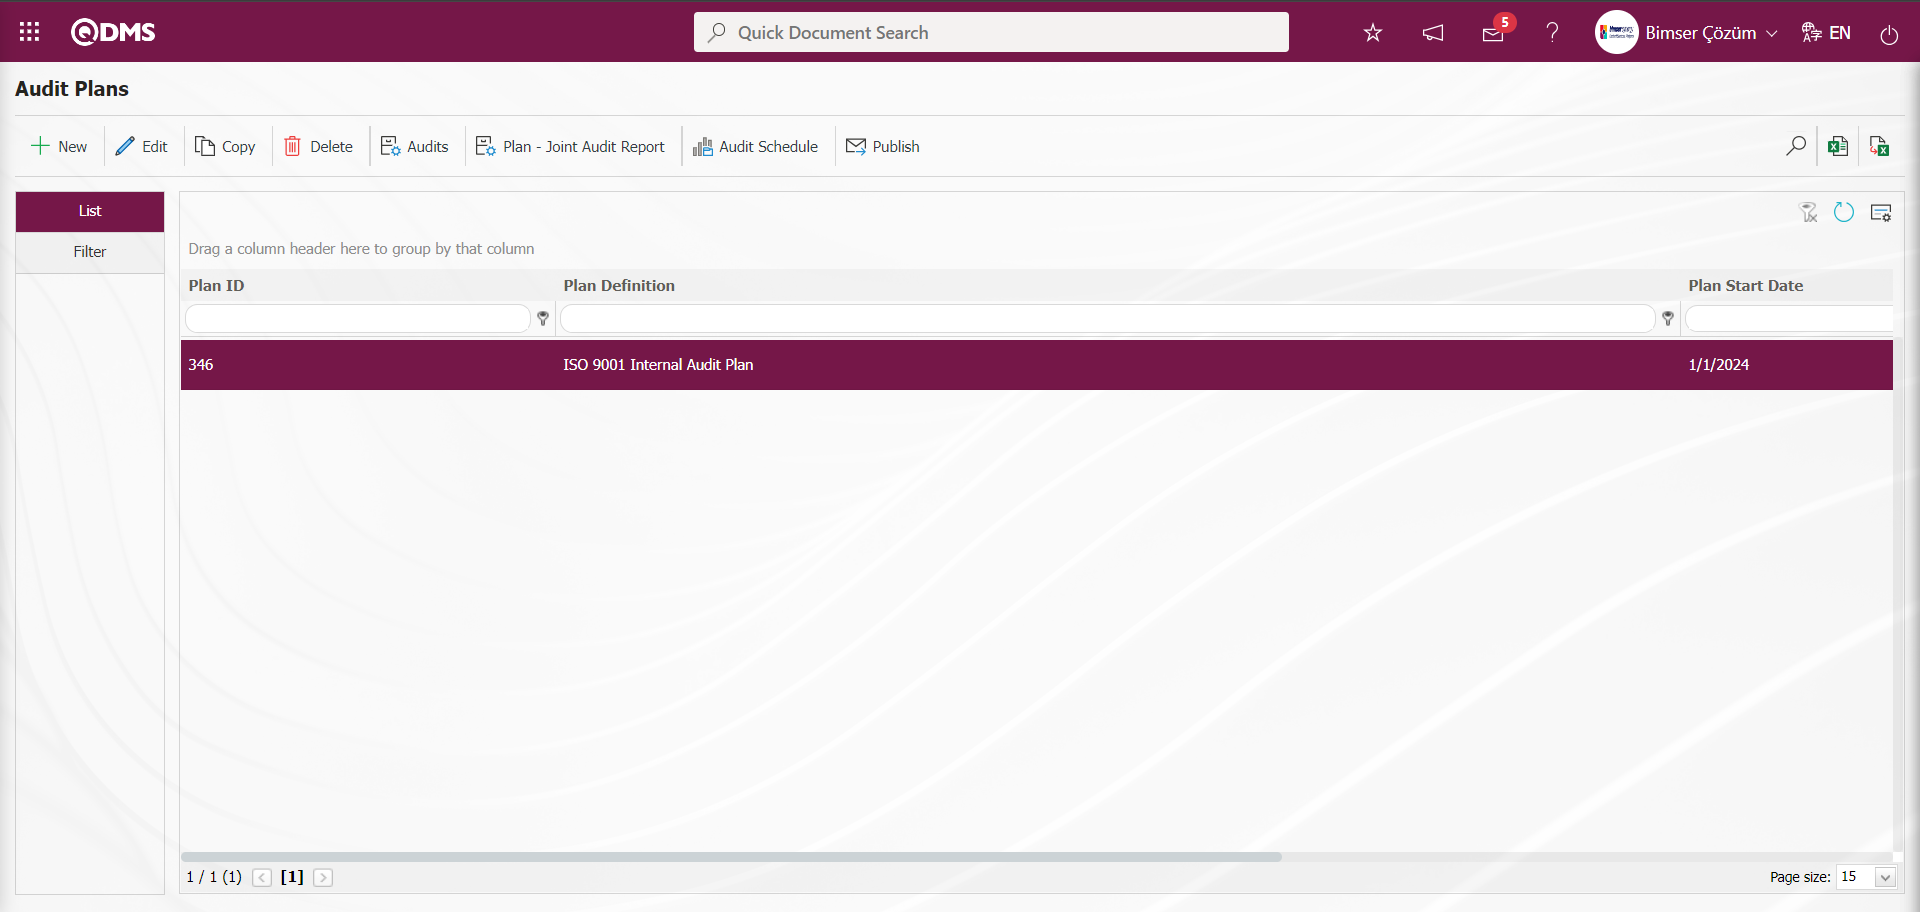
While the audit plan is selected in the list on the Audit Plans screen, edit and update the field information related to the audit plan by clicking the button. If the selected plan information in the list is the same in a new Audit plan to be defined, the Audit plan copy operation is performed by clicking the  button. In the audit plan copying process, if there is an audit in the plan, copying is done with the audits in it. When you want to delete any audit plan on the Audit Plan screen, select it and click the button to delete the audit plan. In this way, update, copy and delete operations are performed on the selected plan in the list on the audit plan screen.
Plan - Joint Audit Report;
It is the report where audit information is displayed together with the audits in the plan. It is the report where the questions, answers, CAPA opened in the findings and code information of the planned Actions in the audits in the plan are accessed, and the CAPA and planned Actions opened by clicking these code links are displayed. On the Audit Plans screen, click the  button while the audit plan is selected in the list tab.

Plan - Joint Audit Report is received in Excel format.
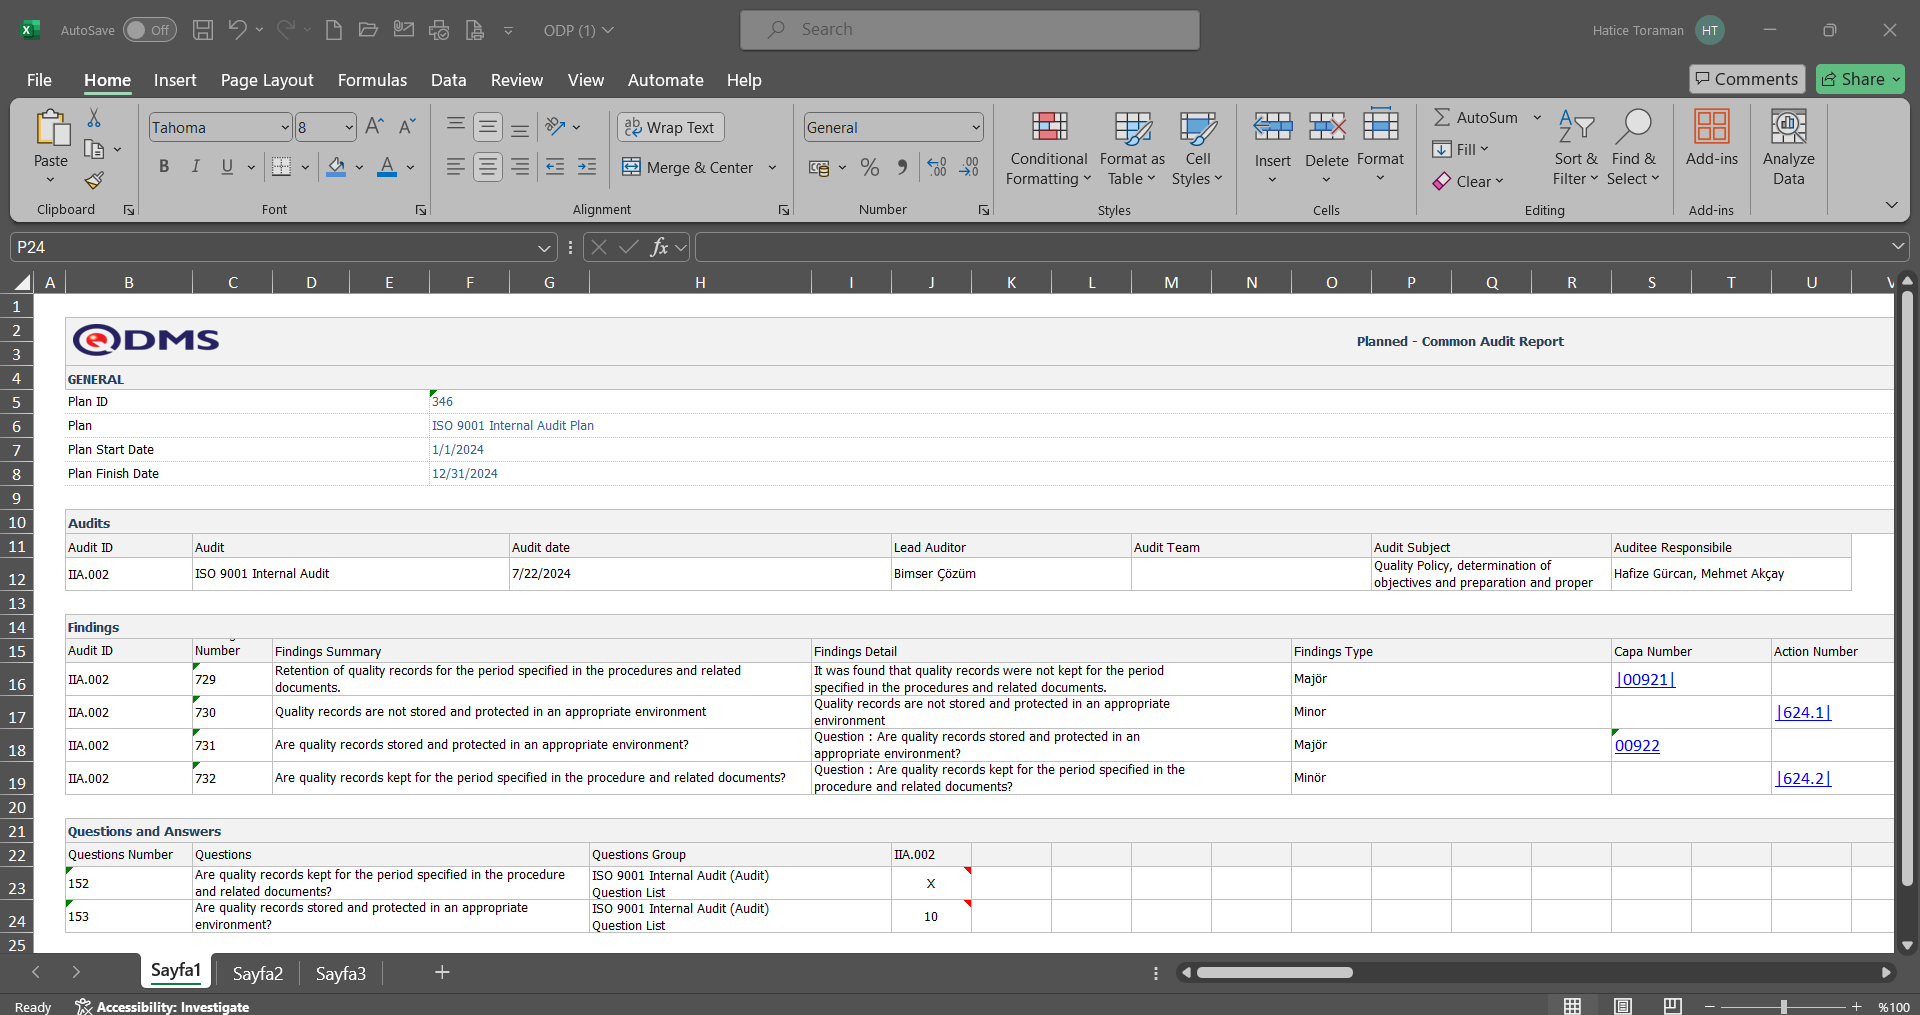
Audit Schedule Report;
It is the report in which the audits of the auditors in the audit plan are given in the form of a schedule in the specified time interval. In this audit schedule, the number of audits in the audit plan of the auditors is also given. To get Audit Schedule Report, this report is obtained by clicking the  button while the Audit Plan is selected.
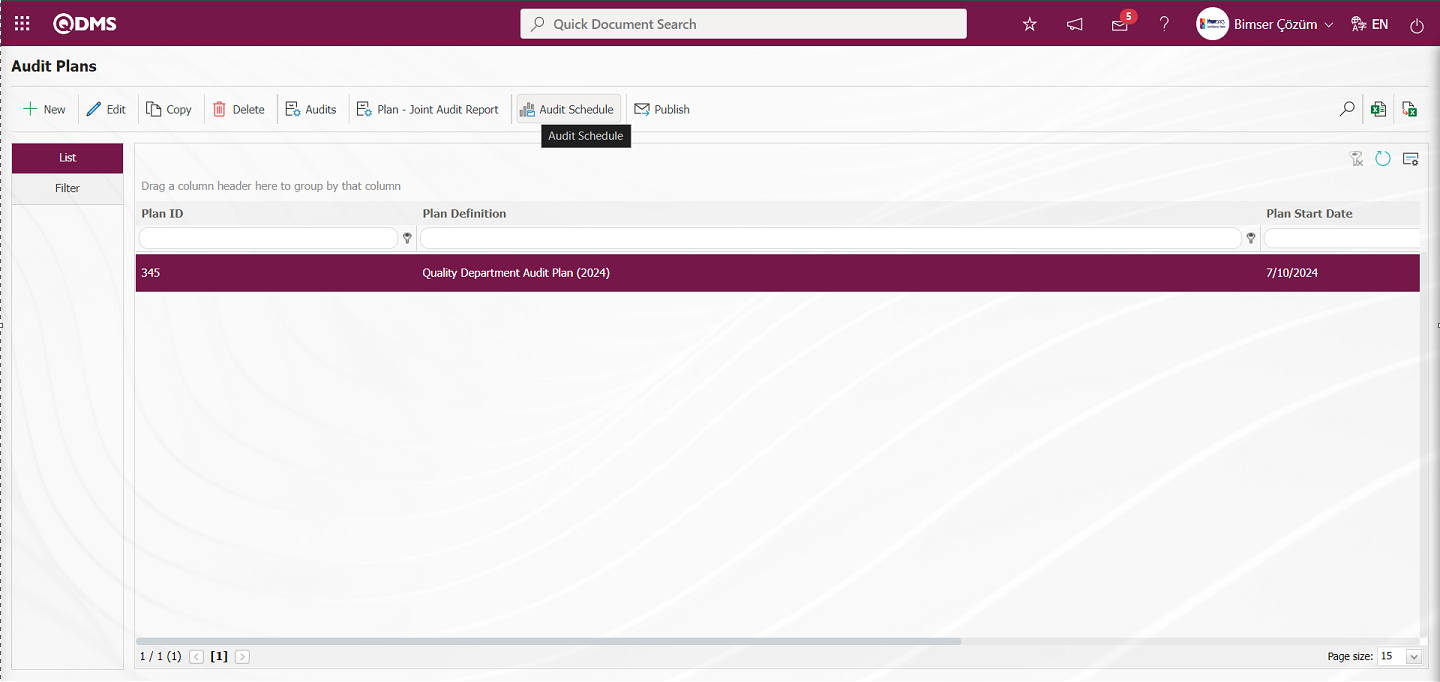
Two tabs are displayed in the Audit Schedule report: Filter and list tab. Enter data in the fields with search criteria in the filter tab and click the  (Search) button to get the Audit Schedule report in the relevant list tab.
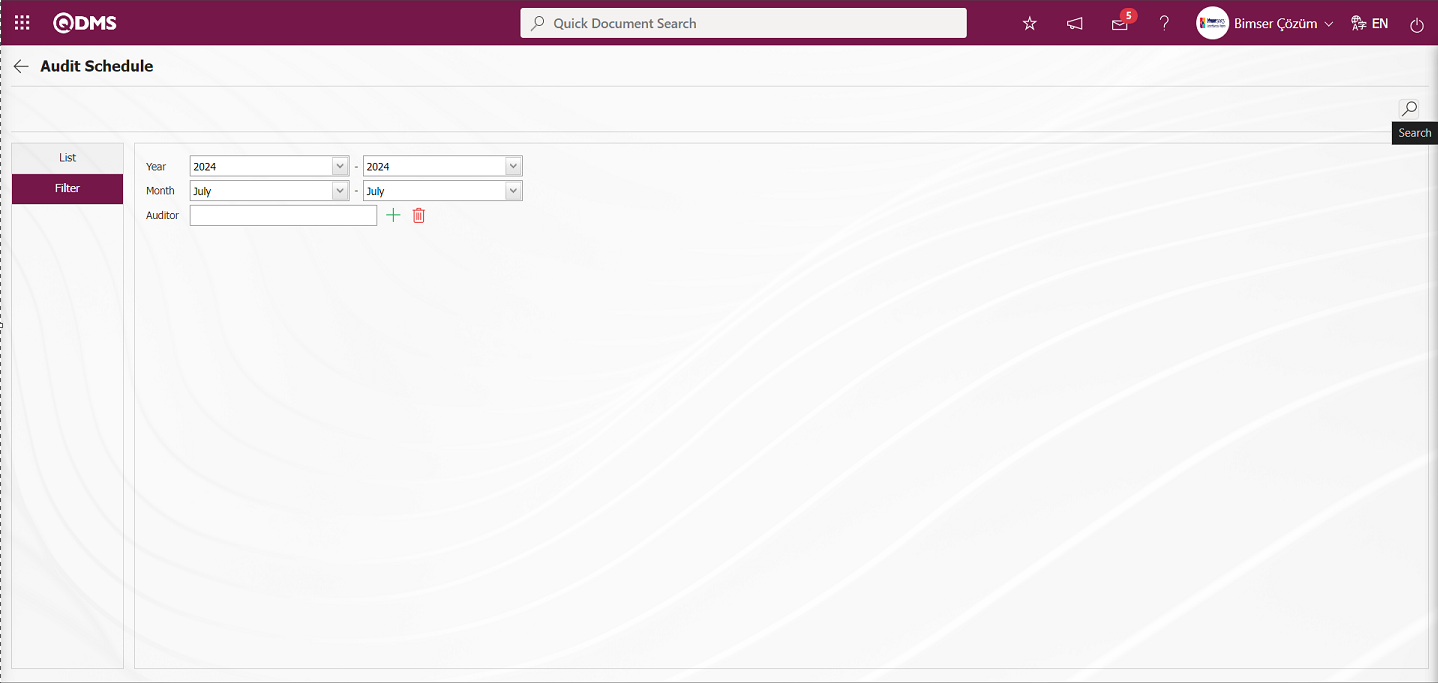
In the Filter tab, the month determined on the basis of the year of the audit plan is selected and the Audit Schedule report of the Auditor is obtained by selecting the relevant Auditor in the Auditor list by clicking the  (Select) button in the Auditor field. If no Auditor is selected, the Audit Schedule report of all Auditors in the relevant plan is received in the specified date range.
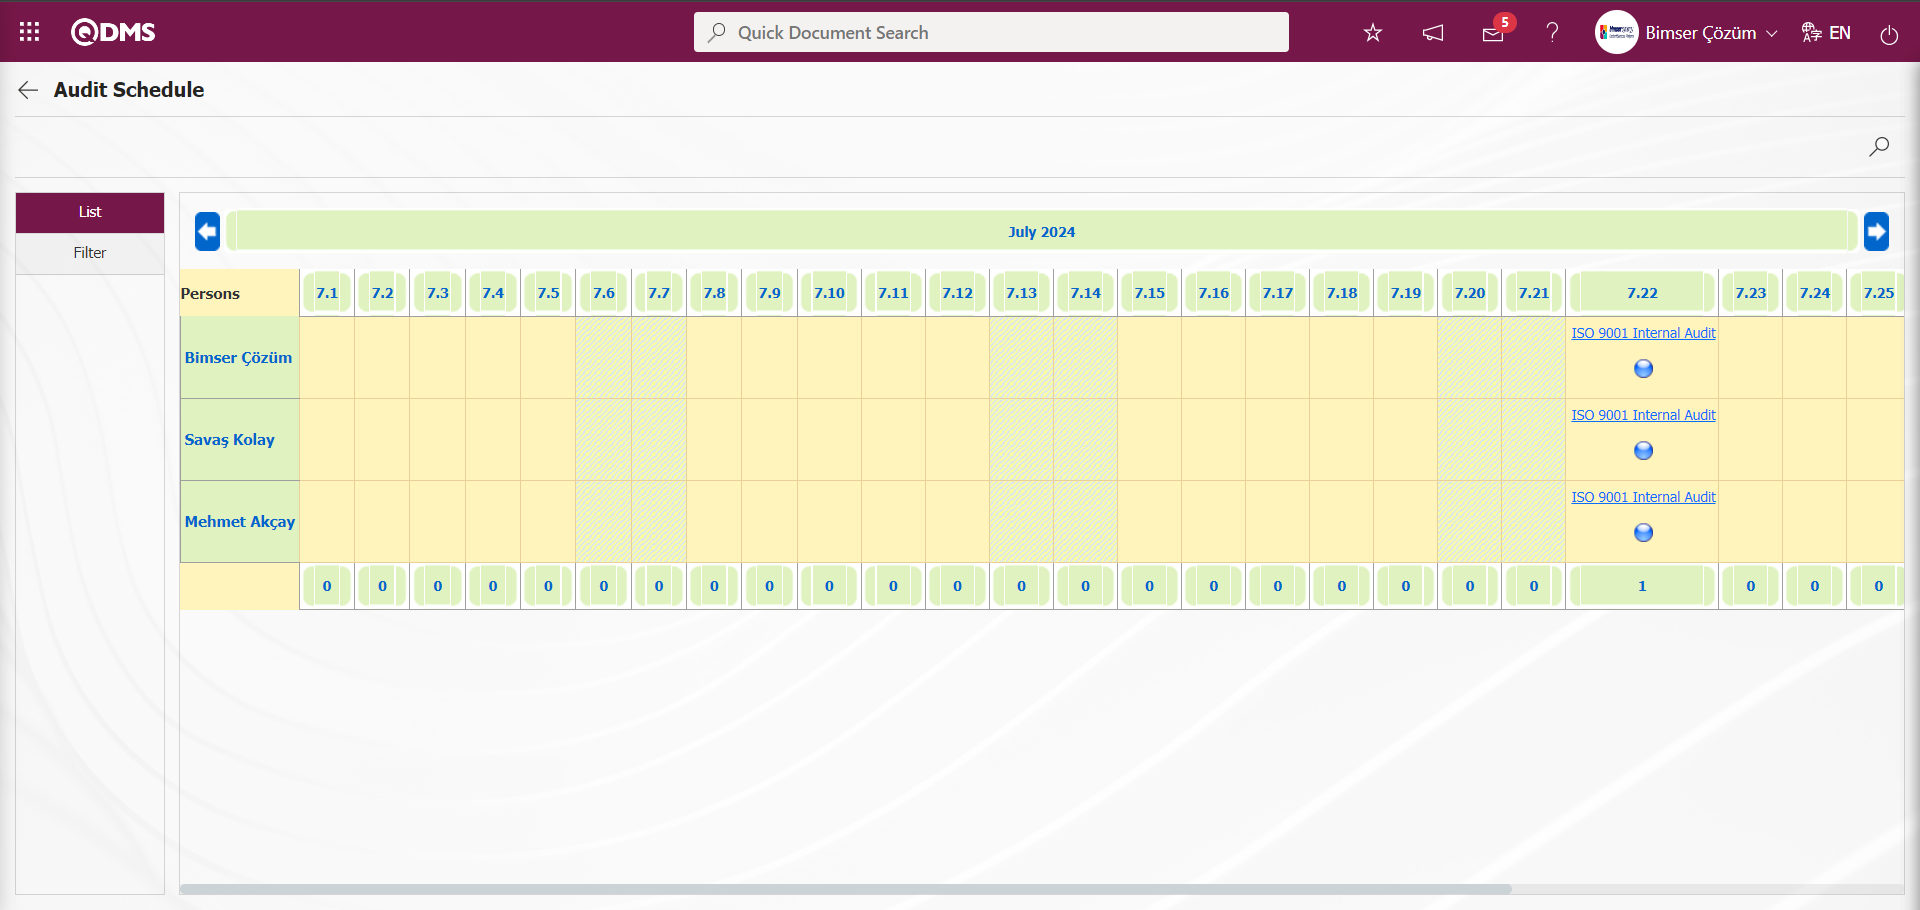
On the Audit Plans screen, click the  button while the audit plan is selected in the list tab.
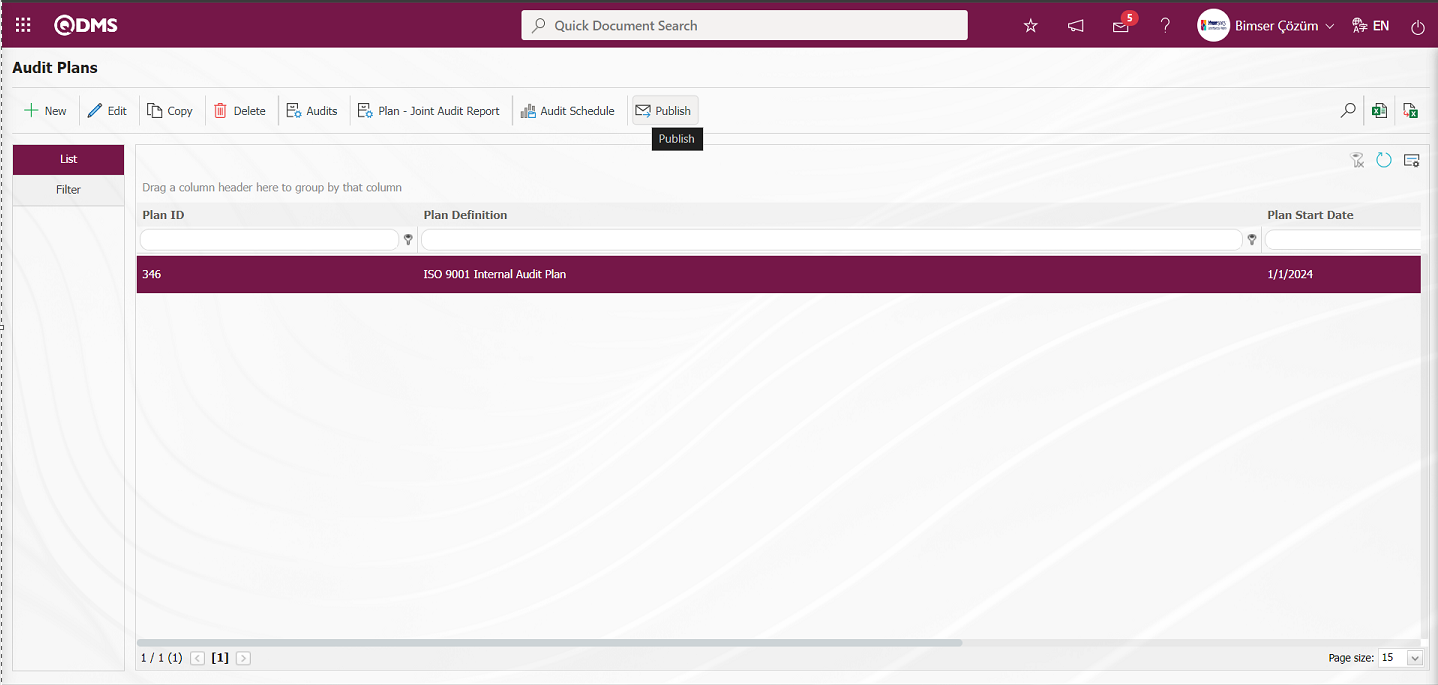
By clicking the button, the process of publishing the Audit Plan to the relevant personnel according to the adjustments made in the e-mail settings is made. The “OK” button is clicked in the message given by the system.
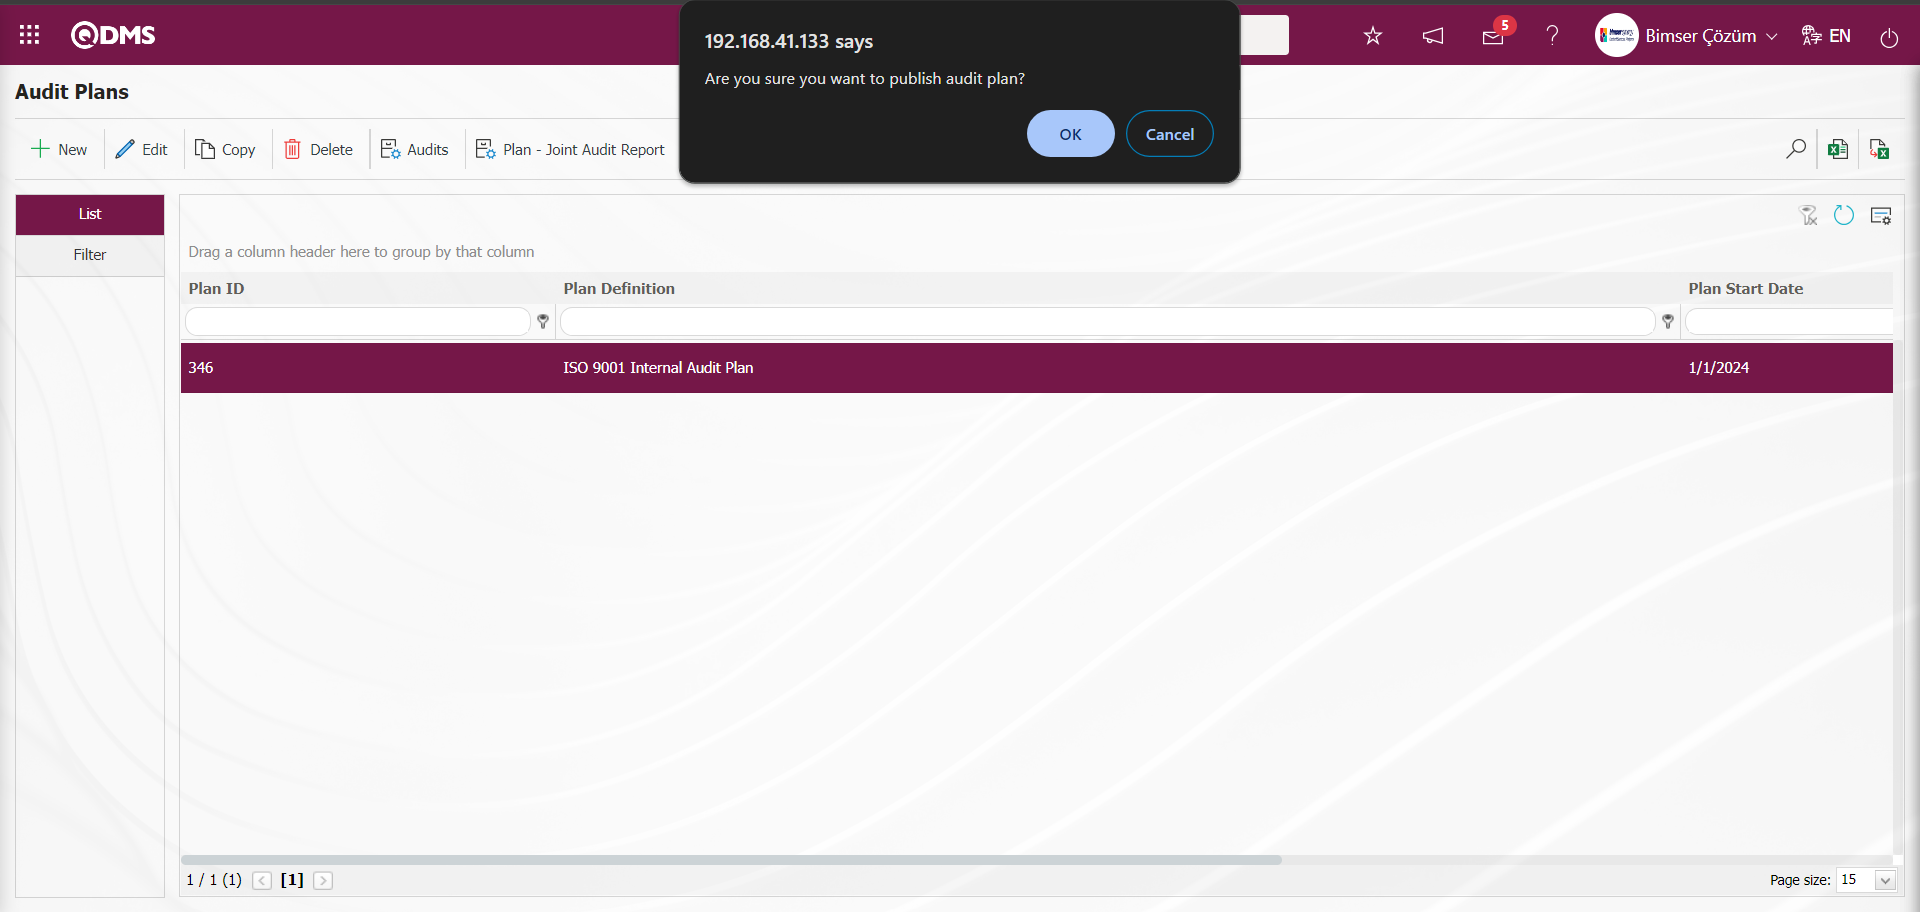
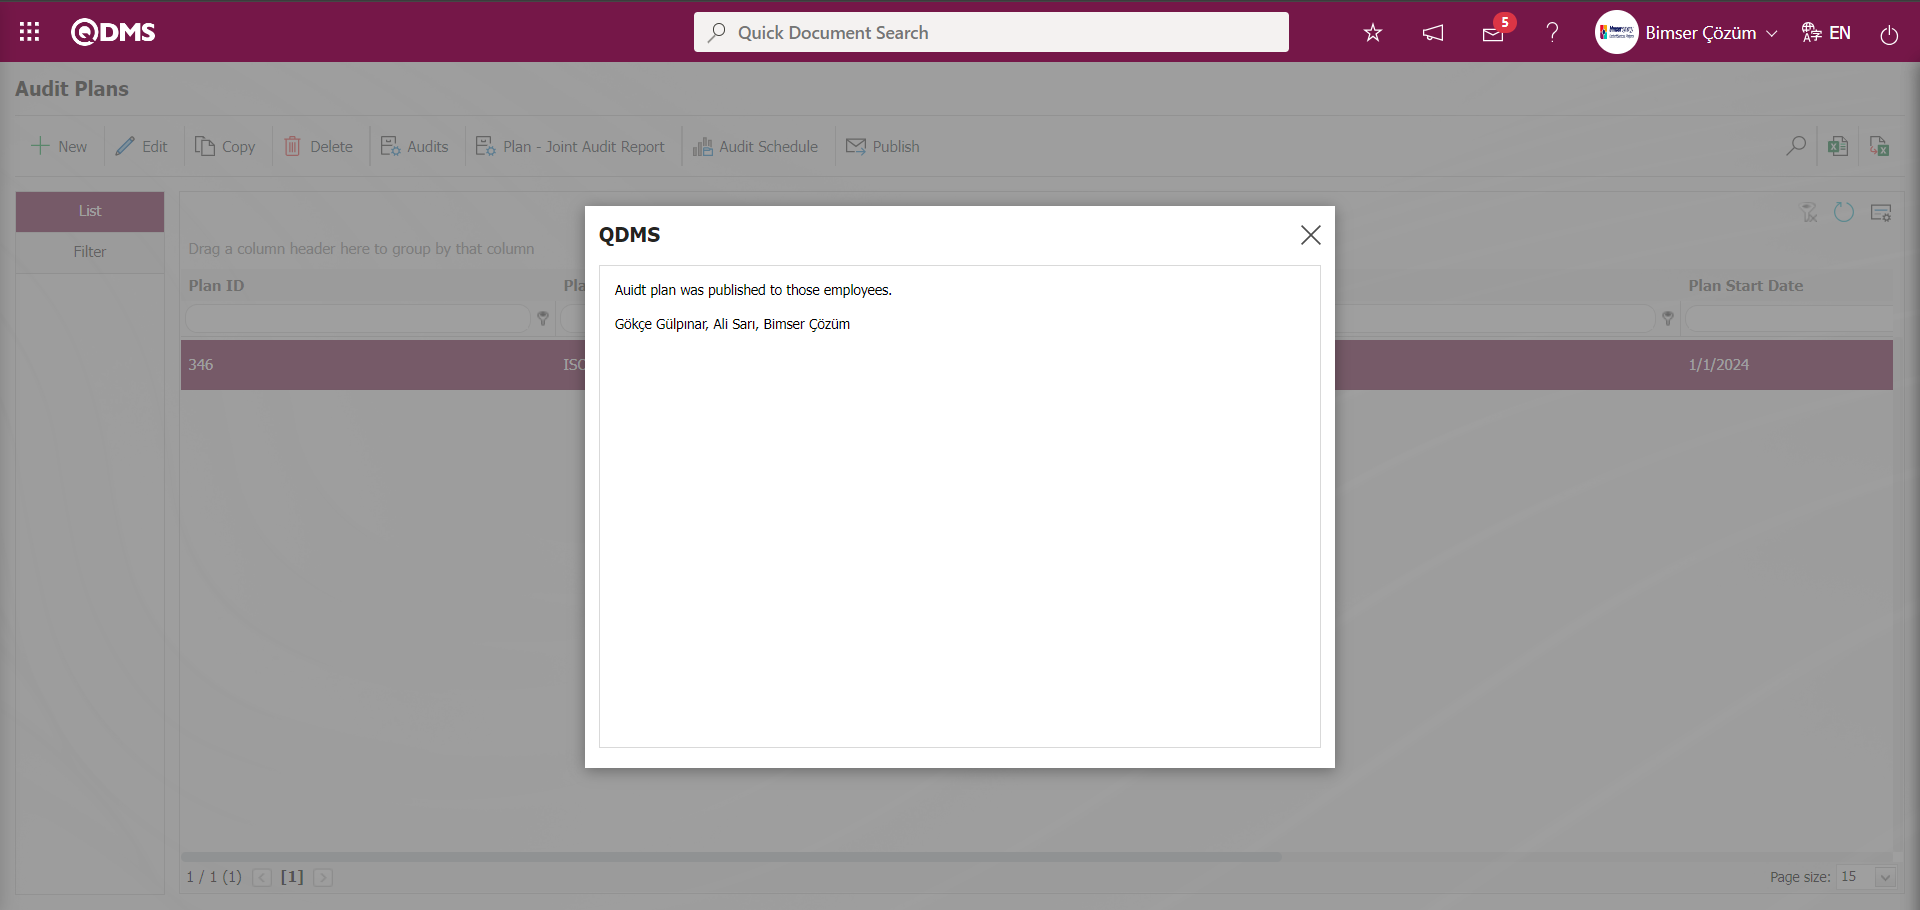
With the Filter tab on the Audit Plans screen Enter data in the fields such as Plan ID, Plan Definition, Plan Start Date and Plan End Date and filter according to the search criteria by clicking the (search) button.
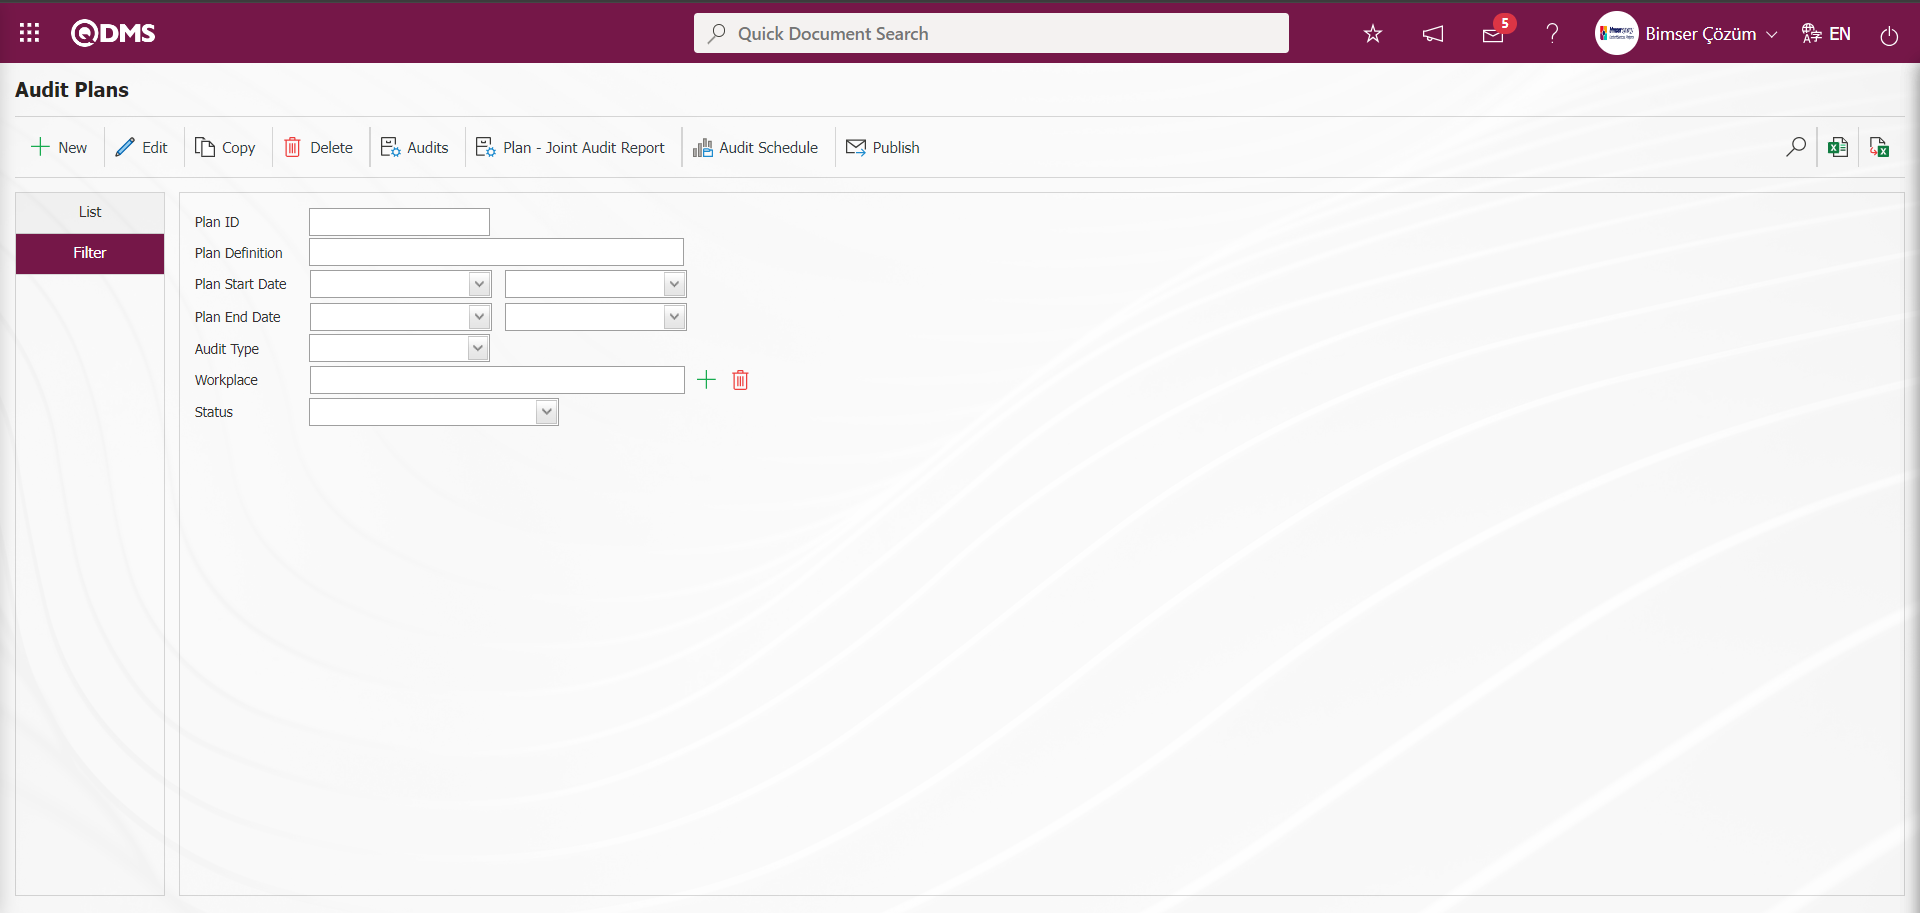
6.2.1.1. Determining the Audits in the Plan
After making the audit plan, it is time to add audits into the plan. Adding an audit to the Audit Plan is done by clicking the  button while the Audit Plan is selected.

Audit Plans - Audits screen opens.
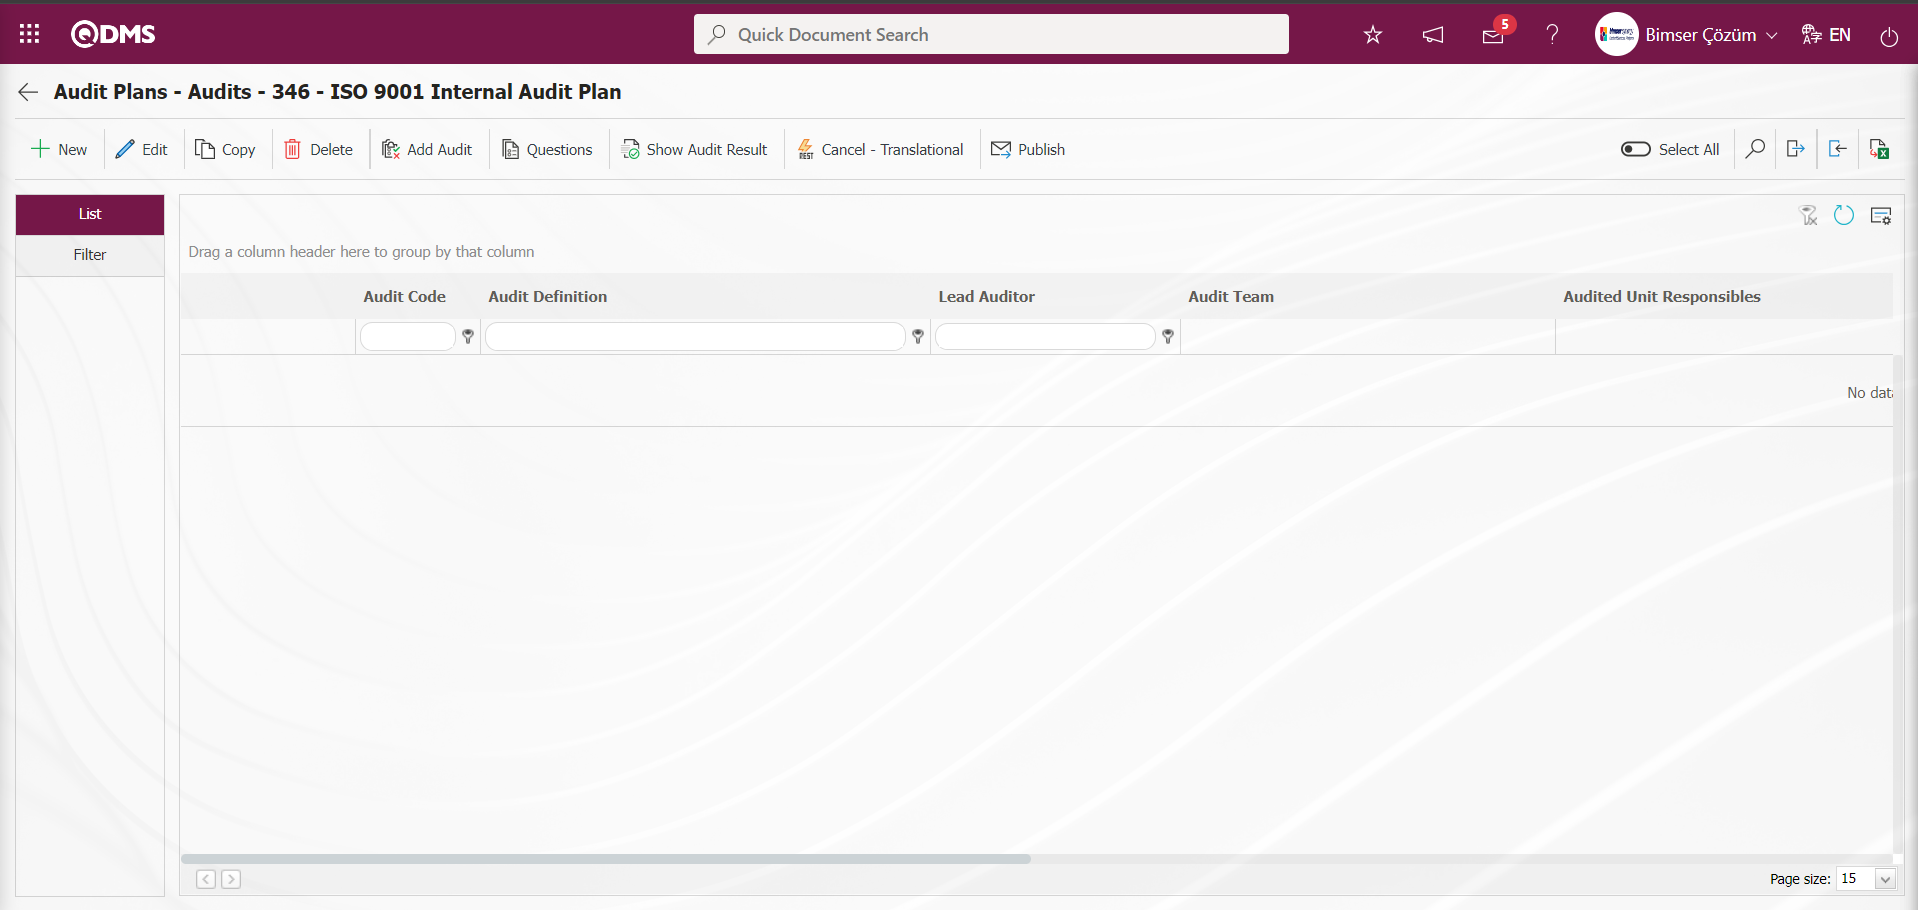
With the help of the buttons on the screen;
: A new audit record can be defined.
: Make any correction, change or update related to the selected audit record information in the list.
: A new record is created by copying the selected audit record in the list.
: Deletes the audit record selected in the list.
 : Multiple selection is made from the audit pool by adding audits. The parameter is activated by selecting “Yes” for parameter 115 in the audit module parameters.
 After the parameter is activated, the capacity information in the Audit Plan Capacity field in the Audit Plan in the Audit Plan on the Audit Plans-Audits screen / Total Audit hours in the Plan information is displayed.
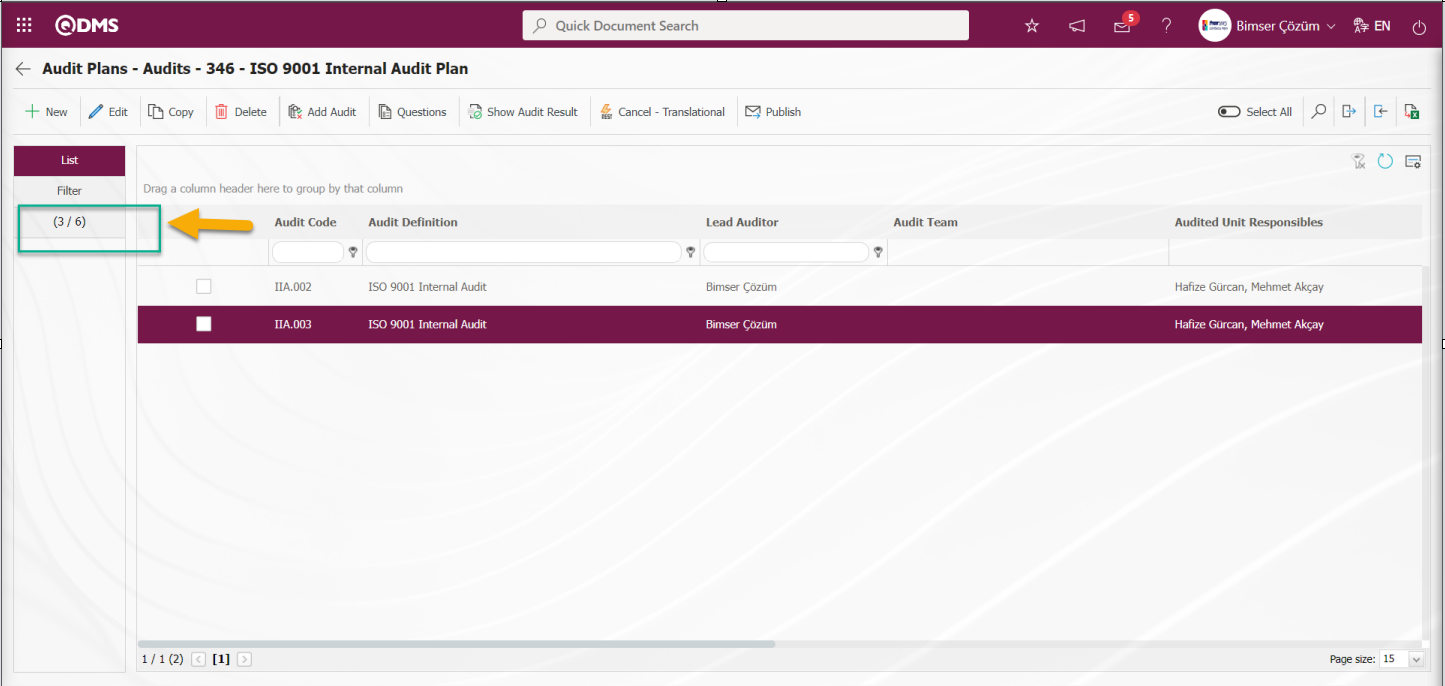
 :Add a question to the selected Audit in the question list
 :The result of the selected control in the list is displayed.
 : The selected control in the list can be postponed / canceled. It is the button displayed depending on the parameter. The parameter is activated by selecting “Yes” for parameter 43 in the Audit Activity module parameters.

After the parameter is activated, the button is displayed on the screen.
 : Selected audits in the Audit Plan are published and notified by e-mail.
 : Records are searched by filtering.
 : Data is transferred to Excel.
 : An audit transfer template is created.
 :The created Audit transfer template is uploaded to the system.
By using the (Create Template) and  (Upload Template) buttons, the audits are collectively included in the plan through a previously created Excel template. In order for the Audit Transfer templates to be displayed on this screen, the user must be defined as an administrator in the Audit Activity module on the System Infrastructure Definitions/BSID/Configuration Settings/ Manager Definition screen.
 : The search criteria on the menu screens are used to clear the data remaining in the filter fields in the grid where the search operation is performed.
 : The menu screen is restored to its default settings.
 : User-based designing of the menu screen is done with the show-hide feature, that is, the hiding feature of the fields corresponding to the columns on the menu screens.
Audit Plans - Audits screen, click the button in the upper left corner of the screen to add a new audit to the audit plan.
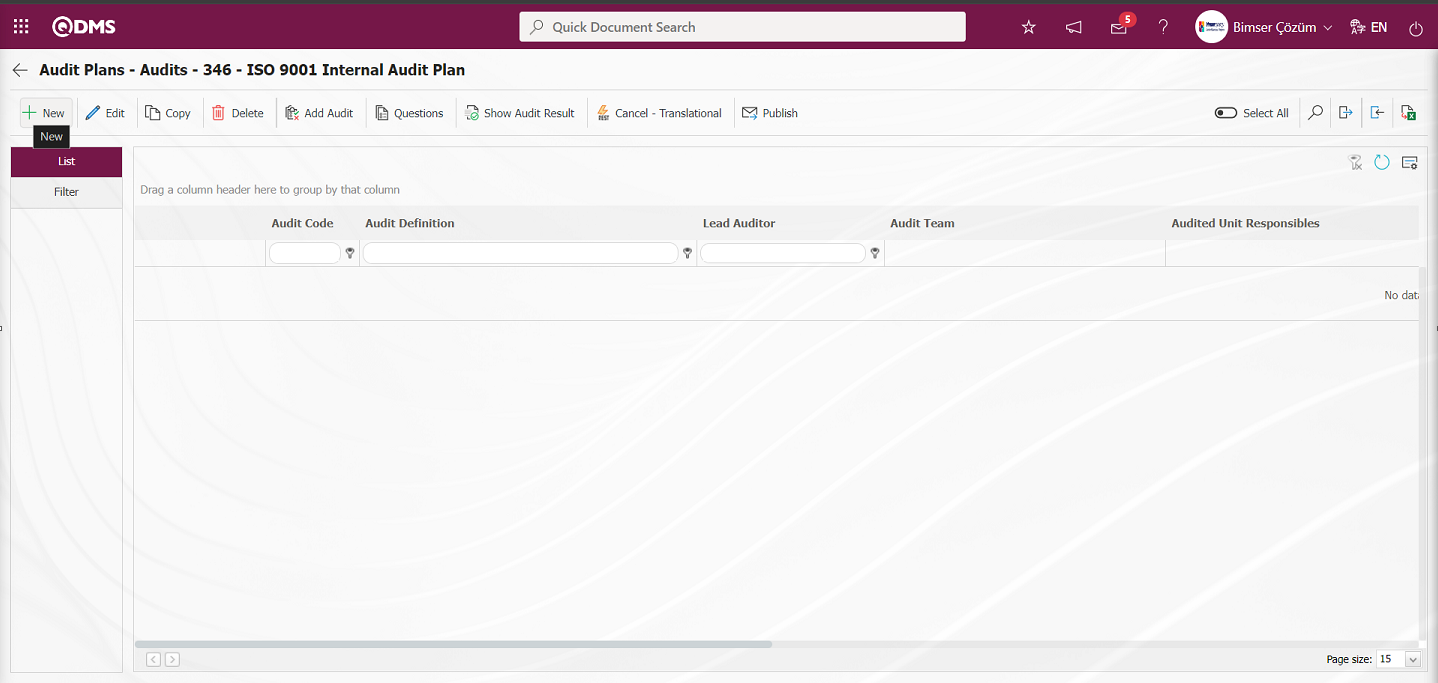 Audit Plans - Audits - New Record screen opens.
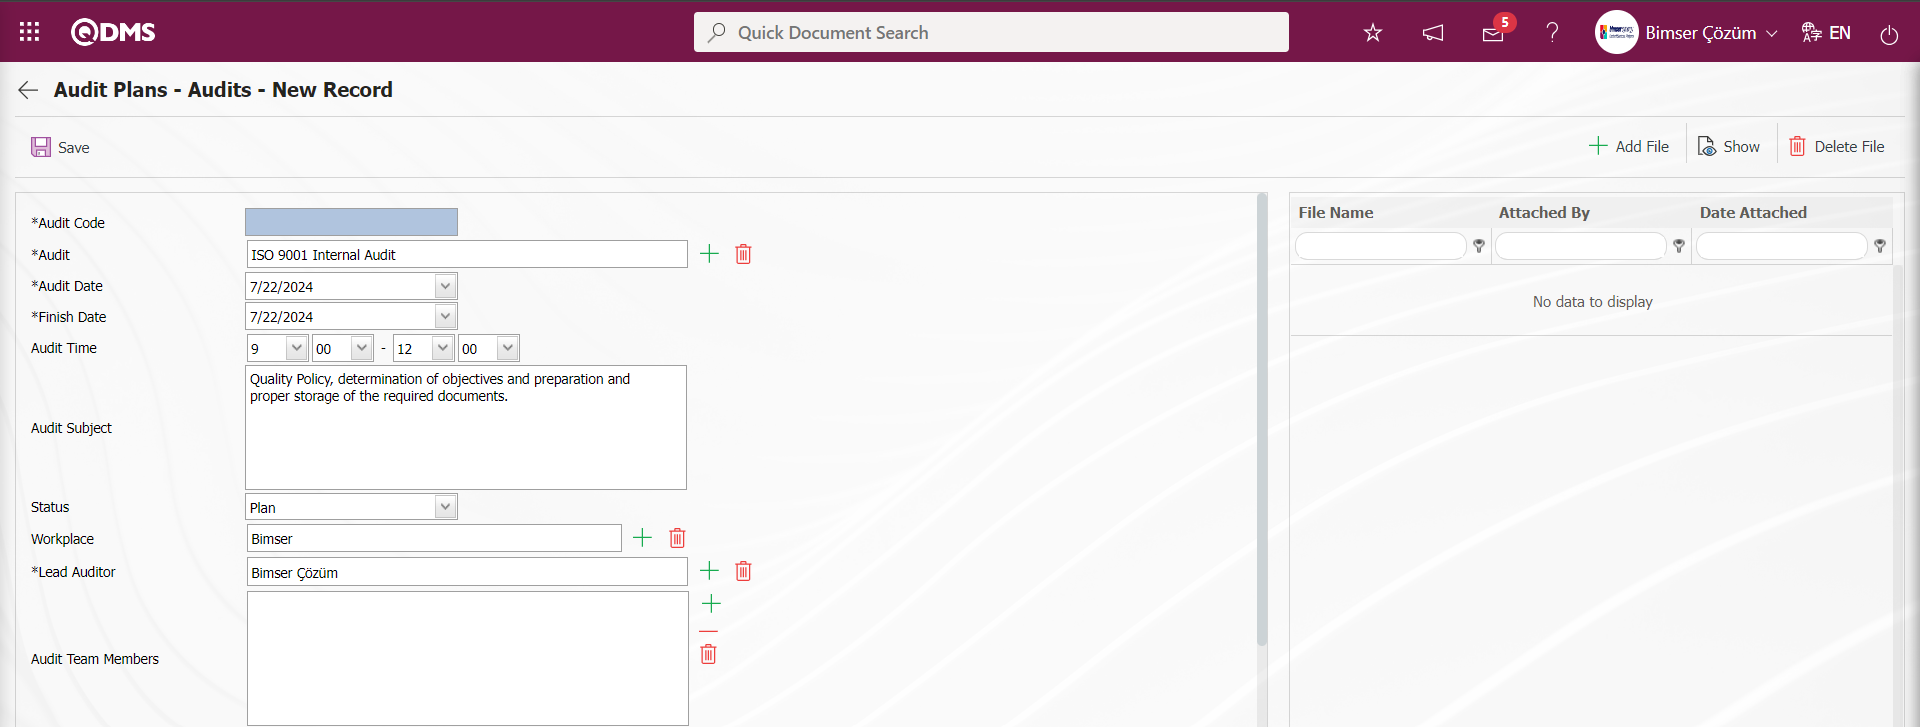
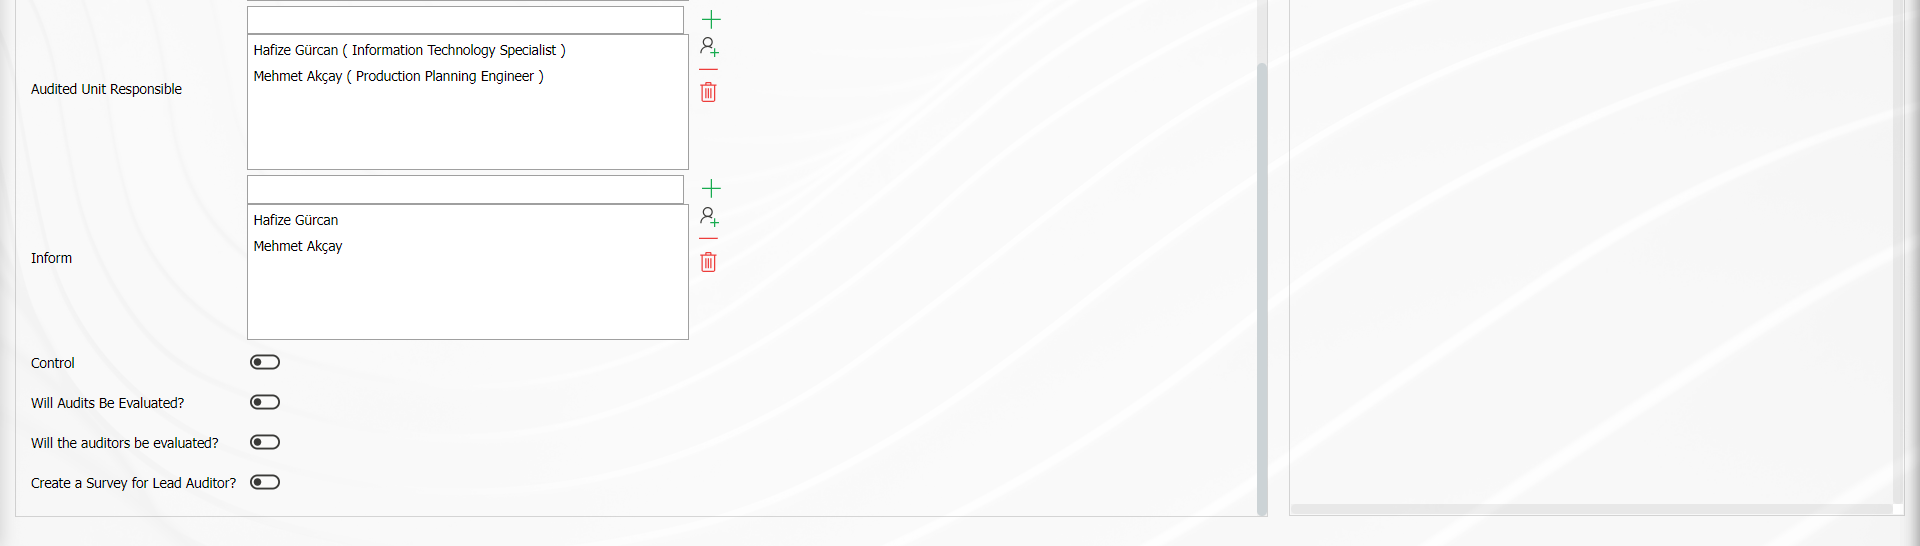
Related fields are defined on the screen that opens:
Audit Code: This is the field where the audit code information is given automatically by the system on the Audits Plans - Audits - New Record screen. This field comes automatically according to the code template defined in the Audit Code template field on the Audit Plan - New Record screen.
Audit: This is the field where the audit is selected from the Audit list defined in the system opened by clicking the (Select) button on the Audits Plans - Audits - New Record screen. The audit list is defined in the System Infrastructure Definitions/Audit /Audit Definition menu. The necessary information can be accessed by clicking the relevant link.
Audit Date: It is the field where the Audit start date information is selected from the calendar field on the Audits Plans - Audits - New Record screen.
Finish Date: It is the field where the Audit end date information is selected from the calendar field on the Audits Plans - Audits - New Record screen.
Audit Time: This is the field where the Audit time information is selected on the Audits Plans - Audits - New Record screen.
Audit Subject: It is the field where the Audit subject is written on the Audits Plans - Audits - New Record screen.
Status: It is the field where the audit status is determined on the Audits Plans - Audits - New Record screen. Newly defined audits are saved with plan status. As the status of the audits changes, the field here is automatically updated.
Workplace: In the Audits Plans - Audits - New Record screen, the workplace information where the audit will be performed is selected from the workplace information defined in the system that opens by clicking the (Select) button.
Lead Auditor: Audits Plans - Audits - New Record screen is the field where the Chief Auditor information is selected from the system-defined Auditor list opened by clicking the (Select) button. Auditor List comes defined in the System Infrastructure Definitions / Audit Activity / Auditor Definition menu. The necessary information about Auditor Identification is accessed by clicking the relevant link.
Audit Team Members:This is the field where the Audit Team information that will perform the audit on the Audit Plans - Audits - New Record screen is selected from the Auditor list defined in the system that opens by clicking the (Select) button.Auditor List is defined in the System Infrastructure Definitions / Audit Activity / Auditor Identification menu.
Audited Unit Responsible: This is the field where the audited unit supervisors are selected from the personnel and user group list on the Audits Plans - Audits - New Record screen. Audited Unit Supervisors are selected from the list of personnel defined in the system by clicking the (Add) button or from the list of user groups defined in the system by clicking the  (Select) button.
Inform: This is the field where the people who will be informed about the stages of the audit by e-mail are selected on the Audits Plans - Audits - New Record screen. The person to be notified in the audit is selected from the list of personnel defined in the system by clicking the ( Add) button or the selection is made from the list of user groups defined in the system by clicking the (Select) button. When the check box related to the “Reflect all audits in the plan to be notified” field on the Audit Plans-New Record screen is checked, it automatically comes to this field in the To Be Notified field of the Audit Plan - New Record screen.
Control: On the Audits Plans - Audits - New Record screen, if you want to check whether the people in the audits have audits on the given dates, the relevant check box is checked. When the relevant check box is checked, when the audit registration process is done, the system automatically informs the system that the people in the audits have audits on the given dates on the screen that opens automatically.
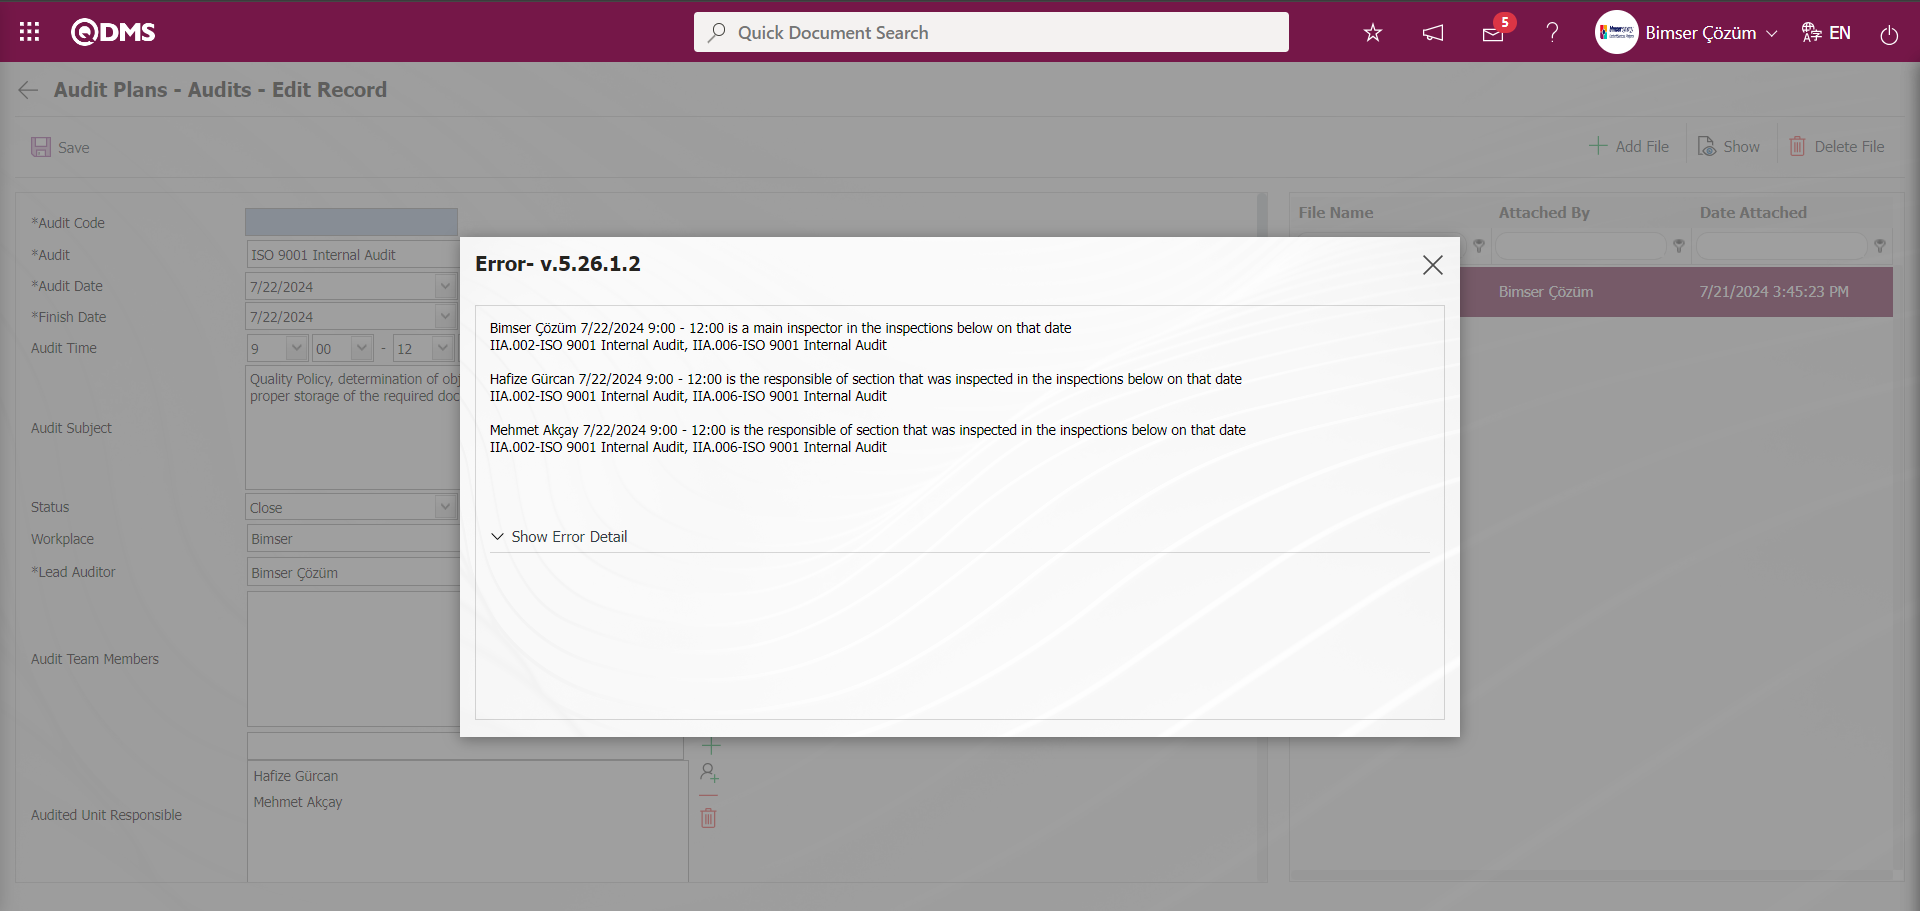
In order for the check box related to the “ Control” field to be checked on the Audit Plans - Audits - New Record screen, the parameter value of parameter 74 of the Audit Activity module parameters is selected as “Yes” and the parameter is activated.
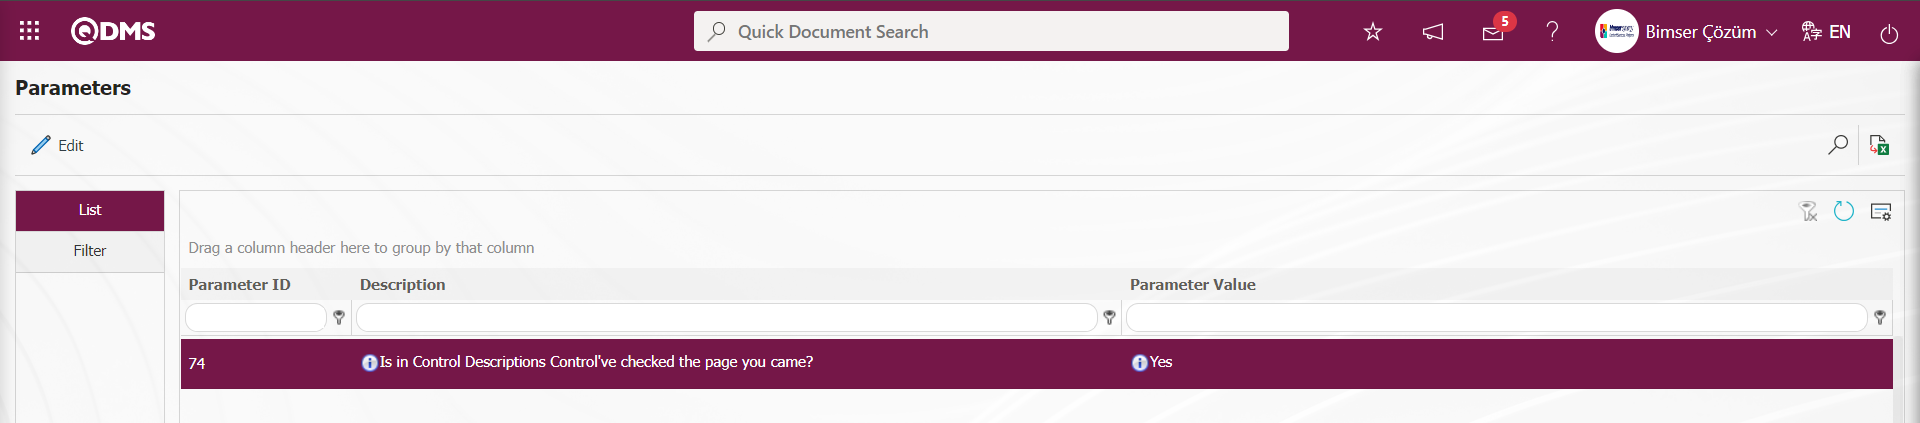
When the parameter is activated, the check box related to the “ Control” field on the Audits Plans - Audits - New Record screen is automatically checked by the system.
Will Audits Be Evaluated?: On the Audits Plans - Audits - New Record screen, if it is desired to evaluate the audits with a questionnaire at the end of the audit, this is the field where the relevant check box is checked. It is the field displayed depending on the parameter. The parameter is activated by selecting the parameter value “Yes” of parameter 87 in the Audit Activity parameters.
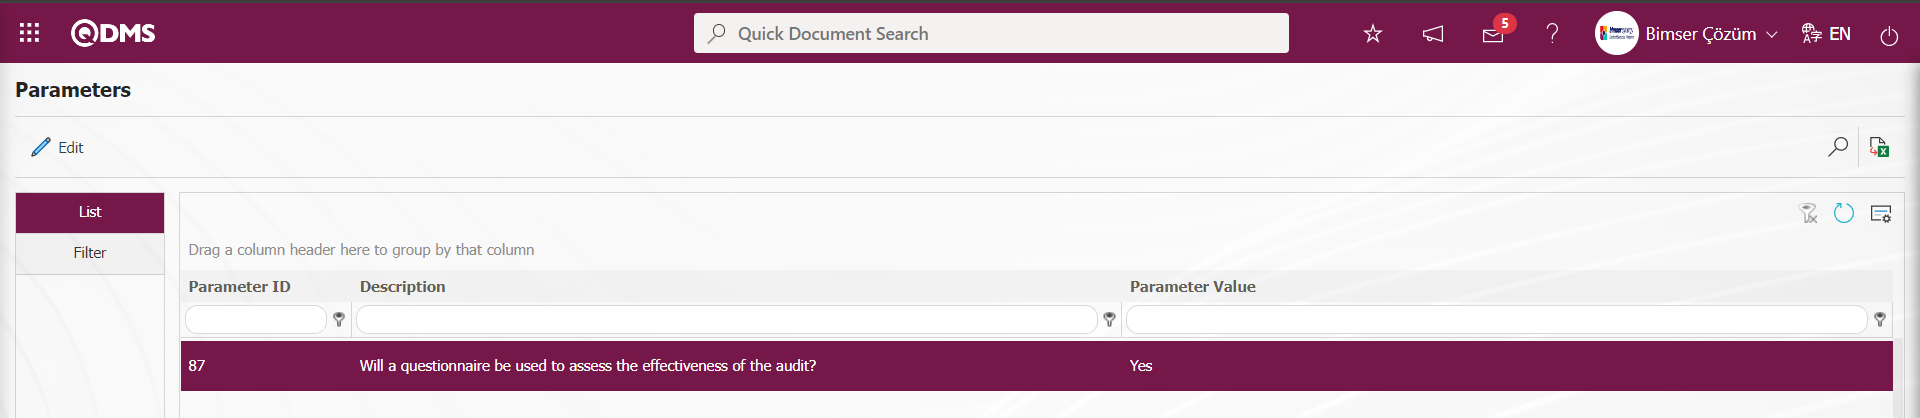
After the parameter is activated, the “Will Audits Be Evaluated?” field is displayed. By checking the relevant check box and making the necessary adjustments in other parameters related to the evaluation of audits, the function related to the agent is run after the audit closure process. In the Survey Operations module, “Surveys will be filled out.” task is created as “Surveys will be filled out.” task. The survey code in the relevant task is clicked and the evaluation process is done with the survey. (Necessary adjustments must be made in parameters 88 and 91 in the Audit Activities module parameters)
Will the auditors be evaluated?: In the Audits Plans - Audits - New Record screen, if it is desired to evaluate the auditors with a questionnaire at the end of the audit, it is the field where the relevant check box is checked. The parameter value of parameter 92 in the Audit Activity parameters is activated by selecting “Yes”.

After the parameter is activated, “Will Audits Be Evaluated?” and “Will the auditors be evaluated?” fields are displayed. After the relevant check box is checked and the necessary adjustments are made in other parameters related to the evaluation of auditors and lead auditors, the function related to the agent is run after the audit is closed. In the Survey Operations module, surveys related to the evaluation of auditors and lead auditors are waiting for the “Surveys will be filled out.” task. The survey code in the relevant task is clicked and the evaluation process is done with the survey. (Necessary adjustments must be made in parameters 93 and 96 in the Audit Activities module parameters).
Create a Survey for Lead Auditor?: Audits Plans - Audits - New Record screen, if it is desired to send the survey to the lead auditor, it is the field where the relevant check box is checked. It is the field that is displayed when the parameter is activated by selecting parameter 92 “Yes” in the Audit Activity module parameters.
Additional Files: This is the section to upload additional files if there are any in the control.

With the help of the buttons on the screen;
 : The additional file is uploaded to the system.
 : The uploaded additional file information is displayed.
 : The uploaded additional file information is deleted.
On the Audit Plans - Audits - New Record screen, click the button on the Additional files tab and add an additional file to the Audit if desired. Multiple additional files can be added.
While creating each audit record to be included in the plan on the Audit Plans - Audits - New Record screen; the name of the audit, the start and end dates of the audit, the time, the subject of the audit, the workplace, the chief auditor, the audit team, the audited unit and the responsible persons, and the fields to be notified are determined. Additional file is added if available. Qdms applies a control method; the auditor cannot audit his own unit, at the same time the auditor cannot be selected as auditor in another audit on the same day, if this control is desired, the “ Control” button at the bottom of the page should be checked.
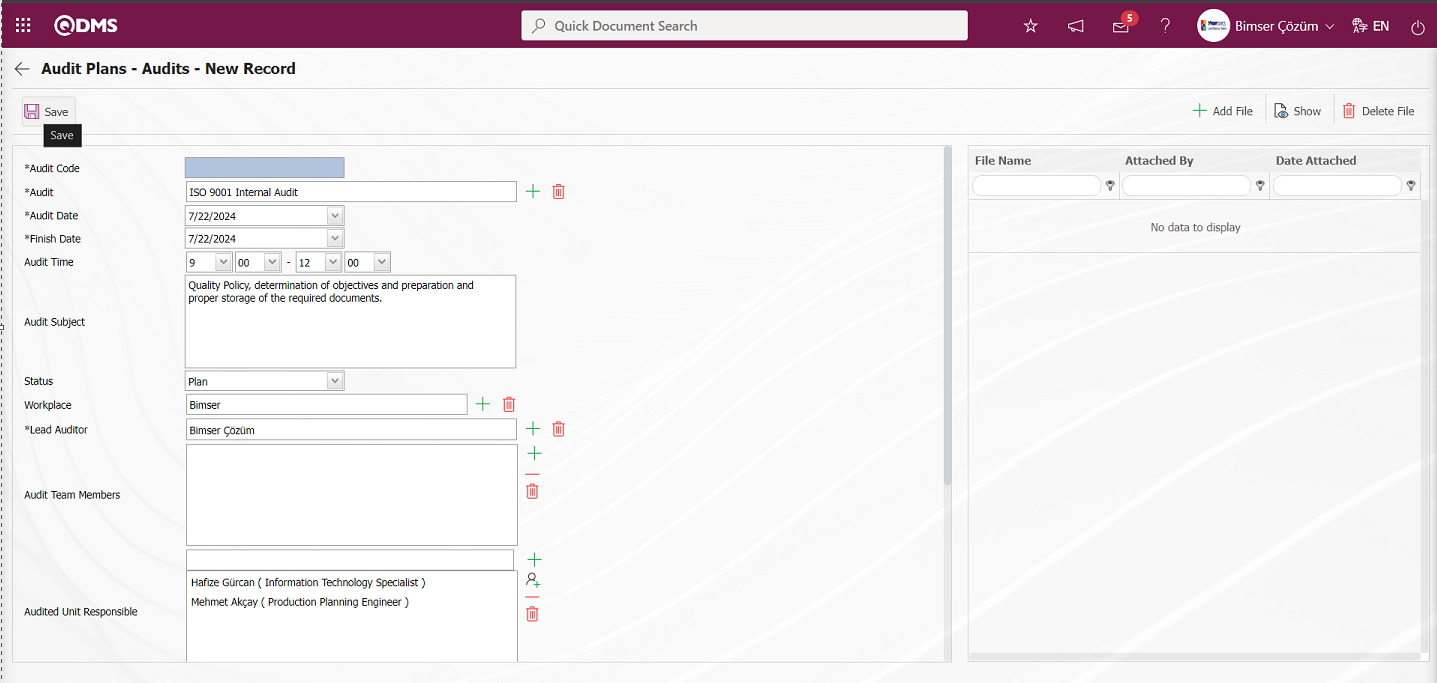
After entering the relevant information in the required fields on the Audit Plans - Audits - New Record screen, the audit registration process is performed in the audit plan by clicking the  button in the upper left corner of the screen.
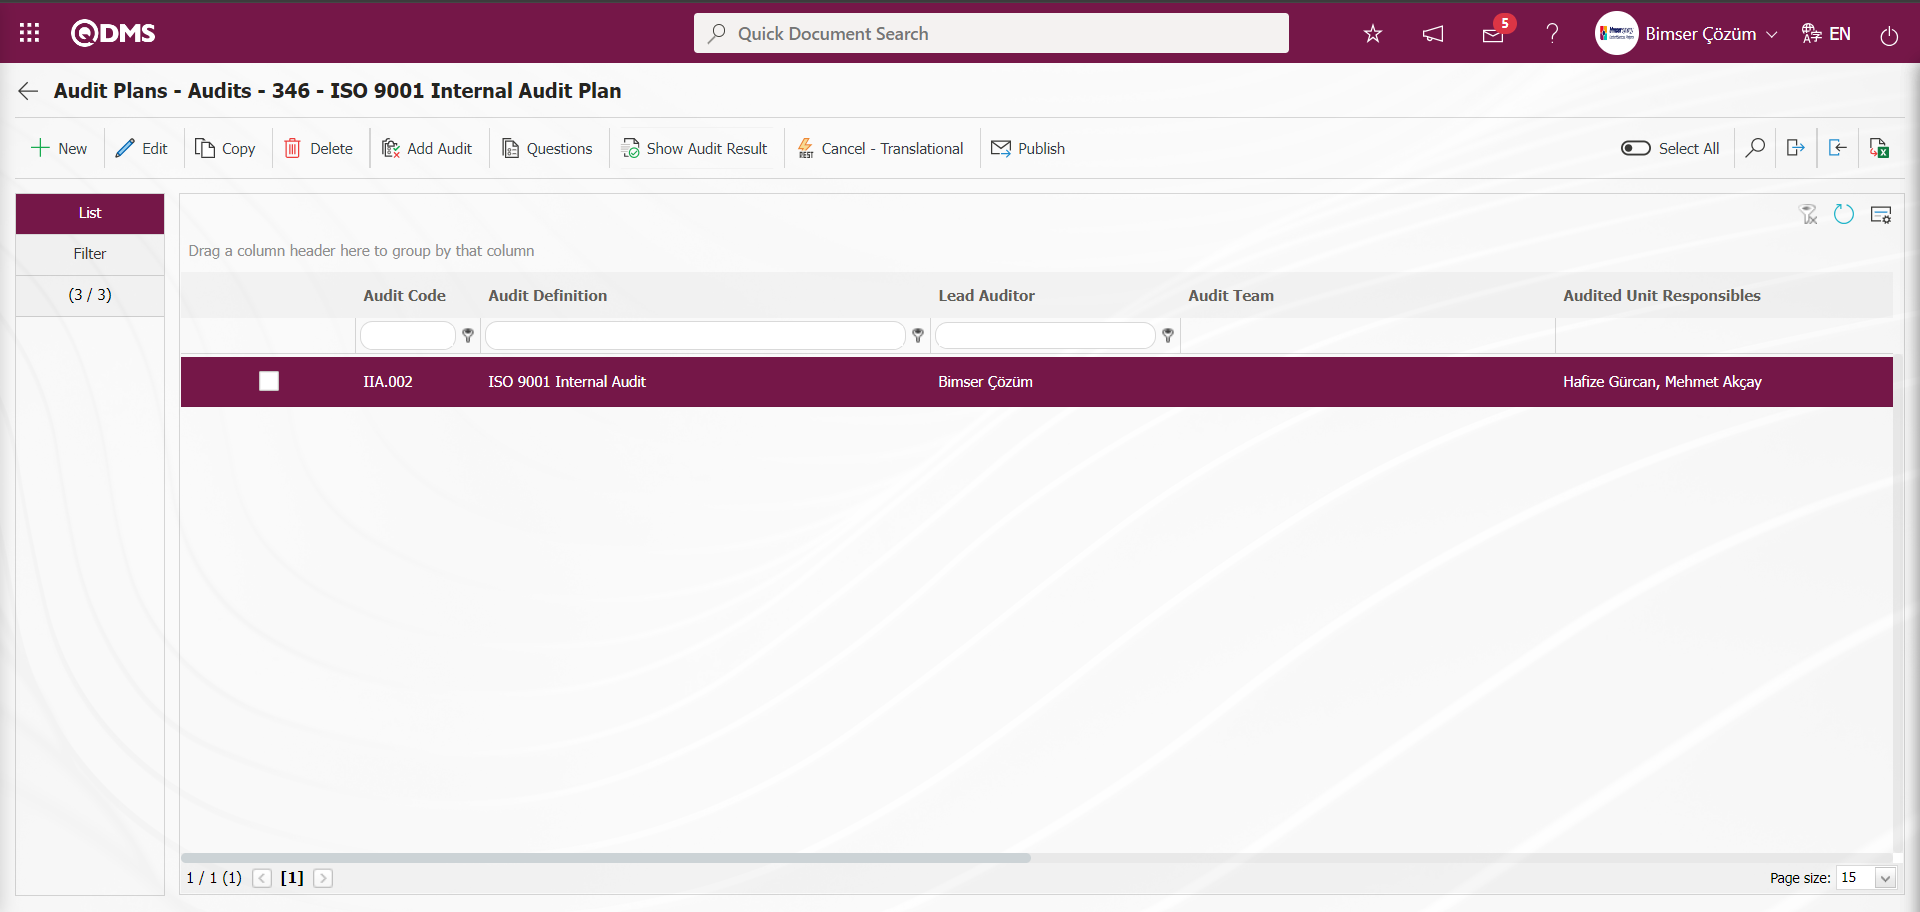
"Audits to Perform ‘ will be displayed on the ’My Pending Work ” page of the lead auditor and audit team. On the date when the audit will take place, the system will send notifications of the relevant audit record via e-mail.
6.2.1.2. Audit Cancel - Translational Process
It is to cancel the audit in the realization phase and postpone it from a specified date to another date. (According to parameter 43 in the Audit Activities module parameters, the  button is displayed.)
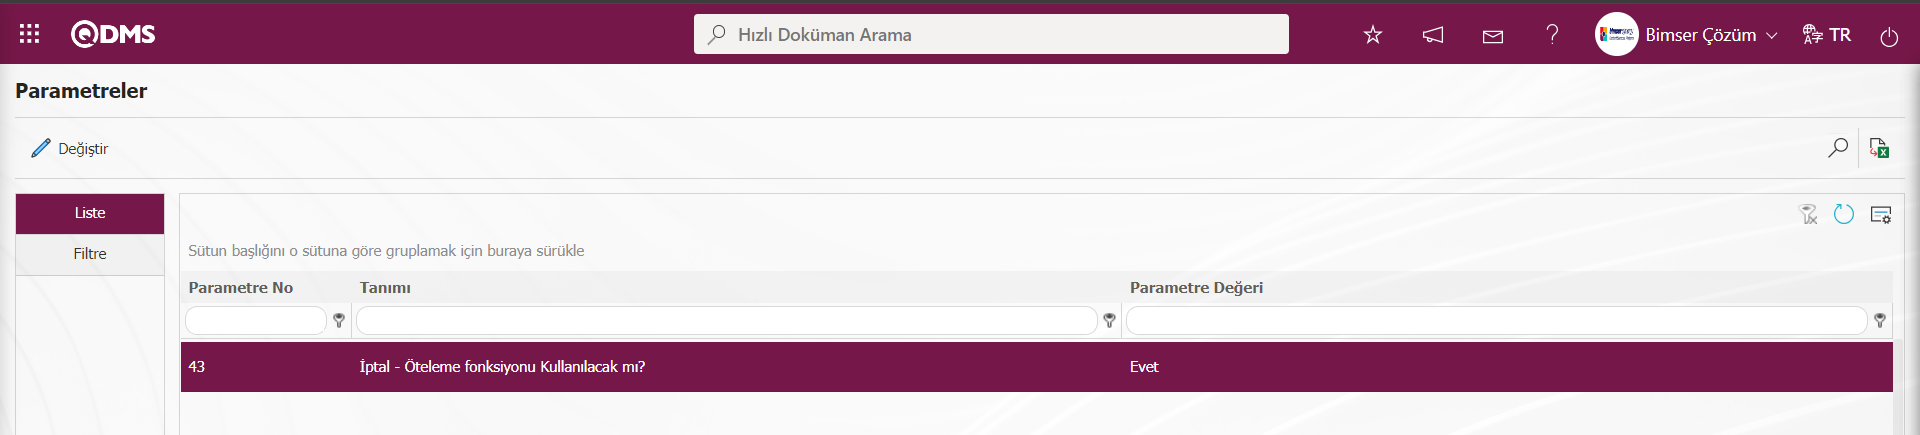
Cancel Audit;
It is the process of canceling the audit that will take place on the planned date. On the Audit Plans-Audits screen, click the  button while the Audit is selected for canceling the audit.
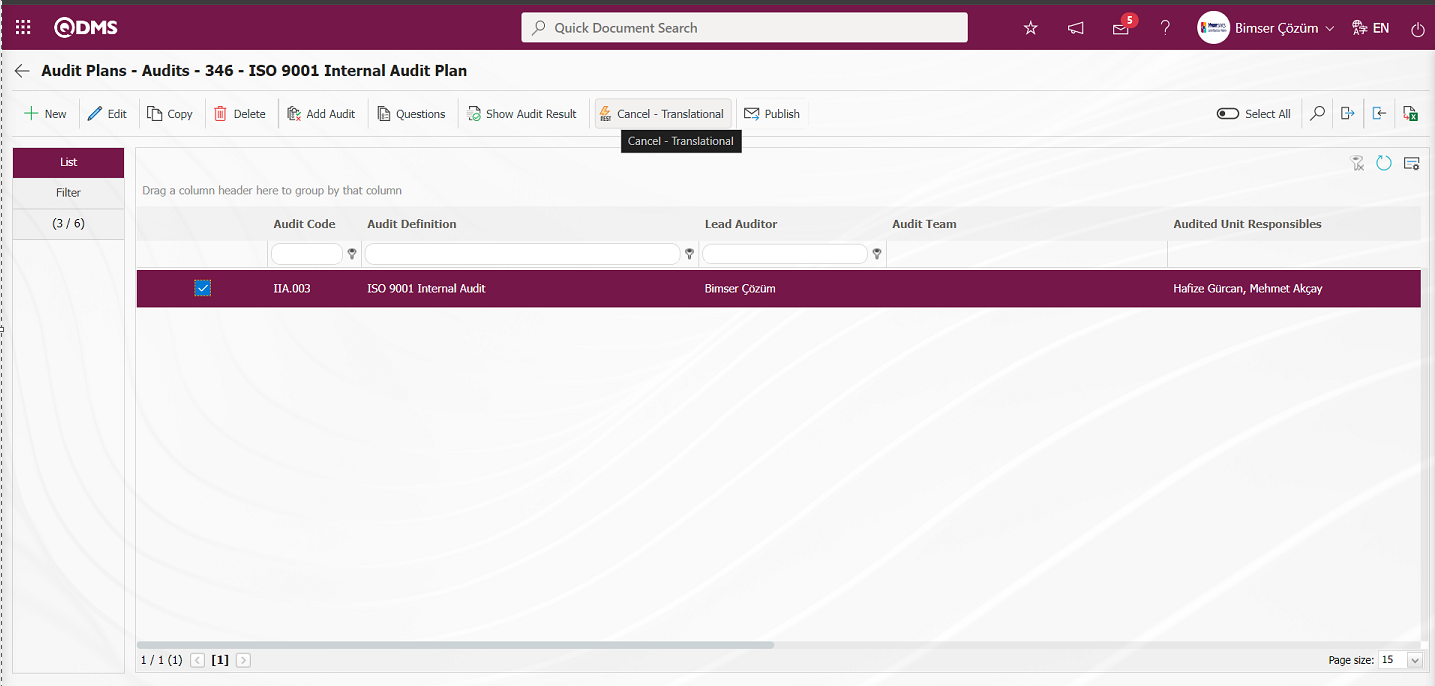
Audit Cancel - Translational screen opens.
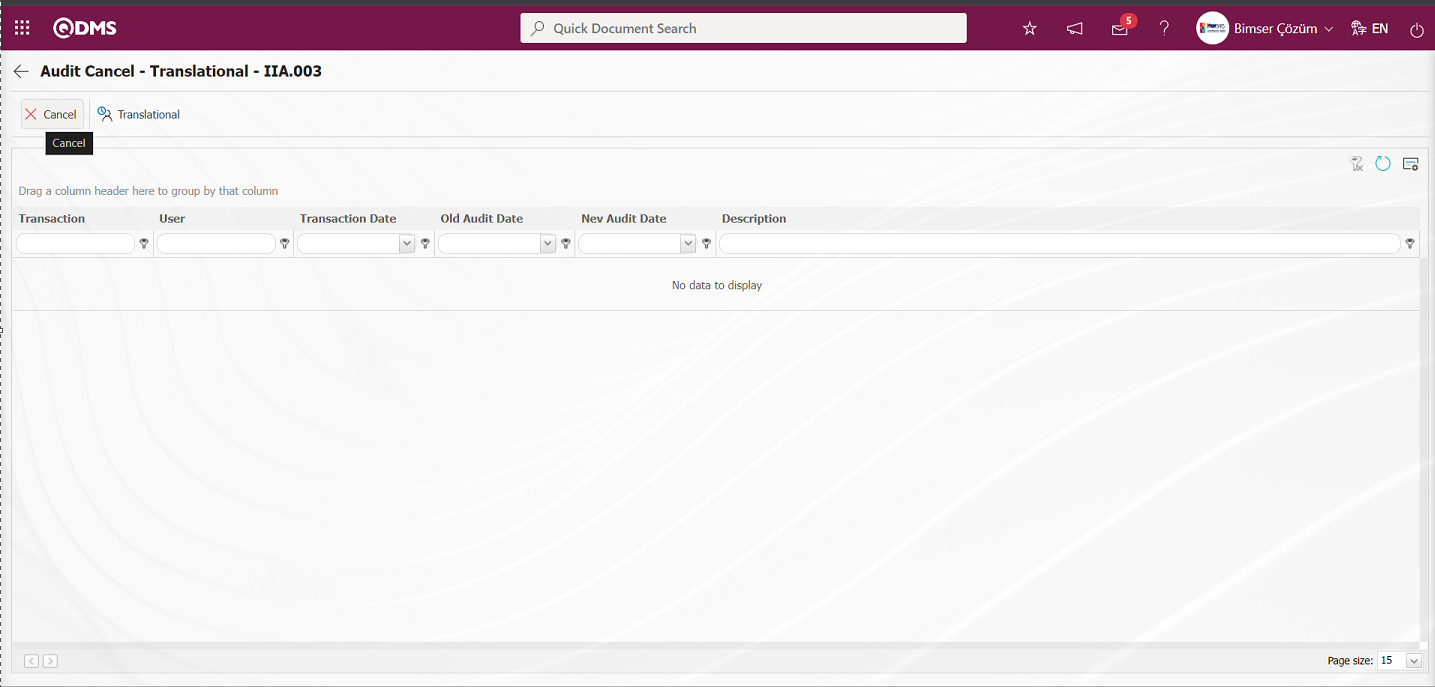
With the help of the buttons on the screen;
 : My audit is canceled.
 : The audit is transferred to another date.
Click the button on the Audit Cancel - Translational screen.

Related fields are defined on the screen that opens:
Description: This is the field where the cancellation explanation information of the Audit Cancel screen is written.
On the Audit Cancellation screen, in the Description field, the explanation information about the reason why the audit was canceled is written. After entering the relevant information in the required fields, click the button in the upper left corner of the screen and the Audit cancel registration process is done.
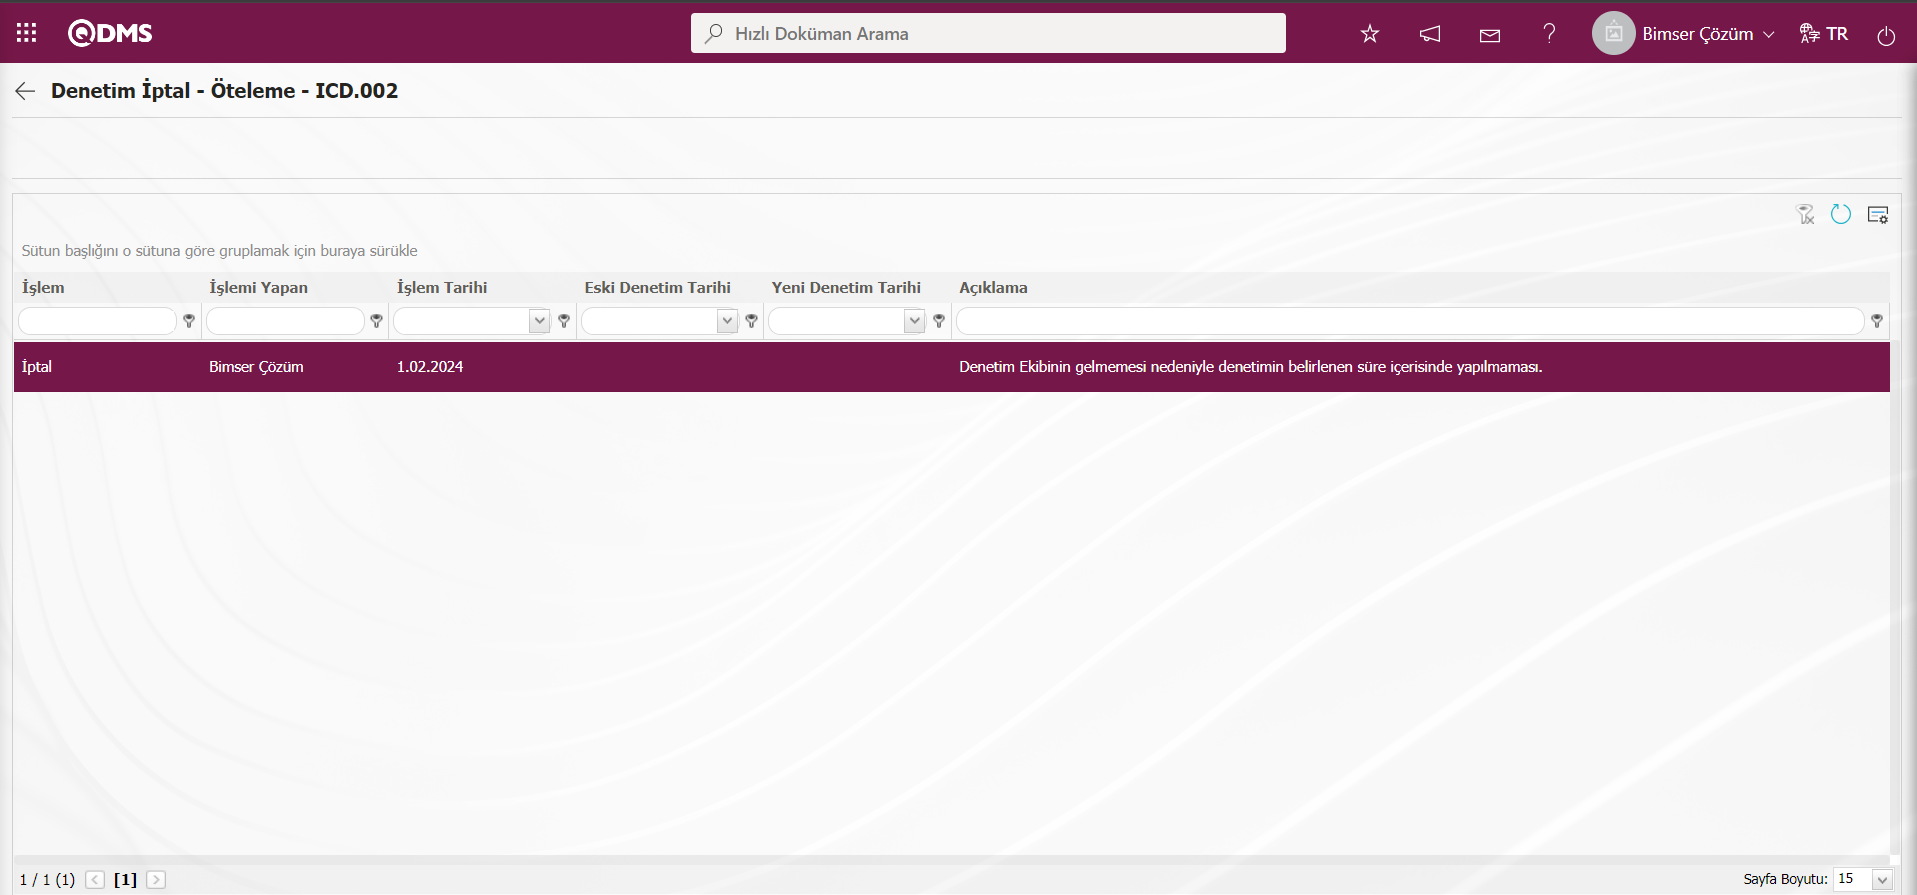

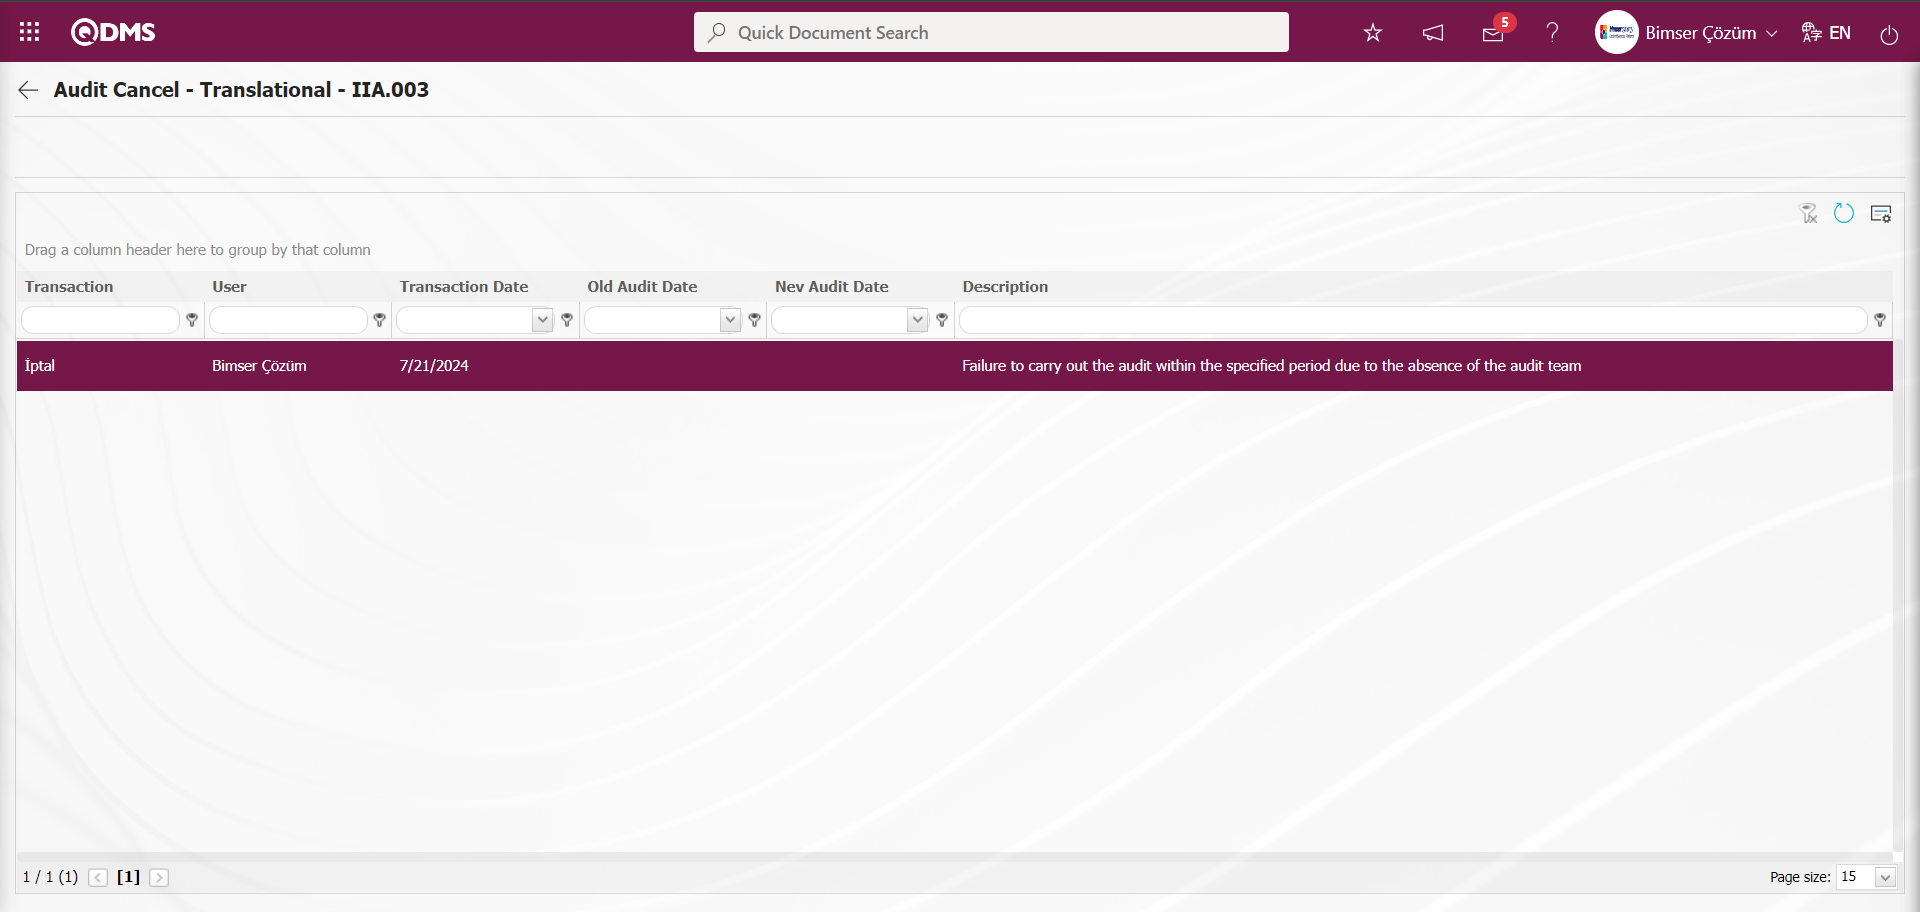
Audit Translational Process;
It is the process of performing the audit on another date by translating it to another date other than the planned realization date. On the Audit Plans-Audits screen, click the button while the Audit is selected for the translational operation of the Audit.
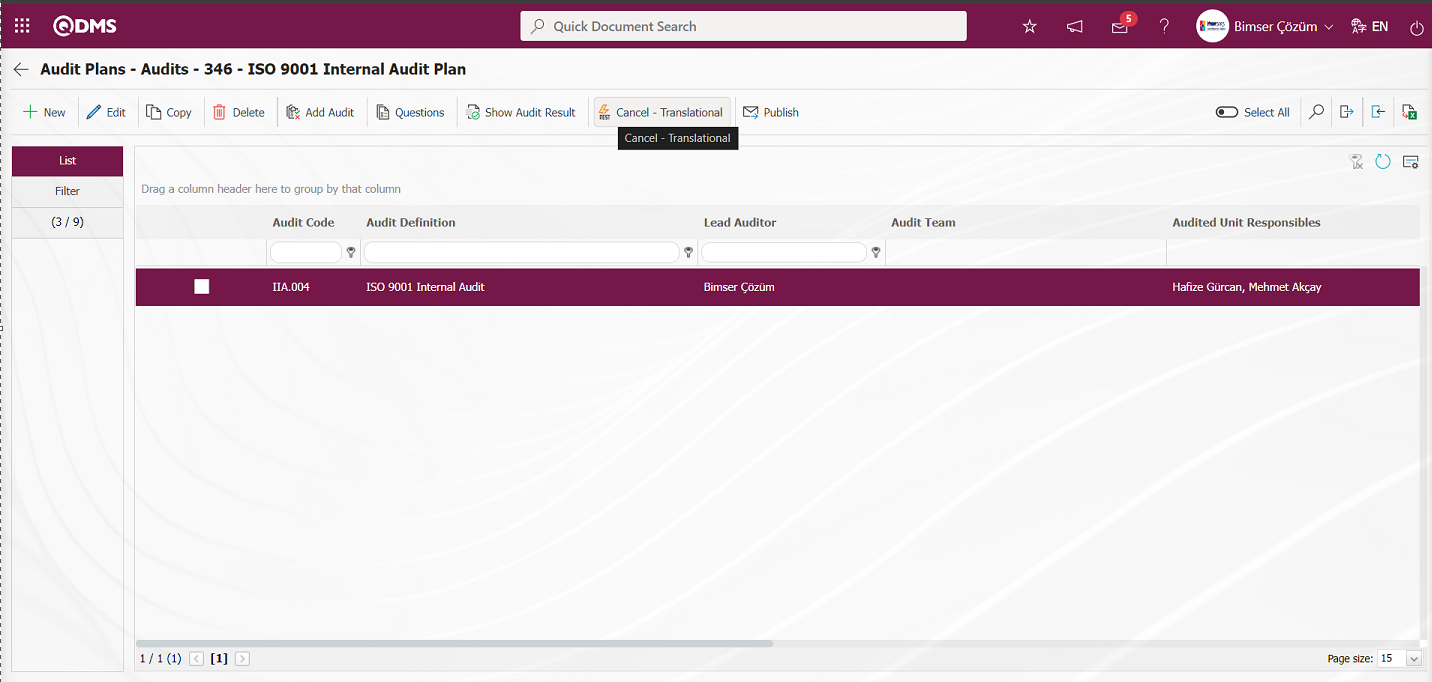
With the help of the buttons on the screen;
 : Cancel the audit.
 : The audit is transferred to another date.
Click the button on the Audit Cancel - Translational screen.
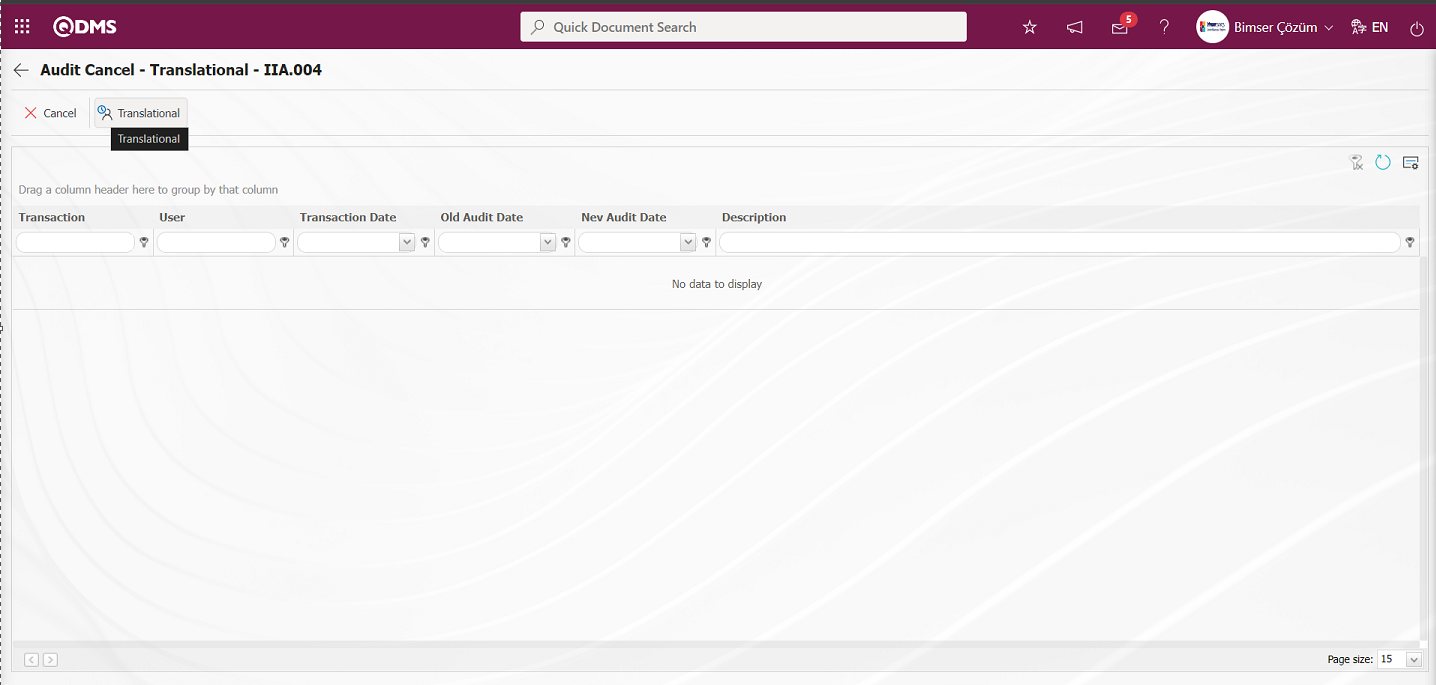
The Audit Translational** screen opens.

Related fields are defined on the screen that opens:
Translational Date: In the Audit Translational -screen, the date on which the audit will be translated is selected in the calendar field that opens.
New End Date: In the Audit Translational screen, the new end date of the audit is selected in the calendar field.
Description: It is the field where the description information about the postponement is written on the Audit Translational screen.
On the Audit Translational** screen, in the Description field, the explanation information about why the audit is postponed is written. After entering the relevant information in the required fields, the Audit Translational record is made by clicking the button in the upper left corner of the screen.
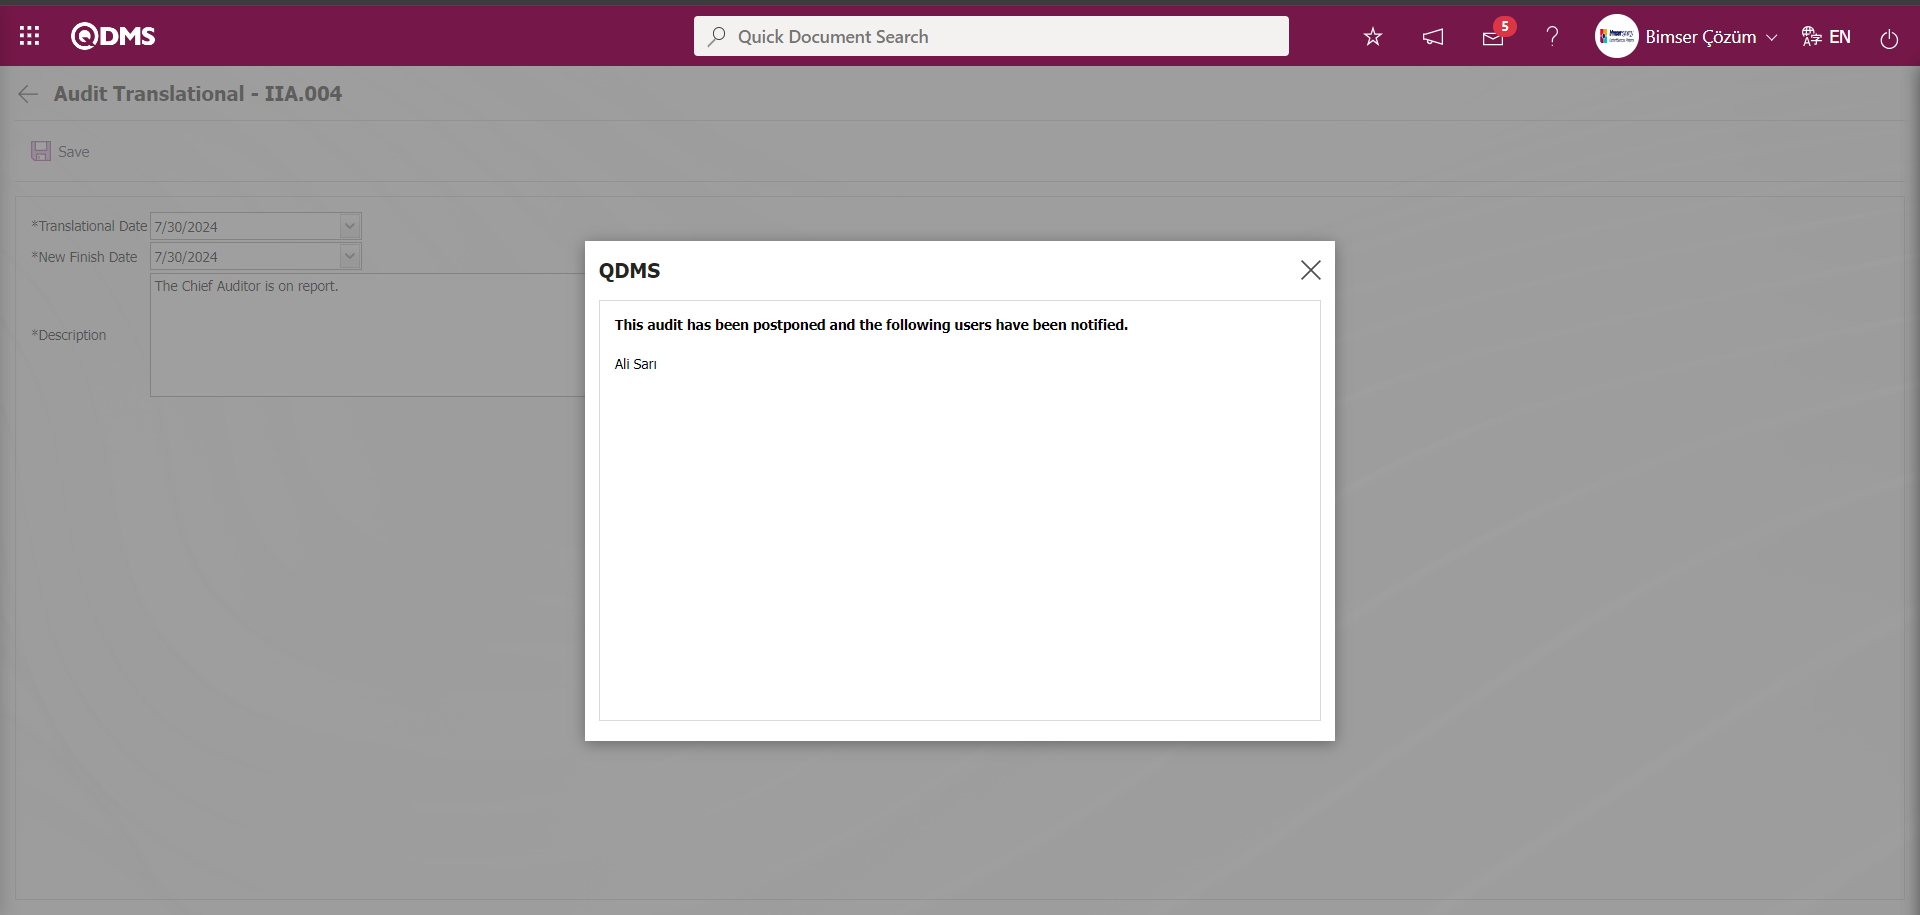

6.2.1.3. My Audits Bulk Transfer Process
Mass transfer of audits to the Audit Plan is done. In order to perform this process, firstly, the Audit Plans - Audits Template, which is the downloaded transfer template by clicking the  (Create Template) button, is filled in the transfer template by entering the relevant information about the audits to be transferred. The Audit Plans - Audits Template
  (Load Template) button, which is the filled transfer template, is clicked and the system is loaded and the bulk transfer of audits into the plan is made.
Click the (Create Template) button on the Audit Plans - Audits screen.
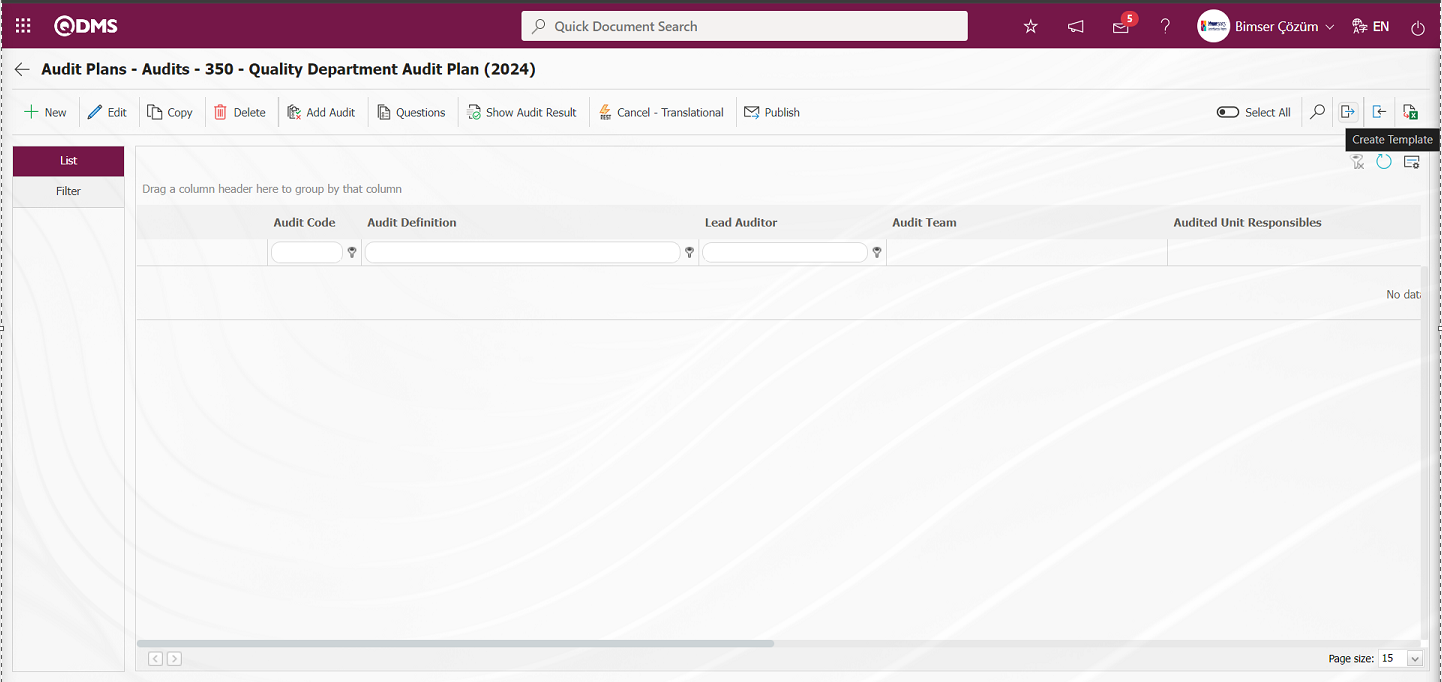
Enter the audit information to be transferred in the Downloaded Audit Plans - Audits Template.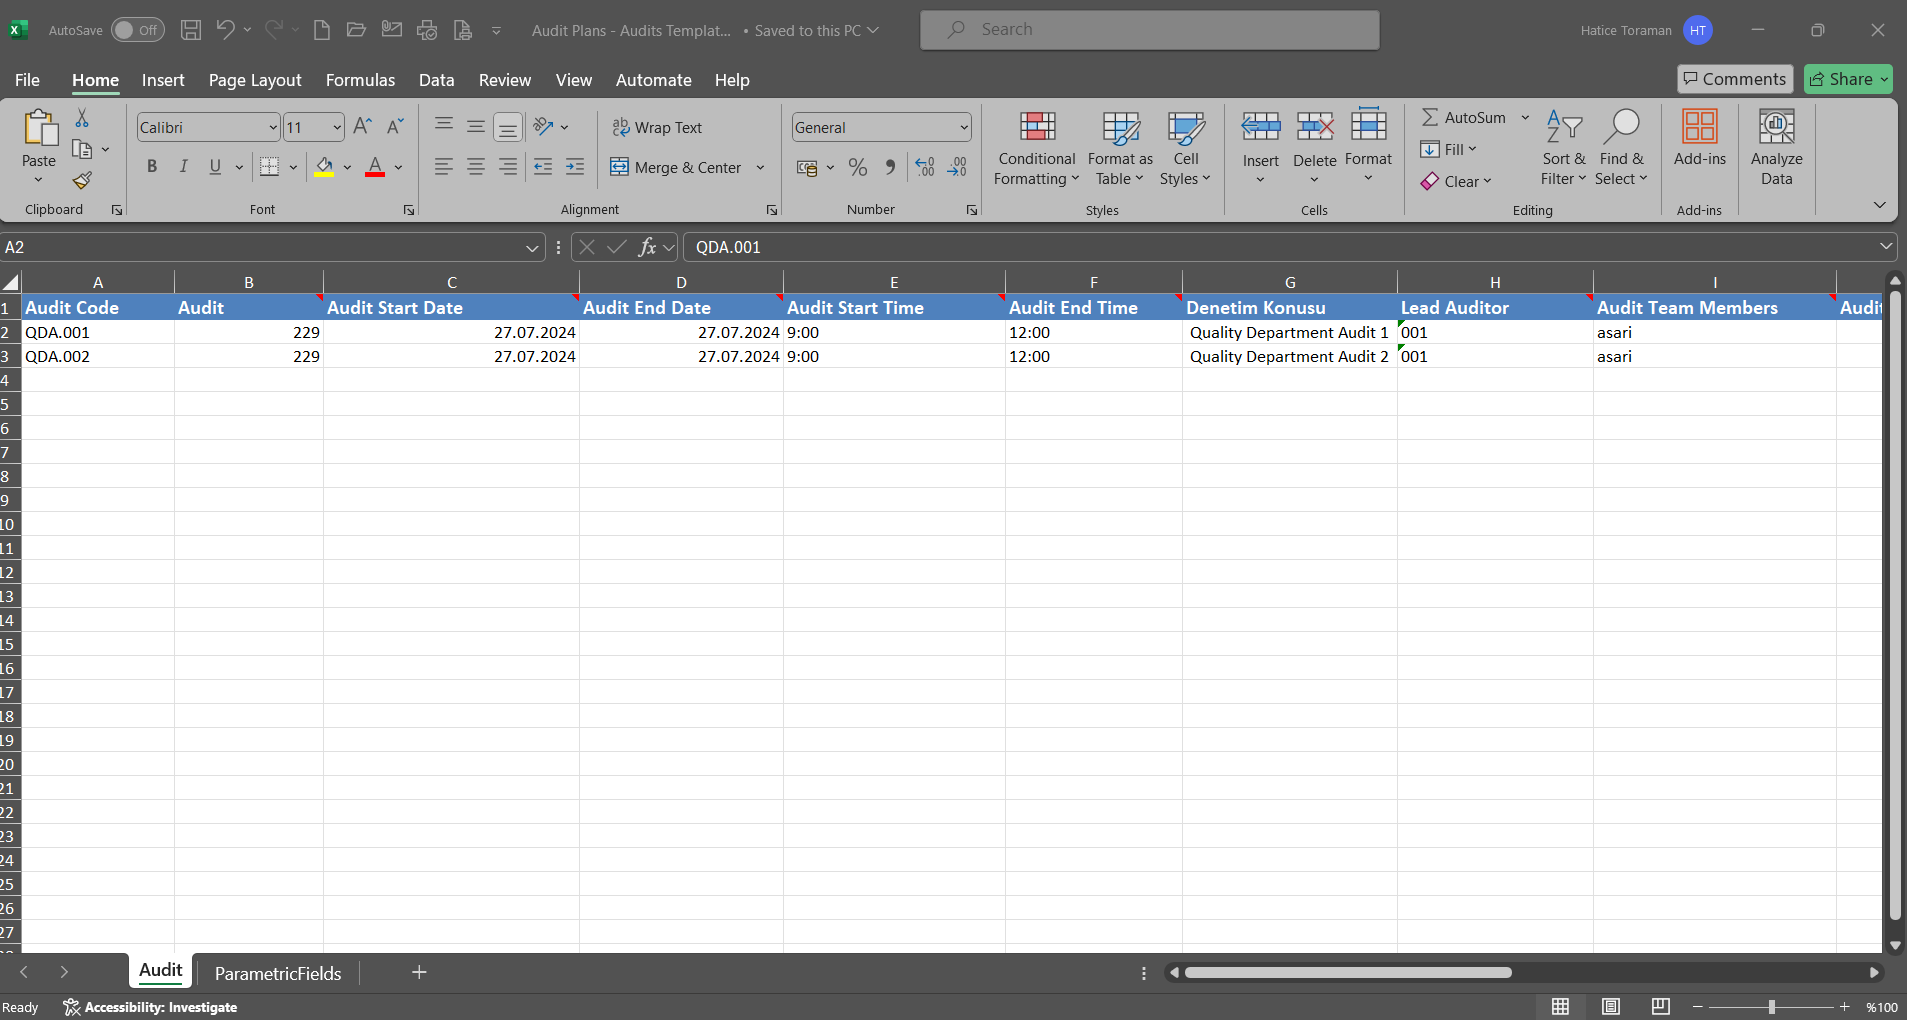
Click on the Completed Audit Plans - Audits Template (Upload Template) button.
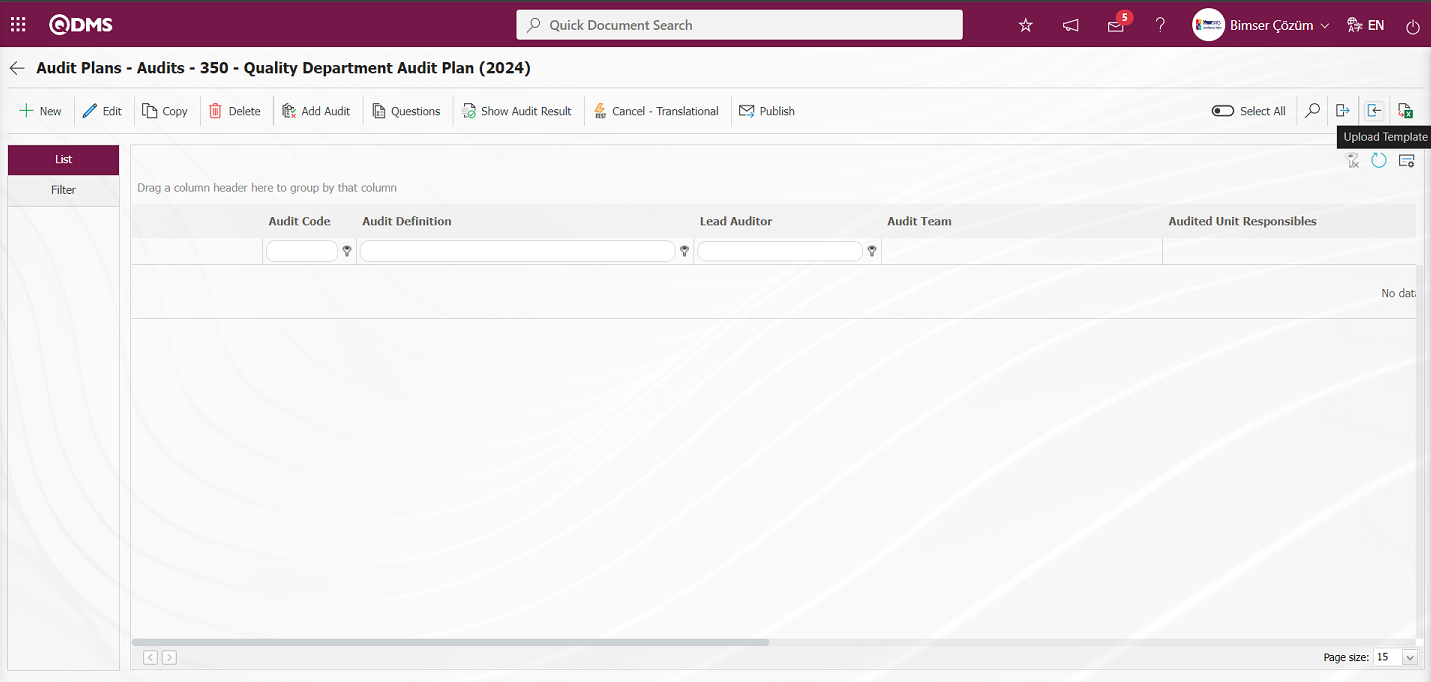
Click the Browse button on the Upload File screen.
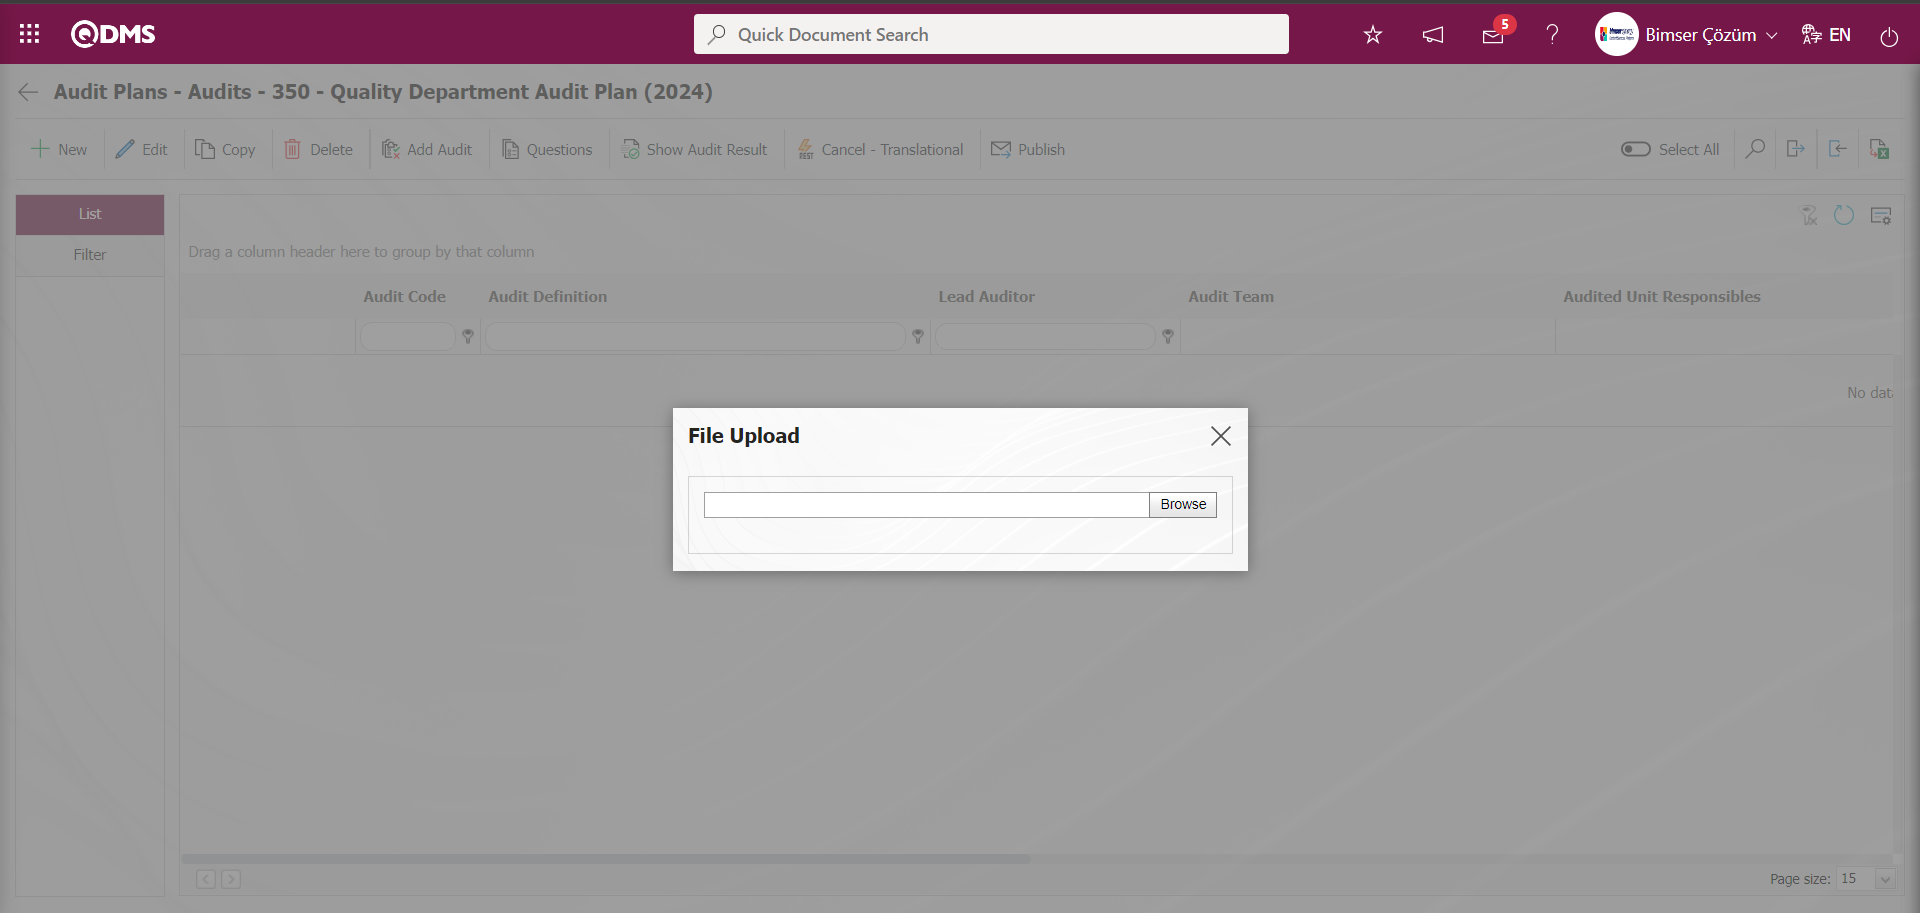
Audit Plans - Audits Template is selected and uploaded to the system.
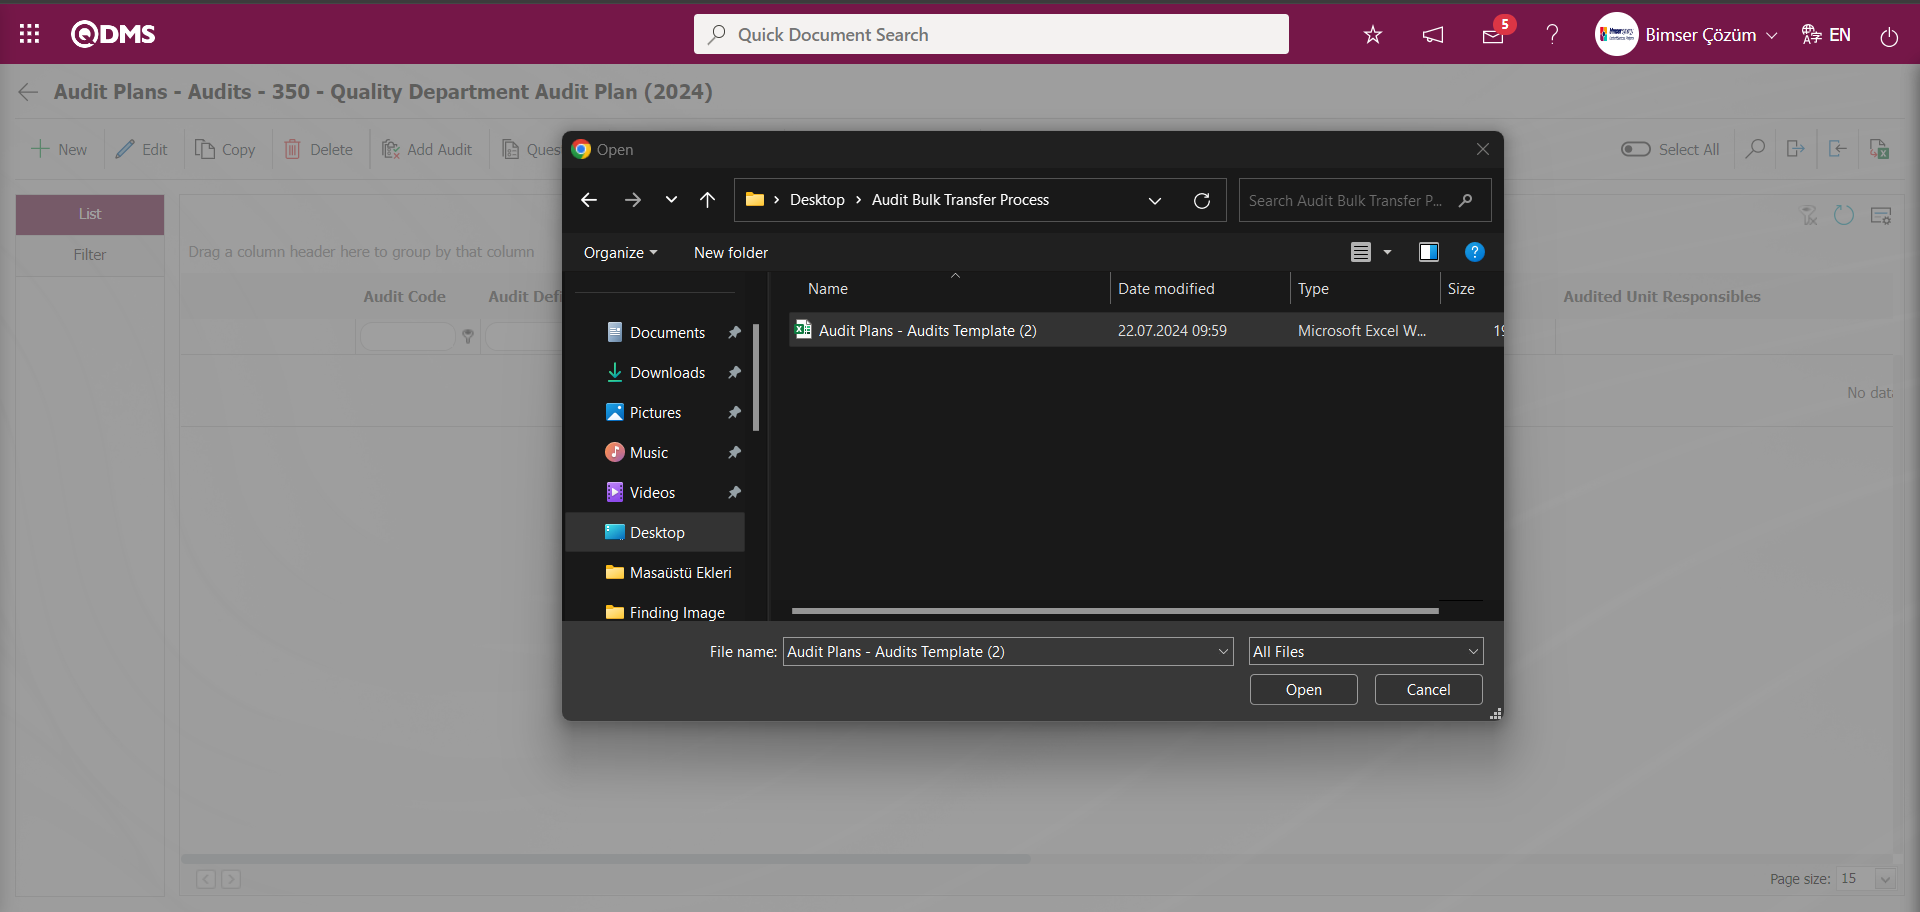
After the Audit batch transfer process in the audit plan, the system gives a message about the successful transfer of the audits and it is seen that the audit batch transfer process has been realized.
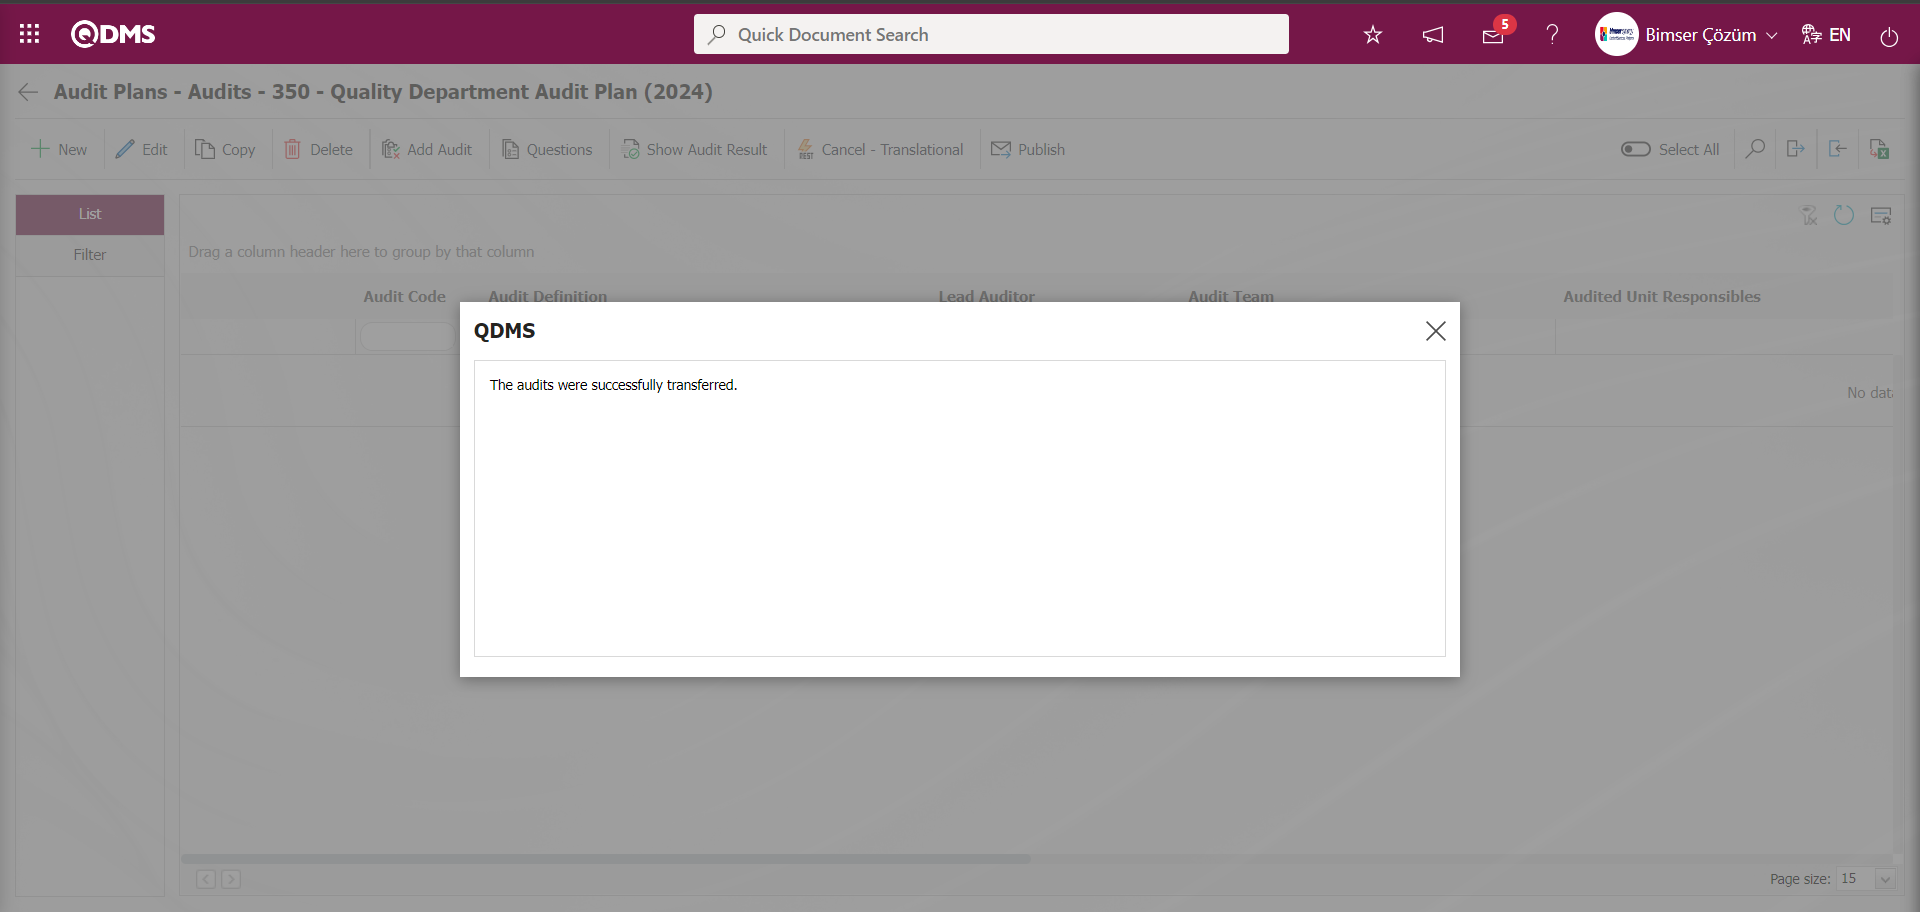
After the Audit Bulk transfer process, it is seen that it is included in Audits - Audit Plan.
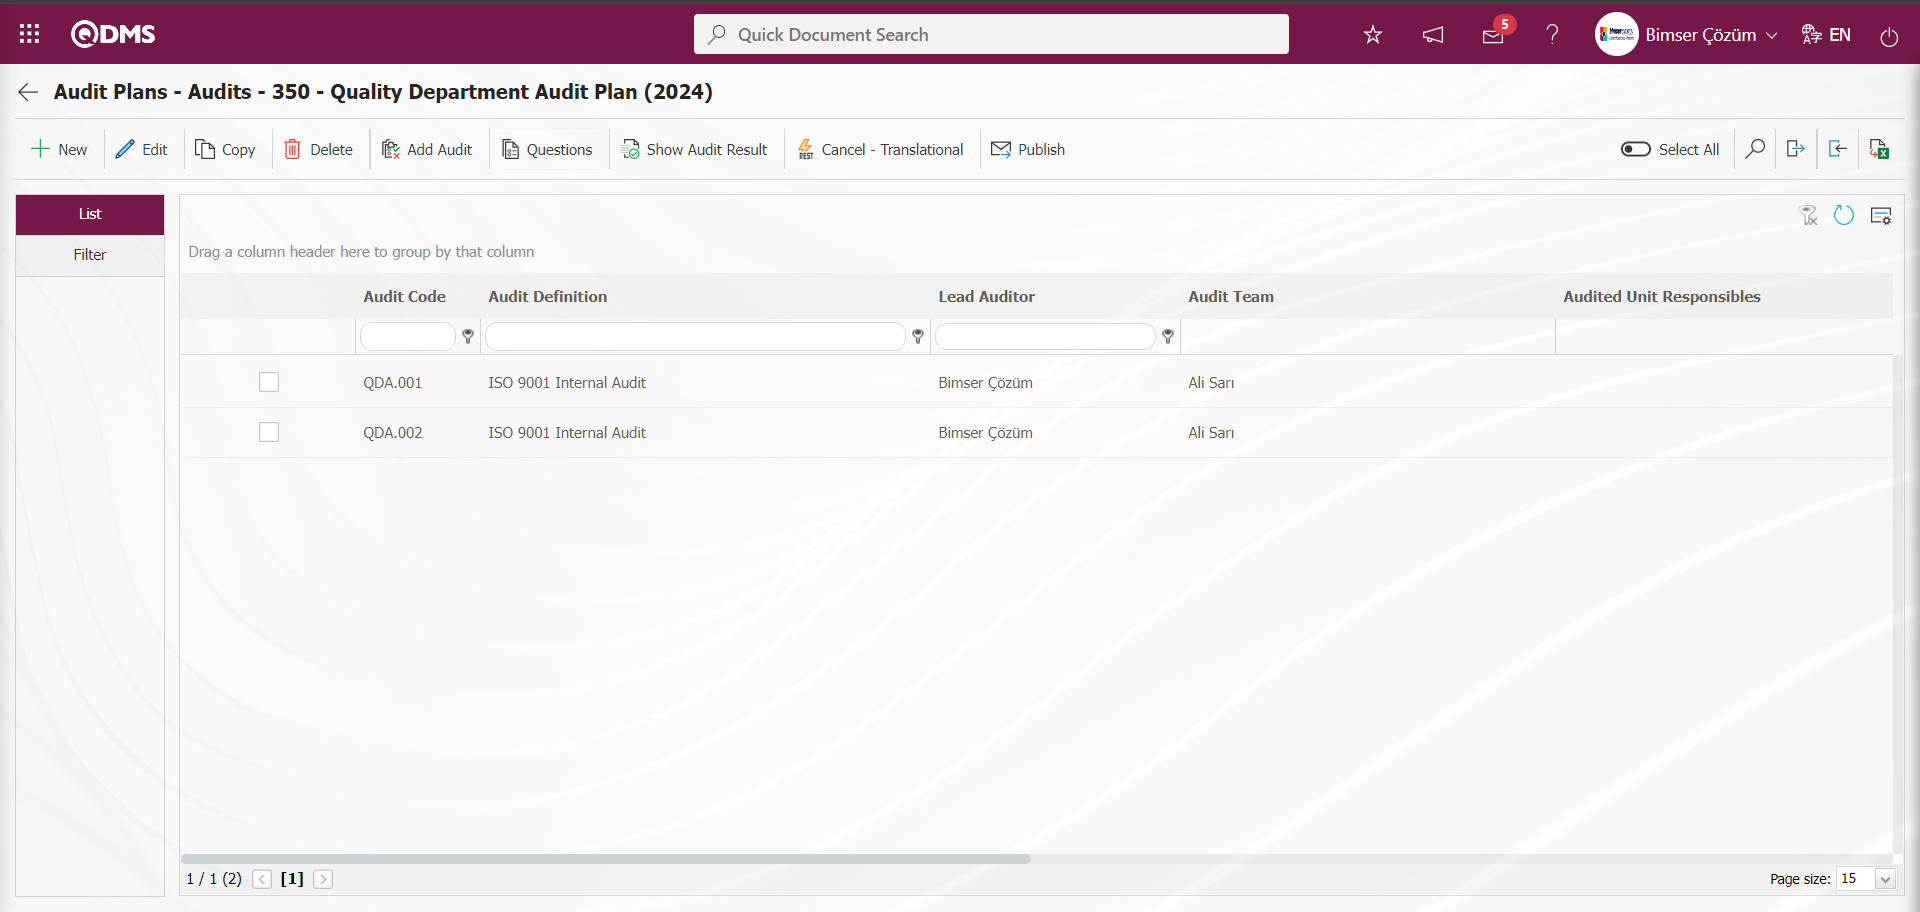
6.2.2. My Pending Audits
Menu Name: Integrated Management System/ Audit Activities/ Audit Activity (for Auditors Only)
On the “My Pending Work” page of the lead auditor and audit team, the audit records with upcoming deadlines are listed. “Audits to Perform” is assigned as a job on the ‘My Pending Jobs’ page of the Lead Auditor and Audit Team.
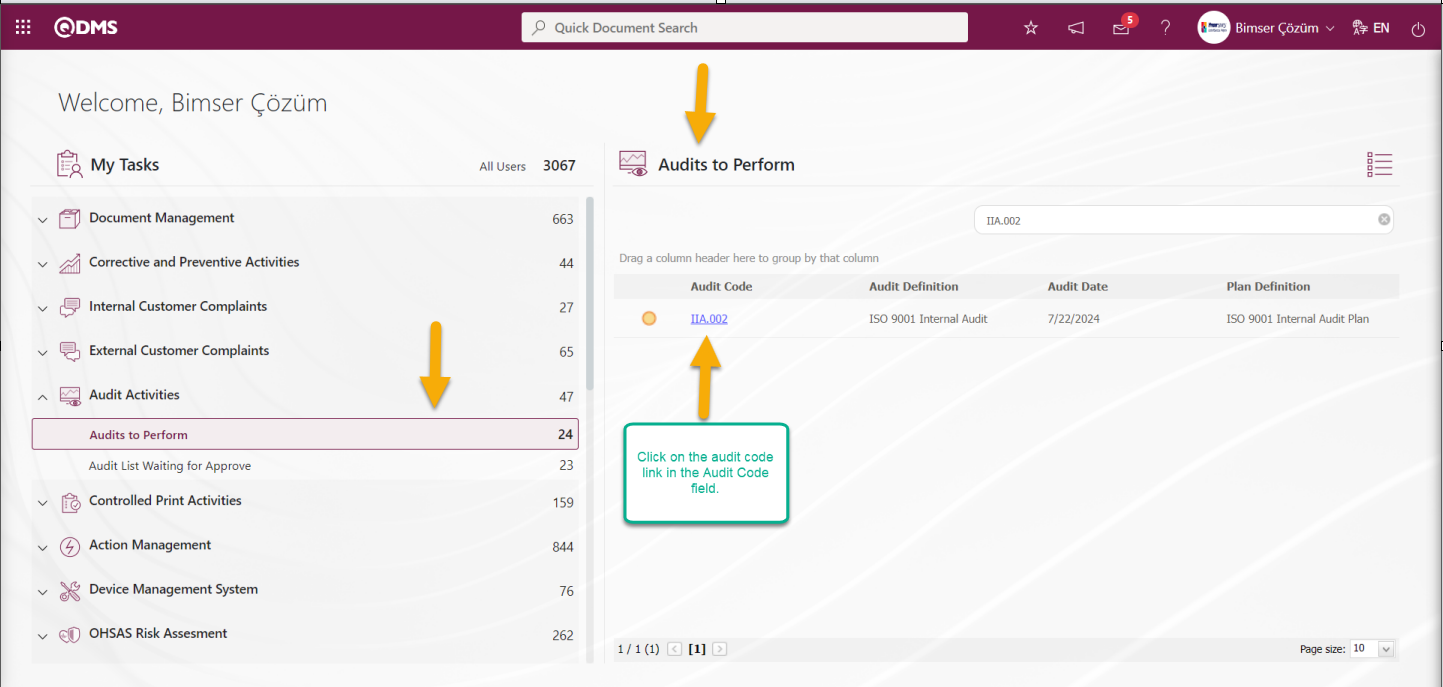
Click on the audit code link in the Audit Code field in the related task to open the audit realization screen. Or by clicking the Integrated Management System/Audit Activities/Audit Activity (for Auditors Only) menu, the audits pending in the realization stage are displayed. In the My Audits screen, the list and Filter tab appear. In the Filter tab, data is entered in the fields with search criteria and filtering is done by clicking the  (Search) button.

In the List tab, the list of Audits pending at the realization stage in the Audit Activities module is displayed. In the list tab, the Audit code at the realization stage is written in the Audit Code field in the grid and the selection process of the audit at the realization stage is made.

With the help of the buttons on the screen;
 : The audit date information of the selected audit in the list is updated.
 :New questions can be added to the selected audit in the list.
 :The detail plan of the selected audit in the list is created.
 :Additional file is added to the selected audit in the list.
 :The audit selected in the list is performed.
: Records are searched by filtering.
: Data is transferred to Excel.
: The search criteria on the menu screens are used to clear the data remaining in the filter fields in the grid where the search operation is performed.
: The menu screen is restored to its default settings.
: User-based designing of the menu screen is done with the show-hide feature, that is, the hiding feature of the fields corresponding to the columns on the menu screens.
Update Audit Date;
Update the start and end date of the audit on the My Audits screen. Depending on the 8 parameters in the Audit Date update process, it is determined how many days the user selected as the lead auditor can make changes on the date determined on the audit.
While the Audit is selected on the My Audits screen, click the  button.
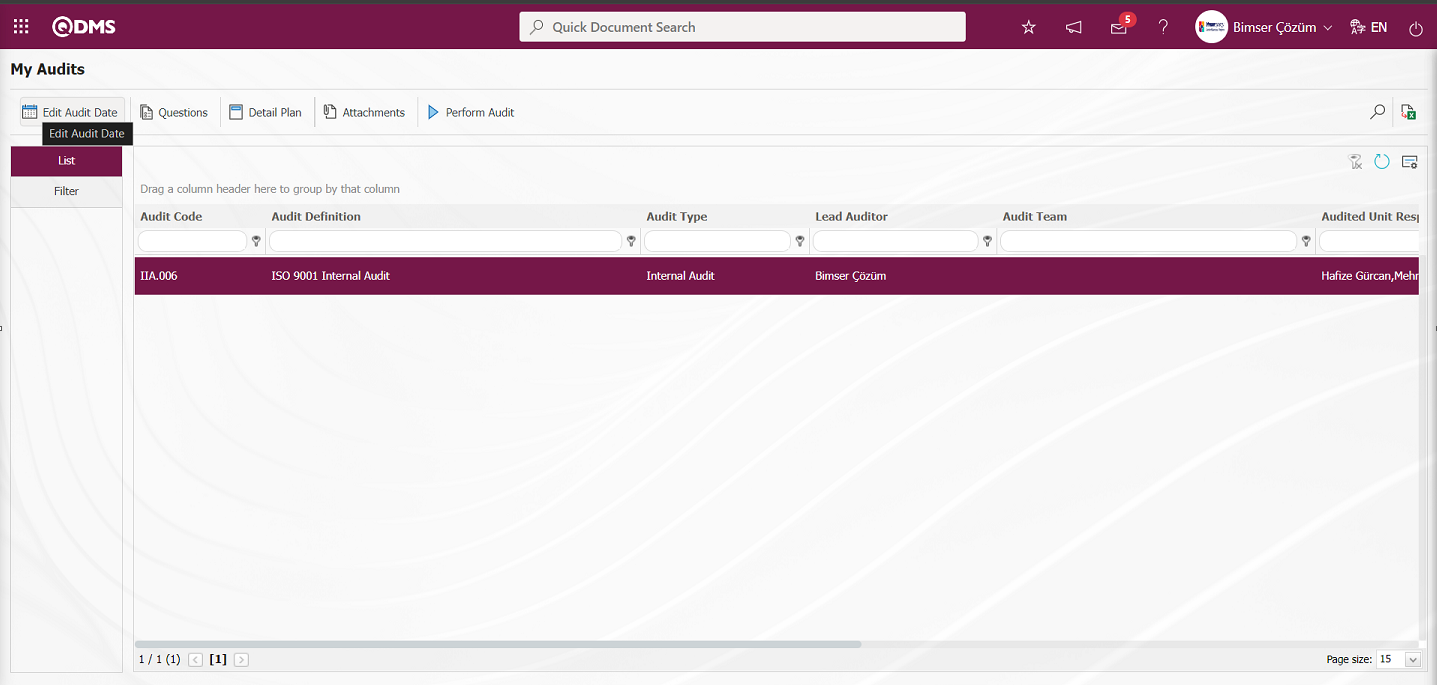
The Detail Plan screen opens.
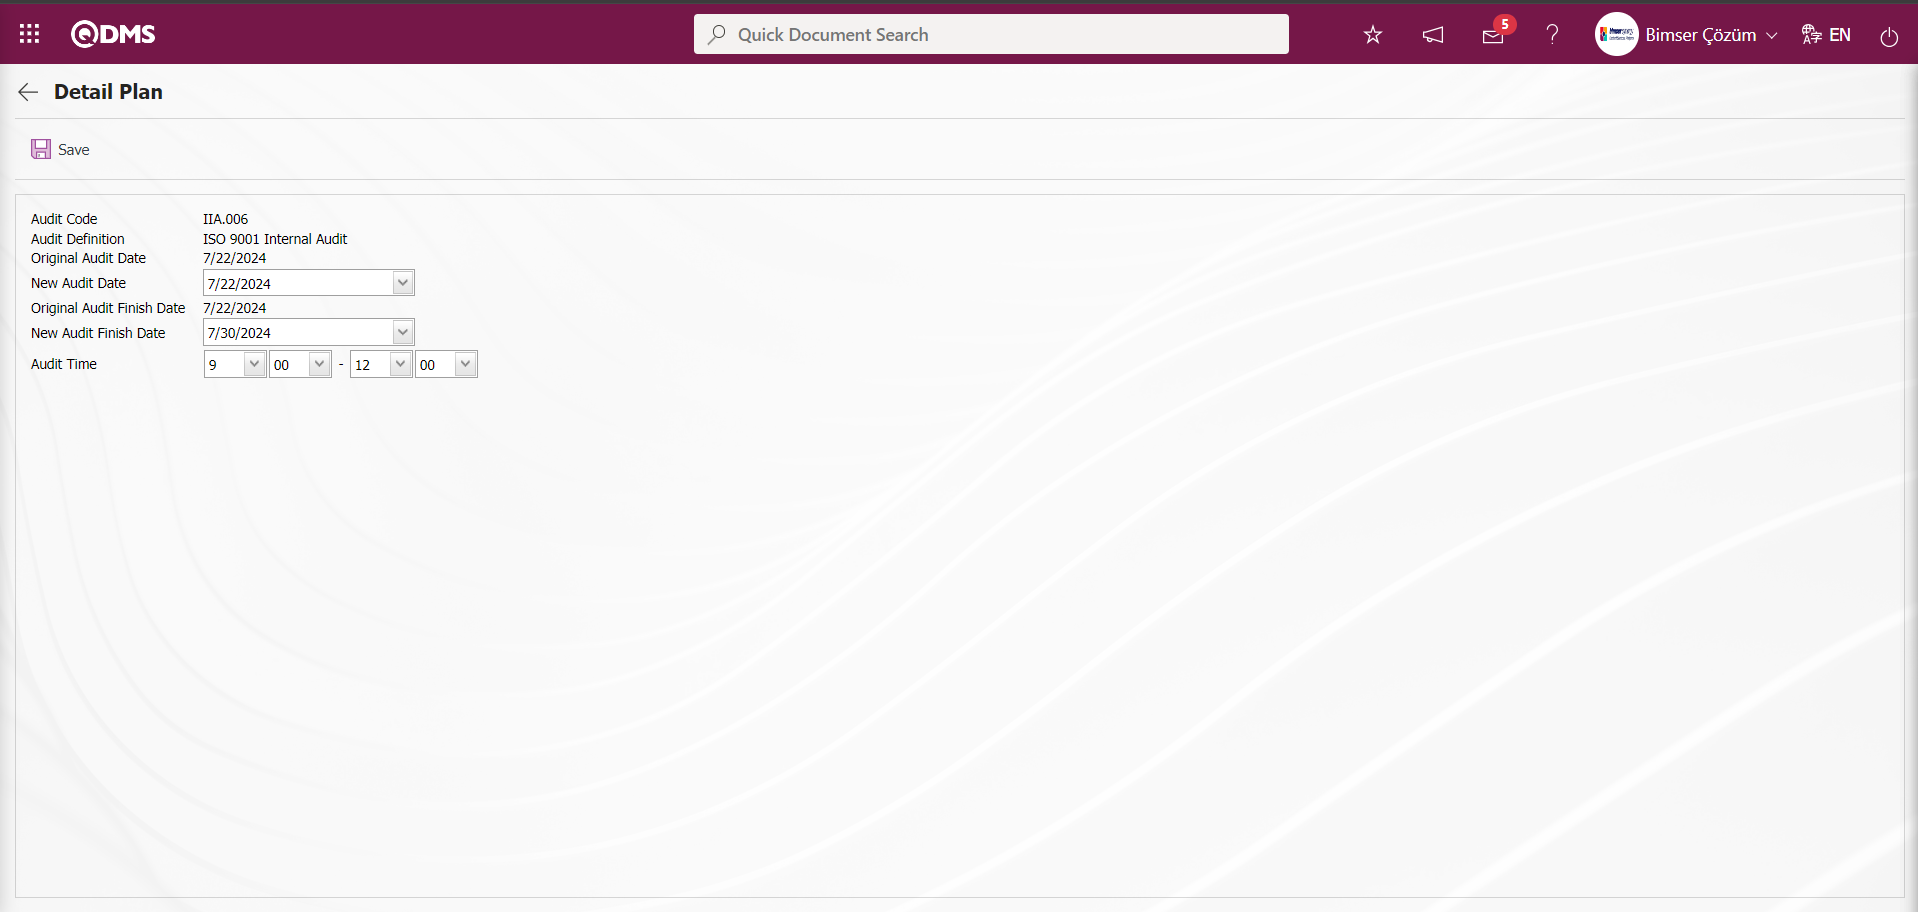
Related fields are defined on the screen that opens:
Audit Code: This is the field where the audit code information is given automatically by the system on the detail plan screen.
Audit Definition: It is the field where the audit definition information is given by the system on the detail plan screen.
Original Audit Date: This is the field where the Original Audit Date information is given by the system on the detail plan screen.
New Audit Date: It is the field where the new Audit Date information is selected from the drop-down list on the detail plan screen.
Original Audit End Date: This is the field where the Original Audit End Date information is given by the system on the detail plan screen.
New Audit End Date: This is the field where the new Audit End Date information is selected from the drop-down list on the detail plan screen.
The audit date is postponed up to the value entered in the field in parameter 8 of the Audit Activity Module.

When the translation value in this parameter is exceeded, the warning message in the screenshot below is given by the system.
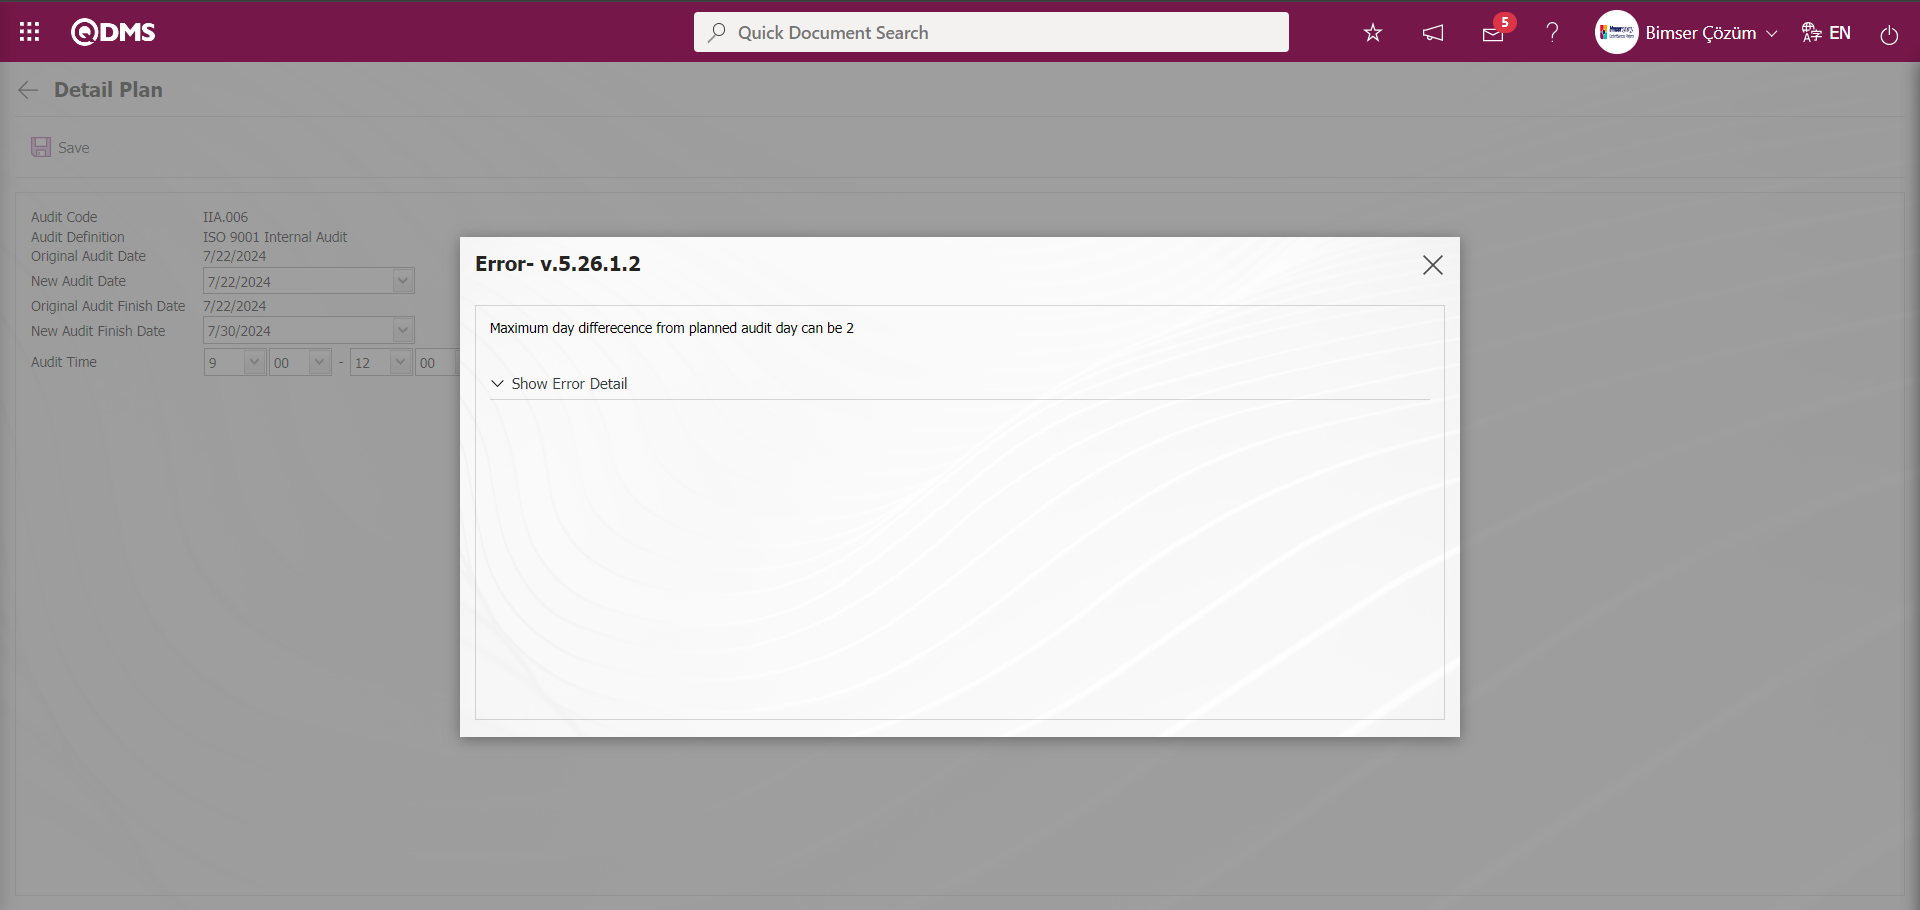
The lead auditor sets the audit date - how many days he/she can change the date without exceeding the number of days.
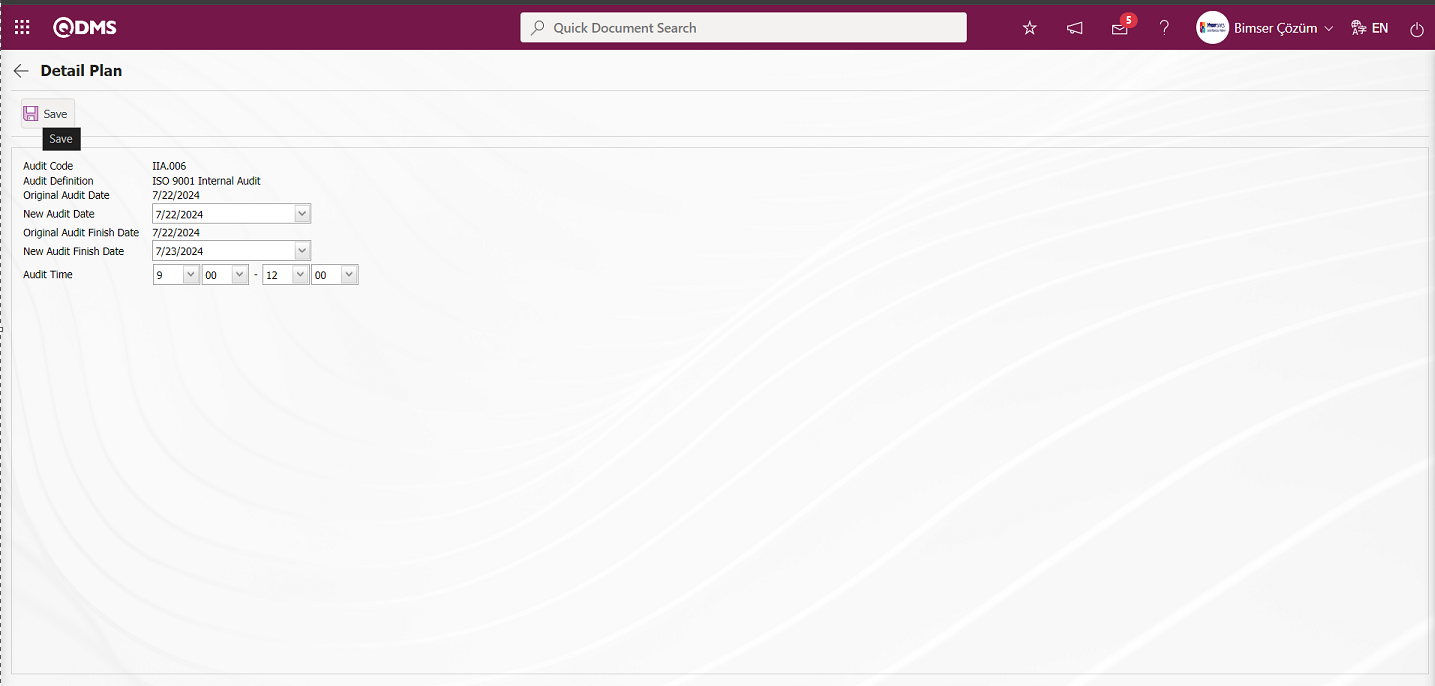
On the Detail plan screen, you can perform an operation in the Revise audit date menu. After determining the new audit start and end date and entering the relevant information in the required fields, the Audit date update registration process is performed by clicking the button in the upper left corner of the screen.
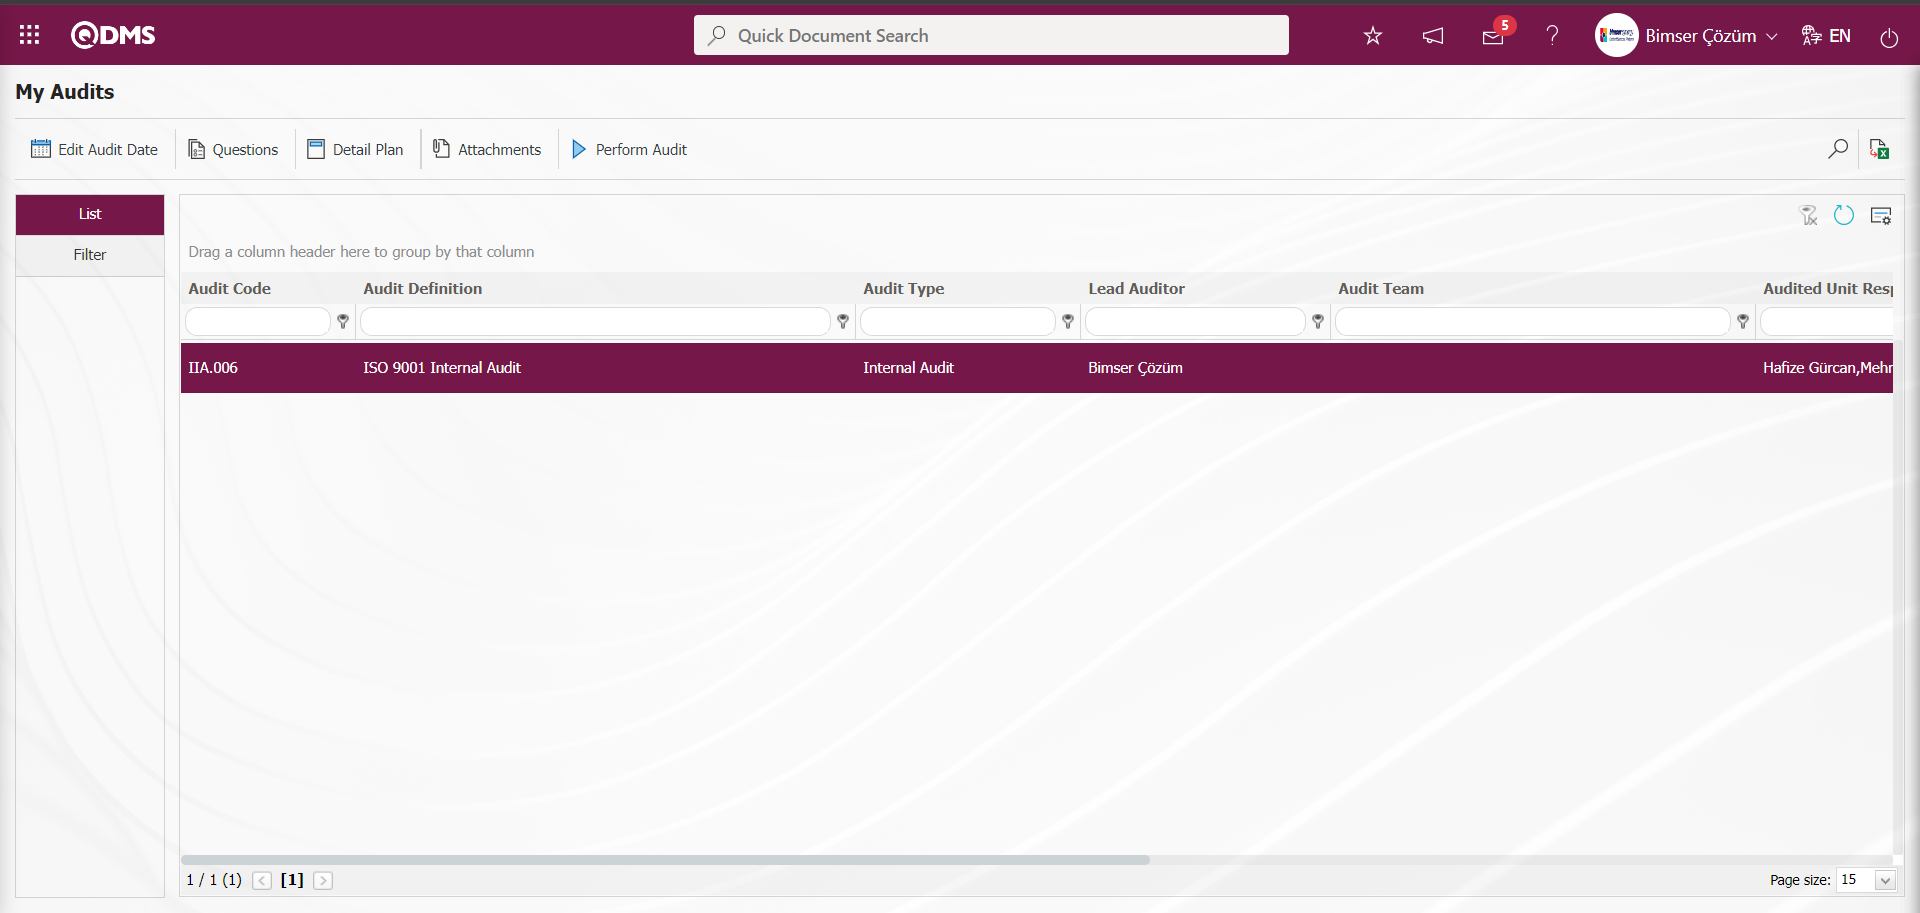
While Audit is selected in the list, click on the  button.

On the Audit Plan - Questions screen, add and delete questions in the list of questions added in the scored audit.
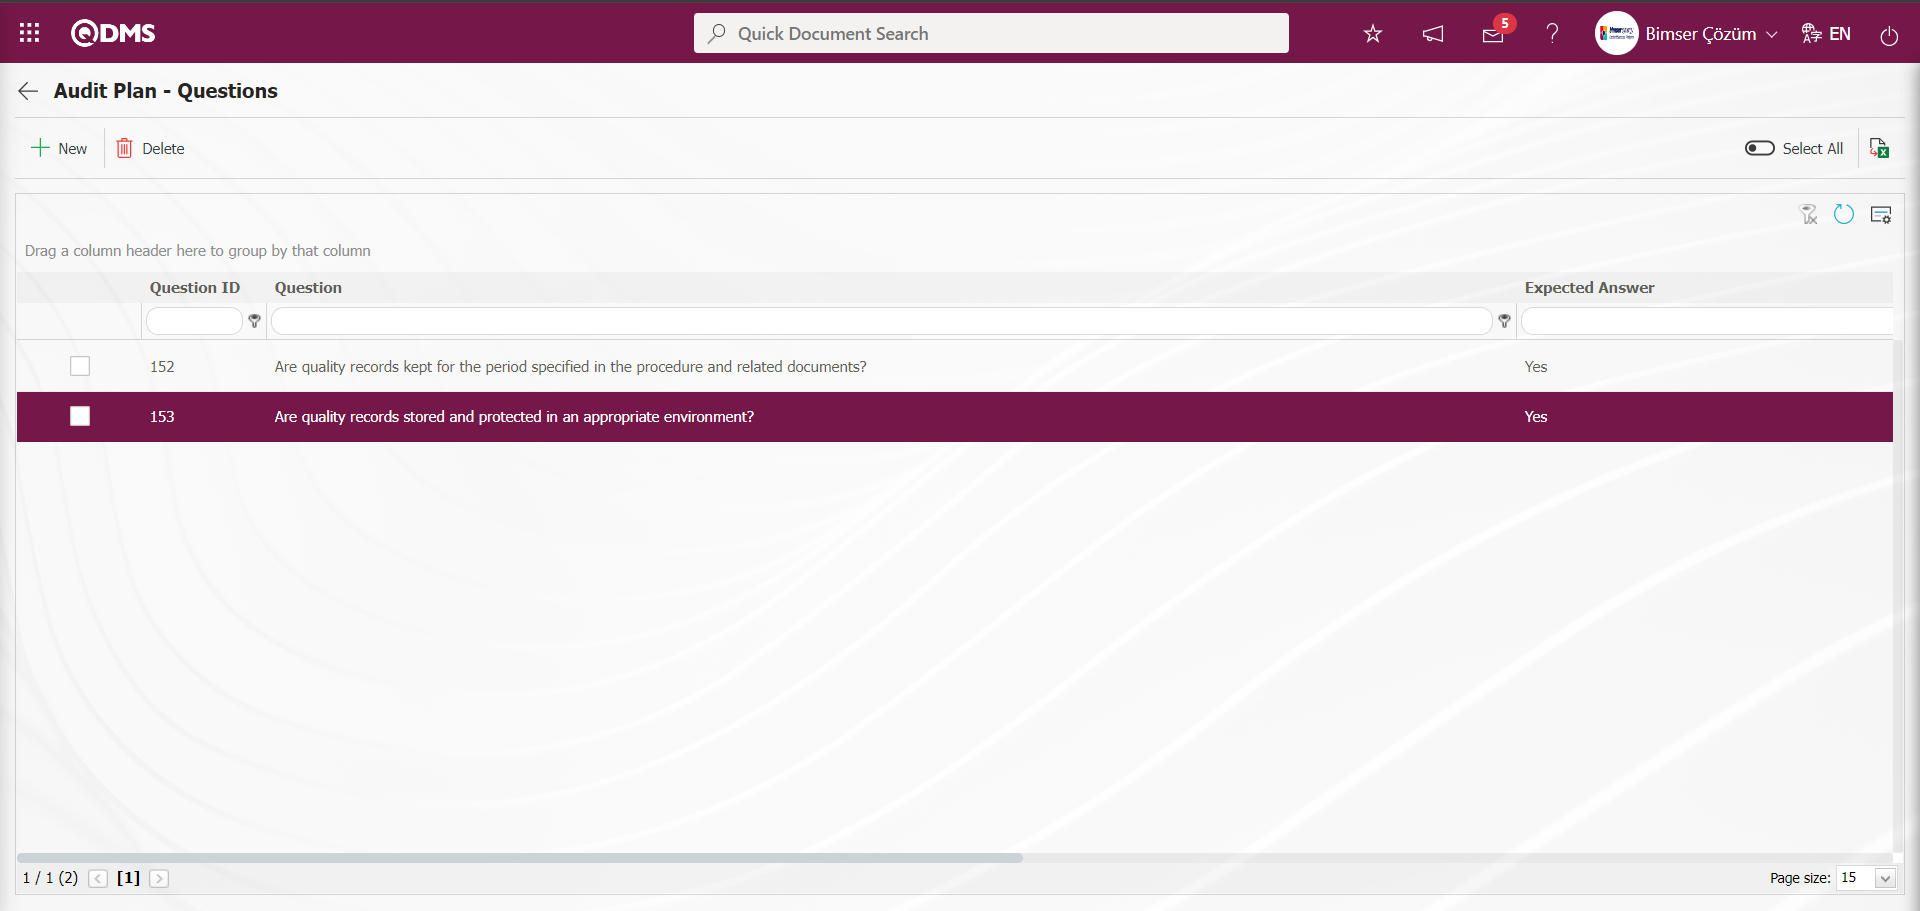
With the help of the buttons on the screen;
 : Adding a question is done.
 :Deletes the selected question in the list.
: Data is transferred to Excel.
: The search criteria on the menu screens are used to clear the data remaining in the filter fields in the grid where the search operation is performed.
: The menu screen is restored to its default settings.
: User-based designing of the menu screen is done with the show-hide feature, that is, the hiding feature of the fields corresponding to the columns on the menu screens.
On the screen opened by clicking the  button on the Audit Plan - Questions screen, the question list changes according to whether the audit is scored or not. If the audit is not scored on the screen opened by clicking the button on the questions screen, the list of questions in the question pool is displayed and a selection is made from this list. If the audit is scored on the screen opened by clicking the button on the questions screen, the addition process is made from the questions in the question list.
Click the button on the Scored Audit Audit Plan -Questions screen.
![A screenshot of a computer
Description automatically generated]ref114
Since the audit is a scored audit, the scored question list appears on the screen opened by clicking the button in this audit and a selection is made in this question list.
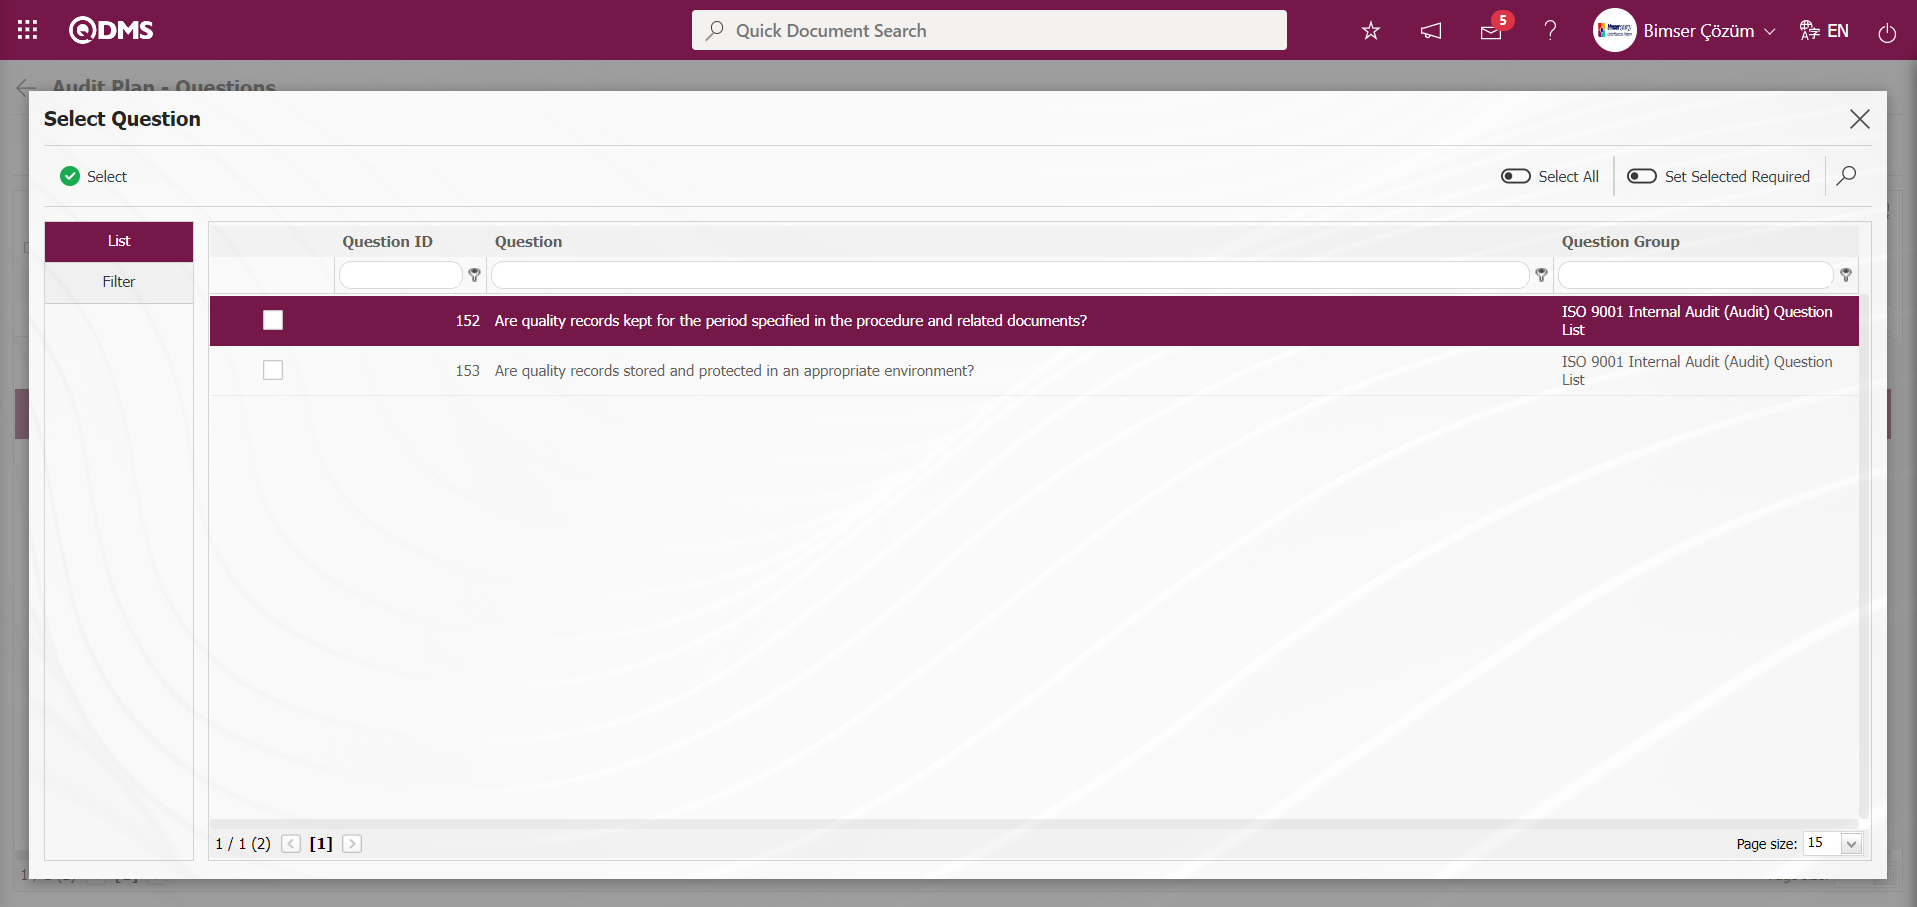
Detail Plan
The detail plan contains general information and questions about the audit. The Detail Plan report is created with the  button. The auditor or audited unit makes preliminary preparation for the audit before the audit by using the detail plan.
While the Audit is selected in the list, the button is clicked.
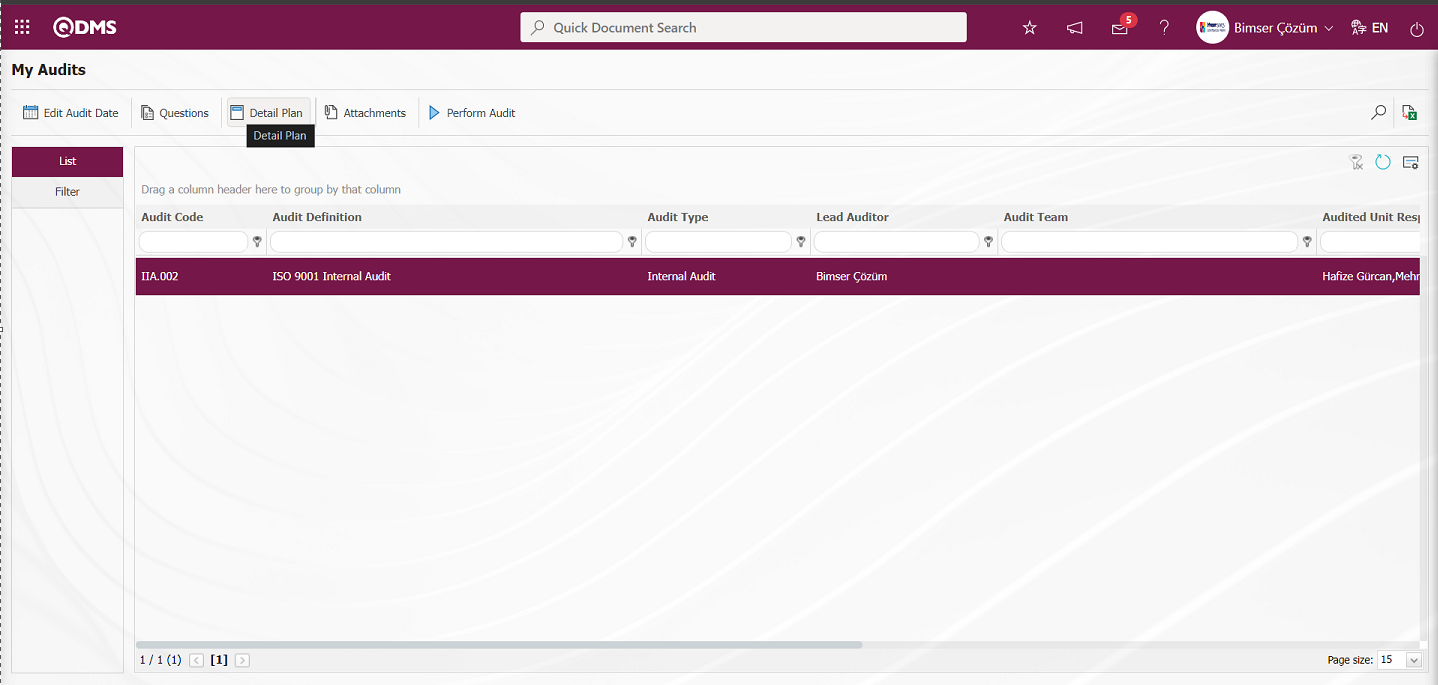
The Detail Plan screen opens.

With the help of the buttons on the screen;
 : Create an audit detail plan for the related audit.
 :Audit detail plan upload process is done for the user with the related audit.
 : The audit detail plan related to the relevant audit is published. The publication of the detail plan is sent to the people specified in the E-Mail settings.
Click the (Create Detail Plan) button on the Detail Plan screen.
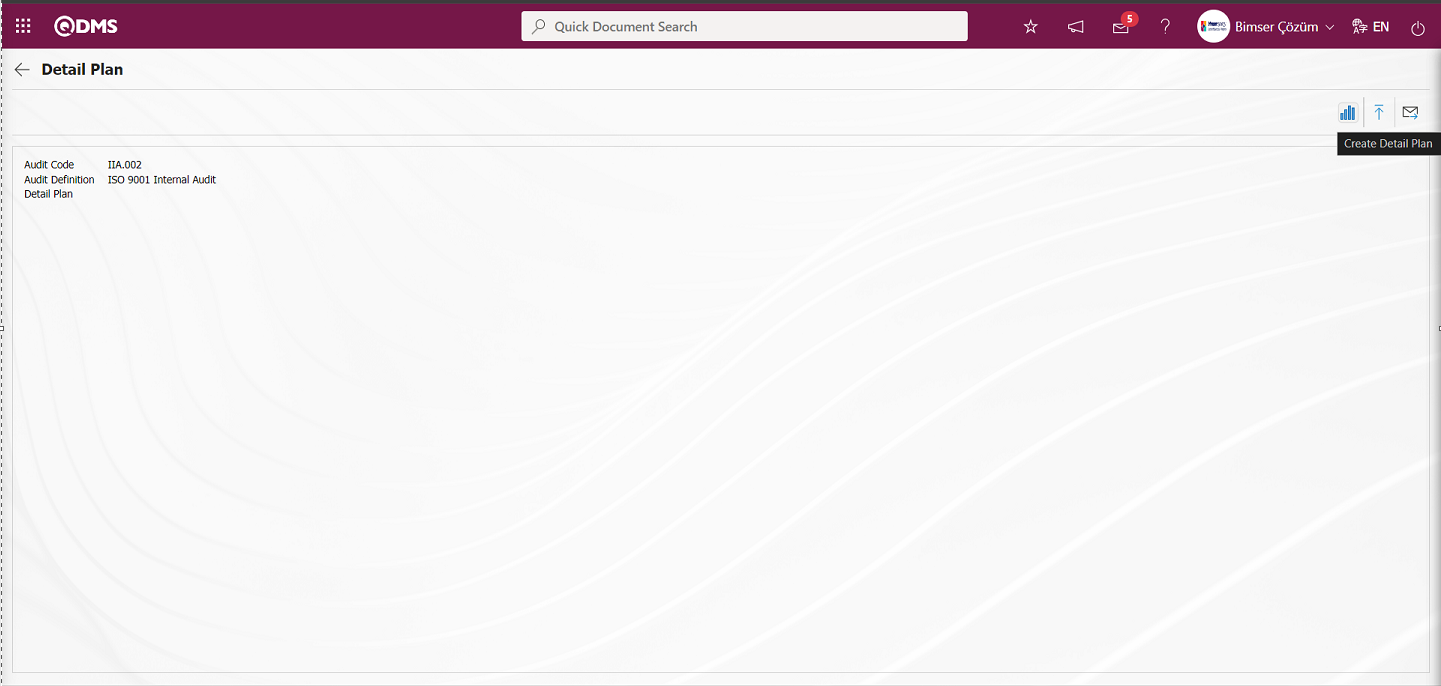
Define the relevant fields on the screen that opens:
Audit Code: This is the field where Audit code information is given on the Detail Plan screen.
Audit Definition: This is the field where Audit Definition information is given on the Detail Plan screen.
Detail Plan: It is the field where the link of the detail plan created by clicking the (Create Detail Plan) button on the Detail Plan screen is located.
“Audit detail plan created successfully” message is given by the system on the Detail Plan screen.
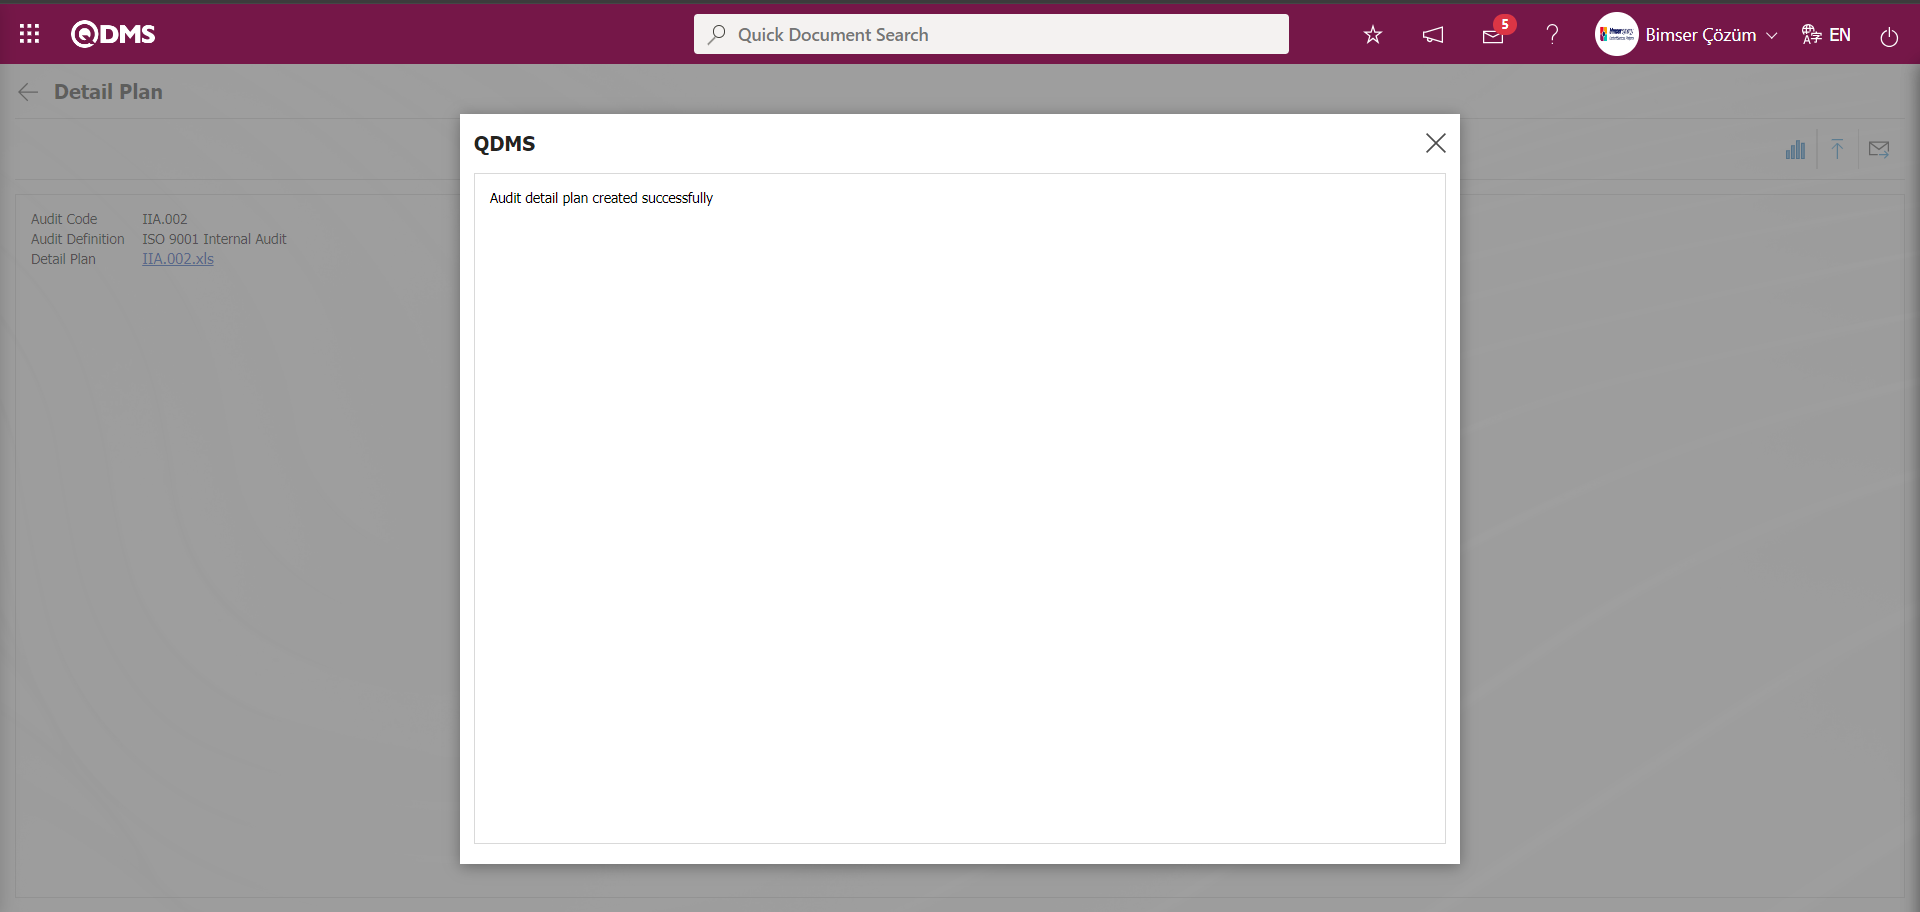
Click on the link in the Detail Plan field to access the Audit Detail Plan report.
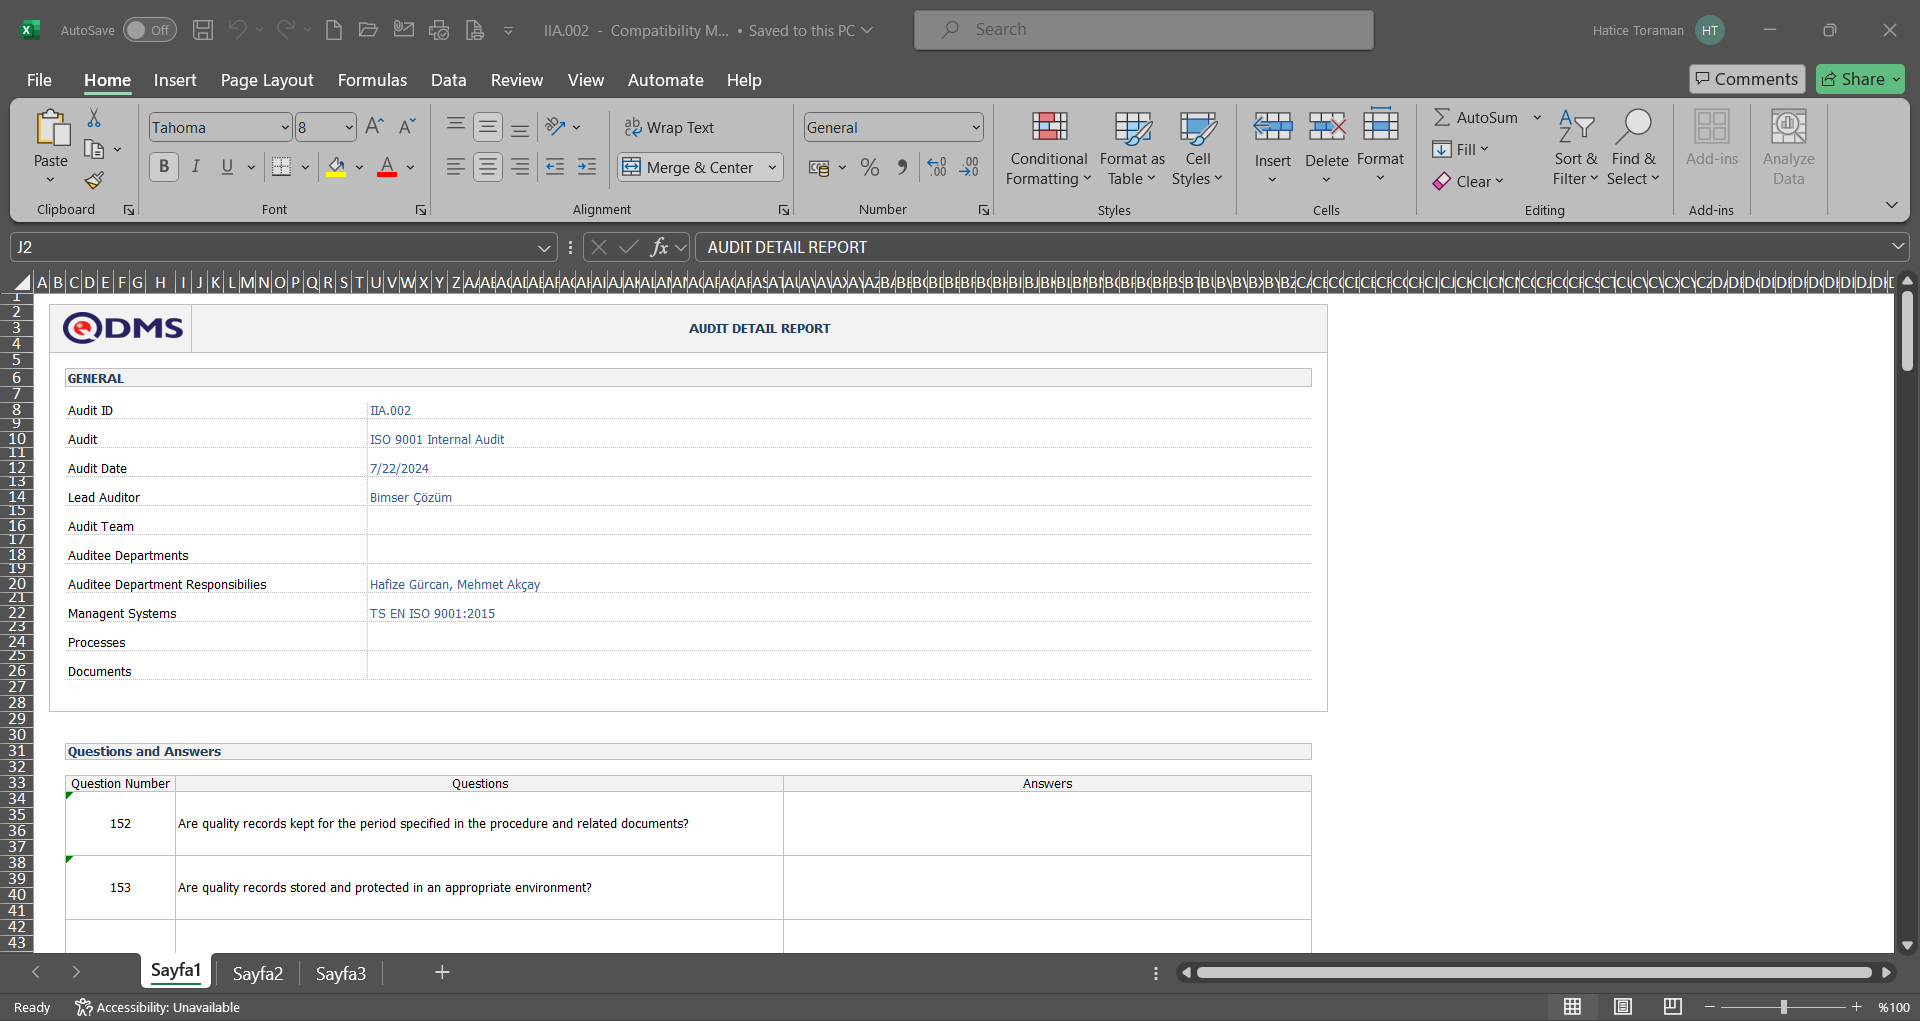
Click the  (Upload) button on the Audit Detail Plan screen.
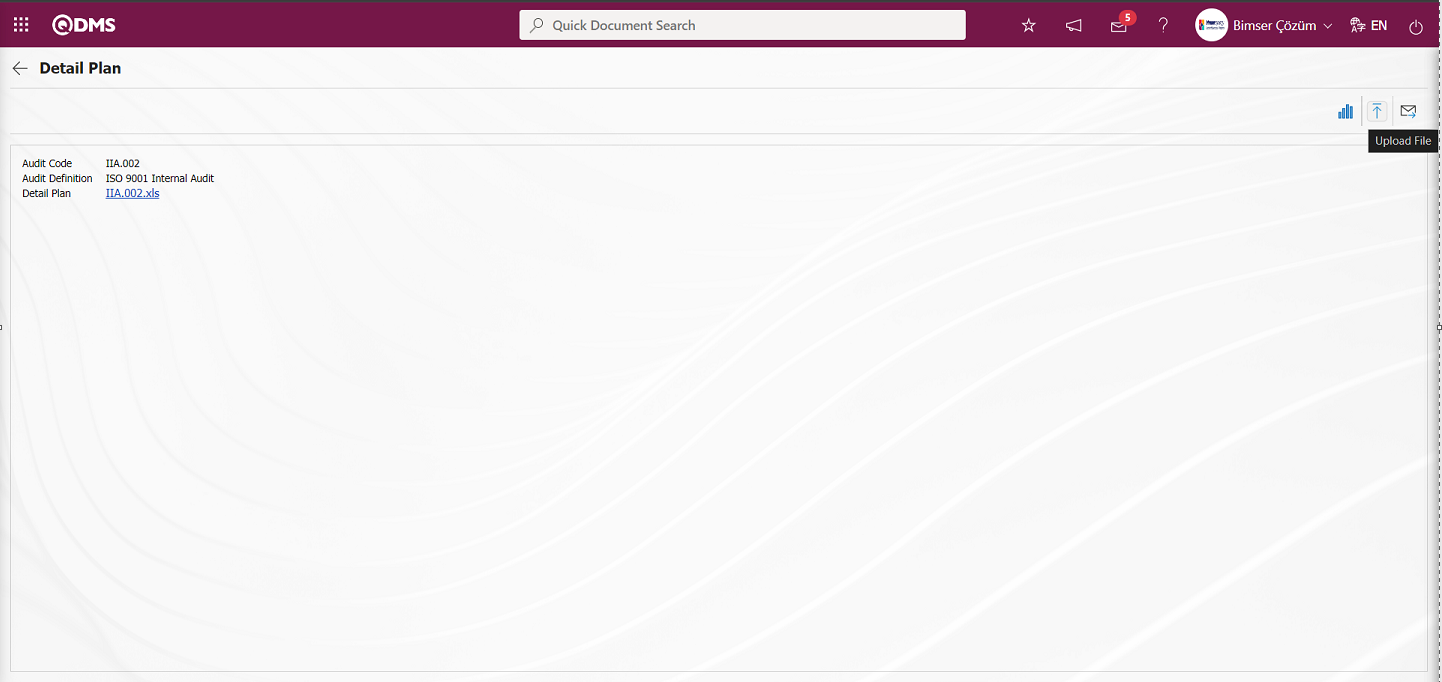
On the Select File screen, click the Browse button and select the Audit Detail plan.
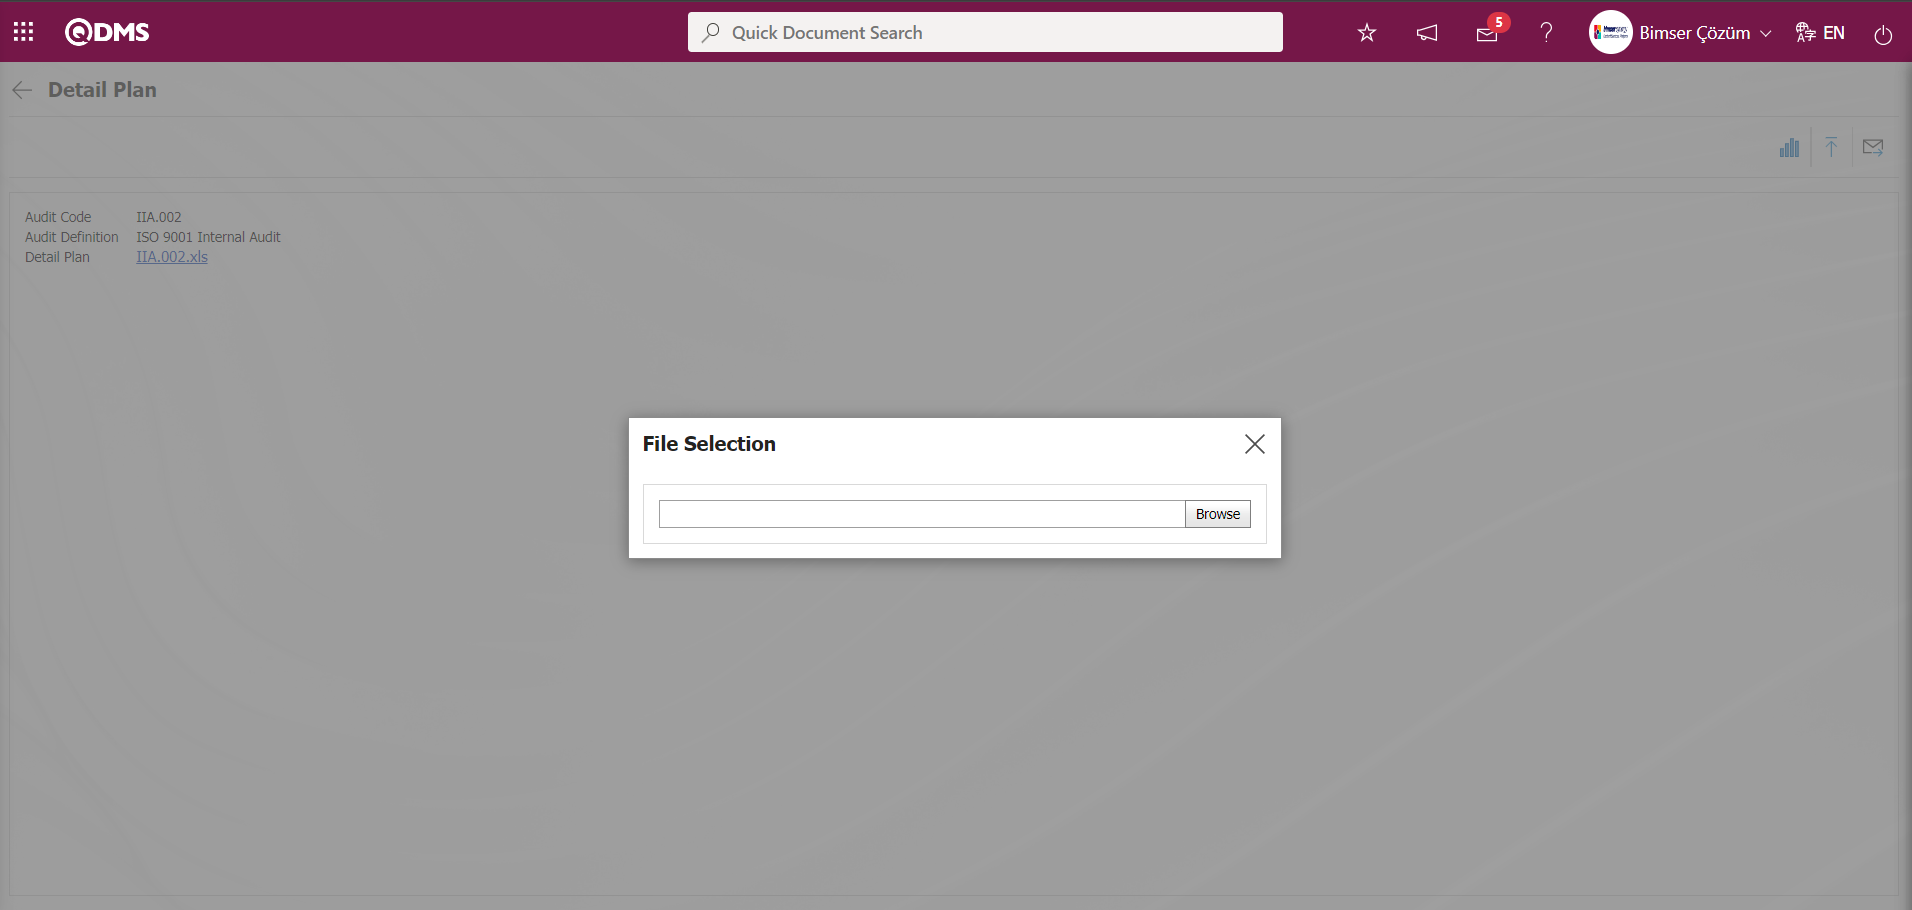
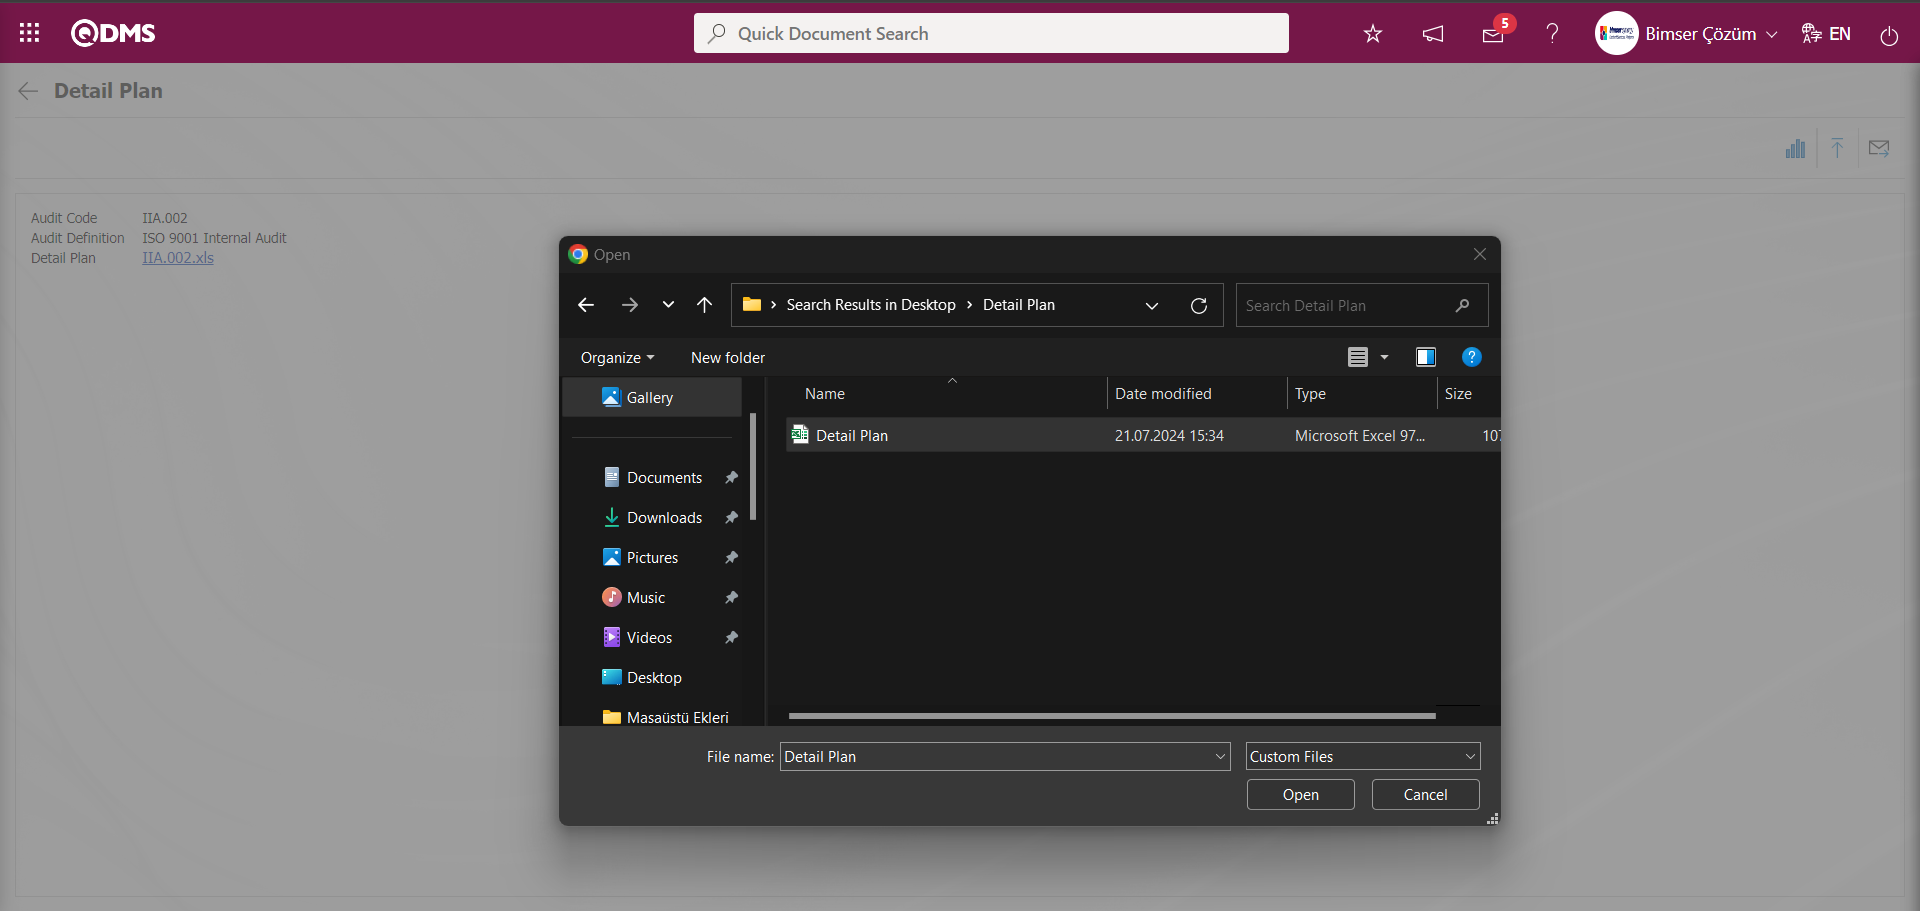
In the relevant audit, user-specific changes are made on the audit detail plan available in the system and uploaded in the Audit detail plan.
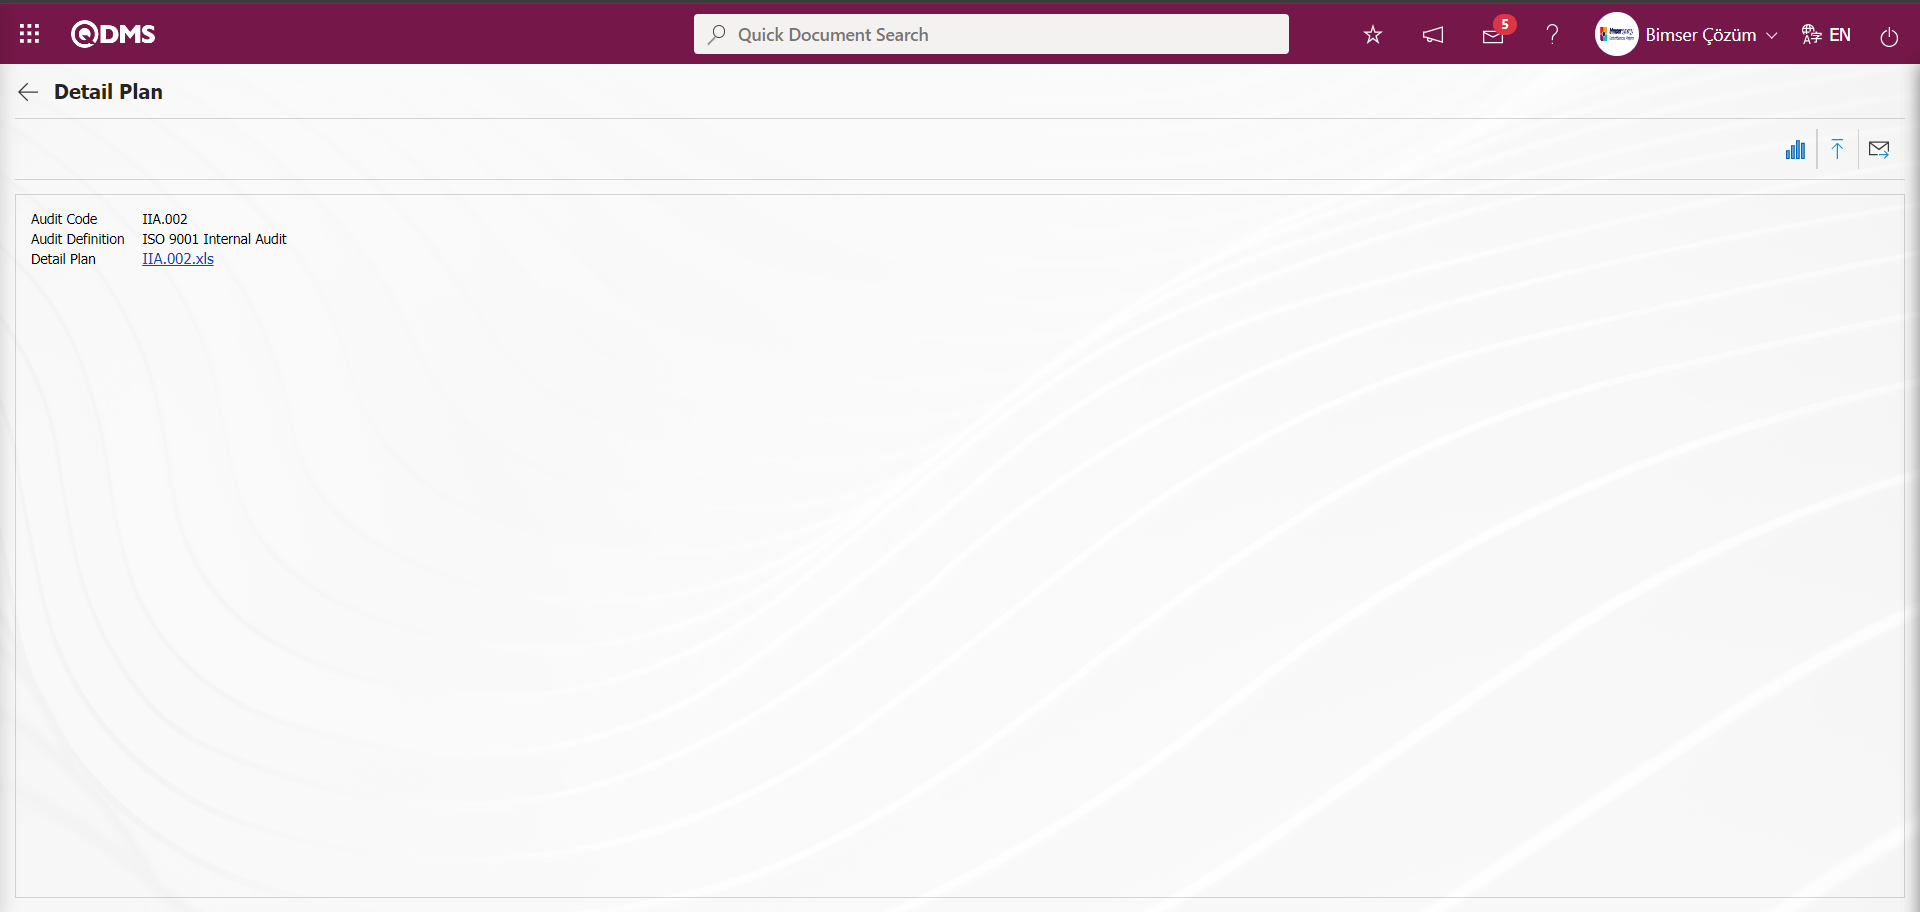
On the Detail Plan screen, the user-specific audit detail plan is accessed by clicking the link in the Detail plan field according to the user-specific change made on the existing audit detail plan in the system.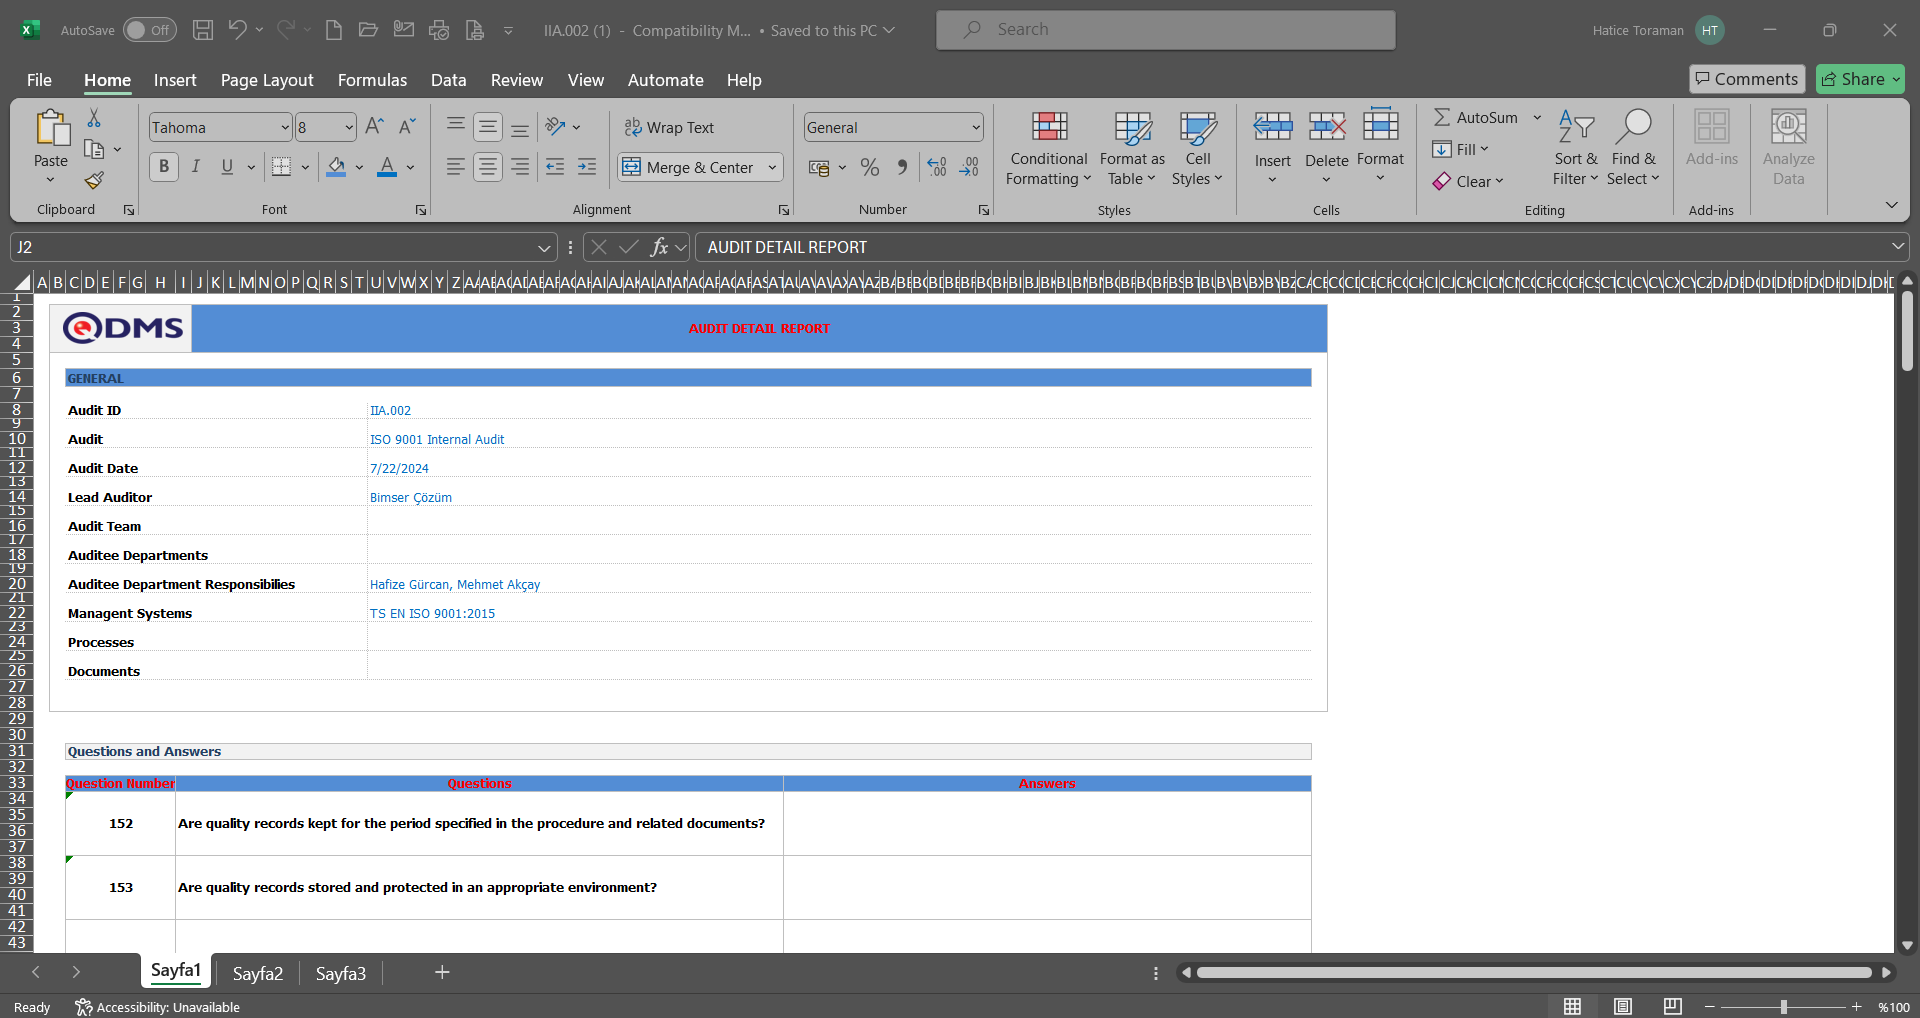
By clicking the (Publish Detail Plan) button on the Detail Plan screen, the publishing of the Control plan to the people set in the E-Mail settings is done.

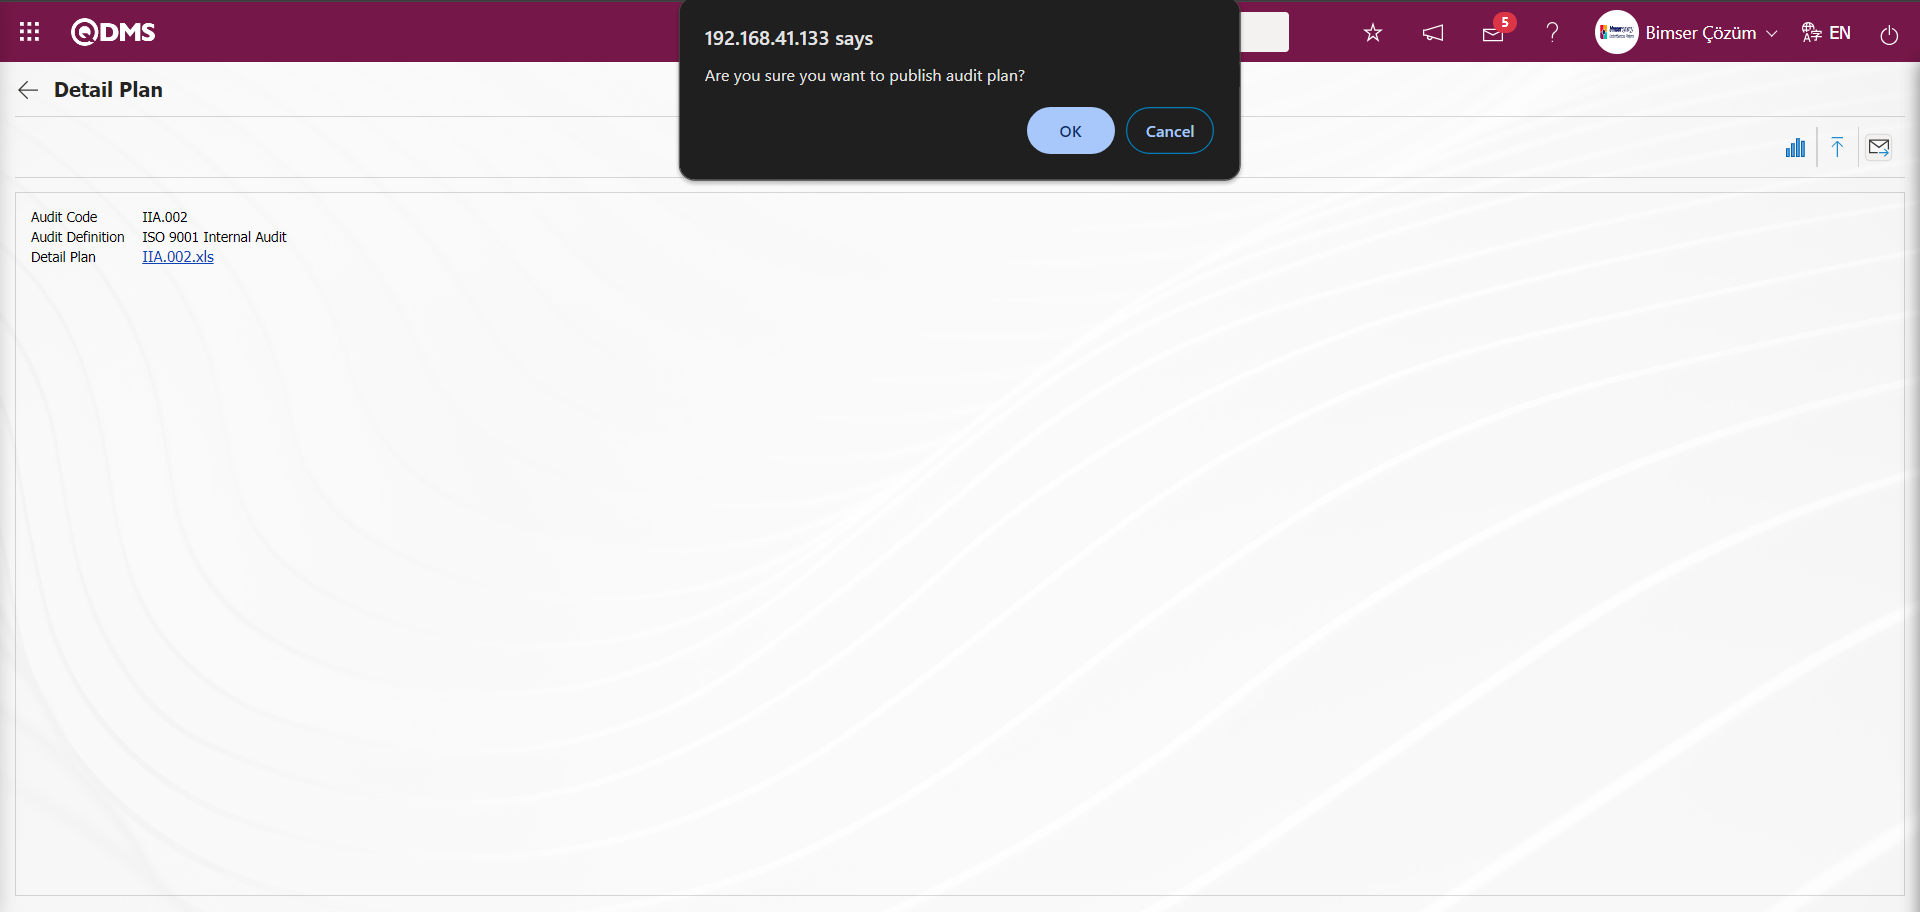
On the Detail Plan screen, the “Are you sure you want to publish the Audit Plan?” message, click the “OK” button and publish the Audit Detail Plan.

Attachments;
During the audit execution phase, the process of uploading an attachment file to the selected audit in the list, deleting the uploaded attachment file and viewing the uploaded file is performed.

On the My Audits screen, on the list tab, click the  button while audit in progress is selected in the list.
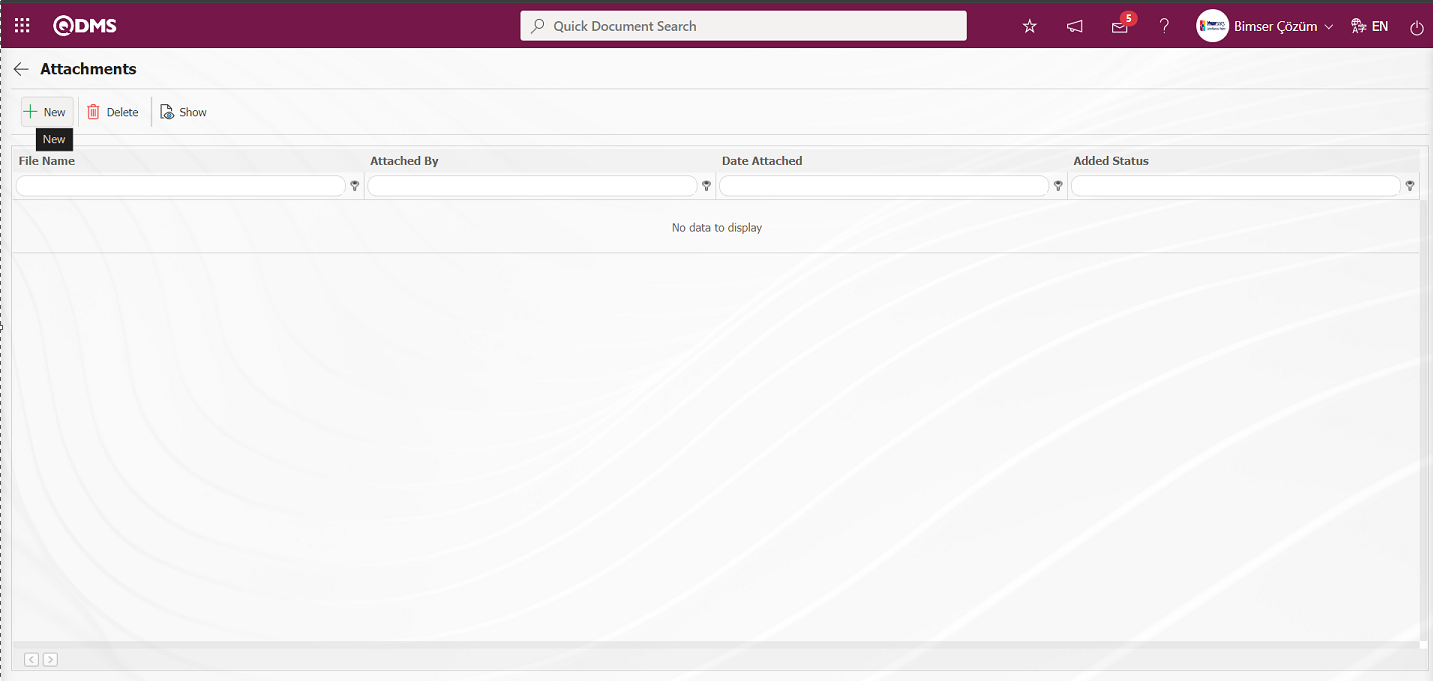
With the help of the buttons on the screen;
 : The additional file is uploaded to the system.
 : The uploaded additional file information is deleted.
 : The uploaded additional file information is displayed.
 button is clicked to add additional file to the Audit record. Multiple attachment files can be added.
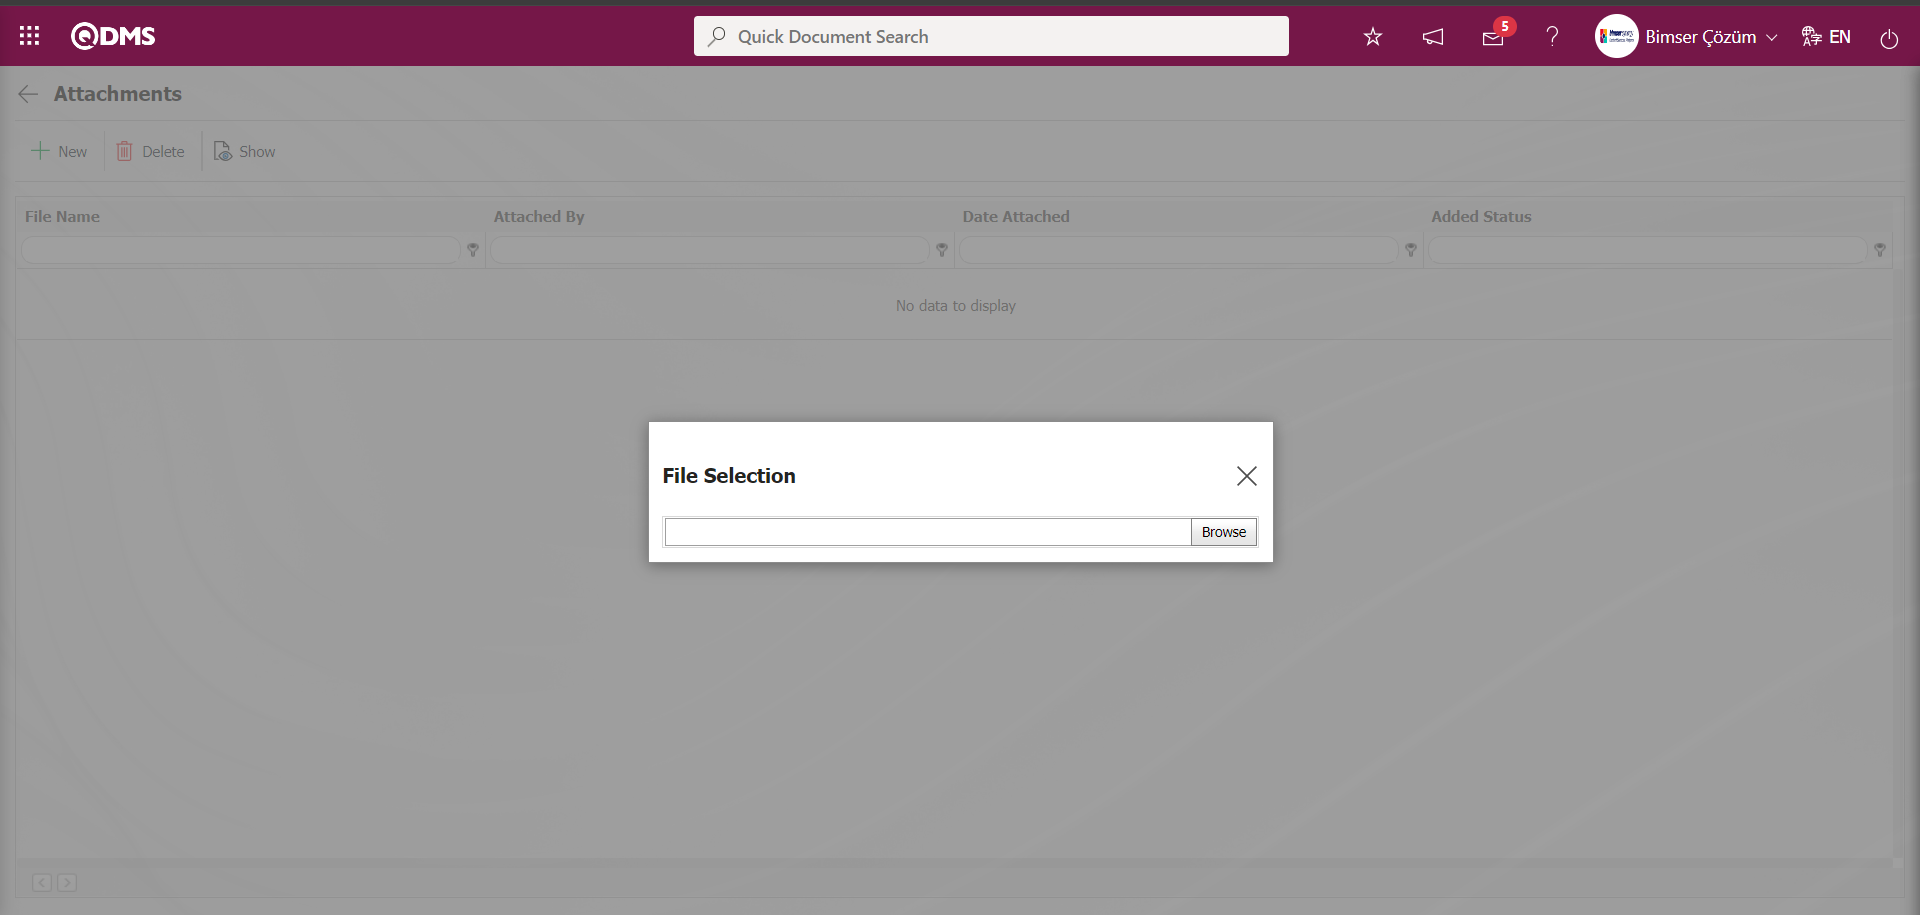
Click the Browse button on the Select File screen. On the screen that opens, the file to be uploaded is selected and uploaded to the system.

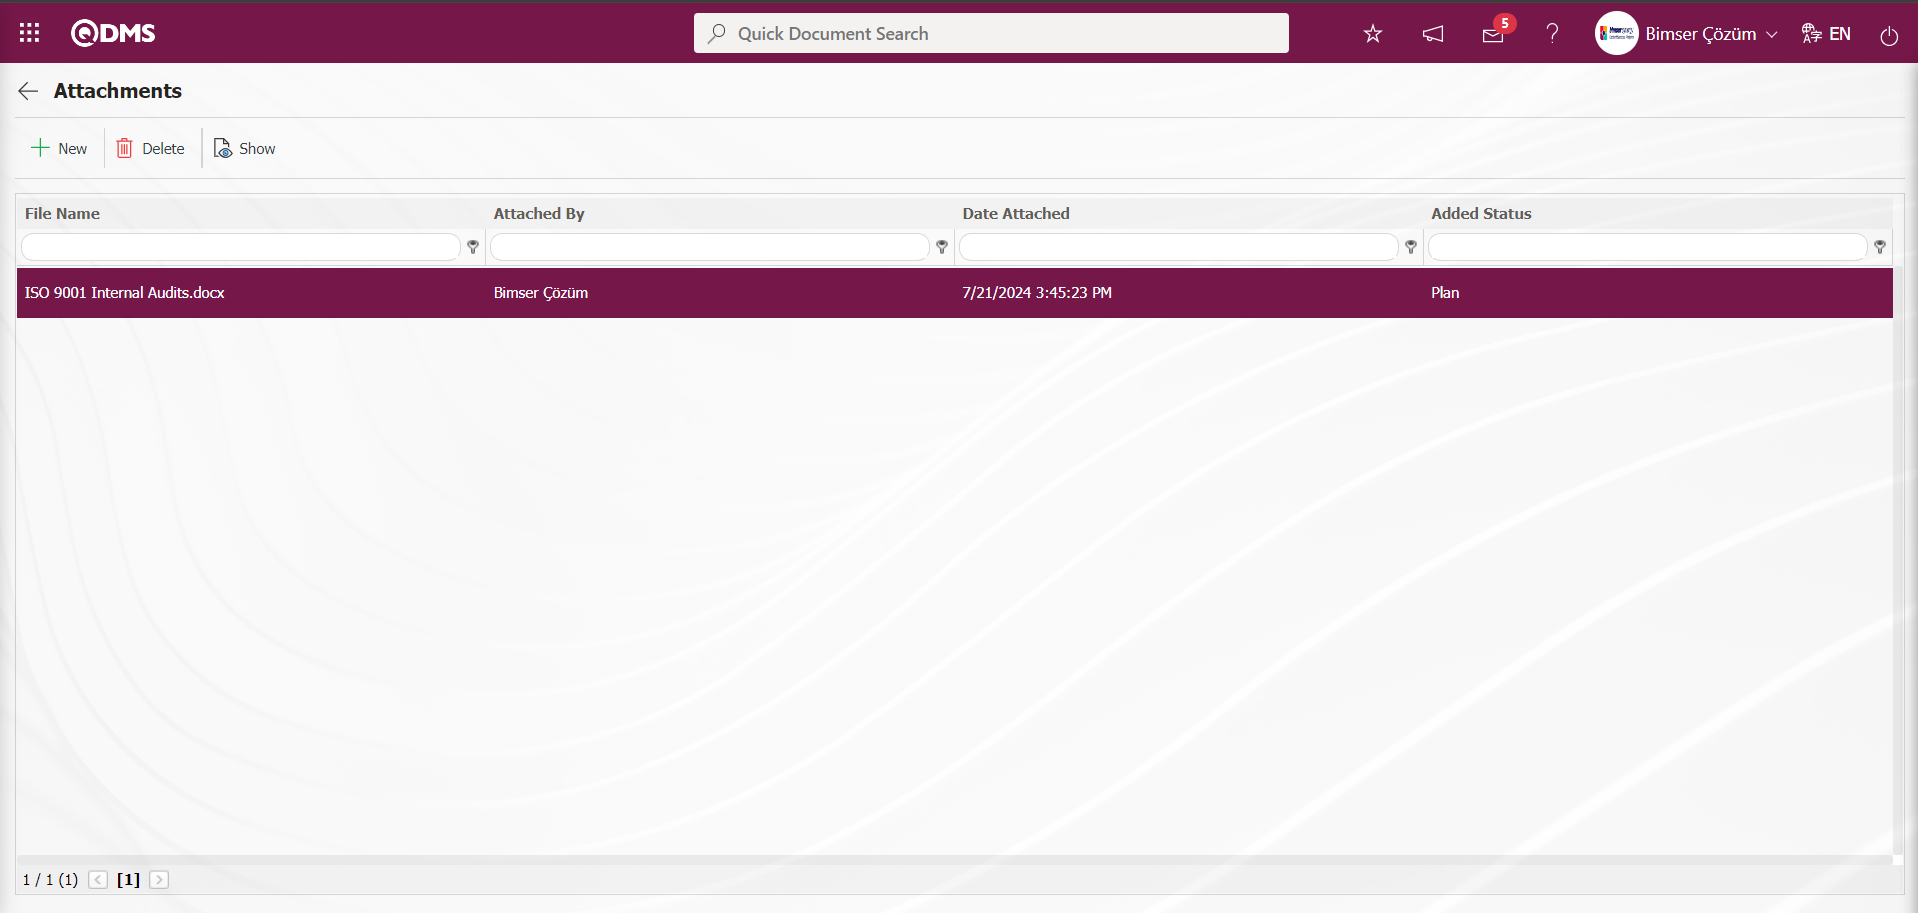
Perform Audit;
In order to perform the audit on the Pending Audits screen, the  button is clicked and the answers, findings, other information, additional files, if any, are entered, and finally the audit report is prepared. If the necessary adjustments have been made in the parameters related to CAPA and Action in the audit activities module parameters during the audit realization phase, CAPA record opening and Action Planning is also performed when deemed necessary.
On the Pending Audits screen, on the list tab, click the button while the Audit in the realization stage is selected in the list.
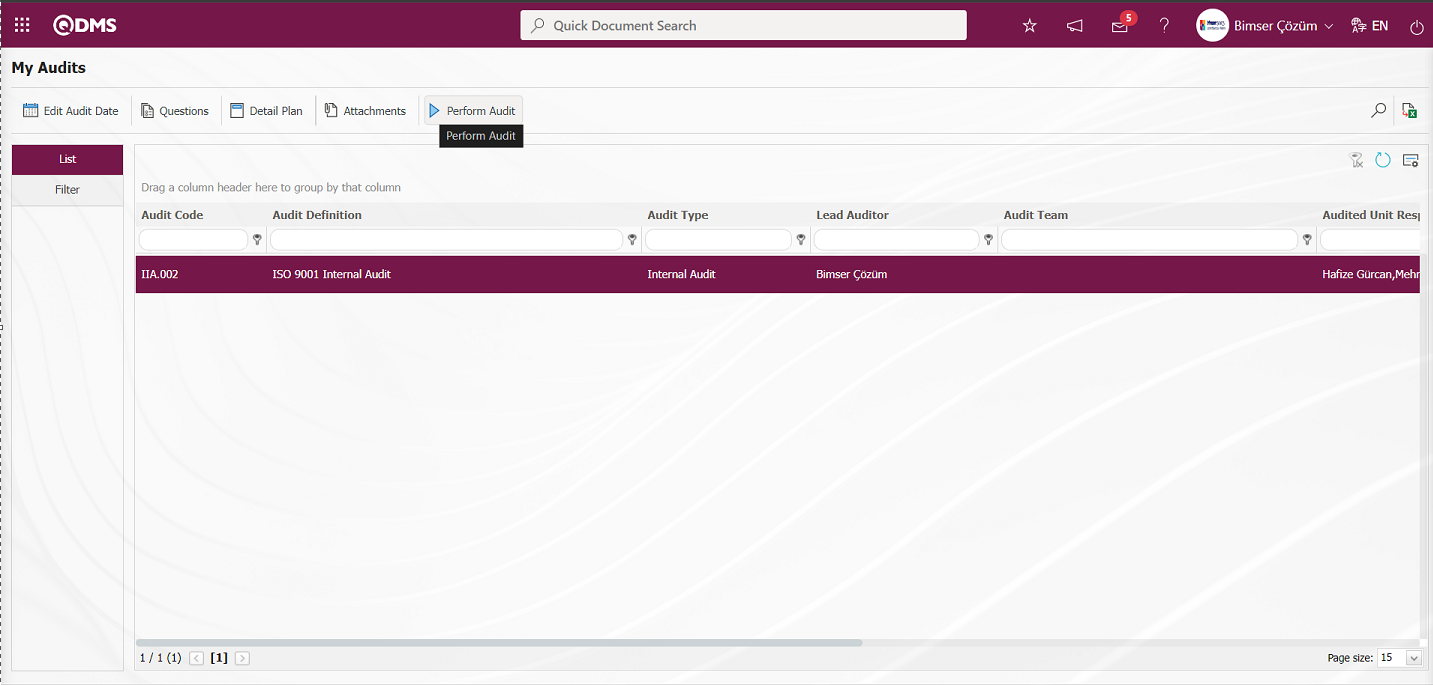
Answers tab;
On the Perform Audit - Edit Record screen, click on the Answers tab. This is the section where the answers given by the auditees to the questions asked in the audit can be written. While the 1st question is selected in the Answers tab, the details of the question are displayed by clicking the  button.
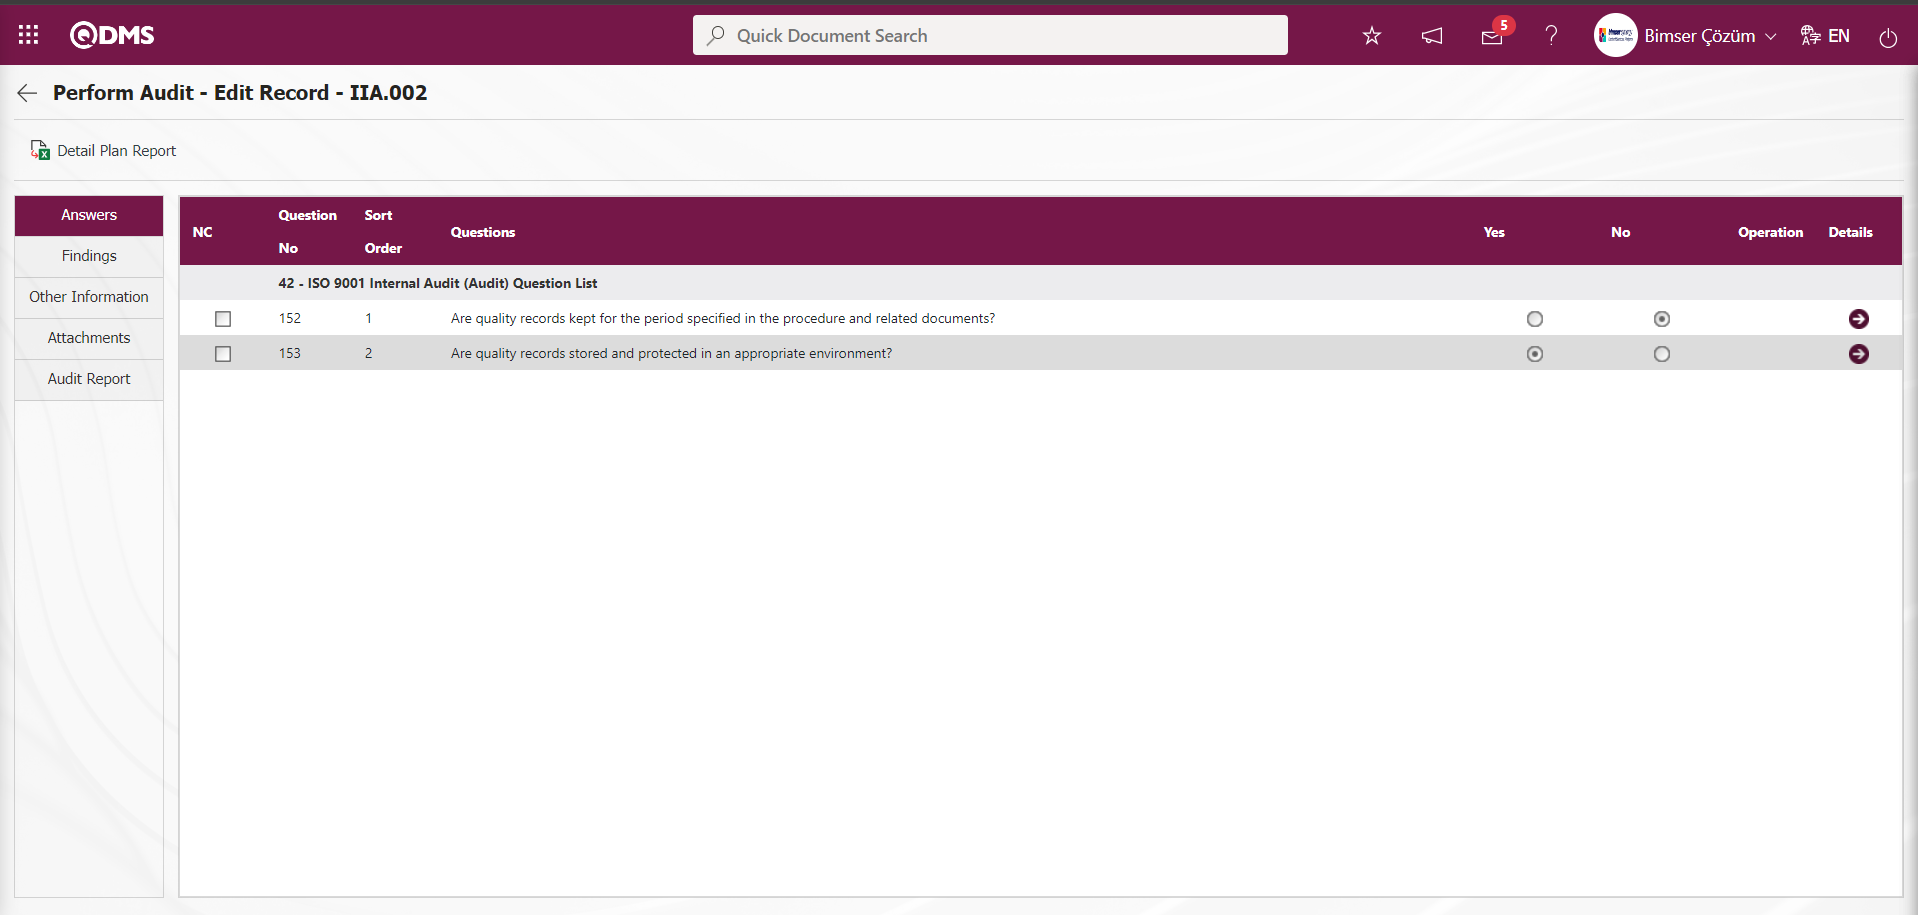
On the page that appears, enter the answer given. If CAPA or Action will be opened, the relevant check-boxes are checked. If it is an optional scored audit, the option is selected.
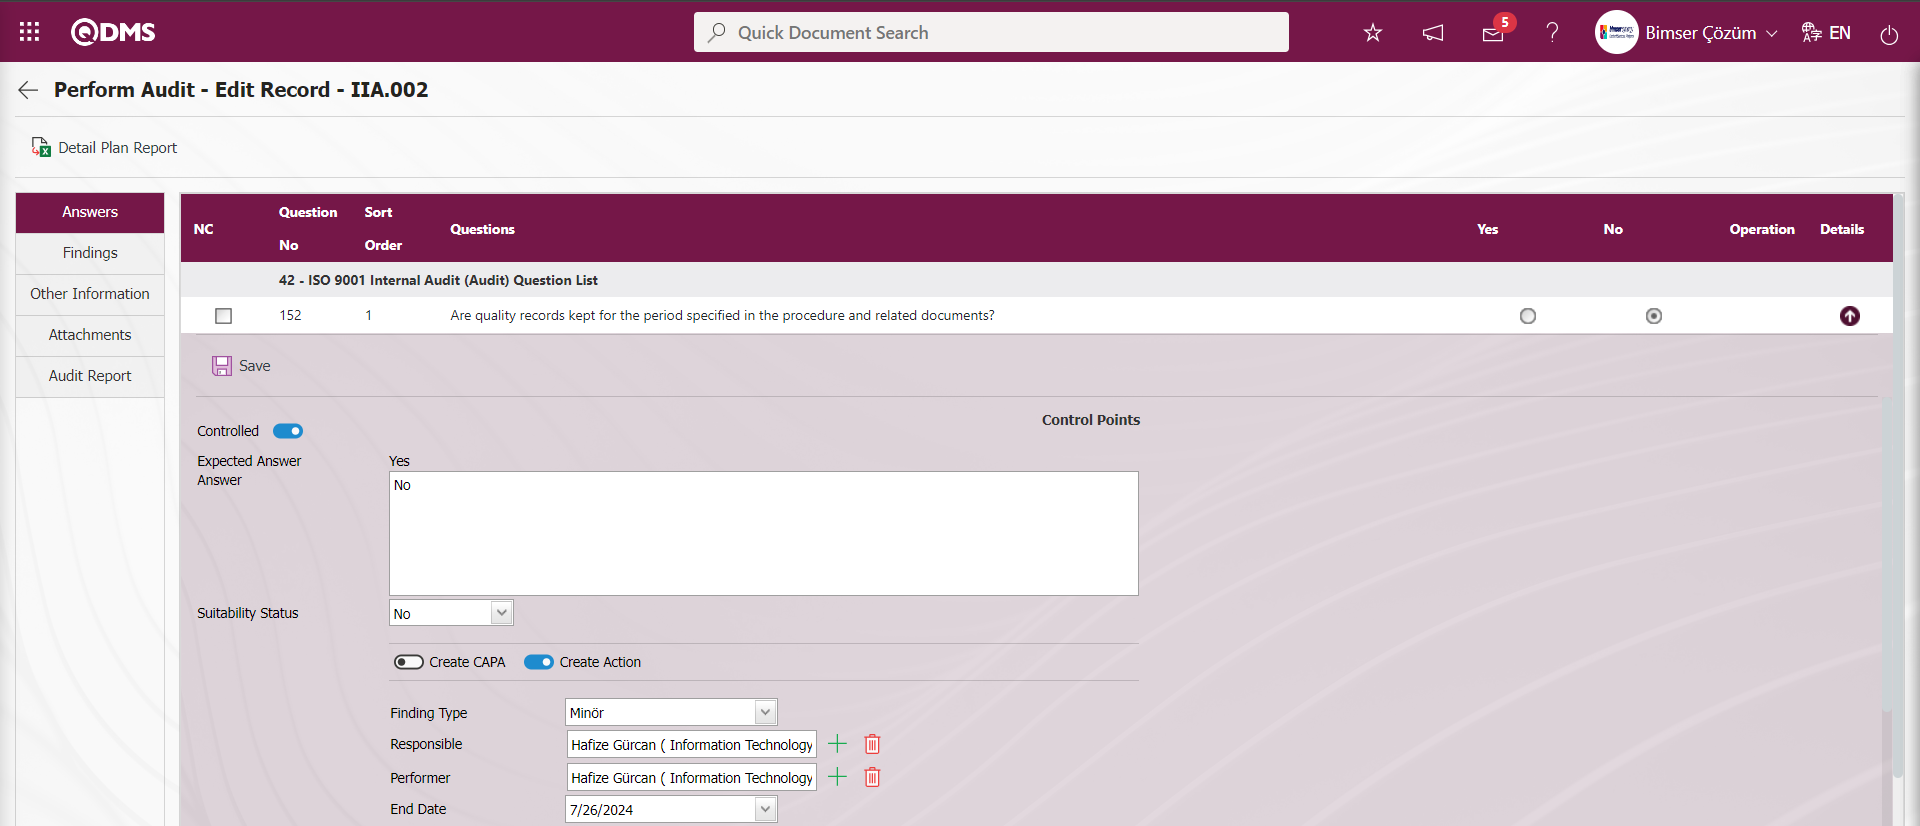

On the Perform Audit - Edit Record - screen, the option information is selected in the option section of the relevant question in the scored audit and the answer information is written in the answer field in the detail section. According to the answer given in the question, it is decided to open an Action or CAPA. If the check-boxes Create CAPA or Action are clicked, the fields related to CAPA or Action will be displayed. By entering the relevant information in these fields, the process of opening a CAPA and Action related to the audit is done. Depending on the answer to the related question, Action Planning is decided and the relevant information is entered in the fields related to Action Planning. Necessary adjustments must be made in advance in the parameters related to Action in the Audit Activities module parameters.
For Action
At this point, if you want to open automatic actions from the answers tab, some parametric arrangements should be made. Actions opened from this tab will occur after the audit is closed. The following Action related audit parameters should be updated according to the values defined in the relevant company:
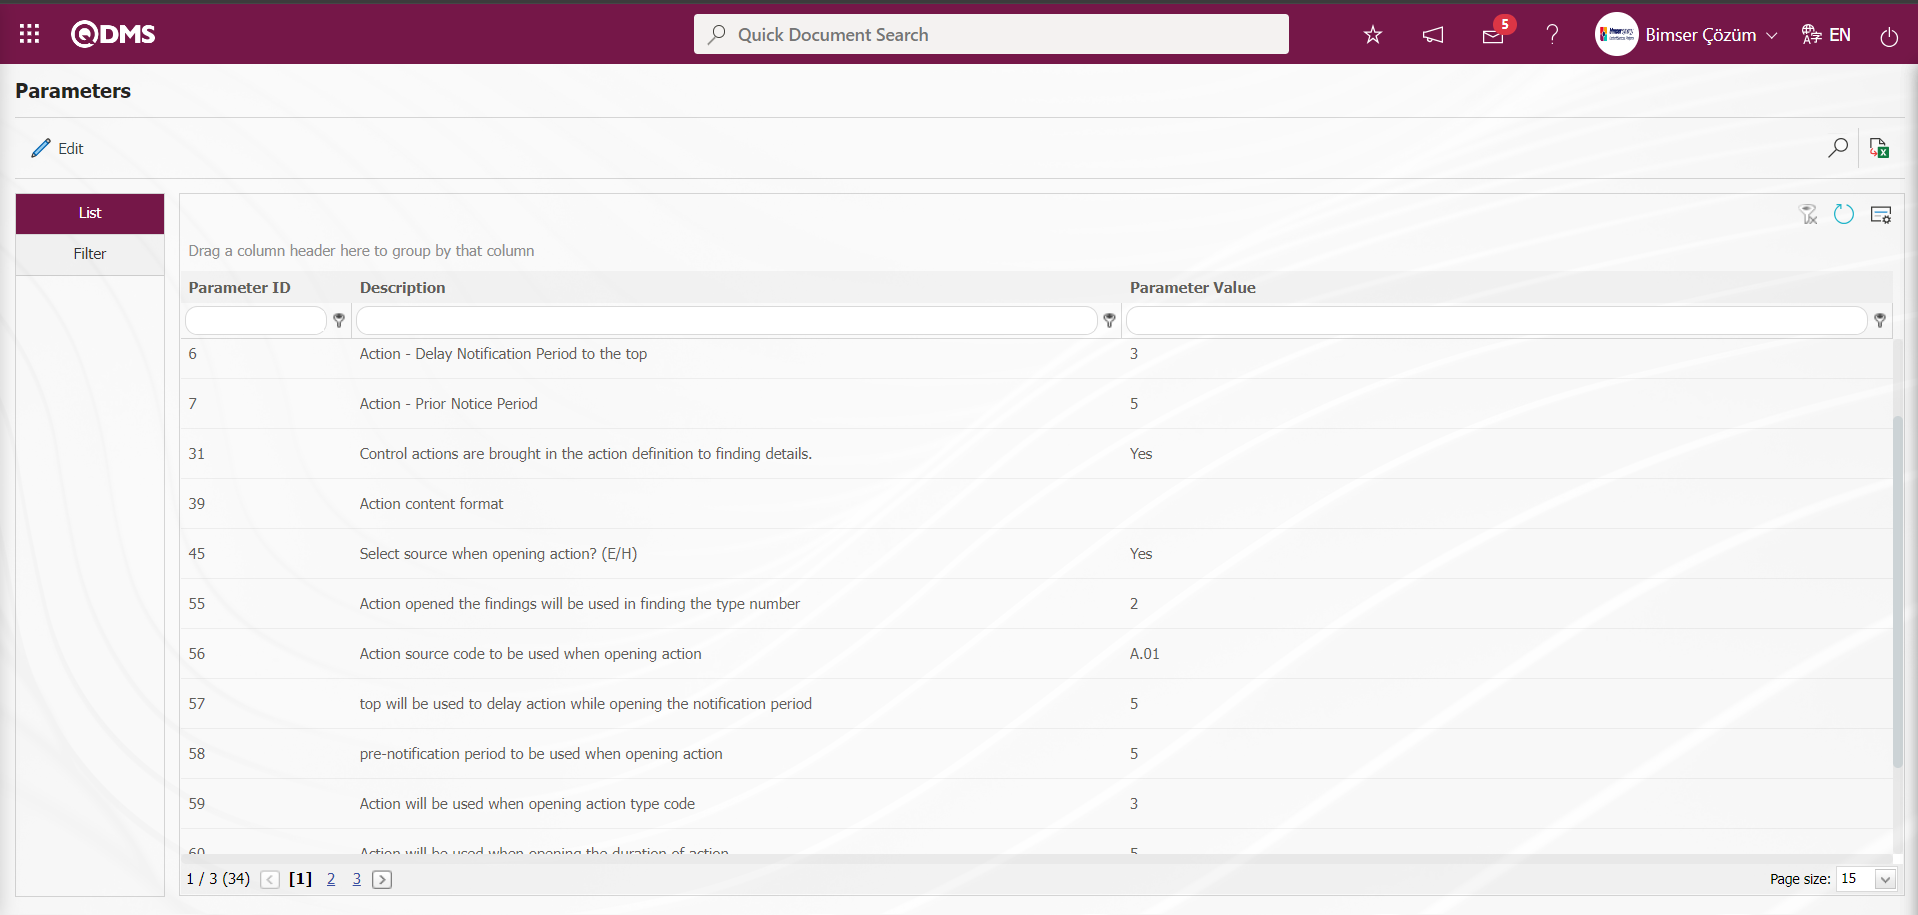
When Action Planning is performed in the parameters of the Audit Activities Module, the Action source code must be defined in parameter 5.

The Action Source Code information defined in the parameter is obtained from the System Infrastructure Definitions/Action/Action Source Definition menu. In the Audit Activities Module parameters, the Action Item type code to be used in action planning is defined in parameter 59.

The Action Item Type code information defined in the parameter is obtained from the System Infrastructure Definitions/Action/Action Item Type Definition menu. It is determined by making the necessary adjustments in the parameters related to the Action such as opening and closing confirmation when opening the action, selecting and selecting the source, determining the pre-notification period to be used when opening the action and setting the action content format. For the first question, depending on the relevant option, Action planning is decided and action related fields information is entered. If desired, depending on the answer to the relevant question, uploading additional files, viewing the uploaded additional file or deleting the uploaded additional file is performed.
After entering the relevant information in the required fields, the registration process is done by clicking the  button in the upper left corner of the screen.
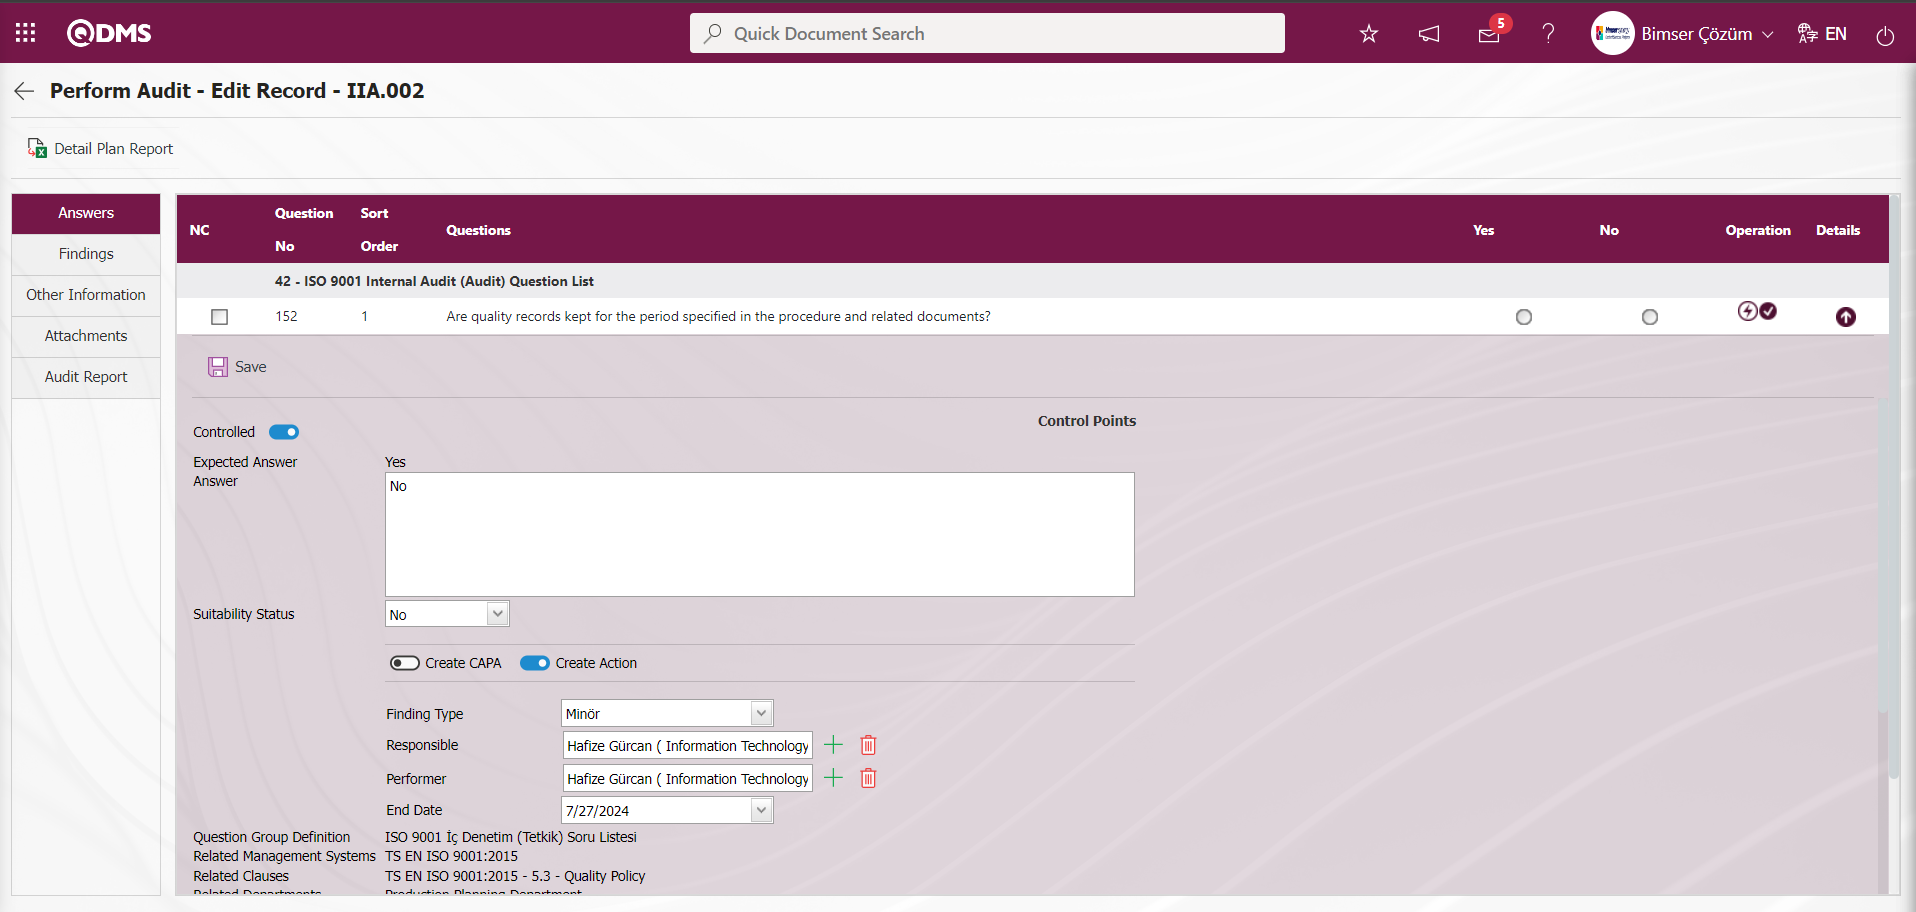
1. Action Planning with Question 1 is shown on the screen with the icon representing the Action.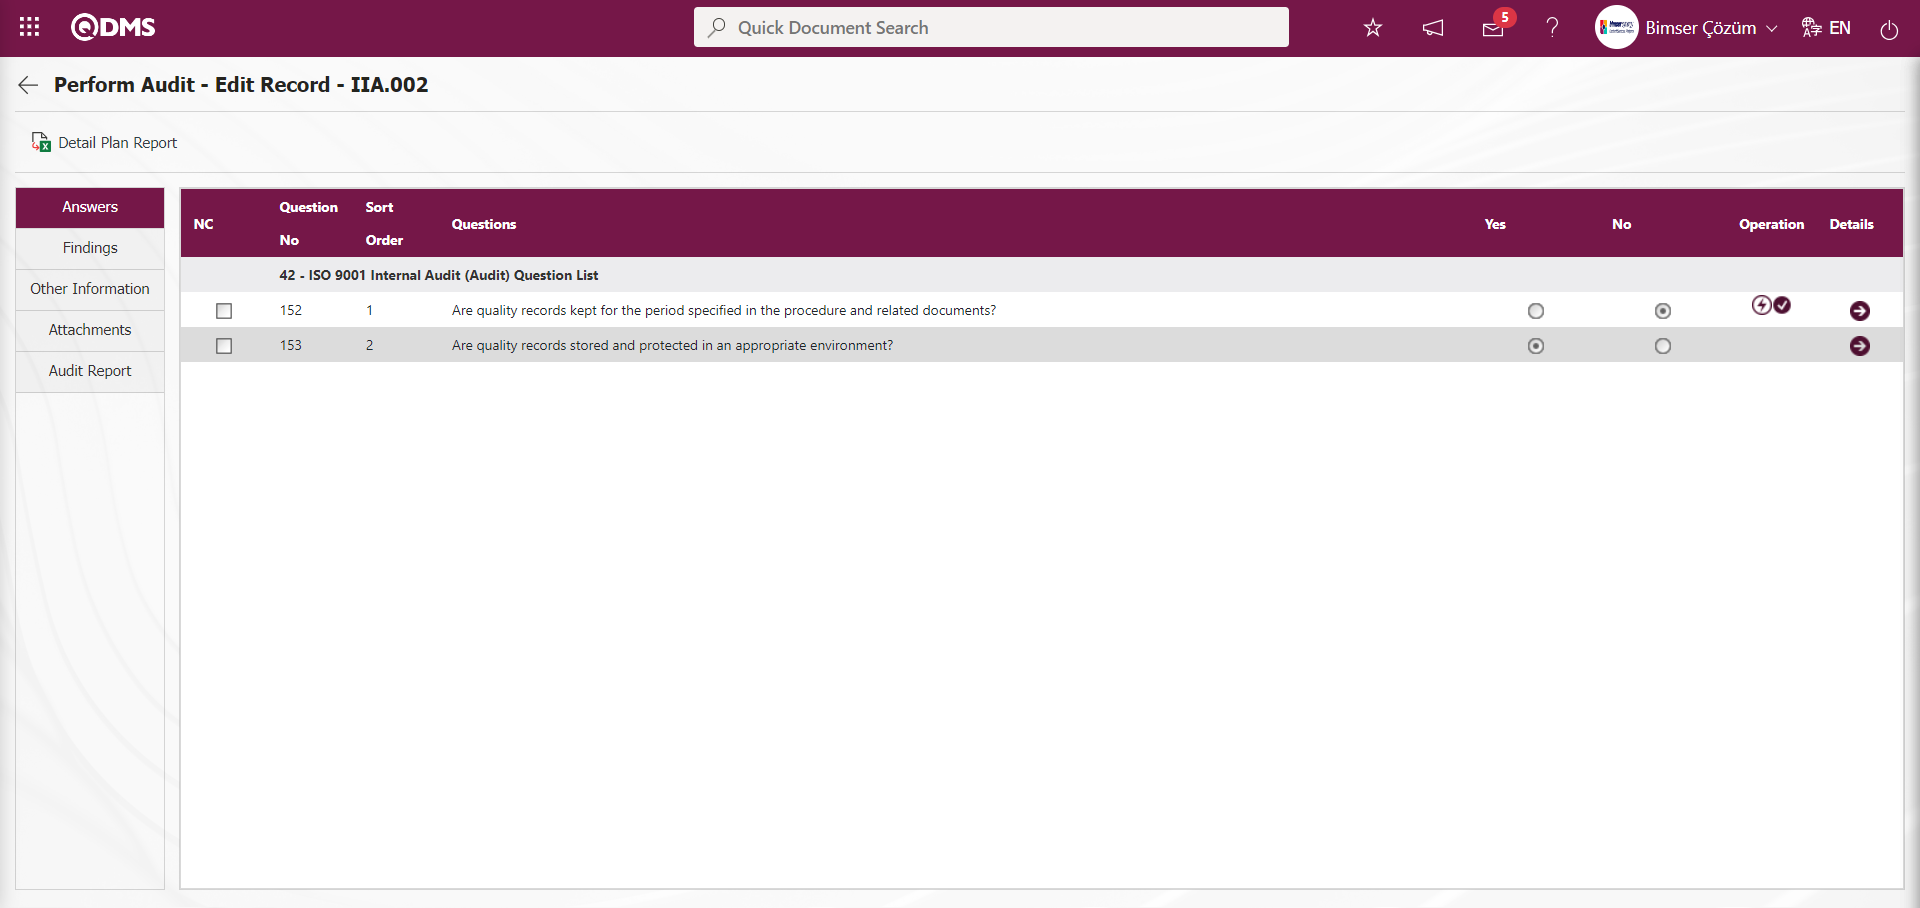
When question 2 is selected in the Answers tab, click on the button to view the details of the question.
On the page that appears, enter the answer given. If CAPA or action will be opened, the relevant check-boxes are checked. If it is an optional scored audit, the option is selected.
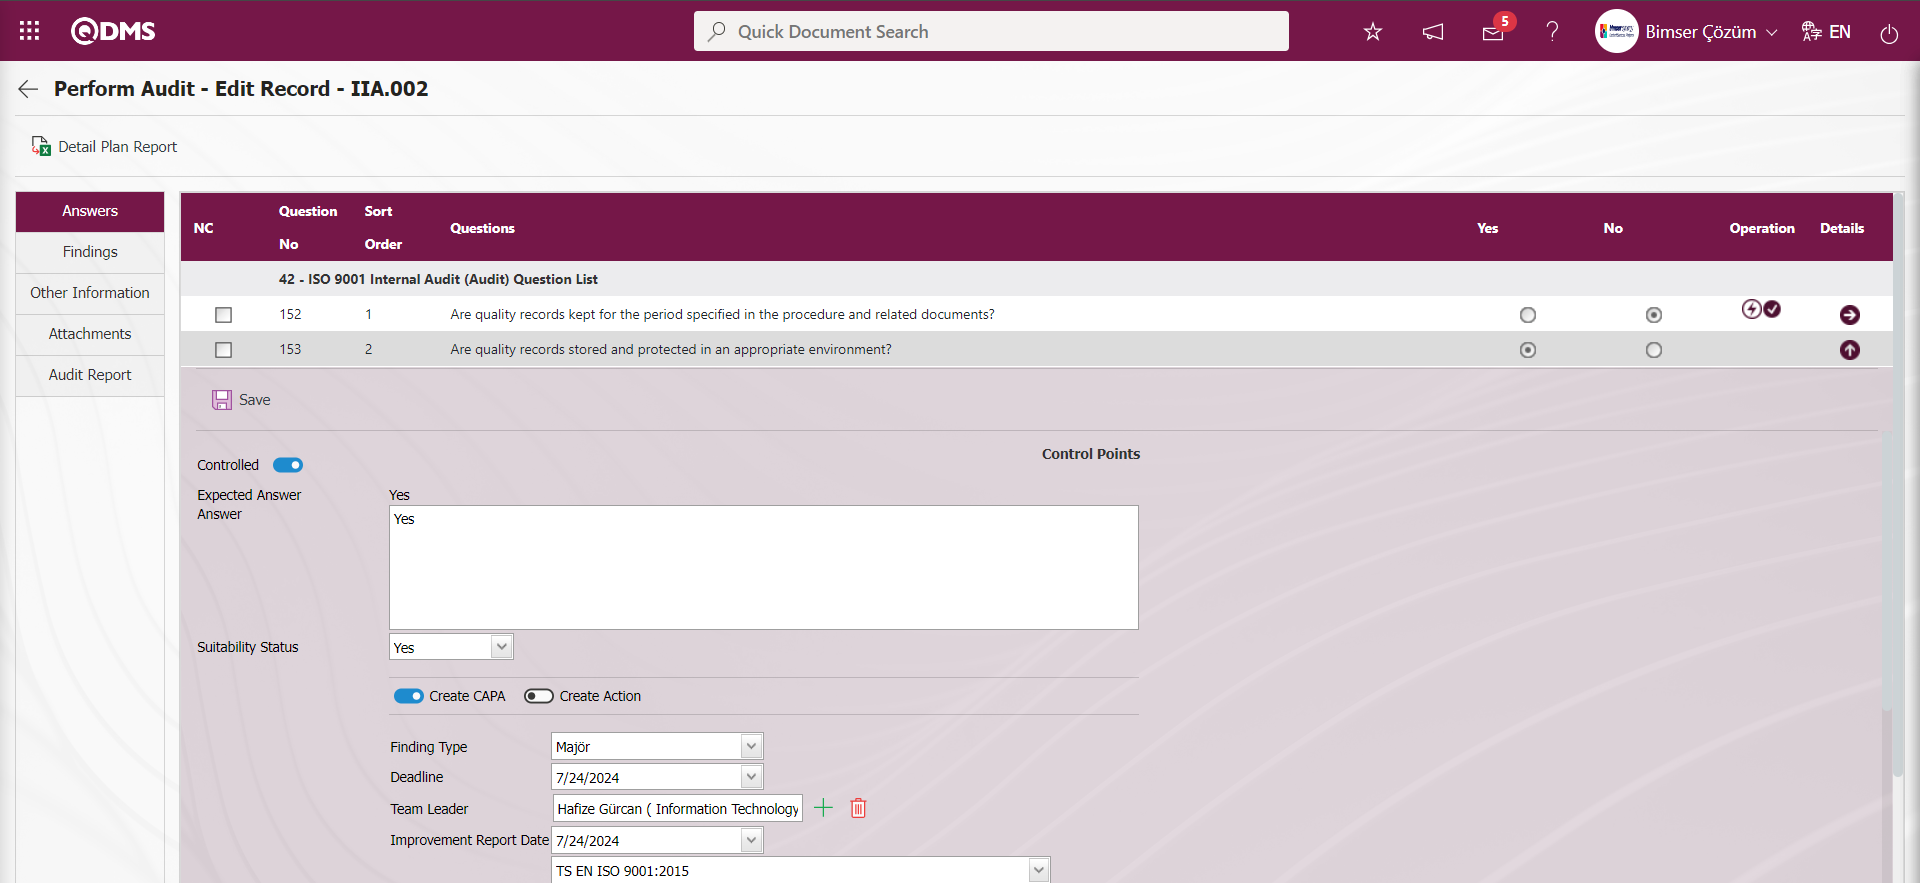

On the Perform Audit - Edit Record screen, the option information is selected in the option section of the relevant question in the scored audit and the answer information is written in the answer field in the detail section. According to the answer given in the question, it is decided to open an Action or CAPA. If the check-boxes Create CAPA or Action are clicked, the fields related to CAPA or Action are displayed. CAPA and Action opening process related to the audit is done by entering the relevant information in these fields. Depending on the answer to the relevant question, it is decided to open a CAPA and the relevant information is entered in the fields related to the CAPA.
It is necessary to make the necessary adjustments in the parameters related to CAPA in the Audit Activities module parameters.
For CAPA;
At this point, if you want to open CAPA automatically from the answers tab, some parametric arrangements should be made. The CAPA record opened from this tab will be created after the audit is closed. The audit parameters related to CAPA below should be updated according to the values defined in the relevant company:
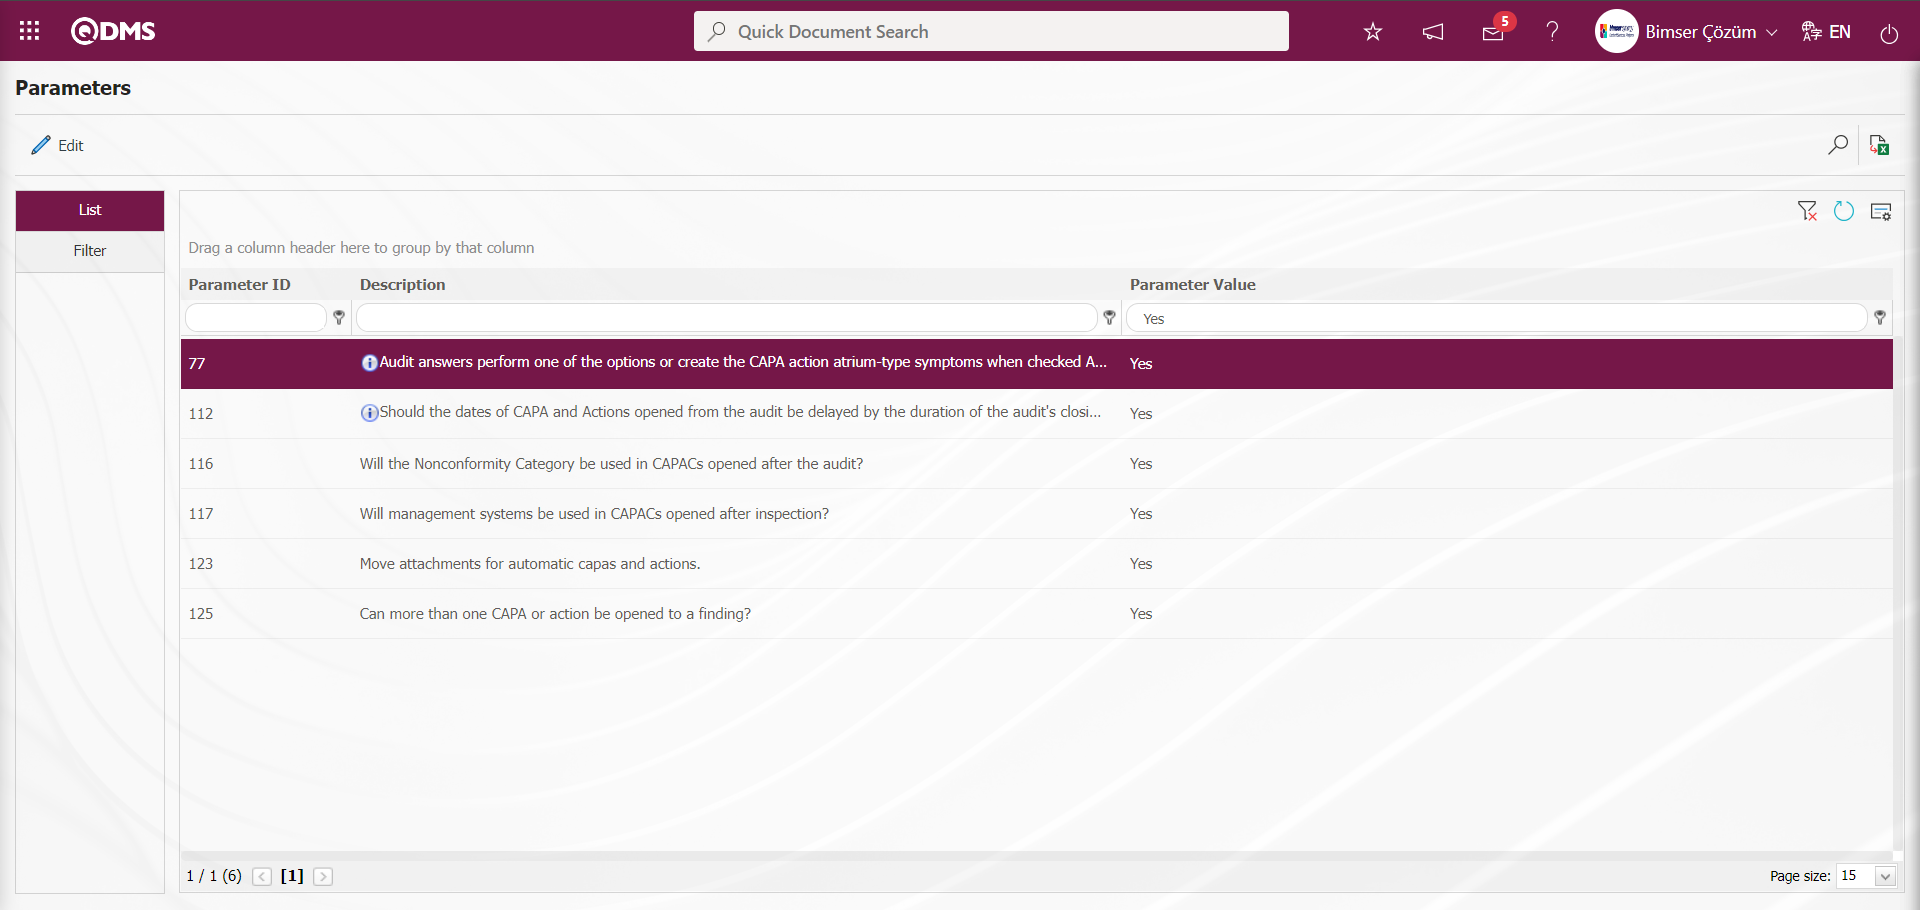
In the Audit Activities Module parameters, the CAPA Source number to be used when opening a CAPA record must be defined in parameter 54.
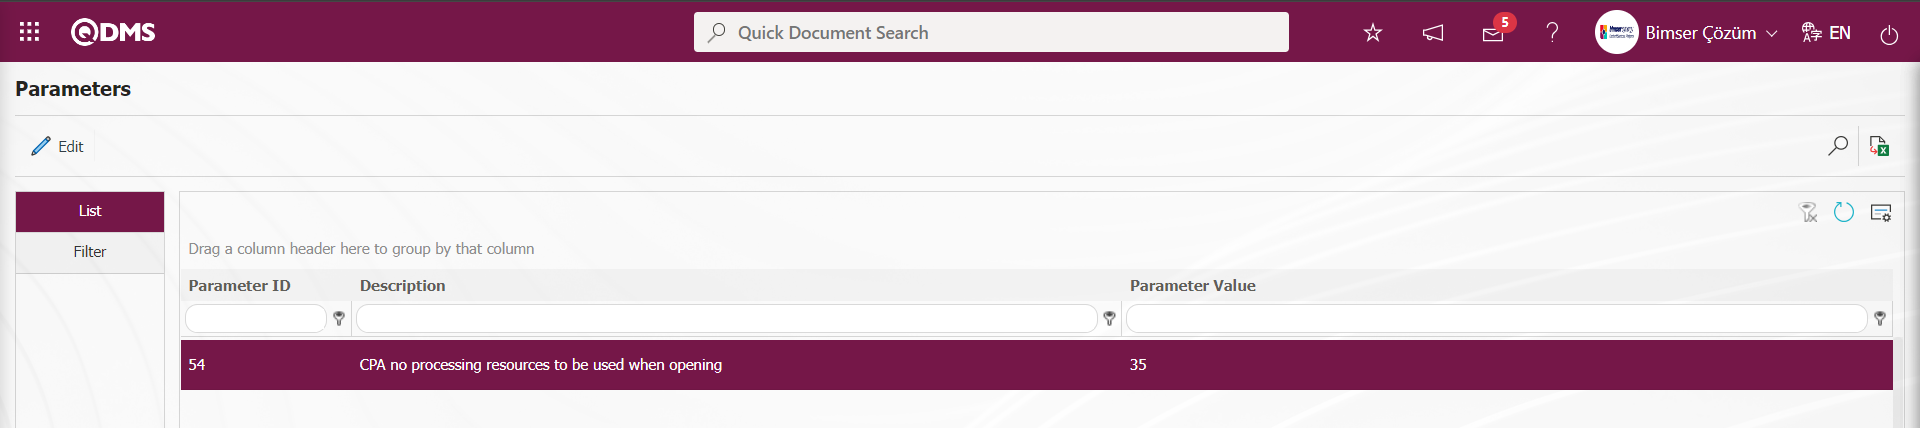
The defined CAPA Source number is obtained from the System Infrastructure Definitions/CAPA/ CAPA Source Definition menu. In this way, the necessary adjustments are made in the Audit Activities module parameters, such as the user group code to be added to the information when opening a CAPA, and the definition of the CAPA Definition Format to be used. If desired, depending on the answer to the relevant question, uploading additional files, viewing the uploaded additional file or deleting the uploaded additional file is done.
After entering the necessary information in the required fields, the button in the upper left corner of the screen is clicked and the registration process is completed.

2. Action Planning with Question 2 is shown on the screen with the icon representing CAPA.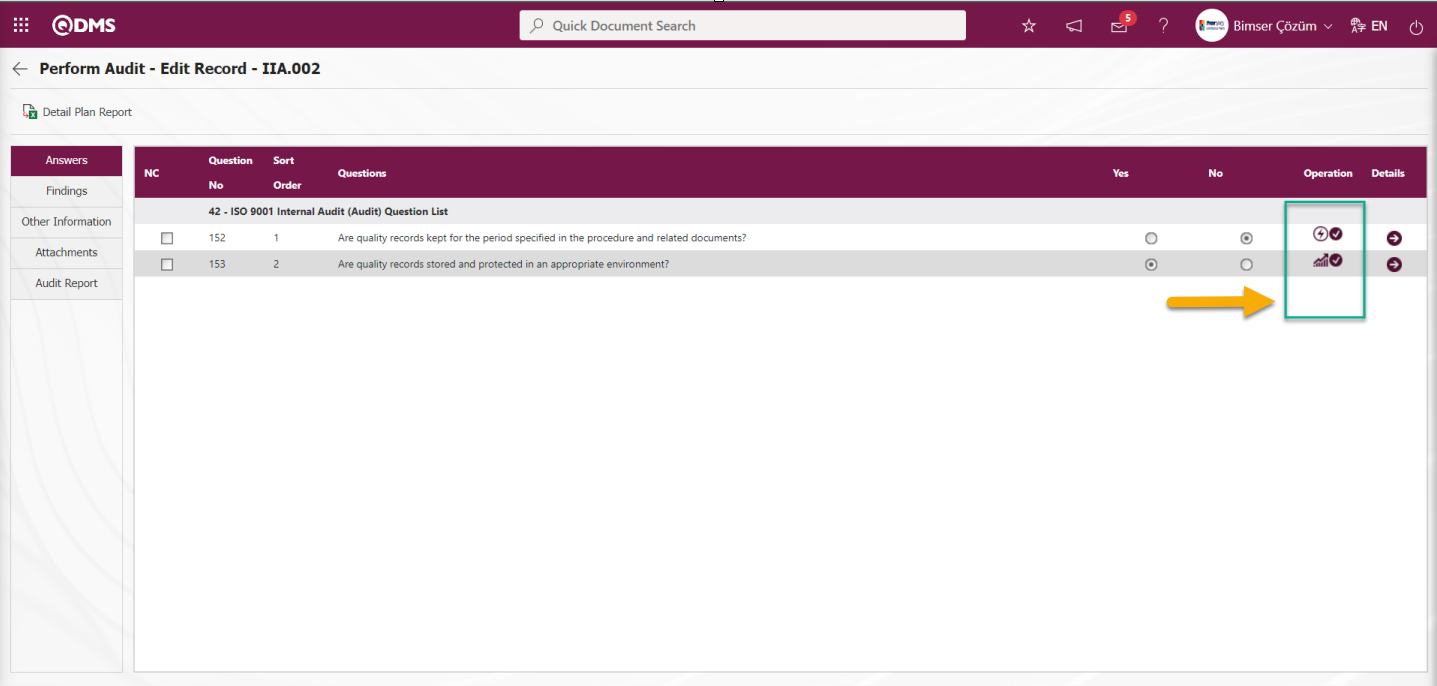
On the Perform Audit - Edit Record - screen, depending on the answers to the relevant questions in the Answers tab, the Action and CAPA are displayed with the Action and CAPA icons in the process area where the Action and CAPA are opened.
 : On the Perform Audit - Edit Record screen, it is the icon that shows that an Action is opened according to the answer given in the Answers tab.
 : The icon that shows that CAPA is opened according to the answer given in the Answers tab on the Perform Audit - Edit Record screen
On the Perform Audit - Edit Record screen, in the Answers tab, all questions related options are checked and the fields related to the planning of CAPA and Actions to be opened depending on the options are entered.
Findings;
The findings detected in the audit are defined and CAPA opening or Action planning is performed depending on the question related to the findings. The parameter should be activated by selecting “Yes” for parameter 79 in the Audit Activities module parameters related to action planning and CAPA opening related to the findings.
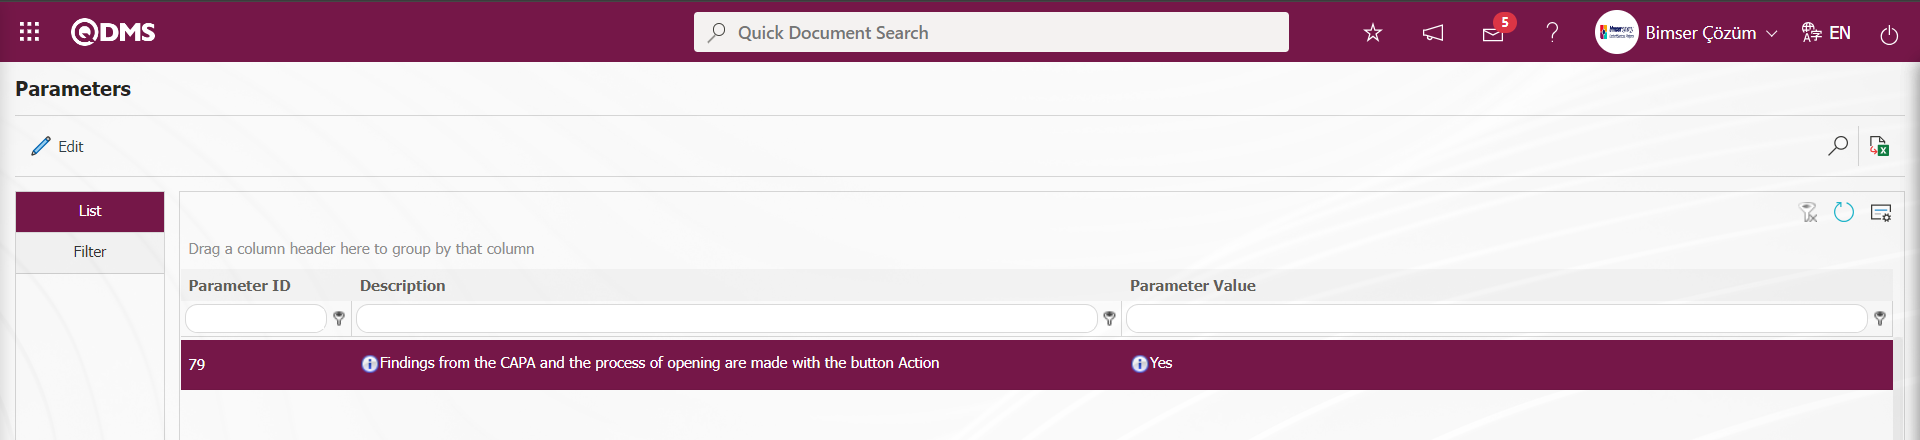
When the parameter is activated, the relevant buttons are displayed on the screen according to the type of finding defined depending on the type of finding selected in the relevant question on the Finding Type definition screen. CAPA creation according to the Major Finding Type and Action opening according to the Minor Finding Type are defined in the relevant finding types infrastructure. Both Action Planning and CAPA creation are provided according to the user-selected finding type. (Finding Types are defined in the System Infrastructure Definitions/ Audit Activity/ Finding Type Definition menu.)
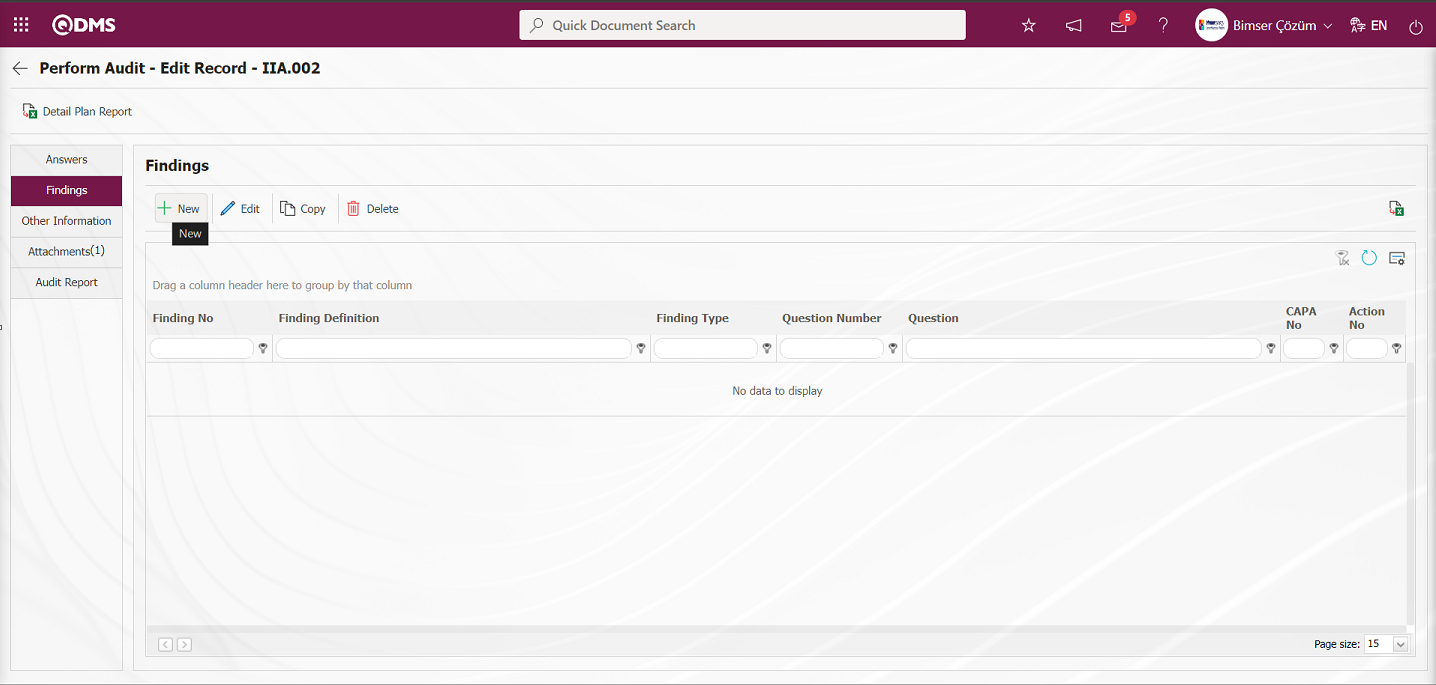
With the help of the buttons on the screen;
 : Define a new finding.
 : Make any correction, change or update related to the selected finding information in the list.
 : Selected finding information in the list can be copied.
 : Selected finding information in the list can be deleted.
 : CAPA is created.
 : Action is created.
On the Perform Audit - Edit Record screen, click the button on the Findings tab to open the Finding Definition screen. (For Question 1, select Finding type major from the findings)
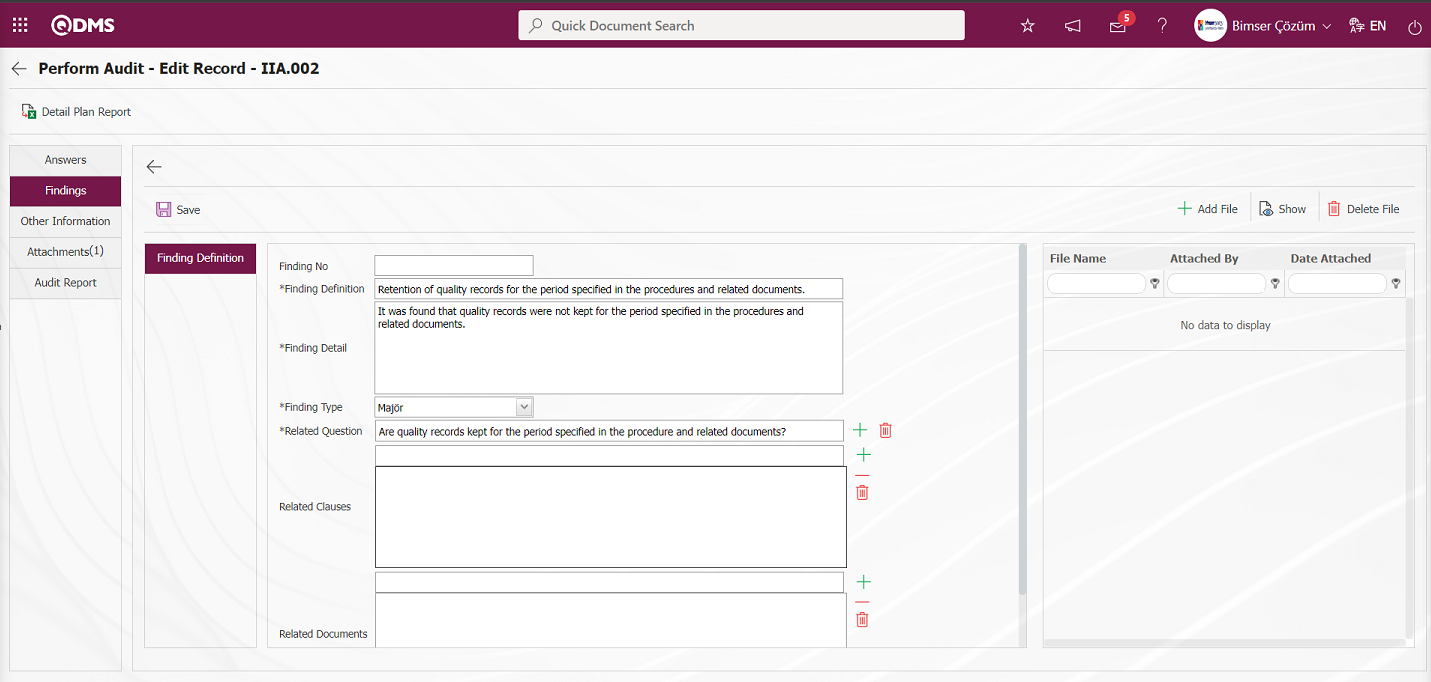
Related fields are defined on the screen that opens:
Finding No: This is the field where the Finding No information is automatically given by the system on the Finding Definition screen.
Finding Definition: This is the field where the finding summary information is written on the Finding Definition screen.
Finding Detail: This is the field where the finding and detail information is written on the Finding Definition screen.
Finding Type: It is the field where the finding type information is selected in the finding list by clicking the drop-down list on the Finding Definition screen. Major option is selected for the related question as the finding type option. Depending on the Major option, the “Create CAPA” option is selected in the Finding type definition menu. (The Finding Type list is defined in the System Infrastructure Definitions/Audit Activity/Finding Type Definition menu. )
Related Question: This is the field where the question related to the finding is selected on the Finding Identification screen.
Related Clauses: It is the field where the related item number information of the finding is associated by selecting it in the list of item numbers defined in the system opened by clicking the  (Add) button on the Finding Identification screen.
Related Documents: This is the field where the related document information of the finding on the Finding Identification screen is associated in the system-defined Document list opened by clicking the (Add) button.
Additional Files: If there is a related additional file on the Findings Identification screen, uploading the additional file, viewing the uploaded additional file and deleting the uploaded additional file if desired.
Enter the finding summary and detail from the Finding Definition screen. Major finding type is selected as Finding Type. When the Finding Type is selected as major, Corrective and Preventive Actions are initiated with the  button when the “Create CAPA” option is selected for this finding in the infrastructure. If the relevant question section is opened from the answers page, it comes automatically, if it is opened directly from the findings tab, the user makes a selection. If it is desired to associate the findings with the relevant item numbers and related documents, the item number and document are added to these fields with the (Add) button. If there is an Additional File related to this finding, upload the additional file, view the uploaded additional file and delete the uploaded additional file in this field. After the required fields are filled in, the Finding Identification registration process is performed by clicking the
  button in the upper left corner.
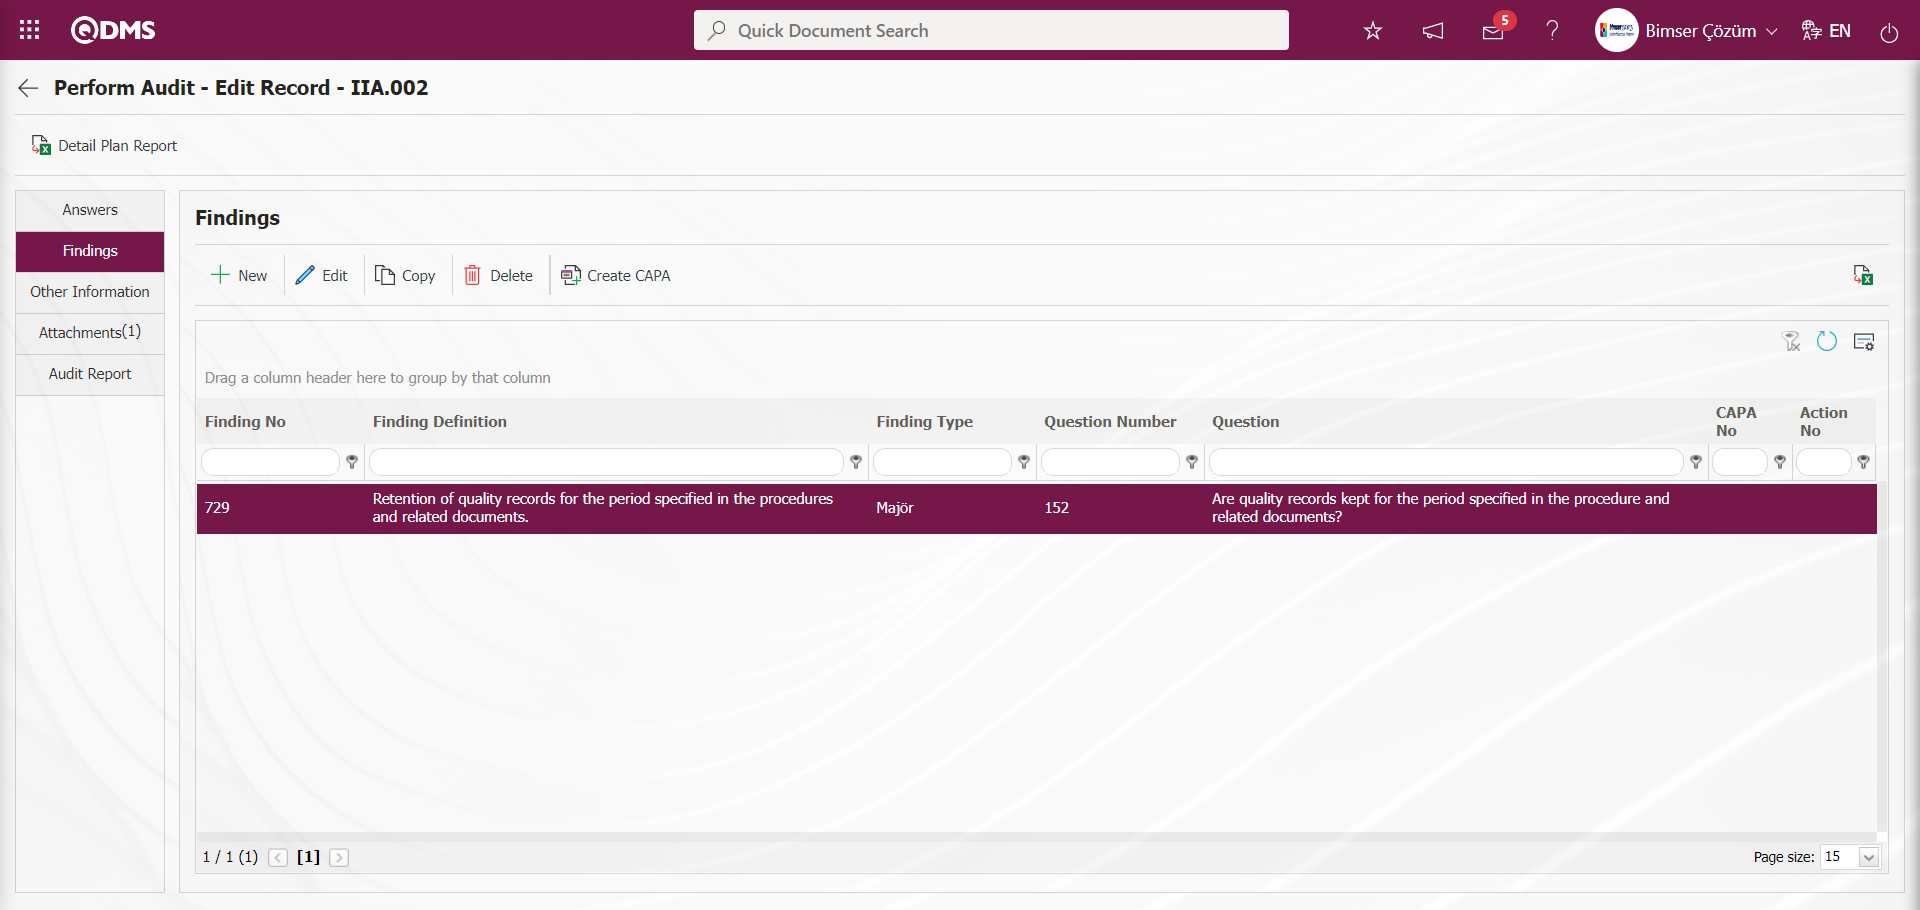
Since the finding type for the related question is Major, the button is displayed. button is clicked to open the CAPA record. The button is displayed because the option to create CAPA for the Major finding type defined in System Infrastructure Definitions / Audit / Finding Type Definition is checked. (Parameter 79 in the Audit Activity module parameters must be activated.)
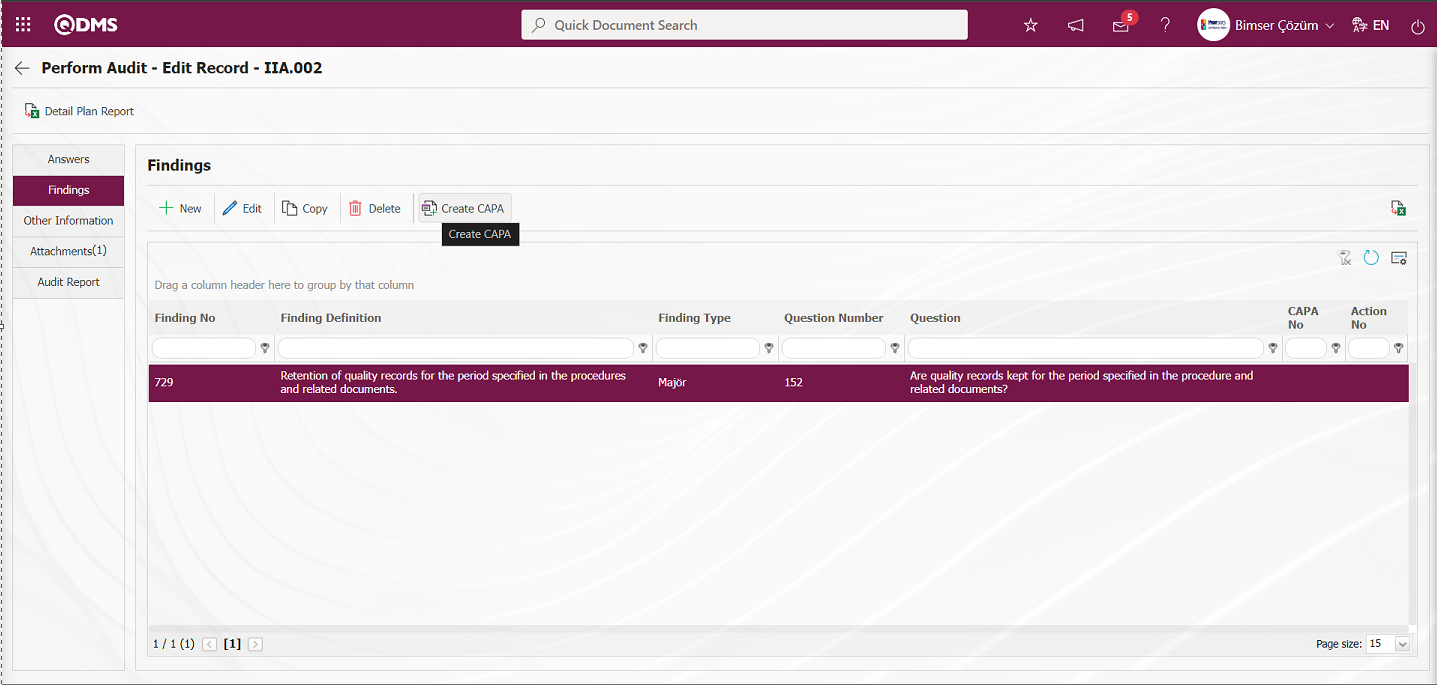
CAPA Activities - New Record by clicking the button on the Findings tab on the Perform Audit - Edit Record screen CAPA Record identification is made on the screen.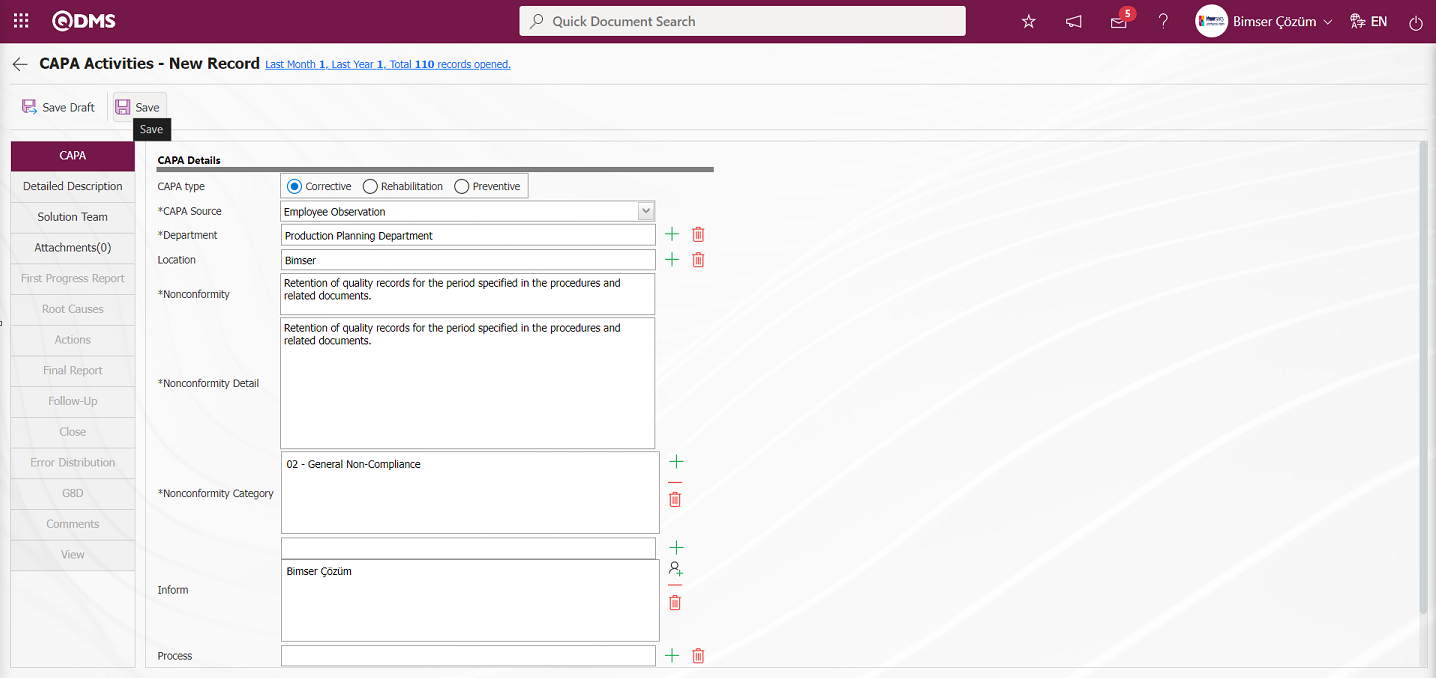
On the CAPA Activities - New Record** screen, enter the relevant fields in the tabs related to CAPA. After entering the relevant information in the required fields, CAPA transactions are registered by clicking the  button on the top left of the screen. The system informs that the CAPA record opened with the relevant question in the findings is opened.
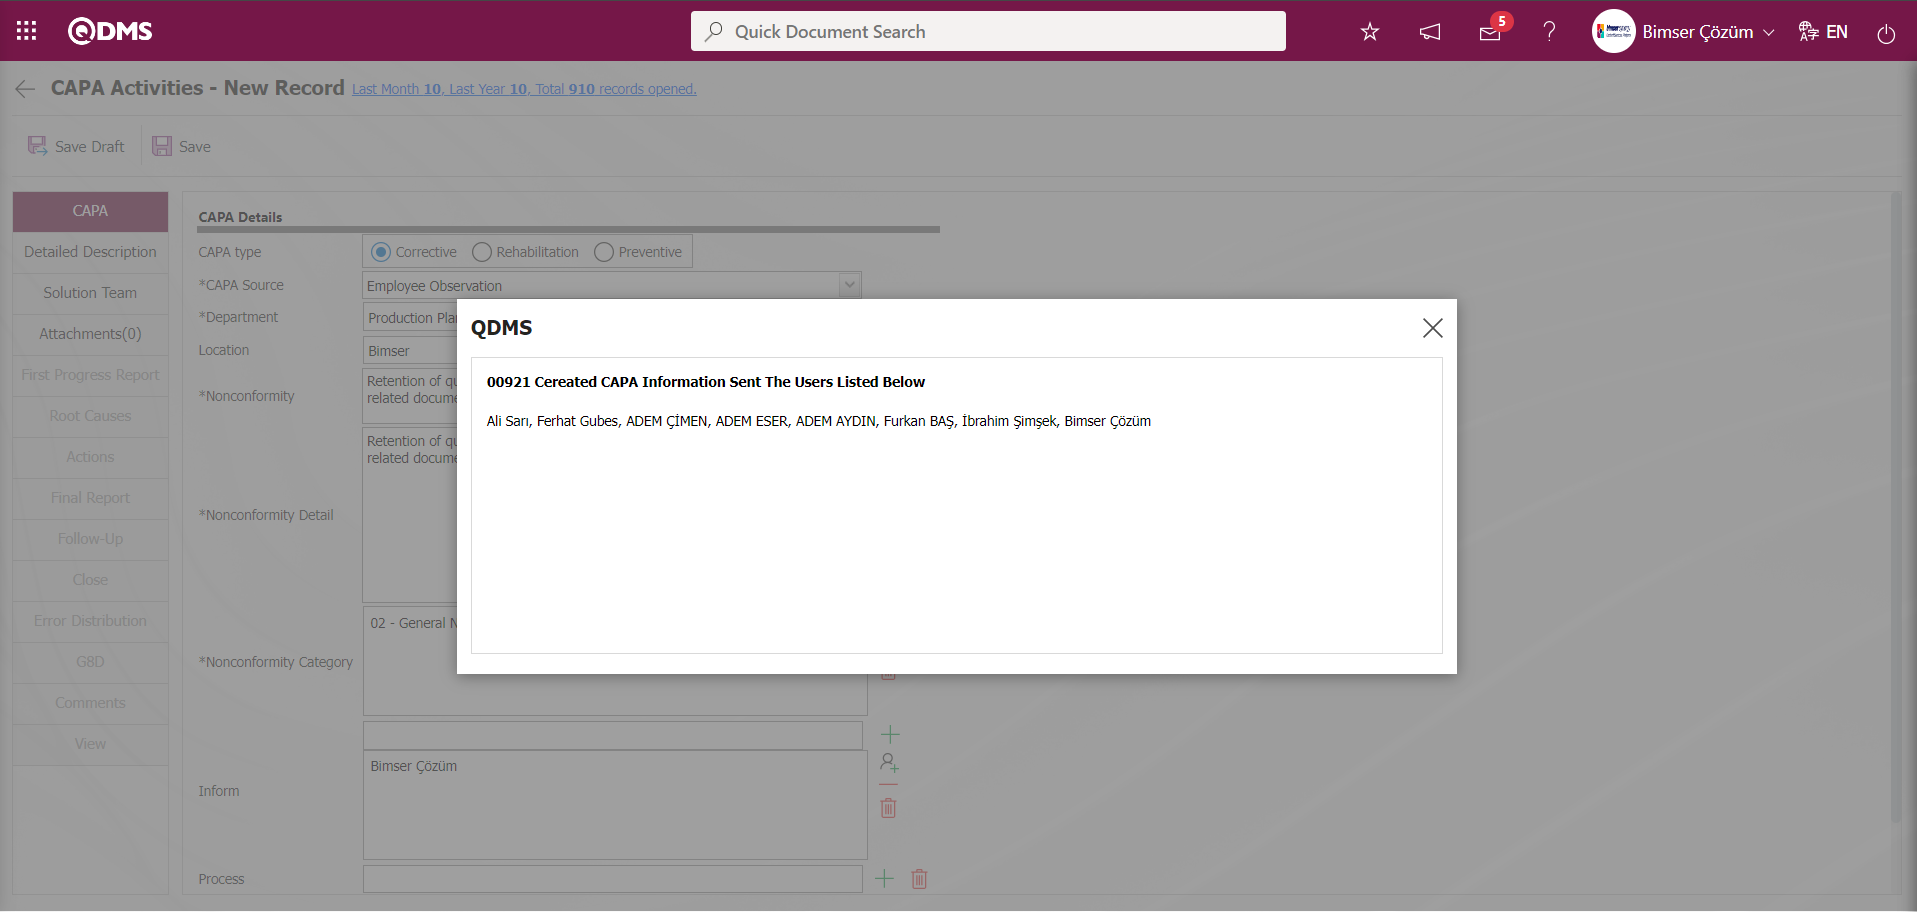
The CAPA code information is given in the CAPA No field to indicate that the CAPA record opened in the Findings tab has been opened.
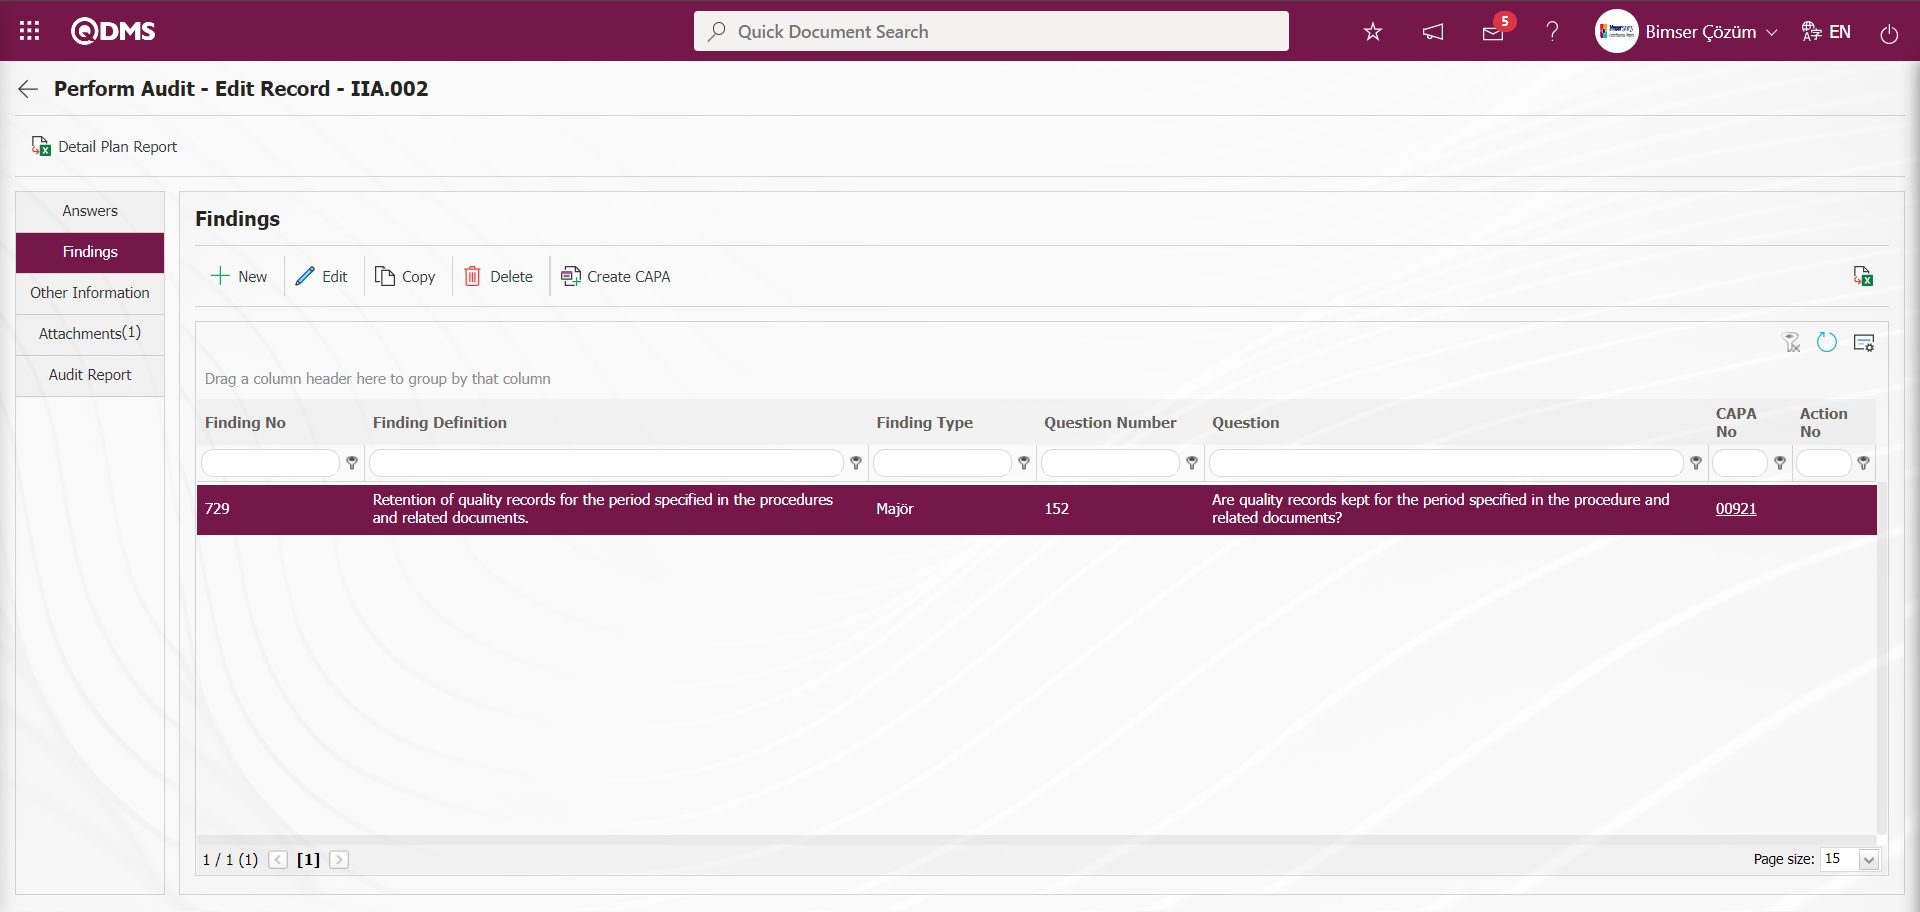 On the Perform Audit - Edit Record** screen, click the
  button on the Findings tab to open the Finding Identification screen. (For Question 2, select Finding type minor from the findings)
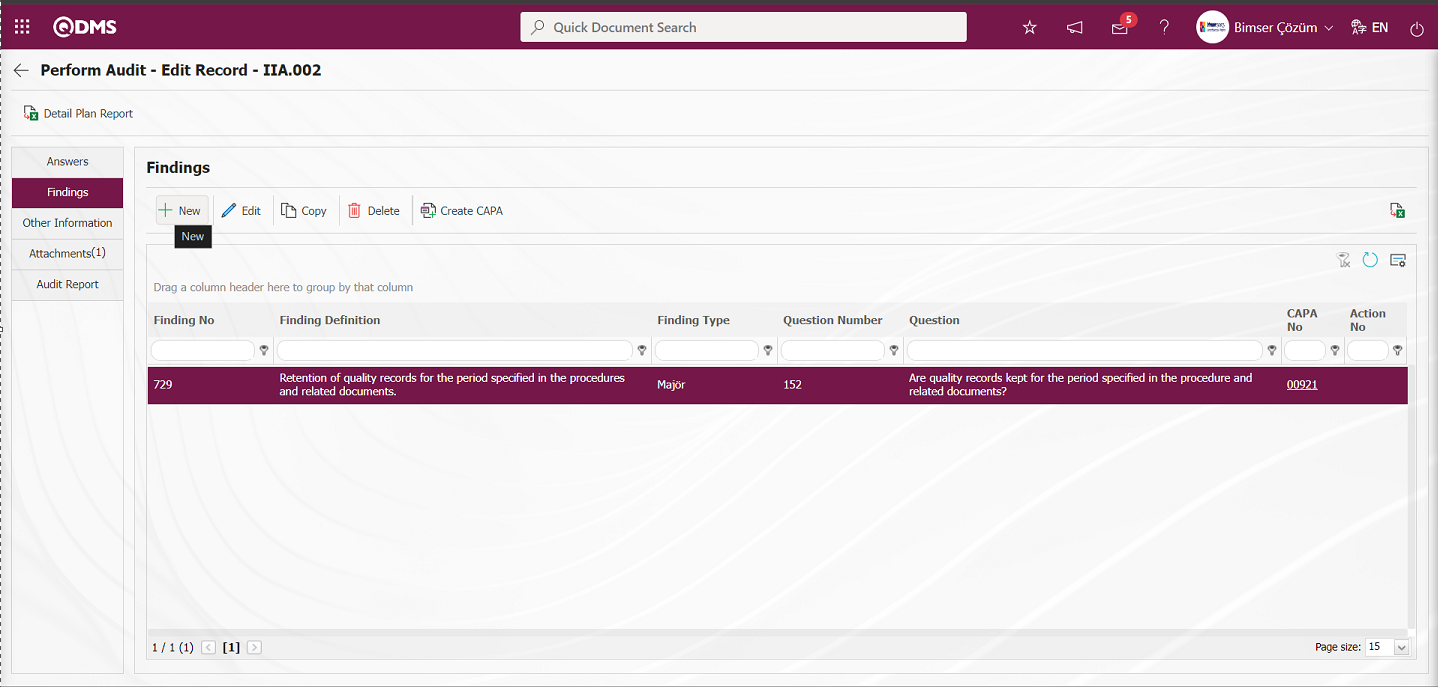
The finding definition screen opens
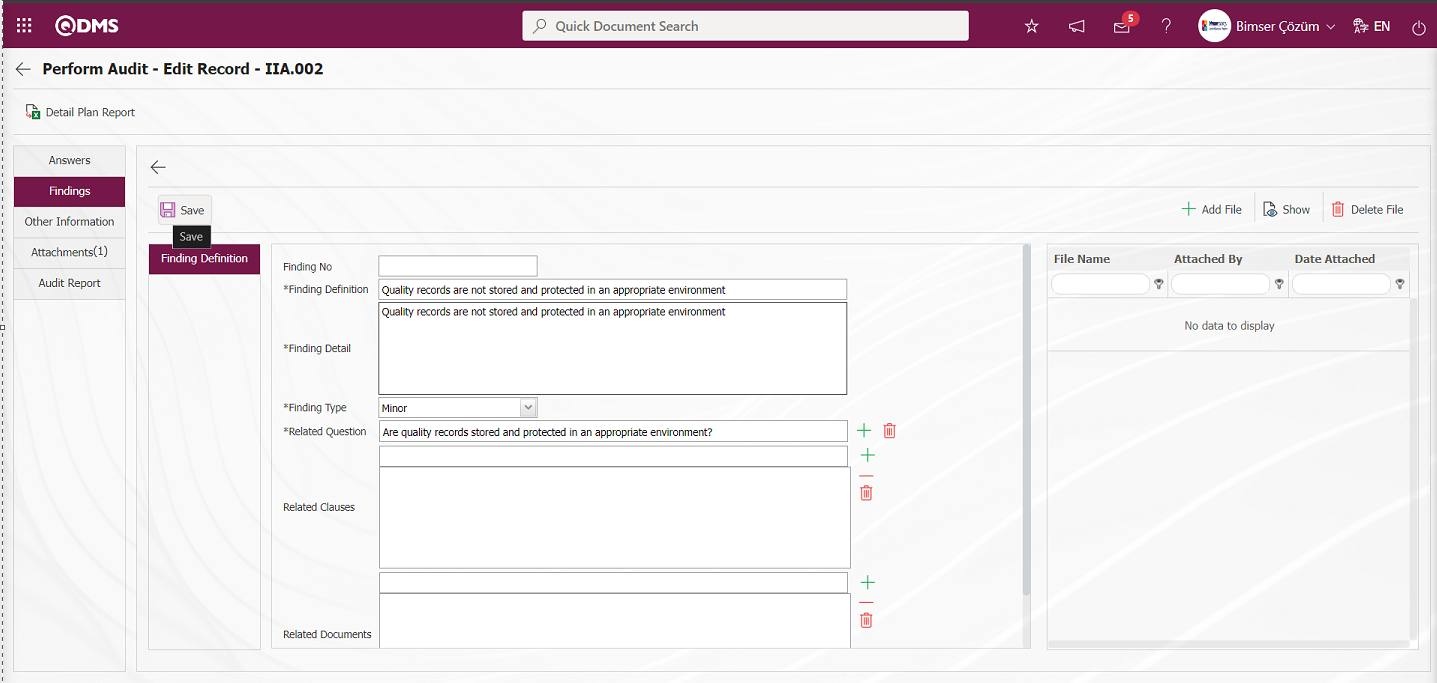
Related fields are defined on the screen that opens:
Finding No: This is the field where the Finding No information is automatically given by the system on the Finding Definition screen.
Finding Definition: This is the field where the finding summary information is written on the Finding Definition screen.
Finding Detail: This is the field where the finding and detail information is written on the Finding Definition screen
Finding Type: This is the field where the finding type information is selected in the finding list by clicking the drop-down list on the Finding Definition screen. Minor option is selected for the related question as the finding type option. Depending on the Minor option, the “Create Action” option is selected in the Finding type definition menu. (The Finding Type list is defined in the System Infrastructure Definitions/Audit/Finding Type Definition menu. )
Related Question: This is the field where the question related to the finding is selected on the Finding Definition screen.
Related Clauses: It is the field where the related item number information of the finding is associated by selecting it in the list of item numbers defined in the system opened by clicking the (Add) button on the Finding Definition screen.
Related Documents: This is the field where the related document information of the finding on the Finding Definition screen is associated in the system-defined Document list opened by clicking the (Add) button.
Additional Files: If there is a related additional file on the Findings Definition screen, uploading the additional file, viewing the uploaded additional file and deleting the uploaded additional file if desired.
Enter the finding summary and detail from the Finding Definition screen. Minor finding type is selected as Finding Type. When the Finding Type is selected as minor, when the “Create Action” option is selected for this finding in the infrastructure, the Action Planning process is performed with the  button. If the relevant question section is opened from the answers page, it comes automatically, if it is opened directly from the findings tab, the user makes the selection process. If it is desired to associate the findings with the relevant item numbers and related documents, the item number and document are added to these fields with the (Add) button. If there is an Additional File related to this finding, upload the additional file, view the uploaded additional file and delete the uploaded additional file in this field. After the required fields are filled in, the Finding Definition registration process is performed by clicking the button in the upper left corner. Since the finding type for the relevant question is Minor, the button is displayed. Action Item Planning is done by clicking the button. The button is displayed because the option to create an action for the Minor finding type defined in System Infrastructure Definitions / Audit / Finding Type Definition is selected. (Parameter 79 in the Audit Activity module parameters must be activated.)
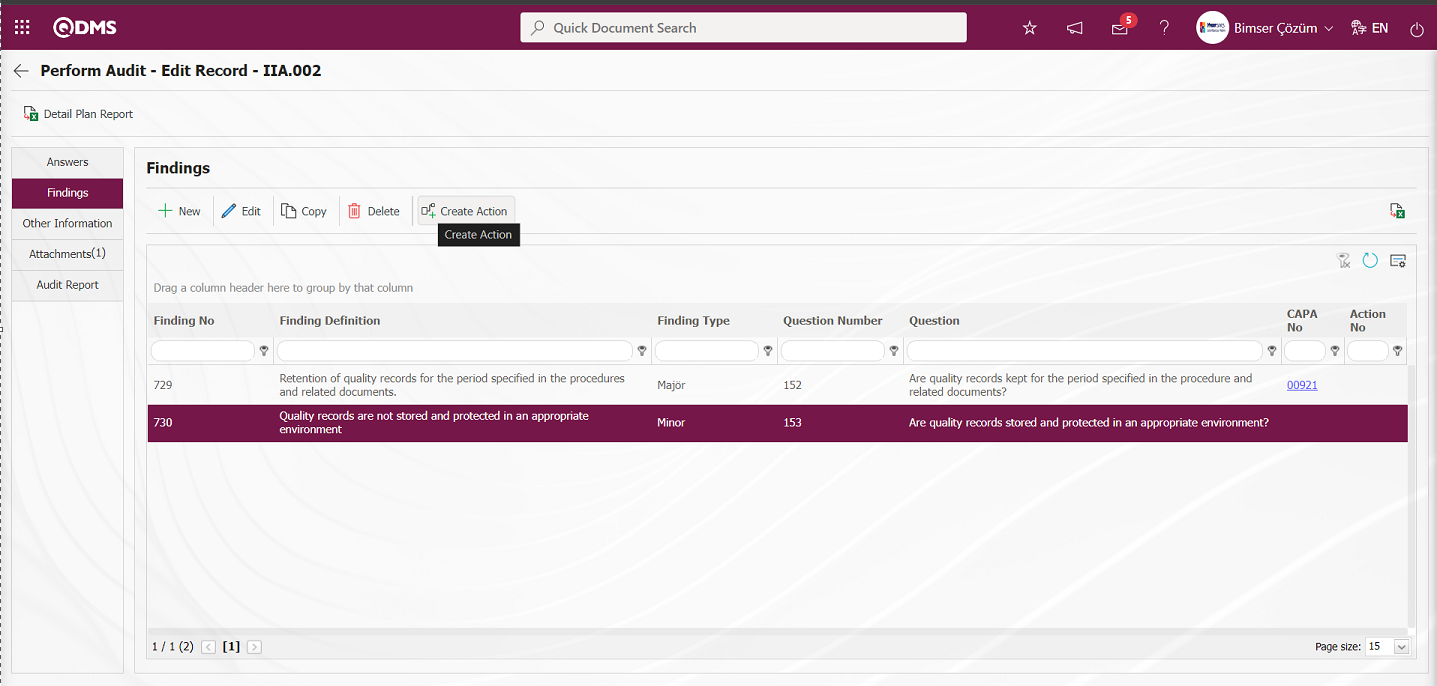 On the Perform Audit - Edit Record** screen, click the button on the Findings tab. Action Planning is defined from the Sum Action Planning - New Record screen.
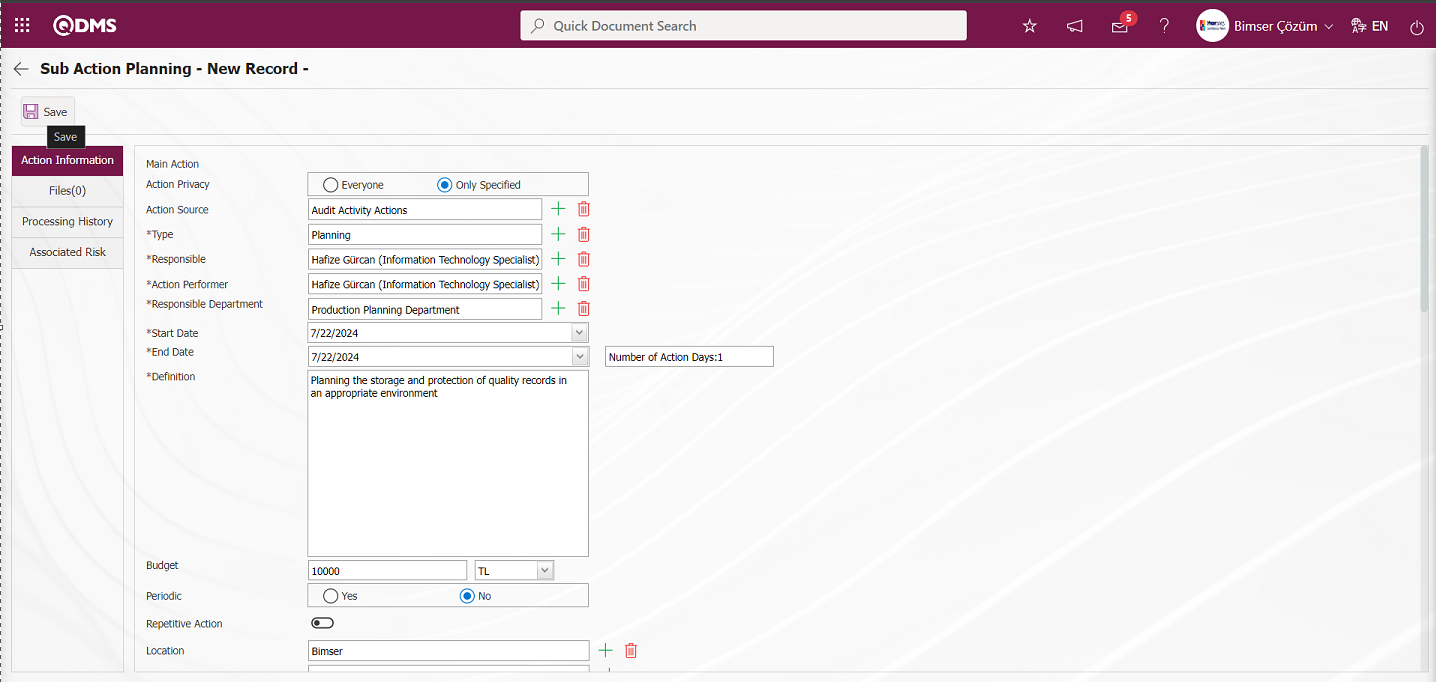
From the Sum Action Planning - New Record screen, the fields related to the Action are entered. After entering the information about the required fields, the Action Planning registration process is done by clicking the  button in the upper left corner. The system informs that the Action Planning process is done with the relevant question in the findings.
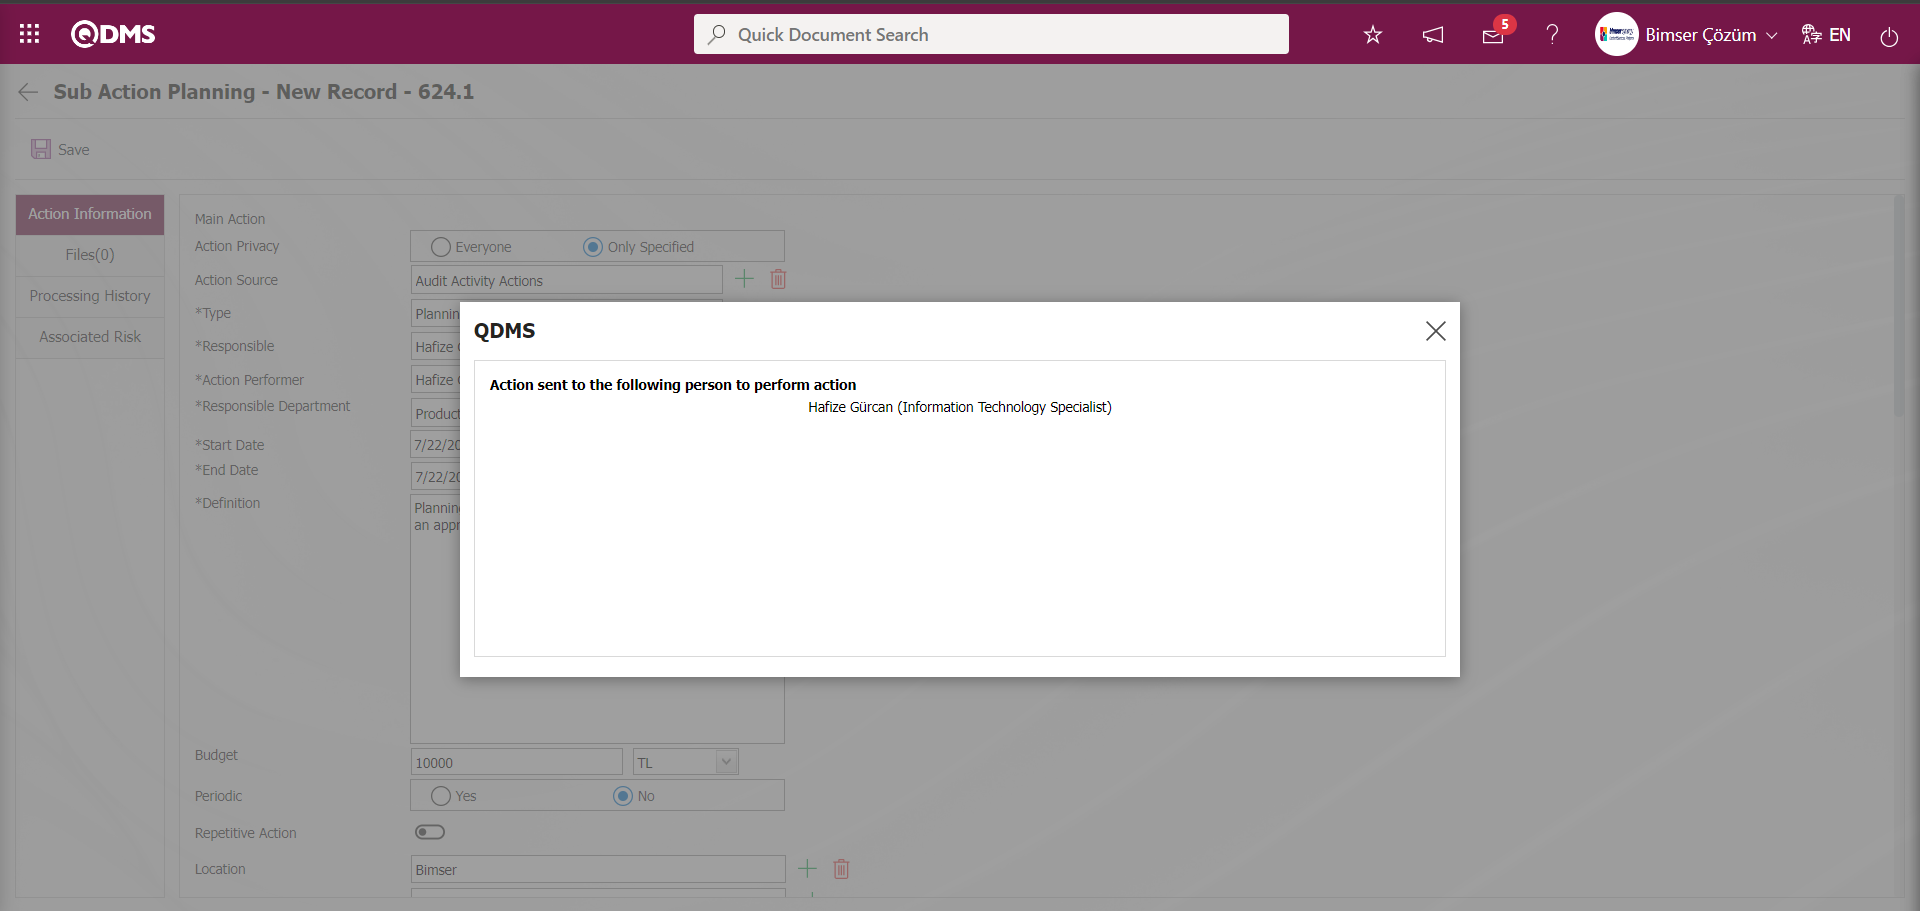
In the Findings tab, it is indicated by giving the Action code information in the Action No field for the Action Planning process.
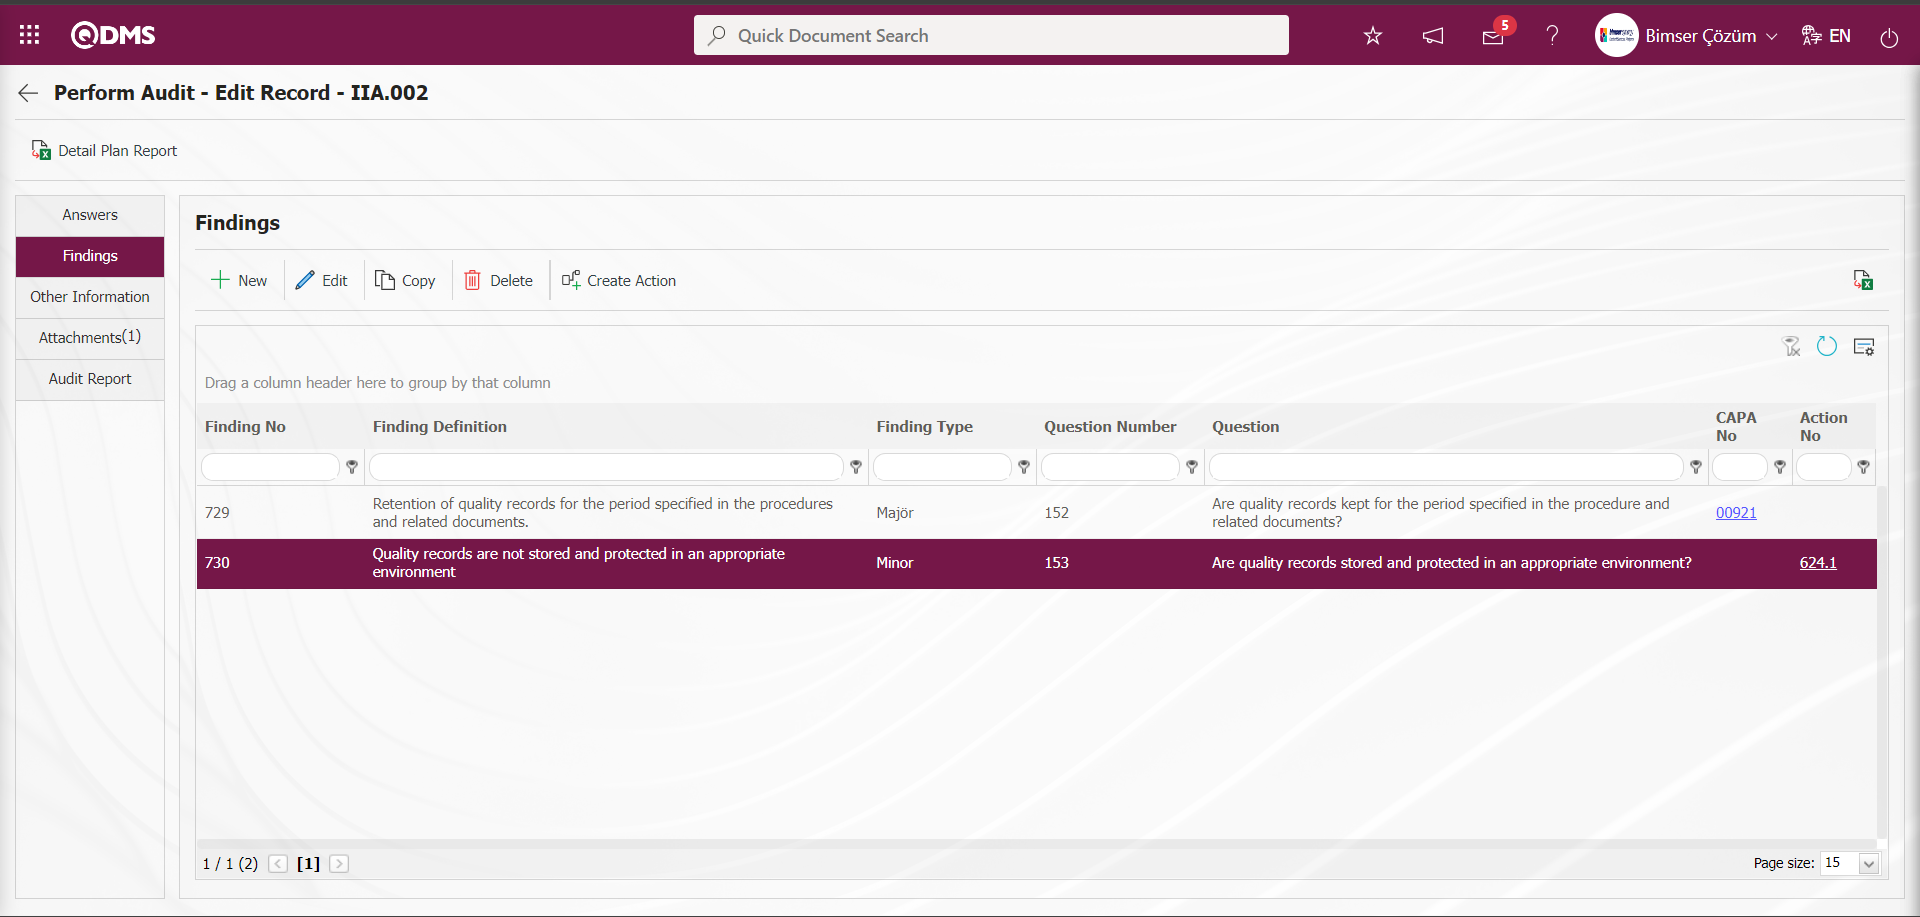
Other Information,
Additional information and notes can be added in the Other Information tab on the Perform Audit - Edit Record screen. If you want to add fields to this tab, select Audit Activity Module in the modules field from the System Infrastructure Definitions / BSID / Configuration Settings / Language Settings menu and passive fields to be defined are displayed. By selecting the passive fields and clicking the  button, the definition of parametric type fields such as text, Text (Multiple Line) and date is done by typing the value information of the field on the screen that opens.
In the language settings in the Audit Activities module, it is determined on which screen the label codes will be displayed according to the abbreviation in the title of the label codes in the parametric field definition process.
lblD_: It is a parametric type field that appears in the Other Information tab on the Perform Audit - Edit Record screen.
lblB_: Label codes starting with short code Perform Audit - Edit Record is displayed on the Finding Definition screen opened by clicking the  button on the Findings tab on the** screen.
Parametric Type Fields Defined in the Audit Activity Module and Their Definitions;
1-Date type: Calendar field is the added parametric field. Sample Shortcode: lblD_DPARAM1(Opened from Pending Audits - Planned and unplanned Audits menu Displayed on the Other Information tab on the Perform Audit - Edit Record screen)
Passive fields with Date Type to be defined: lblD_DPARAM1...lblD_DPARAM5
lblB_DPARAM1(It is displayed on the Finding Definition screen opened by clicking the  button on the Findings tab on the Perform Audit - Edit Record screen opened from the Pending Audits - Planned and unplanned Audits menu).
Passive fields with Date Type to be defined: lblB_DPARAM1...lblB_DPARAM5
2-List type: It is a parametric field where a single selection is made from multiple list elements. List elements are defined and selected from the defined list elements. Example Short Code: lblD_LPARAM1 (Pending Audits - Planned and unplanned Audits menu Perform Audit - Edit Record is displayed in the Other Information tab on the screen).
List Type Passive fields to be defined: lblD_LPARAM1...lblD_LPARAM5
lblL_LPARAM1 (It is displayed on the Finding Definition screen opened by clicking the button on the Findings tab on the Perform Audit - Edit Record screen opened from the Pending Audits - Planned and unplanned Audits menu).
List Type Passive fields to be defined: lblL_LPARAM1...lblL_LPARAM5
3-Text type: It is a parametric field that adds a text box that allows manual typing. Sample Shortcode: lblD_PARAM3 (displayed in the Other Information tab on the Perform Audit - Edit Record screen opened from the Pending Audits - Planned and Unplanned Audits menu)
Passive fields with Text Type to be defined: lblD_PARAM3... lblD_PARAM5
lblT_TPARAM1 (It is displayed on the Finding Definition screen opened by clicking the button in the Findings tab on the Perform Audit - Edit Record screen opened from the Pending Audits - Planned and Unplanned Audits menu).
Passive fields with Text Type to be defined: lblT_TPARAM1...lblT_TPARAM3
4-Text (Multiple Line) Type: It is a parametric field that allows manual typing and adds a multi-line text box with no character limit. Sample Short Code: lblD_PARAM1 (It is displayed in the Other Information tab on the Perform Audit - Edit Record screen opened from the Pending Audits - Planned and Unplanned Audits menu).
Passive fields with (Multiple Line) Type to be defined: lblD_PARAM1,lblD_PARAM2
lblT_TPARAM4 (It is displayed on the Findings tab on the Findings tab on the Perform Audit - Edit Record screen opened from the Pending Audits - Planned and Unplanned Audits menu, on the Finding Definition screen opened by clicking the button).
Passive fields with (Multiple Line) Type to be defined: lblT_TPARAM4, lblT_TPARAM5
5- Measurement Unit Type: It is the parametric field that allows data entry as measurement. Next to the defined parametric field, the Units of Measurement selection field appears. Units of measurement in the units of measurement selection field are the units of measurement defined in the System Infrastructure Definitions/BSID/Definitions/Define Units of Measurement menu. Example Short Code: lblD_NPARAM1 (It is displayed in the Other Information tab on the Perform Audit - Edit Record screen of the Pending Audits - Unplanned Audits menus and on the Audit Plans - Audits - New Record screen of the Audit Plans menu).
Passive fields with Unit of Measure Type to be defined: lblD_NPARAM1... lblD_NPARAM3
lblB_NPARAM1 (It is displayed on the Finding Definition screen opened by clicking the button on the Findings tab on the Perform Audit - Edit Record screen opened from the Pending Audits - Planned and unplanned Audits menu).
Passive fields with Unit of Measure Type to be defined: lblB_NPARAM1... lblB_NPARAM3
6- Monetary Type: It is the parametric field that makes data entry in monetary terms. Next to the defined parametric field, the field where currencies are selected appears. Sample Short Code: lblD_NPARAM4 (Displayed in the Other Information tab on the Perform Audit - Edit Record screen opened from the Pending Audits - Planned and Unplanned Audits menu)
Passive fields with Monetary Type to be defined: lblD_NPARAM4...lblD_NPARAM6
lblB_NPARAM4 (It is displayed on the Finding Definition screen opened by clicking the button on the Findings tab on the Perform Audit - Edit Record screen opened from the Pending Audits - Planned and Unplanned Audits menu).
Passive fields with Monetary Type to be defined: lblB_NPARAM4, lblB_NPARAM5

Additional Files;
Perform Audit - Edit Record is the tab where additional files such as files, pictures and minutes related to the audit are uploaded. Viewing and deleting the additional file uploaded in this tab is also done.
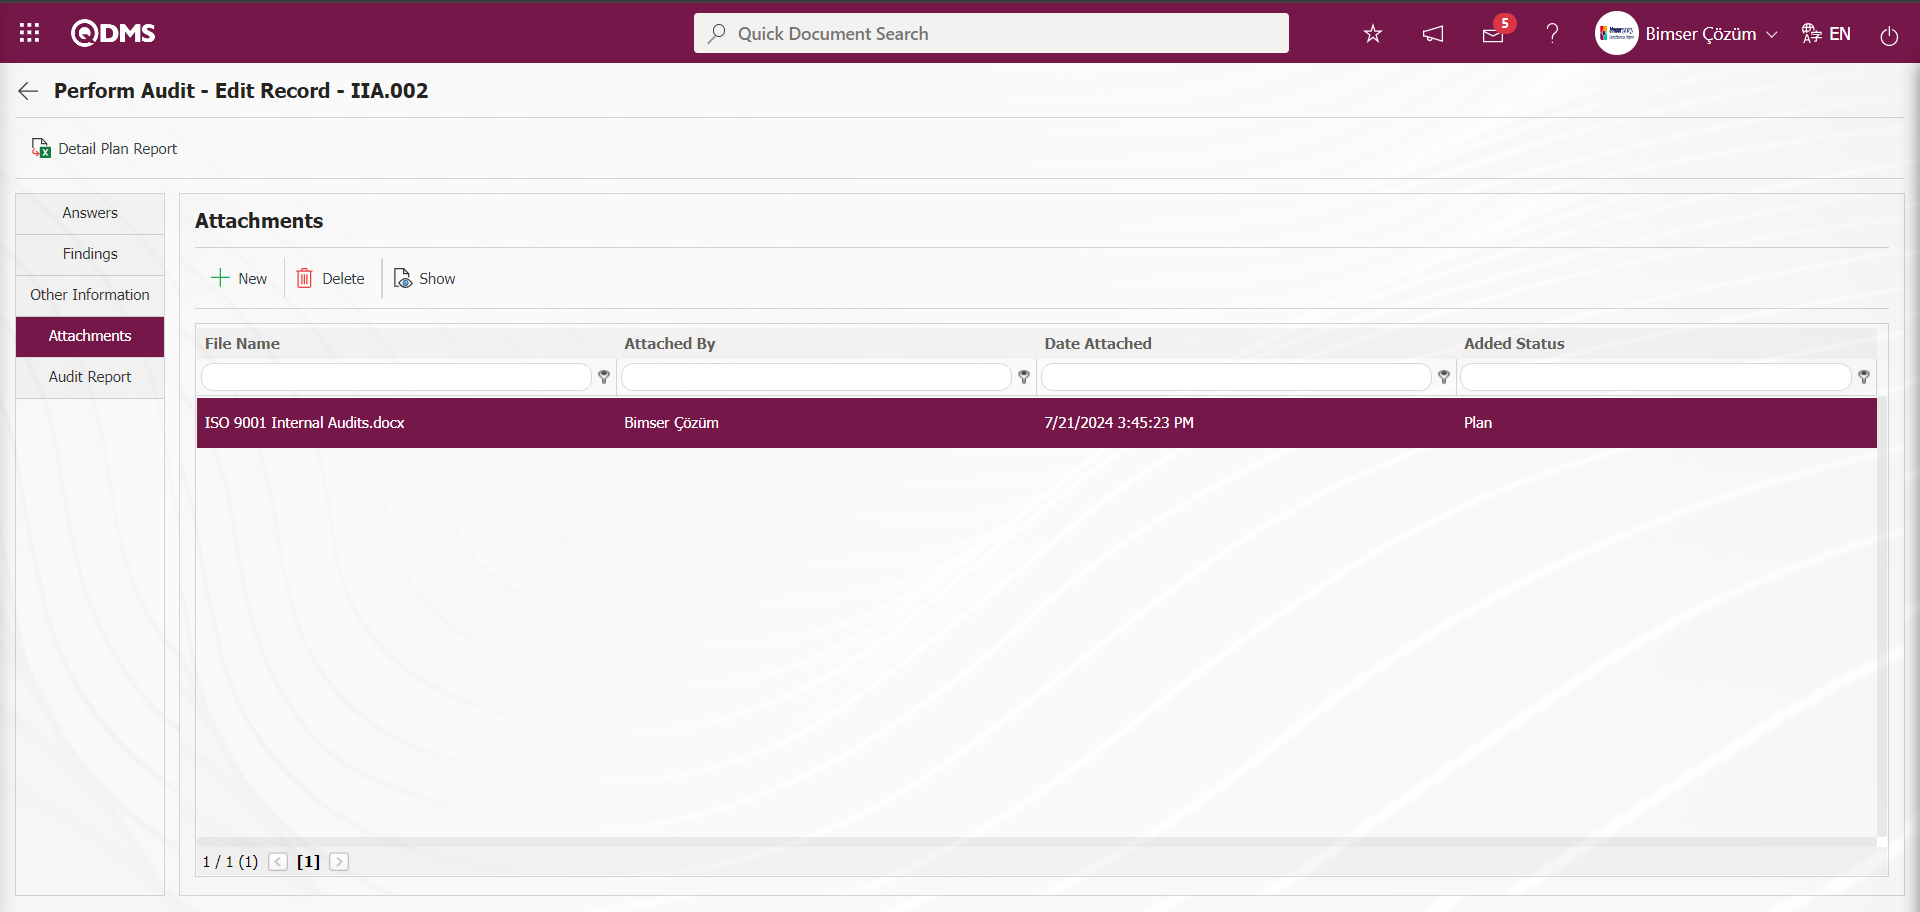
With the help of the buttons on the screen;
 :Add a new attachment file.
 :The selected attachment file in the list can be deleted.
 :The selected attachment file in the list is displayed.
Audit Report,
After entering the information about the audit, the audit report is created and the audit is closed.
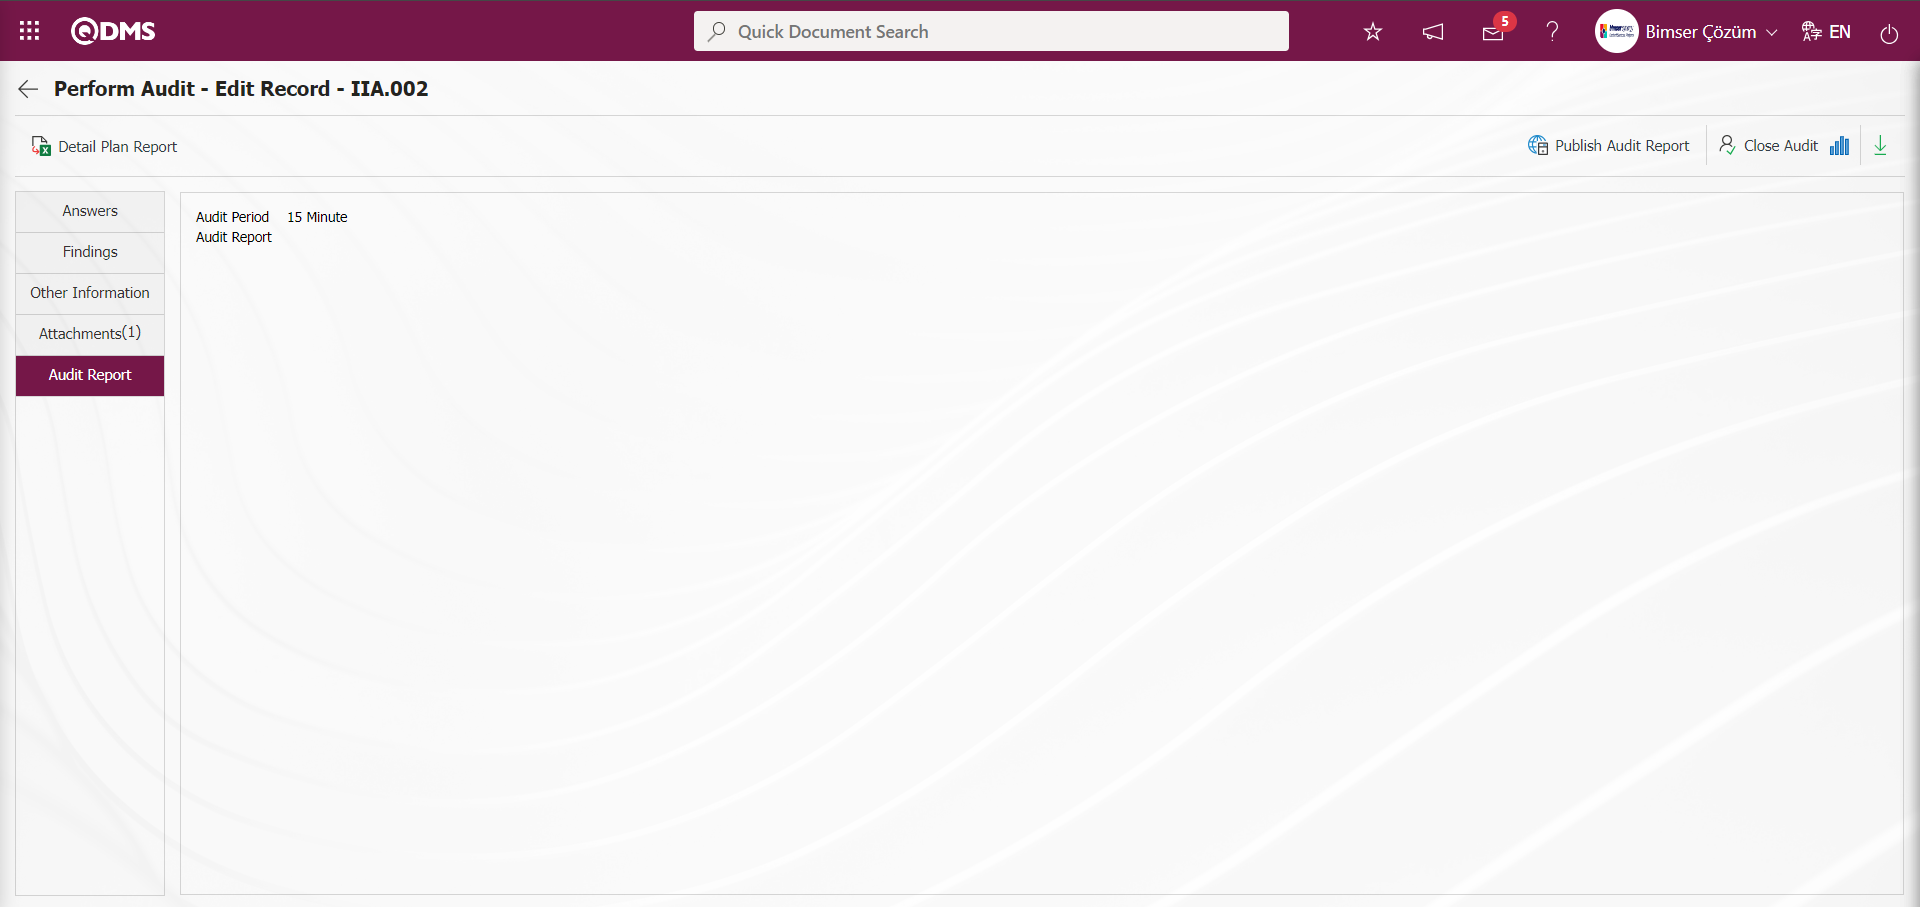
On the Perform Audit - Edit Record screen, click the  (Create Audit Report) button in the Audit Report tab to create the Audit Report in the system.
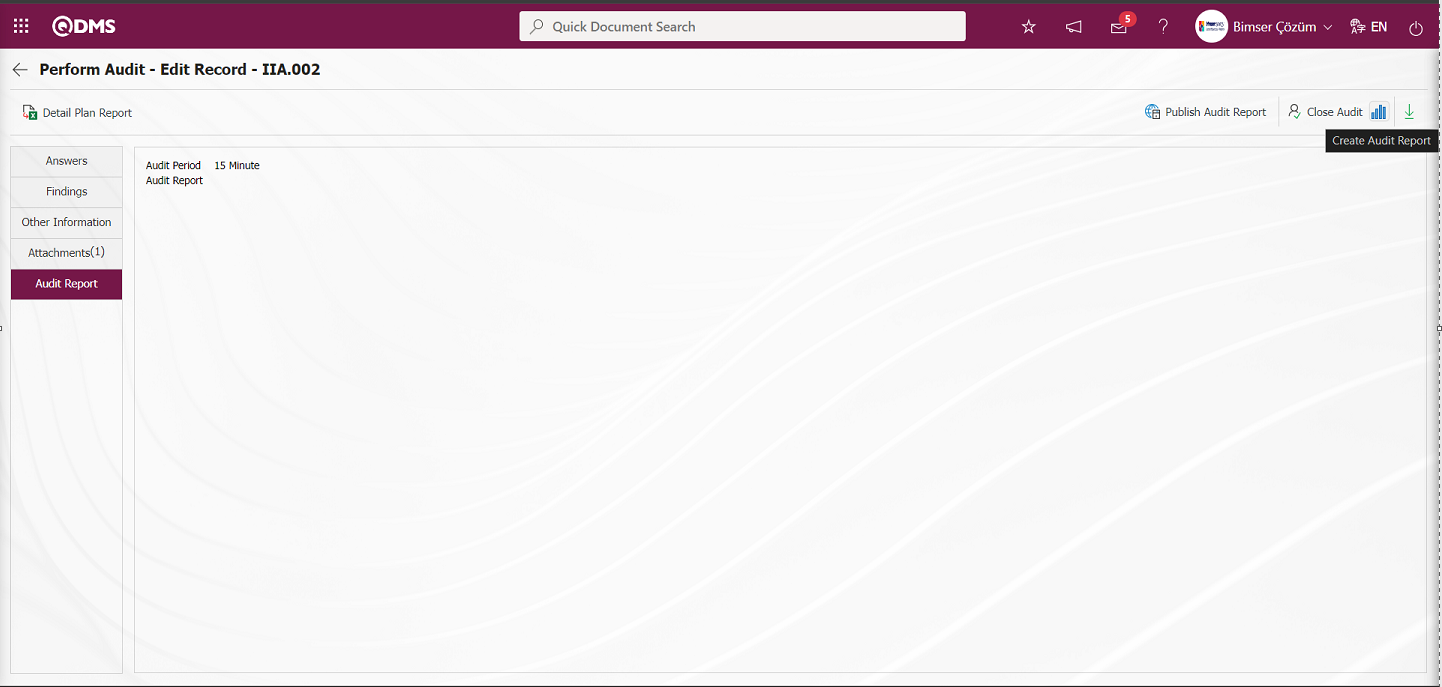
Click the “OK” button when the system displays the message “Are you sure you want to create audit report?”.

“Audit report created successfully” message is given by the system, indicating that the audit report has been created.
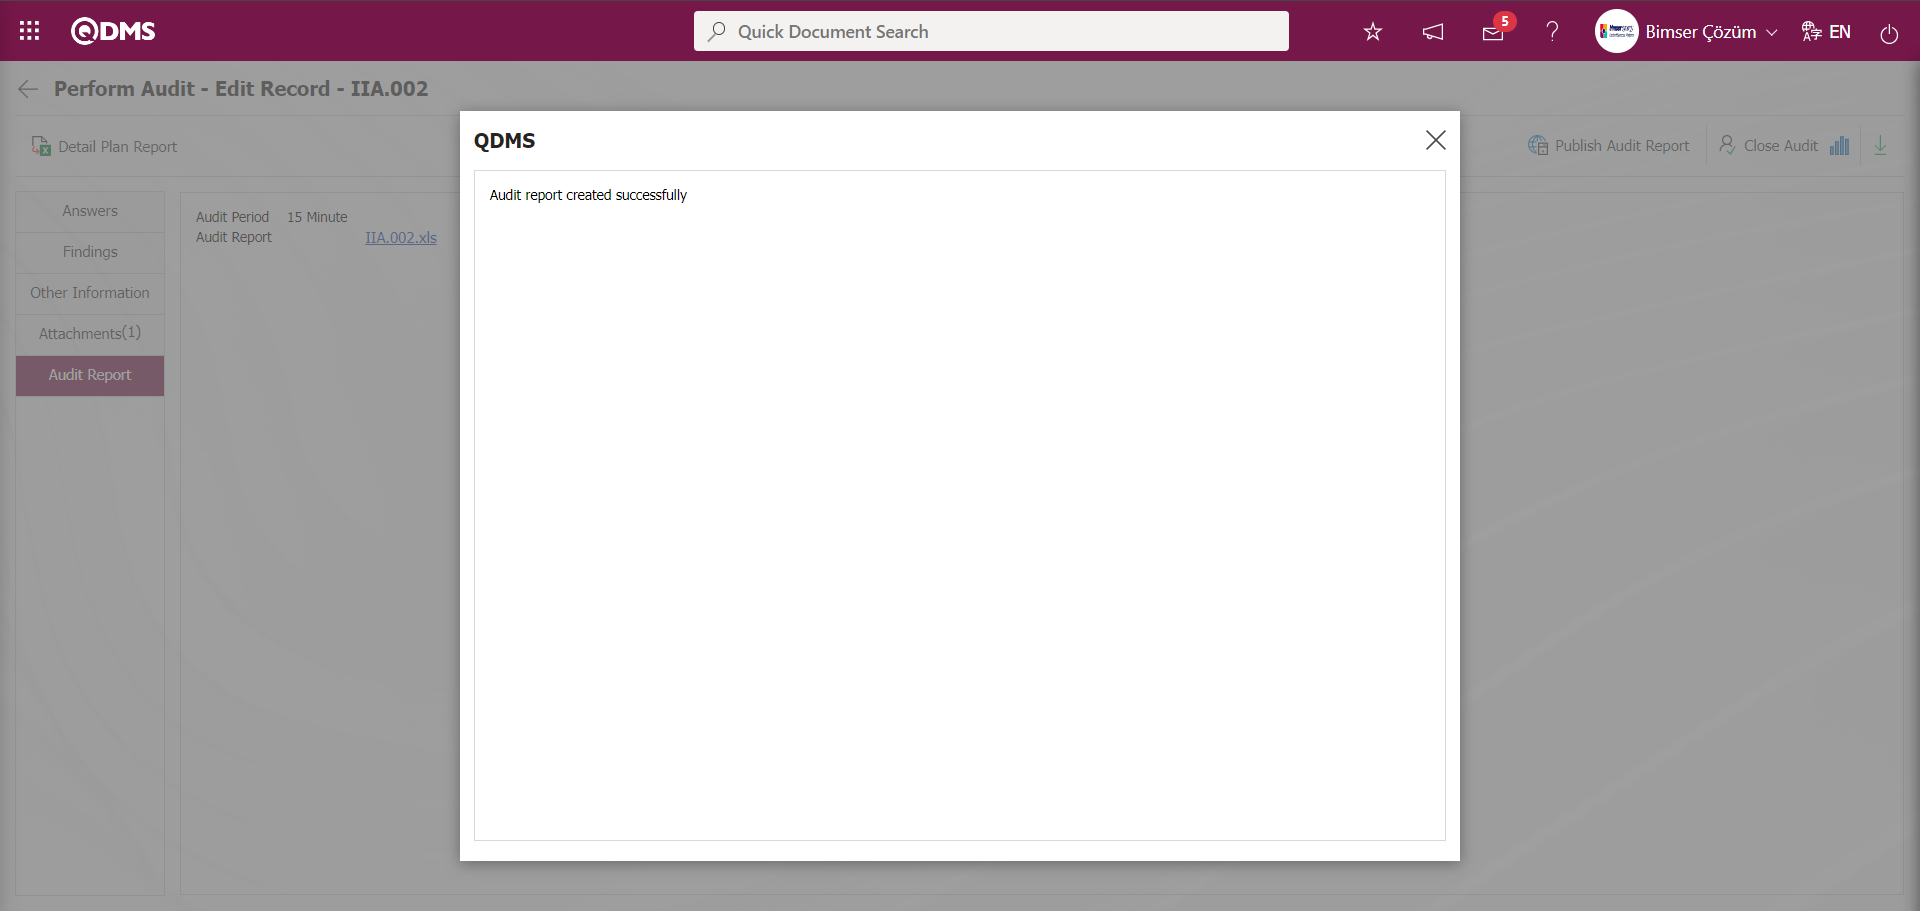
Click on the link with the code of the audit in the Audit Report field.

The Audit report is displayed by clicking the Audit code link in the Audit report field. In the downloaded Audit report, general information about the audit, audit questions, answers given to the audit, information about the CAPA and Actions opened depending on the answers and findings are given. The Audit Report includes the Audit Score and average score percentage information.
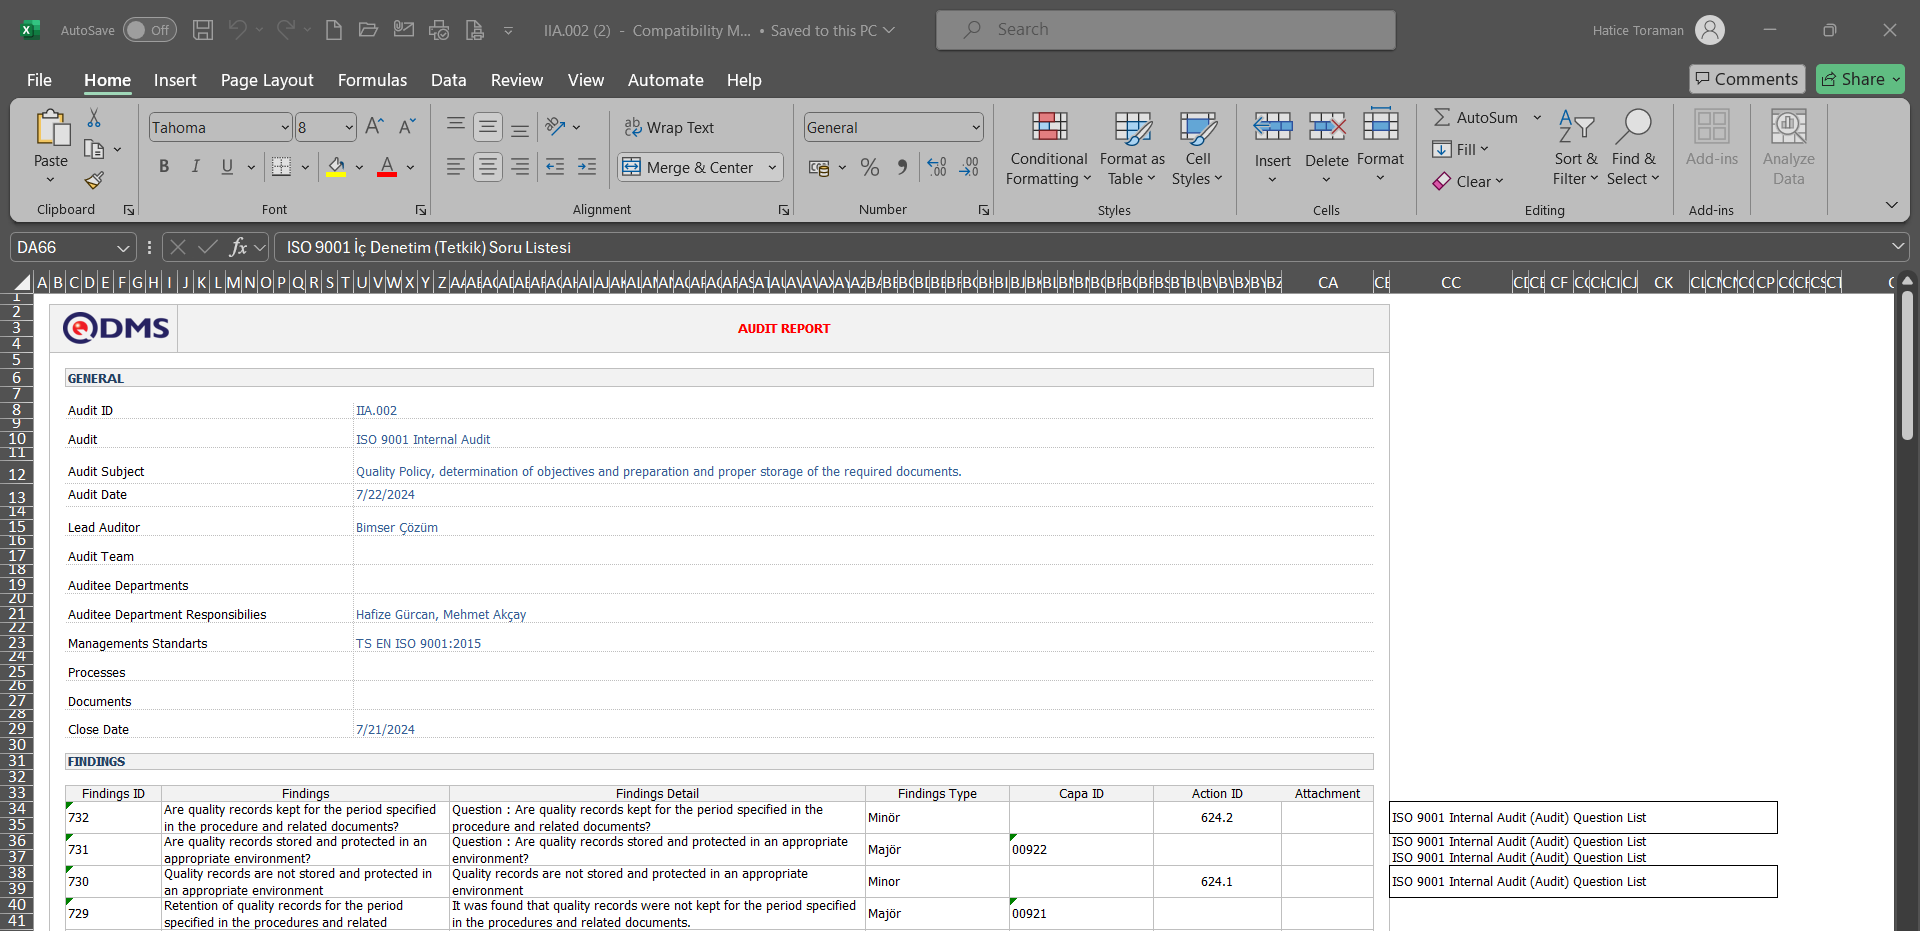
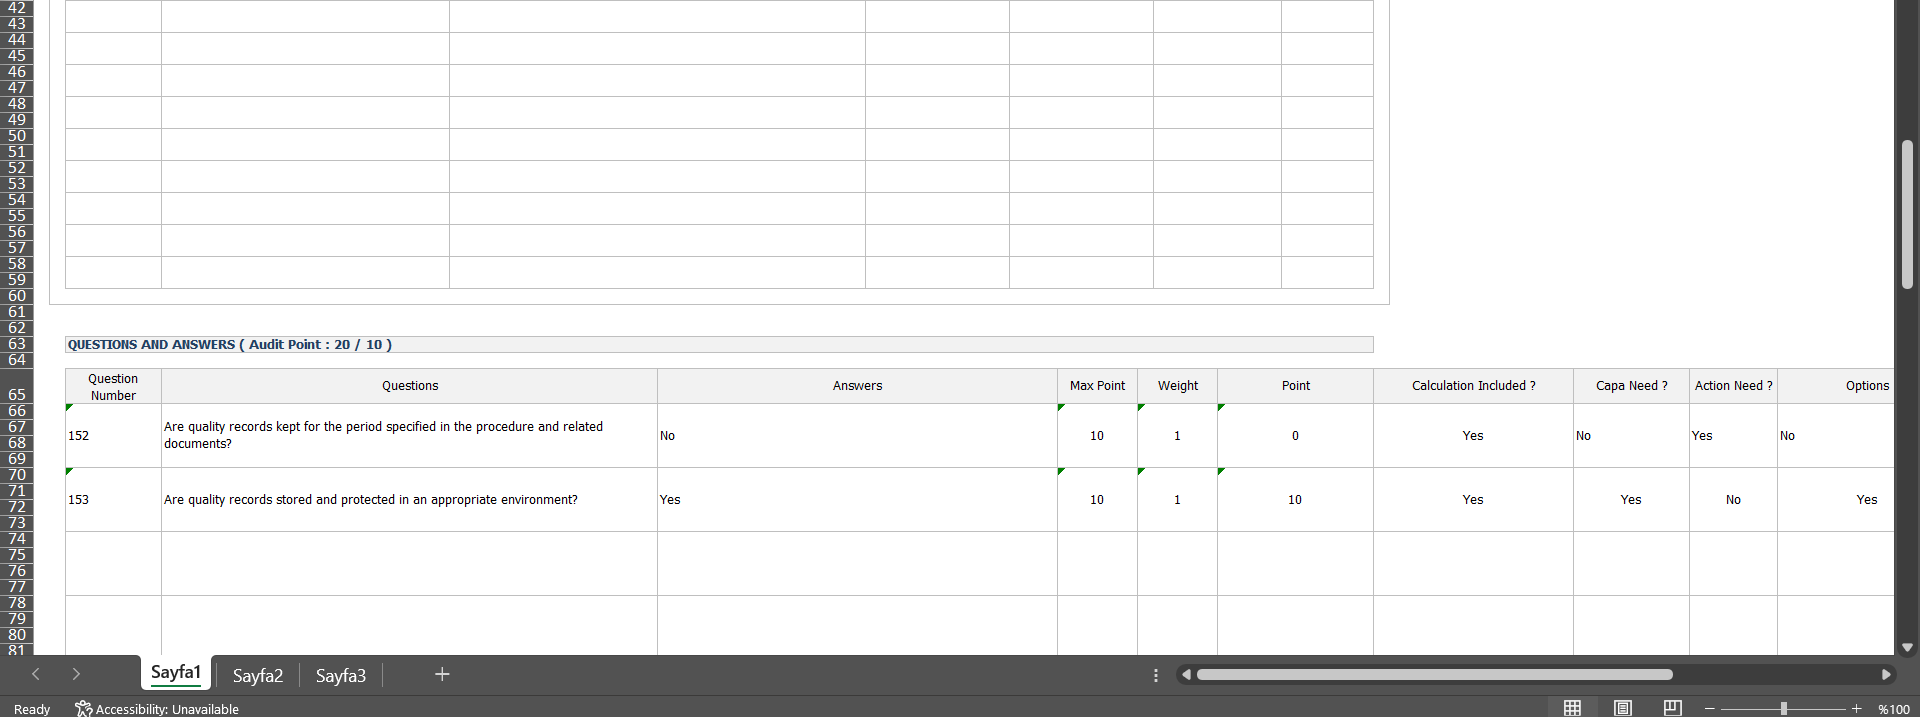
On the Perform Audit - Edit Record** screen, click the  button on the Audit Report tab.

Click the “OK” button when the system displays the message “Are you sure you want to close audit?”.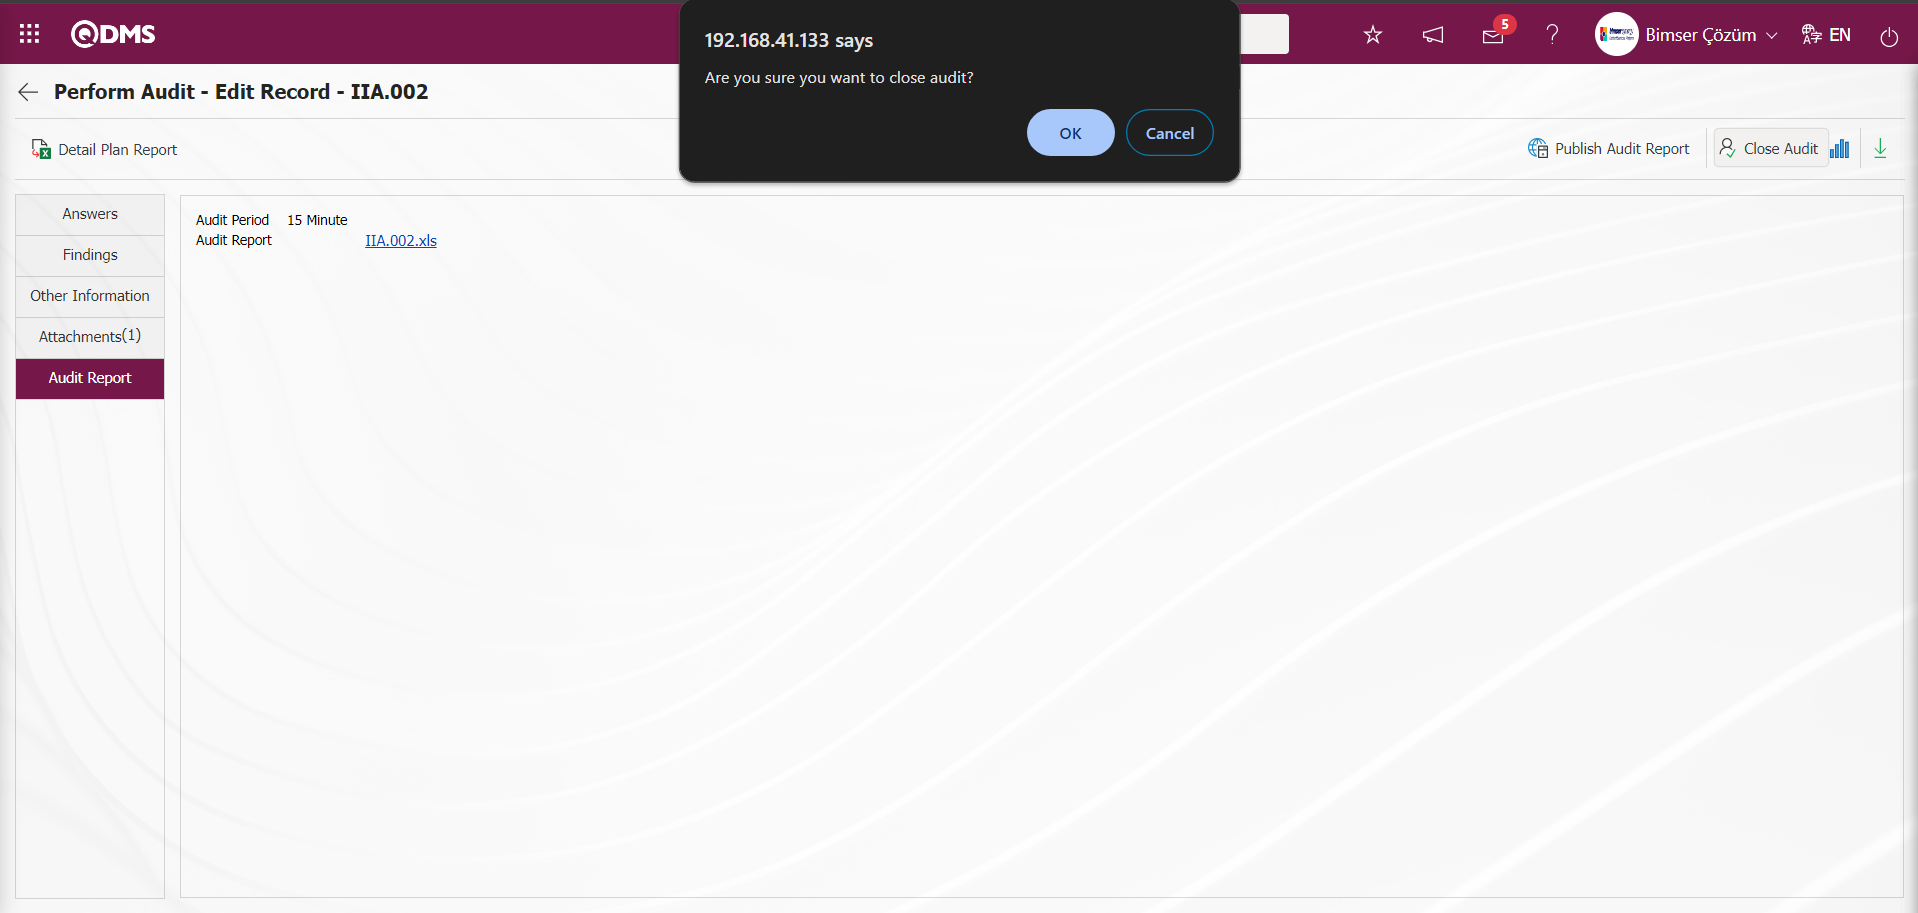
If the audit closure approval is set up, the "Audit List Waiting for Approve" will be assigned as a job to the pending jobs of the person in the approval for the audit approval. Otherwise, the audit is closed without approval and the closure information is announced to the relevant people by e-mail.
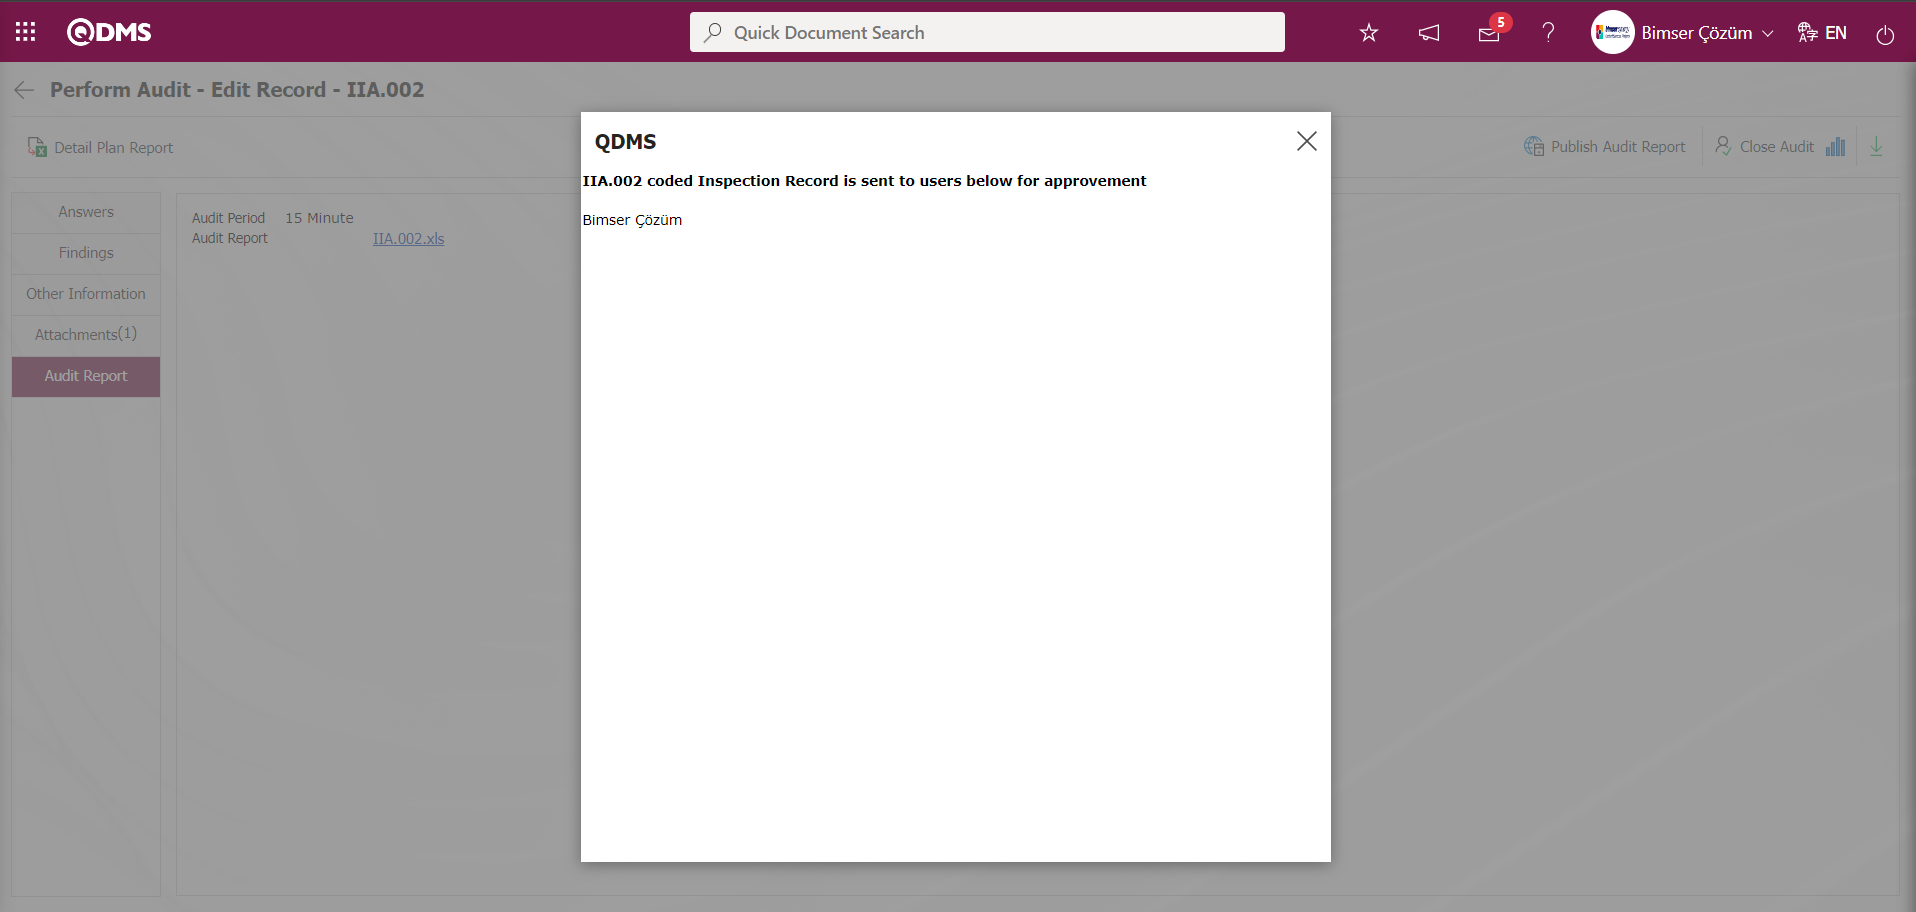

“Audit List Waiting for Approve” is assigned as a job in the pending jobs of the person on approval.
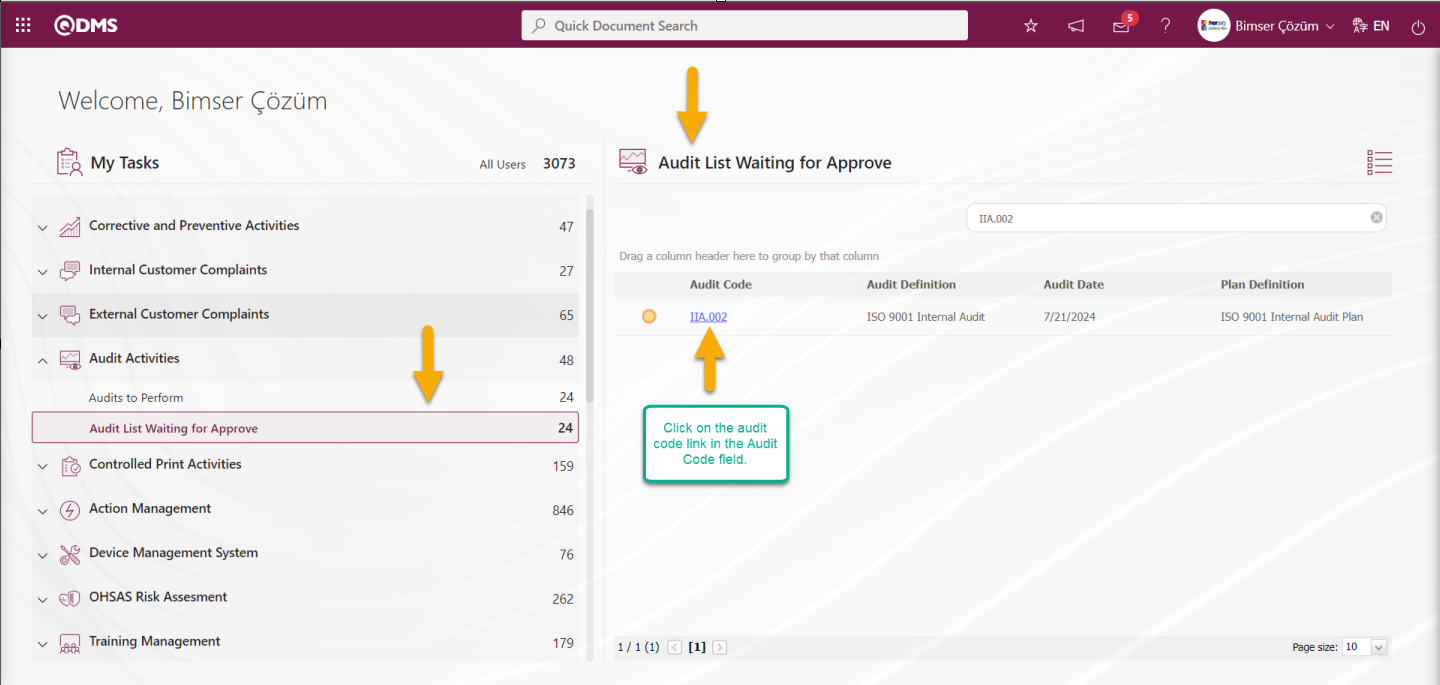
The “Approve My Audits” screen is opened by clicking the Audit code link in the Audit Code field in the relevant task.

With the help of the buttons on the screen;
 :Approval of the selected audit in the list is made.
 : The selected audit in the list is rejected.
 : The selected audit in the list is performed.
On the My Audits Pending Approval screen, click the  button while the Audit is selected in the list in the list tab. Opened Plan Rejection Rejection Reason information is written in pop-un to reject the audit.
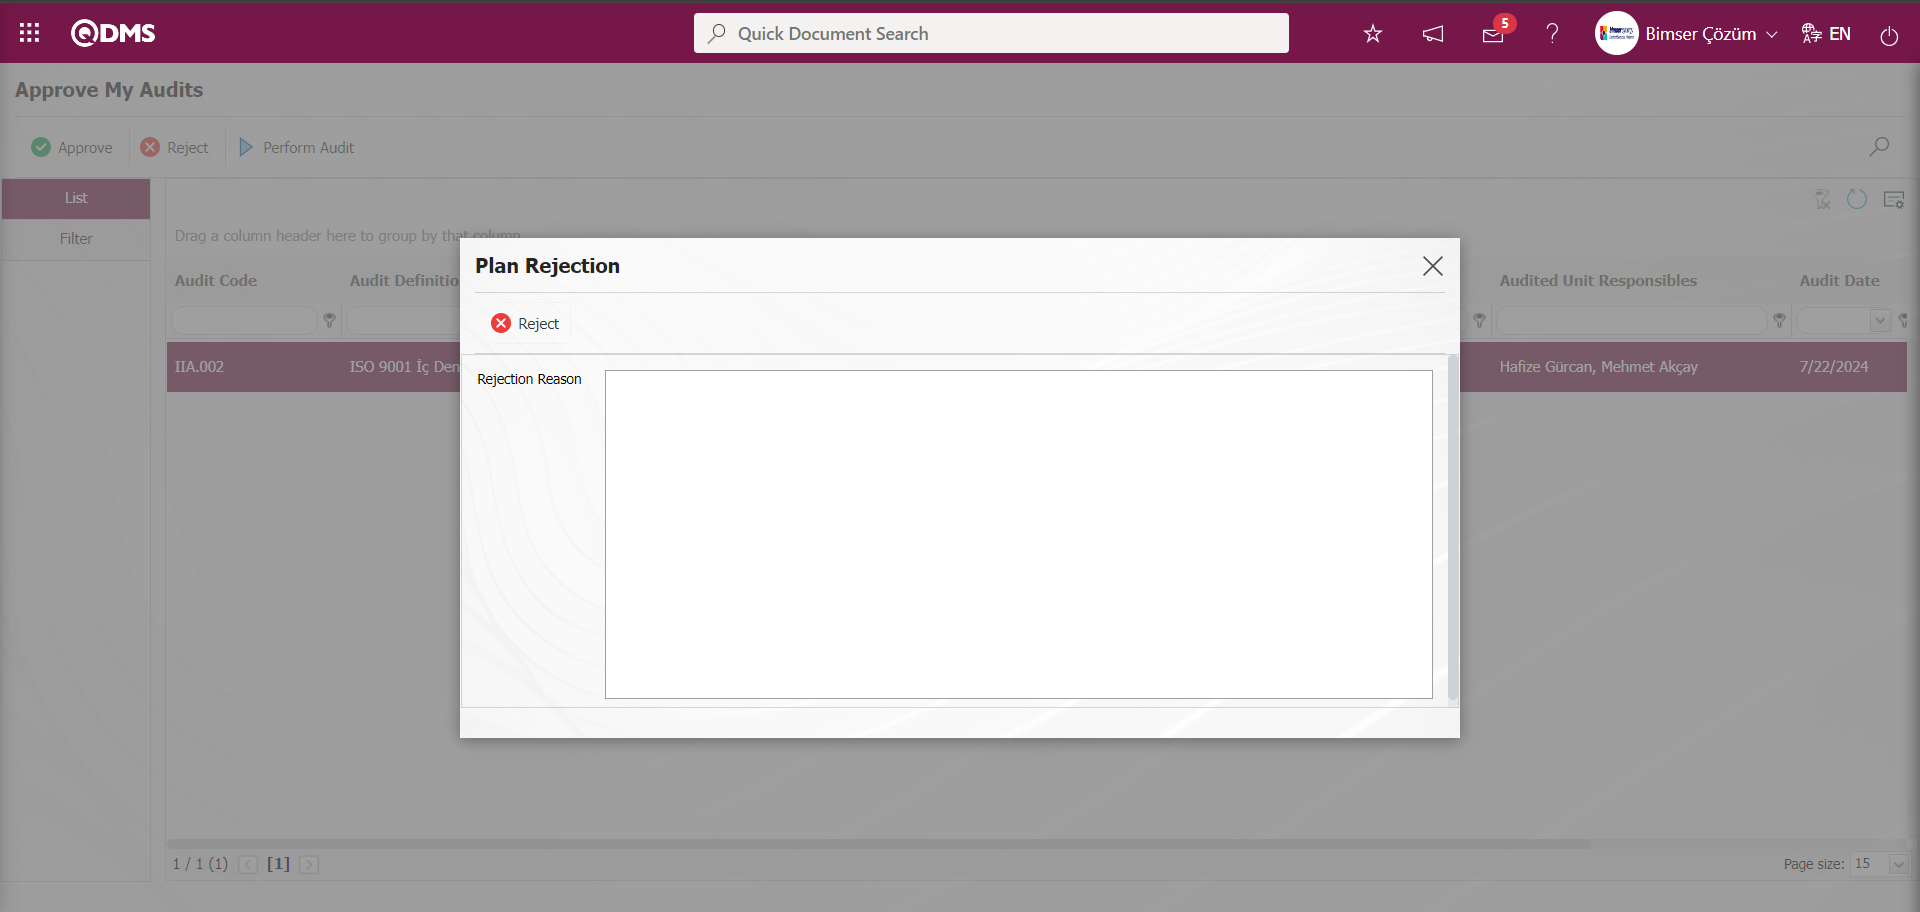
On the Approve My Audits** screen, on the list tab, click the  button while the Audit is selected in the list.
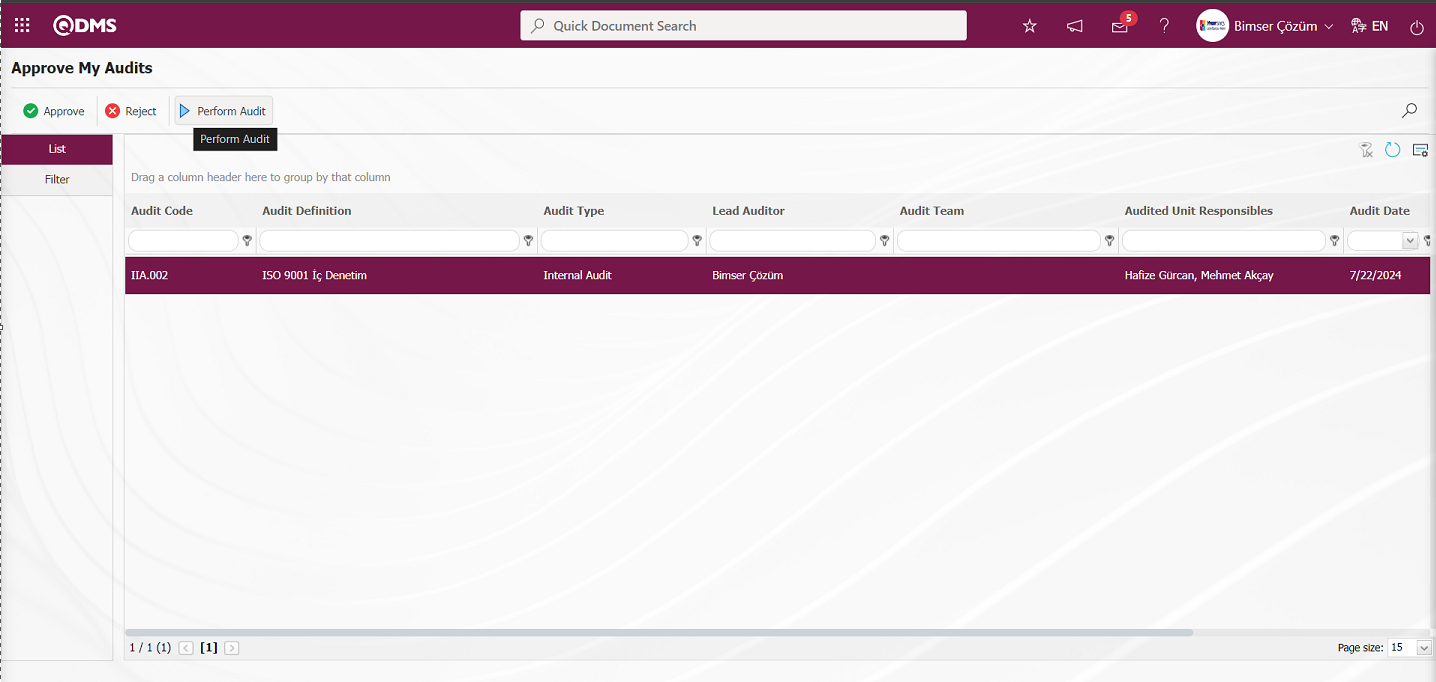
The Answers tab opens on the Perform Audit - Edit Record screen.
Answers tab;
The Answers tab displays the answers to the questions given and the CAPA and Actions opened based on the answers.
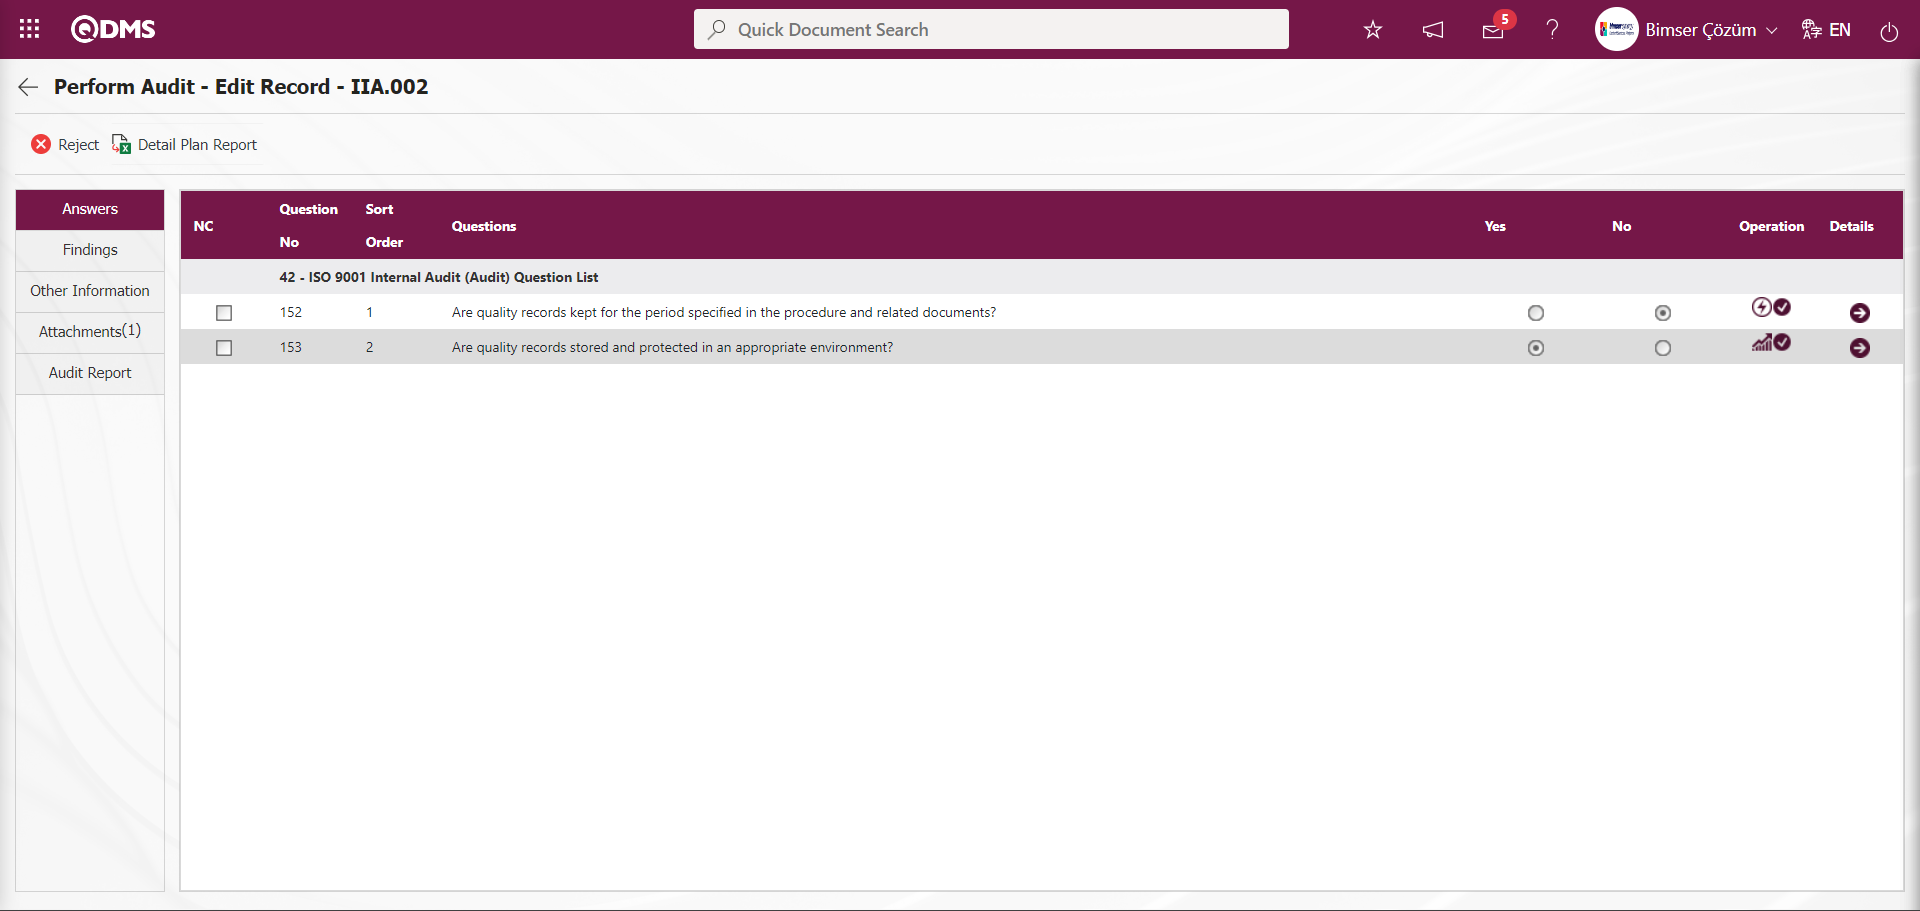
In the Perform Audit - Edit Record Answers tab, the details of the questions can be viewed by clicking the  button in the Details field and editing and modification can be made on the relevant fields if desired.

Findings tab;
In the Findings tab on the Perform Audit - Edit Record screen, the CAPA and Actions opened in the findings related to the relevant questions are displayed. If desired, CAPA record opening and Action Planning can be done with the and buttons at this stage.
Click the  button to open the CAPA record for the relevant question in the findings.

Click the 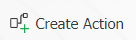 button for Action Planning for the relevant question in the findings.
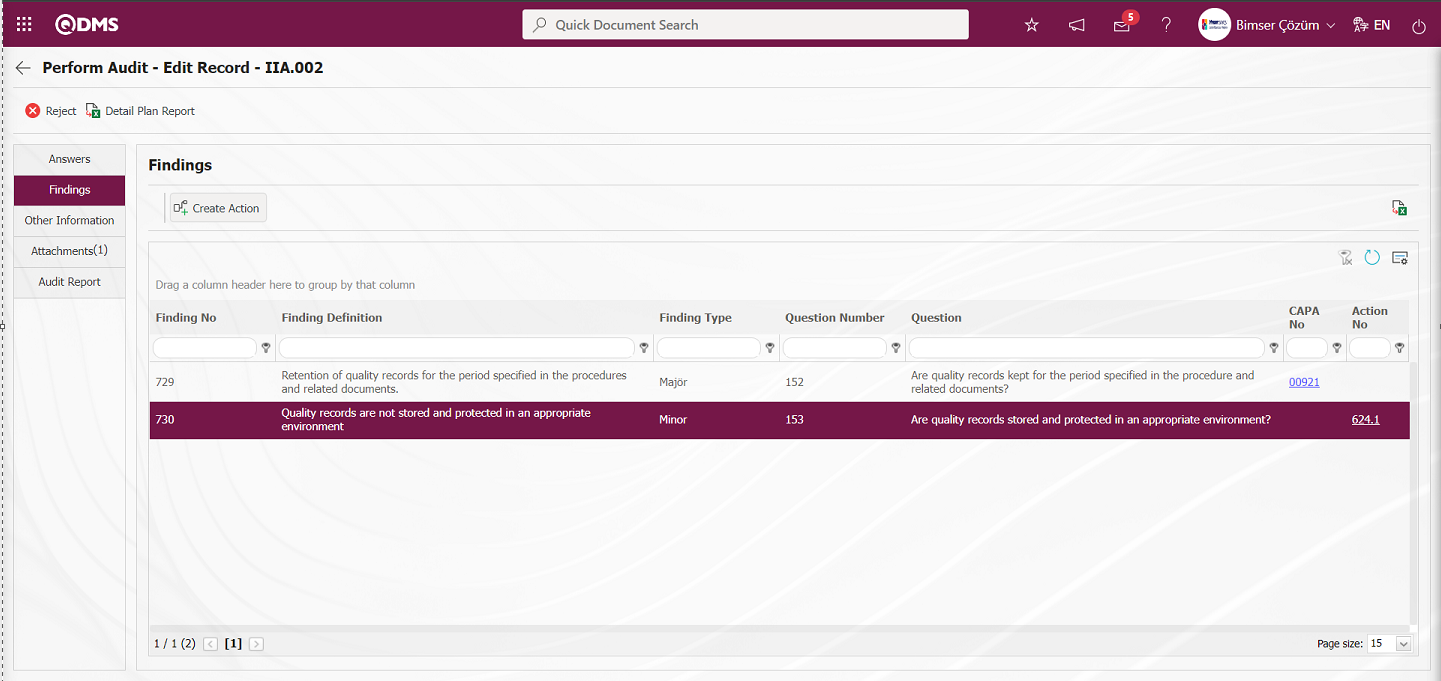
On the Perform Audit - Edit Record screen, in the Findings tab, in order to view the CAPA record opened for the relevant question in the findings, the CAPA record is viewed by clicking the link-shaped code of the CAPA record in the CAPA No field.
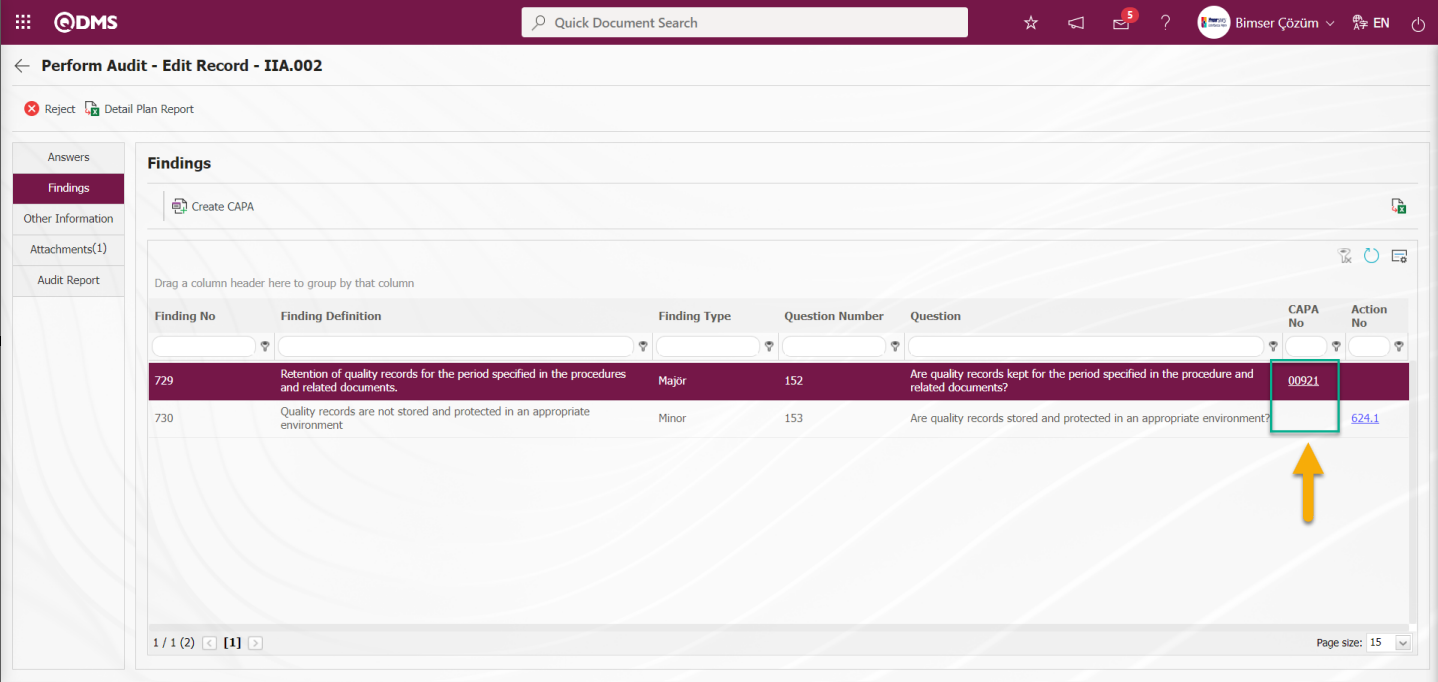
On the Perform Audit - Edit Record screen, in the Findings tab, in order to view the record of the Action opened for the relevant question in the findings, the Action record is viewed by clicking the link-shaped code of the Action record in the Action No field.
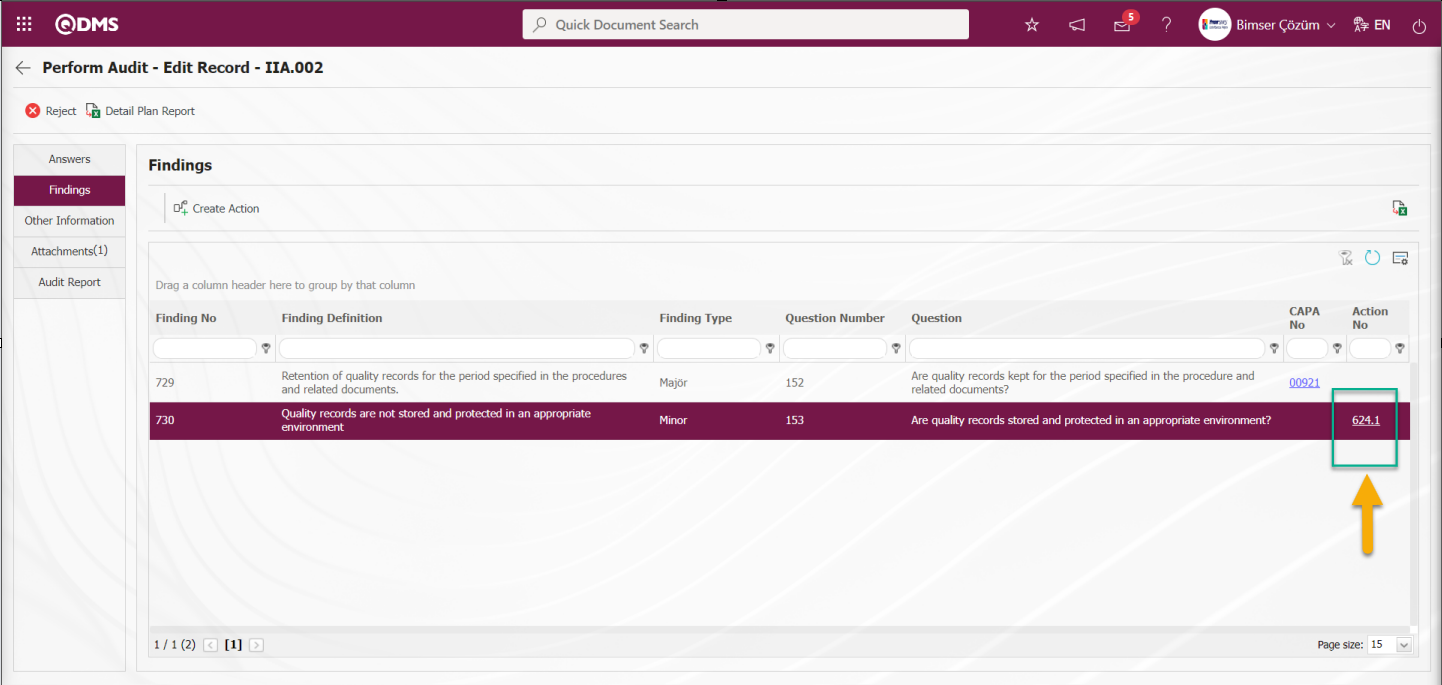
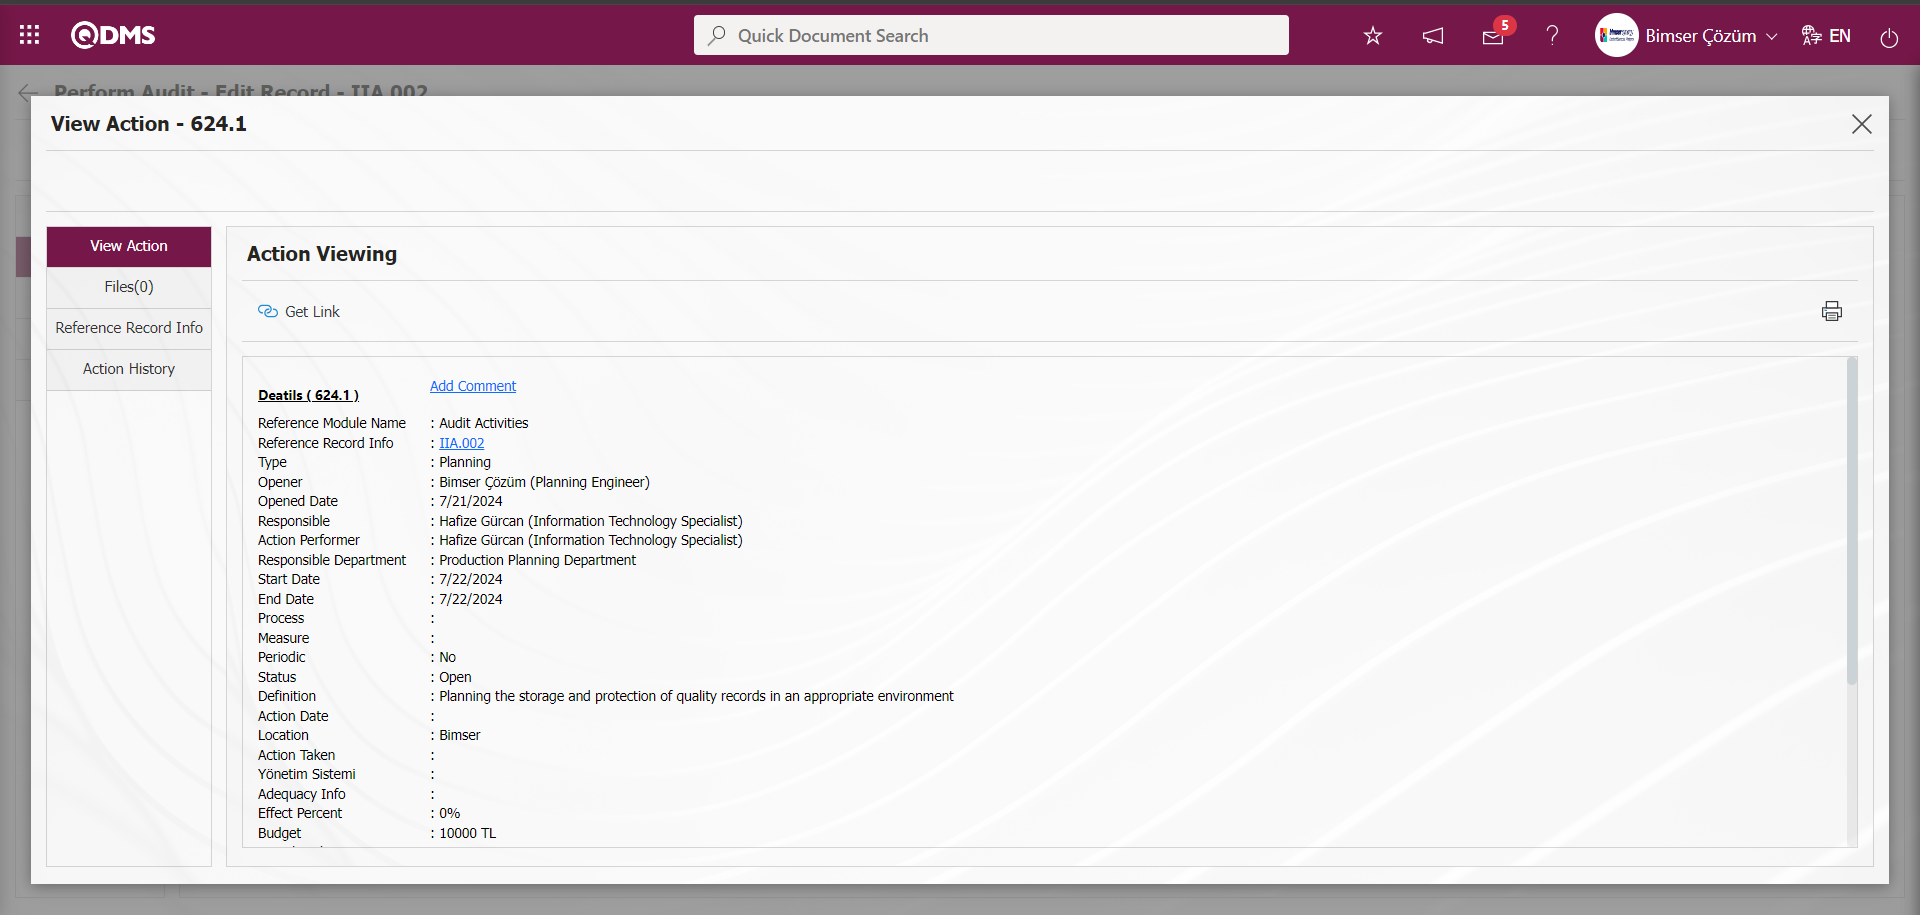
Other Information;
On the Perform Audit - Edit Record screen, notes related to the audit, if any, related management system, departments, processes and documents are displayed. If parametric fields are defined by selecting the Audit Activity module in the System Infrastructure Definitions/BSID/Configuration Settings/Language Settings menu, the parametric fields defined in this field are displayed.
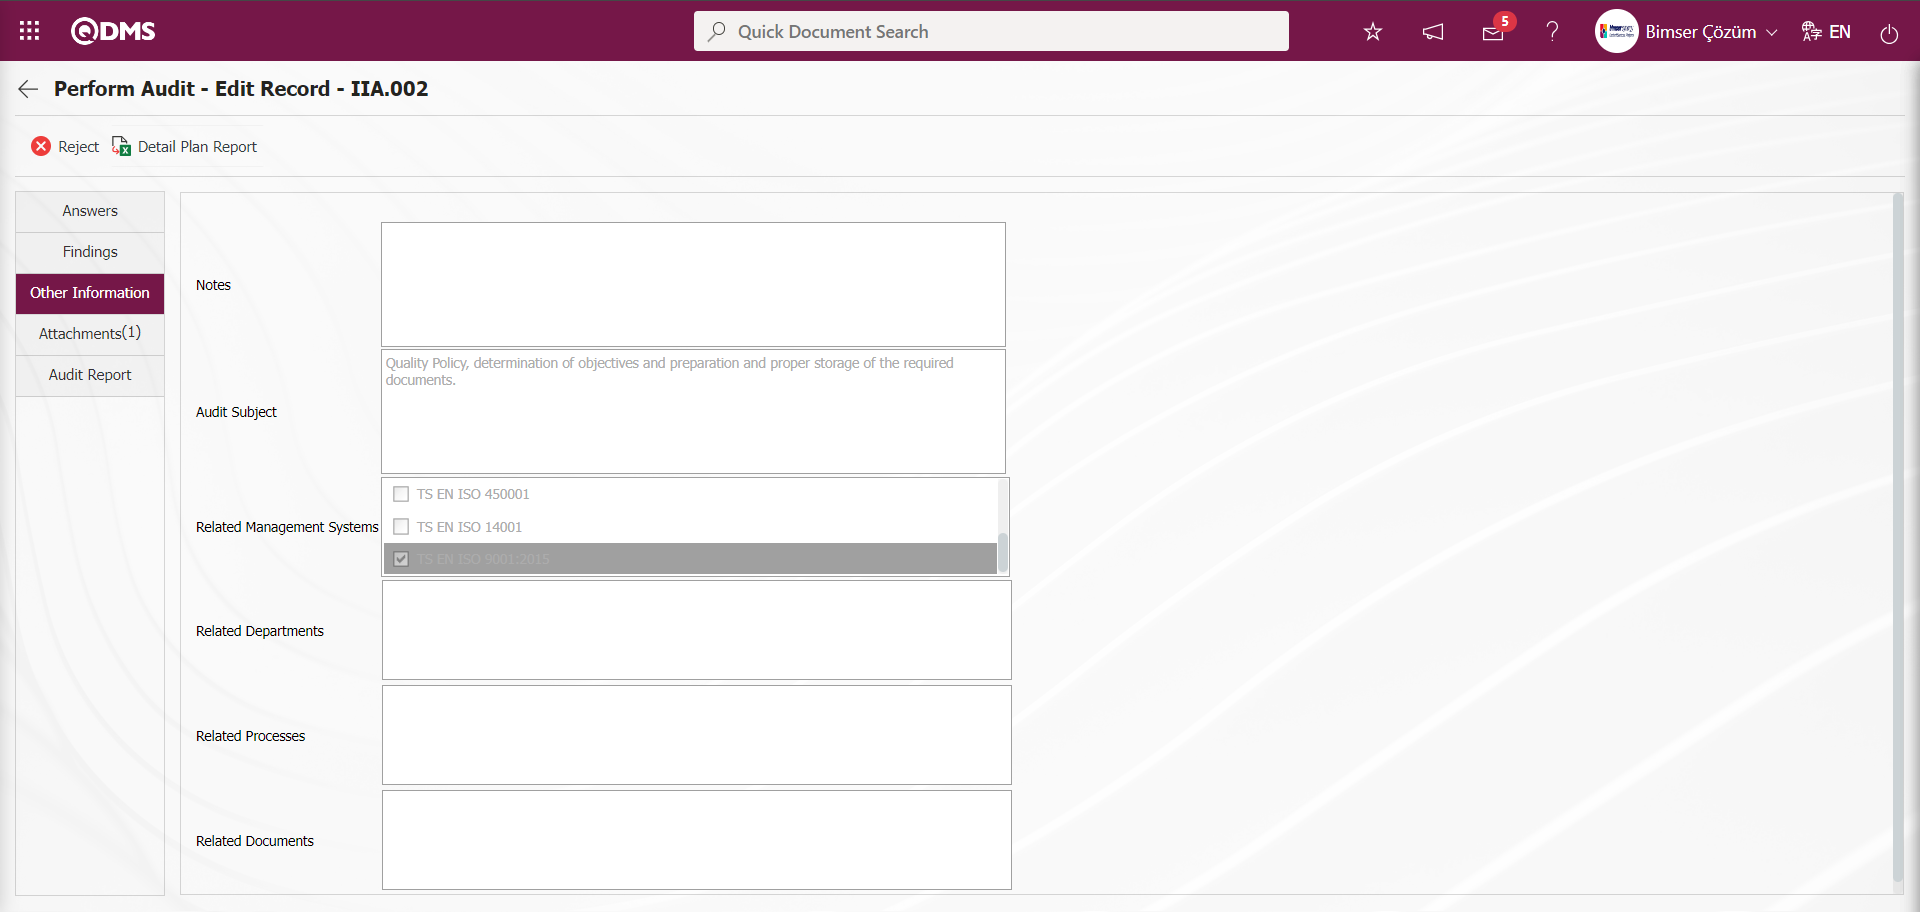
Additional Files;
On the Perform Audit - Edit Record screen, the additional files uploaded during the audit realization phase are displayed. If desired, you can upload additional files related to the audit, view the uploaded additional file and delete the uploaded additional file at this stage.

Audit Report;
In the audit report tab, if desired, the audit code link in the Audit report field is clicked and the audit report is downloaded in the system at this stage.

The downloaded Audit report contains general information about the audit, audit questions, audit responses, CAPA and Actions opened based on the responses and findings.
![A screenshot of a computer
Description automatically generated]ref136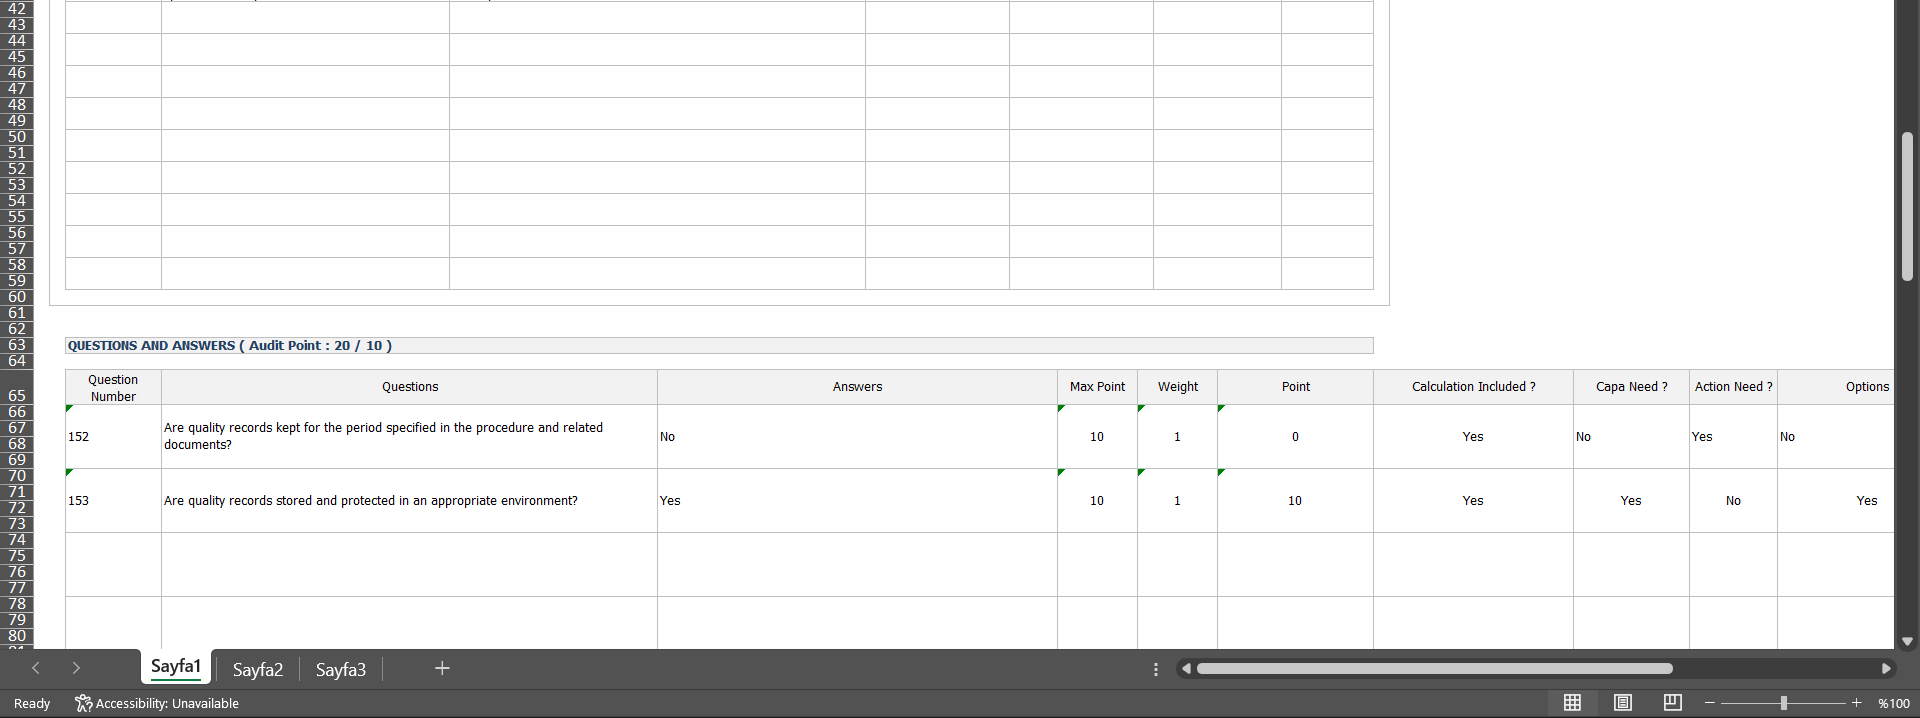
On the Perform Audit - Edit Record screen, click the  (Download Audit Report With Attachments) button on the Audit Report tab.
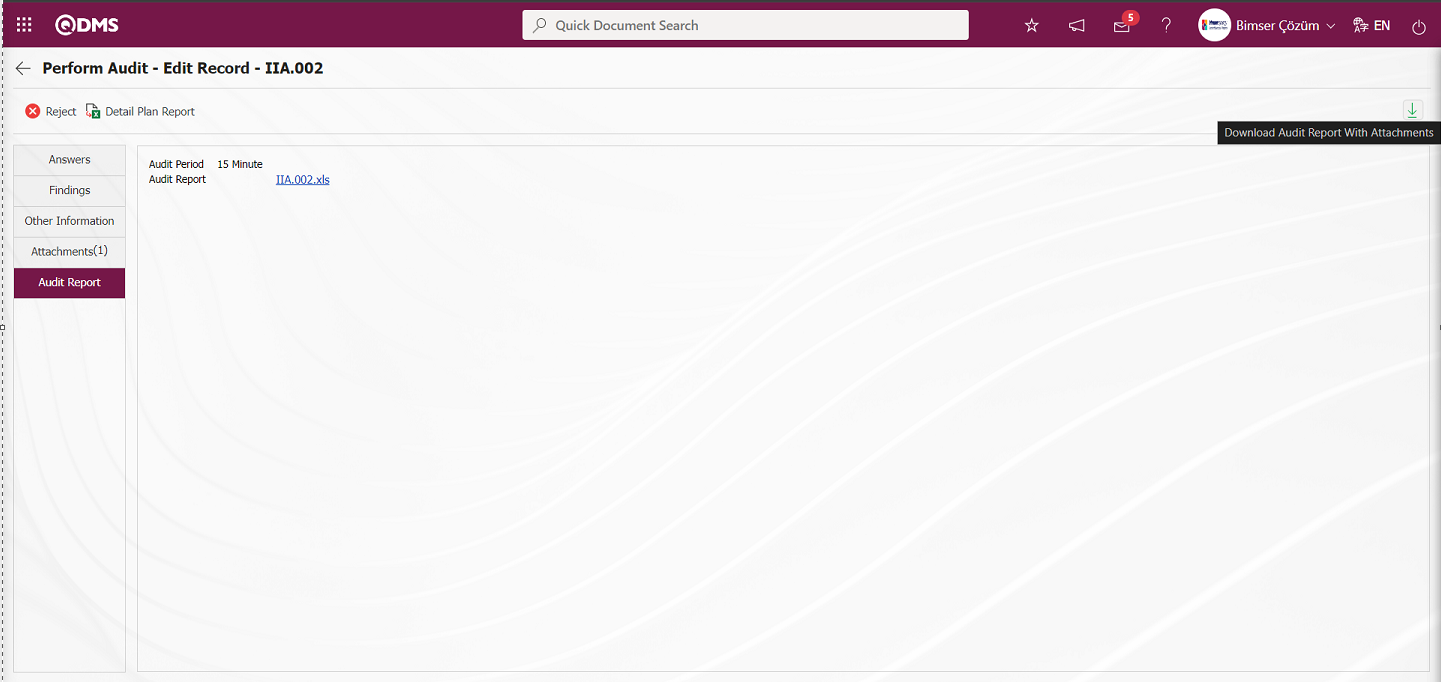
(Download Audit Report With Attachments) button is clicked and the downloaded folder contains the Audit Report and the additional files installed. If the user wants to view the file in the folder, the file is downloaded to the computer by double clicking.
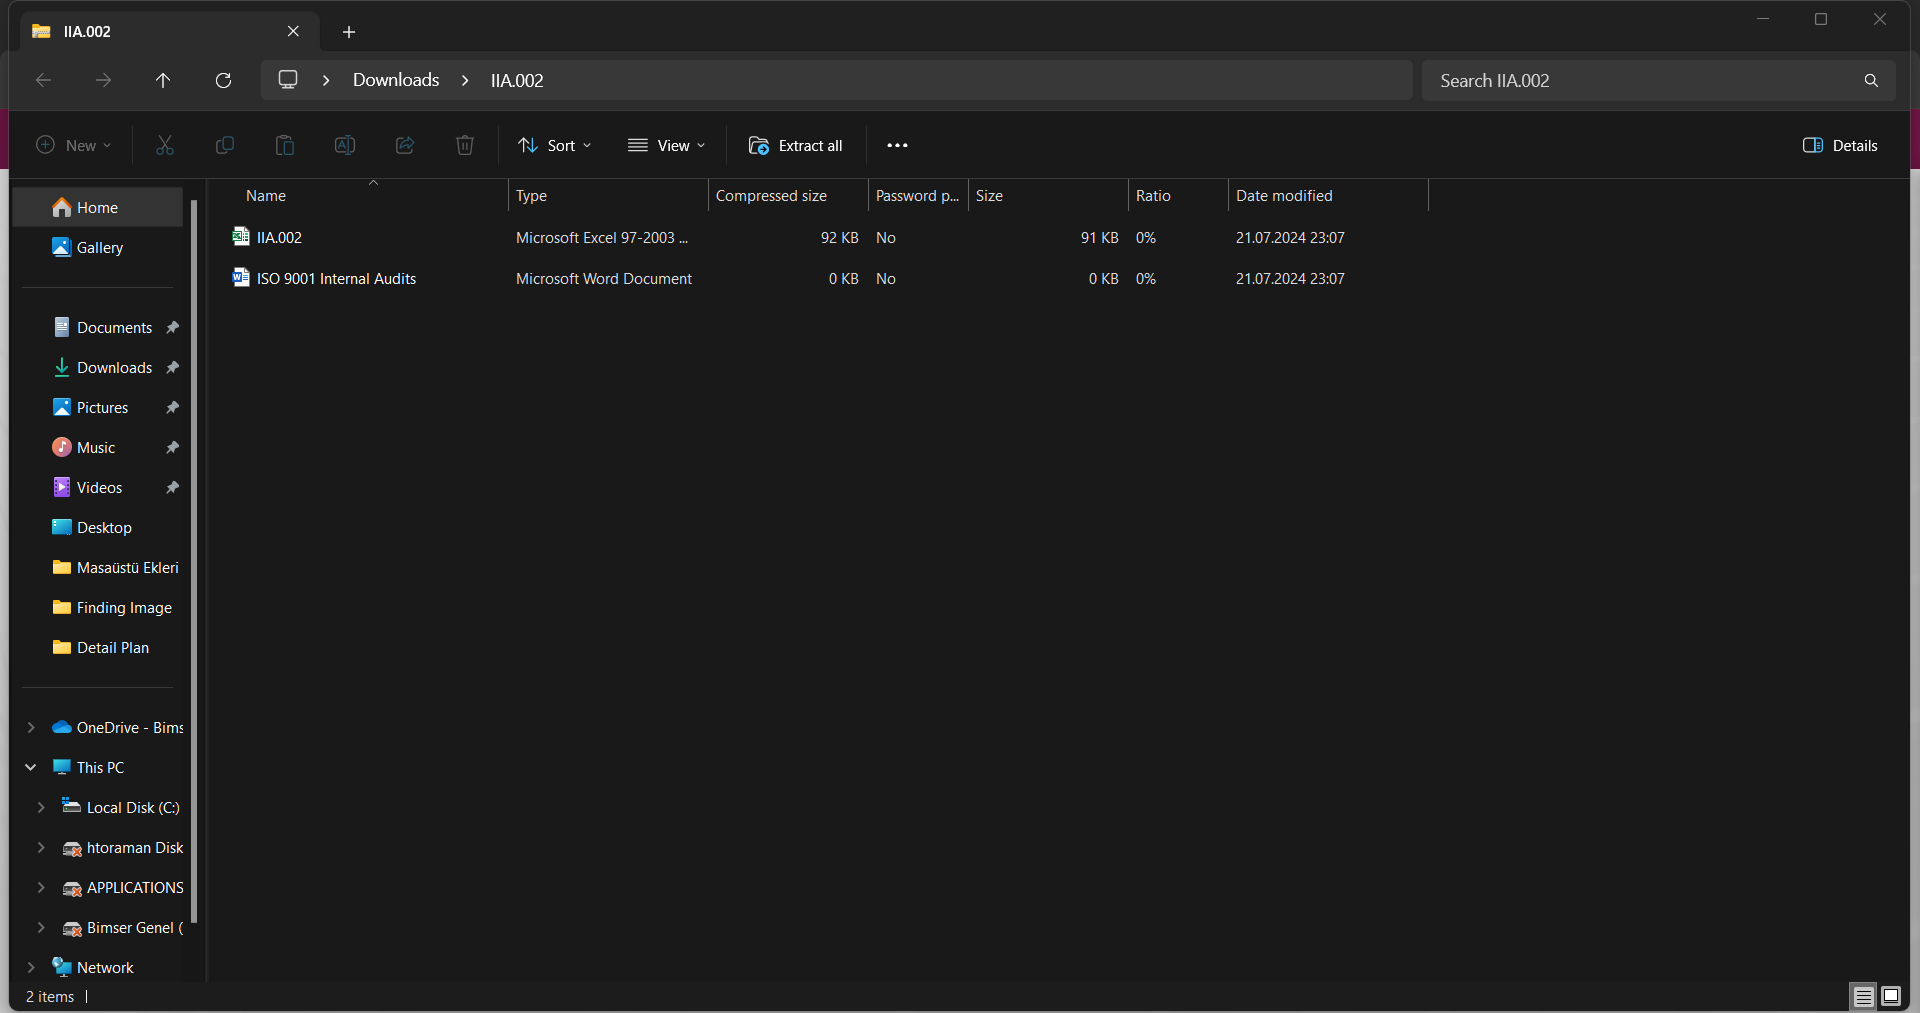
At this stage, click if desired.
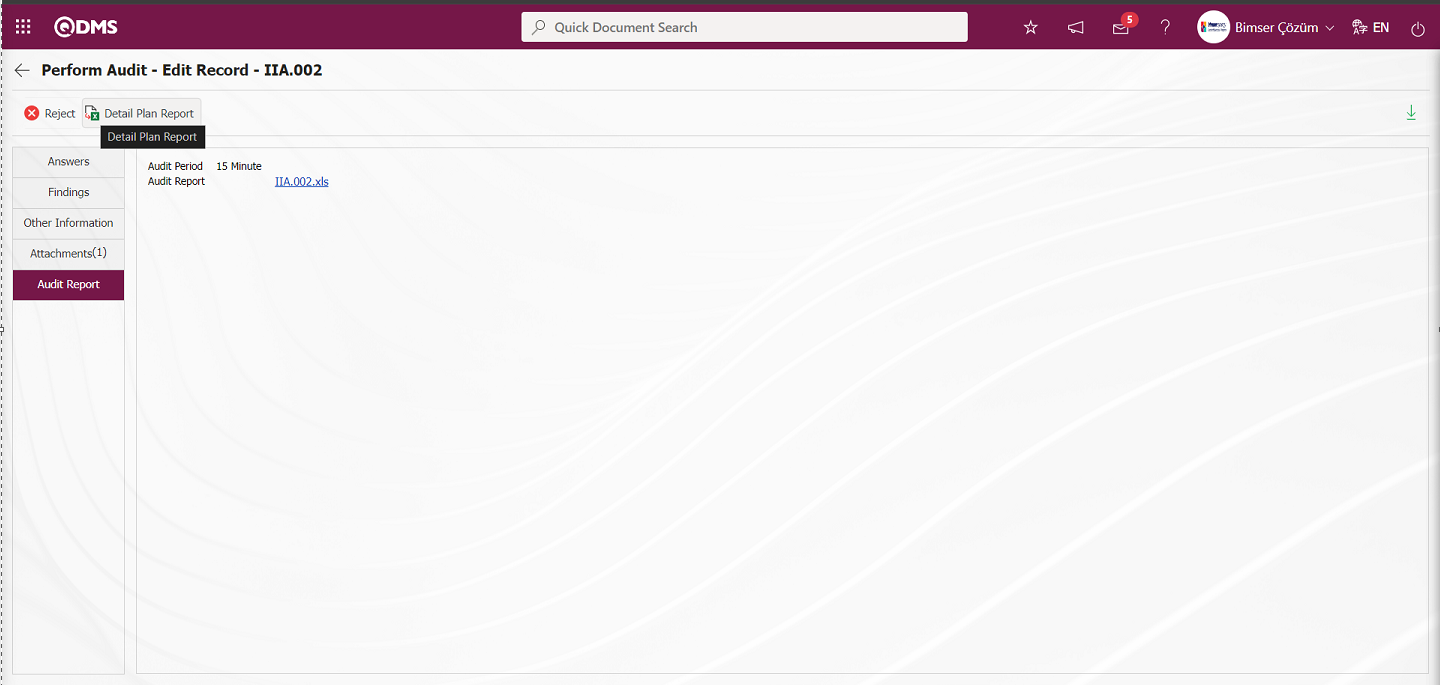
Downloads the Detail Plan Report installed for the user to his/her computer.
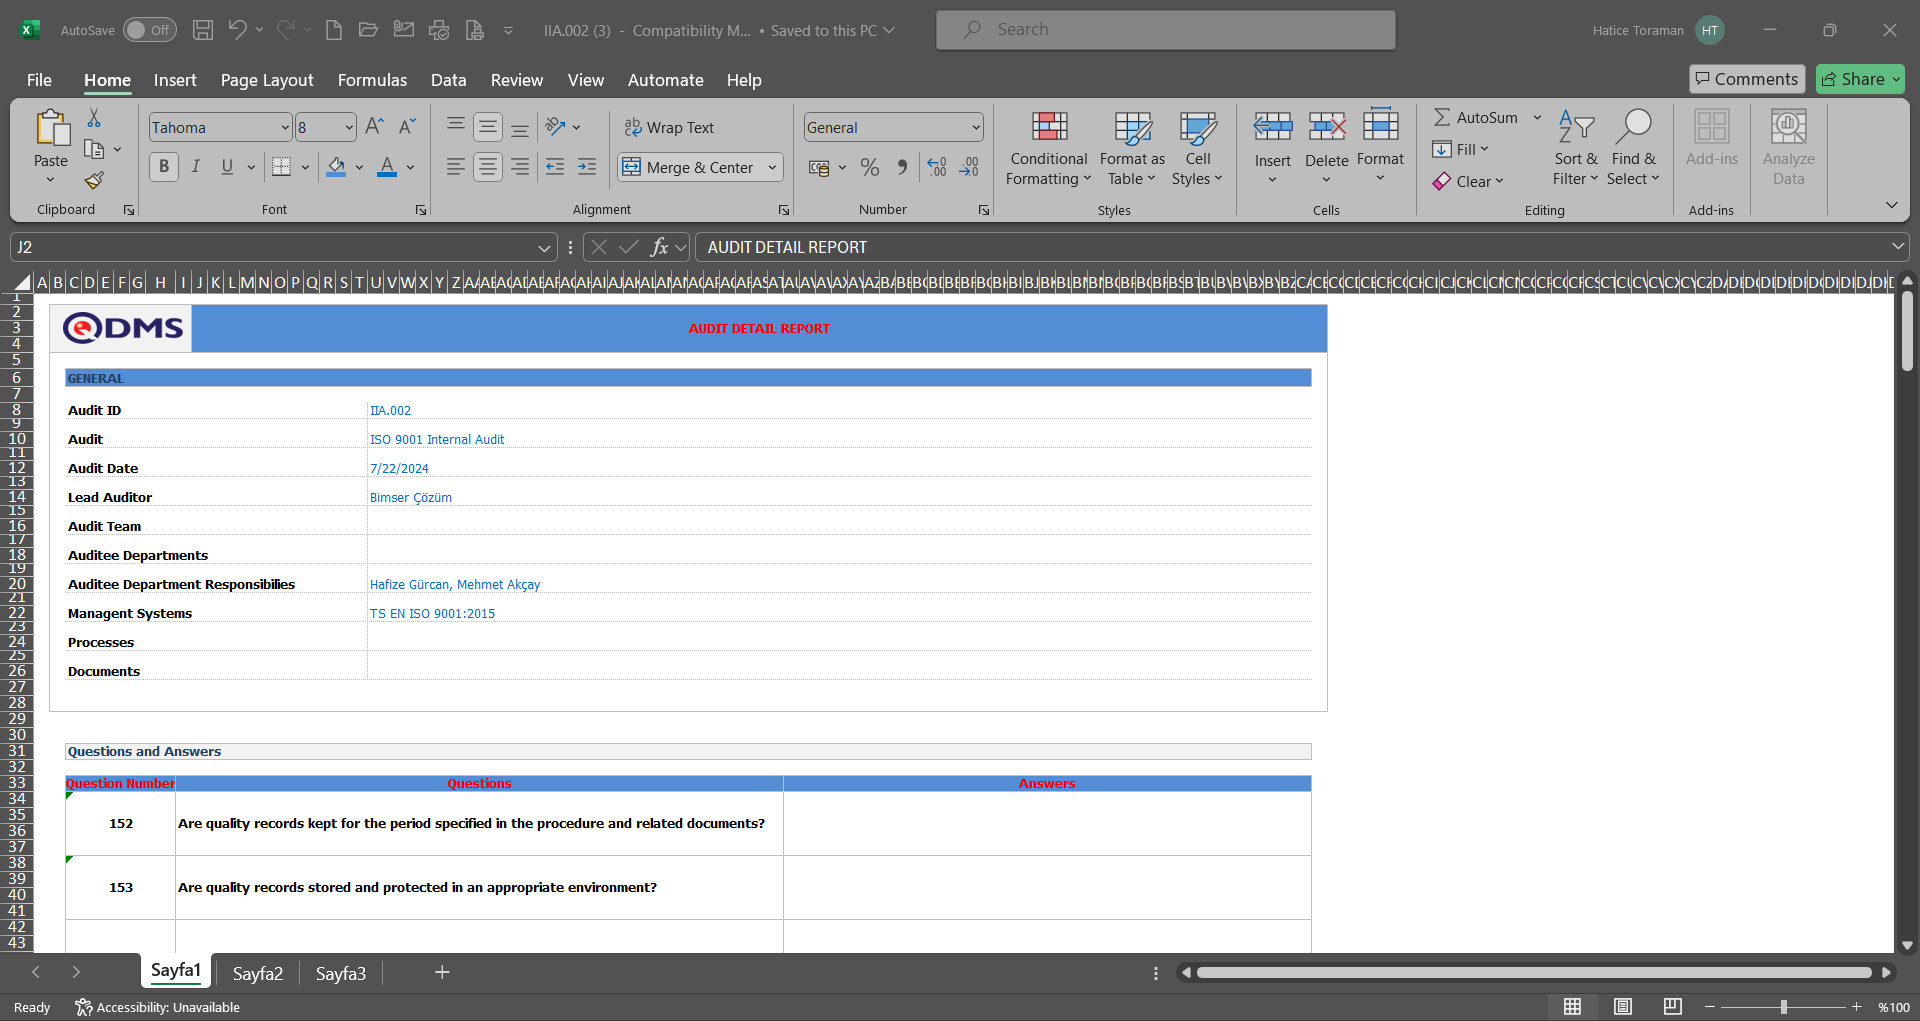
On the Perform Audit - Edit Record screen, click the  (Back) button to go to the “Approve My Audits” screen.
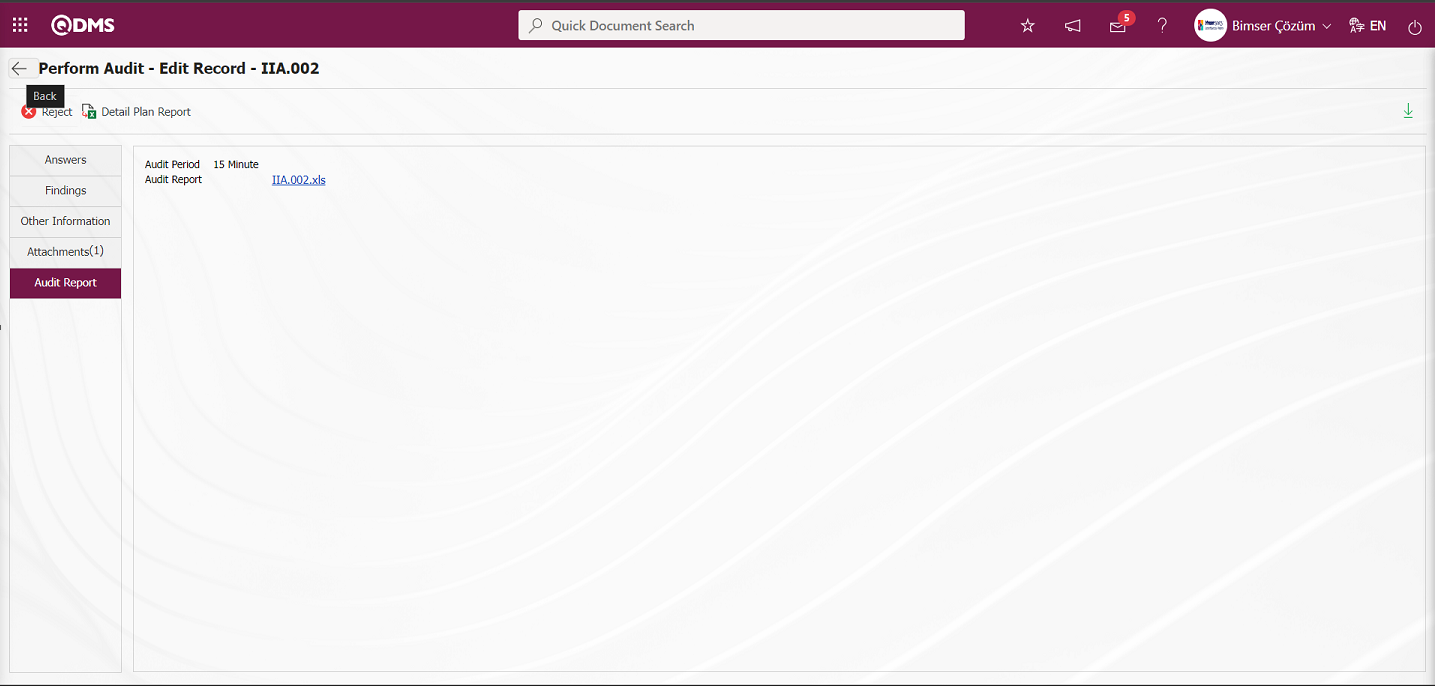
 button is clicked to approve the audit at the Approval stage.

Click the “OK” button on the “Are you sure to approve Inspection record?” message by the system.
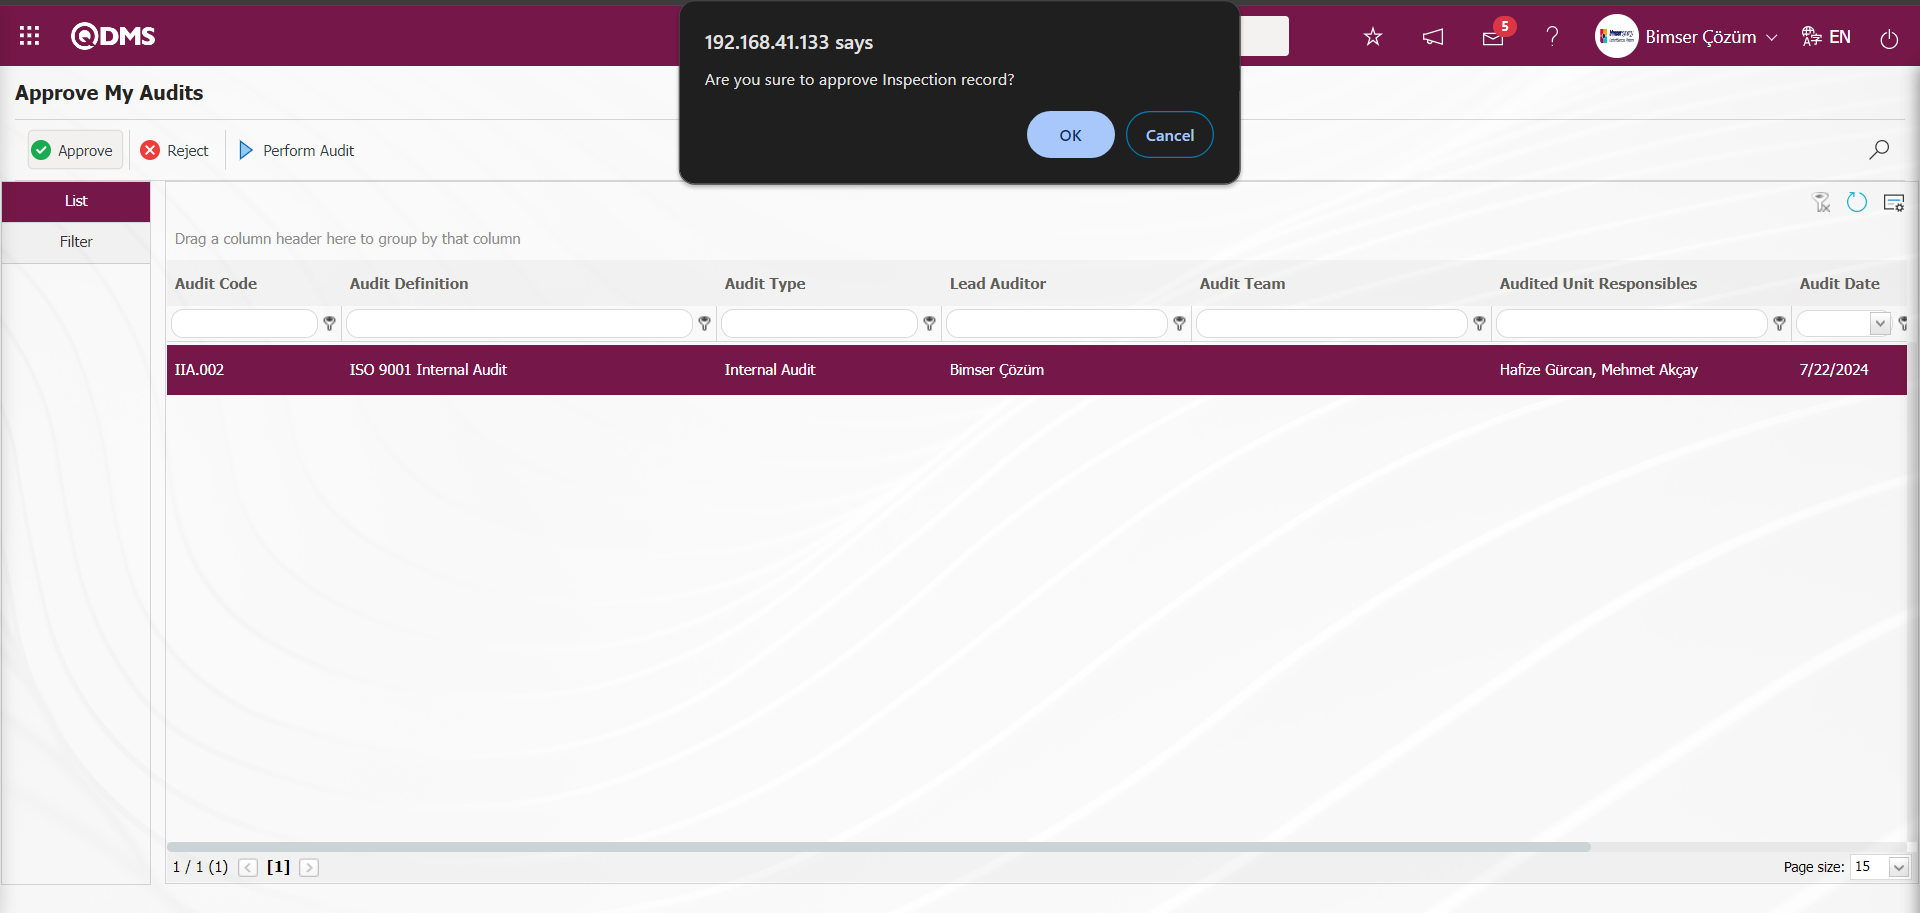
The audit approval process is performed by the system and the relevant persons are notified.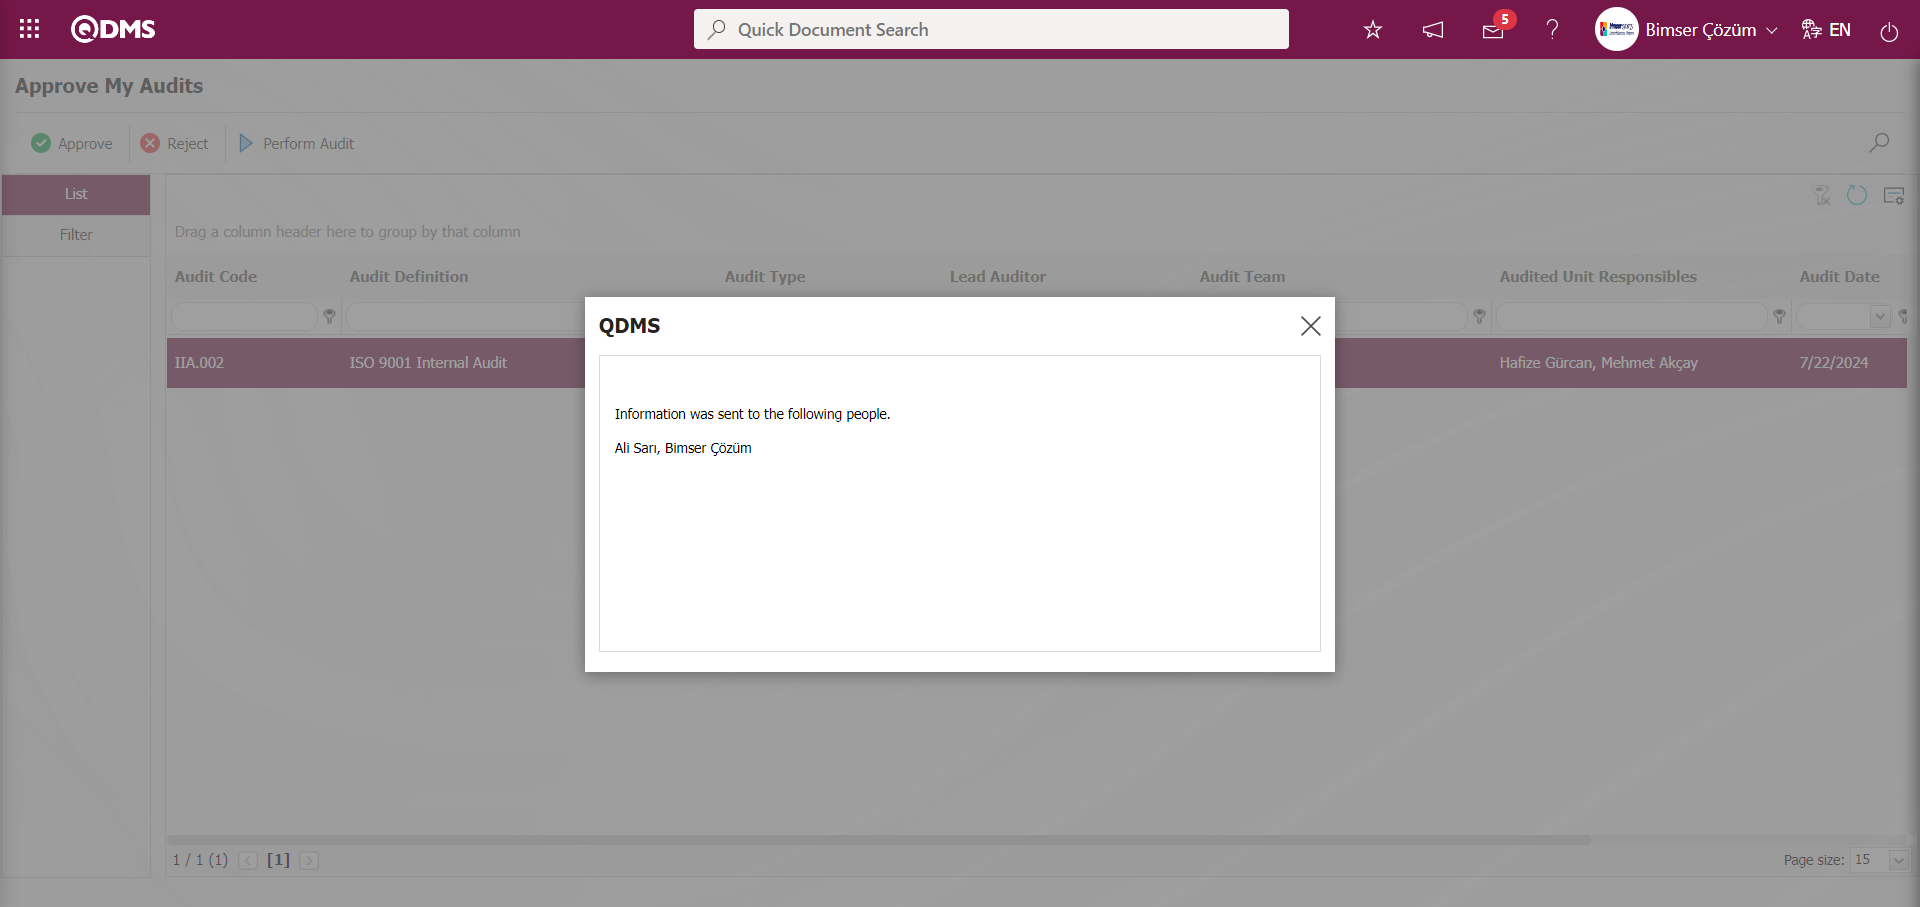
6.2.3. Unplanned Audits
Menu Name: Integrated Management System/ Audit Activities/ Unplanned Audits
This is the menu where unplanned inspections take place. It is not associated with any plan. Audits defined as unplanned in the audit definition menu are included in this menu. The auditor performs the audit defined through this menu at any time. The steps of the operations performed in the audit execution menu are the same. In order for the audits to appear in this menu, an existing audit plan code must be written to the parameter value of the “Audit ID to be used for unplanned audits” parameter numbered 100 in the Audit Activities parameters and defined in the parameter.

When Unplanned Audits are defined in the system, it is ensured that they are included in the plan in the plan code defined in the parameter. After defining the unplanned audit plan code in the parameter, the System Infrastructure Definitions / BSID / Configuration Settings / Language Settings menu is entered in order to display the Audit “Unplanned?” Option on the screen opened in the System Infrastructure Definitions / Audit Activities / Audit Definition menu and the Audit Activity module is selected as the module in the modules field. In the Headings tab, type “lblplansiz” in the Name field in the grid and click the  button.
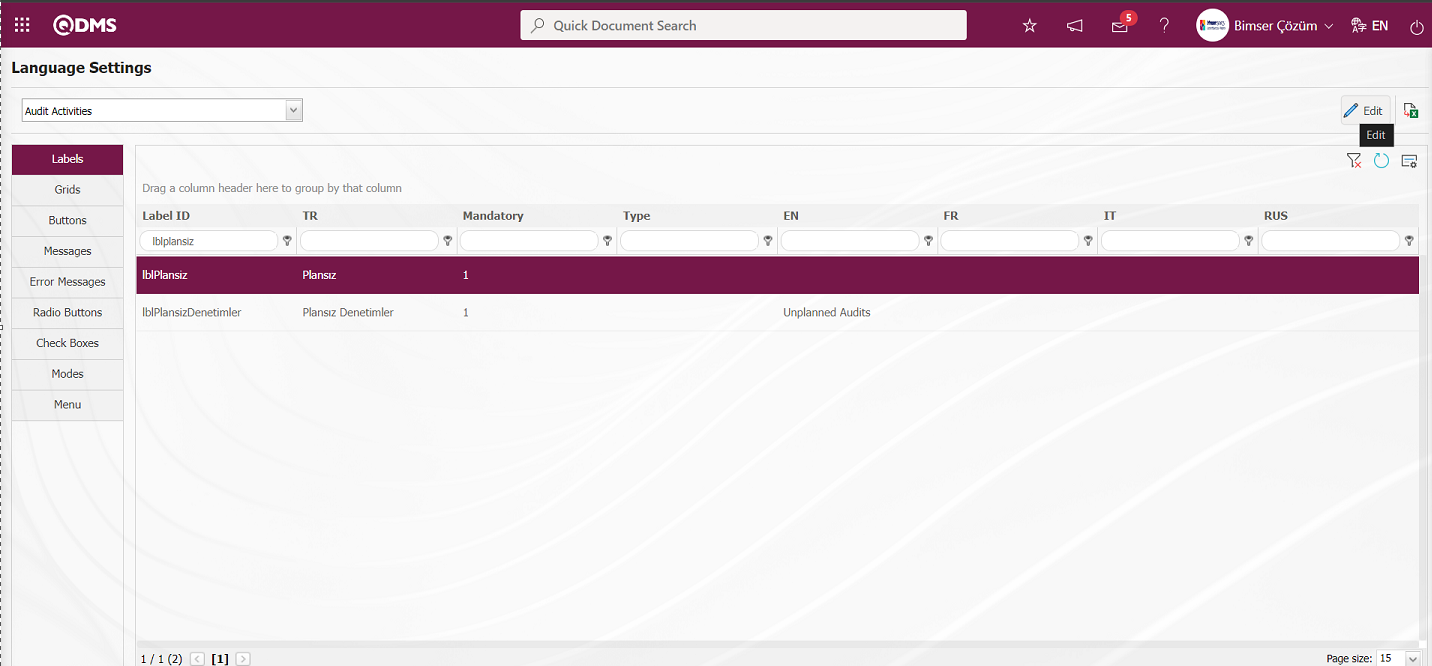
In the Language Settings screen, enter the information in the Value field.

After entering the necessary information in the required fields on the language settings screen, the language settings are saved by clicking the  button in the upper left corner of the screen.
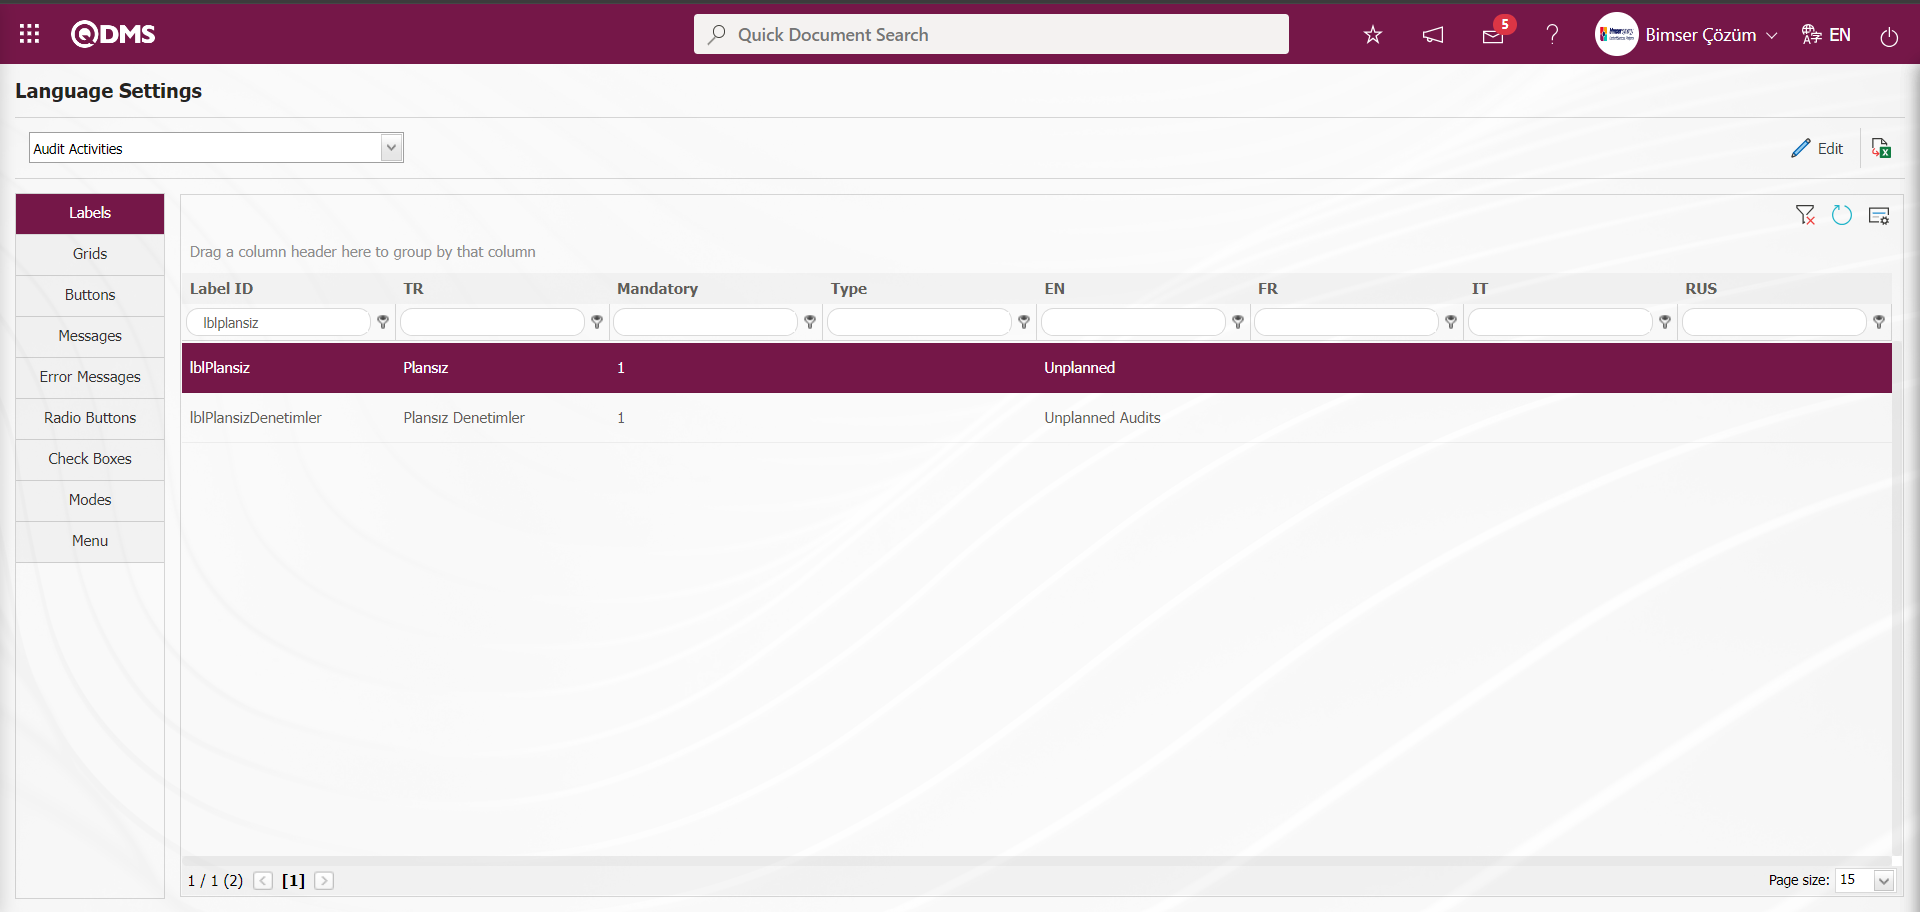
On the screen opened in the System Infrastructure Definitions/Audit Activities/Audit Definition menu, an unplanned audit is defined or a defined audit is updated and the “Unplanned?” option is activated. While Audit is selected on the Audit Definition screen, click the button.

Opened On the Audit Definition - Edit Record** screen, select the “Unplanned?” option for the audit to be included in the list of unplanned audits in the unplanned audit plan.
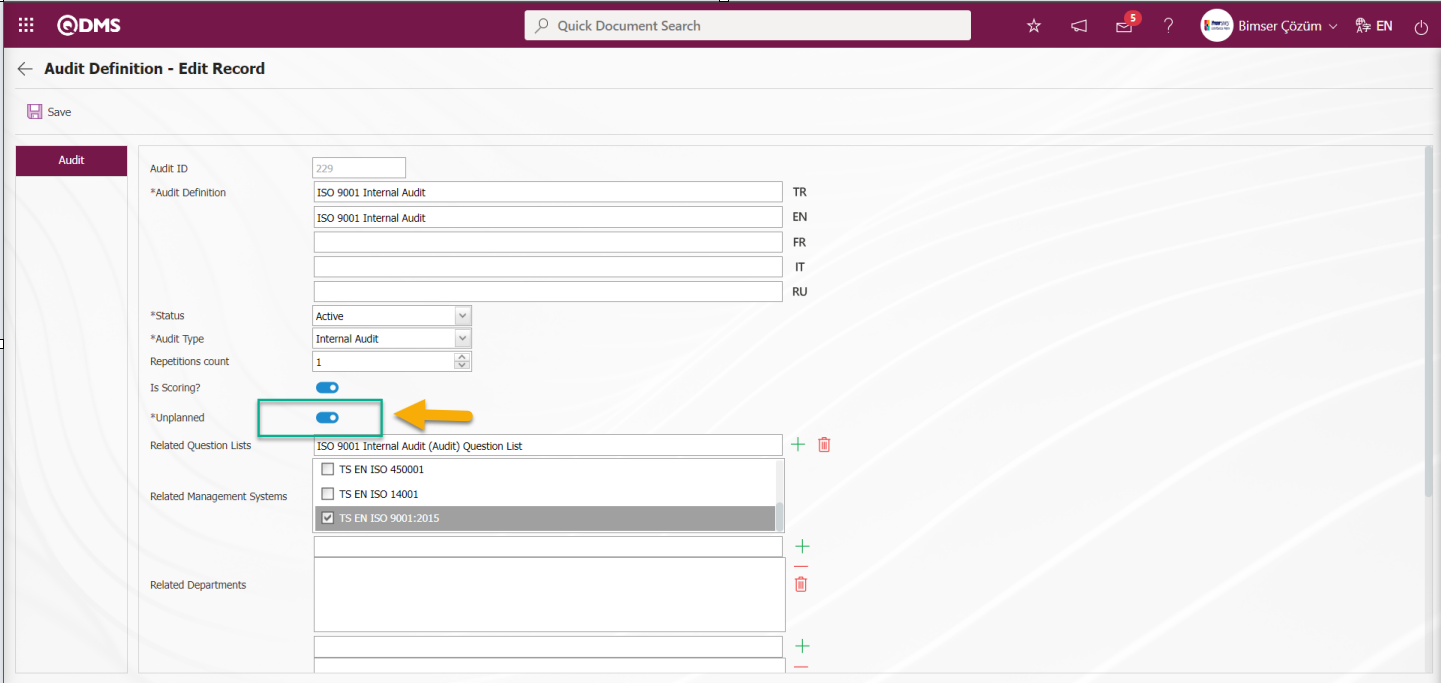
The required fields are edited on the relevant information and the audit definition record update process is defined by clicking the  button in the upper left corner of the screen.
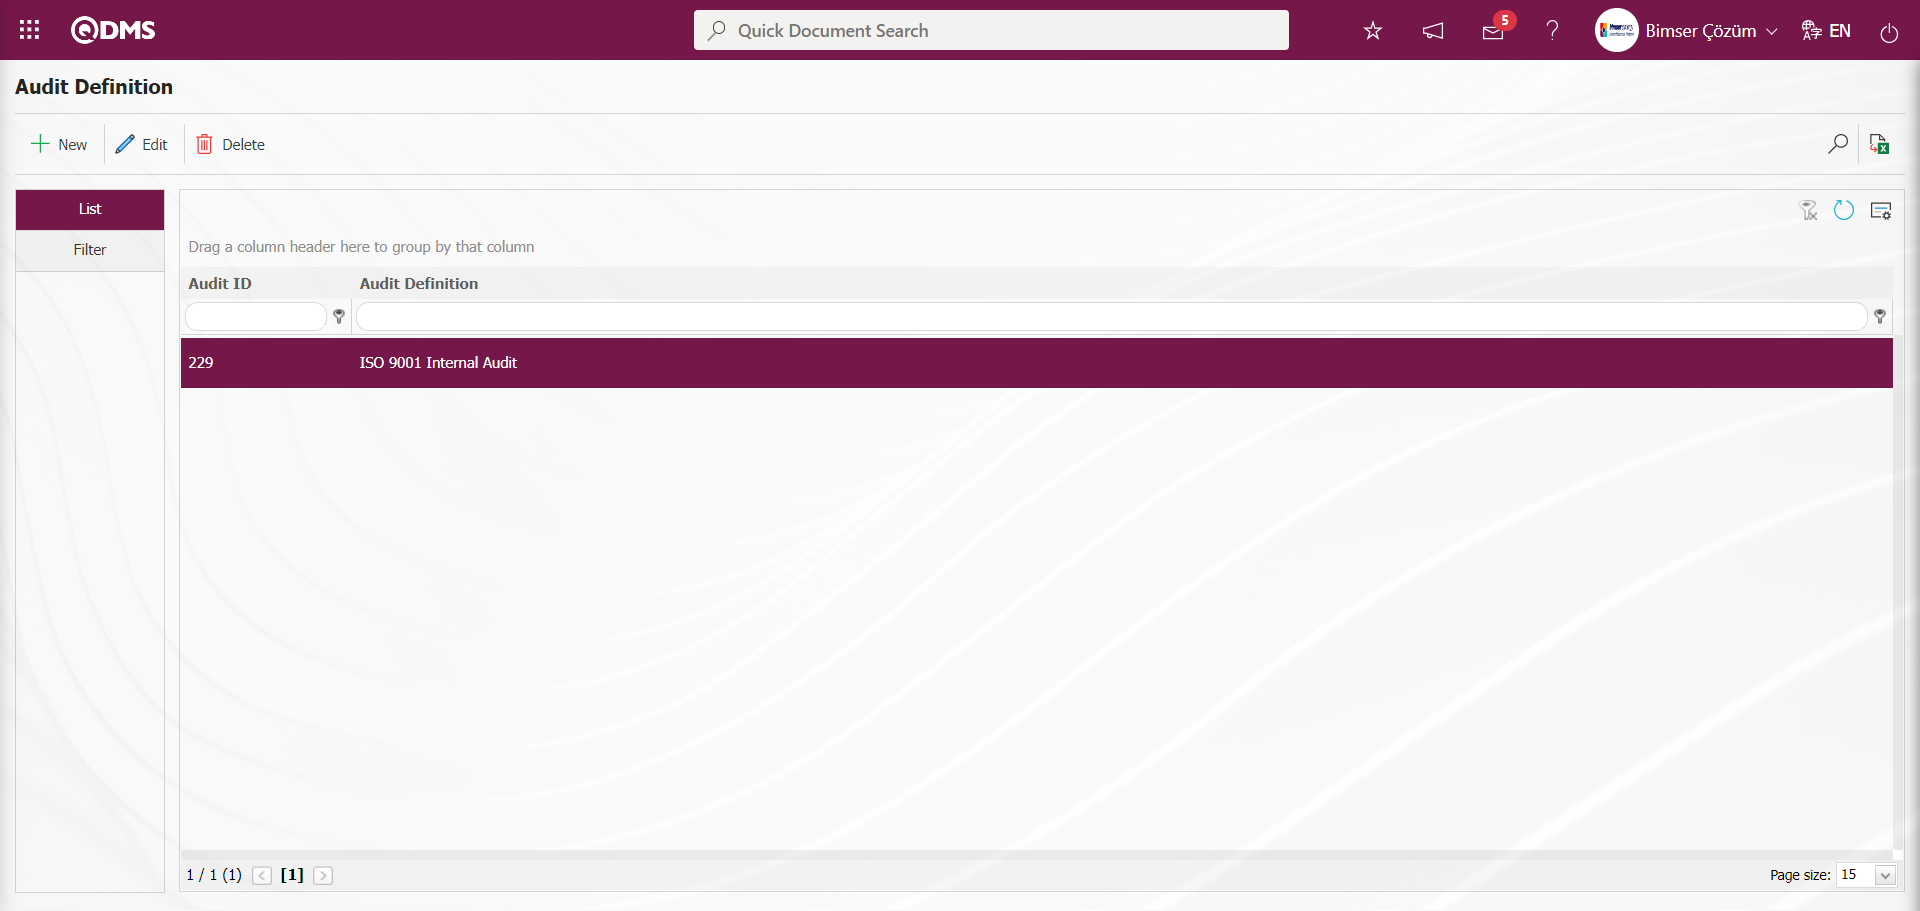
After unplanned audits are defined, they are listed in the Integrated Management System / Audit Activity / Unplanned Audits menu.
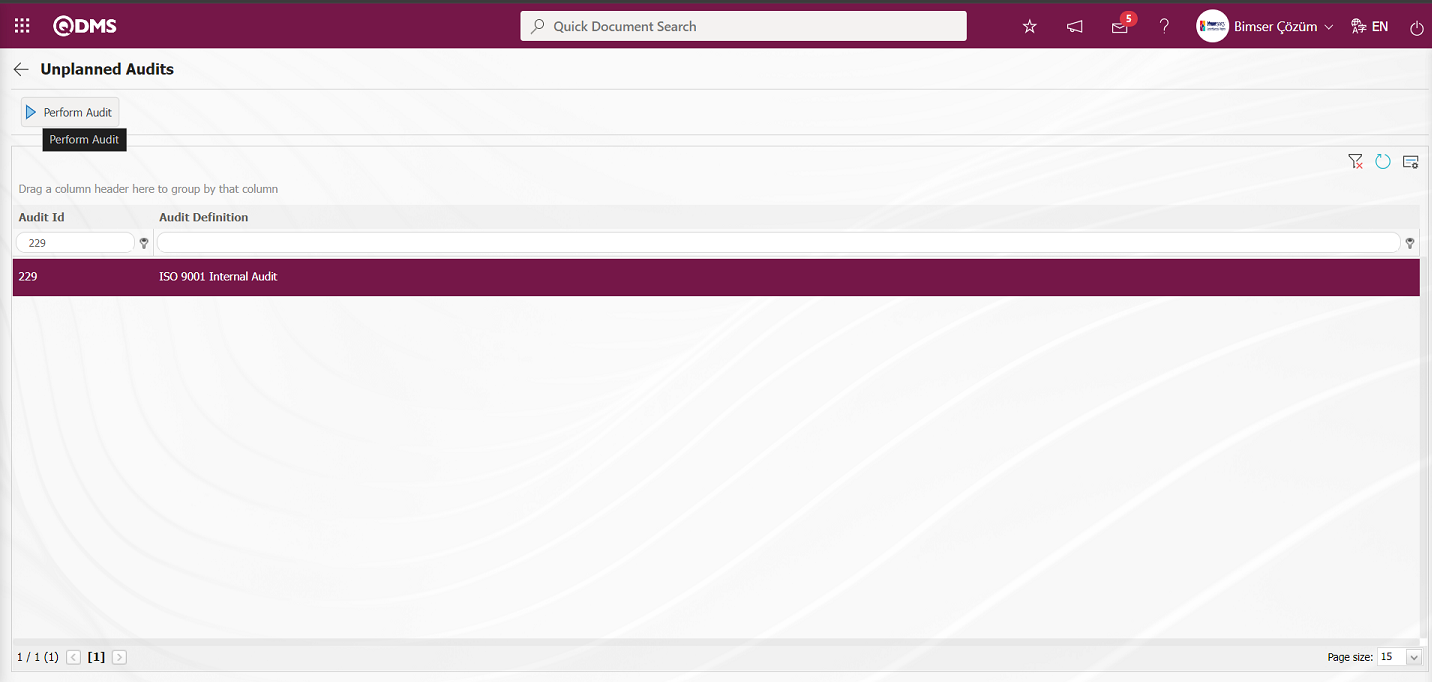
With the help of the buttons on the screen;
 : The selected Audit in the list is performed.
: The search criteria on the menu screens are used to clear the data remaining in the filter fields in the grid where the search operation is performed.
: The menu screen is restored to its default settings.
: User-based designing of the menu screen is done with the show-hide feature, that is, the hiding feature of the fields corresponding to the columns on the menu screens.
On the Unplanned Audits screen, while the Audit is selected in the list, click the button. On the screen that opens, the Answers, Findings, Other Information, Additional Files and Audit Report tabs are displayed. The process stages in these tabs are carried out in the same way as the planned audit realization stages. All stages and buttons functioning, CAPA opening and Action Planning process stages in answers and findings are carried out in the same way.
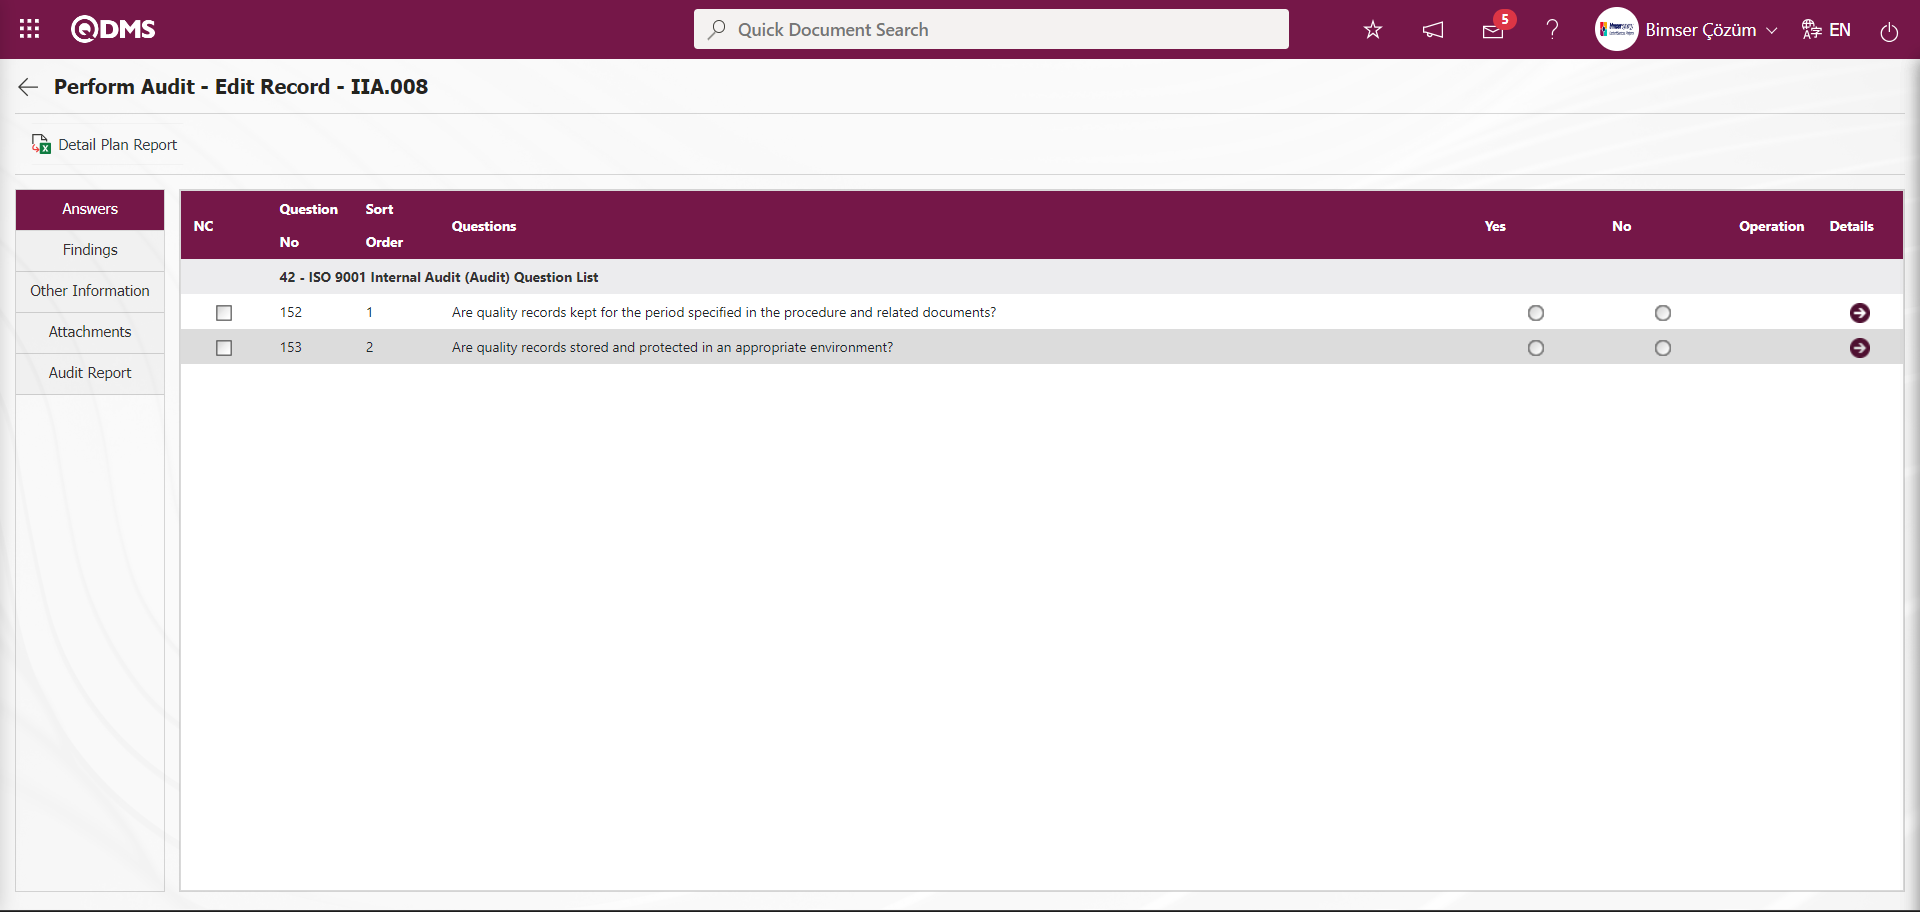
The only difference of the unplanned audit from the planned audit is to perform the relevant steps before the unplanned audit to be included in the Unplanned Audit list and to be included in the unplanned audit list in the Integrated Management System / Audit Activity / Unplanned Audits menu and to perform the realization process. By selecting the “Unplanned?” option on the Audit Identification screen, it is to ensure that it is included in the unplanned audit plan defined in parameter 100 in the Audit Activities module parameters.
6.2.4. Reports
Menu Name: Integrated Management System/ Audit Activity/ Reports
This is the menu where reports related to the Audit Activity module are displayed.
6.2.4.1. Audit Score Report
Menu Name: Integrated Management System/ Audit Activities/ Reports/ Audit Score Report
It is a report that shows the scored audits and the score values of these audits as a table. In this report, the total score value and percentage success rate of the audit can be seen. On the Audit Score Report screen, two tabs, Filter and List tabs, appear. By entering data in the search criteria fields in the filter tab and clicking the  (Search) button, the relevant data is displayed in the list in the list tab.

With the help of the buttons on the screen;
: Records are searched by filtering.
: Data is transferred to Excel.
On the Audit Score Report screen, the Audit Score Report in Excel format is displayed with the  (Export to Excel) button.
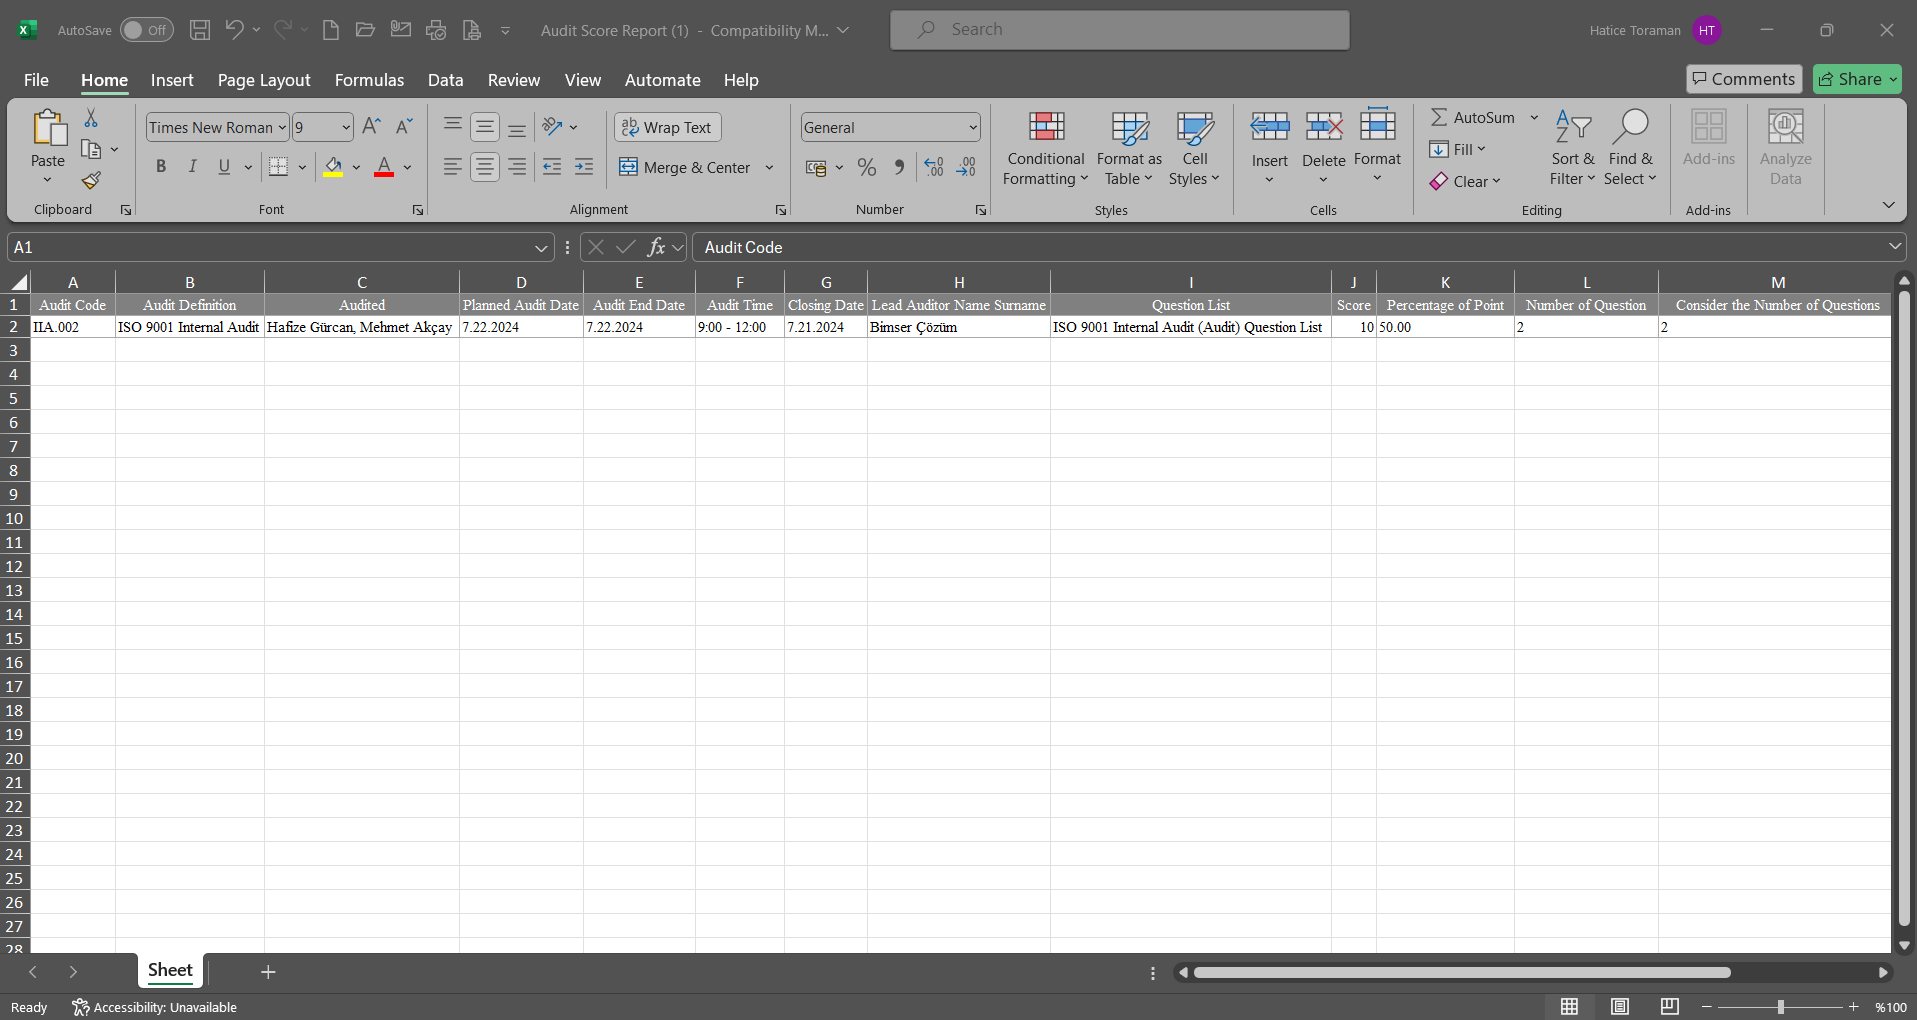
6.2.4.2. Audit Points Report By Questions
Menu Name: Integrated Management System/ Audit Activities/ Reports/ Audit Points Report By Questions
It is a report in which the questions used in different audits; how many points they scored in each audit and the overall average score are displayed. On the Audit Points Report By Questions screen, data is entered in the search criteria fields and filtering is done.
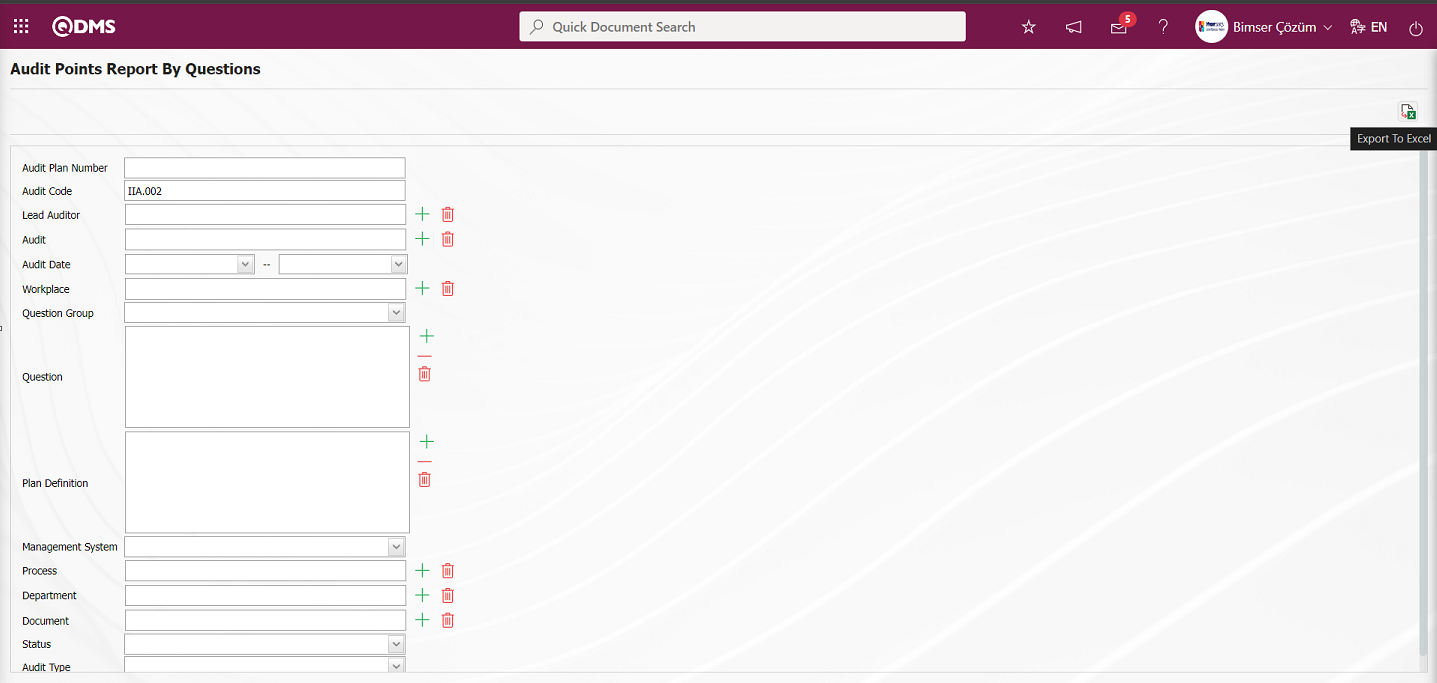
With the help of the buttons on the screen;
: Data is transferred to Excel.
On the Audit Points Report By Questions screen, the Audit Points Report By Questions in Excel format is displayed with the (Export to Excel) button.
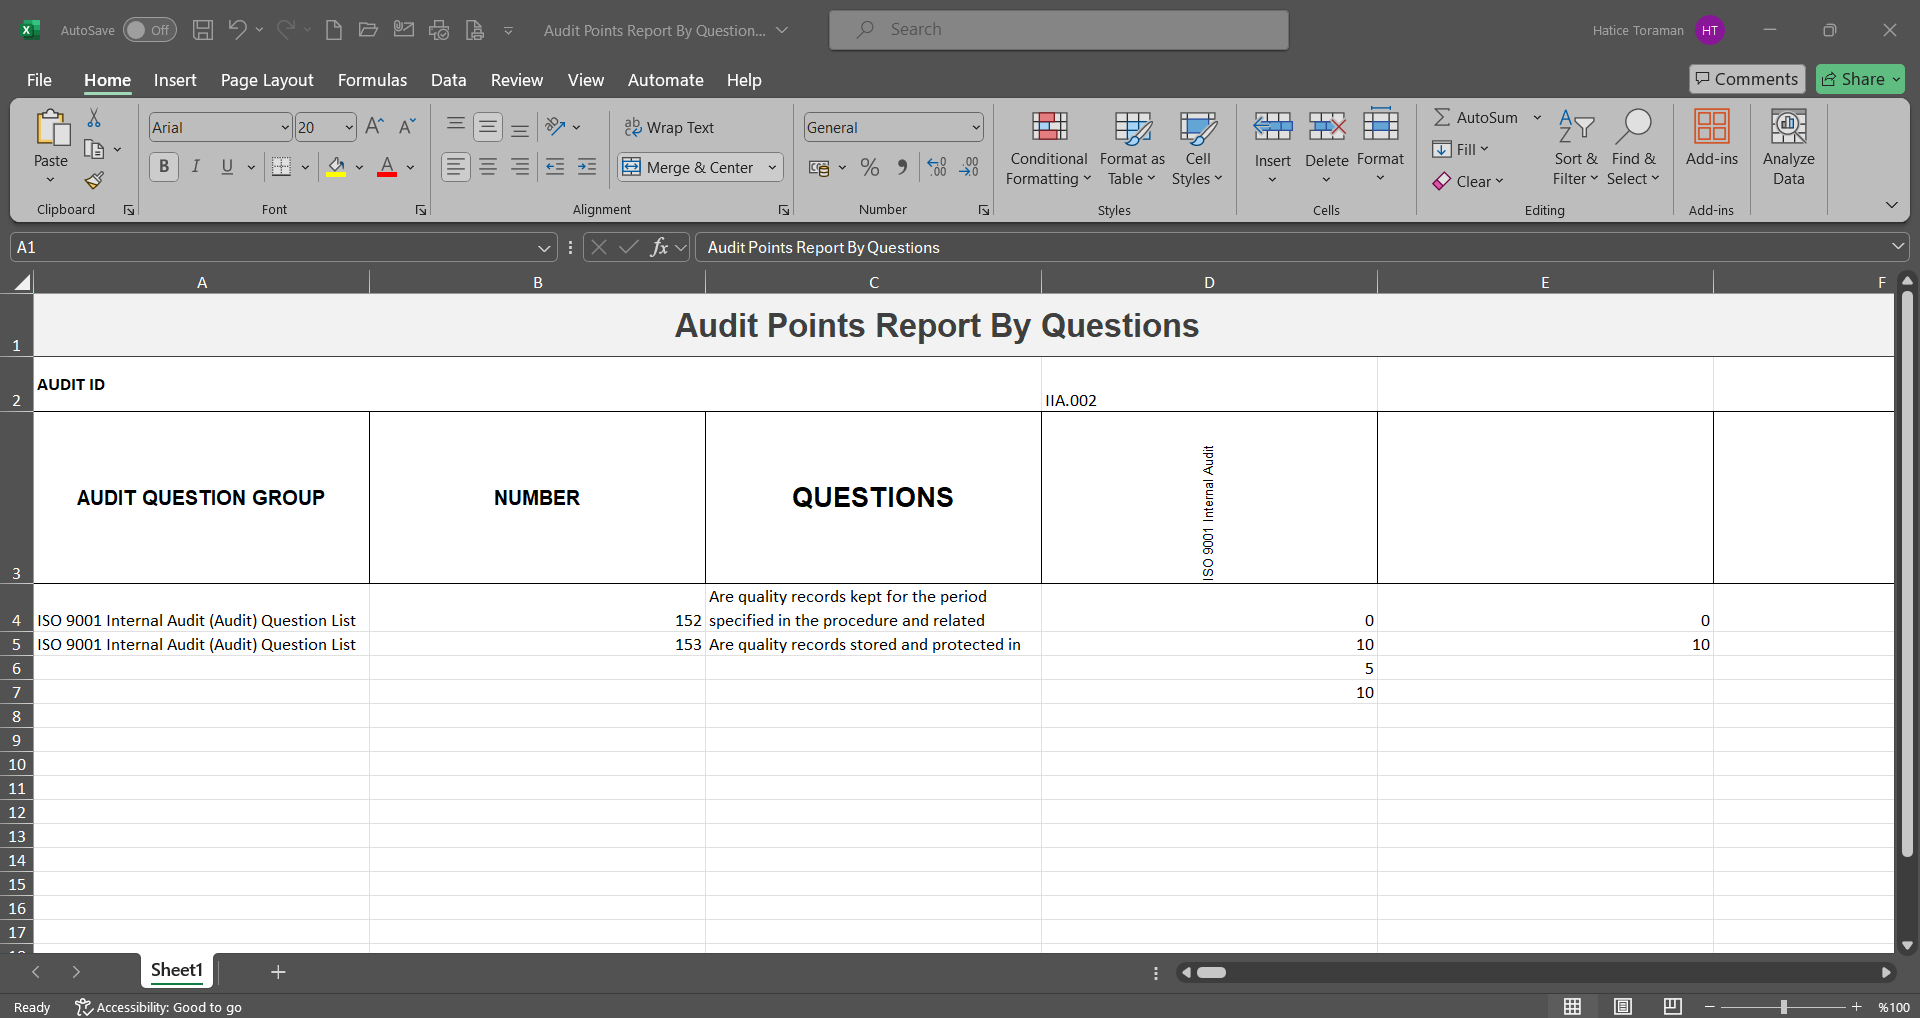
6.2.4.3. Audit Options Report By Questions
Menu Name: Integrated Management System/ Audit Activities/ Reports/ Audit Options Report By Questions
It allows the answers given to the questions to be compared on the basis of audits, and in this report, it is the menu where you can see which options of the related question are selected in which audit. On the Audit Options Report By Questions screen, the filter search criteria fields are filtered by entering data.

With the help of the buttons on the screen;
: Data is transferred to Excel.
Audit Options Report By Questions ekranında (Excele aktar) butonu ile Excel formatındaAudit Options Report By Questions görüntülenir.
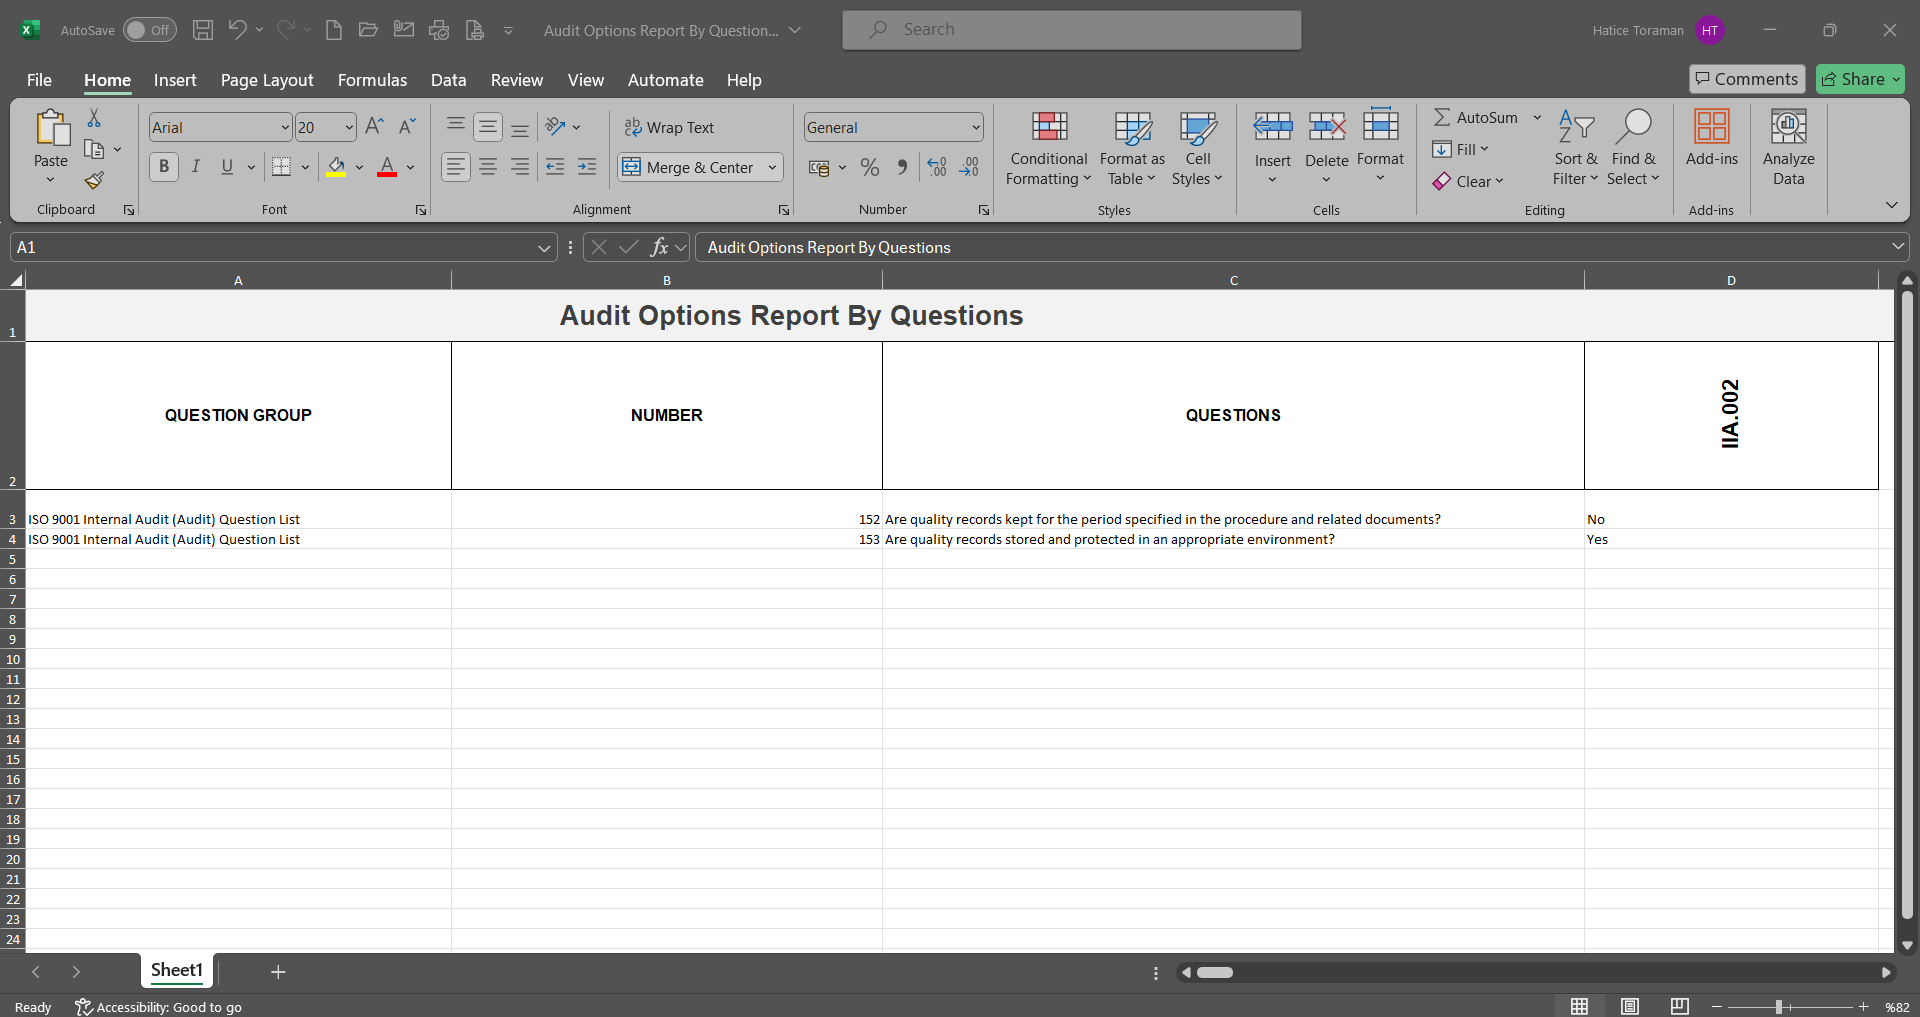
6.2.4.4. Findings by Audit
Menu Name: Integrated Management System/ Audit Activities/ Reports/ Findings by Audit
In this report, audits are included in the matrix by the number of finding types. From which audit, which types of findings are opened and the total number of audits at the end of the year are shown on the screen. Audit Findings** report displays two tabs, List and Filter tabs. By entering data in the fields with search criteria in the filter tab and clicking the  (Search) button, the records are listed according to the criteria in the list tab.
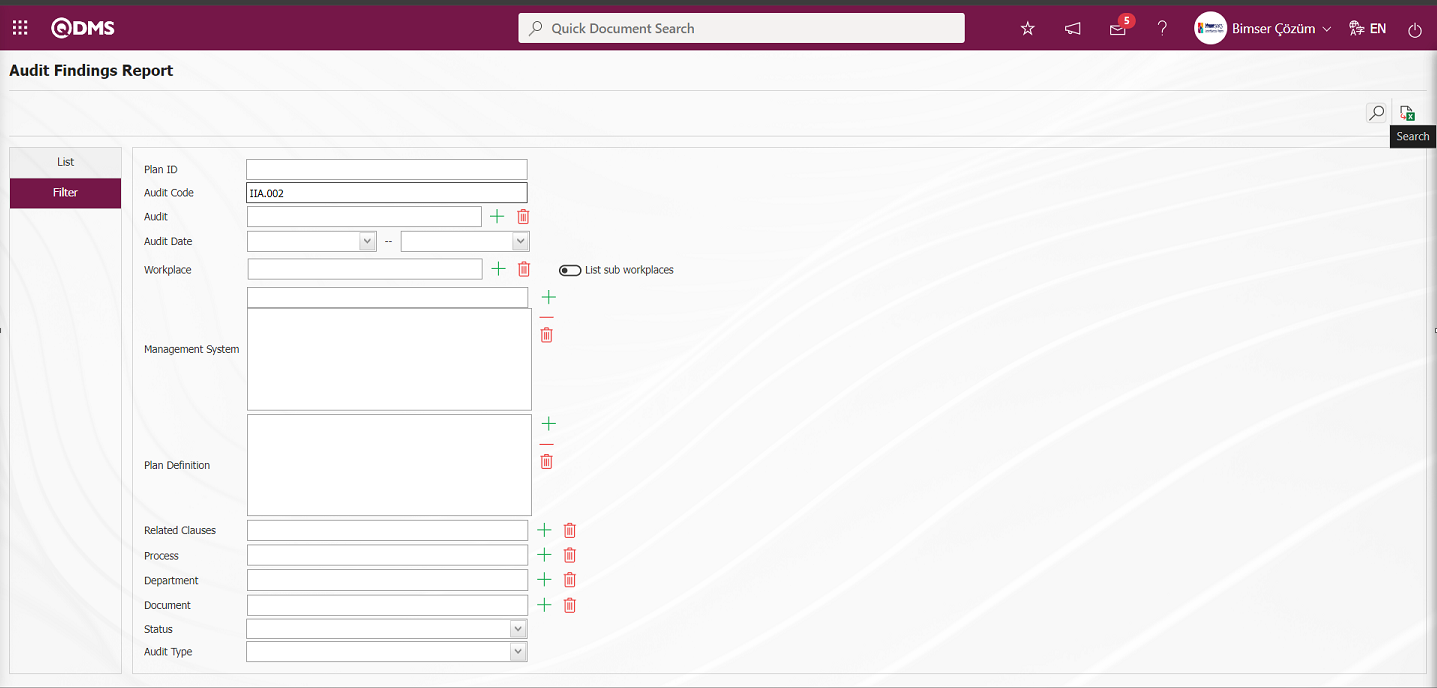
With the help of the buttons on the screen;
: Records are searched by filtering.
: Data is transferred to Excel.
In the Filter tab, enter data in the search criteria fields and click the  (Search) button to display the relevant records in the list tab according to the search criteria.
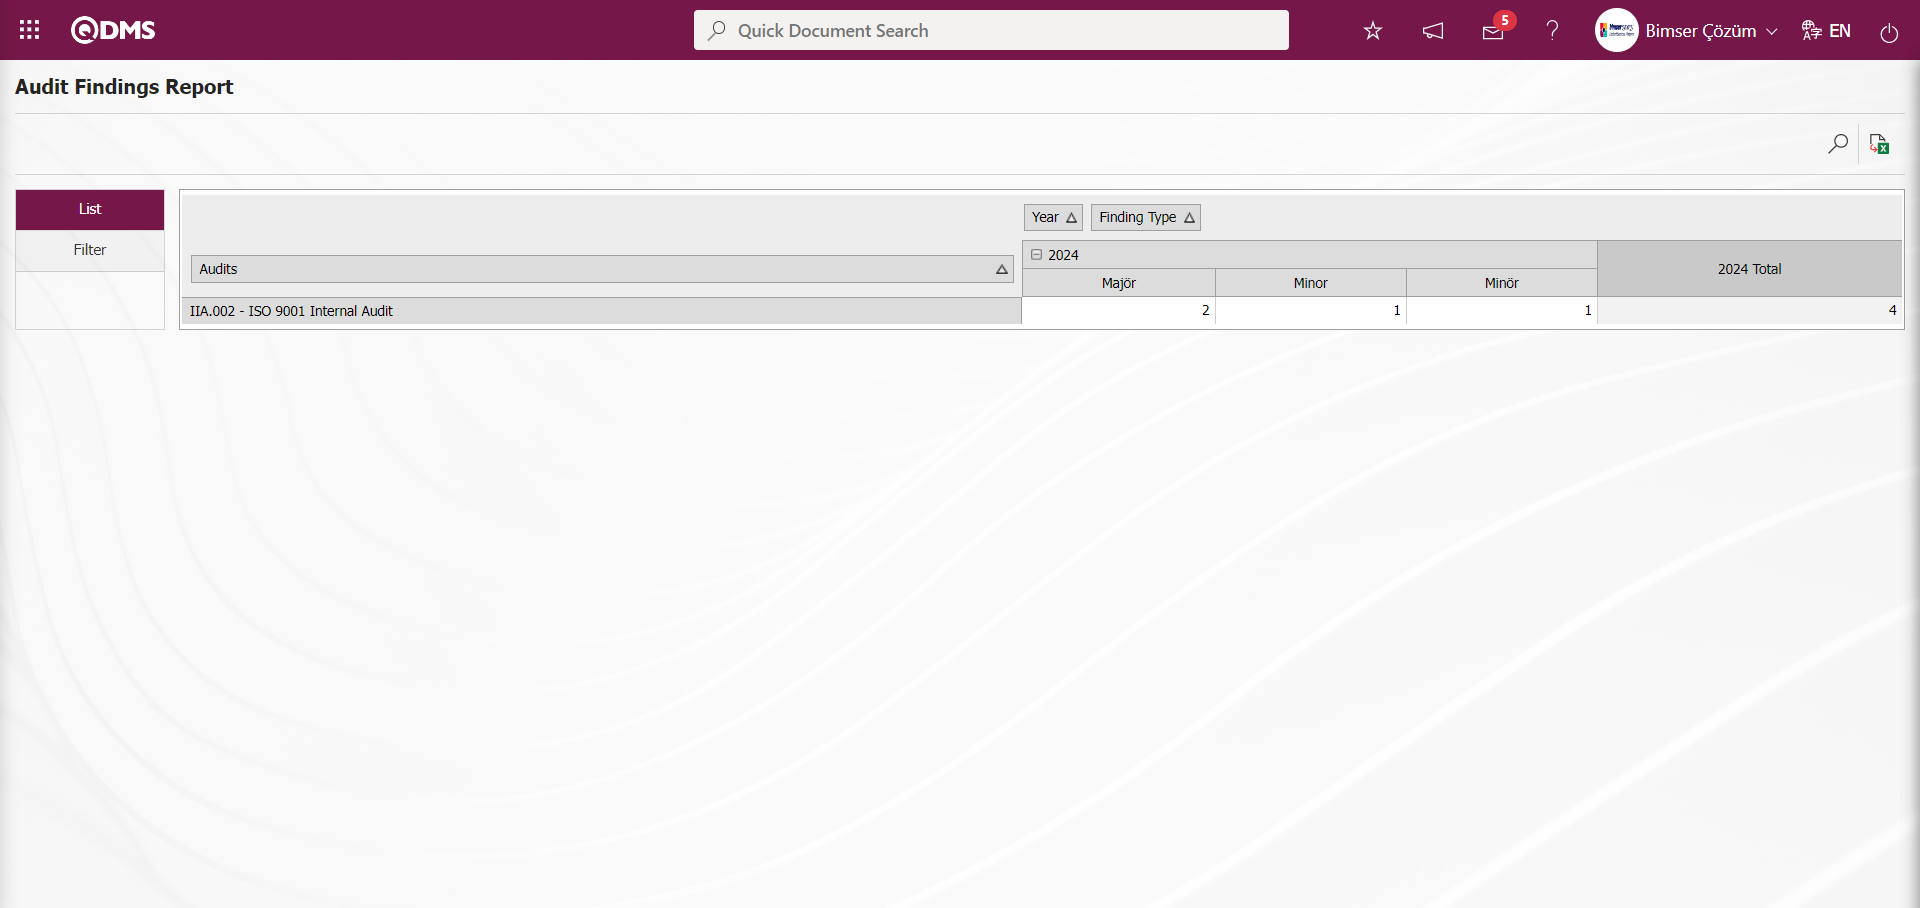
Click the  (Export to Excel) button on the Audit Findings Report screen.
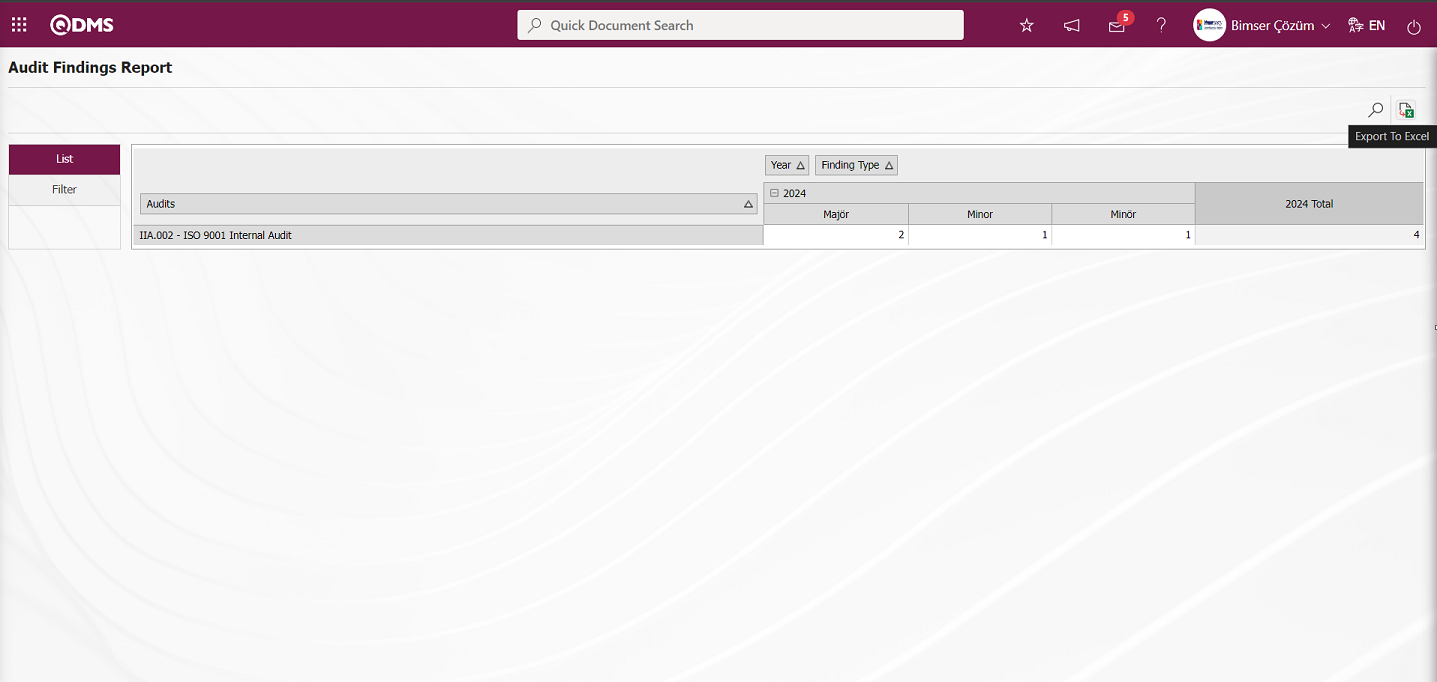
Audit Findings Report in Excel format is displayed.
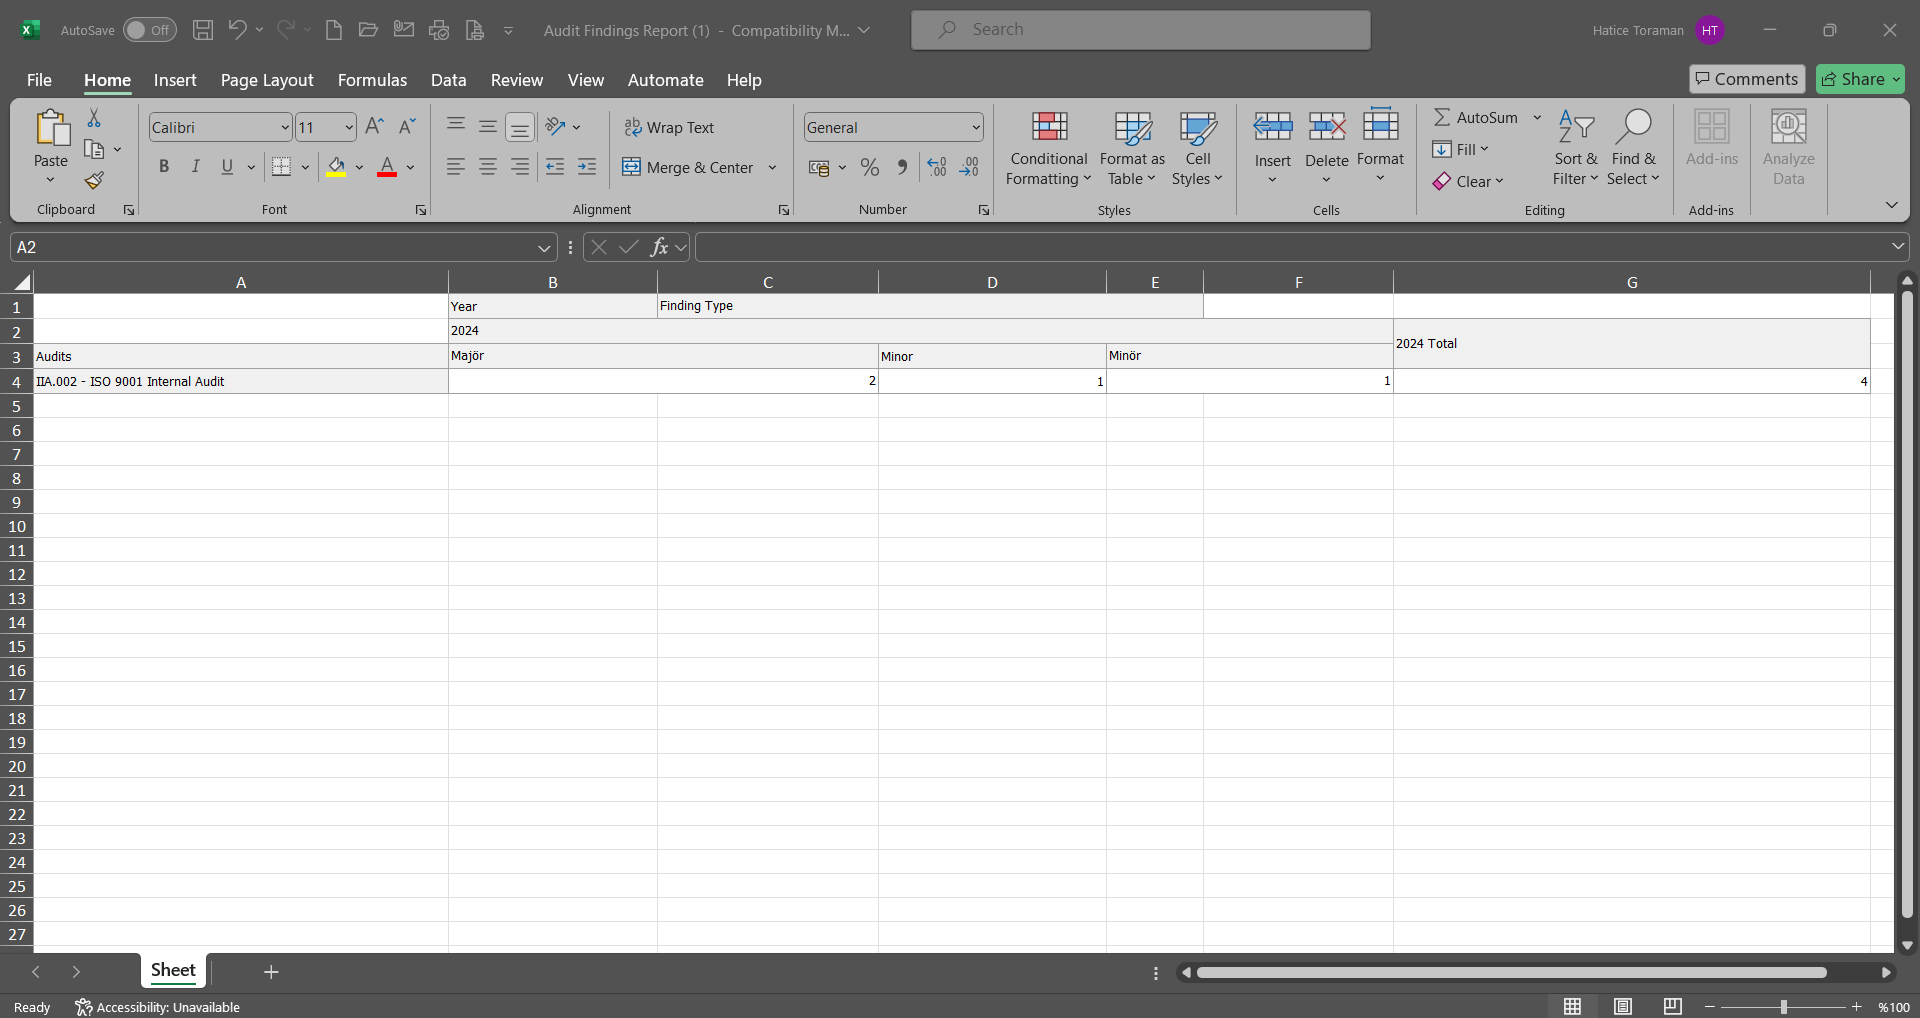
6.2.4.5. E-Card Audit Planing Report
Menu Name: Integrated Management System/ Audit Activities/ Reports/ E-Card Audit Planning Report
It is a report that gives the audits that the auditors are assigned on a monthly basis as a chart. With this report, the workload of the auditors can be easily viewed. There are two tabs on the Monthly Report screen: Filter and List tabs. In the Filter tab, the report timeline report is obtained according to the options such as Department, Audit Plan, Workplace, User Group, Personnel and Process in the Search type field.
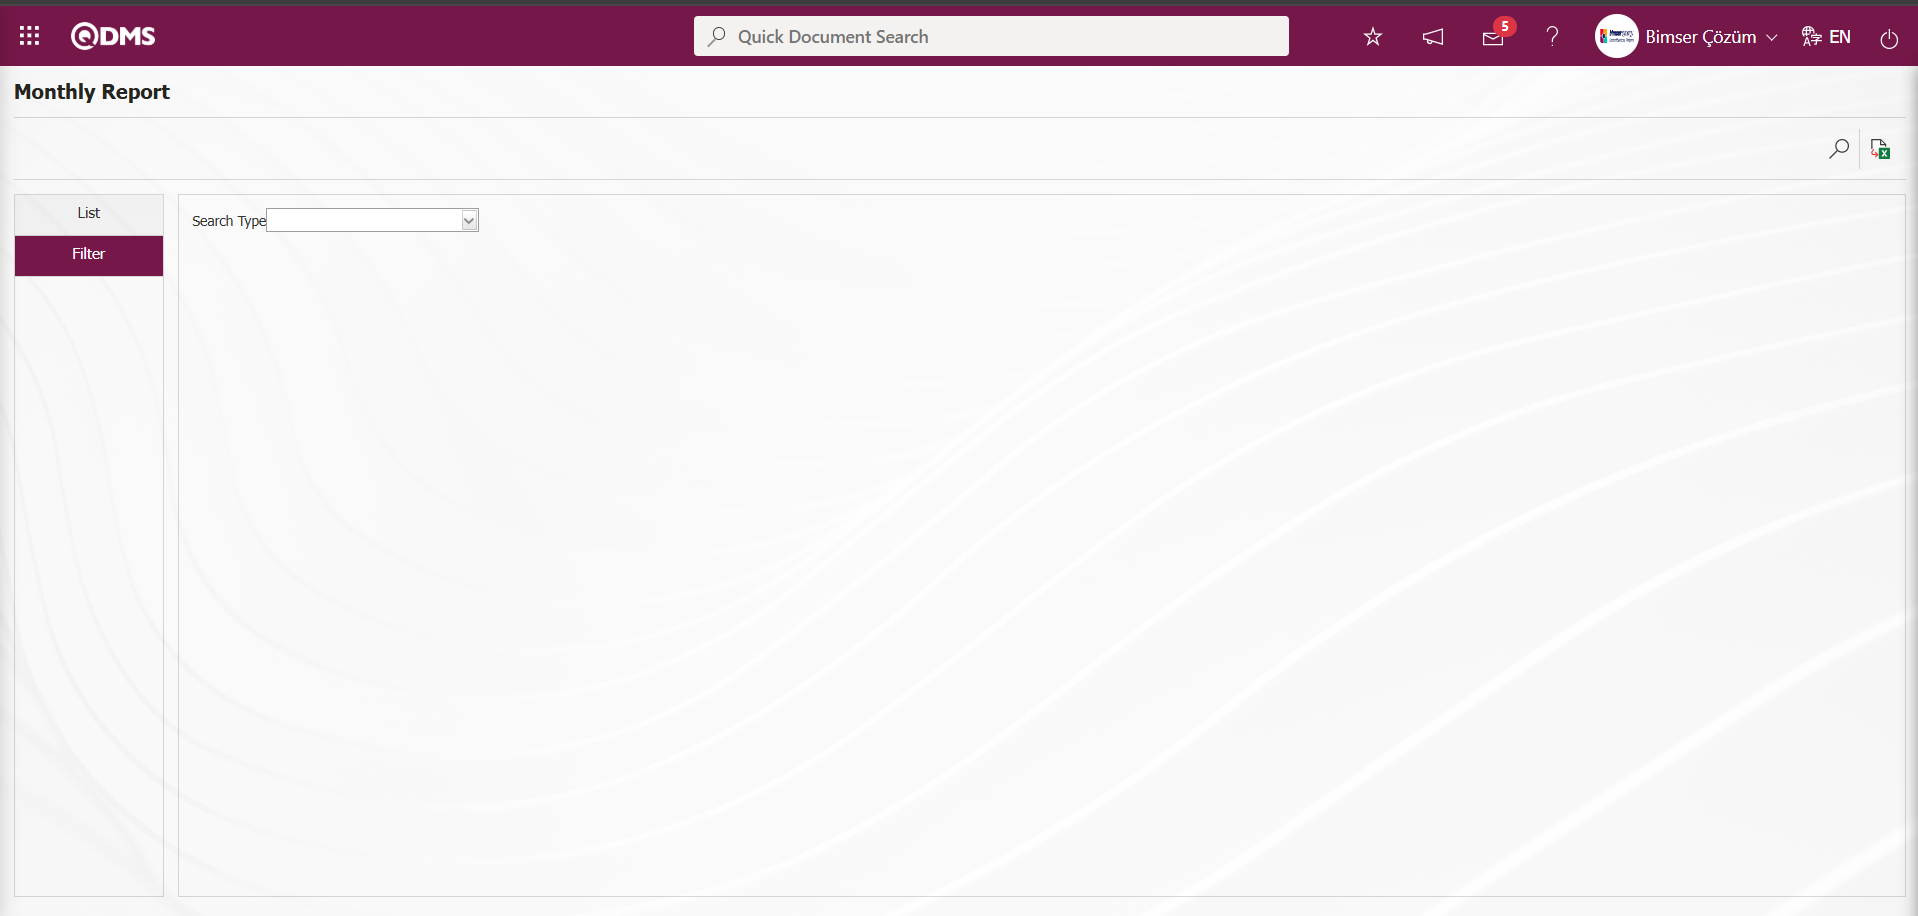
With the help of the buttons on the screen;
: Records are searched by filtering.
: Data is transferred to Excel.
When the Search Type Audit Plan is selected, the relevant Audit Plan is selected in the Audit Plan list defined in the system by clicking the  (Select) button in the field displayed at the bottom and the
  (Search) button is clicked to get the timesheet report on the basis of the Audit Plan.
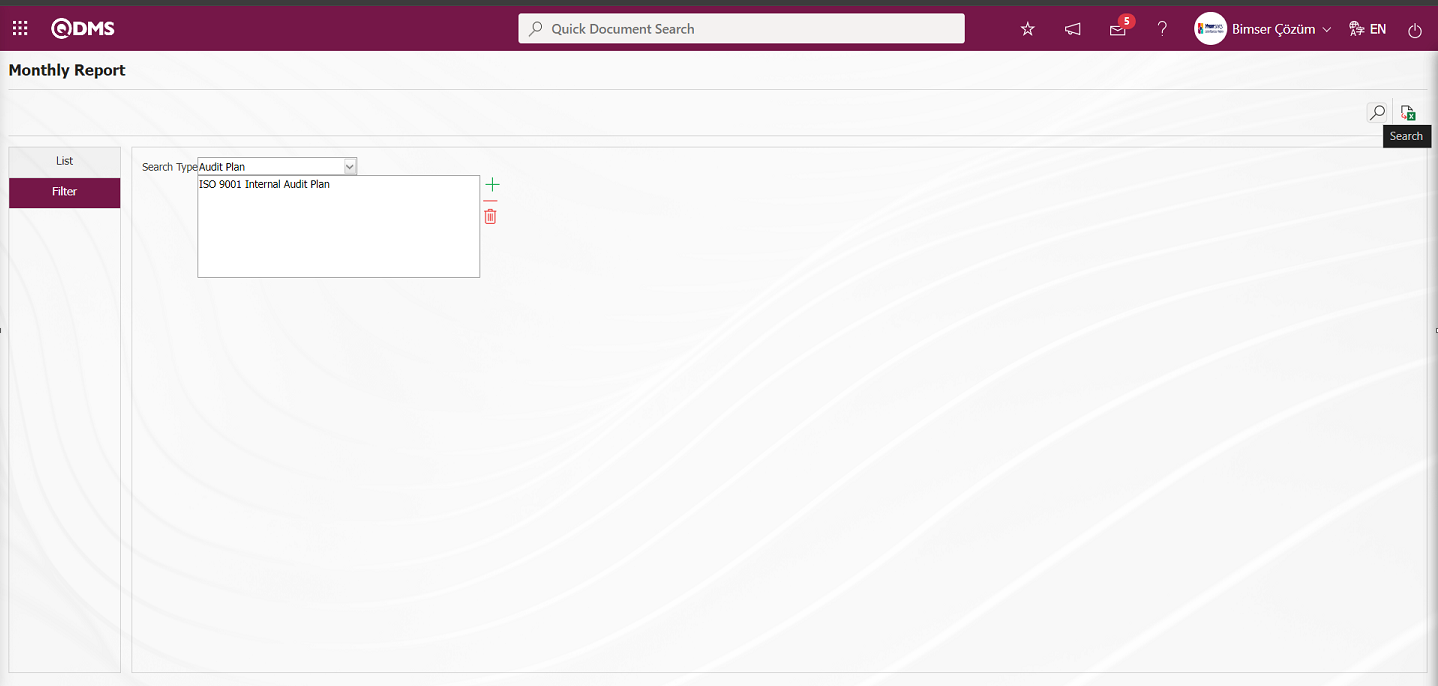
In the Audit Activities module, the colors in the report indicate the status of the audits. In the report in the Audit Activities module, the audits in red in the report refer to overdue audits, the audits shown in blue refer to ongoing audits and the audits shown in green refer to incomplete audits with closed status.
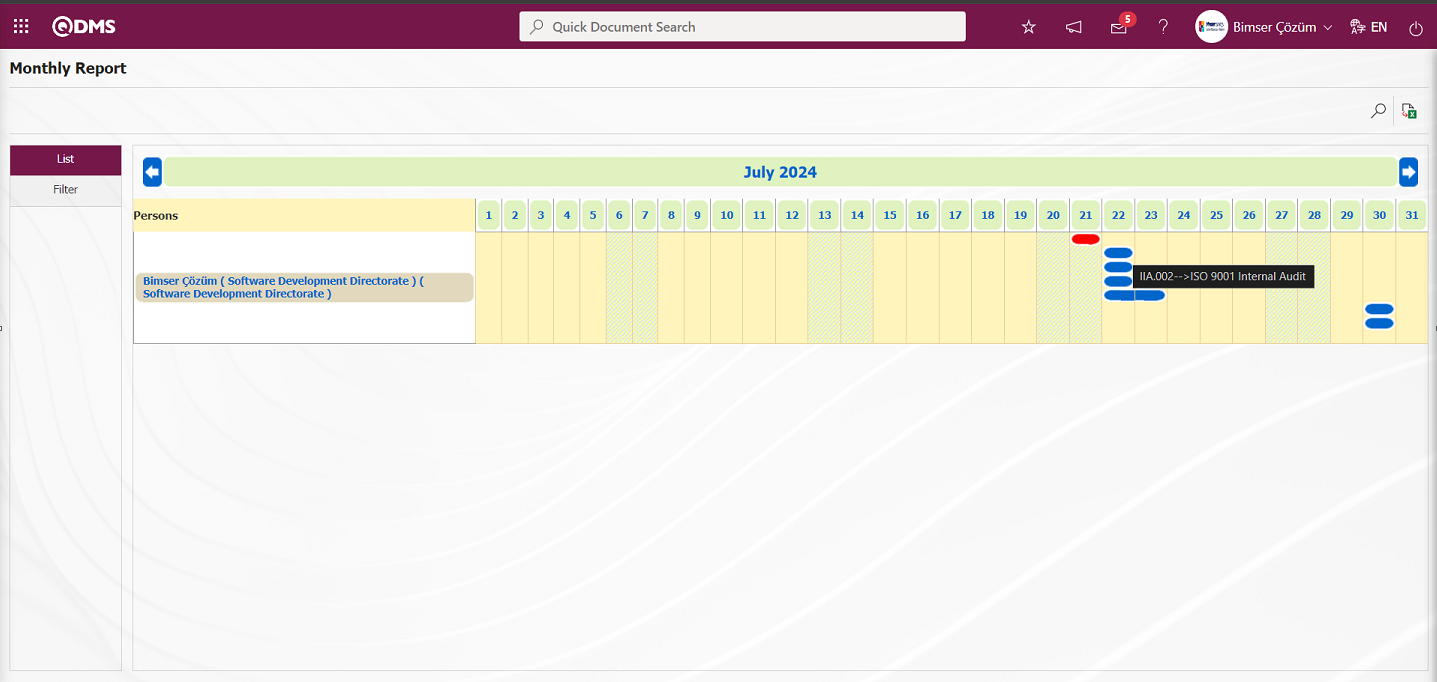
Click the  (Export to Excel) button on the Monthly Report screen.
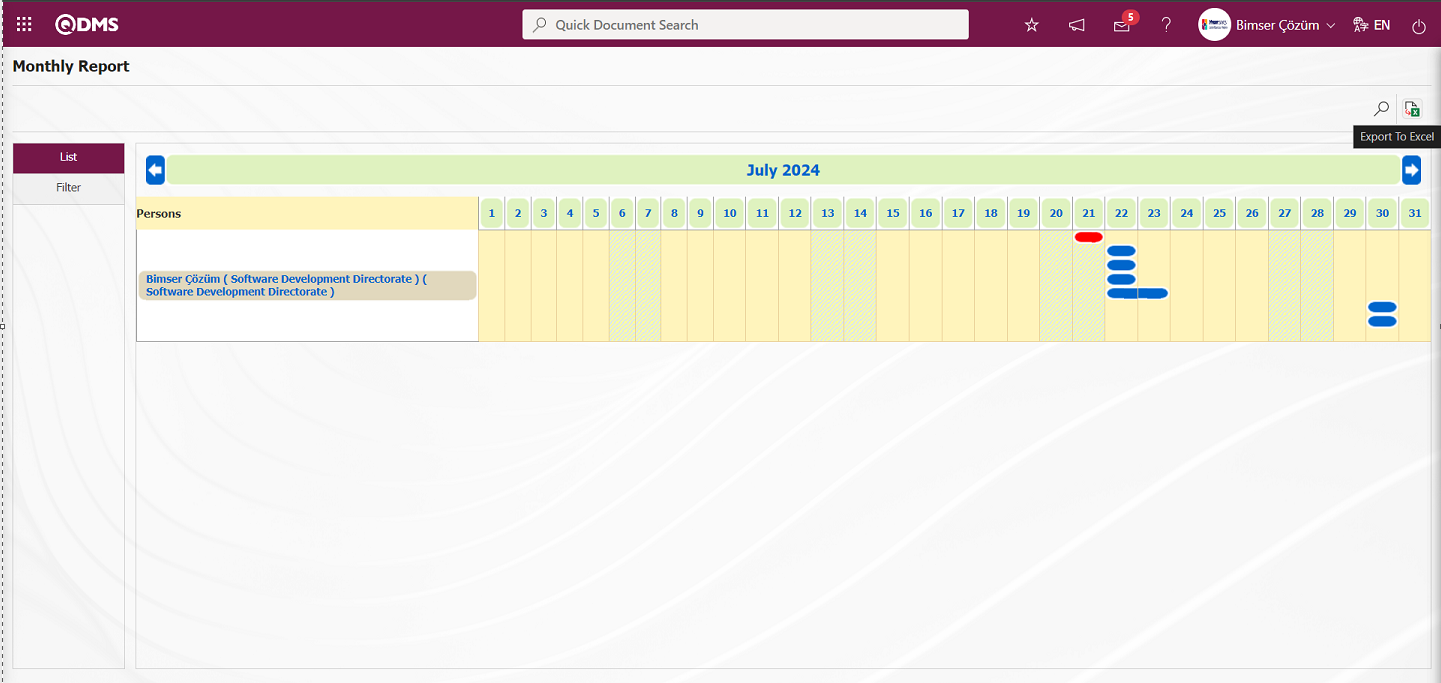
The E-Card Audit Planning Report in Excel format is displayed.
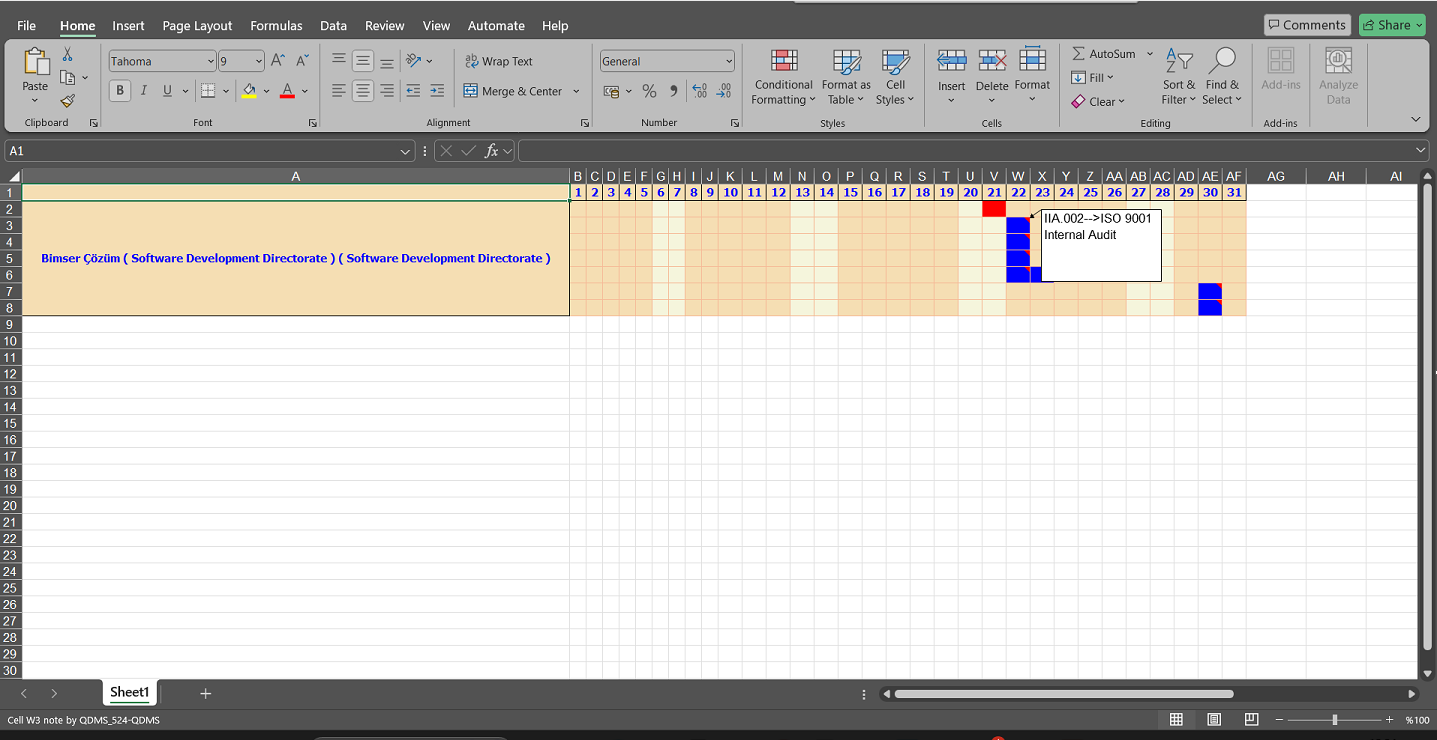
6.2.4.6. E-card audit planning report by the department based
Menu Name: Integrated Management System/ Audit Activities/ Reports/ E-card audit planning report by the department based
E-card audit planning report by the department based Report is the menu that gives the report.E-card audit planning report by the department based Report has two tabs, List and Filter tabs. In the Filter tab, click the  (Add) button in the Related Departments field and select the Department to be reported in the Department list defined in the system and click the (Search) button to display the report in the Audit List tab.

With the help of the buttons on the screen;
: Records are searched by filtering.
: Data is transferred to Excel.
In the Audit Activities module, audits in red in the report indicate overdue audits, audits in blue indicate ongoing audits and The audits shown in green color represent the audits that have not been completed and whose status is closed.
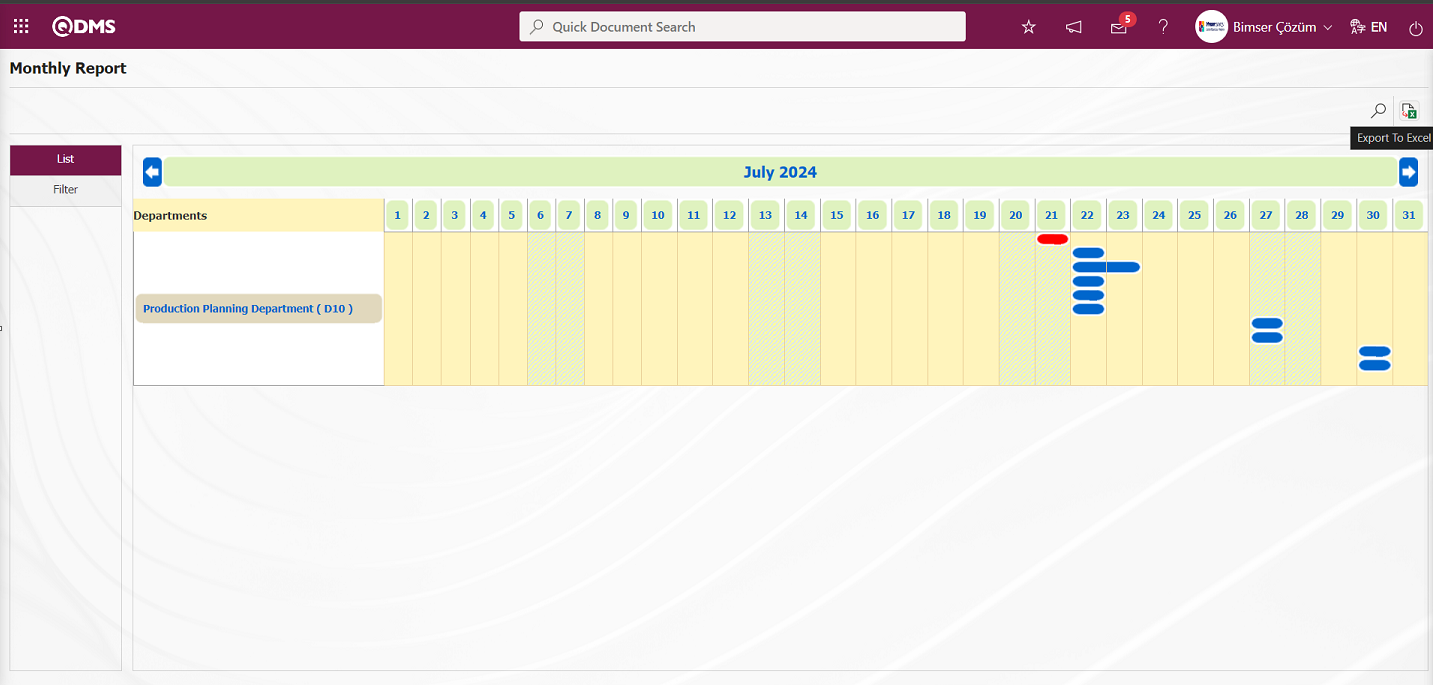
E-card audit planning report by the department based Report in Excel format is displayed with the (Export to Excel) button on the Monthly Report screen.
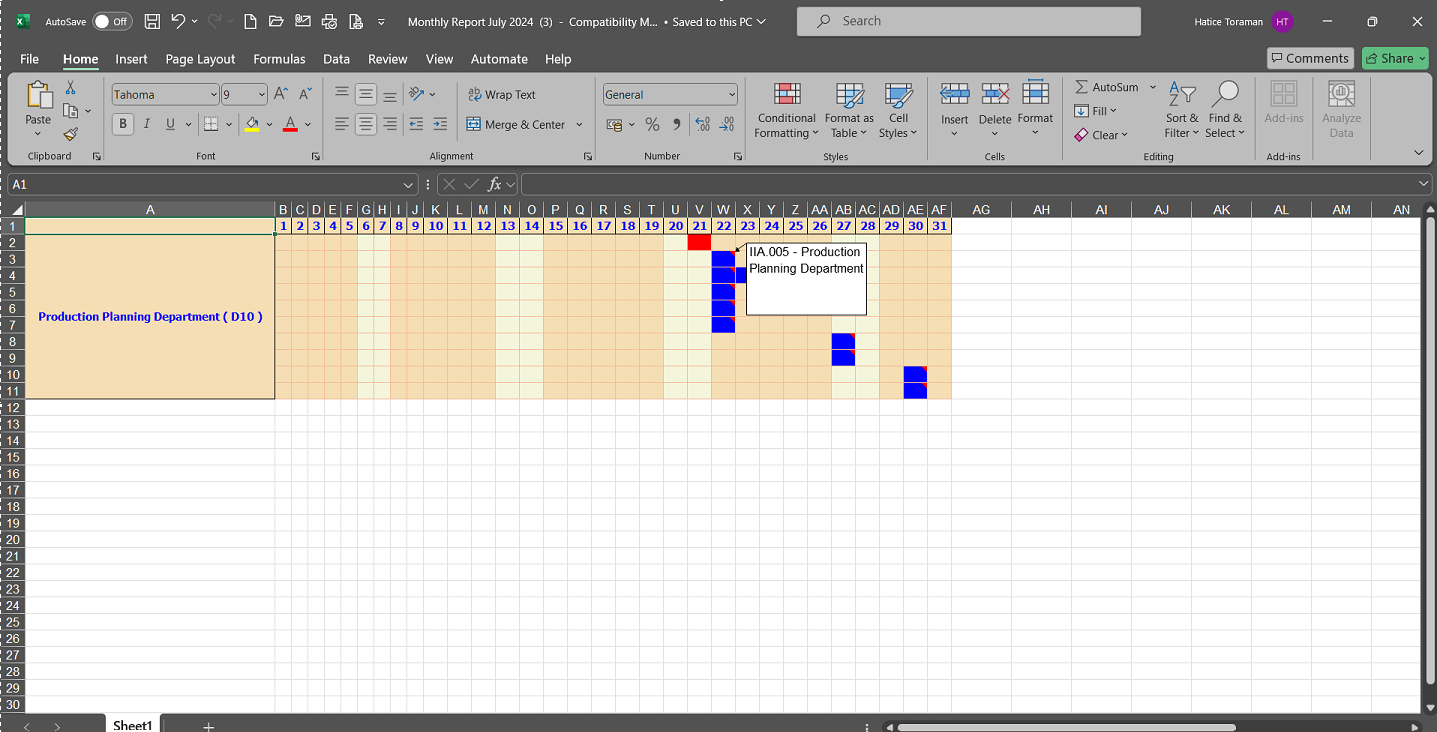
6.2.4.7. Question Option Report
Menu Name: Integrated Management System/ Audit Activities/ Reports/ Question Option Report
It is the menu that lists the number of times the options of the questions are selected in the audits.Question Option Report screen has two tabs, list and filter tab.

With the help of the buttons on the screen;
: Records are searched by filtering.
: Data is transferred to Excel.
Enter data in the fields with search criteria in the filter tab and click the (Search) button to list the relevant records in the list tab.
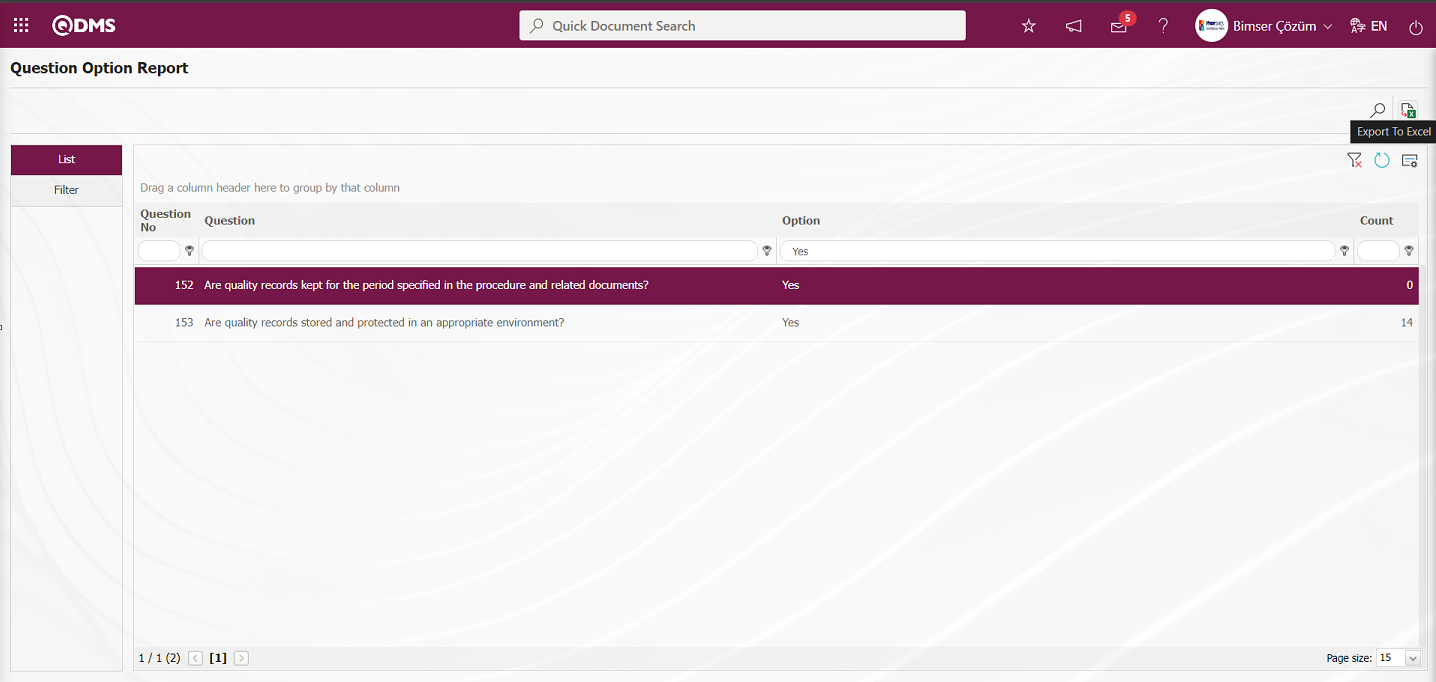
The Question Option Report screen displays the Question Option Report in Excel format with the (Export to Excel) button.
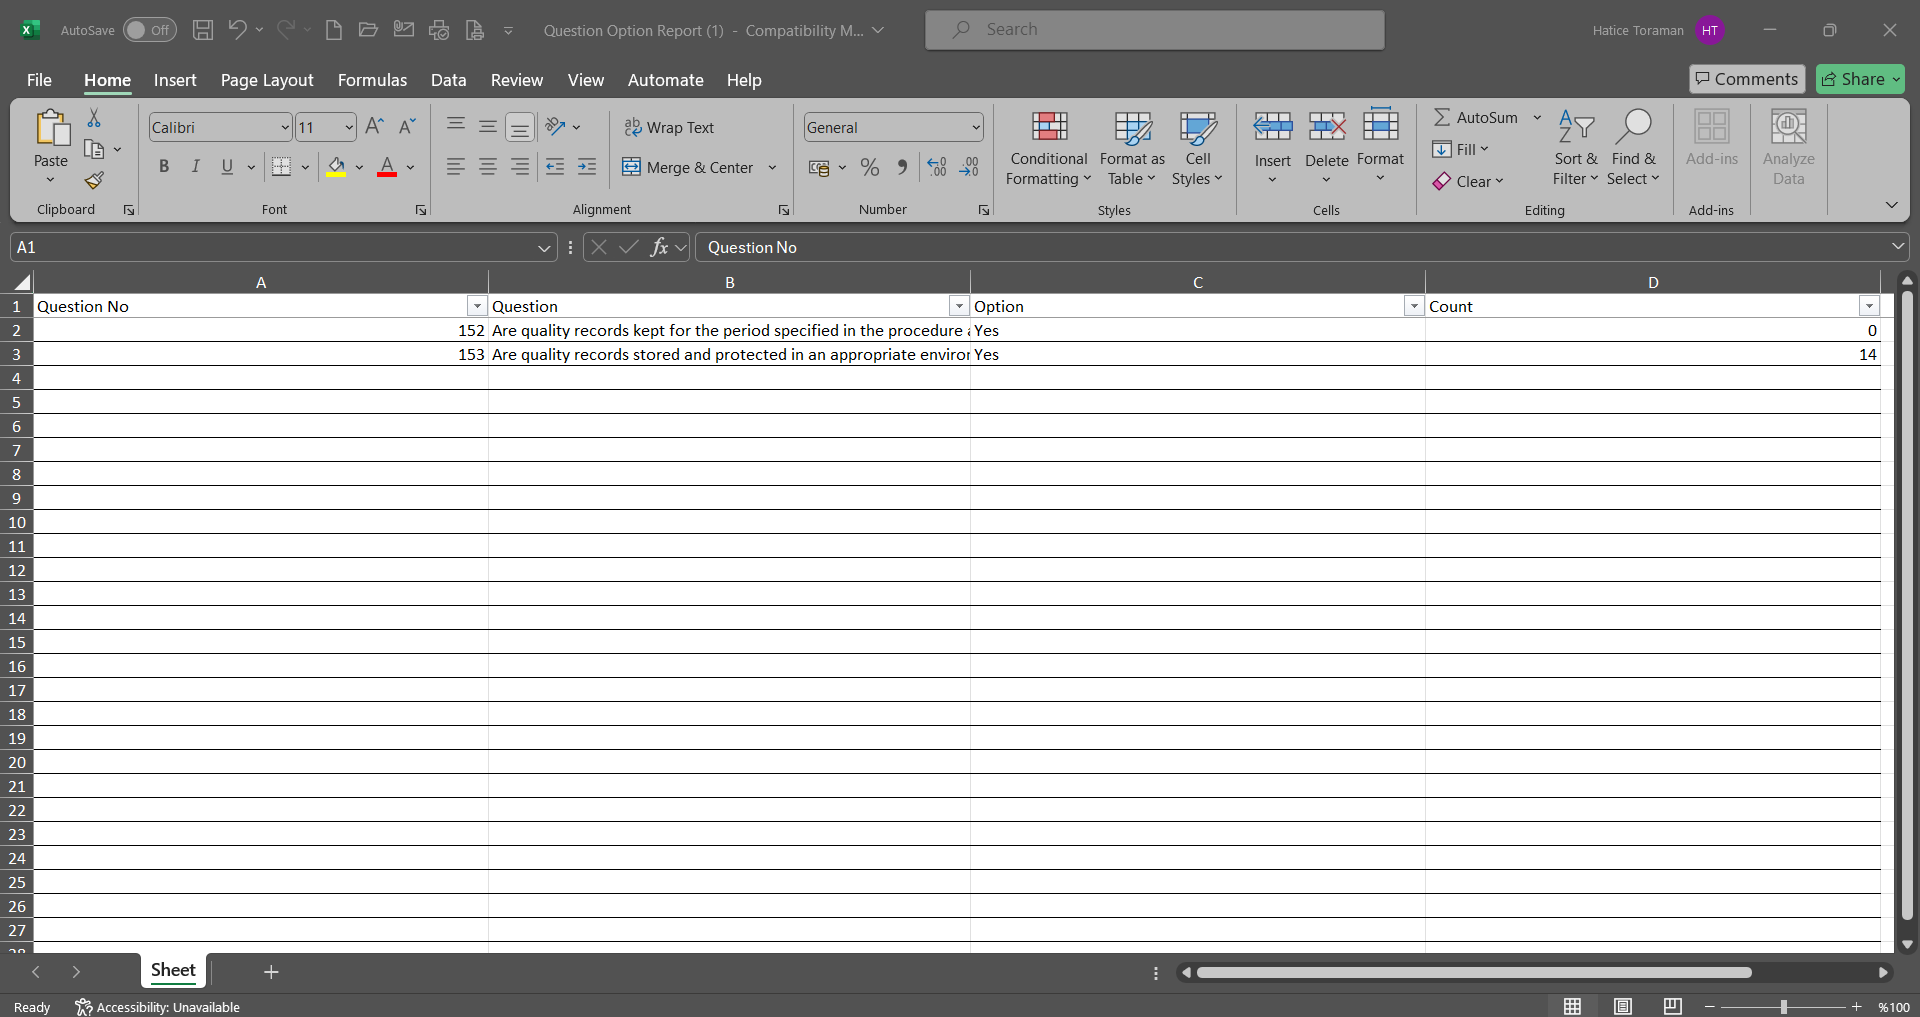
6.2.4.8. Audit History Records
Menu Name: Integrated Management System/ Audit Activities/ Reports/ Audit History Records
It is a report that collectively shows the inspections defined under an inspection plan. Two tabs, List and Filter, appear on the Detail History screen. In the Filter tab, data is entered in the fields with search criteria and the records that come according to the search criteria are displayed in the list tab by clicking the (Search) button. By selecting the relevant record in the list tab, the process of obtaining the relevant Audit report is also done.
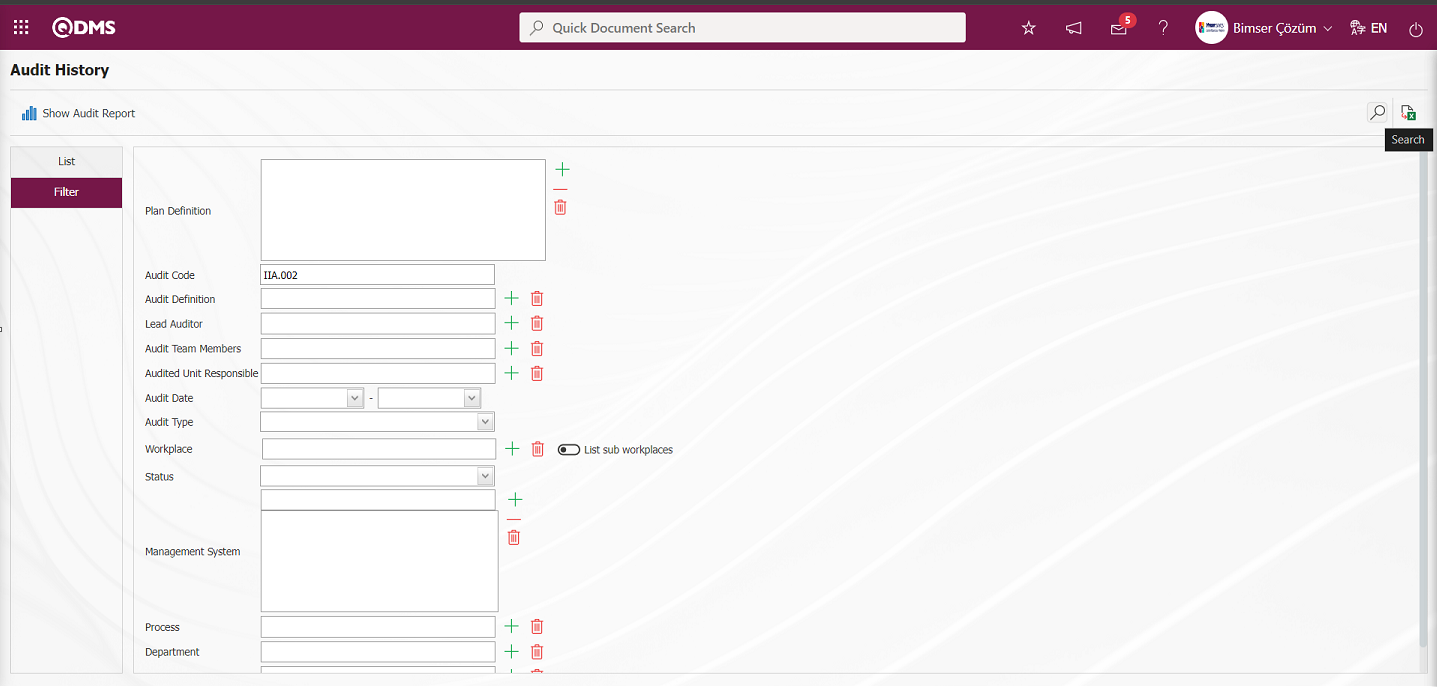
With the help of the buttons on the screen;
 : Shows the audit report.
: Records are searched by filtering.
: Data is transferred to Excel.
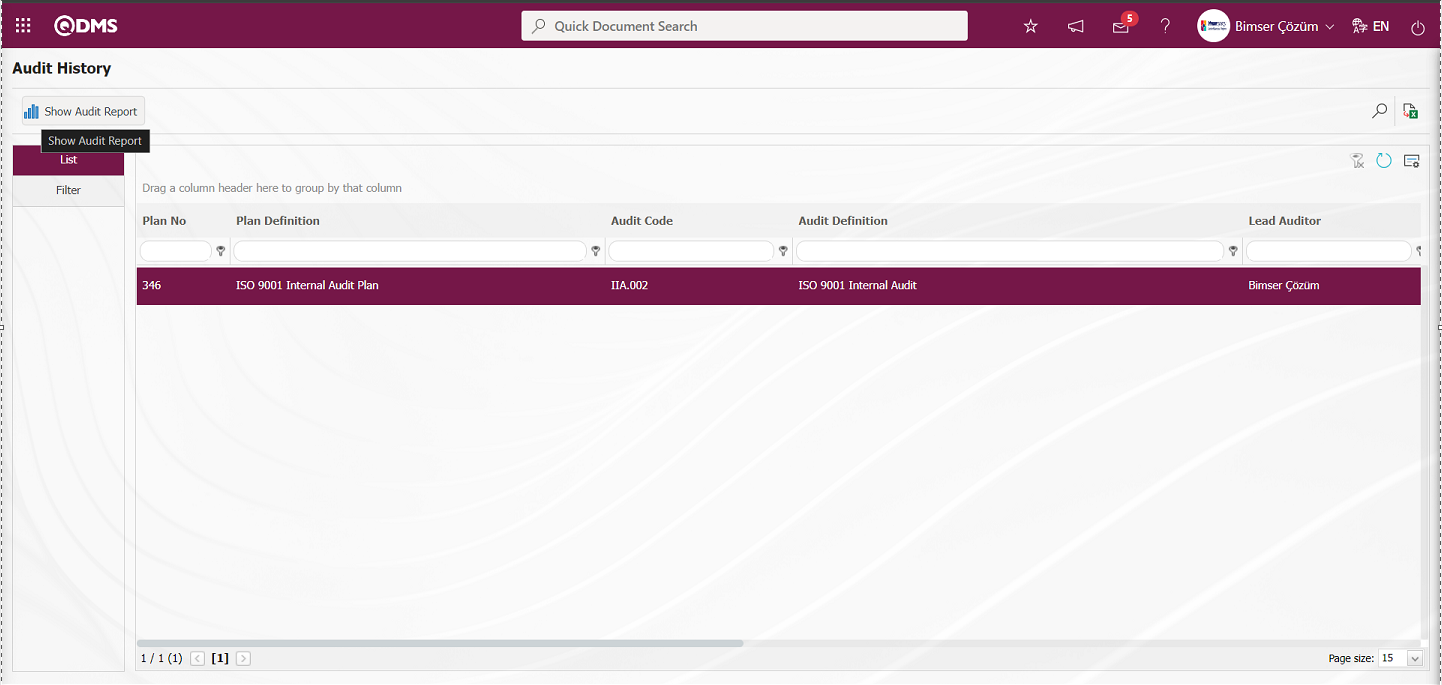
While Audit is selected in the list tab on the Audit History screen, the Audit Report related to the relevant record is obtained by clicking the ![A close up of a word
Description automatically generated]ref149 button.
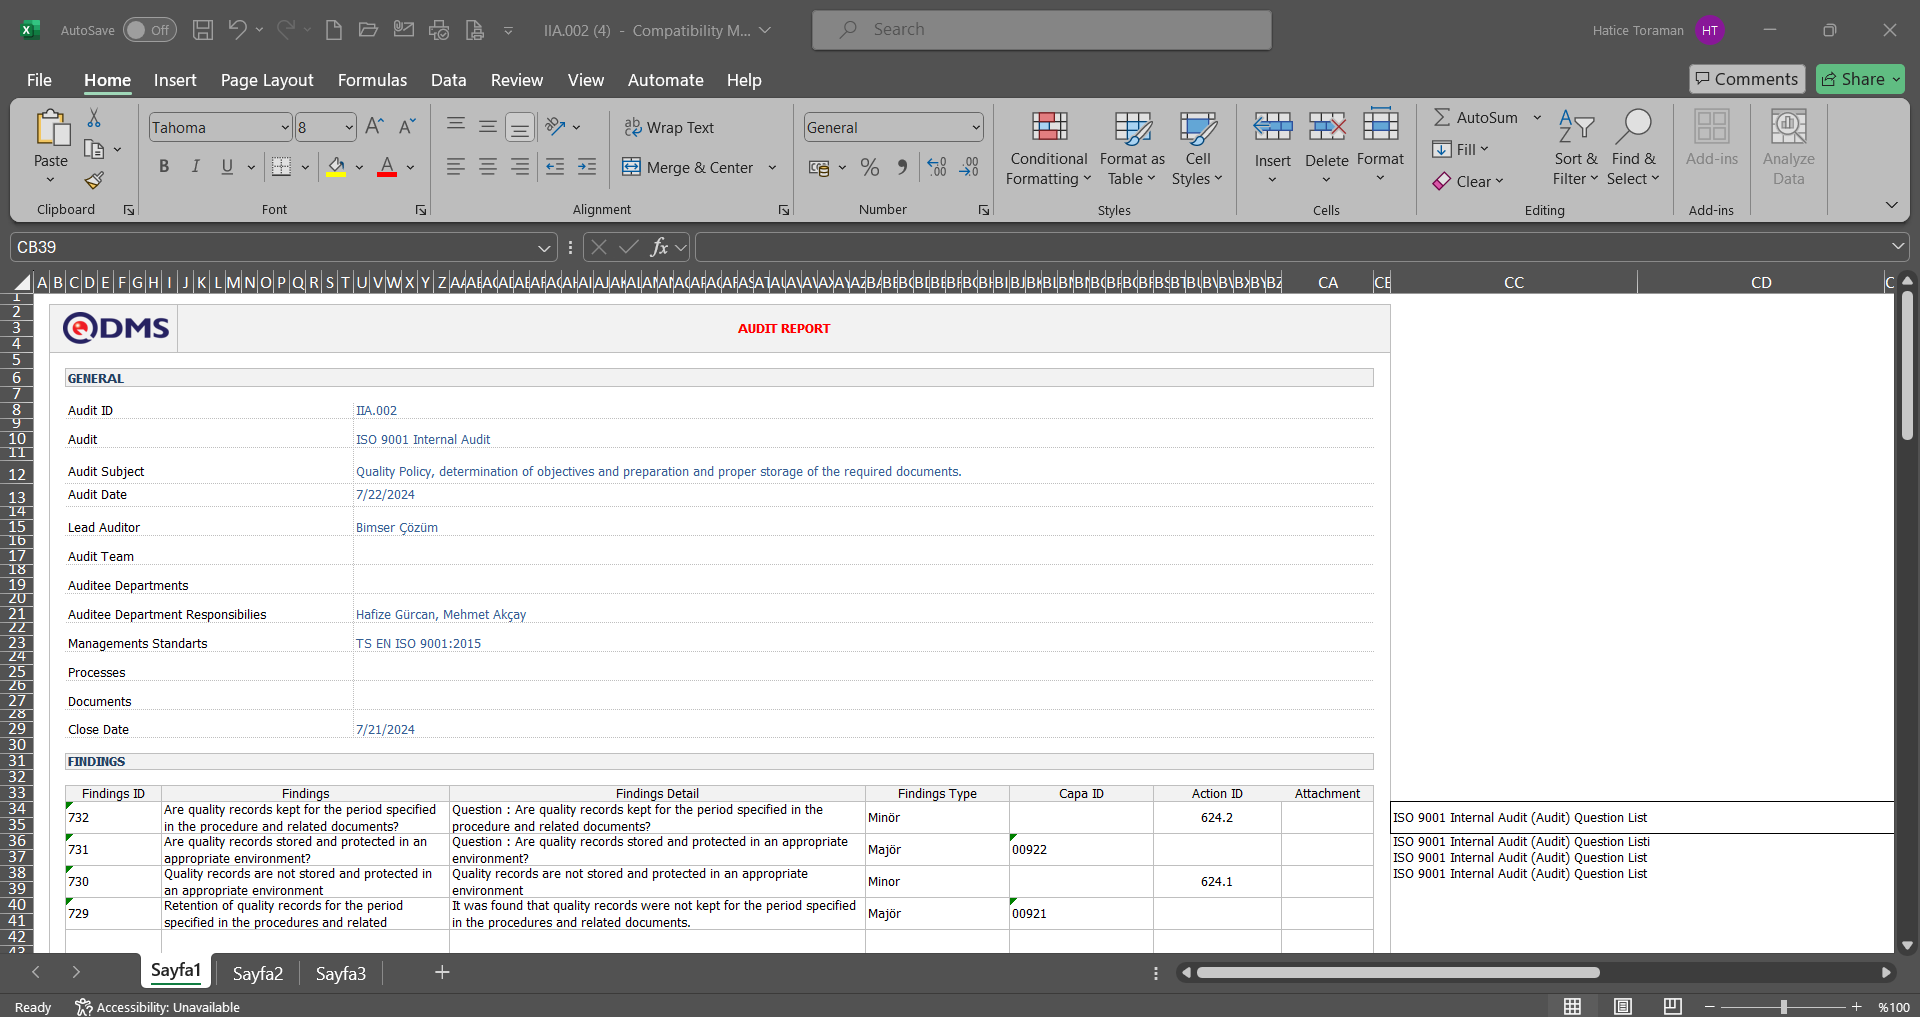
Click the (Export to Excel) button on the Audit History screen.
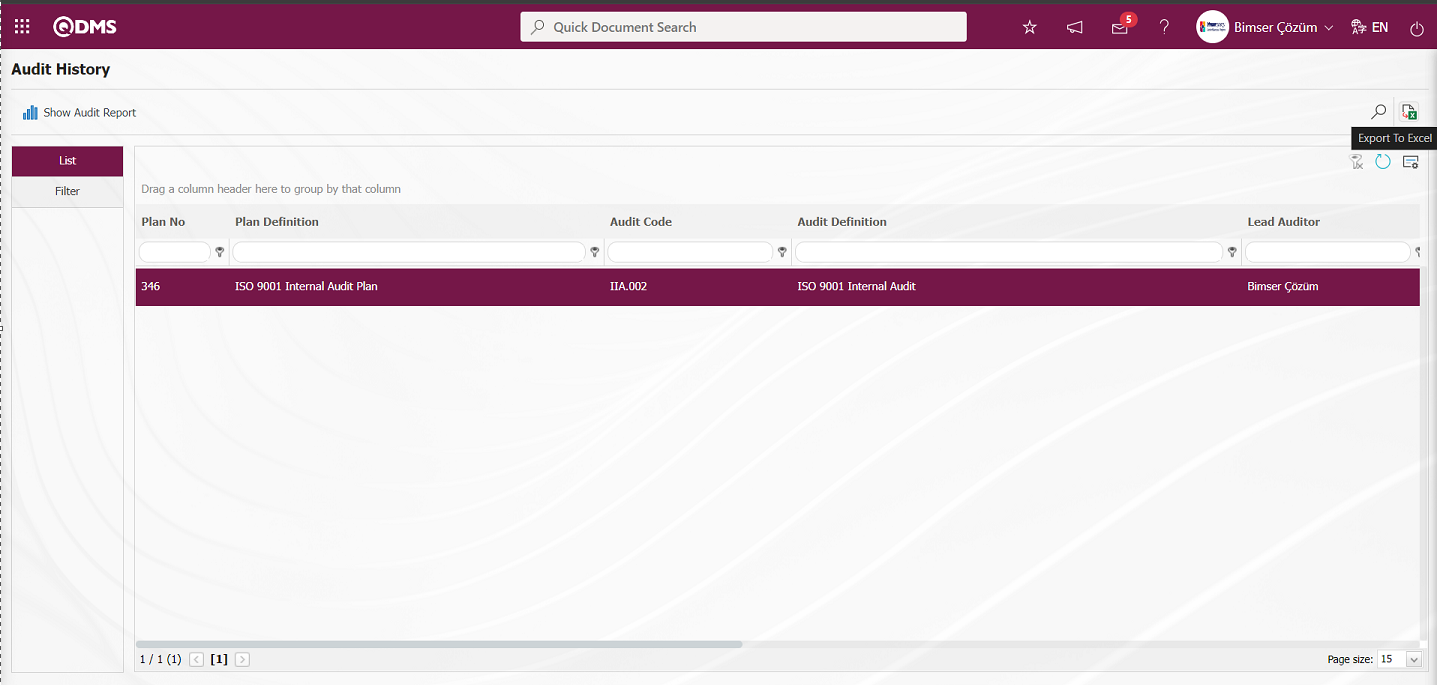
The Audit History report in Excel format is displayed.
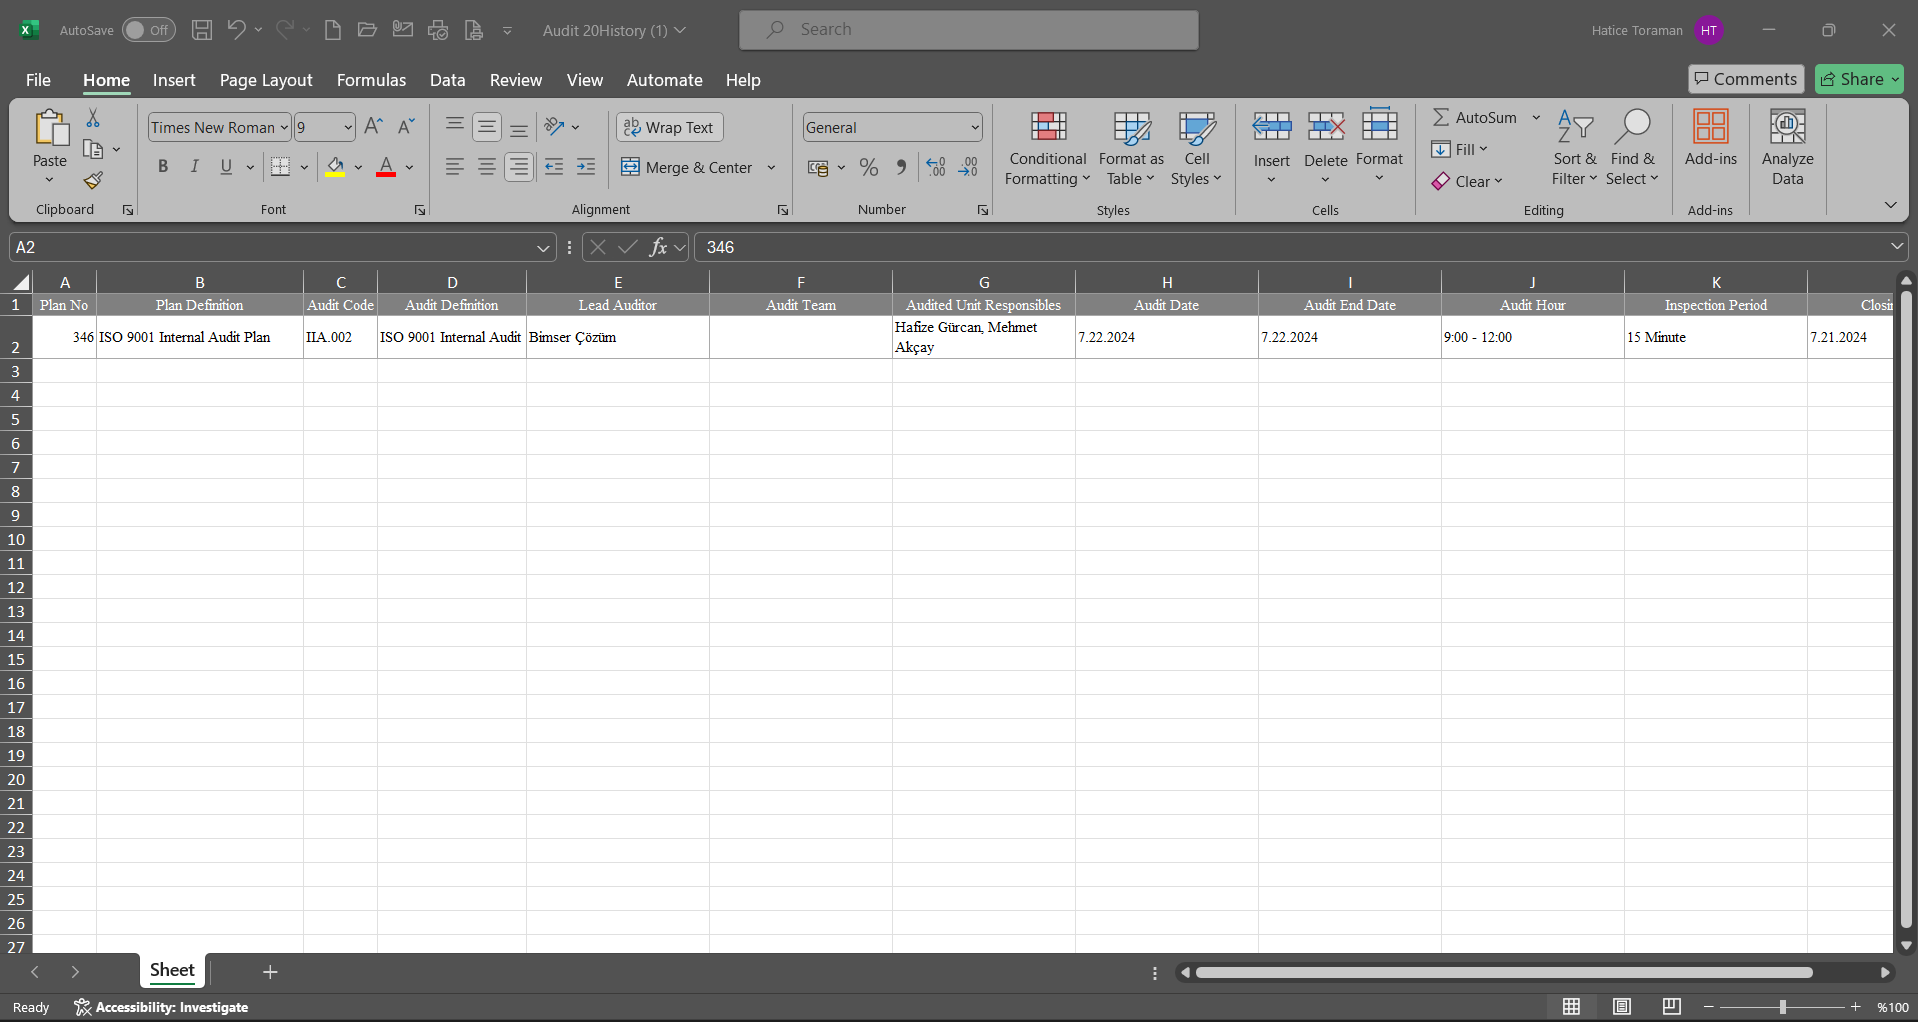
6.2.4.9. Inspection Finding Action Report
Menu Name: Integrated Management System/ Audit Activities/ Reports/ Inspection Finding Action Report
It is the report that collects the findings detected in the audit on a single screen. According to the report type in the findings, it is the report that brings only the Action opened, only the Action not opened, only the action not closed and only the CAPA opened. By filtering according to the fields with search criteria, the report is obtained in Excel format by clicking the (Export to Excel) button.
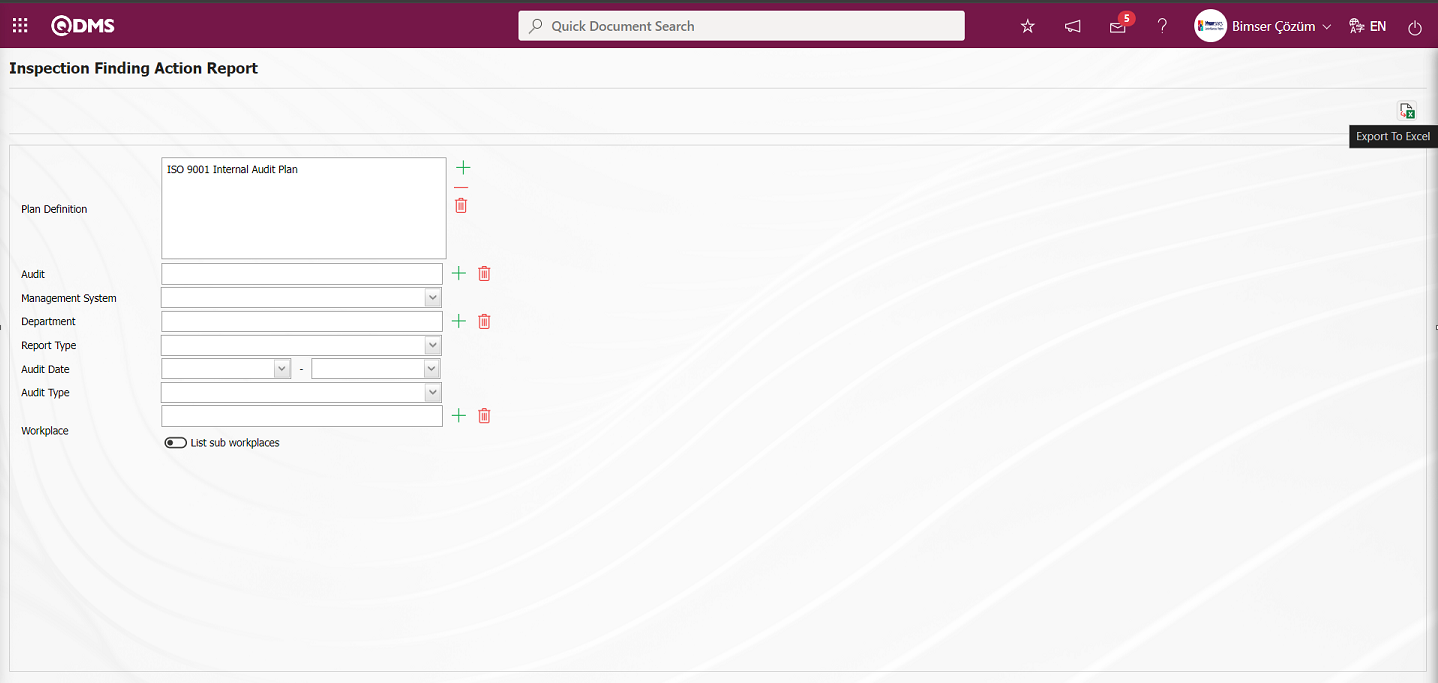
With the help of the buttons on the screen;
: Data is transferred to Excel.
Inspection Finding Action Report (Export to Excel) button displays Inspection Finding Action Report in Excel format.
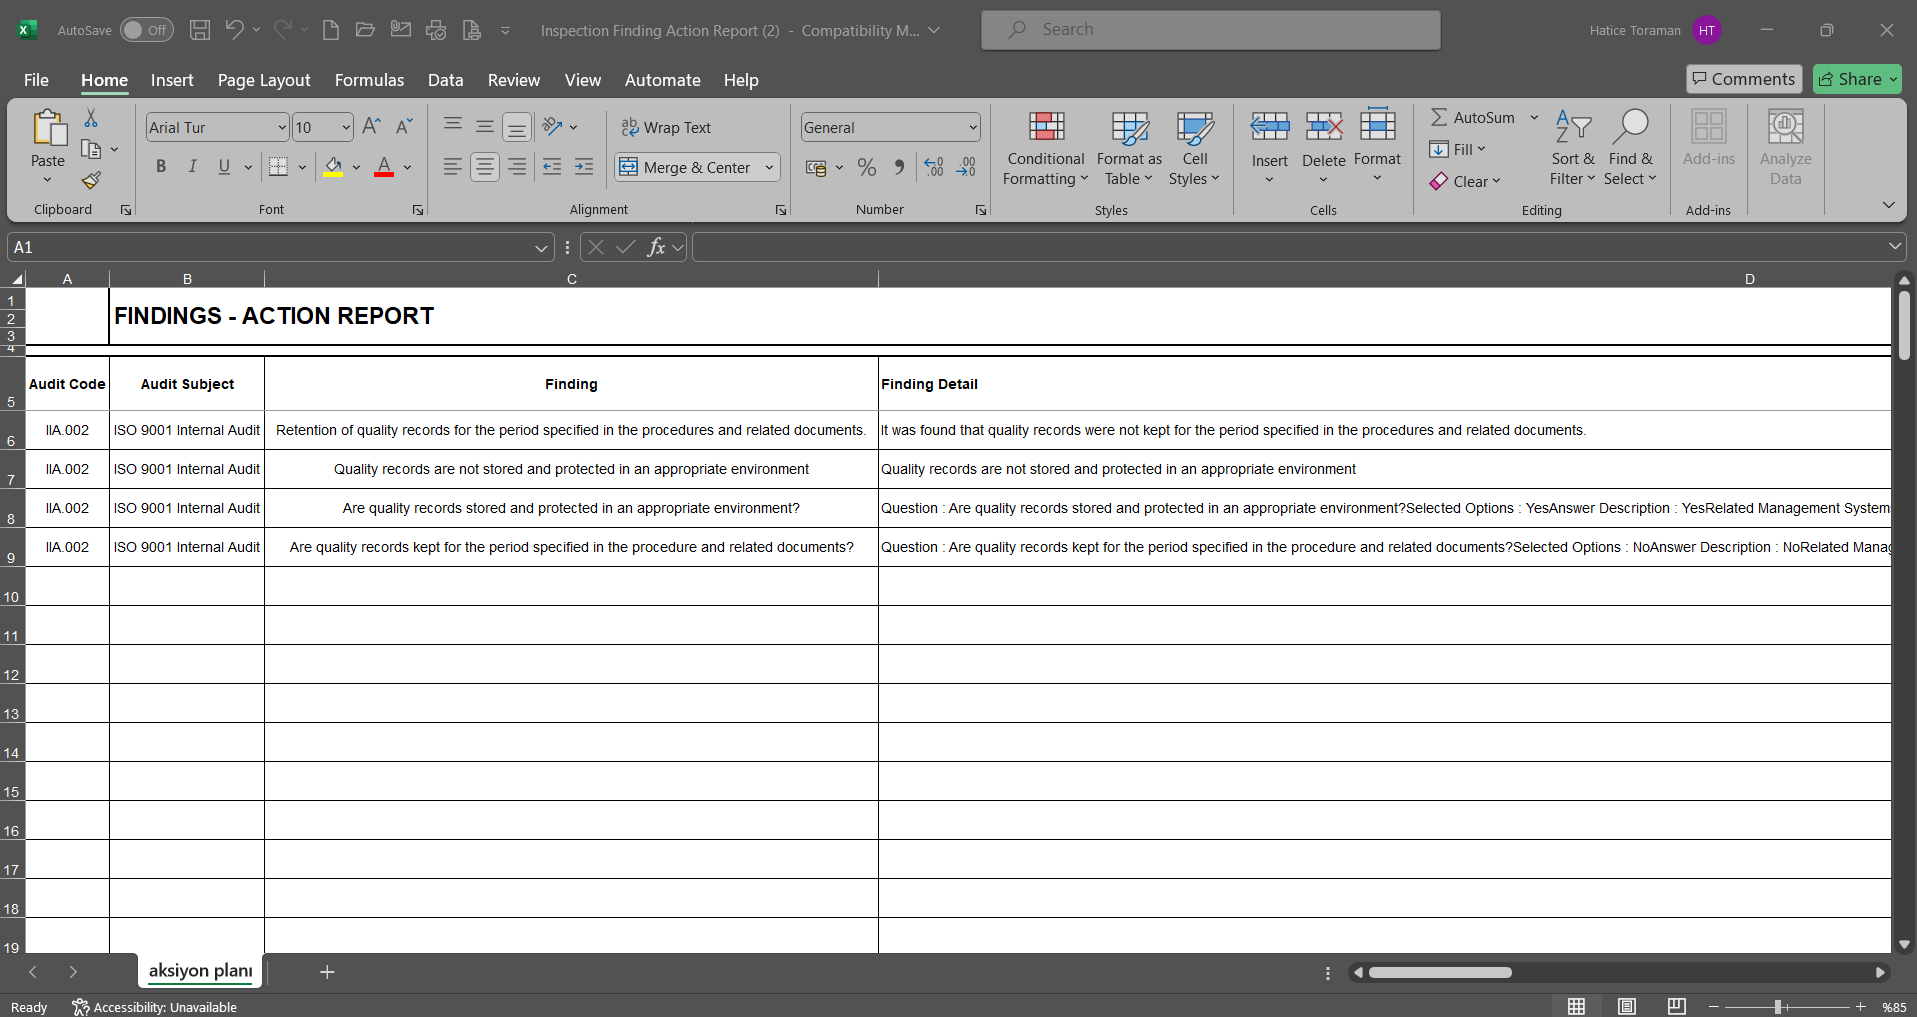
6.2.4.10. Audit Process Report
Menu Name: Integrated Management System/ Audit Activities/ Reports/ Audit Process Report
If a Process - Audit relationship is established in Audit Plans, what kind of findings were detected in which process as a result of the audit can be monitored through this report. There are two tabs on the Audit Process Report screen: List and Filter tabs. In the Filter tab, data is entered in the fields with search criteria and the relevant records are displayed in the list tab by clicking the (Search) button. By clicking the (Export to Excel) button, the report of the Audit Process Report in Excel format is obtained in Excel format.
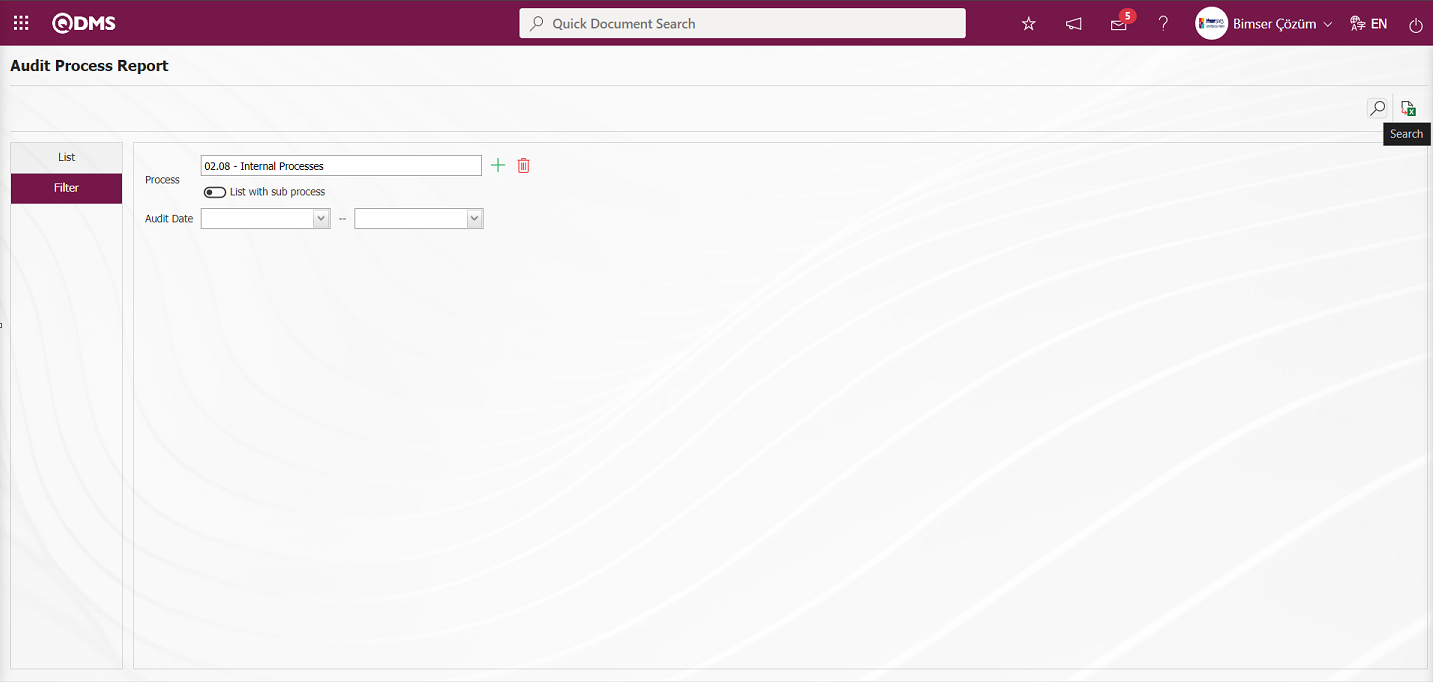
With the help of the buttons on the screen;
: Records are searched by filtering.
: Data is transferred to Excel.
On the Audit Process Report screen, the process is selected in the process list defined in the system by clicking the  (Select) button in the Process field, which is the search criteria in the Filter tab, and the report of the findings detected in the selected process is obtained by clicking the (Search) button.
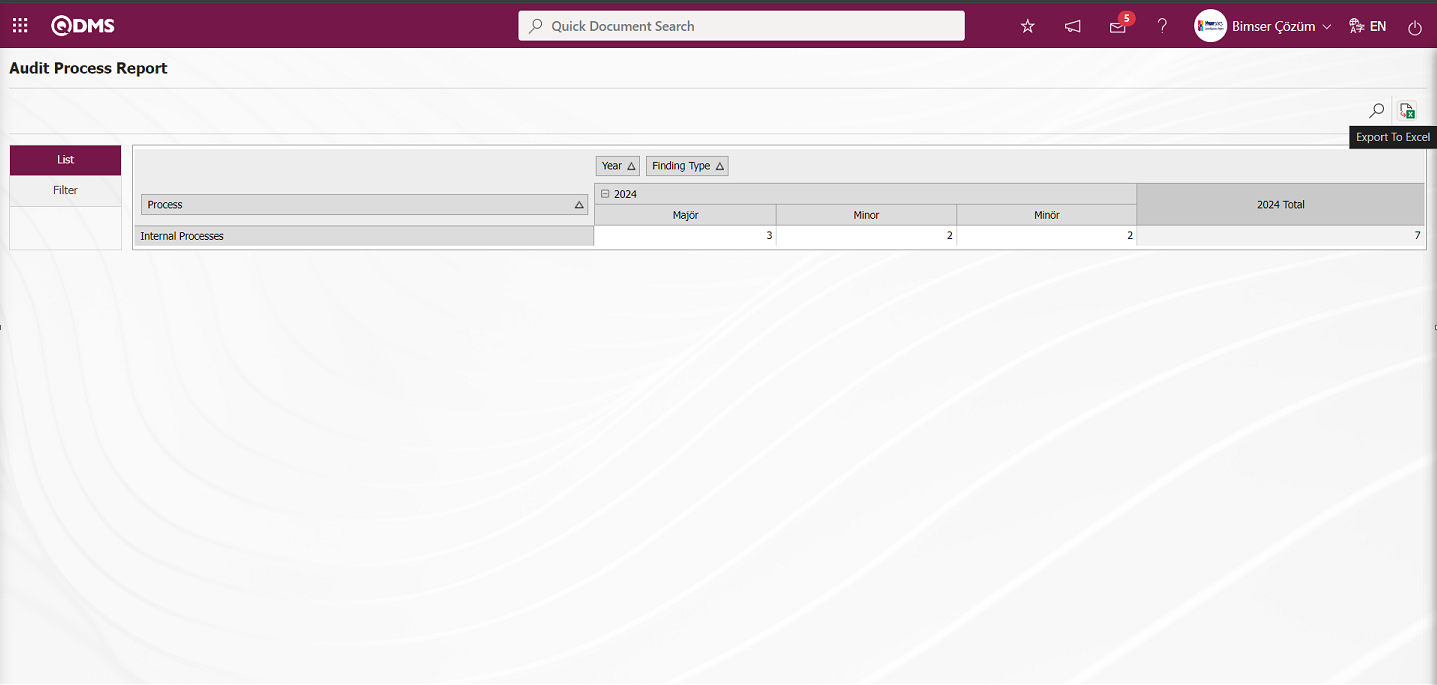
On the Audit Process Report screen, the Audit Process Report in Excel format is displayed with the (Export to Excel) button.
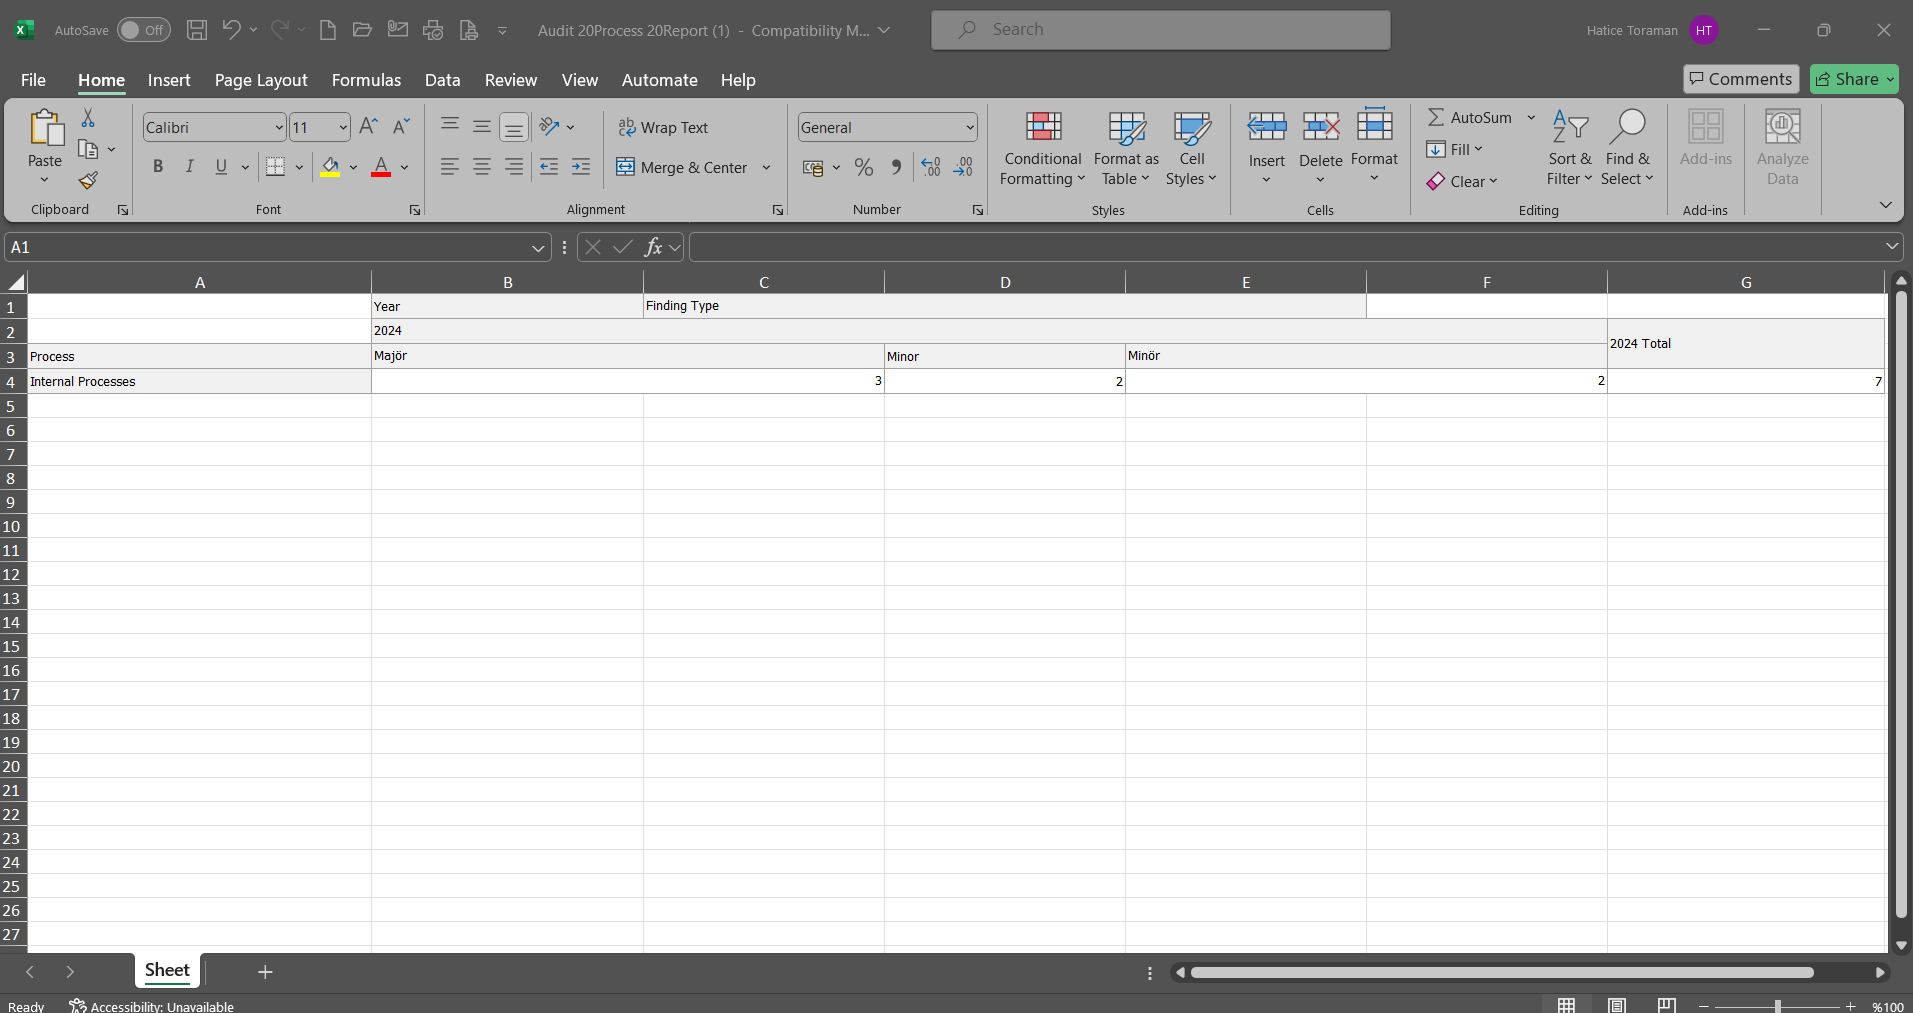
6.2.4.11. Open Audits Report
Menu Name: Integrated Management System/ Audit Activities/ Reports/ Open Audits Report
It was a report in which all audits that have been opened and not yet closed are listed and given with the delay time information. On the Open Audits Report screen, we see two tabs, list and filter tab. In the filter tab, data is entered in the fields with search criteria and the relevant records are displayed in the list tab by clicking the (Search) button. The (Export to Excel) button of the records displayed in the list tab is clicked to get the report in Excel format.
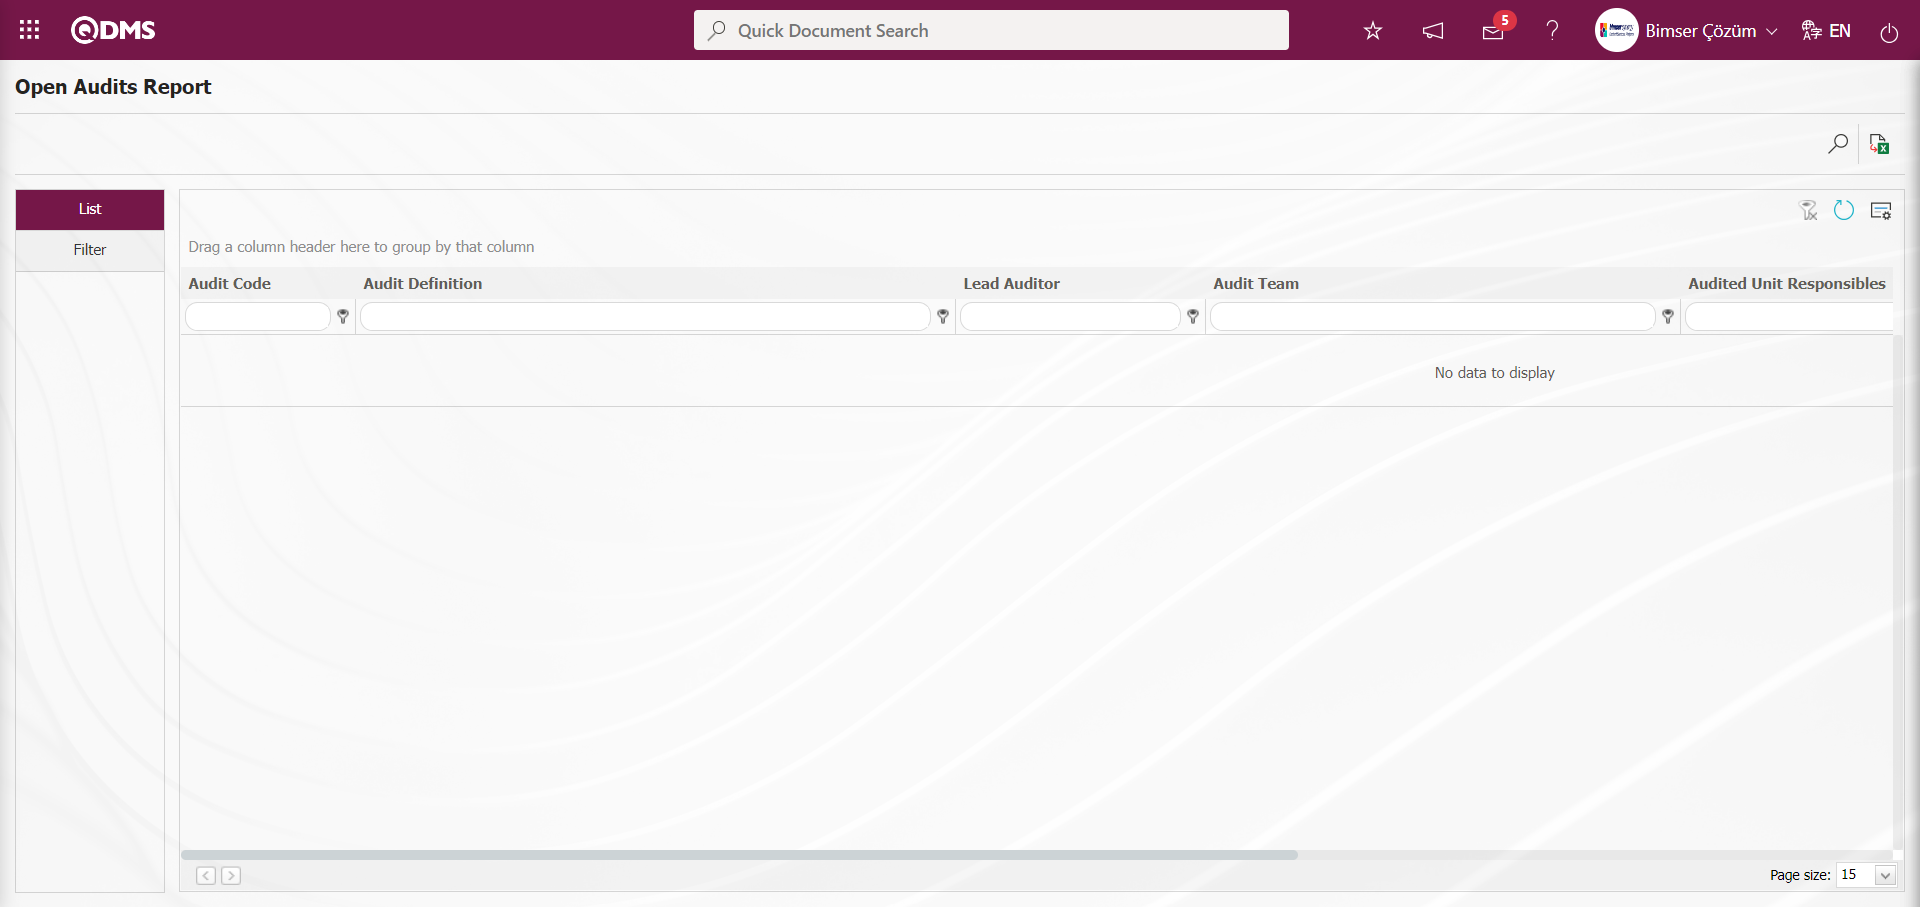
With the help of the buttons on the screen;
: Records are searched by filtering.
: Data is transferred to Excel.
: The search criteria on the menu screens are used to clear the data remaining in the filter fields in the grid where the search operation is performed.
: The menu screen is restored to its default settings.
: User-based designing of the menu screen is done with the show-hide feature, that is, the hiding feature of the fields corresponding to the columns on the menu screens.
In the filter tab, click the  (Add) button in the “Plan Definition” field, which is the search criteria, and select from the Audit Plan list defined in the system and click the (Search) button.
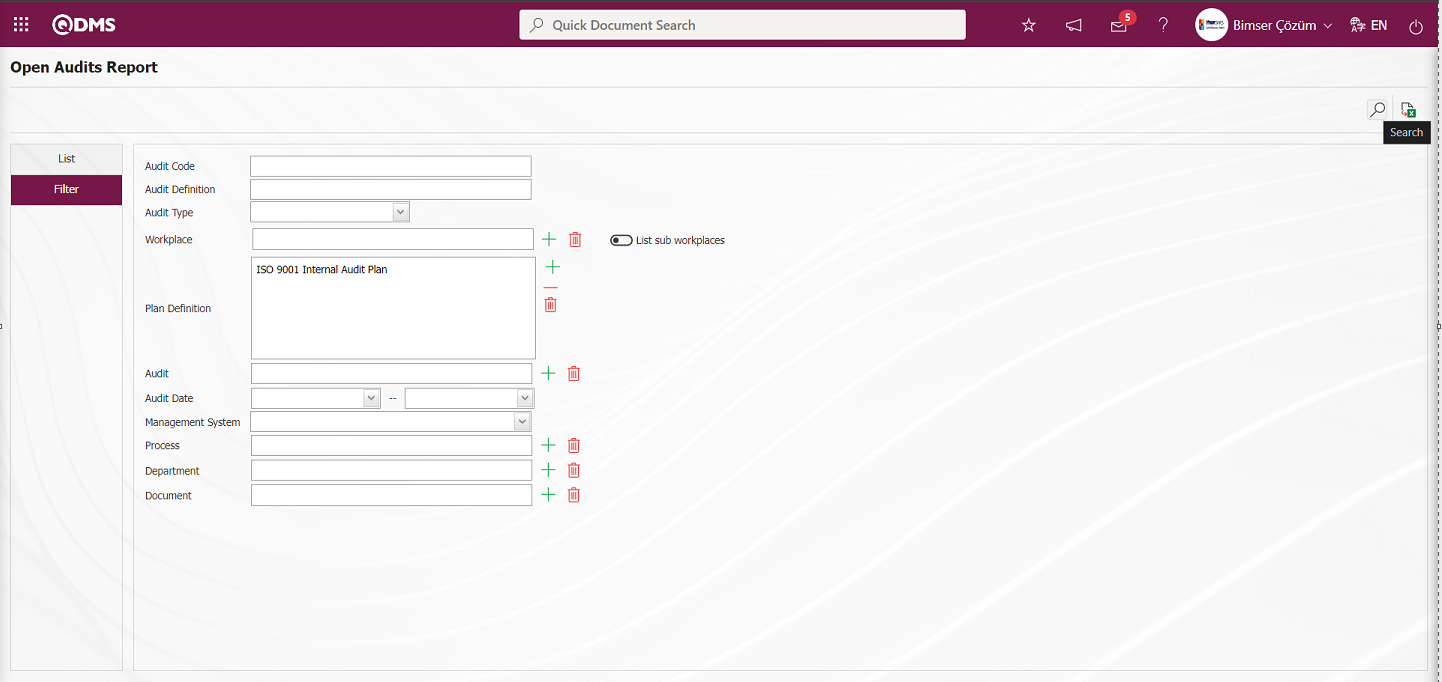
Related records are listed in the list tab.
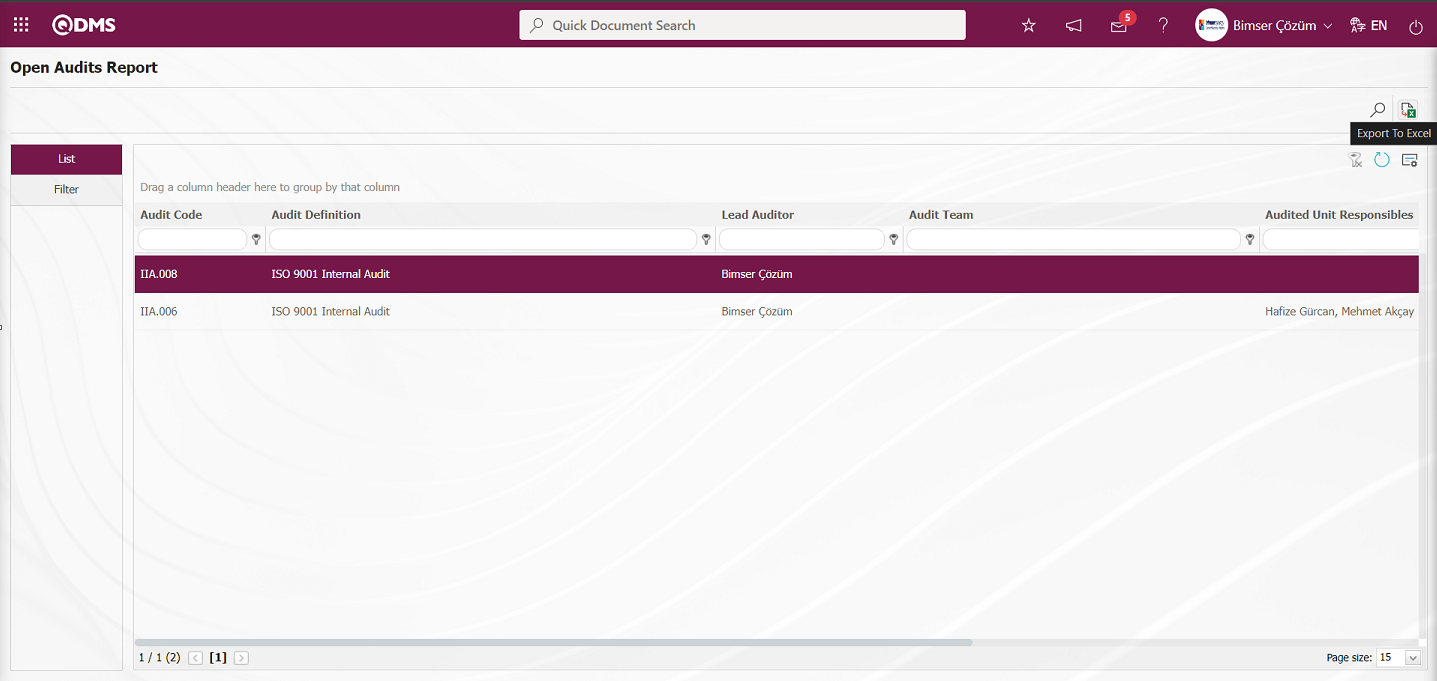
From the Open Audits Report screen (Export to Excel) button displays the Open Audits Report in Excel format.
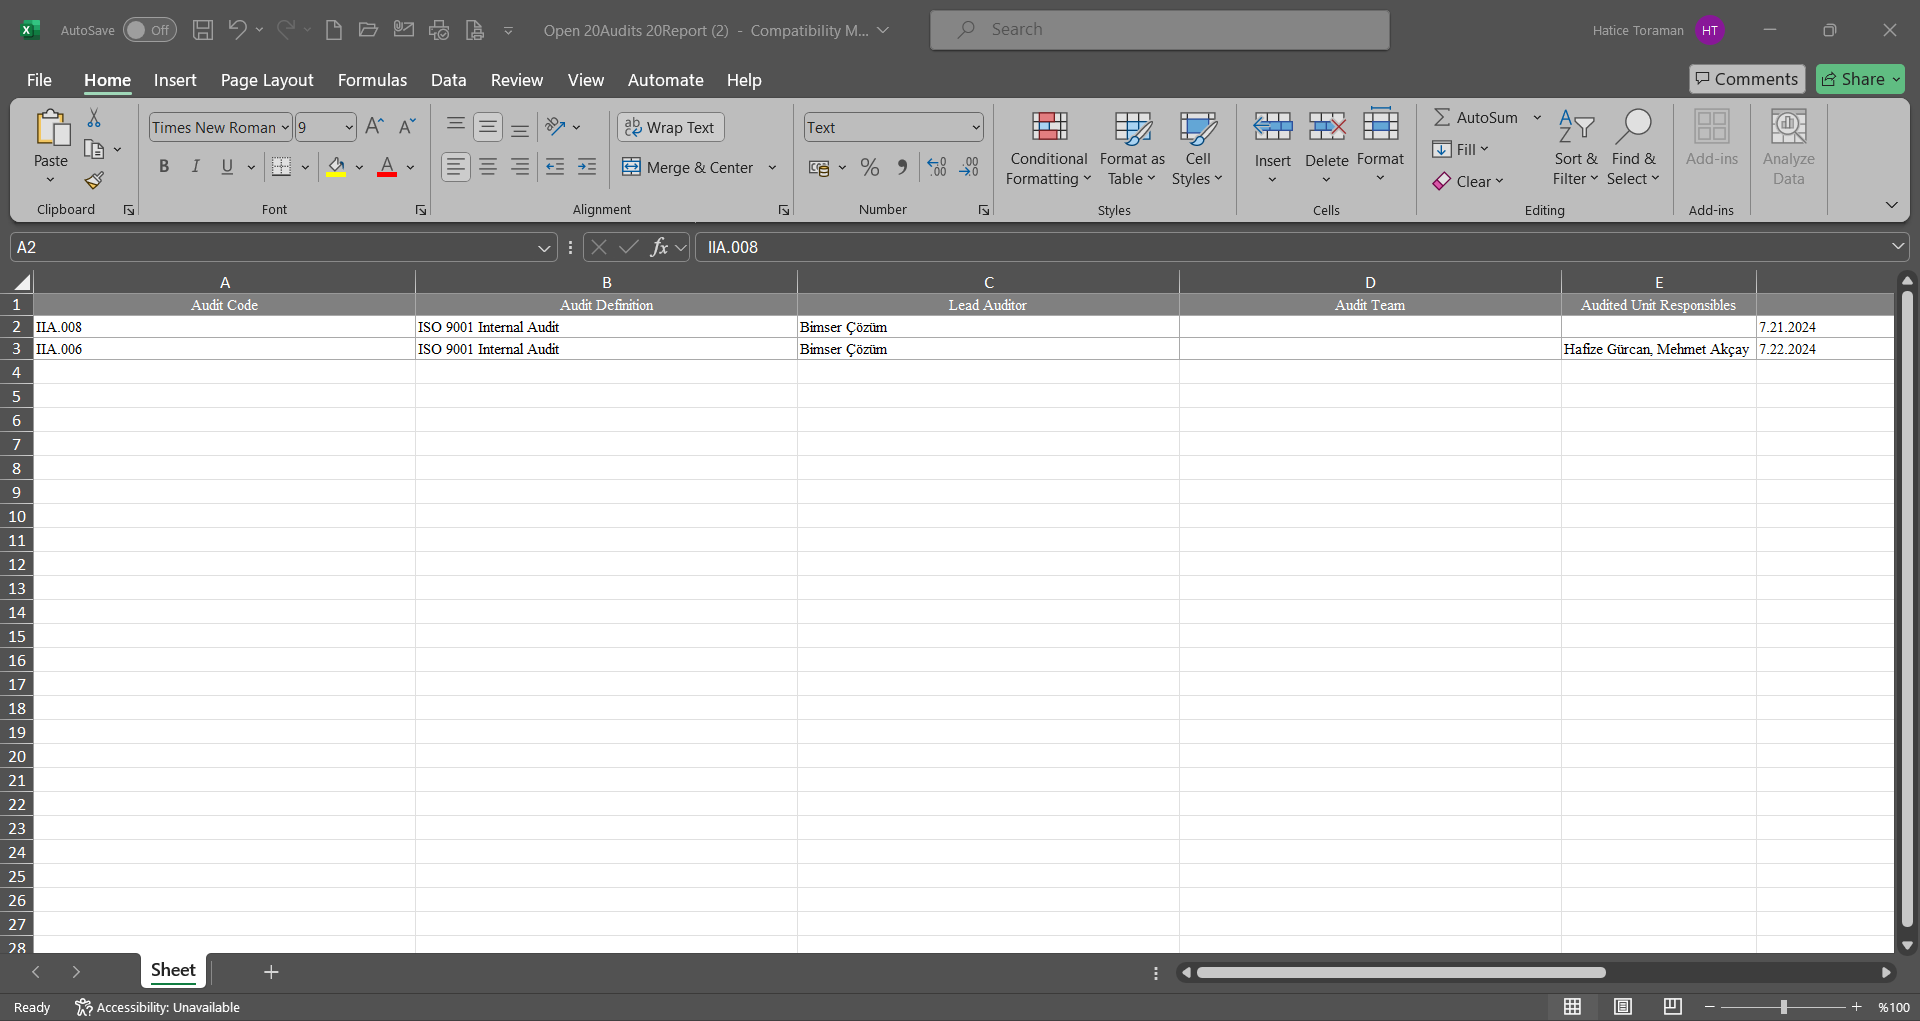
6.2.4.12. Audit Surveys Report
Menu Name: Integrated Management System/ Audit Activities/ Reports/ Audit Surveys Report
It is the report showing the results of the questionnaires sent to the audited unit at the end of the audit. In this report, information about the survey sent to the audited unit at the end of the audit, the people who filled out the survey, the score of the completed survey, the survey success percentage and the max survey score can be accessed. There are two tabs on the Audit Surveys Report screen: list and filter tabs.
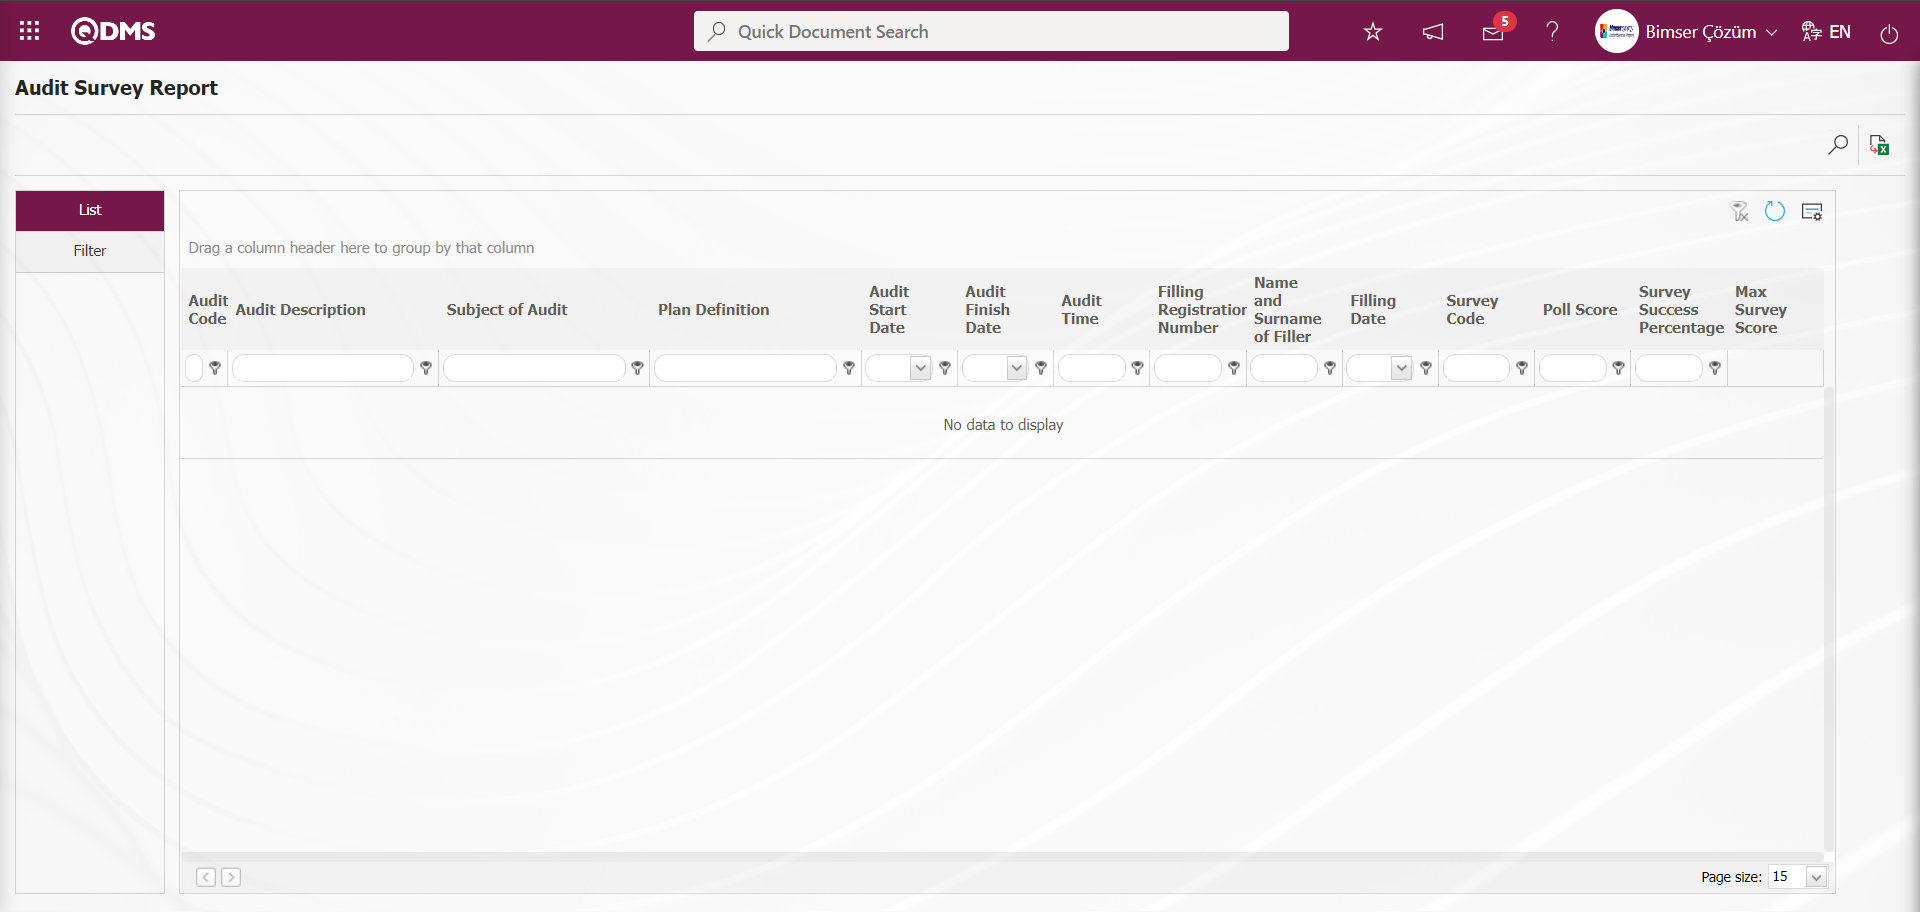
With the help of the buttons on the screen;
: Records are searched by filtering.
: Data is transferred to Excel.
: The search criteria on the menu screens are used to clear the data remaining in the filter fields in the grid where the search operation is performed.
: The menu screen is restored to its default settings.
: User-based designing of the menu screen is done with the show-hide feature, that is, the hiding feature of the fields corresponding to the columns on the menu screens.
In the Filter tab, enter data in the fields with search criteria and click the (Search) button.
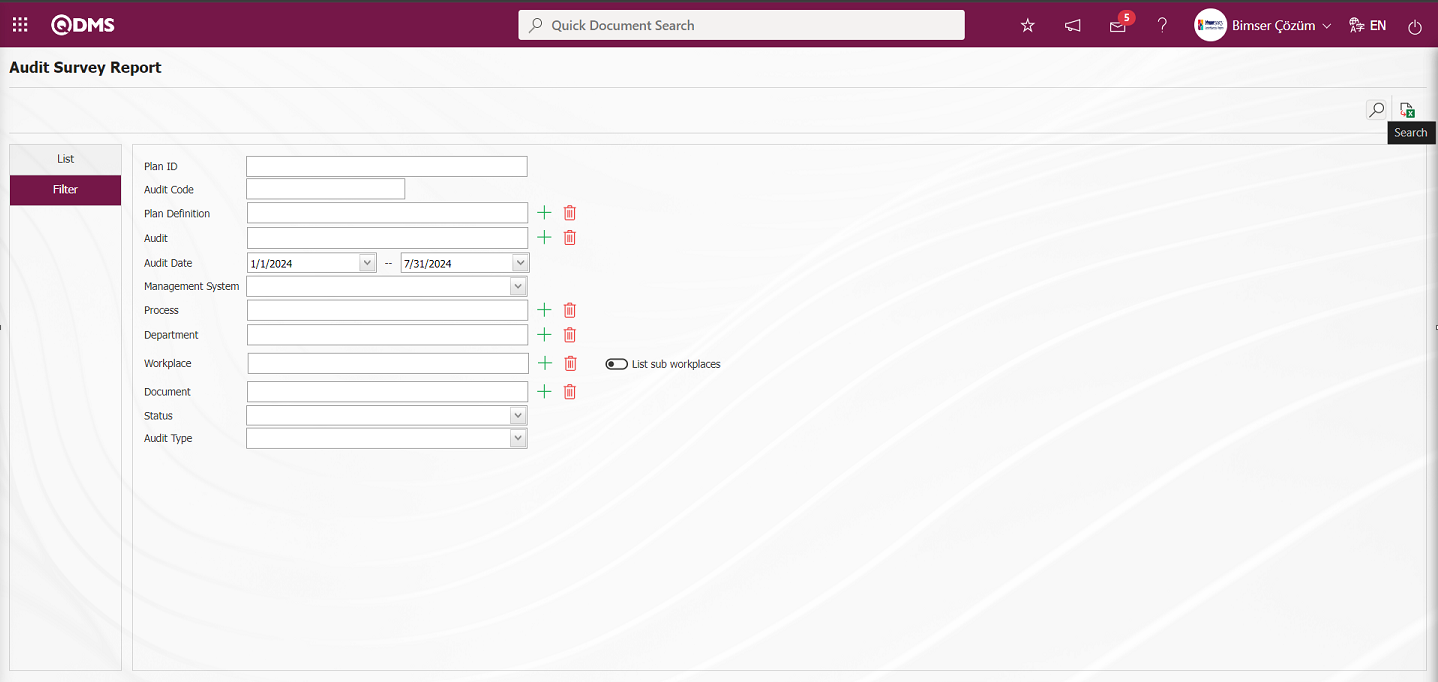
After filtering according to the search criteria in the filter tab, the records are listed in the list in the list tab.
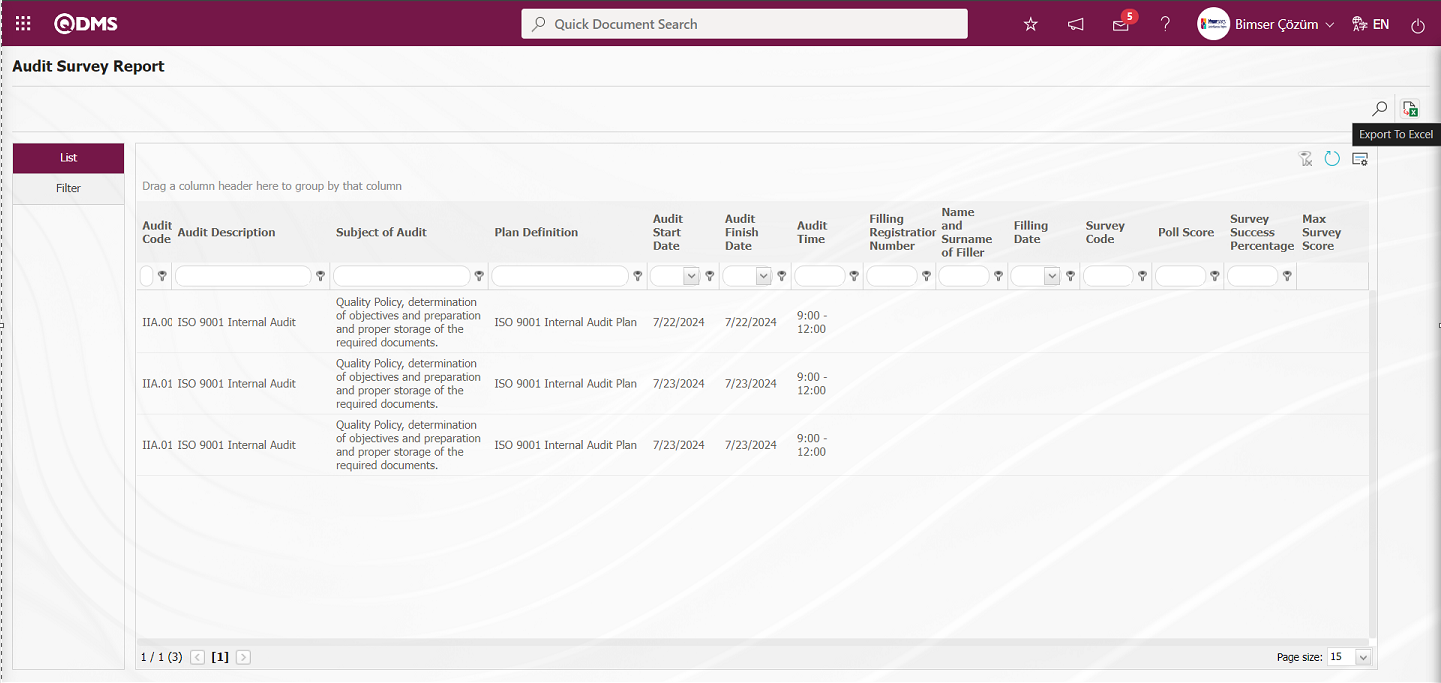
The (Export to Excel) button of the records displayed in the list tab is clicked to get the report in Excel format.
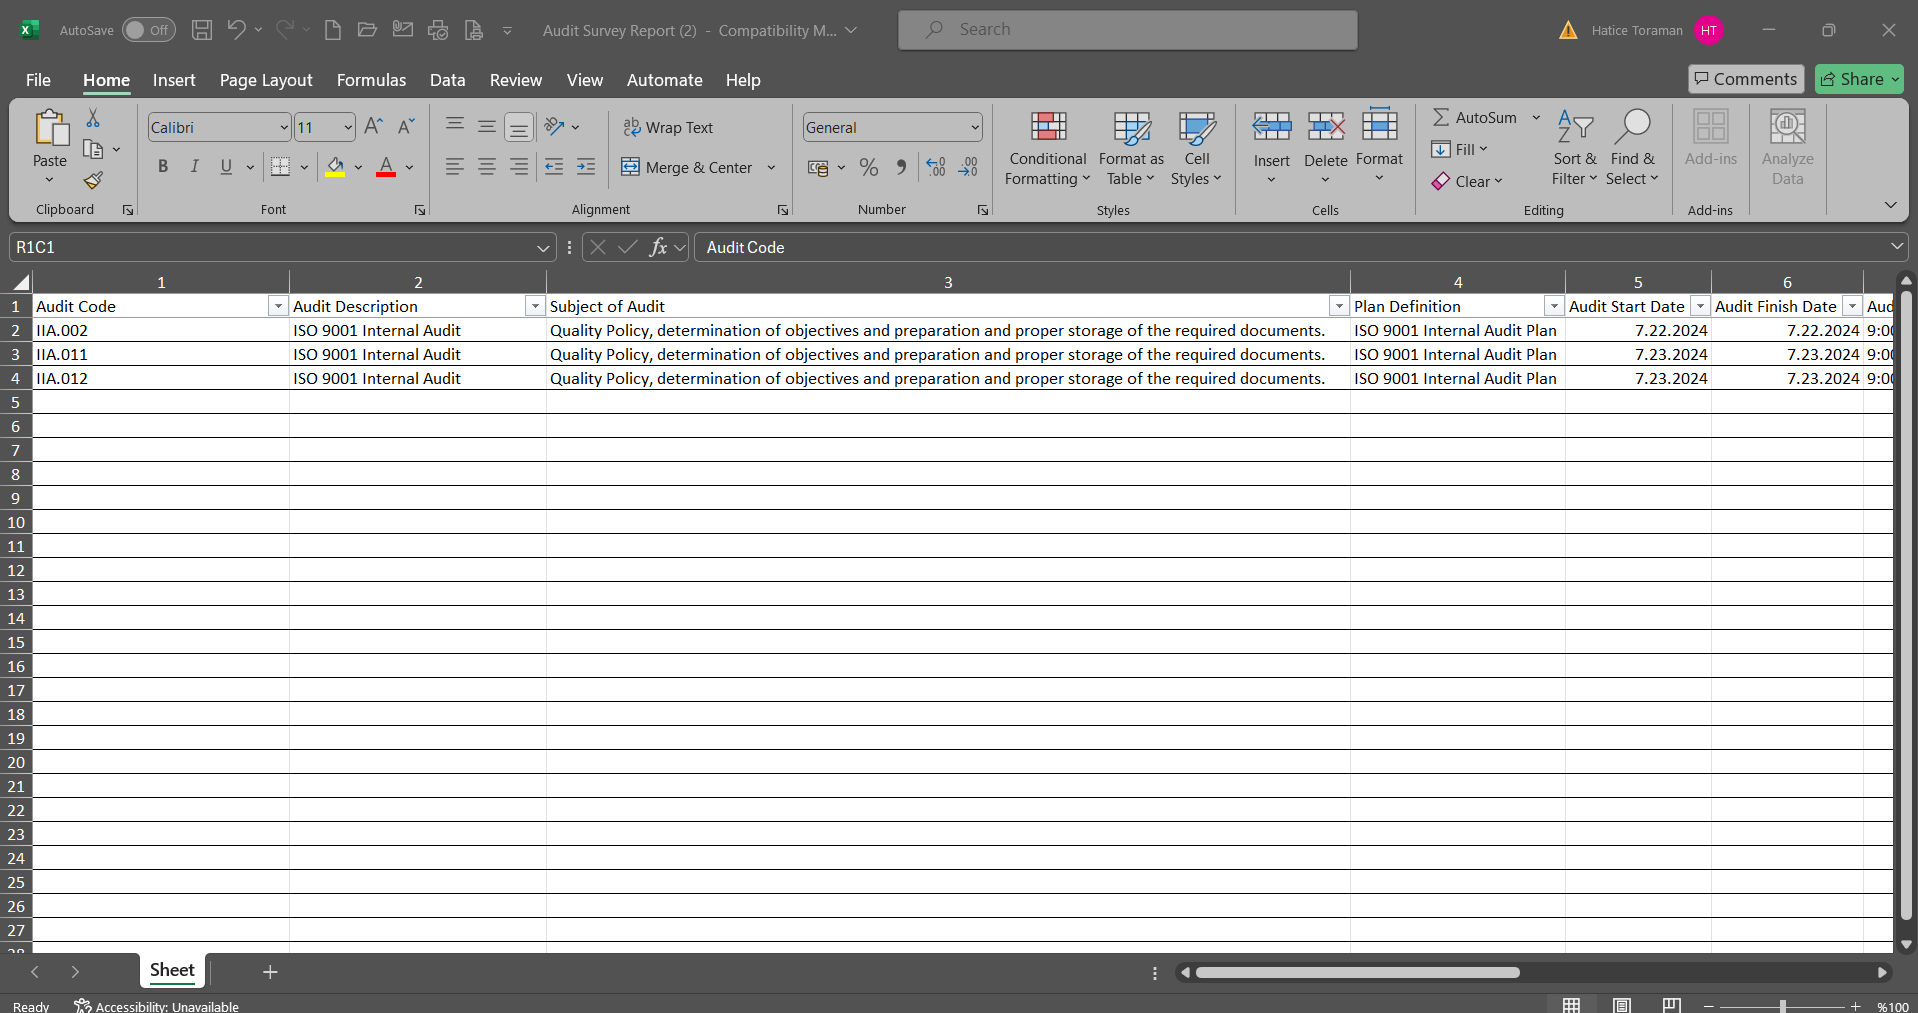
6.2.4.13. Auditor Surveys Report
Menu Name: Integrated Management System/ Audit Activities/ Reports/ Auditor Surveys Report
It is the report showing the results of the questionnaires sent to the auditor at the end of the audit. In this report, information about the survey sent to the auditor at the end of the audit, the people who filled out the survey, the score of the completed survey, the survey success percentage and the max survey score can be accessed. There are two tabs on the Auditor Surveys Report screen: list and filter tab. In the filter tab, data is entered in the fields with search criteria and the relevant records are displayed in the list tab by clicking the (Search) button. The (Export to Excel) button of the records displayed in the list tab is clicked to get the report in Excel format.

With the help of the buttons on the screen;
: Records are searched by filtering.
: Data is transferred to Excel.
: The search criteria on the menu screens are used to clear the data remaining in the filter fields in the grid where the search operation is performed.
: The menu screen is restored to its default settings.
: User-based designing of the menu screen is done with the show-hide feature, that is, the hiding feature of the fields corresponding to the columns on the menu screens.
In the Filter tab, enter data in the fields with search criteria and click the (Search) button.
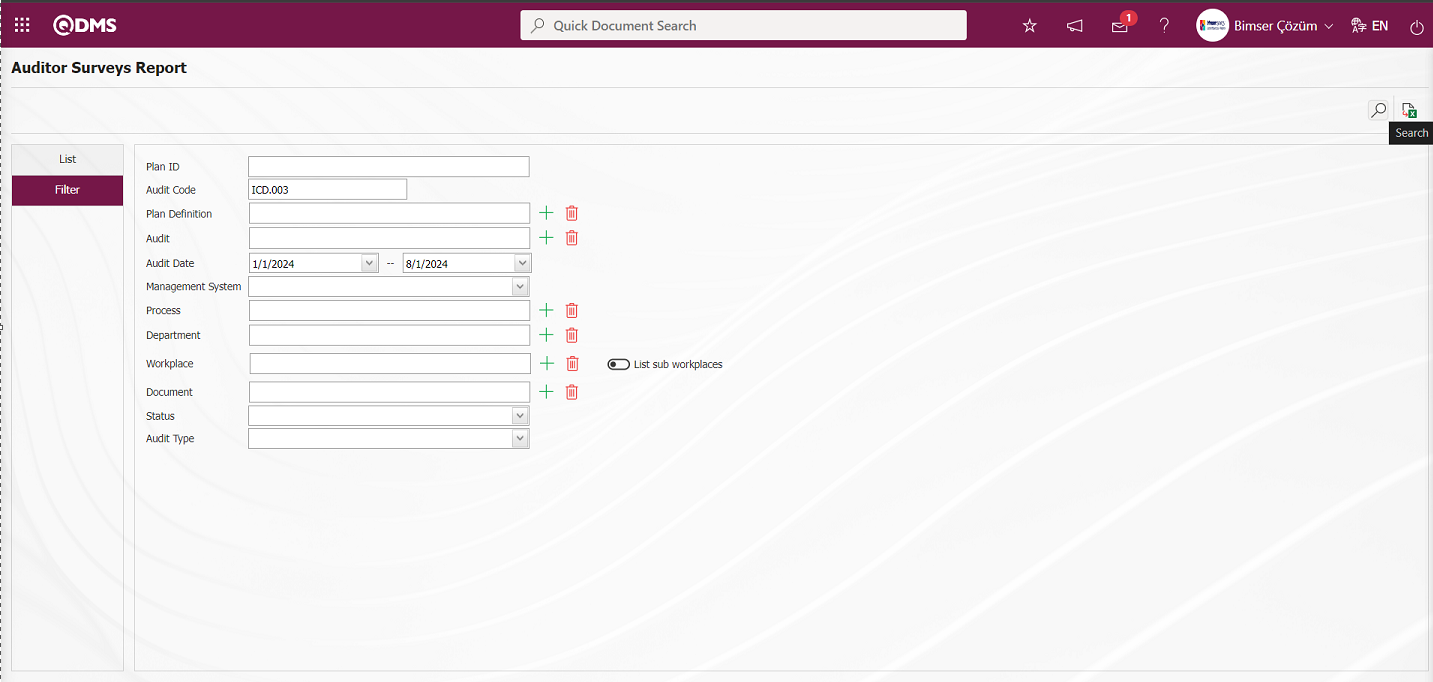
After filtering according to the search criteria in the filter tab, the records are listed in the list in the list tab.
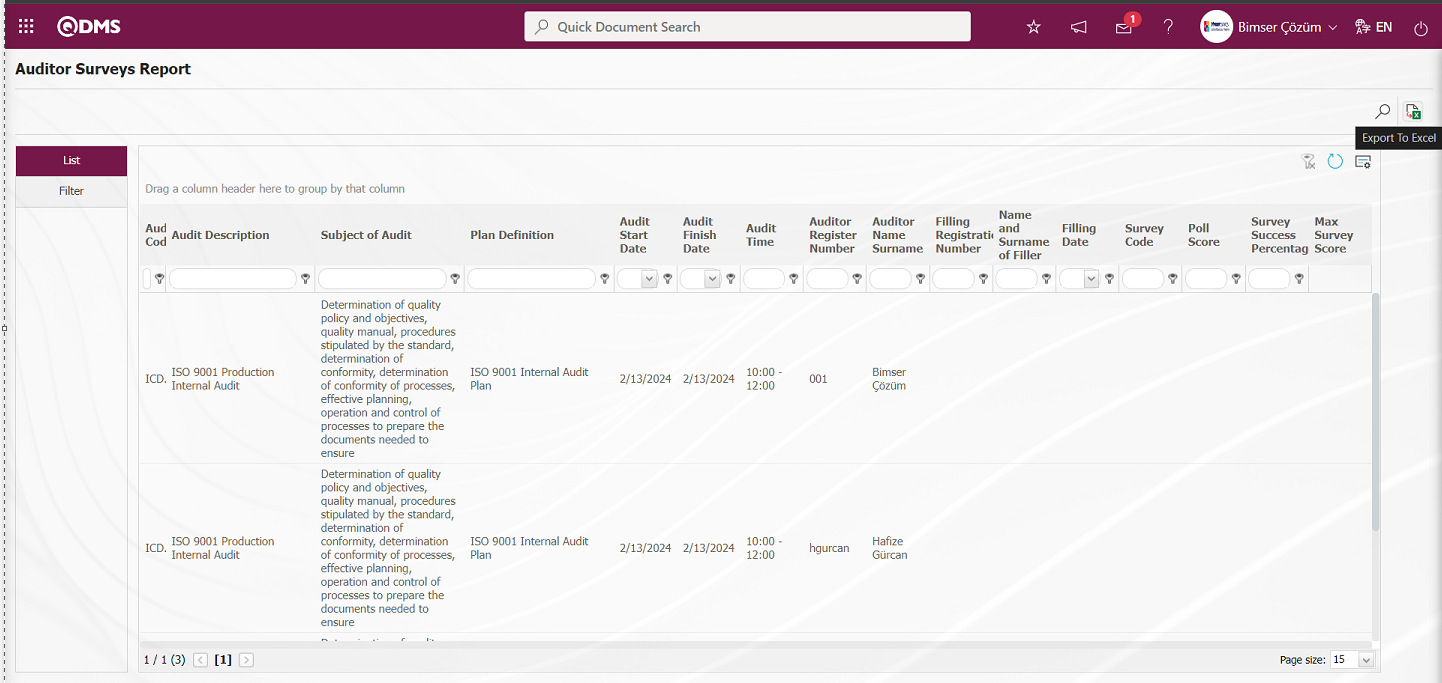
The (Export to Excel) button of the records displayed in the list tab is clicked to get the report in Excel format.
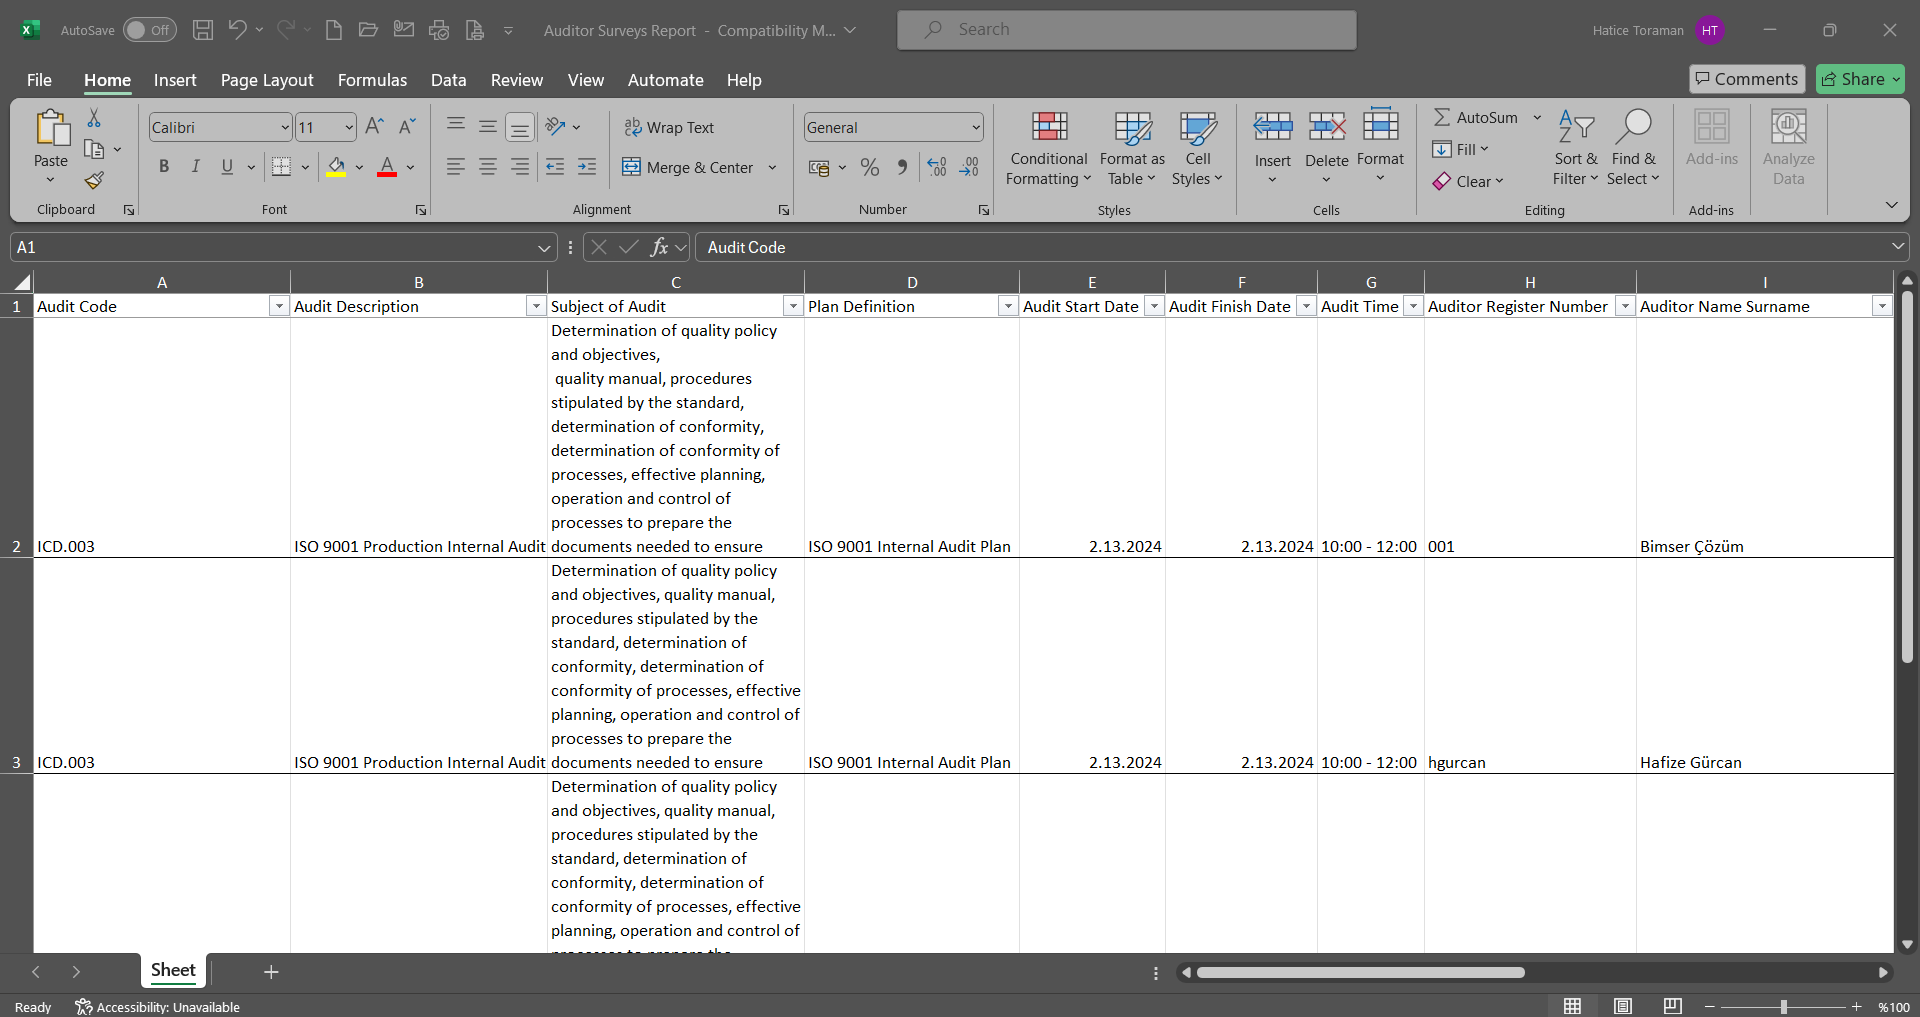
6.2.4.14. Joint Audit Report
Menu Name: Integrated Management System/ Audit Activities/ Reports/ Joint Audit Report
It is the report where audit information is displayed together with the audits in the plan. It is the report where the questions, answers, CAPA opened in the findings and code information of the planned Actions in the audits in the plan are accessed, and the CAPA and planned Actions opened by clicking these code links are displayed. There are two tabs on the Common Audit Report screen: list and filter tab. In the filter tab, data is entered in the fields with search criteria and the relevant records are displayed in the list tab by clicking the (Search) button. The process of obtaining the report in Excel format by clicking the (Export to Excel) button of the records displayed in the list tab is done.
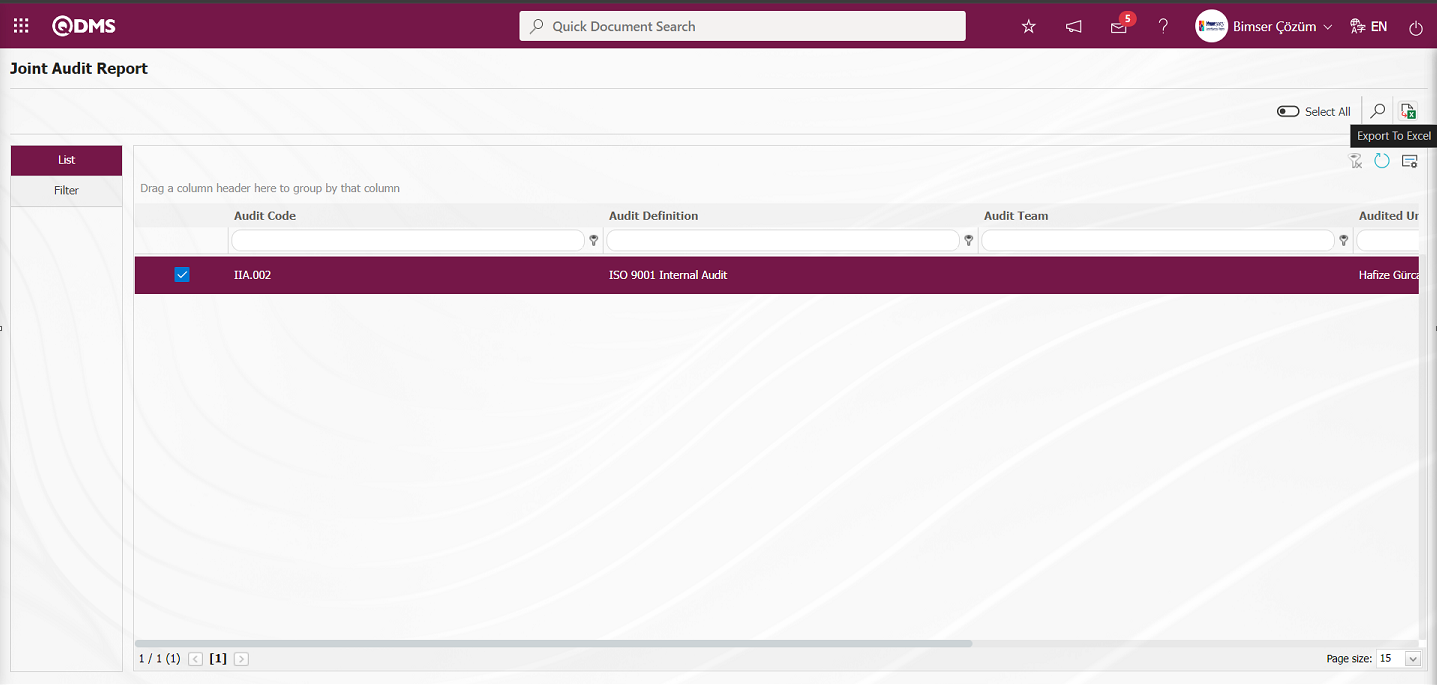
With the help of the buttons on the screen;
: Records are searched by filtering.
: Data is transferred to Excel.
: The search criteria on the menu screens are used to clear the data remaining in the filter fields in the grid where the search operation is performed.
: The menu screen is restored to its default settings.
: User-based designing of the menu screen is done with the show-hide feature, that is, the hiding feature of the fields corresponding to the columns on the menu screens.
(Export to Excel) button on the Joint Audit Report screen displays the Joint Audit Report in Excel format.
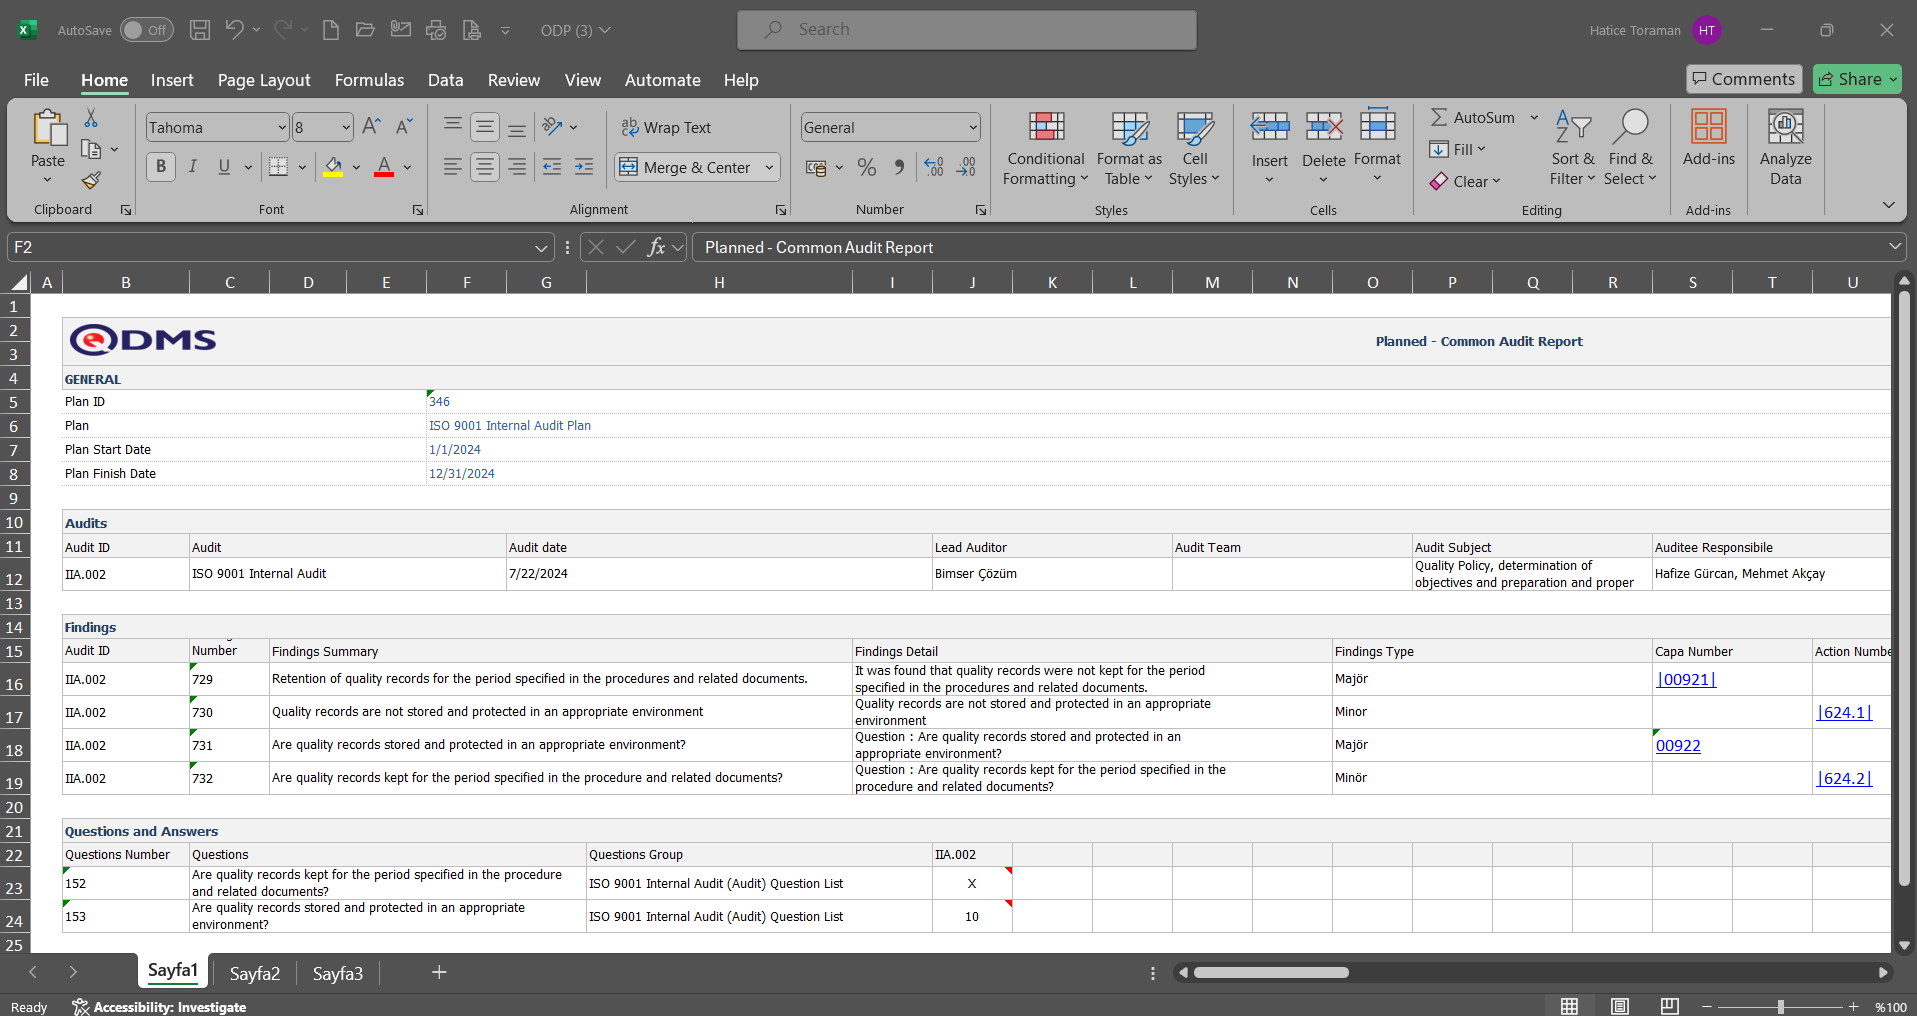
6.2.5. Graphics
Menu Name: Integrated Management System/ Audit Activities/ Graphics
This is the section in the Audit Activity module where the reports of the graphics related to the audit are received.
6.2.5.1. The most occurency Analysis (Graphics)
Menu Name: Integrated Management System/ Audit Activities/ Graphics/ The most occurrency Analysis (Graphics)
It is the menu where audits can be reported graphically on the basis of management system, finding type, auditor, audited unit, department, system entry and question. Graphic output (jpeg, png, xls) etc. can be exported in formats.
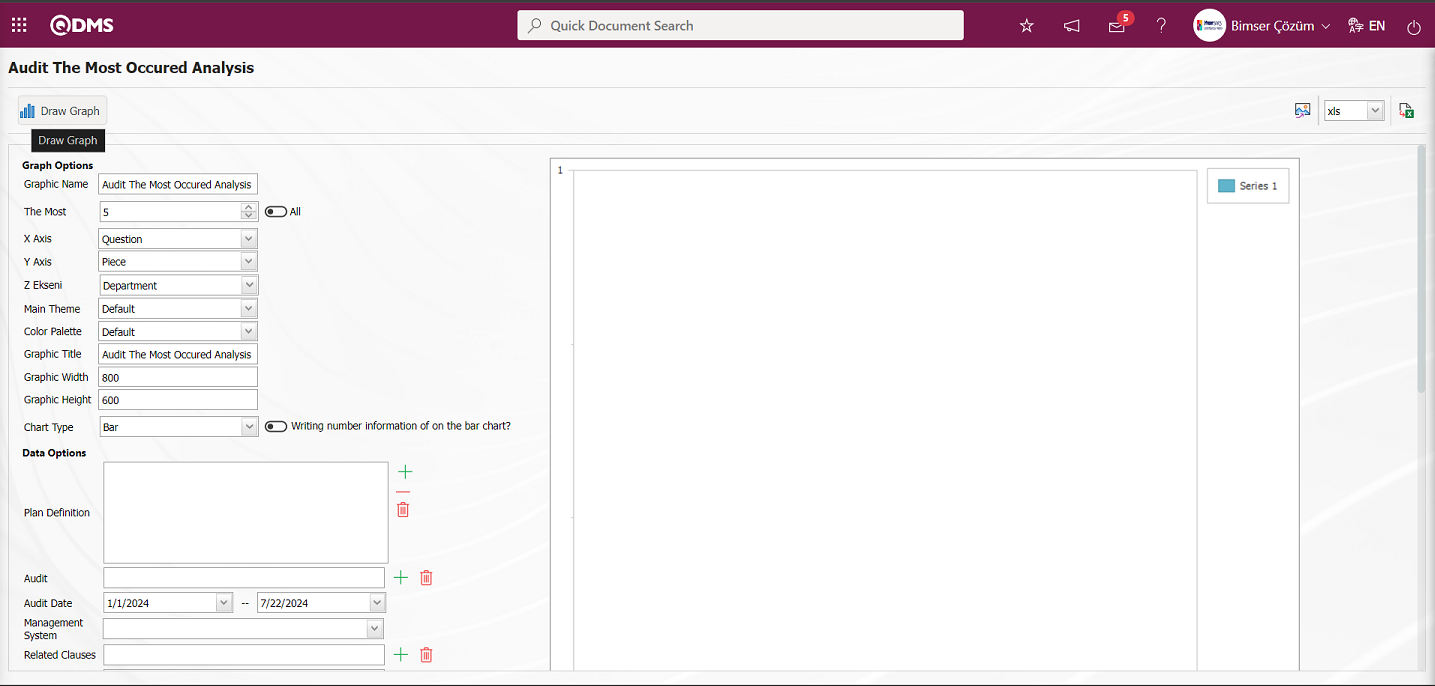
With the help of the buttons on the screen;
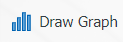 : Draws the graph on the screen according to the specified properties.
 : Converts the graph to the format type selected from the drop-down menu (png, jpg, bmp, xls, etc.) and exports it to the external environment.
: Data can be exported to Excel.
There are two separate settings for creating a graph. These are Chart and Data options. As the name suggests, it is the area where adjustments such as the colors, width and height of the graph are made. X axis and Y axis are important in chart settings. From the X axis, we want to query, management system, finding type, auditor, audited unit, department, system entry and question etc. It allows us to obtain graphics according to the subjects. From the Y Axis, it is ensured that the graph is obtained according to the number of the relevant query. From the Data Options, it is the field used if you want to filter to get a more limited data than the graphic settings we have determined. When the check box is checked, the quantity information is displayed on the bar in the graph. After the settings are completed, the graph is created by clicking the button. If you want to export the graph to different formats, after selecting the format from the right (Export Graphic), the graph can be exported to xls, png, jpg. With the (Export to Excel) button, it is enabled to transfer the data to Excel. Graphs in different formats can be created with this data.
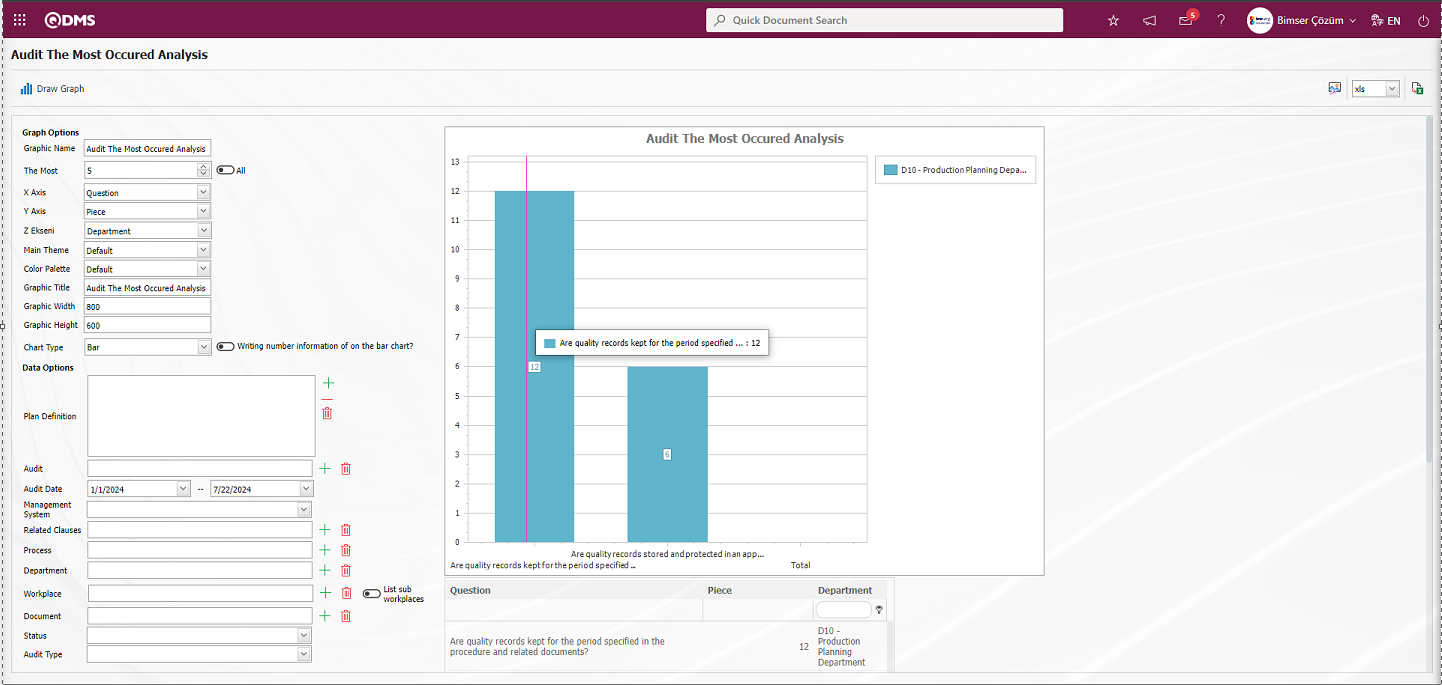
On the Audit The Most Occured Analysis screen, the Audit The Most Occured Analysis Chart is taken in Excel format by clicking the (Export to Excel) button.
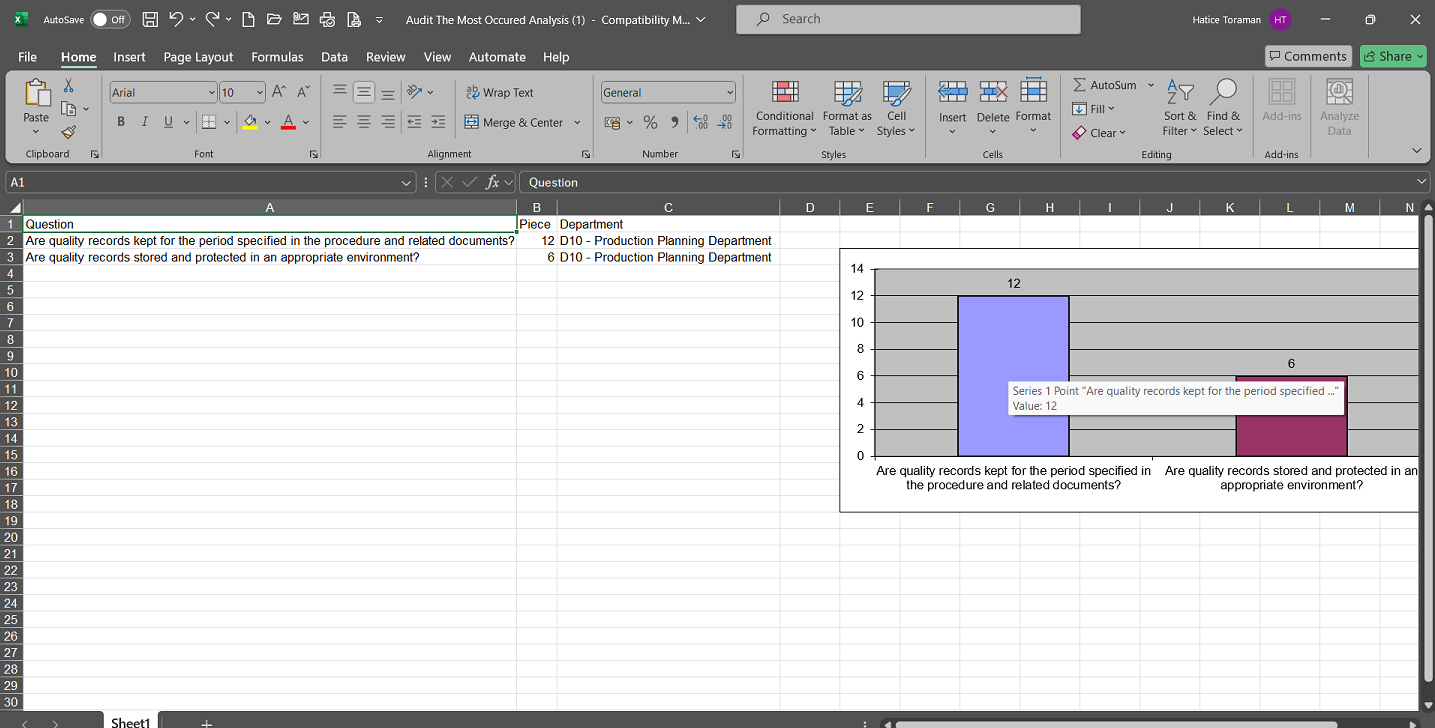
6.2.6. Dashboard/ Audit
Menu Name: Dashboard/ Audit / Audit Dashboard
It is the part of the Qdms system that allows users to view transactions, metrics, graphs and reports on a single screen. Dashboard is defined as a display of indicators, a business dashboard and a table of indicators used to summarize the flow and/or content of information and to explain a particular situation through graphs and tables. Its purpose is to present the necessary information in the shortest time, with the least interaction and thinking requirements. It is the screen that is often used by people in managerial positions. In the Qdms system, the Dashboard feature has been introduced within the scope of the Audit Activity Module. This screen appears depending on the authorization to see the menu.
When the Dashboard menu is clicked, two tabs, list and filter tab, appear.

In the Filter tab, filtering is done according to the fields in the search criteria.
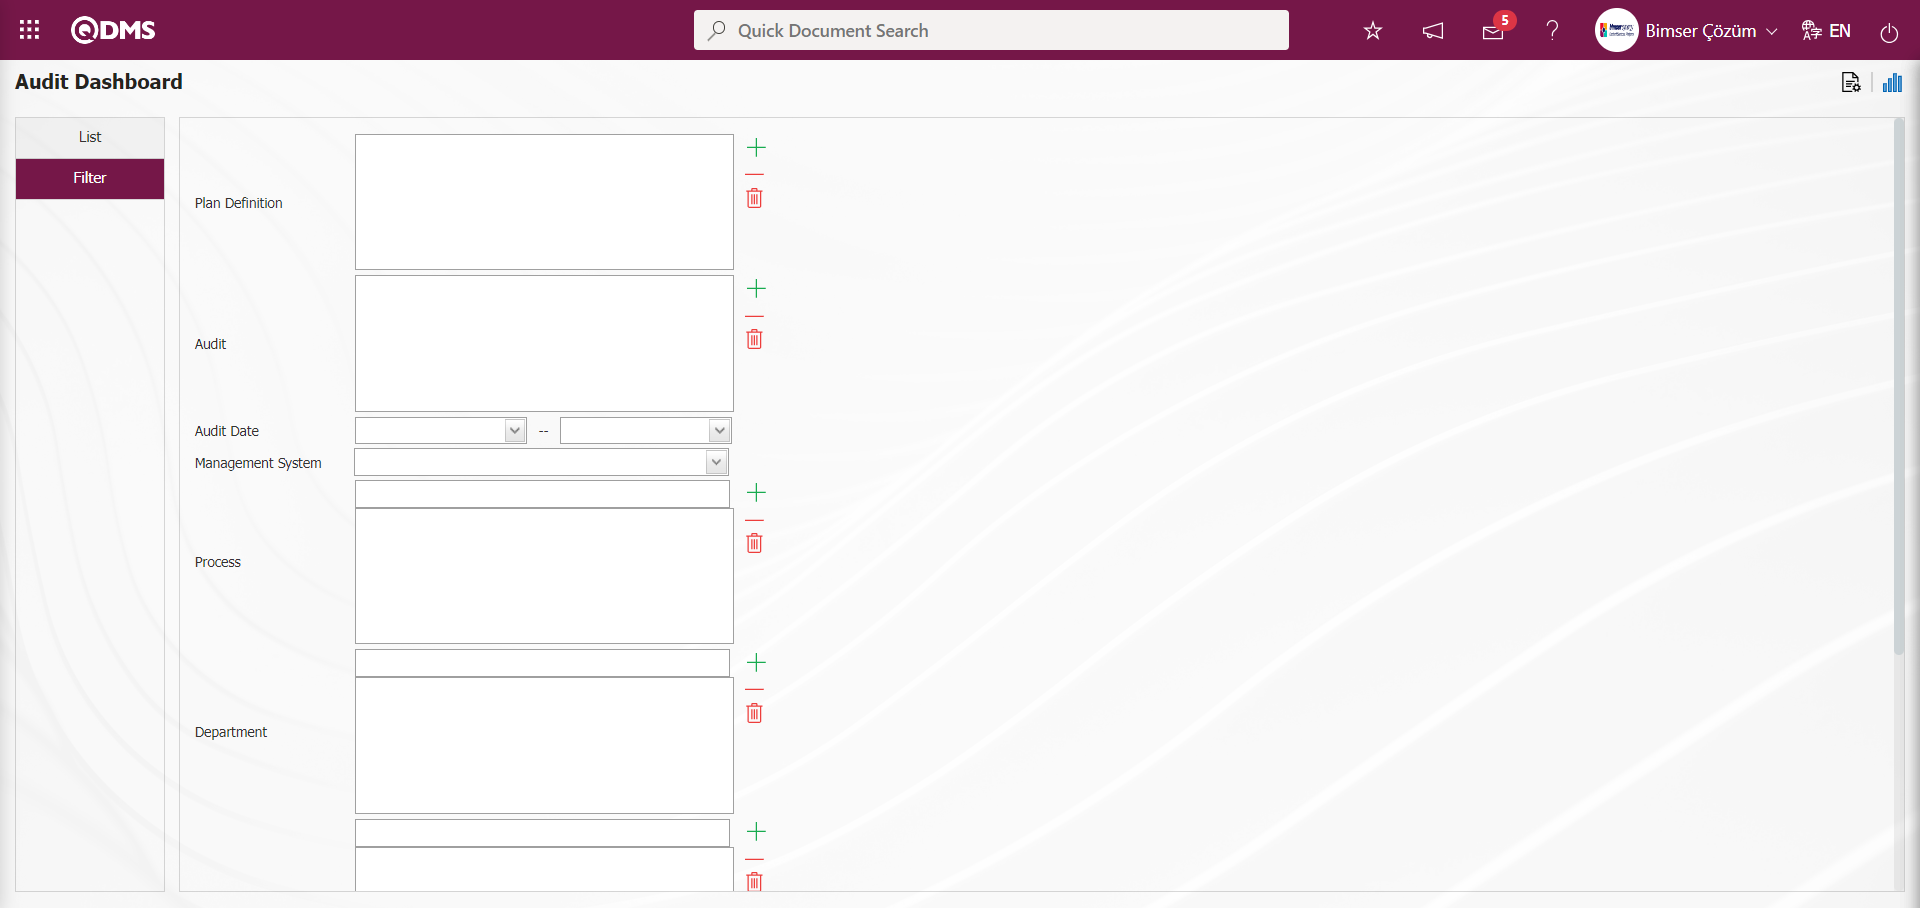
In the Audit Activity module, fields such as Total Audit, Open Audits, Closed Audits, Number of Finding, Created Action Count and Created CAPA Count in the List tab on the Audit Dashboard screen are displayed as fixed fields and no editing is done on them. In these fixed fields, information is given in total and percentages.
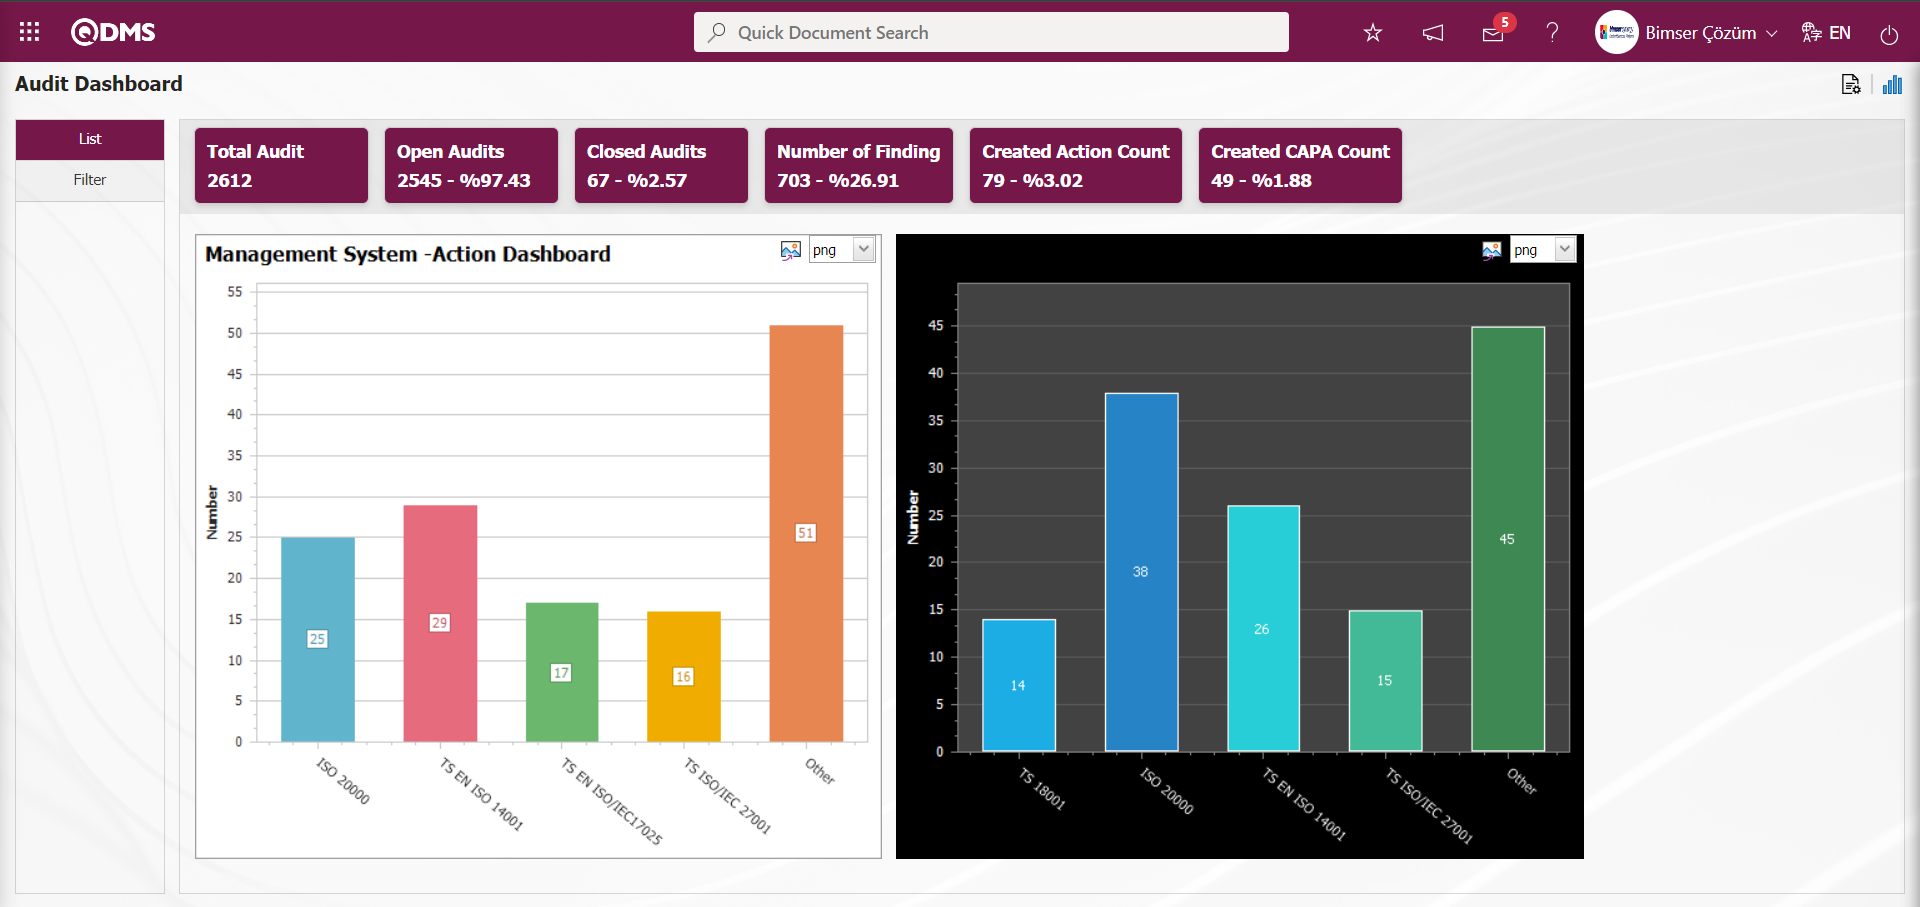
On the Audit Dashboard screen, the graphic design process is done with settings such as how many graphics there will be, what the name of the graphic will be, what the order of the graphics will be, which areas will be on the Z axis, Y axis, graphic length, graphic width and graphic type. In order to make these adjustments on the Audit Dashboard screen, the user must be defined as a Module Administrator in the Audit Activity Module. (Module administrator identification is made in the Audit Activity Module in the System Infrastructure Definitions / BSID / Configuration Settings / Manager Definition menu).
When the user is not a Module Manager in the Audit Activity Module, the button in the screenshot below is displayed on the Audit Dashboard screen.
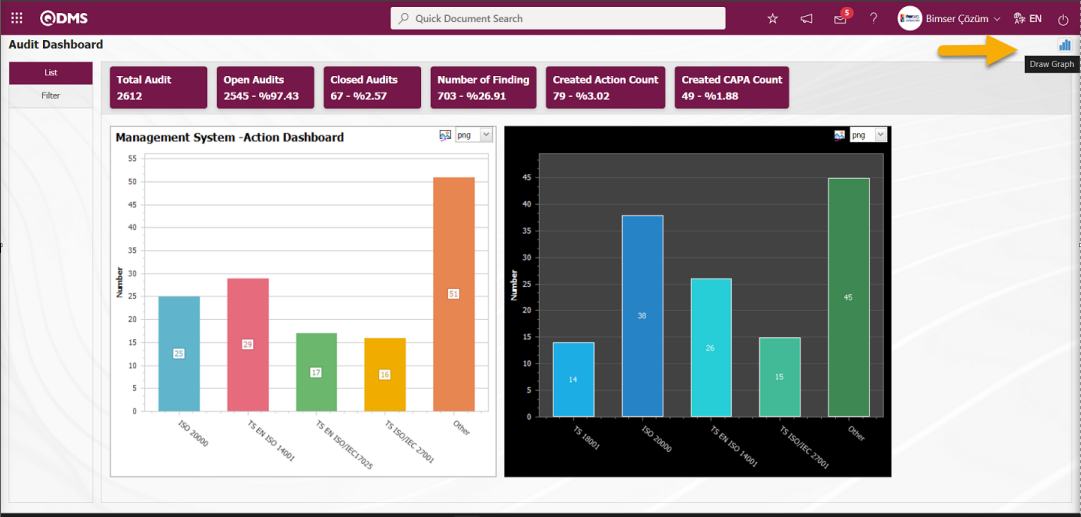
The first button  (Graphic Settings) is displayed on the Audit Dashboard screen of the user who is defined as the module Administrator in the Audit Activity Module. The user who is the Module Administrator makes the necessary adjustments on the Audit Dashboard screen with the help of the (Graphic Settings) button. Users who are not Module Administrators can also make graphic design by making the necessary adjustments in the Dashboard Configuration screen in the System Infrastructure Definitions / BSID / Configuration Settings / Dashboard Configuration / Audit Activity menu.
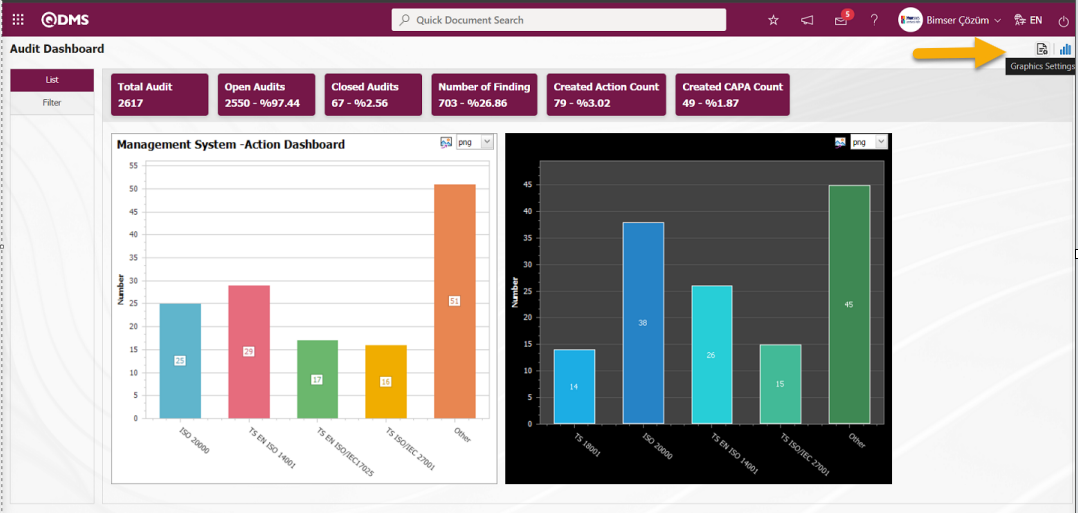
Click on the (Graphic Settings) button to design a graphic in the Audit Activities Module, update and delete the selected graphic information in the list.
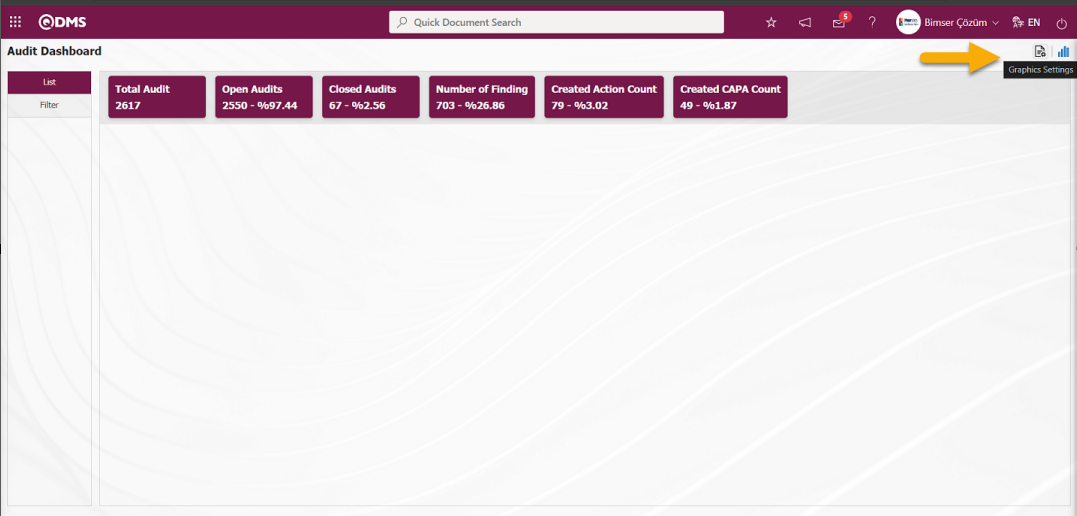
The Dashboard Configuration screen opens.
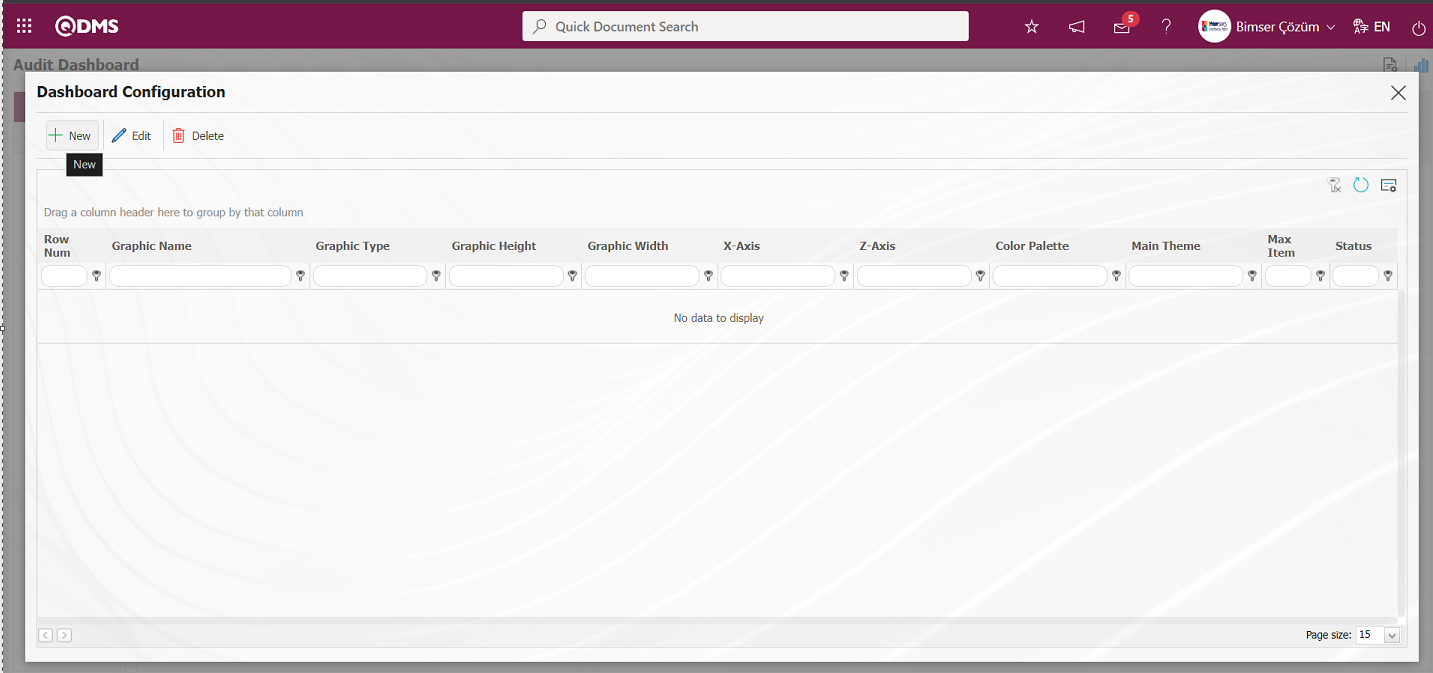
With the help of the buttons on the screen;
 : A new Dashboard is defined.
 : Correction / change / update is made on the Dashboard information selected in the list.
 : The Dashboard information selected in the list is deleted.
- Dashboard Configuration screen is closed.
Click the button to add a new Dashboard in the Audit Activities Module
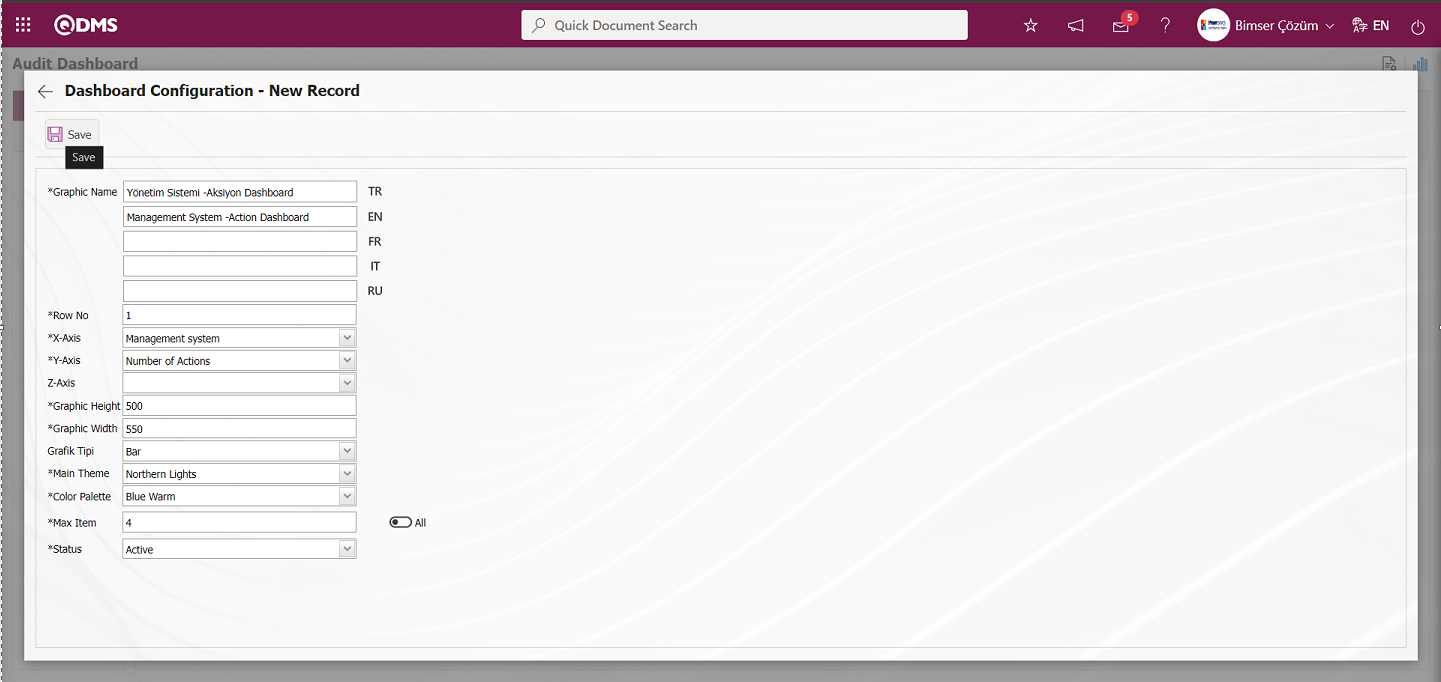
Dashboard Configuration - After filling in the required fields on the New Record screen, click the  button on the top left of the screen.
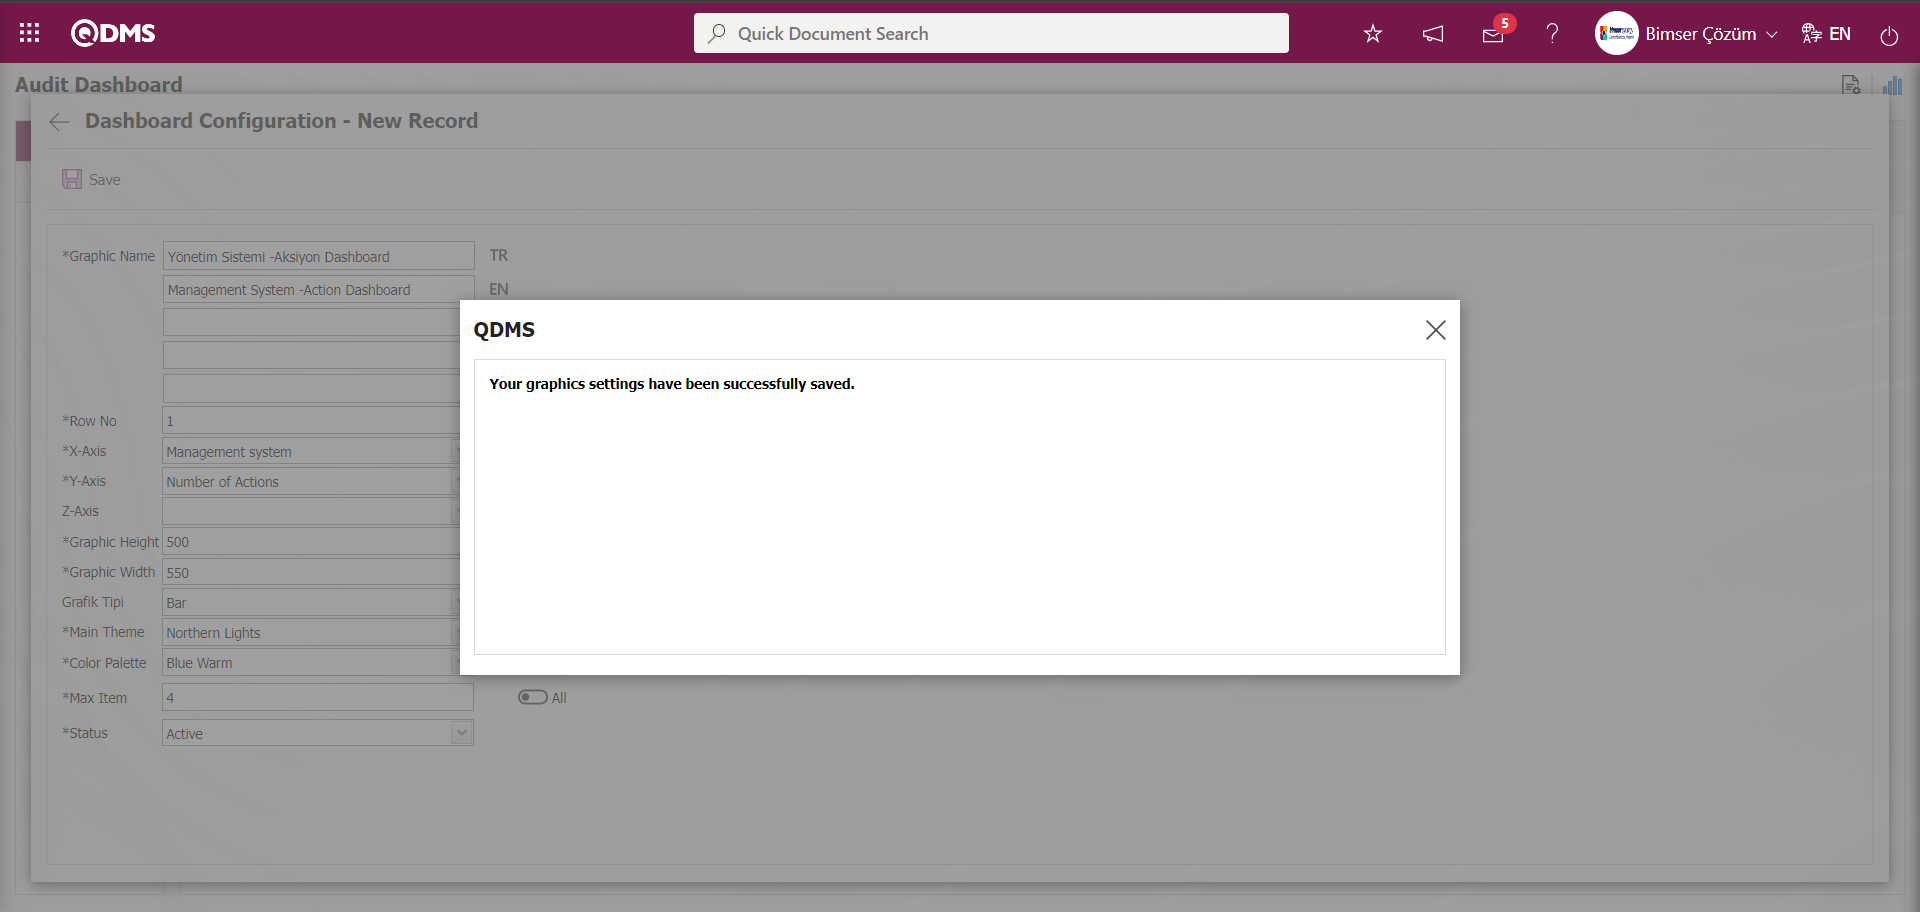
The system displays the message “Your graphics settings have been successfully saved.”, indicating that the saving process has been completed.
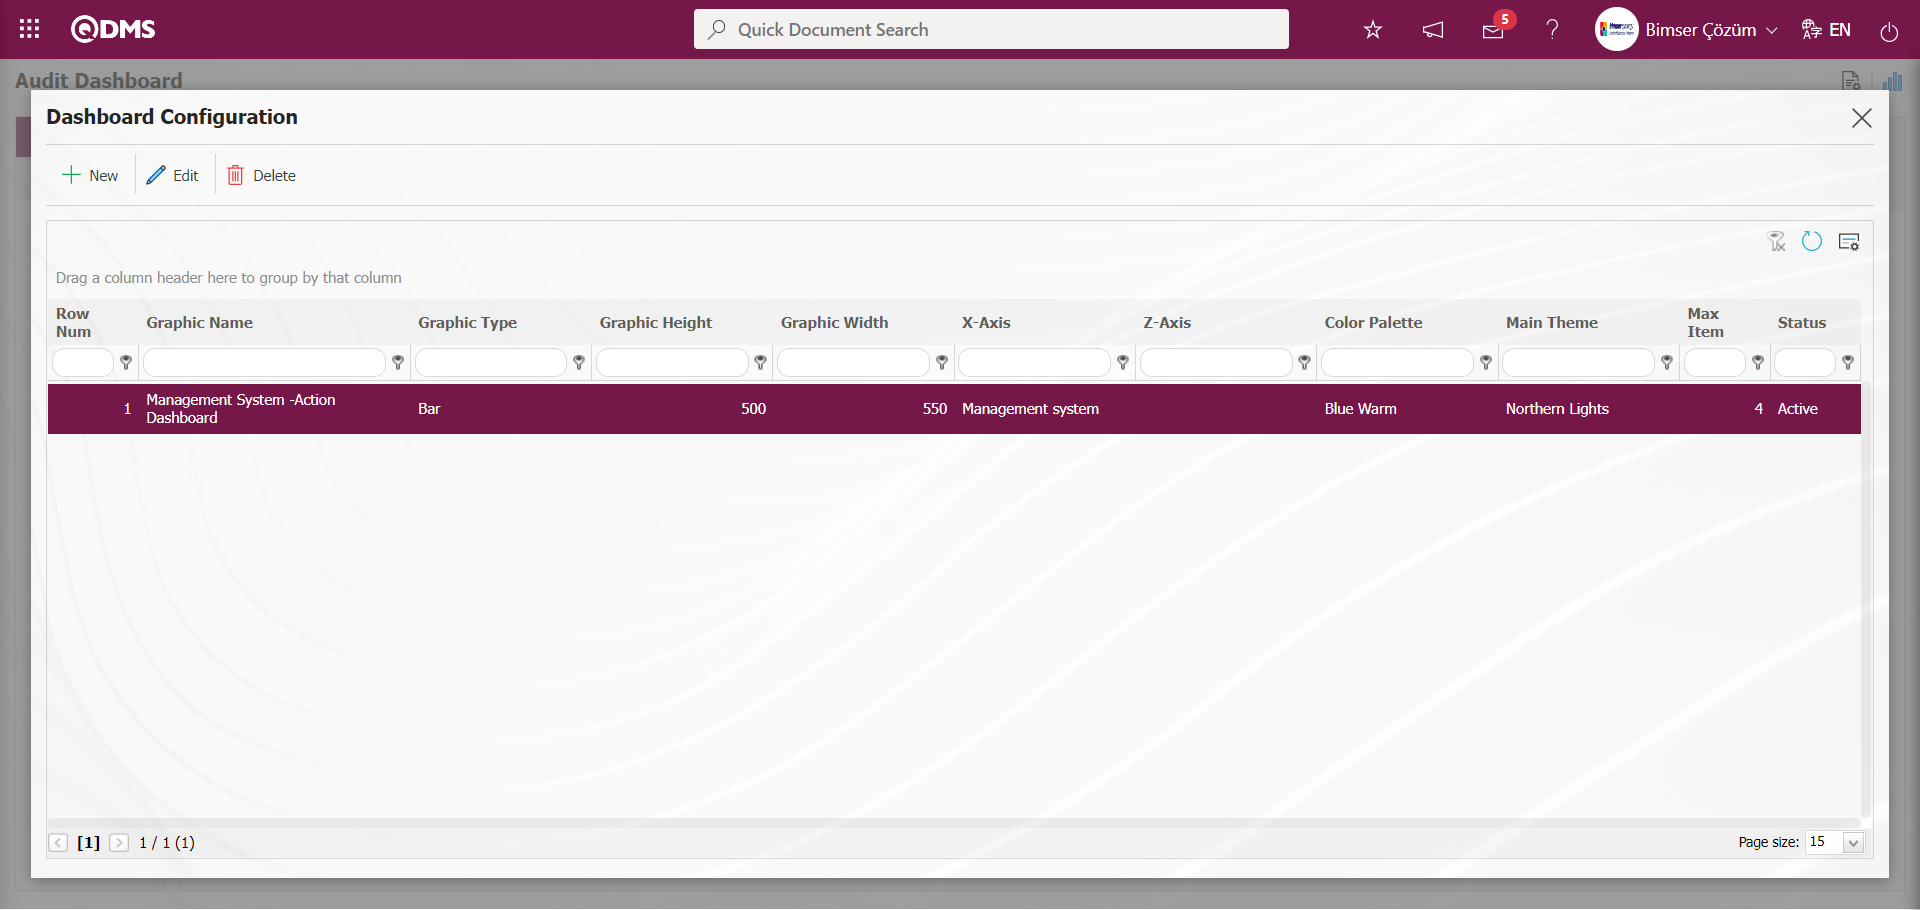
The Dashboard defined in the Audit Dashboard screen is displayed.
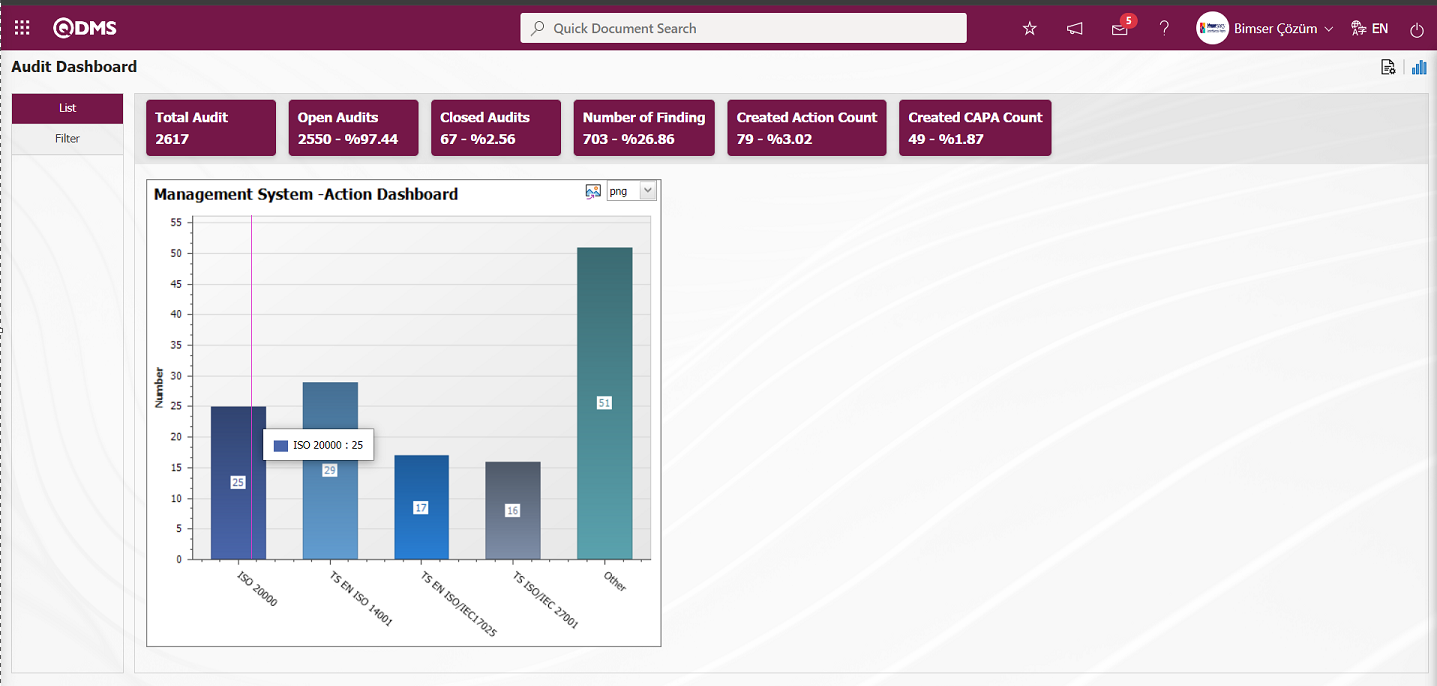
The Dashboard defined in the Audit Dashboard screen is displayed as a PieChart.
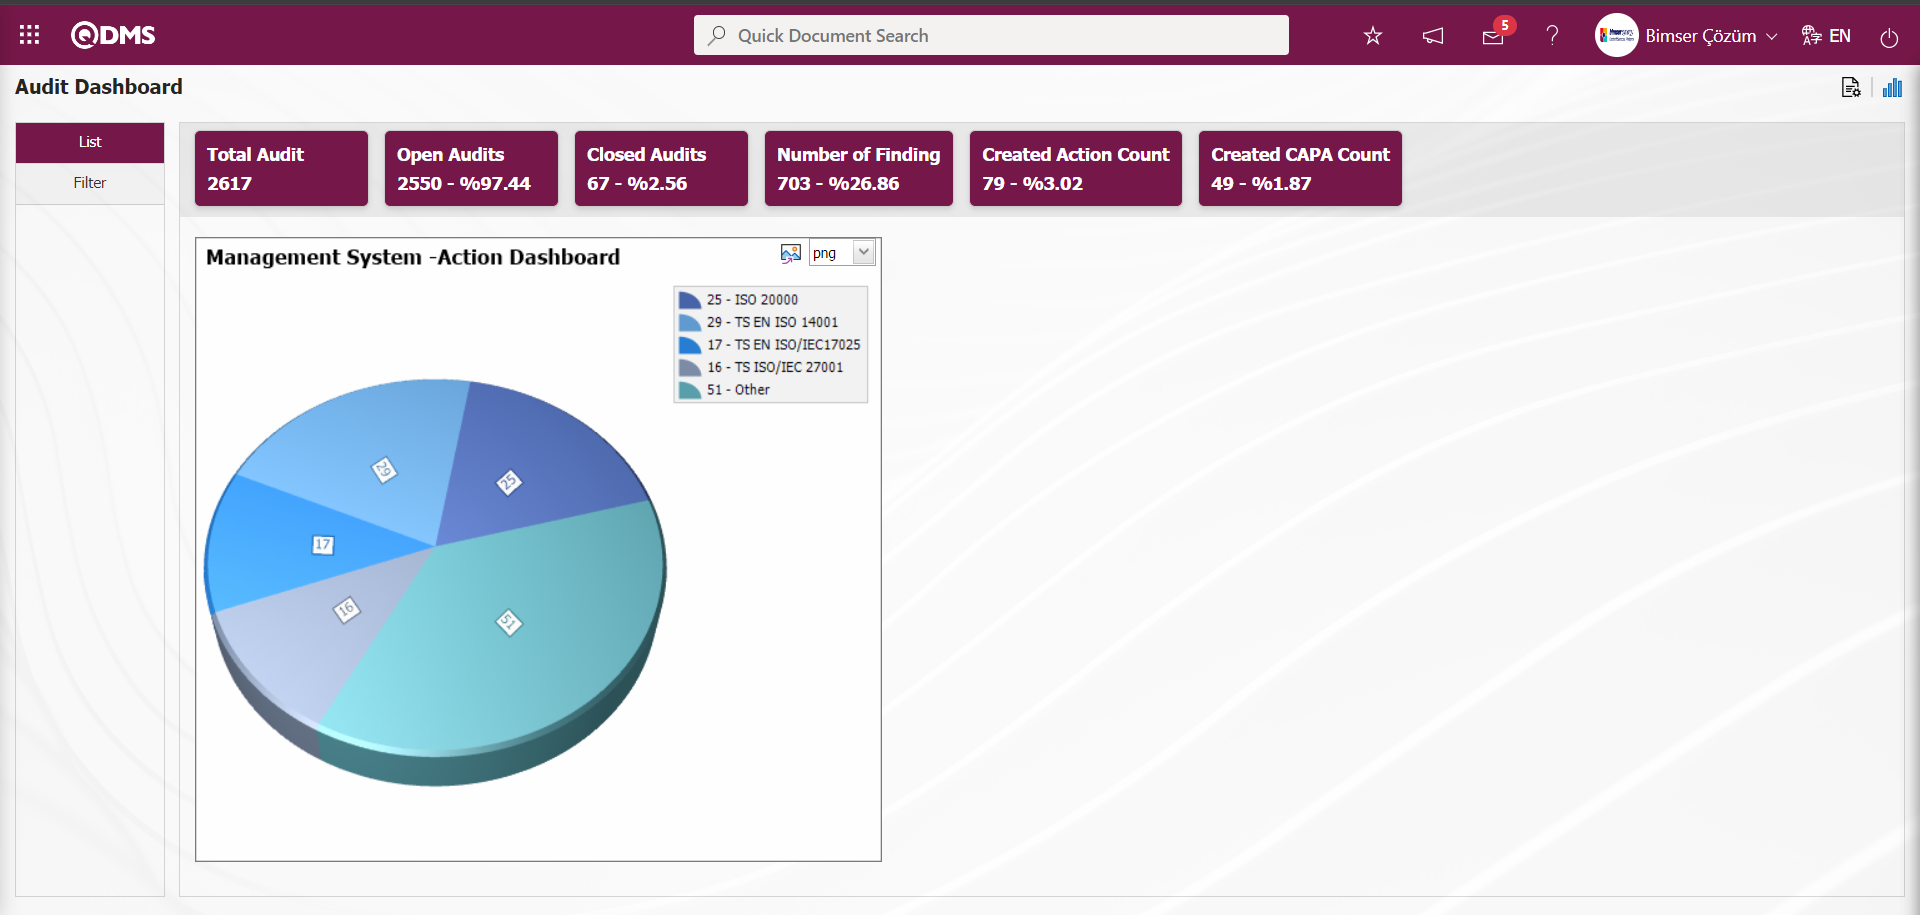
By clicking the (Export Graphic) button, the graphic can be exported to the external environment by converting it to the format type (png, jpg, bmp, xls, etc.) selected from the drop-down menu.
Graphic Length is limited to a min value of 500 and a maximum of 1000. Graphic Width is limited to a min value of 550 and a max value of 1800. Chart Length and Width should be selected between these values. Dashboard Configuration - If the row number is already used on the New Record screen, an error message “The row number you specified is in use, you must specify a row number that is not in use.” is given by the system during the saving phase.
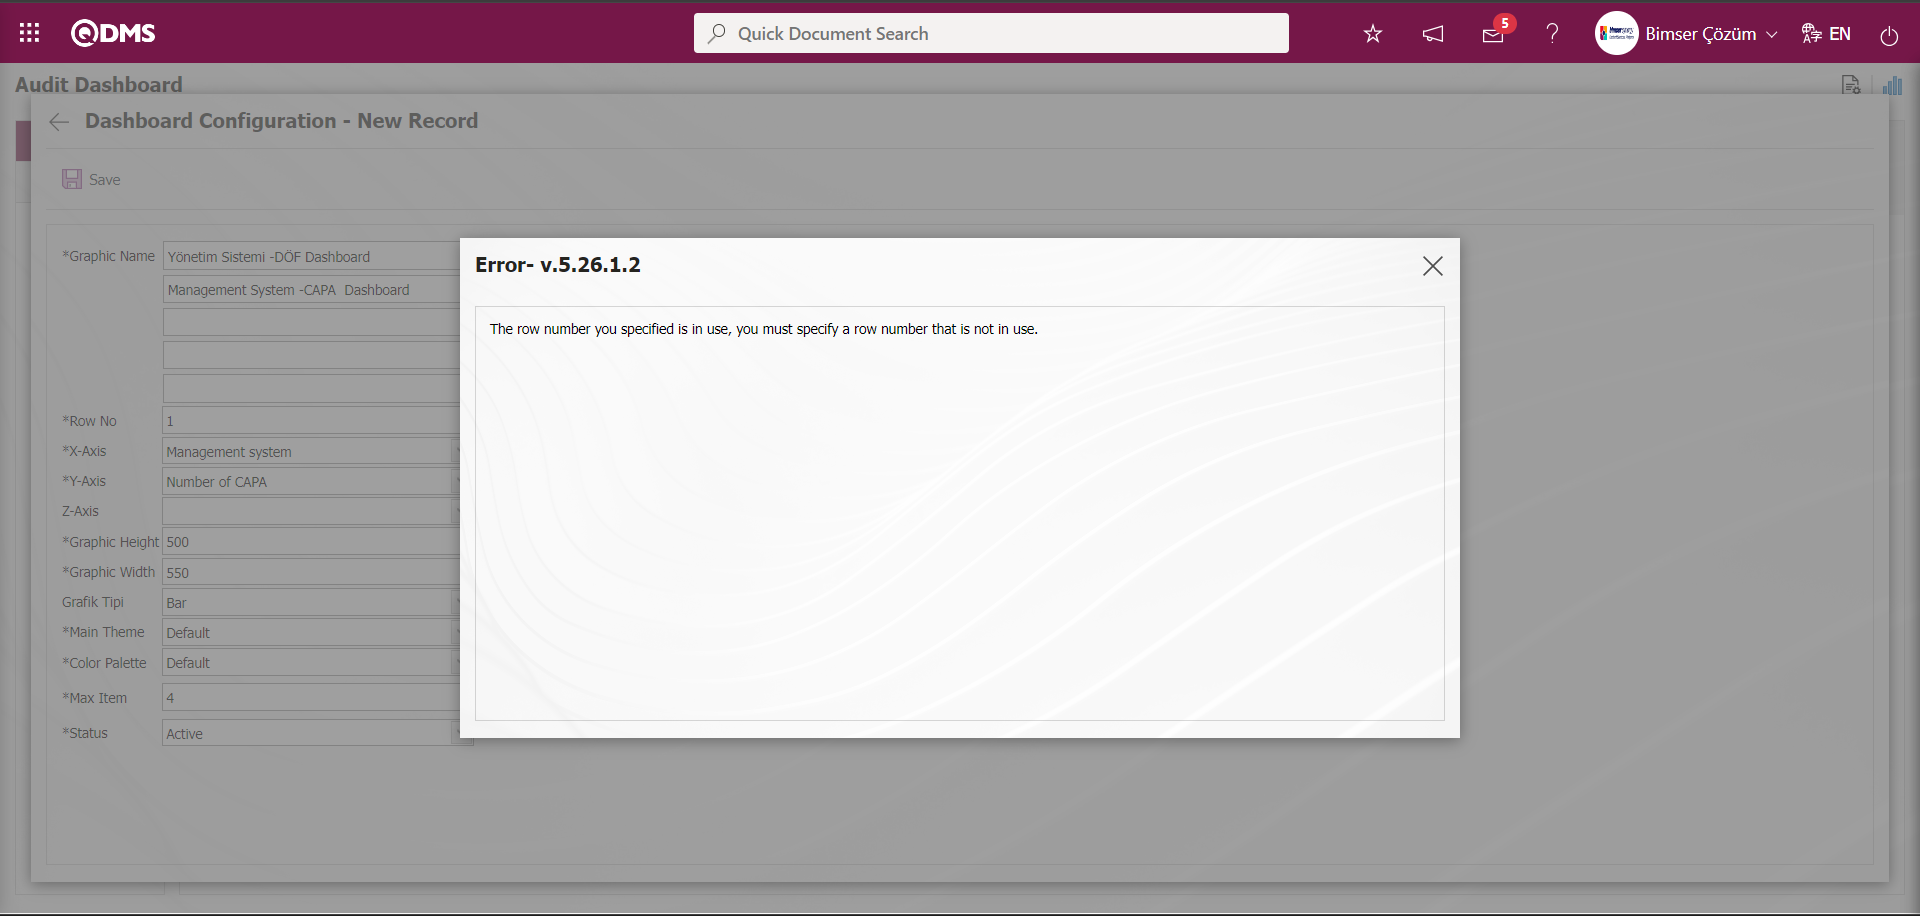
In this way, a new chart can be added on the screen opened with the Chart Settings button. Editing, updating, changing and deleting operations are performed on the added chart information. The filtering screen for the relevant graphics in the list is defined and set as downloadable.
For users who are not Module Administrators, the Dashboard Configuration screen is opened by clicking on the System Infrastructure Definitions/BSID/Configuration Settings/ Dashboard Configuration/ Audit Activities menu and the necessary adjustments are made on the screen that opens and the graphic design process is also done.
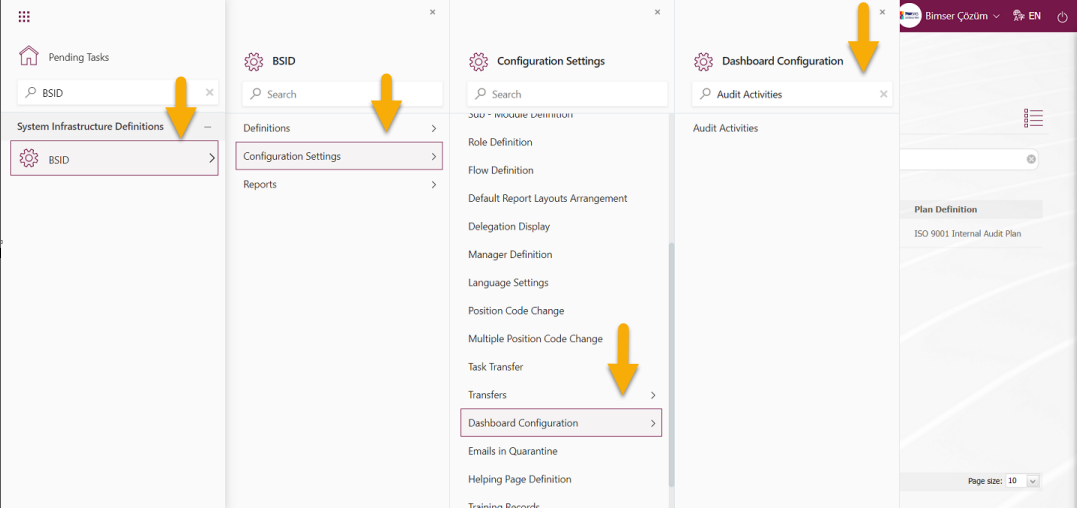
They can define a new Dashboard by using the same buttons on the Audit Dashboard Configuration screen and performing the same steps.