Training Planning
Information
You can quickly reach the relevant topic with the help of navigation on the right side.
Training Planning Module (v.5.26) User Help Document
Module Version: 5.26
1. INTRODUCTION:
The “QDMS Training Planning Module” is a module where training is planned, participants are identified, and training is conducted and reported within organizations. With this module, users can request training they wish to conduct. After training sessions are completed, it enables users to assess the effectiveness of the training from the participants' perspective. The system facilitates the submission of OHSAS training records to the Ministry of Family, Labor, and Social Security under the Training Management (Occupational Health and Safety Information Management System) framework.
2. PURPOSE:
The purpose of this help guide is to explain the workflow of the QDMS “Training Planning” module. It provides detailed instructions on how to create training definitions, plan training sessions, add participants, conduct training, evaluate training activities after the training, grade training sessions, and generate reports on all activities performed.
3. RESPONSIBILITIES:
QDMS Training Module Managers, Training Officer, Trainer, Participants, Training Activity Evaluation Position, Users Who Can Request Training, Training Request Approval Role
4. ABBREVIATIONS:
QDMS: “Quality Document Management System”
5. WORKFLOW:
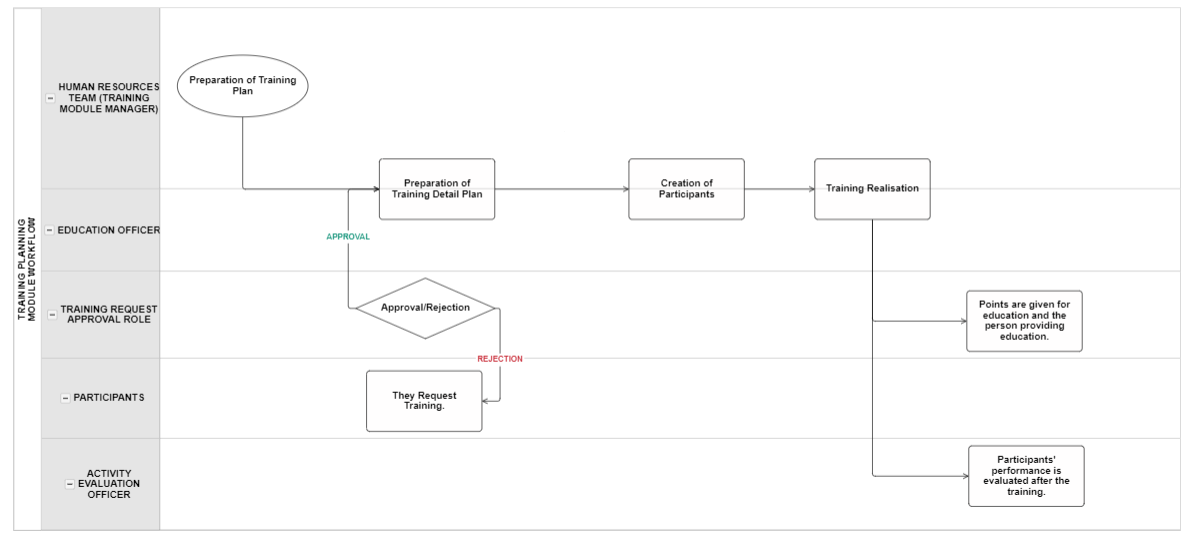
6. TRAINING PLANNING MODULE
This module enables the preparation and tracking of training plans, automatic creation of training participation forms, generation of reports based on individuals/departments/training, instant preparation of personnel training cards, and notification of participants via email.
This module covers the following features:
- Ensuring that training provided/planned to be provided within the institution is defined in the system.
- By determining the start and end dates, defining annual master training plans in the system, and creating a training calendar.
- Determining which of the defined training courses should be taken from the titles defined in the system and ensuring that they are tracked in the “Report of Taken/Required Trainings” report.
- Determining the validity period of training courses and ensuring that expired training courses are displayed in the “Report of Taken/Required Trainings” report.
- The “Is it Selectable?” feature allows you to determine whether the training defined when planning training details can be selected or not.
- Ensuring that system adjustments are made according to user requests and needs based on the parameters of the Training Planning module.
- Instead of using a general flow, the ability to select a separate flow for each training defined under the training definition menu.
- Ensuring that revision and approval procedures are used.
- After the training plan has been created, ensure that all participants are manually sent an informational email.
- Ensuring that the training courses included in the training plan are assigned to the plan.
- Ensuring that a participation form containing the list of participants and their wet signatures is obtained.
- After the detailed training plan has been created, ensure that the personnel who will participate in this training are assigned.
- Canceling a training detail plan created with the “Cancel” feature by entering the reason for cancellation.
- The training created with the Delay feature can be postponed to a later date by selecting the postponement date and entering the reason for postponement.
- Determining the dates of the training and the duration of the training in hours/minutes.
- Ensuring that the number of participants in the training is set.
- Ensuring that automatic participant quota alerts are issued.
- Ensuring that the trainer and training supervisor are assigned.
- Ensuring that the success certificate, participation certificate, and certificate to be given as a result of the training are determined.
- Ensuring that periodic training plans can be defined with the “Periodicity” feature and that automatic notifications are generated by the system for trainings whose time has come.
- Ensuring that the training result activity evaluation is carried out.
- Ensuring integration with the survey module
- Ensuring that the trainer is evaluated by selecting a trainer evaluation survey template and evaluating the trainer according to the survey.
- Ensuring that the training is evaluated by selecting a training activity evaluation survey template and evaluating the training according to the survey.
- Ensuring that parametric field types are defined according to the institution's requests and needs.
- Ensuring that participants are added to the created training.
- Ensuring that emails are sent to all participants of the created training.
- Ensuring that training is carried out using the “Conduct training” feature.
- Ensuring that training is evaluated by defining a passing score for each training course.
- Ensuring that new participants can be added or existing participants can be removed during the training implementation phase.
- Ensuring that the quick training definition function is used.
- The “I will rate this training” feature allows users who participate in the training to evaluate it.
- Ensuring that the system provides success, participation, and certificates.
- Training requests can be collected from employees working at the institution, and their planning can be ensured after the approval process of the relevant requests.
- “Detailed Report Based on Department” displays detailed information about the training courses taken by departments in the system and allows reports to be generated according to the desired criteria in the training search section.
- “Detail Report on the basis of Staff” displays detailed information about the training courses taken by employees in the system and allows reports to be generated according to the desired criteria in the training search section.
- “Detail Report on the basis of Training” displays detailed information about users who participated or did not participate in each training course, broken down by training breakdown in the system, and enables reports to be generated according to the desired criteria in the Training tab.
- “Summary Report on the basis of Department” displays information on the total number of training hours taken by departments defined in the system and enables reports to be generated according to the desired criteria in the training search section.
6.1. Integrated Management System/ Training Planning - Part 1
The first step in training planning is to identify existing or potential training needs within the organization. The following steps should be followed to ensure this process is carried out effectively.

6.1.1. Define Training Types
Menu Name: System Infrastructure Definitions/ Training Planning/ Define Training Types
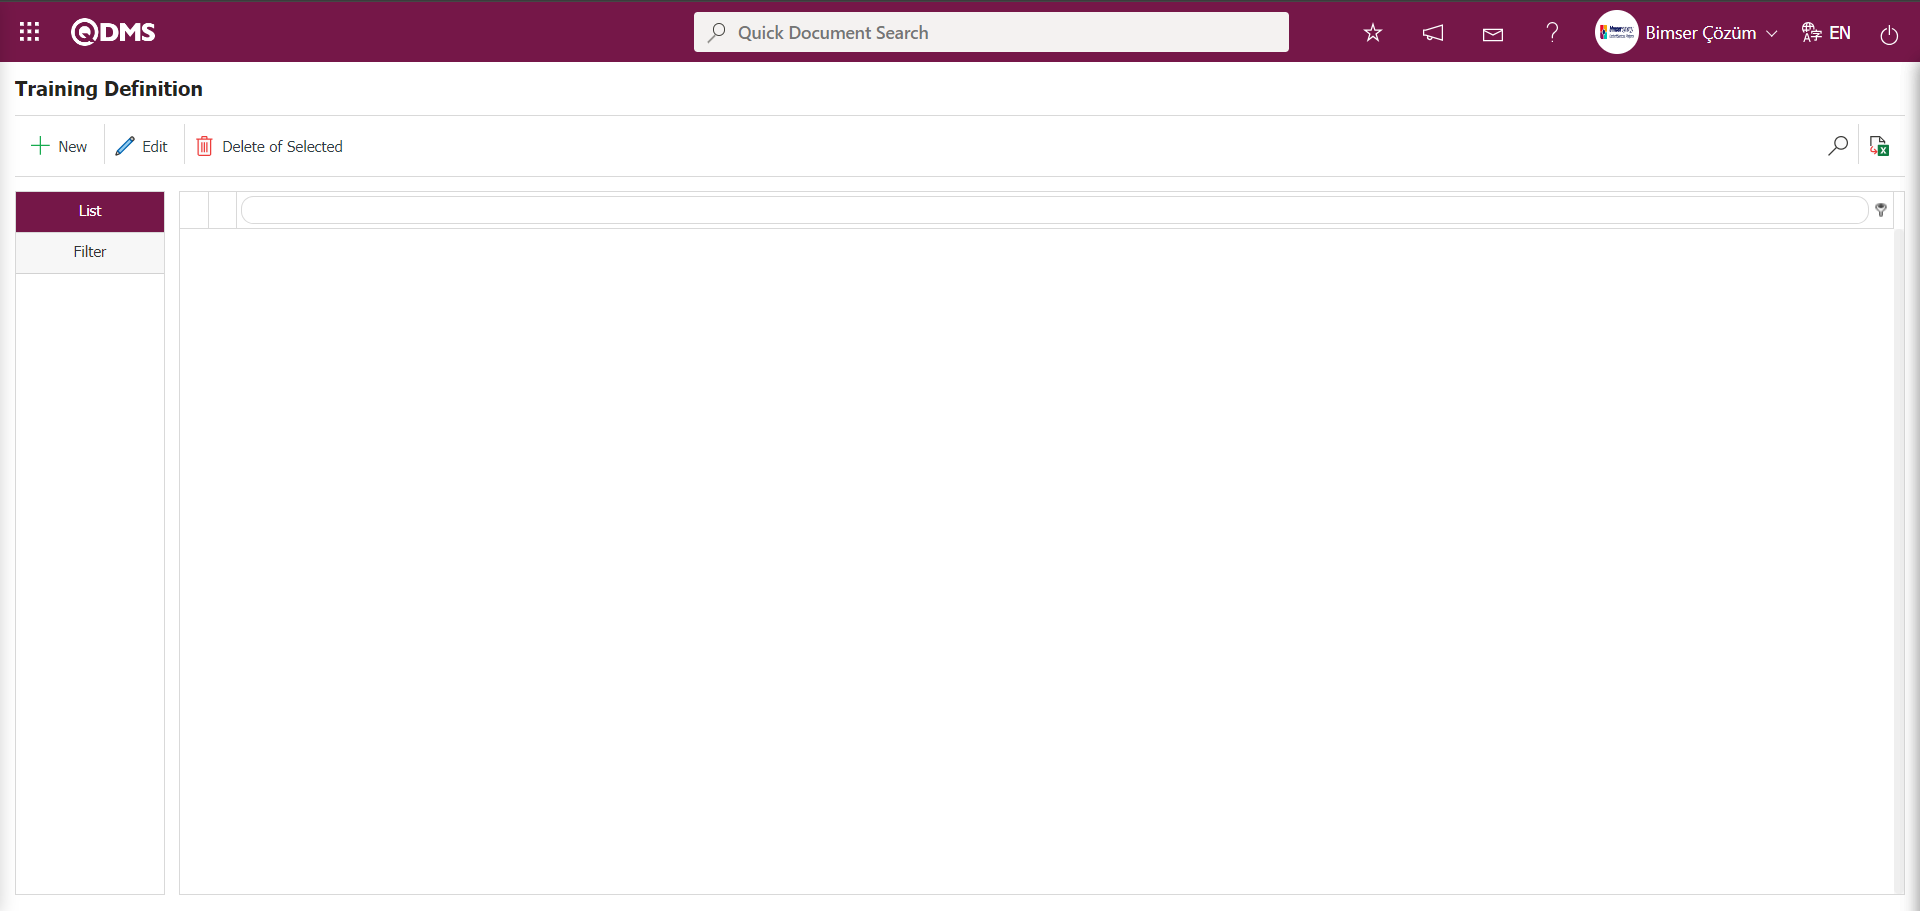
This menu is used to define training courses provided or planned to be provided within the company. The Training Definition screen has two tabs: List and Filter. The Filter tab is used to filter records based on search criteria. The List tab displays a list of records that match the search criteria entered in the Filter tab.
Using the buttons on the screen
 : A new training definition process is performed. The training definition menu is suitable for a tree structure. Once the main training has been defined in a training definition, if you want to define sub-trainings related to this training, click the “New” button while on the main training definition. “Training Top Code” is automatically selected and the structure is created.
 : Changes and updates are made to the selected training definition information in the list. Changes and edits are made to the selected training definition information in the list, except for the “training code.”
 : The selected training definition information in the list is deleted. (For example: Incorrectly coded training definitions)
 : Records can be filtered and searched.
 : The data can be transferred to Excel.
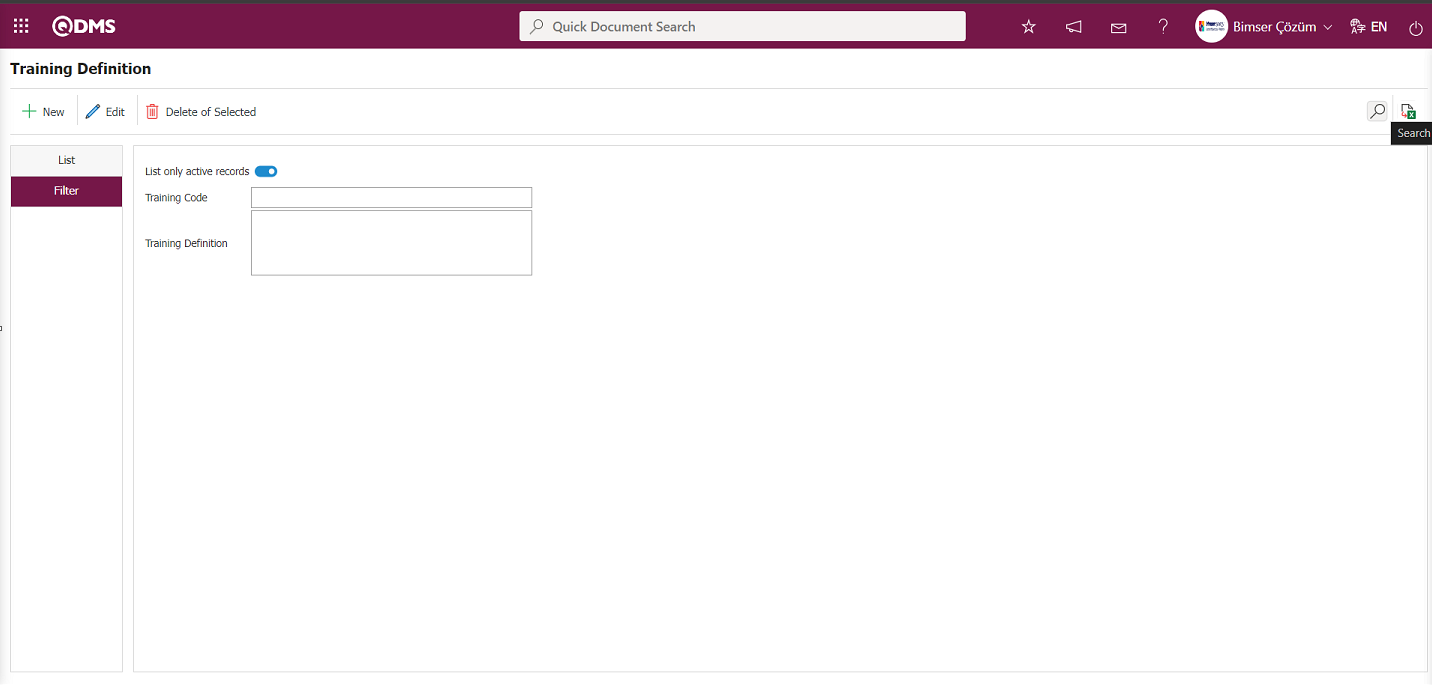
Filter: If there are a large number of training definitions created from the Training Definition screen, check the “List only active records” check box or enter data in the “Training Code” and “Training Definition” fields and click the  (Search) button to filter according to the search criteria.
6.1.1.1. Creating a New Training Definition
Menu Name: Integrated Management System / Training Planning/Define Training Types
To create a new training definition within the Training Planning module, click the button in the upper left corner of the screen to open the Define Training Types screen. In the Define Training Types screen that opens, enter the relevant information in the appropriate fields and click the  button in the upper left corner of the screen to save the Training Definition.
Example: First Aid Training Definition Process.
To add a new training definition to the training definition screen, click the  button in the upper left corner of the screen.
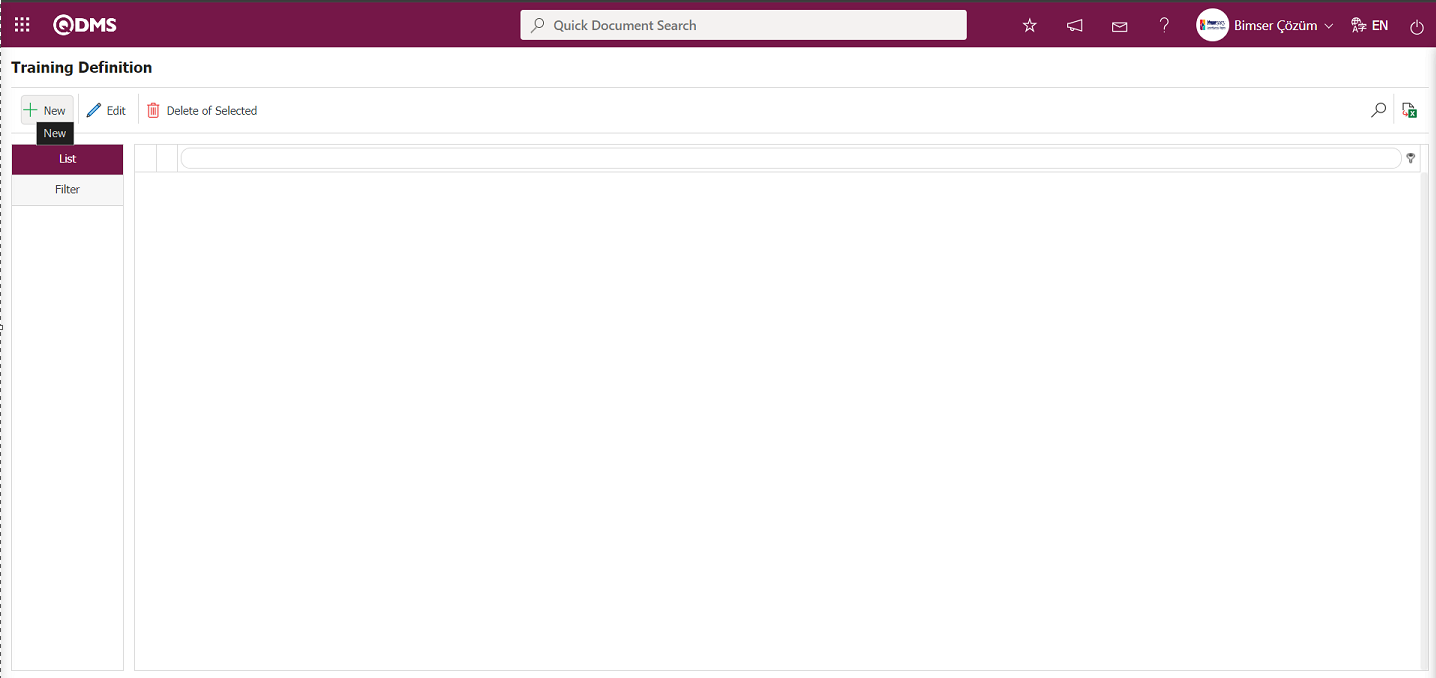
The Training Definition screen opens.

The relevant fields are defined on the screen that opens:
Training Top Code: If the newly defined training is a subcategory of another training, this field is automatically filled. The code and name of the training definition to which it is linked are displayed in the field that is automatically filled. To delete the parent training definition, use the  (Delete) button on the right. To change the parent training definition, use the
  (Add) button on the right. If there is no parent training definition, this field is left blank.
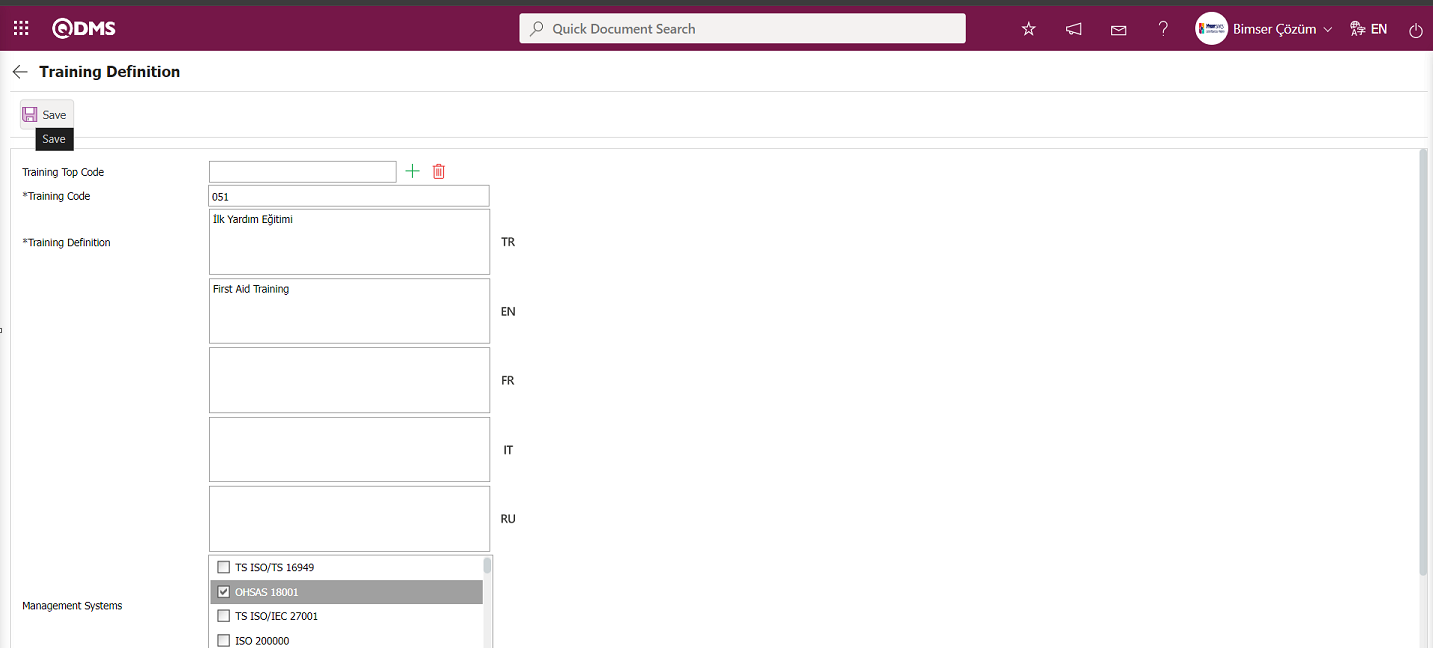
Training Code: This is the field where the training code information is entered in the Training Definition screen. If there is a higher-level category associated with it, it is recommended to assign the appropriate code in accordance with the code system.
Training Definition: The Turkish field in the Training Definition screen is where the training definition information is entered. (For example: Occupational Health and Safety Training, 5S Training, Communication Skills Training) If other languages are used in addition to Turkish, the corresponding languages should be entered in the relevant flag fields.
Management Systems: This is the area where the management system of the training defined in the Training Definition screen is linked. A connection can be established by selecting a management list with multiple management systems.
Is it used in list of Departments/Titles?: This is the area where you select the check box corresponding to the title from the titles available in the system for which the training defined in the Training Definition screen should be assigned. The selected training definitions are selected from the Training/Title menu, and the titles in the system that should receive this training are marked. Tracking is performed in the “Report of Taken/Required Trainings” report.
Status: This is the area where the active/passive status of the training courses defined in the Training Definition screen is determined. The Status field defines whether the active/passive status of the training courses defined in the training definition will be used in planning.
Validity Period (Day): This field specifies the validity period of the training defined in the Training Definition screen. The validity periods of training courses that must be retaken at specific intervals are entered in this field. This ensures that expired training courses are also displayed in the “Report of Taken/Required Trainings” list.
Is it Selectable?: This field determines whether the training defined during training detail planning can be selected. If the relevant check box is selected, the training can be selected from the Training list in the Training Definition field on the Training Detail Planning screen. If the relevant check box is not selected, the system displays the warning message “This training cannot be selected!” when the training is selected from the Training list in the Training Definition field on the Training Detail Planning screen.
For example: The following training courses are included in the tree structure below.
01- Environmental Training
- 01.01-General Environmental Awareness Training
- 01.02-Waste Management Training
If the check box for “Environmental Training” is selected, this training can be included in the training plan when it is created. However, if you want to create sub-trainings separately in the plan instead of selecting the main training, the Environmental Trainings should be saved so that they are not selectable, and the sub-trainings should be marked as selectable. This way, the sub-trainings can be selected separately in the plan.
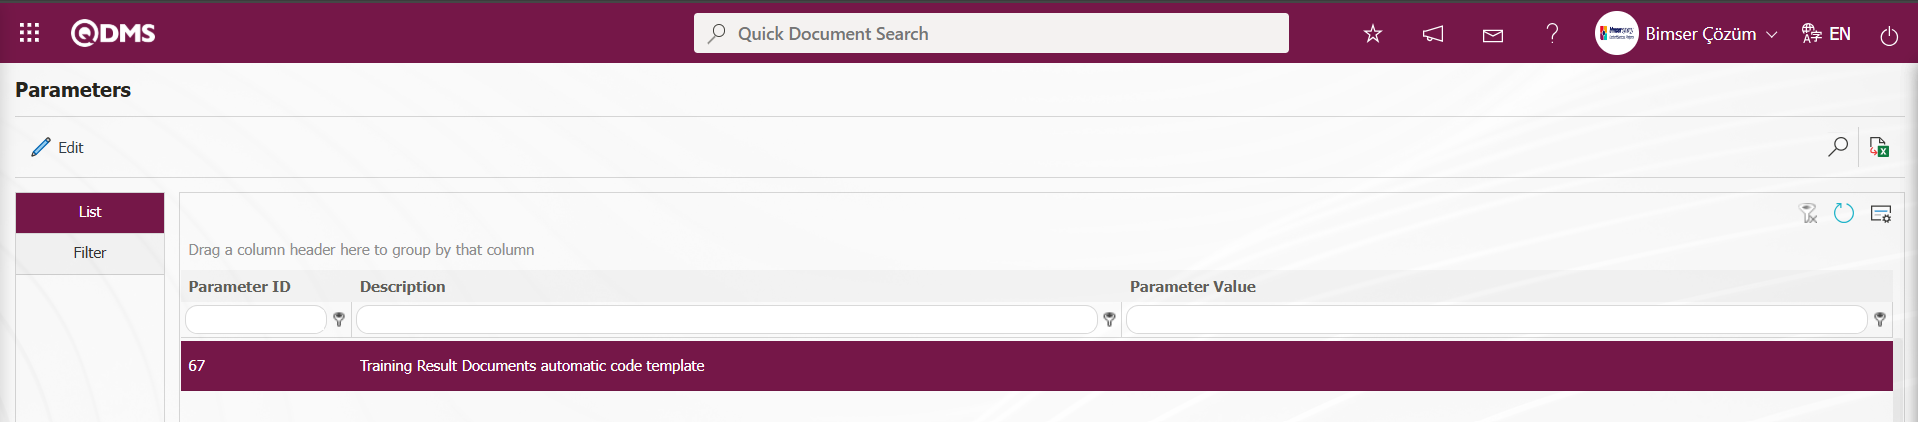
Automatic Code Template: This is the area where the automatic code template for the training defined in the Training Definition screen is defined. If you want the system to automatically assign a certificate number (document number) to the document printed when certificates/participation certificates/success certificates are printed for each participant in the Participants screen, this definition is made in this area. When a code template is used at the training level, automatic certificate (document) numbers are assigned to certificates (documents) based on the training. In the prepared certificate/participation certificate/success certificate format, the short code <SERTIFIKA_NO> is used in the field where the certificate number is written. If an automatic code template is not defined in the training definition, the general code template specified in parameter 67 is used.
 In the code template, the word [CODE] must be added so that the training code can be used. Example code template: BİMSER.[CODE].#####
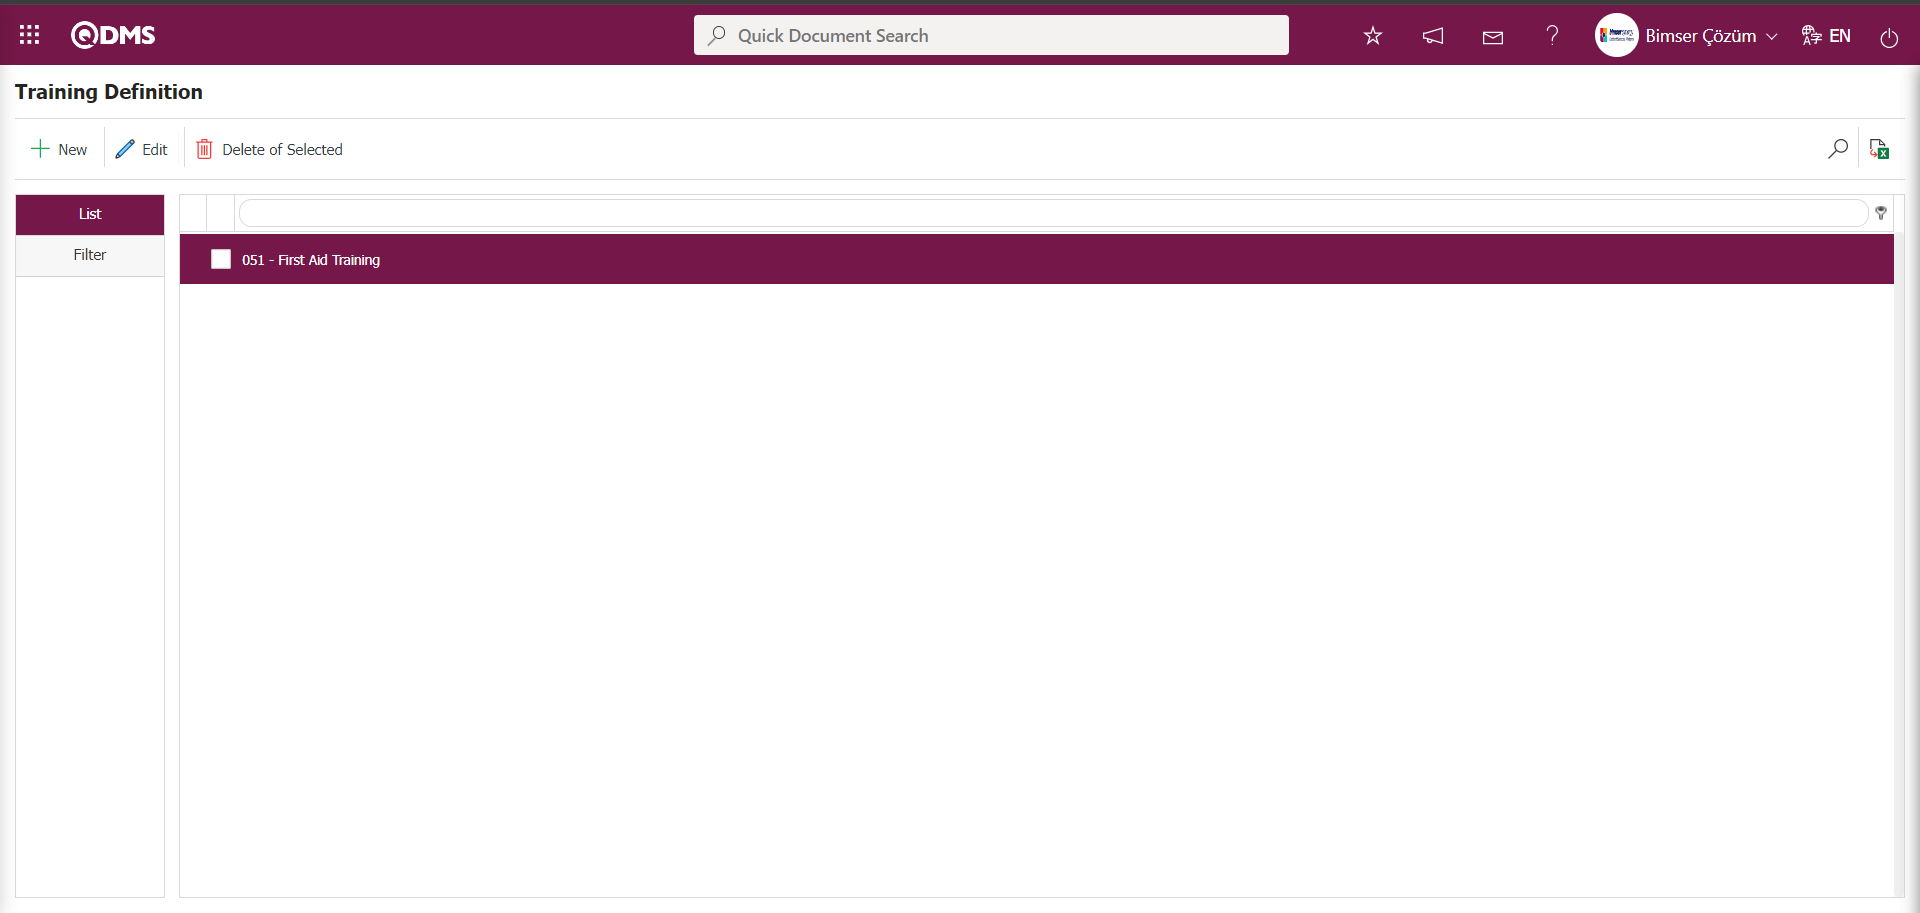
Enter the Training Code and Training Definition information. Select the training defined in the Management System field from the list of relevant management systems. Check the box next to “Is it used in list of Departments/Titles?” When defining the Training Detail Plan, the checkbox next to the “Is it Selectable?” field is checked to select the defined training. The Validity Period (Day) information is entered, and the active option is selected from the status field. After filling in the required fields, the training definition registration process is completed by clicking the  button in the upper left corner.
6.2. System Infrastructure Definitions/ Training Planning
This section is where the infrastructure definitions for the Training Planning Module are defined. The Email Settings section is where email settings are configured, the Training Parameters section is where the necessary settings are configured for the parameters related to the module, and the Authorization Matrix section is where the necessary authorizations are configured in the Training module for the roles or user groups in the Training matrix. The Topic Definition menu, where the duration of training sessions within the HIMS scope is set, and the Survey Question Lists menu, where the survey question lists for relevant functions in the training module are defined, are also included. The steps related to the Training Planning Module are performed in these menus.
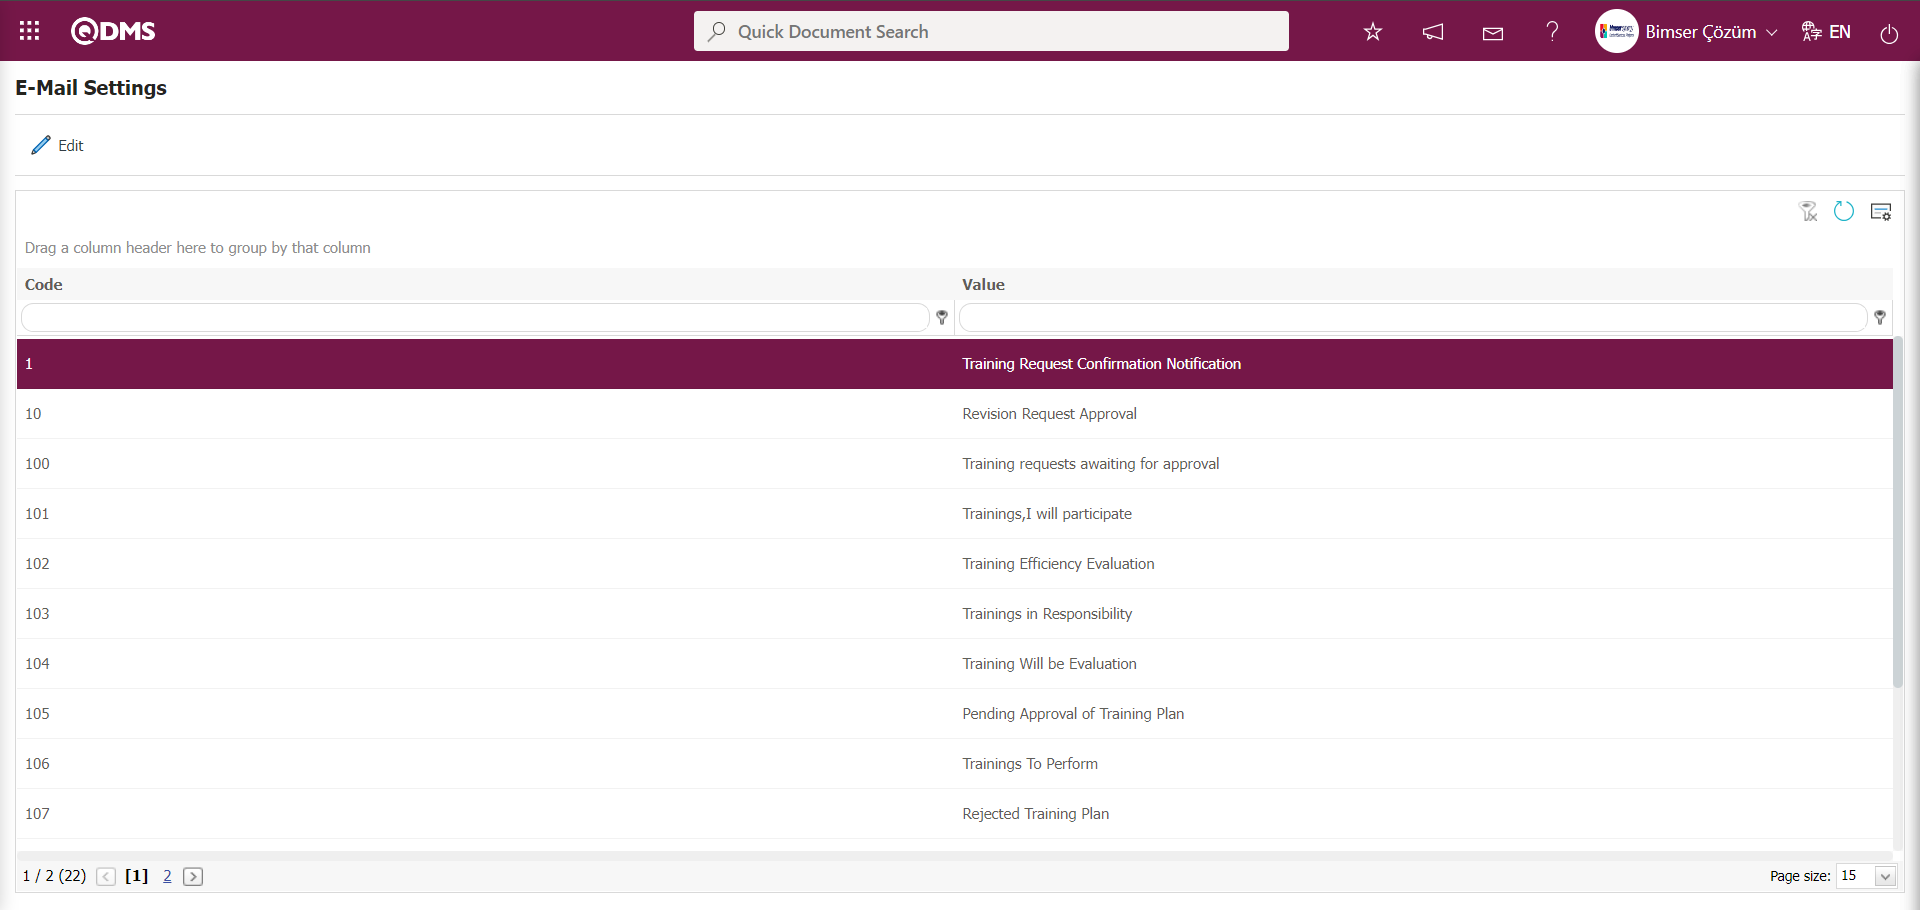
6.2.1.Email Settings
Menu Name: System Infrastructure Definitions/ Training Planning/Email Settings
This menu is used to configure email notifications within the Training Planning module. In the Email Settings screen, you can specify who will receive emails and at which stage of the “Training Planning” module.
With the help of the buttons on the screen;
 : Editing/ changing/ updating is done on the value of the e-mails selected in the list.
 : Clearing the data remaining in the filter fields in the grid where the search criteria search operation on the menu screens is performed
 : The process of returning the menu screen to its default settings is done.
 : User-based designing of the menu screen is done with the show-hide feature, that is, the hiding feature of the fields corresponding to the columns on the menu screens.
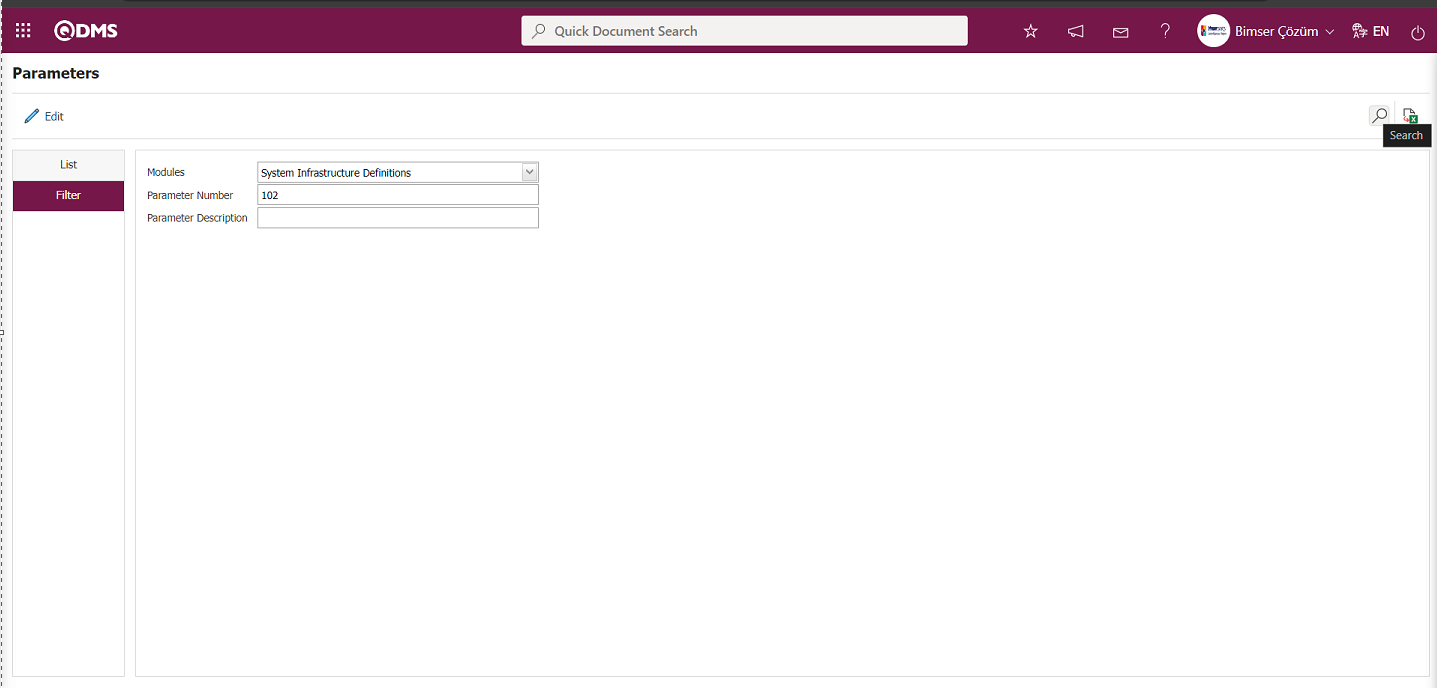
If SMS notification will be used in E-mail Settings;
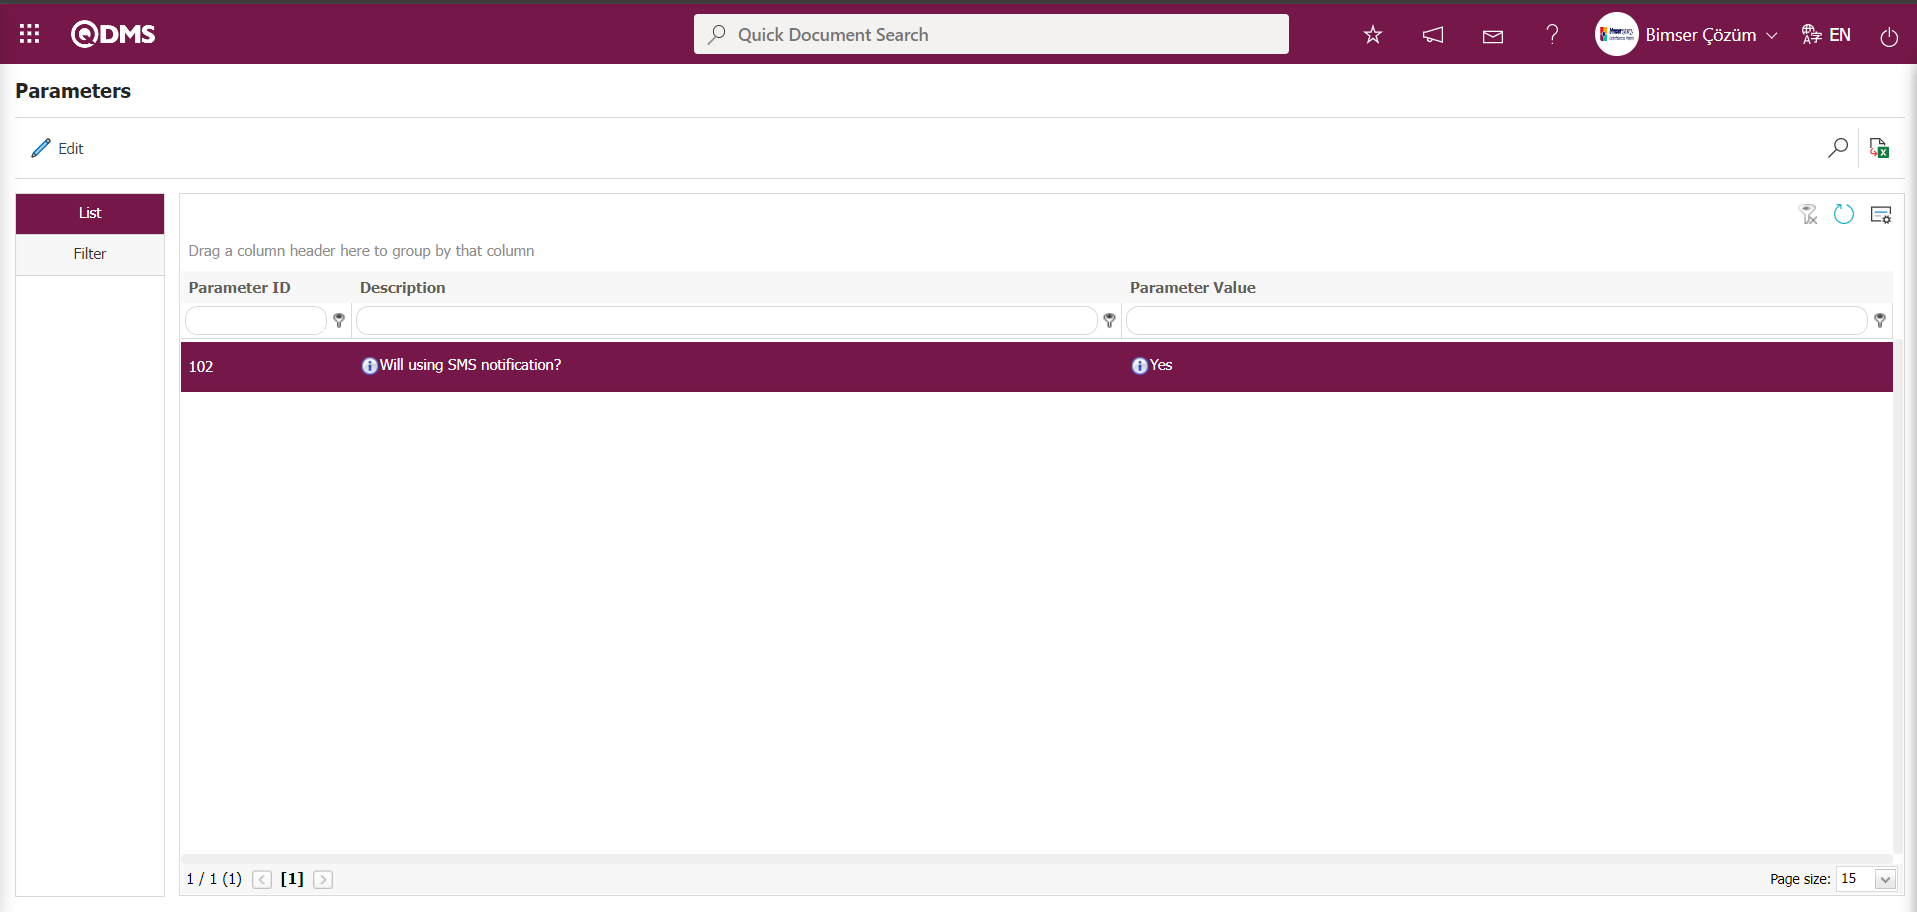
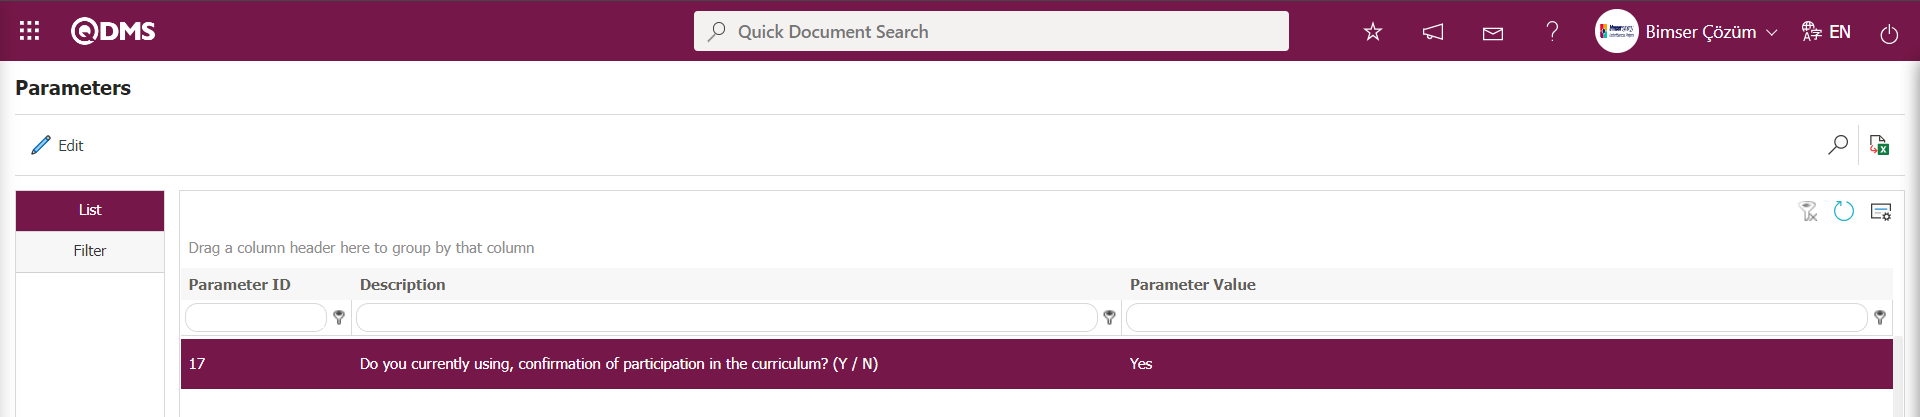
Click on System Infrastructure Definitions/BSID/Configuration Settings/ Parameters menu. In the parameters of the System Infrastructure Definitions module parameters listed on the Parameters screen, the parameter number 102 “Will using SMS notification?” is selected by typing the parameter number in the parameter no field in the Filter tab on the parameters screen and clicking the  (Search) button.
After selecting parameter 102 “Will using SMS notification? ” in System Infrastructure Definitions module parameters, click  button.

Select the parameter value ‘Yes’ on the parameters screen.
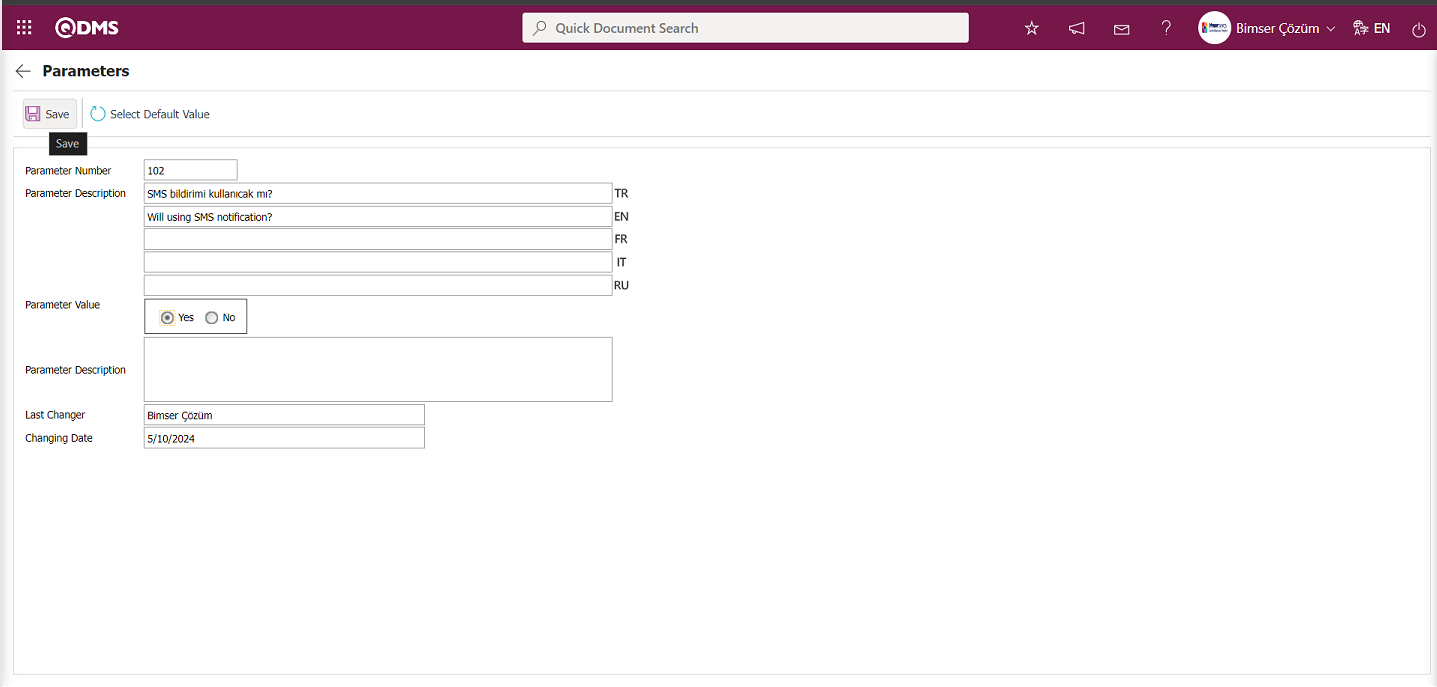
After selecting the parameter value ‘Yes’ on the Parameters screen, the  button on the top left of the screen is clicked and the parameter is activated.
After the parameter is activated, the check box related to the “Send SMS” field related to the use of SMS notification is displayed on the E-Mail Settings screen. By checking the relevant check box, SMS notification is used in E-Mail settings.
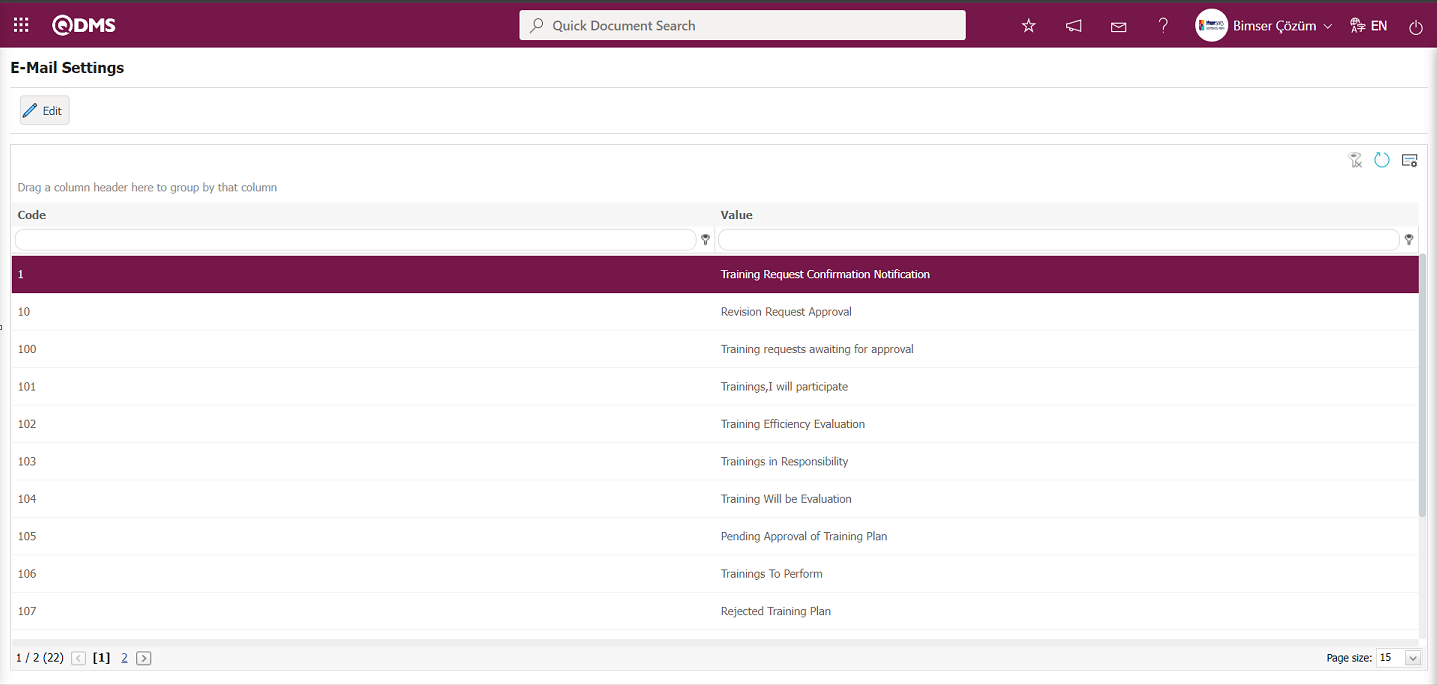
Select which step you want to send e-mail/message and click the  button.
For example: Select the / “Training Request Confirmation Notification” step in the Email Settings screen and click the  button.
The E-Mail Settings/ Training Request Confirmation Notification screen appears. The screen displays a list of roles defined in the system for the relevant module. The roles listed are defined in the System Infrastructure Definitions/ BSID/ Configuration Settings / Role Definition menu. The Roles section shows the role of the person to whom the email and message notification will be sent.
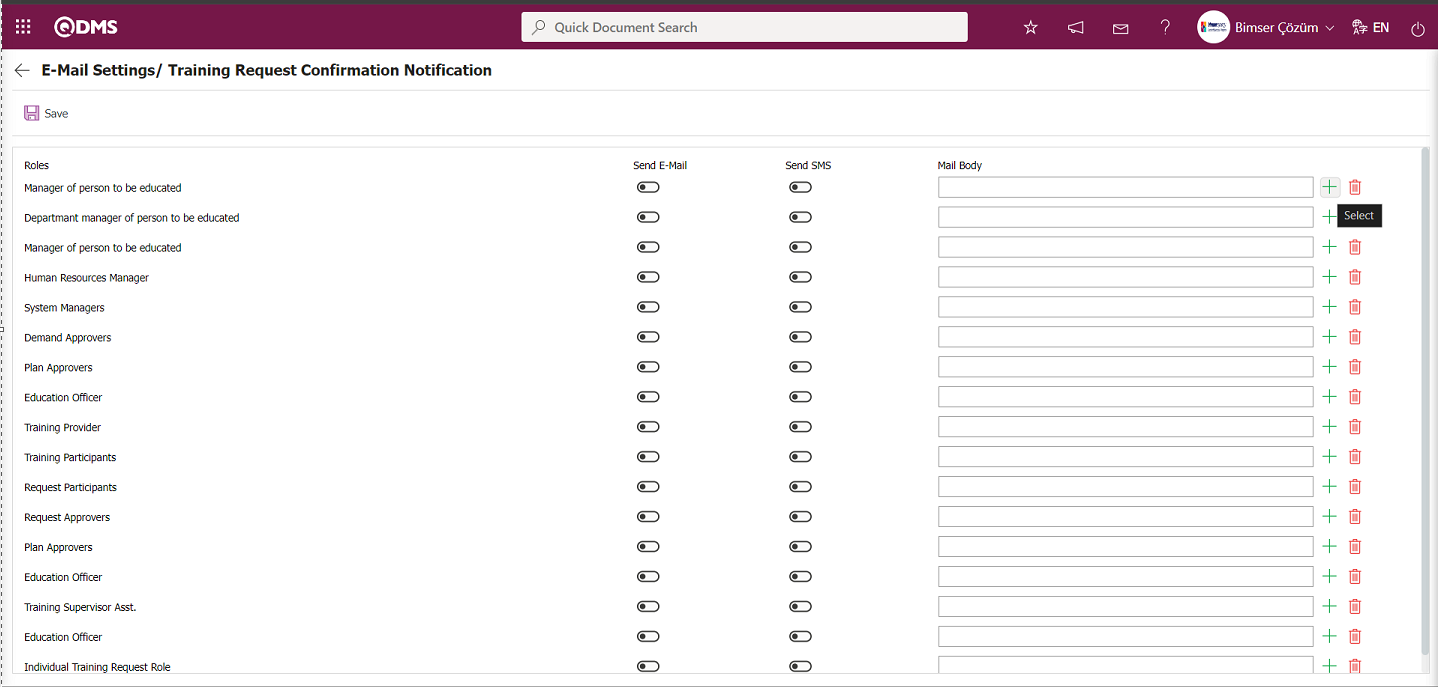
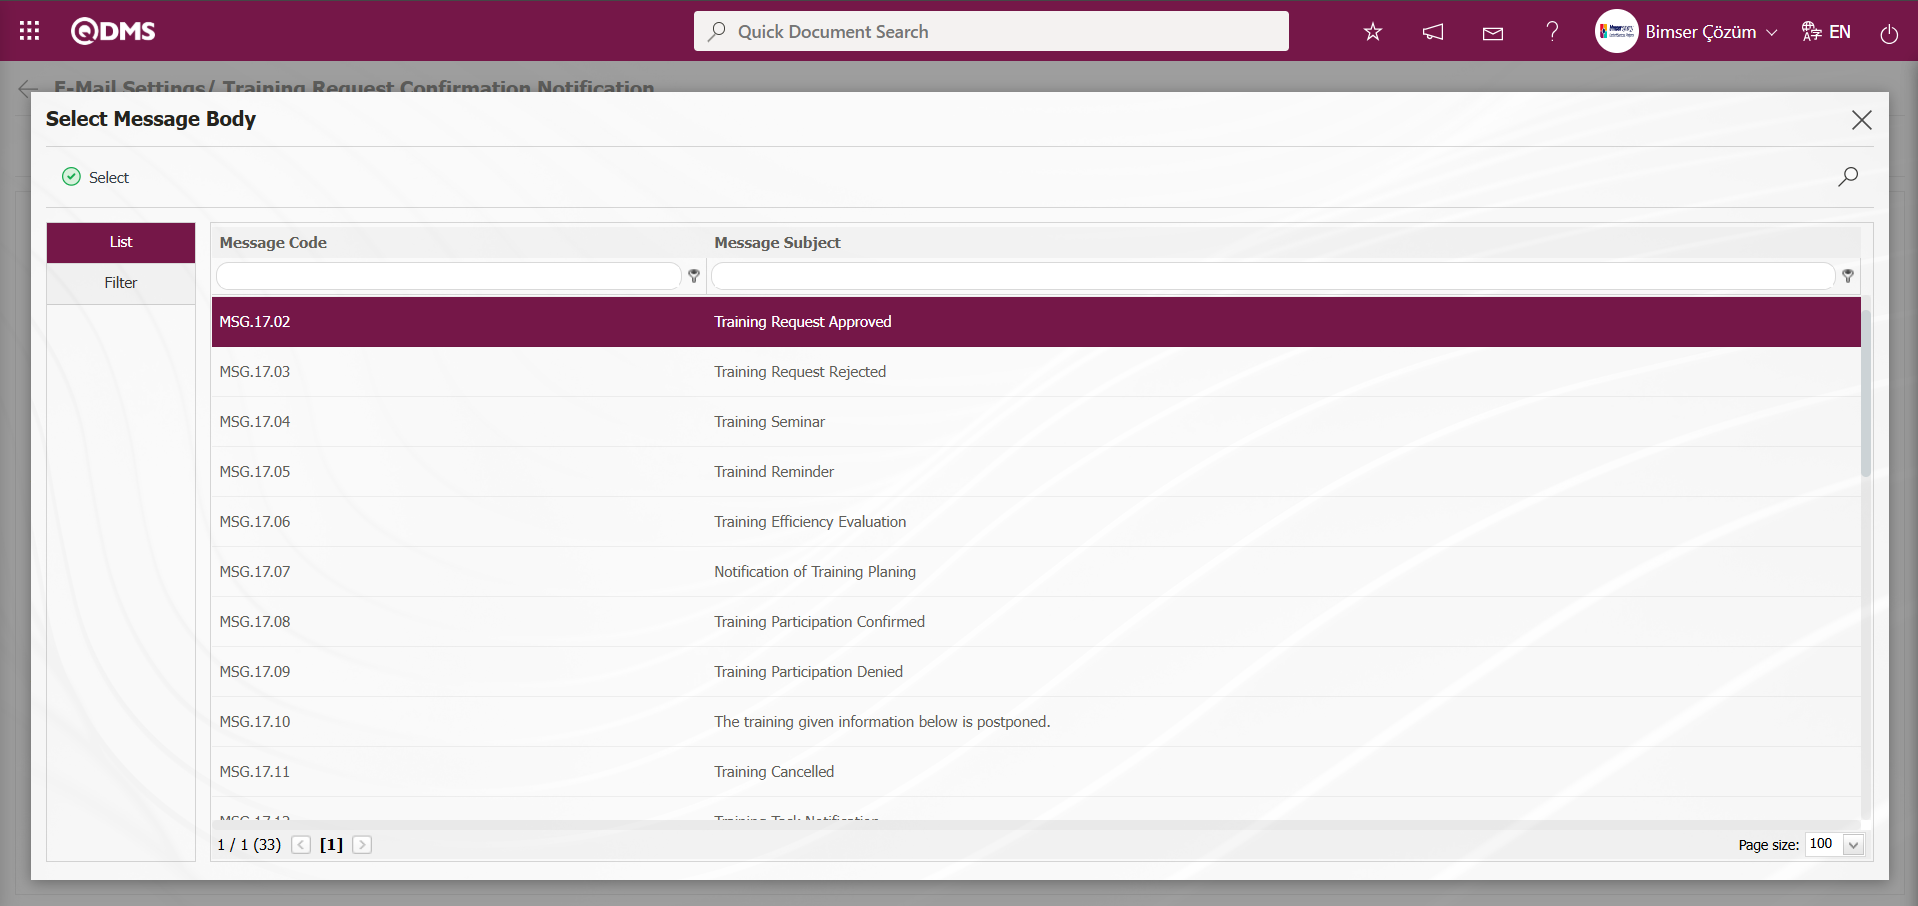
In the E-Mail Settings/ Training Request Confirmation Notification screen, click the  (Select) button to open the system-defined Message Body list and select the message body to be sent from the relevant list. To delete an incorrectly added message body, use the
  (Delete) button. The message bodies to be sent for the relevant roles are selected by selecting the message body in the message body list and clicking the
  button.
If you want to send an email to someone, check the “Send Email/Send SMS” box for that role. For the message to be sent, the mobile phone number of the person defined in the role must be defined in the personnel definition screen.
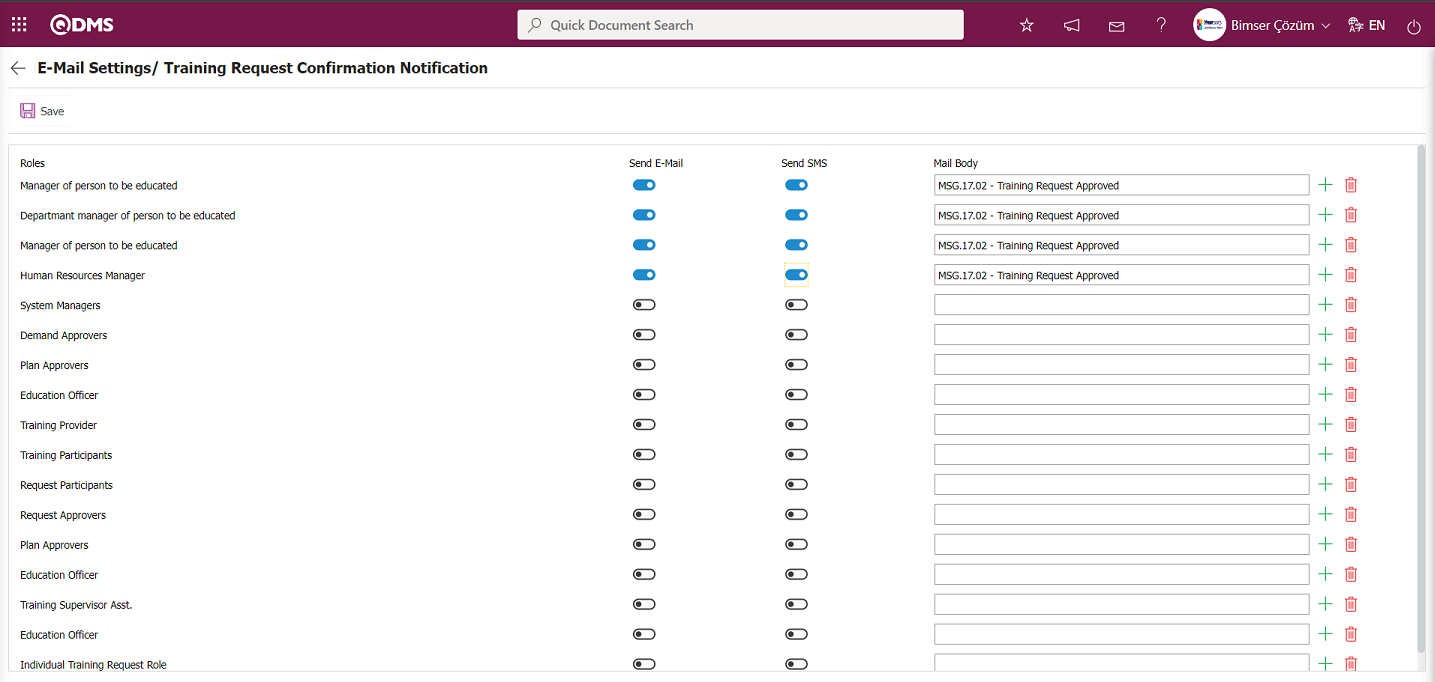
In the E-Mail Settings/ Training Request Confirmation Notification screen, after checking the “Send Email/Send SMS” check box related to the roles to which the email should be sent, click the  button in the upper left corner of the screen to save the email settings.
6.2.2. Training Parameters
Menu Name: System Infrastructure Definitions/ Training Planning/ Training Parameters
This menu allows users to make various adjustments according to their requests and needs for the Training Planning Module and to determine (select) parameters accordingly. The Training Planning Module is selected in the Modules field in the Filter tab, and the Training Planning Module parameters are listed in the List tab. Use the  button to make changes based on the selected parameter information.
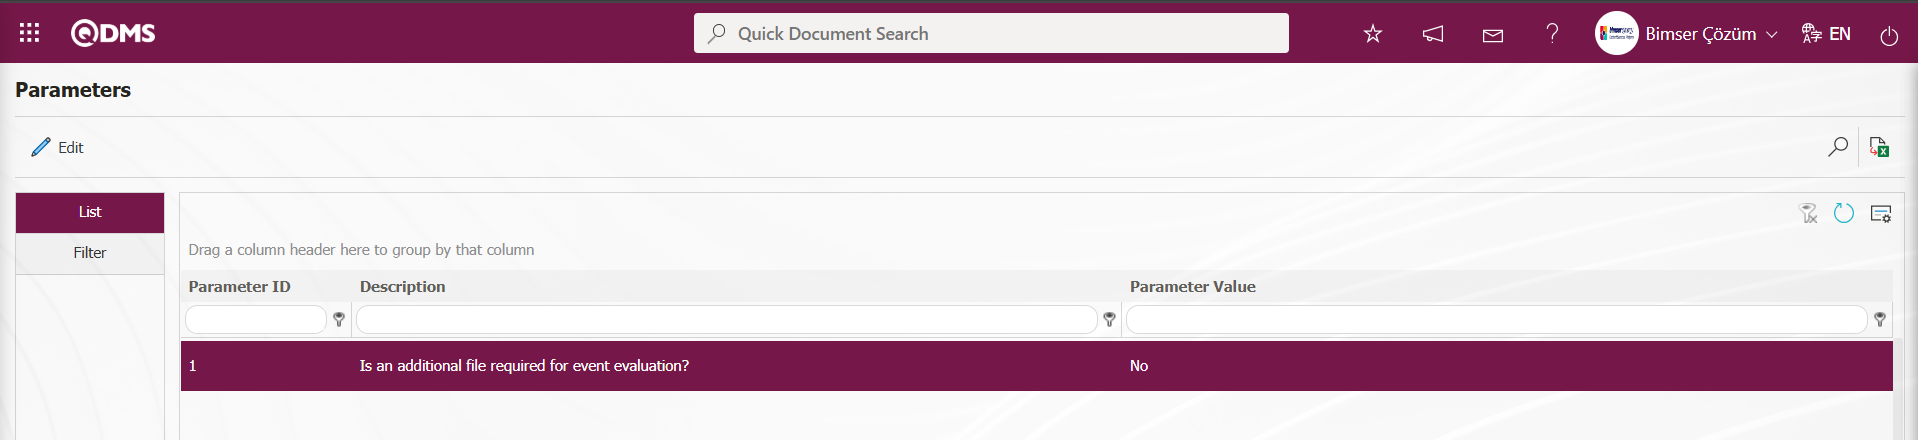
 The Training Planning Module is selected in the Modules field in the Filter tab, and the Training Planning Module parameters are listed in the List tab. Use the button to make changes based on the selected parameter information. In the Filter tab, filtering is performed based on the search criteria of Parameter Number and Parameter Description, while in the List tab, searches can also be performed based on the Parameter Number and Parameter Description fields in the grid.

Using the buttons on the screen;
 : Changes and edits are made to the selected parameter in the list.
 : Records are filtered and searched.
 : The search criteria on the menu screens are used to clear the data remaining in the filter fields in the grid where the search operation is performed.
 : The menu screen is restored to its default settings.
 : User-based designing of the menu screen is done with the show-hide feature, that is, the hiding feature of the fields corresponding to the columns on the menu screens.
In the Parameters screen, select the parameters numbered 1 in the List tab, then click the  button.

In the parameters screen that opens, change the parameter value information for the “Is an additional file required for event evaluation?” parameter. If desired, click the  button in the parameters screen to display the default value information for the parameter value.
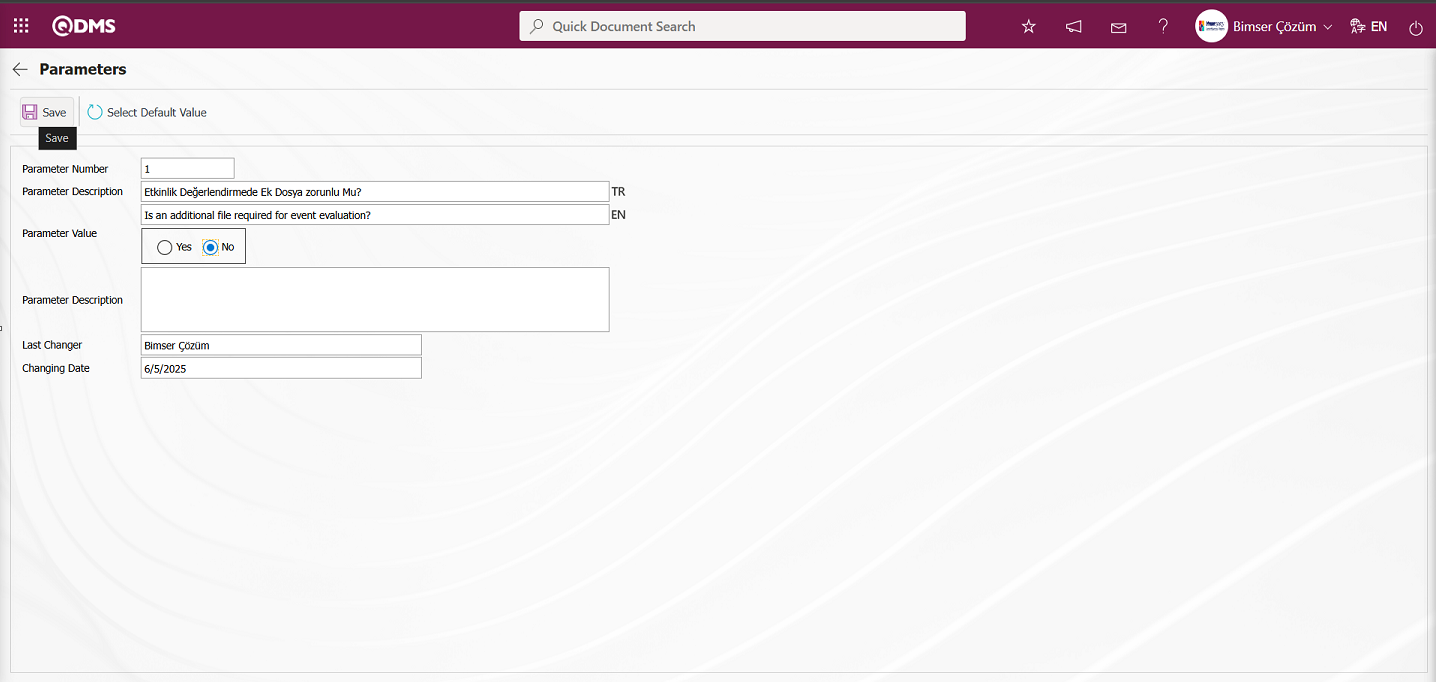
In the Parameters screen that opens, select “No” for the parameter value, enter the necessary information in the relevant fields, and then click the  button in the upper left corner of the screen to update the parameter settings.
On the Parameters screen, clicking the button allows you to activate the selected passive parameter by setting its parameter value to “Yes,” deactivate the selected active parameter by setting its parameter value to “No,” change the parameter value of the selected parameter if it exists, and select the default value for the selected parameter.
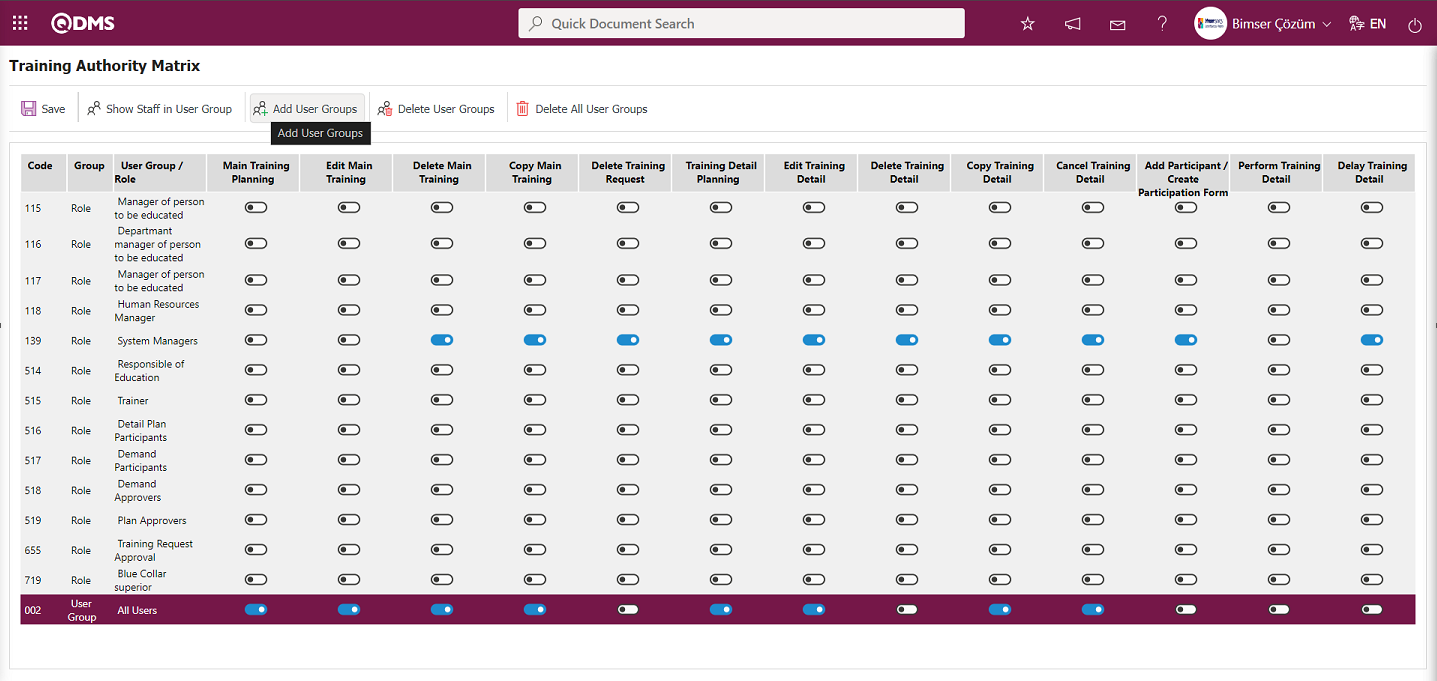
6.2.3. Authority Matrix
Menu Name: System Infrastructure Definitions/ Training Planning/ Authority Matrix
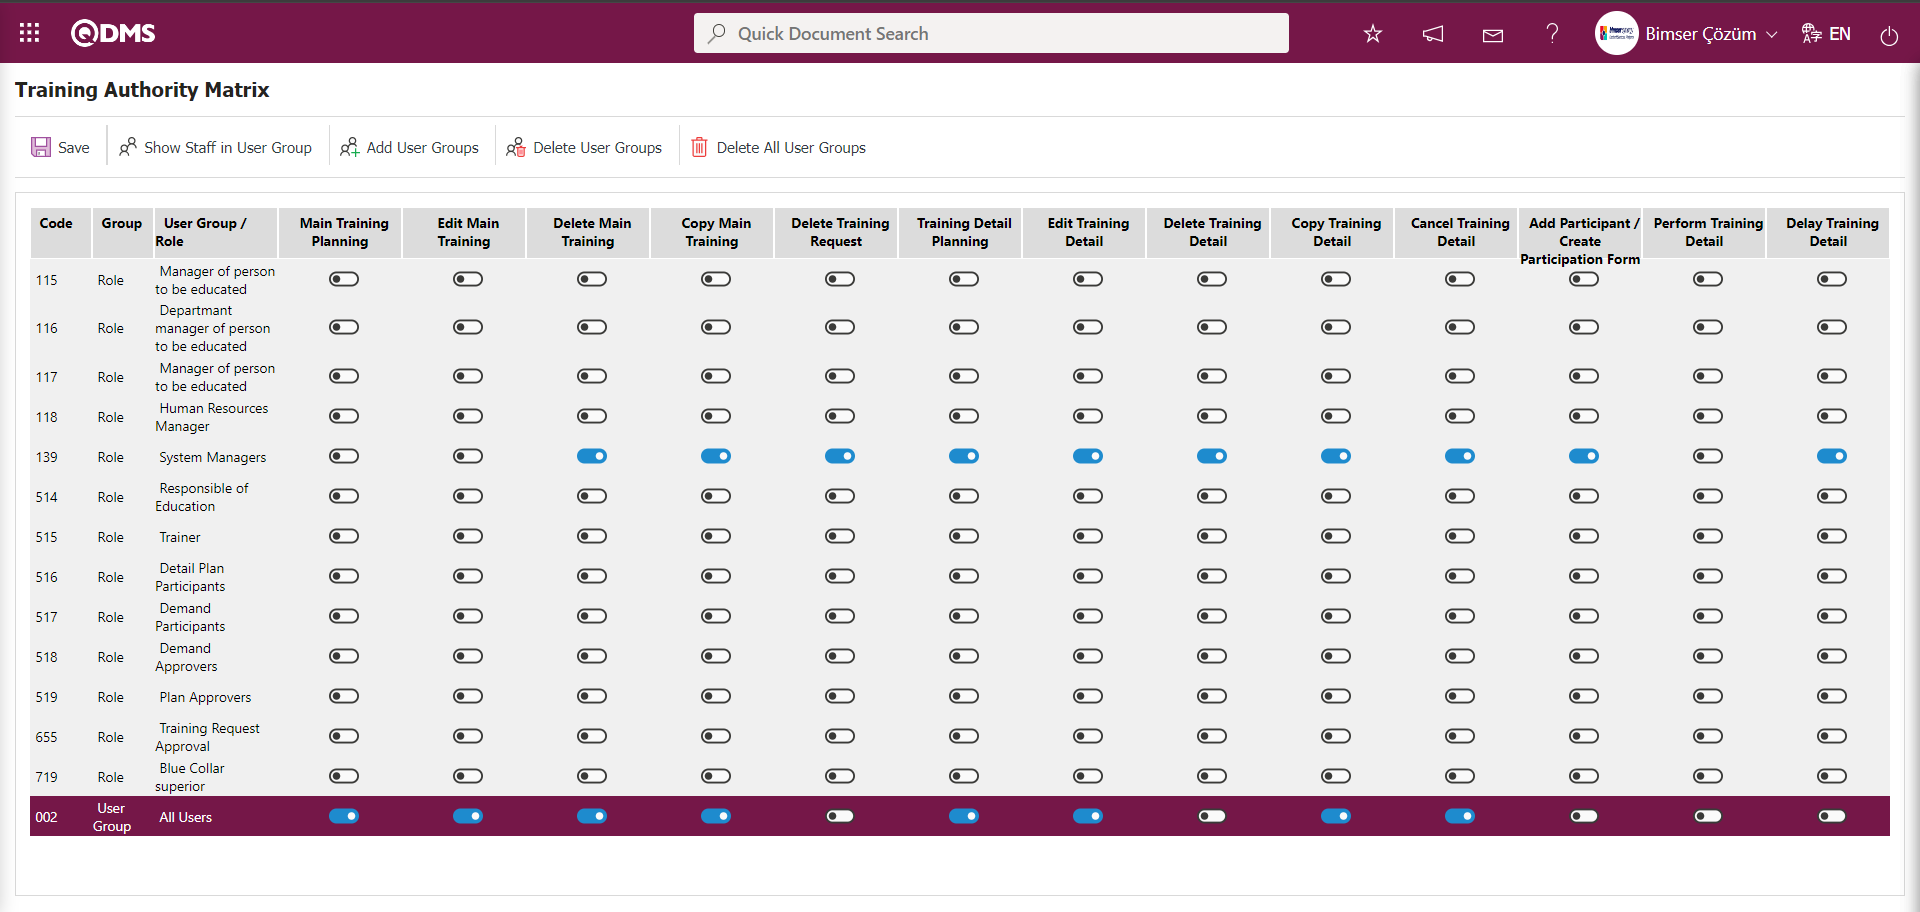
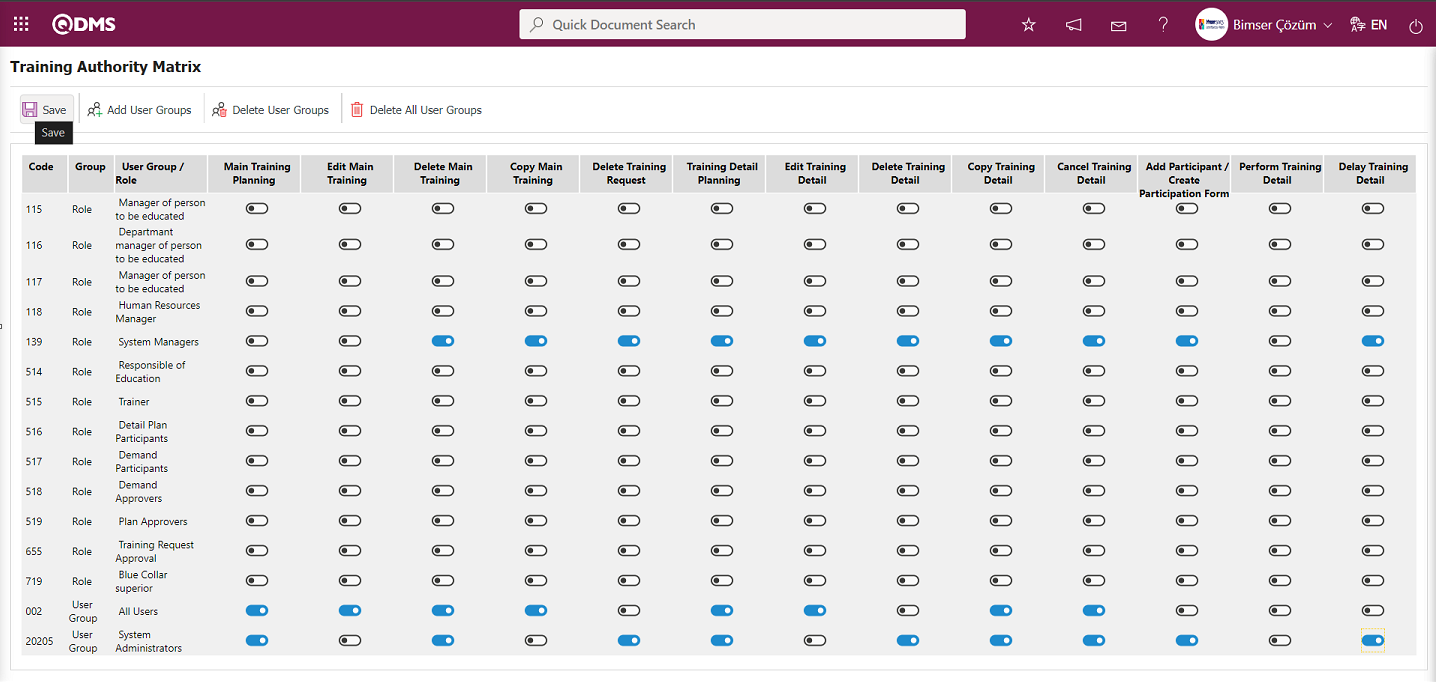
This is a menu that authorizes actions to be performed on the training plan. The necessary authorization actions are performed in the training module for the roles or user groups listed in the training matrix. With the permissions granted, “Main Training Planning” and “Training Detail Planning” can be created, deleted, and updated. For example, authorization can be granted to the training manager to copy the main training.
Using the buttons on the screen;
: The registration process is carried out on the Training Authority Matrix screen.
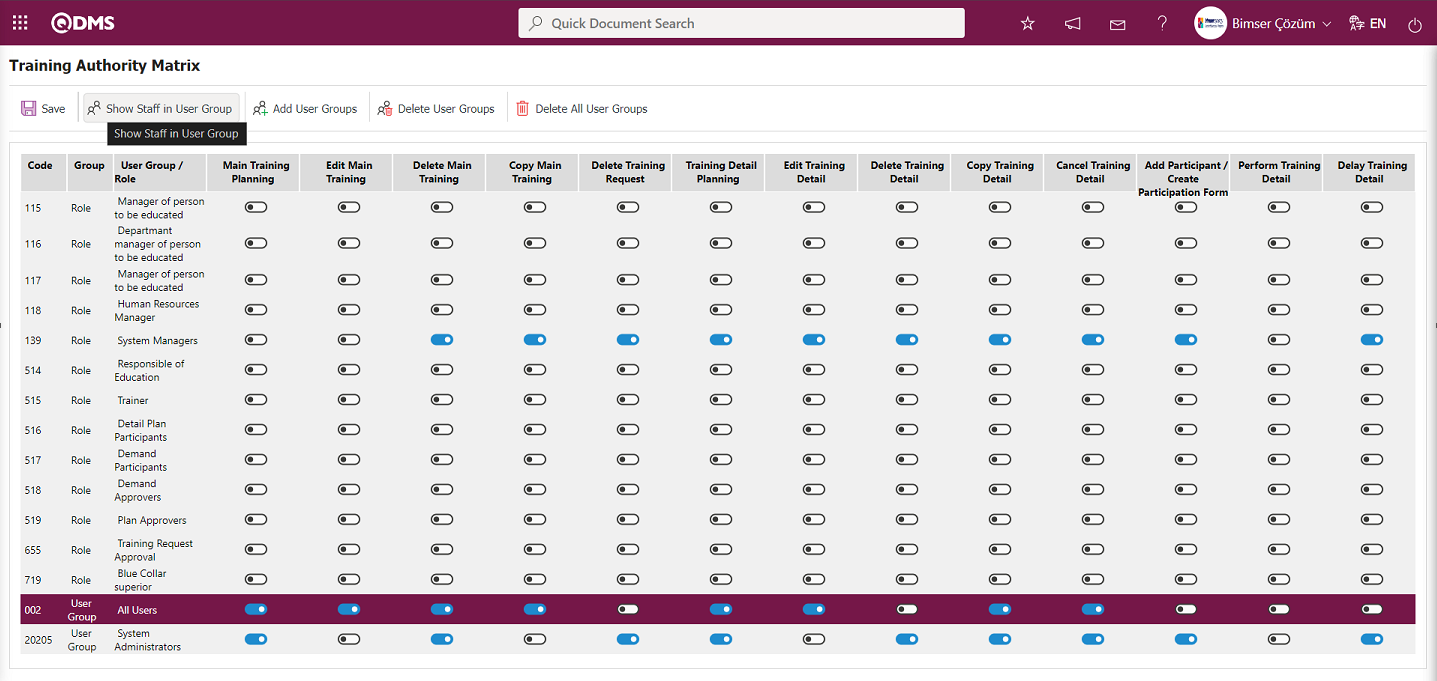
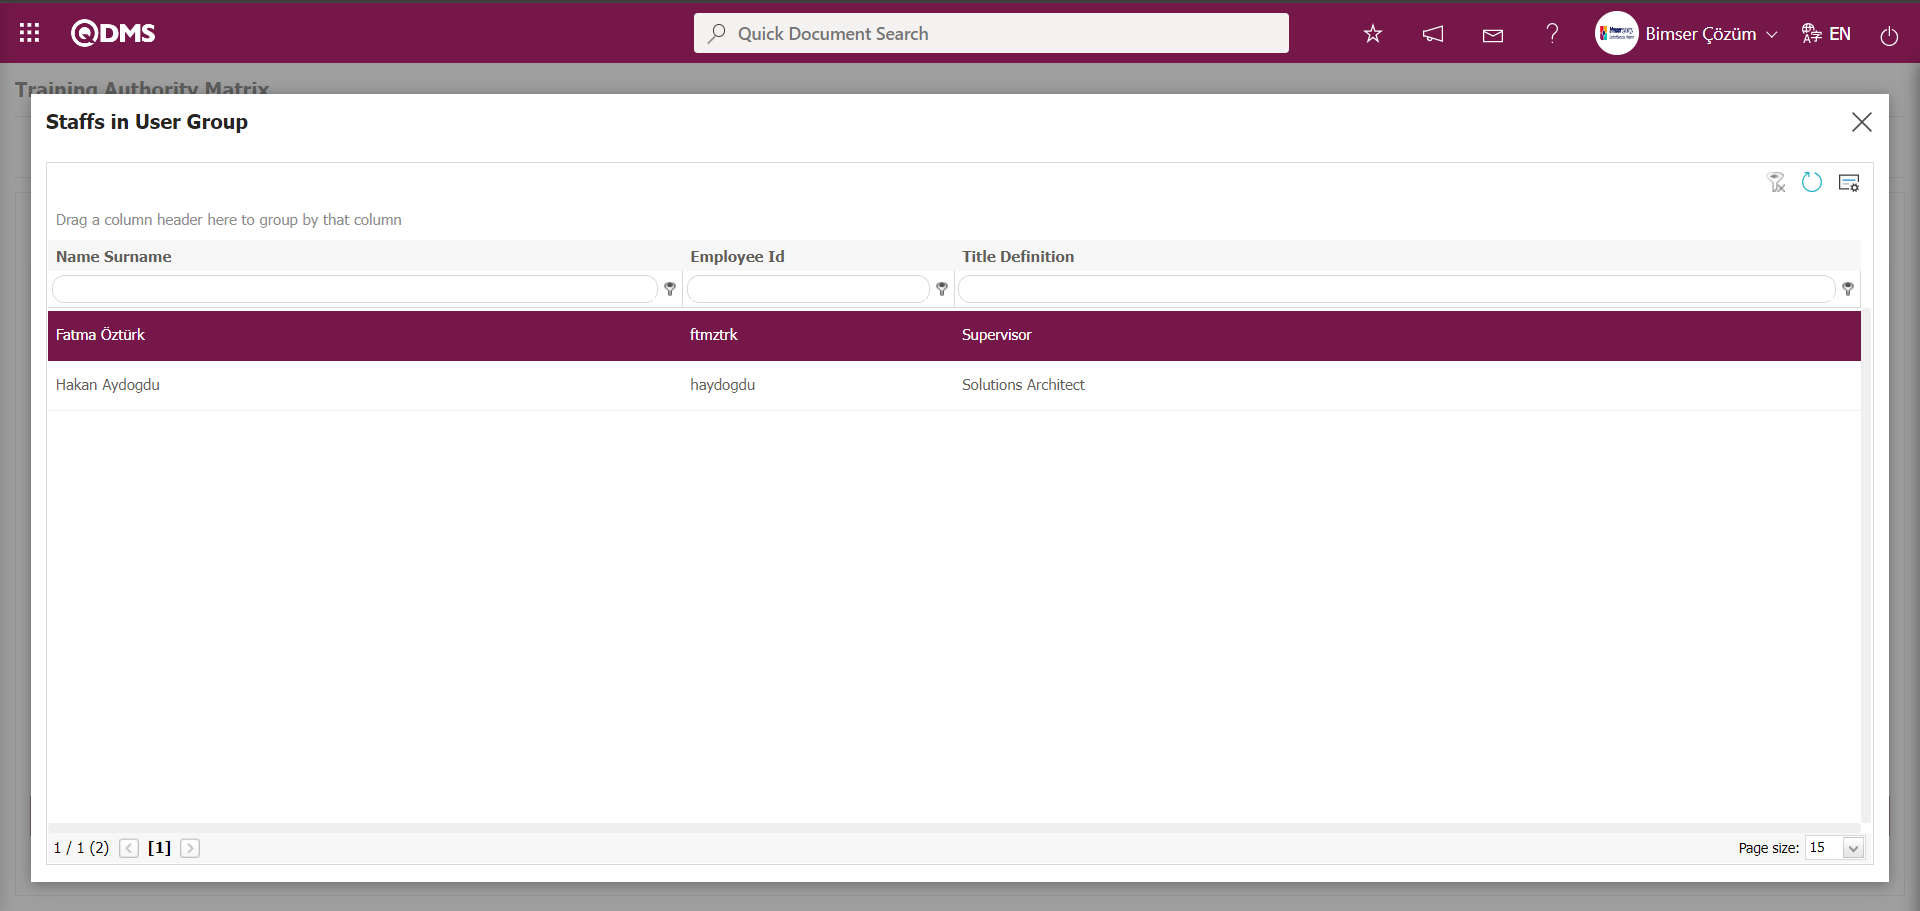
 : The list of personnel in the selected User group in the authorization list on the Training Authorization Matrix screen is displayed. This button is displayed when the User group is selected in the list.
 : In the Training Authorization Matrix screen, add the user group to which you want to grant authorization from the list of user groups defined in the system.
 : The selected user group is deleted from the list of authorized users on the Training Authorization Matrix screen.
 : All user groups with permissions are deleted from the Training Permissions Matrix screen.
In the Training Authorization Matrix screen, the Role System Infrastructure Definitions/BSID/Configuration Settings/Role Definition menu is displayed. For the role definitions, the check box corresponding to the role to which the authorization is to be granted is selected, and the button is clicked to save the settings.
To grant permissions to a user group in the Training Authorization Matrix screen, click the button.
In the system that opens, select the user group to which you want to grant permissions from the list of defined user groups, and click the  button in the upper left corner of the screen.

In the Training Authorization Matrix screen, after selecting the authorization check boxes for the user group in the Training Planning module, click the button in the upper left corner of the screen to perform user group-based authorization registration.As shown in the example, for the added user group, the relevant checkboxes are selected for operations such as Main Training Planning , Edit Main Training, Delete Main Training, and Training Detail Planning, there by completing the authorization process.
If you want to remove permissions from an authorized user group and remove the user group from the permission matrix, use the  button. The
  button removes permissions from all authorized user groups and deletes all user groups from the permission matrix.
In the Training Authorization Matrix screen, select the User Group to which authorization is to be granted from the list, then click the  button.
The list of personnel in the user group is displayed.
6.2.4. Survey Question Lists
Menu Name: System Infrastructure Definitions/ Training Planning/ Survey Question Lists
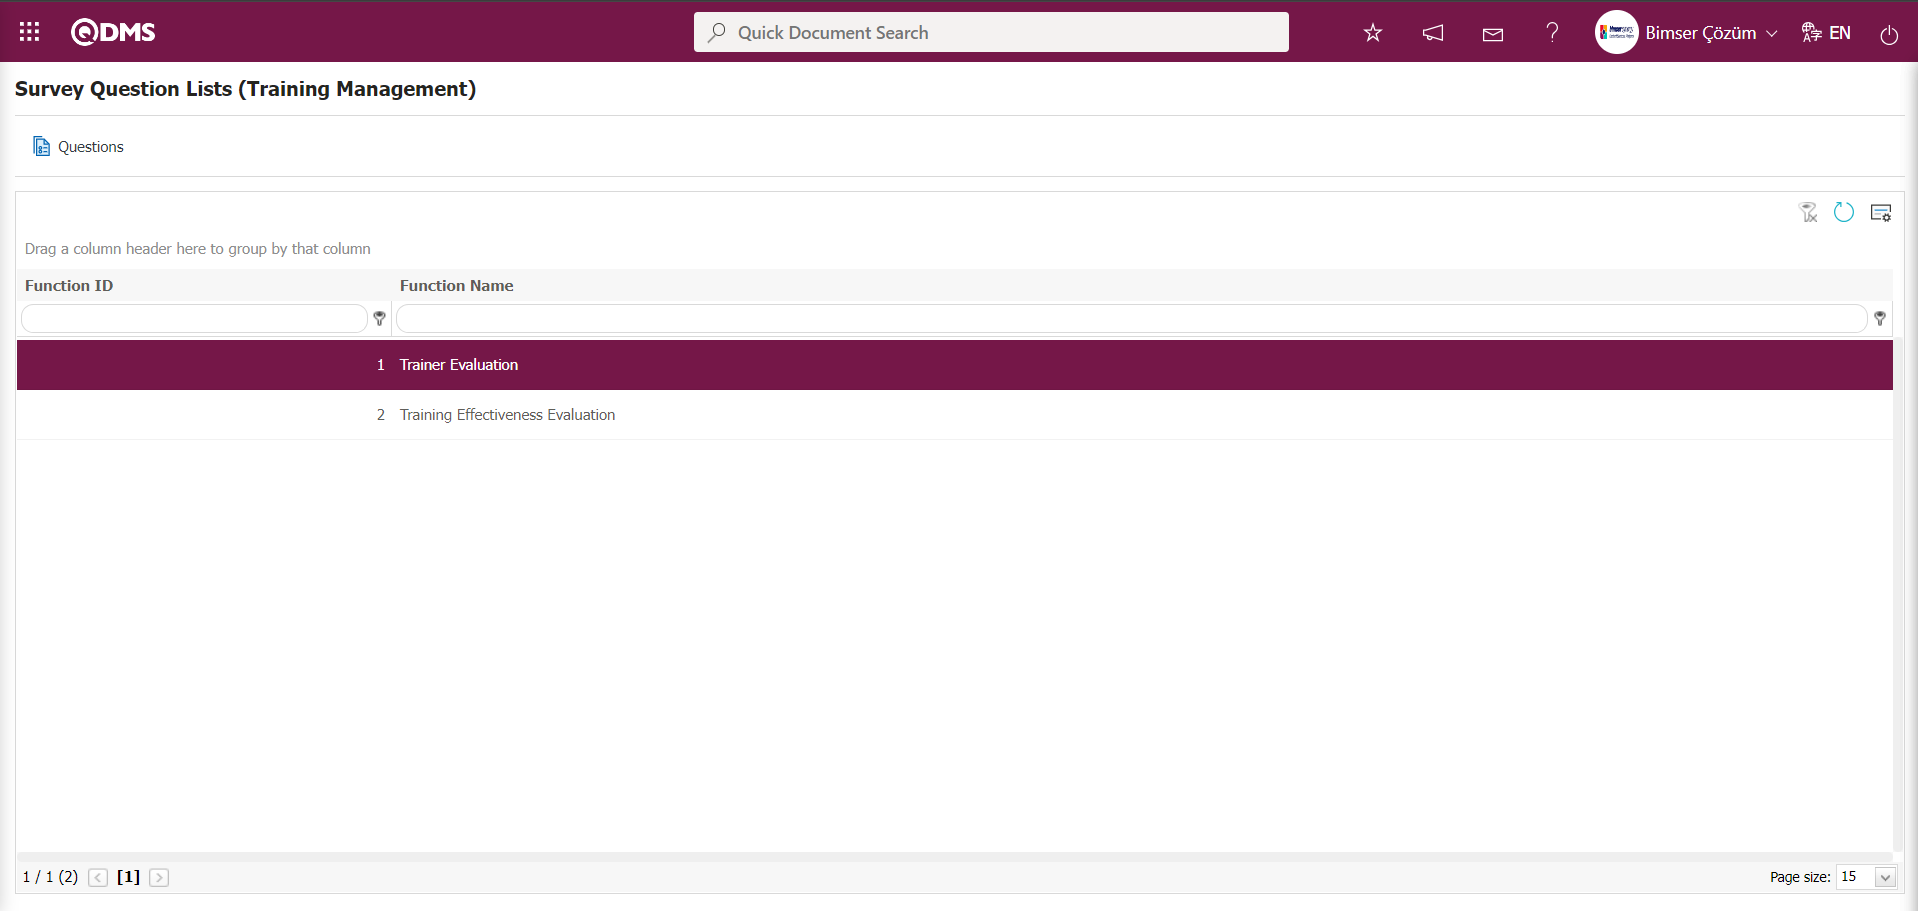
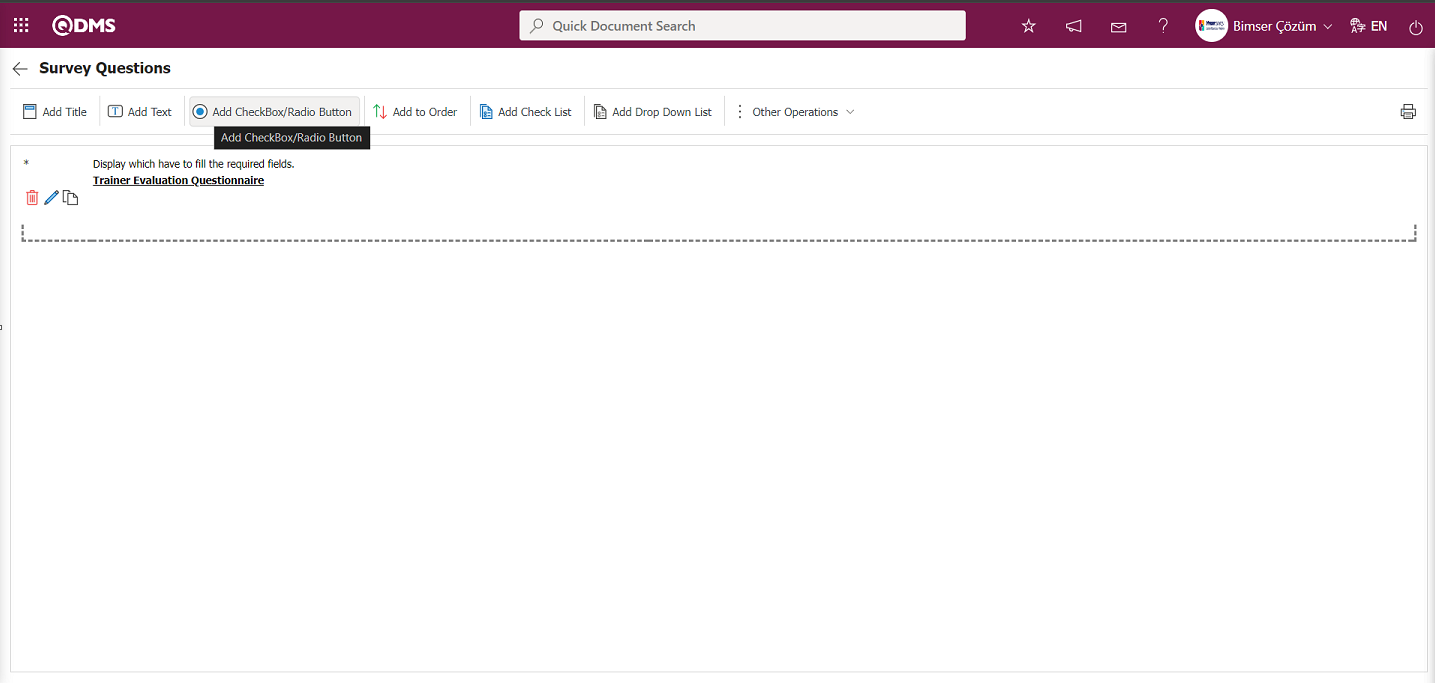
This menu has been prepared for functions related to Survey Question Lists for the Training Module. It is used to design survey templates for related functions in this module, just like the Survey Template screen opened in the Survey Operations Module for users who do not have the Survey Operations Module. These functions are Trainer Evaluation and Training Effectiveness Evaluation. When the “Trainer Evaluation” function is selected as the function in the Survey Question Lists (Training Management) screen, clicking the  button in the top right corner allows you to design and save template surveys in this menu based on the Supplier Evaluation module logic.
Using the buttons on the screen;
 : Questions are added to the survey to be defined.
: The search criteria on the menu screens are used to clear the data remaining in the filter fields in the grid where the search operation is performed.
: The menu screen is restored to its default settings.
: User-based designing of the menu screen is done with the show-hide feature, that is, the hiding feature of the fields corresponding to the columns on the menu screens.
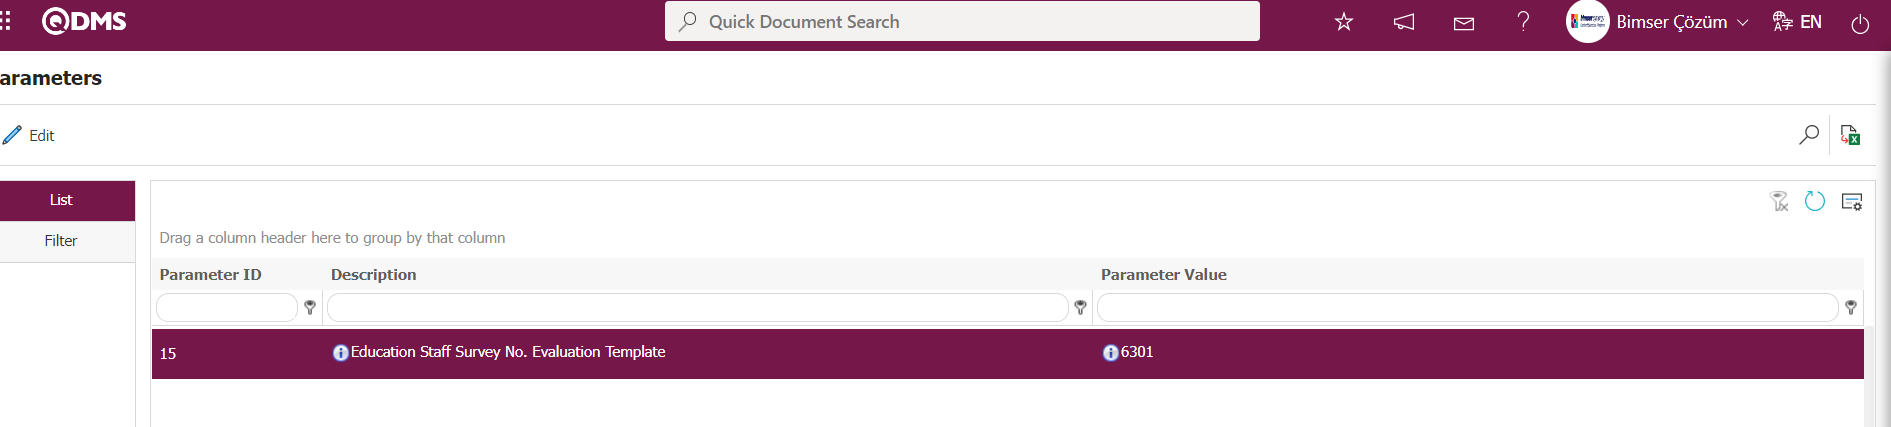
After the template surveys are designed, if the parameter value of parameter number 15, which is related to the first function of the Training Planning module, is blank, the system automatically assigns the survey code to the parameter value.
If the value of parameter 28, which is the parameter related to function 2, is empty, the system automatically assigns the survey code to the parameter.
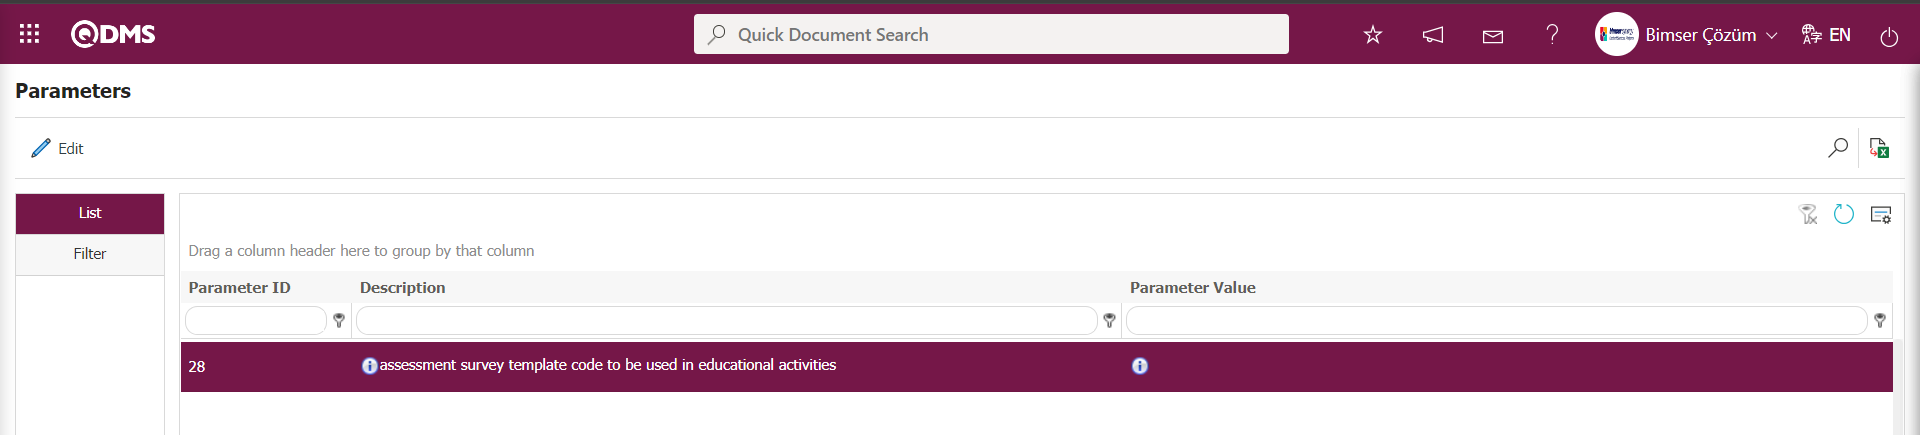
1. Trainer Evaluation Function;
 By clicking the button, the screen for adding questions to the Survey Operations Module is displayed, similar to the screen for adding questions in the structure of the Survey Operations Module. The screen for adding questions is displayed for the relevant function in the Training Planning Module, and questions can be added from the question options.
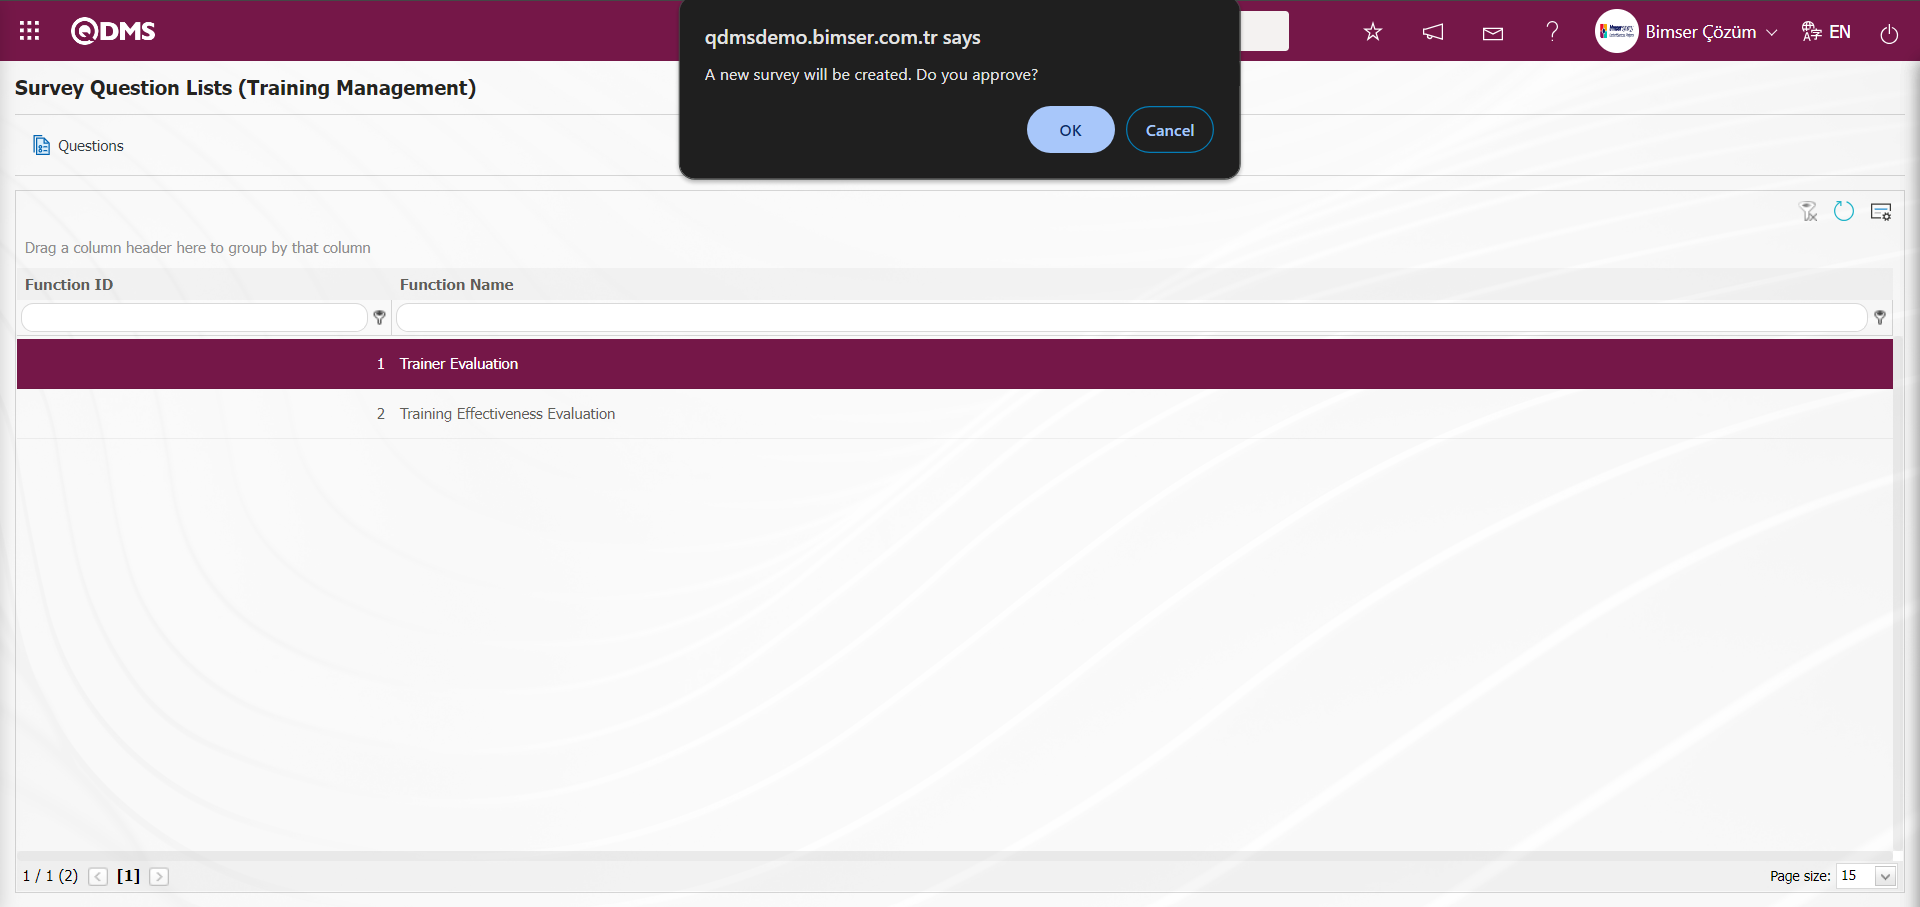
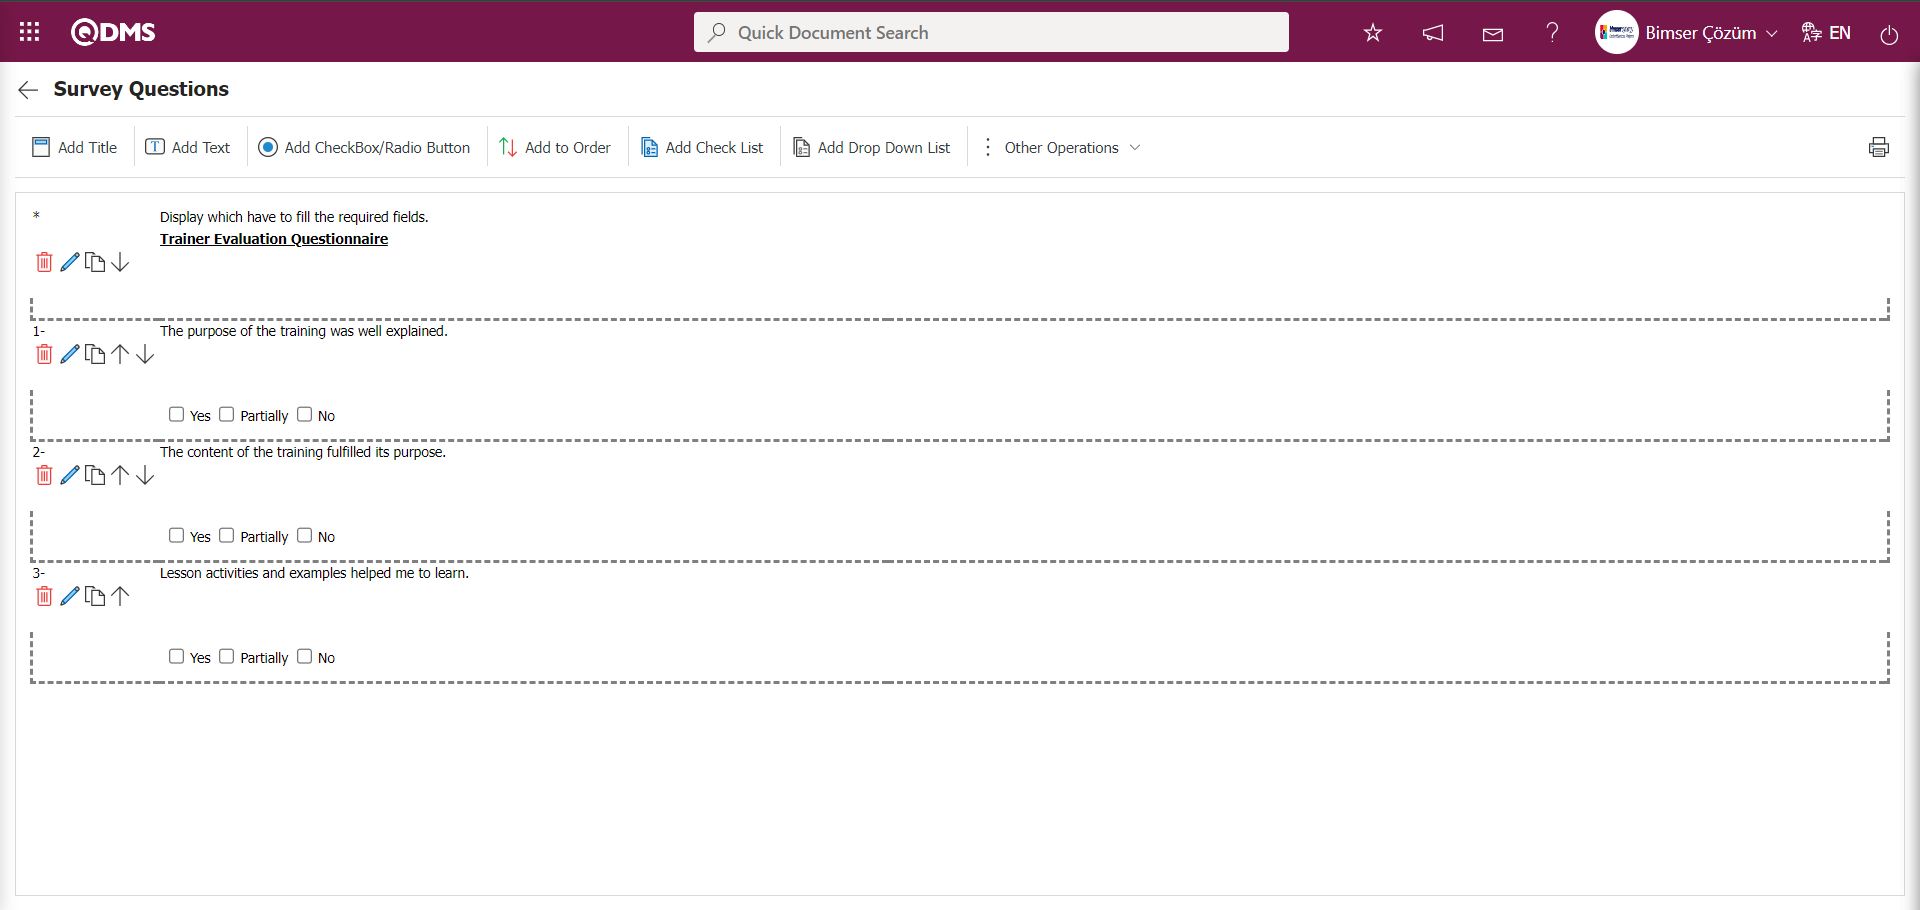
When no parameter code is defined for the parameter value of parameter number 15, “Education Staff Survey No. Evaluation Template,” in the Training Planning parameters, the system displays the warning message "A new survey will be created. Do you approve?“ The survey questions screen is displayed when the ”OK" button is clicked. A survey template is designed using the question options on the Survey Questions screen. If a survey code is defined for the parameter in the system, the questions screen of the defined survey opens in update mode. The Survey Questions screen is opened, and the relevant editing and updating operations are performed on the questions.
With the help of the buttons on the screen;
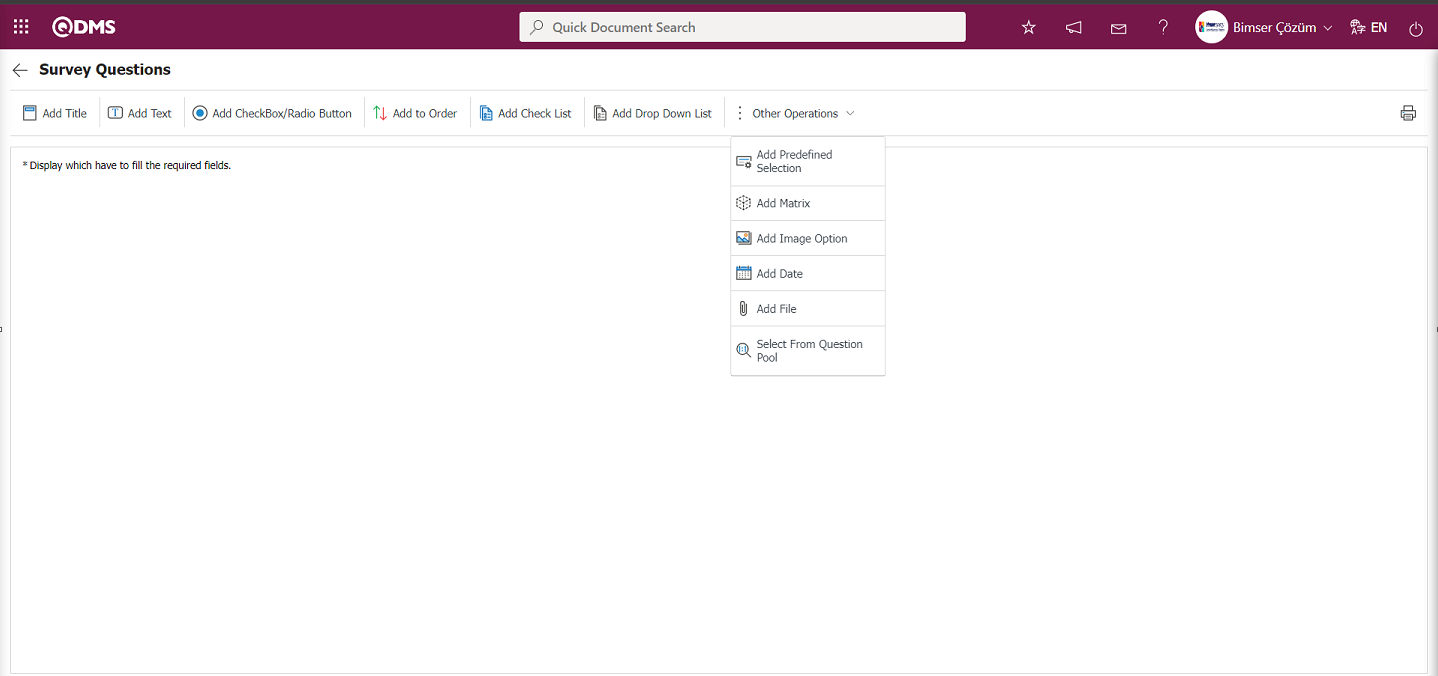
 : It is the button that allows you to print your questions.
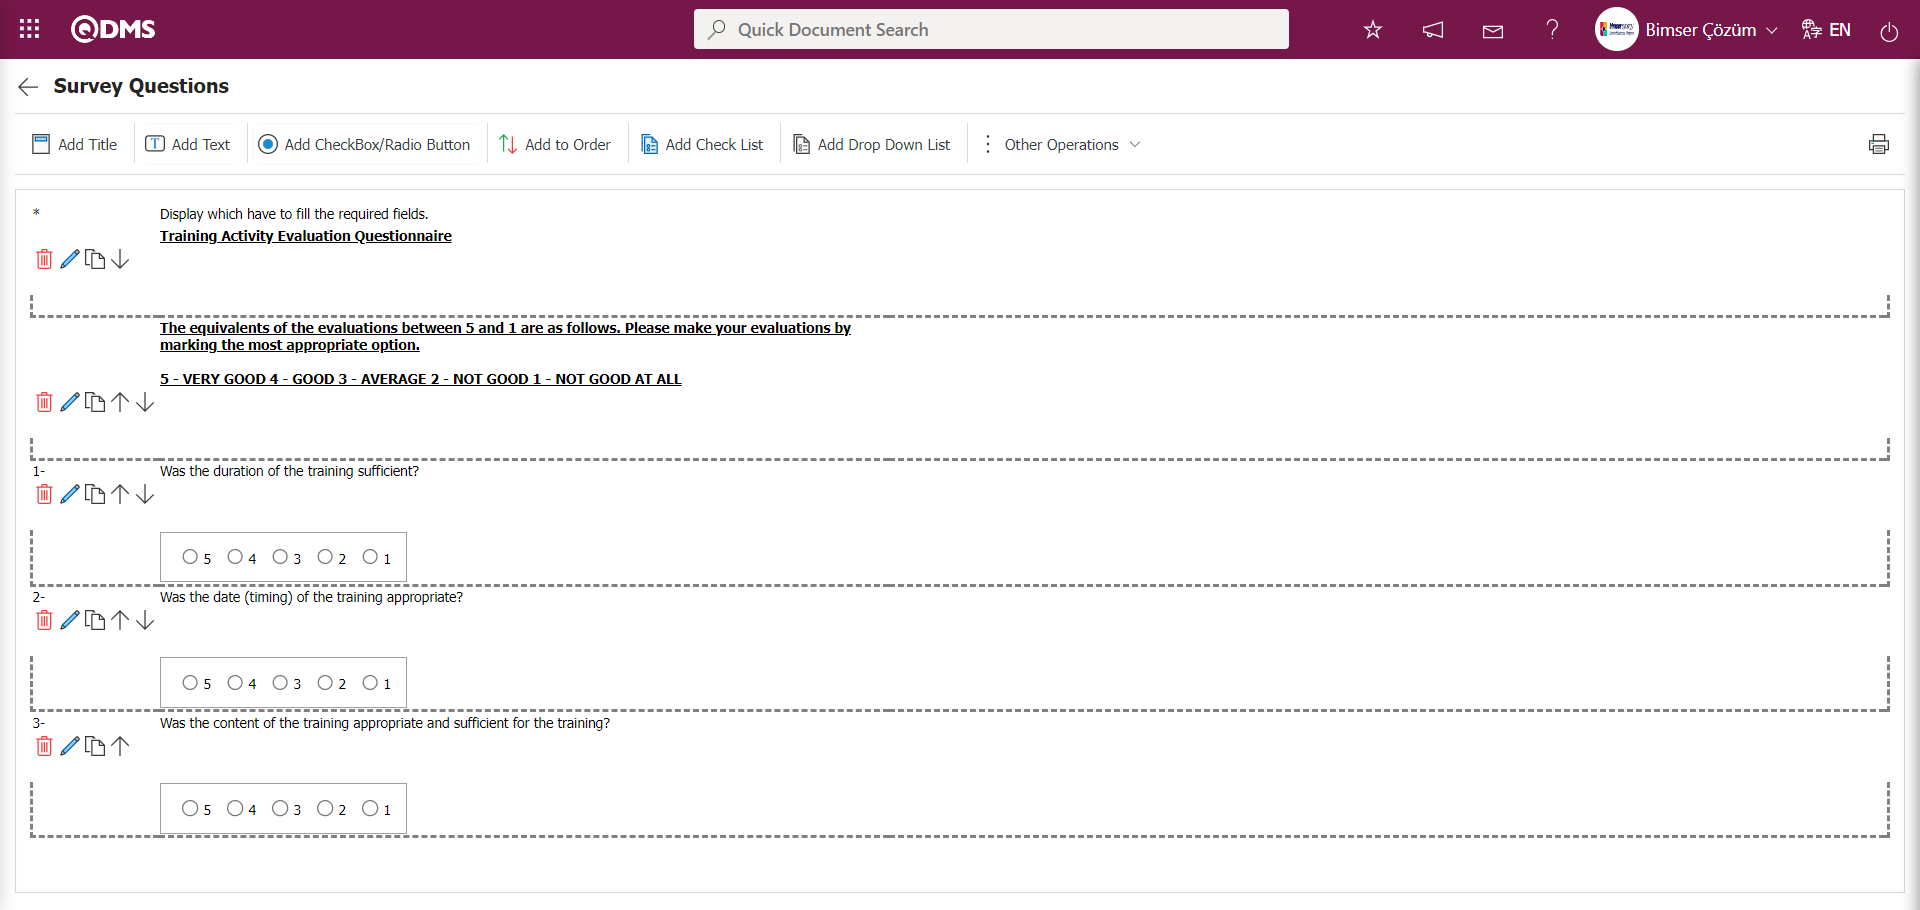
 : This button is used if you want to section the questionnaire and add a title. After each title separator, the number of the defined question comes as 1.
 : It is the question type used when the people who fill out the questionnaire are asked questions that require free information.
 : It is used when the answers given are selected from the specified options.
 : It is used when all options of a question are preferred and listed in order of priority. The options are listed from more>less or less>most.
 : If there are too many options in the question to be created and they need to be selected like a check list, a multiple choice list type question can be added.
 : It is the question type to be used in case the question asked is selected as a single answer from the drop-down list.
 : This question type allows the selection of lists from the personnel, customer, department, company profile and product fields defined in Qdms.
 : It is a question type formed in the form of a matrix in which sub-questions are defined under the question text.
 : It is a type of question in the form of a picture matrix in which a picture is added in the question text field and a picture is added in the options.
 : On the screen opened by clicking, the user can add a question to select a date.
 : Creates an Additional File field for adding additional files to the survey.
 : It is the question type that is selected from the list of question categories defined in the Question Categories screen opened in the Question Pool menu in the Survey Operations module.
Adding Questions to a Survey Process ;
Click the  button on the Survey Questions screen to add a heading by dividing the survey into sections.
The Title Definition screen opens.
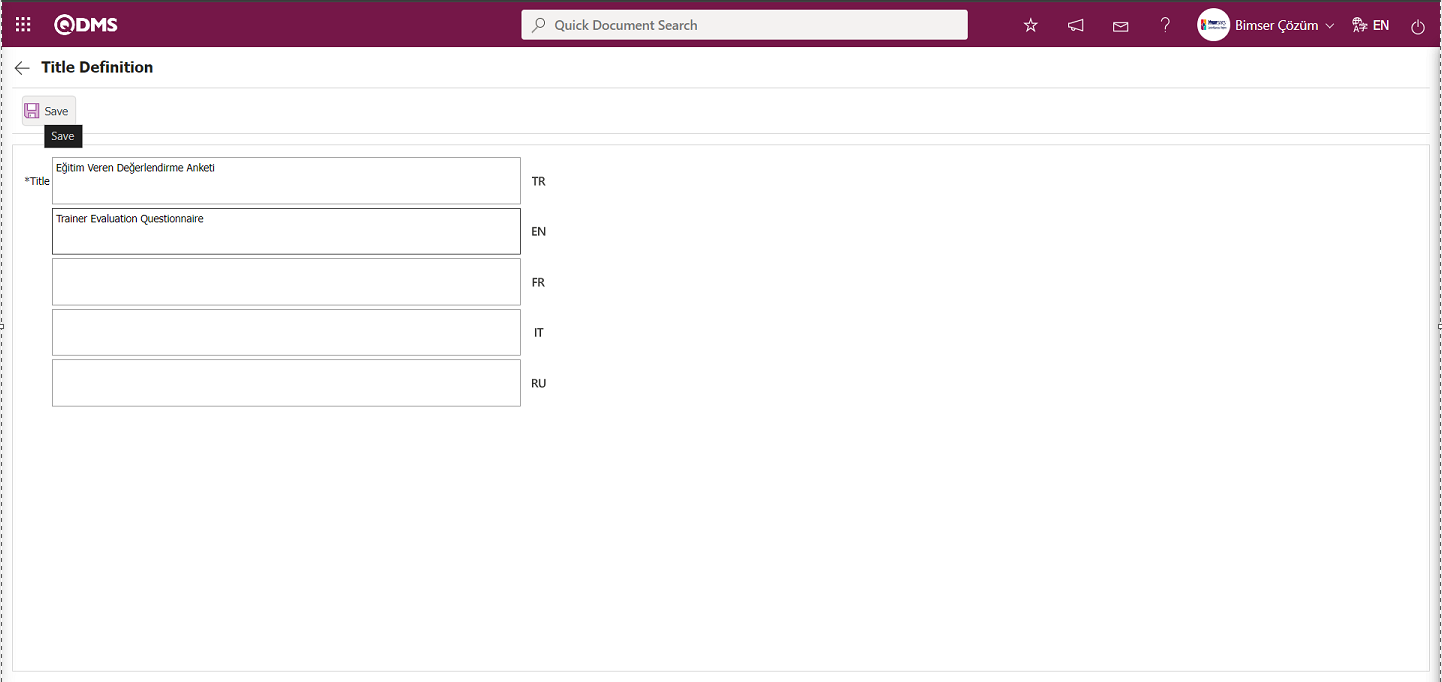
The relevant title is added to the Title Definition** field and the registration process is realized with the  button.
With the help of the buttons on the screen
 : The defined question information is deleted.
 : Editing and updating is done on the defined question information.
 : The defined question information is copied.
The answers given are selected from the specified options by clicking the  button on the Survey Questions screen.
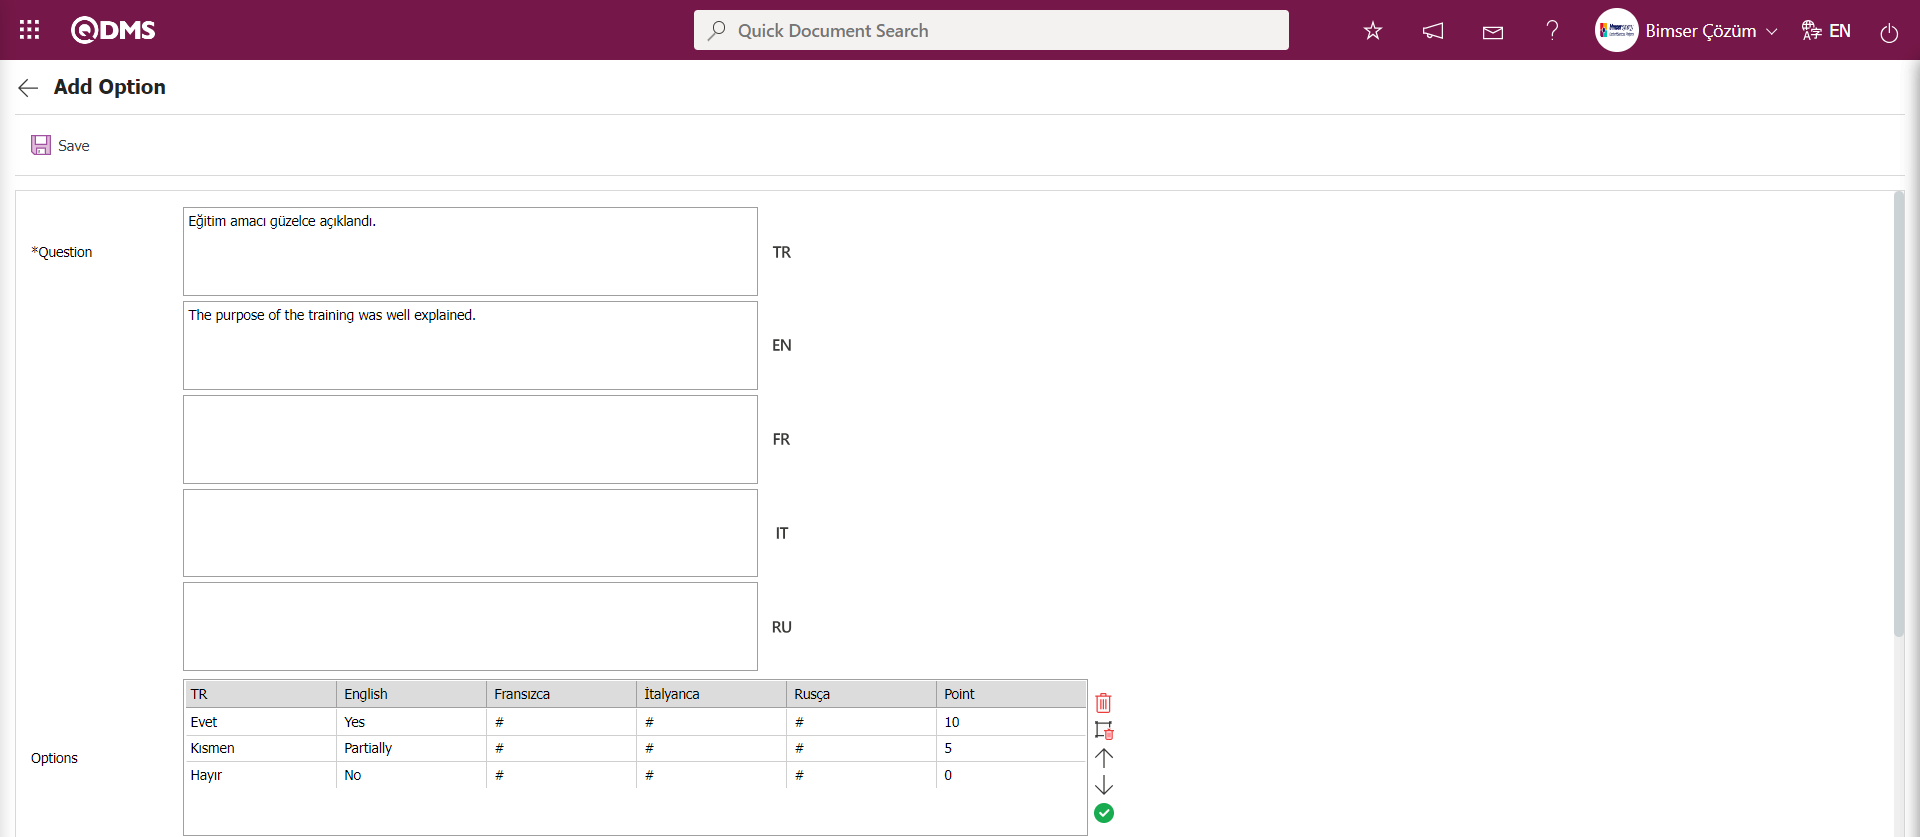
The relevant fields are defined on the screen that opens.
Question: The question text is written in the Turkish field. If other languages are used, the question data is entered in the field corresponding to the relevant languages.
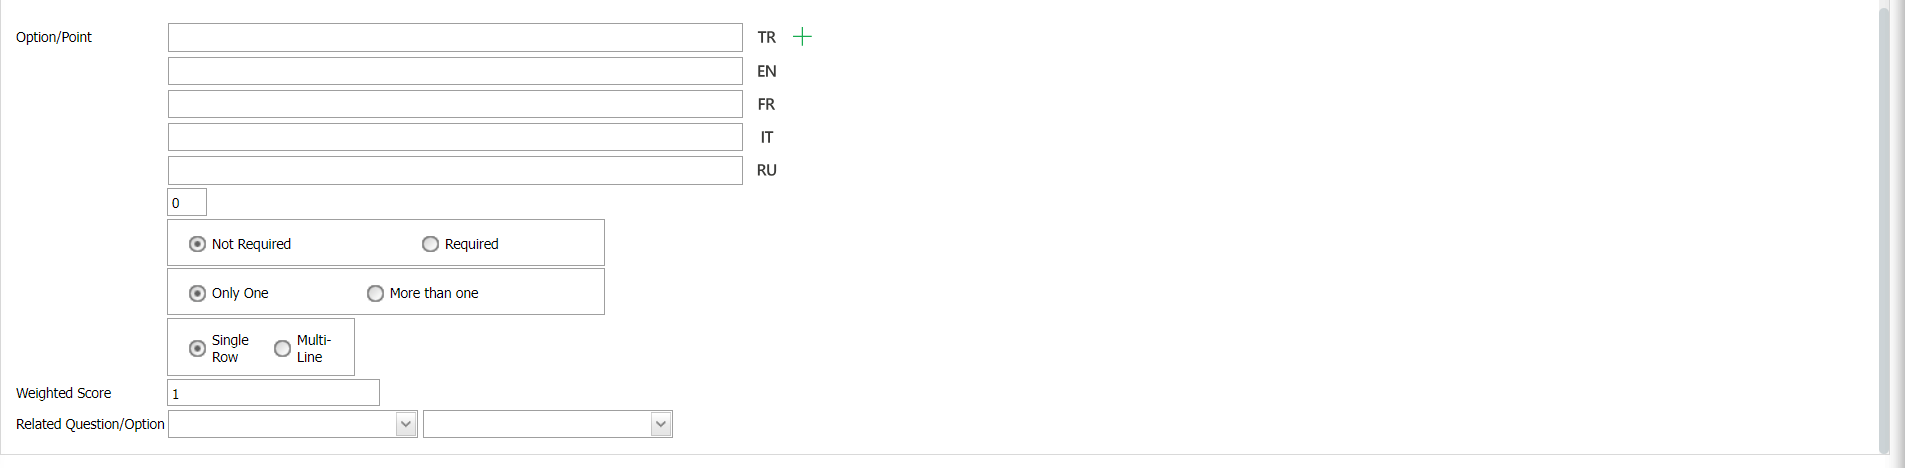
Option/Point: The options for the question are entered in this field. If the survey is a scored survey, the points for each option must also be entered.
The obligation to answer a question is determined in this section.

Whether one or more options can be selected is determined by the check box in this area.
Options can be displayed side by side (single line) or one below the other (multiple lines).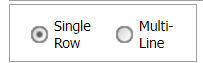
If the multi-line option is selected, a field called column count appears and the options for the question are displayed in columns according to the specified value.
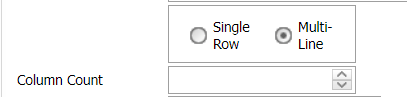
Min / Max Select Count: This is the area where the minimum and maximum number of questions to be selected are determined. (This area is displayed when the “Multiple options can be selected” option is checked.)

Calculate Method: If the survey is a scored survey, this field specifies how the scores given to the options for this question will be calculated. For example, in a survey with 10 respondents, a question has 4 options, and each option has its own score. If we assume that the first option is worth 5 points, when 10 users select the first option, it is determined whether these points will be summed (50) or averaged (5) to be included in the survey's average score. (This field is displayed when the “Multiple options can be selected” option is checked.)

Weighted Score: If the survey is a scored survey, this is the field where the weight of the question within the survey is determined. If all questions have equal weight, enter 1. If 0 is entered, the survey score will not be calculated.
Related Question/Option: If you want a question to appear based on a condition in another question's option, use related question/option logic.
After filling in the relevant fields, click the  button to complete the registration process.
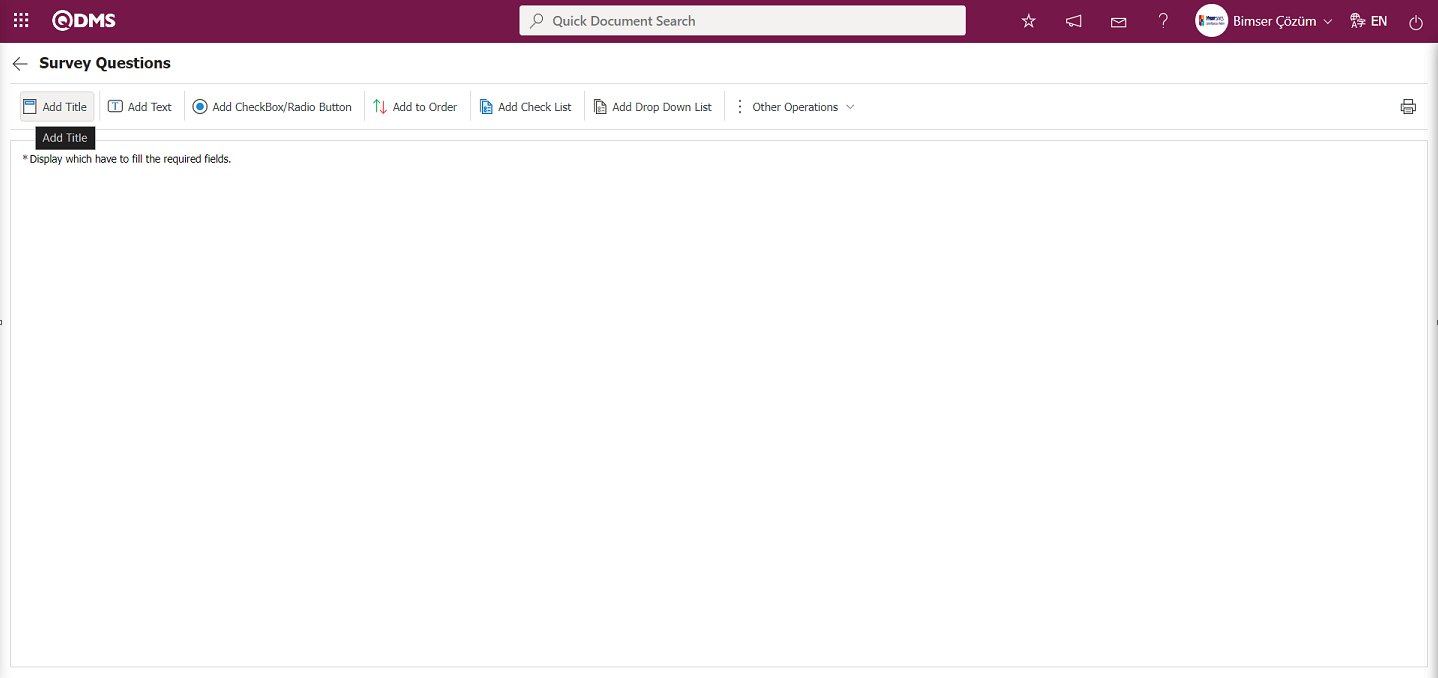
In the Survey Question Lists (Training Management) menu, while the relevant function is selected, click the  button to open the Survey Questions screen and define a few question options as examples to complete the Survey Question Lists (Training Management) definition process. The definition process for other question options is performed in the same way in the Question Definition screen of the Survey Operations Module. The screen that opens is the same as the Survey Operations Question Definition screen. After the question definition process is completed, the Survey Question Lists (Training Management) menu automatically assigns the survey code to the relevant parameter of the corresponding module, which is the 15th parameter named “Education Staff Survey No. Evaluation Template.”
2. Training Activity Evaluation Function;
In the Survey Question Lists (Training Management) screen, by clicking the button at the top right , you can design and save template surveys in this menu based on the Supplier Evaluation module logic. After the template surveys are designed, if the parameter value of parameter number 28 in the Training Planning module is empty, the system automatically assigns the survey code to the parameter value. 1. For the “Trainer Evaluation” function, the questionnaire question lists (Training Planning) process steps are performed in the same way by defining the questions, and the questionnaire definition process is carried out for the second function.
The only difference in the process steps is that for the second function, if the parameter value of the “Assessment survey template code to be used in educational activities” parameter is blank, the template survey code defined is automatically identified by the system.

For this parameter to work properly, you need to go to the Training Planning Module parameters, select parameter number 27, “Will training effectiveness evaluation survey be used?”, and then click the  button to set the parameter value to “Yes.”
By running the relevant functions of the agent program, the task is assigned to the “Surveys will be filled out” task in the Survey Operations module. Additionally, based on the value entered in the “Education Assessment questionnaire validity period” parameter (parameter number 16), the duration for which the survey task will remain in the pending tasks is determined. The survey's validity period is set according to the number of days specified in this parameter value. The survey remains as a task in the pending tasks for this duration.

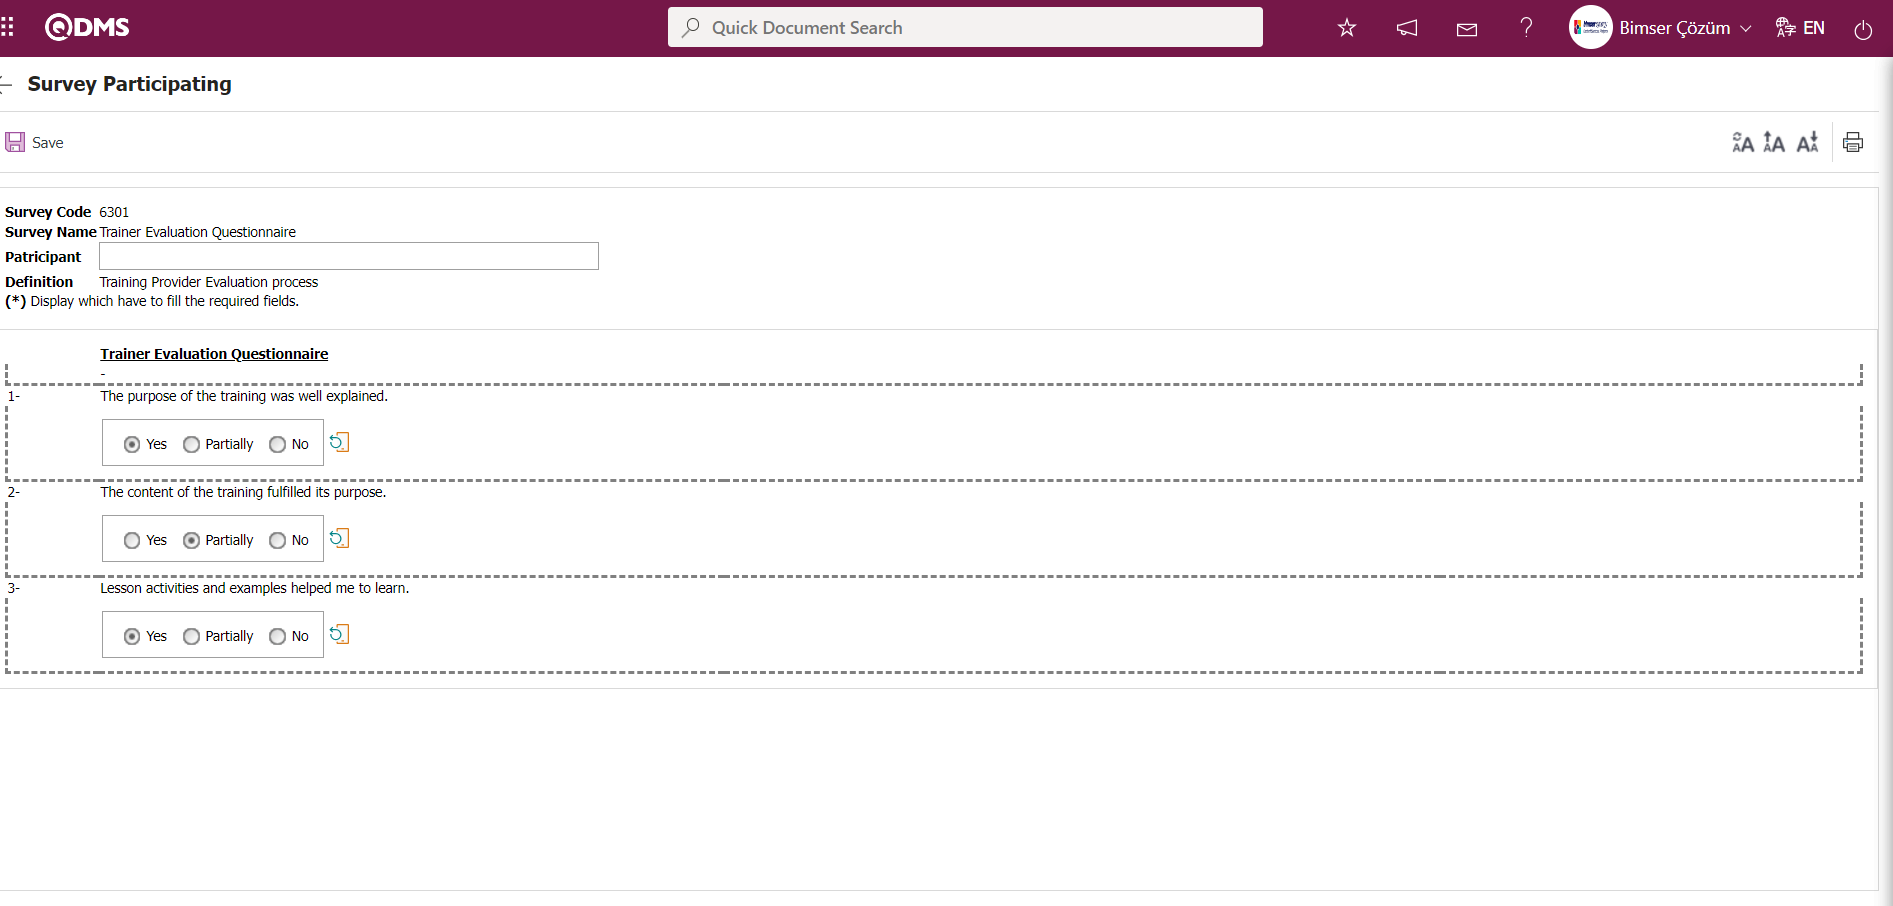
Trainer Evaluation Survey;
Trainer Evaluation Survey appears as a task in my pending tasks under “Surveys will be filled out.”
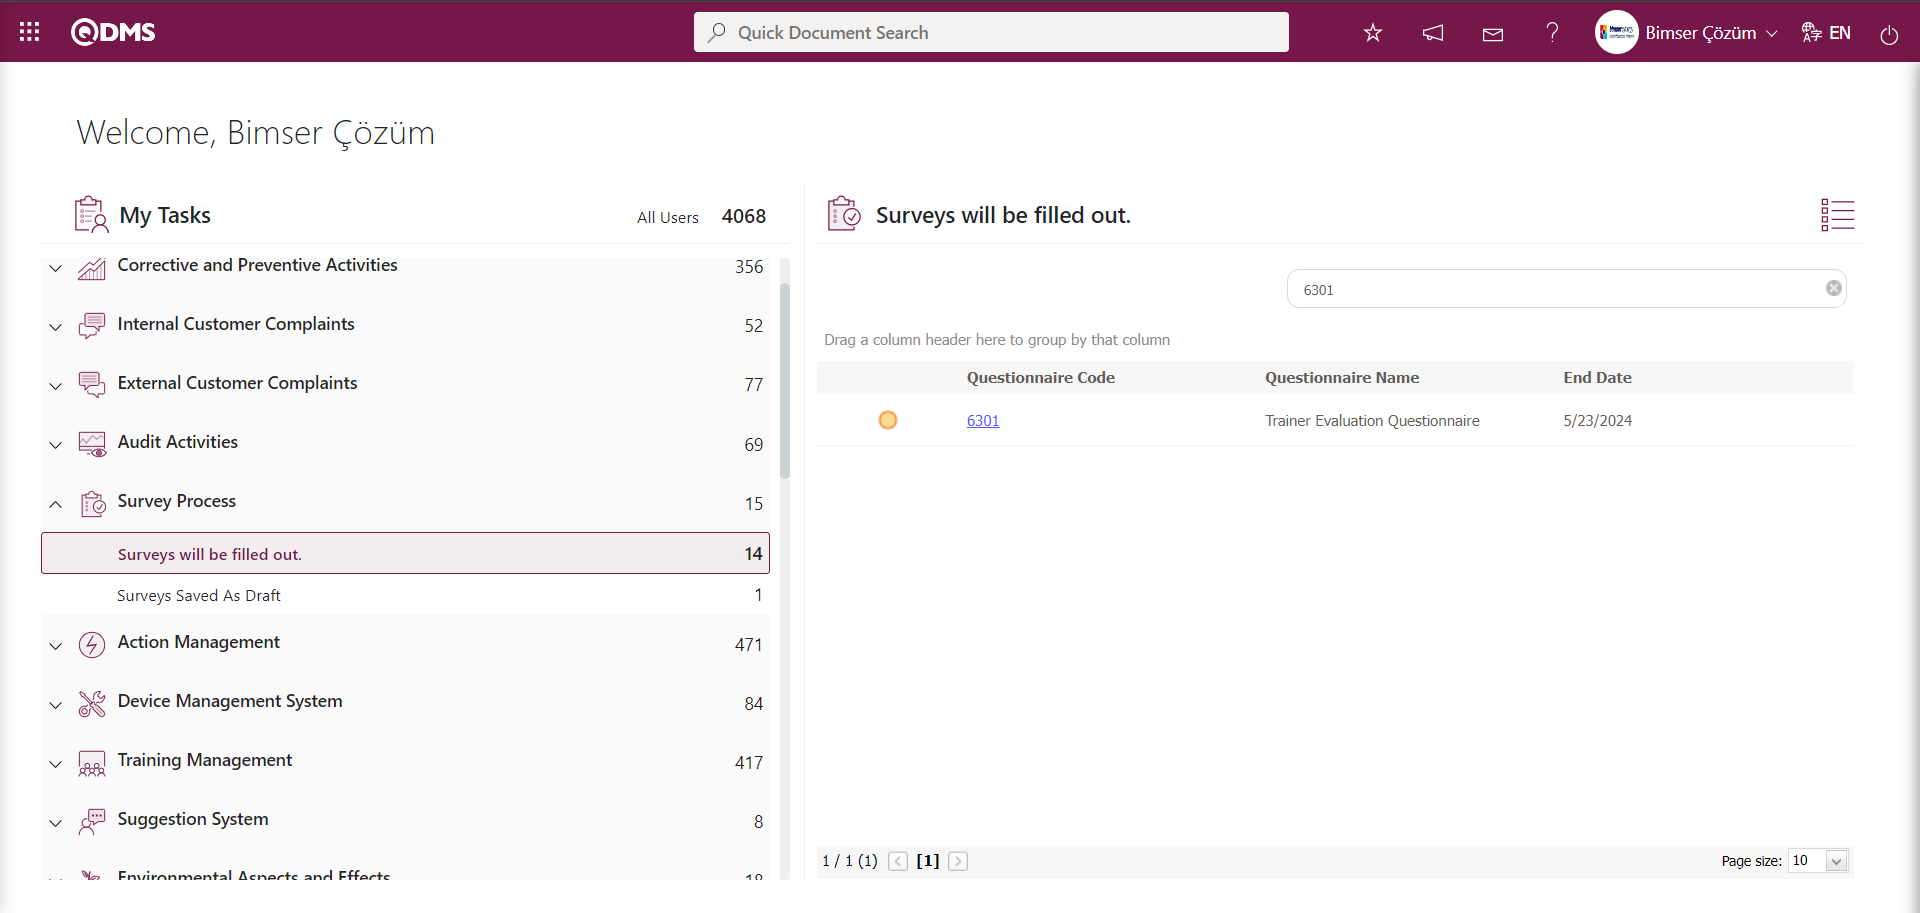
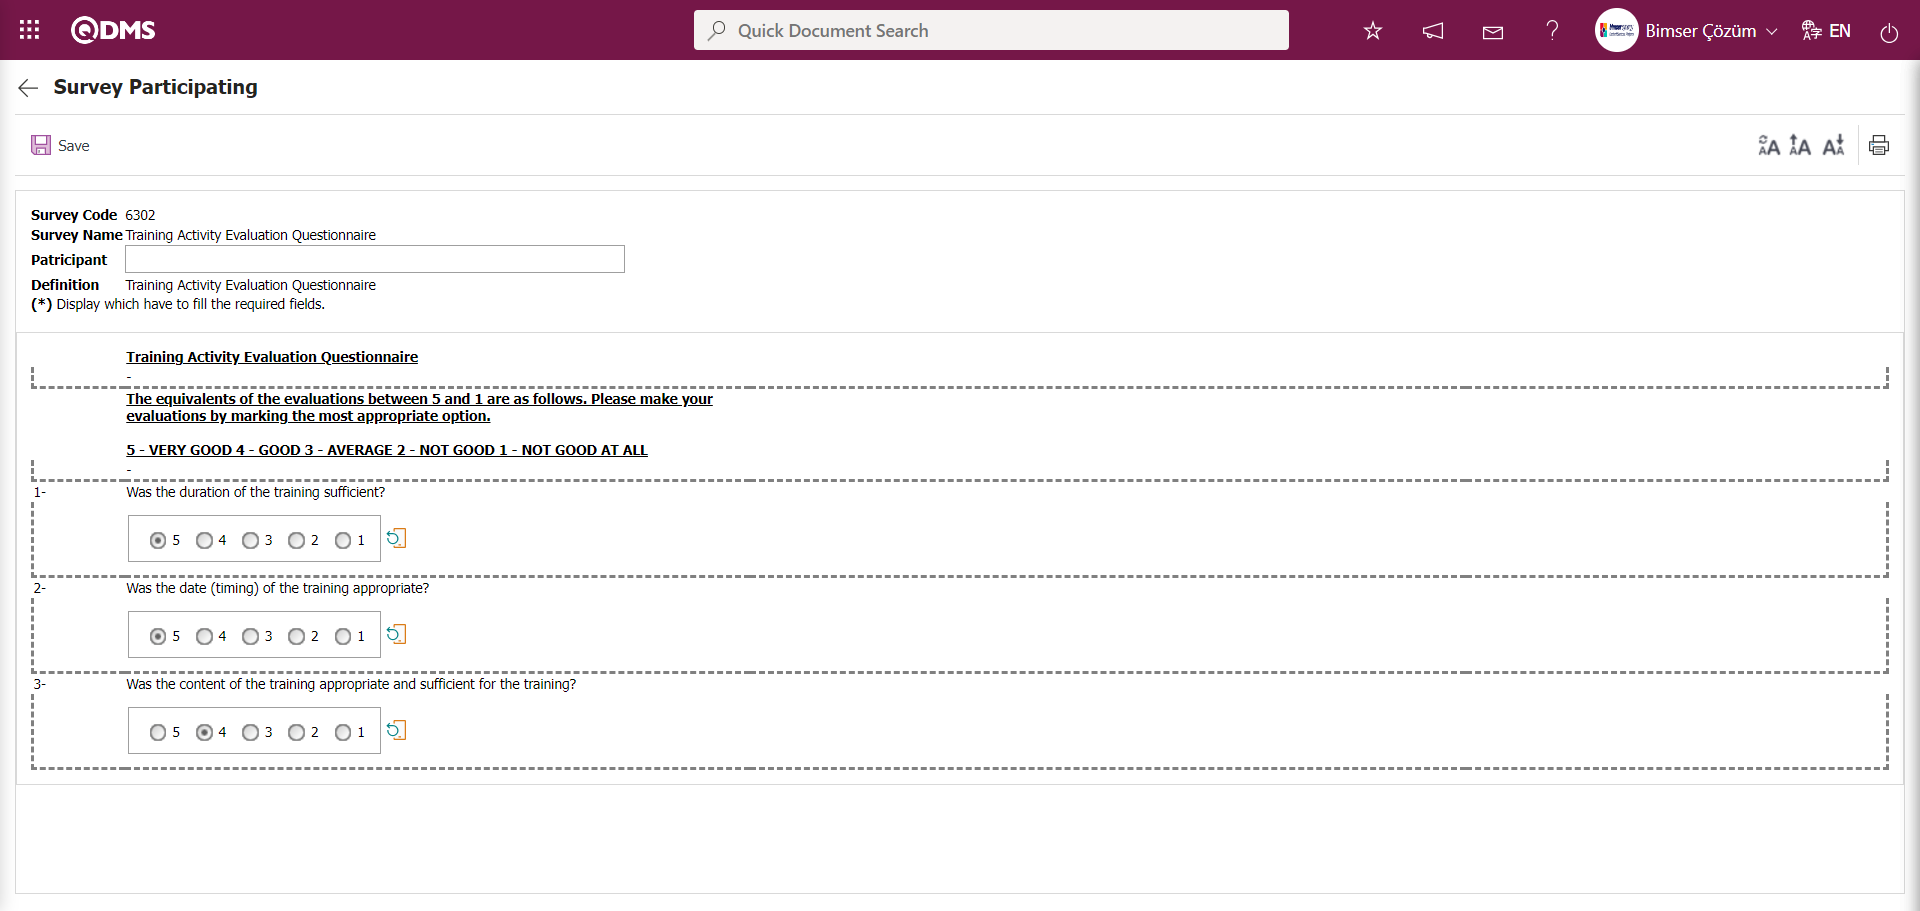
The survey code link in the Survey Code field of the relevant task is clicked to perform the training evaluation process.
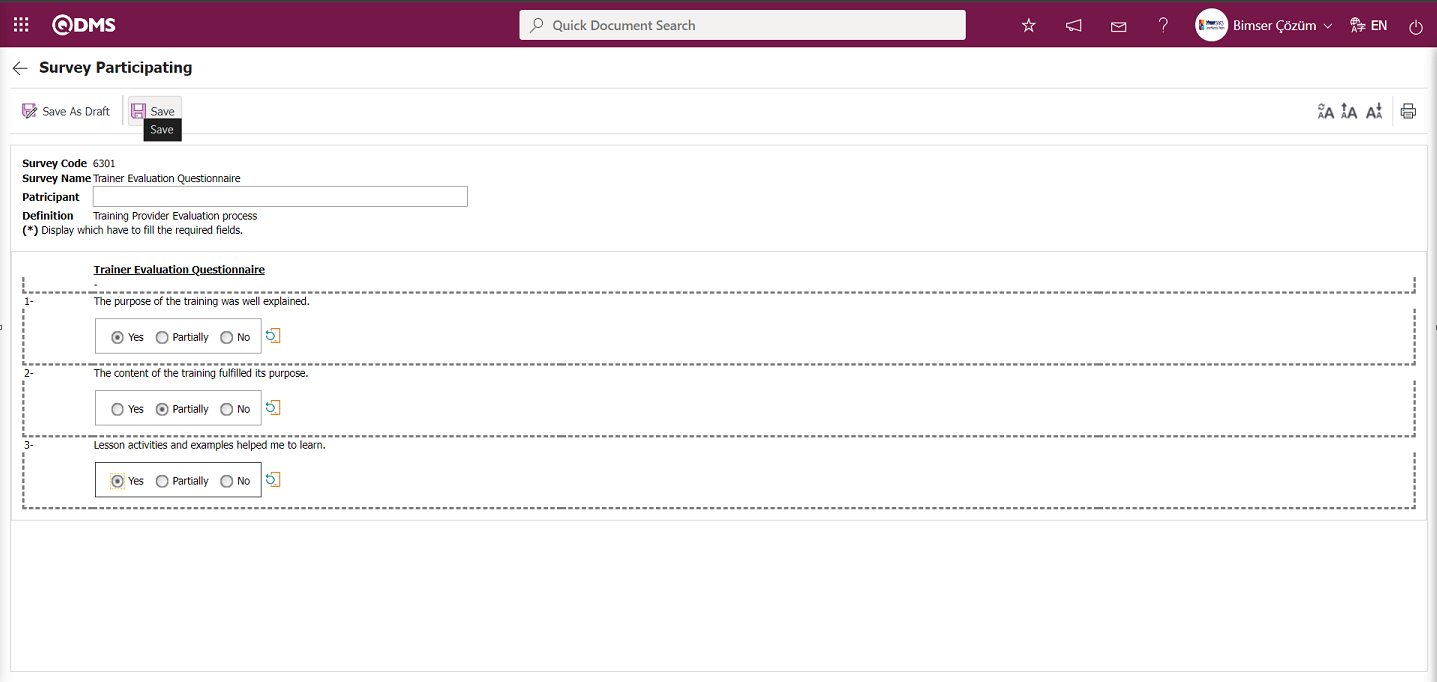
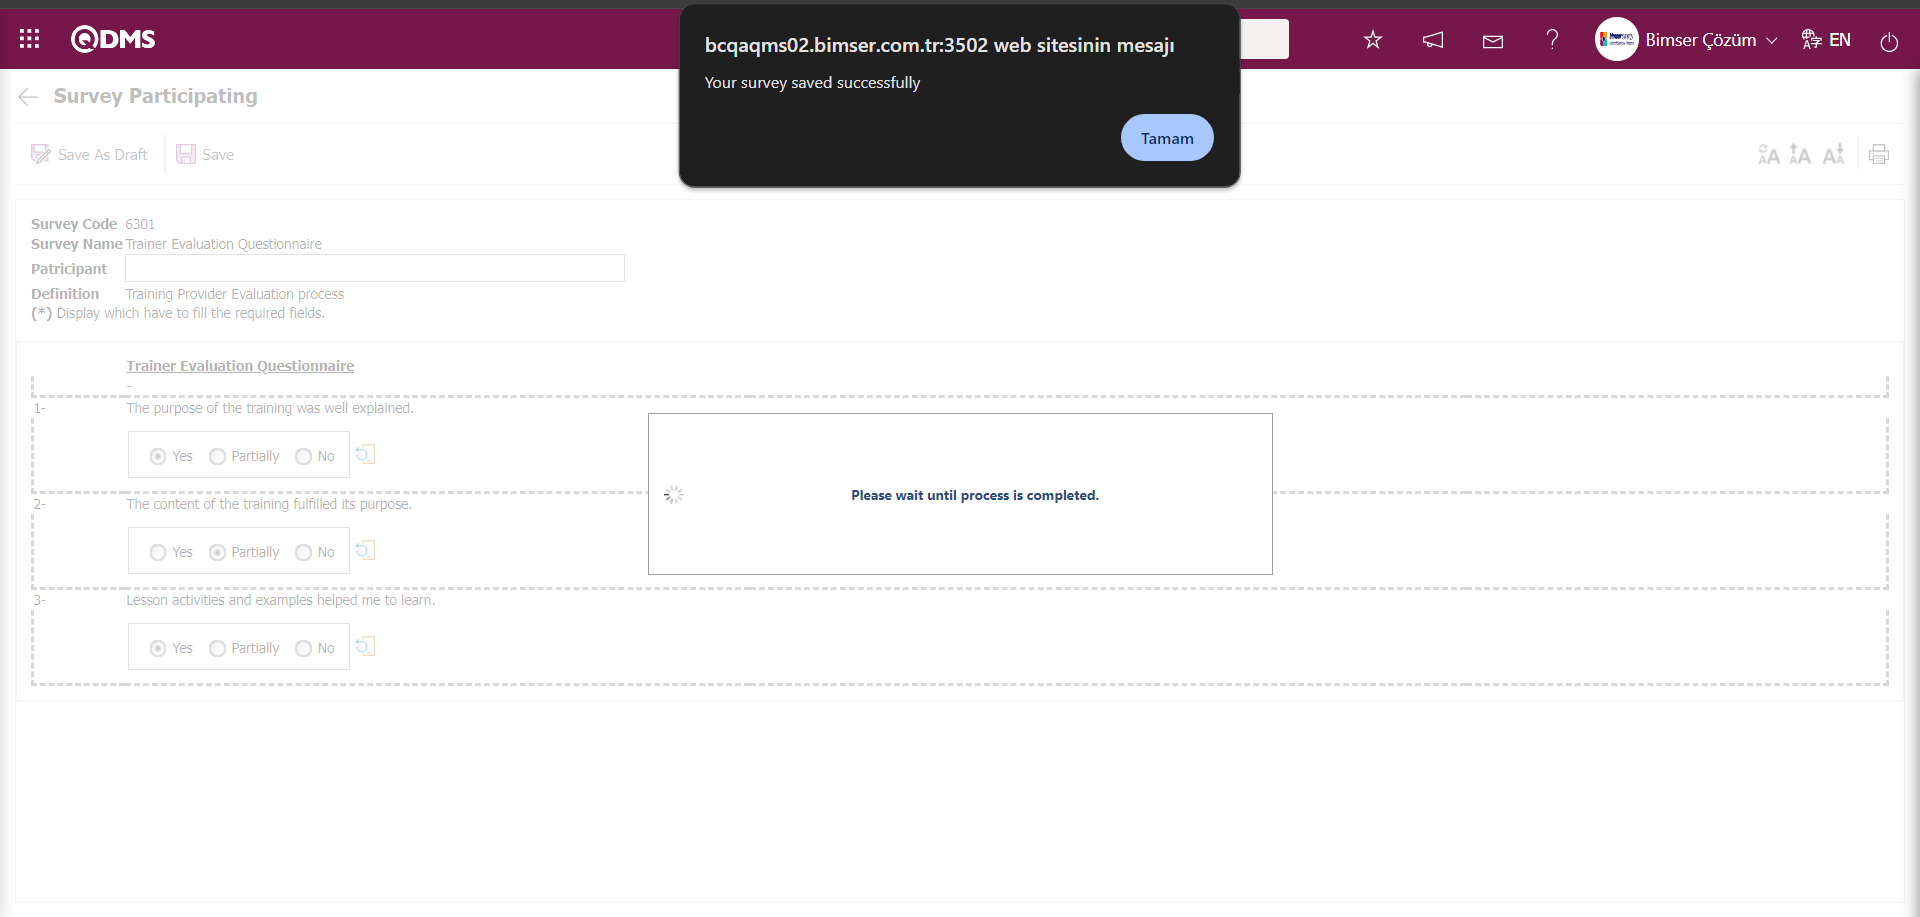
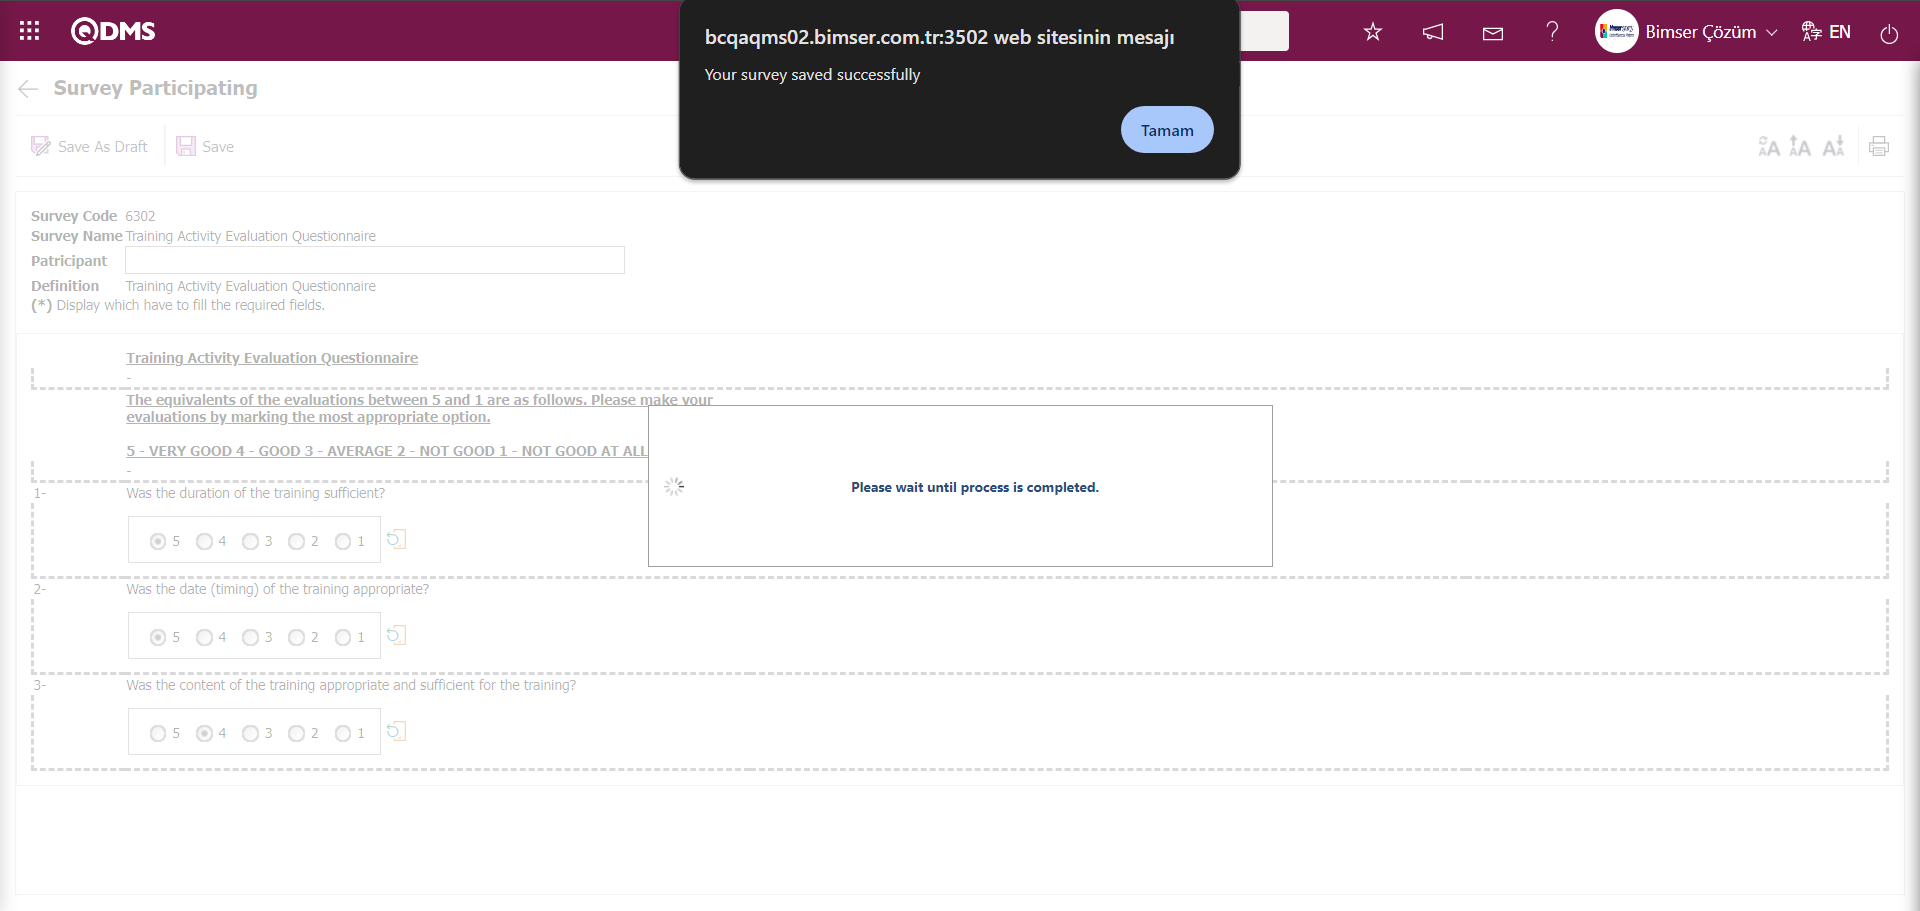
After answering the survey questions, click the  button. After registration, the system will display the message “Your survey saved successfully .” Click the “OK” button.
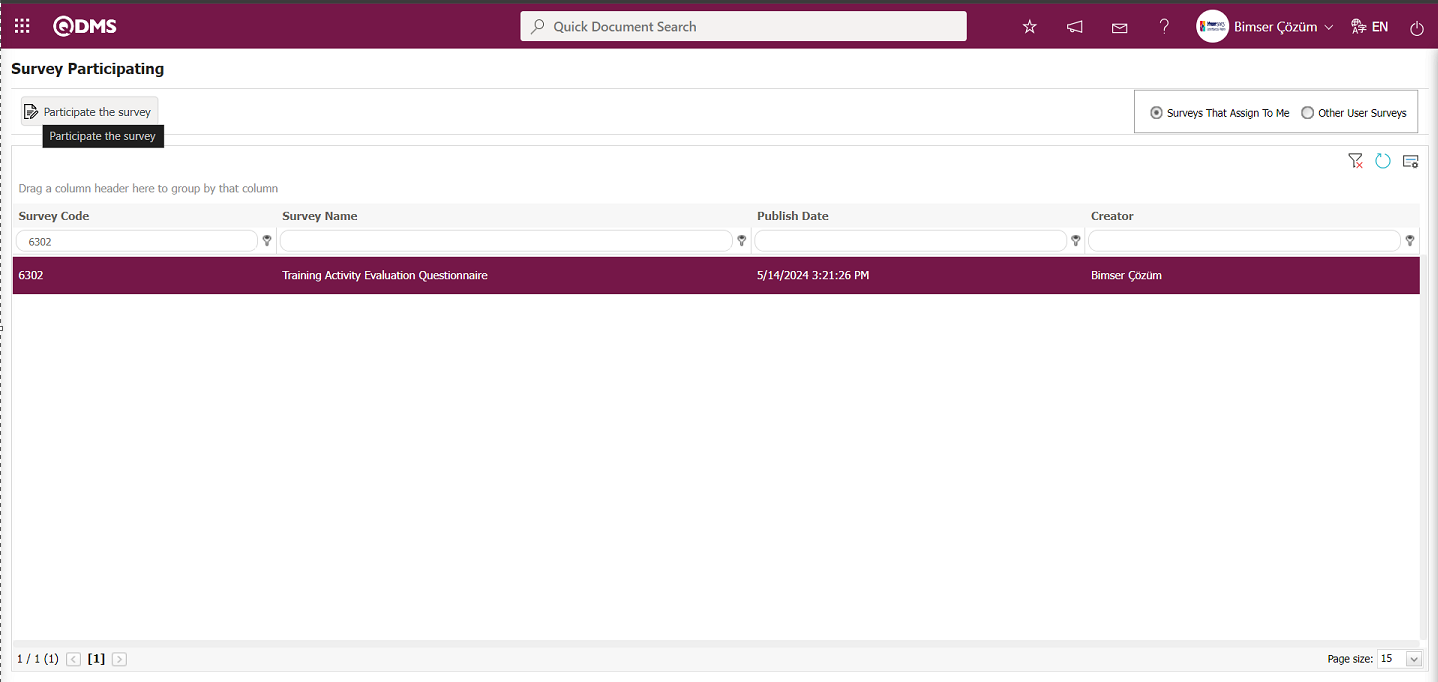
Click the  button on the Survey Participating screen.
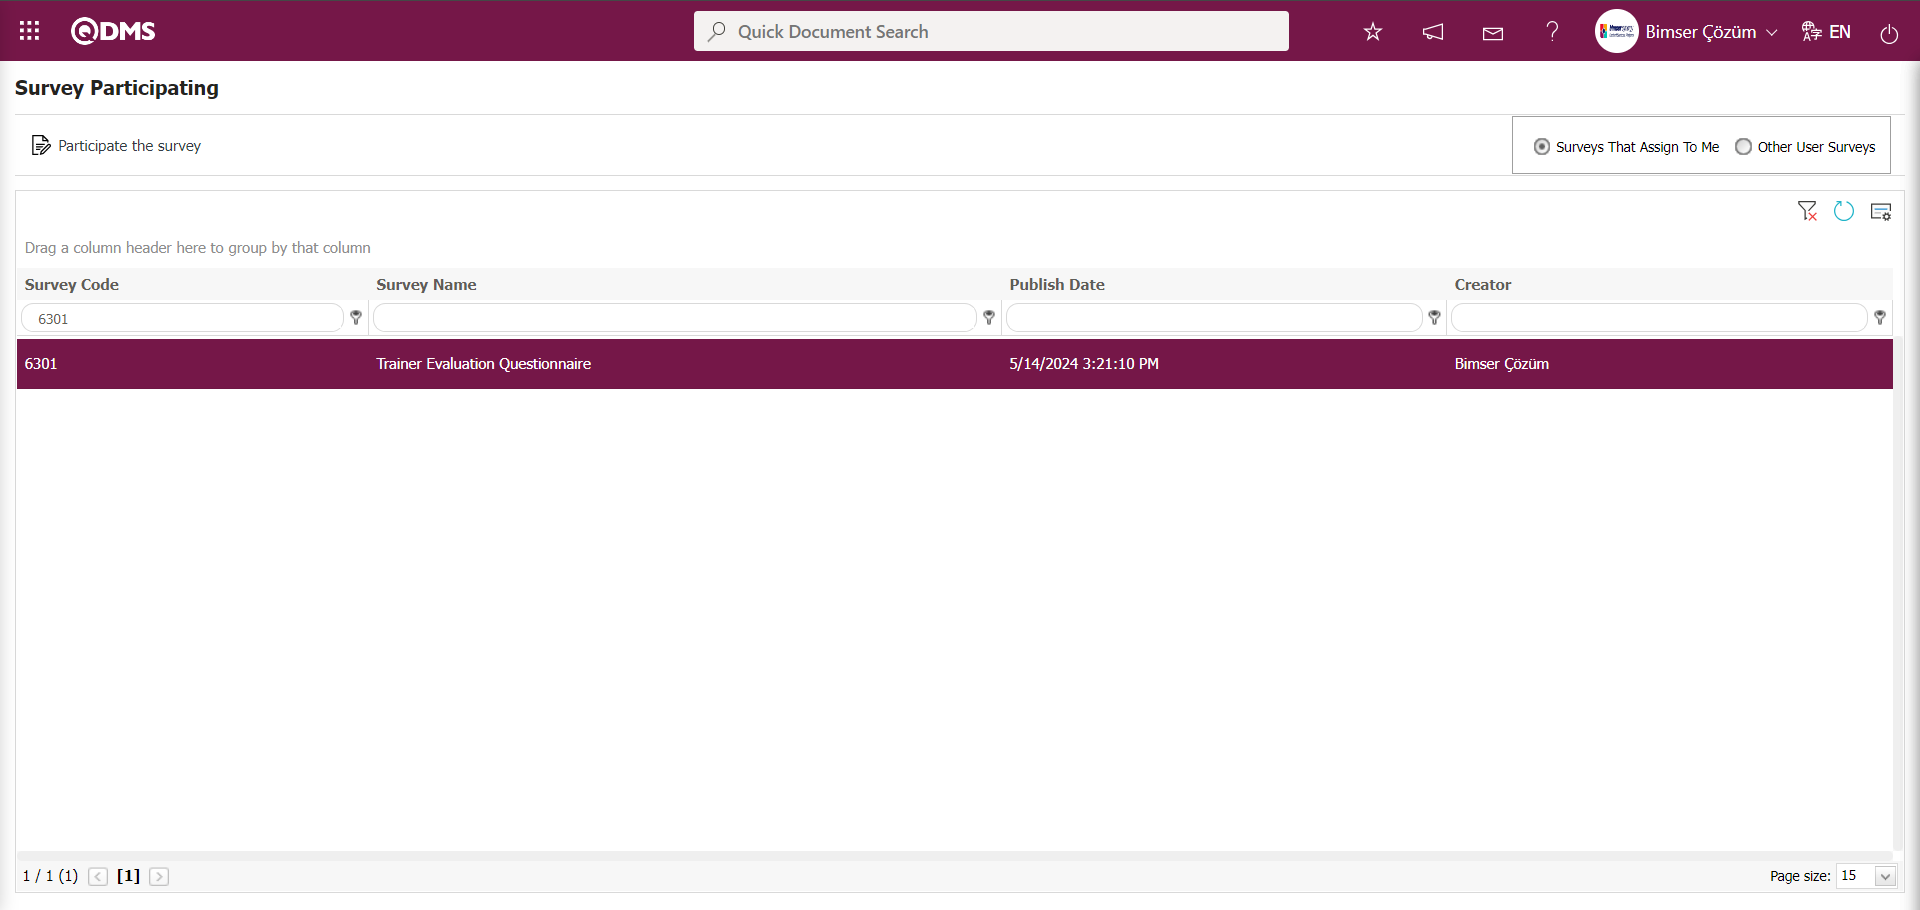
It can be seen that the survey has been completed.
Training Effectiveness Evaluation Survey;
Training Effectiveness Evaluation Survey The task “Surveys will be filled out” appears in my pending tasks.

The Questionnaire code link in the Questionnaire Code field of the relevant task is clicked to perform the training evaluation process.
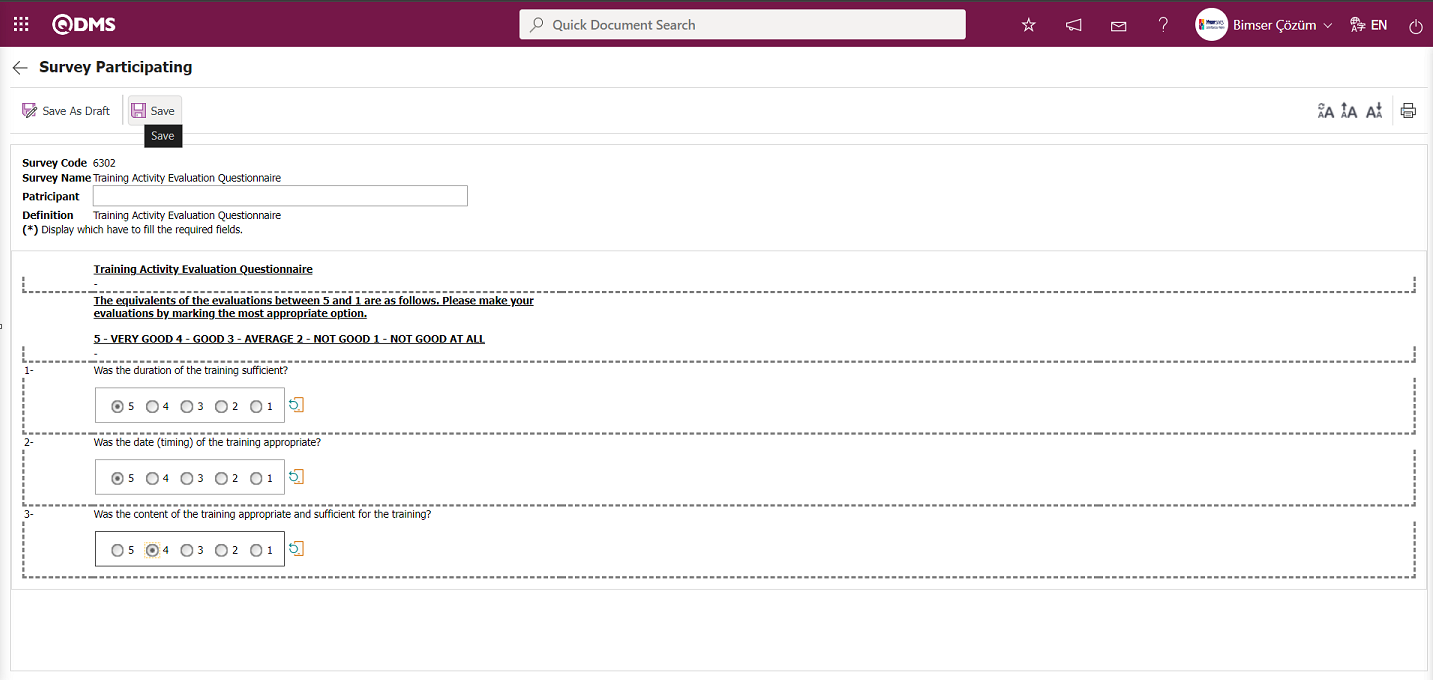
After answering the survey questions, click the button. After registration, the system will display the message “Your survey saved successfully .” Click the “OK” button.
Click the  button on the Survey Participating screen.
It can be seen that the survey has been completed.
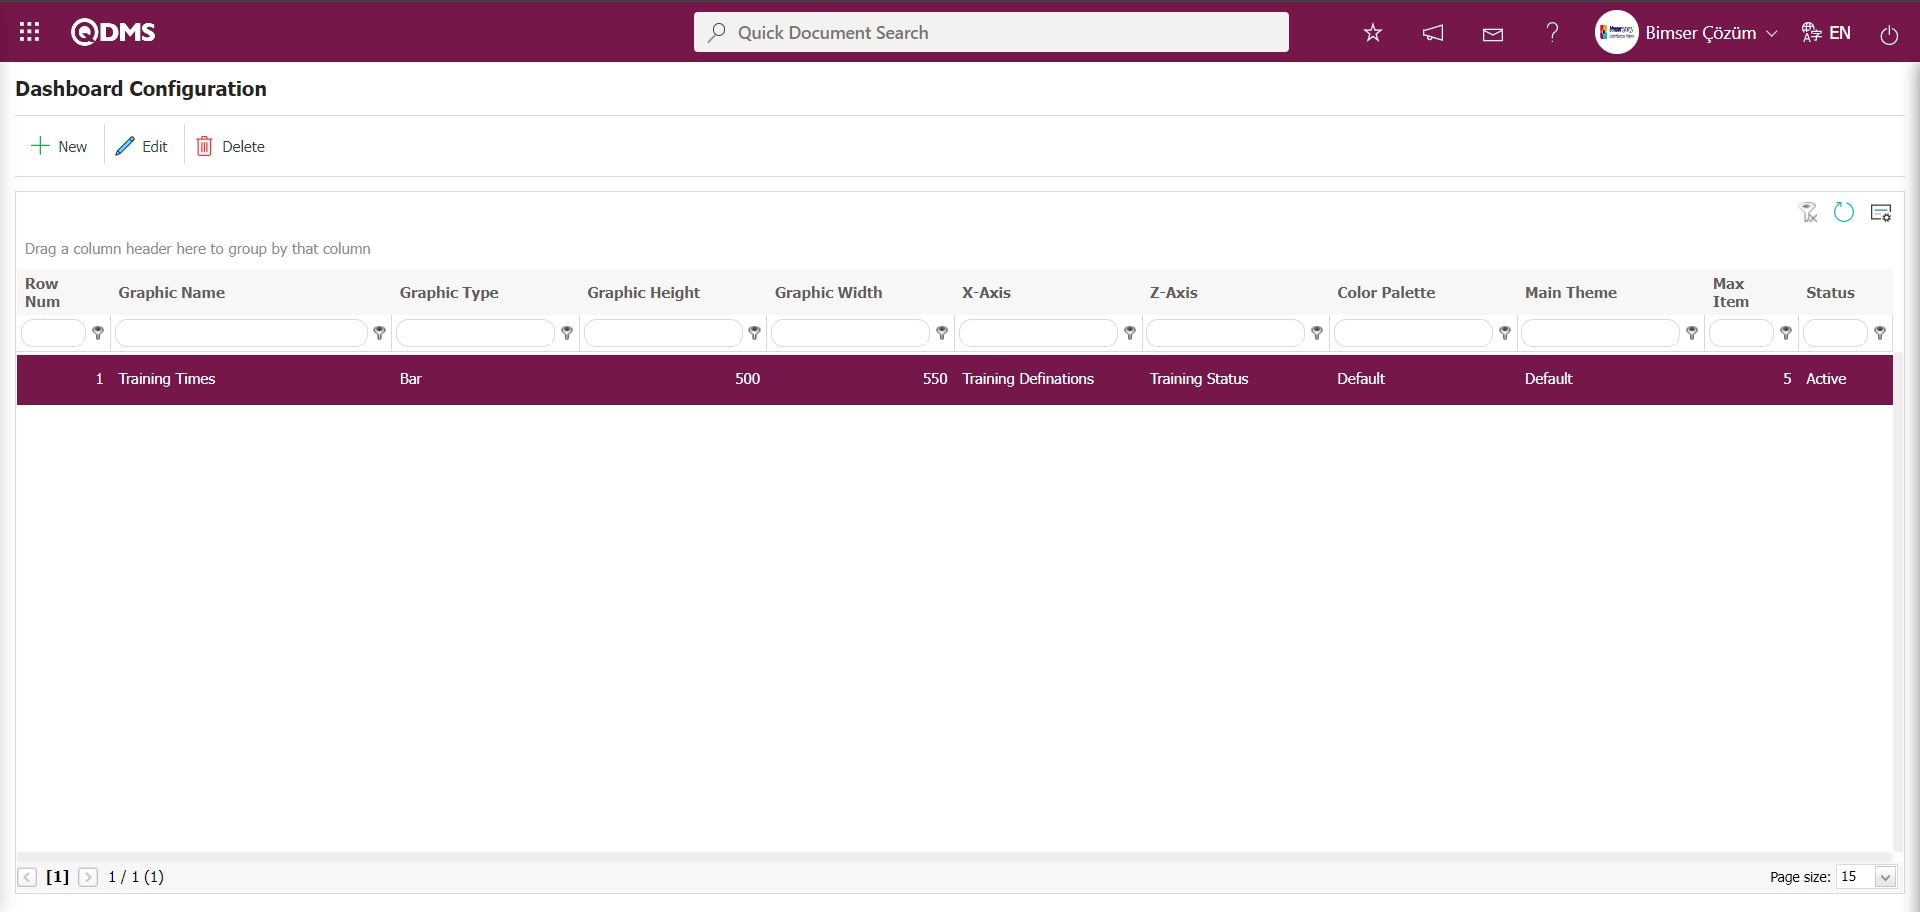
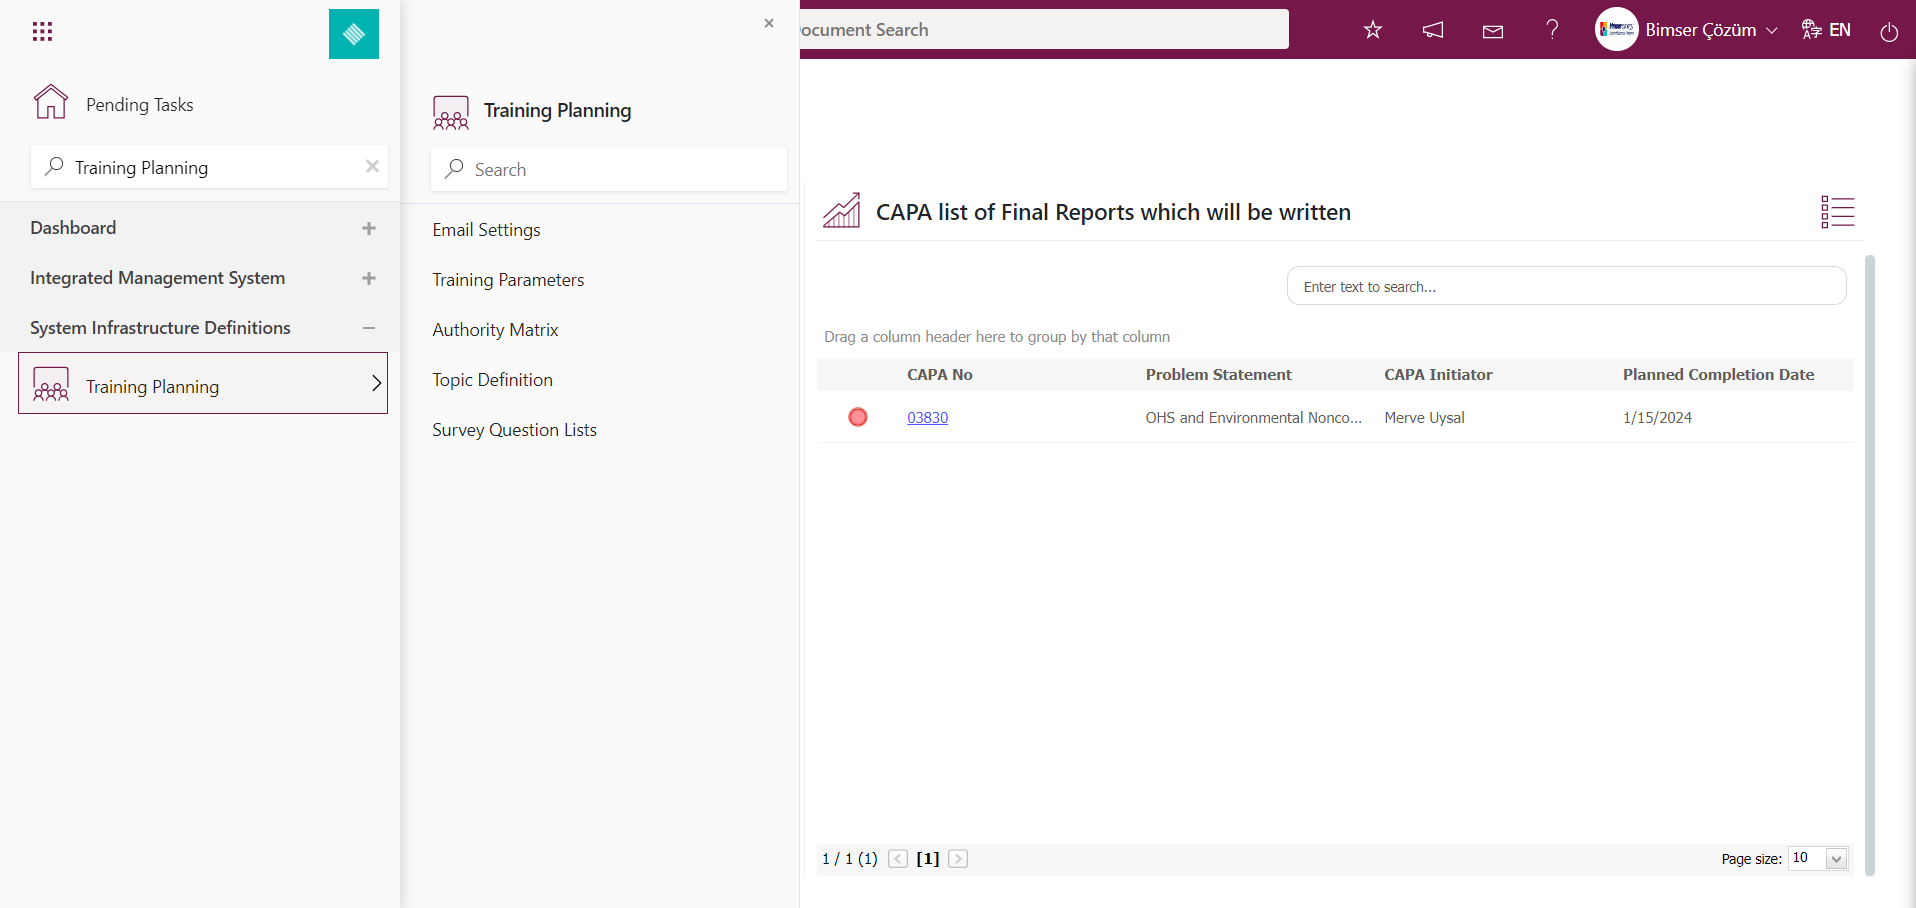
6.3. Integrated Management System/ Training Planning - Part 2
![A screenshot of a computer
AI-generated content may be incorrect.]ref1
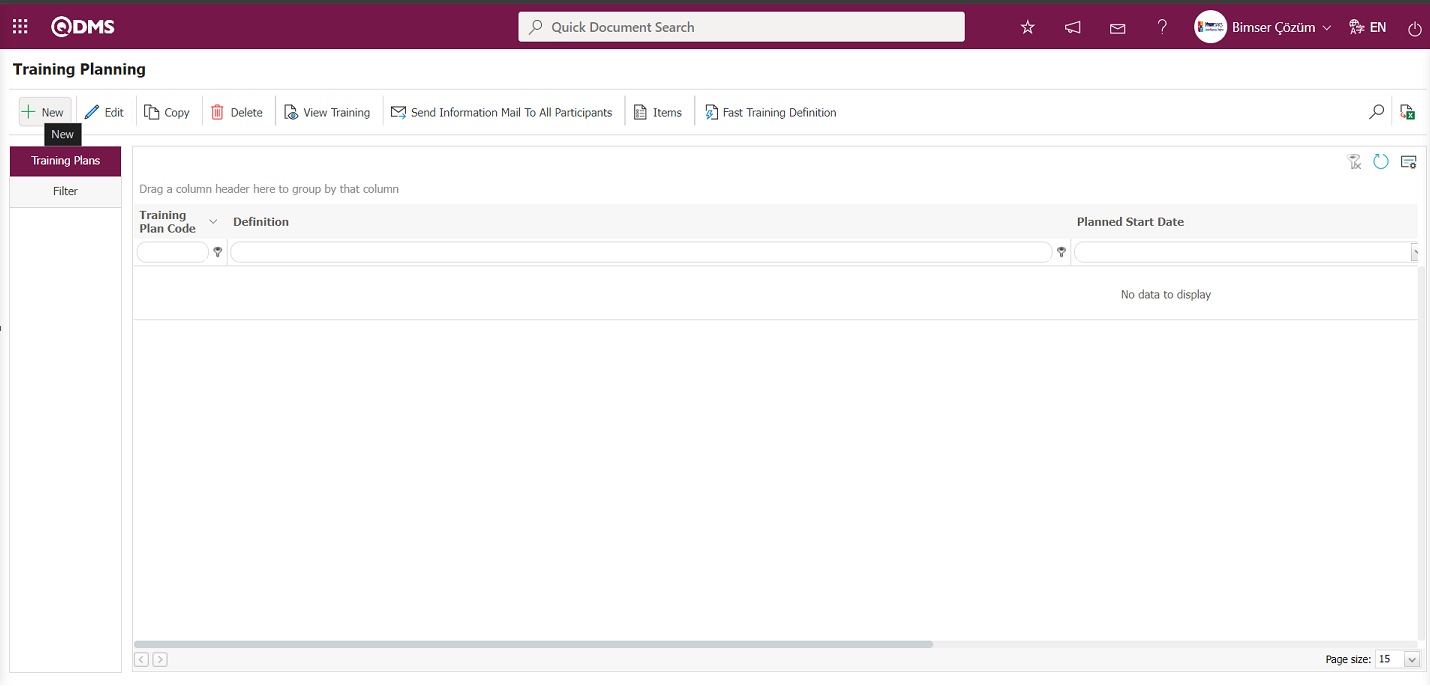
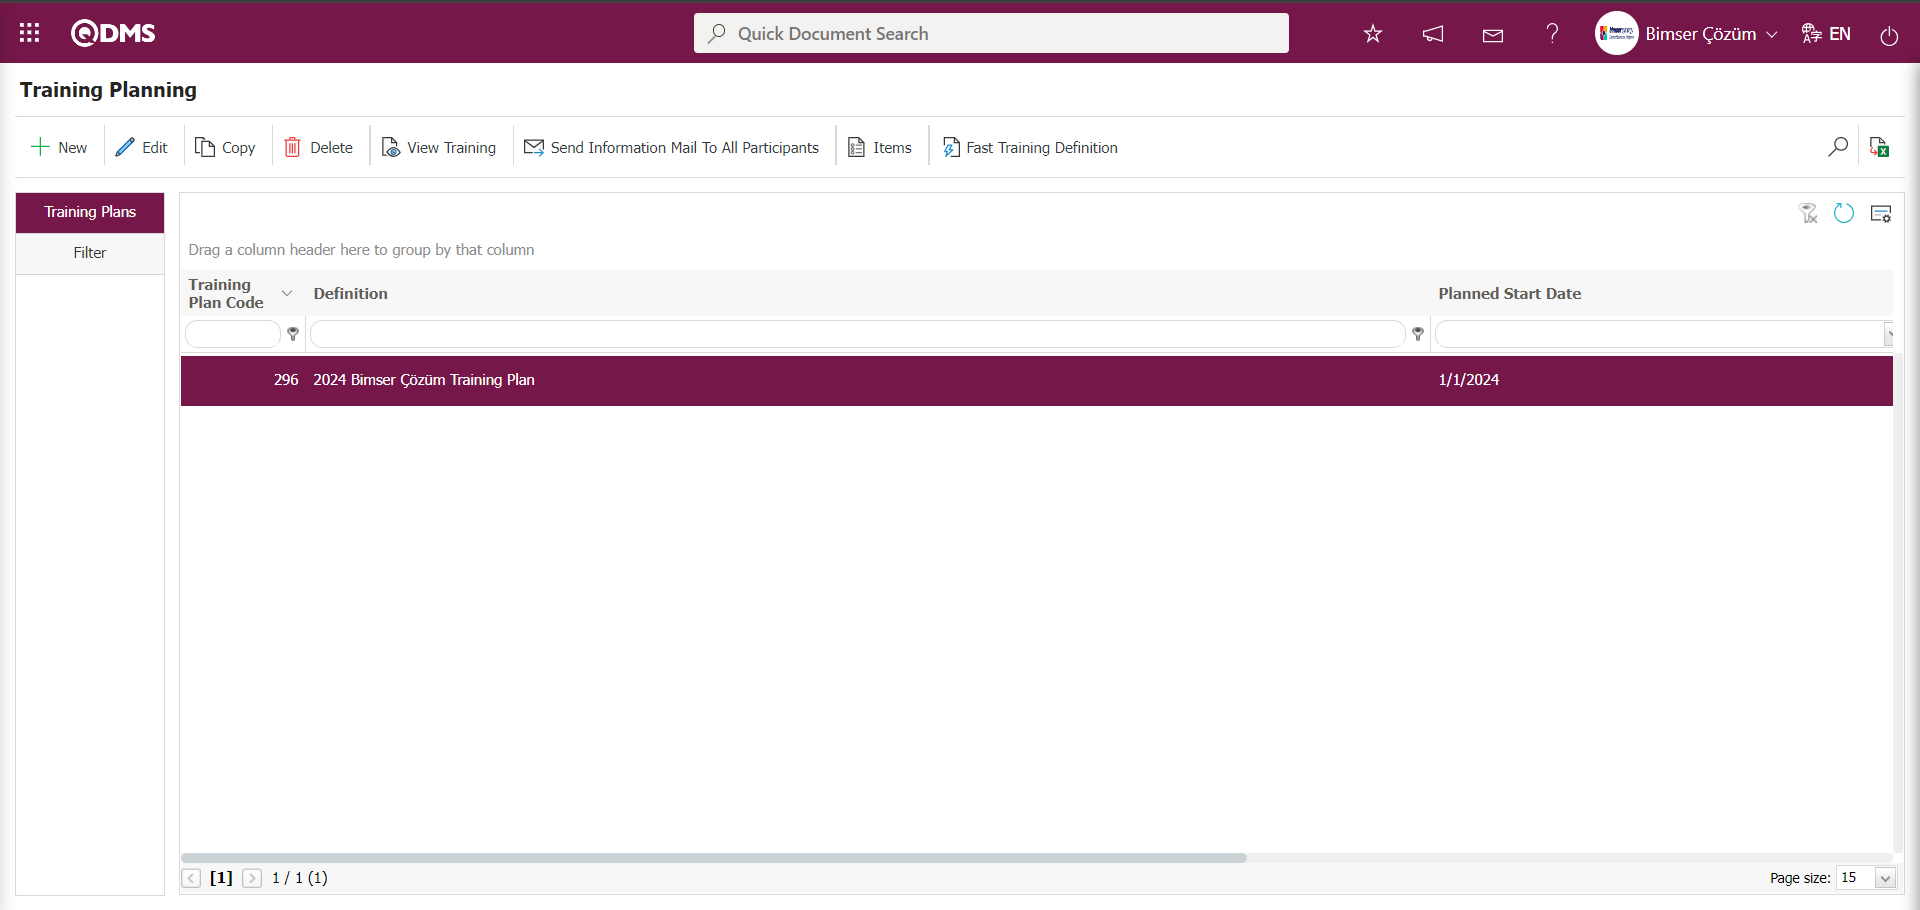
6.3.1. Training Plan
Menu Name: Integrated Management System/ Training Planning/ Training Plan
This menu contains the company's training plans, defined in the system with specified start and end dates. Training plans are typically defined on a six-month or annual basis. In the Qdms system, annual training plans are defined as a single plan with start and end dates selected from January to December. The number of training sessions to be conducted that year can be assigned within this defined annual plan. This completes the definition of the annual training plan.

Using the buttons on the screen;
 : A new training plan is defined.
 : The selected training plan in the list is modified and updated.
 : The selected training plan in the list is copied.
 : The training courses defined in the selected training plan in the list are displayed.
 : After the training plan is created, an email is manually sent to all participants to inform them.
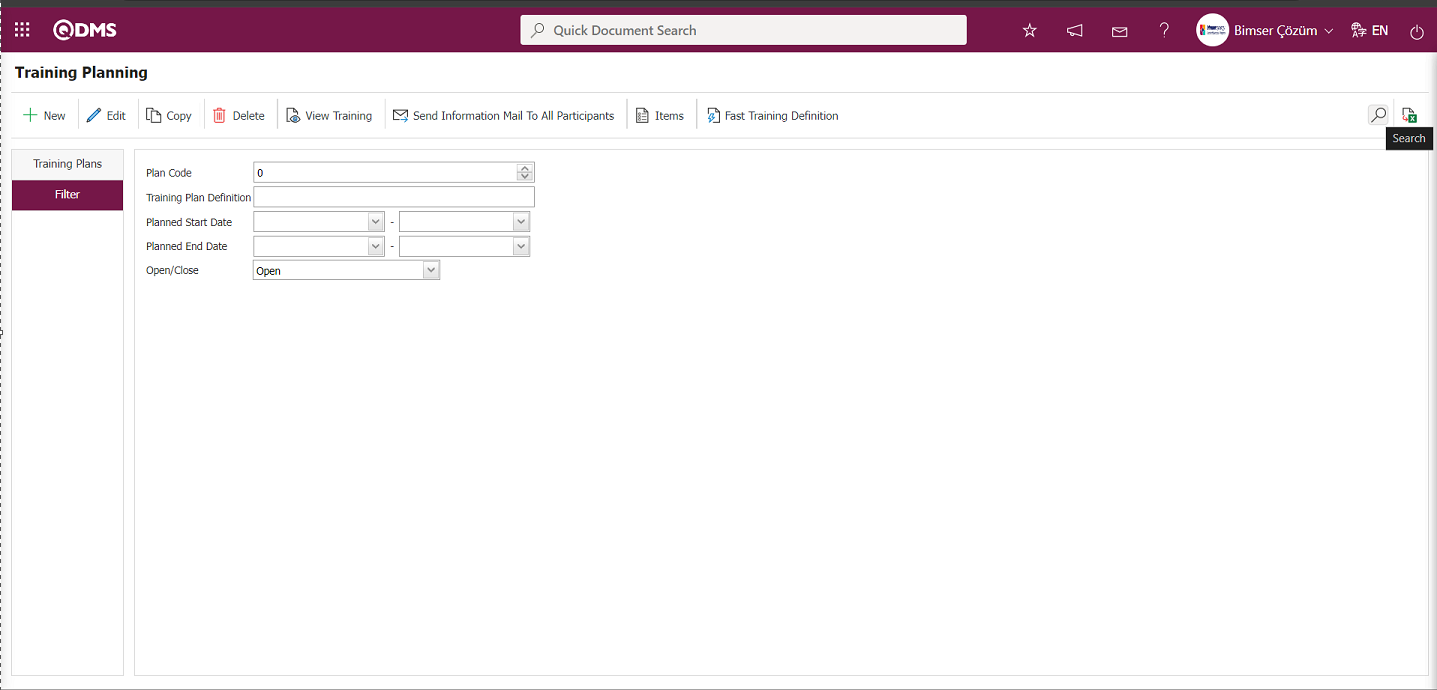
 : Transition to the Training Item Planing** page is enabled. The process of defining the trainings to be conducted within the plan is performed.
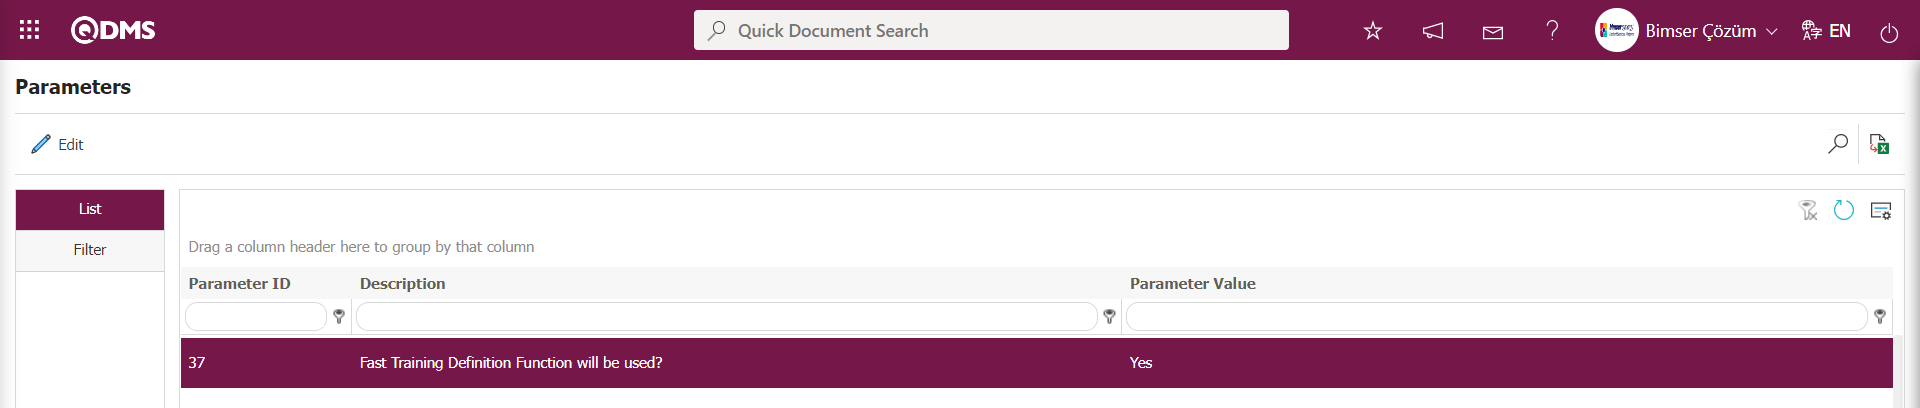
 : The Fast Training definition process is performed. This is an area that is displayed depending on the parameter. In the Training Planning module parameters, the parameter value of parameter number 37, “Fast Training Definition Function will be used?”, is selected as “Yes” to activate the parameter.
After the parameter is enabled, the button appears, and clicking this button initiates the quick training definition process. The Training Planning module determines which main training plan the training details will be opened under in the fast training definition based on the plan code defined in the parameter value of parameter 64, “Plan No to be used in Defining Quick Training.” The plan definition defined in the parameter is automatically retrieved by the system in the Training Plan Definition field of the Training Planning screen where the fast training definition process is performed.
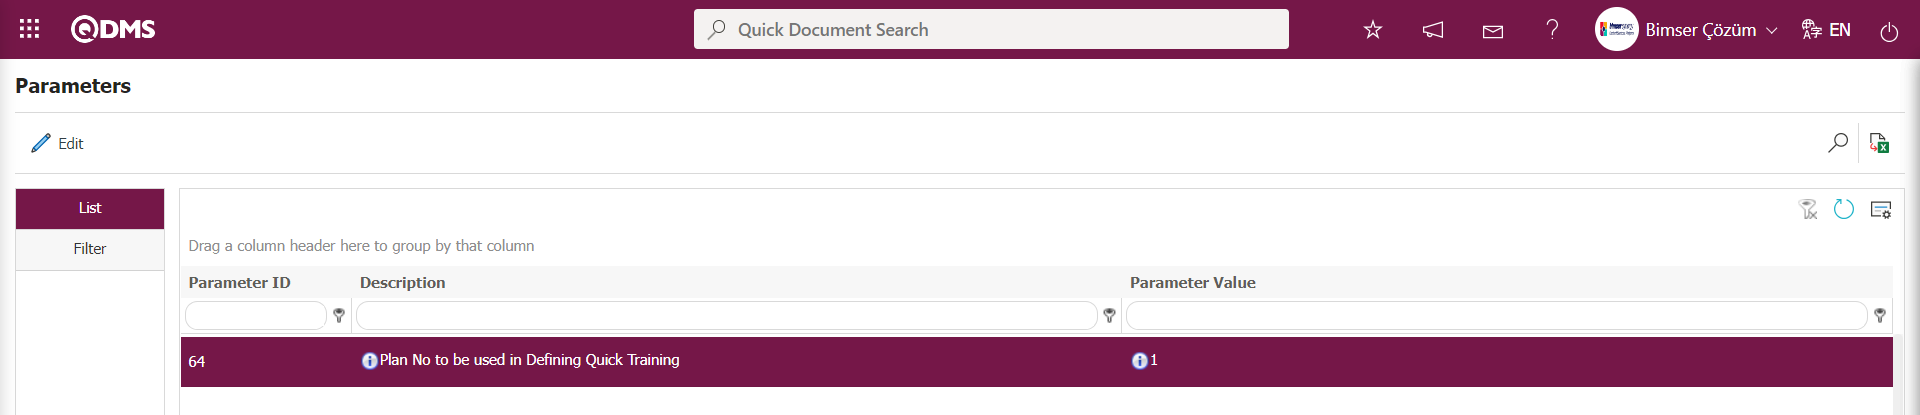
If the parameter value is “0,” a new plan will be created for each training session. A new training plan is defined in the Training Plan Definition field of the Training Planning screen where the quick training definition process is performed.
 : The list of training plans created in the system is exported to Excel.
 : Filtering is performed according to the search criteria in the “Plan Code, Training Plan Definition, Planned Start Date, and Planned End Date” fields selected in the Filter tab.
6.3.1.1. Creating a New Training Plan
Menu Name: Integrated Management System/ Training Planning/ Training Plan
In the Training Planning screen, a new training plan is defined in the system.
Click the button on the Training Planning screen.

The relevant fields are defined on the screen that opens:
Training Plan Definition : This is the field where the Training plan definition information is entered in the Training Planning screen. If other languages are used in addition to Turkish, the Training plan definition information for those languages is entered in the field with the corresponding symbols.
Planned Start Date: This is the field where the planned start date of the plan defined in the Training Planning screen is selected from the Calendar field that opens.
Planned End Date : This is the field where the planned end date of the plan defined in the Training Planning screen is selected from the Calendar field that opens.
Open/Close : This is the area where the status of the training plan defined in the Training Planning screen is selected as open or closed.
Responsible User Groups: This is the area where the responsible user group is selected from the list of defined User Groups in the system that opens when the (Add) button is clicked in the Training Planning screen. This is an area that is displayed depending on the parameter. The parameter is activated by selecting “Yes” for the parameter value of parameter number 72, “Will authorization control be made over the responsible user groups in the training plan?”, in the Training Planning module parameters.
 After the parameter is enabled, the Responsible User Groups field appears on the Training Planning screen. People in the selected User Group can view the master plan (except for the Module Administrator). If a person is not in the authorized user group, they cannot view the master plan and therefore cannot view the Training Plan details below it or perform Training Details plan steps.
The training definition information is entered on the Training Planning screen. The planned start and end dates of the training are selected in the calendar field that opens. The status of the defined plan is selected as Open. The Responsible User Group field is selected by clicking the (Add) button, and the responsible user group information is selected from the list of user groups defined in the system that opens. After entering the required information in the relevant fields, the Training Planning registration process is completed by clicking the  button in the top left corner of the screen.
In the Training Planning module, the parameter value of parameter number 87, “Will participant restriction be applied on the basis of the main training plan?”, is set to “Yes” to activate the parameter.
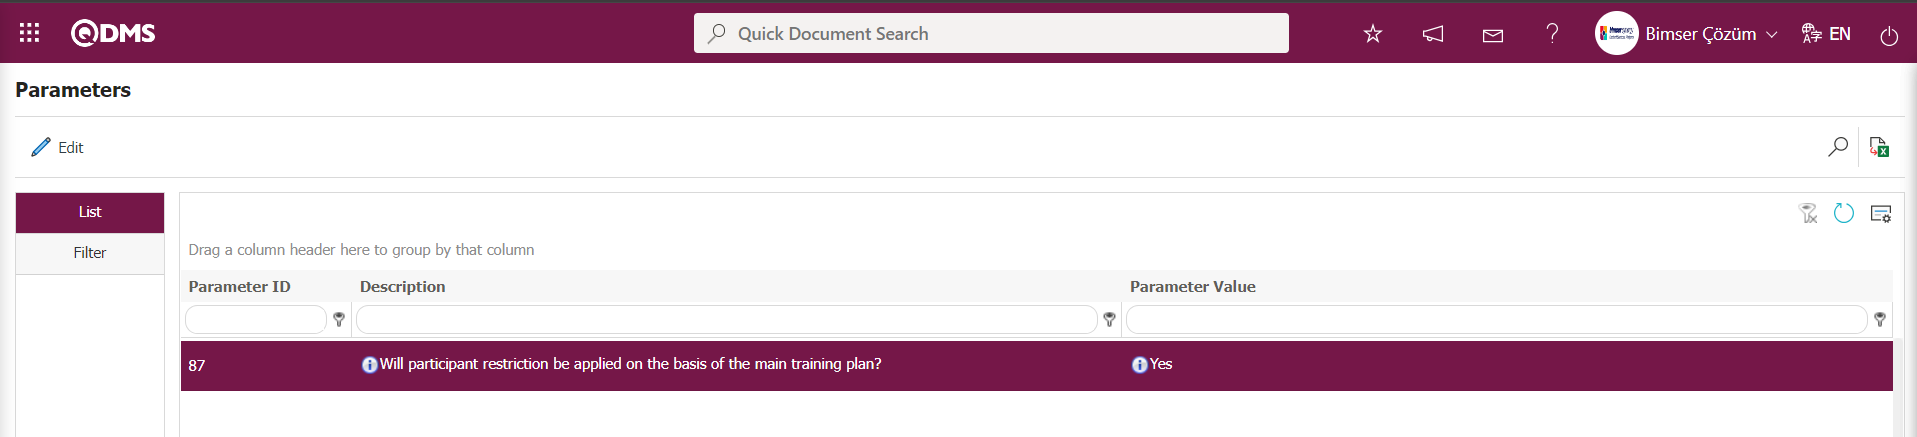
After the parameter is enabled, the Participants field appears in the Training Planning screen.
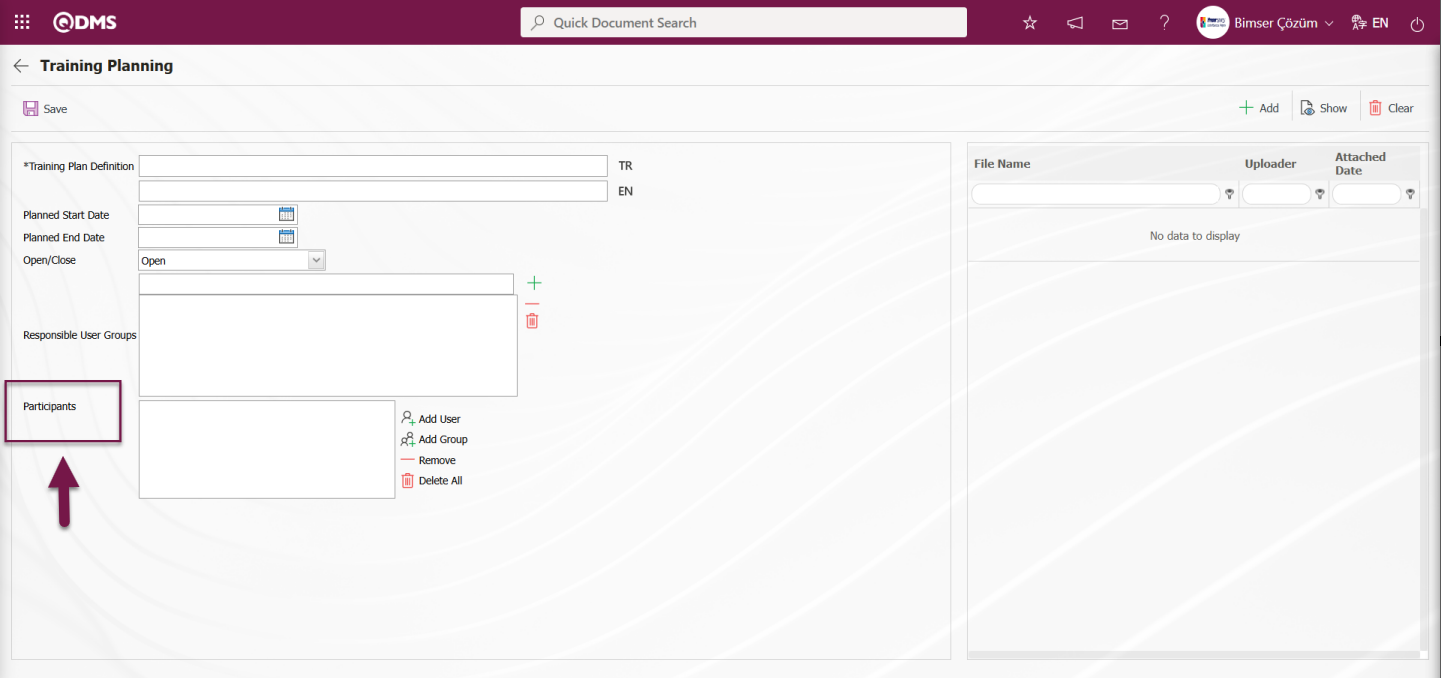
In the Participants section, click the  “Add User” button to add personnel from the personnel list, and click the
  “Add Group” button to add a user group from the User Group list. When the “Add Participant” button is clicked in the Participants screen to add participants to the Training Detail Plan, the list that opens displays the participants added to the main plan, and participants are selected from this list. Users can enable this parameter to apply participant restrictions based on the main training plan.
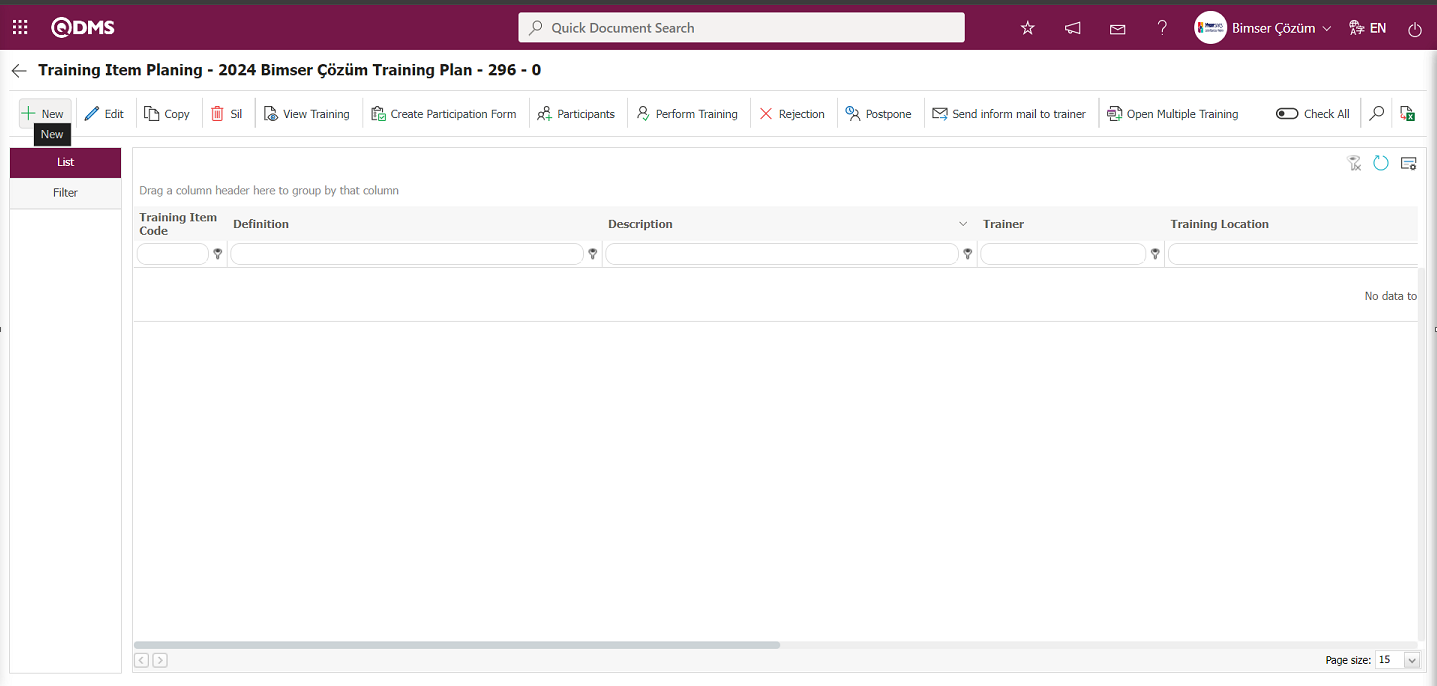
6.3.1.2.Training Item Planing
Menu Name: Integrated Management System/ Training Planning/ Training Plan
The process of assigning the training courses to be provided within the defined training plan is carried out.

When the defined training plan is selected, click the  button to go to the “Training Item Planning” screen.
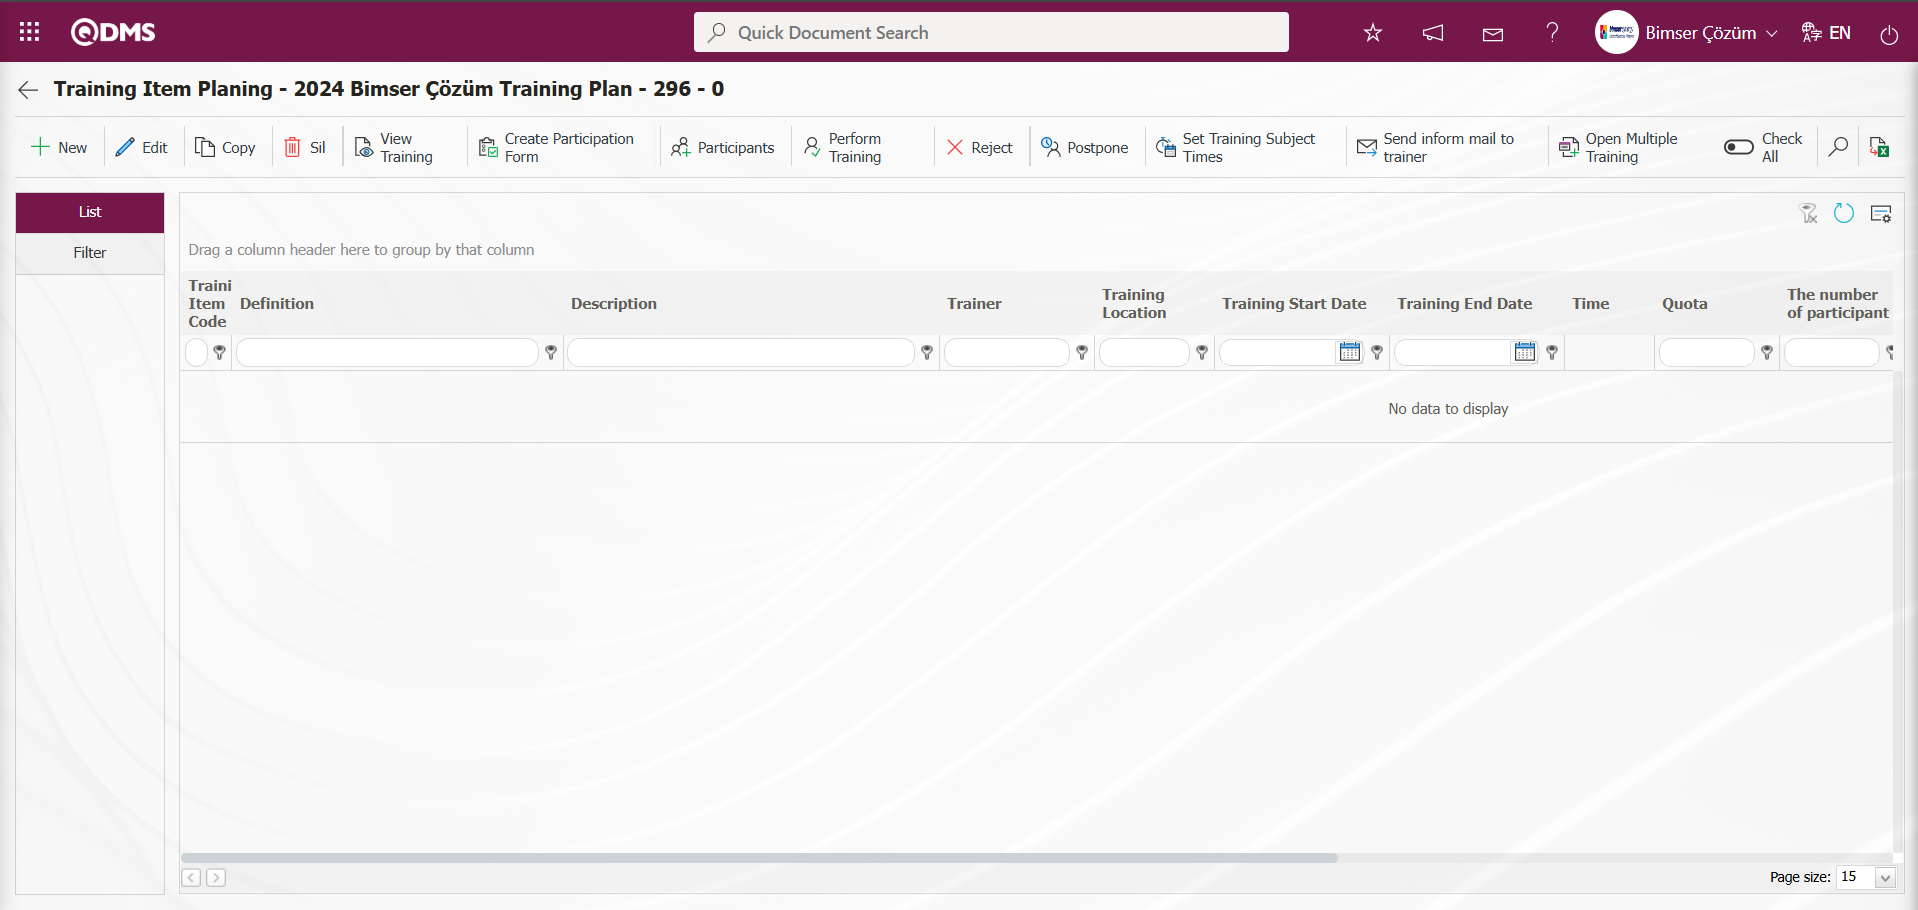
Using the buttons on the screen;
 : A new Training Item Planning definition process is performed. The assignment of the training to be conducted within the plan is performed within the training plan.
 : Changes and edits are made to the selected Training Item Planning information in the list.
 : The selected Training Item Planning information in the list is copied. If the newly defined training detail plan has similar data to the previously defined detail plan, the copy button is used. Then, any minor changes are made and saved.
 : The selected Training Item Planning information in the list is deleted. Use this button to delete training details that are no longer included in the training plan or have been incorrectly defined.
 : Displays the selected Training Item Planning information in the list. Used to view the details of the selected training..
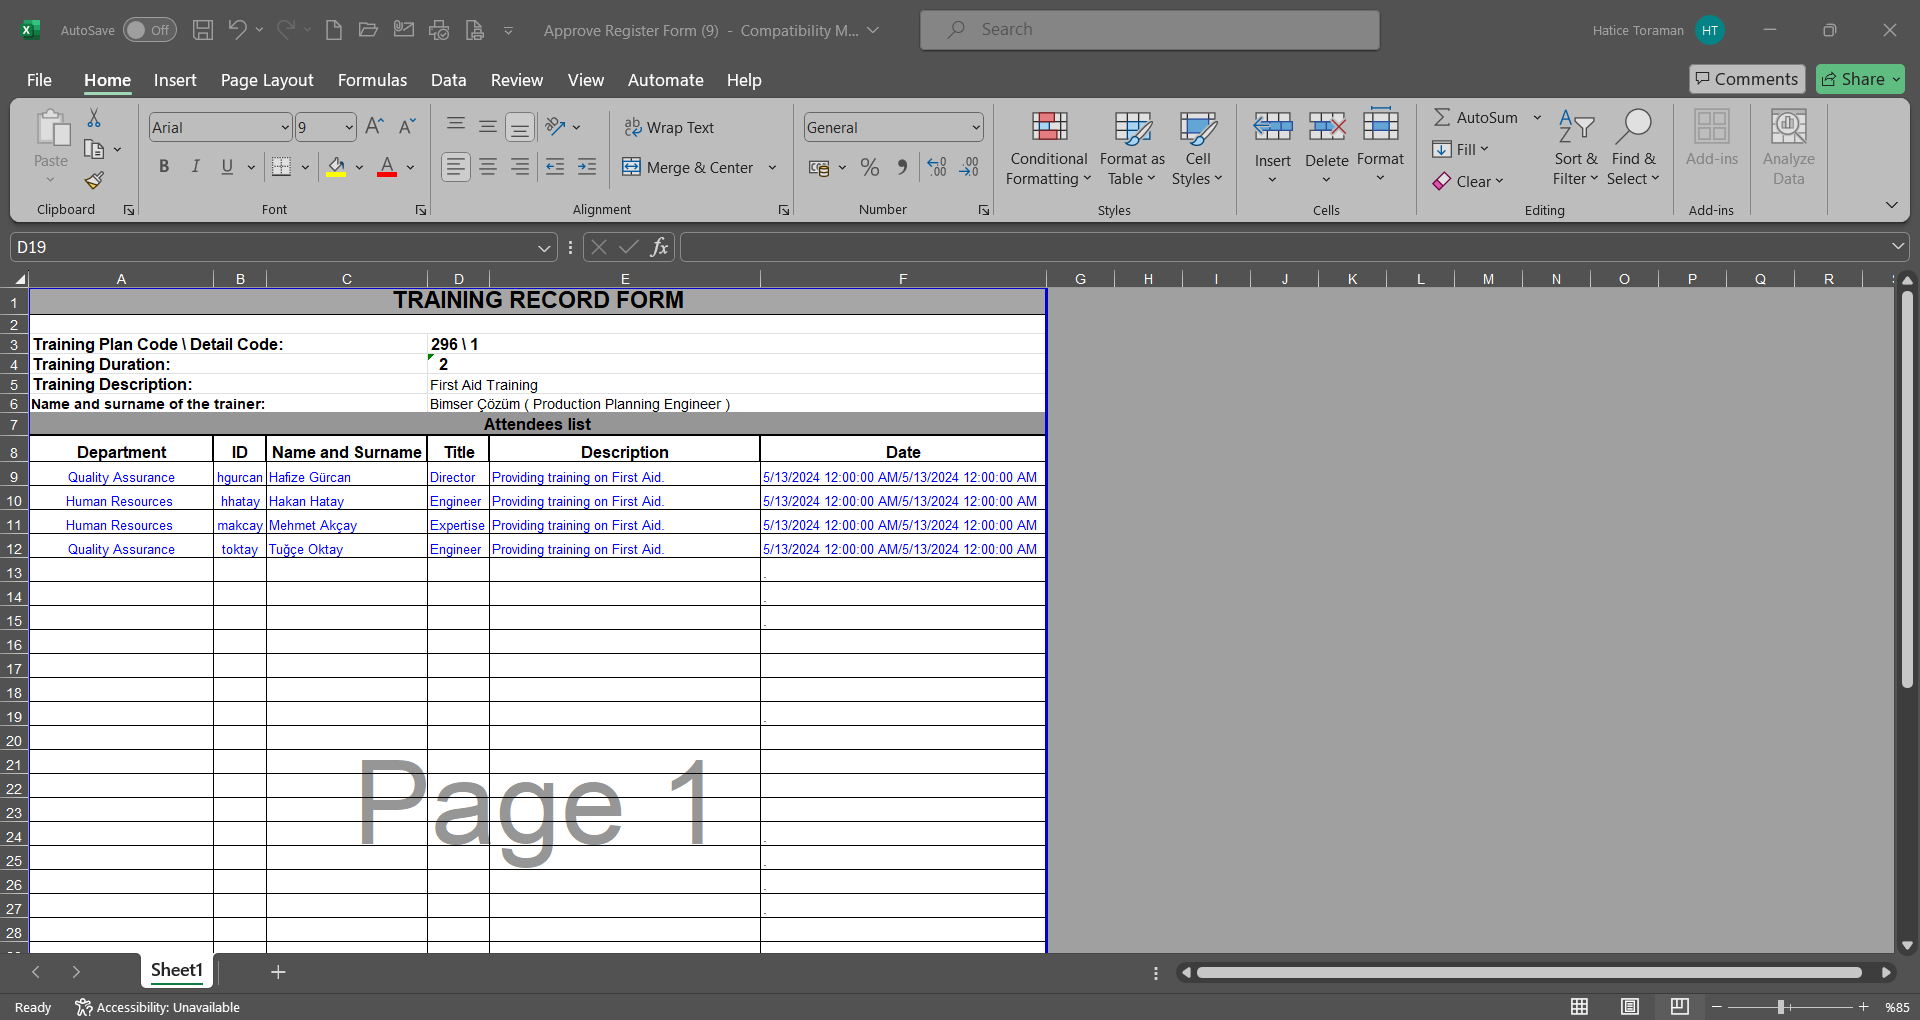
 : The process of obtaining the selected Training Item Planning participation form is carried out. This button is used when you want to obtain a form containing the list of participants and their wet signatures. This form includes fields for training information, the list of participants, and the wet signatures.
 : The participant addition process is performed for the selected Training Item Planning in the list. When the defined training detail is selected, this button is used to assign personnel who will participate in this training.
 : The training selected in the list is carried out. This button enables the training to be carried out. It provides access to the screen where you can enter data on whether participants attended or did not attend, the reasons for their absence, and their training success scores.
 : The selected training in the list is canceled. In the Cancel Training Request screen that opens, enter the “Reason for Cancellation” information and click the
  button to cancel the training. The status of canceled trainings changes to “Cancel.”

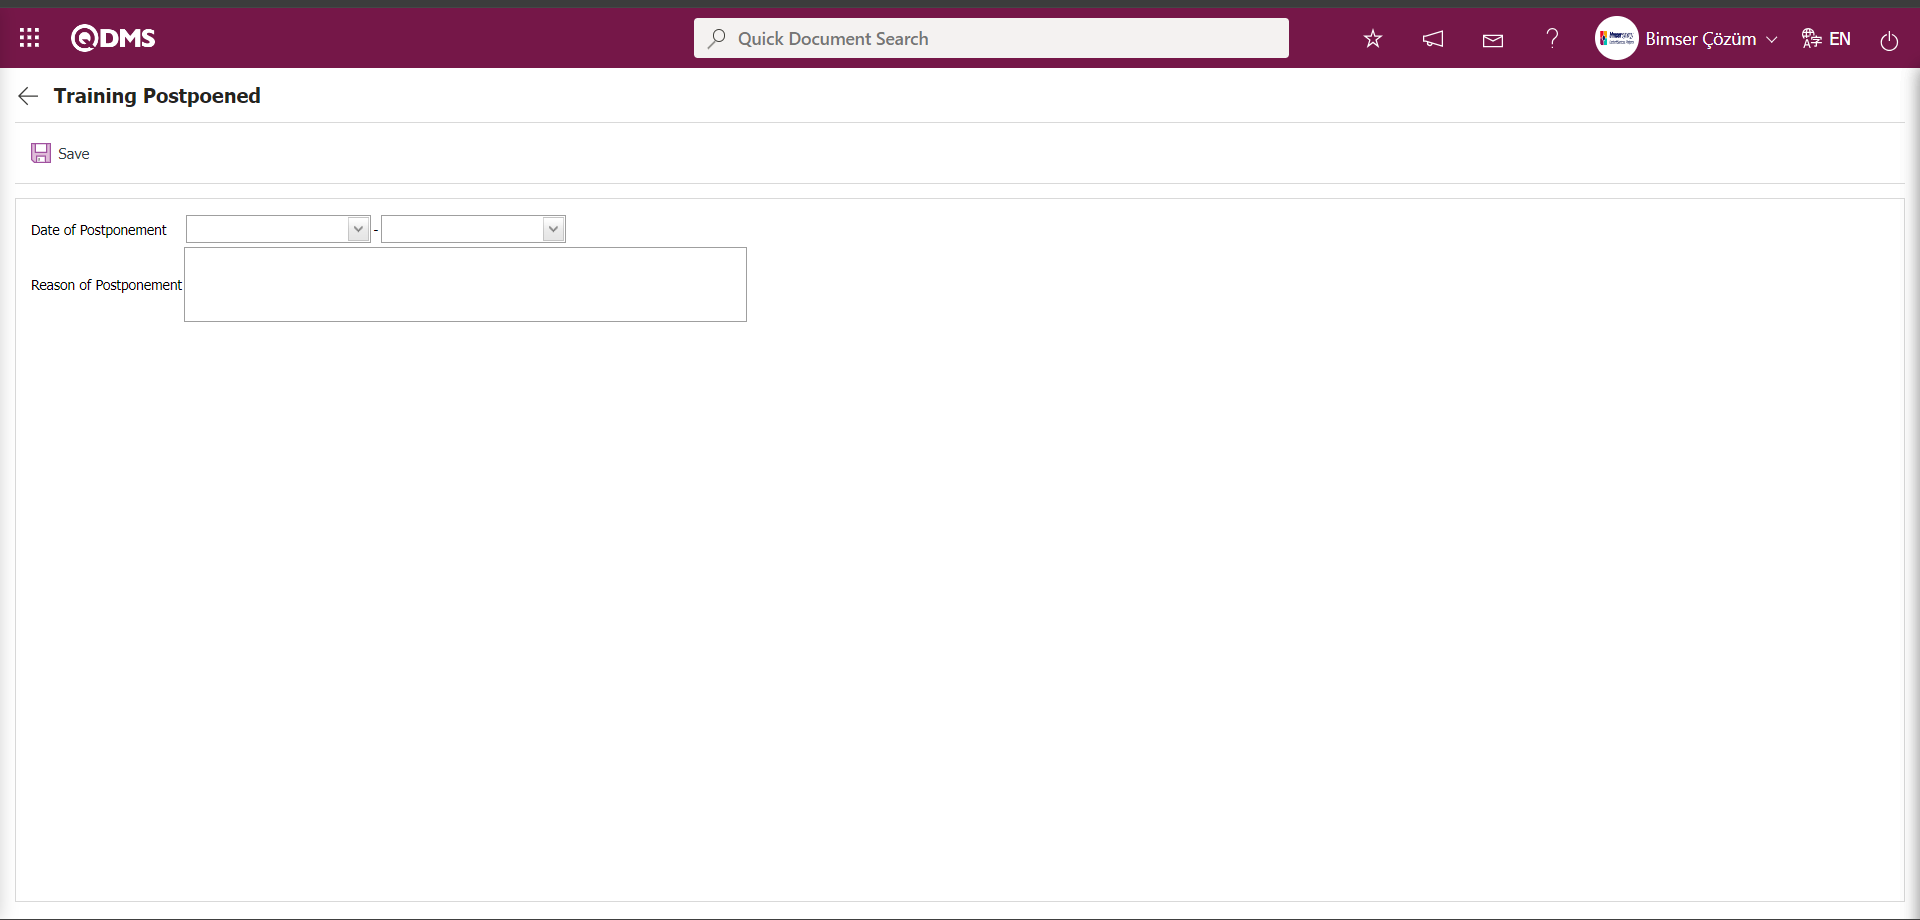
 : The process of postponing the planned training to a later date is carried out. On the Training Postponed screen that opens, select “Date of Postponement” and enter the “Reason for Postponement.” Click the button to complete the training postponement registration process.
 : An email notification is sent to the training provider for the selected training in the list.
 : The multiple training definition process is performed.
 : If there are a large number of Training Item Plannings, you can filter them by going to the filter tab and creating a detailed training plan based on the data entered. After entering the data in these fields, click the (Search) button to access the desired detailed plan.
 : The Training Item Planning list defined in the training plan is transferred to Excel.
6.3.1.2.1. Creating a New Training Item Planning
Menu Name: Integrated Management System/ Training Planning/ Training Plan
To add Training Item Planning to the main training plan created in the system, click the  button in the upper left corner of the screen to open the Training Item Planning screen.
 The Training Item Planning screen opens, providing access to a screen where detailed information can be entered. This screen contains tabs for Training Item Information, Efficiency Evaluation, Training Requests, Other Areas, and Additional Files.
Training Item Information Tab;
This tab is where you enter detailed information such as Training Definition, Training Type, Certificate Type, Study Description, and Start/End Date related to Training.
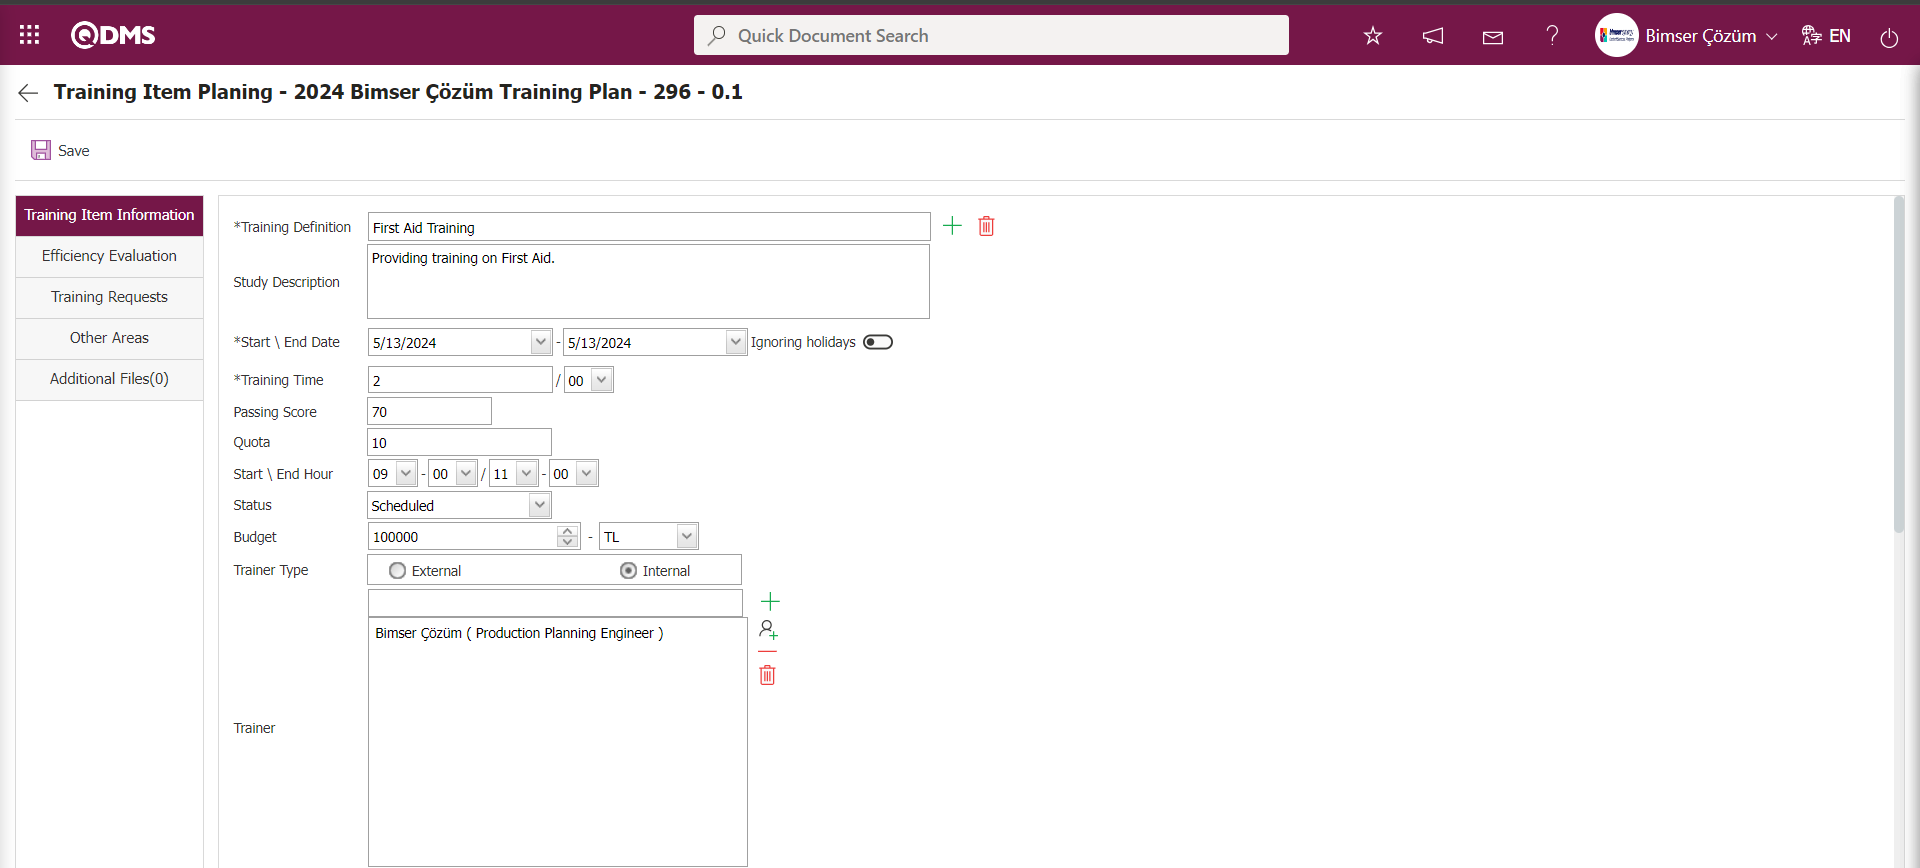

The relevant fields are defined on the screen that opens:
Training Definition: This is the field where you select training definitions defined in the Training Definitions menu. Click the  (Select) button in the Training Definition field to open the system and select from the list of defined trainings. Use the
  (Delete) button on the right to remove the selected training definition.
Study Description: This is the field where you enter the description of the training defined in the Training Item Planning screen. Information such as the reason for the training and the benefits it will provide is entered in the relevant field.
Start \ End Date: This field is where you select the start and end dates of the training defined in the Training Item Planning screen from the Calendar field that opens.
In the Training Module parameters, parameter number 80 is activated by selecting “Yes” as the parameter value.
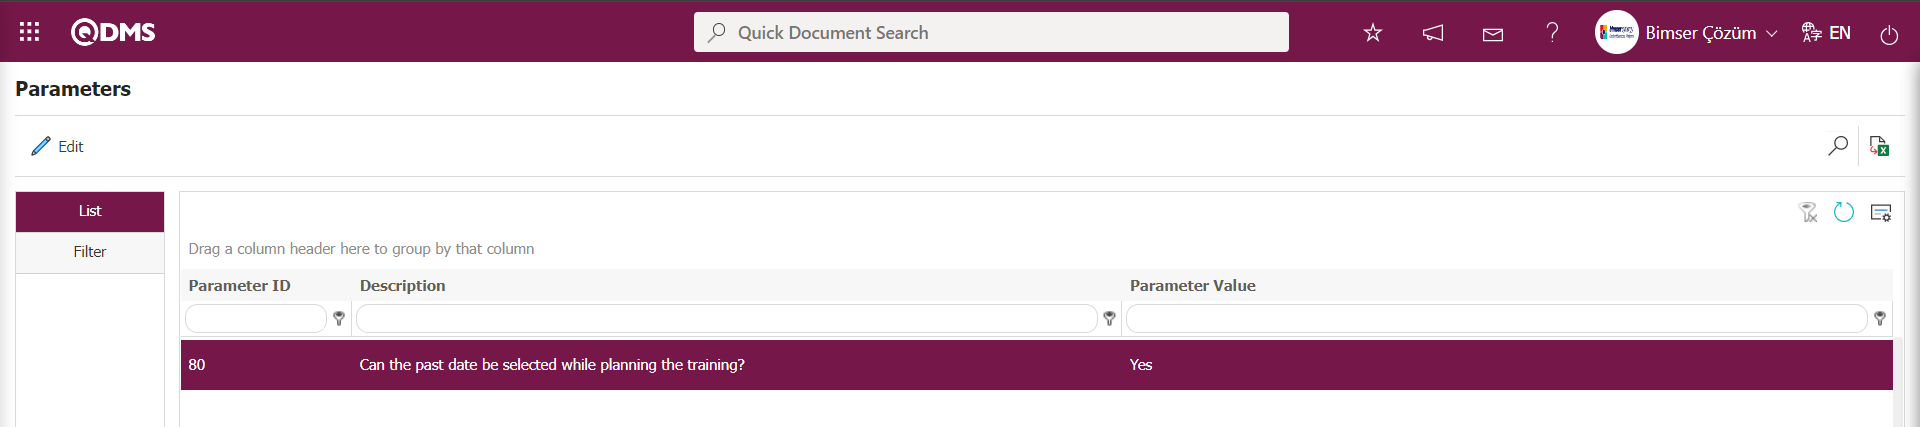
After the parameter is enabled, the past date selection is made in the Start/End Date field on the Training Item Planning screen to define past training dates. When the parameter is disabled by selecting “No,” the system displays the warning message “The start or end date cannot be a date prior to today's date” and does not allow the definition of past training dates. Users can enable this parameter if desired to perform past-dated training planning
Training Duration (Minutes): This field specifies the number of hours/minutes of training defined in the Training Item Planning screen.
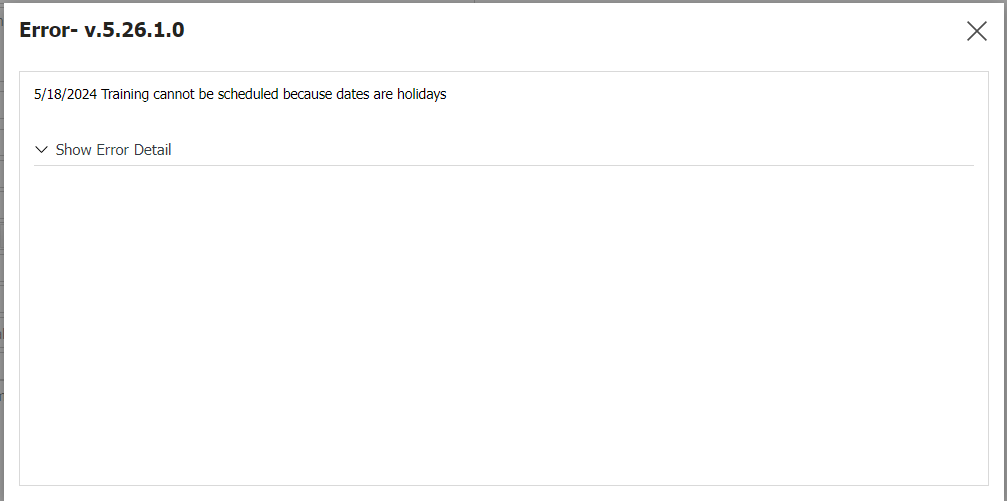
Ignoring Holidays: If you want to ignore holidays in the Training Item Planning screen, select the relevant check box. When this check box is selected, training planning is performed on holidays. If the relevant check box is not selected and the holiday training details are planned and saved, the system displays the warning message shown in the example below.
 To view this area from the Training Item Planning screen, you must enable parameter 58 in the Training Planning module parameters by selecting “Yes” as the parameter value.

After the parameter is enabled, if the check box for the “Ignoring Holidays” field is not selected, the system will warn you when scheduling training for weekends or holidays such as public holidays.
Passing Score: This field displays the passing score that will be assigned based on the training defined in the Training Item Planning screen. The roles responsible for sending notification emails to participants who score below the passing score are determined based on the value defined in parameter 86 of the Training Planning Module parameters.

For participants who fall below the passing score, an informational email will be sent. If the role is Supervisor, the parameter value will be “A”; if it is Training Officer, the parameter value will be ‘ES’; and if it is Module Manager, the parameter value will be “MA.” If multiple roles are to be assigned, the letters representing the roles are separated by commas and entered into the parameter value. In parameter 86, as shown in the example, the parameter value for the Training Officer is defined as “ES.”
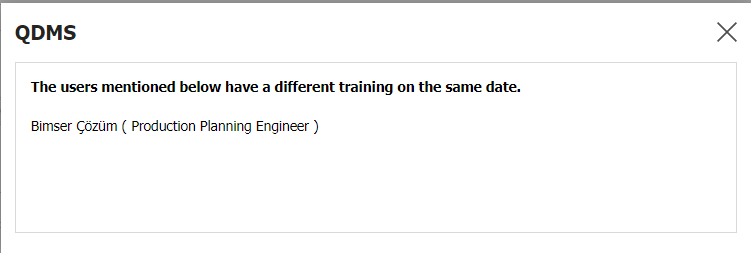
Quota: This field is where you enter the number of people who will participate in the training defined in the Training Item Planning screen. The parameter value of parameter number 60 in the Training Planning module parameters is set to “Yes” to activate the parameter.

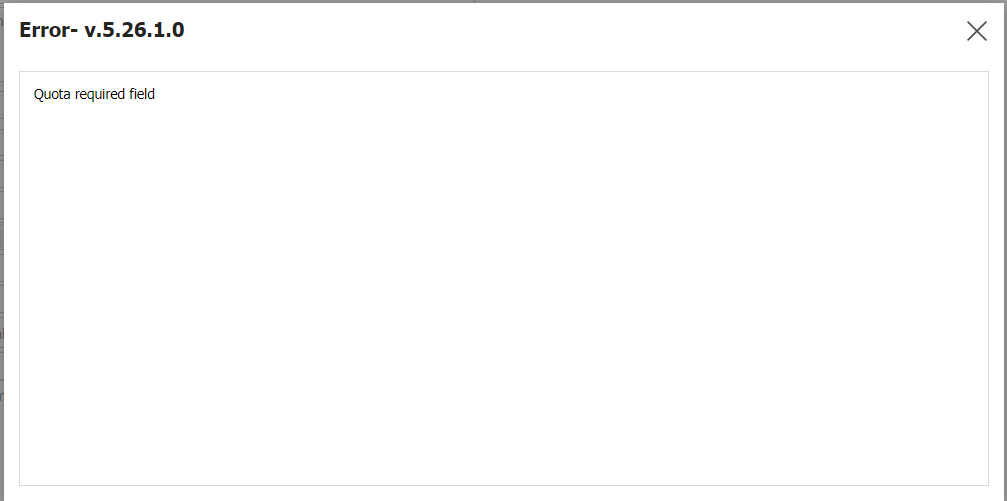
After the parameter is enabled, the field must be filled in. If Training Item Planning is defined and saved, and no information is entered in this field, the system displays the following warning message indicating that the field must be filled in.
When the parameter value is set to “No,” this field is no longer required to be filled in.
Start \ End Hour: This is the area where the start and end times of the training defined in the Training Item Planning screen are specified.
Status: This field indicates the stage of the training defined in the Training Item Planning screen. When a new training is created, the status is automatically set to ‘Planning’. Later, depending on the status of the training, the status is set to ‘Scheduled’, ‘Continues’, ‘Closing Confirmation’, or ‘Cancel’.
Budget: This is the field where you can enter the budget required for the training planned in the Training Item Planning screen.
Trainer Type: If the user providing the training is internal, they should be selected internally. If selected internally, the next step is to select the personnel providing the training from the personnel pool in QDMS. Click the (Add) button in the Trainer field to open the system and select from the list of defined personnel. Click the  (Select) button in the Training Provider field to open the user group list and add the user group.

If the trainer is from outside the organization, select “External.” If you select “External,” fields will appear in the next step where you can enter the person's name and Turkish ID number.
Trainer: The Training Item Planning screen is where you select the type of training provider and enter the user's information from the list of personnel defined in the system. In the Training Planning Module parameters, select “Yes” for parameter number 92 to activate the parameter.
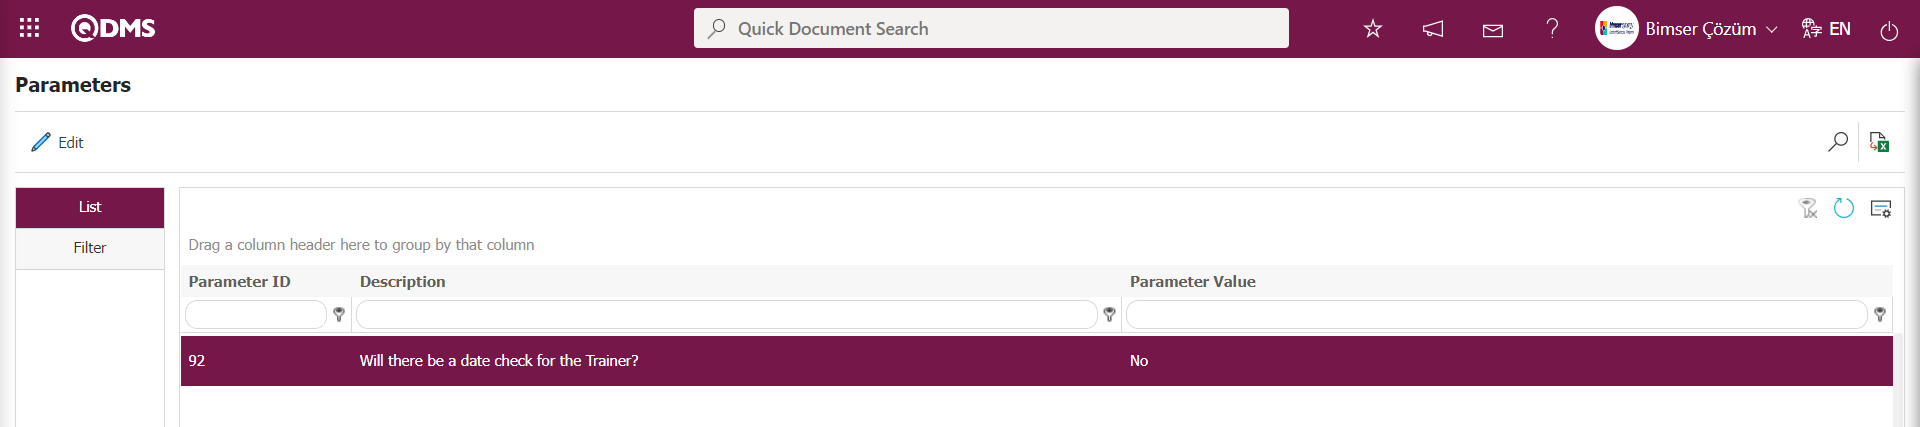
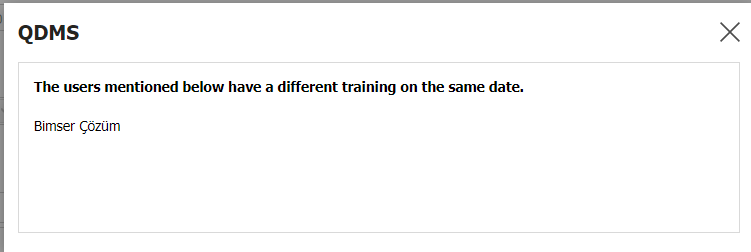
After the parameter is enabled, when a Training Item is planned for the person selected as Trainer, the system checks whether that person is scheduled as Trainer for a different training session on the same date and time. After the registration process is completed on the Training Item Planning screen, the system displays the following warning message and checks the date of the person who will deliver the training.
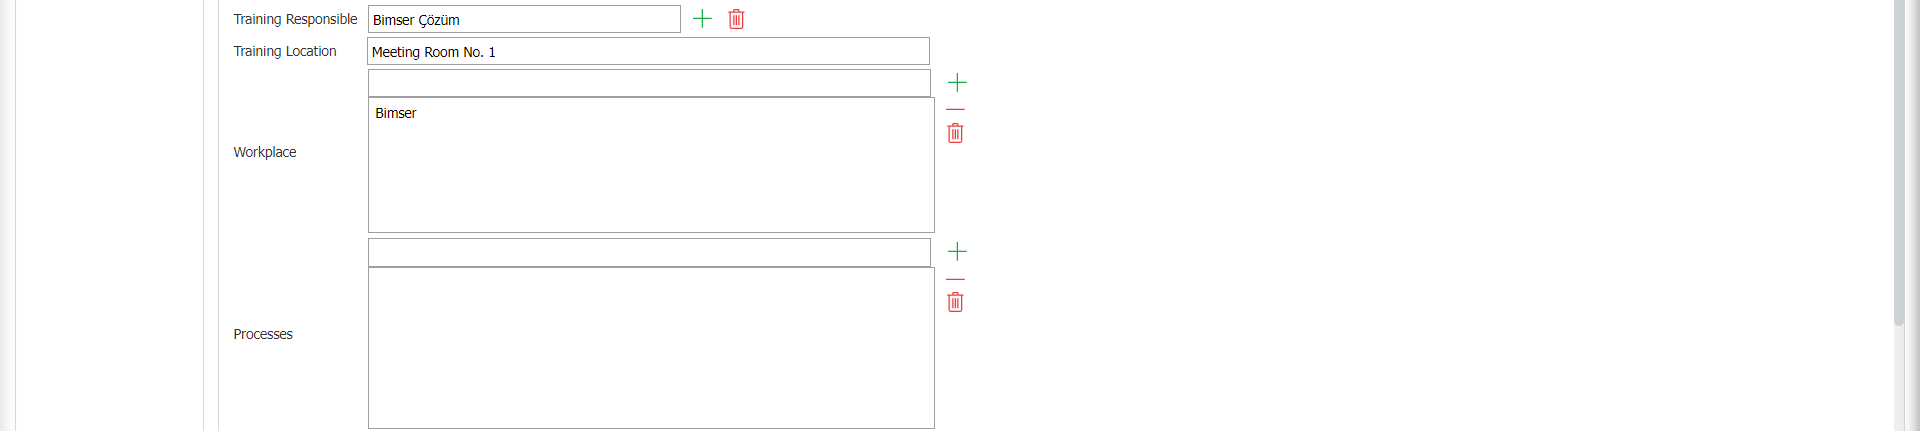
Training Responsible: This is the area where the person responsible for delivering the training defined in the Training Item Planning screen is specified. The responsibilities of the training coordinator include adding or updating participants, organizing the training, tracking the progress of the training, and entering participants' attendance status and success scores to ensure the training is conducted. The parameter value of parameter number 93 in the Training Planning Module parameters must be set to “Yes” to activate the parameter.
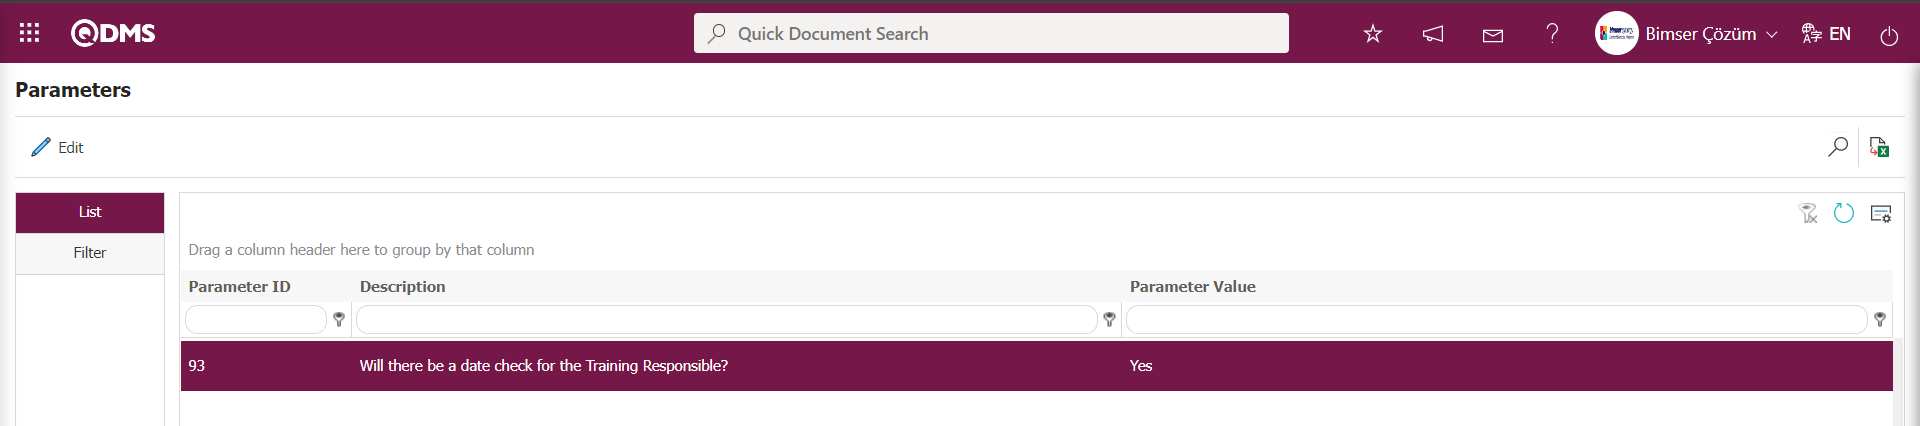
After the parameter is enabled, when a Training Item is planned for the person selected as the Training Responsible, the system checks whether that person is already assigned as the training responsible for a different training session on the same date and time. After the registration process is completed on the Training Item Planning screen, the system displays the following warning message and checks the date of the training responsible person.
Send to Opening Approval: If you want the training details plan defined in the Training Item Planning screen to go to the opening approval, check the relevant check box. After the relevant checkbox is selected, the training sent for opening approval appears as the “Training Details Pending Opening Approval” task on the “Pending Tasks” page of the approver. This is a field displayed based on the parameter settings. The parameter is activated by selecting “Yes” for parameter number 88 in the Training Planning module parameters.
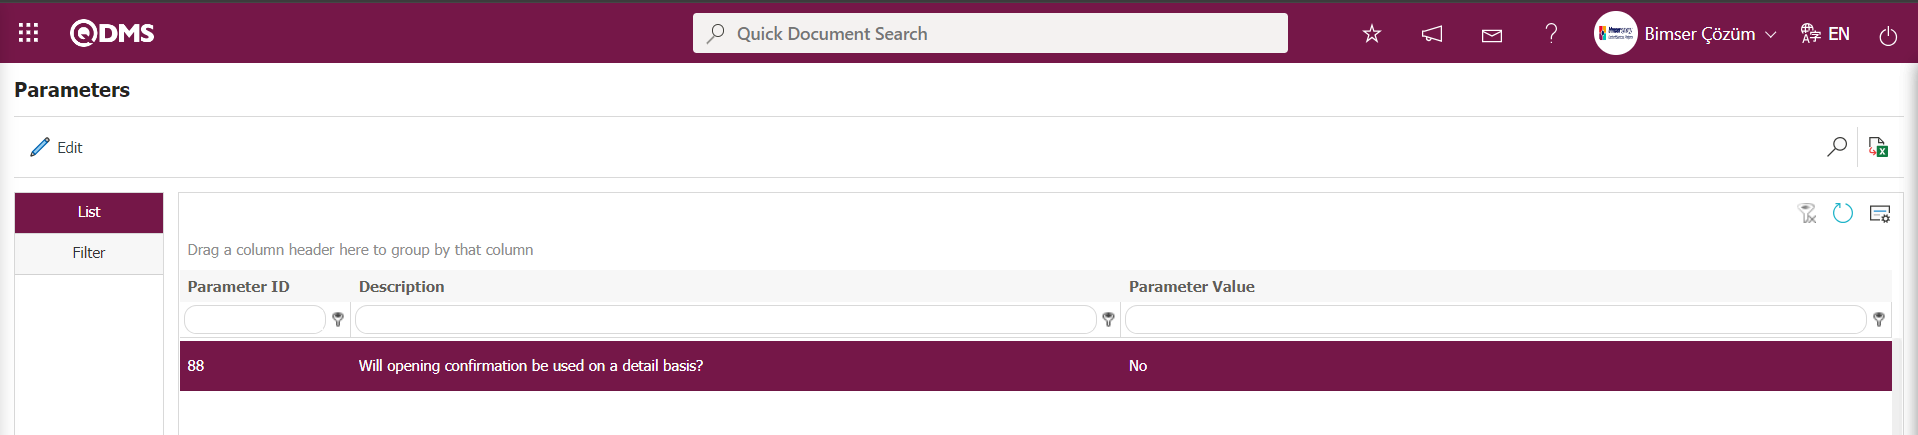
After the parameter is enabled, the “Send to Opening Approval” check box appears in the Training Planning Details screen. When this check box is selected, the training detail plan defined for opening approval is sent.
Send to Closing Approval: If you want the training details plan defined in the Training Item Planning screen to go to closing approval, select the relevant check box. After the relevant check box is selected, the training items sent for closing approval appear as the “Training Details Pending Closure Approval” task on the approver's “Pending Tasks” page. This is a field displayed based on the parameter settings. The parameter is activated by selecting “Yes” for parameter number 89 in the Training Planning module parameters.

After the parameter is enabled, the “Send to Closing Approval” check box appears in the Training Planning Details screen. When this check box is selected, the training details plan defined for closing approval is sent on a detailed basis.
Training Place Type: (External/Internal) This is the area where the location of the training defined in the Training Item Planning screen is selected from internal and external options.
Training Location: This is the area where the location of the training defined in the Training Item Planning screen is specified.
Workplace: This is the field where you select the location within the organization where the training defined on the Workplace screen will take place by clicking the (Add) button and selecting from the list of defined workplaces in the system that opens. Multiple selections can be made. The workplace list is defined in the System Infrastructure Definitions/BSID/Definitions/Locations menu. The parameter value of parameter number 19 in the Training Planning module parameters must be set to “Yes” to activate the parameter.

When the parameter is enabled, the workplace of the person who defines the training plan is automatically selected in this field when adding a new training in the training detail plan.
Processes: The training defined in the Training Item Planning screen is opened by clicking the (Add) button, and the association process is performed by selecting from the defined Process list. Multiple selections can be made. The process list is defined in the Ensemble program under System Infrastructure Definitions/BSID/Definitions/Process Definition menu.
Document: The training defined in the Training Item Planning screen is opened by clicking the (Add) button, and the association process is performed by selecting from the list of uploaded documents. Multiple selections can be made. Documents are selected from the document pool uploaded to the Document Management Module in Qdms from this area.
Training Results: This is the field where you select the “Certificate of Achievement, Certificate of Attendance, or Certificate” option to be given at the end of the training defined in the Training Item Planning screen.
Periodic? : If the training is periodic during the definition phase, this check box is selected. When this field is selected, a field named “Repeat period” appears, where you can specify how often the training should be held.

Online Training Link: If the training defined in the Training Item Planning screen is online training, this is where the online training link is entered.
Meeting Room: This is where you select the meeting room information for the training defined in the Training Item Planning screen, if available. The list of meeting room options is defined in the System Infrastructure Definitions/BSAT/Definitions/Meeting Room Definition menu.
Efficiency Evaluation Tab;
This tab should be used if you want to evaluate the effectiveness of the training. The training is evaluated both by the participants and by someone in a role such as the supervisor of the trainer or trainee. If you want the participant to evaluate the training, select the relevant check box. The participant who will evaluate the effectiveness of the training should be selected in this field. The time required for this participant to evaluate the effectiveness of the training should be specified. If the activity evaluation of the training is to be conducted by the designated role, the relevant checkbox should be selected. If the company has a survey module, integration with this module can be enabled to send evaluation surveys to participants and trainers through the system.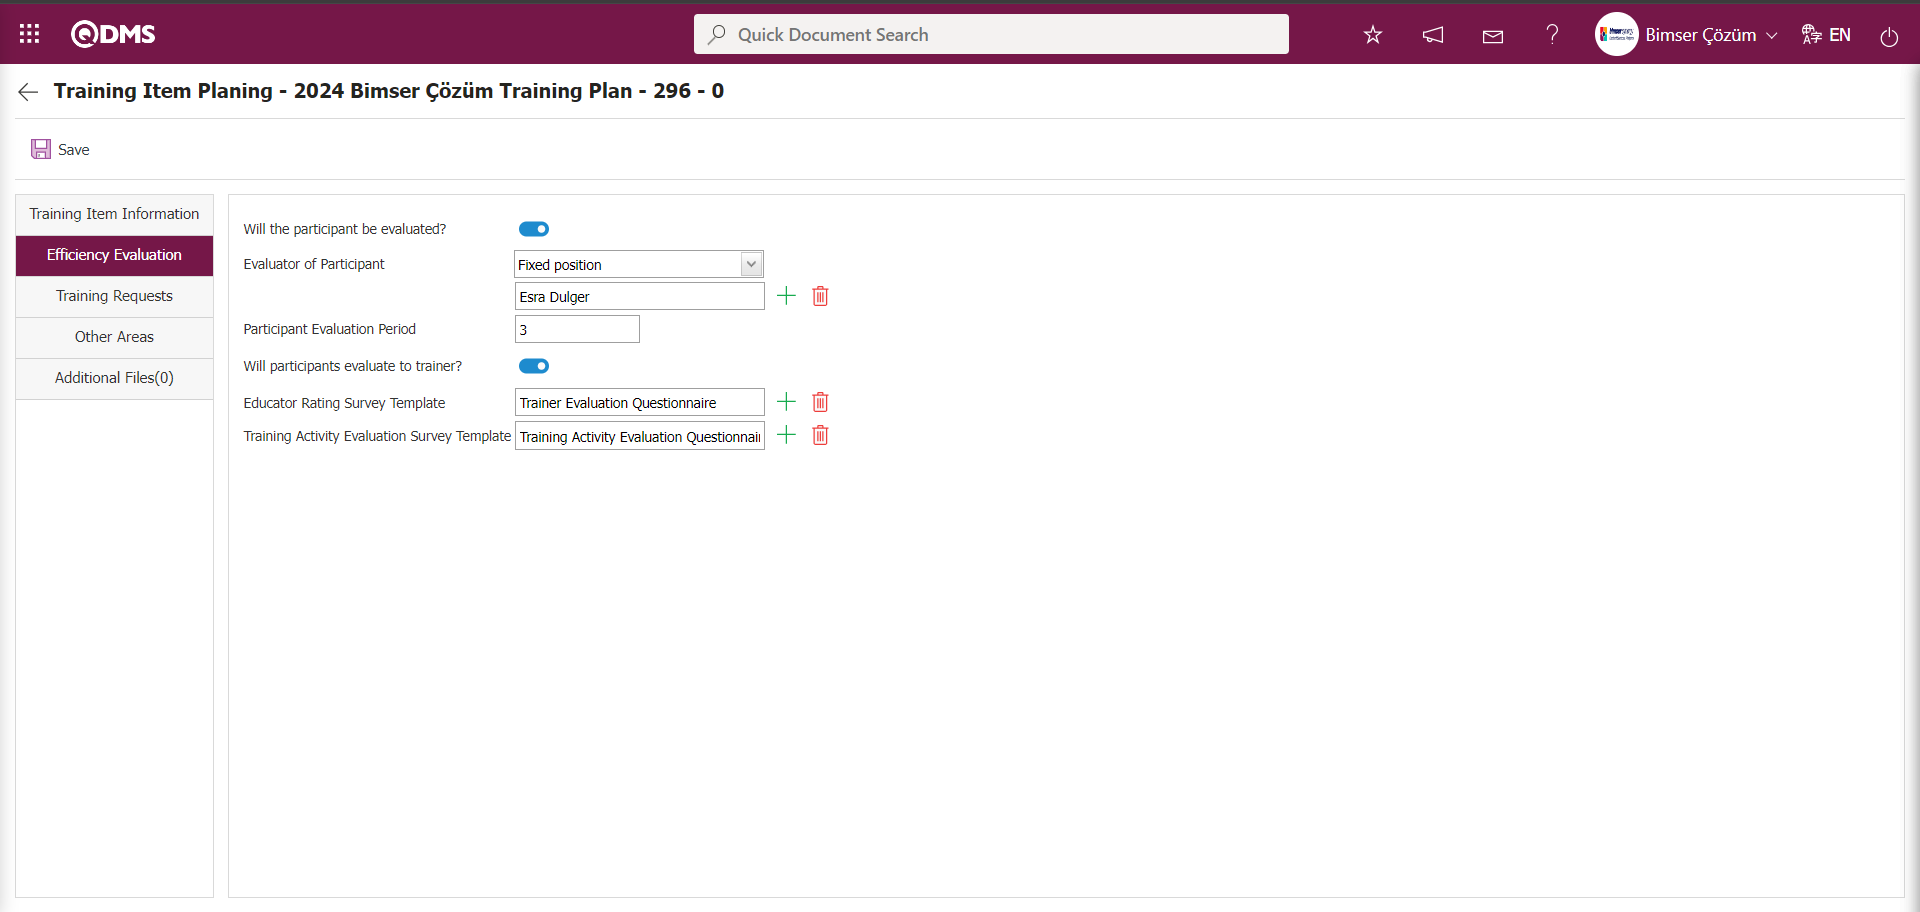
The relevant fields are defined on the screen that opens:
Will the participant be evaluated?: If the training defined in the Efficiency Evaluation tab of the Training Item Planning screen is to be evaluated by the participant, the check box for the relevant field is selected. When the check box for the Will participants be evaluated? field is selected, the Will participants evaluate to trainer? and Participant Evaluation Period fields are displayed. The parameter value of parameter number 48 in the Training Planning module parameters is set to Yes to activate the parameter.

After the parameter is enabled, the “Will participants evaluate the trainer?” field will be checked in the Efficiency Evaluation section of the system, and the activity evaluation process will become mandatory in the training detail planning. If users want the activity evaluation process to be Evaluator of Participant: This is the area where you select a fixed position or role from the options available to designate the person who will evaluate the training defined in the Efficiency Evaluation tab of the Training Item Planning screen. When a fixed position is selected, click the  (Select) button to open the system and select a user from the list of personnel defined in the system to assign the task to a fixed user.

When a role is selected, click the (Select) button to open the system and select a role from the defined Role list. The Role list is defined in the System Infrastructure Definitions/BSID/Configuration Settings/Role Definition menu. When a role is selected, you can choose roles such as the supervisor of the person receiving training or the department supervisor. For example, if the department supervisor is selected, each employee's post-training activity evaluation will be conducted by their own department supervisor.

Participant Evaluation Period: This field is where you enter the participant evaluation period for the training defined in the Efficiency Evaluation tab of the Training Item Planning screen.
Will participants evaluate to trainer?: This is the area where the relevant check box is selected in the Efficiency Evaluation tab of the Training Item Planning screen to enable training participants to evaluate the training provider. The parameter is activated by selecting “Yes” as the parameter value for parameter number 27 in the Training Planning module parameters.

After the parameter is enabled, the use of surveys in training activity evaluation is enabled. To use surveys in training activity evaluation, the “Educator Rating Survey Template” and “Training Activity Evaluation Survey Template” fields are displayed. Select a survey template in these fields to enable the use of surveys in training activity evaluation. If the parameter value is set to “No,” these two fields will not be displayed when the parameter is deactivated, and the use of surveys in the Education Event Evaluation process will not be enabled.
Educator Rating Survey Template: If you want to conduct the trainer evaluation survey in the Efficiency Evaluation tab of the Training Item Planning screen, click the  (Select) button to open the Survey list and select the survey template. The template surveys defined in the Internal Survey Definition menu of the Survey Operations module are selected as the trainer evaluation survey templates.
Training Activity Evaluation Survey Template: If you want to conduct training activity evaluations using a survey in the Efficiency Evaluation tab of the Training Item Planning screen, click the (Select) button to open the Survey list and select the survey template. The template surveys defined in the Standard Survey Definition menu of the Survey Operations module are selected as training activity evaluation survey templates.
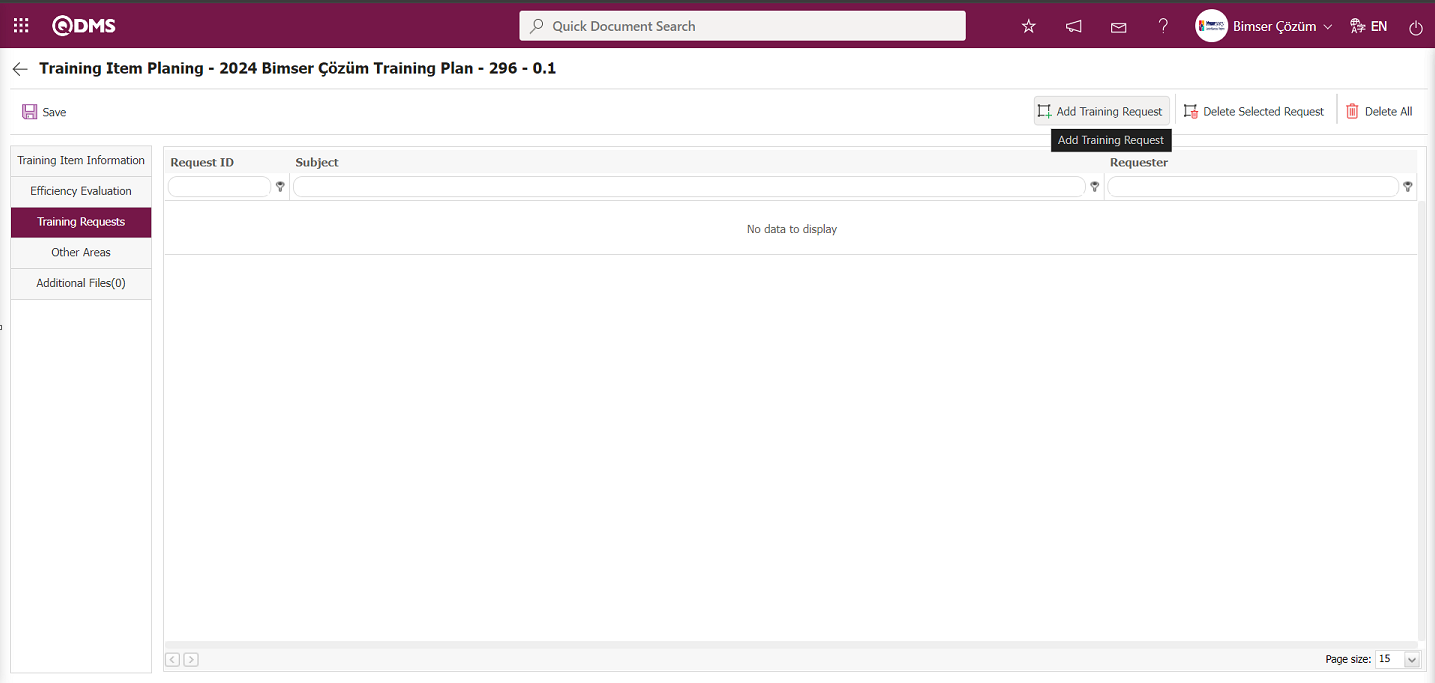
Training Requests tab;
If training has been opened in accordance with a training request, this tab is used to select which training request the training was created for. In this tab, a selection is made from the list of training requests defined in the Training Request menu.
Using the buttons on the screen;
 : The Training request addition process is performed. A selection is made from the list of Training requests made by personnel defined in QDMS. The Training Requests list is defined in the Integrated Management System/Training Planning/Training Request menu.
 : The added training request is deleted.
 : All added training requests are deleted.
Click the button in the Training Requests tab of the Training Item Planning screen. In the system that opens, select the Training Request you want to add from the list of defined Training Requests.
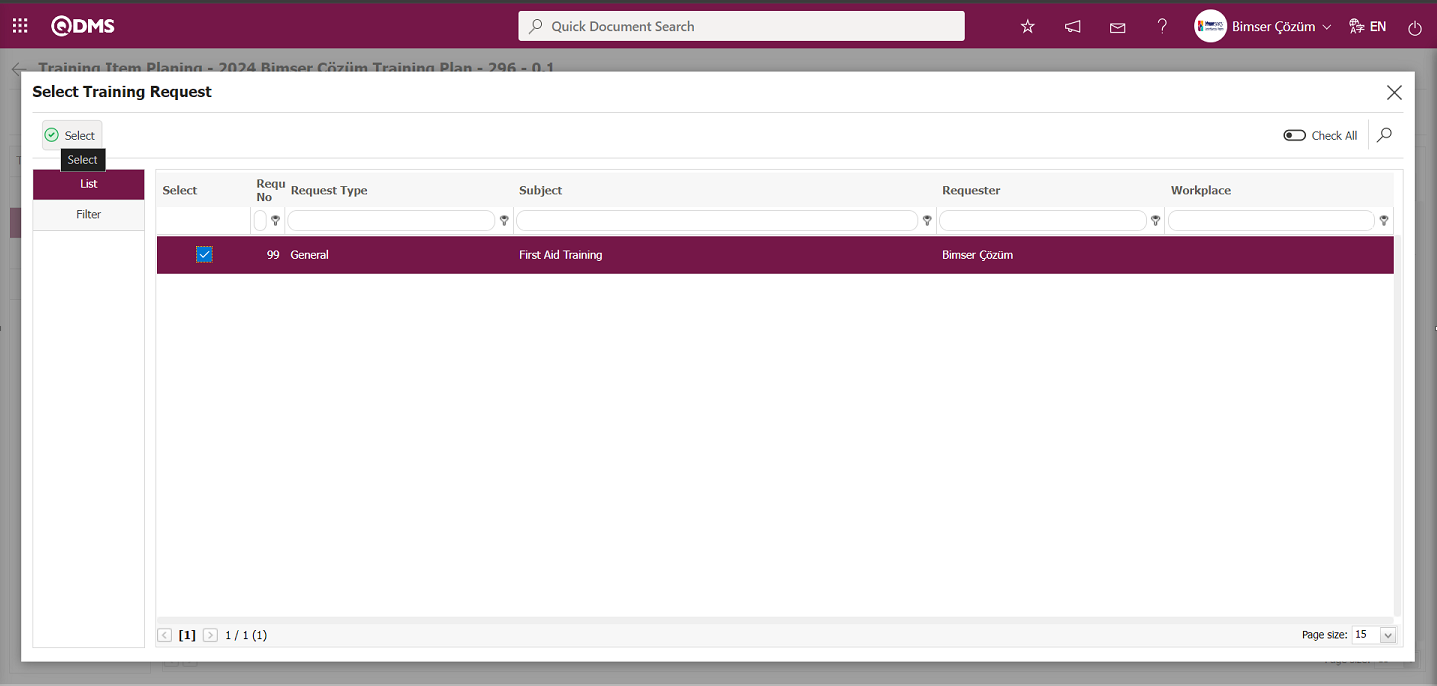
After the training request selection process, click the  button to add the training request.
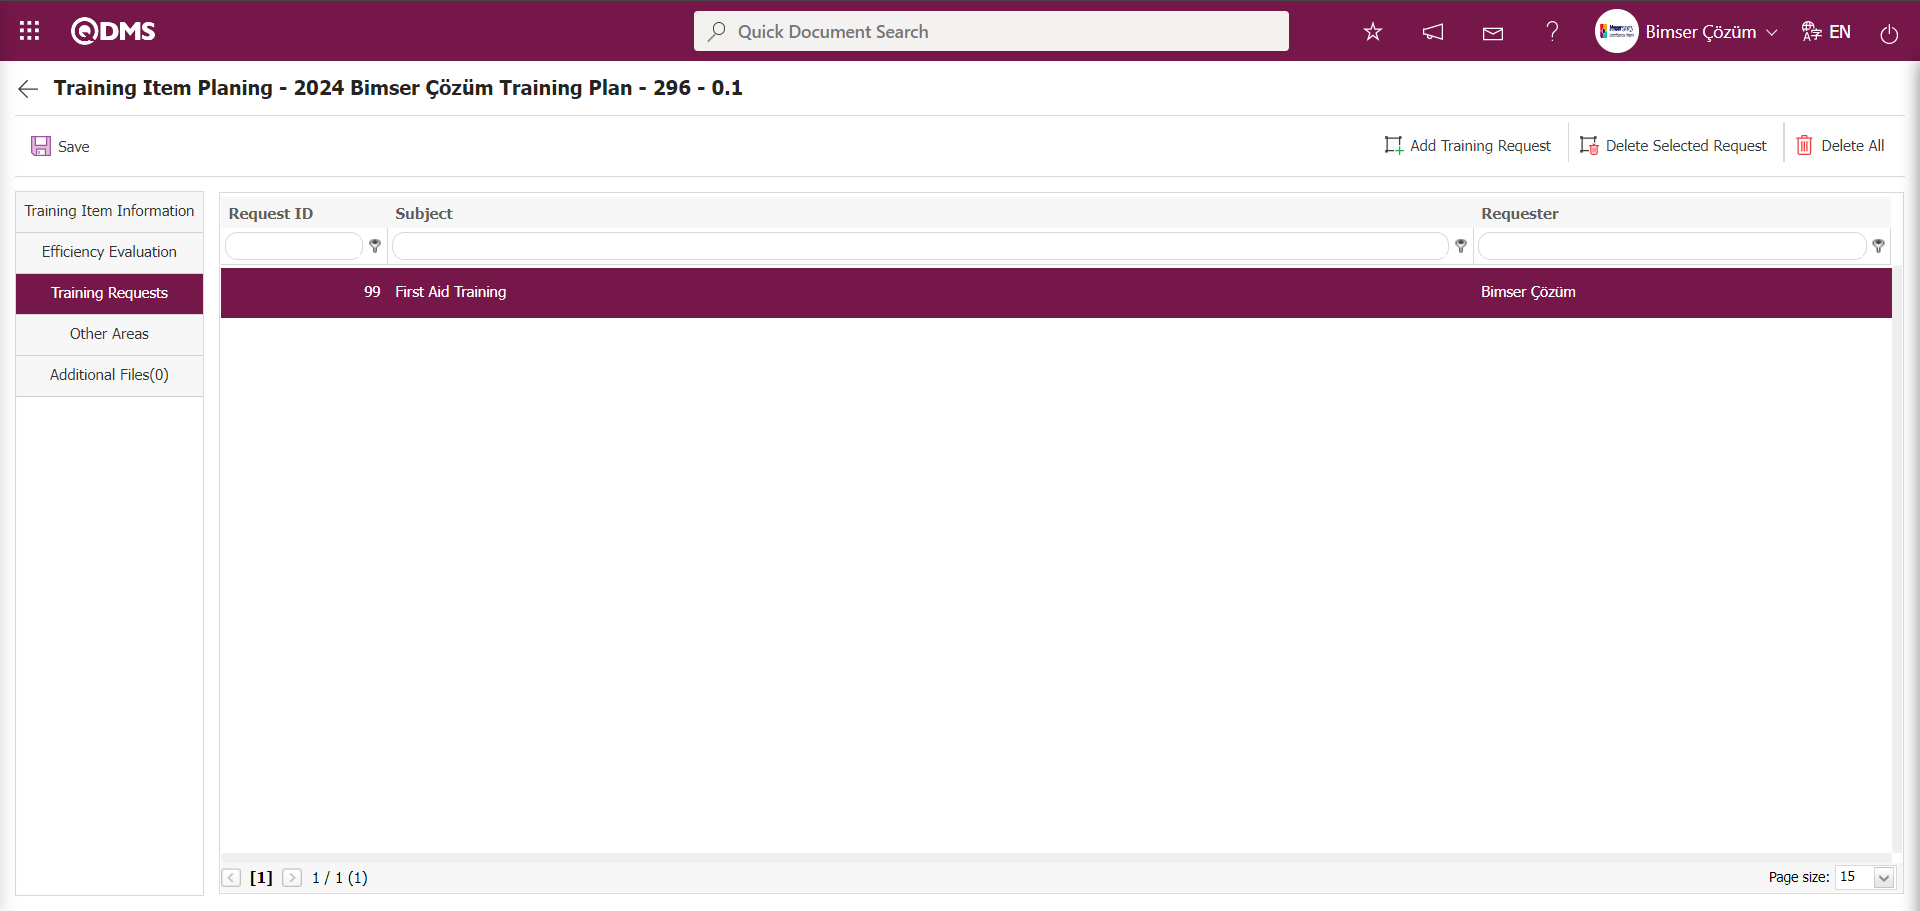
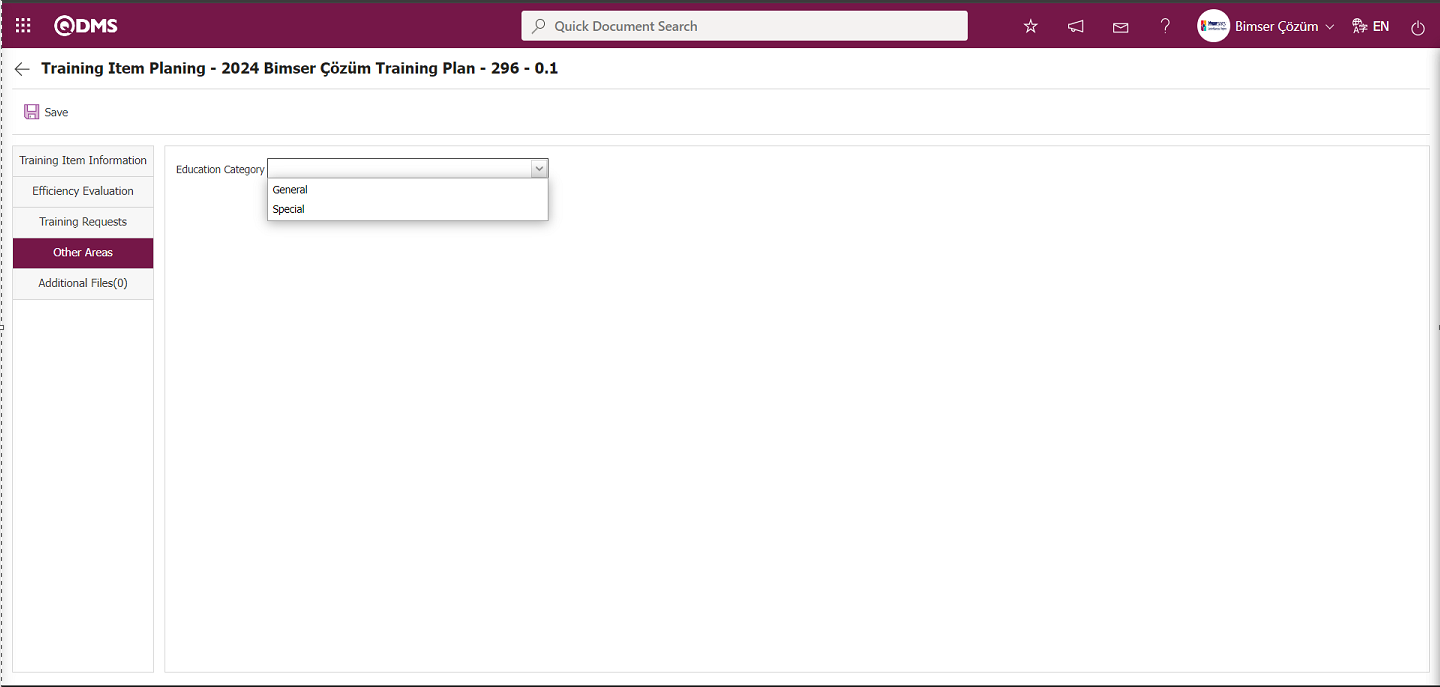
Other Areas tab;
This tab is used to define parametric fields such as text, list, and date when the customer requests fields other than those included in the Training Planning module. In the Training Item Planning Other Areas tab, the "Education Category" list-type parametric field has been defined as an example.
In this tab, the process of adding parametric fields is performed by selecting the Training Planning module as a module in the System Infrastructure Definitions/BSID/Configuration Settings/Language Settings menu and defining parametric fields in the listed language definitions. In this tab, the short codes of the parametric fields defined in the language settings are short codes defined with the lblO_ header. When all parametric fields with short codes under the lblO_ heading are defined, they are displayed in the Other Fields tab of the Training Details Planning screen in the Training Module. In this tab, parametric fields such as text, list, and date are defined. In the table below, parametric fields with label codes are defined in the language settings as an example. In the language settings, the label codes for parametric field types are determined based on the label codes in the example in the Training Planning module.
| Parametric Field Label Code | Parametric Field Type |
|---|---|
| lblO_DPARAM2 | Date |
| lblO_LPARAM2 | List |
| lblO_PPARAM1 | Staff |
| lblO_NPARAM6 | Unit of Measure |
| lblO_NPARAM2 | Monetary |
| lblO_DSPARAM1 | Department |
| lblO_DMPARAM1 | Department (Multiple Choice) |
| lblO_PMPARAM1 | Staff (Multiple Choice) |
| lblO_PARAM2 | Text |
| lblO_PARAM6 | Text(Multiple Line) |
Additional Files Tab;
This tab is where additional files related to training, such as images, documents, and minutes, defined in the Training Planning module are uploaded, uploaded additional files are viewed, and accidentally uploaded additional files are deleted.
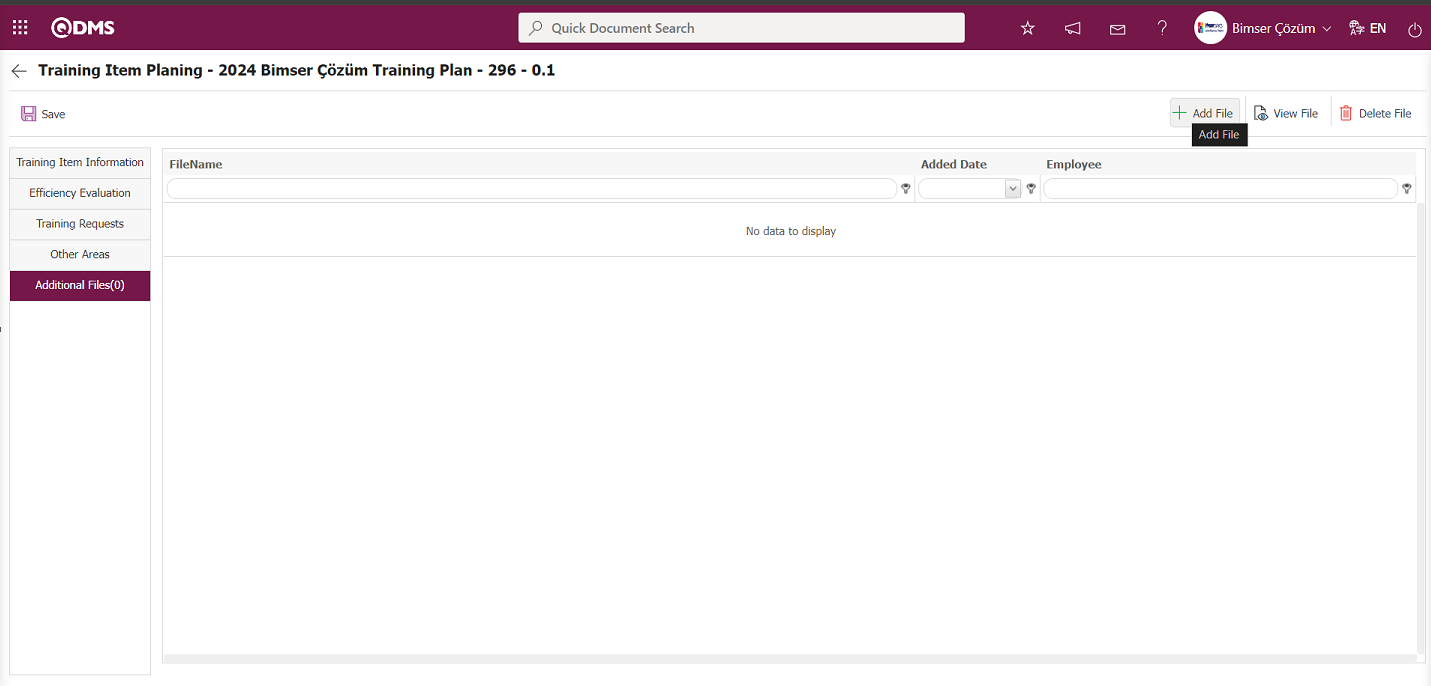
Using the buttons on the screen;;
 : The file attachment process is performed.
 : The added file is displayed.
 : The added file is deleted.
On the Training Item Planning screen, click the button in the Additional Files tab.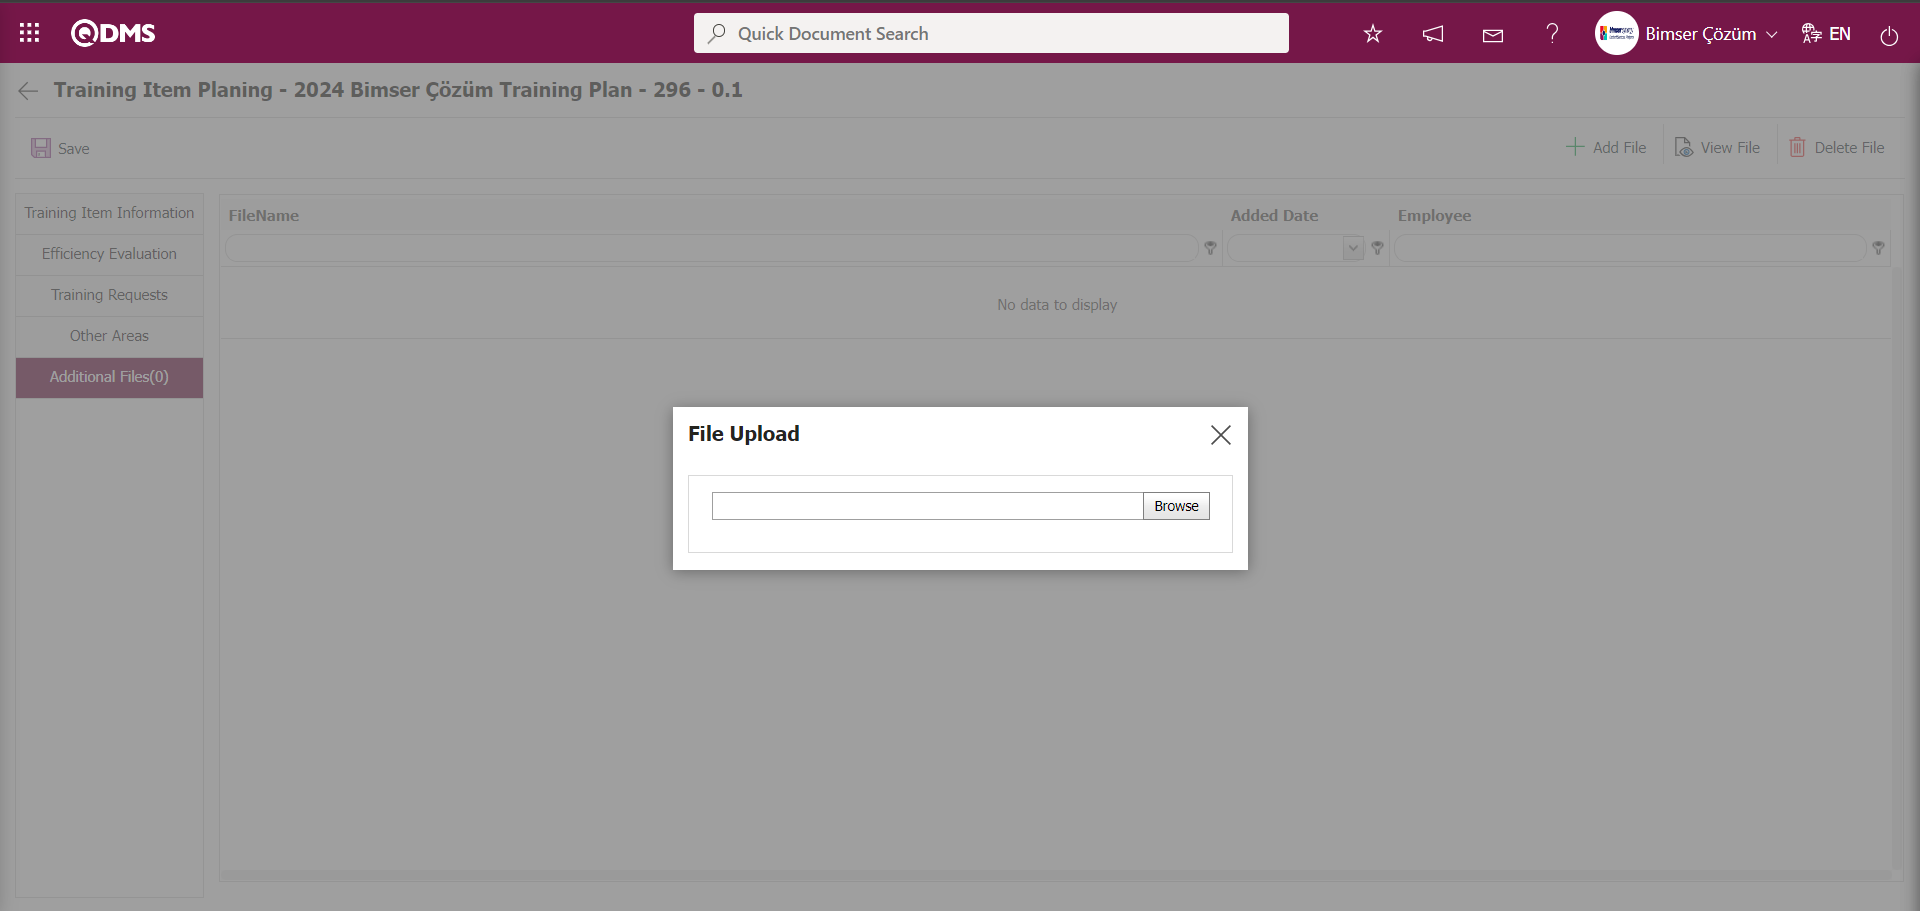
Click the  button on the File Upload screen.

The file to be uploaded is selected on the screen that opens, and the upload process is performed.
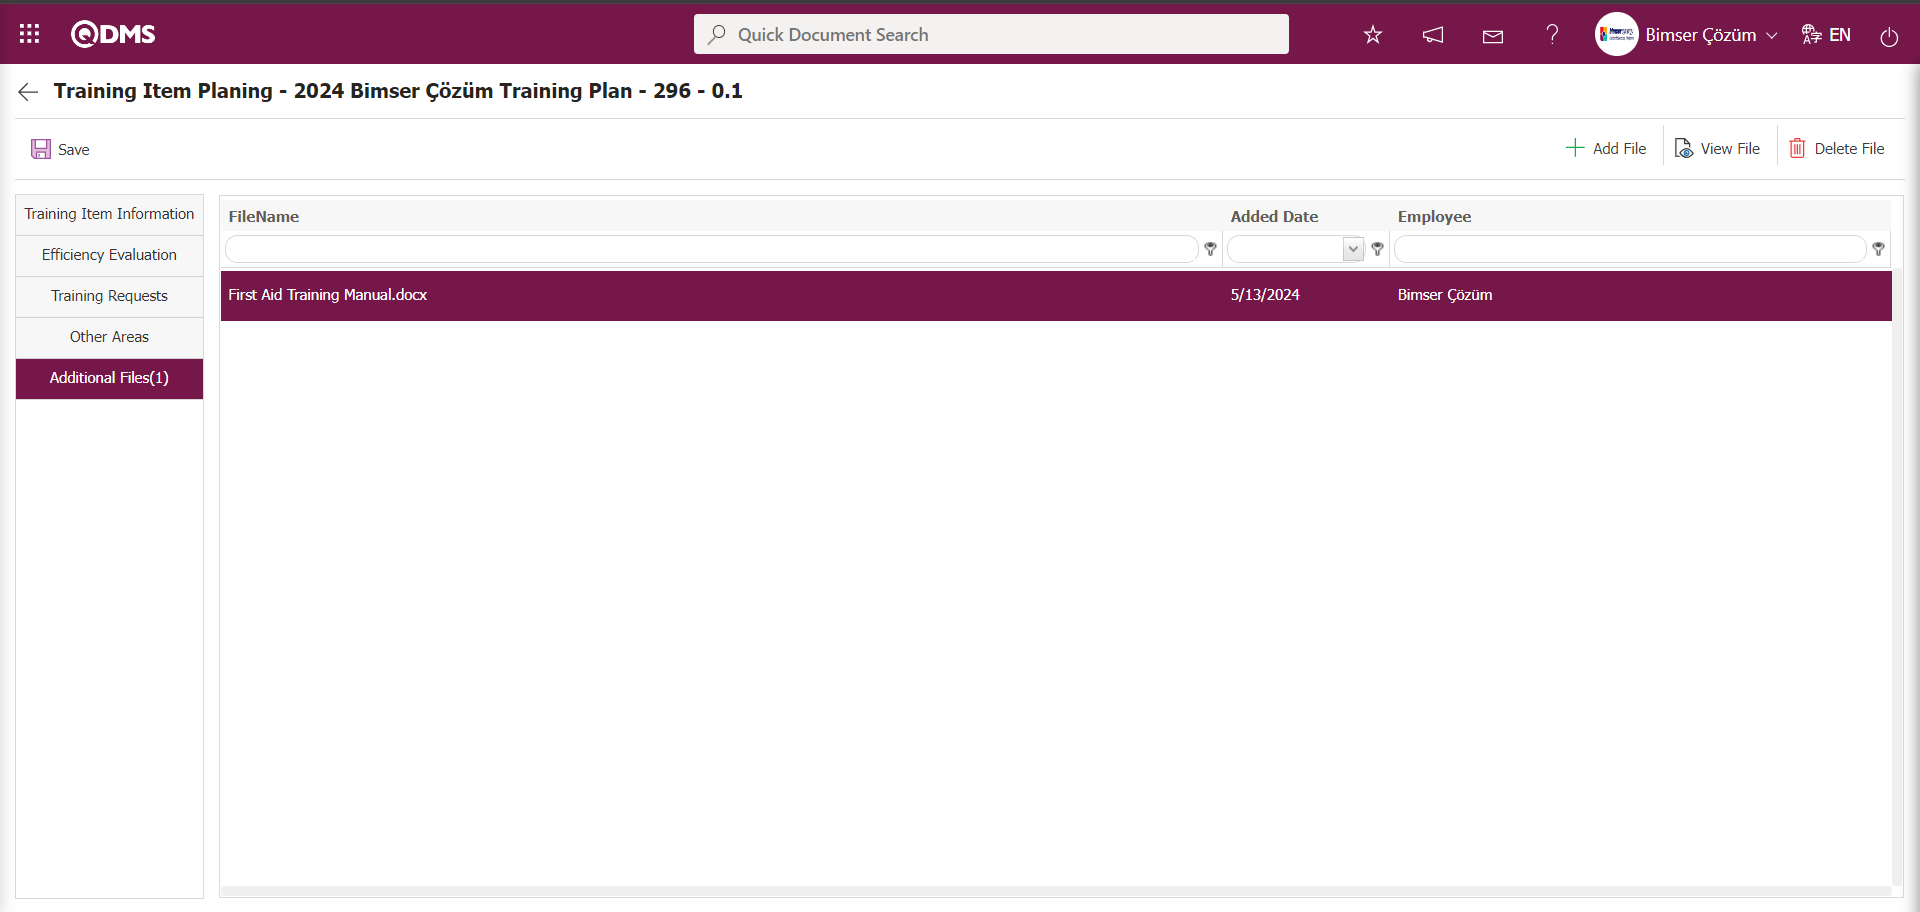
After entering the information related to the fields in the 5 tabs on the Training Item Planning screen, click the  button located at the top left to complete the Training Item Planning registration process.

After the Training Item Planning registration process in the Training Plan, the training is added to the training list and the training assignment process is carried out.

6.3.2.2.1.1. Establishment of Participants
Menu Name: Integrated Management System/ Training Planning/ Training Plan
After completing the Training Item Planning definition process, select the training detail plan and click the  button to access the page where participants can be added. In the Participants screen that opens, click the relevant buttons to add participants. Individuals authorized to add participants to Training Item Planning are the Training Responsible and Training Module Manager selected when the Training Item Planning is created.
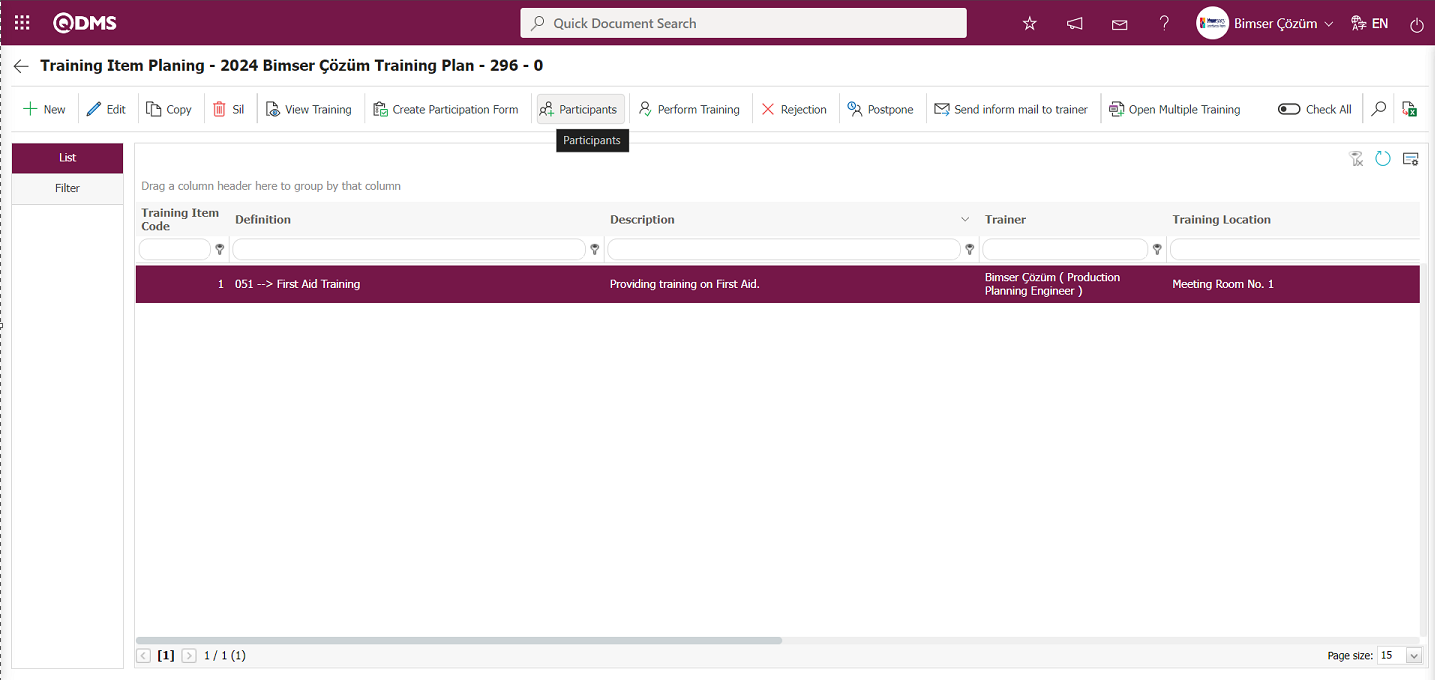
In the Training Item Planning screen, click the  button while Training Item Planning is selected.
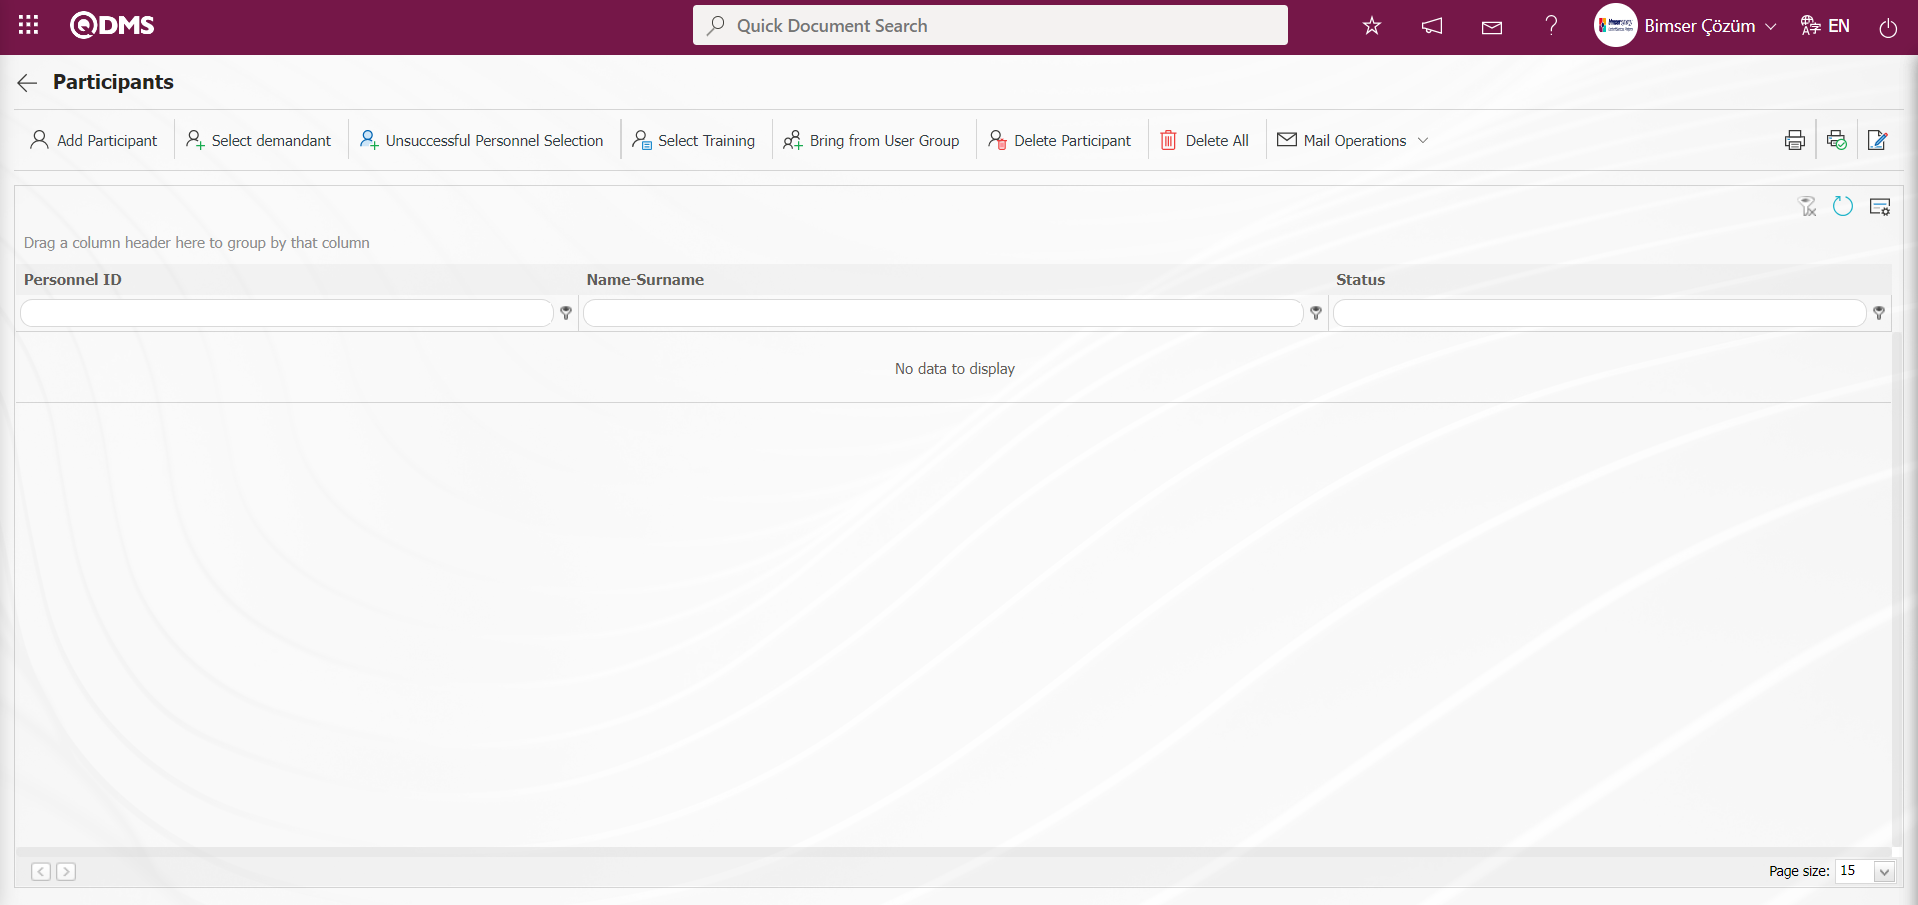
Using the buttons on the screen;
 : Go to the previous page.
 : The Training Item Planning system selects personnel from the list of personnel defined in the system who are required to participate in training.
 : If the defined Training Item Planning is associated with a request, the selection process is performed on the users in the request.
 : The selection process is performed from the list of unsuccessful personnel defined in Training Item Planning. Personnel who were unsuccessful in previous training sessions are selected from the list.
 : The selection process is performed in the list of persons who should receive the relevant training according to the defined Training Item Planning training title matrix.
 : The user group list defined in the system is selected for the defined training detail plan.
 : The participant on the list is deleted.
 : All participants are deleted.
 : The defined Training Item Planning mail sending processes are performed.
 : The Training Item Planning defined is sent to users added later.
 : The defined Training Item Planning process is carried out by sending emails to all participants.
 Print Certificate: If a selection was made as a result of training in the Training Item Planning stage, the participant is selected and their certificate is printed if the name of the file uploaded from the report formats is entered in the relevant parameters.
 Print Certificate: If a selection was made as a result of training in the Training Item Planning stage, this button is used to print certificates for all participants if the name of the file uploaded from the report formats is entered in the relevant parameters.
(For this process, first go to System Infrastructure Definitions/BSID/Configuration Settings/Default Report Layouts Arrangement menu, upload the participation certificate file, success certificate file, and certificate files, then go to parameters 24, 25, and 26 and enter the file names in the parameter values.)
The success certificate file must be defined in the Training Planning Module parameter 24. The name and extension of the success certificate loaded in the Default Report Layouts Arrangement menu must be defined in the parameter value using the copy/paste function.
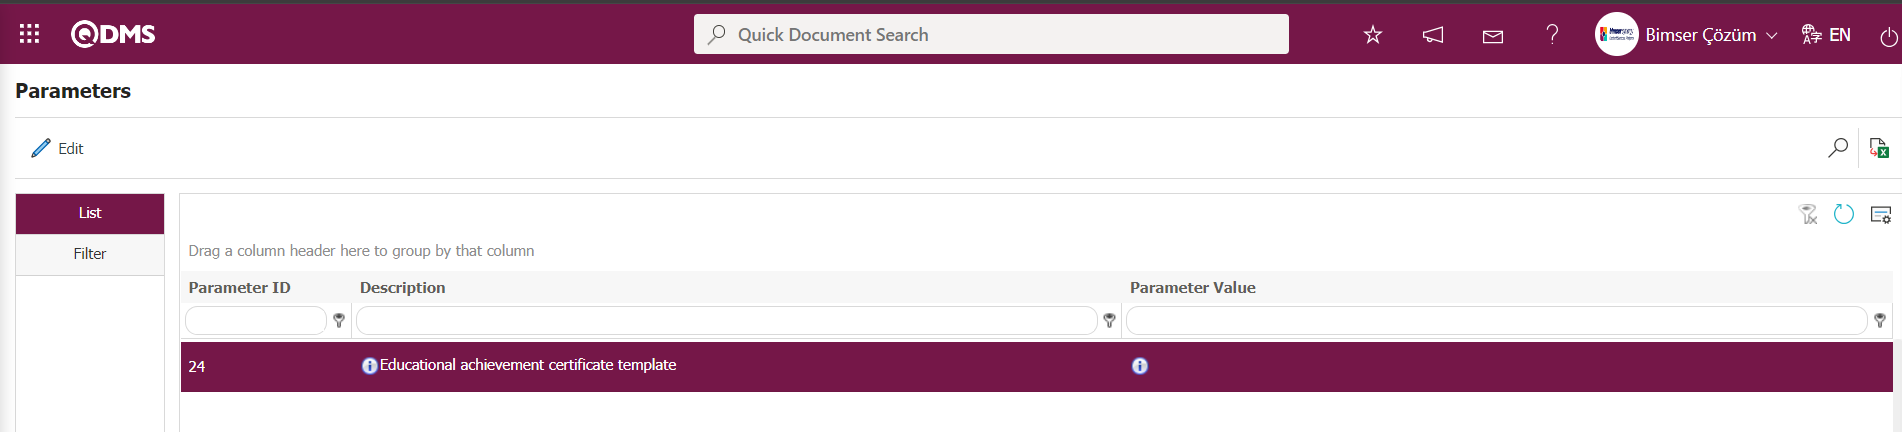
The participation certificate file must be defined in the Training Planning Module parameter 25. The name and extension of the participation certificate uploaded in the Default Report Layouts Arrangement menu must be defined in the parameter value using the copy/paste function.

The Training Certificate document file must be defined in the Training Planning Module parameter 24 parameter value. The name and extension of the Training Certificate document loaded in the Default Report Layouts Arrangement menu must be defined in the parameter value using the copy/paste management.
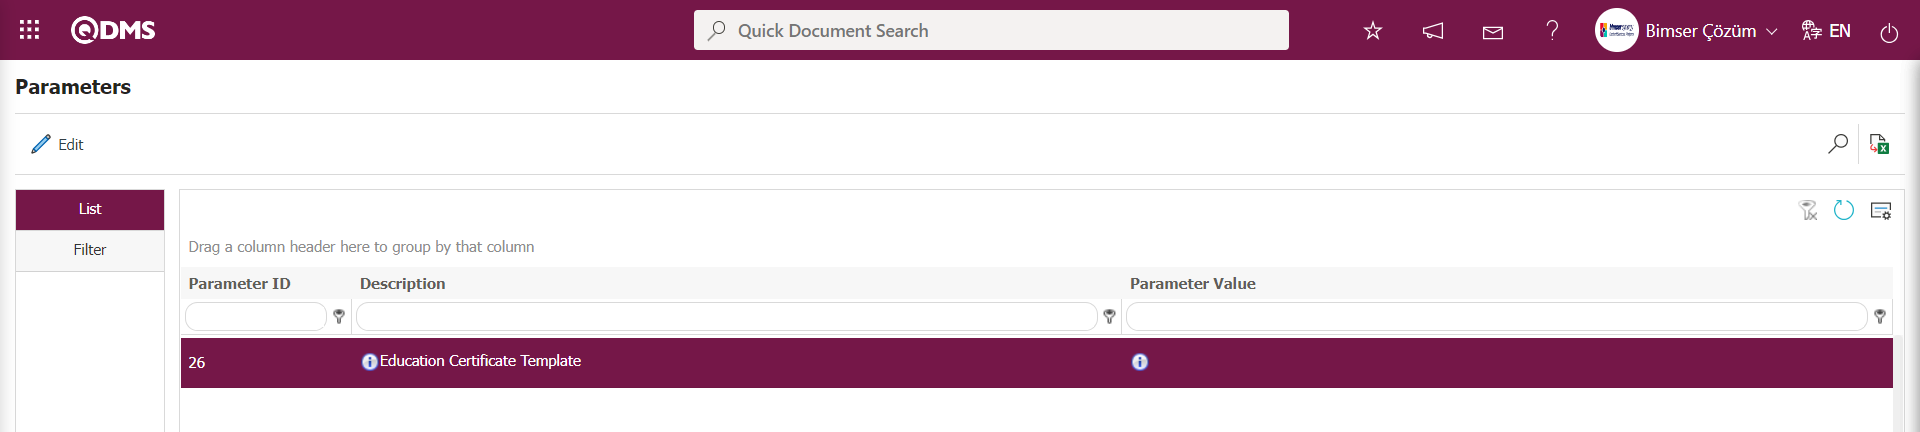
Note: The templates loaded into the parameters must be the language equivalents of the templates. (Print Signed Certificate): The printing process for certificates signed with an e-signature is performed. When the button is clicked, a window opens displaying the participants. Select the relevant participants for whom the signed certificate will be printed. For this process to be performed, the e-signature card must be inserted into the computer where the certificate will be printed. Since the certificate must be signed before printing, it is signed with an e-signature and then printed.
Click the  button on the Participants screen to add participants.
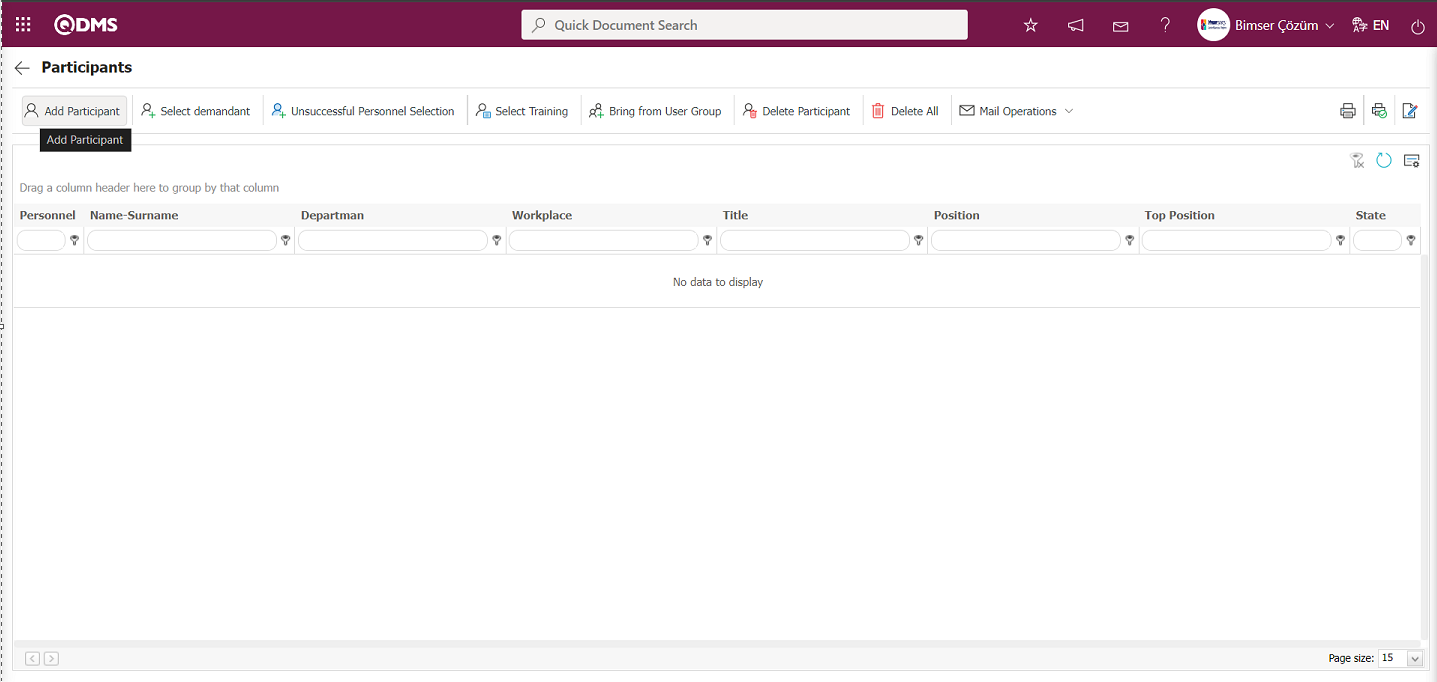
In the system that opens, select the personnel to be added as participants from the list of defined personnel.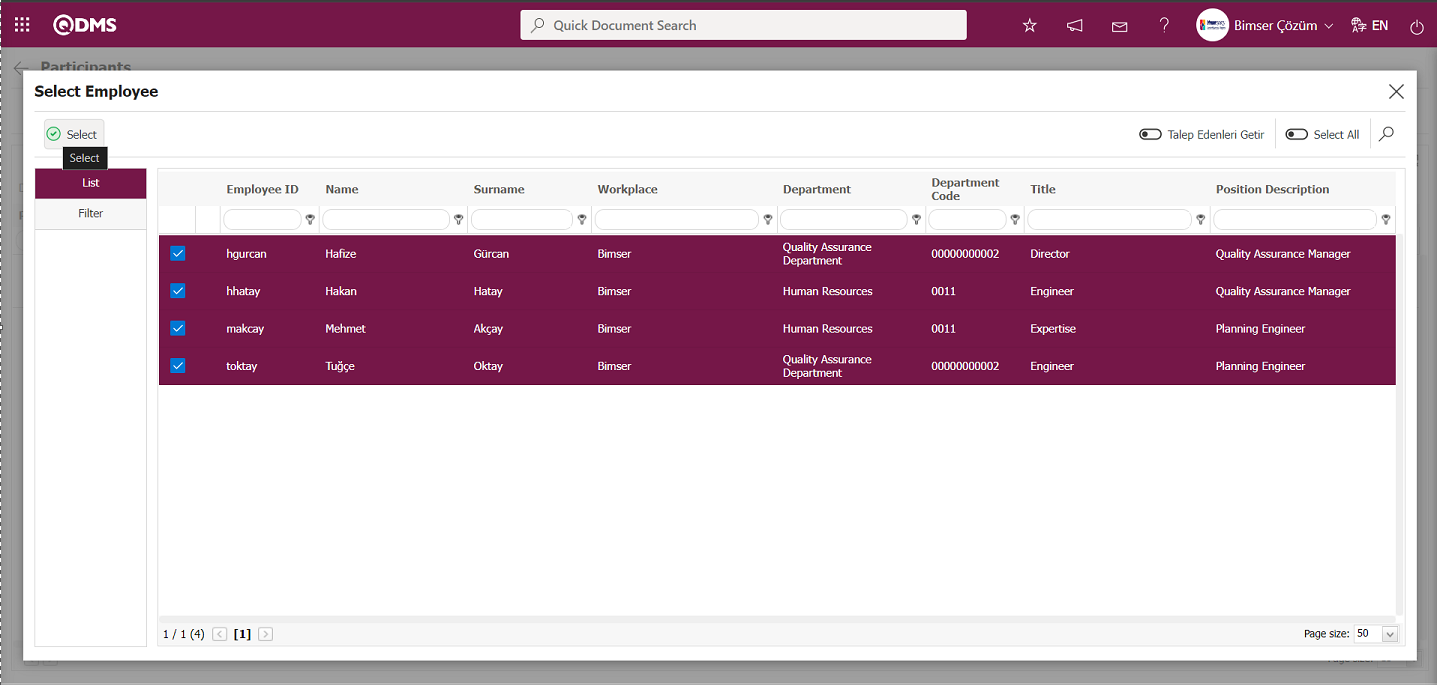
After selecting the personnel to be included in the personnel list, click the  button to add participants.
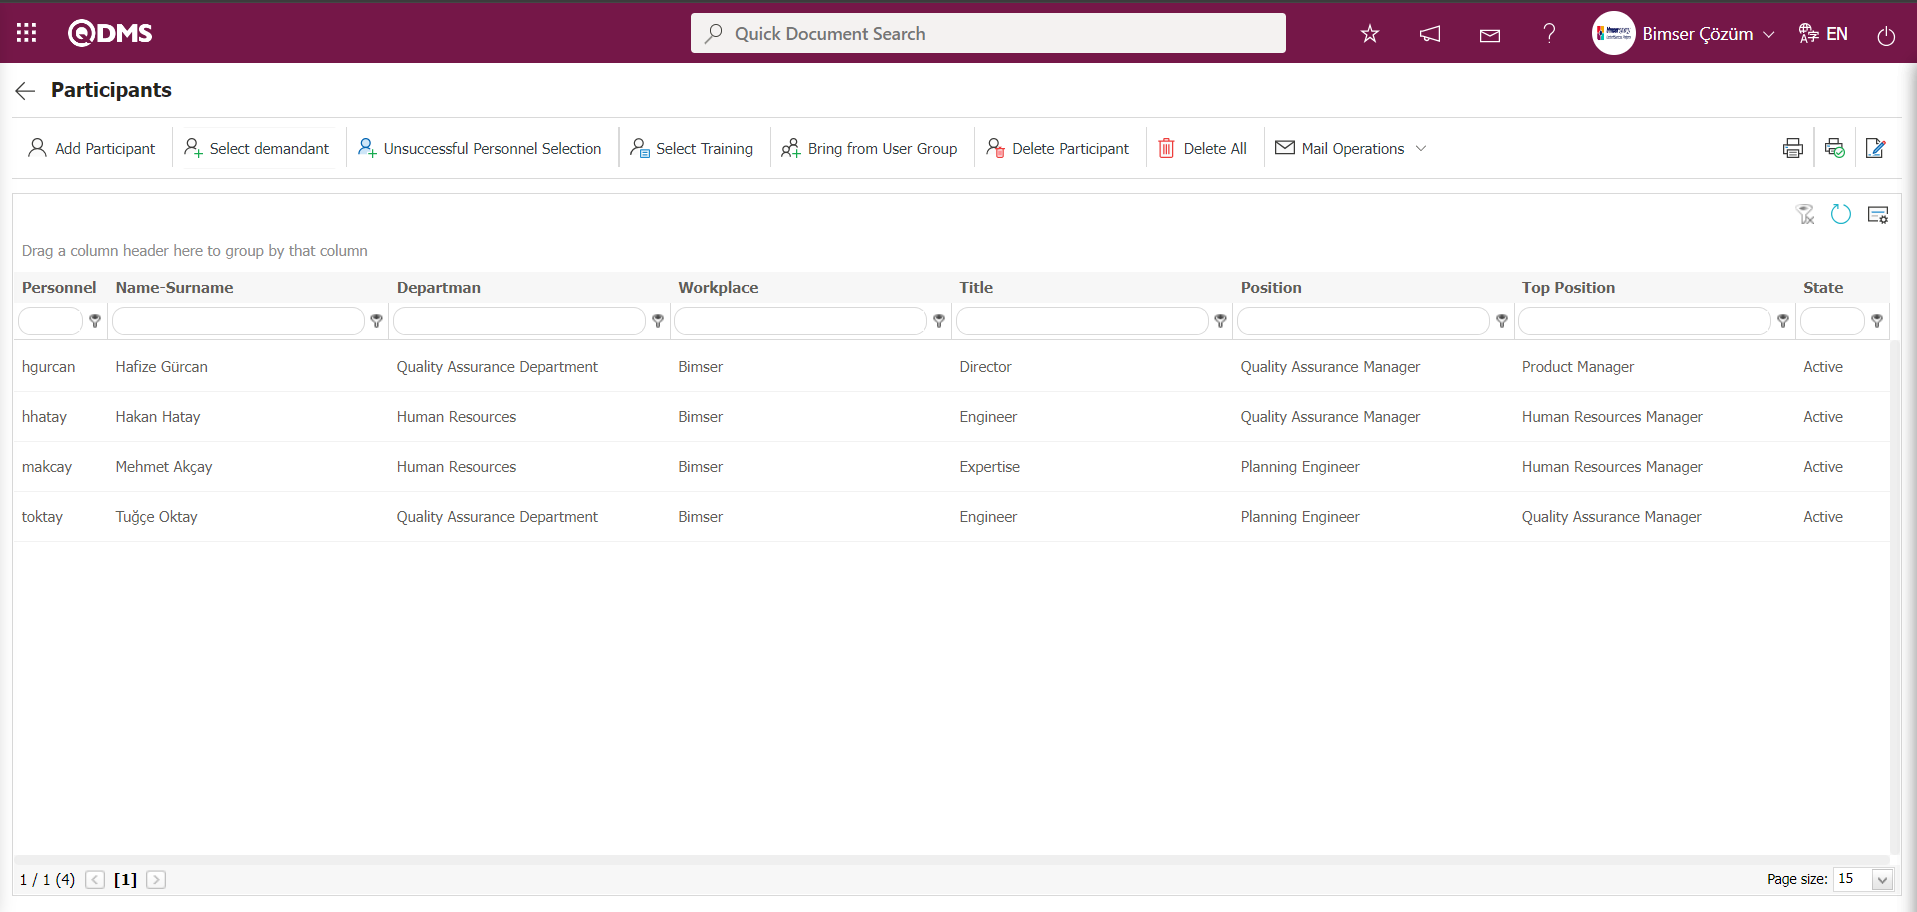
If desired, click the  button to add participants to the training details plan from the list of user groups defined in the system.
6.3.2.2.1.2.Perform Training
After adding participants in the Training Item Planning screen, click the ( ) Back button.
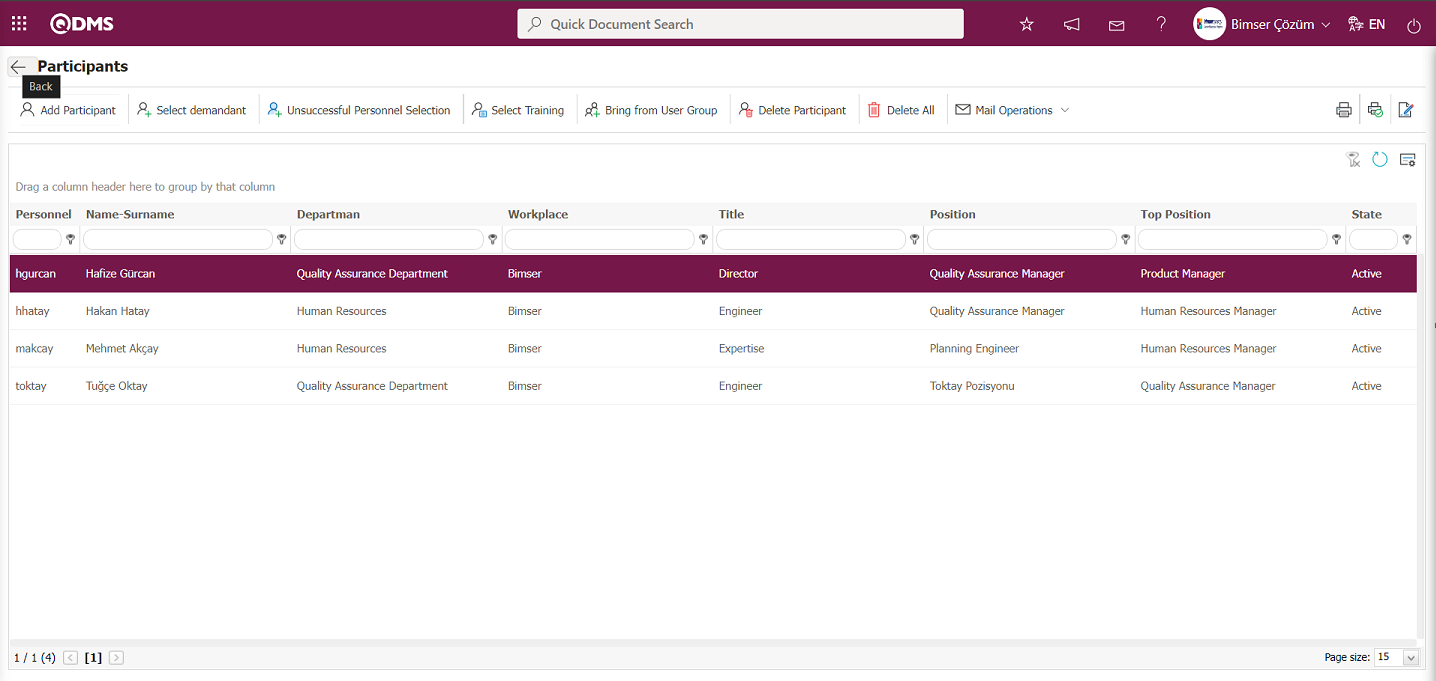
In the Training Item Planning screen that opens, click the  button while Training Item Planning is selected.
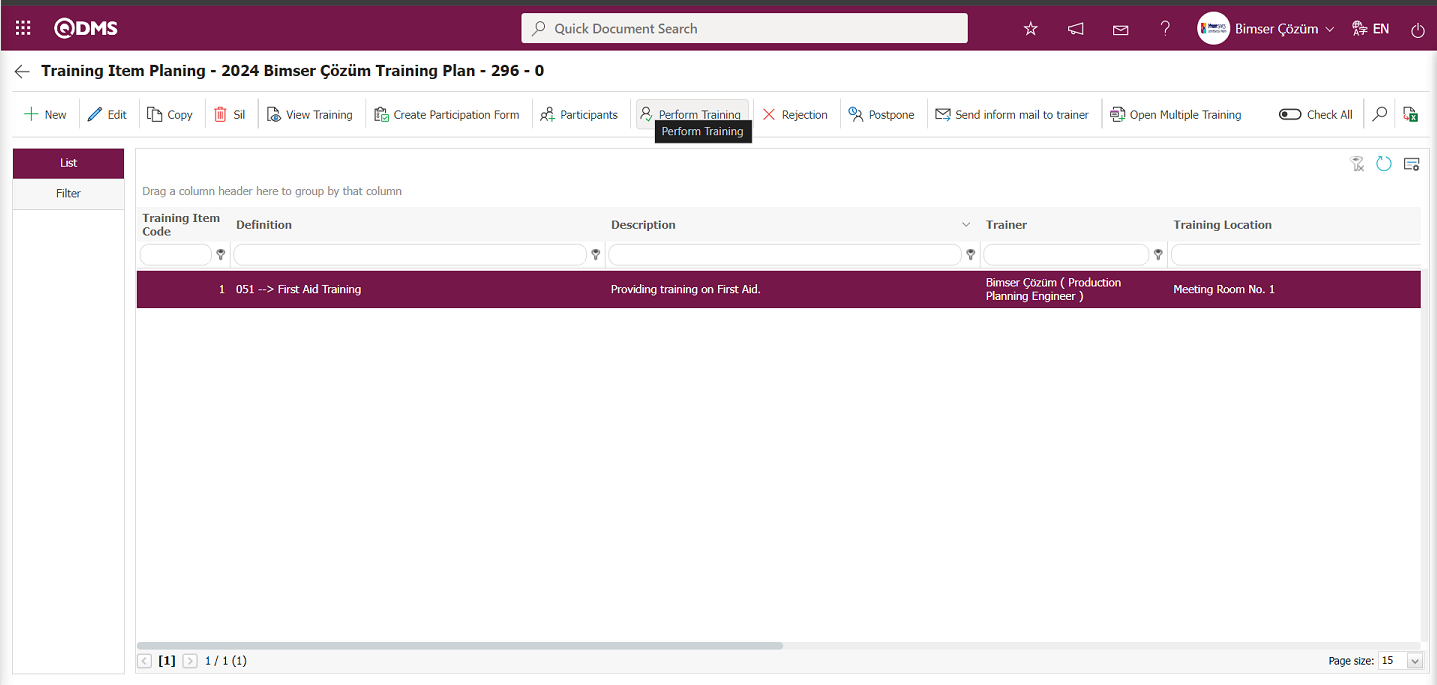
The Perform Training screen that opens allows you to enter data on whether participants attended or did not attend, and if they did not attend, the reasons why, as well as their training success scores.
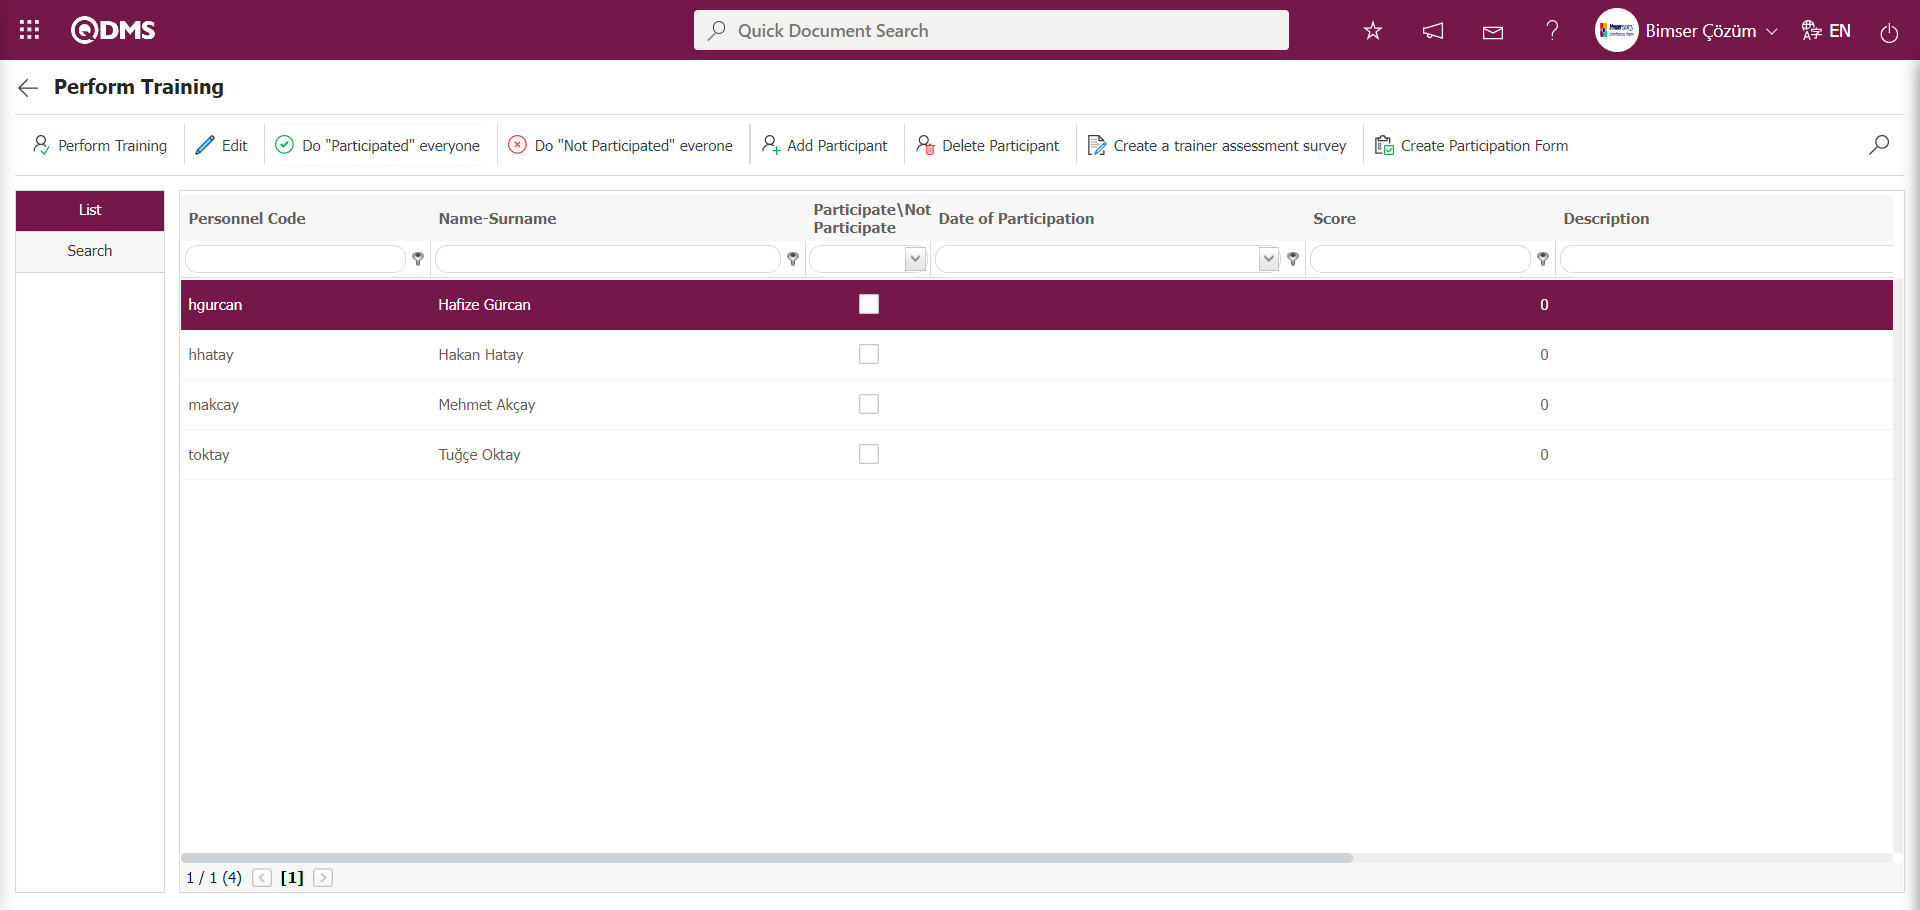
Using the buttons on the screen;
 Back: Allows us to go back to the previous page.
 : After updating the participation status of all participants and entering their information, the training status is changed to “Completed.”
 : Access is provided to the page where the information about the selected participant's attendance in the training, the date of attendance, the success score, any comments about the participant, and the reason for non-attendance, if applicable, is entered, and the necessary steps are taken.
 : All participants are marked as attended.
 : If none of the participants attended the training, mark all of them as “did not attend.”
 : Even if the names of individuals who participated in the training are not included in the training list, they can be added as participants from the list of personnel defined in the system.
 : If there is an error in the participants, the selected participant is deleted. This is a button that appears depending on the parameter. The parameter is activated by selecting “Yes” for parameter number 77 in the Training Planning module parameters.
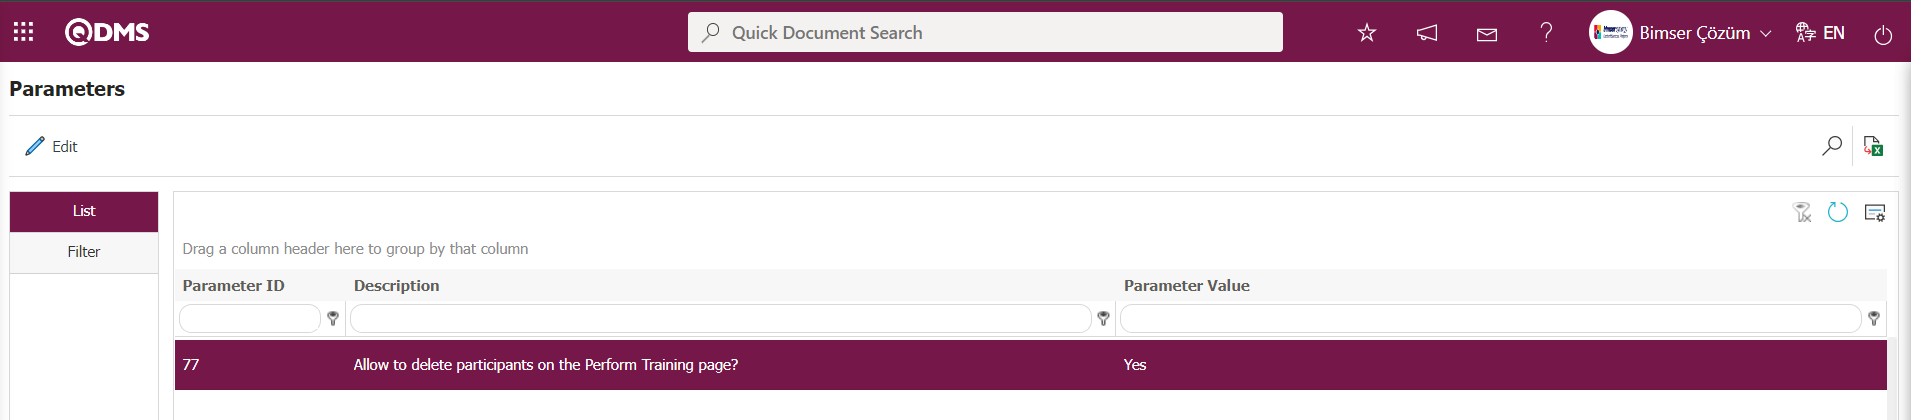
After the parameter is enabled, this button appears on the Perform Training screen and the participant deletion process is performed during the Perform Training phase. : If the Survey Operations module is available, this button is used when the survey code prepared in the survey module is entered into the “Training Provider Evaluation Template Survey No” parameter. Clicking this button sends the survey to participants for evaluation of the training and the trainer.
 : The Training Registration form containing the list of participants is obtained. In order to obtain the Training Registration form, the template must be loaded in the Report Formats menu.
 : If there are a large number of participants, filtering can be performed according to the participant by clicking on the intermediate tab. After selecting the participant, click on the
  (Search) button to access the relevant participant.
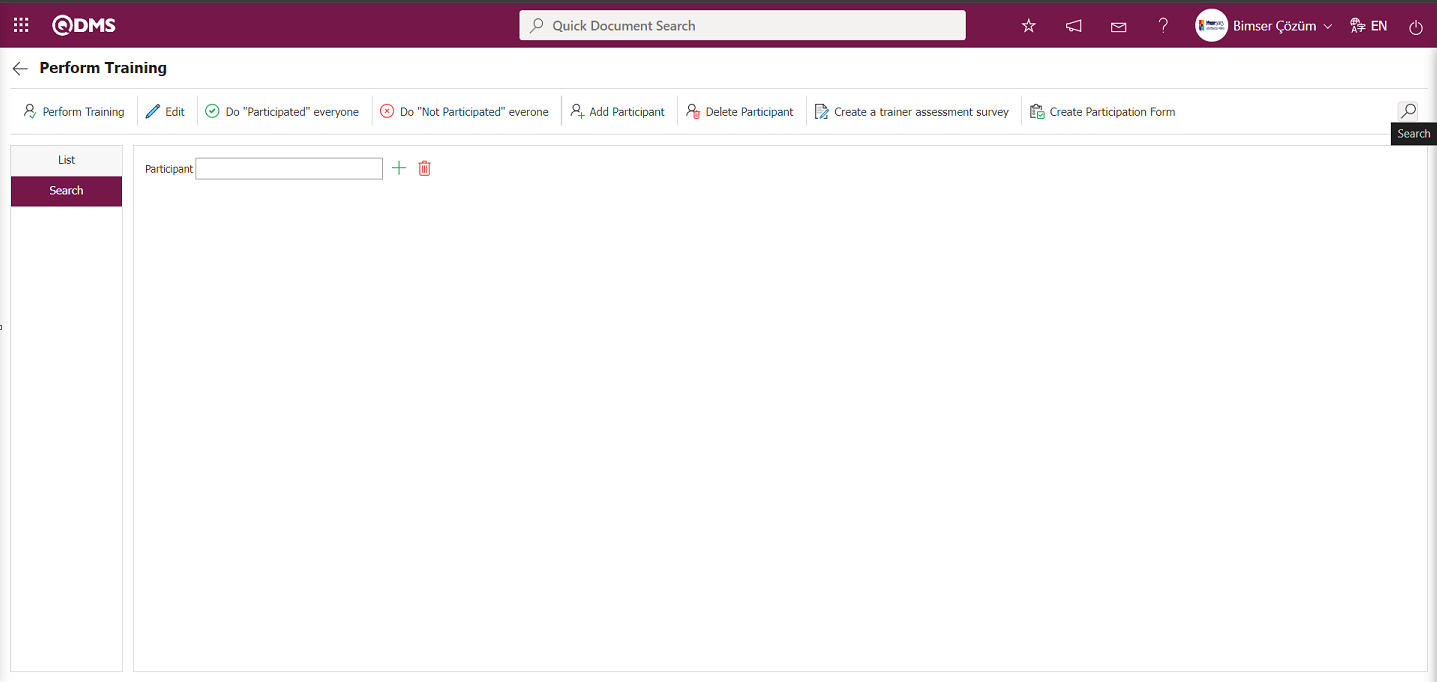
Click the  button on the Perform Training screen.
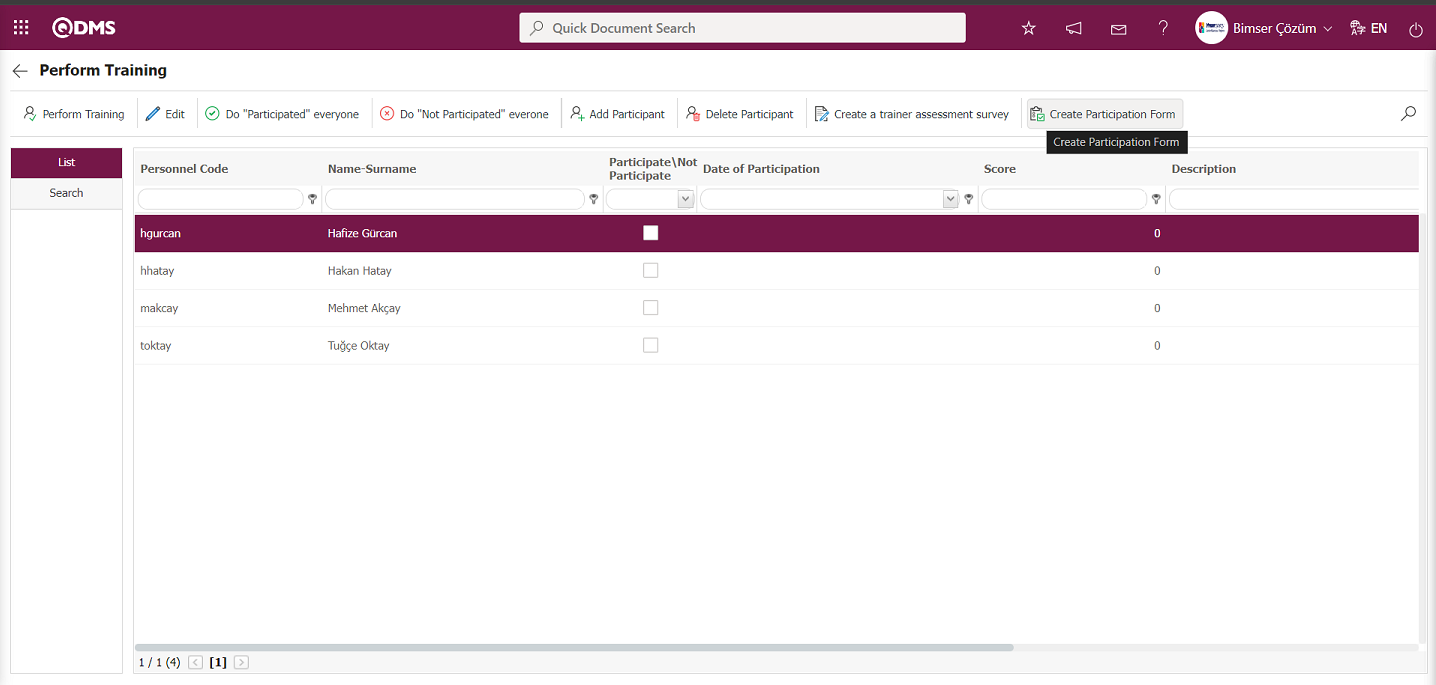
When the button is clicked, the Training Registration form is downloaded in Excel format.
![A screenshot of a computer
Description automatically generated]ref33
From the Perform Training screen, click the  button to add all participants to the training.
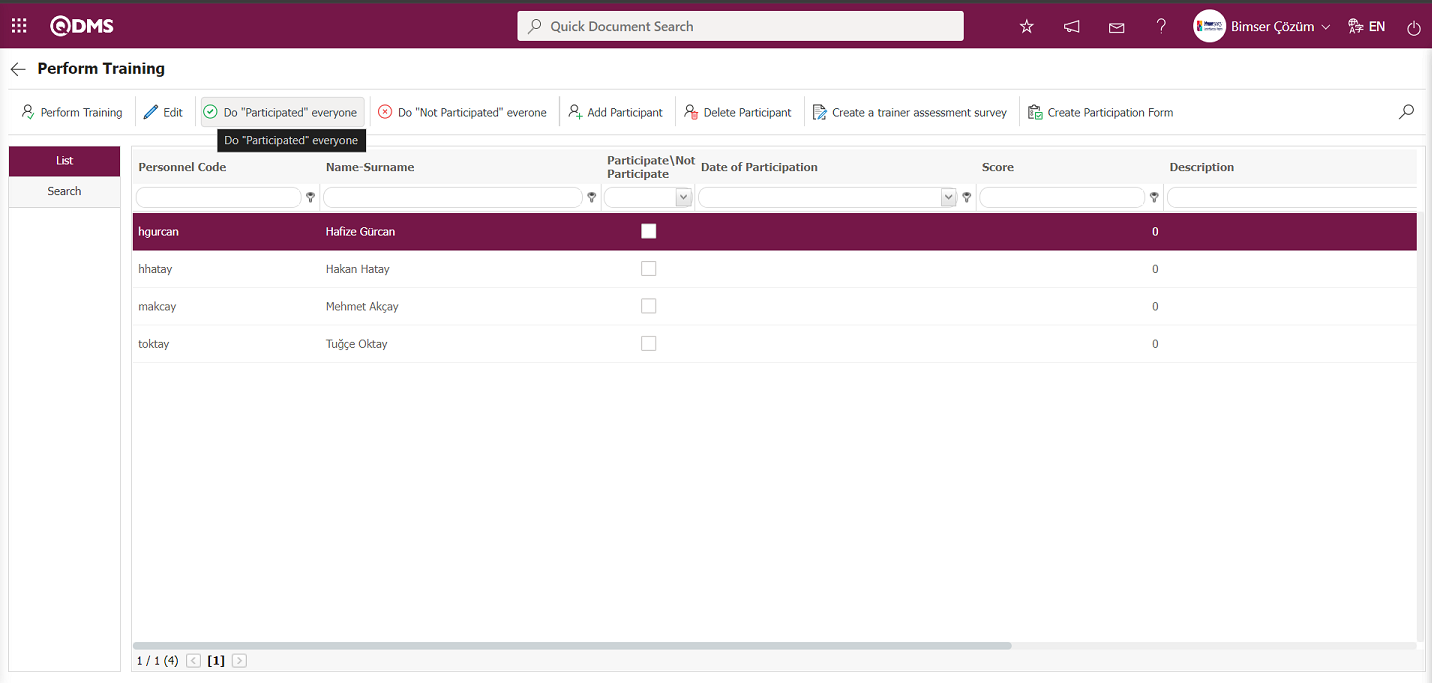
When the system displays the message “All participants will be marked as ‘Participated’. Are you sure you want to continue?”, click the “OK” button.
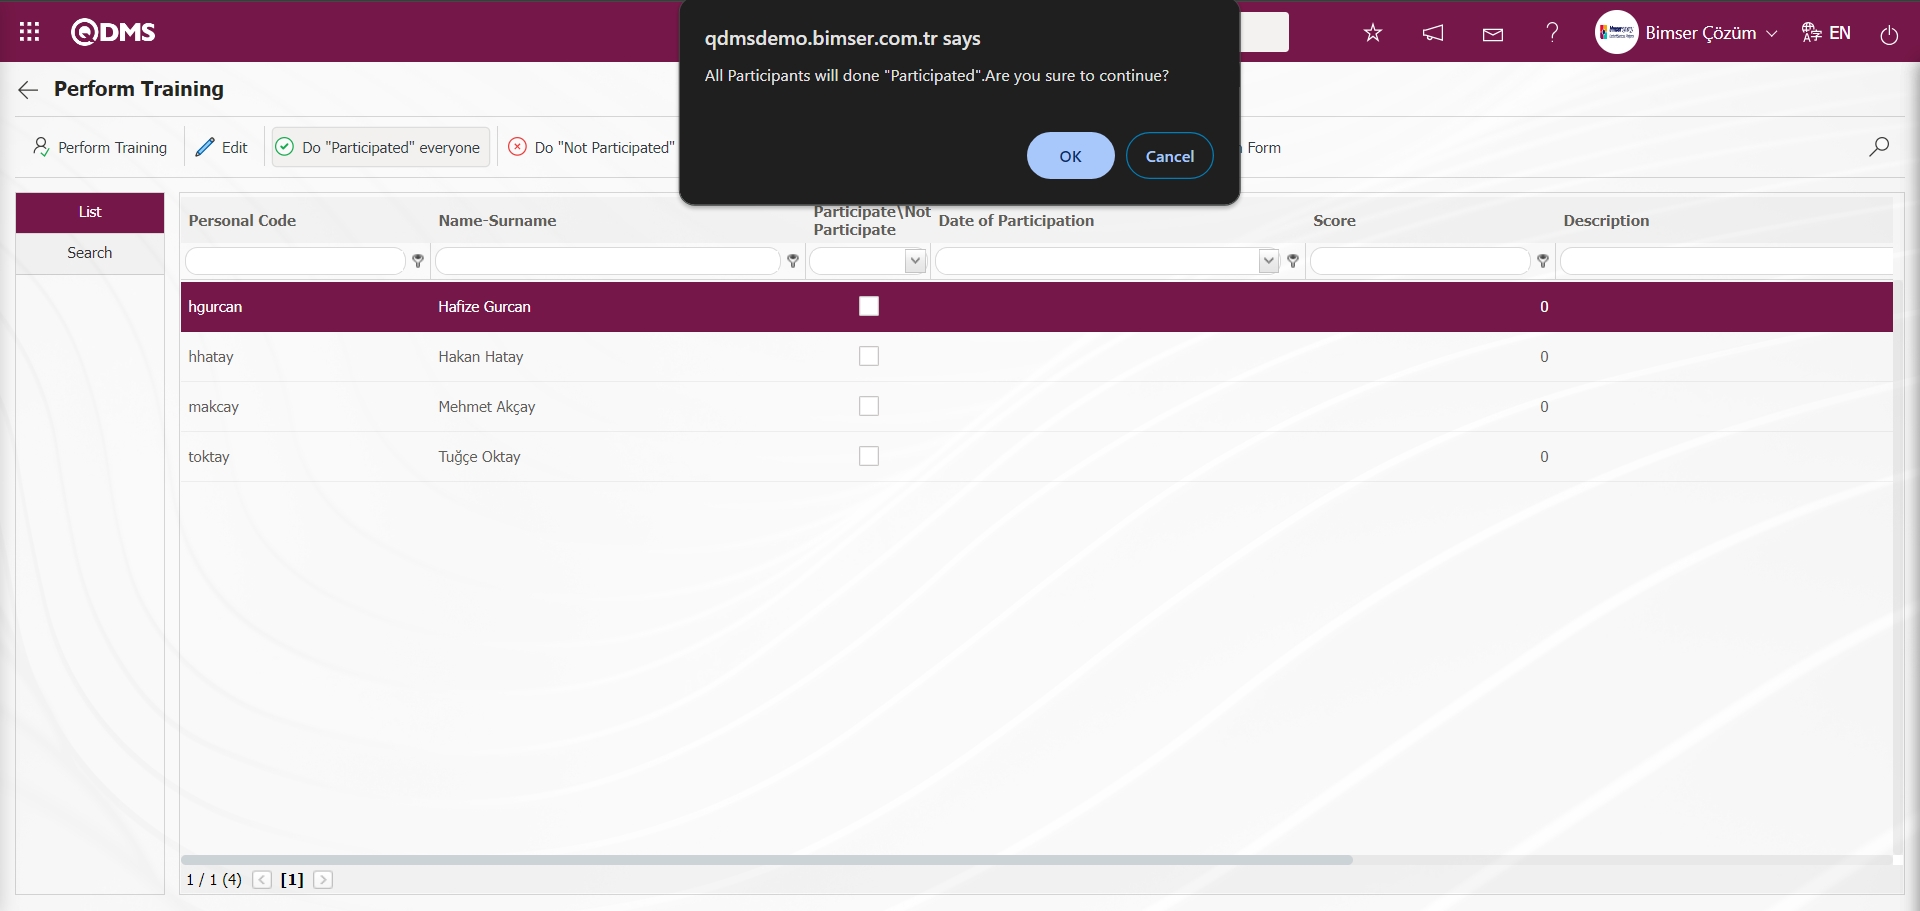
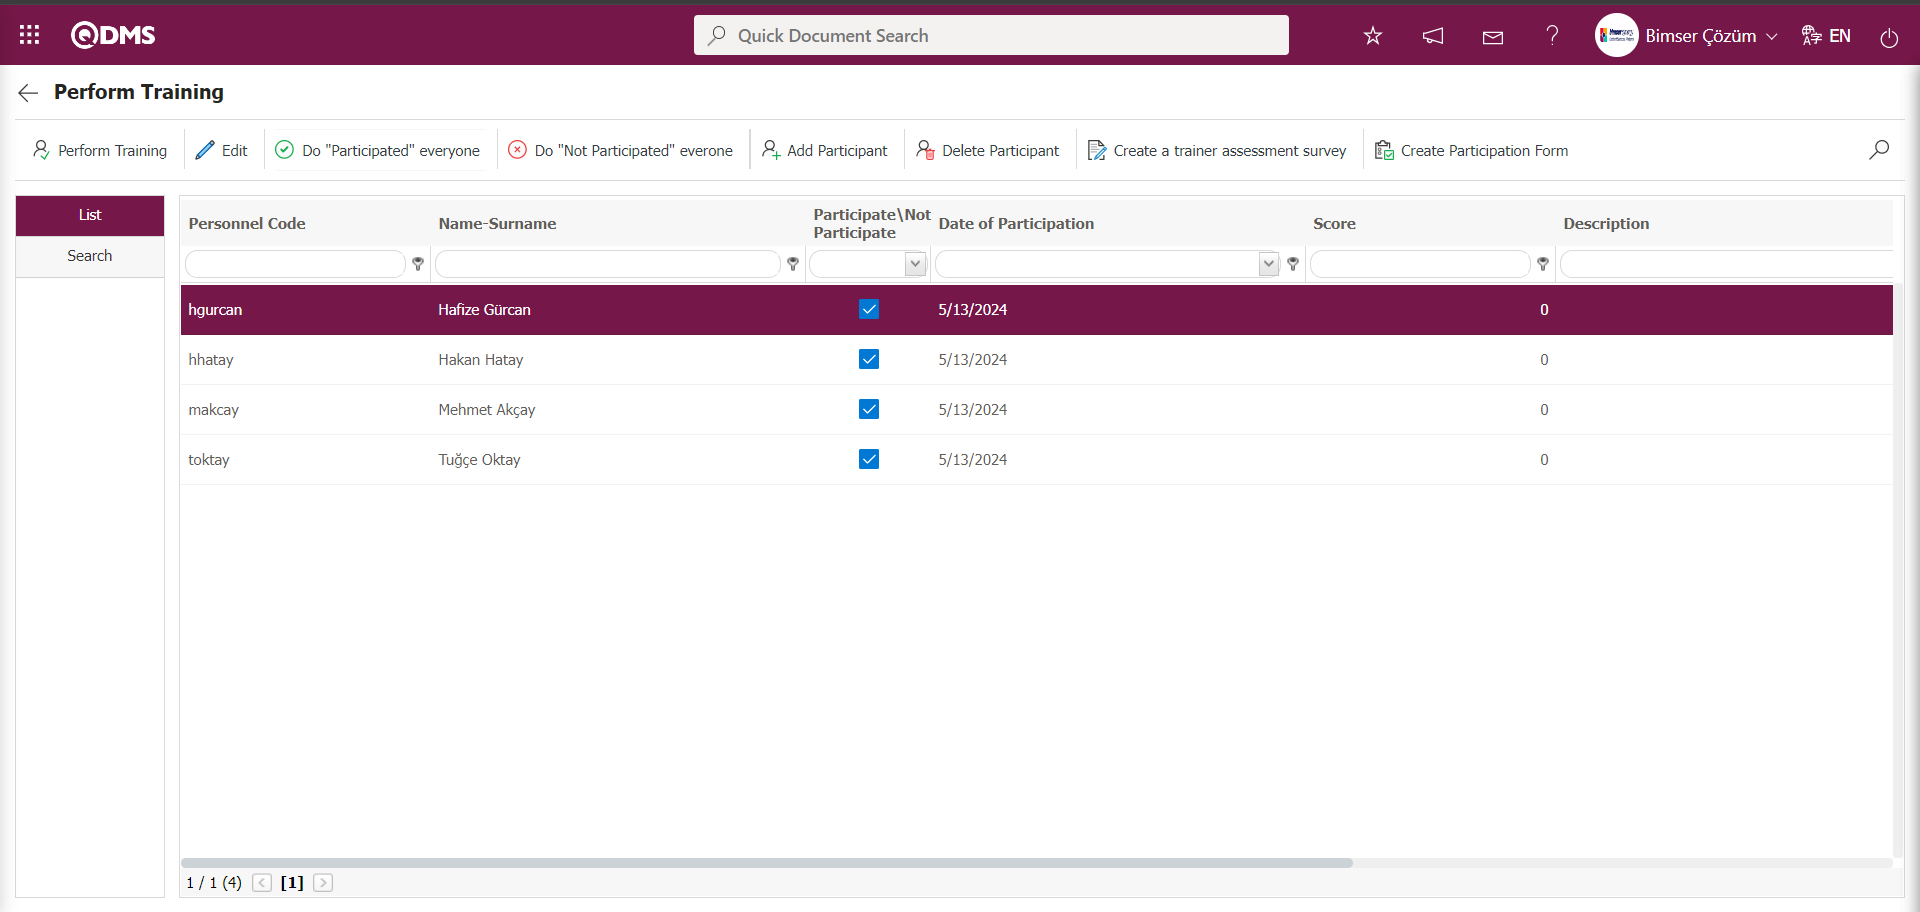
From the Perform Training screen, select a participant and click the  button.
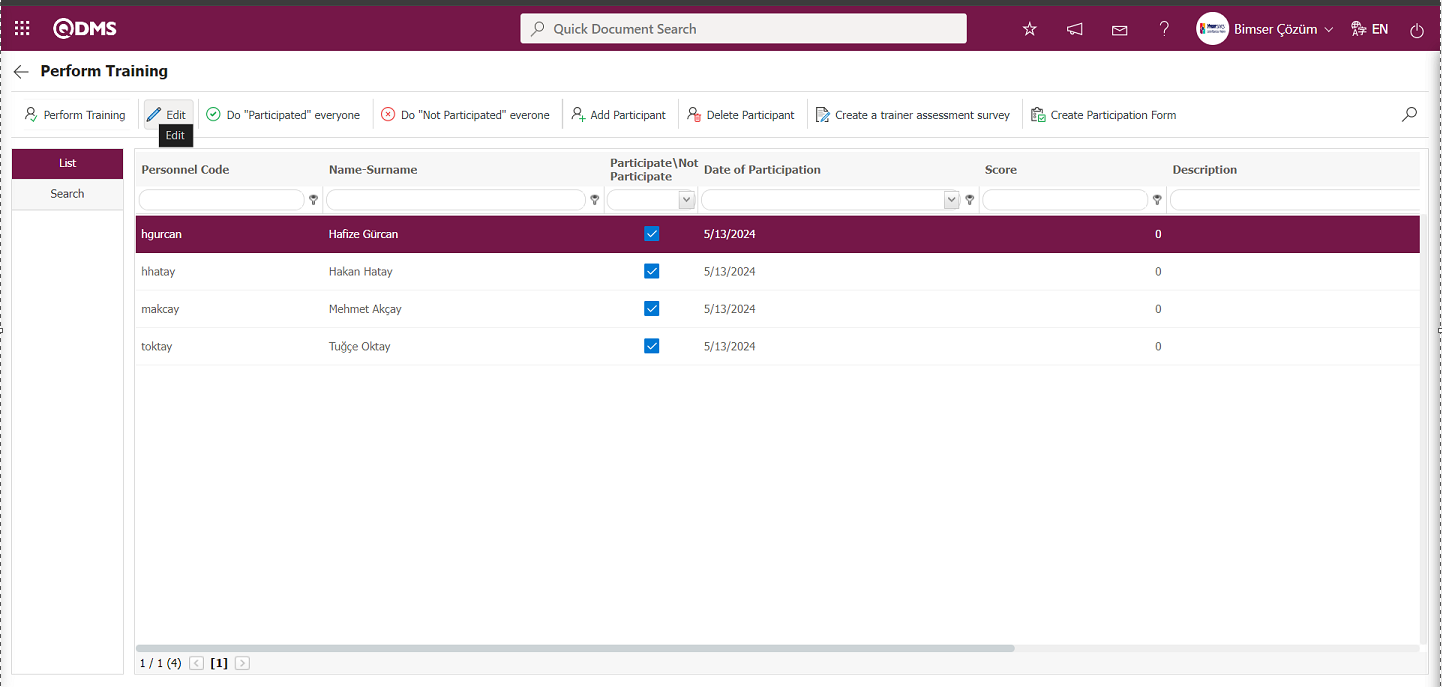
The Perform Training screen opens, providing access to the page where you can enter information about the participant's attendance, attendance date, success score, any comments you wish to add about the participant, and the reason for non-attendance, if applicable.
When the check box next to Participated is not selected on the Perform Training screen;
From the Perform Training screen, enter the participant's reason for attending and, if applicable, upload any relevant files explaining their reason for not attending.
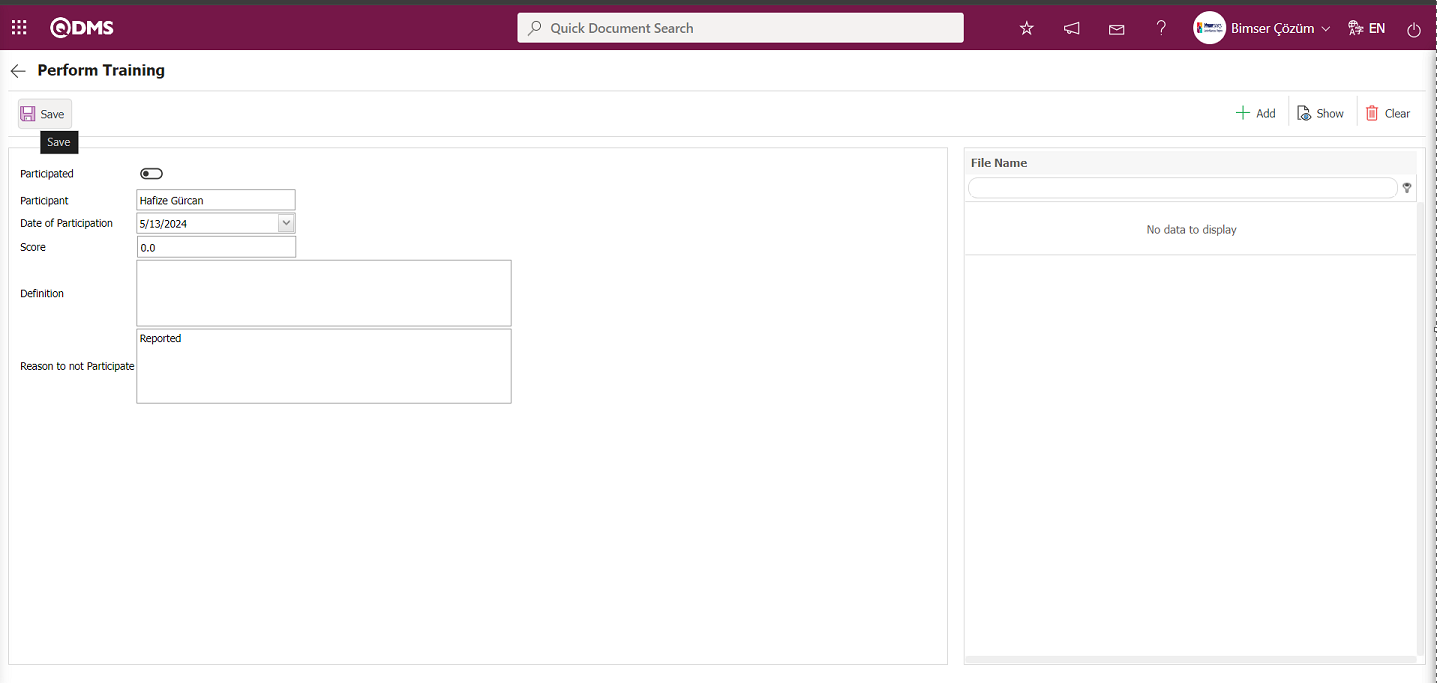
The relevant fields are defined on the screen that opens:
Participated: This is the area where the relevant check box is not selected based on the user's participation status in the training.
Participant: This is the field where the system automatically displays the first and last name of the selected participant.
Date of Participation: This is where you put the info that the participating user took part in the training.
Score: The participant's score is not recorded because the user did not participate in the training.
Definition: Information about the participant's absence from the training is recorded.
Reason to not Participate: If the Participated field is not marked, this field is active and the reason why the participant did not attend the training is entered in this field.
After entering the required information in the relevant fields, click the  button in the upper left corner of the screen to save your information.
When the Participated check box is selected on the Perform Training screen;
From the Perform Training screen, enter the participant's score in the score field and upload any additional files related to the training, if available.
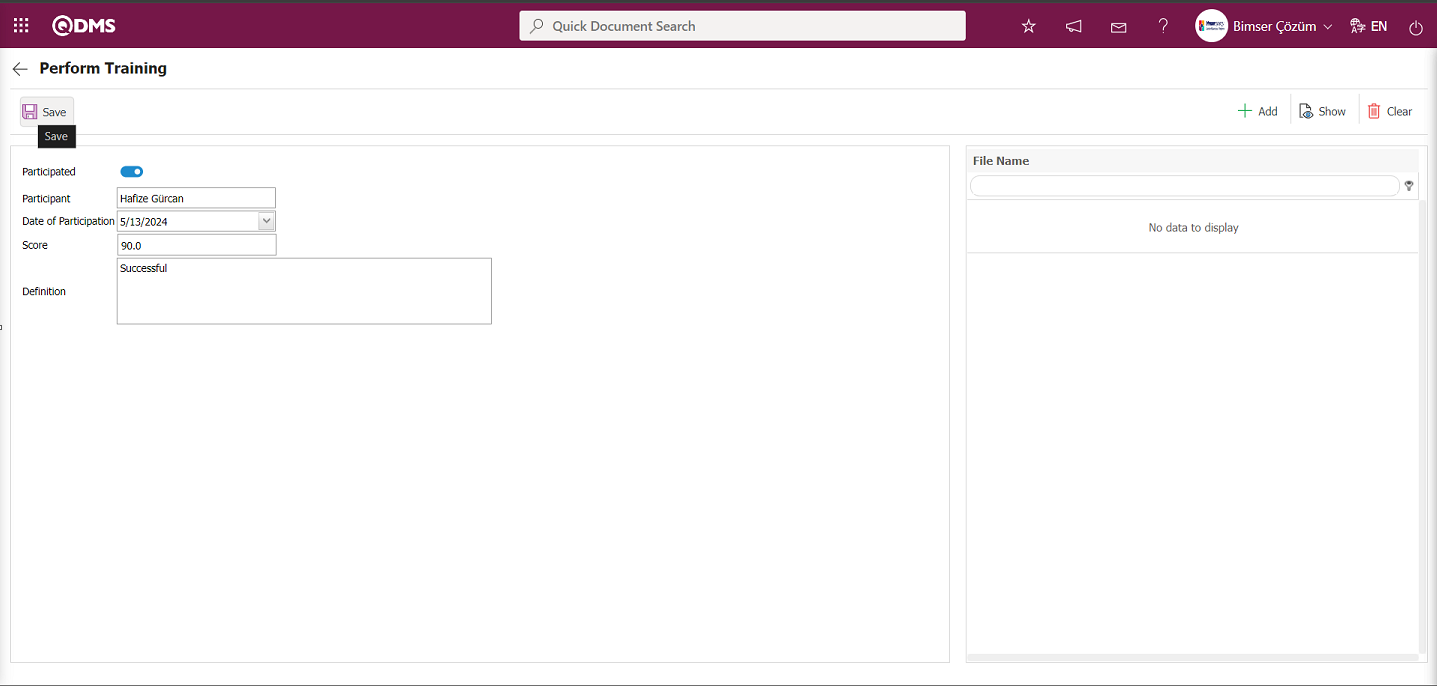
The relevant fields are defined on the screen that opens:
Participated: This is the area where the relevant check box is not selected based on the user's participation status in the training.
Participant: This is the field where the system automatically displays the first and last name of the selected participant.
Date of Participation: This is where you put the info that the participating user took part in the training.
Score: The participant's score is not recorded because the user did not participate in the training.
Definition: Information about the participant's absence from the training is recorded.
After entering the required information in the relevant fields, click the button in the upper left corner of the screen to save your information.
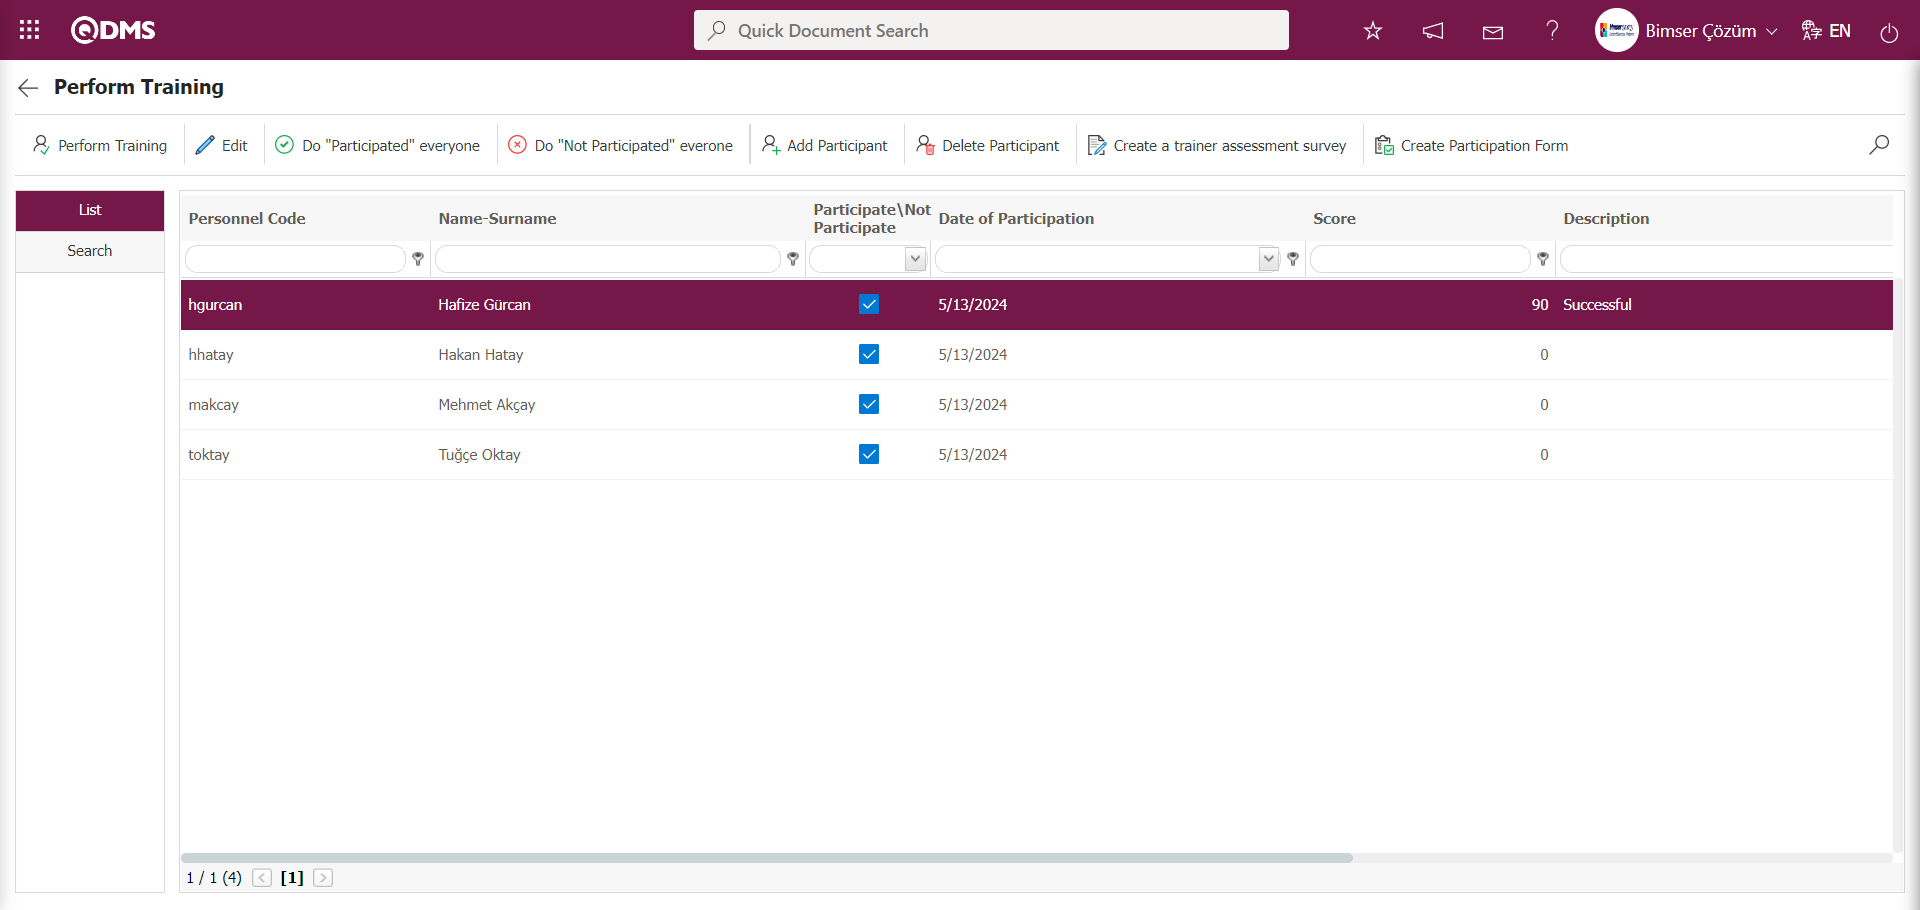
On the Perform Training screen, double-click the row in the list where the second participant is located in the list tab without clicking the  button.

In the Perform Training screen, enter the relevant information in the fields related to the training to be conducted for the second participant, and then perform the Perform Training operation.

In the Perform Training screen, double-click the row in the list of participants in the 3rd tab to enter information related to Perform Training.
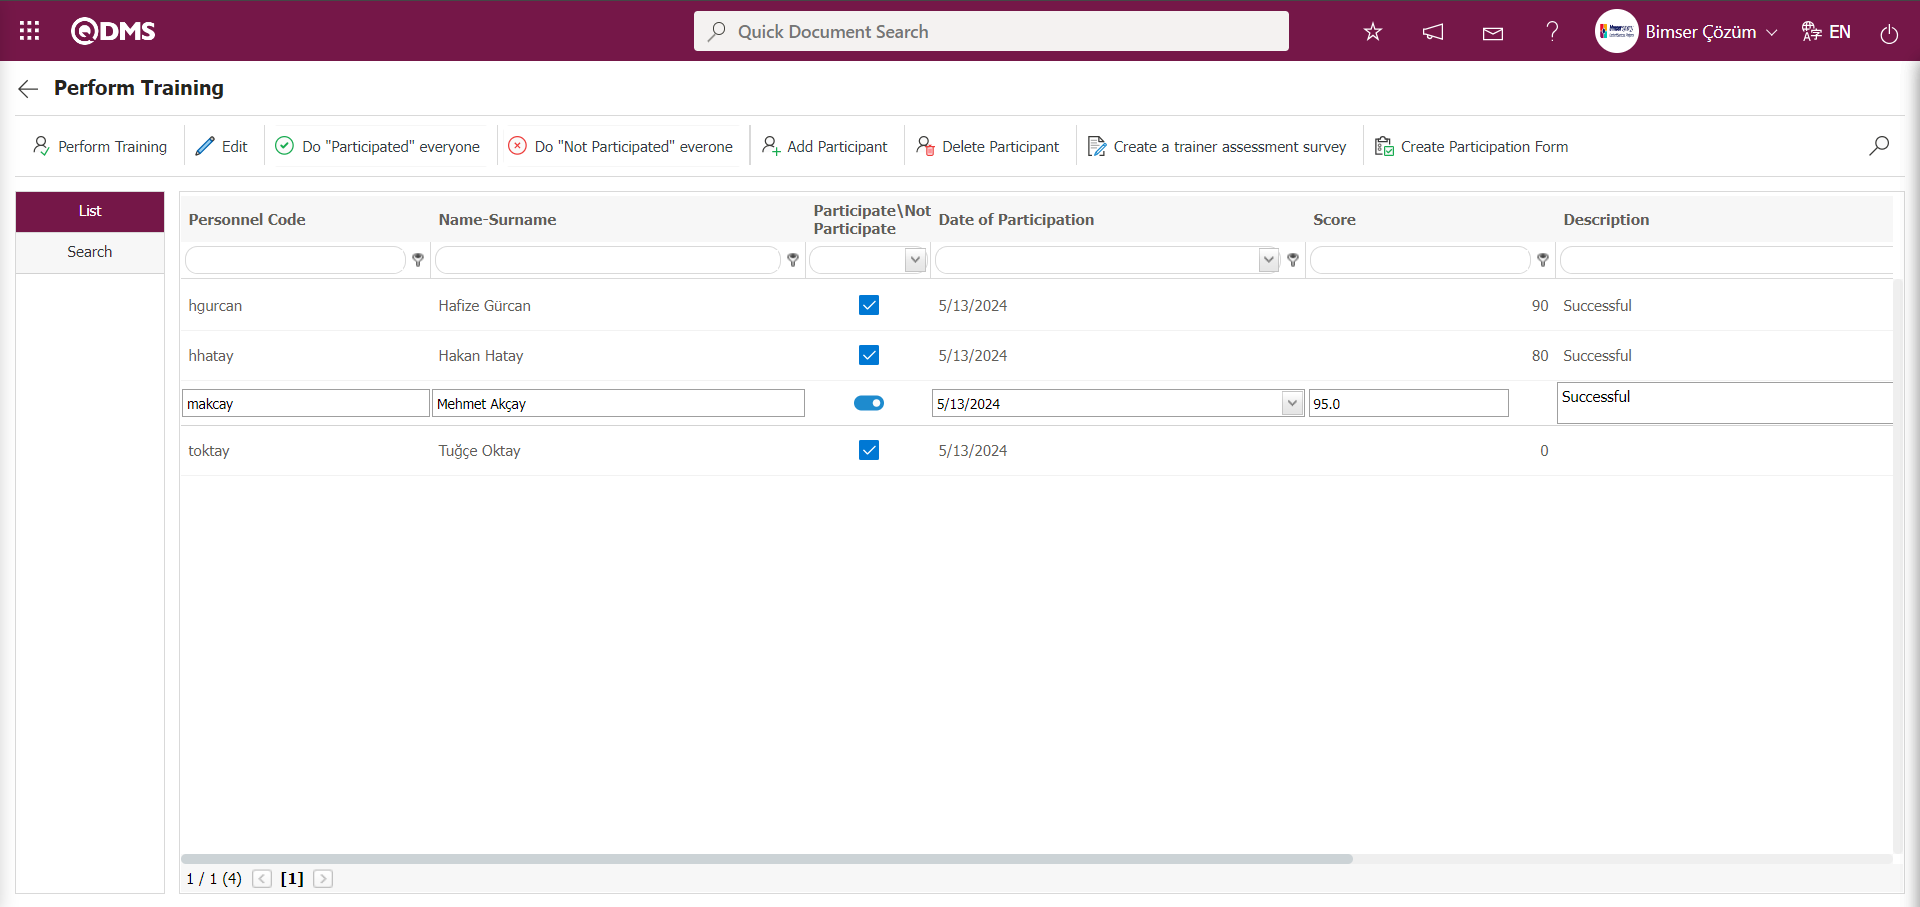
In the Perform Training screen, double-click the row in the list of participants in the 4th tab to enter information related to Perform Training.

The Perform Training screen is where you enter information about the training process for all participants.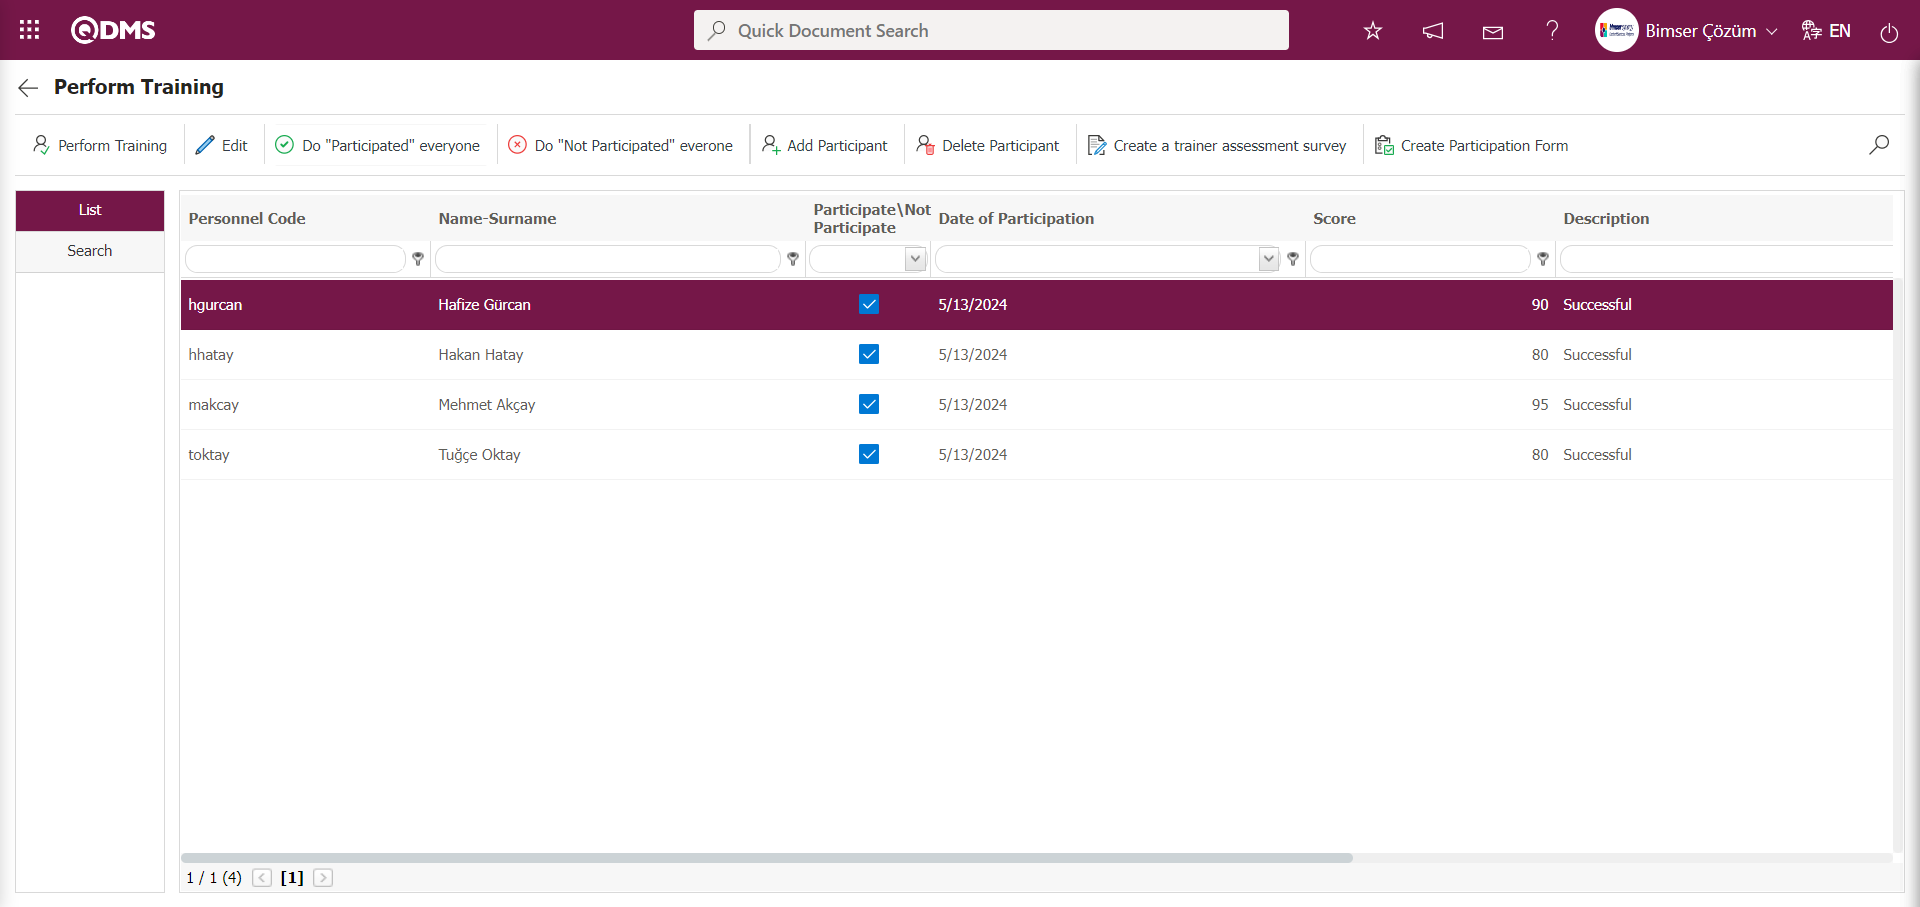
The training evaluation survey is created by clicking the  button on the Perform Training screen.
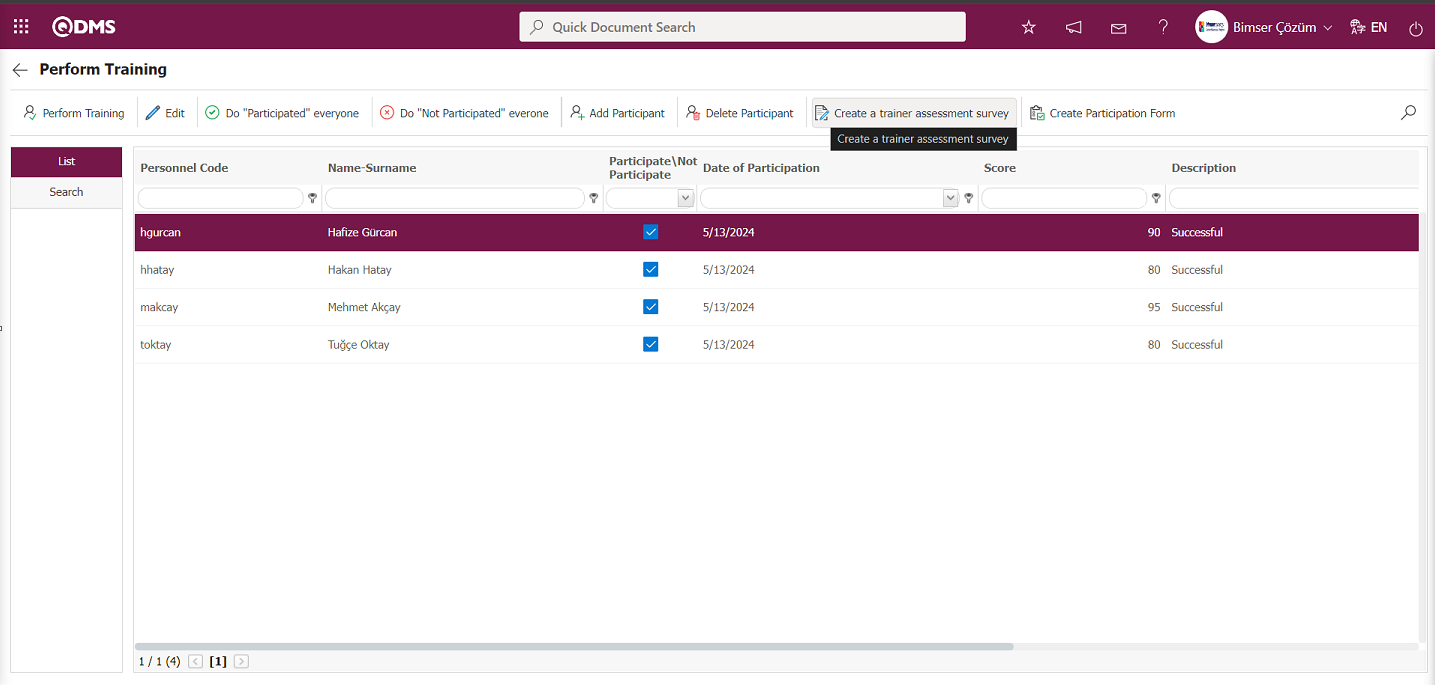
The system successfully created the Training Evaluator Survey and sent it to participants with a message indicating that the training evaluator survey has been created.
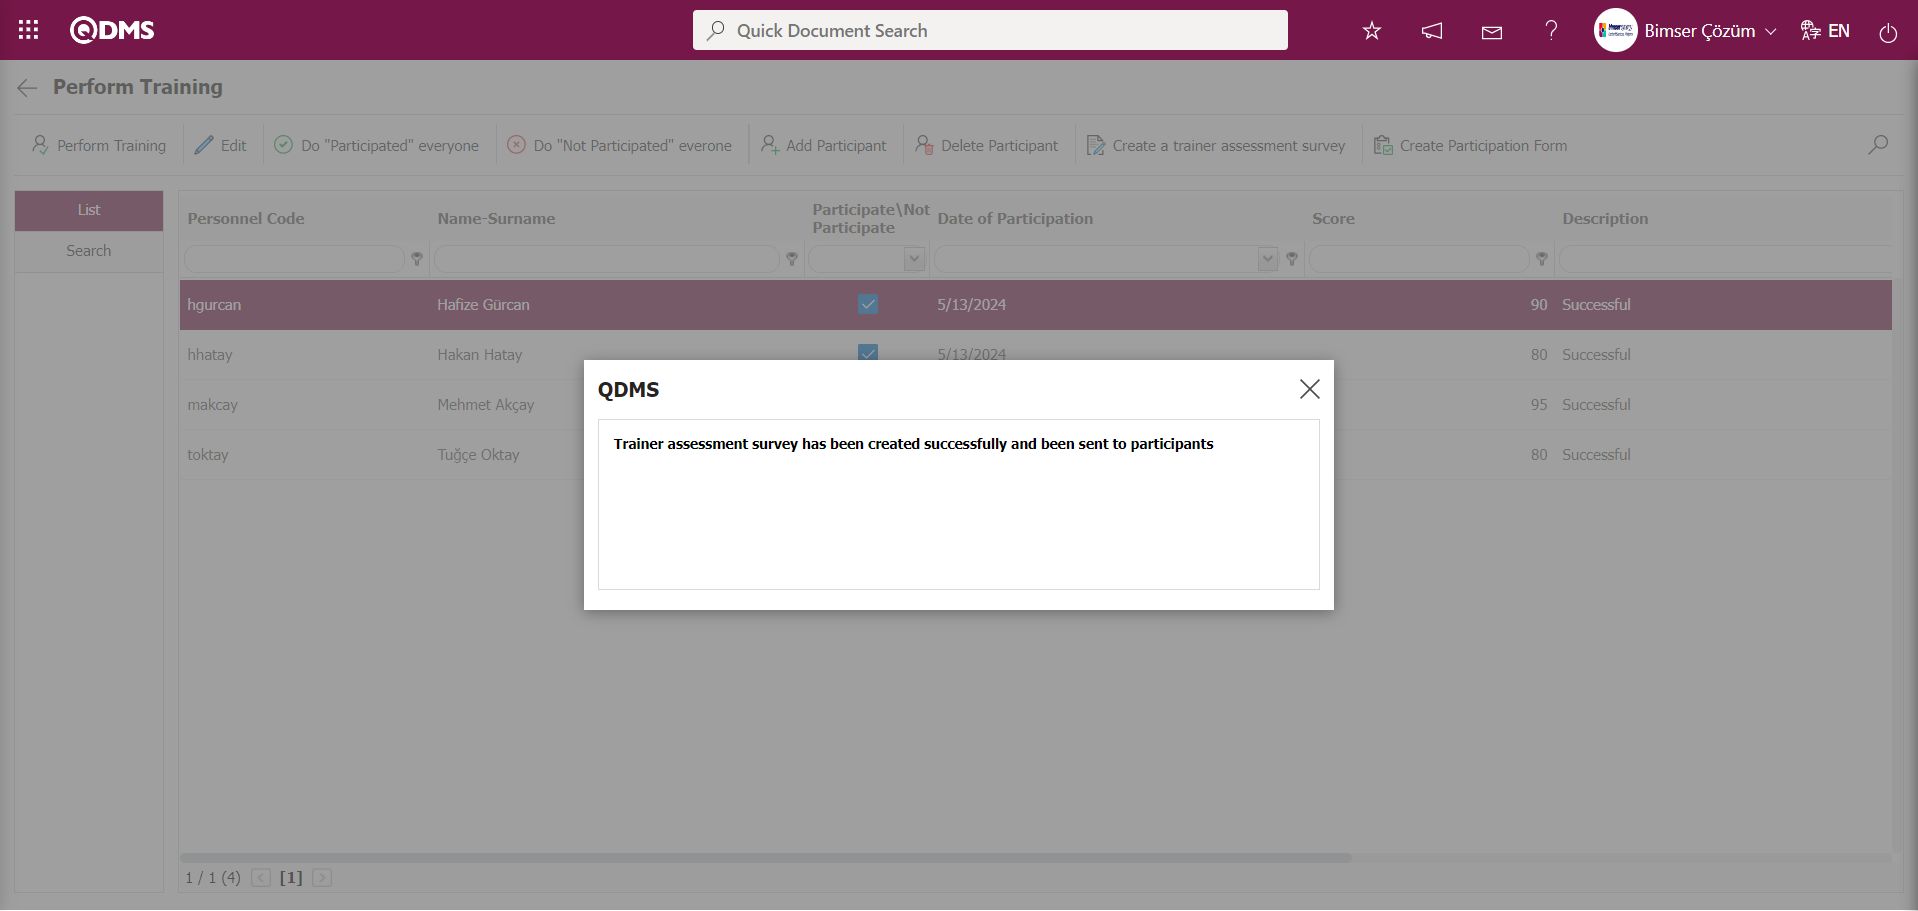
After entering the information related to the training to be conducted for all participants on the Perform Training screen, click the 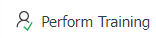 button.
The “Are you sure to perform training?” message appears on the screen. Click the “OK” button.
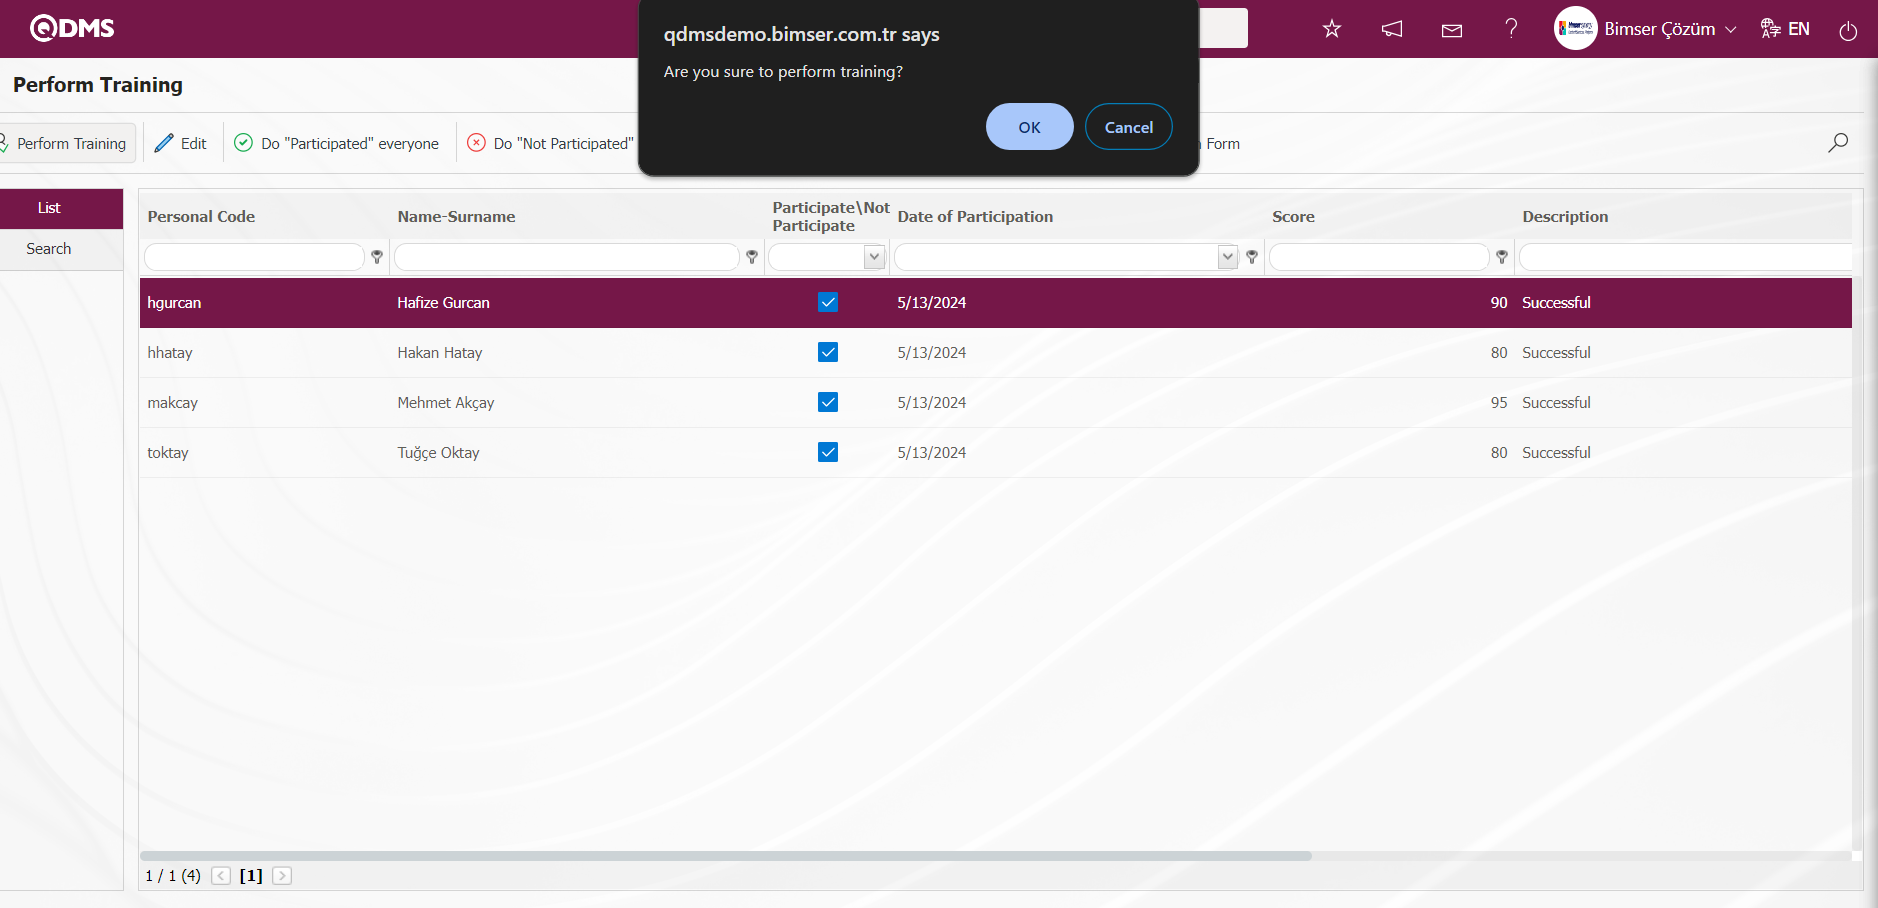
The system displays the message “Training is performed and its status is set as finished” to indicate that the training status has been set to “Finished.”
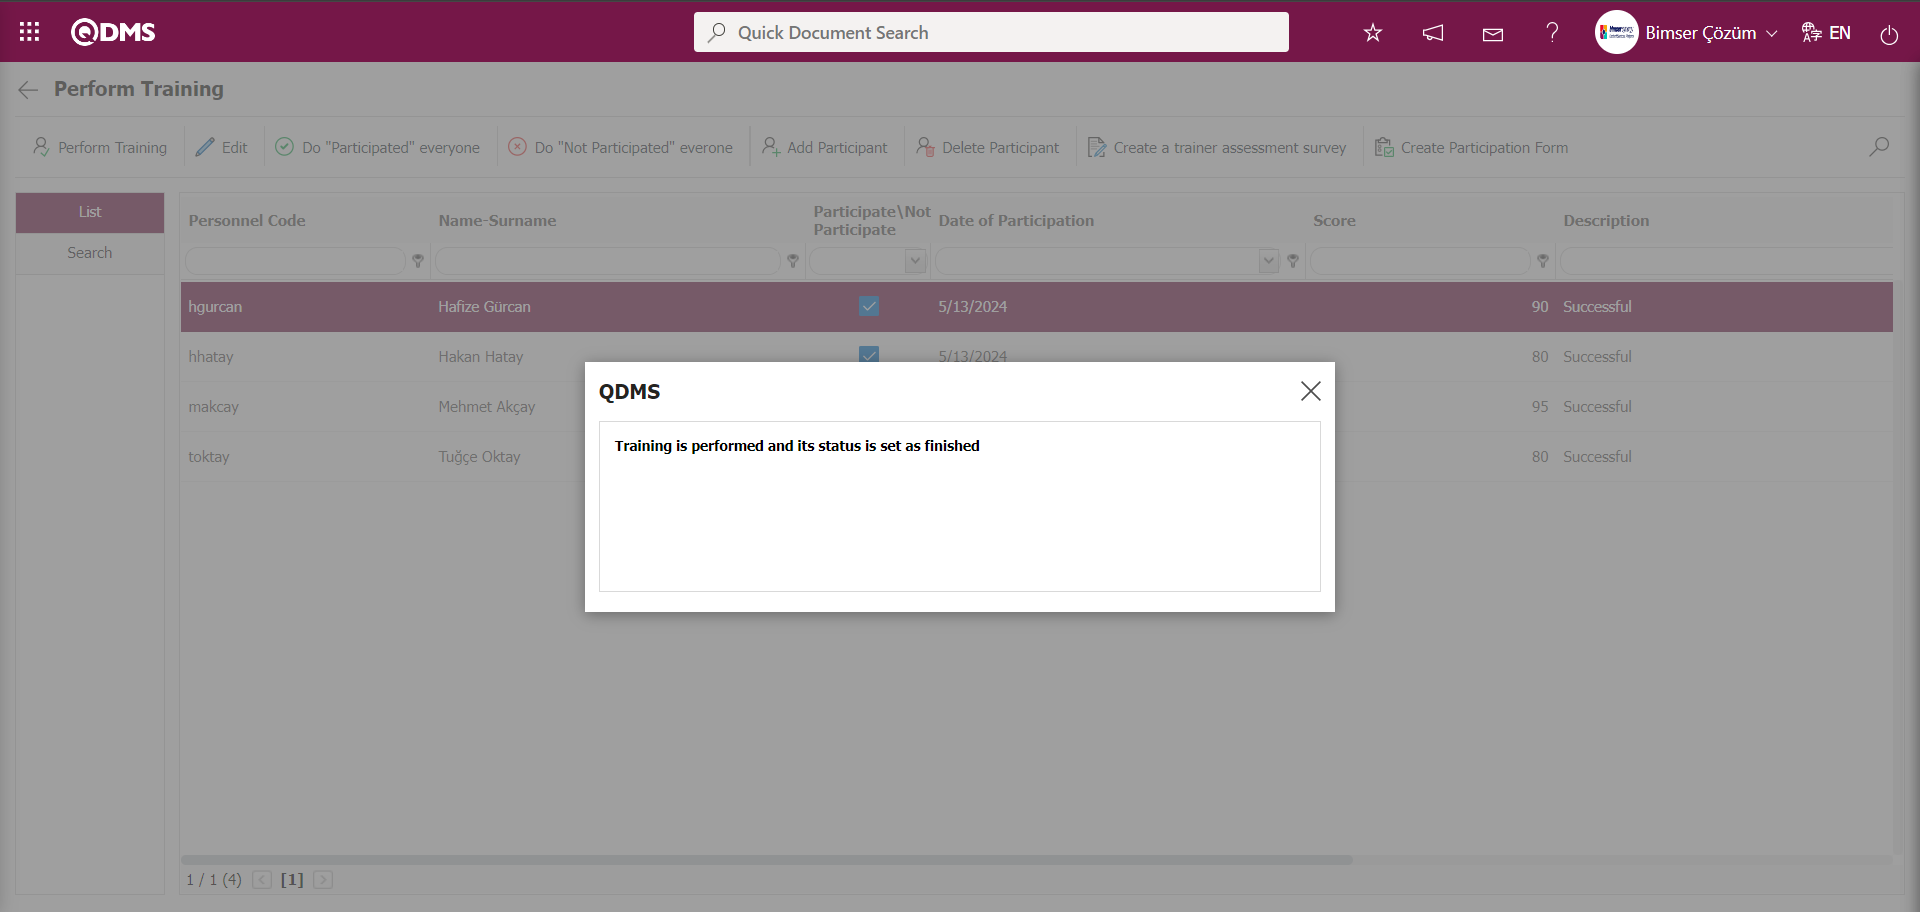
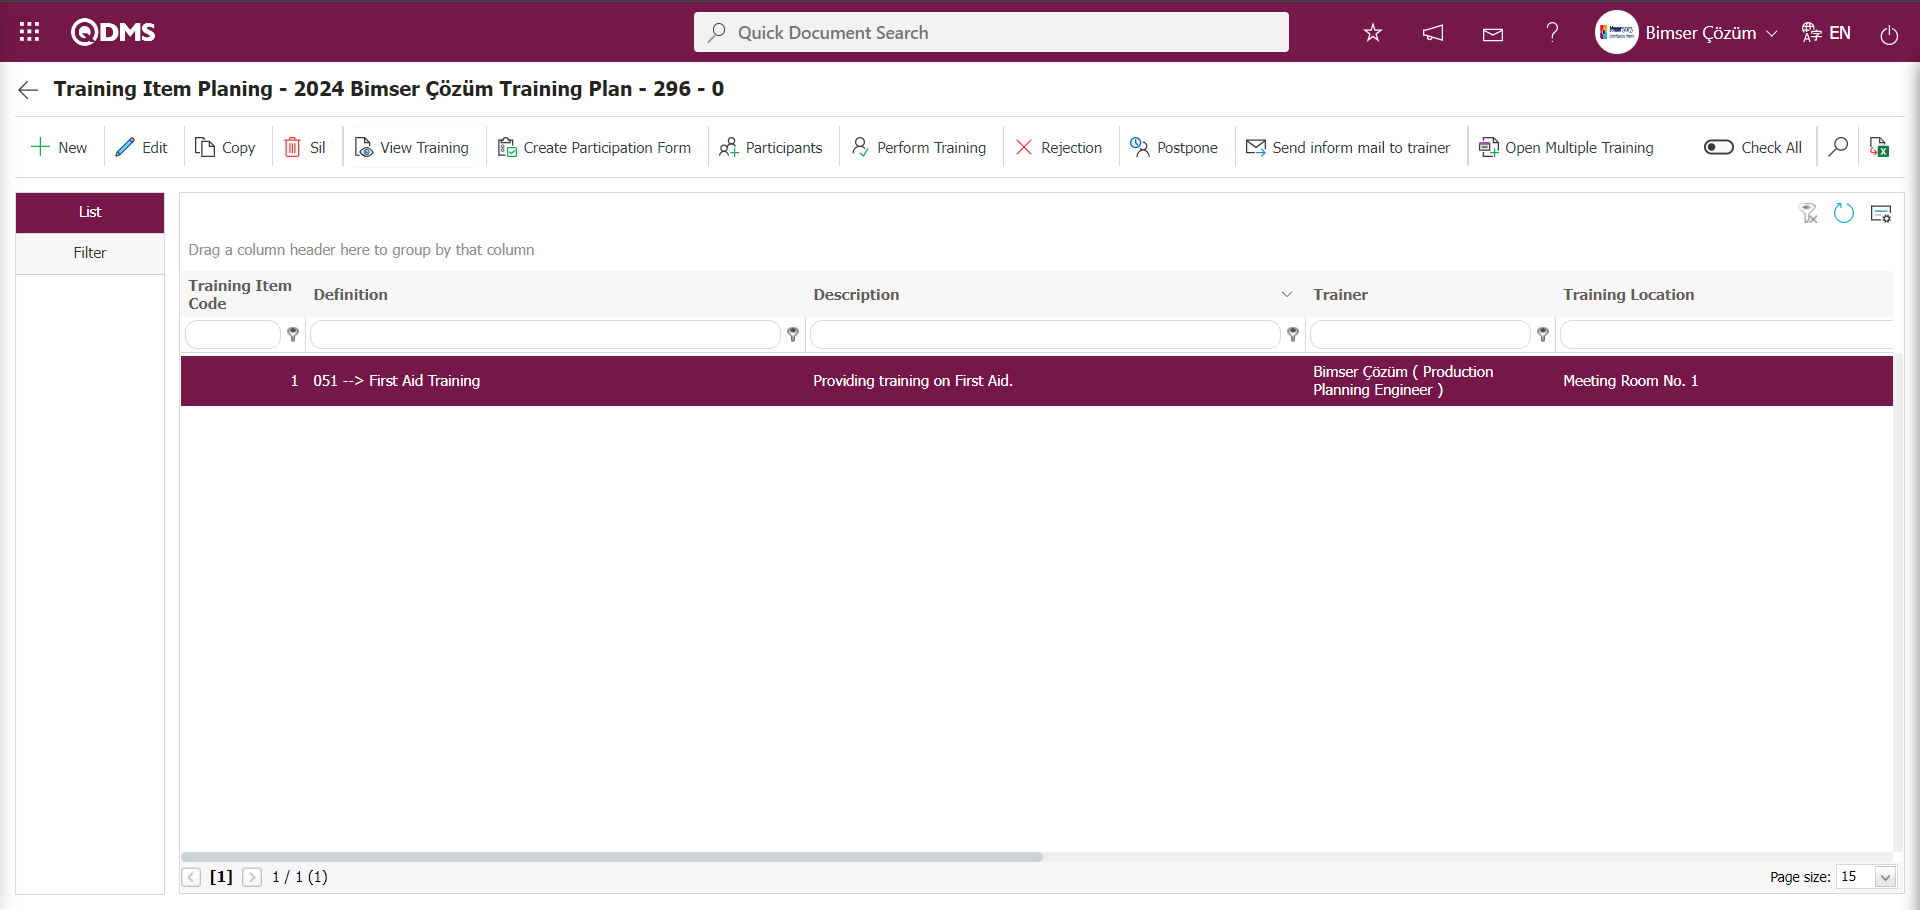
6.3.2.2.1.3.Trainings in Responsibility
The task “Trainings in Responsibility” is assigned to the pending tasks of the training manager assigned to a training detail plan defined within the scope of the Training Planning Module.

Click the link in the Training Code field of the relevant task to open the Training Planning screen.

In this screen, the training supervisor performs the steps related to training and completes the training by bringing it to the “training completed” status.
6.3.2.2.1.4.Trainings,I will participate
The training of participants in a training detail plan defined within the scope of the Training Planning Module is assigned to their pending tasks as a “Trainings, I will participate” task.
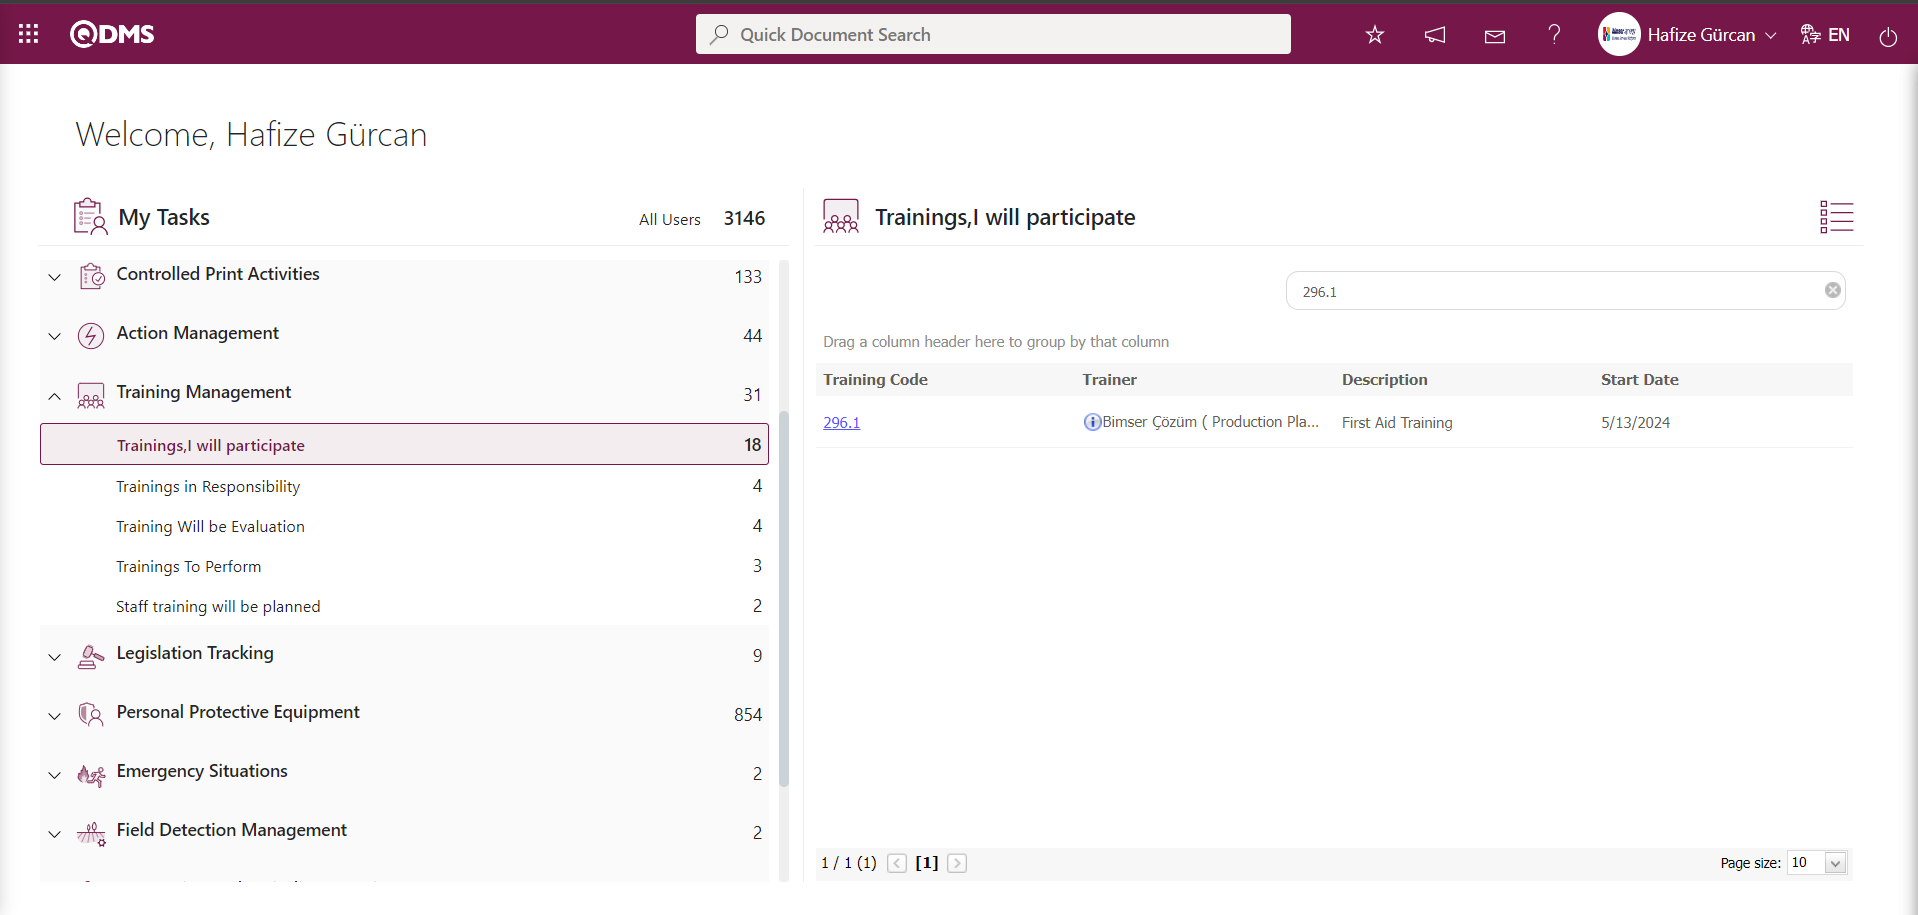
Participants open the Training Approval screen by clicking the link in the Training Code field for the relevant task. At this stage, participants either approve their participation in the training or decline by providing a reason for their refusal.
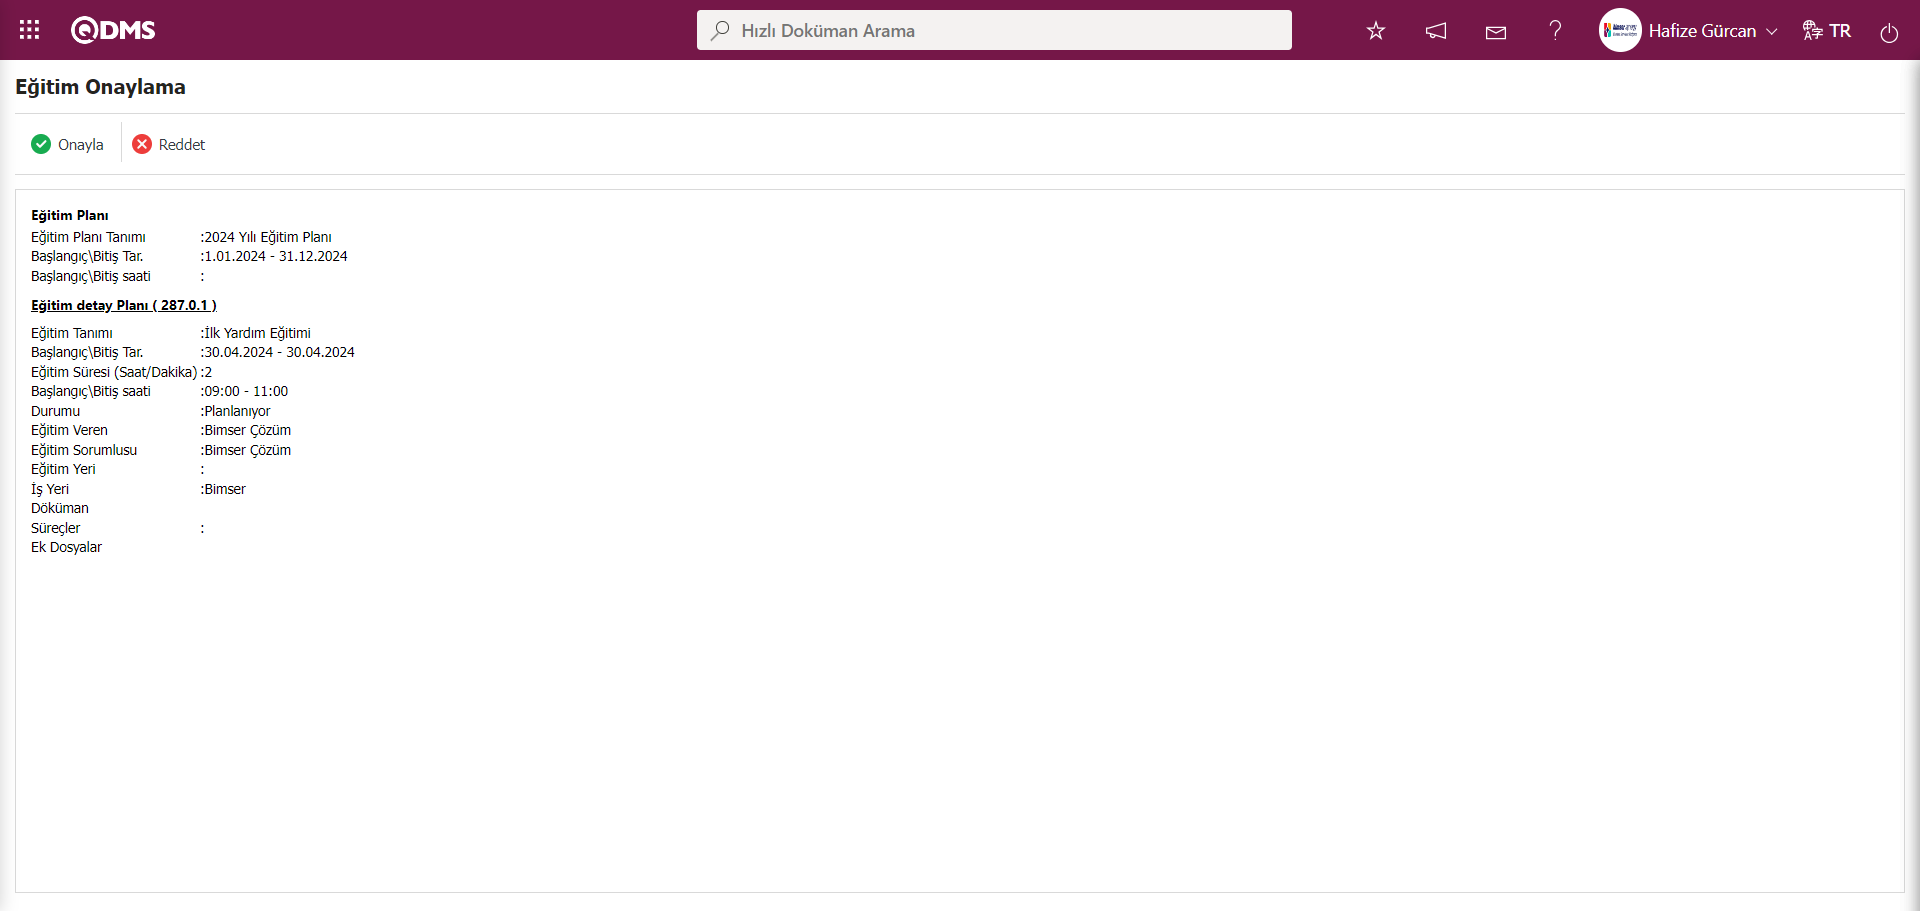
Using the buttons on the screen;
 : A confirmation process is carried out to confirm participation in the training.
 : The rejection process is carried out by writing the reason for not participating in the training.
Click the button on the Training Approve screen.
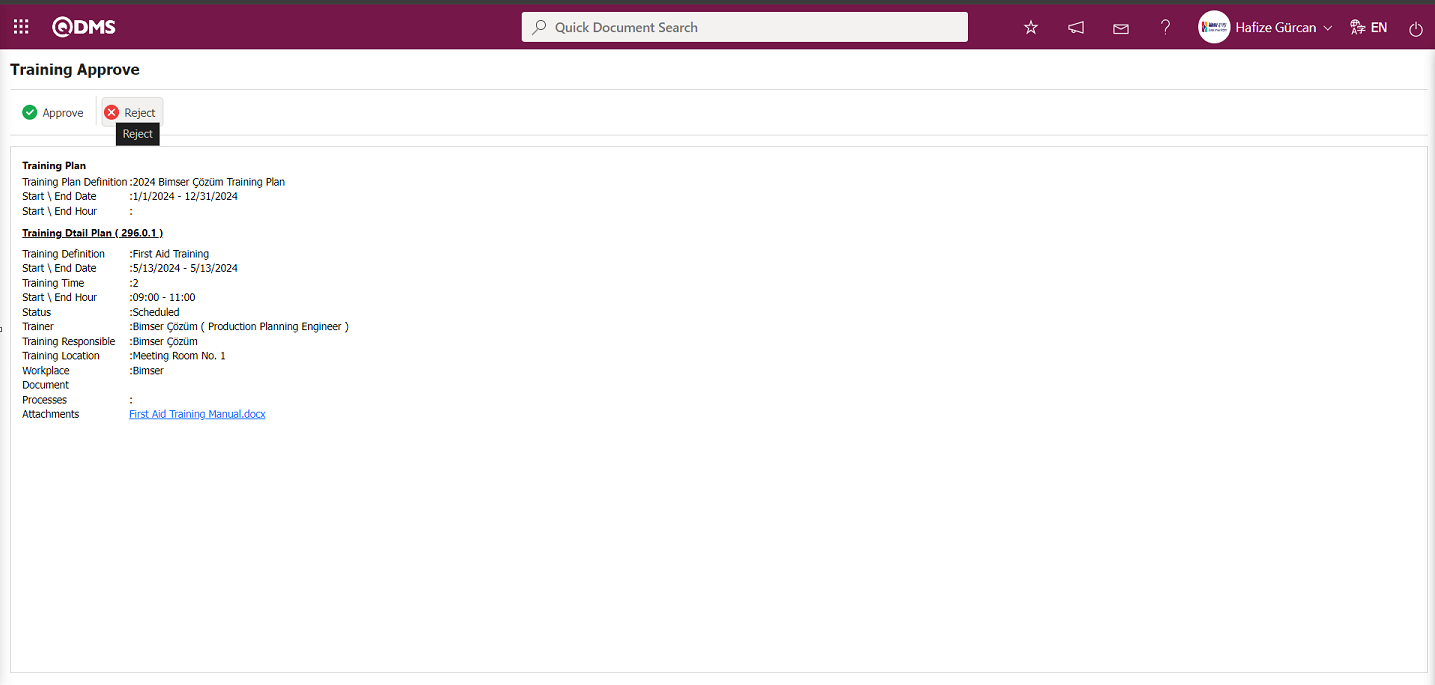
In the Training Reject screen that opens, the participant can enter a Rejection Reason and reject the training.
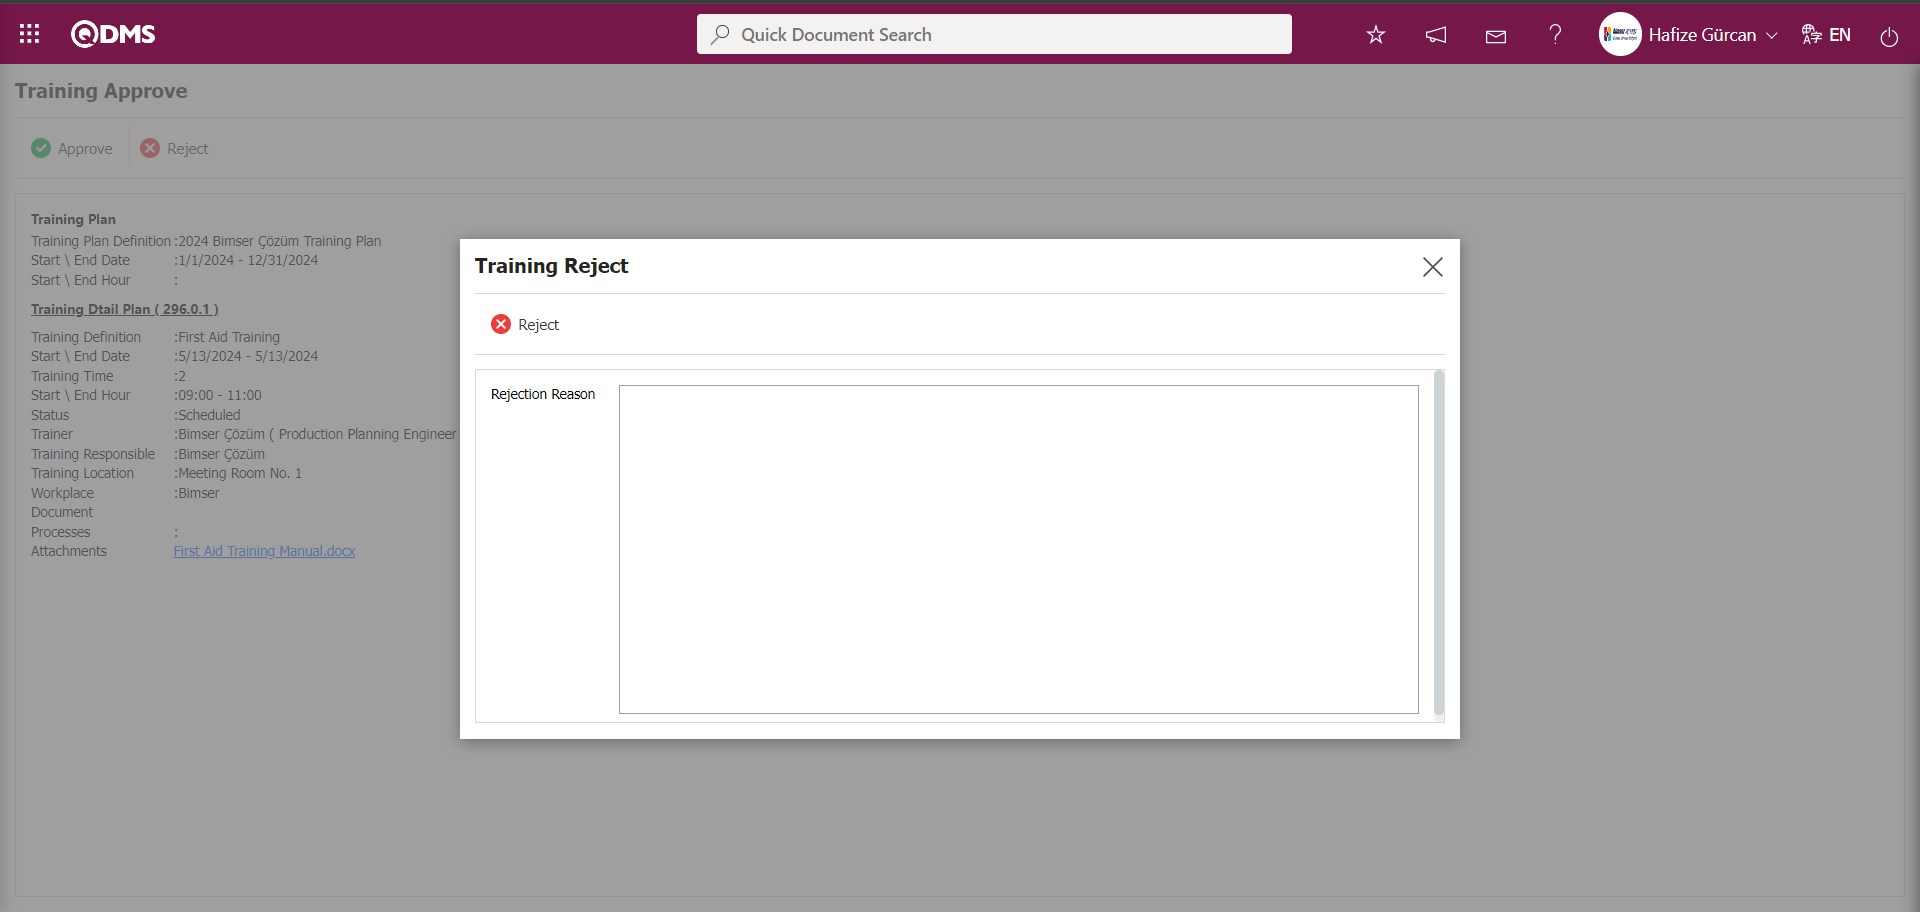
Click the  button on the Training Approve screen.
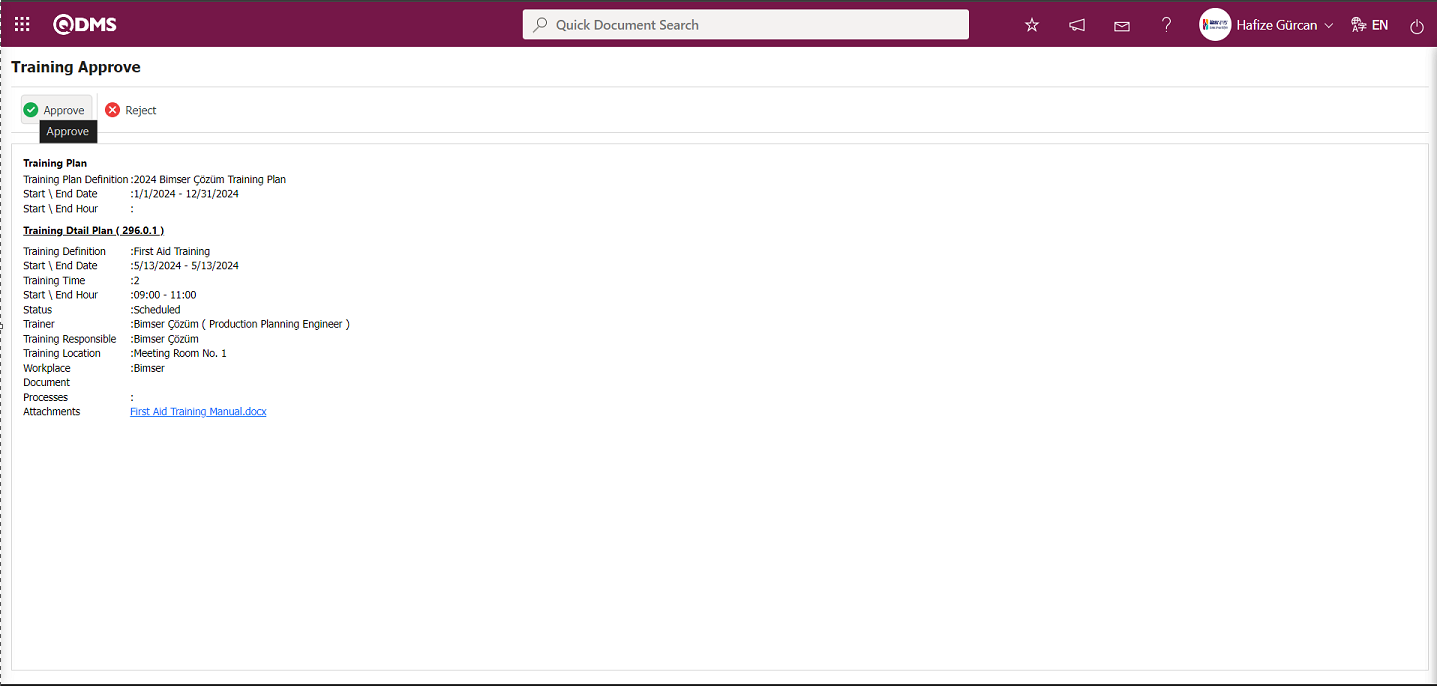
In the Training Approve screen that opens, participants enter the Confirmation note information and click the  button to participate in the training.
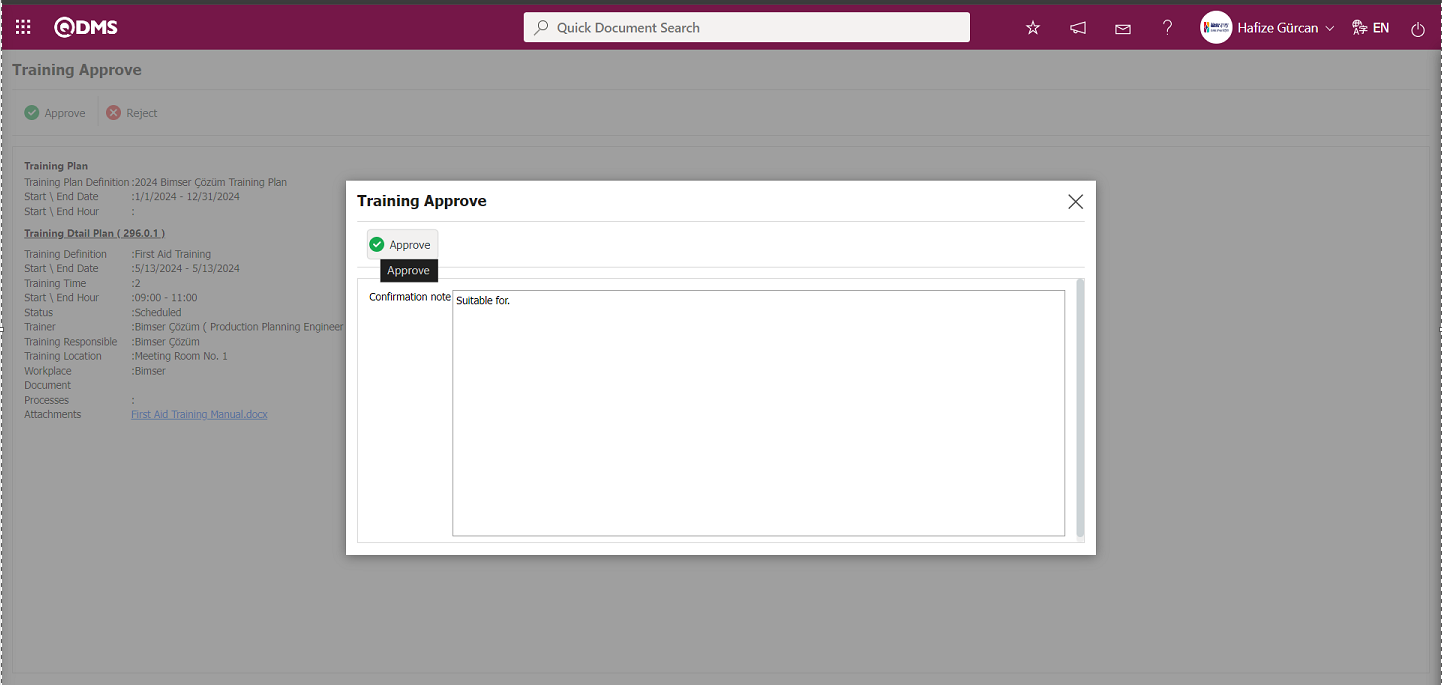
The user information to whom the system sent the confirmation email is provided.
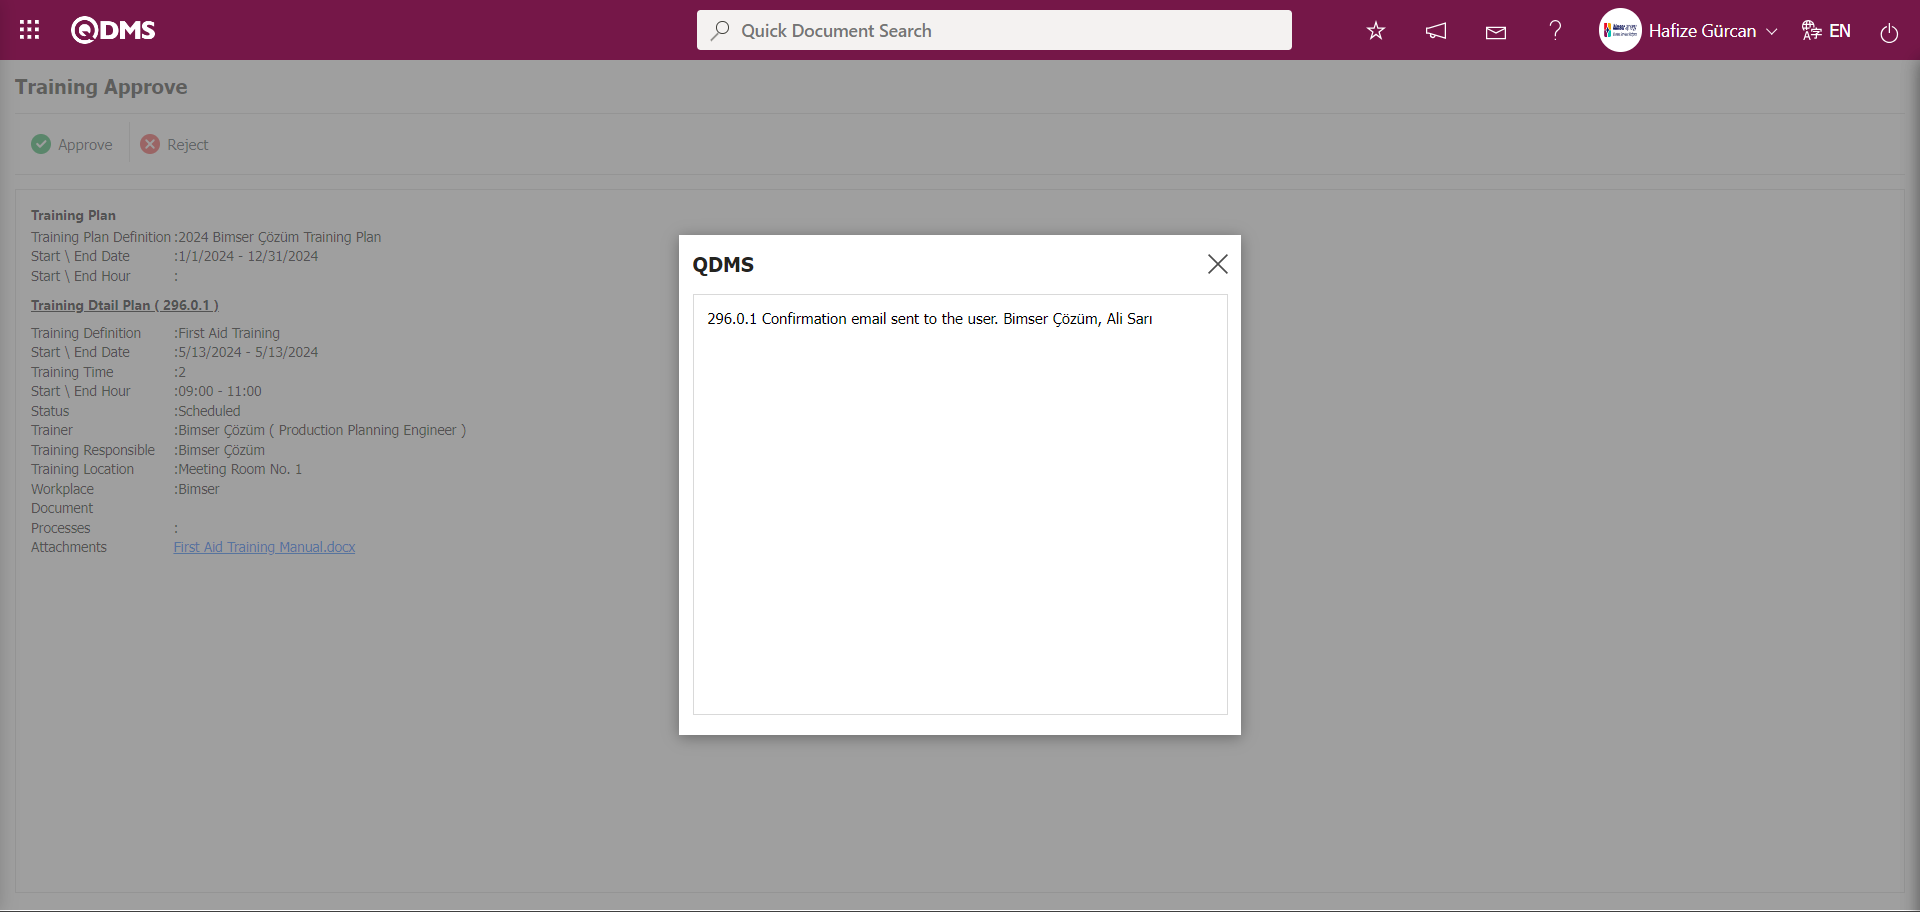
6.3.2.2.1.5. Trainings To Perform
The task “Trainings To Perform” is assigned to the pending tasks of the trainer assigned to a training detail plan defined within the scope of the Training Planning Module.
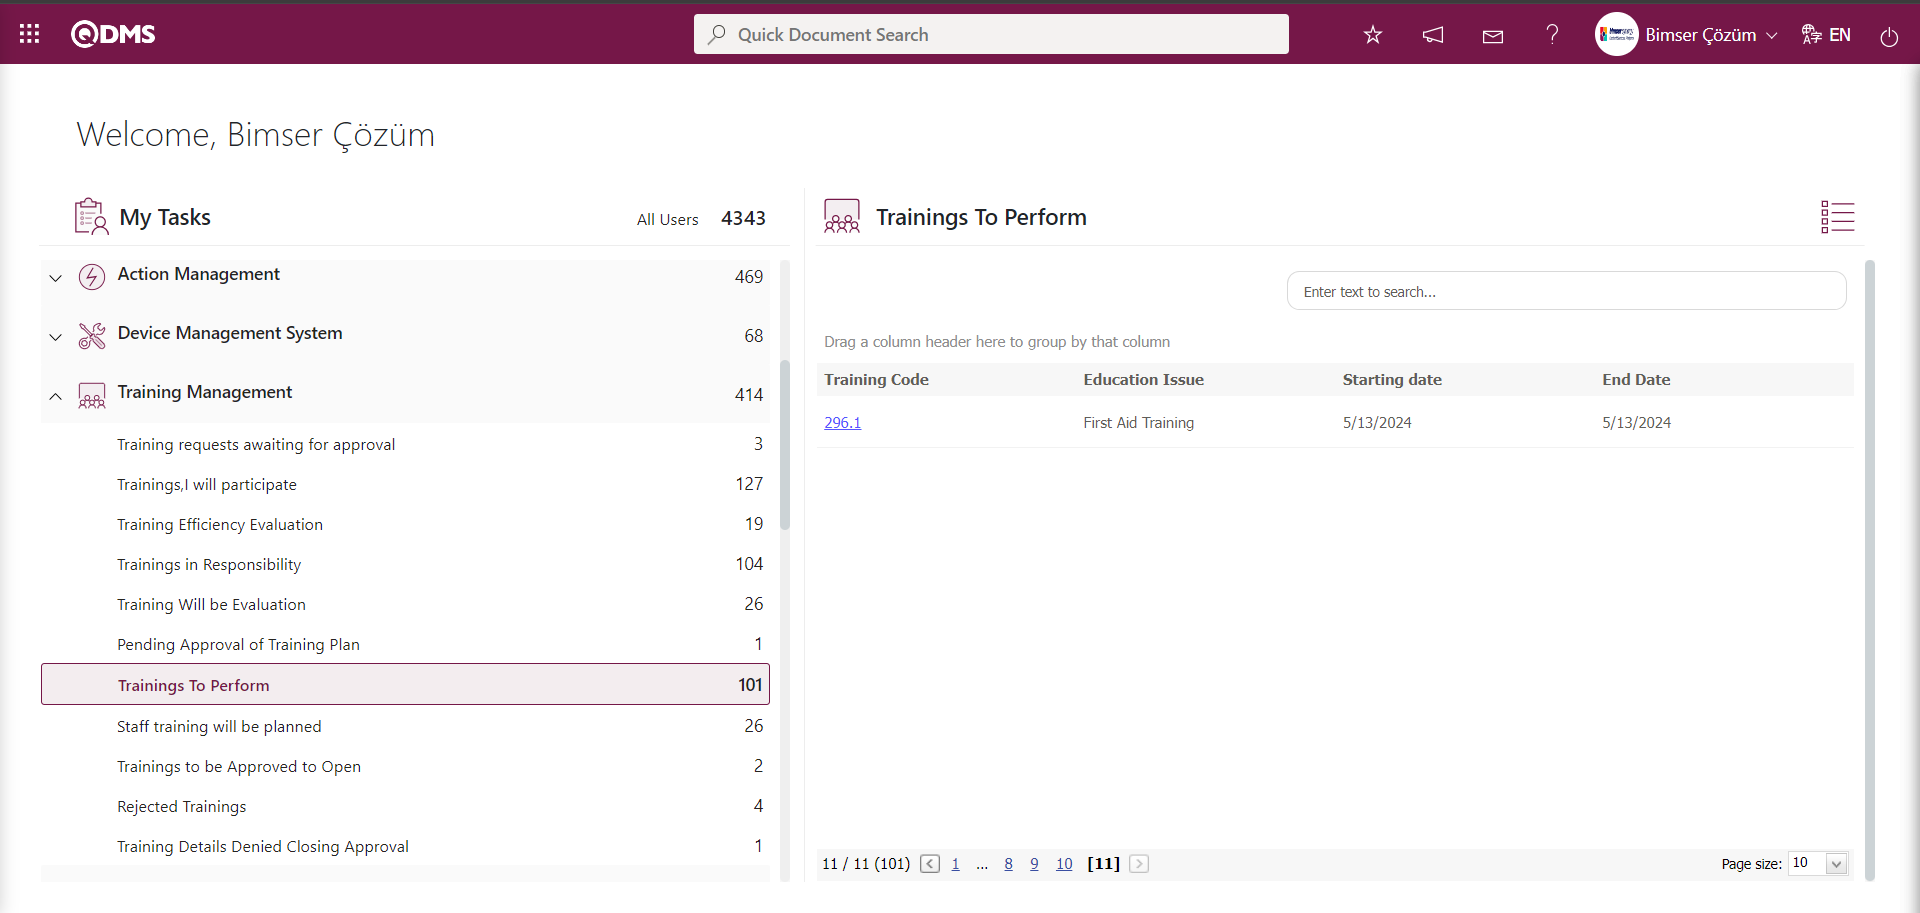
Click the link in the Training Code field of the relevant task to open the Training Planning screen.
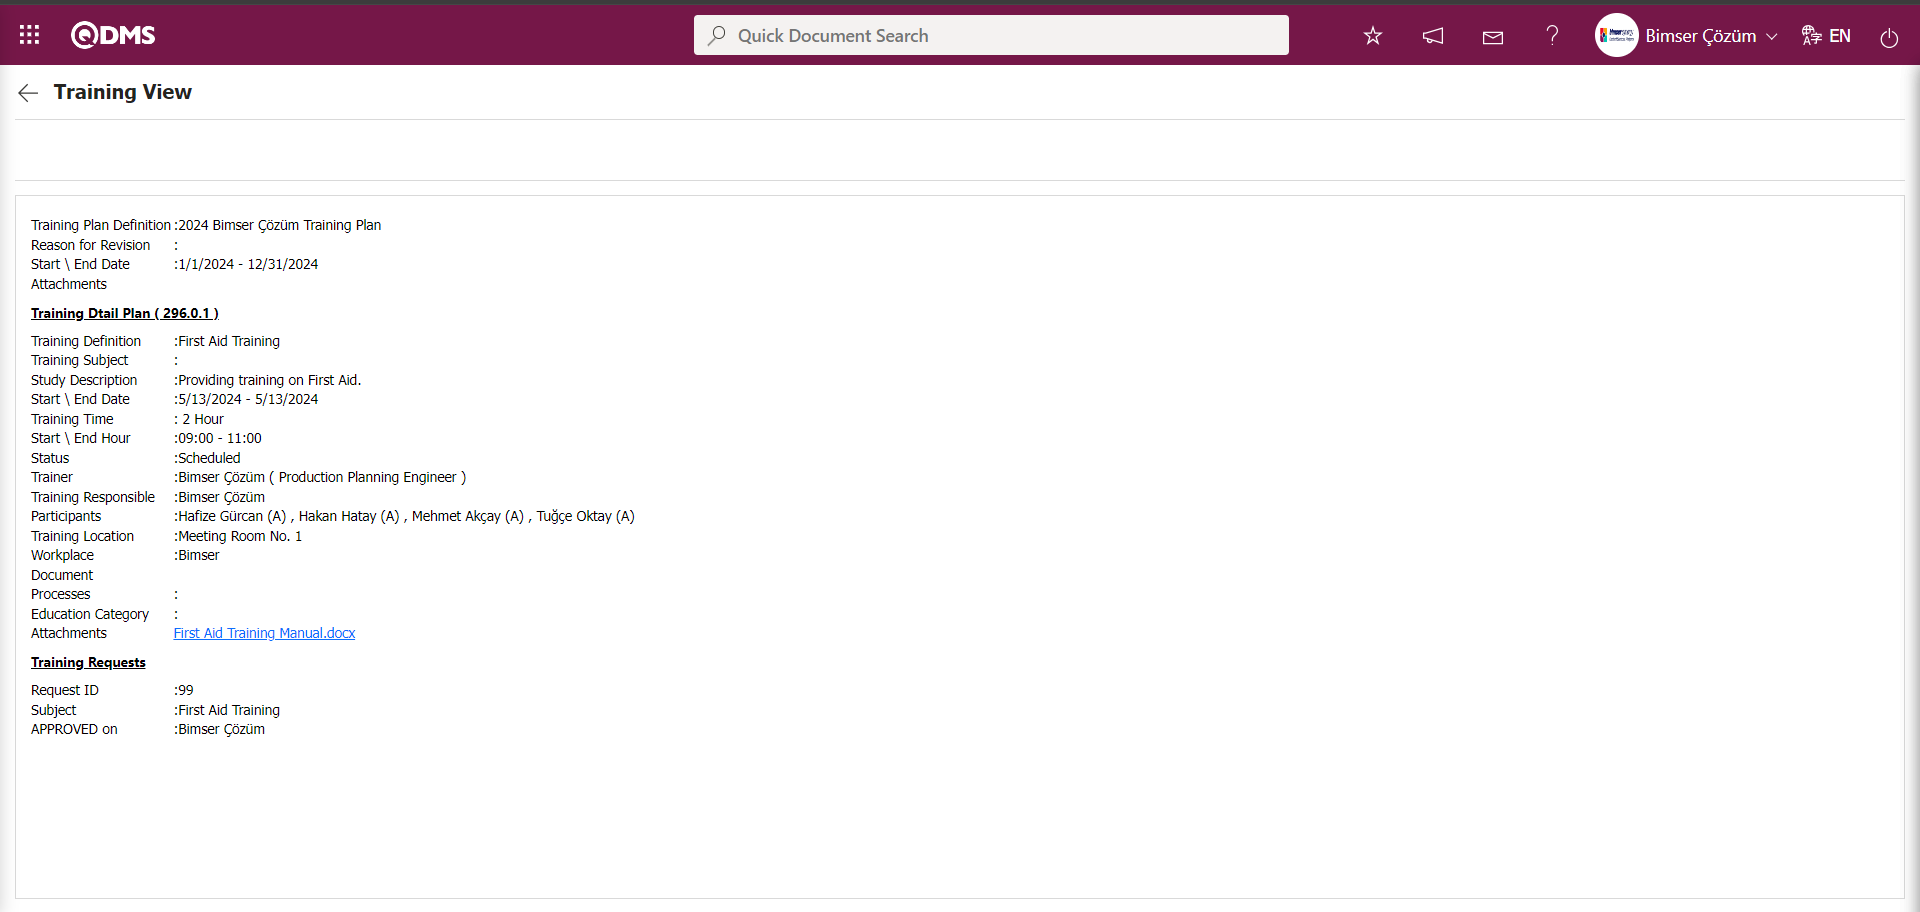
6.3.2.2.2. The Process of Postponing Training
This is the process of postponing a training scheduled in the Training Plan to a later date. Training details with a status of “Cancelled” or ‘Completed’ in the Training Plan cannot be postponed. When the postponement process is performed on a Training Item Planning with this status, the system displays the message “Cancelled or over trainings cannot be postponed.” In the Training Item Planning screen, under the List tab, the status of Training Detail Plans that have been postponed will be displayed as “Postponed.”
In the Training Item Planning screen, under the List tab, click the  button while the Training Item Planning is selected in the list.
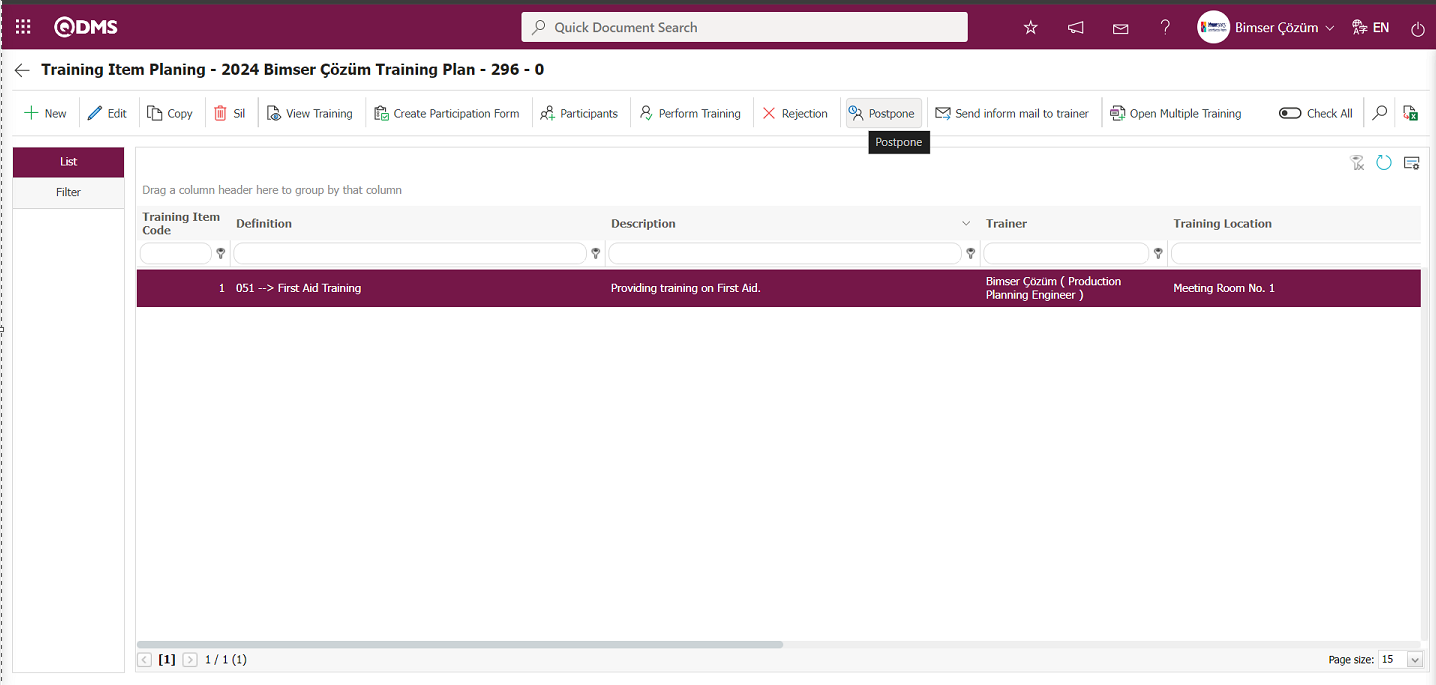
The Training Postponed screen appears.
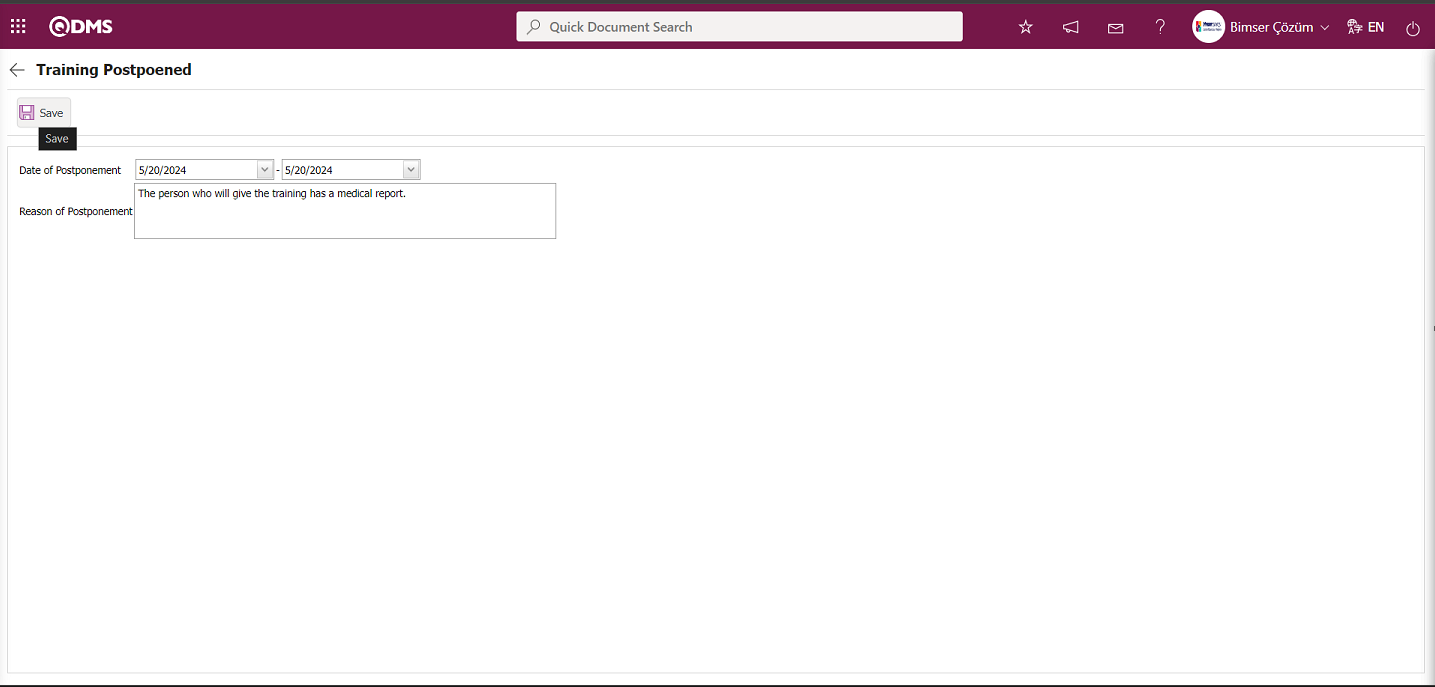
The relevant fields are defined on the screen that opens:
Date of Postponement: The Training Postponed screen displays the date of the training postponement in the Calendar field that opens.
Reason of Postponement: The Training Postponed screen displays the reason why the training has been postponed.
On the Training Postponed screen, select the “Date of Postponement” from the calendar field and enter the “Reason for Postponement.” After filling in the required fields, click the  button in the upper left corner of the screen to complete the training postponement registration process. After registration, the system displays the message “Training Postponed.” to indicate that the training details have been postponed.

6.3.2.2.3. Cancellation of Training.
This is the process of canceling Training Item Planning within the training plan. In the Training Item Planning screen, the status of canceled Training Item Planning appears as “Cancel” in the List tab.
In the Training Item Planning screen, select Training Item Planning from the list in the list tab and click the  button.
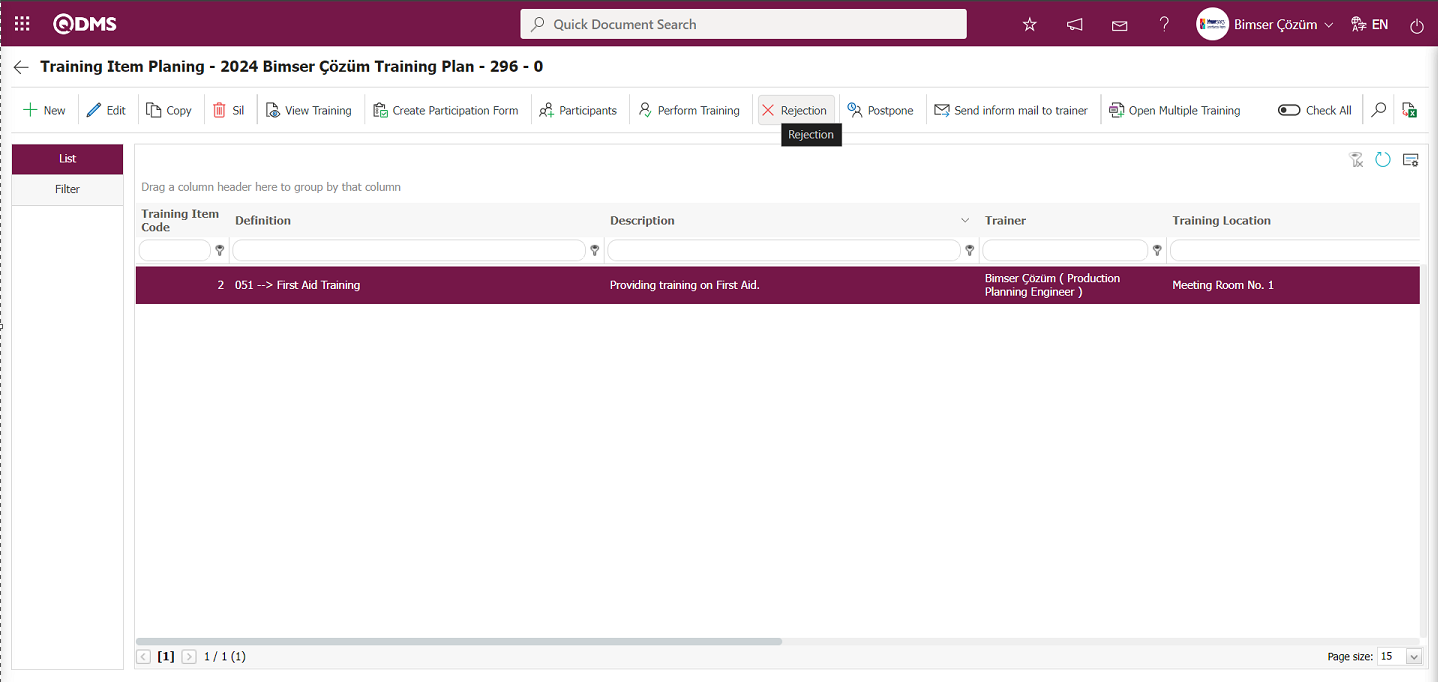
The Cancel Training Request screen opens.
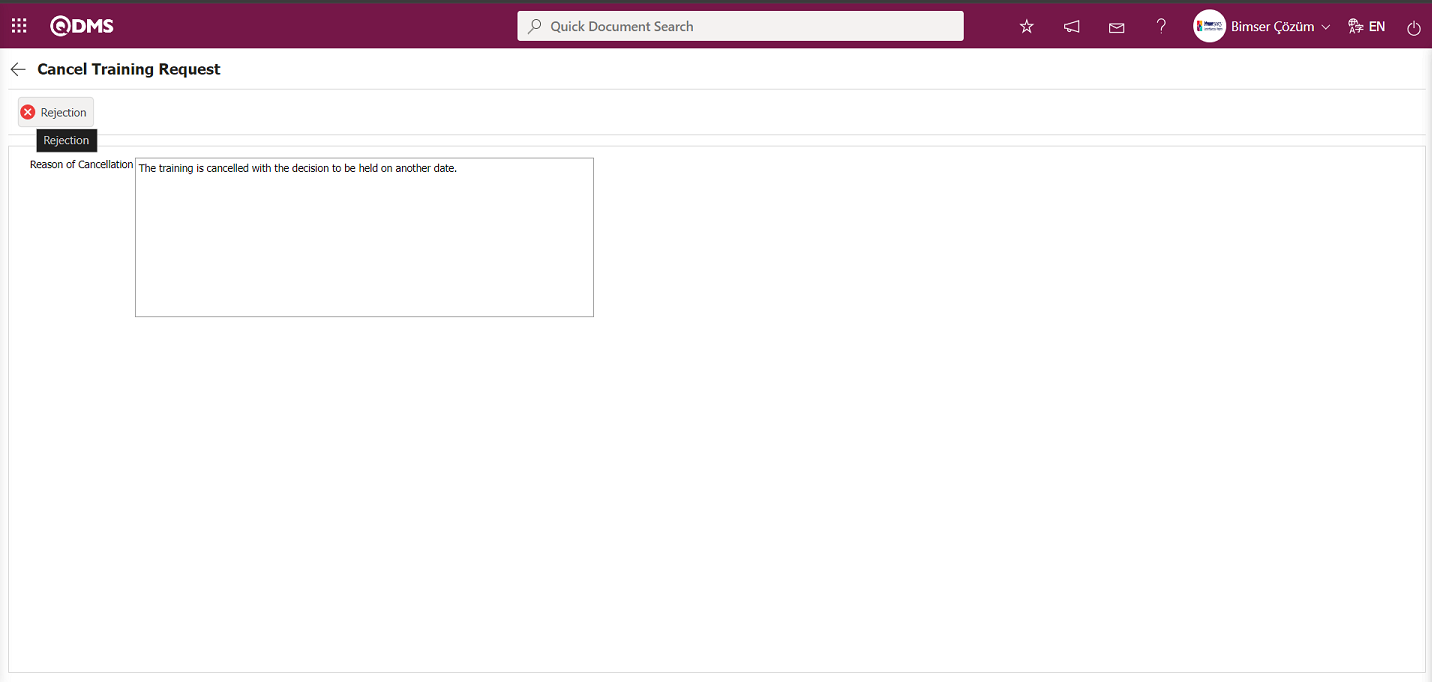
The relevant fields are defined on the screen that opens:
Reason of Cancellation: The “Cancel Training Request” screen is where you enter the reason for canceling the training.
In the Cancel Training Request screen, enter the reason for cancellation in the Reason for Cancellation field. After filling in the required fields, click the  button in the upper left corner of the screen to cancel the training.
The system displays the message “Training is canceled.” to indicate that the training has been canceled.
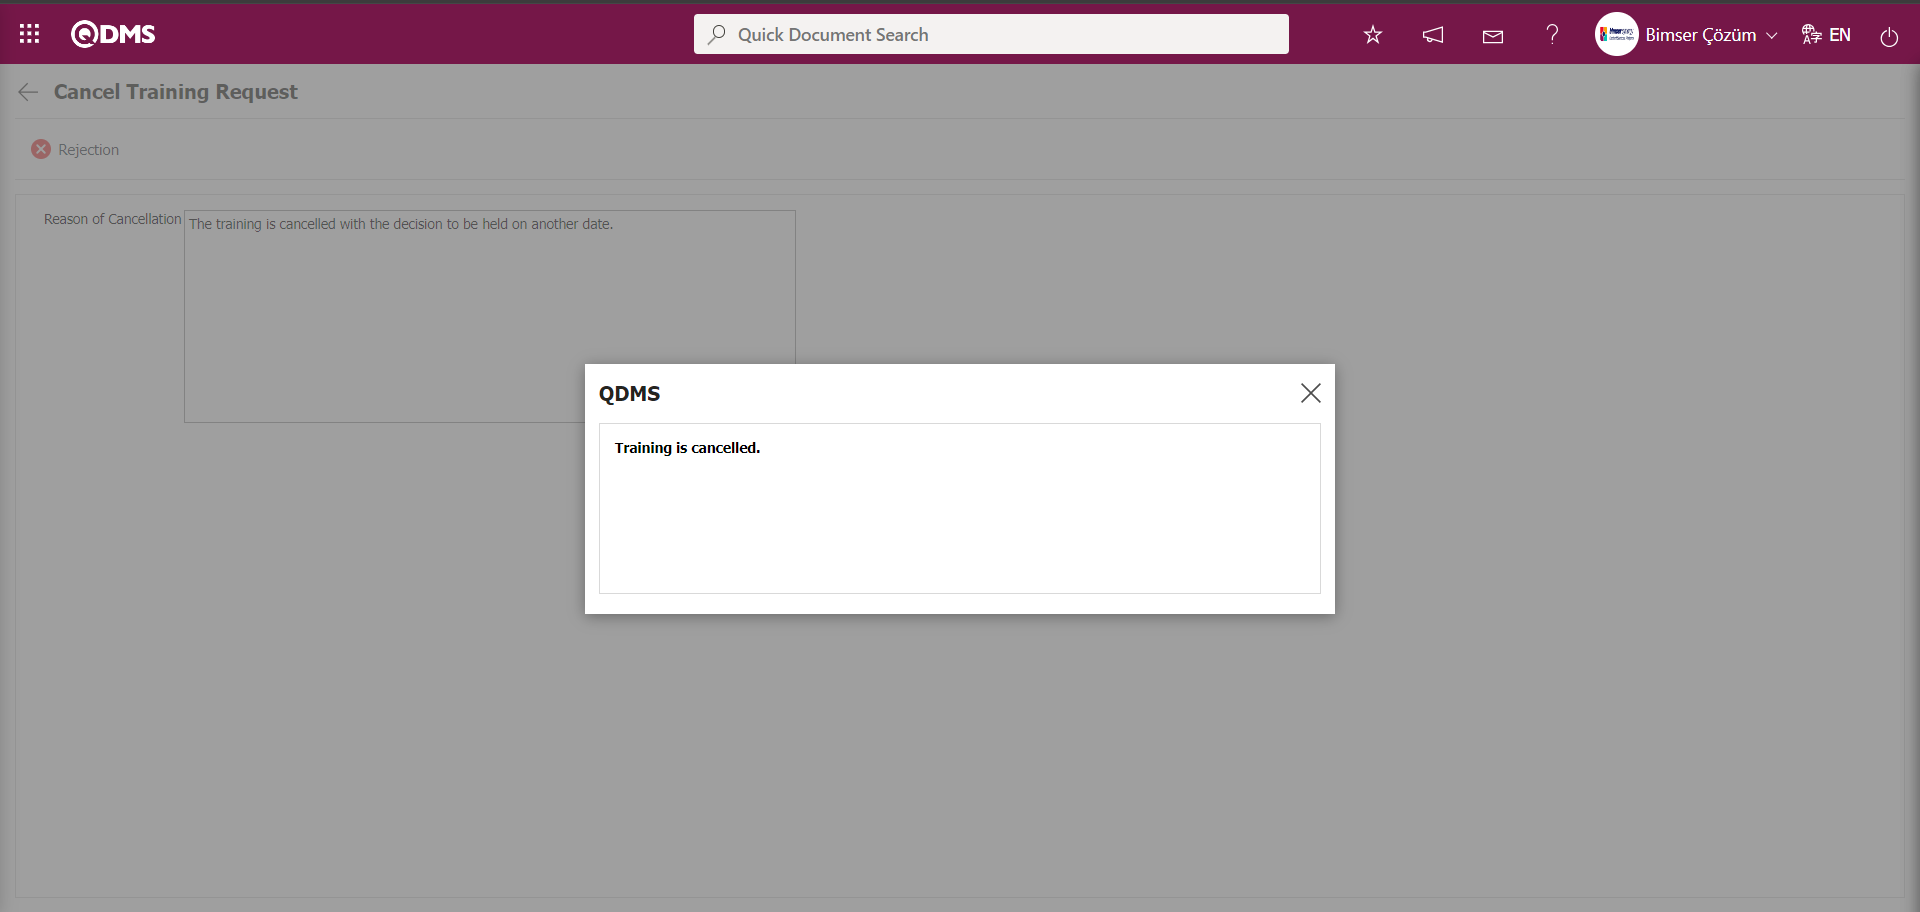
6.3.2.2.4. Training Viewing Process
In the Training Item Planning screen, this is the process of opening the display screen for the selected training in the list tab of the list and viewing the detailed information about the training.
In the Training Item Planning screen, with Training Item Planning selected in the list tab, click the  button.
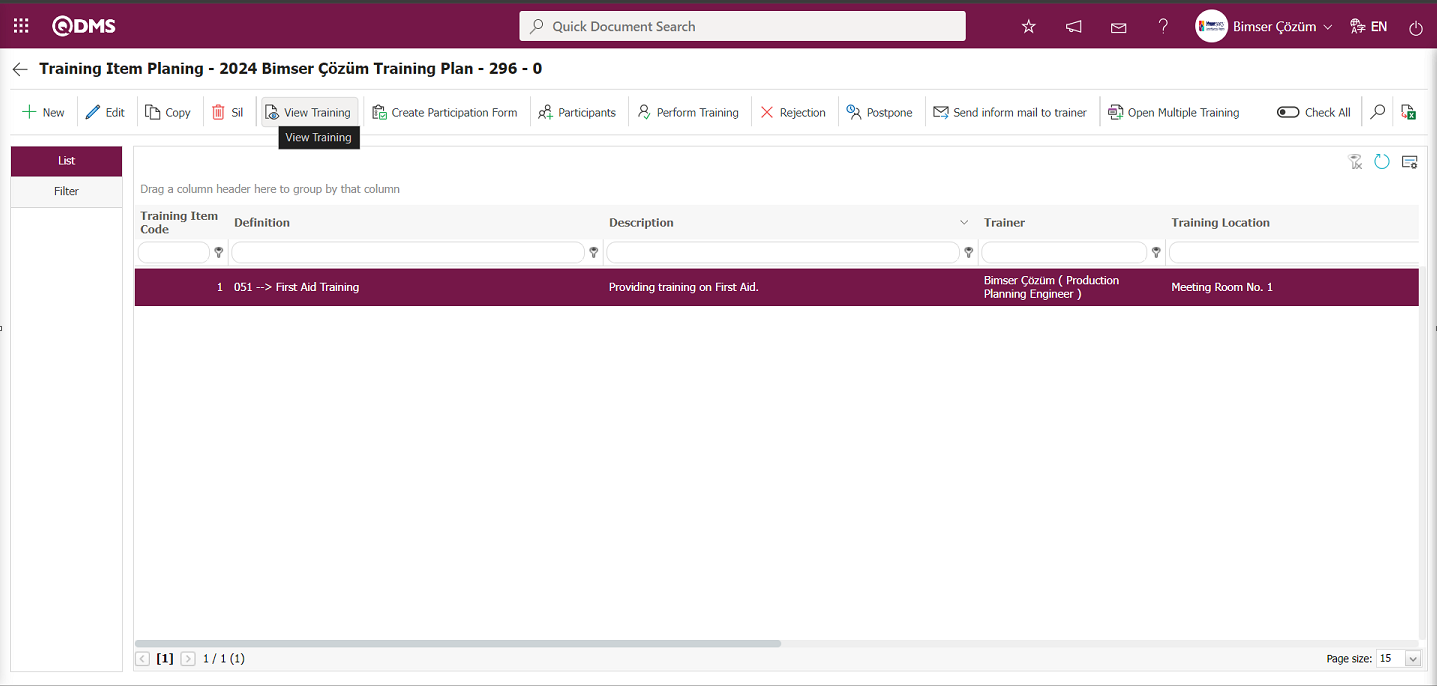
The Training View screen opens and displays the training details.
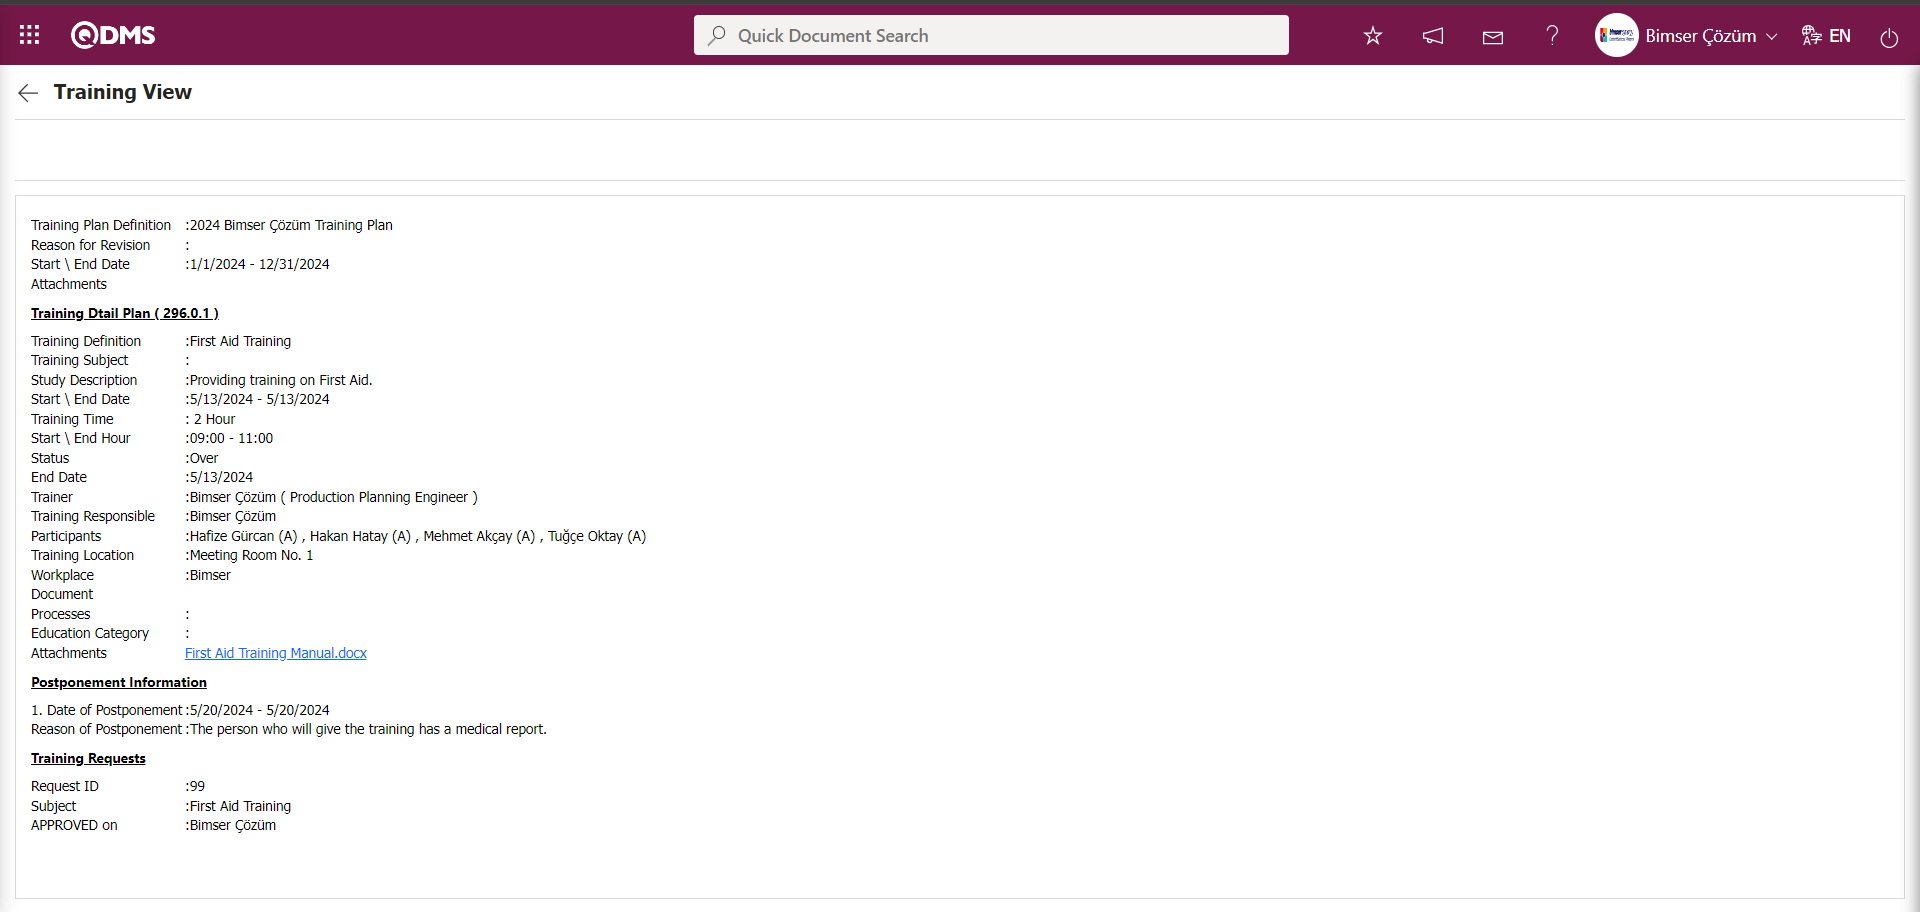
6.3.2.2.5. Multi-Training Opening Process
In the Training Planning module, the training dissemination process is carried out by assigning training to multiple people as separate tasks using the multi-training opening feature defined in the system. In the Training Item Planning screen, while the training detail plan is selected, the  button is clicked.
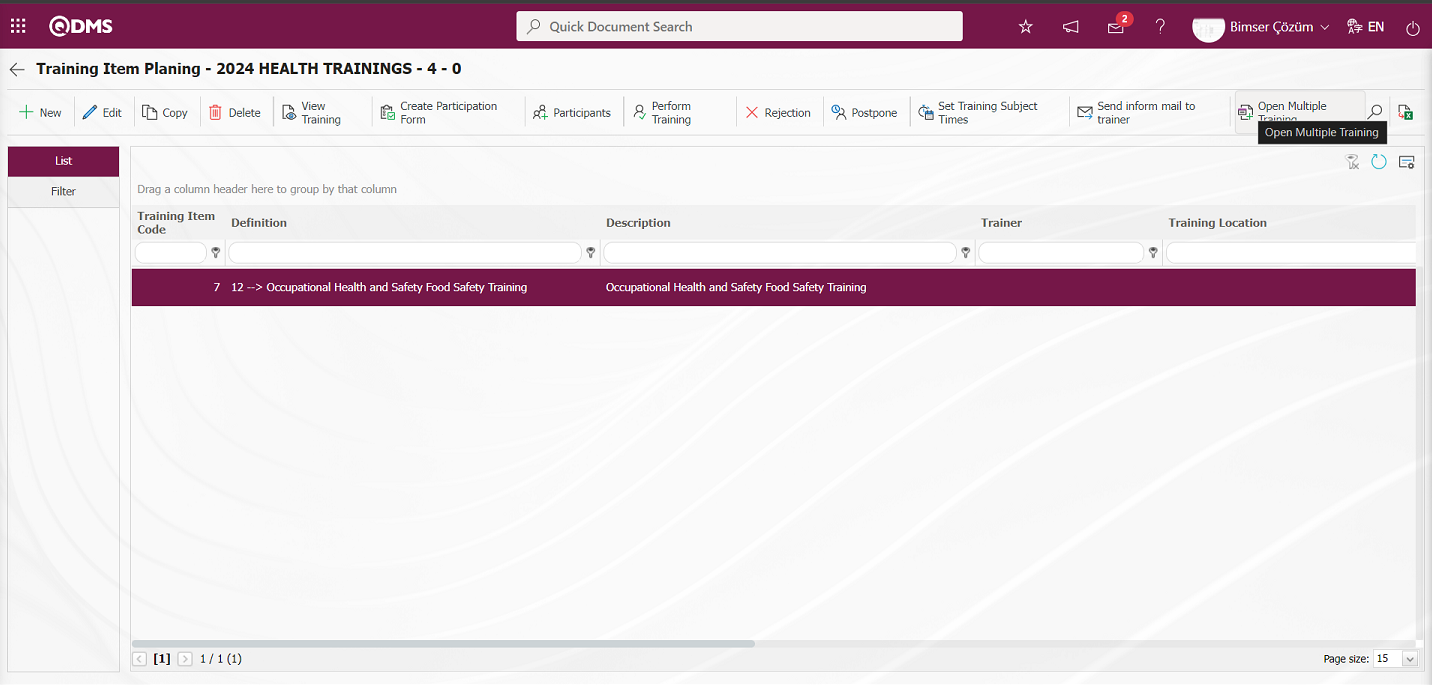
The Training Item Planning screen opens. In this process, after filling in the relevant information in the Multiple Training Information and other tabs and completing the addition process, the registration process is performed to open multiple training.
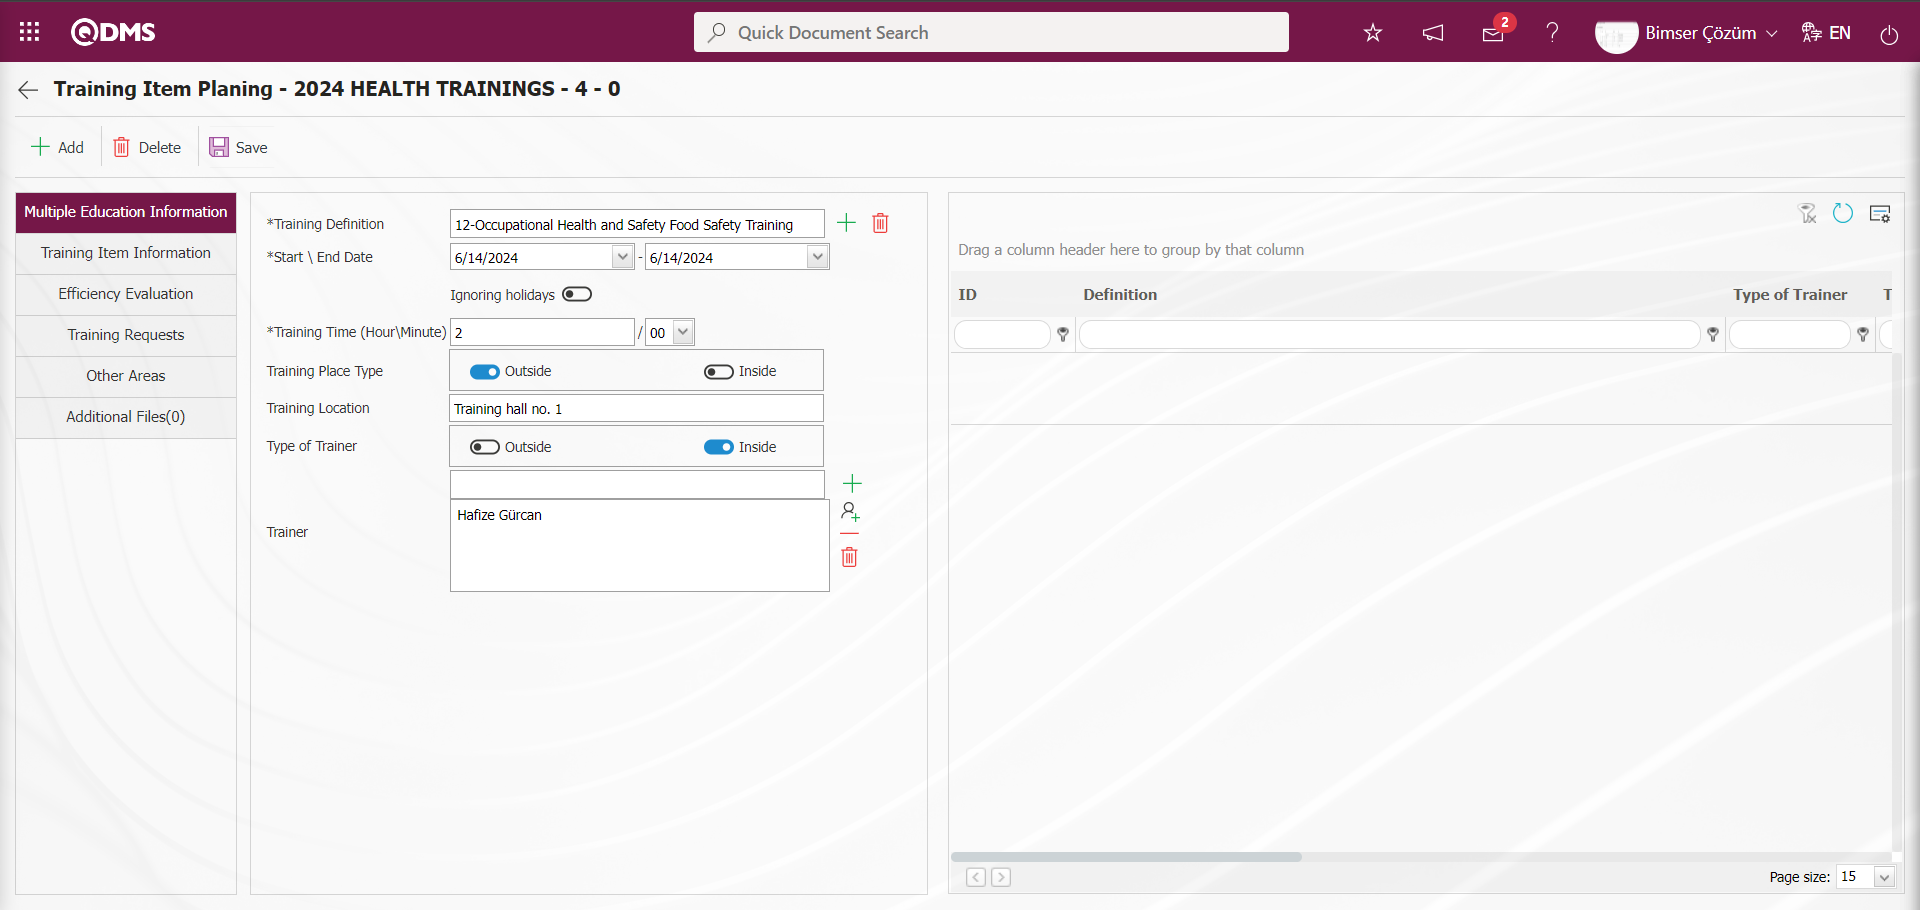
Using the buttons on the screen;
 : Multiple training is added.
 : Multiple training information is deleted from the list.
 : The registration process is completed.
Enter the relevant information in the Multiple Training Information and other tabs on the Training Item Planning screen.
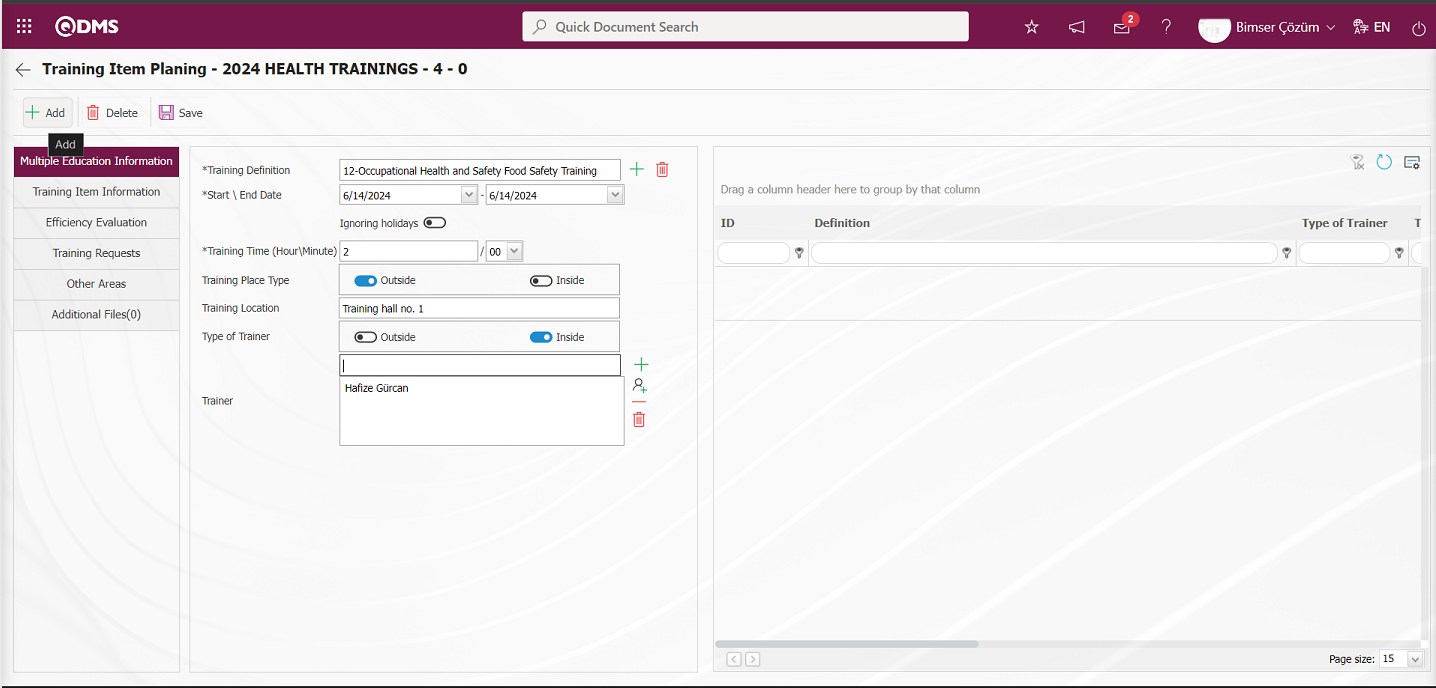
After entering the necessary information, click the  button in the upper left corner of the screen to add a Training Item Planning.
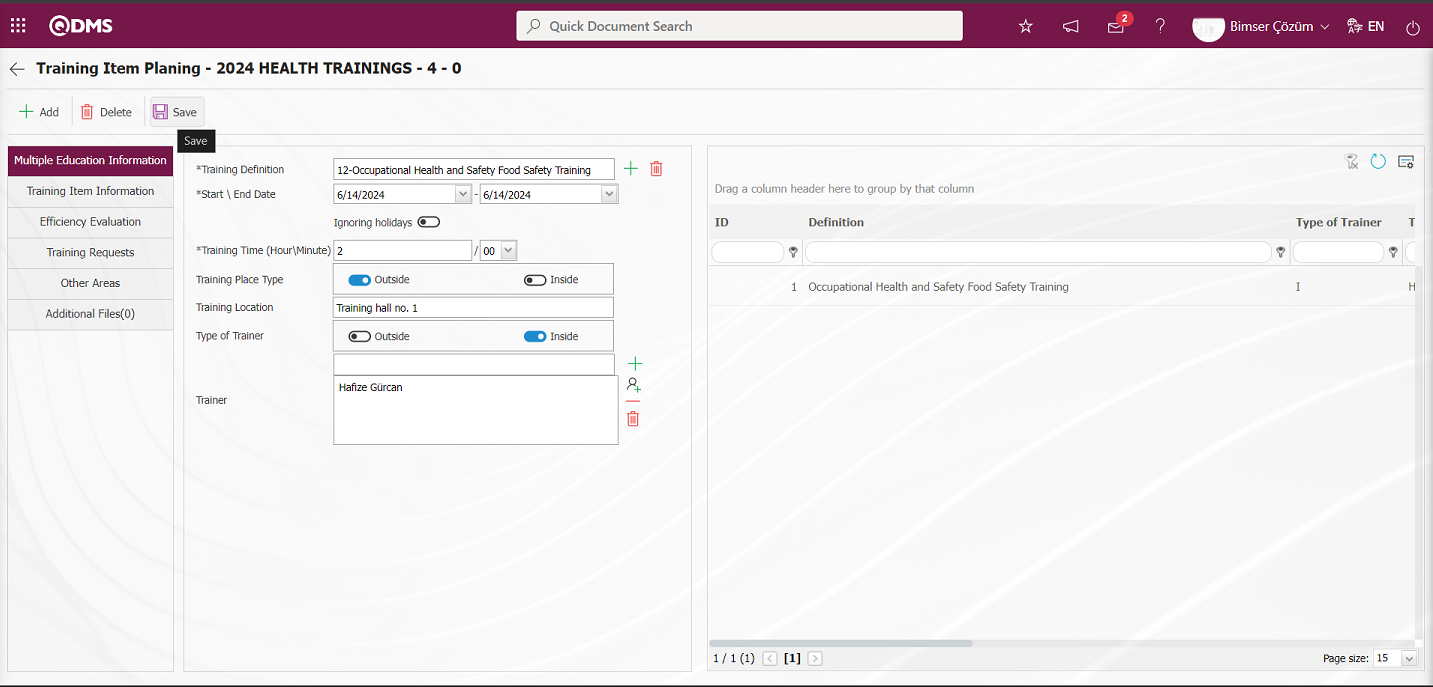
After adding a Training Item Planning, click the  button in the upper left corner of the screen to open the multiple training registration process.
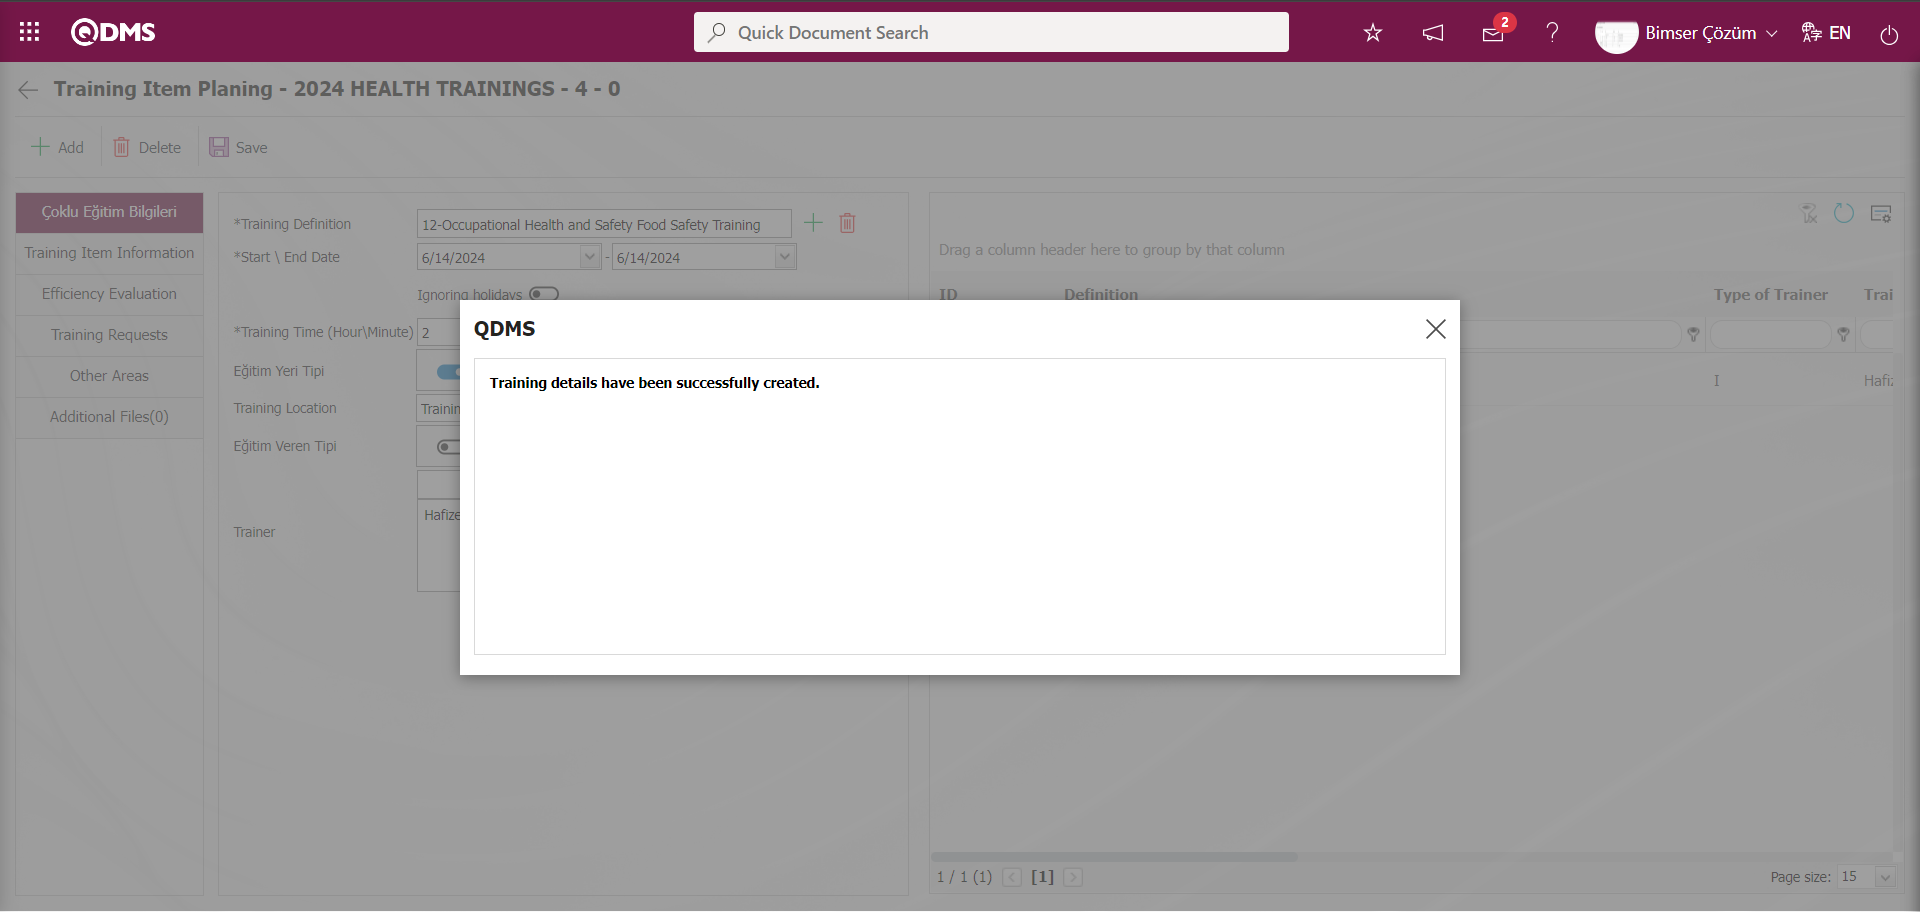
The system displays the message “Training details have been successfully created.” to indicate that the multiple training creation process has been completed.
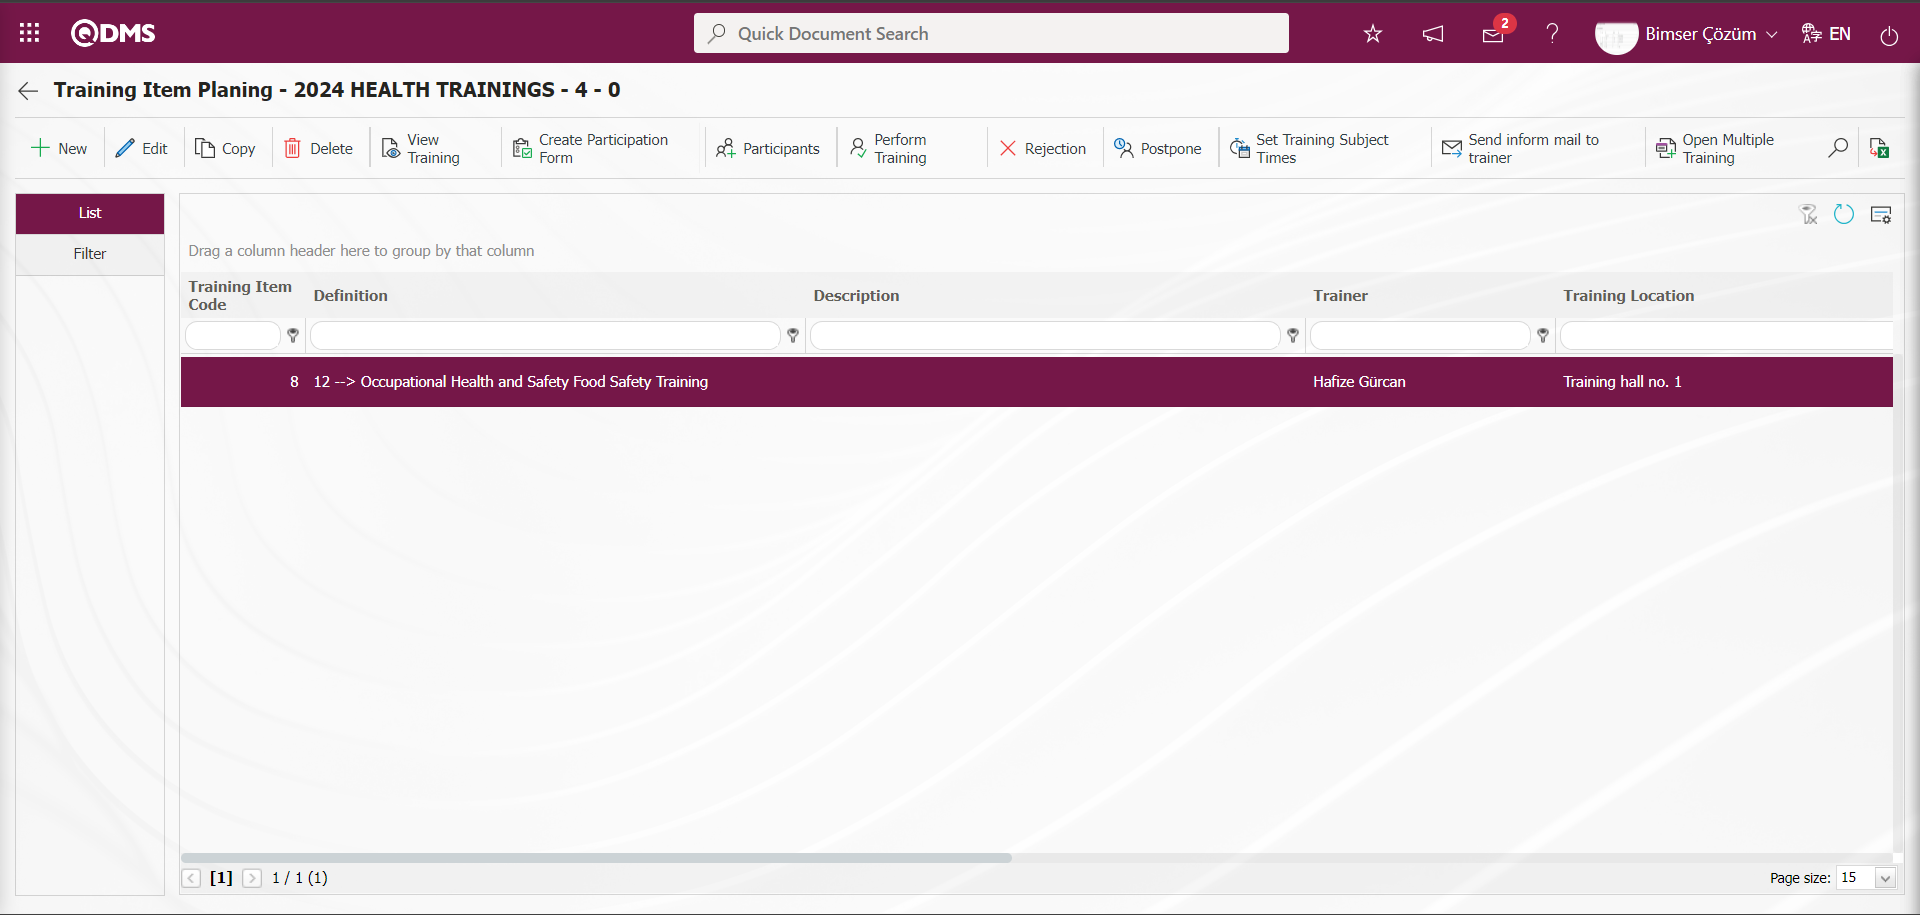
6.3.2. Fast Training Definition
The Fast training definition process is performed in the Training Planning module. The fast training function must be active for this process to be performed. If the plan code to be used in fast training is defined in the parameter, the necessary fields are filled in with the relevant information in the training plan with the plan code defined in the parameter, and one or more training detail planning processes are performed. If the fast training plan code is not defined in the parameter in the fast training definition screen, the definition process is performed by creating a plan on the same screen for each training detail plan. To activate the fast training definition function, select “Yes” for parameter number 37 in the Training Planning module parameters to activate the parameter.

After the parameter is enabled, the  button appears on the Training Planning screen, and the quick training definition process is performed by clicking this button.
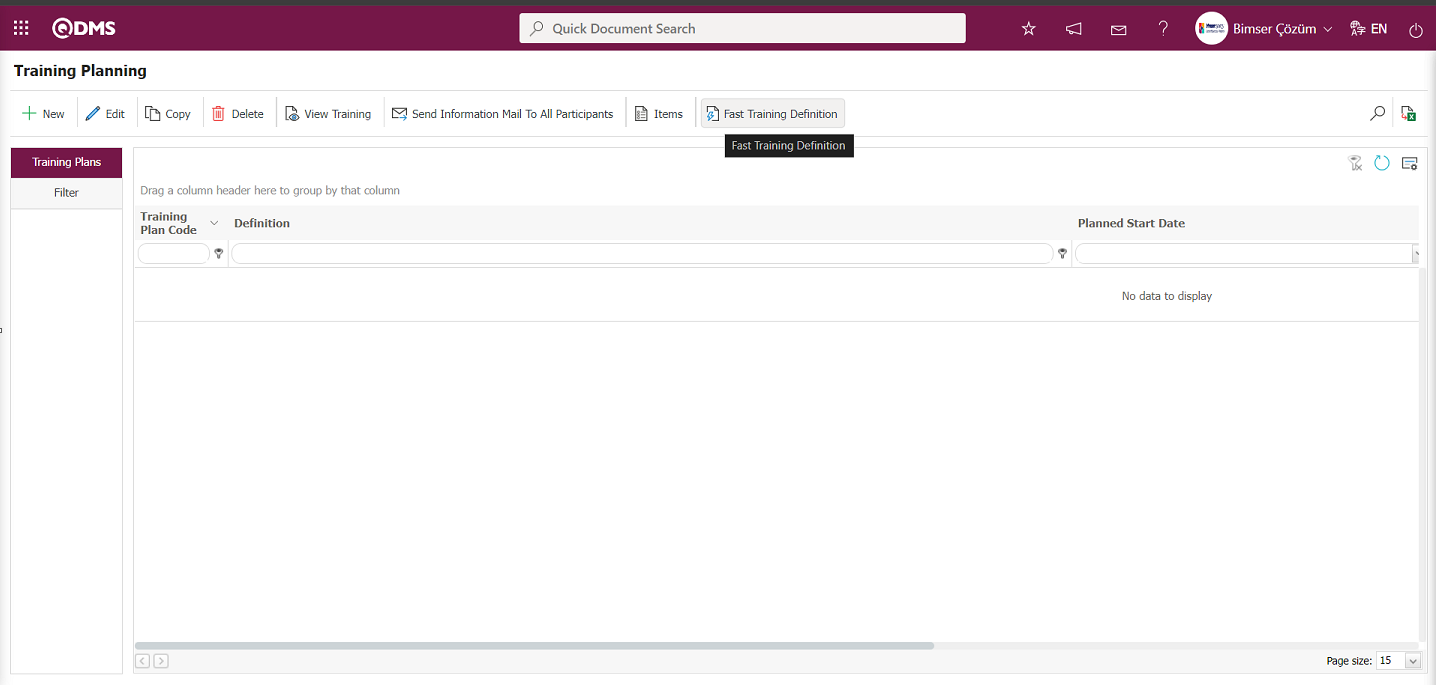
In the Fast Training Planning process, if the parameter value for parameter number 64, “Plan No to be used in Defining Quick Training,” in the Training Planning Module parameters is not defined as a plan code;
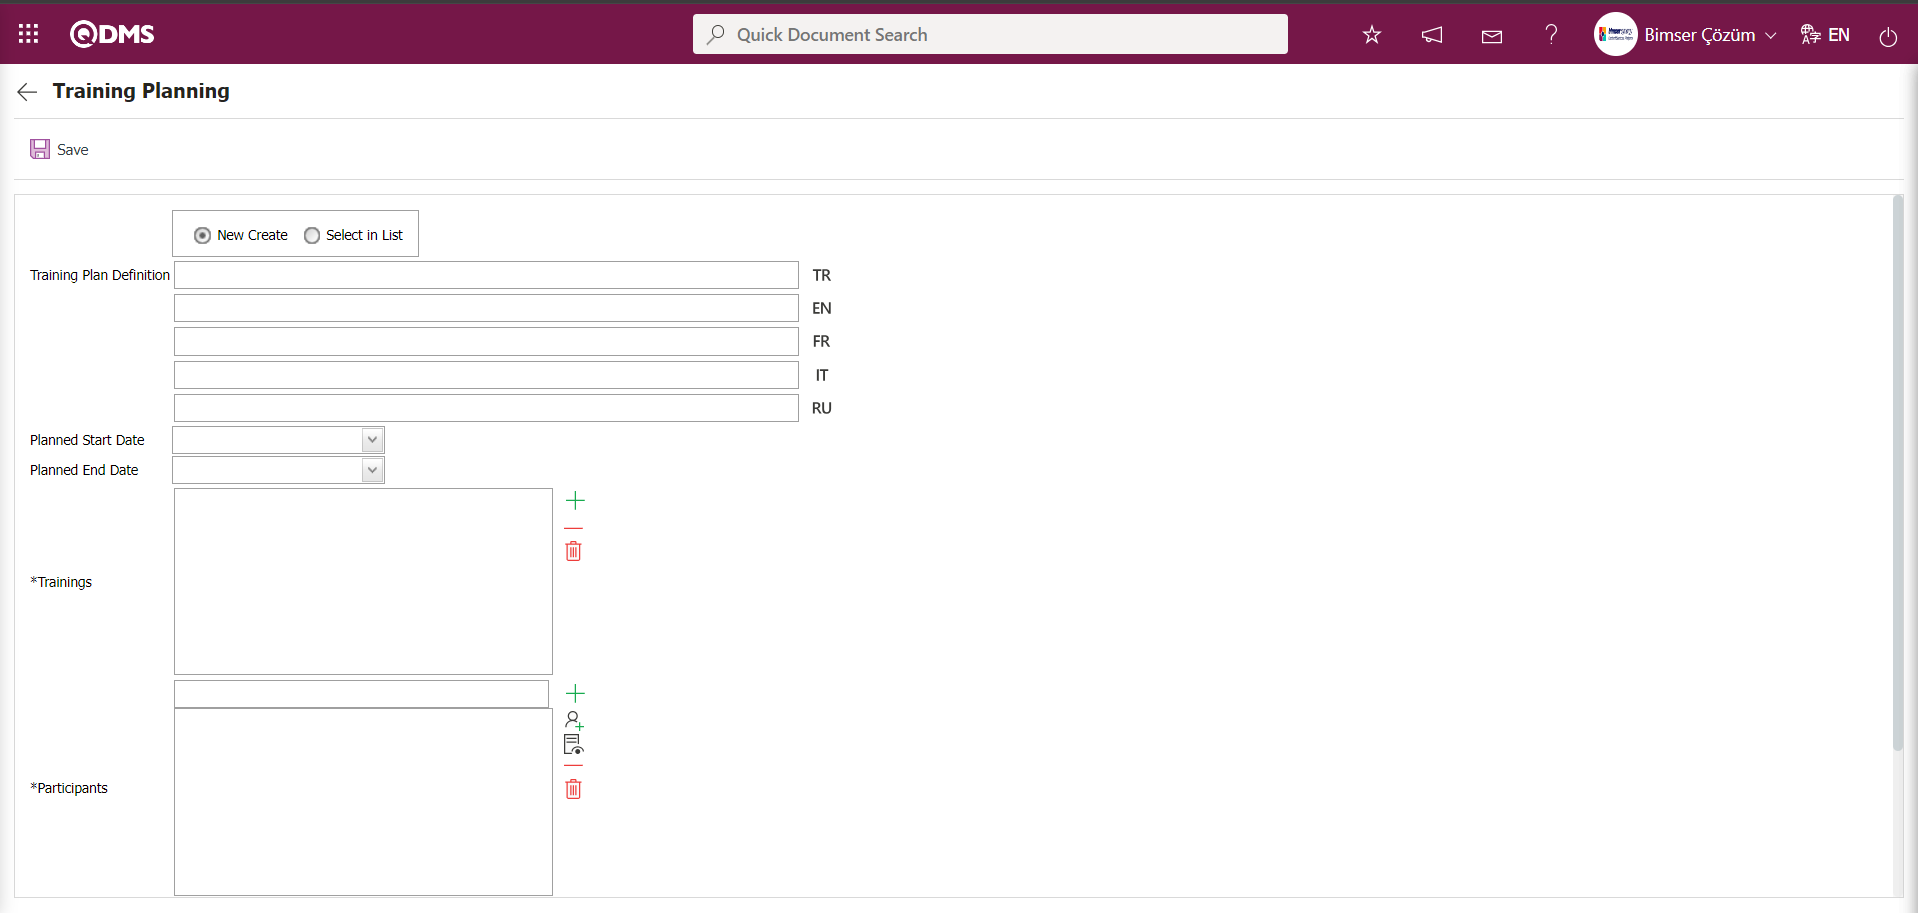
The relevant fields are defined on the screen that opens:
New Create: When the check box for the option is selected in the Training Planning screen, the quick training plan is defined in the Training Plan field.
Select in List: When the check box for the option is selected in the Training Planning screen, the Training Plan Definition field is displayed. In the Training Plan Definition field, click the  (Select) button to open the system and select the quick training plan to be defined from the defined Training List

Training Plan Definition: In the Training Planning screen, select the New Create check box to display the field where you can quickly define a training plan.
Planned Start Date: This is the area where the start date of the fast training defined in the Training Planning screen is selected from the Calendar field that opens.**
Planned End Date: This is the field where the end date of the quick training defined in the Training Planning screen is selected from the Calendar field that opens.
Trainings: This is the field where training courses to be added are selected from the defined Training List opened by clicking the  (Add) button on the Training Planning screen.**
Participants: This is the area where participants are added by clicking the “Add” button for fast training defined in the Training Planning screen and selecting participants from the list of personnel defined in the system and the list of user groups defined in the system by clicking the  “Select” button.
Workplace: This is the field where the location information for the fast training defined in the Training Planning screen is selected from the list of workplaces defined in the system by clicking the (Add) button.
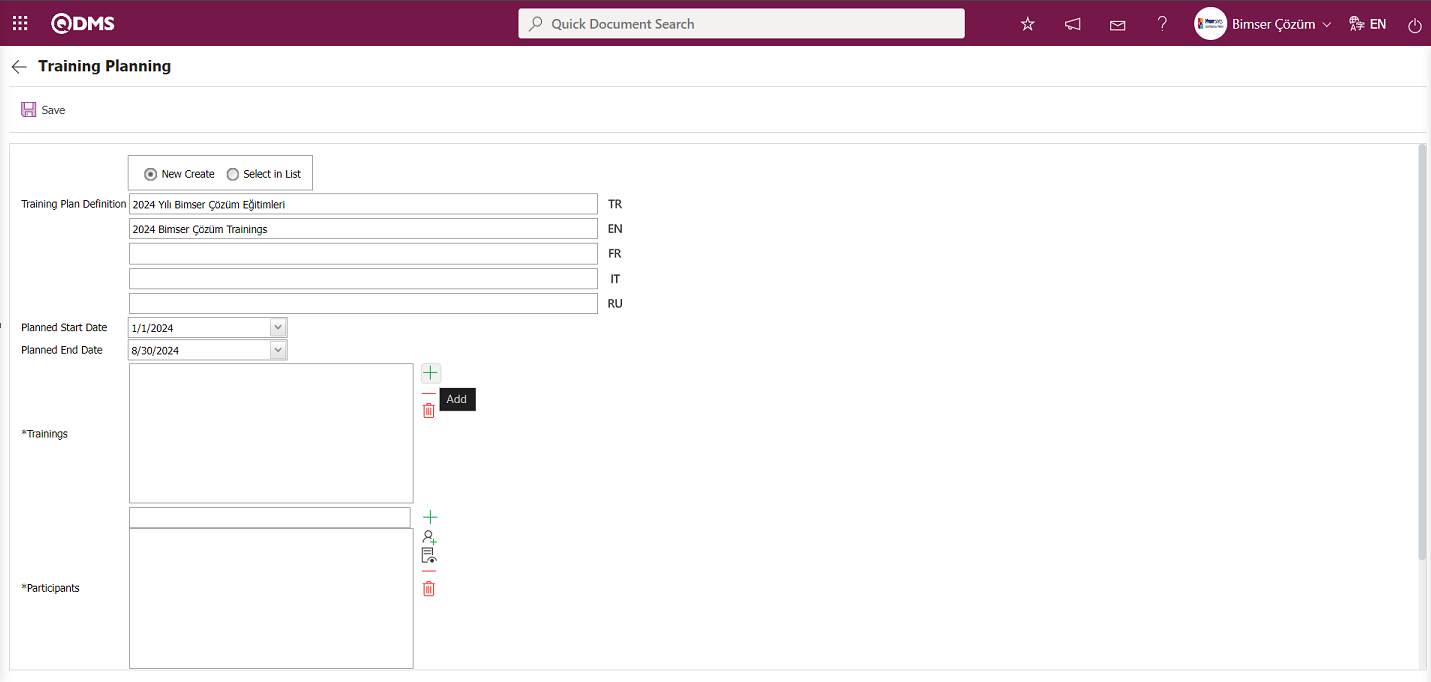
In the Training Planning screen, check the box next to New Create. Write a quick training plan description in the Training Plan Description field. Select the planned start and end dates for the quick training from the Calendar field that opens. Click the (Add) button in the Trainings field to open the system and select the trainings to be defined as quick trainings from the list of defined trainings.
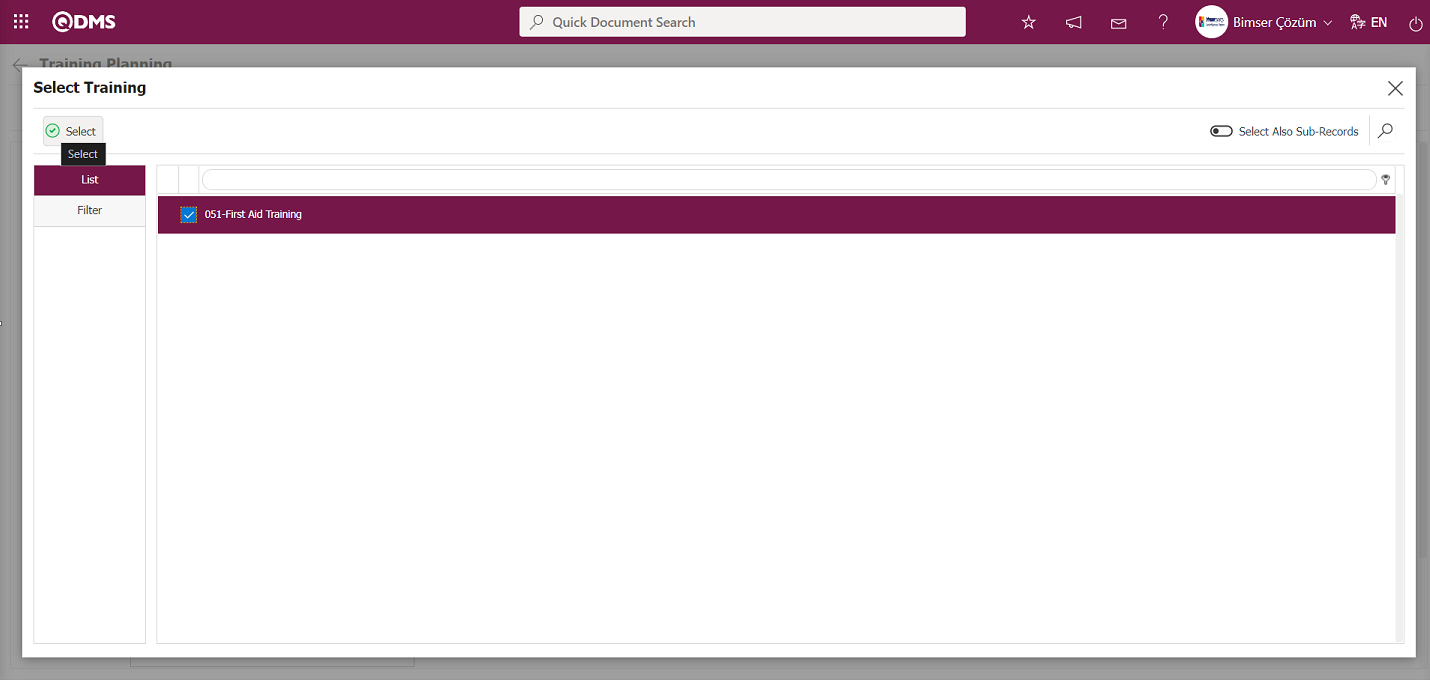
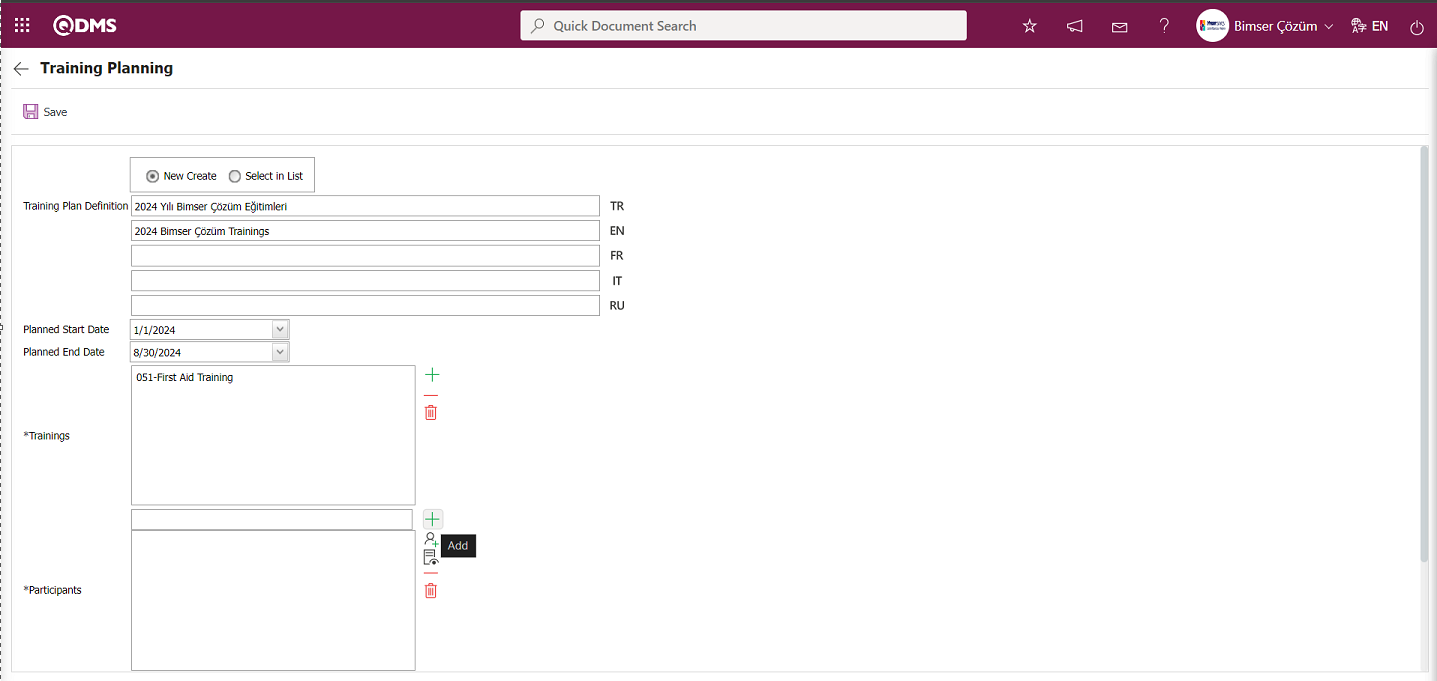
In the Training Planning screen, click the (Add) button in the Participants field to open the system and add participants to the quick training from the defined Staff List.
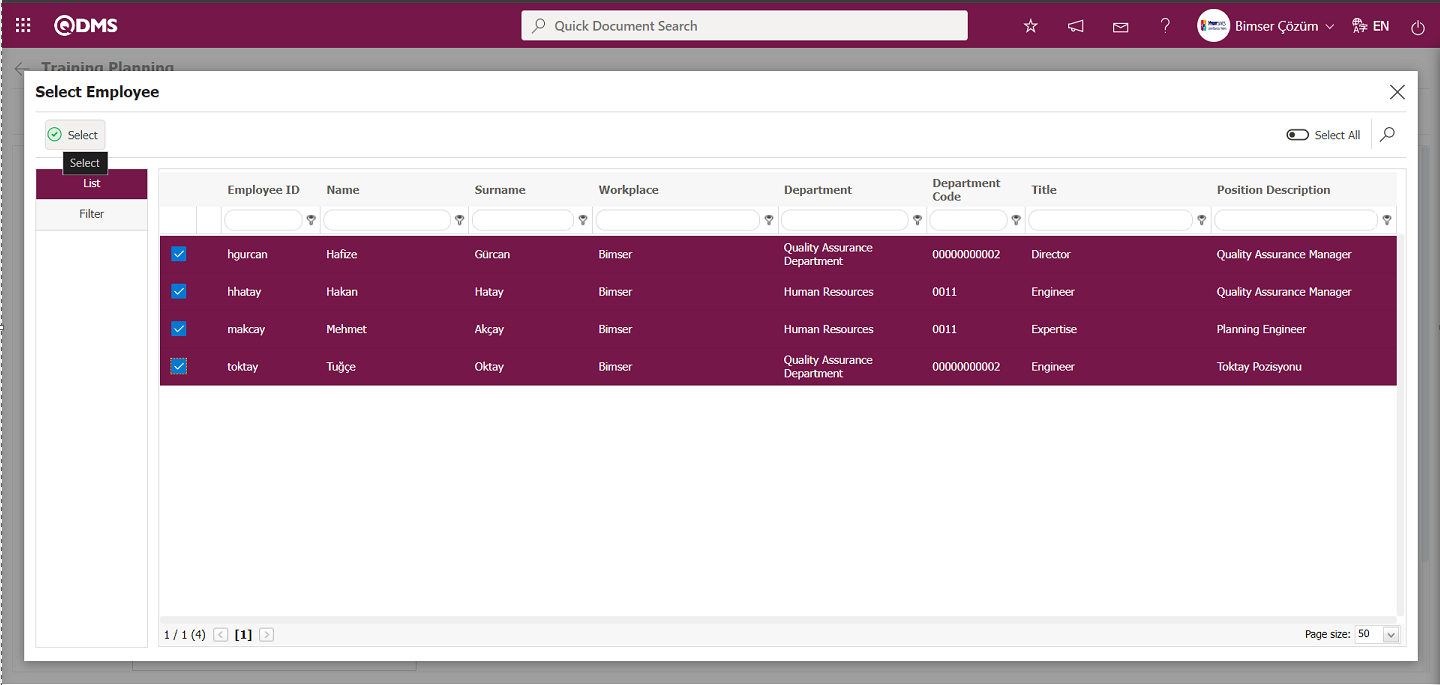
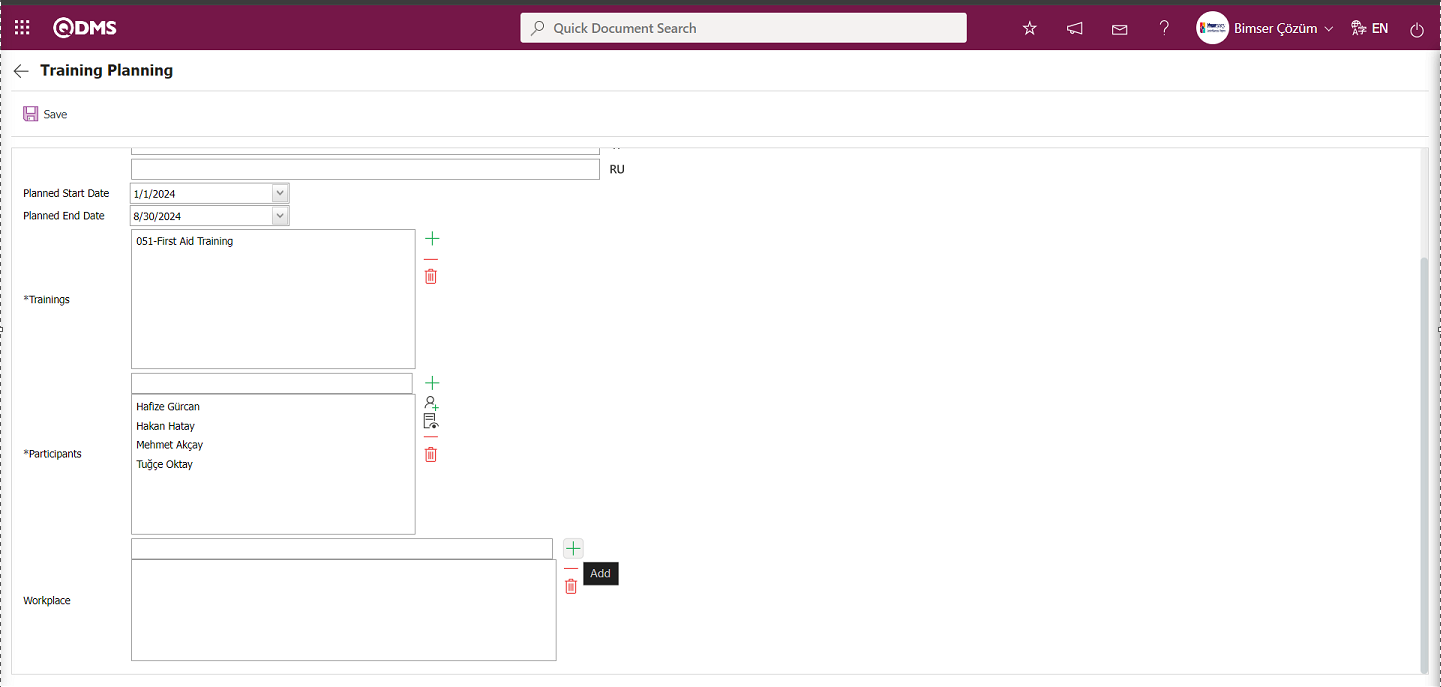
In the Training Planning screen, click the (Add) button to open the system and select the location information for the fast training defined in the list of workplaces defined in the system.
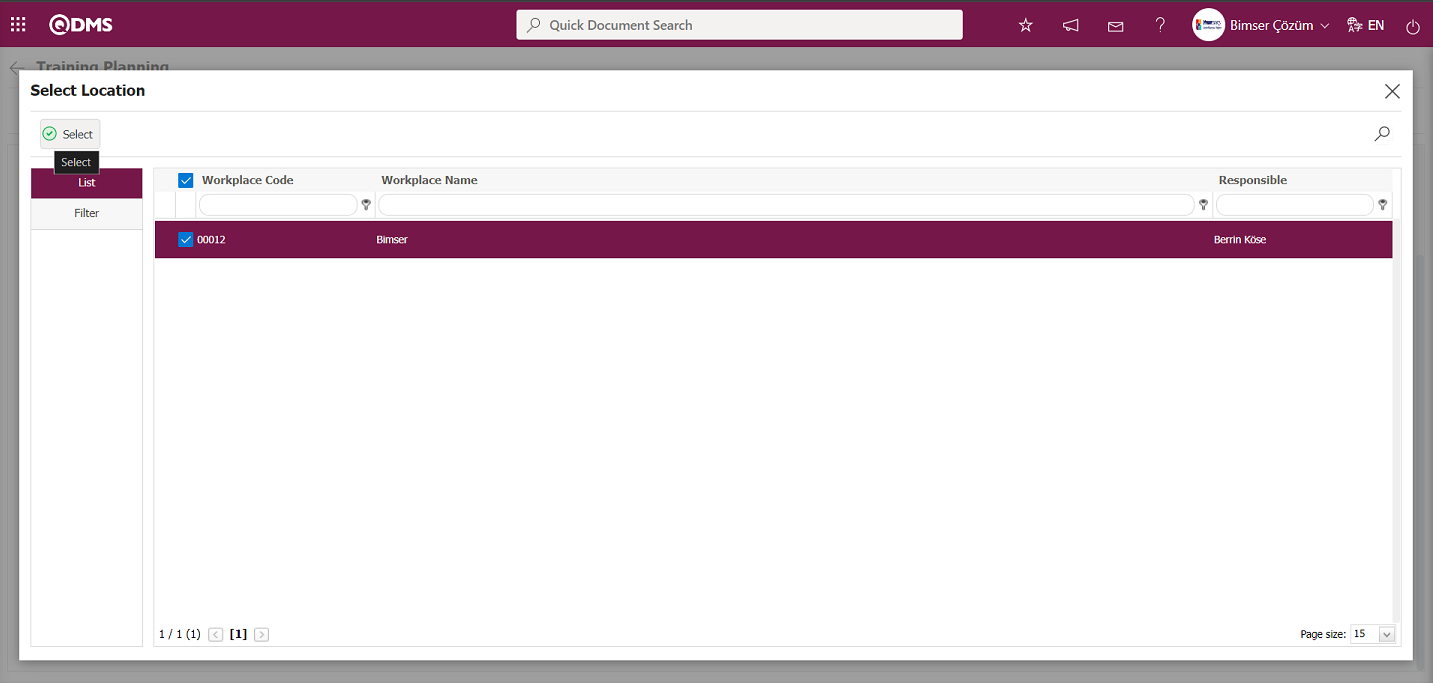
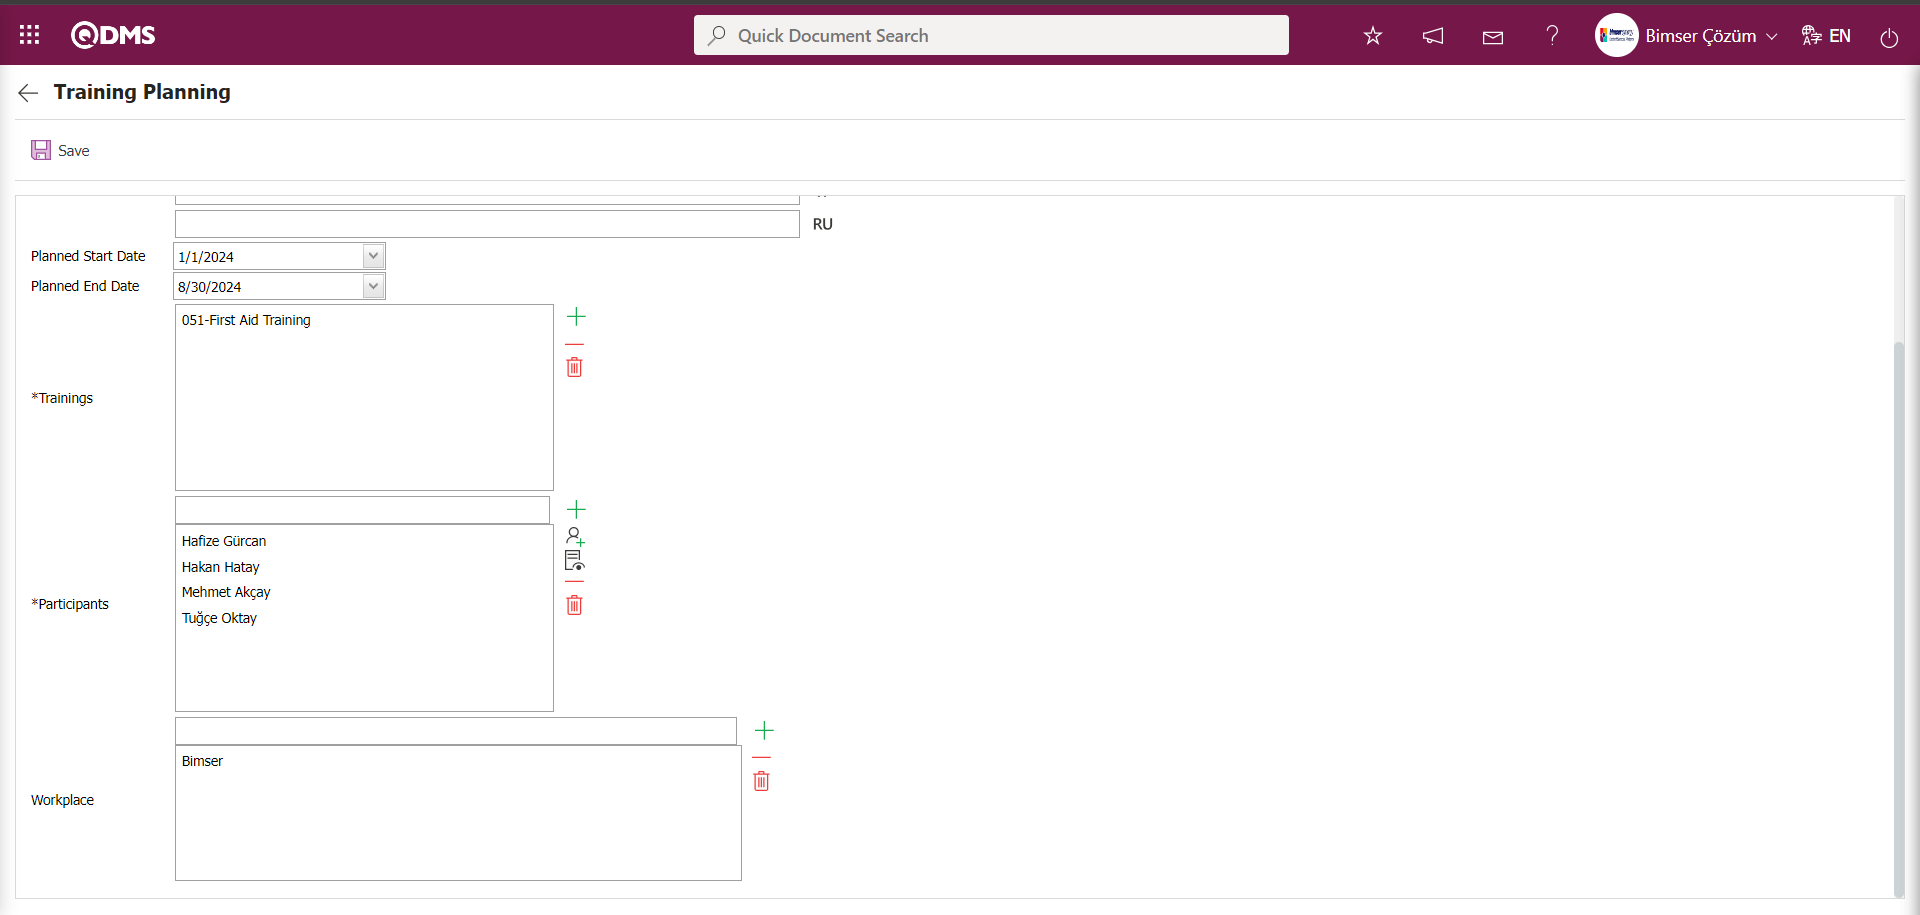
After entering the necessary information about quick training in the Training Planning screen, click the  button in the upper left corner of the screen to register the quick training definition.

In the Training Planning screen, select the plan to which the quick training has been assigned in the list tab and click the  button.
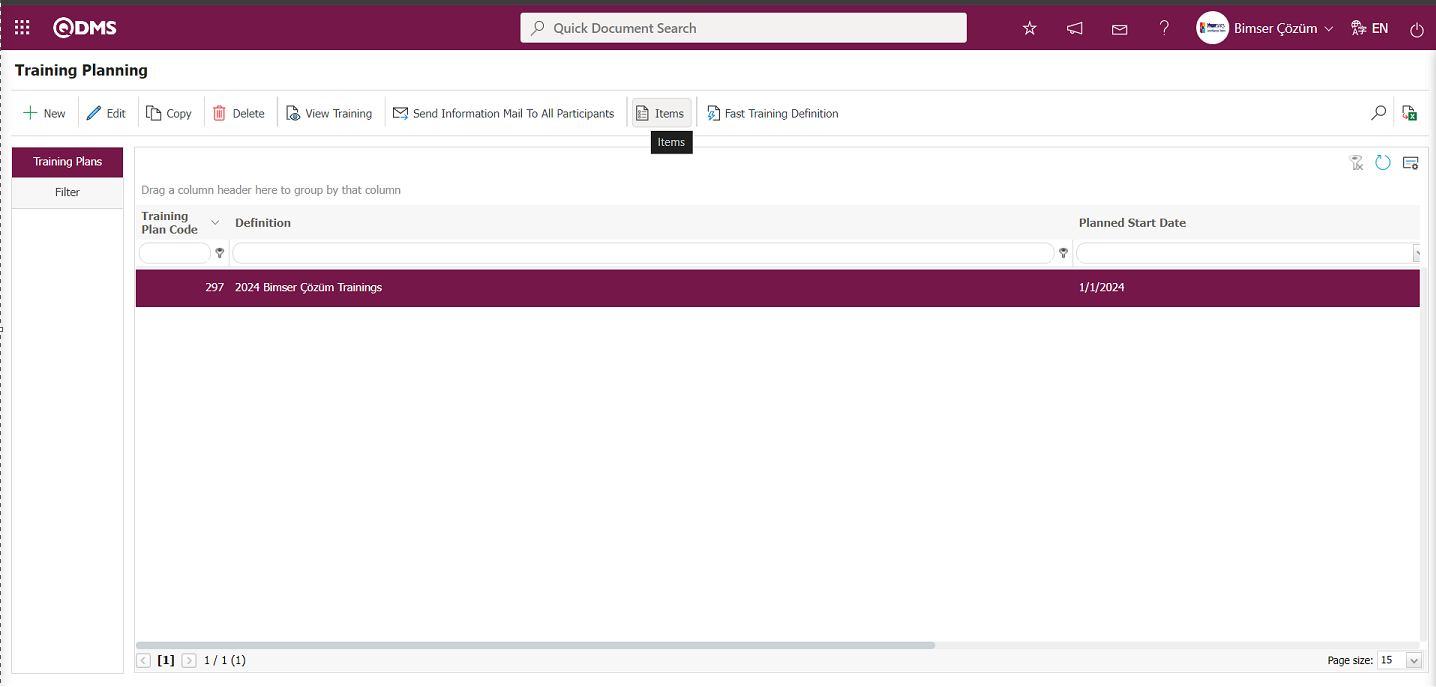
The fast training defined in the Training Item Planning screen that opens is displayed.
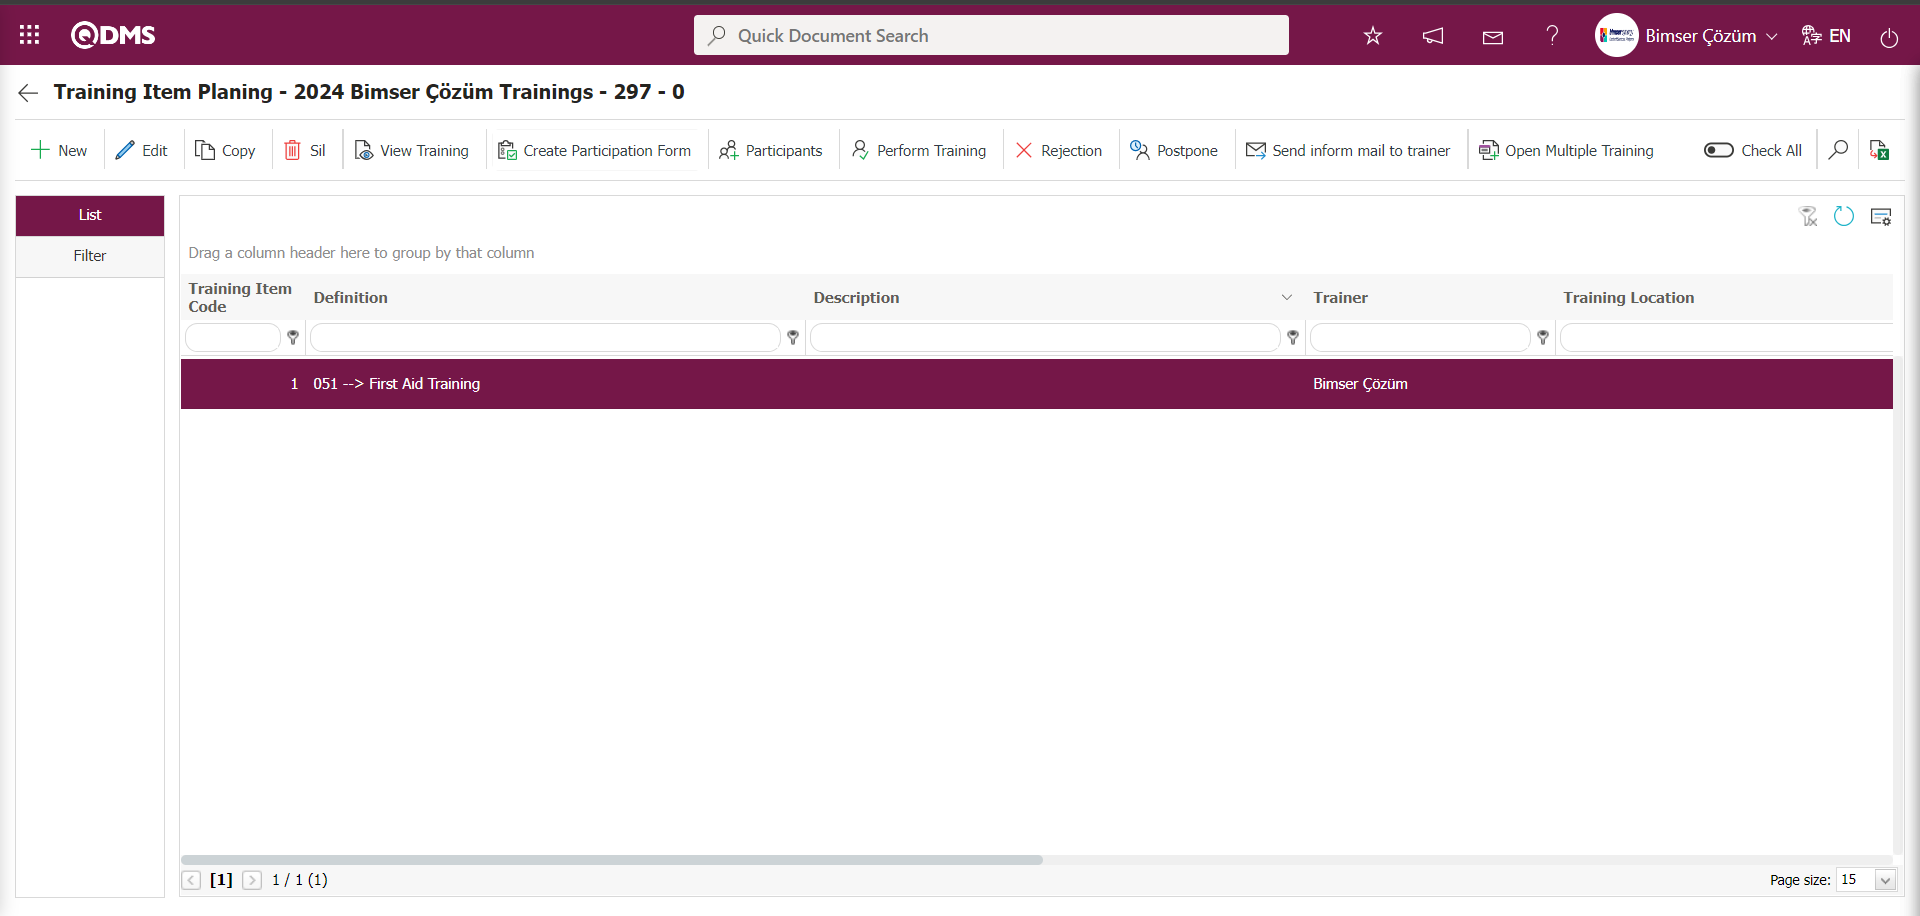
In the fast training planning process, if you define the plan code in the parameter value of parameter number 64, “Plan No to be used in Defining Quick Training,” in the Training Planning Module parameters,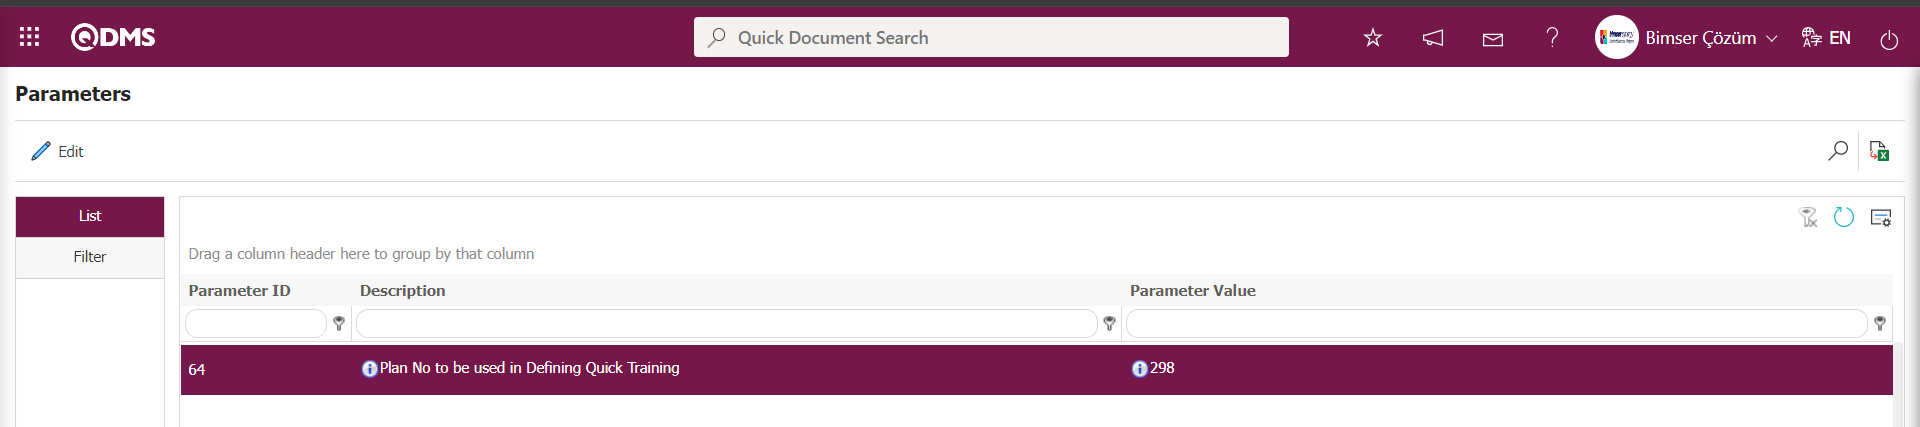
In the Training Planning screen, click the  button to fast define training linked to the plan code defined in the parameter.
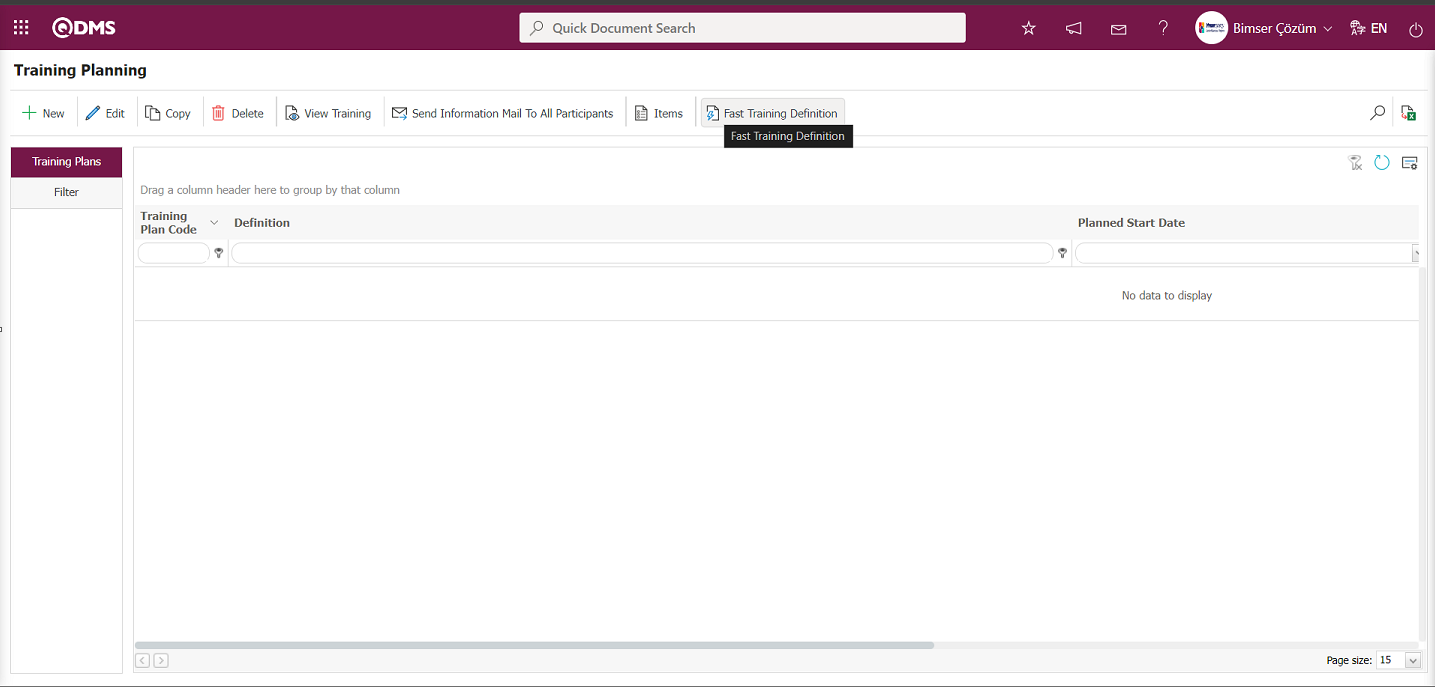
In the Training Planning screen that opens, the Training Plan Definition field is automatically filled by the system with the training plan definition with the plan code defined in the parameter value of parameter number 64, “Plan No to be used in Defining Quick Training.” Quick training sessions defined in the training plan with the plan code defined in this parameter are assigned to the training plan.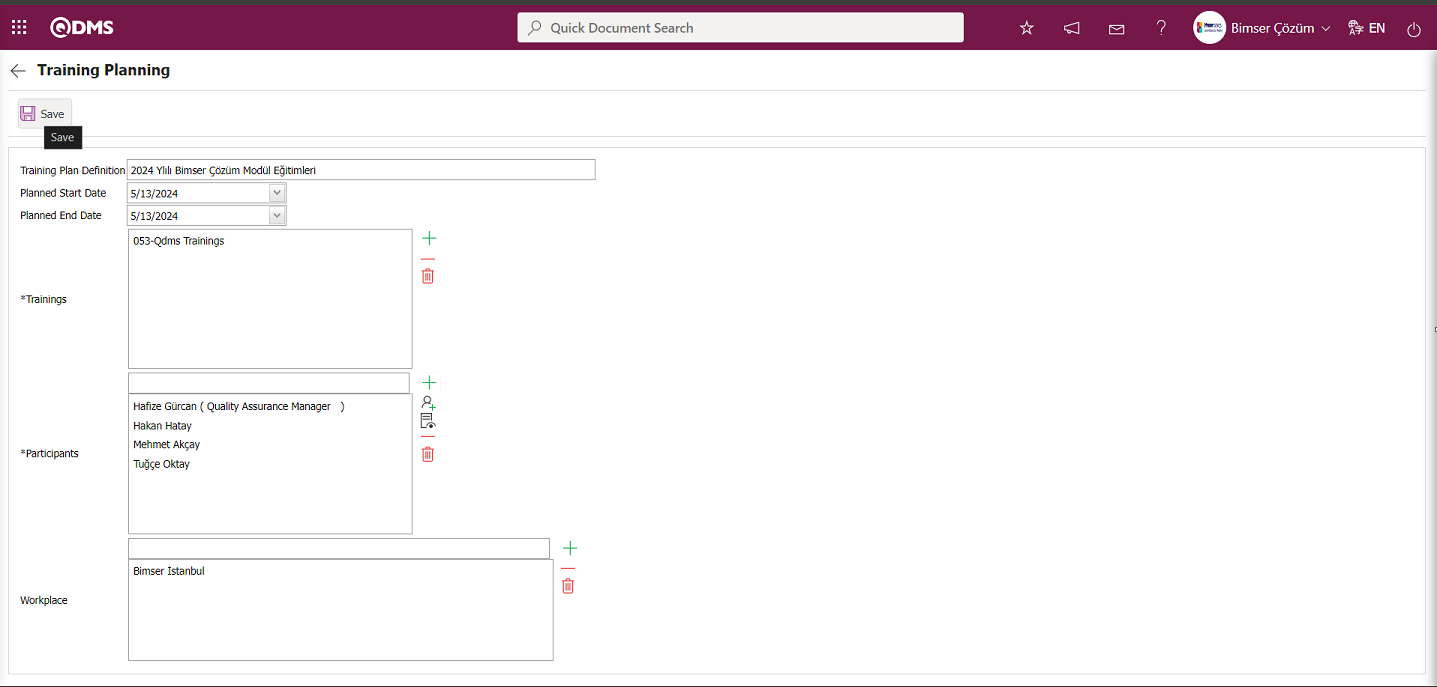
The relevant fields are defined on the screen that opens:
Training Plan Definition: The Training Plan screen displays the training plan definition defined in the plan code specified in the parameter value of the parameter, which is automatically retrieved by the system.
Planned Start Date: This is the area where the start date of the fast training defined in the Training Planning screen is selected from the Calendar field that opens.**
Planned End Date: This is the field where the end date of the quick training defined in the Training Planning screen is selected from the Calendar field that opens.
Trainings: This is the field where training courses to be added are selected from the defined Training List opened by clicking the (Add) button on the Training Planning screen.**
Participants: This is the area where participants are added by clicking the “Add” button for fast training defined in the Training Planning screen and selecting participants from the list of personnel defined in the system and the list of user groups defined in the system by clicking the “Select” button.
Workplace: This is the field where the location information for the fast training defined in the Training Planning screen is selected from the list of workplaces defined in the system by clicking the (Add) button
The training plan definition is automatically provided by the system based on the parameters in the Training Planning screen. The planned start and end dates of the plan are selected in the Calendar field that opens. The training courses to be included in the plan as fast training are selected from the defined Training list that opens by clicking the  (Add) button in the Training field. Participants to be added to the fast training are selected from the defined Personnel list in the system by clicking the (Add) button in the participants field. The workplace information is selected. After entering the required information in the relevant fields, the fast training definition registration process is completed by clicking the
  button in the upper left corner of the screen.
In the Training Planning screen, select the plan to which the quick training has been assigned in the list tab and click the button. The fast training defined in the Training Item Planning screen that opens will be displayed.
6.3.3. Training Efficiency Evaluation
Menu Name: Integrated Management System/ Training Plan/ Training Efficiency Evaluation
When creating a Training Item Plan, if a position or role has been assigned as a fixed position in the Efficiency Evaluation section of the post-training evaluation, the users whose effectiveness you will evaluate will appear in this menu.

Using the buttons on the screen;
 : Records are filtered and searched.
 : The training activity evaluation process is performed for the selected user in the list.
: The search criteria on the menu screens are used to clear the data remaining in the filter fields of the grid where the search was performed.
: The menu screen is reset to its default settings.
: The menu screens are customized based on user preferences by enabling or disabling the display of columns corresponding to specific fields.
Training Efficiency Evaluation Menu Activity Evaluation Process;
On the Training Efficiency Evaluation screen, click the button while a user is selected in the List tab.
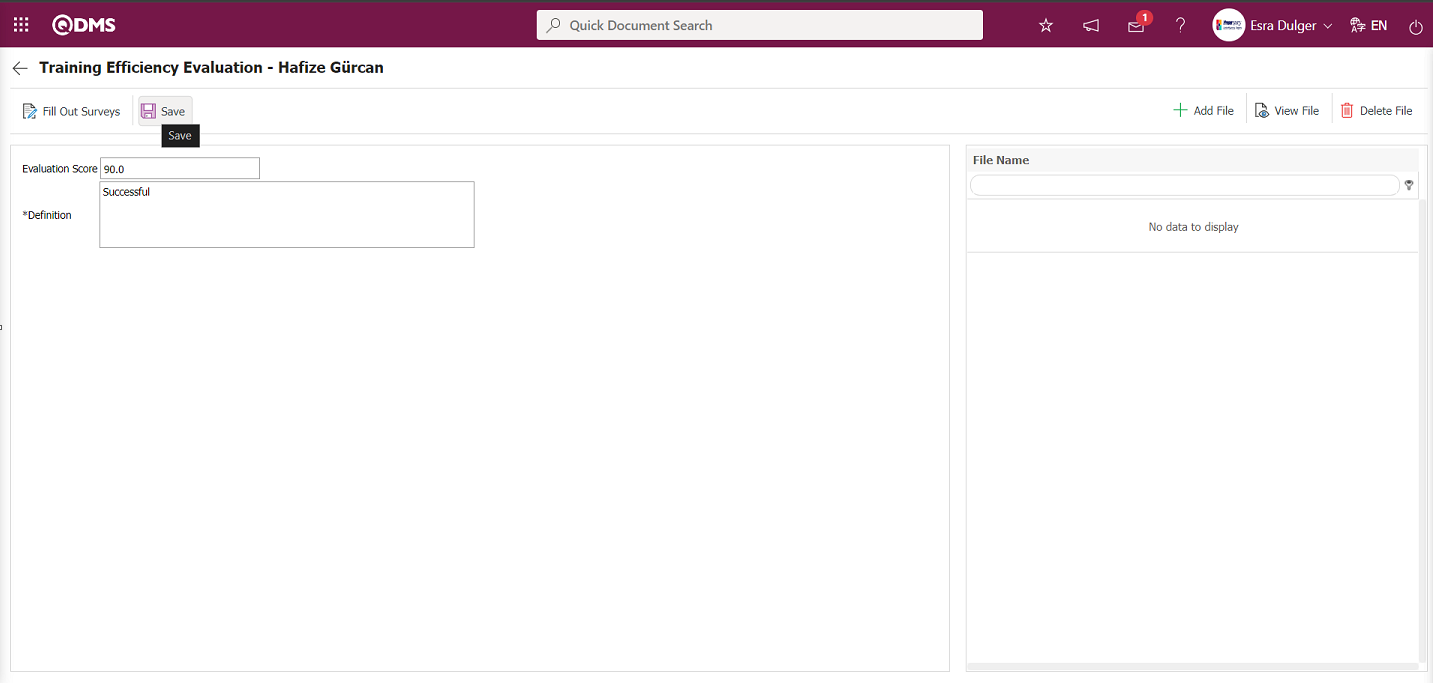
The relevant fields are defined on the screen that opens:
Evaluation Score: The Training Efficiency Evaluation screen is where you enter the score you will give based on the contribution after the training.
Definition: The Training Efficiency Evaluation screen is where information related to the evaluation or the benefits of the training received by the user is entered.
Using the buttons on the screen;
 : If there is a defined survey for evaluating the training activity, the survey is completed.
 : Registration is complete.
 : The file attachment process is performed.
 : The added file is displayed.
 : The added file is deleted.
In the Training Efficiency Evaluation screen that opens, enter the evaluation score and description in the Evaluation Score field, then click the button in the upper left corner of the screen to record the activity evaluation.
Survey Completion Process in the Training Efficiency Evaluation Menu;
On the Training Efficiency Evaluation screen, click the  button while a user is selected in the List tab. At this stage, fill out the selected survey in the Training Activity Evaluation Survey Template field in the Activity Evaluation tab of the Training Item Planning screen.

By clicking the button on the Training Efficiency Evaluation screen, you can fill out the training activity evaluation survey, if available.
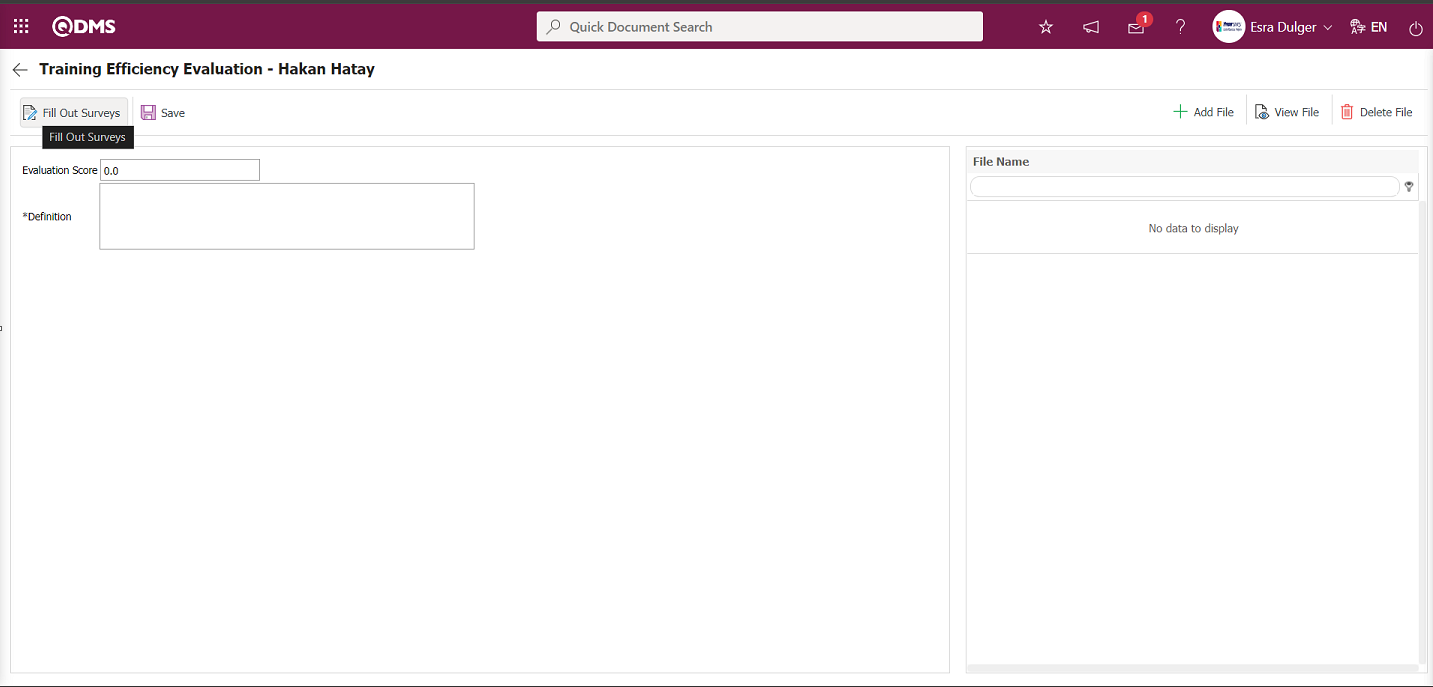
In the Survey Participation screen that opens, select the survey questions and options, then click the button in the upper left corner of the screen to complete the survey participation registration process.
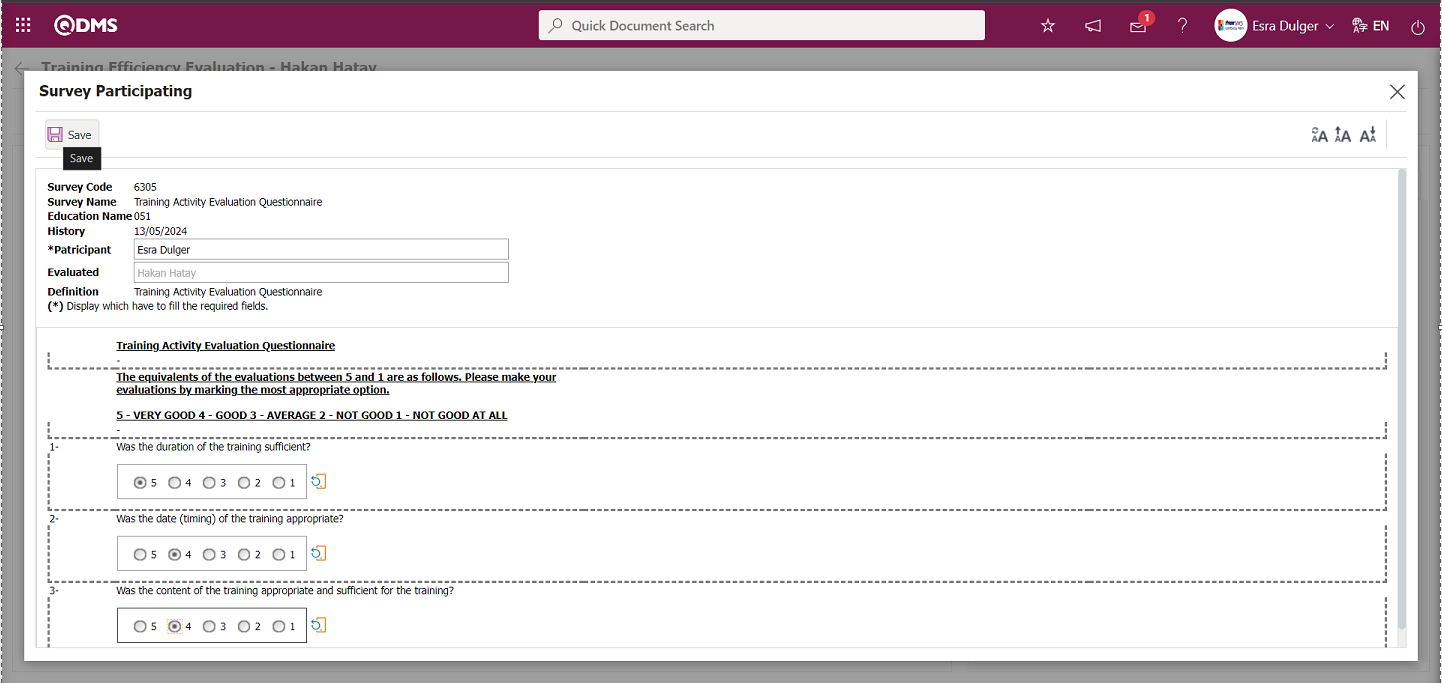
In addition, during the Training Efficiency Evaluation process, when the Training Item Planning is created, the person assigned to a fixed position or role in the Efficiency Evaluation tab will see the “Training Efficiency Evaluation” task in the “My Pending Tasks” page at their local address.
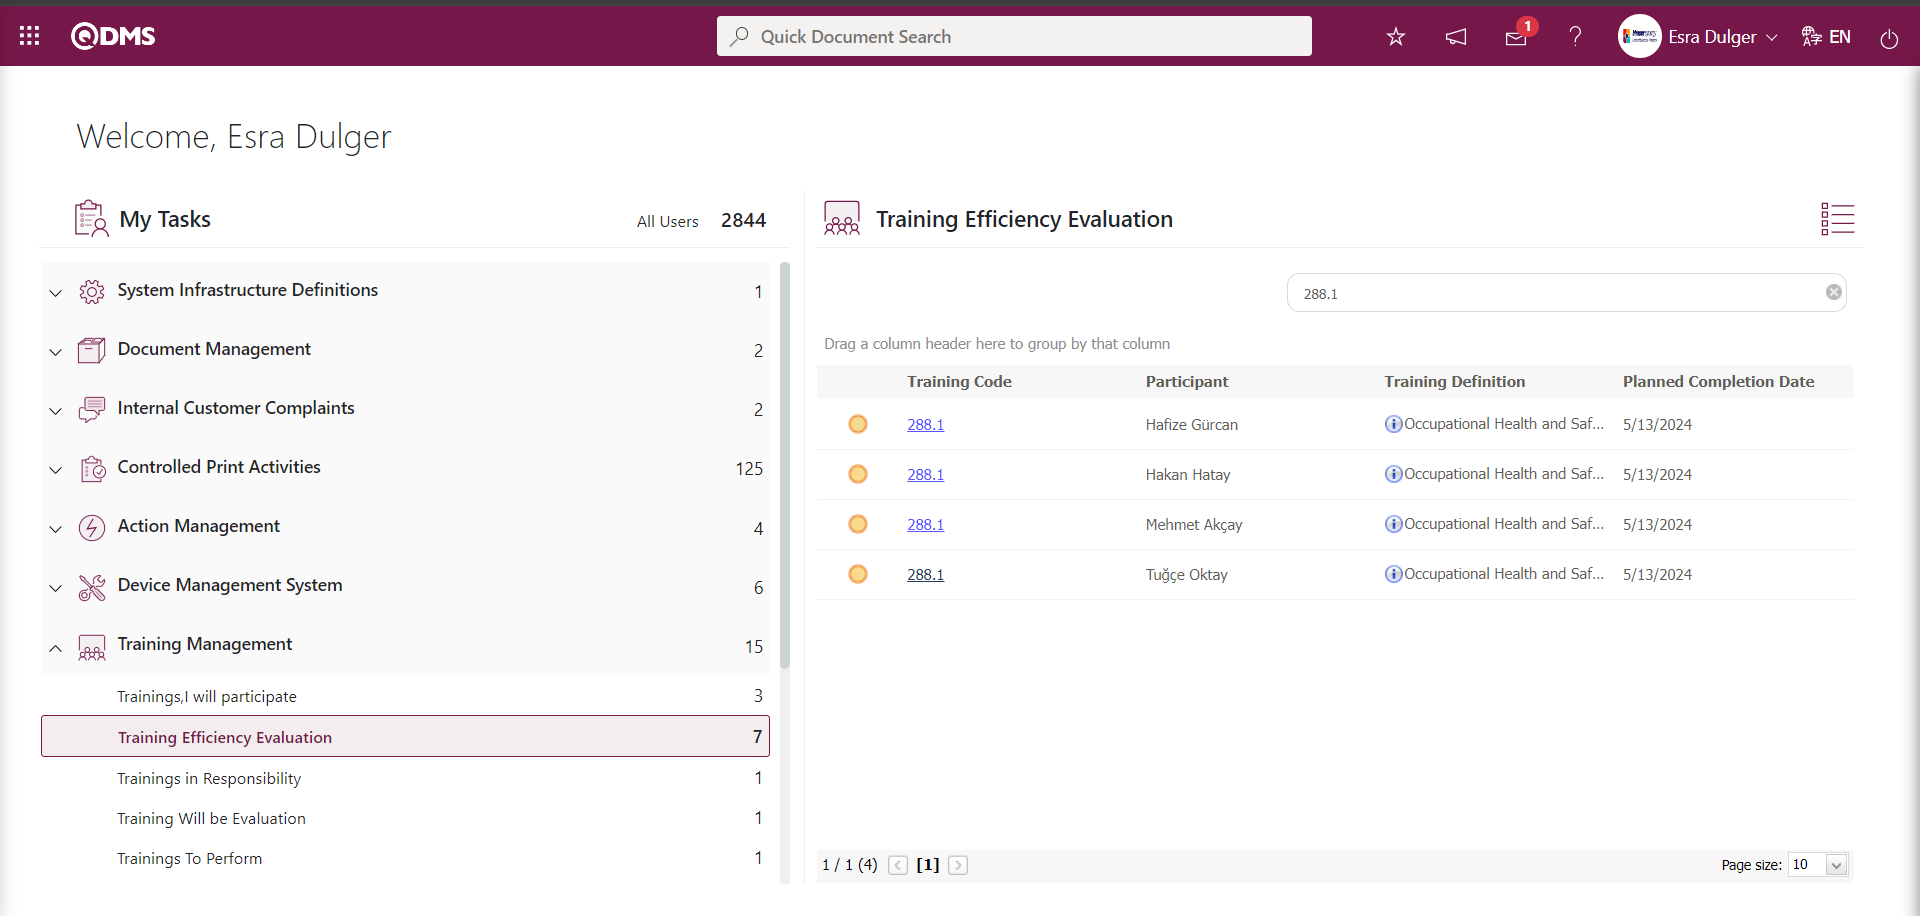
Click the training code link in the Training code field of the relevant task to display the Training Efficiency Evaluation screen.

The person assigned to a fixed position or role in the Efficiency Evaluation tab of the Training Item Planning screen performs the training activity evaluation process, similar to the steps performed in the Training Efficiency Evaluation menu.
6.3.4.Trainings To Be Evaluated
Menu Name: Integrated Management System/ Training Planning/ Trainings To Be Evaluated
This menu is where users who participated in training evaluate the training. If the training that the user participated in is marked as to be evaluated, it will appear in this menu to be evaluated. In order for the list of trainings that users who participated in training appear in the Trainings To Be Evaluated menu, the parameter value of parameter number 23 in the Training Planning module parameters must be set to “Yes” to activate the parameter.
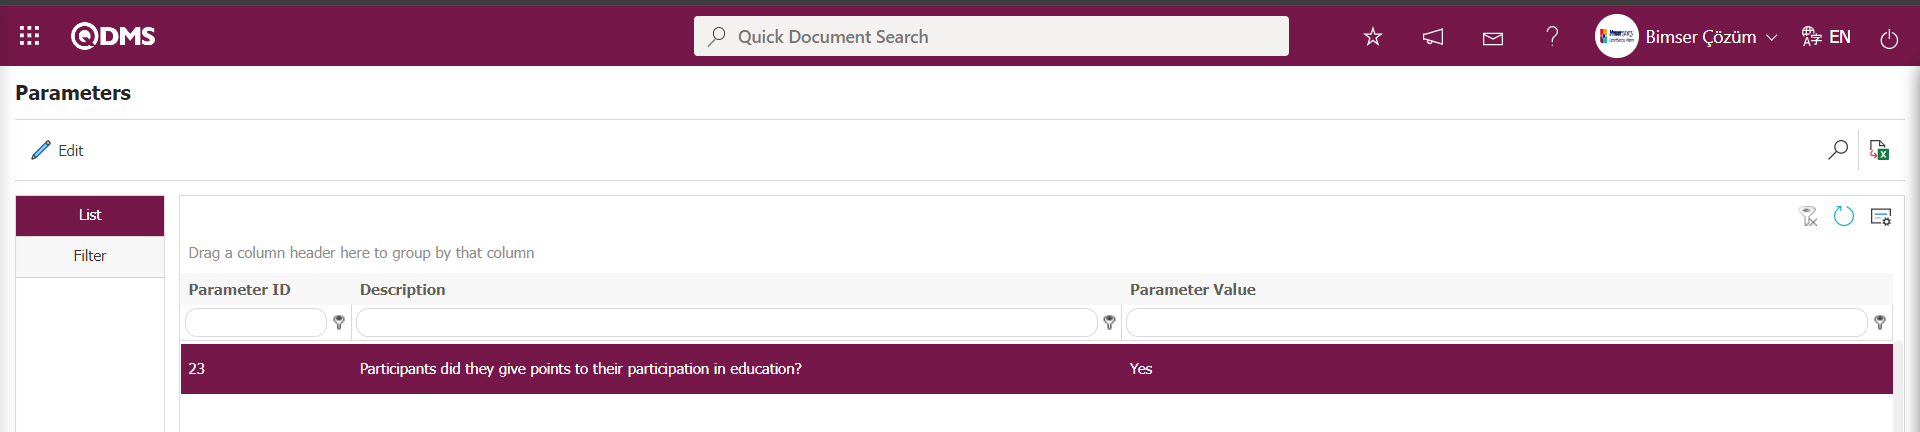
After the parameter is activated, the list of training courses to be evaluated for users participating in the training is displayed in this menu at their local address, and the evaluation process is performed.
Using the buttons on the screen;
: Records are filtered and searched.
 : The evaluation process for the selected training in the list is performed.
: The search criteria on the menu screens are used to clear the data remaining in the filter fields of the grid where the search was performed.
: The menu screen is reset to its default settings.
: The menu screens are customized based on user preferences by enabling or disabling the display of columns corresponding to specific fields.
Click the button on the Training Evaluation screen.
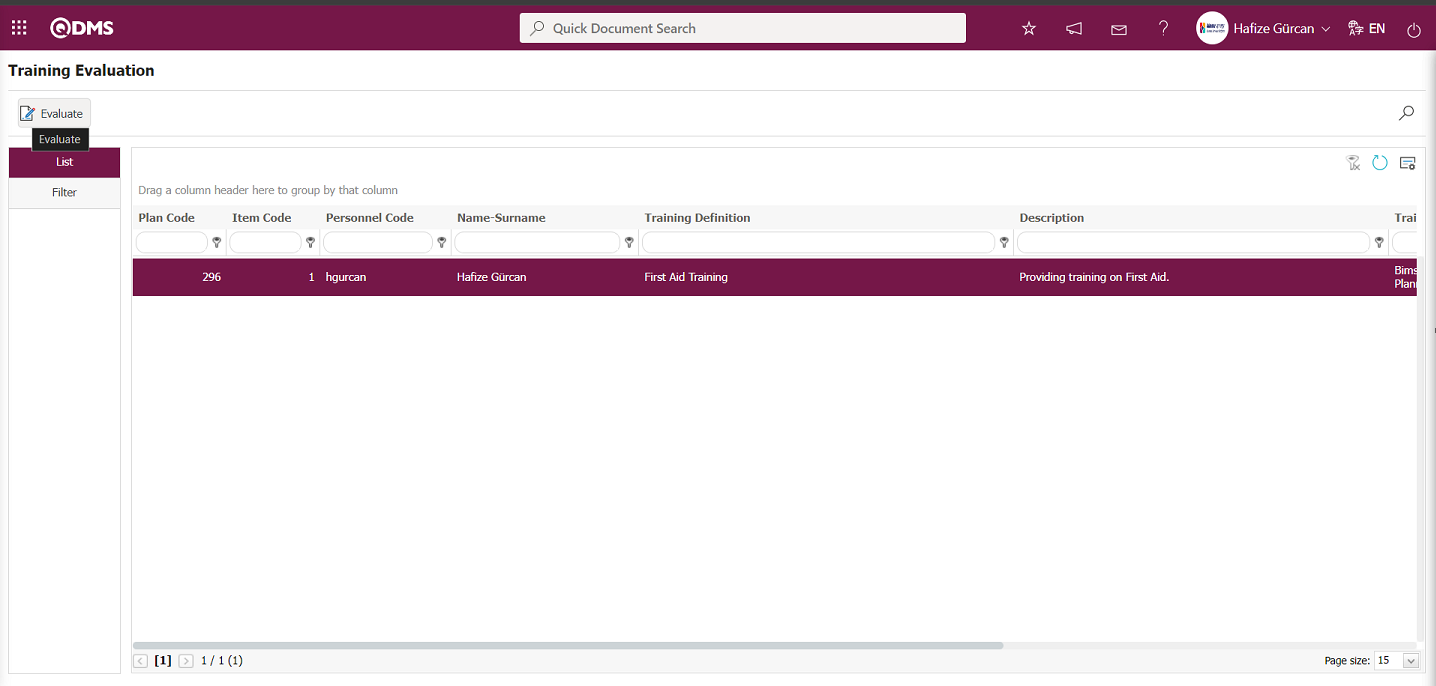
The screen for evaluating the training from the participant's perspective opens.
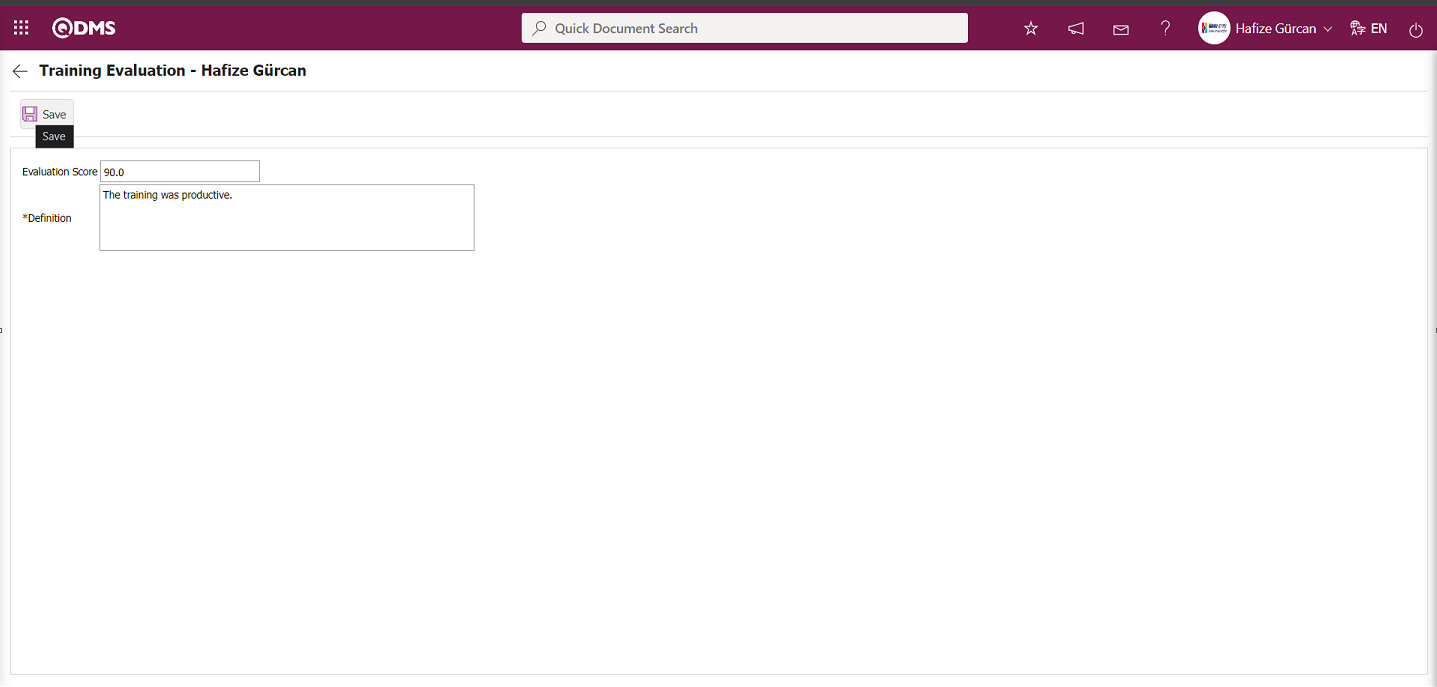
The relevant fields are defined on the screen that opens:
Evaluation Score: This is the field where the score given for the training is entered on the Training Evaluation screen.
Definition: This is the area where you can enter your opinions about the training from the Training Evaluation screen.
On the Training Evaluation screen, the participant writes their evaluation score in the Evaluation Score field and any relevant comments in the Description field. After entering the required information in the relevant fields, click the  button in the top-left corner of the screen to complete the training evaluation registration process. Additionally, the training sessions for which the participant will assign scores will appear as the “Training Will be Evaluation” task on the participant's local “Pending Tasks” page
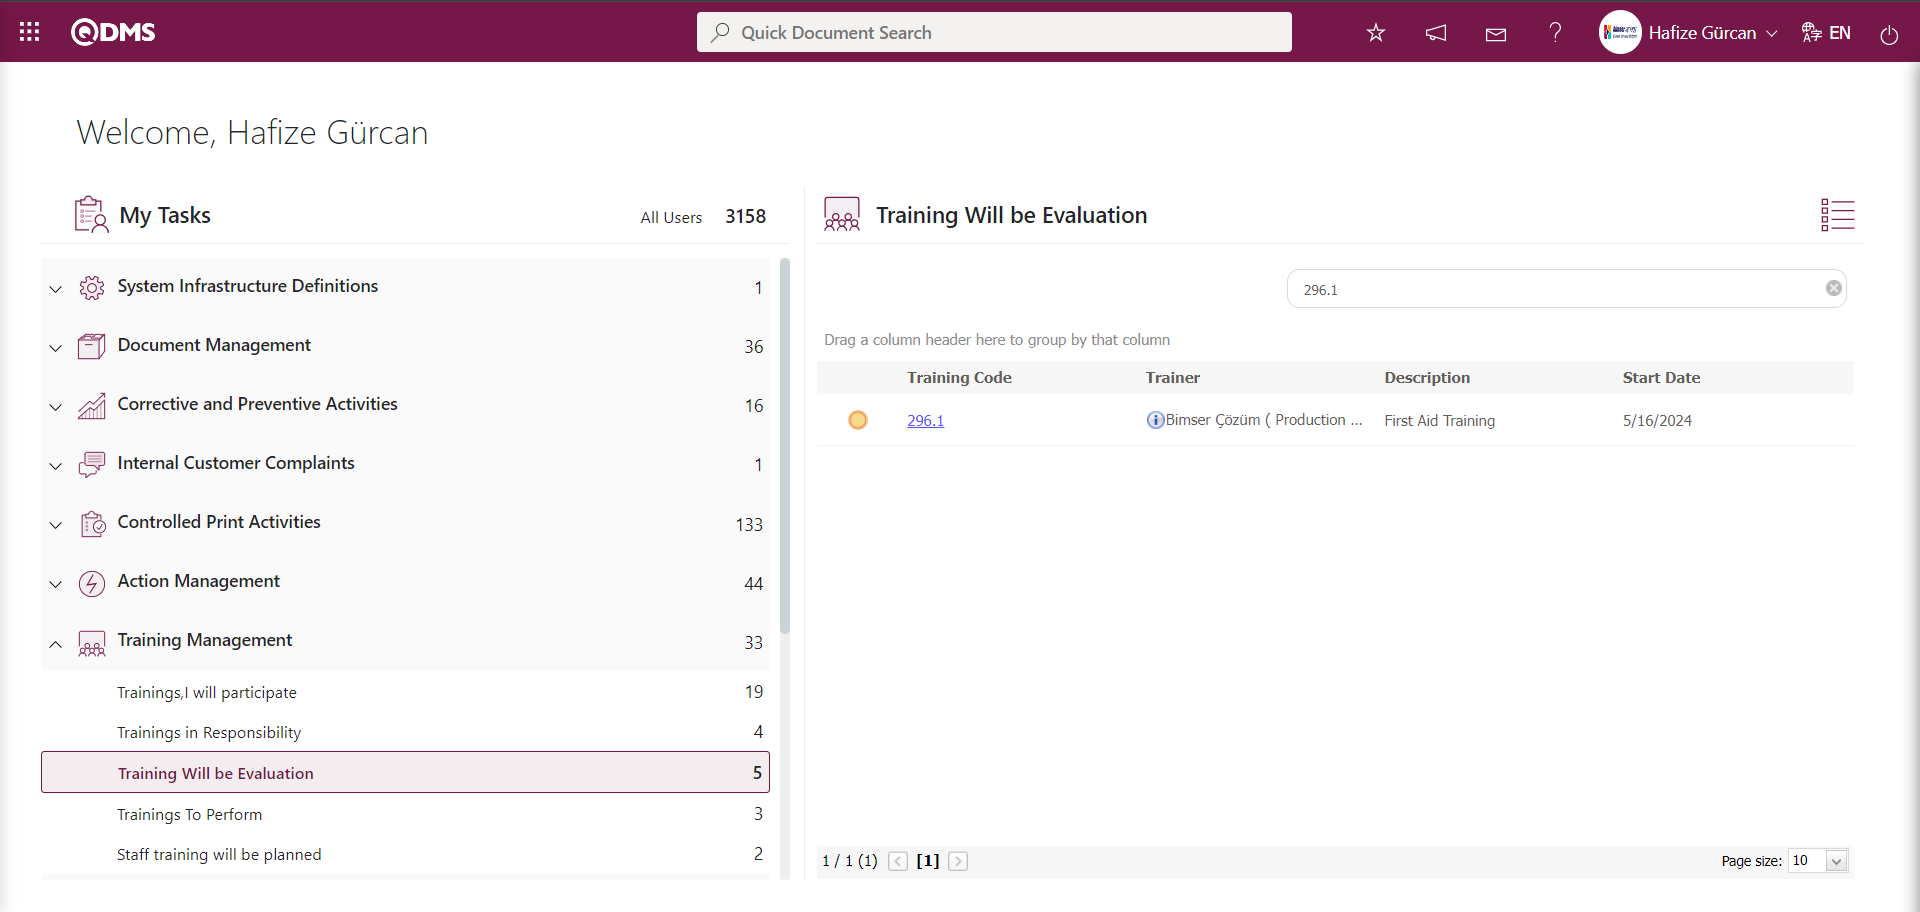
Click the Training code link in the Training code field of the relevant task to display the Training Evaluation screen.
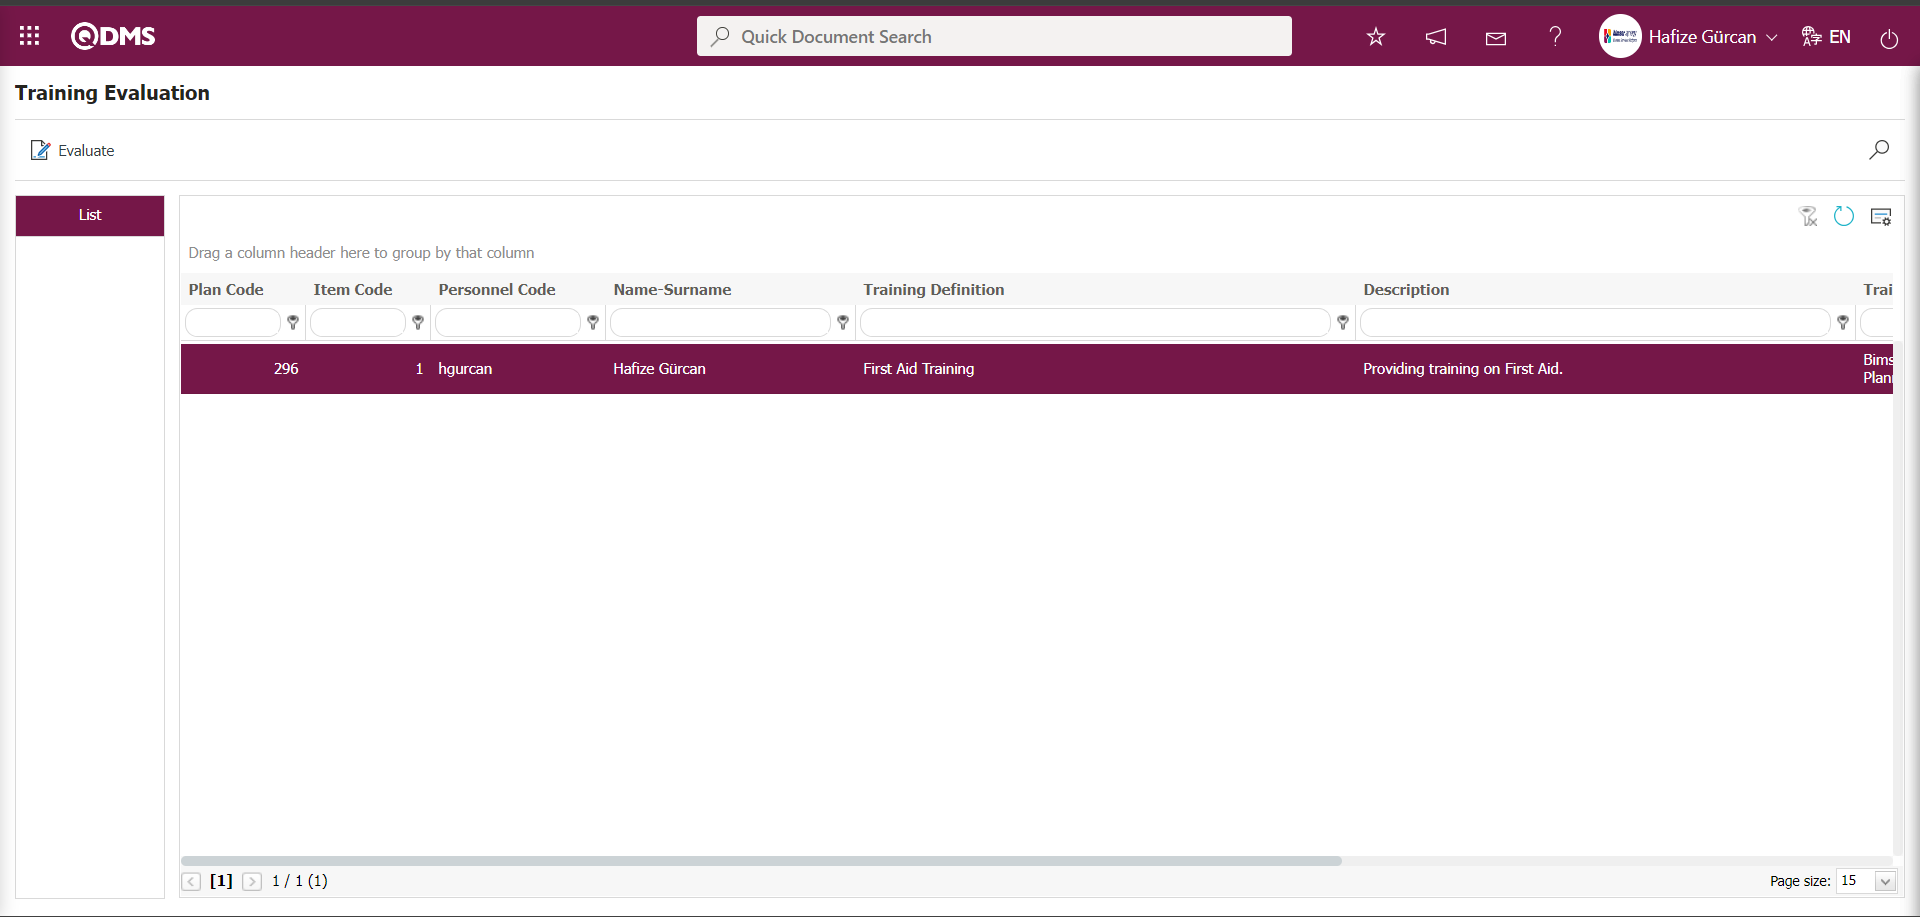
The participant evaluates the training in the same way as the steps in the “Trainings To Be Evaluated” menu.
6.3.5.Training/Title
Menu Name: Integrated Management System/Training Planning/Training/Title
The training definitions created in the Training Definition menu are displayed on this page if the check box next to the “Is it used in list of Departments/Titles?” field is selected. Training definitions with the checkbox selected in the relevant field appear in the Training/Title menu, where you can select which titles should receive this training. This enables reporting on the training received or required for each title.
List tab;
This tab displays the list of training definitions whose “Is it used in list of Departments/Titles?” check box is selected in the Training Definition screen.
In the List tab, click the  button while a Training Definition is selected from the list.

A page opens where the titles that require training can be marked.
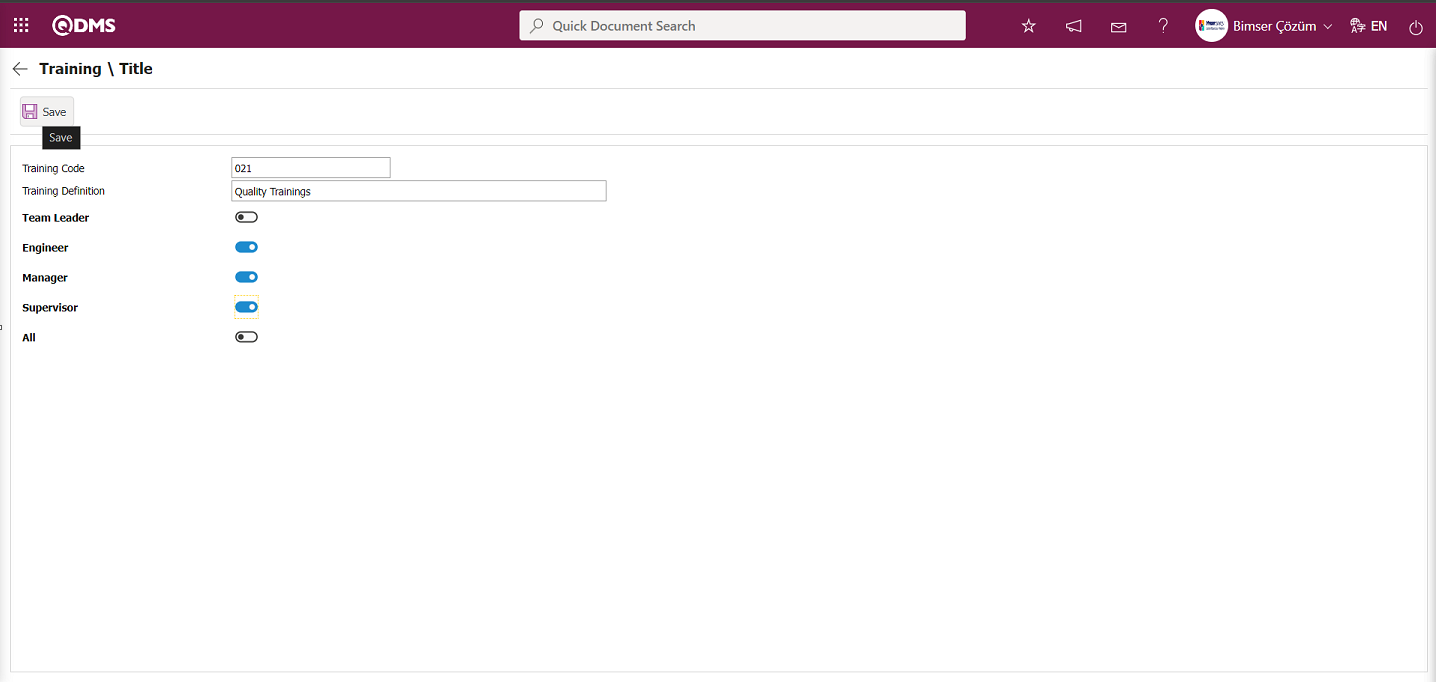
In the Training\Title screen, check the boxes corresponding to the titles that need to receive this training, then click the  button in the upper left corner of the screen to generate a report of the training that has been received/needs to be received.
In the List tab, double-click the relevant training definition as the second method.
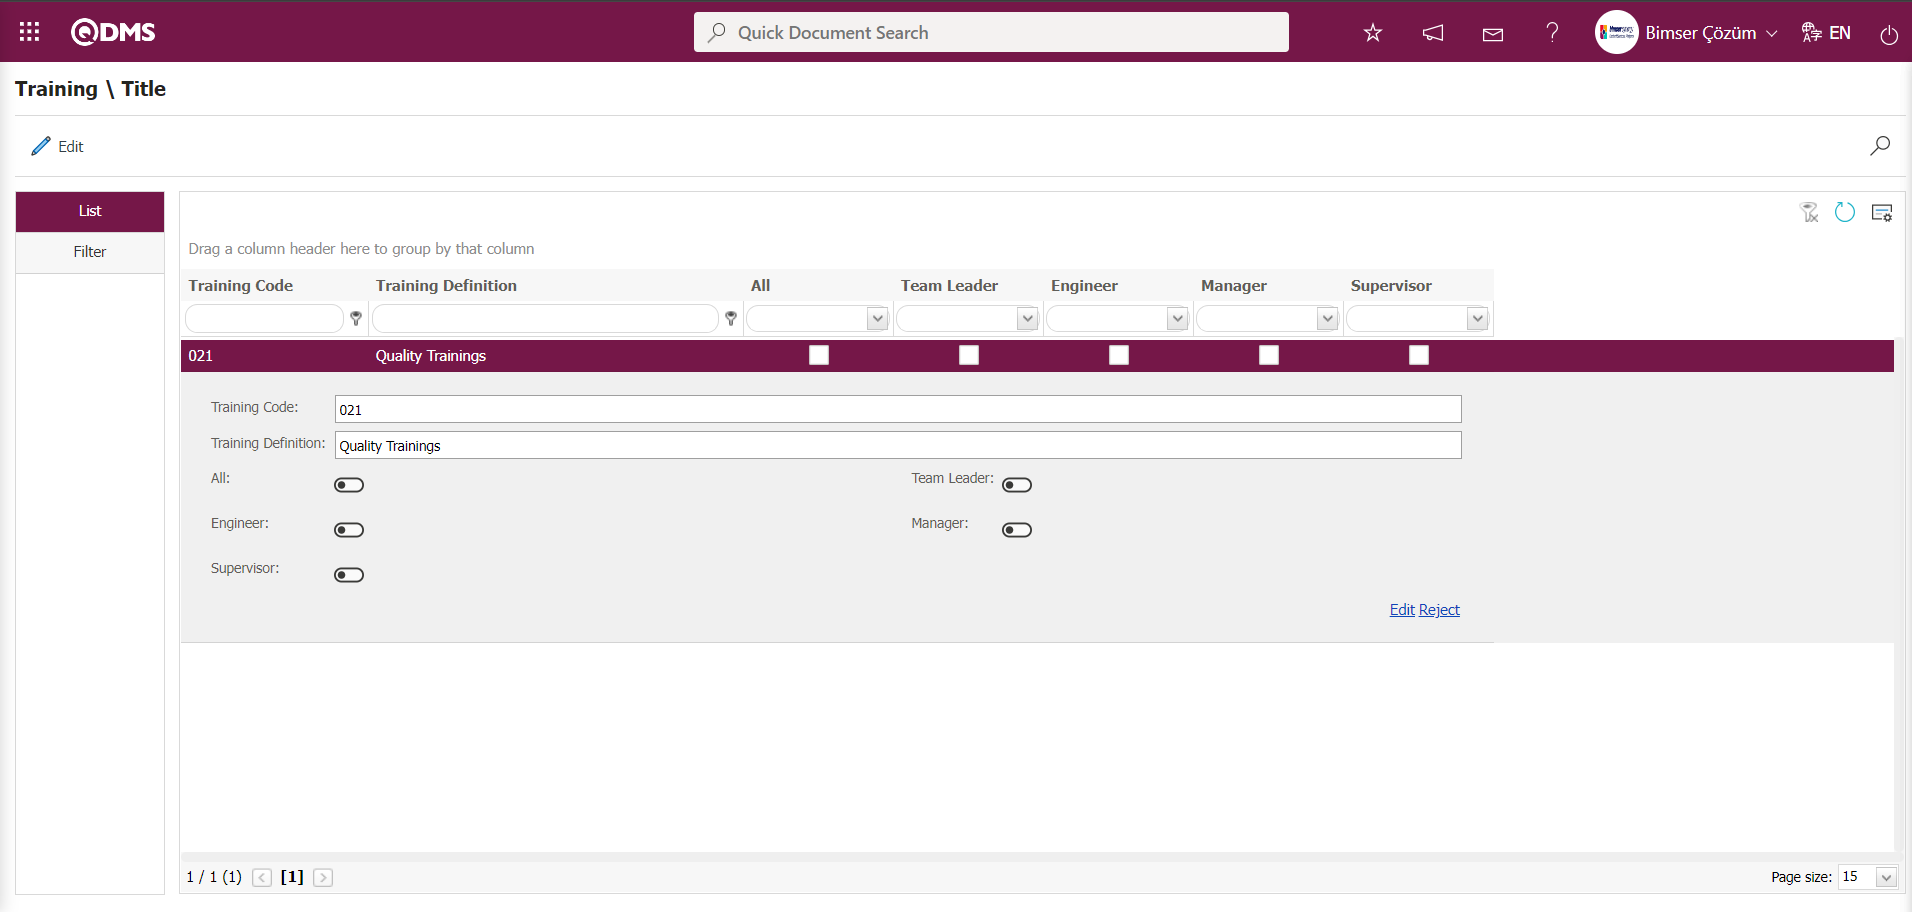
In the Training\Title screen, check the boxes corresponding to the titles that require this training in the list tab.
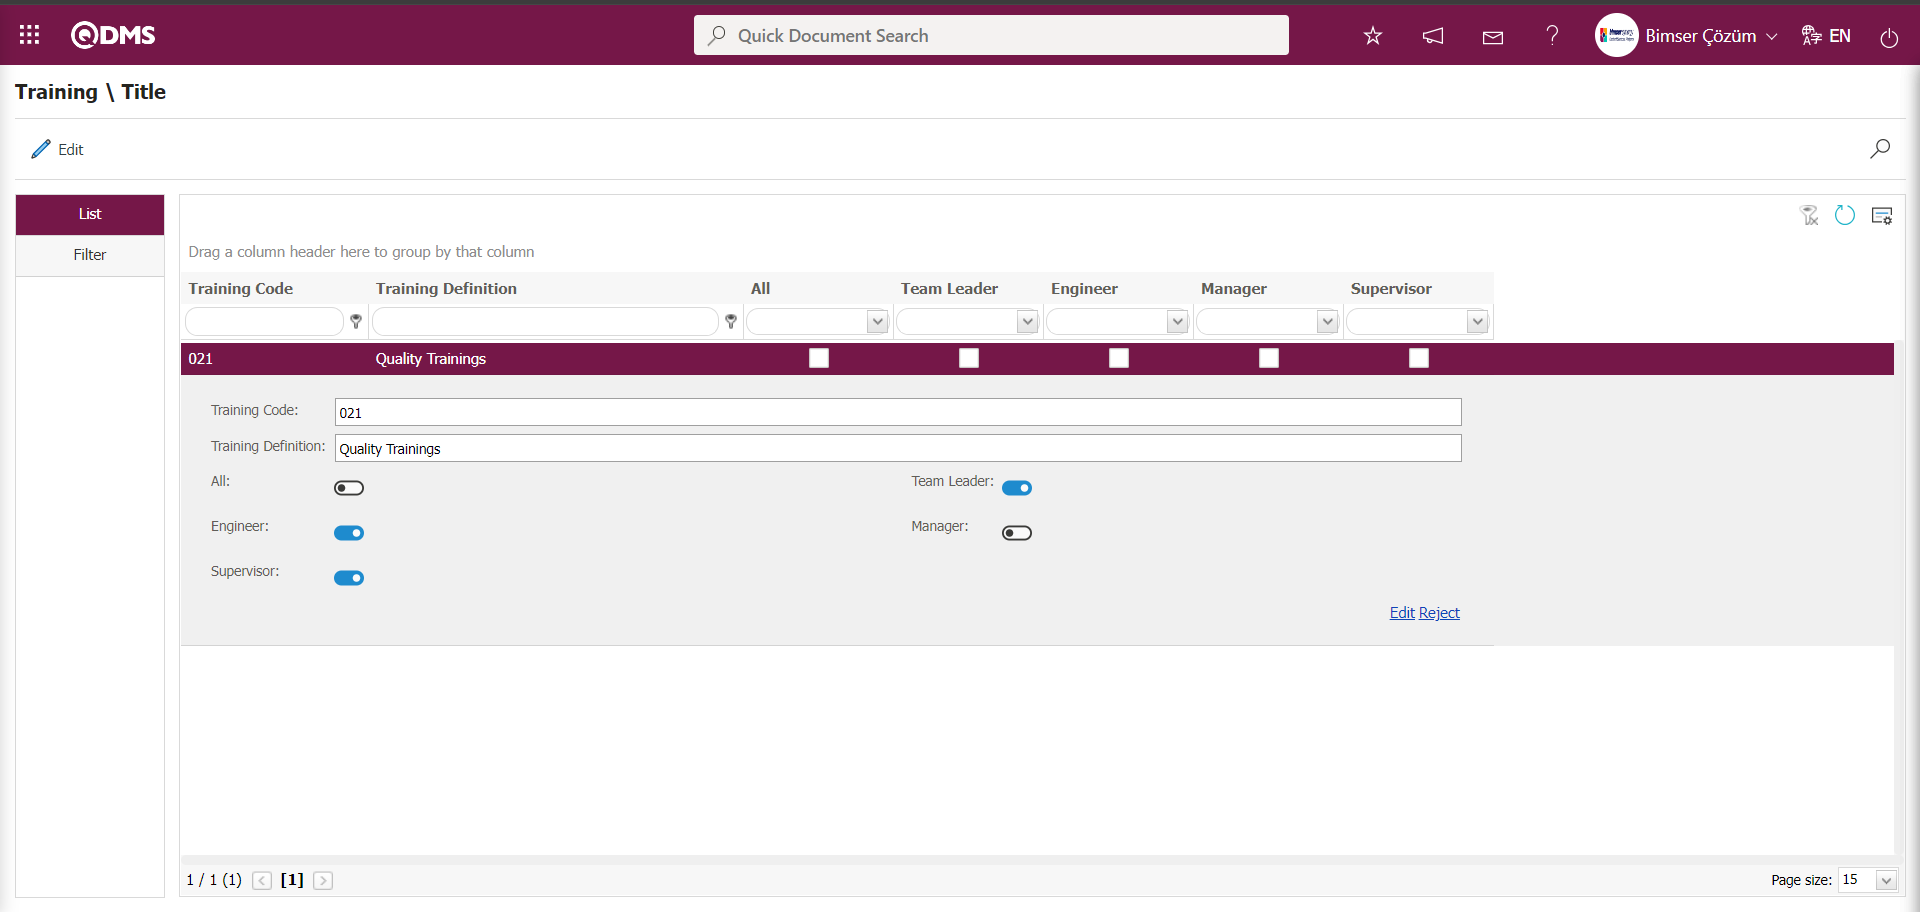
In the Training\Title screen, after checking the checkboxes for the titles that need to take this training in the list tab, clicking the  button allows you to report the training taken/needed according to the titles.
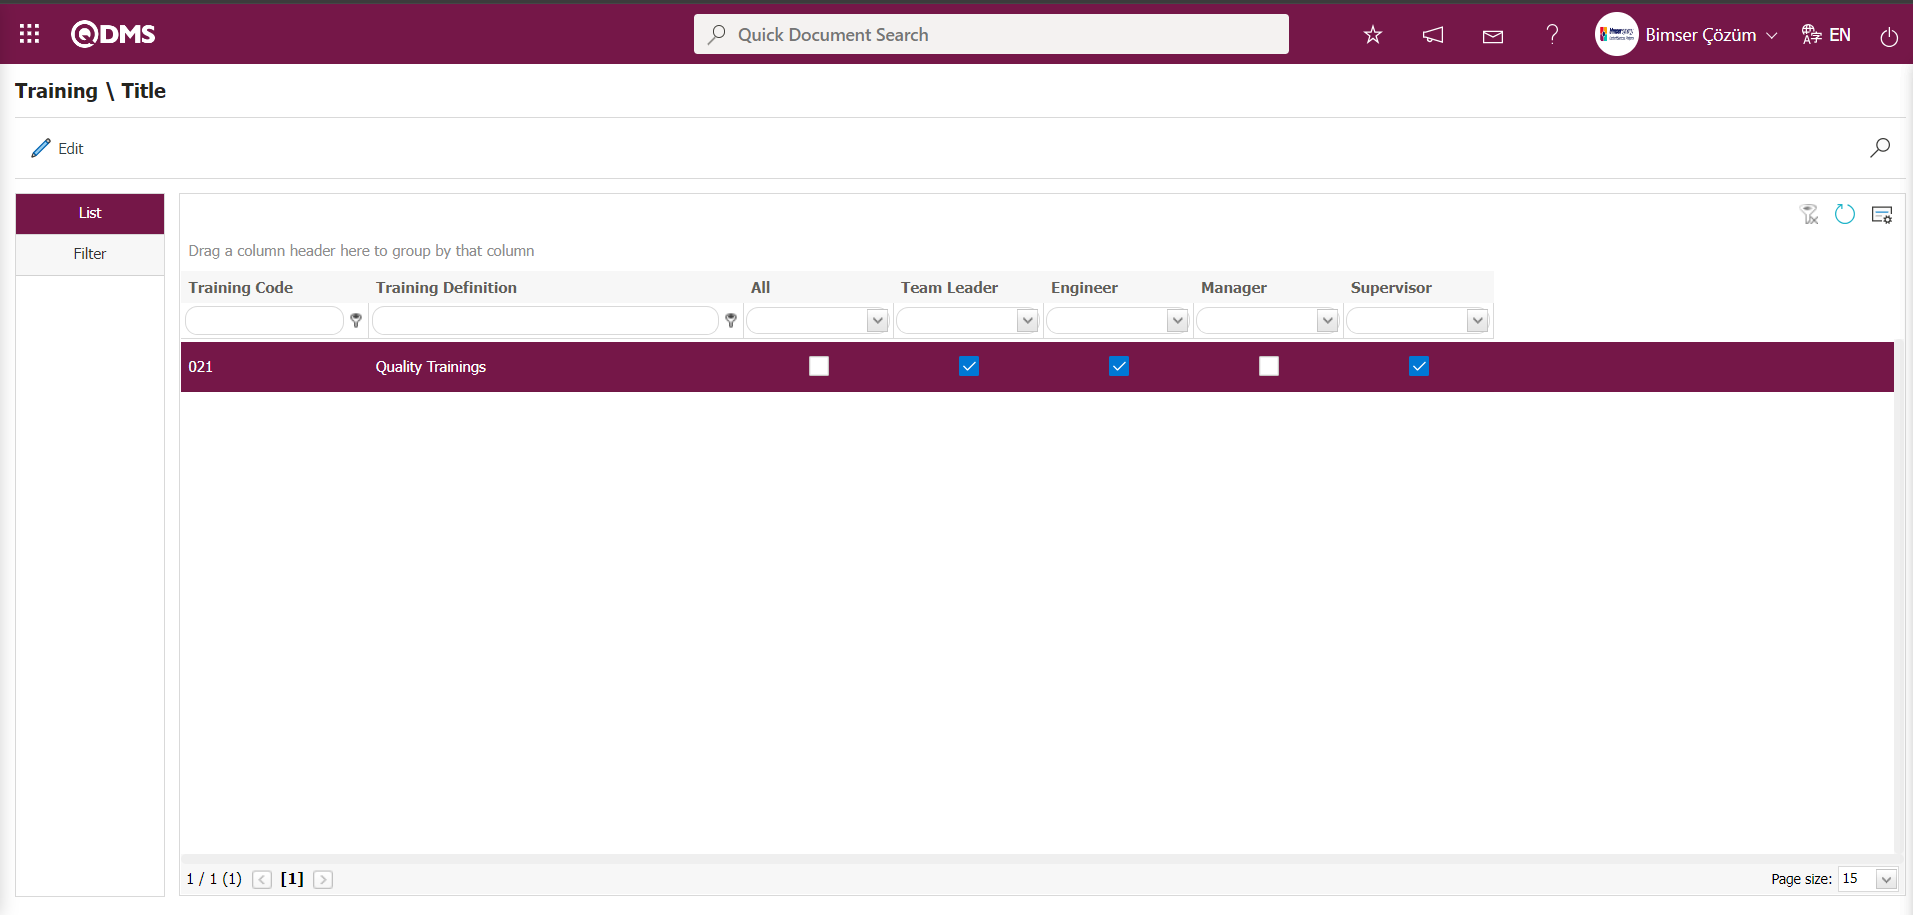
Filter tab;
This tab is used to filter search criteria based on the fields in the Training/Title menu. Filtering can be done based on the Department and Training Definition fields. After entering the relevant data in the fields, click the  (Search) button in the upper right corner to access the desired data.
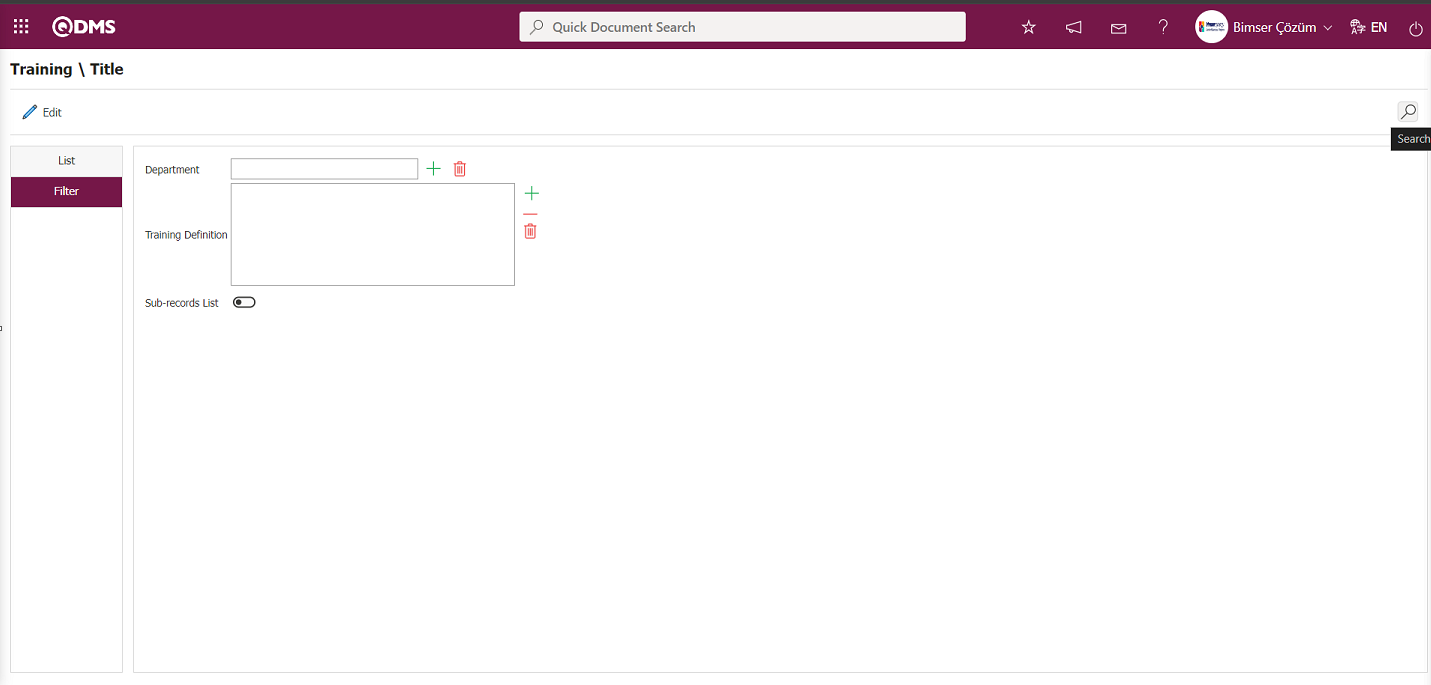
6.3.6. Training Request
Menu Name: Integrated Management System/ Training Planning/ Training Request
This is the menu where Qdms users submit requests when they want to take a new training course or when they believe that a training course needs to be taken within the organization. Requests are approved or rejected by the “Request Approval Role.”
6.3.6.1. Determining the Training Request Approval Role
Before submitting a training request, it is necessary to determine who the request will be sent to. Depending on the request type, the training request approval flow is defined as Individual or General.
To set up the approval flow for general training requests:
Go to System Infrastructure Definitions / BSID/Configuration Settings/Flow Definition menu.
In the Flow Definition screen, select the “Training Planning” module from the modules in the Filter tab and click the  (Search) button.
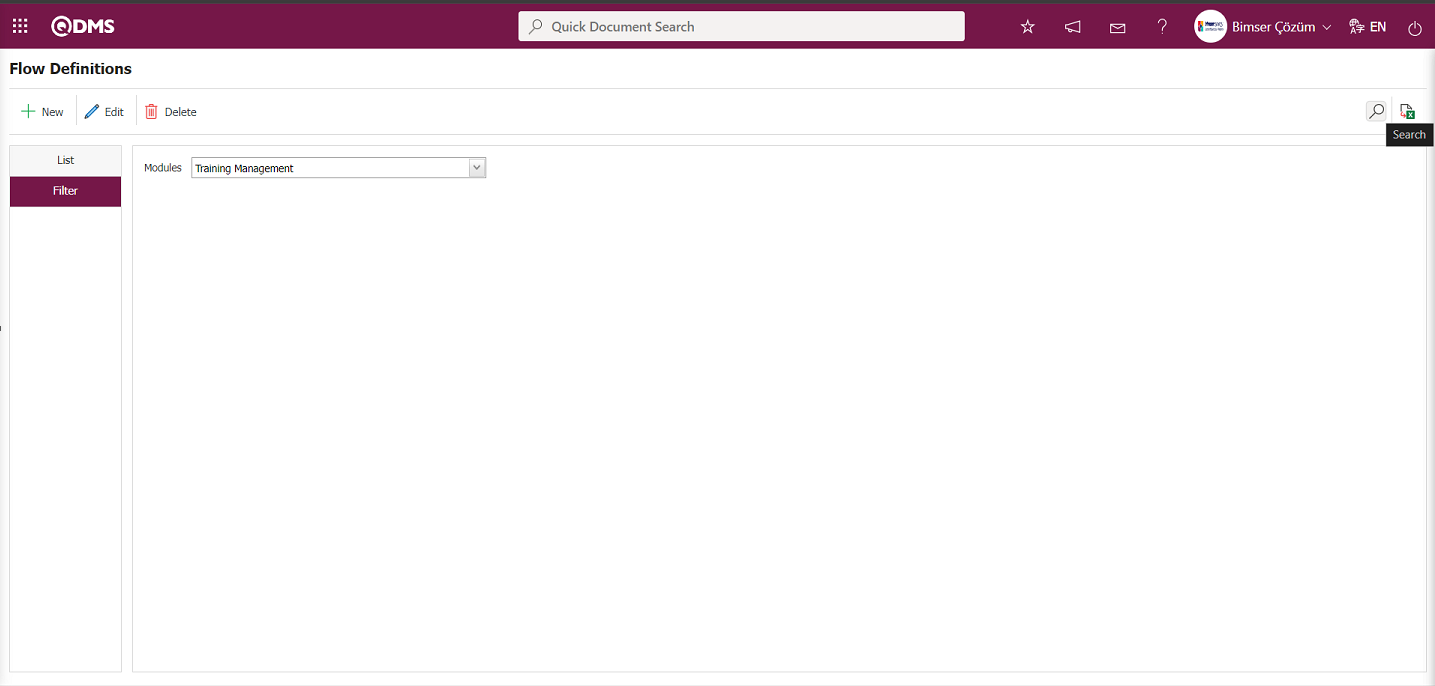
In the Flow Definition screen, click the  button while the Training Request Approval flow is selected in the List tab.
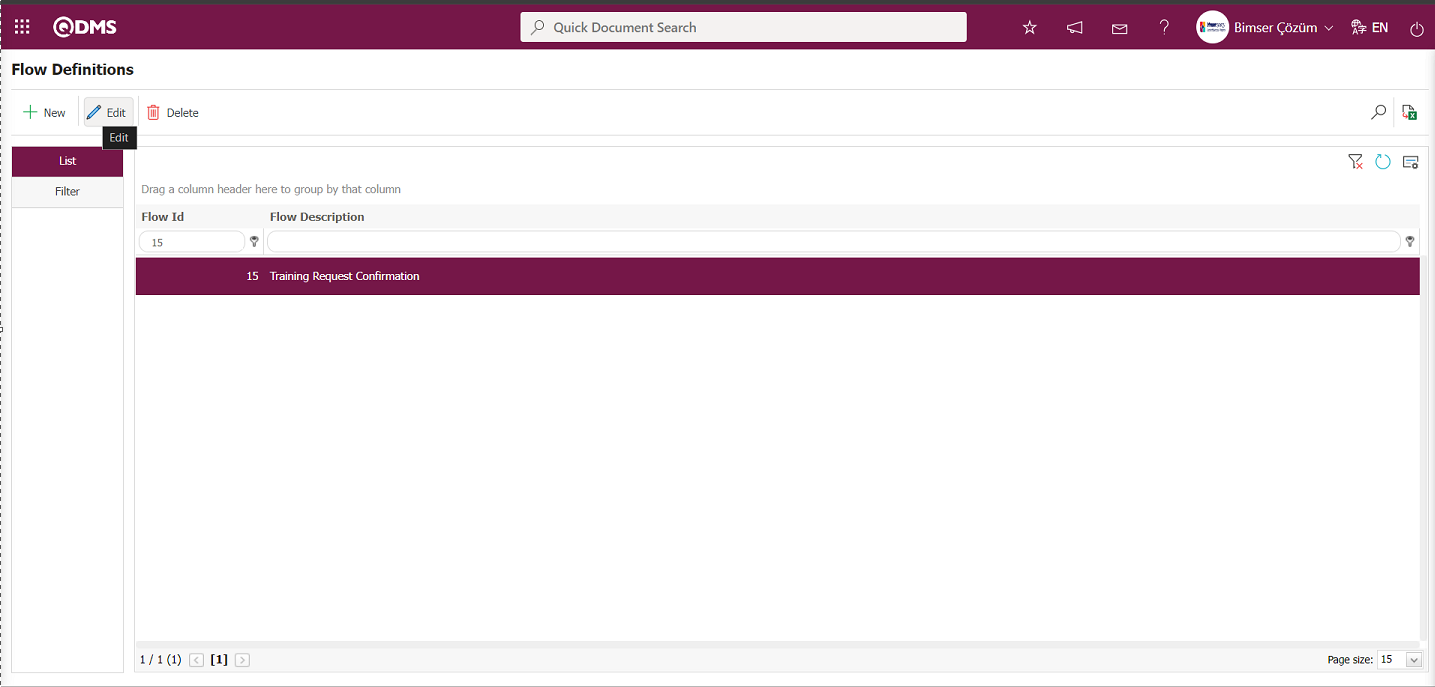
Click the  button on the Open Flow Definition - Integrated Management System screen.

In the Role list that opens, select the appropriate role for Training Request Approval and click the  button.
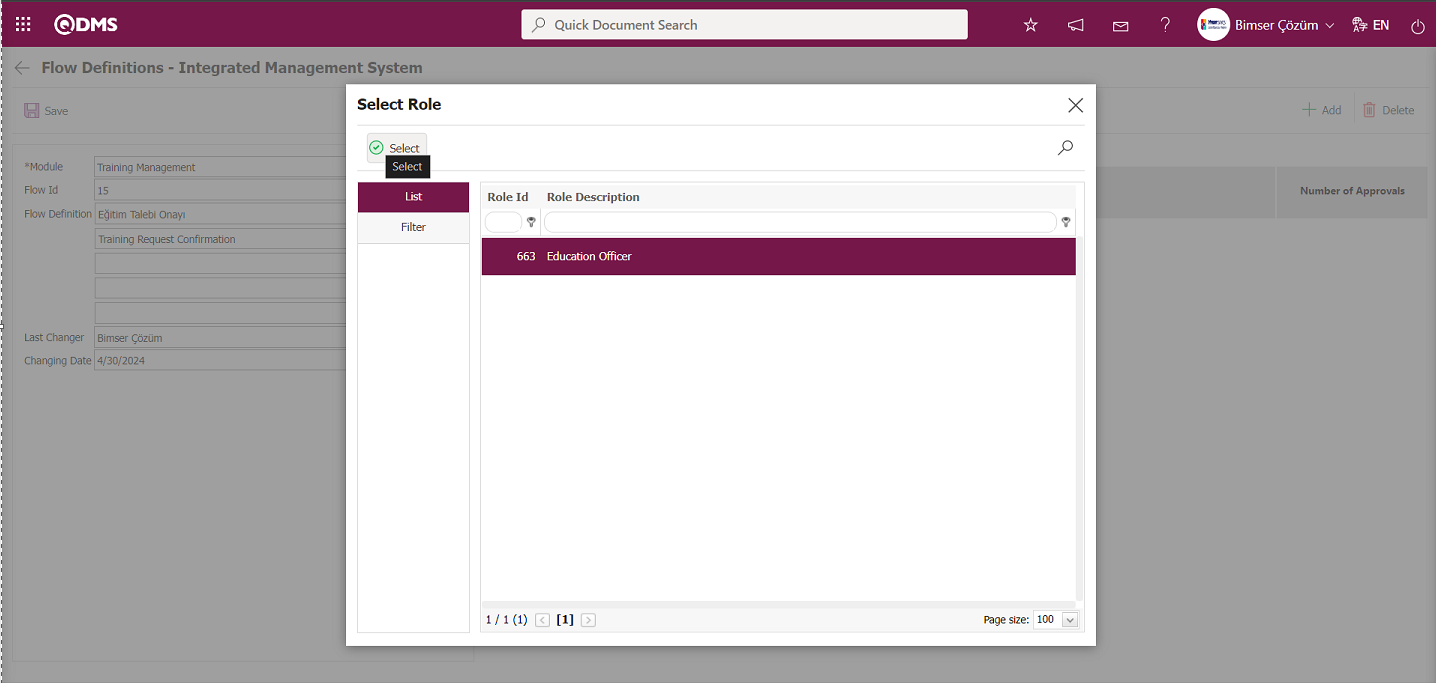
Flow Definition - In the Integrated Management System screen, the role selection process is performed based on the Training Request Approval flow.
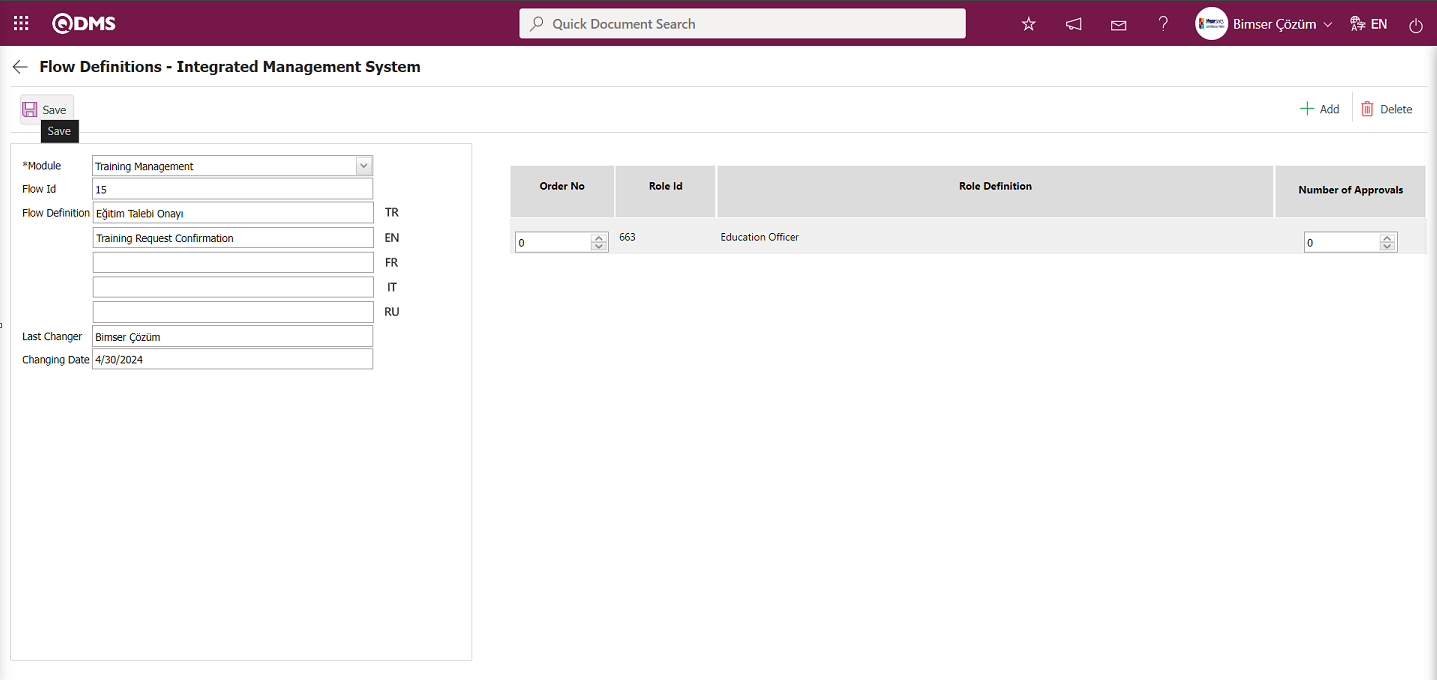
After selecting a role, click the  button in the upper left corner of the screen to update the flow definition record and proceed to the Training Request Approval flow with the selected role.

After selecting a role in the Training Request Approval flow, the process of associating the flow defined in the Sub-Module Definition menu with the module, approval request, notification, and rejection messages is performed. When “Training Request Approval” is selected in the Sub-Module Definition menu, clicking the  button performs the association process for the workflow defined in the Workflow Definition.
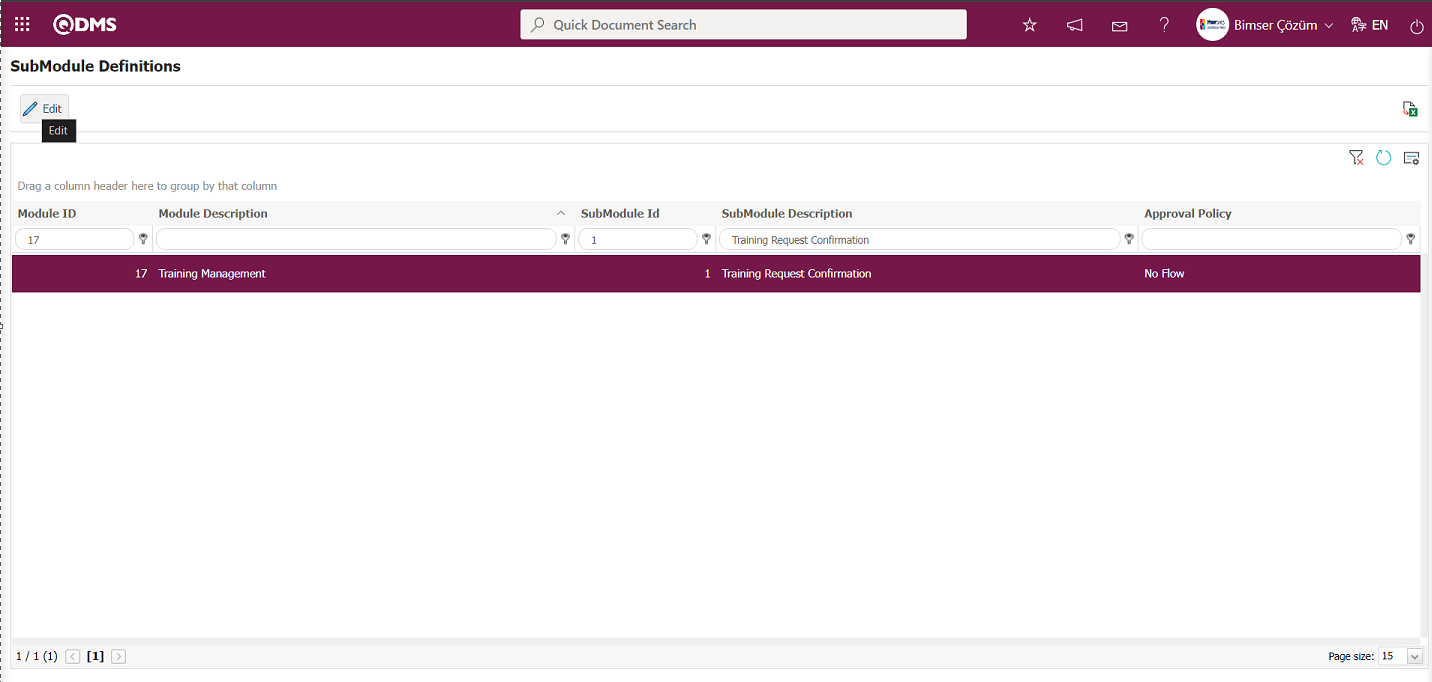
In the Sub-Module Definition screen that opens, the process of associating the flow defined in the Flow Definition field with the module, approval request, notification, and rejection messages is performed.
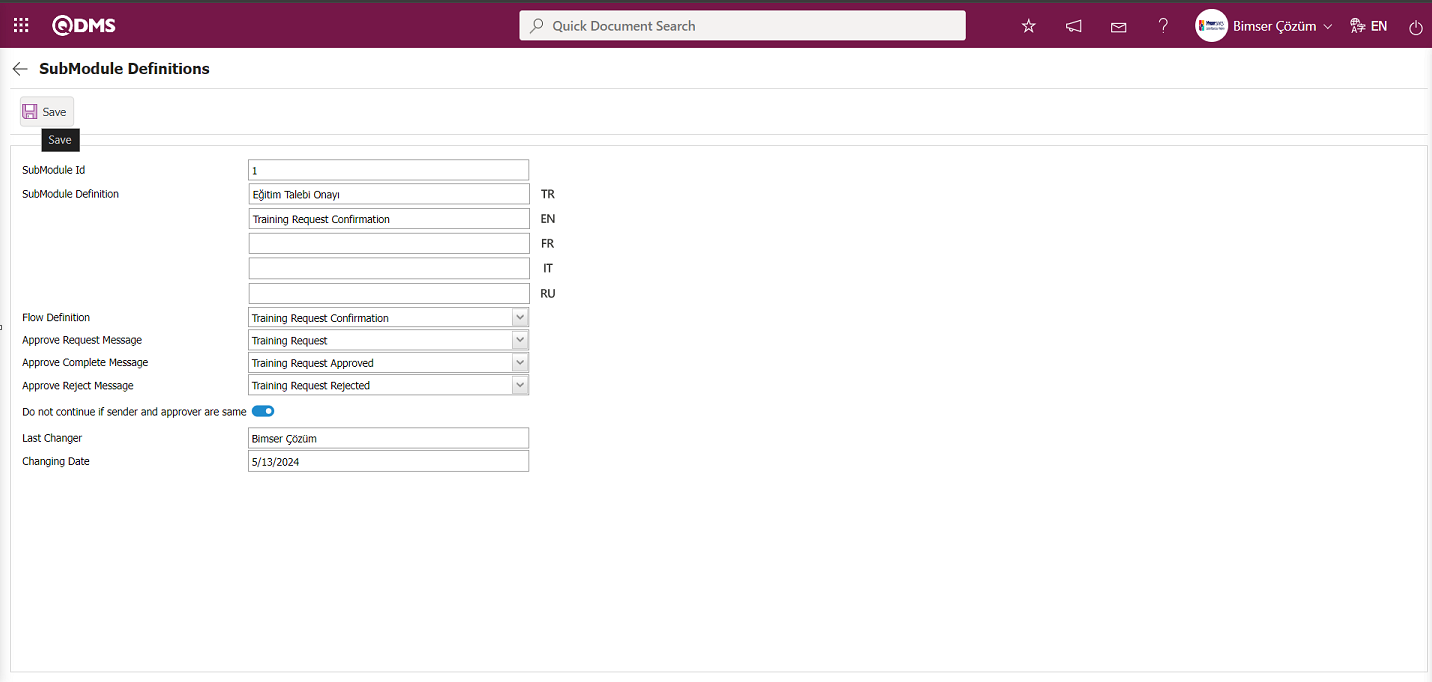
After completing the necessary steps, click the  button in the upper left corner of the screen to define the Sub-Module Definition.

To set up an approval flow for individual Training requests;
Go to System Infrastructure Definitions / BSID/Configuration Settings/Flow Definition menu.
In the Flow Definition screen, select the “Training Planning” module from the modules in the Filter tab and click the  (Search) button.
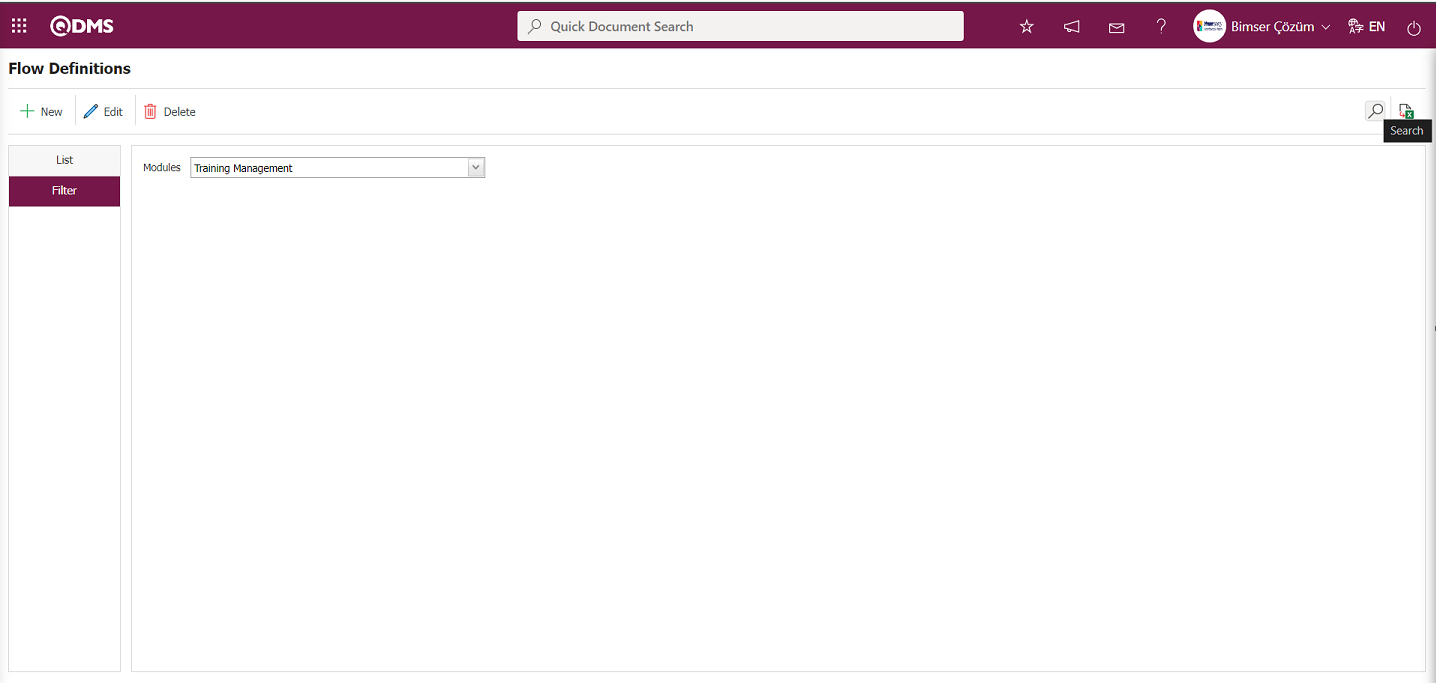
In the Flow Definition screen, click the  button while the Individual Training Request Approval flow is selected in the List tab.
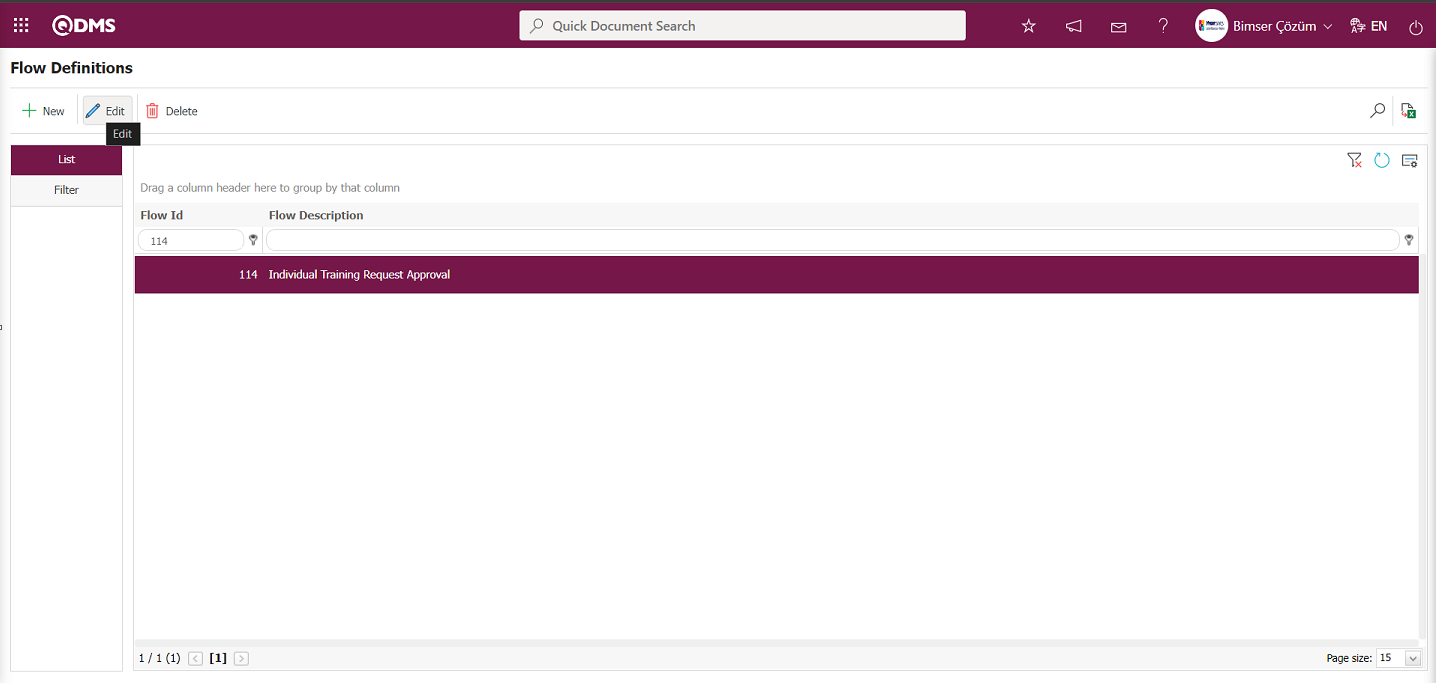
Click the  button on the Open Flow Definition - Integrated Management System screen.
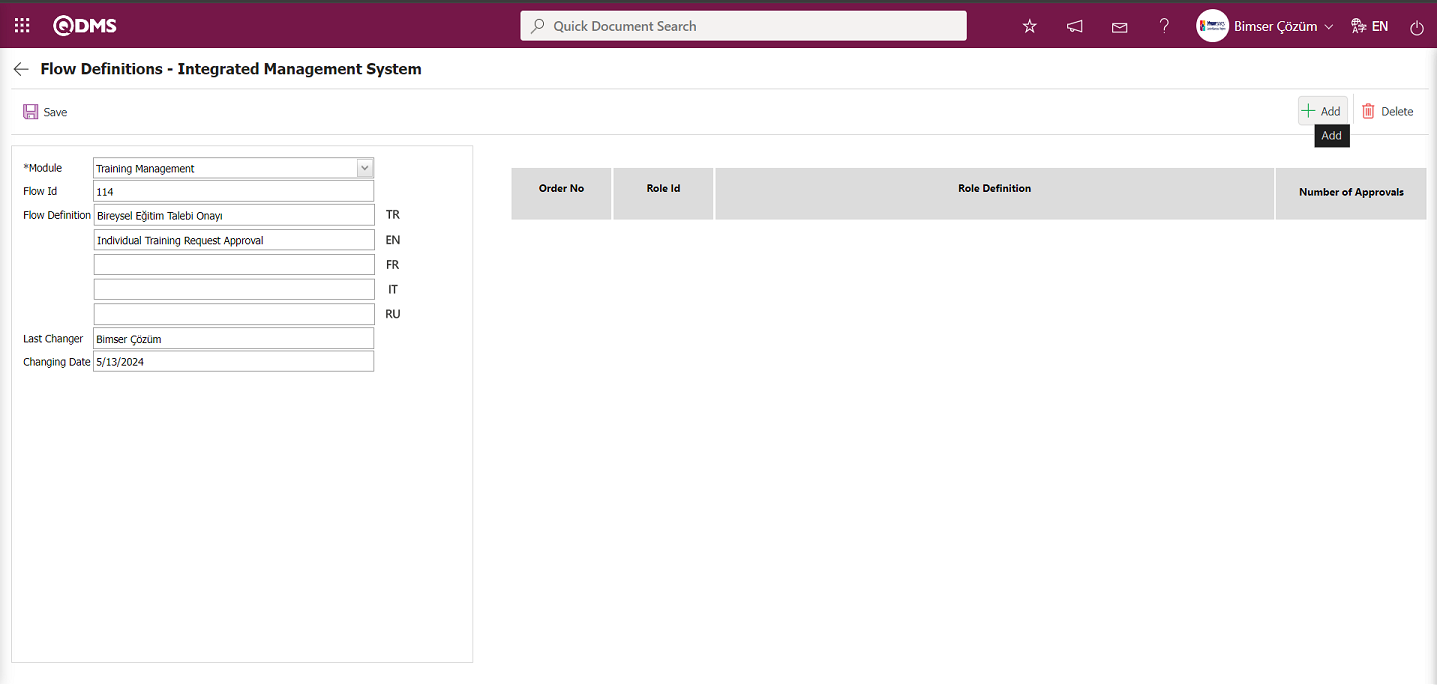
In the Role list that opens, select the appropriate role for the Individual Training Request flow and click the  button.
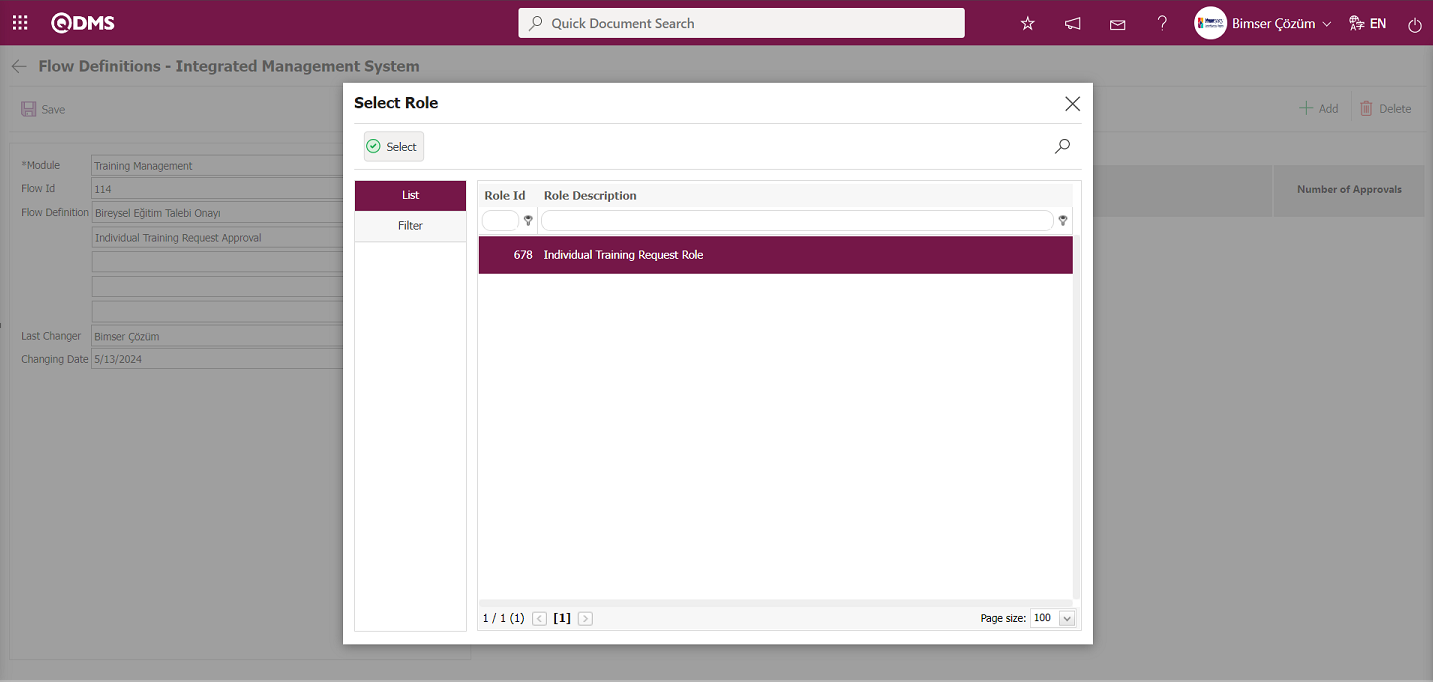
Flow Definition - In the Integrated Management System screen, the role selection process is performed based on the Individual Training Request flow.
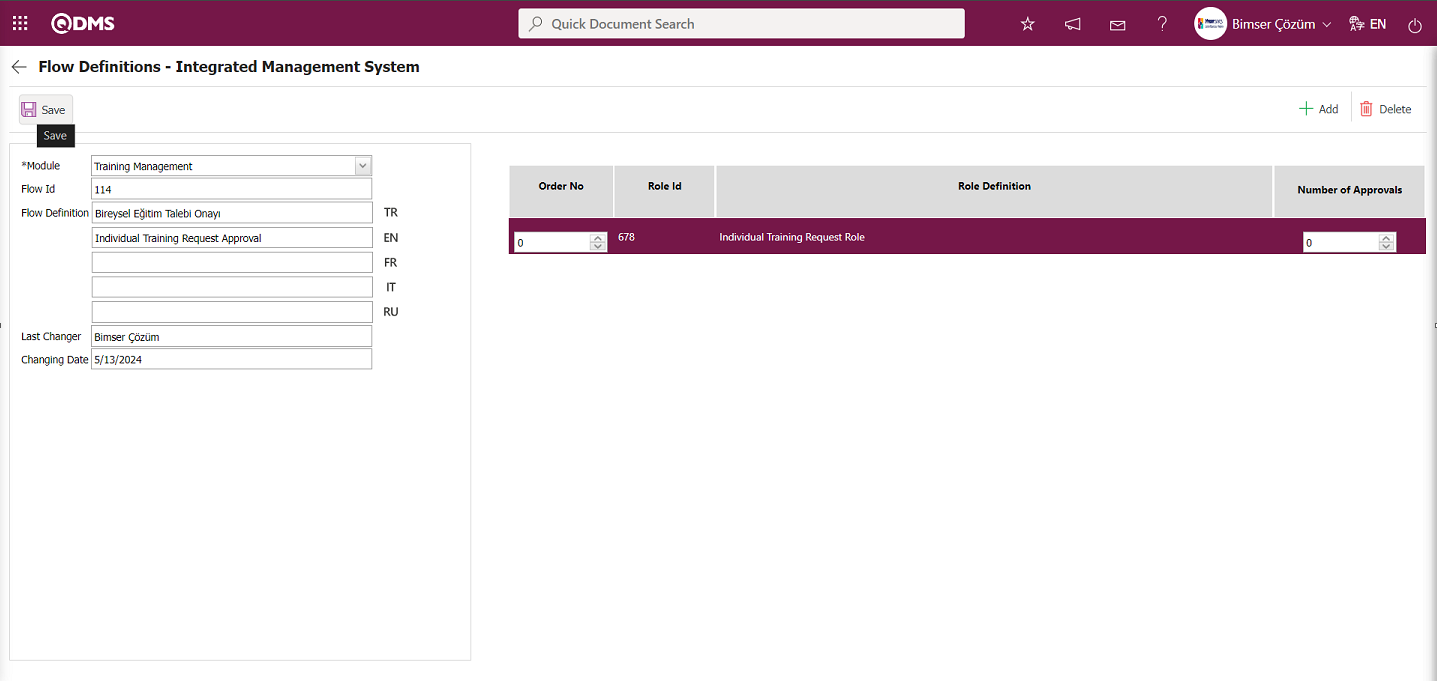
After selecting a role, click the button in the upper left corner of the screen  to update the flow definition record and proceed to the Individual Training Request Approval flow with the selected role.

After selecting a role in the Individual Training Request Approval flow, the flow defined in the Sub-Module Definition menu is introduced in the module, and the approval request, notification, and rejection messages are linked. With “Individual Training Request Approval” selected in the Sub-Module Definition screen, click the  button to link the flow defined in Flow Definition.
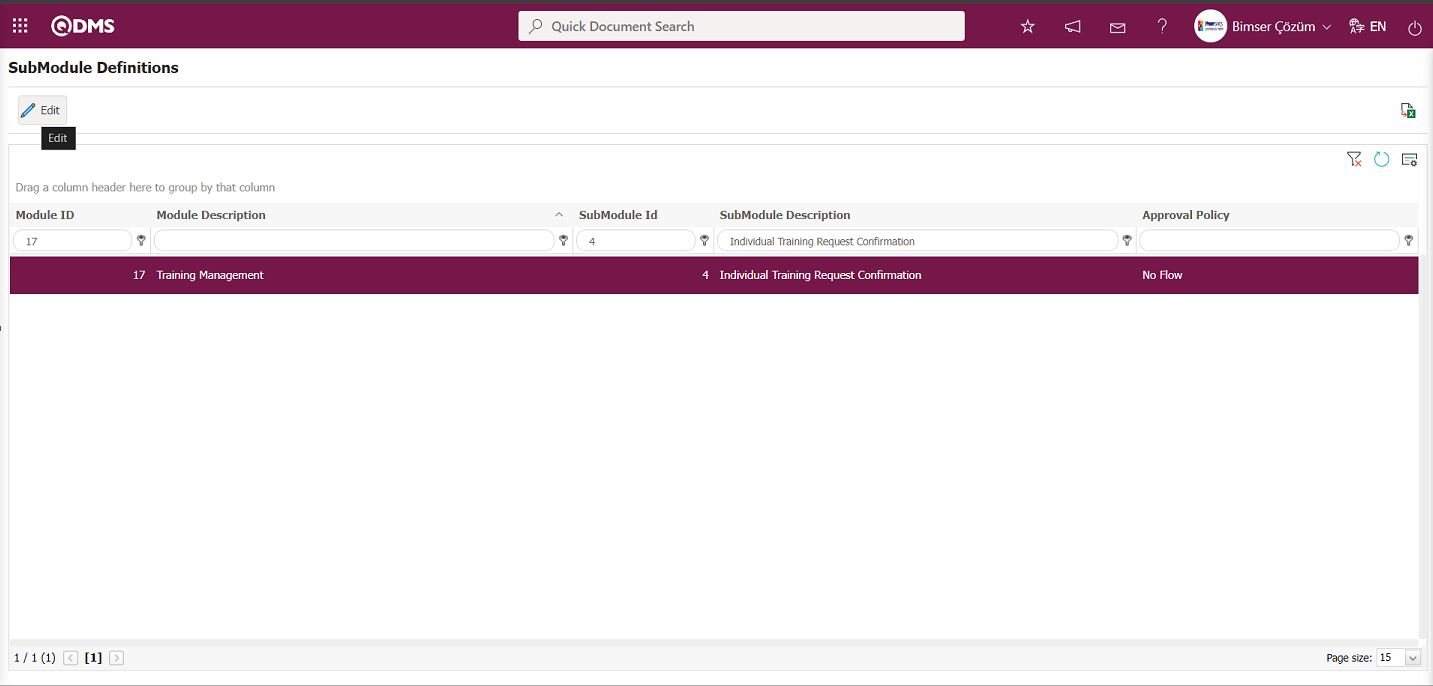
In the Sub-Module Definition screen that opens, the process of associating the flow defined in the Flow Definition field with the module, approval request, notification, and rejection messages is performed.
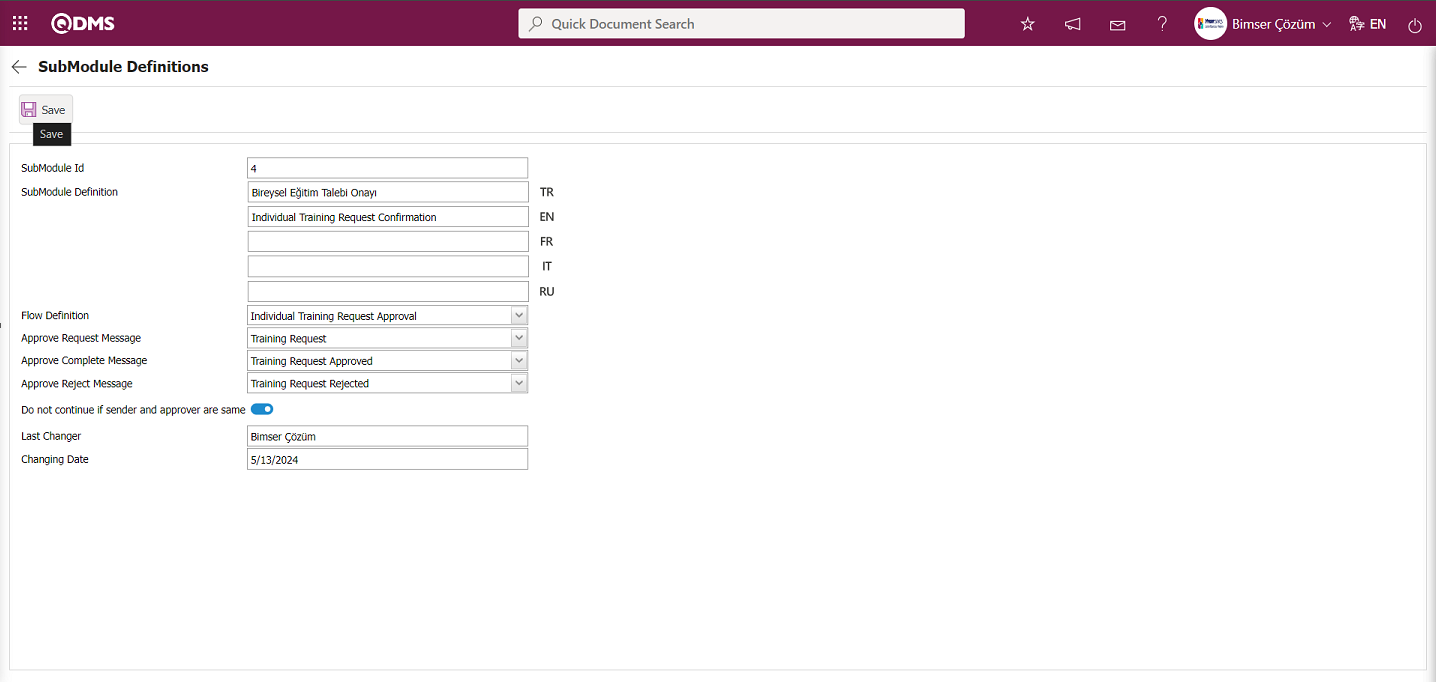
After completing the necessary steps, click the  button in the upper left corner of the screen to register the Sub-Module Definition.
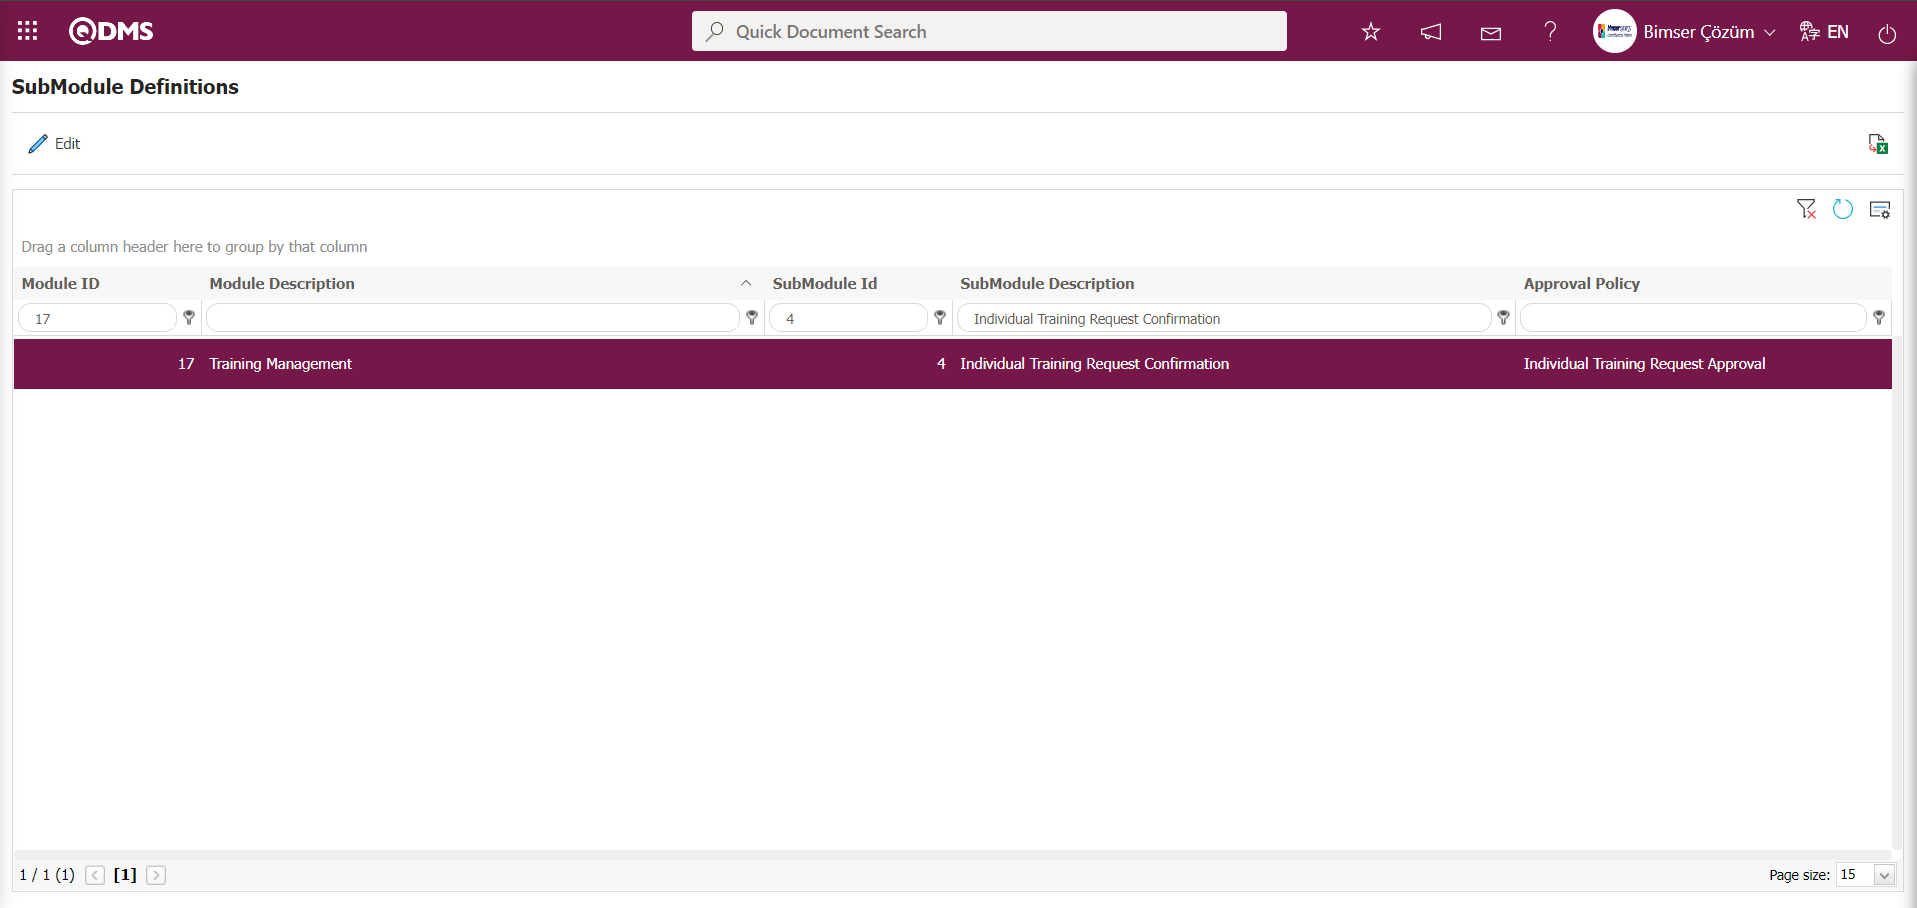
6.3.6.2. Create a New Training Request
Menu Name: Integrated Management System/ Training Planning/ Training Request
This menu is used to request training that has been defined in the User Training Definition menu or has not been provided at all.

Using the buttons on the screen;
 : A new Training Request is defined.
 : The selected Training Request information in the list will be deleted.
 : The selected Training Request Information is displayed in the list.
To create a new training request, click the button to open the New Training Request screen.

The relevant fields are defined on the screen that opens:
Warning: This is the area where the system automatically displays warning information related to the requested training on the New Training Request screen. This area is displayed depending on the parameters. The warning message defined in parameter number 32 of the Training Planning module parameters is displayed.
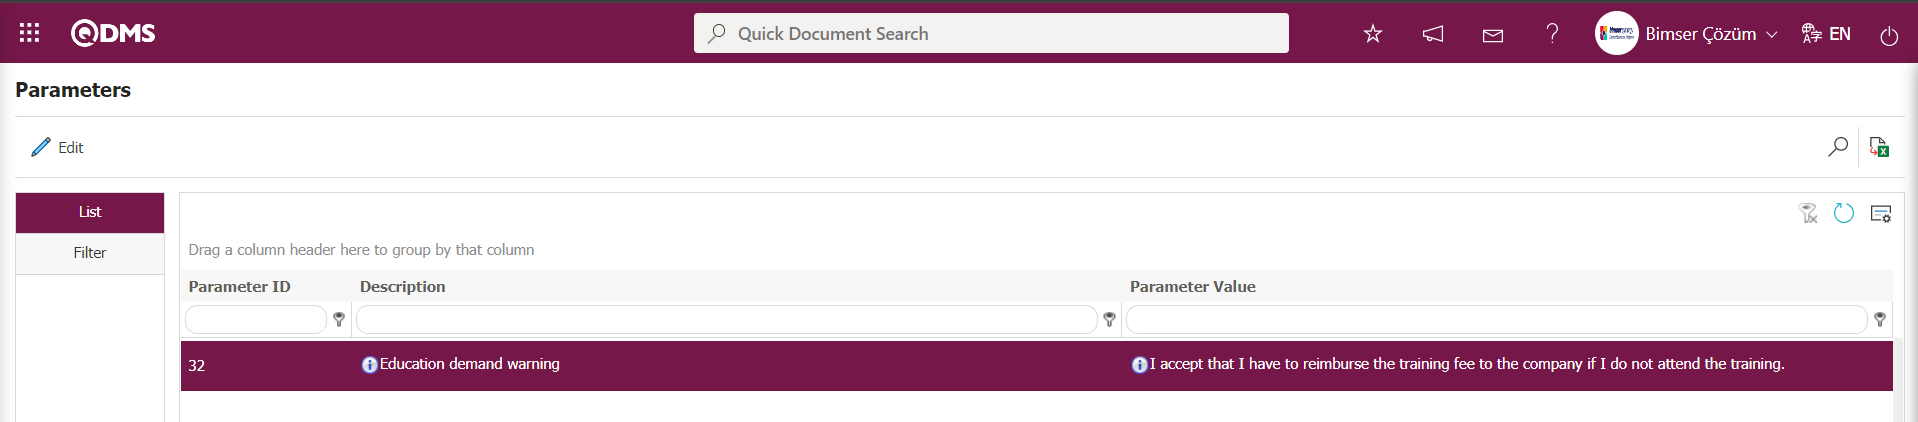
Subject: This is the field where the subject of the training is entered on the New Training Request screen. The training may be one that has been provided previously or one that has never been provided before.
Definition: The New Training Request screen is where you enter information such as the reason for requesting training and its benefits.
Training Definition: If the training requested in the New Training Request screen is one of the training definitions introduced into Qdms, this is where the link is established. By clicking the  (Select) button in the Training Definition field, a selection is made from the list of defined trainings in the system that opens, and the requested training is linked.
Estimated Cost: This is the field where you enter an estimated cost for the requested training on the New Training Request screen.
Participants: This field specifies the users who are requested to participate in the training requested on the New Training Request screen or who are required to take this training. In this field, you can select personnel from the list of personnel defined in the system by clicking the (Add) button, or select a user group from the list of user groups defined in the system by clicking the (Add) button.
After entering the required information in the New Training Request screen, click the  button in the upper left corner of the screen to send the training request to the user selected for approval.
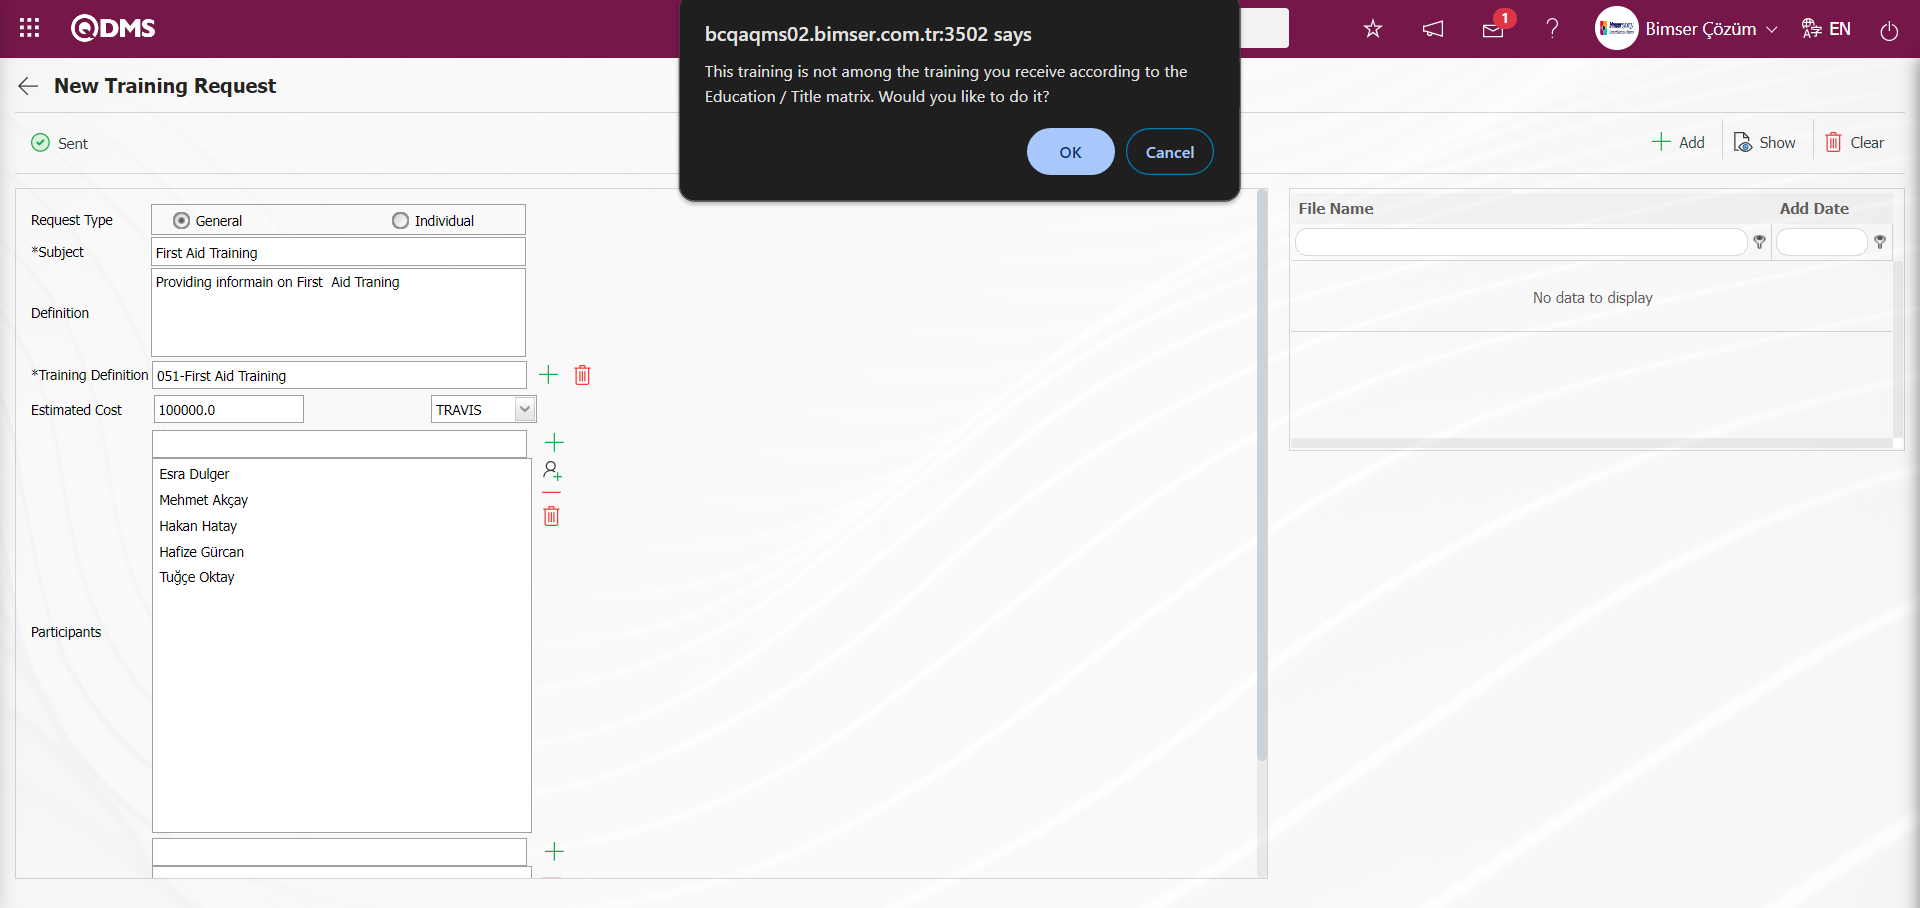
Click the “OK” button in the message displayed by the system.
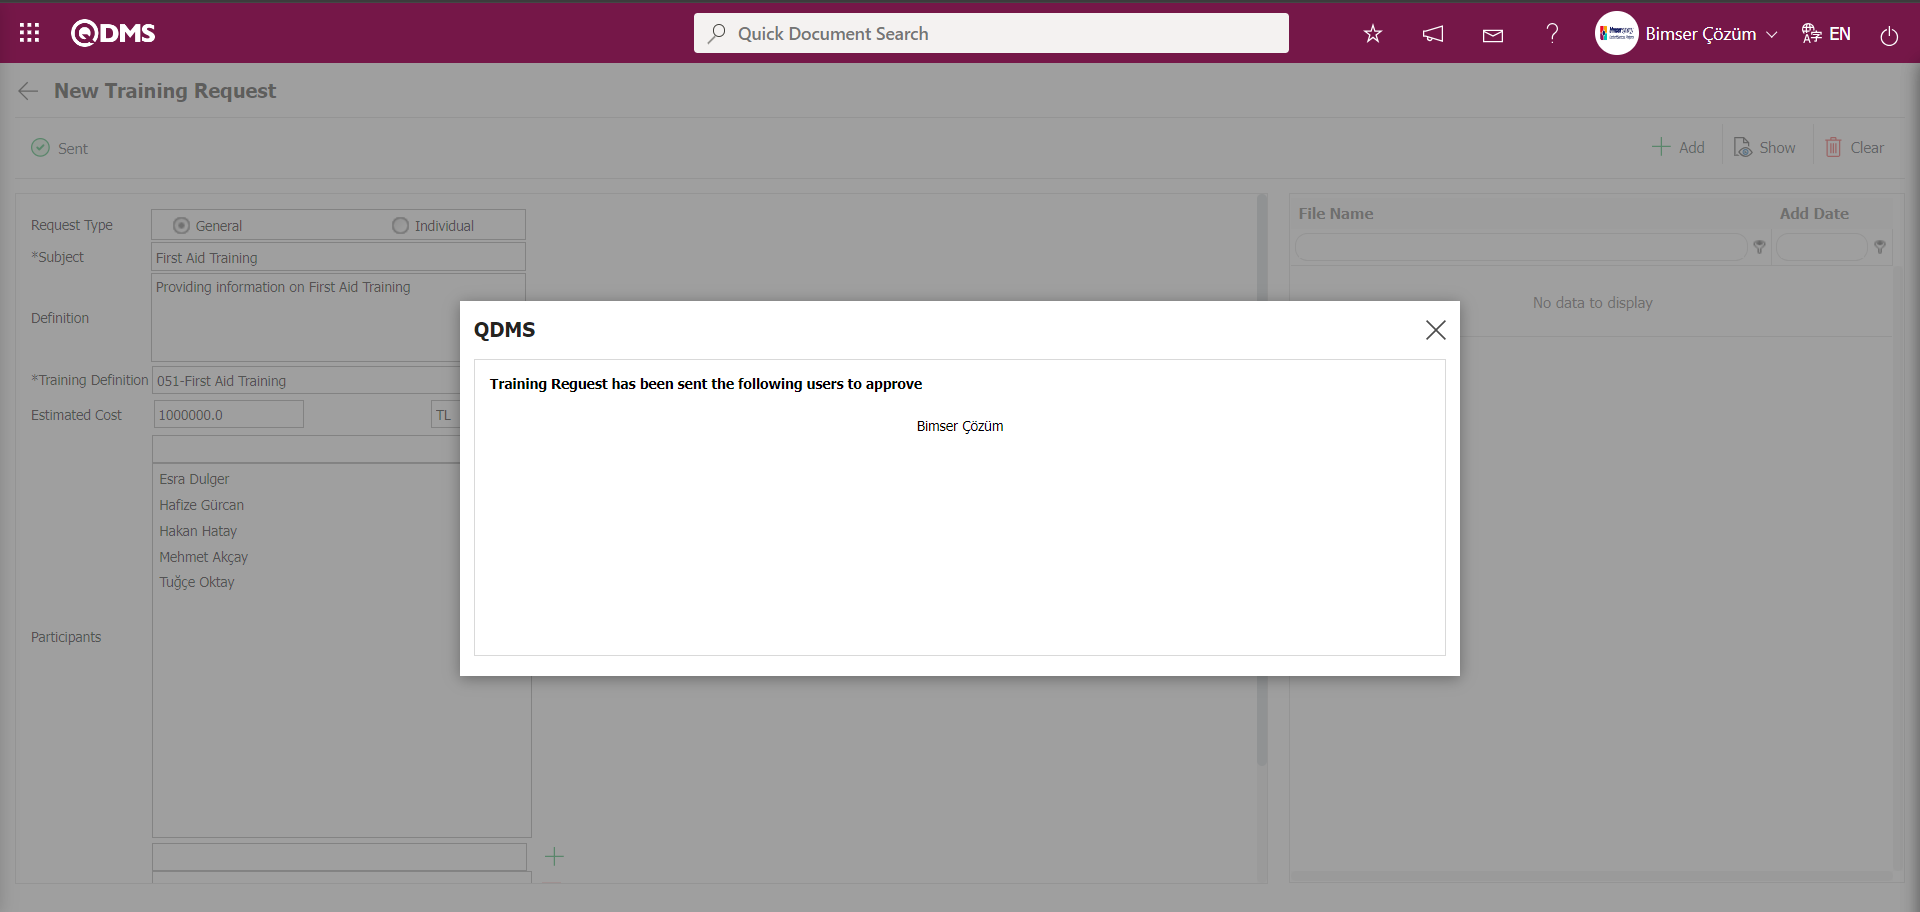
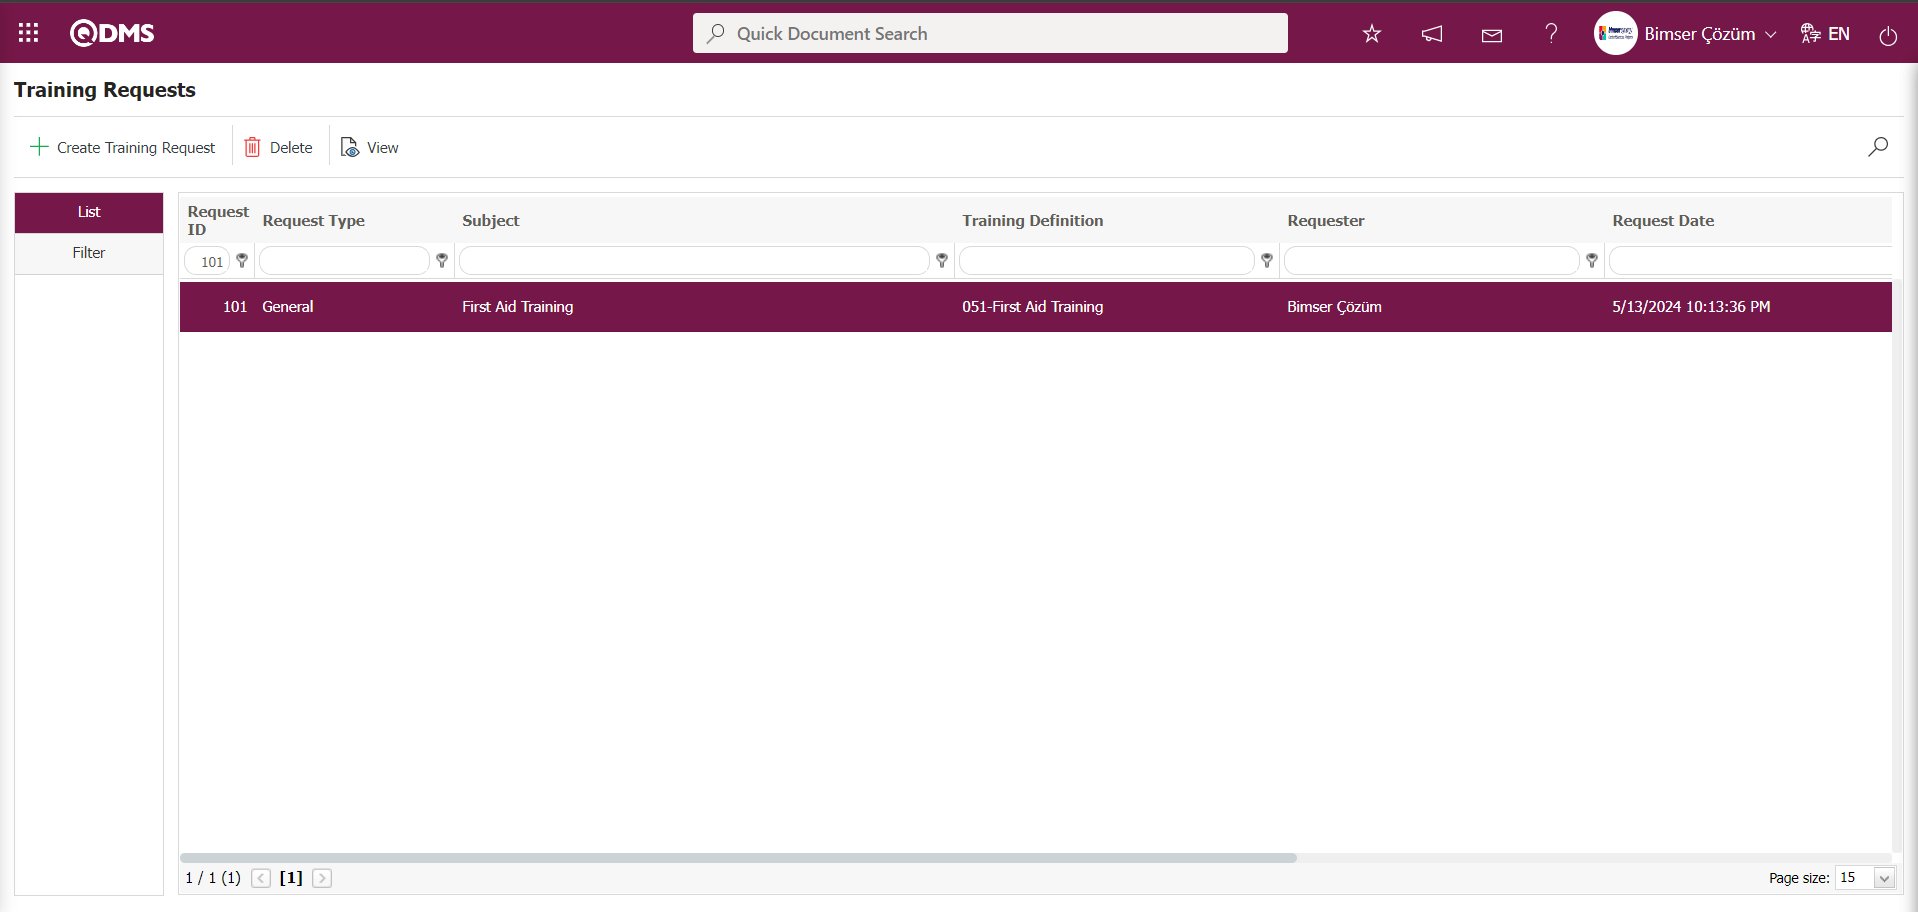
From the Training Requests screen, select a Training Request from the list and click the  button.
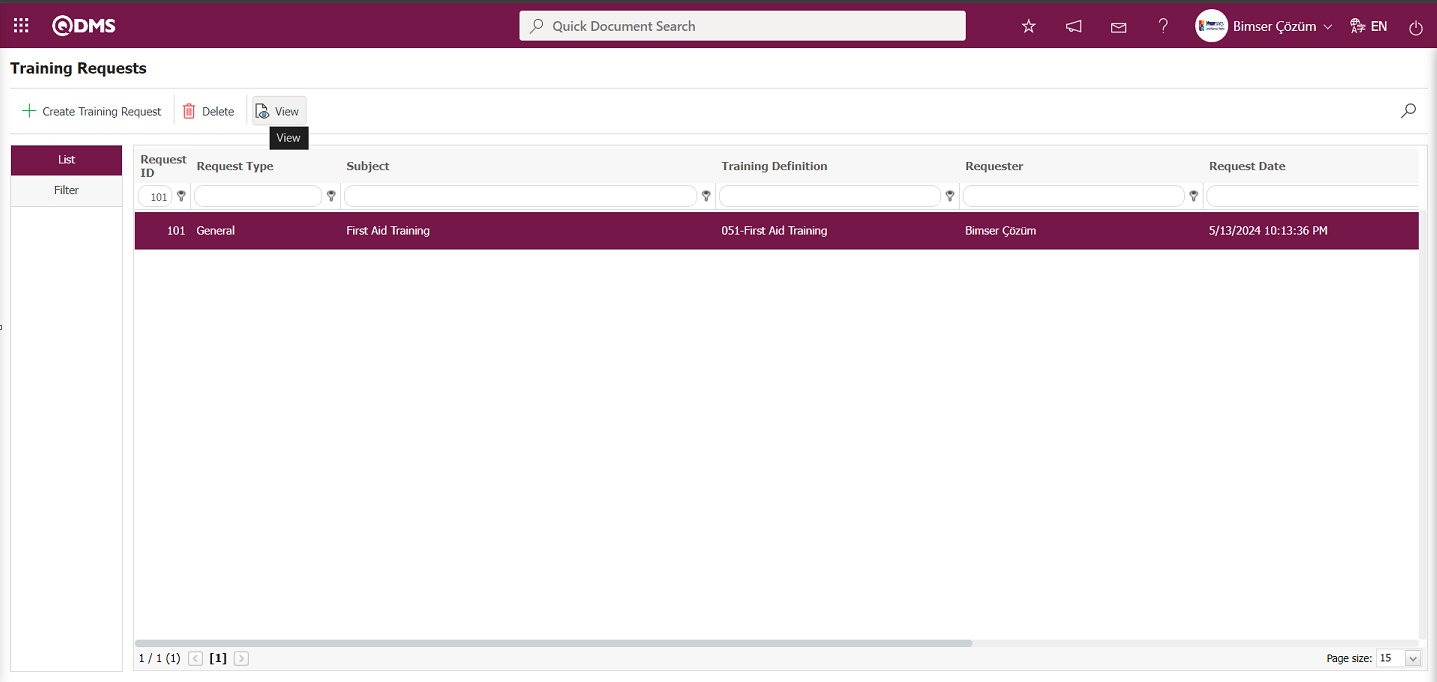
The details of the training request are displayed on the screen that opens.
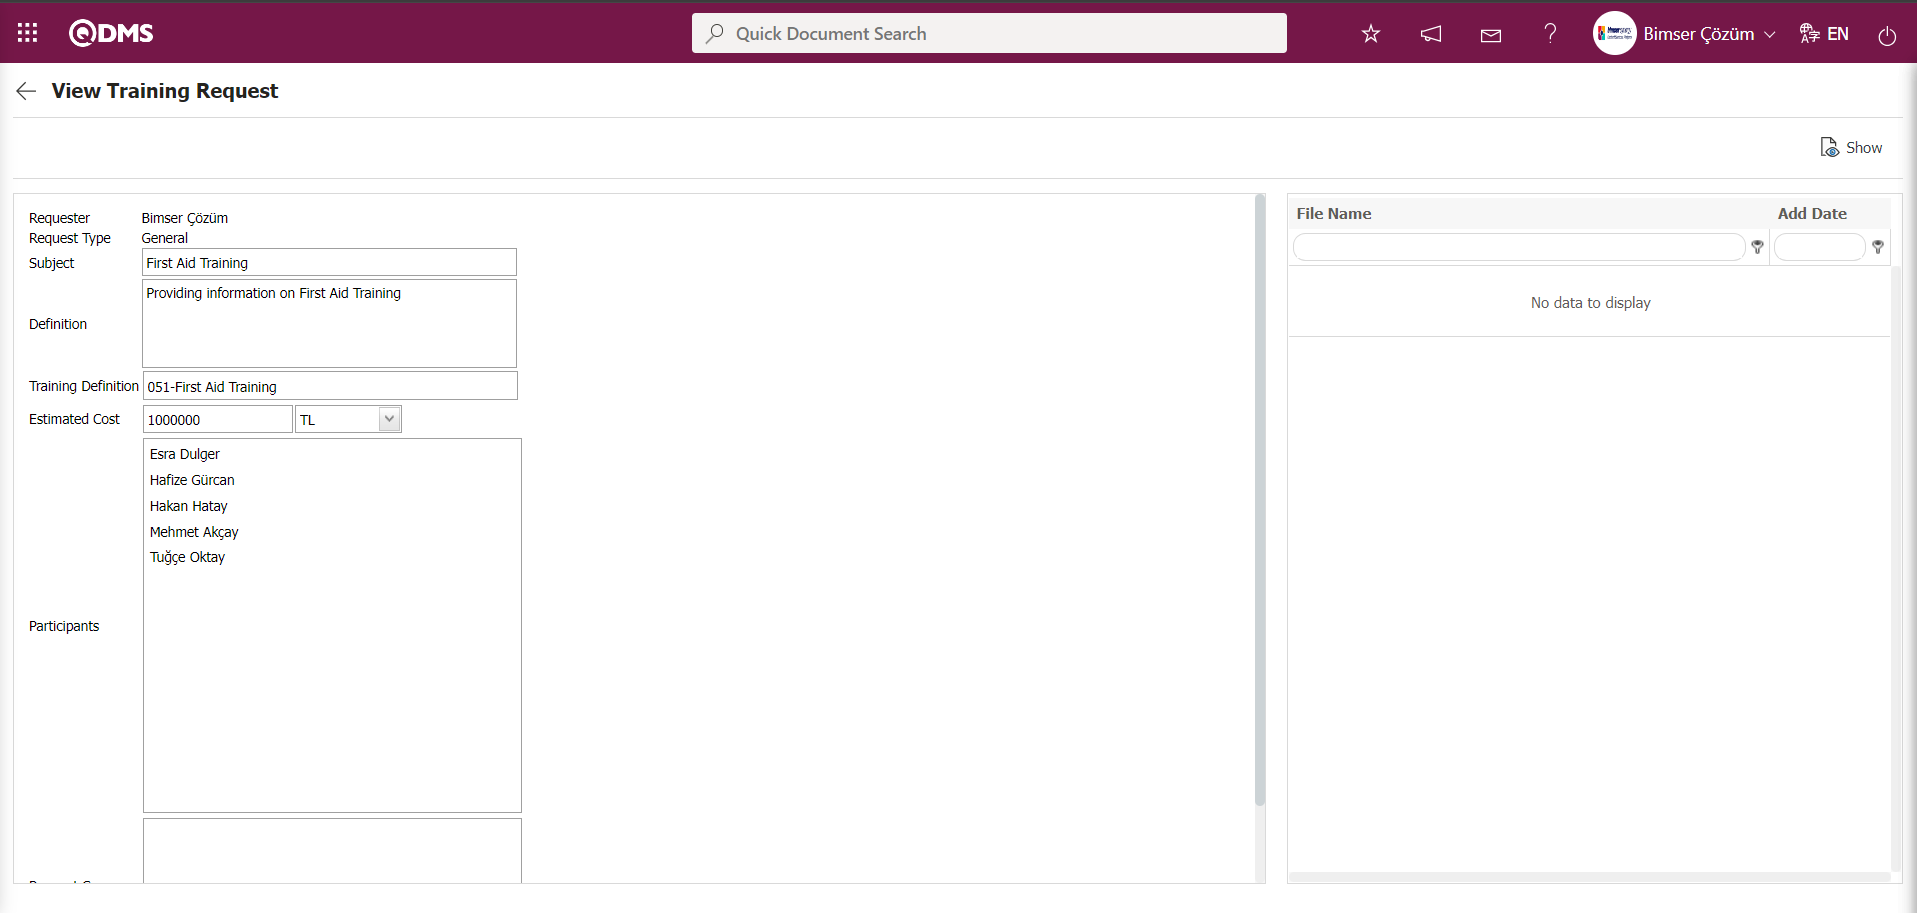
From the Training Requests screen, enter data in the filter fields such as Subject, Request ID, and Requester, then click the Search button to filter the results.
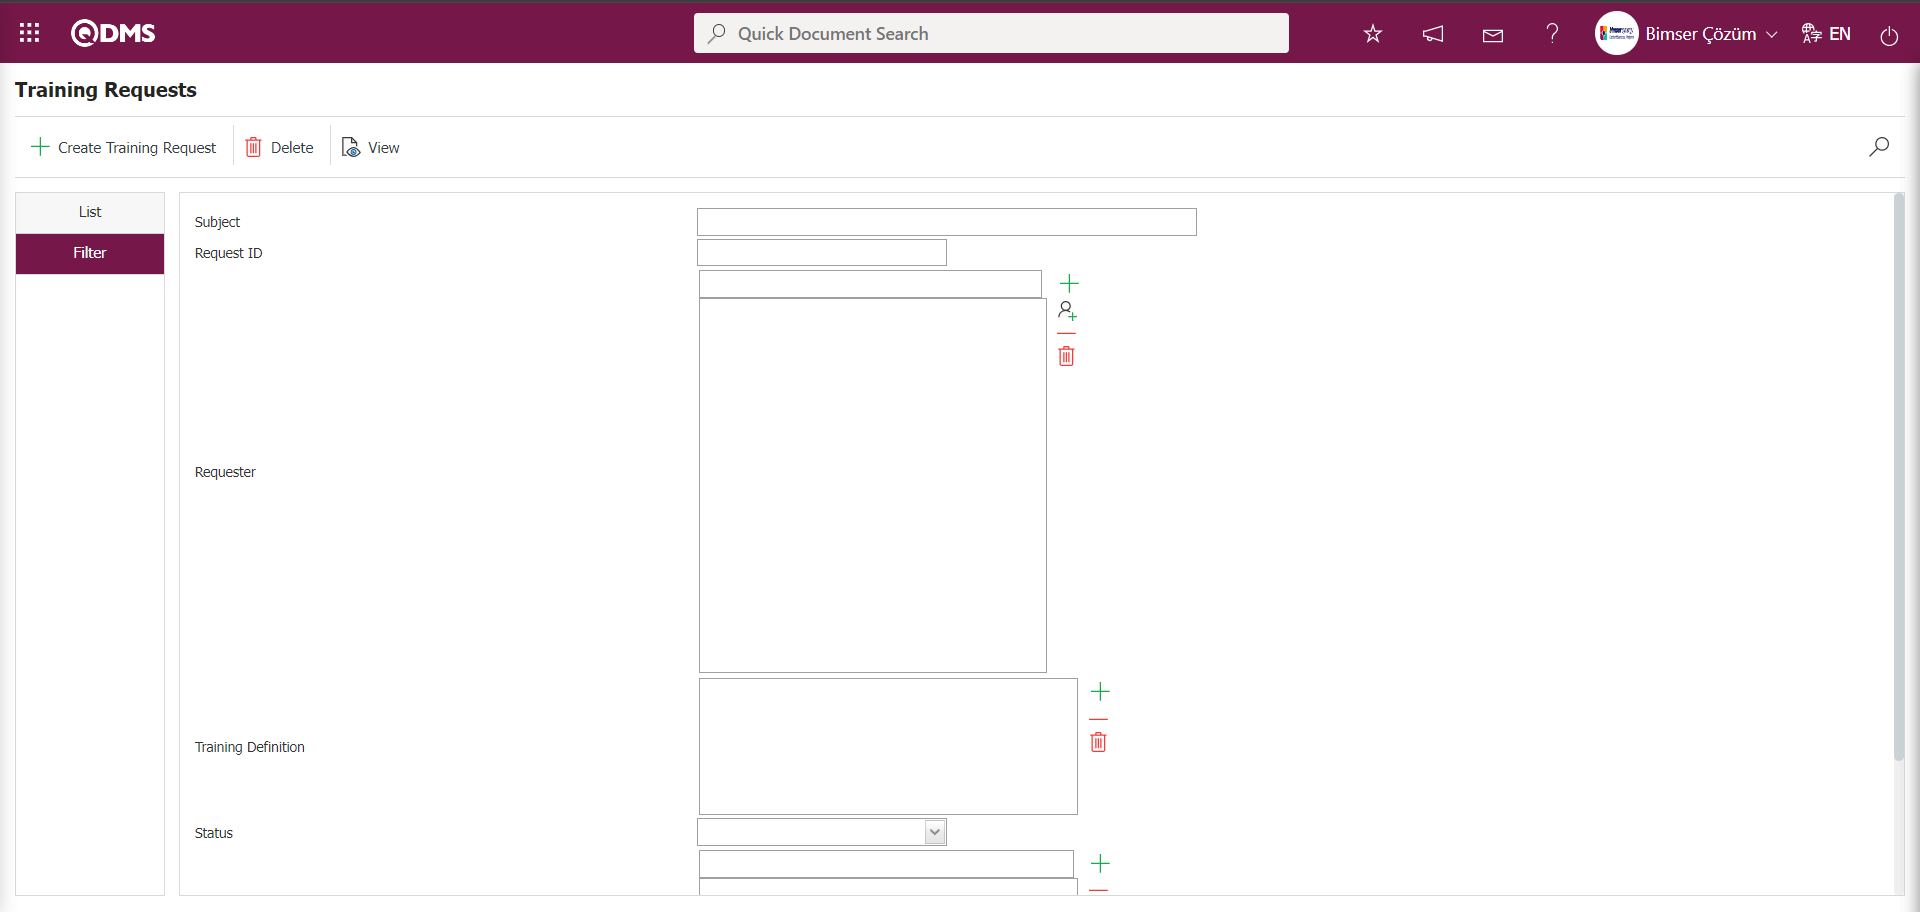
6.3.6.3. Training Request Approval
Menu Name: Integrated Management System/ Training Planning/ Training Request Approval
After training requests have been made, this menu is used by users with the training request approval role to approve or reject requests. In the Training Request Approval screen, the training request related to the selected Training Request in the list can be approved, rejected, or viewed.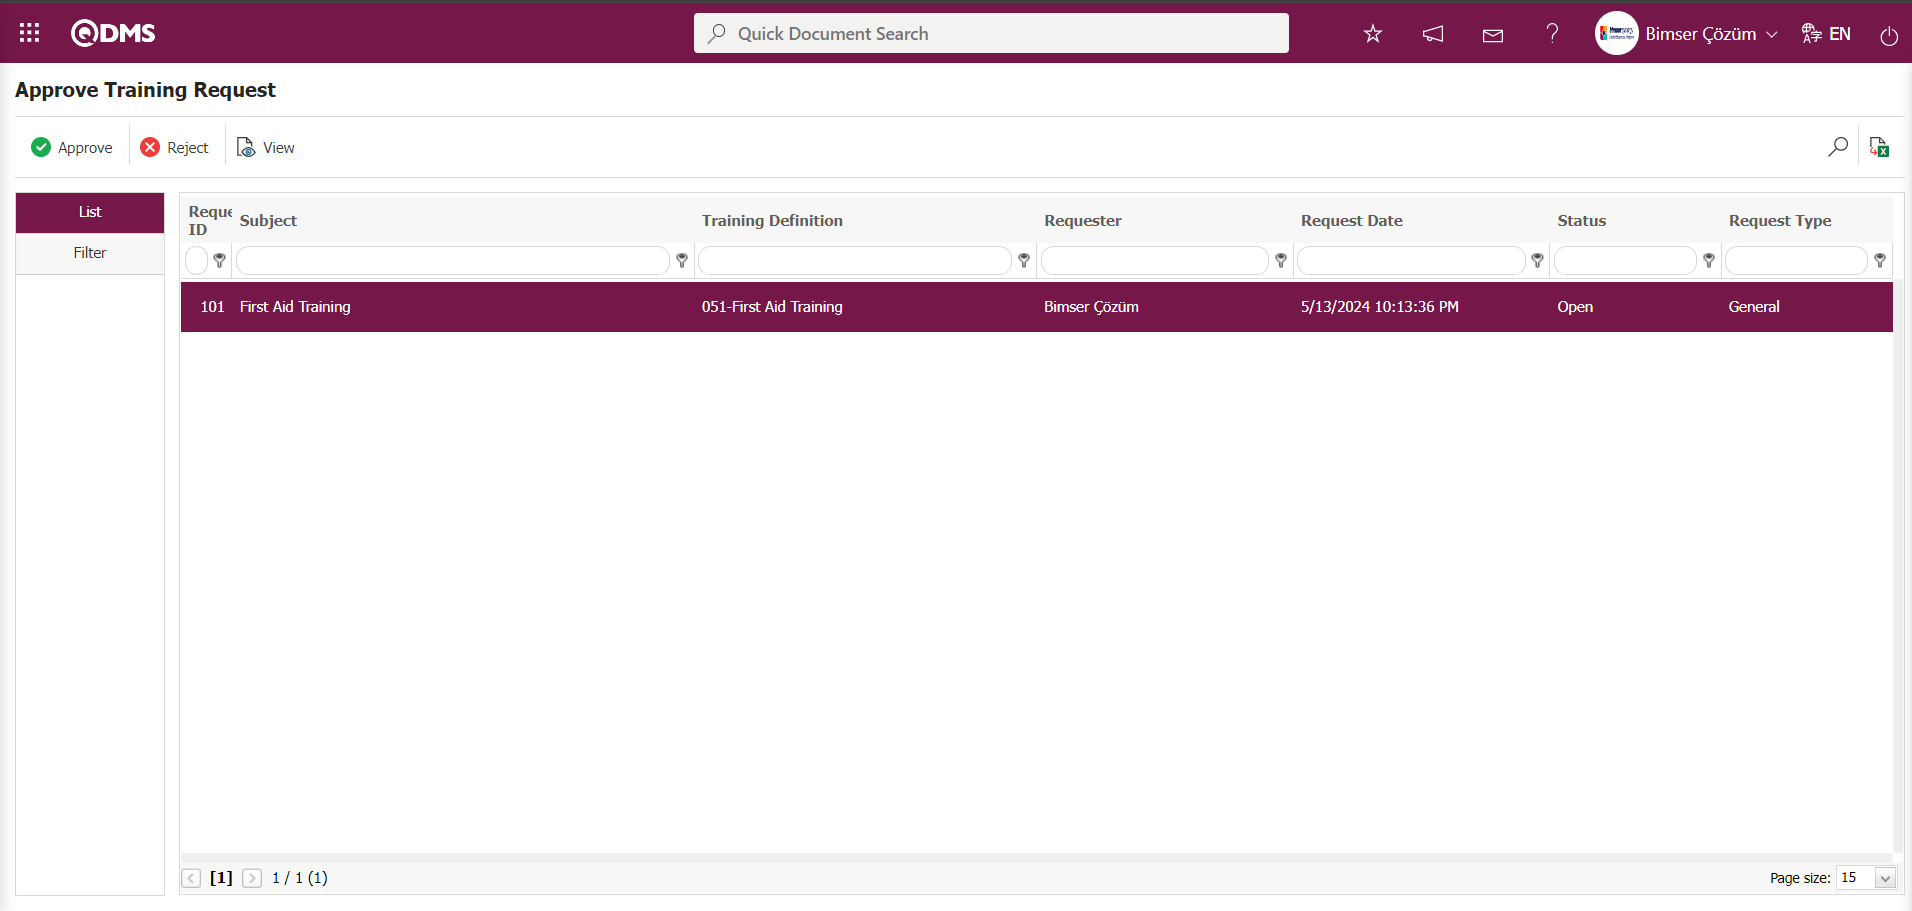
Using the buttons on the screen;
 : The selected training request in the list is approved.
 : The selected training request in the list is rejected.
 : Displays the selected training requests in the list.
 : Records can be filtered and searched.
 : The data can be exported to Excel.
In addition, pending training requests appear as tasks on the pending tasks page. In the approval workflow, the user's “Pending Tasks” page displays the task “Training requests awaiting approval.”
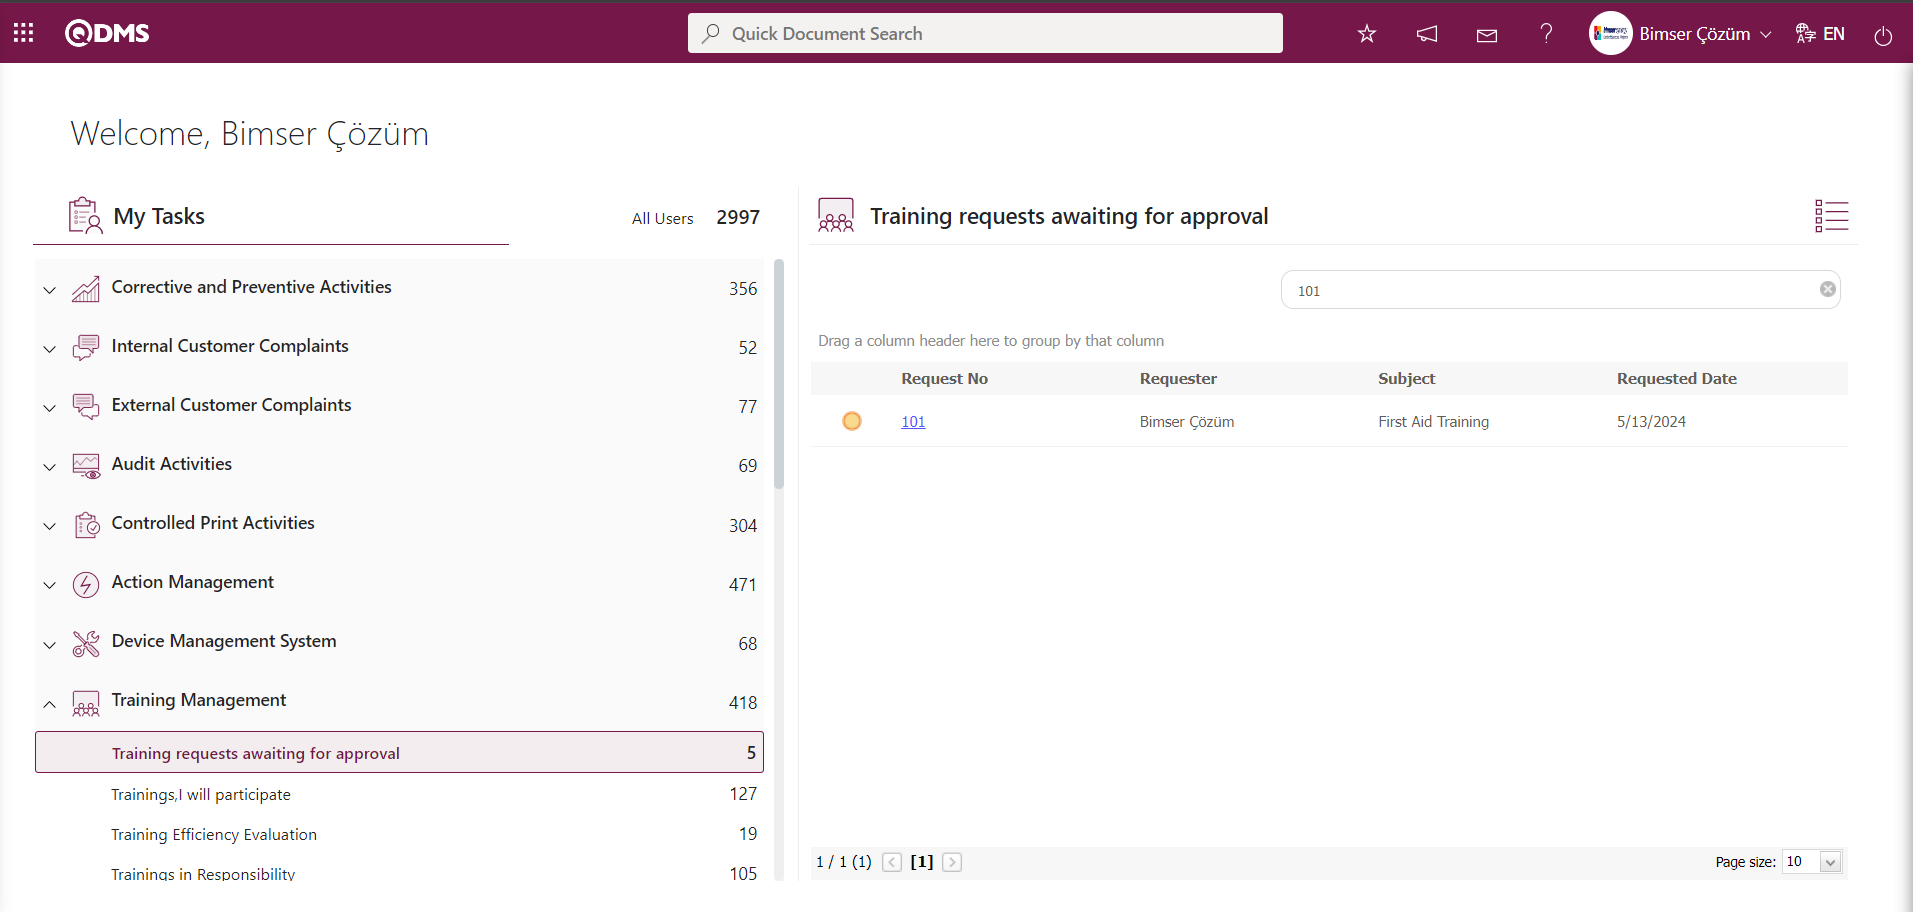
Click the Request No. link in the Request No. field of the relevant task to open the Training Request Approval screen.
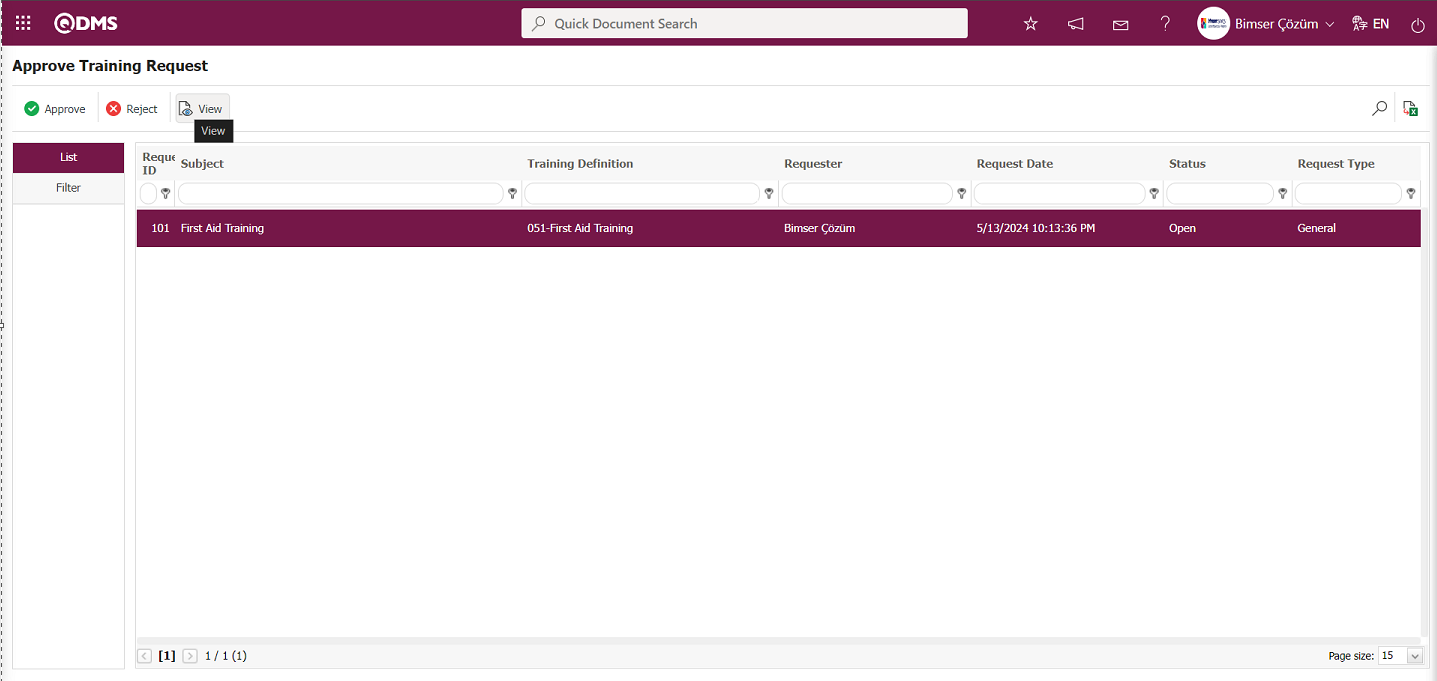
When an Training request is selected in the Training Request Approval screen, click the  button to view the Training request. At this stage, the Training request is approved or rejected.
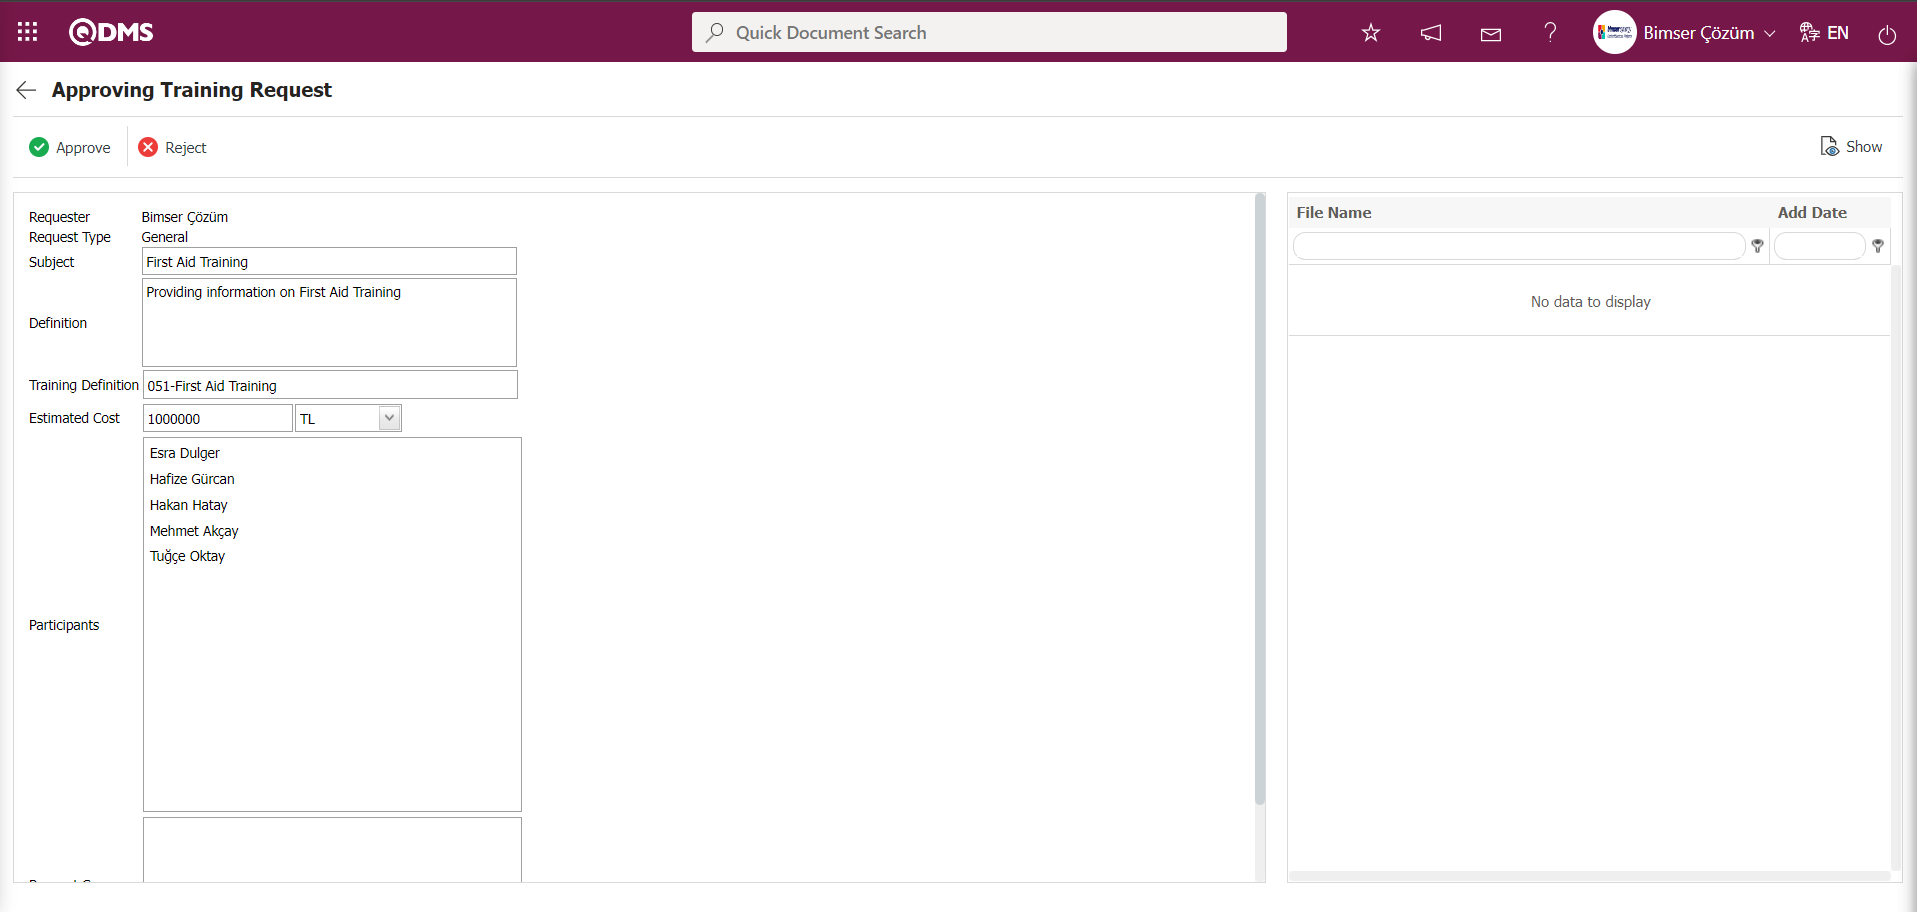
On the Training Request Approval screen, click the  button while the training request is selected.
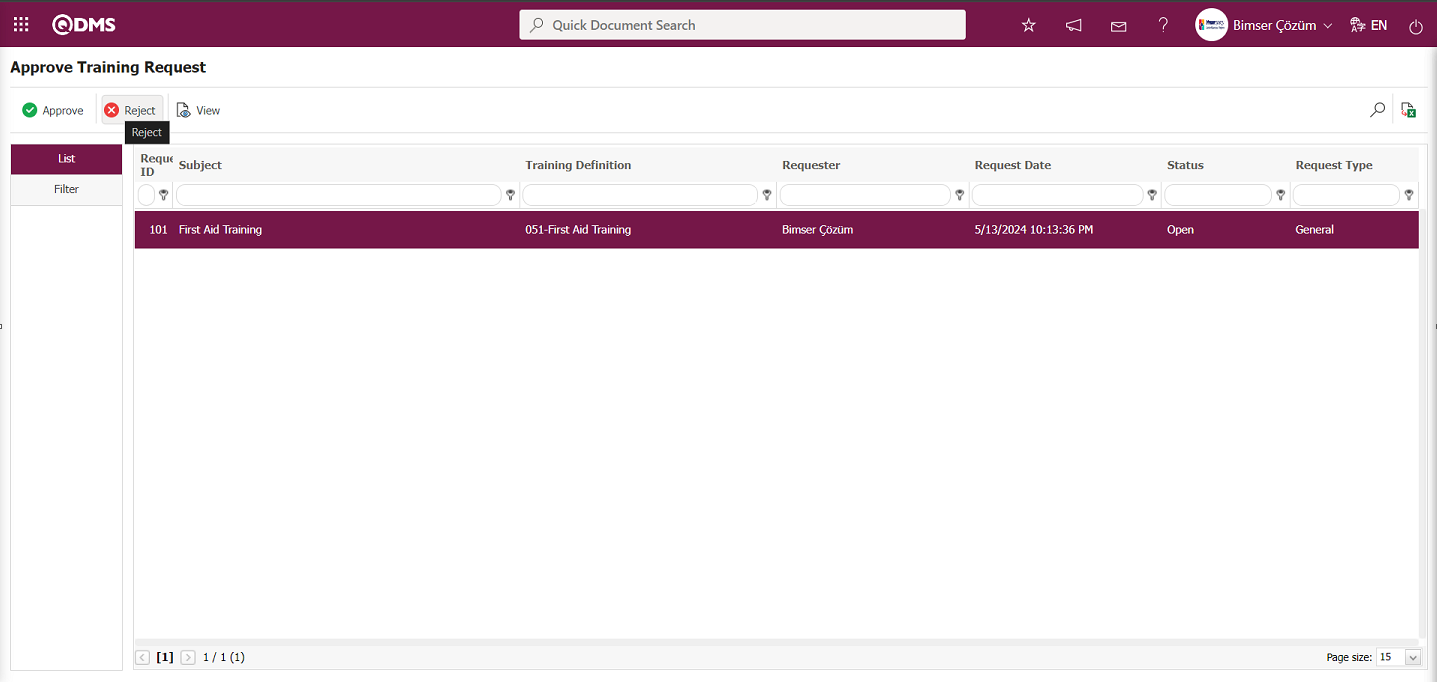
In the Reject Training Request screen that opens, the training request is rejected by entering the reason for rejection. When rejecting, you can reject for detailed information or cancel the training request record; select the appropriate option accordingly.
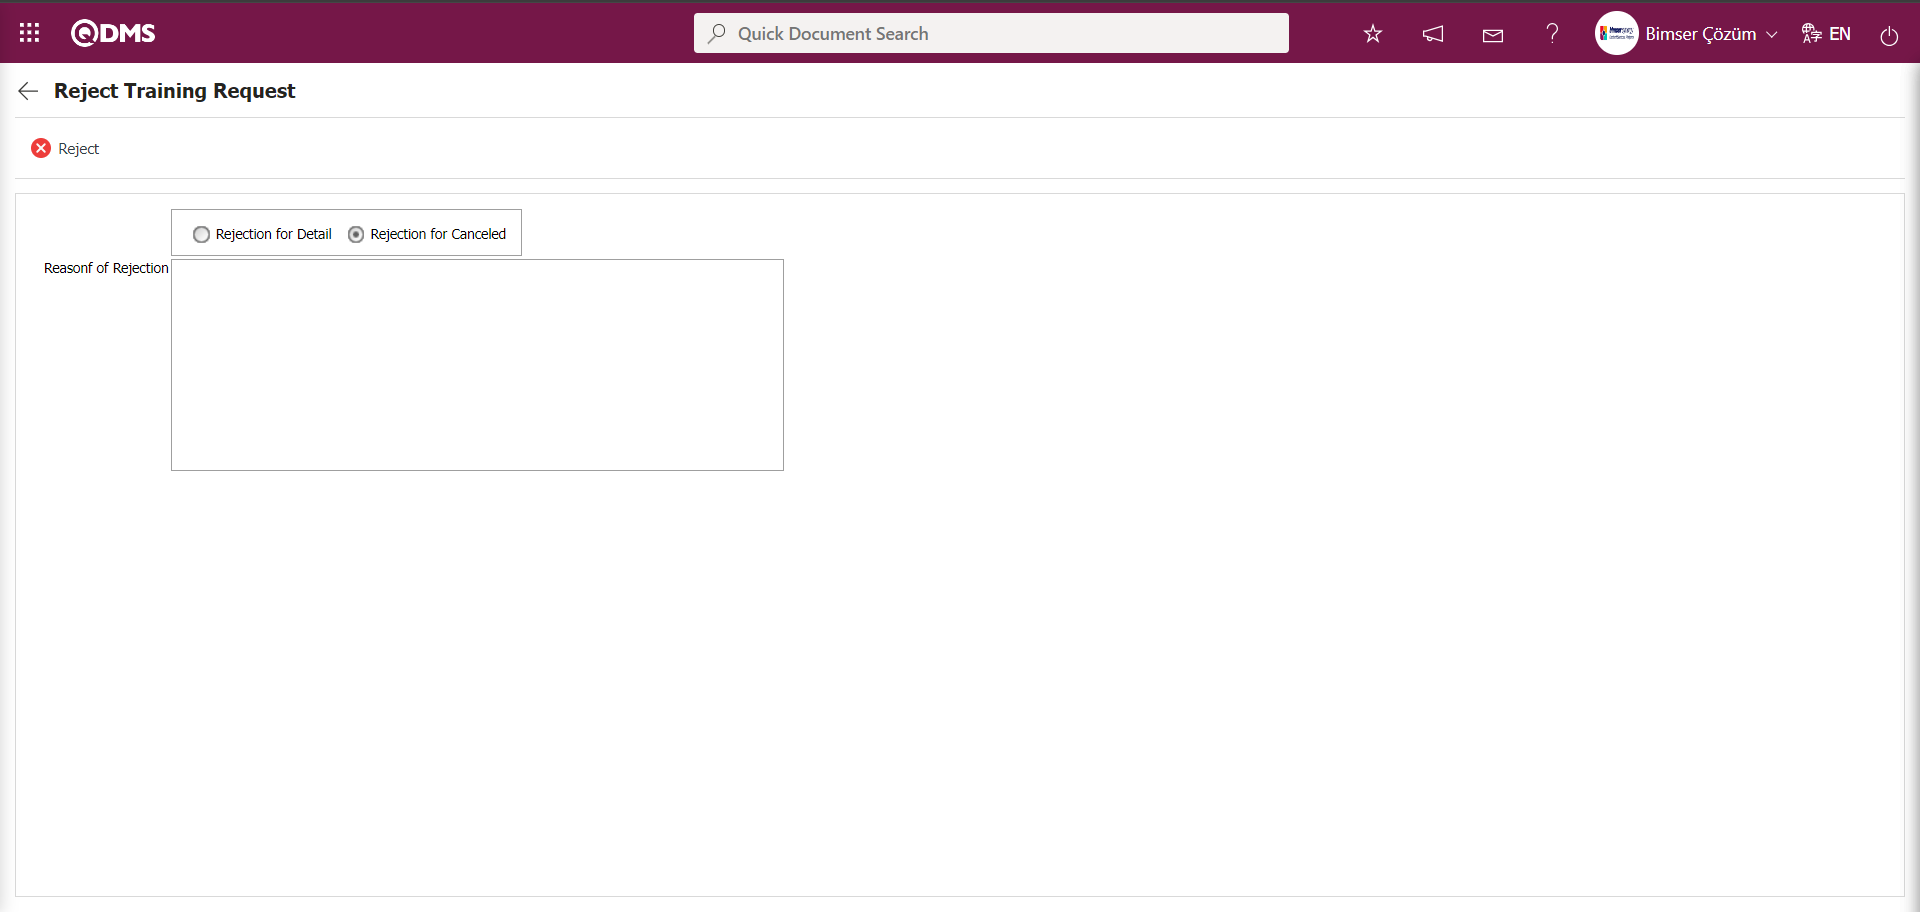
On the Training Request Approval screen, click the  button while the training request is selected.
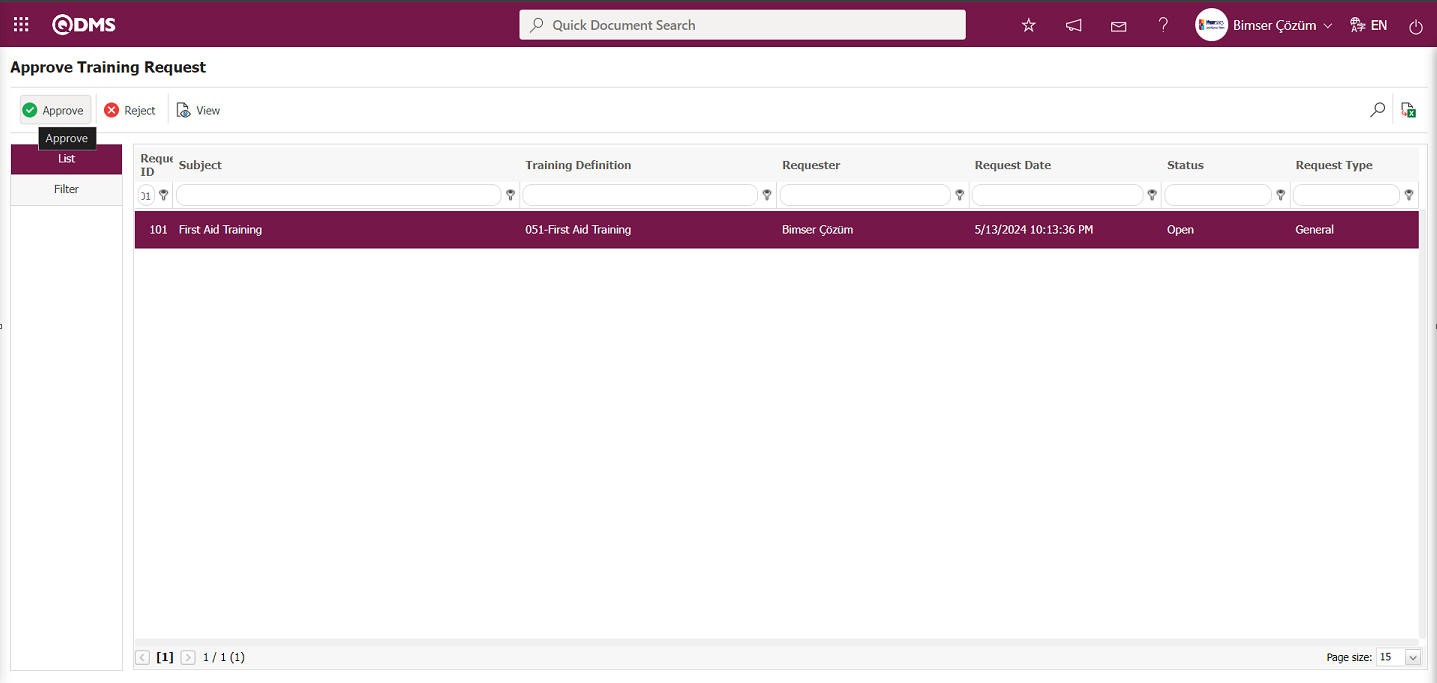
The Approve Training Request screen is opened, and the button is clicked to approve the information if deemed appropriate.
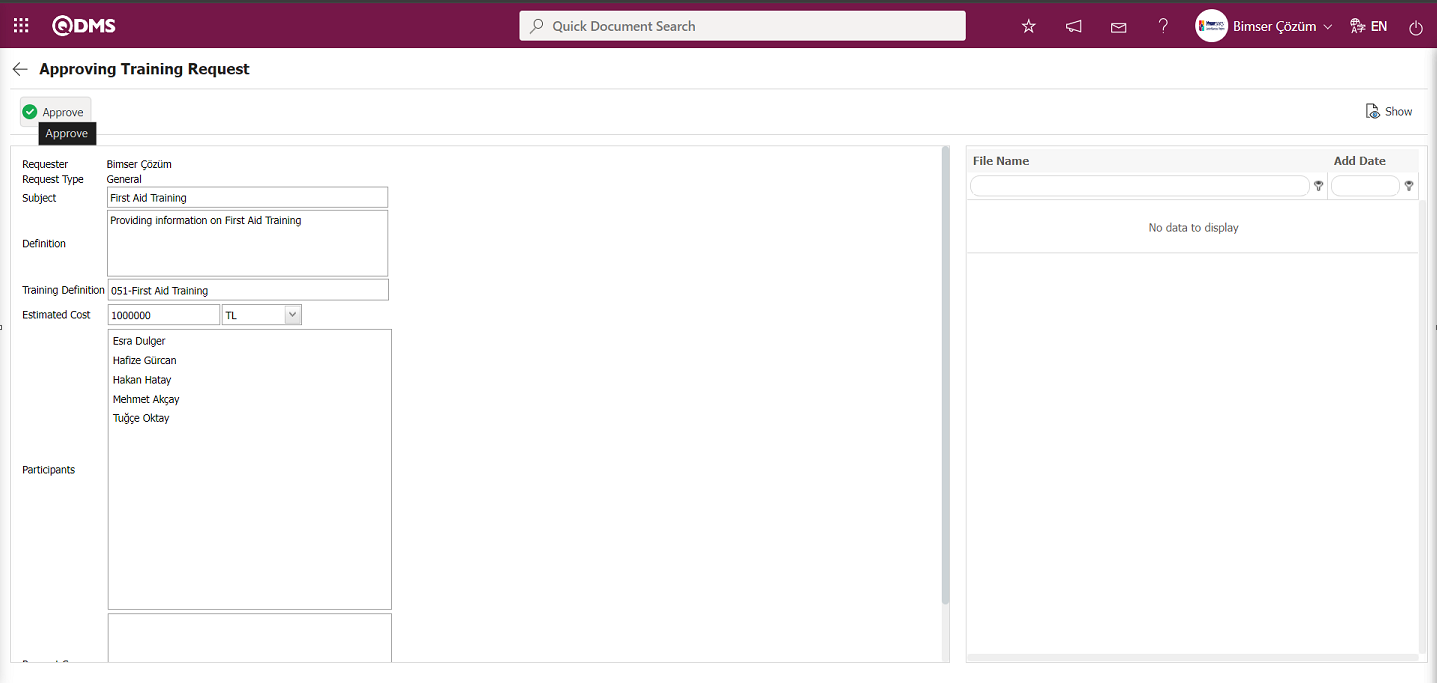
The system displays the message “Training request has been approved and published” to indicate that the training request has been approved. The approved training request is made available on the training planning page.
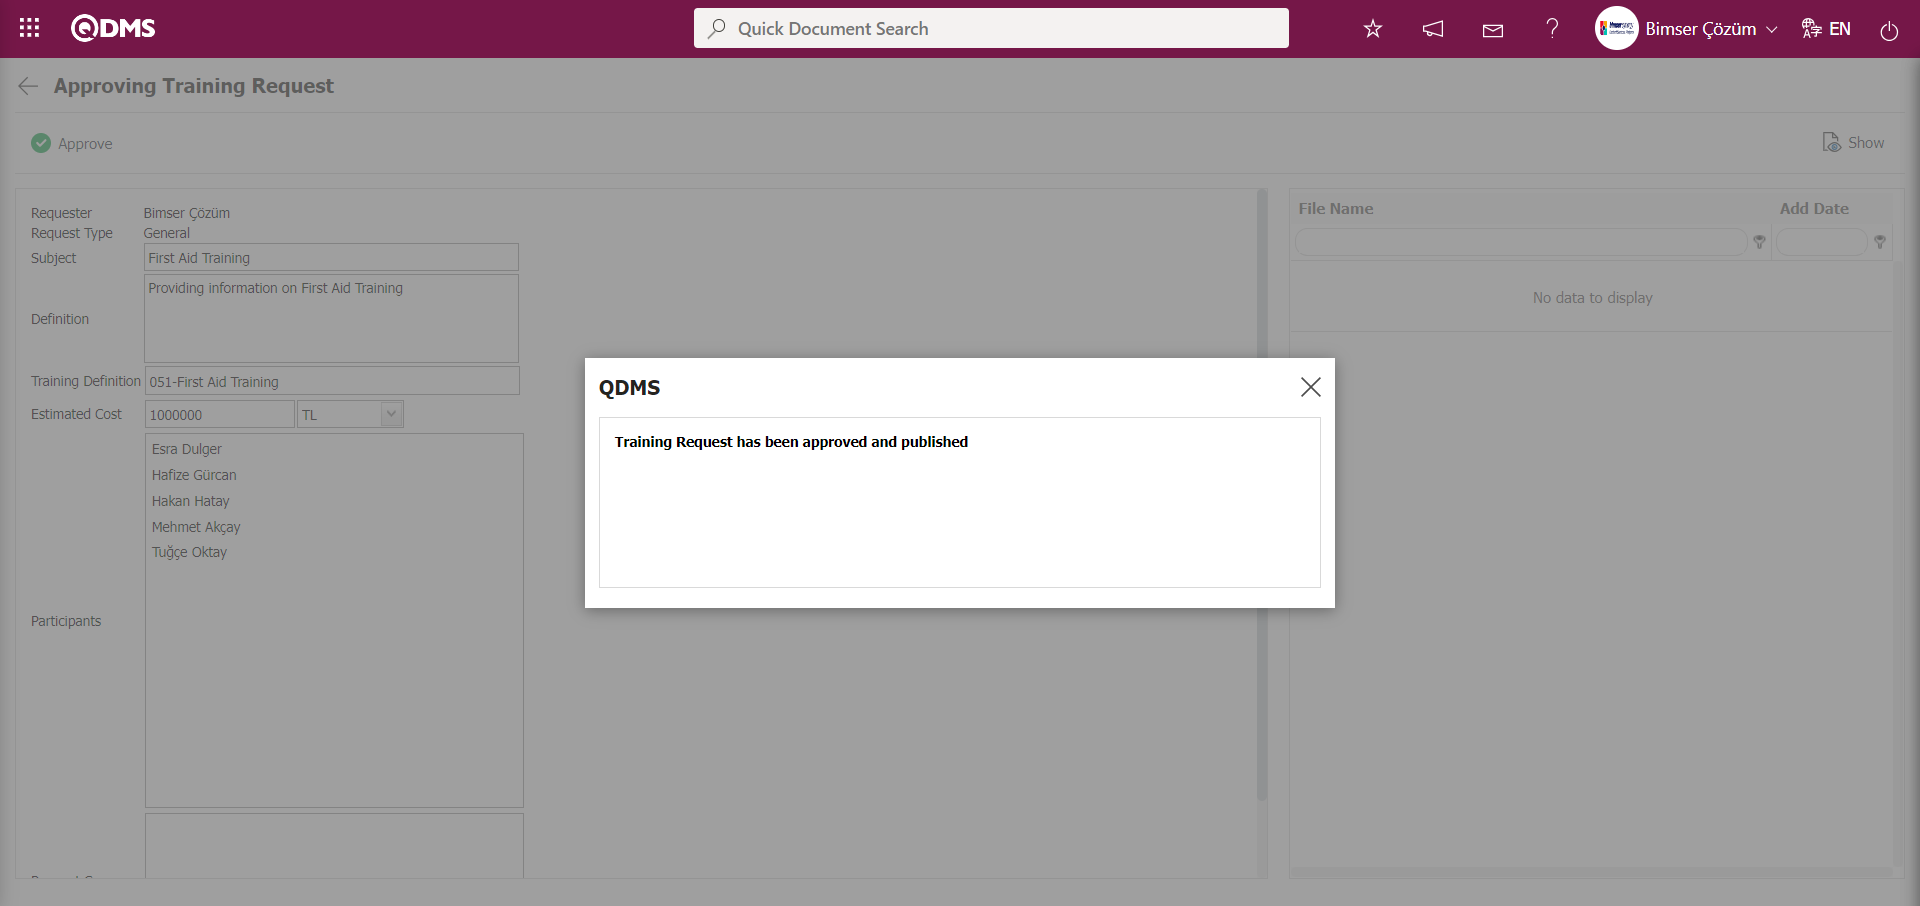
In the Training Request Approval screen, filter data according to search criteria such as Subject, Requester, and Training Definition in the Filter tab, and then click the  (Search) button to filter the data.
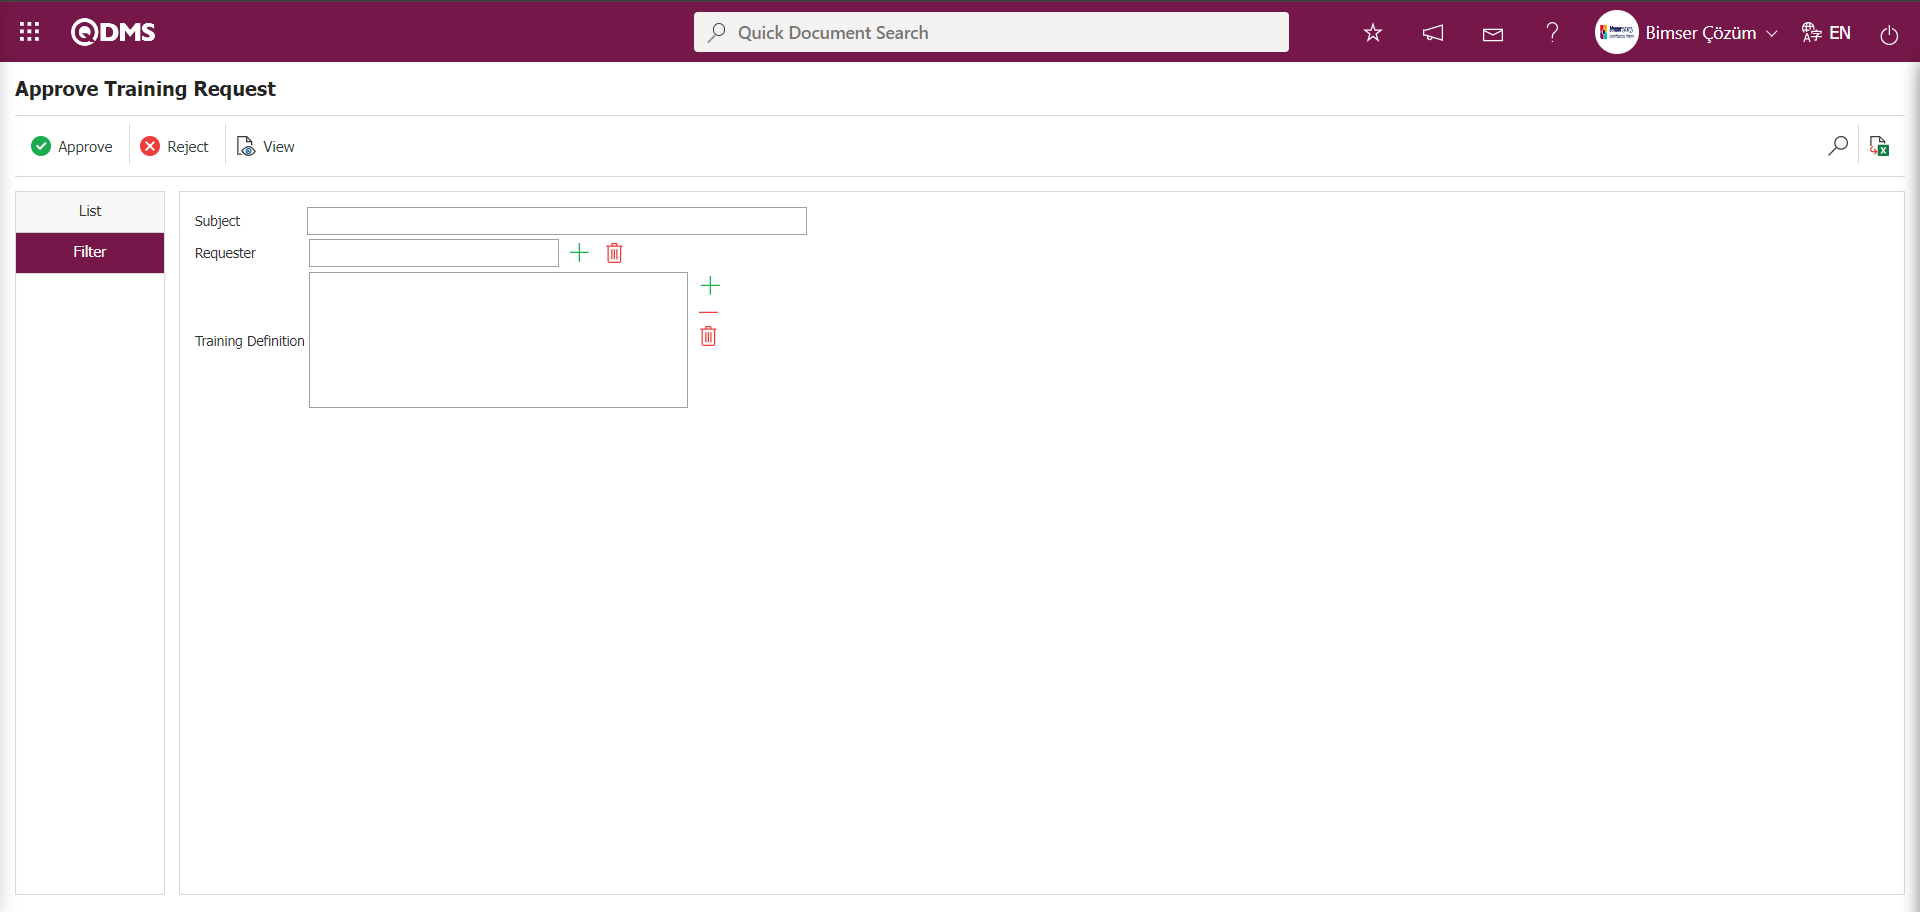
6.3.7.Training Transfer
Menu Name: System Infrastructure Definitions/ BSID/ Configuration Settings/ Transfers/Training Transfer
In the Training Planning module, it is the menu where the trainings are transferred to the system in bulk.
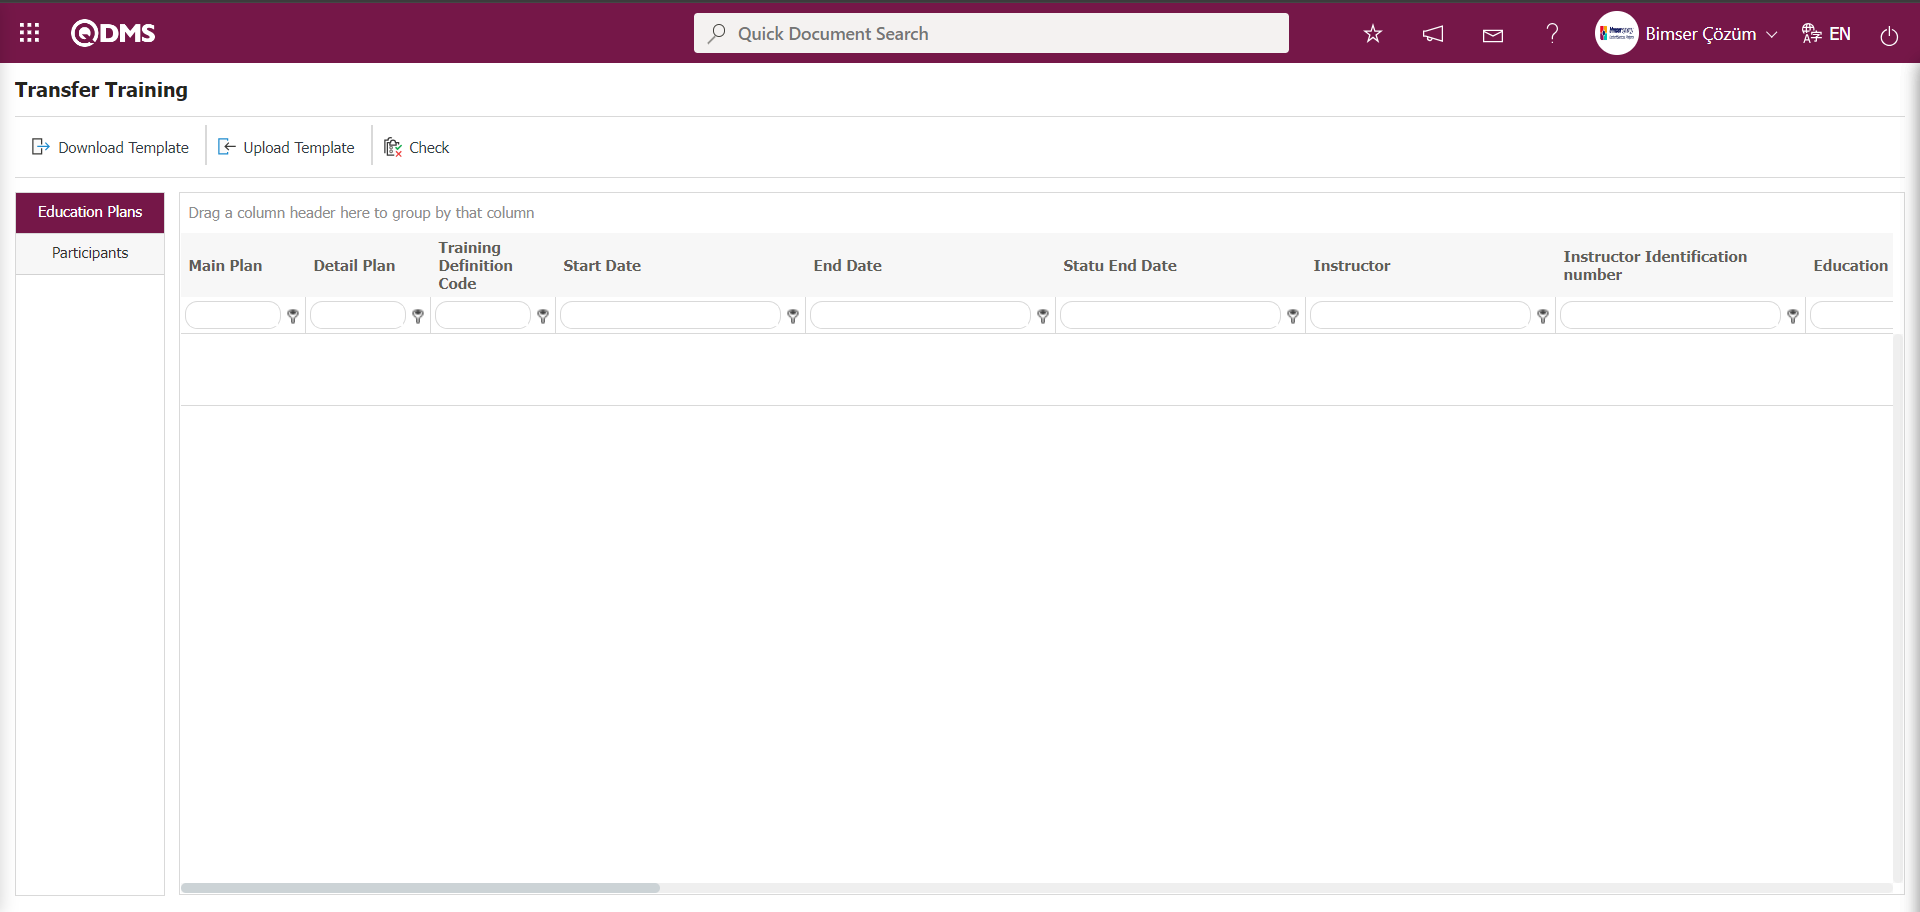
With the help of the buttons on the screen;
 : Training Transfer template is downloaded to the computer.
 : The filled Training Transfer template is uploaded to the system.
 : The training transfer template filled and uploaded to the system is checked to see if it gives an error or not.
 : The transfer process is performed.
The Training Transfer template is downloaded with the button on the screen, after filling in the necessary information, the Training Transfer template is uploaded to the system with the button. In order to check the information entered, the button is used. If the transferred data is suitable for transfer, the Training transfer process is realized via the button.

The Transfer Training template is downloaded to the computer with the button on the Transfer Training screen. The relevant fields in the Transfer Training template are saved to the computer by typing the relevant information.
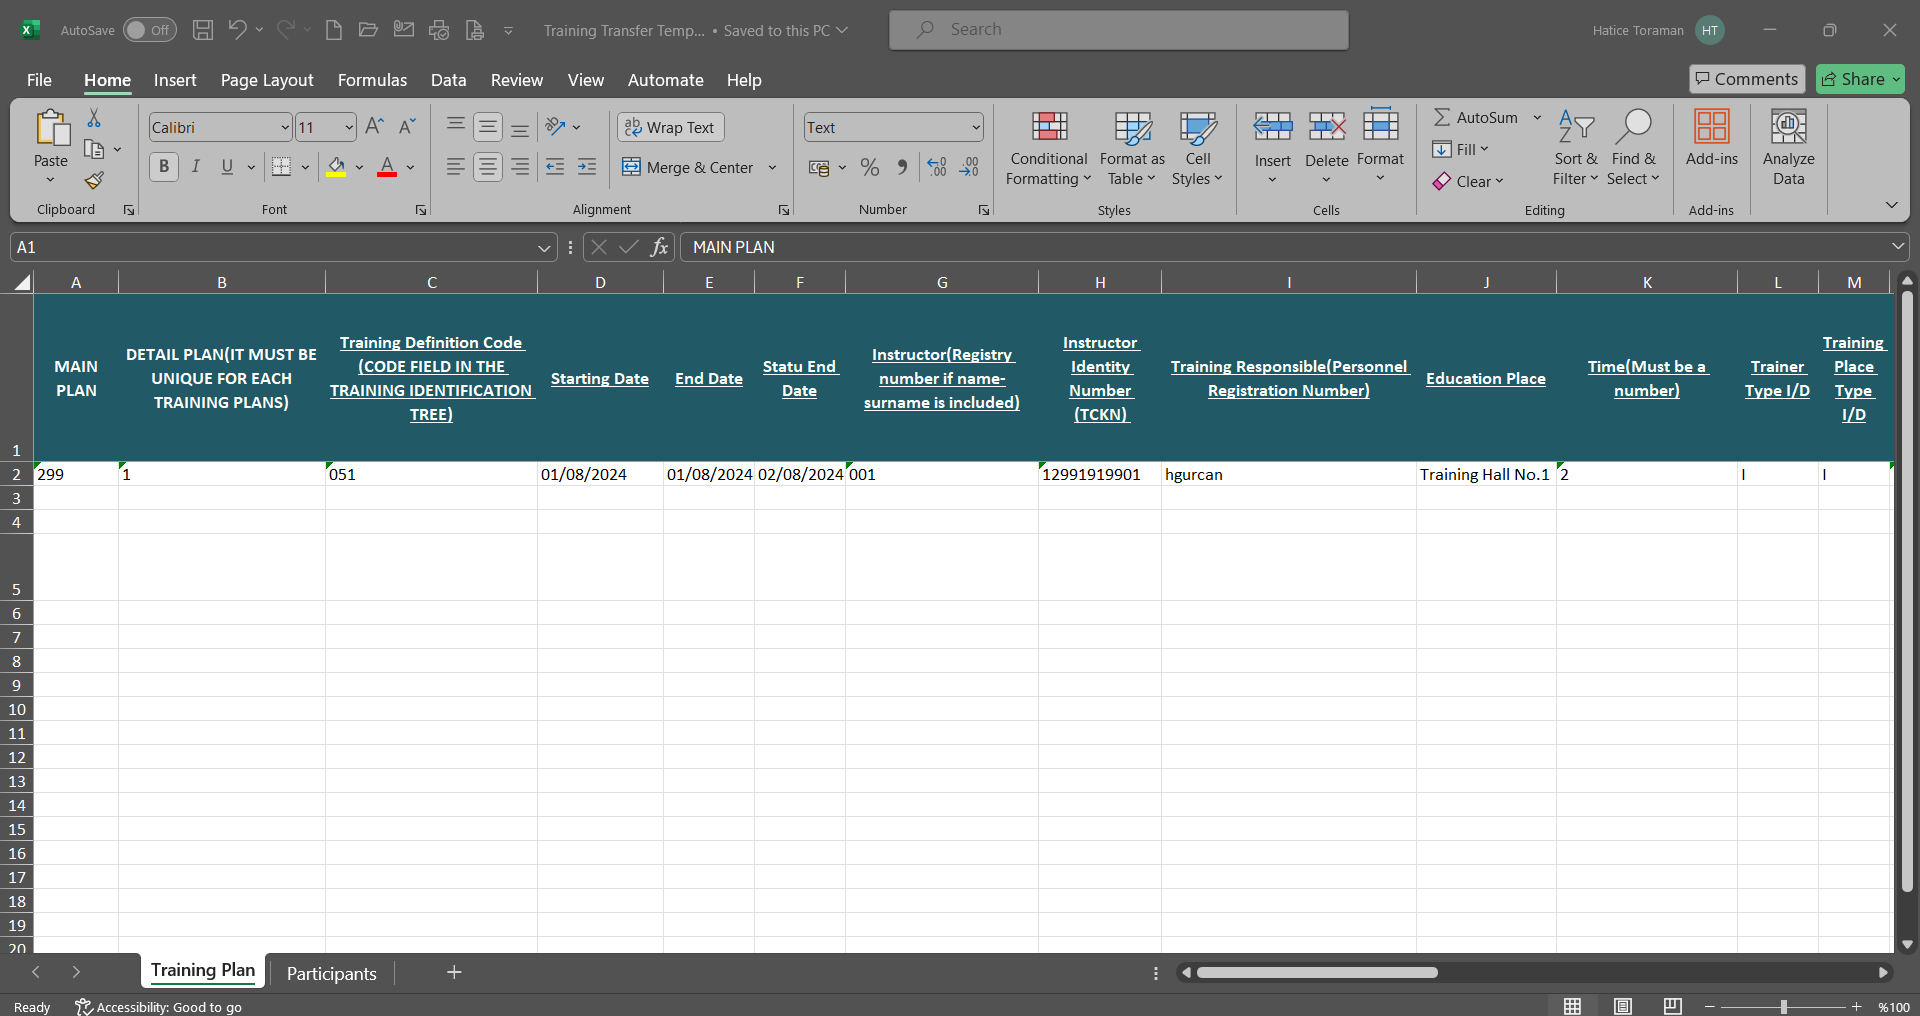
In the Participants tab of the Transfer Training template, the Master Plan and Detail Plan code information is filled in for each participant.
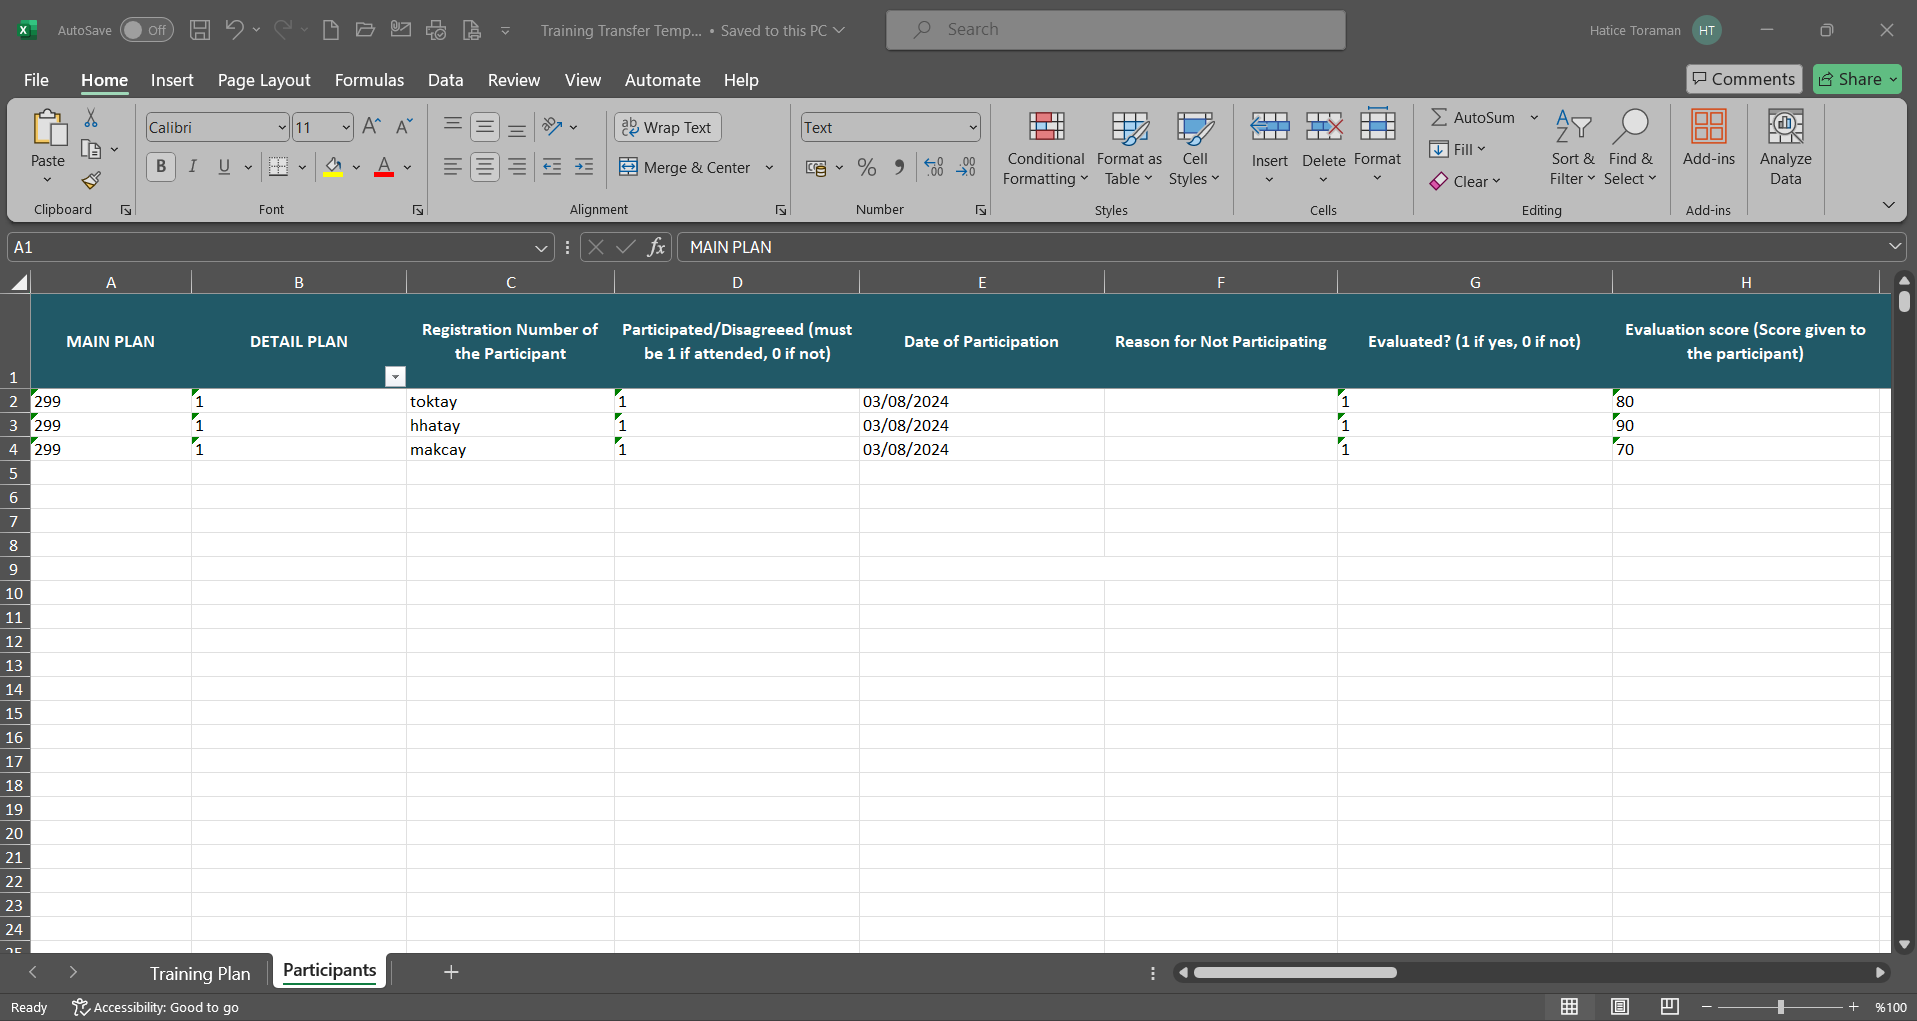
Click the  button on the Transfer Training screen.
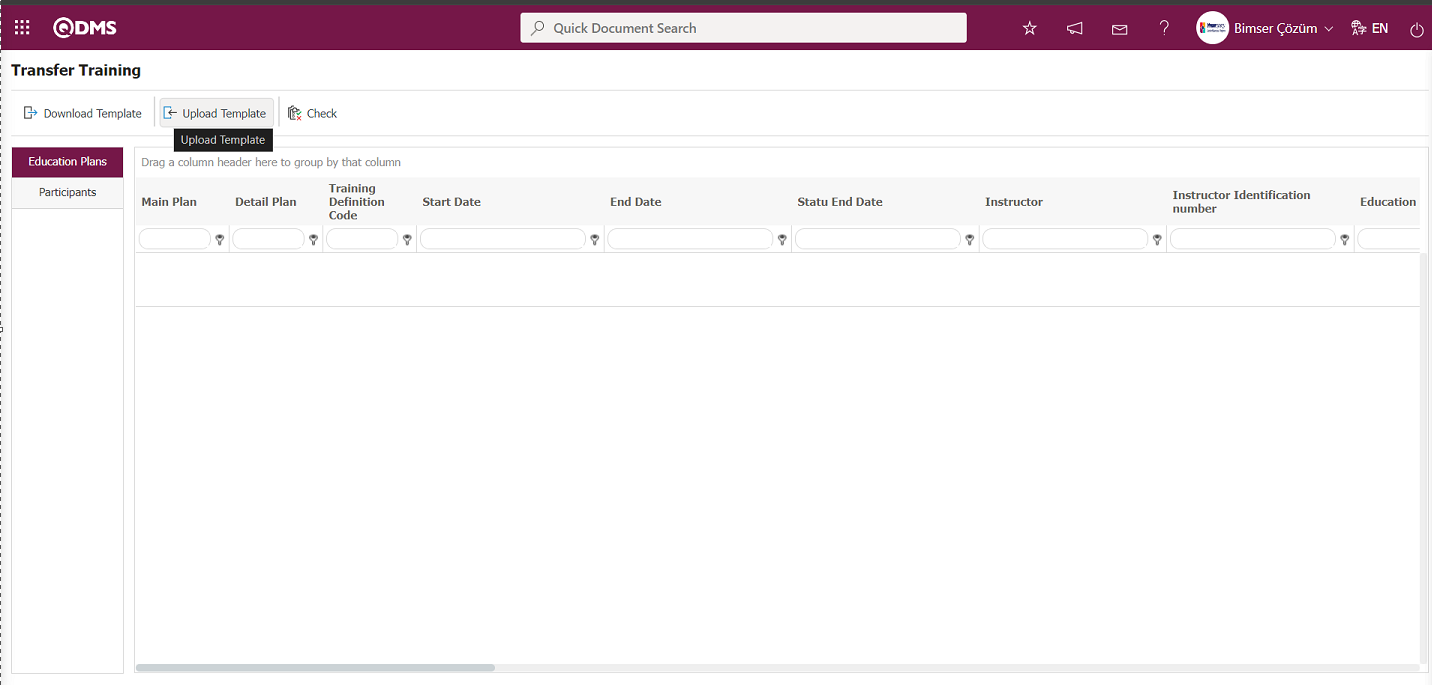
Click the “ ” button on the File Upload screen.
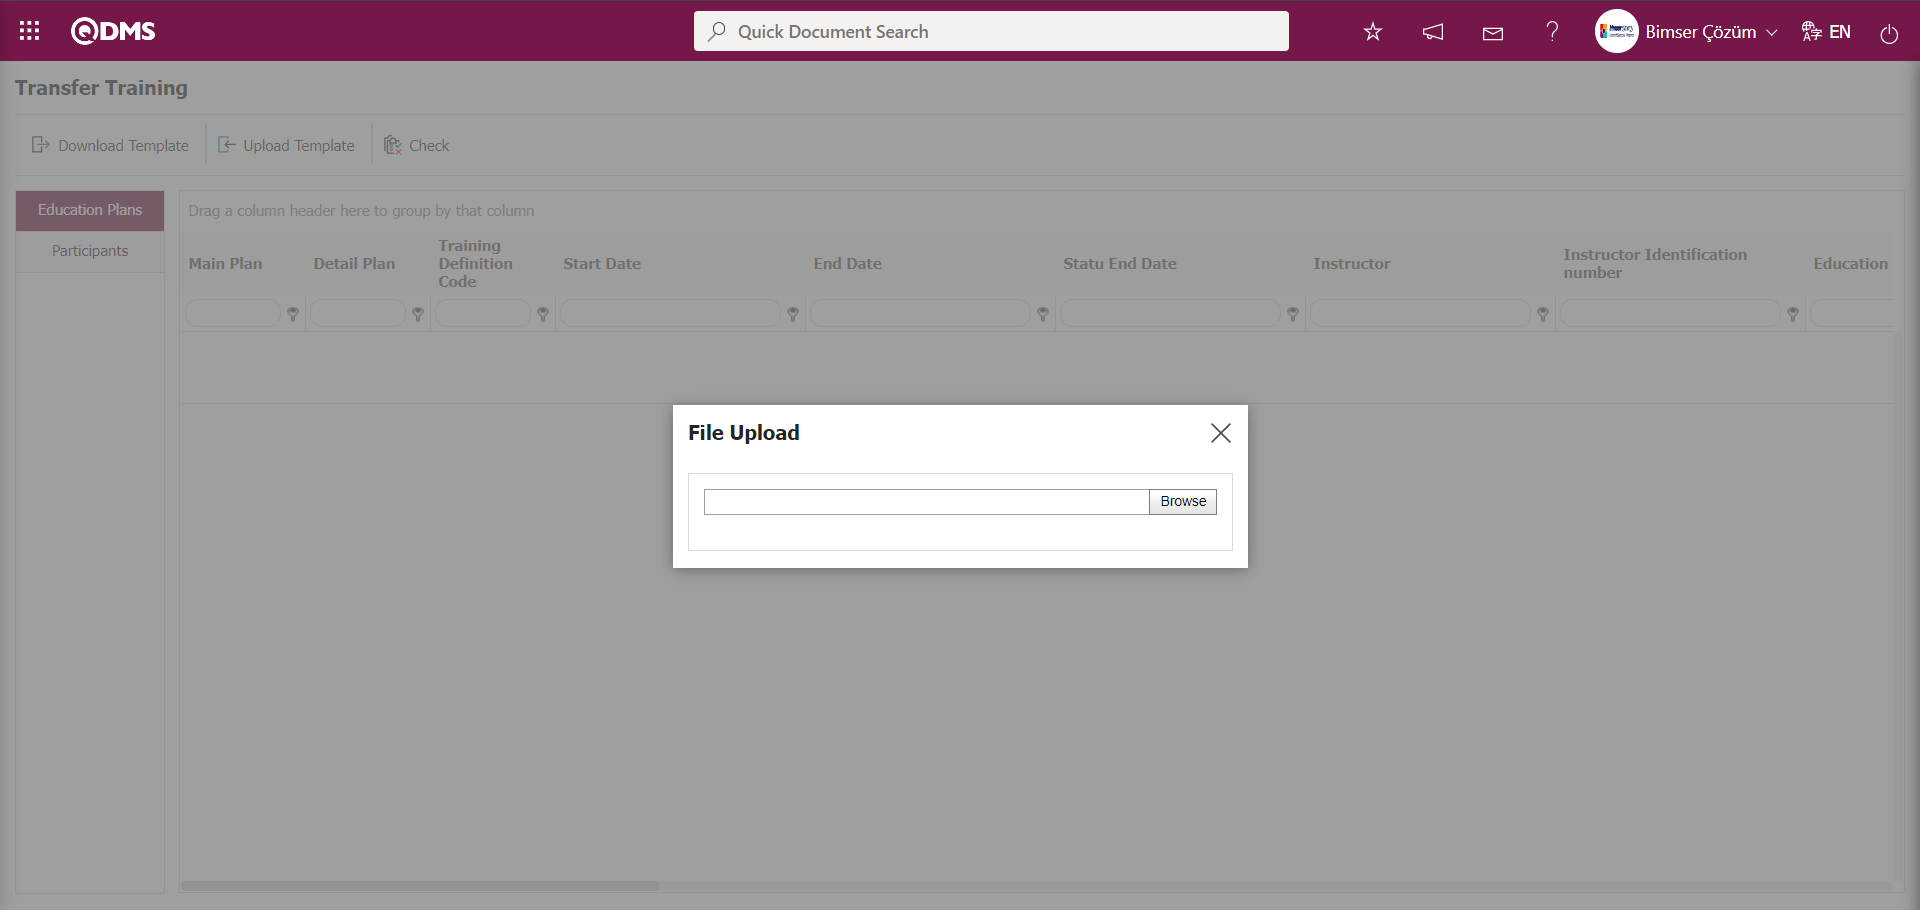 On the screen that opens, the filled Transfer Training template is selected.
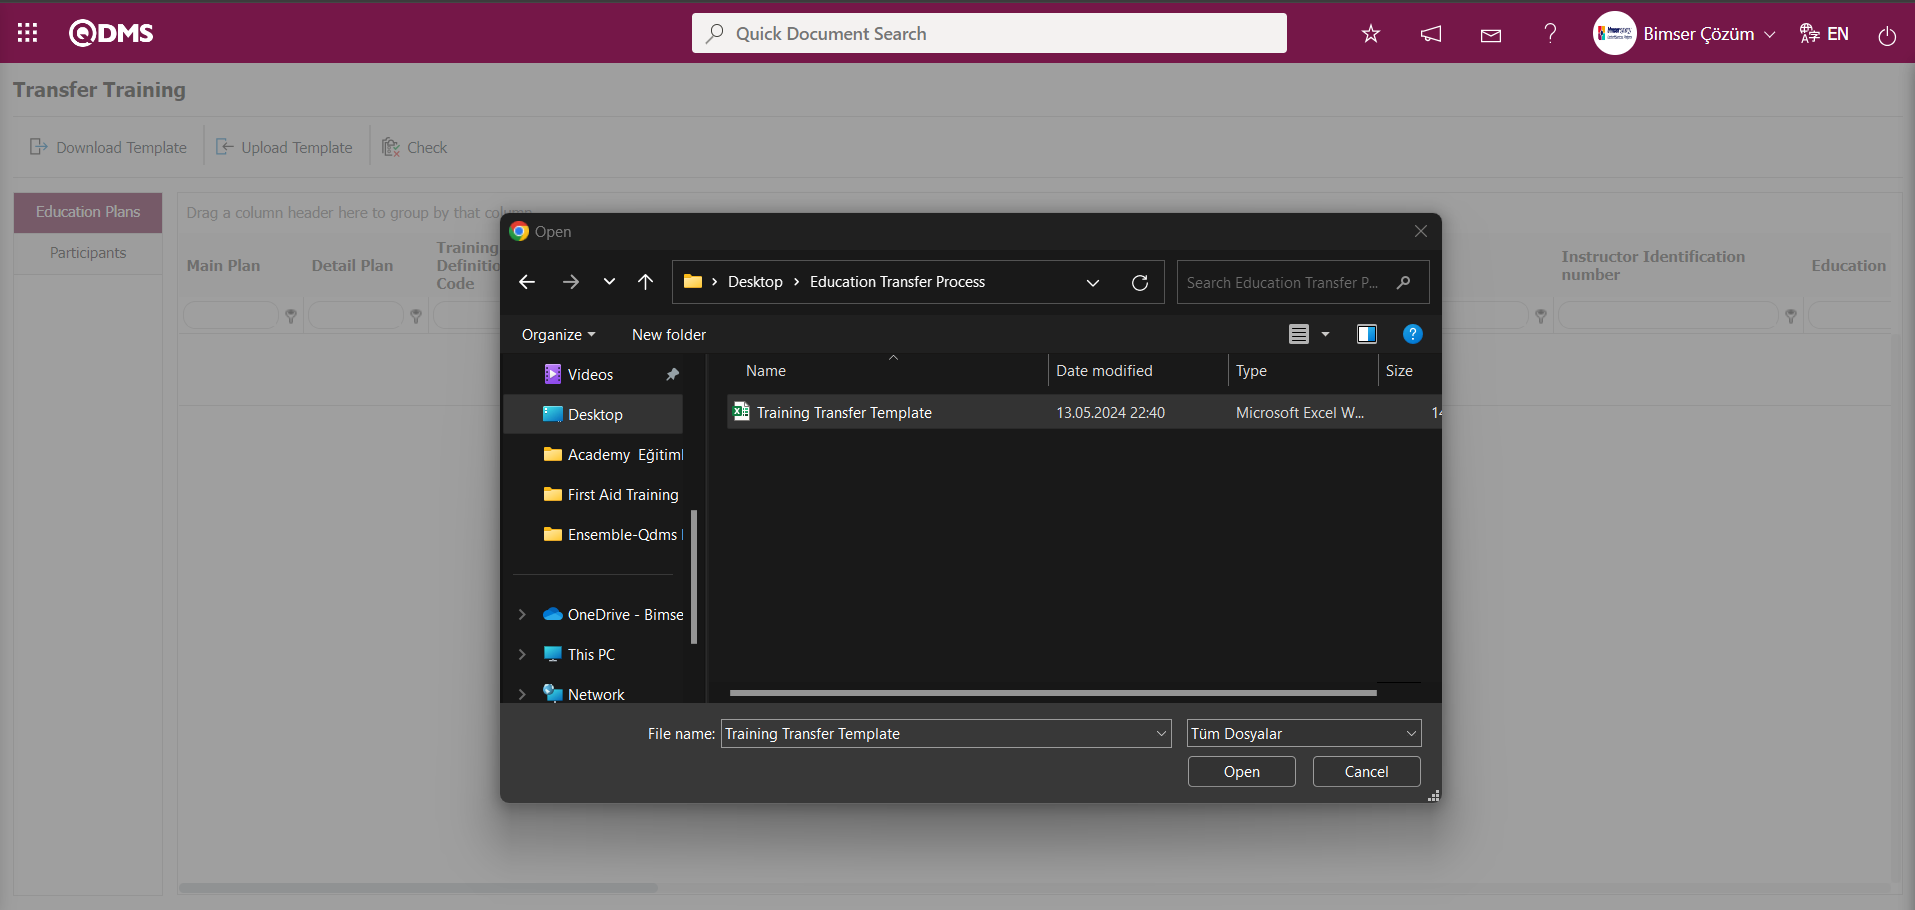
On the Transfer Training screen, the  button is clicked to check whether the template created and uploaded to the system gives an error or not.
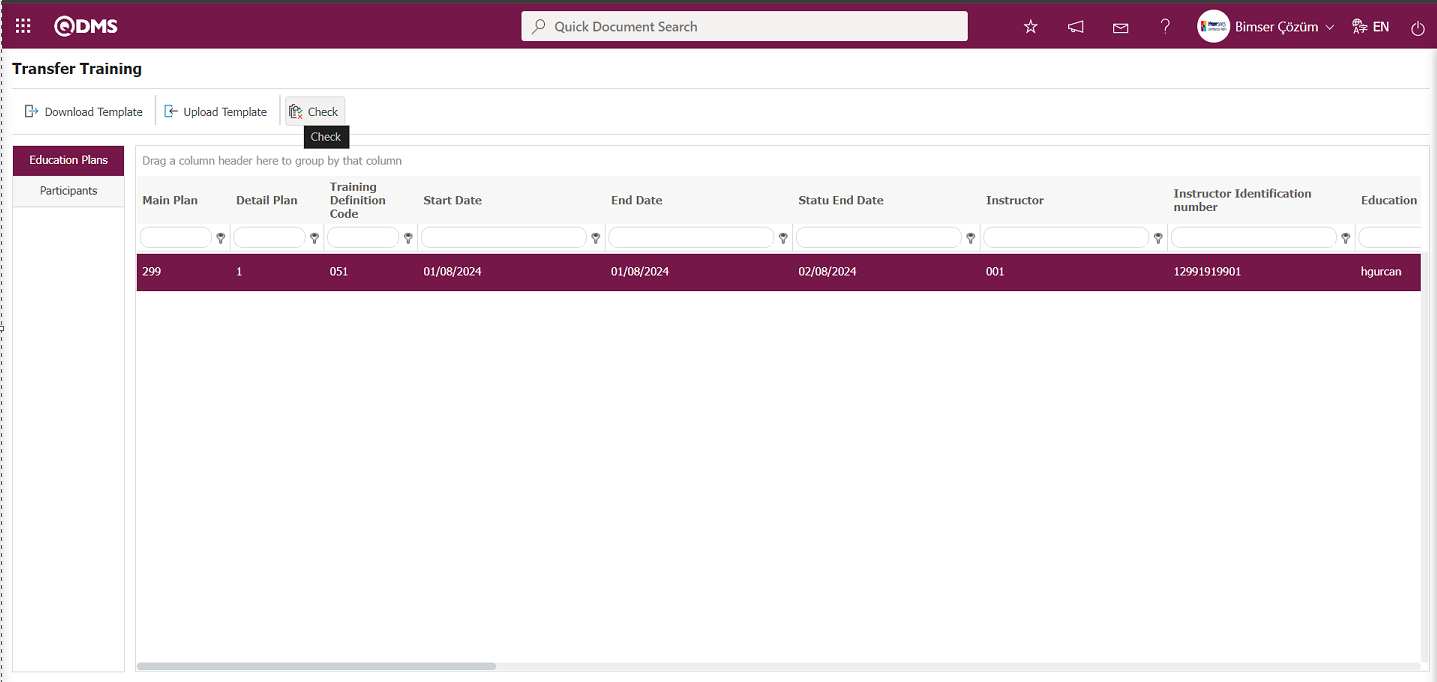
The system displays the message “Data is suitable for transfer”.
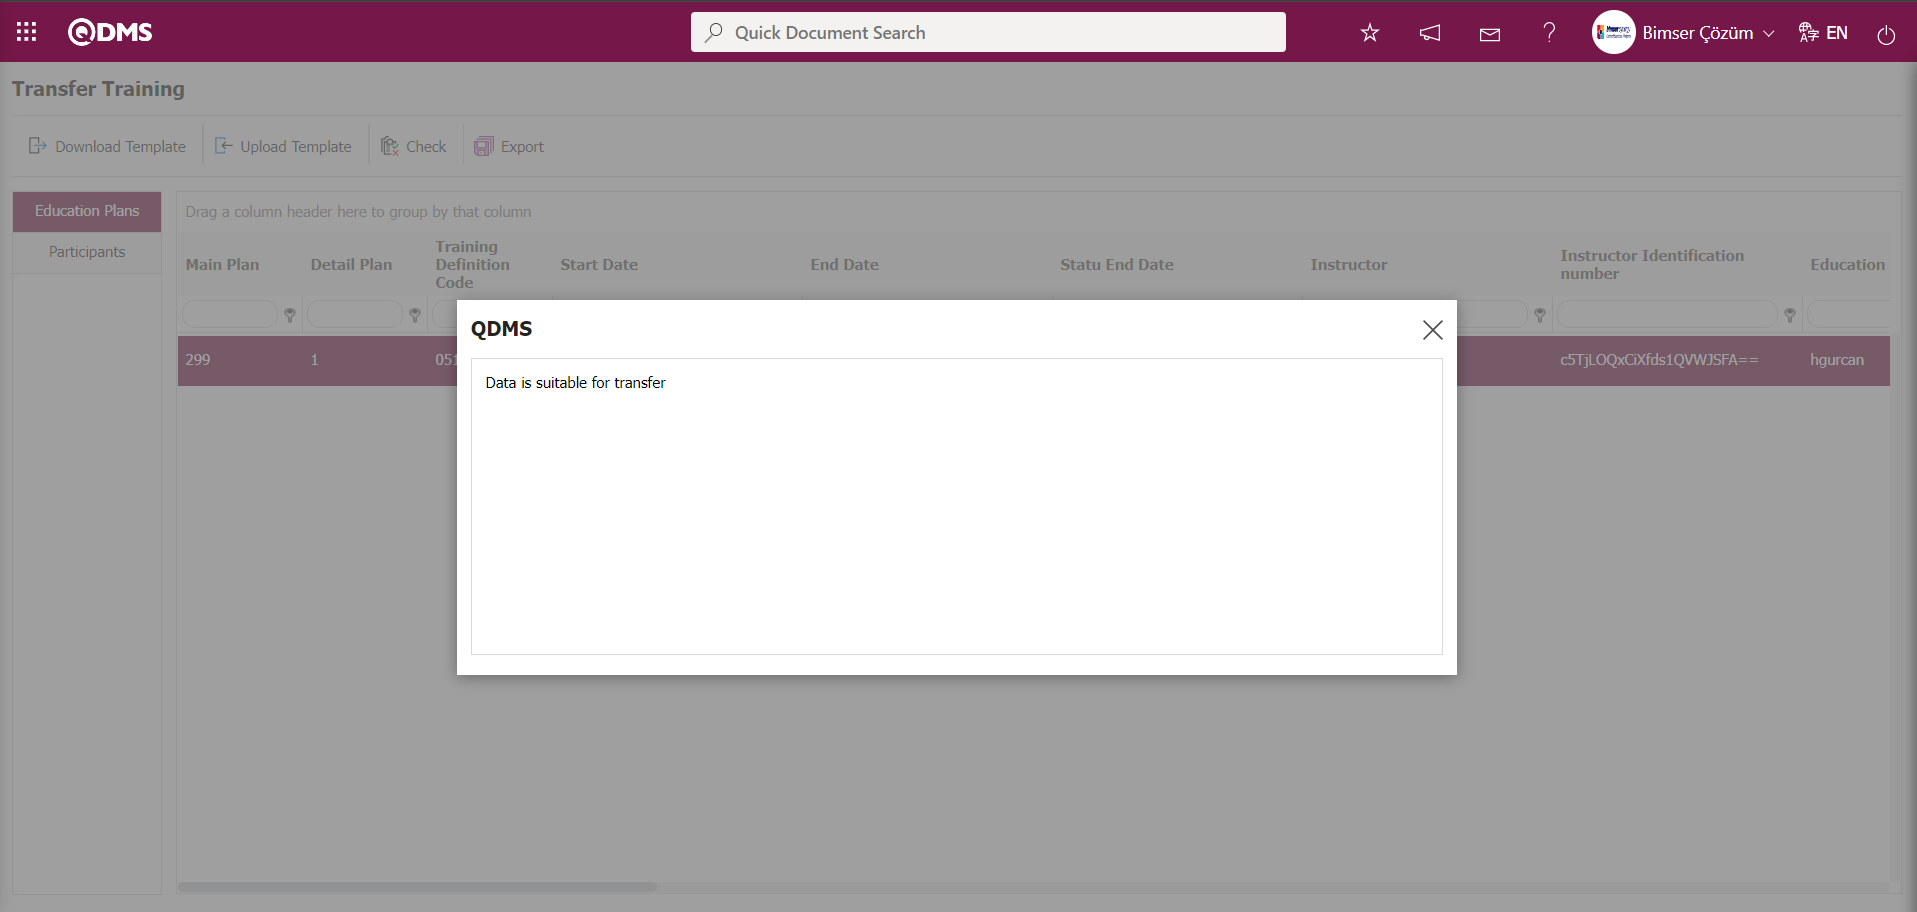
On the Transfer Training screen, click on the button to transfer the training.
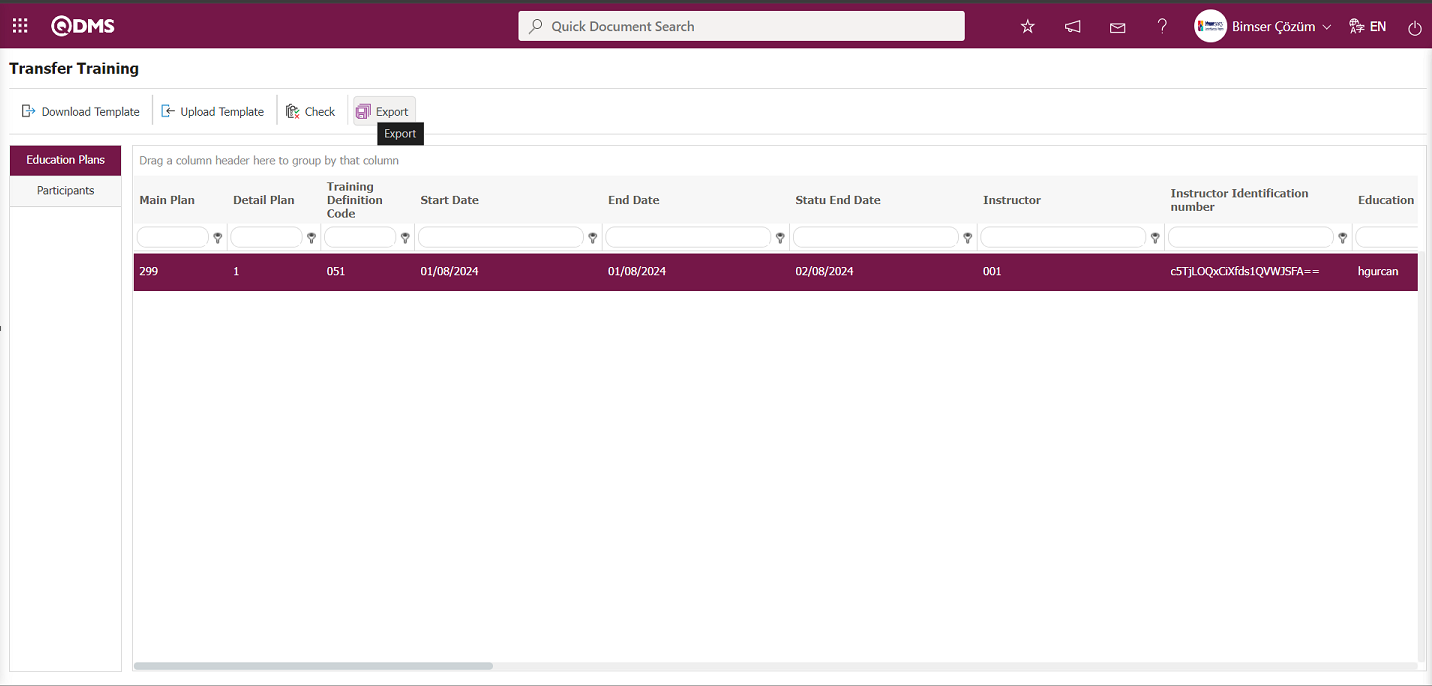
The system displays the message “Data transferred” to indicate that the training transfer has been completed. From the Training Plan screen, click the  button while the Main Plan is selected.
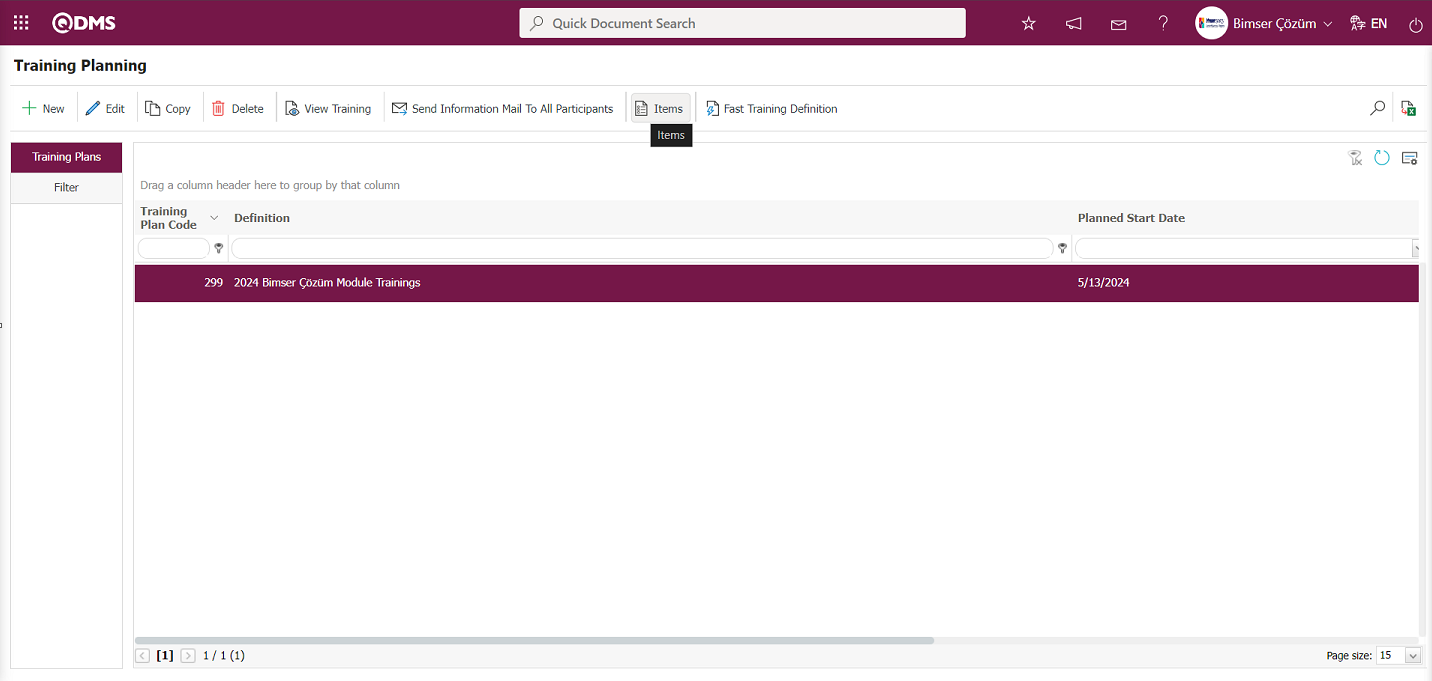
The transferred Training Item Planning display process is performed.
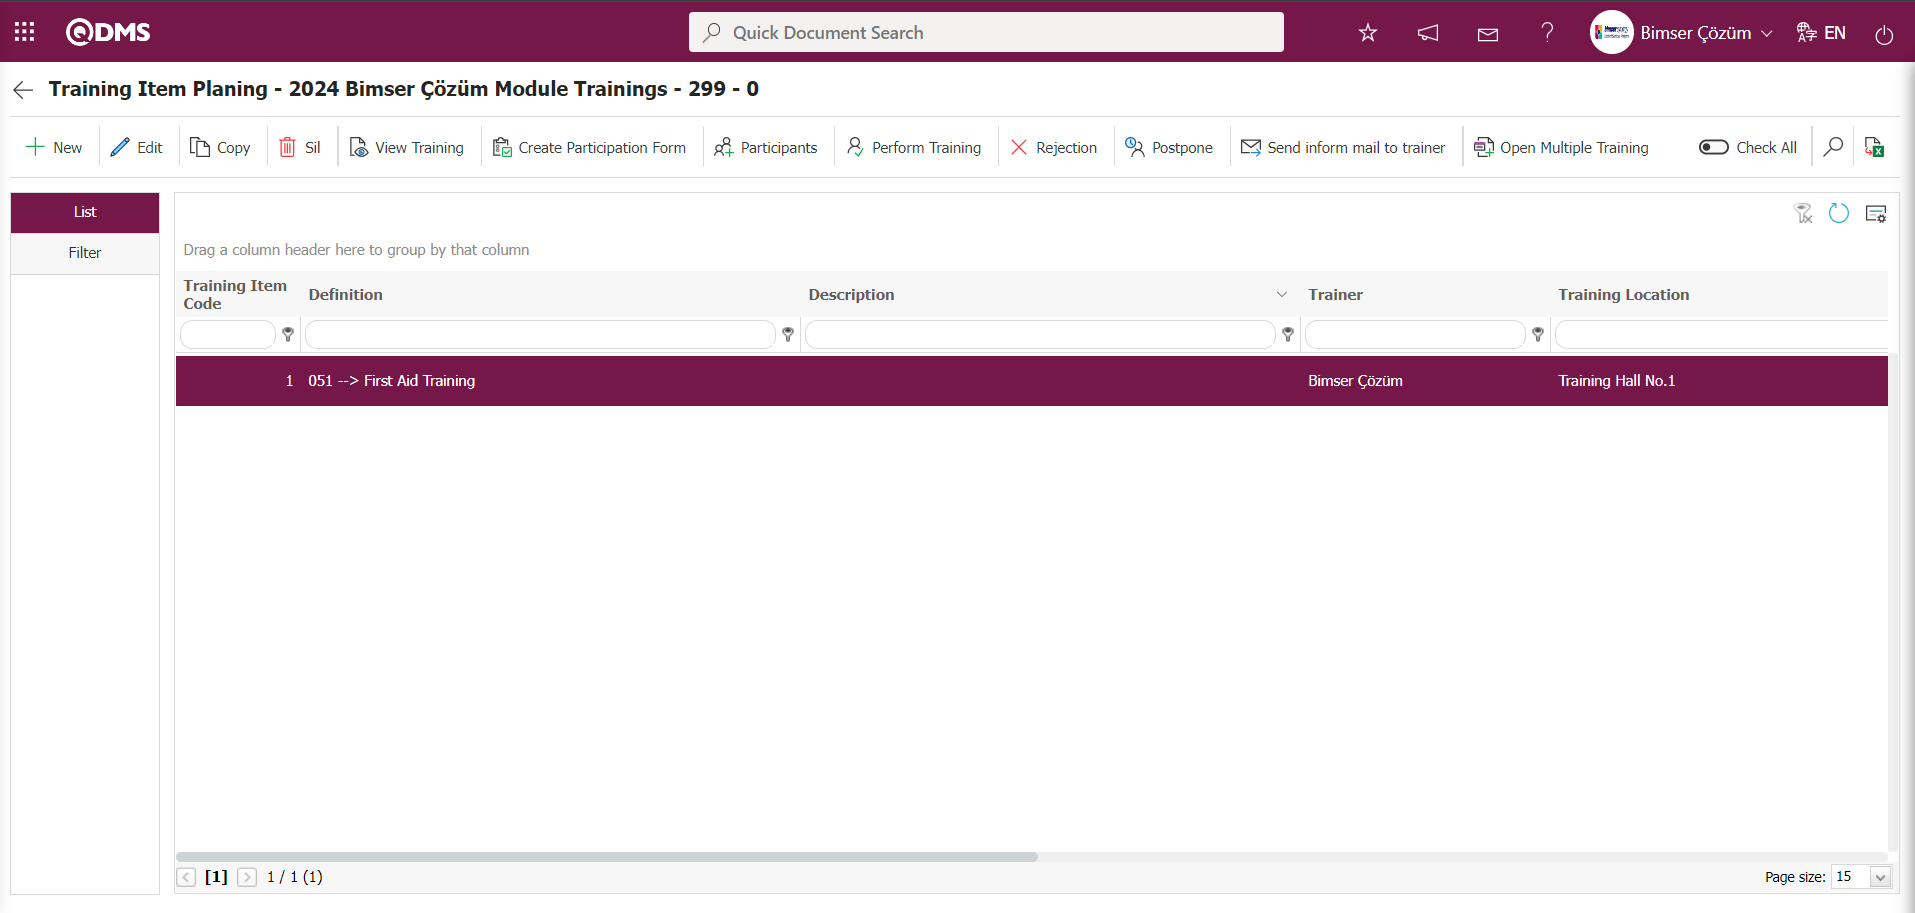
6.3.8.Reports
Menu Name: Integrated Management System/ Training Planning/ Reports
This section provides access to all reports related to the Training Planning Module.
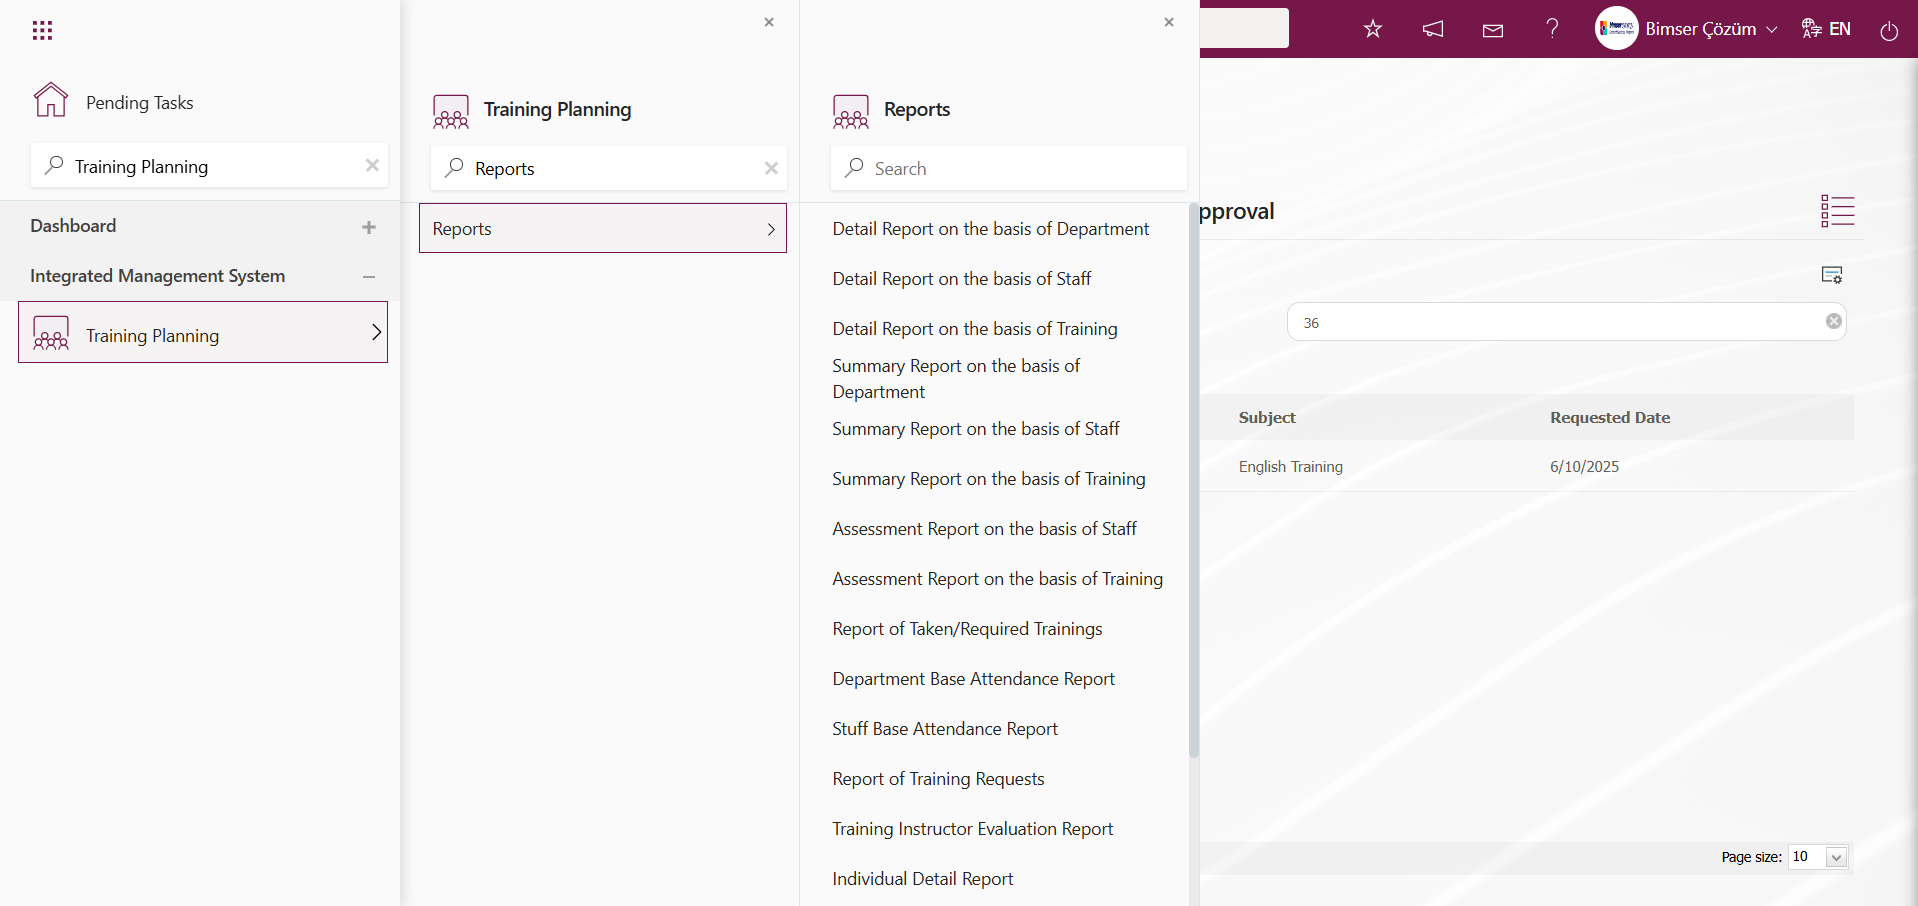
6.3.8.1.Detail Report on the basis of Department
Menu Name: Integrated Management System/Training Planning/Reports/Detail Report on the basis of Department
This report provides detailed information about the training courses taken by departments. When you want to review the training courses taken by departments, you should use this report, which lists the training courses taken by department. The “Detailed Report on the basis of Department” screen displays two tabs: “Training Search” and “Training List.” In the “Training Search” tab, filtering is performed based on search criteria. In the “Training List” tab, records are listed according to the filtering criteria specified in the search.
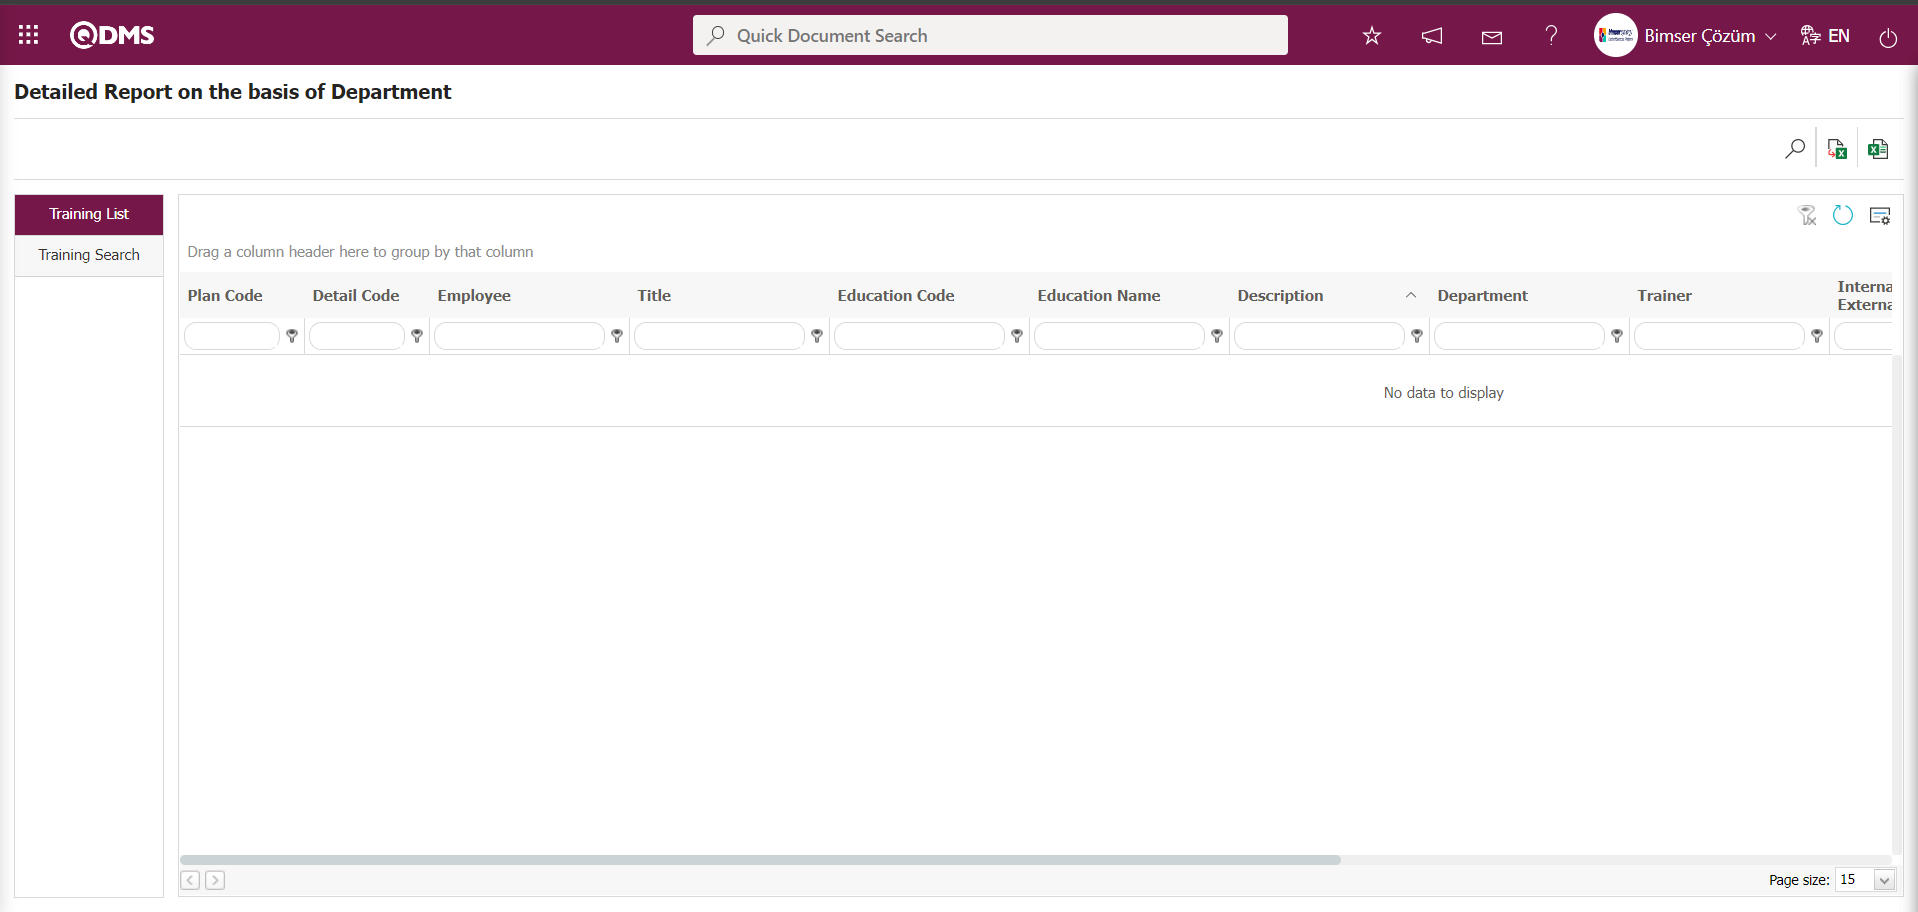
Using the buttons on the screen;
: Records are filtered and searched.
 : The data is transferred to Excel.
 : Reports are exported to Excel as flat lists.
: The search criteria on the menu screens are used to clear the data remaining in the filter fields of the grid where the search was performed.
: The menu screen is reset to its default settings.
: The menu screens are customized based on user preferences by enabling or disabling the display of columns corresponding to specific fields.
In the Detail Report on the basis of Department screen, in the training search tab, enter the plan code in the “Plan Code” field of the filter search criteria and click the  (Search) button.
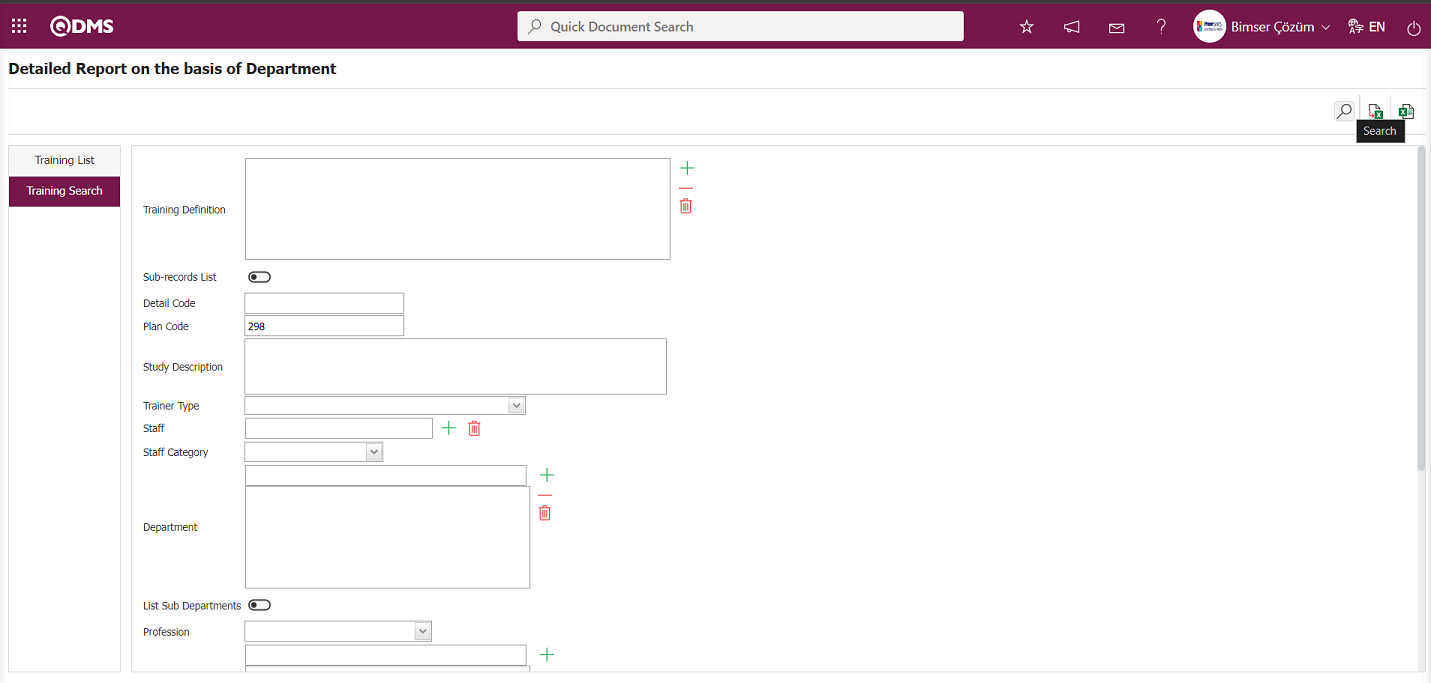
Detailed Report on the basis of Department screen, records are listed according to the search criteria in the filter in the training list tab.
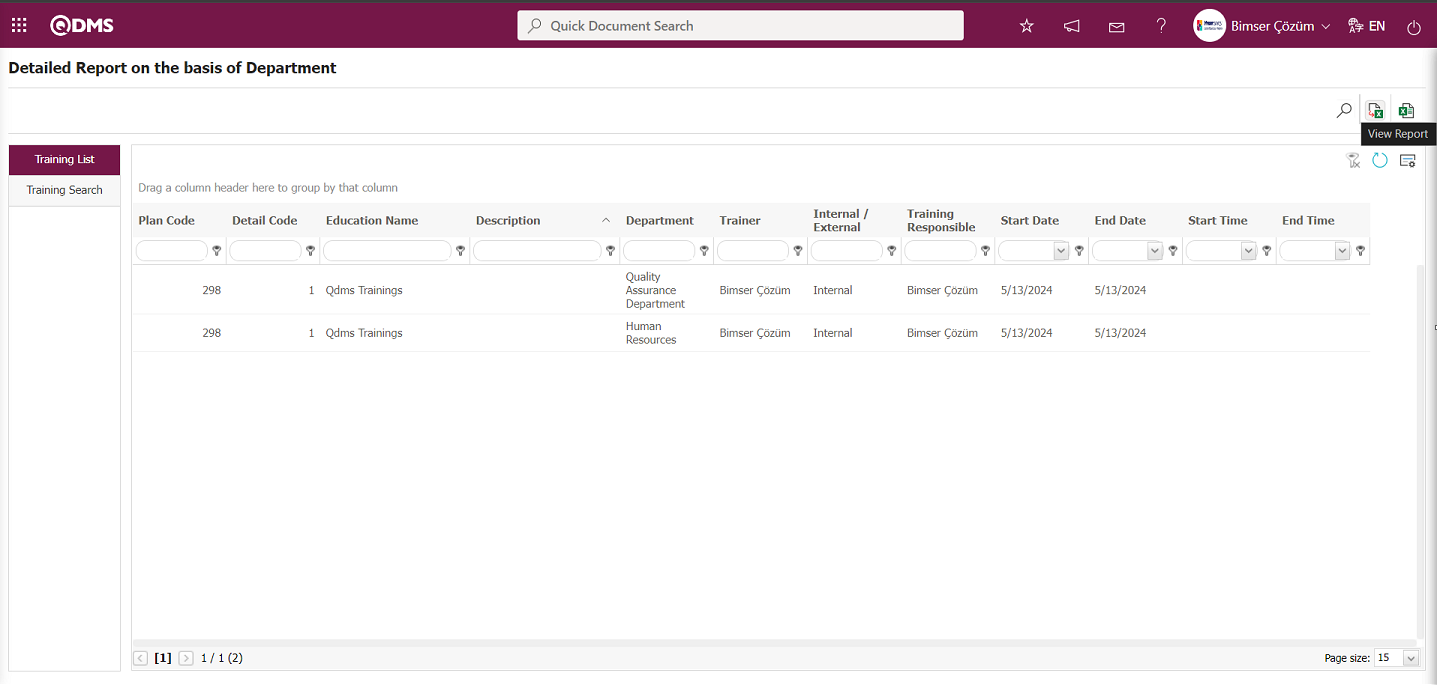
Detailed Report on the basis of Department screen  (View Report) button is clicked, Detailed Report on the basis of Department report is obtained in Excel format.
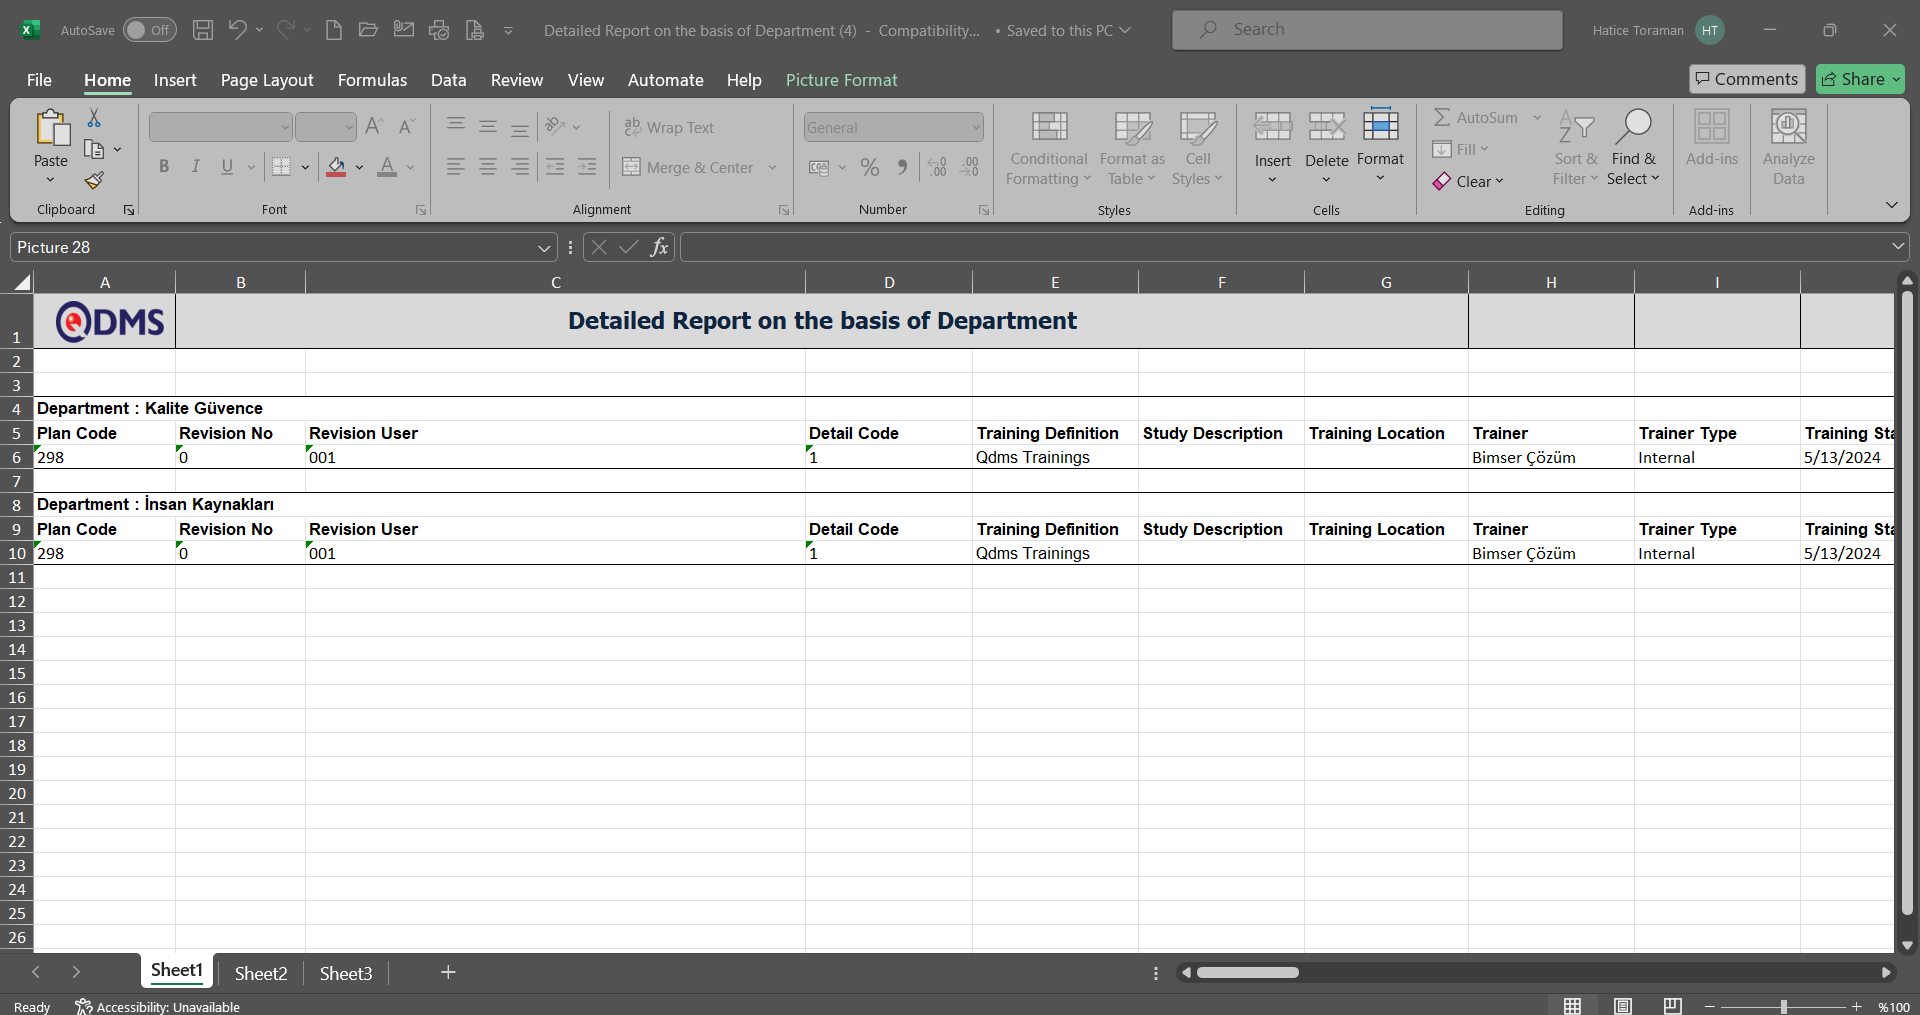
Click the View Report (Linear List) button on the Detailed Report on the basis of Department screen.
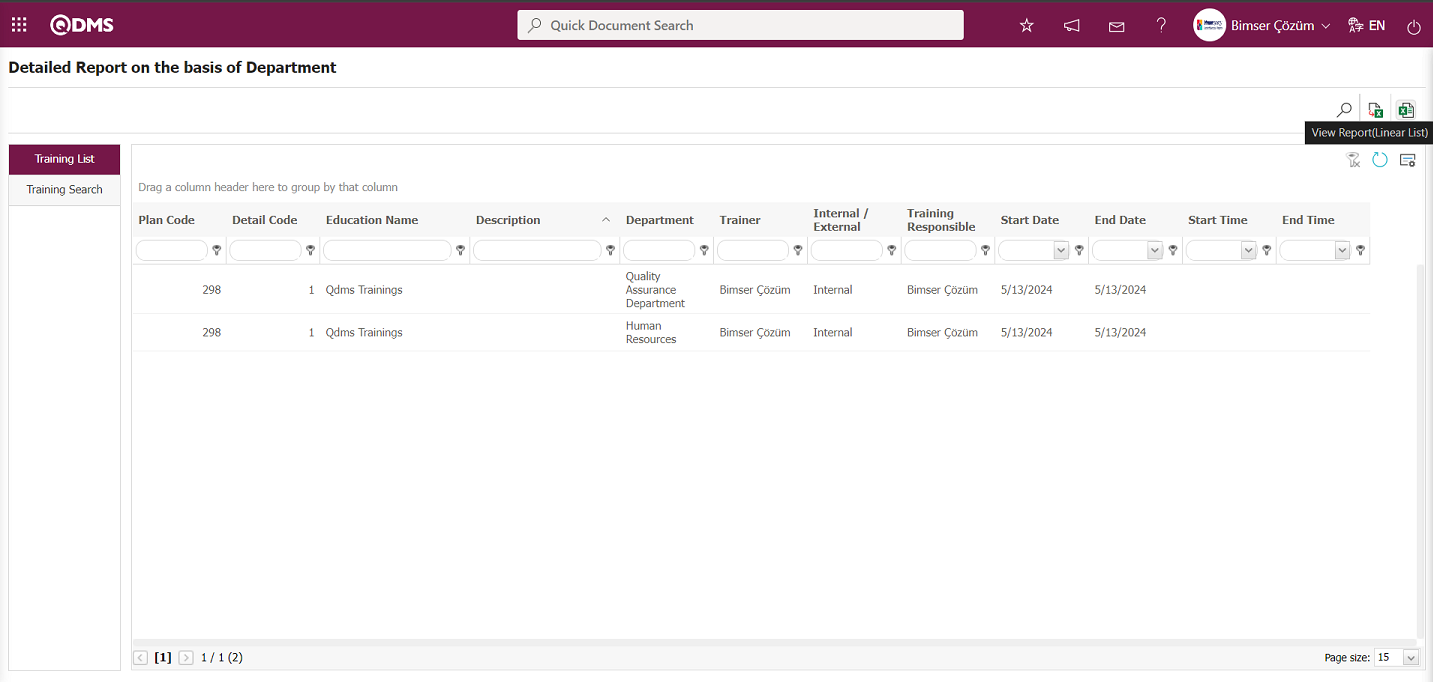
A detailed report based on the department report is obtained in a plain list format in Excel.
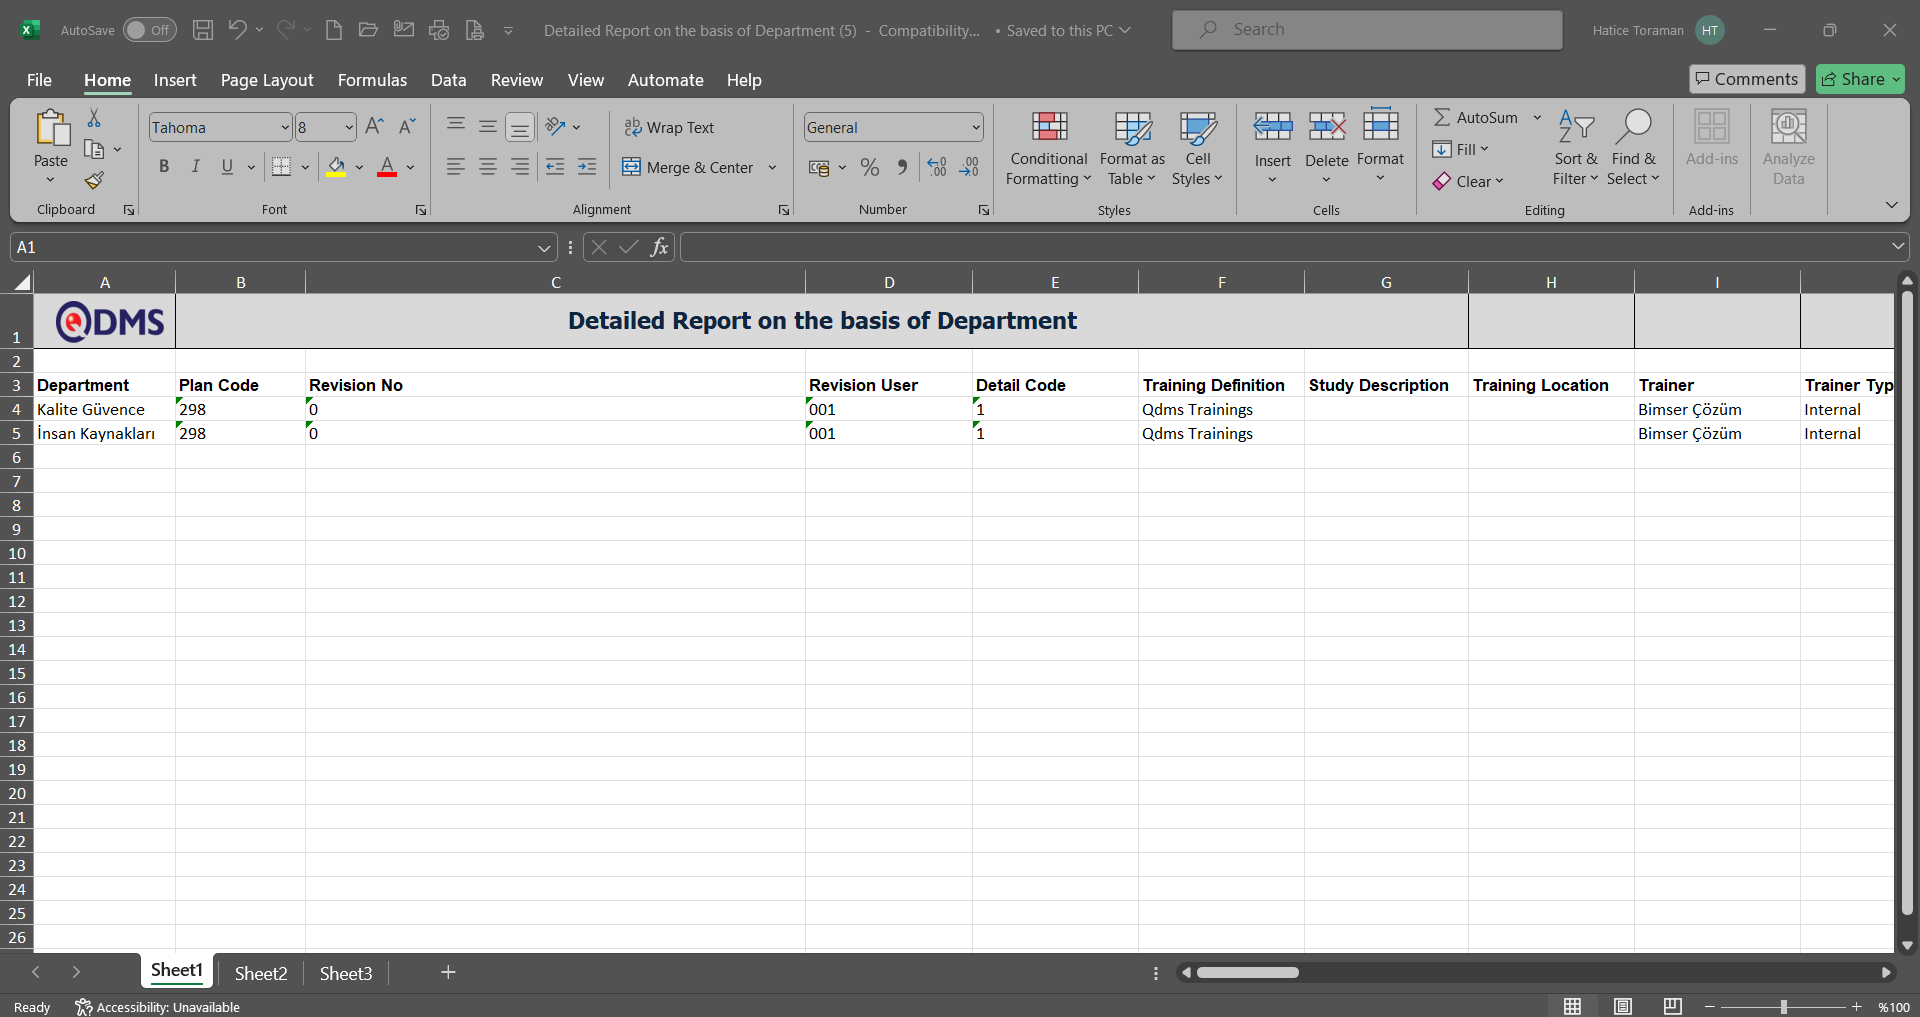
6.3.8.2.Detail Report on the basis of Staff
Menu Name: Integrated Management System/Training Planning/Reports/Detail Report on the basis of Staff
This report provides detailed information about the training courses taken by employees. When you want to review the training courses taken by employees, you should use this report, which lists the training courses taken by employee breakdown. The “Detail Report on the basis of Staff” screen displays two tabs: “Training Search” and “Training List.” In the “Training Search” tab, filtering is performed based on search criteria. In the “Training List” tab, records are listed according to the filtering criteria specified in the “Training Search” tab.

Using the buttons on the screen;
: Records are filtered and searched.
: The data is transferred to Excel.
: Reports are exported to Excel as flat lists.
: The search criteria on the menu screens are used to clear the data remaining in the filter fields of the grid where the search was performed.
: The menu screen is reset to its default settings.
: The menu screens are customized based on user preferences by enabling or disabling the display of columns corresponding to specific fields.
Detailed Report based on the staff screen, in the training search tab, filter search criteria “Plan Code” field is filled with the plan code and the (Search) button is clicked.
 Detailed Report based on the search criteria in the filter of the training list tab on the staff screen displays the records.
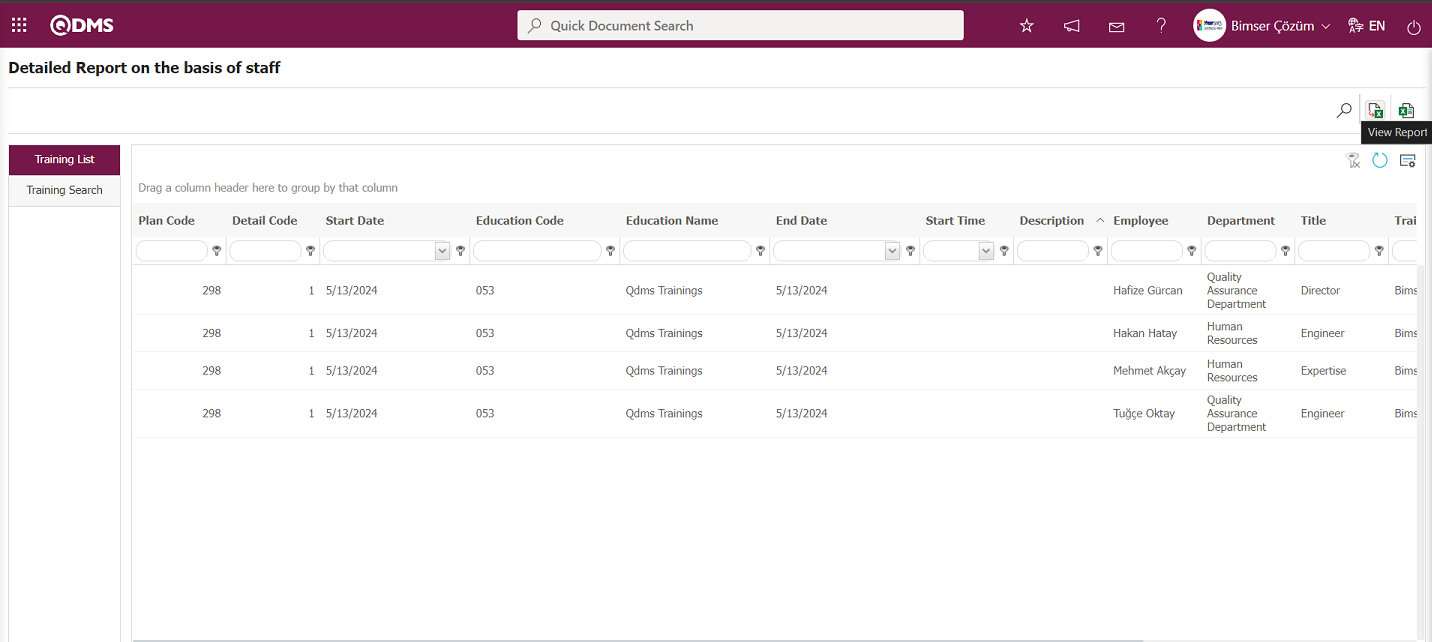
Click the “Detailed Report on the basis of staff” button (View Report). A detailed report is generated based on the staff Excel format.
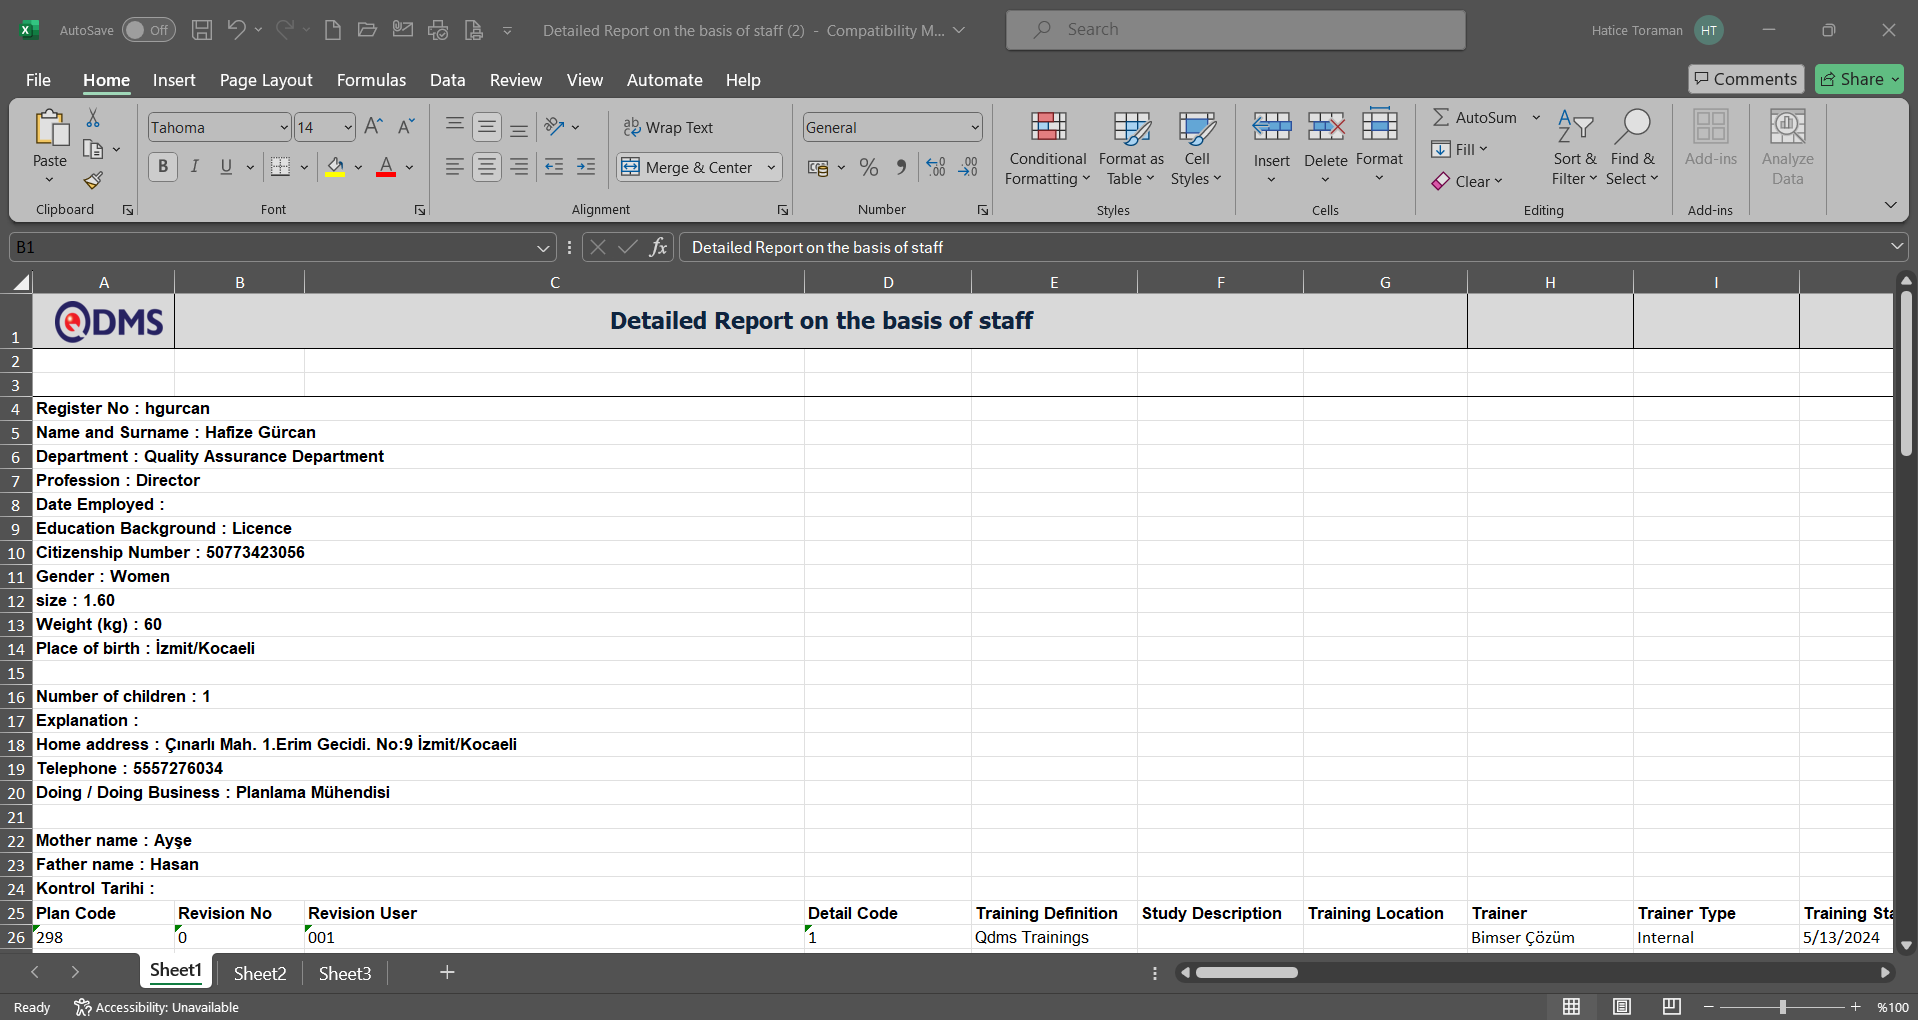
Click the View Report (Linear List) button on the Detailed Report on the basis of staff screen.
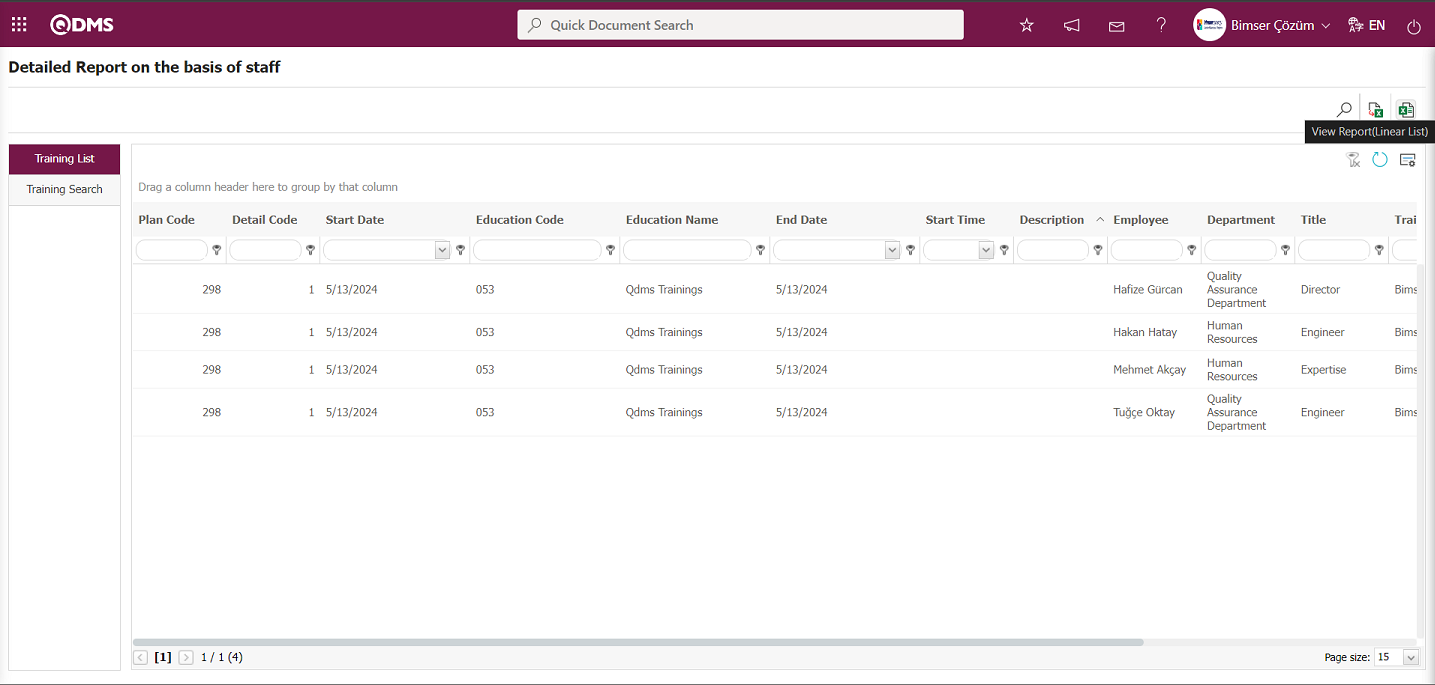
Detailed Report based on staff is obtained from the Excel format in a plain list.
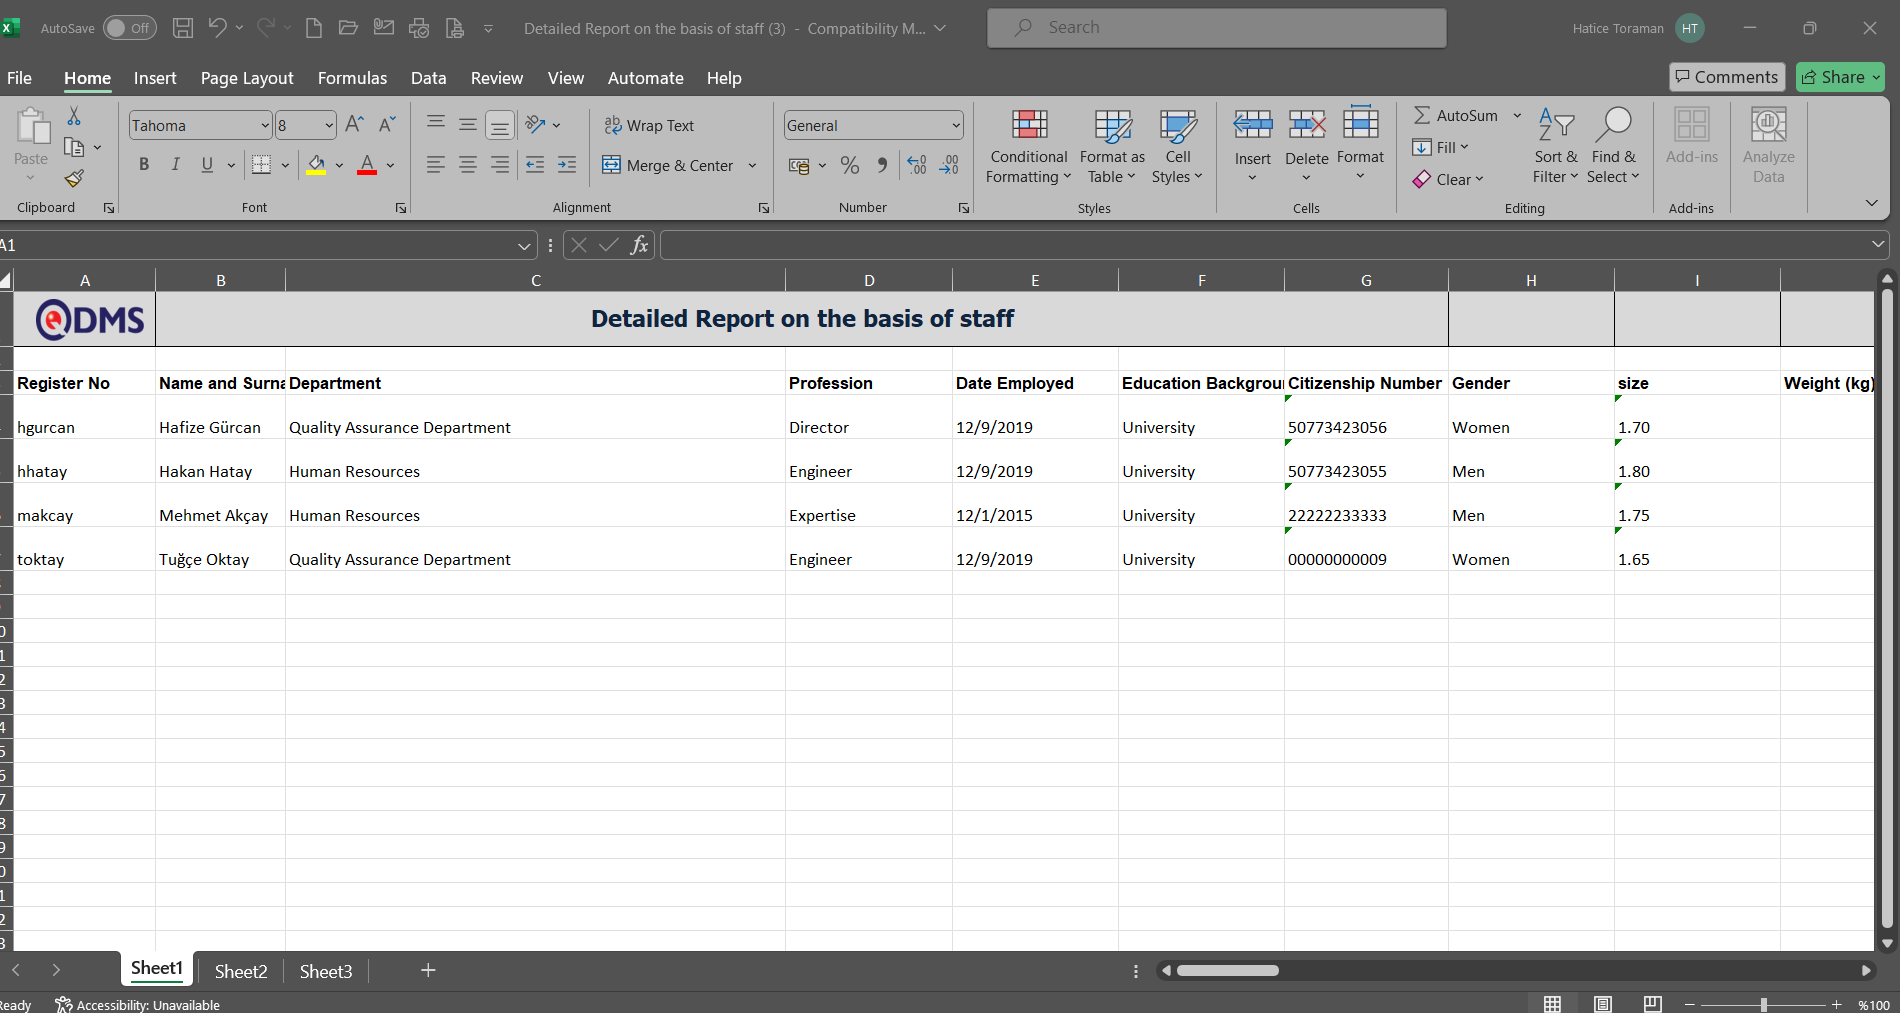
6.3.8.3.Detail Report on the basis of Training
Menu Name: Integrated Management System/Training Planning/Reports/Detail Report on the basis of Training
This menu allows you to separate training courses according to training breakdown, access detailed information about users who participated in each training course and those who did not, and generate reports in Excel format. The Detail Report on the basis of Training menu contains two tabs: Training Search and Training List. In the Training Search tab, you can filter results according to search criteria. In the Training List tab, records are listed according to the filter criteria specified in the Training Search tab.
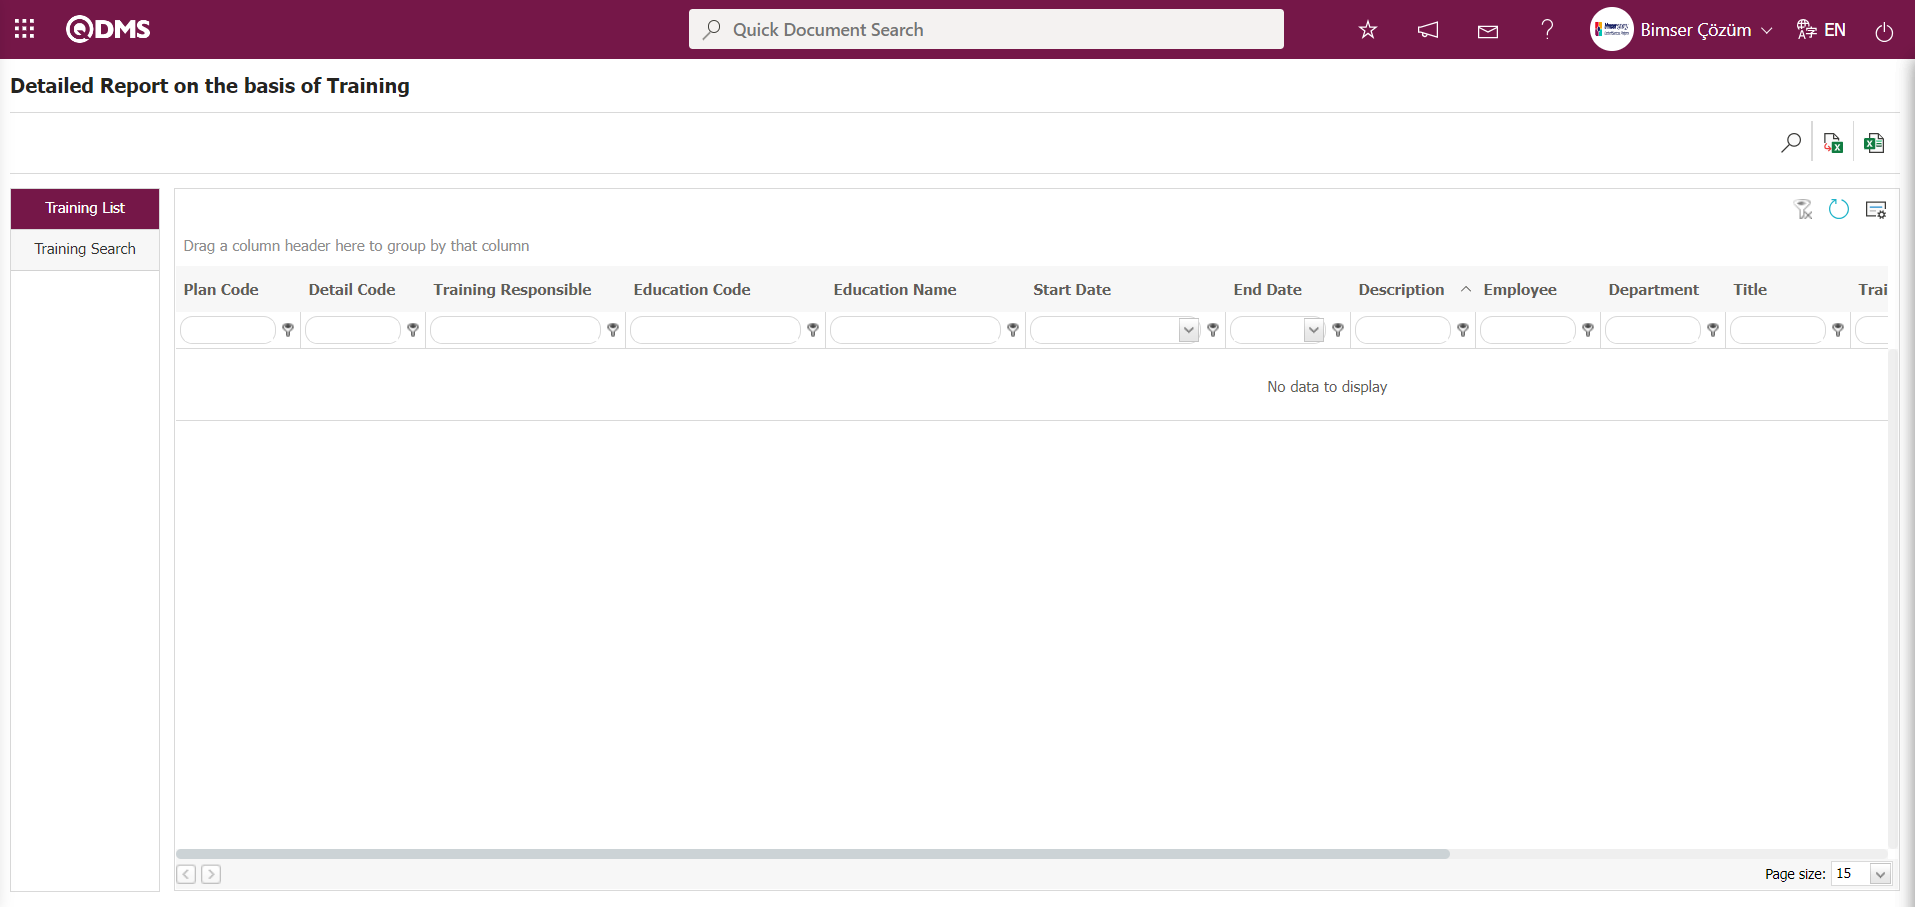
Using the buttons on the screen;
: Records are filtered and searched.
: The data is transferred to Excel.
: Reports are exported to Excel as flat lists.
: The search criteria on the menu screens are used to clear the data remaining in the filter fields of the grid where the search was performed.
: The menu screen is reset to its default settings.
: The menu screens are customized based on user preferences by enabling or disabling the display of columns corresponding to specific fields.
In the Detail Report on the basis of Training screen, in the training search tab, enter the plan code in the “Plan Code” field of the filter search criteria and click the (Search) button.

The records are listed according to the search criteria in the filter applied in the training list tab on the Detail Report on the basis of Training screen.

Click the (View Report) button on the “Detail Report on the basis of Training” screen to download the report in Excel format.
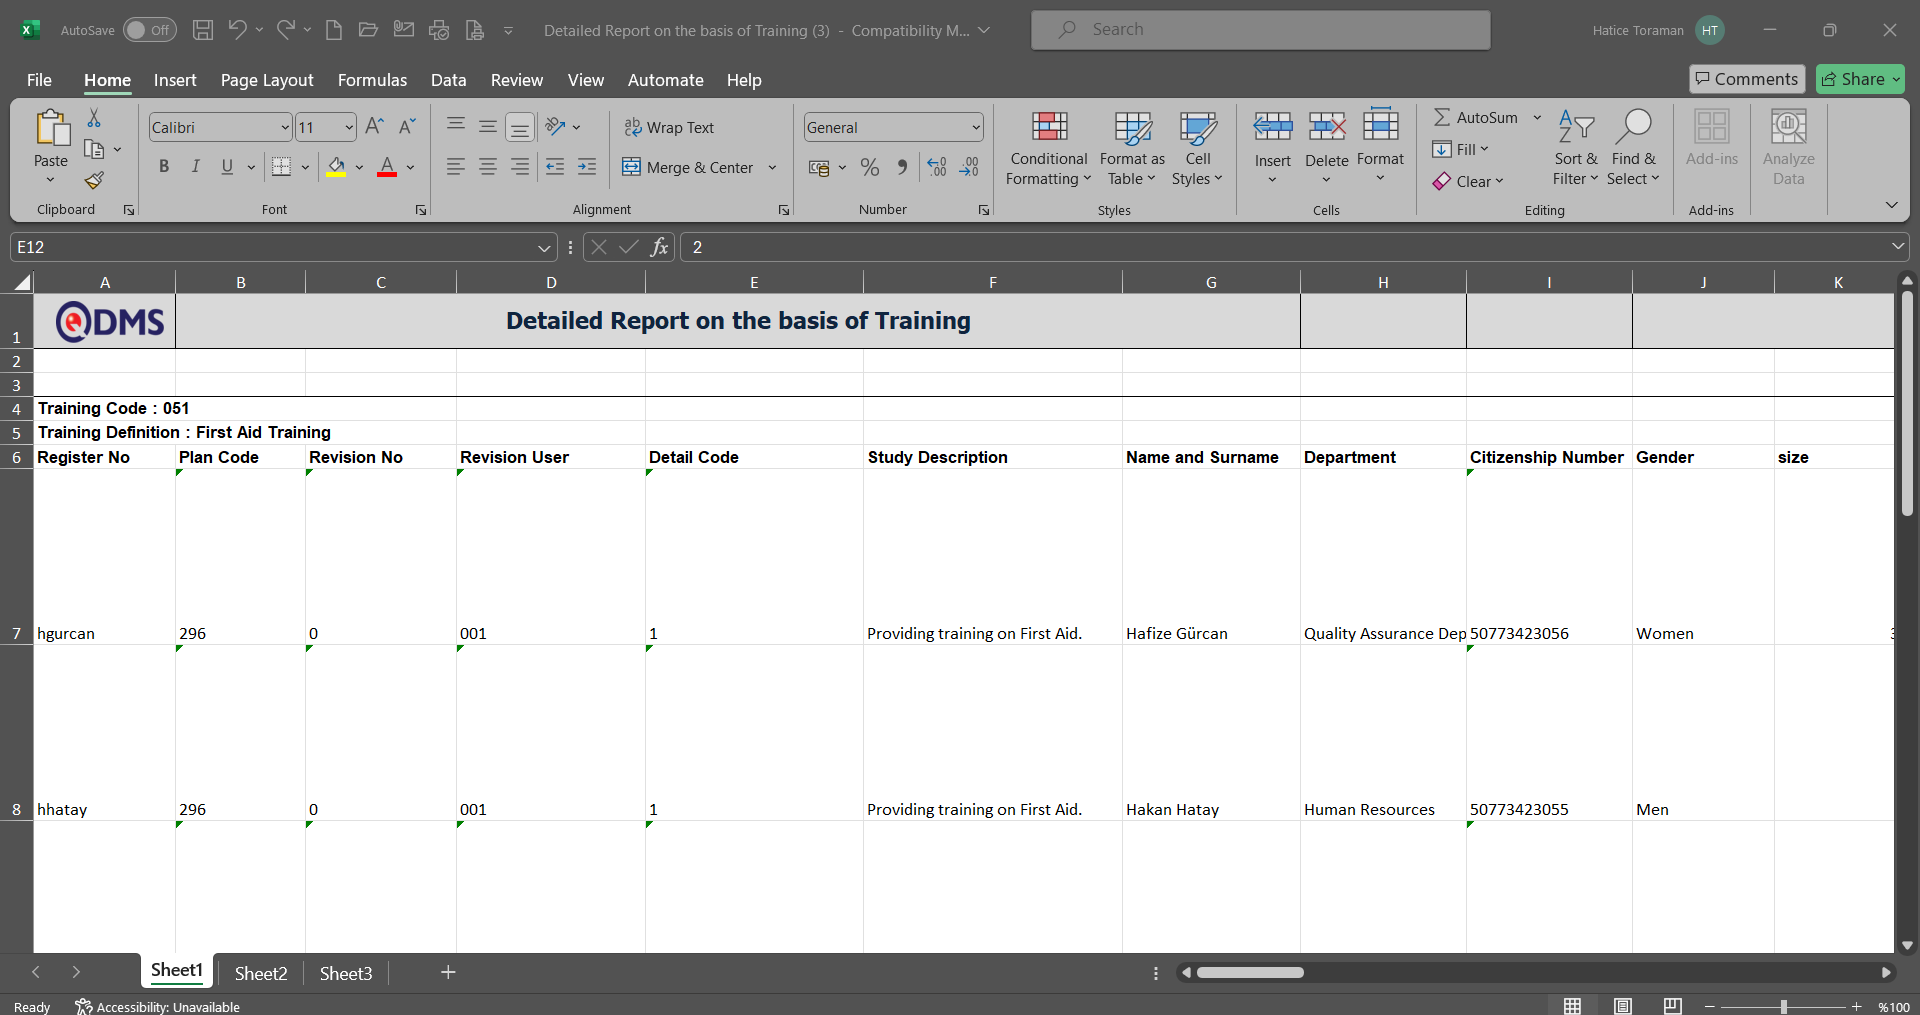
Click the  View Report (Linear List) button on the Detail Report on the basis of Training screen.
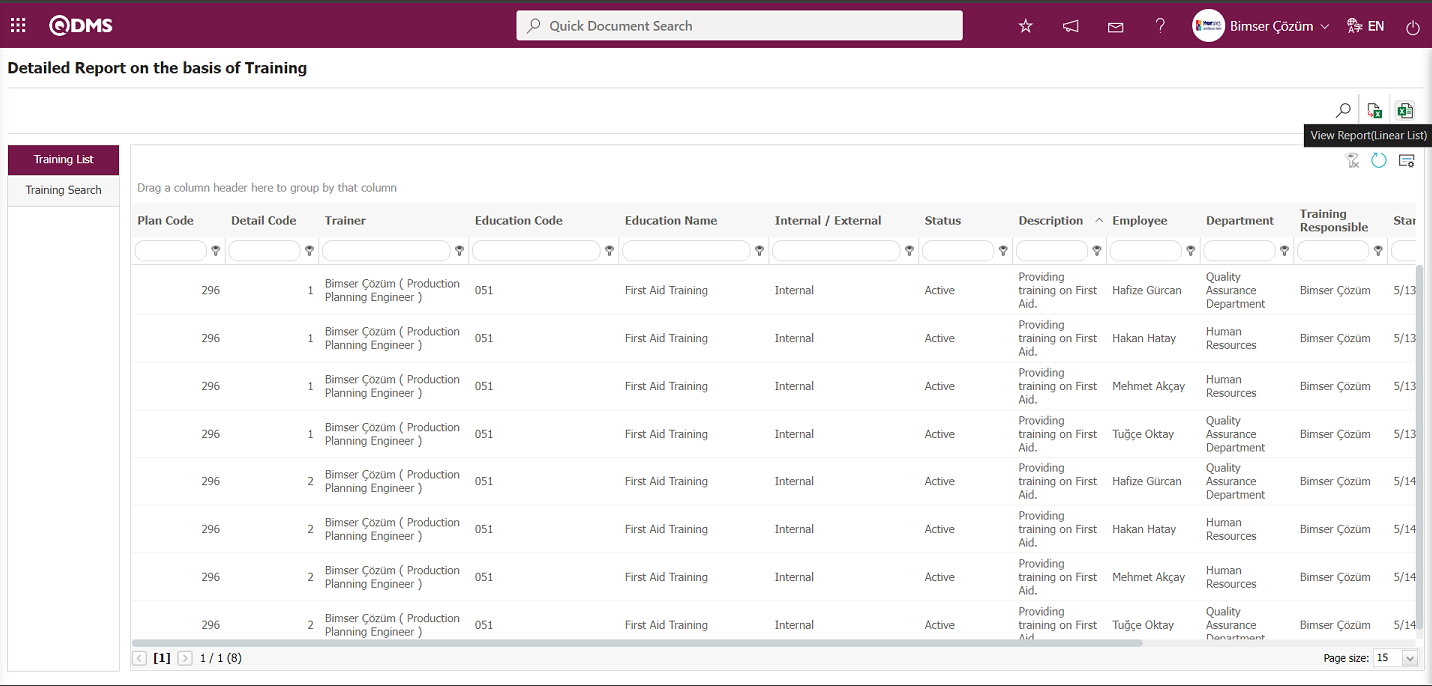
“Detail Report on the basis of Training” The report is obtained in Excel format as a plain list.
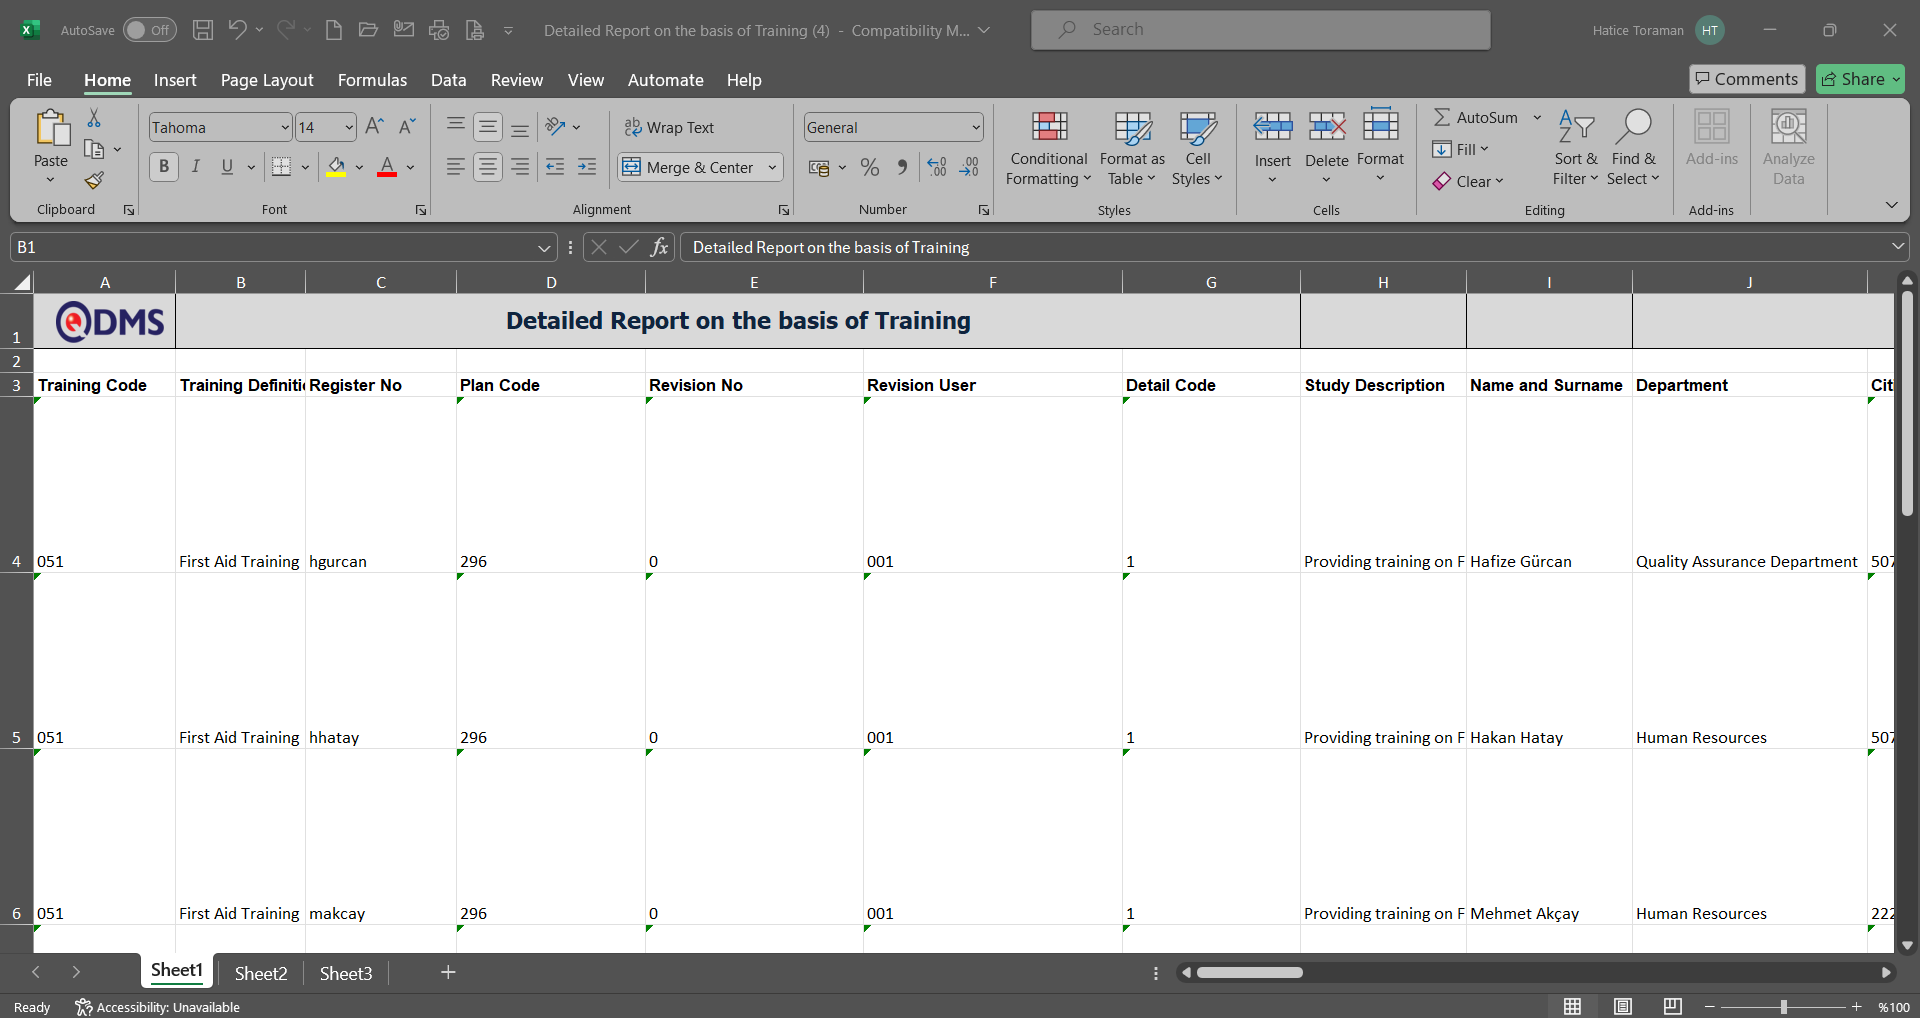
6.3.8.4.Summary Report on the basis of Department
Menu Name: Integrated Management System/Training Planning/Reports/Summary Report on the basis of Department
This menu allows you to view the total number of training hours taken by departments defined in QDMS and generate a report in Excel format. The training search tab appears on the Summary Report on the basis of Department screen. In the training search tab, you can filter the results according to the search criteria and generate a report in Excel format based on the filter criteria.
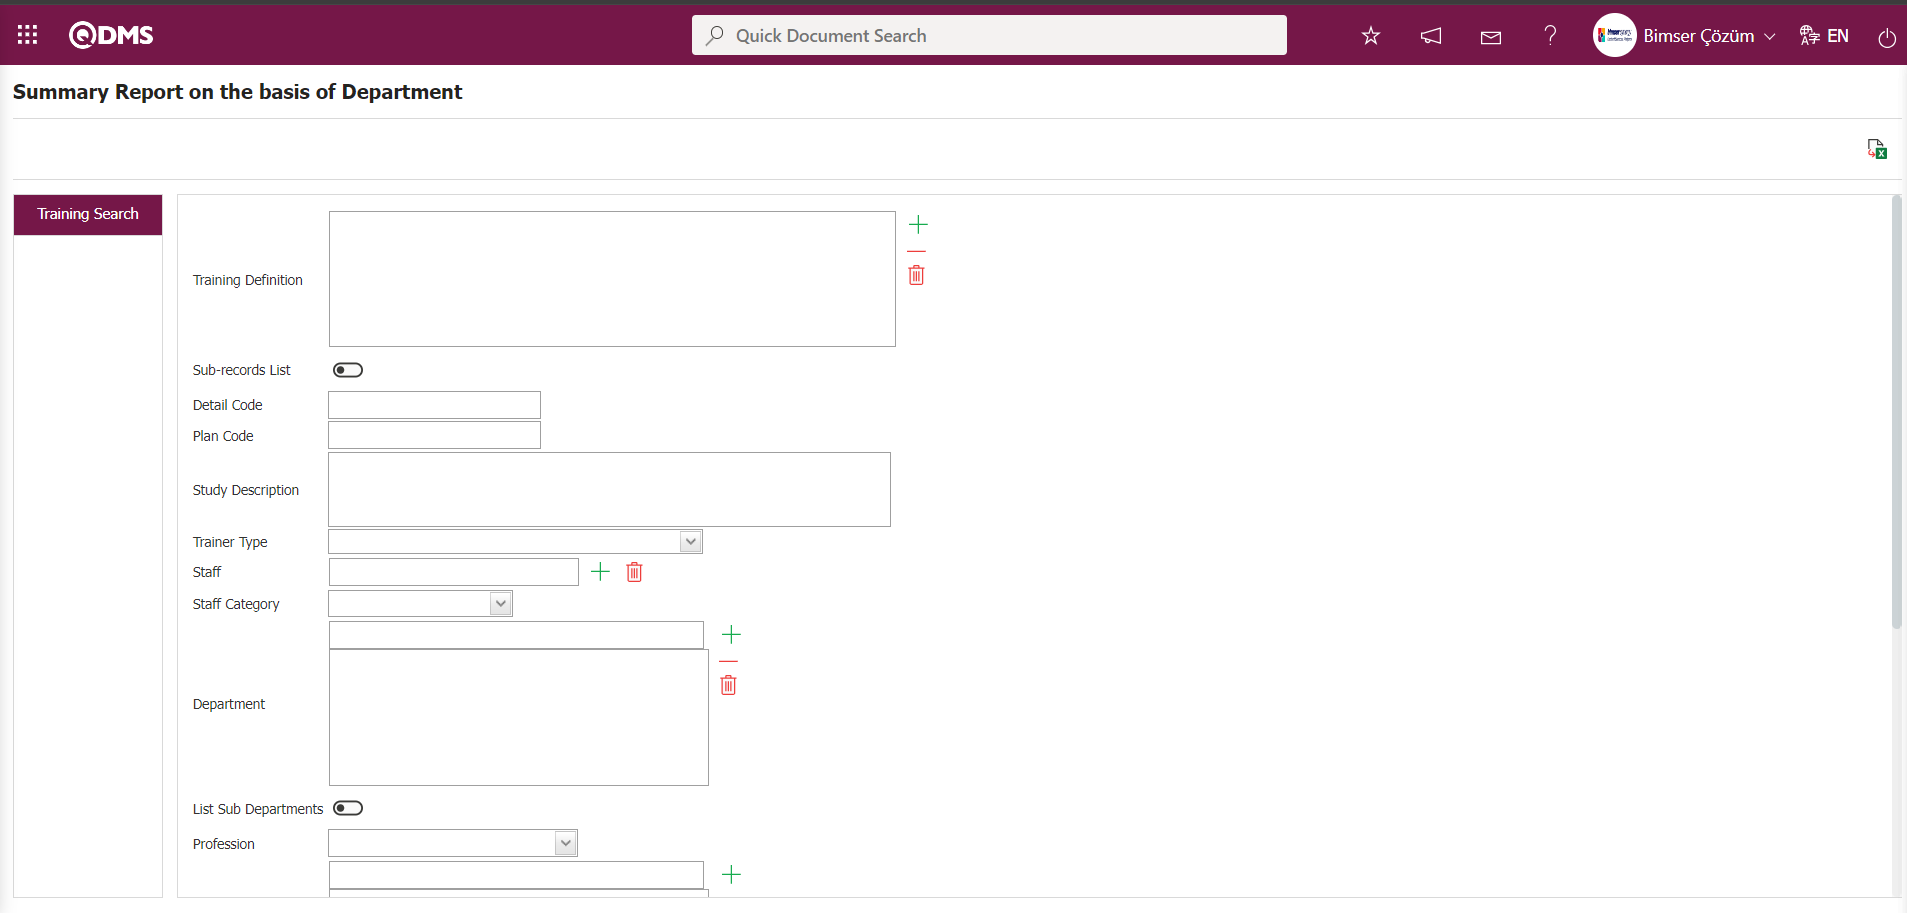
Using the buttons on the screen;
: The data is transferred to Excel.
Summary Report based on the Department screen, in the Training search tab, filter search criteria “Plan Code” field is filled with the plan code and the (View Report) button is clicked.
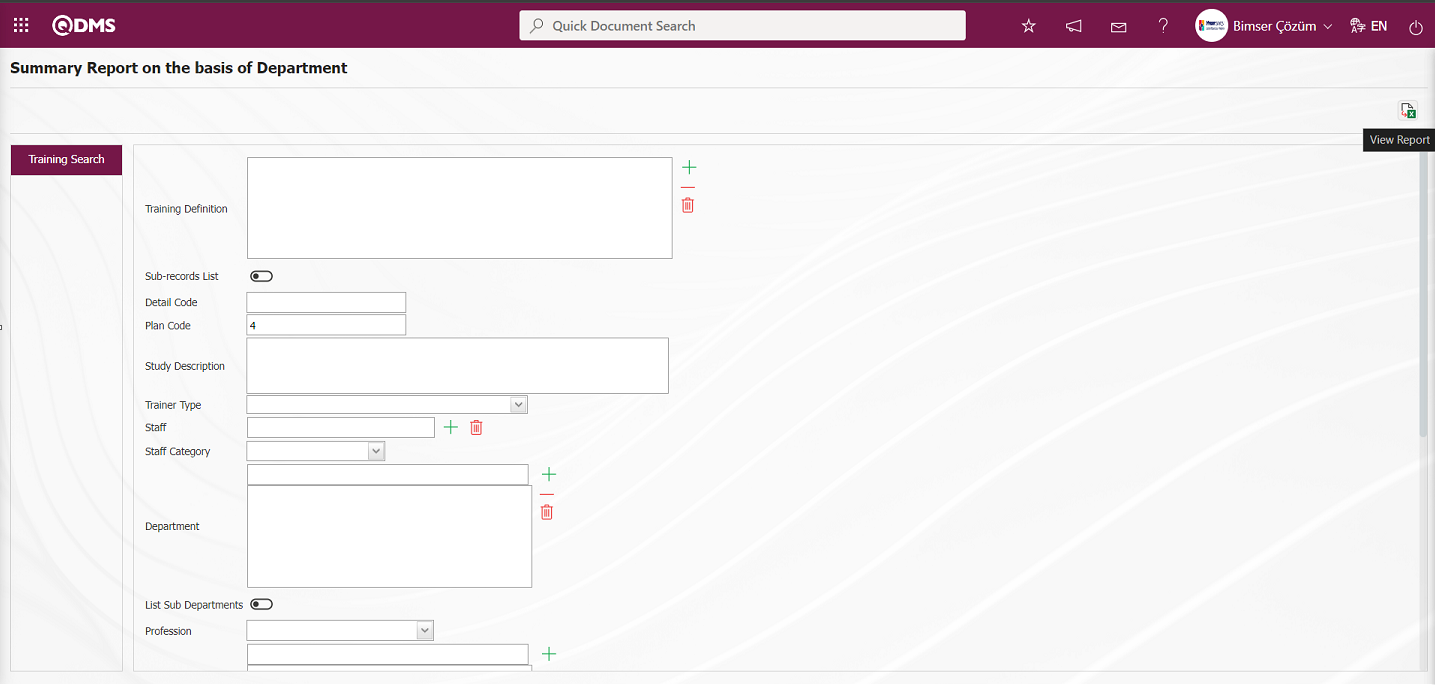
To obtain the “Summary Report on the basis of Department” in Excel format, click the (View Report) button on the Summary Report on the basis of Department screen.
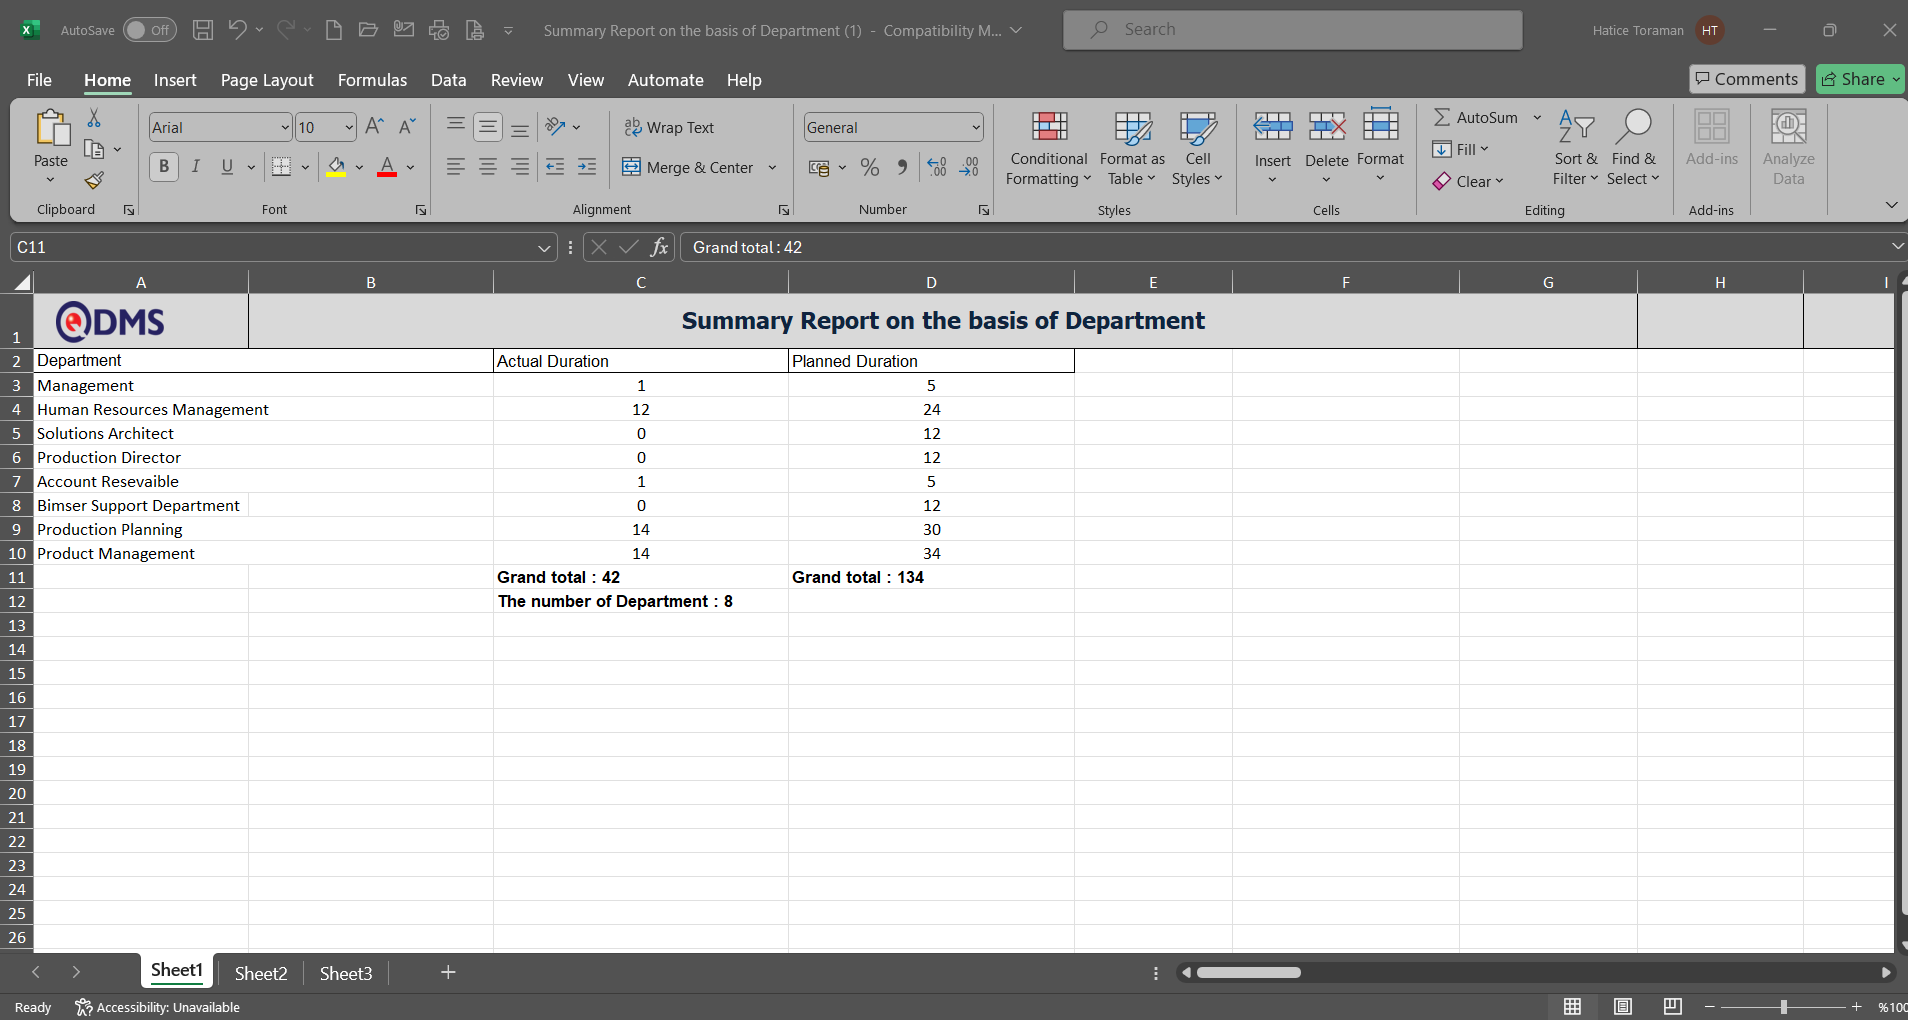
6.3.8.5.Summary Report on the basis of Staff
Menu Name: Integrated Management System/Training Planning/Reports/Summary Report on the basis of Staff
This menu allows users to view the training hours completed by personnel defined in QDMS and generate reports in Excel format. The Training Search tab appears on the Summary Report on the basis of Staff screen. In the Training Search tab, users can filter results based on search criteria and generate reports in Excel format according to the filter settings.
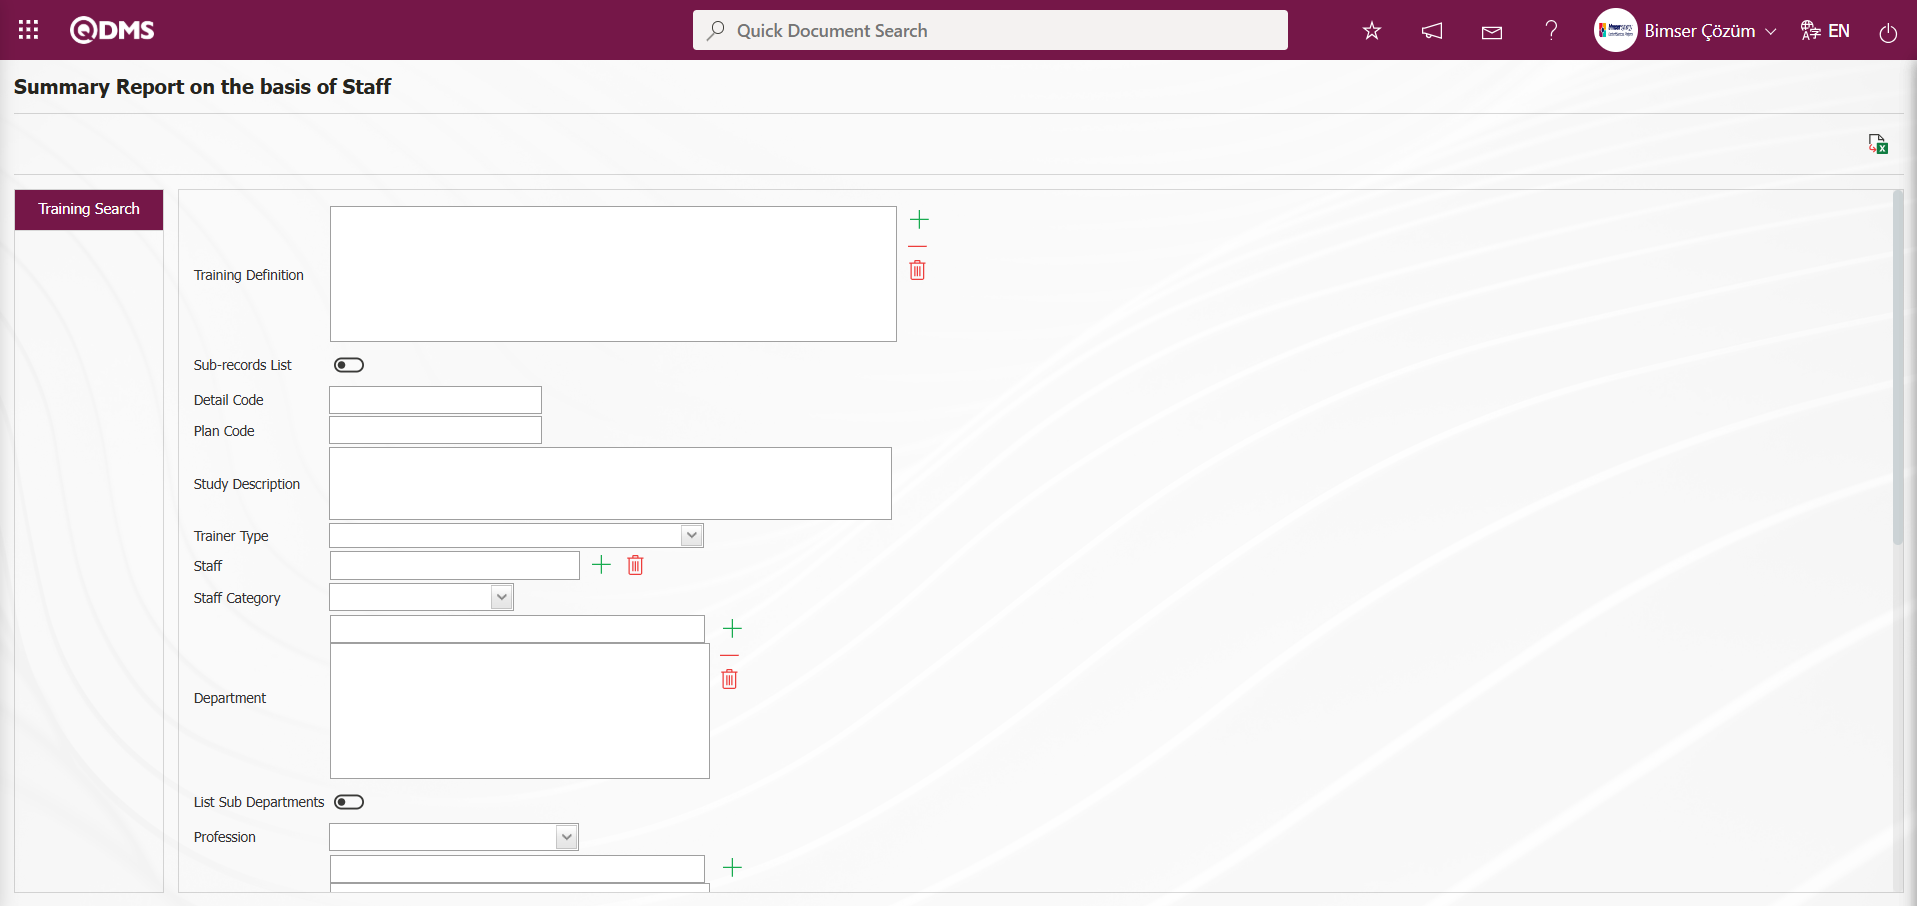
Using the buttons on the screen;
: The data is transferred to Excel.
Summary Report based on the Staff screen, in the training search tab, filter search criteria “Plan Code” field is filled with the plan code and the (View Report) button is clicked.

An Excel report titled “Personnel Summary Report” can be generated from the “Personnel Summary Report” screen.
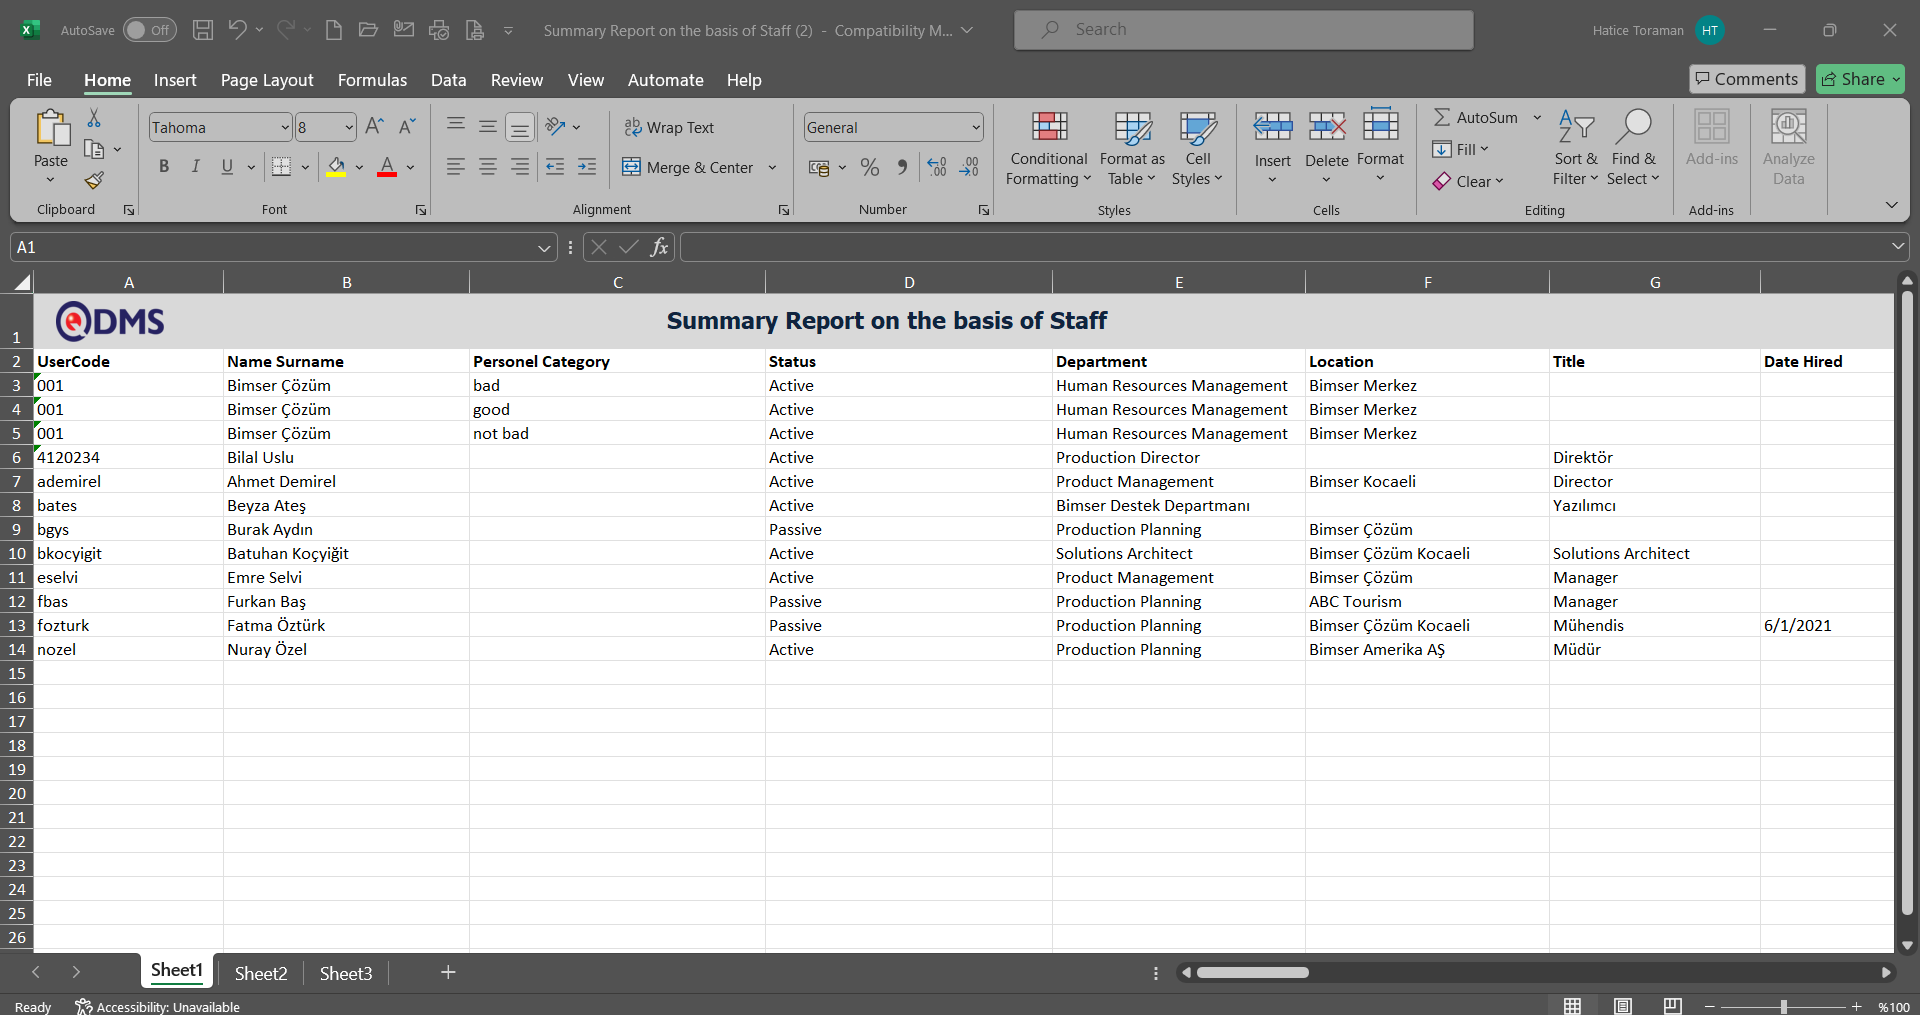
6.3.8.6.Summary Report on the basis of Training
Menu Name: Integrated Management System/Training Planning/Reports/ Summary Report on the basis of Training
This menu provides access to information such as the number of hours of training provided, the number of participants and non-participants, and allows you to generate a report in Excel format. The Training Search tab appears on the Summary Report on the basis of Training screen. In the Training Search tab, you can filter the results according to search criteria and generate a report in Excel format based on the filter criteria.
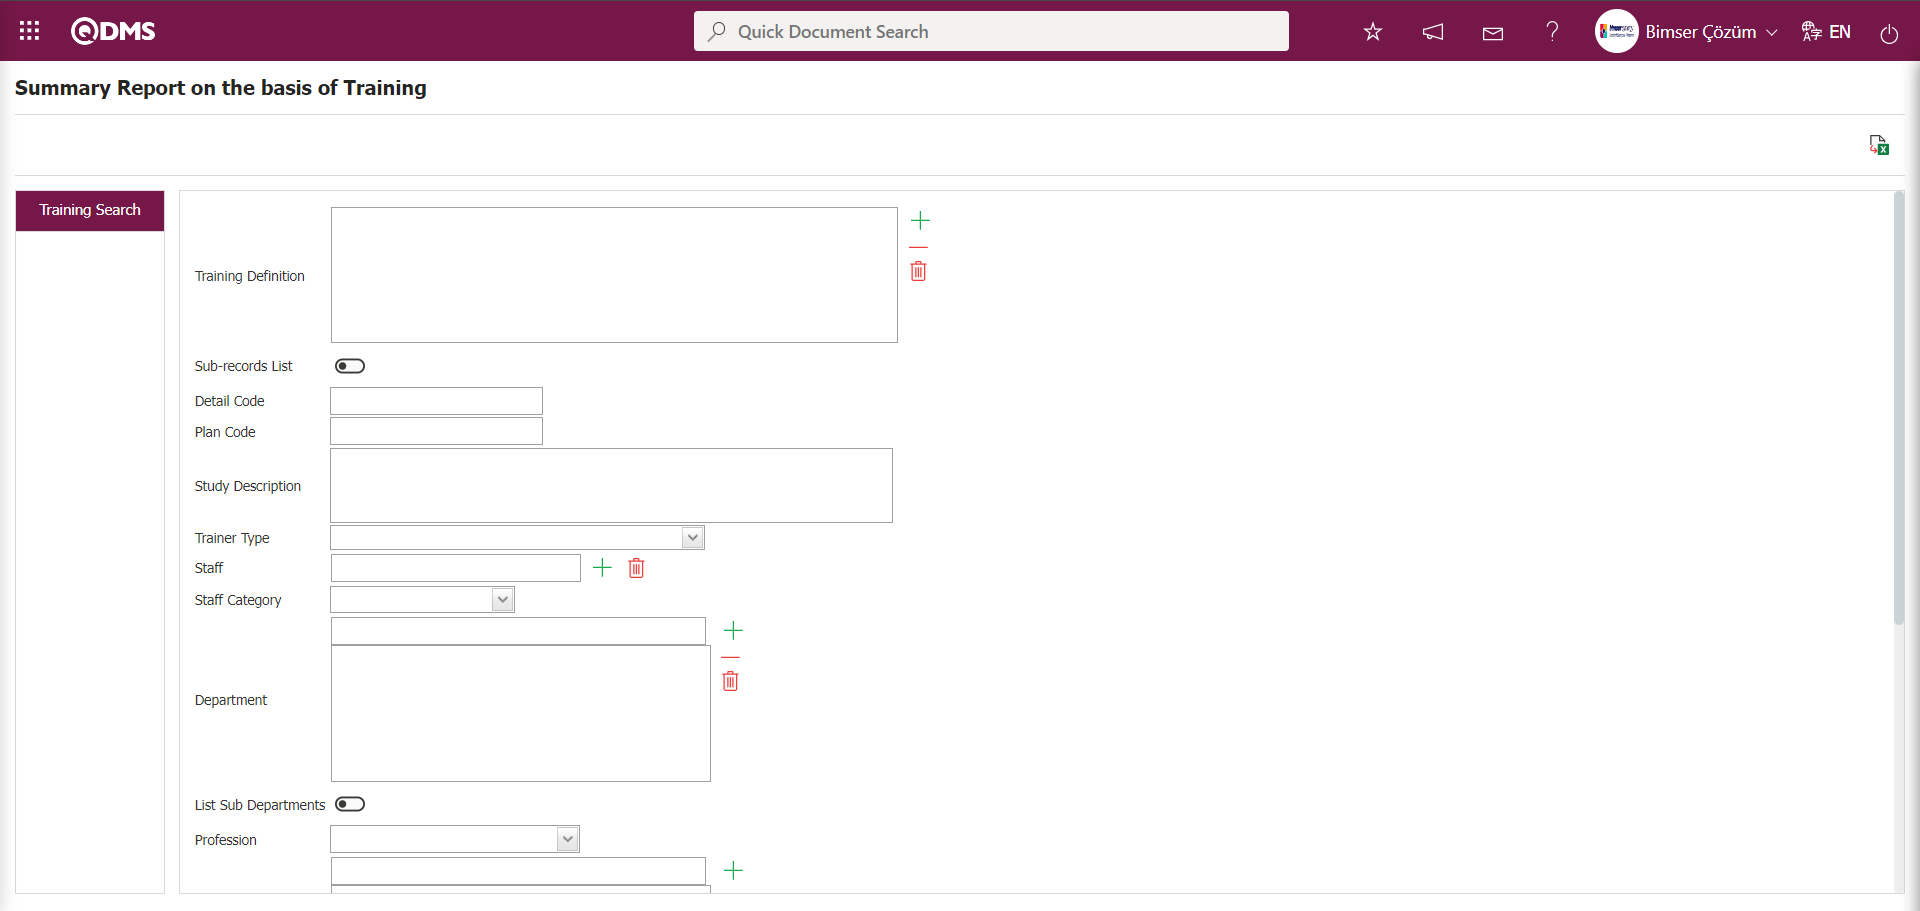
Using the buttons on the screen;
: The data is transferred to Excel.
In the Summary Report on the basis of Training screen, in the training search tab, enter the plan code in the “Plan Code” field of the filter search criteria and click the (View Report) button.
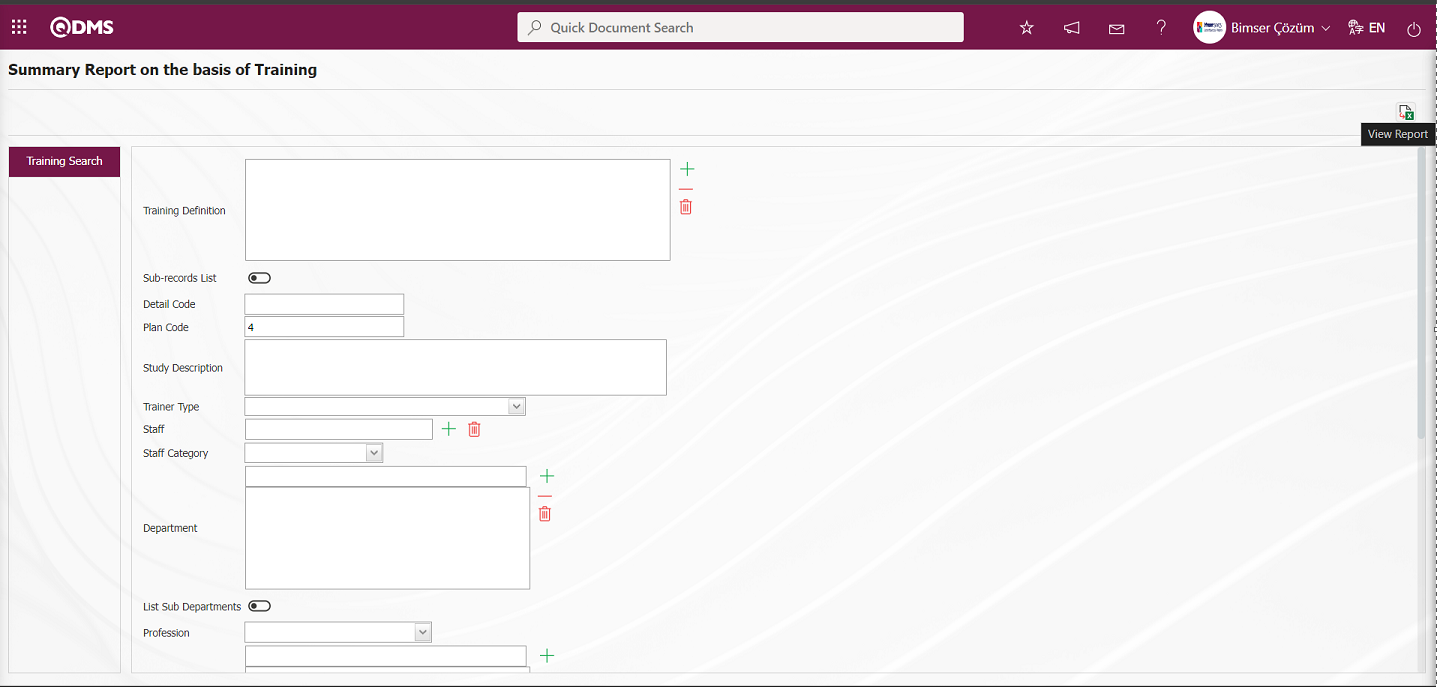
The “Summary Report on the basis of Training” report is obtained in Excel format on the “Summary Report on the basis of Training” screen.
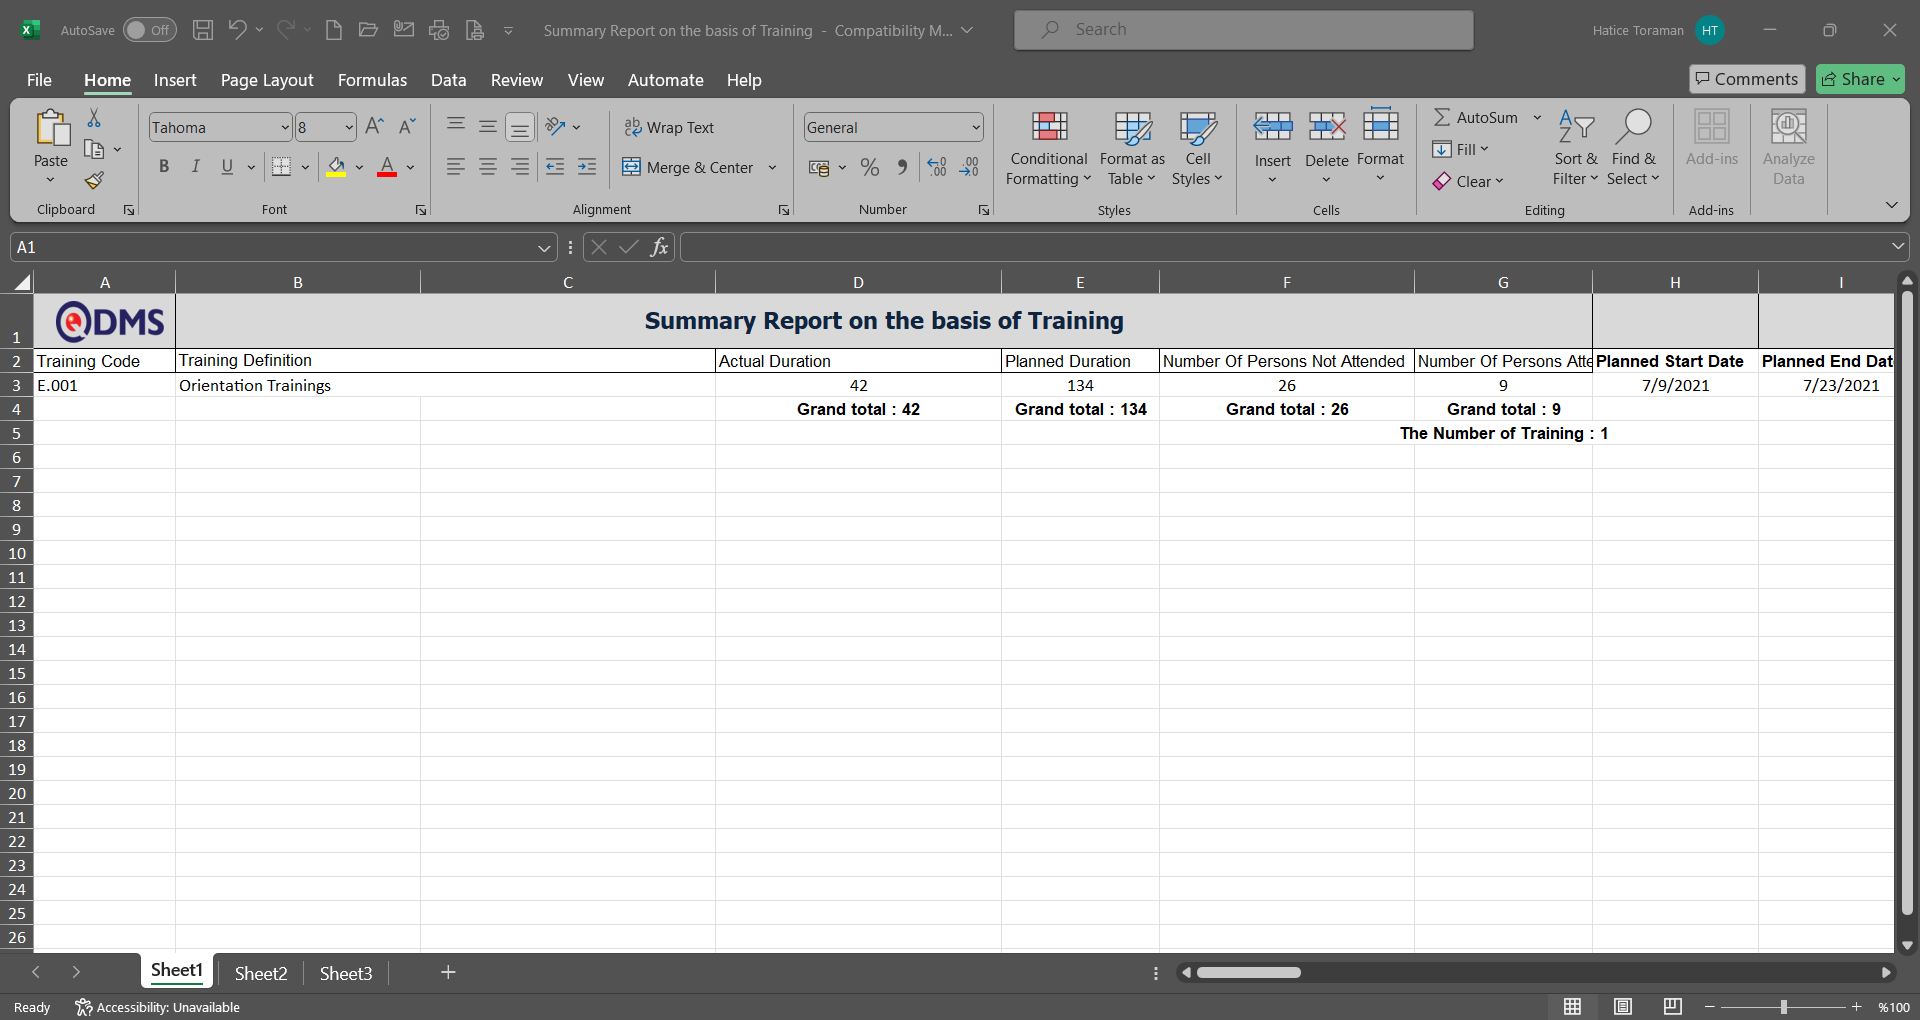
6.3.8.7.Assessment Report on the basis of Staff
Menu Name: Integrated Management System/Training Planning/Reports/Assessment Report on the basis of Staff
This menu provides access to information on the effectiveness of training courses taken by staff, broken down by staff member, and generates a report in Excel format. The Training Search tab appears on the Assessment Report on the basis of Staff screen. The report is generated in Excel format based on the filter criteria selected in the Training Search tab.

Using the buttons on the screen;
: The data is transferred to Excel.
: Reports are exported to Excel as flat lists.
Activity Assessment Report based on Staff screen, in the training search tab, filter search criteria “Plan Code” field is filled with the plan code and the (View Report) button is clicked.

The “Assessment Report on the basis of Staff” report is obtained in Excel format.
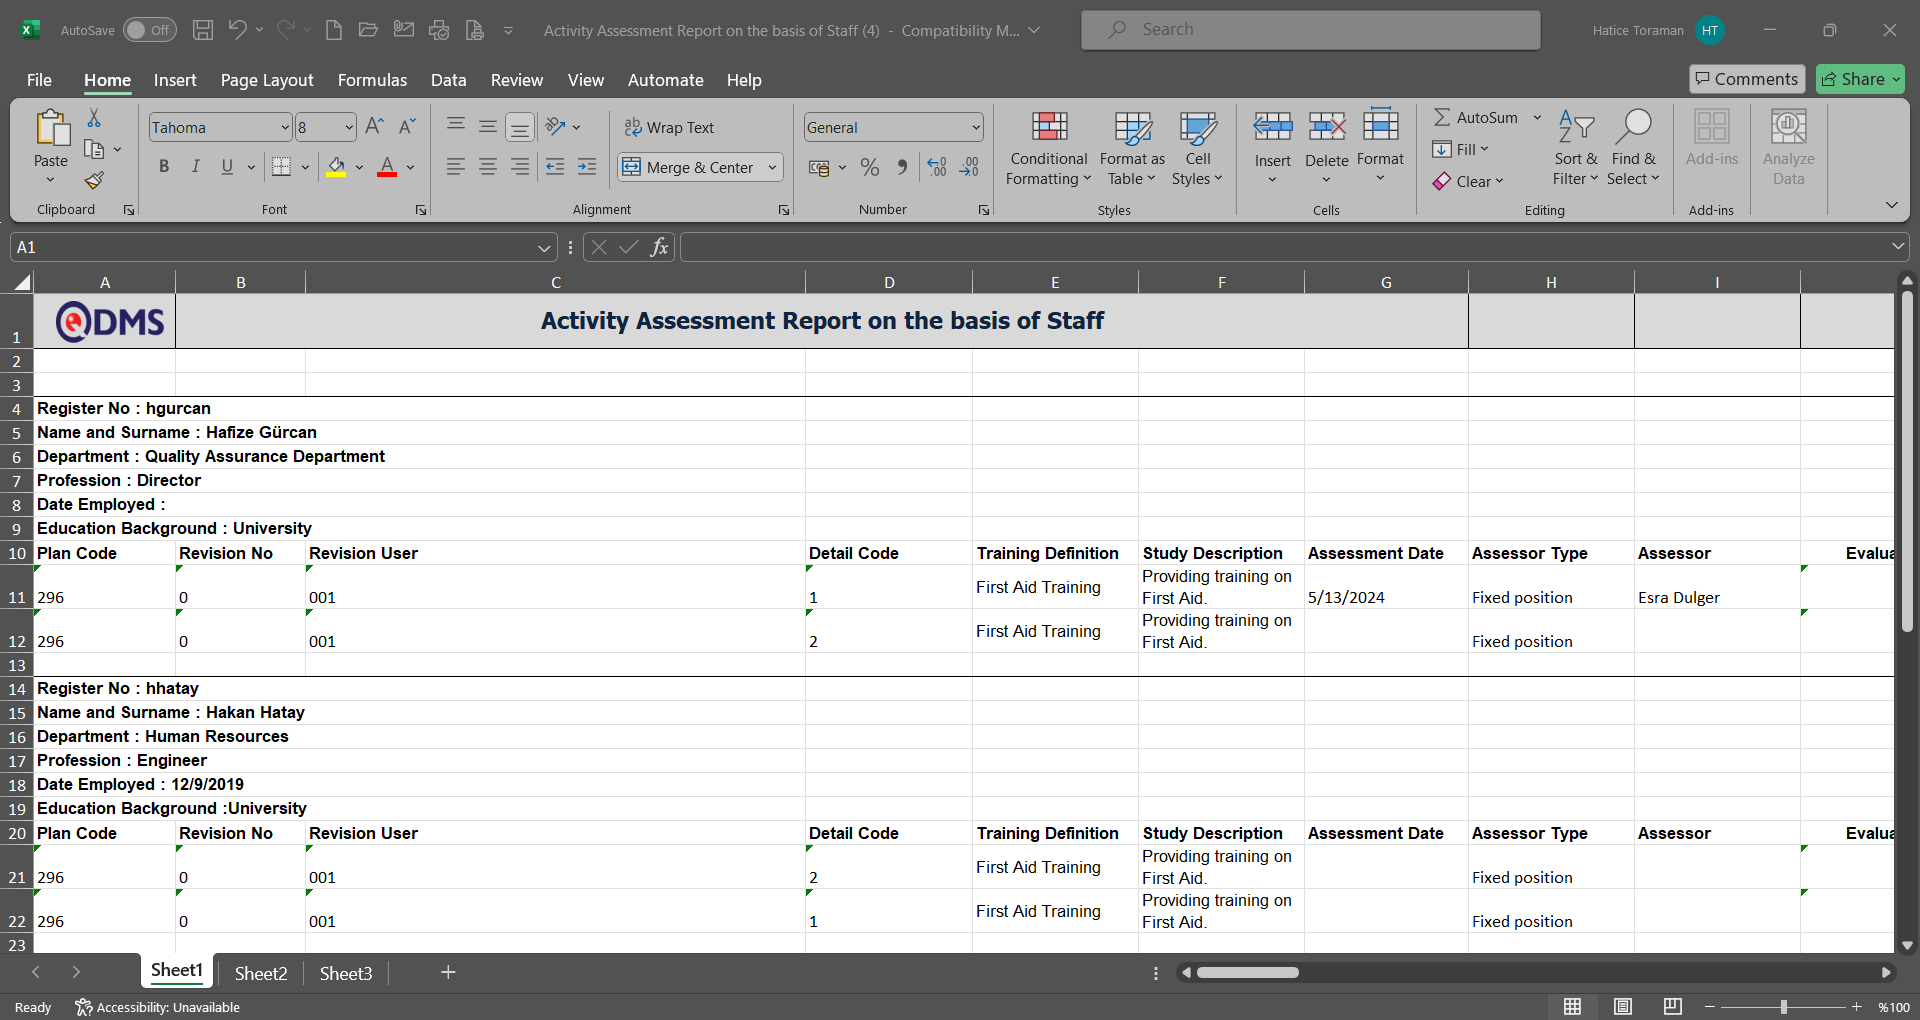
6.3.8.8.Assessment Report on the basis of Training
Menu Name: Integrated Management System/Training Planning/Reports/Assessment Report on the basis of Training
This menu allows you to access the activity evaluation scores of employees by breaking them down according to training and obtain a report in Excel format. The Training Search tab appears on the Assessment Report on the basis of Training screen. In the Training Search tab, you can filter according to search criteria and obtain a report in Excel format based on the filtering criteria.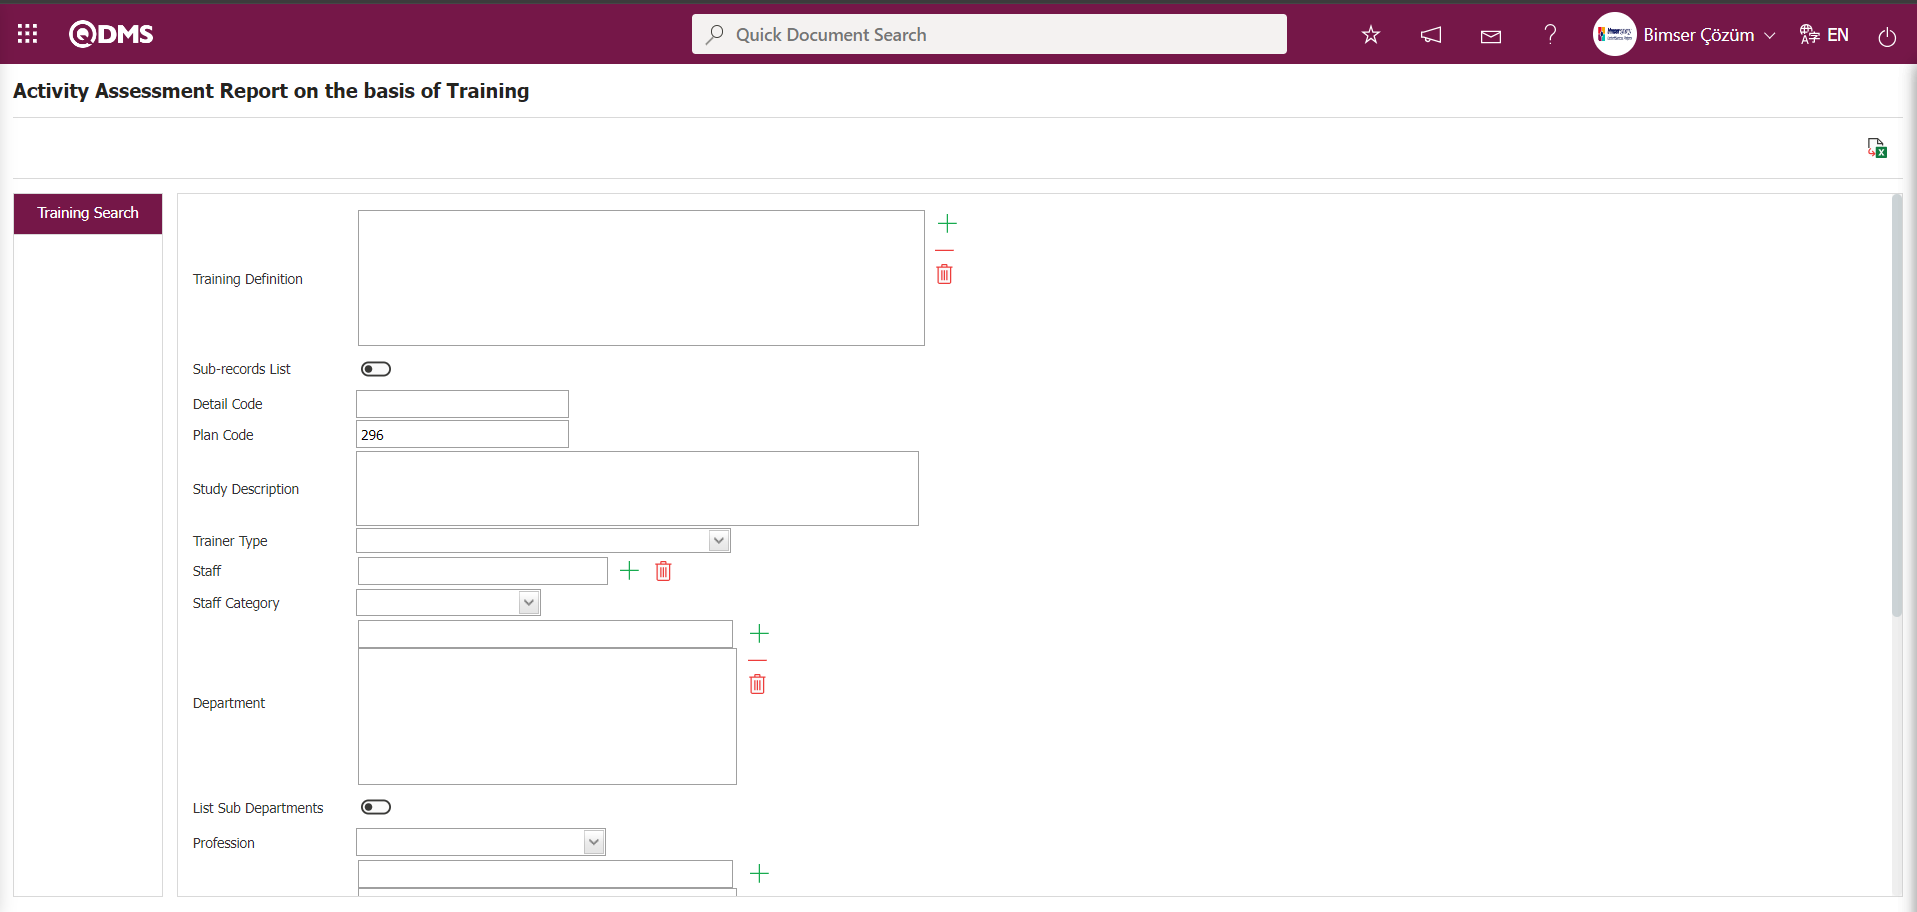
Using the buttons on the screen;
: The data is transferred to Excel.
: Reports are exported to Excel as flat lists.
In the Activity Assessment Report based on Training screen, enter the plan code in the “Plan Code” field of the training search filter criteria in the training search tab, then click the (View Report) button.

Training-based activity evaluation report Report is provided in Excel format
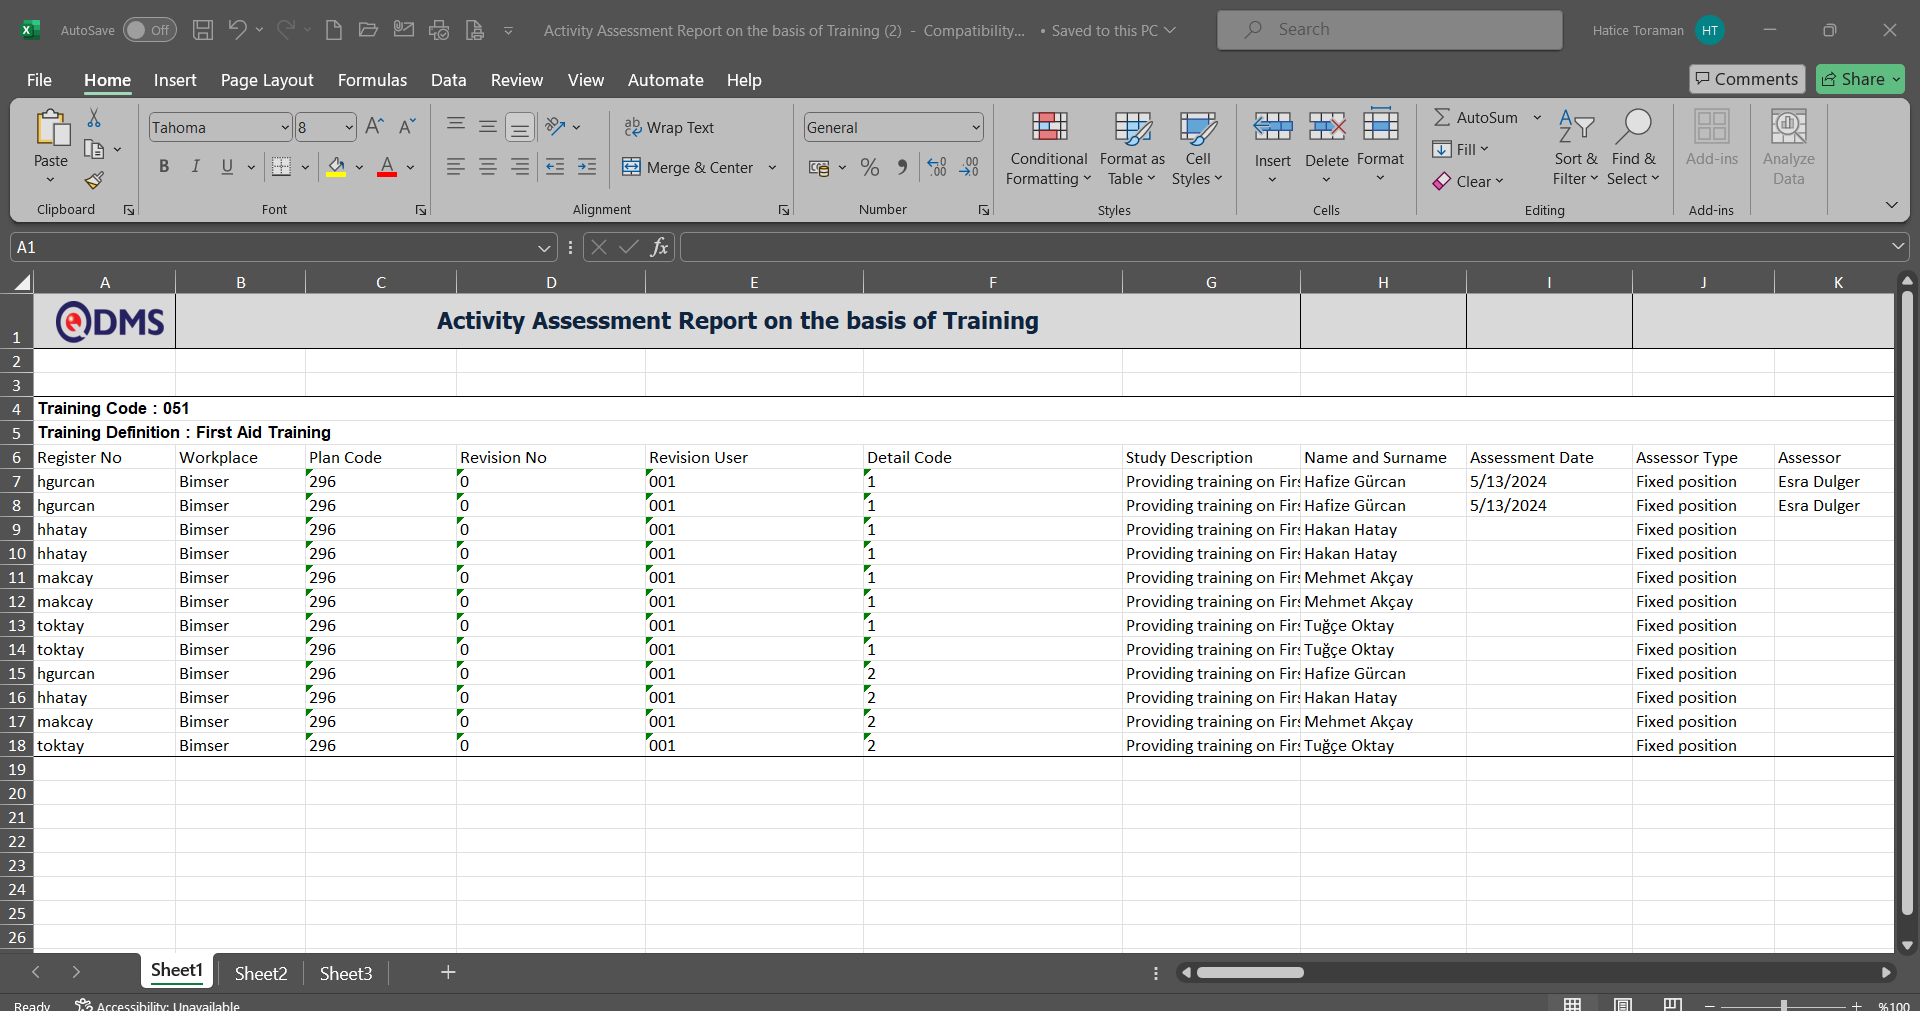
6.3.8.9.Report of Taken/Required Trainings
Menu Name: Integrated Management System/Training Planning/Reports/Report of Taken/Required Trainings
This menu displays information about training courses that have been taken and are required to be taken by employees according to their job titles, and allows you to generate reports in Excel format. The “Report of Taken/Required Trainings” screen displays the training search tab. In the training search tab, you can filter the results according to search criteria and generate reports in Excel format based on the filter criteria.
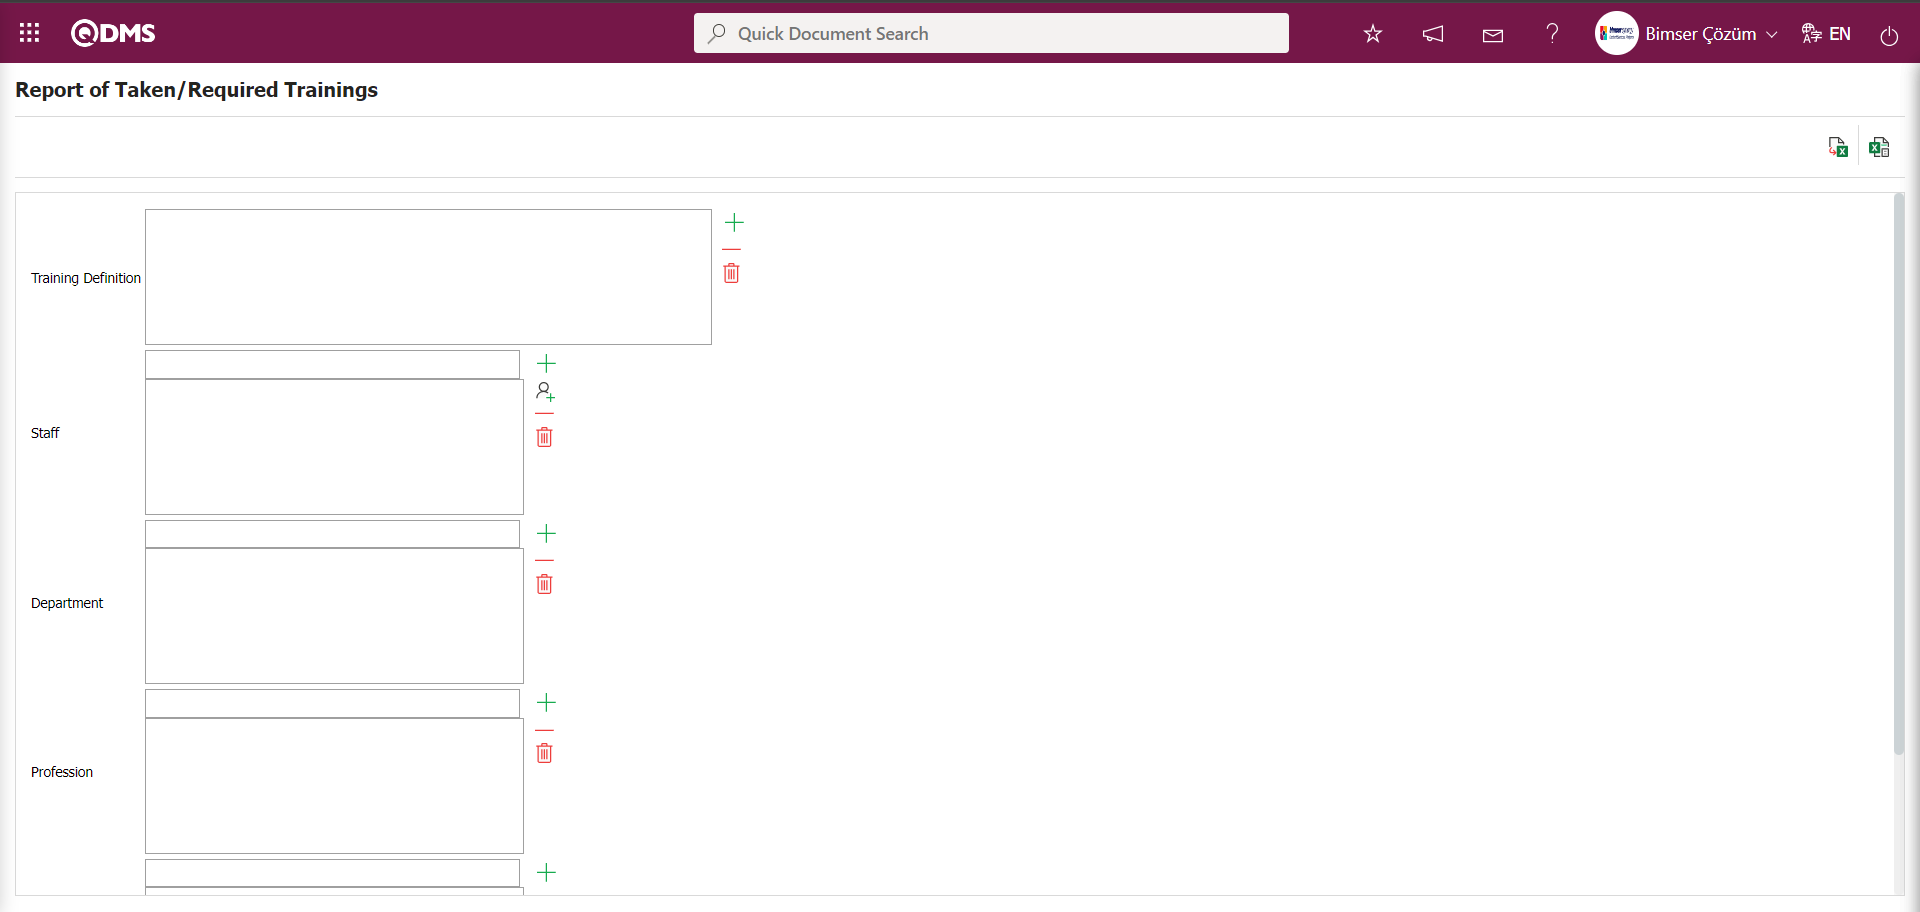
Using the buttons on the screen;
: The data is transferred to Excel.
: Reports are exported to Excel as flat lists.
In the Report of Taken/Required Trainings screen, in the training search tab, filter search criteria are selected from the Training Description field. The (Add) button is clicked to open the system, and the training is selected from the list of defined trainings. Then, the (View Report) button is clicked.
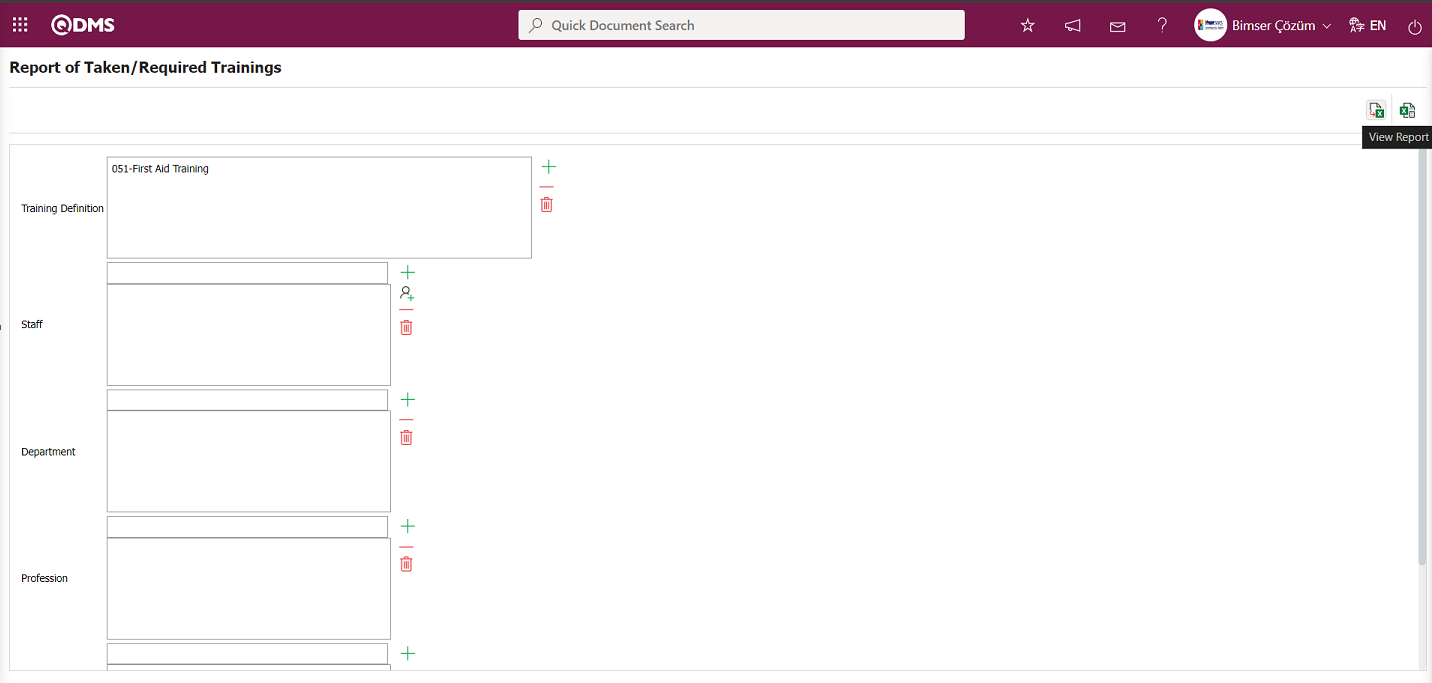
“Report of Taken/Required Trainings” The report is obtained in Excel format.
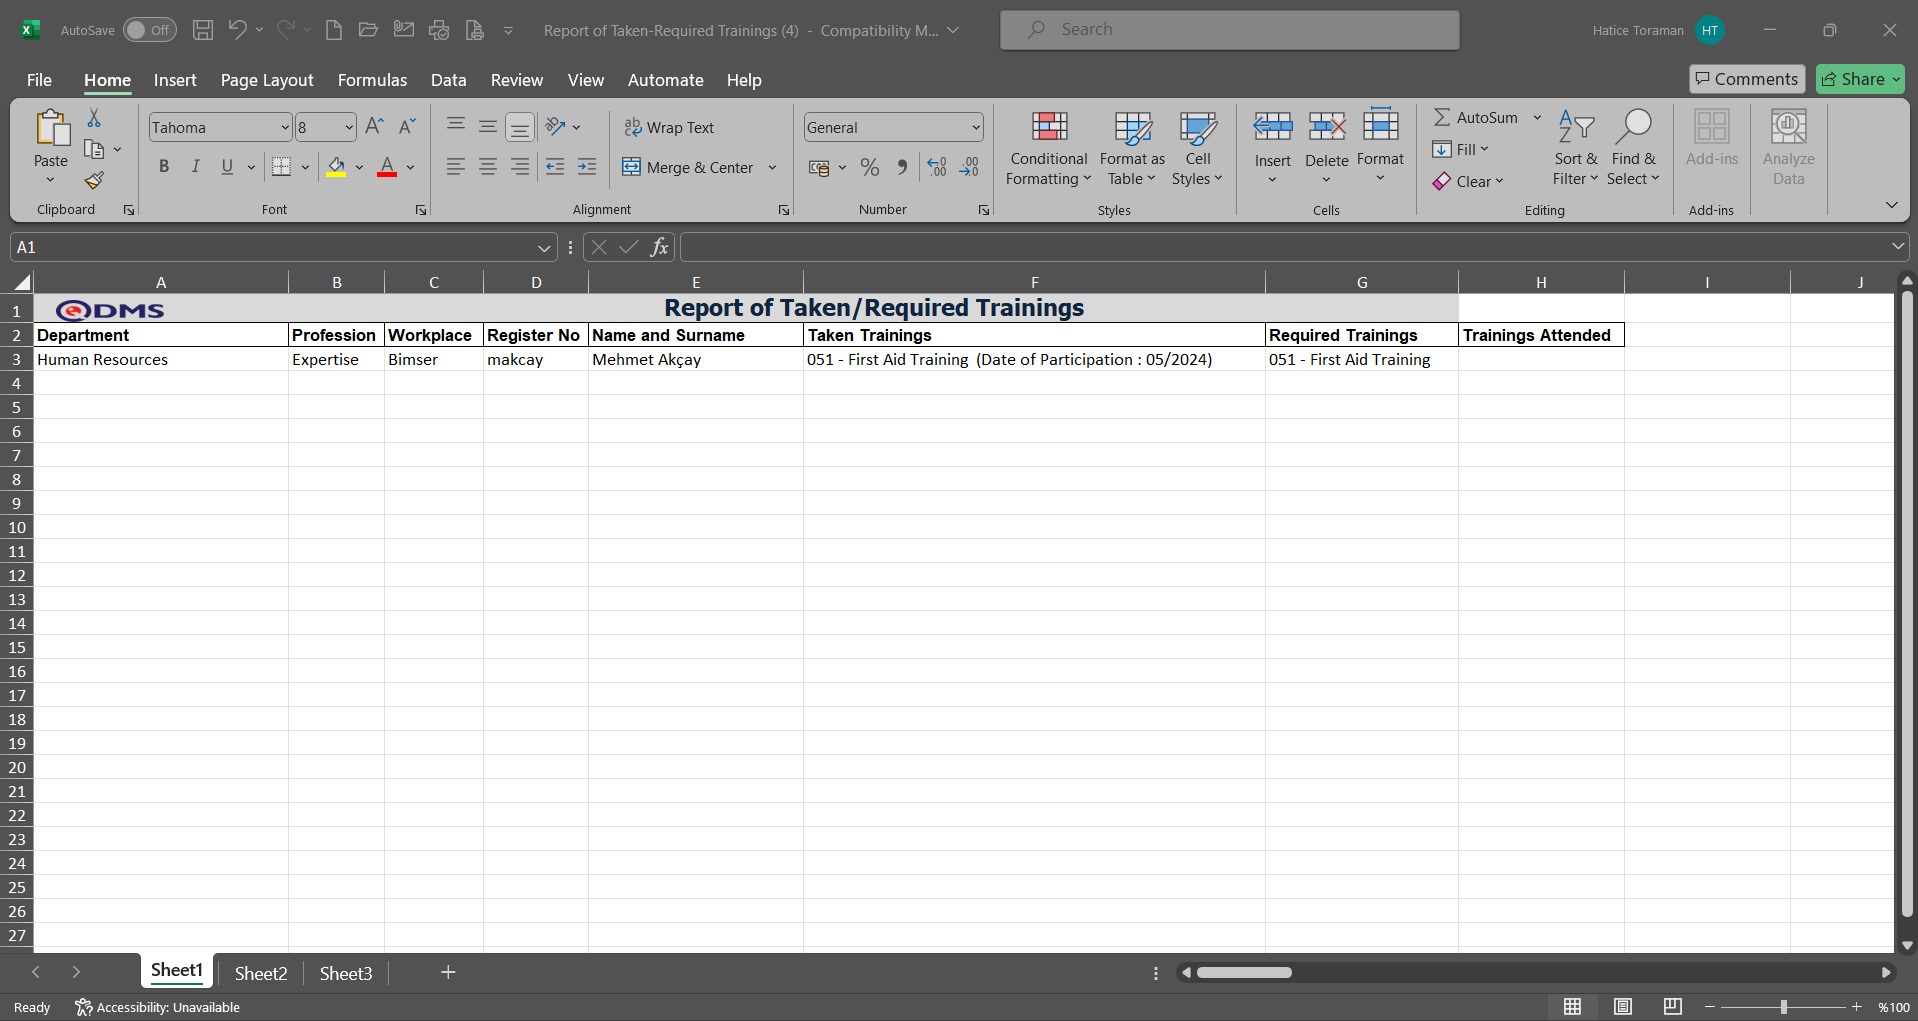
6.3.8.10.Department Base Attendance Report
Menu Name: Integrated Management System/Training Planning/Reports/Department Base Attendance Report
This menu provides information on which department users participated in the training and how many users participated, and allows you to obtain a report in Excel format. The Department Base Attendance Report screen displays the training search tab. In the training search tab, you can filter according to search criteria and obtain a report in Excel format based on the filter criteria.

Using the buttons on the screen;
: The data is transferred to Excel.
In the Department Base Attendance Report screen, in the training search tab, enter the plan code in the “Plan Code” field of the filter search criteria and click the (View Report) button.
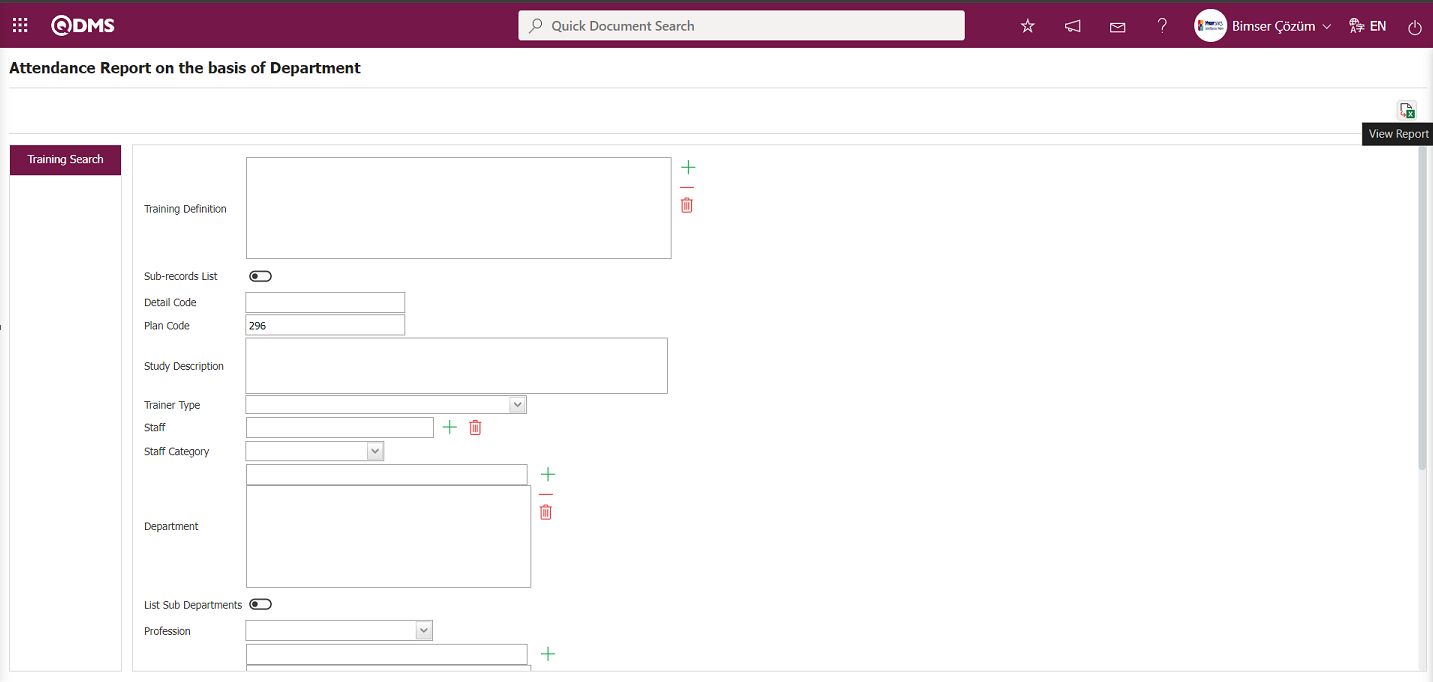
The report is obtained in Excel format as “Department Base Attendance Report.”
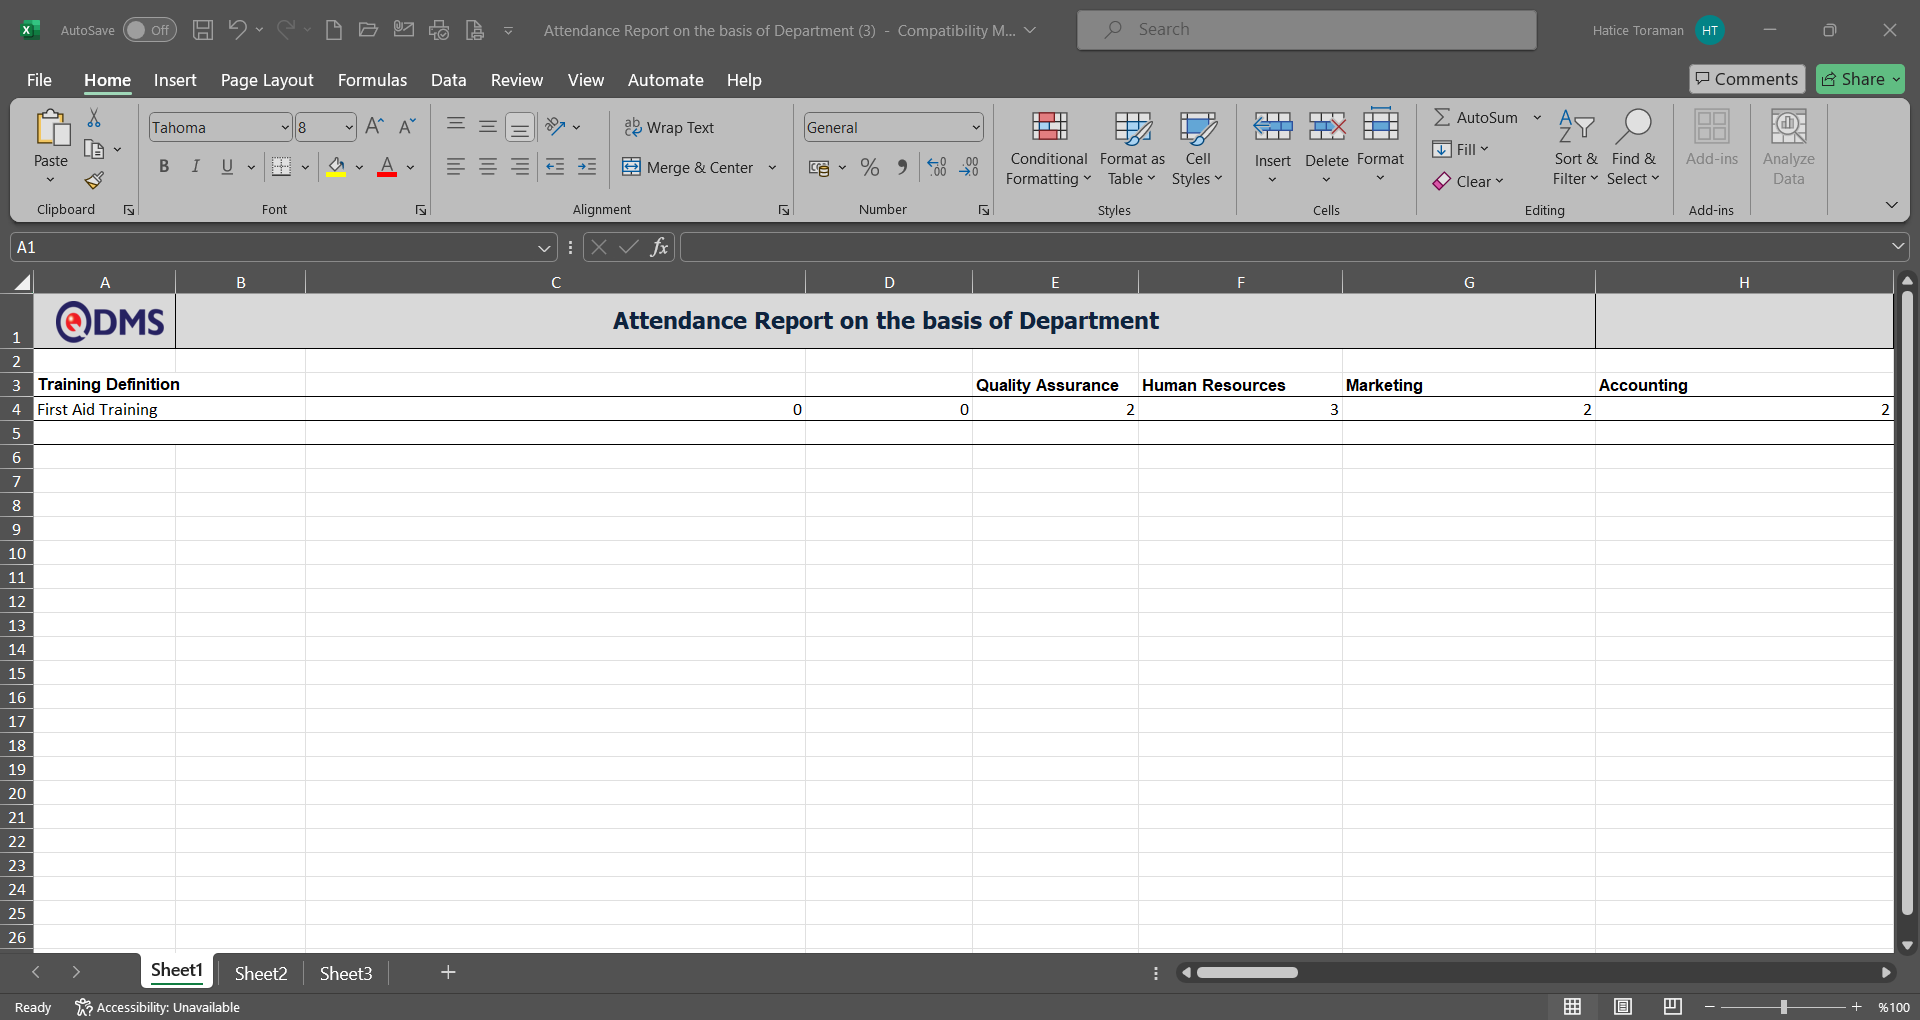
6.3.8.11.Stuff Base Attendance Report
Menu Name: Integrated Management System/Training Planning/Reports/ Stuff Base Attendance Report
This menu provides information on which training courses employees have attended and which they have not, and allows you to generate a report in Excel format. The Training Search tab appears on the Stuff Base Attendance Report screen. In the Training Search tab, you can filter the results according to the search criteria and generate a report in Excel format based on the filter criteria.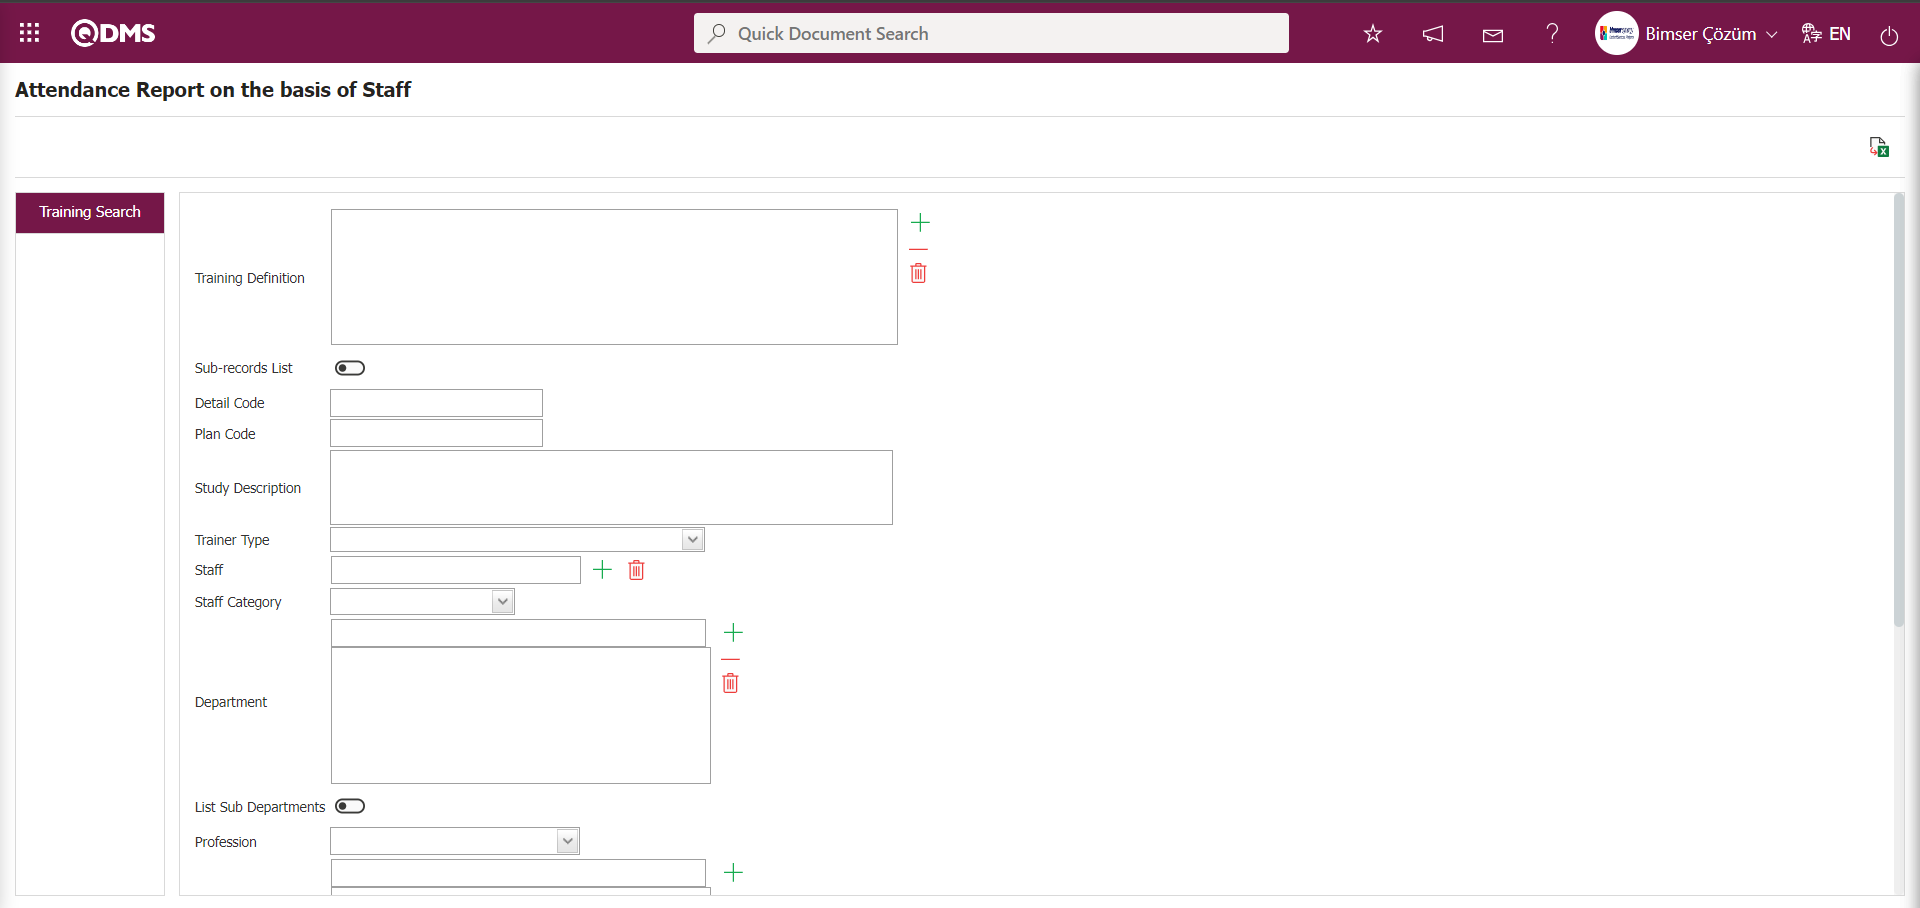
Using the buttons on the screen;
: The data is transferred to Excel.
In the Staff screen, in the Search Training tab, enter the plan code in the “Plan Code” field of the filter search criteria, then click the (View Report) button.
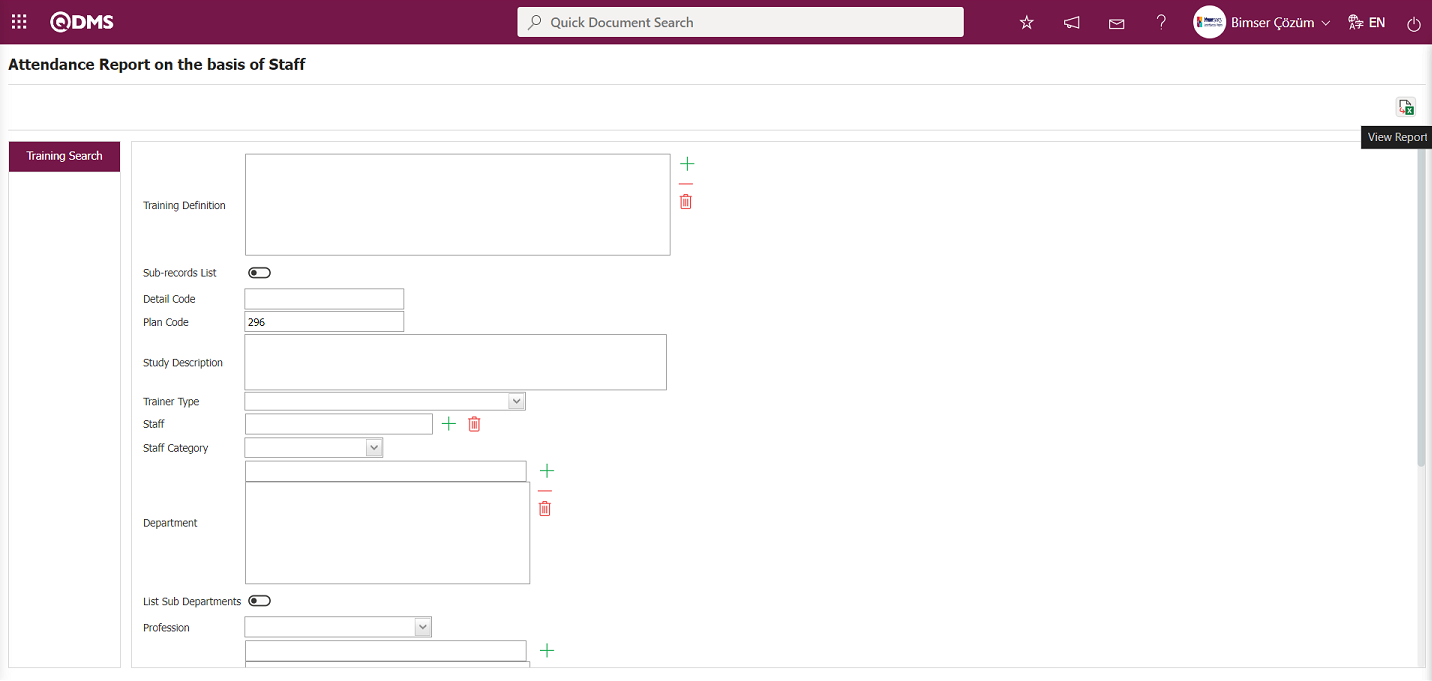
“Attendance Report on the basis of Staff” The report is obtained in Excel format.
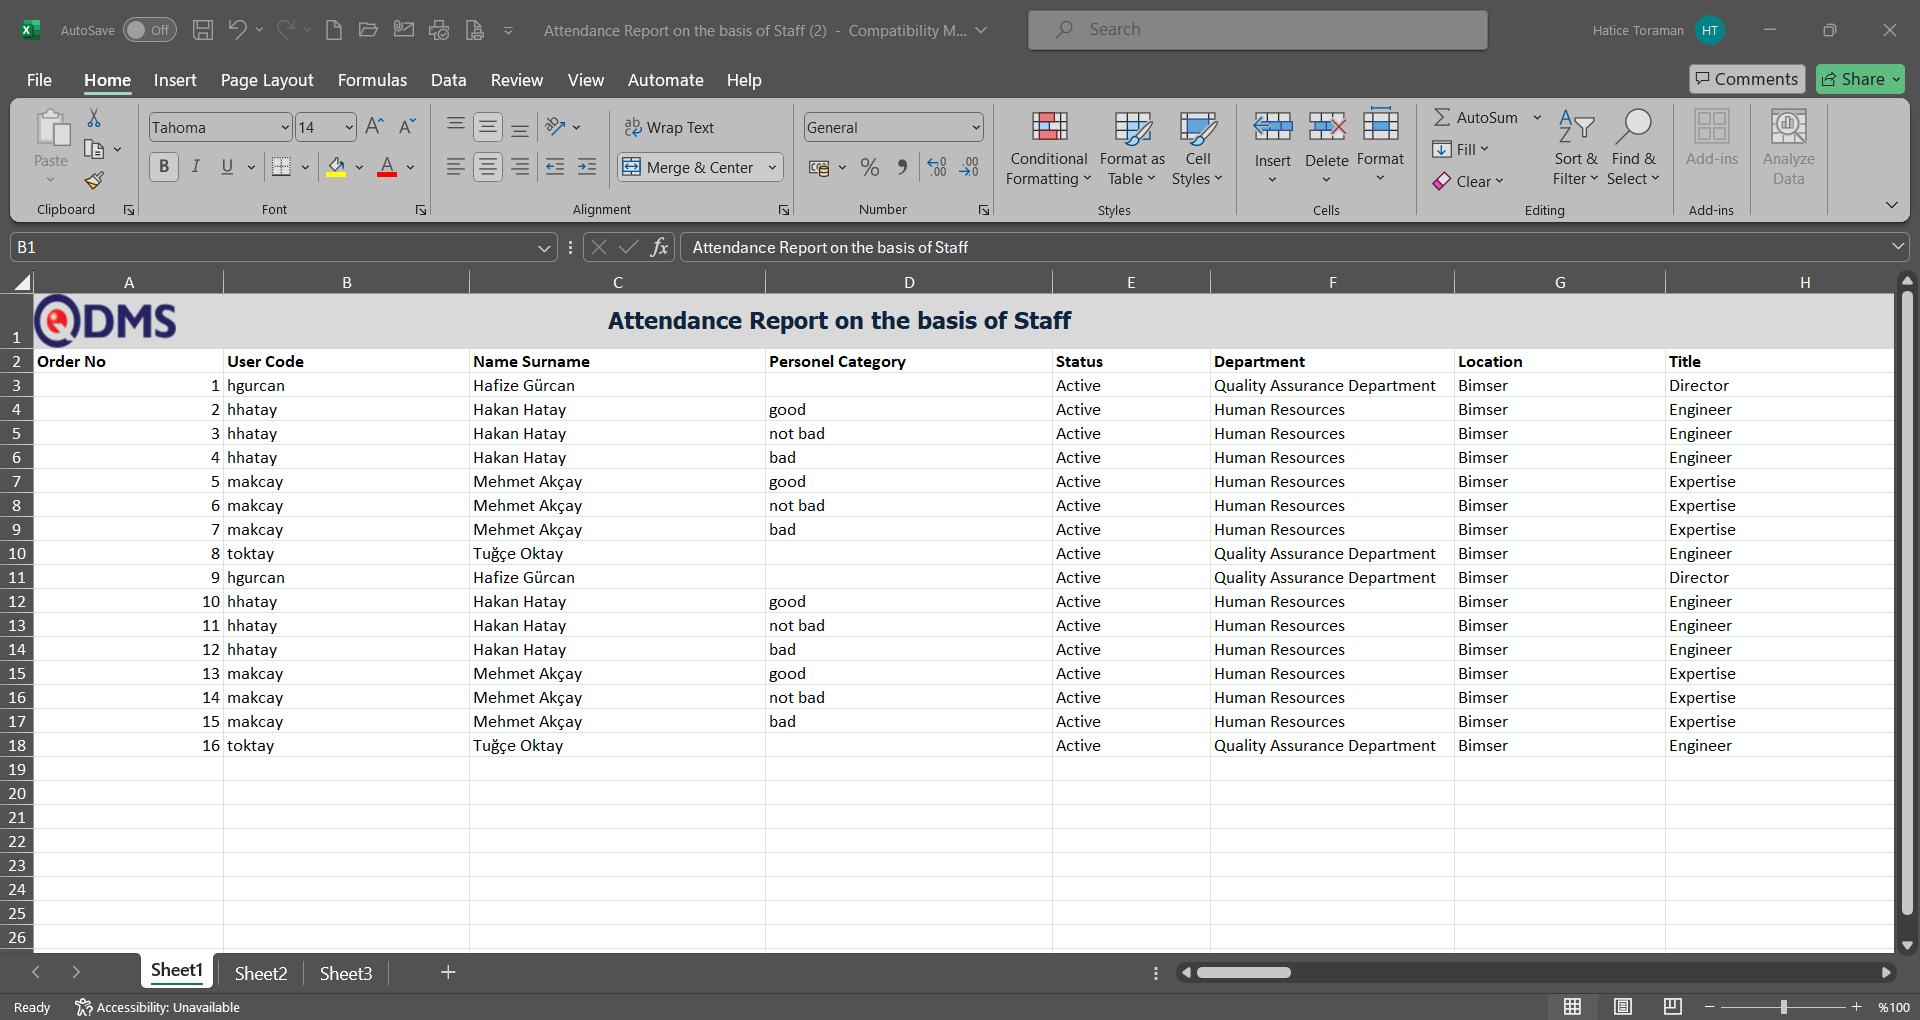
6.3.8.12.Report of Training Requests
Menu Name: Integrated Management System/Training Planning/Reports/Report of Training Requests
This menu provides access to the list of information related to training requests and allows you to download a report in Excel format.
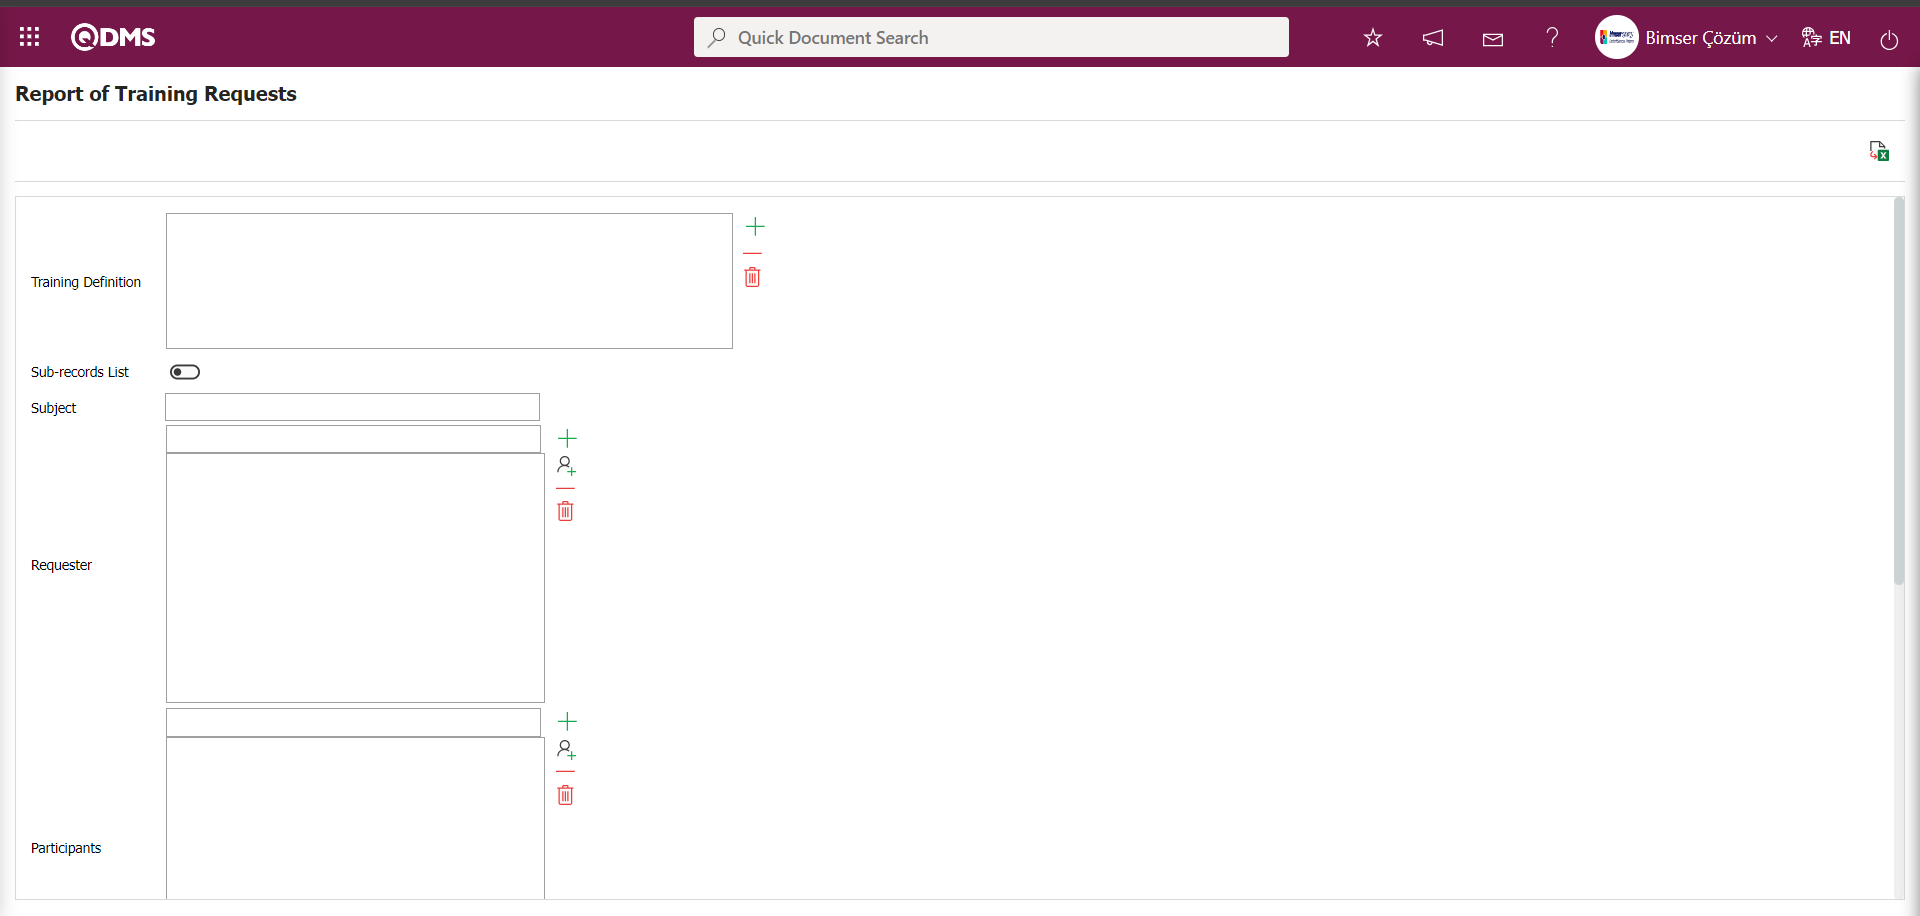
Using the buttons on the screen;
: The data is transferred to Excel.
In the Training Requests Report screen, click the (Add) button in the “Training Description” field of the filter search criteria in the training search tab. Select the training from the list of defined trainings in the system that opens, and then click the (View Report) button.
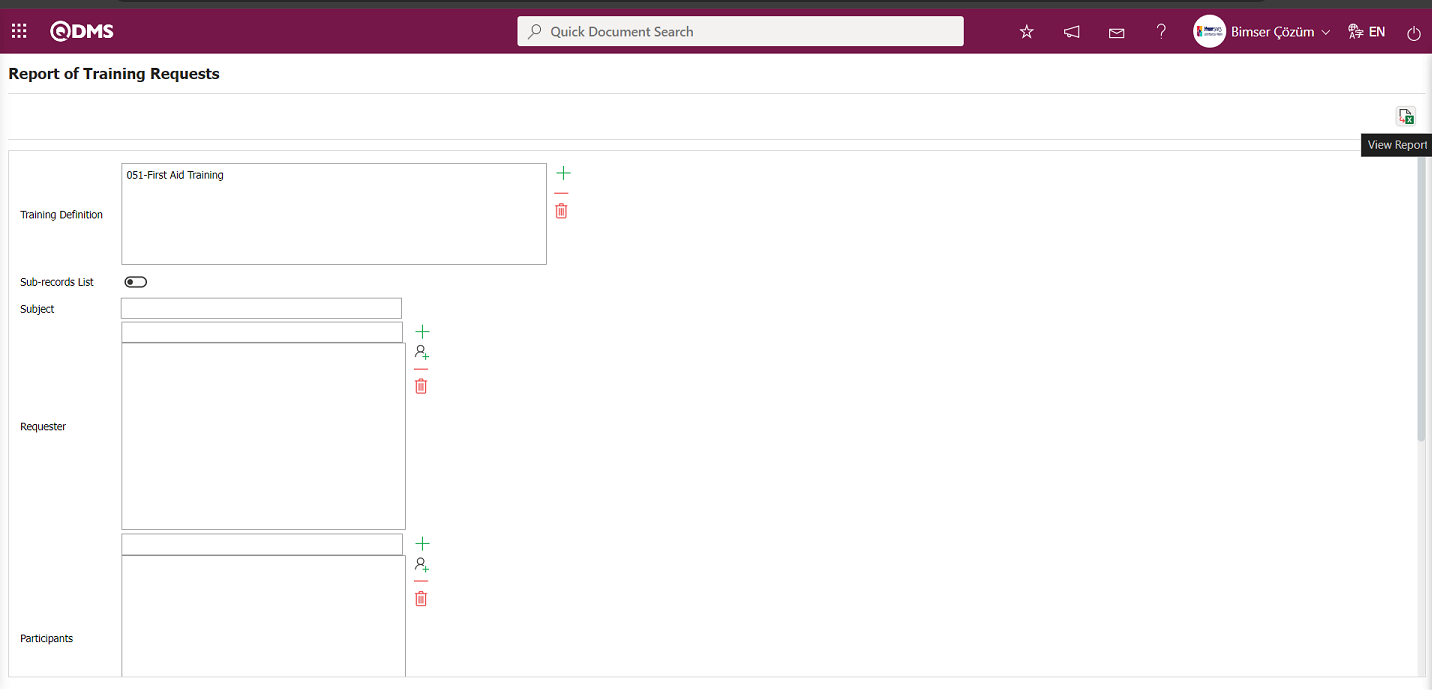
The Training Request Report is downloaded in Excel format from the Training Request Report screen.
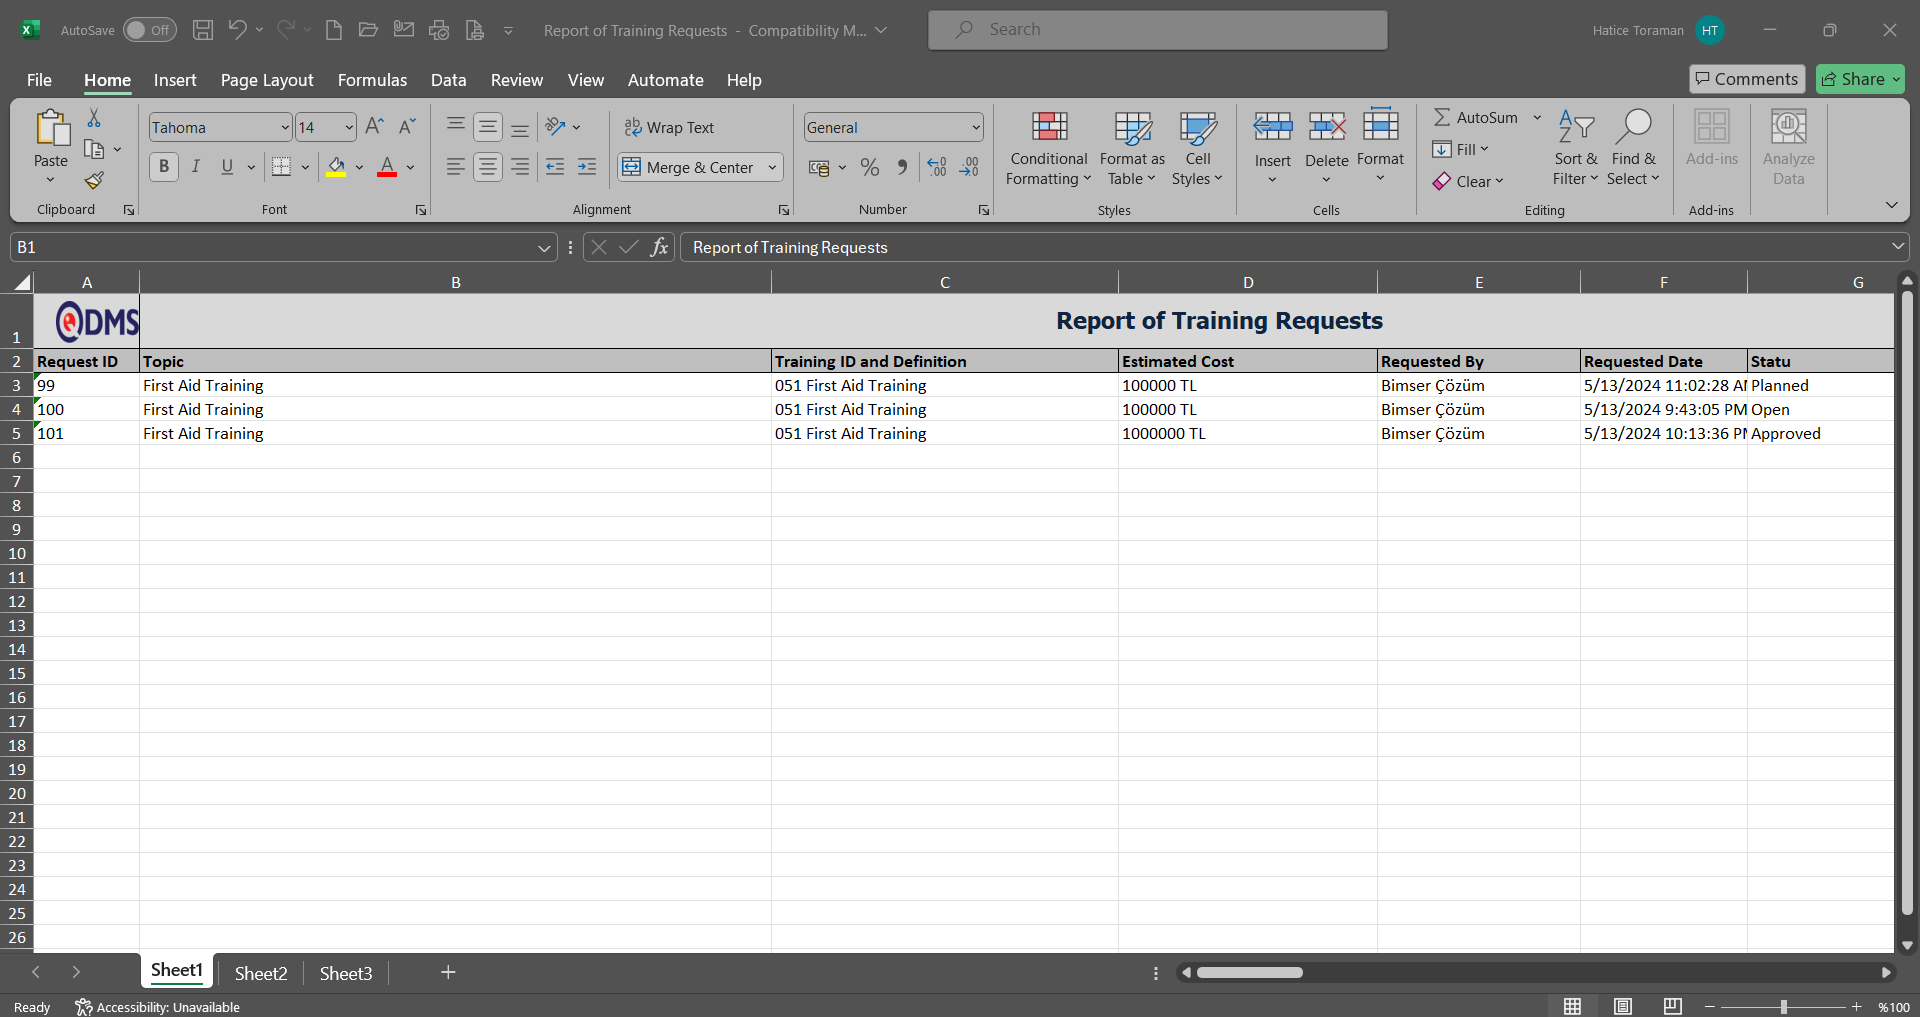
6.3.8.13.Training Instructor Evaluation Report
Menu Name: Integrated Management System/Training Planning/Reports/Training Instructor Evaluation Report
You can access the Trainer Assessment Survey Report to see which participants filled out the training evaluation report and their evaluation scores. The Trainer Assessment Survey Report screen has two tabs: Filter and List. Use the Filter tab to filter based on search criteria. The List tab displays the records filtered based on the search criteria.
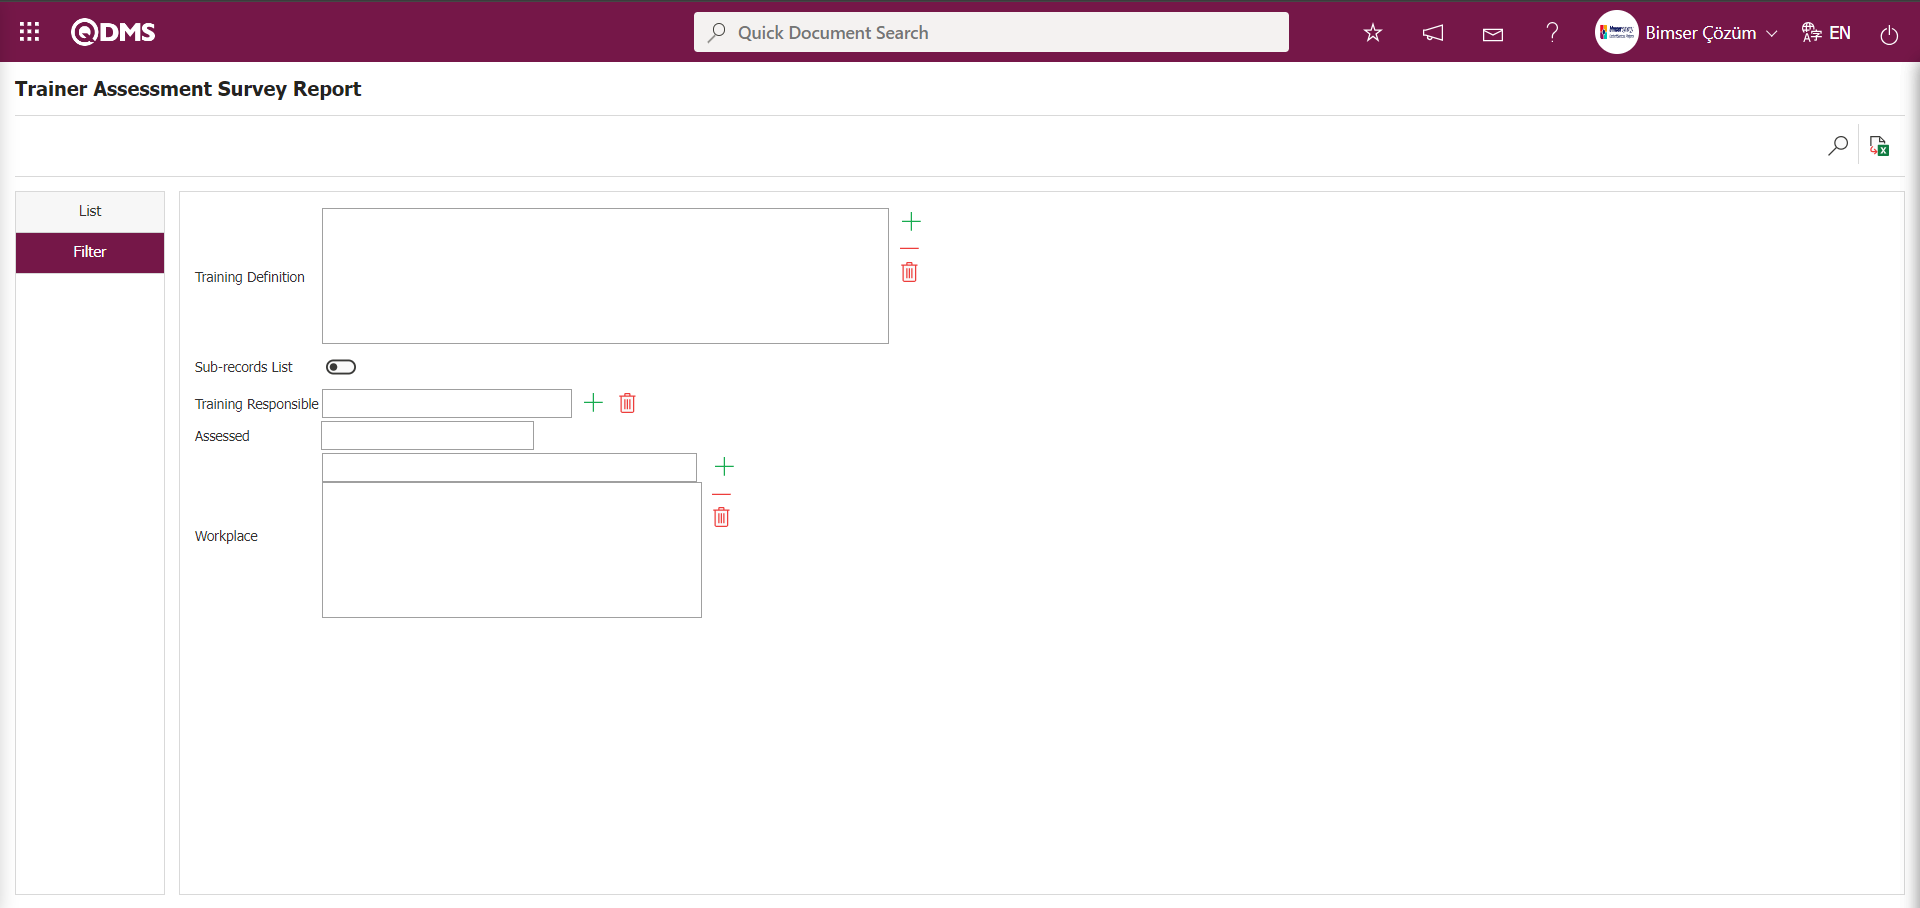
Using the buttons on the screen;
: Records are filtered and searched.
: The data is transferred to Excel.
: The search criteria on the menu screens are used to clear the data remaining in the filter fields of the grid where the search was performed.
: The menu screen is reset to its default settings.
: The menu screens are customized based on user preferences by enabling or disabling the display of columns corresponding to specific fields.
On the Trainer Assessment Survey Report screen, click the (Add) button in the “Training Description” field of the filter search criteria in the filter tab to open the system, select the training from the defined training list, and click the  (Search) button.
 The records are listed according to the search criteria in the filter on the list tab of the Trainer Assessment Survey Report screen.
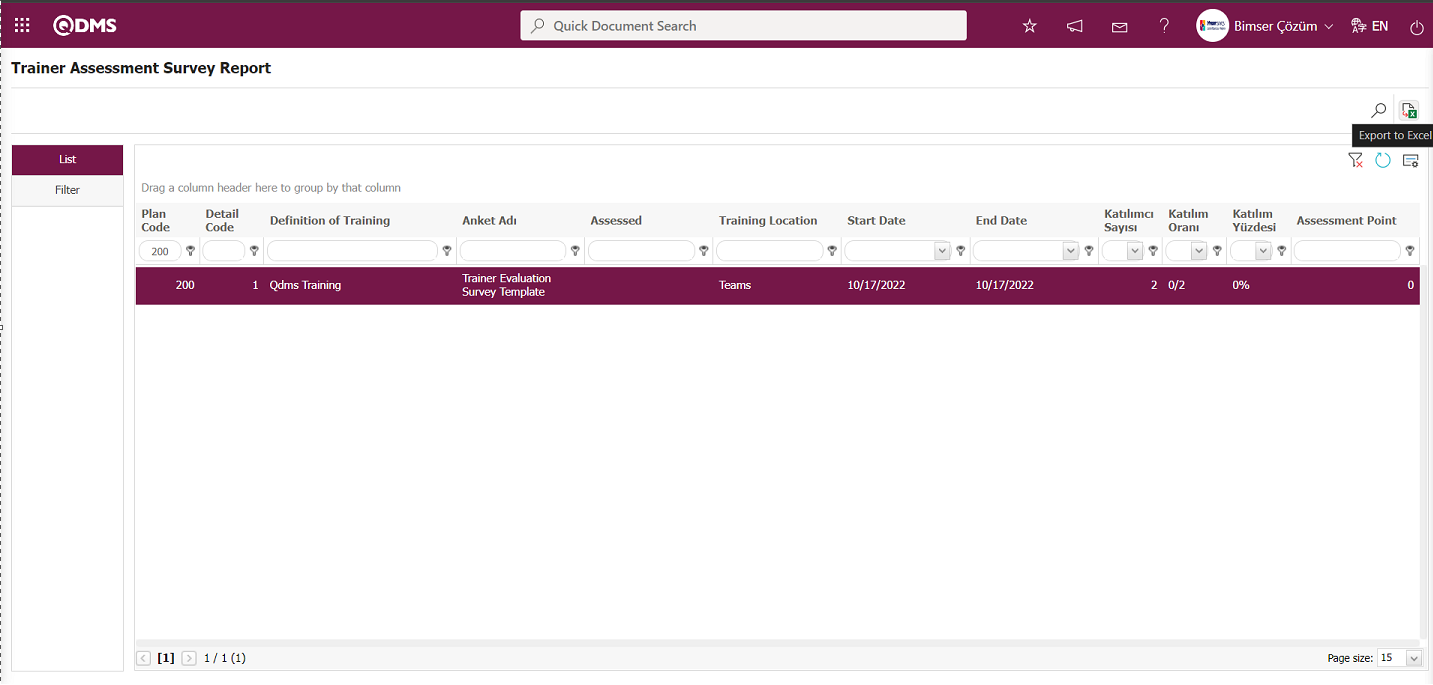
Click the  (Export to Excel) button on the Trainer Assessment Survey Report screen to download the Trainer Assessment Survey report in Excel format.
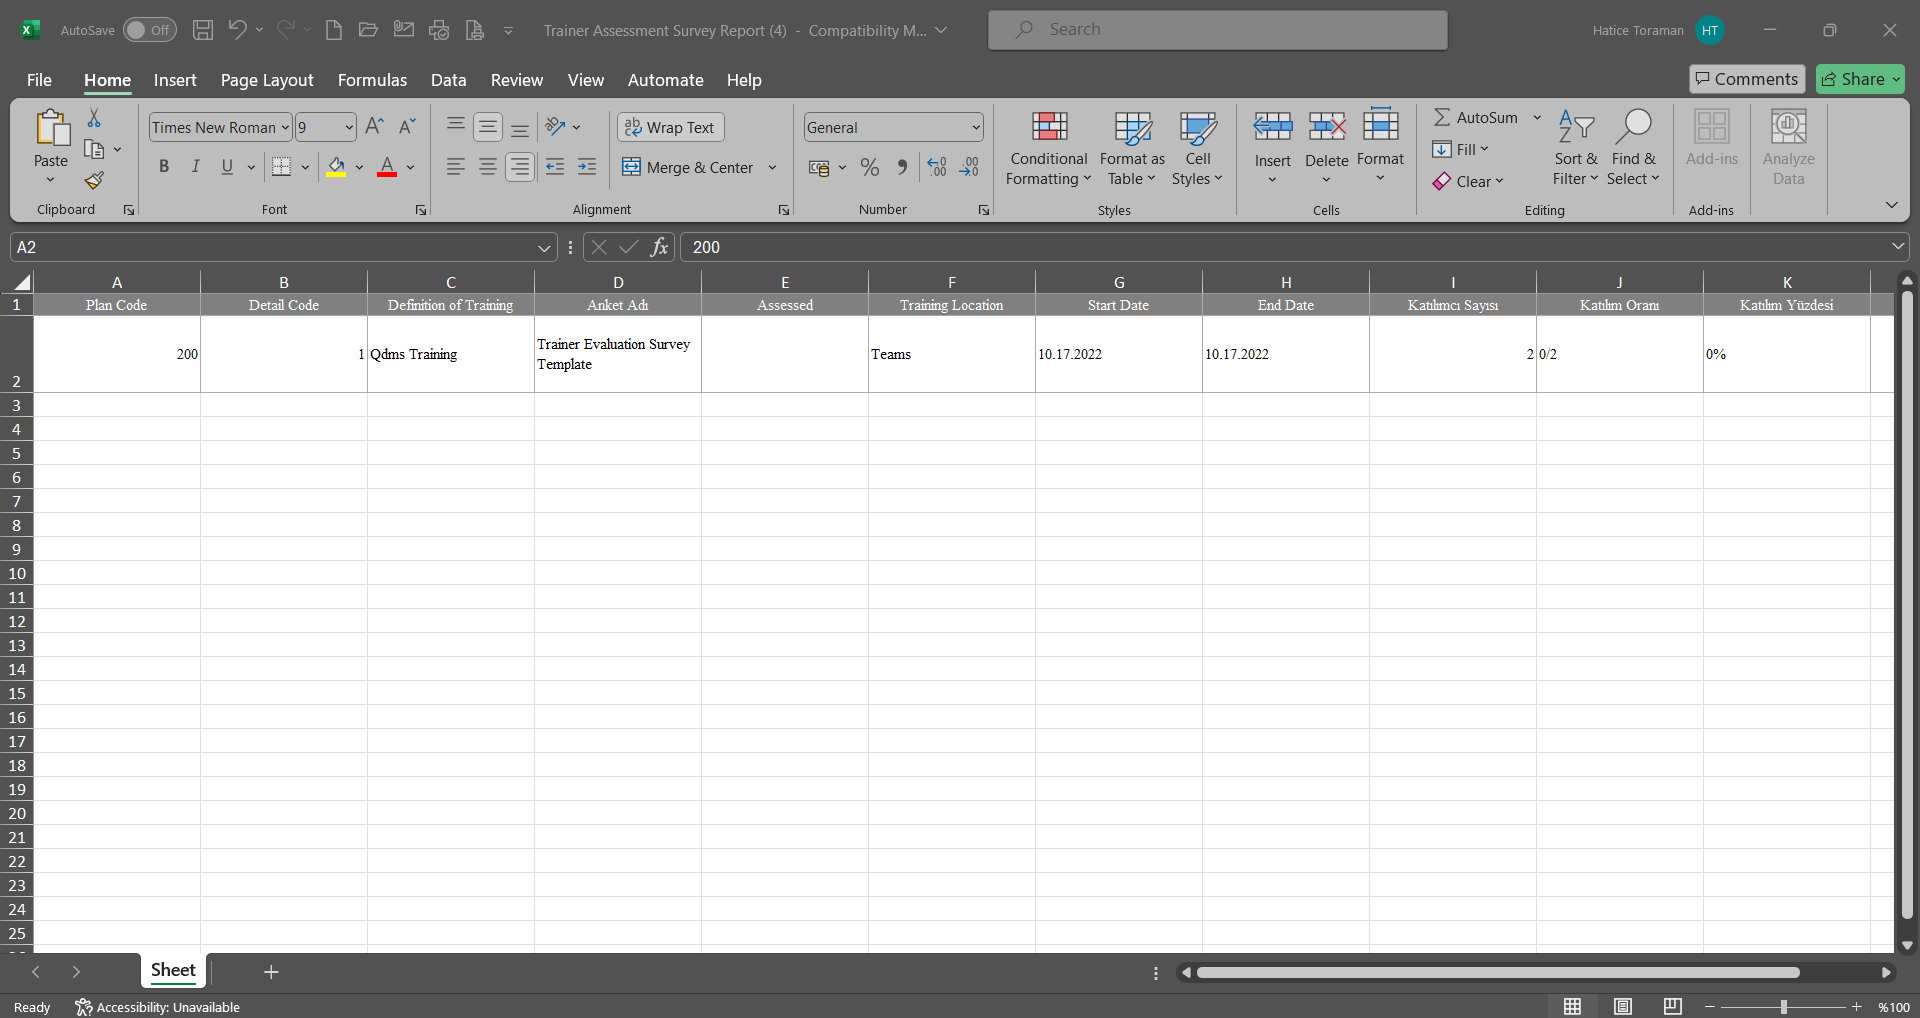
6.3.8.14. Individual Detail Report
Menu Name: Integrated Management System/Training Planning/Reports/Individual Detail Report
This menu provides access to detailed information about the training courses taken by the user and allows you to download a report in Excel format.
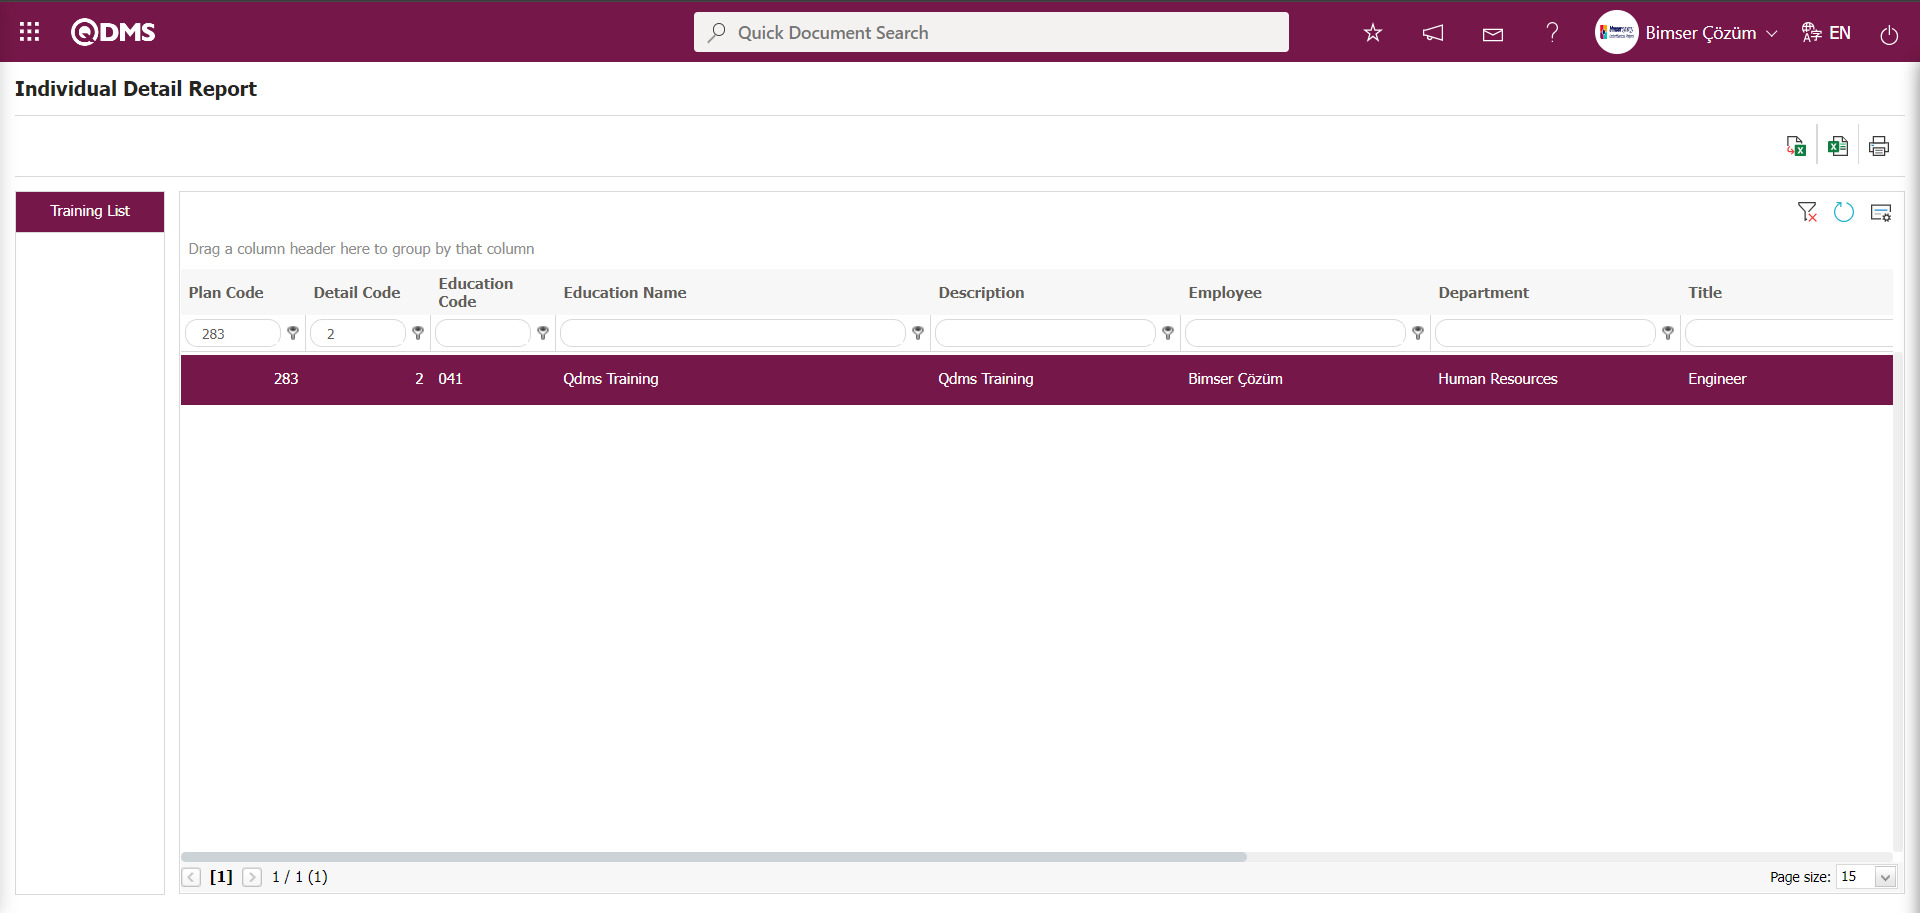
Using the buttons on the screen;
 : Records are filtered and searched.
 : The data is transferred to Excel.
 : Reports are exported to Excel as flat lists.
 : The certificate printing process is performed.
Click the (View Report) button on the Individual Detail Report screen.
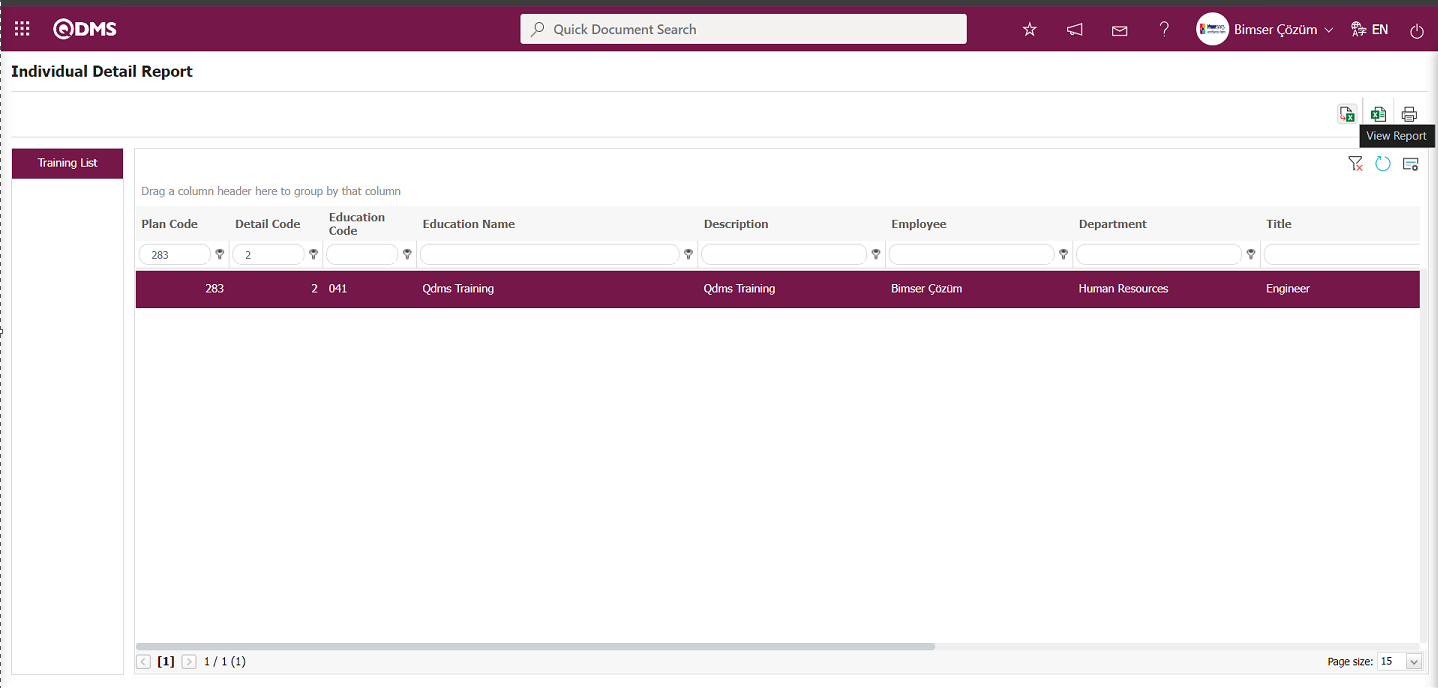
The Individual Detail Report is generated in Excel format.
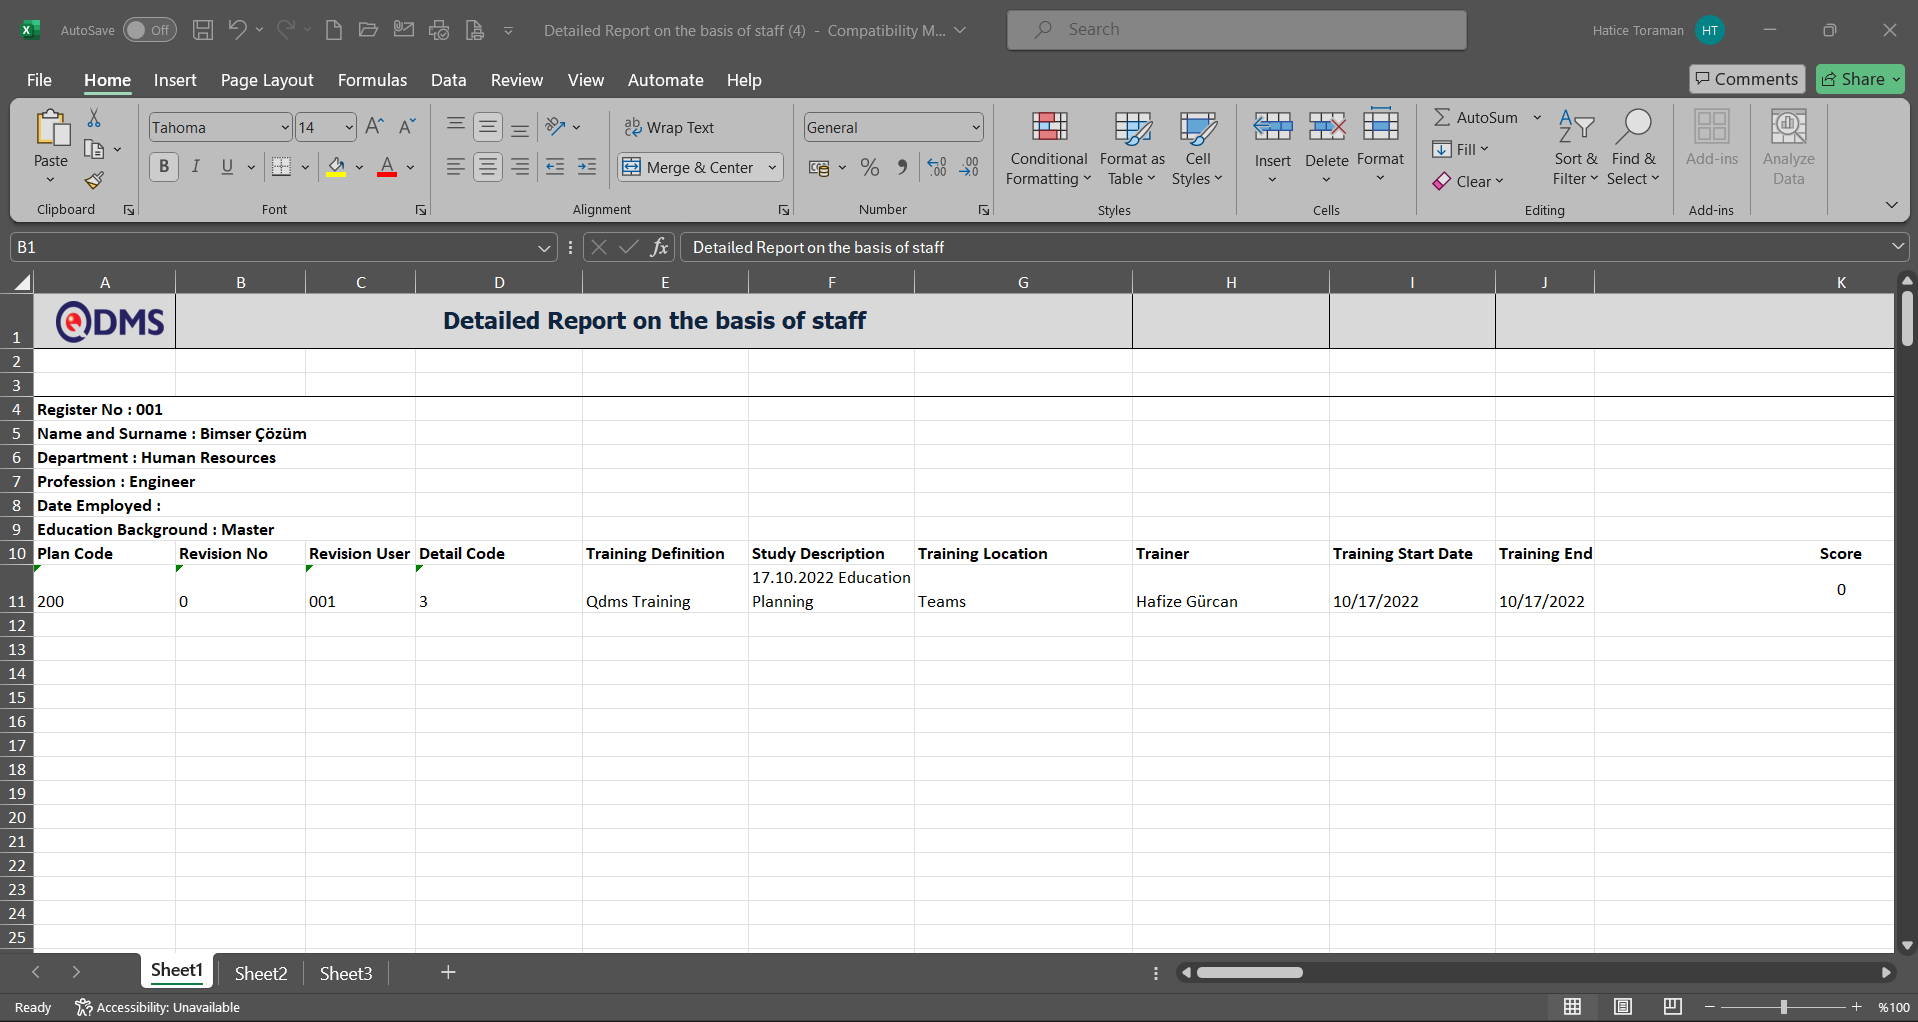
The Individual Detail Report is retrieved from the Excel format in a plain list.
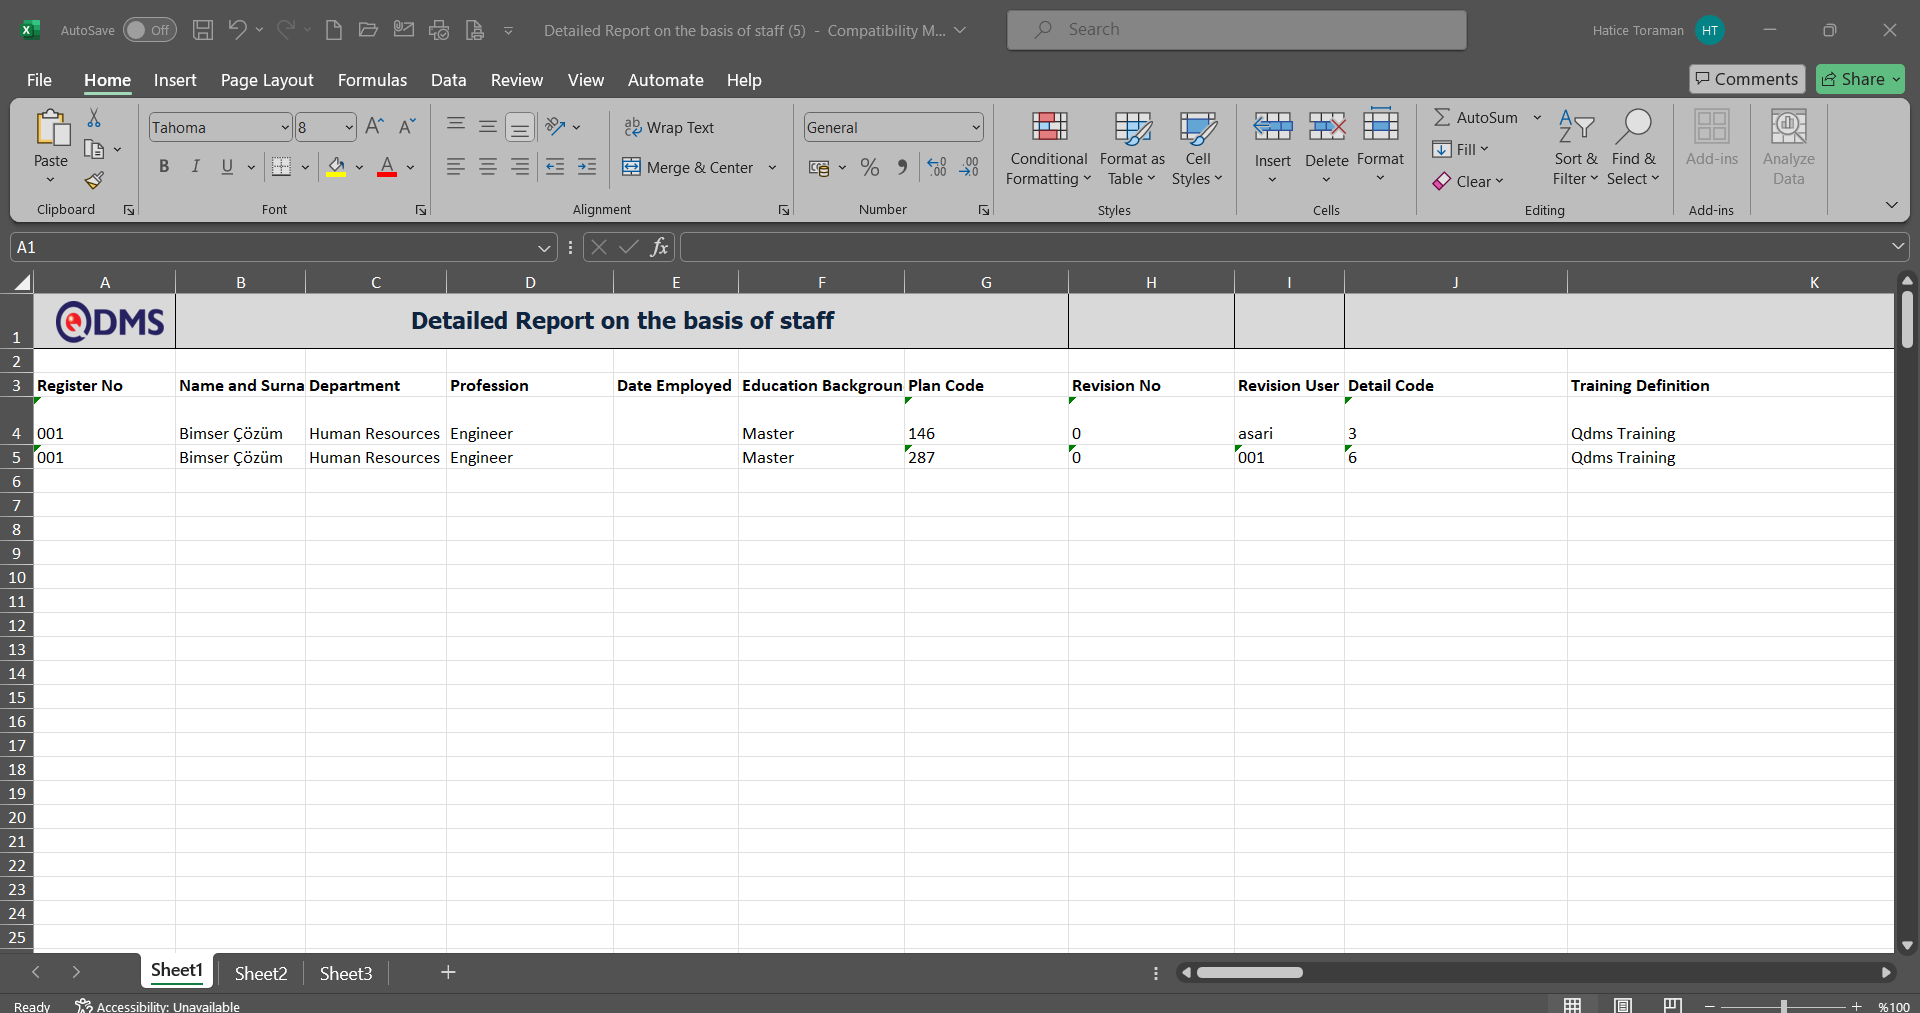
Click the  (Print Certificate) button on the Individual Detail Report screen.

The certificate printing process is performed on the Individual Detail screen.
6.3.8.15.Education Budget Report
Menu Name: Integrated Management System/Training Planning/Reports/ Education Budget Report
This menu displays information on the budget based on education, the budget per person, and the total budget, along with a list of participants and training information, which can be exported in Excel format. The Education Budget Report screen has two tabs: Training Search and Training List. The Training Search tab allows you to filter results based on search criteria. In the Training List tab, records are listed according to the filtering process based on these search criteria..
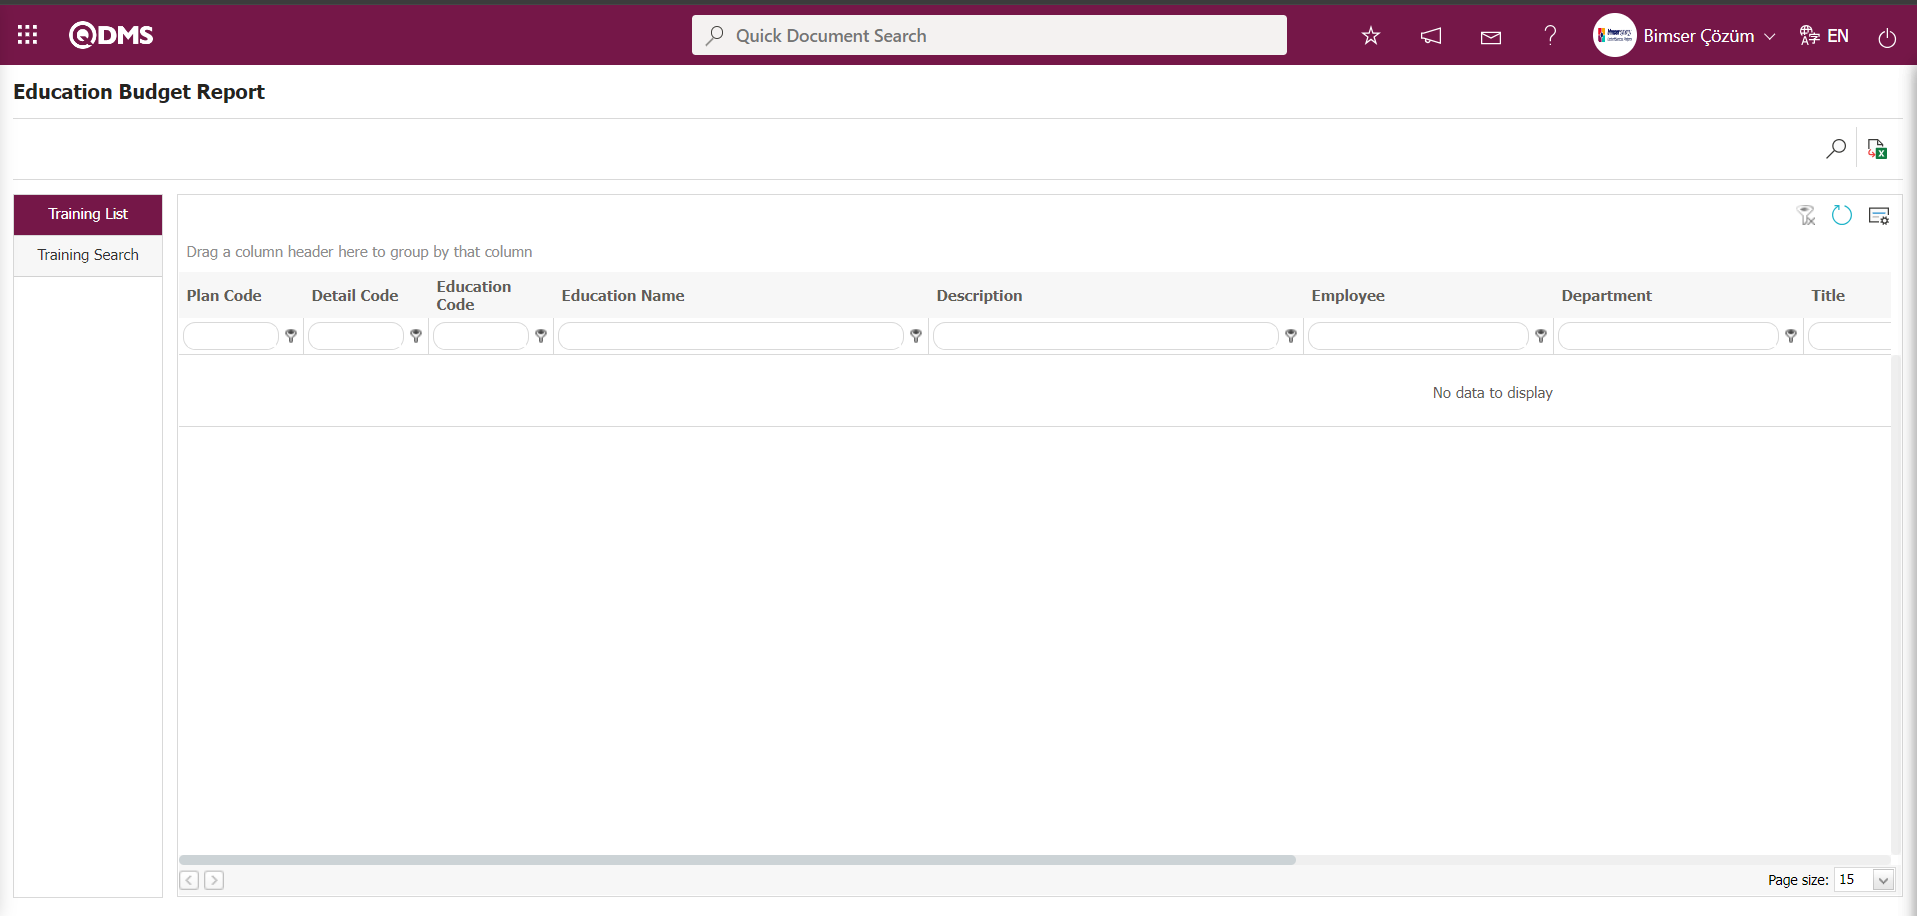
Using the buttons on the screen;
: Records are filtered and searched.
: Reports are exported to Excel as flat lists.
: The search criteria on the menu screens are used to clear the data remaining in the filter fields of the grid where the search was performed.
: The menu screen is reset to its default settings.
: The menu screens are customized based on user preferences by enabling or disabling the display of columns corresponding to specific fields.
In the Education Budget Report screen, in the education search tab, click the (Add) button in the training definition field (filter search criteria) to open the system, select the training from the list of defined trainings, and click the (Search) button.
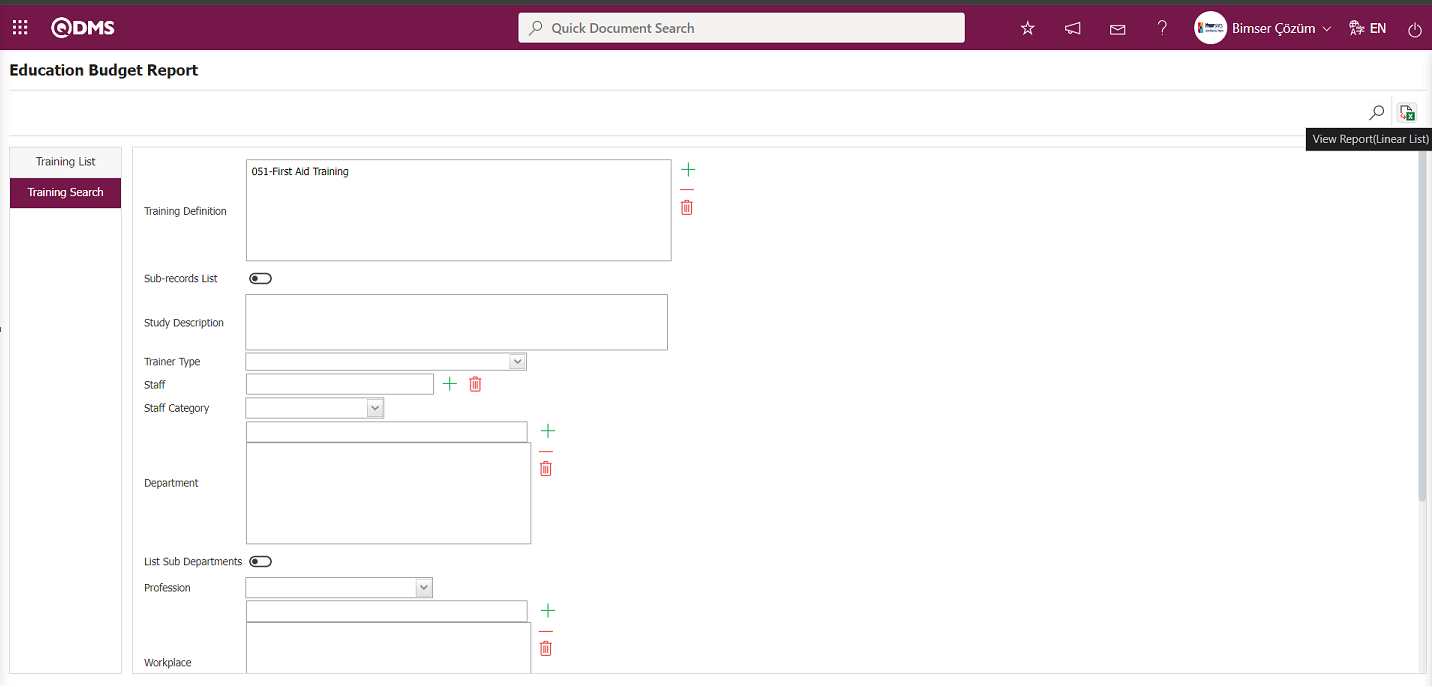
The records are listed according to the search criteria in the filter applied in the education list tab on the Education Budget Report screen.
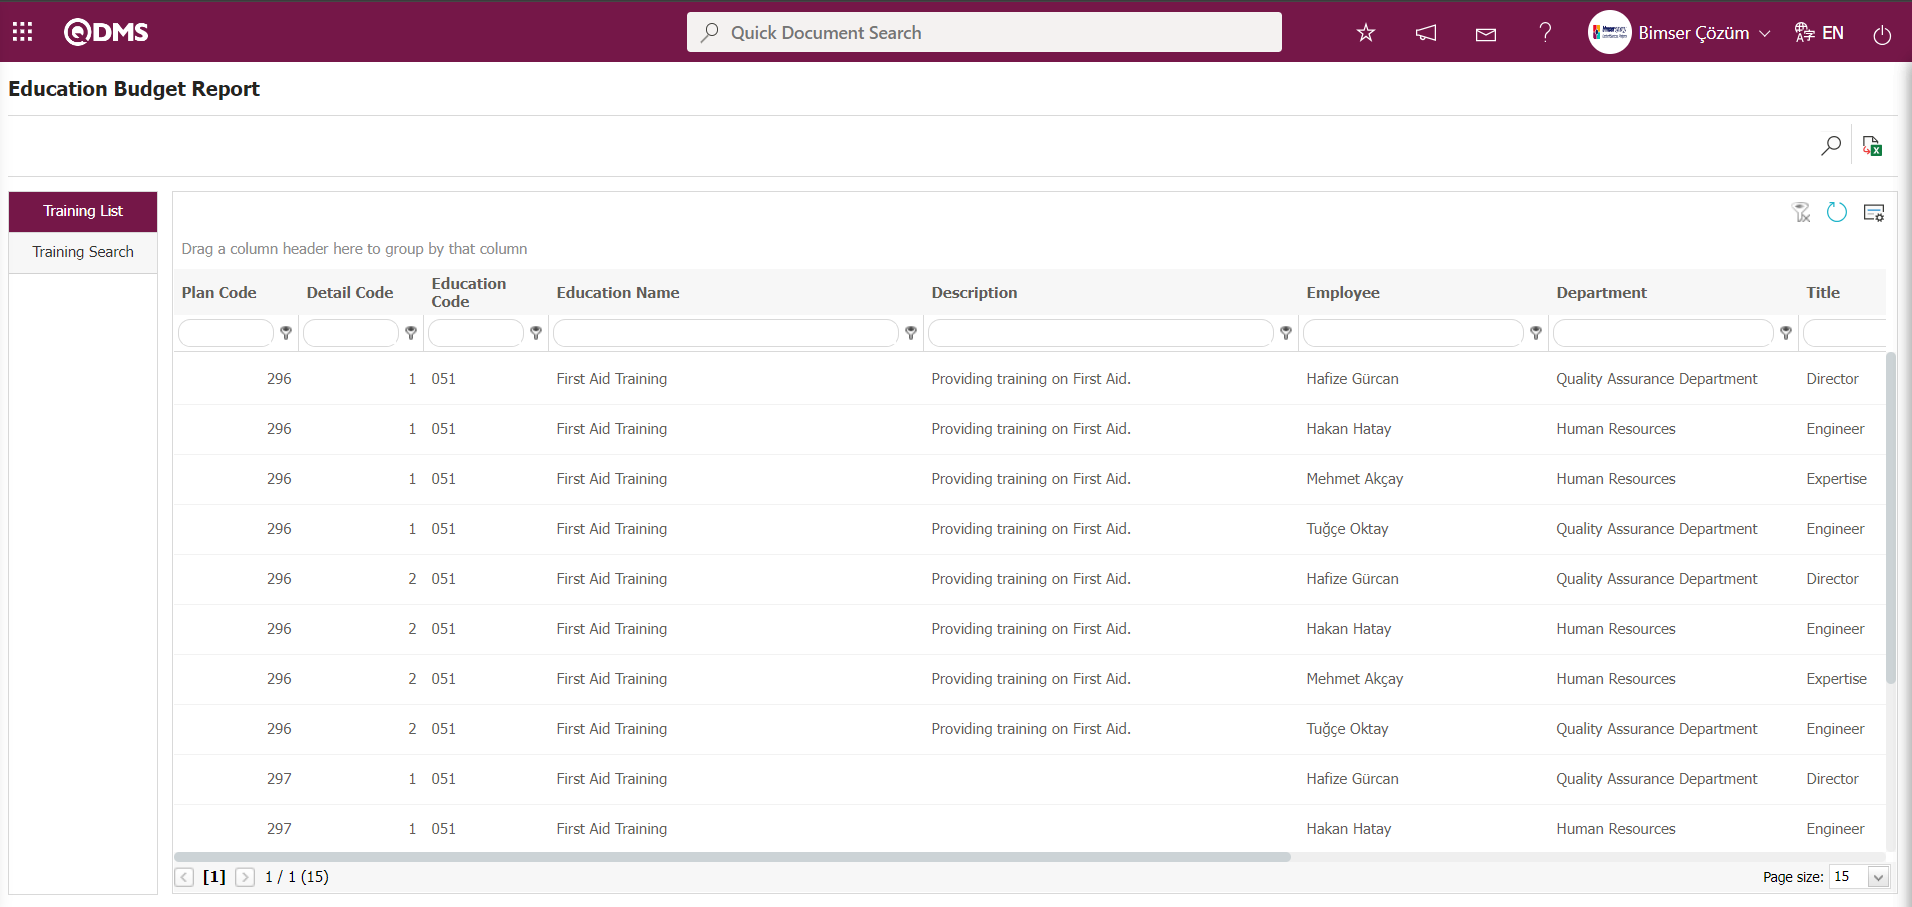
Click the View Report (Linear List) button on the Education Budget Report screen.
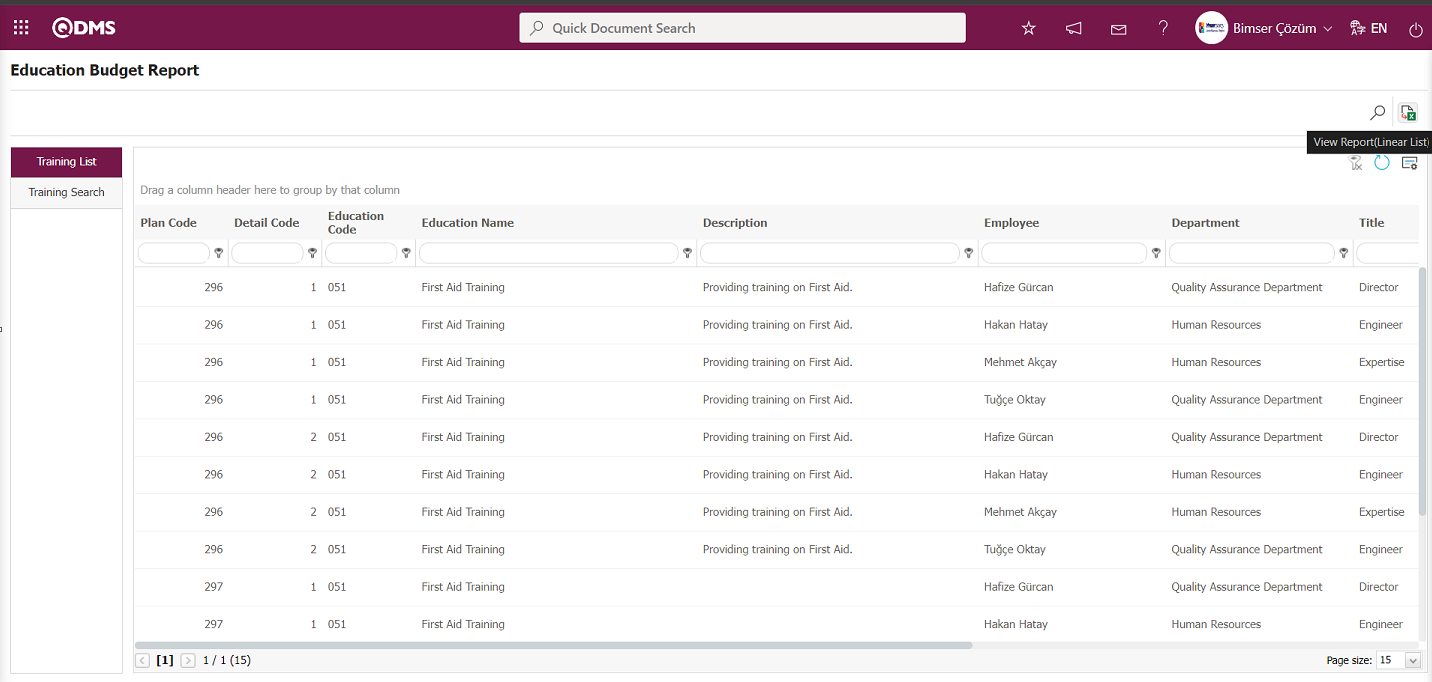
The Education Budget report is obtained in Excel format as a plain list.
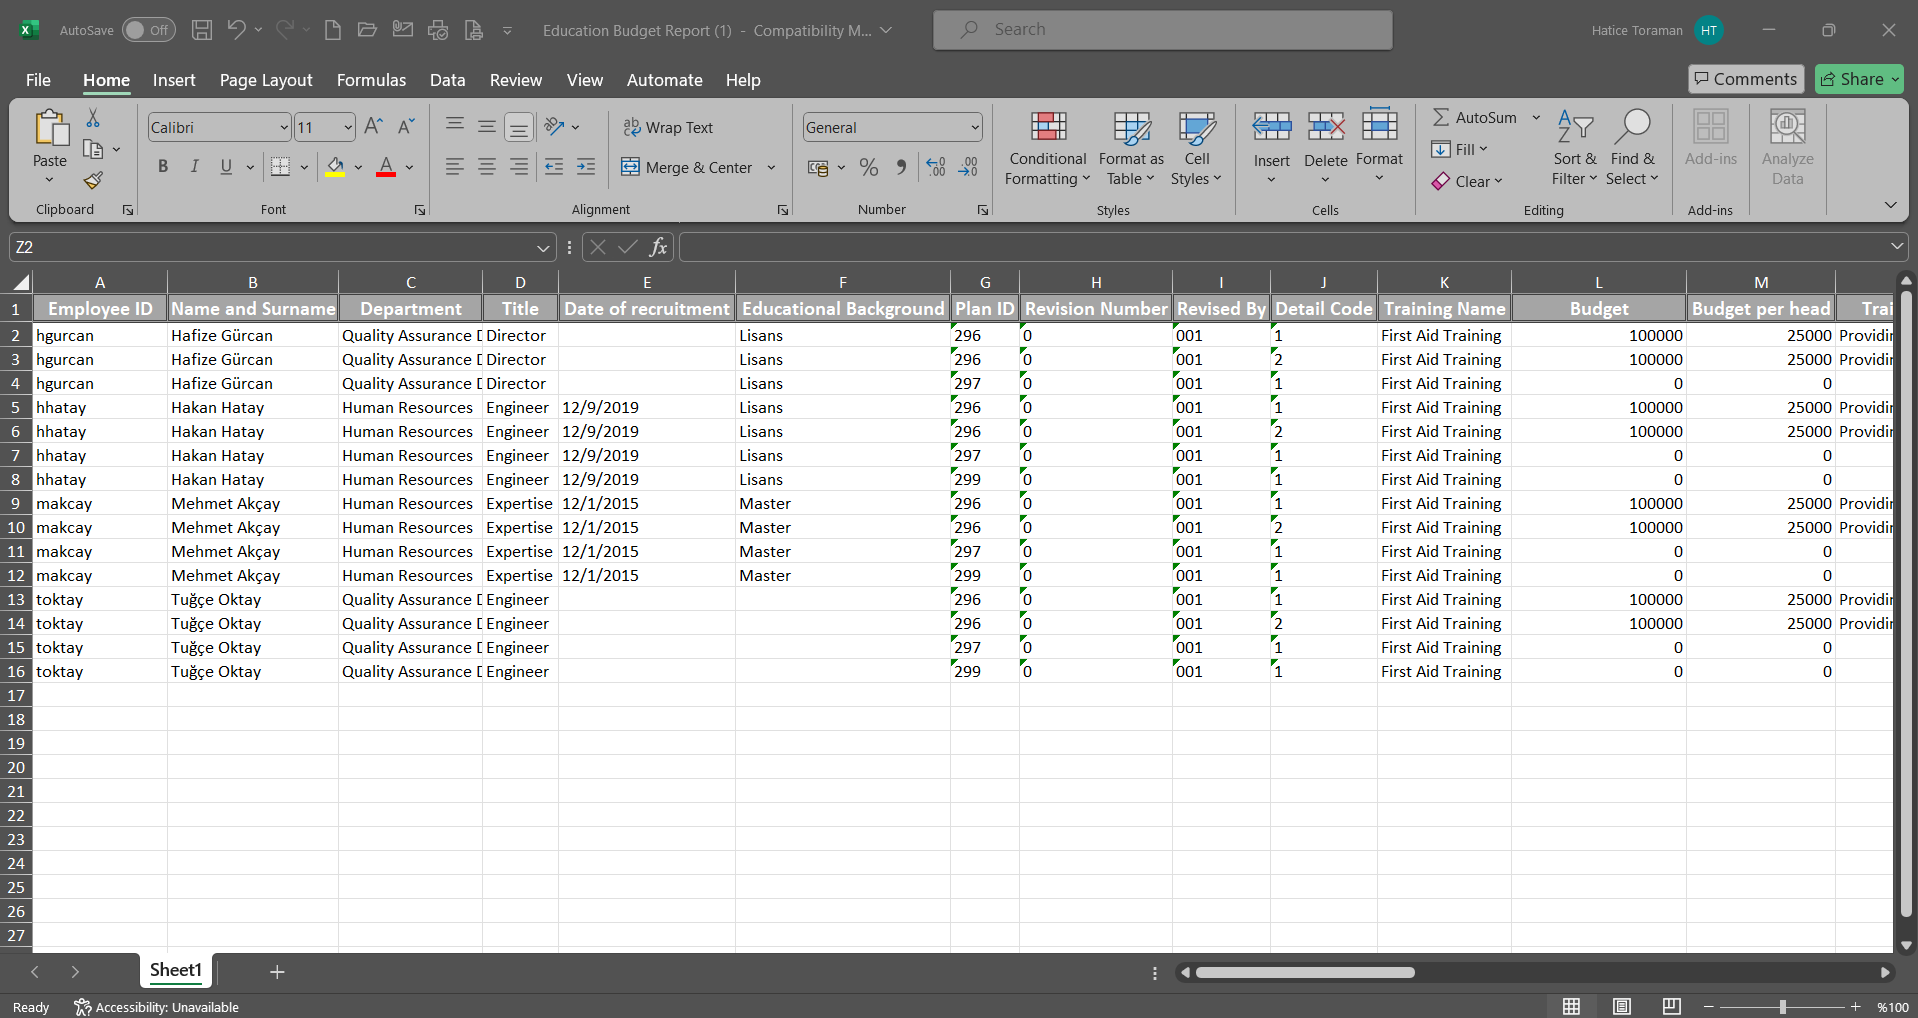
6.3.8.16.Staff Training Card
Menu Name: Integrated Management System/Training Planning/Reports/Staff Training Card
This menu allows you to access information about employees and the training they have completed or are scheduled to complete, as well as information about the training they have attended or are scheduled to attend, and to generate reports in Excel format.
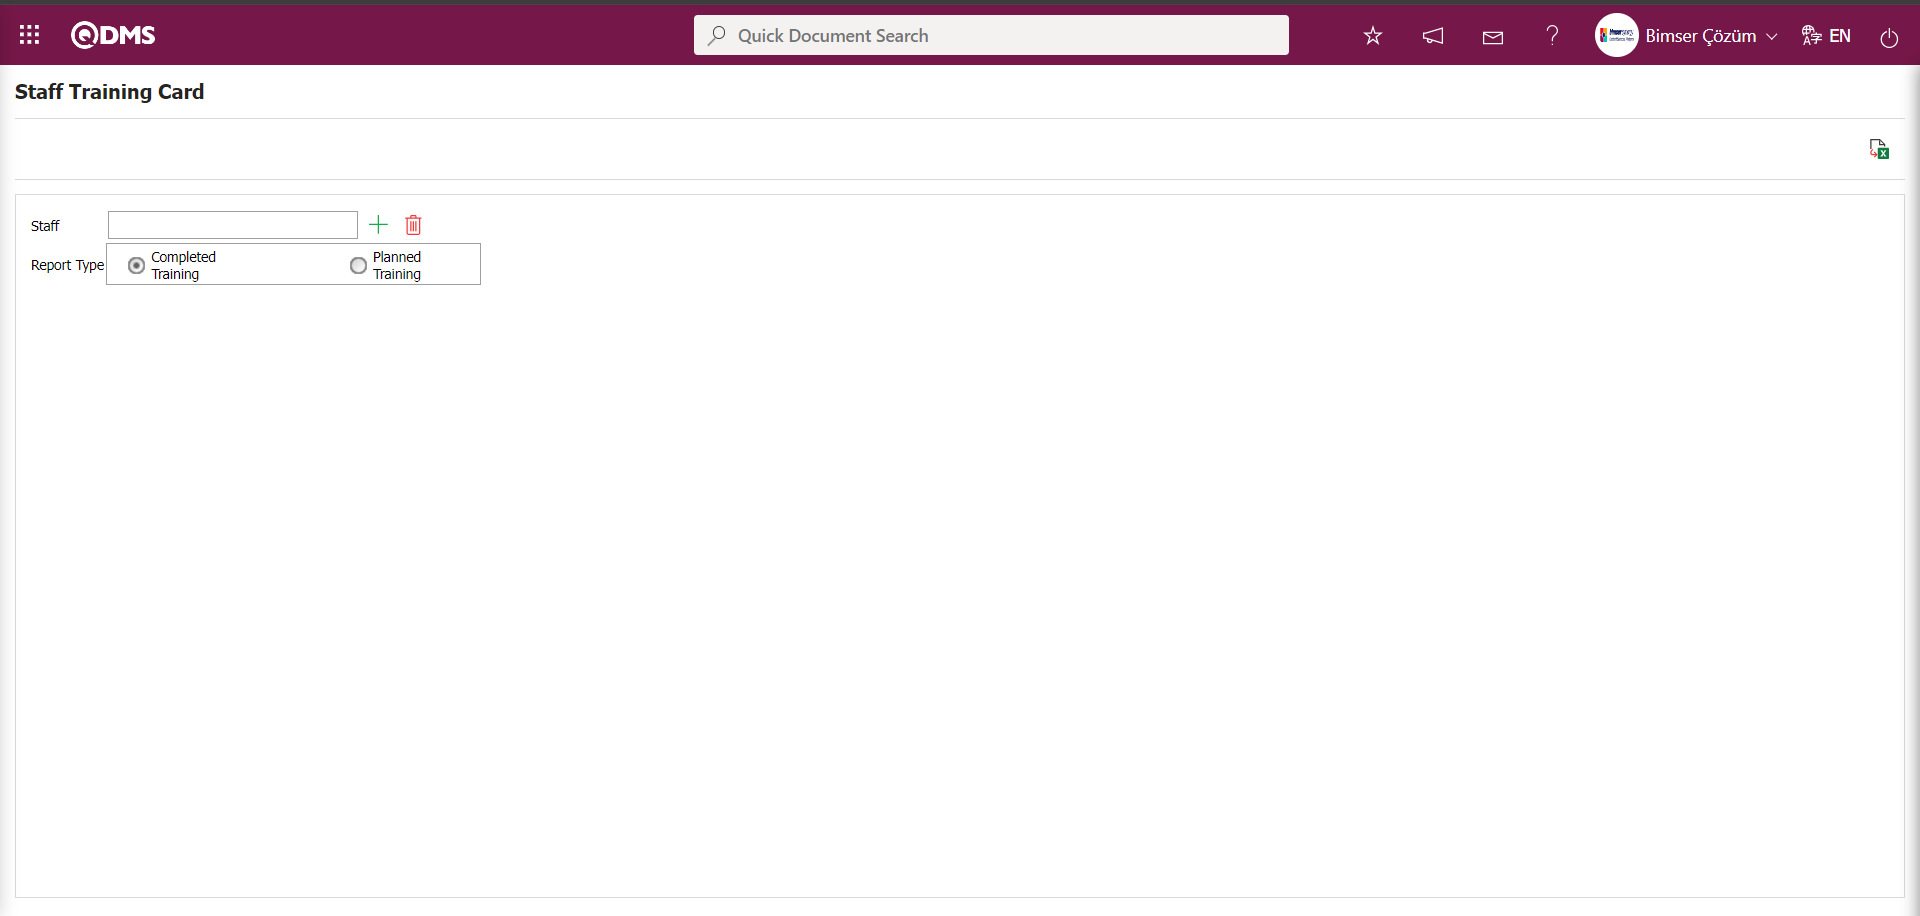
Using the buttons on the screen;
: The data is transferred to Excel.
On the Staff Training Card screen, click the  (Select) button in the Staff field to open the system, select the staff from the list of defined staff, select the “Completed Trainings” options in the report type field, and click the (View Report) button.
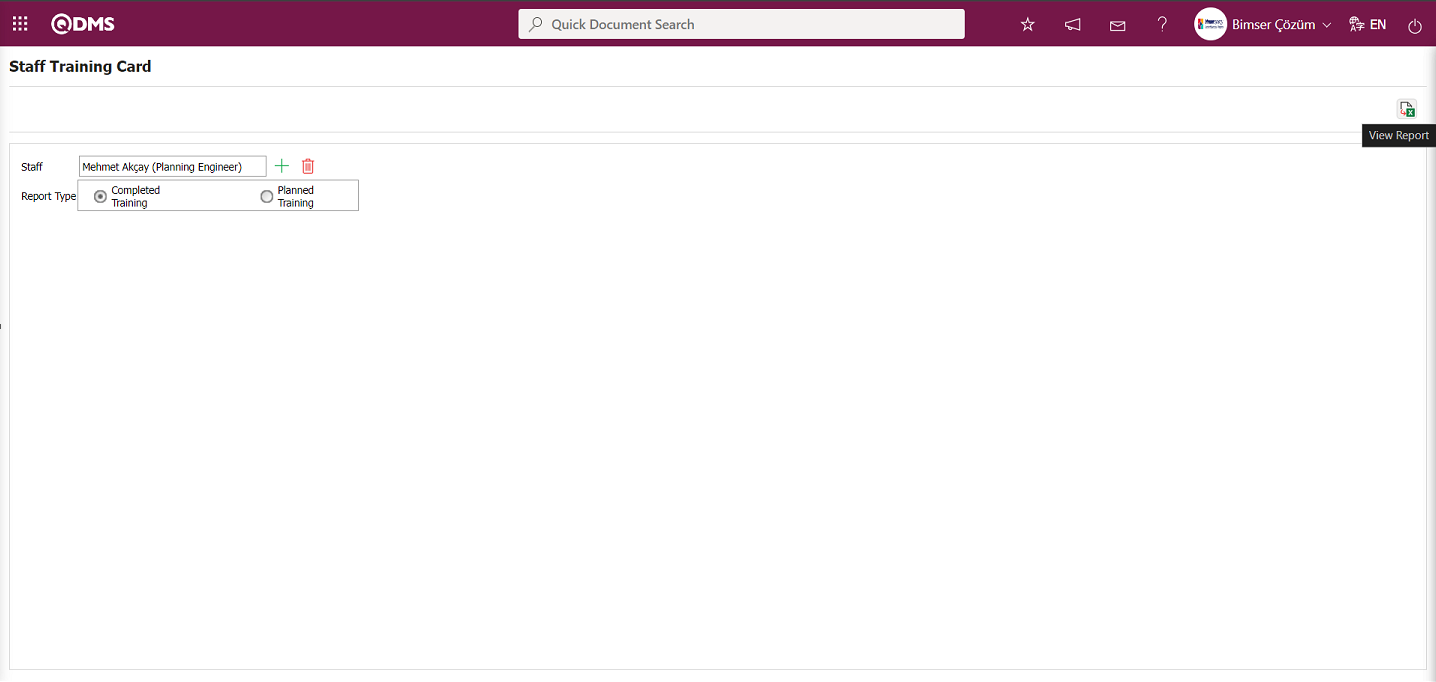
Report Type: Get the Staff Training Card report in Excel format based on completed training.
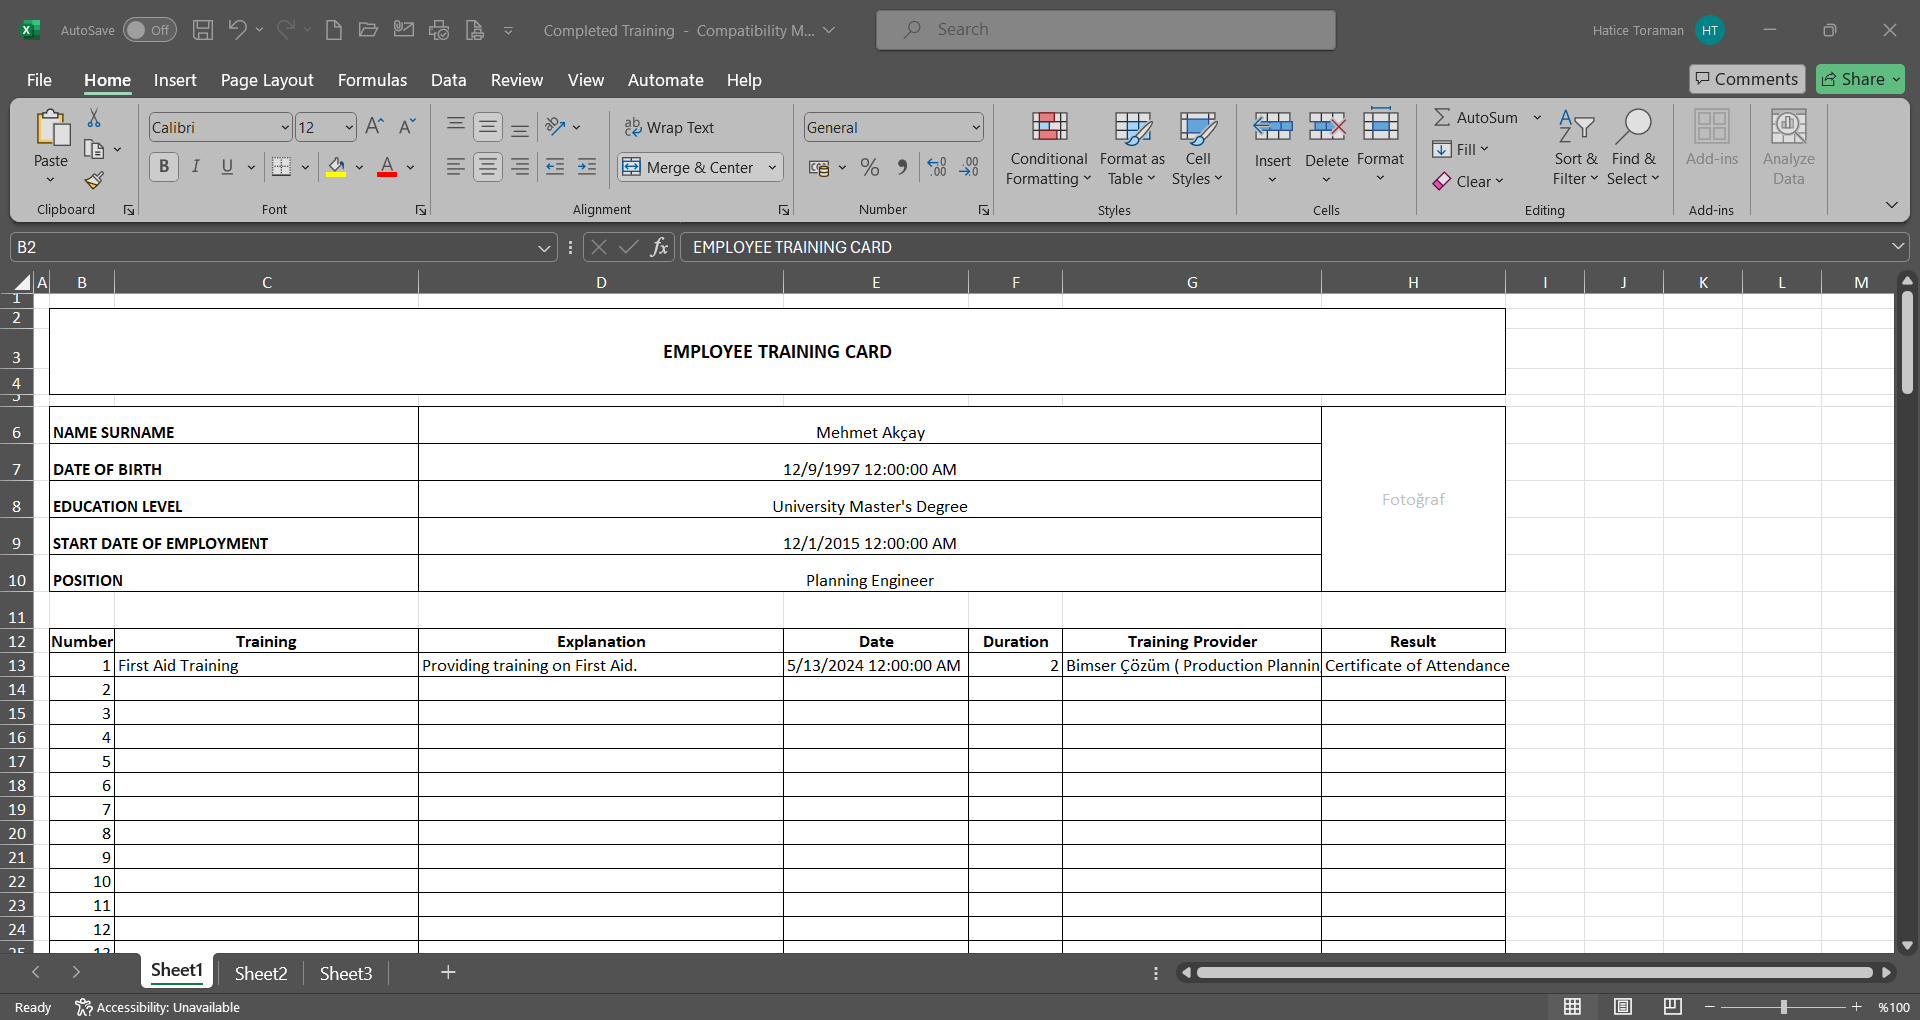
On the Staff Training Card screen, click the (Select) button in the Personnel field to open the system, select the personnel from the list of defined personnel, select the “Planned Training” options in the report type field, and click the (View Report) button.

Based on the Report Type of Planned Training, the Staff Training Card report is obtained in Excel format.
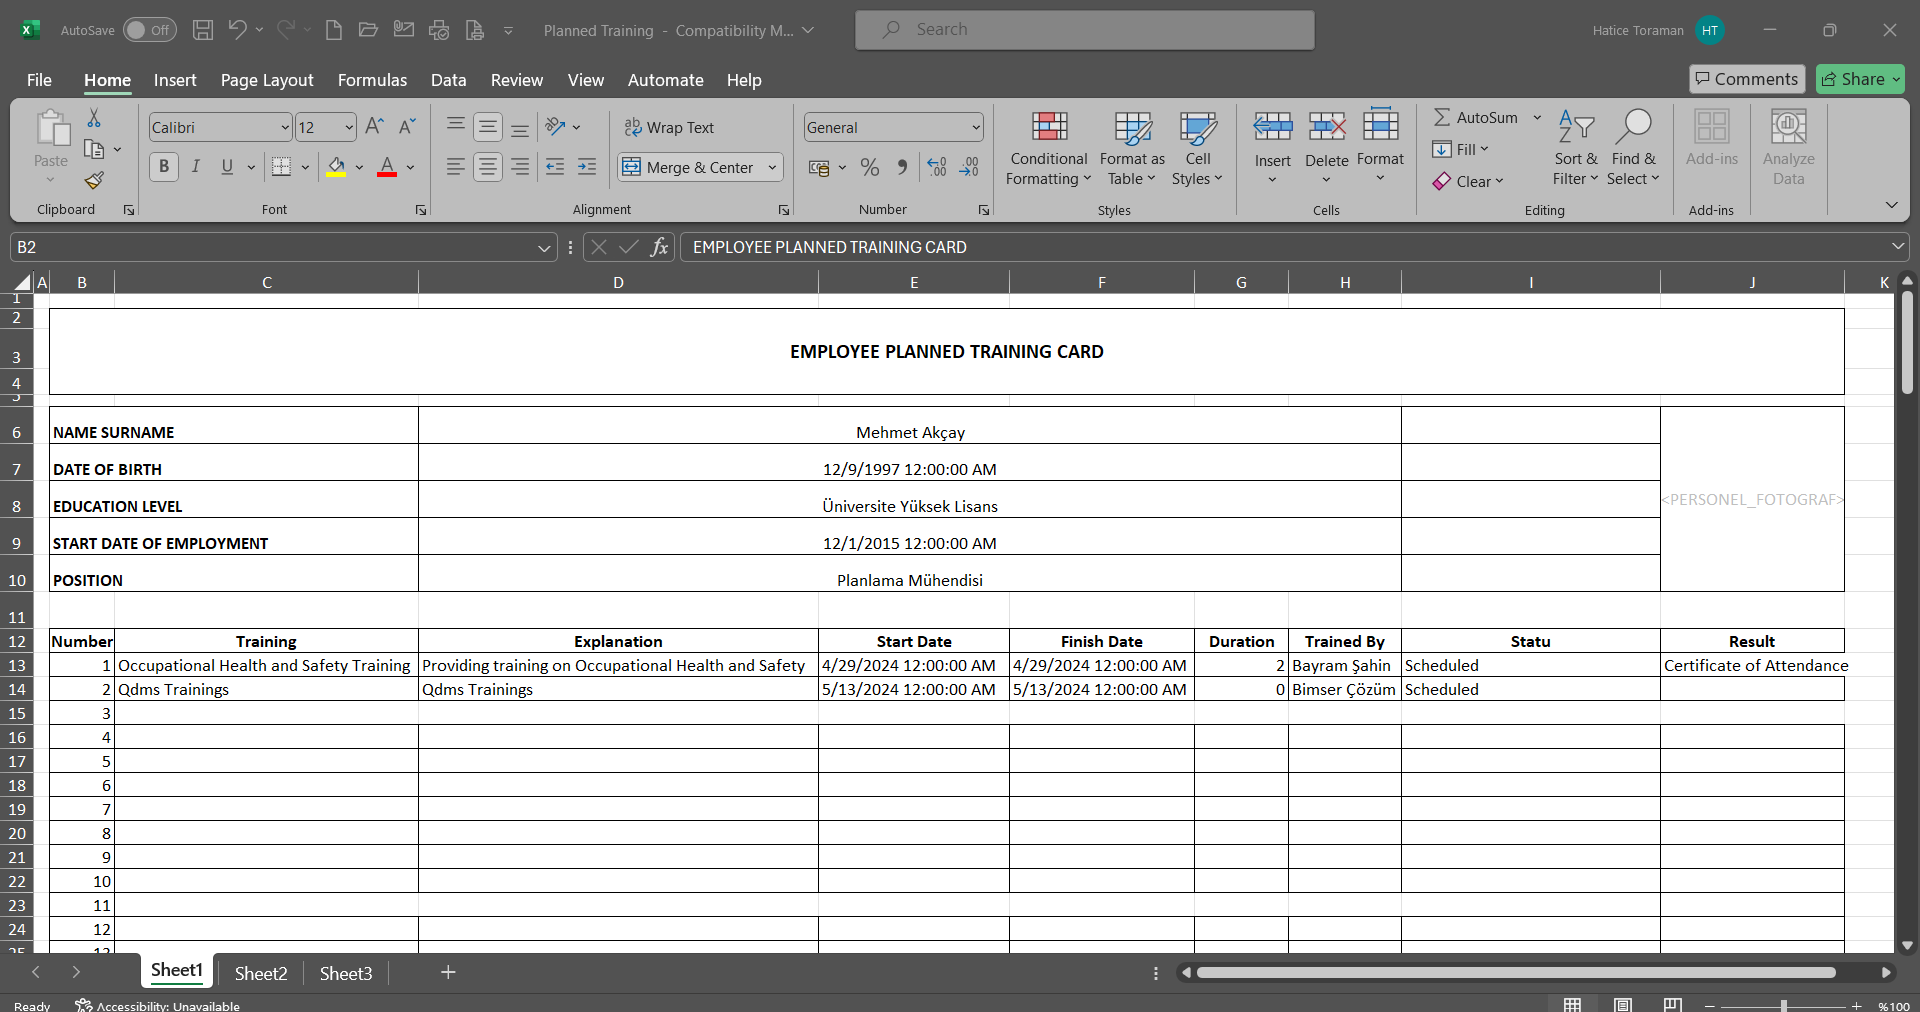
6.3.7.17.Individual Training Card
Menu Name: Integrated Management System/ Training Planning/Reports/ Individual Training Card
This report lists the information and training courses attended by personnel who log into Qdms.

Using the buttons on the screen;
: The data is transferred to Excel.
Click the (View Report) button on the Individual Training Card screen.
The Individual Training Card report is available in Excel format.
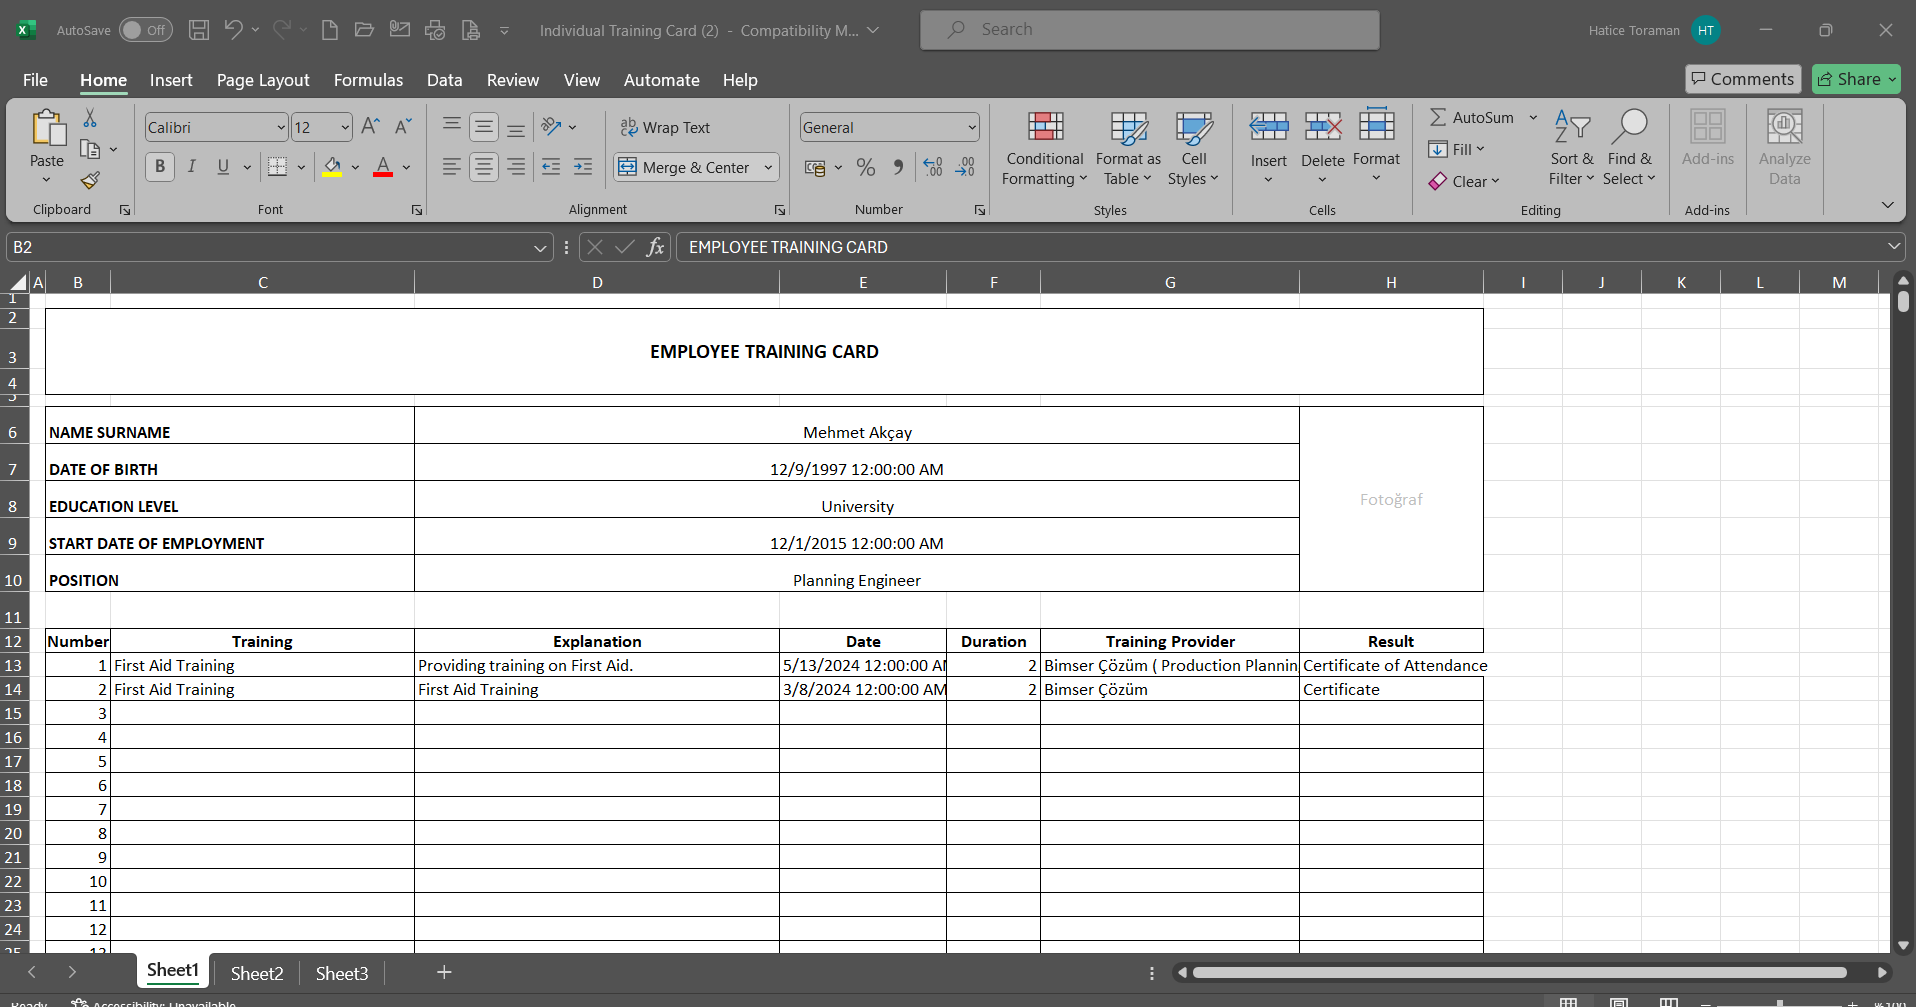
6.4. Dashboard/Training Planning
Menu Name: Dashboard/Training Planning
In the Qdms system, it is the section that allows users to view processes, metrics, graphs, and reports on a single screen. Dashboard is defined as a display screen, workboard, and indicator table that summarizes information flow and/or content and explains a specific situation through graphs and tables. Its purpose is to provide the necessary information in the shortest possible time with minimal interaction and thought. It is a screen frequently used by individuals in managerial positions. The Dashboard feature has been added to the Qdms system within the scope of the Training Planning Module. This screen appears depending on menu viewing permissions.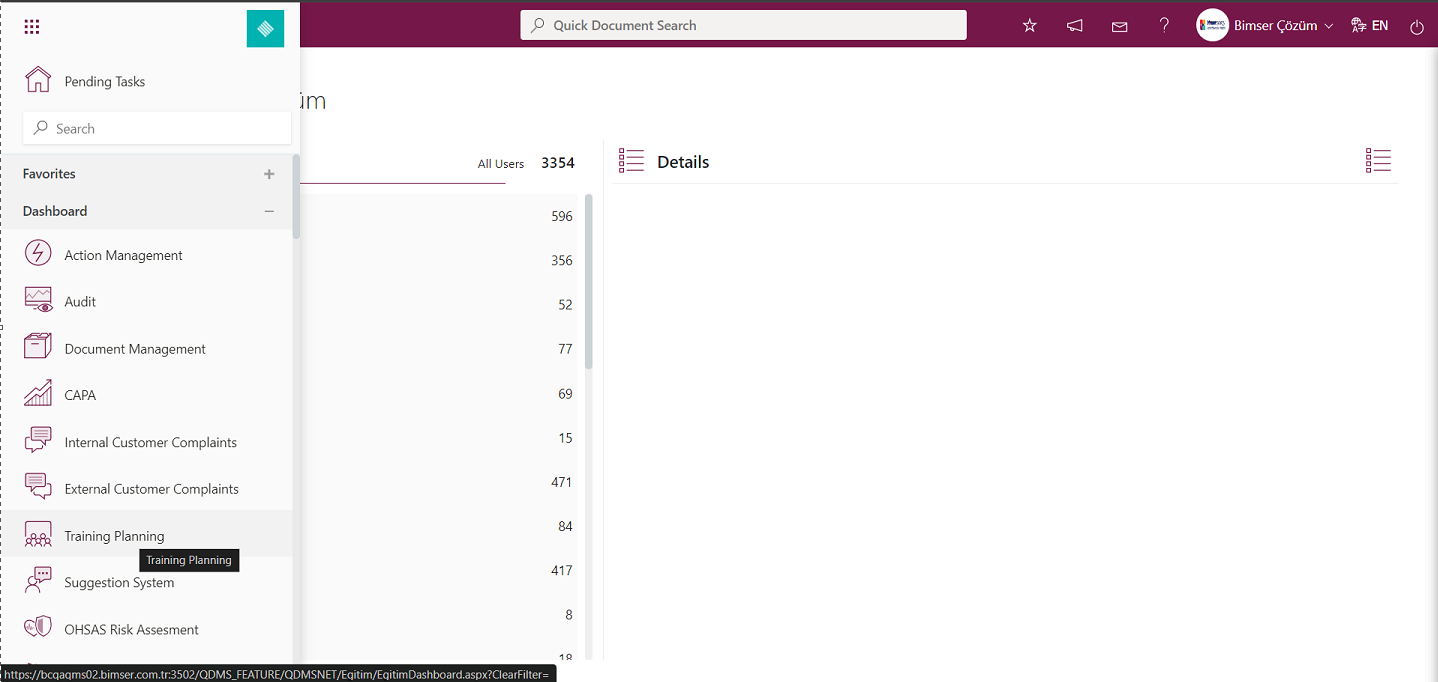
When you click on the Dashboard menu, two tabs appear: List and Filter.
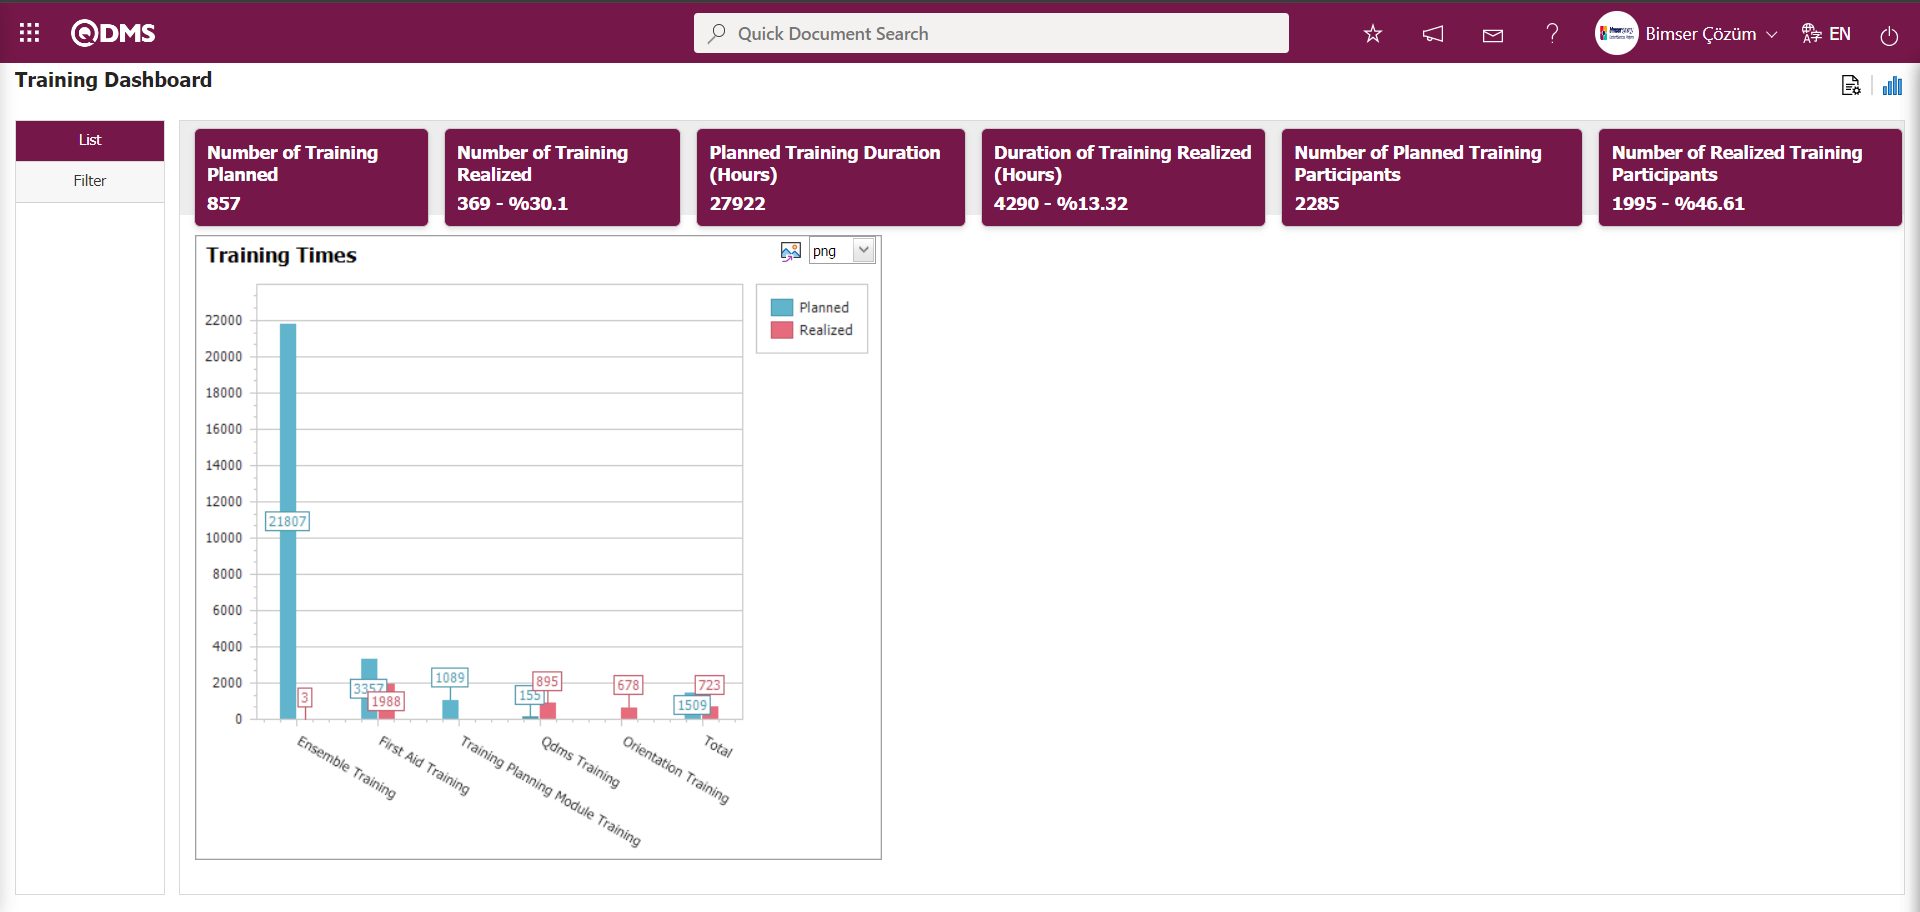
Filtering is performed according to the fields found in the search criteria in the Filter tab.
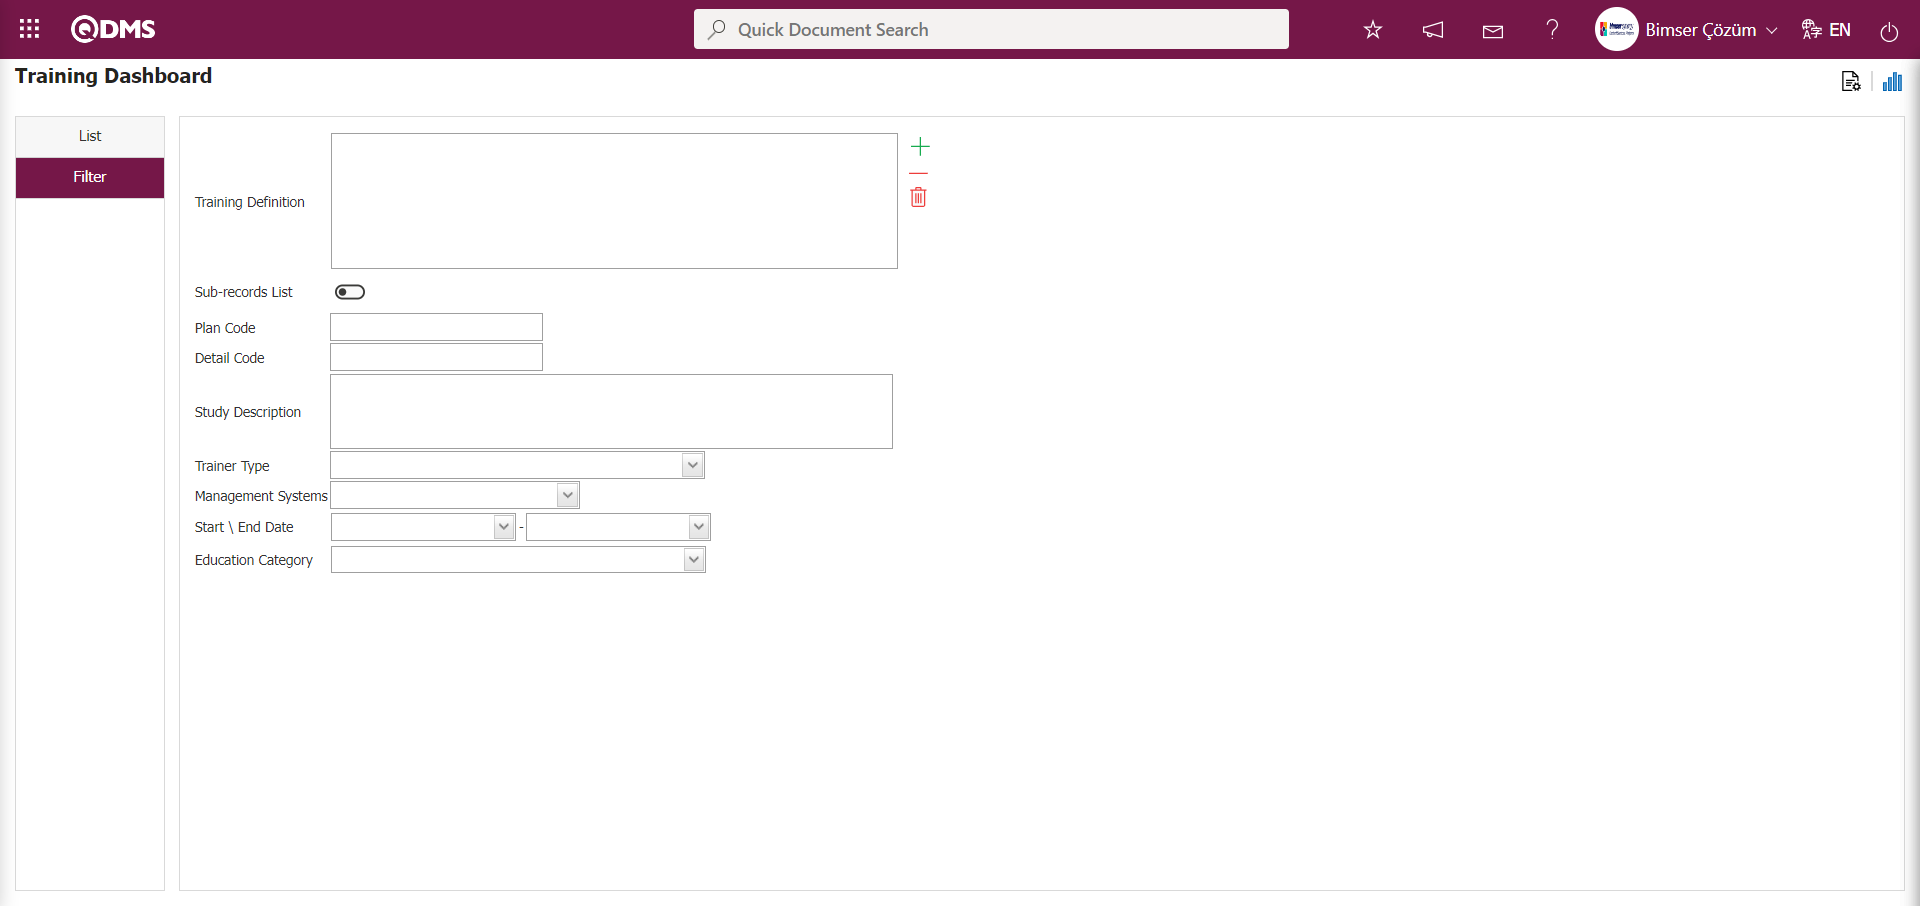
In the Training Planning module, on the Dashboard screen, in the List tab, the fields Number of Training Planned, Number of Training Realized, Planned Training Duration (Hours), Duration of Training Realized (Hours), Number of Planned Training Participants, and Number of Realized Training Participants appear as fixed fields on the screen and cannot be edited. These fixed fields display information in total and percentage segments.

In the Training Planning module, module managers can increase the number of graphs by designing the graphs they want.In the Training Planning Module Dashboard screen, you can design graphs by specifying the number of graphs, their names, their order, the fields to be included in the X and Y axes, the height and width of the graphs, and the graph type. To make these settings on the Training Planning Dashboard screen, the user must be defined as a Training Planning Module Manager. (The module manager definition process for the Training Planning Module is performed in the System Infrastructure Definitions/BSID/Configuration Settings/Manager Definition menu.)
When there is no Module Manager in the User Training Planning Module, the button shown in the screenshot below appears on the Training Planning Dashboard screen.
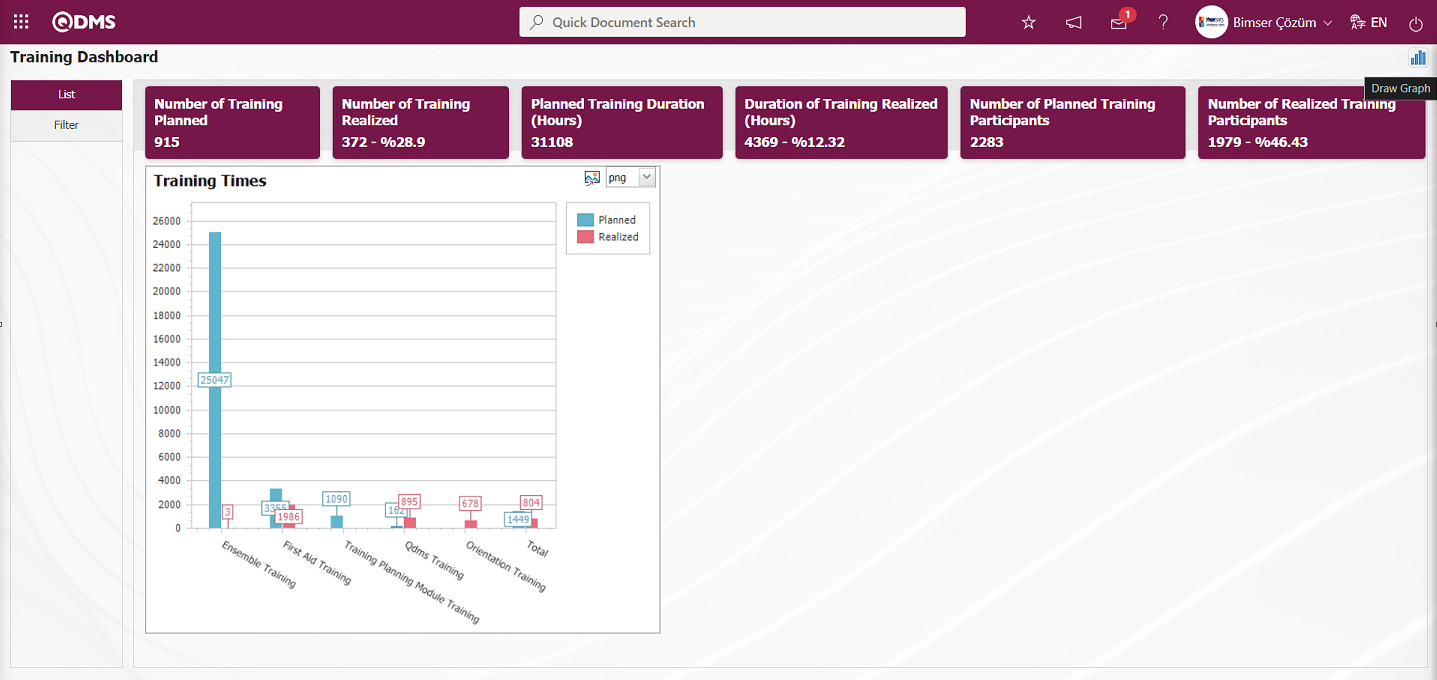
In the Training Planning Module, the  (Graphics Settings) button, which is the first button on the Training Planning Dashboard screen, is displayed for users defined as module administrators. The Module Admin user makes the necessary settings (Graphics Settings) on the Training Planning Dashboard screen and designs the graphics. Users who are not Module Manager can make the necessary settings in the Dashboard Configuration screen under System Infrastructure Definitions/BSID/Configuration Settings/Dashboard Configuration/Training Planning menu and design the graphics.
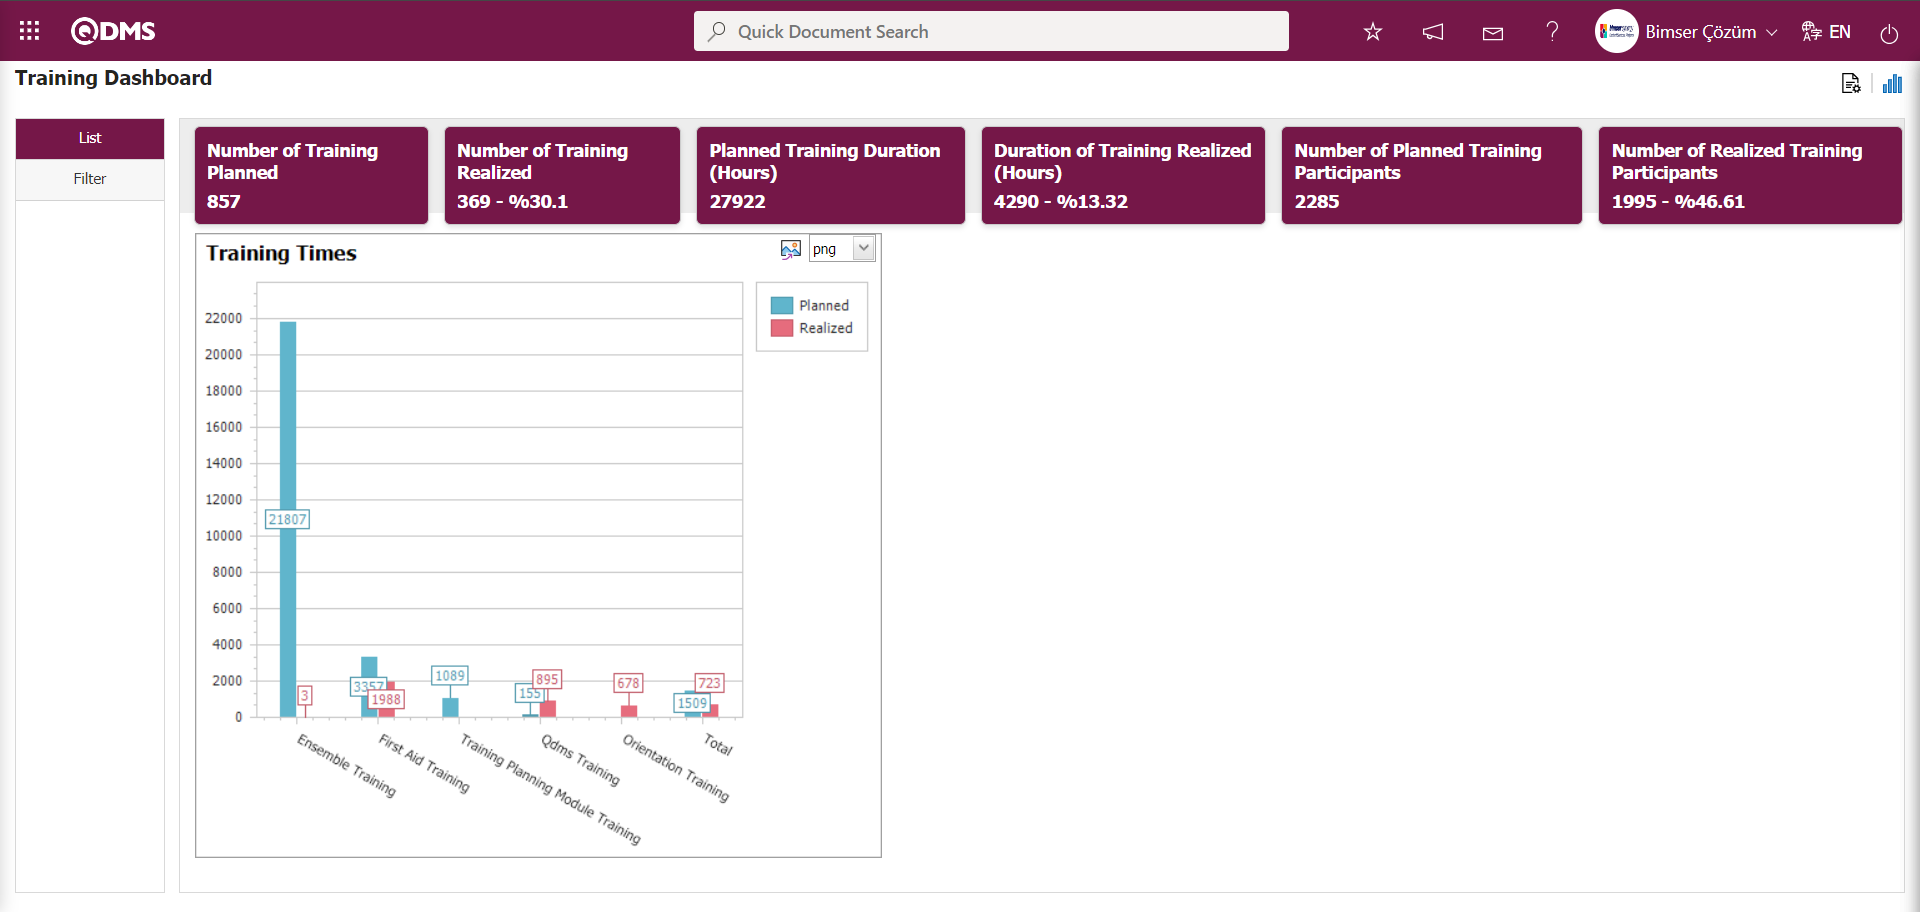 In the Training Planning Module, click the Graphics Settings button to design graphics, update selected graphic information in the list, and delete information.
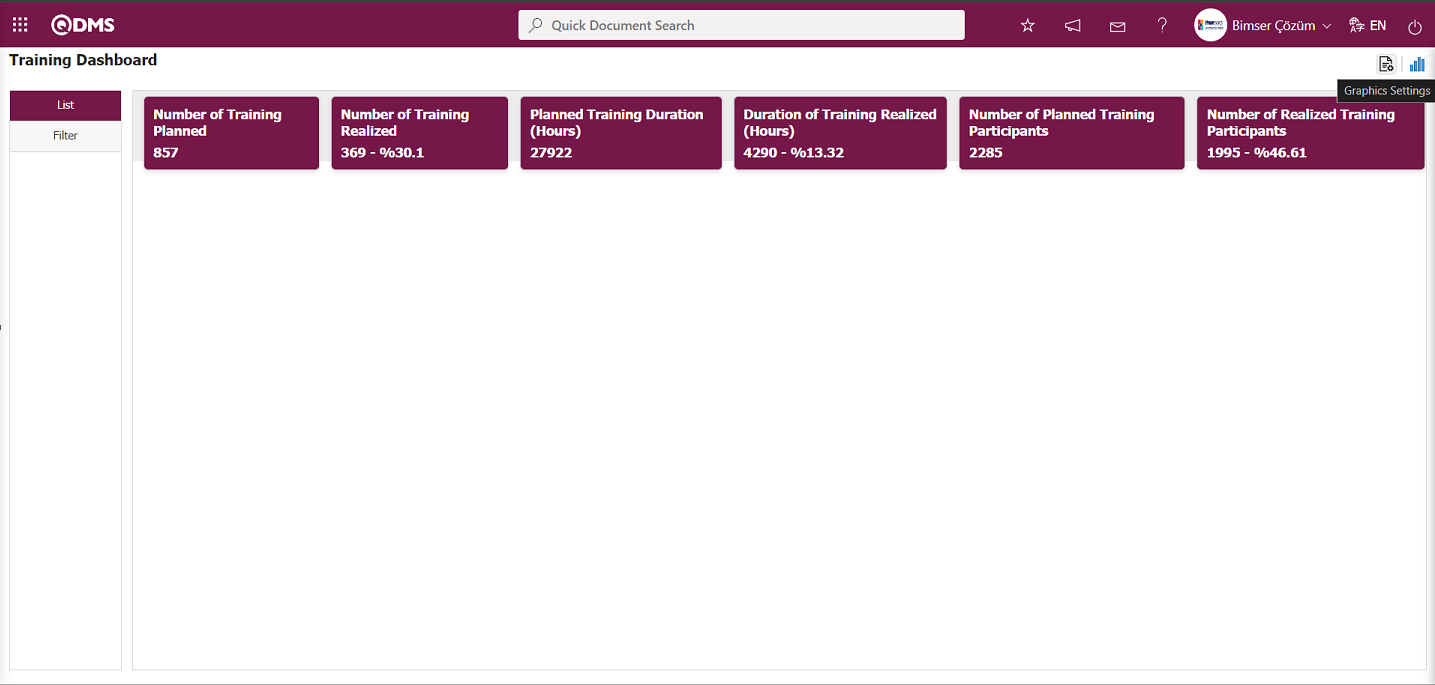
The Dashboard Configuration screen opens.
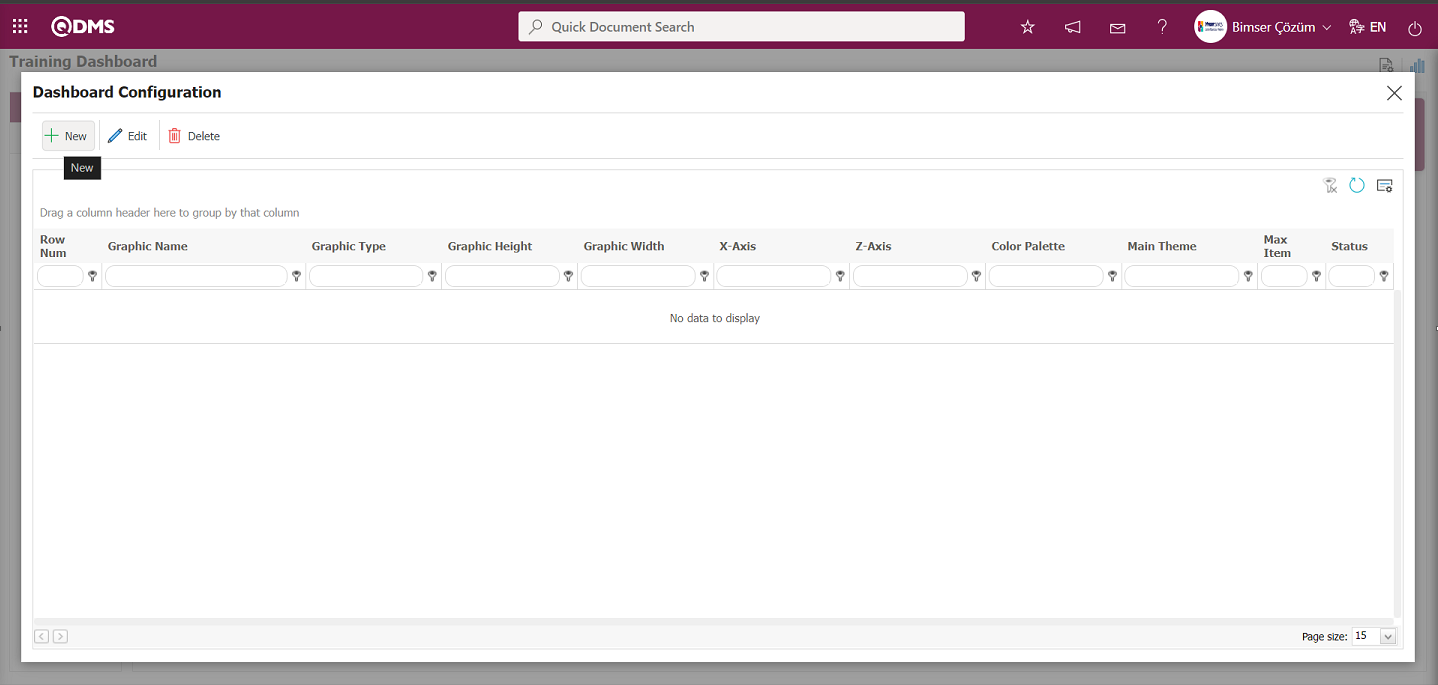
Using the buttons on the screen;
 : A new Dashboard is defined.
 : The Dashboard information selected in the list is corrected/changed/updated.
 : The Dashboard information selected in the list is deleted.,
- : The Dashboard Configuration screen is closed.
To add a new Dashboard in the Training Planning Module, click the  button.
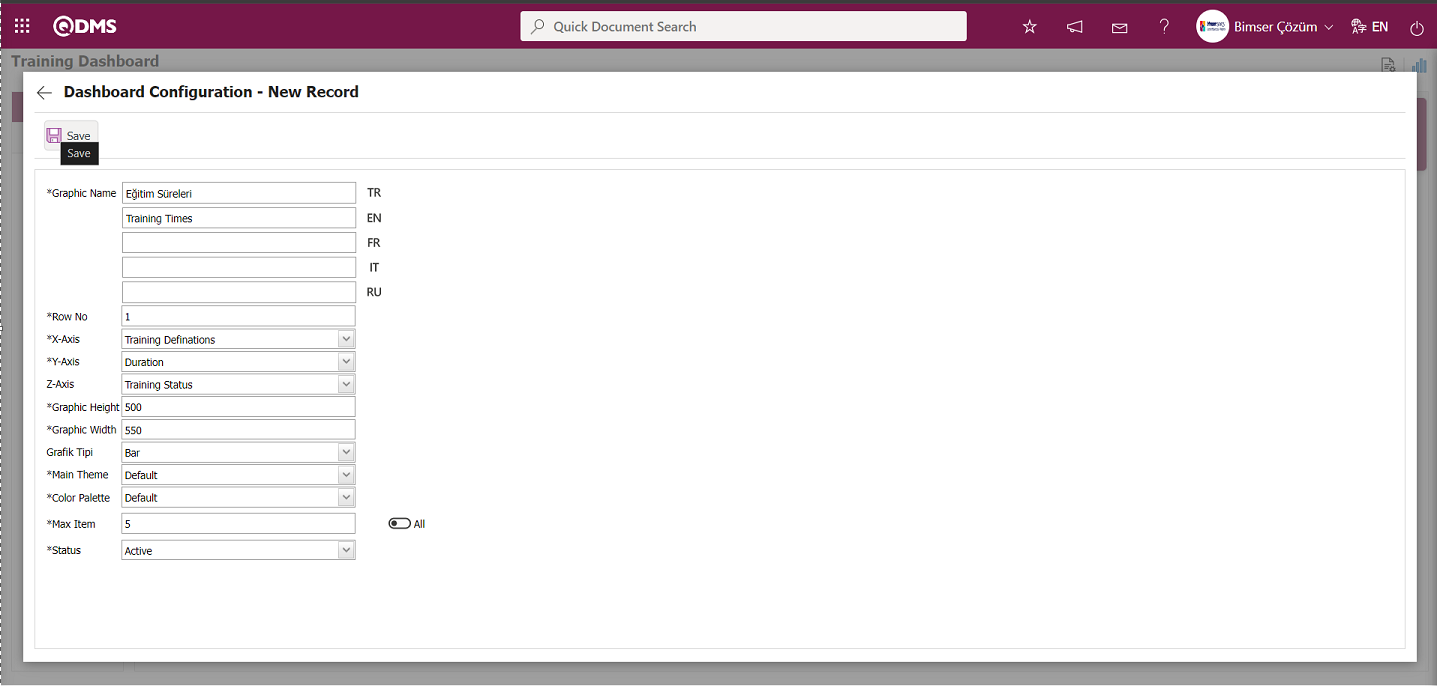
Dashboard Configuration - New Record screen after filling in the required fields with the relevant information, click the  button located at the top left of the screen.
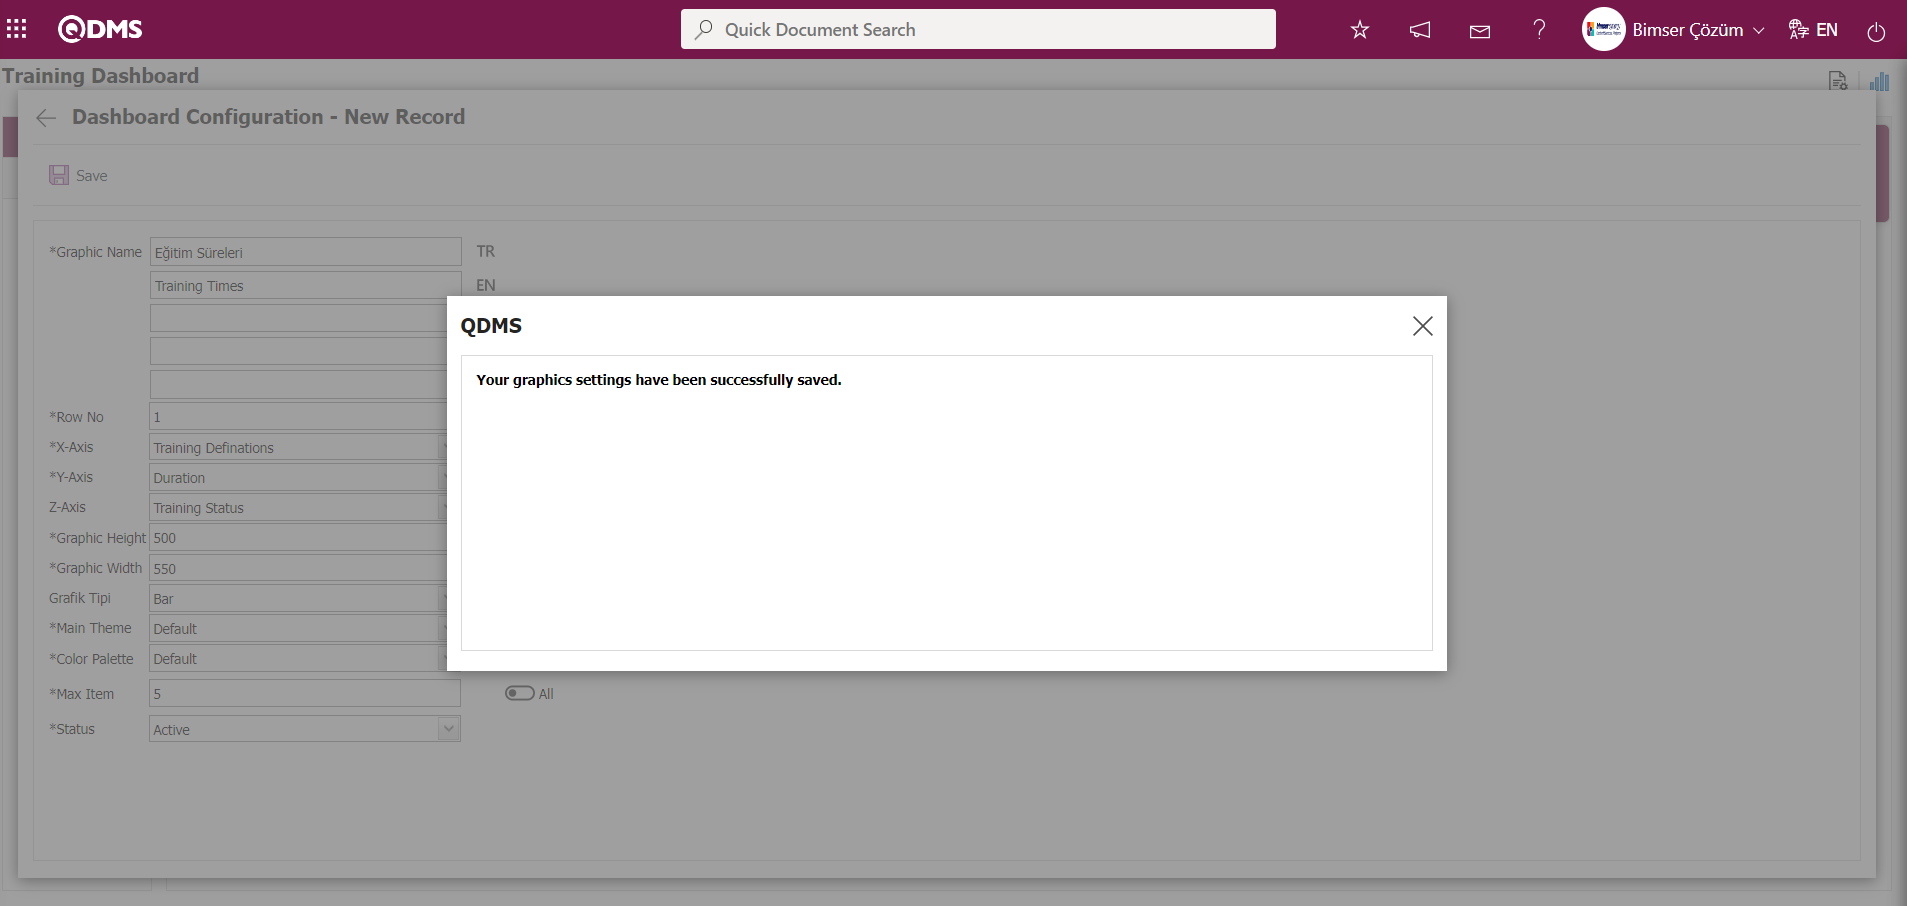
The system displays the message “Your graphics settings have been successfully saved” to indicate that the save operation has been completed.
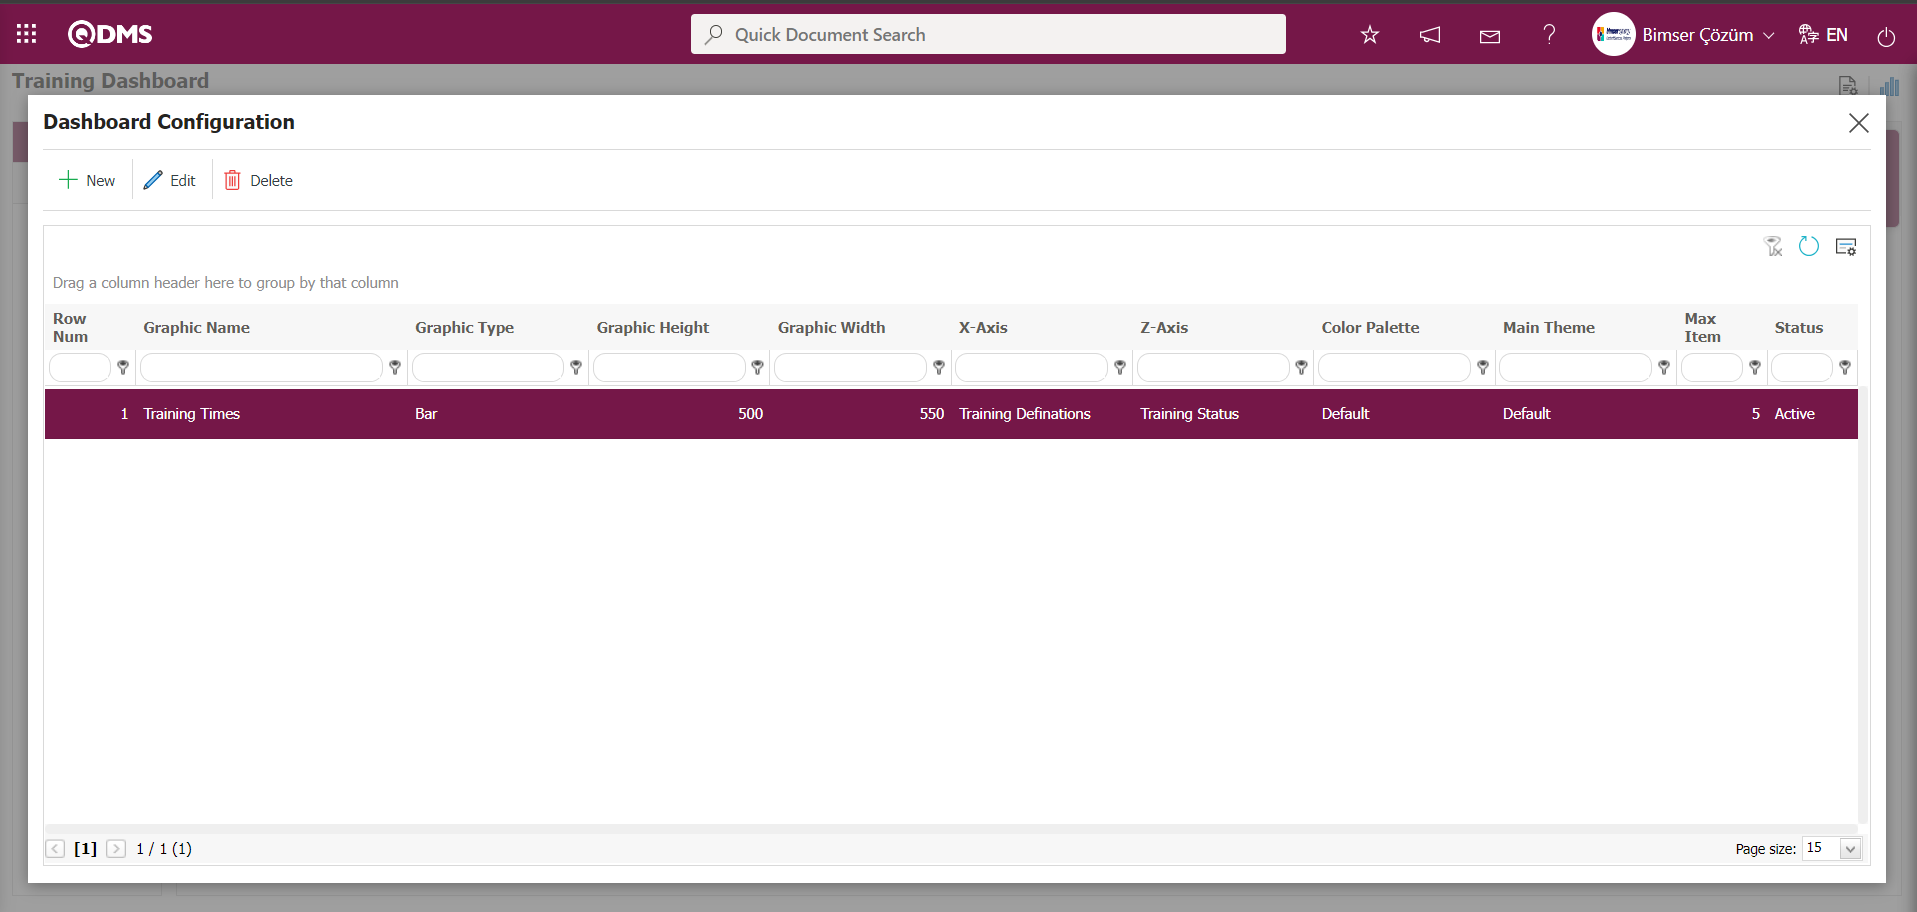
The Dashboard defined on the Training Dashboard screen is displayed.
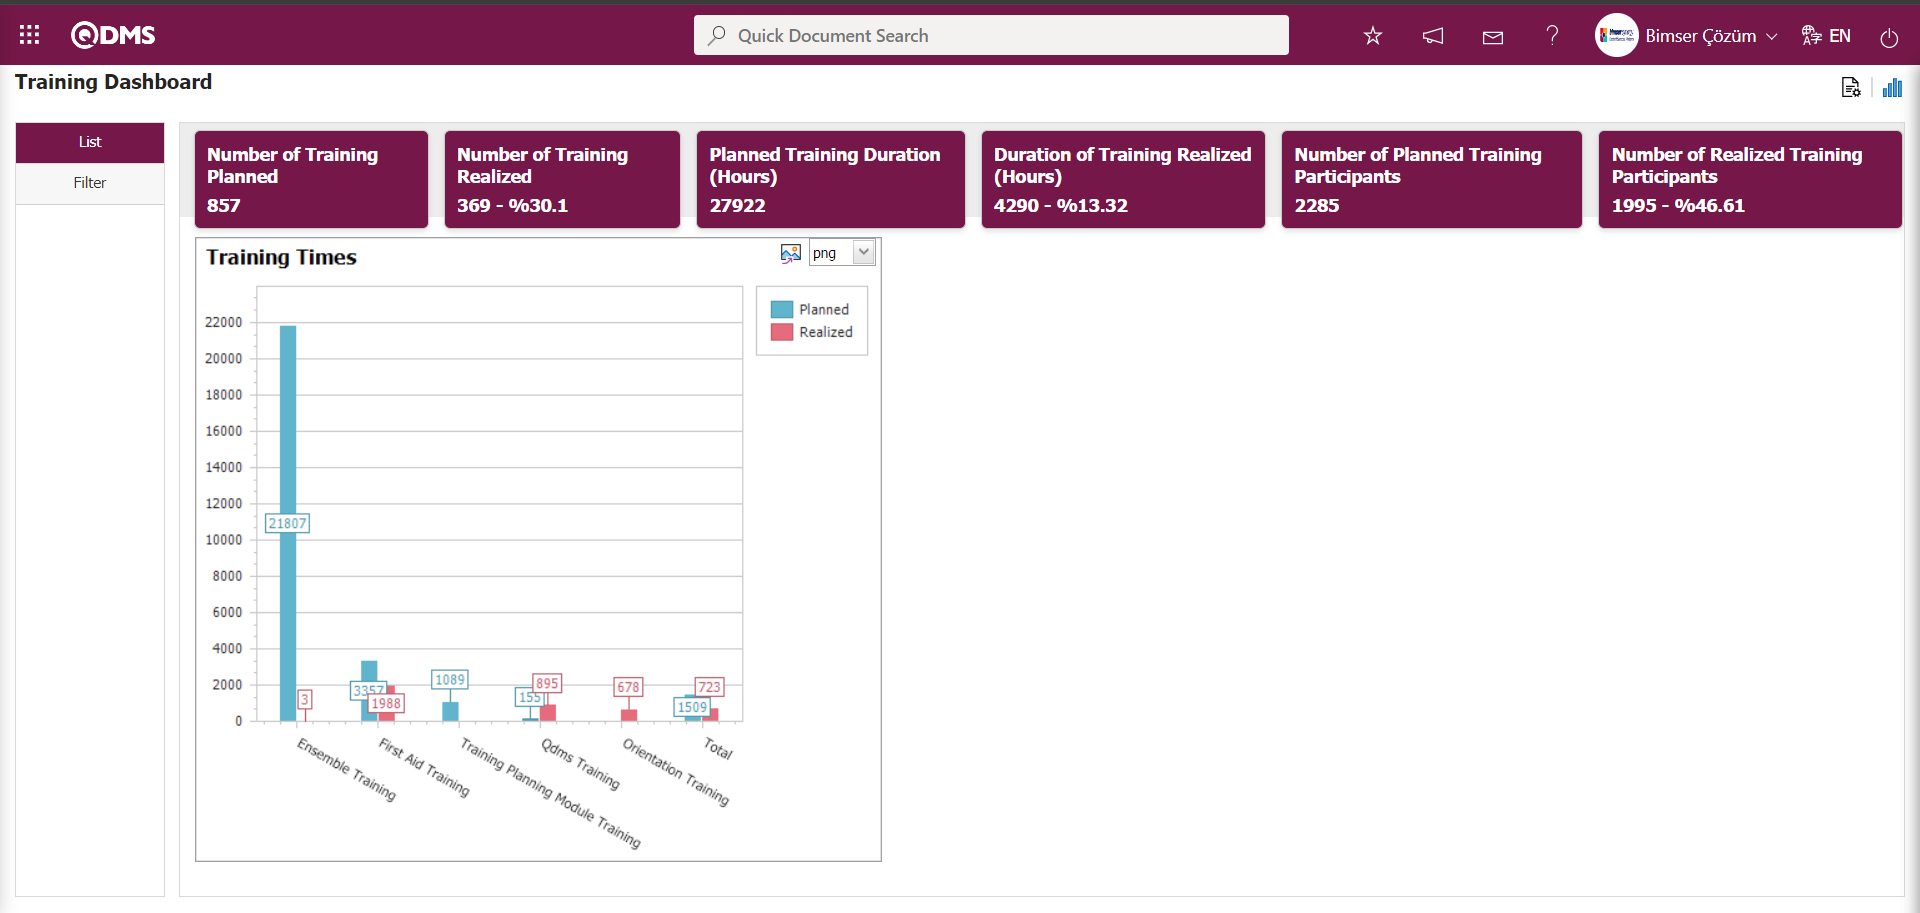
By clicking the  (Export graph) button, the graph is opened and converted to the selected format type (png, jpg, bmp, xls, etc.) from the drop-down menu and exported to an external environment.
Graph Size is limited to a minimum value of 500 and a maximum value of 1000. The minimum width of the graph is 550 and the maximum width is 1800. The graph height and width must be selected within these values. Dashboard Configuration - If the new record row number has been used previously, the system displays the error message “The row number you specified is in use, you must specify a row number that is not in use.” during the saving process.
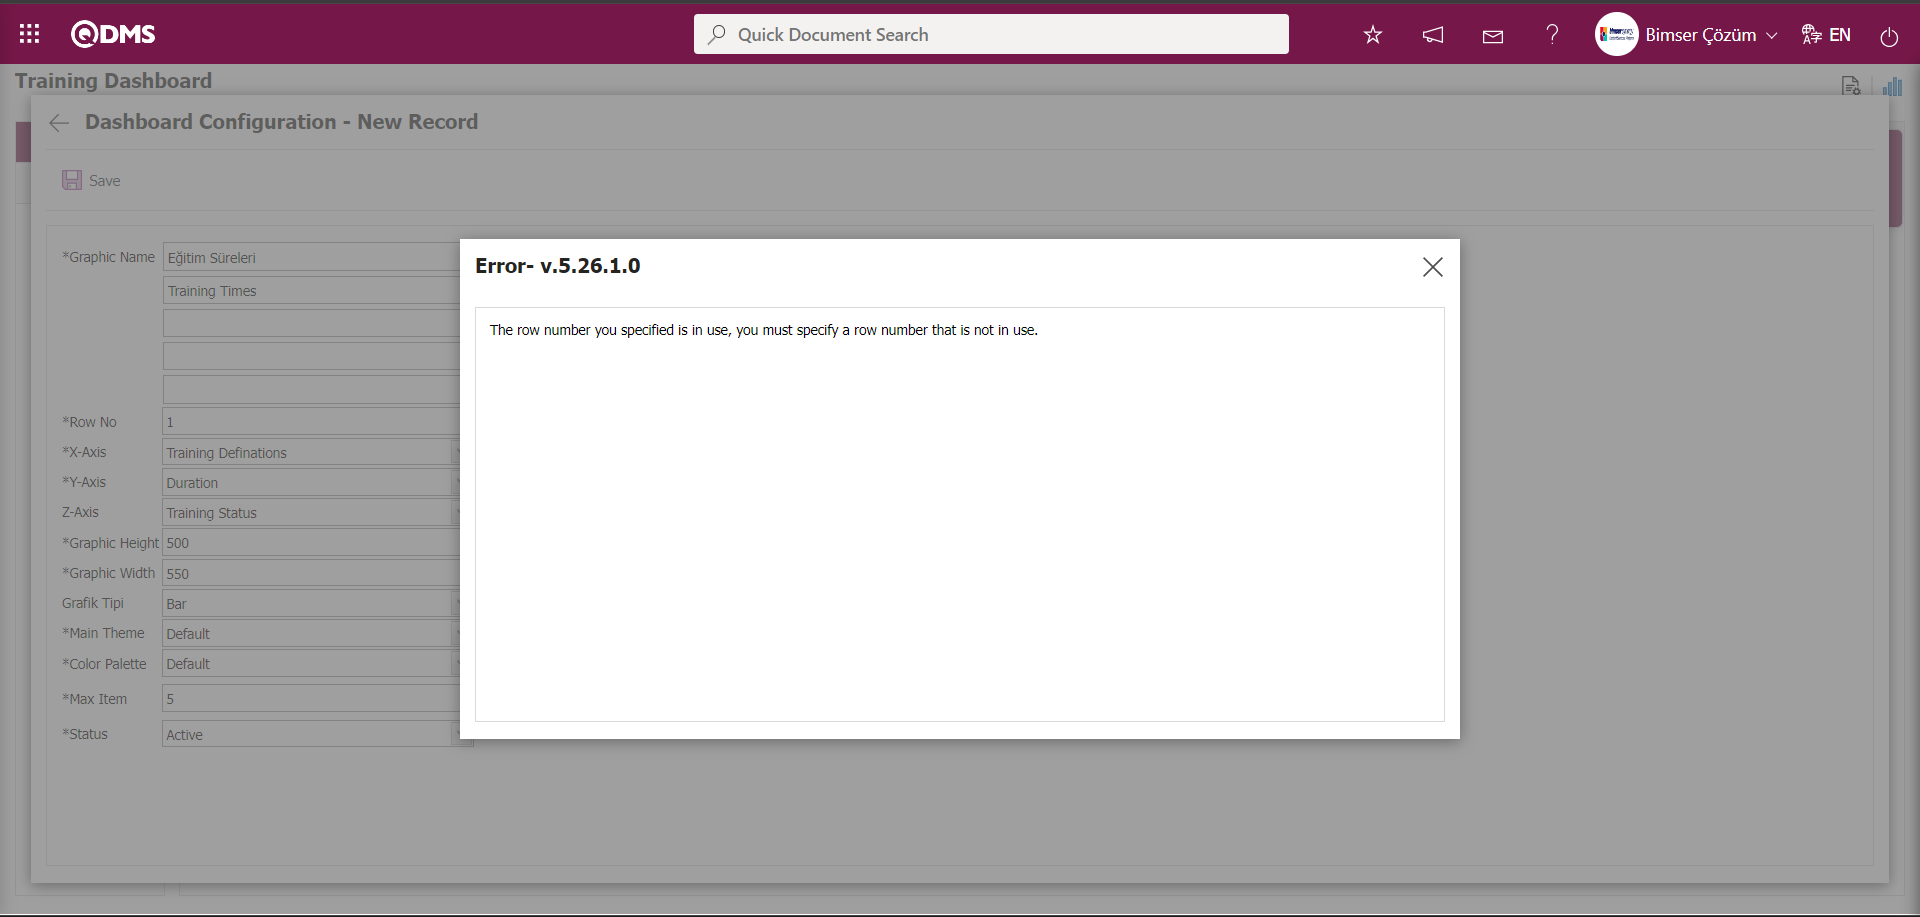 In this way, a new graph can be added on the screen opened with the Graph Settings button. Editing, updating, changing, and deleting operations are performed on the added graph information. A filtering screen has been defined for the relevant graphs in the list and set to be downloadable.
Users who are not Module Manager can open the Dashboard Configuration screen by clicking on the System Infrastructure Definitions/BSID/Configuration Settings/Dashboard Configuration/Training Planning menu and make the necessary adjustments on the screen that appears to complete the graphic design process.
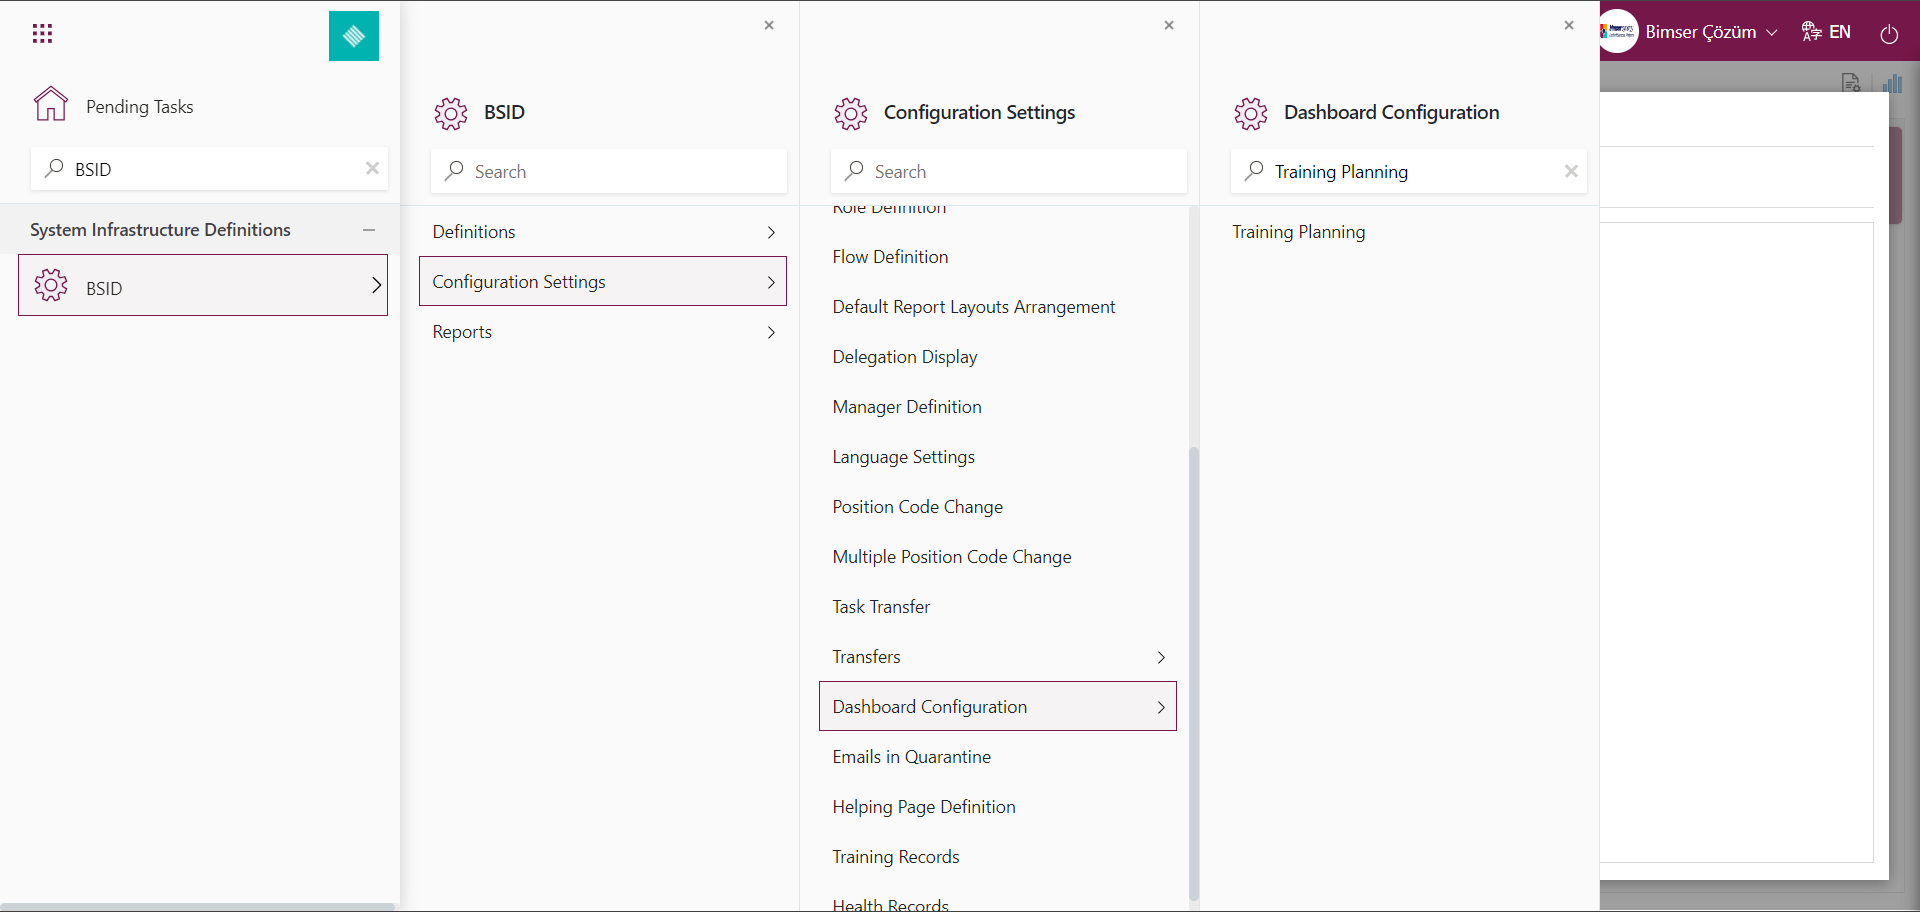
In the Training Planning Dashboard Configuration screen, you can define a new dashboard by performing the same steps using the same buttons.