Suggestion System
: : : tip Information
You can quickly reach the relevant topic with the help of navigation on the right side.
: : :
Suggestion System Module (v.5.26) User Help Document
Module Version: 5.26
1. INTRODUCTION:
“QDMS Suggestion Module” is a module where suggestions are entered, evaluated, finalized and reported.
2. PURPOSE:
The purpose of this help guide is to explain the working process of the suggestion module. It explains what the suggestion module should be used for, how it should be designed on QDMS, what should be done in its infrastructure and what should be considered in data entry. How suggestions are entered into the system, how they are evaluated, how they are scored and how the suggestion is closed.
3. RESPONSIBILITIES:
Suggestion Project Team, All Employees
4.WORK FLOW:
5. Suggestion System Module
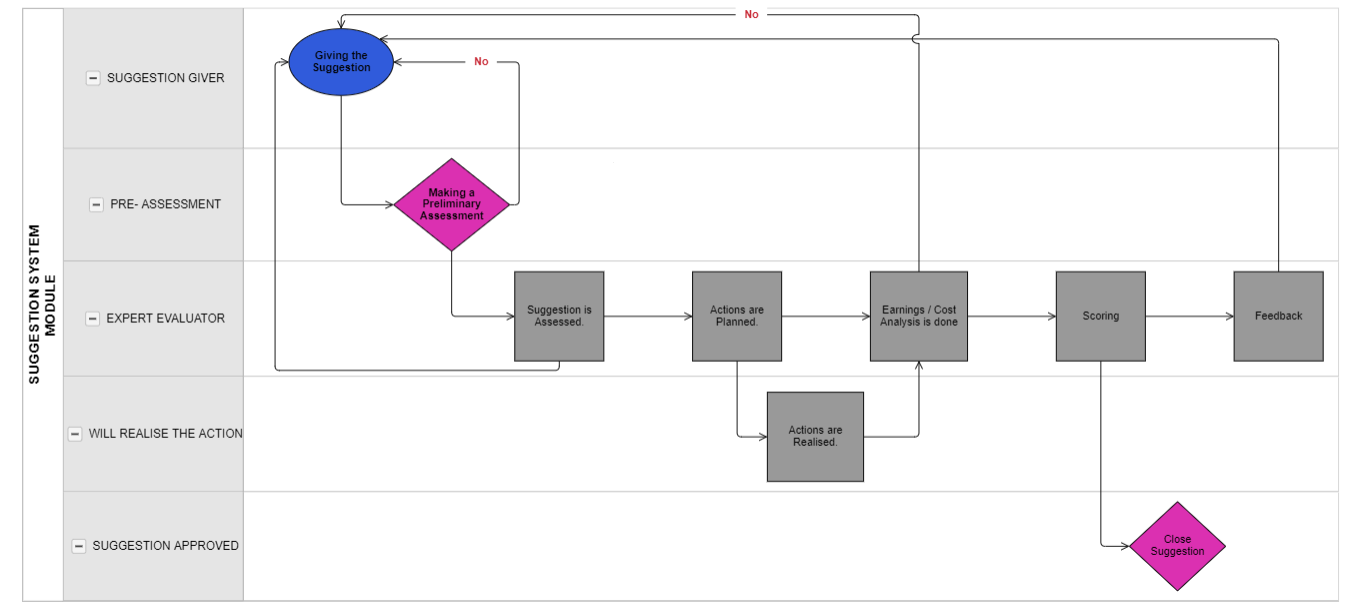
Apart from approaches such as complaints, wishes, requests, demands; it is a module that aims to improve the system, personnel, processes, manage personnel, customer or supplier suggestions, integrate with the Action module for suggestion realization, determine institution-specific scoring, change the scoring system for the campaign period, make Gain / Cost analysis, provide personnel, department score and target tracking. A suggestion entered into the system is formed as a suggestion record in the system after passing certain approvals.
After the Suggestion entered into the system passes through certain approvals, it goes through the following processes;
1-Suggestion Entry Process: This is the process where the suggestion is defined and entered in the system.
2- Pre-assessment Process: After the suggestion is submitted in the system, it goes through a pre-assessment phase. The purpose of pre-assessment is to distinguish suggestions from other notifications. The opened suggestion is evaluated by the pre-evaluator to determine whether it is a suggestion or a complaint / request / request.
3- Specialist Assessment Process: The suggestion accepted by the pre-assessor is sent to the selected specialist for assessment. While evaluating the suggestion, the expert evaluator determines whether it is related to his/her department. If it is not related to his/her department, he/she may refer it to a different expert. The specialist assessment expert decides whether the given suggestion is a suggestion or not. It is determined whether there is a need for action.
4-Action Planning Process: If there is a need for action, move to the next status to plan an action. If there is no need for action, the action planning stage is skipped and the benefit / cost analysis is performed. After the actions are planned in the Action Planning status, the action realization phase is completed. After the completed actions, the recommendation goes to benefit / cost analysis.
5- Benefits/Cost Analysis Process:In the benefits/cost analysis, the financial gain of the suggestion is determined. In the cost/benefit analysis, it is determined whether it will be disseminated to other departments/workplaces. The process after the cost/benefit analysis is the scoring process.
6-Scoring Process:In the scoring phase, the suggestion is scored. The scoring process is carried out according to the determined scoring method (Score Sheet, Using Formula, Survey) and the suggestion is closed with the registration process. After the scoring process, the suggestion is closed. The proposer is notified by the system as “My Proposal Resulted”.
This module includes the following features.
- Defining the expert/leader who will perform operations such as assessment, benefit/cost, scoring related to the suggestion.
- Defining the earning category in which the suggestions given such as income enhancement, job security, motivation enhancement are categorized in terms of what kind of earnings they will provide to the organization.
- Defining campaigns to give extra points and rewards for suggestions given for certain periods of time.
- Using formula-based scoring management as scoring management.
- Using scoring management on the survey module.
- Defining system variables and formula when formula based scoring management is used as scoring management.
- Managing personnel, customer or supplier suggestions by making Formula-Suggestion type matching process for personnel suggestions, customer suggestions and supplier suggestions.
- Defining the suggestion acceptance definitions to be selected in the system in case the suggestion is accepted in the evaluation stages after the suggestion is given.
- Defining the reasons for rejection of the suggestion to be selected in the system in case the suggestion is rejected in the evaluation stages after the suggestion is given.
- Defining projects such as 5S, Kaizen and Lean Production in the system, creating project groups and ensuring that the expert is selected in which project group during the Expert/Leader definition phase.
- Entering daily, weekly, monthly and yearly suggestion targets for departments and defining departmental targets and making suggestion target management on a department basis.
- Entering daily, weekly, monthly and yearly suggestion targets for personnel and defining person targets and performing suggestion target management on person basis.
- Ensuring that systemic adjustments are made in the parameters defined in line with the requests and needs of the users.
- With the “Suggestion System” feature, suggestions can be entered into the system, and the suggestion process can be initiated and monitored.
- With the “Suggestion Entry” feature, suggestions can be entered into the system in the organization.
- Managing all processes with stages such as defining the suggestion to the system, pre-assessment, pre-expert evaluation, Action Planning, Profit/Cost Analysis, Scoring and closure.
- With the “Spend Point” feature, it is possible to spend points for rewards such as additional payments, gifts or shopping in the reward system for suggestions.
- With the “Feedback Approval ” feature, it is ensured that manual feedback is made regarding the status of the suggestion given in the system on behalf of a staff member who is registered in the Qdms system but is not a Qdms system user.
- With the “Suggestion Objection” feature, the “Rejected Suggestions - Filling in the Objection Form” screen can be opened for the suggestions rejected at any stage of the suggestion and the rejection of the suggestion can be objected.
- With the “Council Assessment” feature, if the suggestion is to be evaluated by a suggestion commission after the 2nd objection to the suggestion, the commission evaluation process can be initiated.
- With the “Action Tracking” feature, it is ensured that the actions of the suggestions given by the users are tracked and reported.
- With the “Suggestion Tracking” feature, it is ensured that the status of the suggestions given by the users is tracked by displaying the information about the status of the suggestions.
- With the “Suggestion Record Maintenance” feature, it is ensured that the assigned suggestion system administrators update the suggestion information and change the status of any suggestion.
- With the “Suggestion Deleter” feature, the managers of the assigned suggestion system can delete the suggestions and as a result of this process, the suggestions are removed from the database.
- “Suggestion Status Report” provides information on the latest status of the suggestions in the system, “Preliminary Evaluation Status Report” provides information on the stages of suggestion evaluation in the system, “Annual Suggestion Tracking List” provides information on how many suggestions were submitted by which personnel in which department for the year selected in the system and how many of these suggestions were approved, and “Suggestion Tracking Report” provides information on how many suggestions are at which stage in the system within the specified date range, how many of these suggestions are pending, and how many of these suggestions are preliminary evaluated.
- “"Suggestion Counts Graphic” to obtain the graph of the number of suggestions on a weekly, monthly and annual basis for the date range specified in the system and to transfer the graph created to the external environment in the desired format (Excel, jpg, pdf, etc.).
- Providing Web Service support for external applications.
5.1. System Infrastructure Definitions / Suggestion - Part 1
Menu Name: System Infrastructure Definitions/ Suggestion
This is the section where the necessary definitions are made in order to create the infrastructure of the suggestion module. Data appears according to these definitions made in the entries from the Integrated Management System menu.
5.1.1. Define Specialist/Leader Definition
Menu Name: System Infrastructure Definitions/Suggestion/Define Specialist/Leader Definition
After the suggestion is received, this menu is the menu where the people who will carry out the processes such as Assessment, Benefit / Cost, Scoring related to the suggestion are defined to the system. In other words, users who will take part in the expert evaluation status must be defined in this area.
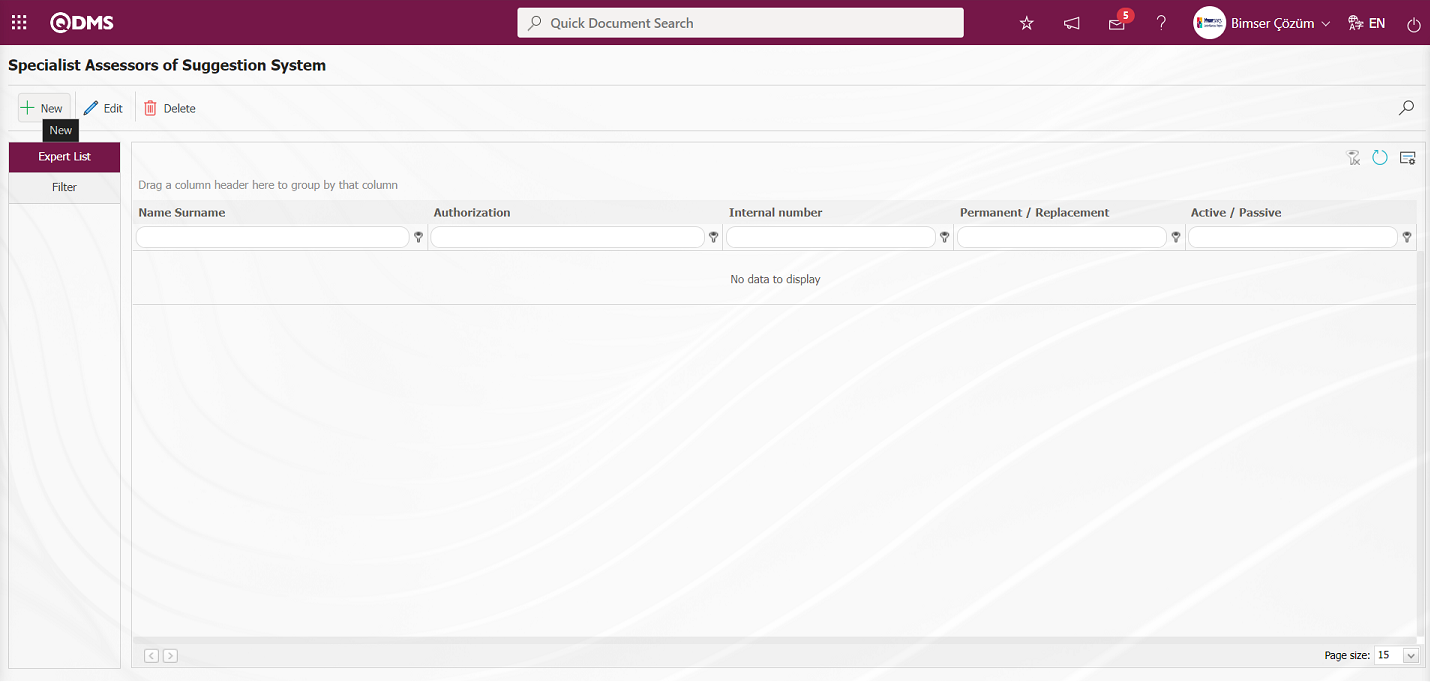
With the help of the buttons on the screen,
 : A new specialist evaluator is defined.
 : Changes are made on the specialist evaluator information selected in the list.
 : Delete the selected specialist evaluator information in the list.
 : Records are filtered and searched.
 : The search criteria on the menu screens are used to clean the data remaining in the filter fields in the grid where the search operation is performed.
 : The menu screen is restored to its default settings.
 : User-based designing is done on the menu screen with the show-hide feature, that is, the hiding feature of the fields corresponding to the columns on the menu screens.
To add a new Specialist/Leader, the Definition of Specialist screen is displayed by clicking the button on the top left corner of the screen.
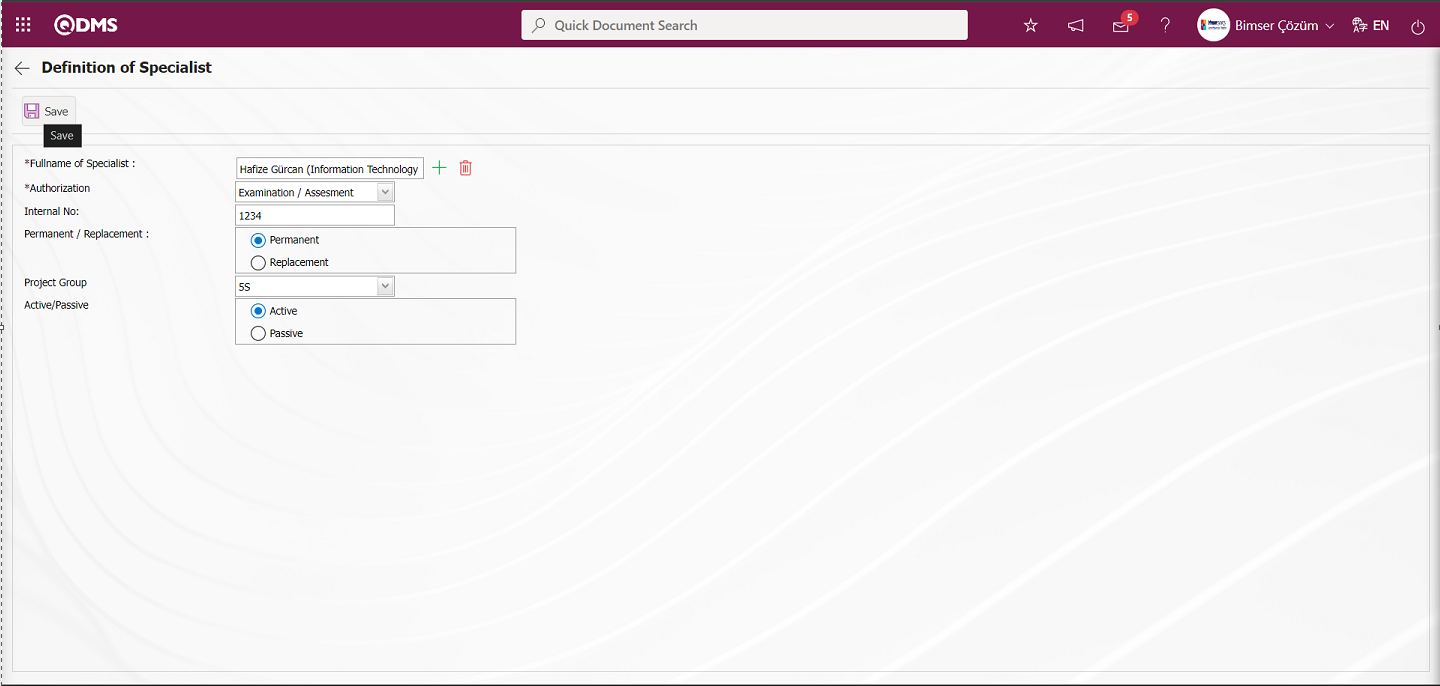
The following fields are defined on the screen that opens;
Fullname of Specialist:This is the field where the expert evaluator is selected from the list of personnel defined in the system opened by clicking the  (Select) button on the Definition of Specialist** screen.
Competence: It is an informational field where the authority of the expert selected on the Definition of Specialist screen is selected in the options opened by clicking the drop-down list. Depending on the options selected, it is a field used in the filtering stage at the stage where an expert is selected in the Expert to be Evaluated field at the suggestion pre-evaluation stage.
Included No: It is an informational field where the Internal No information of the expert is defined on the Definition of Specialist screen.
Permanent / Replacement: It is an informational field where the Permanent / Replacement information of the expert can be selected on the Definition of Specialist screen.
Project Group: Definition of Specialist screen, in which project group the expert is included. If the project group will be used, this field is displayed on the expert definition screen. It is a field displayed depending on the parameter. The parameter is activated by selecting the parameter value “Yes” of parameter 10 in the Suggestion System module parameters.
After the parameter is activated, the Project Group field is displayed on the Definition of Specialist screen and selection is made in the list of Project Groups defined in the system. When the parameter is disabled by selecting the parameter value of the parameter “No”, this field is not displayed on the Definition of Specialist screen and no selection is made in the list of project groups defined in the system.
Active/Passive: This is the field where the status of the specialist defined in the Definition of Specialist screen is selected to appear in the Active / Passive options.
On the Definition of Specialist screen, the specialist is selected from the list of personnel defined in the system opened by clicking the (Select) button in the Specialist Name and Surname field. The authority of the defined specialist is determined by selecting from the relevant options. The project group to which it is connected and finally the active and inactive status are determined. After the required fields are filled in, the Definition of Specialist registration process of the earnings / cost information defined in the Earnings / Cost Definitions screen is performed by clicking the  button in the upper left corner.
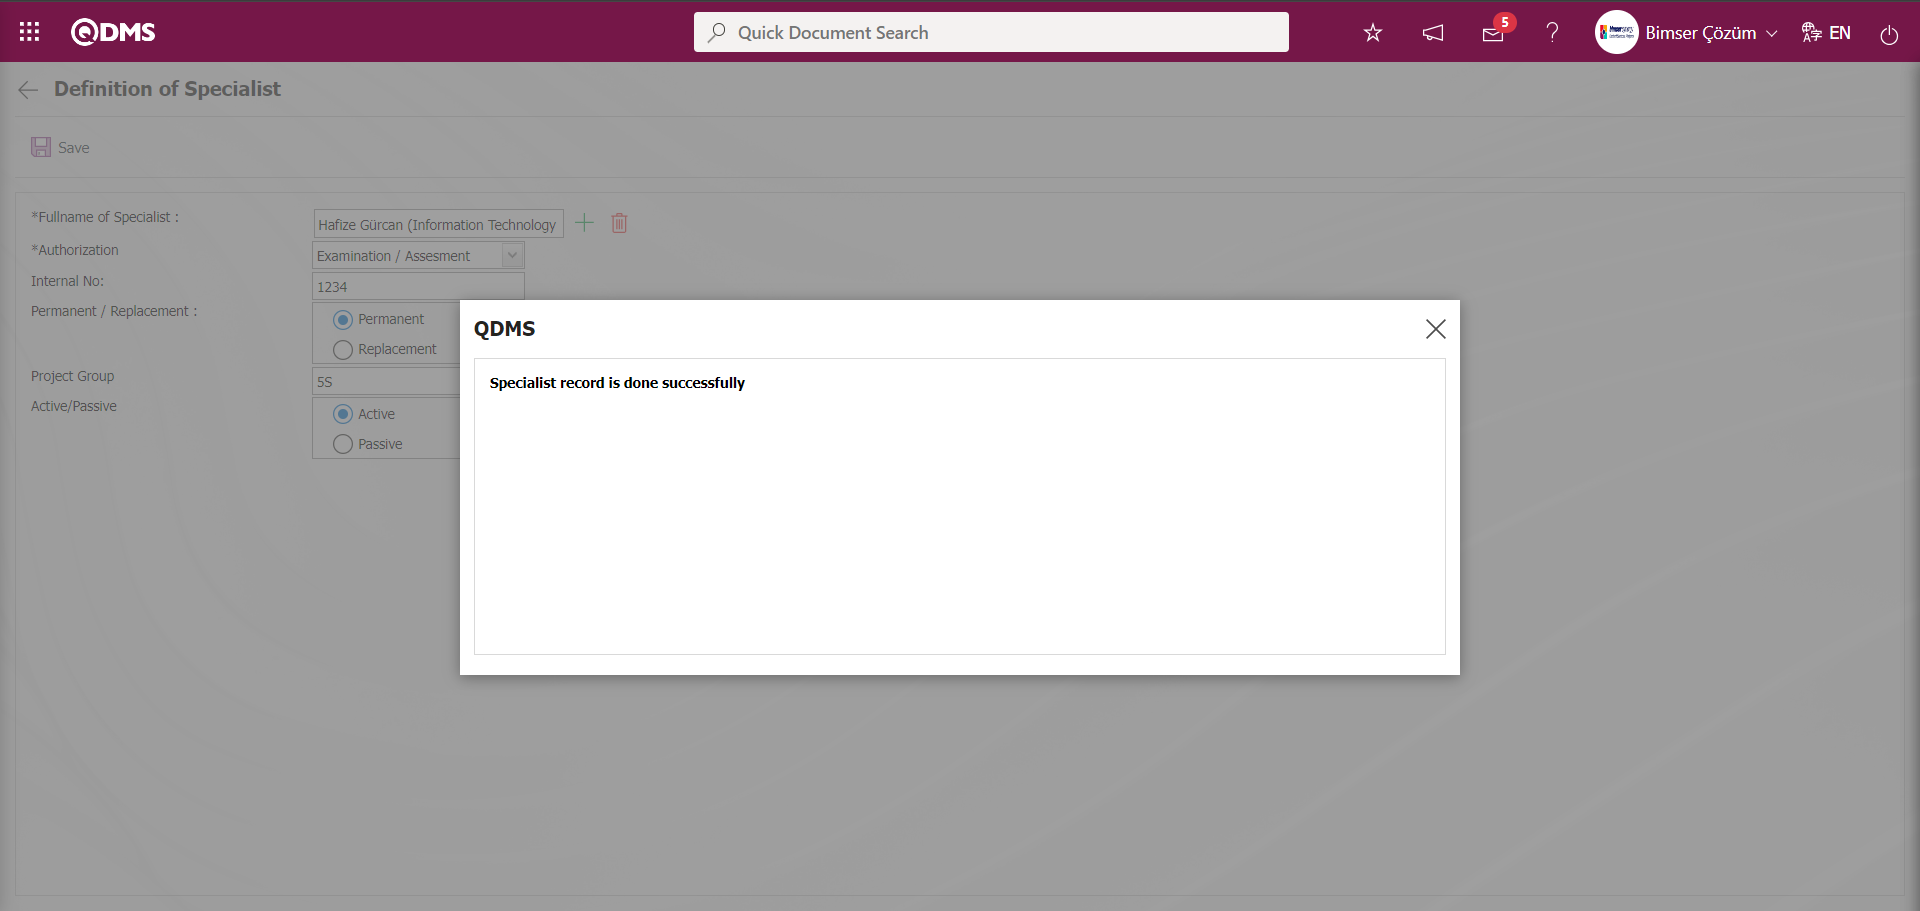
The system indicates that the specialist identification registration process has taken place by giving a message about the successful realization of the specialist registration.

On the Specialist Assessors of Suggestion System screen, data is entered or selected in the fields with search criteria in the Filter tab and filtered according to the search criteria by clicking the (Search) button.

5.1.2. Define Benefit Category Definition
Menu Name: System Infrastructure Definitions/ Suggestion/ Define Benefit Category
It is the menu where the definition and categorization of the Benefit Category is made in the system. With the process of defining the benefit category, it is determined what kind of benefits the suggestions given will provide to the company. For example: Income increasing, job security, motivation increasing and productivity increasing gain categories are defined.

With the help of the buttons on the screen;
 : Defining a new Benefit/Cost category.
: Update the information of the selected Benefit/Cost category in the list.
 : Delete the selected Benefit/Cost category information in the list.
 : Records can be searched by filtering.
To add a new Benefit/Cost category, click the button in the upper left corner of the screen to display the Benefit/Cost Definitions screen

The following fields are defined on the screen that opens;
Parent Category: This is the field where the parent category of the Benefit category defined in the list of Benefit categories defined in the system by clicking the  (Select) button from the Benefit/Cost Definitions screen is selected.
Benefit categories can be defined as a tree breakdown if desired. For example; while “occupational safety” is the main category, “accident reduction” can be defined as a sub-category. “01-Occupational Safety”, which was previously defined as the main category in the system, is selected as the parent category or click on the new record button while ‘01-Occupational Safety’ is selected on the gain/cost category definition screen. Thus, the parent category code is defined. If you want to delete the upper category to which it is connected, the  (Delete) button on the right side is deleted. If there is no upper category to which it is connected, this field is left blank.
Benefit Category: In the Benefit/Cost Definitions screen, it is the area where the information about what kind of benefit/cost the suggestion provides to the company is defined. Such as revenue increasing, expense reducing, standardization, productivity increasing. In the English language icon field, the English language equivalent of the Benefit/Cost definition is written.
Workplace: It is the field where the workplace to which the benefit/cost information defined in the Benefit/Cost Definitions screen belongs is selected in the workplace list opened by clicking the (Add) button.
Active / Passive: This is the field where the status of the benefit / cost information defined in the Benefit / Cost Definitions screen is selected to appear in Active / Passive options.
Do you want to block selection?: When the check box related to the relevant field is checked, the process of selecting the Benefit category field in the Benefit category list is blocked. A warning message is given by the system as in the screenshot below. In Benefit Category definitions, which are generally sub-divided under main headings, check boxes related to the main headings “Do you want to block selection?” are checked. For example: Income Increase (Main Benefit Category), Product Quality Improvement (subordinate Benefit Category), etc.

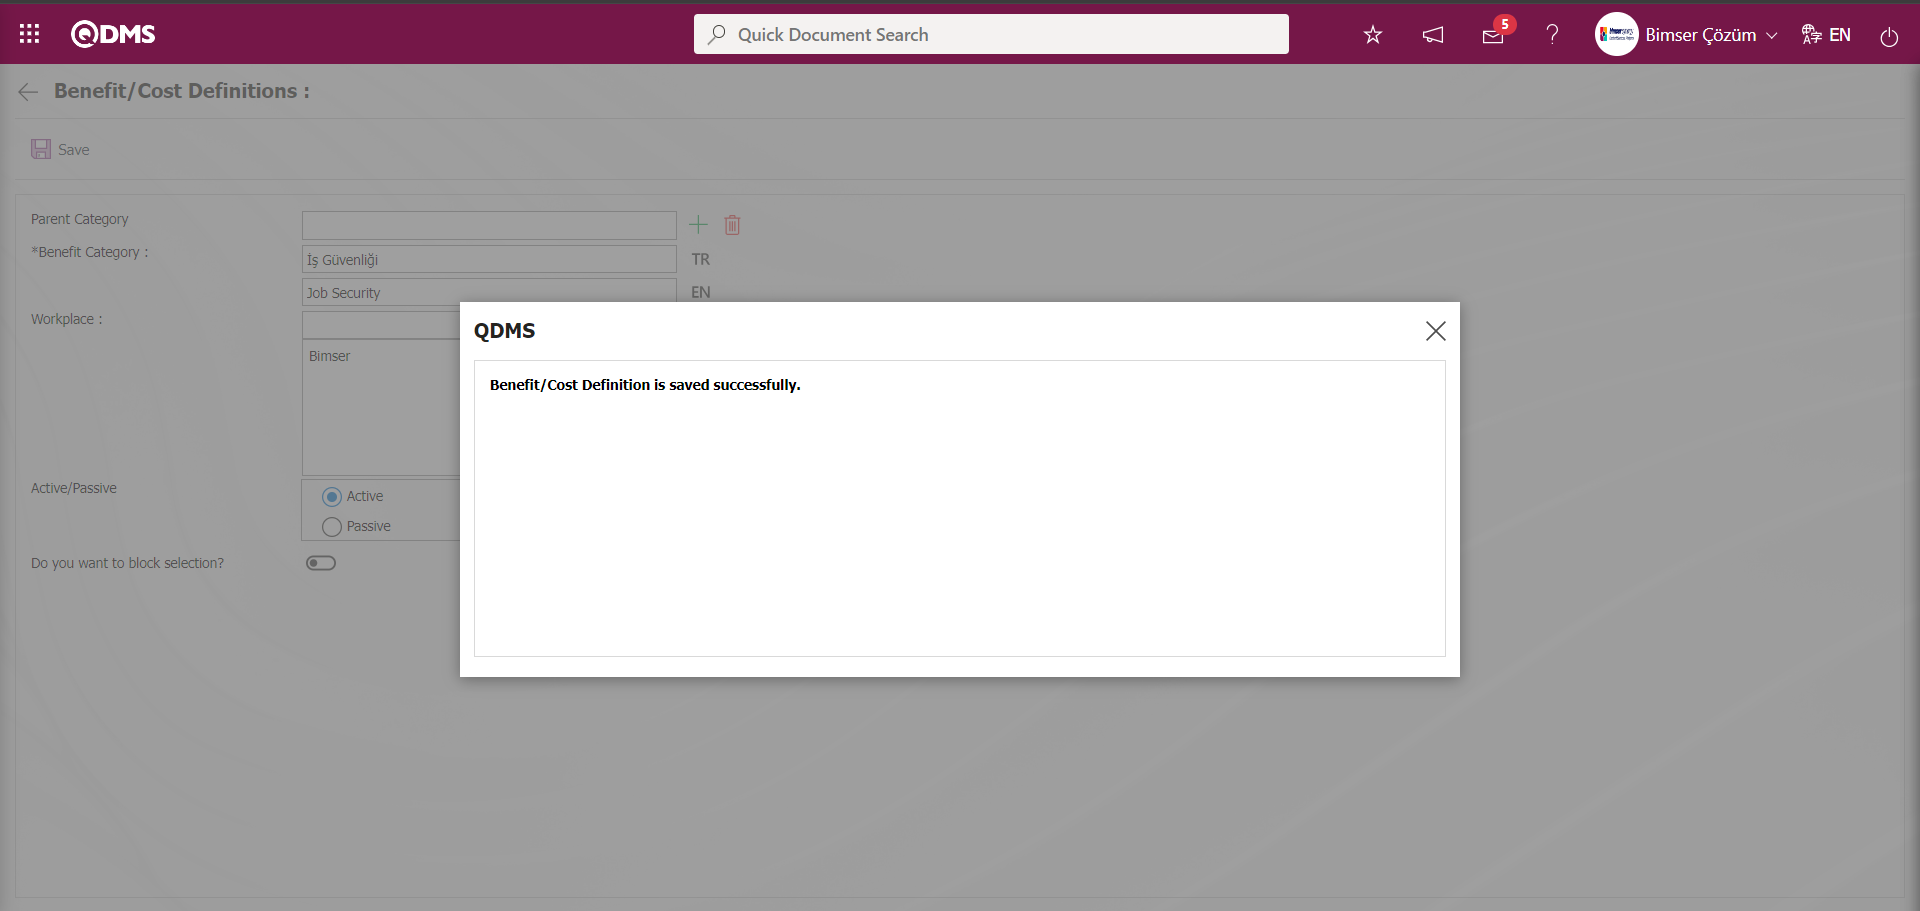
In the Benefit/Cost Definitions screen, the benefit/cost definition information is written. The workplace to which the defined benefit/cost definition belongs is selected in the Workplace list opened by clicking the (Add) button. Finally, the status of the defined benefit/cost information to appear in the Active / Passive options is selected. After the required fields are filled in, the Benefit/Cost Definition registration process is realized by clicking the  button in the upper left corner.
The system will give a message about the successful registration of the Benefit/Cost definition, indicating that the Benefit/Cost definition registration process has taken place.
From the Benefit/Cost Definitions screen, data is entered or selected in the fields with search criteria in the Filter tab and filtered according to the search criteria by clicking the (Search) button.

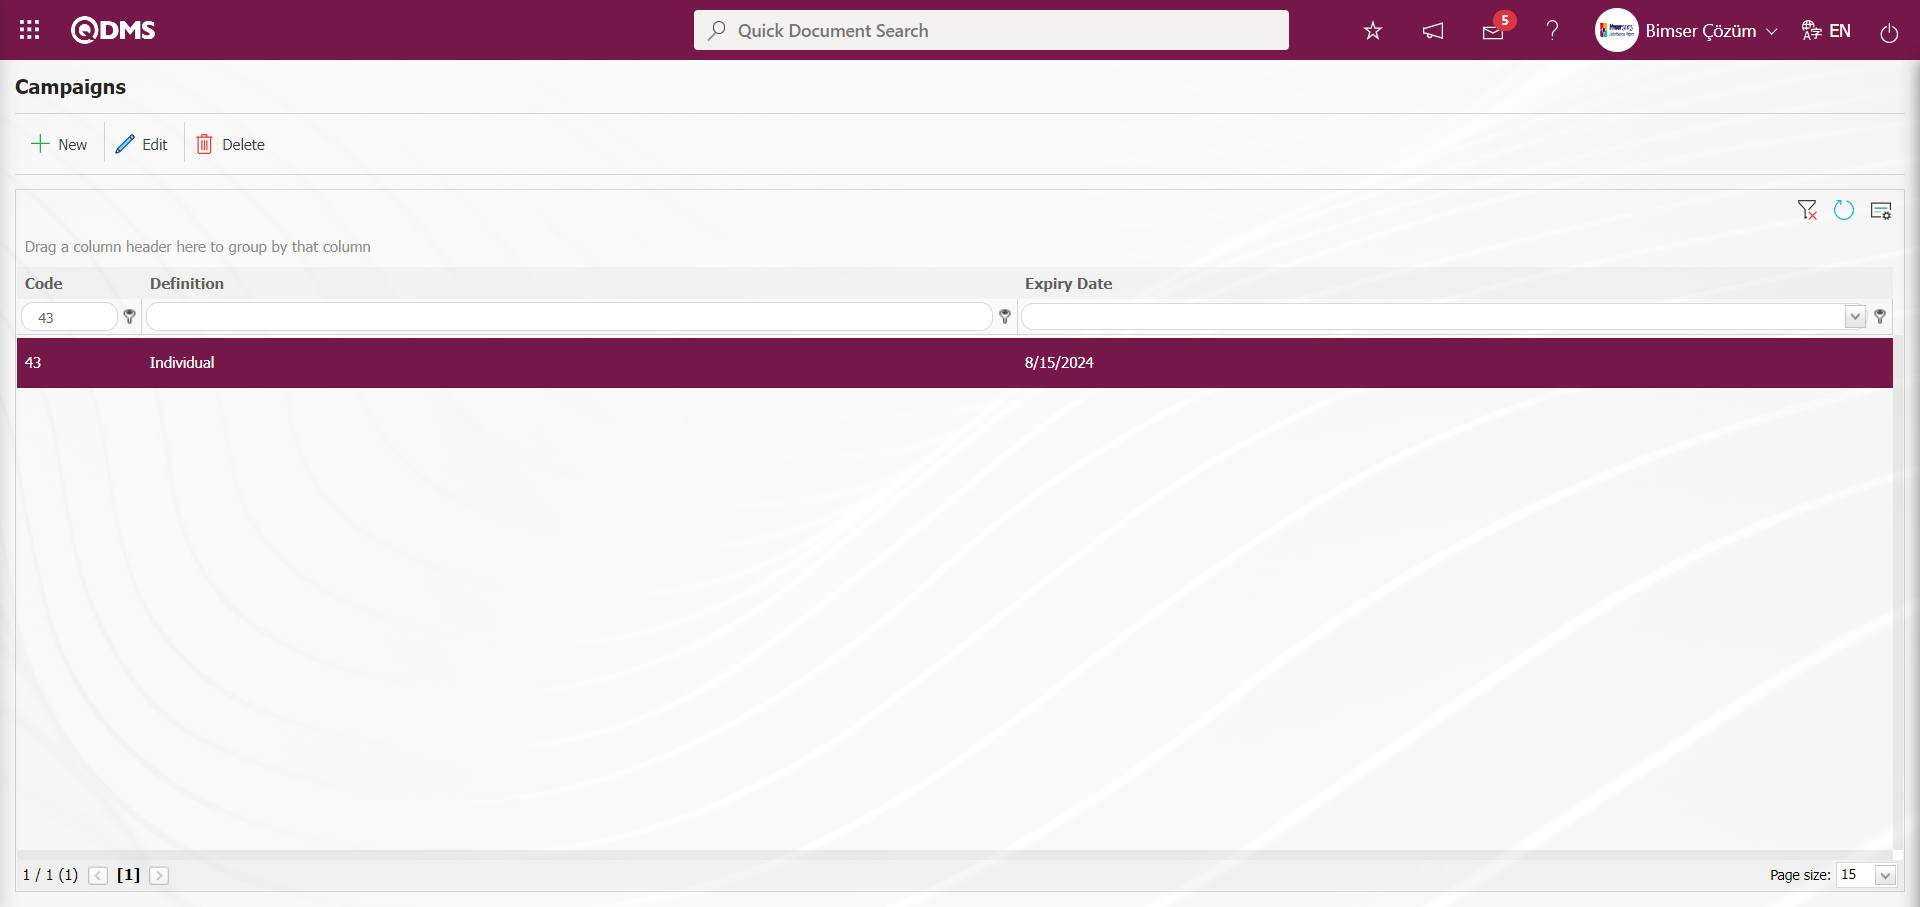
5.1.3. Campaign Definition
Menu Name: System Infrastructure Definitions/ Recommendation/ Campaign Definition
This is the menu where the campaign definition process is done in the system. Campaign periods are defined for certain periods in order to give extra points or rewards to the suggestions given. For example: Campaigns can be applied in the summer months when the number of suggestions is low. 
With the help of the buttons on the screen;
: A new campaign is defined
: Changes are made on the campaign information selected in the list.
: Deletion of the campaign information selected in the list is done.
: The search criteria on the menu screens are used to clean the data remaining in the filter fields in the grid where the search operation is performed.
: The menu screen is restored to its default settings.
: User-based designing is done on the menu screen with the show-hide feature, that is, the hiding feature of the fields corresponding to the columns on the menu screens.
To add a new campaign, click the button in the upper left corner of the screen to display the Deifining Campaign screen.
The following fields are defined on the screen that opens;
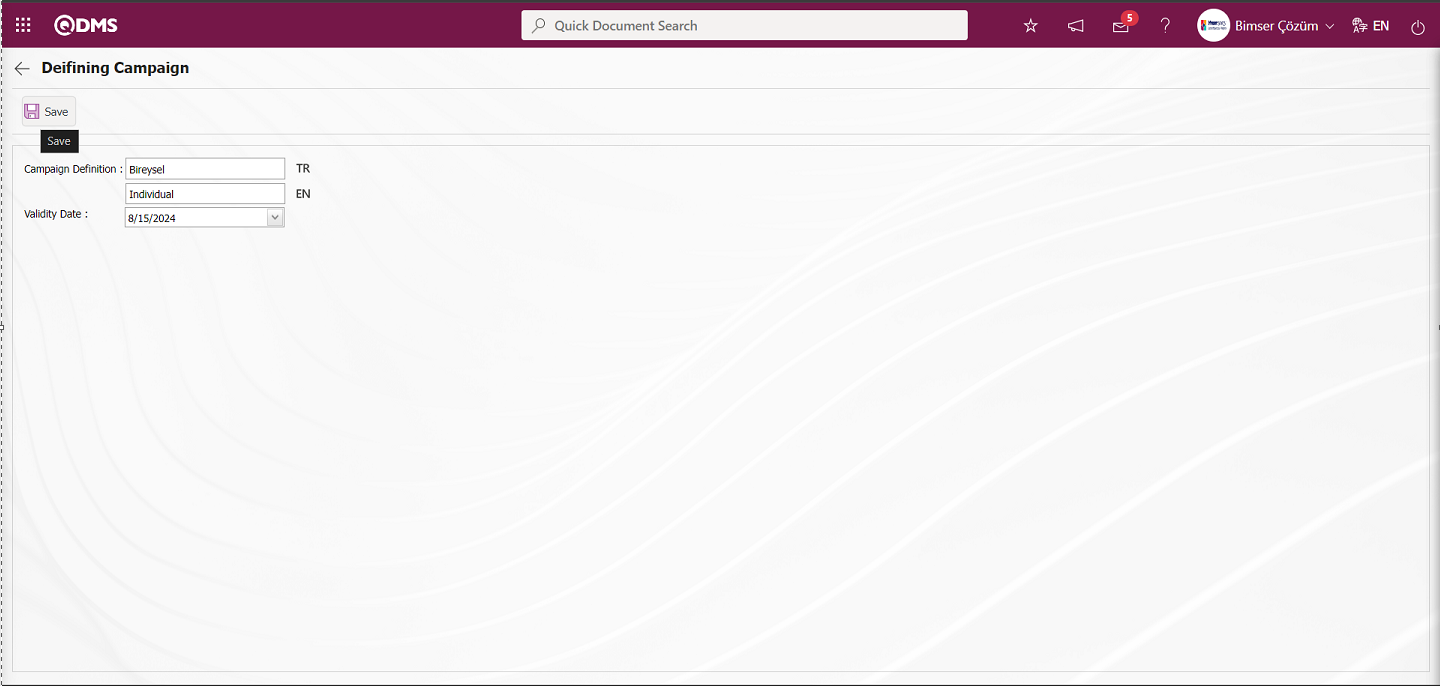
Campaign Definition: This is the field where the definition of the campaign is written on the Campaign Definition screen. In the English language icon field, the English language equivalent of the campaign definition is written.
Validity Expiry Date: This is the field where the validity expiry date of the campaign defined in the Campaign Definition screen is selected in the drop-down calendar field.
In the Deifining Campaign screen, the campaign definition information is written. The last validity date of the defined Campaign is selected in the Calendar field. After the required fields are filled in, the button in the upper left corner is clicked and the Define Campaign record process is performed.

The system will give a message about the successful registration of the campaign definition, indicating that the campaign definition registration process has taken place.
5.1.4. Determination of the Scoring Method
At the suggestion scoring stage, 3 types of scoring methods can be used. These methods are as follows:
1.Formula Based Scoring Method: This is the method in which the variables and formula are defined during the formula-based scoring process and then the formula is matched for each suggestion. Variables are defined in the Variable Definition menu. Formula creation is done depending on these variables defined in the formula definition menu. Then the matching process is done for which formula will be used in which suggestion. If it is desired to use formulas in suggestion scoring, the parameter value of parameter 38 “Did Scoring criteria will be used?” from the suggestion system module parameters should be disabled by selecting “No”.

2. Point Ruler Method:This is the method in which the point ruler defined in the Point Ruler Definition menu is used. In the scorecard, the same scorecard can be used for all suggestion types (personnel suggestion, customer suggestion, supplier suggestion). If it is desired to use Scorecard management in suggestion scoring, the parameter value of the parameter 38 “Did Scoring criteria will be used?” from the suggestion system module parameters should be activated by selecting “Yes”.

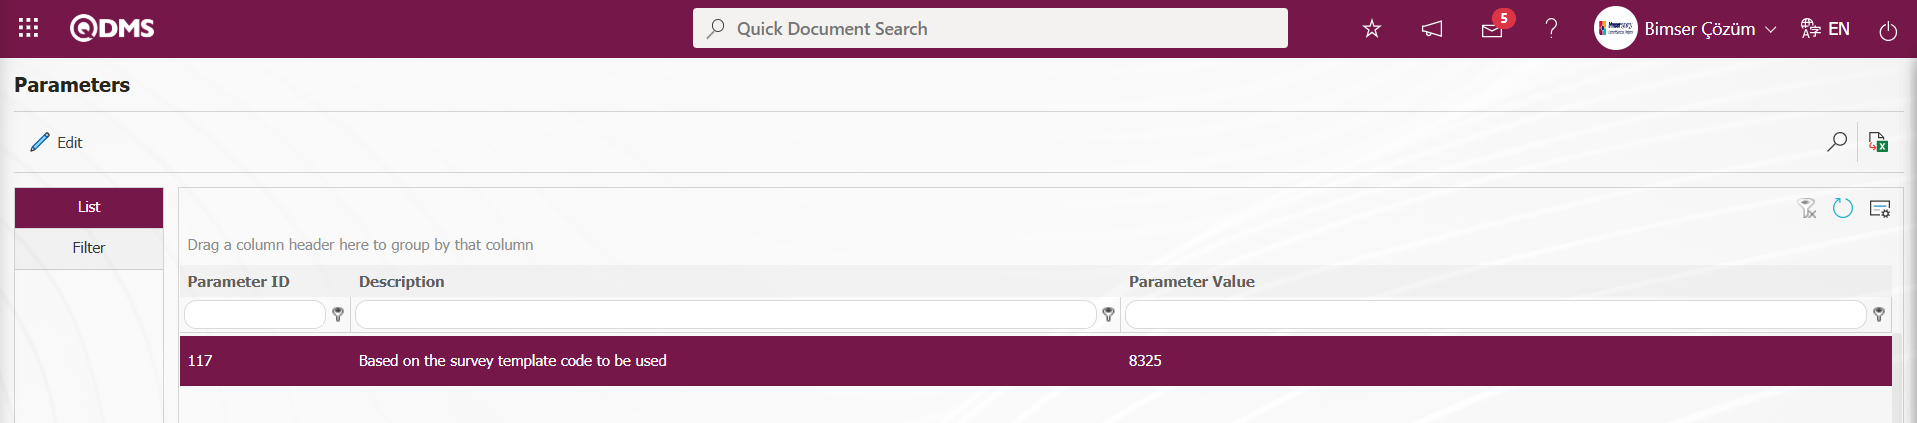
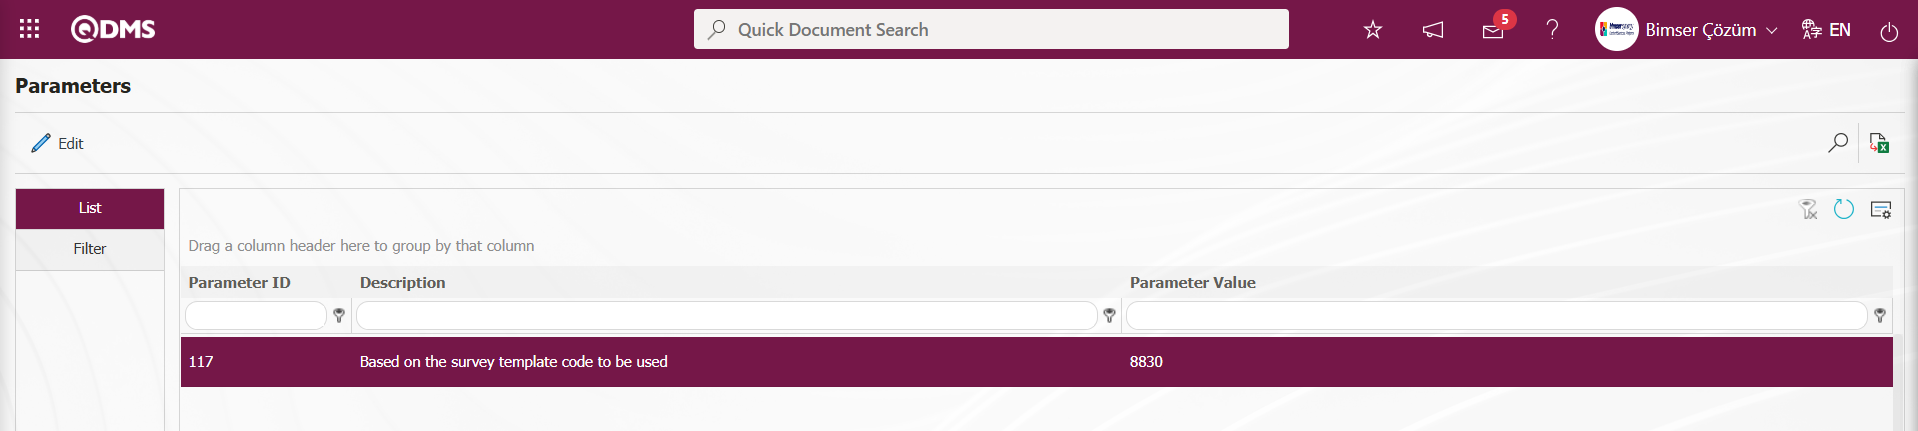
3.Survey Method:The use of Survey from the scoring stage is done in the Survey Question Lists menu. In the Survey Question Lists menu, when the relevant function is selected, the survey questions are defined on the Survey Questions screen opened by clicking the button and the survey definition process is performed. After the question definition process is done, the system automatically defines the survey code in the parameter 117 “Based on the survey template code to be used”, which is the relevant parameter of the relevant module of the Survey Question Lists menu.

When a survey is used as a scoring method in the suggestion module, the survey assigned to this parameter is displayed in the scoring phase. This stage is done by using the survey in the scoring stage. In order to use the survey at this stage, the parameter value of the parameter 116 “Did ‘Based on the survey will be used?’ from the ‘Suggestion System Module parameters’ is selected as ‘Yes’ and the parameter is activated.

After the parameter is activated, a task is created as “Suggestions awaiting for Scoring” task on the user's “My Pending Jobs” page. By clicking the Suggestion code link in the Suggestion No field in the relevant task, the survey defined in the survey question lists menu during the scoring phase is displayed at this stage, the survey questions are answered and the scoring phase is completed and the suggestion passes to the next stage.
5.1.4.1. Formula Usage
5.1.4.1.1. Define Variable
Menu Name: System Infrastructure Definitions/ Recommendation/ Define Variable
Companies use some formulas to calculate their suggestion ratings. In order to define these formulas to QDMS, the variables in the formula must first be defined to the system. This is the menu where the variables required to define the formulas are defined to the system. When introducing the variables, if these variables are to be retrieved with a query, support should be provided by Bimser and the query should be written, if it will be user-selected, the formulas are easily written by the consultants during the training.

With the help of the buttons on the screen;
: Defining a new variable information.
: Update the selected variable information in the list.
: Delete the selected variable information in the list.
: Records can be filtered and searched.
: The search criteria on the menu screens are used to clean the data remaining in the filter fields in the grid where the search operation is performed.
: The menu screen is restored to its default settings.
: User-based designing is done on the menu screen with the show-hide feature, that is, the hiding feature of the fields corresponding to the columns on the menu screens.
In order to define the variables in the recommendation formula to the system, the Definition of Variable screen is displayed by clicking the button on the upper left corner of the screen.
Related fields are defined on the screen that opens:
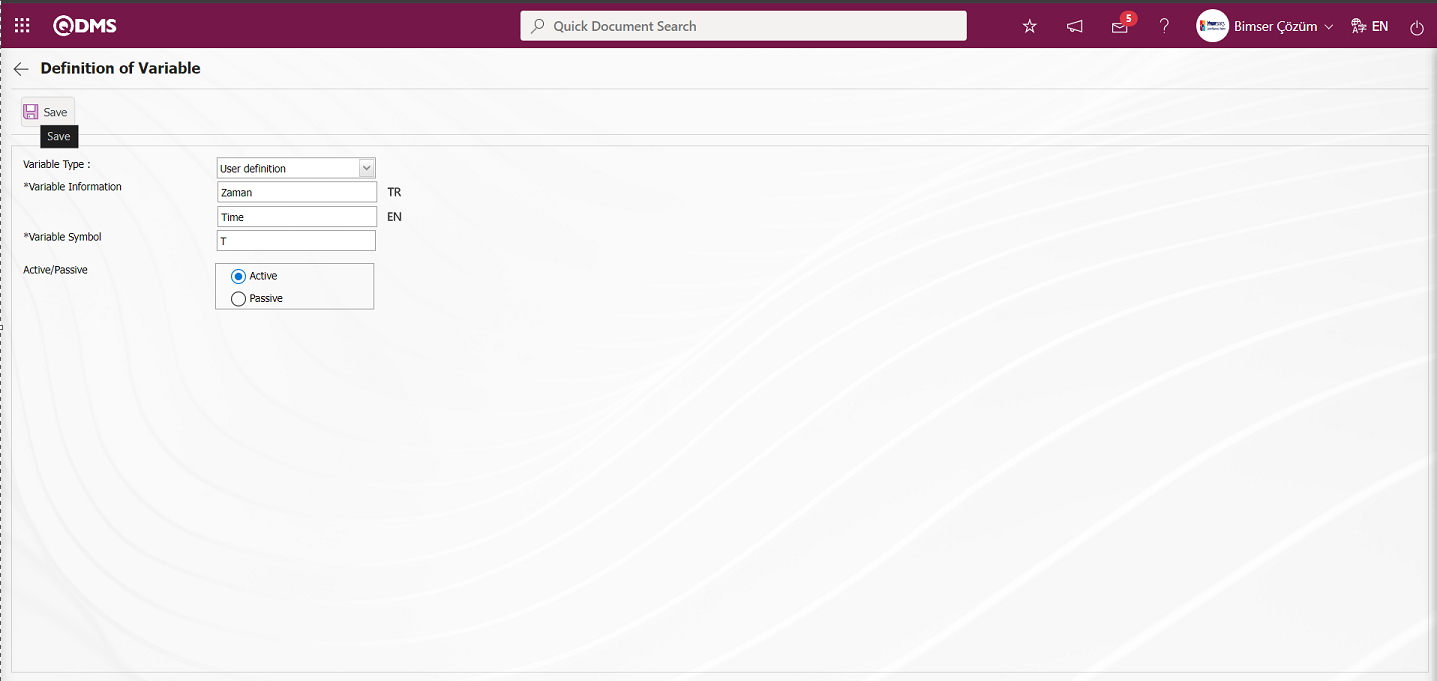
Variable Type: It is the field where the variable type is selected in the variable type options by clicking the drop-down list on the Definition of Variable screen. Variable Type options are “User Defined” and “Query” type options. If a variable will be defined by the user in the system, the “User Defined” option is selected in the variable type options opened by clicking the drop-down list in the variable type field. However, if the variable will be retrieved with a query in a system, the “Query” option is selected in the variable type options opened by clicking the drop-down list in the variable type field. It is necessary to get help from Bimser Technical Support team in the variable type “Query” option selection process. In the manual definition process, it is sufficient to define by selecting the “User Defined” option, which is the drop-down list option in the variable type field.
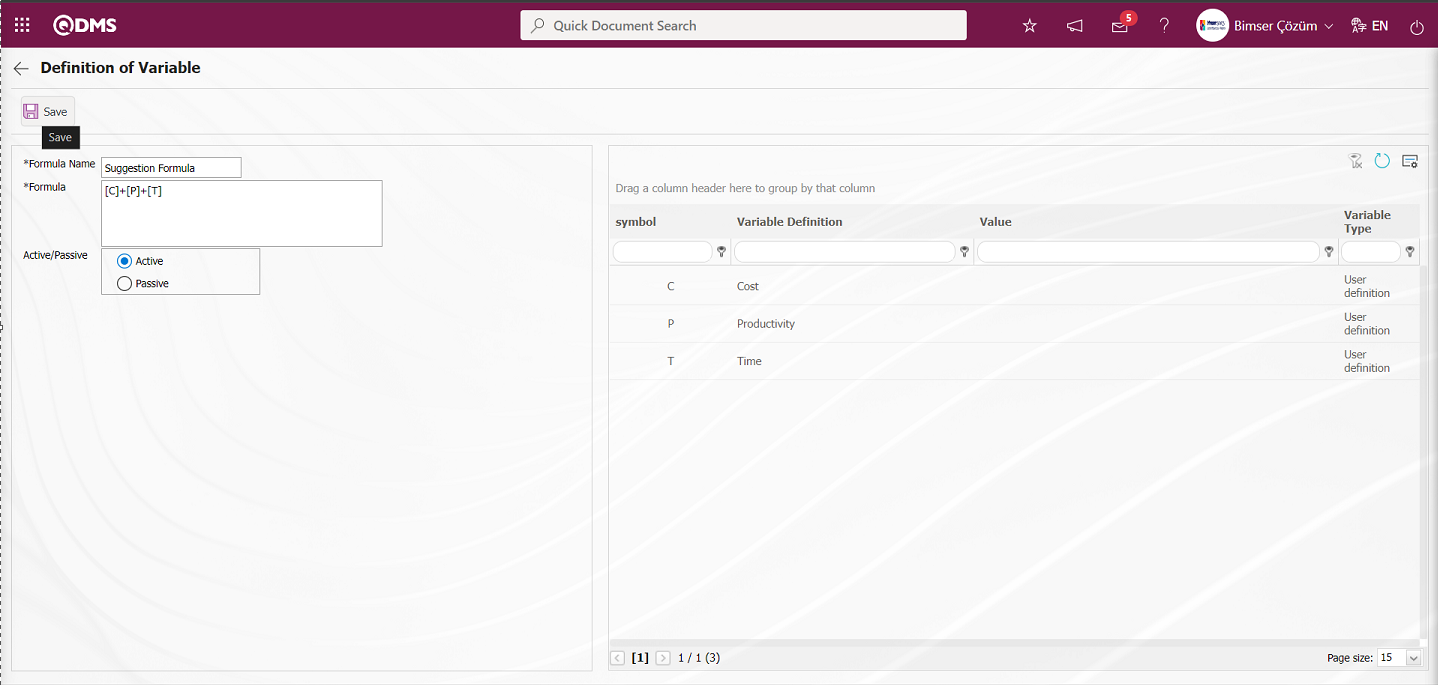
Variable Information: In the Definition of Variable screen, the definition of the variable in the Suggestion formula is written. The English language equivalent of the variable defined in the Variable Definition field is written in the field with the English language icon. For example; Financial Contribution, Time, Productivity and Cost.
Variable Symbol: This is the field where the symbol of the variable defined in the Definition of Variable screen is written. The variable symbols are used to define formulas. For example; M for Material Contribution variable, Z for Time variable, V for Productivity variable, etc.
Active / Passive: This is the field where the variable information defined in the Definition of Variable screen is selected to appear in the Active / Passive options.
After filling in the information about the required fields, the variable definition record process is done by clicking the button in the upper left corner of the screen.

The system will give a message about the successful saving of the variable definition, indicating that the variable definition process has been completed.

In the Definition of Variable screen, all variables used in the suggestion formula are defined to the system. 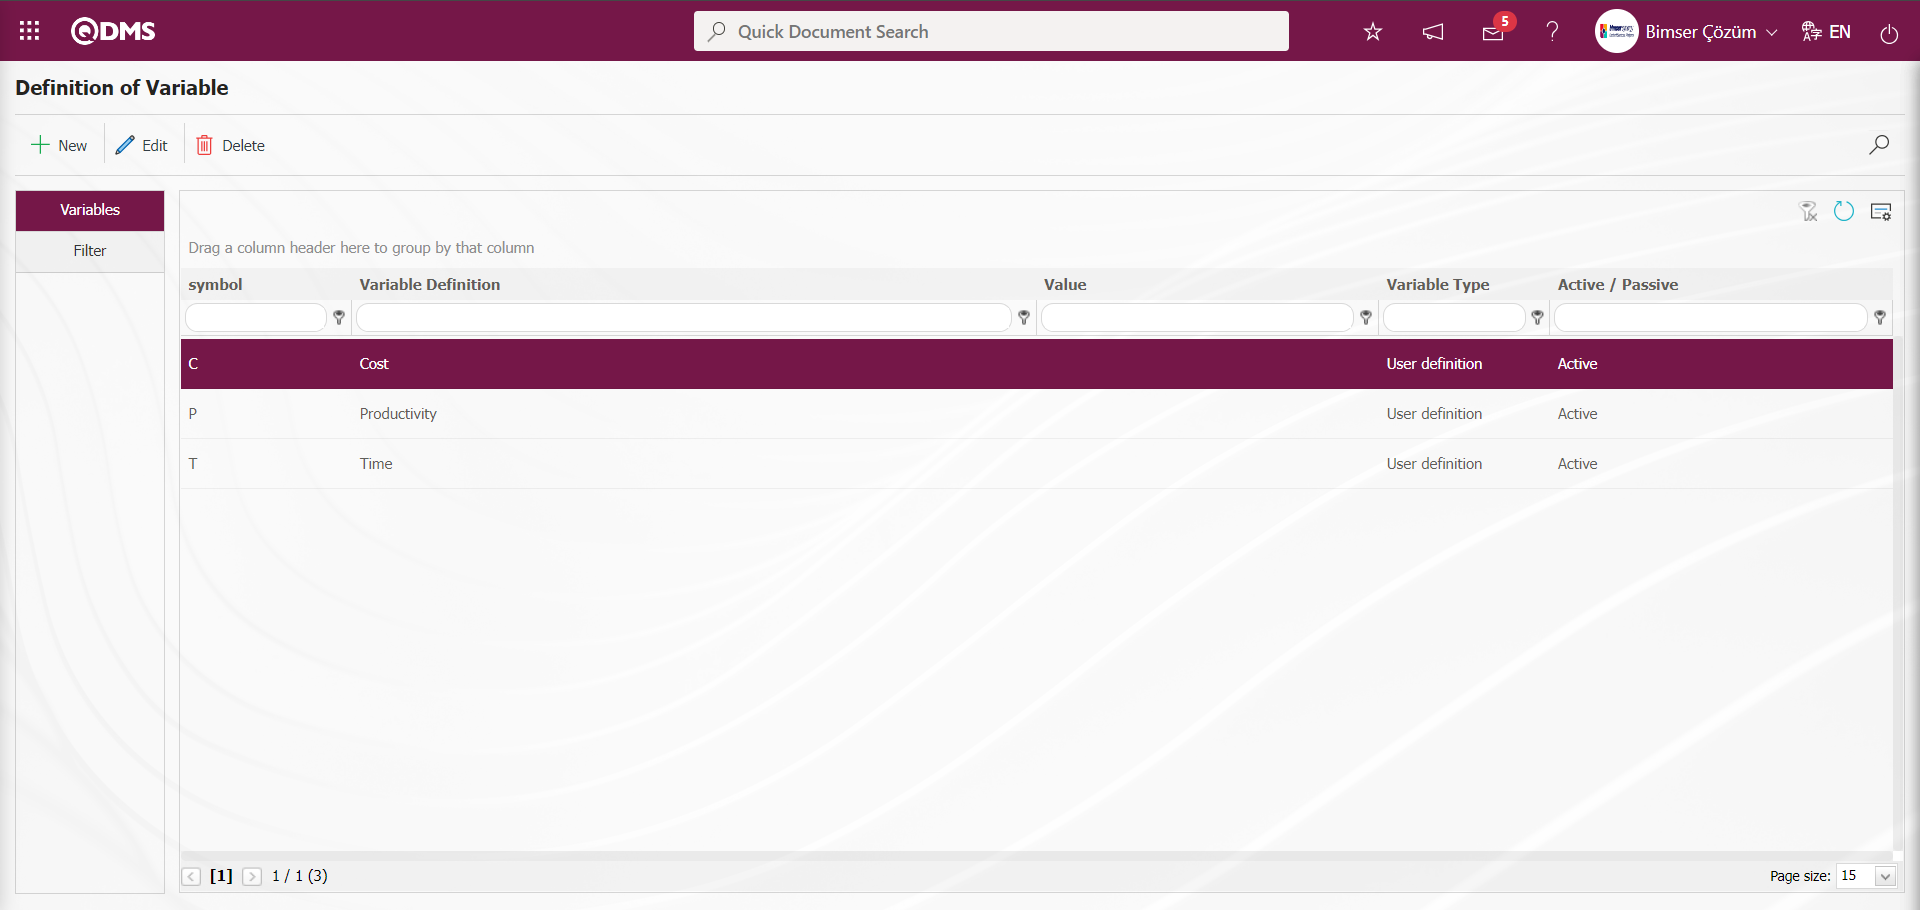
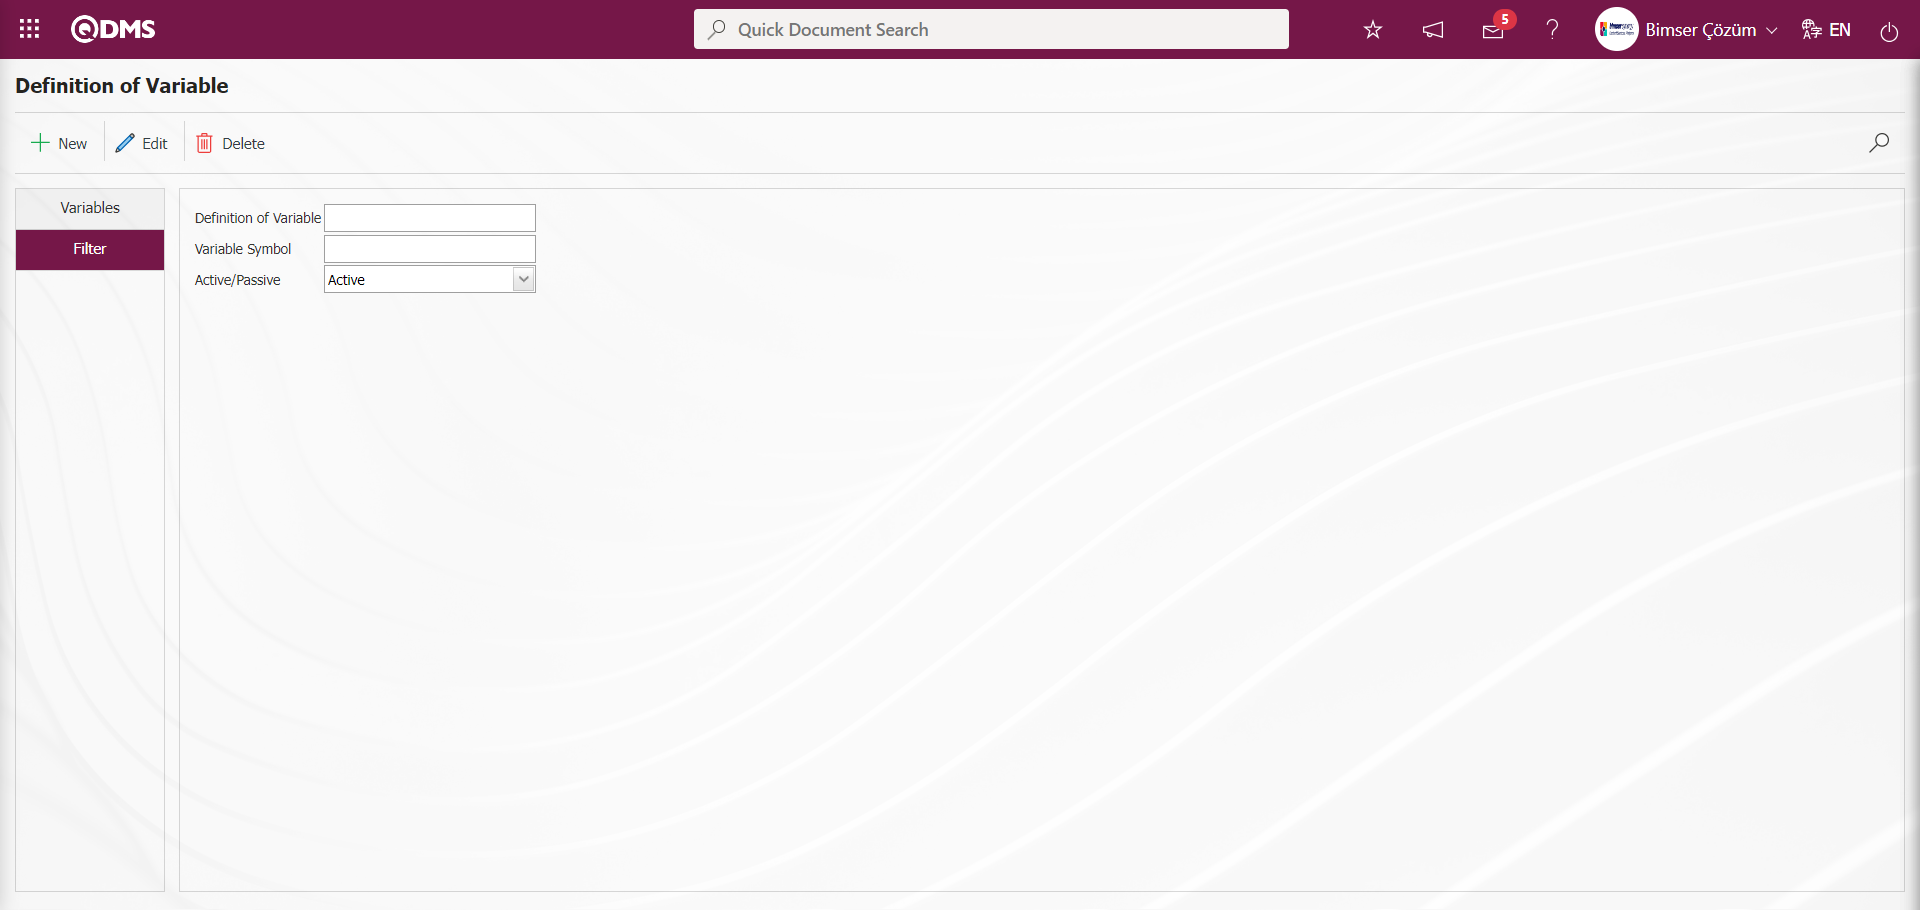
From the Definition of Variable screen, data is entered or selected in the fields with search criteria in the Filter tab and filtered according to the search criteria by clicking the (Search) button.
5.1.4.1.2. Define Formula
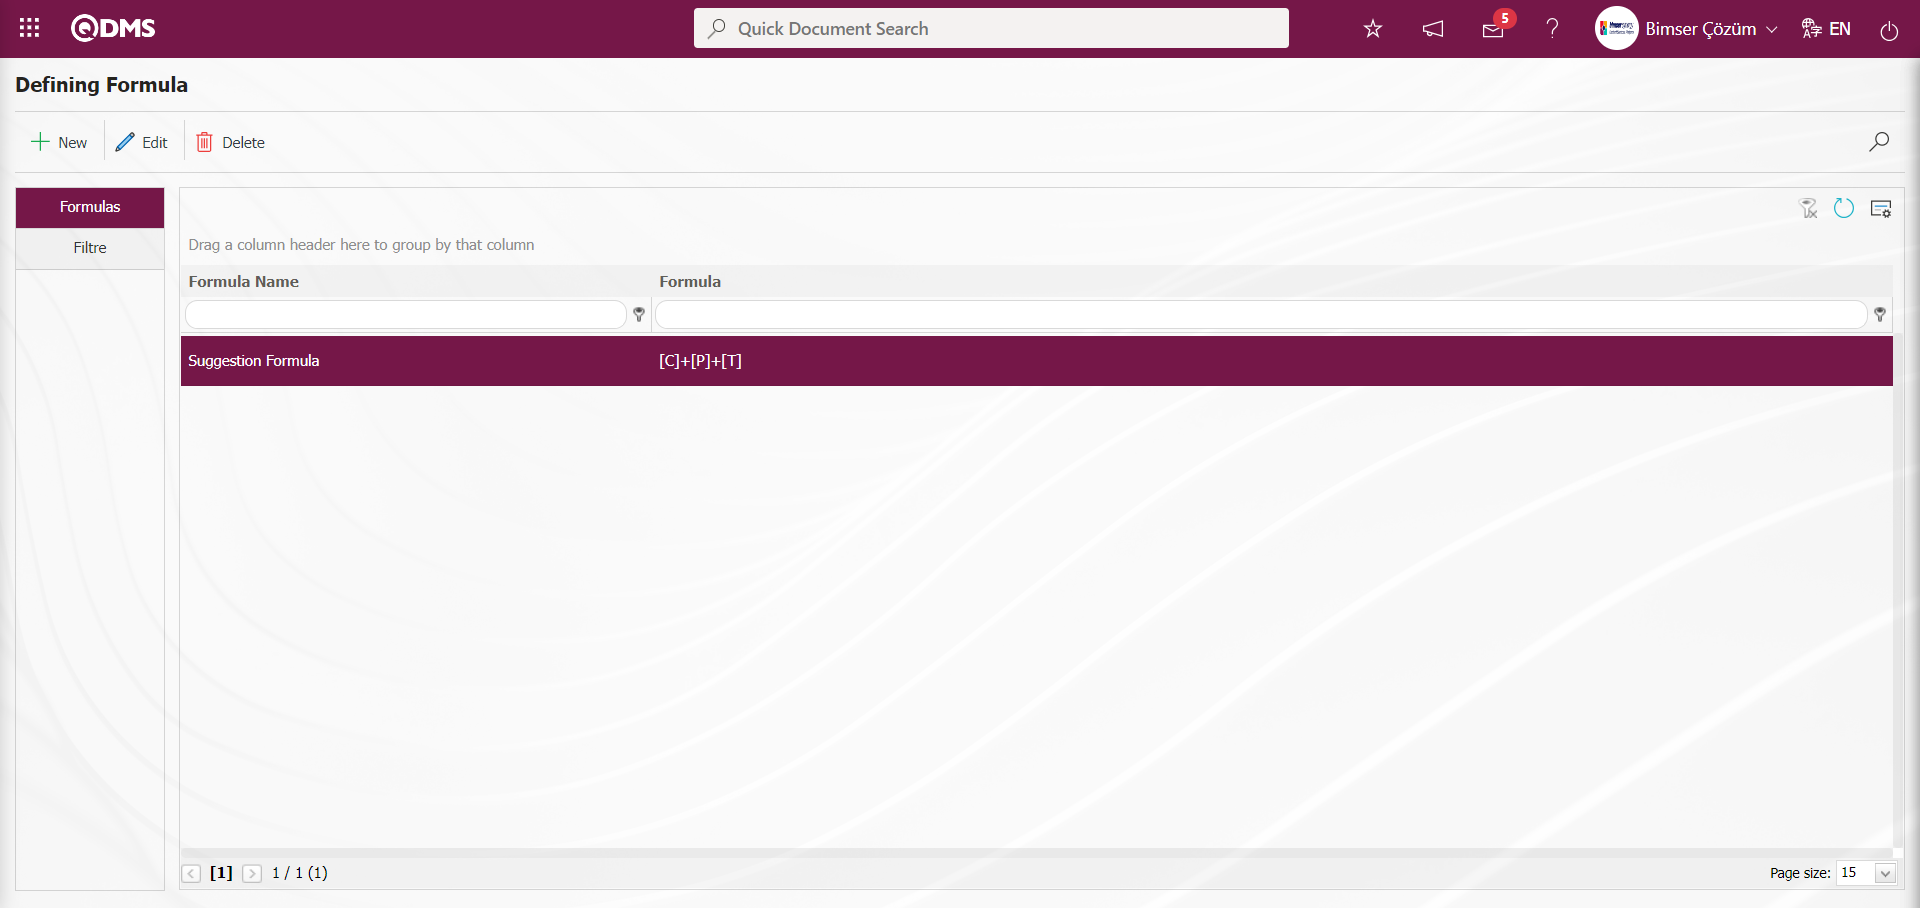
Menu Name: System Infrastructure Definitions/ Suggestion/ Define Formula
It is the menu where the suggestion formulas to be used in the scoring phase are defined to the system. The recommendation formula is created in the system in this menu by using the variables defined in the Define Variable menu. Multiple formulas such as General Suggestion Formula, Supplier Suggestion Formula, Customer Suggestion Formula and OHS Suggestion Formula are defined to the system. 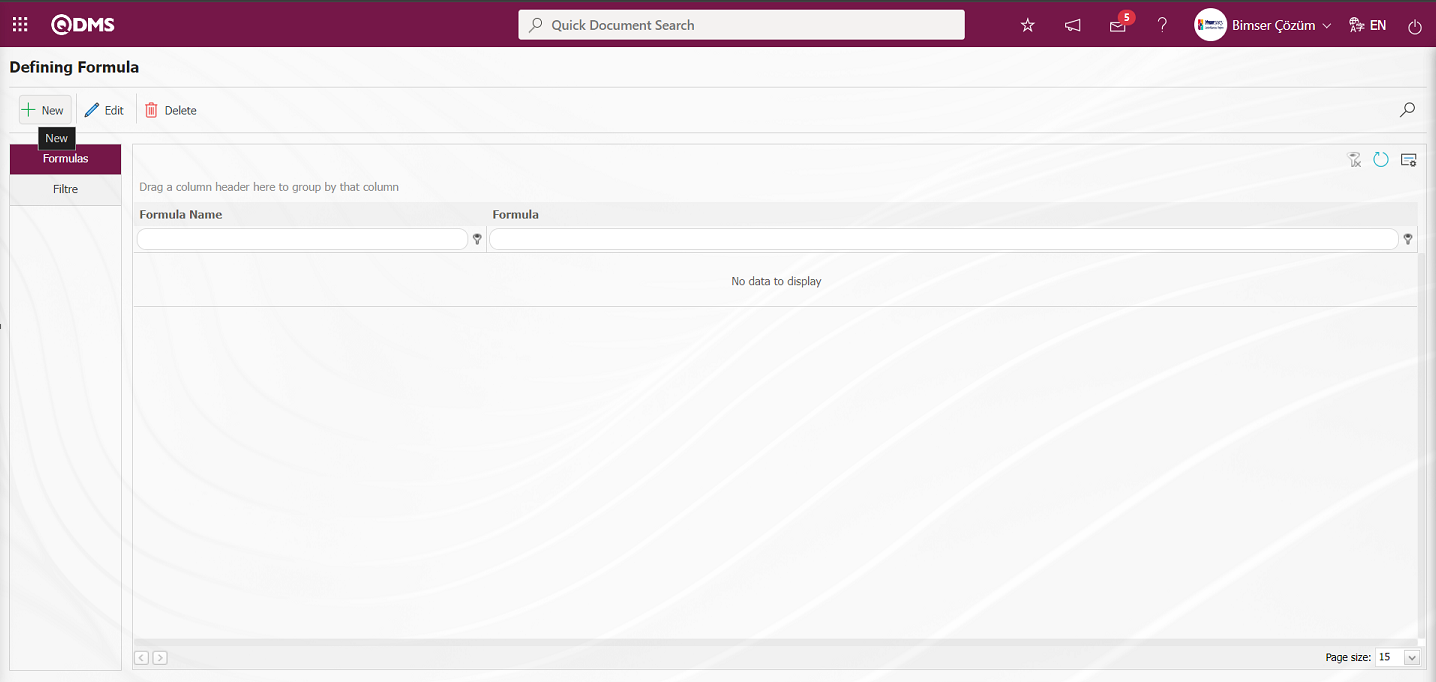
With the help of the buttons on the screen;
: Defining a new formula is done.
: Updating operation is performed on the selected formula information in the list.
: Delete the selected formula information in the list.
: Records are filtered and searched.
: The search criteria on the menu screens are used to clean the data remaining in the filter fields in the grid where the search operation is performed.
: The menu screen is restored to its default settings.
: User-based designing is done on the menu screen with the show-hide feature, that is, the hiding feature of the fields corresponding to the columns on the menu screens.
To add a new formula, the Definition of Variable screen is displayed by clicking the button in the upper left corner of the screen.
Related fields are defined on the screen that opens:
Formula Name:This is the field where the formula name is written in the Variable Definition screen. For example; Suggestion Score Formula, Customer Suggestion Formula.
Formula:In the Variable Definition screen, the process of defining the recommendation formula is done by using the symbols of the variables defined in the system.
In the Variable Definition screen, the name of the defined formula is written in the Formula name field. In the formula field, the process of creating the formula is done by using the variables in the variable definition screen. Finally, the status of the defined formula in Active / Passive options is selected. After the necessary fields are filled with the relevant information, the formula definition registration process is realized by clicking the button in the upper left corner of the screen.
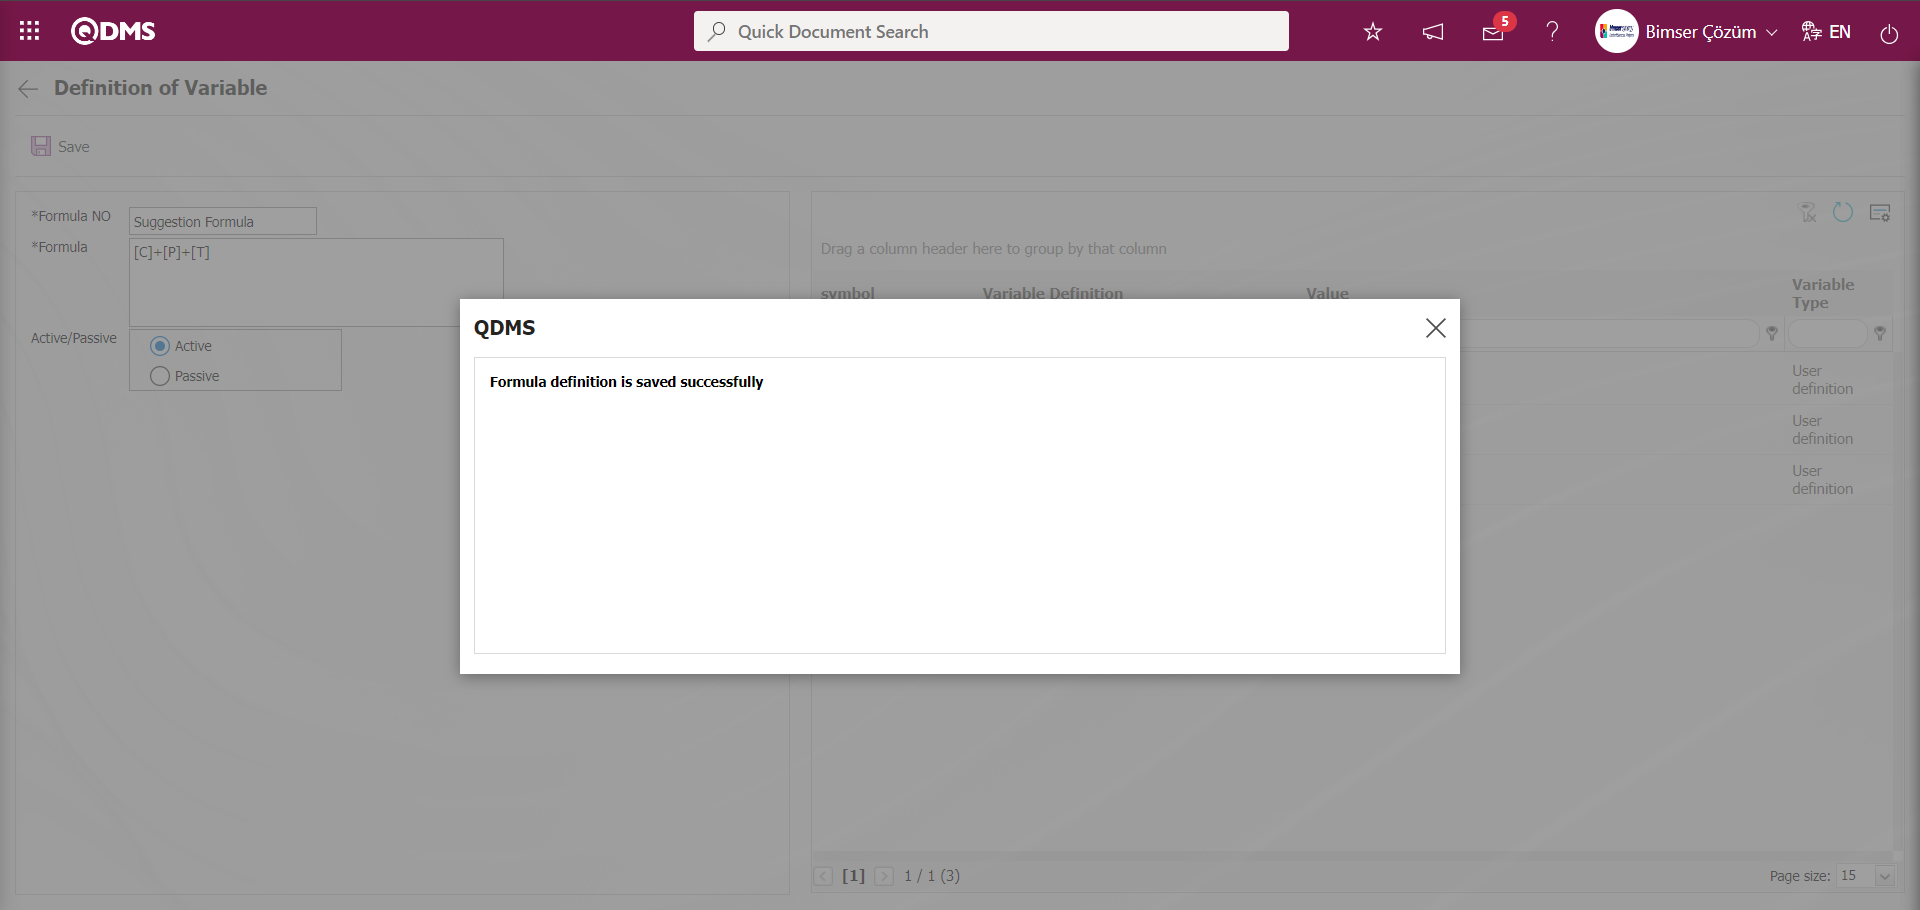
The system will give a message about the successful registration of the formula definition, indicating that the formula definition registration process has taken place.
On the Defining Formula screen, data is selected in the fields with search criteria in the Filter tab and filtering is done according to the search criteria by clicking the (Search) button.

5.1.4.1.3. Match Formula-Suggestion Type
Menu Name: System Infrastructure Definitions/ Suggestion/ Match Formula-Suggestion Type
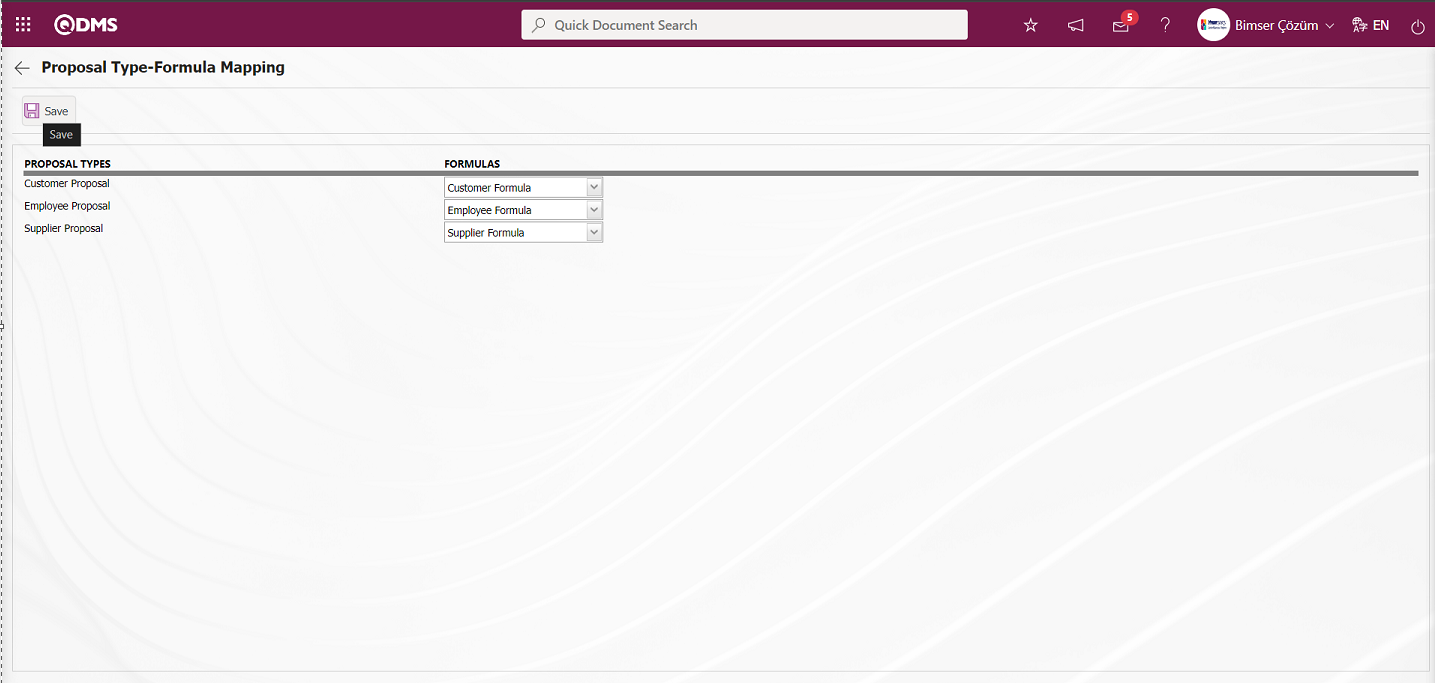
This is the menu where Formula-Suggestion Type matching is done in the system. There are 3 types of suggestions; Personnel suggestions, Customer suggestions and Supplier suggestions. The matching process is done for which suggestion type and which formula to use.
Define the relevant fields on the screen that opens;
Customer Suggestion: It is the field where the formula to be used for scoring in the customer suggestion is selected in the list of formulas defined in the system opened by clicking the drop-down list on the Proposal Type-Formula Mapping screen.
Personnel Suggestion: It is the field where the formula to be used for scoring in the Personnel suggestion is selected in the system-defined formula list opened by clicking the drop-down list on the Proposal Type-Formula Mapping screen.
Supplier Suggestion: It is the field where the formula to be used for scoring in the Supplier suggestion is selected in the system-defined formula list opened by clicking the drop-down list on the Proposal Type-Formula Mapping screen.
On the Suggestion Type-Formula Matching screen, Customer Suggestion & Customer Formula, Personnel Suggestion & Personnel Formula and Supplier Suggestion & Supplier Formula are selected in the drop-down list of formulas defined in the system. After entering the relevant information in the required fields, click on the button in the upper left corner of the screen to register the Proposal Type-Formula Mapping Identification.
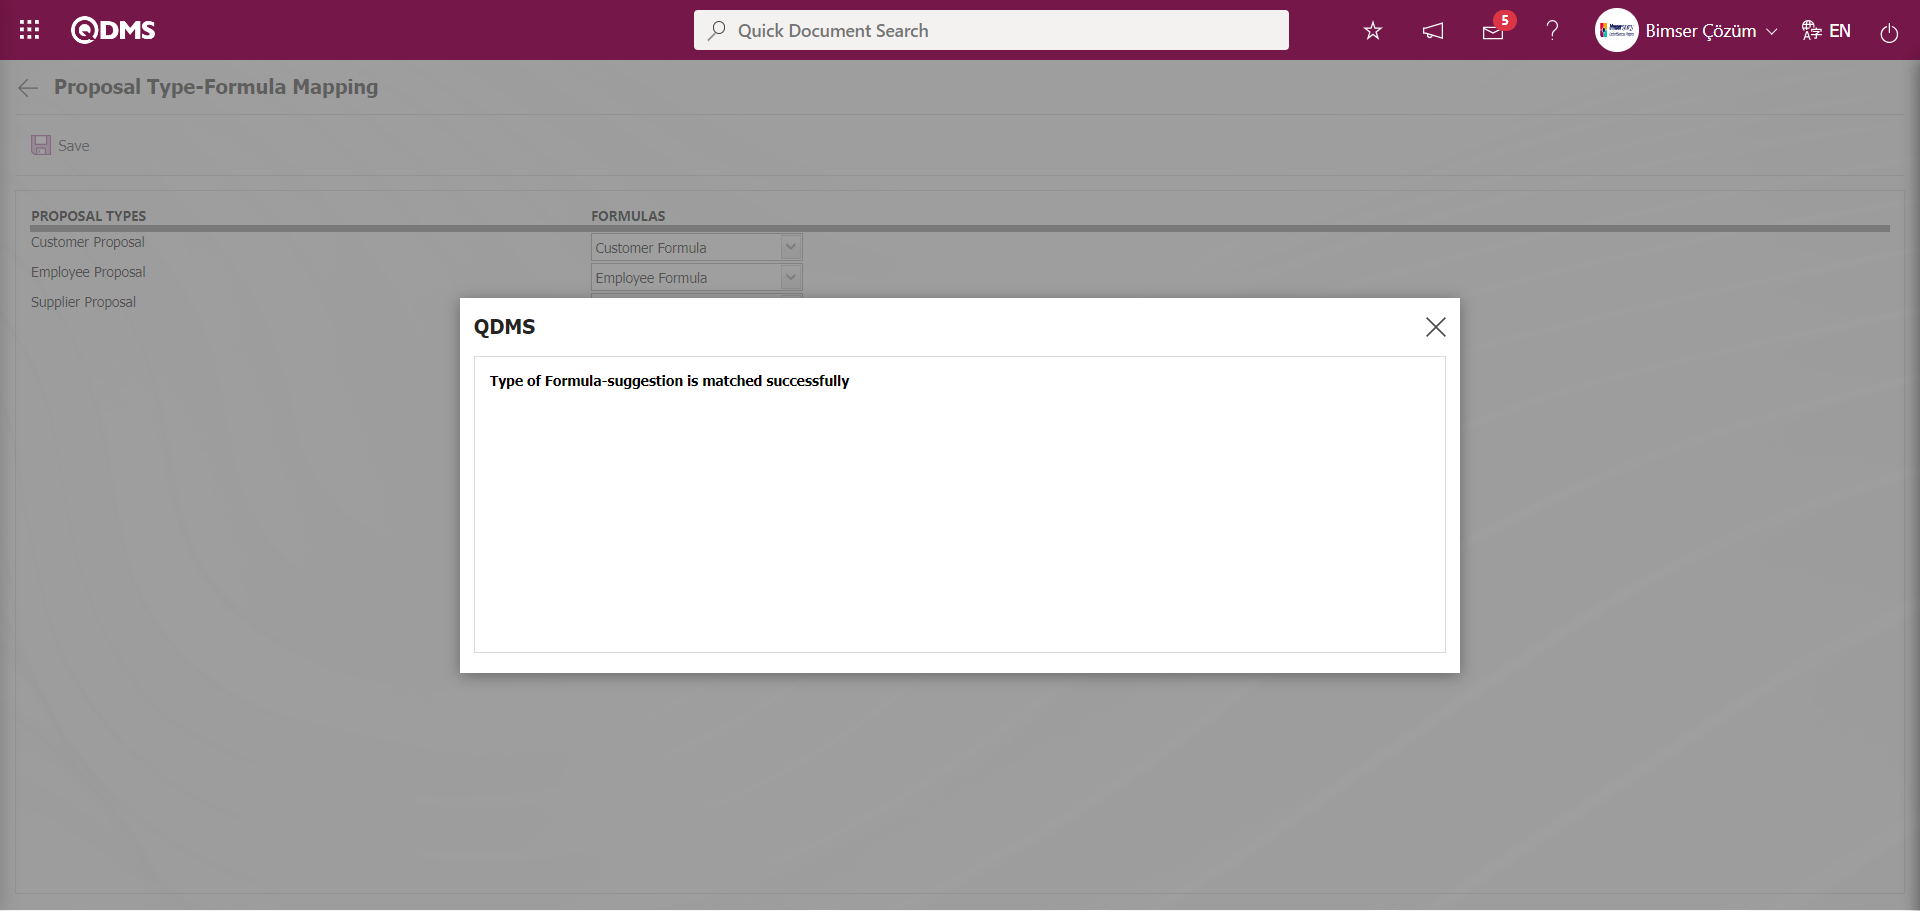
The system gives a message about Formula-recommendation type matched, indicating that the formula-recommendation type matching registration process has been performed.
5.1.4.2. Scoring Ruler Usage
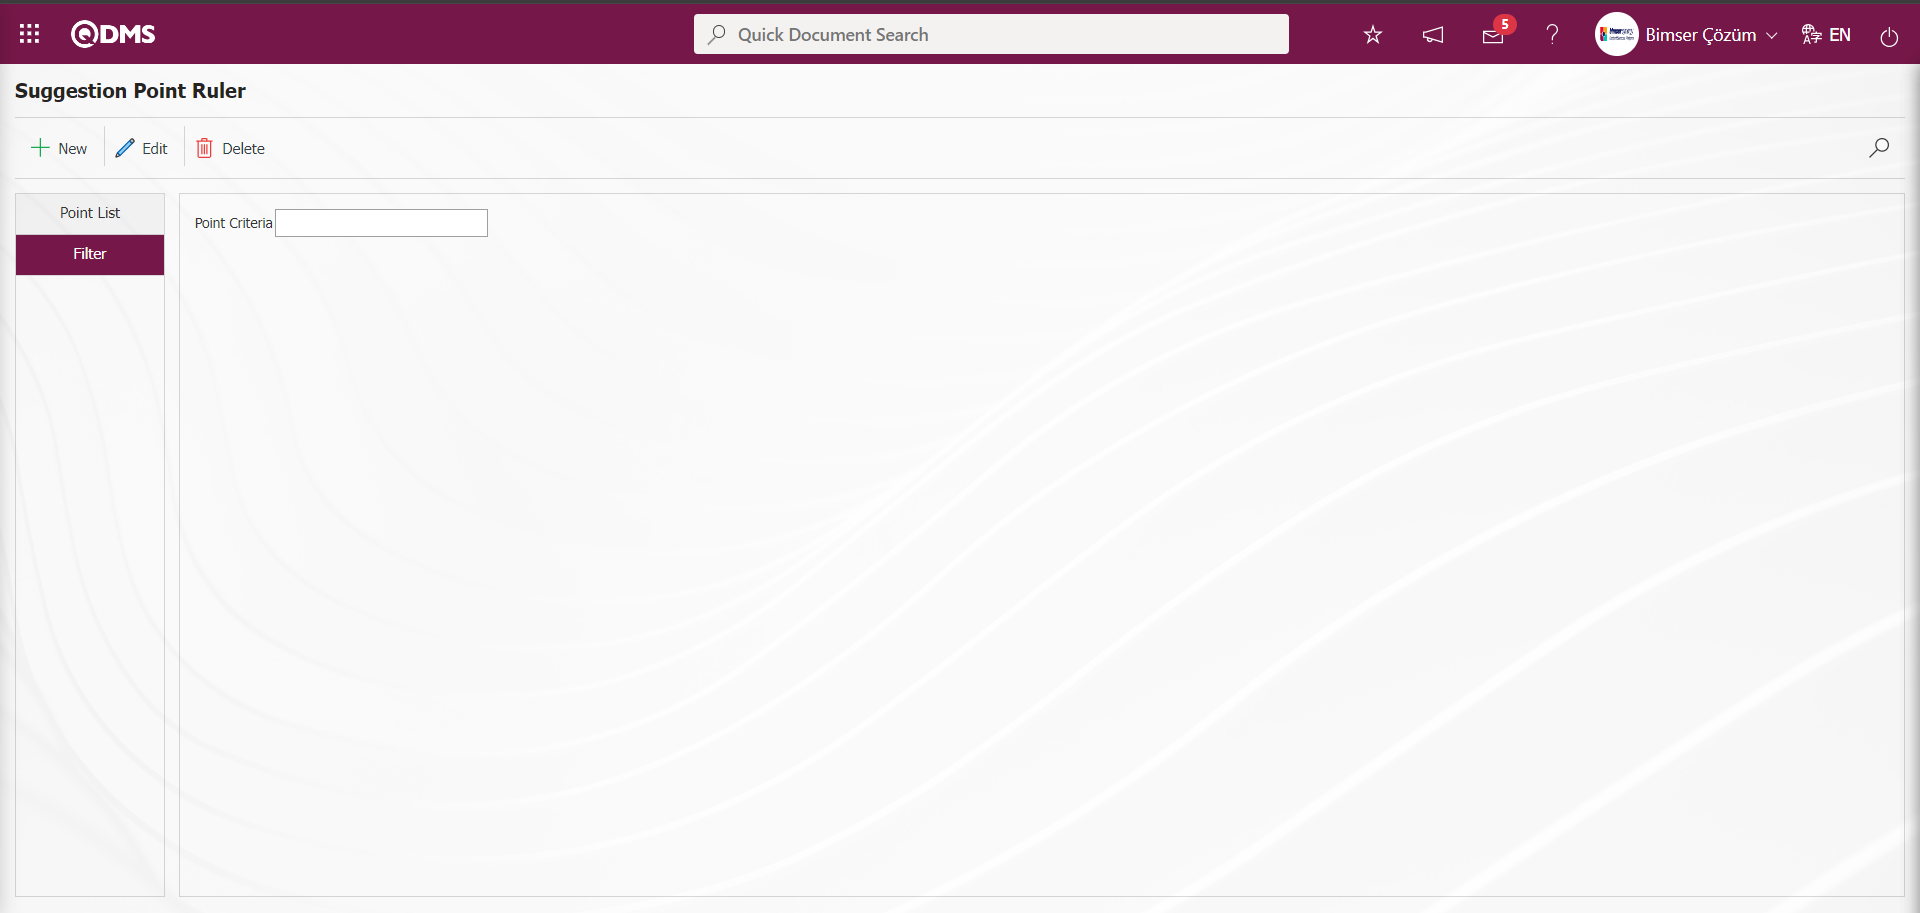
Menu Name: System Infrastructure Definitions/ Suggestion/ Point Ruler
This is the menu where the score sheet to be used in the company is defined to the system. Scores are fixed and certain, they do not vary.

With the help of the buttons on the screen;
: A new suggestion point puler is defined.
: Changes are made on the selected suggestion point ruler information in the list.
: The selected suggestion point ruler information in the list is deleted.
: Records are filtered and searched.
: The search criteria on the menu screens are used to clean the data remaining in the filter fields in the grid where the search operation is performed.
: The menu screen is restored to its default settings.
: User-based designing is done on the menu screen with the show-hide feature, that is, the hiding feature of the fields corresponding to the columns on the menu screens.
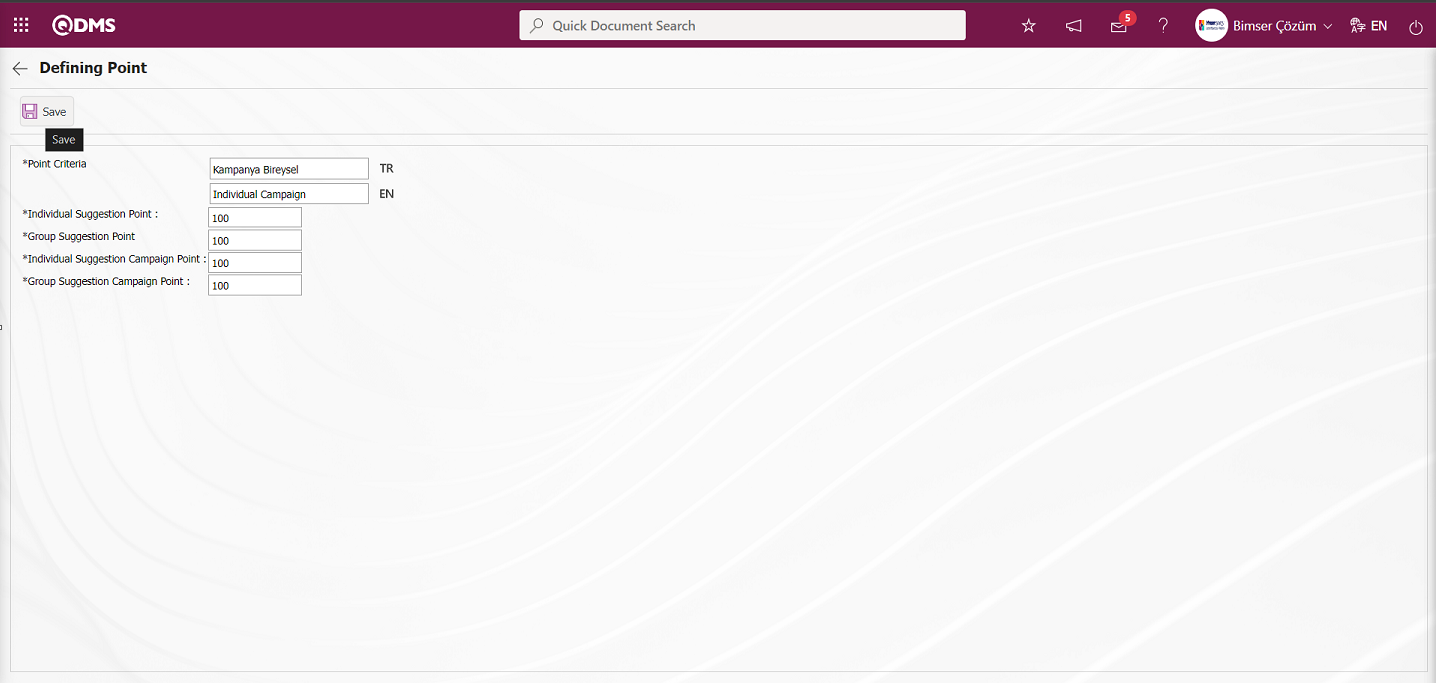
To add a new suggestion point ruler, click on the button in the upper left corner of the screen to display the Defining Point screen.
Related fields are defined on the screen that opens:
Point Criteria: This is the field where the definition information of the Score Criteria is written on the Defining Point screen. In the English language icon field, the English language equivalent of the definition of the Score Criteria is written. For example; Individual Points Scale, Group Points Scale, Campaign Individual Points Scale, Campaign Group Points Scale, OHS Points Scale, Kaizen Points Scale.
Individual Suggestion Point: This is the field where the score information of the suggestions given individually on the Defining Point screen is written.
Group Recommendation Score: This is the field where the score information of the suggestions given as a group on the Defining Point screen is written.
Individual Recommendation Campaign Points: It is the field where the score information of the campaign suggestions given individually on the Defining Point screen is written.
Group Recommendation Campaign Score: Defining Point is the field where the score information of the campaign suggestions given as a group on the screen is written.
On the Defining Point screen, the Score Criteria information is written. Individual, Group, Individual Suggestion Campaign and Group Suggestion Campaign point information is written. After the required fields are filled in, the point definition registration process is done by clicking the button in the upper left corner.
 The system gives a message about saving the score definition and indicates that the score definition registration process has taken place.
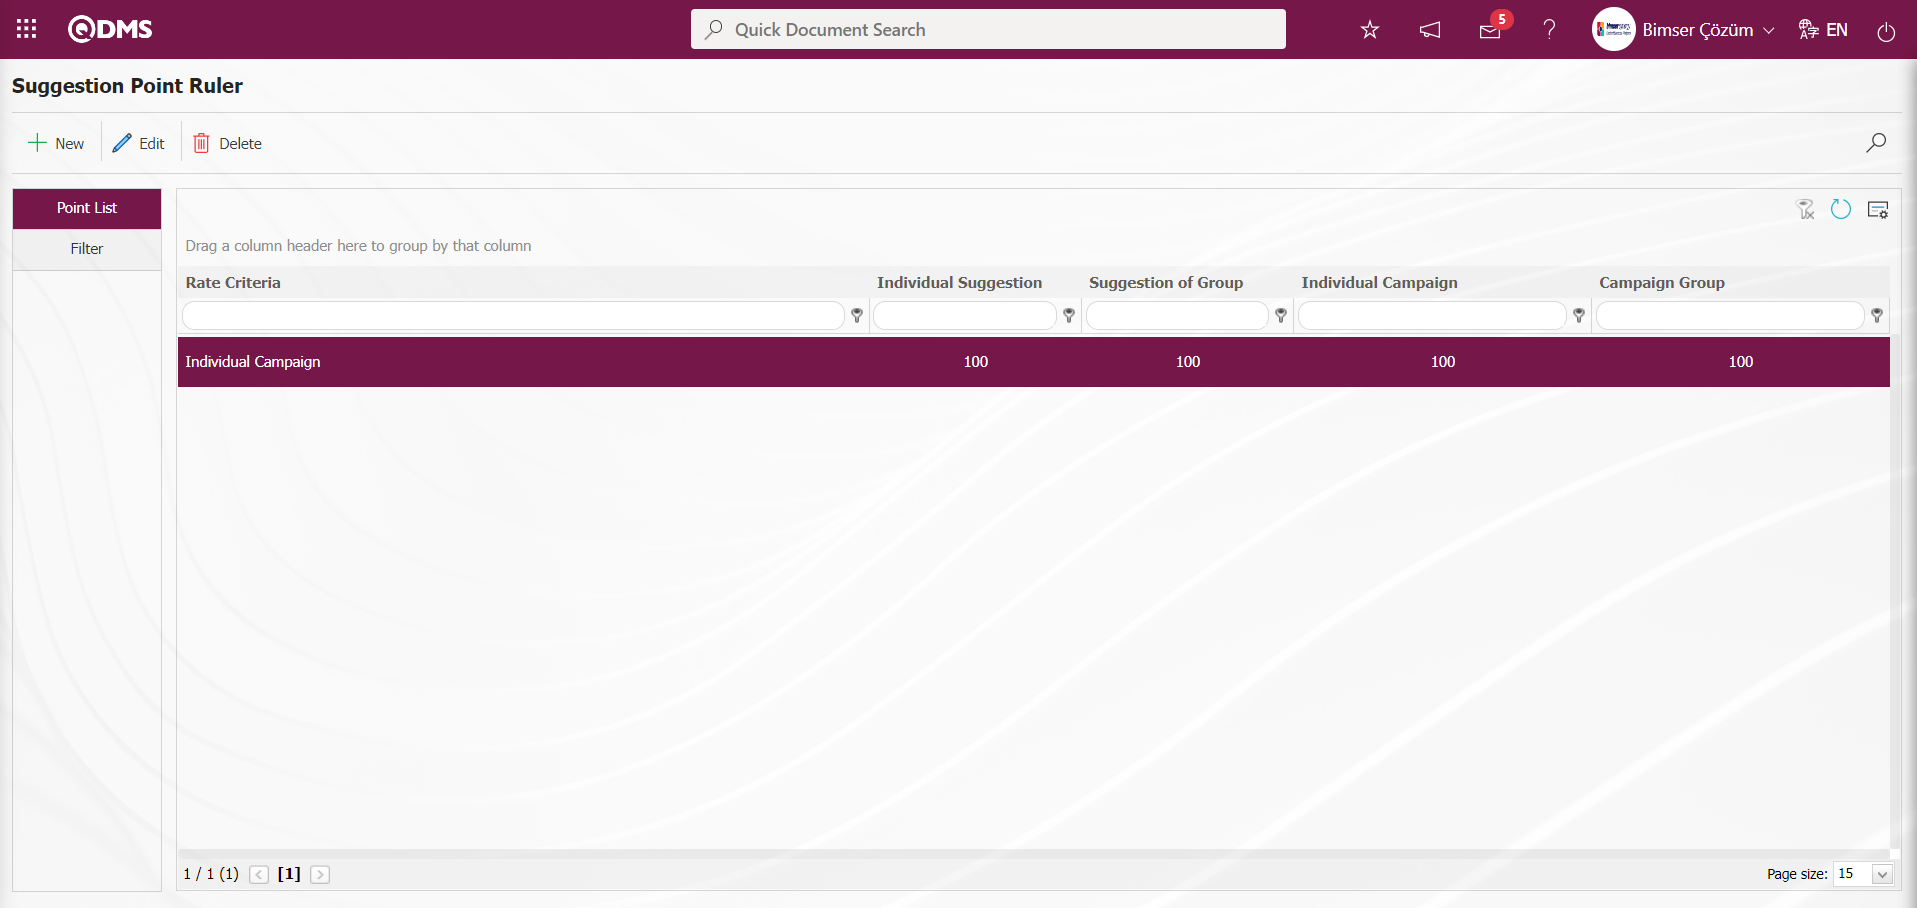
From the Suggestion Point Ruler screen, enter data in the fields with search criteria in the Filter tab and click the (Search) button to filter according to the search criteria.
5.1.4.3. Survey Use
Survey Method: The use of Survey from the scoring stage is done in the Survey Question Lists menu. While the relevant function is selected in the Survey Question Lists menu, the Survey is defined by defining the survey questions on the Survey Questions screen opened by clicking the ( ) button. After the question definition process is done, the system automatically defines the survey code in the parameter 117 “Based on the survey template code to be used”, which is the relevant parameter of the relevant module of the Survey Question Lists menu.
When a survey is used as a scoring method in the suggestion module, the survey assigned to this parameter is displayed in the scoring phase. This stage is done by using the survey in the scoring stage. In order to use the survey at this stage, the parameter value of the parameter 116 “Did Based on the survey will be used?” of the Suggestion System Module parameters is selected as “Yes” and the parameter is activated.

After the parameter is activated, a task is created as “Suggestions awaiting for Scoring” task on the user's “My Pending Jobs” page. By clicking the Suggestion code link in the Suggestion No field in the relevant task, the survey defined in the survey question lists menu during the scoring phase is displayed at this stage and the scoring phase is completed by answering the survey questions and the suggestion is passed to the next stage.
5.1.5. Acceptance Definitions
Menu Name: System Infrastructure Definitions/ Suggestion/ Acceptance Definitions
In the evaluation stages that take place after the suggestion is given, the suggestion acceptance definitions that will be selected from the system in case the suggestion is accepted are defined to the system. For example: Applicable, Applicable as a Project, Applicable at a Later Date.

With the help of the buttons on the screen;
: A new suggestion acceptance definition is defined.
: Update the information on the selected suggestion acceptance definition in the list.
: The selected suggestion acceptance definition information in the list is deleted.
: The search criteria on the menu screens are used to clean the data remaining in the filter fields in the grid where the search operation is performed.
: The menu screen is restored to its default settings.
: User-based designing is done on the menu screen with the show-hide feature, that is, the hiding feature of the fields corresponding to the columns on the menu screens.
To add a new suggestion acceptance definition, the “Acceptance Definitions ” screen is displayed by clicking the button in the upper left corner of the screen.

The following fields are defined on the screen that opens;
Acceptance Code: It is the field where the code information of the Acceptance Definition defined in the Acceptance Definitions screen is given by the system.
Acceptance Definition: It is the field where the definition of the Acceptance Definition defined in the Acceptance Definitions screen is written. In the English language icon field, the English language equivalent of the Acceptance Definition is written.
On the Acceptance Definitions screen, the code information of the acceptance definition is given by the system. The definition of the defined Acceptance Definition is written. After entering the relevant information in the required fields, the “Acceptance Definitions” registration process is realized by clicking the button in the upper left corner.
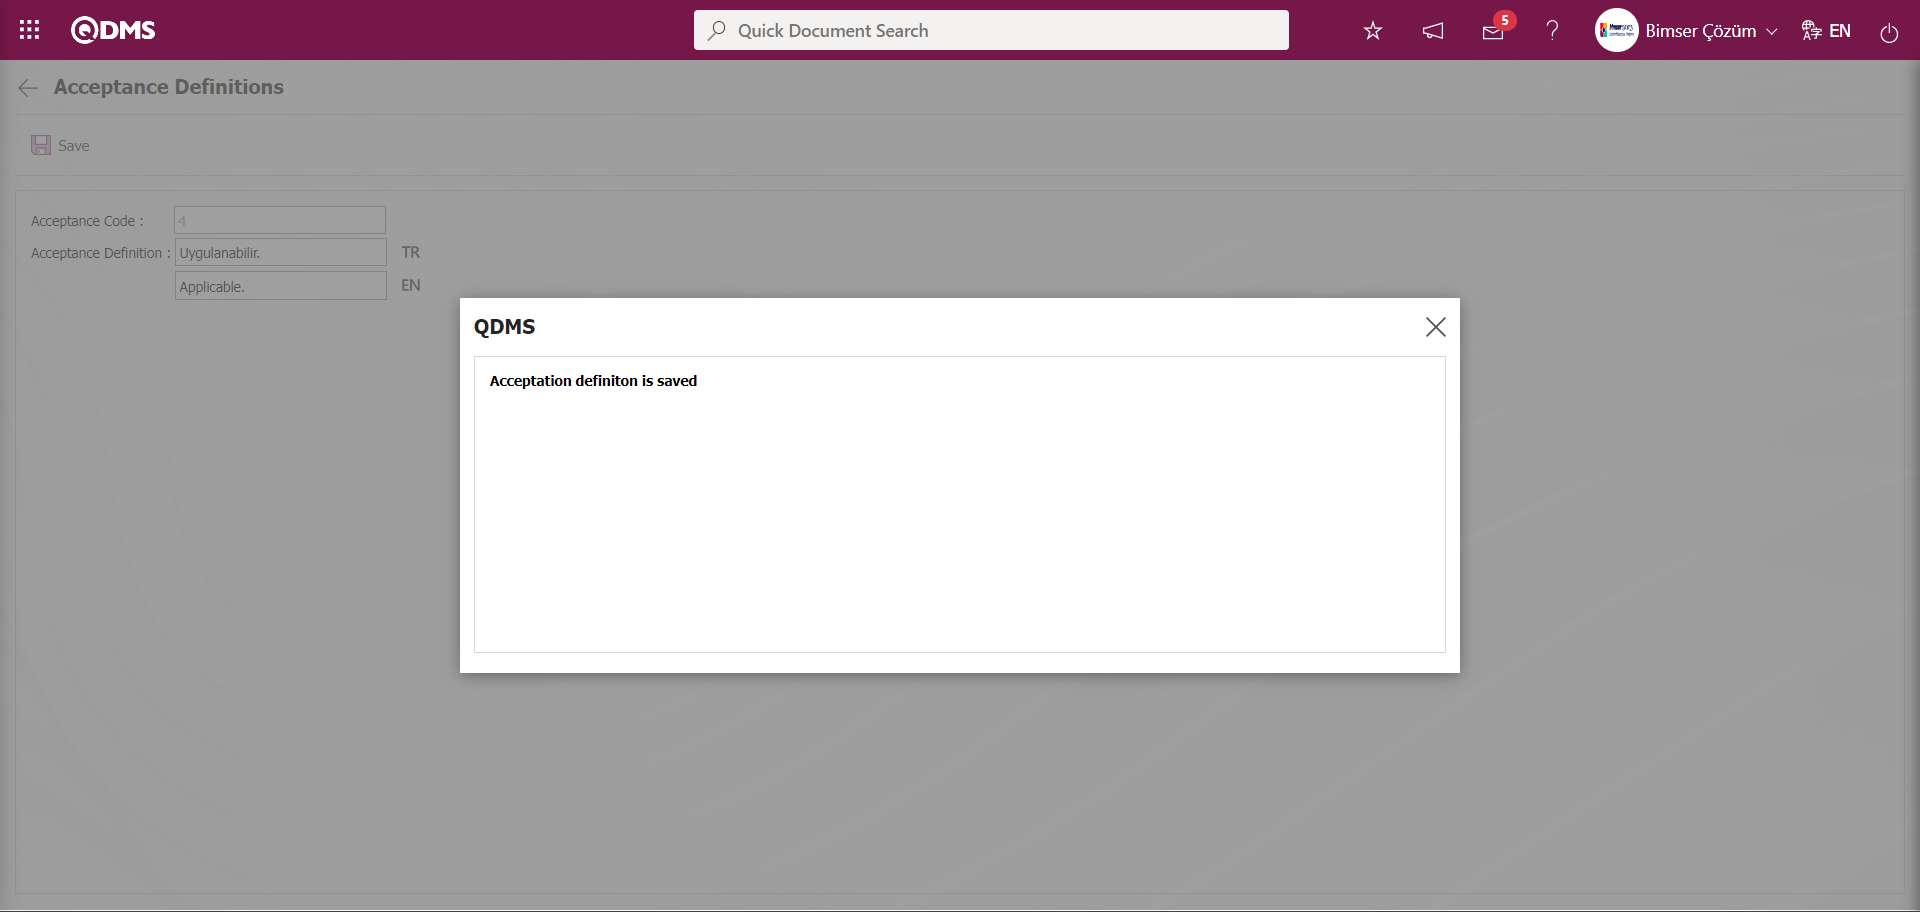
The system gives a message about saving the acceptance definition and indicates that the “Acceptance Definitions” definition record process has been realized.
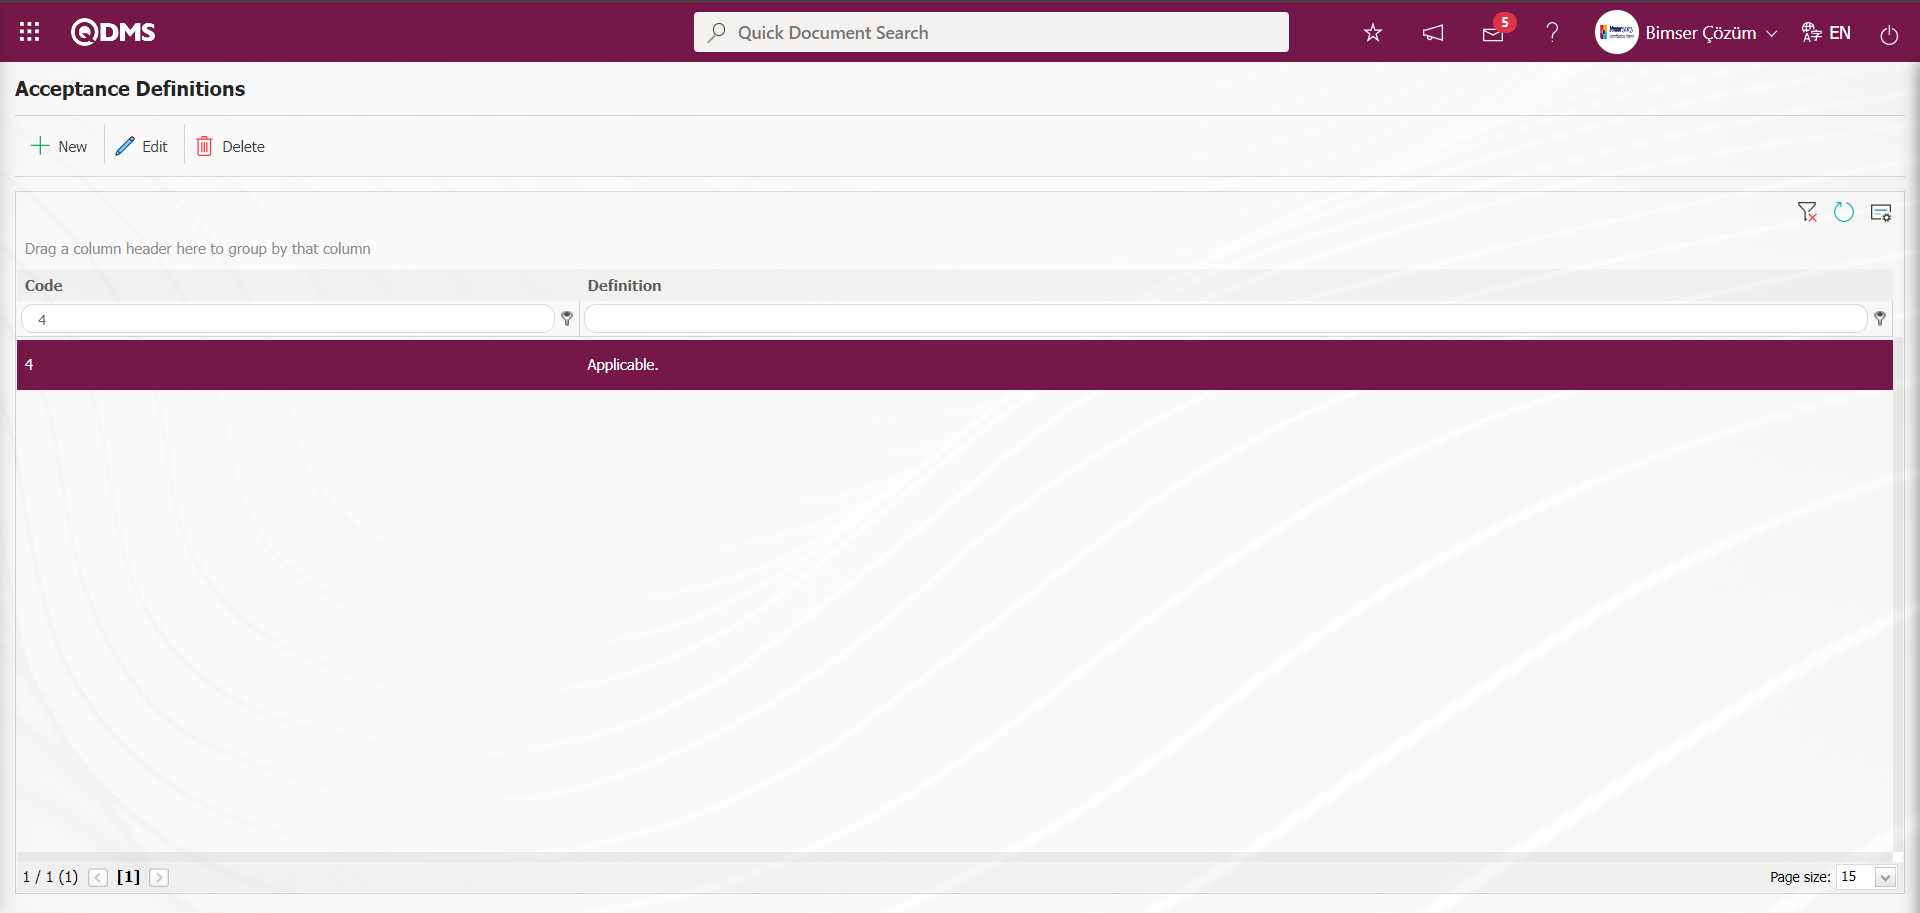
On the Acceptance Definitions screen, all acceptance definitions related to the suggestion are defined in the same way.

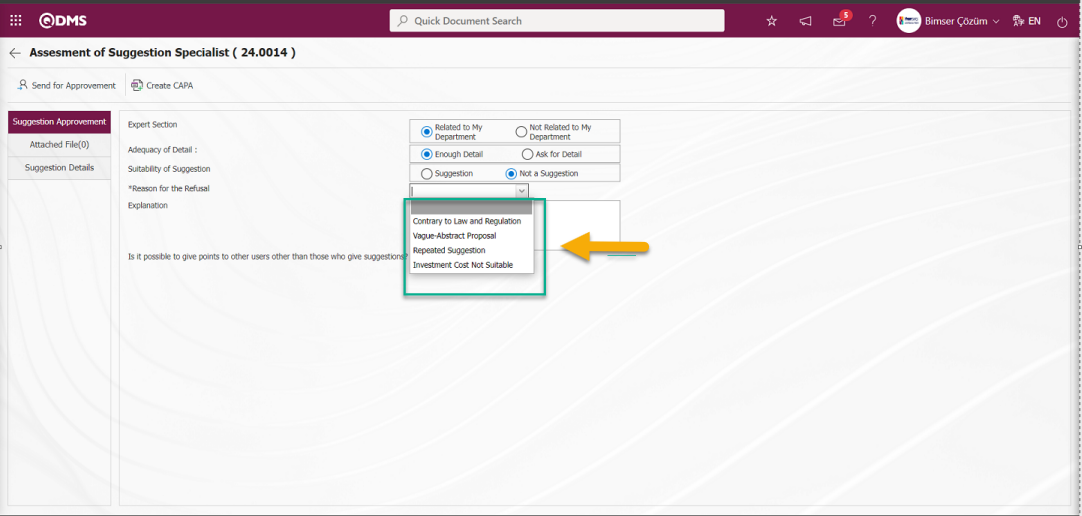
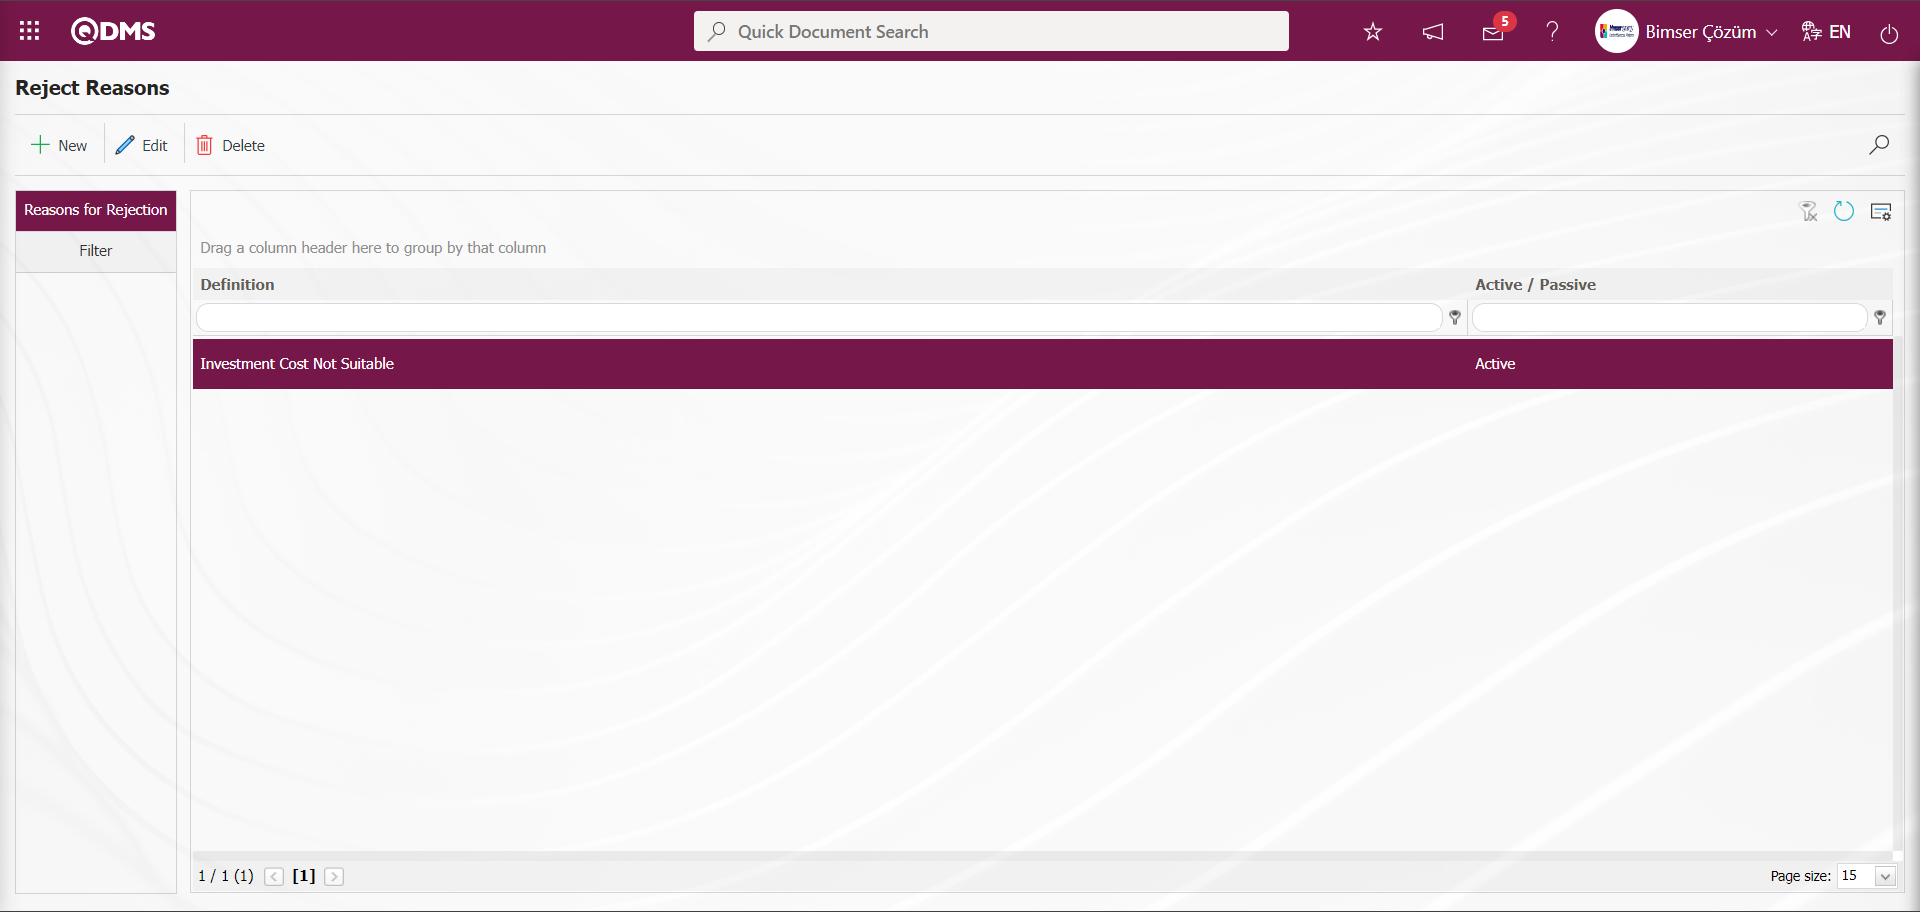
5.1.6. Reject Reasons
Menu Name: System Infrastructure Definitions/ Recommendation/ Reject Reasons
In the evaluation stages that take place after the suggestion is given, the suggestion rejection definitions that will be selected from the system in case the suggestion is rejected are defined to the system. For example: Illegal, Indefinite-Abstract Suggestion, Repeated Suggestion, Investment Cost Not Suitable.

With the help of the buttons on the screen;
: A new suggestion rejection reason is defined.
: Update the selected suggestion rejection reason information in the list.
: The selected suggestion rejection reason information in the list is deleted.
: The search criteria on the menu screens are used to clean the data remaining in the filter fields in the grid where the search operation is performed.
: The menu screen is restored to its default settings.
: User-based designing is done on the menu screen with the show-hide feature, that is, the hiding feature of the fields corresponding to the columns on the menu screens.
To add a new suggestion rejection reason, the Reasons for Rejection screen is displayed by clicking the button in the upper left corner of the screen.

The following fields are defined on the screen that opens;
Definition of Reject Reason:The definition information of the Rejection Reason defined on the Rejection Reasons screen is written. In the English language icon field, the English language equivalent of the Reason for Rejection definition is written.
Active / Passive:It is the field where the status of the Reason for Rejection defined in the Reasons for Rejection screen is selected to appear in Active / Passive options.
Selectability Status: It is the field where the status of the Reason for Rejection information defined in the Reasons for Rejection screen is selected from the relevant options. For example: When the Preliminary Evaluation stage is selected in the selectability status, the Rejection Reason information selected at this stage in the Rejection Reasons List is displayed in the Rejection Reason field displayed when it is accepted that there is no suggestion in the Suggestion conformity field from the Suggestion Preliminary Evaluation stage and the “Not Suggestion” option is selected. Otherwise, when the check box related to the selected stage is not checked, when the Pre-assessment stage is selected, the Rejection Reason information selected at this stage in the Rejection Reasons List is not displayed in the Rejection Reason field displayed when it is accepted that there is no suggestion in the Suggestion eligibility field from the Suggestion Pre-assessment stage and the “Not Suggestion” option is selected. It is ensured that the Reasons for Rejection information is displayed and displayed in the Reasons for Rejection list according to the selected stages.
On the Reject Reasons screen, the definition information of the Reject Reason is written. The status of the defined Reason for Rejection information to appear in the Active / Passive options is selected. The selectability status of the Rejection Reason information is selected from the relevant options. After entering the necessary information in the required fields, the “Reasons for Rejection” registration process is realized by clicking the button in the upper left corner of the screen.

It is indicated that the Reason for Rejection registration process has been realized by the system by giving a message about registering the Reason for Rejection.
In the Reasons for Rejection screen, all Reasons for Rejection related to the suggestion are defined in the same way.

Reject Reasons** screen, enter or select data in the fields with search criteria in the Filter tab and click the (Search) button to filter according to the search criteria.

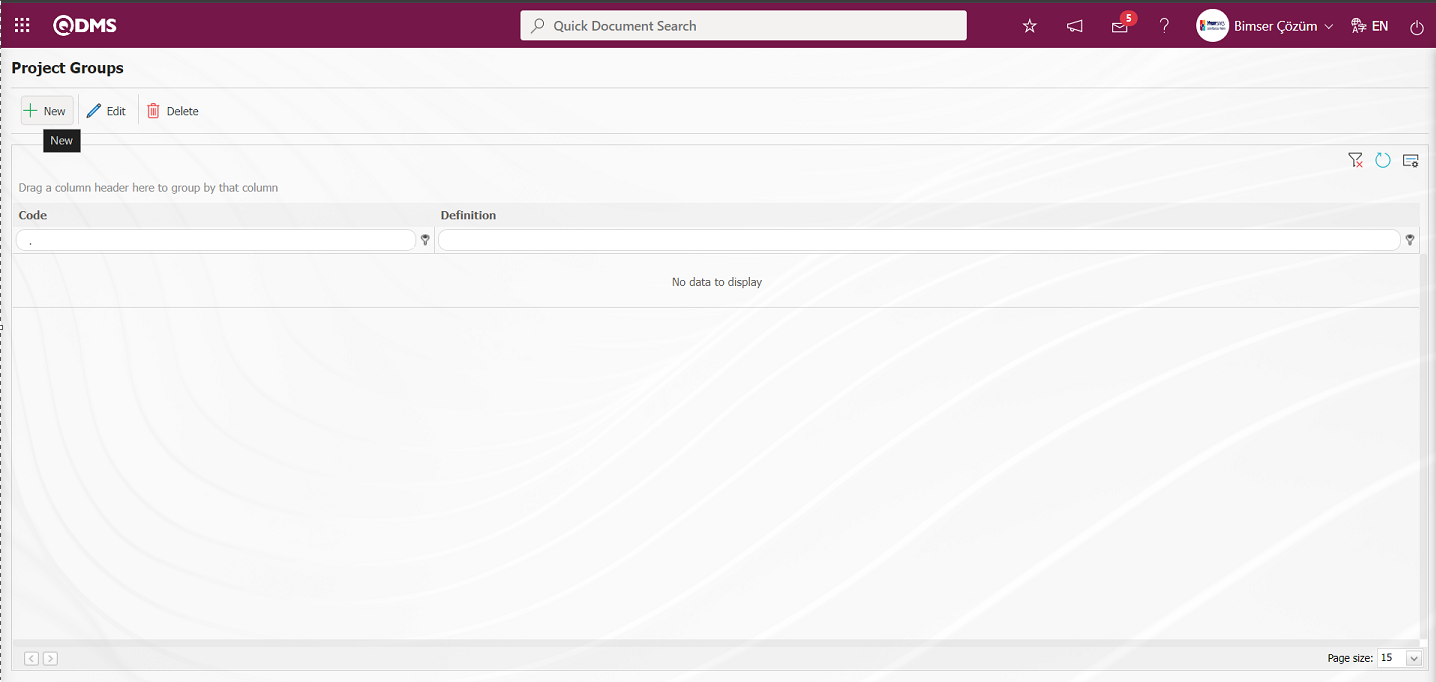
5.1.7. Project Groups
Menu Name: System Infrastructure Definitions/ Recommendation/ Project Groups
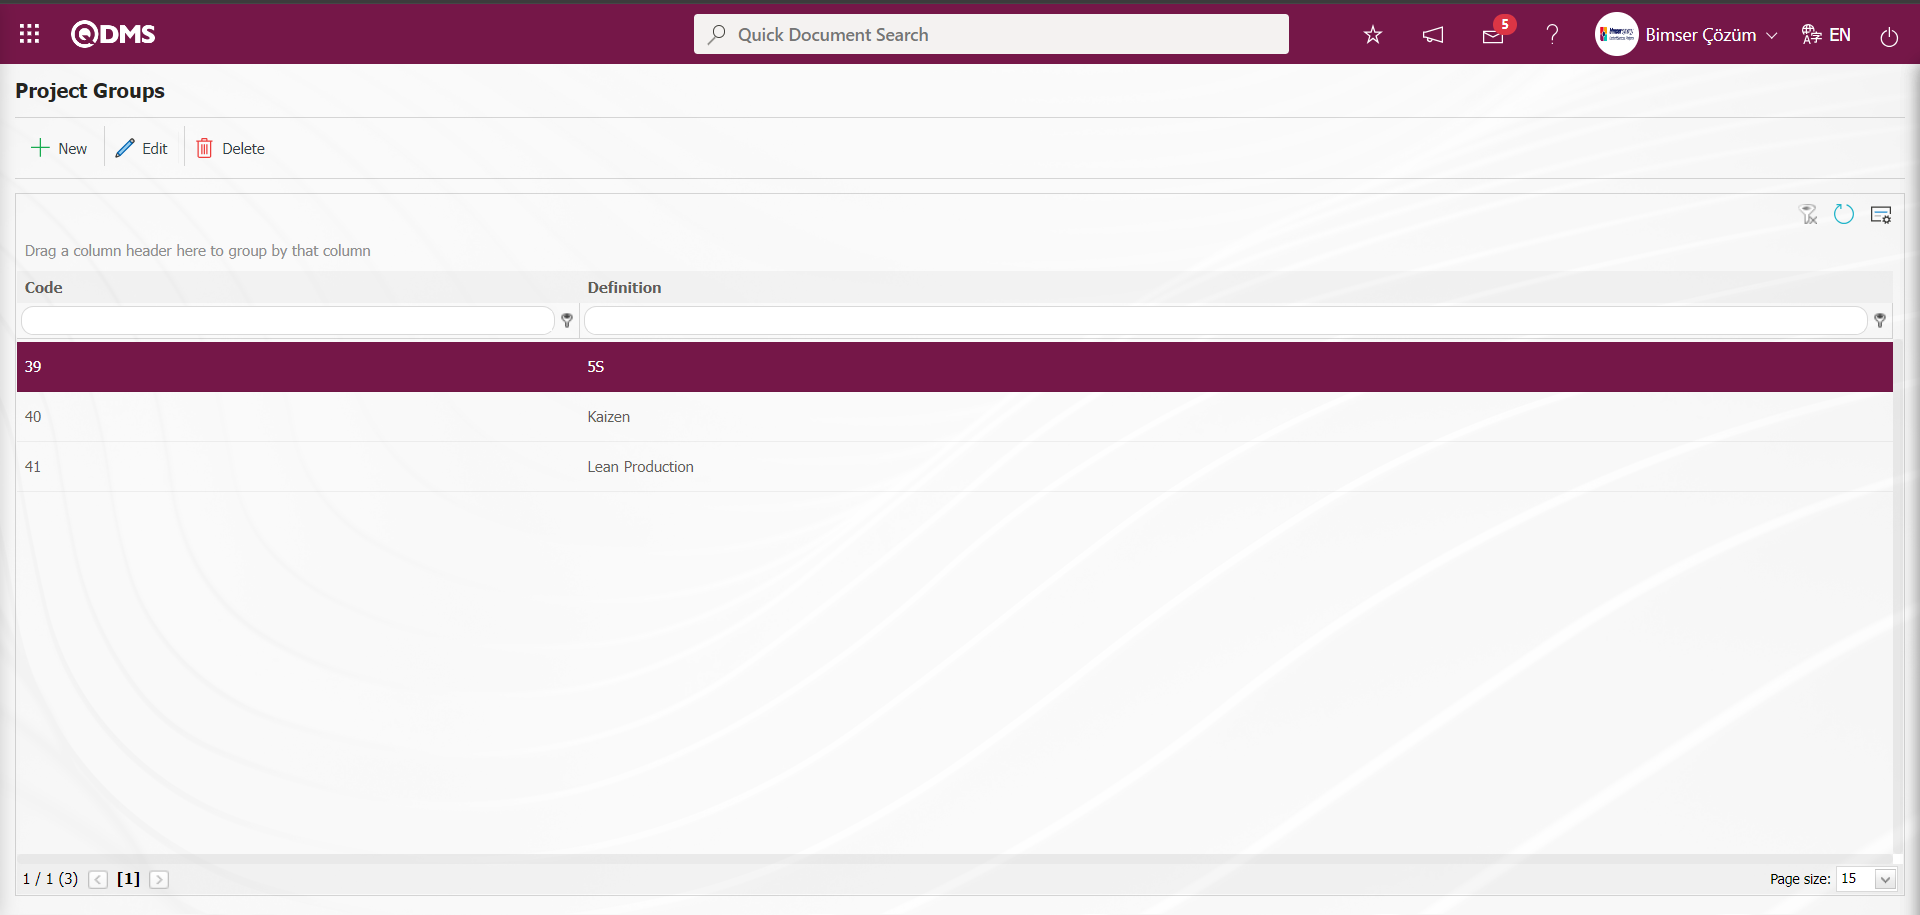
This is the menu where Project Groups are defined to the system. Project groups are created by defining the projects realized within the company such as 5S, Kaizen, Lean Production. “Project Group - Expert/Leader Matching” is done by selecting which project group the expert defined in the Specialist/Leader definition menu is in. The purpose of defining a project group is to ensure that the expert related to that project group evaluates the Suggestion within the scope of the project. Project group menu is used if there are project groups in the company. If there is no project group, no definition process is performed in this menu.
With the help of the buttons on the screen;
: Defining a new project group.
: Update the project group information selected in the list.
: The project group information selected in the list is deleted.
: The search criteria on the menu screens are used to clean the data remaining in the filter fields in the grid where the search operation is performed.
: The menu screen is restored to its default settings.
: User-based designing is done on the menu screen with the show-hide feature, that is, the hiding feature of the fields corresponding to the columns on the menu screens.
To add a new project group, the Project Groups screen is displayed by clicking the button in the upper left corner of the screen.
The following fields are defined on the screen that opens;
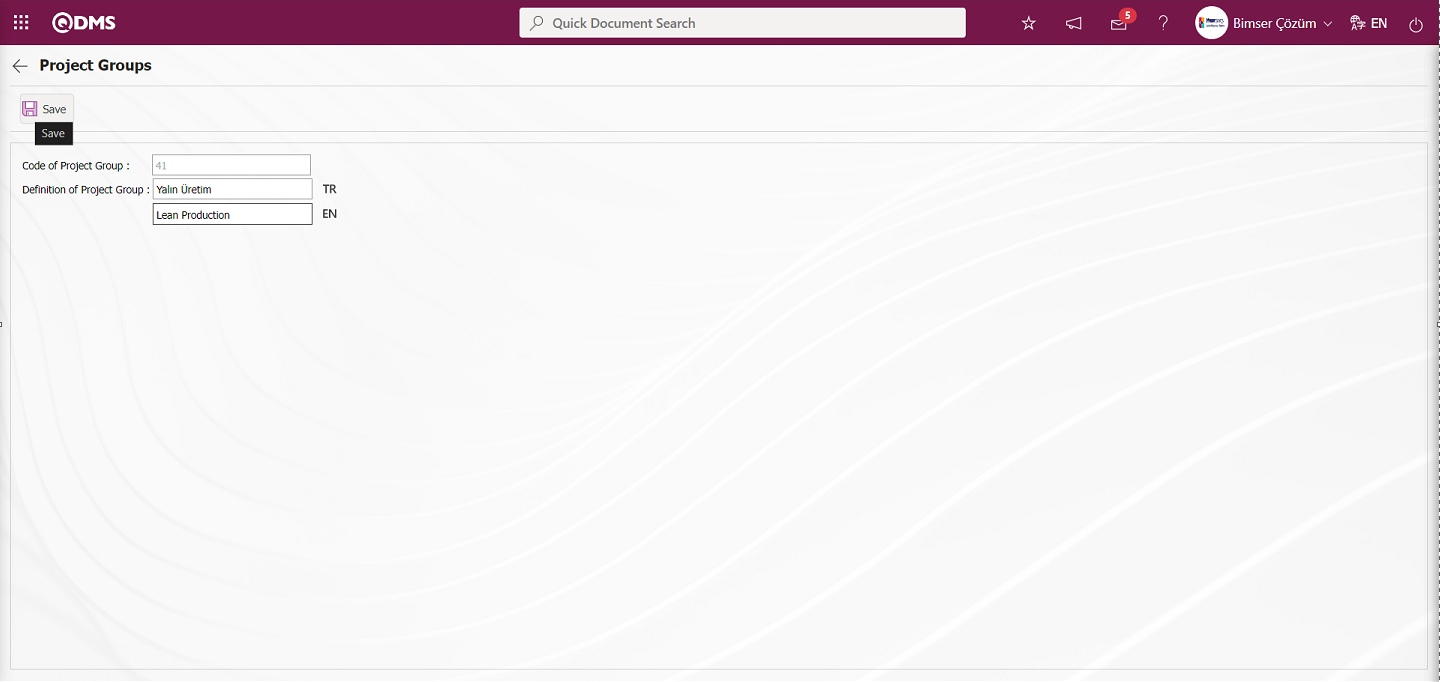
Code of Project Group:This is the field where the code information of the project group defined in the Project Groups screen is given by the system.
Definition of Project Group:It is the field where the definition information of the project group defined in the Project Groups screen is written. In the English language icon field, the English language equivalent of the definition of the project group is written.
Turkish and English language equivalents of the definition of the project group on the Project Groups screen are written in the relevant fields. After entering the relevant information in the required fields, the “Project Groups” registration process is realized by clicking the button in the upper left corner of the screen.
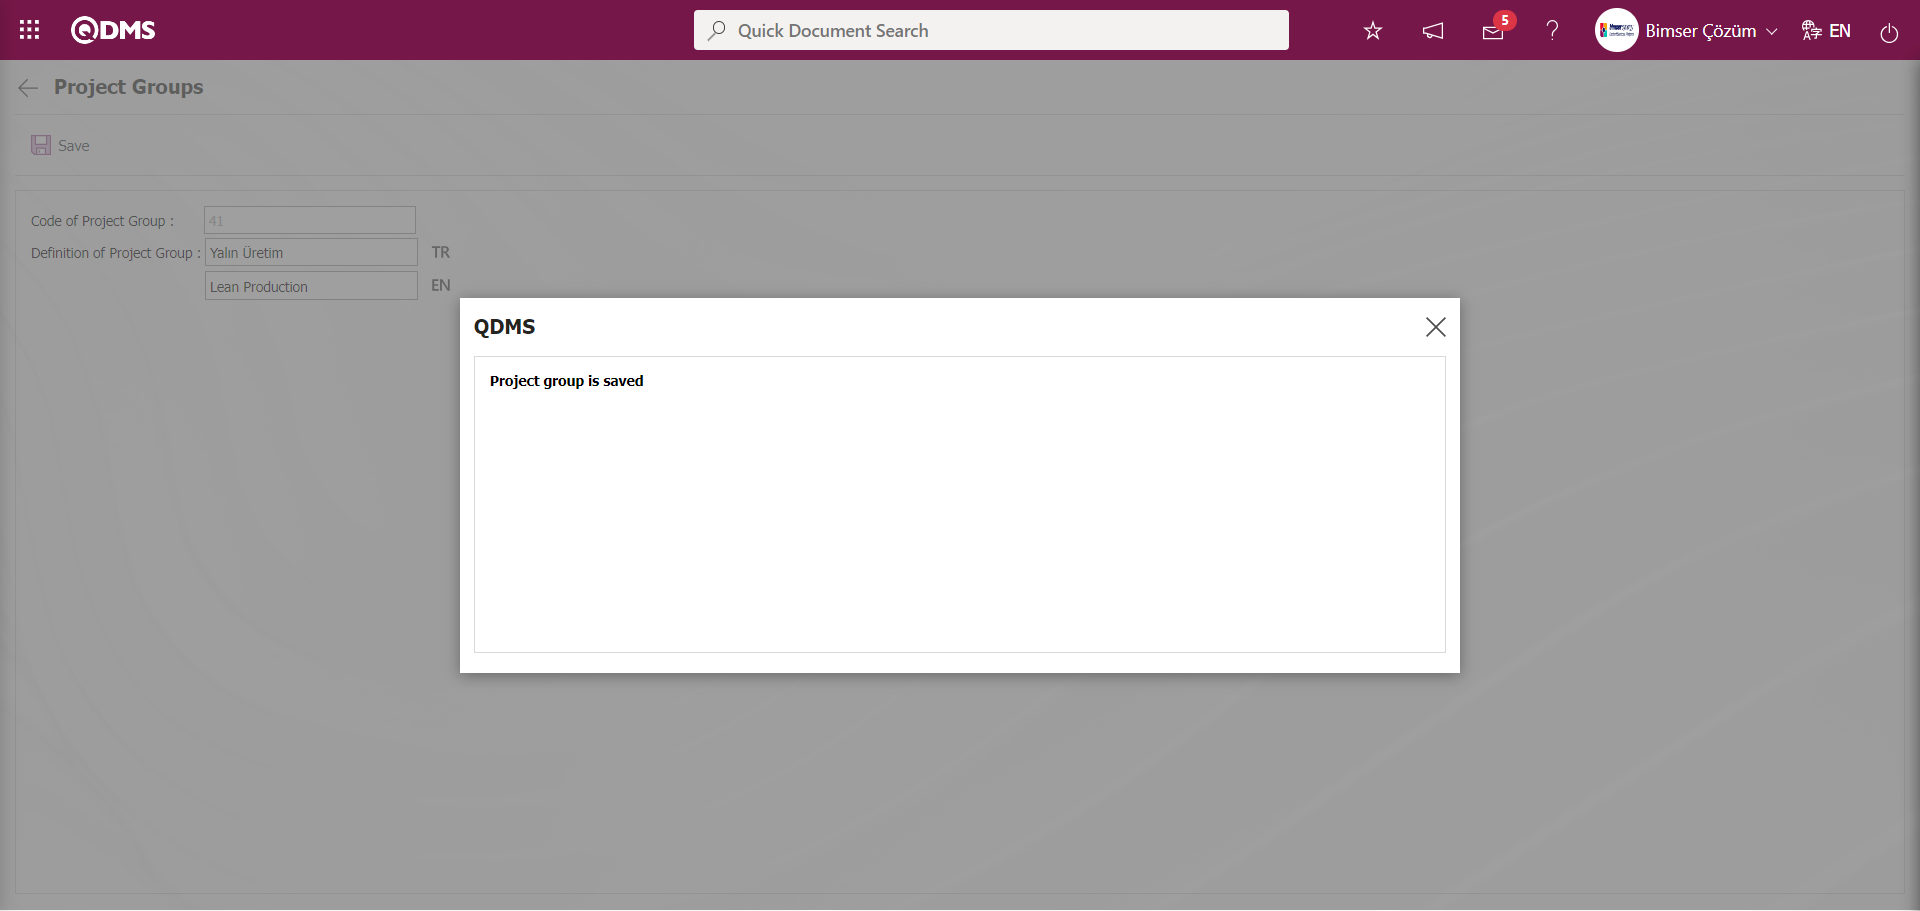
The system will give a message about the project group registration, indicating that the project group definition registration process has been realized.

In the same way, all project groups are defined by performing the process steps.
5.1.8. Department Goals
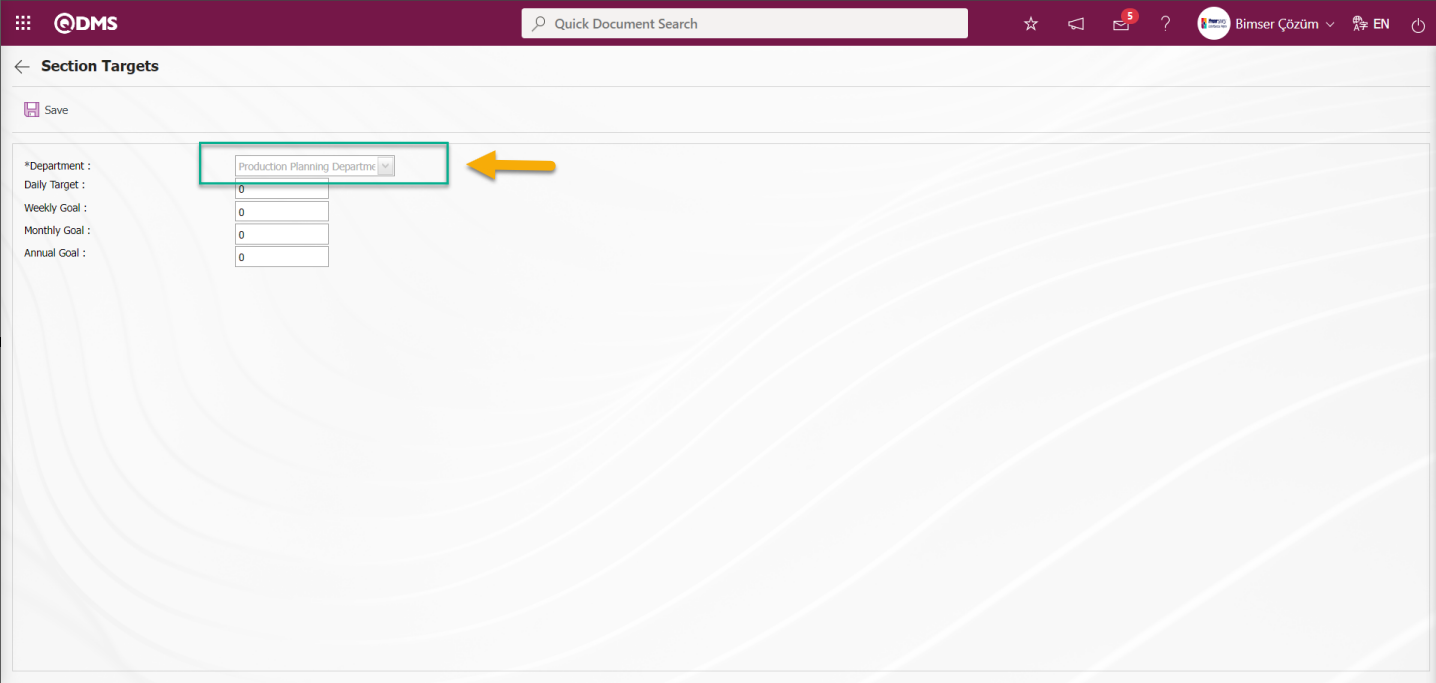
Menu Name: System Infrastructure Definitions/ Suggestion/ Department Goals
This is the menu where daily, weekly, monthly and yearly suggestion targets for the departments in the company are defined to the system for information purposes.

With the help of the buttons on the screen;
: Defining a new department target
: The update operation is performed on the department target information selected in the list.
: Delete the department target information selected in the list.
: The search criteria on the menu screens are used to clean the data remaining in the filter fields in the grid where the search operation is performed.
: The menu screen is restored to its default settings.
: User-based designing is done on the menu screen with the show-hide feature, that is, the hiding feature of the fields corresponding to the columns on the menu screens.
To add a new department target, click on the button in the upper left corner of the screen to display the Department Targets screen.

The following fields are defined on the screen that opens;
Department:This is the field where the department for which the section target will be defined on the Section Targets screen is selected in the list of Departments defined in the system that opens by clicking the drop-down list. The parameter value of parameter 60 of the Suggestion System Module parameters is activated by selecting “Yes”.

After the parameter is activated, the department field of the user who logs in for the definition of the department target in the Department Targets menu automatically comes to the department and this field cannot be intervened as in the screenshot below
If the parameter value of parameter 60 of the Suggestion System Module parameters is disabled by selecting “No”, the user who enters the department information in the system in defining the department target is allowed to make a selection in the list of departments defined in the system by clicking the drop-down list.
Daily Target:This is the field where the number of suggestion targets given daily by the department selected on the Section Targets screen is given.
Weekly Goal: This is the field where the number of weekly suggestion targets given by the department selected on the Section Targets screen is given.
Monthly Goal: It is the field where the information about the number of suggestion targets given monthly by the department selected on the Section Targets screen is given.
Annual Goal: This is the field where the number of recommendation targets given annually by the department selected on the Section Targets screen is given.
On the Department Targets screen, click on the drop-down list from the Department field and select the department where the suggestion targets will be defined in the list of departments defined in the system. Daily, weekly, monthly and annual suggestion targets of the selected department are written. After entering the relevant information in the required fields, the Department targets registration process is done by clicking the button in the upper left corner of the screen.

The system will give a message about the successful registration of the number of department target suggestions, indicating that the registration process of defining the number of department target suggestions has taken place.

On the screen defined in the Department Targets menu, it is possible to set the Department target time period as Daily, Weekly, Monthly, Annual or All. To do this, it is necessary to define the letter value corresponding to the section target time period in the parameter value of parameter 16 of the Suggestion System module parameters. For example
Setting the section target time period as daily:For the daily section target time period, it will be sufficient to define the letter value “G” corresponding to Daily to the parameter value.

In this parameter, after the process of defining the department target time period in the parameter value, the Department Targets definition screen is displayed as in the screenshot below.

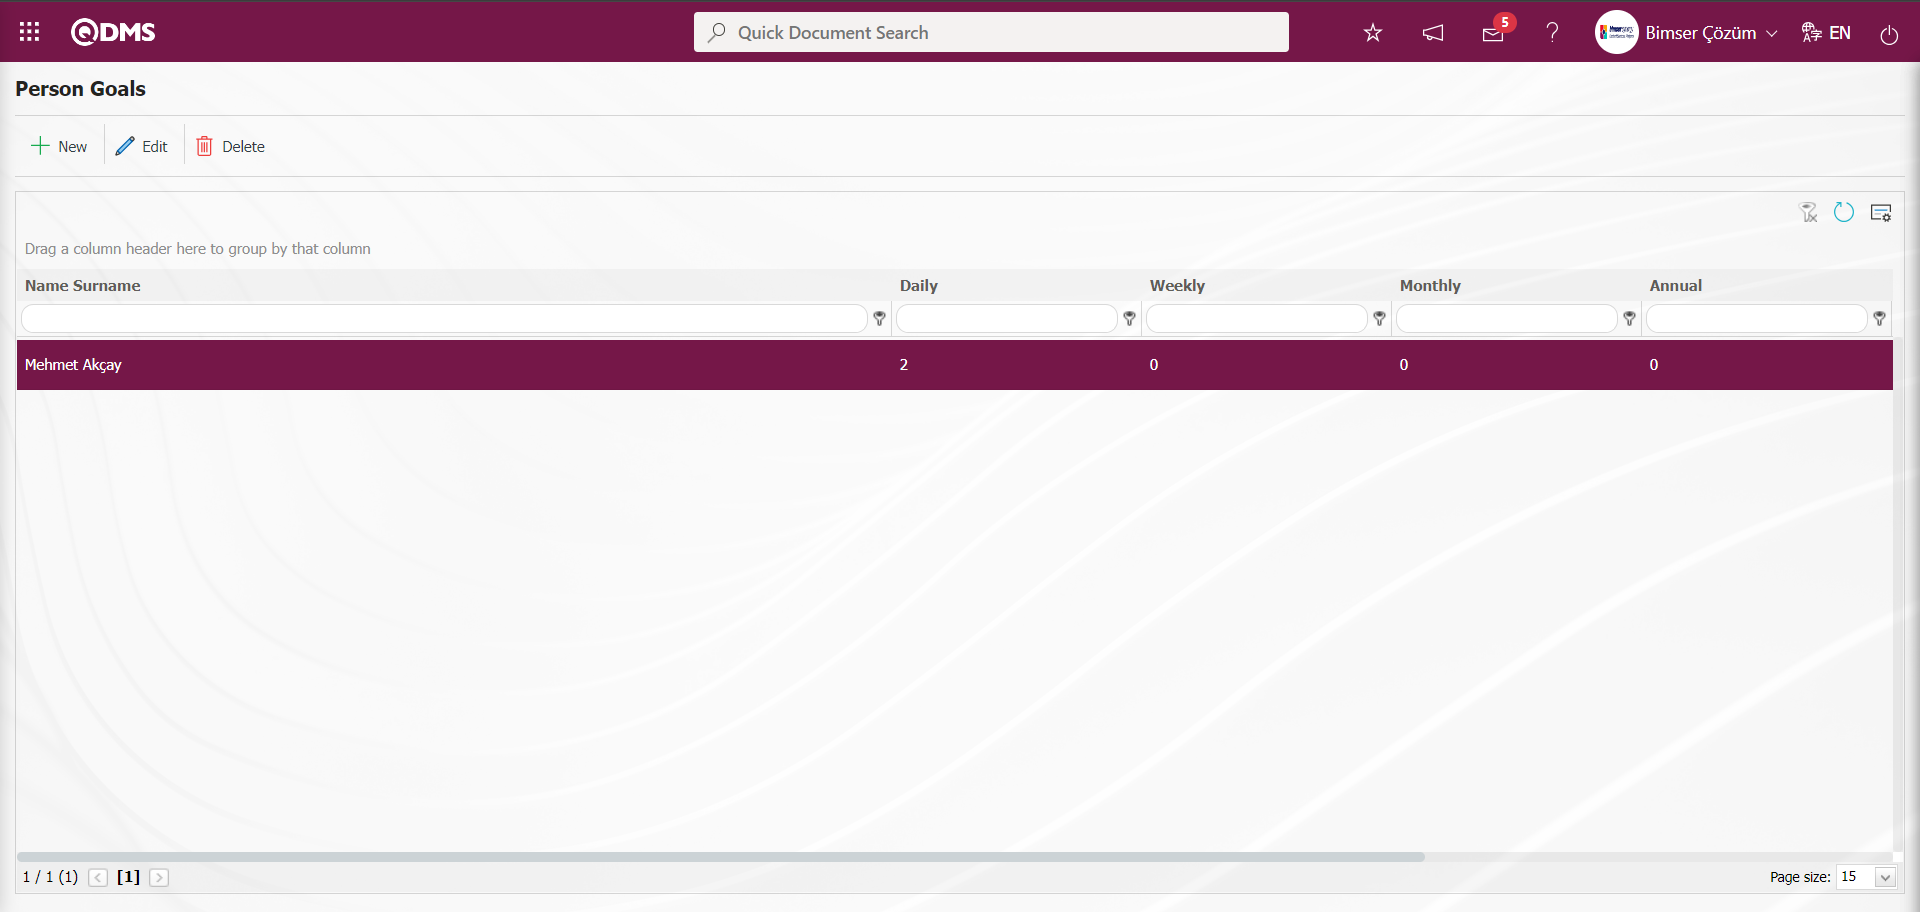
5.1.9. Person Goals
Menu Name: System Infrastructure Definitions/ Recommendation/ Person Goals
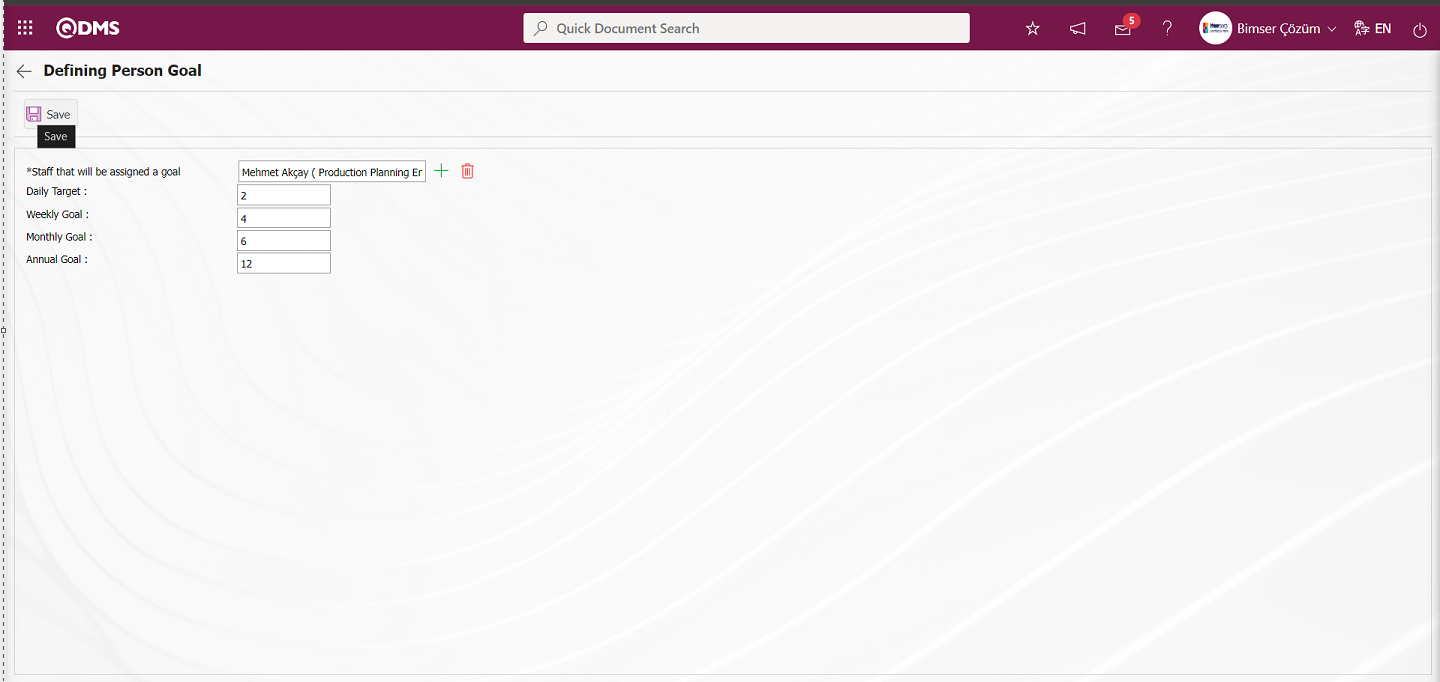
It is the menu where daily, weekly, monthly and yearly recommendation targets are defined to the system for information purposes for users with companies.

With the help of the buttons on the screen;
: Defining a new person target.
: Update the selected person target information in the list.
: Delete the selected person target information in the list.
: The search criteria on the menu screens are used to clean the data remaining in the filter fields in the grid where the search operation is performed.
: The menu screen is restored to its default settings.
: User-based designing is done on the menu screen with the show-hide feature, that is, the hiding feature of the fields corresponding to the columns on the menu screens.
To add a new person target, click on the button at the top left corner of the screen to display the Defining Person Targets screen.
The following fields are defined on the screen that opens;
Staff that will be assigned a goal: This is the field where the personnel whose person target information will be defined in the Person Target Defining screen is selected in the list of personnel defined in the system opened by clicking the  (Select) button.
Daily Target:This is the field where the number of daily suggested targets given by the personnel whose person target information will be defined in the Person Target Defining screen is given.
Weekly Goal: It is the field where the information about the number of weekly targets given by the personnel whose person target information selected in the Person Target Defining screen will be defined is given.
Monthly Goal:It is the field where the information about the number of suggestion targets given monthly by the personnel whose person target information selected in the Person Target Definition screen will be defined is given.
Annual Goal:It is the field where the information about the number of the number of the suggestion targets given annually by the personnel whose person target information will be defined in the Person Target Definition screen is given.
In the Person Target Defining screen, in the Personnel to Define Target field, the personnel whose person target information will be defined is selected in the list of personnel defined in the system opened by clicking the (Select) button. Daily, weekly, monthly and annual suggestion targets of the selected department are written. After entering the relevant information in the required fields, the Person Target Definition registration process is done by clicking the button in the upper left corner of the screen.
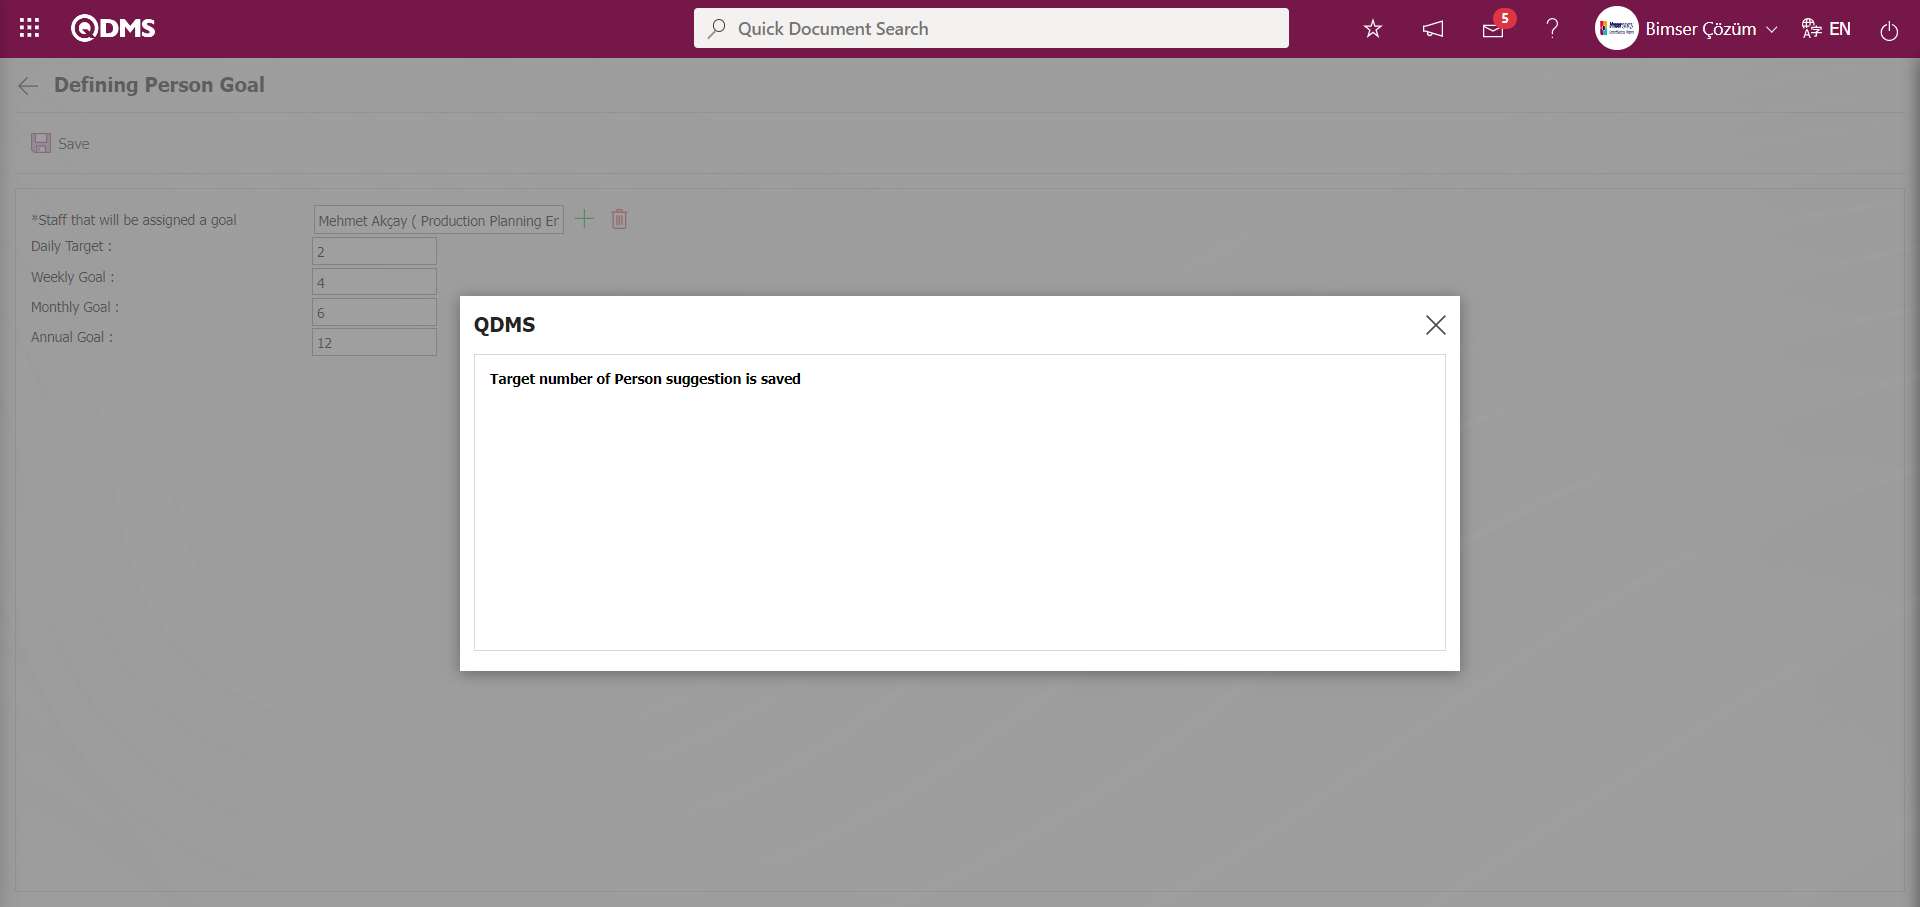
The system will give a message about the successful registration of the number of person target suggestions, indicating that the registration process of defining the number of person target suggestions has taken place.
On the screen defined in the Person Targets menu, it is possible to set the Person target time period as Daily, Weekly, Monthly, Annual or All. To do this, it is necessary to define the letter value corresponding to the department target time period in the parameter value of parameter 17 of the Suggestion System module parameters. For example
Settingthe person target time period as Monthly:For the monthly department target time period, it will be sufficient to define the letter value “A” corresponding to Monthly to the parameter value.
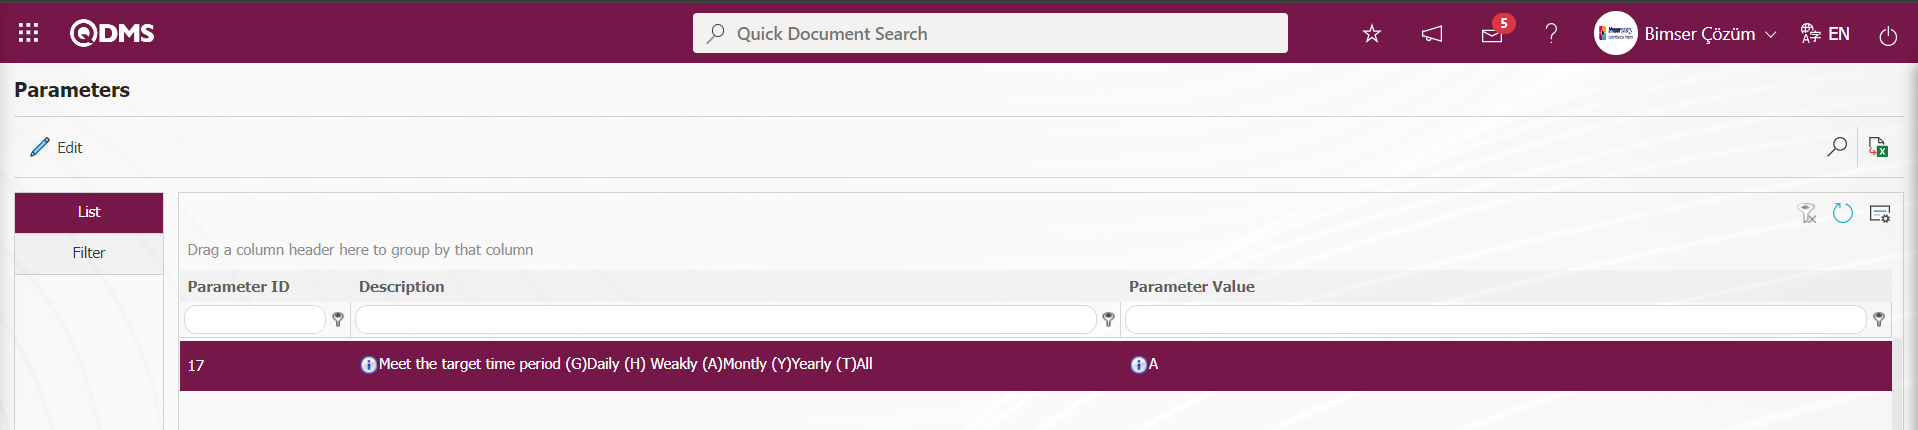
In this parameter, only the monthly target information of the person is defined only by displaying the “Monthly target” field as the period range on the Person Target Definition screen in the process of defining the monthly department target time period in the parameter value.
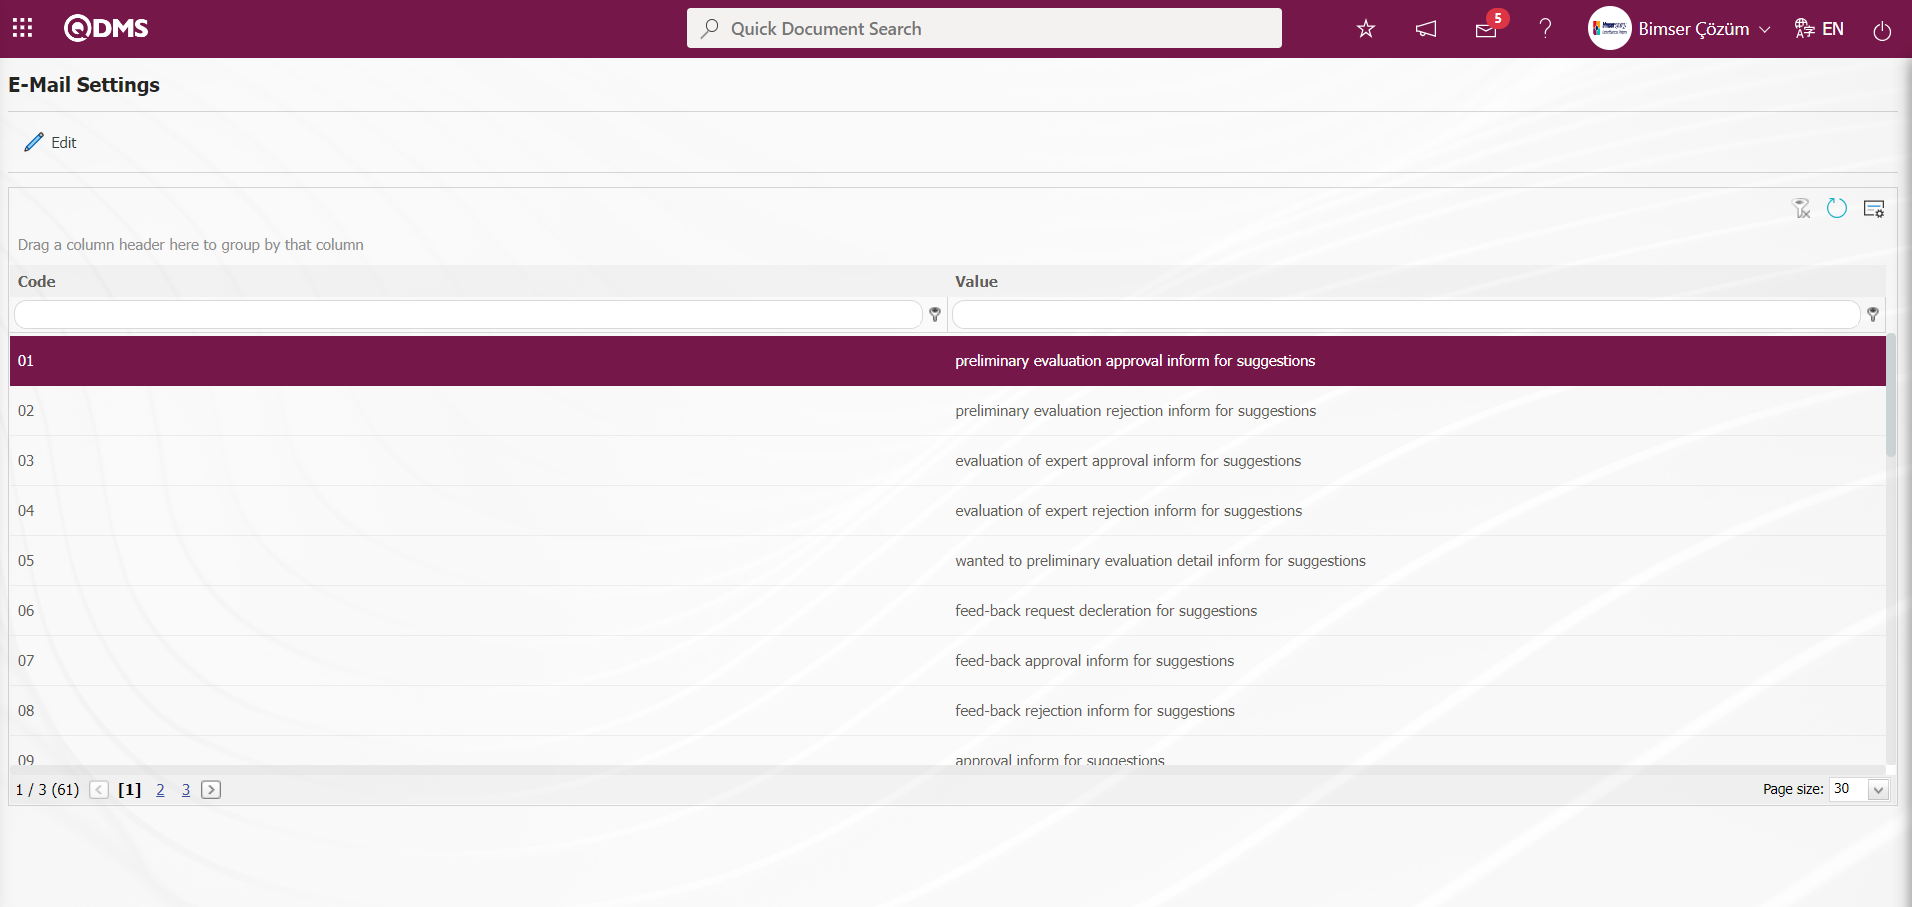
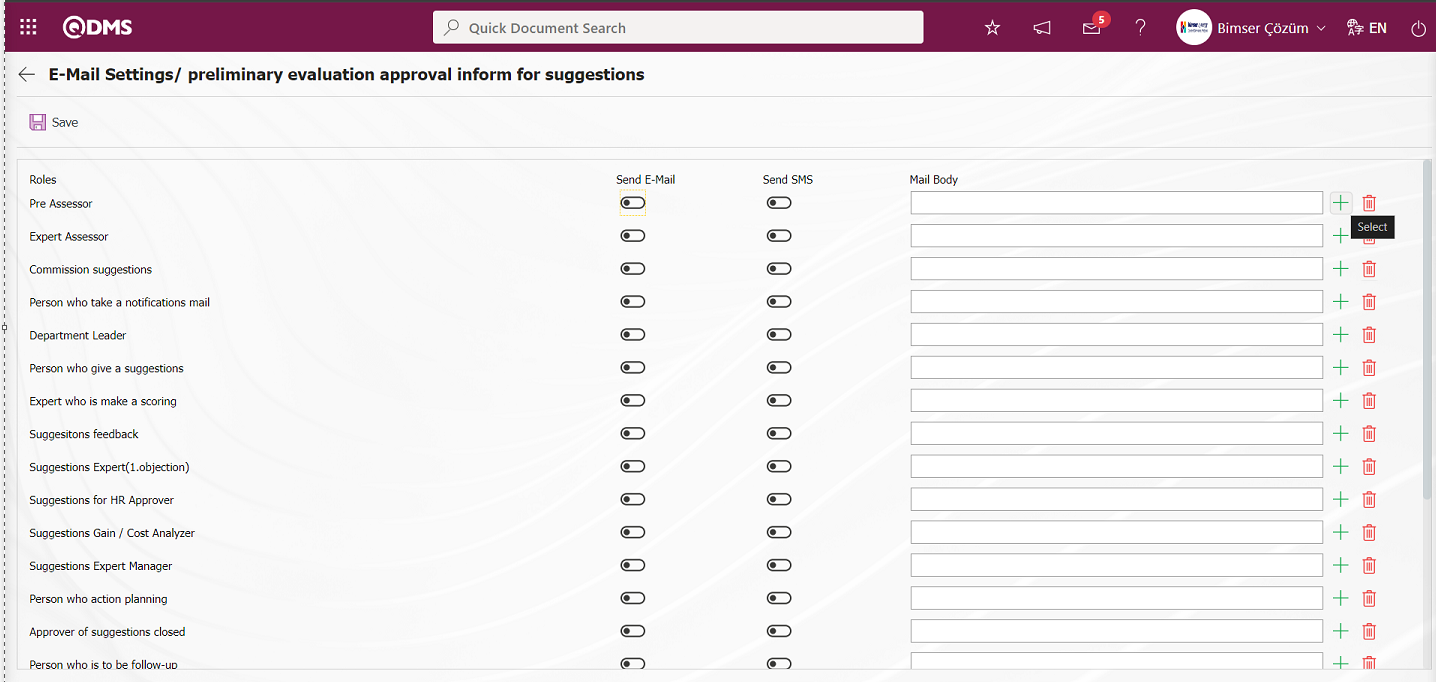
5.1.10. E-Mail Settings
Menu Name: System Infrastructure Definitions / Suggestion / E-Mail Settings
In the Suggestion System module, it is the menu where the e-mails / sms sent by the system should be sent to whom and at what stage.
With the help of the buttons on the screen;
 : Editing/changing/updating is done on the value of the e-mails selected in the list.
: Clearing the data remaining in the filter fields in the grid where the search criteria search operation on the menu screens is performed
: The process of returning the menu screen to its default settings is done.
: User-based designing of the menu screen is done with the show-hide feature, that is, the hiding feature of the fields corresponding to the columns on the menu screens.
If SMS notification will be used in E-mail Settings;
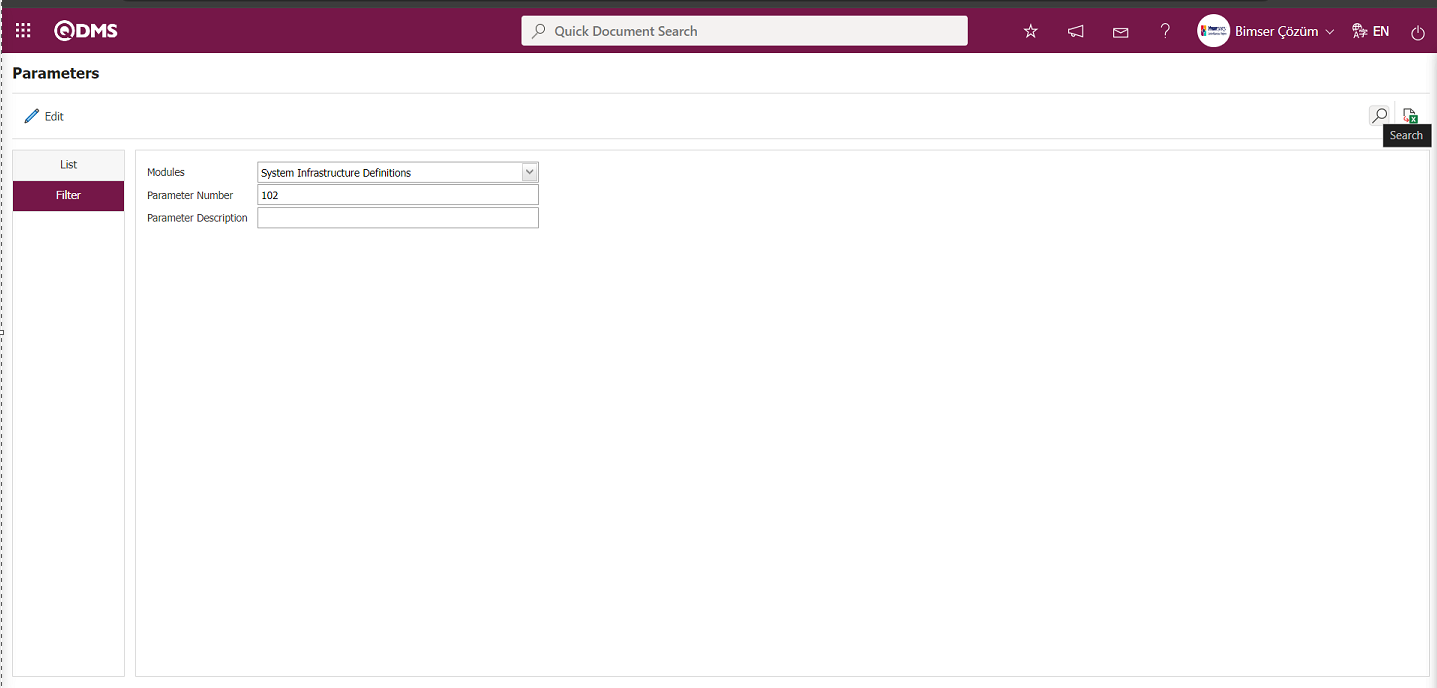
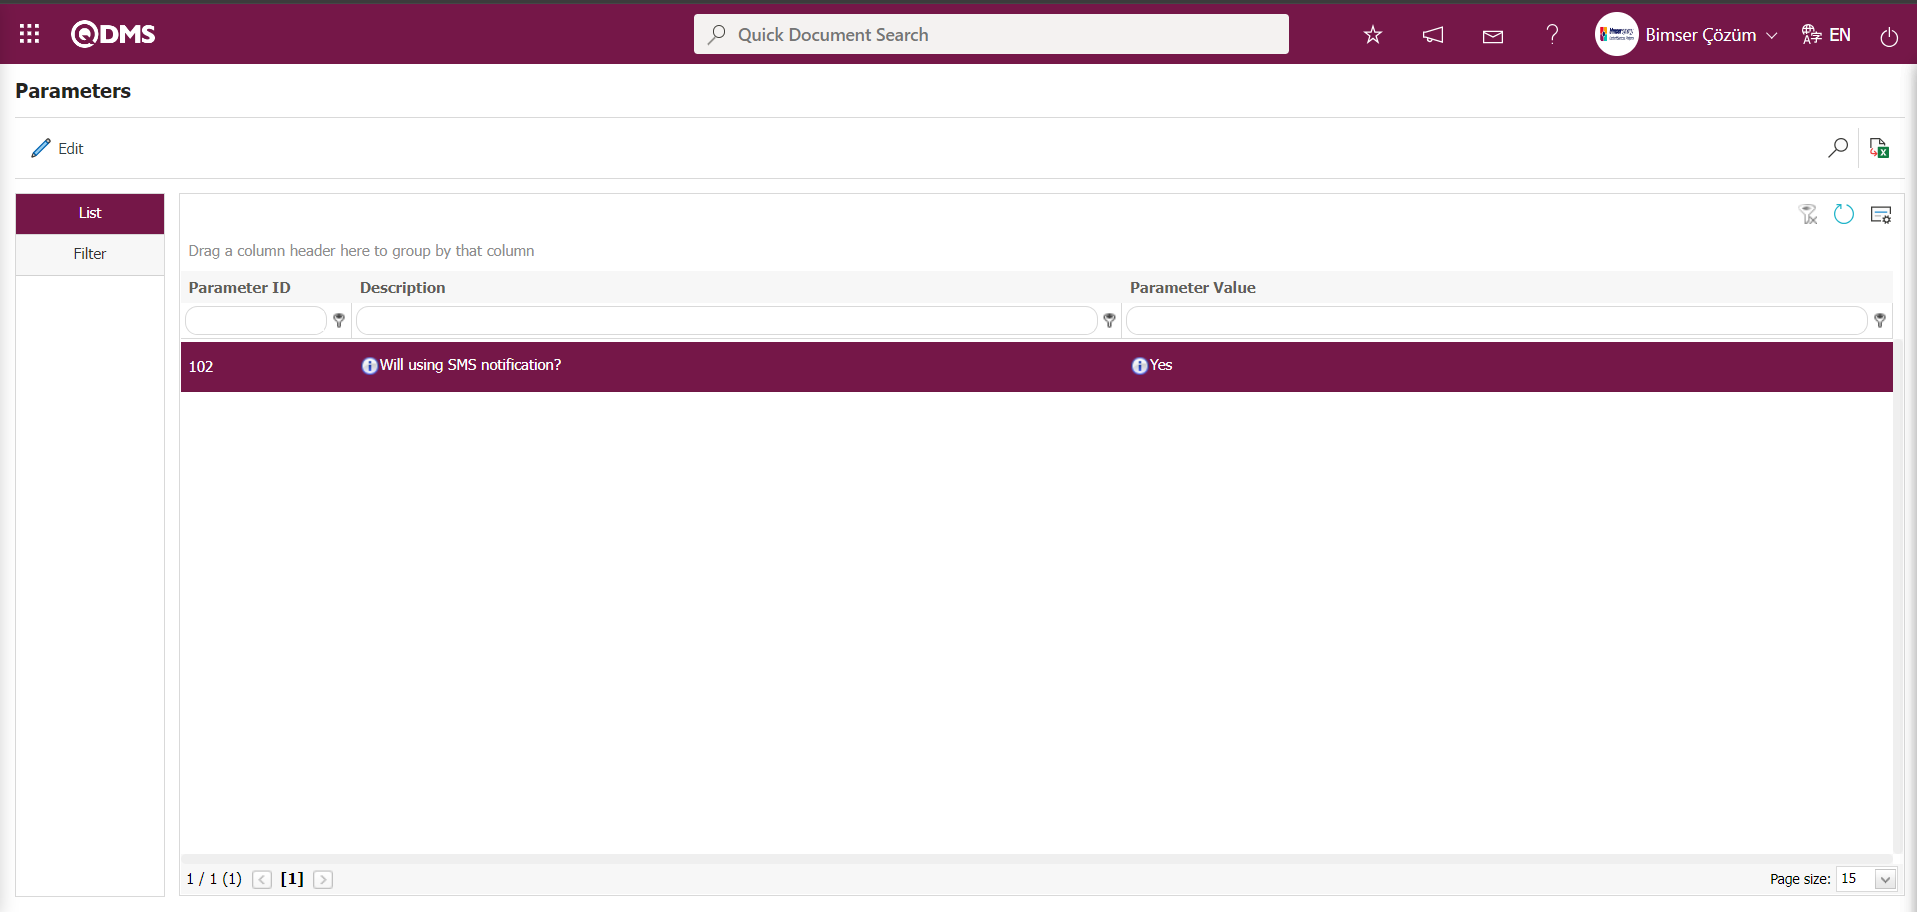
Click on System Infrastructure Definitions/BSID/Configuration Settings/ Parameters menu. In the parameters of the System Infrastructure Definitions module parameters listed on the Parameters screen, the parameter number 102 “Will using SMS notification?” is selected by typing the parameter number in the parameter no field in the Filter tab on the parameters screen and clicking the  (Search) button.
After selecting parameter 102 “Will using SMS notification? ” in System Infrastructure Definitions module parameters, click  button.

Select the parameter value ‘Yes’ on the parameters screen.
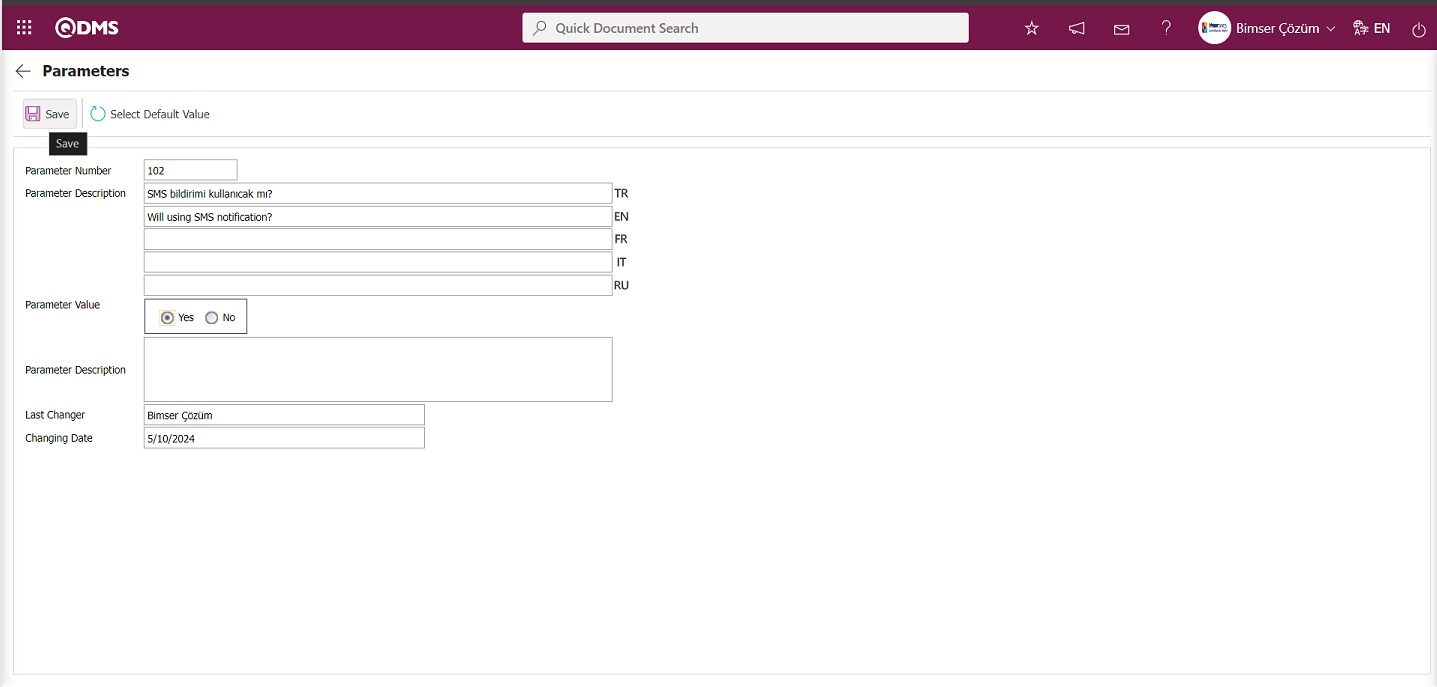
After selecting the parameter value ‘Yes’ on the Parameters screen, the  button on the top left of the screen is clicked and the parameter is activated.
After the parameter is activated, the check box related to the “Send SMS” field related to the use of SMS notification is displayed on the E-Mail Settings screen. By checking the relevant check box, SMS notification is used in E-Mail settings.
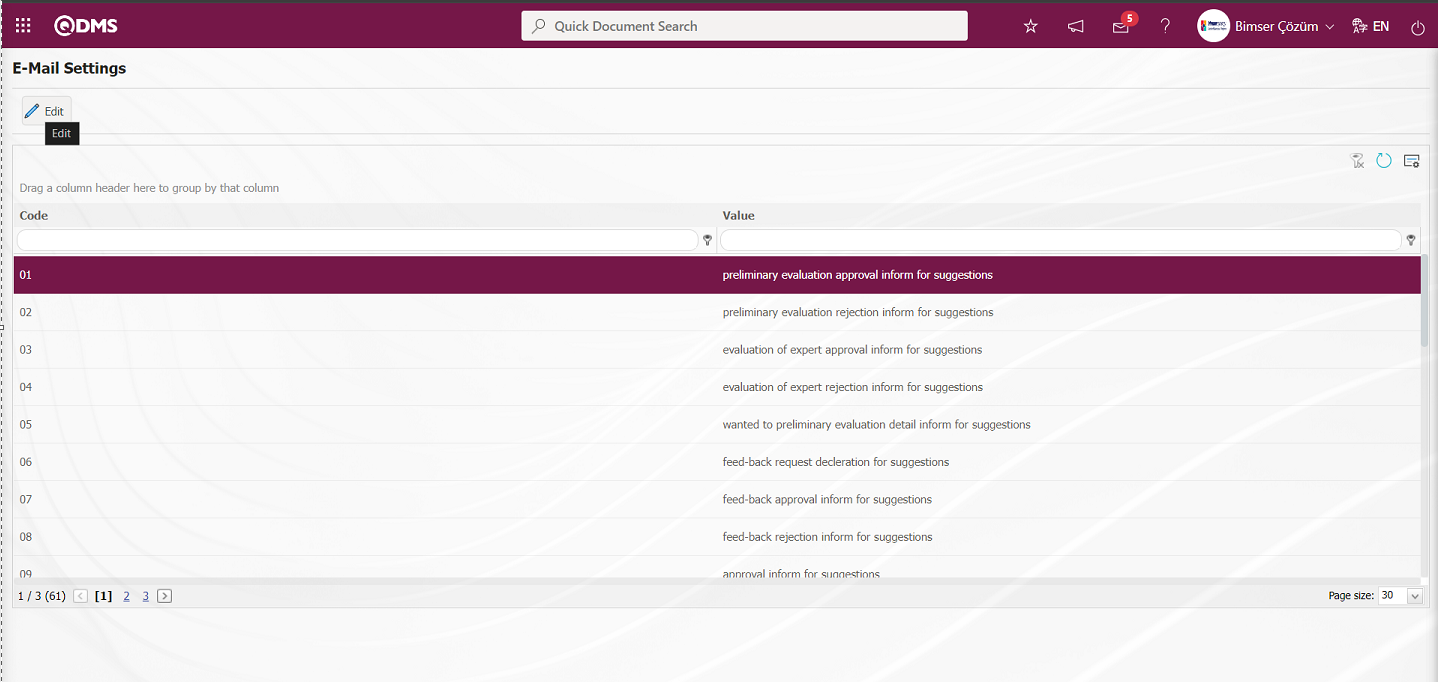
Select which step you want to send e-mail/message and click the  button.
For example: On the E-Mail Settings screen, select the “preliminary evaluation approval inform for suggestions” step and click the  button.
The E-Mail Settings/ preliminary evaluation approval inform for suggestions screen is displayed. The Roles section shows the role to which my e-mail and message notification will go.
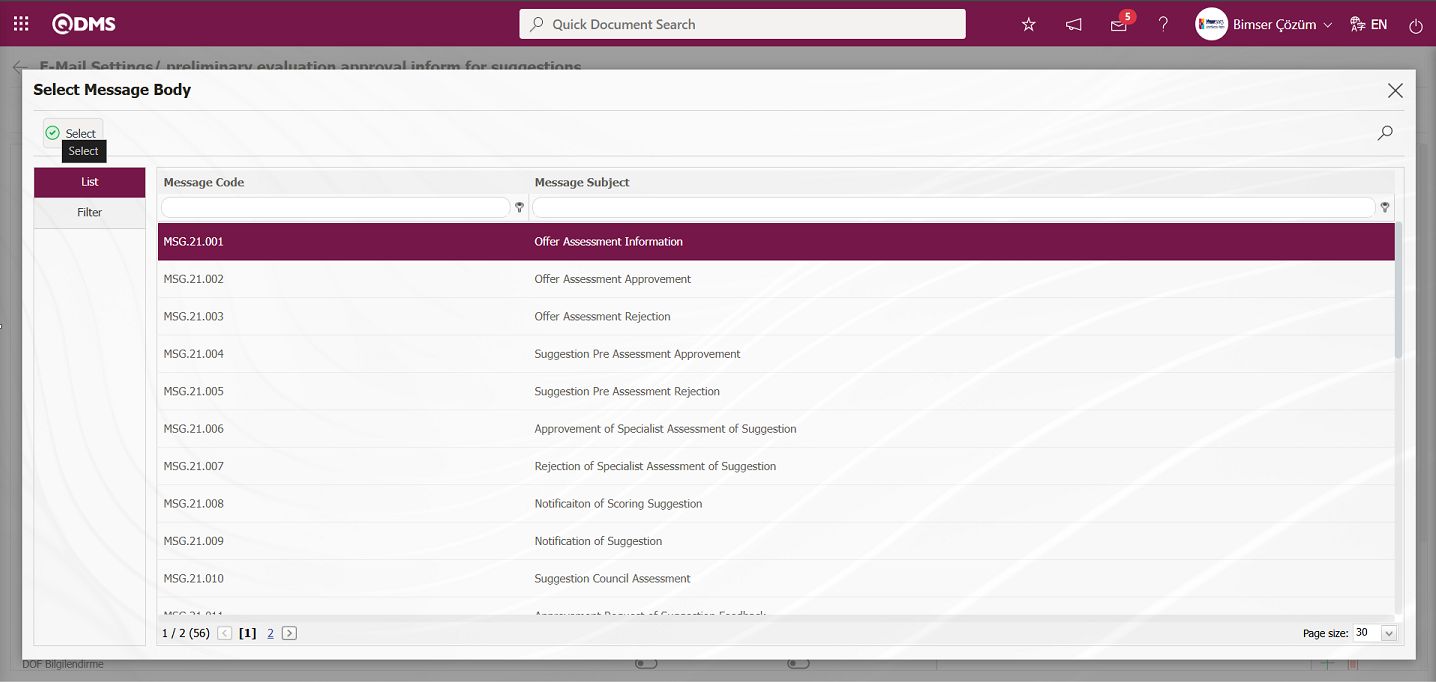
On the E-Mail Settings/ preliminary evaluation approval inform for suggestions screen, click the  (Select) button and select the message body to be sent from the relevant list in the Message Body list defined in the system. The
  (Delete) button is used to delete an incorrectly added message body.
The message bodies to be sent for the relevant roles are selected by selecting the message body in the message body list and clicking the  button.
If you want to send an e-mail to whom, the “Send E-Mail / Send SMS” check box related to that role is checked. The mobile phone number of the person defined in the role must be defined on the personnel identification screen in order to send a message
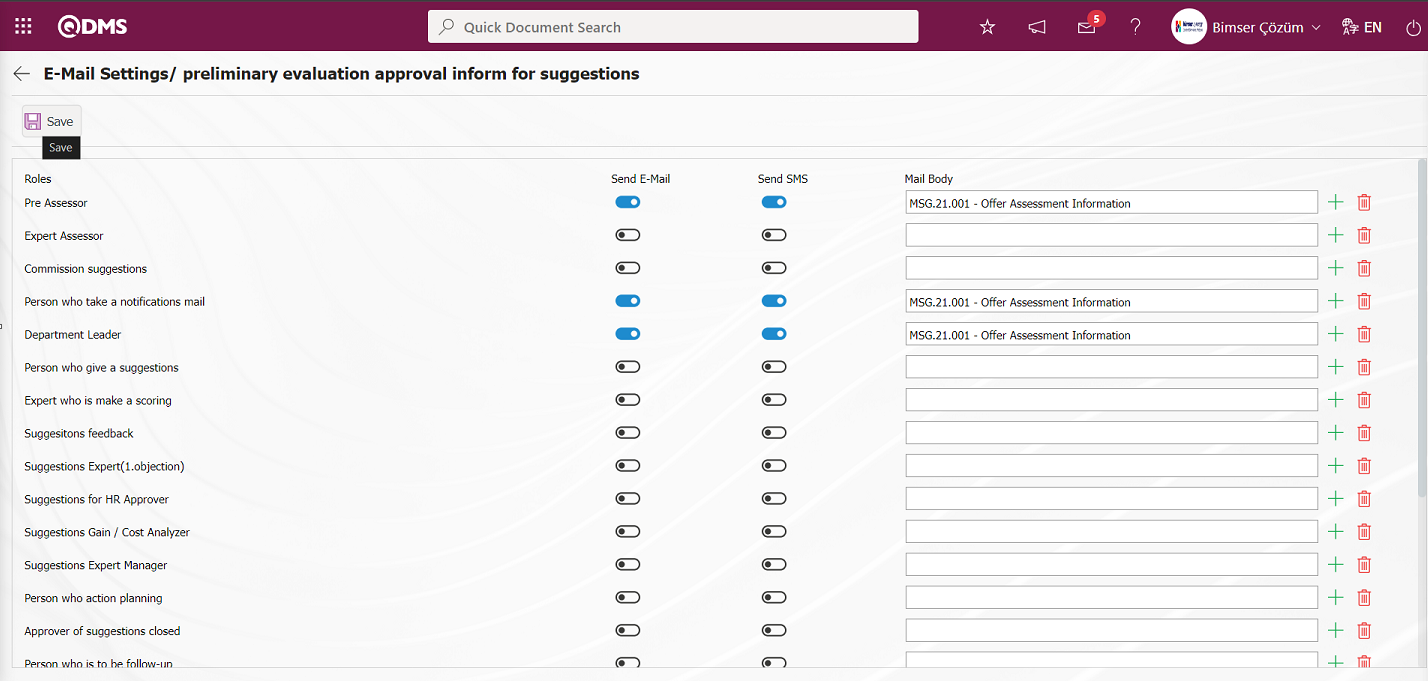
On the E-Mail Settings/ preliminary evaluation approval inform for suggestions screen, after the “Send E-Mail / Send SMS” check box related to the roles to send e-mail is checked, the E-Mail Settings registration process is performed by clicking the  button in the upper left corner of the screen.
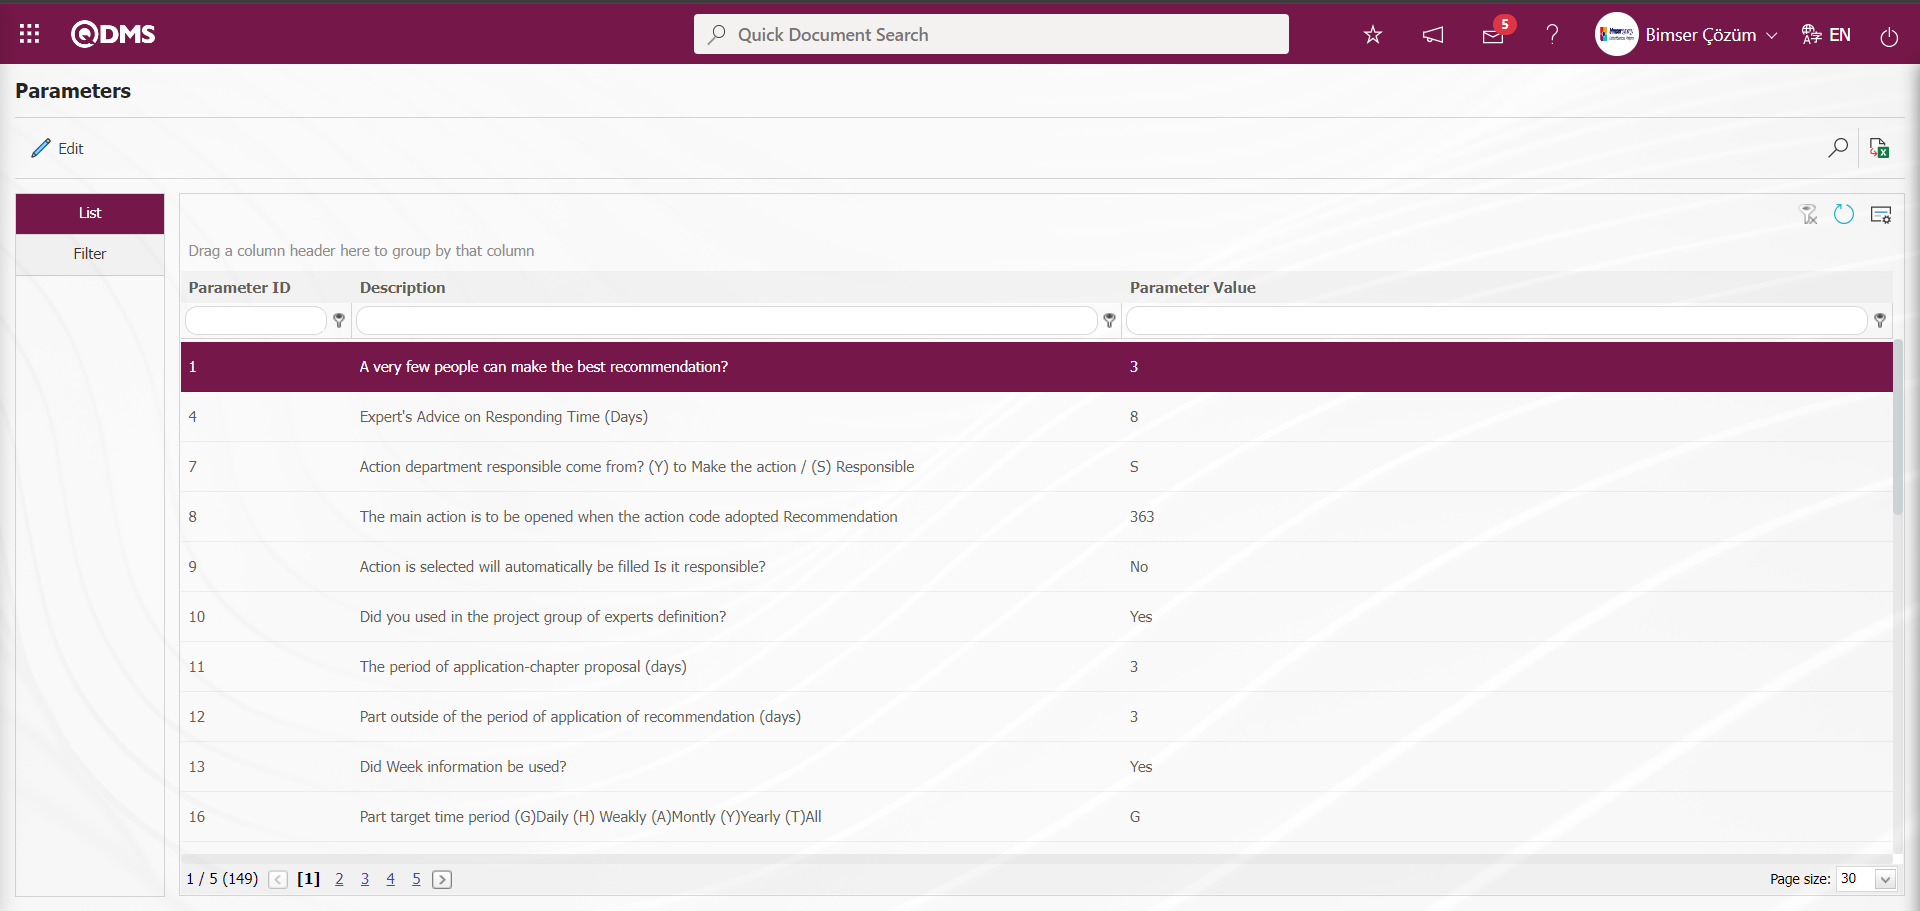
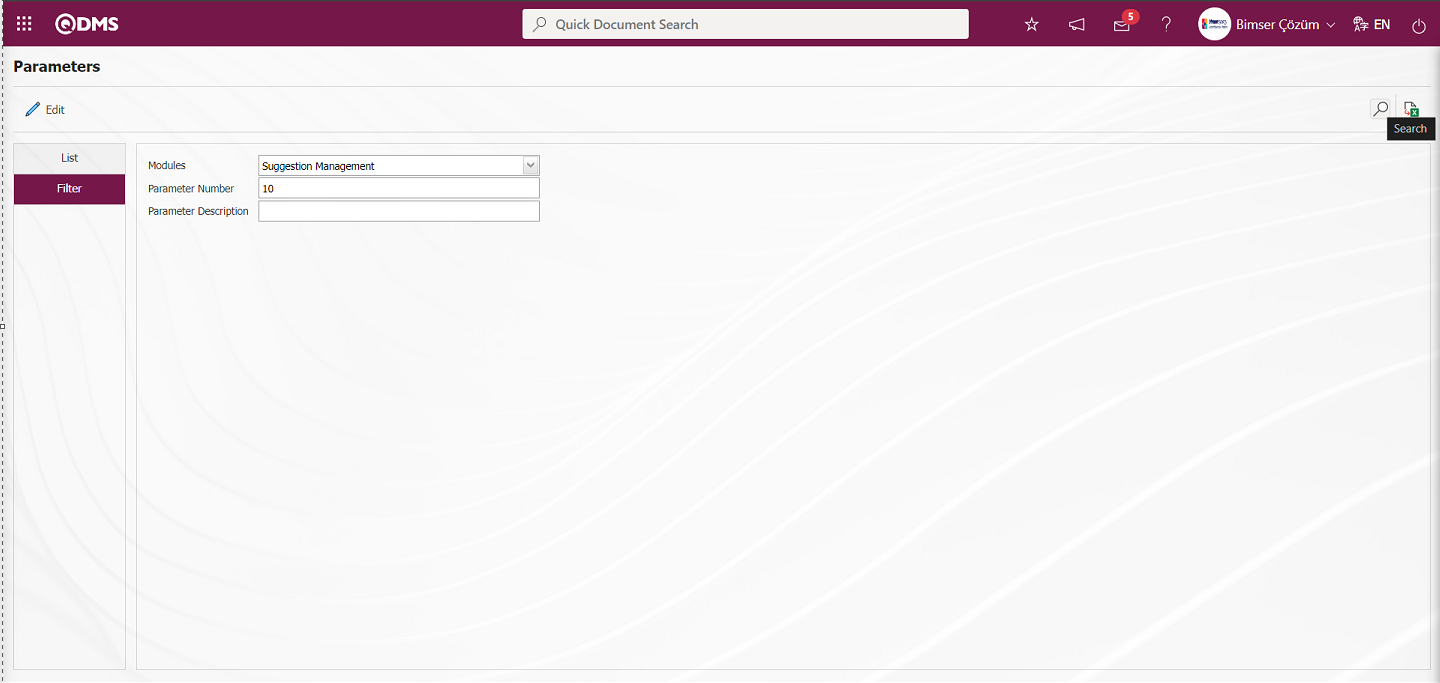
5.1.11. Suggestion Parameters
Menu Name: System Infrastructure Definitions / Suggestion / Suggestion Parameters
It is the menu where various adjustments can be made for the Suggestion System Module according to the wishes and needs of the user and the parameters can be determined (selected) accordingly. In the system, the adjustments made in this menu cover only the content of the Suggestion System module and the changes made in this menu cover all Qdms users. On the Parameters screen, we see two tabs, List and Filter tabs. In the List tab, all parameters related to the Suggestion System are listed.
With the help of the buttons on the screen;
 : Changes and edits are made on the parameter selected in the list.
 : Records are filtered and searched.
: The search criteria on the menu screens are used to clear the data remaining in the filter fields in the grid where the search operation is performed.
: The menu screen is restored to its default settings.
: User-based designing of the menu screen is done with the show-hide feature of the fields corresponding to the columns on the menu screens, that is, the hiding feature.
In the Filter tab on the Parameters screen, data is entered in fields such as Parameter Number and Parameter Description, and filtering operations are performed according to the search criteria by clicking the  (Search) button.

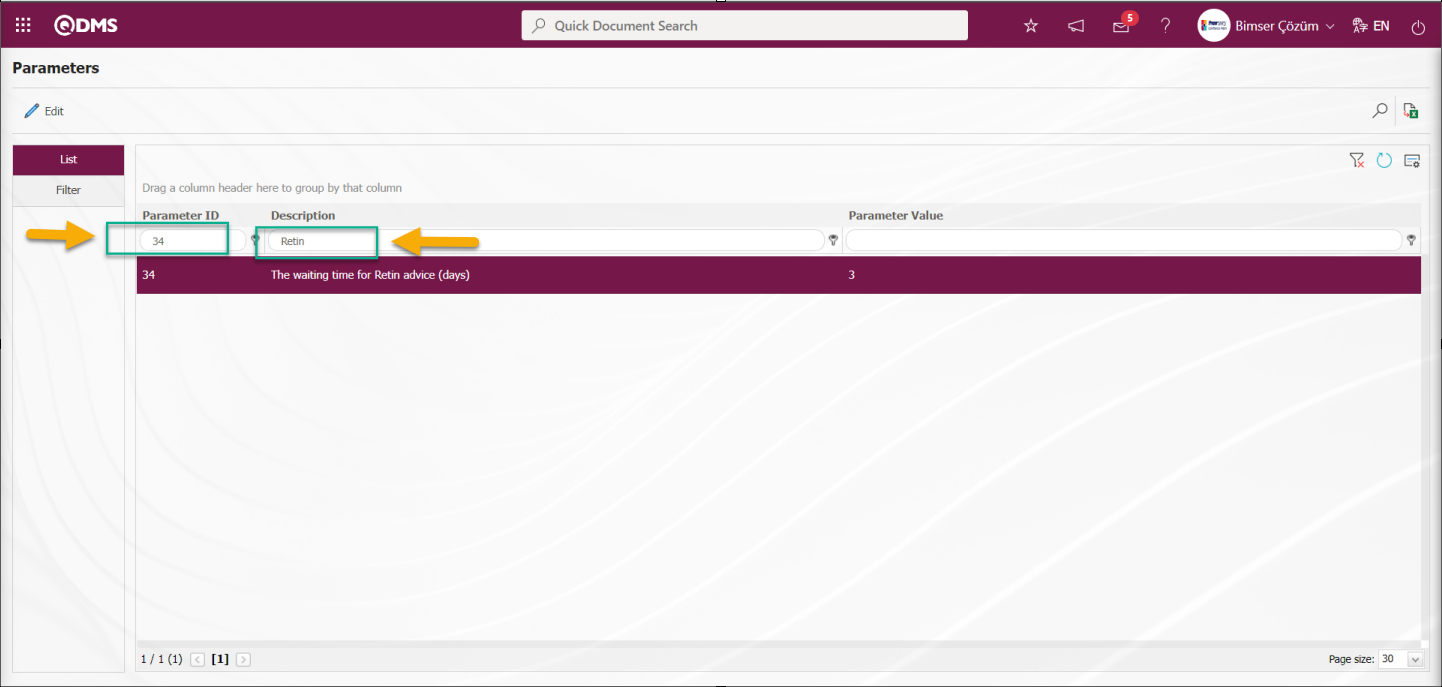
“The waiting time for Retin advice (days)” parameter numbered 34 in the Recommendation System Module parameters is selected by typing its number in the Parameter Number field in the Filter tab on the parameters screen and searching by clicking the  (Search) button.

For the search operation, it is used in the fields corresponding to the columns in the grid in the list tab on the Parameters screen. If the Parameter Number is unknown, the parameter can also be searched by typing a key word in the parameter in the Description field in the grid on the list tab. Or if Parameter Number is known, Parameter Number can be searched by typing Parameter Number in the Parameter Number field in the grid.
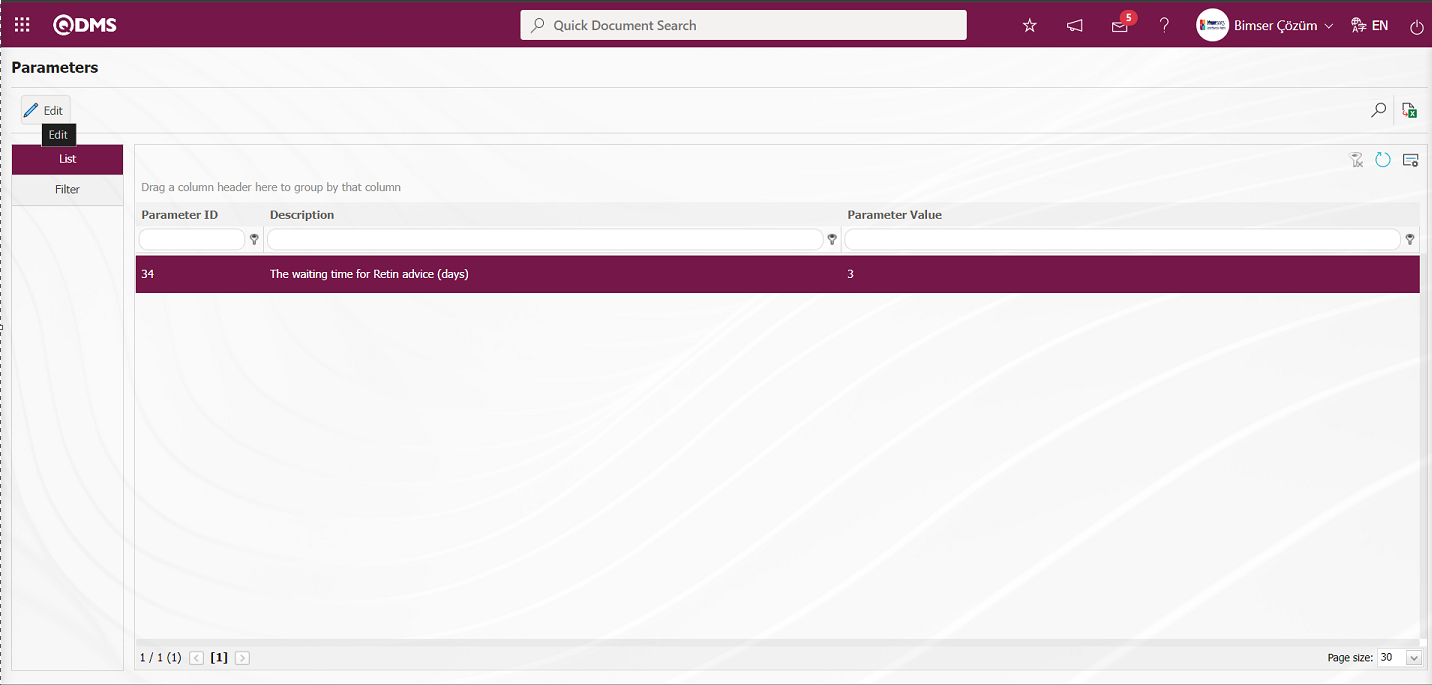
After selecting the parameter, click the  button.
In the parameters screen, enter the new value information that you want to change the parameter value. 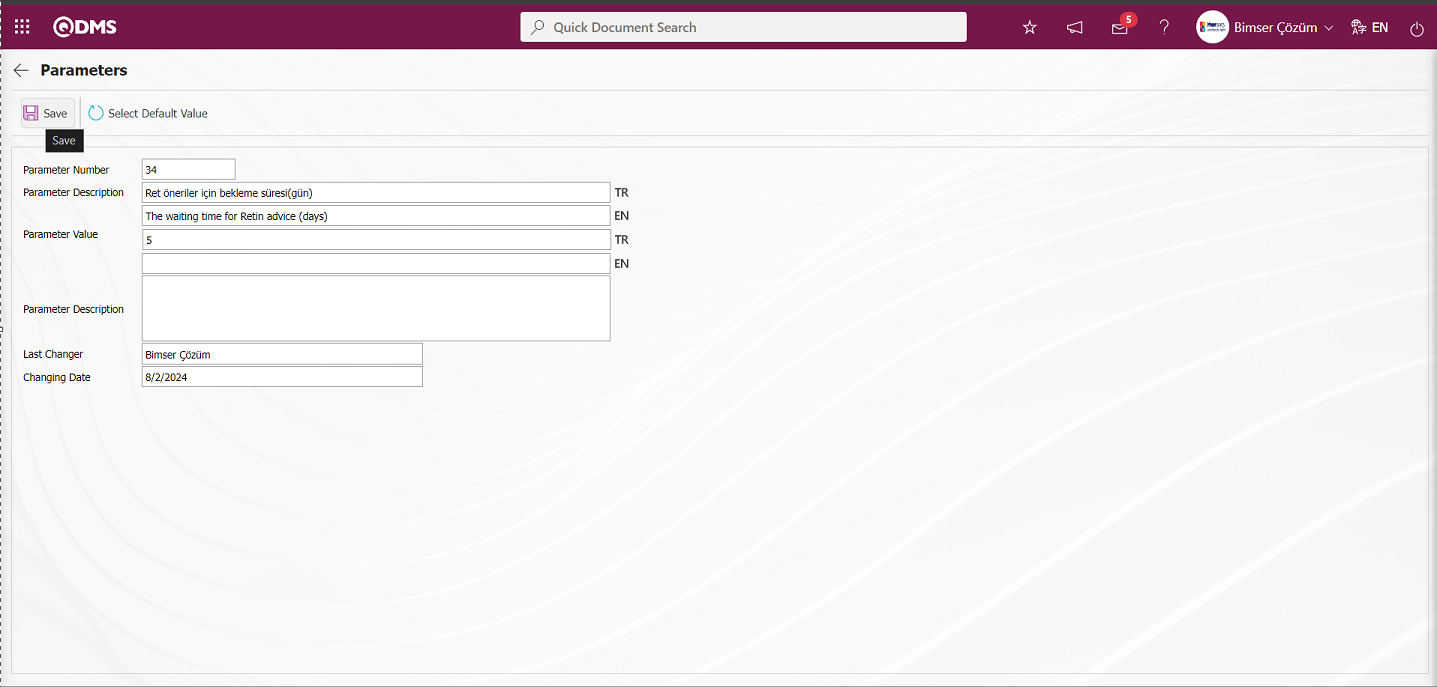
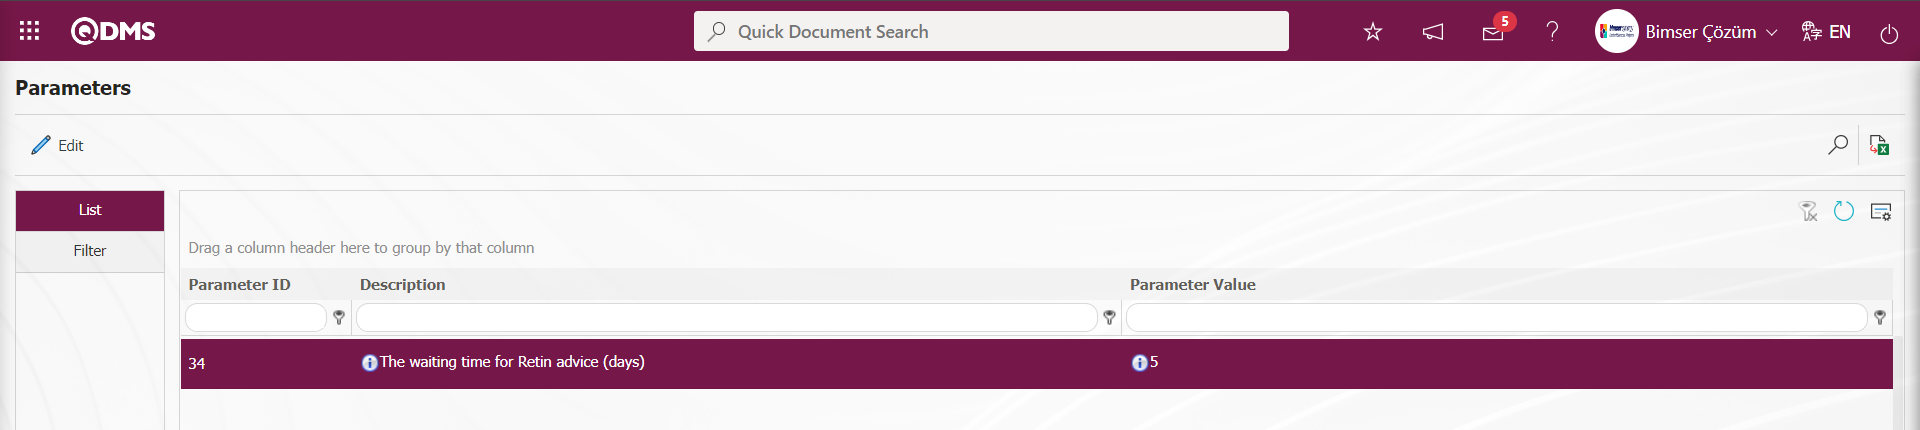
After the new value information entered in the parameter value on the Parameters screen, the parameter record update process is performed by clicking the  button in the upper left corner of the screen.
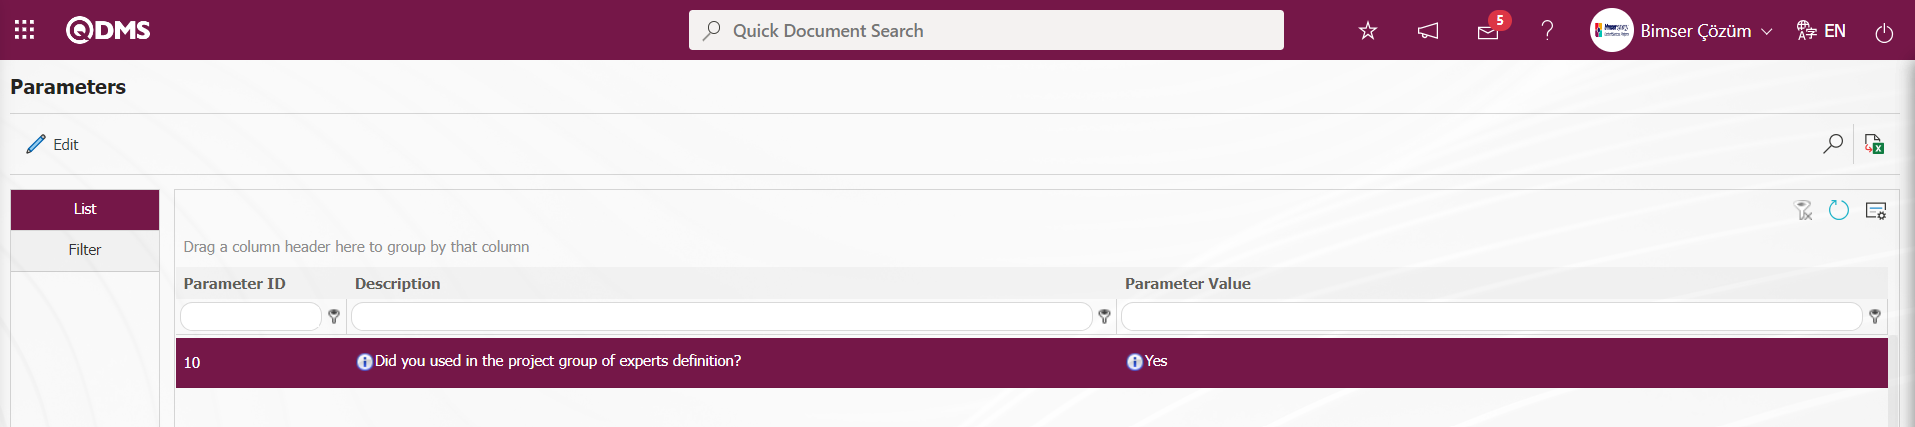
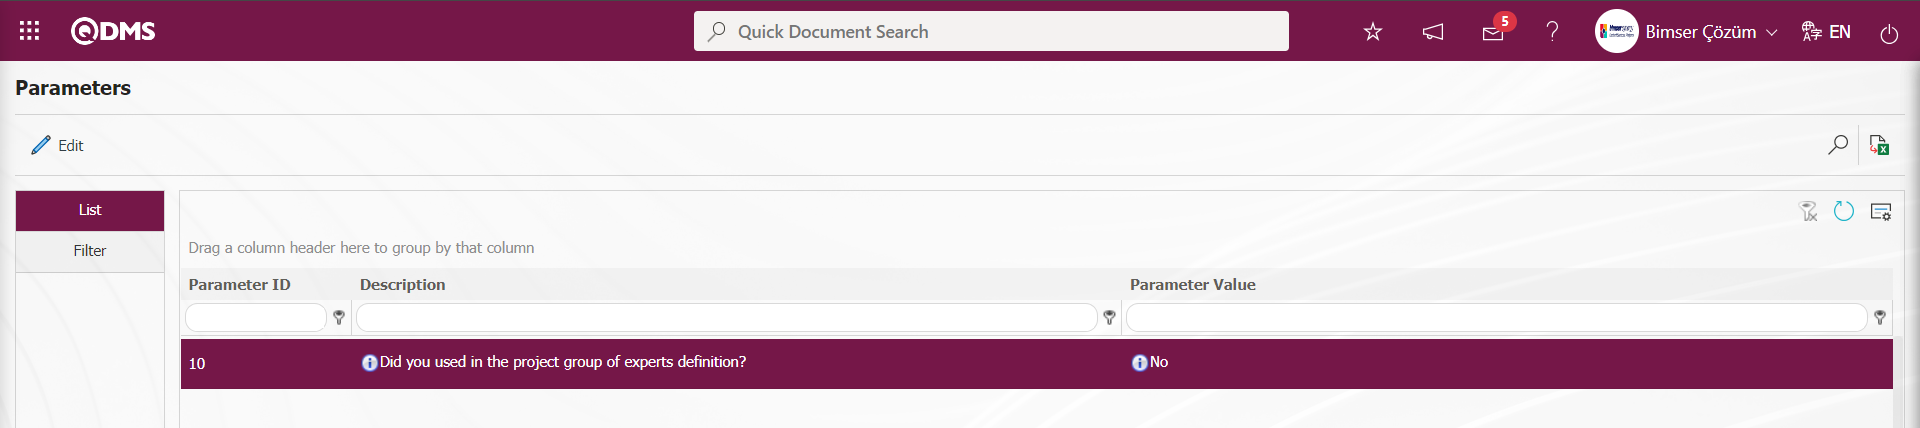
“Did you used in the project group of experts definition?” parameter numbered 10 in the Suggestion System module parameters is selected by typing the parameter number in the Parameter Number field in the Filter tab on the parameters screen and clicking the  (Search) button.
After selecting the parameter, click the button.
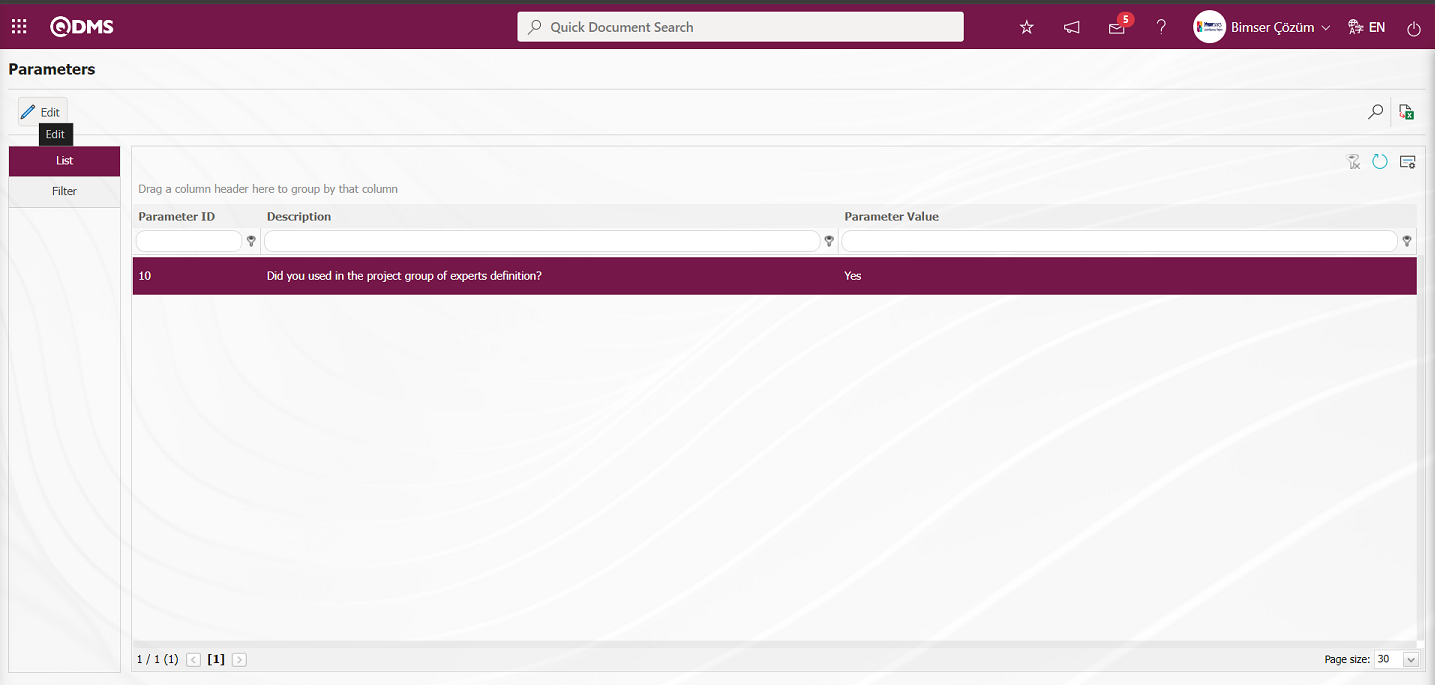
In the parameter value options on the parameters screen, select the relevant check box “No”

After selecting the parameter value “No” on the Parameters screen, the parameter passive registration process is done by clicking the  button in the upper left corner of the screen. After the parameter is disabled, the project group field is not displayed on the screen where the Specialist/Leader identification process is performed and the project group selection process is not performed.
In order to list the parameters related to Action in the Suggestion System module in the list tab, type the keywords related to “Action” in the Parameter Description field in the Filter tab or in the grid and click the (Search) button.

It is provided to list the parameters related to the Action and passed in the content of the Action definition.

In this way, by using the fields with search criteria in the filter tab and the fields in the grid in the list tab on the parameters screen, the related parameter is searched and operations such as activating the parameter whose content is displayed by clicking the button, deactivating the activated parameter or changing the value of the parameter are performed.
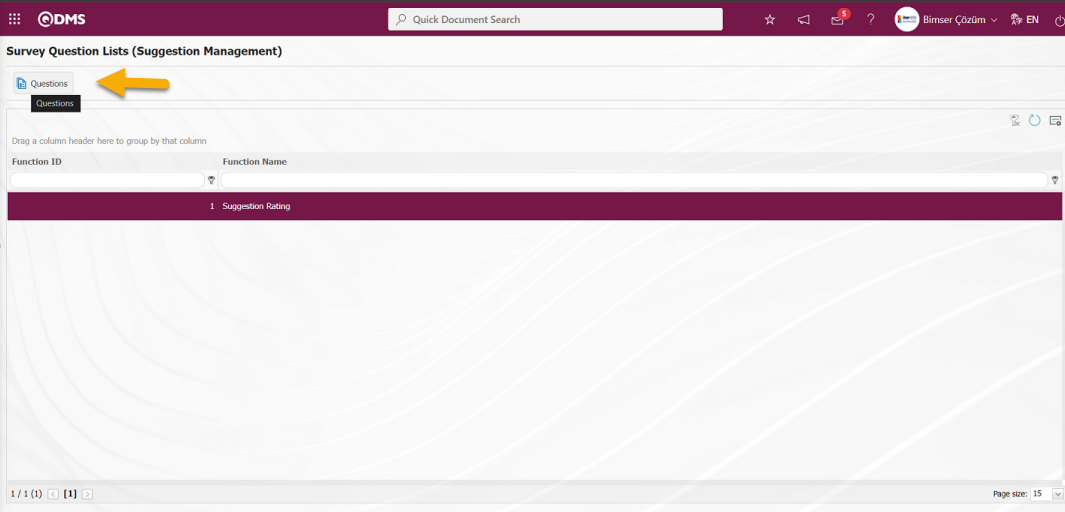
5.1.12. Survey Question Lists
Menu Name: Menu Name: System Infrastructure Definitions / Suggestion / Survey Question Lists
This is the menu where Survey Question lists for the Suggestion System Module are prepared for the relevant functions. It is used for users who do not have a Survey Operations Module to design a Survey template for the relevant function in this module as in the Survey Template screen opened in the Survey Operations Module. This function is the “Suggestion Rating” function. When the “Suggestion Rating” function is selected as a function on the Questionnaire Question Lists (screen, the  button on the top left is clicked and template questionnaires are designed and saved in this menu in the system in the logic of the Supplier Evaluation module. After the template surveys are designed, if the parameter value of the parameter 117 numbered “Based on the survey template code to be used”, which is the parameter related to the 1st function of the Suggestion System module, is empty, the system automatically defines the survey code to the parameter value. In order for this parameter to be active, the parameter value must be activated by selecting “Yes” in the parameters screen opened by clicking the button while the “Did Based on the survey will be used?” parameter is selected from the Suggestion System Module parameters.

The survey defined in the survey lists menu is displayed in the scoring phase. By answering the questions of the displayed questionnaire, the scoring phase is completed and the next phase is started.
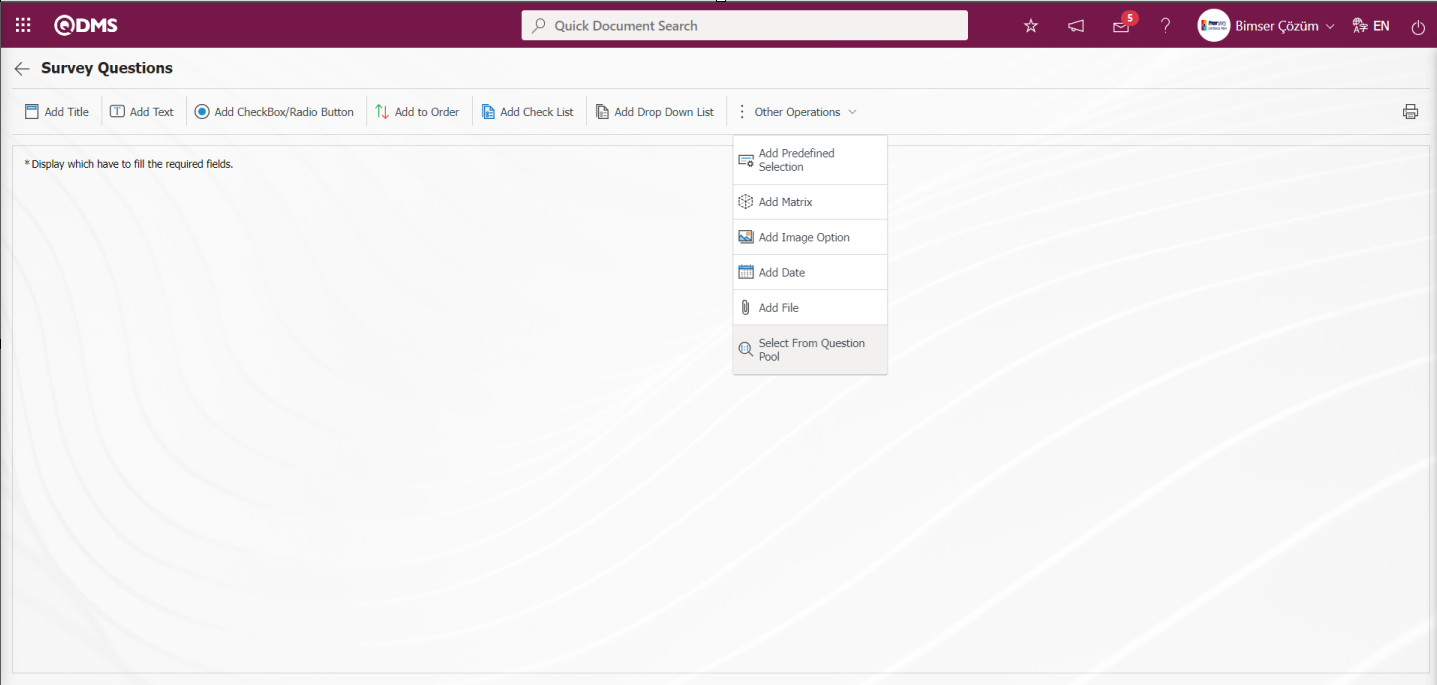
With the help of the buttons on the screen;
 : Add questions to the survey to be defined.
By clicking the button, the screen for adding questions for the relevant function for the Suggestion System module is displayed like the screen for adding questions in the structure of the Survey Module and the process of adding questions from the question options is performed.
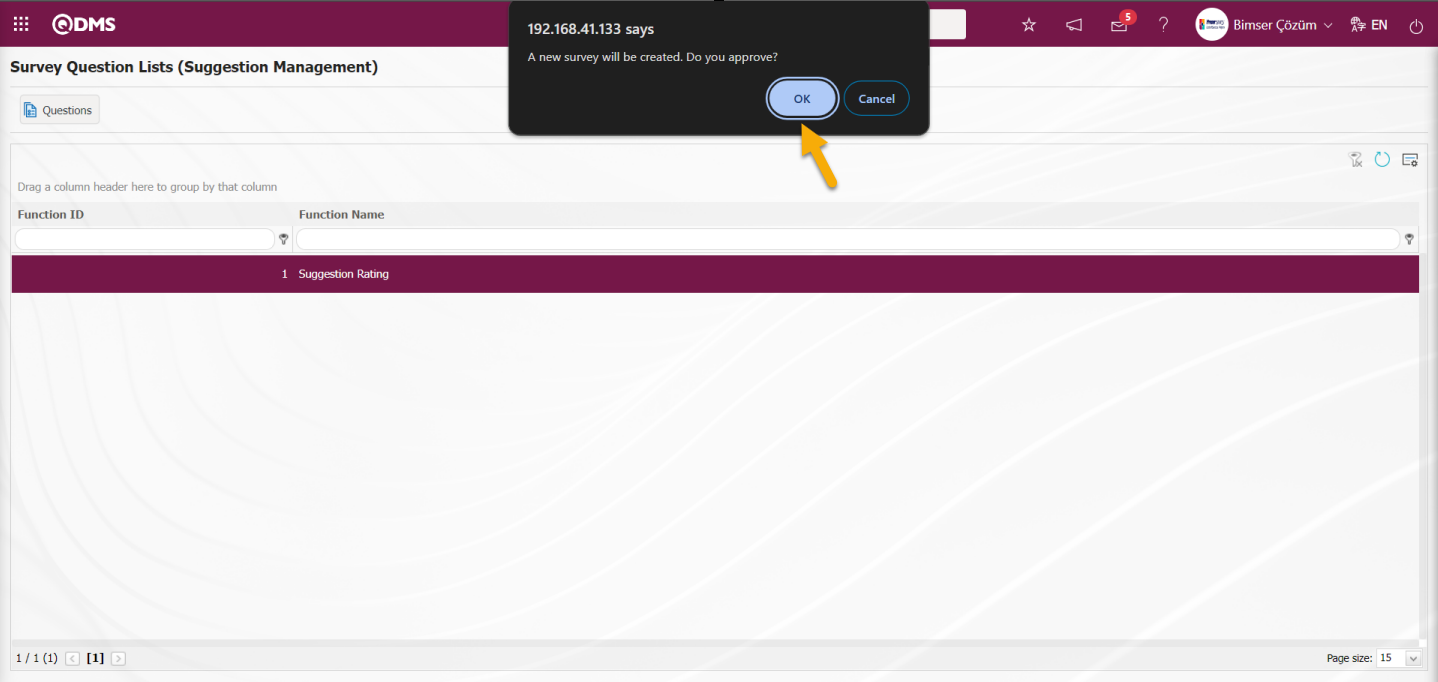
When no parameter code is defined in the parameter value of the parameter 117 “Based on the survey template code to be used” of the Suggestion System Parameters, the system displays the warning message “A new survey will be created. Do you approve?” warning message, the survey questions screen is displayed by clicking the OK button. A template survey is designed using the question options on the Survey Questions screen. If a survey code is defined in the system for the parameter, the questions screen of the defined survey opens in update mode. By opening the Survey Questions screen, editing and updating the questions is done.
With the help of the buttons on the screen;
 : It is the button that allows you to print your questions.
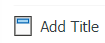
 : This button is used if you want to section the questionnaire and add a title. After each title separator, the number of the defined question comes as 1.
 : It is the question type used when the people who fill out the questionnaire are asked questions that require free information.
 : It is used when the answers given are selected from the specified options.
 : It is used when all options of a question are preferred and listed in order of priority. The options are listed in order from most to least or from fewest to most.
 : If there are too many options in the question to be created and they need to be selected like a check list, a multiple choice list type question can be added.
 : This is the question type to be used in case of selecting a single answer from the drop-down list.
 : This question type allows the selection of lists in the fields of personnel, customer, department, company profile and product defined in Qdms.
 : It is a question type created in the form of a matrix in which sub-questions are defined under the question text.
 : It is a question type in the form of a matrix with pictures where pictures are added in the question text field and picture addition is made in the options.
 : On the screen opened by clicking, the user can add a question to select the date.
 : Creates an Additional File field for adding additional files to the questionnaire.
 : It is the question type that is selected from the list of question categories defined in the Question Categories screen opened in the Question Pool menu in the Survey module sub-structure.
Adding Sample Question options;
 By clicking the button, the Survey is segmented and a title is added.
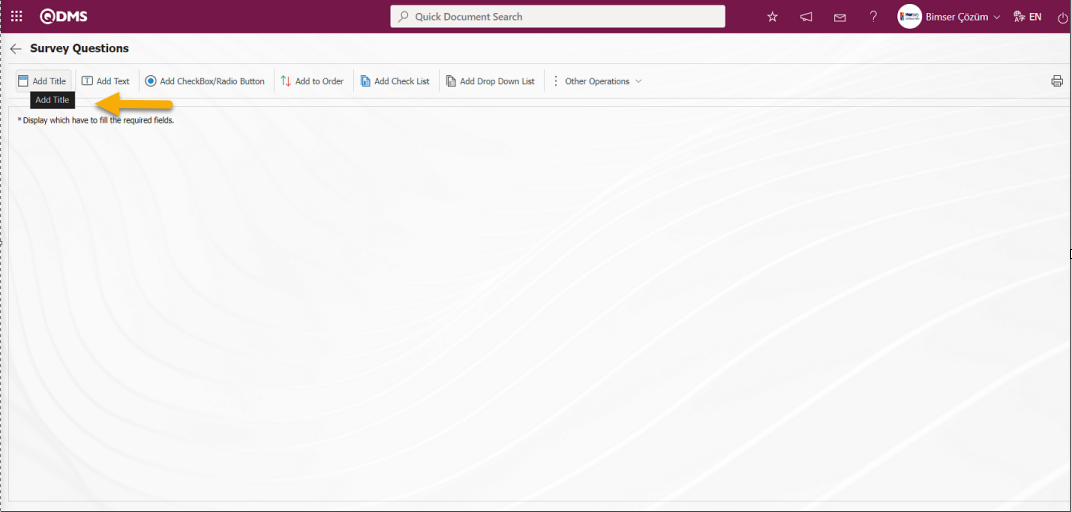
The Title Definition screen opens.
Related fields are defined on the screen that opens:
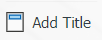
Title:This is the field where the title text information is written on the Add Title screen.
The relevant title is added to the Add title field and the registration process is realized with the  button.
With the help of the buttons on the screen
 : The defined question information is deleted.
 : Editing and updating operation is done on the defined question information.
 : Copy the defined question information
 : It is the question type used when people who fill out the questionnaire are asked Click the button to add the defined Text Definition question type. Text Definition screen opens.
The relevant fields are defined on the screen that opens:
Question: This is the field where the question text to be asked on the Text Definition screen is written in the Turkish field. In case of use in other languages, the question data to be asked is entered in the field with the relevant languages.
Row Number: This is the field where the number of lines is entered on the Text Definition screen. It is used to determine the size of the text. If this field is 0 or 1, the area to be answered is seen as a single line.
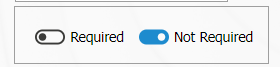
It is the field where the obligation to answer the question to be asked is determined. Check boxes related to the relevant field are checked according to whether the question has to be answered or not.
Related Question/Option: This is the field where the question is displayed depending on the option of the defined optional question. By selecting the option of the related question and question, when the option of this question is selected, the related question is displayed.
If there is an answer requirement, saving is not allowed when the question is not answered, a warning message is given. In the Text Definition screen, Turkish and English language equivalents are written in the Question Text field and the registration process is done by clicking the  button in the upper left corner of the screen.
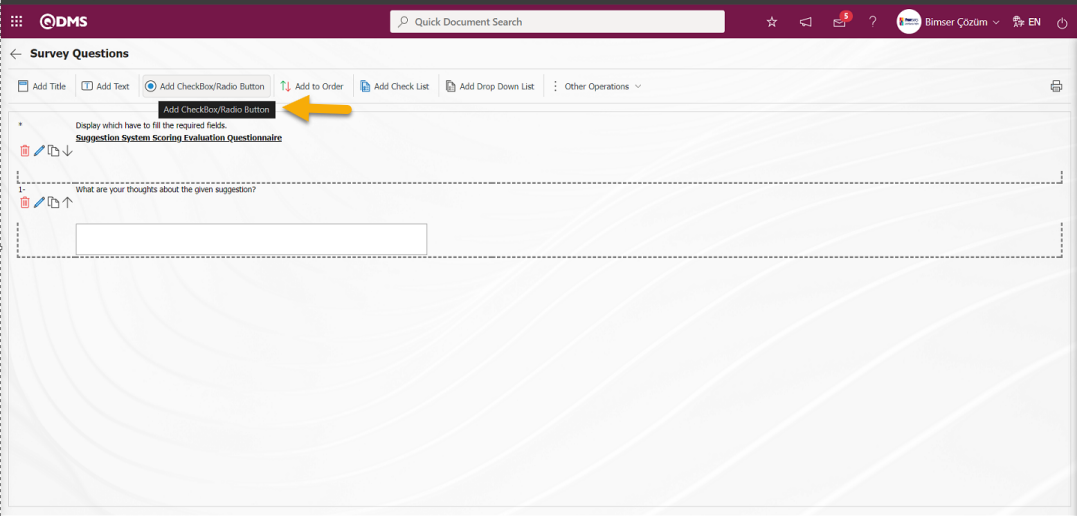
 : It is a question type in which the answers given are selected from the specified options. Click the button to add Add CheckBox/Radio Button type to the survey defined in the Survey Questions screen. Add Option** screen opens.
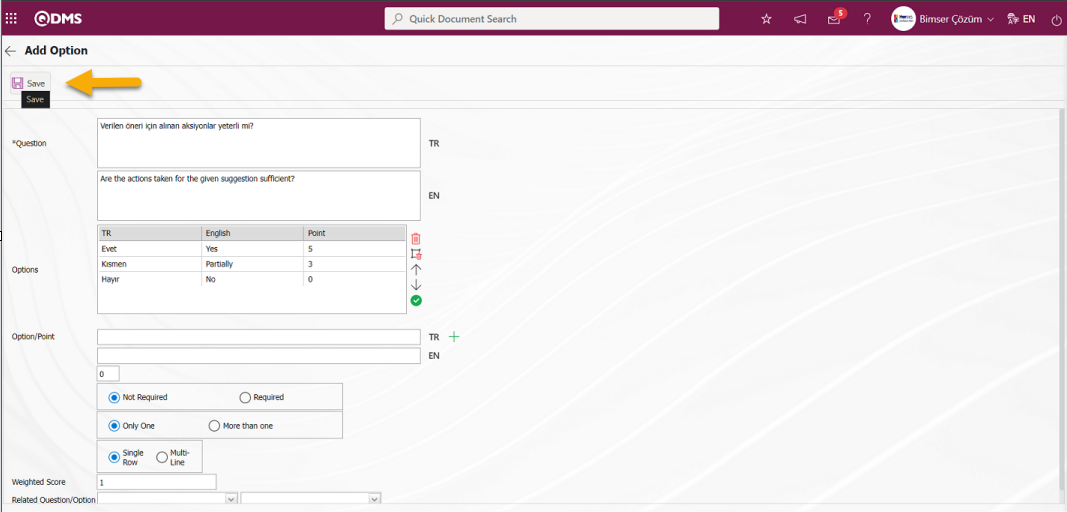
Related fields are defined on the screen that opens:
Question Text:This is the field where the question text to be asked on the Add Option screen is written in the Turkish field. In case of use in other languages, the question data to be asked is entered in the field with the relevant languages.
Options:This field contains the list of options on the Add Option screen.
Option/Point: This is the field where the options of the question are written on the Add Option screen. If the survey will be a scored survey, the score is also written for the options entered.

With the help of the buttons on the screen
 (Delete Row): On the options screen, the selected option is removed from the option list.
 (Delete All): Delete all options on the options screen.
 (Up): In the options screen, the selected option is moved upwards in the option list.
 (Down): In the options screen, the selected option is scrolled down in the option list.
 (Select&Move): It is possible to edit and update the selected option on the options screen by moving it to the Option-Score field.
In the Option-Point field, the option and score information of the question is written and added to the Options list by clicking the (Add CheckBox/Radio Button) button.

The obligation to answer the question to be asked is determined from this field. 
Selecting 1 or more than 1 of the options is determined according to the check box in this field. 
The options can be displayed side by side (Single Line) or stacked (Multi-Line). 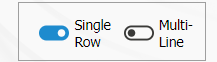
If the multiline option is selected, a field called number of columns will appear and the options of the question will be displayed in as many columns as the specified value. 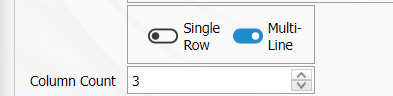
Calculate Method:In the Add Option screen, if the questionnaire is a scored questionnaire, this is the field where the method by which the scores given to the options of this question will be calculated is determined. For example; A question in a survey that 10 people will answer has 4 options and each option has its own points. Assuming that the score of the first option is 5, if 10 users choose the first option, it is determined whether these scores are added up (50) or averaged (5) and included in the average score of the survey.

Weighted Score: In the Add Option screen, if the questionnaire is a scored questionnaire, this is the field where the weight of the question in the questionnaire is determined. If all questions are equally weighted, a value of 1 should be entered. If it is written as 0, the survey score is not calculated.

Related Question/Option: This is the field where the question is displayed depending on the option of the defined optional question. By selecting the option of the related question and question, when the option of this question is selected, the related question is displayed.
After filling in the required fields on the Add Option screen, the registration process is realized by clicking the  button in the upper left corner of the screen.
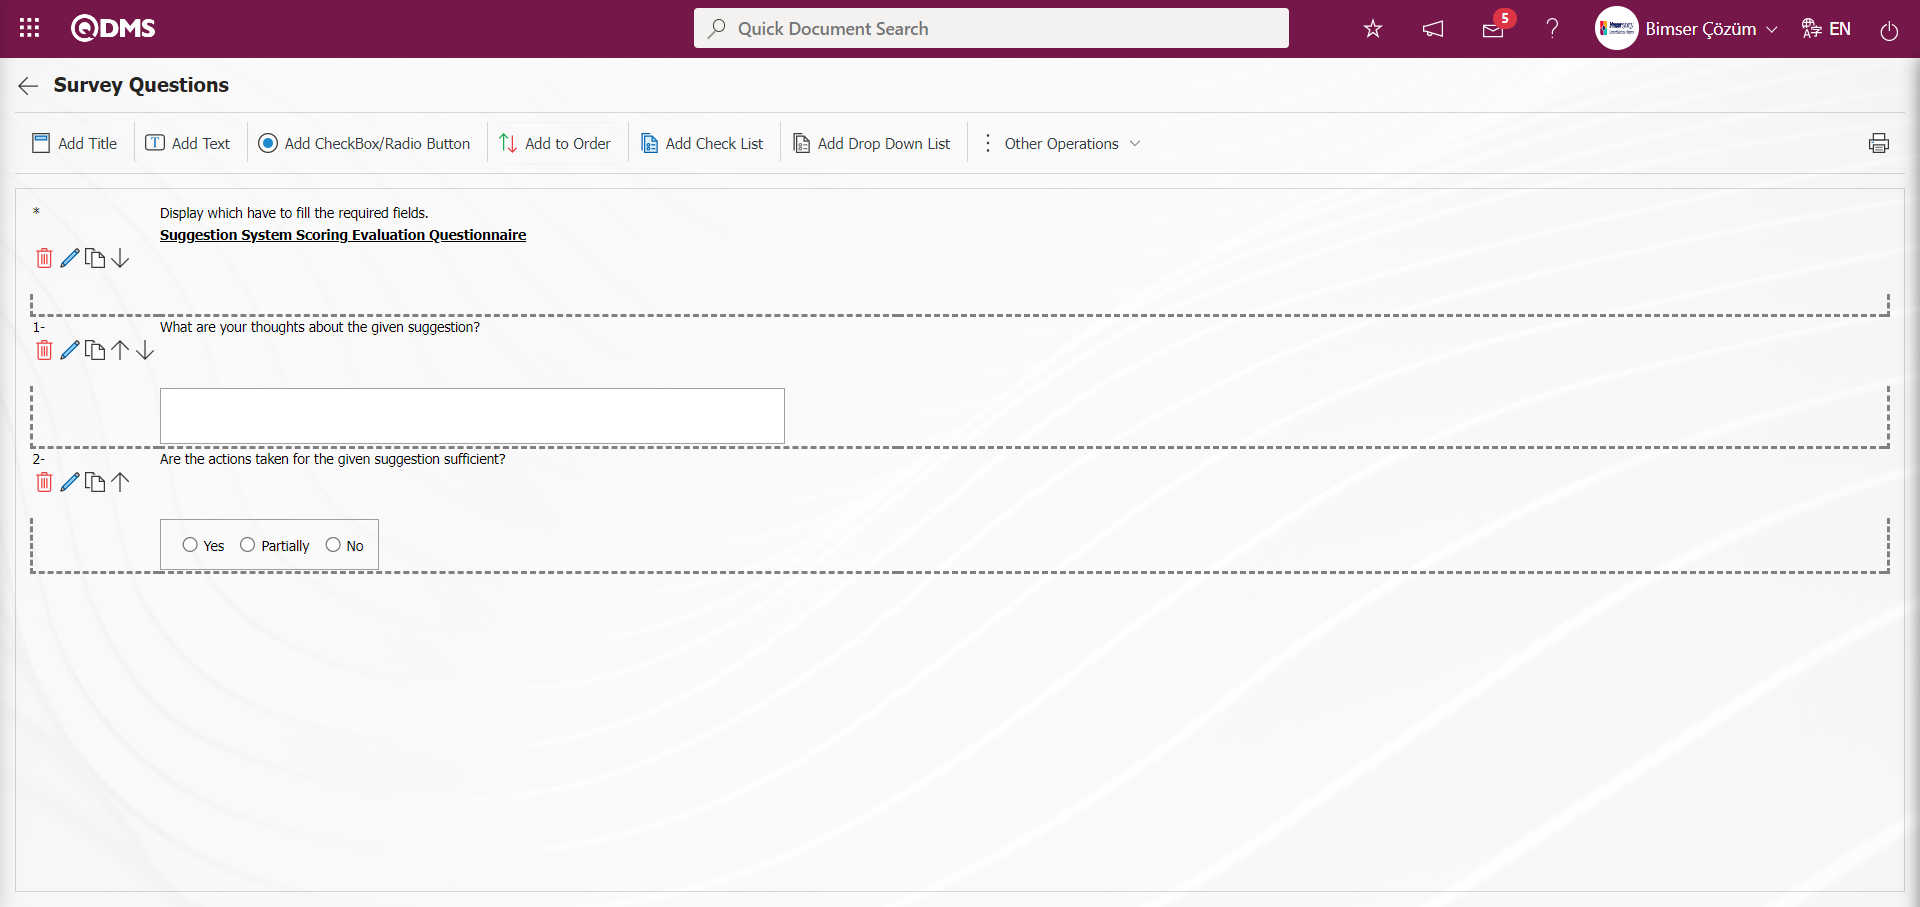
In the Survey Question Lists menu, the Survey Question Lists definition process is done by defining a few question options as an example on the Survey Questions screen opened by clicking the  button while the relevant function is selected. The process of defining other question options is done in the same way on the question definition screen of the Survey Operations Module. After the question definition process is done, the system automatically defines the survey code in the parameter 117 “Based on the survey template code to be used”, which is the relevant parameter of the related module of the Survey Question Lists Suggestion System) menu.
The survey code of the survey defined in Survey Question Lists menu is assigned to the parameter. When a survey is used as a scoring method in the suggestion module, the survey assigned to this parameter is displayed at the scoring stage. This stage is done by using the survey in the scoring stage. In order to use the survey at this stage, the parameter value of the “Did Based on the survey will be used?” parameter numbered 116 from the “Suggestion System Module parameters” is selected as “Yes” and the parameter is activated.

After the parameter is activated, the survey defined in the survey question lists menu in the scoring stage is displayed at this stage, the survey questions are answered and the scoring stage is completed and the Suggestion passes to the next stage.
The scoring phase is done as a“Suggestions awaiting for Scoring” task on the user's “My Pending Jobs” page.
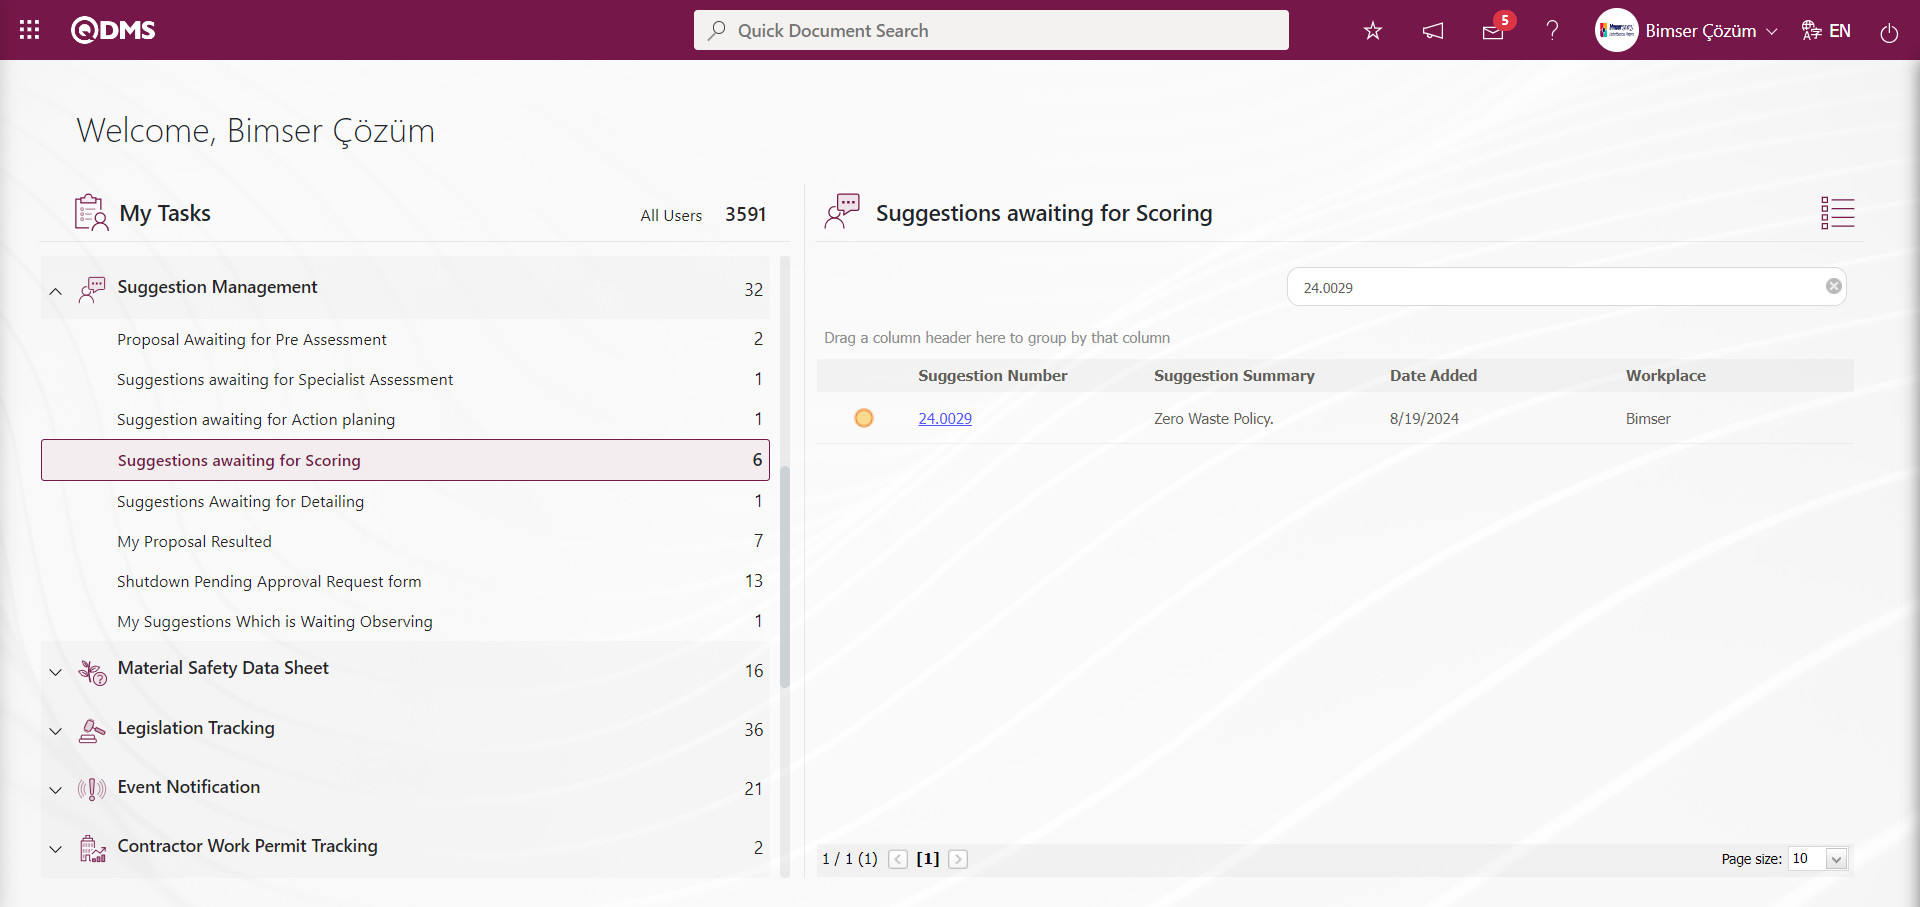
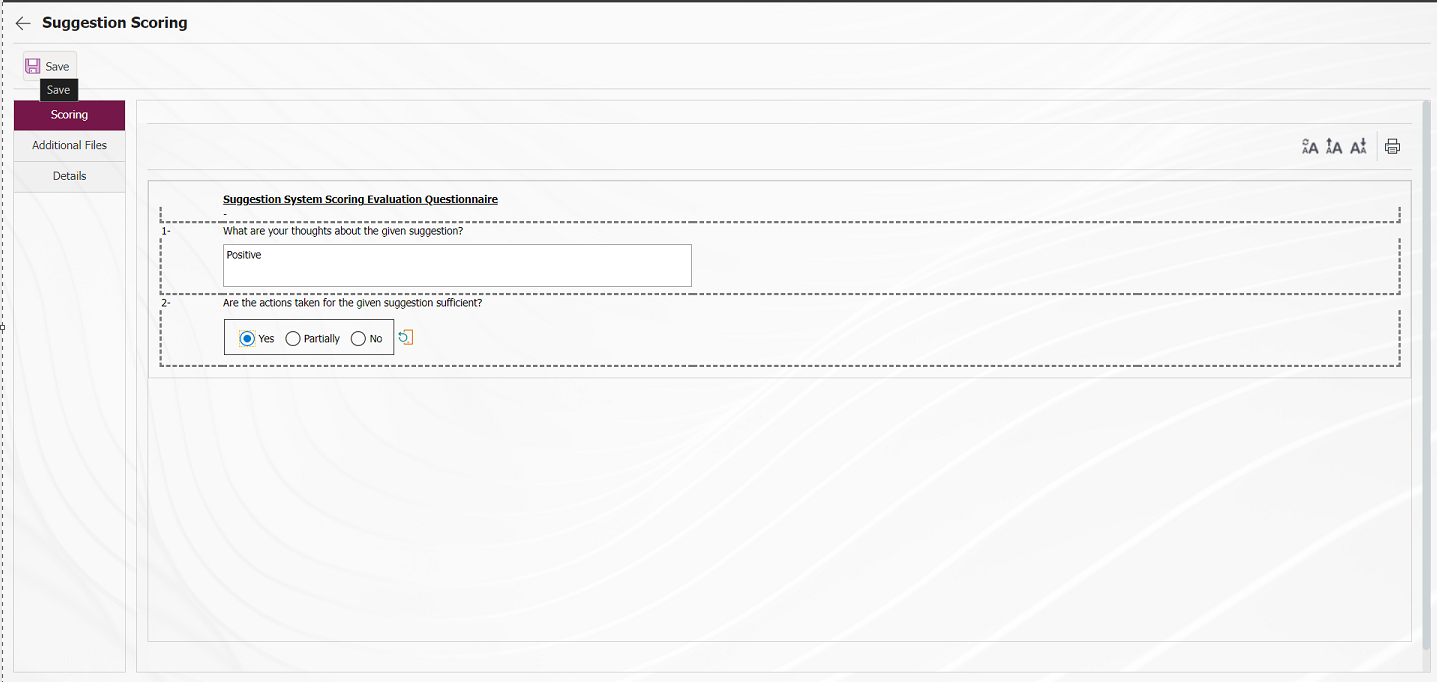
Click on the Suggestion code link in the Suggestion No field in the relevant task, click on the Scoring tab and the Completing Survey screen is displayed.

With the help of the buttons on the screen;
 : Registration is done.
 : Resetting the font size of the survey is done. After the change in the font size of the survey, the process of restoring it to its previous state is done.
 : Enlarging the text size of the survey is done.
 : Reducing the font size of the survey is done.
 : Printing the survey is done.
The questions of the survey displayed on the screen are answered and the scoring phase is completed by using the survey by clicking the button in the upper left corner of the screen.
From the Suggestion Scoring stage, the suggestion is sent to the relevant user for closure approval. 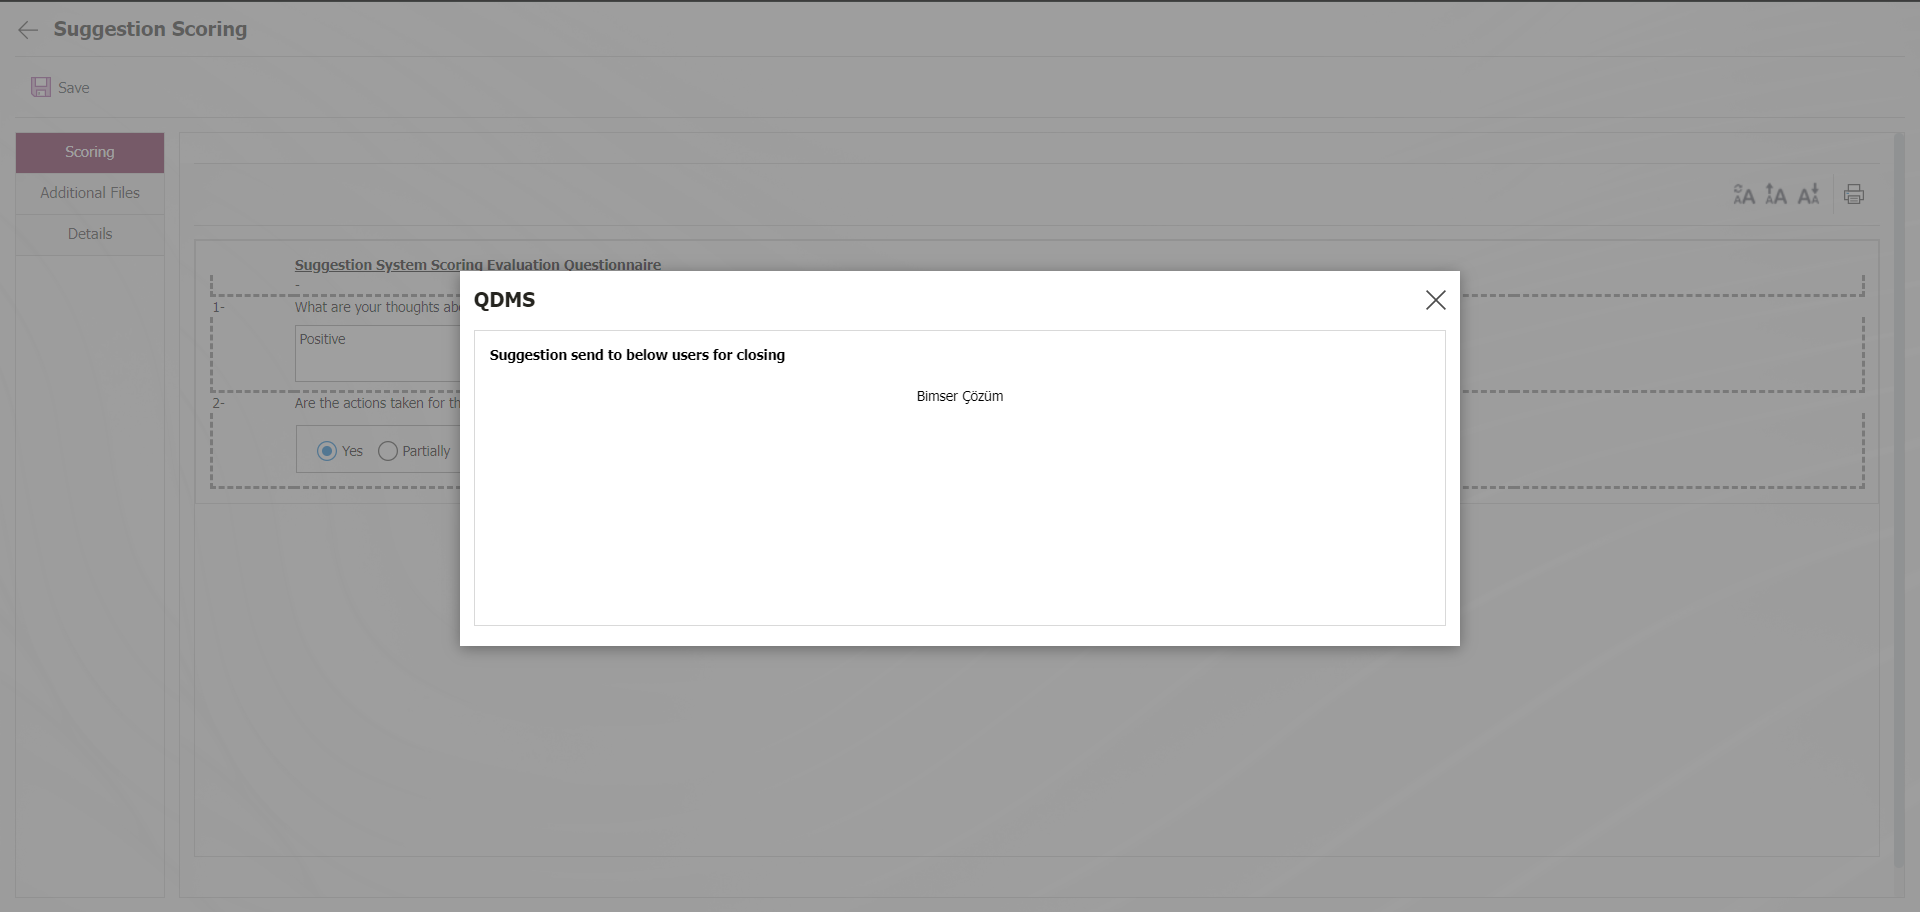
5.1.13. Defining Parametric Field in Suggestion System Module
In the Suggestion System Module, extra fields that are not in the system requested by the company can be defined. These defined fields are valid for all Suggestion System Module resources. Click on System Infrastructure Definitions/BSID/ Configuration Settings/Language Settings menu. On the Language Settings page, select “ Suggestion System ” in the Module field and the language definitions related to the Suggestion System Module are displayed on the screen. 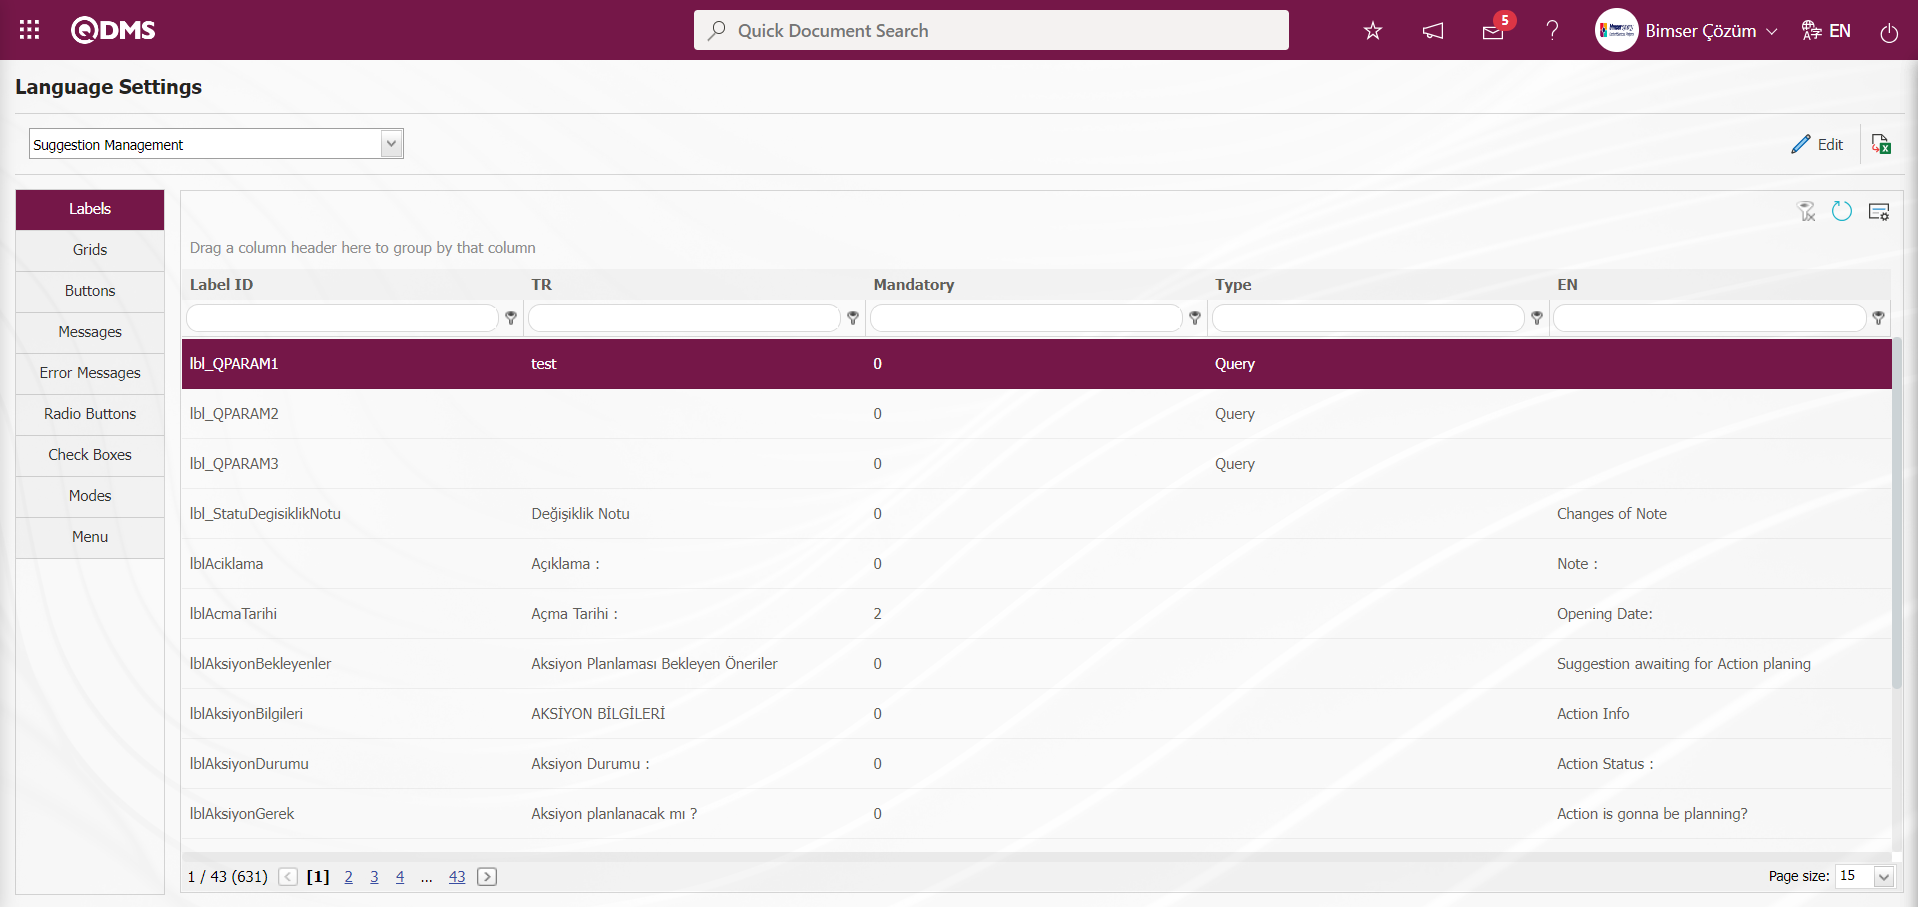 From these displayed language fields, parametric field types such as text, date, list are defined in passive fields. Parametric type fields are defined in the stages of Suggestion Definition, Suggestion Specialist Assessment, Earning / Cost, Scoring and Closing. There are short codes used in parametric type fields in these stages. It is possible to distinguish which short codes are used at which stage. In order to distinguish at which stage the parametric type fields are in, it is necessary to pay attention to the starting parts of the short codes below;
1- Suggestion Definition Screen Suggestion Information tab: lbl
| Label Code List of Passive Parametric Fields to Define Parametric Fields in the Suggestion Information tab of the Suggestion Definition screen | |
|---|---|
| Label Code of Passive Parametric Field Type | Parametric Field Type |
| lblPMPARAM1-lblPMPARAM5 | Staff |
| lblPMPARAM1-lblPMPARAM5 | Staff(Multiple Choise) |
| lbl_QPARAM1- lbl_QPARAM3 | Query |
2- Suggestion Expert Evaluation Screen Suggestion Approvement tab: lbl
| Label Code List of Passive Parametric Fields to be Defined in the Suggestion Expert Assessment screen Suggestion Approval tab | |
|---|---|
| Label Code of Passive Parametric Field Type | Parametric Field Type |
| lblPARAM1-lblPARAM10 | Text |
| lblLPARAM1-lblLPARAM10 | List |
| lblDPARAM1-lblDPARAM5 | Date |
| lblNPARAM6-lblNPARAM10 | Unit of Measure |
| lblNPARAM1-lblNPARAM5 | Monetary |
3- Parametric Values tab on Earnings / Cost Definitions Screen: lblKM_
| Label Code List of Passive Parametric Fields to be Defined in the Parametric Values tab on the Earnings / Cost Definitions screen | |
|---|---|
| Label Code of Passive Parametric Field Type | Parametric Field Type |
| lblKM_PARAM1- lblKM_PARAM5 | Text |
| lblKM_PARAM6- lblKM_PARAM10 | Text(Multiple Line) |
| lblKM_LPARAM1- lblKM_LPARAM10 | List |
| lblKM_DPARAM1- lblKM_DPARAM5 | Date |
| lblKM_PMPARAM1- lblKM_PMPARAM5 | Staff(Multiple Choise) |
| lblKM_DSPARAM1- lblKM_DSPARAM5 | Department |
| lblKM_DMPARAM1- lblKM_DMPARAM5 | Department(Multiple Choise) |
| lblKM_PPARAM1- lblKM_PPARAM5 | Staff |
4- Other fields tab on the Suggestion Scoring Screen: lblP_
| Label Code List of Passive Parametric Fields to Define Parametric Fields in the Other fields tabon the Suggestion Scoring screen | |
|---|---|
| Label Code of Passive Parametric Field Type | Parametric Field Type |
| lblP_PARAM1- lblP_PARAM5 | Text |
| lblP_LPARAM1- lblP_LPARAM10 | List |
| lblP_LMParam1- lblP_LMParam5 | Multiple List |
| lblP_DPARAM1- lblP_DPARAM5 | Date |
| lblP_PPARAM1- lblP_PPARAM5 | Staff |
| lblP_PMPARAM1-lblP_PMPARAM5 | Staff(Multiple Choise) |
| lblP_DSPARAM1- lblP_DSPARAM5 | Department |
| lblP_DMPARAM1- lblP_DMPARAM5 | Department(Multiple Choise) |
| lblP_NPARAM1-lblP_NPARAM5 | Monetary |
| lblP_QParam1- lblP_QParam5 | Query |
5. Suggestion Approval Tab on the Suggestion Close Approval Screen: lblK_
| Label Code List of Passive Parametric Fields to Define Parametric Fields in the Suggestion Approval tabon the Suggestion Close Approval screen | |
|---|---|
| Label Code of Passive Parametric Field Type | Parametric Field Type |
| lblK_PARAM1- lblK_PARAM5 | Text |
| lblK_LPARAM1- lblK_LPARAM5 | List |
| lblK_NCPARAM1- lblK_NCPARAM5 | Monetary |
| lblK_QPARAM1- lblK_QPARAM2 | Query |
Defining a List Type Parametric Field in the Suggestion Expert Evaluation Screen Suggestion Approval tab opened at the Expert Evaluation Stage in the Suggestion System
At this stage, click on System Infrastructure Definitions/BSID/Configuration Settings/Language Settings menu for list type parametric field definition process. Language definitions related to the Recommendation System Module are displayed.
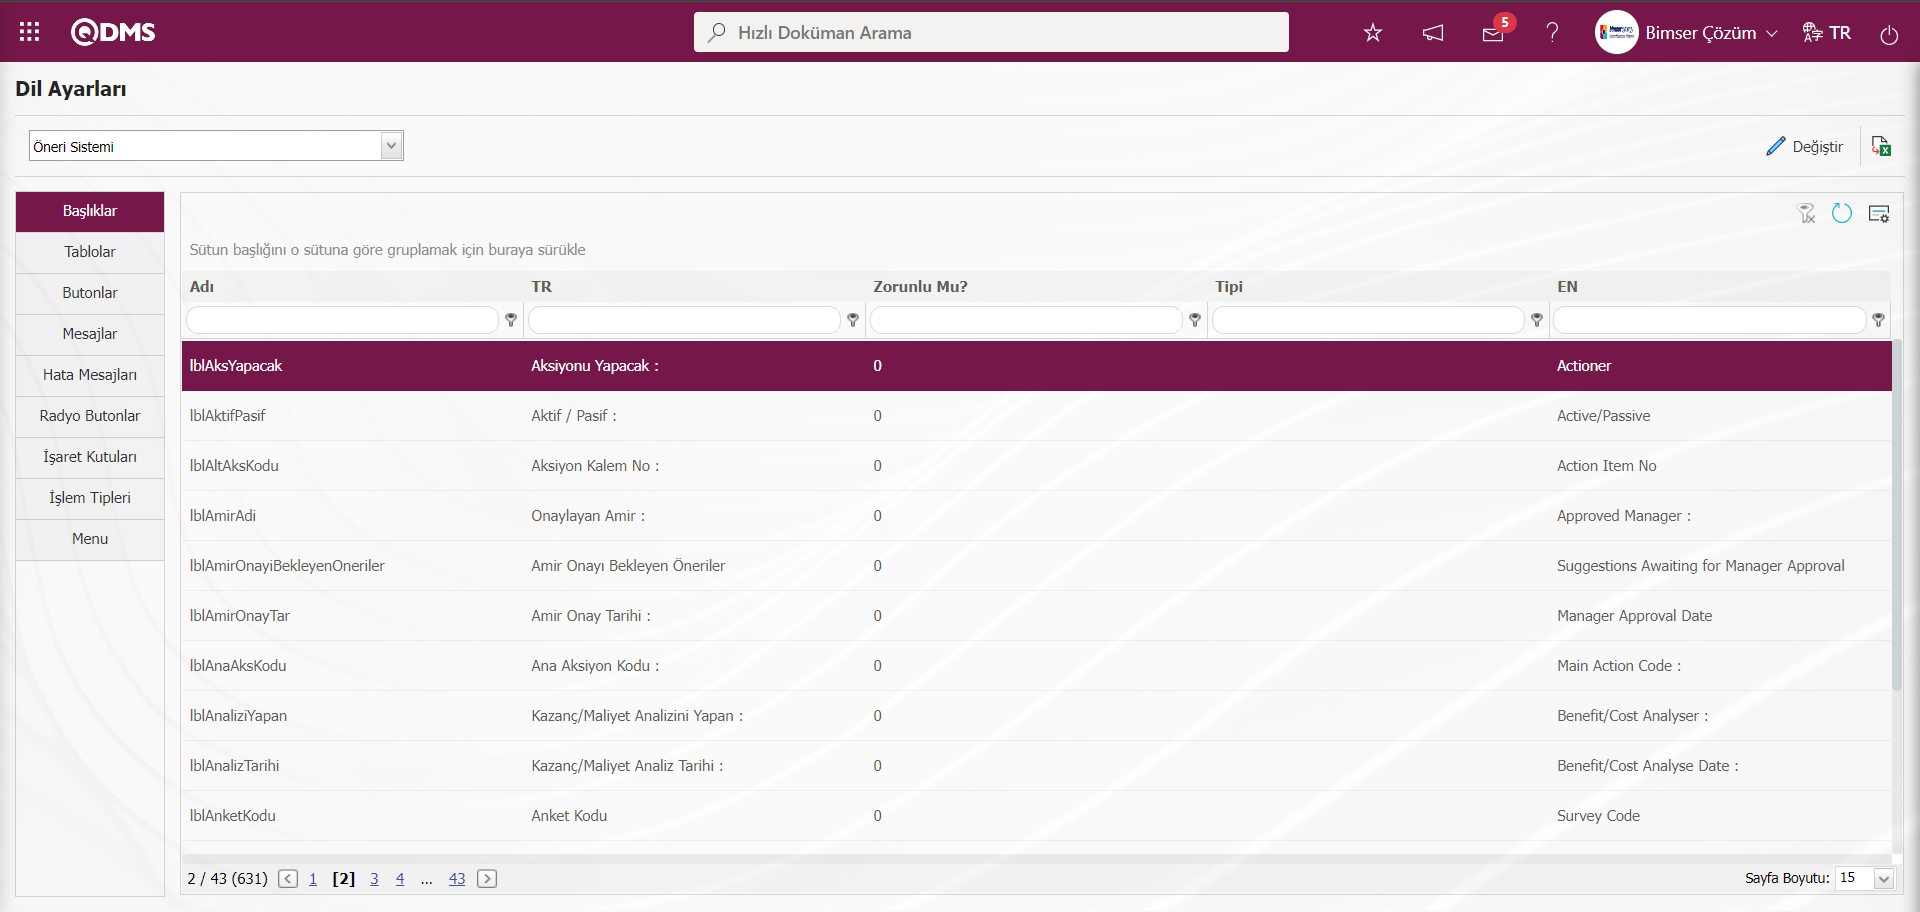
For the process of defining a list type parametric field in the expert evaluation phase, first of all, in the Language Settings screen, in the Labels tab, type “List” as Type in the type field of the parametric field type to be defined in the grid, and the passive fields related to the List type parametric field type related to the suggestion system are listed.

Or, in the Suggestion Expert Assessment screen Suggestion Approval tab, the selection process is done by typing the label code, which is the short codes of list type fields, into the Label ID field in the grid.
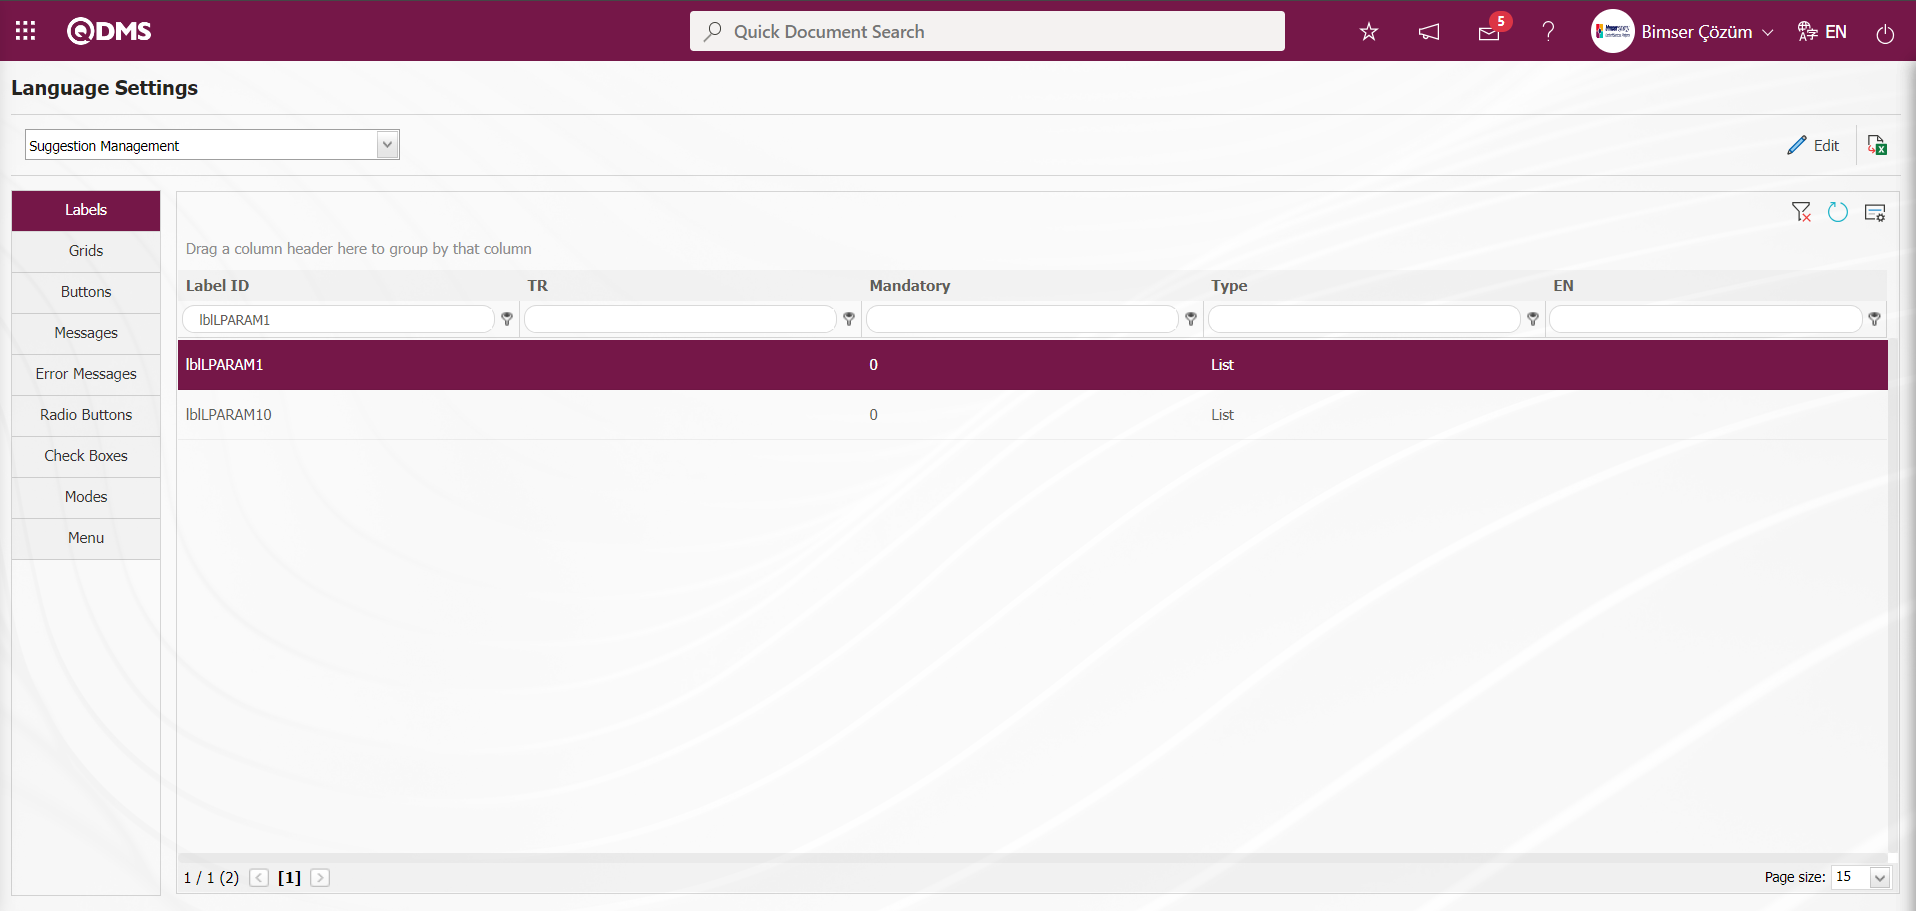
Type the label code of the list type parametric field and click the  button after the selection process.

The Language Settings screen opens.
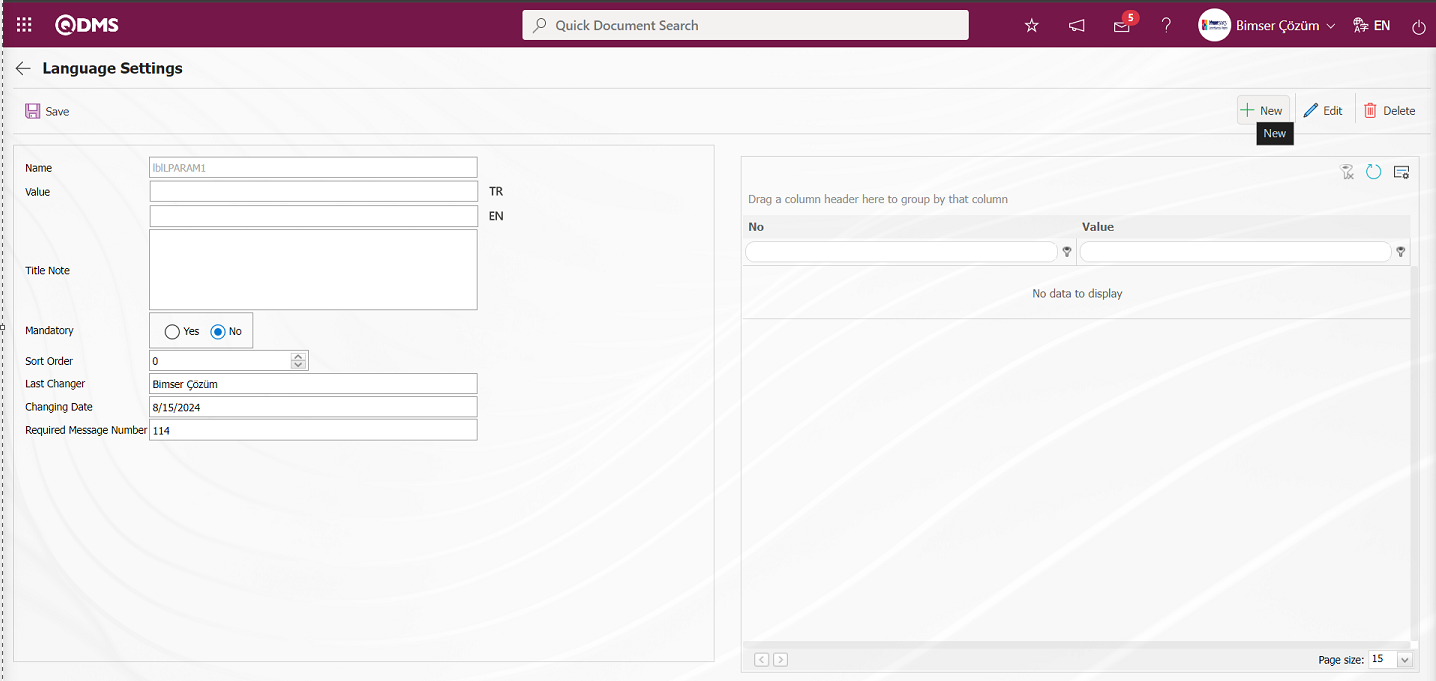
With the help of the buttons on the screen;
: Define a new list value.
 : The selected list value information in the list is updated.
 : Deletes the selected list value information in the list.
In the language settings screen, click the button to define the 1st list elements of the list type field.
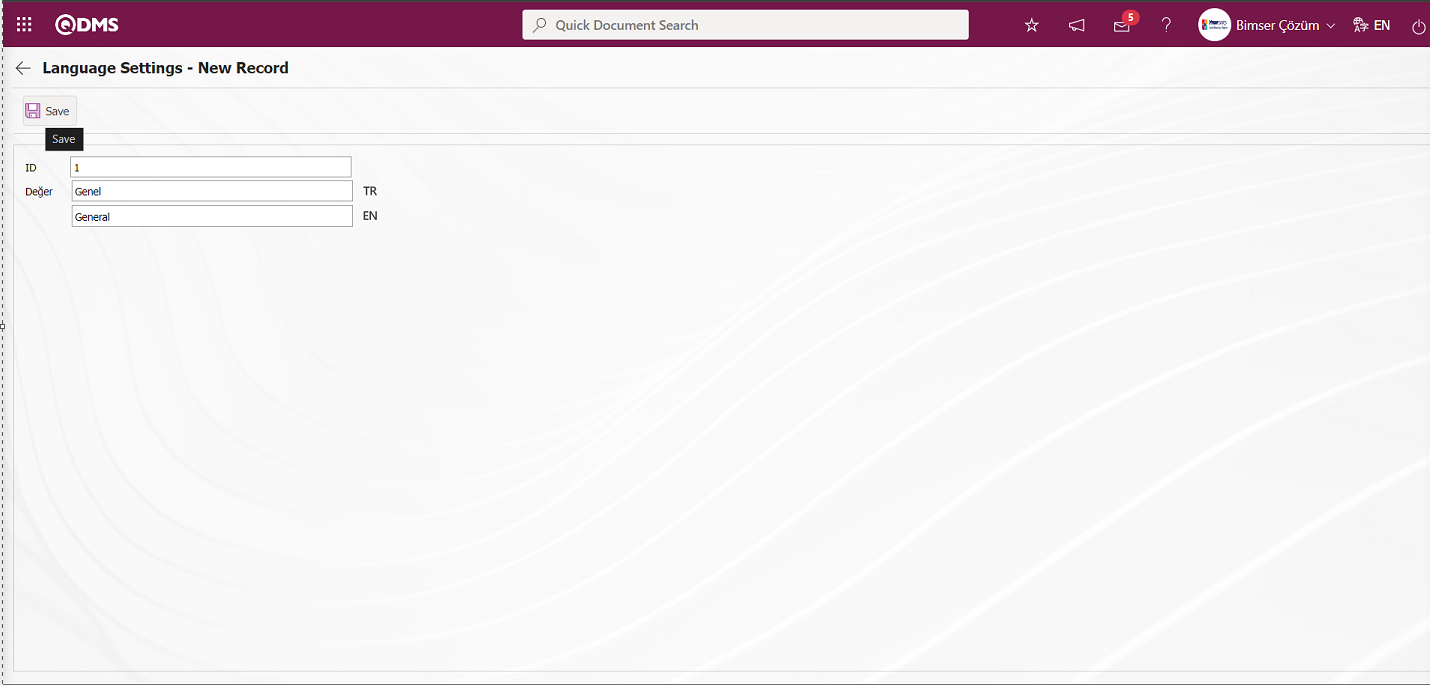
In the screen that opens, the ID value of the list element and the definition information of the list element in the Value field are written and the 1st list element registration is made by clicking the  button in the upper left corner of the screen
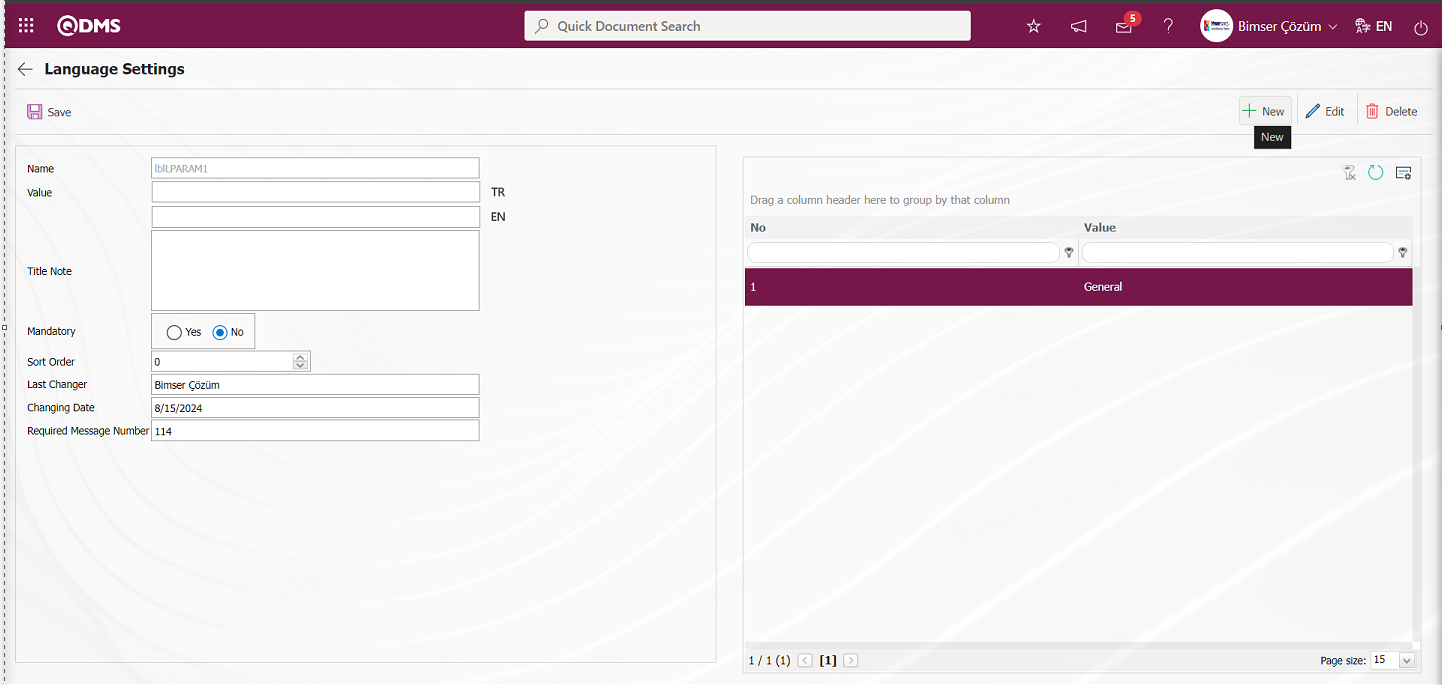
In the language settings screen, click the button to define the 2nd list elements of the list type field.

In the screen that opens, the ID value of the list element and the definition information of the list element in the Value field are written and the 2nd list element registration process is done by clicking the  button in the upper left corner of the screen.
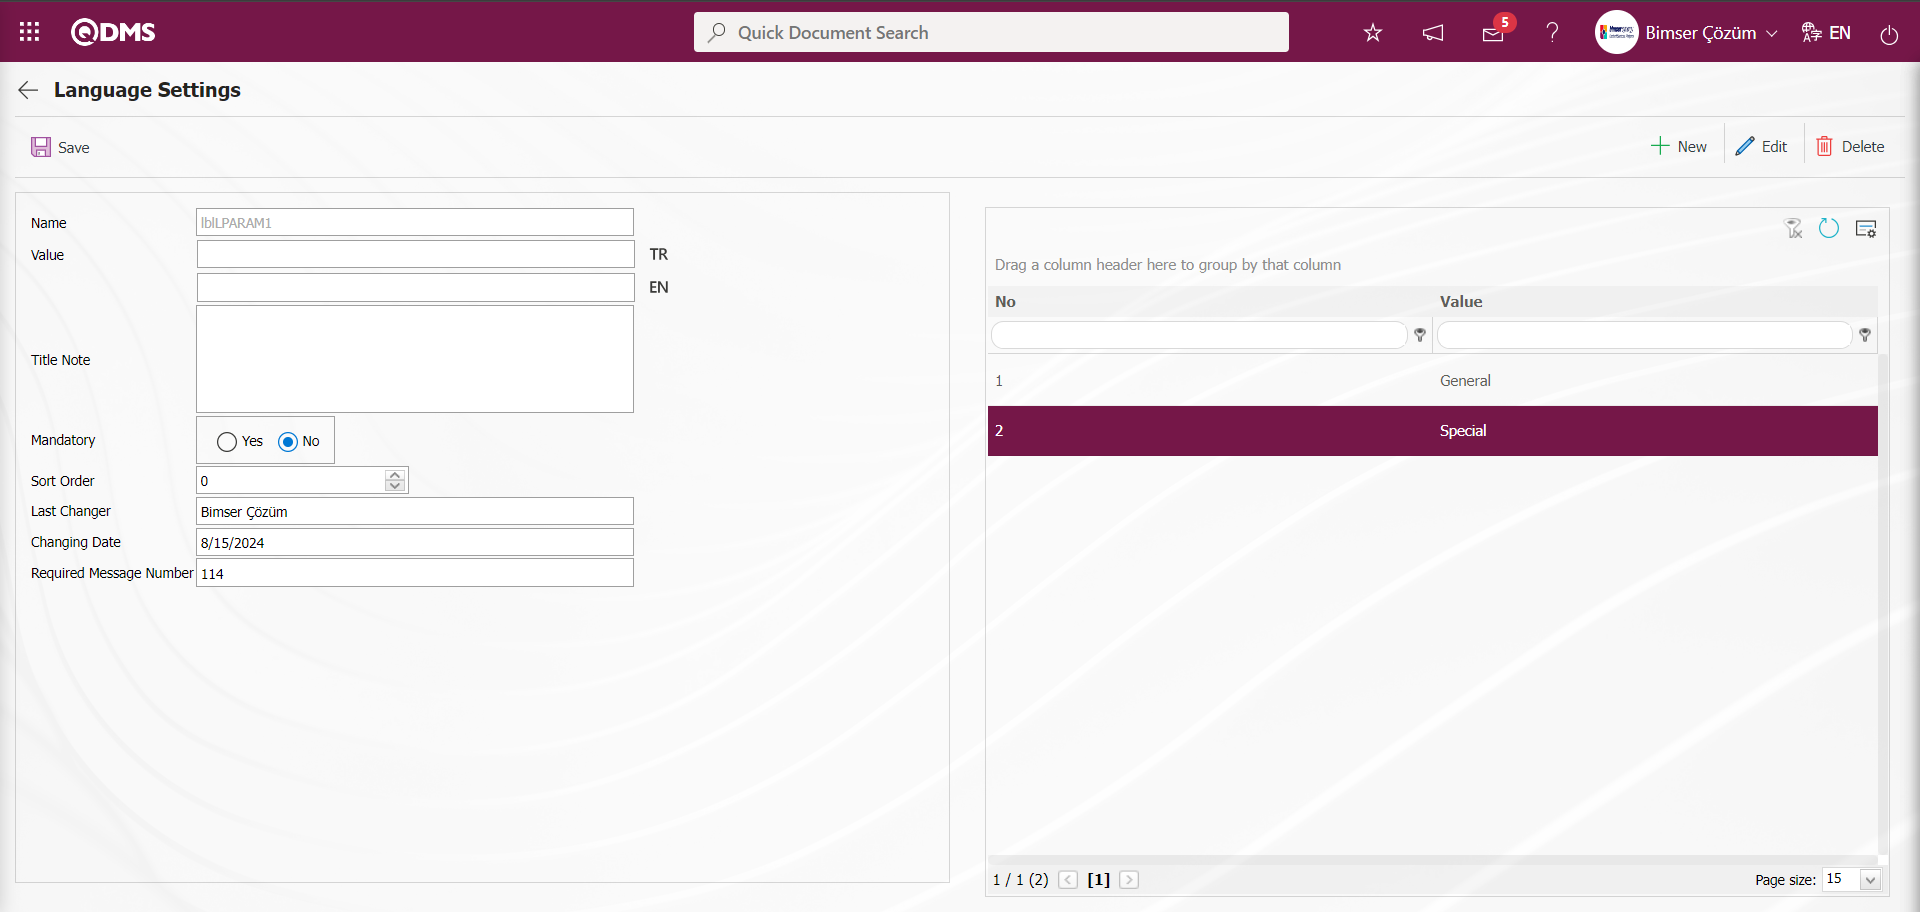
After the definition of the list elements of the list-type parametric field, the value of the list-type field, the language equivalent of the definition if desired in the section with the relevant icons, the Title note information is written and the options related to whether the field is a mandatory field or not are selected.
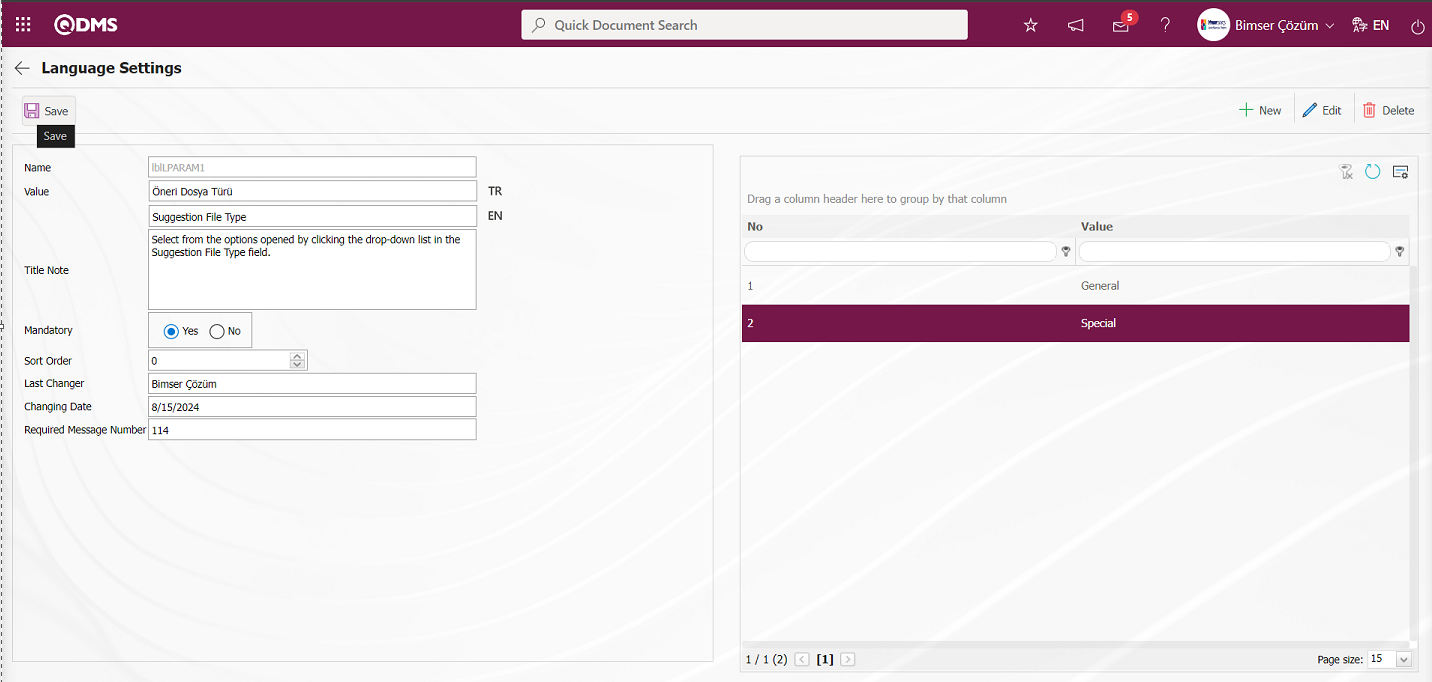
After entering the necessary information in the required fields, the list-type parametric field definition registration process is done by clicking the button in the upper left corner of the screen.
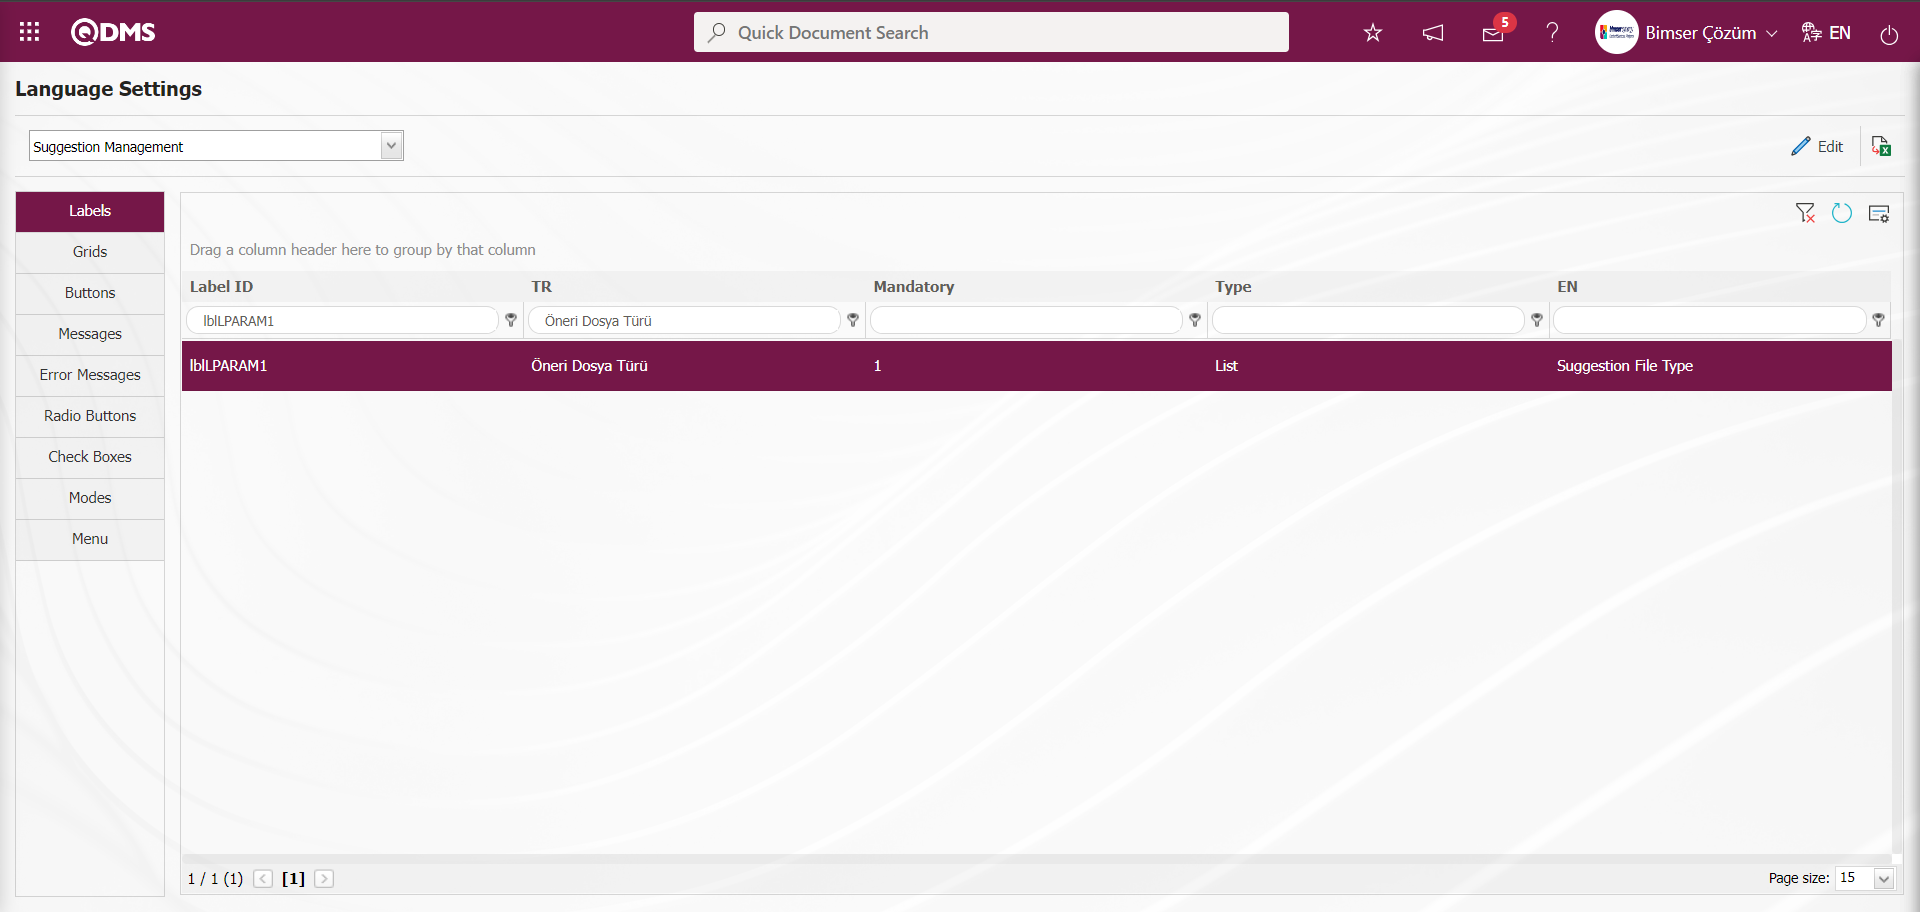
For a suggestion that is in the Expert Assessment Stage in the Suggestion System, the field defined in the Suggestion Approvement tab is displayed on the Suggestion Expert Assessment Screen. 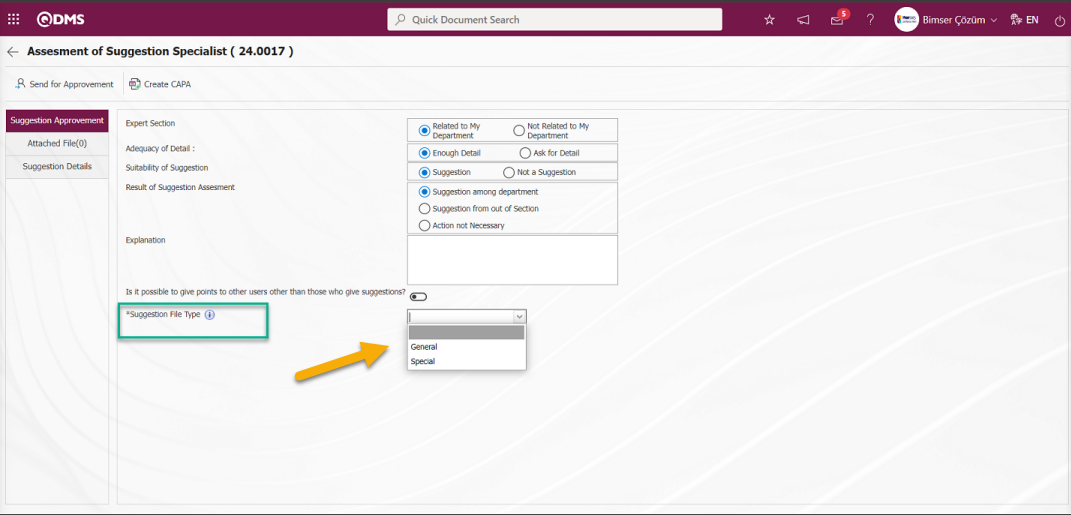
 hovering over the icon displays the title note information.
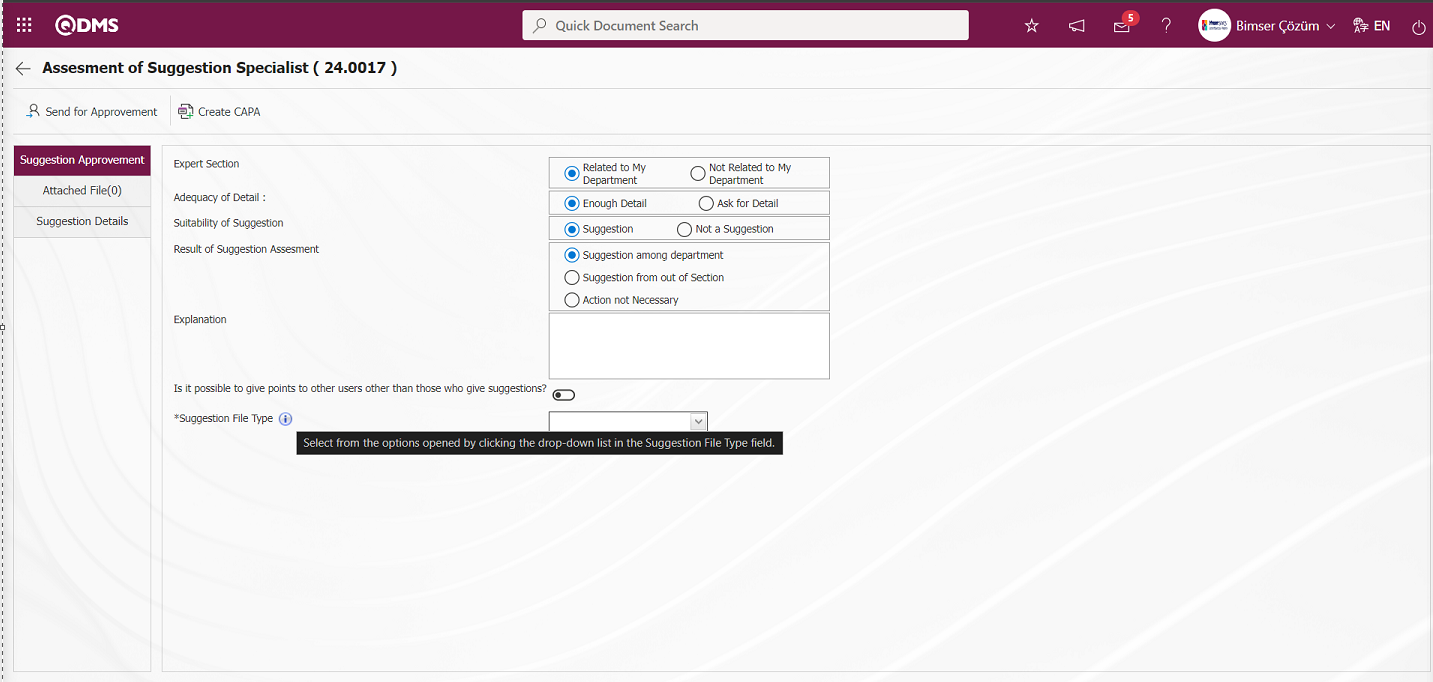
If desired  , clicking on the relevant icon will also display the title note in the pop-up.
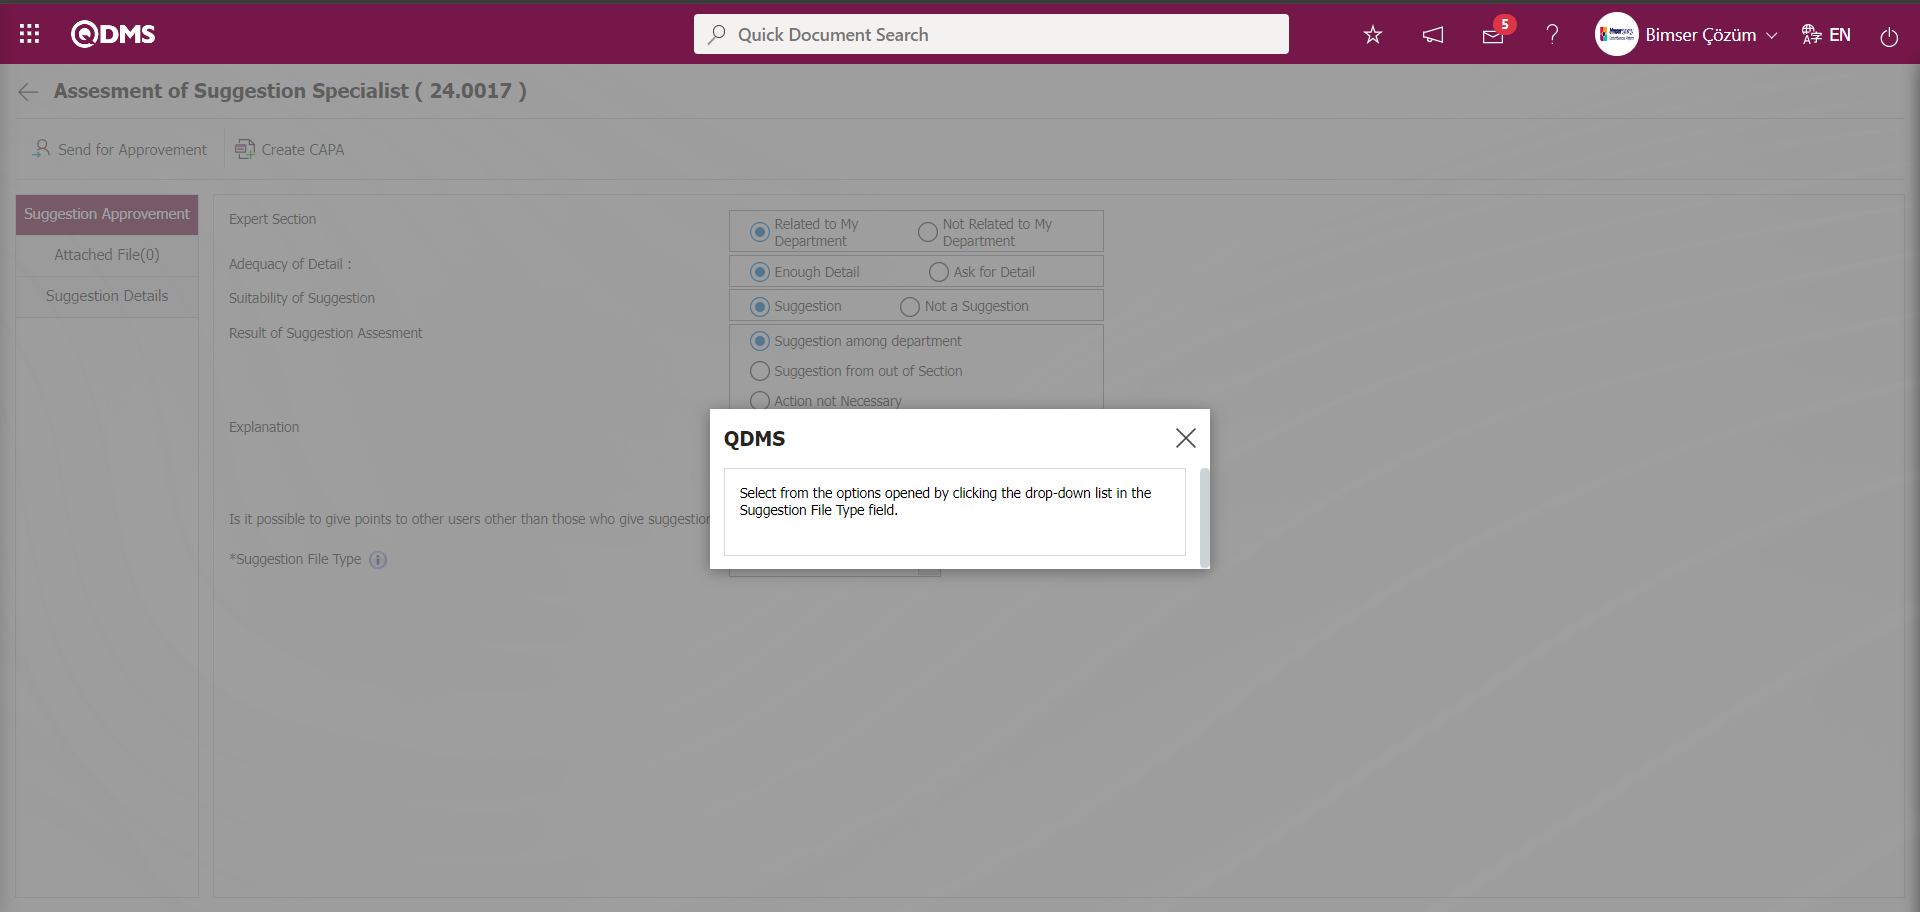
Removing the defined parametric field;
In Stage 1, the screen with the parametric field opens. In the Suggestion System Module, the Suggestion Expert Assessment Screen opened for a suggestion that is in the Expert Assessment Stage in the Suggestion System is displayed in the Suggestion Approvement tab.
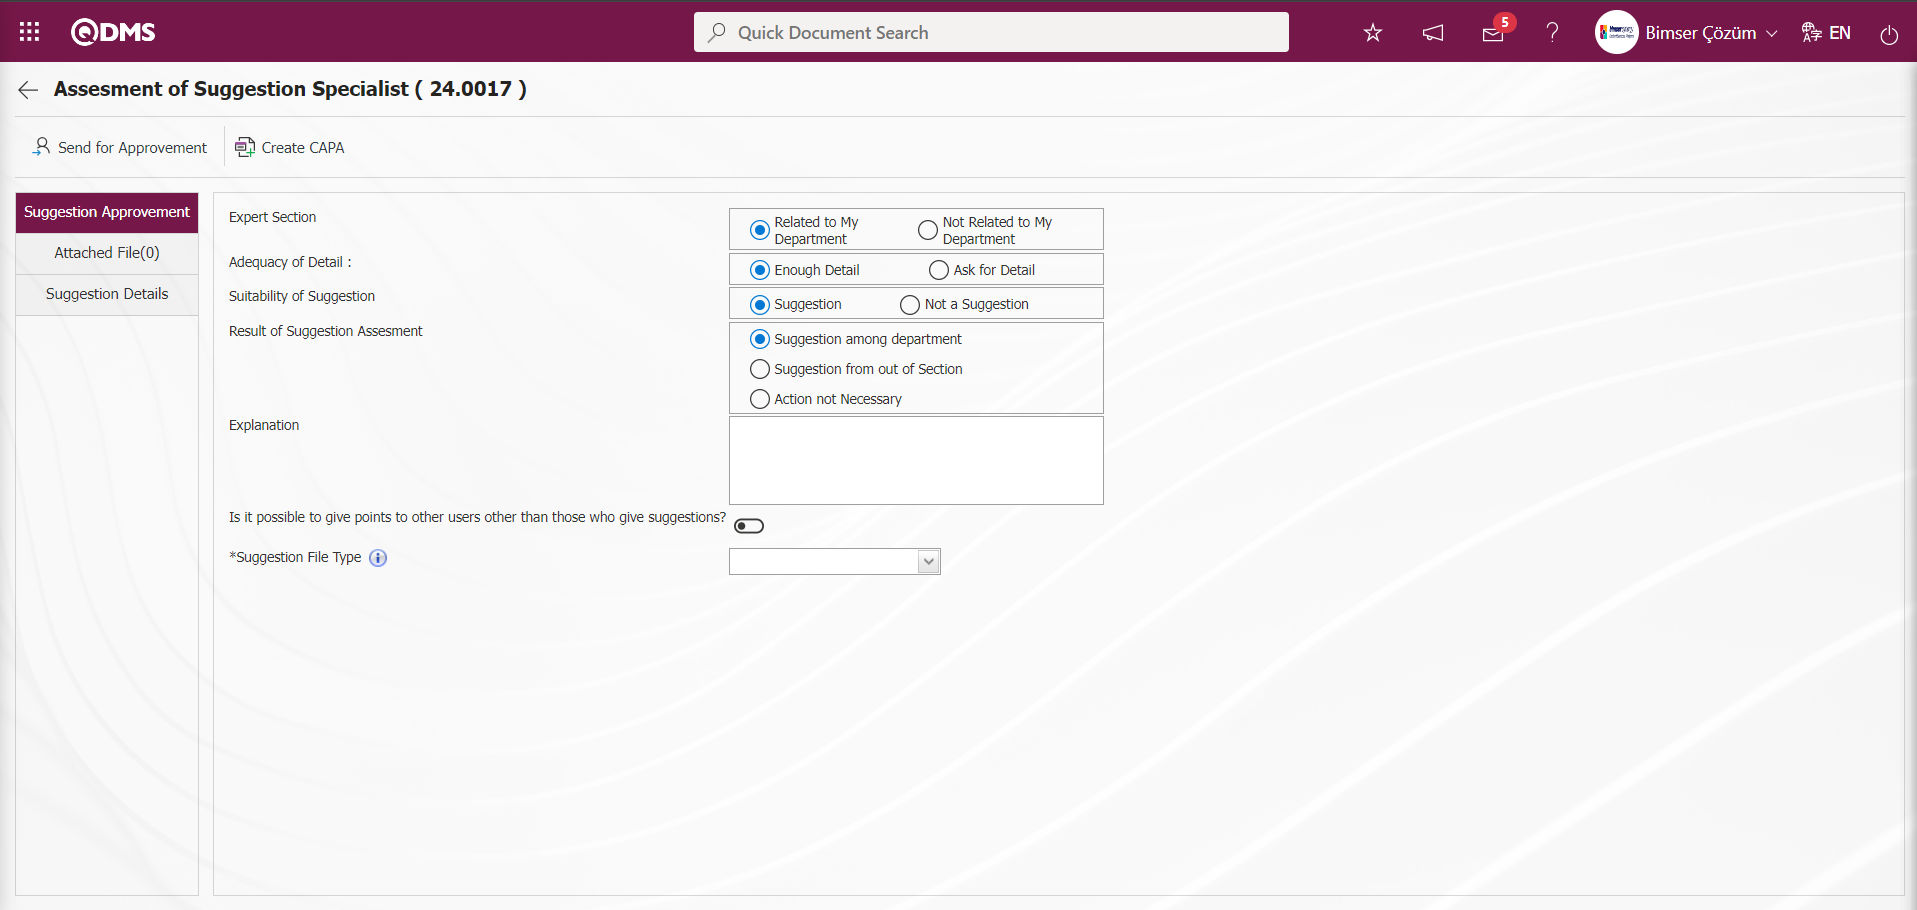
In step 2, after the screen with the parametric field is displayed, the list type field in the example is selected and the name of the parametric field is copied with the right click/copy command. Example: Suggestion File Type
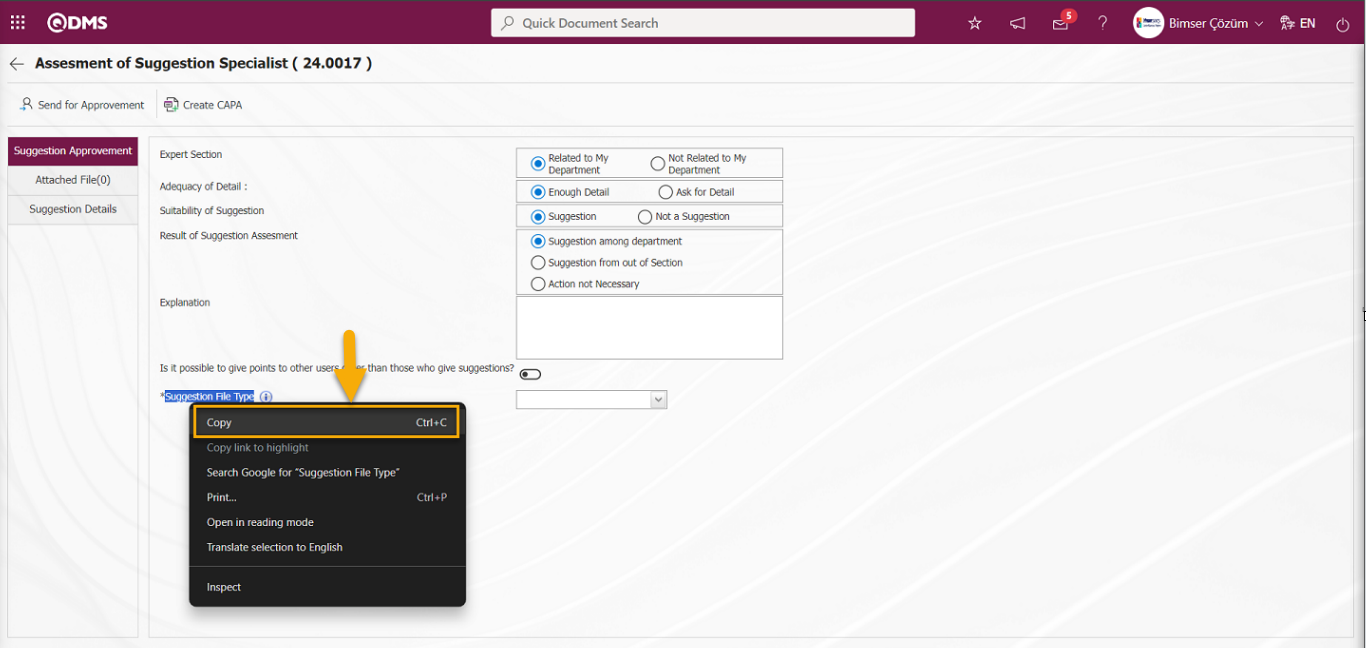
3rd stage, select the Recommendation System Module as the Module on the screen opened by clicking the System Infrastructure Definitions/BSID/Configuration Settings/Language Settings menu. The list-type parametric field defined from the copied Language settings is pasted into the EN field on the grid screen with the right click/paste command.
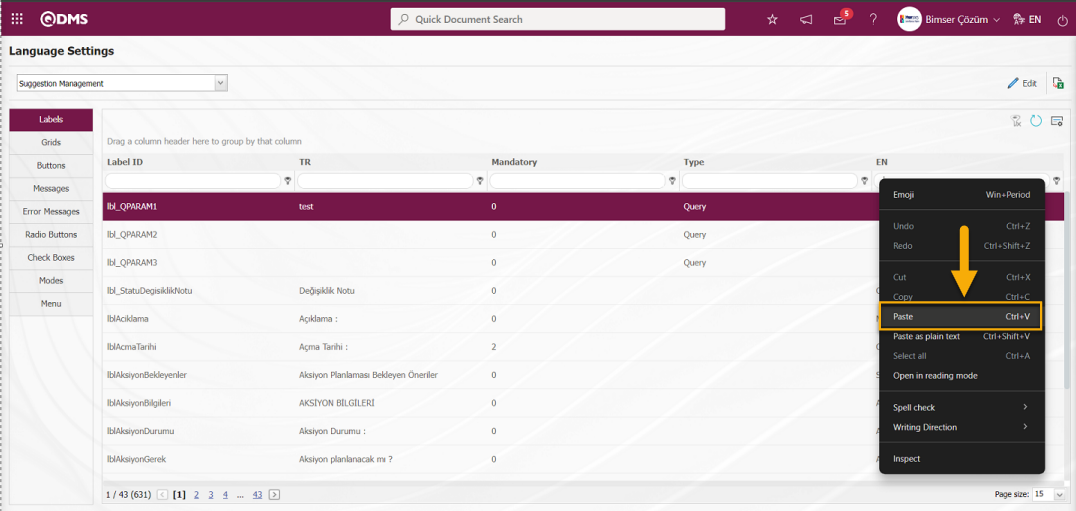
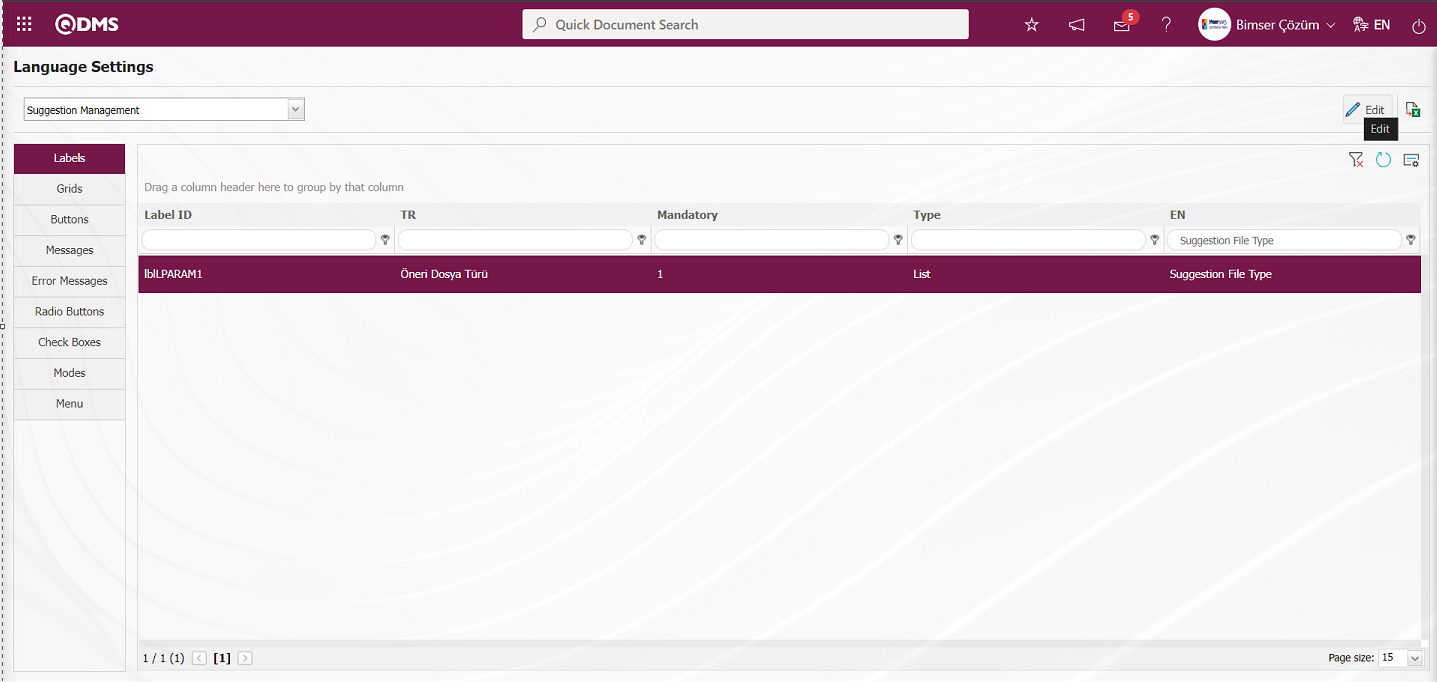
In Stage 4, select the list type parametric field and click on the button to view the content of the field.
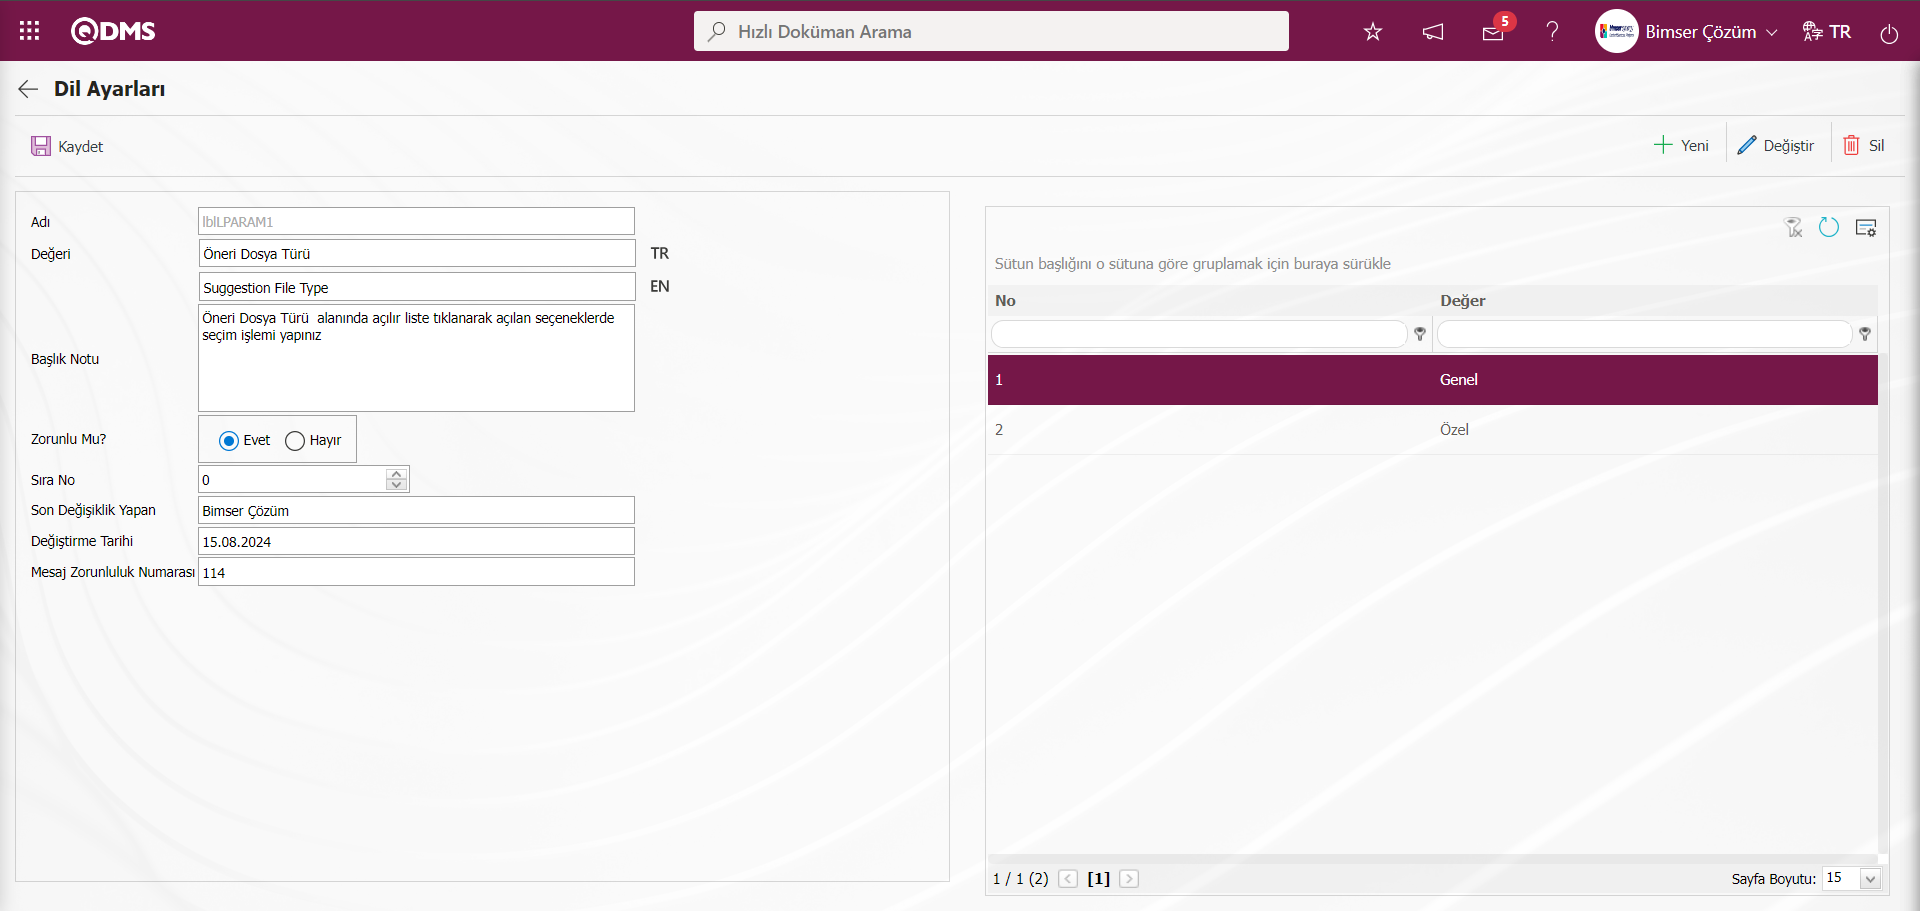
The list elements are selected and deleted one by one by clicking the  button.
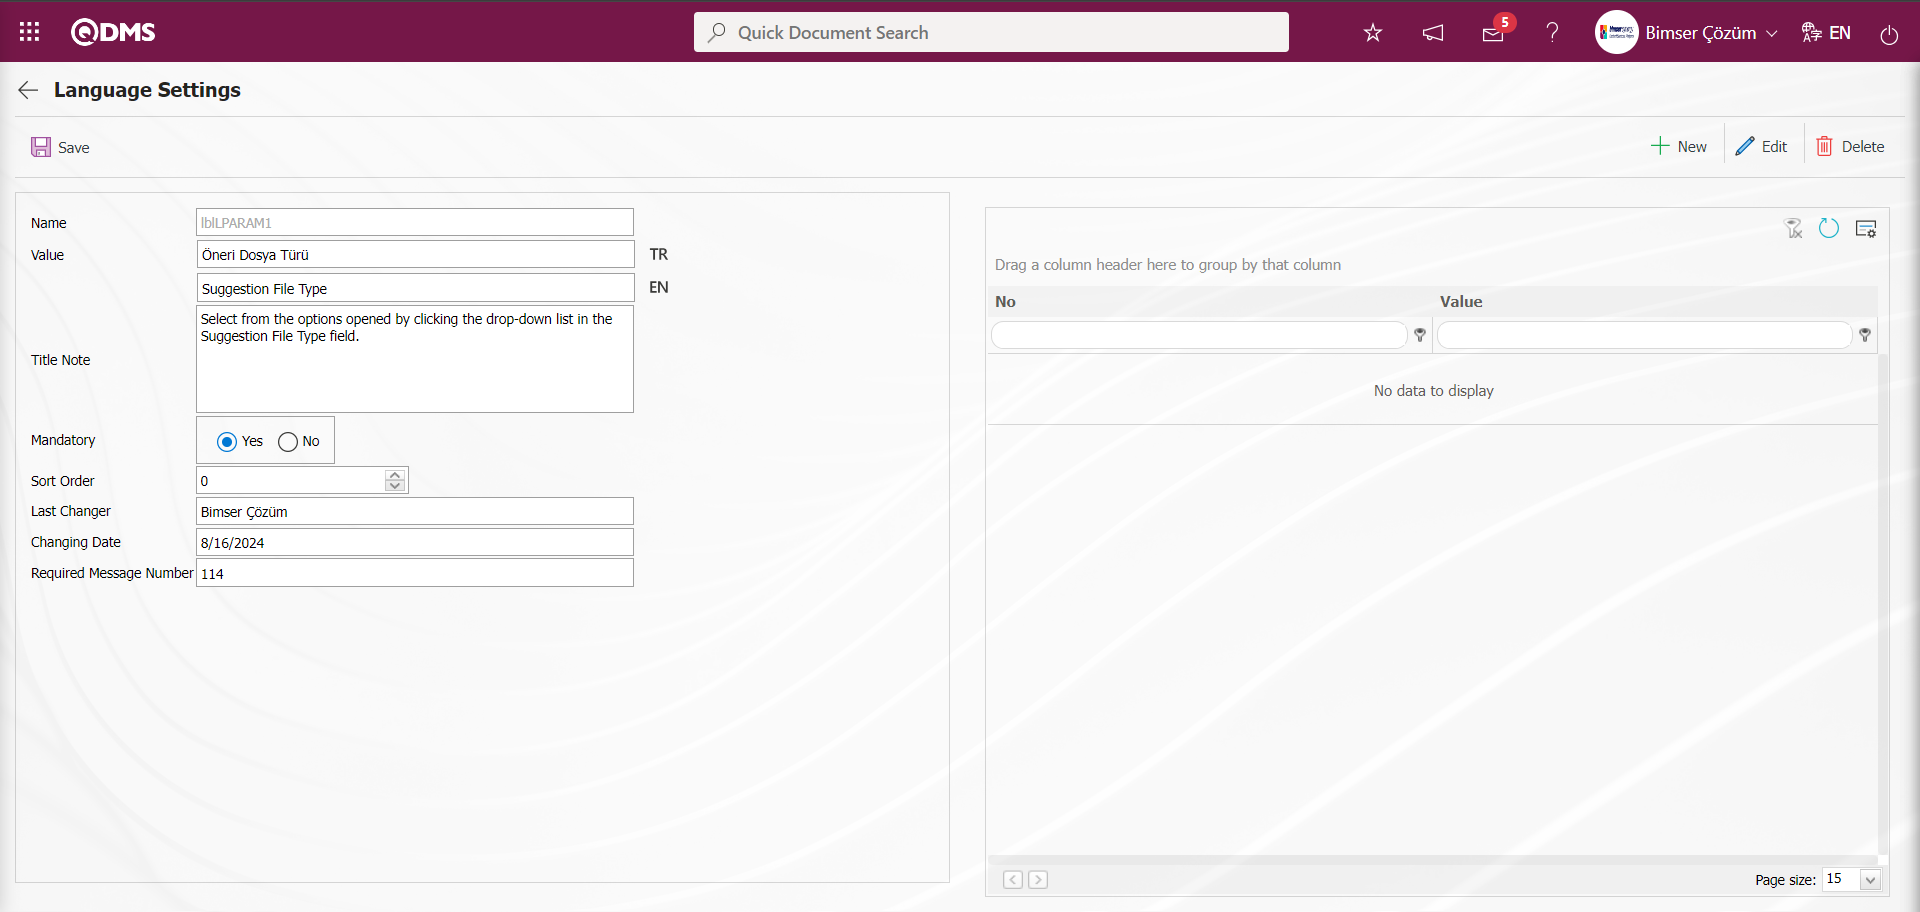 Data entries related to other fields are deleted.
After deleting the required fields related information, the parametric field type deletion process is performed by clicking the button in the upper left corner of the screen.
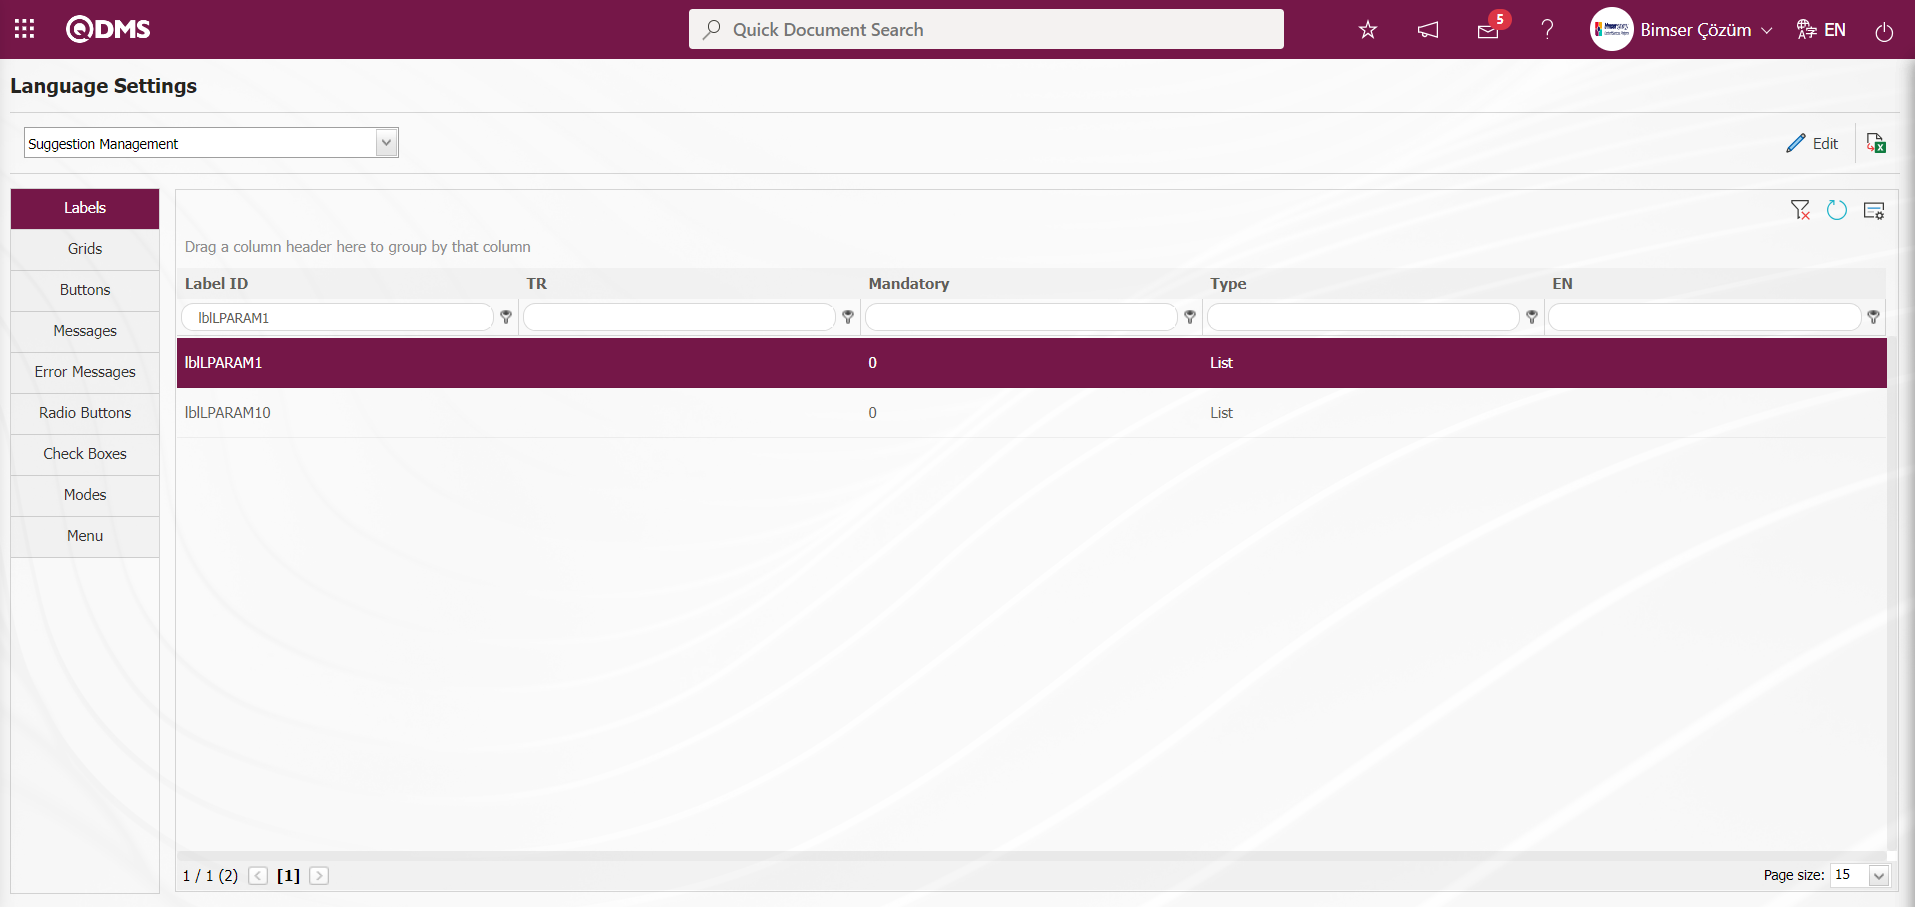
5.2. Determination of Suggestion Assessment Flows
5.2.1. Role Definition
Menu Name: System Infrastructure Definitions/ BSID/ Configuration Settings/ Role Definition
It is the menu where the information about which role will go as the approver in the approval flows used in the suggestion module is defined. There are automatically defined roles for the suggestion module in the system. According to the needs of the company, these roles can be organized with the help of Bimser support staff.

With the help of the buttons on the screen;
 : A new role definition is made.
 : Correction / change / update is made on the role information selected in the list.
 : The role information selected in the list is deleted.
 : Data is transferred to Excel.
 : Records are filtered and searched.
 : The search criteria on the menu screens are used to clean the data remaining in the filter fields in the grid where the search operation is performed.
 : The menu screen is restored to its default settings.
 : User-based designing of the menu screen is done with the show-hide feature, that is, the hiding feature of the fields corresponding to the columns on the menu screens
For example: Since the role of Pre-Assessor will vary from company to company, click the  button while this role is selected.
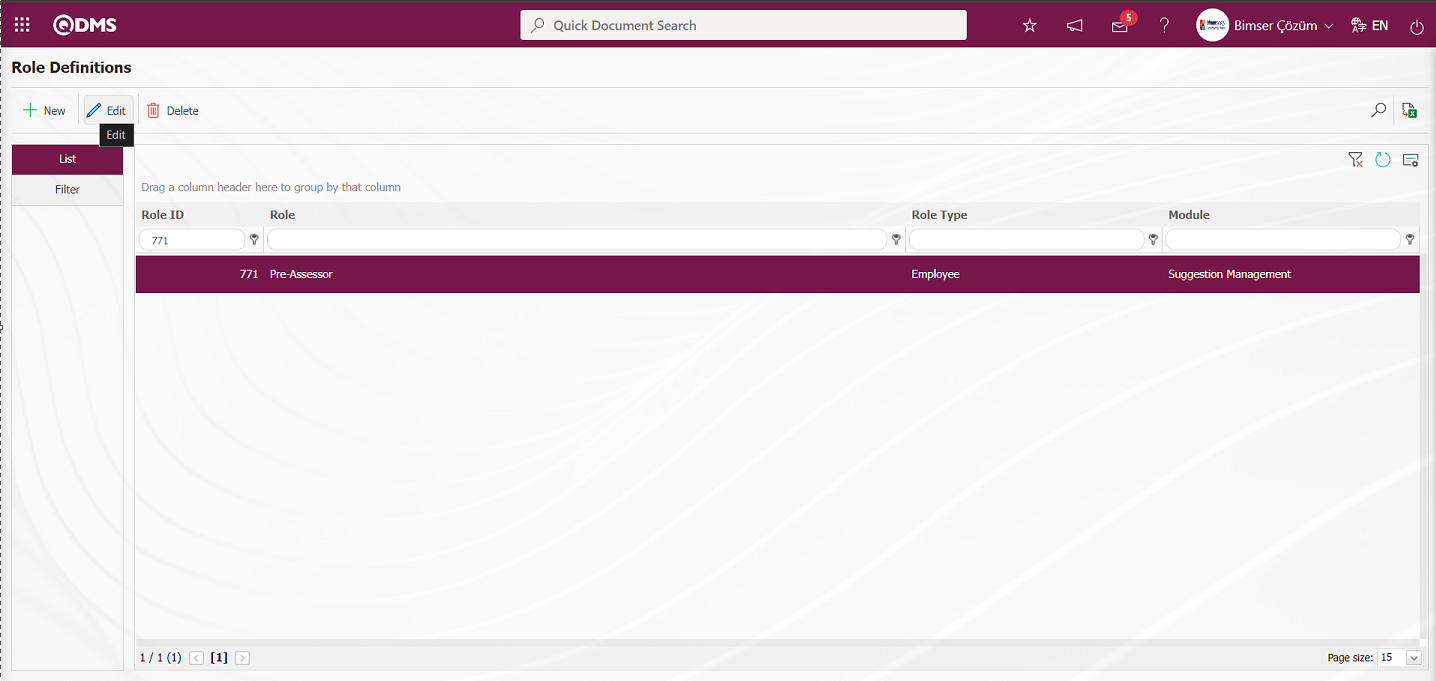
On the screen that opens, the role can be edited if desired in accordance with the structure of the company. 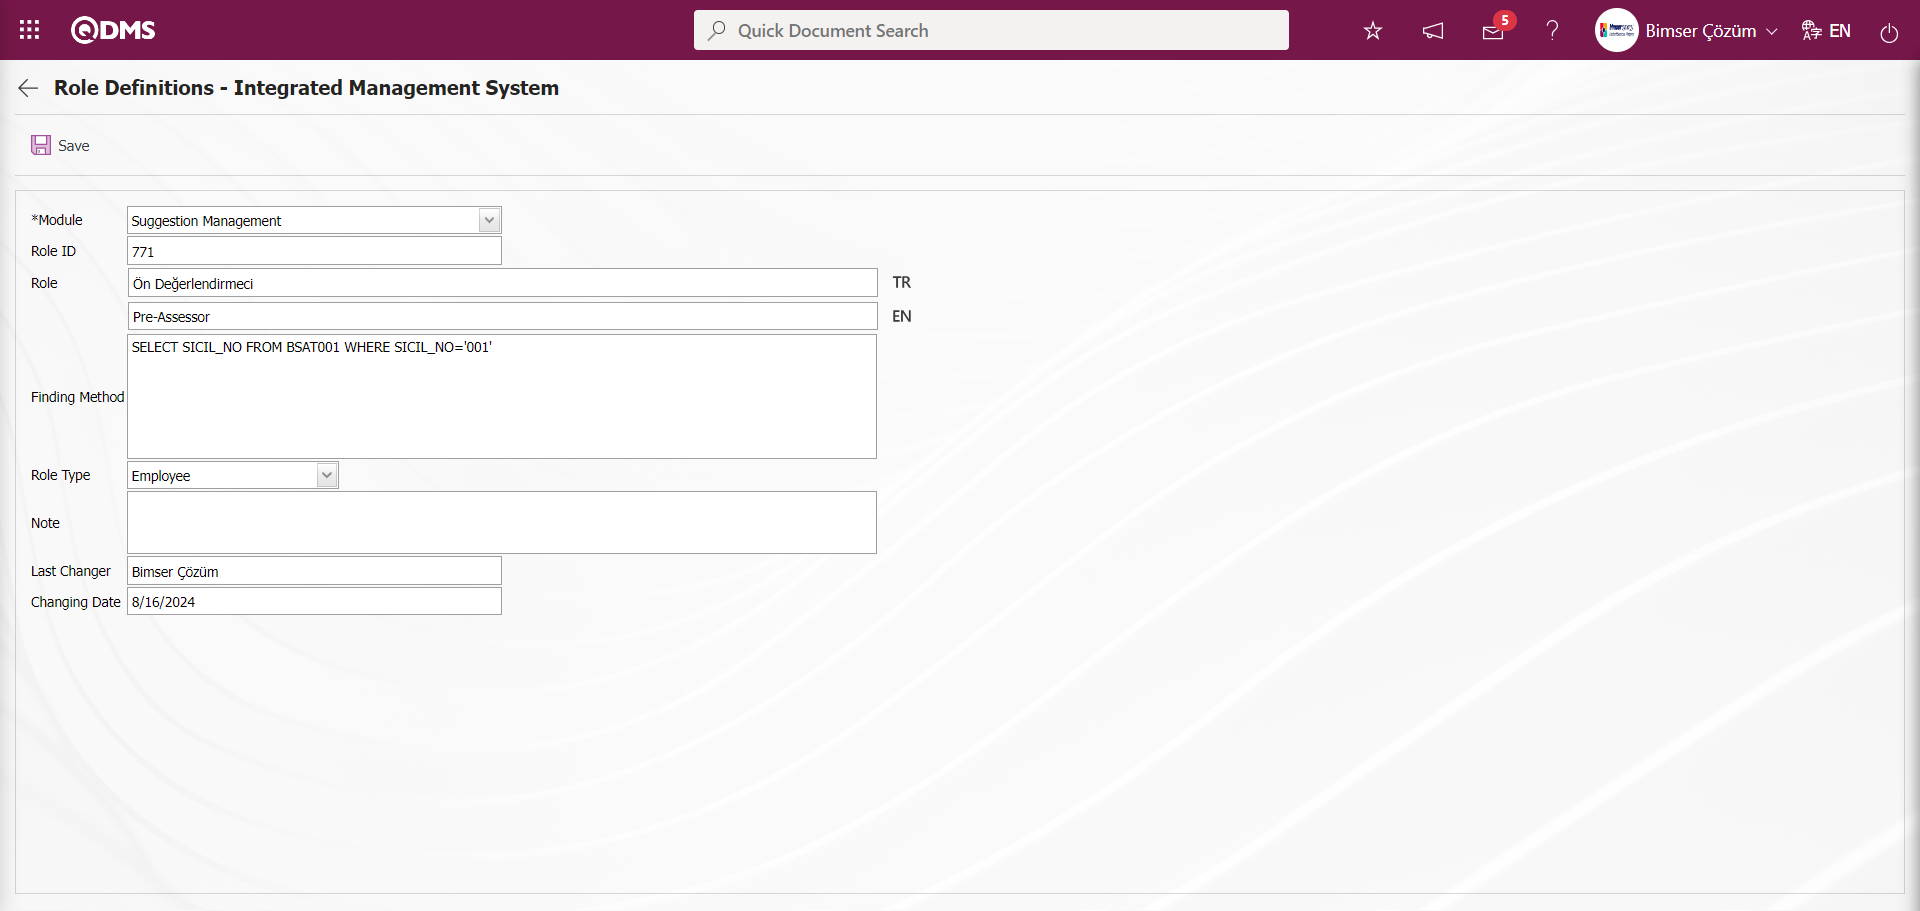
5.2.2. Flow Definition
Menu Name: System Infrastructure Definitions/ BSID/ Configuration Settings/ Flow Definition
The approval flows to be used in the suggestion module are matched with the relevant roles. There are “Pre-assessment Process, Suggestion Commission Evaluation Process, Specialist Assessment Process, Suggestion Scoring Process, Action Planning Process and Benefits/Cost Analysis Process” flows defined in the system. When a suggestion is rejected at the evaluation stage, the “ Suggestion Commission Evaluation Process” is used if it is objected by the proposer and sent to a commission for re-evaluation.

With the help of the buttons on the screen;
: A new flow is defined.
: Correction / change / update is made on the flow information selected in the list.
: The flow information selected in the list is deleted.
: Data is transferred to Excel.
: Records are filtered and searched.
: The search criteria on the menu screens are used to clean the data remaining in the filter fields in the grid where the search operation is performed.
: The menu screen is restored to its default settings.
: User-based designing of the menu screen is done with the show-hide feature, that is, the hiding feature of the fields corresponding to the columns on the menu screens.
The flow to be edited is selected and displayed by clicking the button.

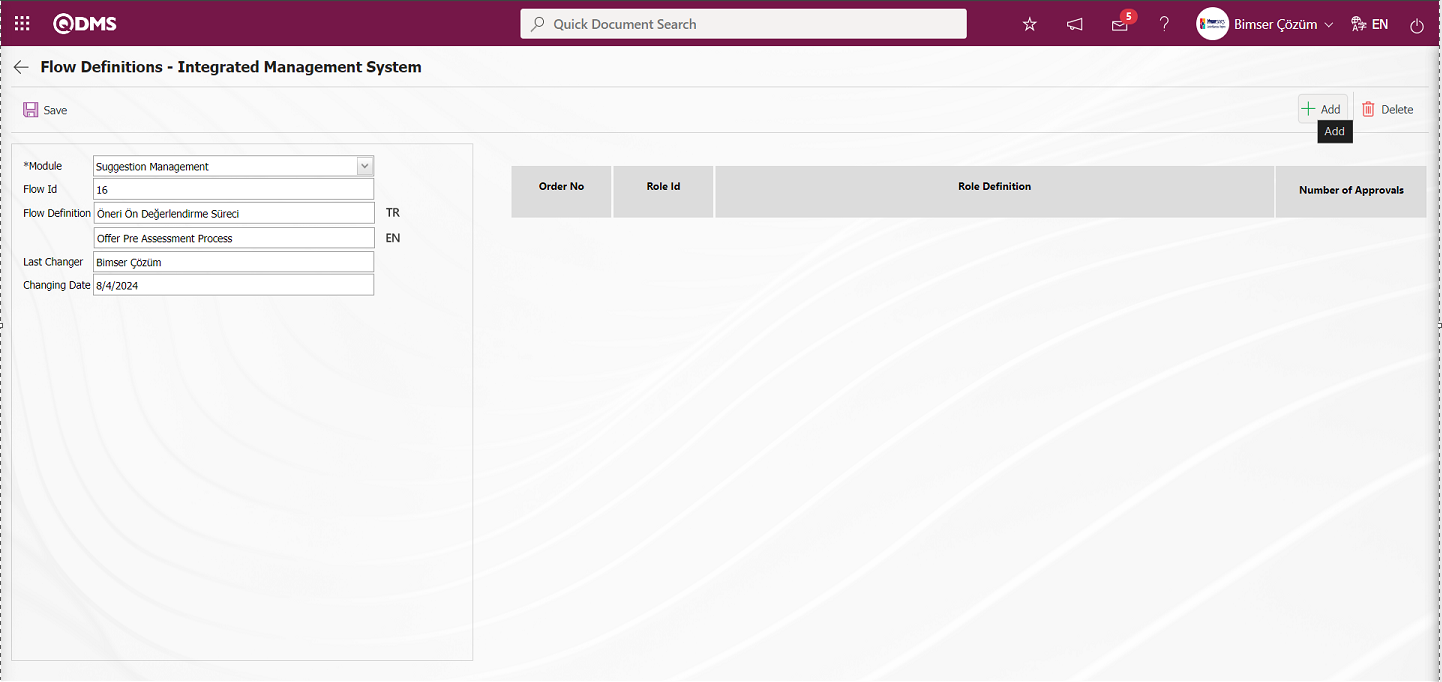
The role to be used in the approval flow is selected from the role pool defined in the system opened by clicking the  button.
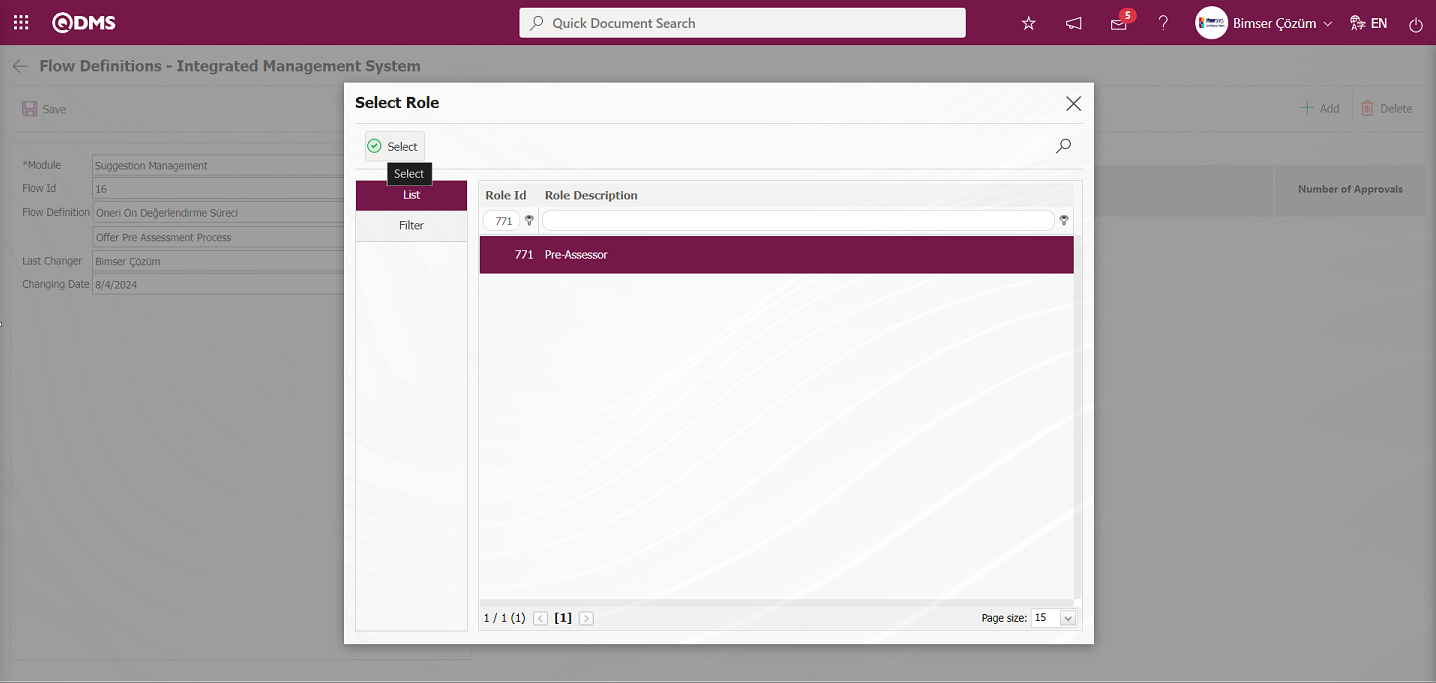
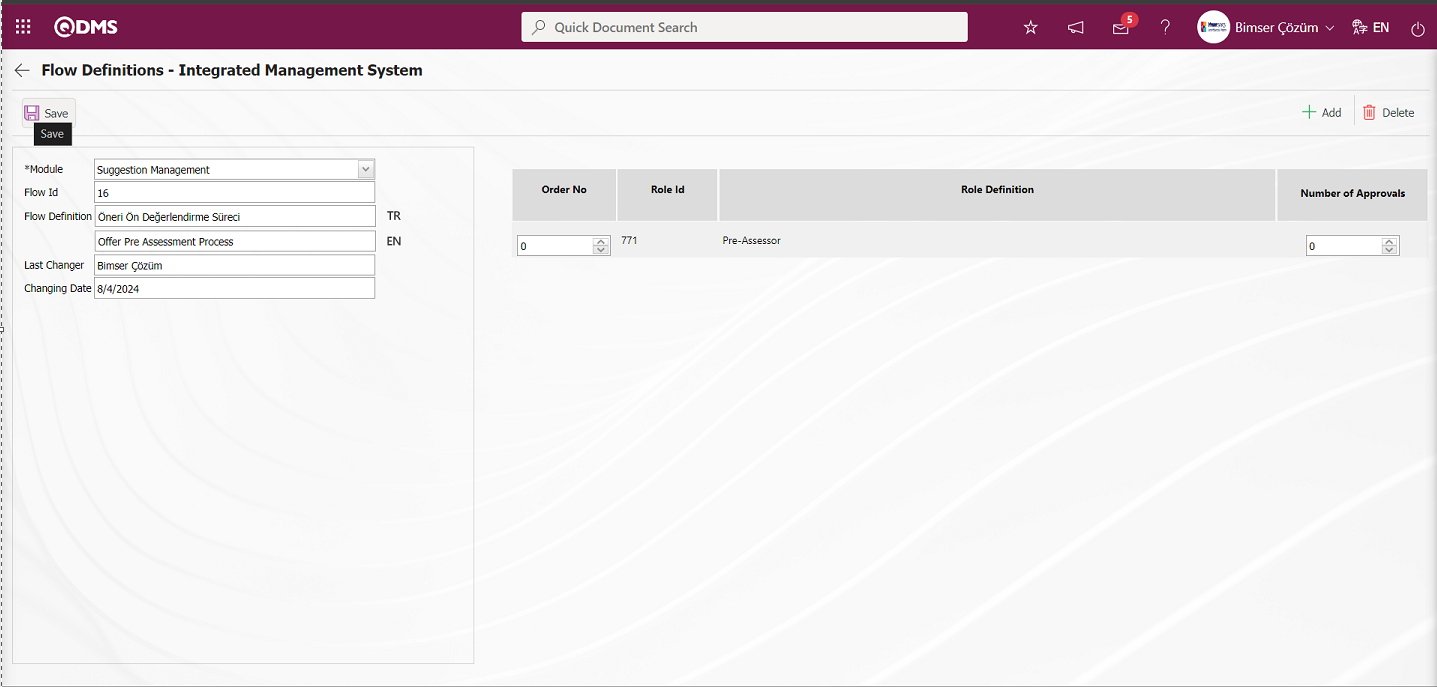
After the role selection process on the Flow Definition screen, the flow update registration process is done by clicking the button in the upper left corner of the screen.
![A screenshot of a computer
Description automatically generated]ref41
After the Flow Definition process is done, the control process of the flows must be done on the Sub-Module Identification screen.
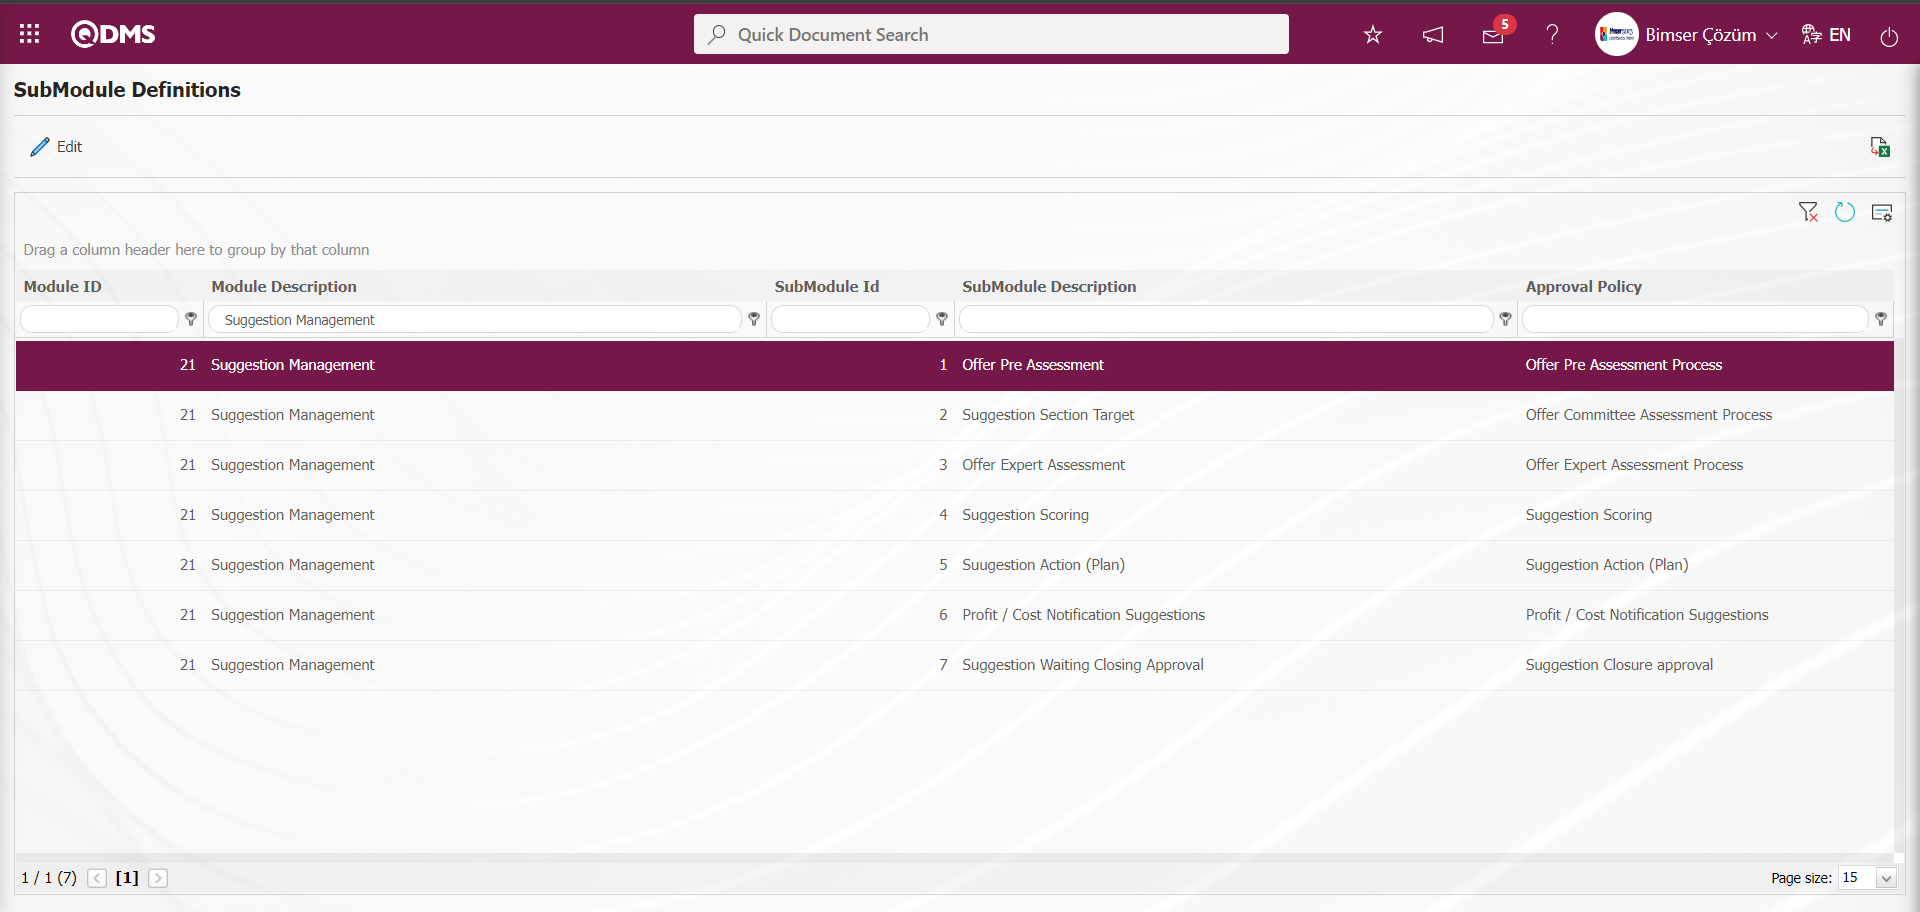
5.3. Integrated Management System / Suggestion System Operations
Menu Name: Integrated Management System / Suggestion System
This is the section where a suggestion is entered into the system, the suggestion process is initiated and monitored, and reports about the suggestion system are received.
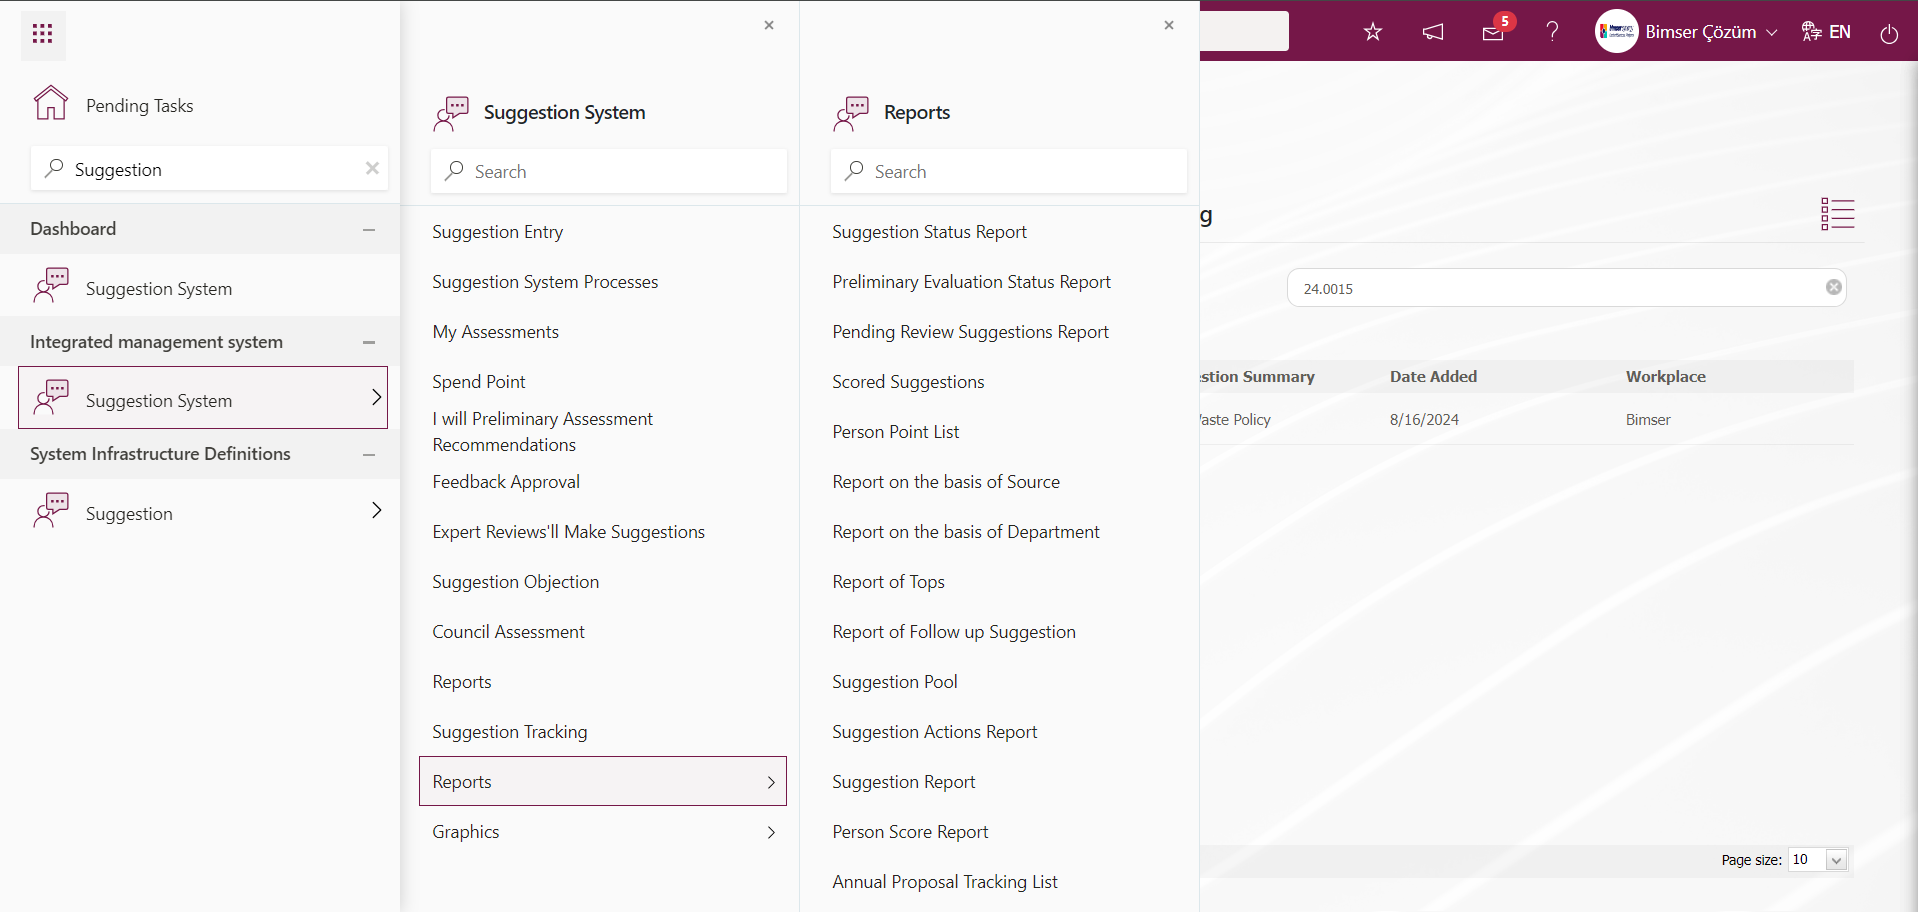
5.3.1. Suggestion Entry
Menu Name: Integrated Management System/ Suggestion System/ Suggestion Entry
This is the menu where suggestions are entered into the system. Two tabs are displayed on the screen: Suggestion Information and Additional Files. Suggestion Information is the tab where the detailed information of the suggestion defined in the tab is entered. Additional Files tab is the tab where the suggestion defined in the Additional Files tab and additional files, if any, are uploaded.
Suggestion Information tab:This is the tab where general information about the suggestion such as Source of Suggestion, Suggestors, Issue Date is entered, and associations with products and processes are made, if any.
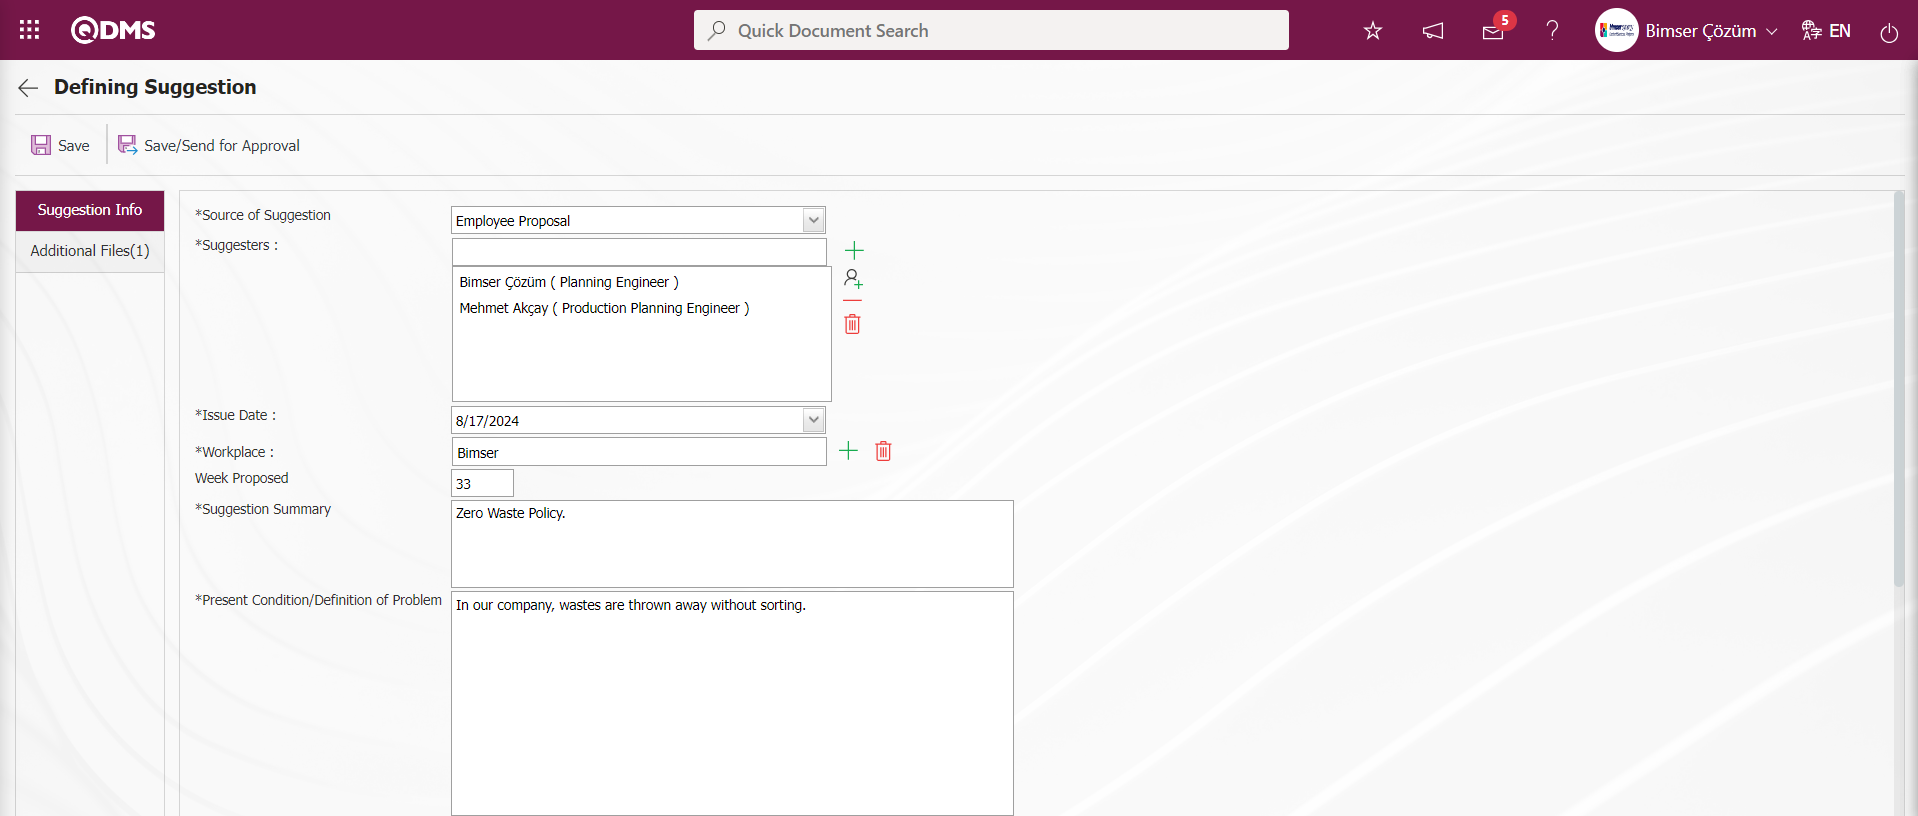
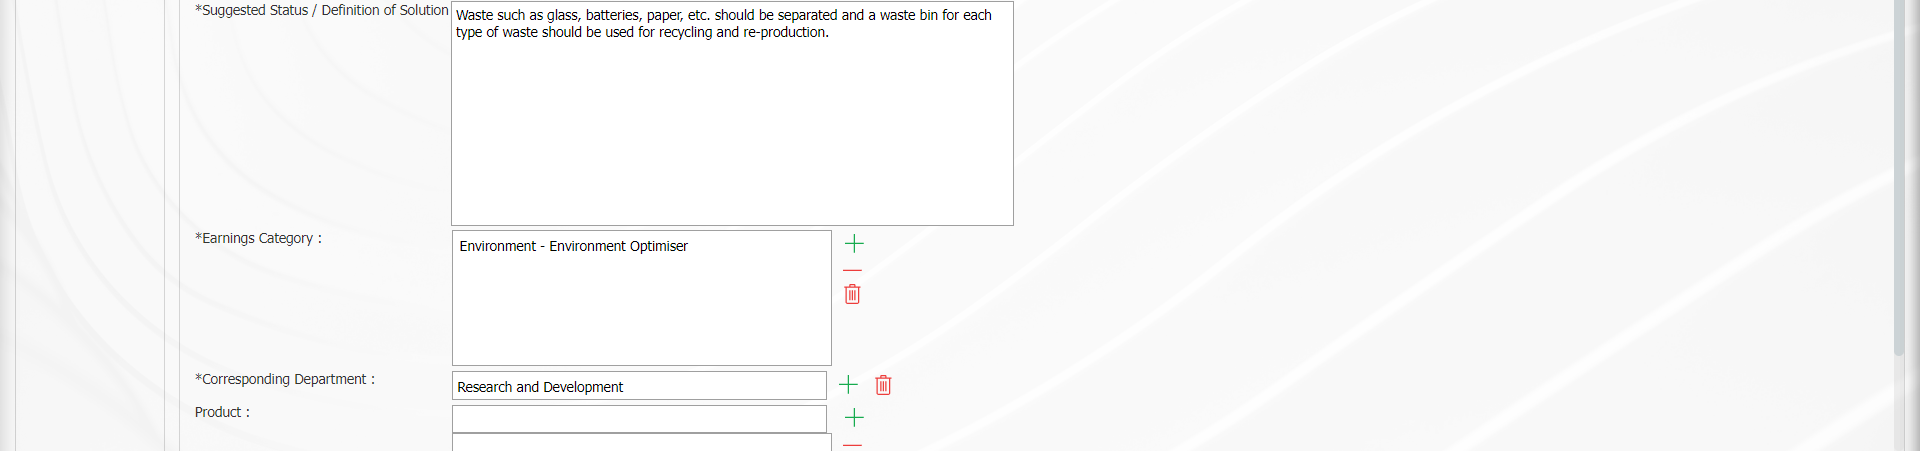
With the help of the buttons on the screen;
 : The suggestion is registered as a draft. It is a field that is displayed depending on the parameter. The parameter value of parameter 153 in the Suggestion System Module parameters is activated by selecting “Yes”.
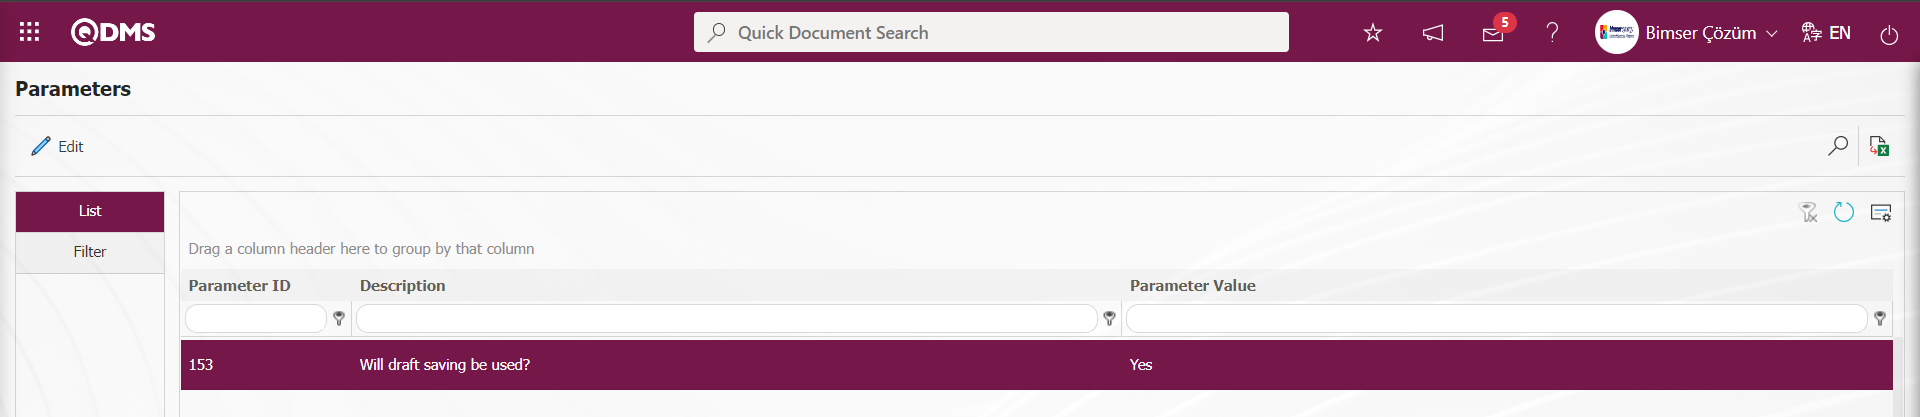
When the parameter is activated, this button is displayed on the Suggestion Definition screen and when clicked, the given suggestion is saved as a draft.
 : The suggestion is saved and sent to the next stage, the pre-evaluation stage.
Related fields are defined on the screen that opens;
Source of Suggestion: Defining Suggestion Suggestion Information tab is the field to select whether the suggestion entered into the system is a customer suggestion, supplier suggestion or personnel suggestion. If the customer suggestion is selected, the selection is made from the customer list defined in the system by clicking the  (Add) button in the suggestion givers field.
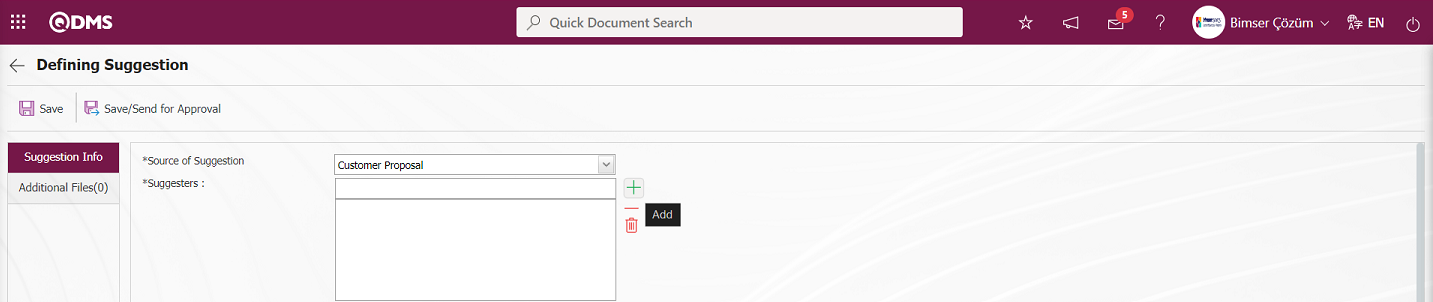
If the supplier suggestion is selected, the selection is made from the list of suppliers defined in the system that opens by clicking the (Add) button in the suggestion givers field.

If the employee suggestion is selected, the selection is made from the list of personnel defined in the system opened by clicking the  (Add) button in the field of those who made the suggestion.

Suggesters: In the Suggestion Information tab on the Suggestion Definition screen, the suggestion source is selected in the list options opened by clicking the drop-down list. If suggestion is selected as the suggestion source, the suggestion givers are selected from the customer list defined in the system. If supplier suggestion is selected, the suggestion givers are selected from the supplier list defined in the system. If employee suggestion is selected, those who give the suggestion are selected from the list of employees defined in the system.
According to the adjustment made to parameter 79 in the Suggestion System Module parameters, it is set whether there will be customer, supply and personnel suggestions or not. If the parameter value is left blank, all suggestion source options are displayed and the drop-down list is selected by clicking.
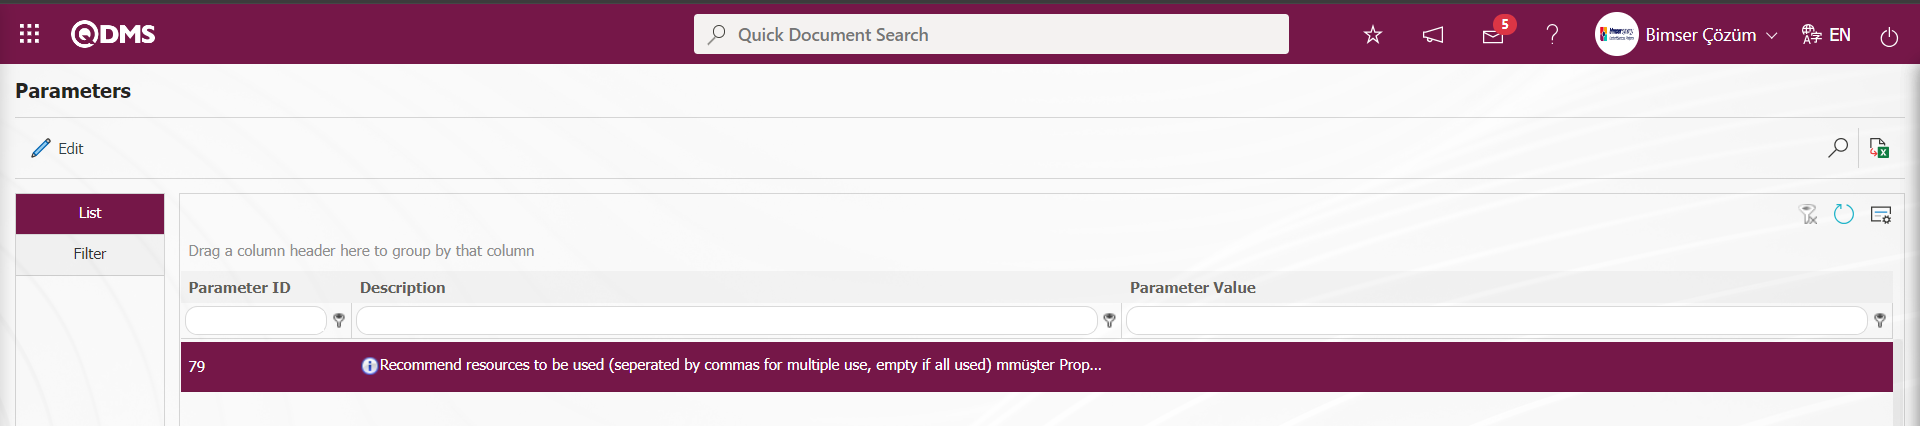
In order to display the Customer option in the Suggestion Source field and select this option only and make a selection in the customer list in the suggestors fields, the letter value “M” must be defined in the parameter value.
The letter value “T” must be defined in the parameter value in order to display the Supplier option in the Suggestion Source field and to make a selection in the Supplier list in the suggestors fields by selecting this option only.
In order to display the Employee option in the Suggestion Source field and to make a selection in the Employee list in the suggestion givers fields by selecting this option only, the letter value “P” must be defined in the parameter value.
According to the value entered in the parameter value in parameter 1 of the Suggestion System Parameters, it is determined how many people can give a suggestion at most.

When the maximum number of people specified in the parameter value in the parameter value is exceeded, a down warning message is given by the system.
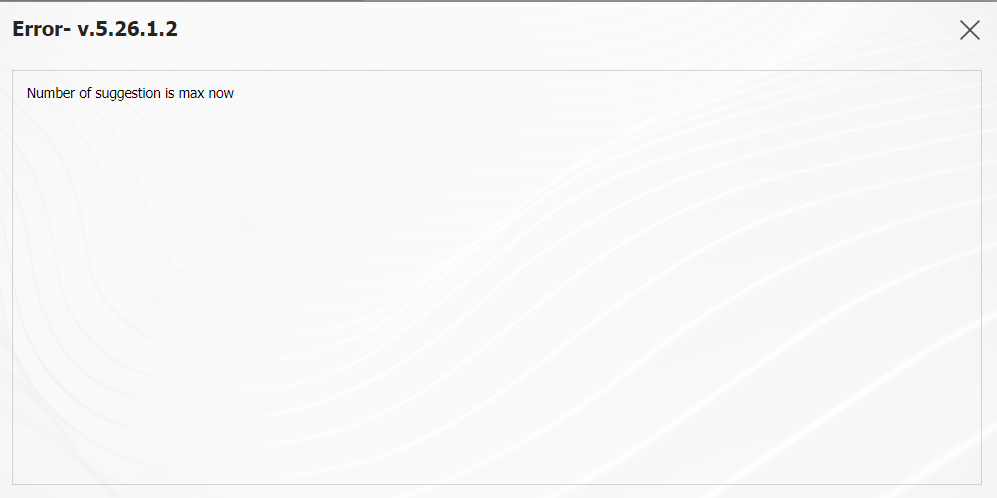
Issue Date: This is the field where the date on which the suggestion is given in the Suggestion Information tab on the Suggestion Definition screen is selected in the Calendar field. Systemic adjustments are made in this field depending on the parameter. It is defined as “S” if the parameter value in the parameter number 35 in the Suggestion System Parameters.

As in the screenshot below, the date on which the suggestion enters the system is automatic and cannot be changed.

It is defined as “V” if the parameter value in parameter number 35 in the Suggestion System Parameters. 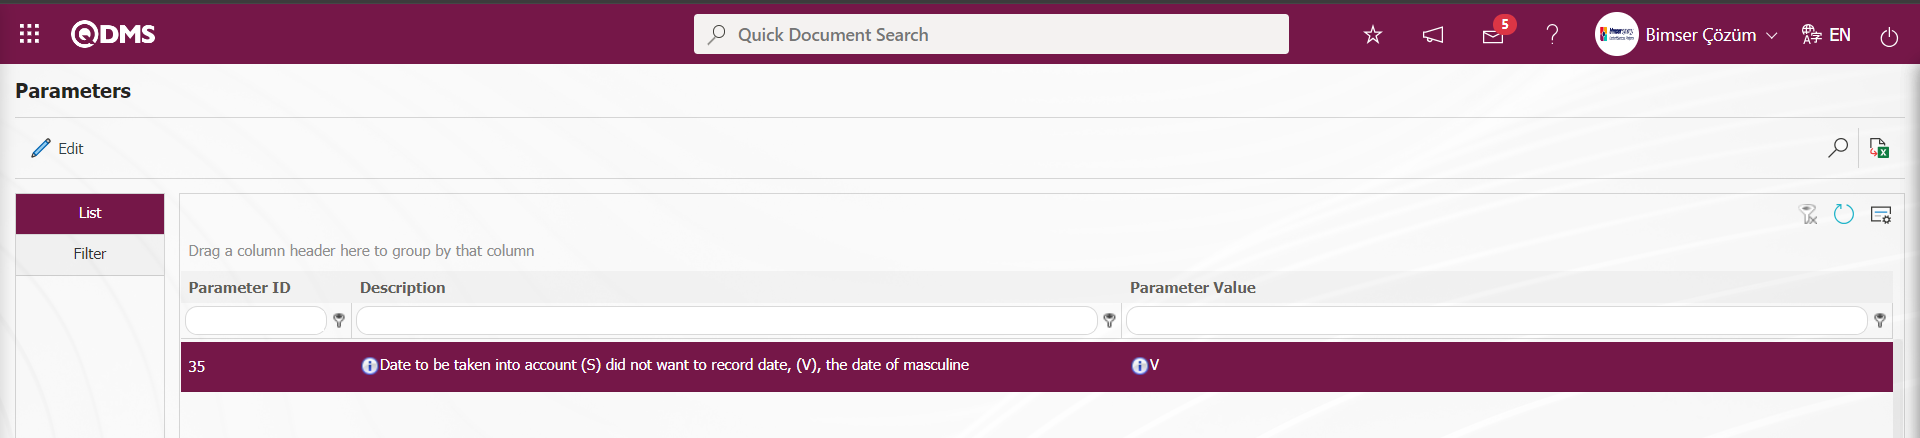
As in the screenshot below, a past date can be selected by changing the date when the suggestion was made.

The parameter value of parameter 164 in the Suggestion System Module parameters is activated by selecting “Yes”.

After the parameter is activated, it is seen that the Week numbers are given numerically in the Calendar field opened in the Date fields.
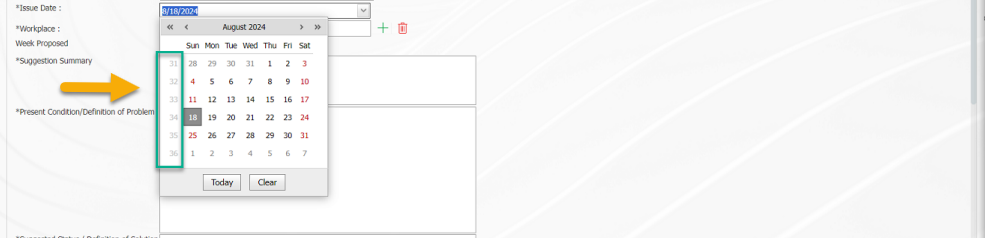
Workplace: It is the field where the suggestion given in the Suggestion Information tab on the Suggestion Definition screen is selected from the list of workplaces defined in the system that opens by clicking the  (Select) button. The parameter value of parameter 144 of the Suggestion System parameters should be activated by selecting “Yes”.
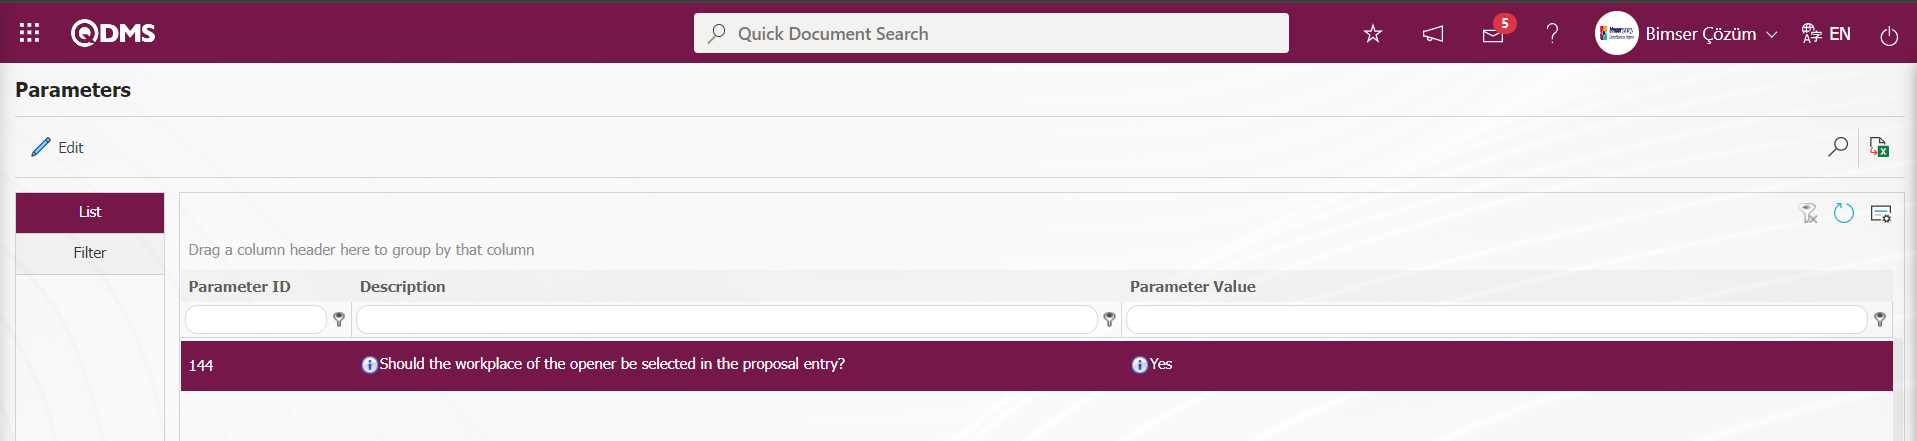
After the parameter is activated, the system will automatically enter the workplace information of the user who made the suggestion in the workplace field.
Week Proposed: In the Suggestion Information tab on the Suggestion Definition screen, it is the field where the week in which the suggestion is given is given. In order to use the week of the suggestion field, the parameter value of parameter 13 of the Suggestion system module parameters must be activated by selecting “Yes”.
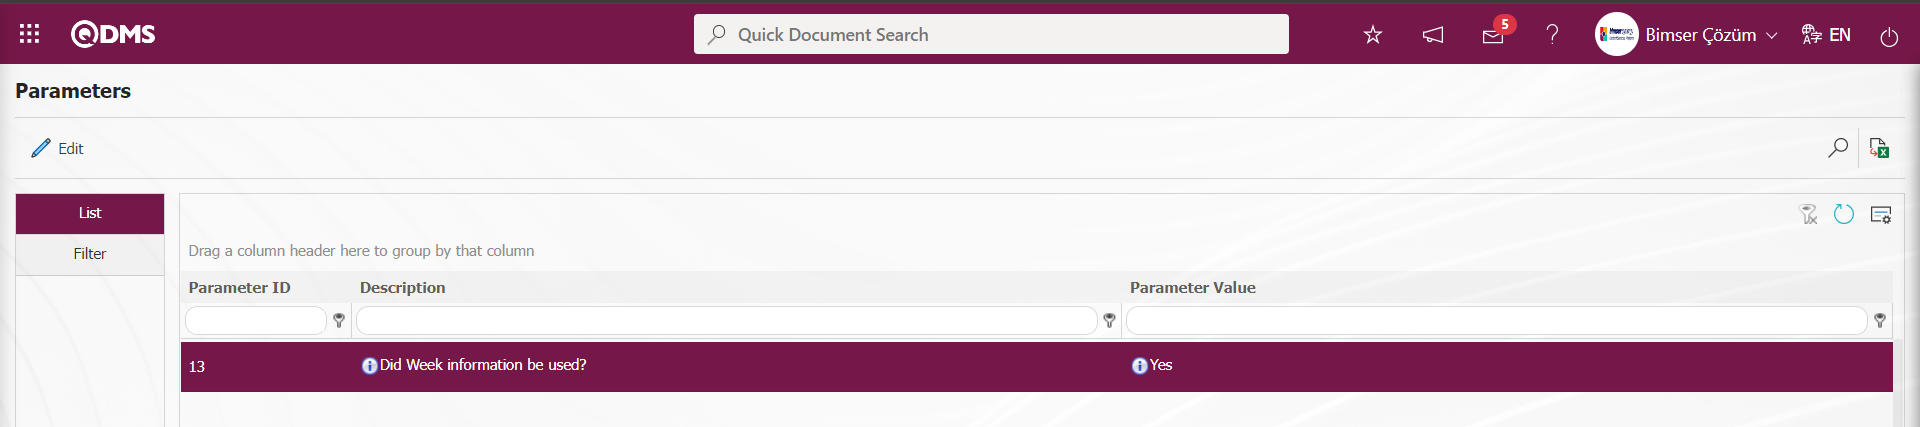
After the parameter is activated, in the suggestion definition suggestion information tab, the information of the week in which the suggestion is given automatically comes in the relevant field defined in the system. However, if the suggestion was given in one of the past weeks, that week information is redefined by editing the week information on the field.
Suggestion Summary: This is the field where the definition of the summary information for the suggestion given in the Suggestion Information tab on the Suggestion Definition screen is written. (For example; Preventing falling from height.)
Present Condition/Definition of Problem: This is the field where the current situation is determined in the Suggestion Information tab on the Suggestion Definition screen and the definition of the problem is written. (For example; danger of falling on elevated working platforms)
Suggested Status / Definition of Solution: In the Suggestion Information tab on the Suggestion Definition screen, this is the area where the situation definition is written for the solution of the problem. (For example; Surrounding the platforms with railings in work areas above 1.5 meters)
Earnings Category: This is the field where the suggestion given in the Suggestion Information tab on the Suggestion Definition screen is selected from the list of gain categories defined in the system defined in the infrastructure by clicking the  (Add) button (For example; reducing the number of accidents). This field is a field that is displayed depending on the parameter. The parameter value of parameter 87 in the Suggestion System module parameters is activated by selecting “Yes”.

After the parameter is activated, the Earnings Category field is displayed in the Suggestion Information tab on the Suggestion Definition screen. The parameter value of parameter 61 of the Suggestion System Module parameters is activated by selecting “Yes”.
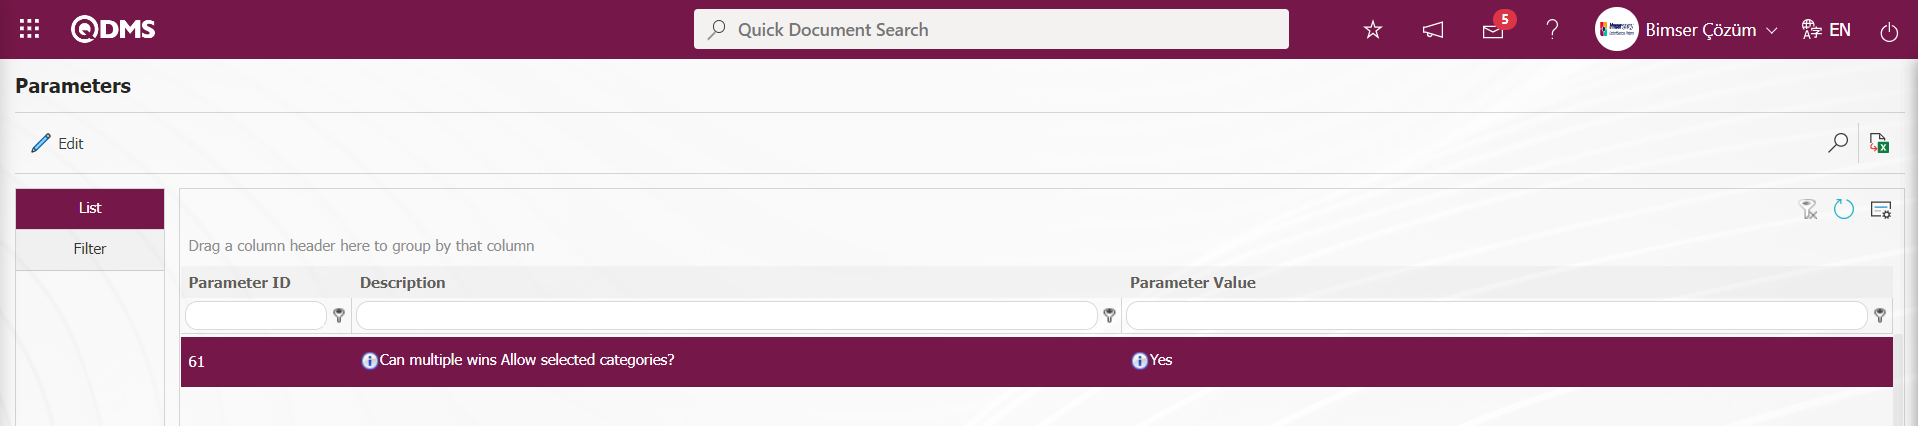
After the parameter is activated, more than one earning category can be selected in the Earnings Category field.
Corresponding Department: This is the field where the department under which the suggestion given in the Suggestion Information tab on the Suggestion Definition screen is selected from the list of departments defined in the system by clicking the  (Add) button. The parameter value of parameter 103 of the Suggestion System Module parameters is selected as “Yes” and the parameter is activated.
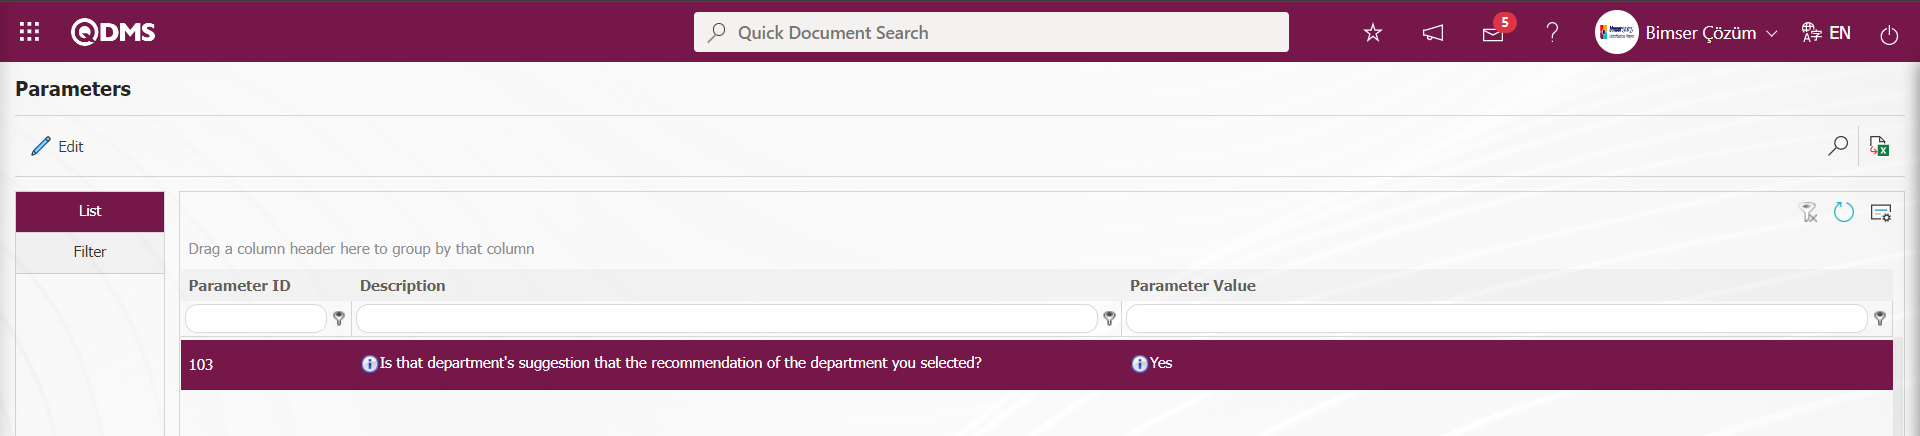
After the parameter is activated, the department information of the user who made the suggestion is automatically entered into the relevant department field by the system.
Product: It is the field where the product related to the suggestion given is selected in the Product list defined in the system opened by clicking the  (Add) button in the Suggestion Information tab on the Suggestion Definition screen. The parameter value of parameter 76 in the Suggestion System Module parameters is activated by selecting “Yes”.
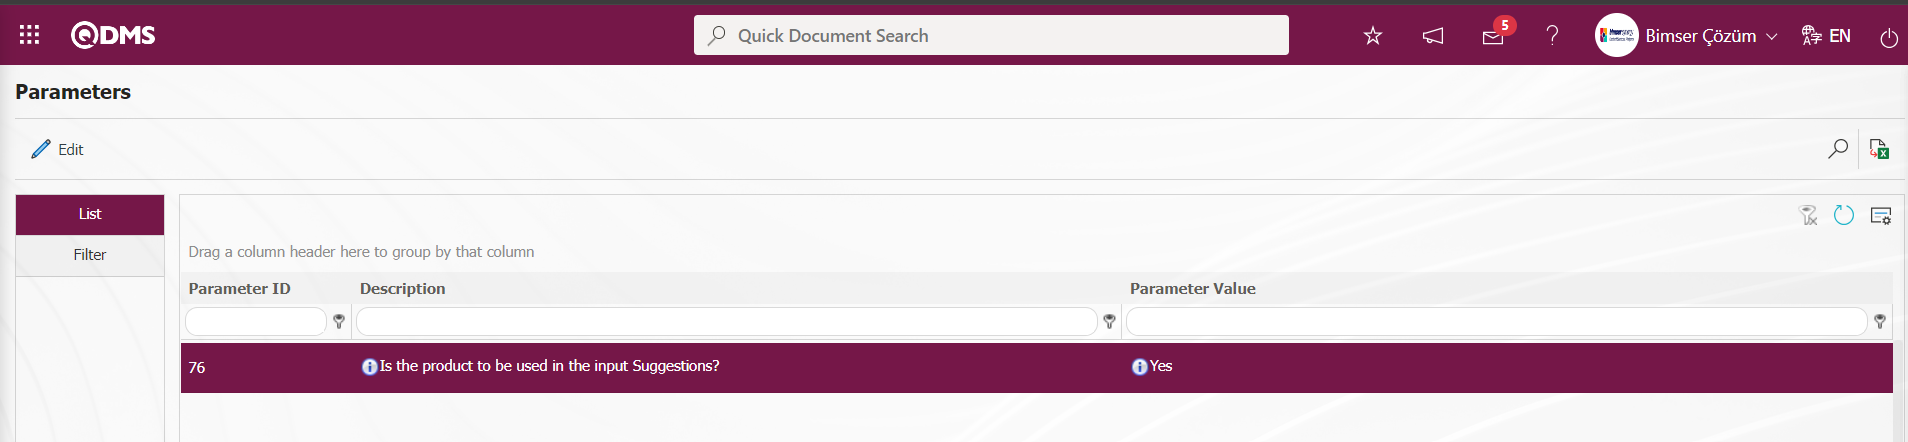
After the parameter is activated, the Product field is displayed in the Suggestion Information tab on the Suggestion Definition screen.
Process: It is the field where the process information related to the suggestion given in the Suggestion Information tab on the Suggestion Definition screen is selected in the process list defined in the system. It is a field displayed depending on the parameter. Parameter 42 is activated by selecting the parameter value “Yes”.

After the parameter is activated, the Process field is displayed in the Suggestion Information tab on the Suggestion Definition screen.
Additional Files Tab: This is the tab for uploading documents, pictures, etc. related to the suggestion. Multiple additional files can be uploaded in this tab.
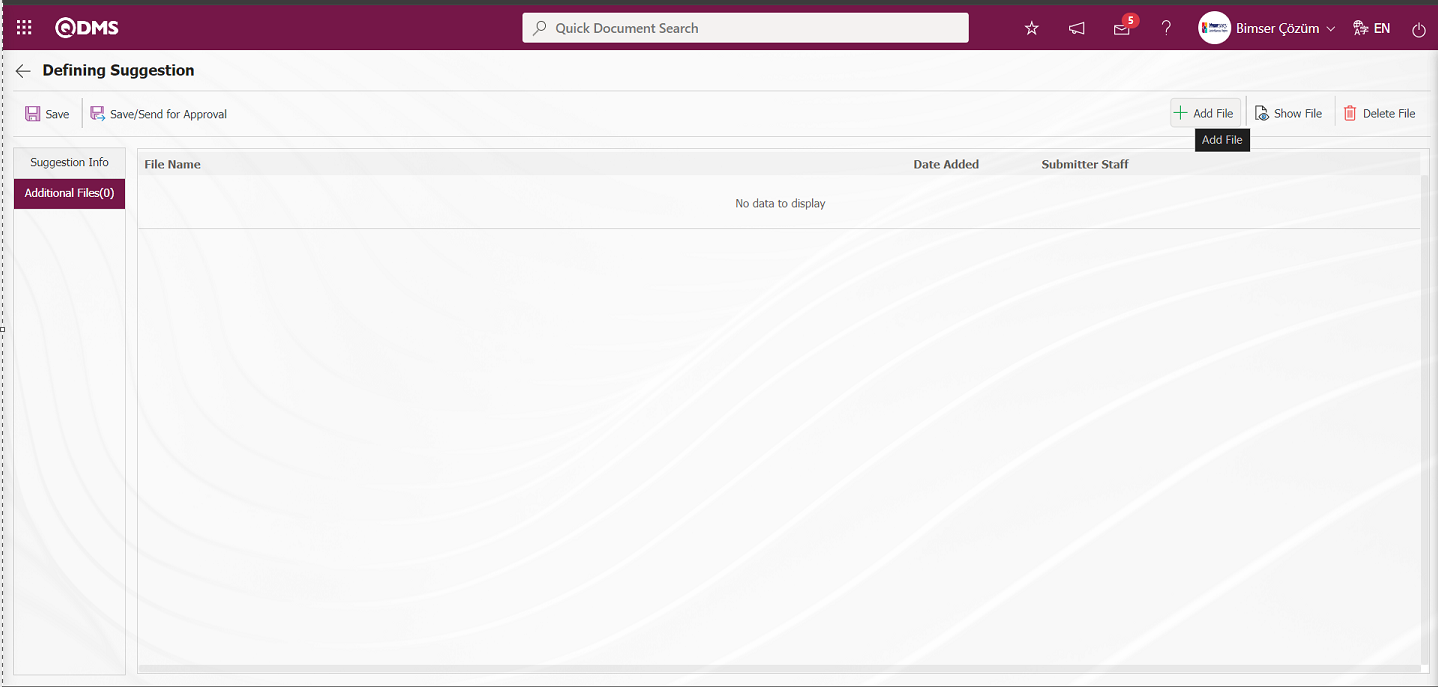
With the help of the buttons on the screen;
 : The additional file is uploaded to the system.
 : The uploaded additional file information is displayed.
 : The uploaded additional file information is deleted.
In the Suggestion Definition screen, additional files are added to the Suggestion record by clicking the button in the Additional files tab. Multiple attachment files can be added.
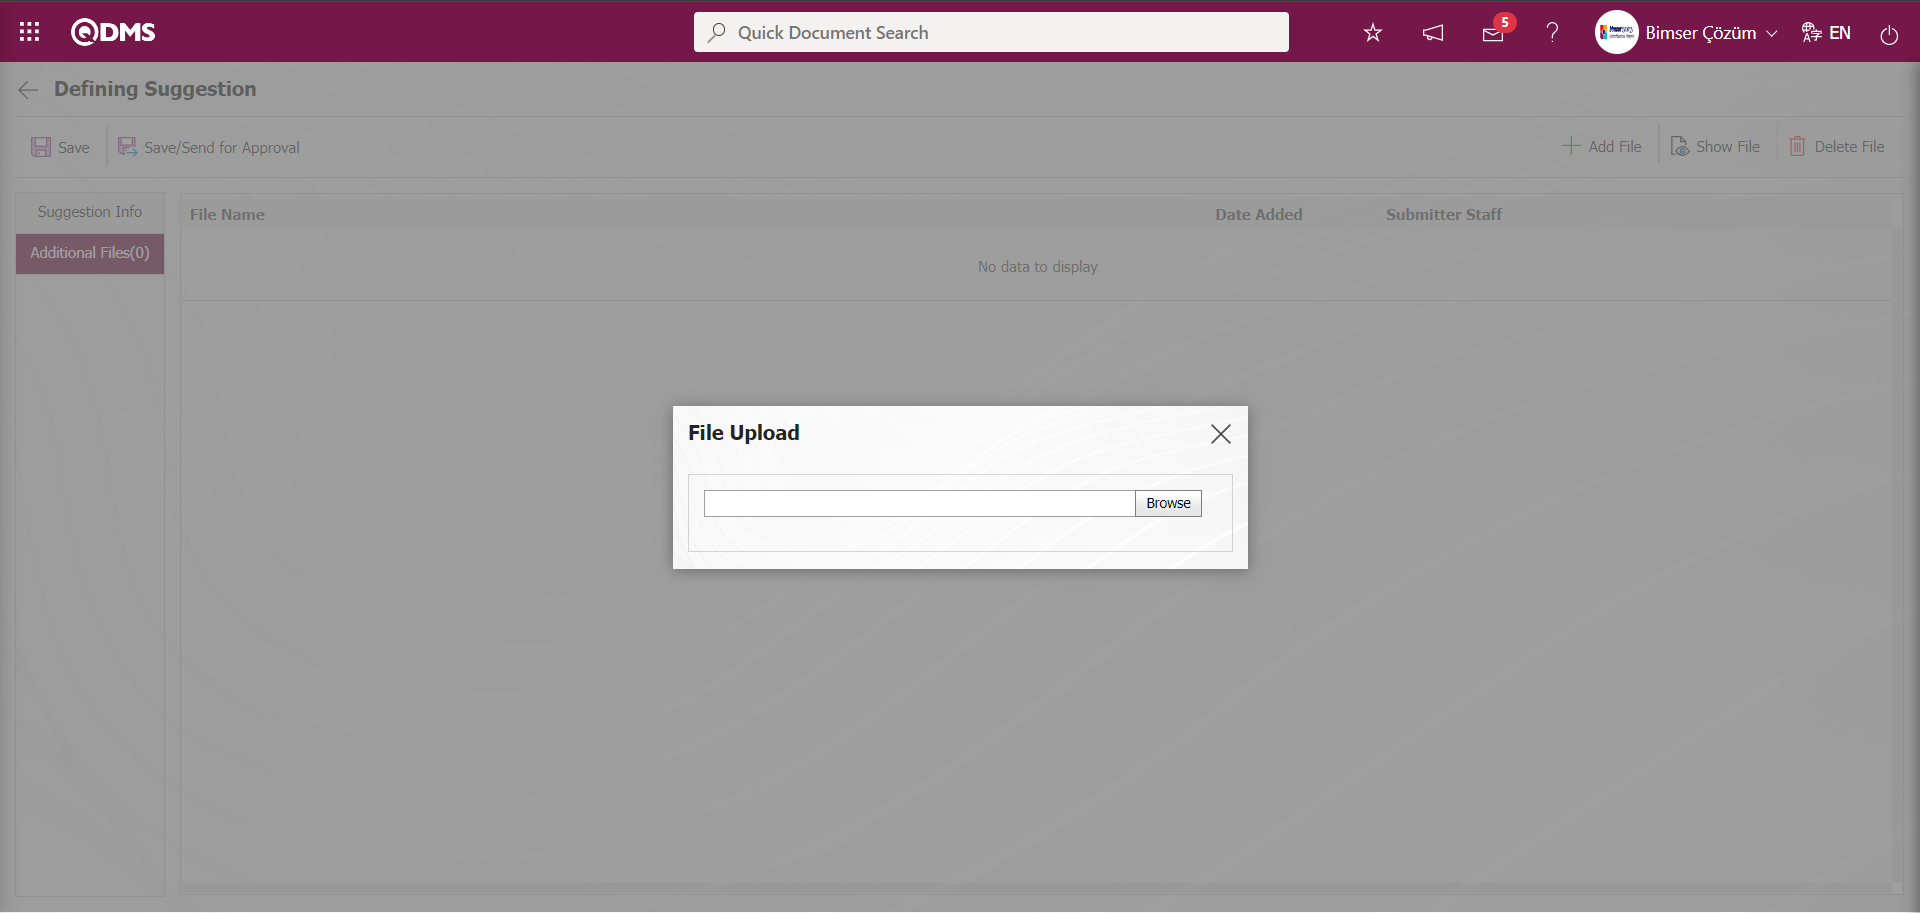
Select the file on the computer by clicking the  button on the File Upload screen
File Upload takes place.
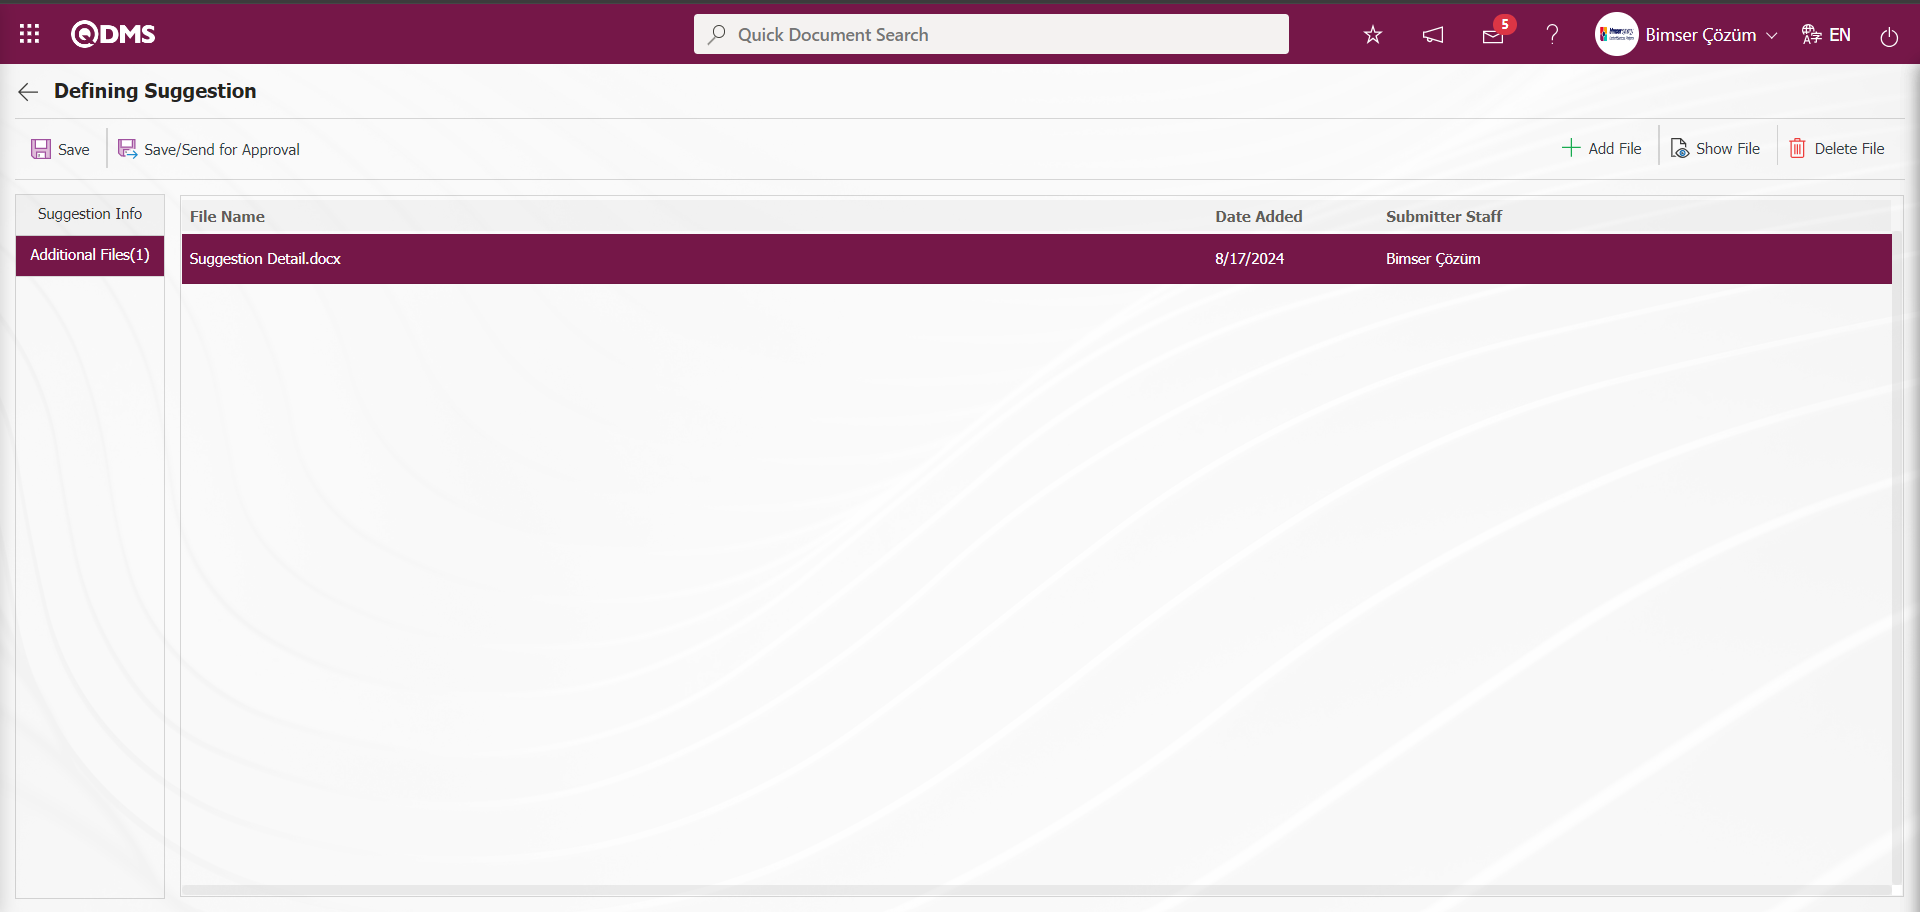
On the Suggestion Definition screen, click on the Suggestion Information tab.
If you click on the  button after entering the suggestion on the Suggestion Definition screen, the suggestion is saved as a draft.
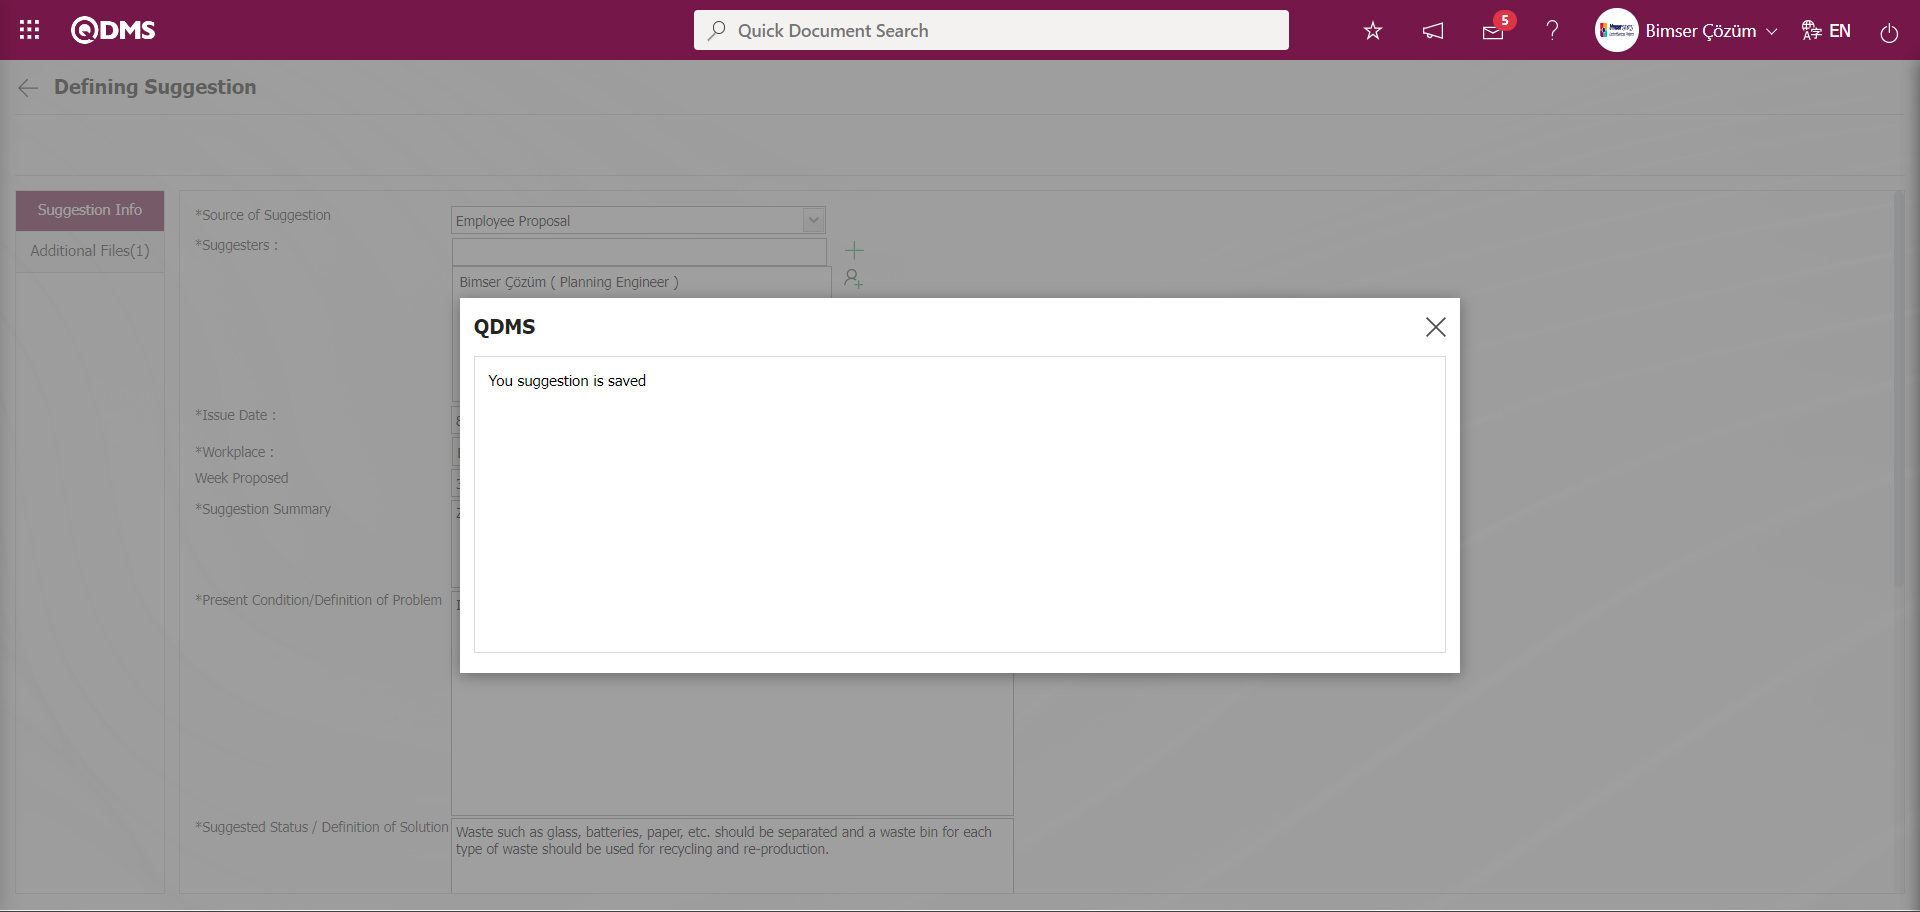

5.3.1.1. Draft Recommendations Process
It is displayed as“Draft Suggestions” on the “My Pending Jobs” page of the user who entered the suggestion. The suggestion code is displayed as “Year.****”.For example; (24.0006 suggestion code; indicates that the suggestion given is the 6th suggestion of the year 2024).
The suggestion definition screen is displayed by clicking the suggestion code link in the No field of the draft suggestion.
Suggestion Information tab:This is the tab where general information about the suggestion such as Source of Suggestion, Suggestors, Issue Date is entered, and associations with products and processes are made, if any.
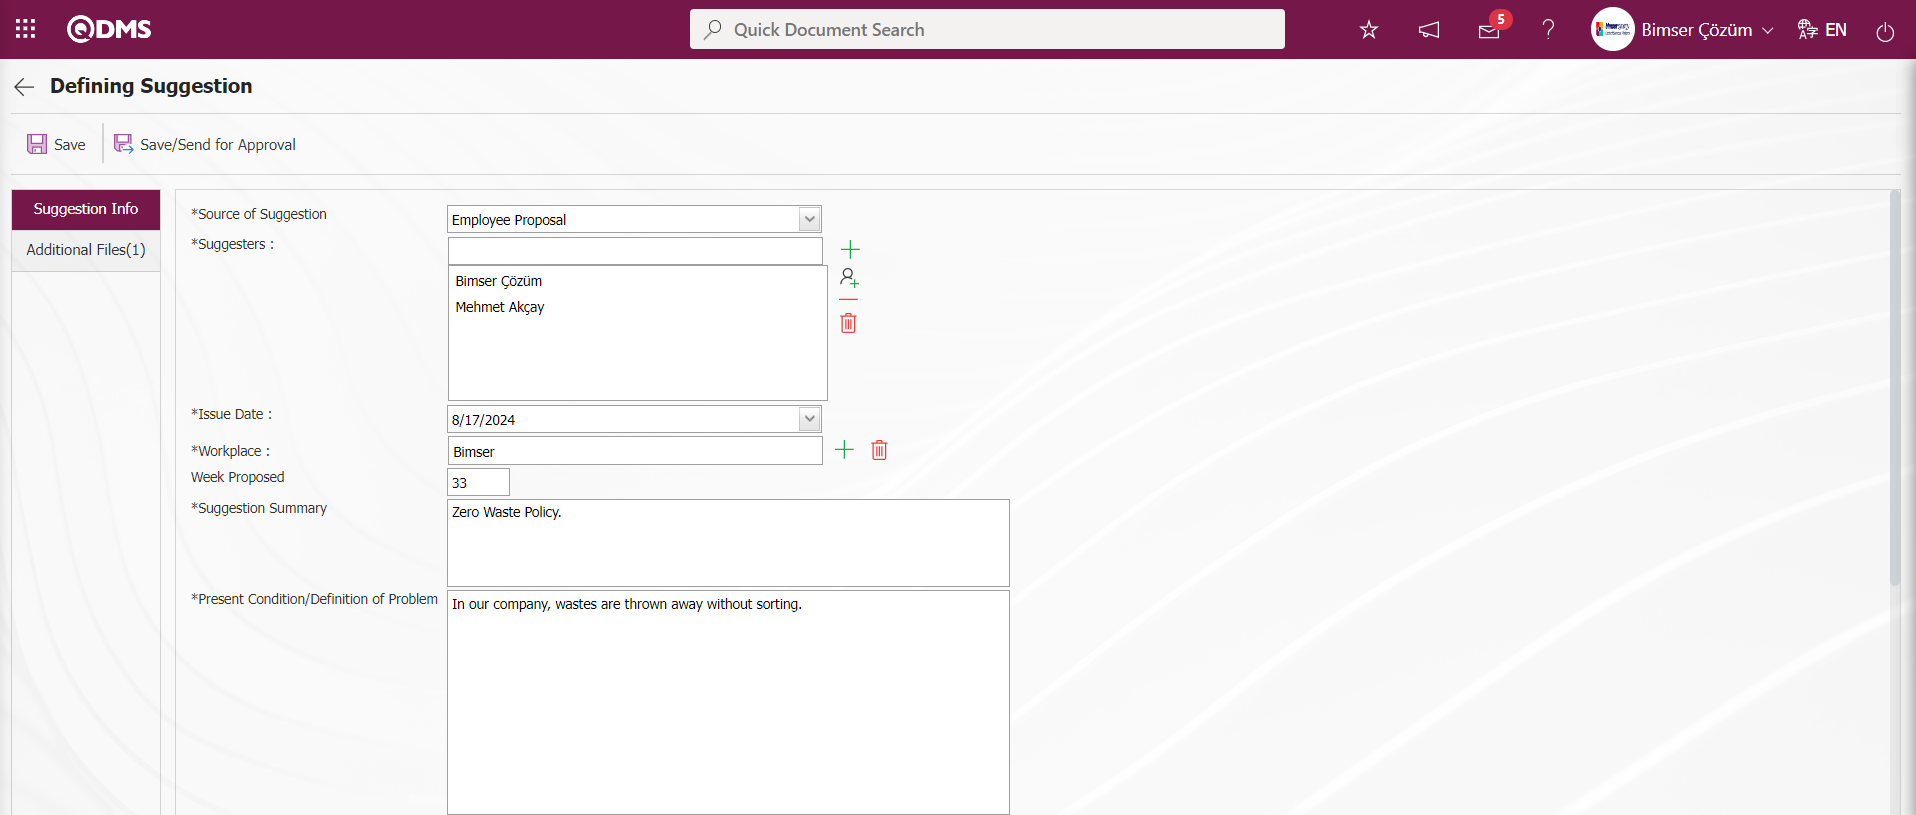
With the help of the buttons on the screen;
 : The suggestion is registered as a draft. It is a field that is displayed depending on the parameter. The parameter value of parameter 153 in the Suggestion System Module parameters is activated by selecting “Yes”.

When the parameter is activated, this button is displayed on the Suggestion Definition screen and when clicked, the given suggestion is saved as a draft.
: The suggestion is saved and sent to the next stage, the pre-evaluation stage.
Additional Files Tab: This is the tab for uploading documents, pictures, etc. related to the suggestion. Multiple additional files can be uploaded in this tab.
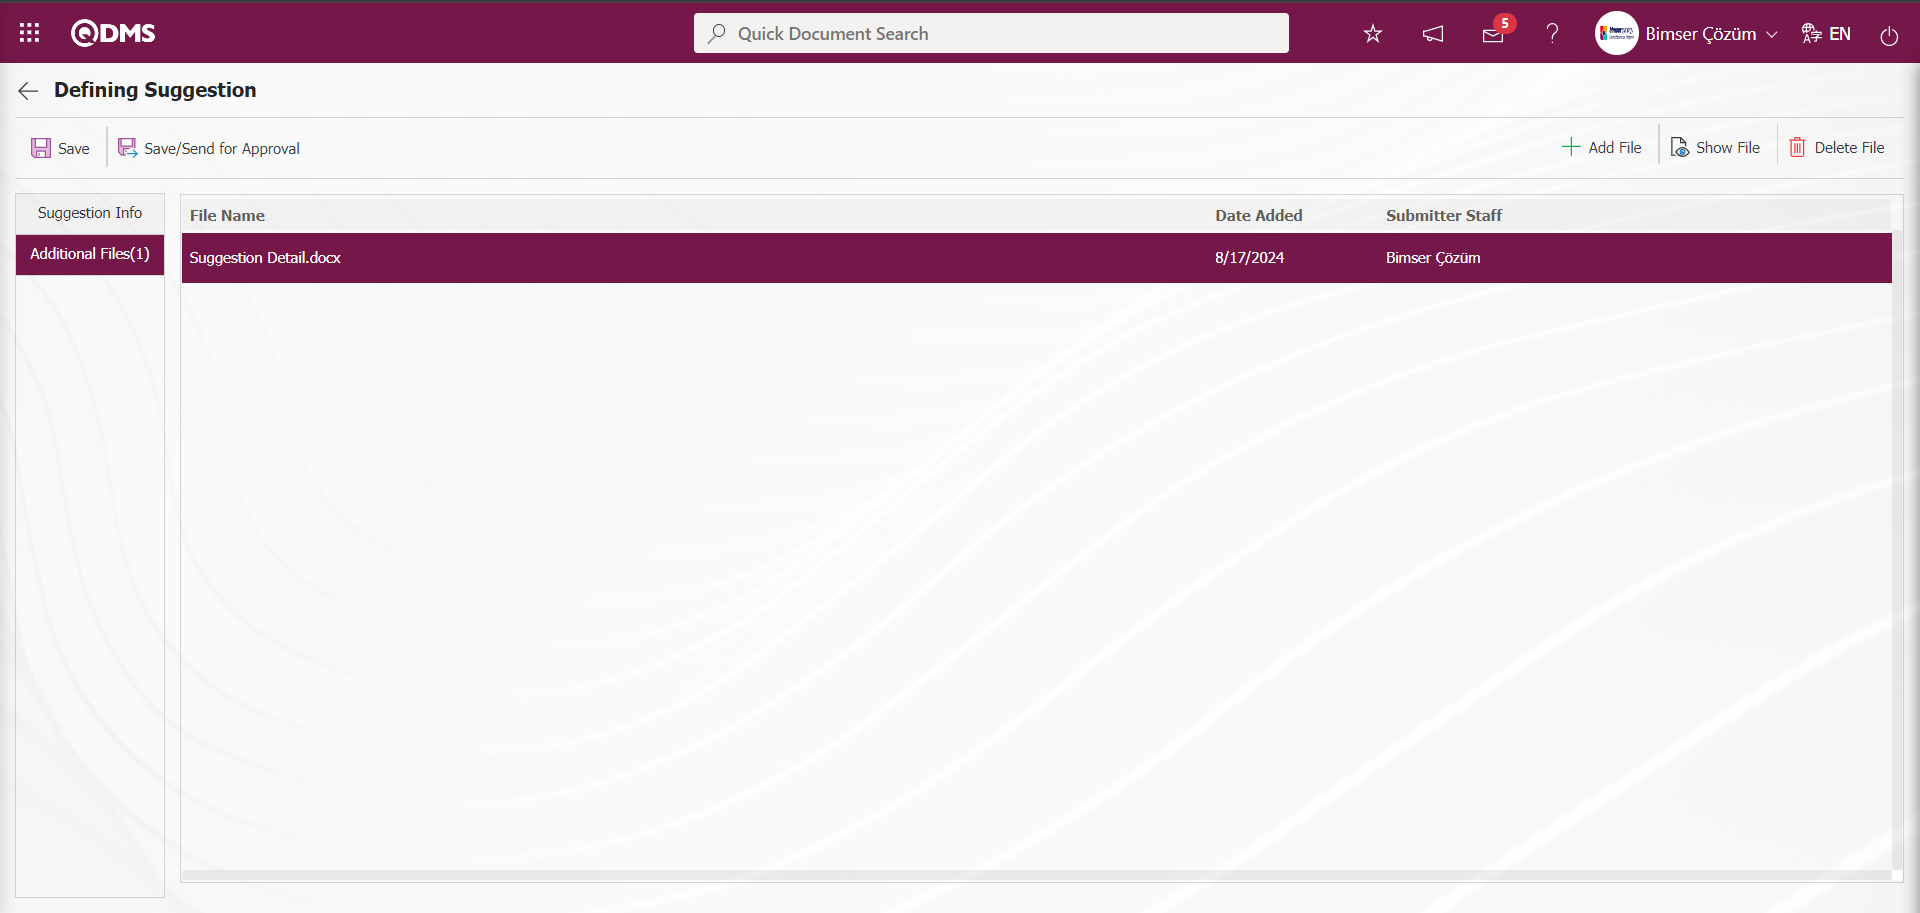
Click on the Suggestion Information tab.

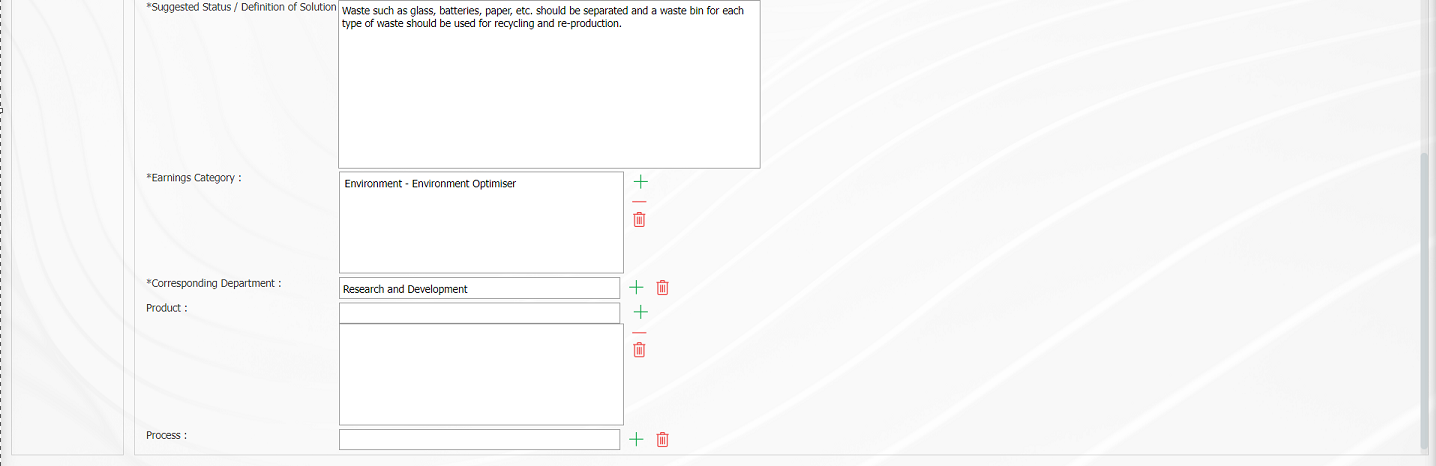
The suggestion information is checked on the Suggestion Definition screen and the suggestion is sent to the pre-assessment role defined in the system for pre-assessment by clicking the  button.
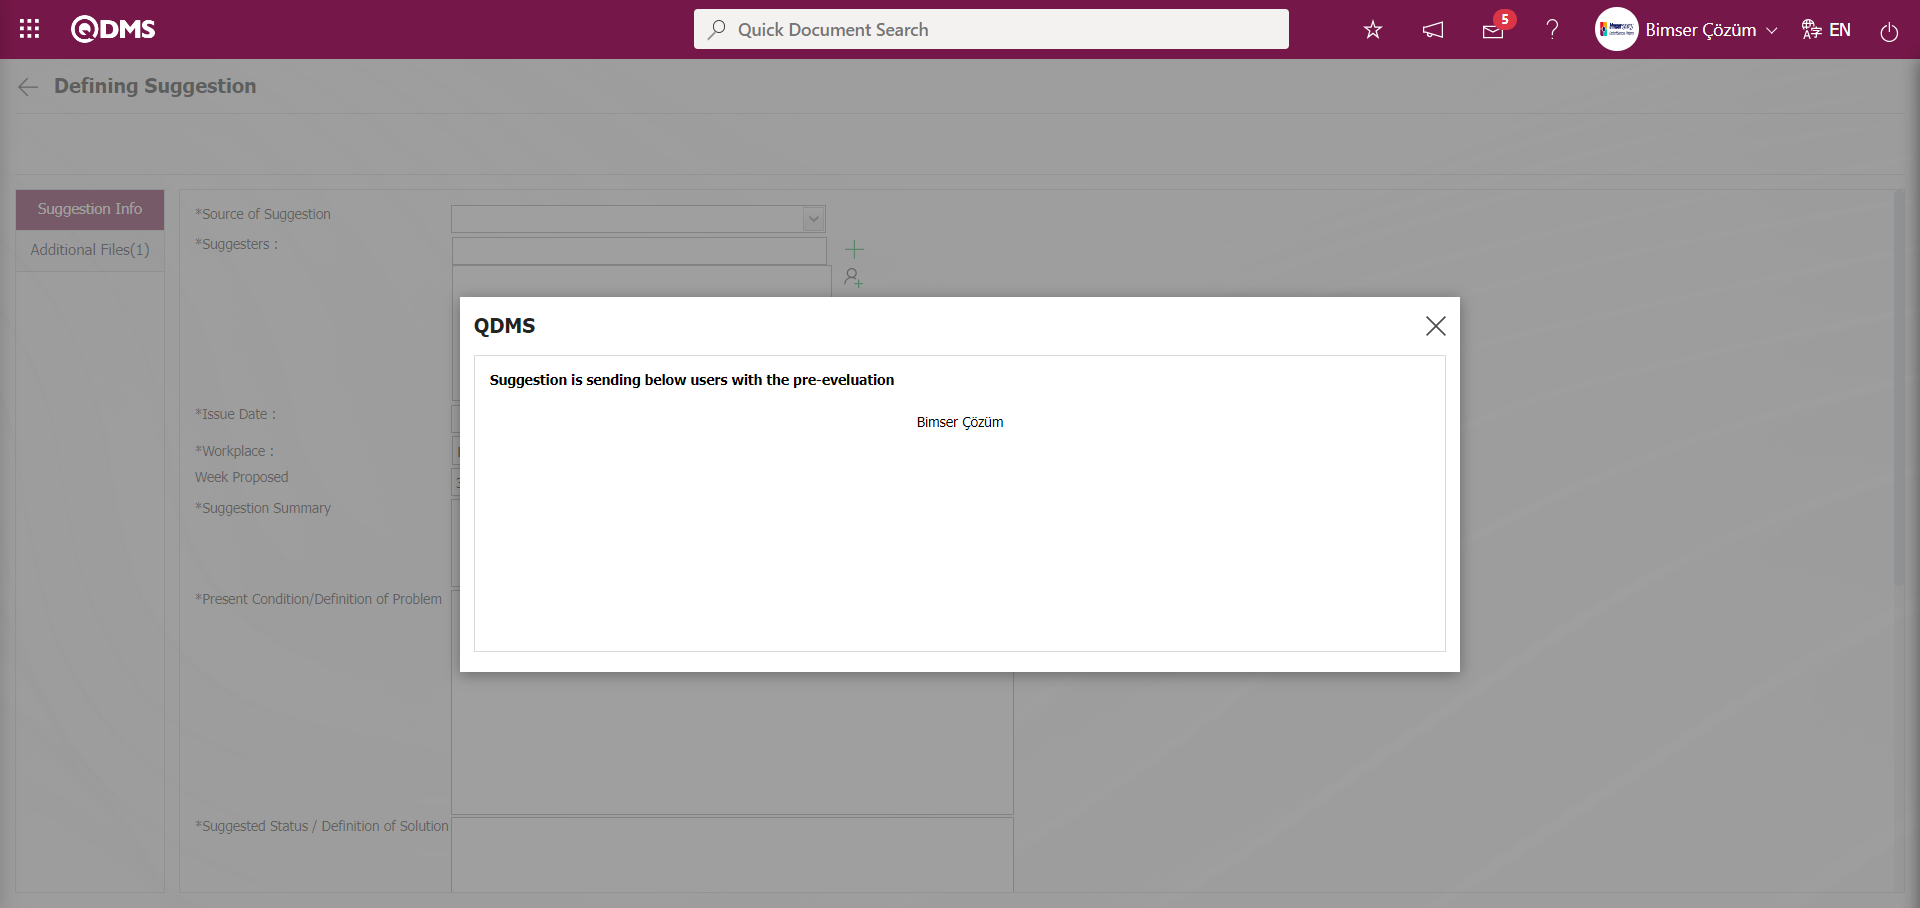

5.3.1.2. Pre-Assessment Process
After the suggestion is sent, the person who will make a pre-assessment is assigned as “Proposal Awaiting for Pre Assessment” on the “My Pending Jobs” page. The parameter value of parameter 97 in the Suggestion System parameters is activated by selecting “Yes”.
 After the parameter is activated, Pre-Assessment Process is used in the Suggestion System Module. According to the value entered in parameter 107 in the Suggestion System Module parameters, the waiting time information is set in the suggestion pre-evaluation process phase. The pre-evaluation process phase must be completed within the period specified in the parameter.

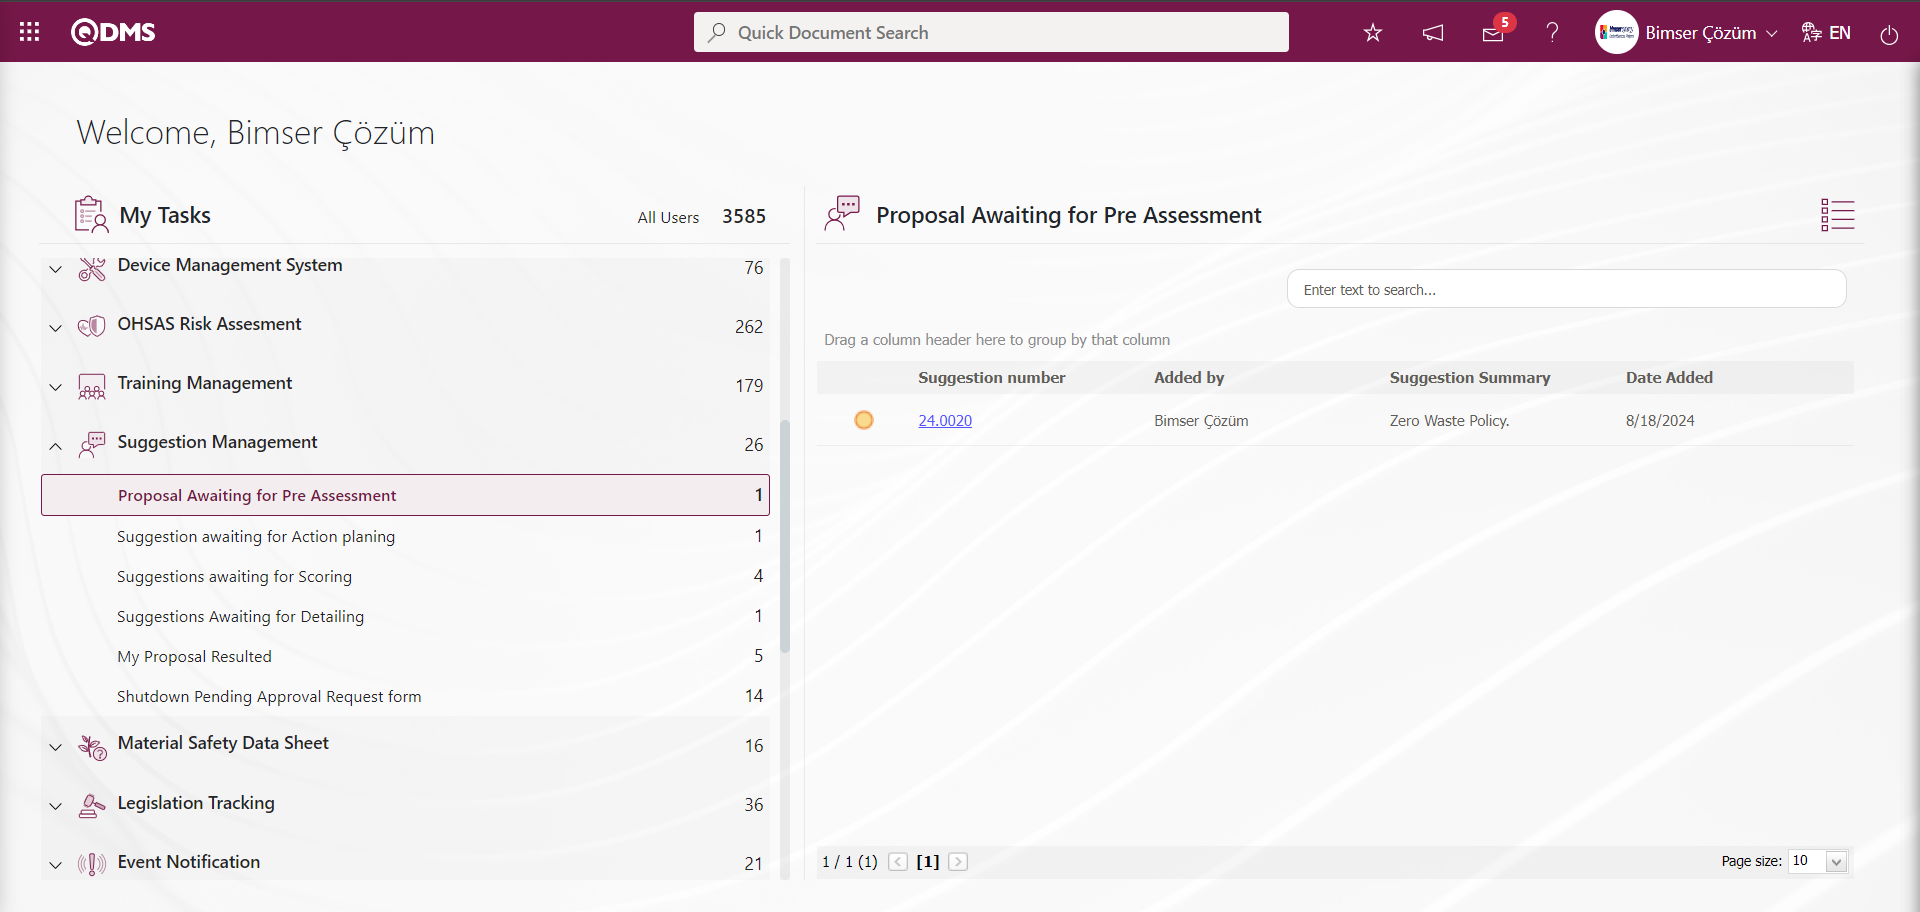
The suggestion code link in the Suggestion No field is clicked and the pre-evaluation process is carried out. At this stage, the suggestion given by the pre-evaluator is evaluated and it is decided whether it is related to the department or not, whether it is a suggestion or not, and if it is a suggestion, the detail is requested and it is decided whether the detail is sufficient or not.
Approvement of Suggestion: It is the tab where the suggestion is related to the expert's department, whether the detail qualification will be requested, whether it is a suggestion, if it is a suggestion, the expert to evaluate it is selected, the suggestion description is written, if it is not a suggestion, the not a suggestion option is selected, the suggestion is selected from the list of reasons for rejection, the relevant check box is checked if it is a campaign suggestion and at this stage, the earnings category is selected.
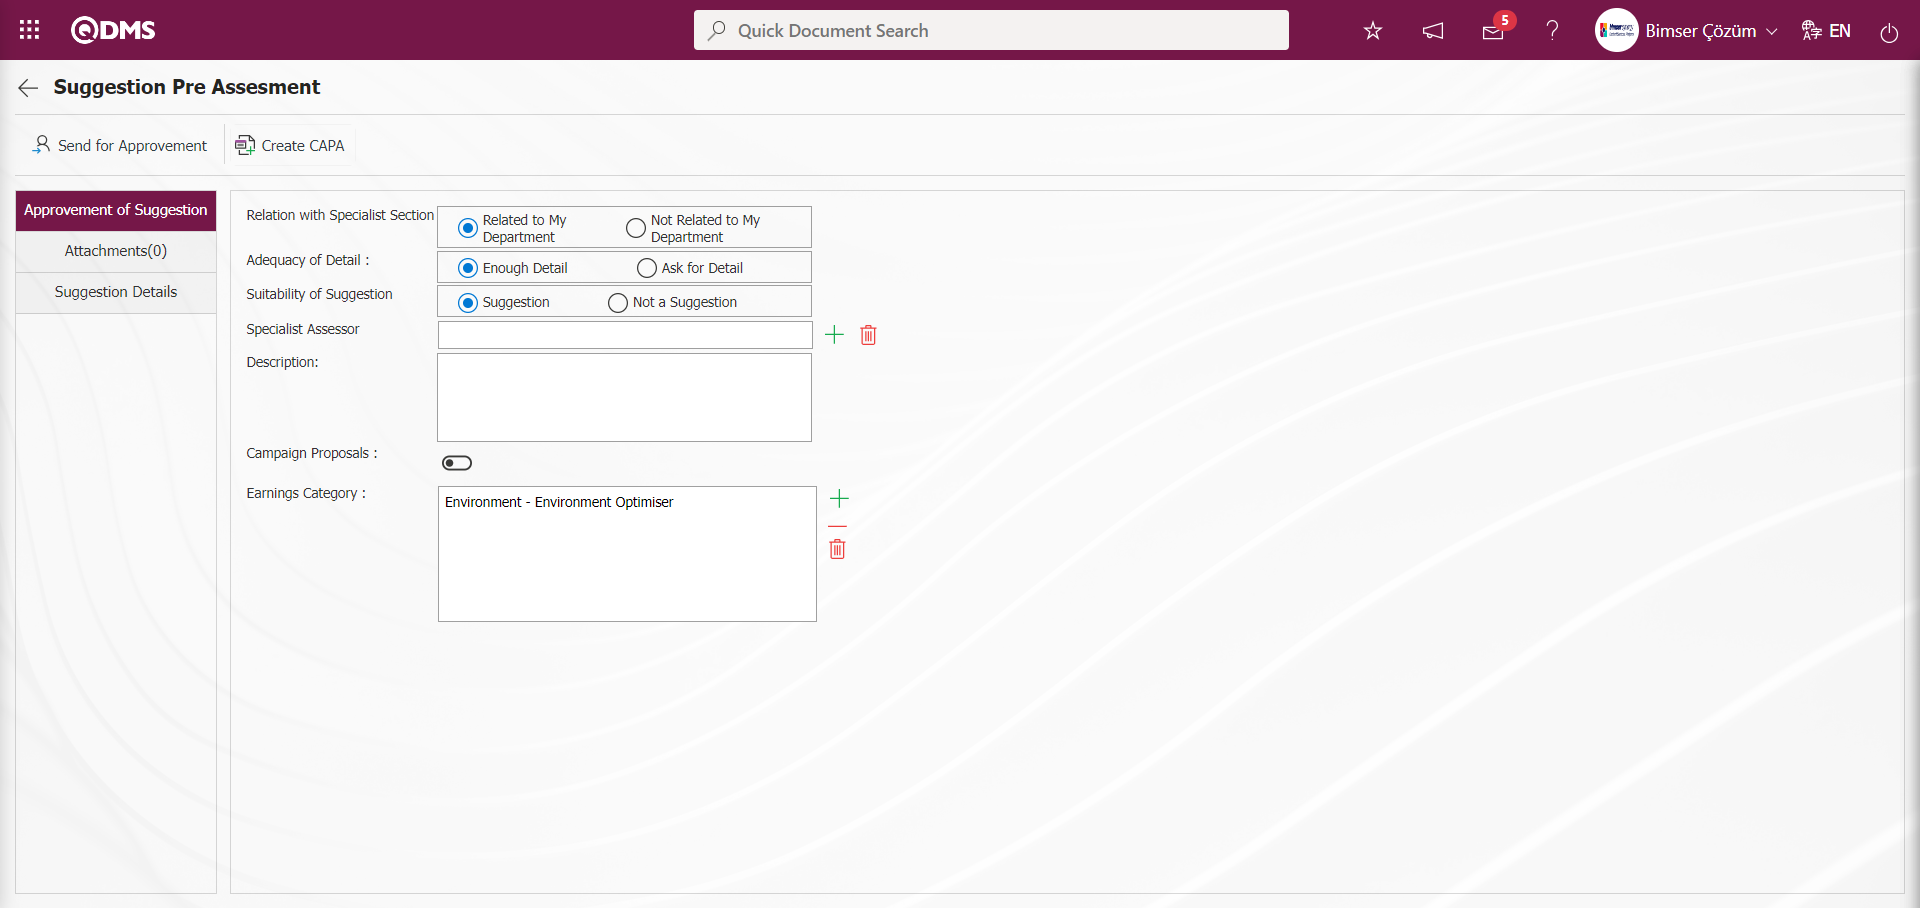
With the help of the buttons on the screen;
 : It is sent to the next stage for approval. The suggestion is sent for approval to the expert selected at the specialist evaluation stage
 : Suggestion CAPA record is opened during the preliminary evaluation phase. It is a button displayed depending on the parameter. The parameter value of parameter 84 of the Suggestion System Module parameters is activated by selecting “Yes”.

After the parameter is activated, this button is displayed on the Suggestion Pre-Assessment screen. By clicking this button, CAPA Activities - New Record screen is displayed and CAPA record is opened at this stage. In order to use a default process source in the CAPA record, the number of the default process source must be defined in parameter 85 of the Suggestion System module parameters. 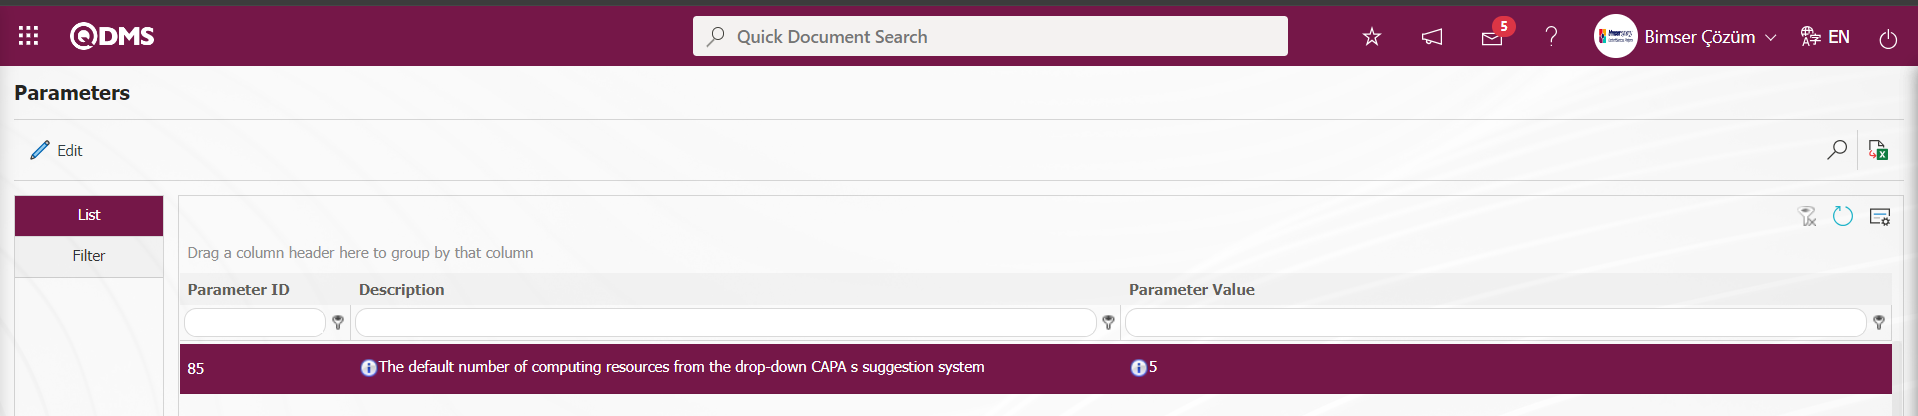
The default transaction source number defined in this parameter is taken from the System Infrastructure Definitions/CAPA/ CAPA Source Definition menu. In the CAPA Activities - New Record screen where the CAPA record is defined, this defined transaction source comes to the related field by default.
Related fields are defined on the screen that opens;
Relation with Specialist Section: This is the field where it is selected from the relevant options whether the suggestion given on the Suggestion Pre-Assessment Suggestion Entry screen is related to the Specialist's department or not. These options are Related to My Department and Not Related to My Department. If the “Relation with Specialist Section” option is selected, the Appointee and description field in the screenshot below is displayed. Select the person to be appointed from the Person to be appointed field by clicking the  (Select) button and select the new person to be appointed in the Personnel list defined in the system and send it for approval by writing the description information.
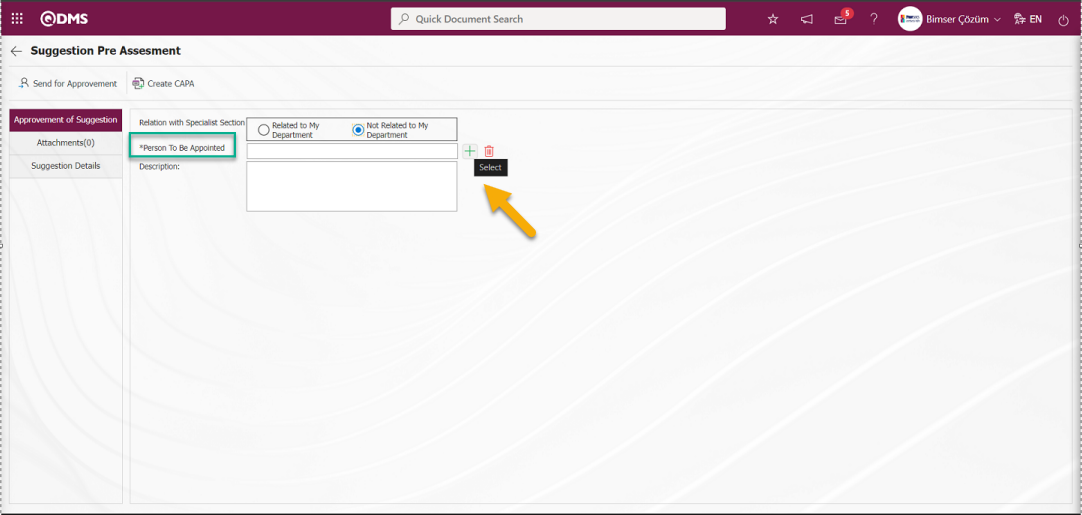
In the Relation with Specialist Section field, select the “Relation with Specialist Section” option.
Adequacy of Detail: It is the field where it is determined whether the adequacy of detail is sufficient or not by selecting the relevant options on the Suggestion Preliminary Evaluation Suggestion Entry screen. These options are “Enough Detail” and “Ask for Detail”. When the detail is not considered sufficient and the “Ask for Detail” option is clicked, the “Description” field is displayed as in the screenshot below and the detail information is written in detail in this field.
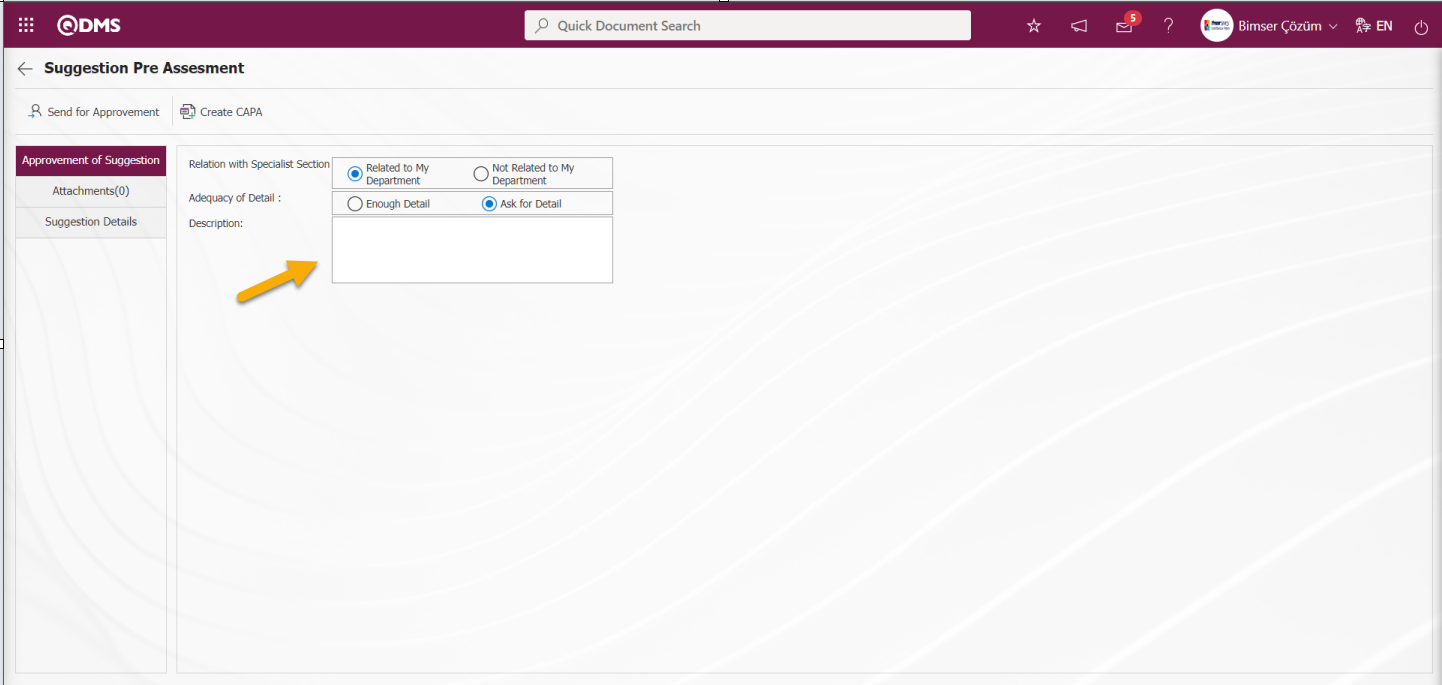
“Enough Detail” option is selected in the Detail Sufficiency field. It is a field that is displayed depending on the parameter. The parameter is activated by selecting the parameter value “Yes” of parameter 66 in the Suggestion System Module parameters.

After the parameter is activated, the Detail Adequacy field is displayed in the Suggestion Pre-Assessment phase.
Suitability of Suggestion: This is the field where the “Suggestion” and “Not Suggestion” options are selected whether it is a Suggestion or not on the Suggestion Pre-Assessment Suggestion Entry screen. When the “Not Recommendation” option is selected in these options, the “Reason for Rejection” and “Explanation” fields in the screenshot below are displayed extra.
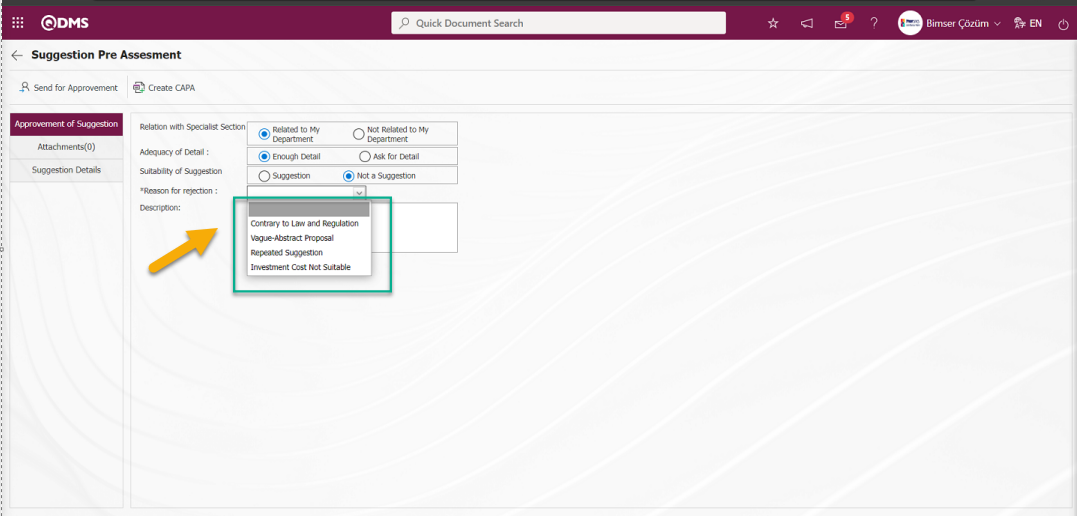
In the “Reason for rejection: ” field, the list of Reasons for Rejection defined in the System Infrastructure Definitions / Suggestion / Reject Reasons menu is displayed. In this list of rejection reasons, the rejection reason is selected and the relevant explanation information about the rejection reason is written in the explanation field.
Specialist Assessor: When the “ Suggestion” option is selected in the Suggestion eligibility field on the Suggestion Pre-Assessment Suggestion Entry screen, the expert who will evaluate the suggestion is selected in the Expert list defined in the system that opens by clicking the (Select) button. Specialist Assessor field is a field displayed depending on the parameter. The parameter value of parameter 69 in the Suggestion System Module parameters is activated by selecting “Yes”.
 After the parameter is activated, this field is displayed and the Specialist selection process is performed in the Specialist list defined in the system.
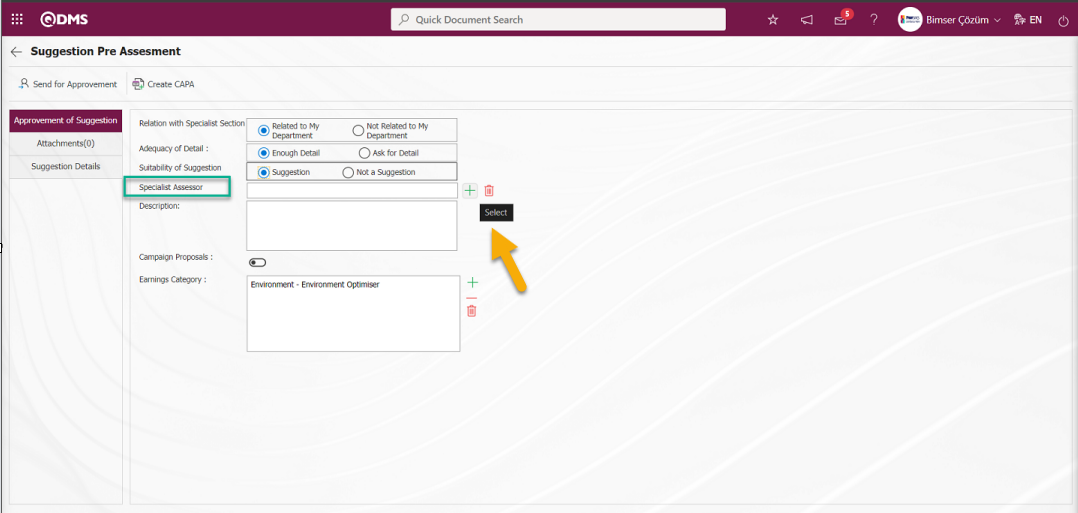
Description: This is the field where the description information, if any, related to the Suggestion is written on the Suggestion Pre-Assessment Suggestion Entry screen.
Campaign Proposal: If the suggestion given on the Suggestion Pre-Assessment Suggestion Entry screen is a campaign suggestion, the relevant check box is marked. This field is the field displayed depending on the parameter. The parameter is activated by selecting the parameter value “Yes” of parameter 67 in the Suggestion System Module parameters.

After the parameter is activated, the Campaign Proposal Related field and check box are displayed on the suggestion Pre-Assessment Suggestion Entry screen. The check box related to the Campaign Suggestion is checked. If the “Campaign Proposal” check box is checked, the scorecard to be used in the scoring phase is evaluated on the campaign score. It is valid only in the score sheet method.
Earnings Category: This is the field where the information about what kind of earnings will be earned to the company related to the suggestion given on the Suggestion Pre-Assessment Suggestion Entry screen is selected at this stage if desired. This field is a field that is displayed at this stage depending on the parameter. The parameter is activated by selecting “Yes” for parameter 110 in the Suggestion System Module parameters.
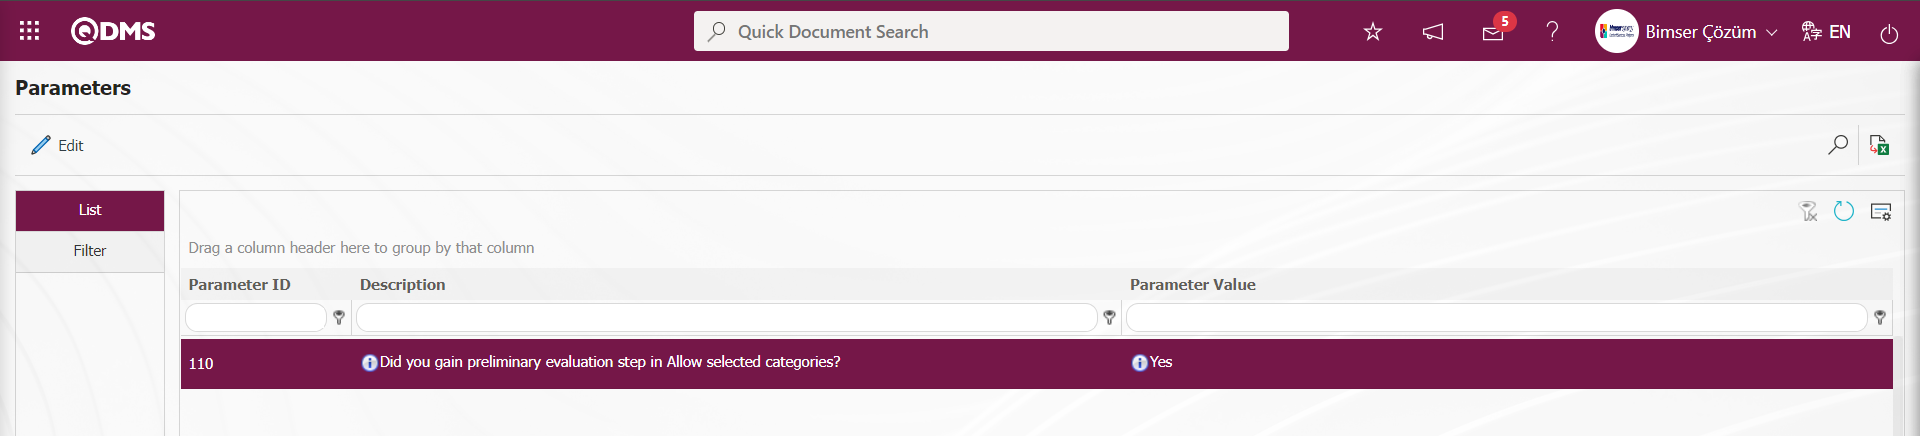 After the parameter is activated, the Earnings category field is displayed in the Suggestion Pre-evaluation phase and if desired, a selection is made from the Earnings Category list defined in the infrastructure.
If “ Suggestion” is selected as a result of the evaluation, “ Specialist to Evaluate” is selected from the defined specialist list.
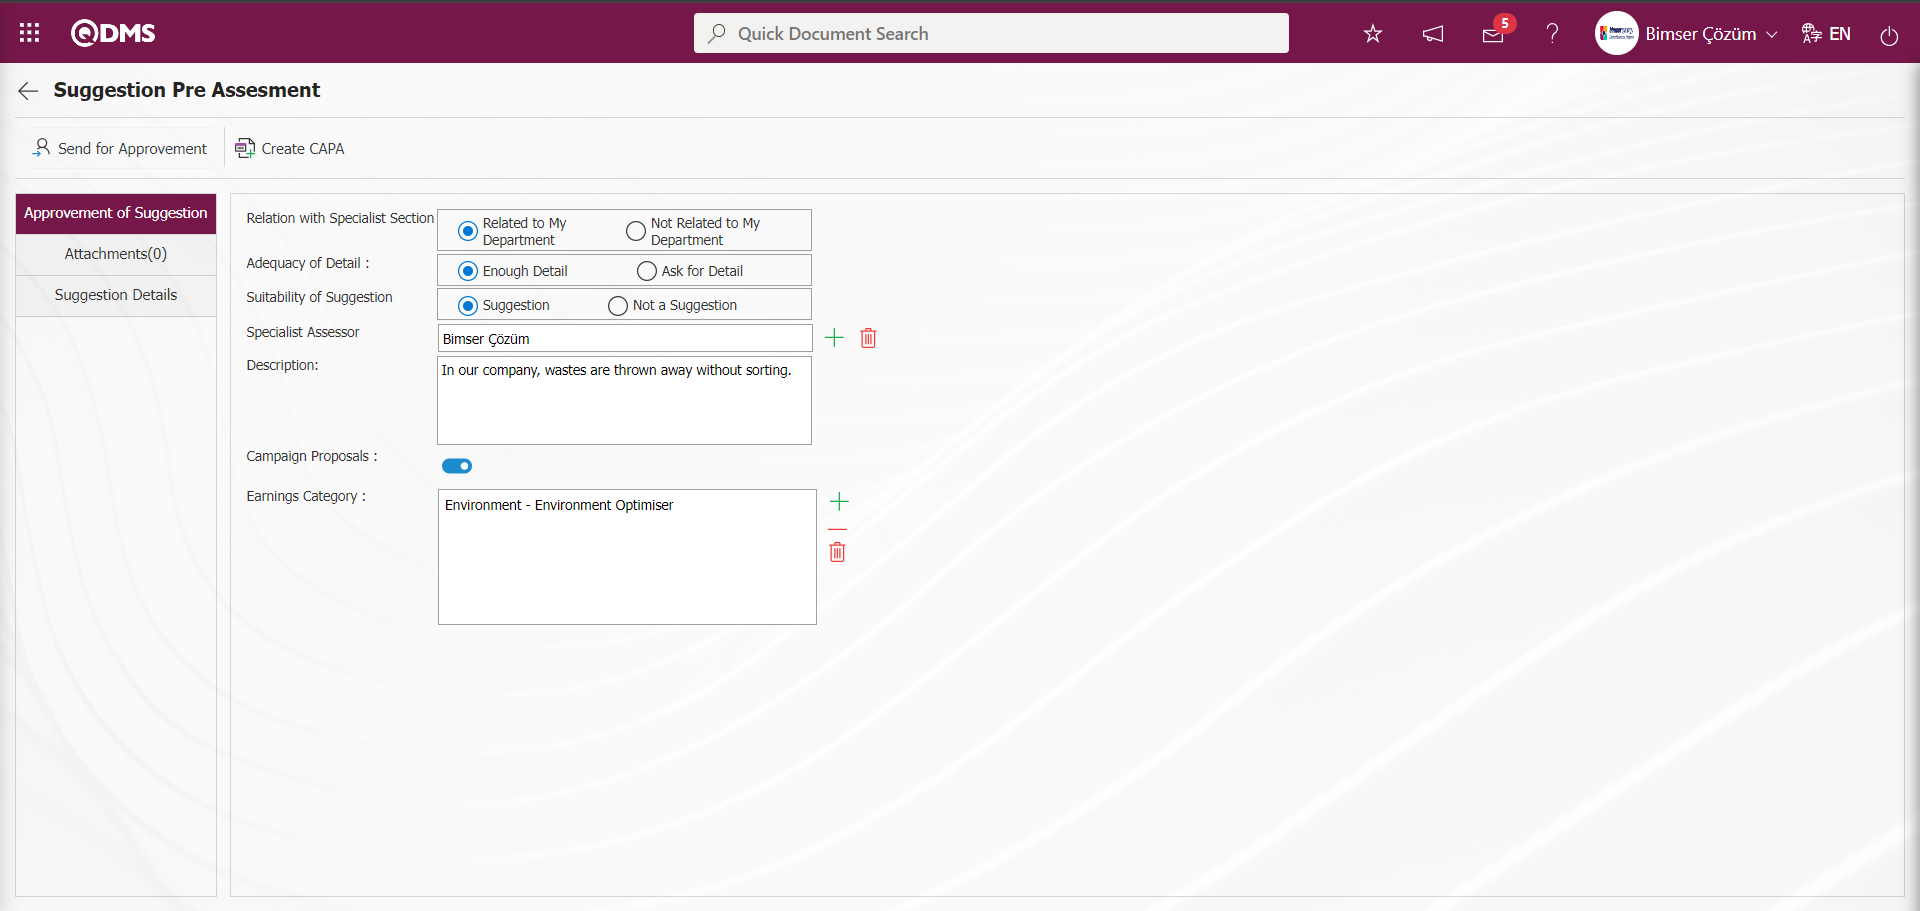
On the Suggestion Pre-Assessment screen, a description is written in the Description field, if any.
Additional Files Tab:This is the tab where you can add evidence files, if any, from the Additional Files tab.
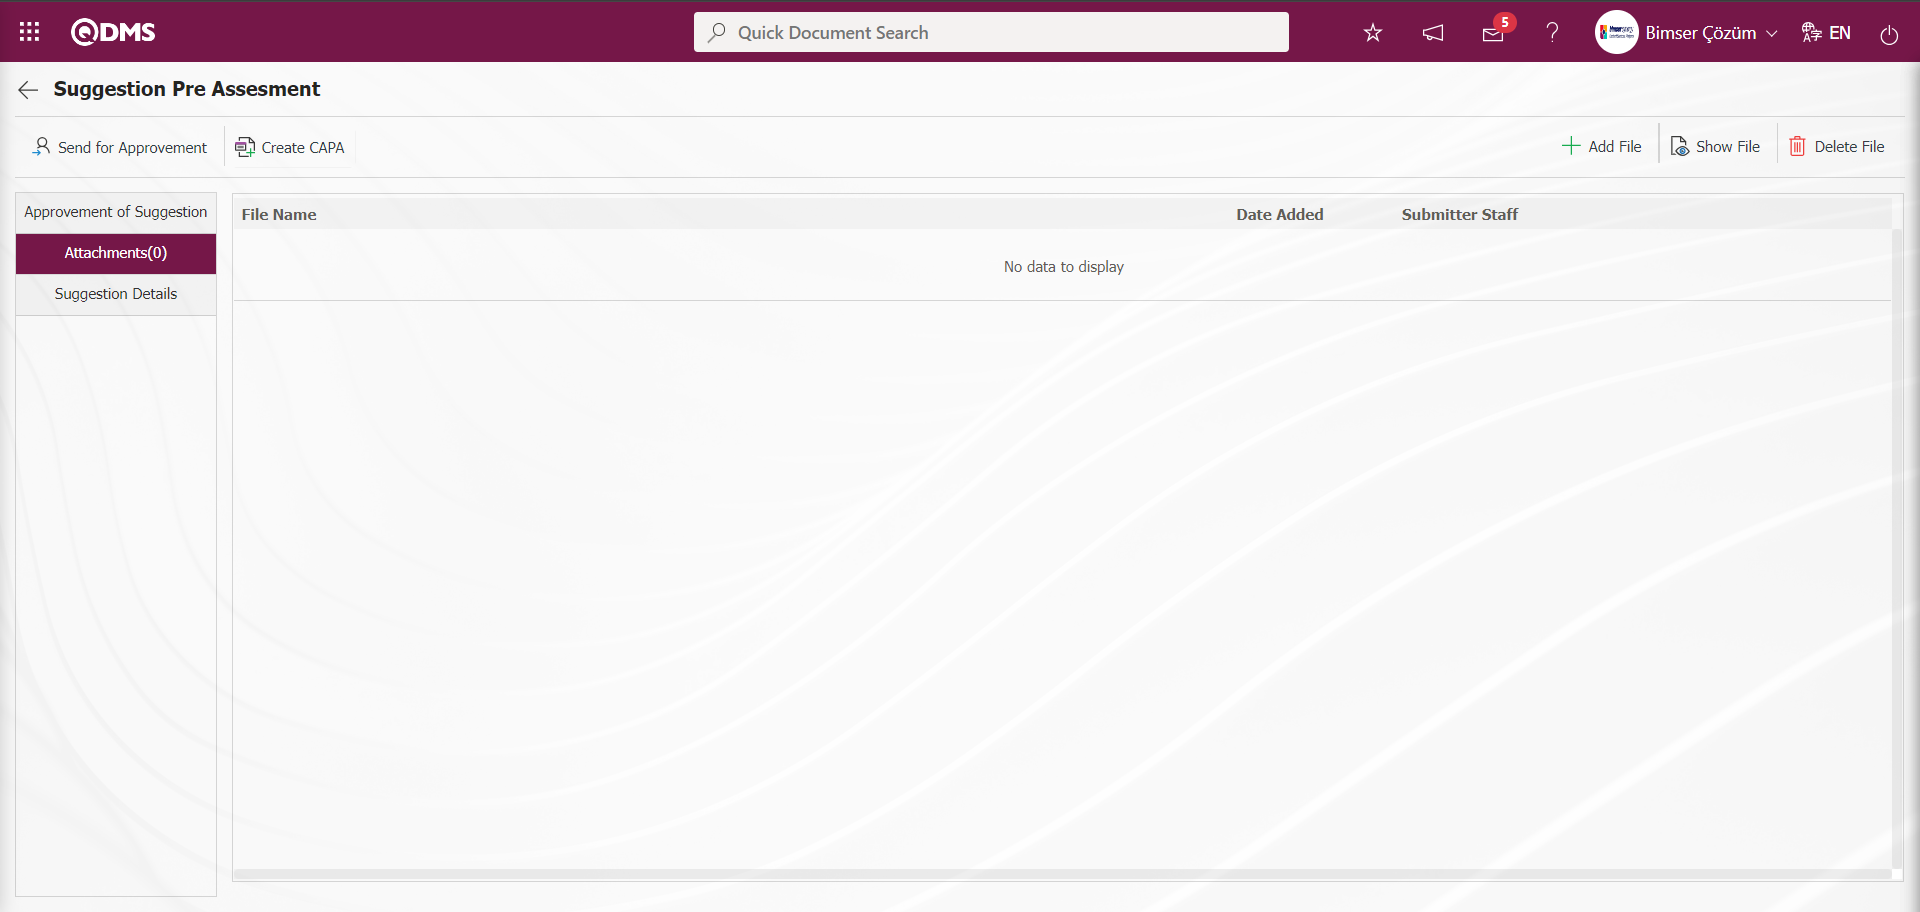
With the help of the buttons on the screen;
: The additional file is uploaded to the system.
: The uploaded additional file information is displayed.
: The uploaded additional file information is deleted.
At this stage, an additional file is added to the Suggestion record by clicking the button in the Additional files tab on the Suggestion Pre-Assessment screen. Multiple additional files can be added.
Suggestion Details tab:All information entered into the system about the given suggestion is displayed. You can access detailed information about the suggestion under Details.

Additional Files Tab: The uploaded additional files related to the suggestion are accessed and the content of the uploaded additional files can be viewed by clicking the  button.
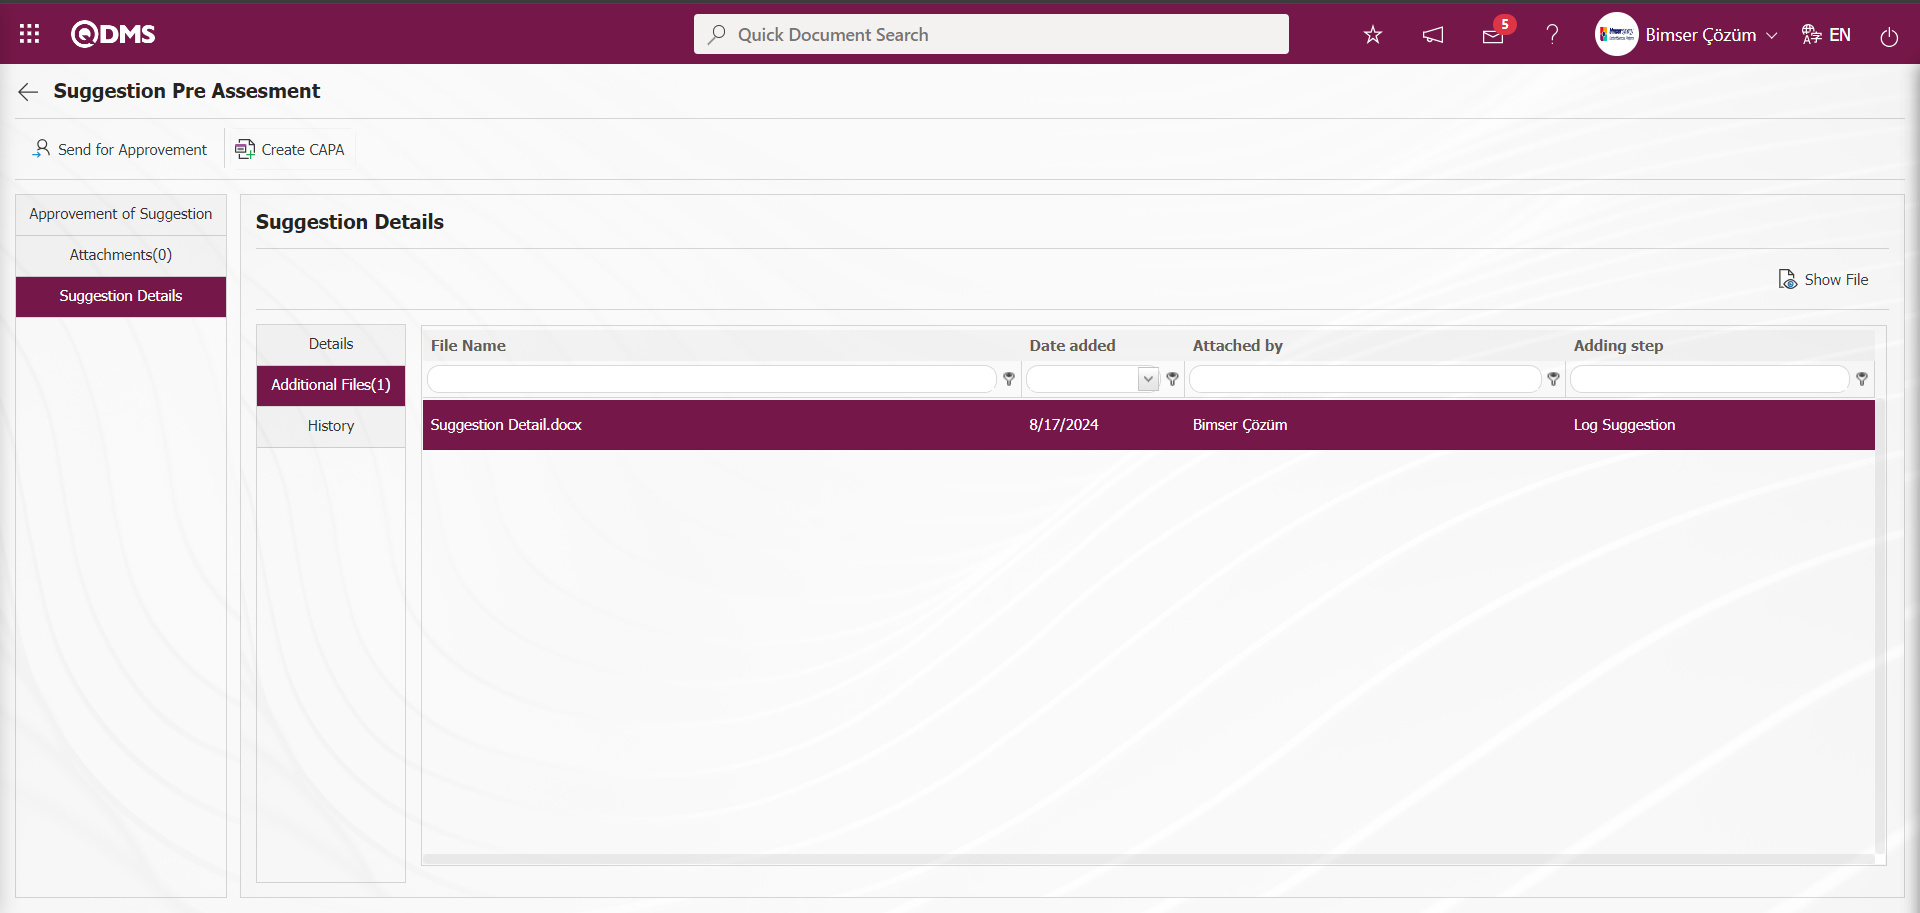
With the help of the buttons on the screen;
: The selected file in the list is displayed.
History tab: This is the tab where all information about the process steps of the suggestion is displayed.
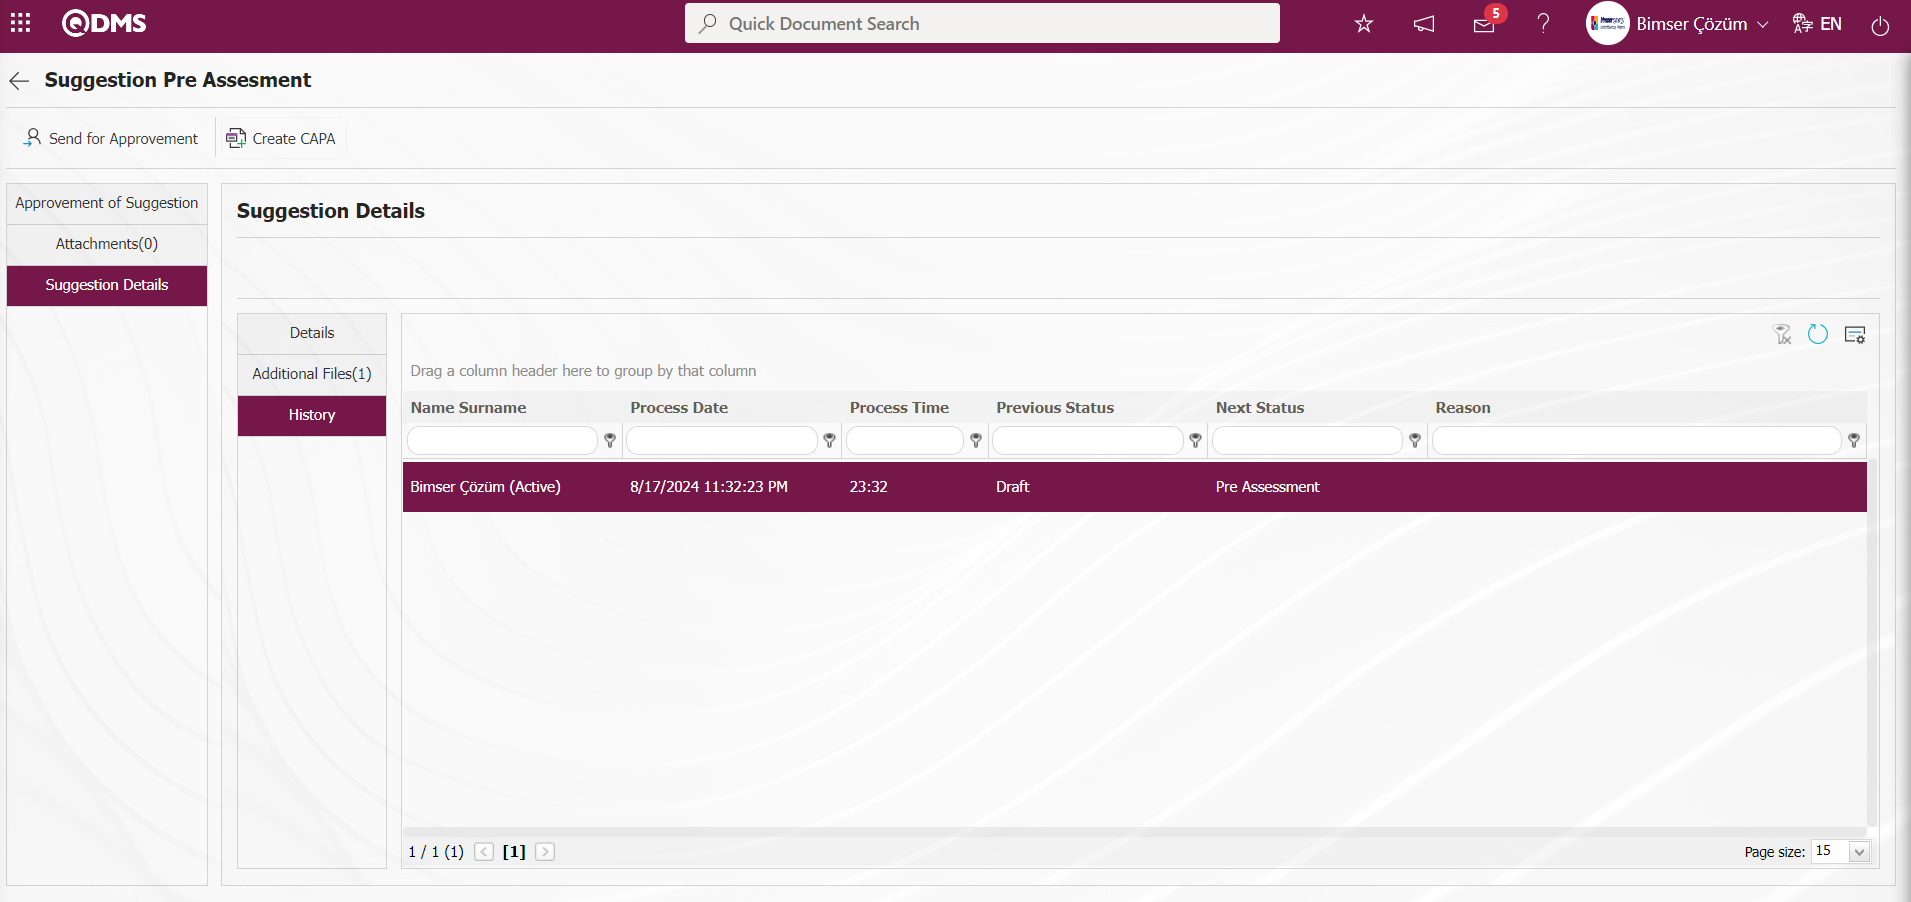
Click on the Pre-Assessment Approvement of Suggestion tab.
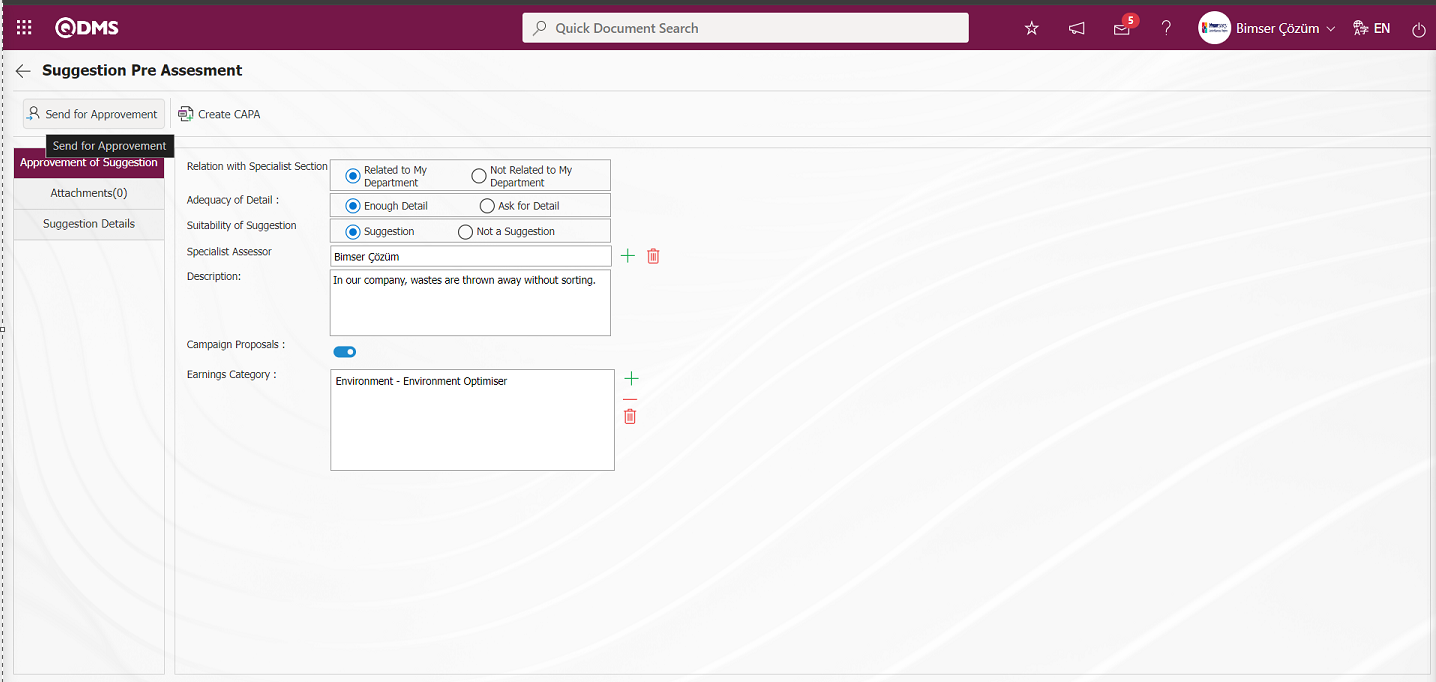
In the Pre-assessment Approvement of Suggestion tab, the “Related to My Department” option is selected in the field related to the expert section, the Detail is sufficient option in the detail sufficiency field, the “Suggestion” option in the suggestion suitability field, and the description of the suggestion is written by making a selection in the list of experts defined in the system in the expert to evaluate field. The check box related to the Campaign Proposal is checked. After selecting and typing the required fields and relevant information, click on the  button to accept the suggestion and send it to the specialist for evaluation. The suggestion goes to the selected specialist for approval during the specialist evaluation phase.
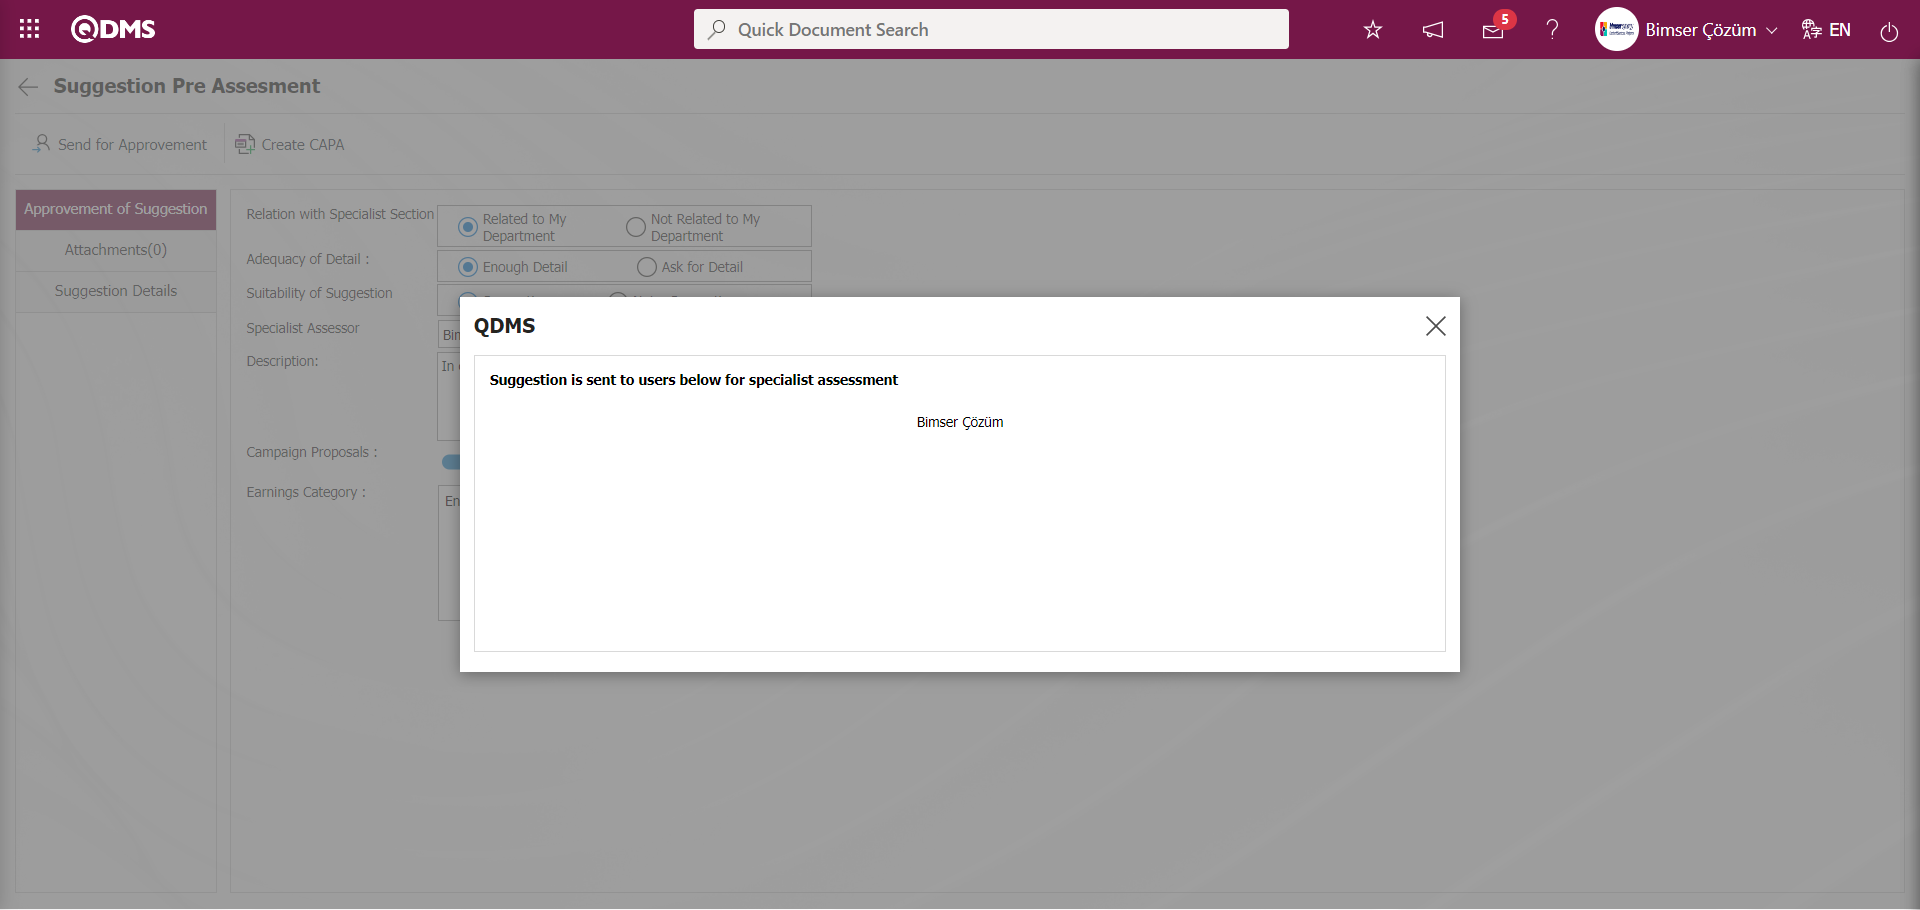
The preliminary evaluation process can also be performed from the Integrated Management System / Suggestion System / I will Preliminary Assessment Recommendations menu. The relevant recommendation is selected in the user's “ Suggestions Pending Pre-Assessment” list and the preliminary assessment process is carried out with the  button.
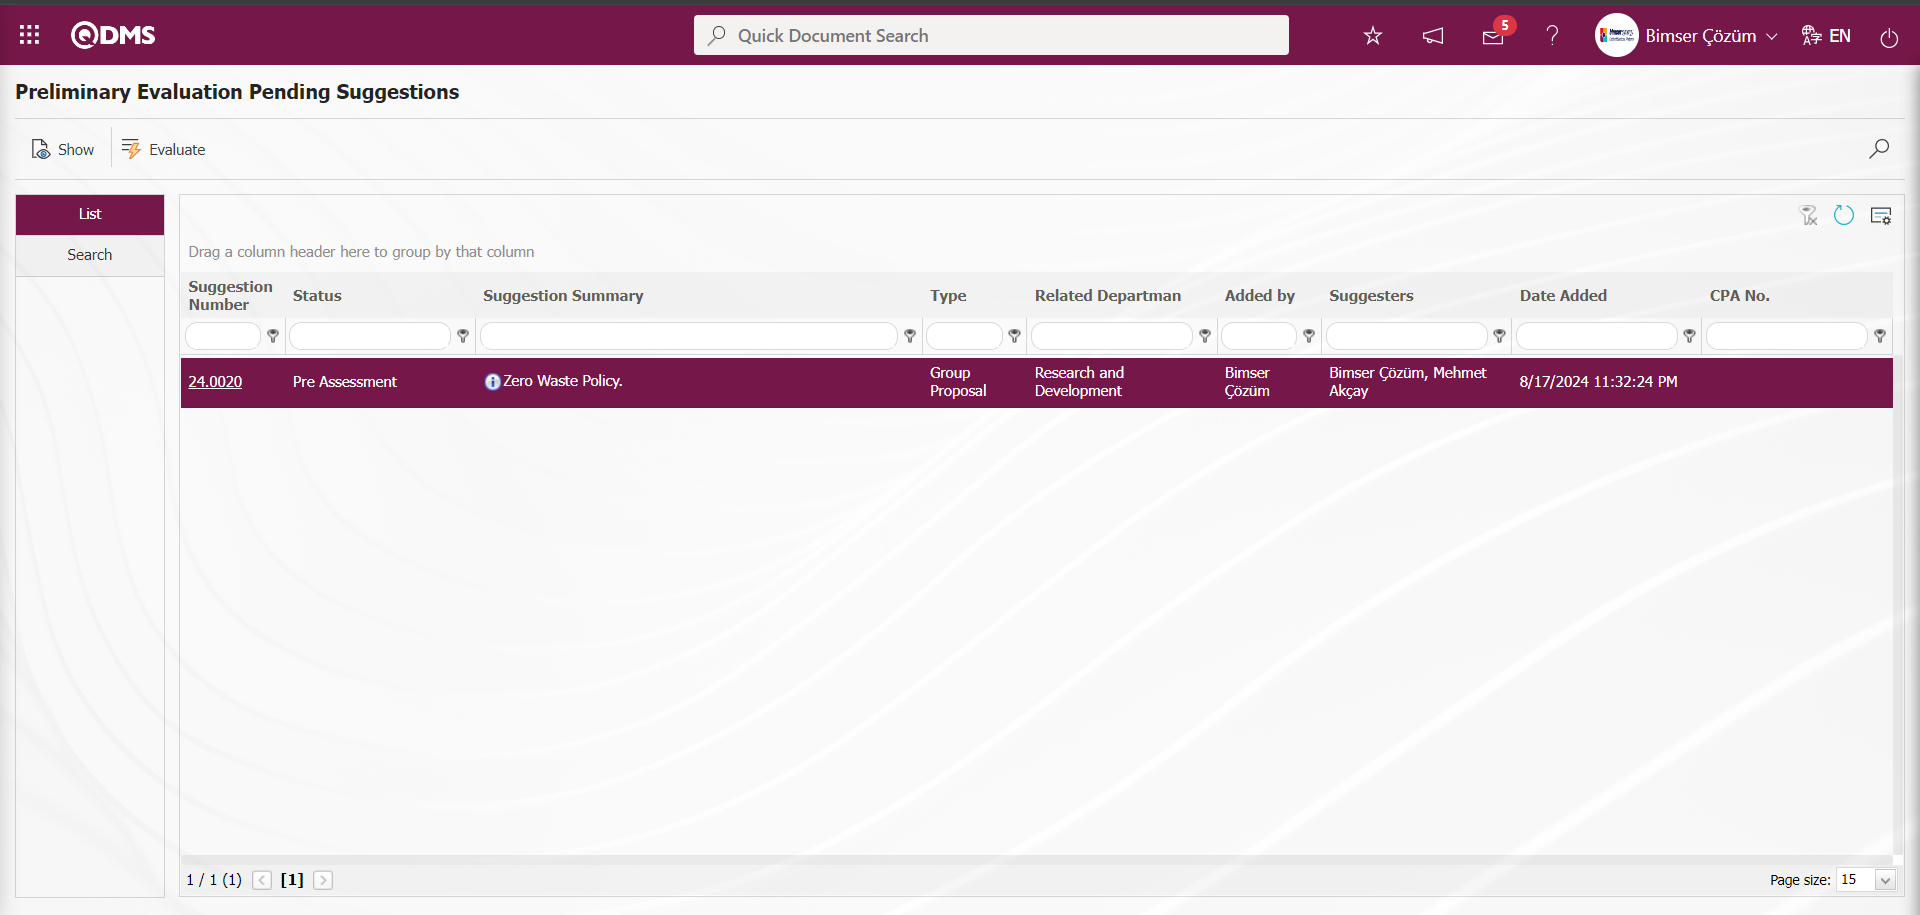
5.3.1.3. Specialist Assessment Process
After the suggestion passes the pre-assessment stage, it is displayed as“Suggestions awaiting for Specialist Assessment” on the “My Pending Work” page of the specialist assessor.
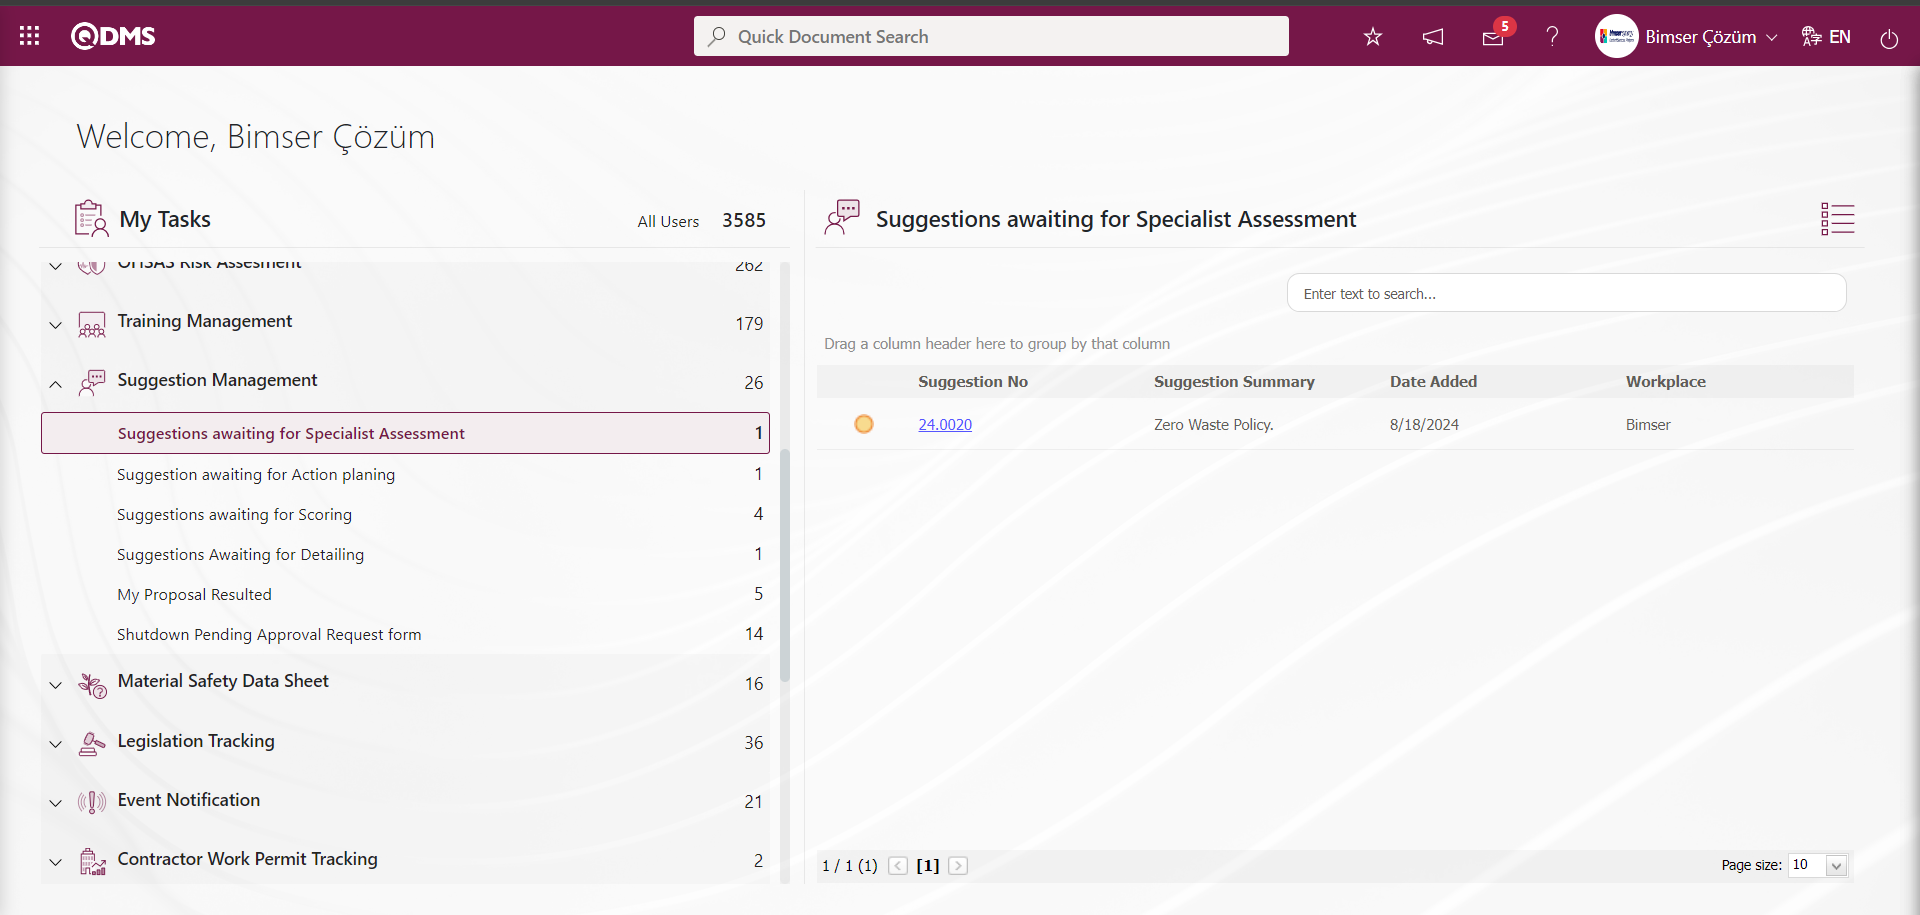
The specialist clicks on the Suggestion code link in the Suggestion number field and the Assesment of Suggestion Specialist screen is displayed.
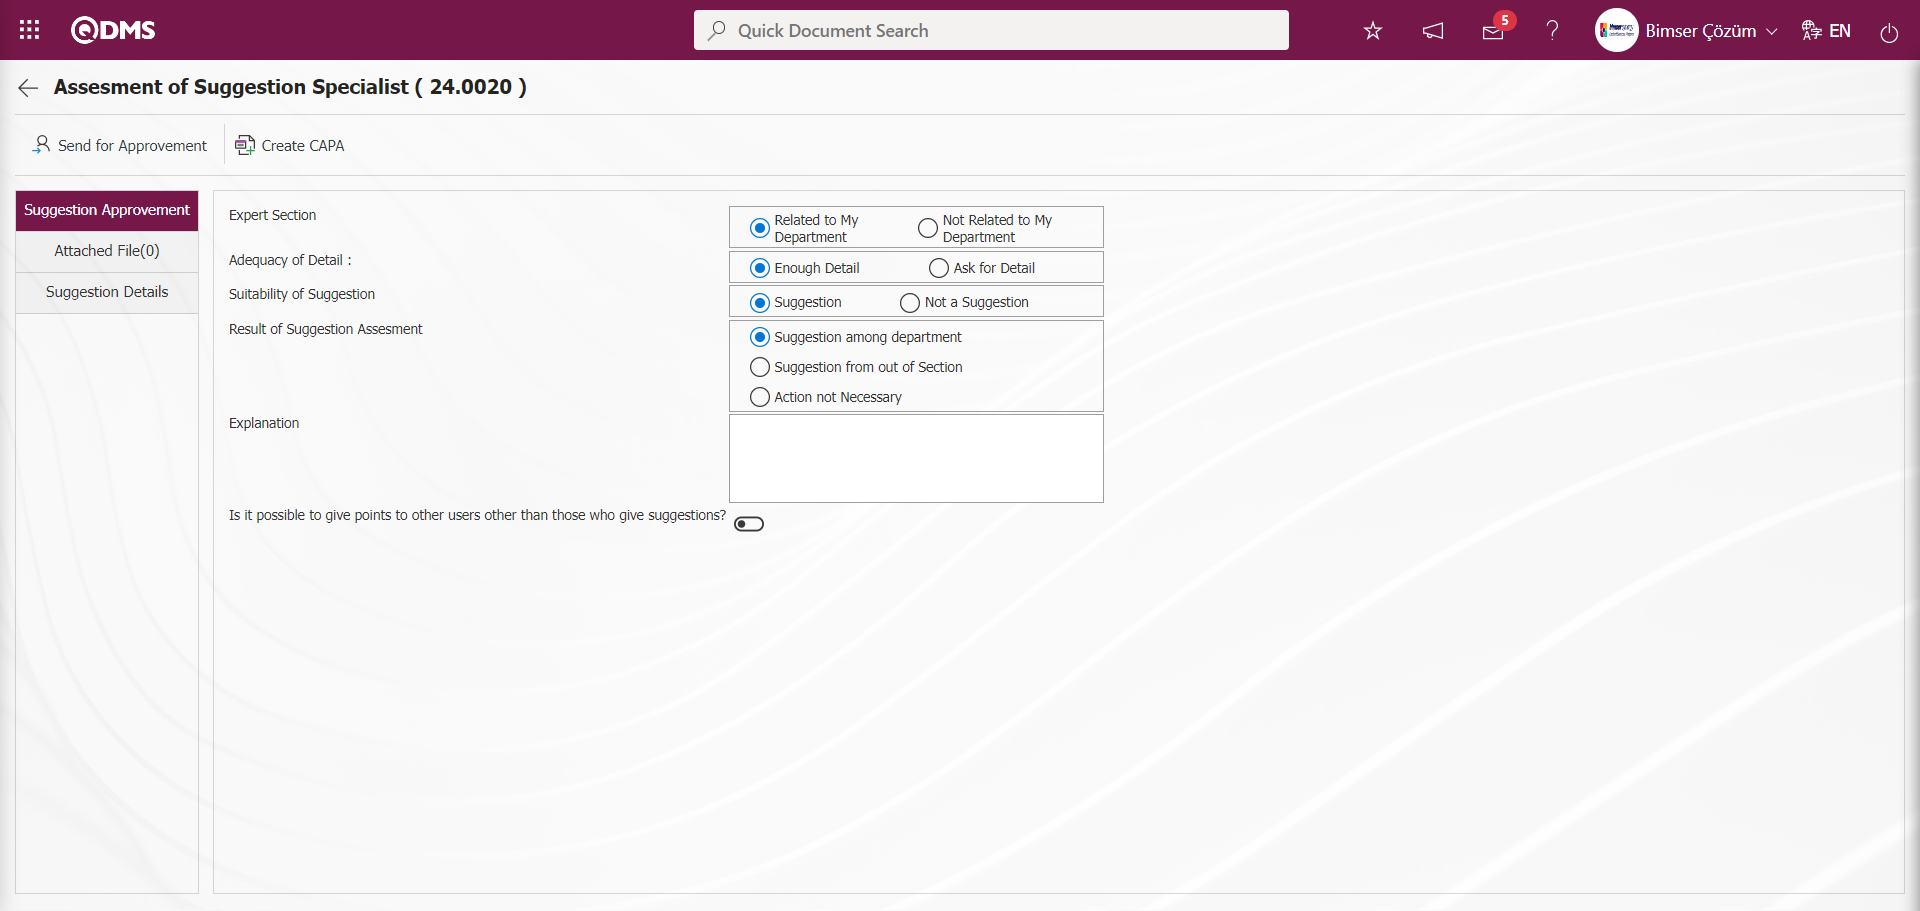
With the help of the buttons on the screen;
 : The specialist evaluation process is carried out.
 : CAPA record opening process is performed during the suggestion expert evaluation phase. It is a button displayed depending on the parameter. The parameter value of parameter 84 of the Suggestion System Module parameters is activated by selecting “Yes”.
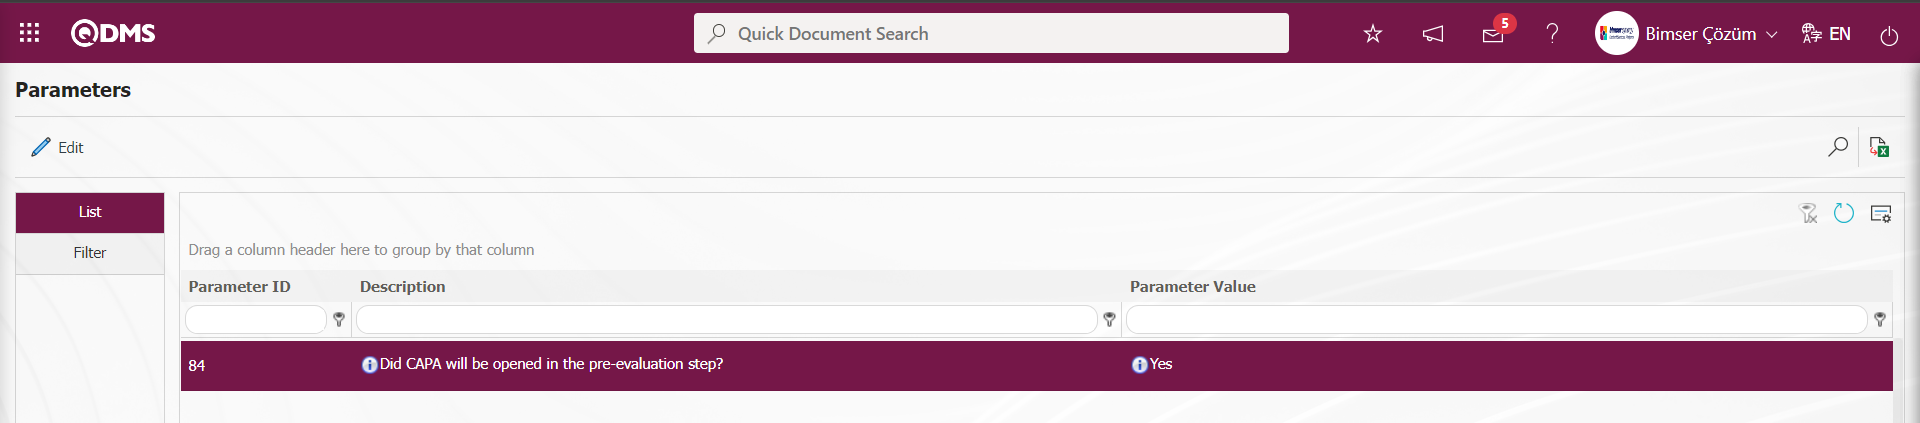
After the parameter is activated, this button is displayed on the Recommendation Specialist Assessment screen. By clicking this button, CAPA Activities - New Record screen is displayed and CAPA record is opened at this stage. To use a default process source in the CAPA record, the number of the default process source must be defined in parameter 85 of the Suggestion System module parameters.

The default transaction source number defined in this parameter is taken from System Infrastructure Definitions/CAPA/ CAPA Source Definition menu. In the CAPA Activities - New Record screen, where the CAPA record is defined, this defined transaction source comes to the related field by default.
At this stage, actions related to the suggestion are taken.
Related fields are defined on the screen that opens;
Expert Section: This is the field where you can select whether the suggestion given in the Suggestion Expert Assessment Suggestion Approval screen is related to the Expert's department or not from the relevant options. These options are related to the department and not related to the department. If the “Not Related to My Department” option is selected, the Person to be assigned and description field in the screenshot below is displayed. From the Person to be Appointed field, the person to be appointed is selected in the Personnel list defined in the system opened by clicking the (Select) button and the description information is written and sent for approval.
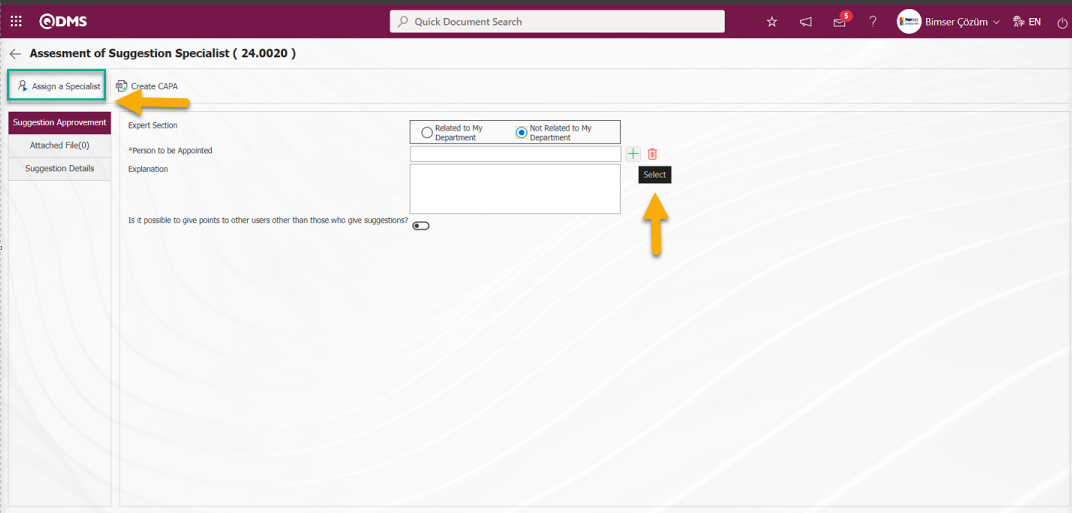
By making a selection in the Expert list in the “Person to be Appointed” field displayed on the Suggestion Expert Assessment screen, if any, by writing a description in the description field  button is clicked and the appointment is made at this stage.
Select the “Related to My Department” option in the Expert Section relevance field.
Adequacy of Detail: It is the field where it is determined by selecting the relevant options whether the adequacy of detail is sufficient or not on the Recommendation Expert Evaluation Recommendation Approval screen. These options are “Enough Detail” and “ Ask for Detail” options. When the detail is not considered sufficient and the “ Ask for Detail” option is clicked, the “Explanation” field is displayed as in the screenshot below and the suggestion for detail information is written in detail in this field.
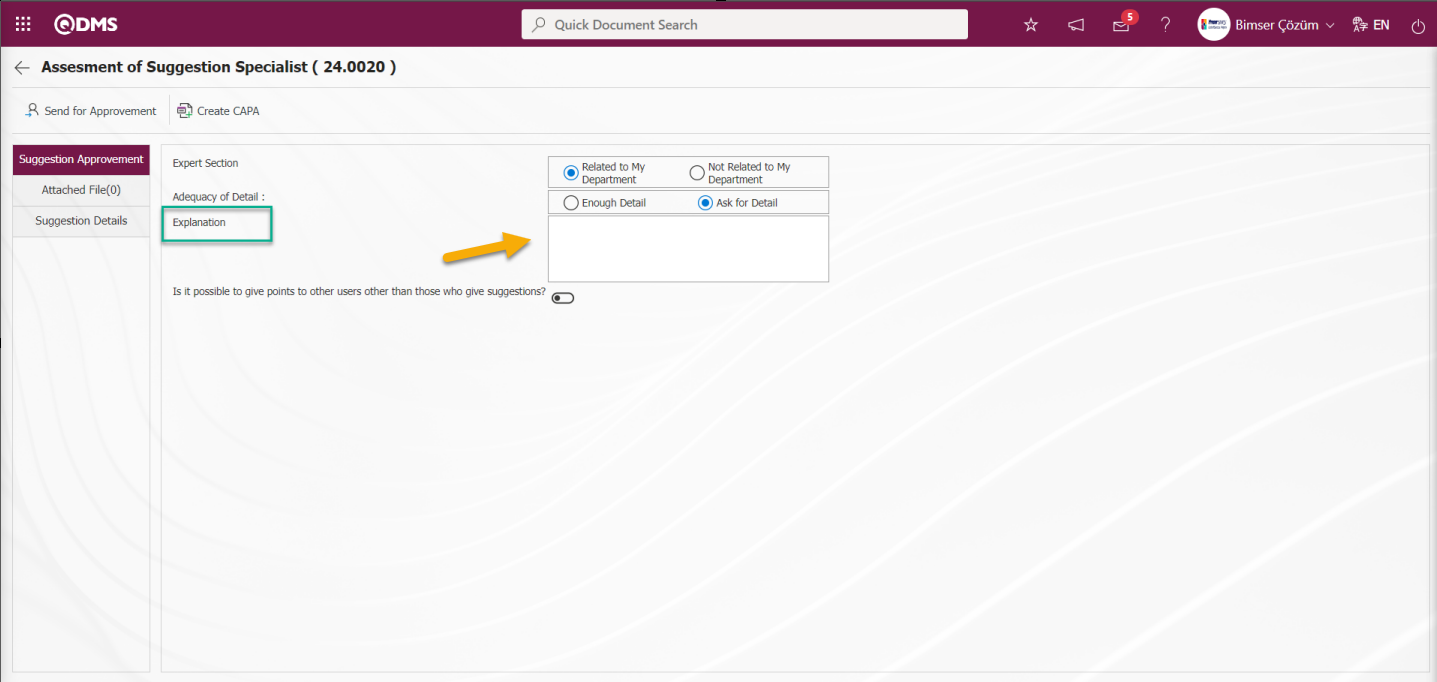
“Enough Detail” option is selected in Adequacy of Detail field. It is a field displayed depending on the parameter. The parameter is activated by selecting the parameter value “Yes” of parameter 66 in the Suggestion System Module parameters.

After the parameter is activated, the Enough Detail field is displayed at this stage.
Suitability of Suggestion: This is the field where “Suggestion” and “Not Suggestion” options are selected whether it is a Suggestion or not on the Suggestion Expert Evaluation Suggestion Approval screen. When the “Not Suggestion” option is selected in these options, the “*Reason for the Refusal” and “Explanation” fields in the screenshot below are displayed extra.
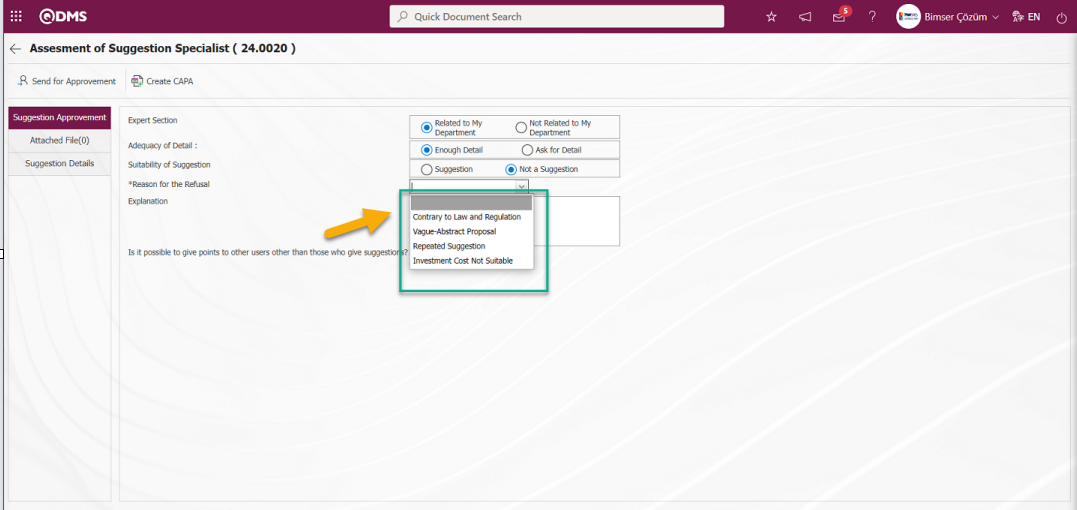
In the “Reason for the Refusal” field, the list of Reject Reasons defined in the System Infrastructure Definitions/ Suggestion /Reject Reasons menu is displayed. In this list of reasons for rejection, the reason for rejection is selected and the relevant explanation information about the reason for rejection is written in the explanation field. Select the “ Suggestion” option in the Suggestion Eligibility field**
Result of Suggestion Assesment: In the Suggestion Expert Evaluation Suggestion Approval screen, it is the field where the suggestion evaluation result options are selected. If “Suggestion among department” or “Suggestion from out of Section” is selected, the suggestion goes to action planning. If the “Action not Necessary” option is selected in the “Result of Suggestion Assesment” field, the system skips the action phase and continues with the gain / cost process
Suggestion among department:When the “Suggestion among department” option is selected as a result of the Preliminary Evaluation, the action goes to planning.
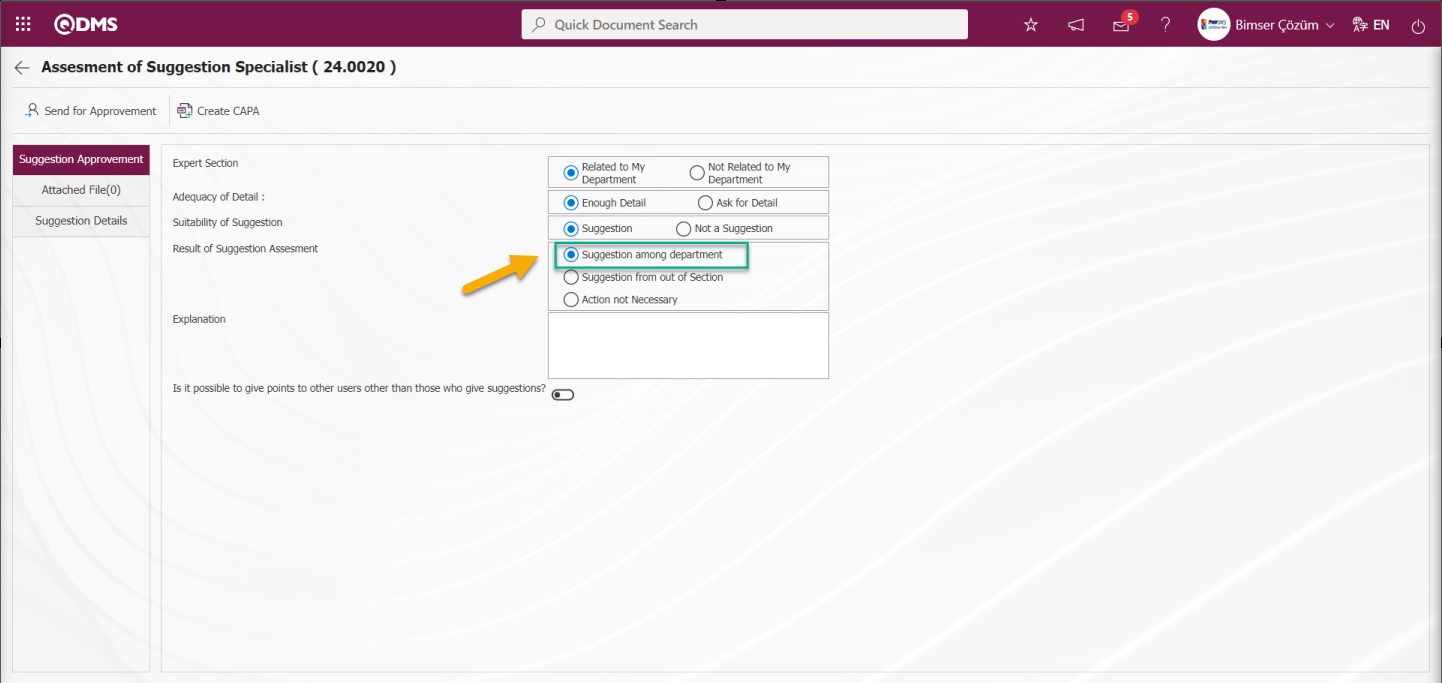 When the “Suggestion from out of Section” option is selected, it means that the action will be taken within the expert's own department. The implementation time is determined according to the value entered in parameter 11 in the Suggestion System module parameters.

Suggestion from out of Section: When “Suggestion from out of Section” option is selected as a result of Preliminary Evaluation, the action goes to planning.
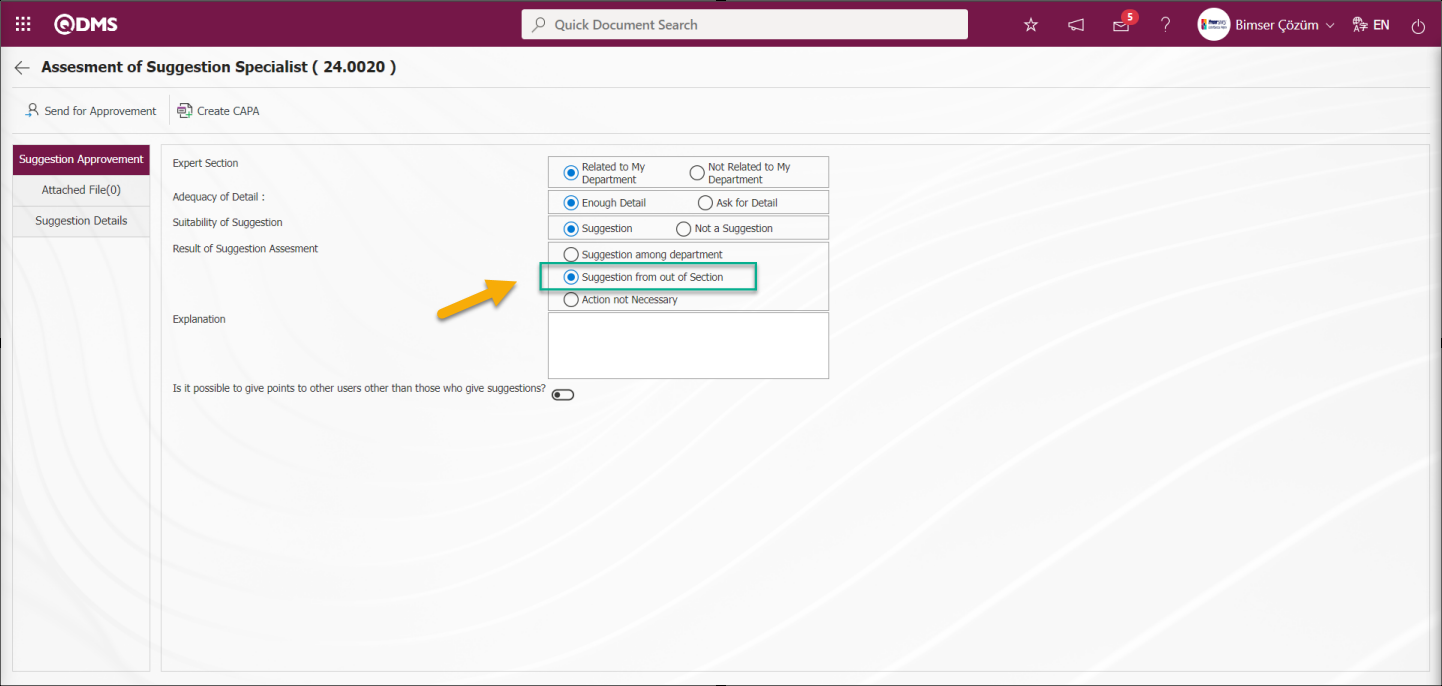
If “Suggestion from out of Section” option is selected, it means that the action will be implemented by another department other than the expert's own department. In summary; if a different department is needed for the action to be realized (For example; Maintenance), the suggestion from out of section is selected. The implementation time is determined according to the value entered in parameter 12 of the Suggestion System module parameters.
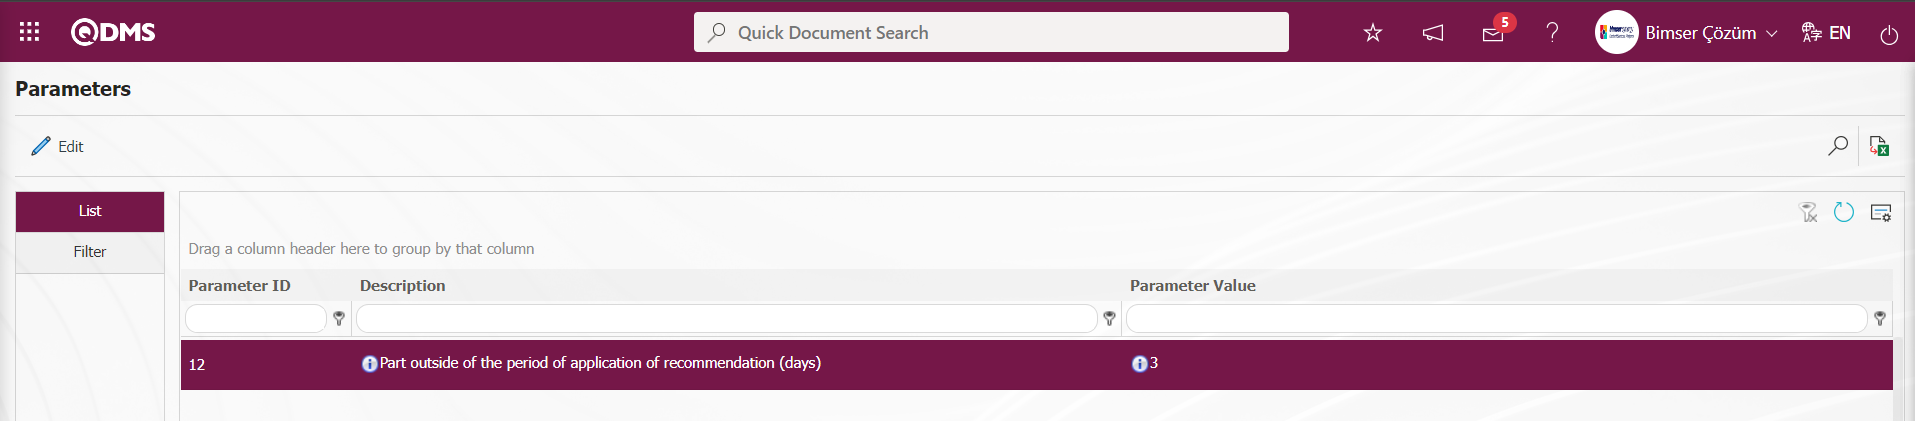
Action not Necessary: If the “Action not Necessary” option is selected in the “Result of Suggestion Assesment” field, the system skips the action phase and continues with the earnings/cost process.
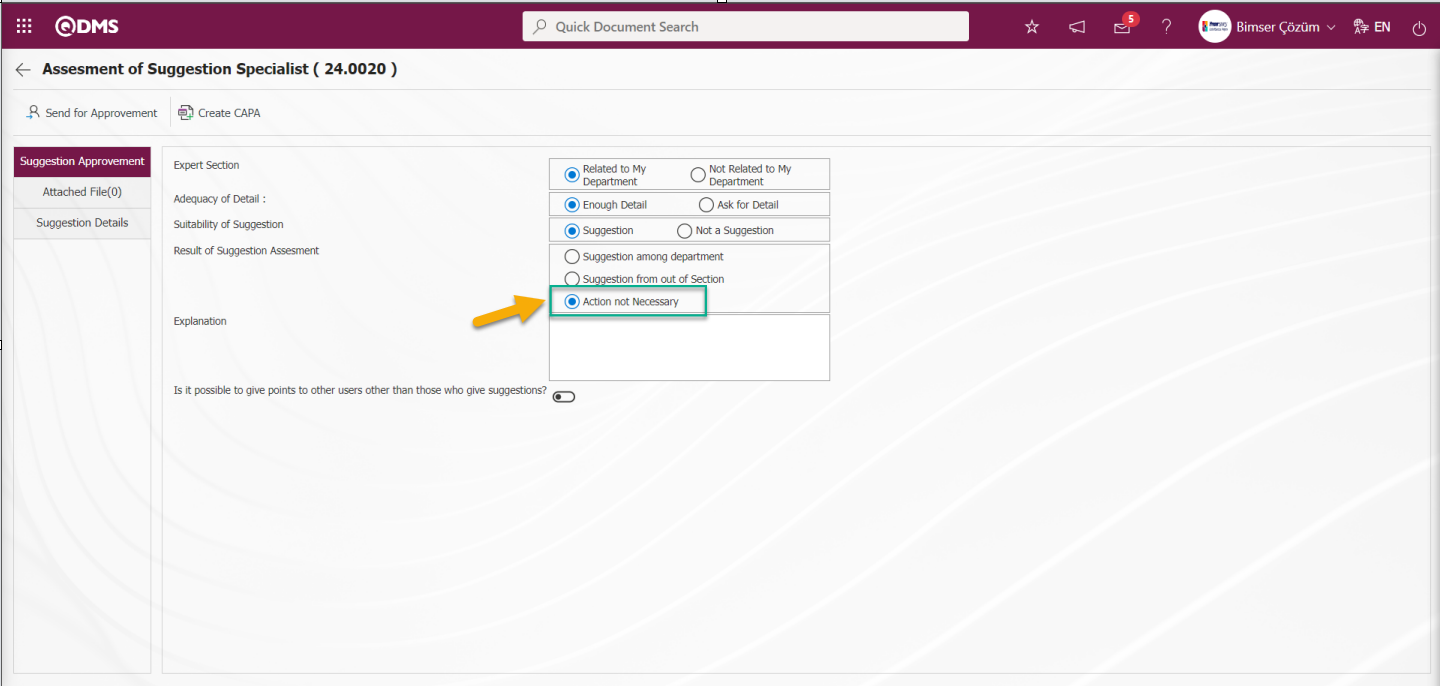
In summary; In order to skip the action phase, the check box related to the “Action not Necessary” option is checked. For Action Realization, the check box related to the “Suggestion among department” or “Suggestion from out of Section” options is checked. In these options, if a different department is needed for the realization of the action, the suggestion from out of section is selected. The difference between them is the implementation time. Action implementation times are set according to the values entered in parameters 11 and 12 of the Suggestion System Module parameters.
Is it possible to give points to other users other than those who give suggestions?: In the Suggestion Expert Evaluation Suggestion Approval tab, if it is desired to give points to users other than the suggestors, the relevant check box is checked.
Additional Files Tab: This is the tab where the files such as documents, pictures, etc. that are desired to be added at this stage regarding the suggestion are uploaded. Multiple additional files can be uploaded in this tab.
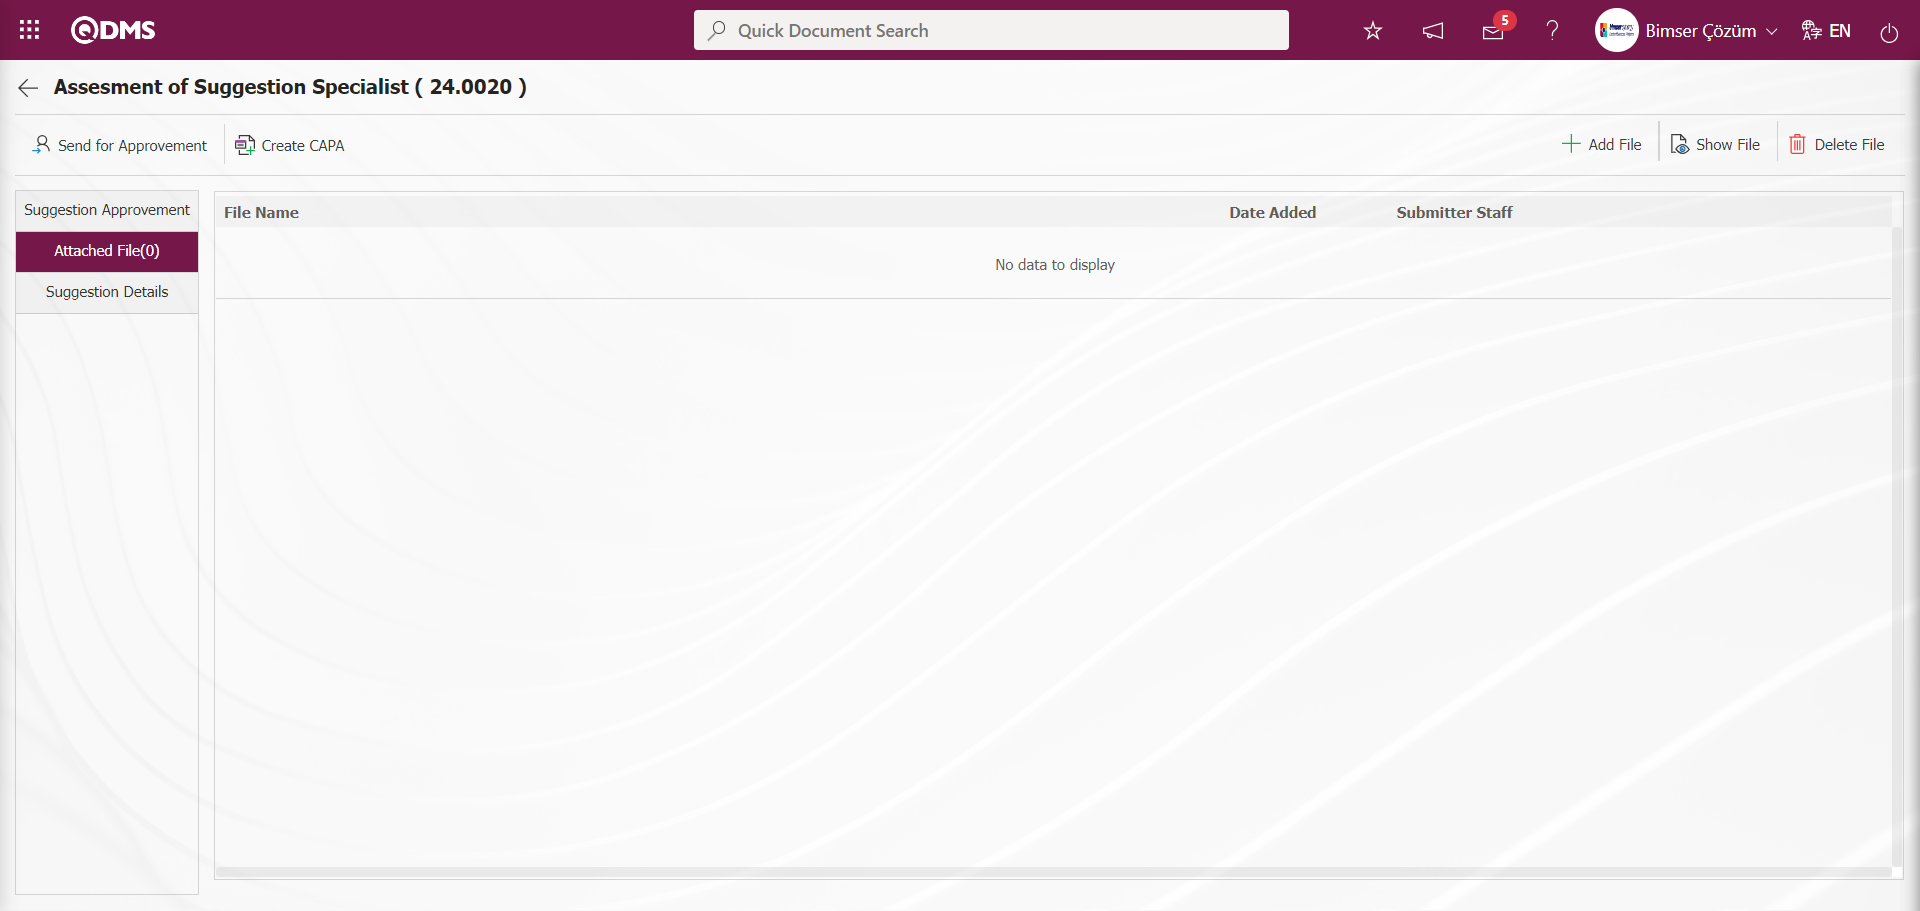
With the help of the buttons on the screen;
: The additional file is uploaded to the system.
: The uploaded additional file information is displayed.
: The uploaded additional file information is deleted.
At this stage, an additional file is added to the Suggestion record by clicking the  button in the Additional files tab on the Suggestion Specialist Assessment screen. Multiple additional files can be added.
Suggestion Details Tab: This is the tab where all the information about the given suggestion and additional files uploaded up to this stage are displayed.
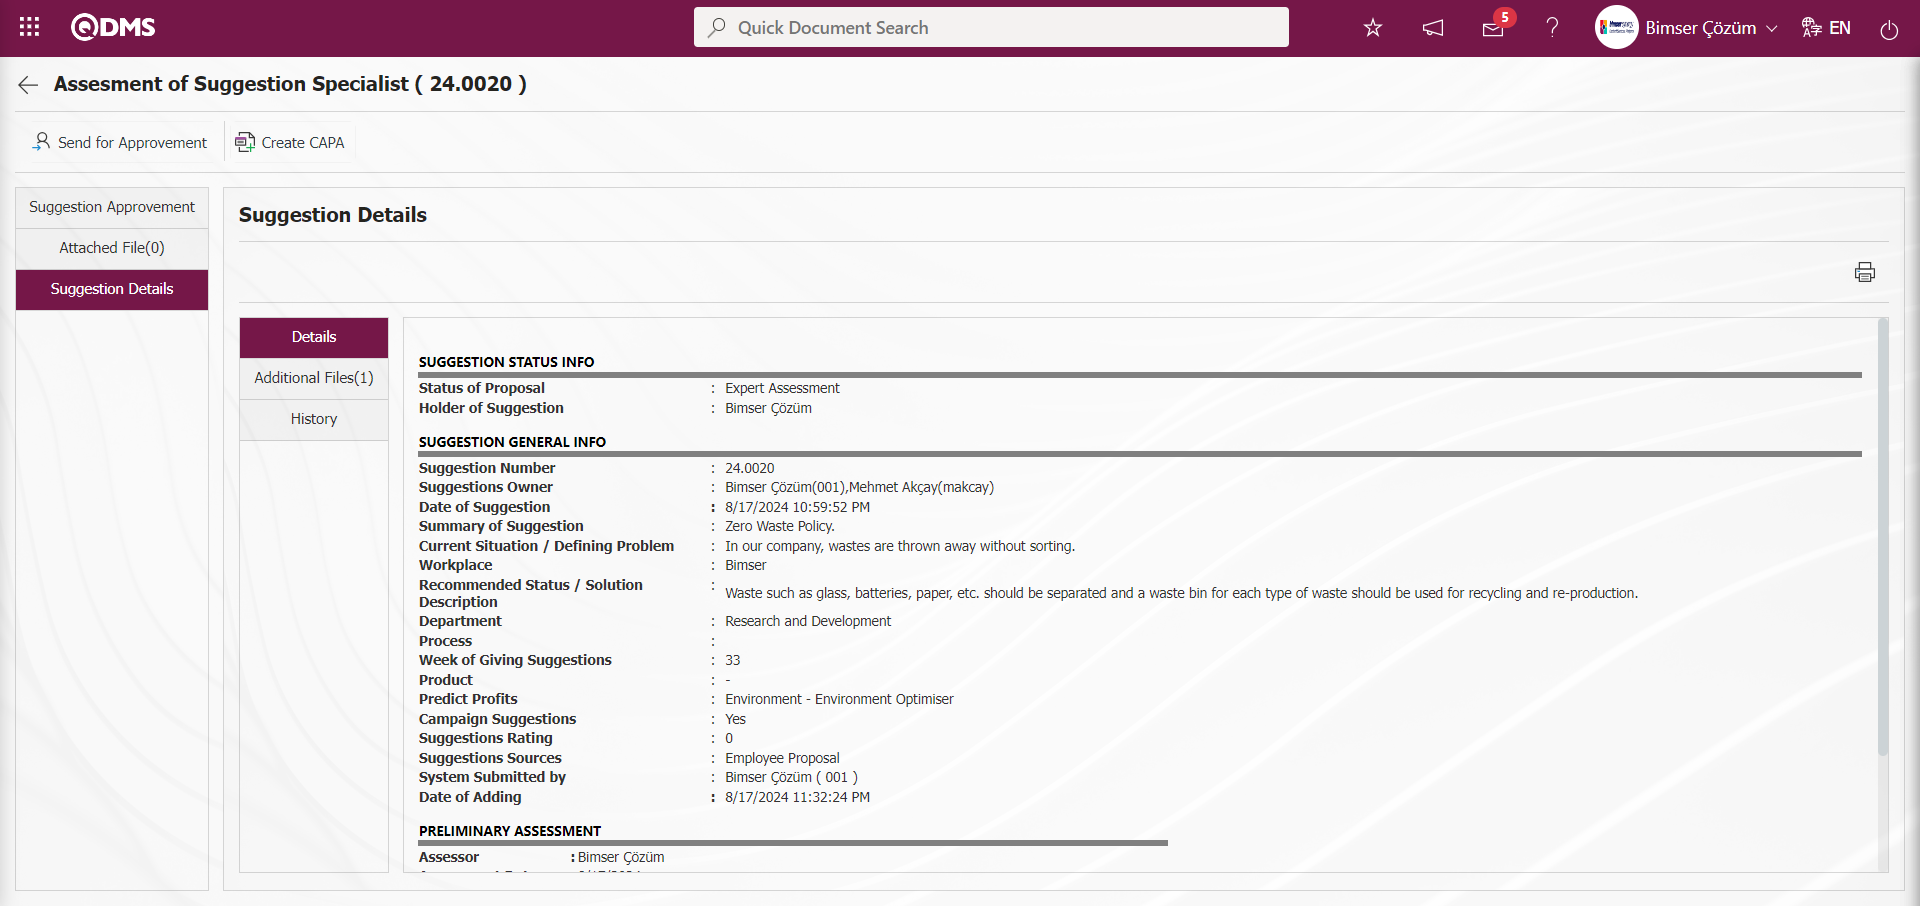
Additional Files Tab: This is the tab where the attachment files uploaded up to this stage are displayed.
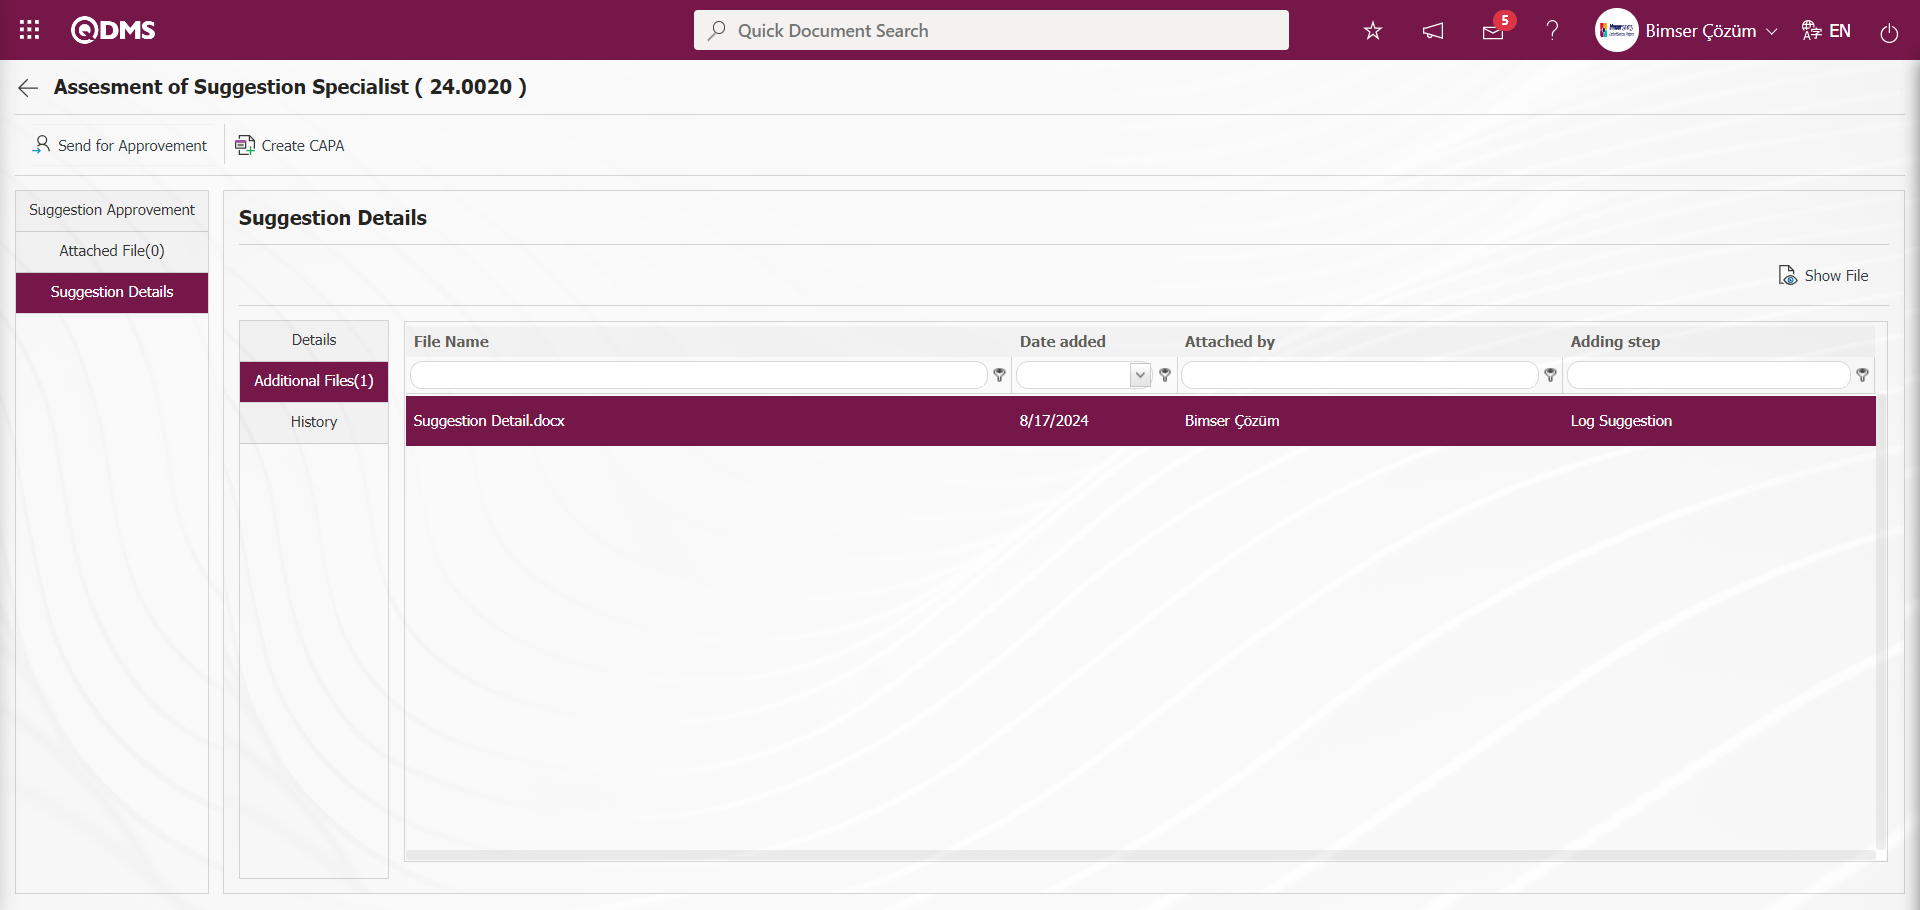
With the help of the buttons on the screen;
 : Display the selected attachment file in the list.
History Tab: It is the tab where the history of the transactions related to the suggestion until this stage is accessed. It is a tab displayed depending on the parameter. The parameter value of parameter 137 in the Suggestion System Module parameters is activated by selecting “Yes”.
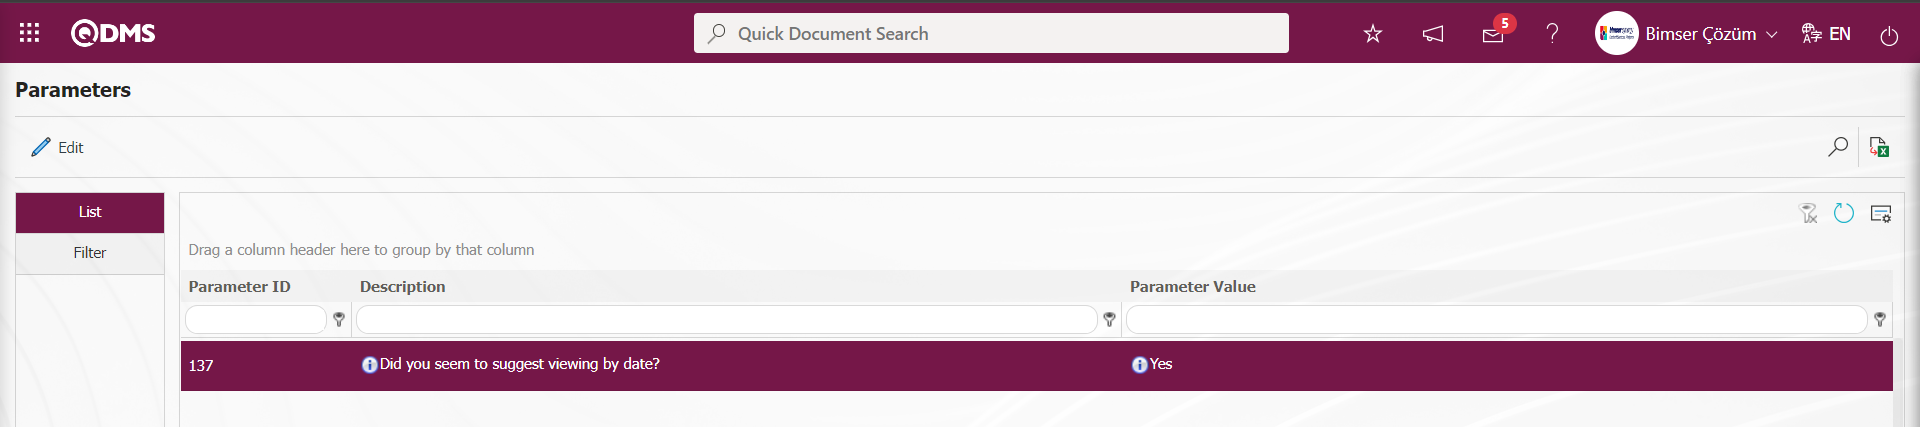
After the parameter is activated, the History tab is displayed at every stage in the Suggestion Details tab in the Suggestion System Module.
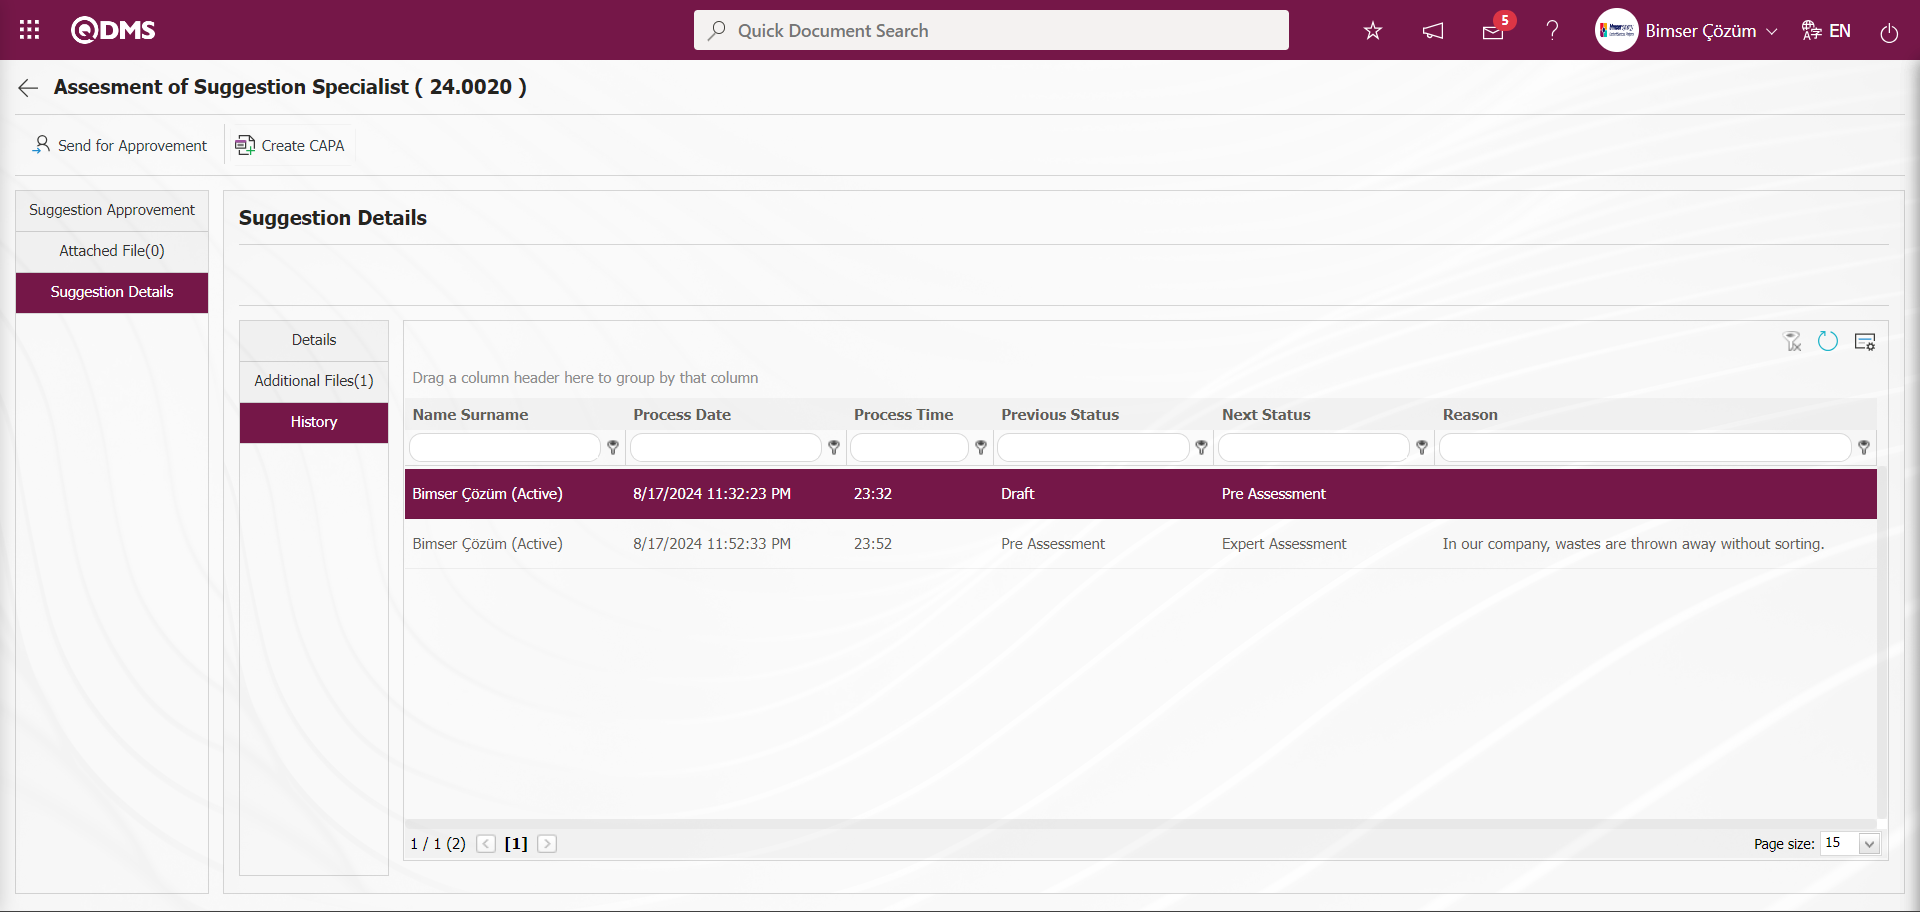
From the Suggestion Specialist Assessment screen, click on the Suggestion Approvement tab. 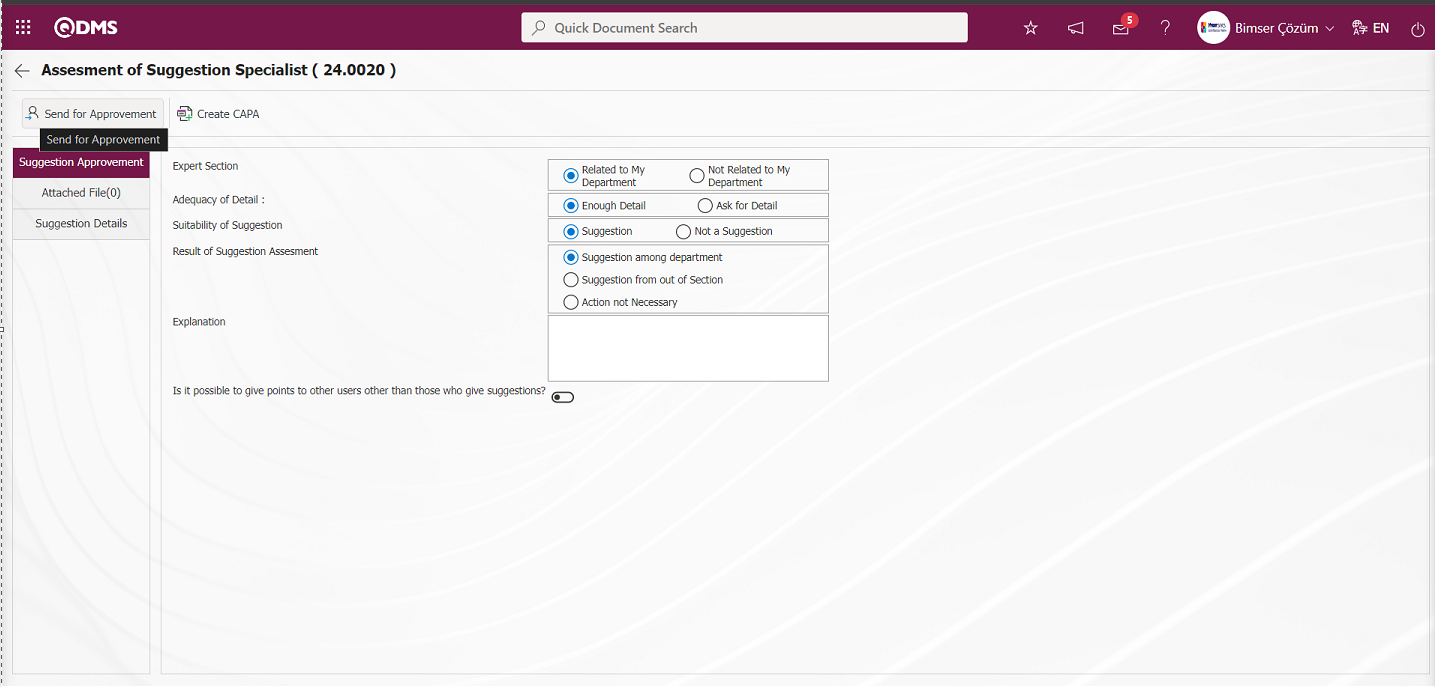
After the specialist assessment is carried out, the  button is clicked. The recommendation is sent to the action planning process to the person designated by the specialist assessment in the role of “action planner” for action planning to be carried out for the realization of the recommendation.
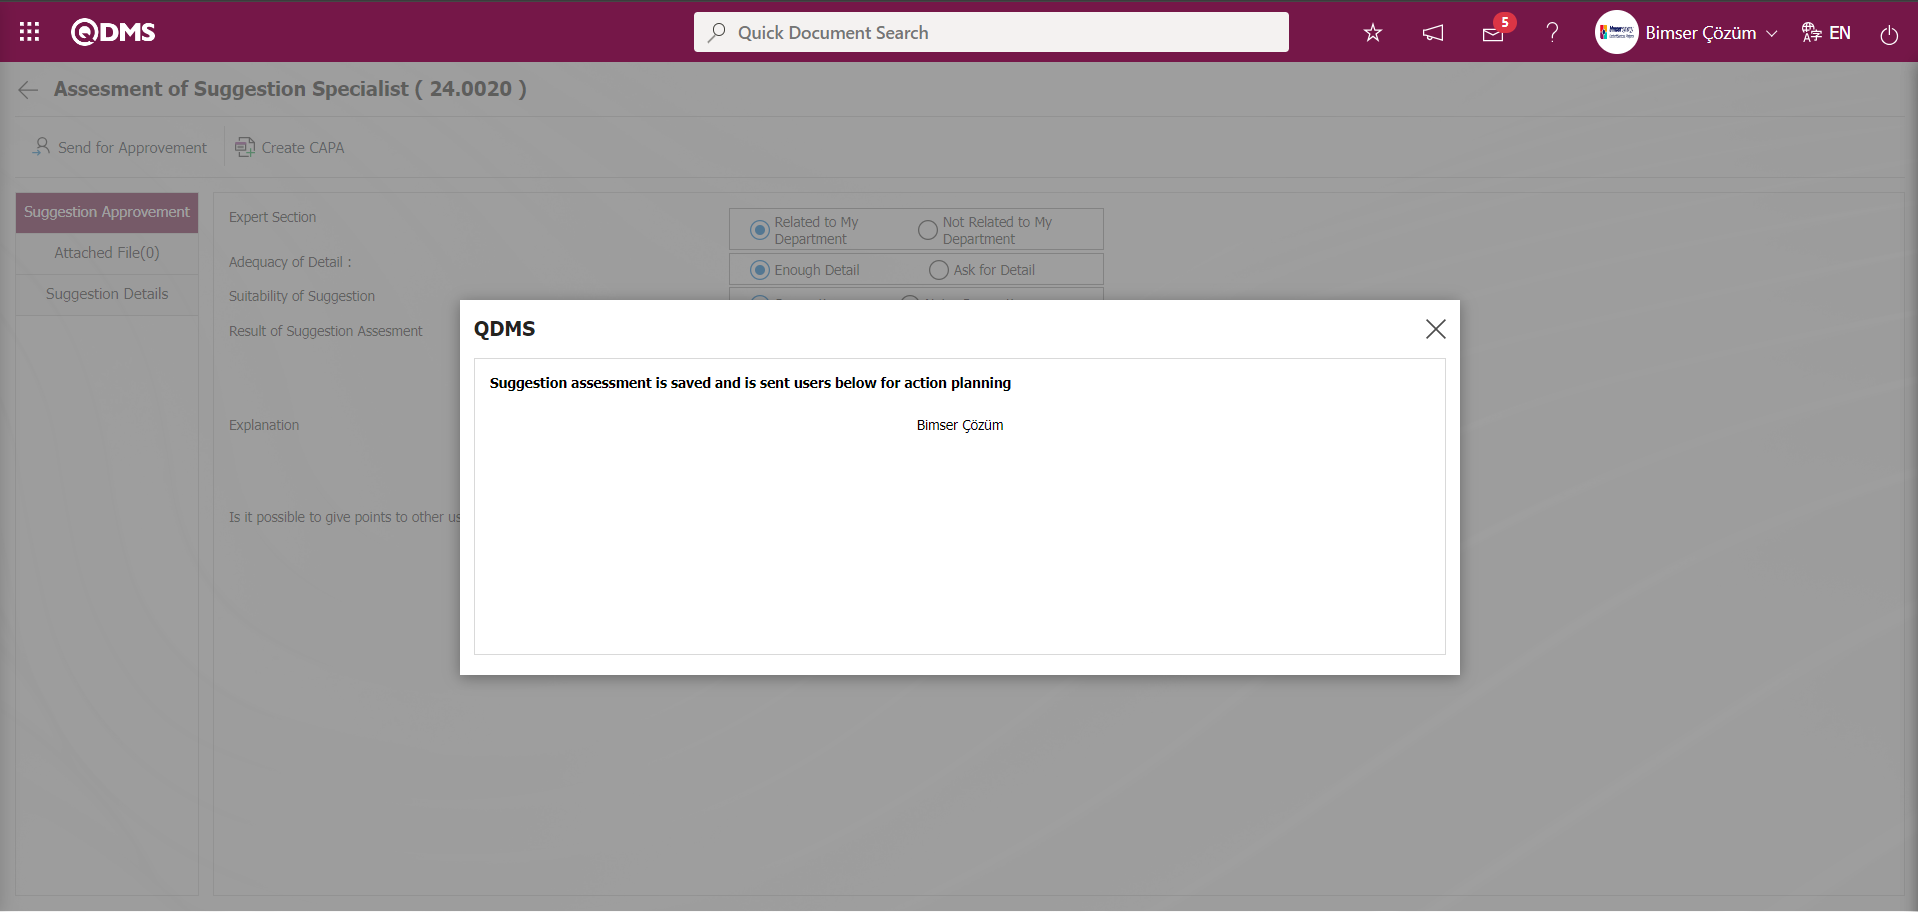
The expert evaluation process can also be performed from the Integrated Management System / Suggestion System / Expert Reviews'll Make Suggestions menu. The relevant suggestion is selected in the user's “Suggestions Pending Expert Evaluation” list and the expert evaluation process is performed with the  button.
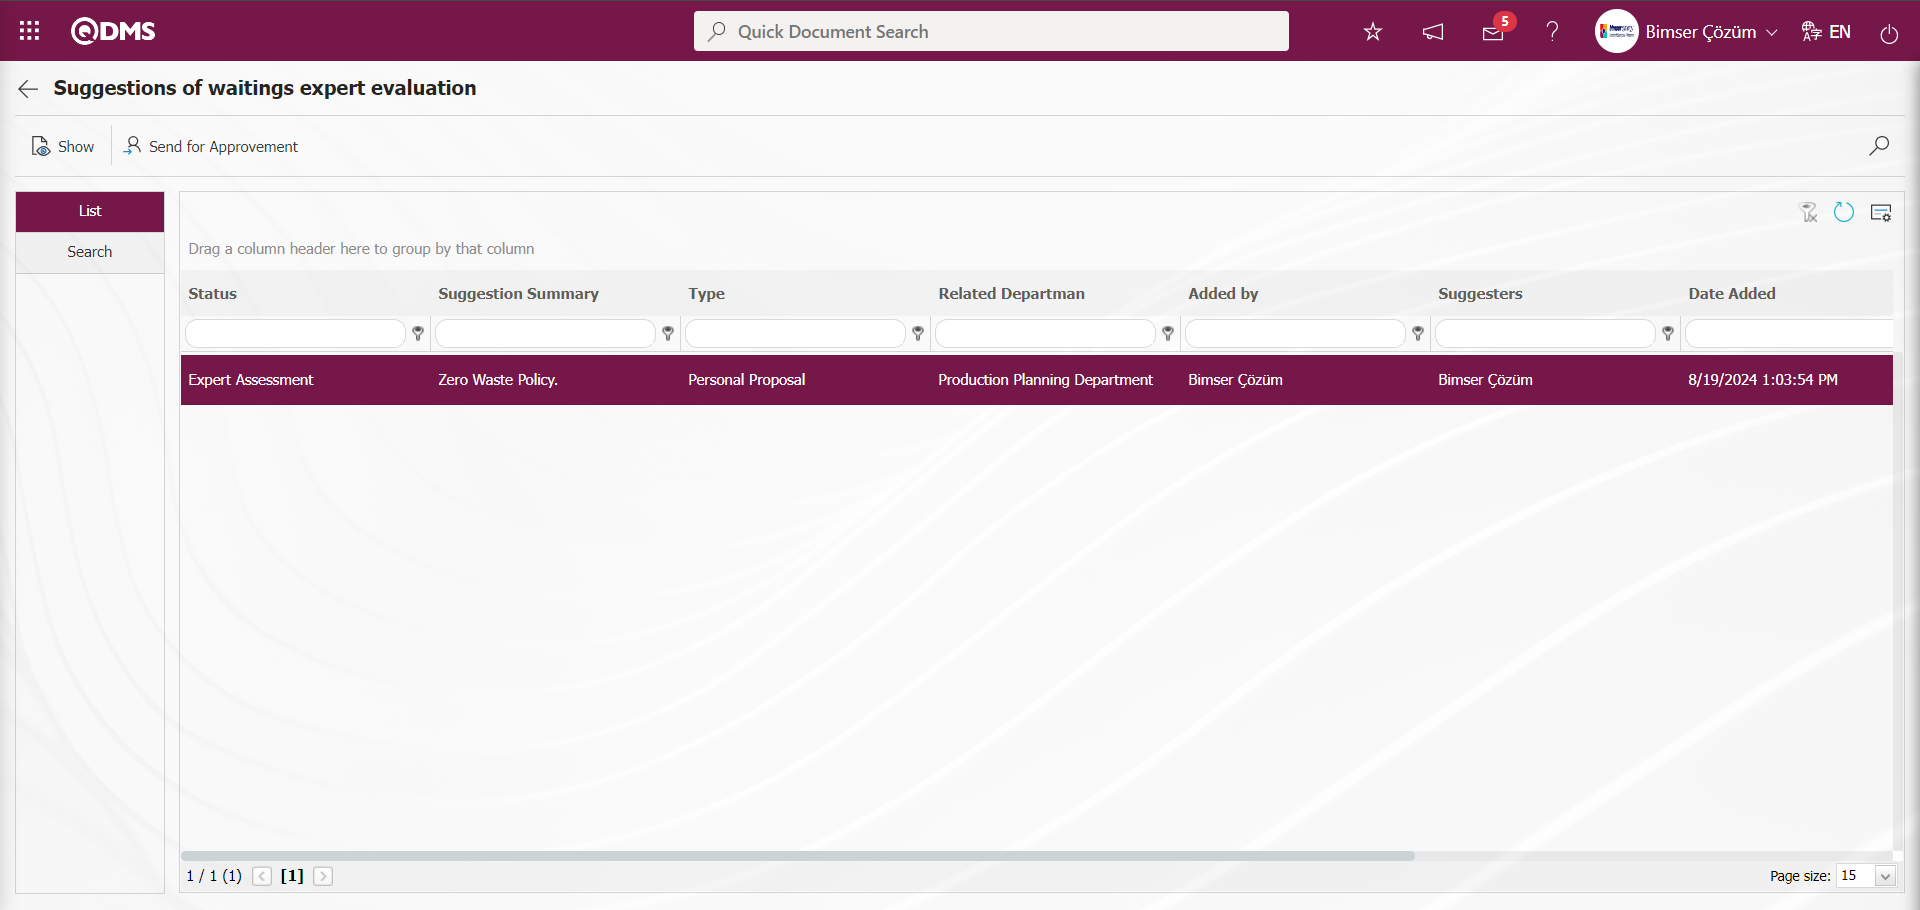
5.3.1.4. Action Planning Process
It will be assigned as “Suggestion awaiting for Action planning” on the “My Pending Work” page of the person who will do action planning.
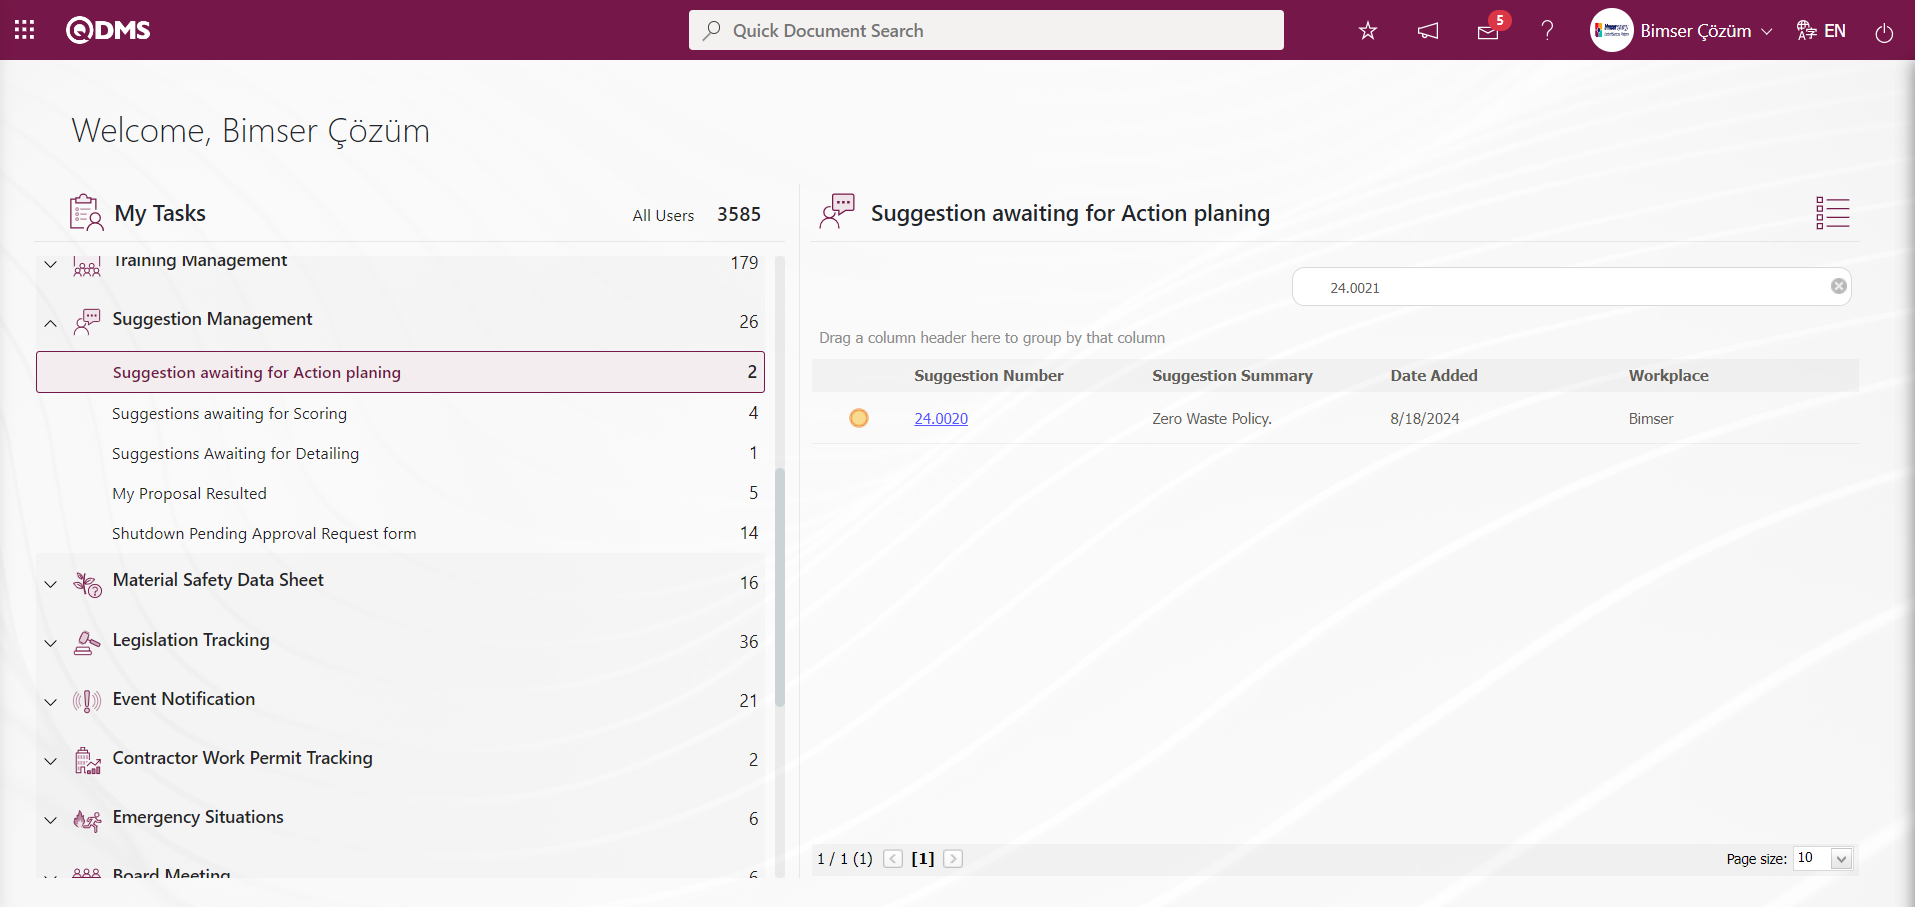
The action planning screen is displayed by clicking the Suggestion code link in the Suggestion No field.
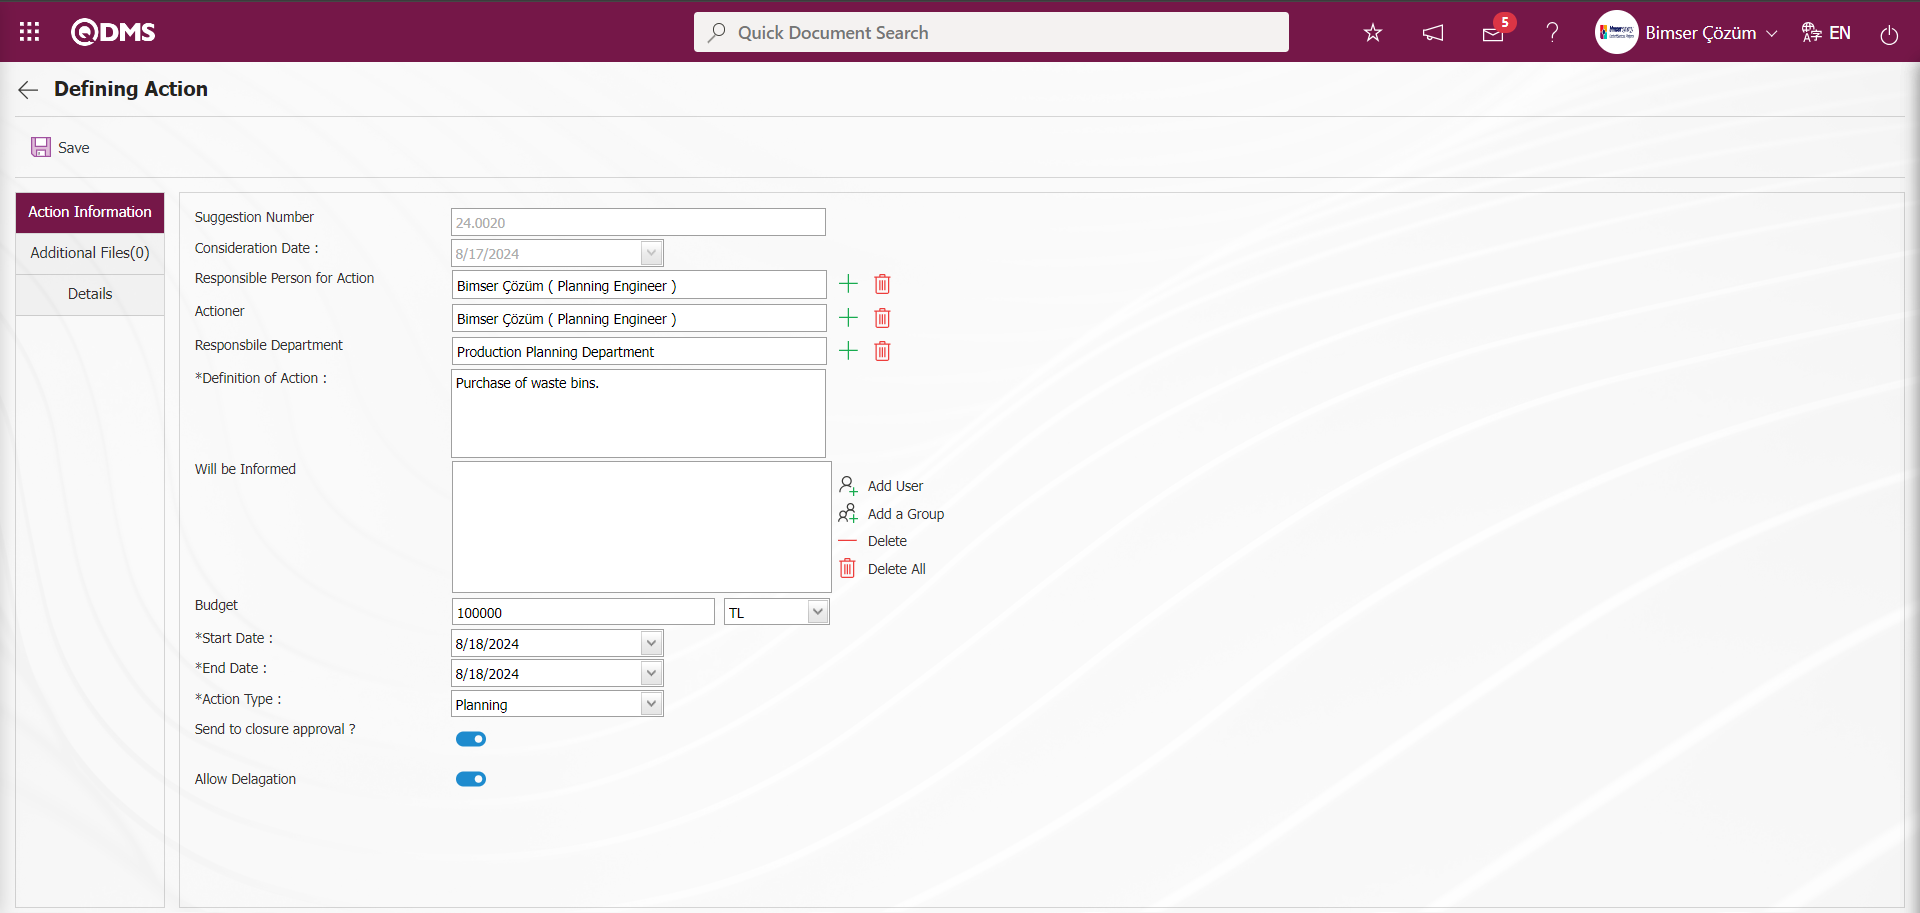
With the help of the buttons on the screen;
 : Action planning process registration process is done.
Define the relevant fields on the screen that opens;
Suggestion Number: This is the field where the suggestion number information is given by the Consideration Date: This is the field where the Consideration Date information is given automatically by the system on the Action Definition screen. It is automatically defined according to the parameter value of parameter 31 in the Suggestion System Module parameters.

The parameter is automatically defined according to the value in the “Consideration Date” field, no matter how many days are defined in the parameter value.**
Responsible Person for Action: In the Action Definition screen, the information about who will be responsible for the action task is selected from the list of personnel defined in the system opened by clicking the  (Select) button.
Actioner: This is the field where the person who will perform the action task on the Action Definition screen is selected from the list of personnel defined in the system opened by clicking the (Select) button.
Responsbile Department: After the action responsible is selected in the system on the Action Definition screen, it is the area where the department information to which the action responsible is connected is automatically defined as the responsible department. The responsible person or the department of the person to be responsible is set depending on the parameter. The system automatically assigns the department information to the value defined in parameter 7 in the Suggestion System Module parameters.

If the department of the person who will take action is desired, the letter value “Y” must be entered in the parameter value in this parameter. If the department of the responsible person is desired, the letter value “S” must be entered in the parameter value in this parameter.**
Definition of Action: This is the field where the action definition information to be performed on the Action Definition screen is entered. The definition of which action task will be assigned is written.
Will be Informed: This is the field where the users and user groups that are requested to be informed about the Action task planned on the Action Definition screen are selected. While users are selected from the list of Personnel defined in the system by clicking the  (Add User) button, they are selected from the list of User groups defined in the system by clicking the
  (User Group) button.
Budget: This is the field where the planned budget information for the Action task planned on the Action Definition screen is entered.
Start Date: This is the field where the start date of the Action task planned on the Action Definition screen is selected in the calendar field opened by clicking the drop-down list.
End Date: This is the field where the end date of the Action task planned on the Action Definition screen is selected in the calendar field opened by clicking the drop-down list.
Action Type: In the Action Definition screen, the type of the planned action task is selected from the list of action types defined in the system by clicking the drop-down list. Action Type list is defined in System Infrastructure Definitions/Action/Sub-Actions Type Definition menu
Send to closure approval?: After the realization of the planned action task on the Action Definition screen, the relevant check box is checked for the person in the approval to go to the closing approval. The parameter value of parameter 78 in the Suggestion System Module parameters is activated by selecting “Yes”.

After the parameter is activated, the “Send to closure approval” field is automatically selected by the system as in the screenshot below.
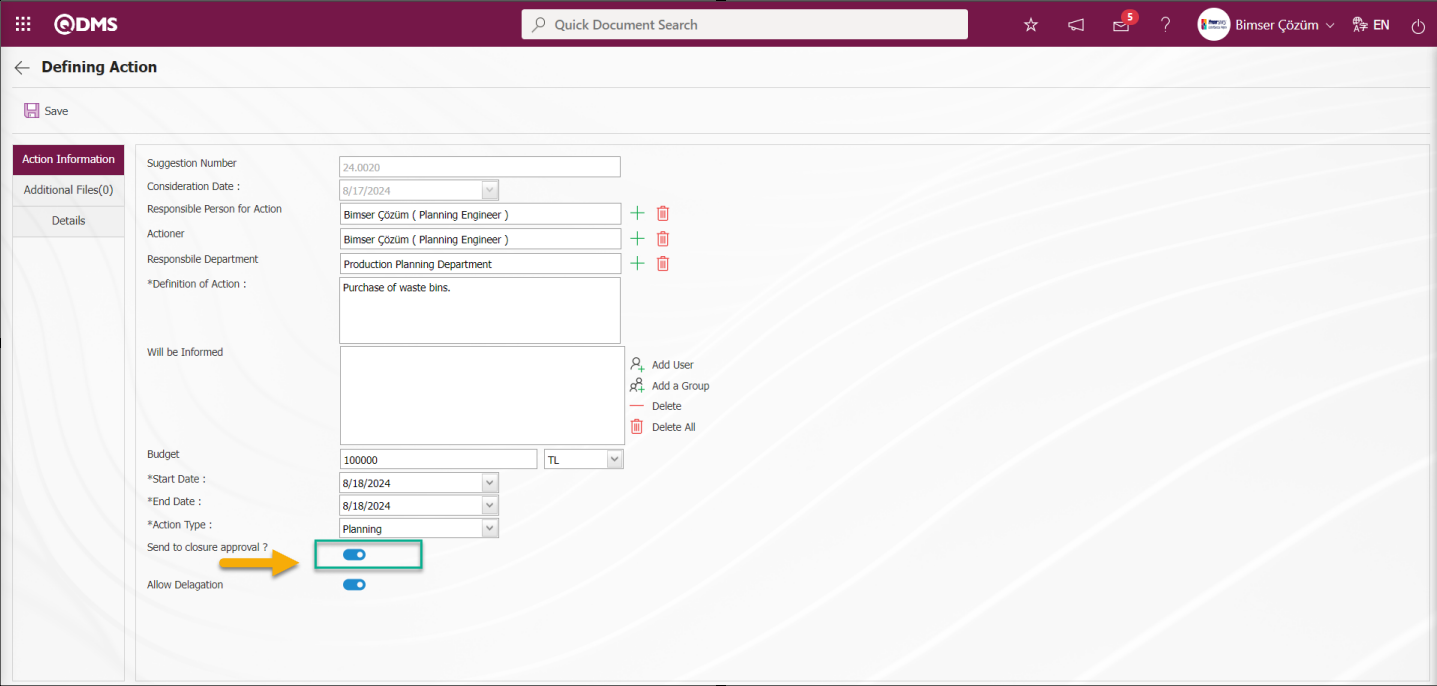 Allow Delagation: In the Action Definition screen, if the task of the planned Action is to be redirected to someone else by the person who will do the work, it is the field where the relevant check box is checked. In order for this field to be displayed and the redirection process to be used, the value of parameter 40 of the action parameters must be activated by selecting “Yes”.
Additional Files tab: It is the tab on the Action Definition screen where the uploading of additional files such as files, pictures, minutes, if any, related to the action planning process phase, the viewing of the uploaded additional files and the deletion of the additional files uploaded incorrectly are performed.
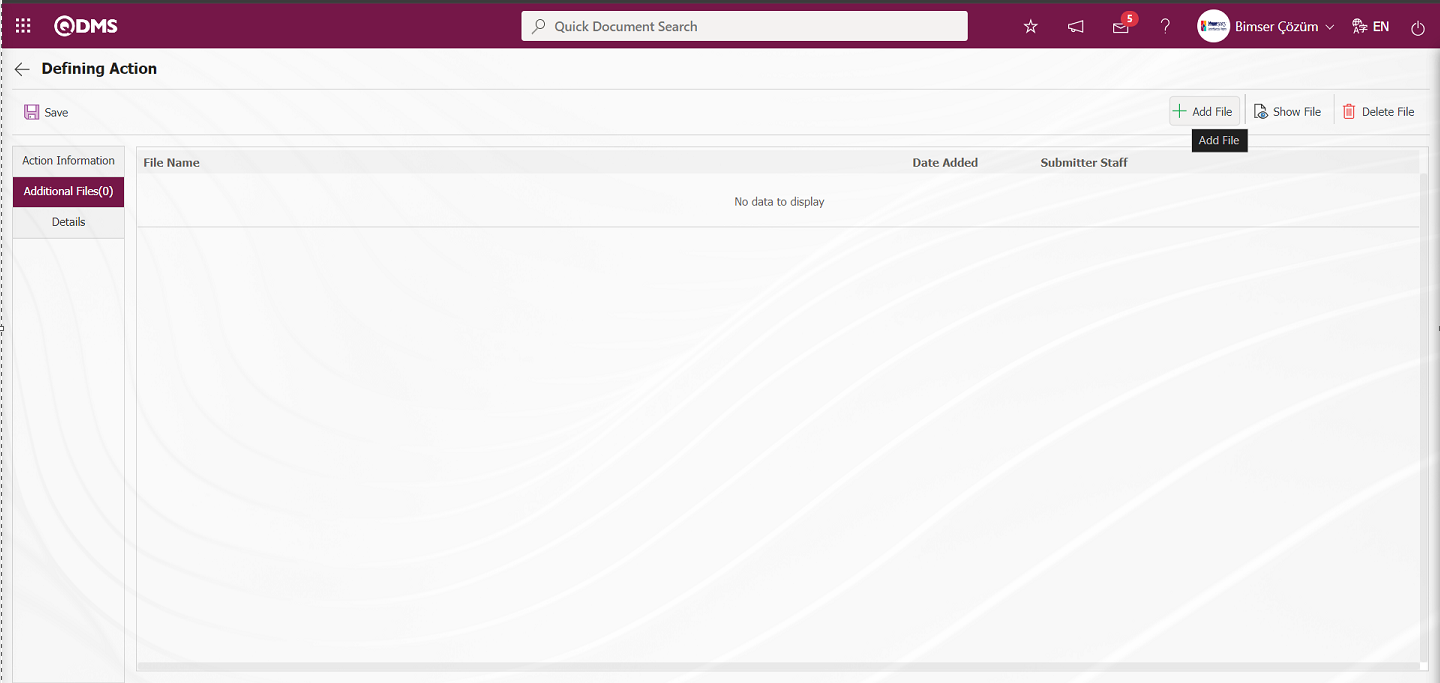
With the help of the buttons on the screen;
: The additional file is uploaded to the system.
: The uploaded additional file information is displayed.
: The uploaded additional file information is deleted.
At this stage, additional files are added to the planned Action by clicking the () button in the Additional Files tab on the Action Definition screen. Multiple additional files can be added.
Suggestion Details tab: All information entered into the system about the given suggestion is displayed. You can access detailed information about the suggestion under Details.
 Attachment Files Tab: Additional files uploaded related to the suggestion can be accessed and the content of the uploaded additional files can be viewed.
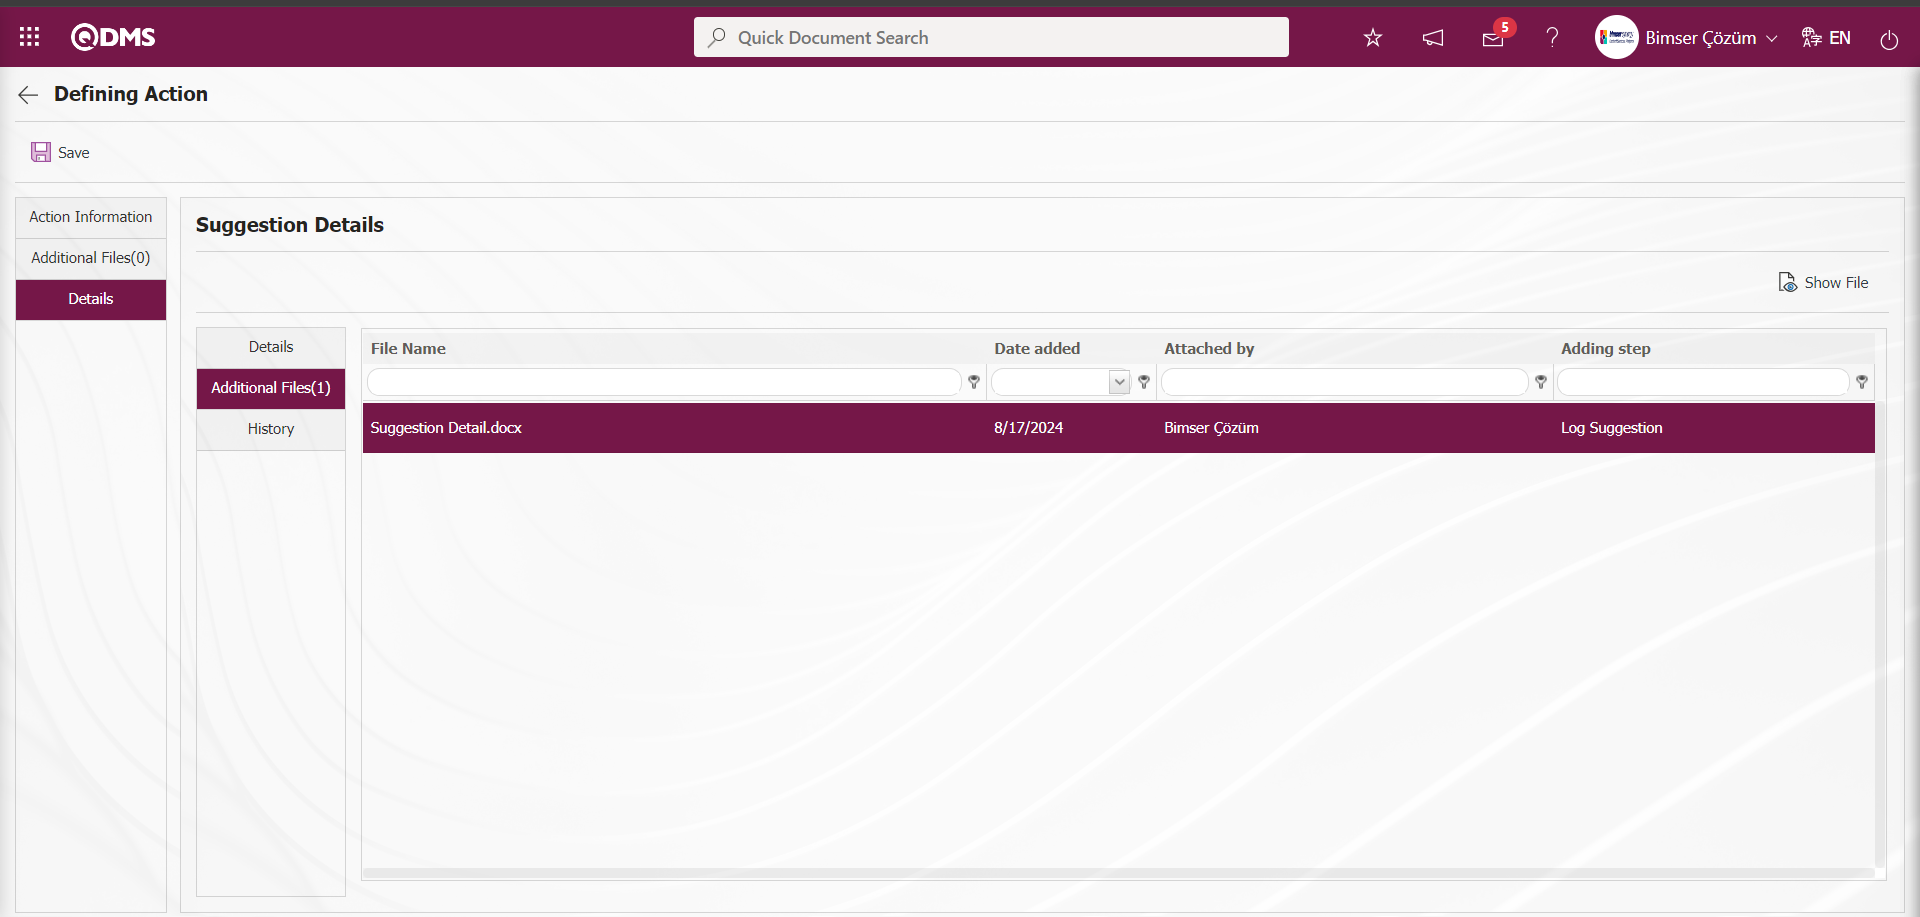
With the help of the buttons on the screen;
 : Display the selected attachment file in the list.
History Tab: It is the tab where the history of the transactions related to the suggestion until this stage is accessed. It is a tab displayed depending on the parameter. The parameter value of parameter 137 in the Suggestion System Module parameters is activated by selecting “Yes”.

After the parameter is activated, the History tab is displayed at every stage in the Suggestion Details tab in the Suggestion System Module.
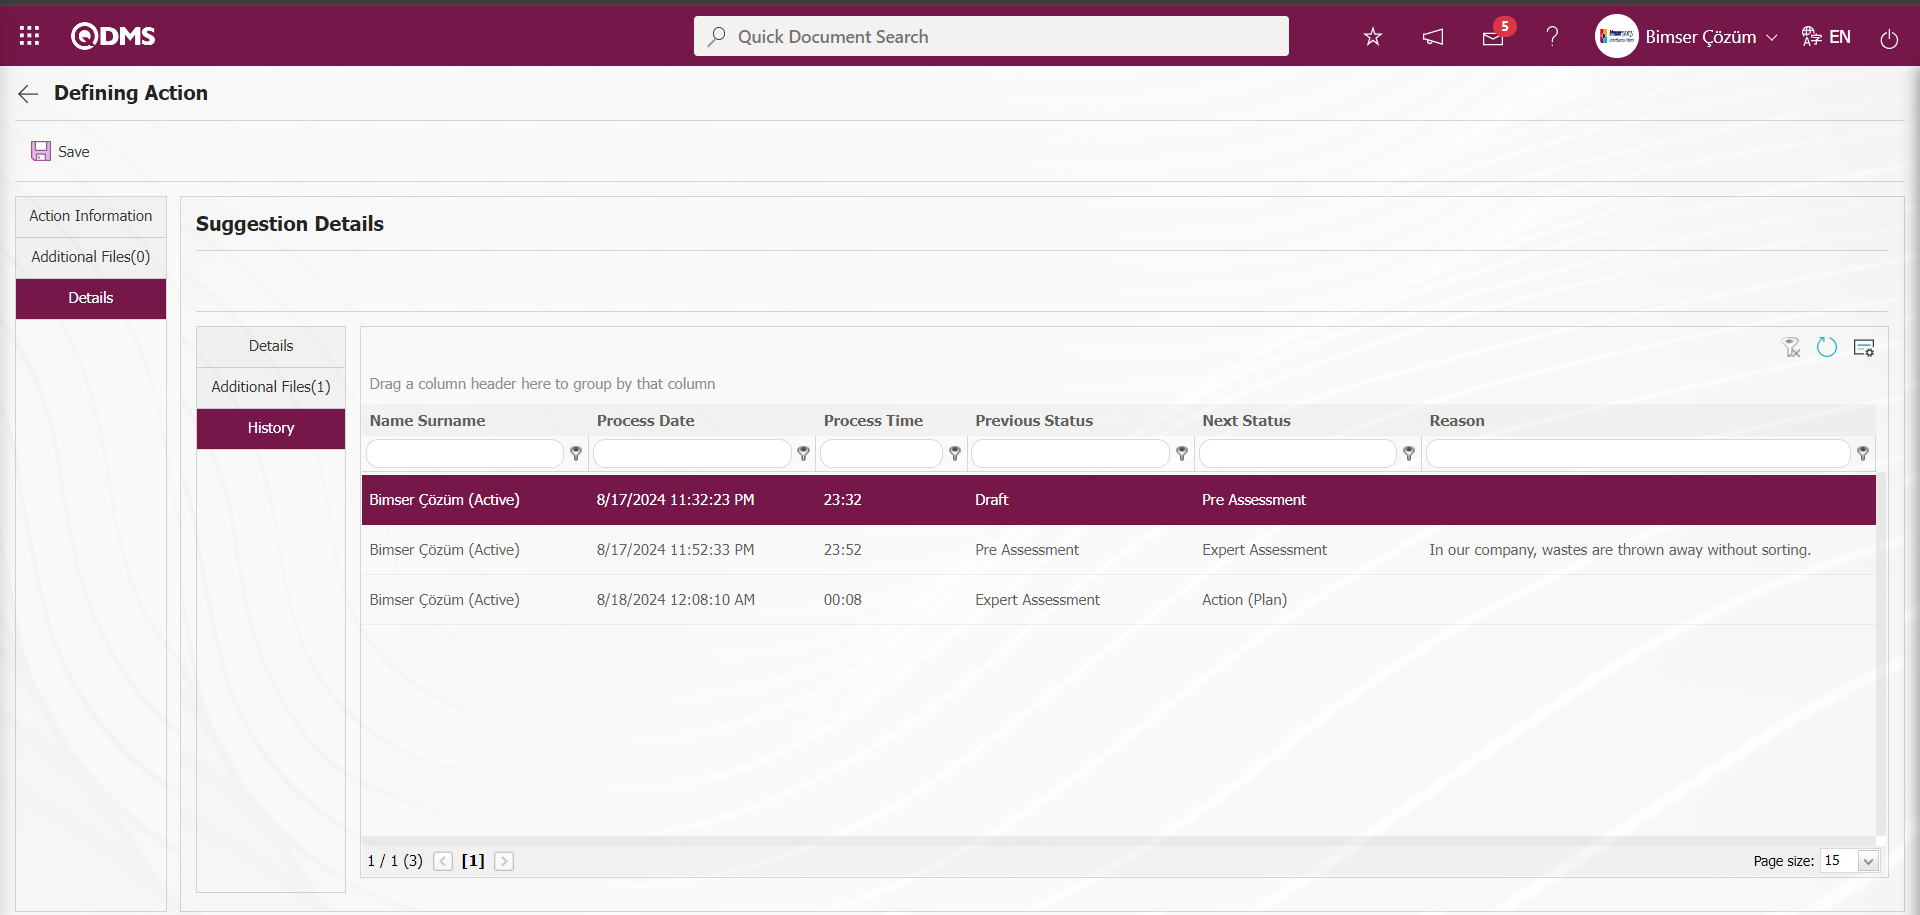 Action Definition Action Information tab is clicked.
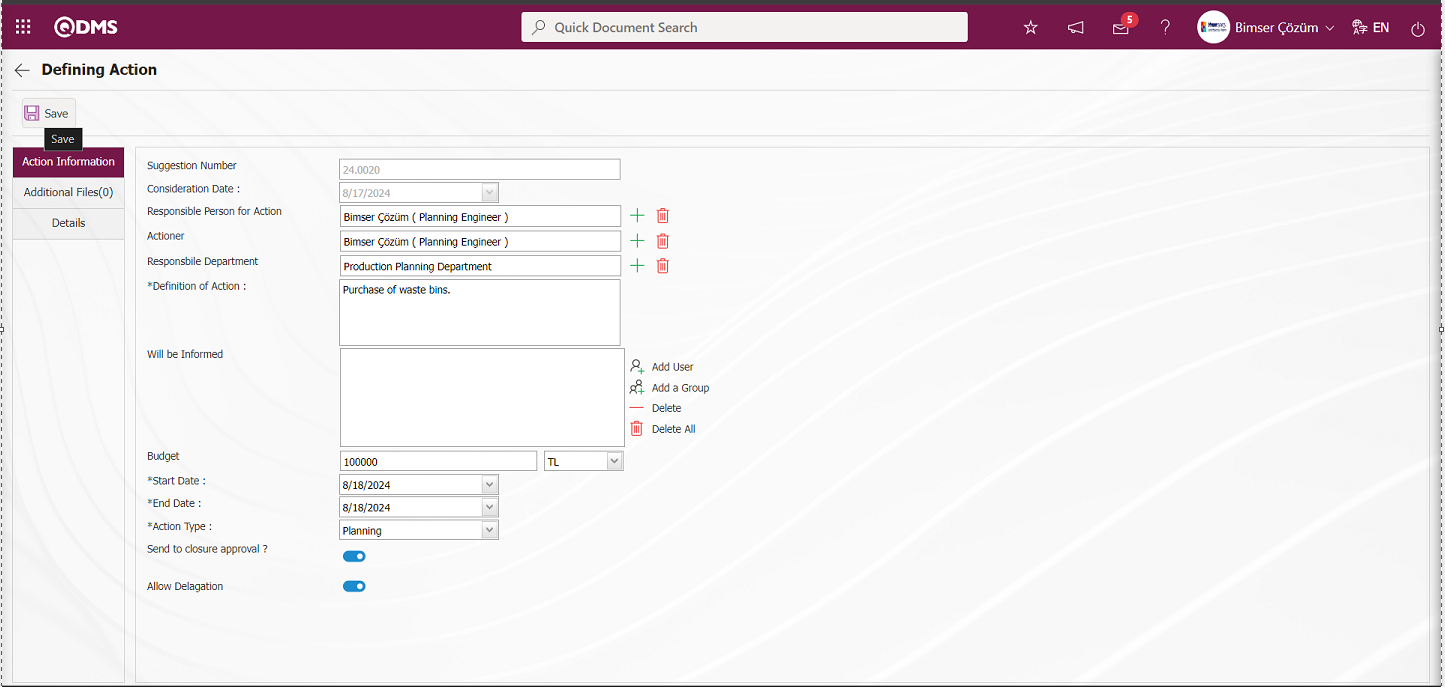
“Consideration Date” field is automatically defined according to the value defined in the suggestion parameter. If the parameter 31 is defined for how many days, the “Consideration Date field” comes according to the value. “Responsible Person for Action” is selected from the list of personnel defined in the system opened by clicking the  (Select) button. “Actioner” field is selected from the list of personnel defined in the system opened by clicking the (Select) button. “Responsbile Department” field is automatically defined as the department of the action responsible, this field can be changed. The definition information of the action is written. Users who are requested to be informed about the action are added to the “Will be Informed” field from the list of personnel defined in the system by clicking the
  (Add User) button or from the list of user groups defined in the system by clicking the
  (User Group) button if there are user groups. Start and end dates of the action are selected from the calendar field opened by clicking the drop-down list. Select the action task type to be assigned for the realization of the action. The check box related to the field “Should it go to the Closing Approval?” is checked and it is ensured that the person in the approval goes to the closing approval after the action realization process. The registration process is performed and the action task is assigned to the user who will do the job. (If there is an approval to open the action item, it goes to approval first. The approved action is assigned to the person who will do the action as a task.)
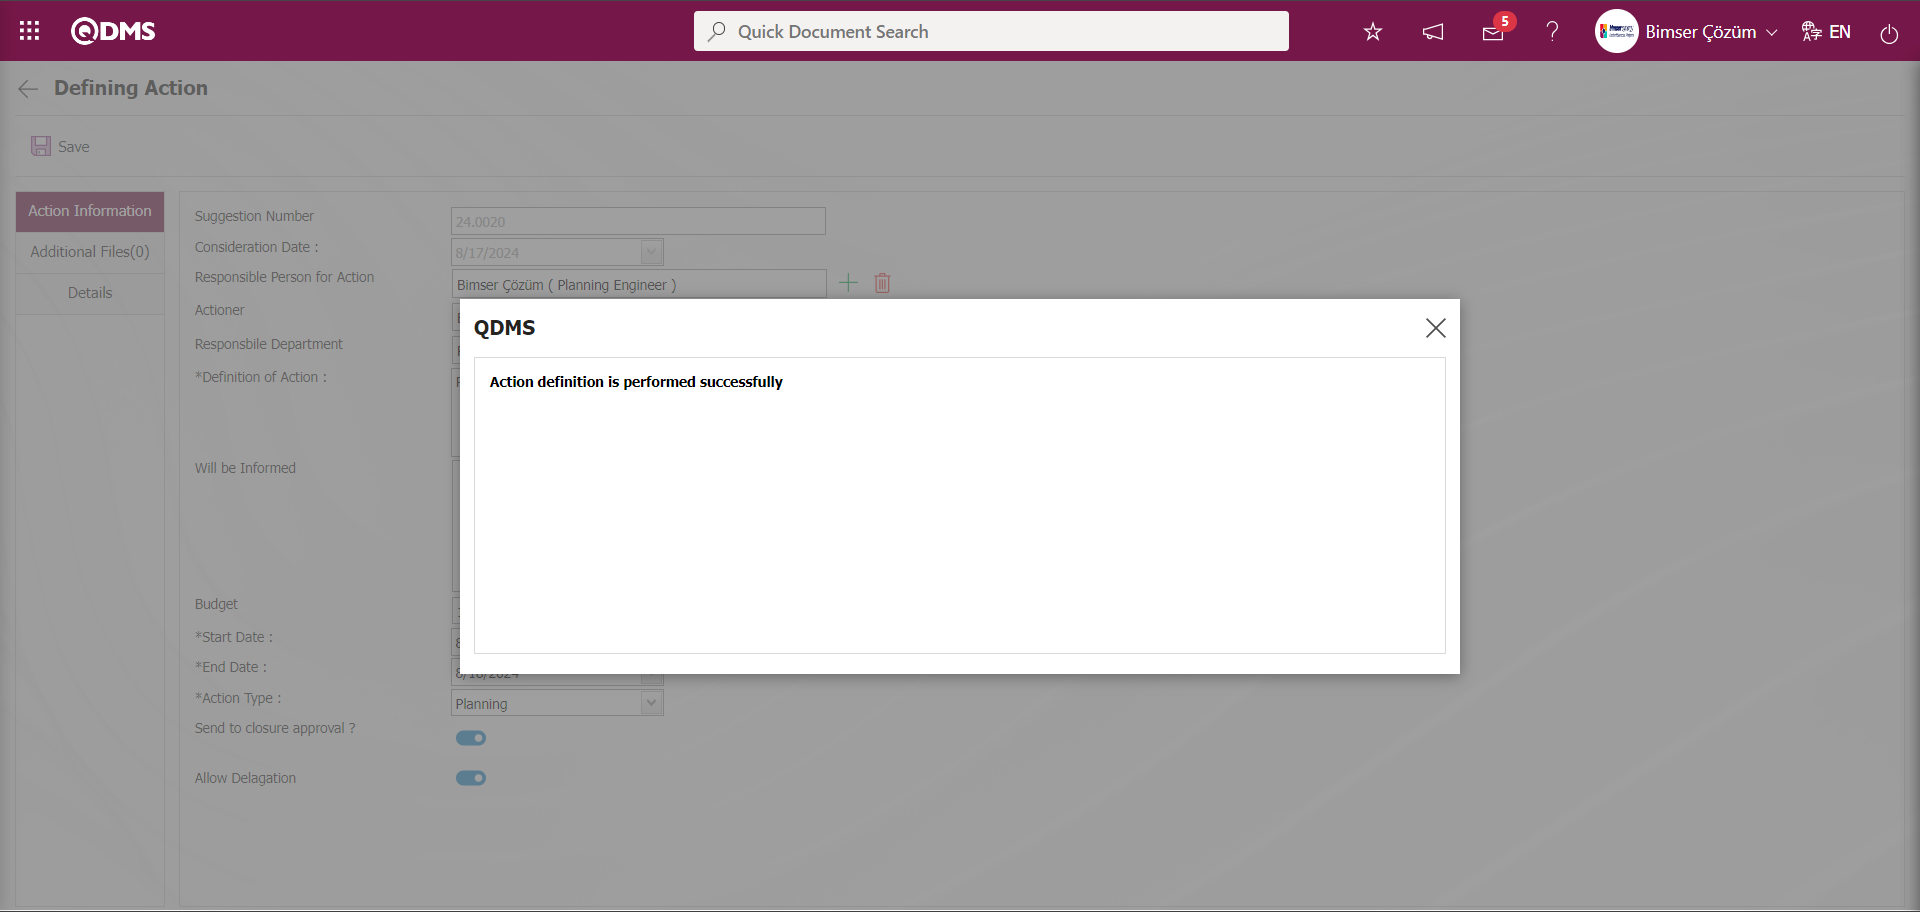
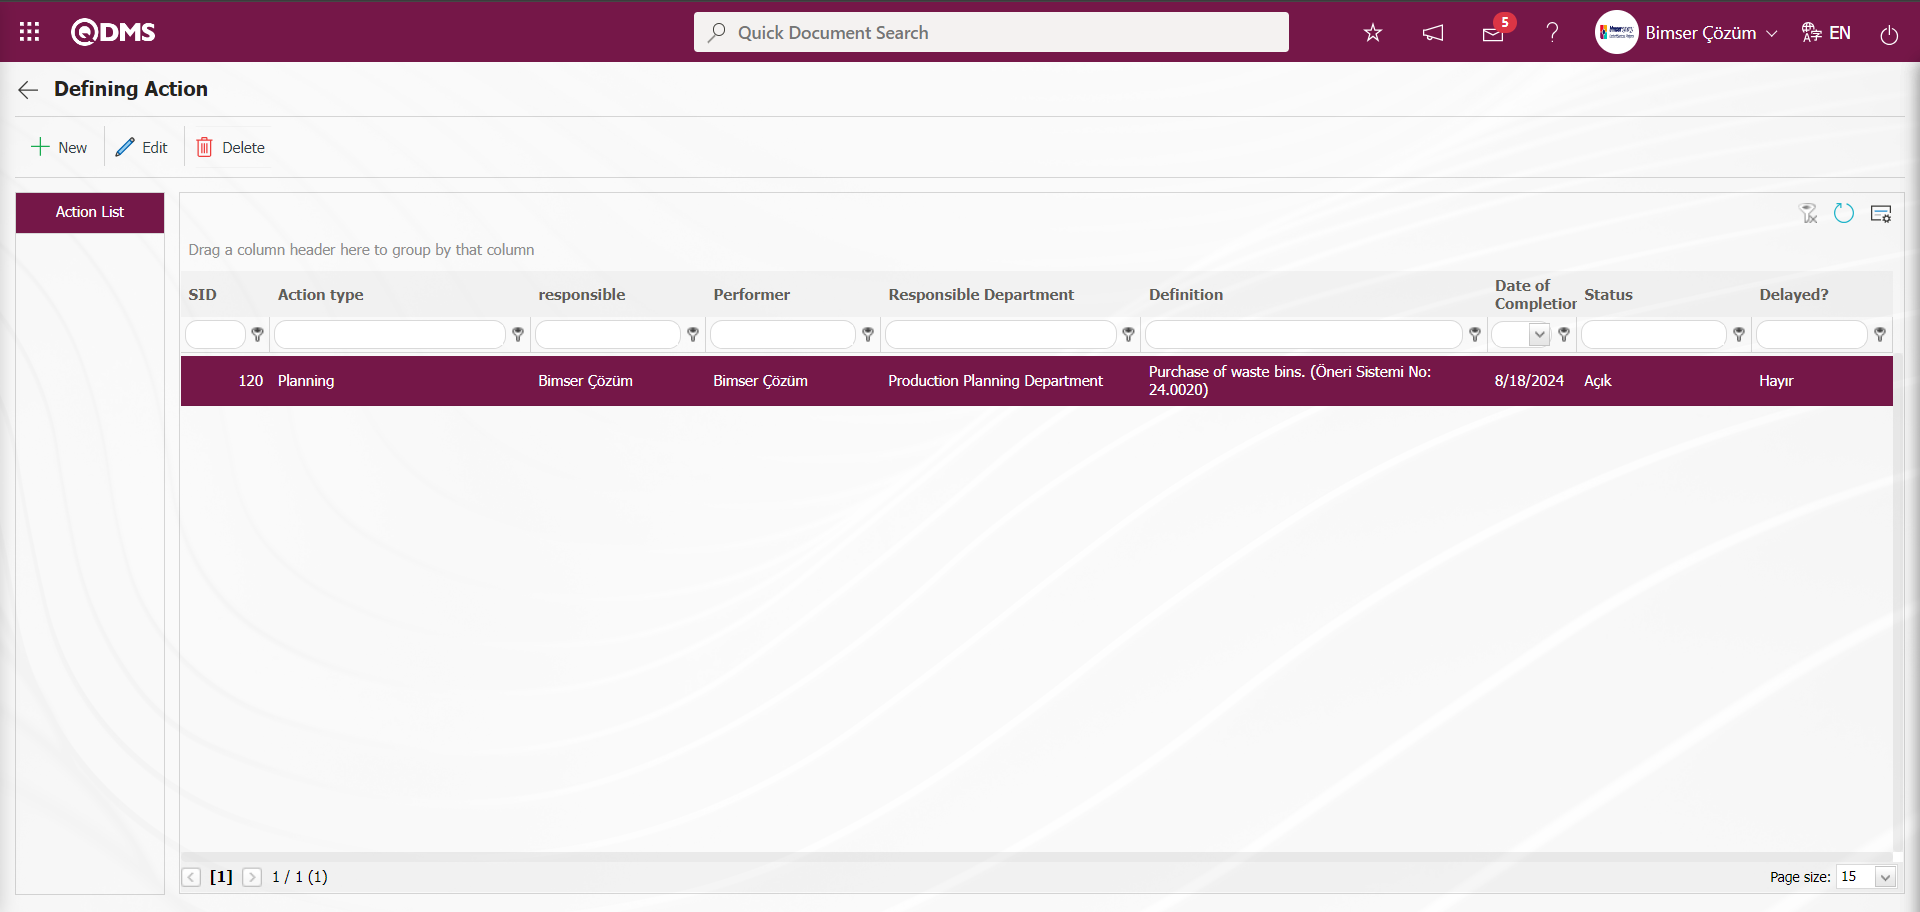
If you want to define more than one action within the scope of the suggestion; select the suggestion of the expert from the Integrated Management System / Suggestion System / My Assessments menu. New actions are defined with the action operations button.
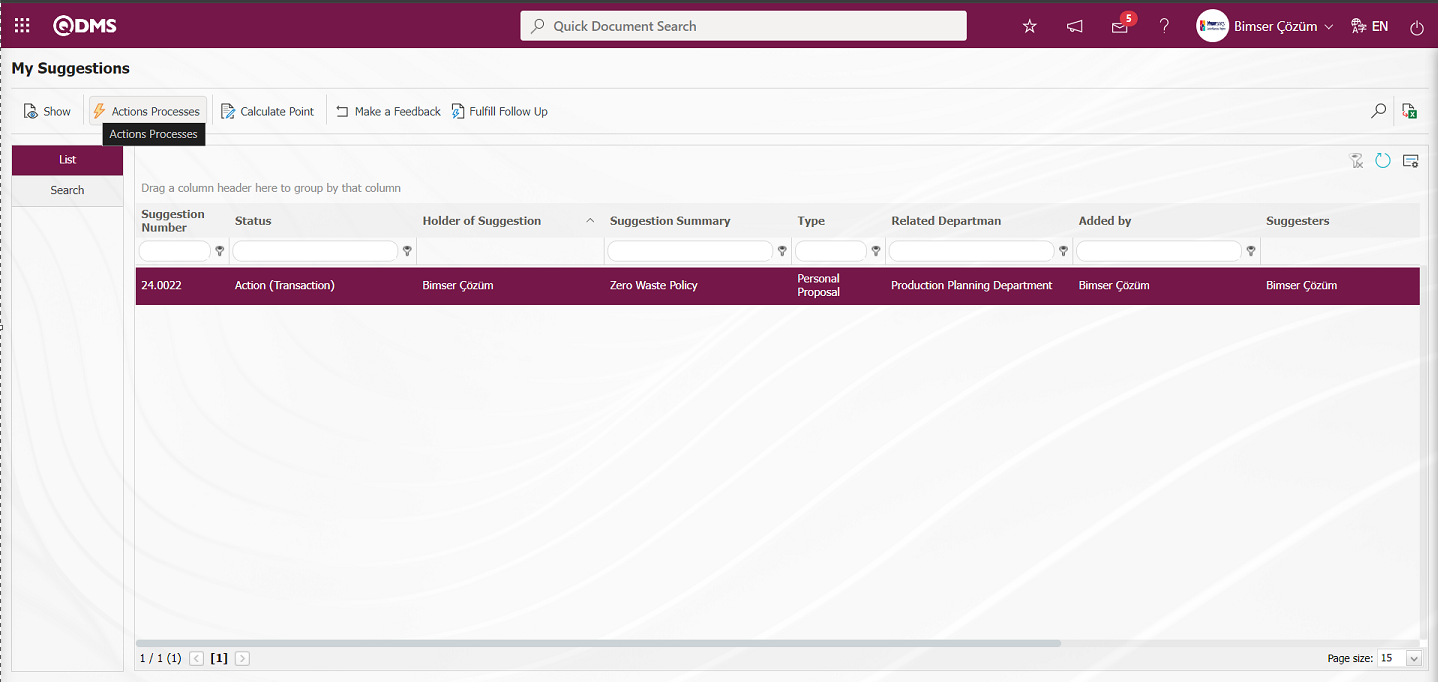
After this stage, the person who will perform the action will have an “Action List ‘ task on the ’My Pending Jobs” page.
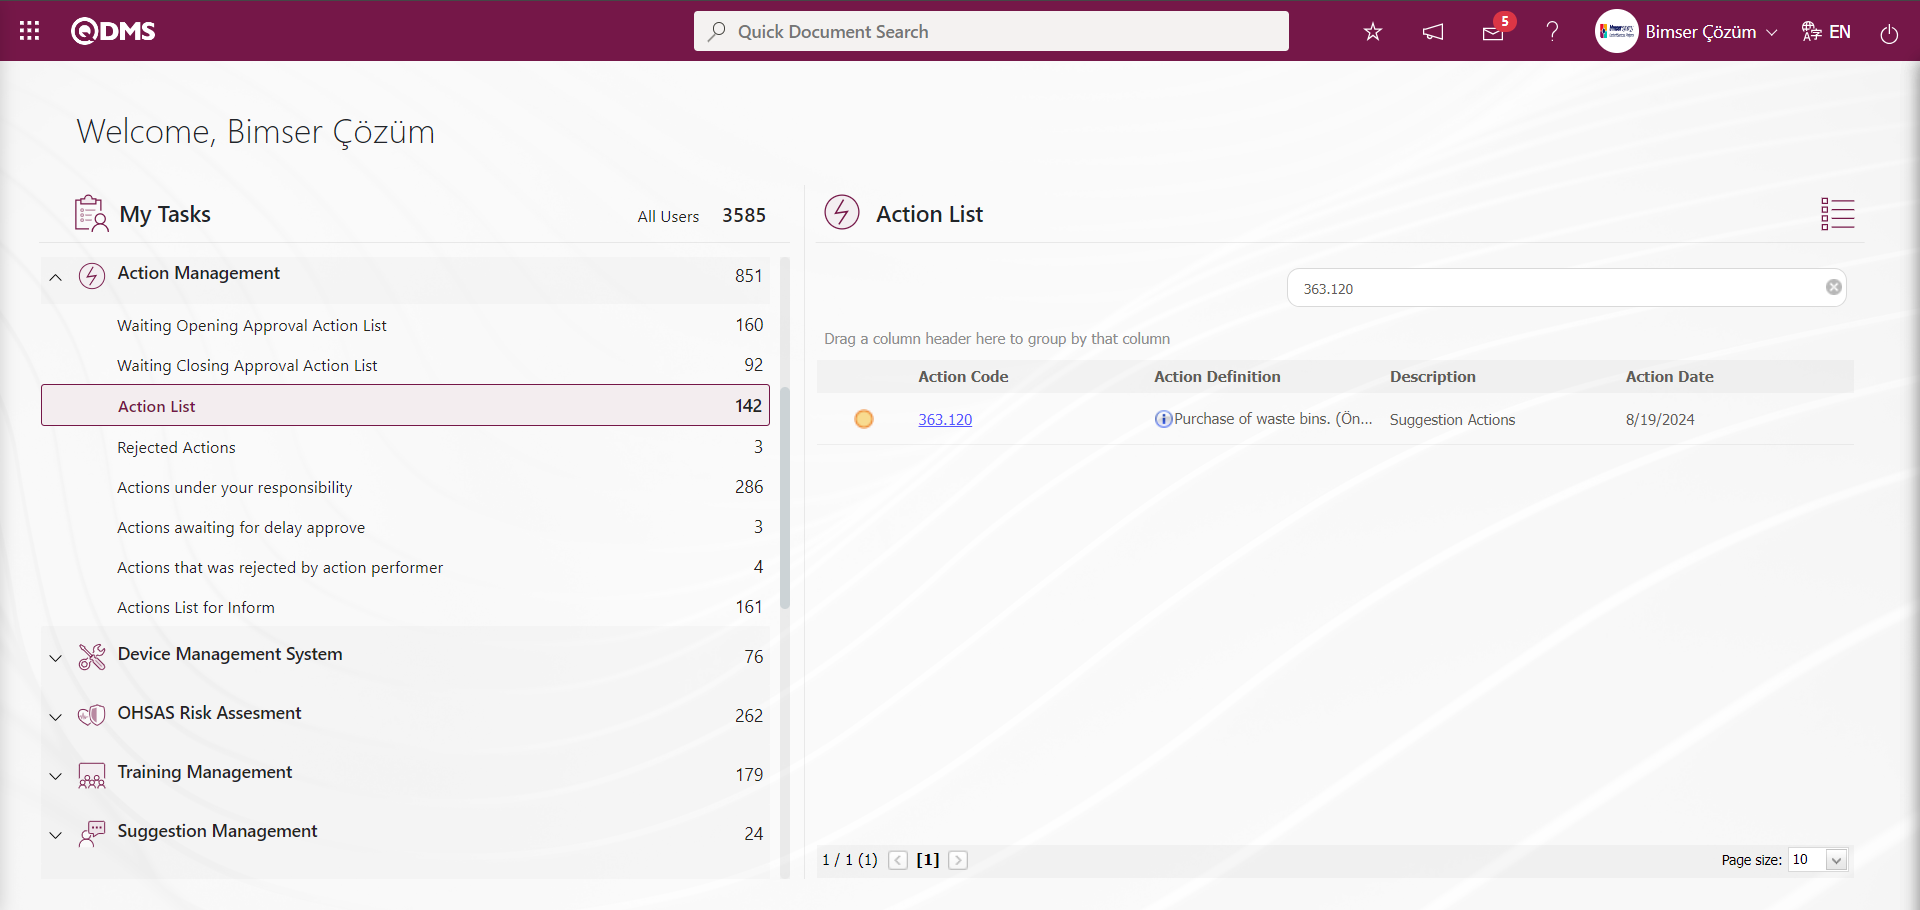
The action to be performed is displayed by clicking the Action code link in the Action number field. On the Action Perform/Delay screen, “Perform”, “Update”, “Delay”, “Reject” and “Redirect” actions can be performed.

With the help of the buttons on the screen;
 : Action realization is performed
 : Action information update process is performed.
 : Action delay is performed.
 : In the action realization task, a rejection is made by the person who will do the work
 : The task of performing the action is redirected to another person.
: Records are filtered and searched.
 : Data is exported to Excel.
: The search criteria on the menu screens are used to clean the data remaining in the filter fields in the grid where the search operation is performed.
: The menu screen is restored to its default settings.
: User-based designing is done on the menu screen with the show-hide feature, that is, the hiding feature of the fields corresponding to the columns on the menu screens.
The person who will perform the action, that is, the person who will do the work, clicks on the button and the action to be performed is displayed.
Action Information Tab: This tab contains detailed information about the action.
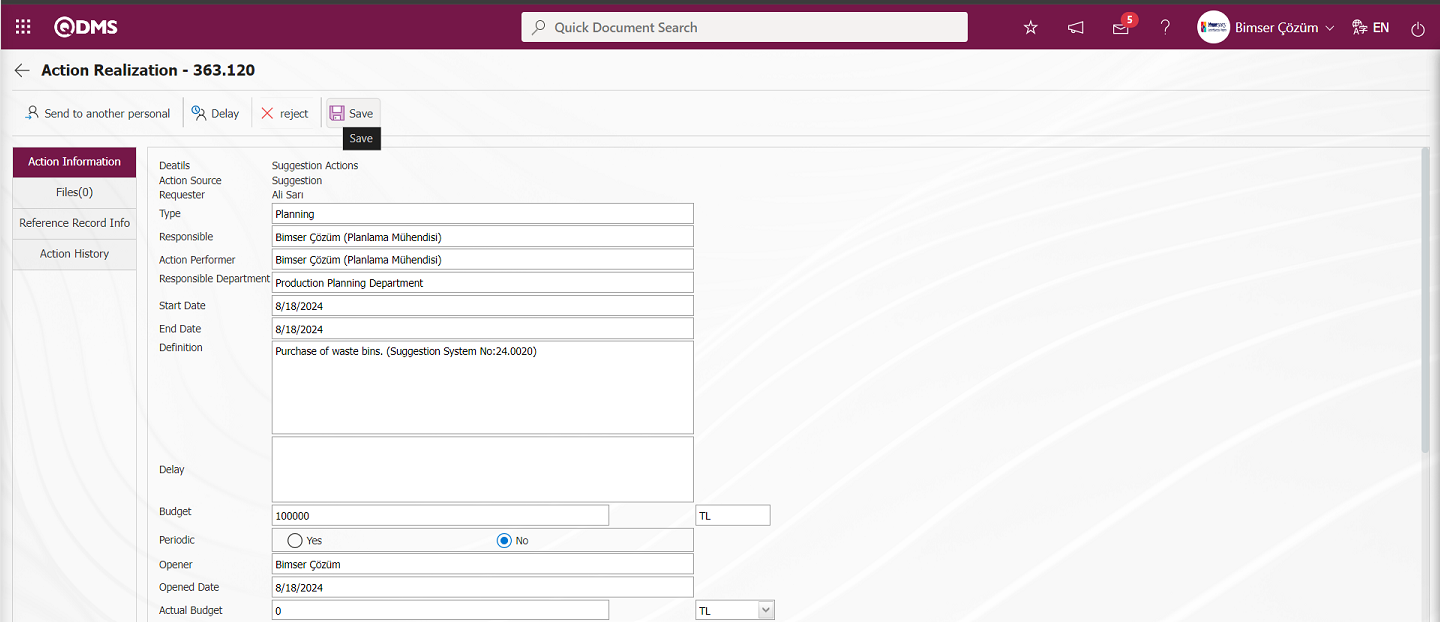
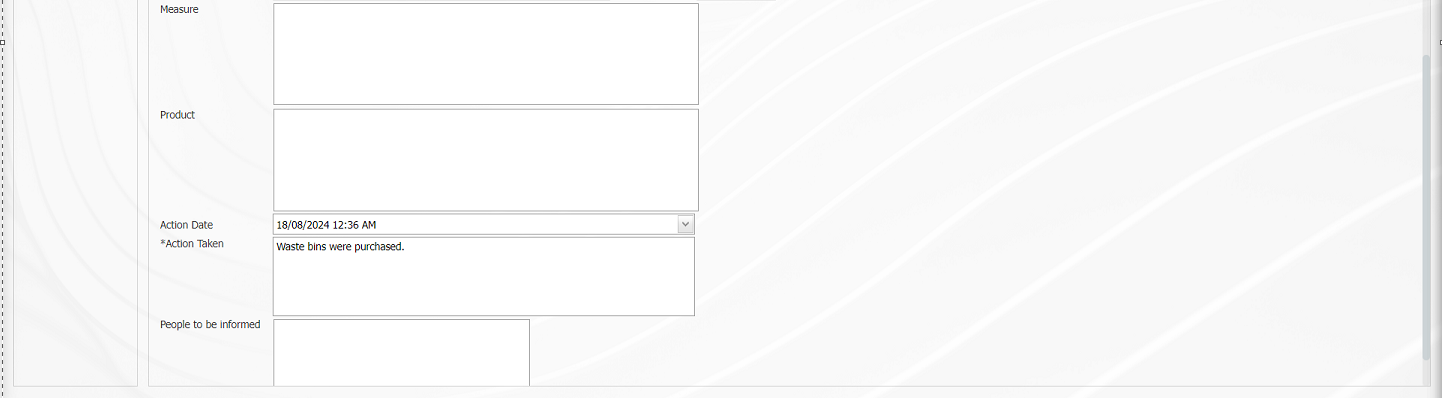
Files tab: It is the tab for uploading additional files such as files, pictures, minutes, if any, related to the realization process phase of the action, viewing the uploaded additional files and deleting the additional files uploaded by mistake.
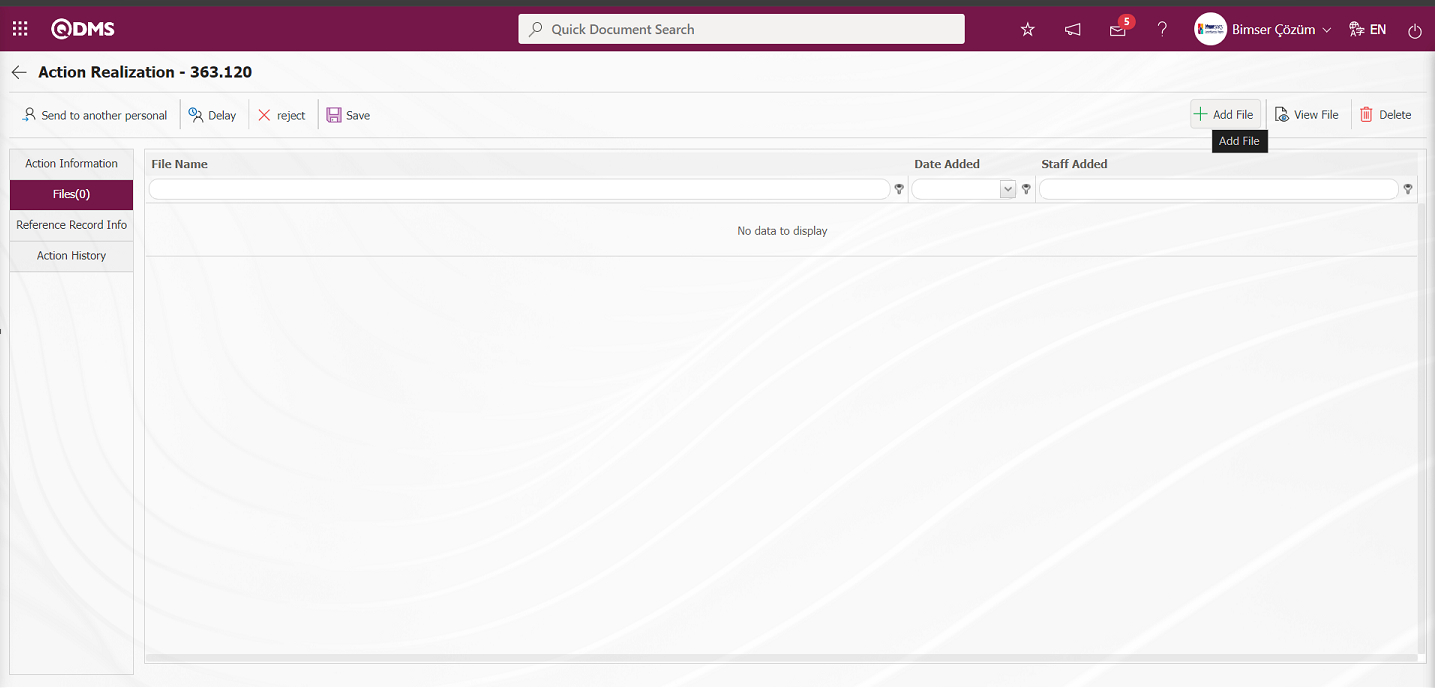
With the help of the buttons on the screen;
: The additional file is uploaded to the system.
: The uploaded additional file information is displayed.
 : The uploaded additional file information is deleted.
Additional files are added at this stage by clicking the  button in the files tab on the Action Realization screen. Multiple additional files can be added.
Reference Record Info tab: This is the tab where reference record information about the module to which the action is referenced is accessed. It is displayed in three tabs on the Suggestion Details tab, namely Details, Additional Files and History tab. In the Details tab, the suggestion detail information up to this stage, in the Additional Files tab, the additional files uploaded about the suggestion are displayed and in the History tab, the log records of the approval history of the suggestion are accessed.

Action History tab: This is the tab where the information about the action, by whom, when and the action type can be accessed.
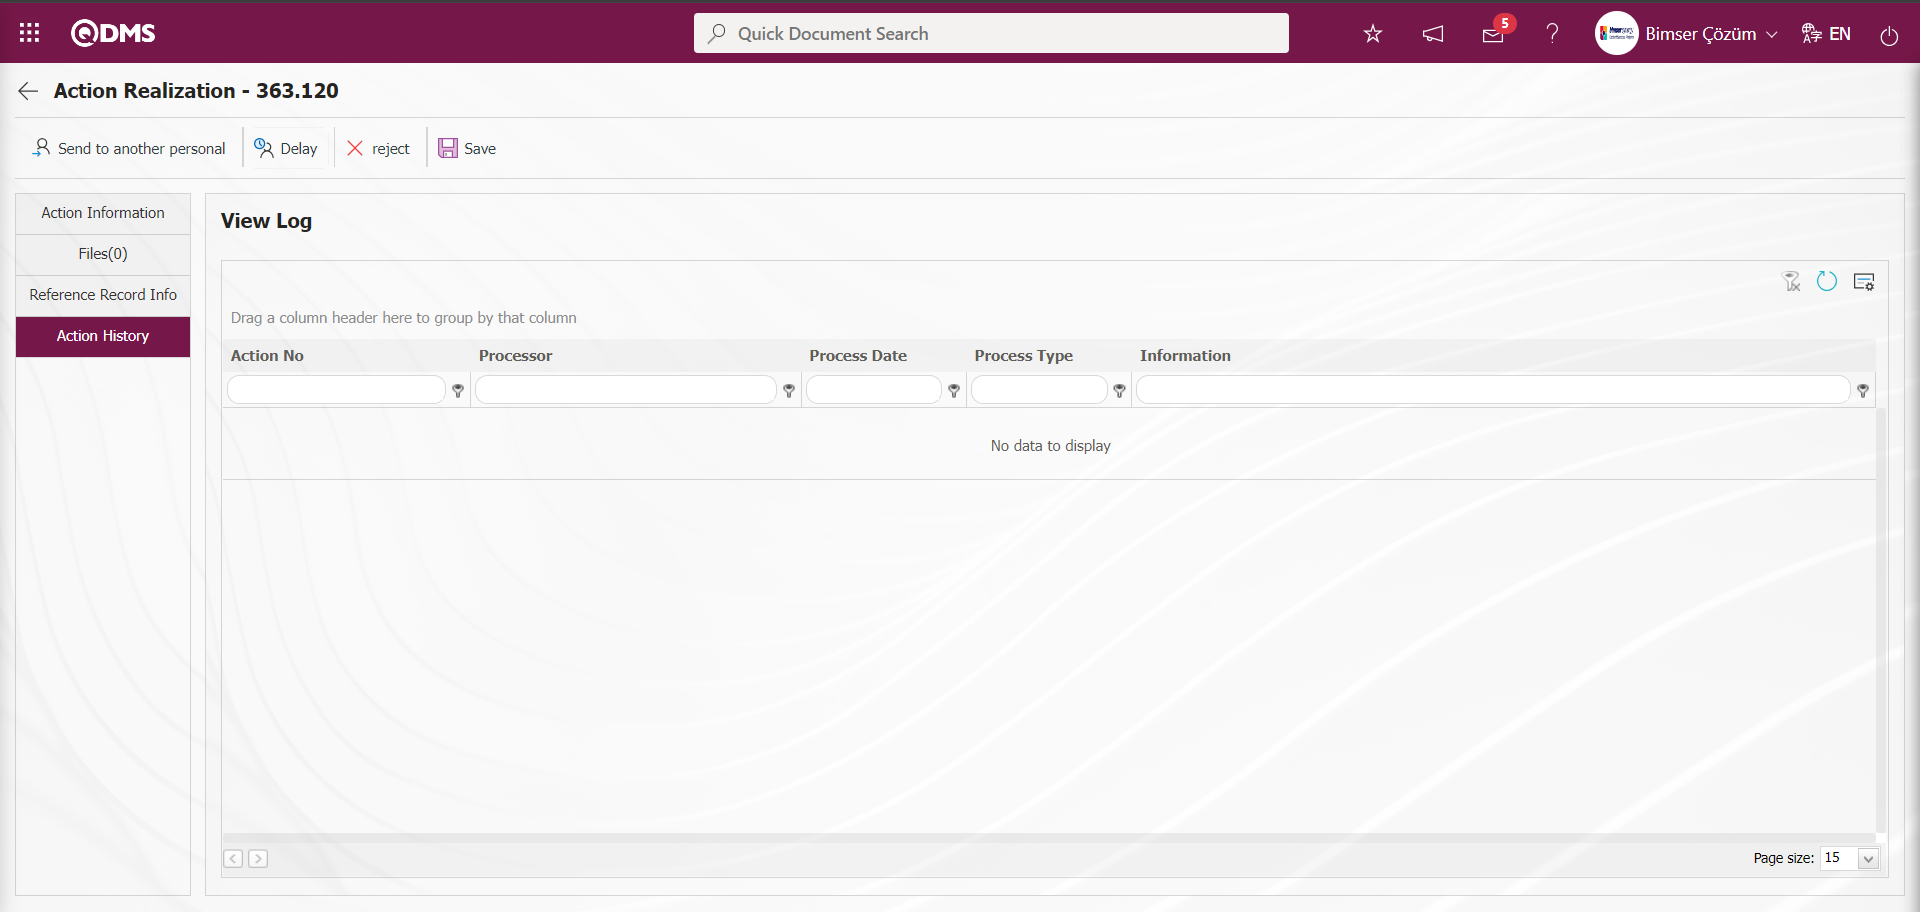
Click on the Action Information tab.
![A screenshot of a computer
Description automatically generated]ref60![A white screen with a white box
Description automatically generated with medium confidence]ref61
In the “Action Taken” field at the bottom of the Action Realization screen, information about the action performed is entered. In the “Action Date” field, the date of the action is selected. After entering the information in the required fields, the registration process is realized by clicking the  button in the upper left corner of the screen.
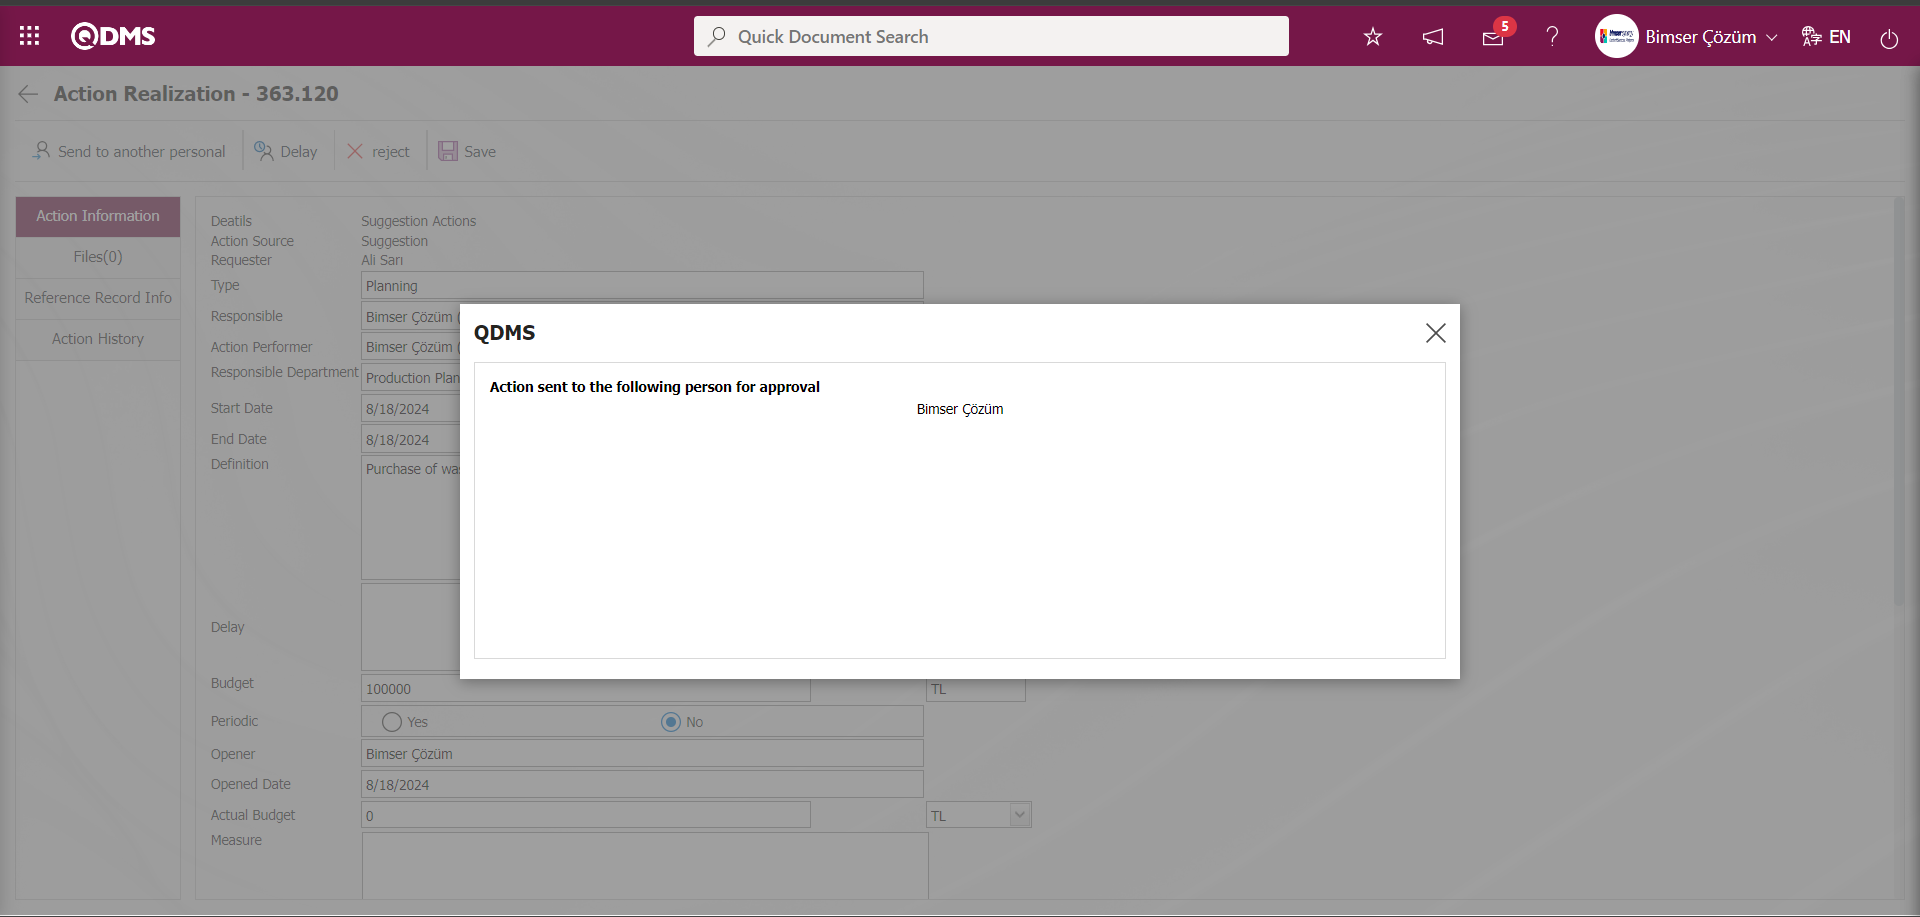
After this stage, the action goes to close confirmation.
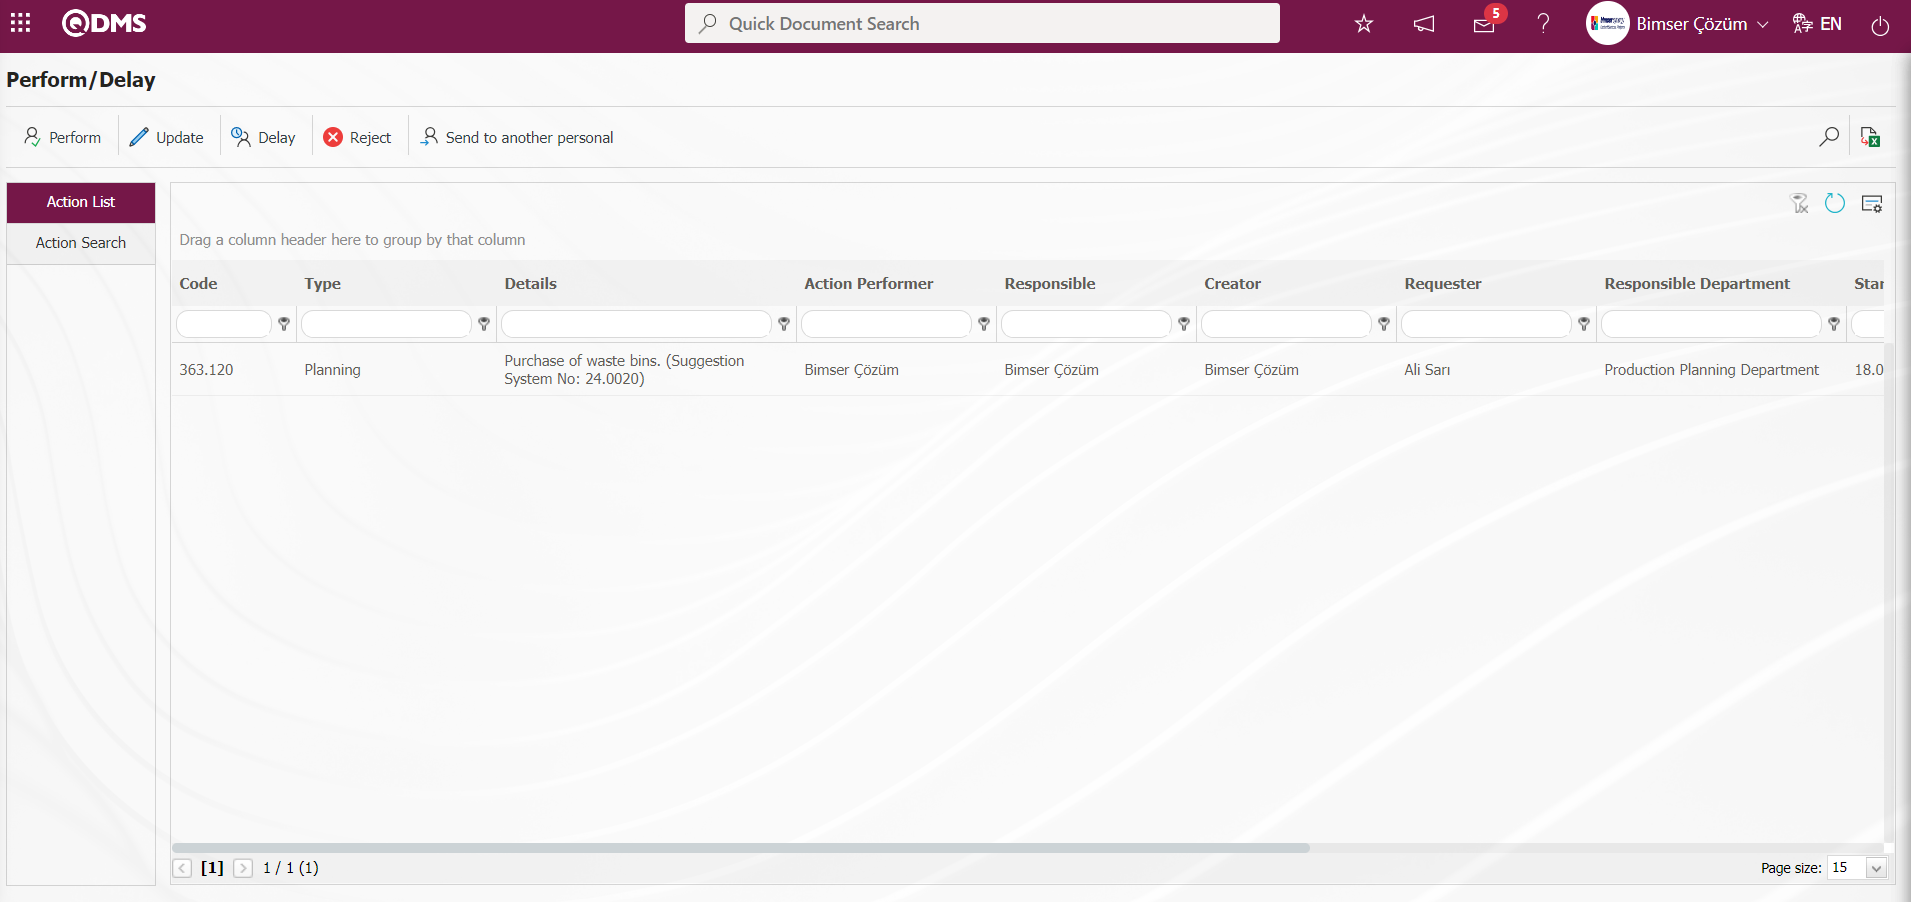
On the “My Pending Jobs” page of the closing approver, the task“Waiting Closing Approval Action List” is created as a task.

The action approval screen is opened by clicking the action code link in the Action number field in the relevant task. At this stage, while the Action is selected, click the  button and the approval process detail information of the Action is displayed. In the same way as the Action approval process is performed at the approval stage, the Action can be rejected at the approval process stage by clicking the
  button and writing the rejection reason information.
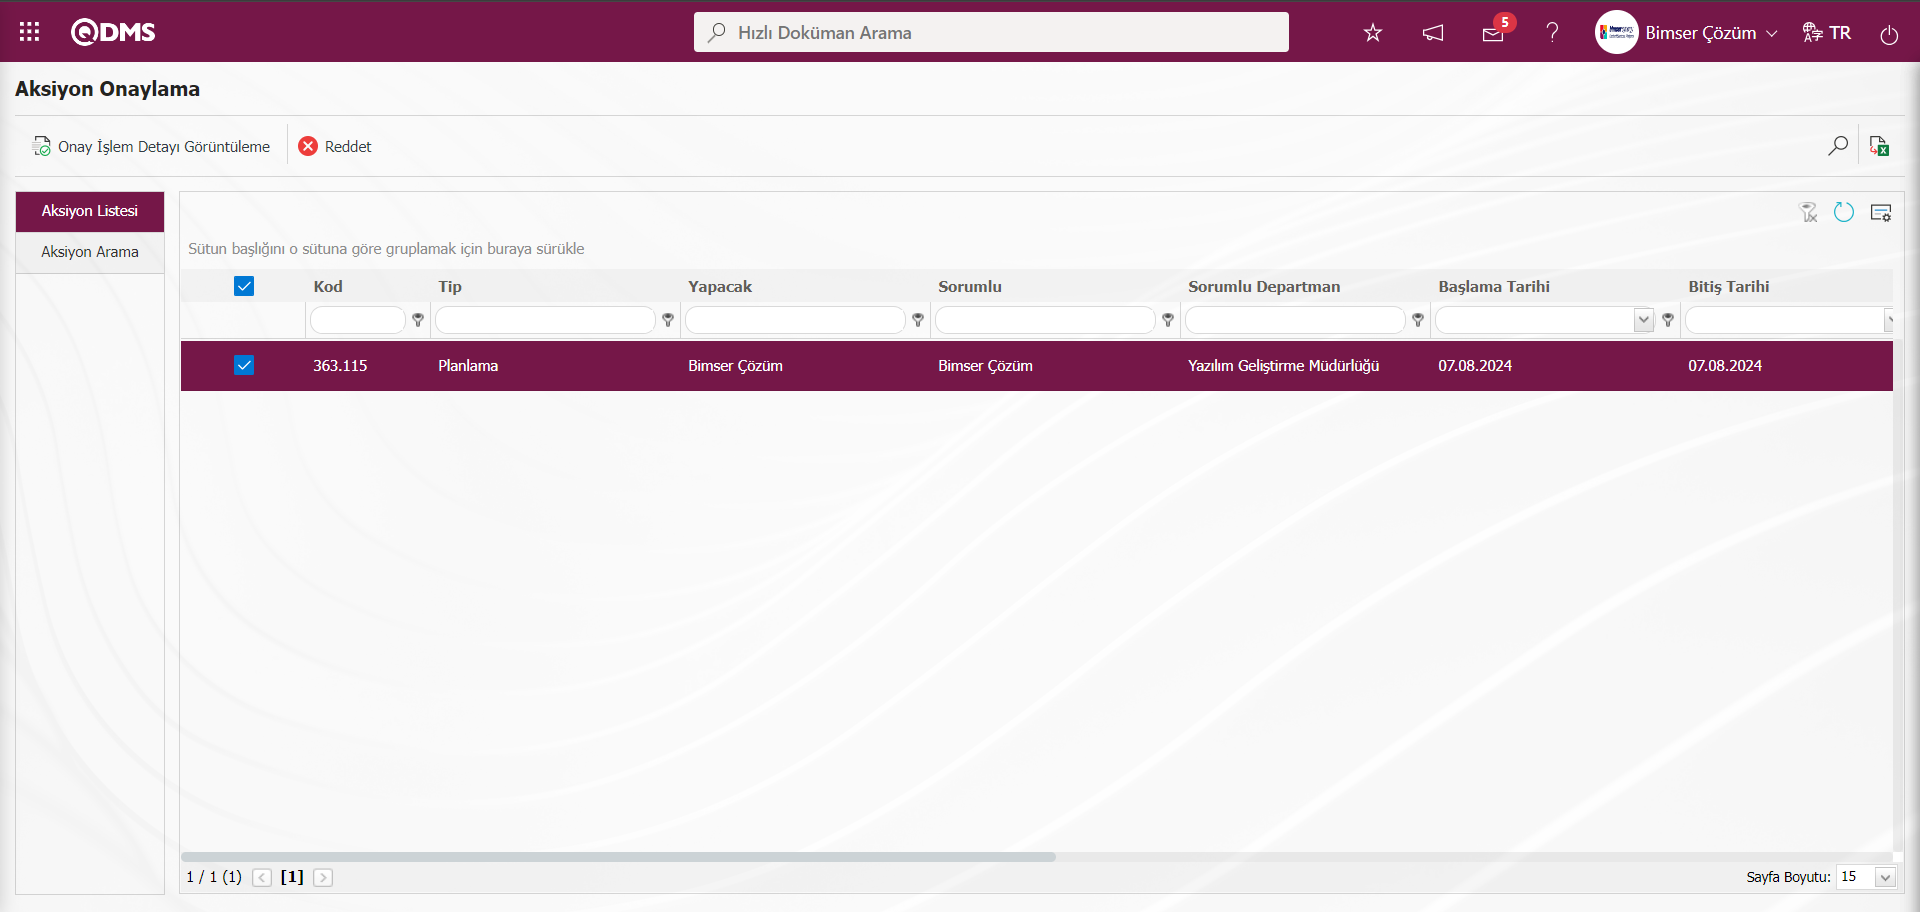
With the help of the buttons on the screen;
 : The Approval Action Detail is displayed.
 : Action approval is rejected.
On the Approve screen, select the action in the approval stage in the Action List tab and click the button.
In the Reject Action screen, enter the Reject Reason field information in the Rejection Reason tab. 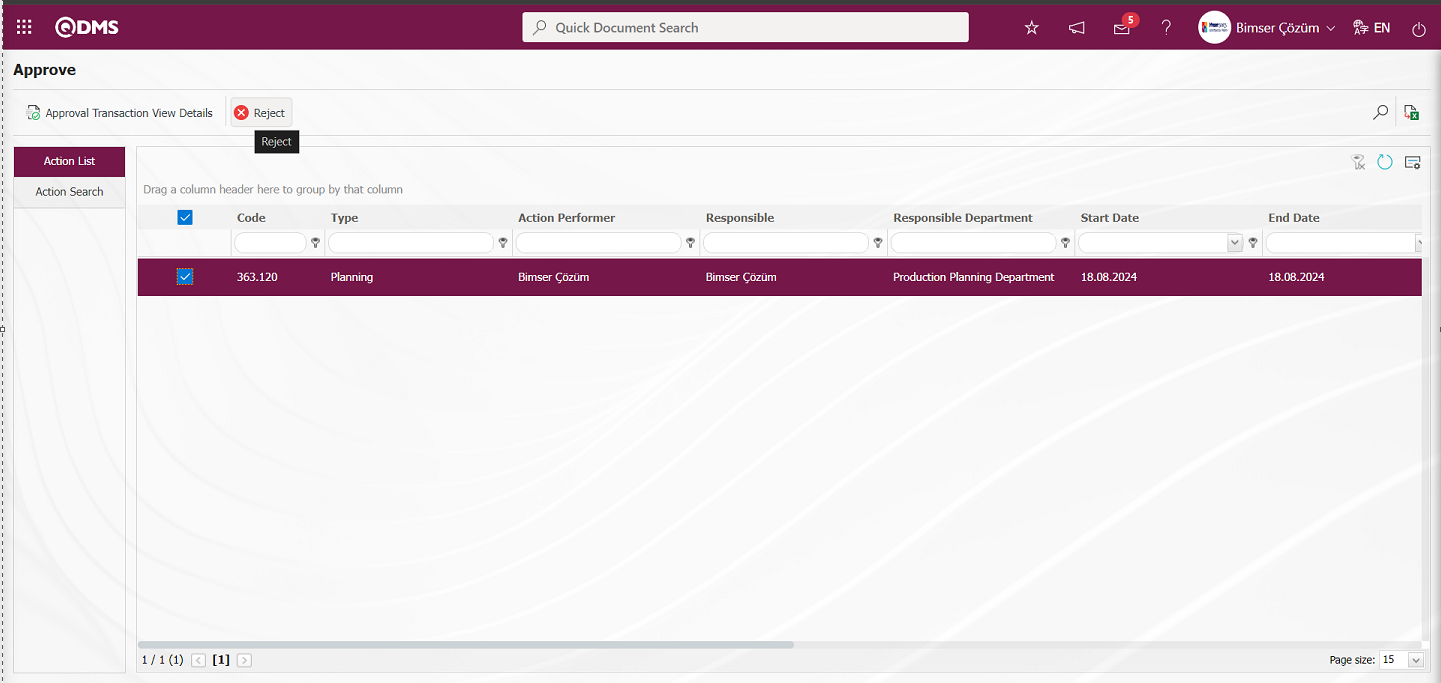 The Reject Action screen opens. Two tabs appear, Rejection Reason and Additional files tab.
Rejection Reason Tab: This is the tab where Reject Reason information is written from the Action Rejection screen.
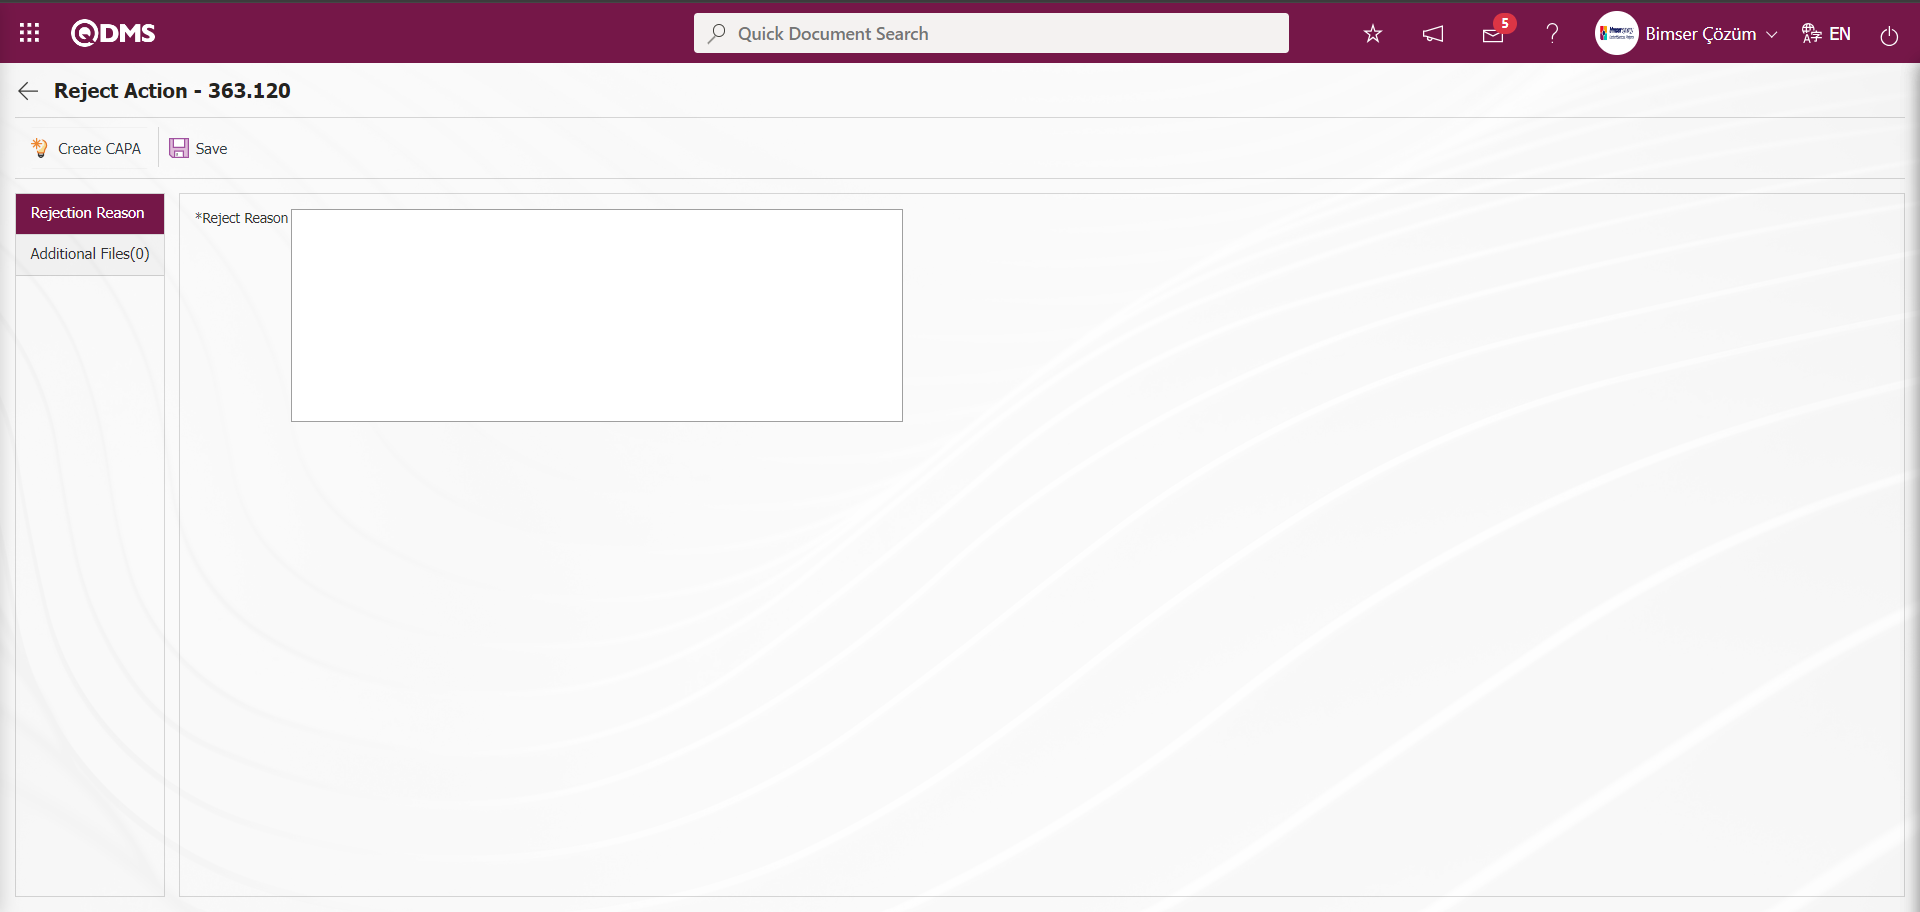
With the help of the buttons on the screen;
 : CAPA Activities - New Record screen is opened and a CAPA record is opened in the reject stage. The parameter value of parameter 53 in the Action Management Module parameters is activated by selecting “Yes”.
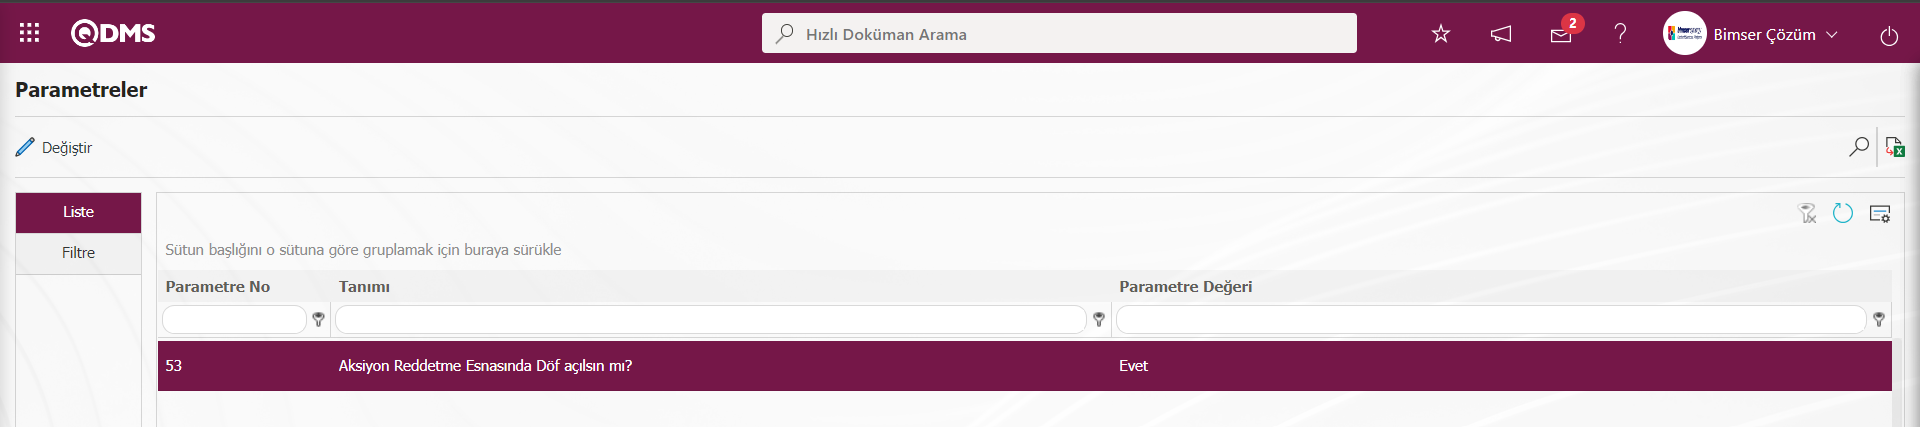
After the parameter is activated, the button is displayed on the Action Rejection screen. By clicking the button, the CAPA Activities - New Record screen is opened and the CAPA record related to the rejection is opened at this stage by entering the fields related to the CAPA record and performing the registration process.
 : Reject Reason is written to record the rejection of the Action.
Additional Files Tab: This is the tab where additional files such as files, pictures, minutes related to the rejection of the action in the Action Rejection tab are uploaded.
With the help of the buttons on the screen;
: The additional file is uploaded to the system.
: The uploaded additional file information is displayed.
 : The uploaded additional file information is deleted.
On the Reject Action screen, click the  button on the Additional Files tab to add an additional file for the action rejection process. Multiple attachment files can be added.
In the Reject Action screen, the  (Back) button is clicked by abandoning the rejection of the action.
The Action to be approved on the Approve screen is selected from the list in the Action list tab and the Approve Action screen is opened by clicking the button.

Approval Action screen opens. There are 4 tabs: Action Information, Files, Reference Record Info and Action History.
Action Information tab: This is the tab where action information is displayed.
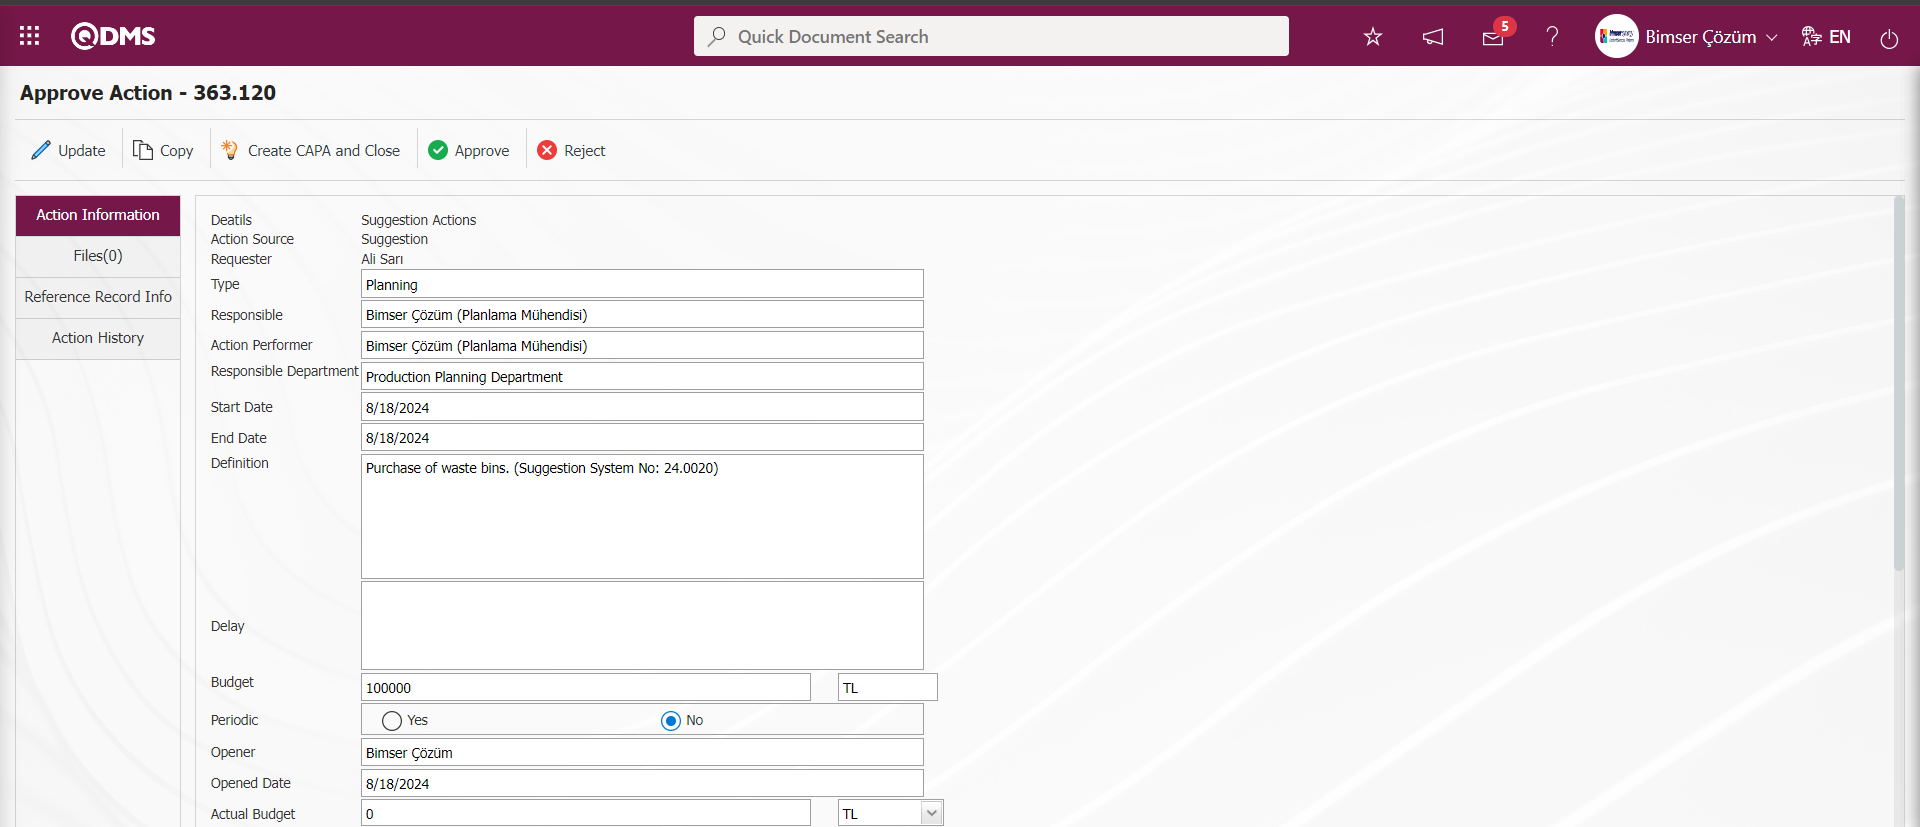
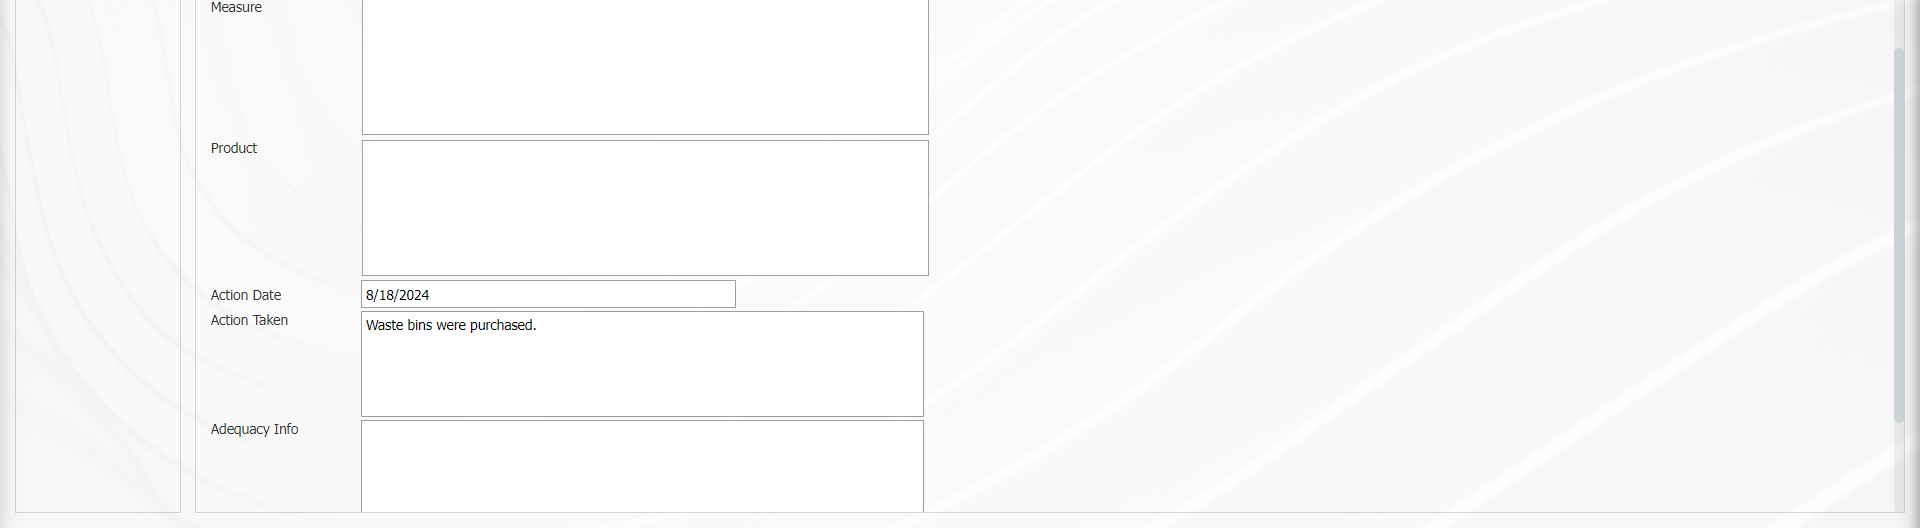
With the help of the buttons on the screen;
 : Update and modify the action item information.
 : Copying is done by entering the information related to the item of the action.
 : The action is closed by creating a CAPA record.
 : The action item is approved.
 : Action Item is rejected.
Files Tab: It is the tab on the Action Approval screen where additional files such as files, pictures, minutes, if any, related to the action approval process phase, uploading additional files, viewing uploaded additional files and deleting additional files uploaded by mistake are performed.

With the help of the buttons on the screen;
: The additional file is uploaded to the system.
: The uploaded additional file information is displayed.
 : The uploaded additional file information is deleted.
At this stage on the Approval of Action screen, the additional file is added by clicking the  button. Multiple additional files can be added.
Reference Record Info tab: This is the tab where reference record information about the module to which the action is referenced is accessed. It is displayed in three tabs on the Suggestion Details tab, namely Details, Additional Files and History tab. In the Details tab, the suggestion detail information up to this stage, in the Additional Files tab, the additional files uploaded about the suggestion are displayed and in the History tab, the log records of the approval history of the suggestion are accessed.
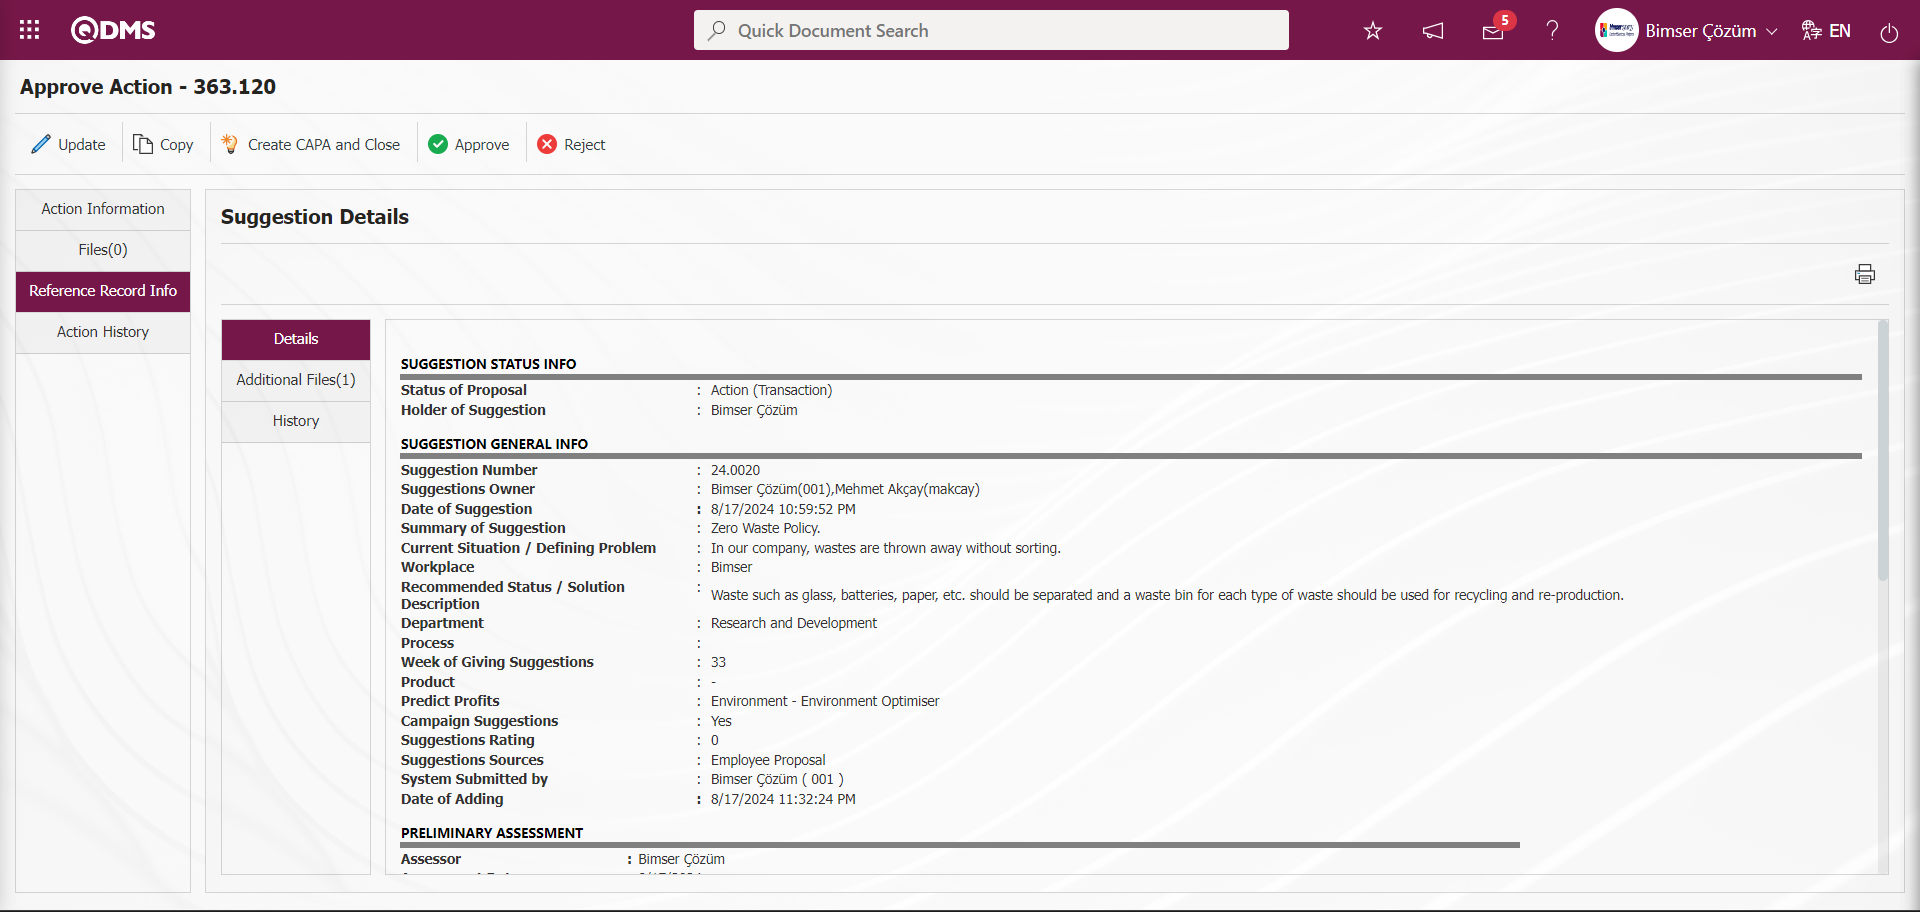
Action History tab: This is the tab where the information about the transactions made with the action, by whom, when and the type of transaction can be accessed.
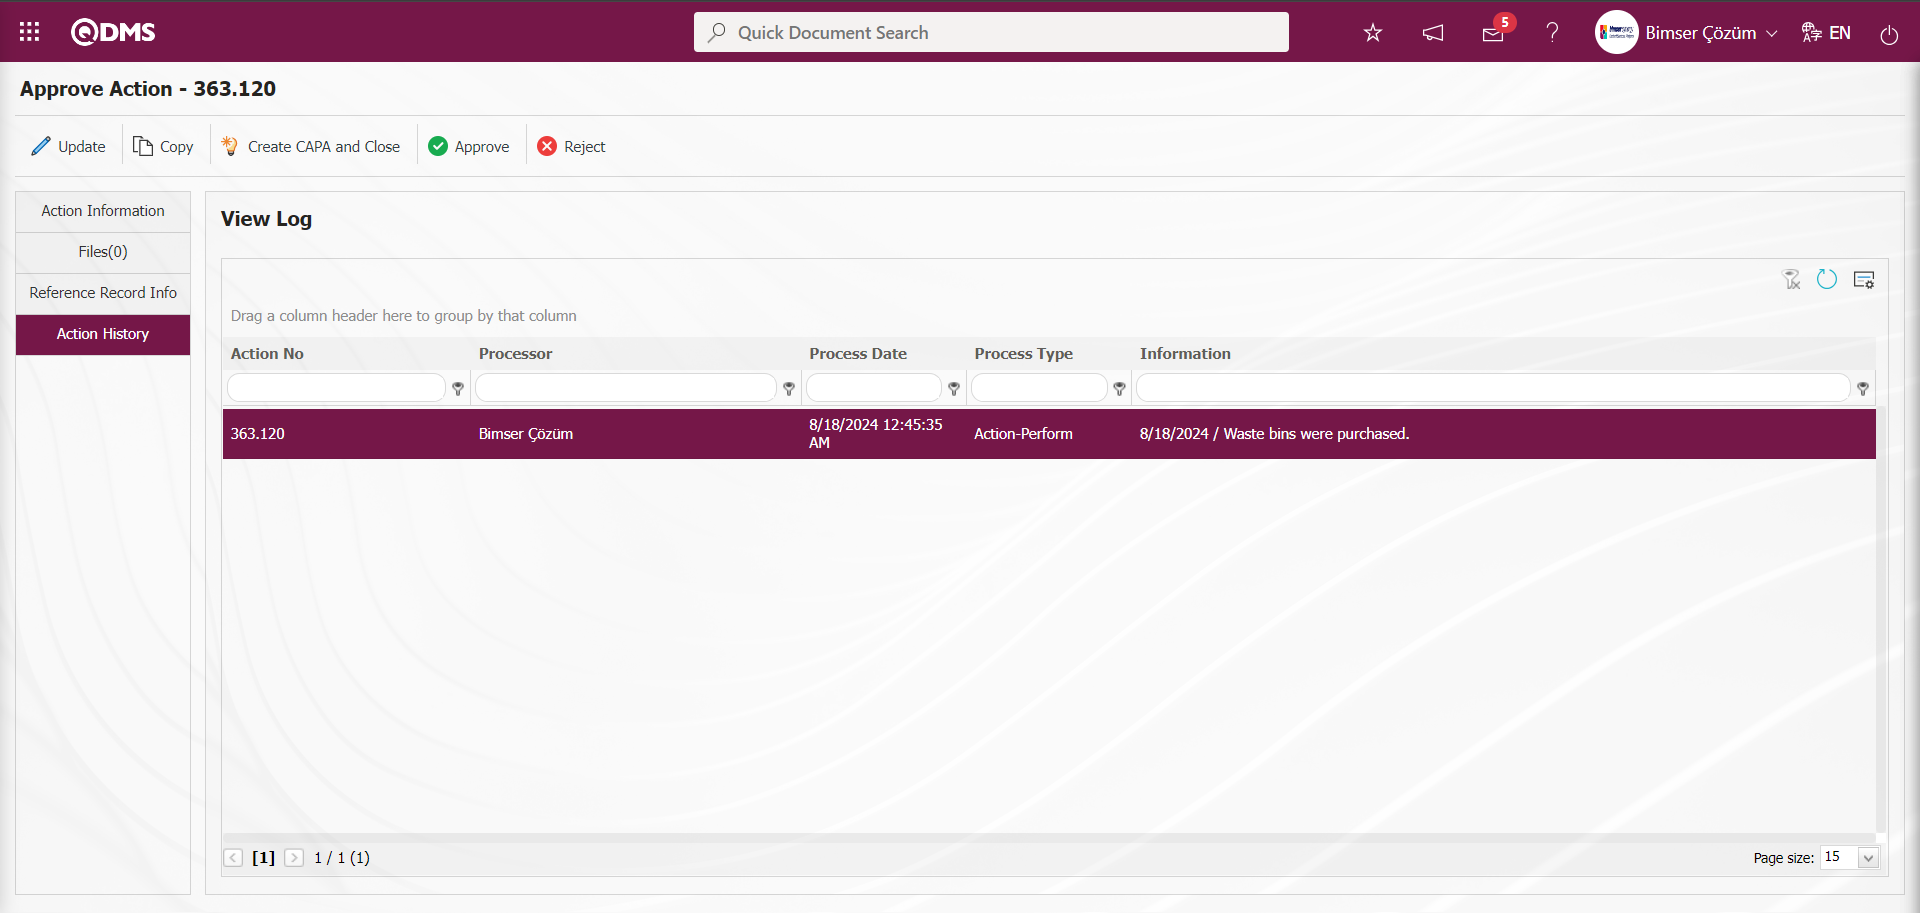
Click on the Action Information tab.
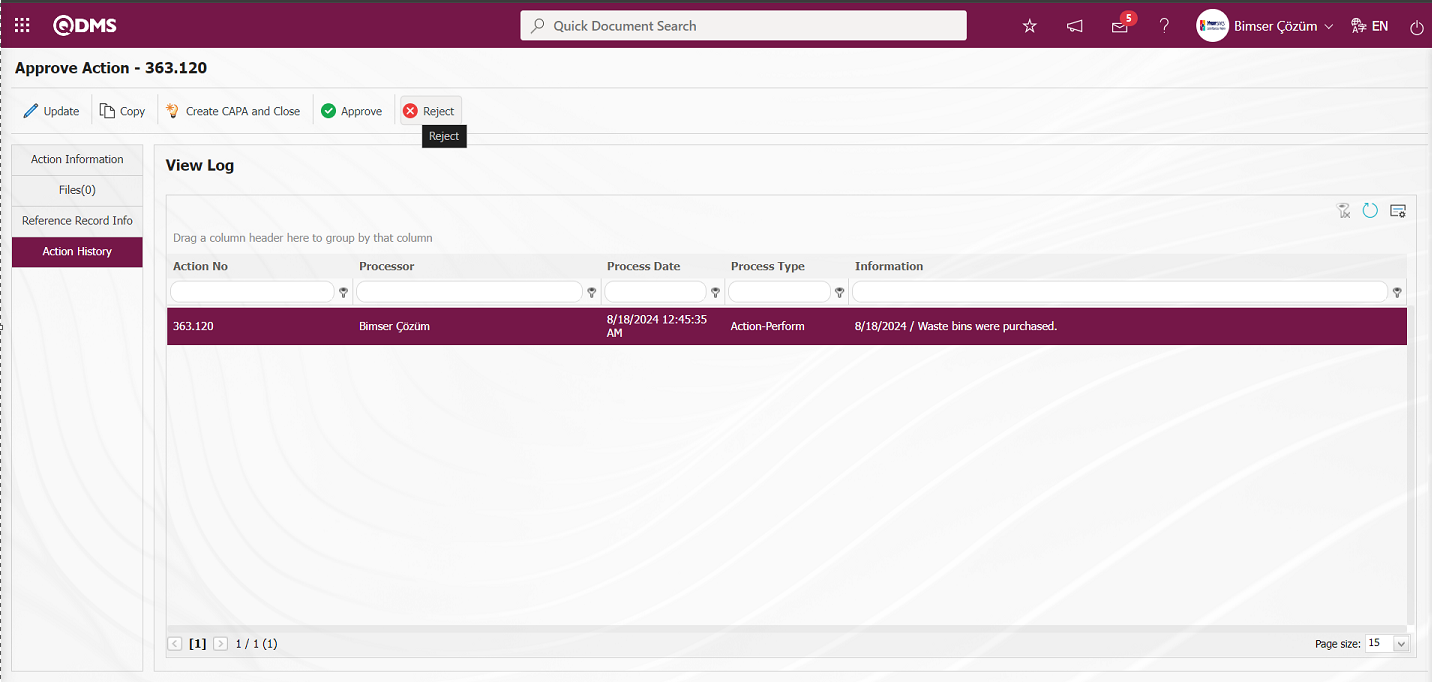
Click the button on the Action Approval screen. Reject Action screen opens.
Rejection Reason Tab:This is the tab where Rejection Reason information is written on the Rejection Reason screen.
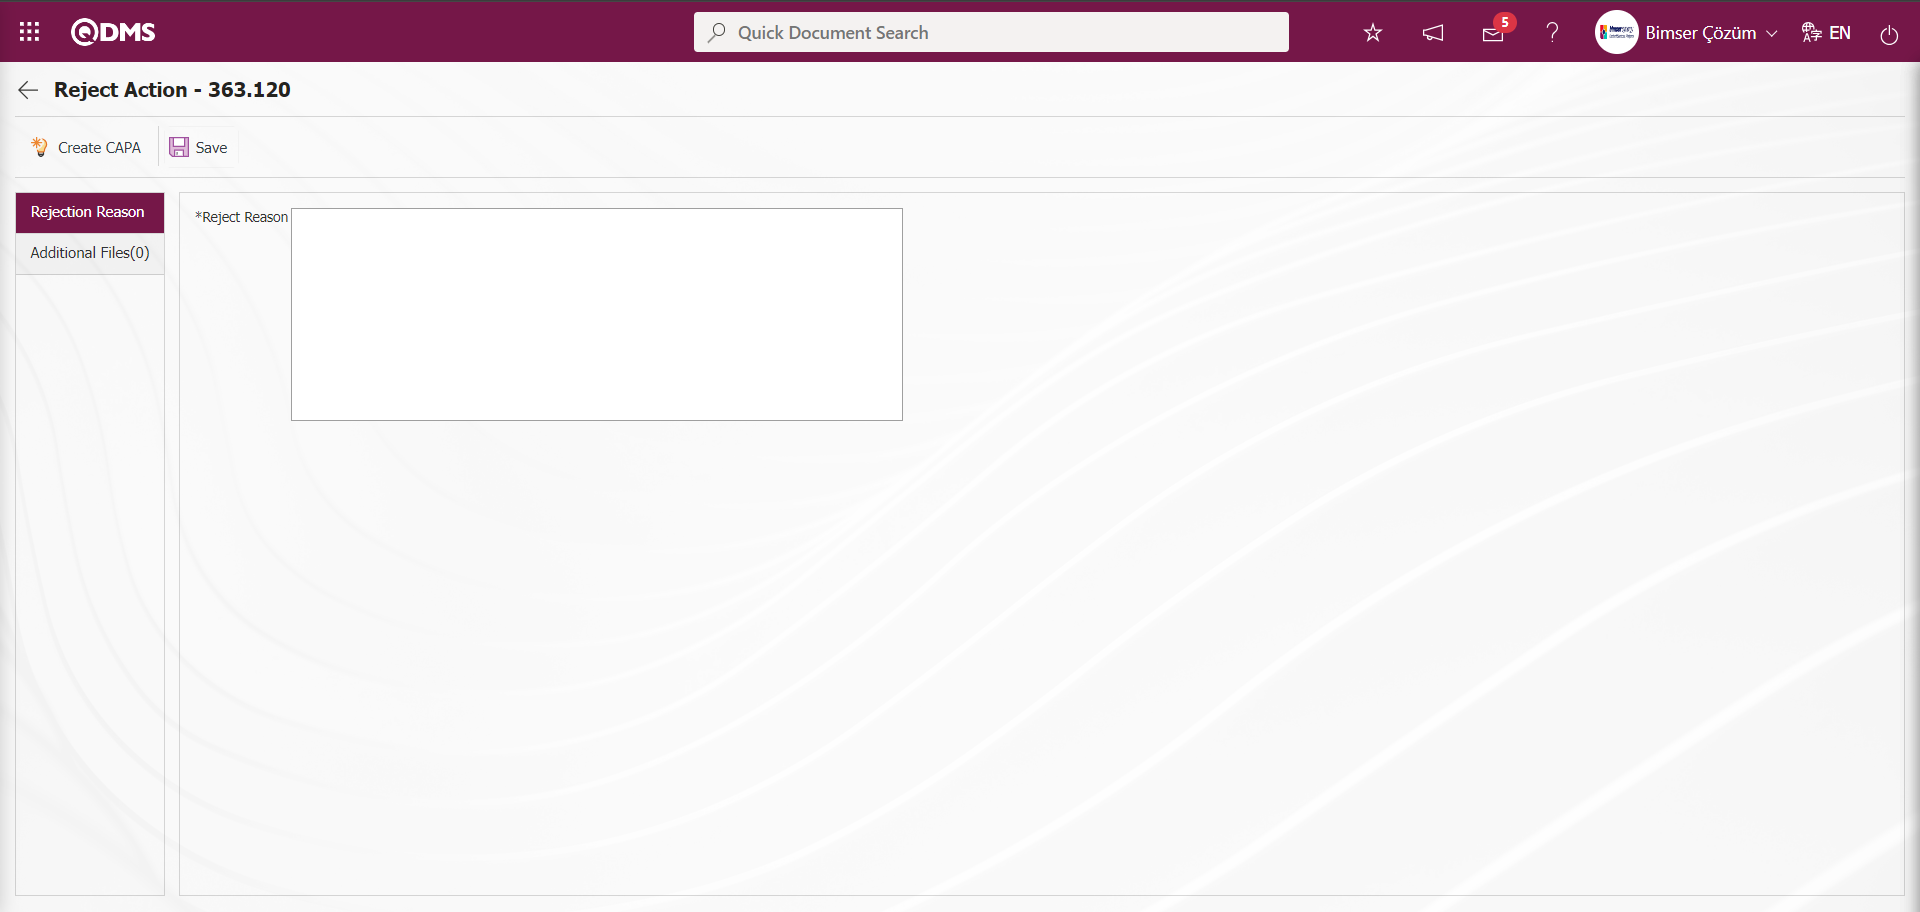
With the help of the buttons on the screen;
 : CAPA Activities - New Record screen is opened and a CAPA record is opened in the reject stage. The parameter value of parameter 53 in the Action Management Module parameters is activated by selecting “Yes”.
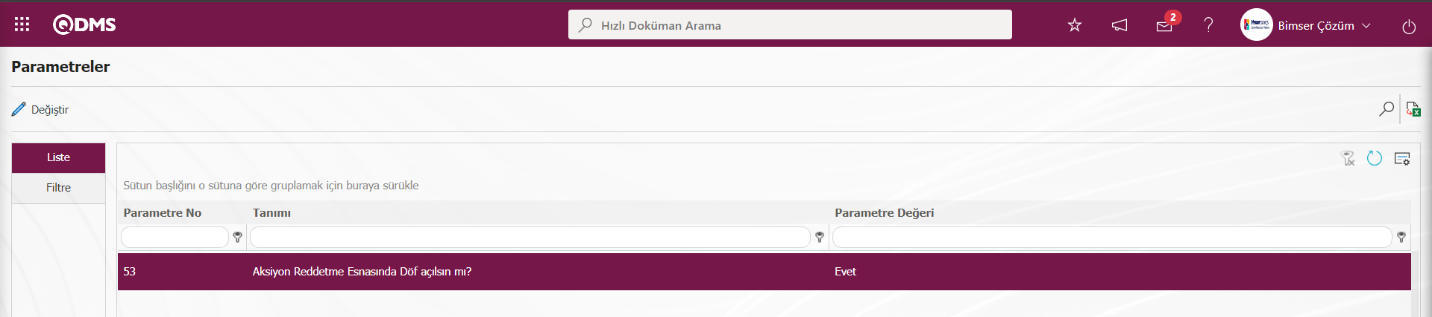
After the parameter is activated, the button is displayed on the Action Rejection screen. By clicking the button, the CAPA Activities - New Record screen is opened and the CAPA record related to the rejection is opened at this stage by entering the fields related to the CAPA record and performing the registration process.
 : Reject Reason is written to record the rejection of the Action.
Additional Files Tab: This is the tab where additional files such as files, pictures, minutes related to the rejection of the action in the Action Rejection tab are uploaded.

With the help of the buttons on the screen;
: The additional file is uploaded to the system.
: The uploaded additional file information is displayed.
 : The uploaded additional file information is deleted.
At this stage on the Reject Action screen, the additional file is added by clicking the  button. Multiple additional files can be added.
In the Reject Action screen, the  (Back) button is clicked to abandon the rejection of the action.

Approve Action screen opens. After entering the Adequacy Info on the Approve Action screen, click the button on the top left of the screen.
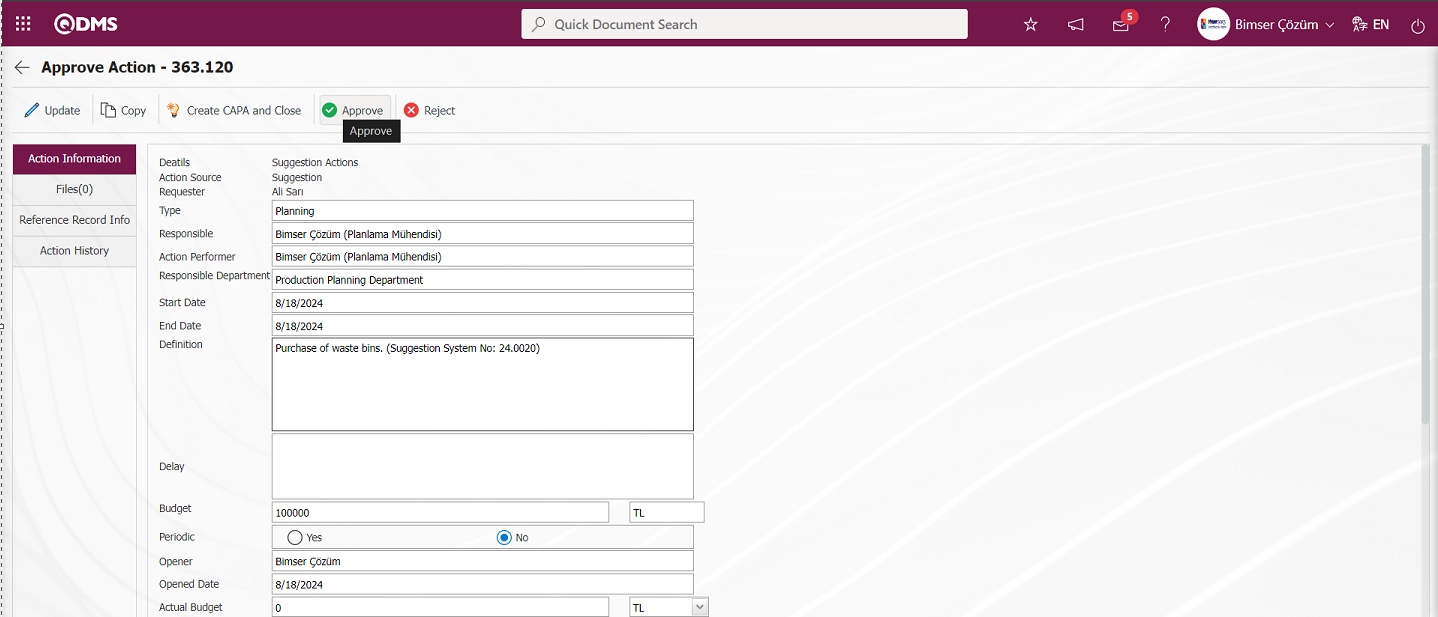
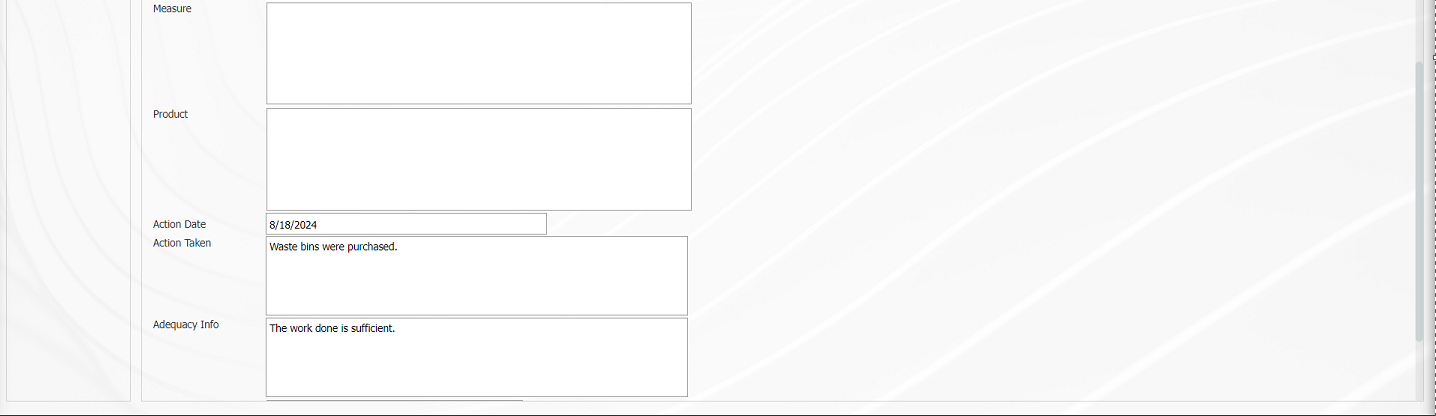
Click OK button when the system displays “Are you sure to approve?” message.
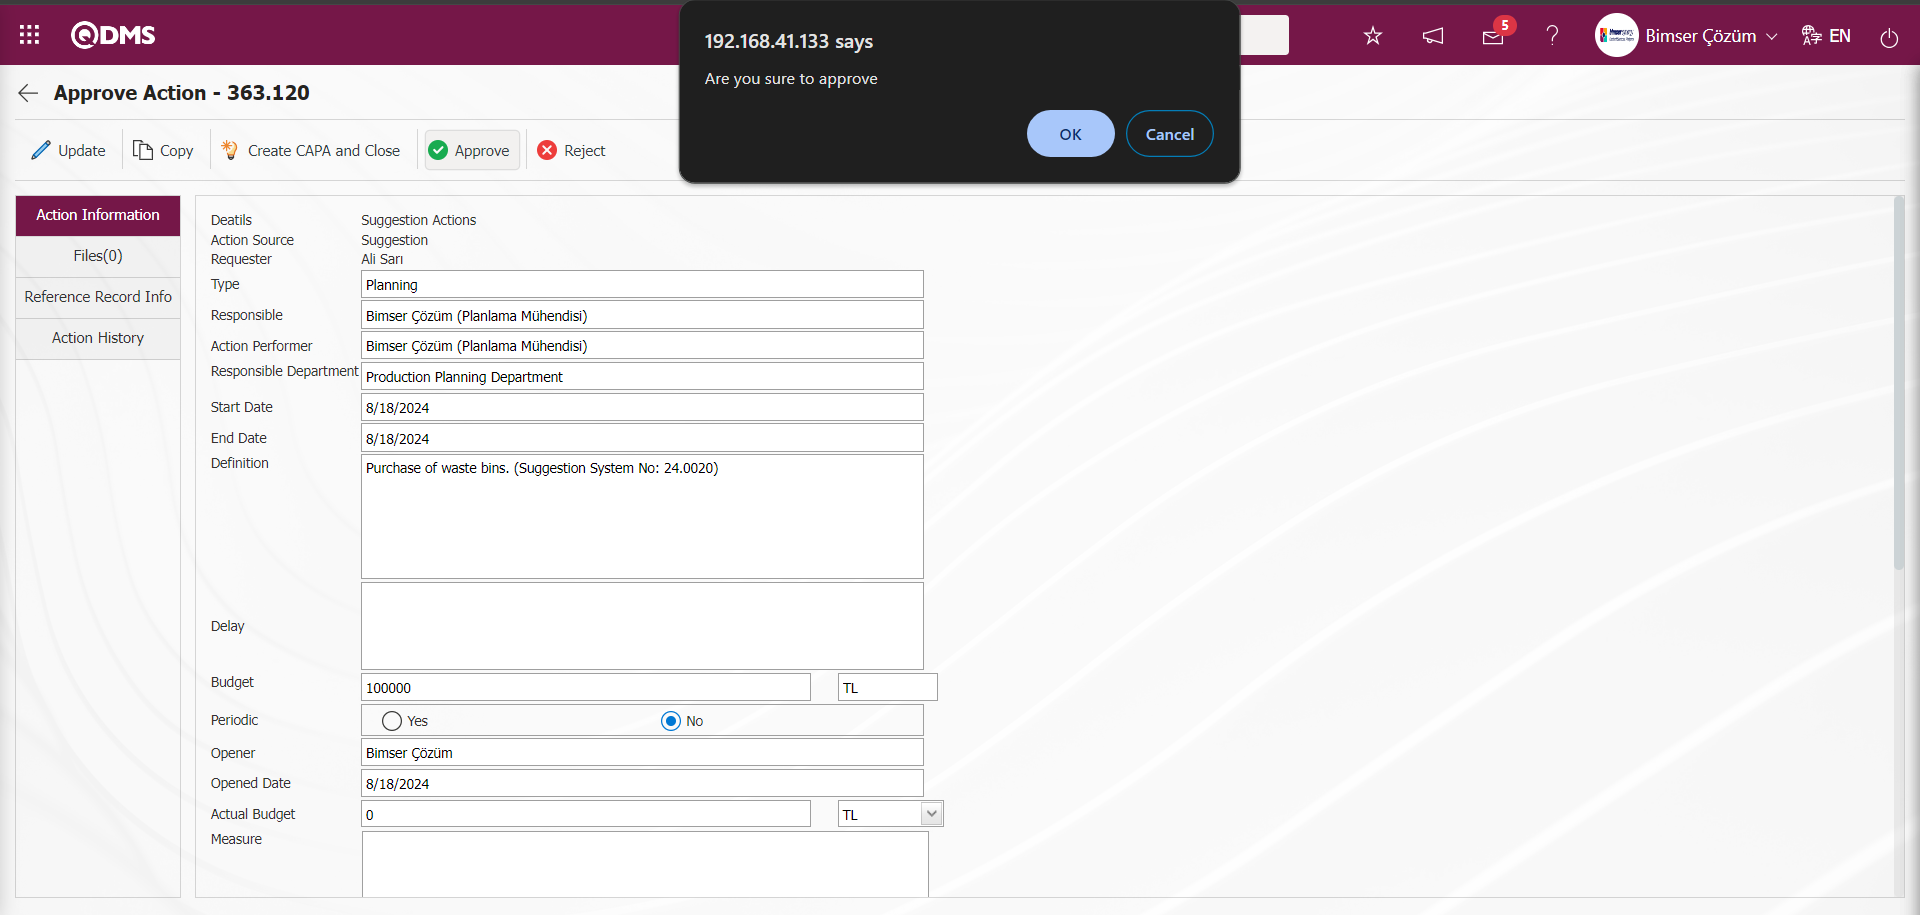
On the Action Approve** screen, the Approve Note information is written and the  button is clicked.
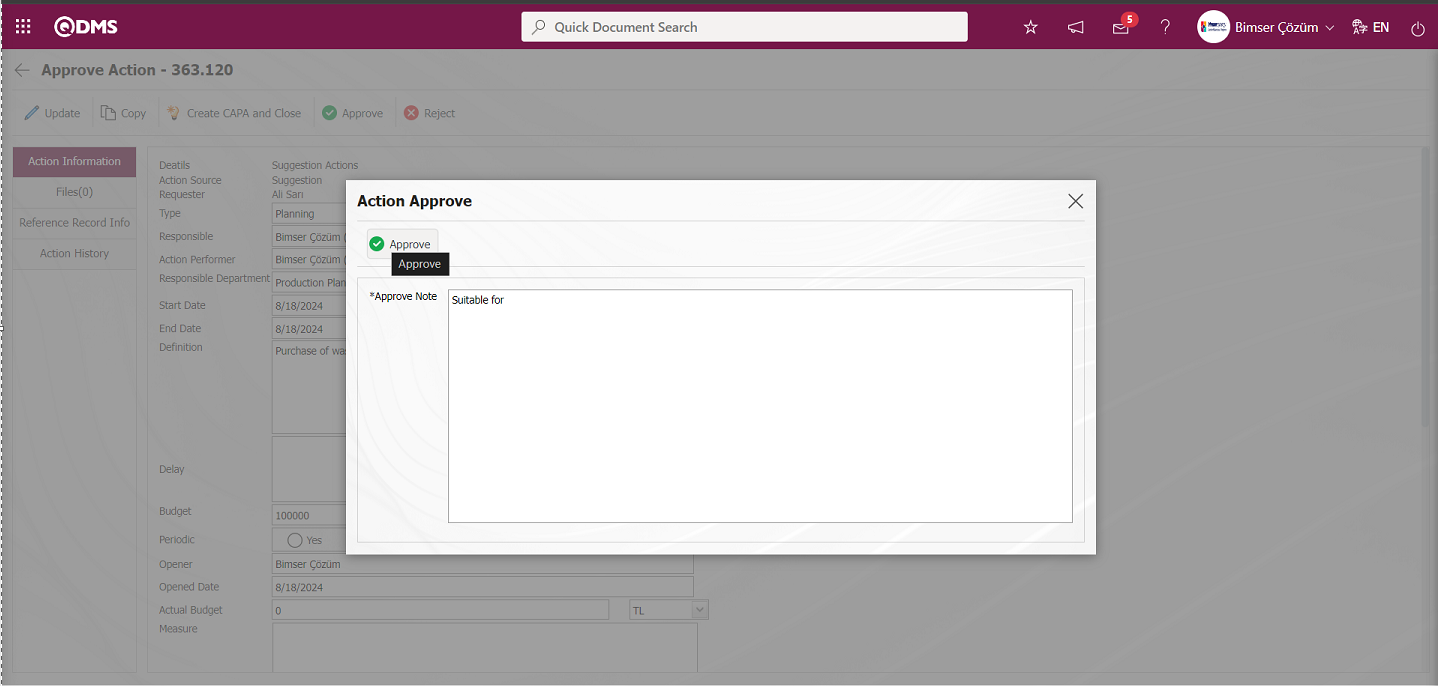
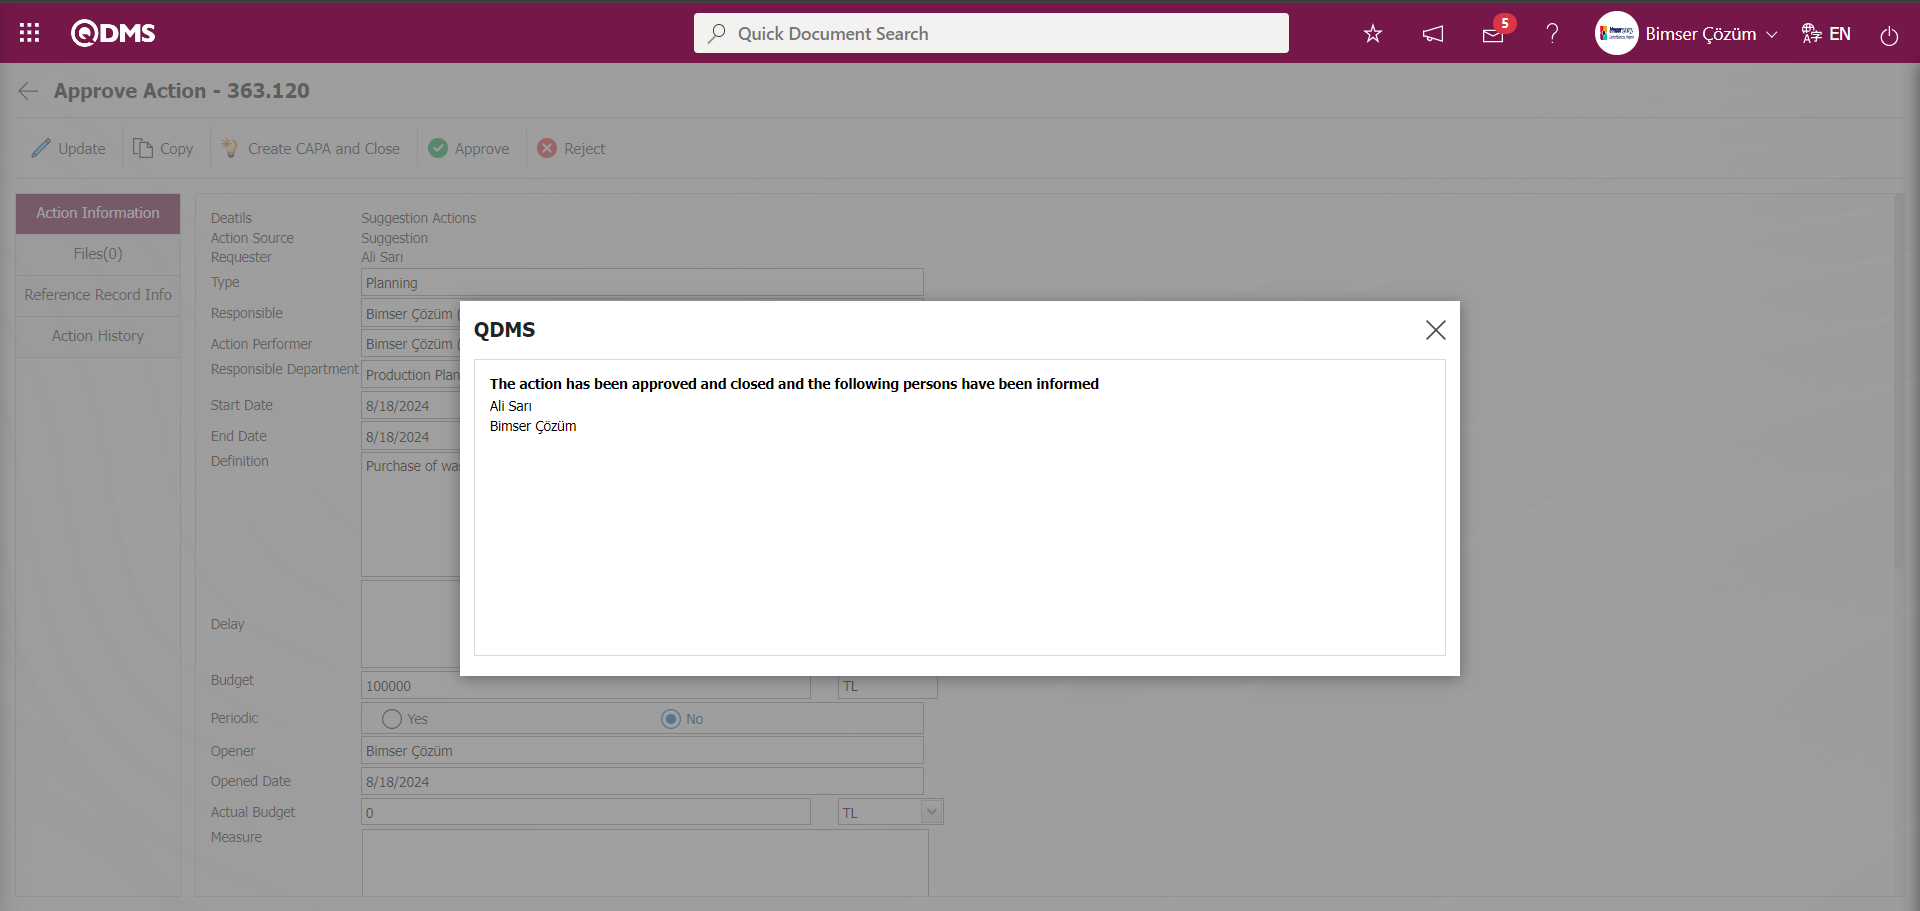
Parameter 83 of the Suggestion System Module parameters is activated by selecting the parameter value “Yes”.

After the parameter is activated, the number of days after all the actions of the suggestion are completed, it should be determined from the suggestion parameter that it will go to the earnings / cost analysis process.
In addition, if the parameter value of parameter 127 in the Suggestion System Module parameters is defined as “0”, after the actions are completed, it immediately goes to the earnings / cost analysis process. 
If the parameter value of parameter 127 is defined as “1”, it starts the cost/benefit analysis process 1 day after the actions are completed.
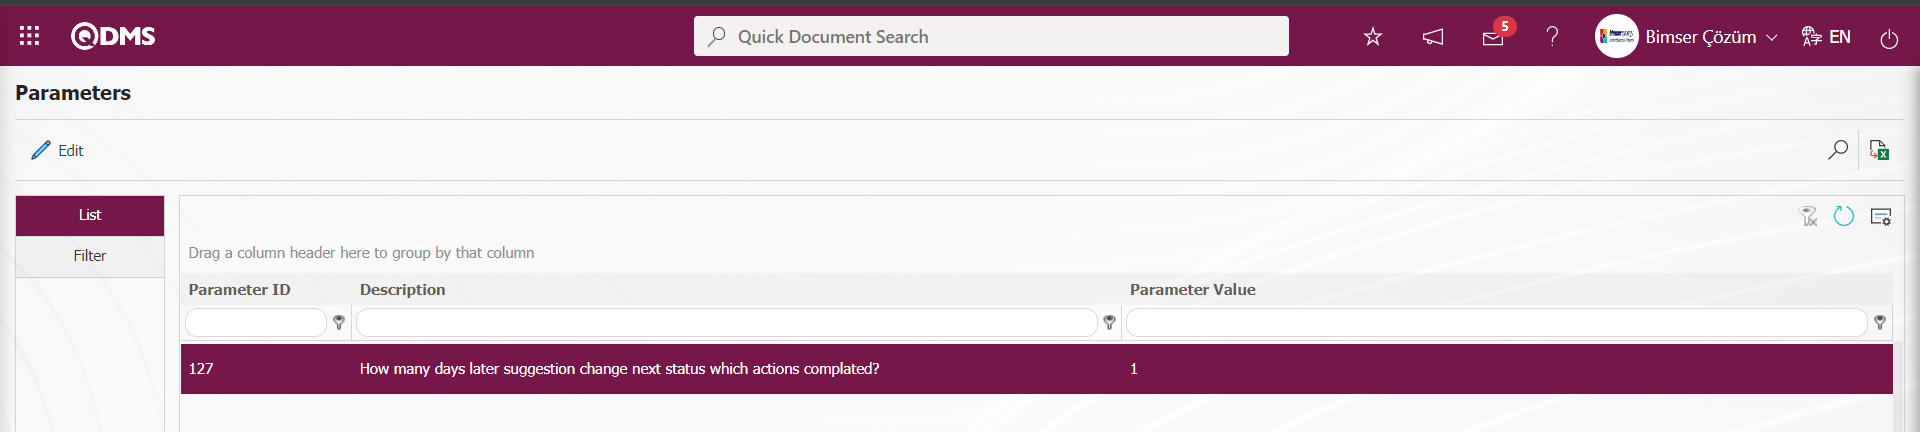
5.3.1.5. Benefit/Cost Analysis Process
After the actions are completed, a cost/benefit analysis is carried out by the expert for the suggestion. Operations such as what will be the return of the suggestion, what will be the net gain after the costs are deducted are carried out.
“Suggestions awaiting for Benefit/Cost Analyse” is assigned as a task on the expert's ‘My Pending Work’ page. The benefit/cost analysis process is started by clicking on the suggestion code link in the number field of the suggestion in the relevant task.

The Benefit/Cost Definitions screen opens.

With the help of the buttons on the screen;
 : The registration process of the Benefit/Cost stage is done.
 : The Benefit/Cost stage is canceled and the suggestion is moved to expert evaluation status.
Related fields are defined on the screen that opens;
Suitability of Suggestion: On the Benefit/Cost Definitions screen, in the Benefit/Cost Definitions screen, in the Earnings/Cost Information tab, it is the field where the relevant check boxes are checked and selected from the “Suggestion” and “Not a Suggestion” options whether the suggestion is appropriate or not. When the relevant check box is selected, the fields in the screenshot below are displayed.

In the Reject Reason field, the rejection of the suggestion is registered by clicking the drop-down list and selecting from the list of reject reasons defined in the system and writing the rejection reason explanation. It is mandatory to select the rejection reason and write the explanation information during the suggestion rejection registration process. It is a field displayed depending on the parameter. The parameter is activated by selecting “Yes” for parameter 44 in the Suggestion System Module parameters.

When the parameter is activated, the “ Suitability of Suggestion” field is displayed. Otherwise, if the parameter value of the parameter is selected as “No”, this field is not displayed when the parameter is inactive.
Action Status: In the Benefit/Cost Definitions screen, in the Benefit/Cost Information tab, it is the area where the relevant check boxes from the “Adequate Actions” and “Actions Insufficient” options are checked and determined whether the action is sufficient or not. When the check box related to “Actions Insufficient option” is checked, the fields in the screenshot below are displayed
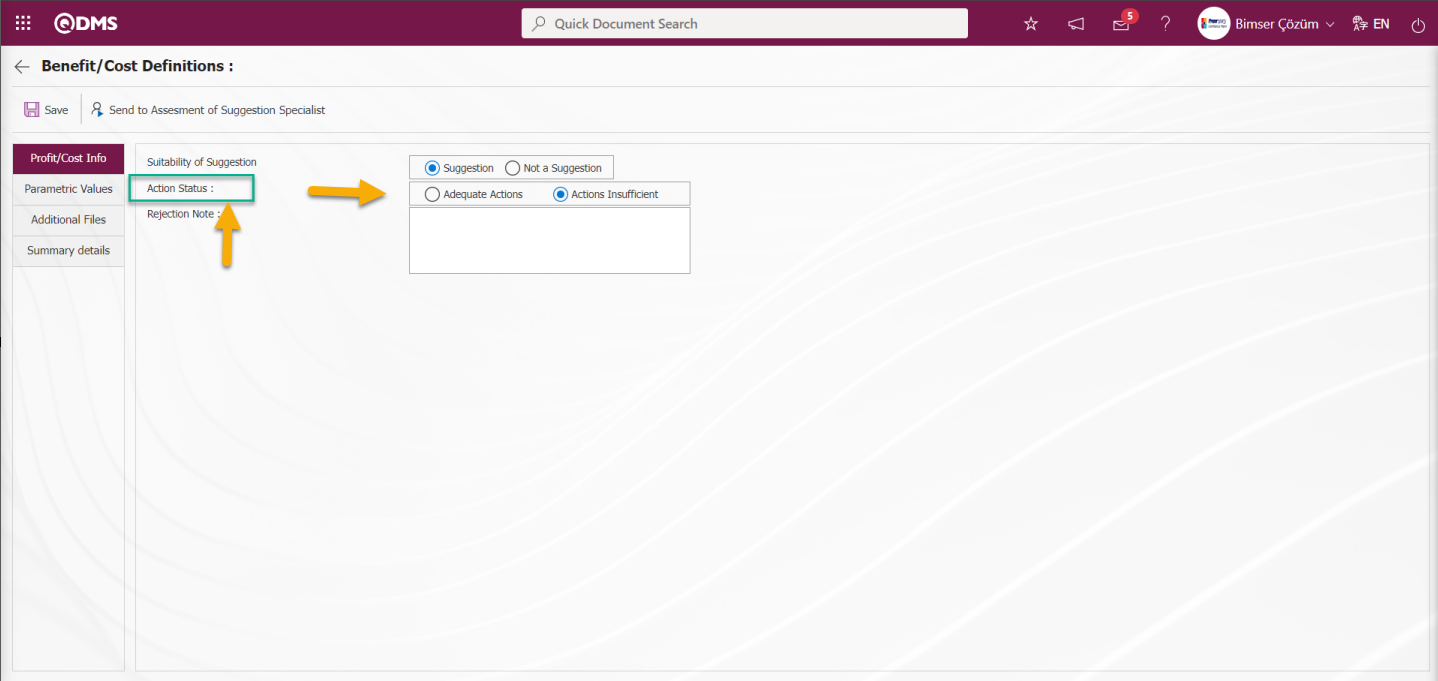 When the actions are seen as insufficient, when the relevant check boxes from the “Actions Insufficient” options are checked, the Rejection Explanation field is written and the registration process is made that the status of the Actions is insufficient. In the registration process where the actions are insufficient, the Rejection Explanation field is mandatory. When the registration process is made that the actions are insufficient, the Suggestion evaluation is saved and sent to the relevant users for action planning. The suggestion stage starts again from the “Suggestion awaiting for Action planning” stage. It is a field displayed depending on the parameter. The parameter is activated by selecting the parameter value “Yes” of parameter 99 in the Suggestion System Module parameters.

After the parameter is activated, the Action Status field is displayed and the relevant option is selected. Otherwise, when the parameter is disabled by selecting the parameter value of the parameter “No”, this field is not displayed and the option selection process is not performed.
Suggestion Number: This is the field where the suggestion number is given by the system in the Profit/Cost Info tab on the Benefit/Cost Definitions screen.
Acceptance of Suggestion: If the suggestion is accepted in the Profit/Cost Info tab on the Benefit/Cost Definitions screen, it is the field where the acceptance definitions defined in the system are selected by clicking the drop-down list. This field is a field that is displayed depending on the parameter. The parameter value of parameter 80 in the Suggestion System Module parameters is activated by selecting “Yes”.

After the parameter is activated, the acceptance of the suggestion field is displayed and the selection of the relevant option is made. Otherwise, when the parameter is disabled by selecting the parameter value of the parameter “No”, this field is not displayed and the option selection process is not performed.
Suggestion with No Monetary Return: In the Profit/Cost Info tab on the Benefit/Cost Definitions screen, if it is a suggestion with no monetary return, the relevant check box is checked.
Annual Benefit / Contribution Account Note Info: In the Profit/Cost Info tab on the Benefit/Cost Definitions screen, it is the field where the tangible / intangible values added to the company by the realization of the suggestion are written. It is a field displayed depending on the parameter. The parameter is activated by selecting the parameter value of parameter 102 of the Suggestion System Module parameters as “Yes”.

After the parameter is activated, information about the cost of this field is displayed. Otherwise, after the parameter value is deactivated by selecting “No”, the cost information in this field is not displayed.
Gross Benefit of Suggestion: In the Profit/Cost Info tab on the Benefit/Cost Definitions screen, this is the field where the gross profit of the suggestion is written after the realization of the suggestion. Enter “0” for suggestions with no financial gain. If there is a financial gain, the information about how much profit the suggestion provides to the company is defined. It is a field that is displayed by activating the parameter by selecting the parameter value of parameter 102 of the Suggestion System Module parameters as “Yes”.
Note of Application Cost of Suggestion: In the Profit/Cost Info tab on the Benefit/Cost Definitions screen, it is the field where the explanation information of what kind of application costs are written during the implementation of the suggestion. It is a field that is displayed by activating the parameter by selecting the parameter value of parameter 102 of the Suggestion System Module parameters as “Yes”.
Cost of Suggestion: This is the field where the cost information of the suggestion in TL is written in the Profit/Cost Info tab on the Benefit/Cost Definitions screen. It is a field displayed by activating the parameter by selecting the parameter value “Yes” of parameter 102 of the Suggestion System Module parameters. The currency to be used in the Suggestion Module is determined according to the values defined in the parameter value of parameter 26 of the Suggestion System Module parameters. If the parameter value is defined as “T” in the parameter, Turkish Lira is selected, if it is defined as “D”, American Dollar and if it is defined as “E”, Euro is selected. If the parameter value is defined as “T” in the parameter, the currency to be used in the Suggestion Module is determined as Turkish Lira.

Net Benefit Of Suggestion: In the Profit/Cost Info tab on the Benefit/Cost Definitions screen, this is the field where the net profit of the suggestion is automatically calculated by the system. The difference formed by subtracting the “Cost of Suggestion” value from the “Gross Profit of Suggestion” value is automatically calculated and displayed by the system as the net profit of the suggestion. It is a field that is displayed by activating the parameter by selecting the parameter value of parameter 102 of the Suggestion System Module parameters as “Yes”.
Suggestion Benefits: On the Benefit/Cost Definitions screen, in the Profit/Cost Info tab, the values selected from the Profit categories are displayed. In this area, changes such as adding and removing can be made in the list of suggestion earnings. It is a field that is displayed by activating the parameter by selecting the parameter value of parameter 102 of the Suggestion System Module parameters as “Yes”.
Can it be applied in other departments?: It is the field where it is determined whether the suggestion implemented in Profit/Cost Info tab on Benefit/Cost Definitions screen can be applied in other departments by checking the check box related to the relevant options. If the check box related to the “Yes” option is checked in the relevant field, the information about which departments can be applied in the departments registered in the system opened by clicking the  (Add) button in the Departments field displayed.
Parametric Values tab: It is the tab where parametric field types such as Text, Text (Multiple Line), List are defined and these defined parametric fields are displayed in the passive fields displayed by selecting the Suggestion System as a module in the System Infrastructure Definitions/BSID/Configuration Settings/Language Settings menu related to Benefit/Cost. Short codes starting with lblKM_, such as Label code lblKM_PARAM1, generally represent the parametric fields displayed in the Parametric Values tab on the Benefit/Cost Definitions screen opened at the Benefit/Cost stage of the suggestion.
| Label Code List of Passive Parametric Fields to Define Parametric Fields in Other Fields Tab in Cost / Benefit Definition Screen | |
|---|---|
| Label Code of Passive Parametric Field Type | Parametric Field Type |
| lblKM_DMPARAM1- lblKM_DMPARAM5 | Department(Multiple Choise) |
| lblKM_DPARAM1- lblKM_DPARAM5 | Date |
| lblKM_LPARAM1- lblKM_LPARAM10 | List |
| lblKM_DSPARAM1- lblKM_DSPARAM5 | Department |
| lblKM_NPARAM1- lblKM_NPARAM5 | Monetary |
| lblKM_PARAM6- lblKM_PARAM10 | Text(Multiple Line) |
| lblKM_PARAM1- lblKM_PARAM5 | Text |
| lblKM_PMPARAM1- lblKM_PMPARAM5 | Staff(Multiple Choise) |
| lblKM_PPARAM1- lblKM_PPARAM5 | Staff |
At this stage, the process of defining the desired type of parametric fields up to the label code range of the parametric passive fields given in the table is done in the System Infrastructure Definitions / BSID / Configuration Settings / Language Settings menu.
Additional Files tab: This is the tab where you can add Additional Files, if any, related to the Suggestion.
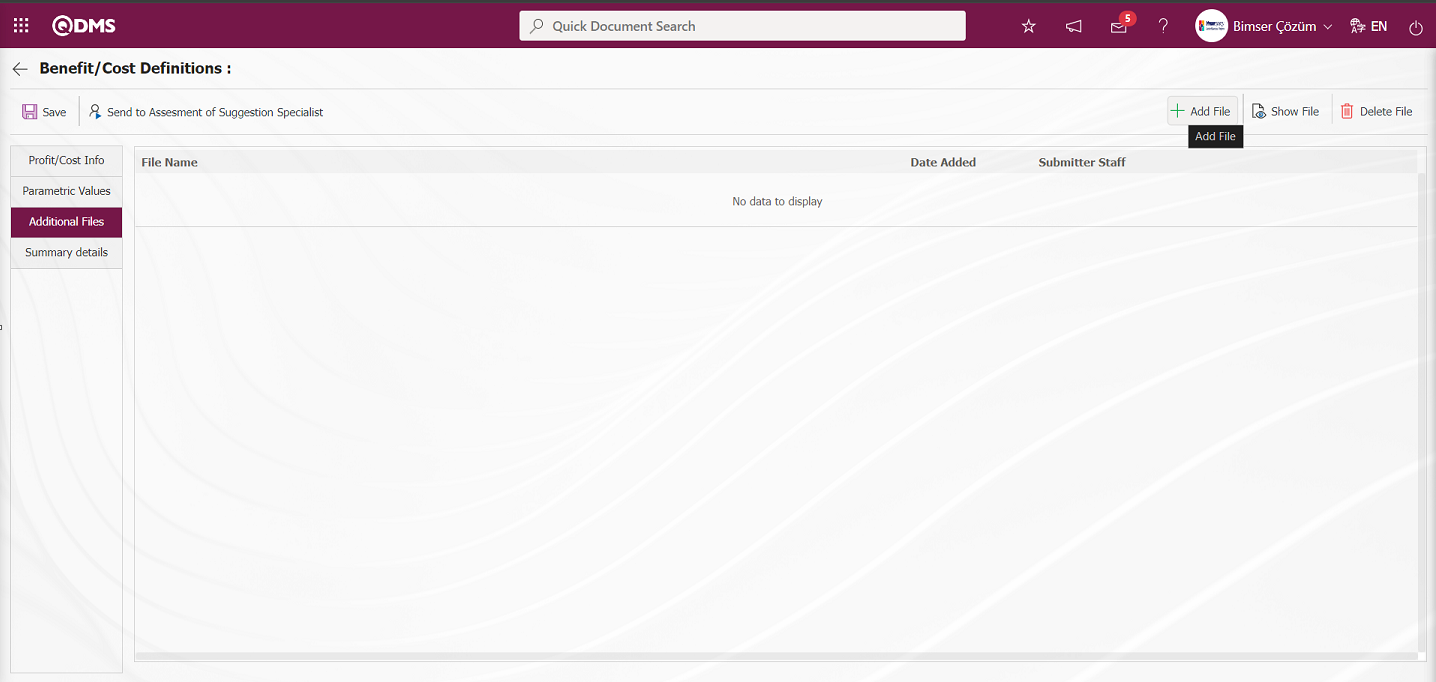
With the help of the buttons on the screen;
: The additional file is uploaded to the system.
: The uploaded additional file information is displayed.
 : The uploaded additional file information is deleted.
In the Additional Files tab on the Benefit/Cost Definitions screen, click the  button to add additional files at this stage Multiple additional files can be added.
Suggestion Details tab: This tab contains the Details, Additional Files and History tabs.
Details tab: This is the tab where all information about the suggestion is displayed.


Additional Files tab: This is the tab where the uploaded additional files related to the suggestion are accessed and the content of the uploaded additional files is displayed.
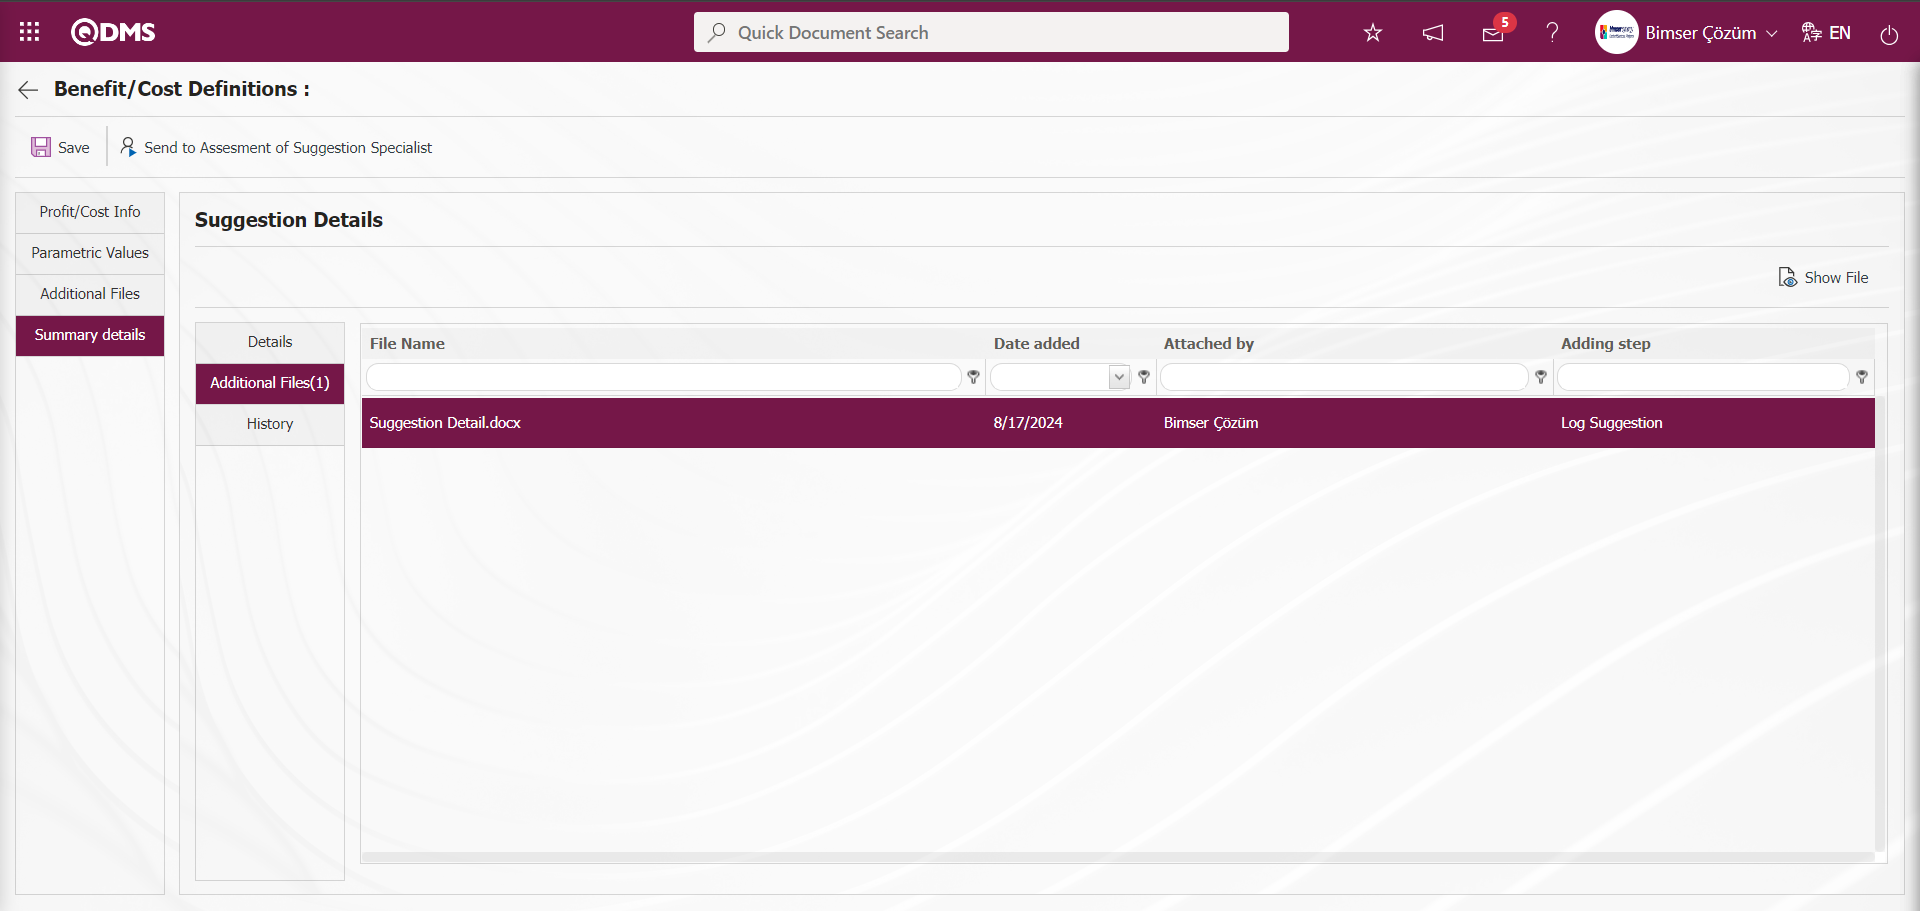
With the help of the buttons on the screen;
 : Display the selected additional file in the list.
History Tab: It is the tab where the history of the transactions related to the suggestion until this stage is accessed. It is a tab displayed depending on the parameter. The parameter value of parameter 137 in the Suggestion System Module parameters is activated by selecting “Yes”.
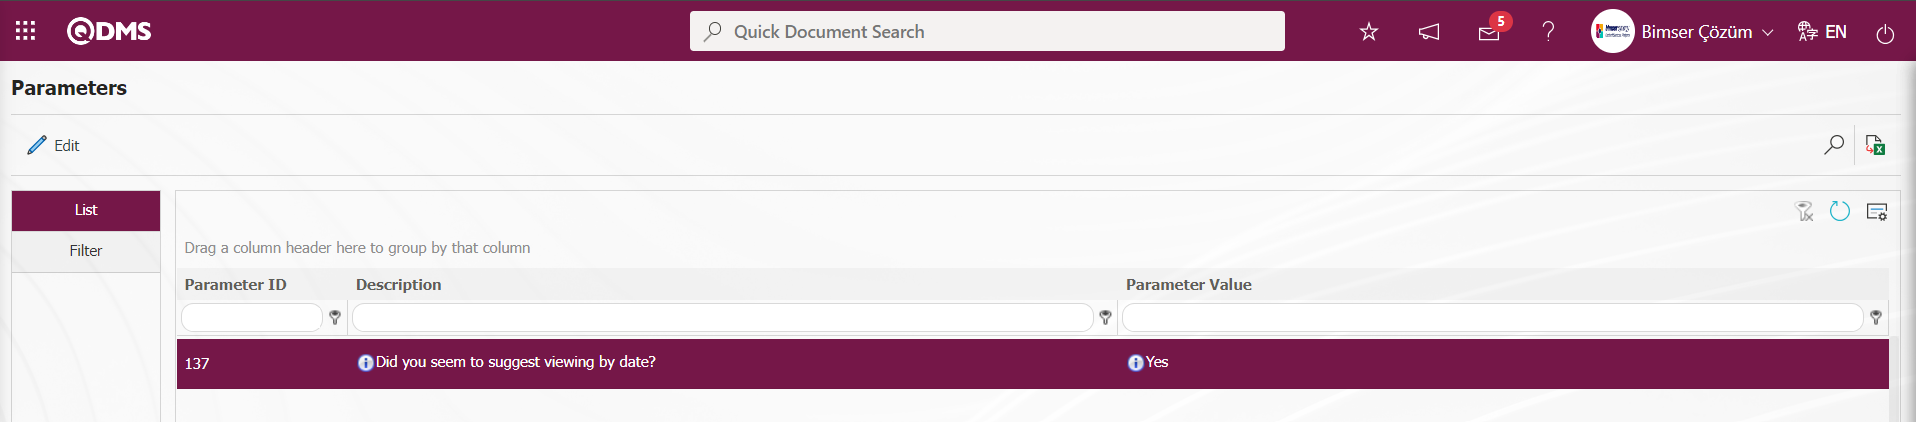
After the parameter is activated, the History tab is displayed at every stage in the Suggestion Details tab in the Suggestion System Module.
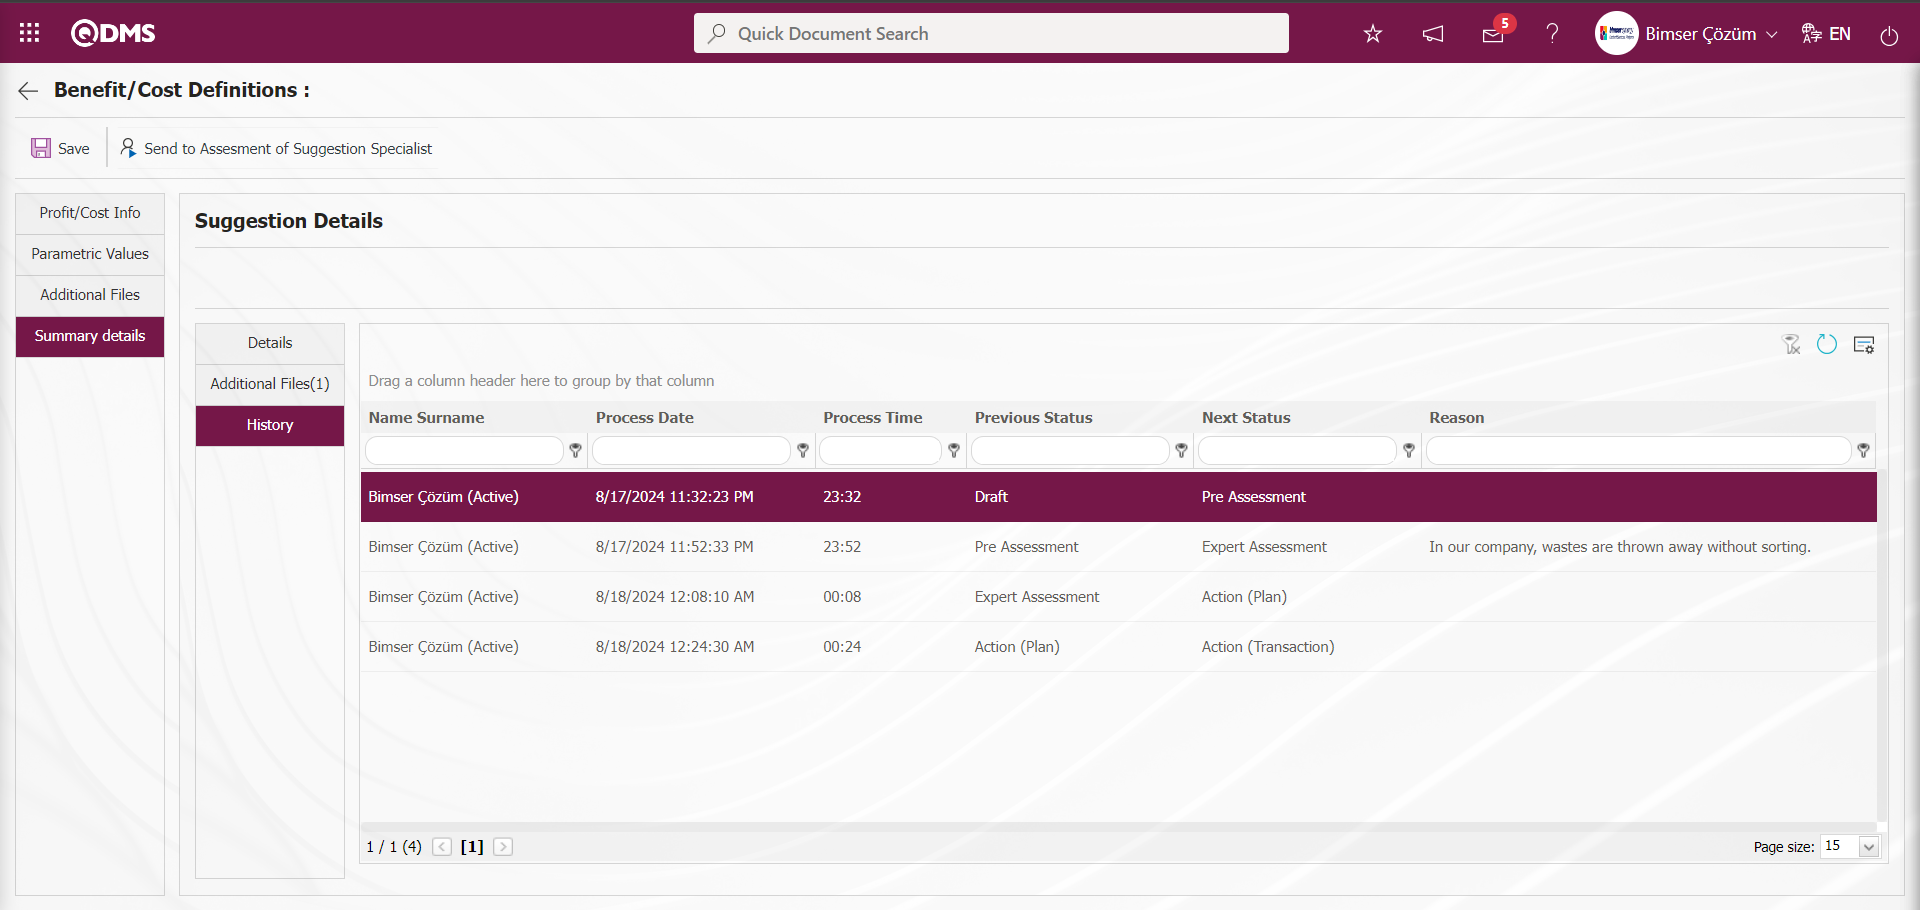
On the Benefit/Cost Definitions screen, click on Profit/Cost Info tab.
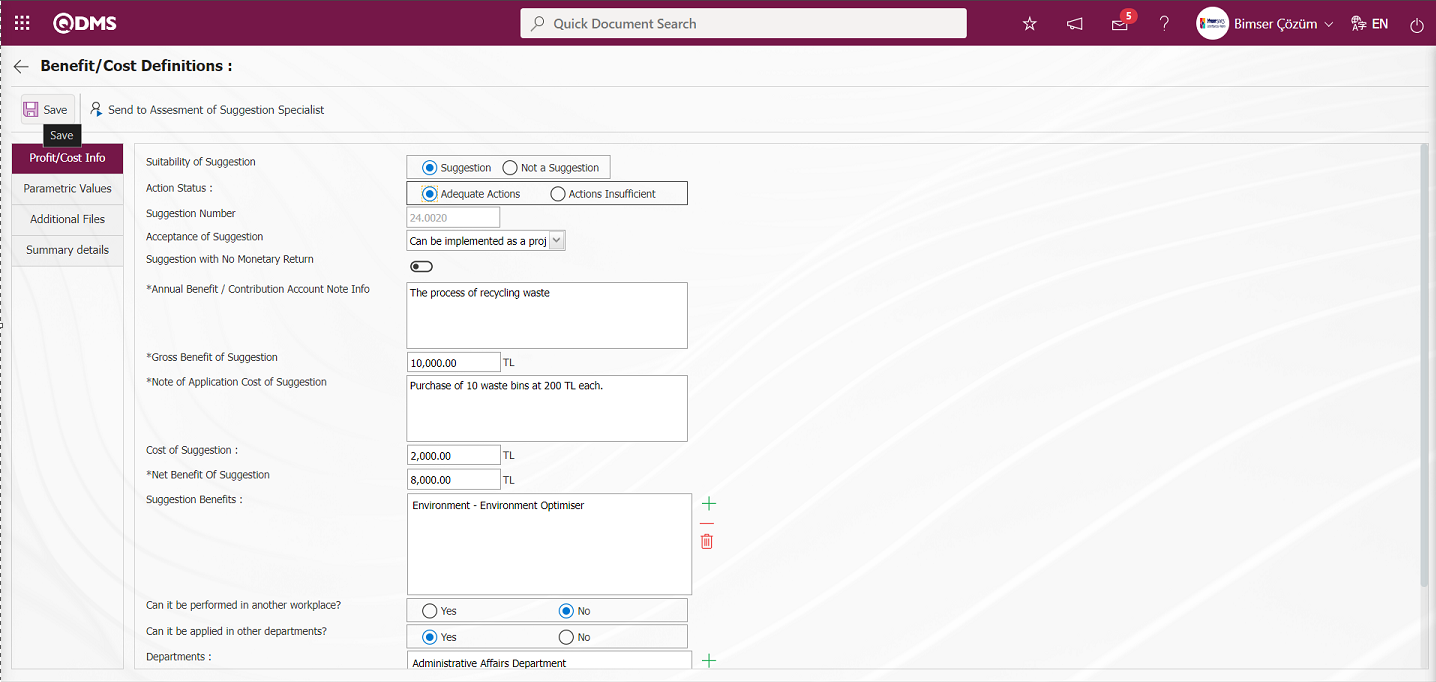
In the Suggestion Eligibility field, check the check box related to the Suggestion option. In the Action Status field, check box related to the Action Adequate field is checked. In the Suggestion Acceptance No field, select the appropriate suggestion from the attributed Acceptance definitions in the system opened by clicking the drop-down list. The Gross Profit and Cost of the Suggestion information is written in TL. Implementation Cost of the Suggestion Description Information is written. The Net Profit of the suggestion is automatically calculated by the system. After the required fields are entered, the profit / cost analysis phase is completed by clicking the  button and the scoring phase is started.
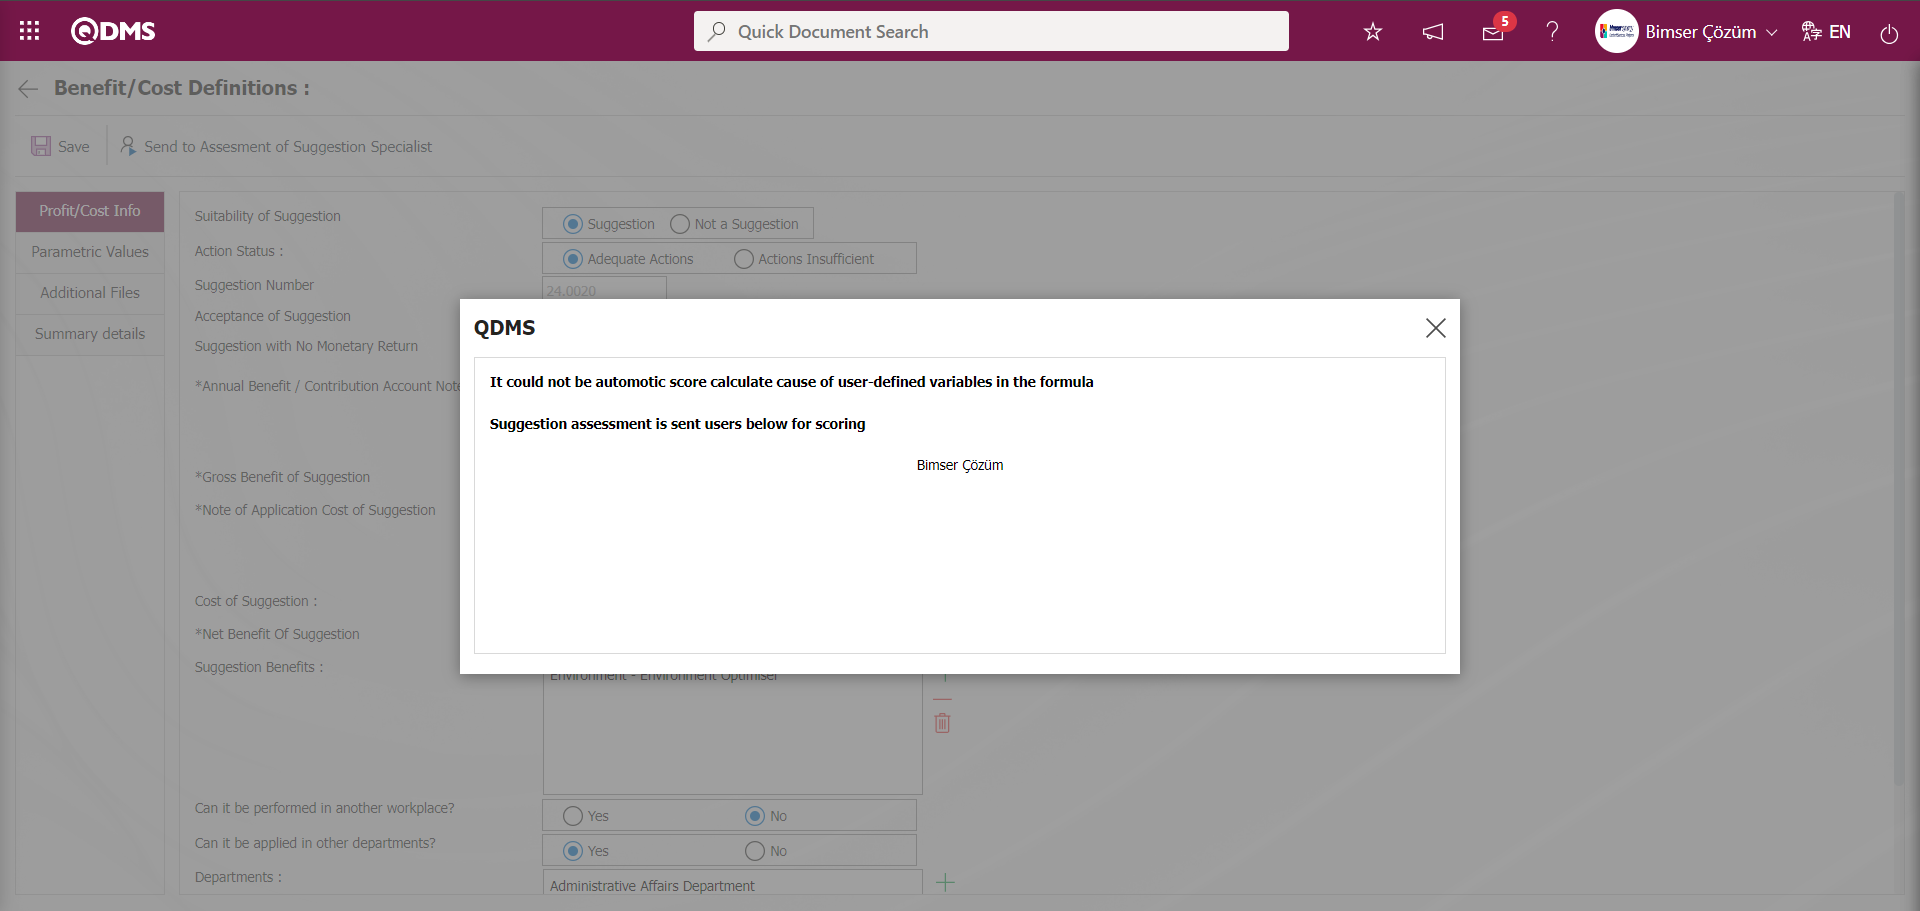
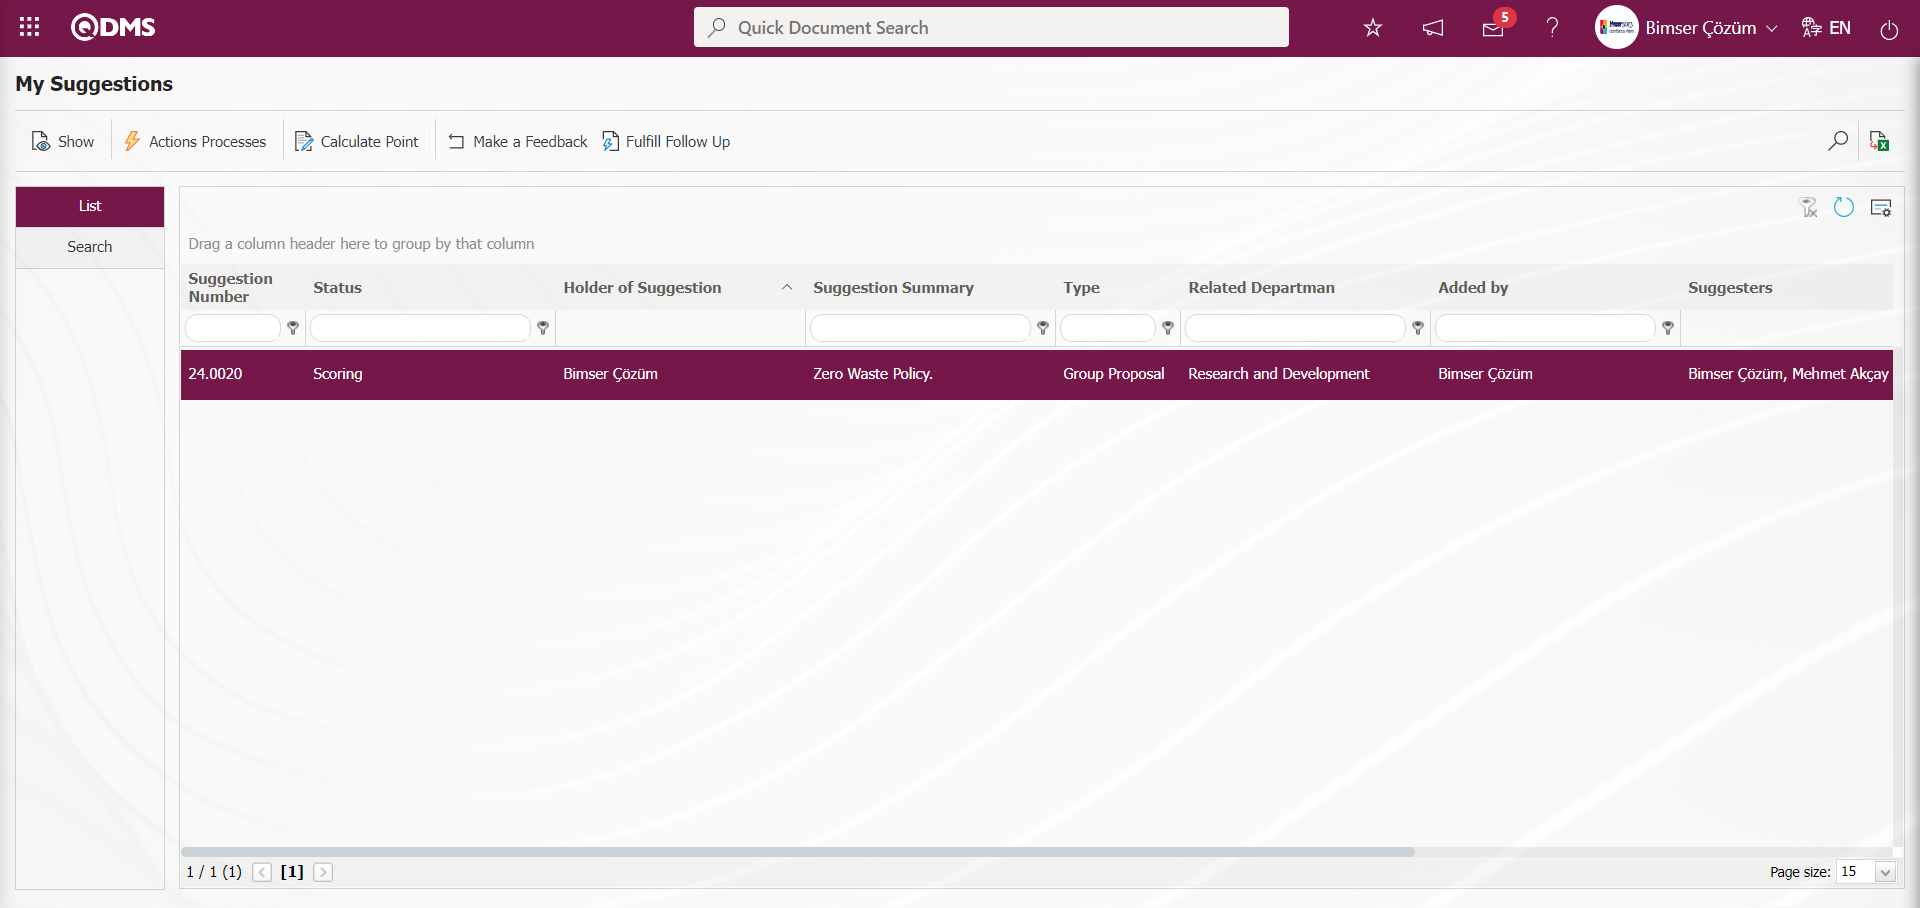
5.3.1.6. Scoring Process
The process after the Benefit/Cost analysis is the scoring process. The role defined in the flow is assigned as “Suggestions awaiting for Scoring” on the “My Pending Jobs” page. The scoring process is started by clicking on the suggestion number.

In order for this step to be realized, the parameter value of parameter 75 of the Suggestion System Module parameters must be activated by selecting “Yes”.
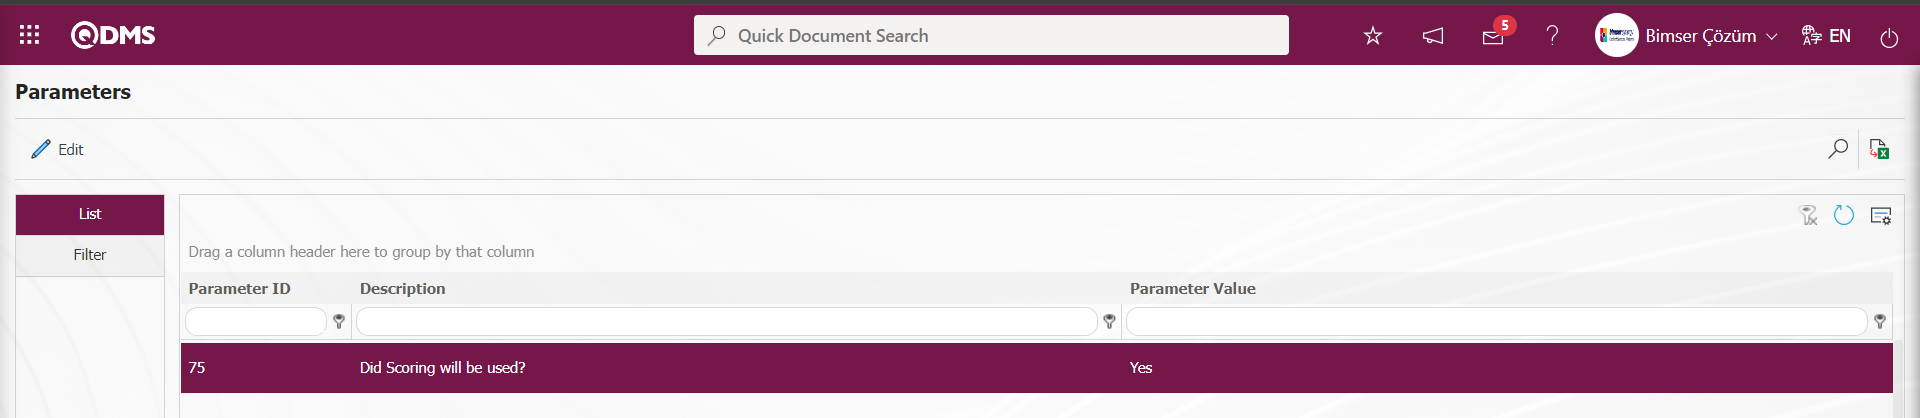 When the parameter value of the parameter is selected as “No” and the parameter is disabled, the closure stage is performed by going to the closure approval of the person in the approval flow of the suggestion without performing this stage in the suggestion.
The parameter value of parameter 38 of the Suggestion System Module Parameters should be activated by selecting “Yes”.
 Scoring criteria can be used in the scoring phase. At this stage, the system automatically defines the questionnaire code in parameter 117, which is the relevant parameter of the relevant module of the Survey Question Lists menu, after the question definition process is done to use the survey without using the scoring criteria.

The survey code of the survey defined in Survey Question Lists menu is assigned to the parameter. When a survey is used as a scoring method in the suggestion module, the survey assigned to this parameter is displayed at the scoring stage. This stage is done by using the survey in the scoring stage. In order to use a questionnaire at this stage, the parameter value of parameter 116 of the “Suggestion System Module parameters” is selected as “Yes” and the parameter is activated. 
After the parameter is activated, the survey defined in the Survey Question Lists menu in the scoring phase is displayed at this stage, the survey questions are answered, the scoring phase is completed and the suggestion passes to the next stage. When parameter 116 is active, other methods are not used.
The scoring process is carried out according to the determined scoring method ( Point Ruler, Using Formulas, Questionnaire) and the suggestion is closed with the recording process.

With the help of the buttons on the screen;
If a point scale will be used, select which point scale will be used from the “Point Criteria” field. If the proposal is selected as “Campaign Suggestion” in the pre-evaluation phase, the individual score of the campaign is displayed as points.
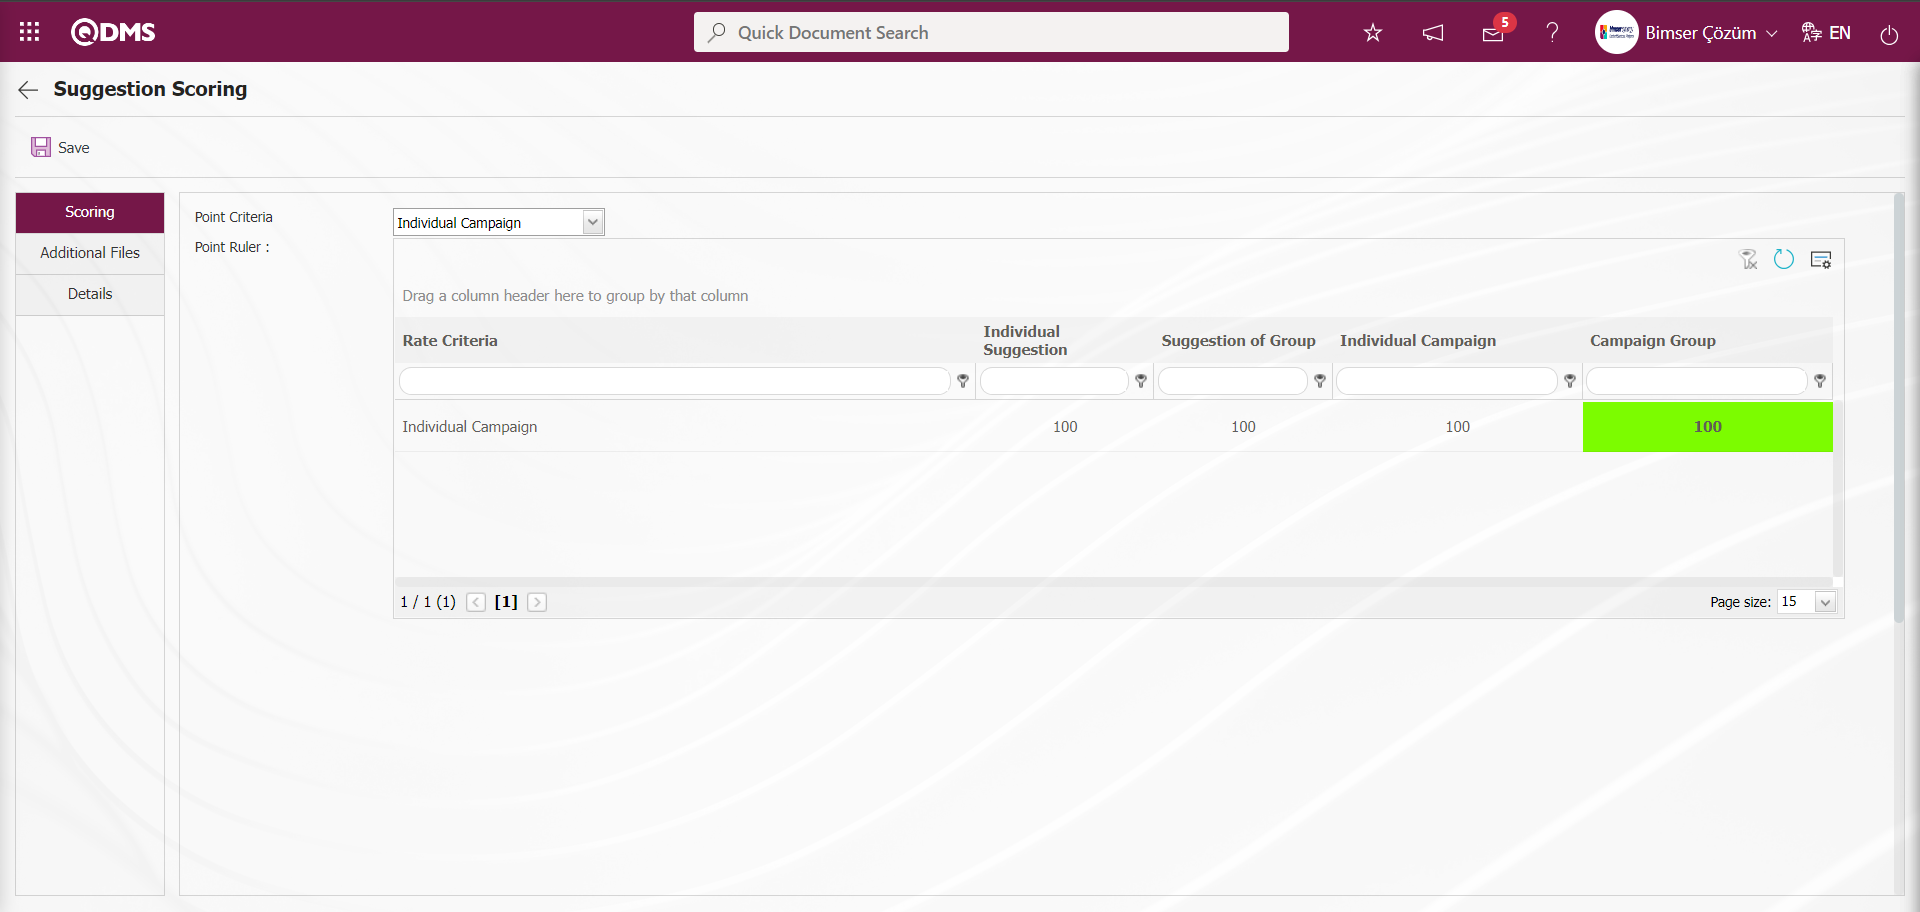
Additional Files tab: This is the tab on the Suggestion Scoring screen where additional files such as files, pictures, minutes, if any, related to this stage are uploaded, the uploaded additional files are displayed and the additional files uploaded by mistake are deleted

With the help of the buttons on the screen;
: The additional file is uploaded to the system.
: The uploaded additional file information is displayed.
 : The uploaded additional file information is deleted.
At this stage, an additional file is added by clicking the  button in the Additional files tab on the Suggestion Scoring screen. Multiple additional files can be added.
Suggestion Details tab: This tab contains the Details, Additional Files and History tabs.
Details tab: This is the tab where all information about the Suggestion is displayed.
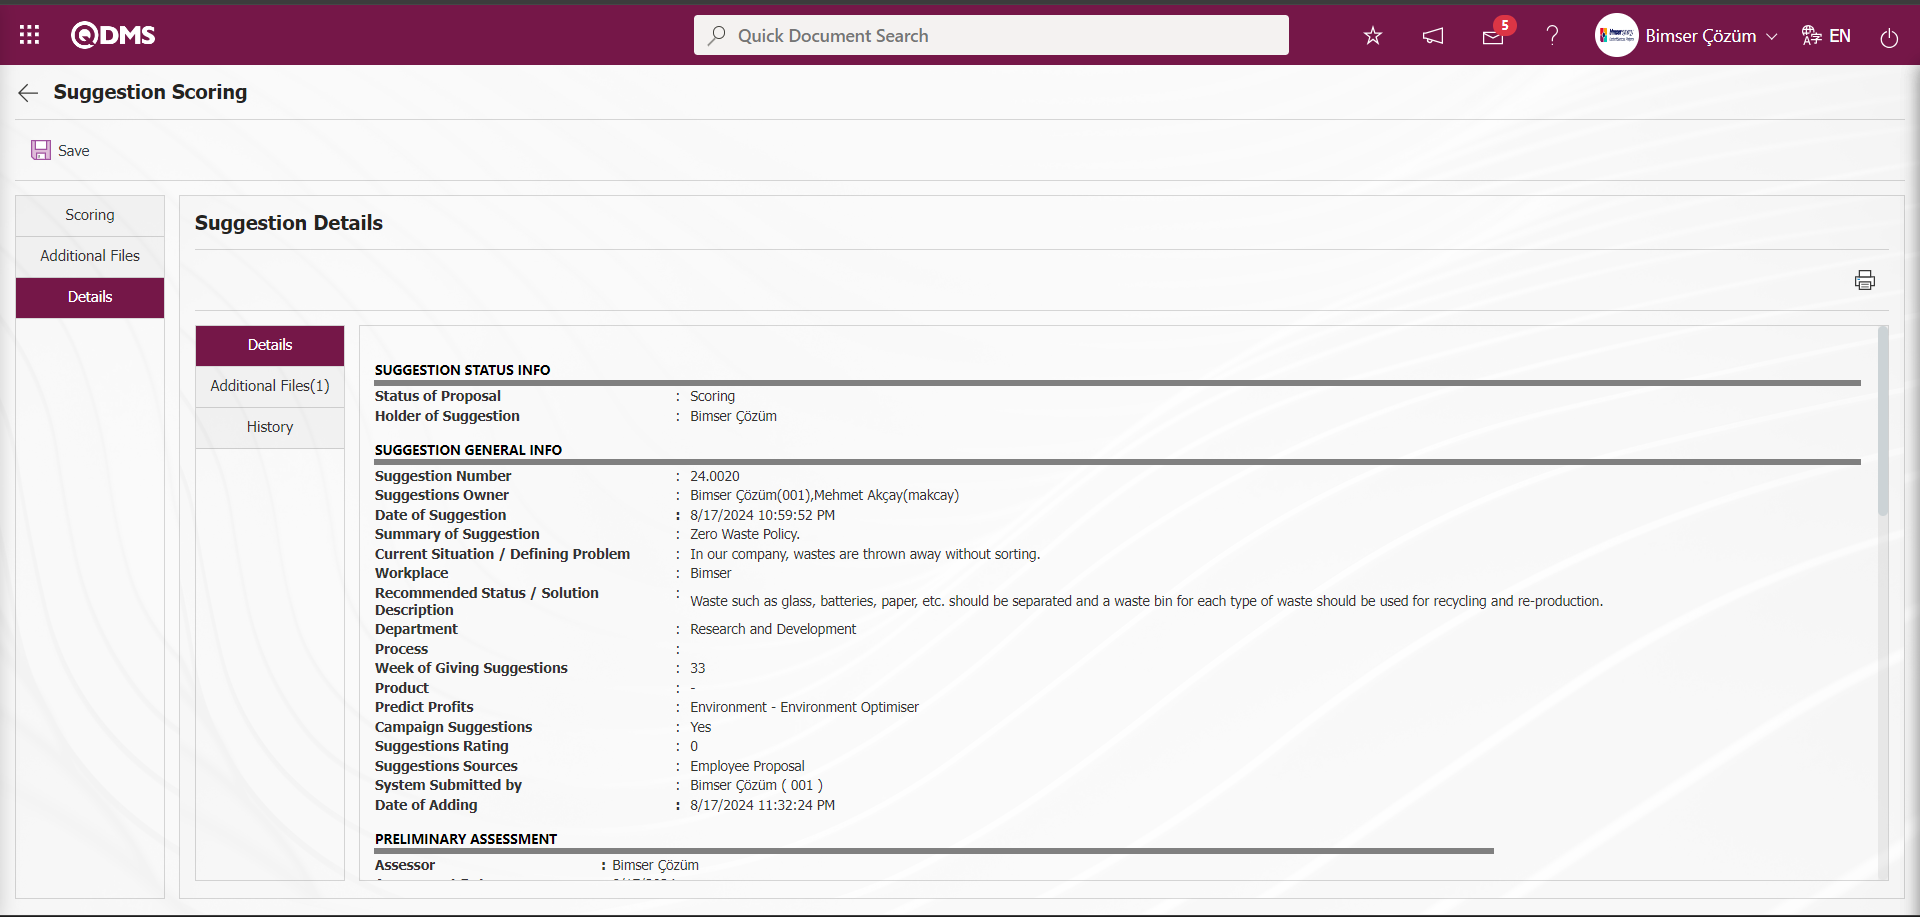
Additional Files tab: This is the tab where the uploaded additional files related to the suggestion are accessed and the content of the uploaded additional files is displayed.
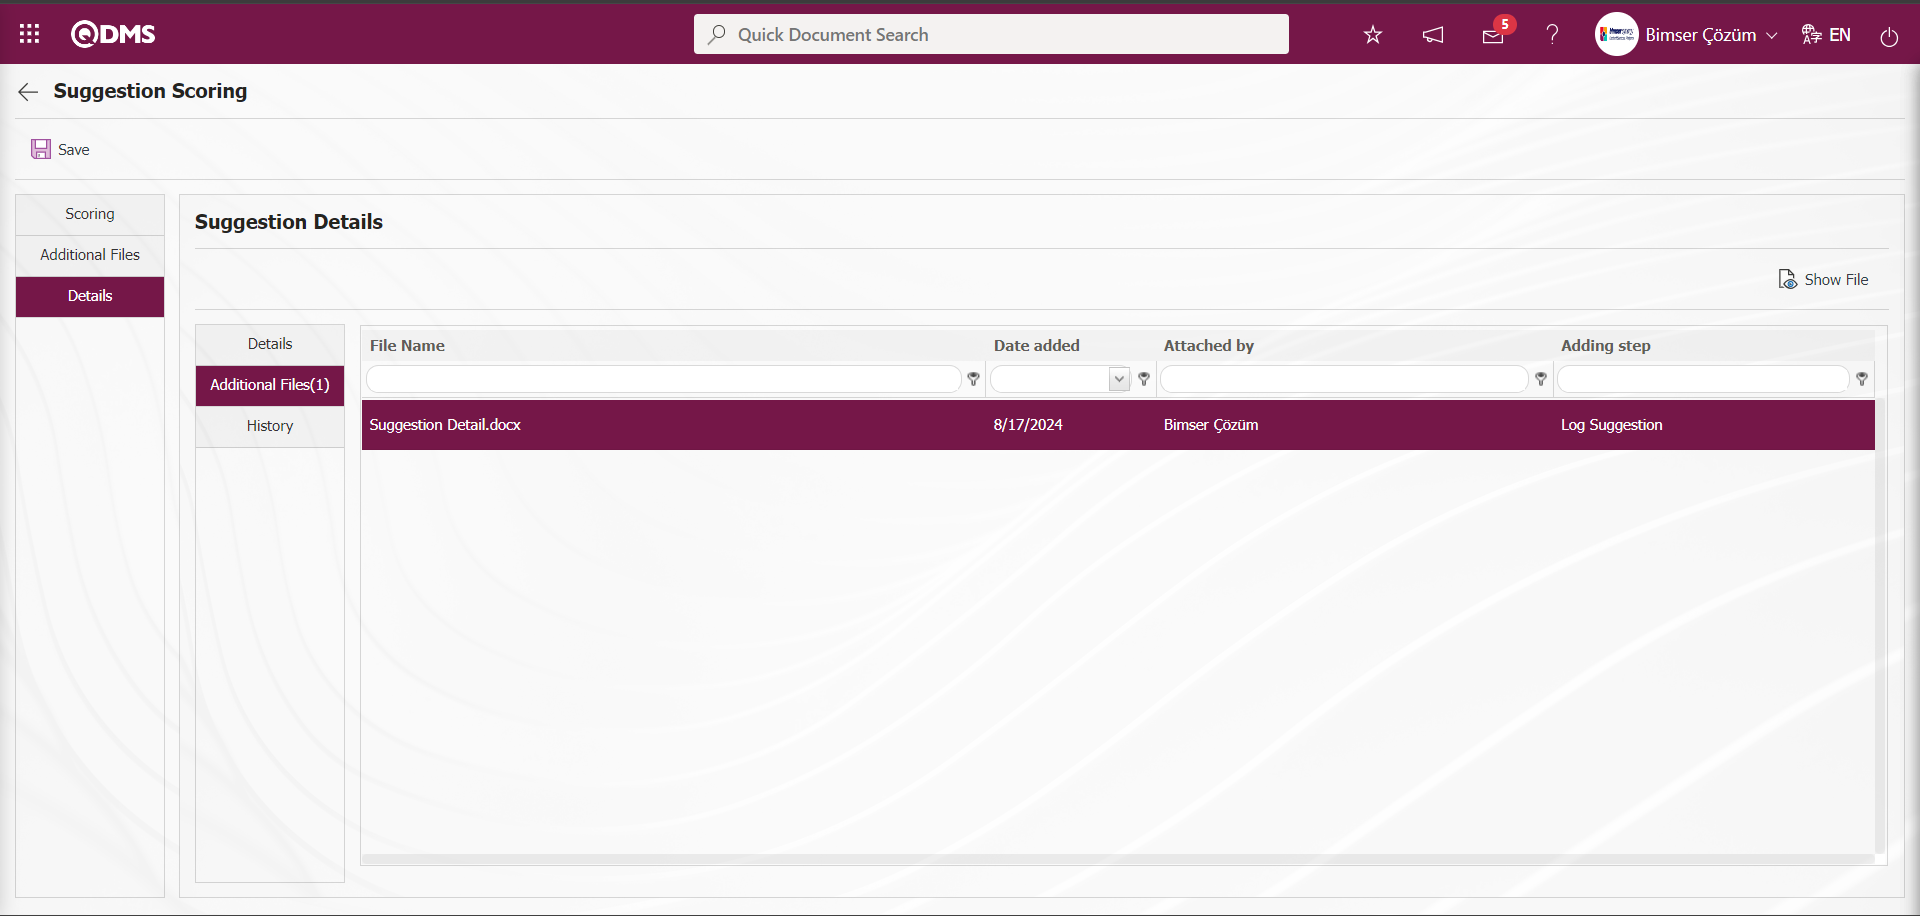
With the help of the buttons on the screen;
 : Display the selected attachment file in the list.
History Tab: It is the tab where the history of the transactions related to the suggestion until this stage is accessed. It is a tab that is displayed depending on the parameter. The parameter value of parameter 137 in the Suggestion System Module parameters is activated by selecting “Yes”.

After the parameter is activated, the History tab is displayed at every stage in the Suggestion Details tab in the Suggestion System Module.
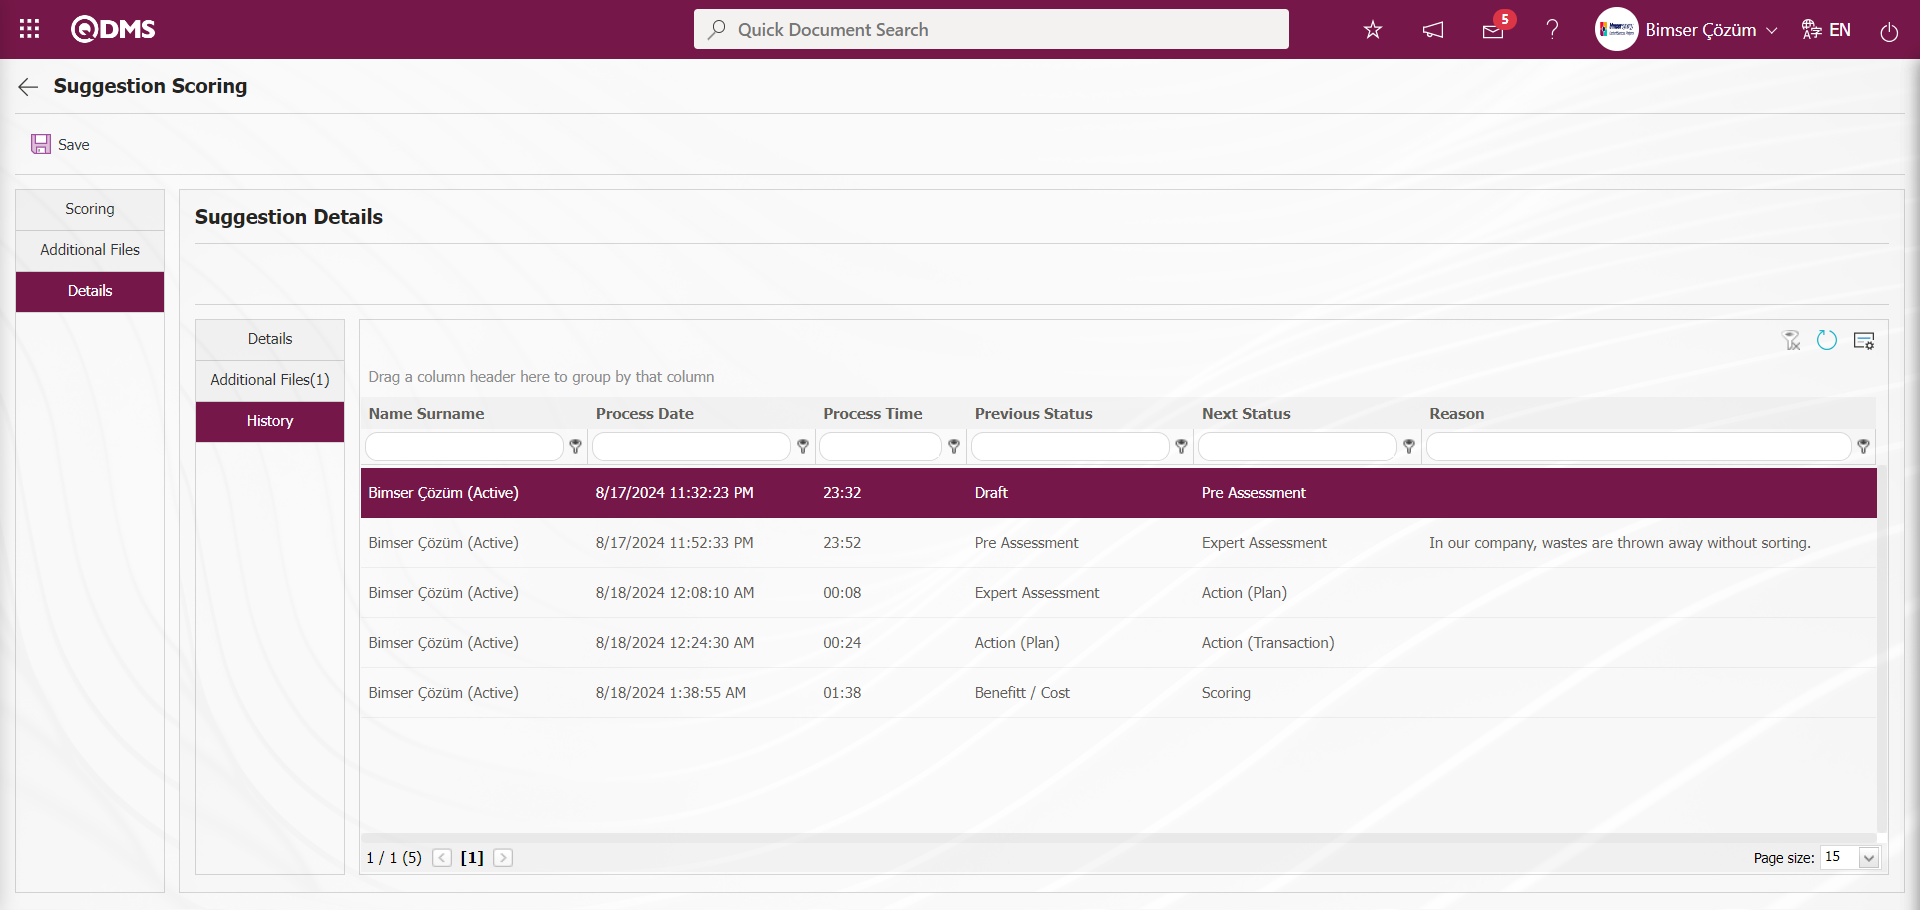
On the Suggestion Scoring screen, click on the Scoring tab.
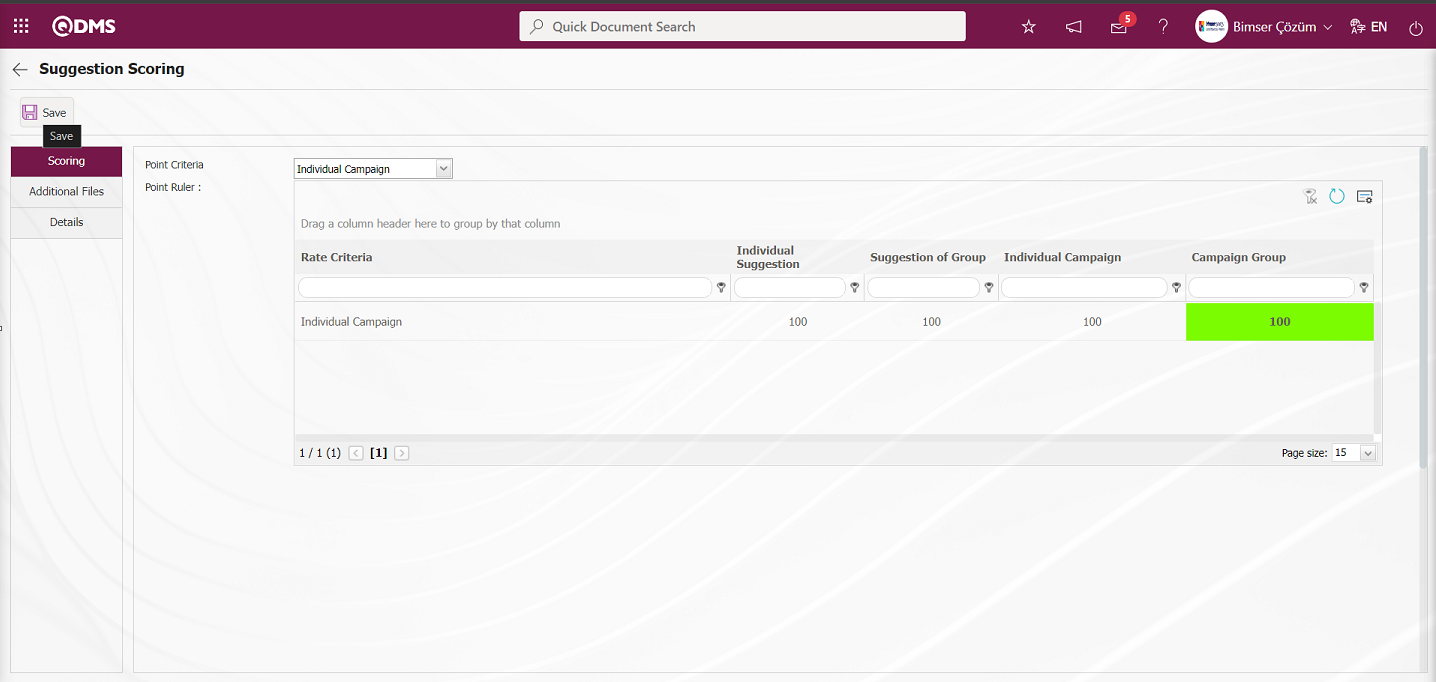
On the Suggestion Scoring screen, click on the drop-down list in the Point Criteria field and select the point criteria from the Point Criteria list. After entering the relevant information in the required fields, the  button in the upper left corner of the screen is clicked and the suggestion is sent to the person in the approval flow for closure approval.

5.3.1.7. My Suggestions Pending Closure Approval
From the Suggestion Scoring stage, the person in the approval flow has the task “Shutdown Pending Approval Request form” on the “My Pending Jobs” page.
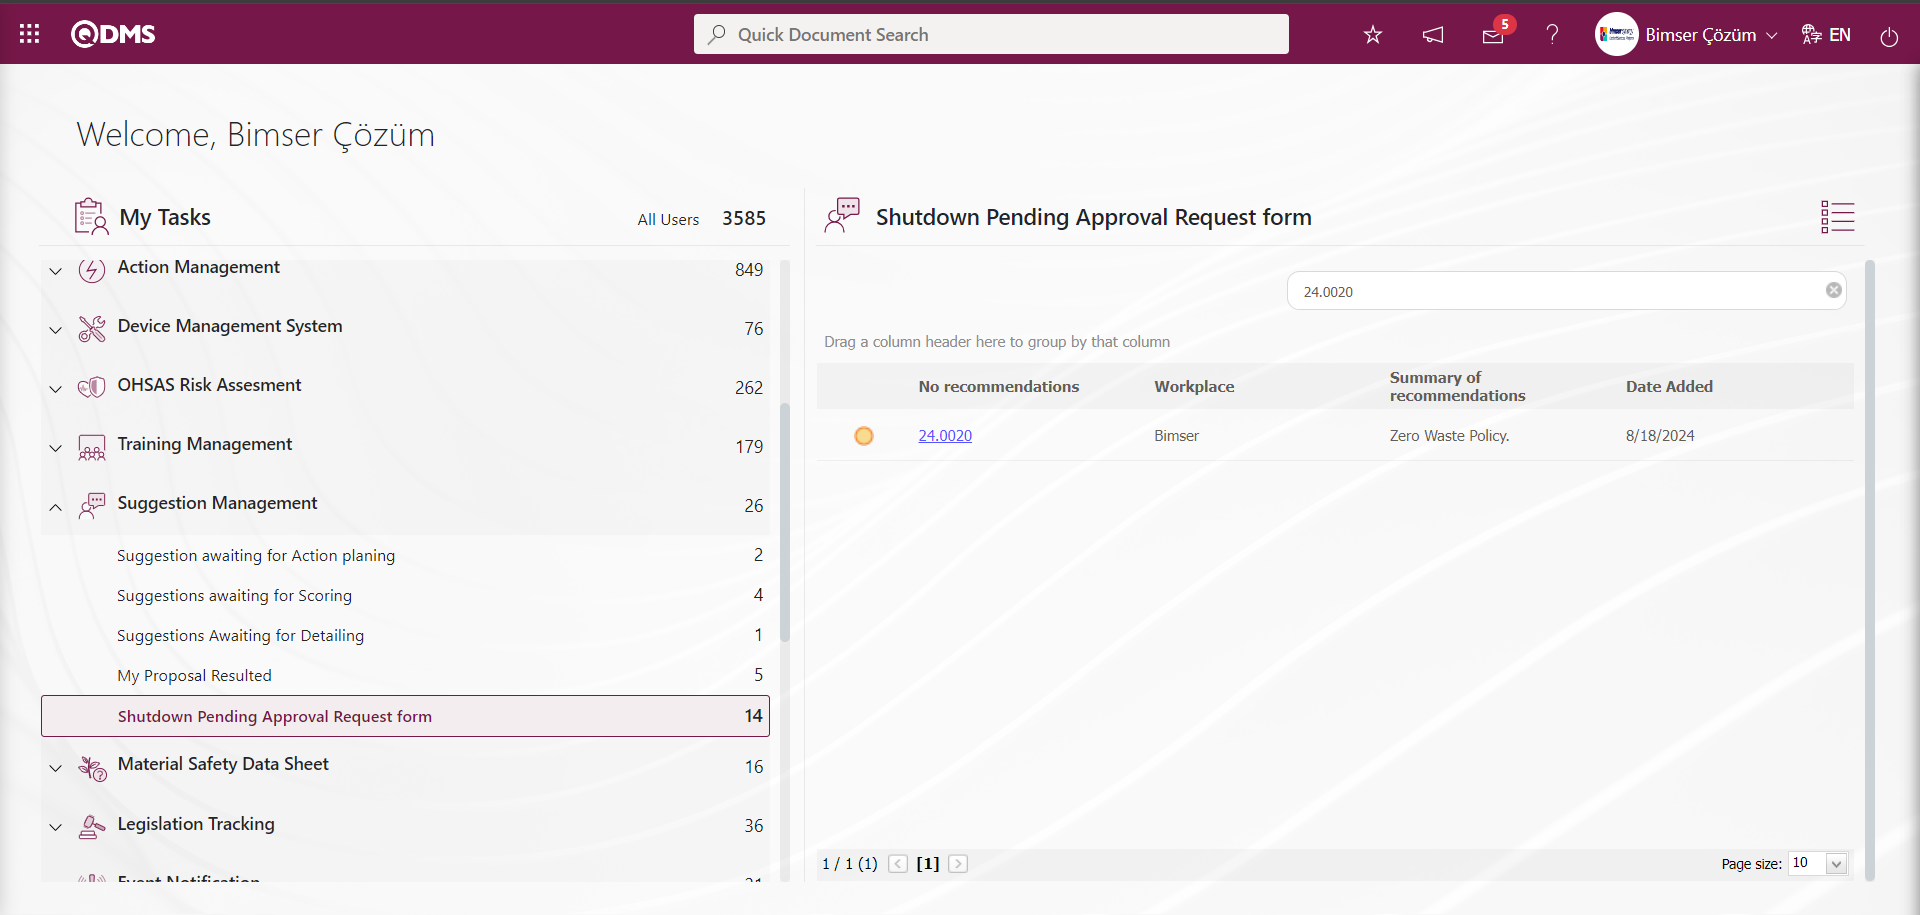
Suggestion code link is clicked in Suggestion No field to open Suggestions Off Approval screen.
Suggestion Approvement tab: This is the tab where the following information about the suggestion is entered.

With the help of the buttons on the screen;
 : Follow-up related to the suggestion takes place.
 : Closing the suggestion is done
Related fields are defined on the screen that opens;
Explanation: It is the field where the explanation information about the Monitoring is written in the Suggestion Approvement tab on the Suggestions Off Approval screen.
Deadline Date: It is the field where the monitoring deadline date is selected in the Calendar field opened by clicking the drop-down list in the Suggestion Approvement tab on the Suggestions Off Approval screen.
To My Watchlist: In the Suggestions Off Approval screen, in the Suggestion Approvement tab on the Suggestion Approvement tab, the person to be followed is selected from the list of personnel defined in the system opened by clicking the  (Select) button.
Additional Files tab: This is the tab on the Suggestions Off Approval screen where additional files such as files, pictures, minutes, if any, are uploaded, the uploaded additional files are displayed and the additional files uploaded by mistake are deleted.

With the help of the buttons on the screen;
: The additional file is uploaded to the system.
: The uploaded additional file information is displayed
: The uploaded additional file information is deleted.
On the Suggestions Off Approval screen, additional files are added at this stage by clicking the button on the Additional Files tab. Multiple additional files can be added.
Suggestion Details tab: Details, Additional Files and History tabs.
Details tab: It is the tab where all information about the suggestion is displayed.
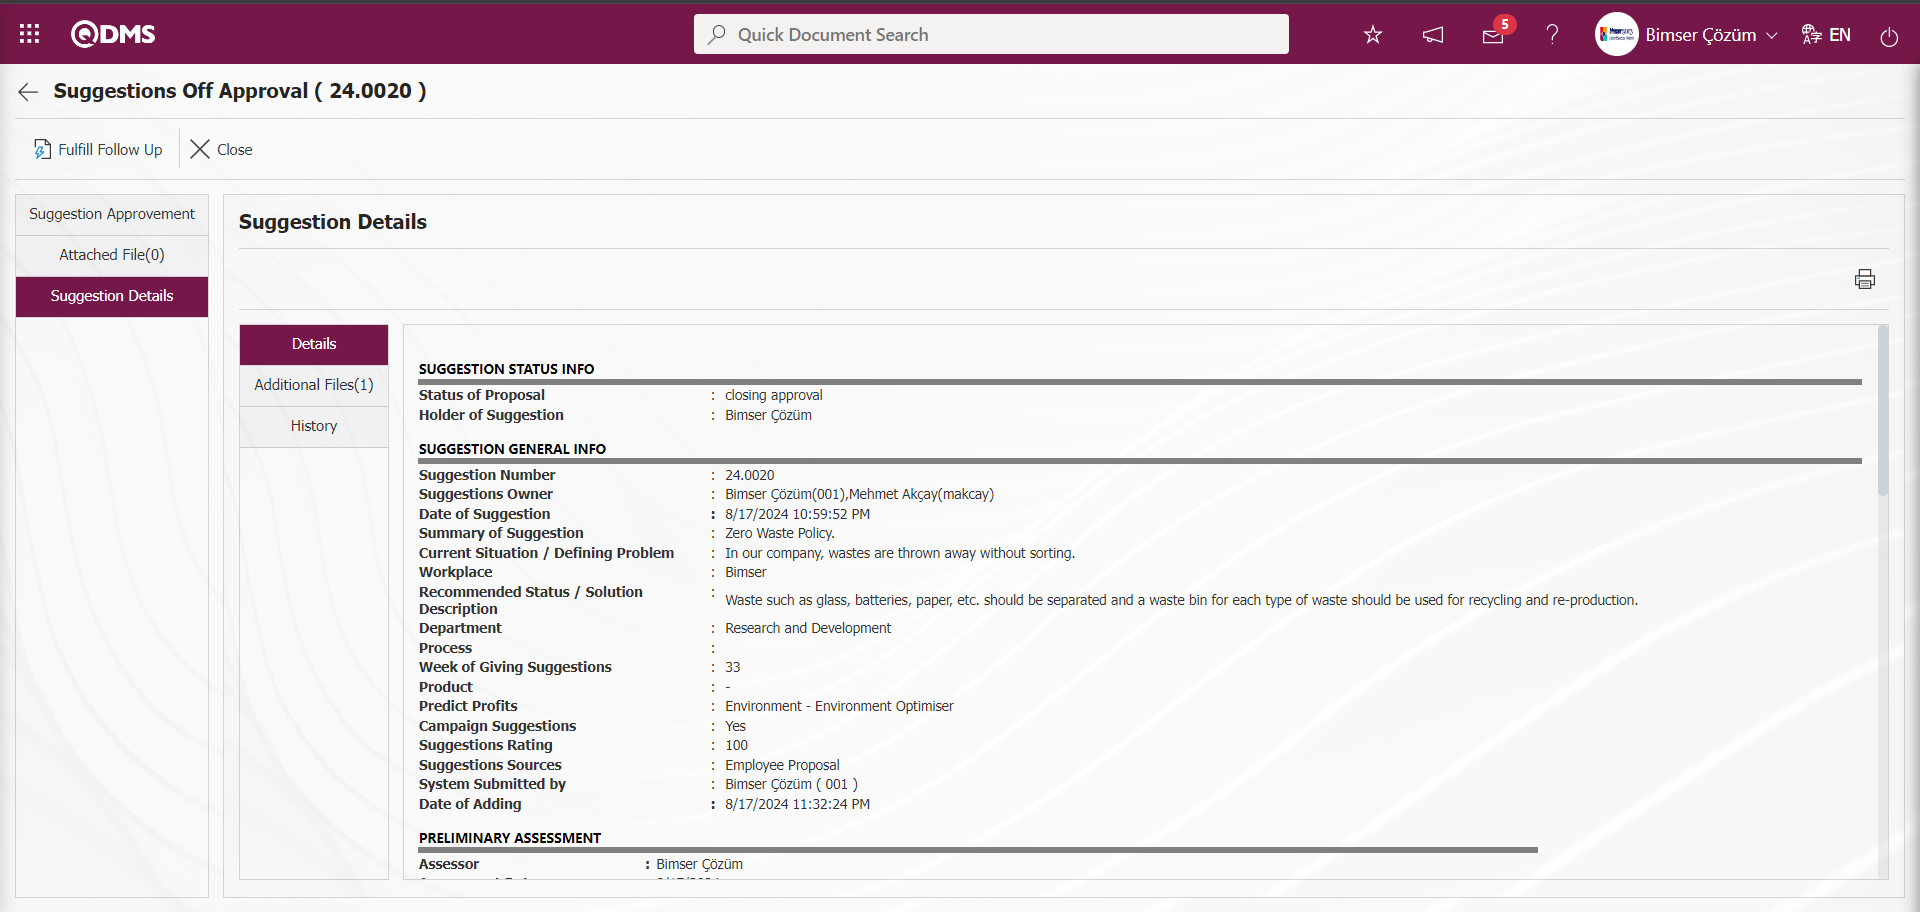
Additional Files tab: This is the tab where the uploaded additional files related to the suggestion are accessed and the content of the uploaded additional files is displayed.

With the help of the buttons on the screen;
 : Display the selected attachment file in the list.
History Tab: It is the tab where the history of the transactions related to the suggestion until this stage is accessed. It is a tab that is displayed depending on the parameter. The parameter value of parameter 137 in the Suggestion System Module parameters is activated by selecting “Yes”.

After the parameter is activated, the History tab is displayed at every stage in the Suggestion Details tab in the Suggestion System Module.
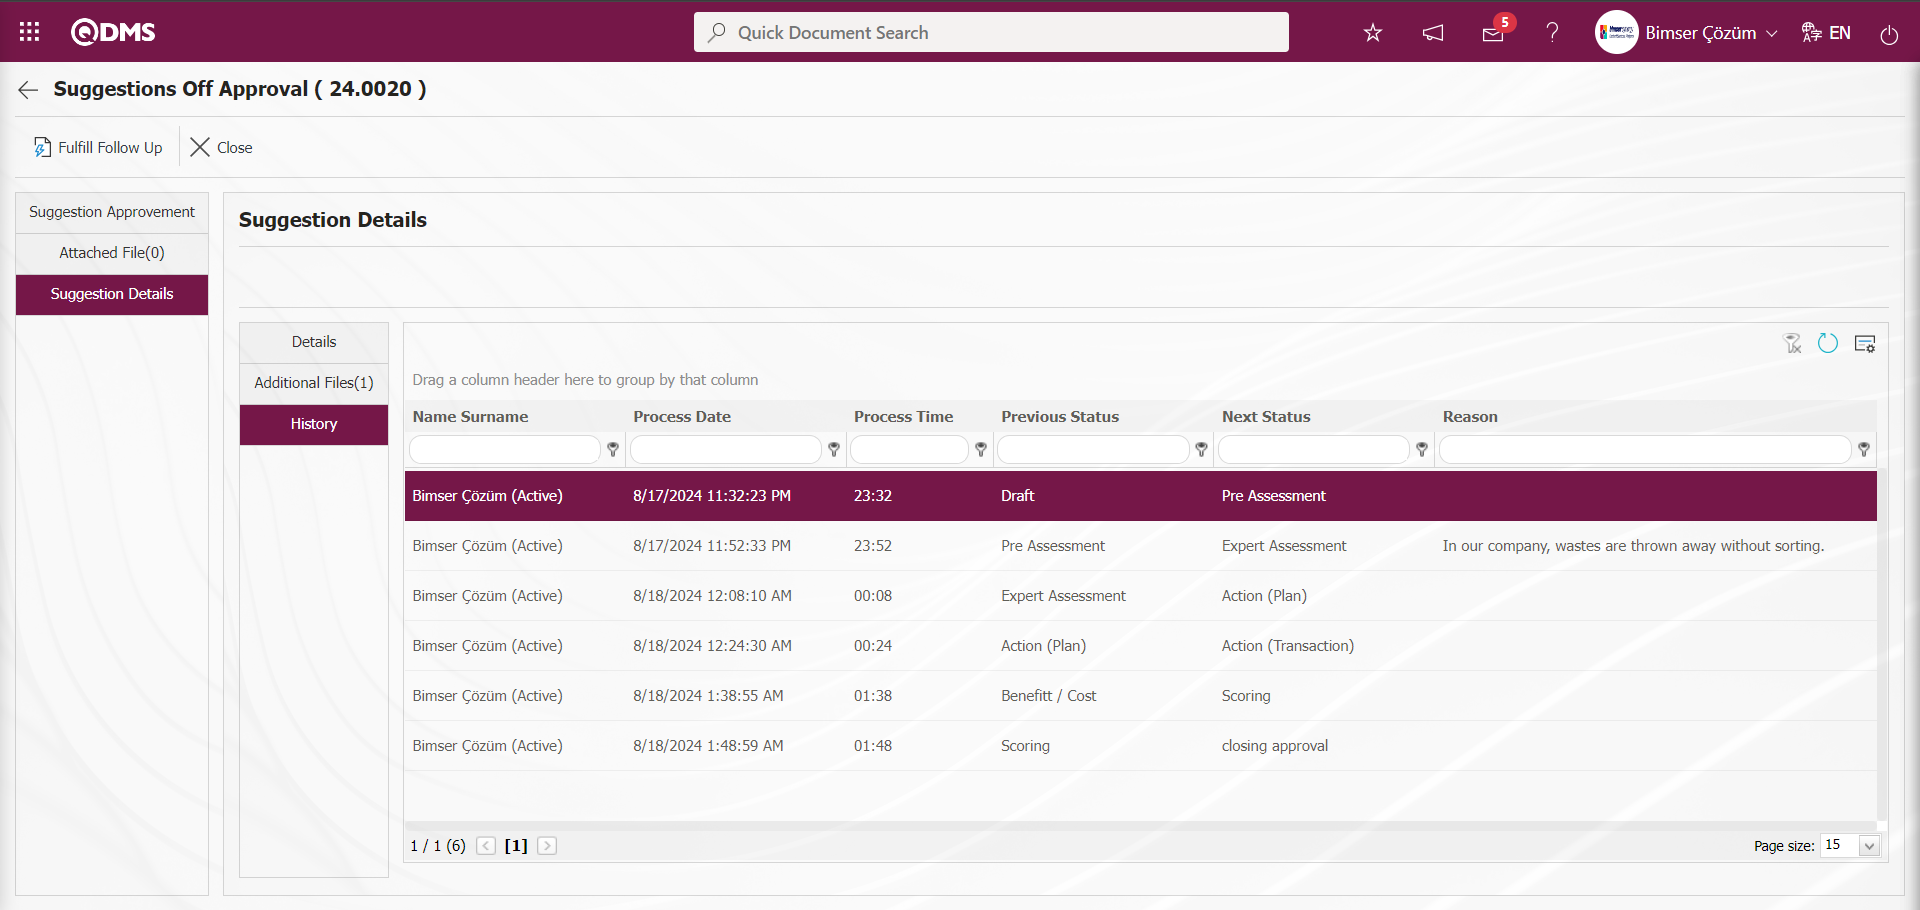
From Suggestions Off Approval screen, click on Suggestion Approvement tab.
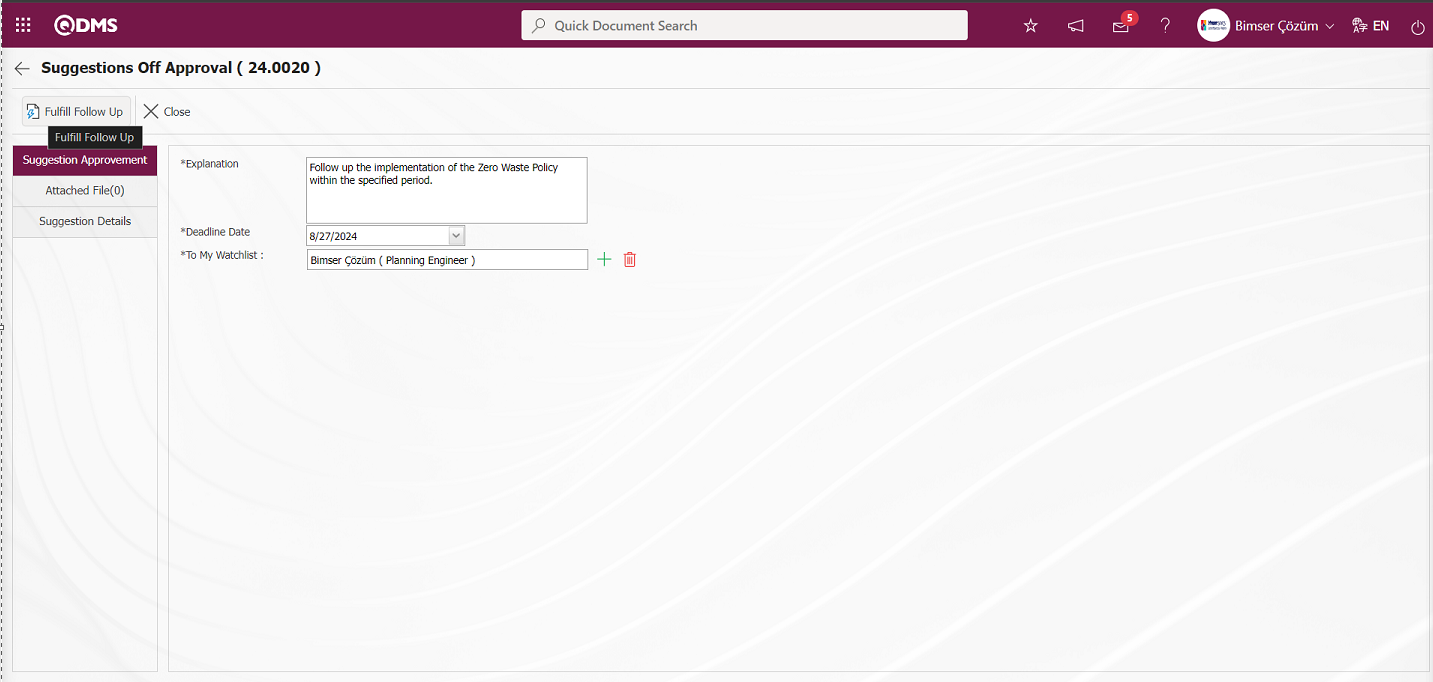
In the Suggestion Approvement tab of the Suggestions Off Approval screen, information about the follow-up process is written in the suggestion. After entering the relevant information in the required fields, the  button in the upper left corner of the screen is clicked. The follow-up officer monitors whether the realization of the suggestion is implemented or not within the specified time interval.
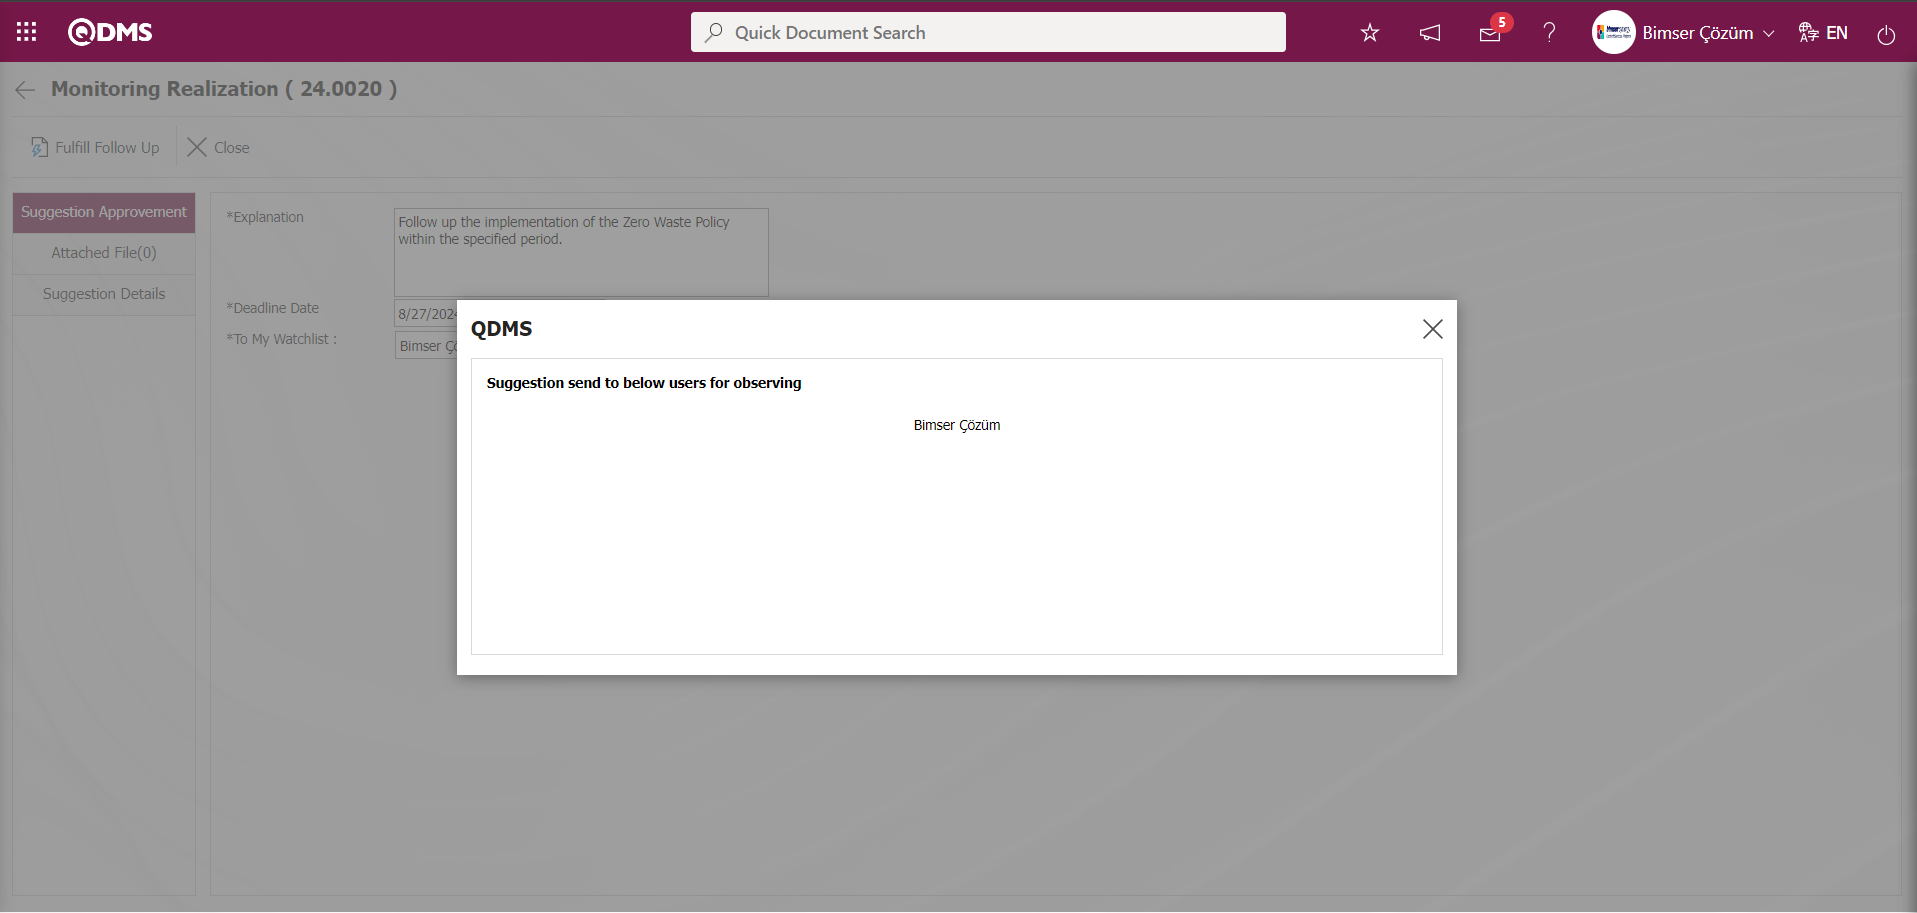

5.3.1.8. My Suggestions Pending Follow-Up
At the closure stage, the task “My Suggestions Which is Waiting Observing” appears on the “My Pending Tasks” page of the monitoring supervisor assigned to the suggestion opened for monitoring. The follow-up responsible checks the implementation of the suggestion given on the specified follow-up deadline and writes the follow-up description information of the suggestion in the follow-up description information field related to the follow-up.
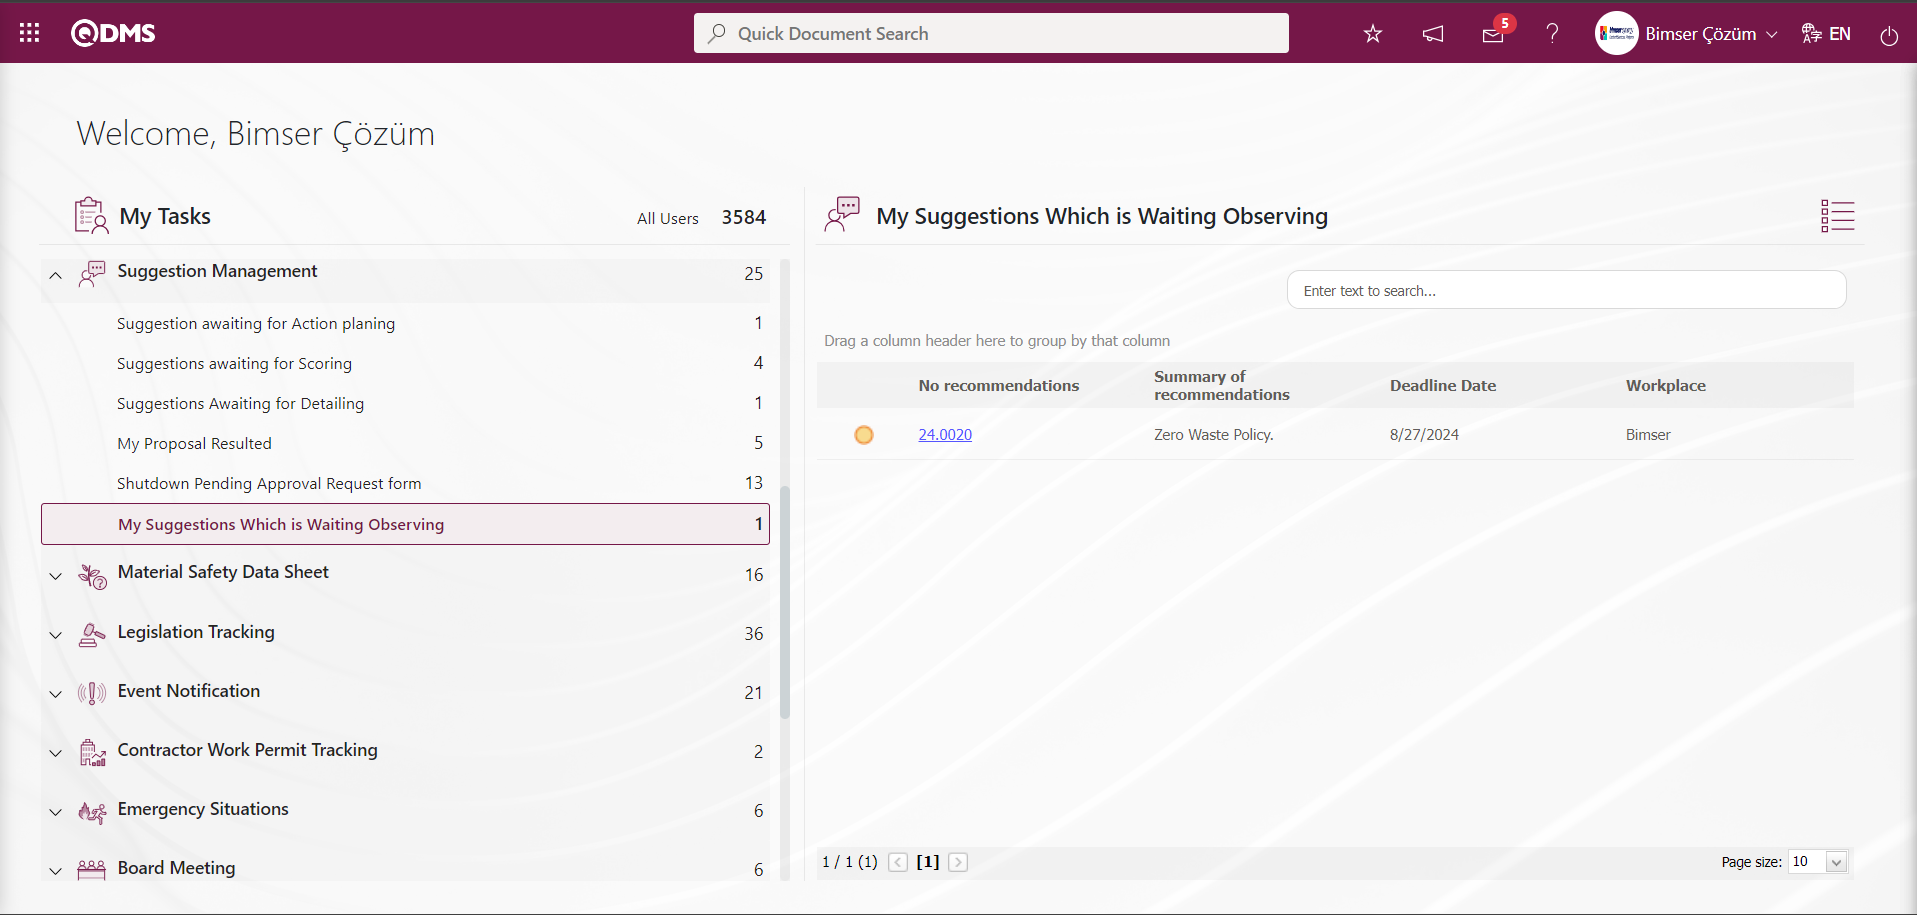
Click on the Suggestion code link in the Suggestion No field in the relevant task.
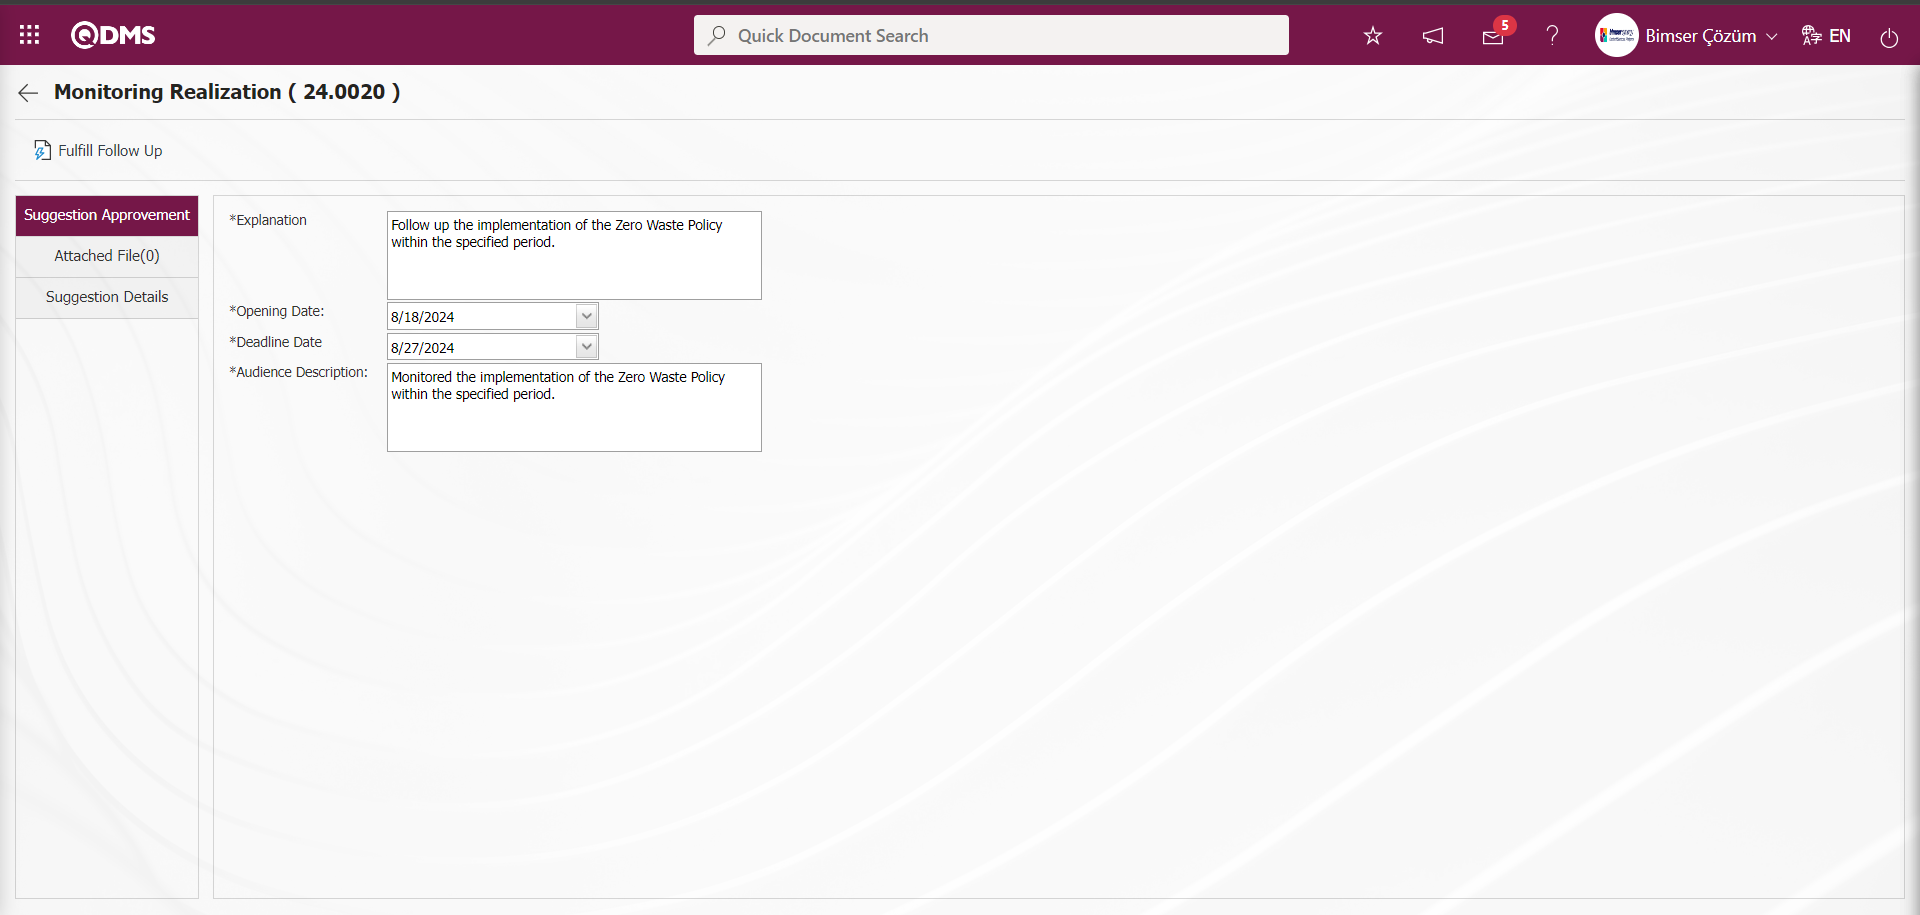
Related fields are defined on the screen that opens;
Explanation:This is the field where the explanation information about the monitoring is written in the Suggestion Approval tab on the Monitoring Realization screen.
Opening Date: It is the field where the opening date of the monitoring is selected if desired in the Calendar field opened by clicking the drop-down list in the Suggestion Approvement tab on the Monitoring Realization screen.
Deadline Date: It is the field where the monitoring deadline date is selected if desired in the Calendar field opened by clicking the drop-down list in the Suggestion Approvement tab on the Monitoring Realization screen.
Audience Description: It is the field where the monitoring responsible writes the suggestion monitoring description in the Suggestion Approval tab on the Monitoring Realization screen.
Additional Files tab: This is the tab on the Monitoring Realization screen where additional files such as files, pictures, minutes, if any, are uploaded at this stage, the uploaded additional files are displayed and the additional files uploaded by mistake are deleted.

With the help of the buttons on the screen;
: The additional file is uploaded to the system.
: The uploaded additional file information is displayed
 : The uploaded additional file information is deleted.
Additional files are added at this stage by clicking the  button on the Additional files tab on the Monitoring Realization screen. Multiple additional files can be added.
Suggestion Details tab: Details, Additional Files and History tabs.
Details tab: It is the tab where all information about the suggestion is displayed.

Additional Files tab: This is the tab where the uploaded additional files related to the suggestion are accessed and the content of the uploaded additional files is displayed.
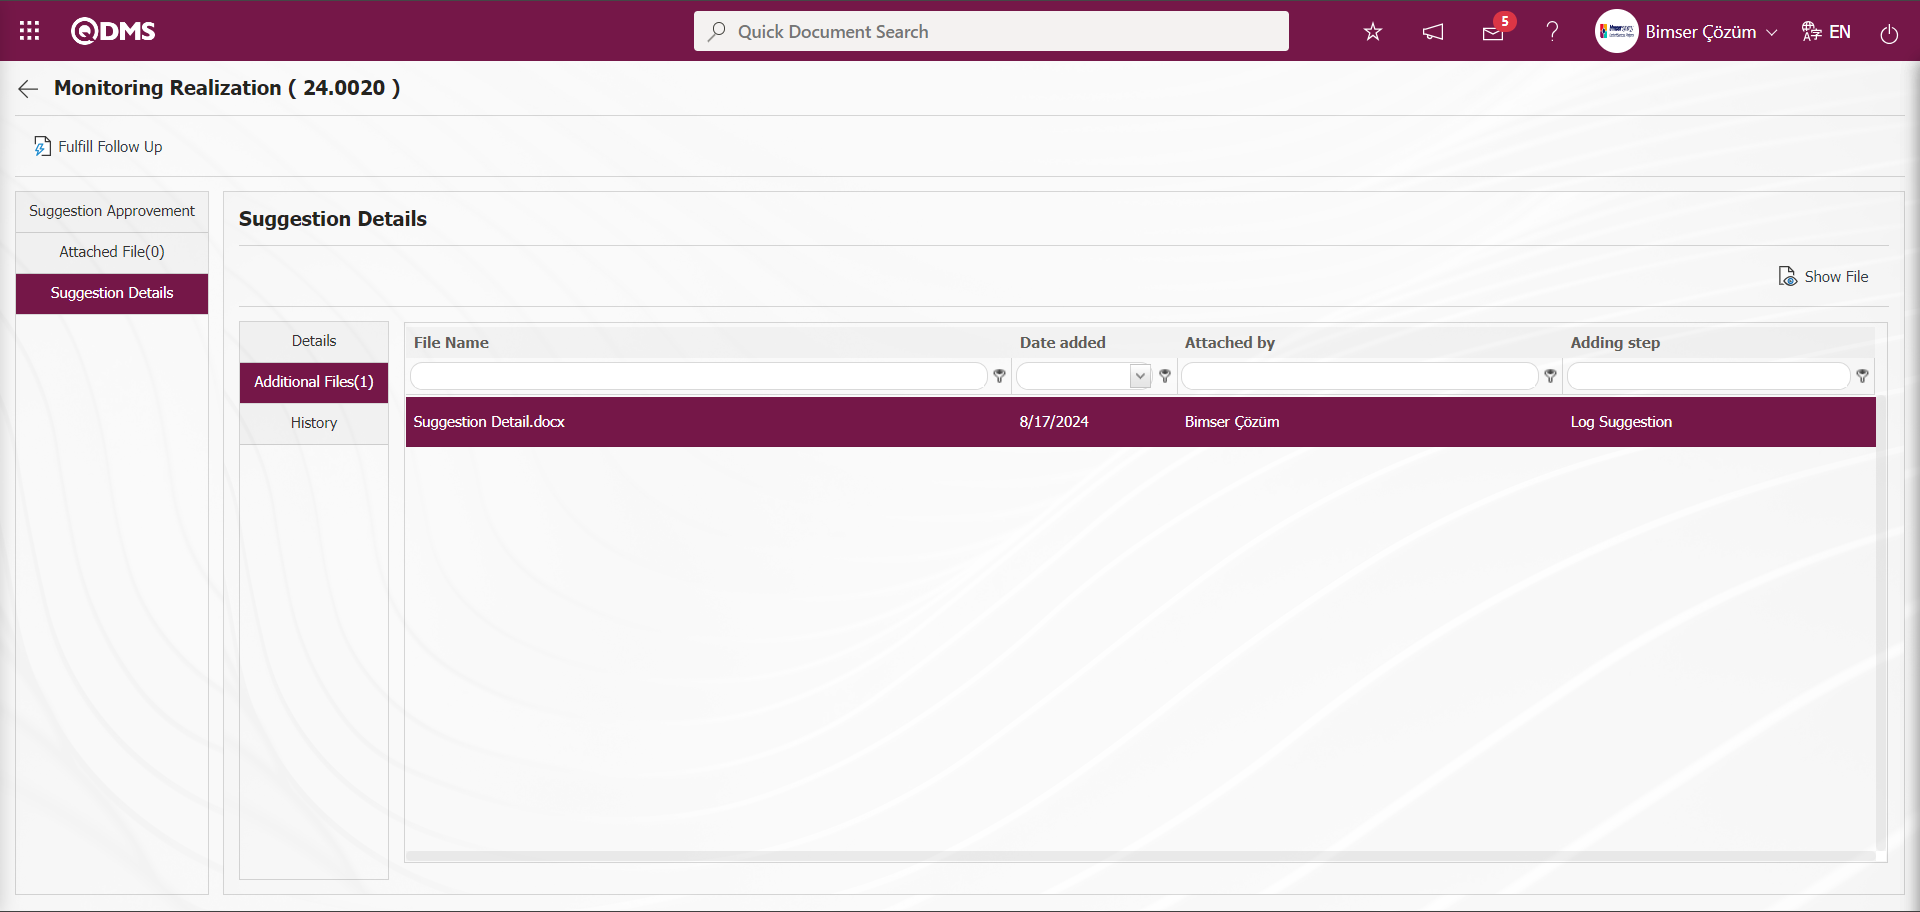
With the help of the buttons on the screen;
 : Display the selected attachment file in the list.
History Tab: It is the tab where the history of the transactions related to the suggestion until this stage is accessed. It is a tab that is displayed depending on the parameter. The parameter value of parameter 137 in the Suggestion System Module parameters is activated by selecting “Yes”.
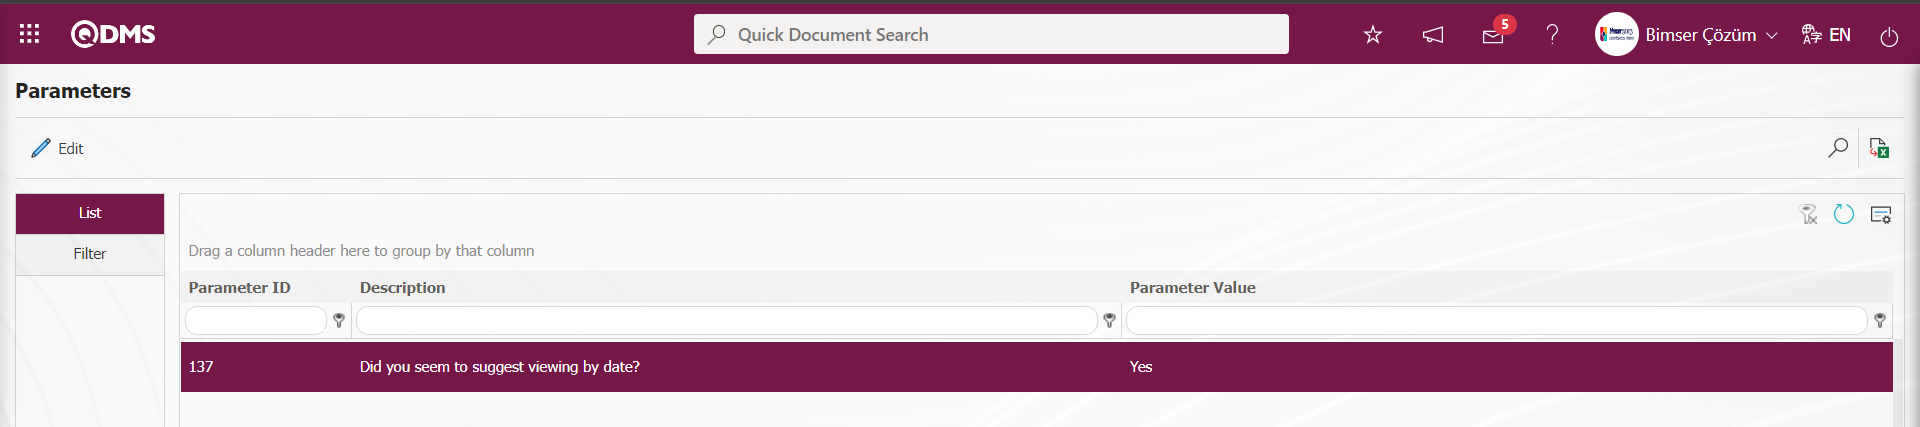
After the parameter is activated, the History tab is displayed at every stage in the Suggestion Details tab in the Suggestion System Module.
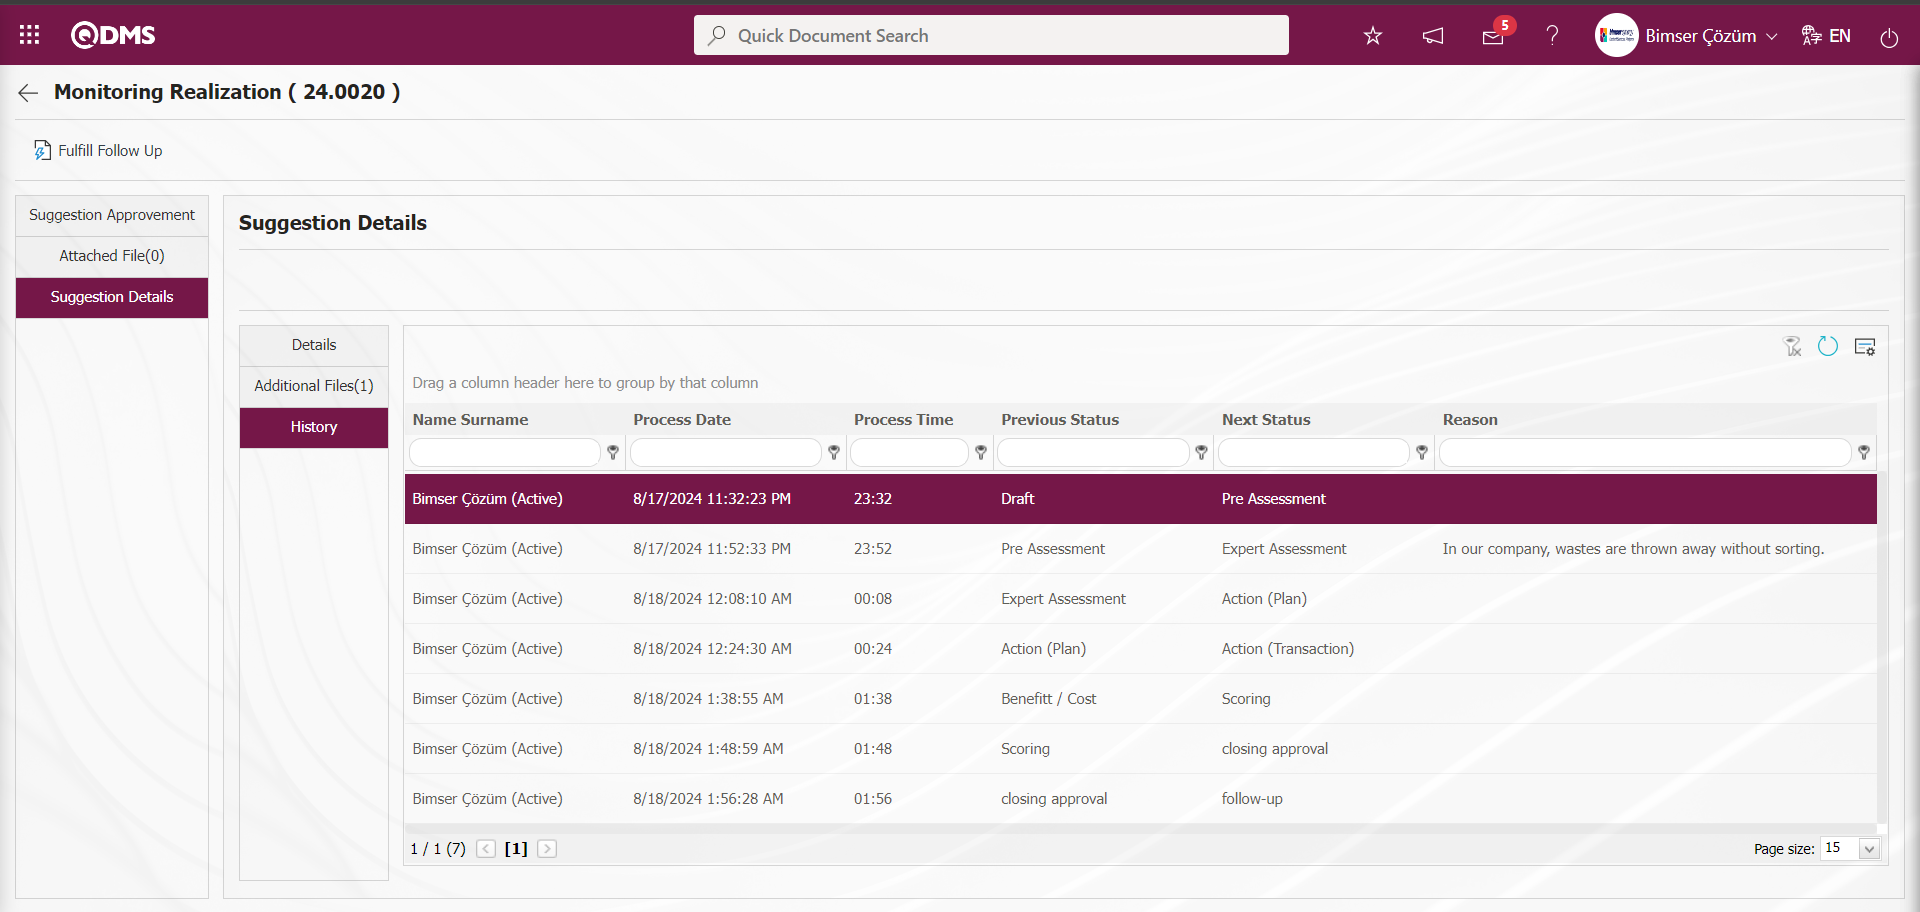
On the Monitoring Realization screen, click on the Suggestion Approvement tab.
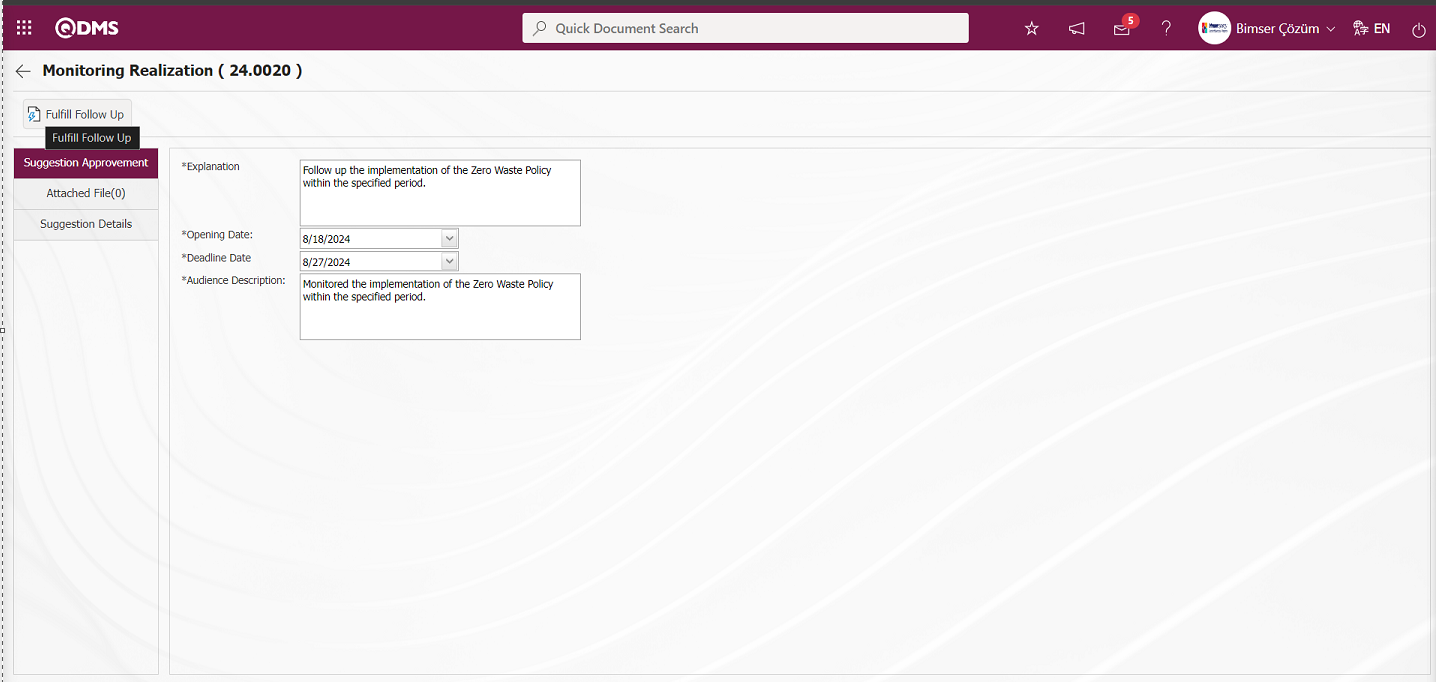
On the Monitoring Realization screen, the Monitoring explanation information is written. The necessary fields are edited on the relevant information and the monitoring realization registration is made by clicking the 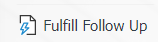 button.

After the monitoring realization registration process, the recommendation is sent to the person at the approval stage to carry out the closure stage.

5.3.1.9. Suggestions Pending Closure Approval
After the Monitoring process of the recommendation is realized, the person in the approval flow has the task “Shutdown Pending Approval Request form” on the “My Pending Jobs” page.
Suggestion Code link in Suggestion No field is clicked to open Suggestions Off Approval screen.
With the help of the buttons on the screen;
: Follow-up related to the suggestion takes place.
: Closing the suggestion is done
Related fields are defined on the screen that opens;
Explanation:It is the field where the explanation information about the Monitoring is written in the Suggestion Approvement tab on the Suggestions Off Approval screen.
Deadline Date: It is the field where the monitoring deadline date is selected in the Calendar field opened by clicking the drop-down list in the Suggestion Approvement tab on the Suggestions Off Approval screen.
To My Watchlist: In the Suggestions Off Approval screen, in the Suggestion Approvement tab on the Suggestion Approval tab, the person to be followed is selected from the list of personnel defined in the system opened by clicking the (Select) button.
Additional Files tab: This is the tab on the Suggestions Off Approval screen where additional files such as files, pictures, minutes, etc. are uploaded, the uploaded additional files are displayed and the additional files uploaded by mistake are deleted.

With the help of the buttons on the screen;
: The additional file is uploaded to the system.
: The uploaded additional file information is displayed.
: The uploaded additional file information is deleted.
On the Suggestions Off Approval screen, additional files are added at this stage by clicking the button on the Additional Files tab. Multiple additional files can be added.
Suggestion Details tab: This tab contains the Details, Additional Files and History tabs.
Details tab: This is the tab where all information about the suggestion is displayed.

Additional Files tab: This is the tab where the uploaded additional files related to the suggestion are accessed and the content of the uploaded additional files is displayed.

With the help of the buttons on the screen;
 : Display the selected attachment file in the list.
History Tab: It is the tab where the history of the transactions related to the suggestion until this stage is accessed. It is a tab that is displayed depending on the parameter. In the Suggestion System Module parameters, the parameter value of the parameter 137 is selected as “Yes” and the parameter is activated. After the parameter is activated, the History tab is displayed at all stages of the suggestion

On the Suggestions Off Approval screen, click on Suggestion Approvement tab.
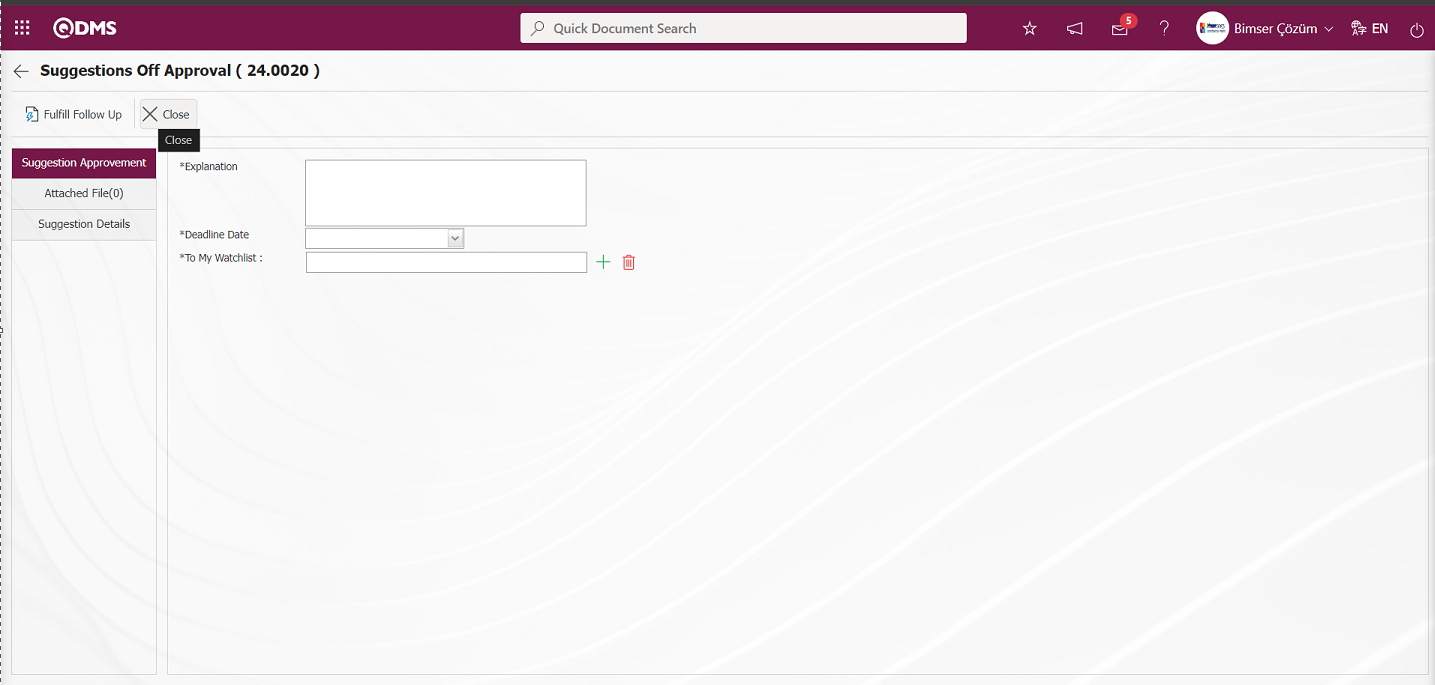
On the Suggestions Off Approval screen, the suggestion is closed by clicking the  button on the Suggestion Approvement tab.
On the My Suggestions screen, the status of the Closed Suggestion is displayed as “Closed Suggestion (Accepted)”.

5.3.1.10. Resulting Suggestions
After the Suggestion is closed, feedback is given to the proposer by the system. “My Proposal Resulted” information appears on the ‘My Pending Work’ page of the suggesting user.
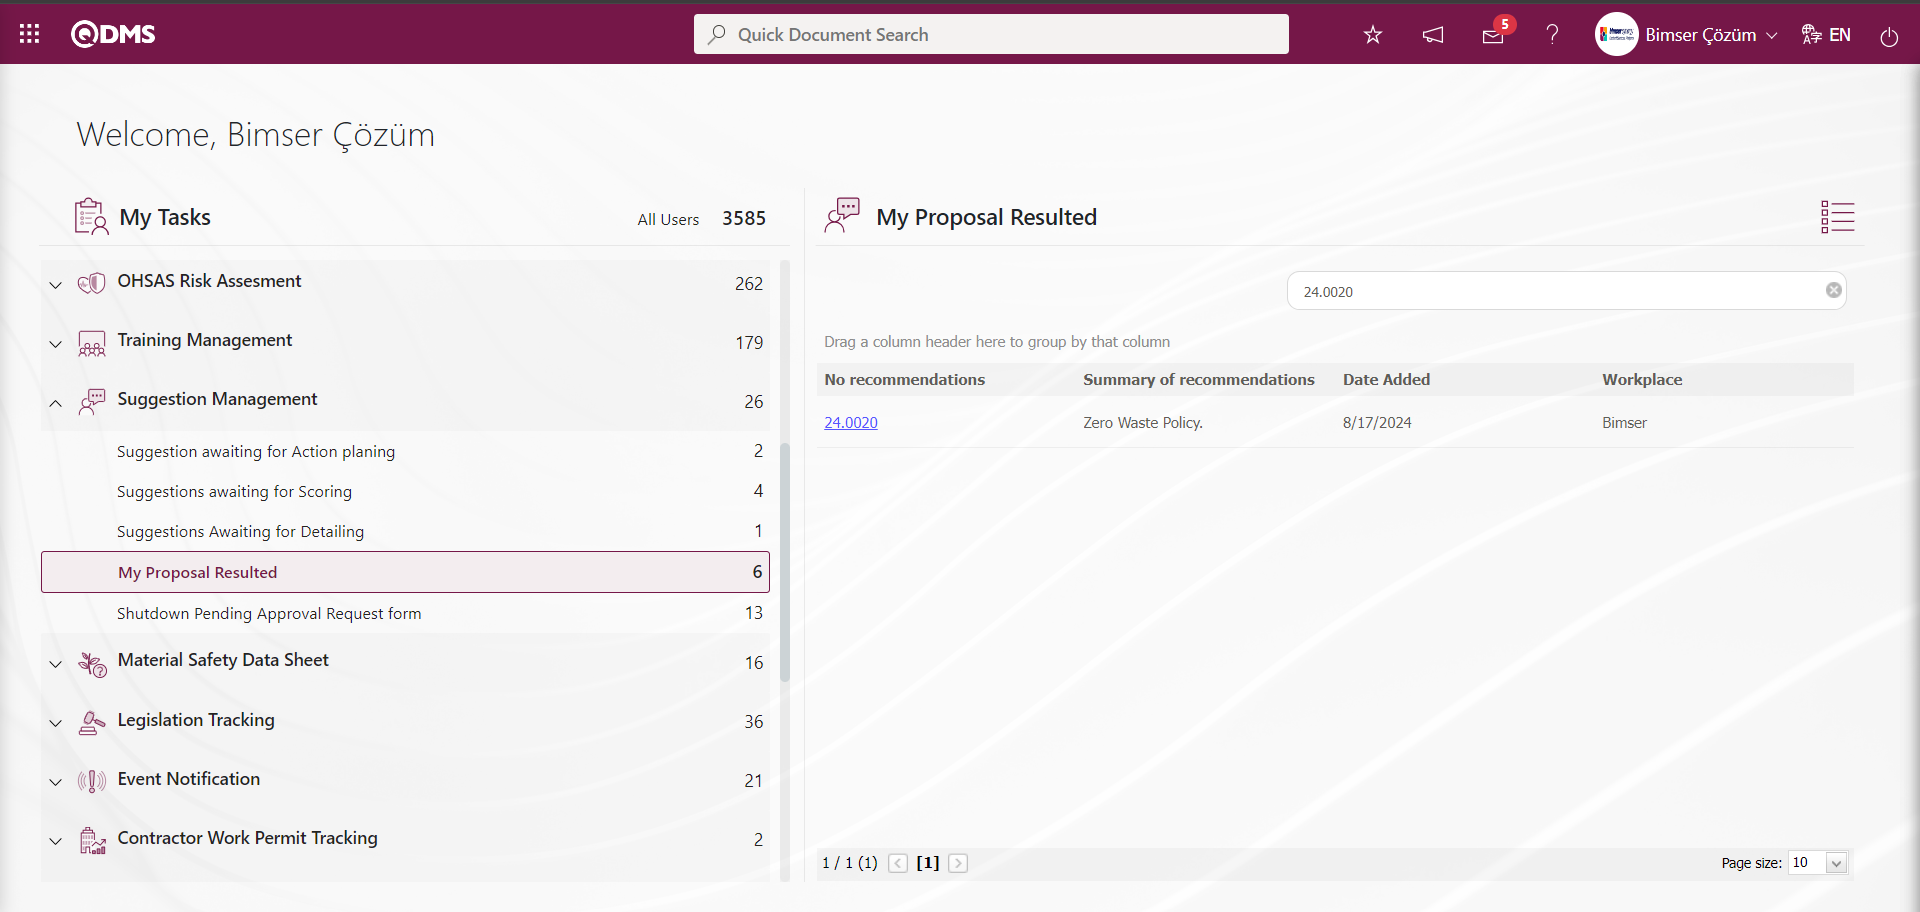
By clicking on the suggestion number, the transaction information related to the suggestion is displayed on the screen that opens.
Details tab: The details of all stages from the suggestion entry stage to the finalization stage of the suggestion are displayed.
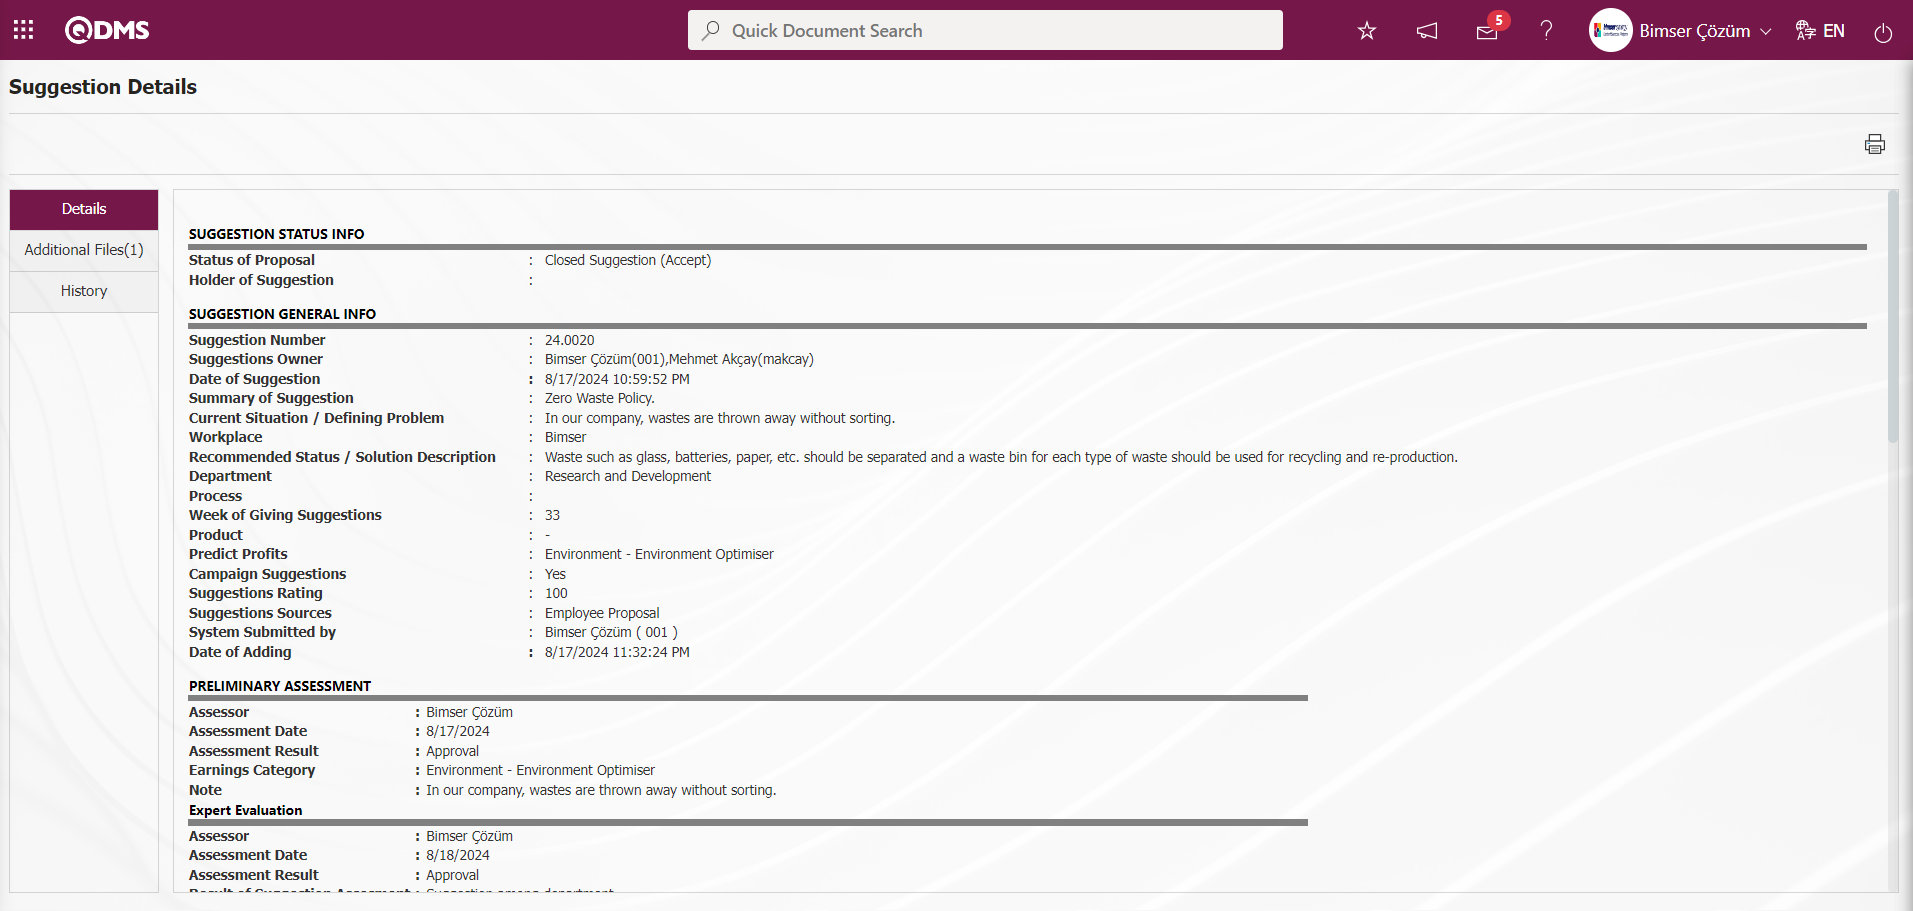
Additional Files tab: This is the tab where the uploaded additional files related to the suggestion are accessed and the content of the uploaded additional files is displayed.
With the help of the buttons on the screen;
 : Display the selected attachment file in the list.
History Tab: It is the tab where the history of the transactions related to the suggestion until this stage is accessed. It is a tab that is displayed depending on the parameter. The parameter value of parameter 137 in the Suggestion System Module parameters is activated by selecting “Yes”.
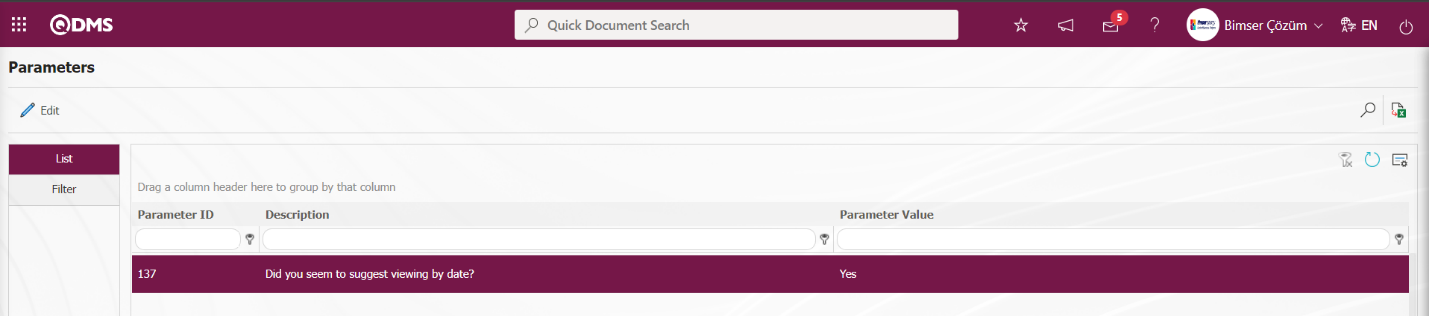
After the parameter is activated, the History tab is displayed at every stage in the Suggestion Details tab in the Suggestion System Module.
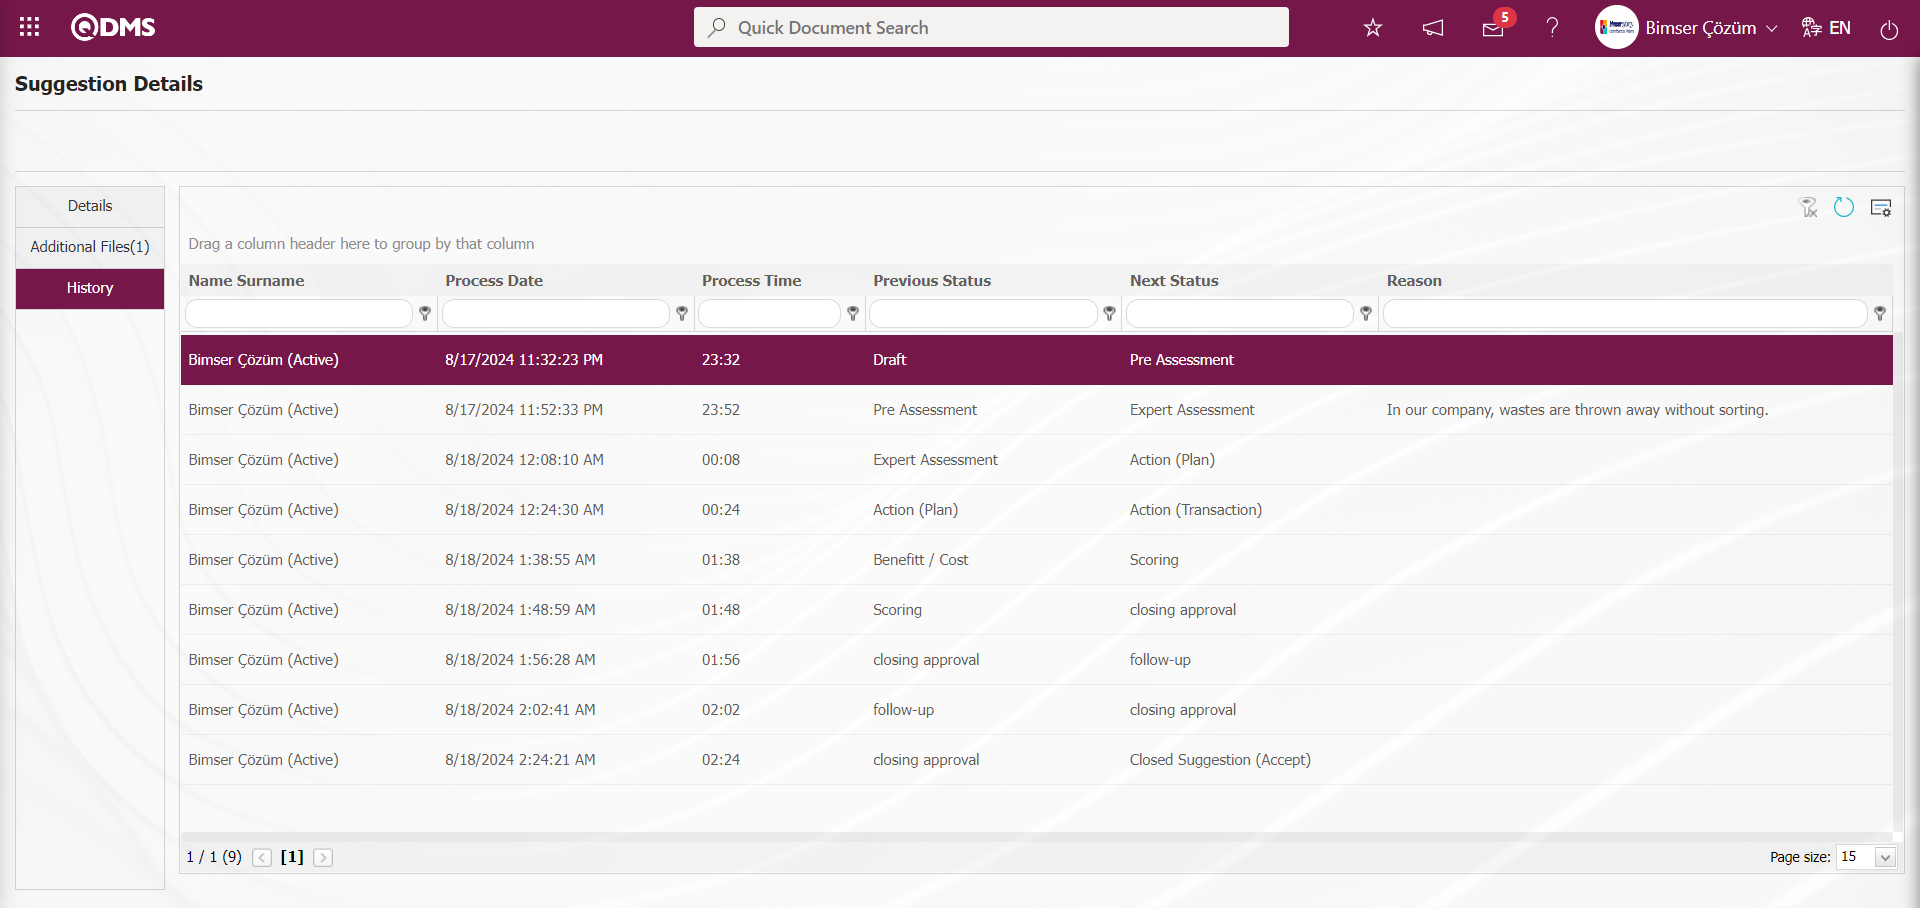
5.3.2. Spend Point
Menu Name: Integrated Management System/ Suggestion System/ Spend Point
This is the menu where the points earned from suggestions are spent by users. This menu is used if the company has a reward system for suggestions. Point spending operations for rewards such as additional payment, gift, shopping voucher are performed in this menu. The point spending process must be done by the users who give the rewards.There are two tabs on the Rate List screen, Rate List and Filter tab.Rate List screen displays the points belonging to the users..

With the help of the buttons on the screen;
 : Point expenditure process is done.
While the user is selected on the Points List screen, click on the button.
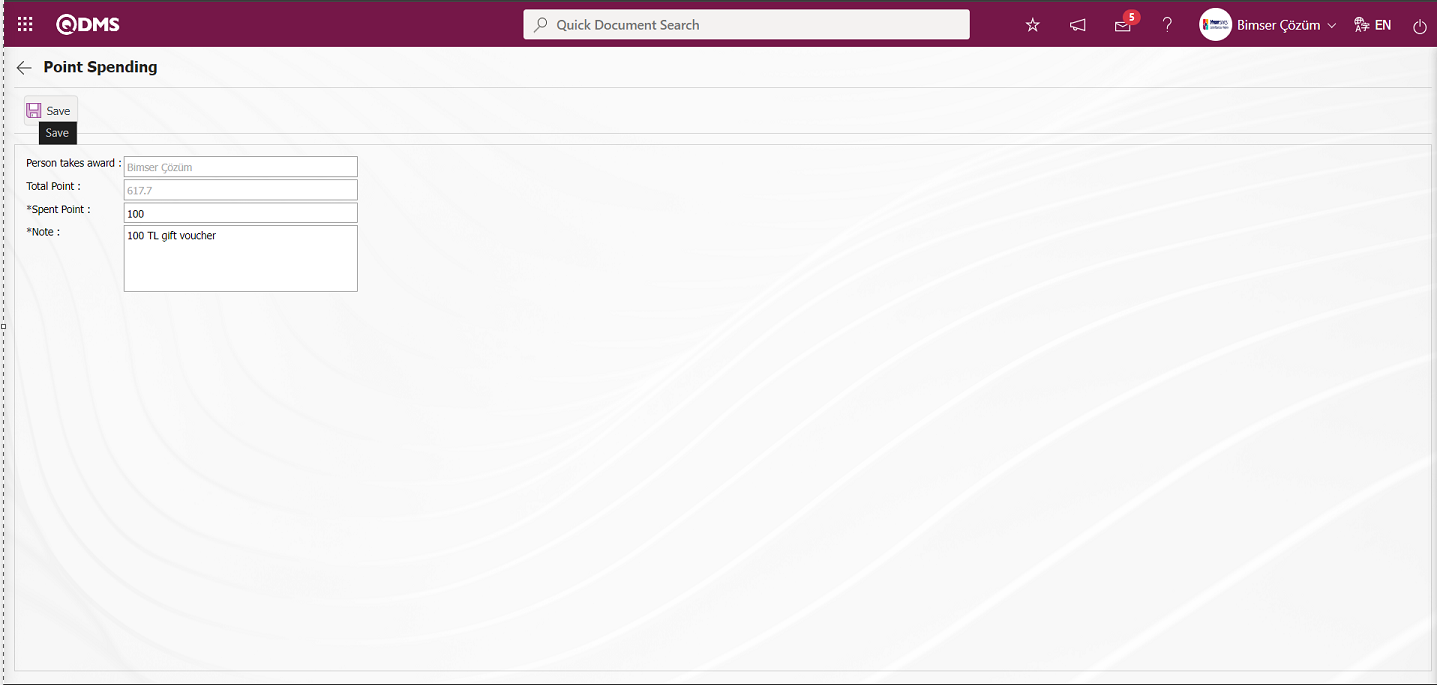
Related fields are defined on the screen that opens;
Person takes award: This is the field where the name and surname information of the user who received the gift is given by the system on the Point Spending screen.
Total Points: This is the field where the total points of the user is given by the system on the Point Spending screen.
Spent Points: This is the field where the point information of the spent points is written on the Point Spending screen.
Note: It is the field where the explanation information about the point expenditure is written on the Point Spending screen.
On the Point Spending screen, the user's spent points and description information are written. After entering the relevant information in the required fields, the Point Spending registration process is done by clicking the  button in the upper left corner of the screen.
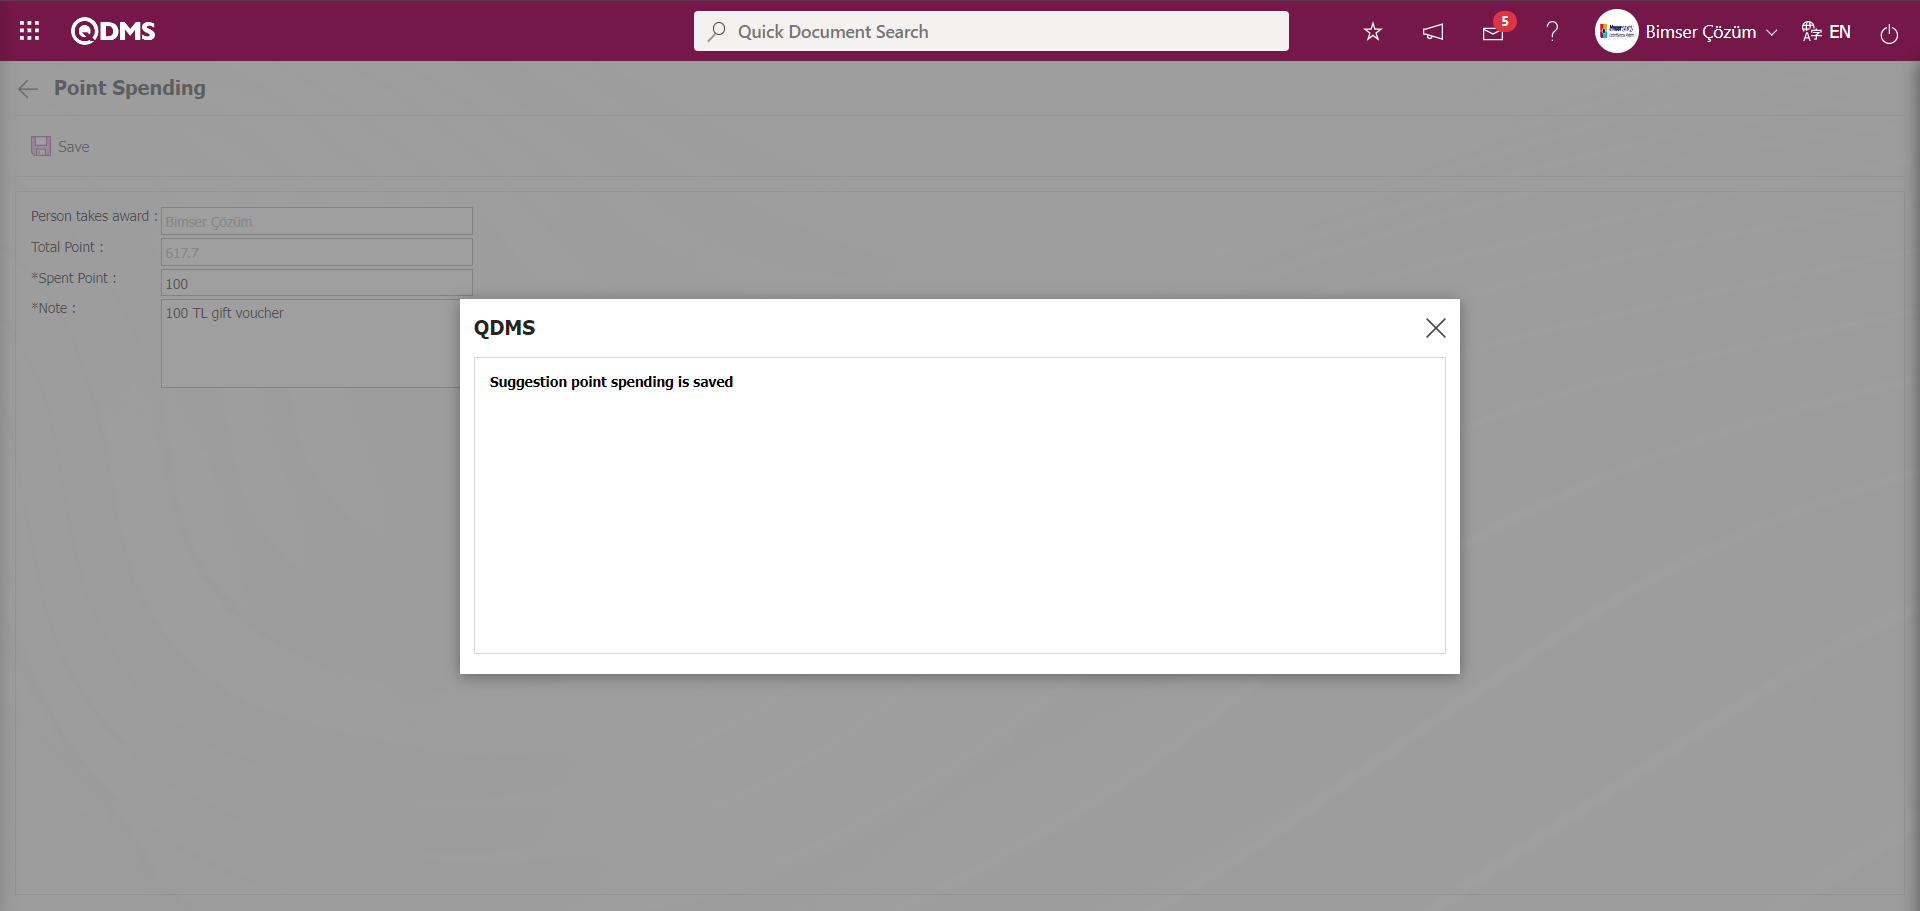
The system will give a message about the registration of the suggestion point spending, indicating that the point spending registration process has taken place.
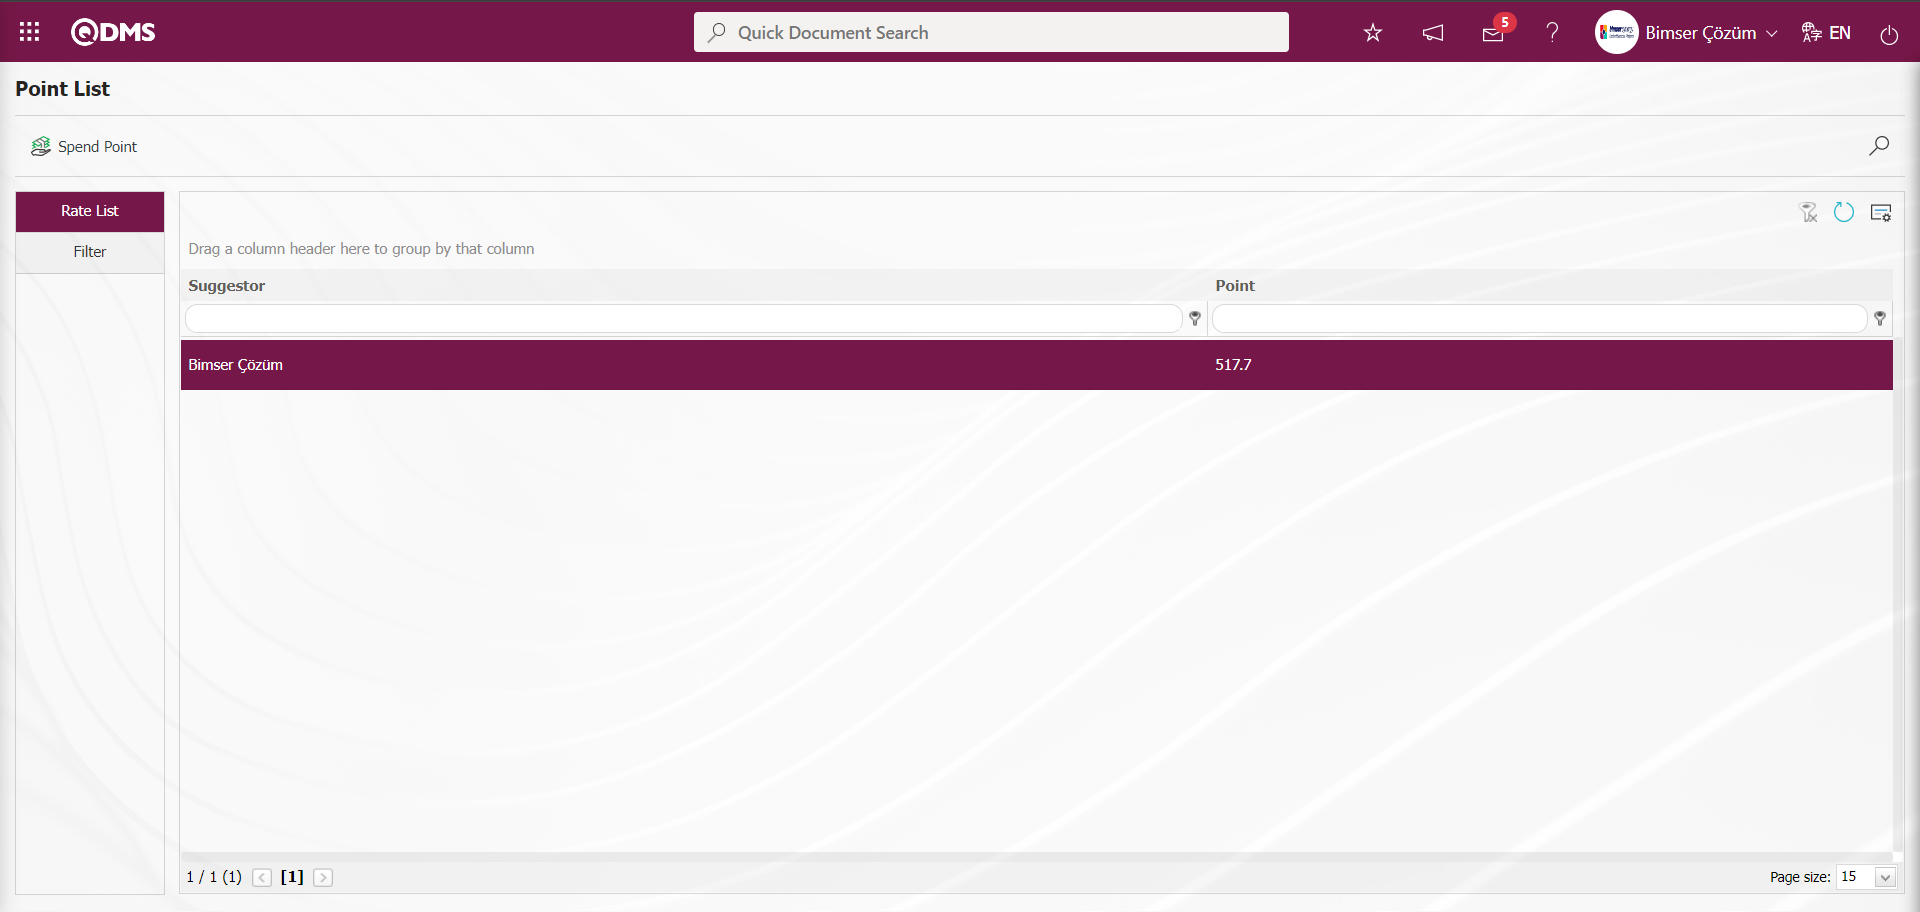
In the Filter tab, filtering is done by entering or selecting data in the search criteria fields and clicking the  (Search) button.
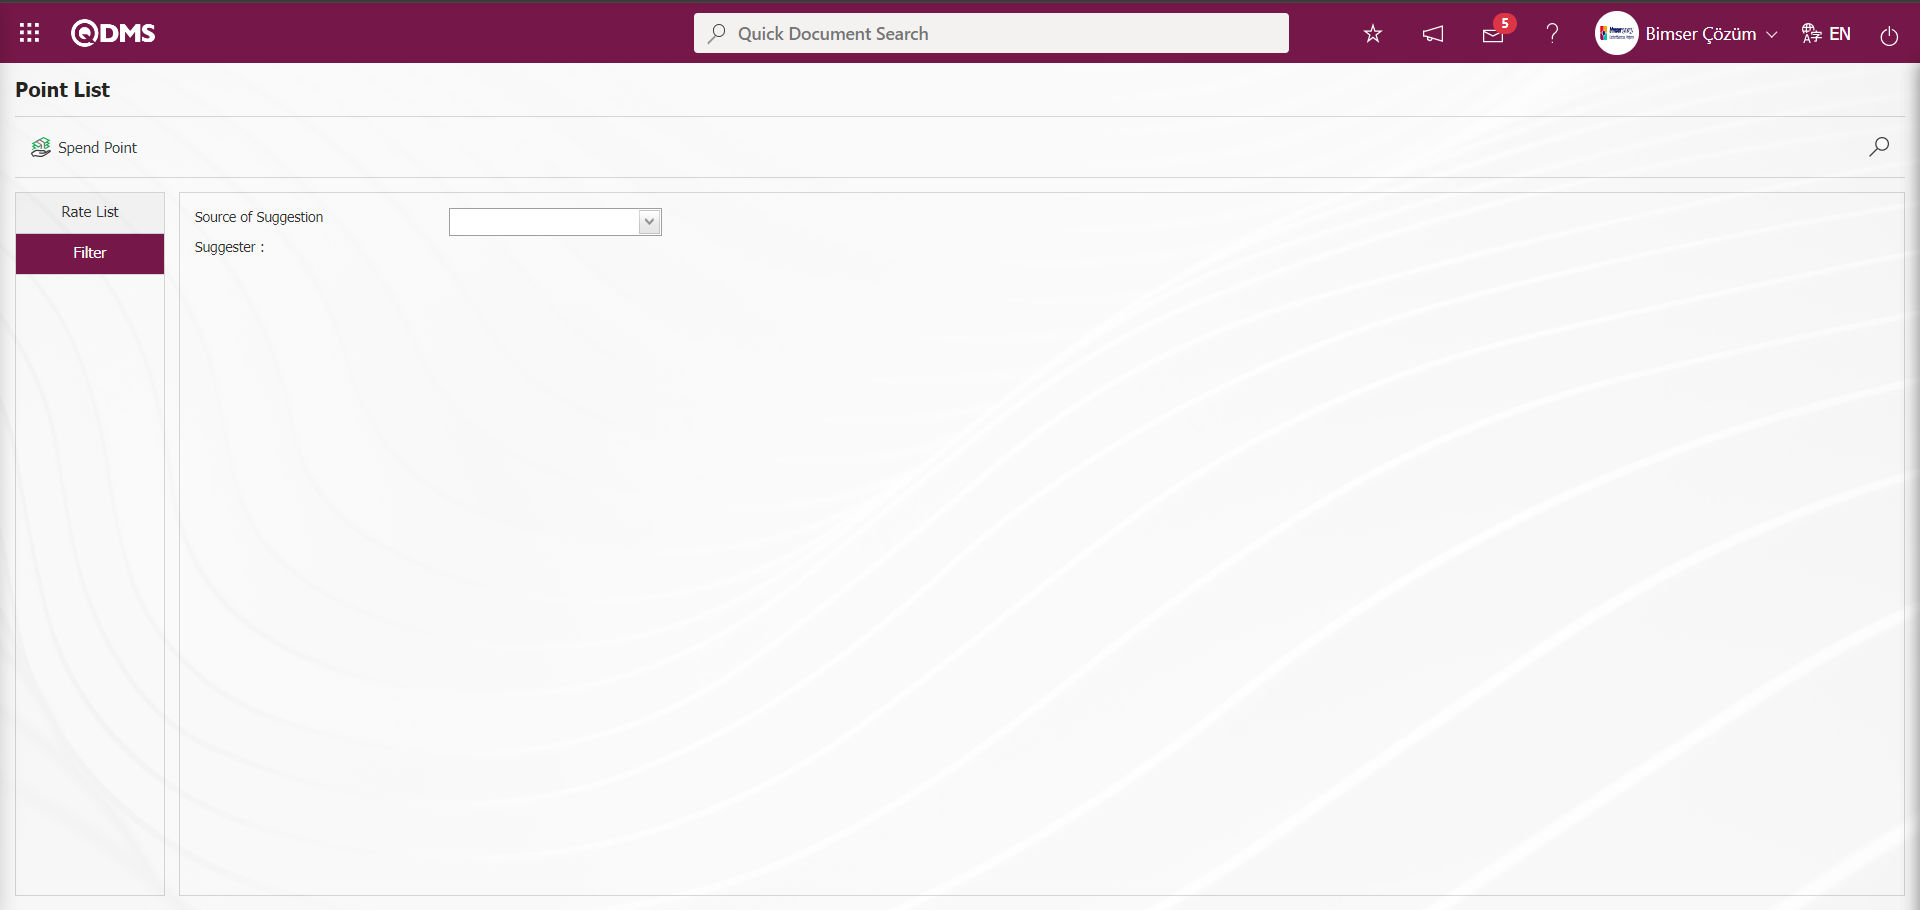
5.3.3. Feedback Approval
Menu Name: Integrated Management System / Suggestion System / Feedback Approval
It is the menu used to manually provide feedback on the status of the suggestion given in the system on behalf of a staff member who is registered in the QDMS system but is not a user of the QDMS system. In cases where the staff member giving the suggestion does not have a computer, it is the mechanism used to transmit the result of the suggestion to the person. The task of transmitting the recommendation result to the person who gave the recommendation is the person who performs the expert evaluation of the recommendation. If the feedback parameter is active, if the suggestion is rejected during the expert evaluation phase, the expert evaluator is tasked with feedback. The expert can close this task by coming to QDMS after communicating this to the recommender. Likewise, when the suggestion is accepted, the Suggestion Specialist is assigned the feedback task. The recommendation expert can close this task in QDMS after informing the recommendation giver that the recommendation has been accepted.
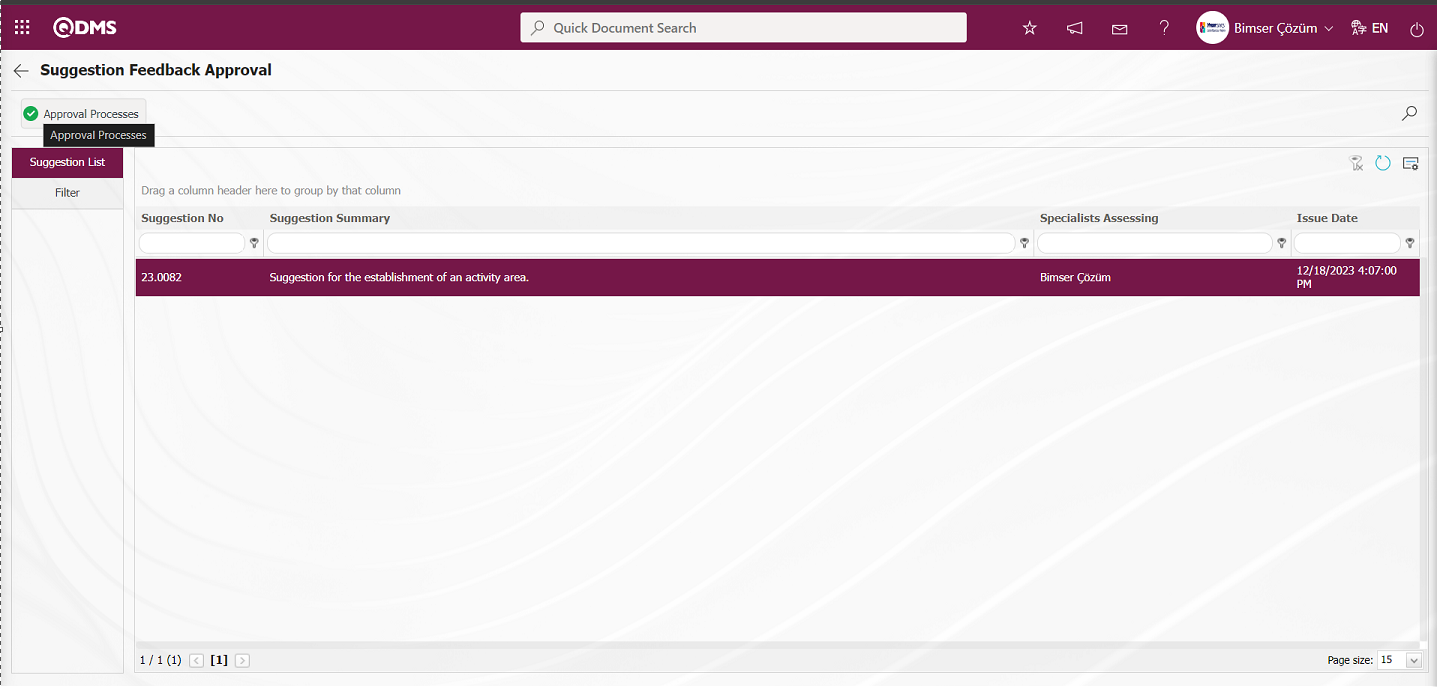
With the help of the buttons on the screen,
 : Returns to the previous screen.
 : Records can be searched by filtering.
 : Approval operations are performed
On the Suggestion Feedback Approval screen, on the Suggestion List tab, click the button while the suggestion is selected from the list. On the Suggestion Feedback Approval - Approval/Rejection Processes screen, there are 3 tabs: Approval/Rejection Processes, Feedback Details and Suggestion Details screen.
Approval/Rejection Processes Tab: This is the tab where Feedback Acceptance Status is selected for approval and rejection options.
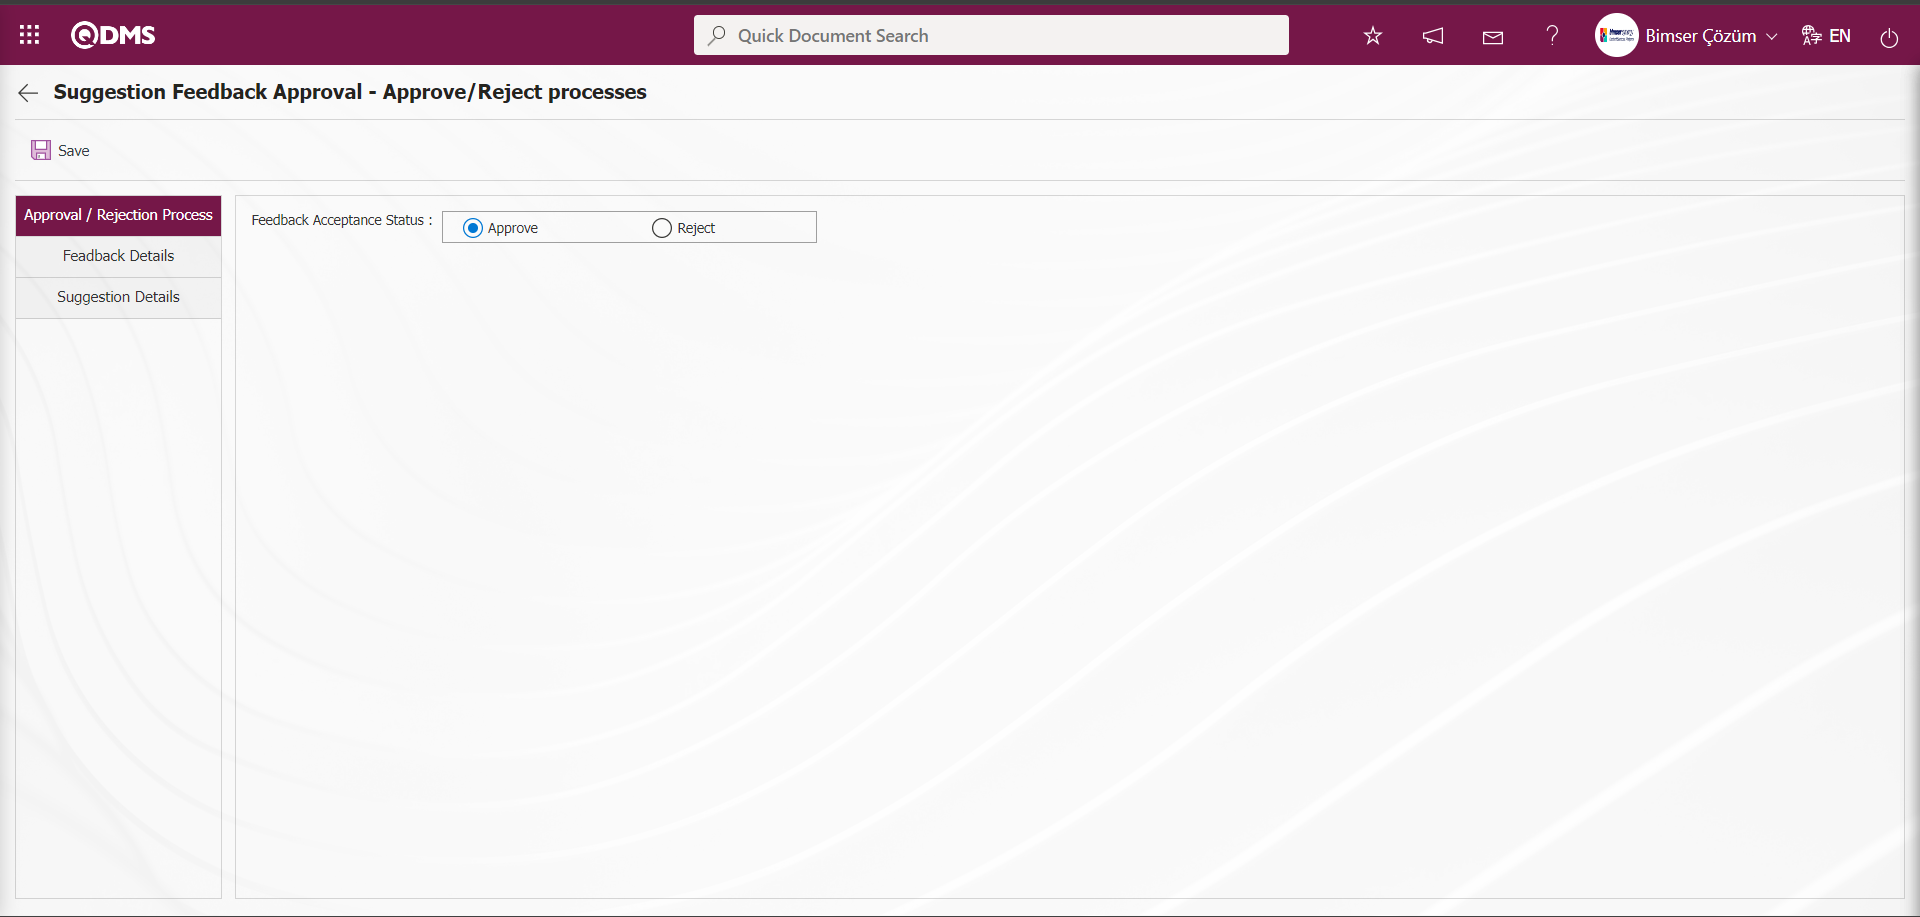
With the help of the buttons on the screen,
 : Registration is done.
The following fields are defined on the screen that opens;
Feedback Acceptance Status: This is the field where the Feedback Acceptance Status is selected from the approval and rejection options on the Suggestion Feedback Approval - Approval/Rejection Processes screen.
Feedback Details tab: This is the tab where detailed information about the feedback such as Suggestion No, Notification No and the feedbacker can be found.
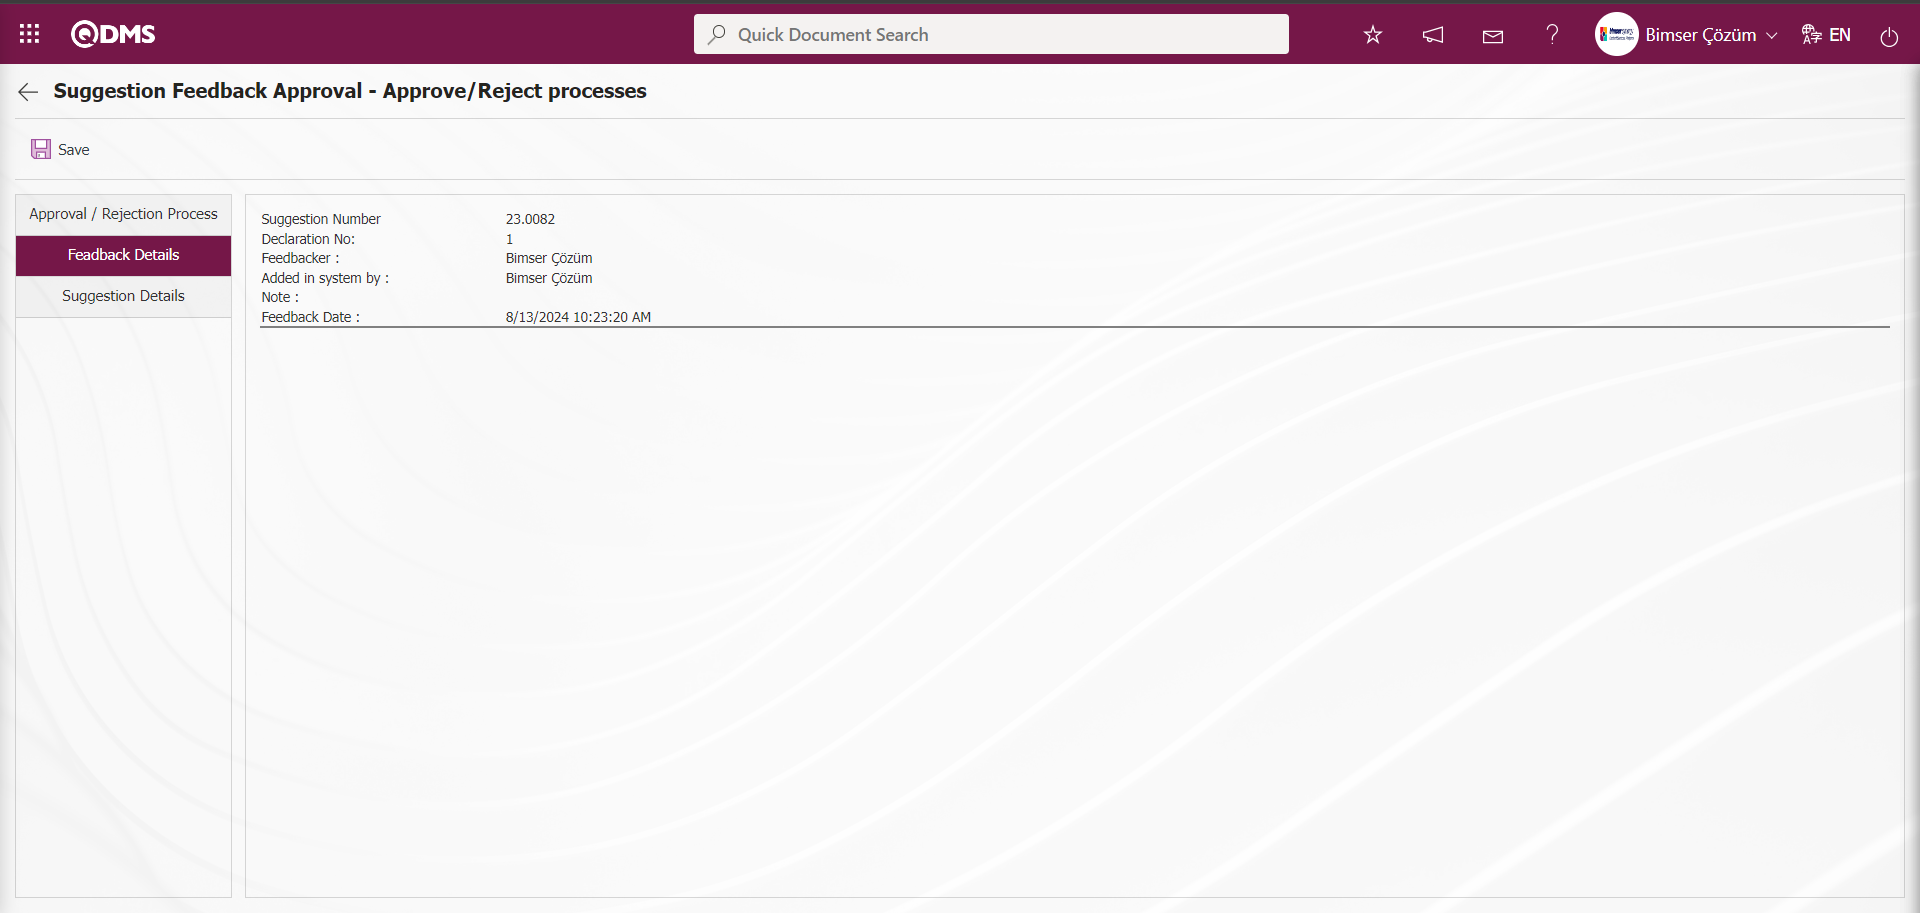
Suggestion Details tab: This tab contains the Details, Additional Files and History tabs.
Details tab: This is the tab where all information about the suggestion is displayed.

Additional Files Tab: This is the tab where the uploaded additional files related to the suggestion are accessed and the content of the uploaded additional files is displayed.
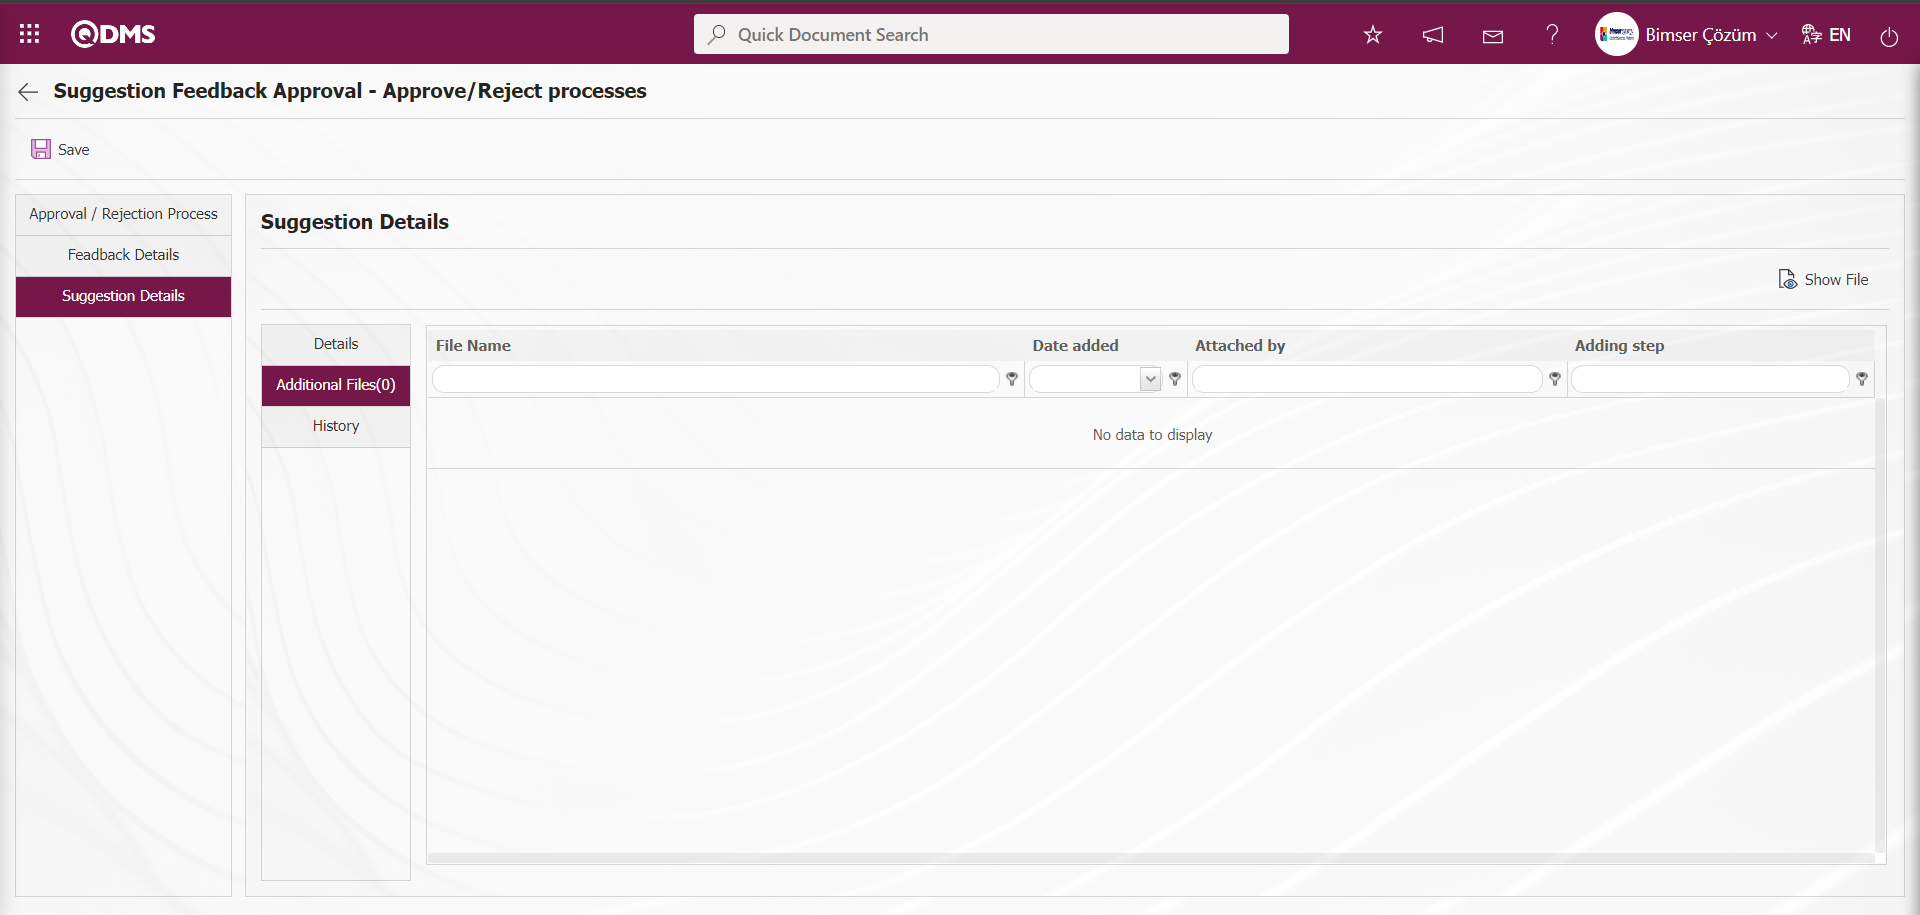
With the help of the buttons on the screen;
 : Display the selected attachment file in the list.
History Tab: It is the tab where the history of the transactions related to the suggestion until this stage is accessed. It is a tab that is displayed depending on the parameter. The parameter value of parameter 137 in the Suggestion System Module parameters is activated by selecting “Yes”.
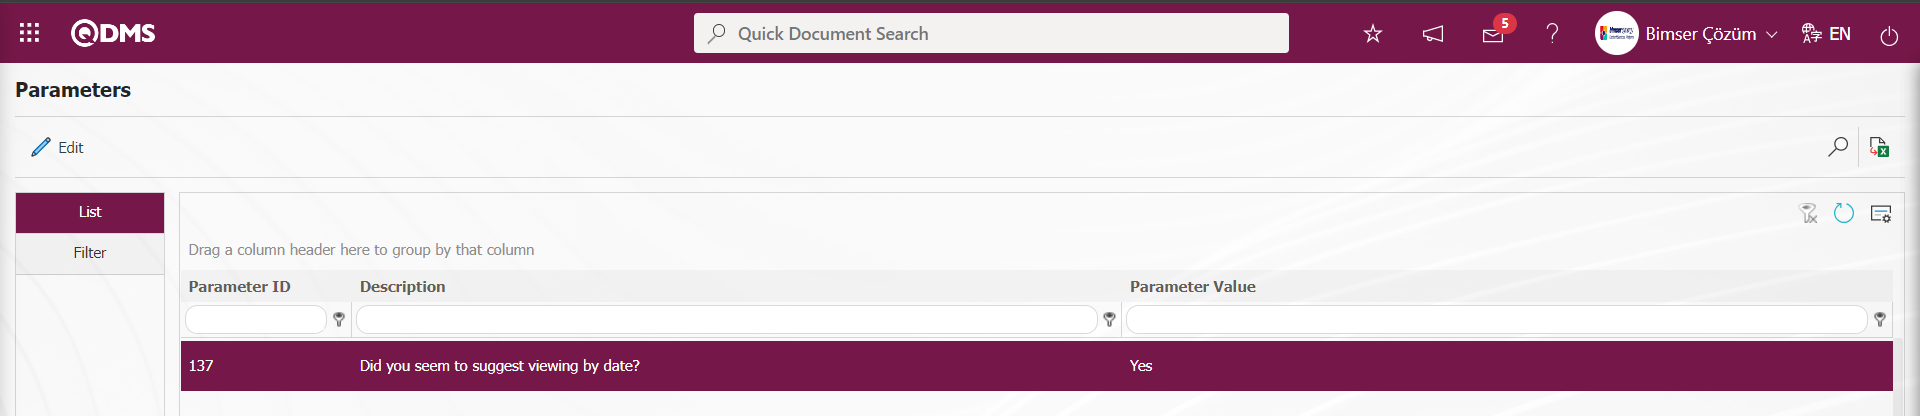
After the parameter is activated, the History tab is displayed at every stage in the Suggestion Details tab in the Suggestion System Module.
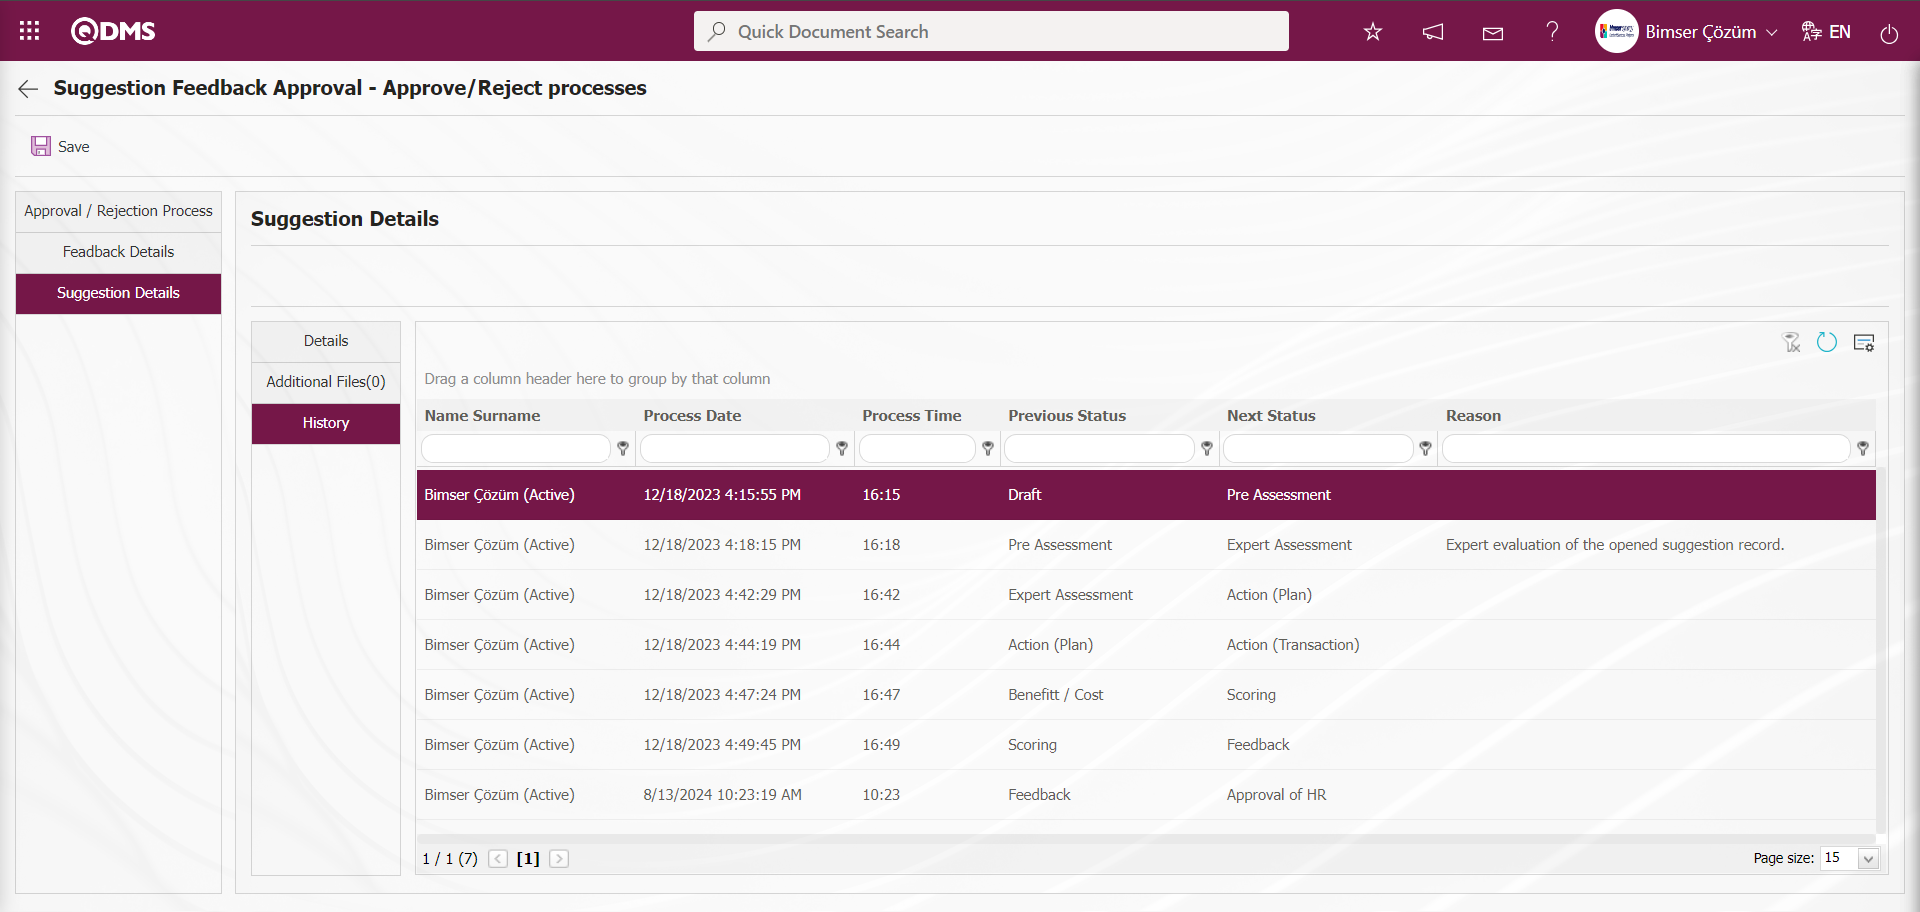
Click on the Approval/Rejection Processes Tab on the Suggestion Feedback Approval - Approval/Rejection Processes screen.

Suggestion Feedback Approval - On the Approval/Rejection Processes screen, in the Approval/Rejection Processes Tab, the Approval option is selected in the Feedback Acceptance Status options. After entering the relevant information in the required fields, the feedback registration process is done by clicking the  button in the upper left corner of the screen.
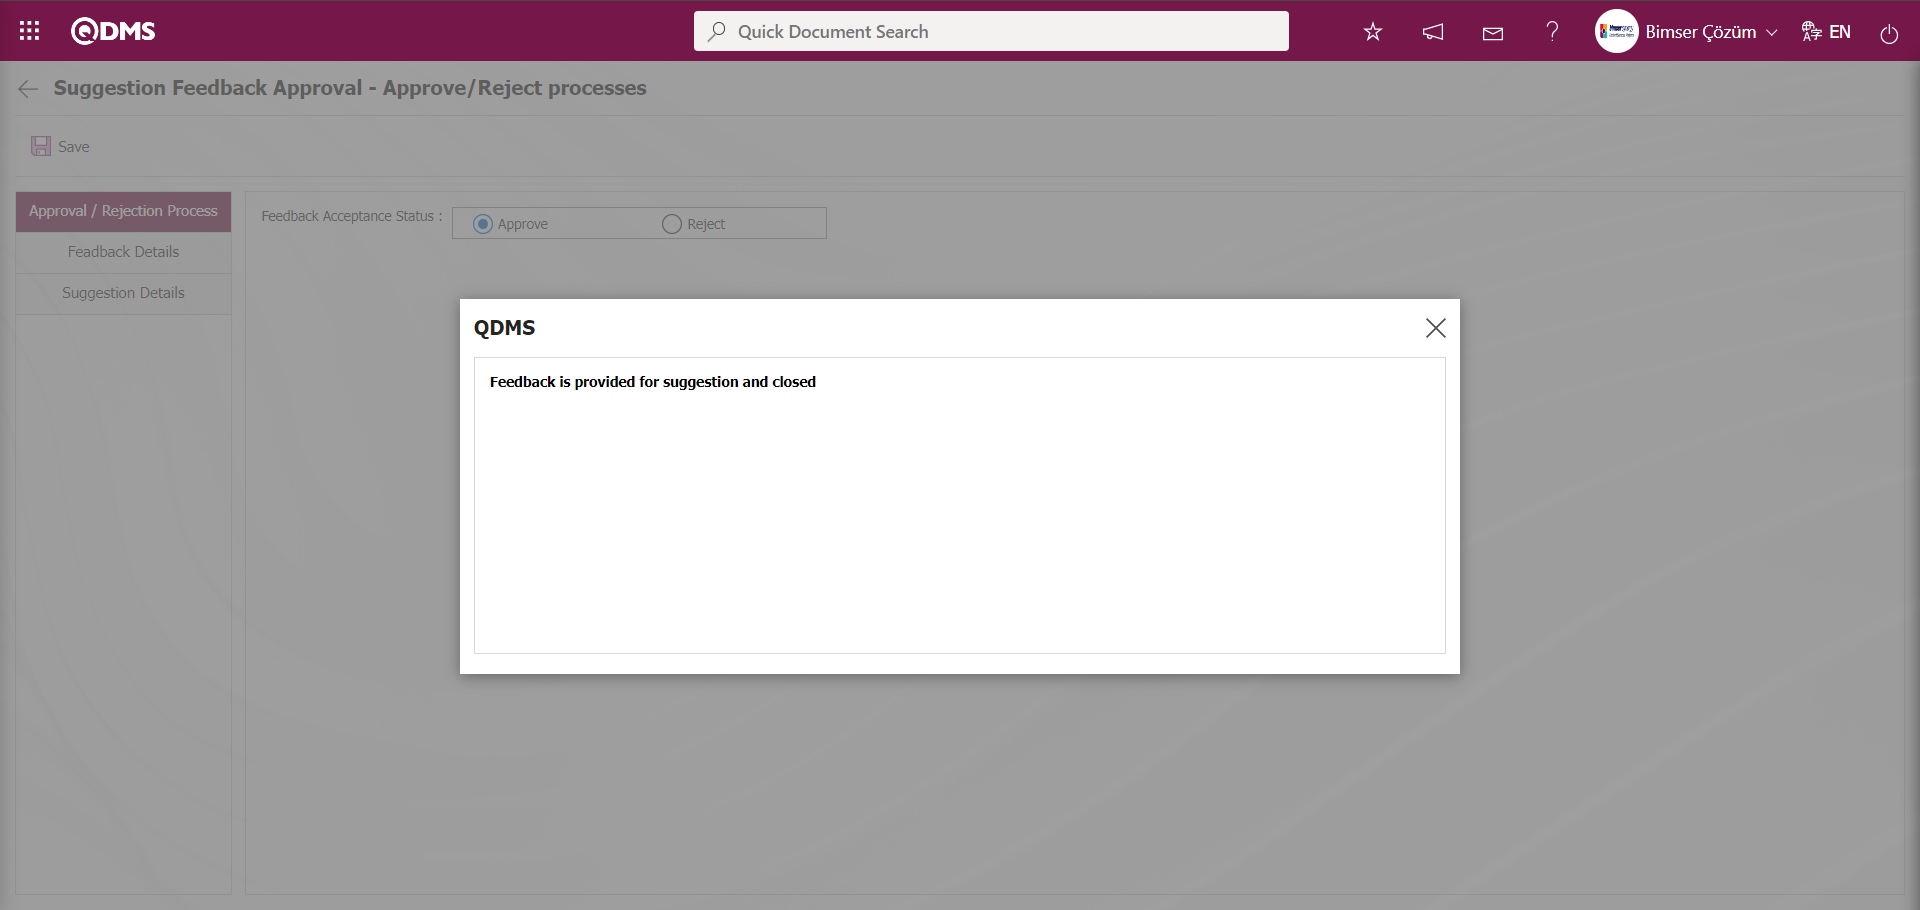
The system will give a message about the successful closure of the suggestion feedback, indicating that the feedback registration process has taken place.
If feedback is required to be mandatory in the Suggestion System Module, the parameter value of parameter 20 should be activated by selecting “Yes”.

If it is desired that the Recommendation goes to the approval of the Pre-assessment team after the Feedback, the parameter value of parameter 25 should be selected as “Yes” and the parameter should be activated.
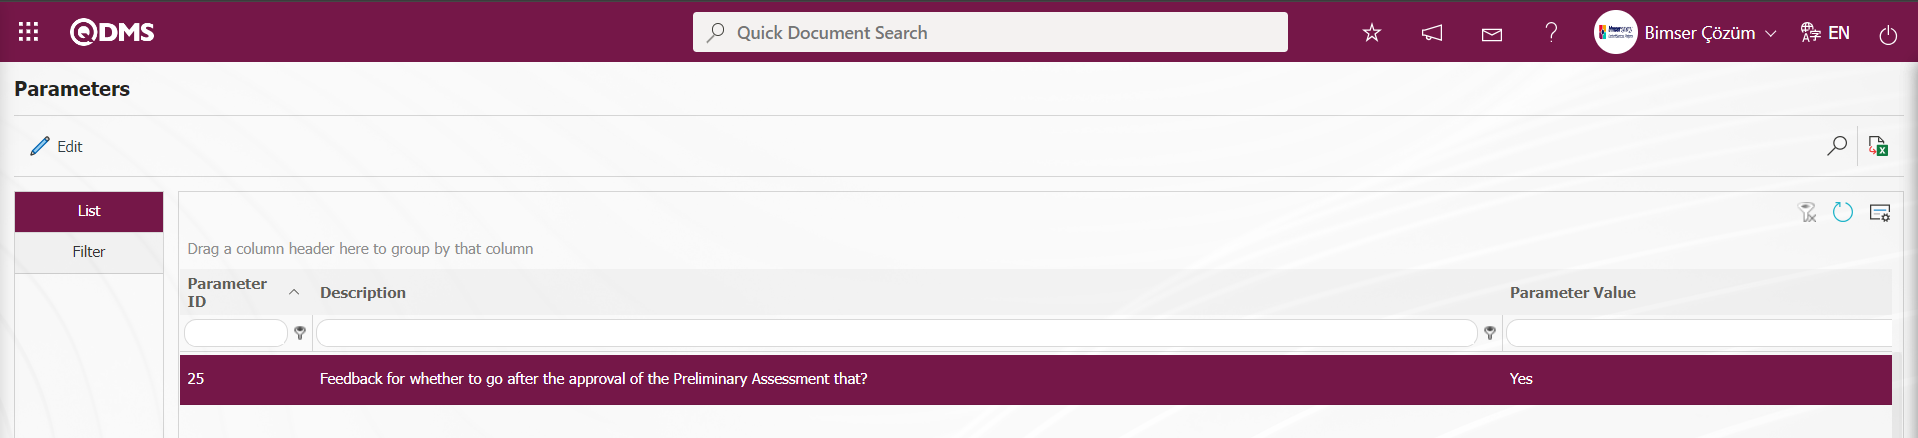
If you want to make attachment of additional file in Feedback mandatory, the parameter value of parameter 37 should be activated by selecting “Yes”.
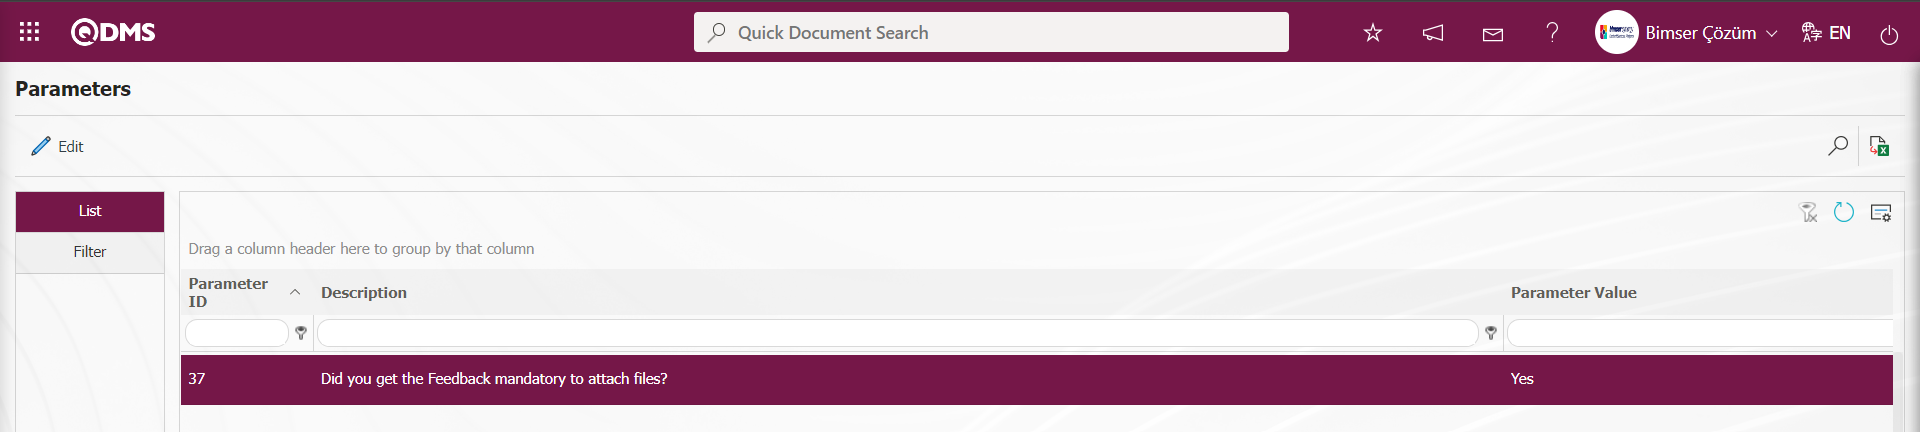
In order to determine the waiting time for feedback in days, parameter 157 must be defined in the parameter value.
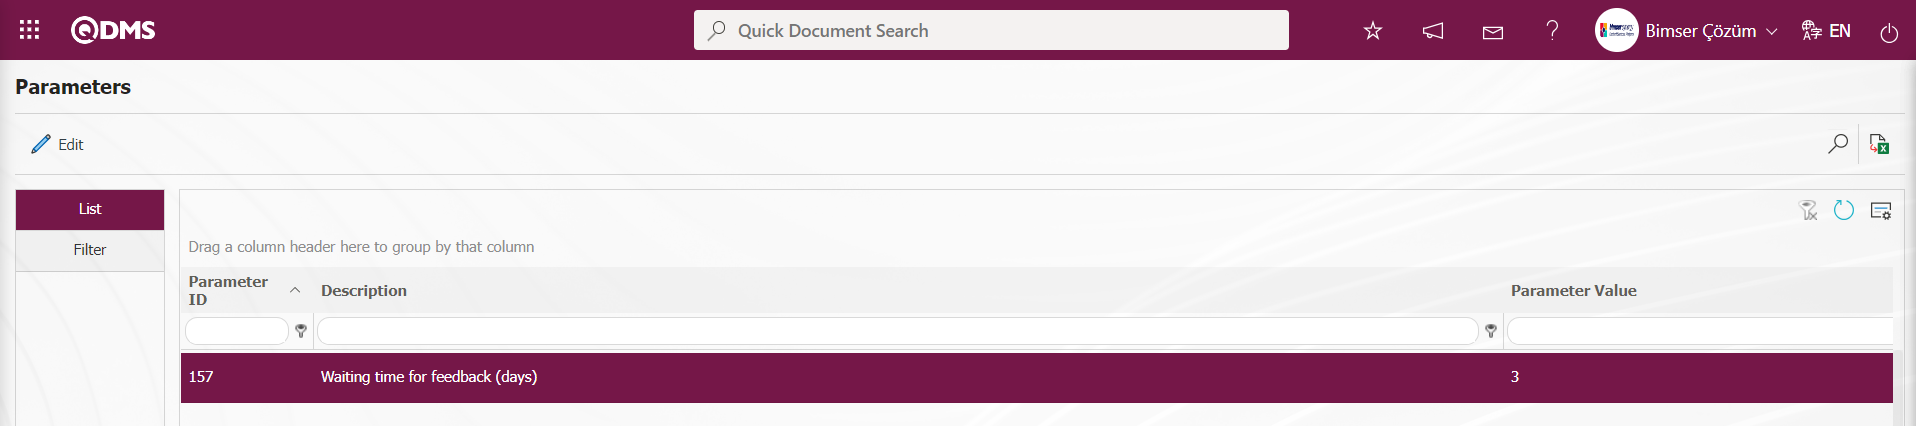
In order to determine the approval period for feedback in days, parameter 158 must be defined in the parameter value.
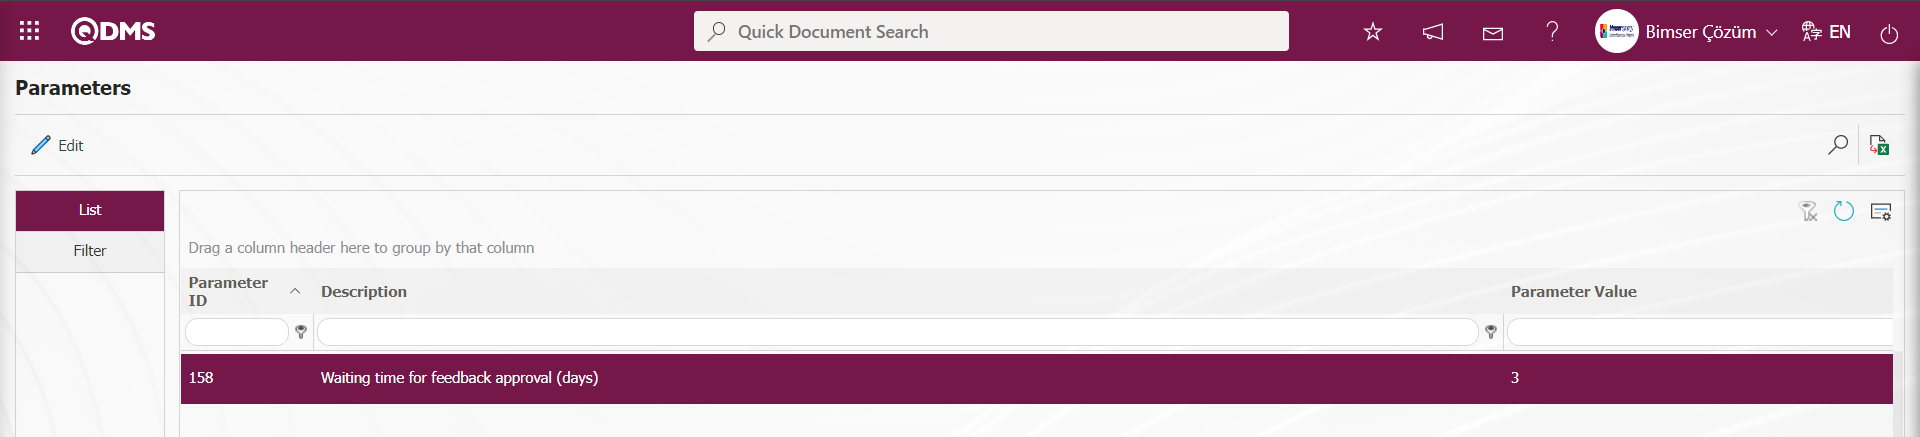
In the Filter tab, data is entered in the fields with search criteria and filtering is done by clicking the  (Search) button.

5.3.4. Suggestion Objection
Menu Name: Integrated Management System/ Suggestion System/ Suggestion Objection
Suggestions rejected by the user at any stage are listed and displayed. The user can use this menu to object to the rejection of his/her suggestion.
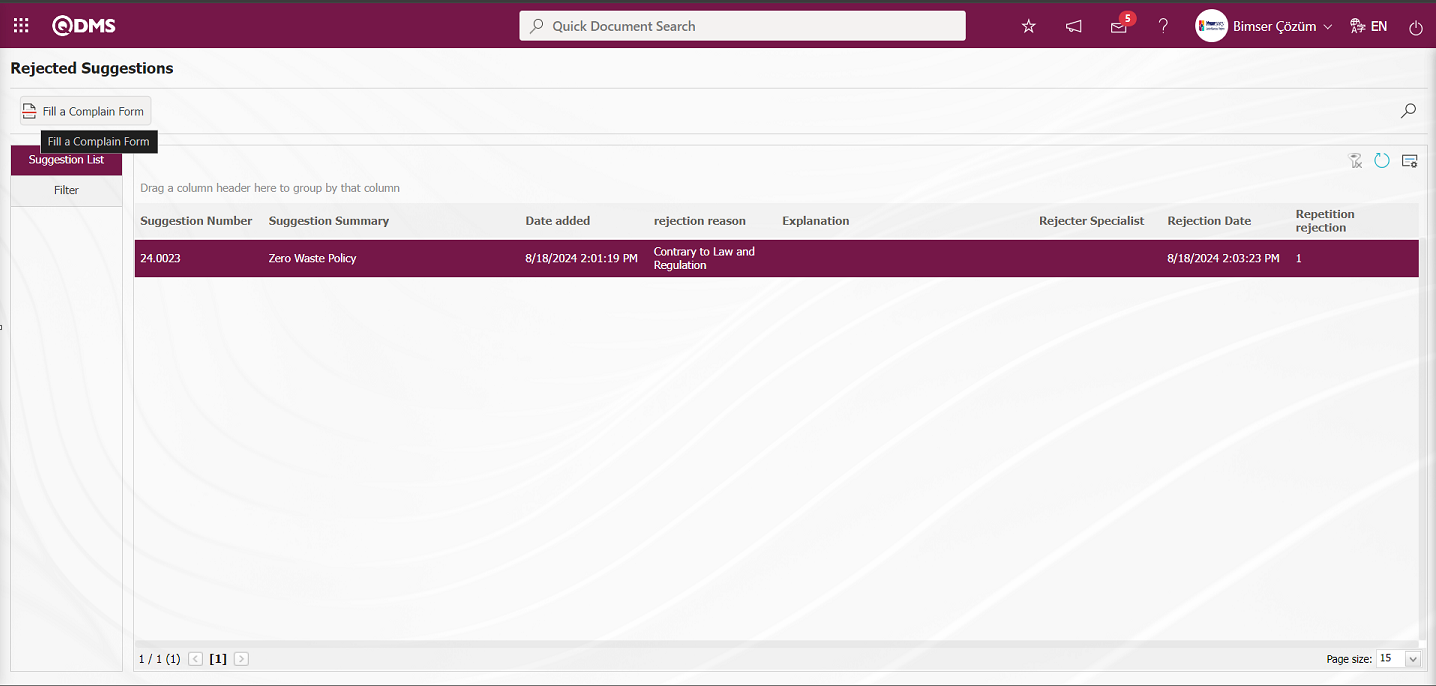
With the help of the buttons on the screen,
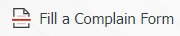 : Filling in the objection form is done.
While the rejected suggestion is selected on the Rejected Suggestions screen, click the button. Rejected Suggestions - Filling Objection Form screen opens. On the Rejected Suggestions - Filling Objection Form screen, we see 3 tabs: Approval / Rejection Process, Suggestion Details and Additional files.
Approval/Rejection Process tab: Rejected Suggestions - This is the tab where the explanation information is written for the Objection Form Filling process.
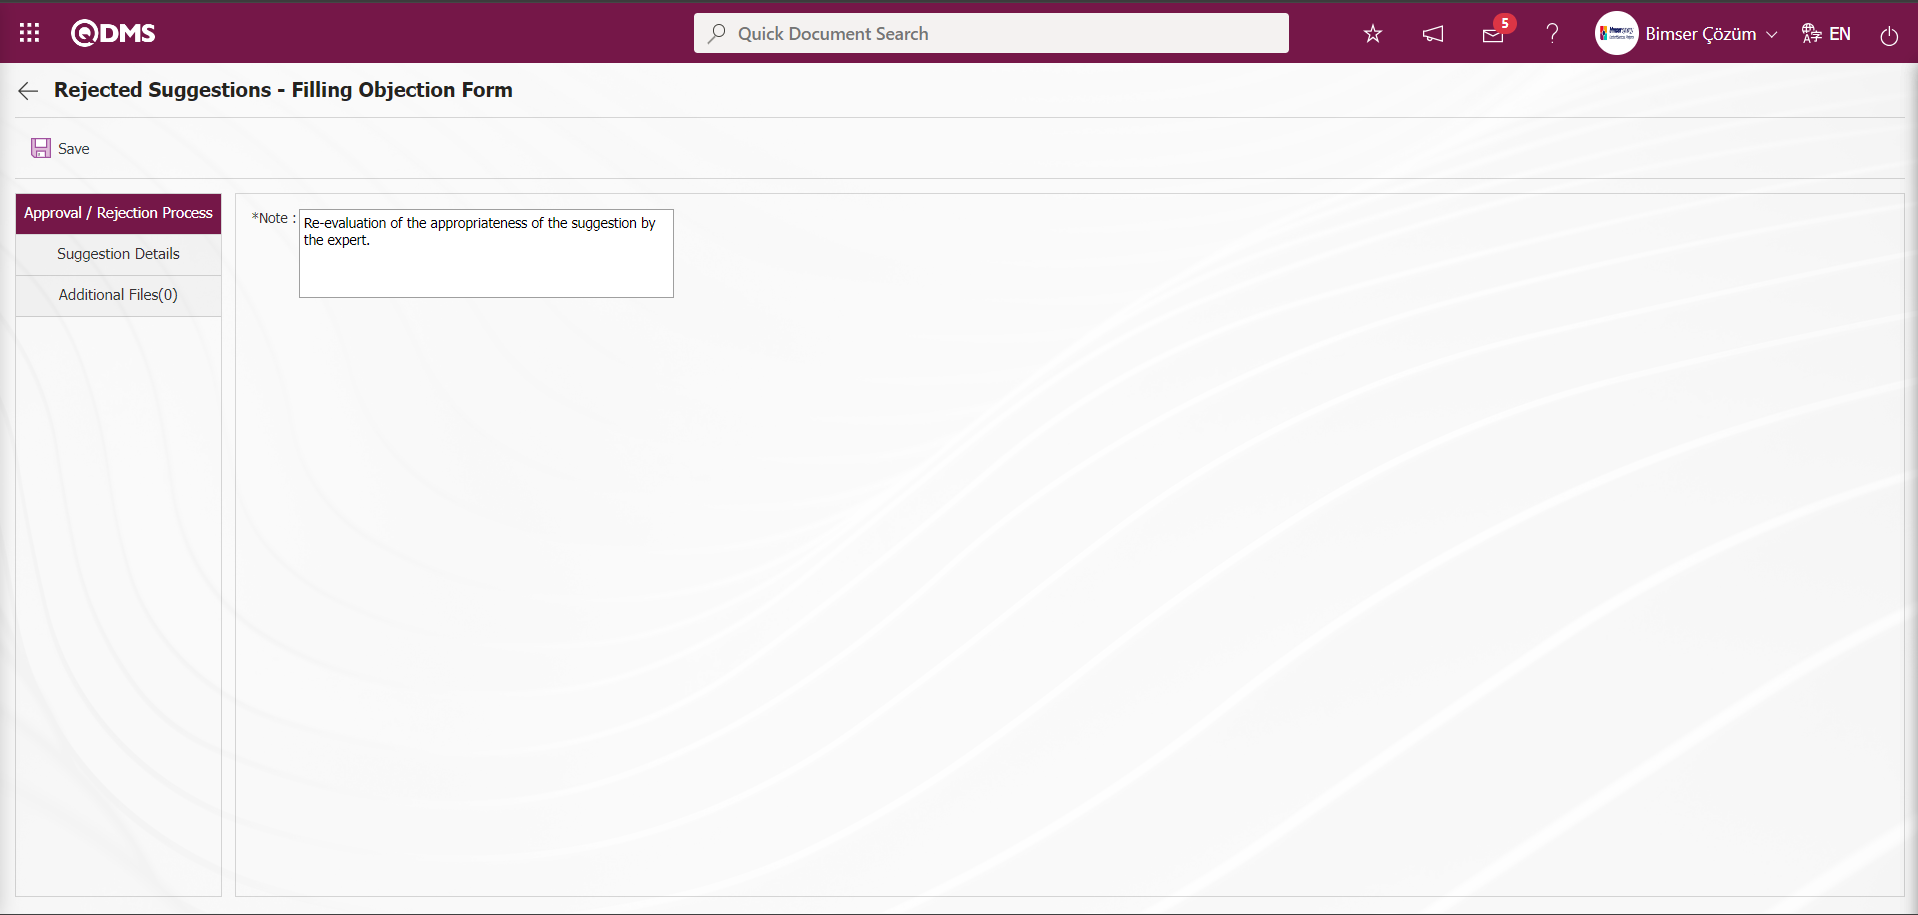
With the help of the buttons on the screen,
 :Filling out the objection form registration process is done.
The following fields are defined on the screen that opens;
Note:Rejected Suggestions - Filling Objection Form screen is the field where the explanation information about the Rejected Suggestions - Filling Objection Form is written.
Suggestion Details tab: This tab contains the Details, Additional Files and History tabs.
Details tab: This is the tab where all information about the suggestion is displayed.
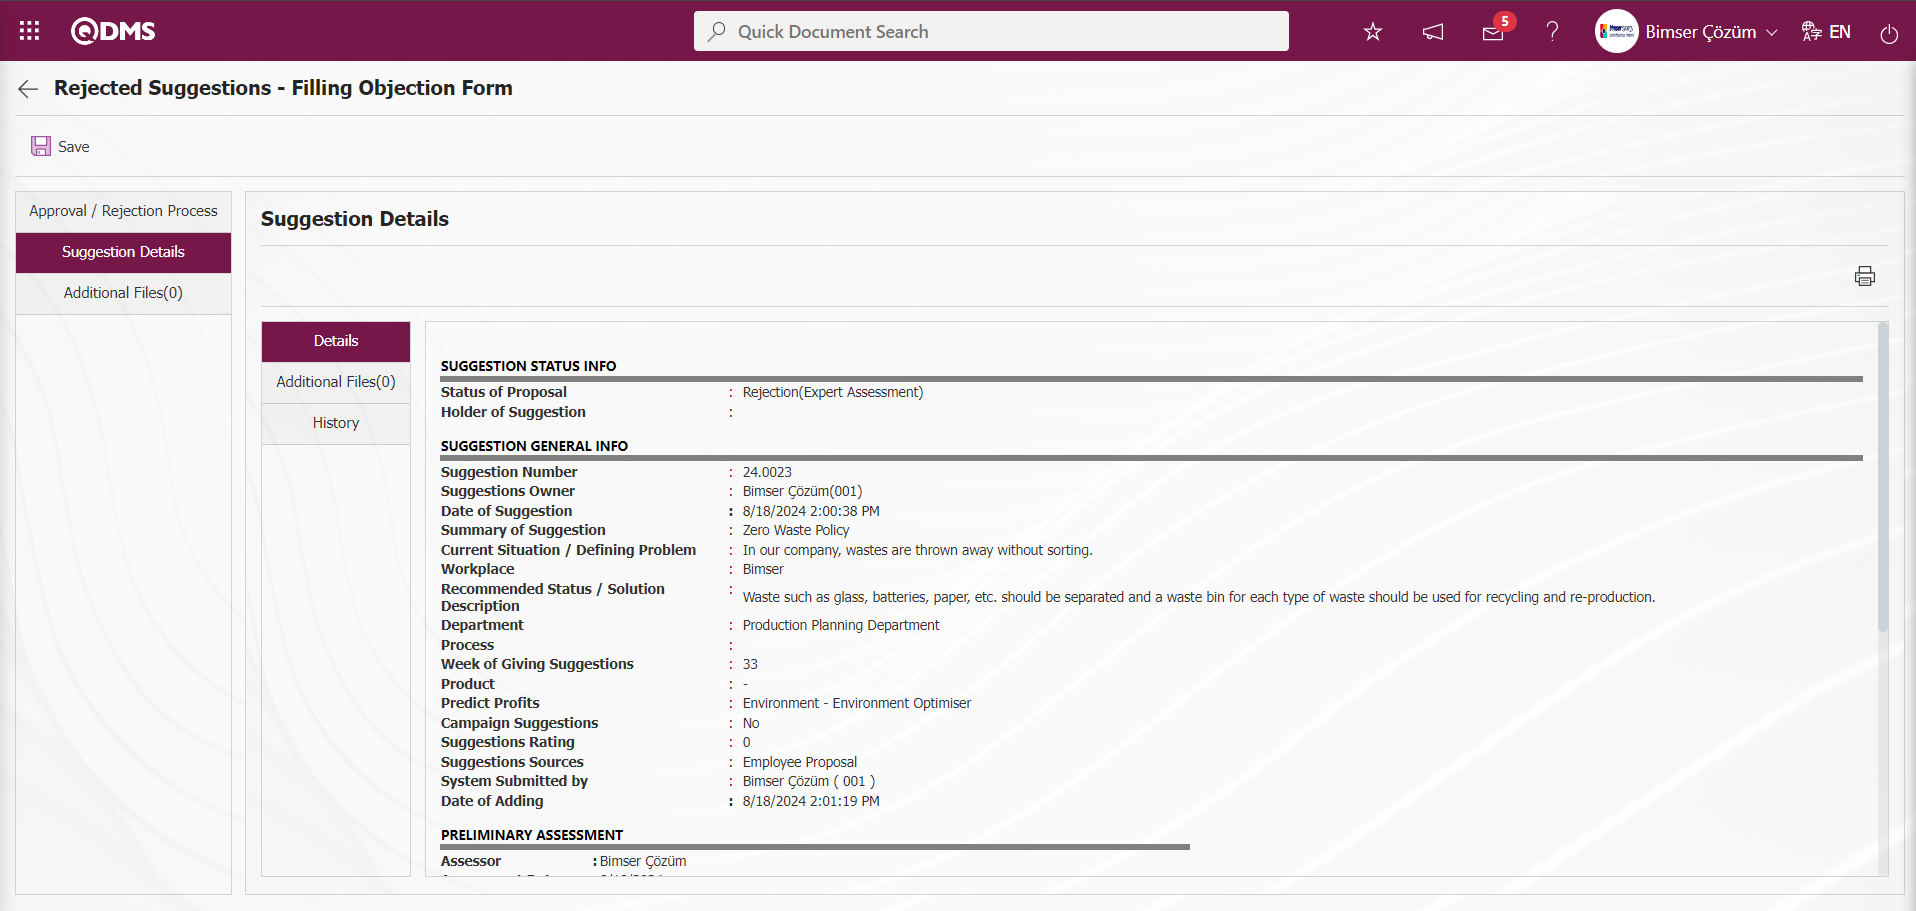
Additional Files Tab: This is the tab where the uploaded additional files related to the suggestion are accessed and the content of the uploaded additional files is displayed.

With the help of the buttons on the screen;
: Display the selected attachment file in the list.
History Tab: It is the tab where the history of the transactions related to the suggestion until this stage is accessed. It is a tab that is displayed depending on the parameter. The parameter value of parameter 137 in the Suggestion System Module parameters is activated by selecting “Yes”.
After the parameter is activated, the History tab is displayed at every stage in the Suggestion Details tab in the Suggestion System Module.
Rejected Suggestions - Filling Objection Form screen, click on the Approval / Rejection Process tab.
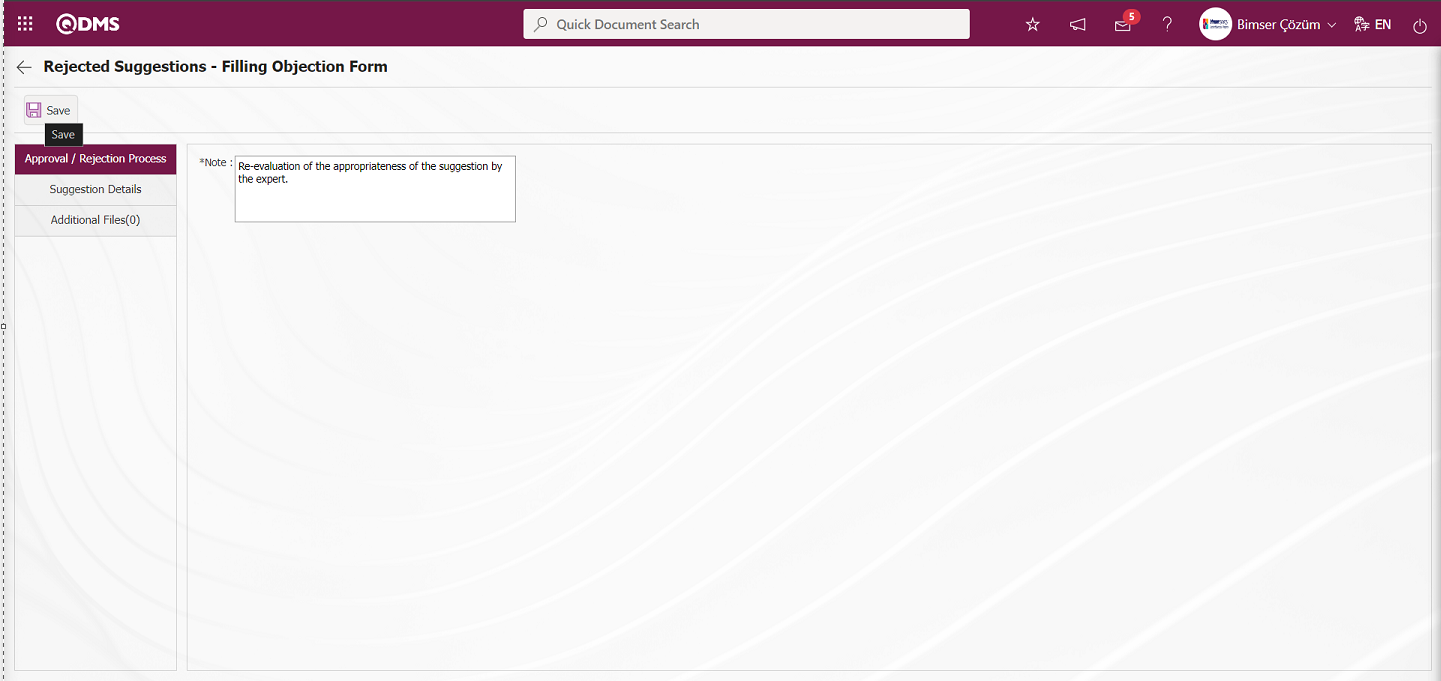
On the Rejected Suggestions - Filling Objection Form screen, in the Approval / Rejection Process tab, the description information about the objection form of the suggestion is written. After entering the relevant information in the required fields, the objection form filling registration process is done by clicking the  button in the upper left corner of the screen.
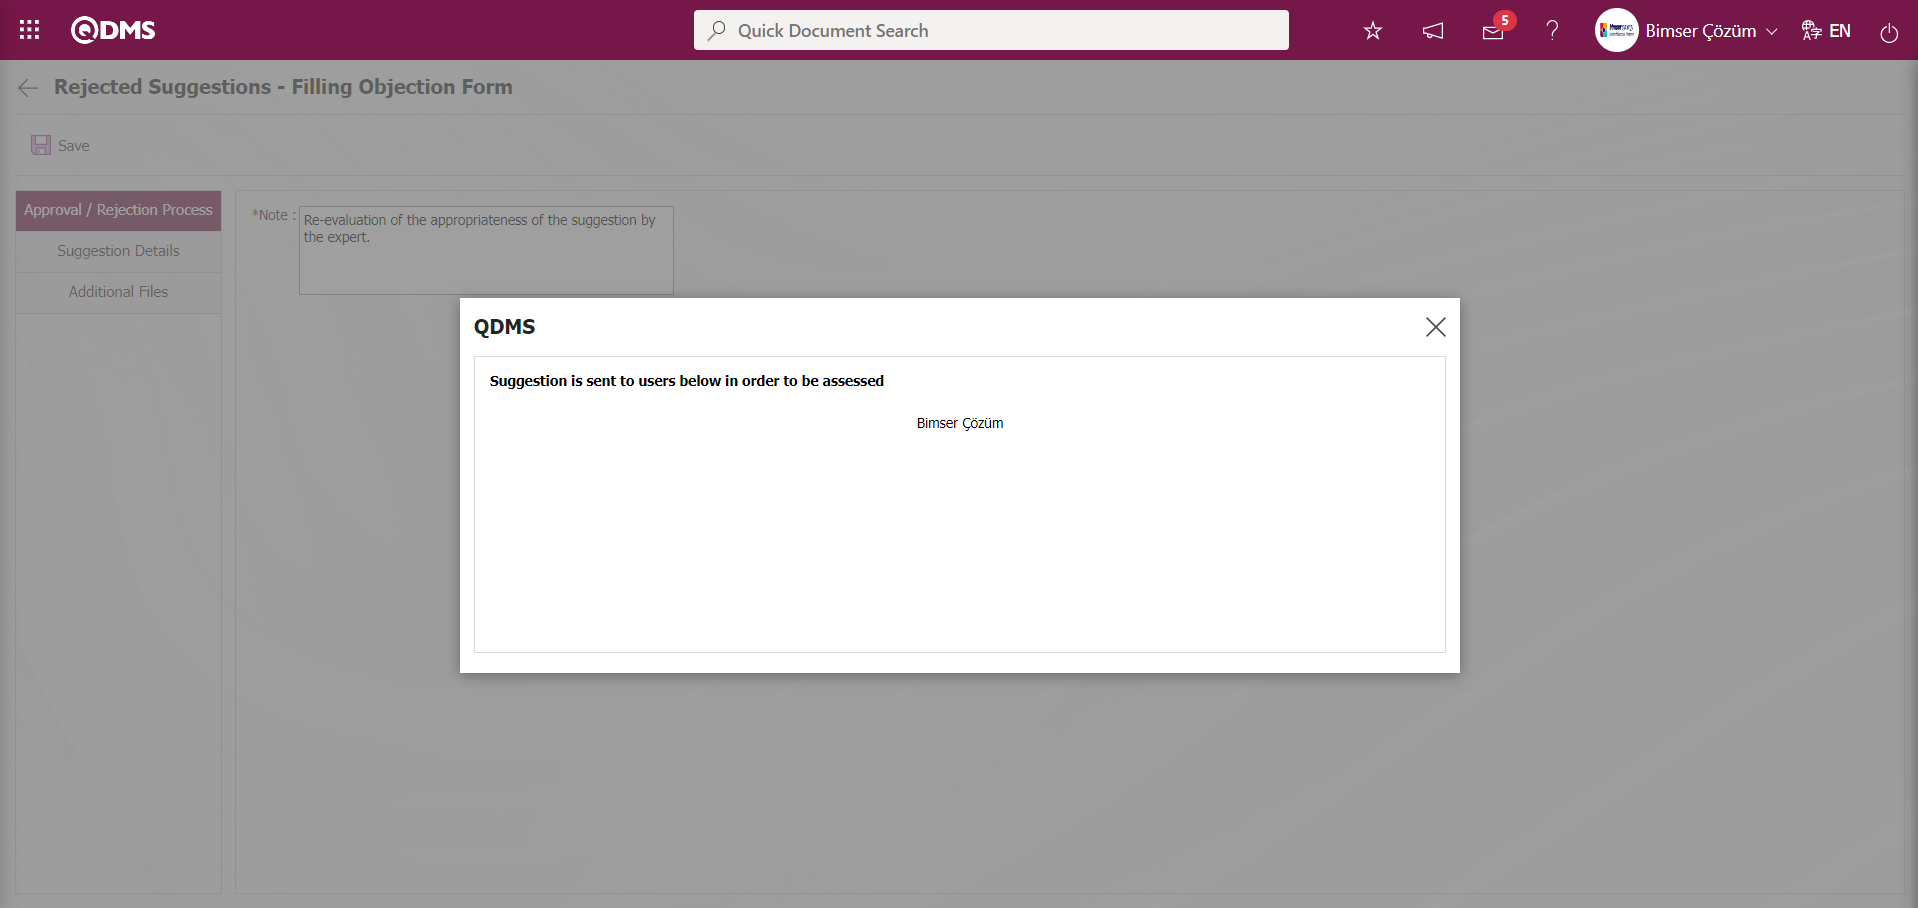
In order to be able to object to the rejected suggestions in the expert evaluation, the parameter value of the parameter number 50 in the Suggestion System Module parameters must be activated by selecting “Yes”.

In order to object to the rejected suggestions in the preliminary evaluation step, the parameter value of parameter 109 must be activated by selecting “Yes”.
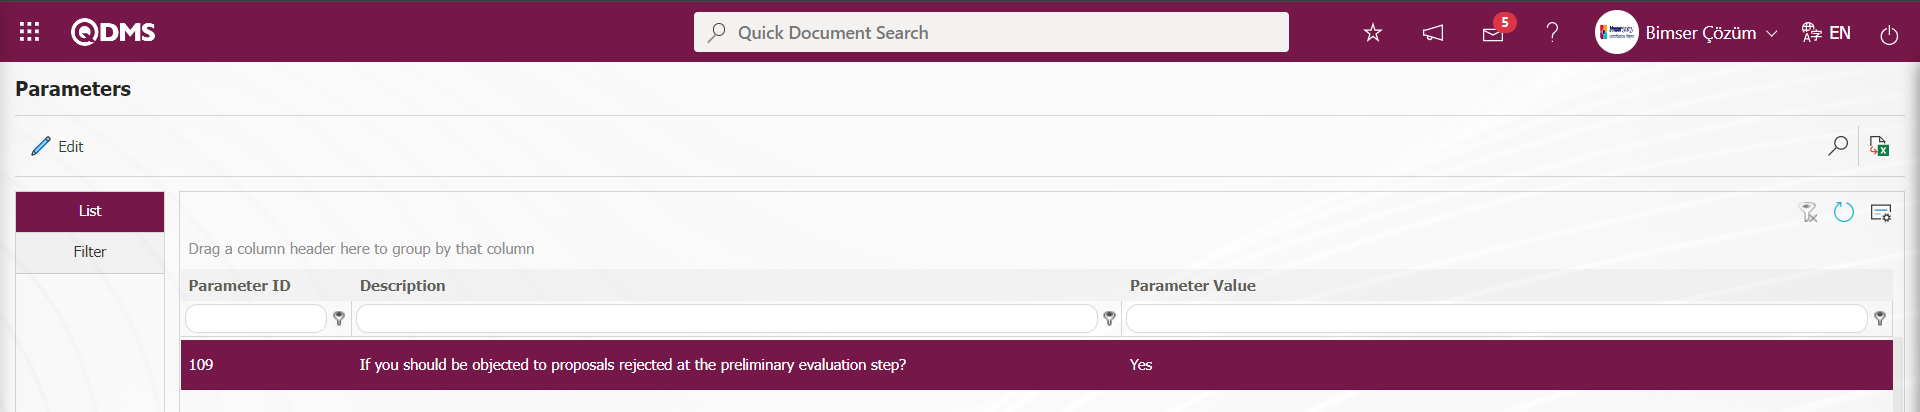
In order to set the waiting time for the specialist assessment objection in days, a desired numerical value must be defined in the parameter value of parameter 159.

In order to set the waiting time for Pre-Assessment objection in days, a desired numerical value must be defined to the parameter value of parameter 163.
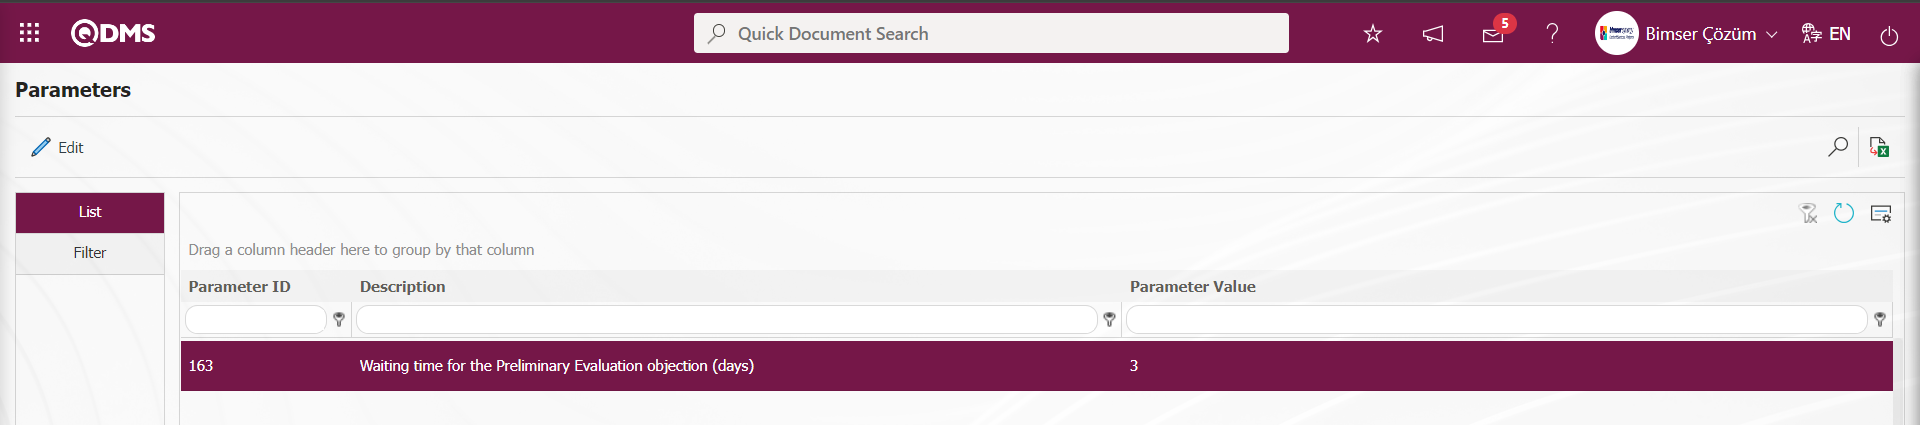
In the Filter tab, data is entered in the fields with search criteria and filtering is done by clicking the (Search) button.

5.3.5. Council Assessment
Menu Name: Integrated Management System/ Suggestion System/ Council Assessment
After the 2nd objection to the Suggestion, if the suggestion is to be evaluated by a suggestion commission, the commission evaluation process is initiated. The suggestion is evaluated by the determined commission. If the commission approves the suggestion, the flow continues, if it rejects it, the suggestion is rejected. The suggestion rejected by the commission cannot be objected again. In order to do this, the parameter value of parameter 106 of the Suggestion System Module parameters should be disabled by selecting “No”. When a suggestion is rejected twice, it is ensured that it falls to the commission.
 When the parameter value of the parameter is selected as “Yes”, it is ensured that once the suggestion is rejected, it is directly sent to the commission. According to the value defined in parameter 160 of the Suggestion System Module parameters, the commission evaluation waiting time is set on a day basis.


With the help of the buttons on the screen,
 : Approval actions are performed for the selected suggestion in the list.
On the Objected Suggestions screen, click the button while the suggestion is selected in the list.
Approval / Rejection Process tab: This is the tab where the compliance of the suggestion is selected as suggestion or not suggestion.
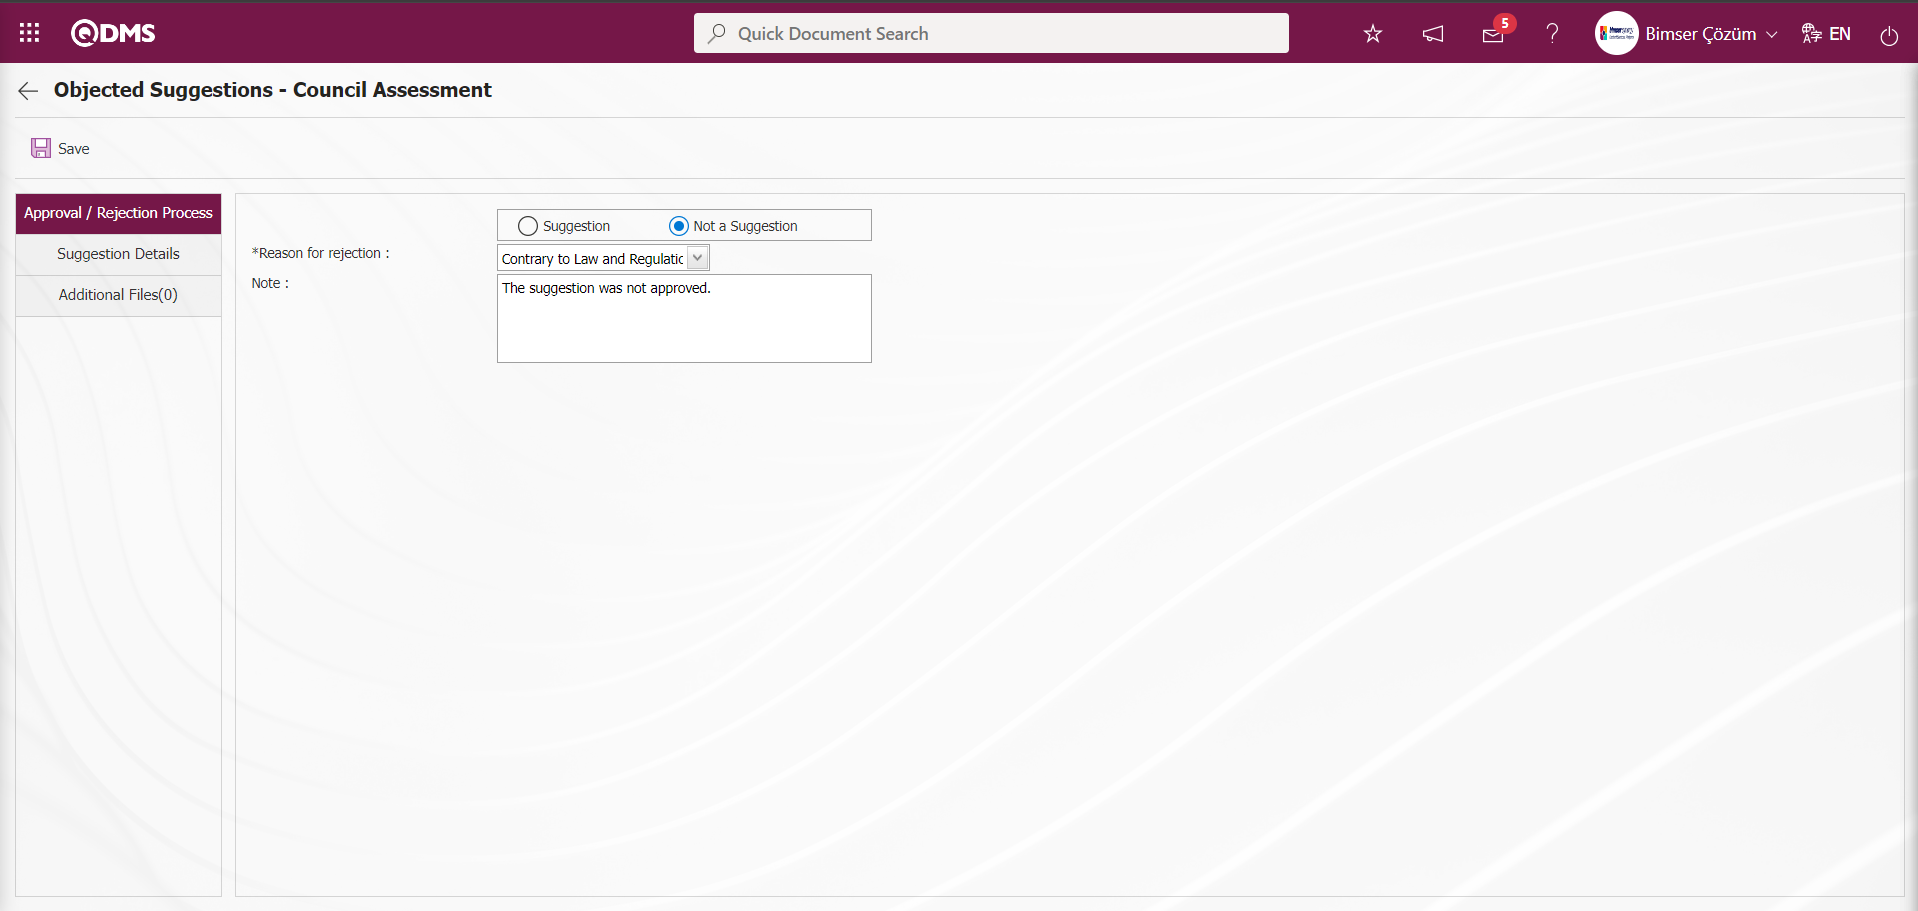
The following fields are defined on the screen that opens;
Suggestion: Objected Suggestions - This is the field where the suggestion option is checked when it is accepted as a suggestion on the Council Assessment screen. When the suggestion is accepted, the note field in the screenshot below is displayed.
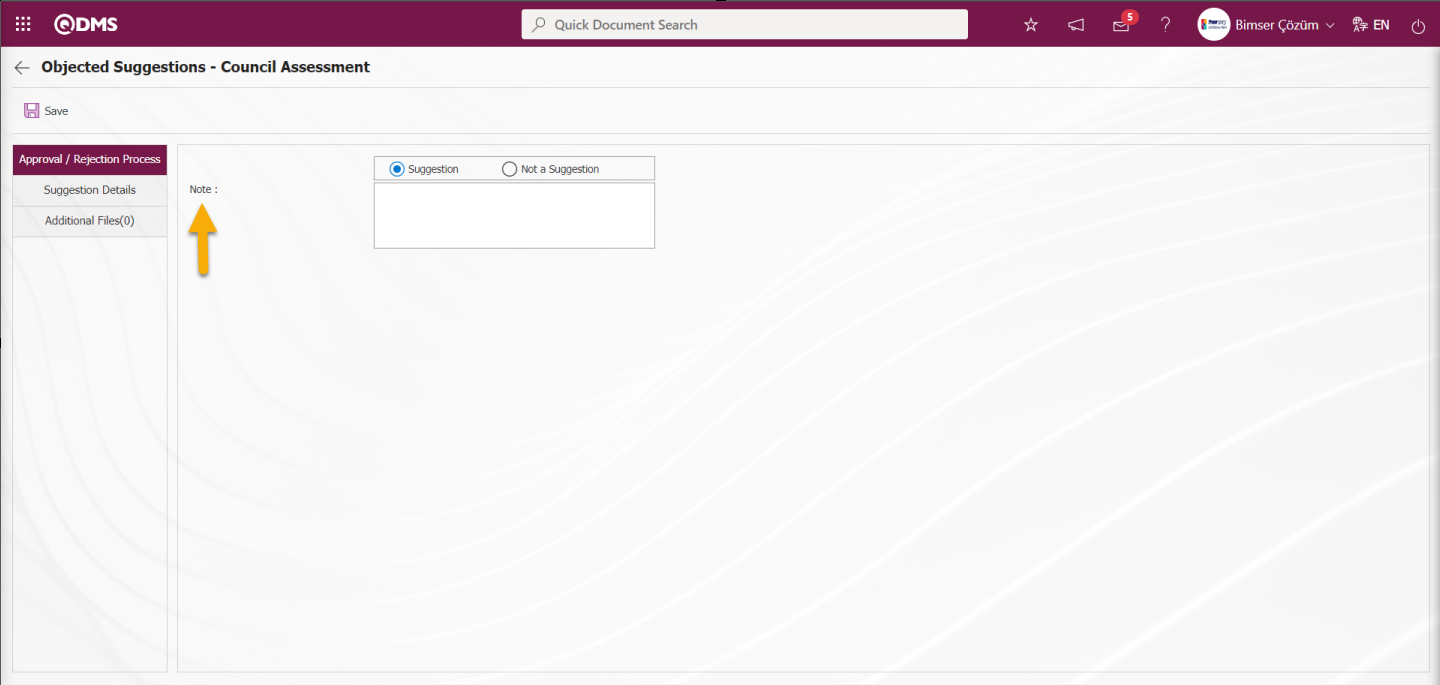
Note: Objected Suggestions - This is the field where the explanation information about the suggestion is written when the suggestion option in the suggestion eligibility acceptance status is selected on the Council Assessment screen.
Not a Suggestion: Objected Suggestions - This is the field where the Not a Suggestion option is checked when it is accepted as not a suggestion on the Council Assessment screen. When the suggestion is not accepted, the fields in the screenshot below are displayed when the Not a Suggestion option is selected.
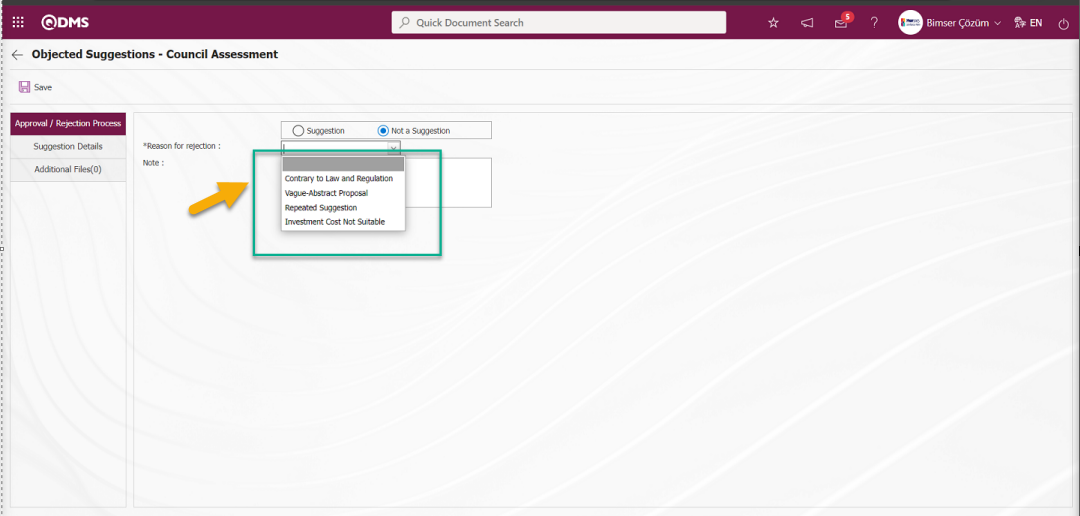
Reason for rejection:It is the field where the selection is made in the list of Reasons for rejection defined in the system, which is opened by clicking on the drop-down list when the not a suggestion option is selected.
Note: When the Not a Suggestion option is selected as the suggestion eligibility, this is the field where the explanation information about the Not a Suggestion option is written.
Suggestion Details tab: Details, Additional Files and History tabs.
Details tab: It is the tab where all information about the suggestion is displayed.
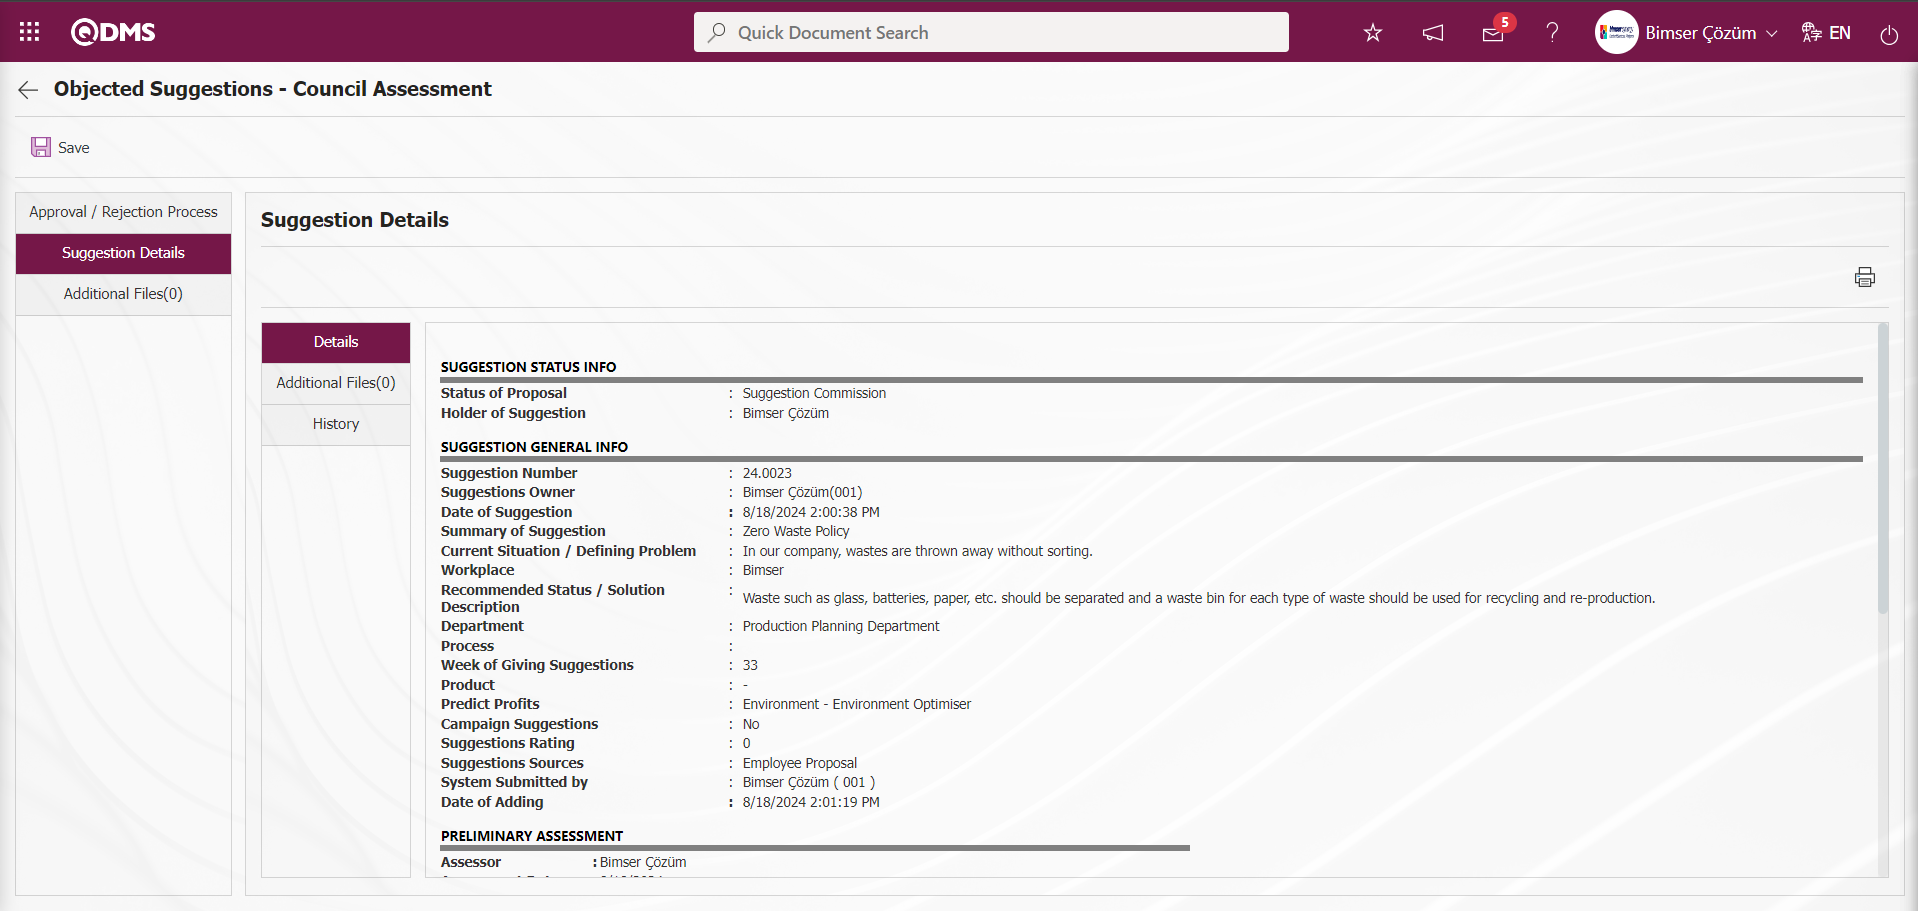
Additional Files tab: This is the tab where the uploaded additional files related to the suggestion are accessed and the content of the uploaded additional files is displayed.
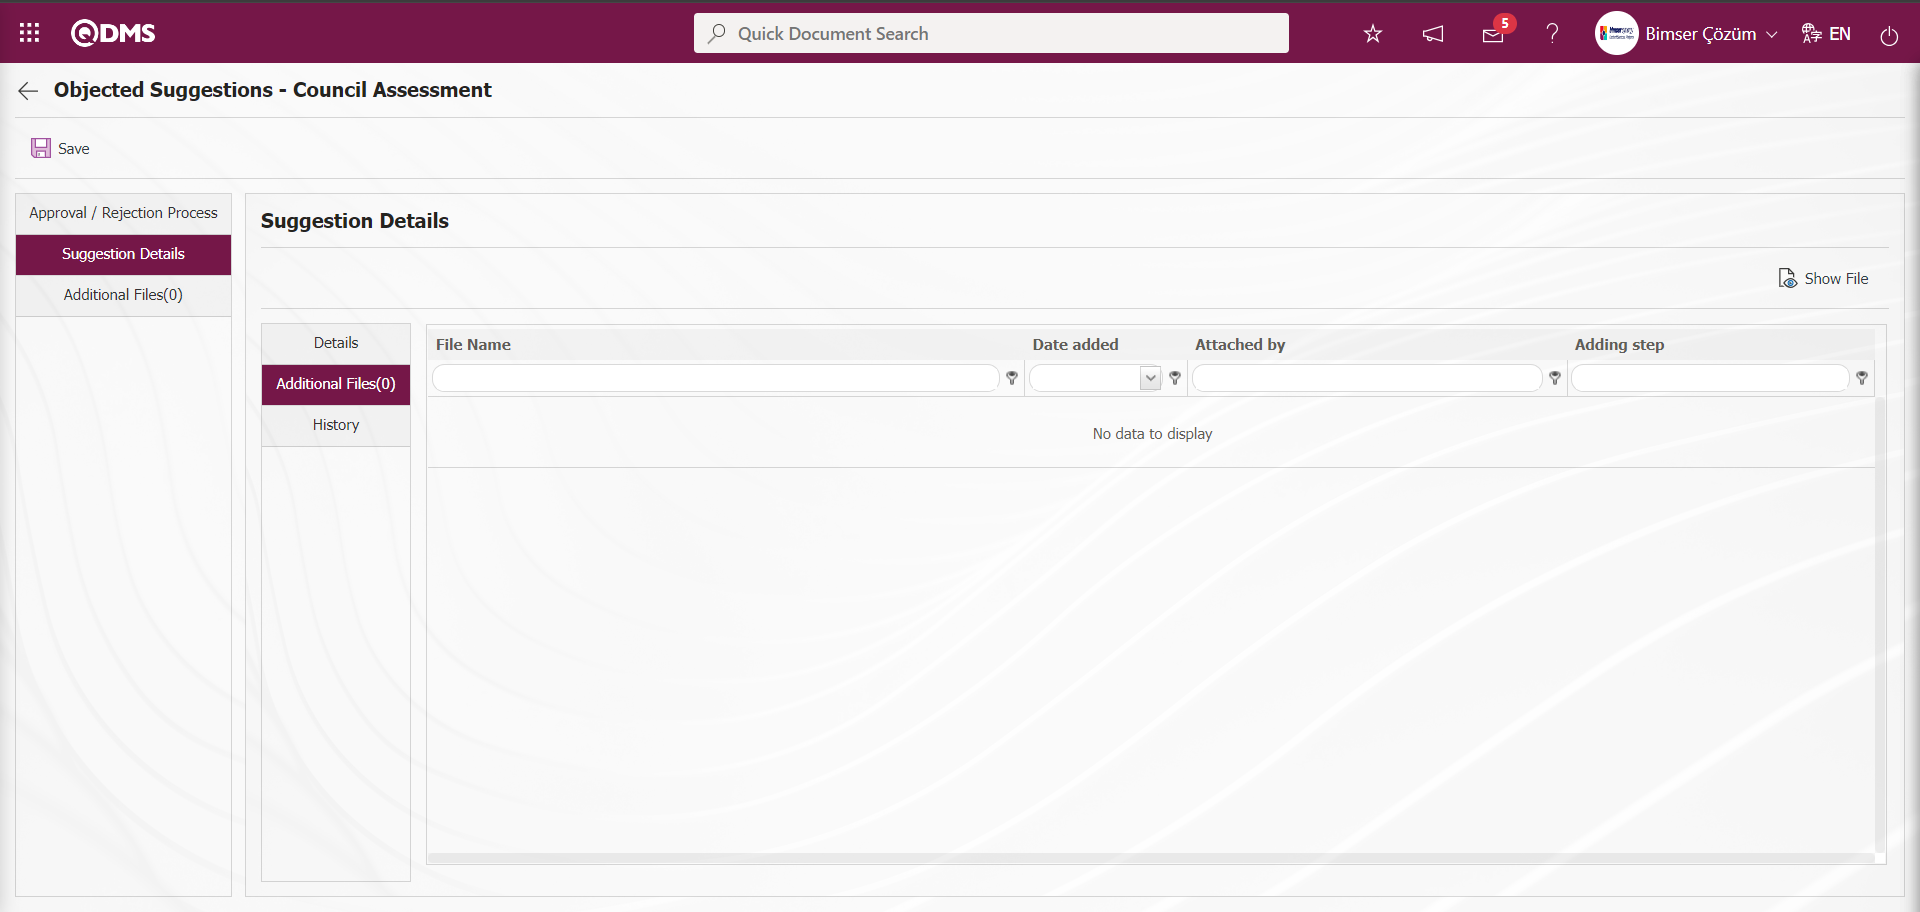
With the help of the buttons on the screen;
: Display the selected attachment file in the list.
History Tab: It is the tab where the history of the transactions related to the suggestion until this stage is accessed. It is a tab that is displayed depending on the parameter. The parameter value of parameter 137 in the Suggestion System Module parameters is activated by selecting “Yes”.
After the parameter is activated, the History tab is displayed at every stage in the Suggestion Details tab in the Suggestion System Module.
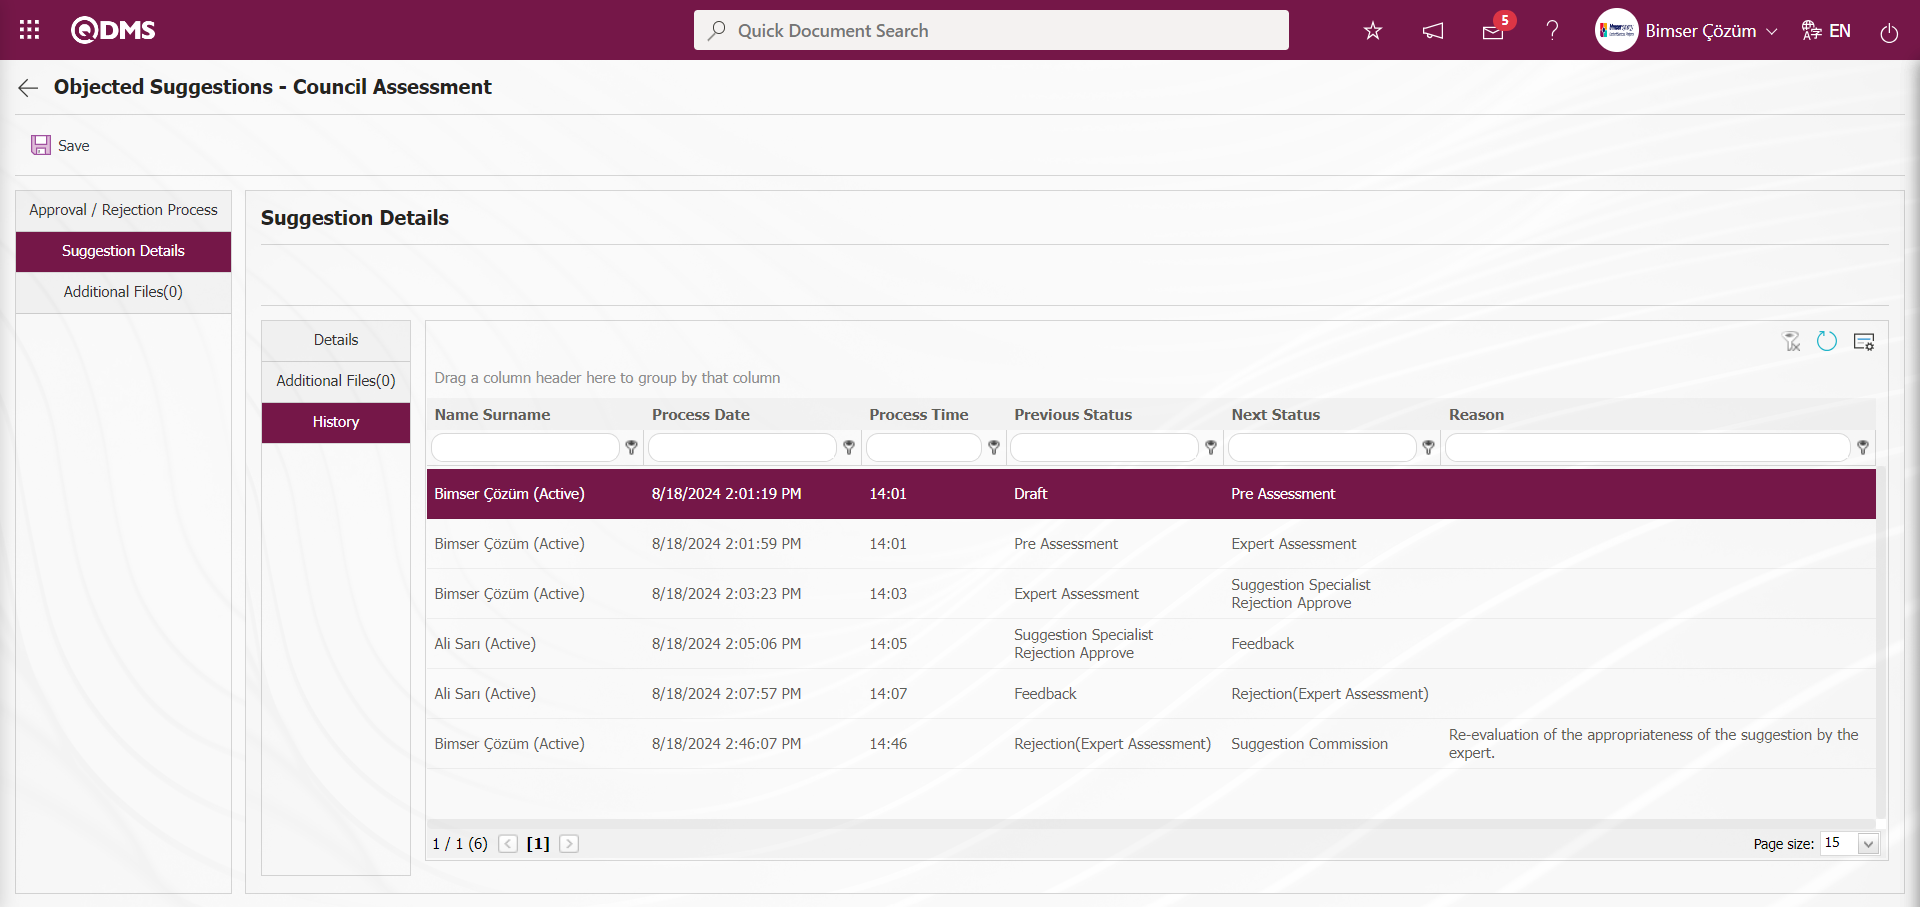
On the Objected Suggestions - Council Assessment screen, click on the Approval / Rejection Process tab.

In the Approval / Rejection Process tab, the approval or rejection process is carried out by selecting the Not a Suggestion option and writing the explanation information about the selected option. After entering the relevant information in the required fields, the commission evaluation process is carried out by clicking the  button in the upper left corner of the screen.
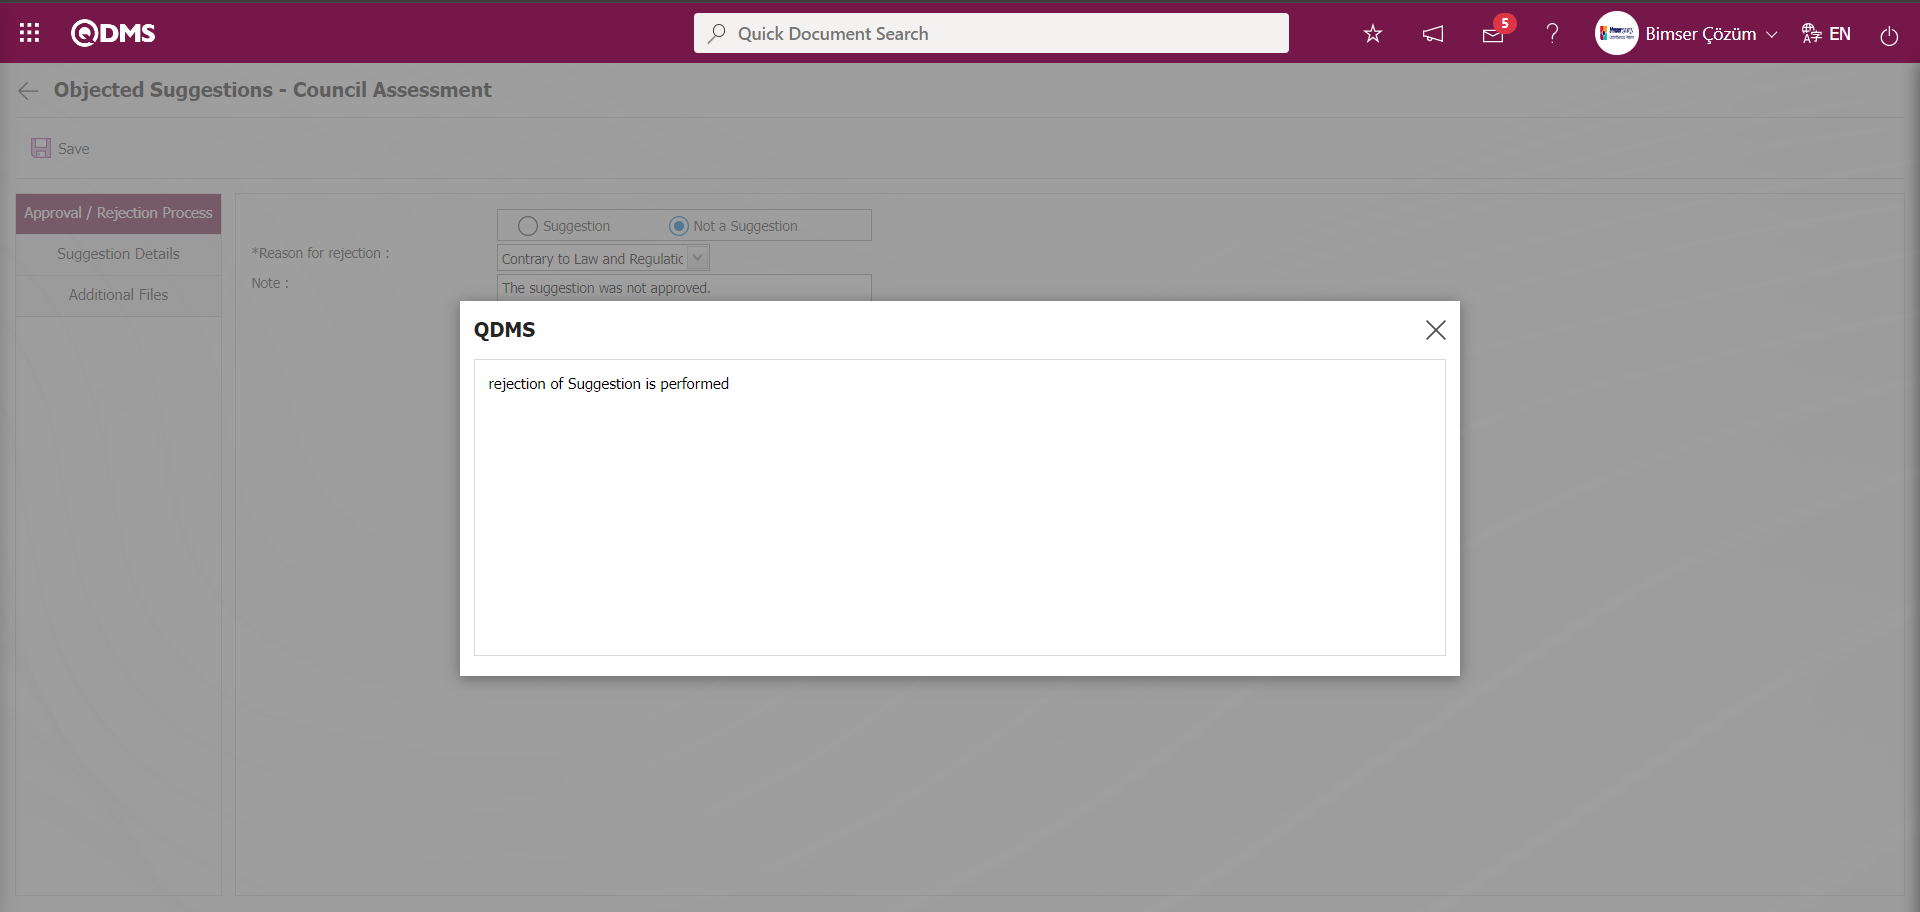
In the Filter tab, data is entered in the fields with search criteria and filtering is done by clicking the  (Search) button.

5.3.6. Action Tracking
Menu Name: Integrated Management System/ Suggestion System/ Reports
It is the menu where the actions of the suggestions given by the user are tracked and reported. It is the items report screen of the action module. It is the report containing the detailed information of the action items. This report can be transferred as excel on the basis of “Summary Report and ‘Horizontal Report’.On the Action Definition screen, two tabs appear as Action List and Action Search tab. In the Action Search tab, the Main Action code is defined in the Main Action No field. The Main Action code is defined in the parameter value of parameter 8 of the Suggestion System Module parameters. Depending on the Main Action Plan, Action Source information is also displayed in the Action Source field.
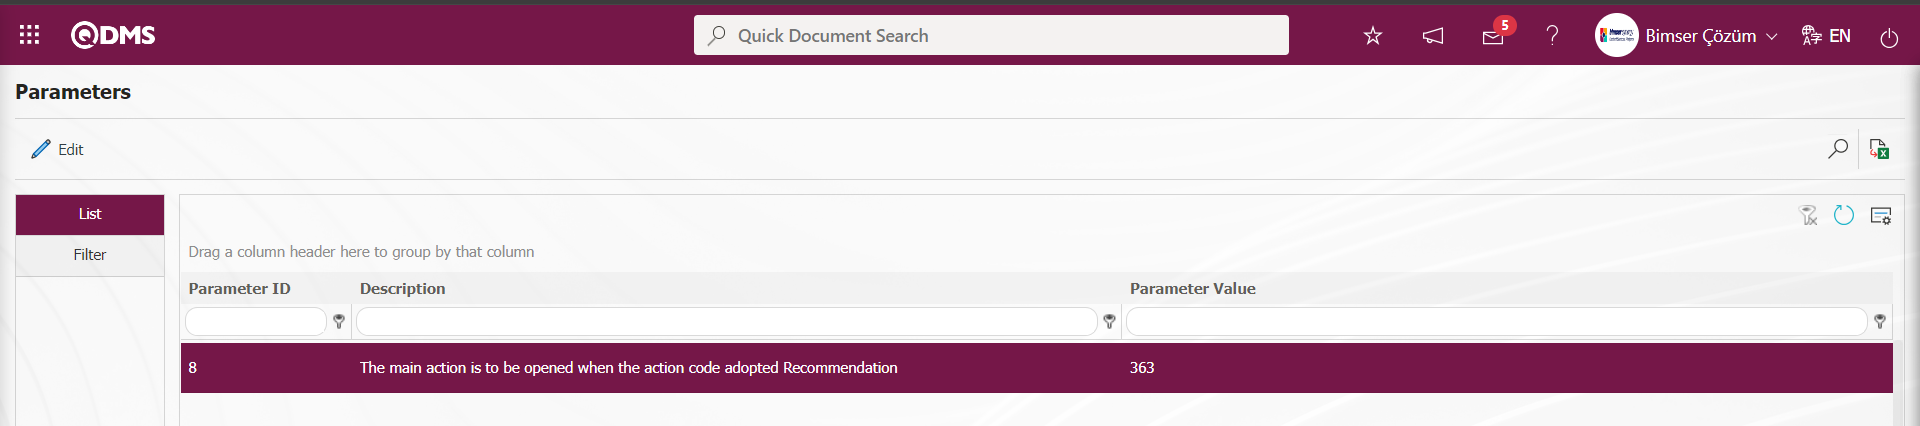
Depending on this defined main action code, planned actions are opened in the Suggestion Module. Main Action Code information is obtained in the Integrated Management System/Action Management/Planning menu. In the Action Tracking menu, reports are received depending on this main action code.

With the help of the buttons on the screen;
 : Records are filtered and searched.
 : View the action schedule report.
 : Summary Report is taken.
 : Data is transferred to Excel.
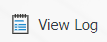 : Log viewing is done.
 : The search criteria on the menu screens are used to clear the data remaining in the filter fields in the grid where the search operation is performed.
 : The menu screen is restored to its default settings.
: User-based designing of the menu screen is done with the show-hide feature, that is, the hiding feature of the fields corresponding to the columns on the menu screens.
In the Defining Action screen, data entries are made in the fields in the search criteria in the Action Search tab and filtering is done by clicking the (Search) button.
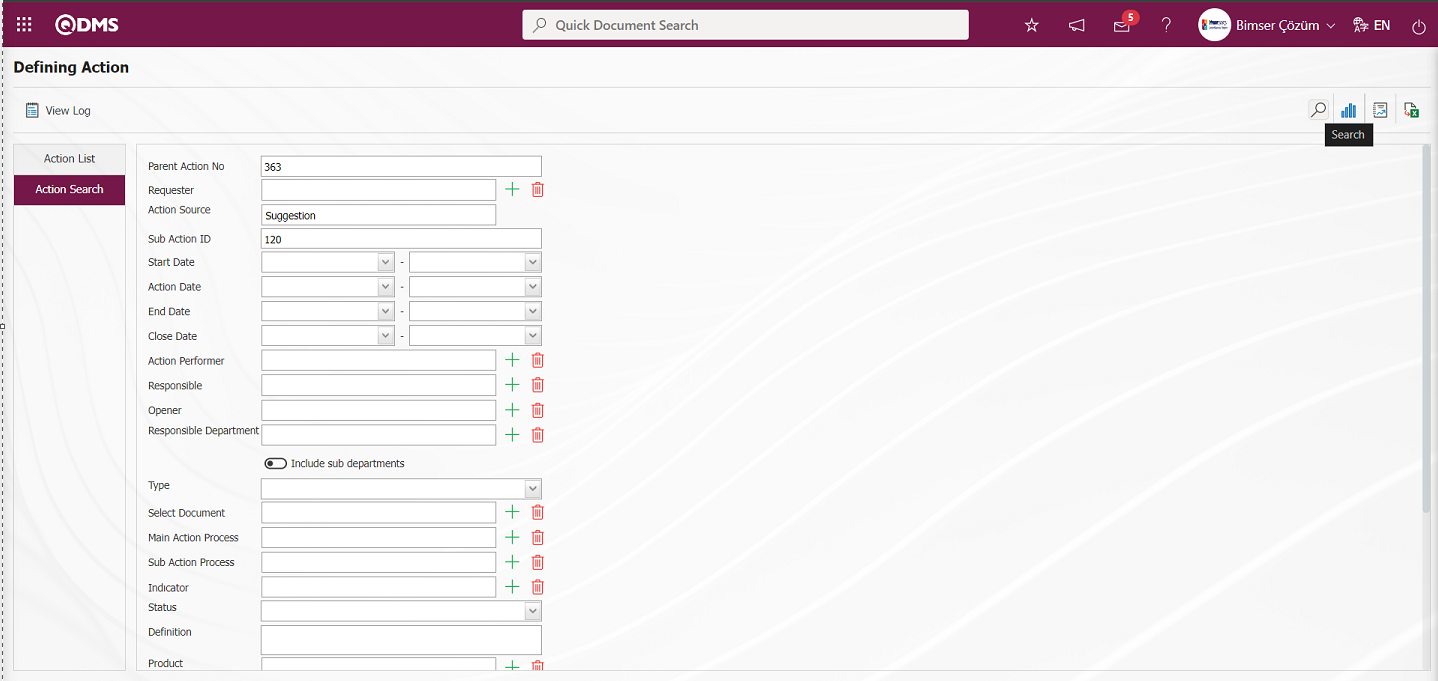
In the Action list in the Action Definition screen, reports of the desired data are displayed according to the filter settings made in the Action Search tab. Click the  (Action Items Report) button in the Action list on the Action Definition screen.
“Action Schedule Report” from Excel Format is displayed.
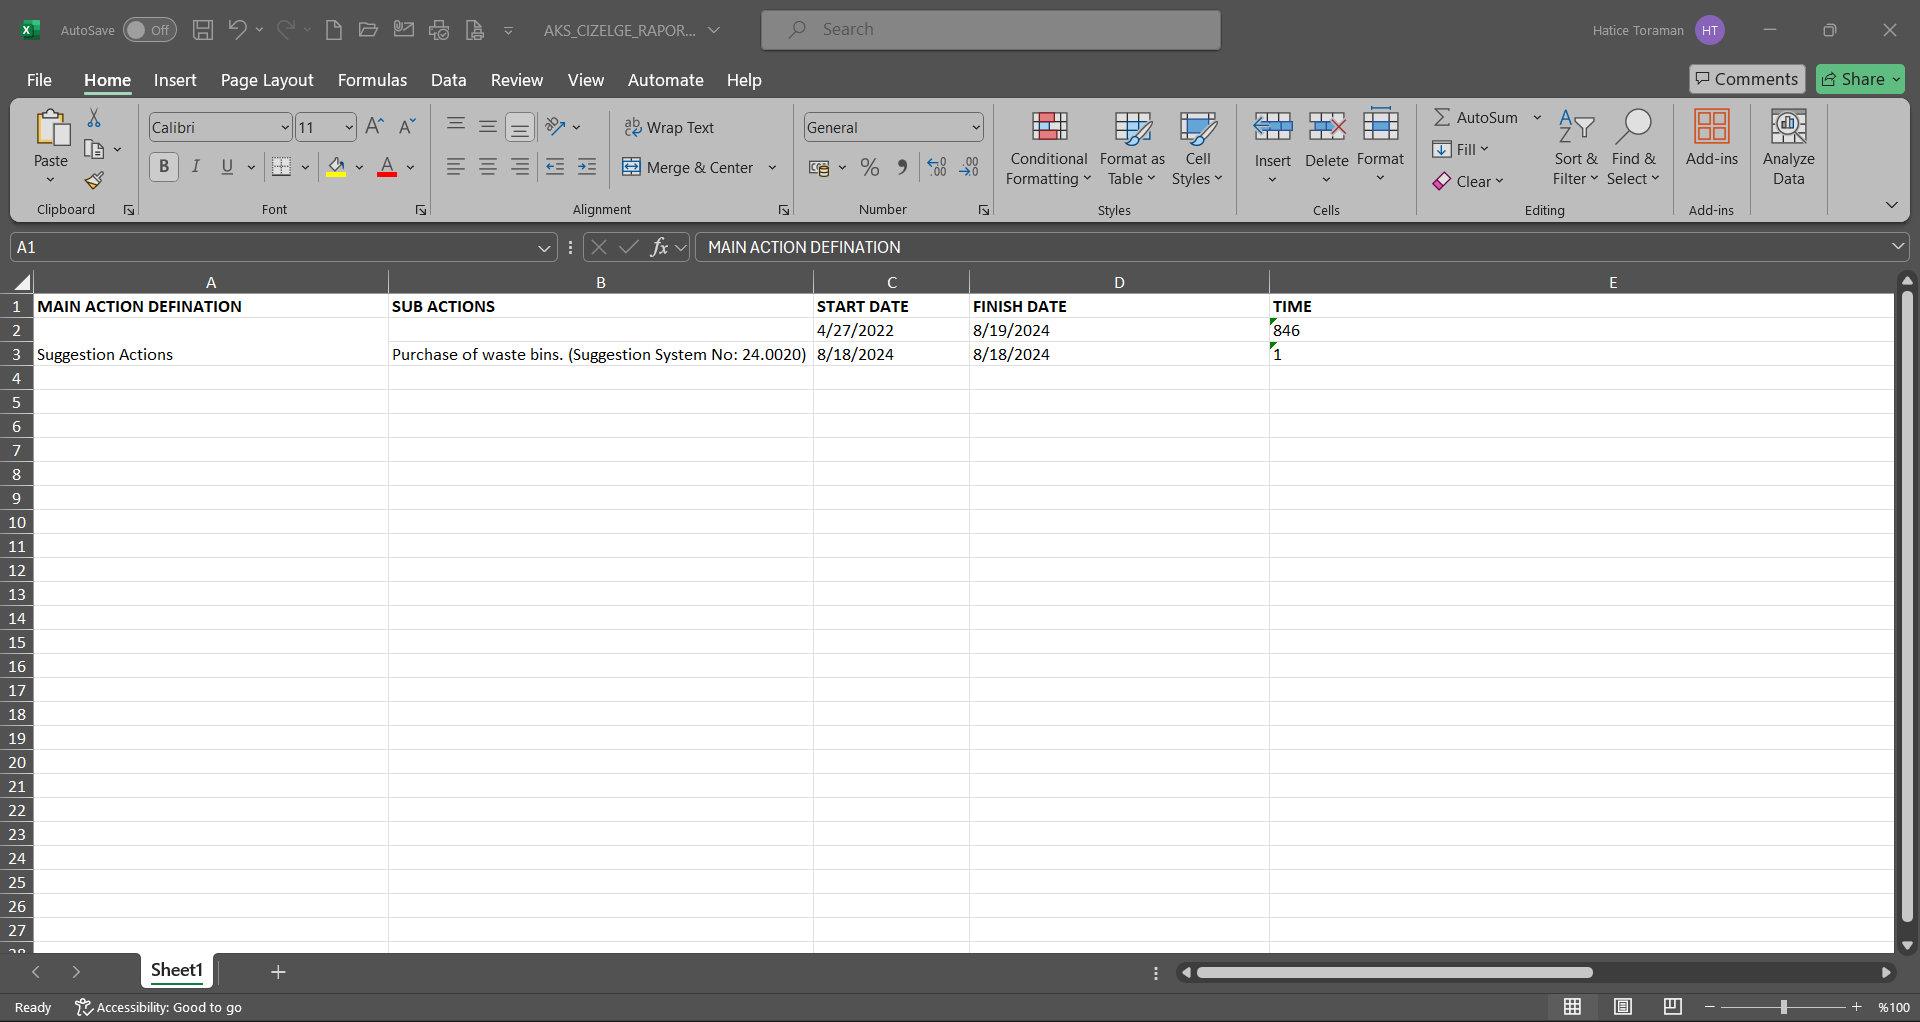
On the Defining Action screen, click the  (Summary Report) button in the Action list.
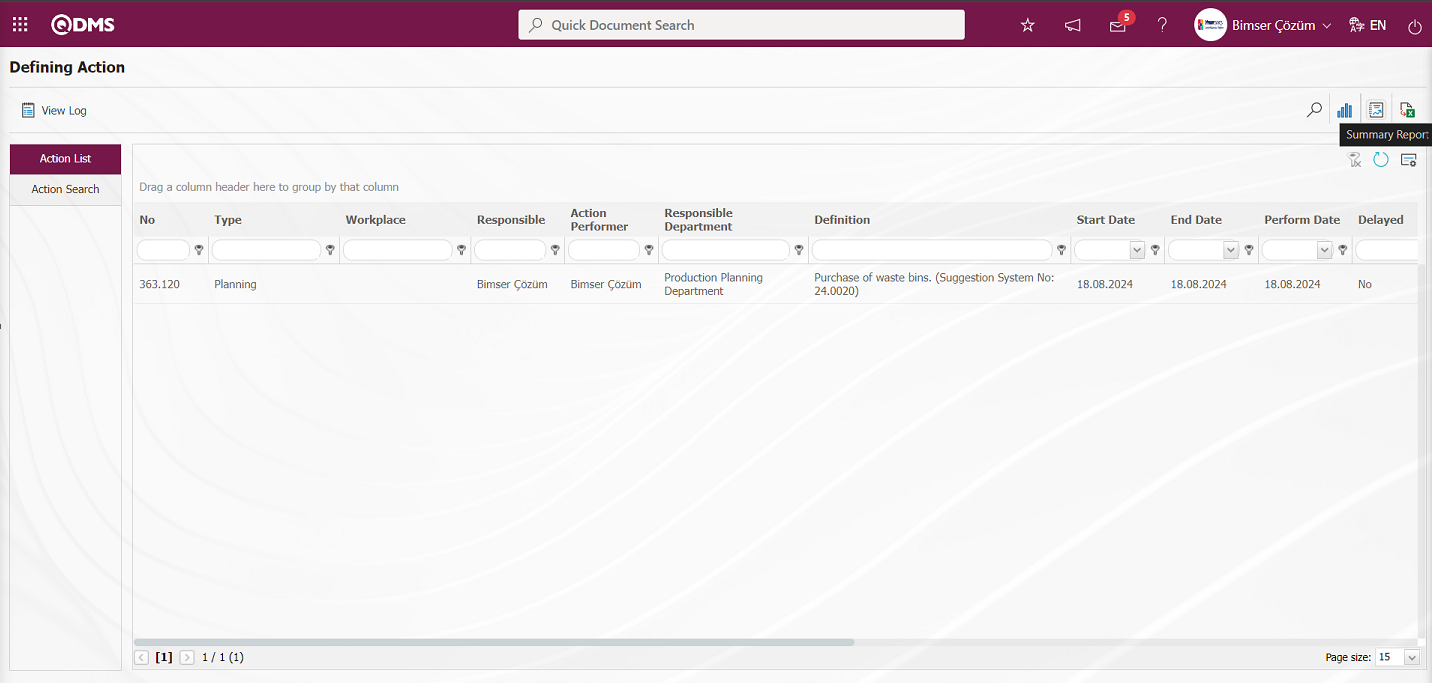
“Action Summary Report” is displayed in Excel format.
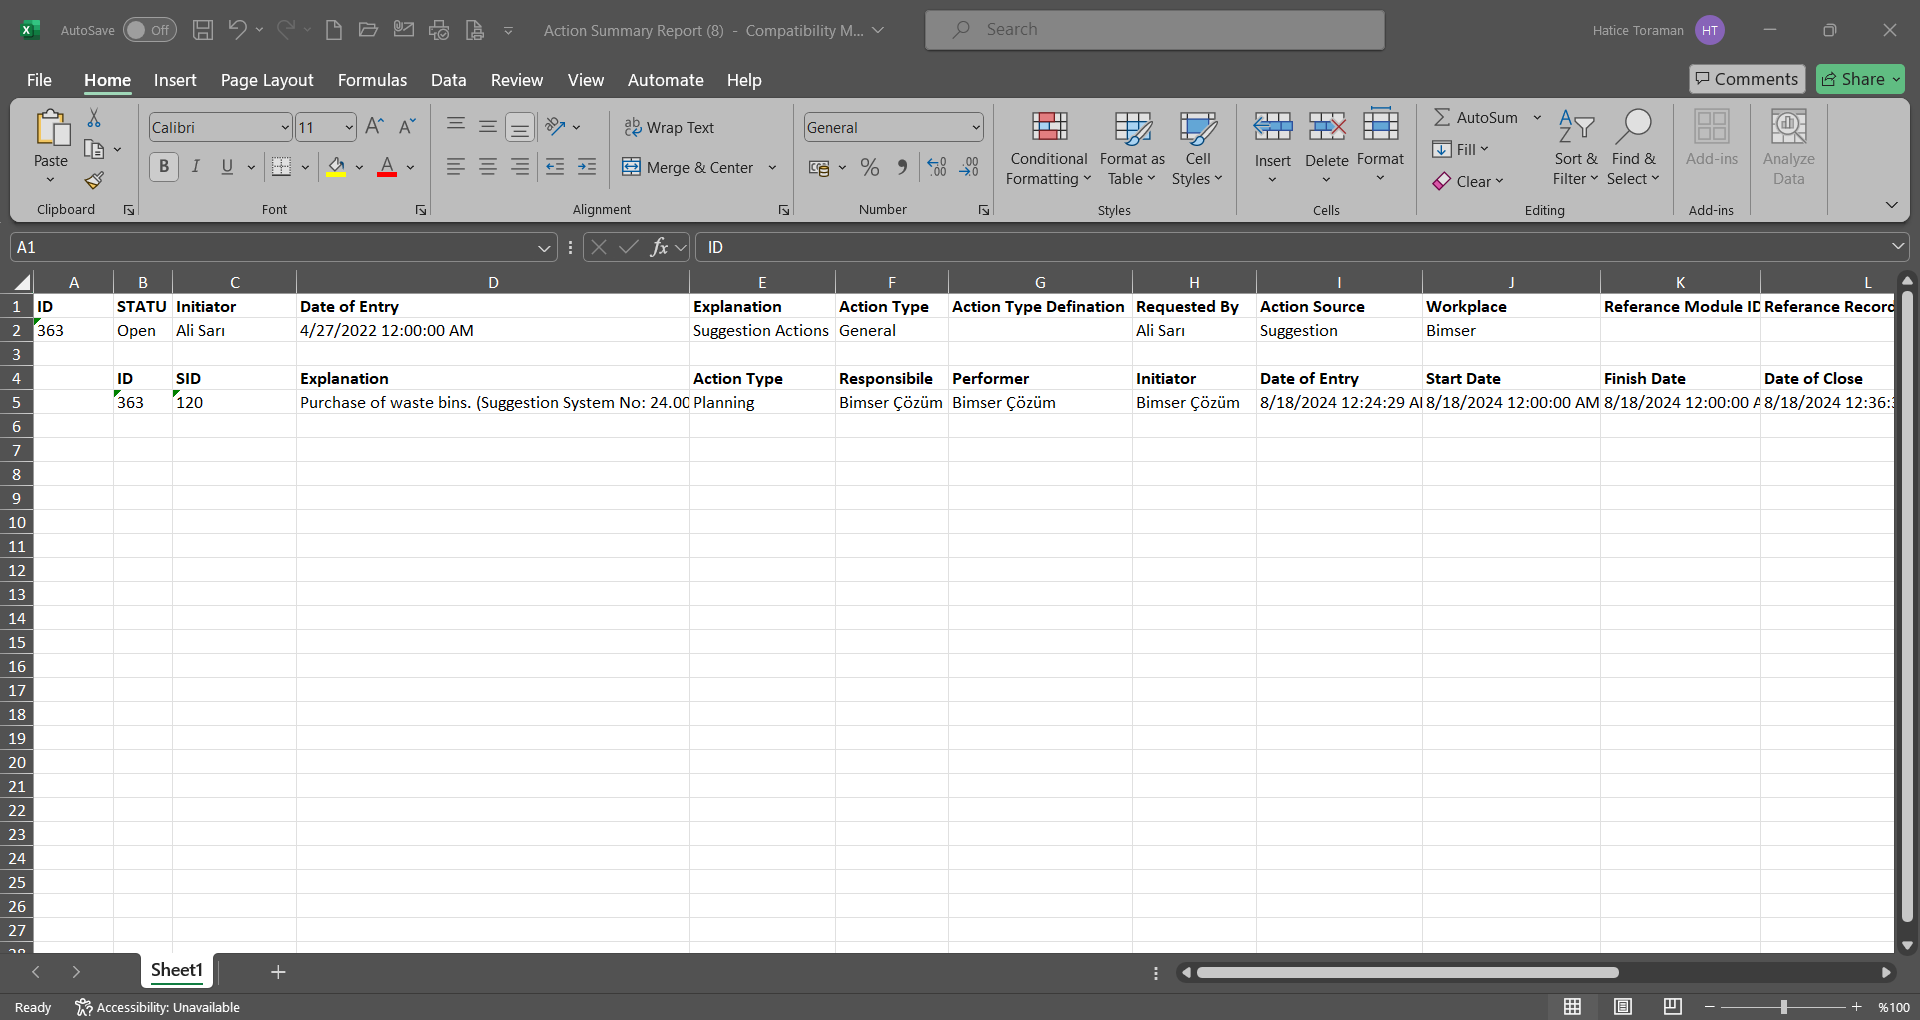
On the Defining Action screen, click the (Export to Excel) button while the action record is selected in the Action List tab.
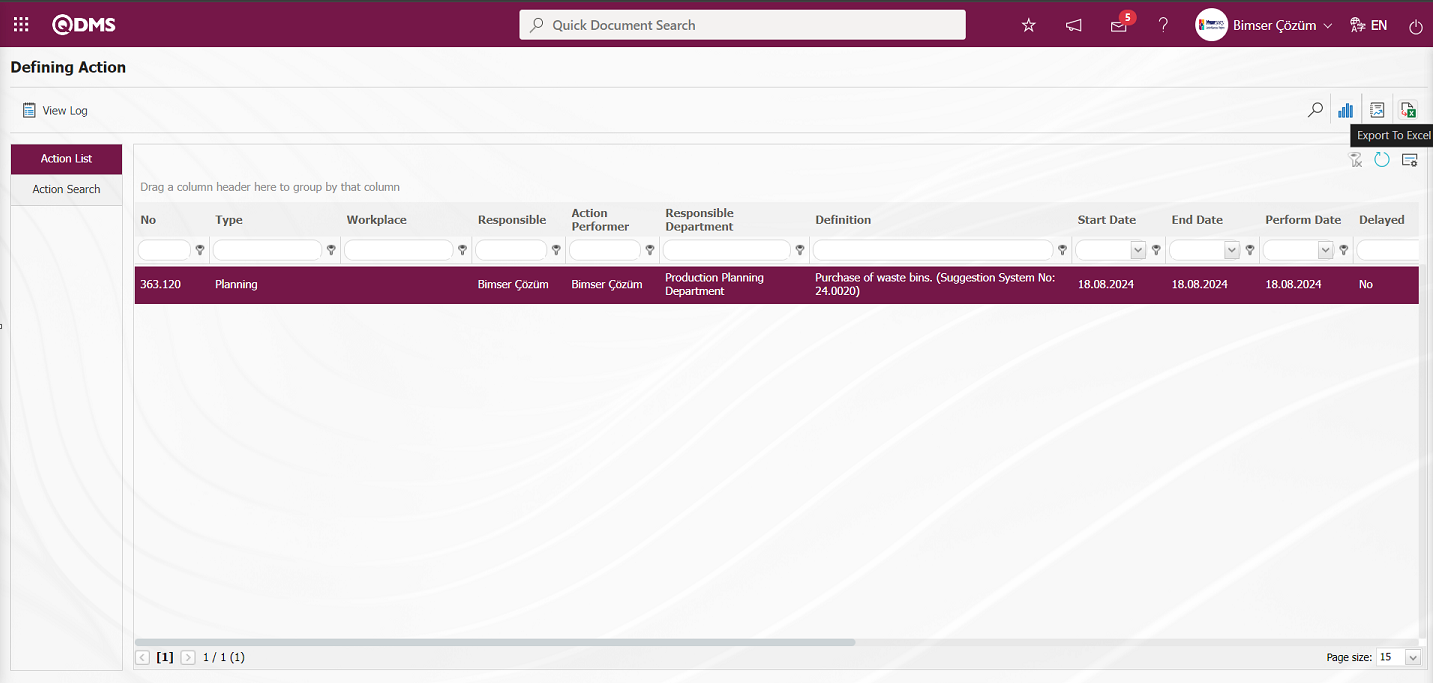
“Action Item Report” is displayed in Excel format.
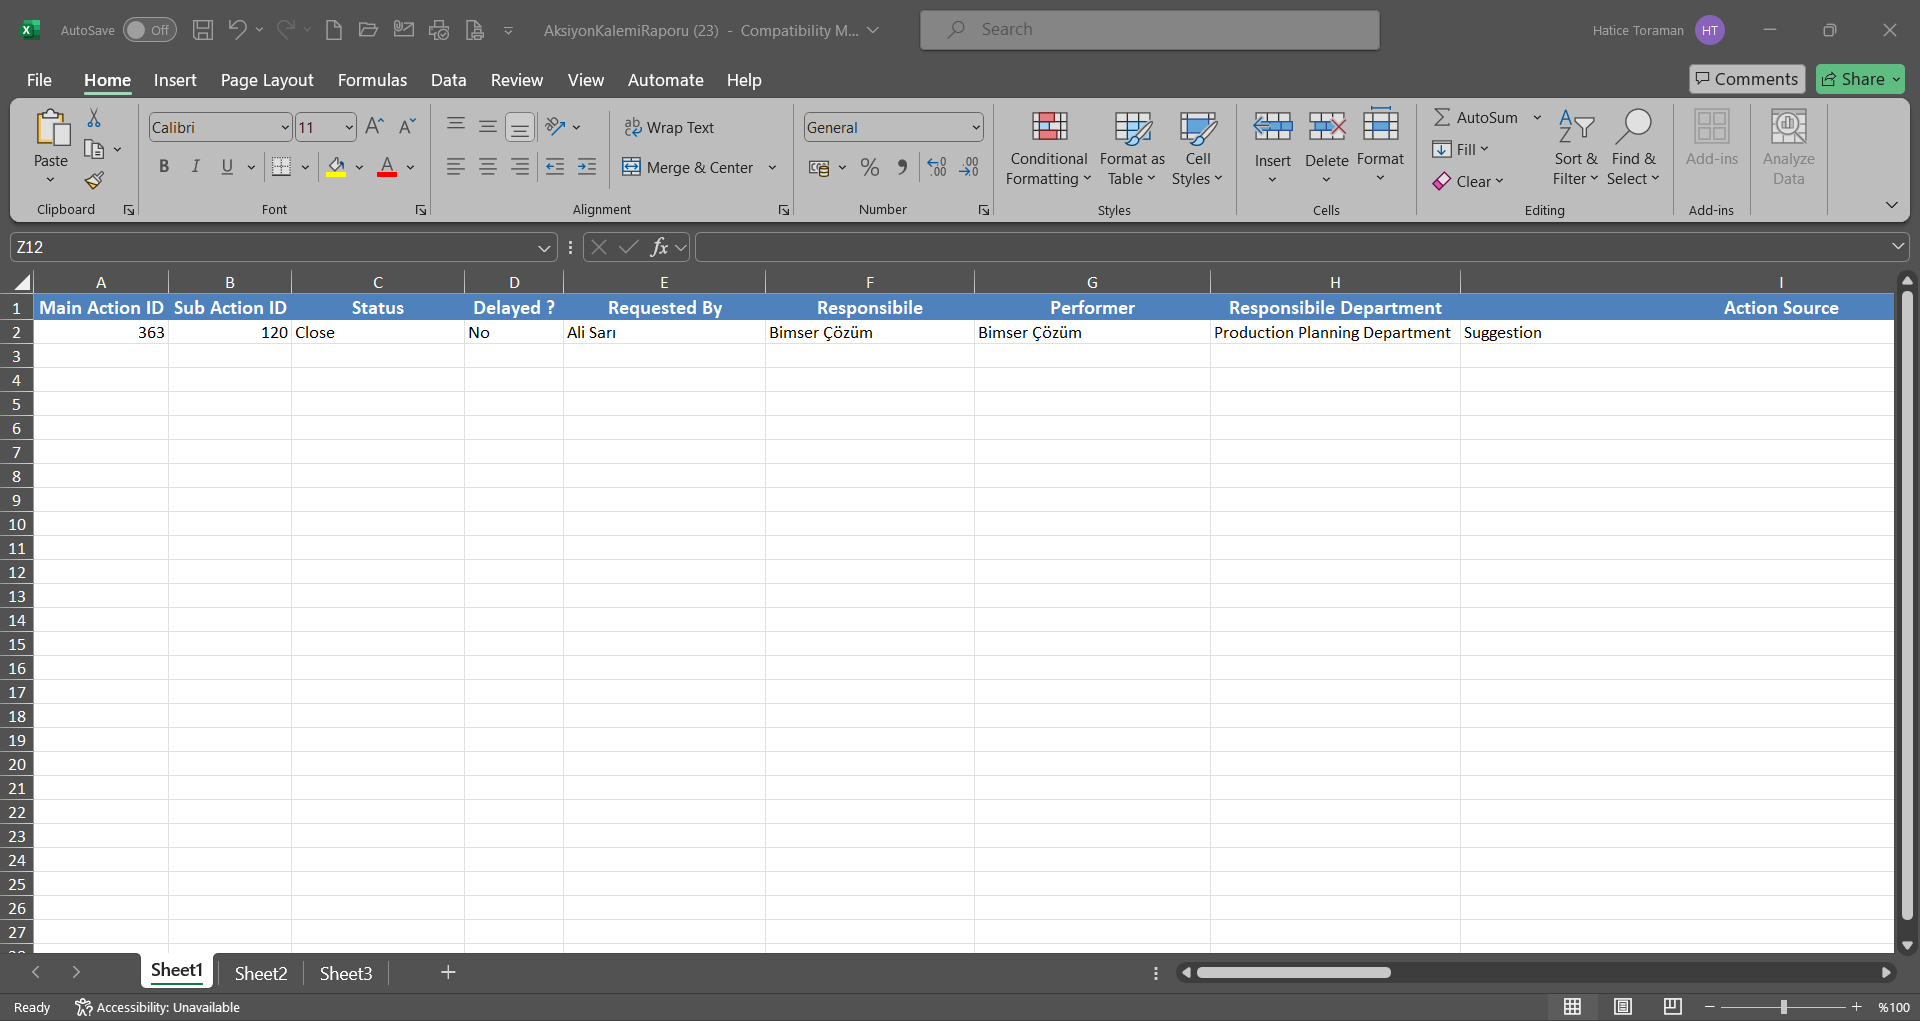
On the Defining Action screen, click the  button on the Action List tab.
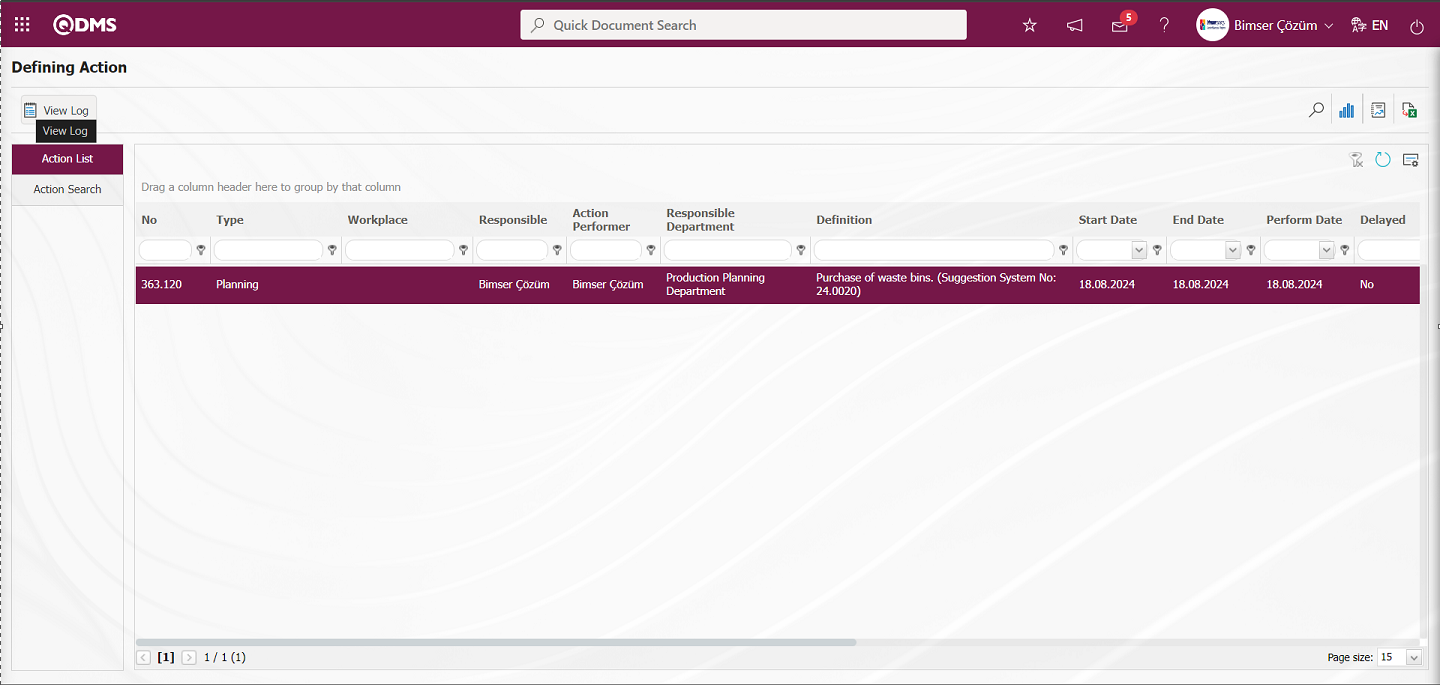
“Action Item Report” is displayed as a log.
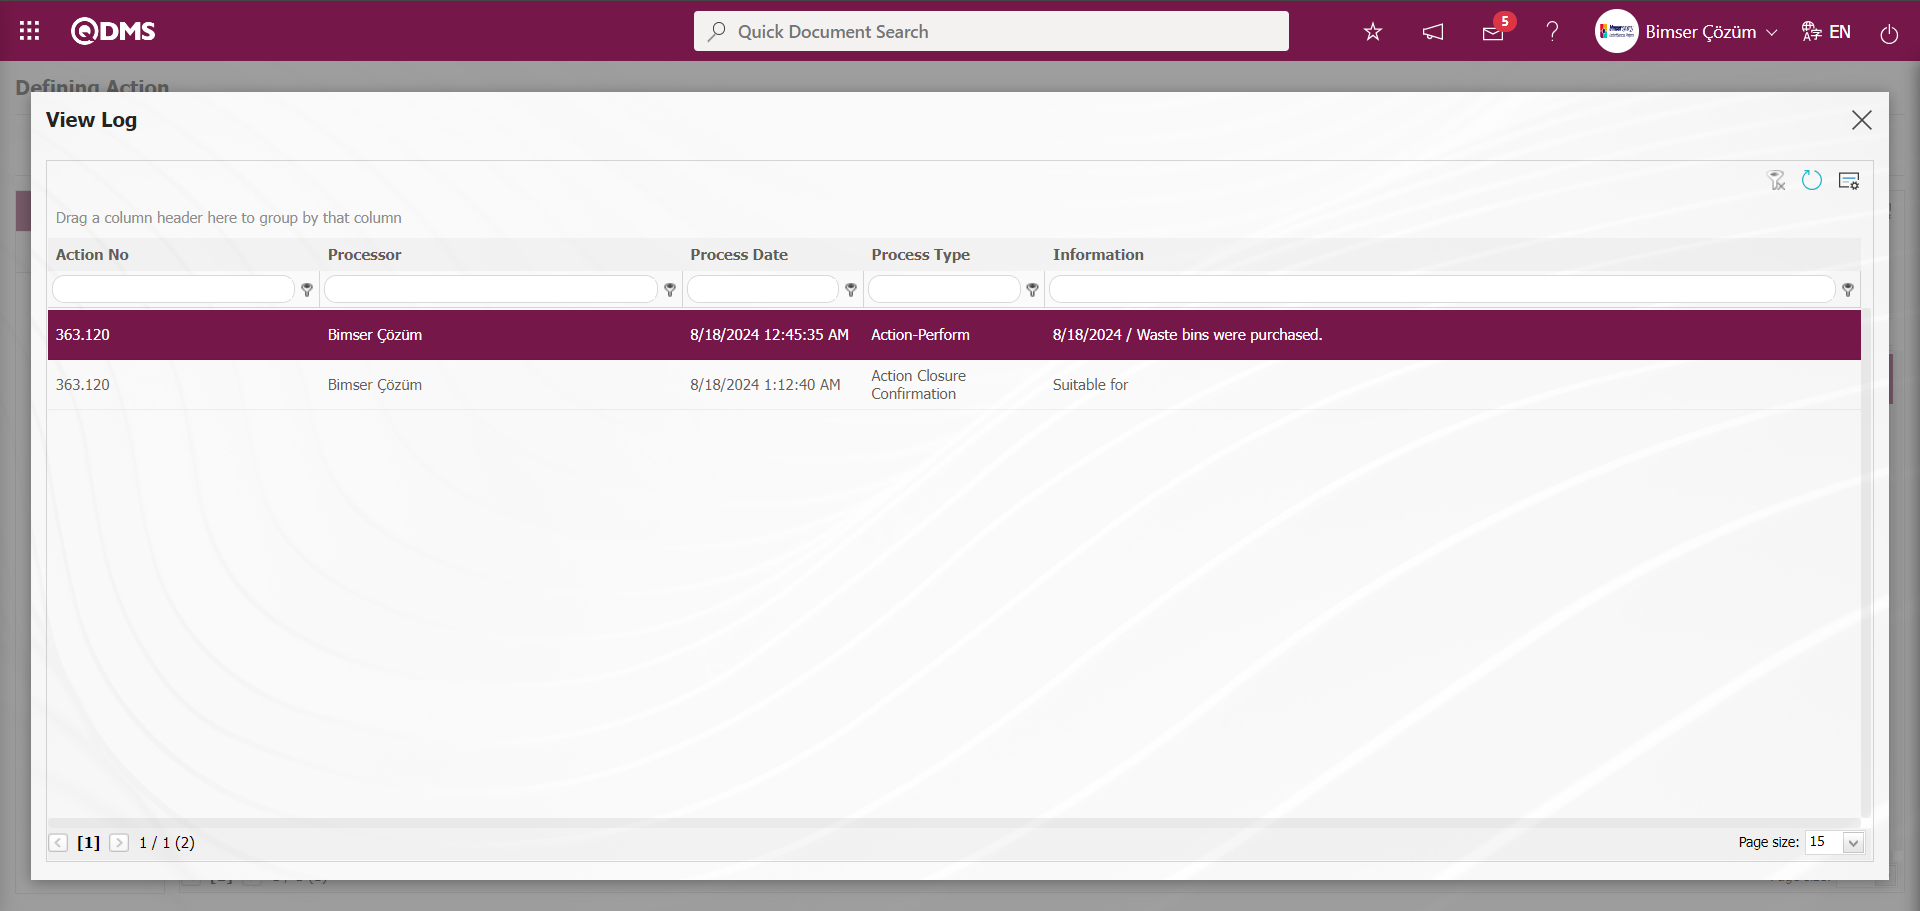
5.3.7. Suggestion Tracking
Menu Name: Integrated Management System/ Suggestion System/ Suggestion Tracking
It is the menu where the status of all suggestions given by the user is tracked. Information such as the status of the suggestion given by the user and who is waiting for it is displayed. On the My Suggestions screen, we see two tabs, List and Search tabs. In the Filter tab, data is entered into the fields with search criteria or data is selected and filtering is done. In the List tab, the Suggestion records are listed according to the filtering process performed in the Search tab.

With the help of the buttons on the screen,
 : The selected Suggestion record in the list is displayed.
: Data can be exported to Excel.
: Records are filtered and searched.
: The search criteria on the menu screens are used to clean the data remaining in the filter fields in the grid where the search operation is performed.
: The menu screen is restored to its default settings.
: User-based designing is done on the menu screen with the show-hide feature, that is, the hiding feature of the fields corresponding to the columns on the menu screens.
In the Search tab, enter the suggestion code information in the Suggestion No field and click the (Search) button at the top right corner of the screen.
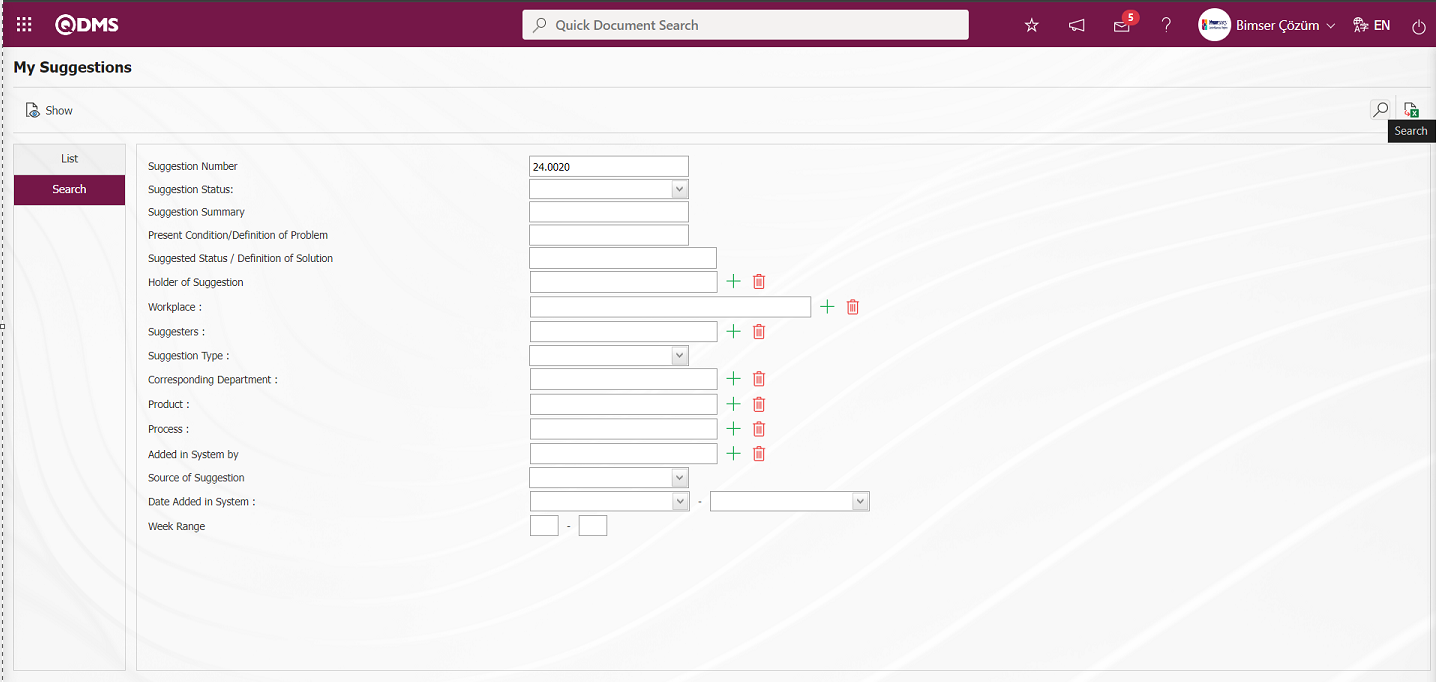
After filtering according to the search criteria in the Search tab, the relevant records are listed in the list tab.

When the Suggestion Record is selected in the List tab, click the  button to open the Suggestion Details screen.
Suggestion Details tab: Details, Additional Files and History tabs.

Details tab: This is the tab where all information about the suggestion is displayed.
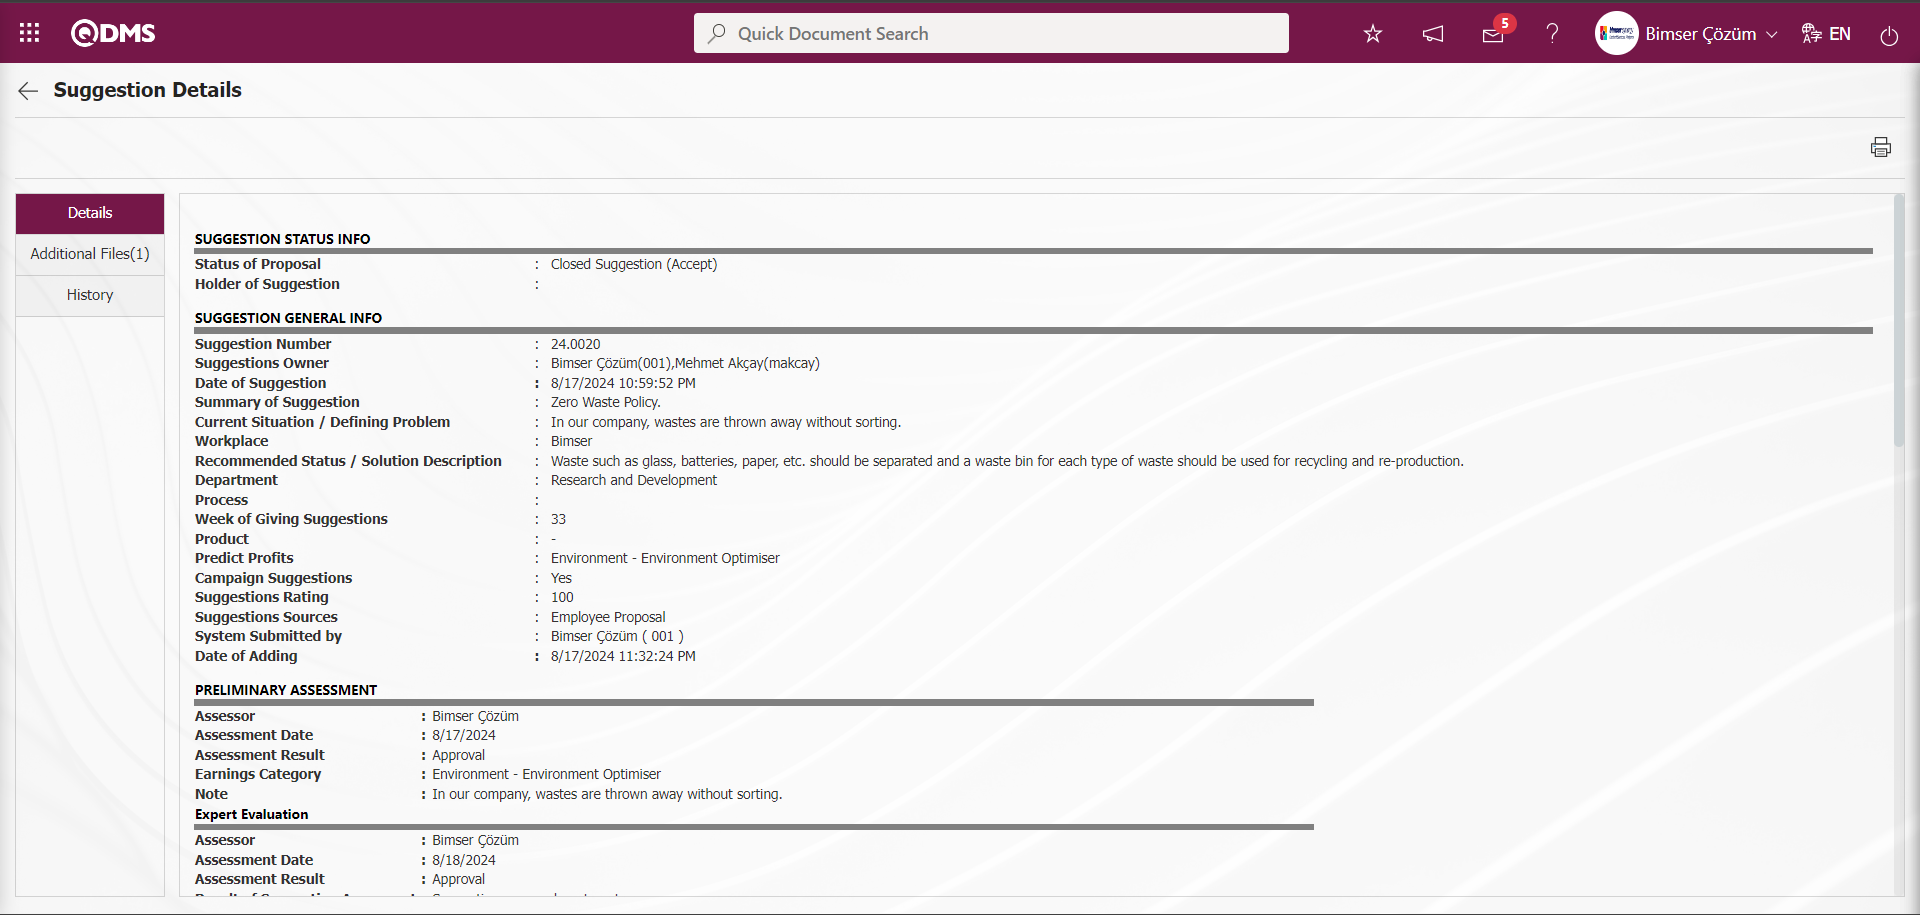
Additional Files tab: This is the tab where the uploaded additional files related to the suggestion are accessed and the content of the uploaded additional files is displayed.
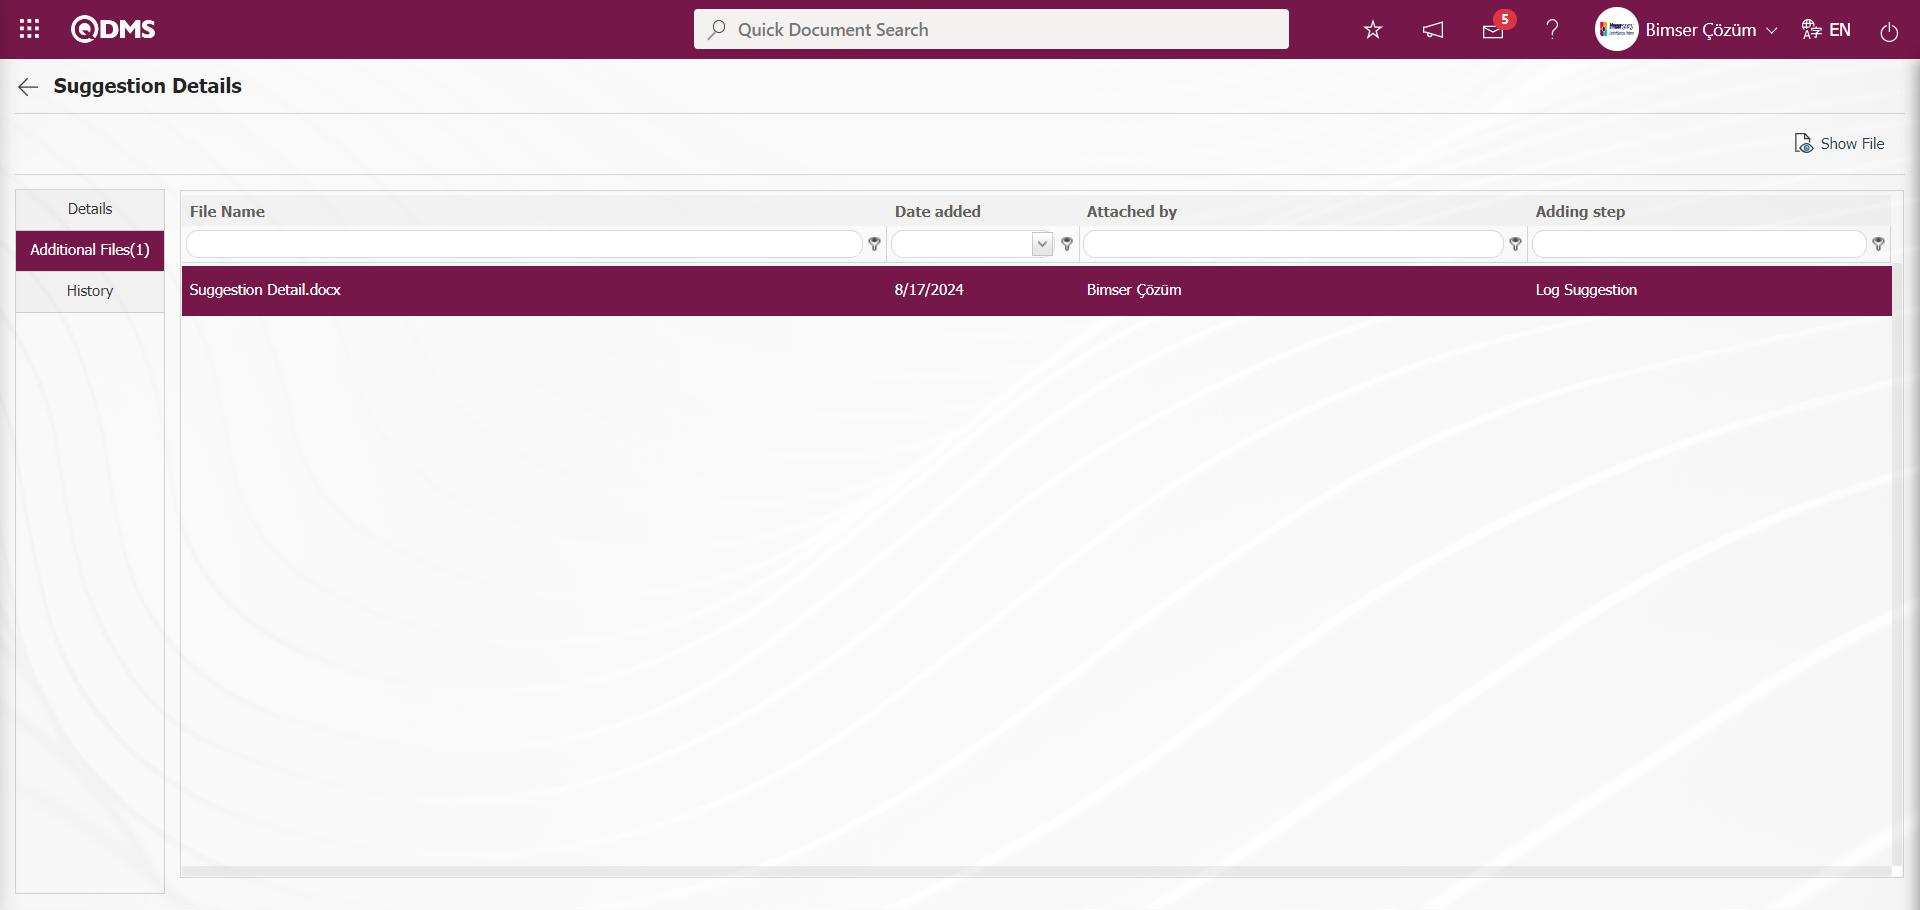
With the help of the buttons on the screen;
: Display the selected attachment file in the list.
History Tab: It is the tab where the history of the transactions related to the suggestion until this stage is accessed. It is a tab that is displayed depending on the parameter. The parameter value of parameter 137 in the Suggestion System Module parameters is activated by selecting “Yes”.
After the parameter is activated, the History tab is displayed at every stage in the Suggestion Details tab in the Suggestion System Module.
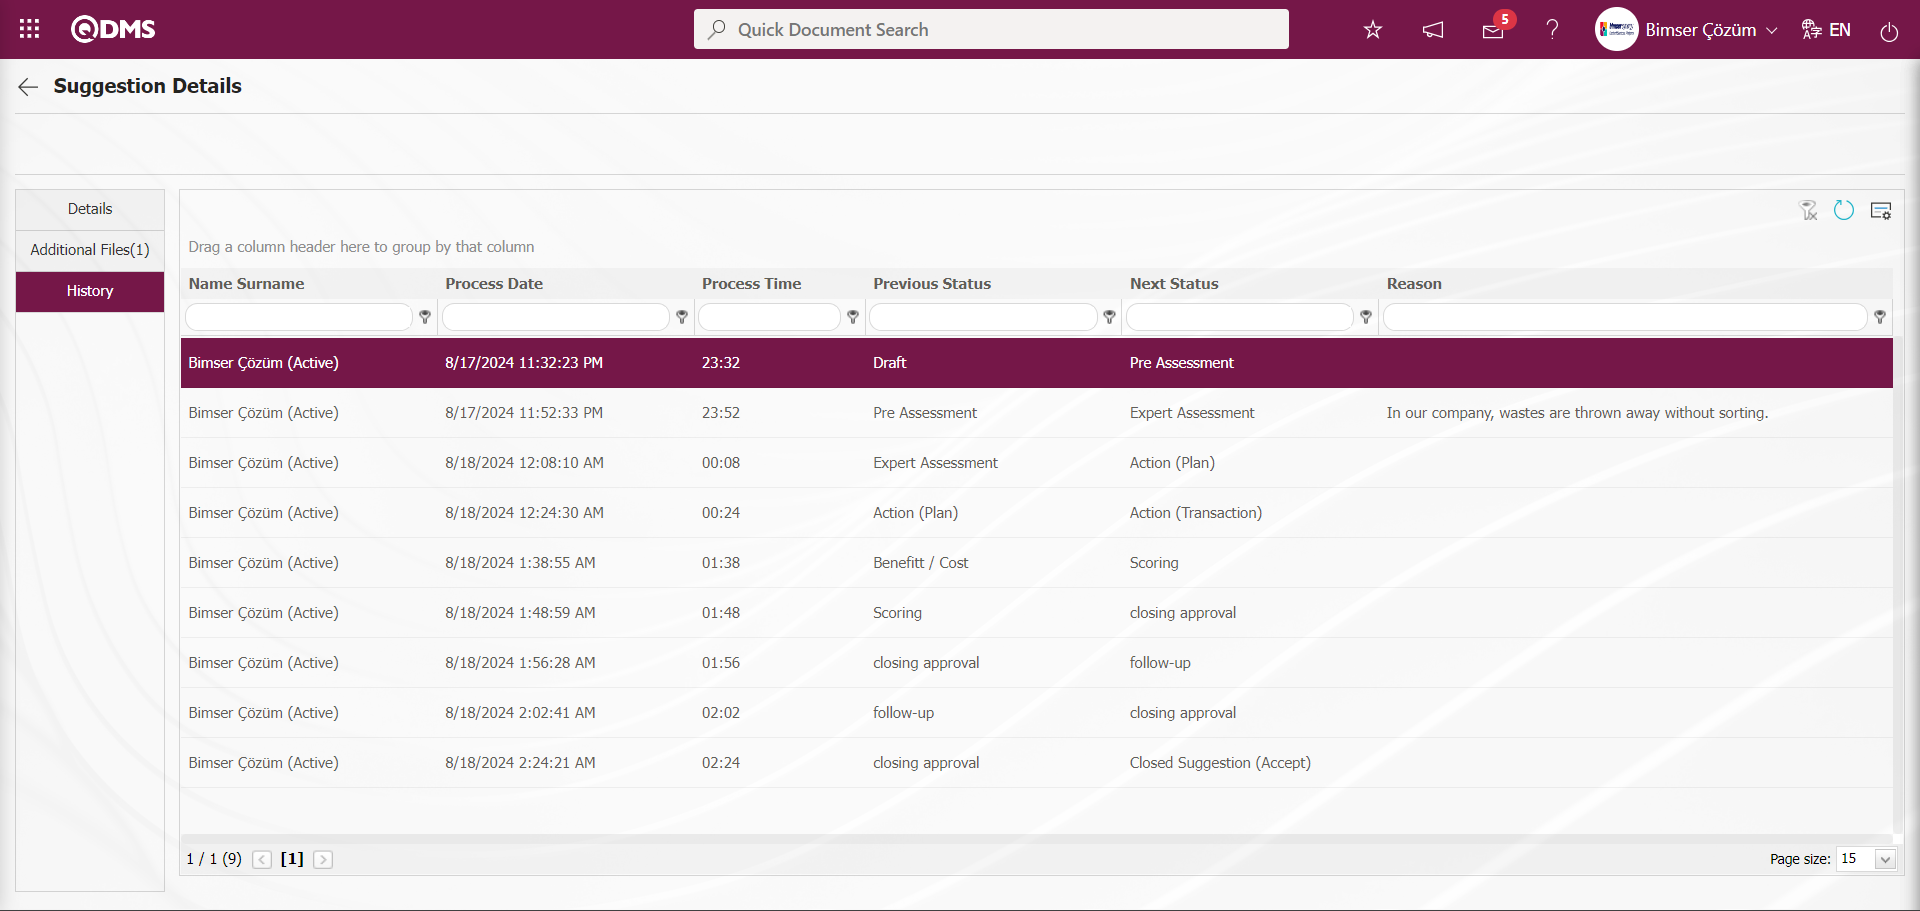
On the My Suggestions screen, click the (Export to Excel) button while the suggestion record is selected in the list tab.
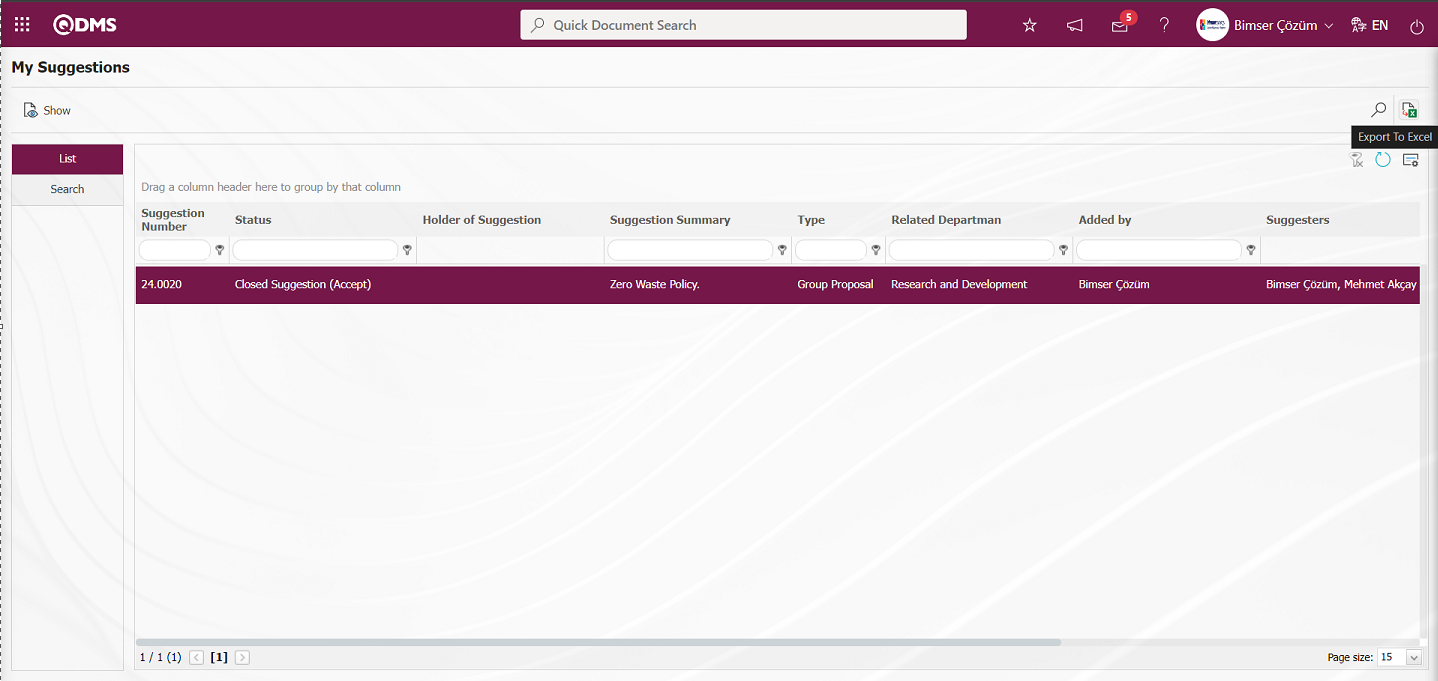
The system automatically presents the report in Excel format.
5.3.8. Reports
Menu Name: Integrated Management System/ Suggestion System/ Reports
It is the menu where the suggestion reports generated as a result of the transactions realized in the suggestion module are displayed.
5.3.8.1. Suggestion Status Report
Menu Name: Integrated Management System/ Suggestion System/ Reports/ Suggestion Status Report
This report provides information about the latest status of the suggestions. On the Suggestion Status Report screen, we see two tabs, List and Search tab. In the Search tab, data is entered into the fields with search criteria or data is selected and filtering is done. In the List tab, the Suggestion records are listed according to the filtering process performed in the Search tab.

With the help of the buttons on the screen,
: The selected Suggestion record in the list is displayed.
: Data can be exported to Excel.
: Records are filtered and searched.
: The search criteria on the menu screens are used to clean the data remaining in the filter fields in the grid where the search operation is performed.
: The menu screen is restored to its default settings.
: User-based designing is done on the menu screen with the show-hide feature, that is, the hiding feature of the fields corresponding to the columns on the menu screens.
In the Search tab, enter the suggestion code information in the Suggestion Number field and click the (Search) button in the upper right corner of the screen.

After filtering according to the search criteria in the Search tab, the relevant records are listed in the list tab.
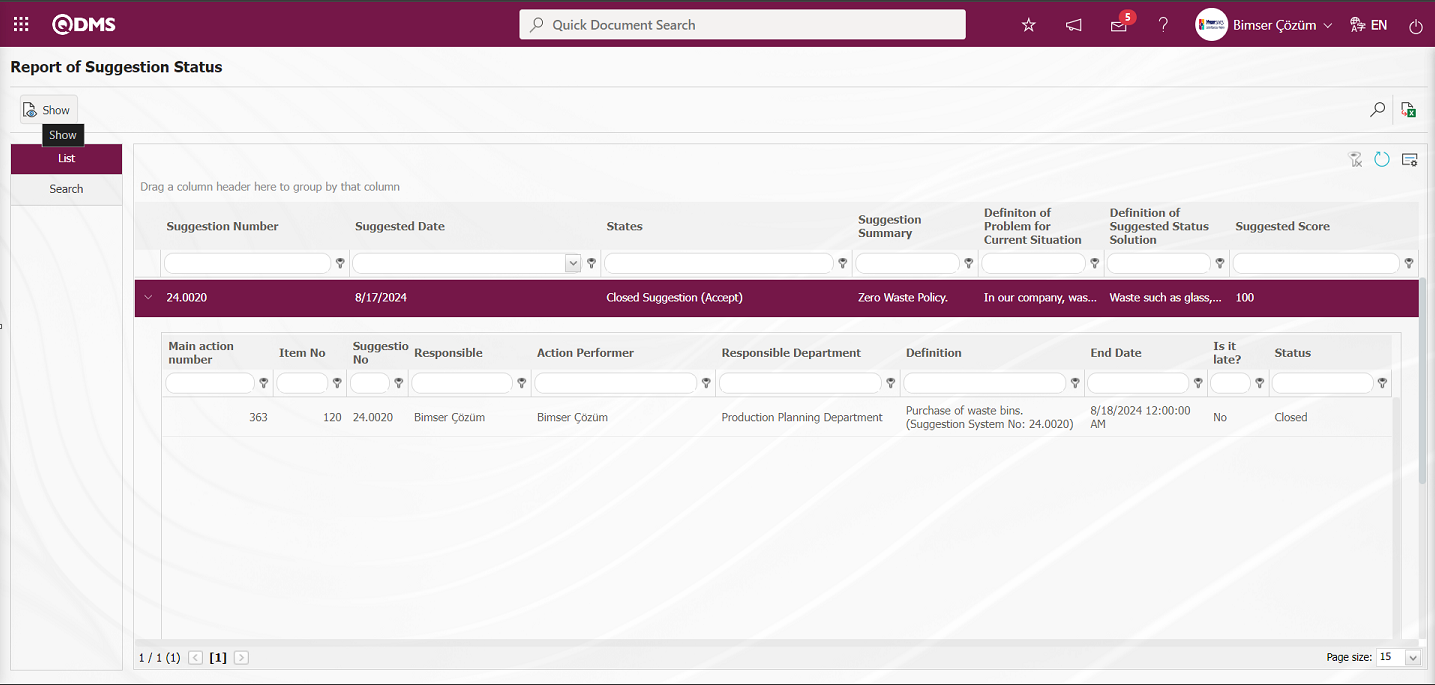
When the Suggestion Record is selected in the List tab, click the  button to open the Suggestion Details screen.
Suggestion Details tab: This tab contains the Details, Additional Files and History tabs.
Details tab: This is the tab where all information about the suggestion is displayed.
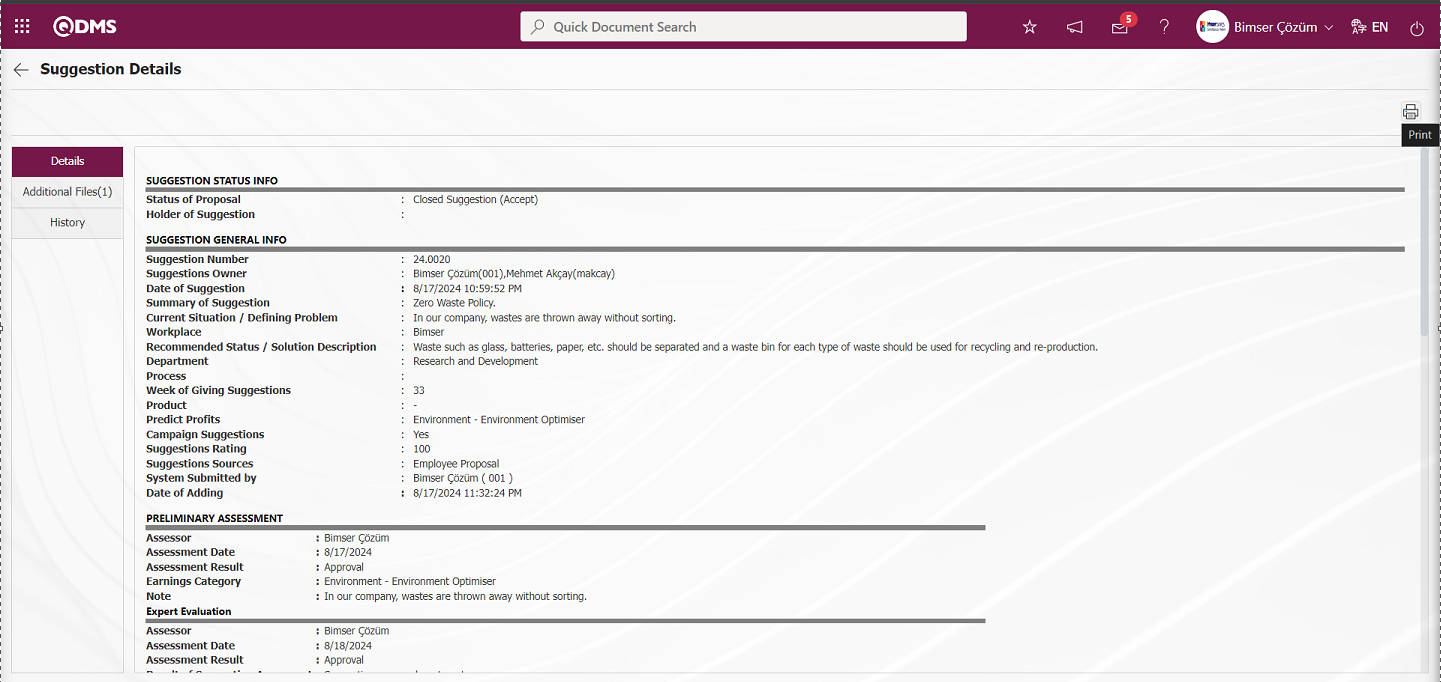
With the help of the buttons on the screen;
 : Printing of the displayed screen is done.
By clicking the relevant tab on the Suggestion Details screen, the screen displayed is printed by clicking the (Print) button.
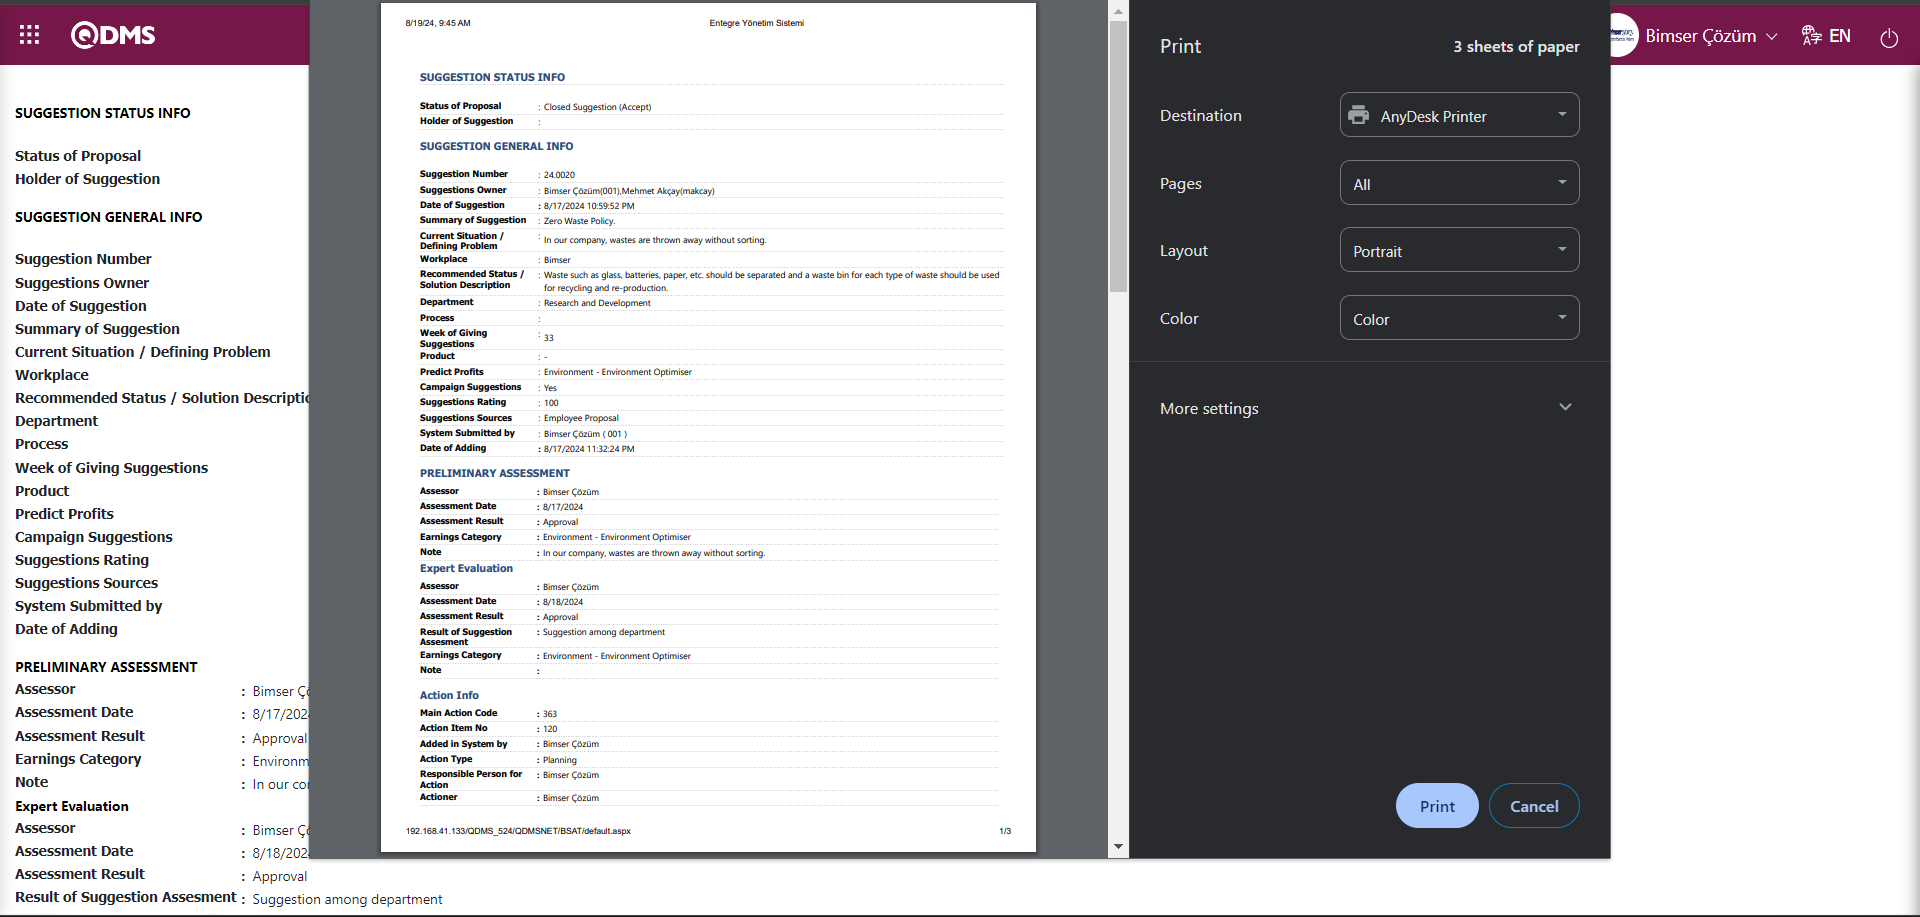
Additional Files tab: This is the tab where the uploaded additional files related to the suggestion are accessed and the content of the uploaded additional files is displayed.

With the help of the buttons on the screen;
: Display the selected attachment file in the list.
History Tab: It is the tab where the history of the transactions related to the suggestion until this stage is accessed. It is a tab that is displayed depending on the parameter. The parameter value of parameter 137 in the Suggestion System Module parameters is activated by selecting “Yes”.
After the parameter is activated, the History tab is displayed at every stage in the Suggestion Details tab in the Suggestion System Module.

 (Back) button is clicked to return to the previous screen. On the Report of Suggestion Status screen, click the
  (Export to Excel) button while the Suggestion Record is selected in the list on the List tab.
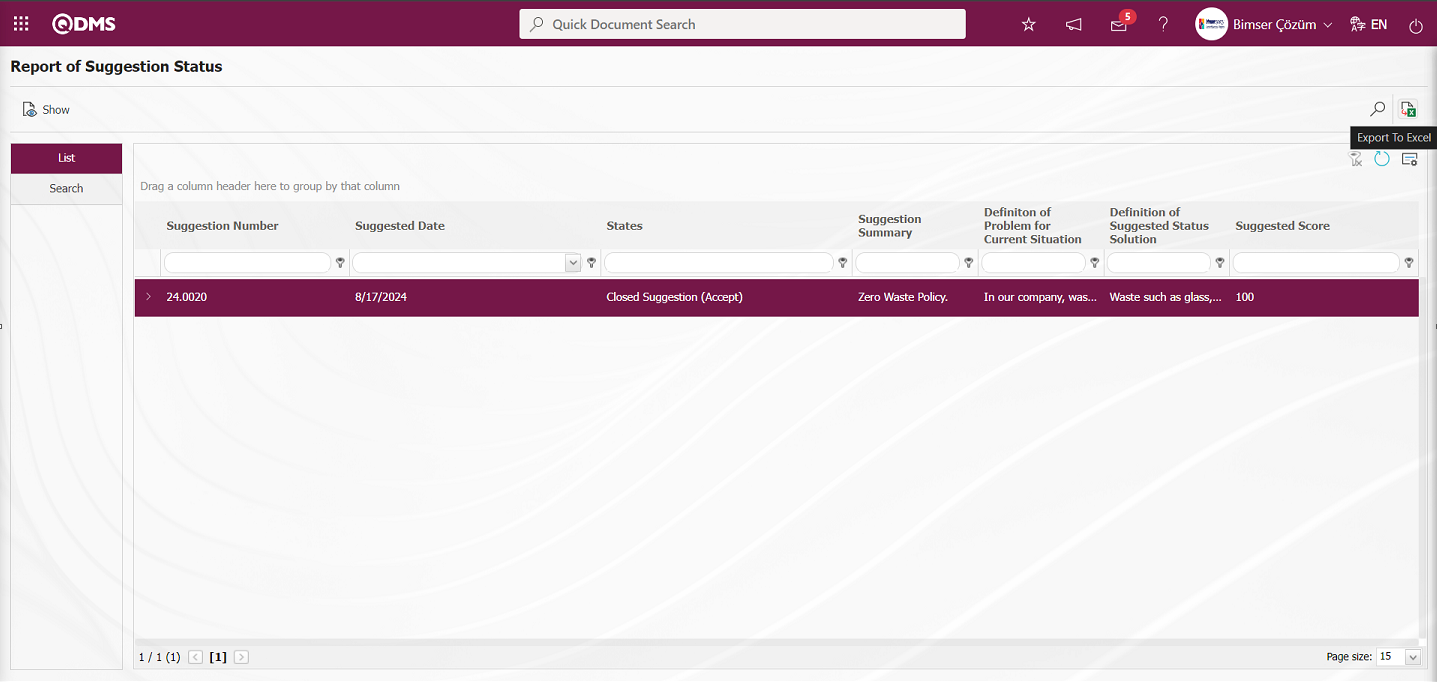
The system automatically provides the Suggestion Status report in Excel format.
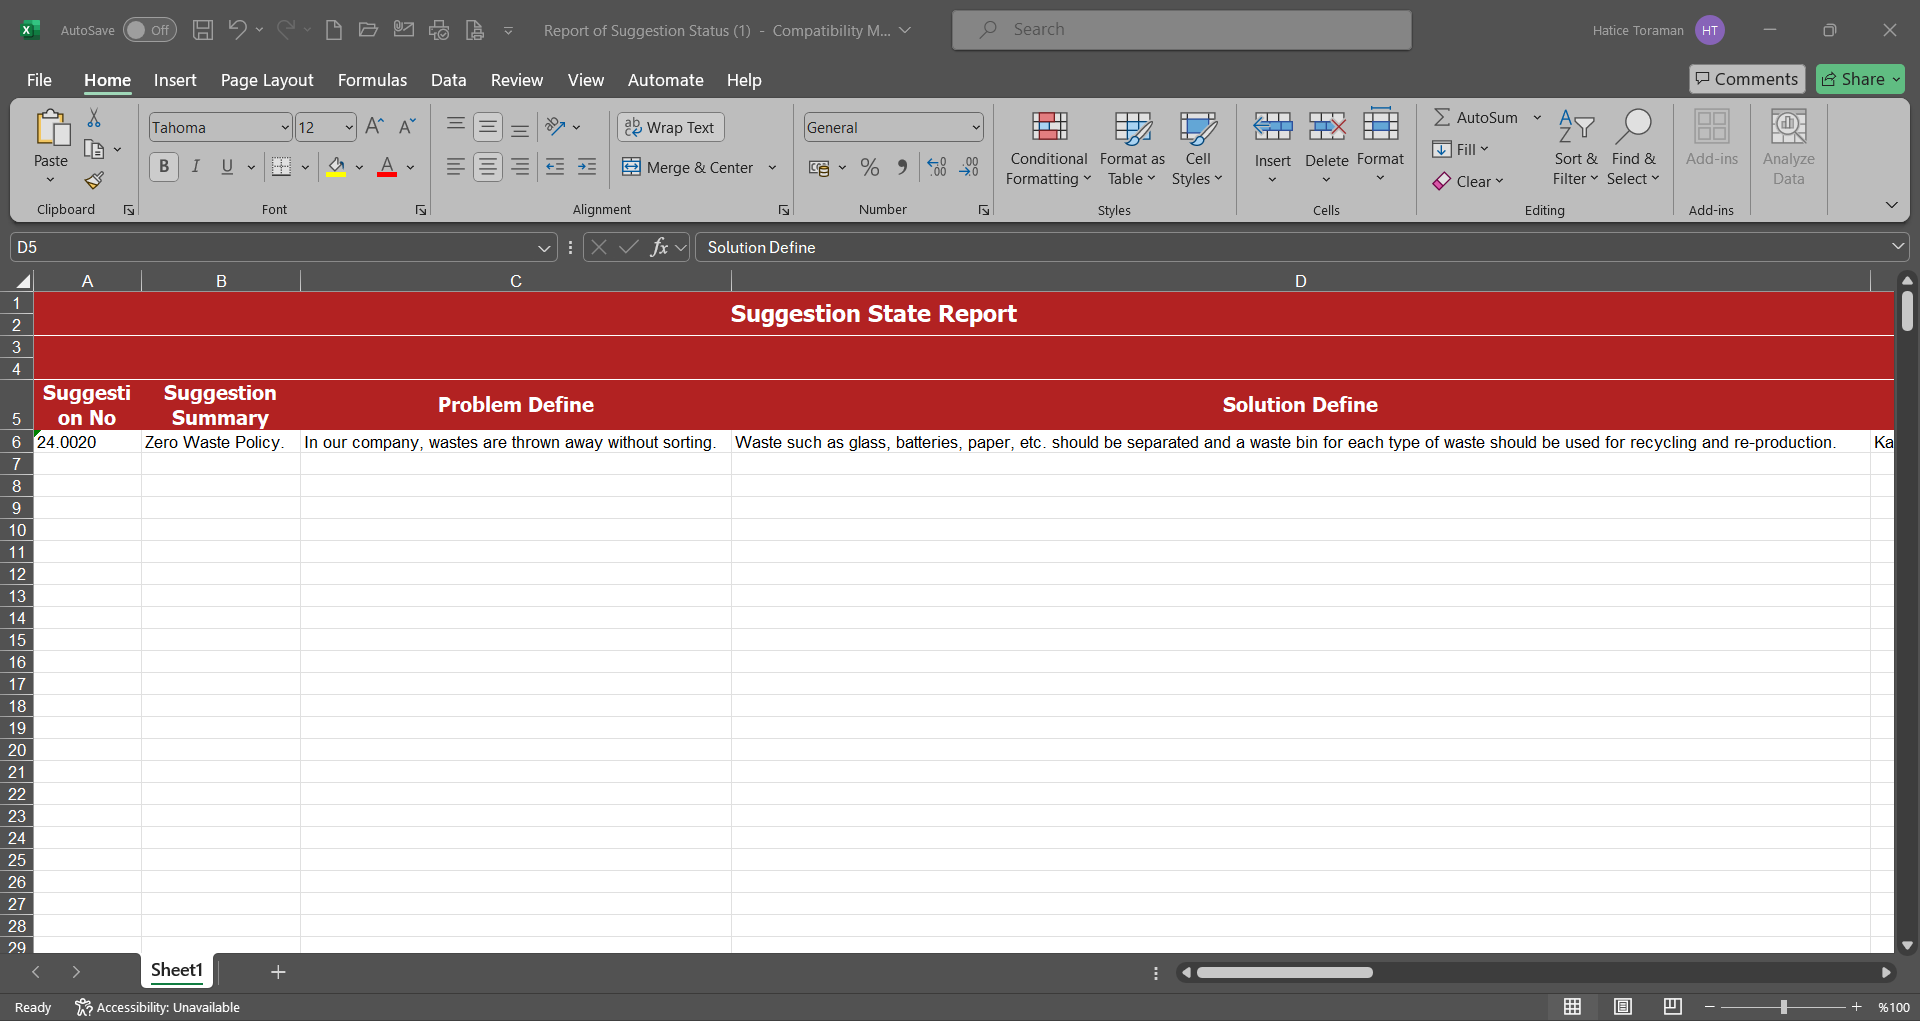
5.3.8.2. Preliminary Evaluation Status Report
Menu Name: Integrated Management System/ Recommendation System/ Reports/ Preliminary Evaluation Status Report
Draft, preliminary evaluation, Rejection (Expert evaluation) is the report that shows the stages of suggestion evaluation with suggestion status such as draft, preliminary evaluation, Rejection (Expert evaluation).On the Preliminary Evaluation Status Report screen, we see two tabs, List and Search tab. In the Search tab, data is entered into the fields with search criteria or data is selected and filtering is done. In the List tab, the Recommendation records are listed according to the filtering process performed in the Search tab.

With the help of the buttons on the screen,
: The selected Suggestion record in the list is displayed.
: Data can be exported to Excel.
: Records are filtered and searched.
: The search criteria on the menu screens are used to clean the data remaining in the filter fields in the grid where the search operation is performed.
: The menu screen is restored to its default settings.
: User-based designing is done on the menu screen with the show-hide feature, that is, the hiding feature of the fields corresponding to the columns on the menu screens.
In the Search tab, enter the suggestion code information in the Suggestion Number field and click the (Search) button in the upper right corner of the screen.
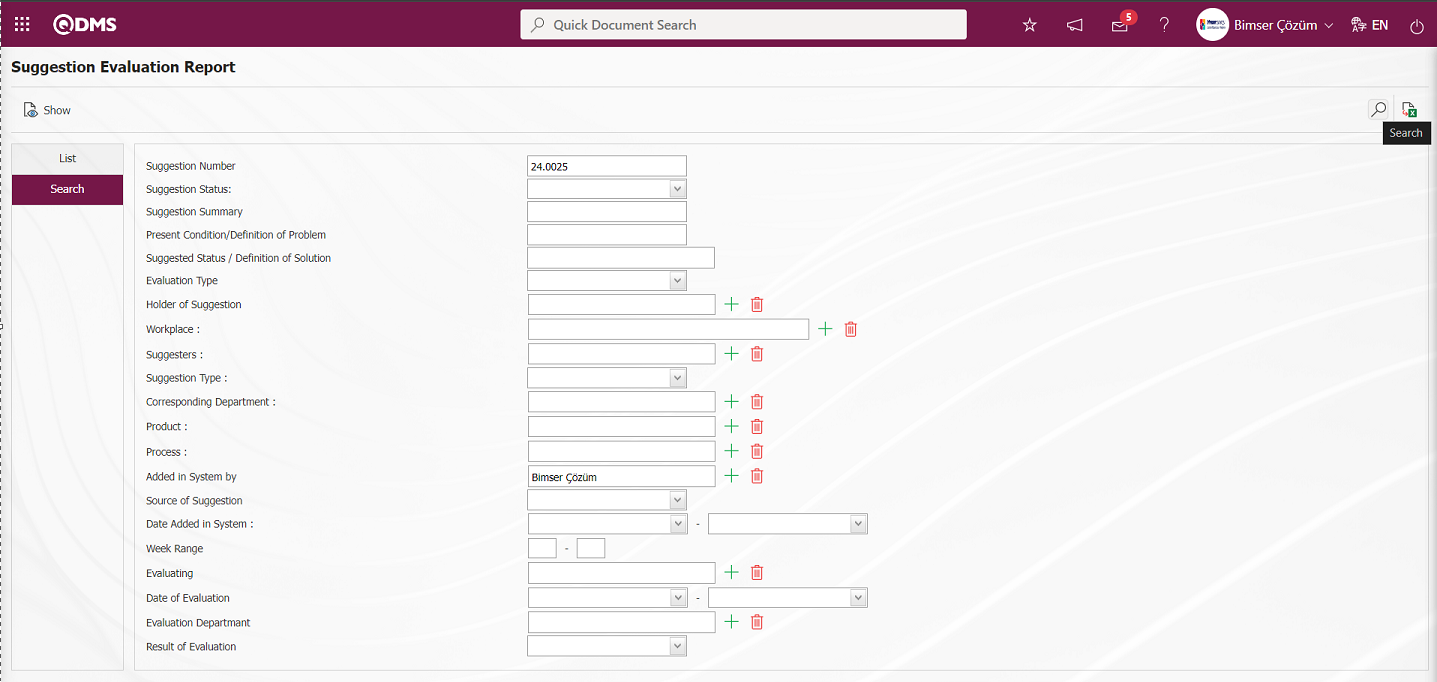
After filtering according to the search criteria in the Search tab, the relevant records are listed in the list tab.

When the Suggestion Record is selected in the List tab, click the  button to open the Suggestion Details screen.
Suggestion Details tab: This tab contains the Details, Additional Files and History tabs.
Details tab: This is the tab where all information about the suggestion is displayed.
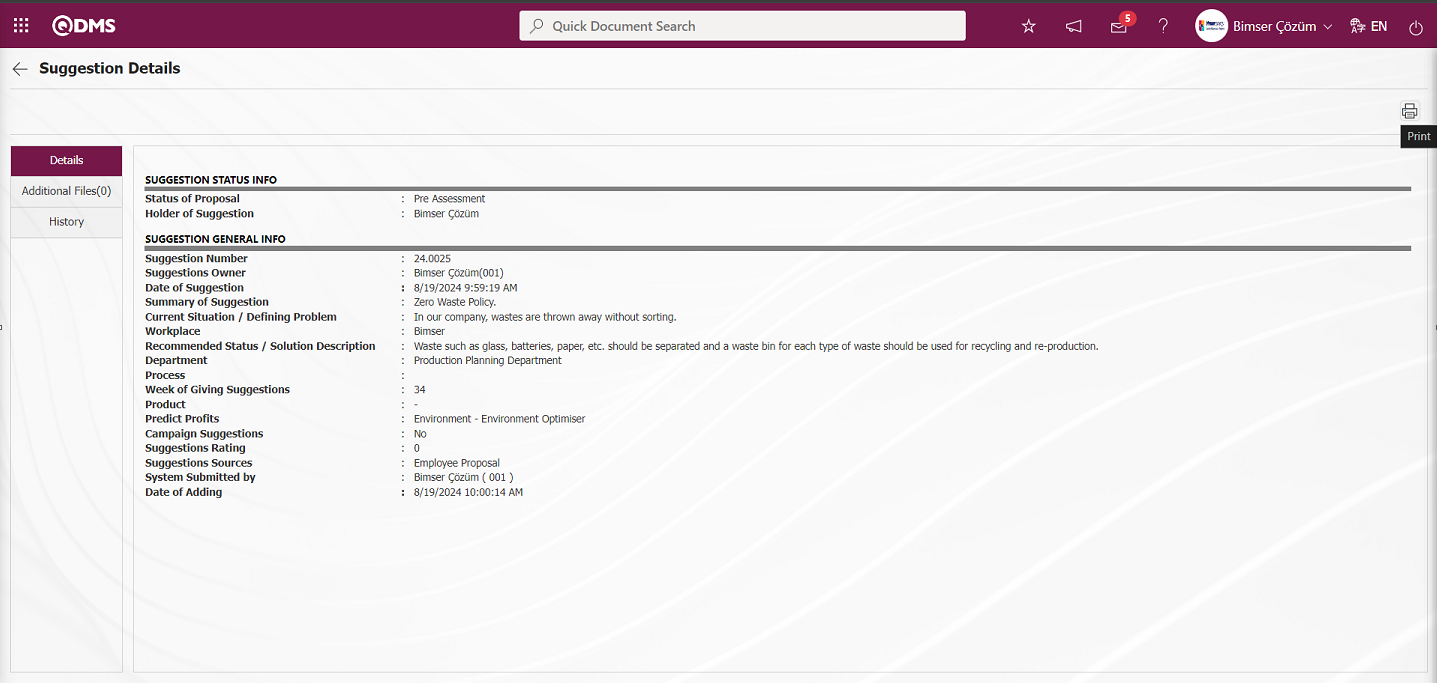
With the help of the buttons on the screen;
 : Printing of the displayed screen is done.
By clicking the relevant tab on the Suggestion Details screen, the screen displayed is printed by clicking the (Print) button.
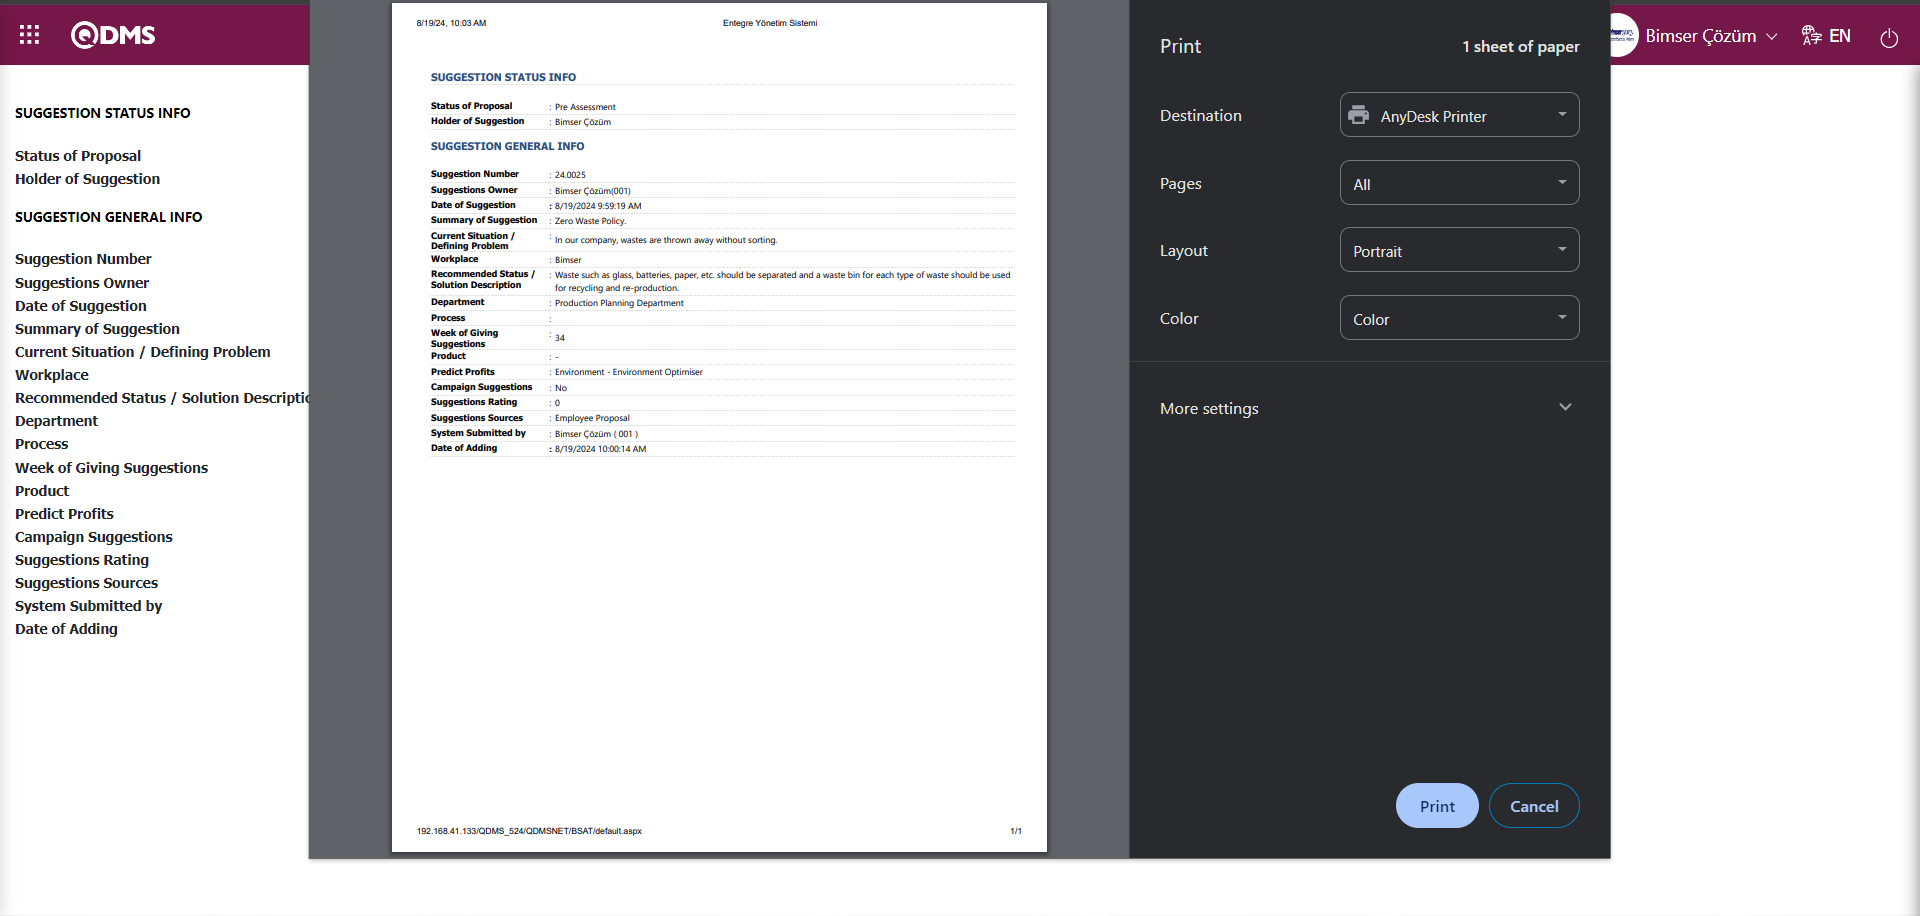
Additional Files tab: This is the tab where the uploaded additional files related to the suggestion are accessed and the content of the uploaded additional files is displayed.
With the help of the buttons on the screen;
: Display the selected attachment file in the list.
History Tab: It is the tab where the history of the transactions related to the suggestion until this stage is accessed. It is a tab that is displayed depending on the parameter. The parameter value of parameter 137 in the Suggestion System Module parameters is activated by selecting “Yes”.
After the parameter is activated, the History tab is displayed at every stage in the Suggestion Details tab in the Suggestion System Module.
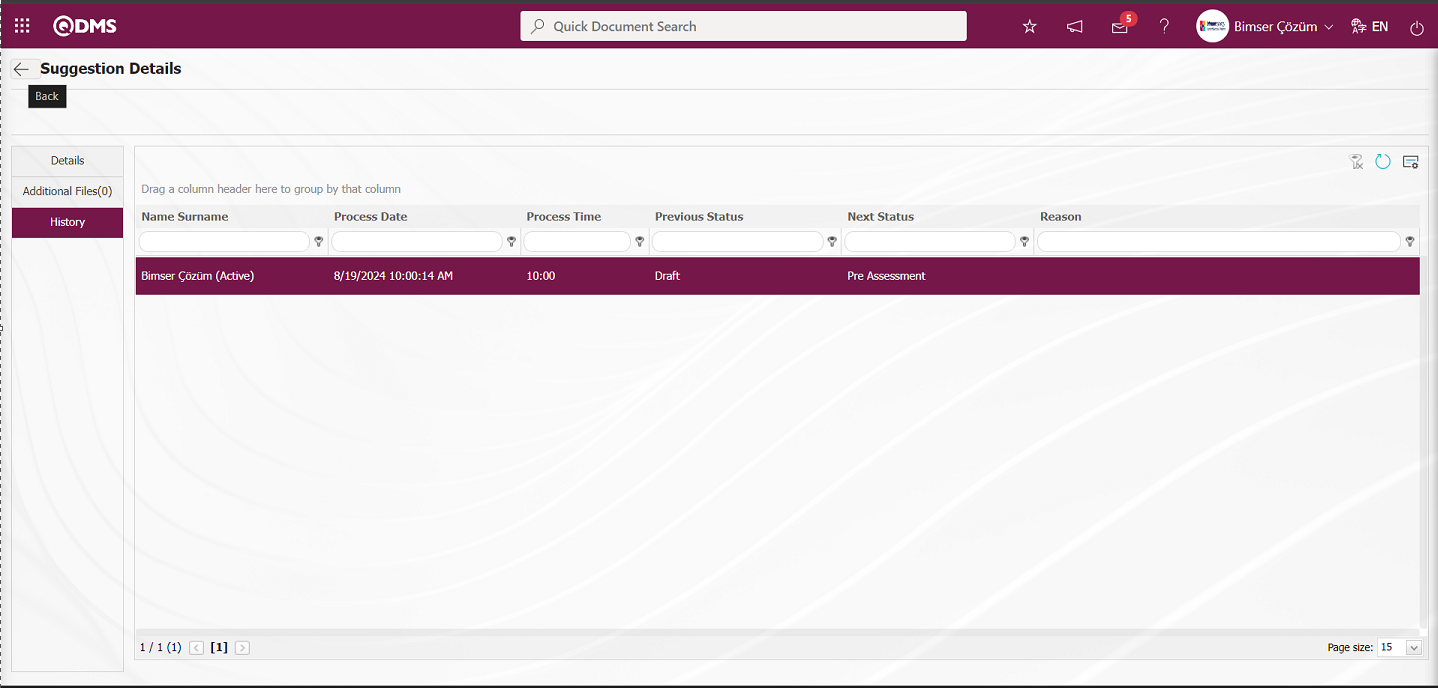
(Back) button is clicked to return to the previous screen. On the Suggestion Evaluation Report screen, click the (Export to Excel) button while the Suggestion Record is selected in the list on the List tab.

The system automatically provides the Preliminary Evaluation Status report in Excel format.

5.3.8.3. Pending Review Suggestions Report
Menu Name: Integrated Management System/ Suggestion System/ Reports/ Pending Review Suggestions Report
It is the report that shows the pending suggestions at the status stage in suggestion evaluation such as Preliminary Evaluation, Expert Evaluation (1st Appeal), Preliminary Evaluation (Commission), Expert Evaluation. On the Pending Review Suggestions Report screen, we see two tabs, List and Search tab. In the Search tab, data is entered into the fields with search criteria or data is selected and filtered. In the List tab, the Suggestion records are listed according to the filtering process performed in the Search tab.

With the help of the buttons on the screen,
: The selected Suggestion record in the list is displayed.
: Data can be exported to Excel.
: Records are filtered and searched.
: The search criteria on the menu screens are used to clean the data remaining in the filter fields in the grid where the search operation is performed.
: The menu screen is restored to its default settings.
: User-based designing is done on the menu screen with the show-hide feature, that is, the hiding feature of the fields corresponding to the columns on the menu screens.
In the Search tab, enter the suggestion code information in the Suggestion Number field and click the (Search) button in the upper right corner of the screen.
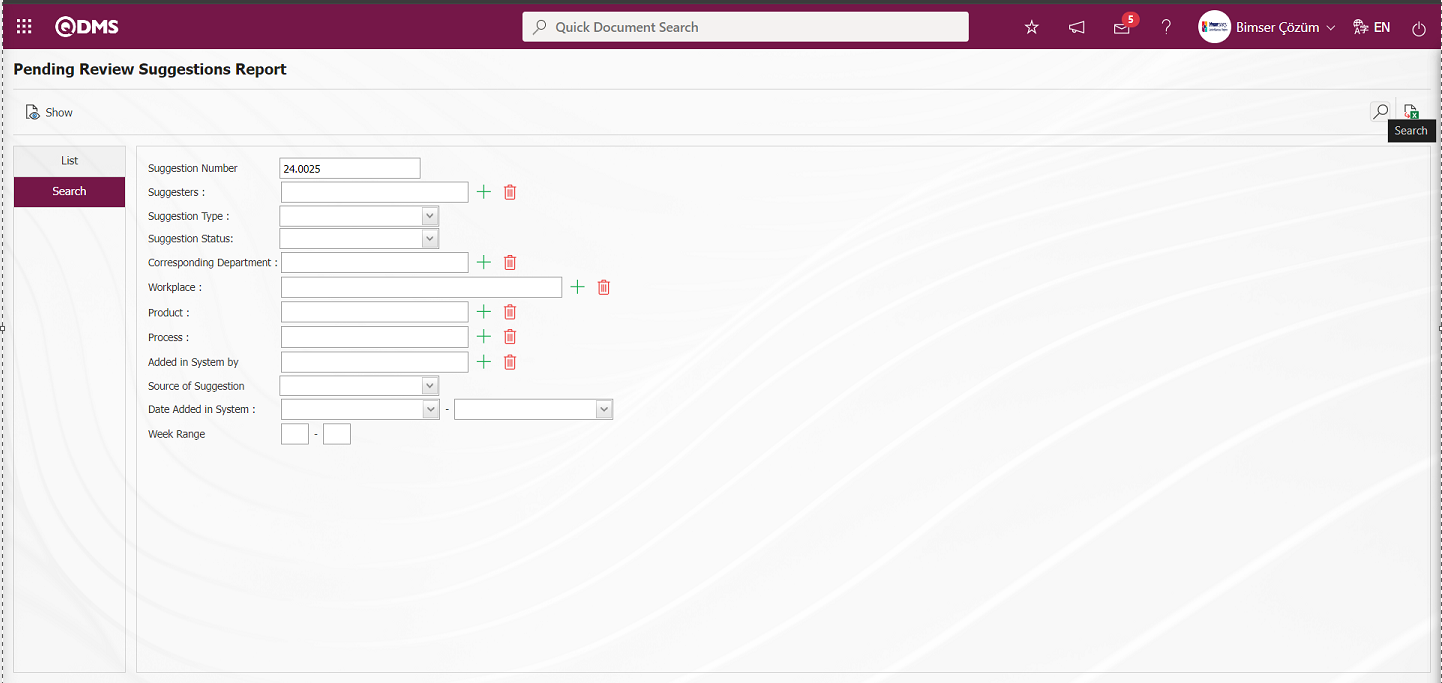
After filtering according to the search criteria in the Search tab, the relevant records are listed in the list tab.

When the Suggestion Record is selected in the List tab, click the button to open the Suggestion Details screen.
Suggestion Details tab: This tab contains the Details, Additional Files and History tabs.
Details tab: This is the tab where all information about the suggestion is displayed.
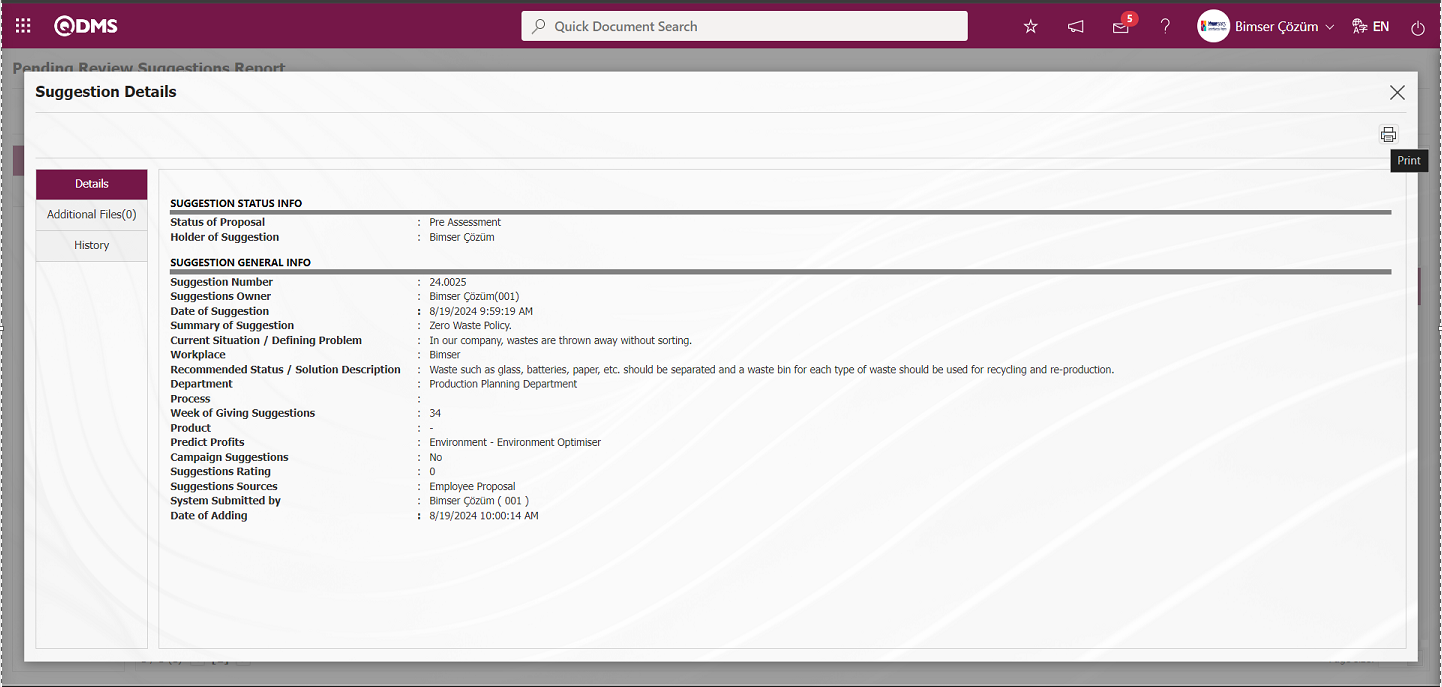
With the help of the buttons on the screen;
: Printing of the displayed screen is done.
By clicking the relevant tab on the Suggestion Details screen, the screen displayed is printed by clicking the (Print) button.
Additional Files tab: This is the tab where the uploaded additional files related to the suggestion are accessed and the content of the uploaded additional files is displayed.
With the help of the buttons on the screen;
: Display the selected attachment file in the list.
History Tab: It is the tab where the history of the transactions related to the suggestion until this stage is accessed. It is a tab that is displayed depending on the parameter. The parameter value of parameter 137 in the Suggestion System Module parameters is activated by selecting “Yes”.
After the parameter is activated, the History tab is displayed at every stage in the Suggestion Details tab in the Suggestion System Module.
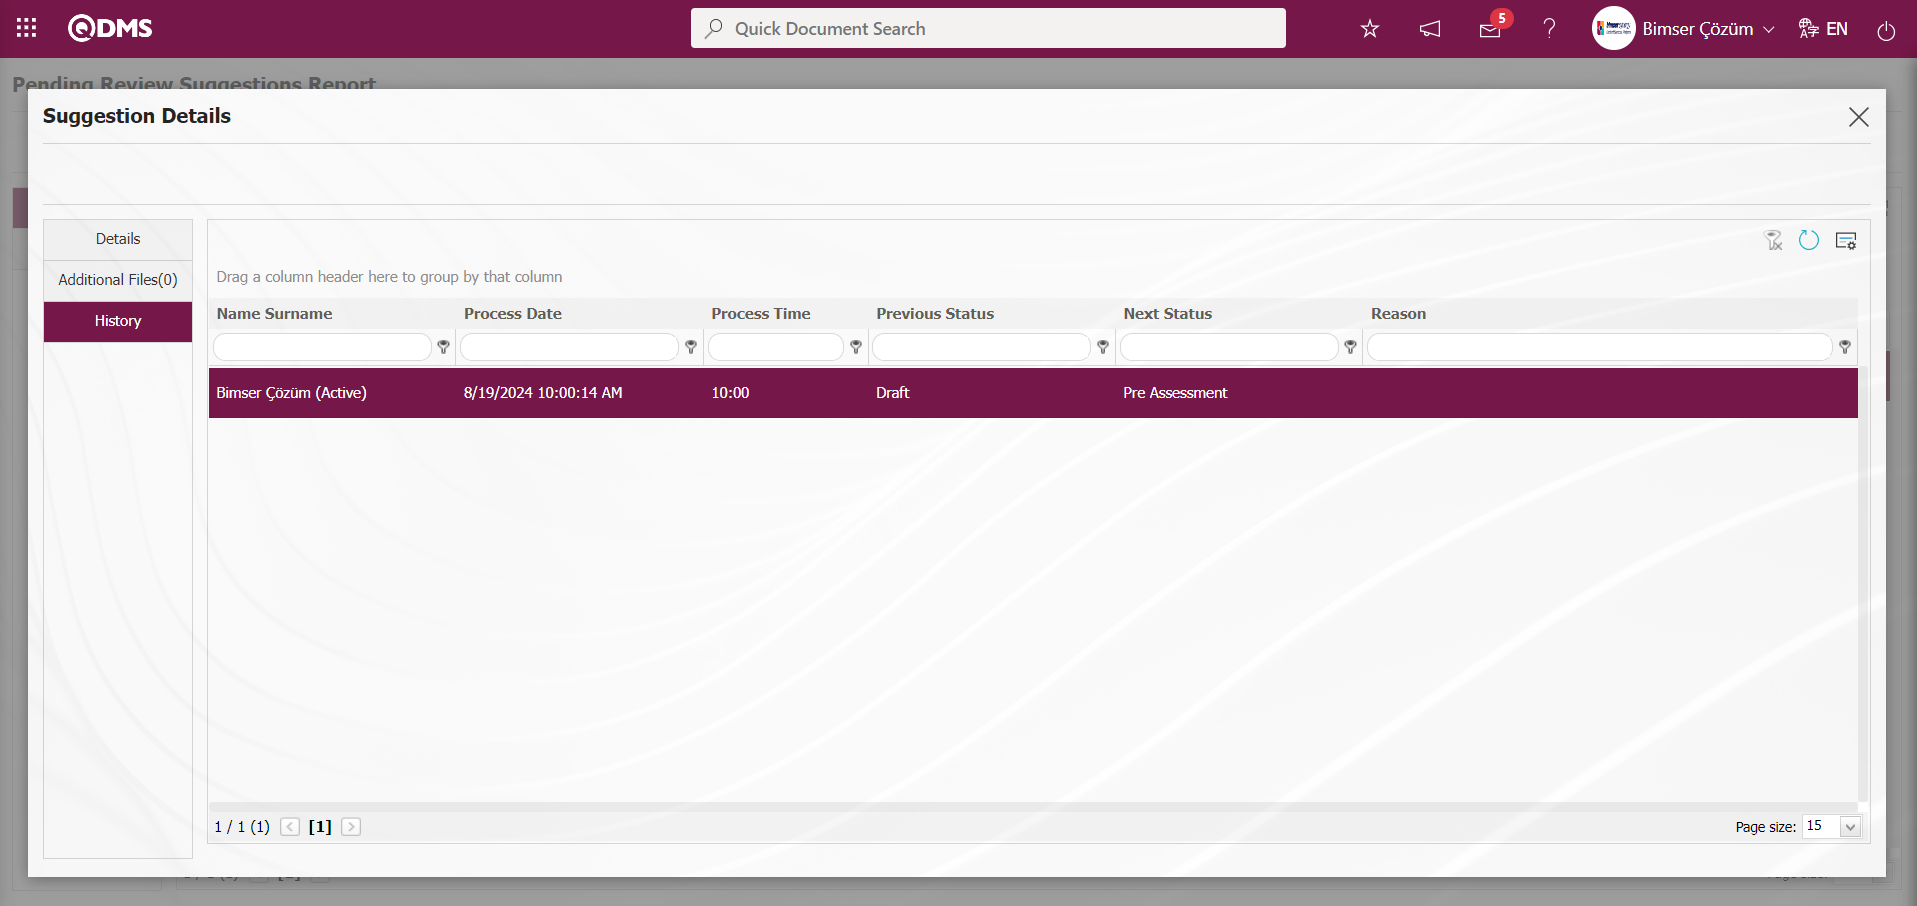
On the Pending Review Suggestions Report screen, click the (Export to Excel) button while the Suggestion Record is selected in the list on the List tab
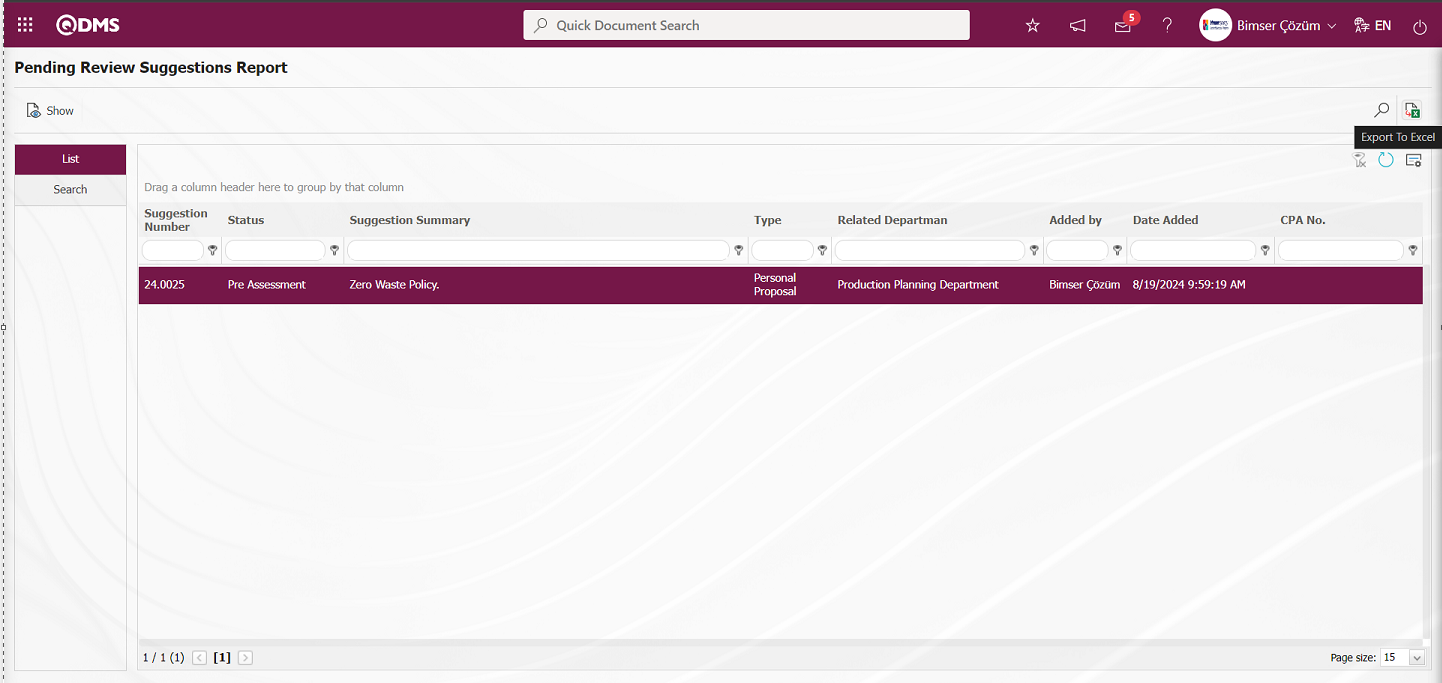
The system automatically presents the Pending Review Suggestions Report in Excel format. 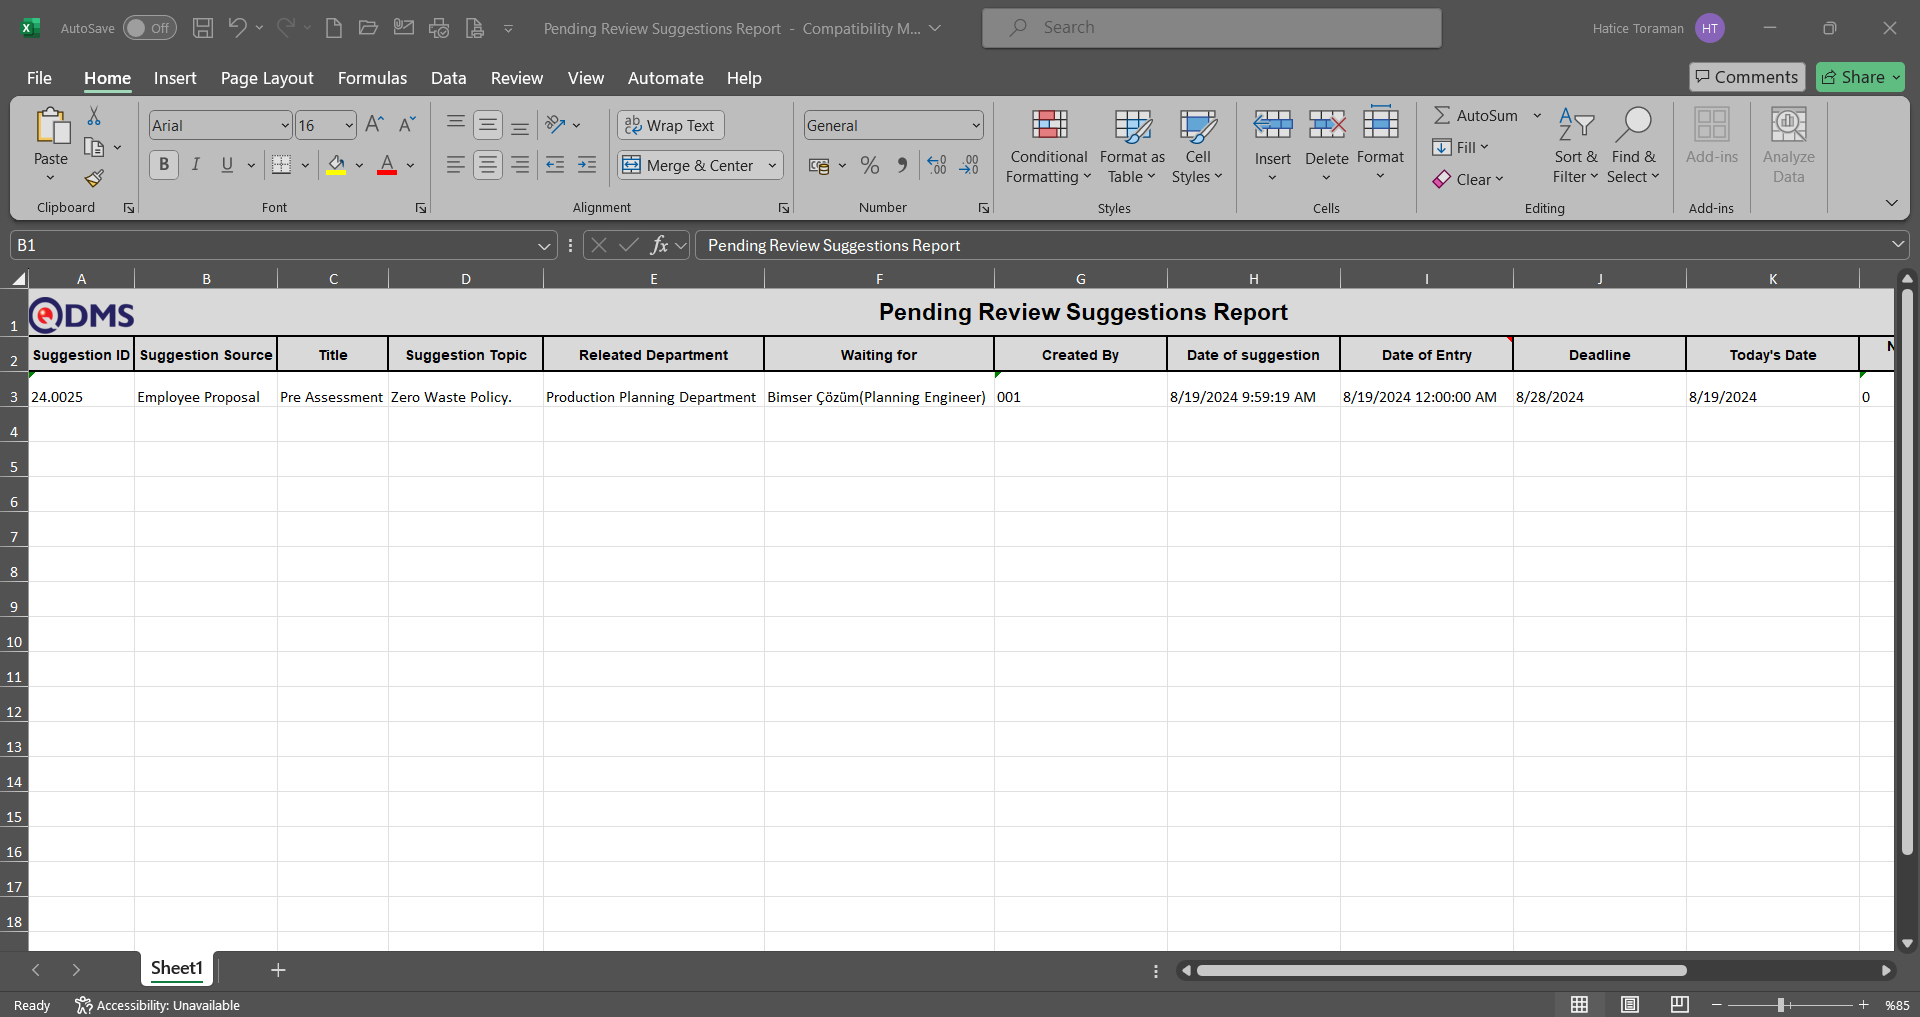
5.3.8.4. Scored Suggestions
Menu Name: Integrated Management System/ Suggestion System/ Reports/ Scored Suggestions
This is the report that shows how many points the suggestions that have gone through the scoring process in the system have received. On the Scored Suggestions screen, there are two tabs: List and Search tab. In the Search tab, data is entered into the fields with search criteria or data is selected and filtering is done. In the List tab, the Suggestion records are listed according to the filtering process performed in the Search tab.
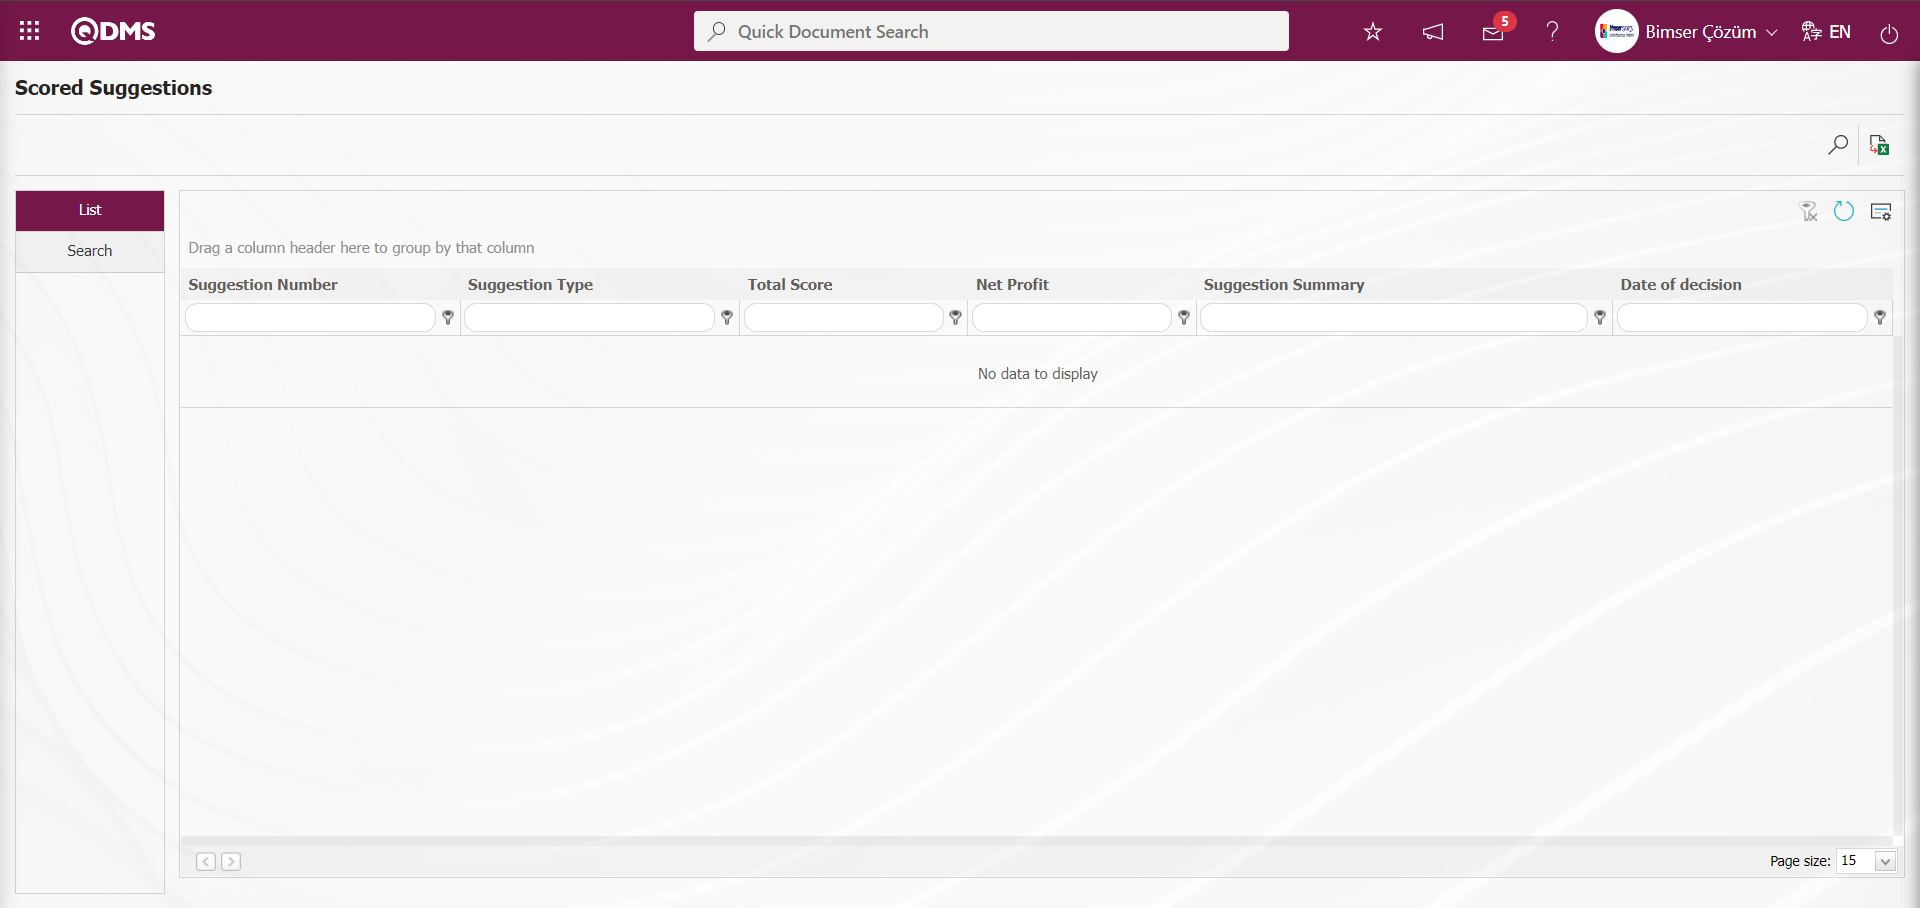
With the help of the buttons on the screen,
: Data can be exported to Excel.
: Records are filtered and searched.
: The search criteria on the menu screens are used to clean the data remaining in the filter fields in the grid where the search operation is performed.
: The menu screen is restored to its default settings.
: User-based designing is done on the menu screen with the show-hide feature, that is, the hiding feature of the fields corresponding to the columns on the menu screens.
In the Search tab, enter the suggestion code information in the Suggestion Number field and click the (Search) button in the upper right corner of the screen.

After filtering according to the search criteria in the Search tab, the related records are listed in the List tab. On the Scored Suggestions screen, click the (Export to Excel) button while the Suggestion Record is selected in the list on the List tab.
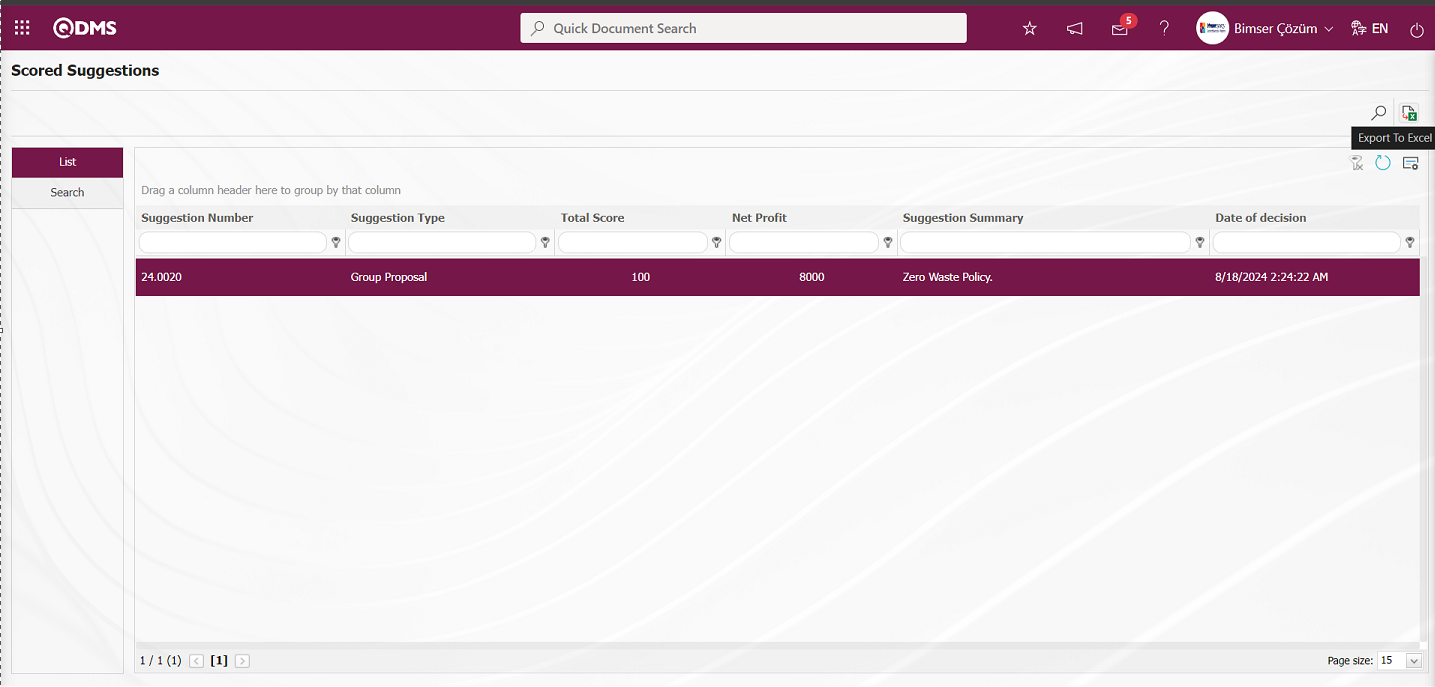 The system automatically presents the Scored Suggestions report in Excel format.
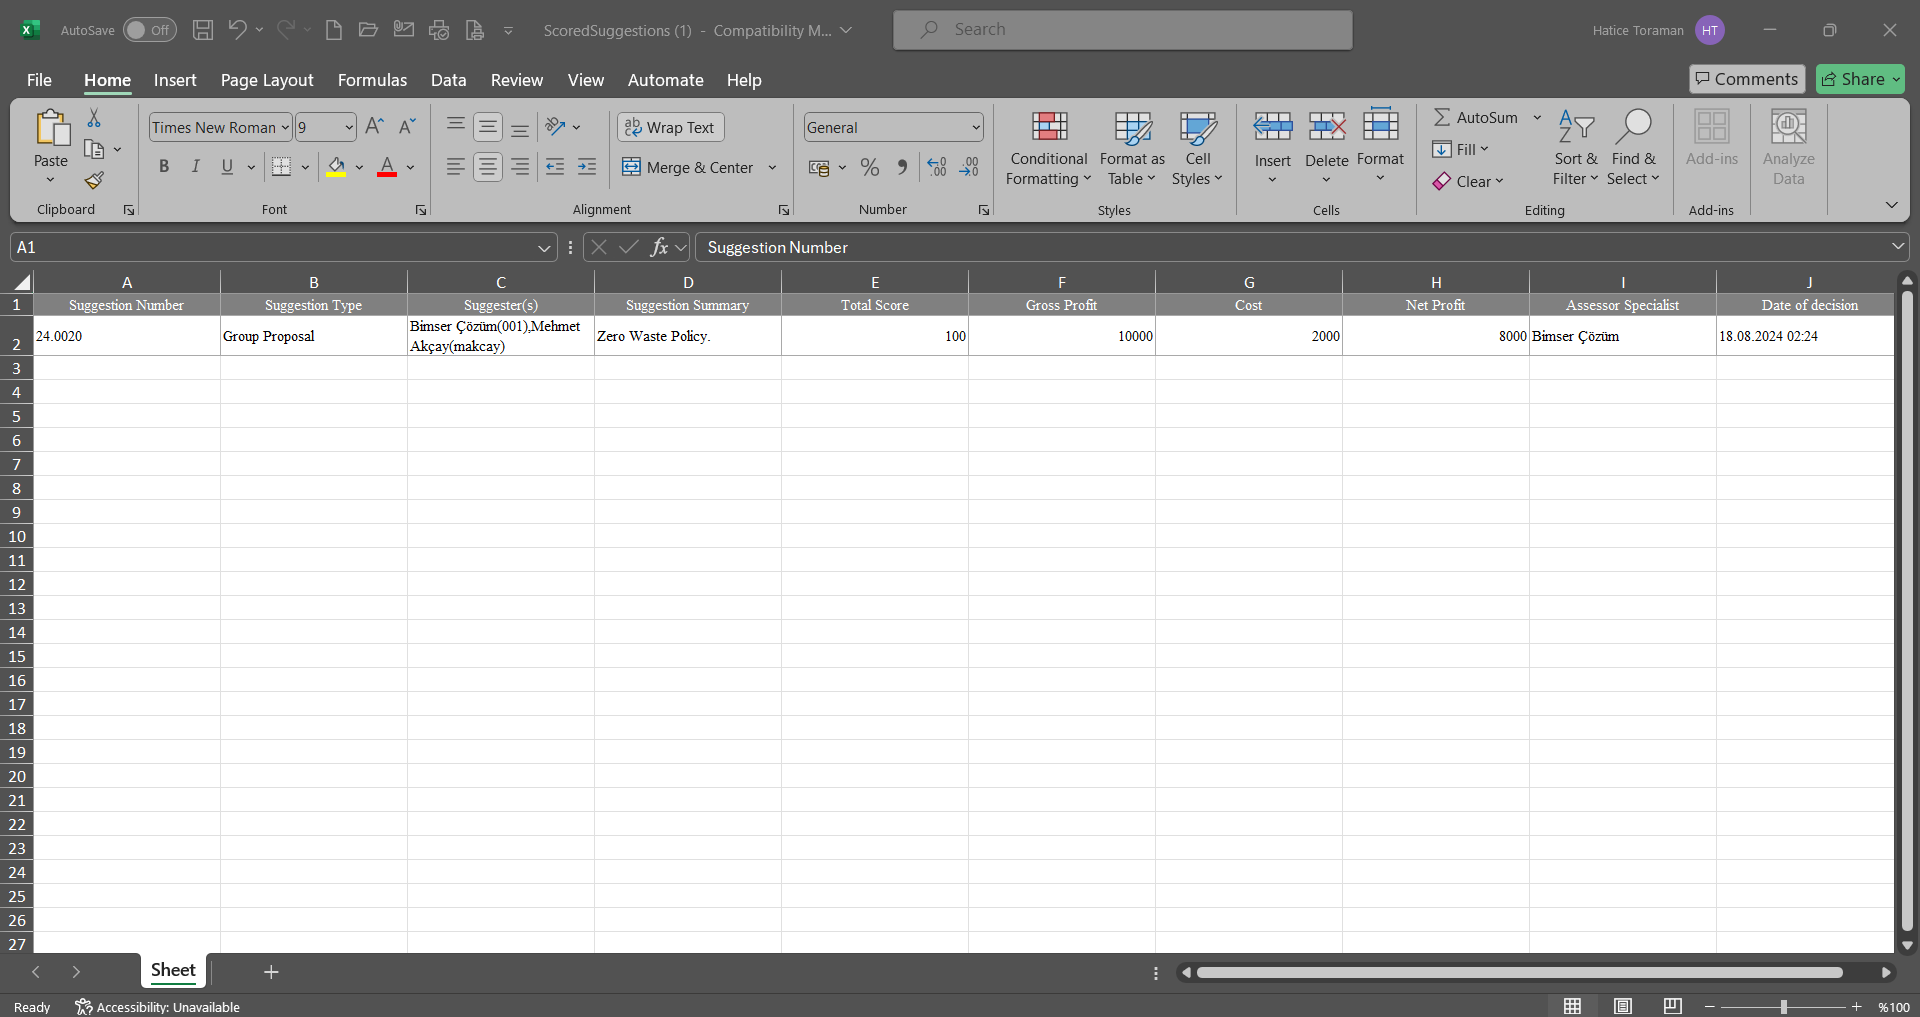
5.3.8.5. Person Point List
Menu Name: Integrated Management System/ Suggestion System/ Reports/ Person Point List
This is the report that shows how many points people received in total within the scope of the suggestions they gave. On the Person Point List screen, there are two tabs, List and Search tabs. In the Search tab, data is entered into the fields with search criteria or data is selected and filtering is done. In the List tab, the Suggestion records are listed according to the filtering process performed in the Search tab.

With the help of the buttons on the screen,
 : The score detail information of the user selected in the list is displayed.
: Data can be exported to Excel.
: Records are filtered and searched.
: The search criteria on the menu screens are used to clean the data remaining in the filter fields in the grid where the search operation is performed.
: The menu screen is restored to its default settings.
: User-based designing is done on the menu screen with the show-hide feature, that is, the hiding feature of the fields corresponding to the columns on the menu screens.
In the Search tab, select the date in the Calendar field opened in the Process Date field and click the (Search) button.
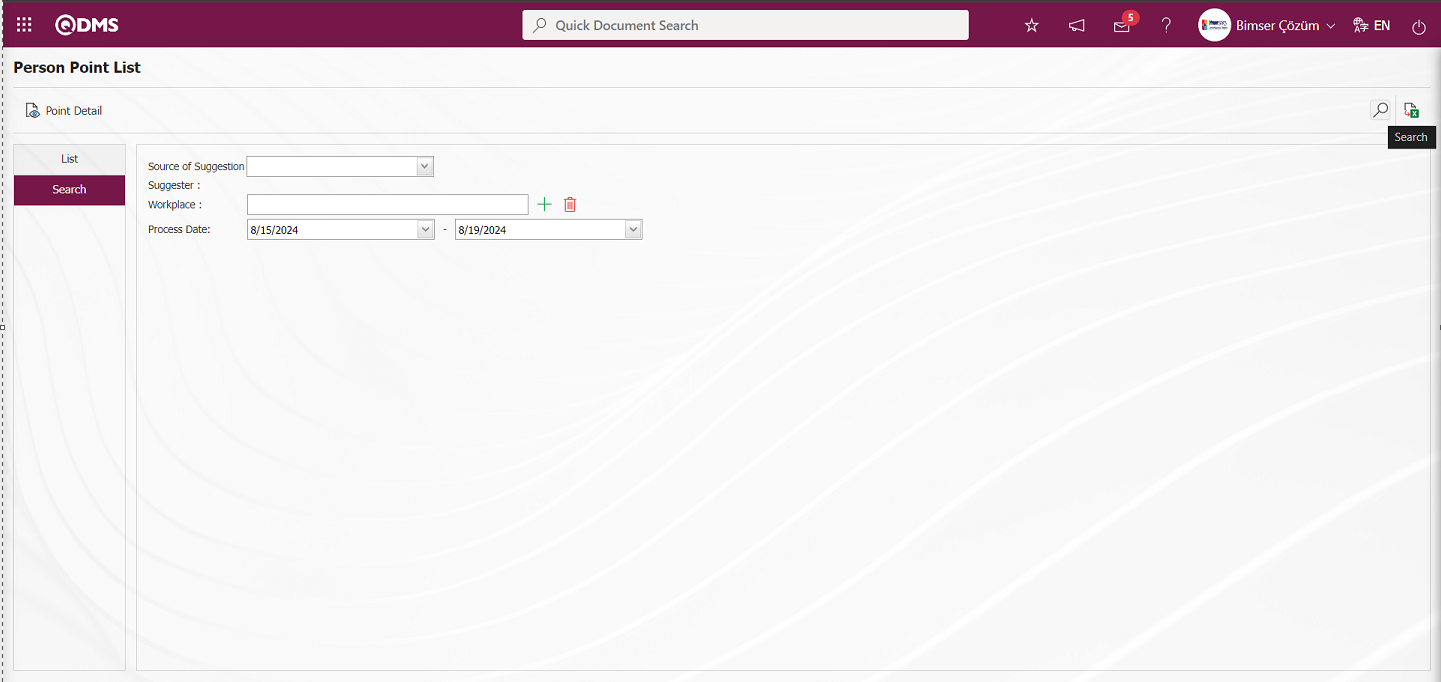
After filtering according to the search criteria in the Search tab, the relevant records are listed in the list tab.

In the List tab, while the user is selected in the list, the user's score detail information is displayed by clicking the  button.

On the Person Point List screen, click the (Export to Excel) button to get the report of the person point detail information in Excel format.
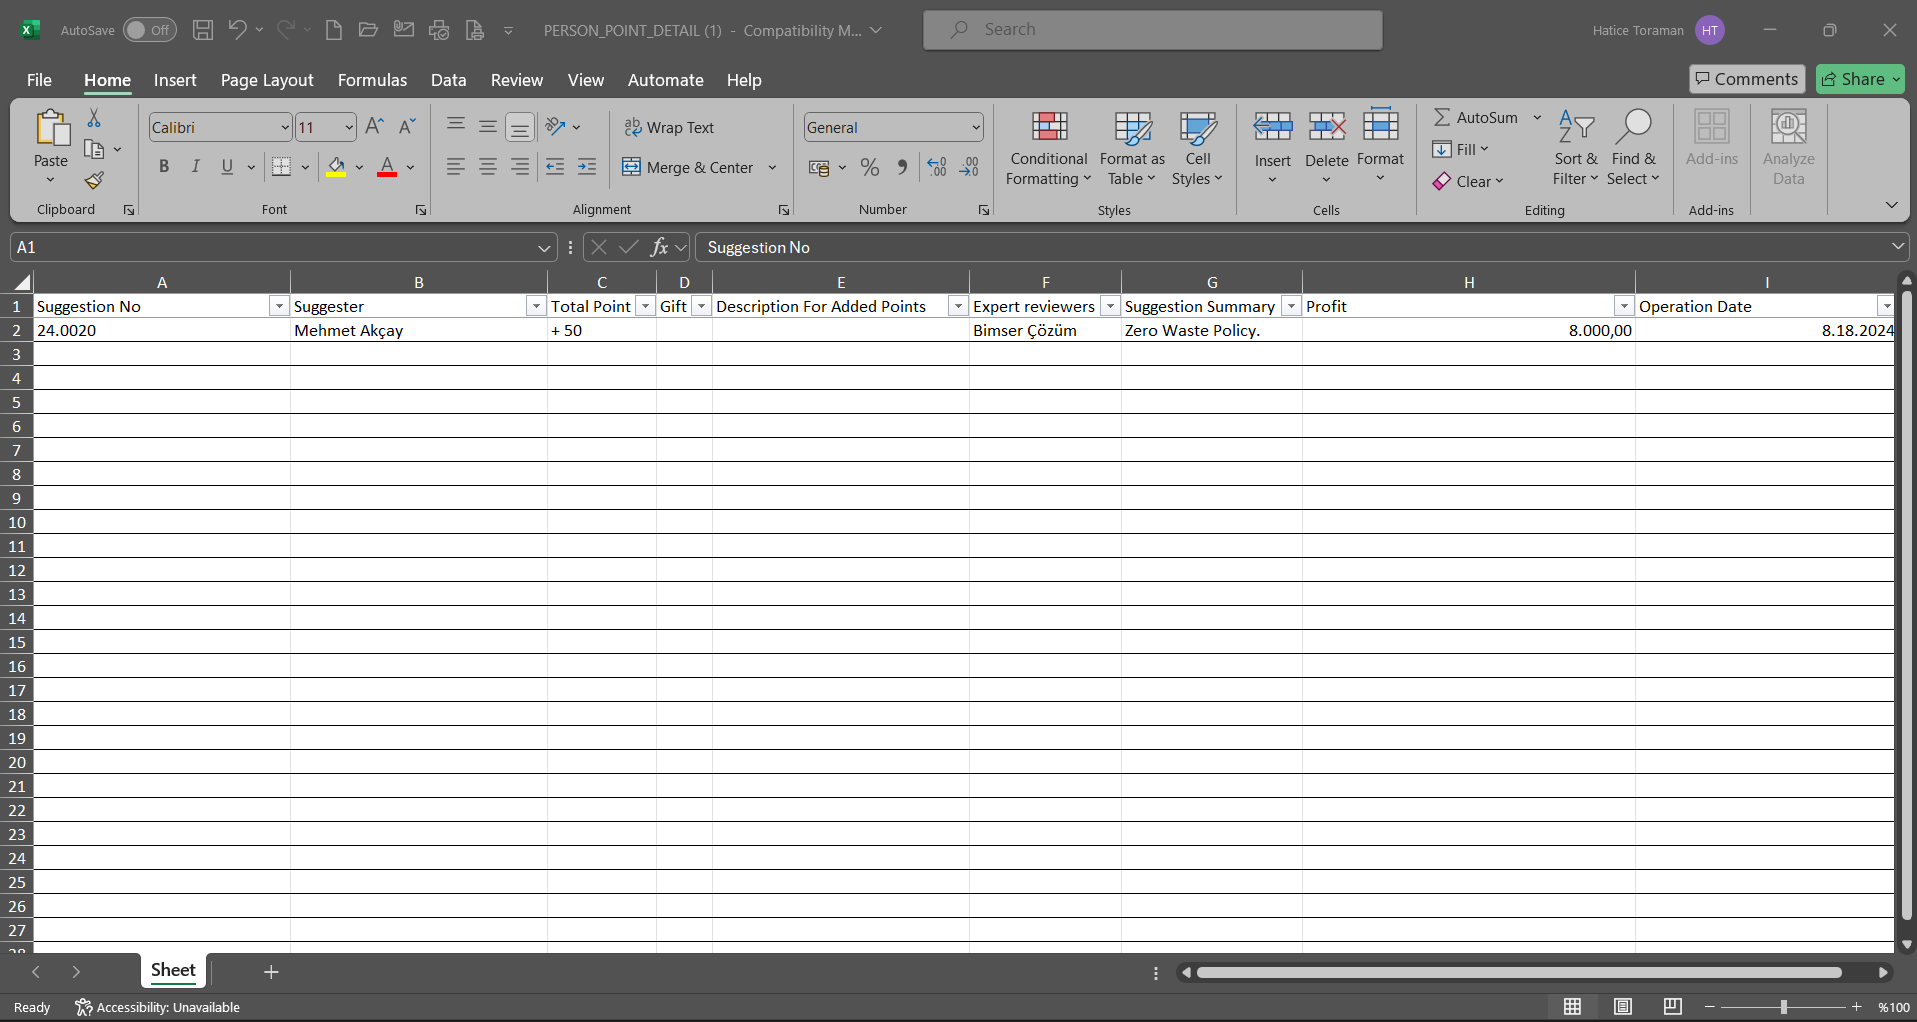
 (Back) button to return to the previous screen.

Click the (Export to Excel) button on the Person Point List screen.
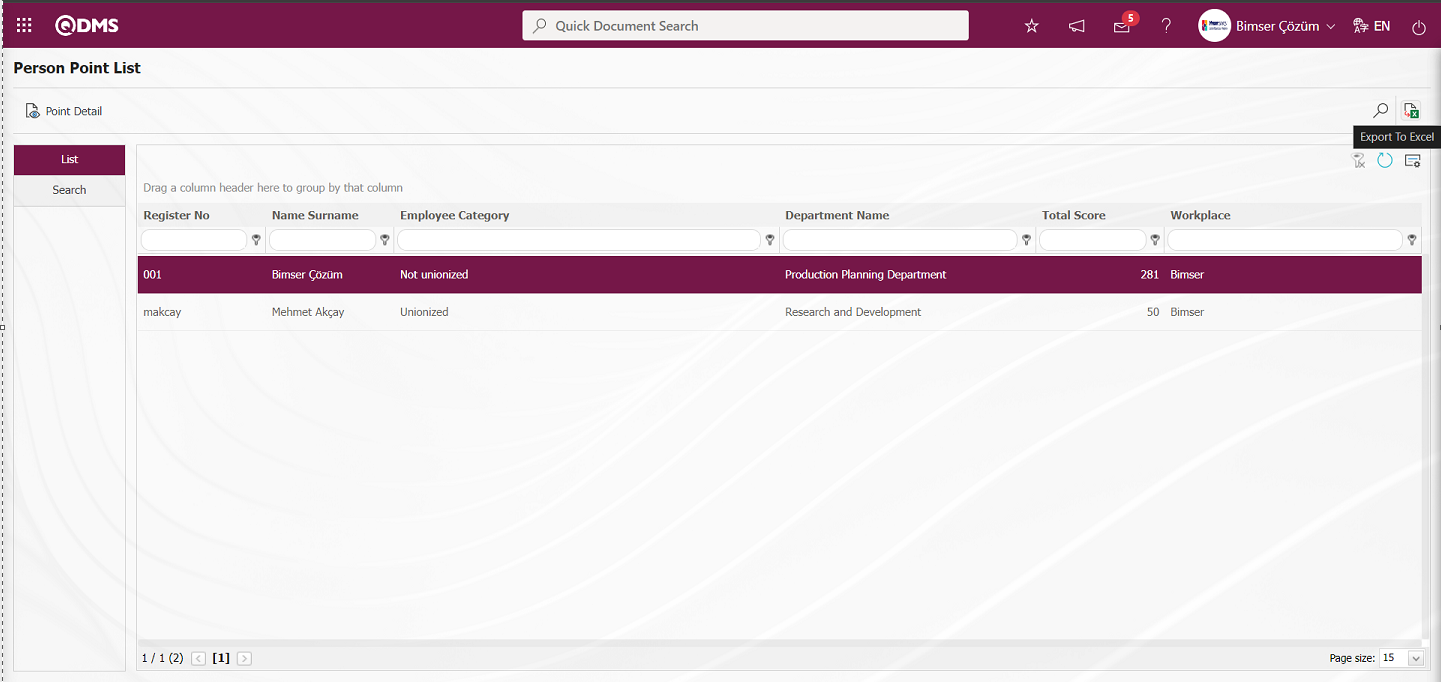
The system automatically presents the Person Point List report in Excel format.
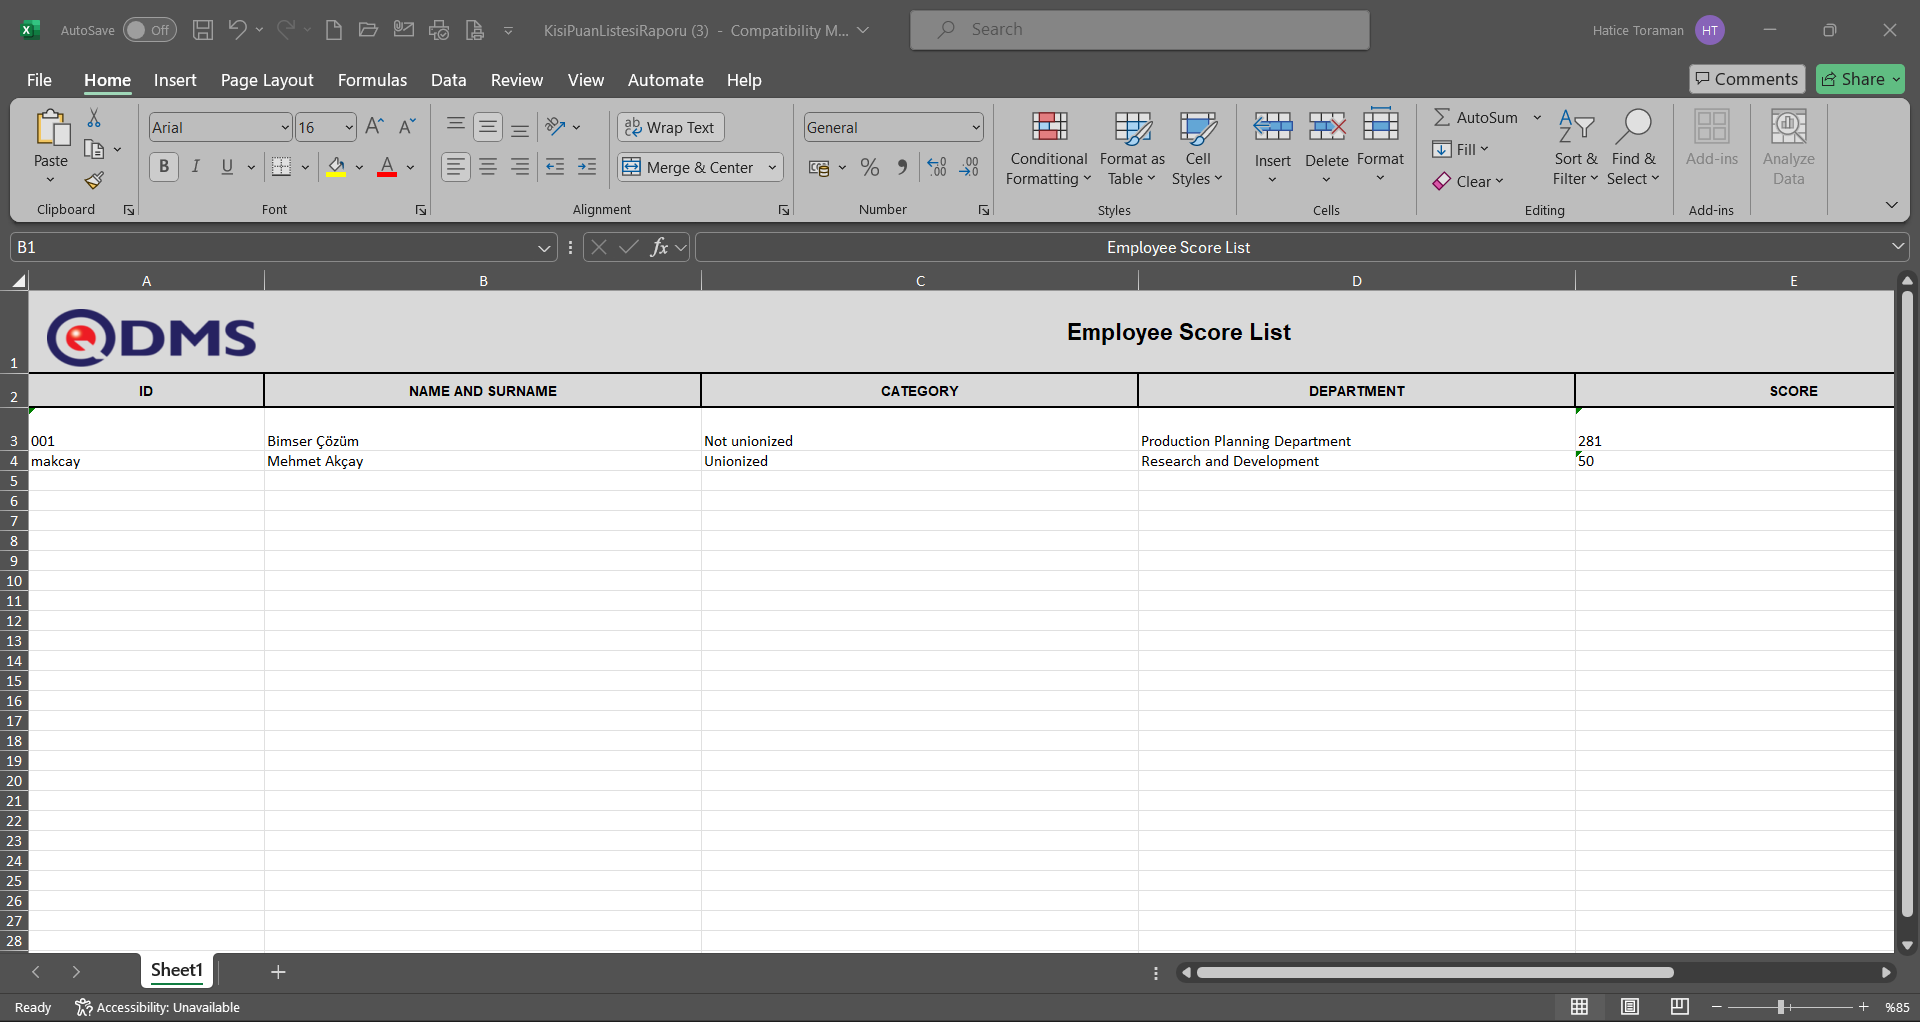
5.3.8.6. Report on the basis of Source
Menu Name: Integrated Management System/ Suggestion System/ Reports/ Report on the basis of Source
This report shows the status of suggestions on the basis of suggestion source. On the Report on the basis of Source screen, there are two tabs: List and Search tab. In the Search tab, filtering is done by entering data or selecting data in the fields with search criteria. In the List tab, the Suggestion records are listed according to the filtering process performed in the Search tab..
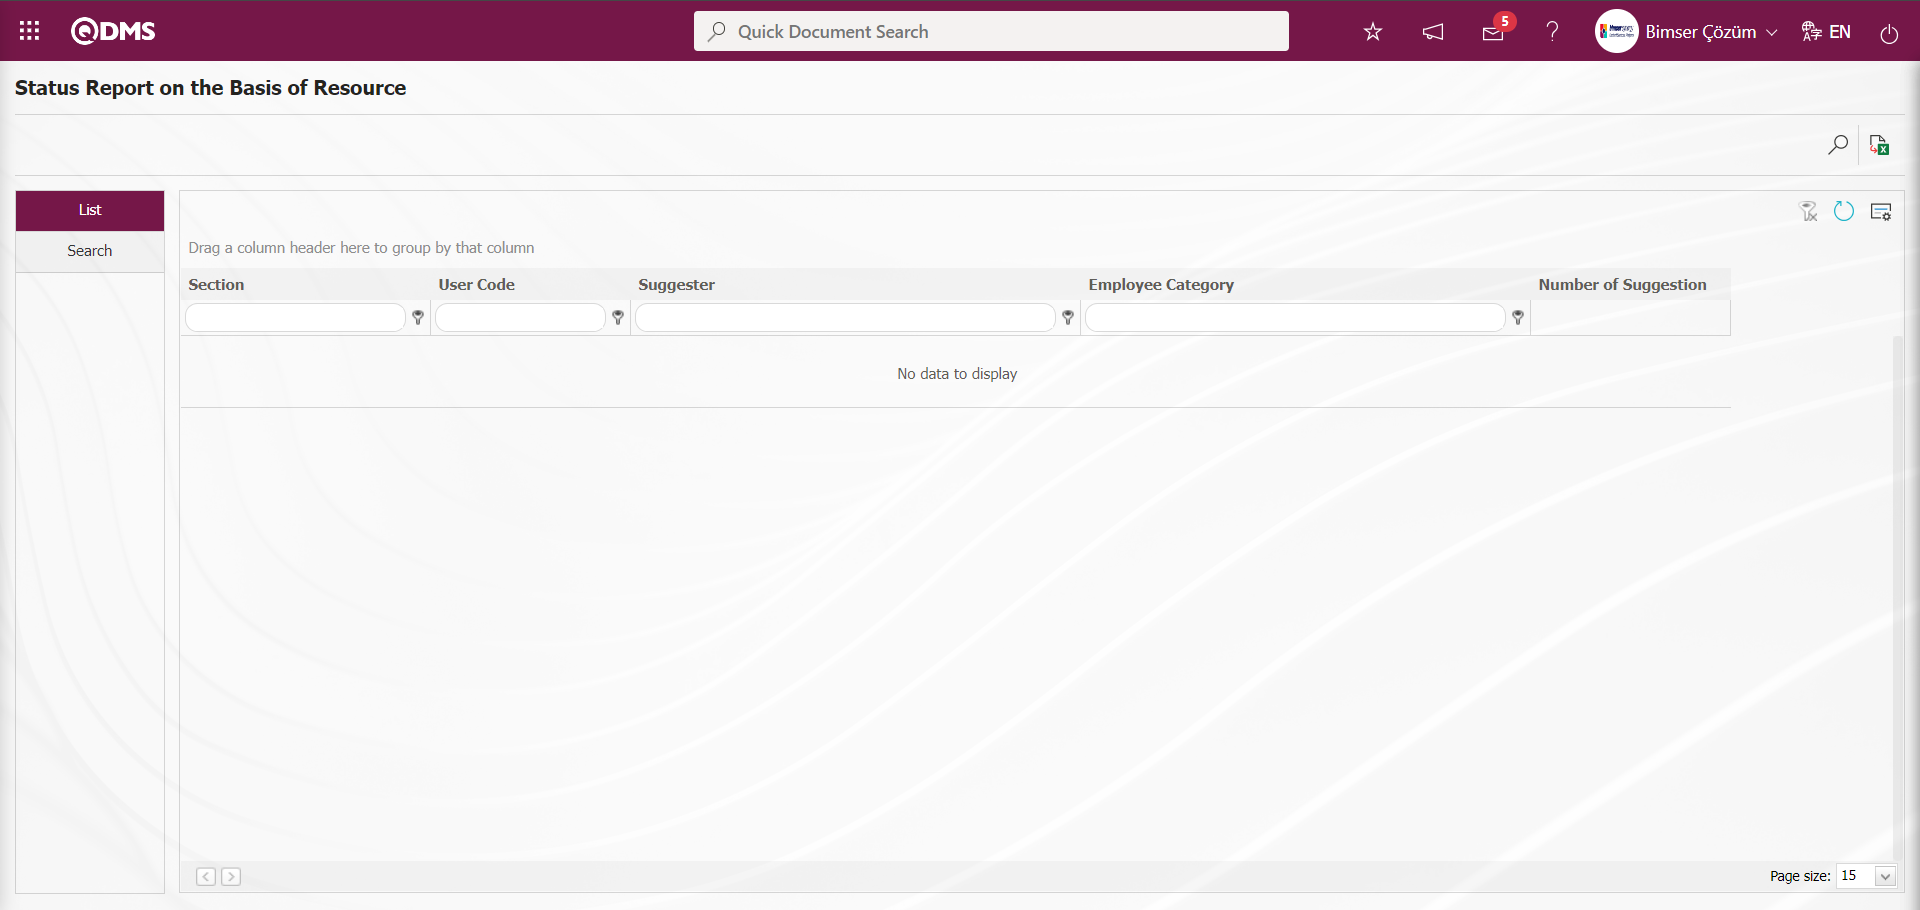
With the help of the buttons on the screen,
: Data can be exported to Excel.
: Records are filtered and searched.
: The search criteria on the menu screens are used to clean the data remaining in the filter fields in the grid where the search operation is performed.
: The menu screen is restored to its default settings.
: User-based designing is done on the menu screen with the show-hide feature, that is, the hiding feature of the fields corresponding to the columns on the menu screens.
In the Search tab, select the date in the Calendar field opened in the Issue Date field and click the (Search) button.
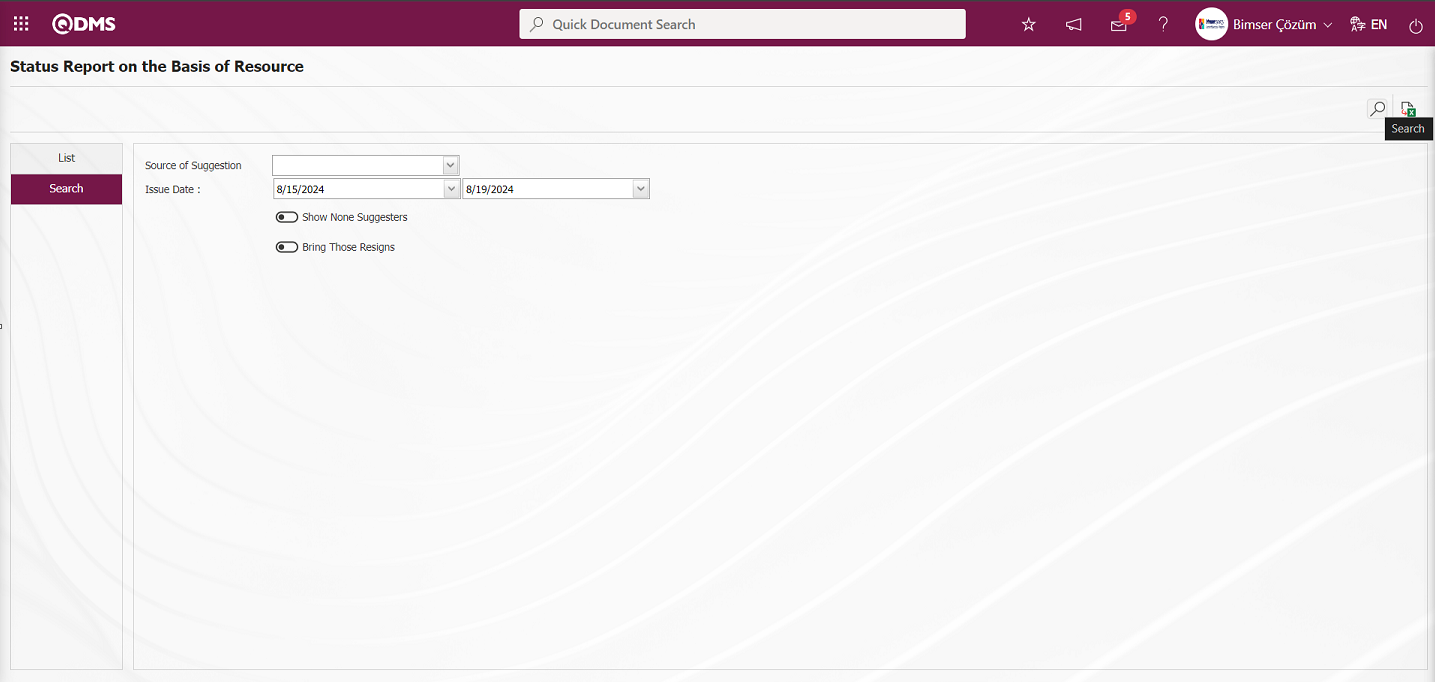
After filtering according to the search criteria in the Search tab, the related records are listed in the List tab. Click the (Export to Excel) button on the Status Report on the Basis of Resource screen.
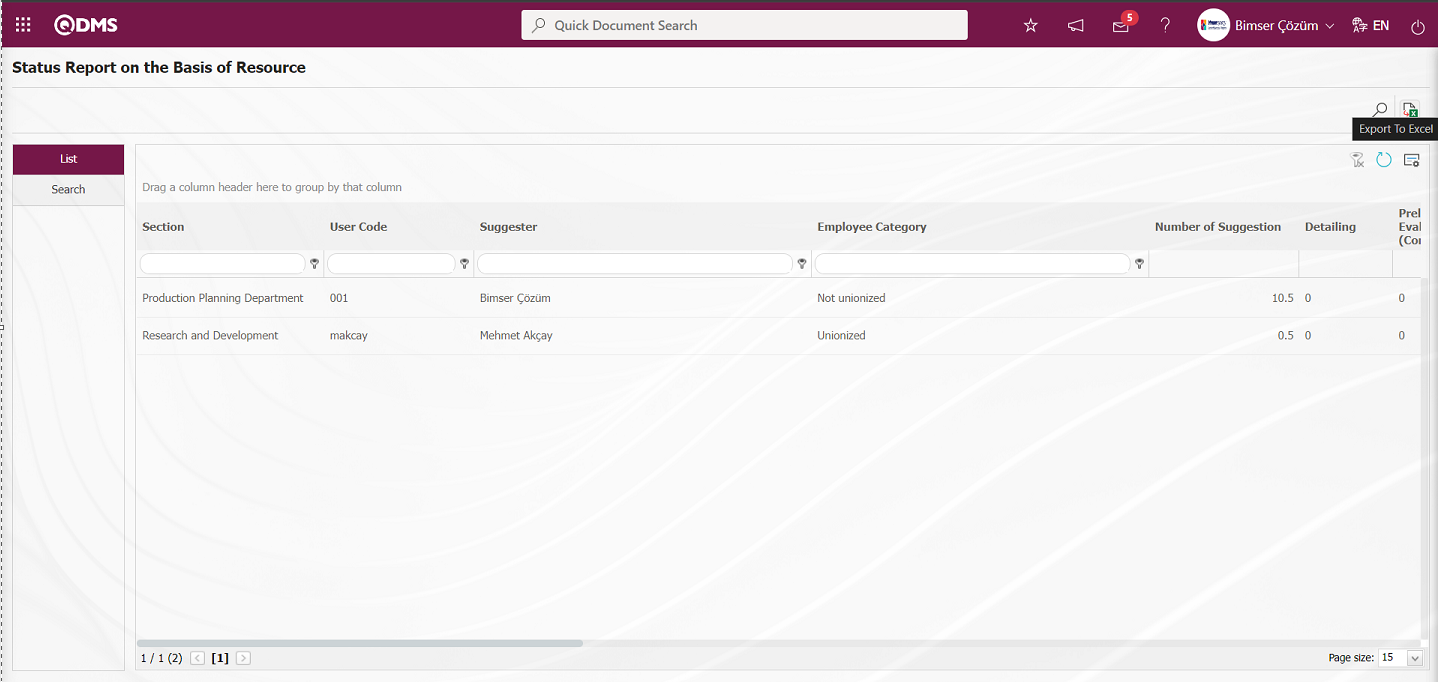
The system automatically presents the Report on the basis of Source in Excel format.
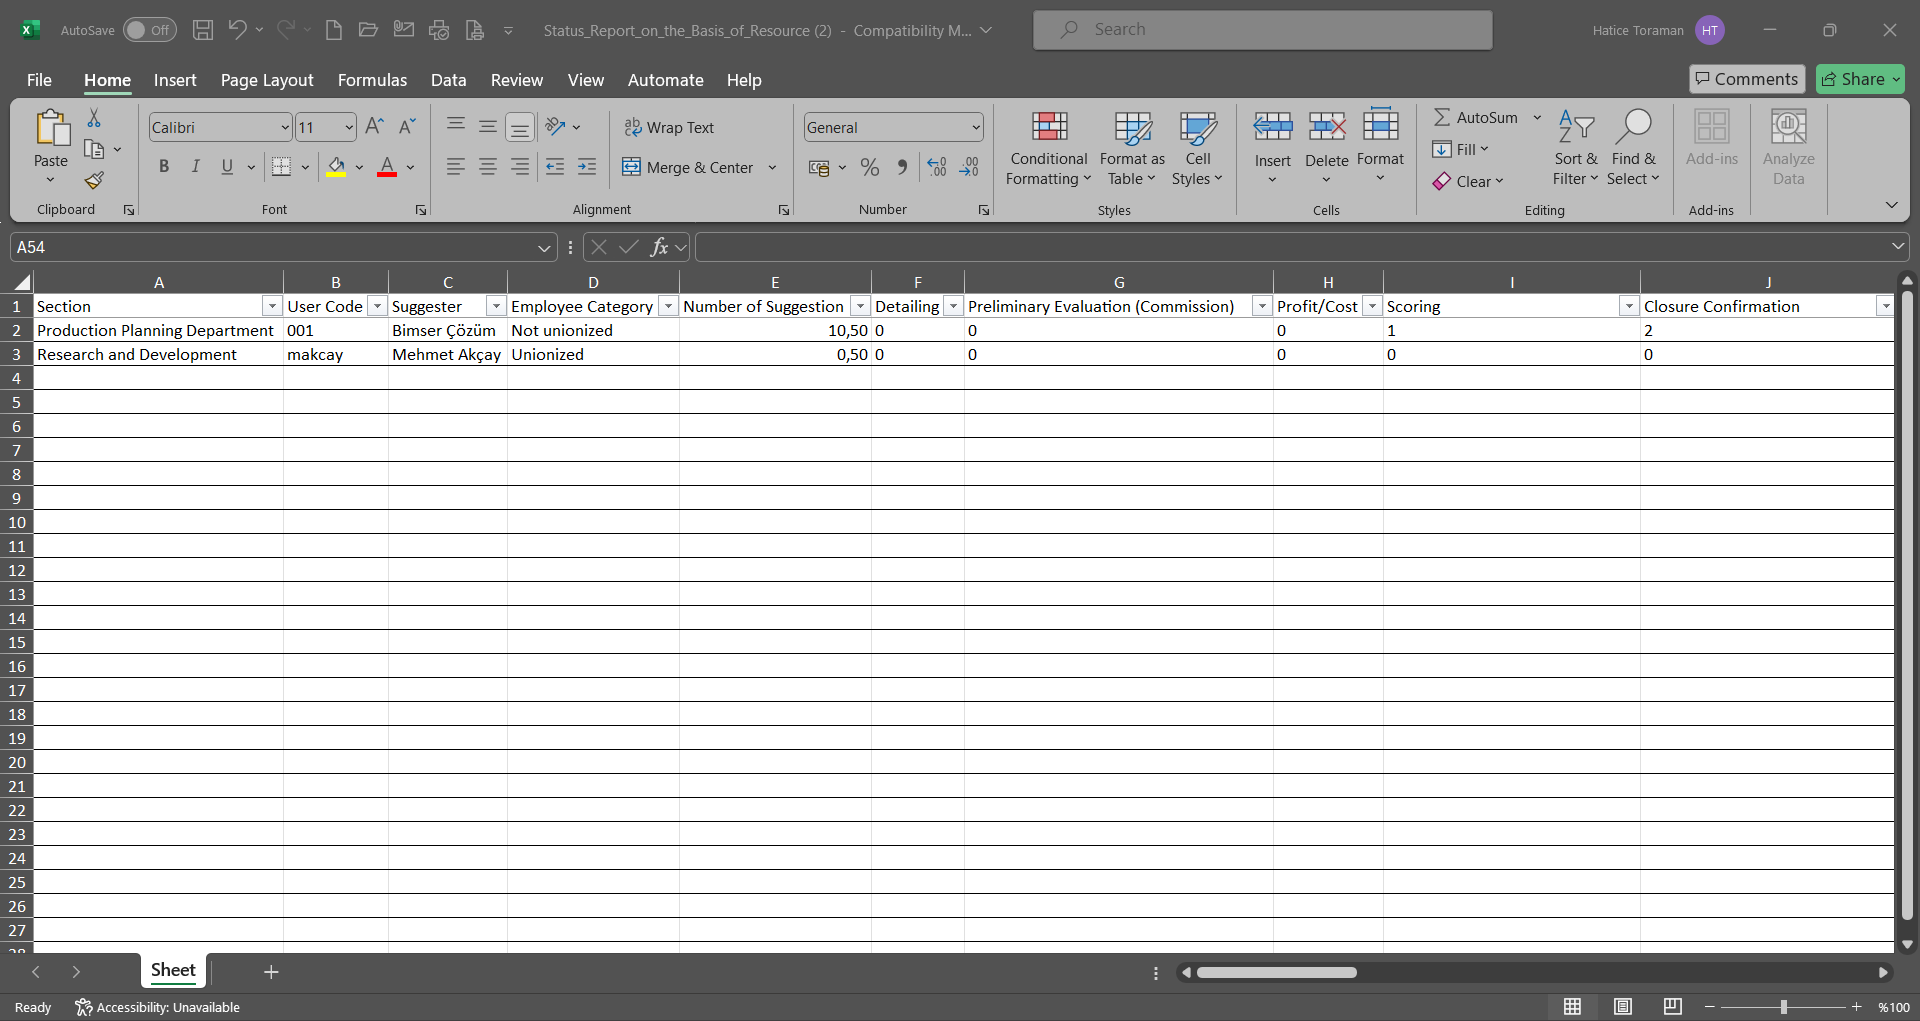
5.3.8.7. Report on the basis of Department
Menu Name: Integrated Management System/ Suggestion System/ Reports/ Report on the basis of Department
This is the report showing the recommendation status by department.
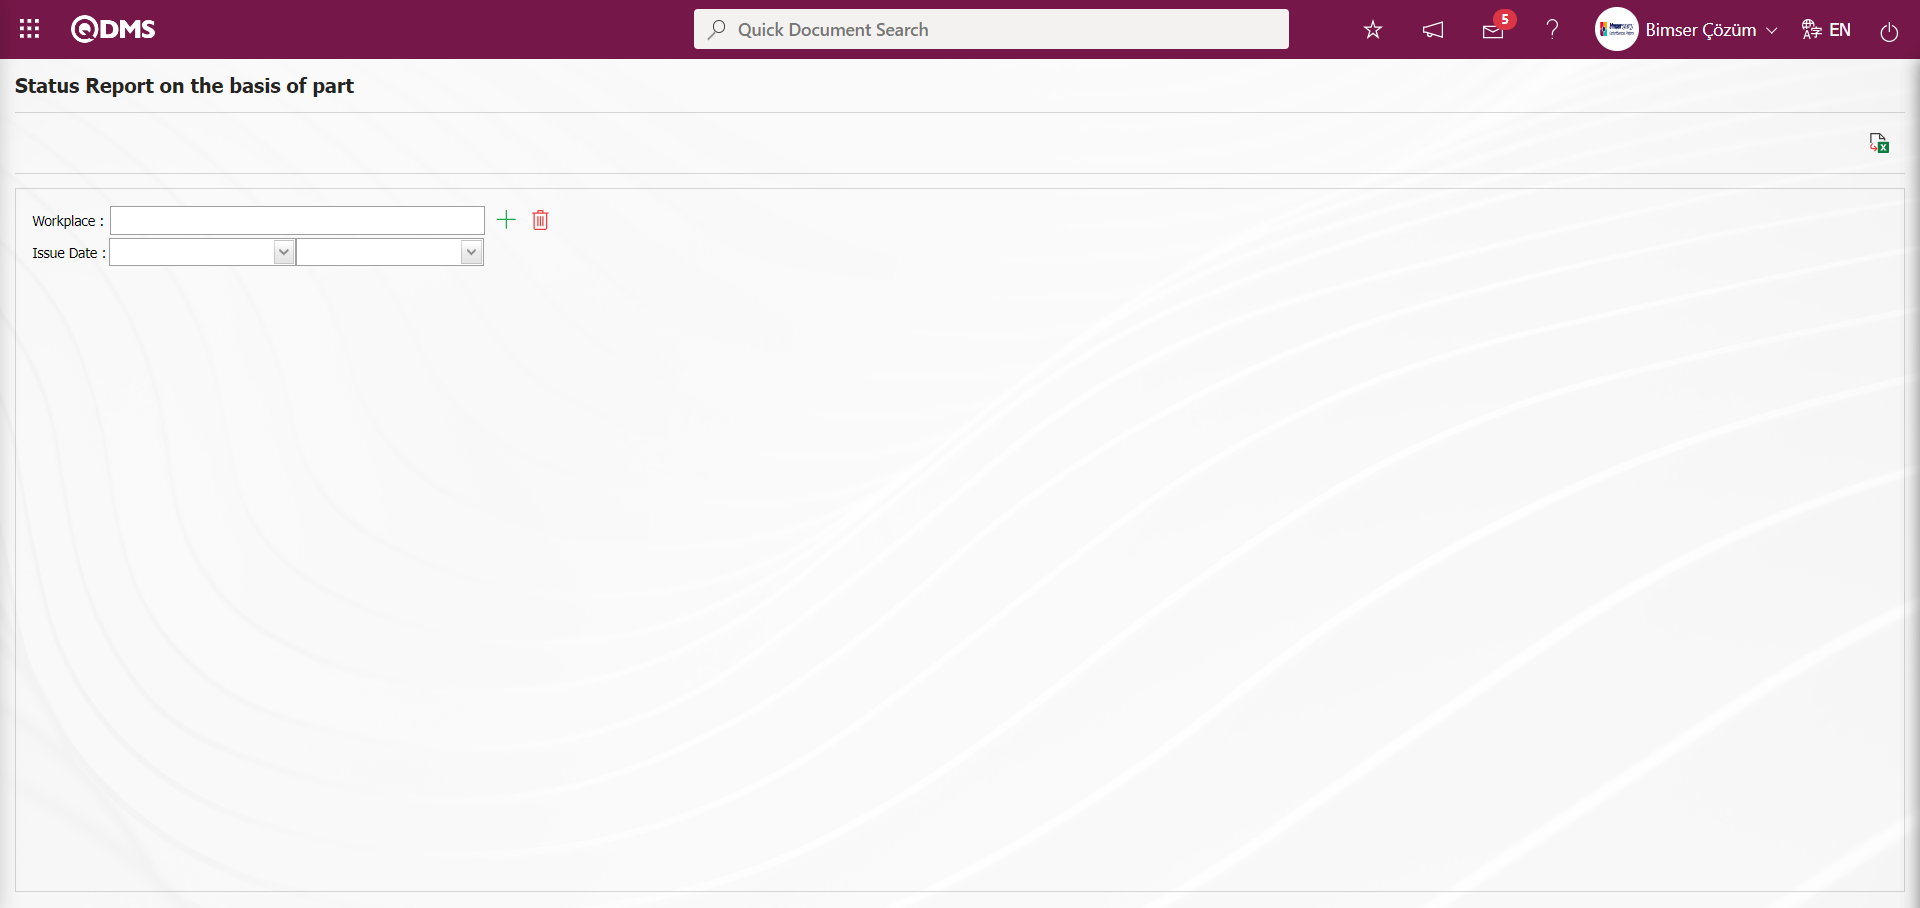
With the help of the buttons on the screen,
: Data can be exported to Excel.
On the Status Report on the basis of part screen, click the (Select) button in the Workplace field from the search criteria and select the date in the calendar field opened in the Workplace and Issue Date field in the Workplace list defined in the system and click the (Export to Excel) button.
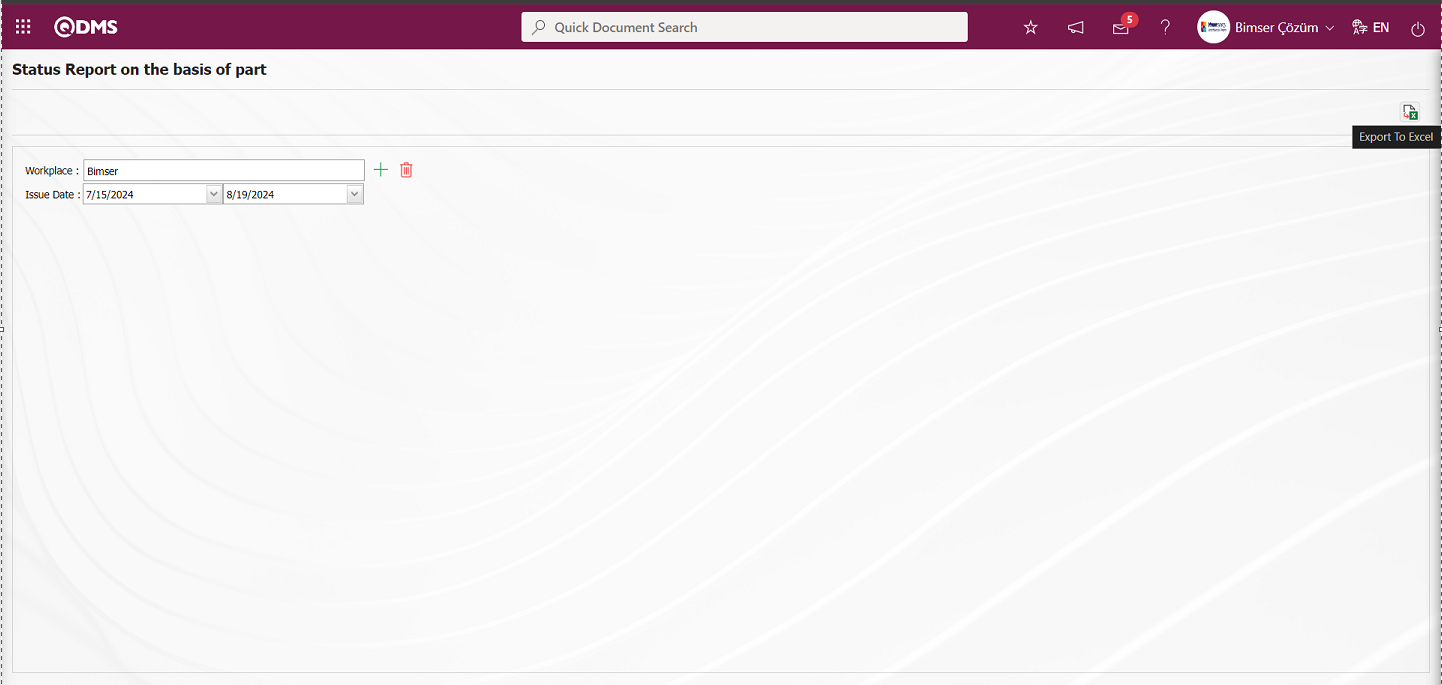
The system automatically presents the Report on the basis of Department in Excel format. 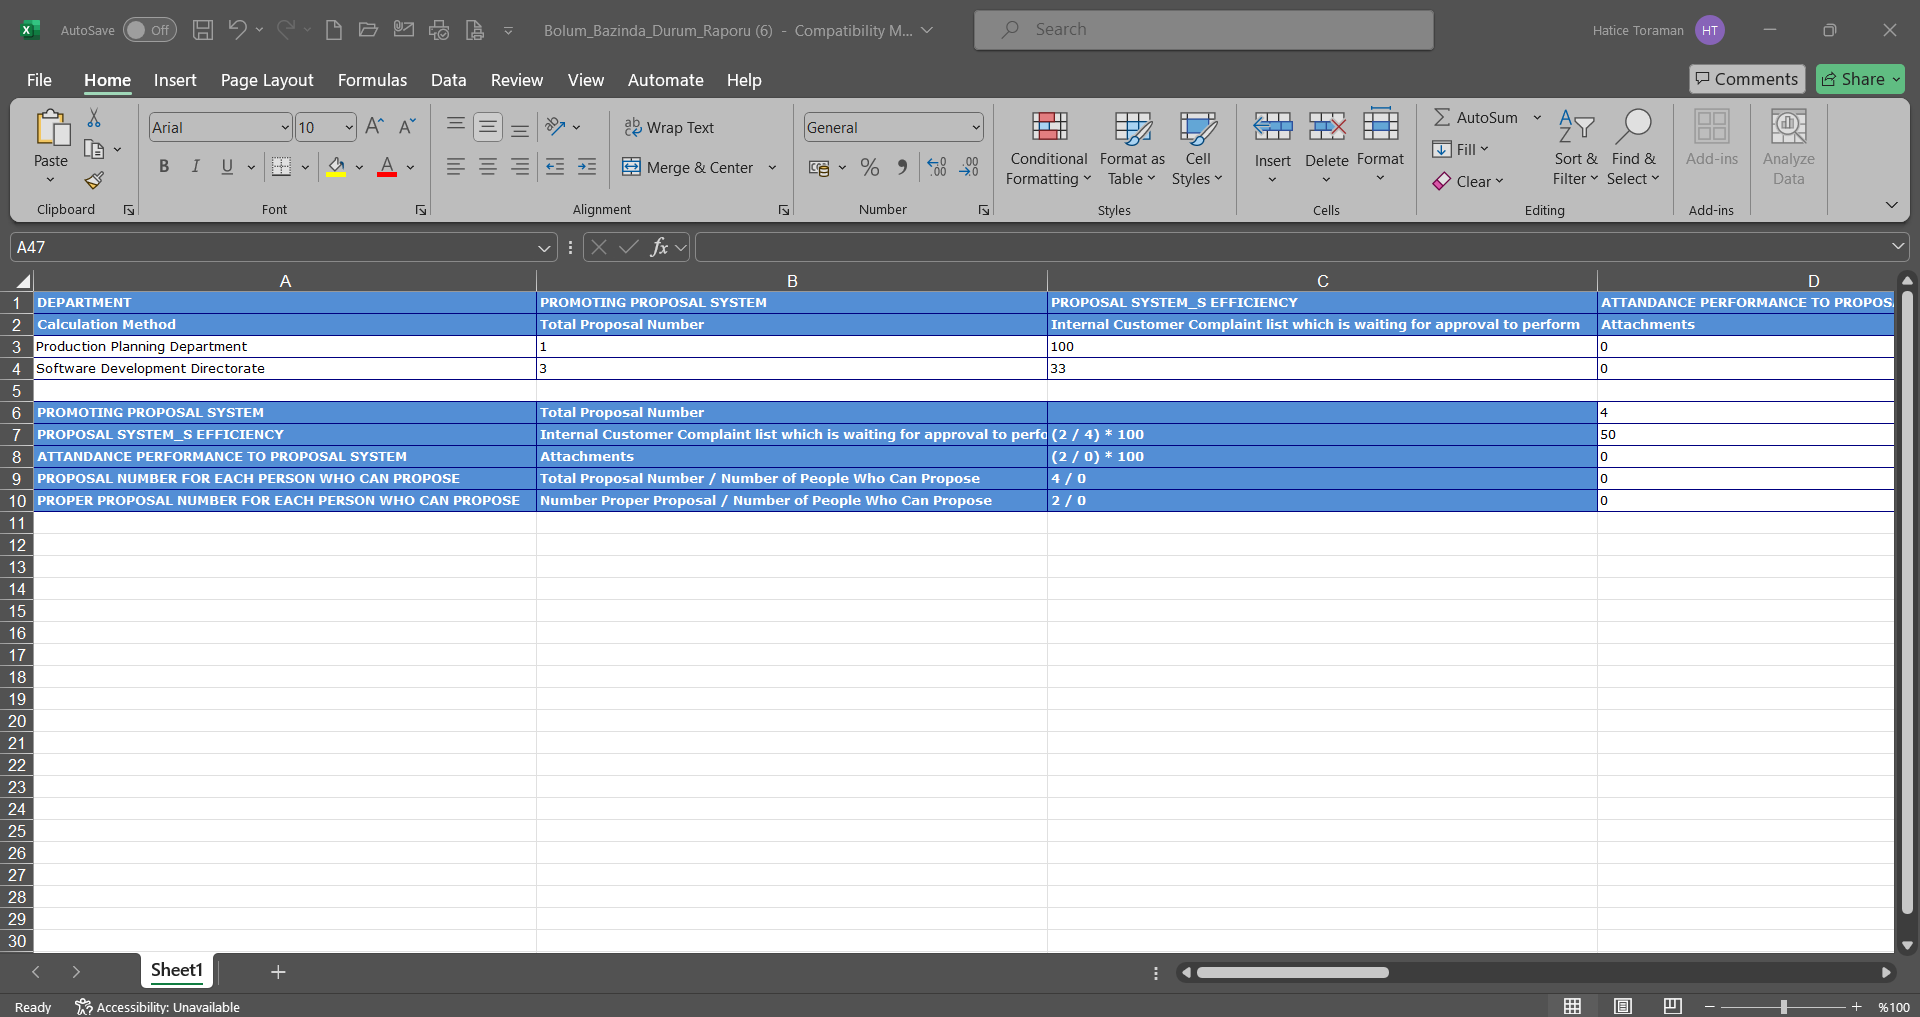
5.3.8.8. Report of Tops
Menu Name: Integrated Management System/ Suggestion System/ Reports/ Report of Tops
It is a report that allows you to see who gave the most suggestions based on all the suggestions given. 
With the help of the buttons on the screen,
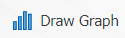 : Graphic retrieval is done according to the filtering made according to the search criteria fields.
: Data can be exported to Excel.
: Records are filtered and searched.
: The search criteria on the menu screens are used to clean the data remaining in the filter fields in the grid where the search operation is performed.
: The menu screen is restored to its default settings.
: User-based designing is done on the menu screen with the show-hide feature, that is, the hiding feature of the fields corresponding to the columns on the menu screens.
On the Report of Top Suggestions screen, the search criteria are filtered according to the fields and the records are listed by clicking the (Search) button.
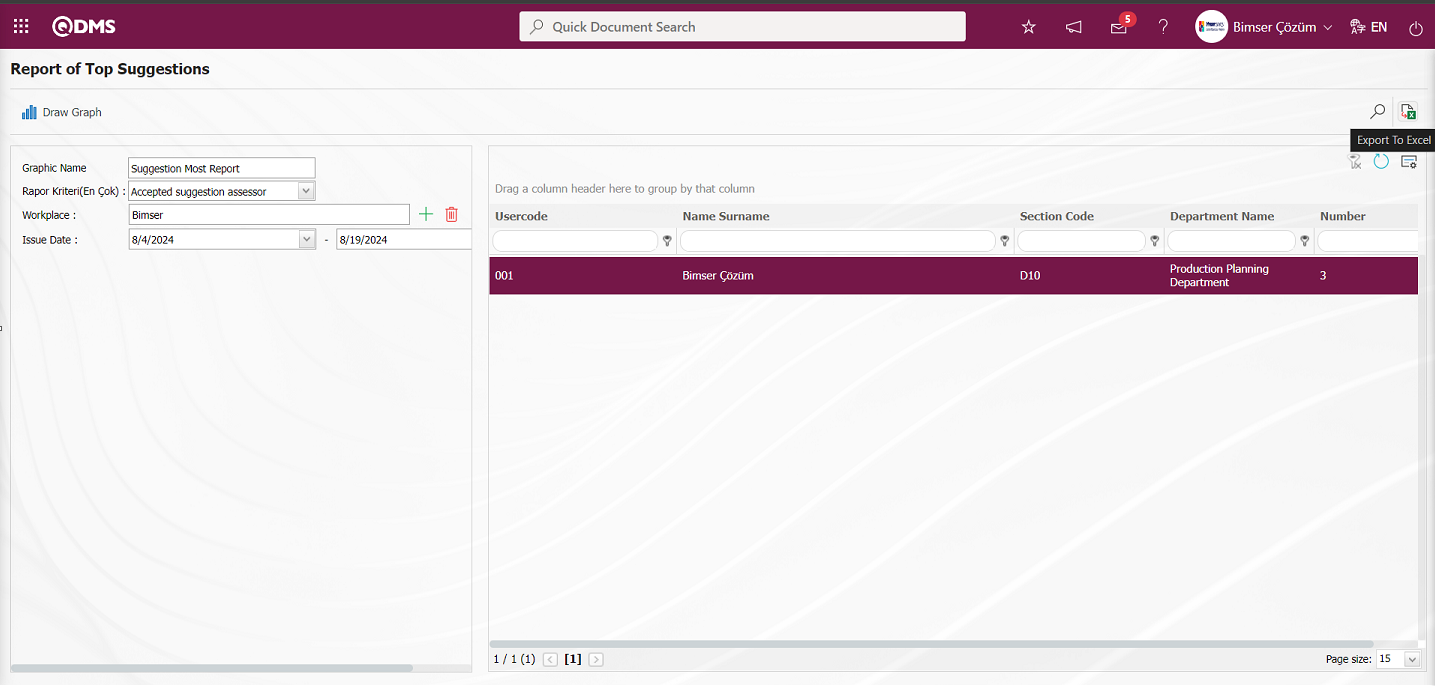
After listing the records on the Report of Top Suggestions screen, the system automatically presents the Report of Top Suggestions in Excel format by clicking the (Export to Excel) button.
After listing the records on the Report of Top Suggestions screen, click the button.
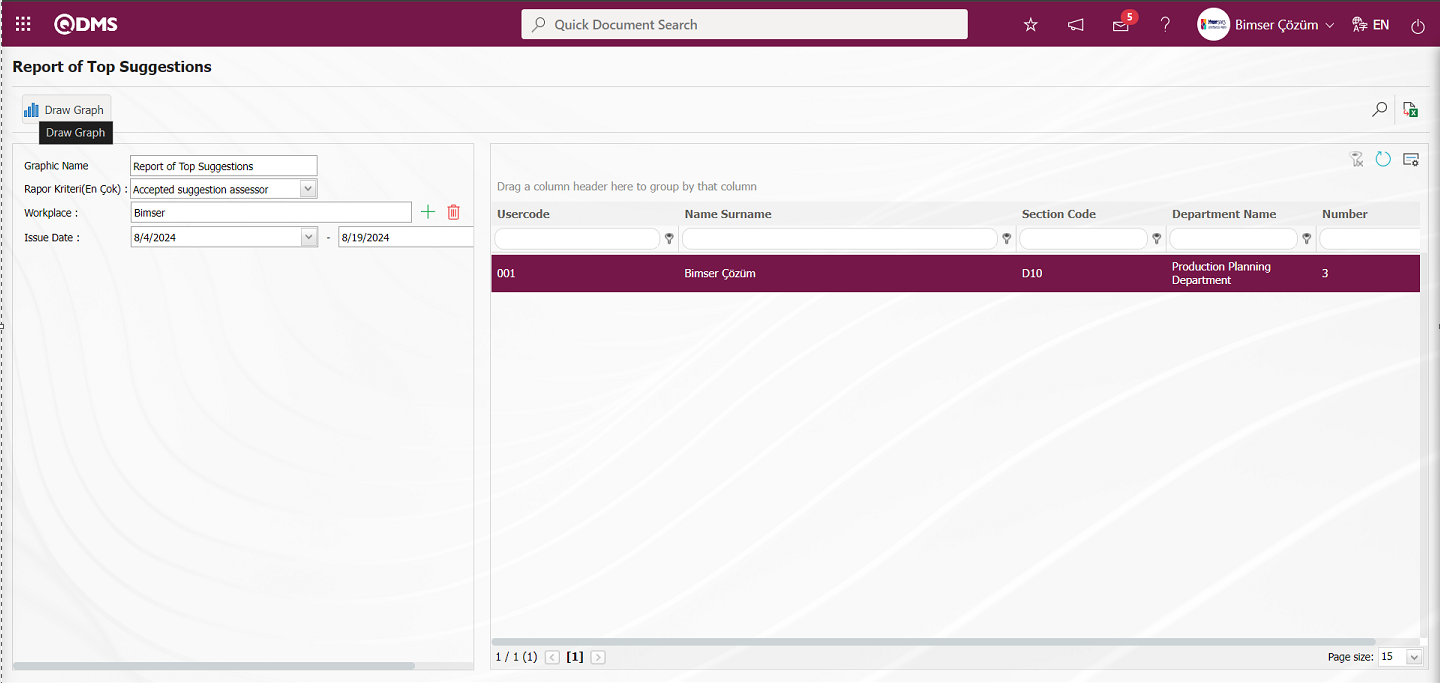
Report of Top Suggestions is made to get the graph in Excel format.
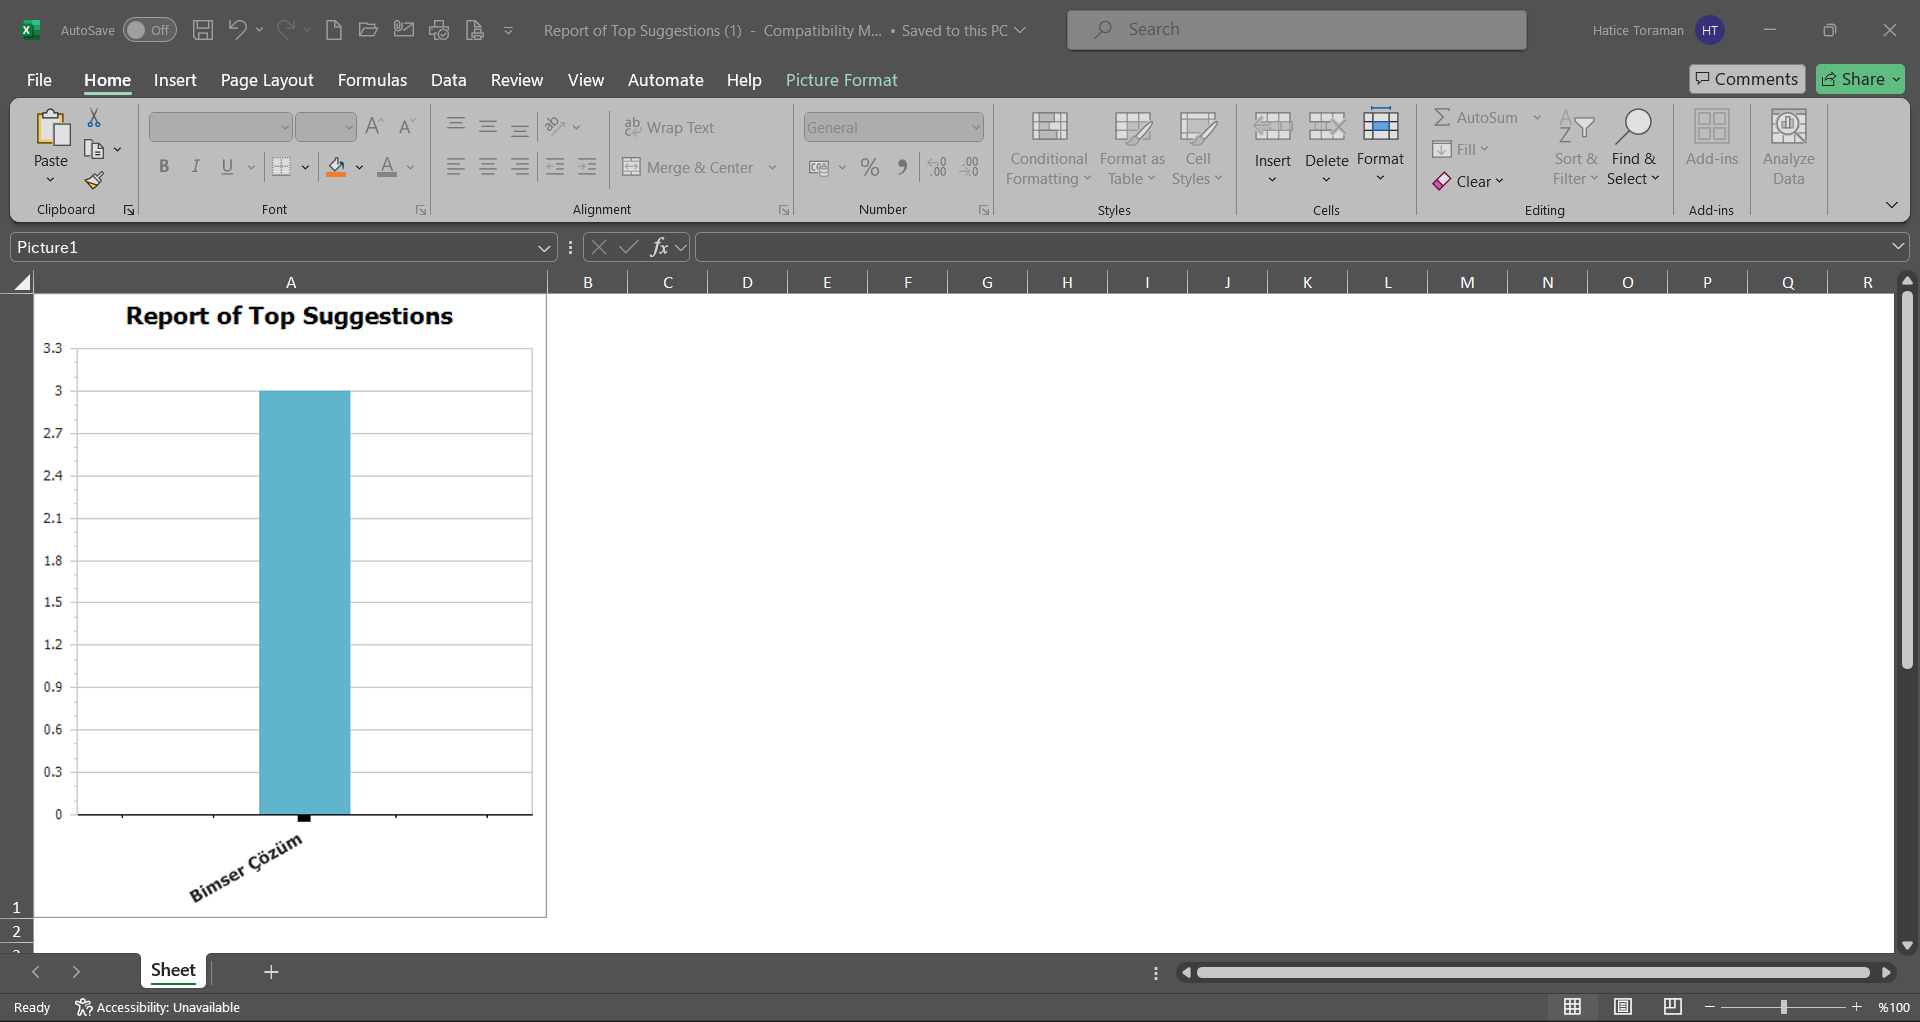
5.3.8.9. Suggestion Pool
Menu Name: Integrated Management System/ Suggestion System/ Reports/ Suggestion Pool
This is the report showing all suggestions in the system. On the Suggestion Pool screen, we see two tabs, List and Search tab. In the Search tab, data is entered into the fields with search criteria or data is selected and filtering is done. In the List tab, the Suggestion records are listed according to the filtering process performed in the Search tab.
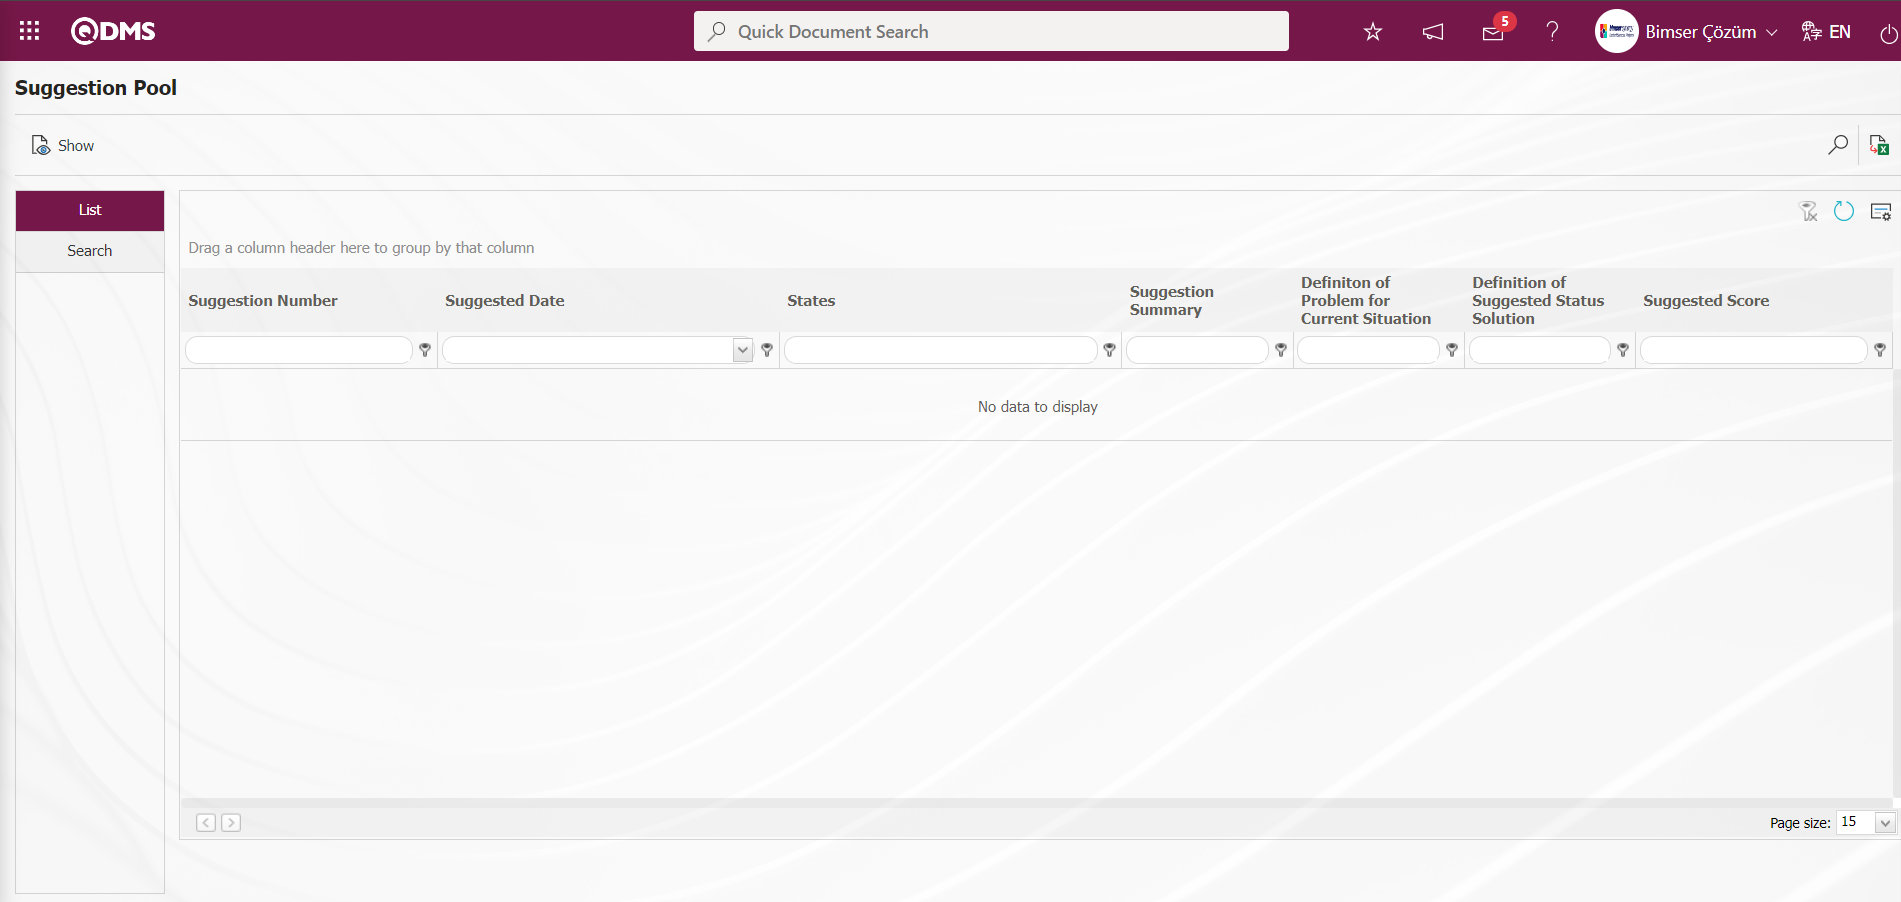
With the help of the buttons on the screen,
: The selected Suggestion record in the list is displayed.
: Data can be exported to Excel.
: Records are filtered and searched.
: The search criteria on the menu screens are used to clean the data remaining in the filter fields in the grid where the search operation is performed.
: The menu screen is restored to its default settings.
: User-based designing is done on the menu screen with the show-hide feature, that is, the hiding feature of the fields corresponding to the columns on the menu screens.
In the Search tab, enter the suggestion code information in the Suggestion Number field and click the (Search) button in the upper right corner of the screen.
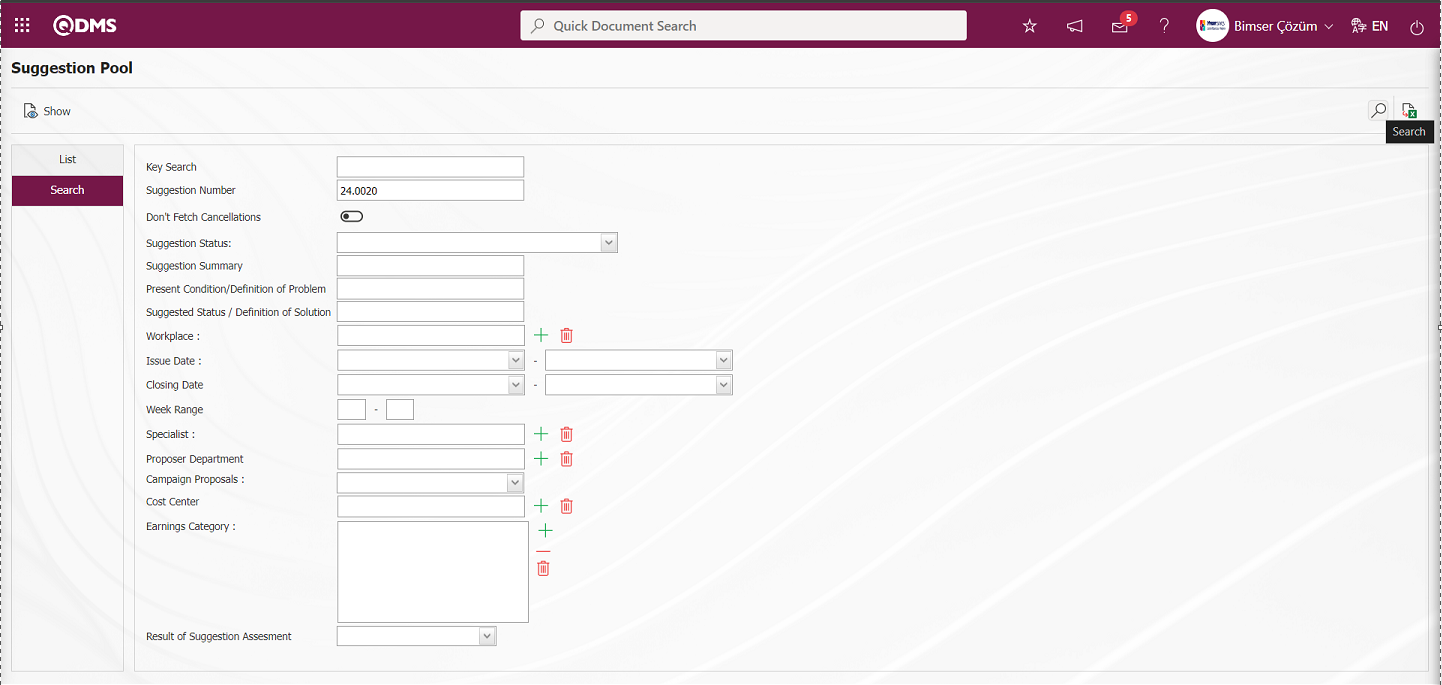
After filtering according to the search criteria in the Search tab, the relevant records are listed in the list tab.
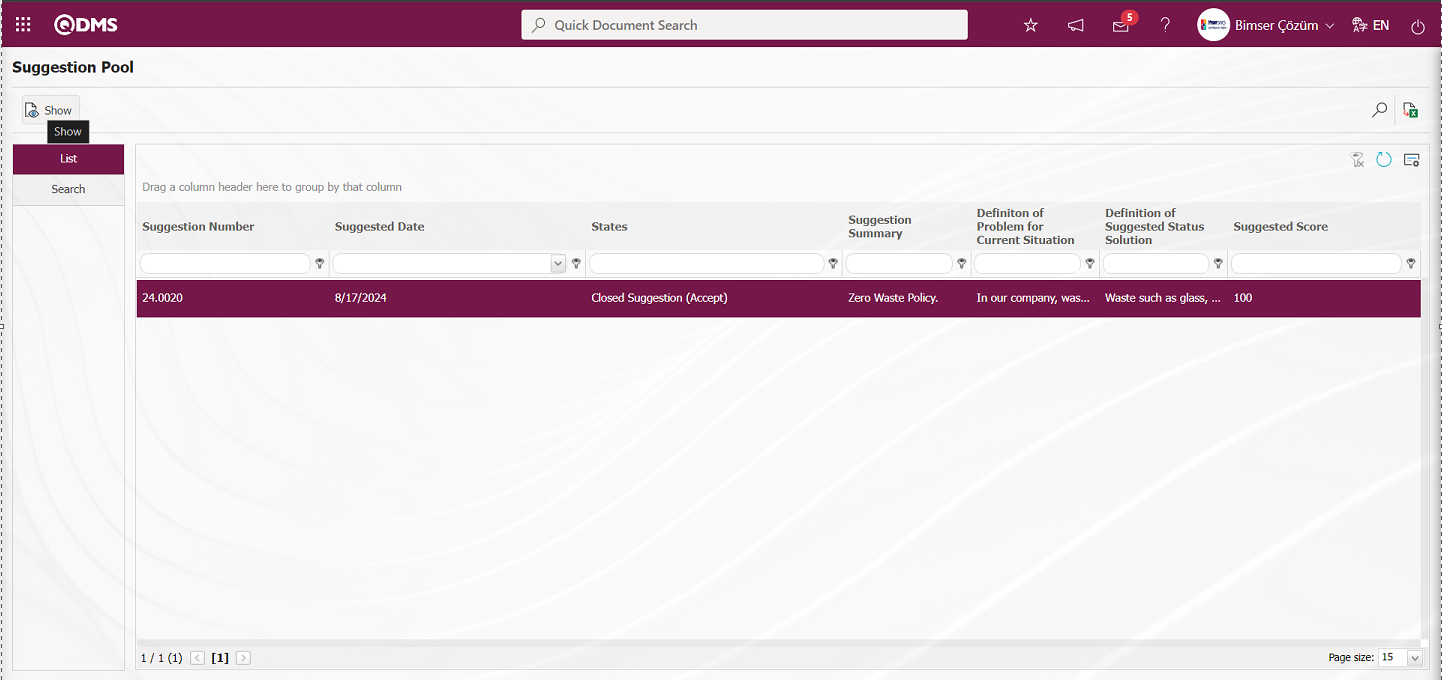
When the Suggestion Record is selected in the List tab, click the button to open the Suggestion Details screen.
Suggestion Details tab: This tab contains the Details, Additional Files and History tabs.
Details tab: This is the tab where all information about the suggestion is displayed.

With the help of the buttons on the screen;
: Printing of the displayed screen is done.
By clicking the relevant tab on the Suggestion Details screen, the screen displayed is printed by clicking the (Print) button.

Additional Files tab: This is the tab where the uploaded additional files related to the suggestion are accessed and the content of the uploaded additional files is displayed.

With the help of the buttons on the screen;
: Display the selected attachment file in the list.
History Tab: It is the tab where the history of the transactions related to the suggestion until this stage is accessed. It is a tab that is displayed depending on the parameter. The parameter value of parameter 137 in the Suggestion System Module parameters is activated by selecting “Yes”.
After the parameter is activated, the History tab is displayed at every stage in the Suggestion Details tab in the Suggestion System Module.
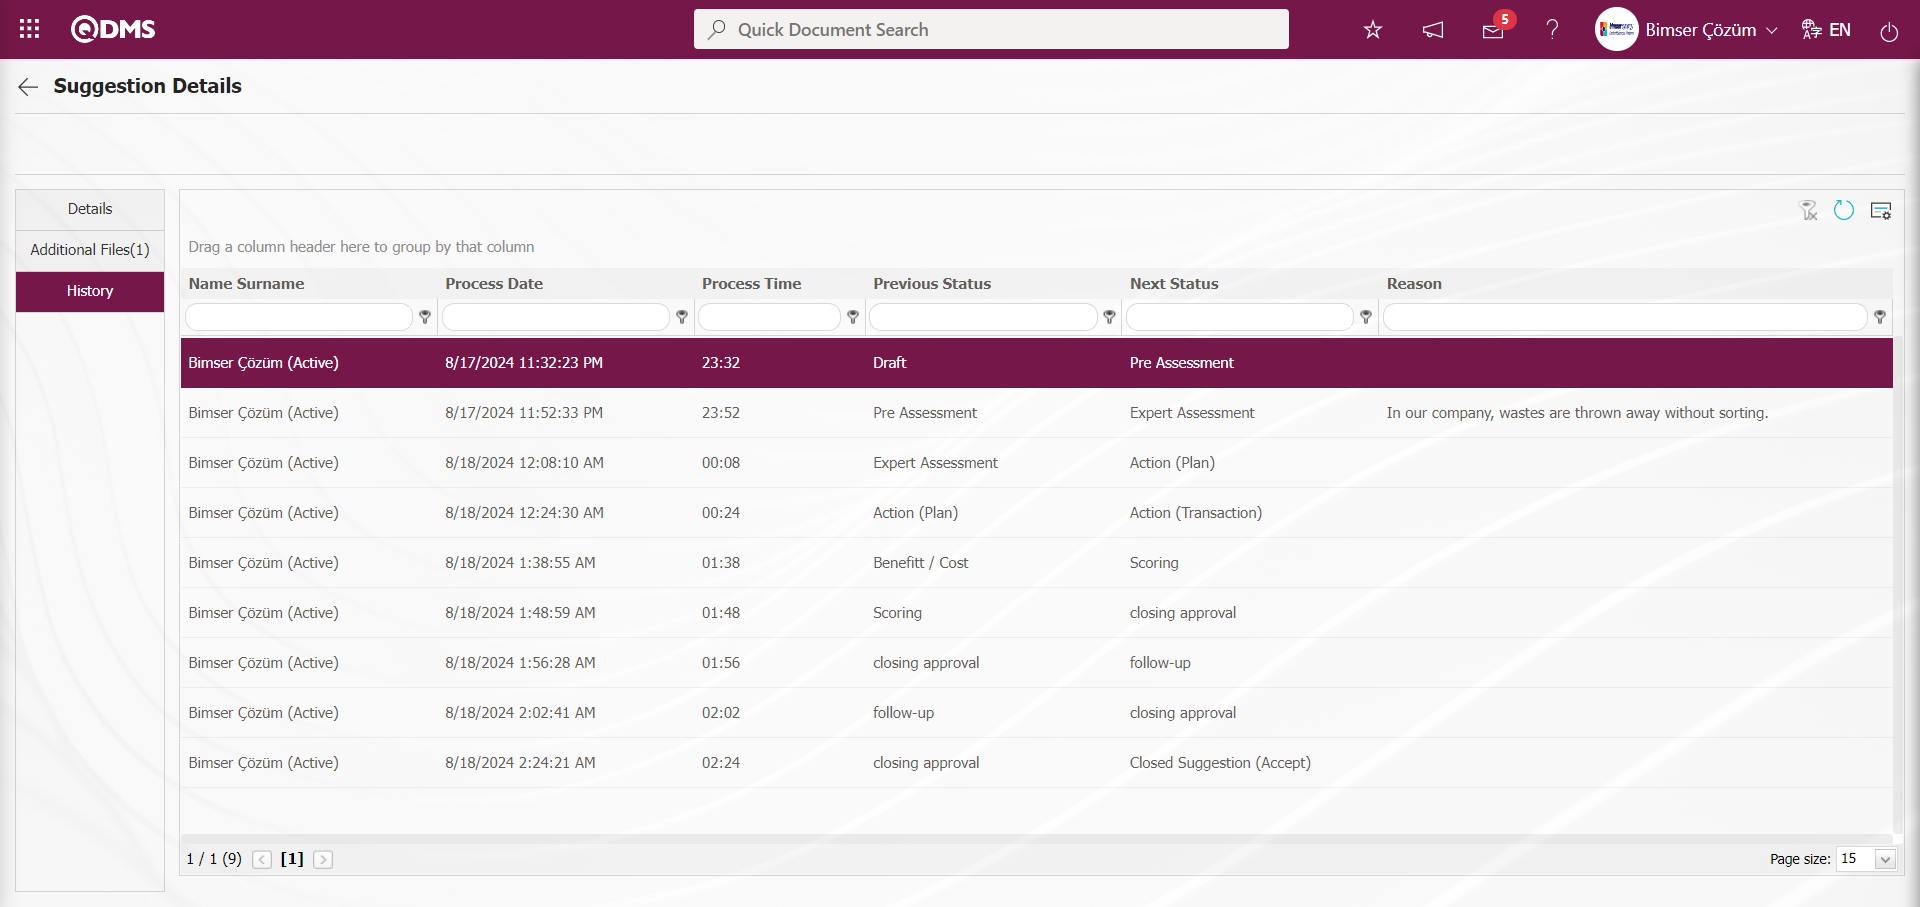
 (Back) button to return to the previous screen.

On the Suggestion Pool screen, on the List tab, click the (Export to Excel) button while the Suggestion Record is selected in the list.
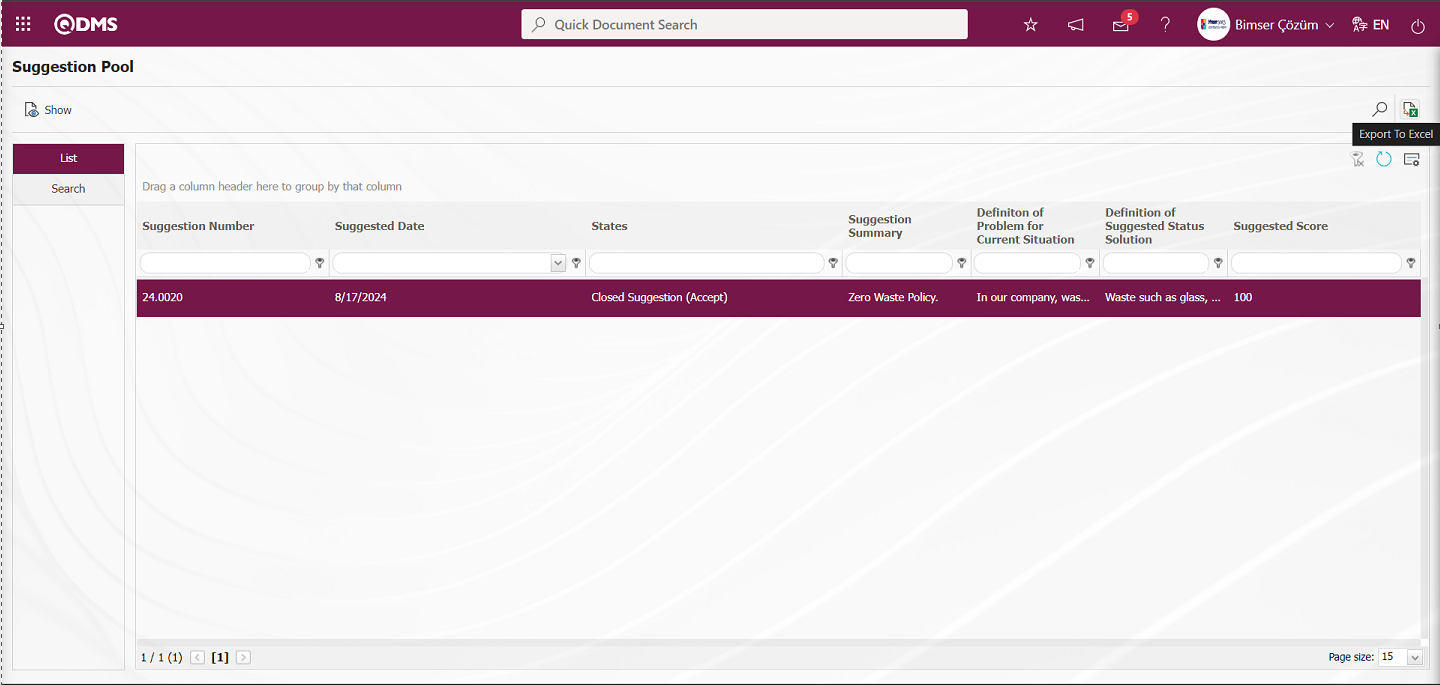
The system automatically presents the Suggestion Pool report in Excel format.
5.3.8.10. Suggestion Actions Report
Menu Name: Integrated Management System/ Suggestion System/ Reports/ Suggestion Actions Report
This report shows the actions of the suggestions in the system. On the Suggestion Action Report screen, there are two tabs: List and Search tabs. In the Search tab, data is entered into the fields with search criteria or data is selected and filtering is done. In the List tab, the Suggestion records are listed according to the filtering process performed in the Search tab.
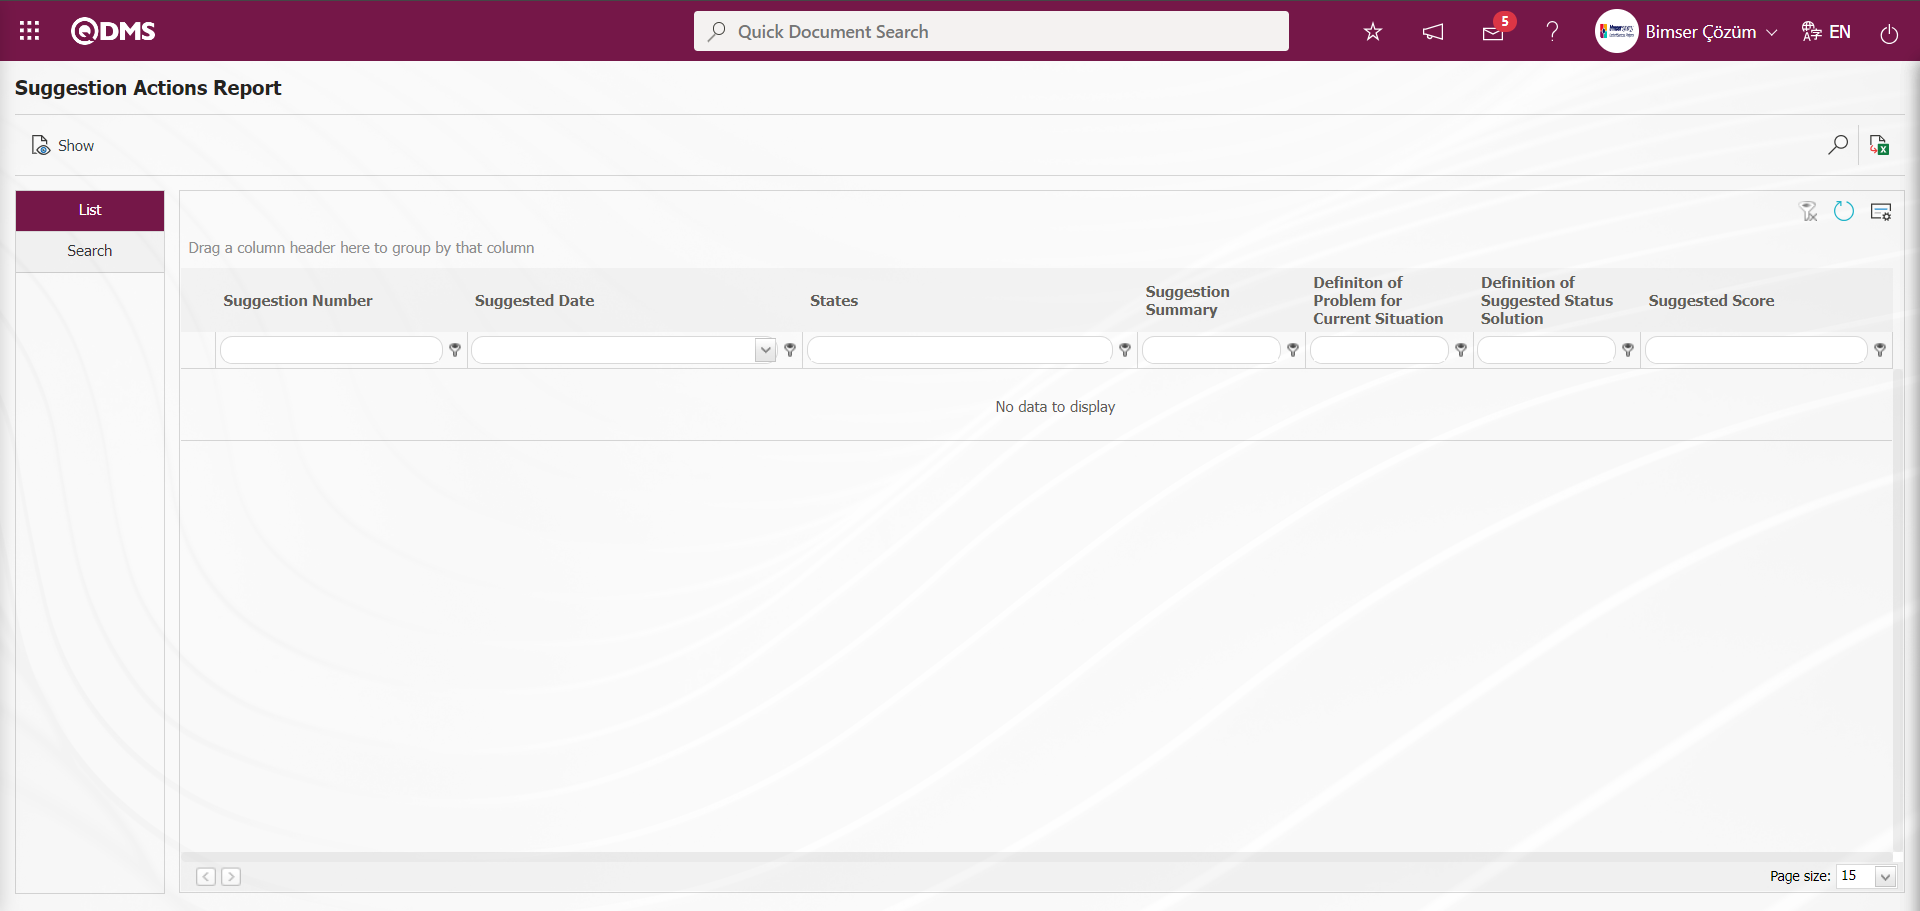
With the help of the buttons on the screen,
: The selected Suggestion record in the list is displayed.
: Data can be exported to Excel.
: Records are filtered and searched.
: The search criteria on the menu screens are used to clean the data remaining in the filter fields in the grid where the search operation is performed.
: The menu screen is restored to its default settings.
: User-based designing is done on the menu screen with the show-hide feature, that is, the hiding feature of the fields corresponding to the columns on the menu screens.
In the Search tab, enter the suggestion code information in the Suggestion Number field and click the (Search) button in the upper right corner of the screen.
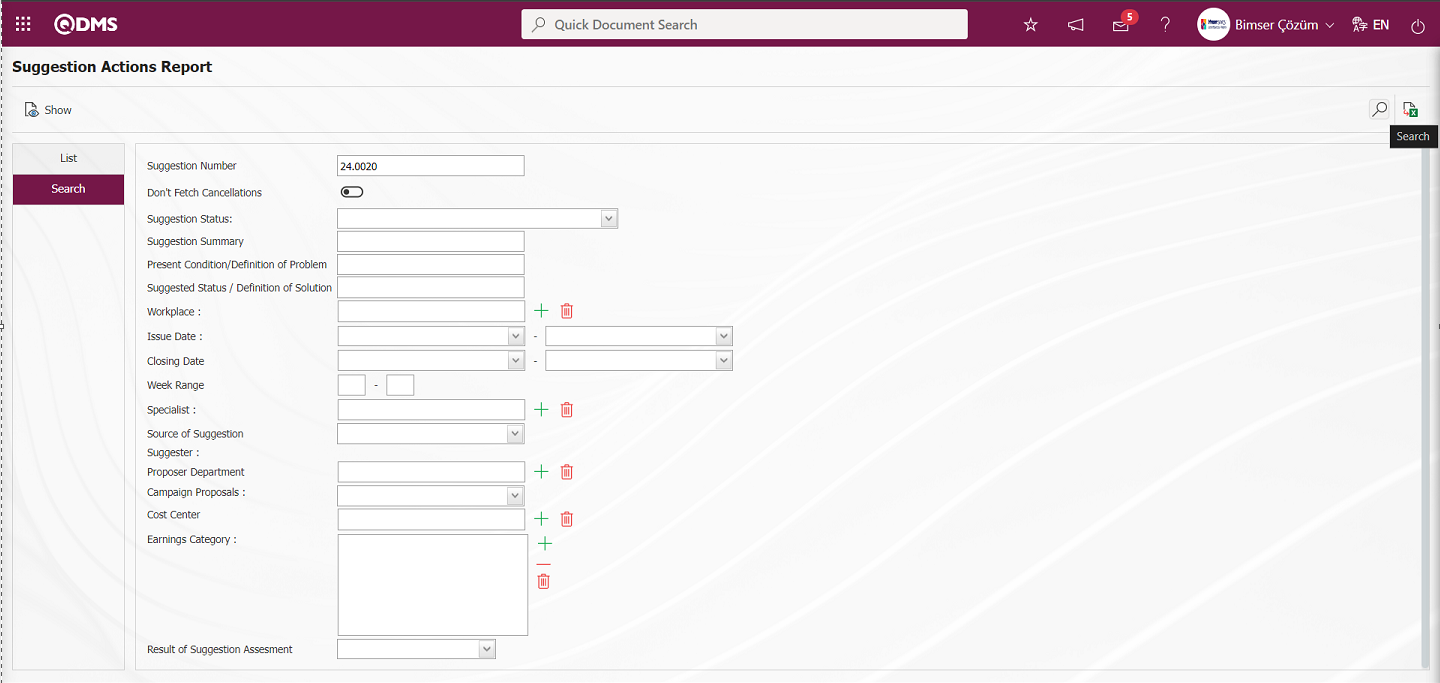
After filtering according to the search criteria in the Search tab, the relevant records are listed in the list tab.
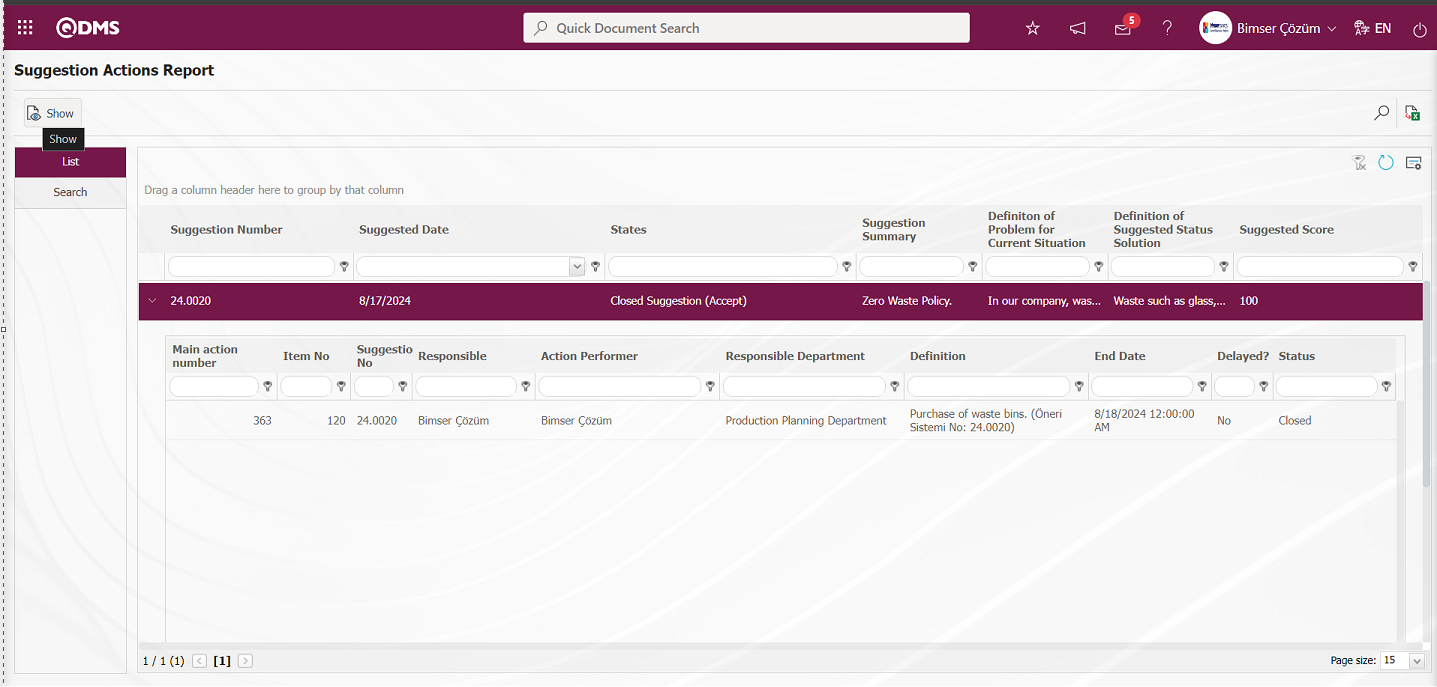 When the Suggestion Record is selected in the List tab, click the button to open the Suggestion Details screen.
Suggestion Details tab: This tab contains the Details, Additional Files and History tabs.
Details tab: This is the tab where all information about the suggestion is displayed.
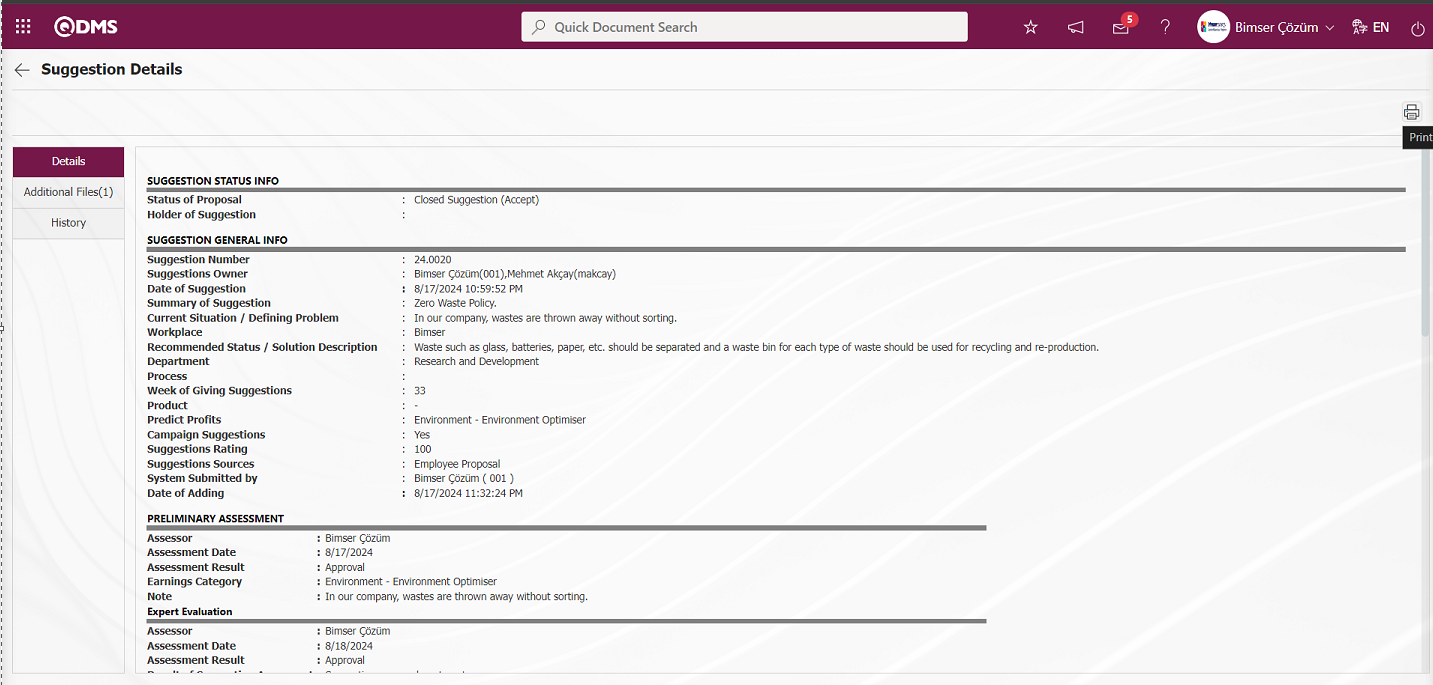
With the help of the buttons on the screen;
: Printing of the displayed screen is done.
By clicking the relevant tab on the Suggestion Details screen, the screen displayed is printed by clicking the (Print) button.

Additional Files tab: This is the tab where the uploaded additional files related to the suggestion are accessed and the content of the uploaded additional files is displayed.

With the help of the buttons on the screen;
: Display the selected attachment file in the list.
History Tab: It is the tab where the history of the transactions related to the suggestion until this stage is accessed. It is a tab that is displayed depending on the parameter. The parameter value of parameter 137 in the Suggestion System Module parameters is activated by selecting “Yes”.
After the parameter is activated, the History tab is displayed at every stage in the Suggestion Details tab in the Suggestion System Module.
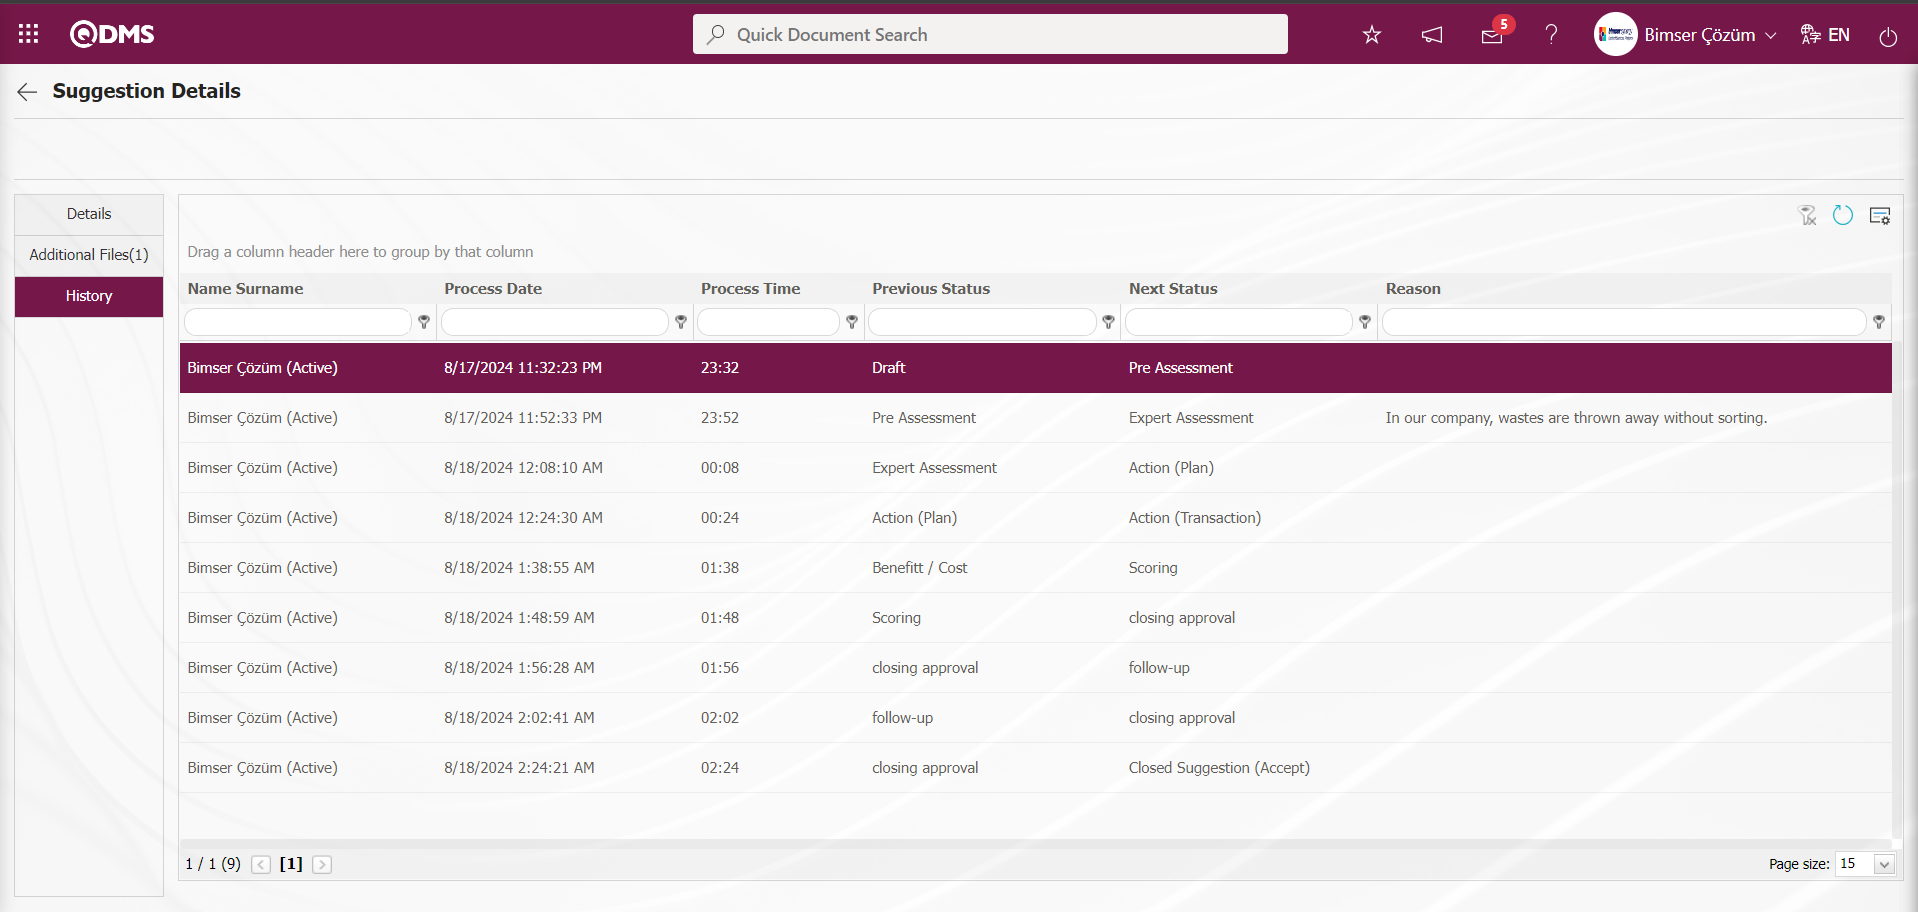
 (Back) button to return to the previous screen.
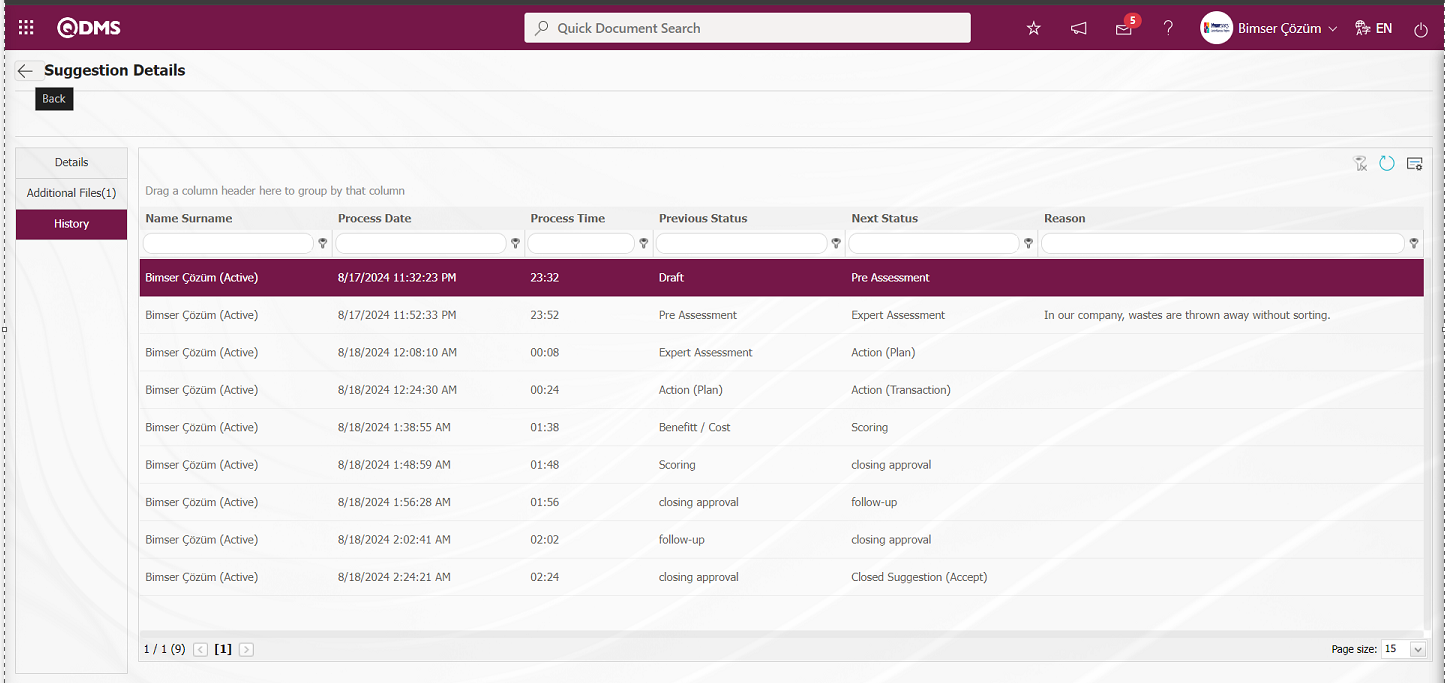
On the Suggestion Actions Report screen, on the List tab, click the (Export to Excel) button while the Suggestion Record is selected in the list.
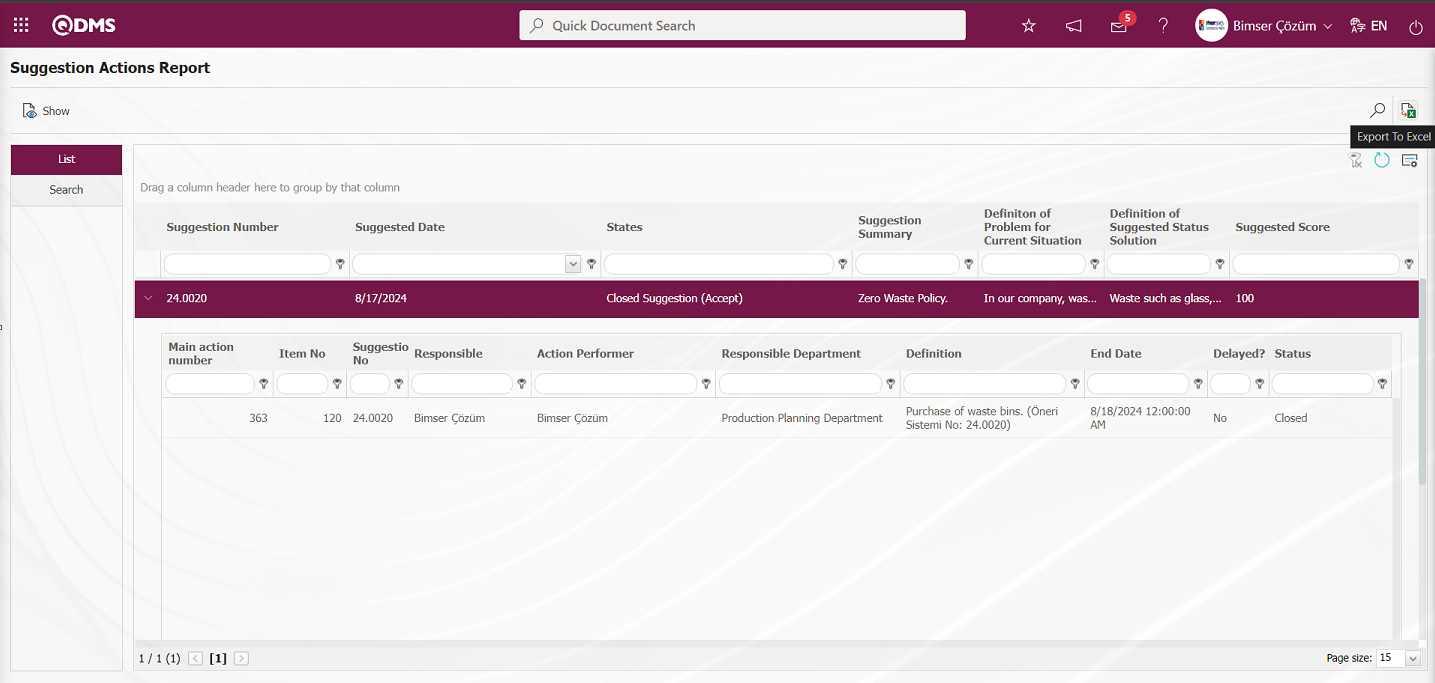
The system automatically presents the Suggestion Actions report in Excel format. 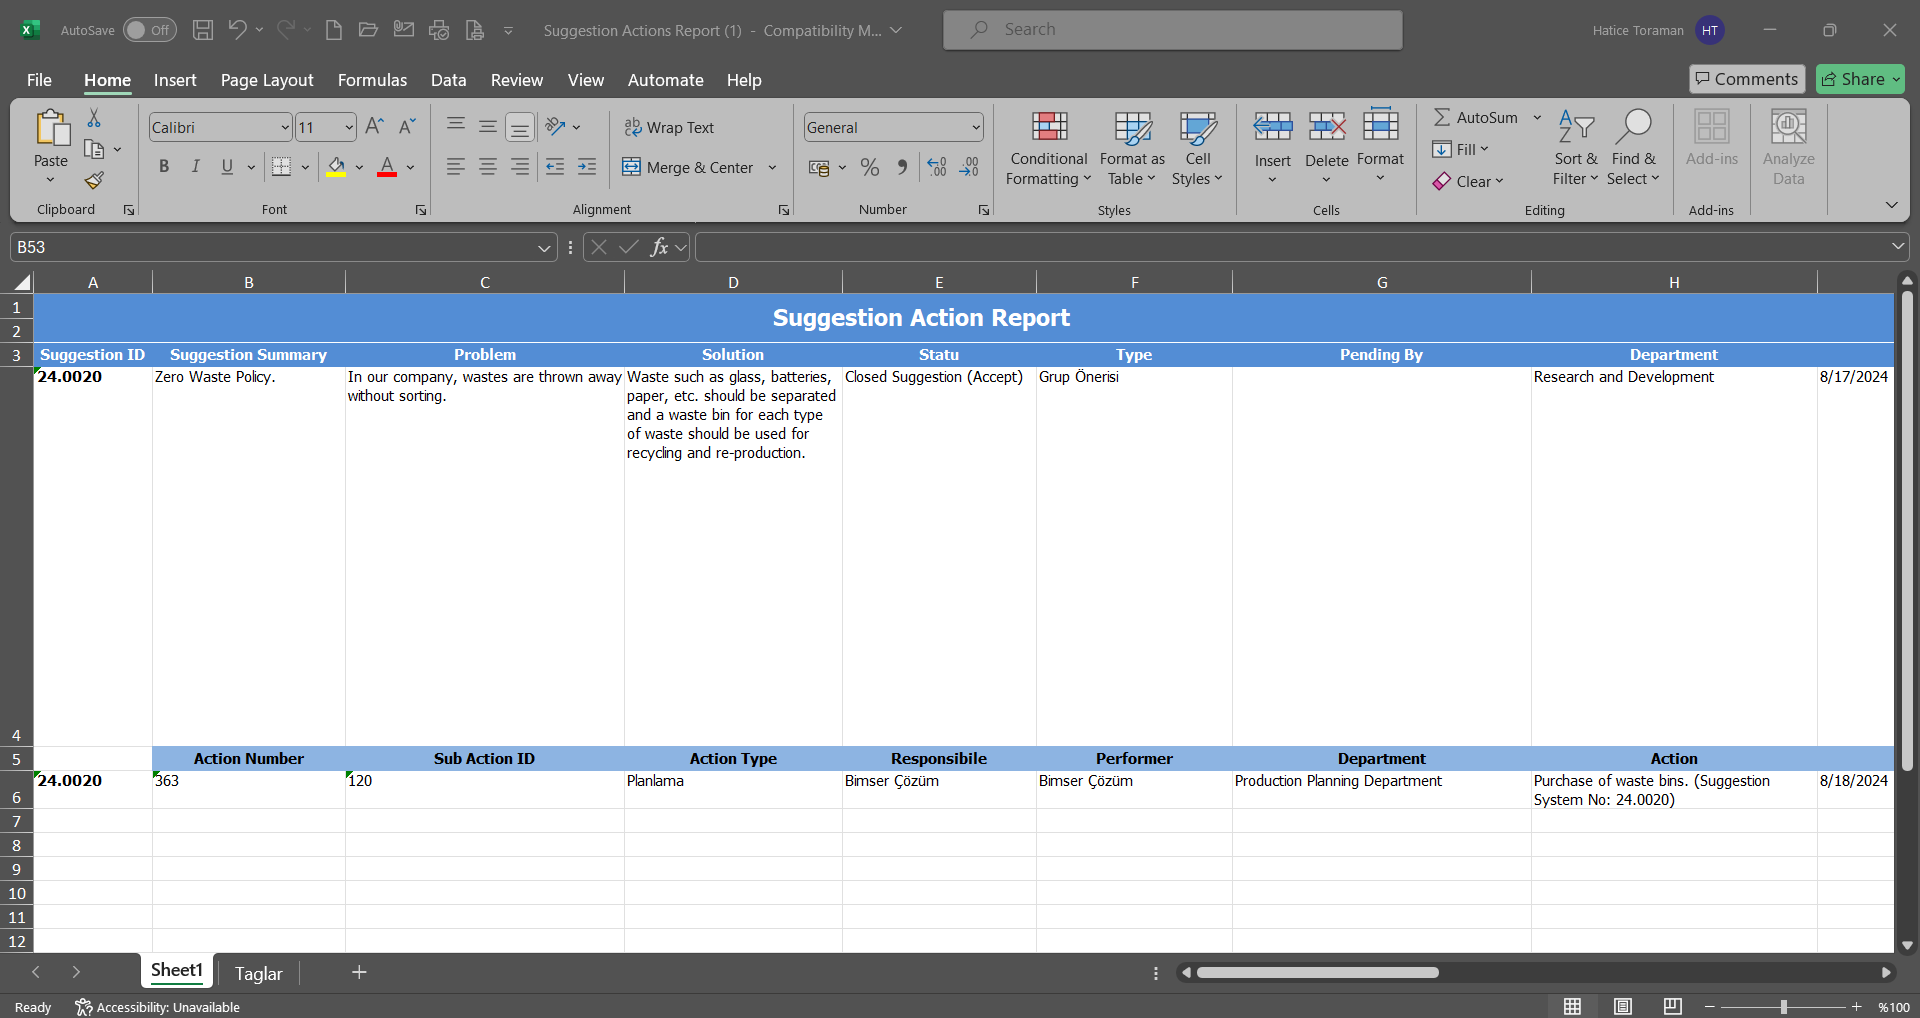
5.3.8.11. Suggestion Report
Menu Name: Integrated Management System/ Suggestion System/ Reports/ Suggestion Report
It is the report that shows which status the suggestion is in. On the Suggestion Report screen, there are two tabs, List and Search tabs. In the Search tab, data is entered into the fields with search criteria or data is selected and filtering is done. In the List tab, the Suggestion records are listed according to the filtering process performed in the Search tab.

With the help of the buttons on the screen,
: Data can be exported to Excel.
: Records are filtered and searched.
: The search criteria on the menu screens are used to clean the data remaining in the filter fields in the grid where the search operation is performed.
: The menu screen is restored to its default settings.
: User-based designing is done on the menu screen with the show-hide feature, that is, the hiding feature of the fields corresponding to the columns on the menu screens.
In the Search tab, enter the suggestion code information in the Suggestion Number field and click the (Search) button in the upper right corner of the screen.
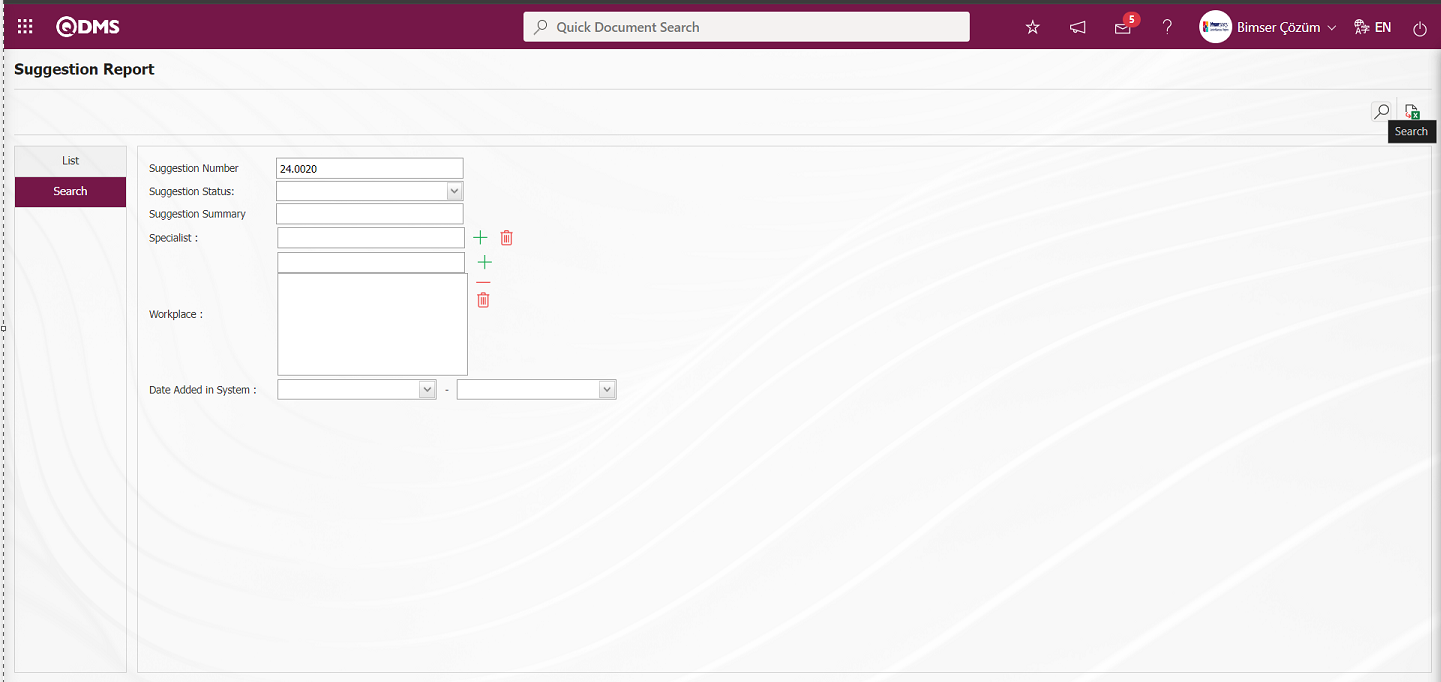
After filtering according to the search criteria in the Search tab, the relevant records are listed in the list tab.
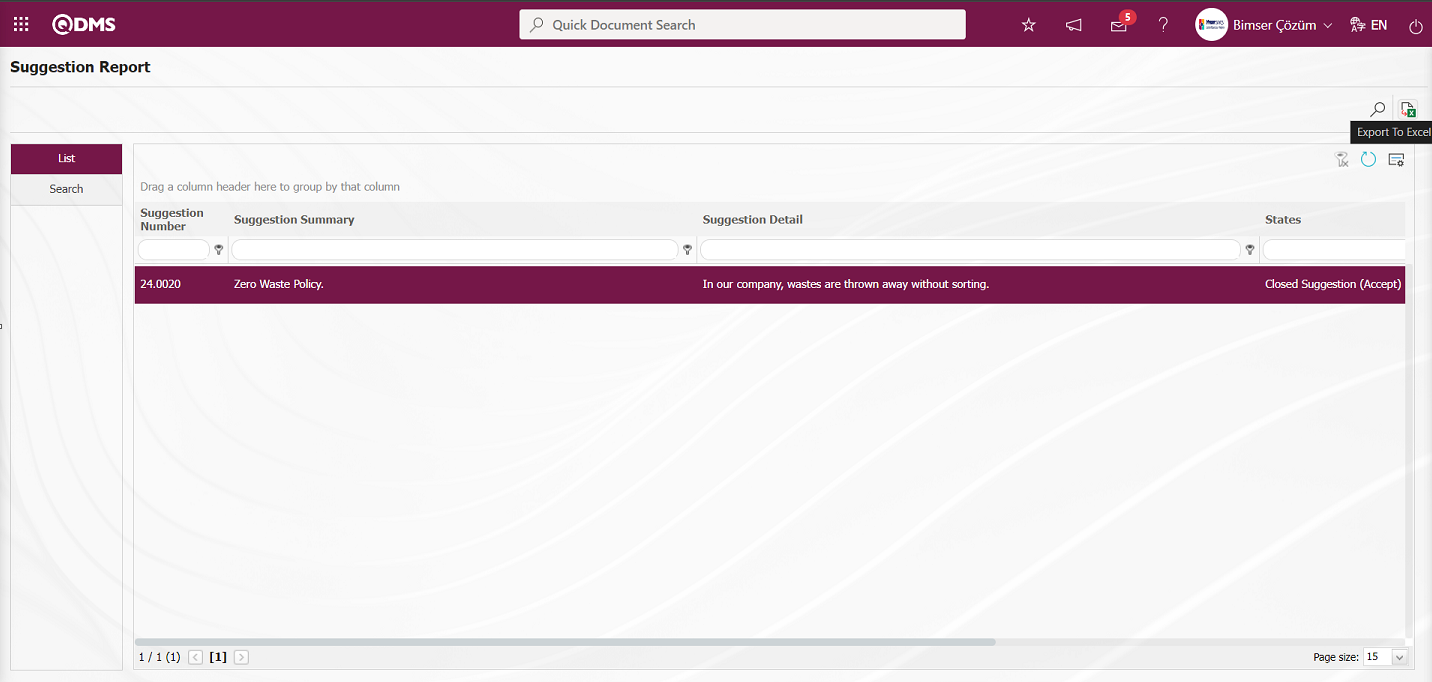
On the Suggestion Report screen, on the List tab, when the Suggestion record is selected in the list, click the (Export to Excel) button and the system automatically presents the Suggestion report in Excel format.
5.3.8.12. Person Score Report
Menu Name: Integrated Management System/ Suggestion System/ Reports/ Person Score Report
This is the report where the users' point detail information is given in fields such as Suggestion, Suggestor, Total Points, Gift, Added Point Description. On the Person Point Detail screen, there are two tabs, List and Filter tabs. In the Filter tab, data is entered into the fields with search criteria or data is selected and filtering is done. In the List tab, the Recommendation records are listed according to the filtering process performed in the Filter tab.

With the help of the buttons on the screen,
: Data can be exported to Excel.
: Records are filtered and searched.
: The search criteria on the menu screens are used to clean the data remaining in the filter fields in the grid where the search operation is performed.
: The menu screen is restored to its default settings.
: User-based designing is done on the menu screen with the show-hide feature, that is, the hiding feature of the fields corresponding to the columns on the menu screens.
In the Filter tab, enter or select data in the fields with search criteria and click the (Search) button.

After filtering according to the search criteria in the filter tab, the related records are listed in the list tab. 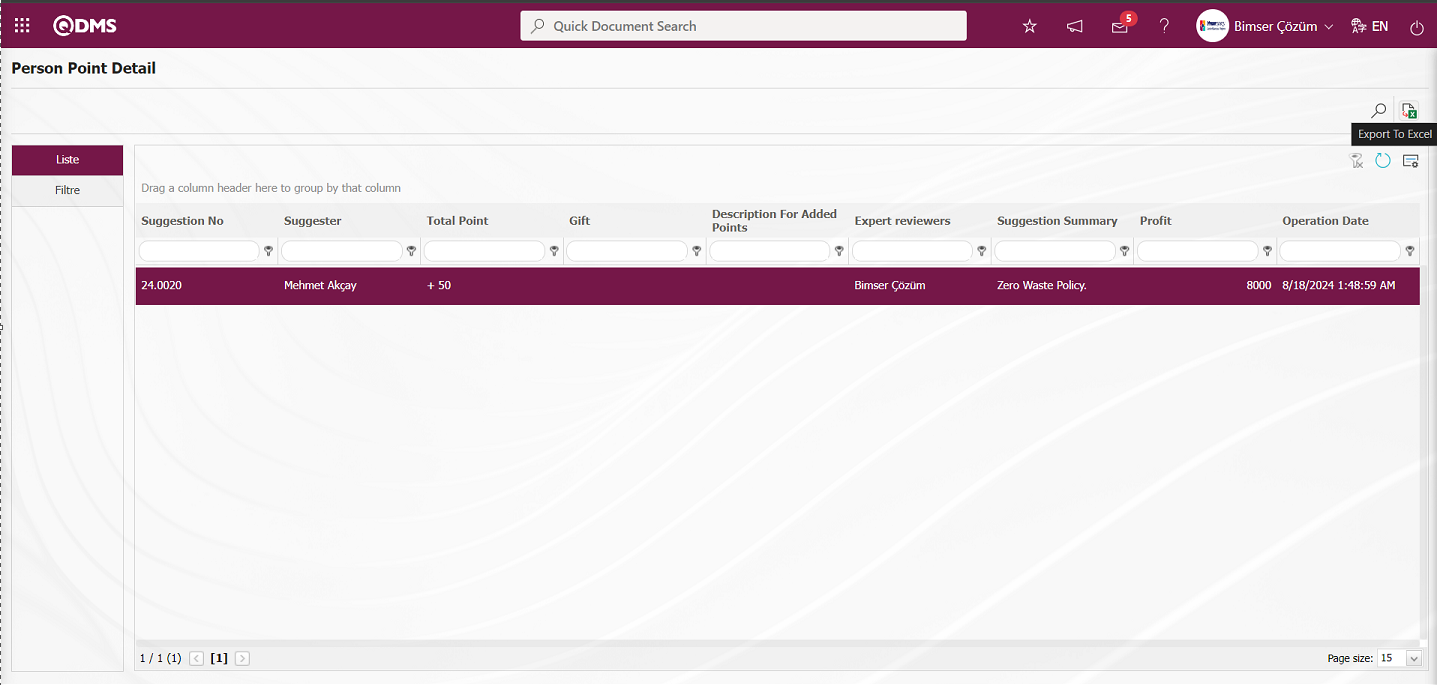
On the Person Point Detail screen, on the List tab, when the Recommendation Record is selected in the list, click the (Export to Excel) button and the system automatically presents the Person Point Detail report in Excel format.
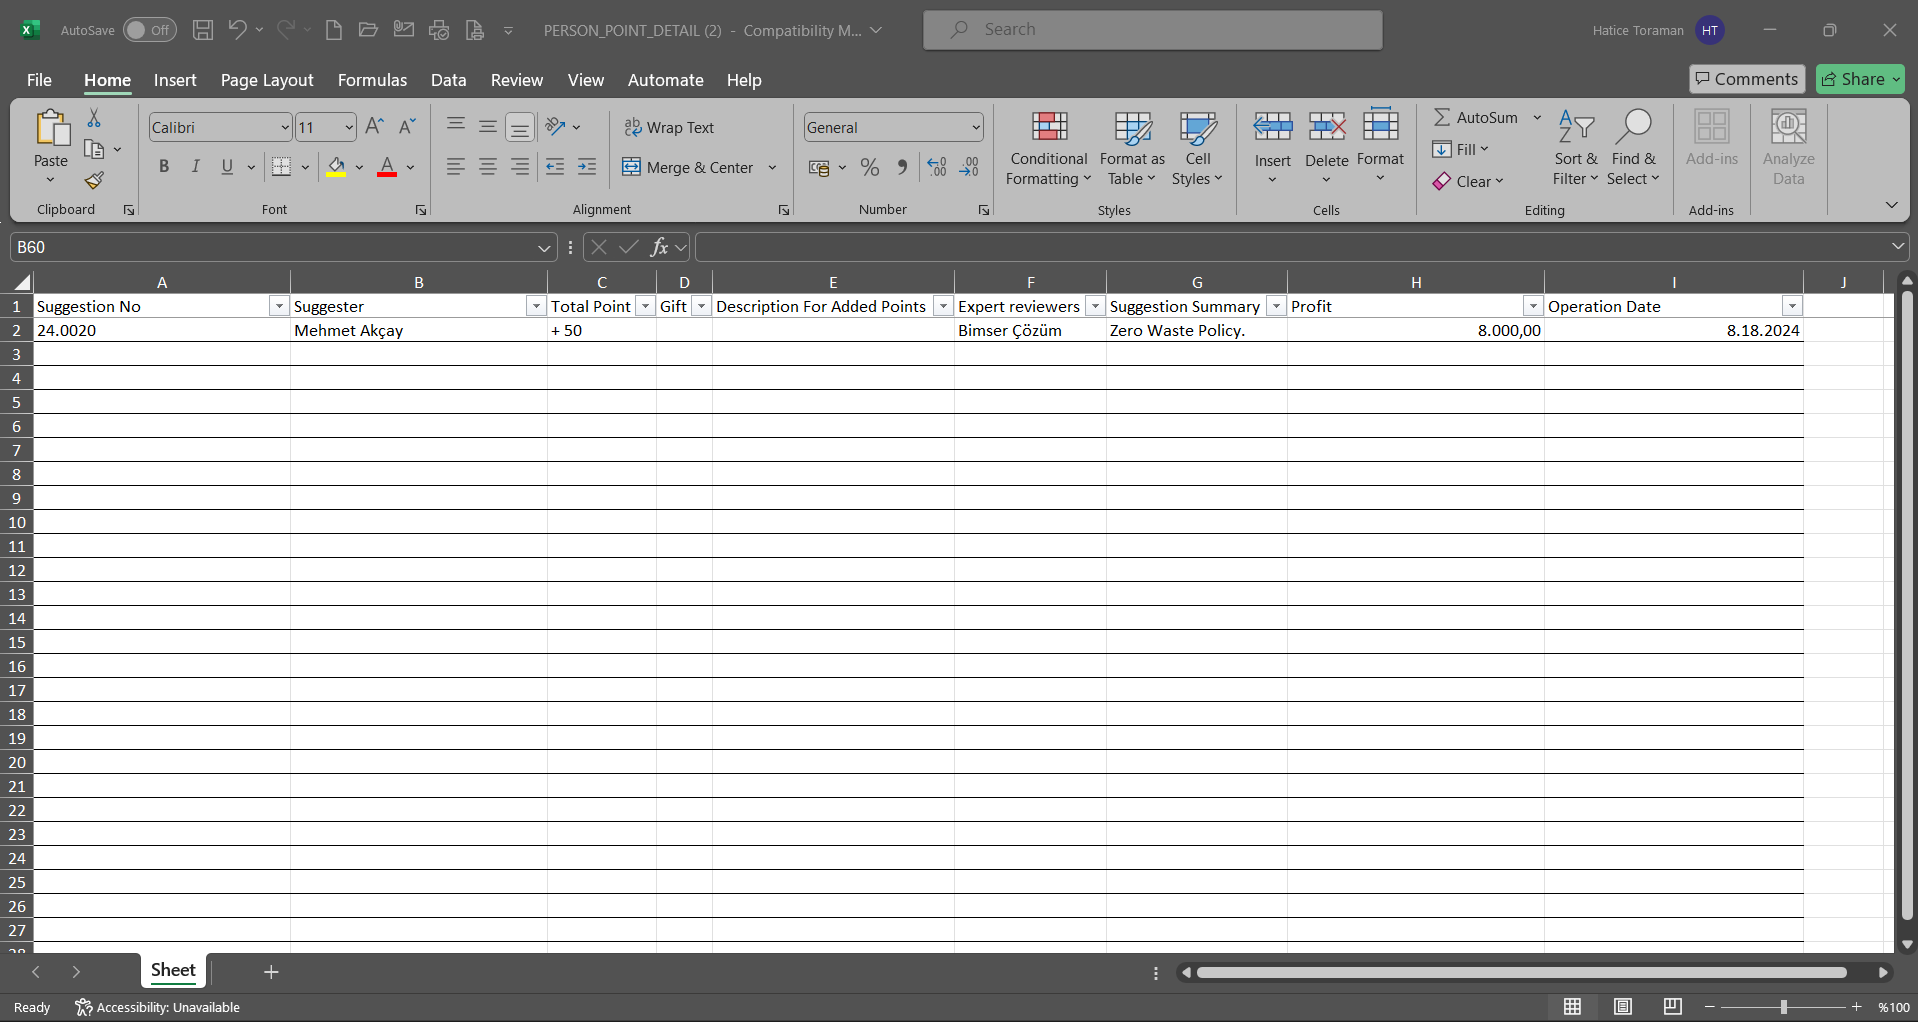
5.3.9.Graphics
Menu Name: Integrated Management System/ Suggestion System/ Graphics
This is the menu where the graphics of the suggestion module are displayed.
5.3.9.1.Suggestion Counts Graphic
Menu Name: Integrated Management System/ Suggestion System/ Graphics/ Suggestion Counts Graphic
Suggestion Status, Workplace, Specialist, Suggestion Source, Suggestion Giver is the menu used to get the graph of the number of suggestions on a weekly, monthly, yearly basis for the date range specified in the graph type field by making the necessary adjustments according to the filter search criteria fields. Two tabs, List and Search tabs, appear on the Suggestion Numbers screen. In the Search tab, data is selected and filtered in the fields with search criteria. In the List tab, according to the filtering process performed in the Search tab, the weekly, monthly and yearly graph of the number of suggestions for the specified date range is taken by clicking the  button.
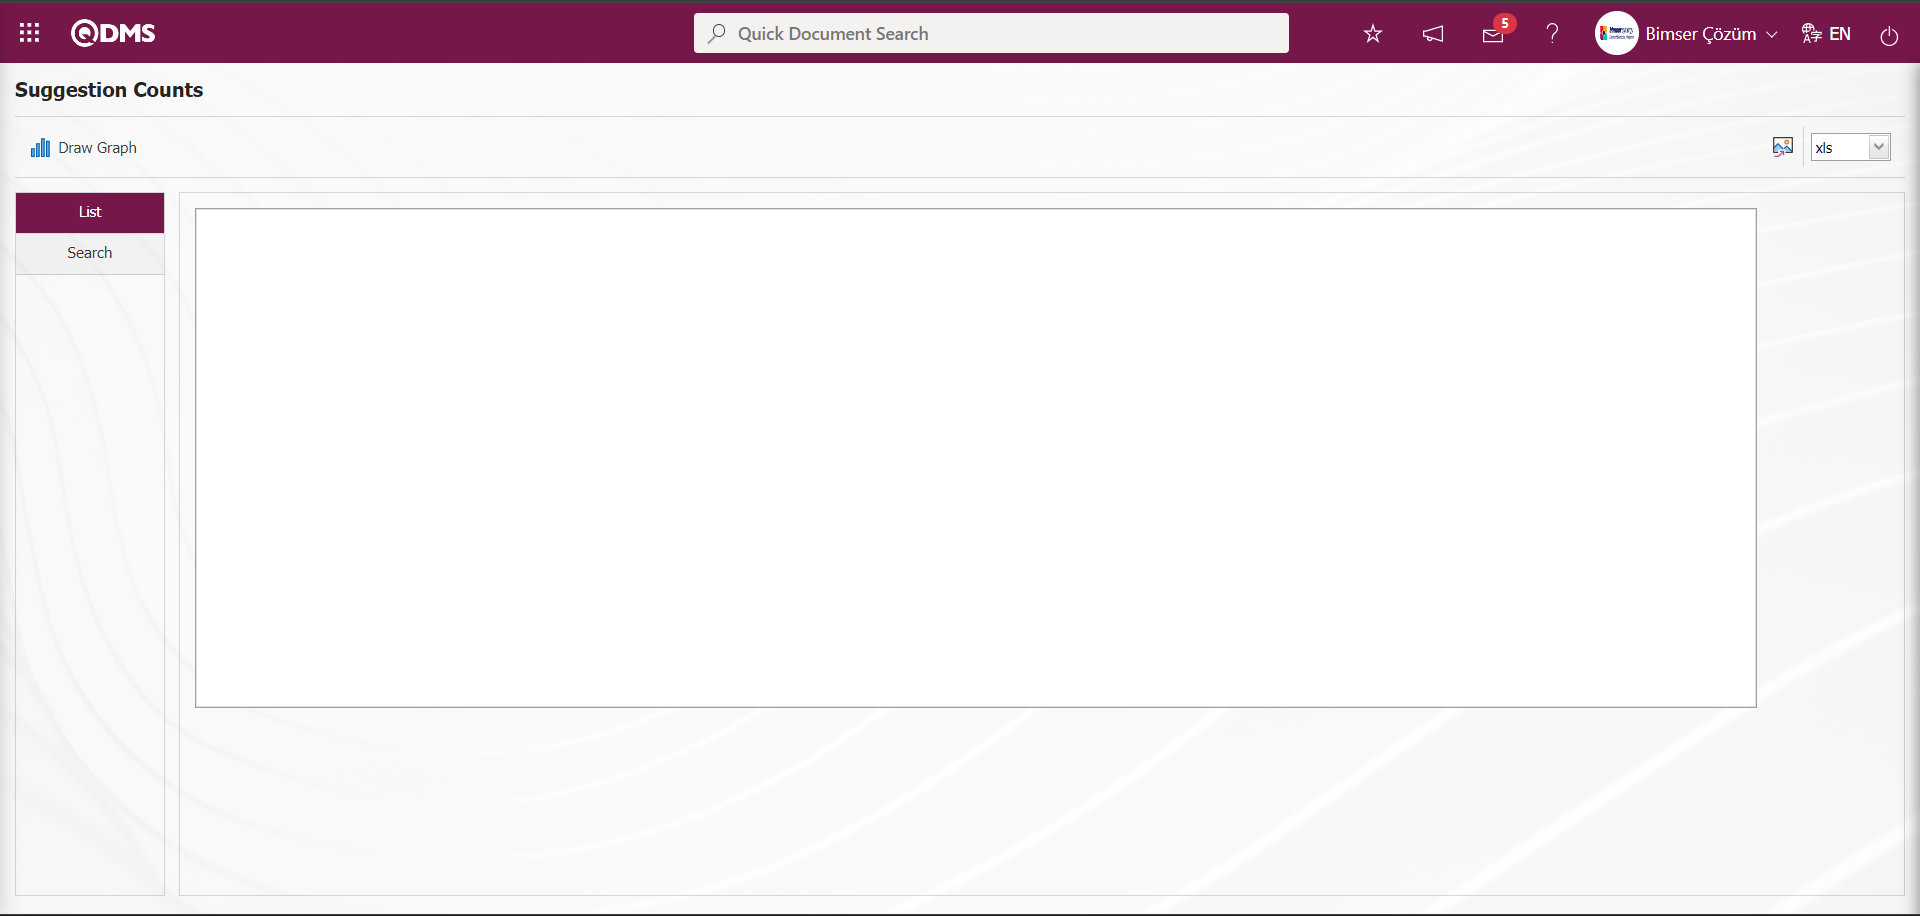
With the help of the buttons on the screen;
 : Draws a graph on the screen according to the specified properties.
 : The graphic is converted to the format type selected from the drop-down menu (png, jpg, bmp, xls, etc.) and exported to external media.
In the Search tab, data selection is made according to the fields with search criteria and the button is clicked.
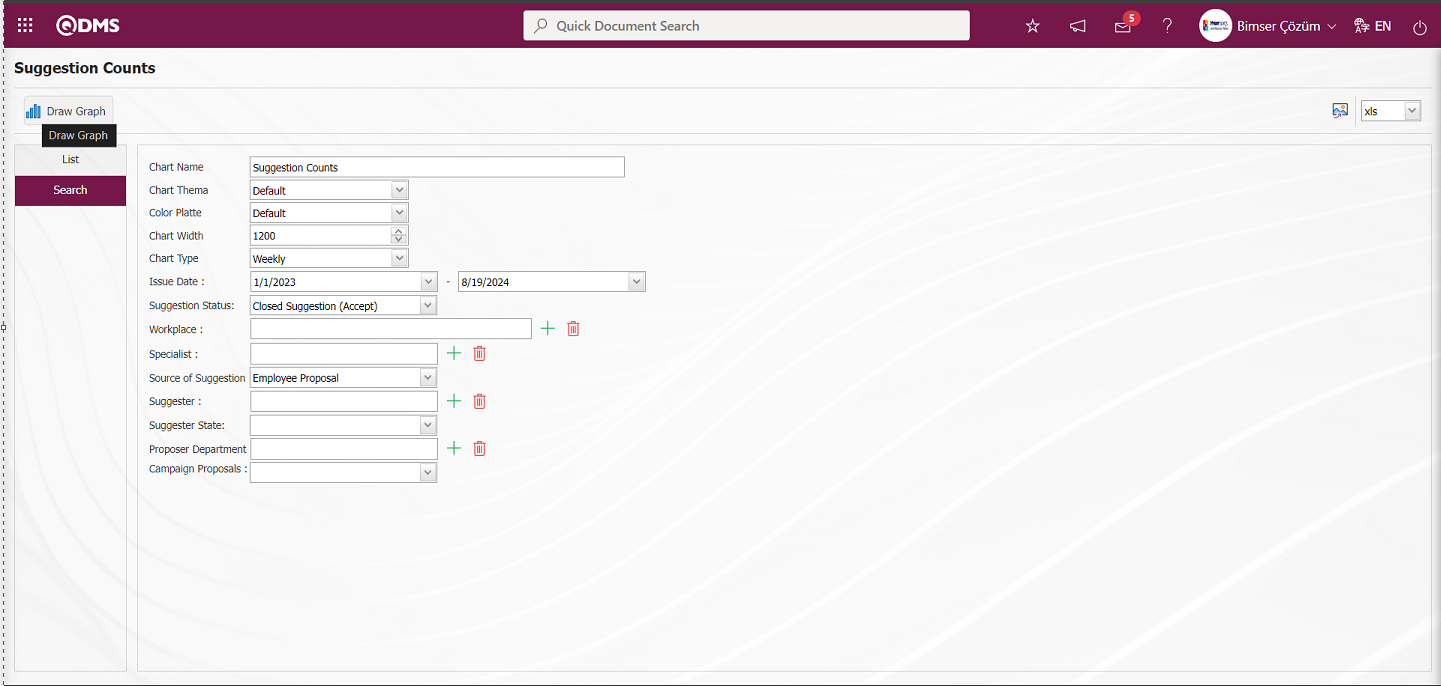
According to the search criteria fields in the Search tab in the List tab, the system automatically presents the graph of the number of suggestions on a monthly basis in the specified date range.
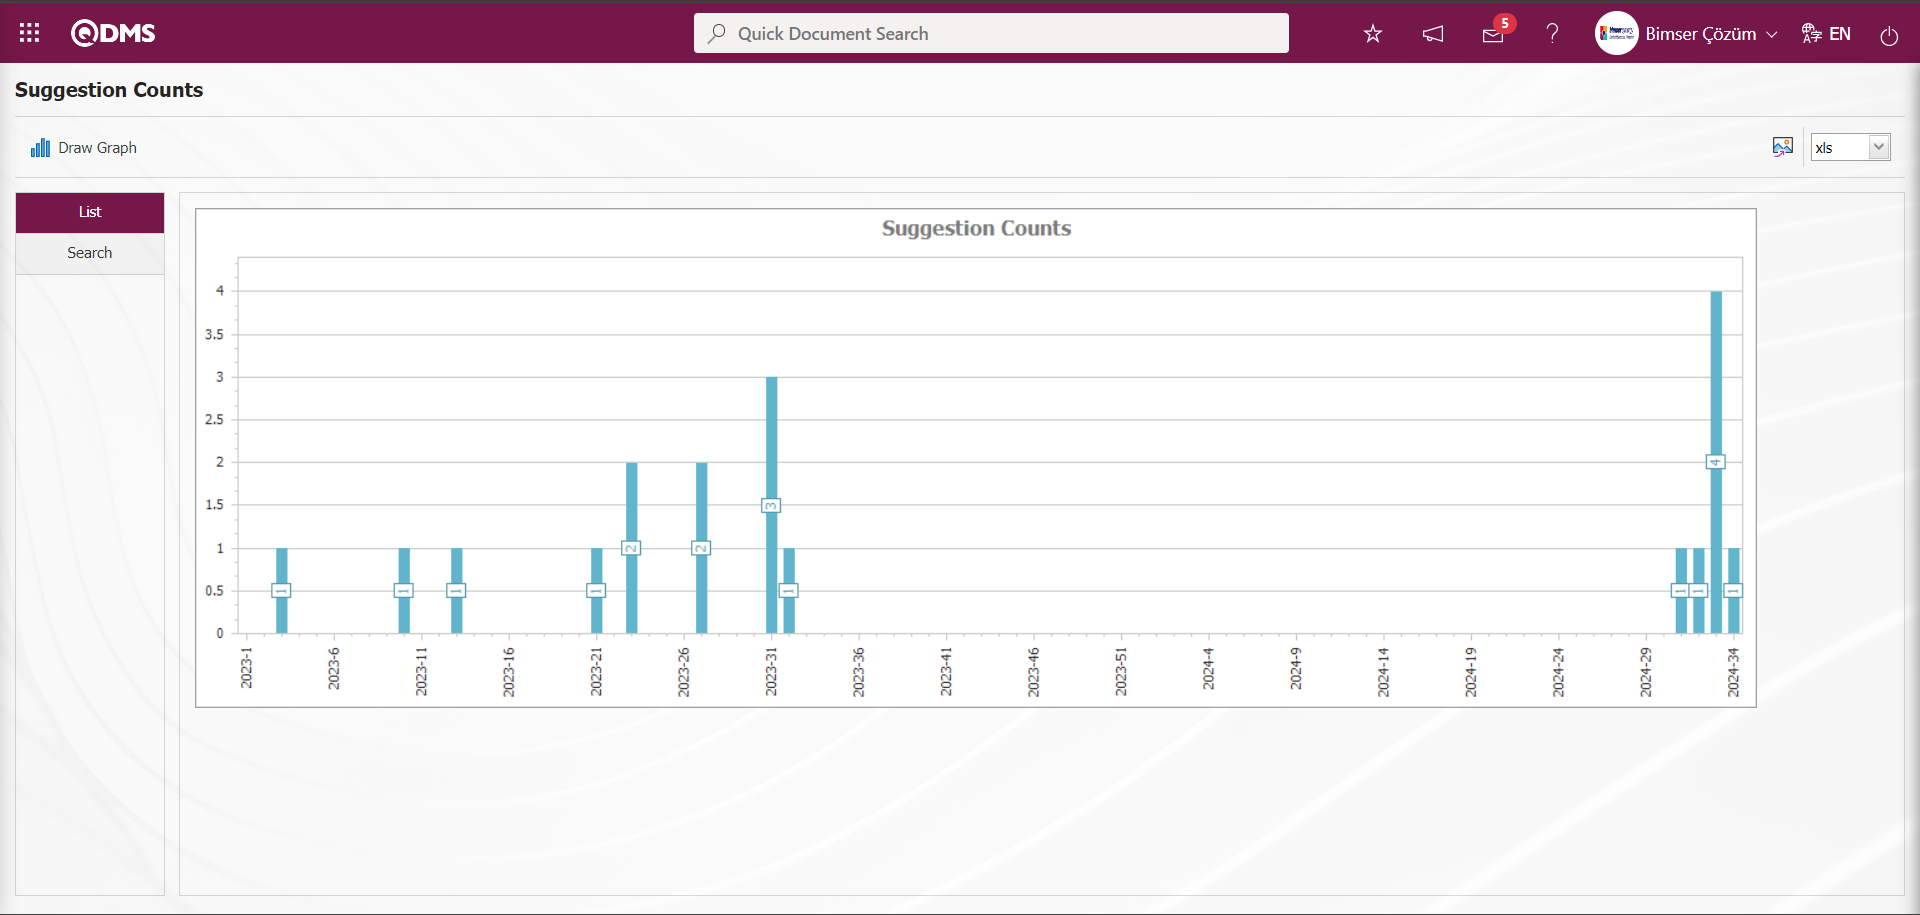
If you want to export the graph to different formats, after selecting the format from the right (Export Graphic), the graph can be exported to formats such as xls, png, jpg. On the Suggestion Counts screen, the ( Export Graphic) button is clicked and the selection is made in pdf format by clicking on the drop-down list.

The system automatically converts the Suggestion Counts chart to the selected pdf format and exports it to external media.
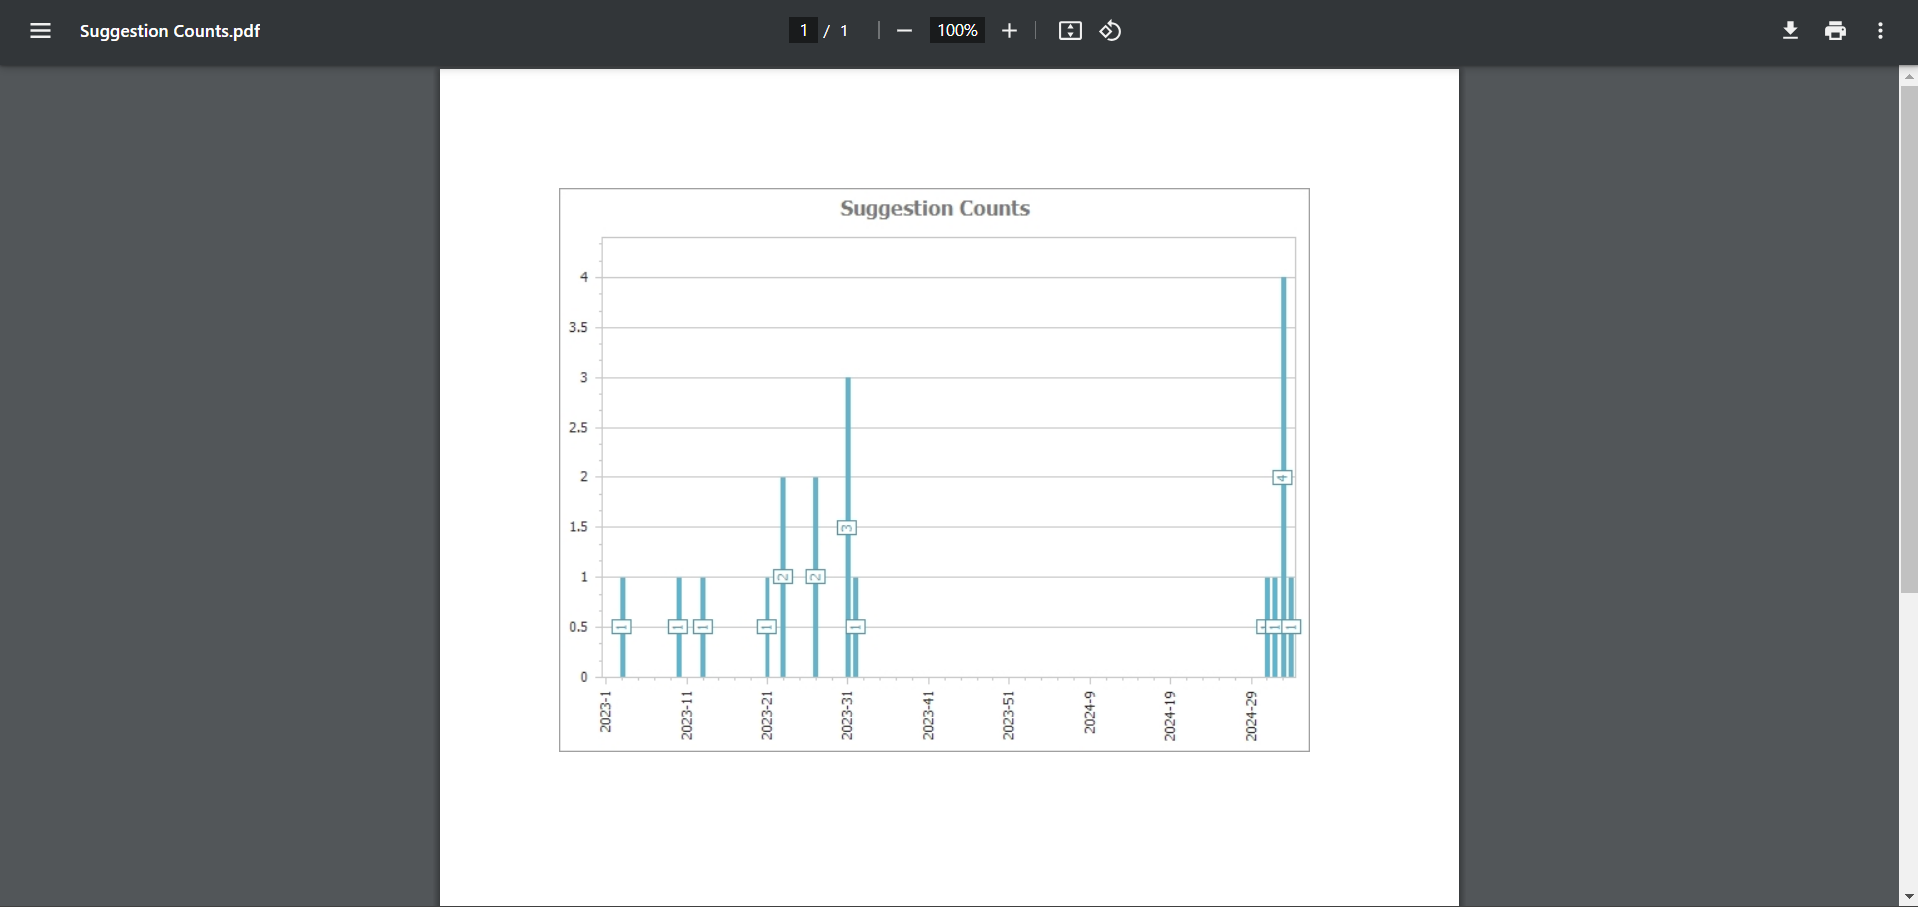
5.4. System Infrastructure Definitions / Suggestion - Part 2
5.4.1. Add Point
Menu Name: System Infrastructure Definitions/ Suggestion/ Add Point
This is the menu used by suggestion module administrators to add points to suggestions. Two tabs, List and Search tab, appear on the Add Points screen. In the Search tab, data is entered into the fields with search criteria or data is selected and filtering is done. In the List tab, the Suggestion records are listed according to the filtering process performed in the Search tab. 
With the help of the buttons on the screen,
 : Points are added to the selected suggestion in the list.
: Records are filtered and searched.
: The search criteria on the menu screens are used to clean the data remaining in the filter fields in the grid where the search operation is performed.
: The menu screen is restored to its default settings.
: User-based designing is done on the menu screen with the show-hide feature, that is, the hiding feature of the fields corresponding to the columns on the menu screens.
In the Search tab, enter the suggestion code information in the Suggestion Number field and click the (Search) button in the upper right corner of the screen

After filtering according to the search criteria in the Search tab, the relevant records are listed in the list tab
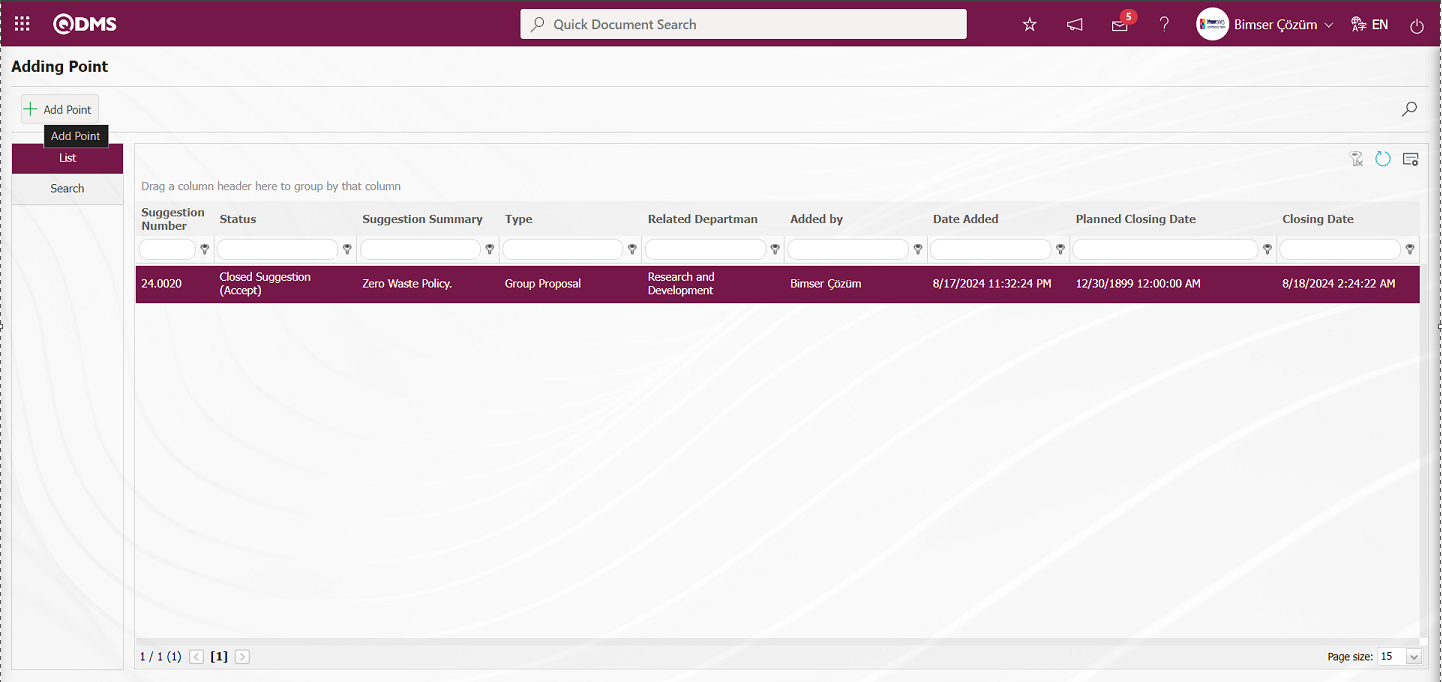
In the list tab, select the suggestion for which points are to be added and click on the button.

Define the relevant fields on the screen that opens:
Point To Be Added To The Suggestion: This is the field where the Point that will be added to the suggestion is written on the Adding Point screen.
Point that will be added for per Person: This is the field where the system automatically calculates the points per person that will be added for the suggestion on the Adding Point screen. The system calculates the point information to be added to the suggestion by dividing it by the number of people. The system automatically calculates the Points per Person to be added = Points to be added to the suggestion / Number of people who gave the suggestion. In this suggestion, since the number of people who gave the suggestion is 2, the system automatically calculates the Points per person to be added = 100/2 as 50.
Description: It is the field where the description information, if any, related to the Point addition process is written on the Adding Point screen.
Suggestion Details tab: This tab contains the Details, Additional Files and History tabs.
Details tab: This is the tab where all information about the suggestion is displayed.
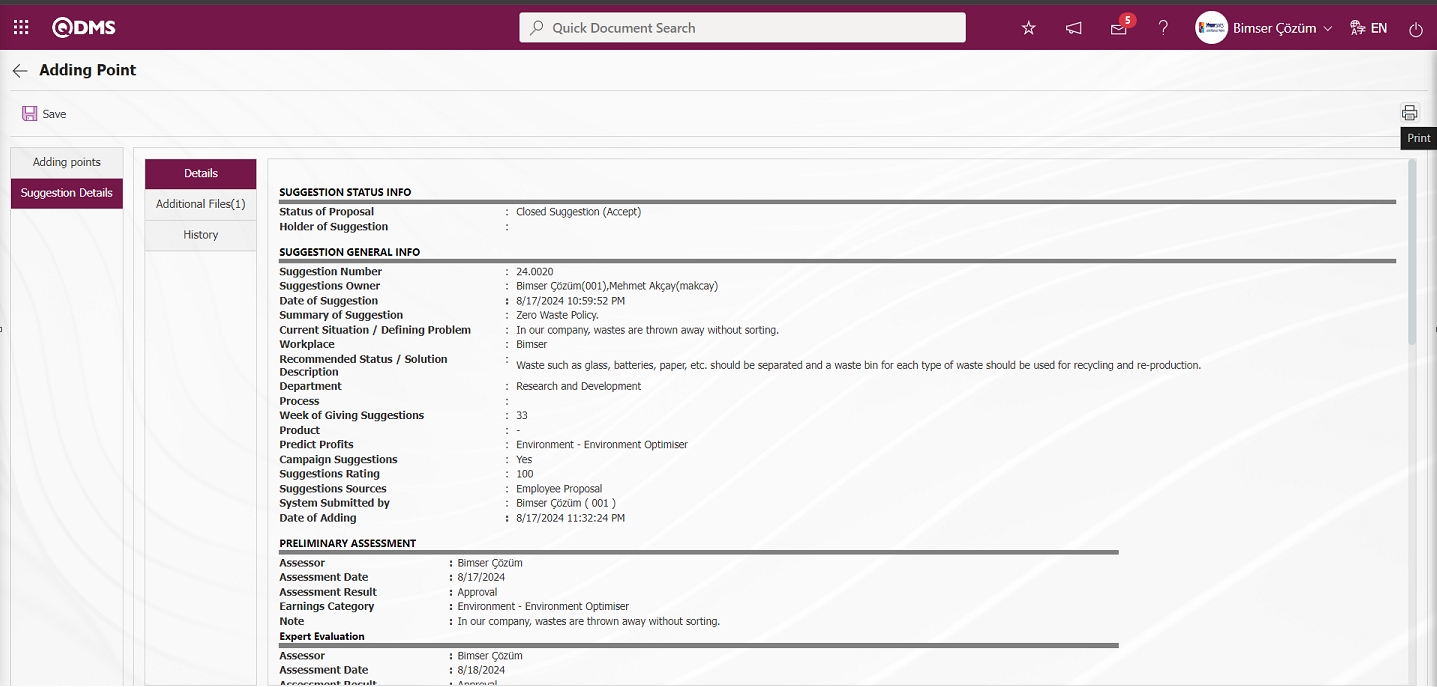
With the help of the buttons on the screen;
: Printing of the displayed screen is done.
By clicking the relevant tab on the Suggestion Details screen, the screen displayed is printed by clicking the (Print) button.

Additional Files tab: This is the tab where the uploaded additional files related to the suggestion are accessed and the content of the uploaded additional files is displayed.
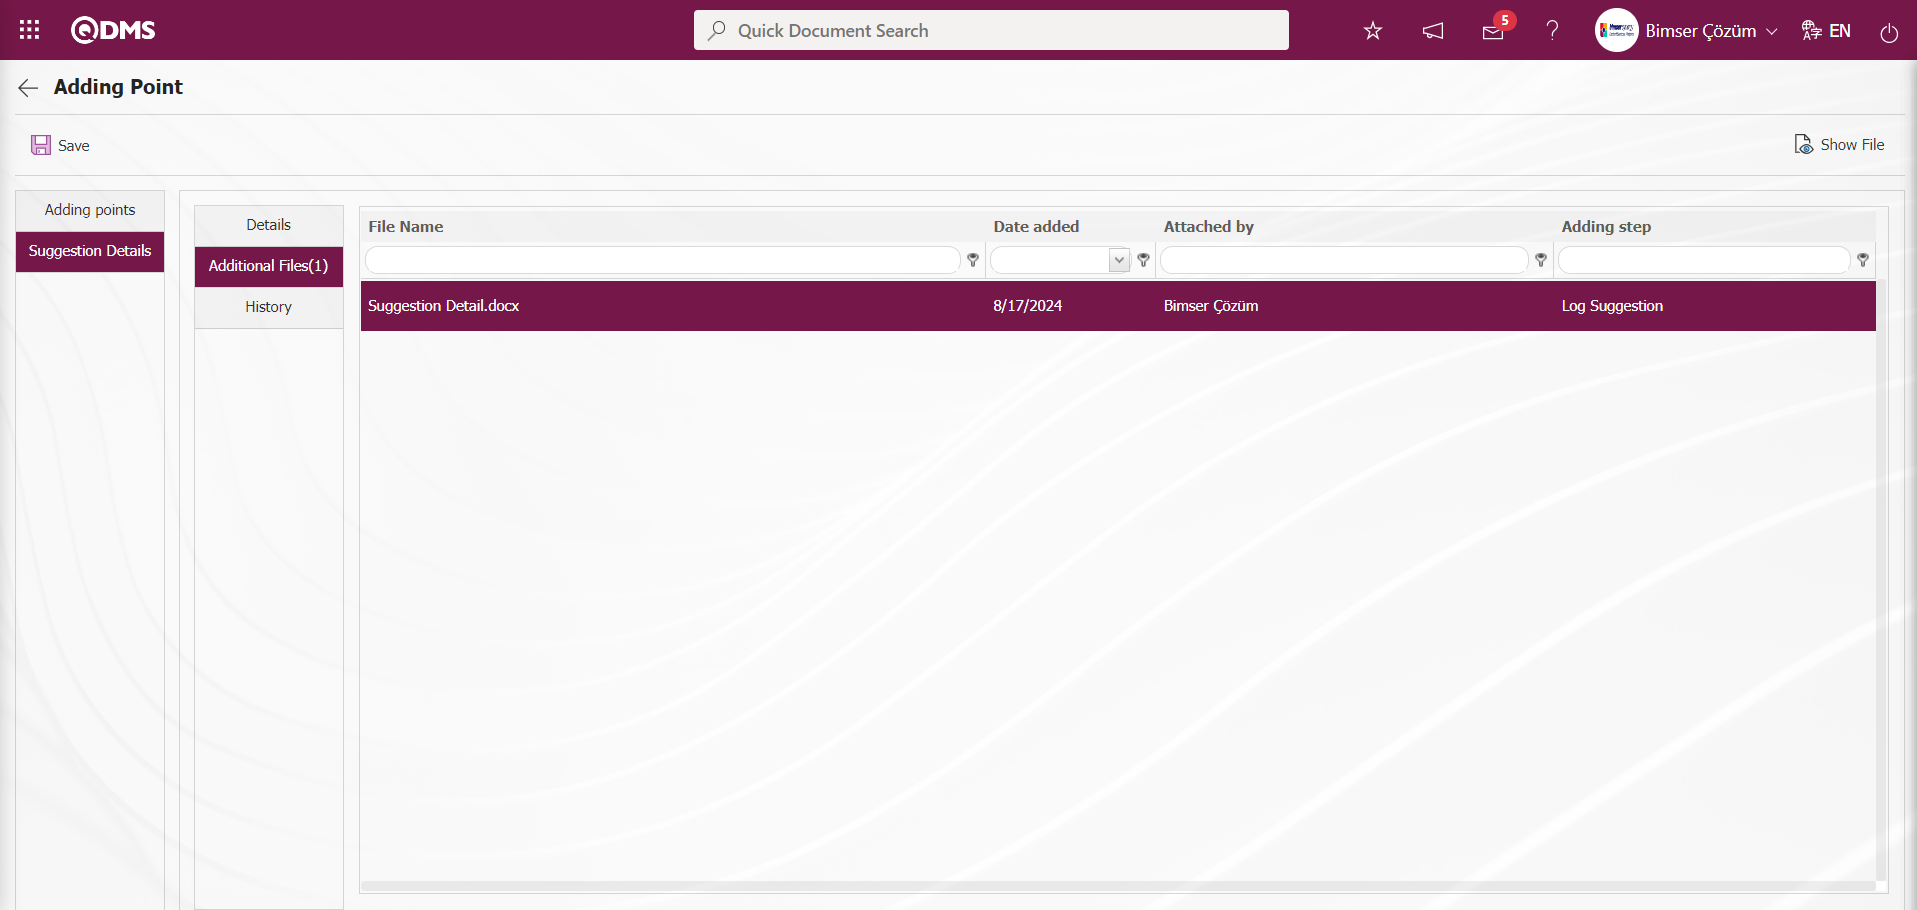
With the help of the buttons on the screen;
: Display the selected attachment file in the list.
History Tab: It is the tab where the history of the transactions related to the suggestion until this stage is accessed. It is a tab that is displayed depending on the parameter. The parameter value of parameter 137 in the Suggestion System Module parameters is activated by selecting “Yes”.
![A screenshot of a computer
AI-generated content may be incorrect.]ref83
After the parameter is activated, the History tab is displayed at every stage in the Suggestion Details tab in the Suggestion System Module.
Click the Adding Point tab on the Adding Point screen.

On the Add Points screen, in the Add Points tab, write the Points to be added to the Suggestion. The points per person to be added by the system is automatically calculated by the system. Explanation information about adding points is written. After entering the necessary information in the required fields, the  button in the upper left corner of the screen is clicked and the Add Points registration process is done.

5.4.2. Maintenance of Suggestion Registration
5.4.2.1. Suggestions Information Update
Menu Name: System Infrastructure Definitions / Suggestion/ Maintenance of Suggestion Registration/ Suggestions Information Update
This is the menu where the information of any suggestion record is edited by the admin user. On the Suggestion Information Update screen, we see two tabs, List and Search tab. In the Search tab, data is entered into the fields with search criteria or data is selected and filtering is done. In the List tab, the Suggestion records are listed according to the filtering process performed in the Search tab. 
With the help of the buttons on the screen,
 : Update and modification operations are performed on the selected suggestion information in the list.
: Data can be exported to Excel.
: Records are filtered and searched.
: The search criteria on the menu screens are used to clean the data remaining in the filter fields in the grid where the search operation is performed.
: The menu screen is restored to its default settings.
: User-based designing is done on the menu screen with the show-hide feature, that is, the hiding feature of the fields corresponding to the columns on the menu screens.
In the Search tab, enter the suggestion code information in the Suggestion Number field and click the (Search) button in the upper right corner of the screen
After filtering according to the search criteria in the Search tab, the relevant records are listed in the list tab.

In the List tab, select the suggestion on the list on which you want to update the information and click on the button. Maintenance of Suggestion record screen opens.
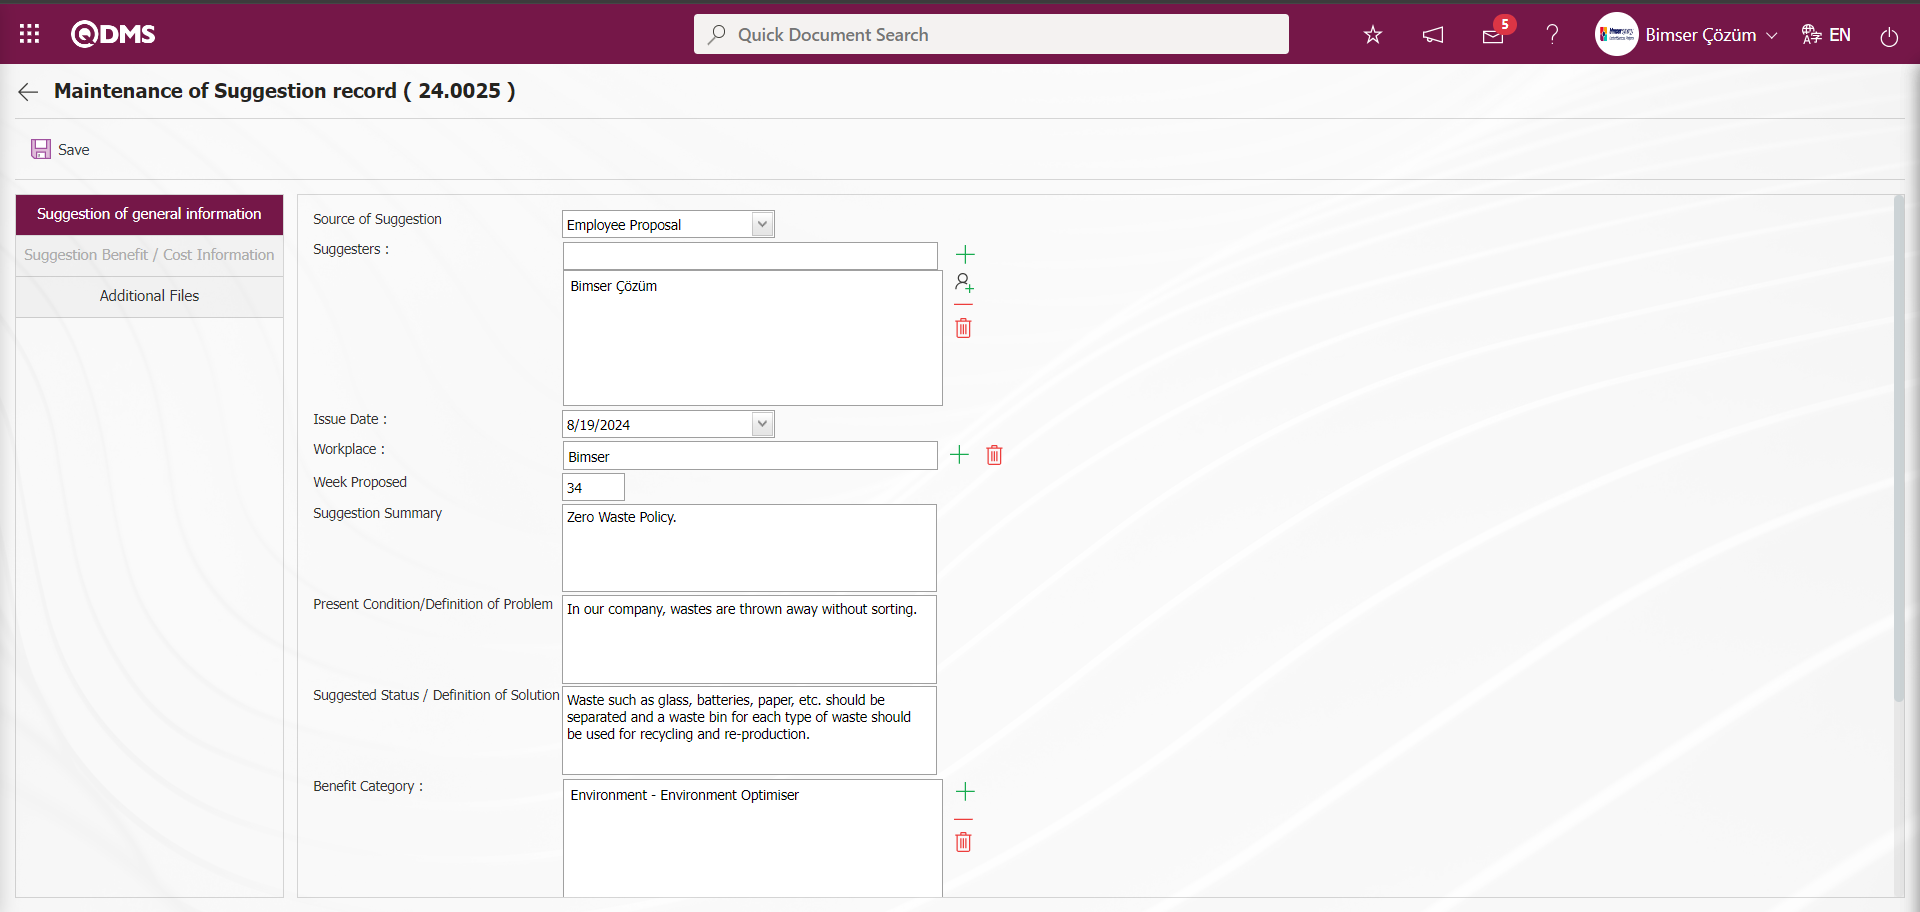
Maintenance of Suggestion record screen displays 3 tabs: Suggestion of general information, Suggestion Benefit / Cost Information and Additional Files tab.
Suggestion of general information:This tab contains general information about the suggestion. During the suggestion Record Maintenance phase, changes and updates can be made on the desired fields in this tab. For example By clicking the  (Add) button in the Suggesters field, you can add people to the list of personnel defined in the system.
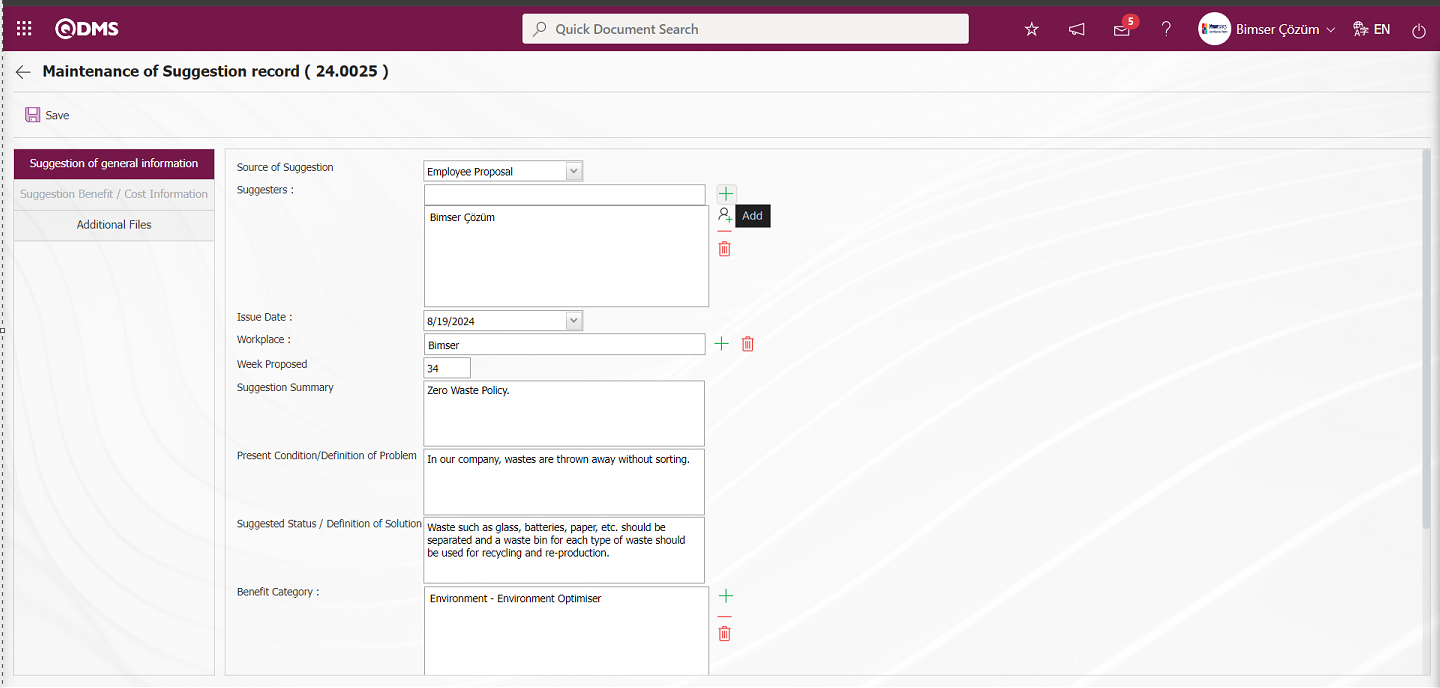
Select the personnel from the Personnel list and click the  button to add them.
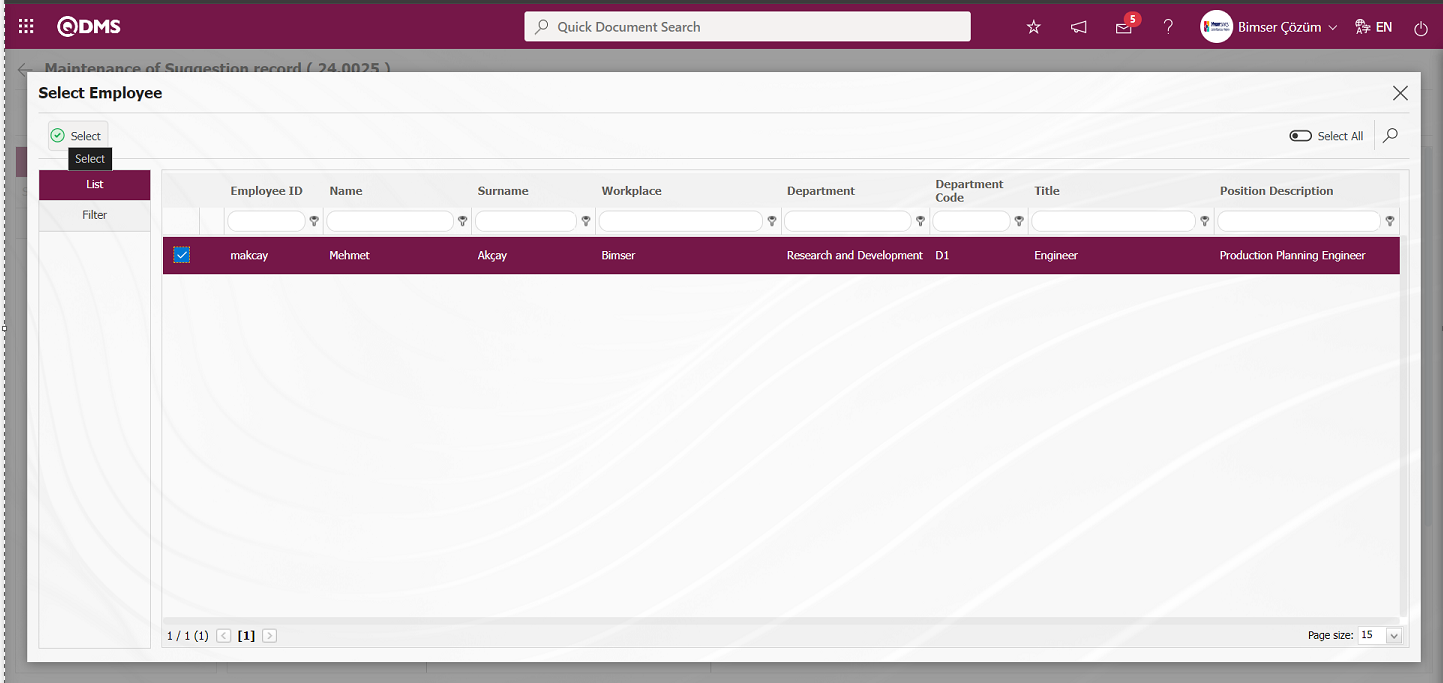
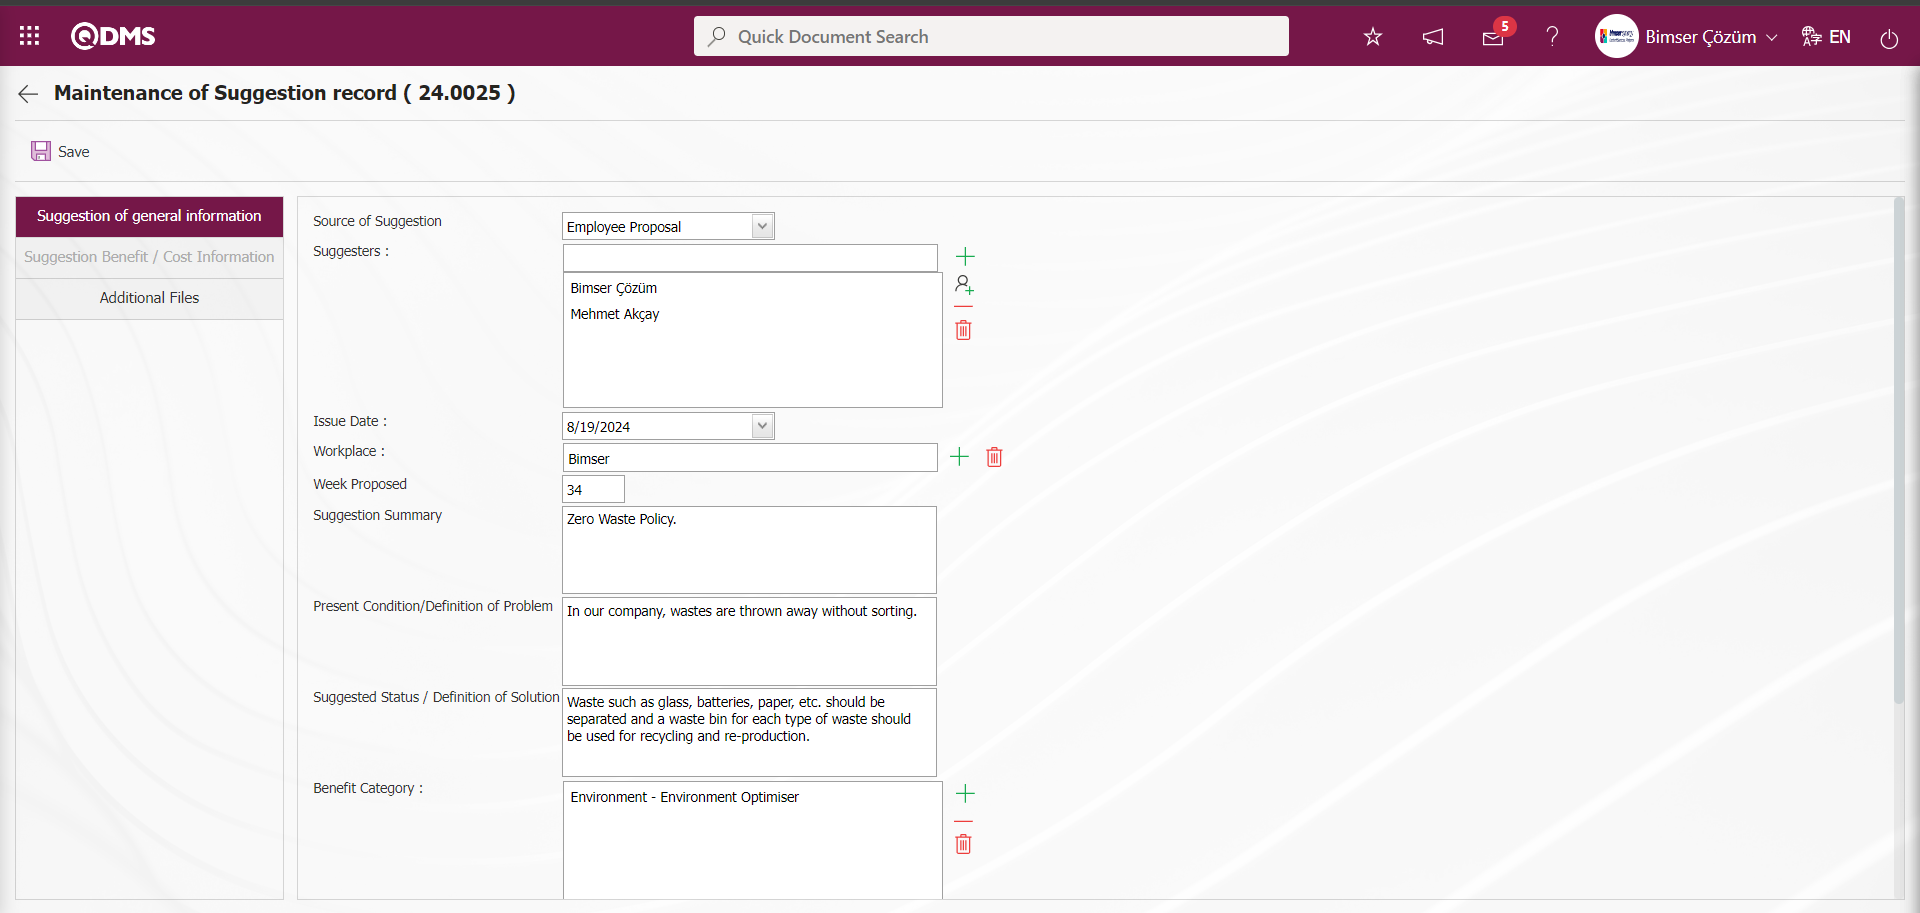
Suggestion Benefit / Cost Information tab:This tab is inactive since there is no data related to the Suggestion Benefit /Cost Information tab since the suggestion status is at the draft stage.
Additional Files Tab:This is the tab where you can upload additional files related to the suggestion from the Record Maintenance phase, view the uploaded file, replace the uploaded file with another file upload and delete the file uploaded by mistake.
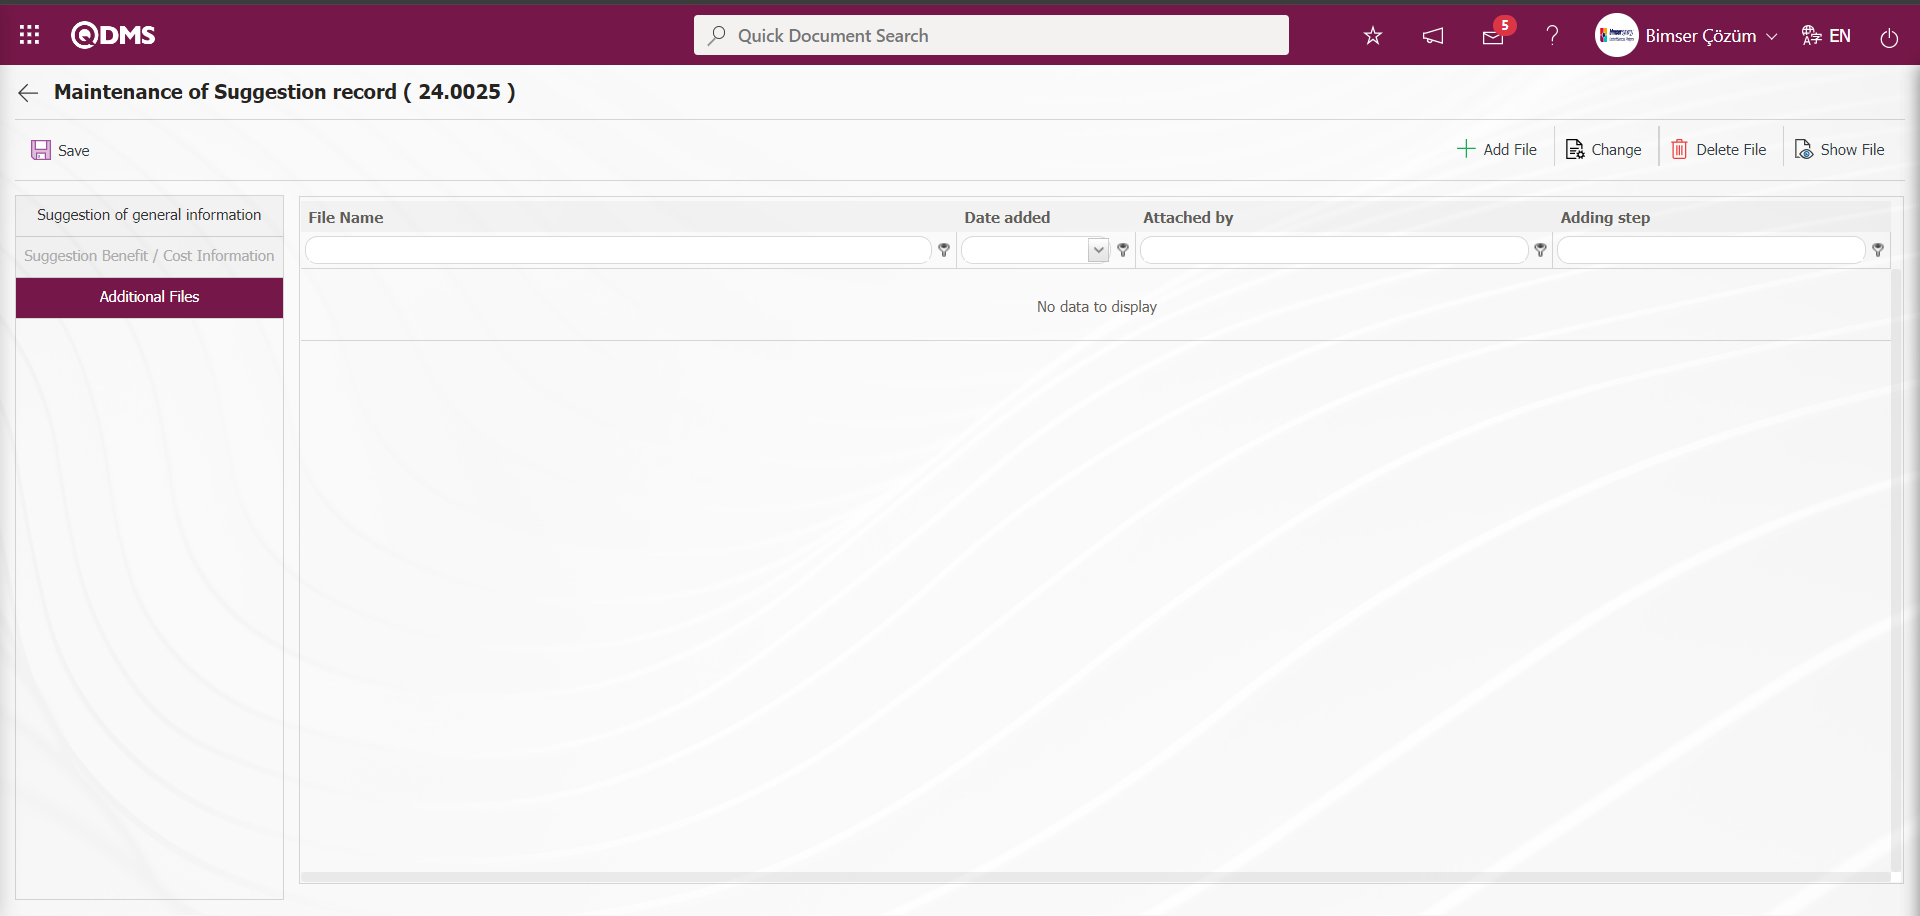
With the help of the buttons on the screen;
 : Additional File upload process is done.
 : The uploaded file is replaced by uploading another file.
 : Delete the file selected in the list.
 : The selected file in the list is displayed.
Click on Suggestion of general information tab.
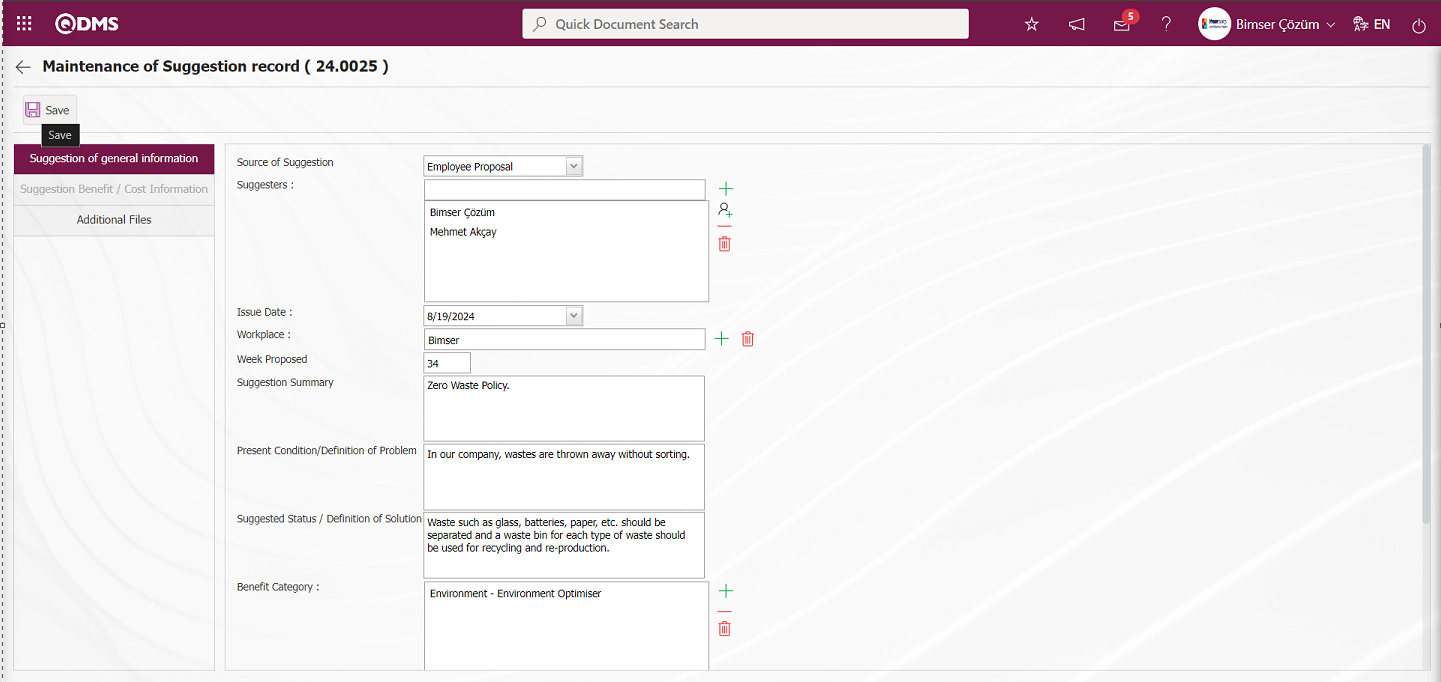
On the Maintenance of Suggestion record screen, the information related to the fields in the tabs of the suggestion is edited and updated. After the necessary fields are edited and updated on the relevant information, the suggestion record maintenance registration process is saved by clicking the  button in the upper left corner of the screen.

5.4.2.2. Change State
Menu Name: System Infrastructure Definitions / Suggestion / Maintenance of Suggestion Registration / Change State
It is the menu where the status of any suggestion record is changed by the admin user. It is used to pull the suggestion to pre-evaluation and previous status. On the Status Change screen, we see two tabs, List and Search tabs. In the Search tab, data is entered into the fields with search criteria or data is selected and filtering is done. In the List tab, the Suggestion records are listed according to the filtering process performed in the Search tab.

With the help of the buttons on the screen,
 : Change the status of the selected suggestion in the list.
: Data can be exported to Excel.
: Records are filtered and searched.
: The search criteria on the menu screens are used to clean the data remaining in the filter fields in the grid where the search operation is performed.
: The menu screen is restored to its default settings.
: User-based designing is done on the menu screen with the show-hide feature, that is, the hiding feature of the fields corresponding to the columns on the menu screens.
In the Search tab, enter the suggestion code information in the Suggestion Number field and click the (Search) button in the upper right corner of the screen

After filtering according to the search criteria in the Search tab, the relevant records are listed in the list tab.
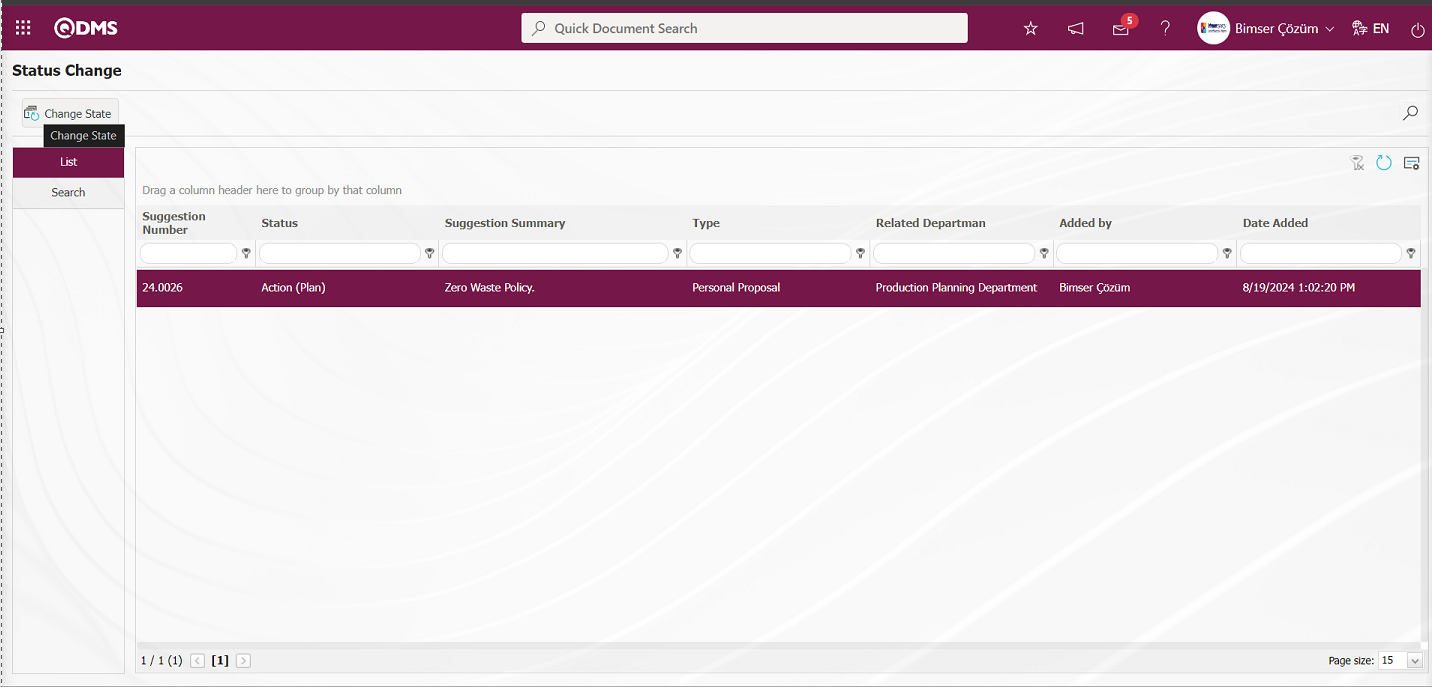
In the list tab, select the suggestion whose status is desired to be changed in the list and click on the button. Status Change screen opens.

With the help of the buttons on the screen;
 : The suggestion is brought to the pre-assessment stage.
 : The process of bringing the suggestion from the current stage to the previous stage is performed.( The suggestion is brought to its previous state.)
Status Change process: It is the process of bringing the suggestion from the current stage to the previous stage by writing the change note information in the status change pop-up that opens when the suggestion is at any stage.
Click the button to bring the recommendation to the previous status from the status change screen.
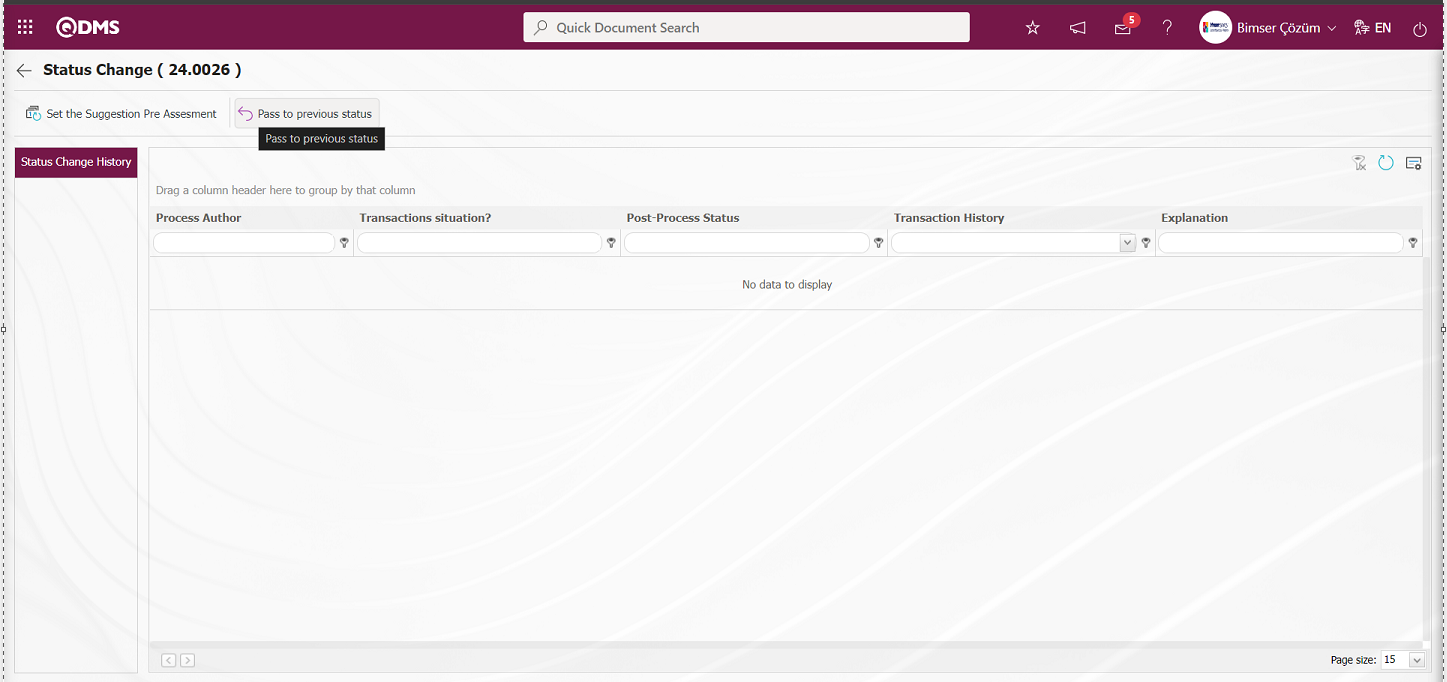
In the Status Change pop-up, the change note information related to the status change operation is written and the  button is clicked.
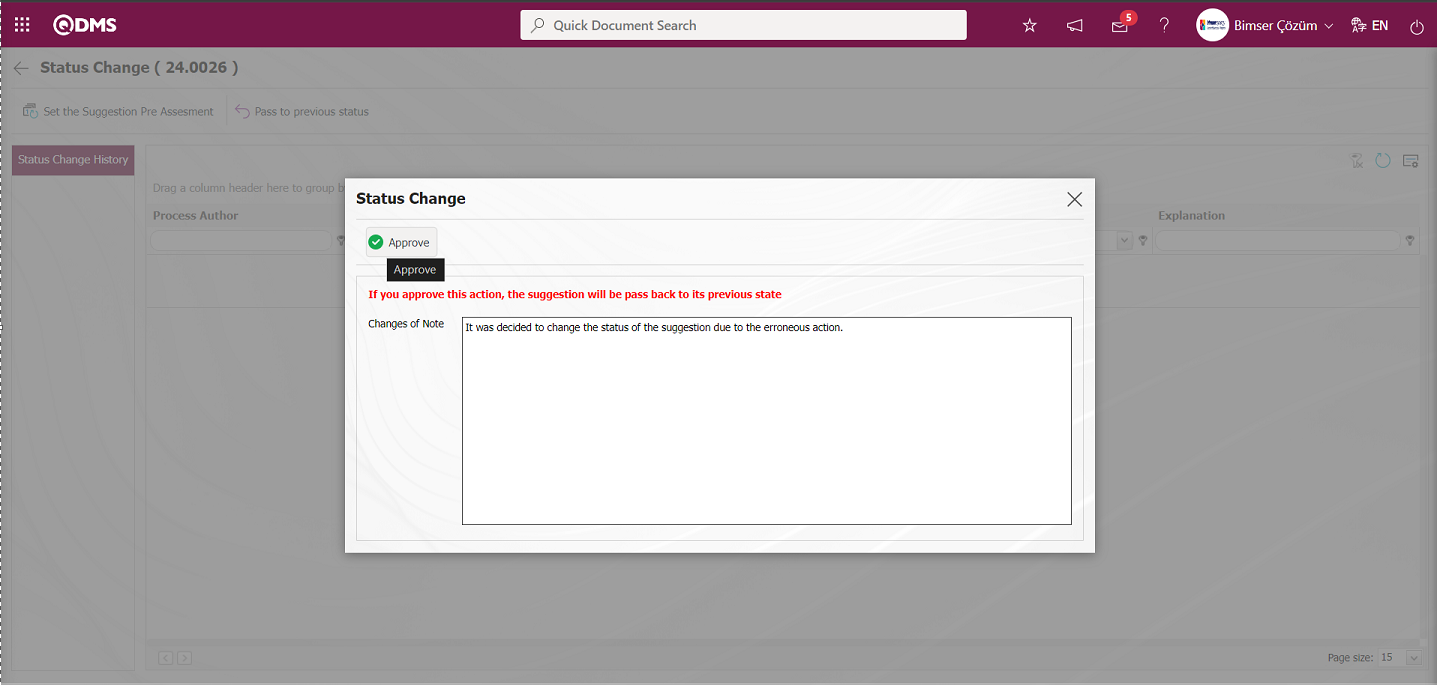
The system will give a message about the change of the suggestion to the previous status, indicating that the status change operation has taken place.
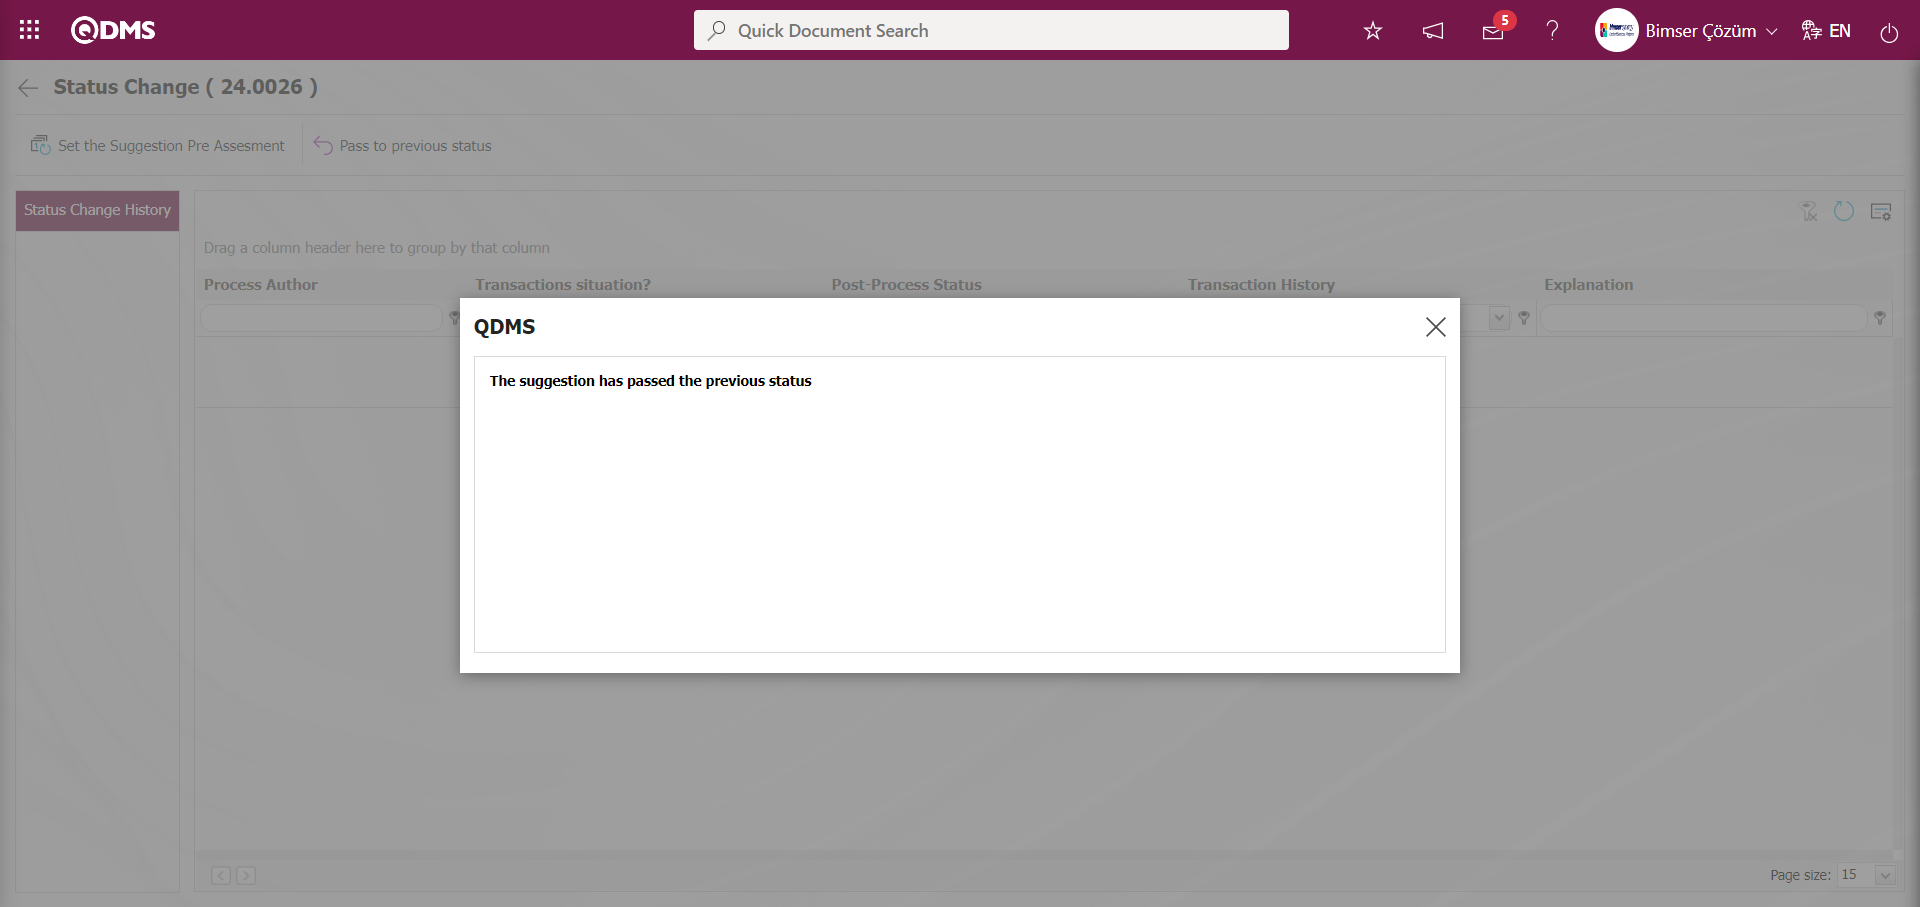
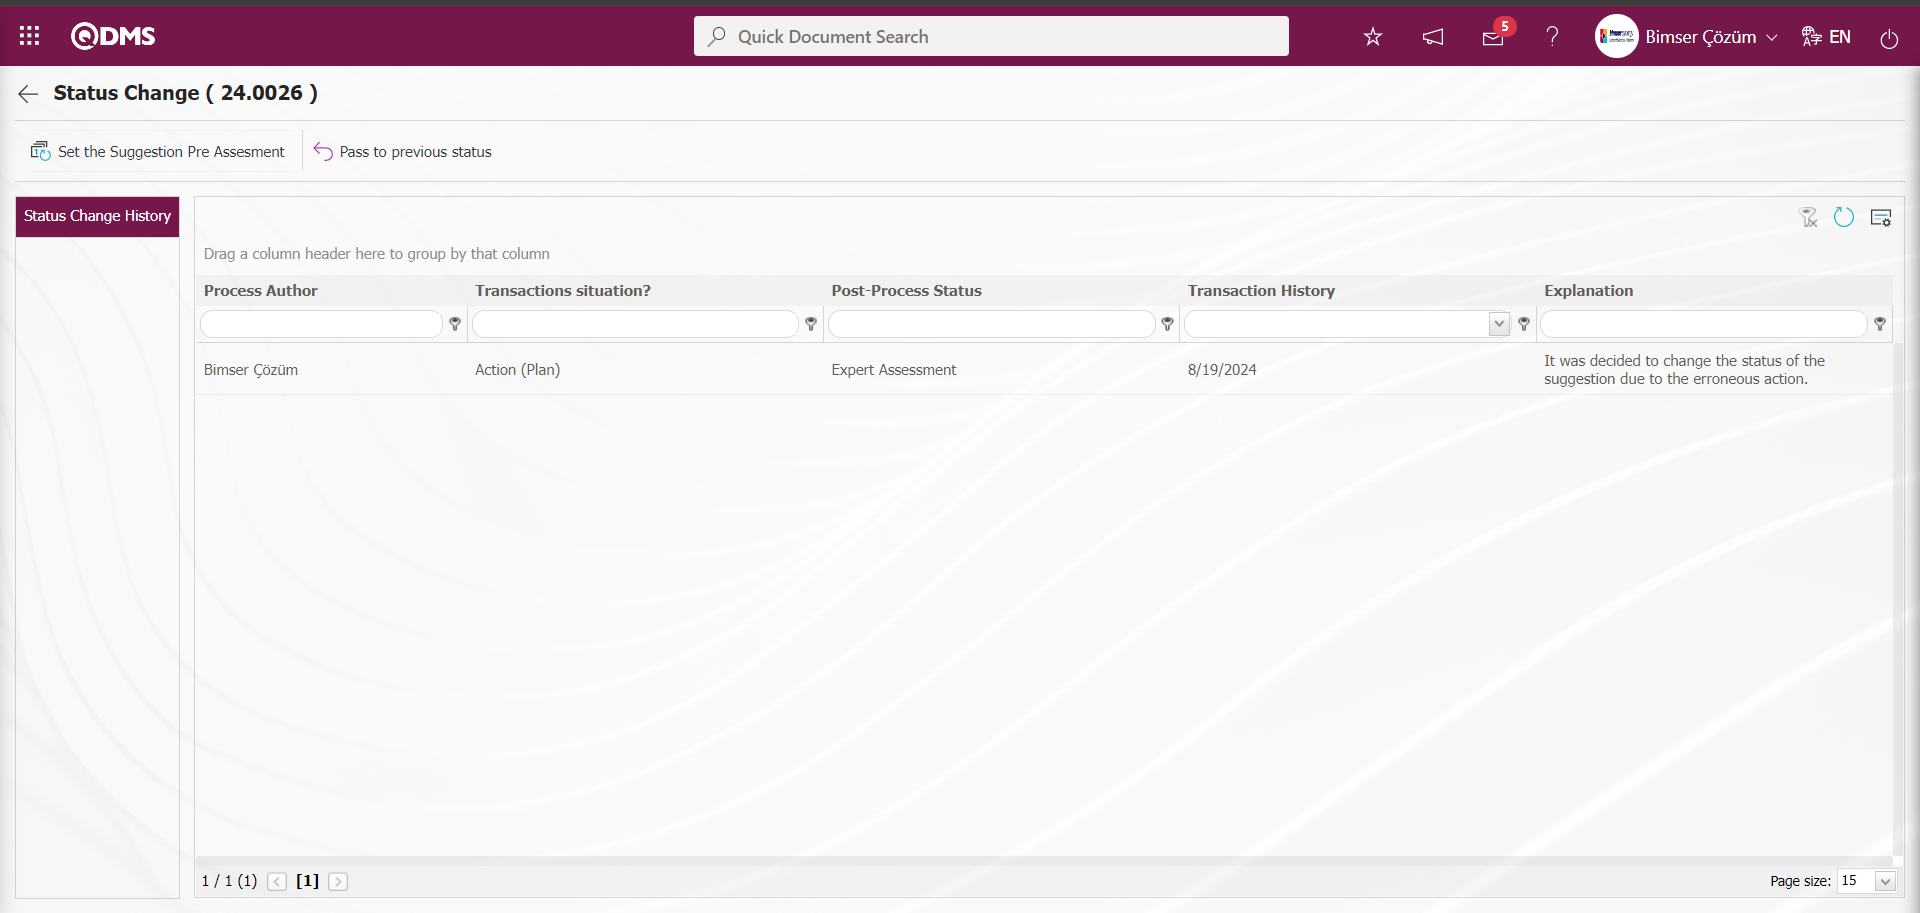
Pre-assessment Process: It is the process of bringing the suggestion to the pre-evaluation process by writing the change note information in the status change pop-up that opens when the suggestion is at any stage. When the suggestion is brought to the Pre-assessment status and after the pre-assessment stage of the suggestion in the system, if there is information about the records related to this stage, the relevant records are deleted after this process: When the suggestion in the Earnings / Cost stage is brought to the preliminary evaluation stage, only the information related to the preliminary evaluation stage is kept in the system and the records related to the information at the other stage are deleted.
From the status change screen, click the  button to bring the suggestion to the Preliminary Evaluation stage.
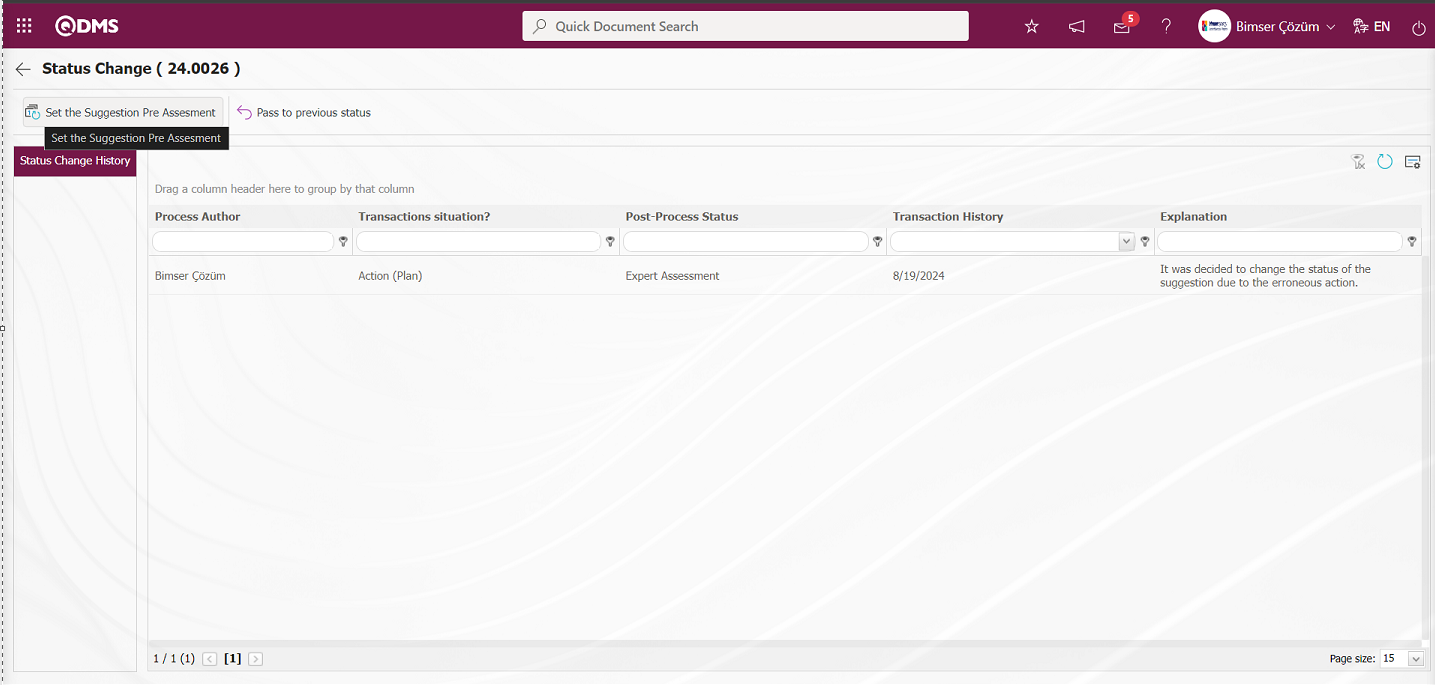
In the Status Change pop-up, the change note information related to the status change operation is written and the  button is clicked.
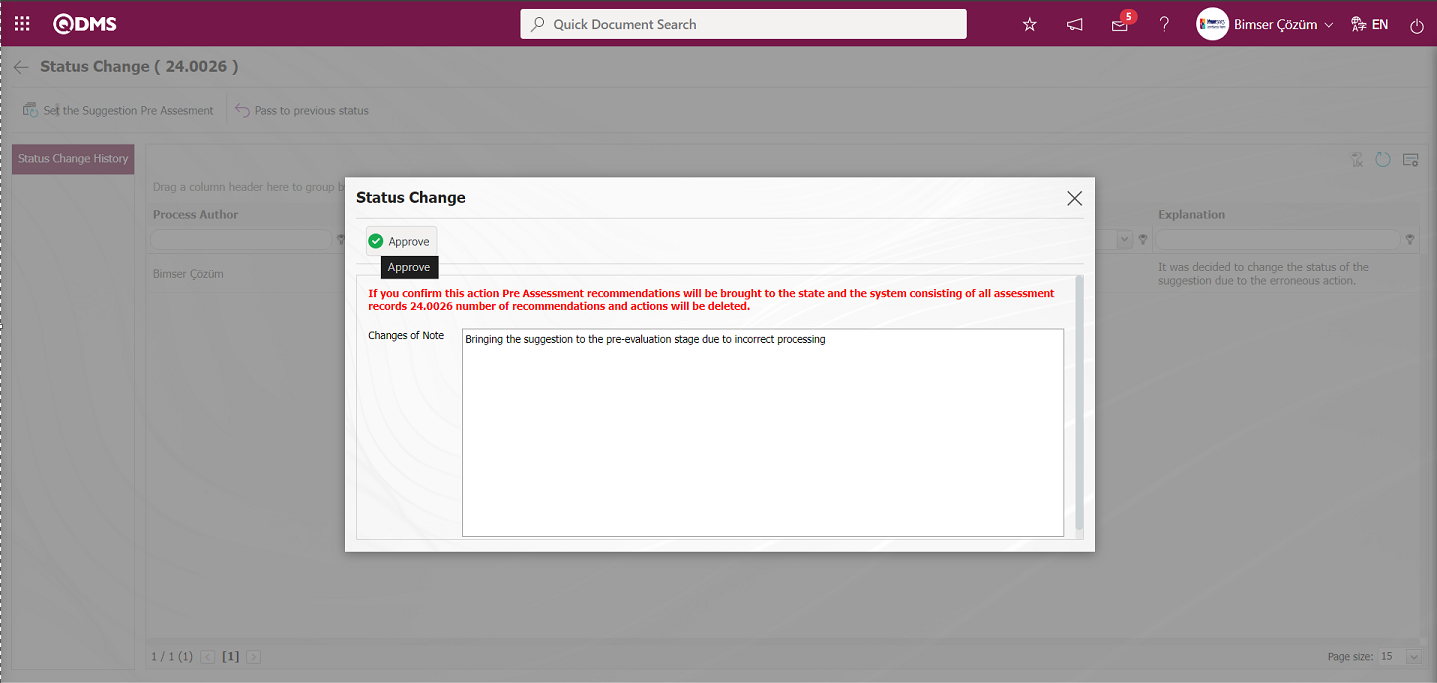
The system informs the user who will carry out the pre-assessment phase of the suggestion that has been pre-assessed by the system.
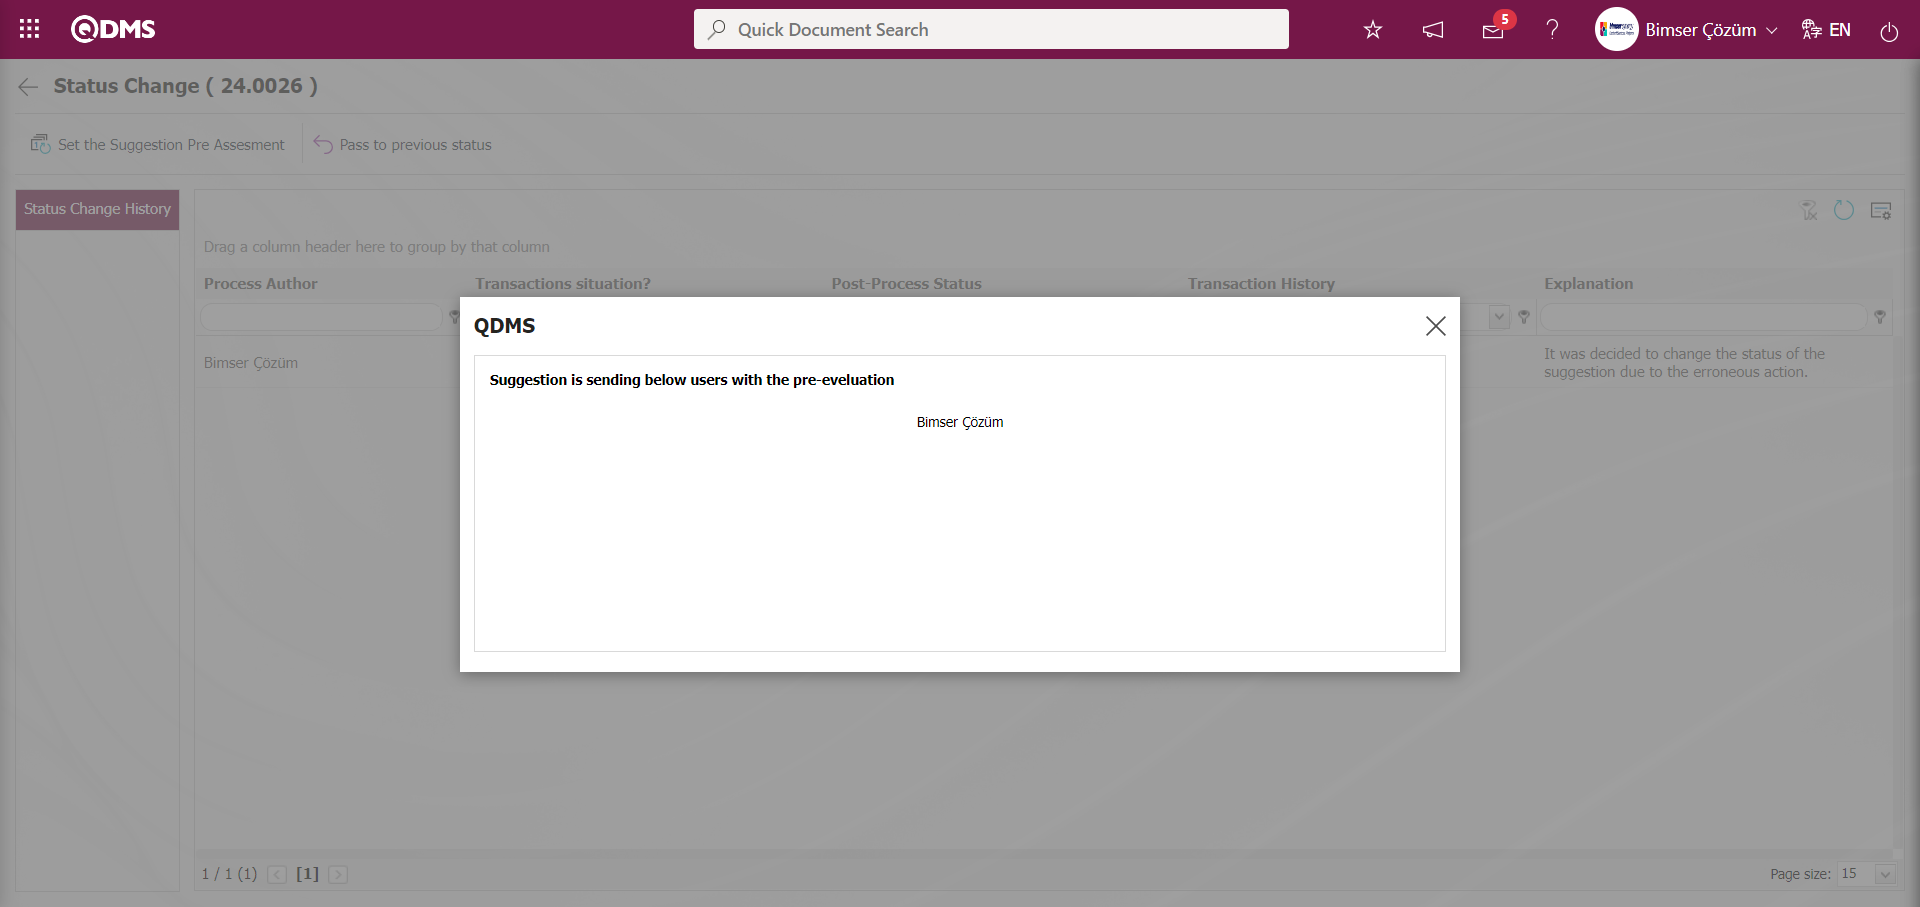
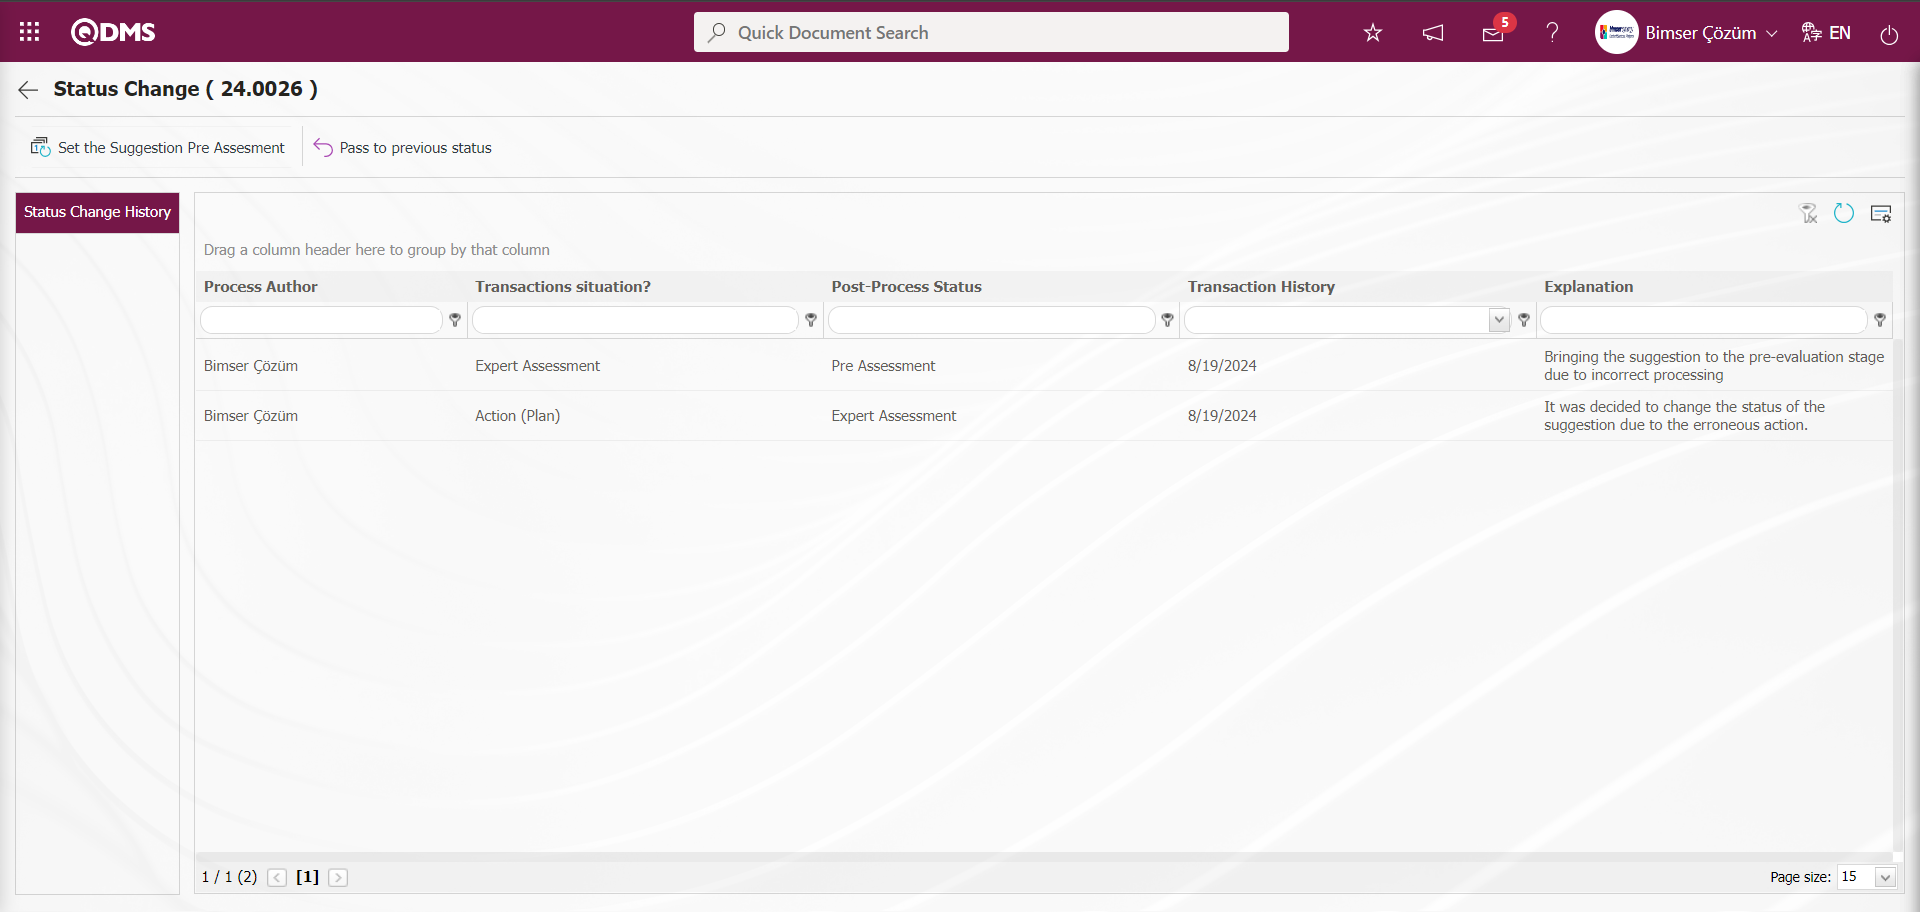
5.4.3. Suggestion Deleter
Menu Name: System Infrastructure Definitions/ Suggestion/ Suggestion Deleter
It is the menu where single or multiple deletion of suggestions is performed by the admin user. Deleted suggestions are removed from the database. On the Suggestion Deleter screen, we see two tabs, List and Search tab. In the Search tab, data is entered into the fields with search criteria or data is selected and filtered. In the List tab, Suggestion records are listed according to the filtering process performed in the Search tab.

With the help of the buttons on the screen;
 : Delete the selected suggestion in the list.
: Data can be exported to Excel.
: Records are filtered and searched.
: The search criteria on the menu screens are used to clean the data remaining in the filter fields in the grid where the search operation is performed.
: The menu screen is restored to its default settings.
: User-based designing is done on the menu screen with the show-hide feature, that is, the hiding feature of the fields corresponding to the columns on the menu screens.
In the Search tab, enter the suggestion code information in the Suggestion Number field and click the (Search) button in the upper right corner of the screen
 After filtering according to the search criteria in the Search tab, the relevant records are listed in the list tab.

In the list tab, select the suggestion to be deleted in the list and click on the button.
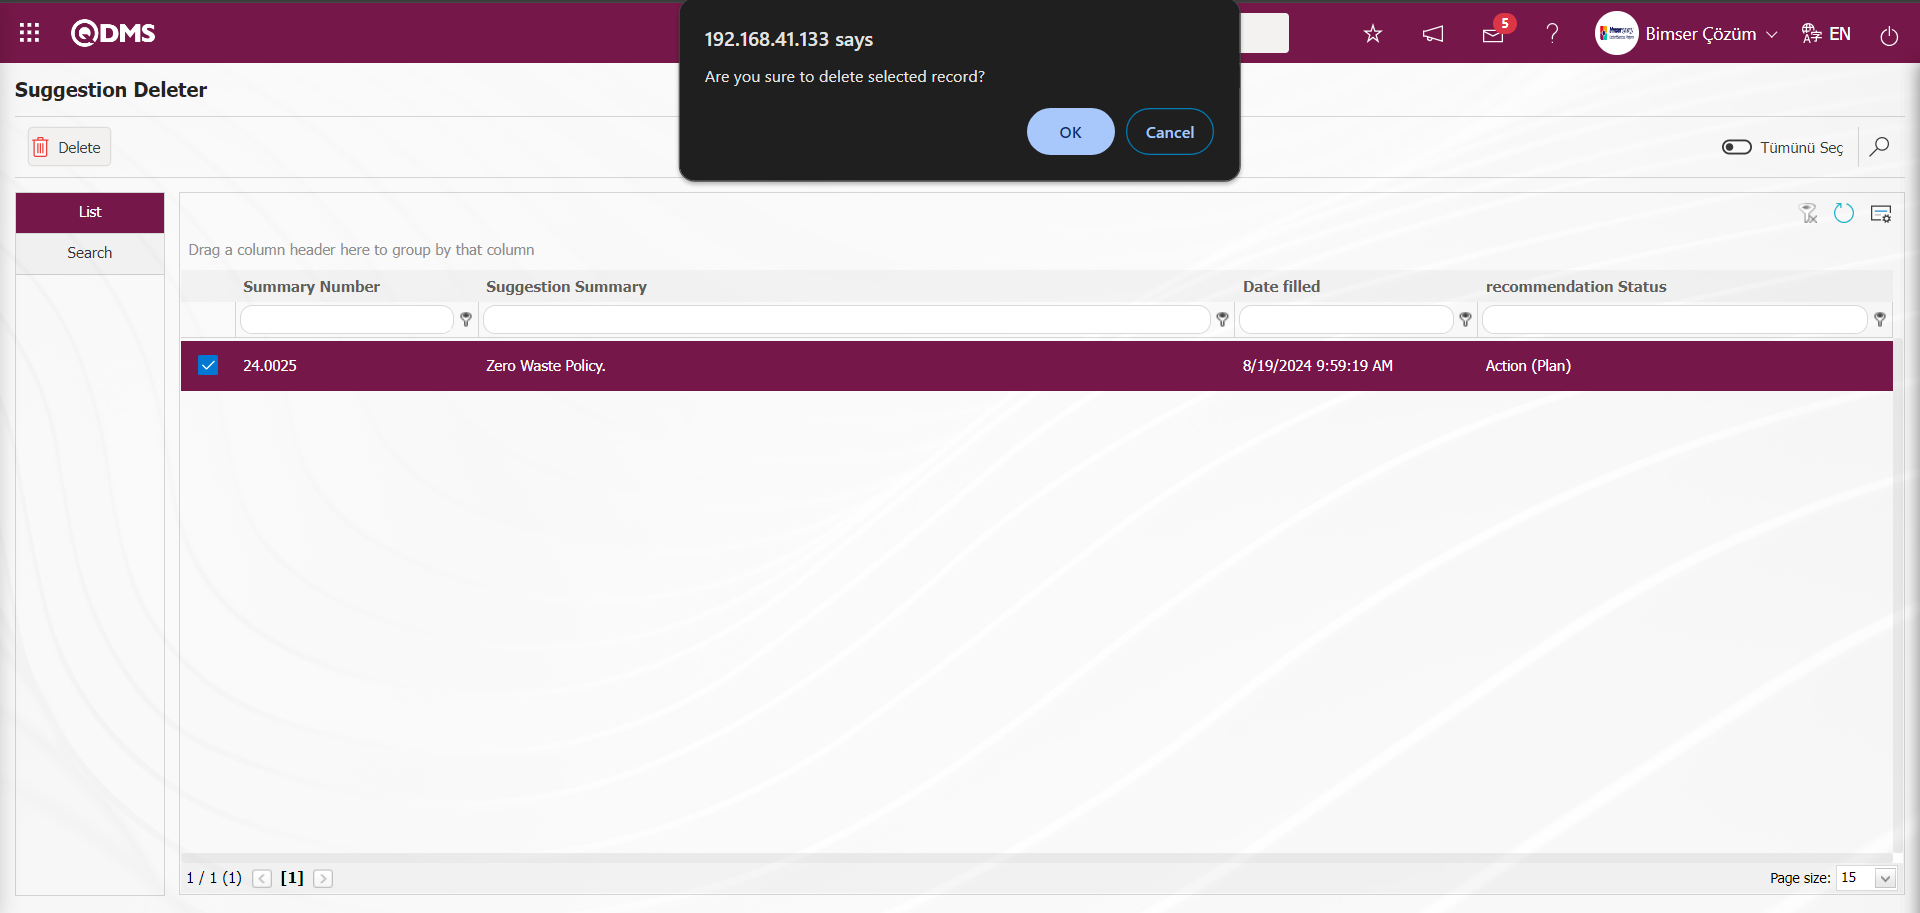
Click the “OK” button in the “Are you sure to delete selected record?” message given by the system. 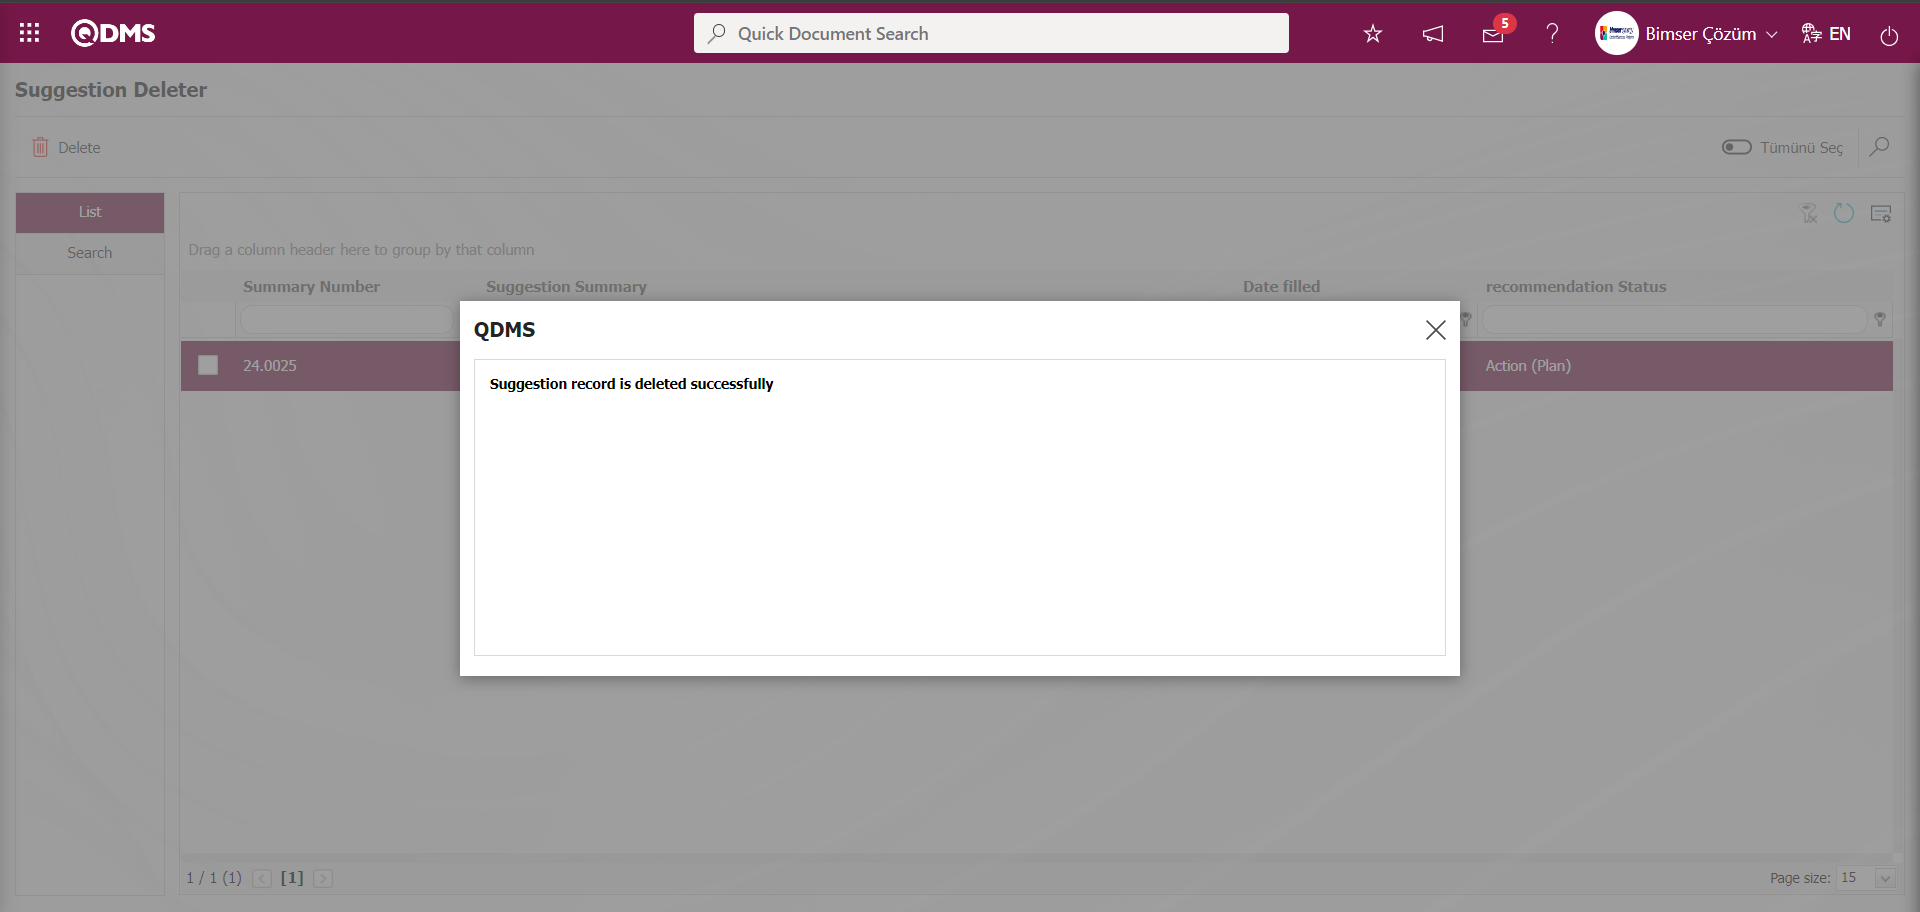
5.5.Dashboard/ Suggestion System
Menu Name: Dashboard/ Suggestion System / Suggestion Dashboard
It is the part of the Qdms system that allows users to view transactions, metrics, graphs and reports on a single screen. Dashboard is defined as a display of indicators, a business dashboard and a table of indicators used to summarize the flow and/or content of information and to explain a particular situation through graphs and tables. Its purpose is to present the necessary information in the shortest time, with the least interaction and thinking requirements. It is the screen that people in managerial positions often use. In the Qdms system, the Dashboard feature has been introduced within the scope of the Suggestion System Module. This screen appears depending on the authorization to see the menu.
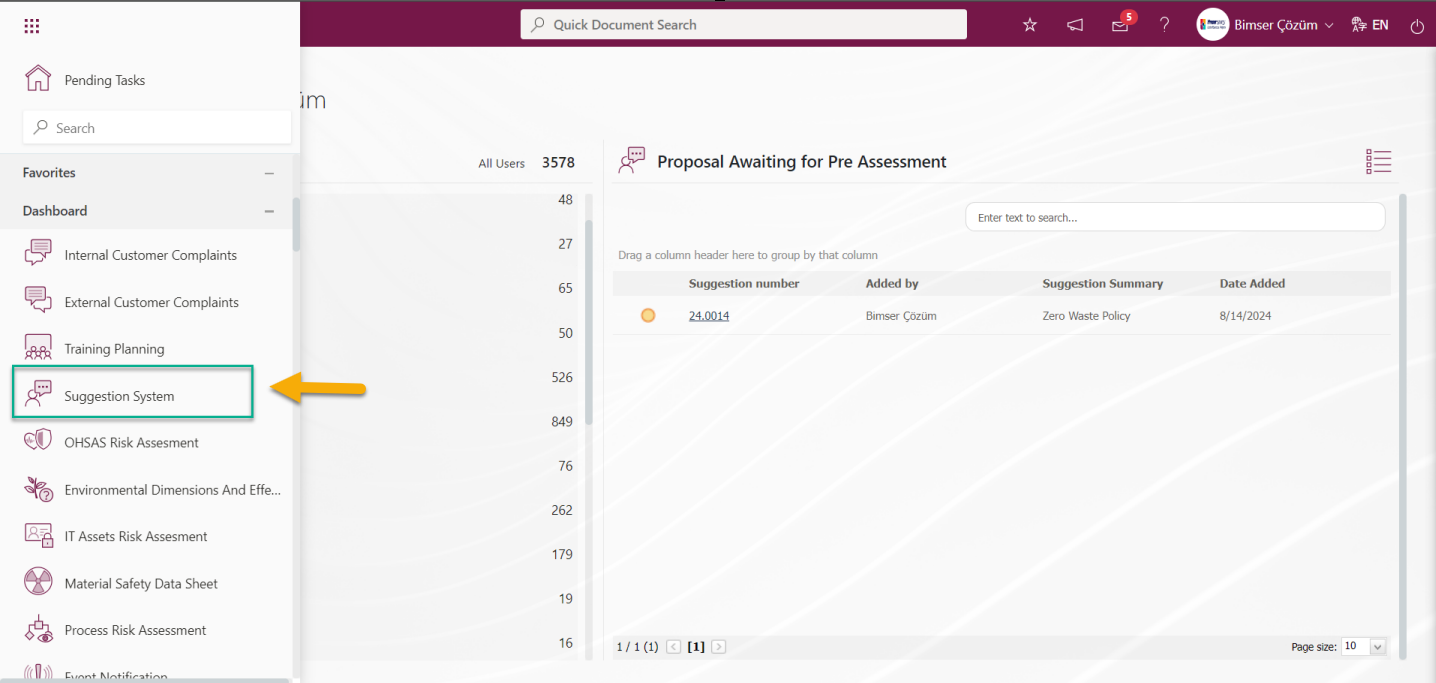
When the Dashboard menu is clicked, two tabs, list and filter tab, appear.
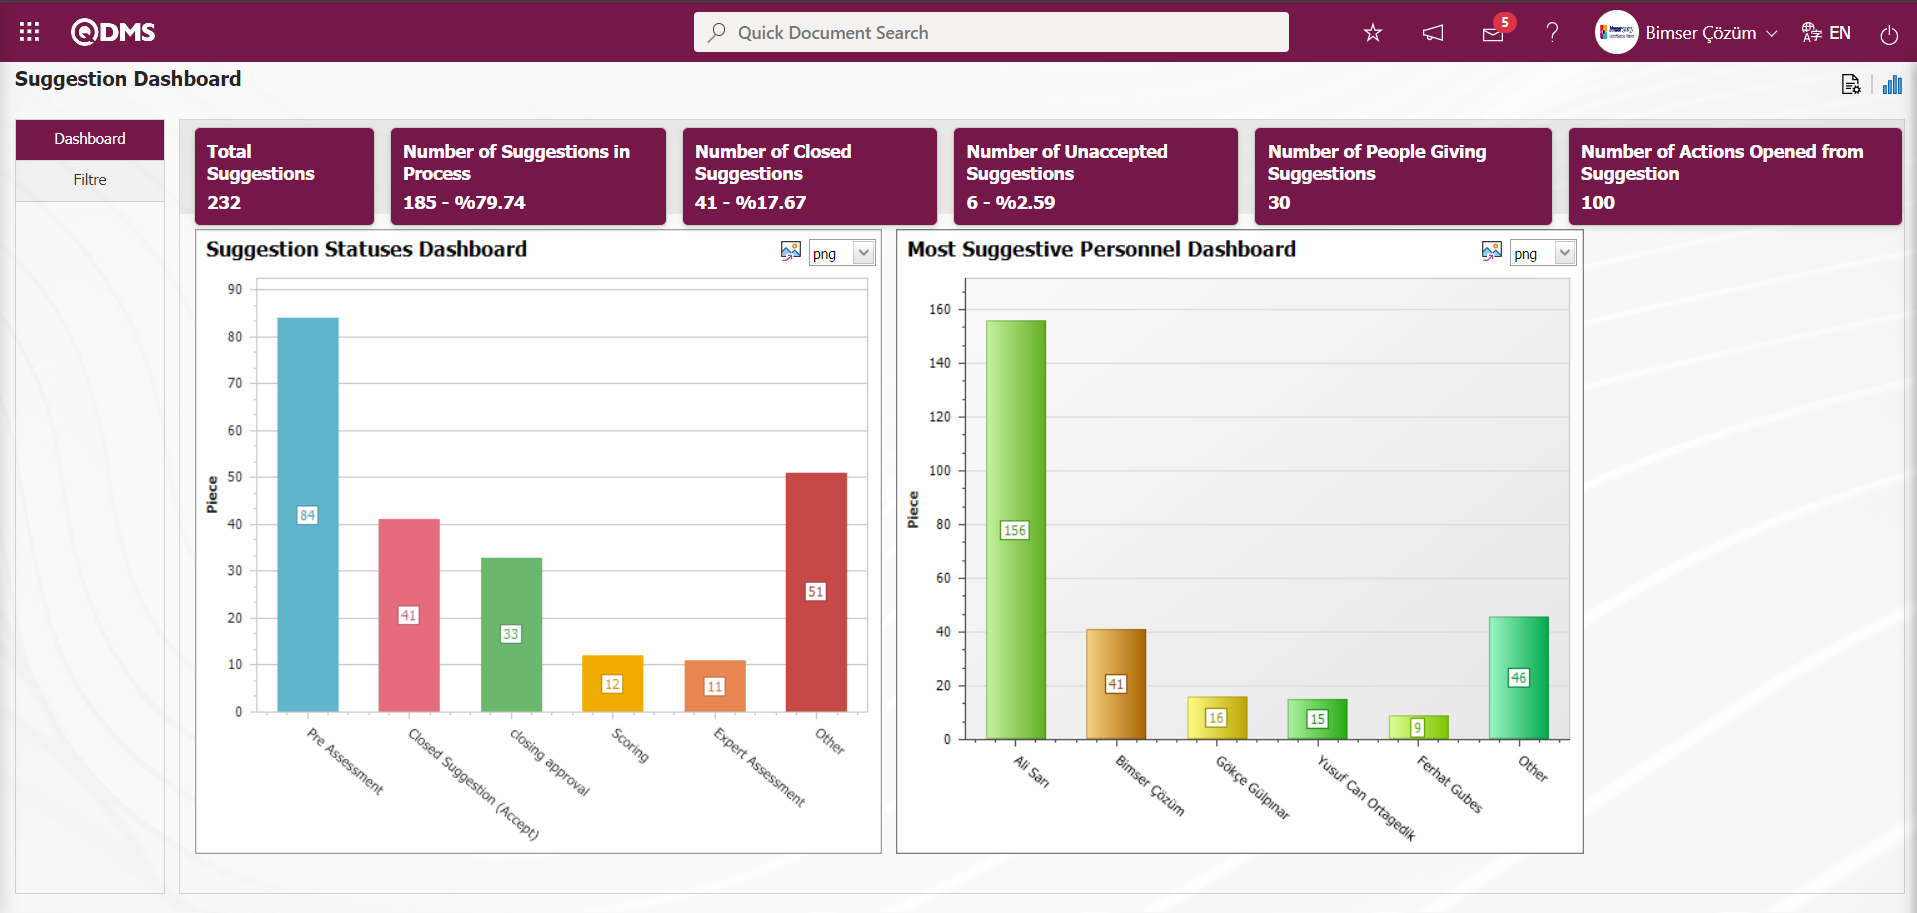
In the Filter tab, filtering is done according to the fields in the search criteria.
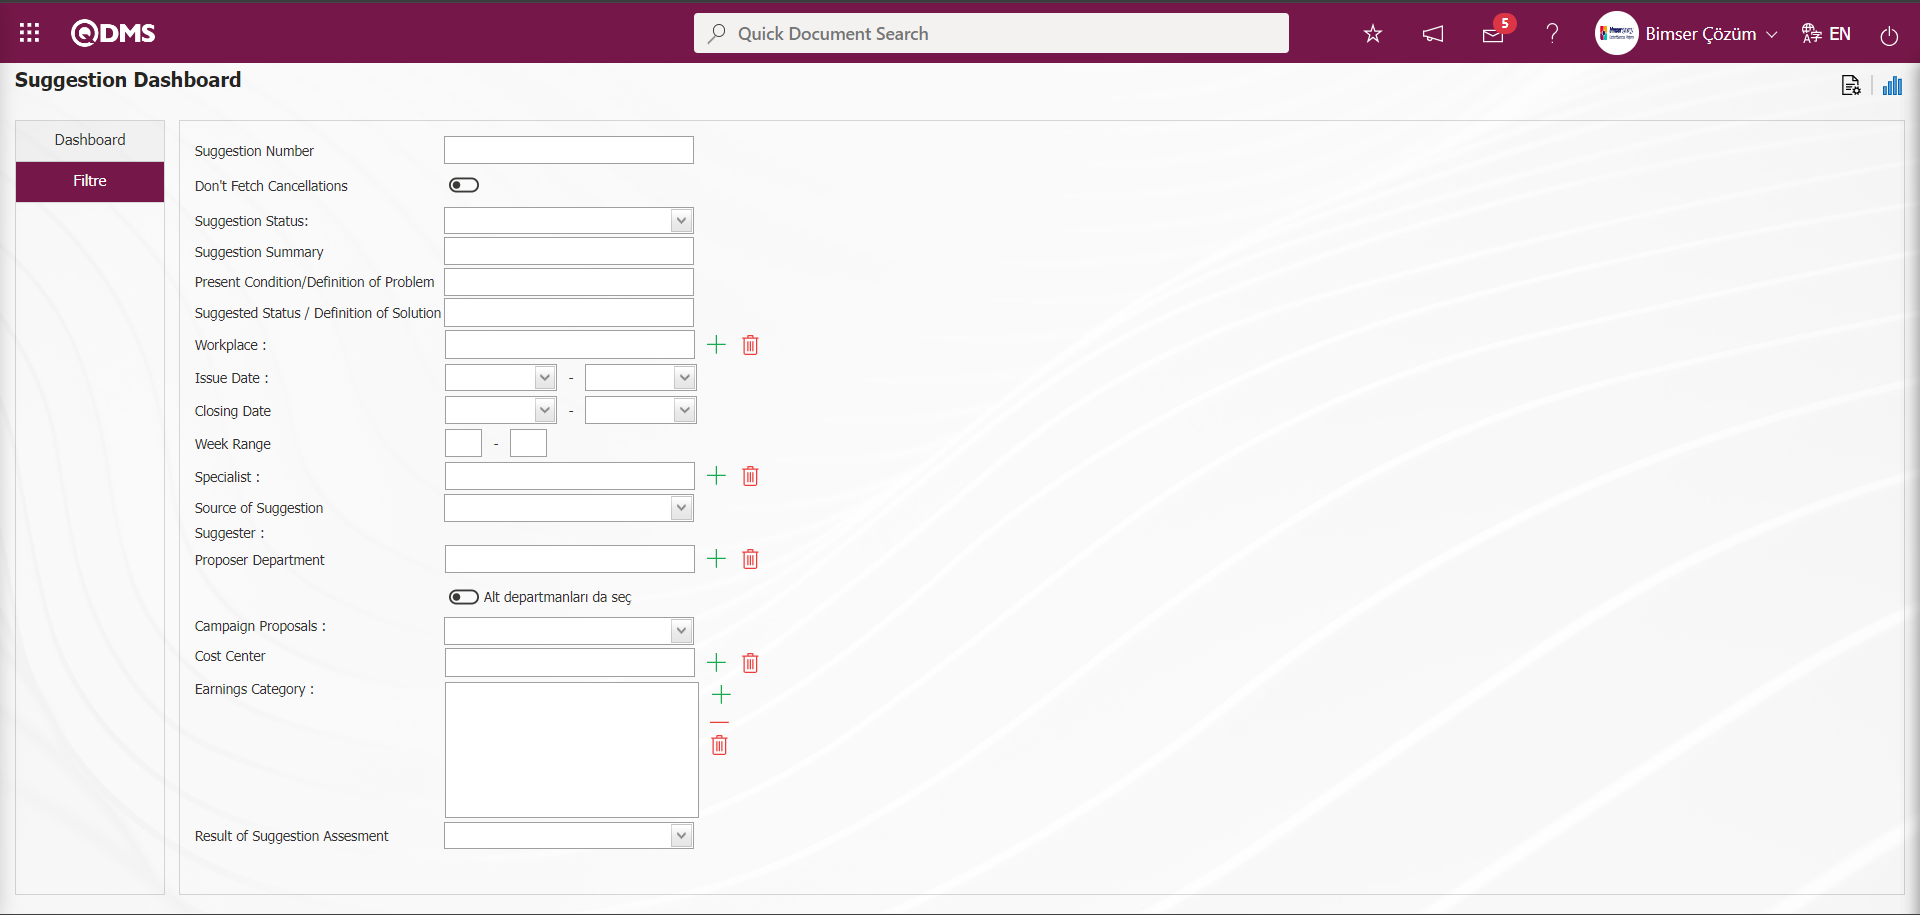
In the Suggestion System module, in the Suggestion Dashboard screen, in the List tab, fields such as Total Suggestions, Number of Suggestions in Process, Number of Closed Suggestions, Number of Unaccepted Suggestions, Number of People Giving Suggestions and Number of Actions Opened from Suggestion are displayed as fixed fields and no editing is done on them.
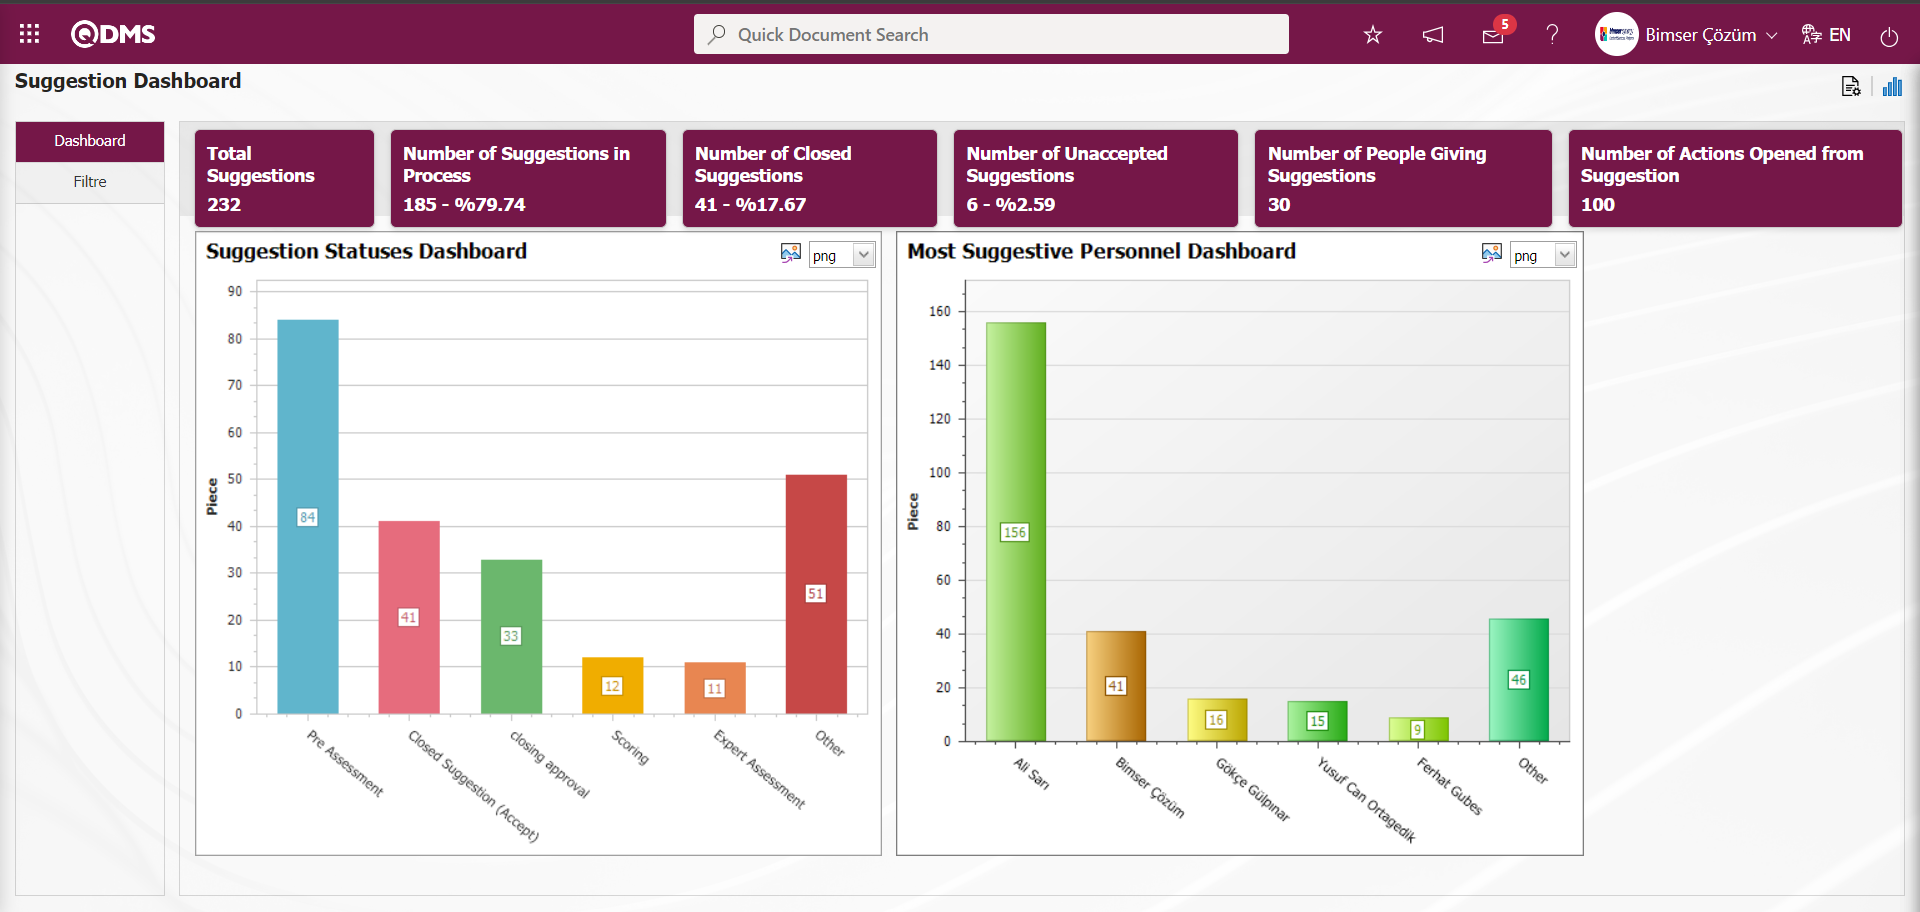
On the Suggestion Dashboard screen, the graphic design process is done with settings such as how many graphics there will be, what the name of the graphic will be, what the order of the graphics will be, which areas will be on the Z axis, Y axis, graphic length, graphic width and graphic type. In order to make these adjustments on the Suggestion Dashboard screen, the user must be defined as a Module Administrator in the Suggestion System Module. (Module administrator identification is made in the Suggestion System Module in the System Infrastructure Definitions/BSID/Configuration Settings/Administrator Identification menu).
When the user is not a Module Manager in the Suggestion System Module, the button in the screenshot below is displayed on the Suggestion Dashboard screen.
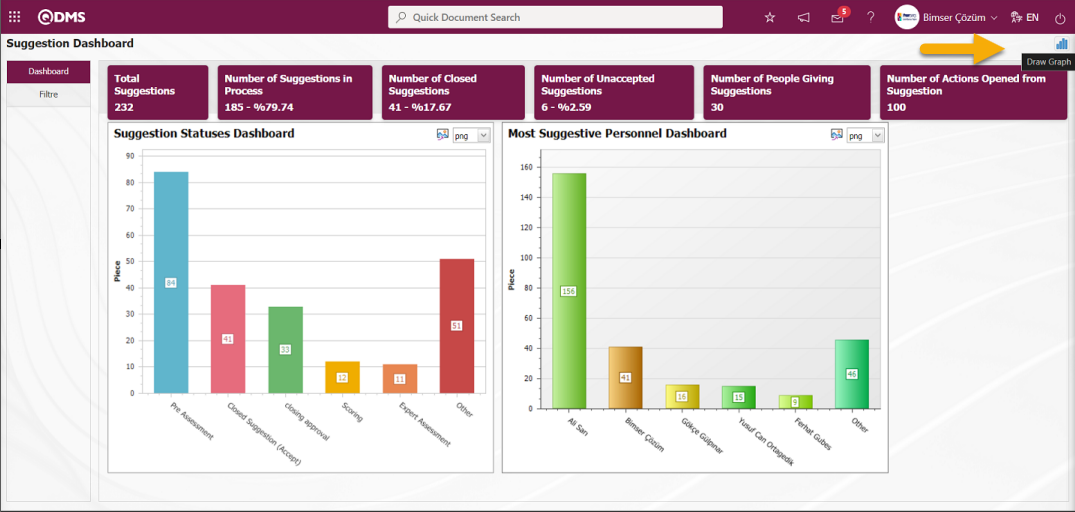
In the Suggestion System Module, the first button  (Graphic Settings) is displayed on the Suggestion Dashboard screen of the user who is defined as the module Administrator. The user who is the Module Manager makes the necessary adjustments on the Suggestion Dashboard screen with the help of the (Graphic Settings) button. Users who are not Module Managers can also make graphic design by making the necessary adjustments in the Dashboard Configuration screen in the System Infrastructure Definitions / BSID / Configuration Settings / Dashboard Configuration / Suggestion System menu.
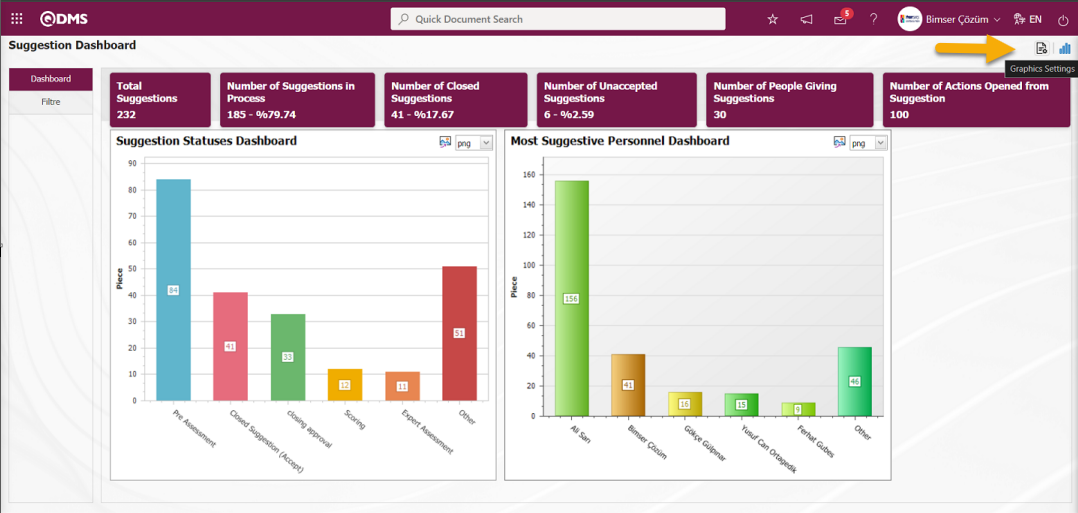
Click on the (Graphic Settings) button to design a graphic in the Suggestion System Module, update and delete the selected graphic information in the list.
The Dashboard Configuration screen opens.
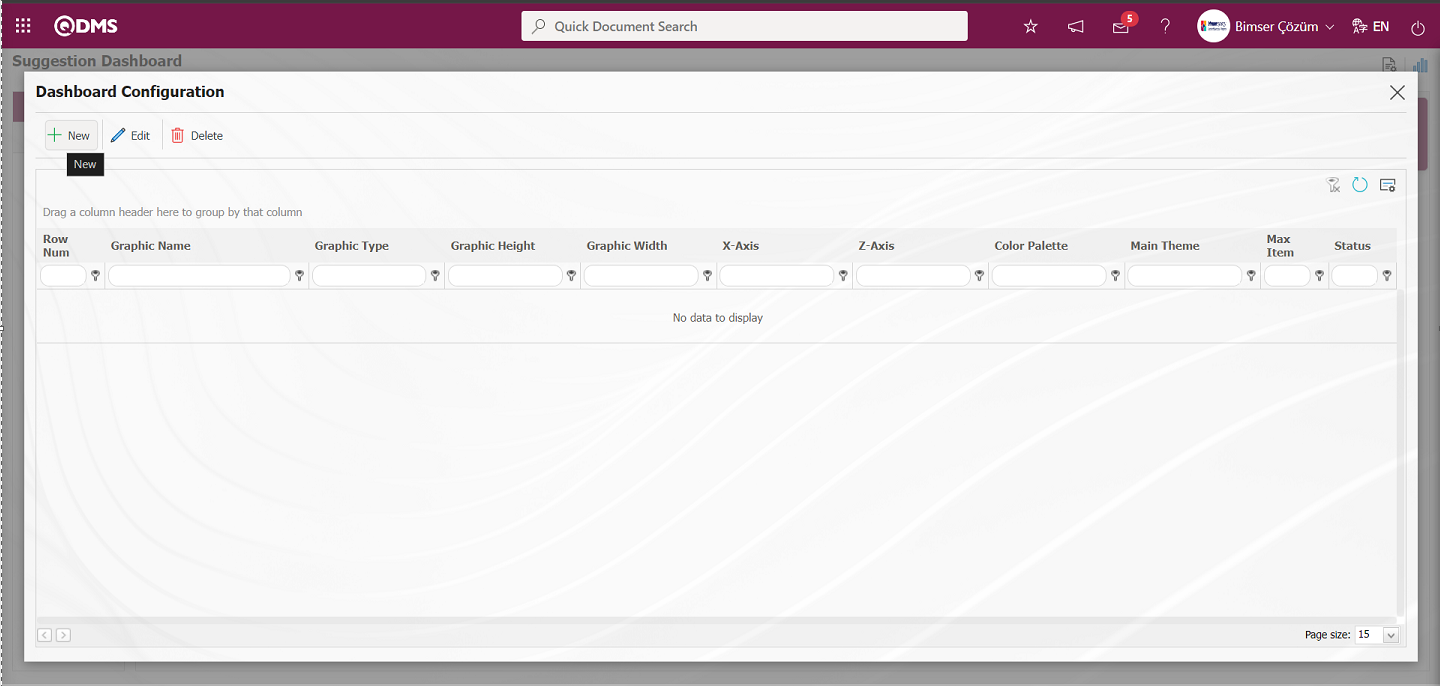
With the help of the buttons on the screen;
 : A new Dashboard is defined.
 : Correction / change / update is made on the Dashboard information selected in the list.
 : The Dashboard information selected in the list is deleted.
-: Dashboard Configuration screen is closed.
Click the  button to add a new Dashboard in the Suggestion System Module
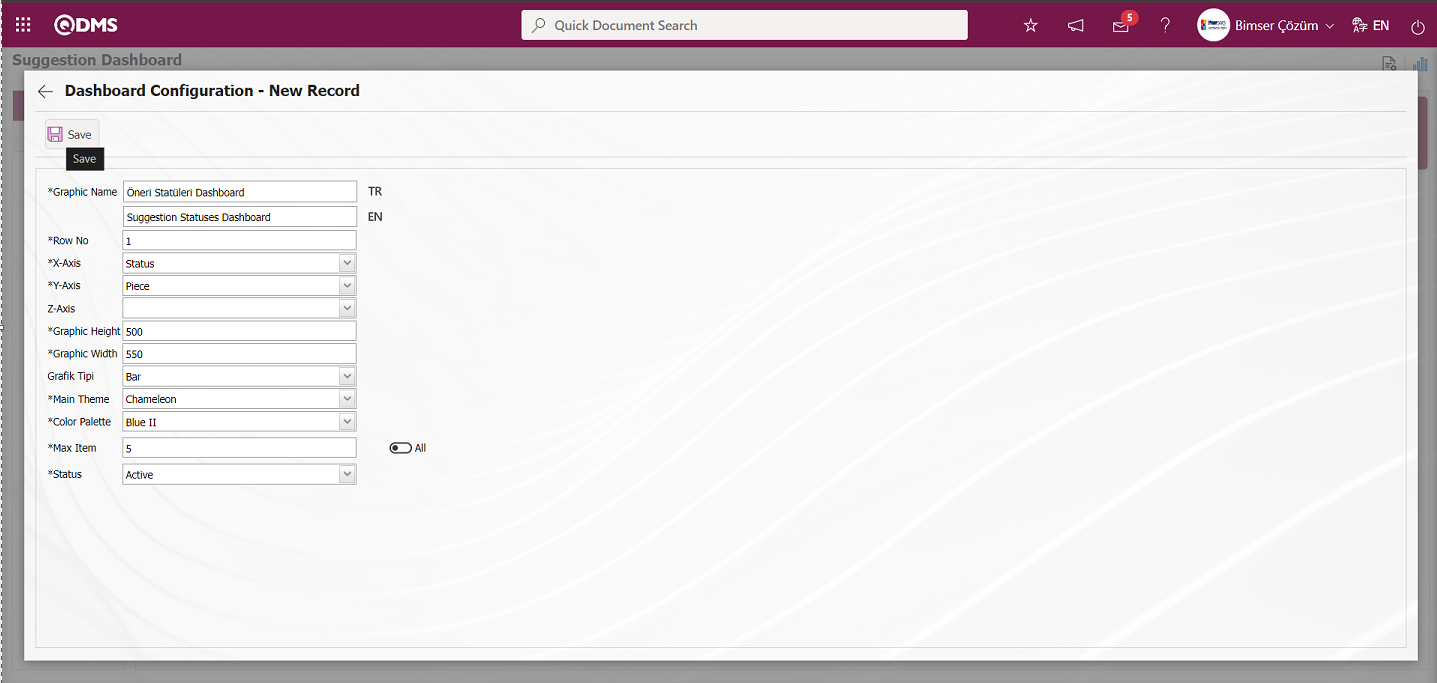
After filling in the required fields on the Dashboard Configuration - New Record screen, click the  button on the top left of the screen.
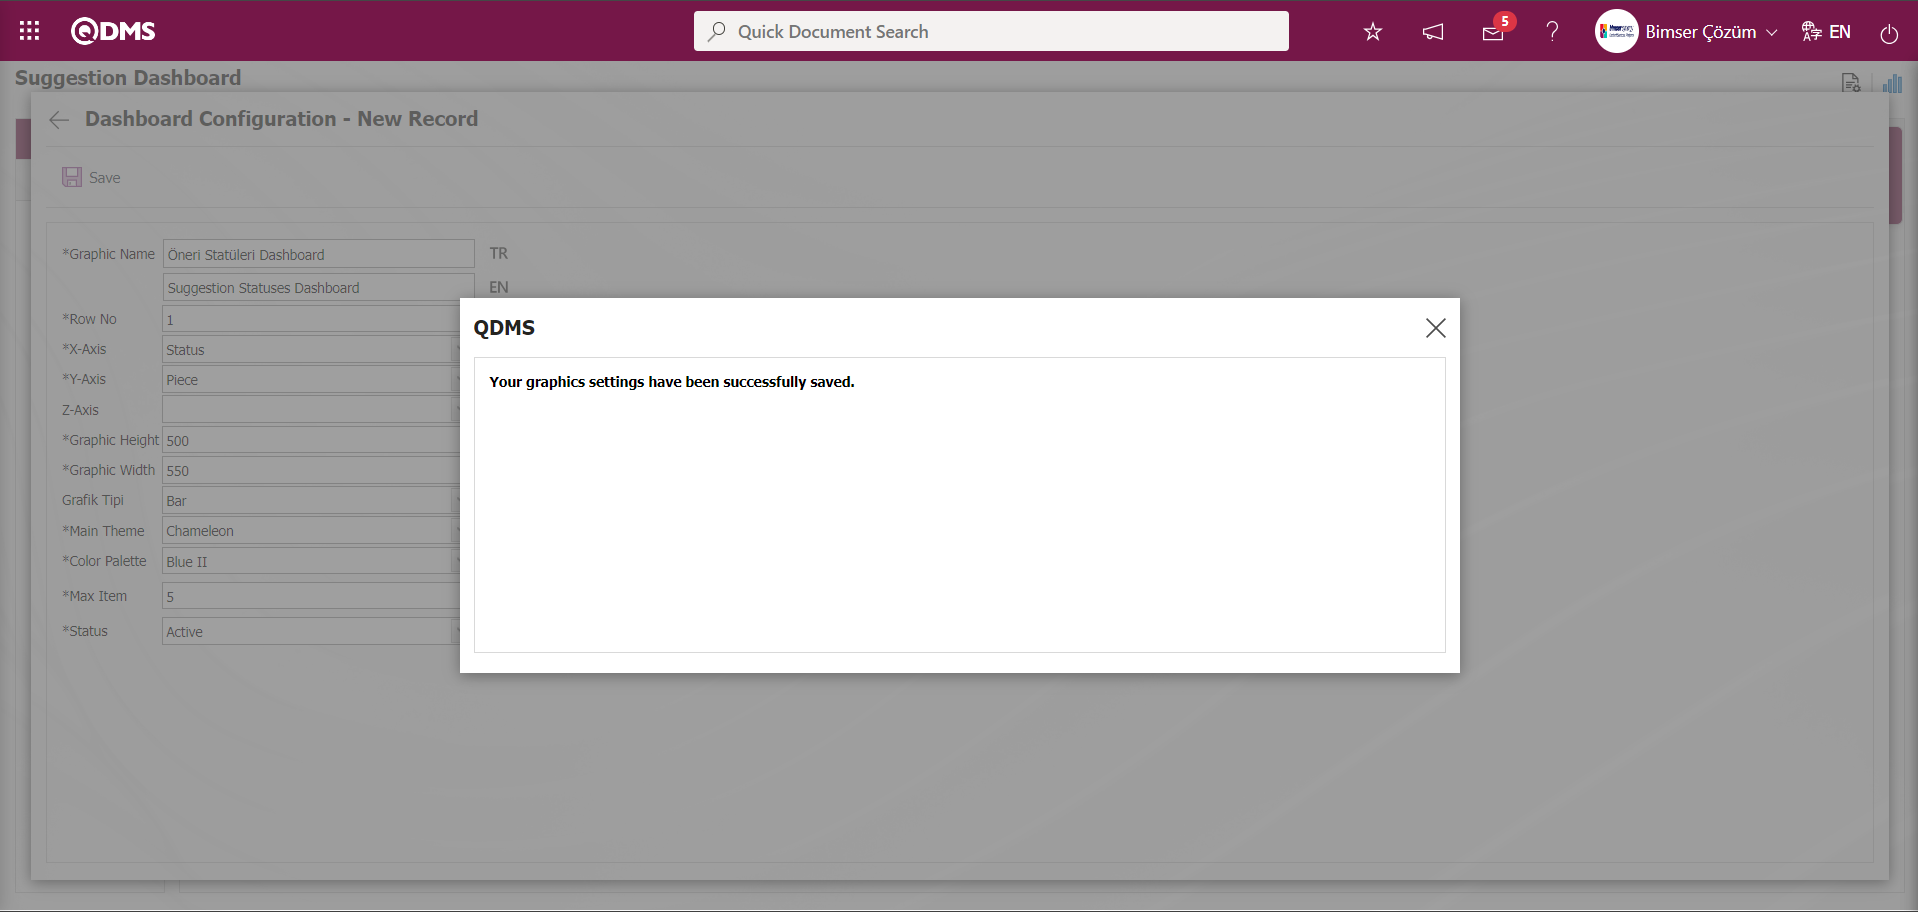
The system displays the message “Your graphics settings have been successfully saved.” indicating that the saving process has been completed.
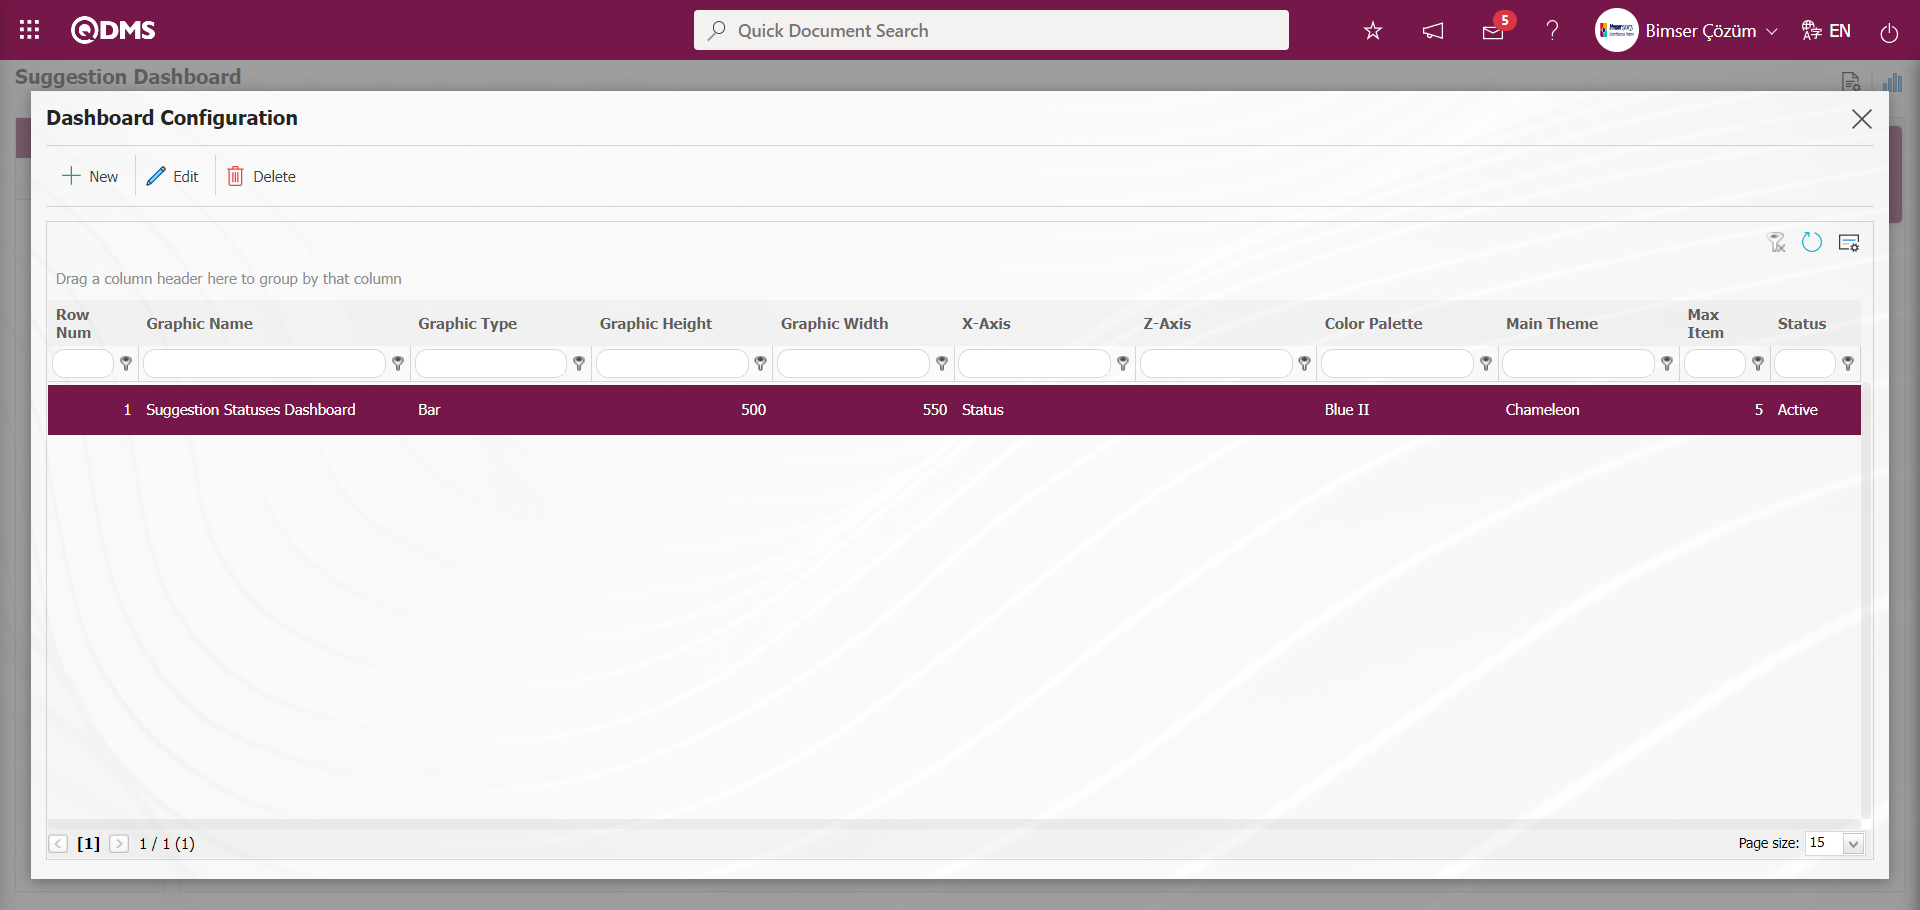
The Dashboard defined in the Suggestion Dashboard screen is displayed.
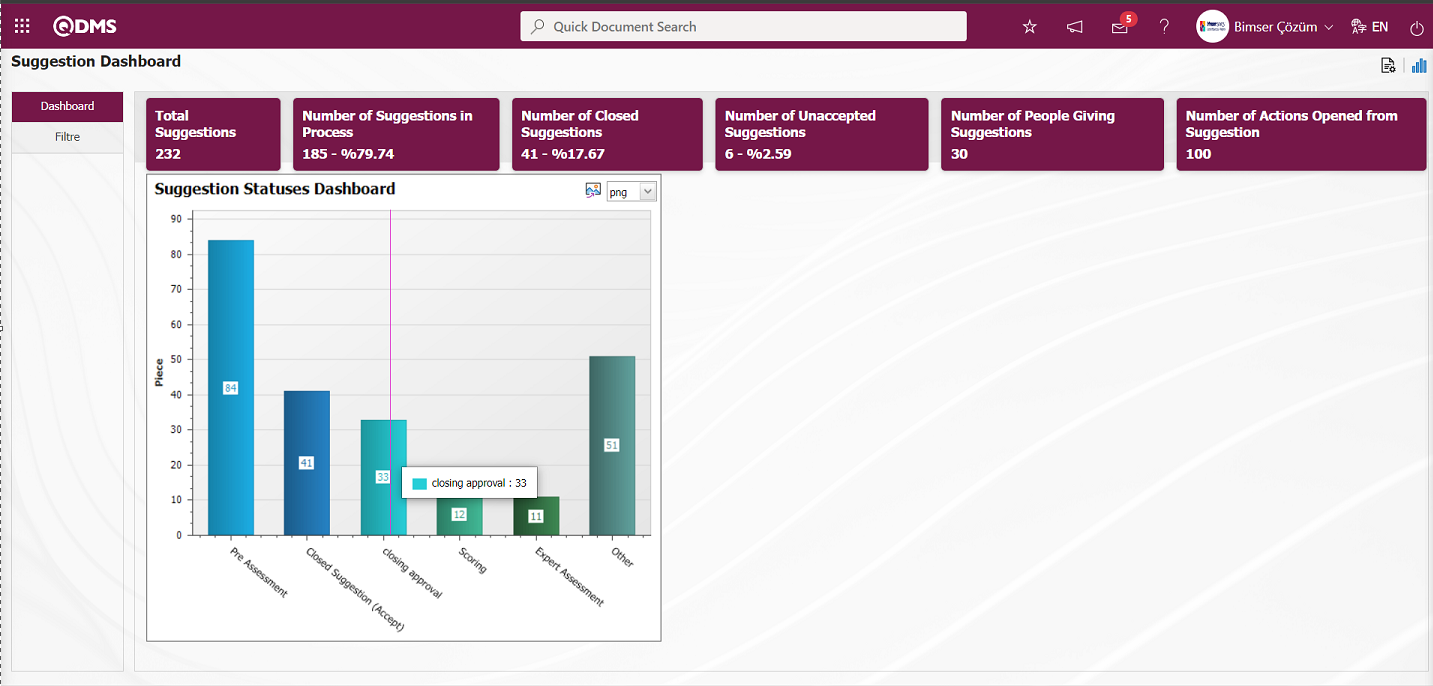 The Dashboard defined on the Dashboard Configuration screen is updated and the PieChart option is selected in the chart type field and displayed as PieChart on the Suggestion Dashboard screen.
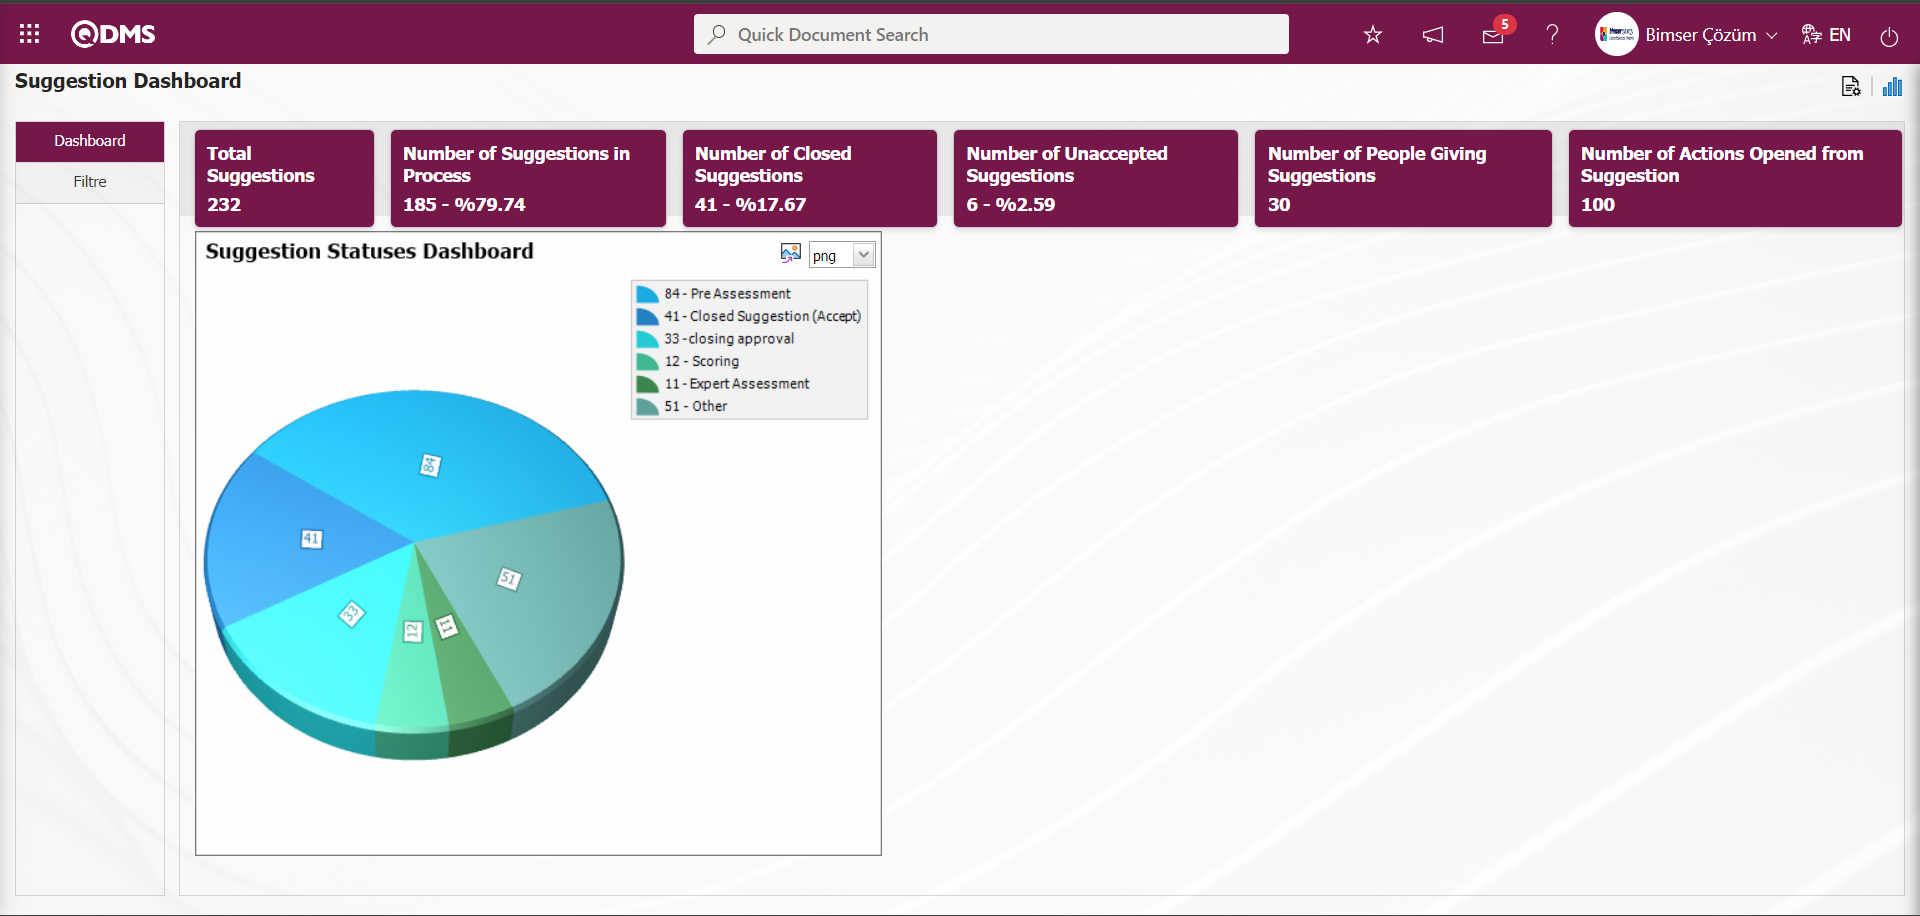
By clicking the (Export Graphic) button, the graphic can be exported to the external environment by converting it to the format type (png, jpg, bmp, xls, etc.) selected from the drop-down menu.
Graphic Length is limited to a min value of 500 and a maximum of 1000. Graphic Width is limited to a min value of 550 and a max value of 1800. Chart Length and Width should be selected between these values. Dashboard Configuration - If the row number is already used on the New Record screen, an error message “The row number you specified is in use, you must specify a row number that is not in use.” is given by the system during the saving phase.
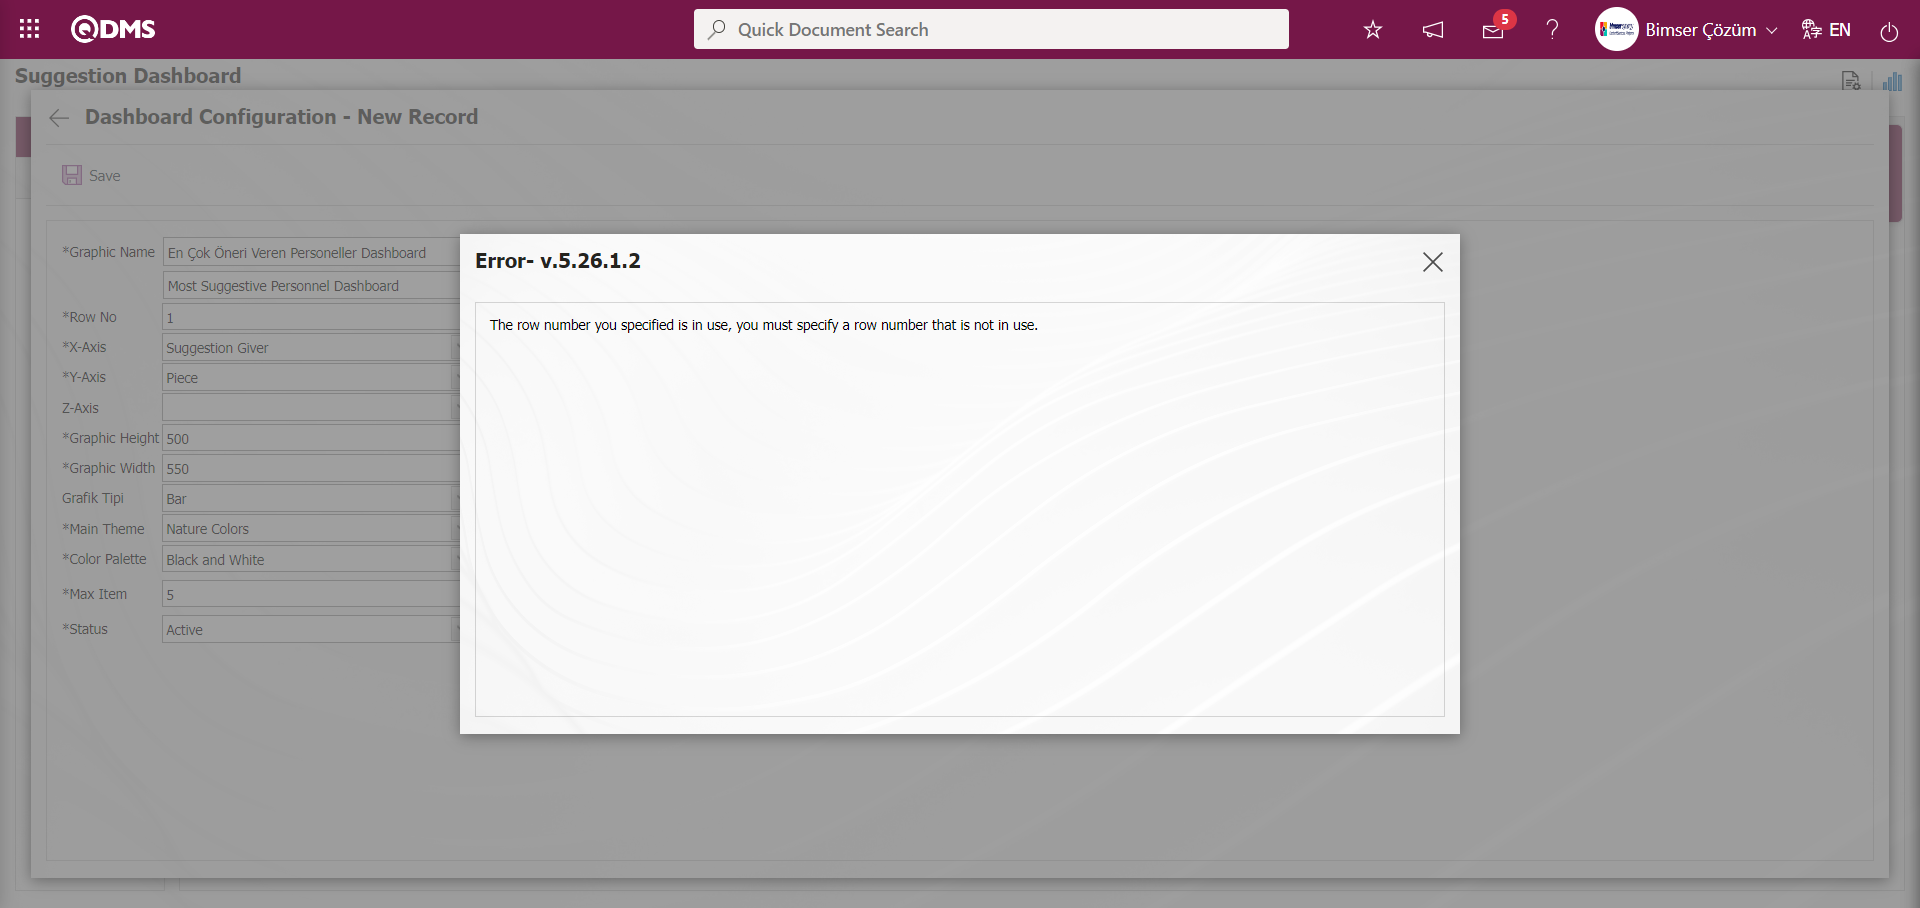
In this way, a new chart can be added on the screen opened with the Chart Settings button. Editing, updating, changing and deleting operations are performed on the added chart information. The filtering screen for the relevant graphics in the list is defined and set as downloadable.
For users who are not Module Managers, the Dashboard Configuration screen is opened by clicking on the System Infrastructure Definitions / BSID / Configuration Settings / Dashboard Configuration / Suggestion System menu and the necessary adjustments are made on the screen that opens and the graphic design process is also done.

They can define a new Dashboard by doing the same steps using the same buttons on the Dashboard Configuration screen.
