OHSAS Risk Assessmentt
Information
You can quickly reach the relevant topic with the help of navigation on the right side.
OHSAS Risk Assessment Module (v.5.26) User Help Document
Module Version: 5.26
1. INTRODUCTION:
In occupational health and safety activities, a number of risk analyzes required by legal regulations are required. Risk analysis is the identification of potential hazards that may occur during business activities and the evaluation of the risks related to them, thus ensuring that the methods and principles for taking control measures related to expected or possible risks are determined in a systematic manner, thus minimizing injuries and health deterioration. At the same time, management systems also require these risk analyses and the preparation of various action plans after the analyses to ensure that the risk is reduced.
2.PURPOSE:
The purpose of this guide is to determine the path that organizations using QDMS will follow during and after the implementation of the OHSAS Risk Assessment module during the planning phase of the risk forms and the measures to be taken regarding these risks.
3.RESPONSIBILITIES:
Management Systems Representative, OHSAS Specialist, Workplace Representative.
# 4.ABBREVIATIONS
RAF: Risk Assessment Form RAFD: Risk Assessment Form Detail
5.WORK FLOW:
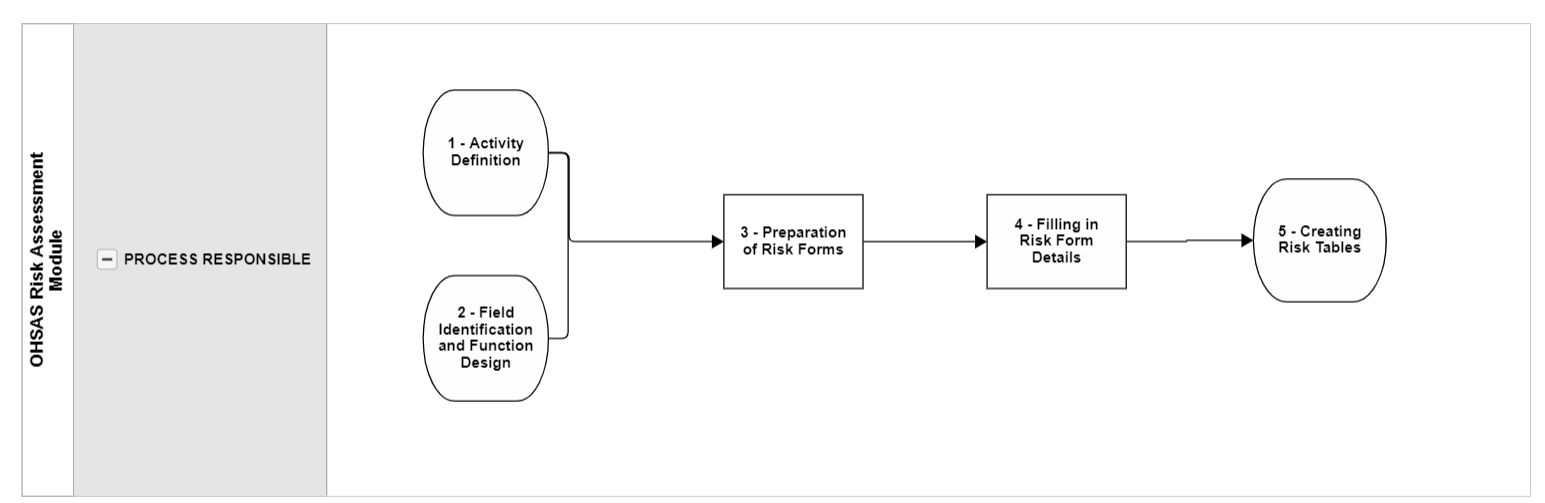
6.OHSAS Risk Assessment Module
It is a risk assessment module that provides digital monitoring of the OHSAS Risk Assessment methodology in use, creating and monitoring the risk analysis history, determining and monitoring measures as a result of risk assessment, transferring existing risk forms to the system, providing authorization control over risk forms and preventing unauthorized access.
6.1.System Infrastructure Definitions/OHSAS Risk Assesment
This is the part where the necessary definitions are made in order to create the infrastructure of the QDMS OHSAS Risk Assessment module. According to the definitions made, this data is used and seen in the entries from the Integrated Management System menu.
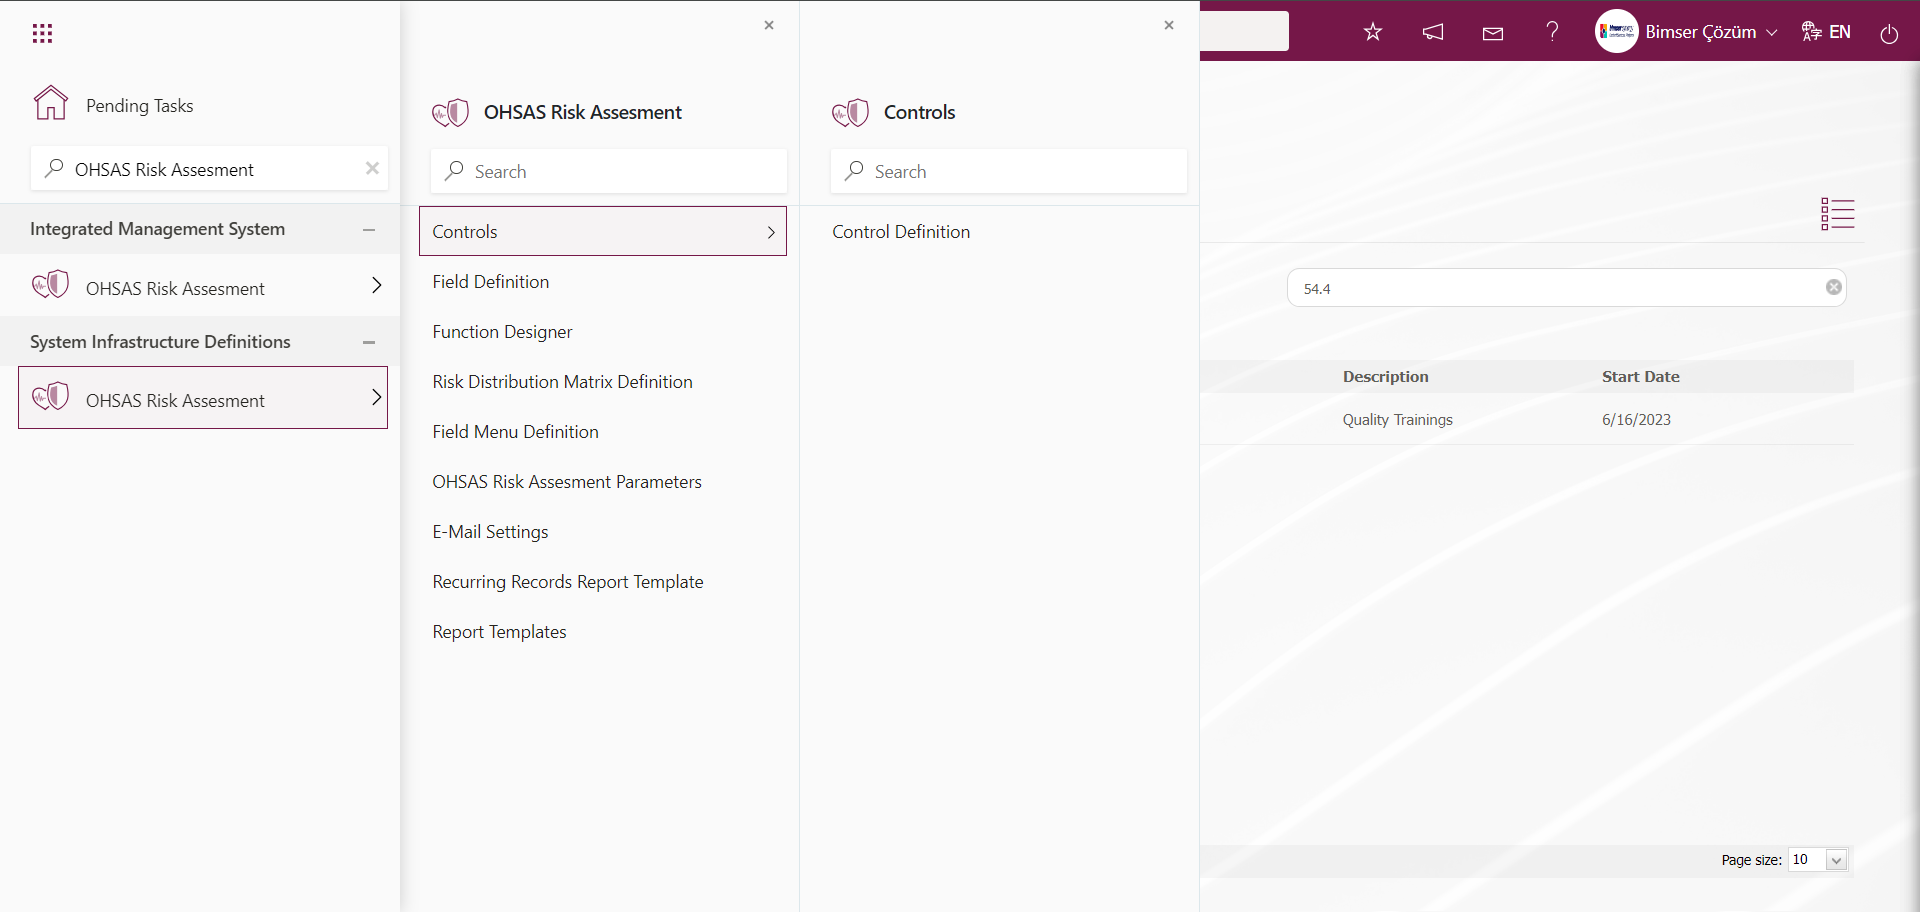
6.1.1.Controls
6.1.1.1.Control Identification
Menu Name: System Infrastructure Definitions / OHSAS Risk Assesment/ Controls / Control Identification
Controls are used in Risk Modules in QDMS. Controls are the items mentioned in 27001 Annex A and come in the Controls tab.In the Controls tab, you can select the control step for each risk.In the Controls tab, the control items you select will appear when you want to get the SOA report in the reports heading in the QDMS environment.In short, Controls are used in the preparation of the SOA report.
In the OHSAS Risk Assesment parameters, the parameter value of parameter 95 ‘Should the Controls tab be used?’ is activated by selecting ‘Yes’.
 After the parameter is activated, it appears as a tab on the new record screen where a new risk record is defined on the Risk Assessment Form - Details screen.
With the help of the buttons on the screen;
 : A new Control is defined.
 : Correction / change / update is made on the selected Control information in the list. Code information cannot be updated.
 : Control information selected in the list can be deleted.
 : Data can be transferred to Excel.
 : Records can be searched by filtering.
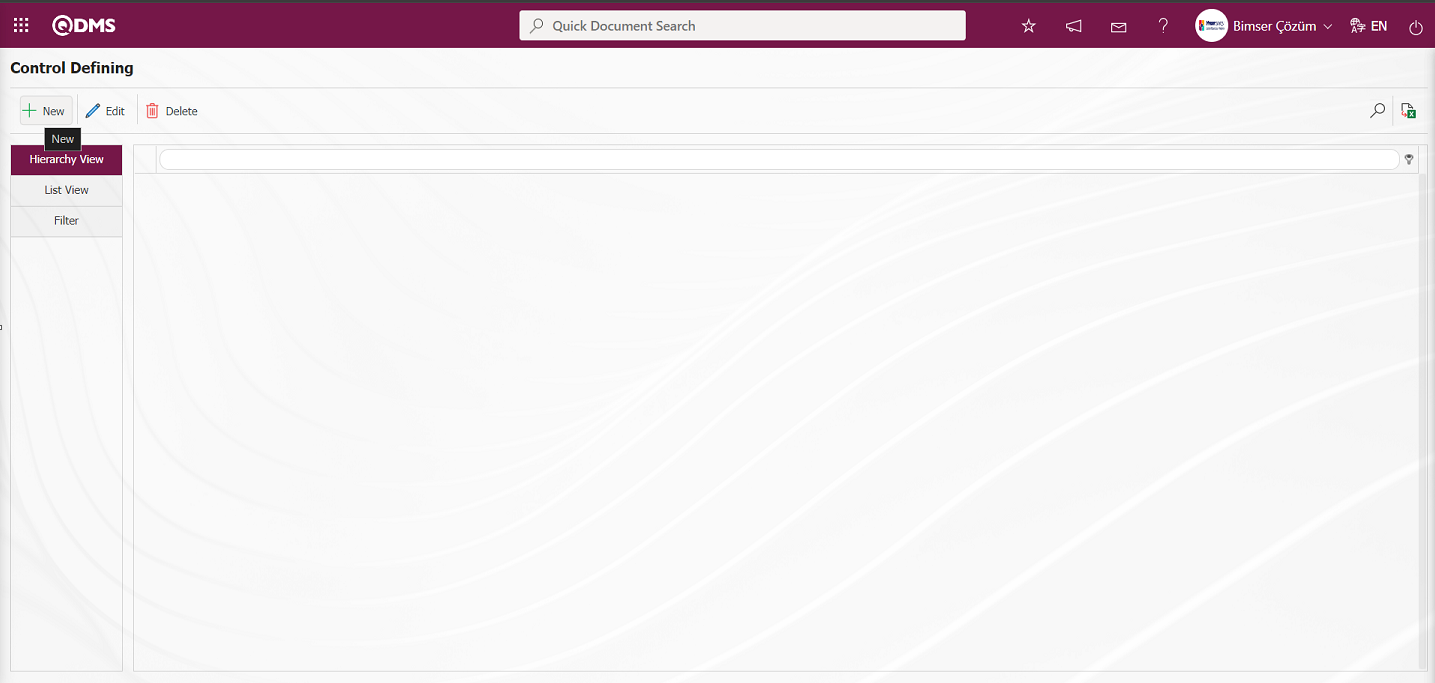
To add a new Control to the Control Definition screen, click on the button on the top left corner of the screen to display the Control Definition-New Record screen.
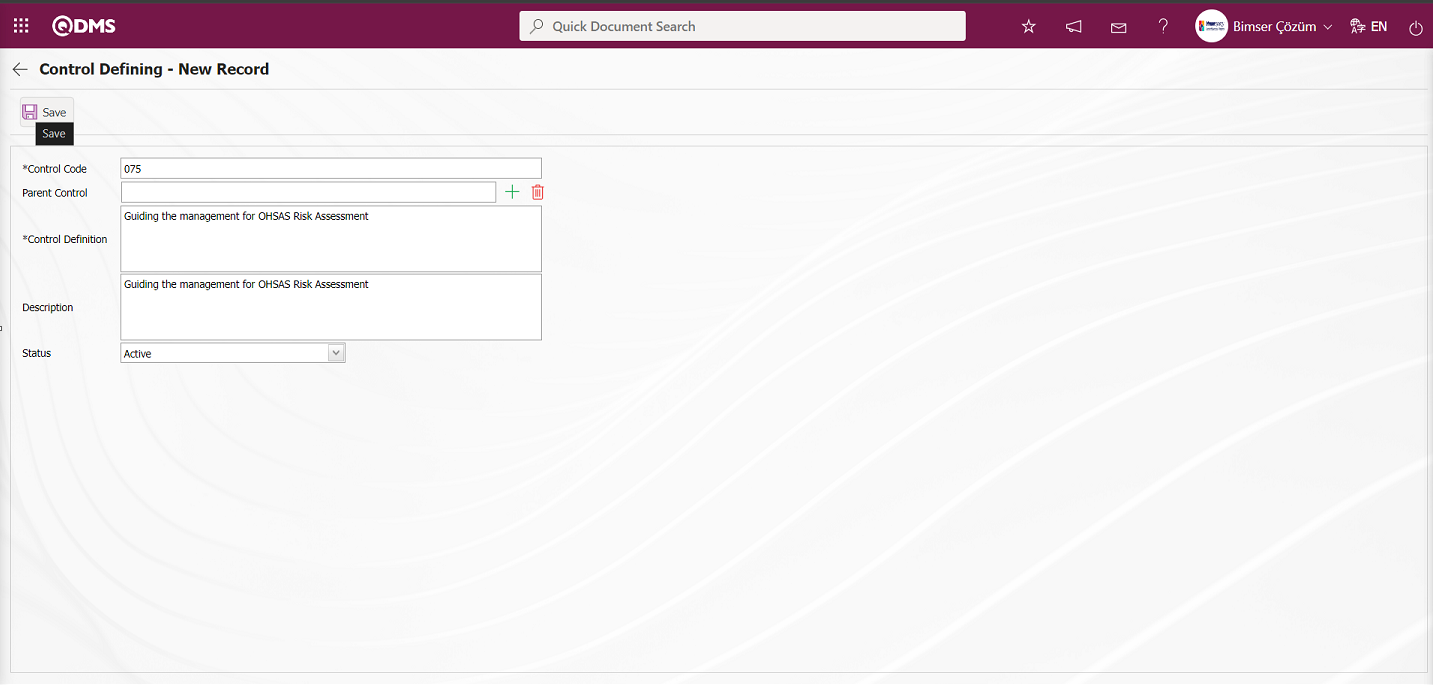
Related fields are defined on the screen that opens:
Control Code: This is the mandatory field where control code information is defined on the Control Defining - New Record screen. It should be defined without using characters such as spaces and Turkish characters, so that it is not the same as the previously defined fields. Ex. ‘001’, ‘RK’
The system automatically assigns the code template according to the code template defined in the ‘Controls Auto Code Template’ parameter 96 of the related module.
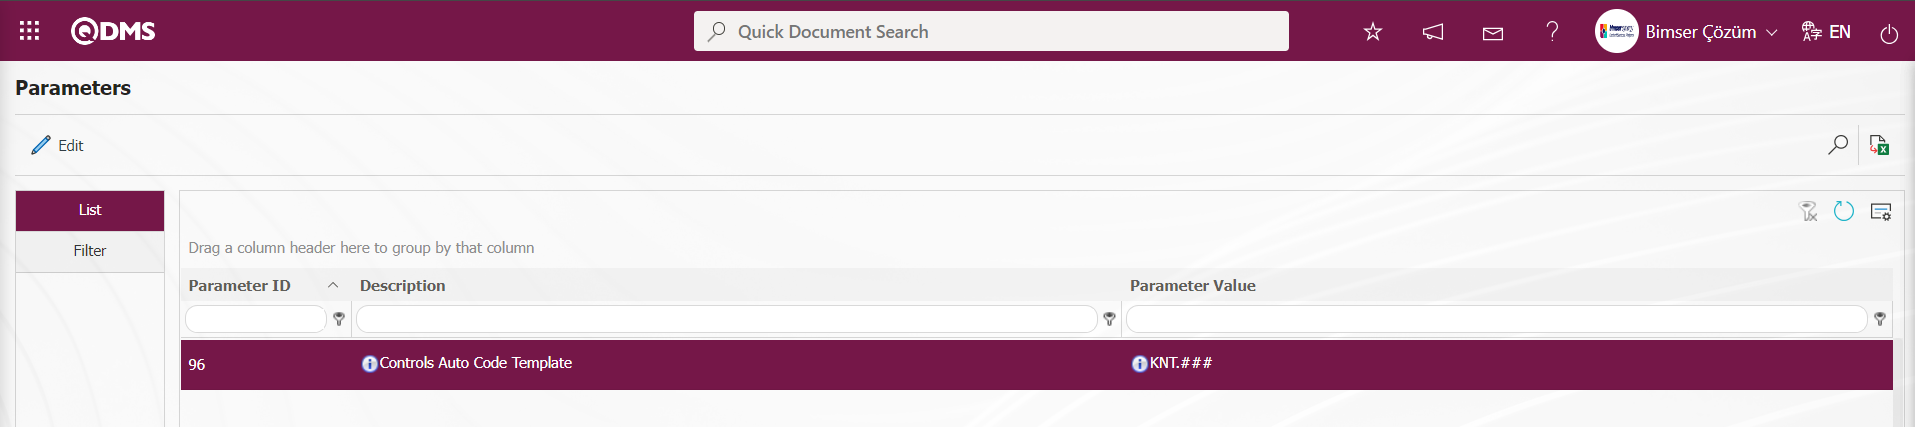 The information that the defined auto code template will start at the counter value comes according to the value defined in the parameter value in the ‘Controls Counter’ parameter 97 of the relevant module.

The counter value is defined as ‘0’ in the parameter value. The system will assign code template as KNT.001, KNT.002, KNT.003.
Parent Control: If the Top Control in the creation phase is a sub-division of a Control definition, this field is automatically filled. In the filled field, the name of the Control definition to which it is connected is written. If you want to delete the top breakdown to which it is connected, use the  (Delete) button on the right side or if you want to change it, use the
  (Select) button on the right side. If there is no parent Control to which it is connected, this field is empty.
Control Definition: This is the mandatory field where the Control definition information is defined on the Control Defining - New Record screen.
Description: It is the field where the Description information is entered on the Control Defining - New Record screen.
Status: It is the field where the ‘Active’ option is selected in the ‘Active’ and ‘Inactive’ options of the Status information on the Control Defining - New Record screen. Controls whose status is inactive are a sign that they are no longer used in the system.
After the required fields are filled in the Control Defining - New Record screen, the Control Identification registration process is performed by clicking the  button in the upper left corner.
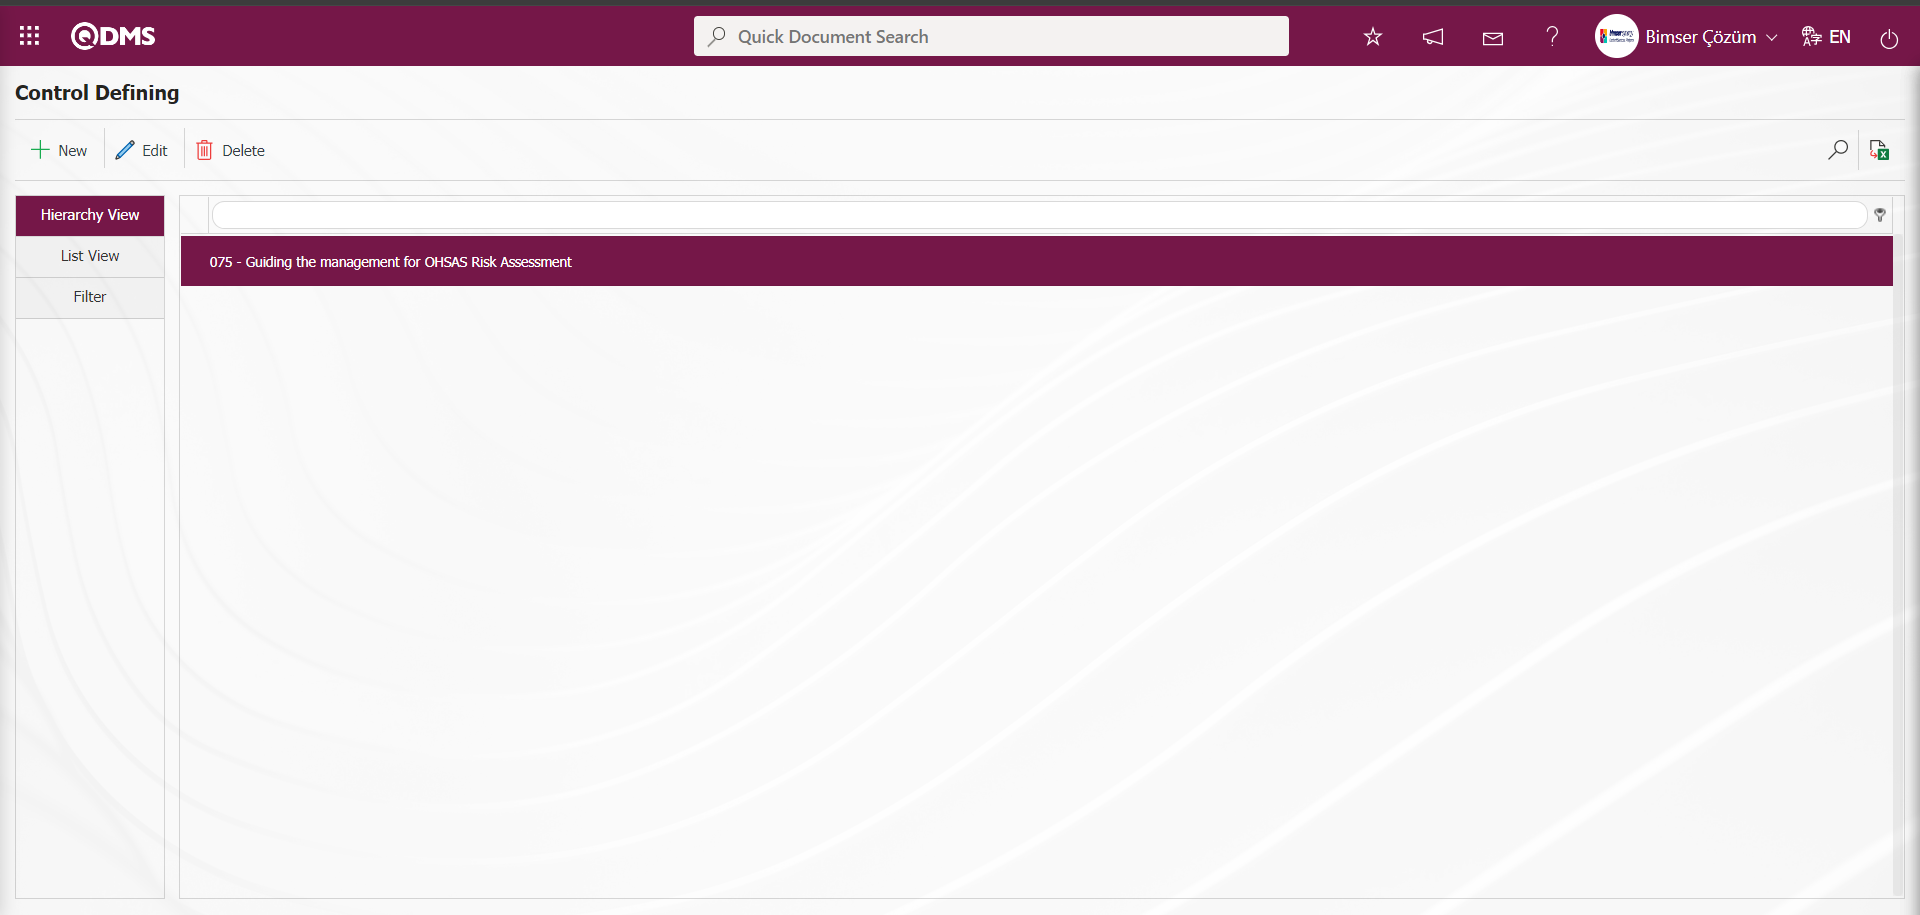
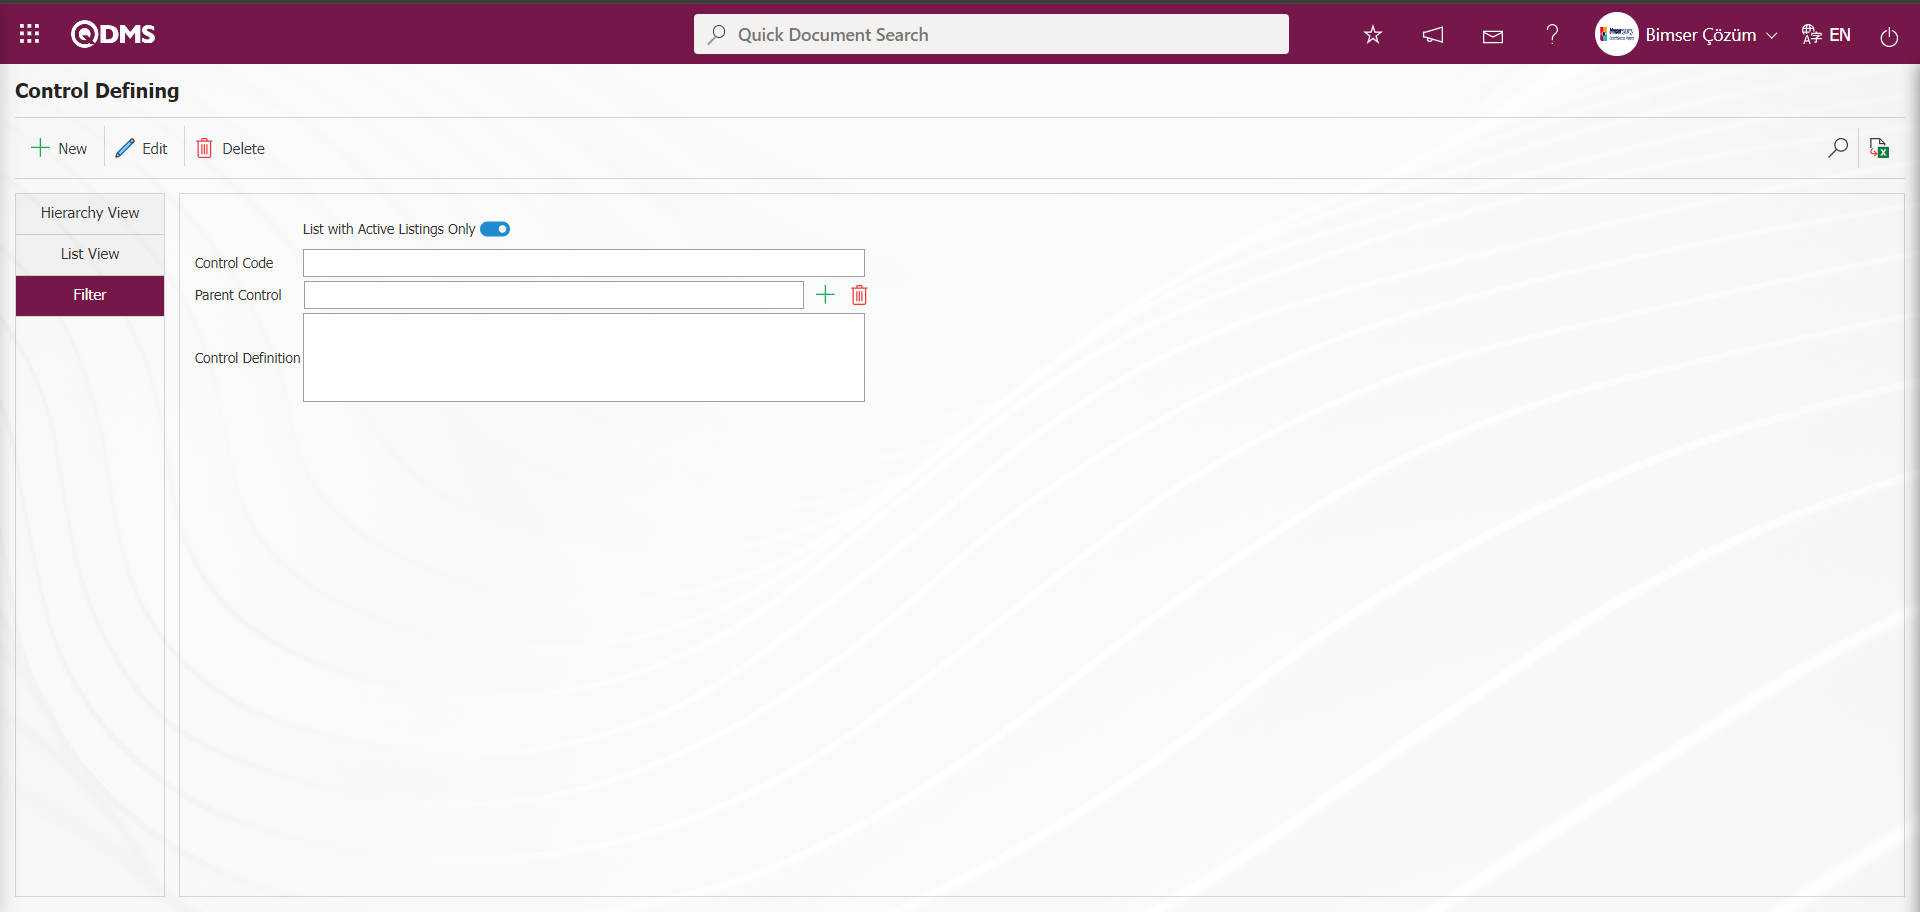
In the Control Defining screen, data is entered in the fields such as Control Code, Related Control and Control Definition with the Filter tab and filtering is done according to the search criteria by clicking the  (Search) button.
6.1.1. Field Definition
Menu Name: System Infrastructure Definitions/OHSAS Risk Assessment/Field Definition
It is the menu where the fields that will be associated with the pages of the functions in the Function Indexer menu in the OHSAS Risk Assessment module are defined. The fields defined in this menu are added to the field pool. The fields added to the field pool are associated with the pages of the Defining a Source Group, Source Definition, Risk Assesment Form Definition, Risk Assesment Details, Precaution Definition and Control Definition functions in the Function Indexer menu.
With the help of the buttons on the screen;
 : Add a new field.
 : Modification/editing/updating operations are performed on the selected field information in the list.
 : Selected field information in the list is copied.
 : Delete the field information selected in the list.
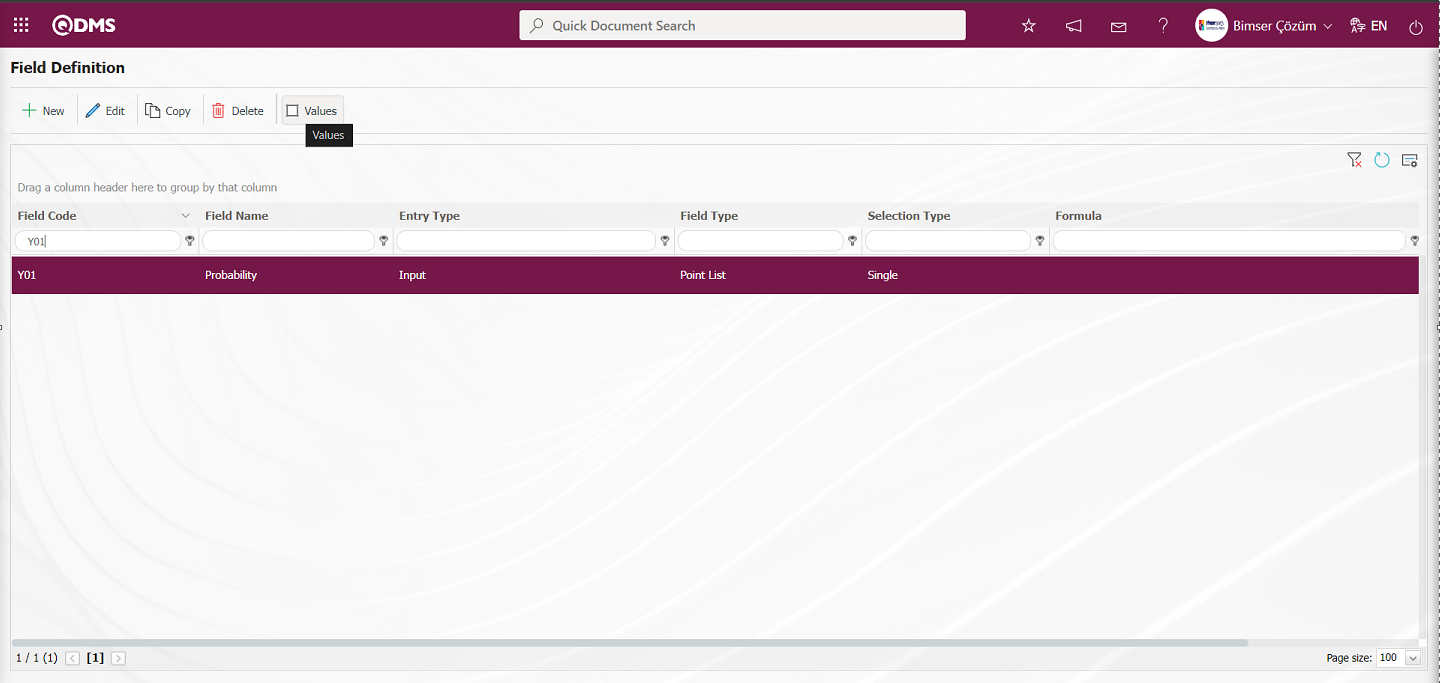
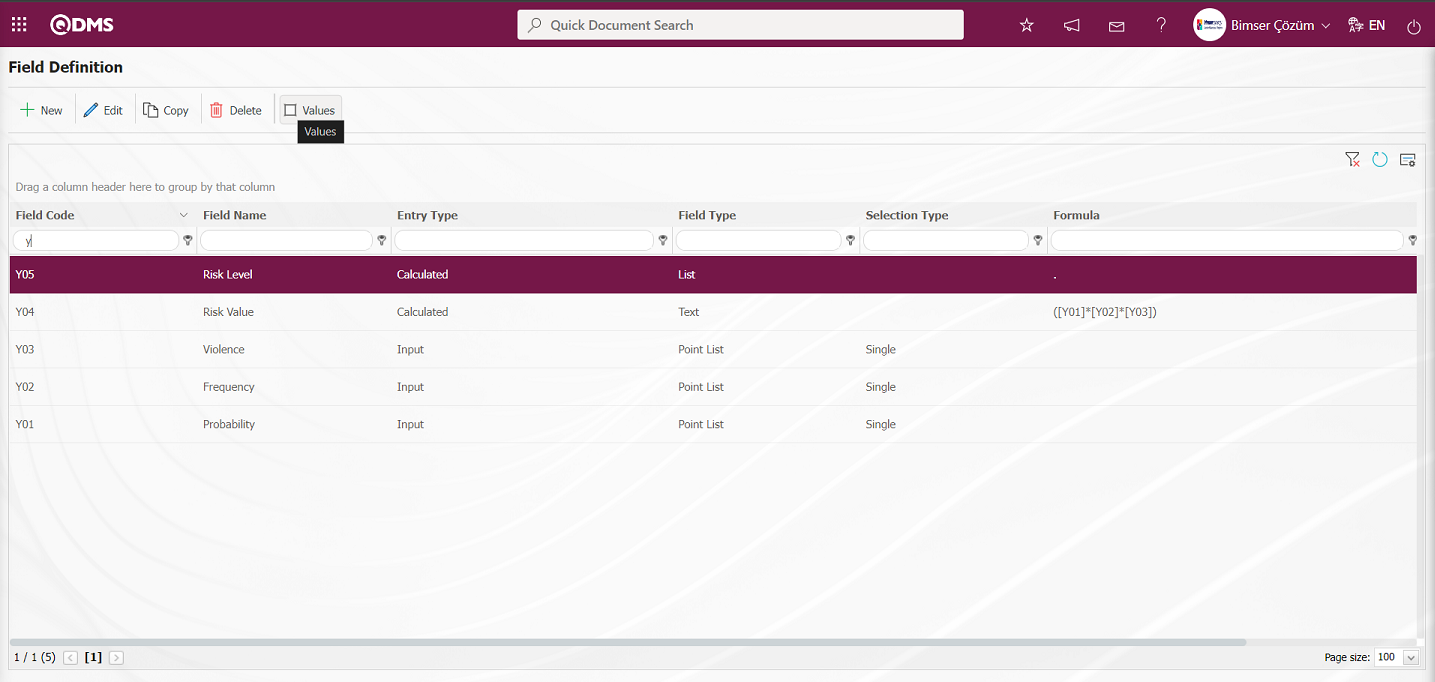
 : Values of the field are defined.
Defining a Parametric Field with Probability Scored List Type: It is a parametric field type that makes a selection from the drop-down menu, and the score values of the list elements are available.
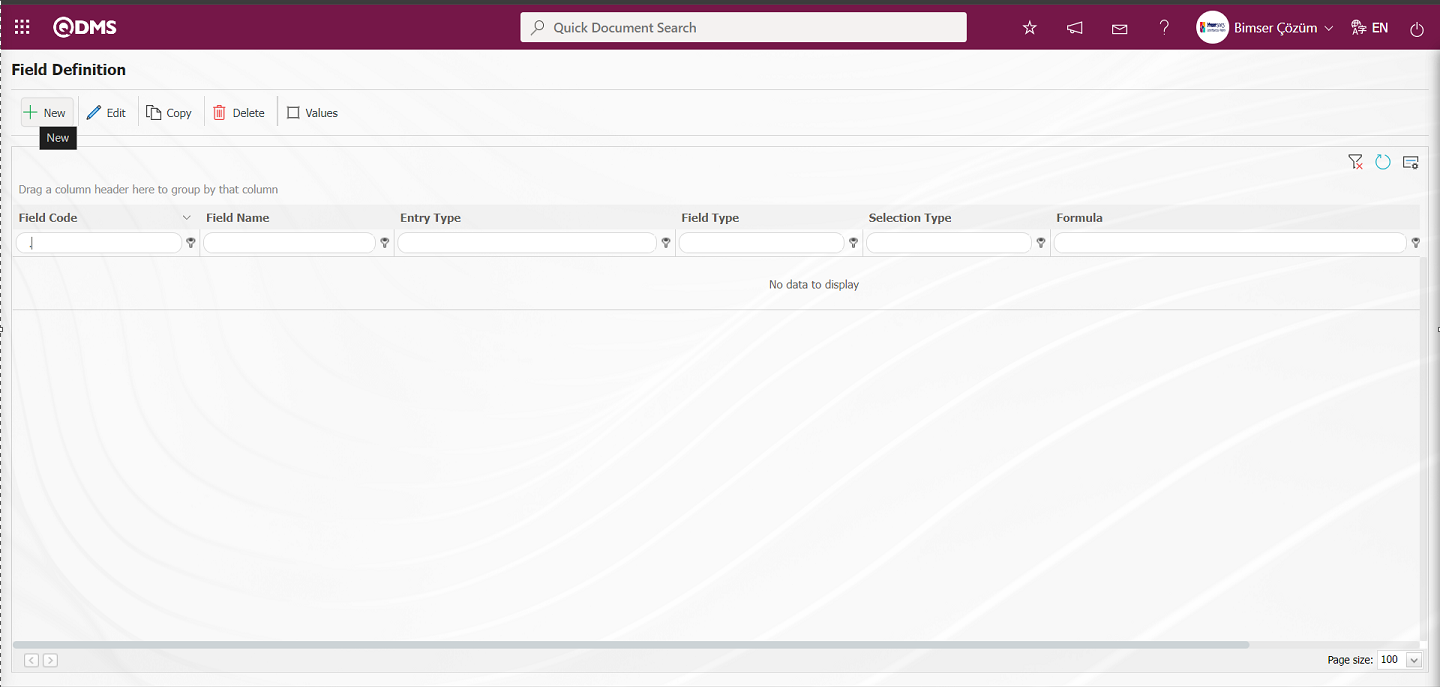
To add a new field to the Field Definition screen, click the button on the top left corner of the screen to open the Field Definition-New Record screen.
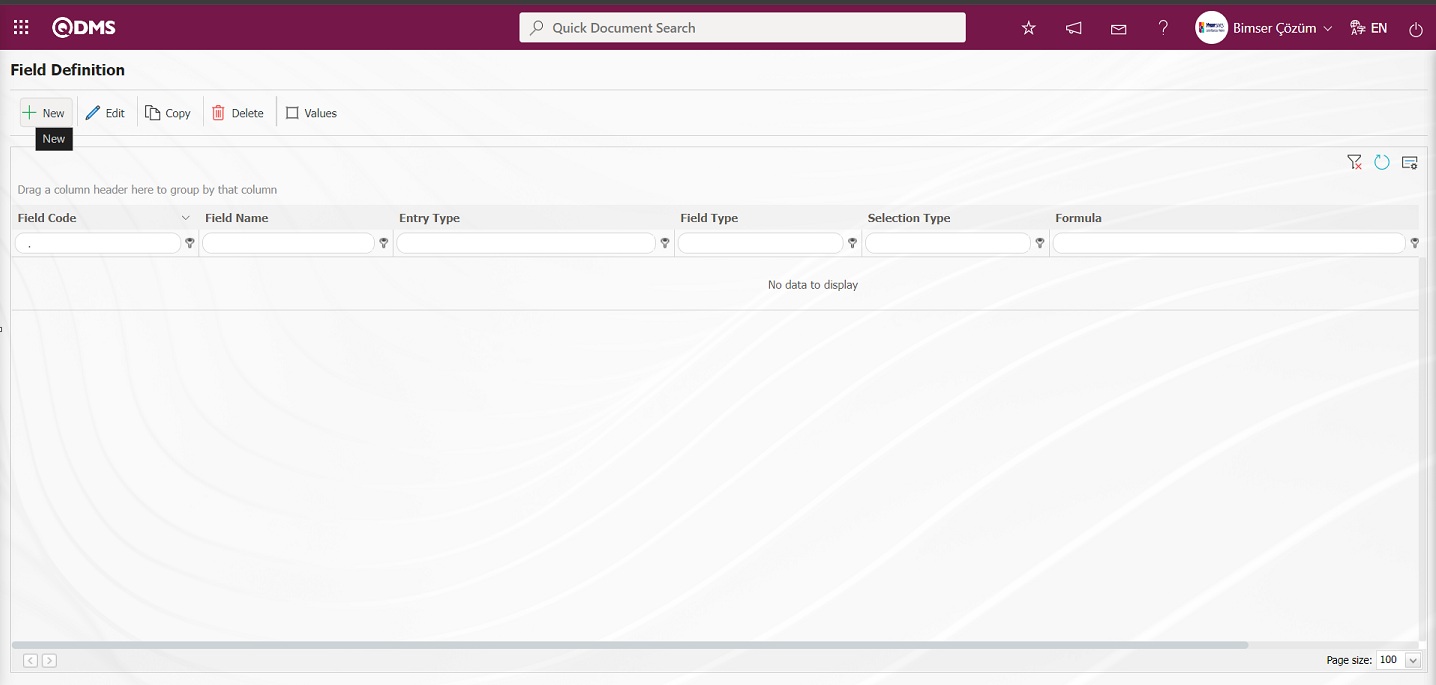
Field Definition - New Record screen opens.
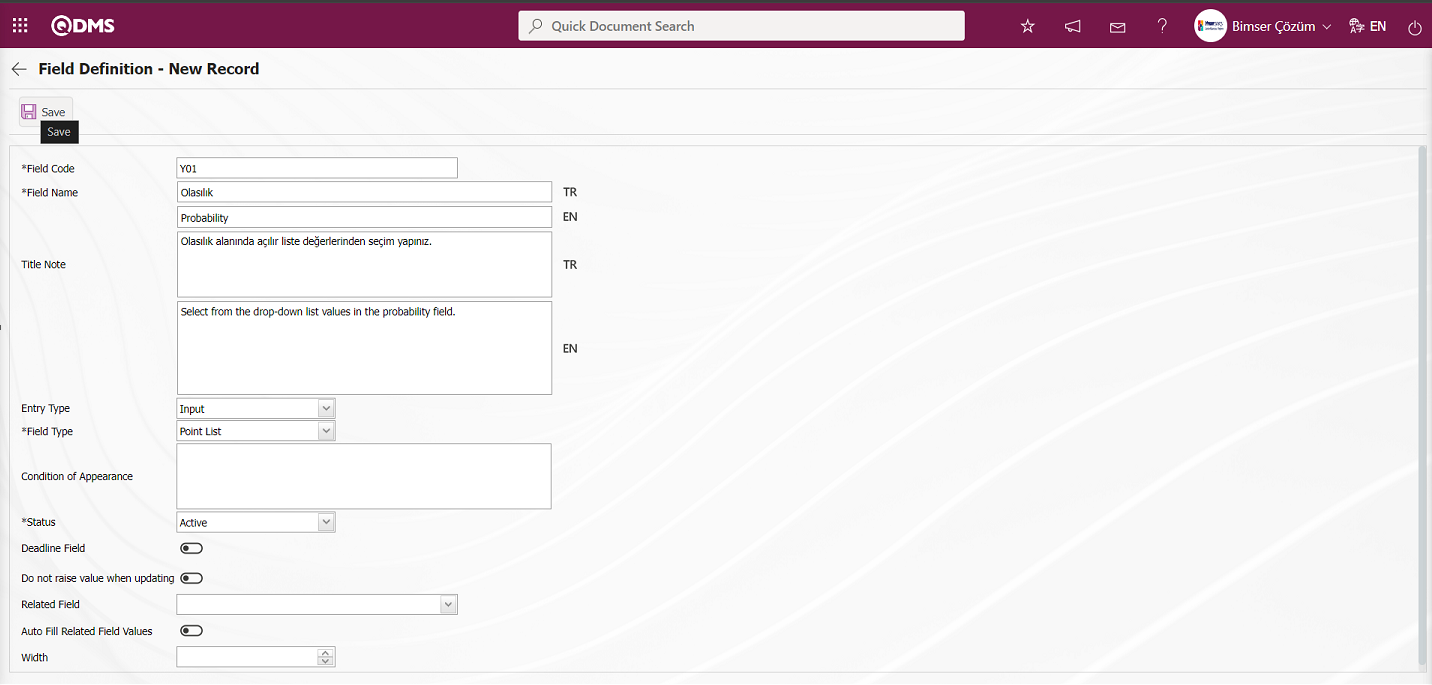
Related fields are defined on the screen that opens;
Field Code: It is the mandatory field where the Field Code information is entered on the Field Definition-New Record screen. It should be defined without using characters such as spaces and Turkish characters, so that it is not the same as previously defined fields. Ex. '001' , 'RK'
Field Name: This is the field where the Field Name information is entered on the Field Definition-New Record screen.
Title Note: It is the field where the note information containing explanatory information about the field data entry is entered on the Field Definition-New Record screen. It is the information displayed when the mouse hovers over the field.
Entry Type:This is the field where the entry type can be selected as Calculated or Data Entry type on the Field Definition-New Record screen. Entry Type option shows whether the created field will be determined manually by data entry or by calculation method. For example; Data Entry.
Field Type:This is the field where the field type information can be selected on the Field Definition-New Record screen. Field Type indicates which type of the created field is text, numeric, date, list, etc. Scored list is selected as Field Type.
Condition of Appearance:This is the field where the Condition of Appearance information is entered on the Field Definition-New Record screen. If a field will be seen depending on the condition of another field, the condition of appearance is used. It allows the field created according to the values of the list-type field to be displayed. Its usage is [ALANKODU]=ALAN_DEĞERİ etc. (For example, Is there an opportunity? Field's field code is 01 and Opportunity field's field code is 02. If the “Opportunity” Field needs to be seen if the “Yes” value with value code 100 is selected from the options in the “Is there an Opportunity?” Field, the 02 numbers
Status: This is the field where the status can be selected as “Active” or “Inactive” on the Field Definition-New Record screen.
Deadline Field: If the deadline field will be activated, the relevant check box is checked. The deadlines of actions and CAPAs are determined by considering the time period here.
Do not raise value when updating: If the Do not raise value when updating is to be activated, the relevant check box is checked. In the fields where this information is checked, the point value cannot be entered higher than the current value during updating.
Related Field: With the related field feature, a relationship can be established between two fields of option type. On the screen where the elements of the reference field are defined, it is possible to select which values are associated with the related field. Thus, when the value of the reference field changes on the form, the related field can be filled automatically or only the associated values can be selected from the selection screen.
Auto Fill Related Field Values: If the auto fill related field option is to be activated, the relevant check box is checked. It allows one of the fields to be filled automatically according to the relationship established between the values of two list-type fields.
Width: This is the field where the width information is entered on the Field Definition-New Record screen.
After filling in the required fields on the Field Definition-New Record screen, the field definition record process is performed by clicking the  button in the upper left corner.
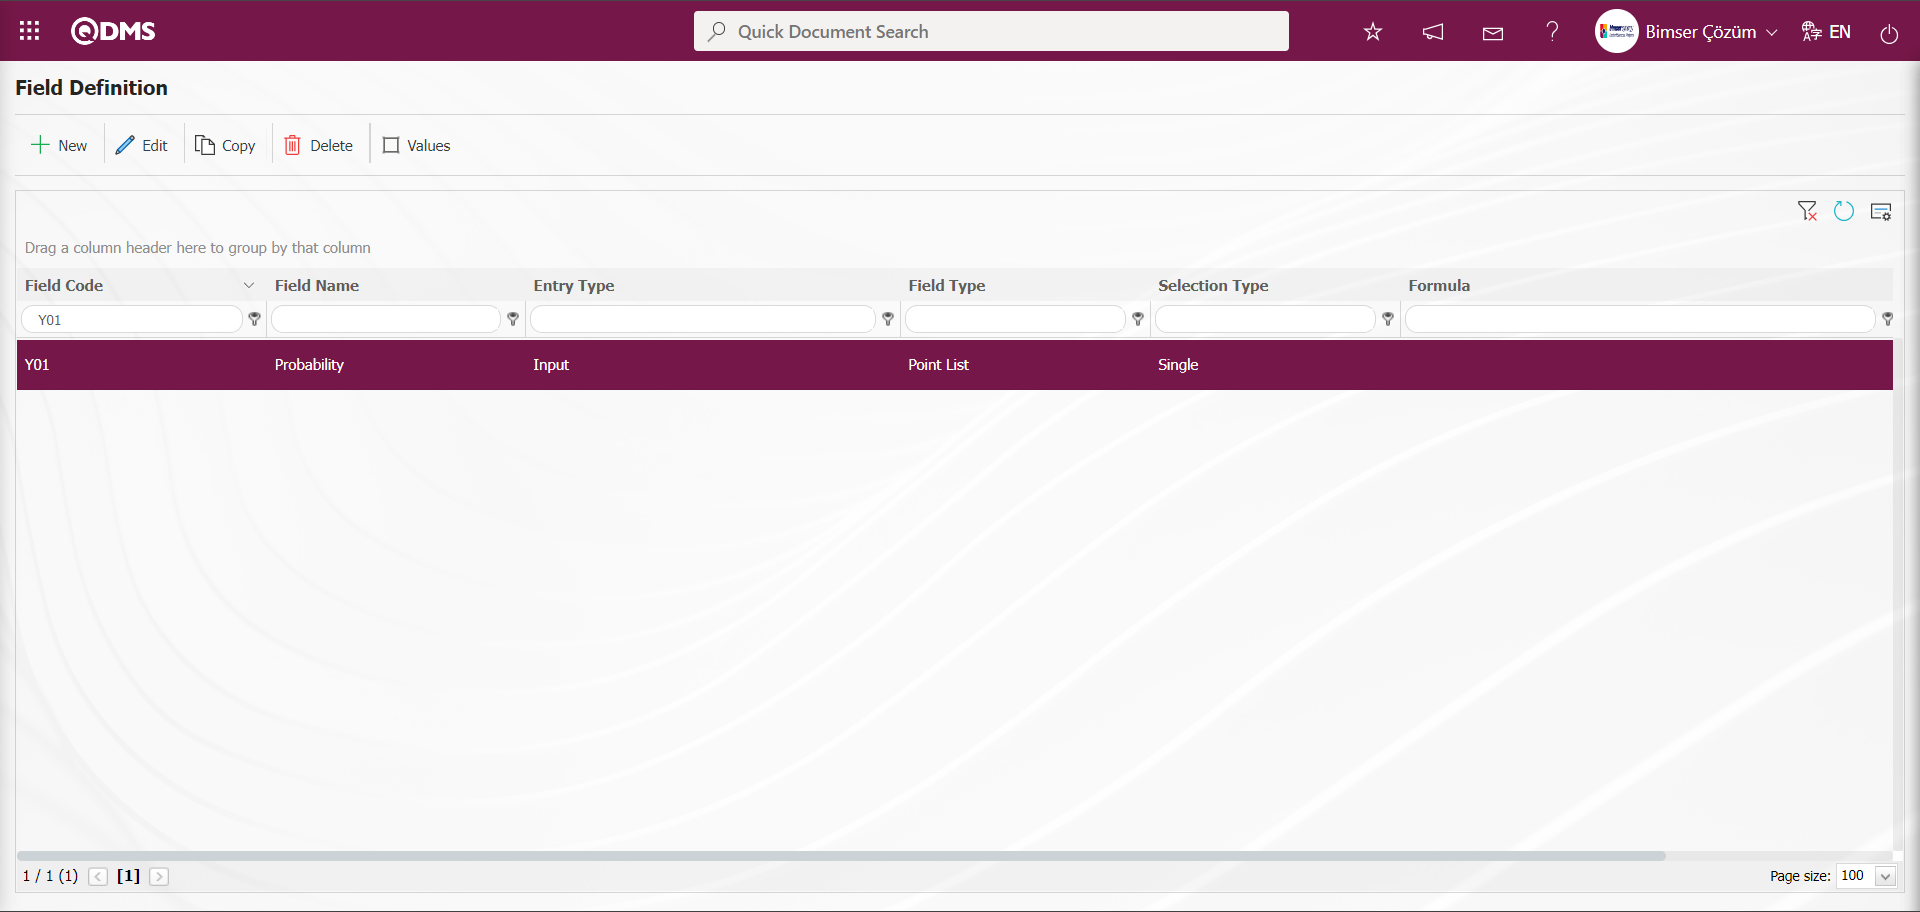
To add a value to the possibility field, while the probability field is selected, click on the  button to get to the screen where the values of the field will be introduced.
You will come to the screen where the values of the field will be introduced.
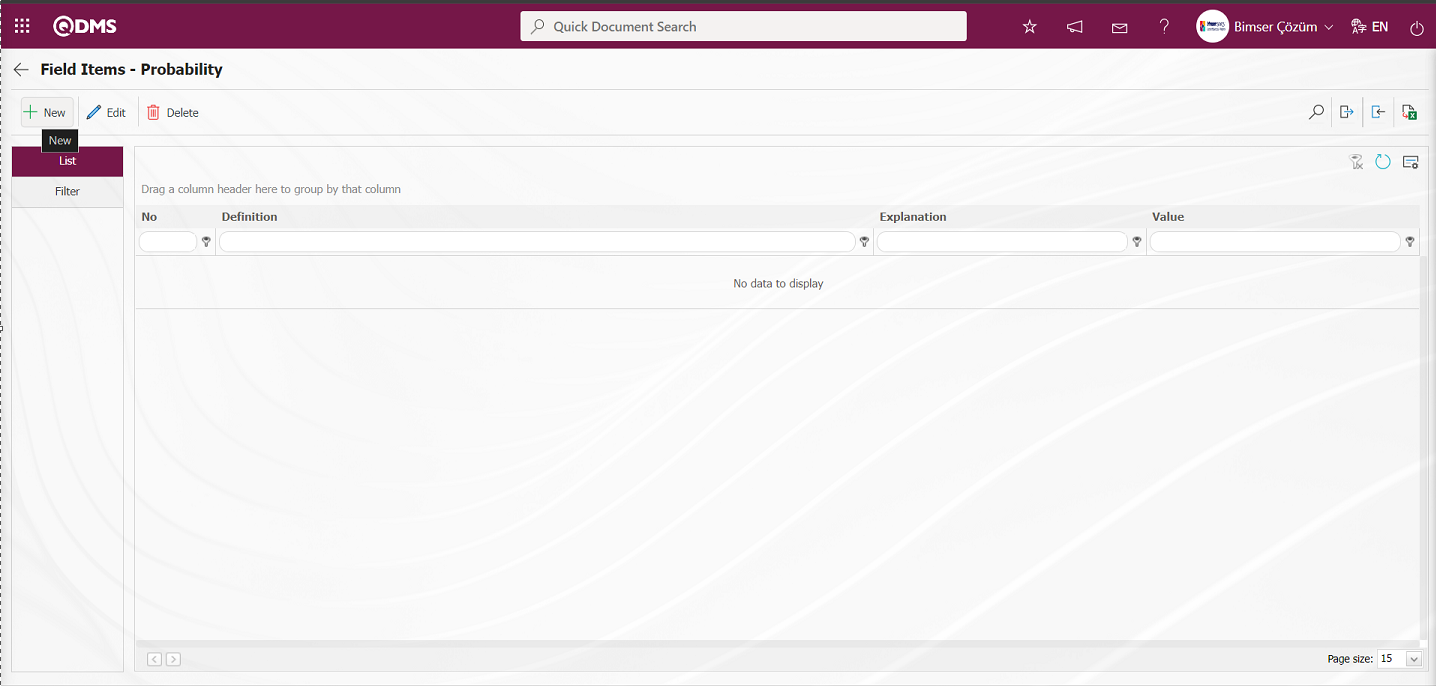
With the help of the buttons on the screen;
 : Define a new value
 : Correction or update operations are performed on the selected value information in the list.
 : Delete the selected value information in the list.
 : Records can be searched by filtering.
 : Data can be transferred to Excel.
 : Template is downloaded.
 : Template is loaded.
Note: (Download Template) and (Upload Template) buttons can be used to transfer field values to the system in bulk. With the template download button, the template in the system is downloaded to the user's computer. When the relevant template is filled in by the users and uploaded to the system with the template upload button, all field values in the template will be transferred to the system.
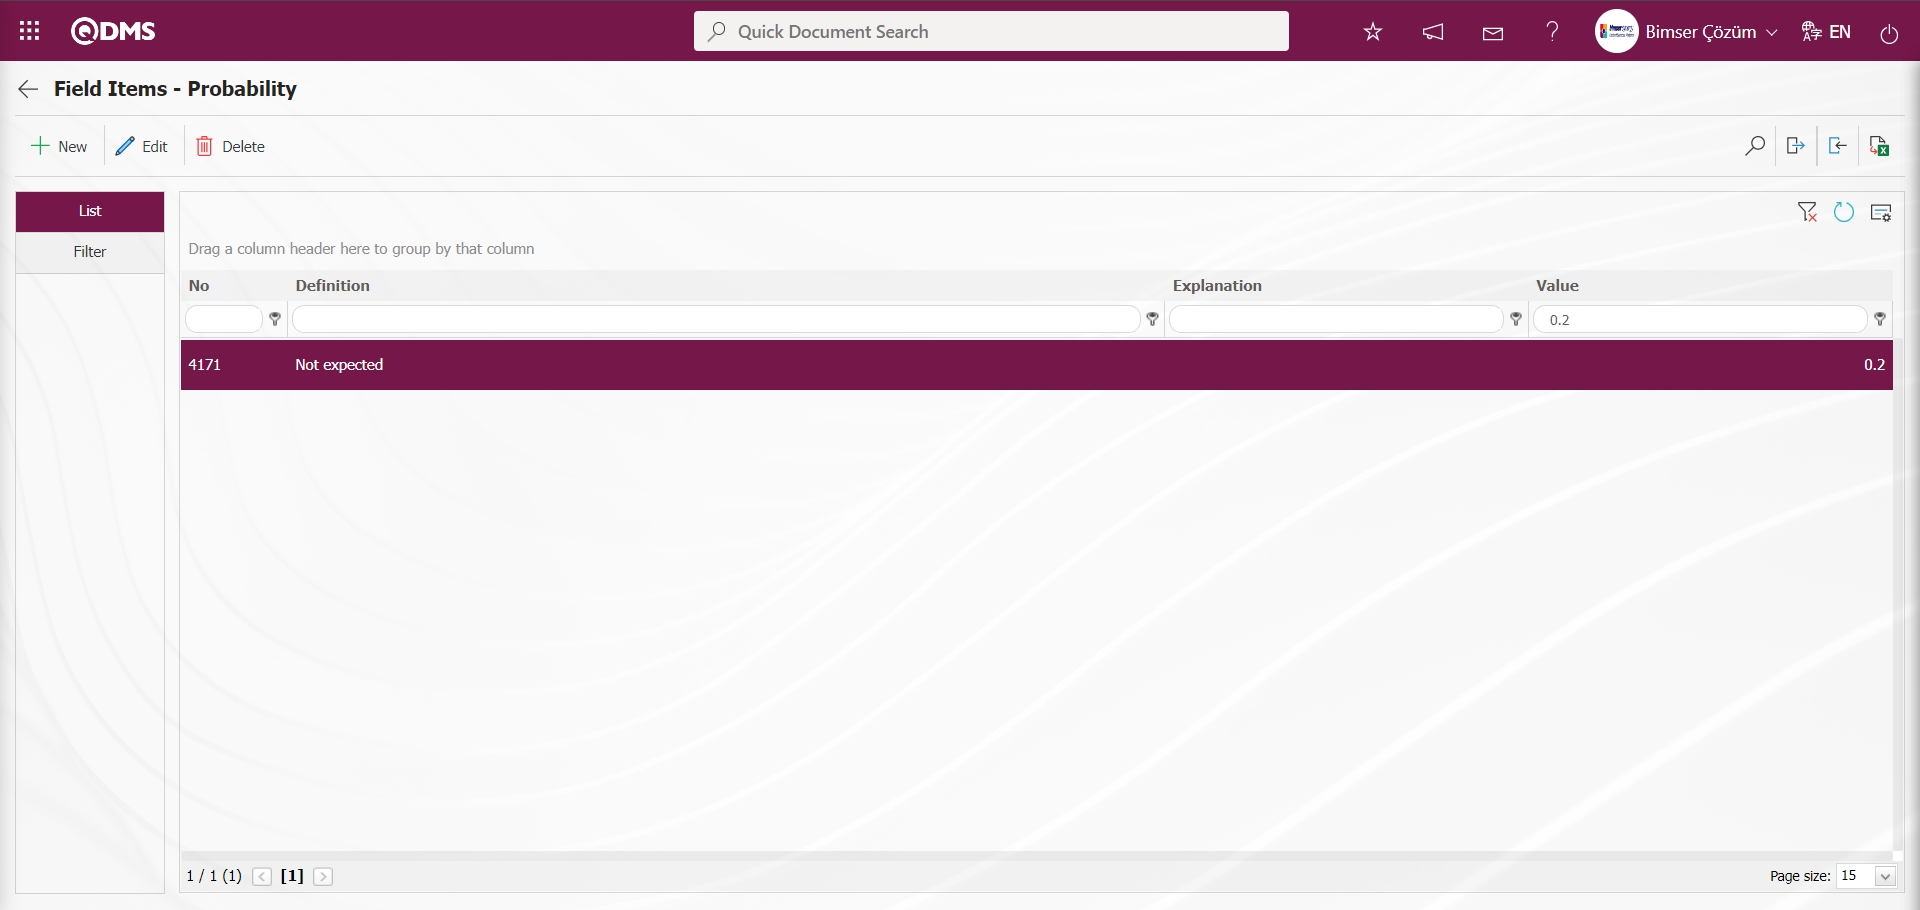
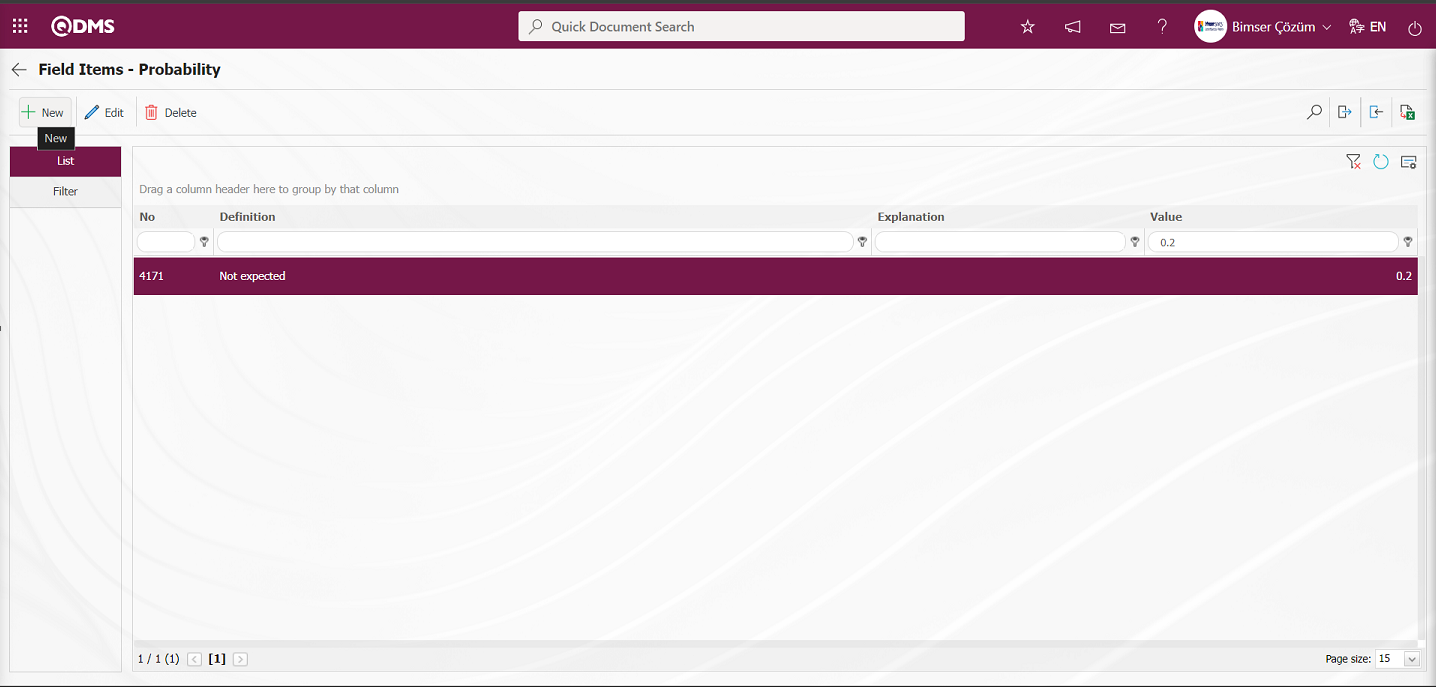
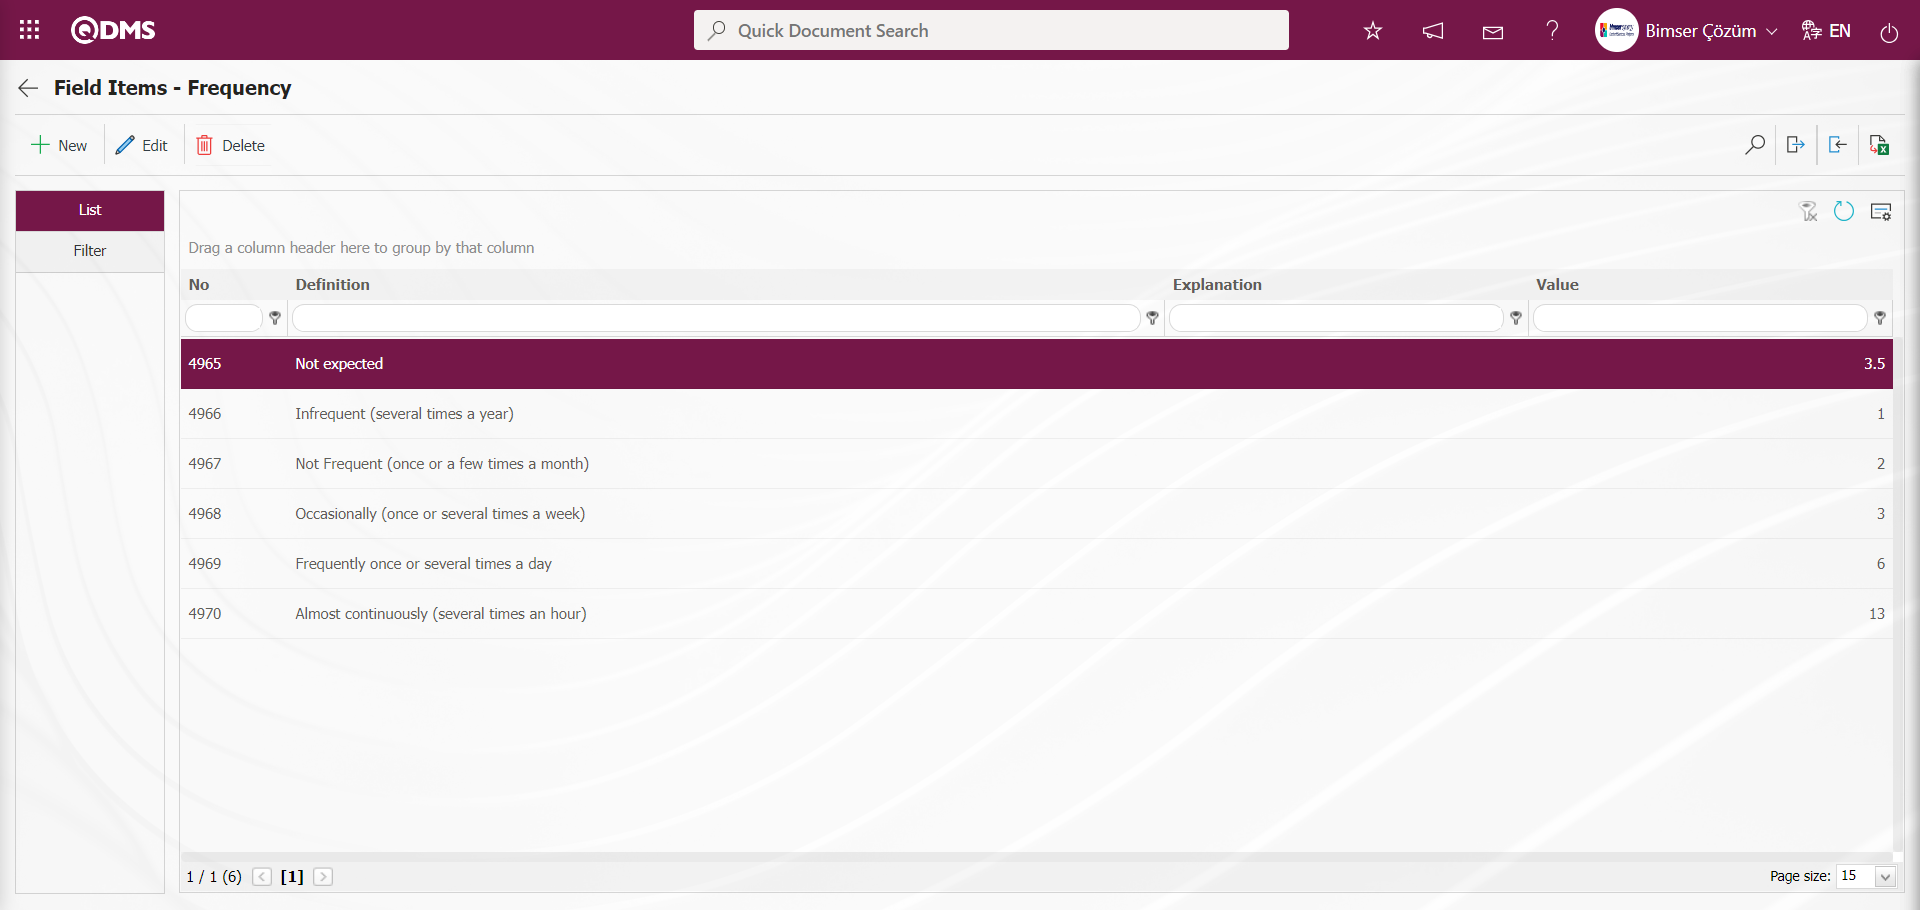
On the Field Items - Probability screen, click on the button to start the new value definition process.
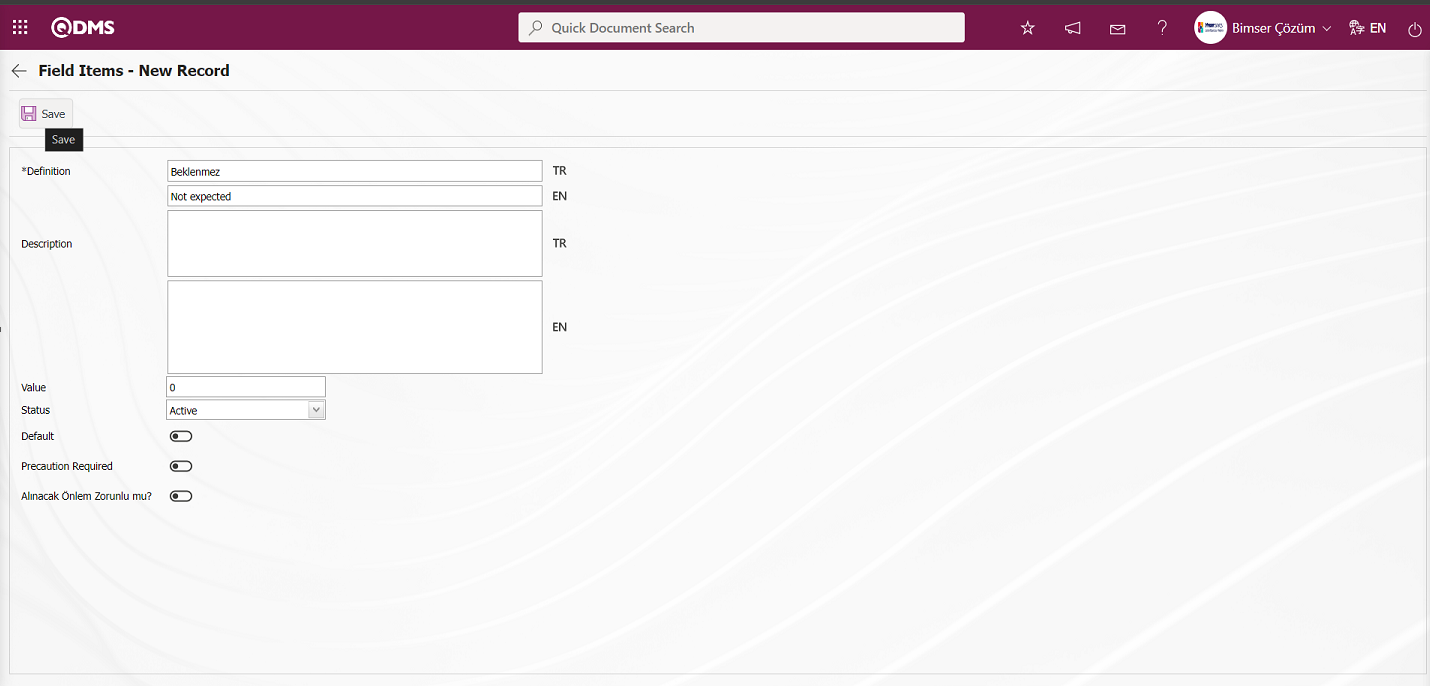
Define the relevant fields on the screen that opens:
Definition: This is the field where the definition information of the value defined in the Field Items - New Record screen is written.
Description:It is the field where the description information of the value defined in the Field Items - New Record screen is written. The parameter is activated by selecting the parameter value “Yes” of parameter 21 in the OHSAS Risk Assessment parameters.
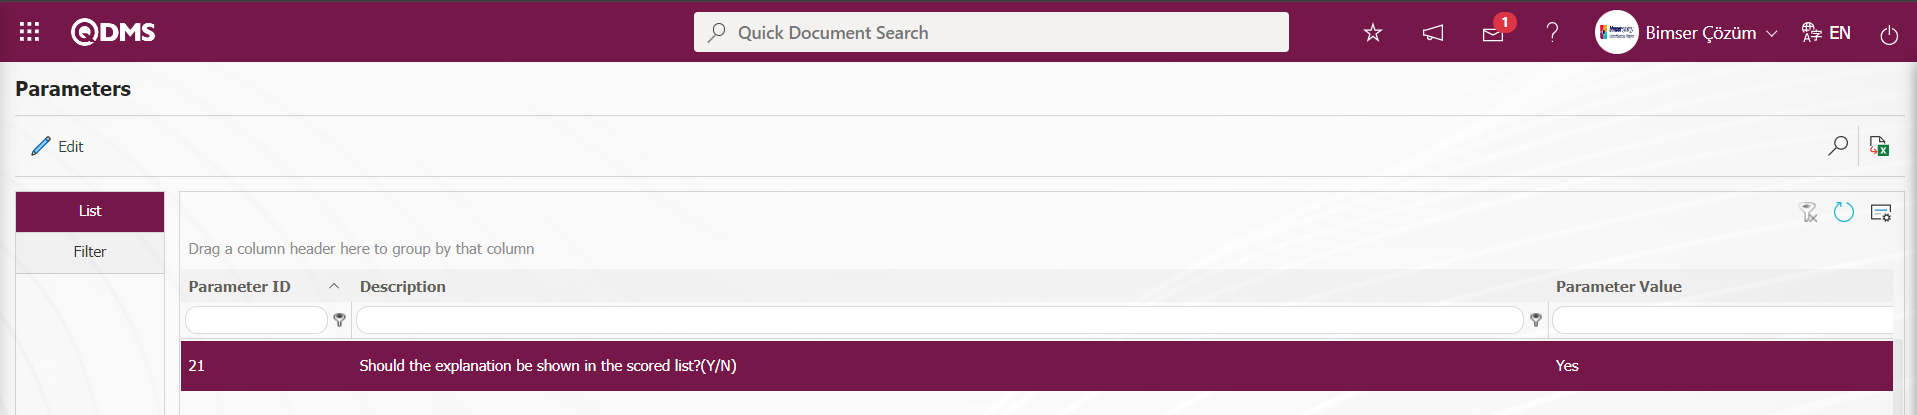
After the parameter is activated, when the value of the field is selected on the risk record screen, the description information is also displayed.
Value This is the field where the value defined on the Field Items - New Record screen is written in points.
Status:This is the field where the status of the value defined on the Field Items - New Record screen is selected as active or passive.
Default: It is the field where the related list value of the value defined on the Field Items - New Record screen is enabled to appear in the field by default. When the check box related to this field is checked, the system automatically brings the value of the field as an option.
Precaution Required: Field Items - New Record is the field where it is mandatory to enter at least one measure from the Precautions tab when the value defined on the New Record screen is selected. When the relevant option is selected, the system does not save the risk record without defining the measure in the Precautions tab and gives a warning message that the measure definition process will be performed.
After the required fields are filled in, the value definition registration process is performed by clicking the  button in the upper left corner. Value definition operations of fields such as probability, severity, frequency, scored list, list, list type with search feature, etc. are done in this way. There may be changes on this screen according to the field properties.
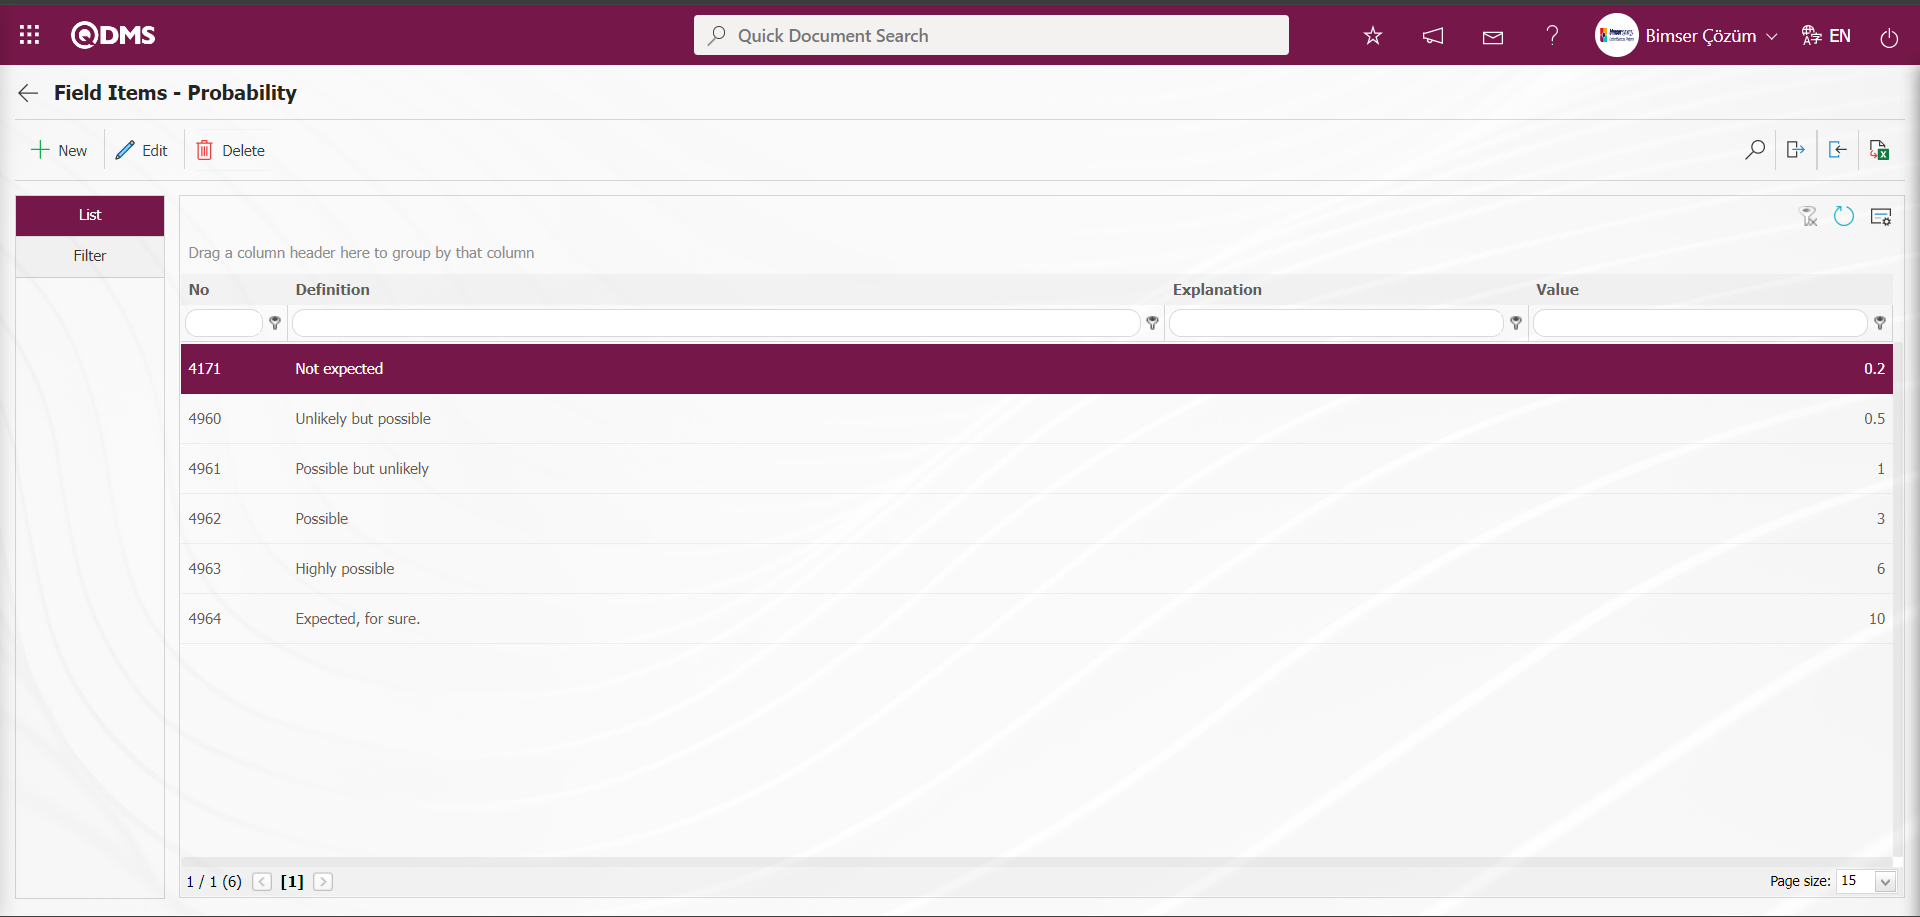
In the Field Items - Probability screen, field values are transferred to the system in bulk with the (Download Template) and (Upload Template) buttons for the definition of other values.
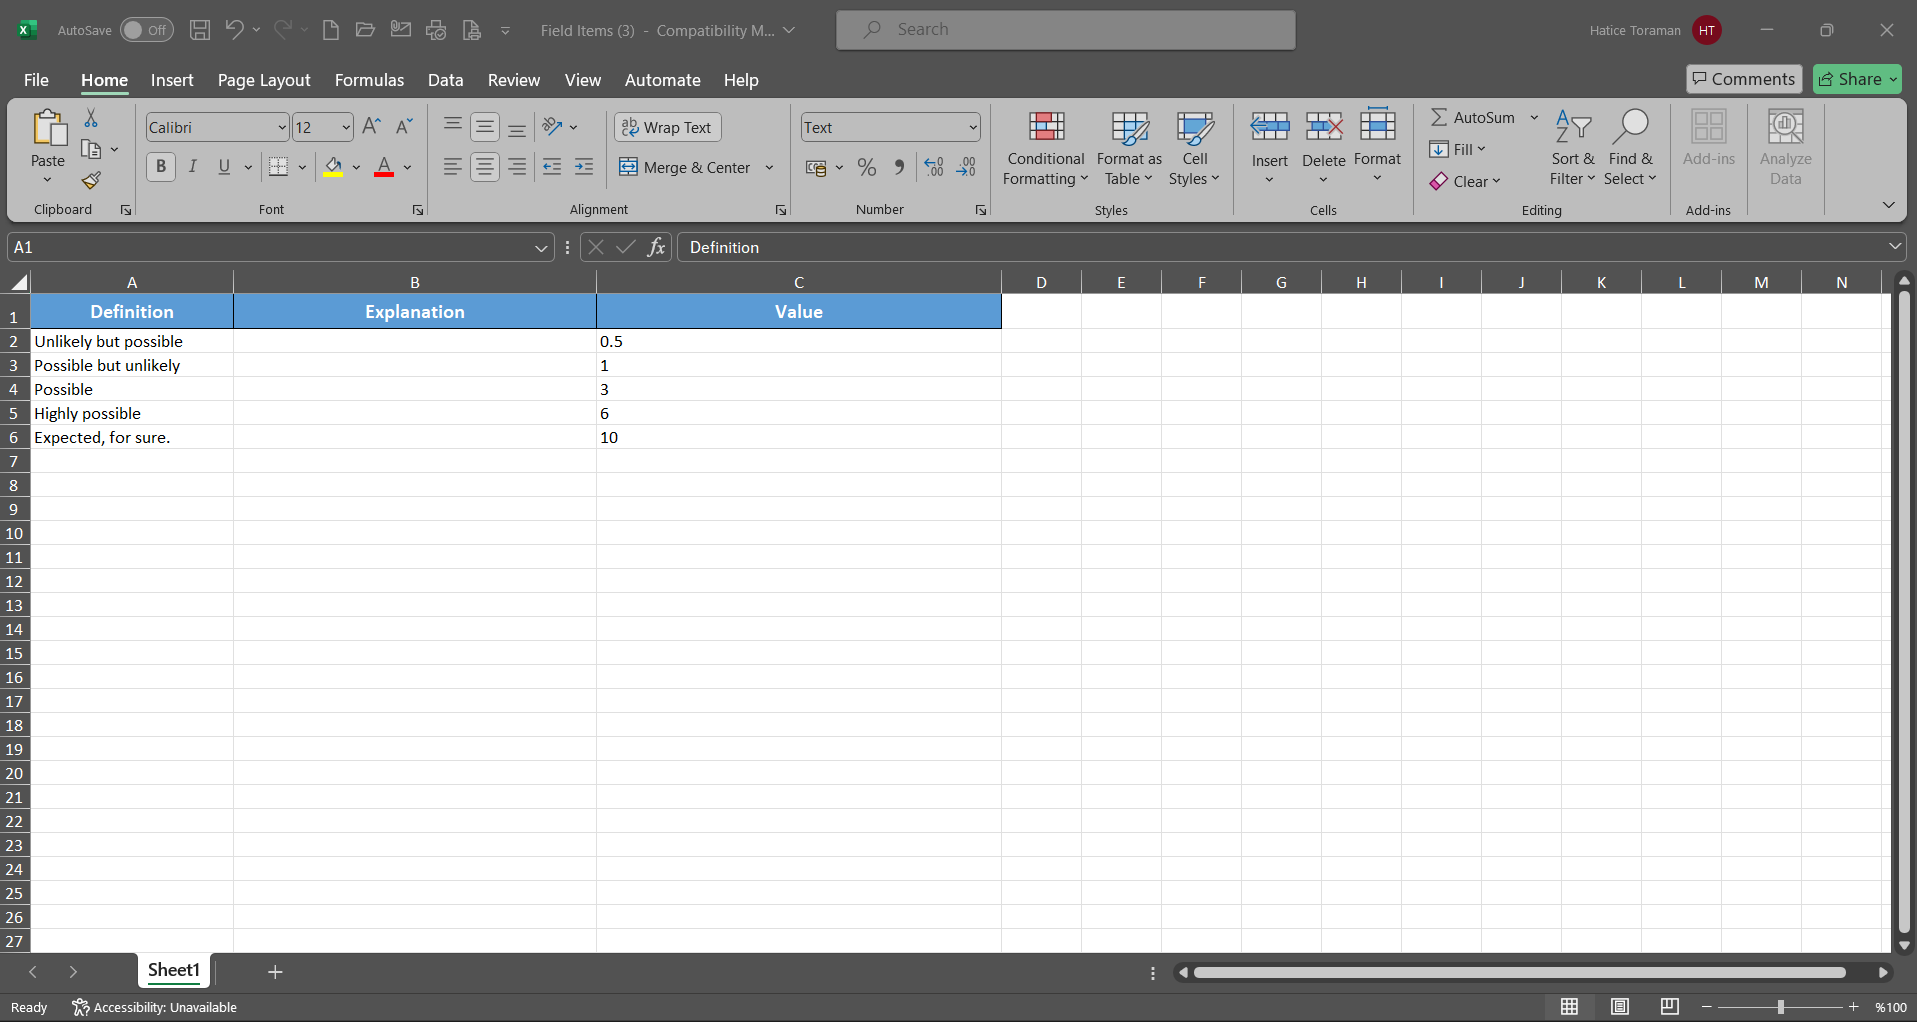
Click the (Download Template) button on the Field Items - Probability screen.
The values transfer template is downloaded to the computer. The relevant fields in the downloaded transfer template are filled by typing the relevant information.
Click the ( Upload Template ) button on the Field Items - Probability screen.

Click the “Browse” button on the Upload File screen.
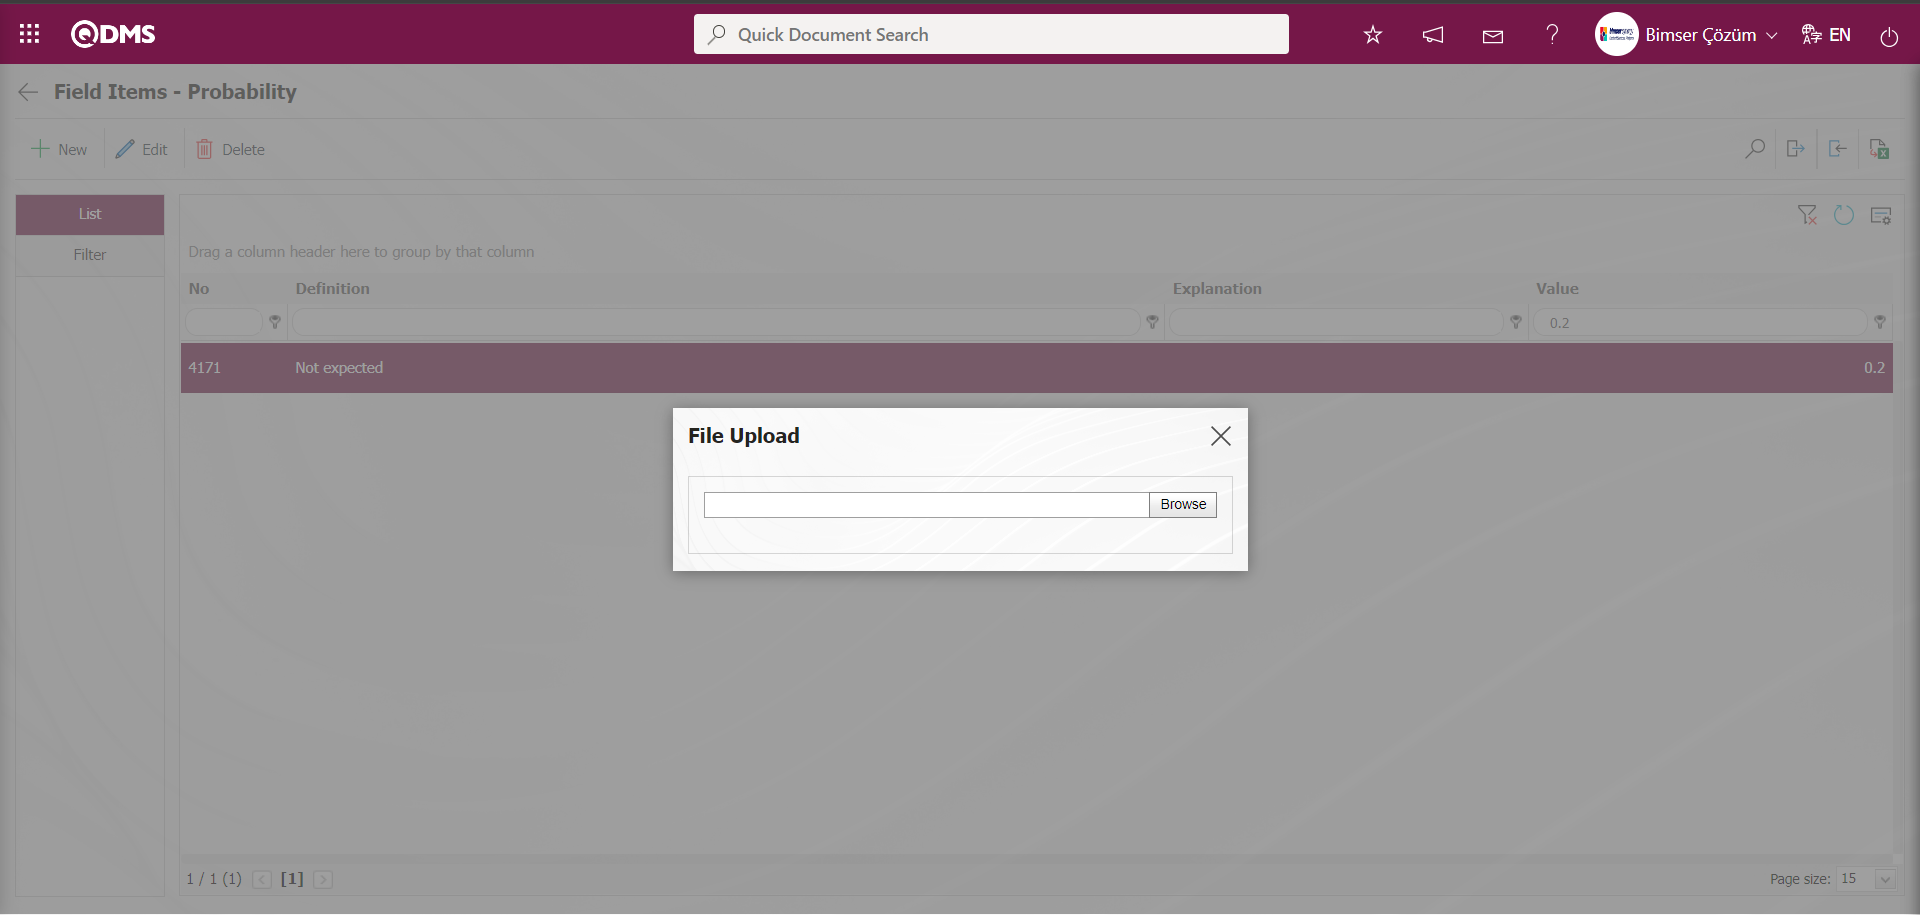
In the screen that opens, the filled Values Transfer template is selected.
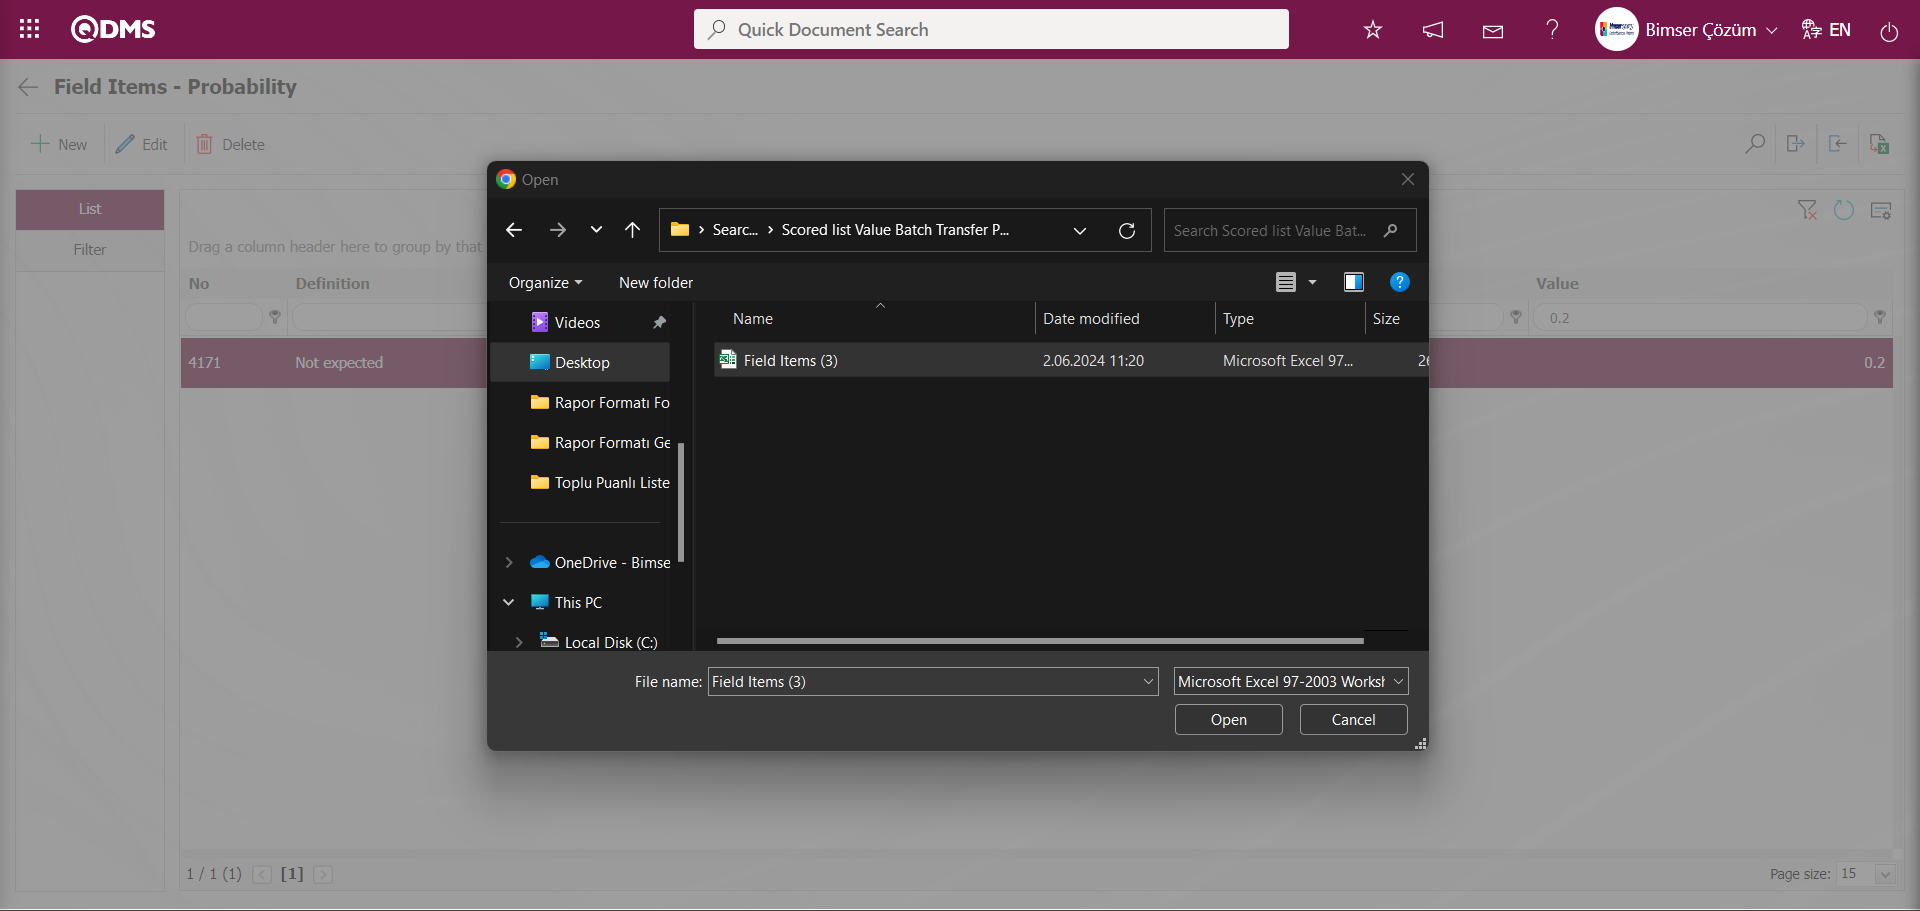
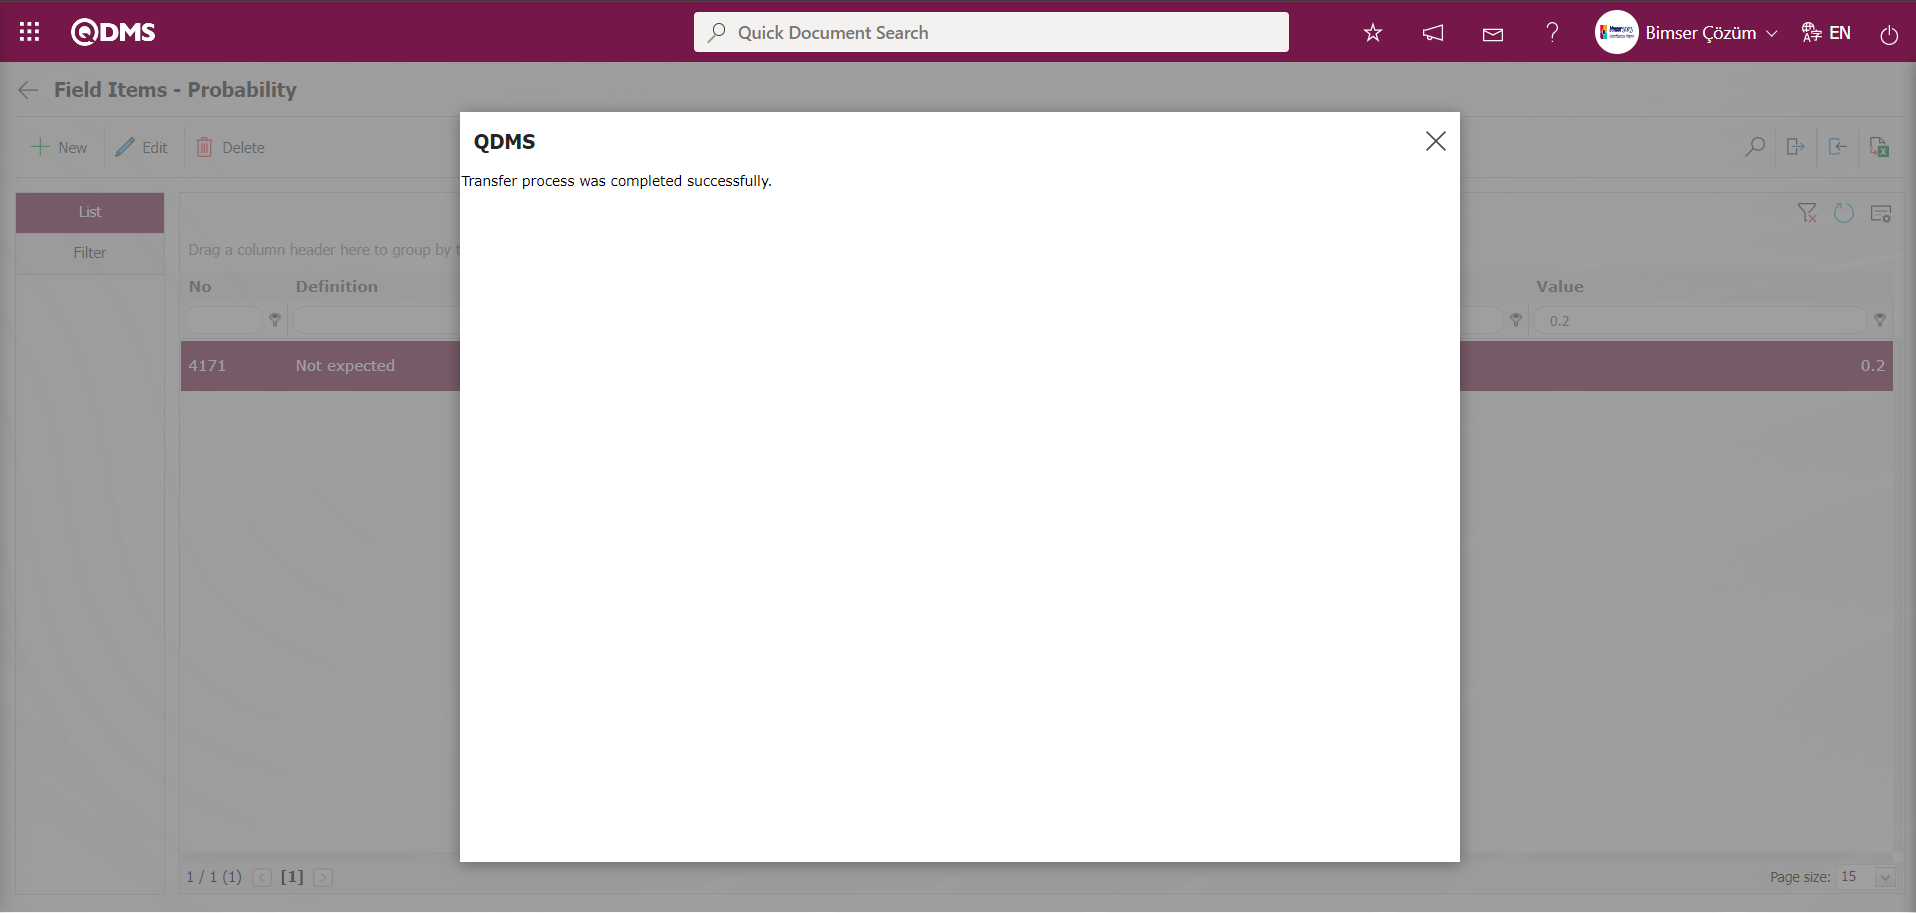
‘Transfer operation completed successfully.’ By giving the message, it is indicated that the transfer process of the values of the scored list field type has been completed.
Defining a Parametric Field with Frequency Scored List Type: It makes a selection from the drop-down menu, it is a parametric field type with the score values of the list elements.
In the same way as the definition process of the field with Probability Score list type, the definition process of the field with Frequency score list type is done.
Defining the values of the parametric field of Frequency Scored List type;
As with the probability scored list field type, the process of defining the values of the Frequency Scored List type is done manually with the button on the Values screen or by using the (Download Template) and (Upload Template) buttons to transfer the field values to the system in bulk.
Violence Scored List Parametric Field Type Definition: It is a parametric field type that allows selection from the drop-down menu and has the score values of the list elements.
Just like the definition process of the field with Probability Score list type, the definition process of the field with Violence score list type is done in the same way.

Defining the values of the parametric field withViolence Scored List type;
As in the probability scored list field type, the process of defining the values of the Violence Scored List type is done manually with the  button on the Values screen or by using the (Download Template) and (Upload Template) buttons to transfer the field values to the system in bulk.

The definition of the fields for which data entry is selected as input type is performed as above. The process of defining scored list type fields and their values is done in this way.

Parametic Field Definition Process with Risk Value Text type: It is a parametric field type that adds a text box that allows manual typing.
In the definition process of this field, the Calculated option is selected in the Input Type field. Excel is selected in the Excel and SQL options in the Formula Type options. (In the Formula fields defined depending on Excel and SQL options, assistance is obtained from the Bimser Support team.)
In the process of defining the parametric field with Risk Value text type, the  button is clicked.

Field Definition-New Record screen opens.

Related fields are defined on the screen that opens;
Field Code:This is the mandatory field where the Field Code information is entered on the Field Definition-New Record screen. It should be defined without using characters such as spaces and Turkish characters, so that it is not the same as previously defined fields. Ex. '001' , 'RK'
Field Name:This is the field where the Field Name information is entered on the Field Definition-New Record screen.
Title Note:This is the field where the note information containing explanatory information about the field data entry is entered on the Field Definition-New Record screen. It is the information displayed when hovering over the field with the mouse.
Input Type:It is the field where the input type can be selected as Calculated or Data Entry type on the Field Definition-New Record screen. Input Type option shows whether the created field will be determined manually by data entry or by calculation method. For example; Calculated is selected.
Entry Type: Field Type - This is the field that is displayed when the entry type Calculated option is selected on the New Record screen. The formula of the field defined in the Formula Type field is written.
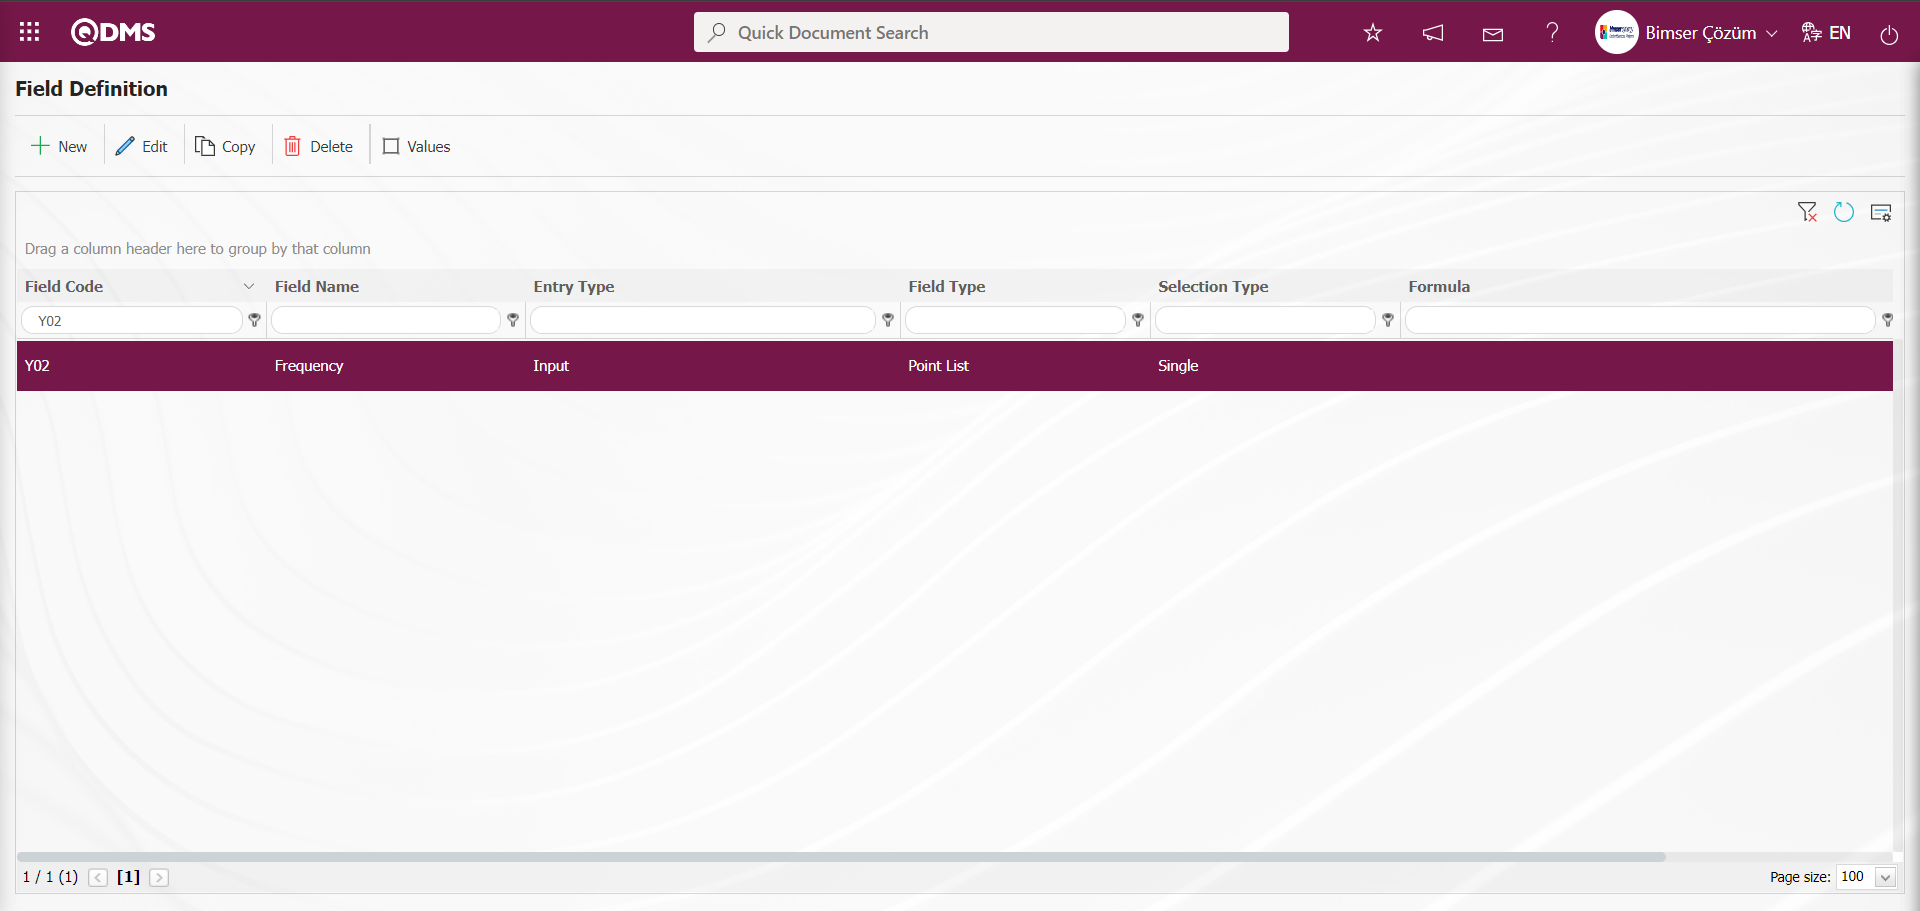
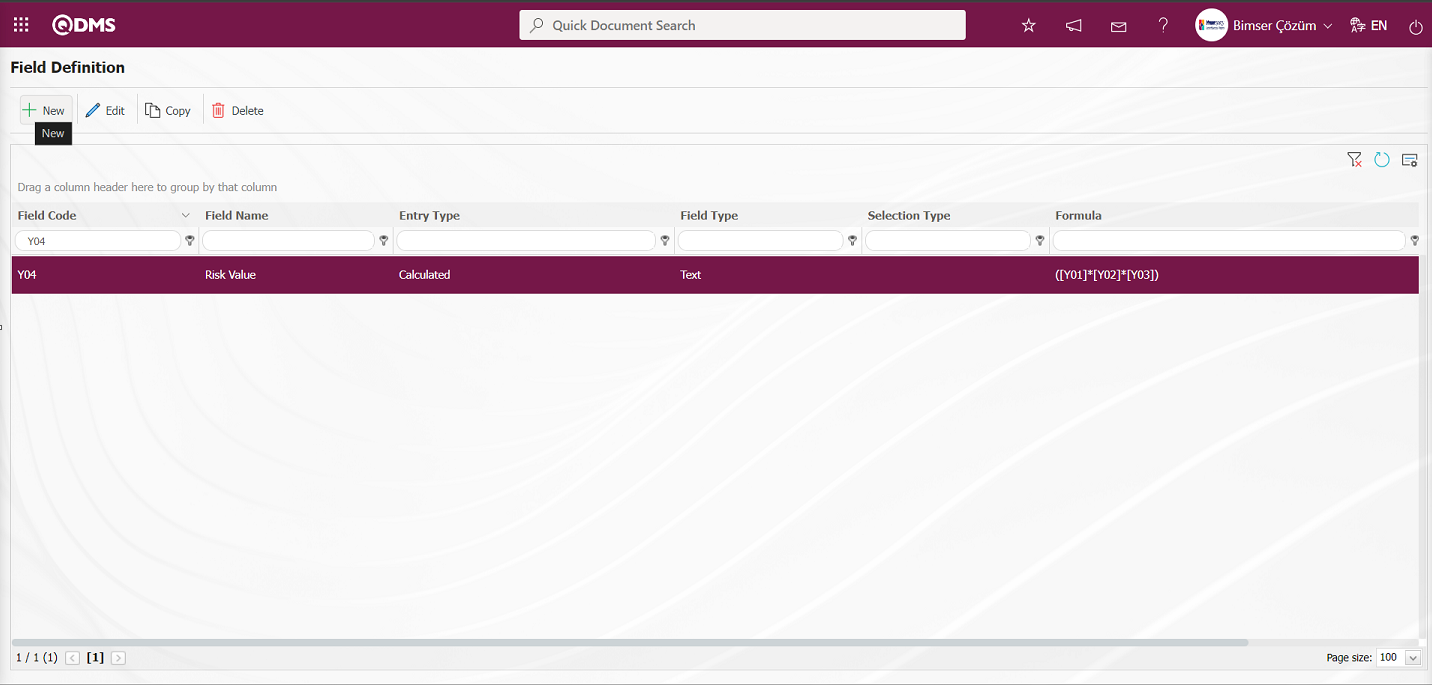
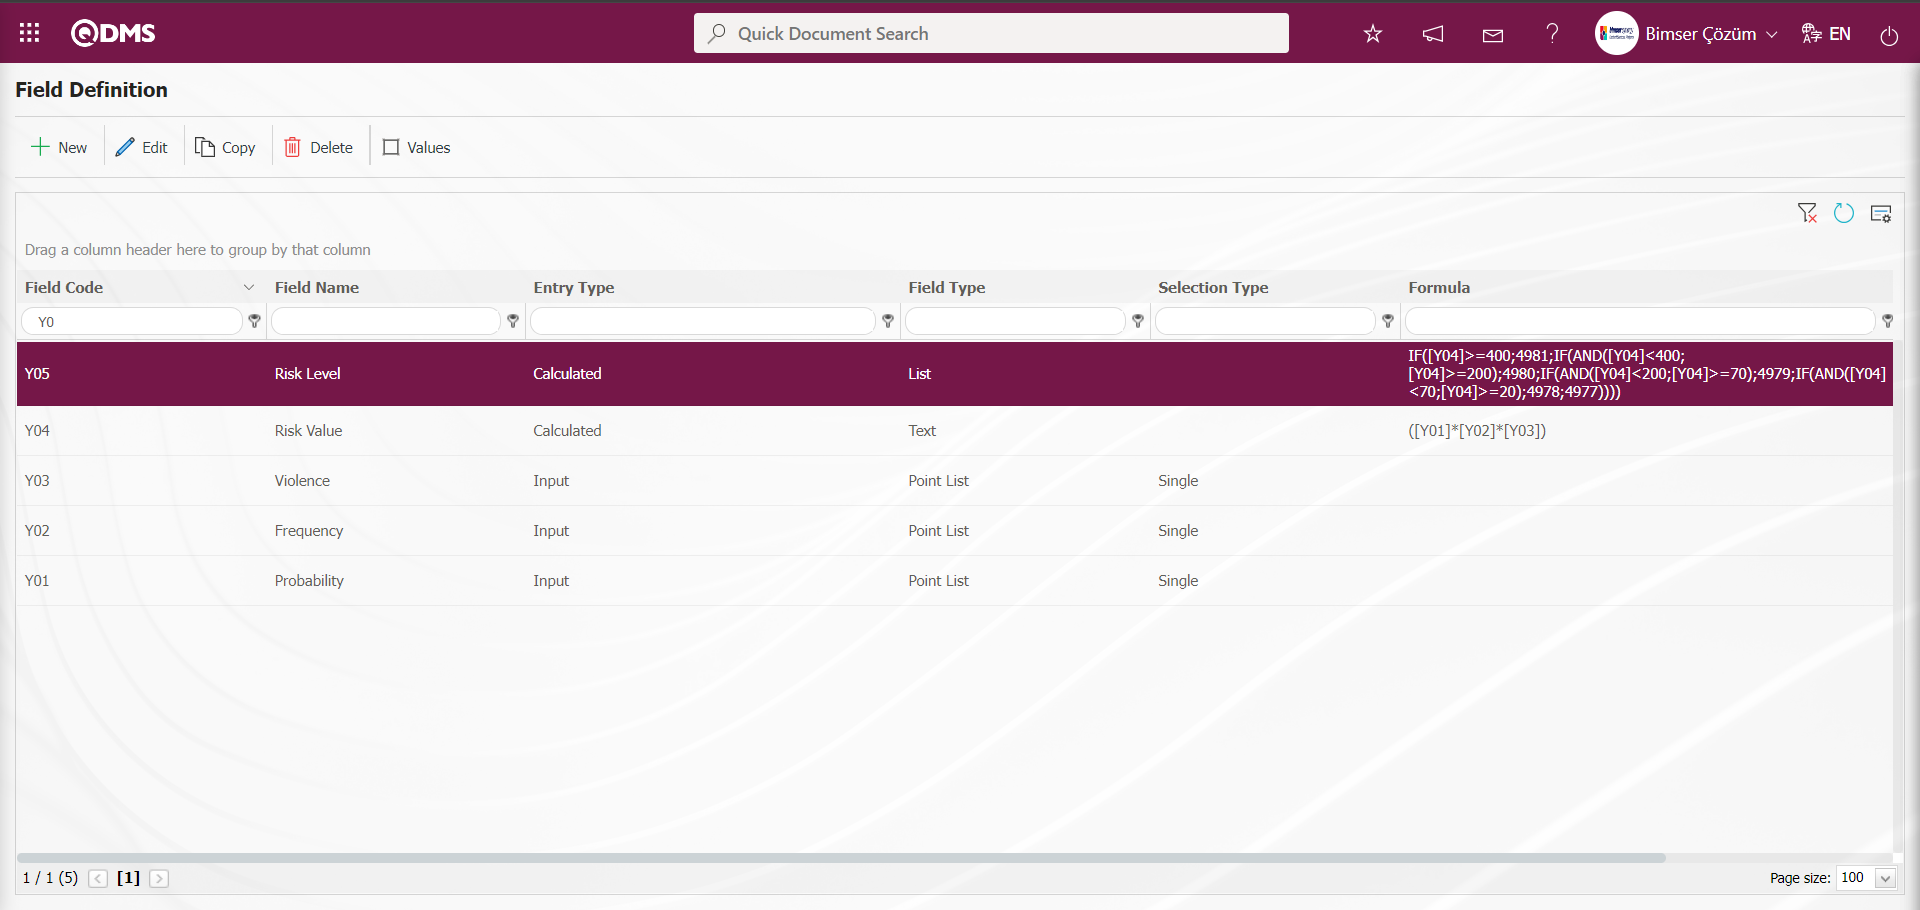
Formula: ([Y01]*[Y02]*[Y03]) is written as a multiplication process by writing the formula field codes in square brackets. In this process, in the Field Definition menu, Probability, Frequency and Severity scored list-type fields are defined and written as the product of the field code in square brackets.
Field Type:This is the field where the field type information can be selected on the Field Definition-New Record screen. Field Type indicates which type of the created field is text, numeric, date, list, etc. In the definition process of Formula Type fields, numeric or text type field selection process is done. Ex: Text field type is selected.
Condition of Appearance: This is the field where the Condition of Appearance information is entered on the Field Definition-New Record screen. If a field will be seen depending on the condition of another field, the condition of appearance is used. It allows the field created according to the values of the list-type field to be displayed. Its usage is [ALANKODU]=ALAN_DEĞERİ etc. (For example, Is there an opportunity? Field's field code is 01 and Opportunity field's field code is 02. If the “Opportunity” field should be seen if the “Yes” value with value code 100 is selected from the options in the “Is there an opportunity?” field, the formula should be written as follows in the “Opportunity” field's appearance condition
Status:This is the field where the status can be selected as “Active” or “Inactive” on the Field Definition-New Record screen.
Width:This is the field where the width information is entered on the Field Definition-New Record screen.
Enter the field code and field name information in the Field Definition-New Record field code and field name information. Input Type and Field Type are selected. Input Type is selected as Calculated and the formula created depending on the field codes is written in the Formula type field. After the required fields are filled in the Field Definition screen, the definition registration process of the field with formula content is performed by clicking the  button in the upper left corner.
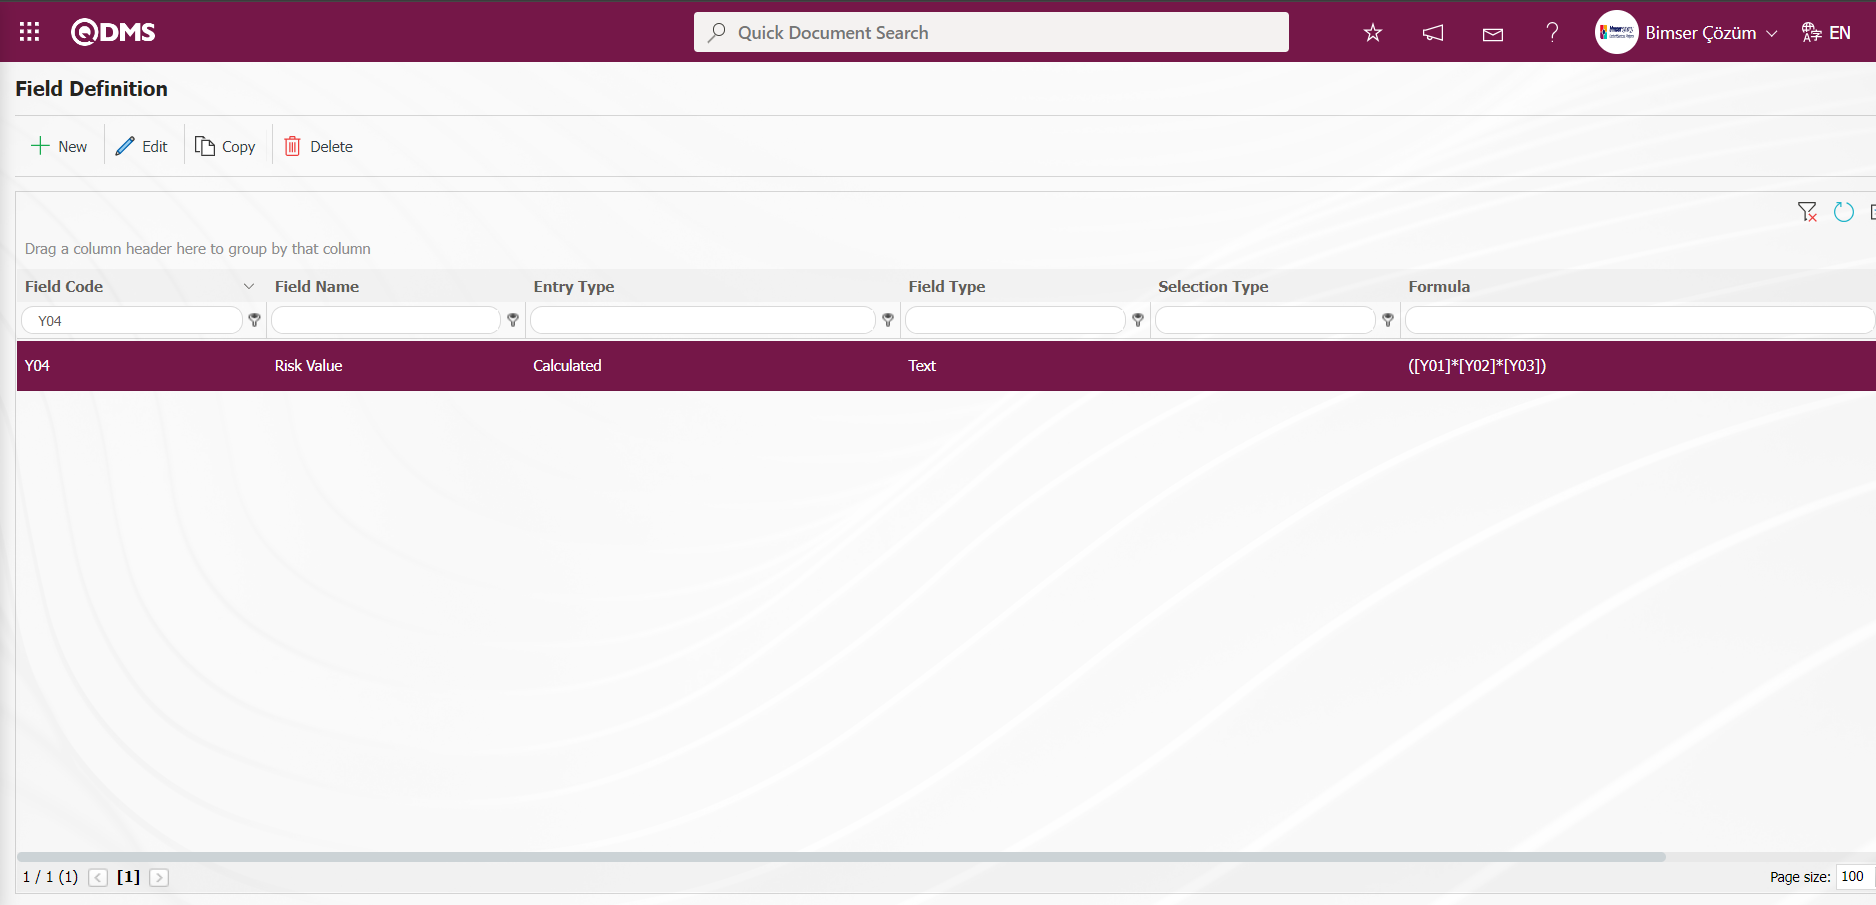
Formula entries are made on the definition screens of the related fields. For example, a formula can be analyzed as follows.
In a field written as ([Y01]*[Y02]*[Y03]), the expression written in square brackets represents the field codes. These expressions are determined by the user when defining fields on the field definition screen.
For the Risk Value field, Y01; for the Probability field, Y02; for the Frequency field, Y03; for the Violence field, the formula will be in the form of ([Y01]*[Y02]*[Y03]). As a result of this formula, the Risk Value Field will be automatically calculated by the system as the product of the values selected in the Probability, Frequency and Violence fields. Another formula use in the calculated fields is with the IF function. In order to use the IF Function for list type fields, a value must first be defined for the relevant field.
Defining Risk Level List Type Parametric Field: It is a parametric field type that makes a single selection from more than one element. Selection is made in the list values of the defined list-type parametric field. Finally, the definition process of the Risk Level list-type field is done.
To add a new field to the Field Definition screen, click the  button on the upper left corner of the screen to open the Field Definition- New Record screen.
Field Definition-New Record screen opens.
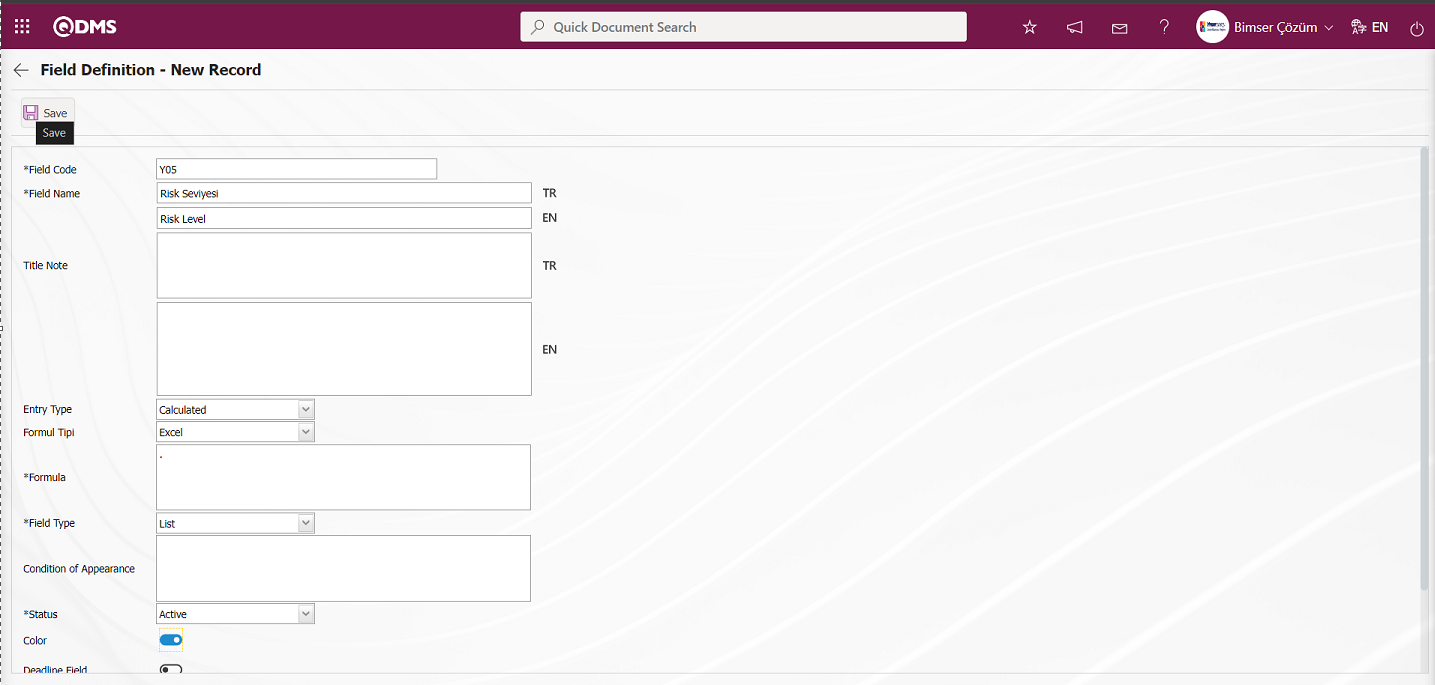
Risk Level is defined by placing a “.” sign in the formula field of the field. After defining the Risk Level for the formula to be written depending on the list values, the field is updated and the formula field is written. The values of the Risk Level field are defined. If the color box is checked in the related field in the field definition screen, the color that this value represents should be selected in the values screen. When the risk details are displayed under the Integrated Management System section, these colorings visually show the users in which range the relevant risk is located. Care should be taken to ensure that the colors here are compatible with the colors in the risk procedure.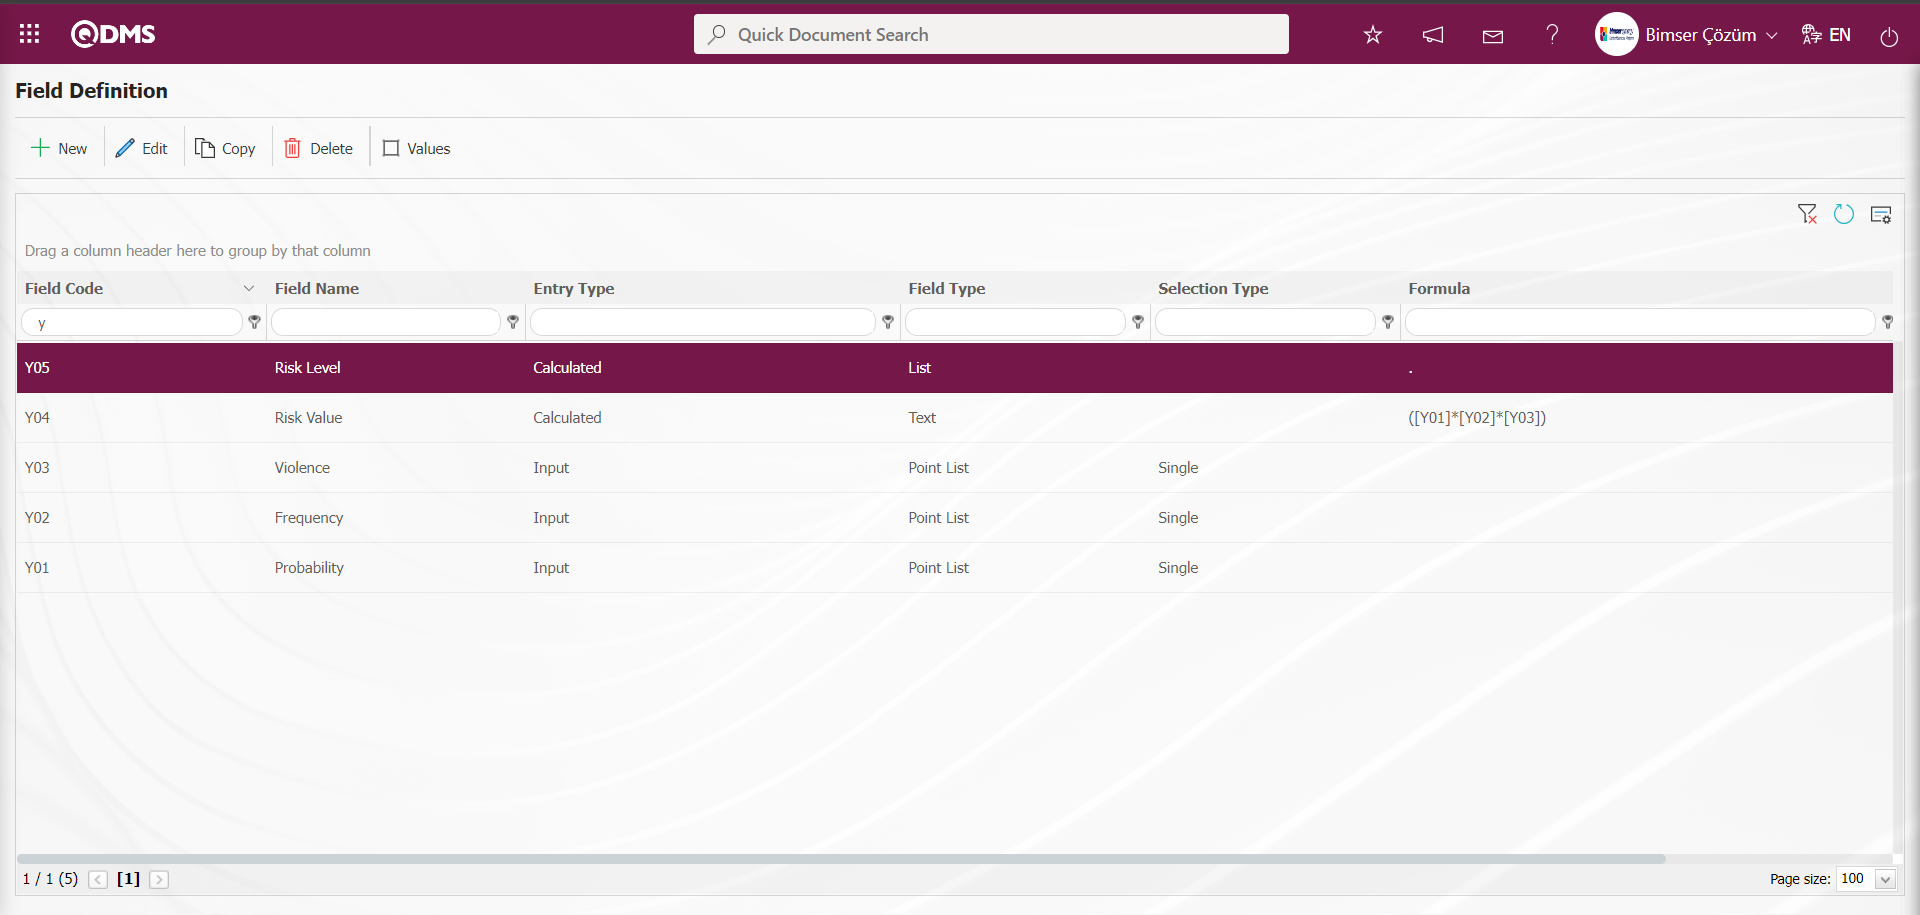
On the Field Definition screen, select the Risk Level list-type field and click the  button to define the values of the field in the same way as the definition of the values of the Probability field.
Click the button to define a new value on the Field Items - Risk Level screen.

Field Items - New Record** screen opens.

Related fields are defined on the screen that opens:
Definition: This is the field where the definition information of the value defined in the Field Items - New Record screen is written.
Description: It is the field where the description information, if any, of the value defined in the Field Items - New Record screen is written.
Status: It is the field where the status information of the value defined on the Field Items - New Record screen is selected by clicking the drop-down list and selecting the “Active” option from the options opened.
Color: This is the field where the value defined on the Field Items - New Record screen is selected from the color options opened by clicking the drop-down list.
Default: It is the field where the check box related to the relevant field is checked in order for the value defined on the Field Items - New Record screen to be the default. When the check box related to the default field is checked, the value of the field is automatically brought by the system in the field.
Precaution Required: Field Items - If it is desired to take precaution about the value defined on the New Record screen, the relevant check box is the field where the relevant check box is checked. When the relevant check box is checked, when the value of the field is selected, the system requires precaution to be taken for this value. When no precaution is taken in the risk registration process, a warning message about taking precautions is sent by the system.
After entering the relevant information in the required fields, the value of the field is recorded by clicking the  button in the upper left corner of the screen
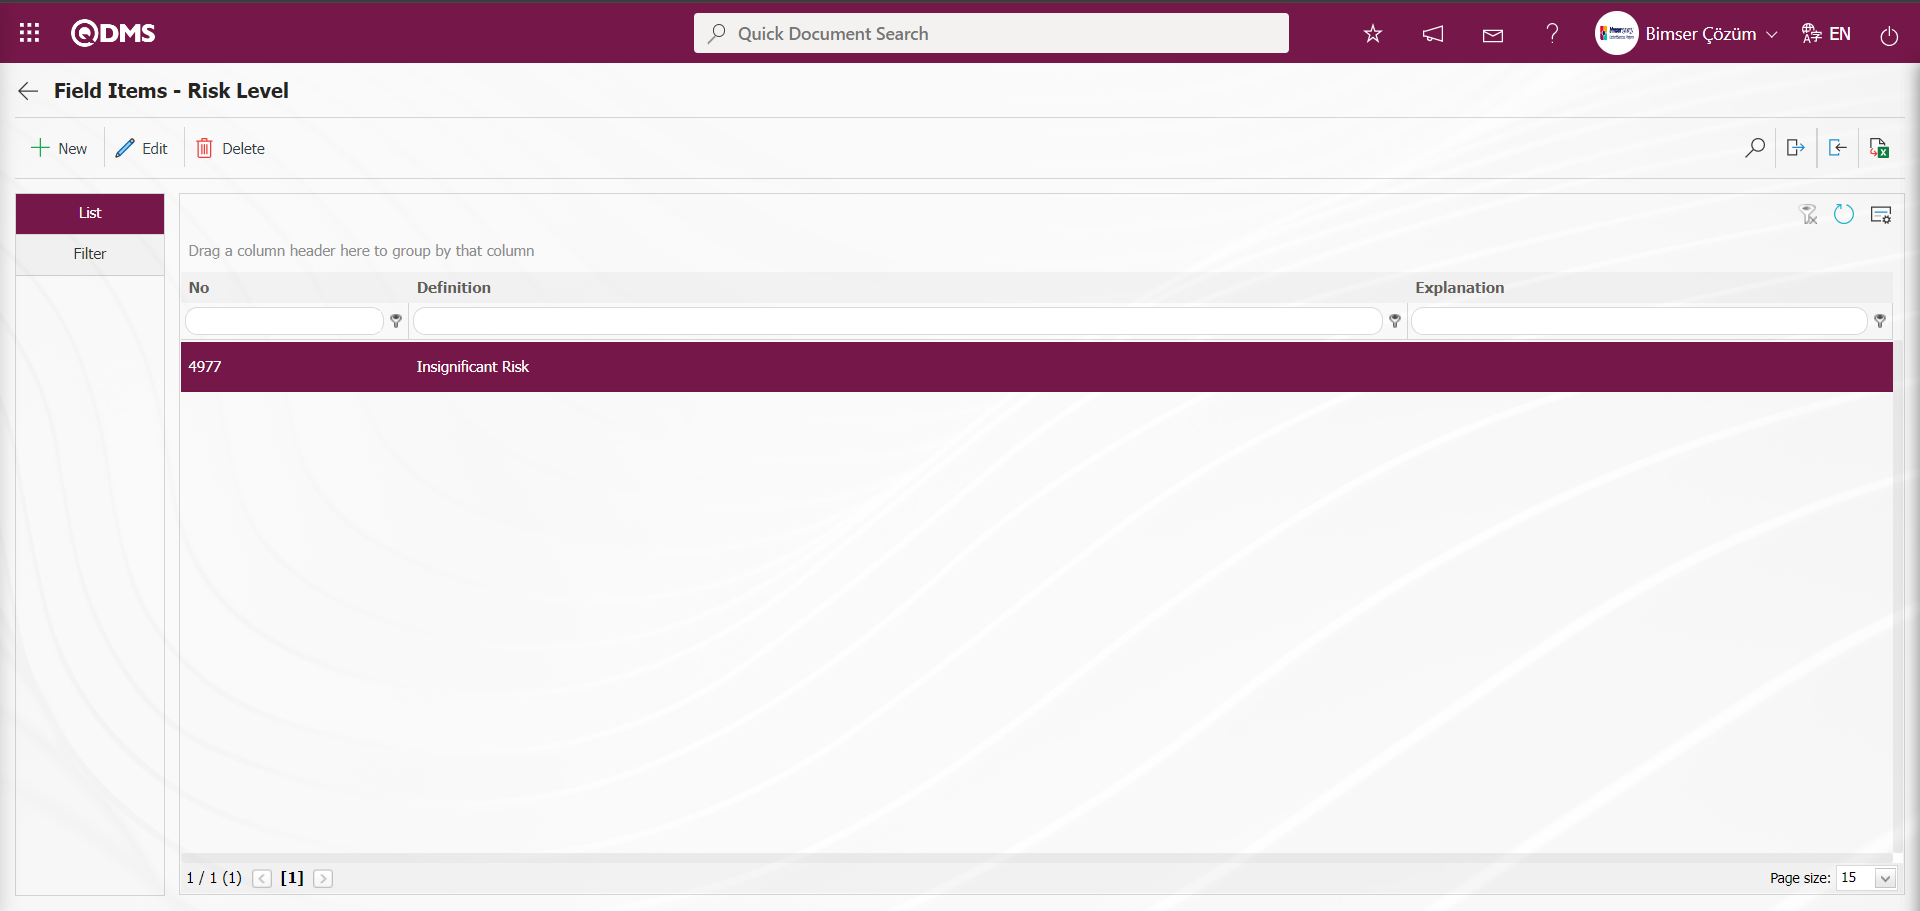
In the same way, the values of the Risk Level are defined manually by clicking the button or by downloading the transfer template, filling the downloaded template and uploading it to the system and defining all values.
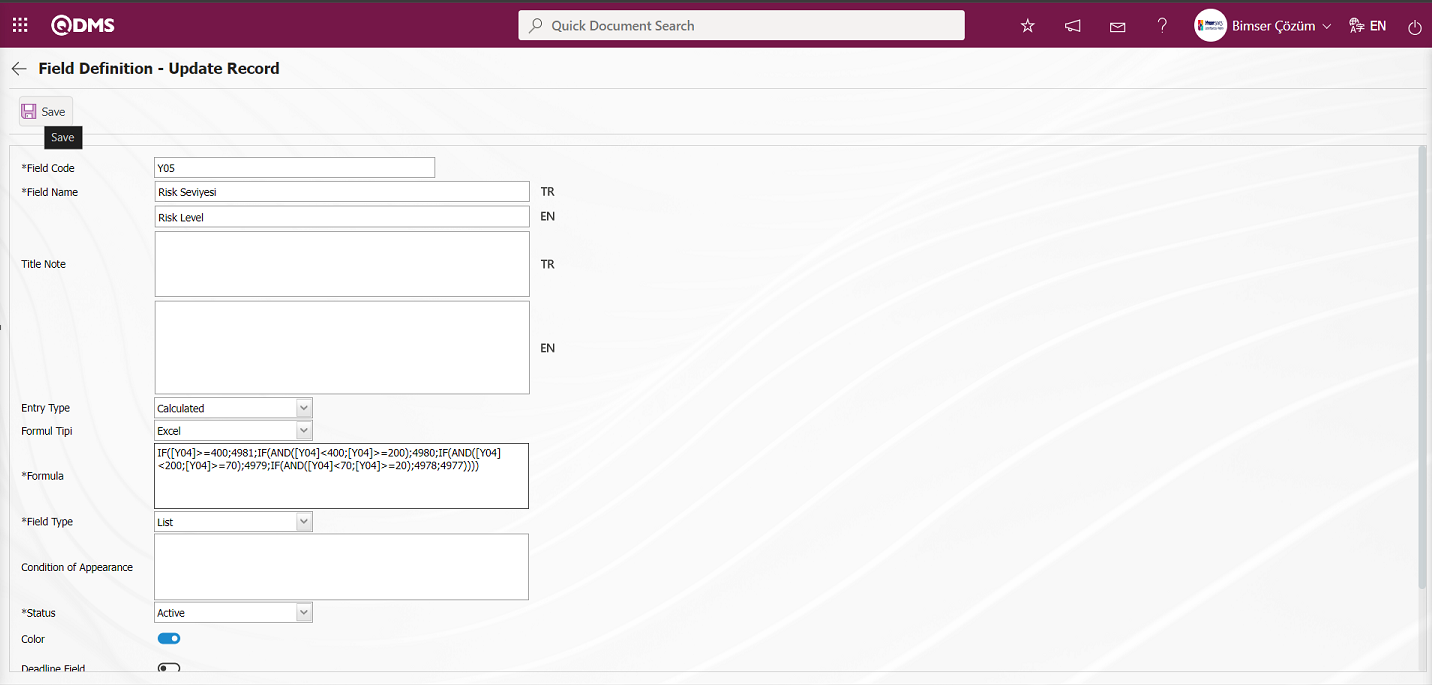
After the related field values are defined, formula entry is made. For formula entry, while in the field definition screen, click on the relevant field and enter the field details with the  button. When entering formulas in this field, field codes must be written in square brackets as mentioned before. The formula should be written in the same logic as the IF function used in Excel, except that some expressions are different (semicolon, comma, etc.). Formula usage: IF([ALANKODU]ConditionCondition; If True, Value Code; If False, Value Code.
Example:
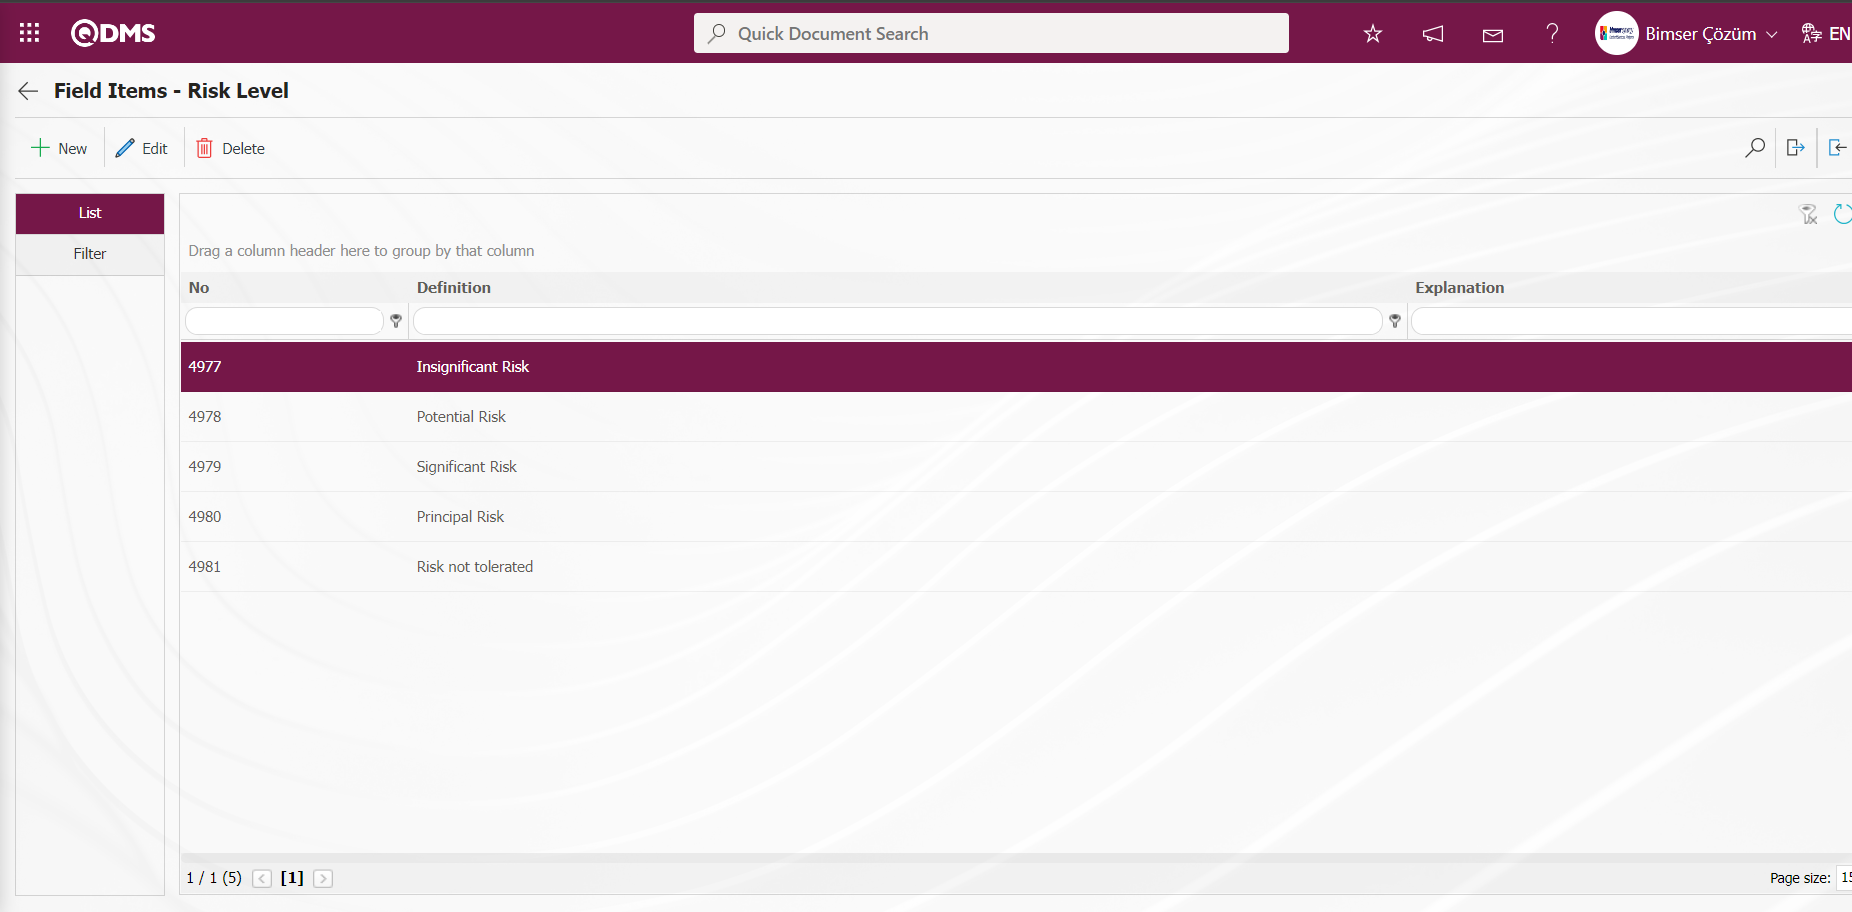
Formula: IF([R09]<2;4192; IF(AND([R09]>=2;[R09]<8);4191;4190))
If the formula whose example is given in the screenshot below is opened, an analysis can be performed as follows.The formula is defined depending on the list values.If the formula whose example is given in the screenshot below is opened, an analysis can be performed as follows.
| Formula Row | Row Meaning |
|---|---|
IF([Y04]>=400;4981 | If field Y04 equals greater than 400, the value 4981 of the Risk Level field (Risk not tolerated), if not... |
IF(AND([Y04]<400;[Y04]>=200);4980 | ...If field Y04 is less than 400 and greater than 200, then value 4980 of the Risk Level field (Principal Risk), if not... |
IF(AND([Y04]<200;[Y04]>=70);4979 | ...If the Y04 field is less than 200 and greater than 70, the value 4979 of the Risk Level field (Significant Risk), if not... |
IF(AND([Y04]<70;[Y04]>=20);4978;4977)))) | ...If the Y04 field is less than 200 and greater than 70, then 4978 of the Risk Level field (Potential Risk), otherwise 4977 of the Risk Level field (Insignificant Risk) |
If the formula is written as a whole, it will be as follows. As in the screenshot, the value 4977 can be added to the formula as a condition, and since the last condition is already this value, writing this value after the semicolon will be enough to complete the formula. The formula is completed by closing the parenthesis as many times as
IF.IF([Y04]>=400;4981;IF(AND([Y04]<400;[Y04]>=200);4980;IF(AND([Y04]<200;[Y04]>=70);4979;IF(AND([Y04]<70;[Y04]>=20);4978;4977))))
Select the Risk Level field on the Field Definition screen and click the button.
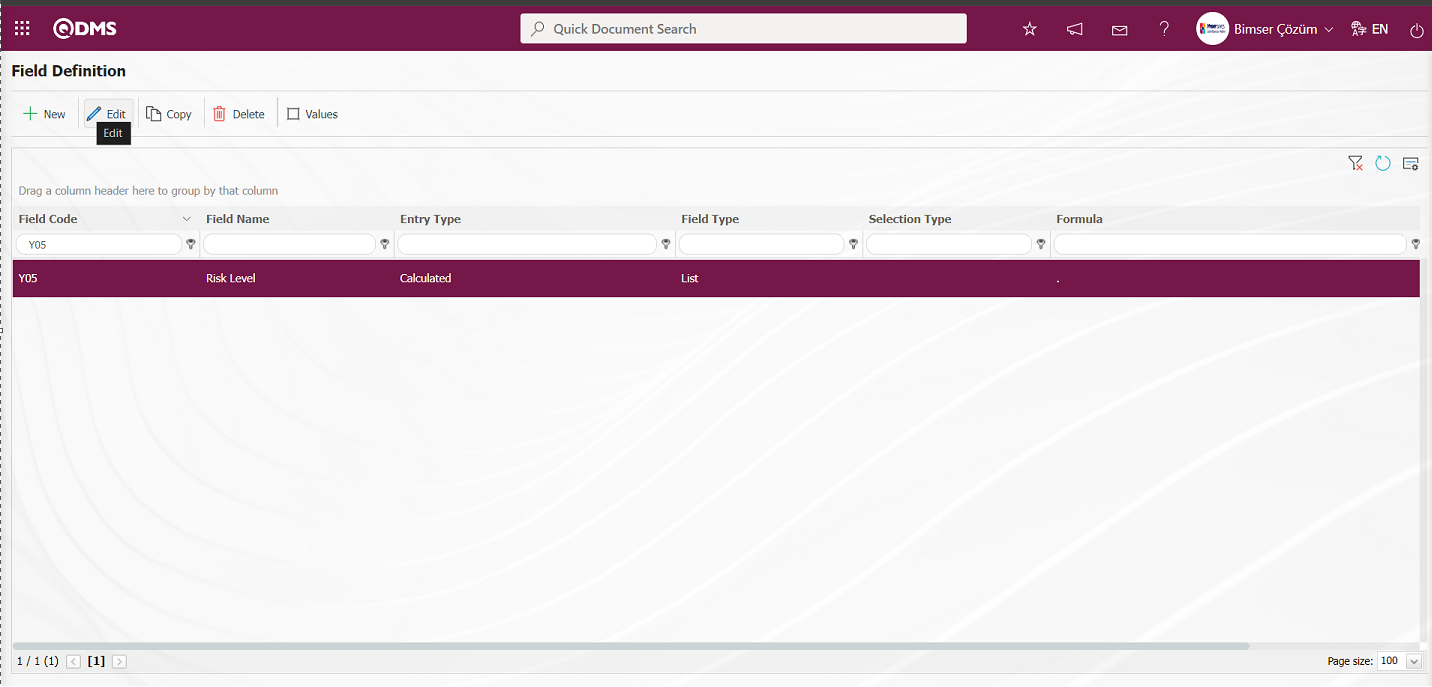
In the Field Definition - Update Record screen, enter the formula information created in the Formula field.
After entering the relevant information in the required fields, the record update process is performed by clicking the button in the upper left corner of the screen.
After all fields are defined in Field Definition, status and buttons are defined by using the  and
and  buttons displayed in the Function Designer menu depending on the parameter 22 “Should the status be used? (Y/N)” After the status and button definition process, the fields are associated with the relevant pages of the functions defined in the Function Designer menu by clicking the
  button. In performing these operations, the approval flow setup must be defined in the Flow Definition menu and the flows must be checked in the Sub-Module Definition menu.
The full list of field types available in the system is given below;
- Text:Adds a text box that allows manual typing.
- Text Multiline: Adds a multi-line text box with no character limit for manual typing.
- Numeric: Enables numeric data entry.
- Numeric-Monetary: Enables numeric entry as monetary value.
- Numeric-Unit: Makes numeric entry as unit.
- Date: Adds a calendar field.
- List: Makes a single selection from multiple elements.
- Scored List: Makes a selection from the drop-down menu, list elements have point values.
- List with Search: Allows single and/or multiple selections from multiple elements with a wide search function.
- Tree List: Allows selection from more than one element with a tree breakdown in a way that can be searched with a wide search function.
- Personnel: Allows to select a person from QDMS personnel database.
- Department: Allows the selection of department information from the QDMS department database.
- Title: Allows to select title information from QDMS title database.
- Document: Allows you to select a document from the QDMS document database.
- Management System: Allows to select management system information from QDMS management system database.
- Customer: Allows to select customer information from QDMS customer database.
- Supplier: Allows the selection of supplier information from the QDMS supplier database.
- Product: Allows product information to be selected from the QDMS product database.
- Company Profile: Allows to select company profile information from QDMS company profile database.
- Title: Adds a title field to the forms to be written in bold letters.
- File: Will bring the appropriate field for file attachment**
- Image:Will bring available space for image attachment
- Image List: Allows selection from a list of images.
- Multiple Image: Allows to select multiple images.
- Table: Allows the creation of a table type field. (After adding this type of field, new field definitions must be made as field values.)
- Query: It is a field type that can be defined in order to make a selection from the main data in QDMS/Ensemble databases. (It should only be defined by Bimser Support Team) Single and multiple selections can be made.
- Query Tree: It is the type of field that can be defined in order to make a selection from the tree-delimited master data in QDMS/Ensemble databases. (It should only be defined by Bimser Support Team) Single and multiple selections can be made.
- Tab: Creates a new tab in which the fields can be seen in the existing risk assessment form by establishing a relationship, except for the tab containing the fields.
- Checkbox List: It is a list type field that can be used for single or multiple selection according to the request.
- Risk: It enables the selection of values from risk-based modules. After adding this type of field, it is necessary to select from which module the values will come from on the field definition screen.
- Annotated List: It is a field type that allows you to write a description next to the selected list value. When defining field values in the Field Definition menu, it is necessary to select whether the description box will be active for each value. According to the selection made here, when the relevant selection is made in the menu where this field will be seen under the Integrated Management System menu, the box is opened for the user to write a description next to the field value.
- Position: It allows to select position information from QDMS position database.
- Clock: Adds a clock type field.
6.1.2. Function Designer
Menu Name: System Infrastructure Definitions/ OHSAS Risk Assessment / Function Designer
The fields added to the field pool with the Function Designer menu can be associated with the desired pages of the risk modules. For this, go to Function Designer menu under System Infrastructure Definitions/ OHSAS Risk Assessment Module. On the screen that opens, the functions of the risk module to which fields can be added will be listed. On this screen, the fields to be used in Defining a Source Group, Source Definition, Risk Assessment Form Definition, Risk Assessment Details, Precaution Definition and Control Definition functions and their order and hierarchy details in approval processes are defined. The buttons to be used in this menu change depending on the activation of the parameter by selecting the parameter value “Yes” of the parameter 22 “Should the status be used? (Y/N)?” from the OHSAS Risk Assessment module parameters. When the parameter is activated by selecting the parameter value of this parameter as “Yes”, the  and
and  buttons appear on the menu. However, when the parameter is inactive by selecting “No” for parameter 22, only the
  button is visible.
With the help of the buttons on the screen;
 : Defining the status is done.
 : Button definition is done.
 : Fields are associated with the related function.
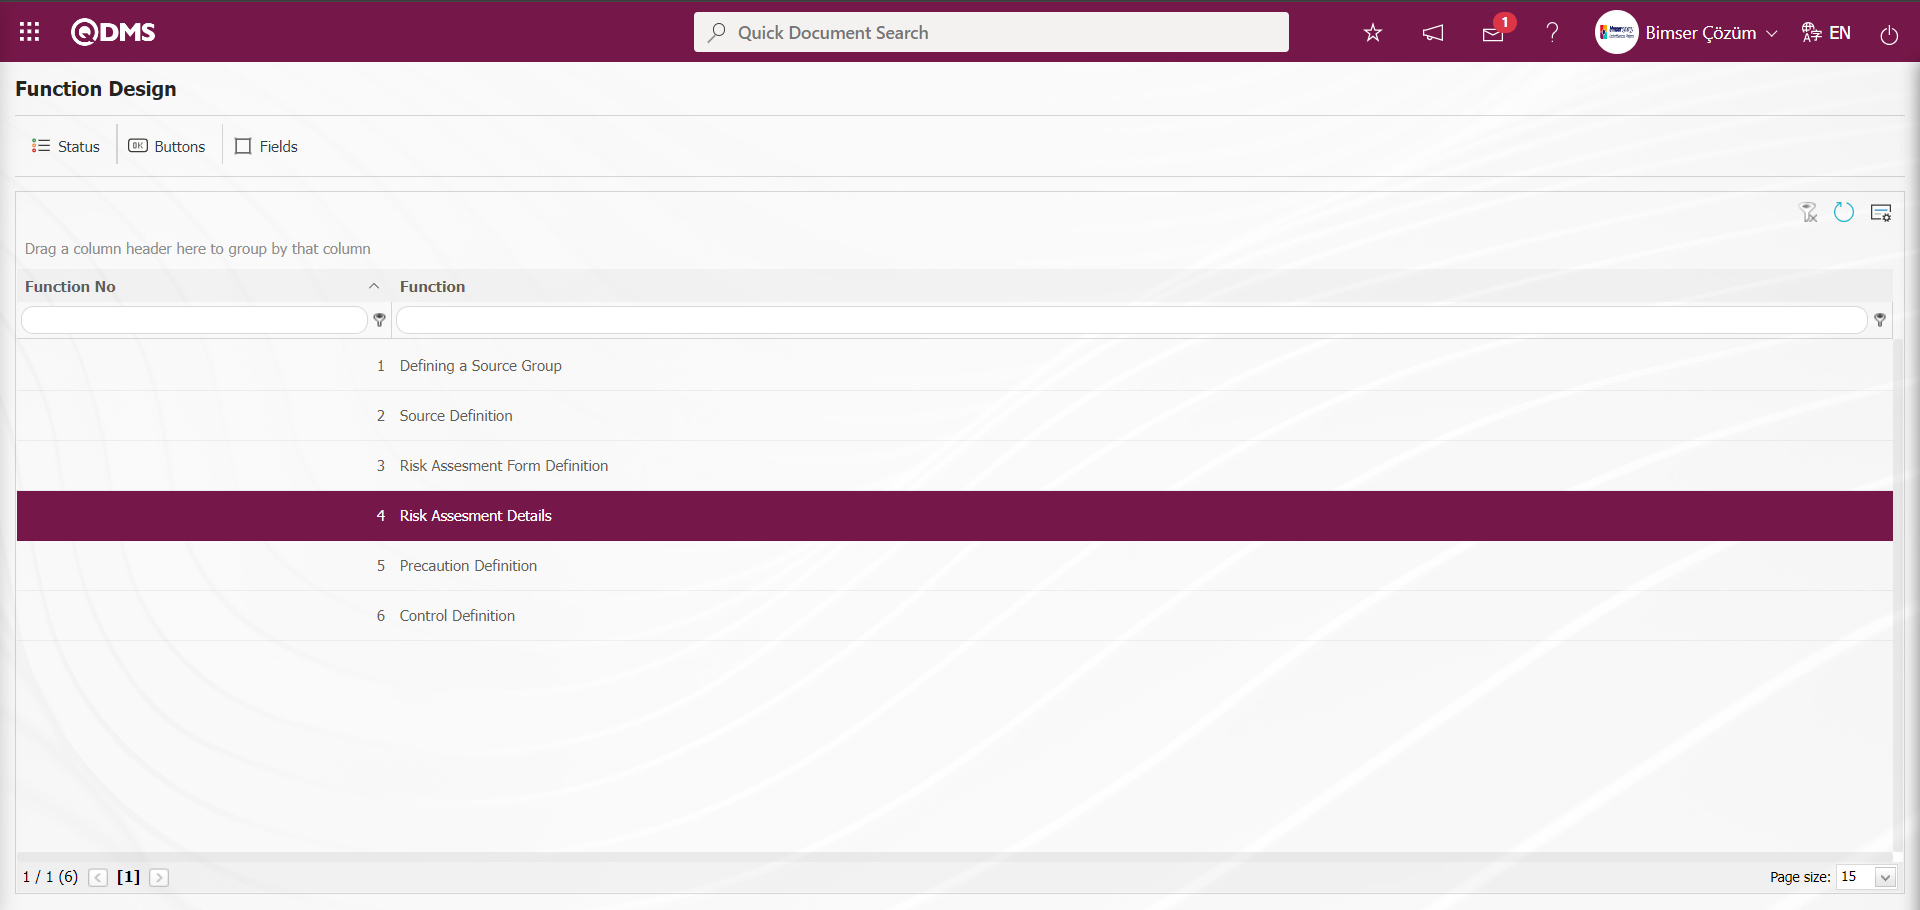
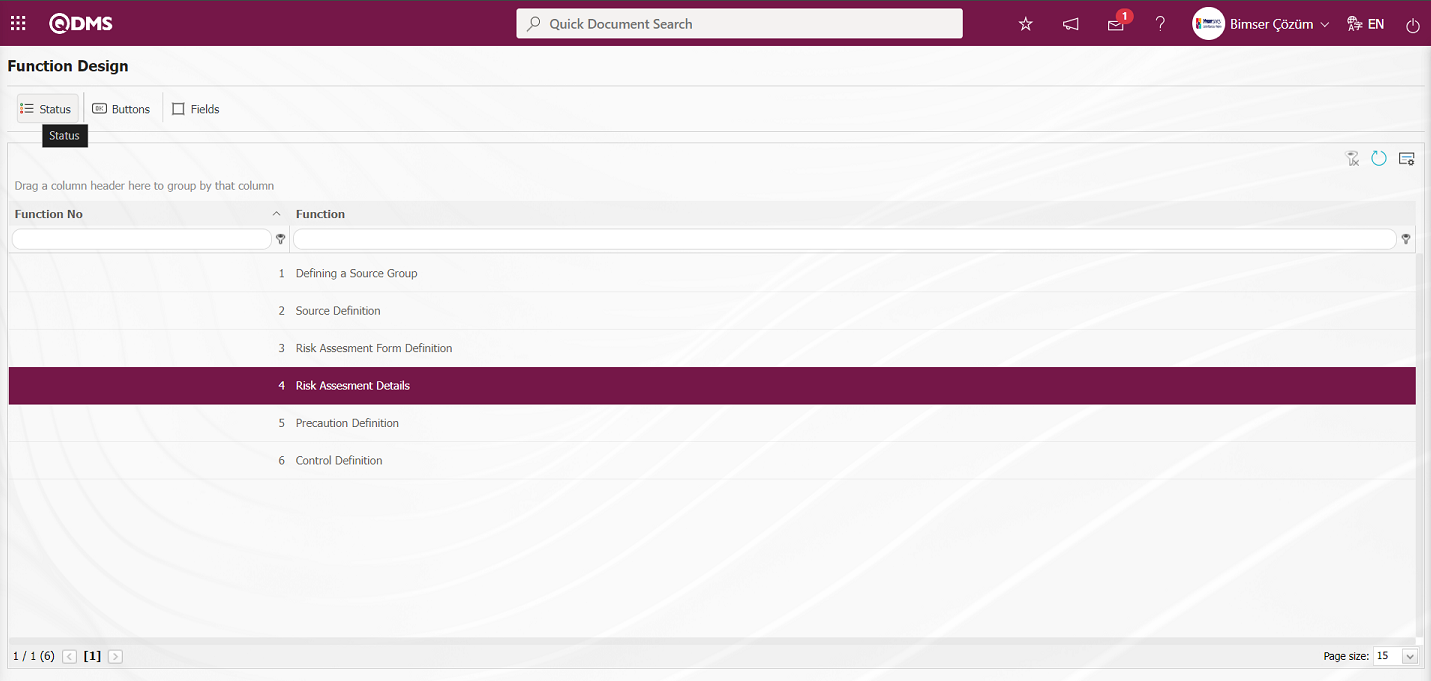
On the Function Design screen, click on the button while the “Risk Assessment Detail” function numbered 4 is selected.
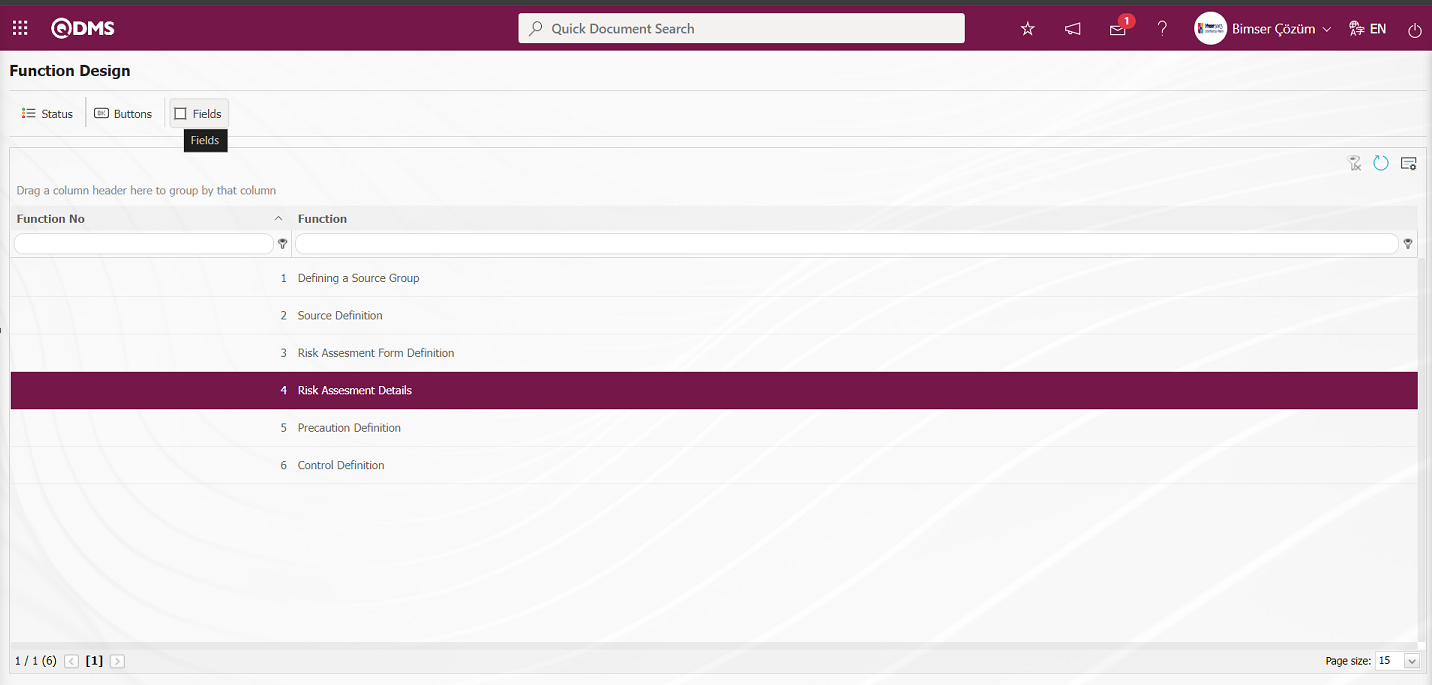
The screen opens where the fields will be associated with the relevant function.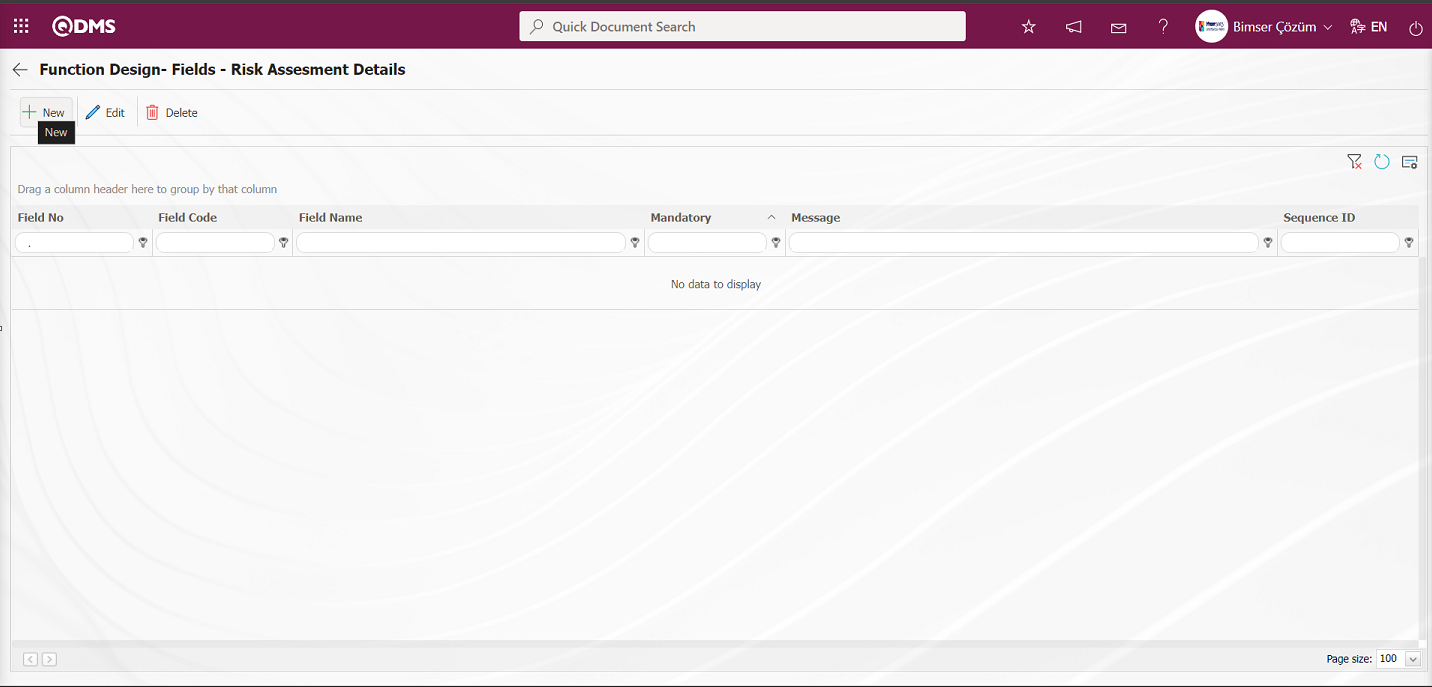
With the help of the buttons on the screen;
 : A new field is added to the selected function in the list.
 : Changes and edits are made on the field information added to the function selected in the list.
 : Delete the field information added to the function selected in the list.
 : Returns to the previous screen.
On the Function Design - Fields - Risk Assesment Details screen, click the button to open the Field Definition - Functions - New Record screen.
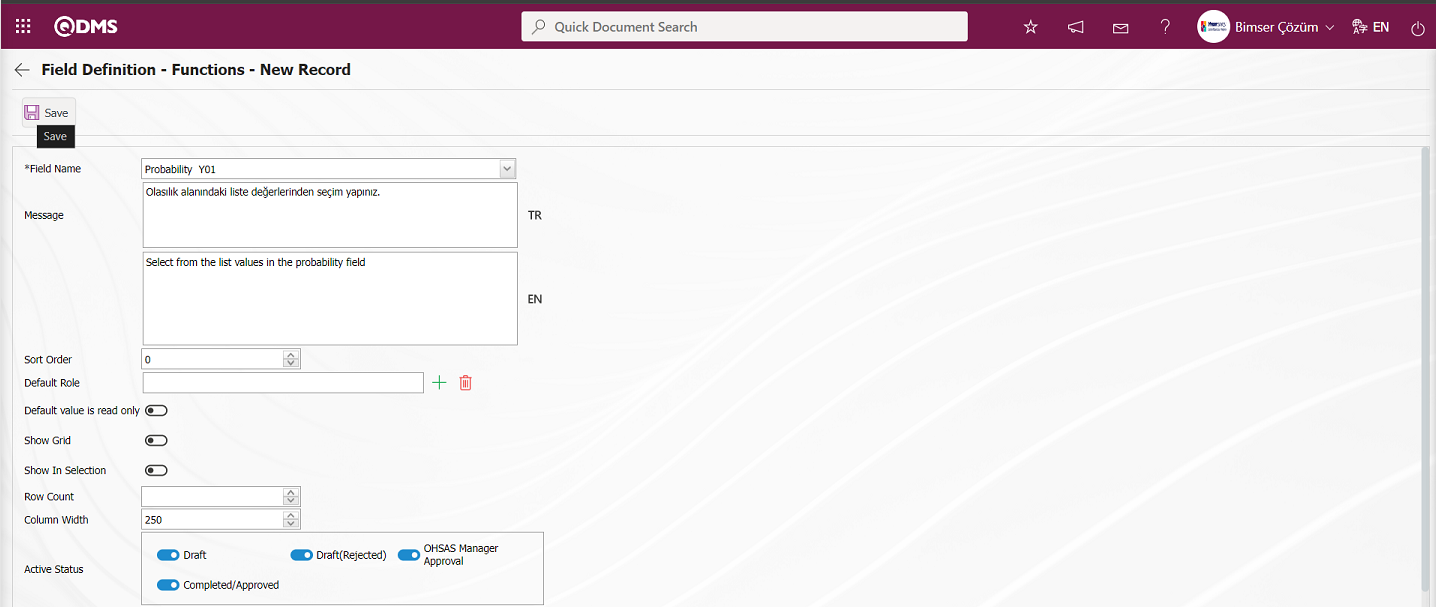
 Related fields are defined on the screen that opens:
Field Name:This is the field where the field selection is made from the fields defined on the Field Definition - Functions - New Record screen.
Message:This is the field where the warning message information to be given when the required field is not filled in the Field Definition - Functions - New Record screen is written.
Sort Order: It is the field where the sequence number of the field is determined on the Field Definition - Functions - New Record screen.
Default Role: In the Field Definition - Functions - New Record screen, if the value of the relevant field is from a previously defined parent form or data such as the name, surname, position, title, department, workplace of the person entering the record, the role defined for them can be selected. For example, in the risk detail form, the default role can be used if a field named department of the risk entrant should contain the department of the user who entered the record into the system. If it is not used, the user can both select their department incorrectly and the user who enters the record will perform an extra operation. Thanks to the default role selected here, the department will come automatically when the user starts to enter risk.
Default value is read only: Field Definition - Functions - If the field selected on the New Record screen brings a value by default, this field ensures that the value it brings is not changed.
Show Grid: Field Definition - Functions - If the field should be shown in the grid on the New Record screen, the relevant check box is the field to be checked.
Show In Selection: Field Definition - Functions - In cases where it is necessary to establish a relationship from other risk or event modules on the New Record screen, a risk-type field can be defined in the field definition menu. As a result, if the related form relationship is established, the risk tab will be created. When the add button is pressed on this tab, the list of risks / events in the module that needs to be related will be displayed. The check box for the fields that should appear in the columns of the list should be checked in the selection in the relevant module for those fields. (Table, file, image, etc. fields that are outside the textual expression should not be selected).
Row Count: Field Definition - Functions - If the related field on the New Record screen is multiple rows, it is the field where it is determined how many rows should appear on the data entry screen.
Column Width: Field Definition - Functions - Determines the column width of the field in the list (grid) of the records entered in the relevant module on the New Record screen. Average for fields with long data. It is ideal to use 250 and 75 for fields where only numbers are entered. Considering the data to be entered in the field, it would be appropriate to use a value in these ranges.
Active Status: On the Field Definition - Functions - New Record screen, it is the field in which the status of the field defined in the system will be active. In the statuses marked in this field, operations can be performed according to the type of the related field.
Visible Status: Field Definition - Functions - New Record screen is the field where it is determined in which of the statuses defined in the system the field will be visible. For the fields whose active status is selected, it should also be determined so that the visible status has at least the statuses marked in the active status field.
Required Status: Field Definition - Functions - New Record is the field where it is determined in which of the statuses defined in the system the field will be mandatory.
On the screen that opens, the field information is selected from the list, if it is a required field, the message that will appear when the user does not fill this field is defined, and the sequence number is determined. Active status, Visible Status and Mandatory Status are selected. After all the required fields are filled by determining whether it is mandatory or not, whether it will be shown in the grid or not, and the column width, the  button in the upper left corner of the screen is clicked and the association with the function is performed for the related field.
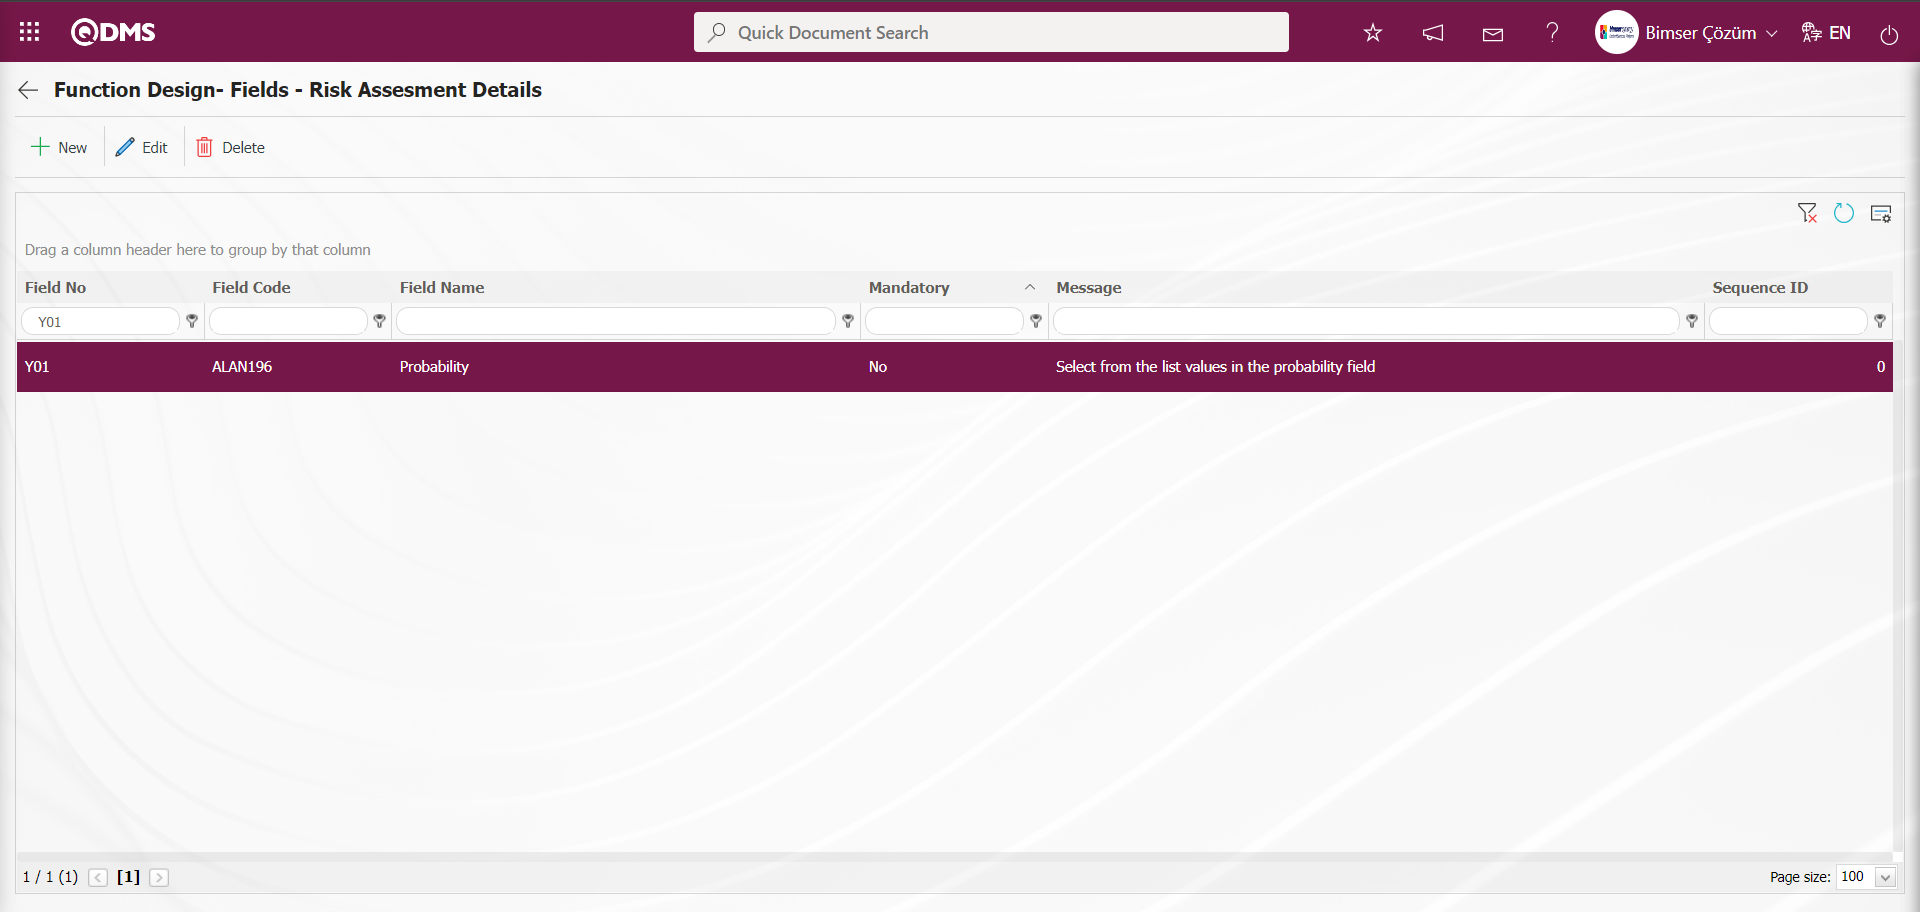
All fields defined in the field definition and added to the field pool are associated with the pages of the relevant function in this way.

On the Function Design - Fields - Risk Assesment Details screen, click on the  button and select the Active, Submit and Mandatory statuses during the process of associating the fields added to the field pool with the related function. These statuses are selected on a screen other than this screen. Click the
  button in the Function Designer menu.
Statutory Declarations - Risk Assesment Details screen opens.
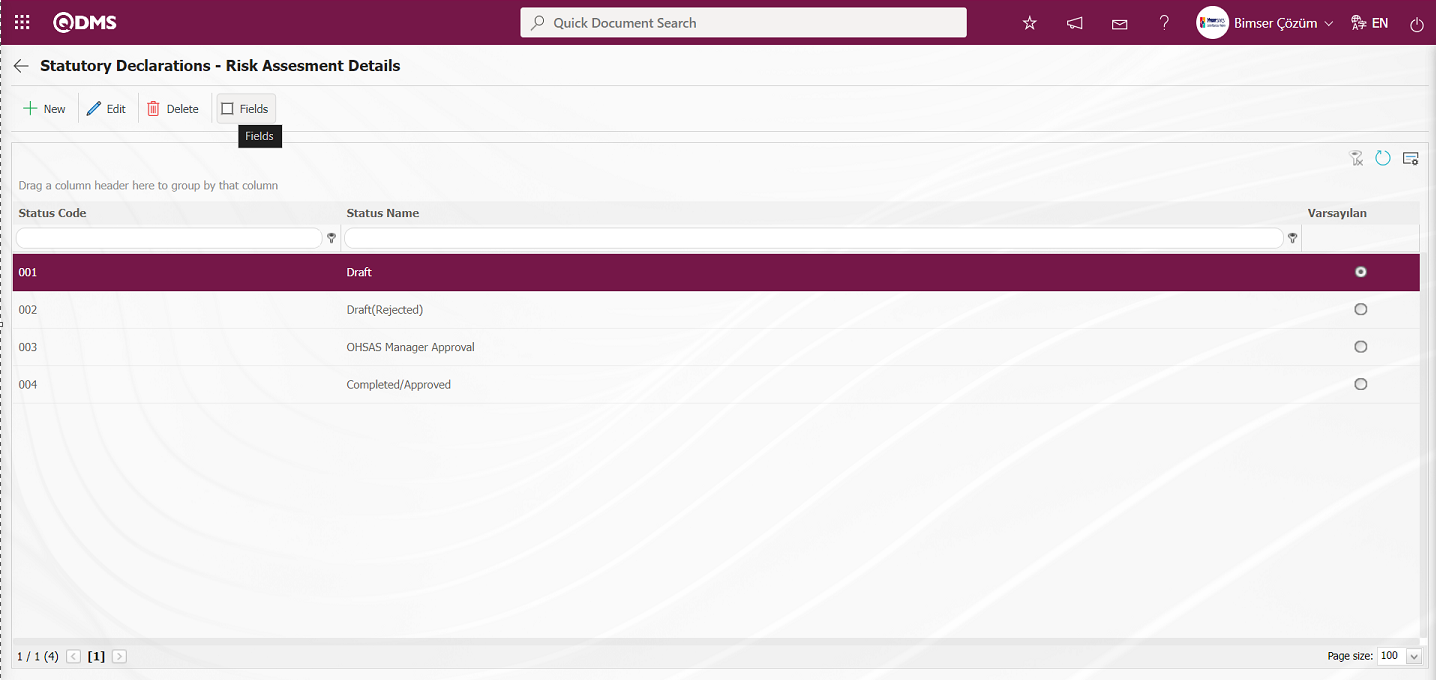 On the Statutory Declarations - Risk Assesment Details screen
  button is clicked and the Enable, Visible and Mandatory statuses of the fields associated with the relevant function in the Function Indexer menu are determined by checking the relevant check box. For example: Enable Visible and Mandatory statuses of the fields in Draft status are determined by checking the relevant check box.
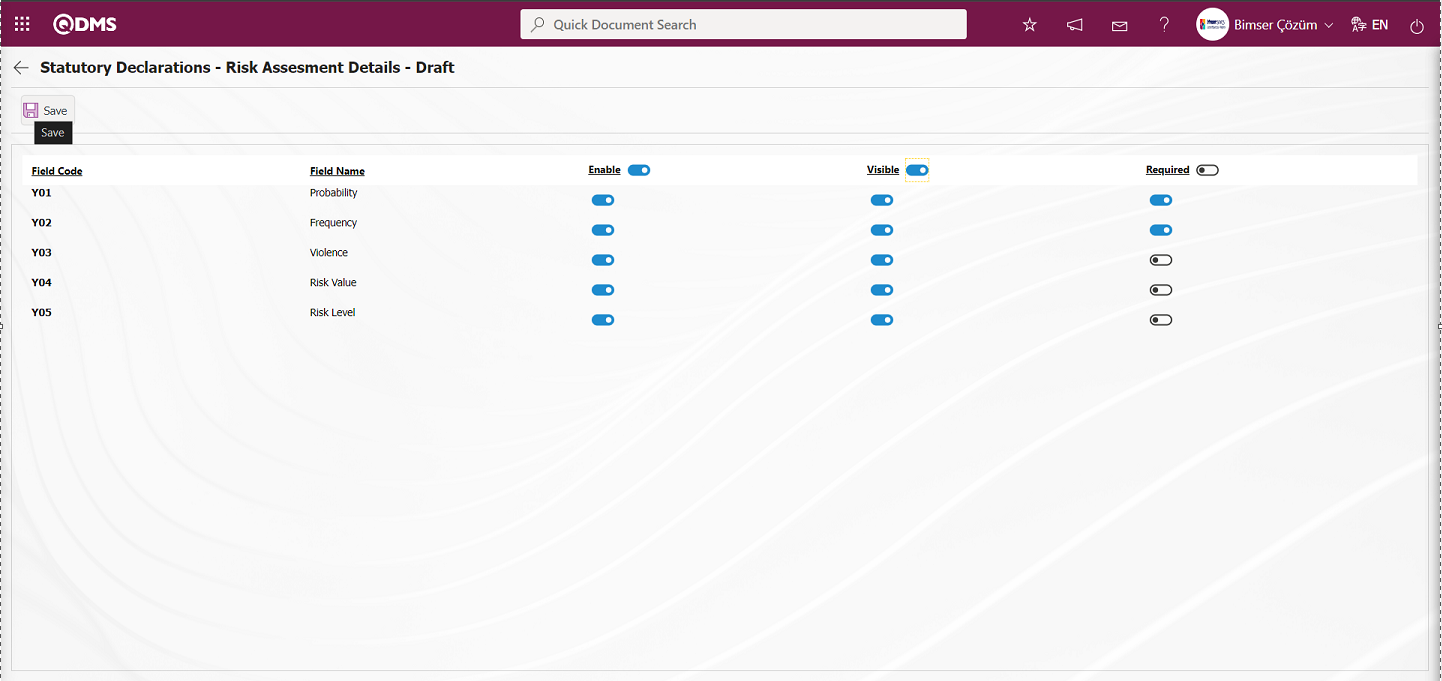
At the Statutory Declarations - Risk Assesment Details - Draft stage, after determining the Enable, Visible and Mandatory statuses, click the  button in the upper left corner of the screen. The same process is performed for all statuses and the Enable, Visible and Mandatory statuses of the fields are determined.
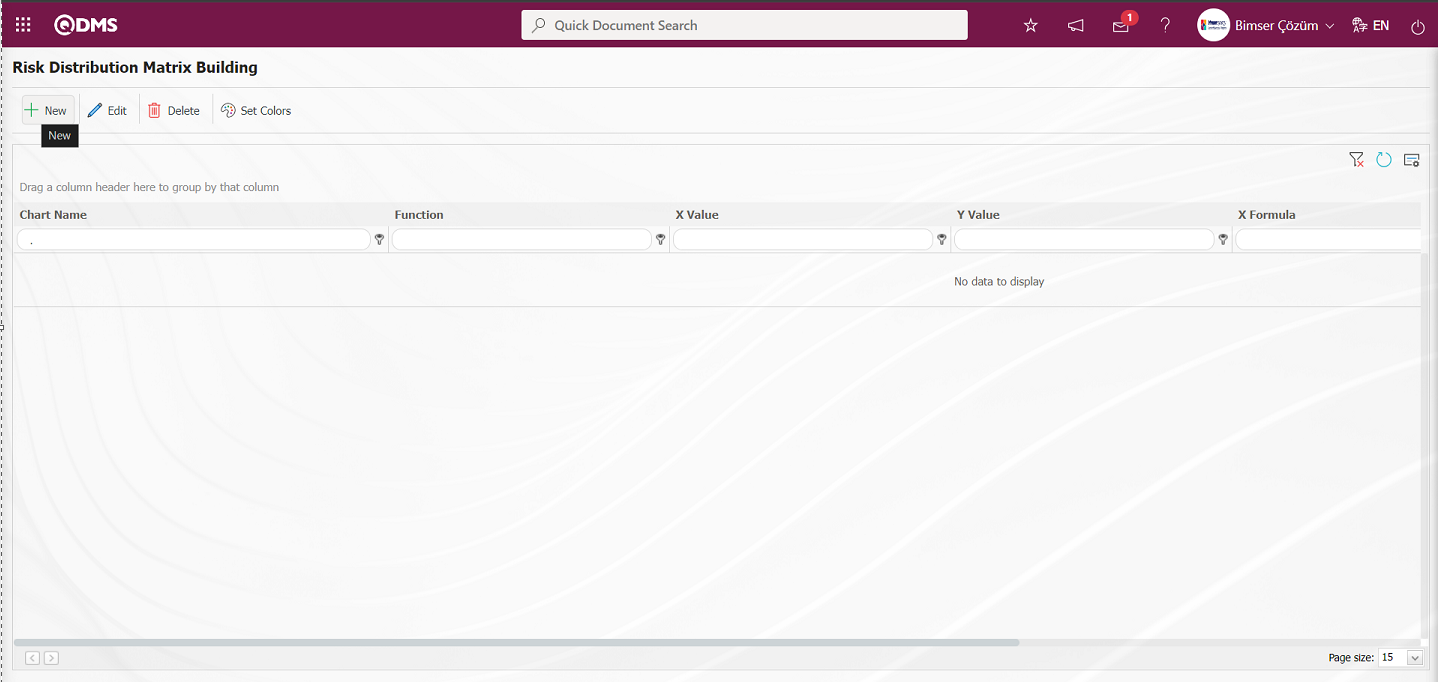
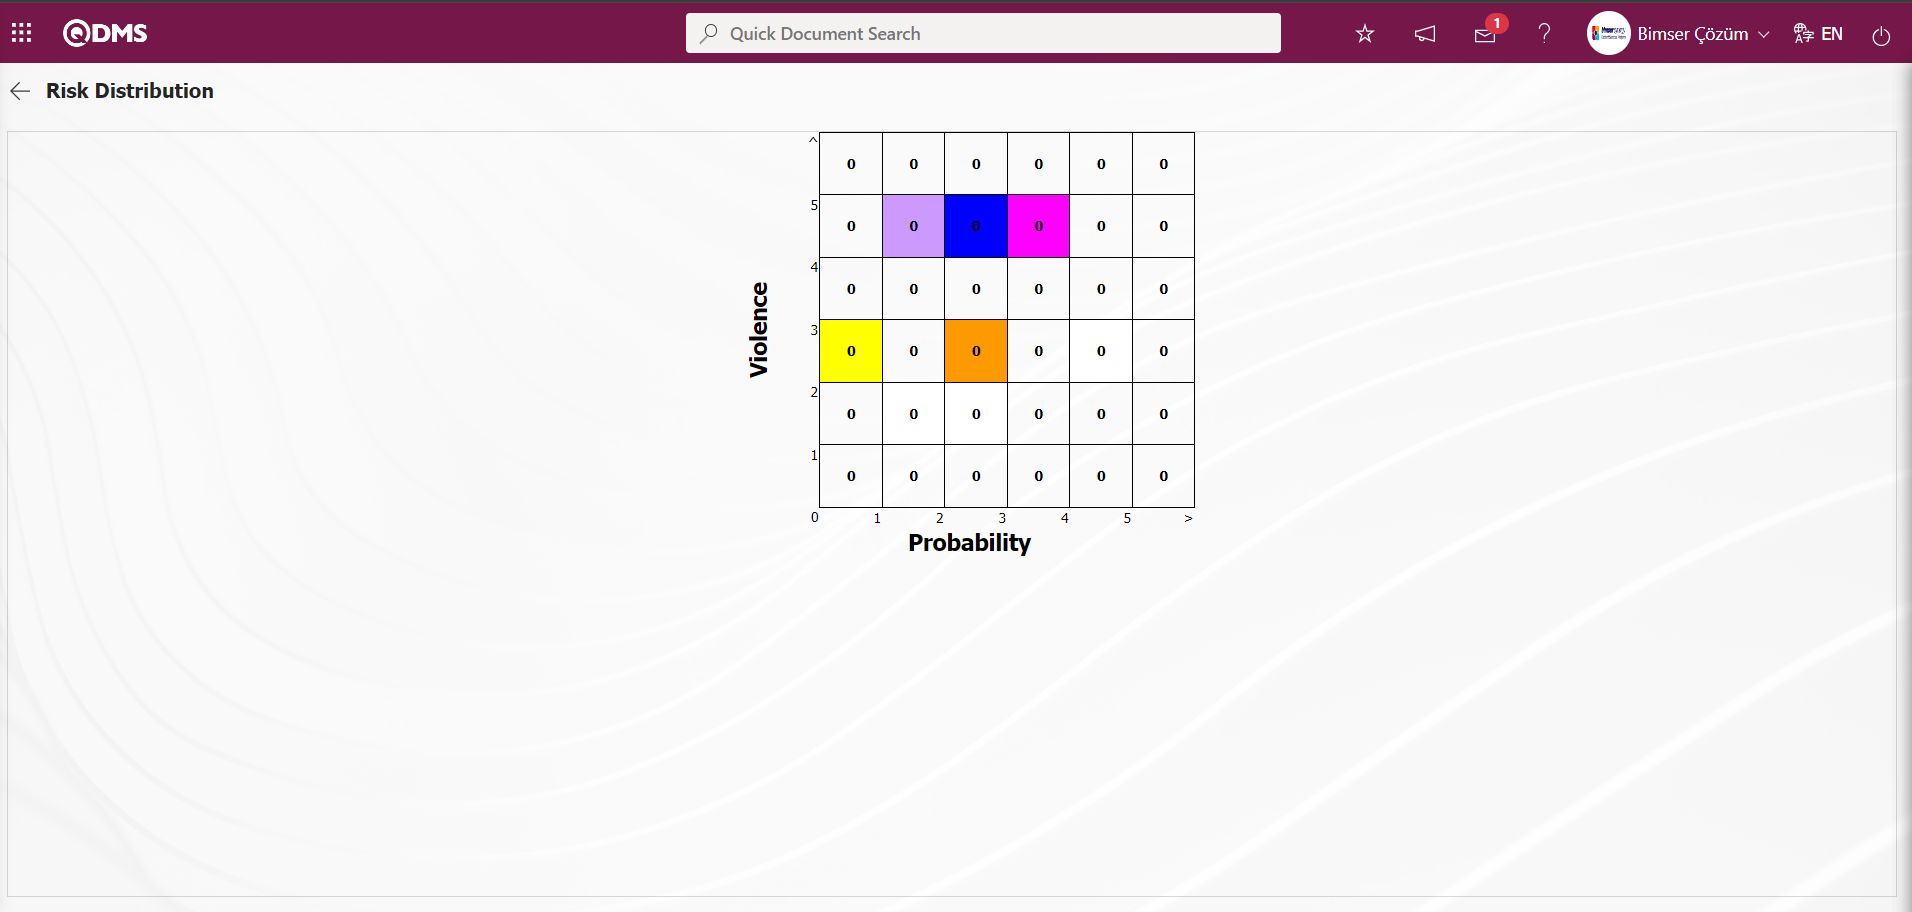
6.1.3. Risk Distribution Matrix Building
Menu Name: System Infrastructure Definitions/ OHSAS Risk Assessment/** Risk Distribution Matrix Building
This is the menu where the risk distribution matrix definition process takes place. The purpose of defining the risk distribution matrix is to determine in which ranges the risk distribution is more intense according to the determined parameters.
With the help of the buttons on the screen;
: Defines a new risk distribution matrix.
 : Changes and updates the selected risk distribution matrix information in the list.
 : Deletes the risk distribution matrix information selected in the list.
 : Colors the risk distribution matrix.
To add a new risk distribution matrix to the list, click on the button at the top left corner of the screen to display the Risk Distribution Matrix Building** screen.
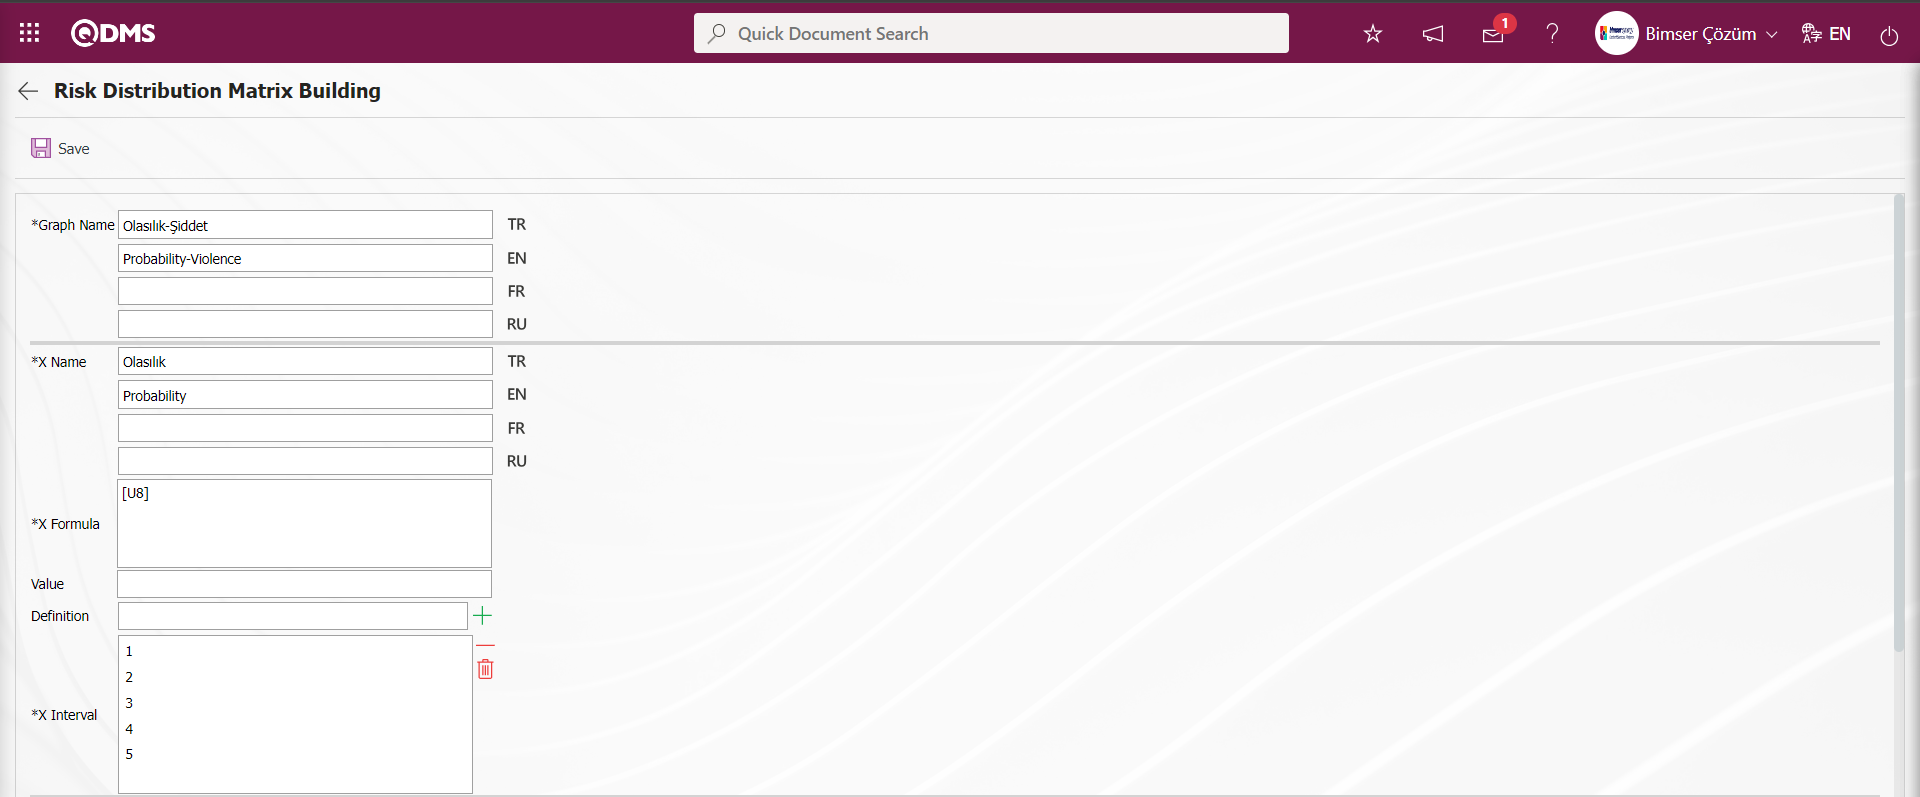
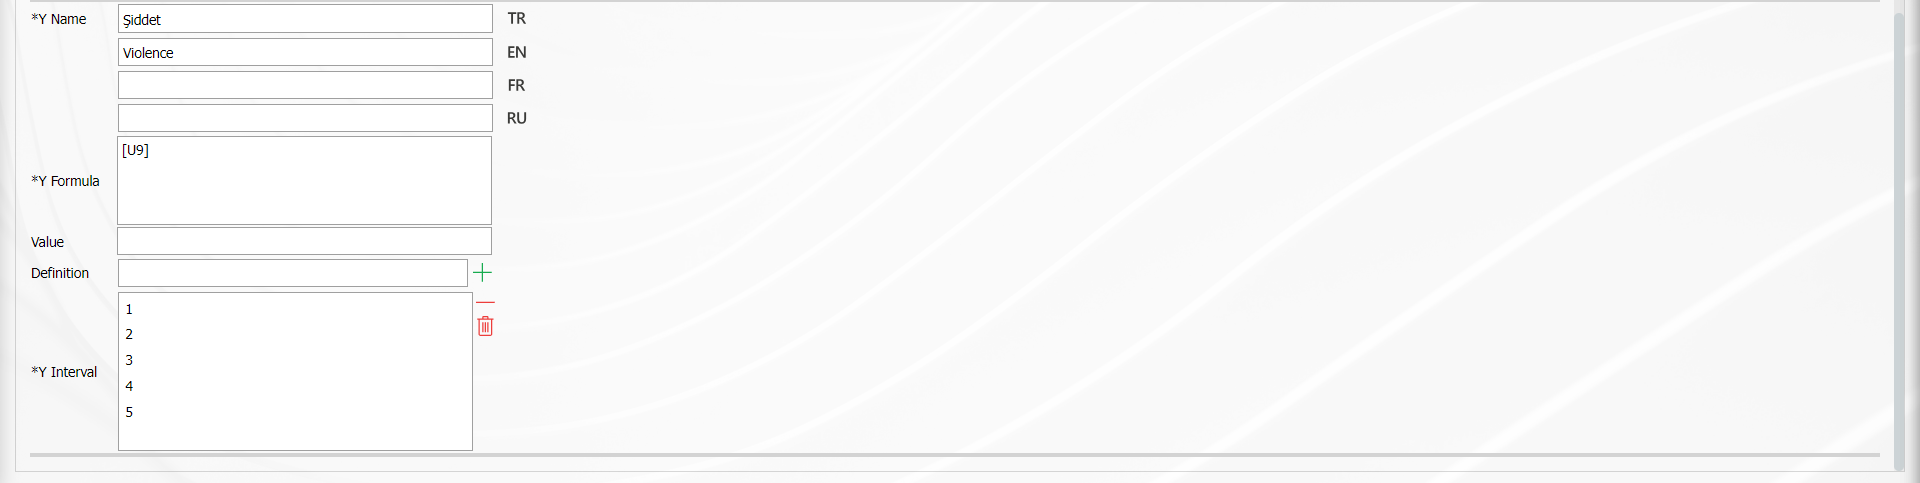
“ Graph Name” is determined on the screen that opens. For the parameters on X and Y axis, the fields to be used in risk comparison are determined. The formulas of these fields in the field definition menu are written in the “X Formula” and “Y Formula” sections. The values of the fields are entered in the “X Ranges” and “Y Ranges” sections. After the operations are completed, the registration process is realized by clicking the  button.
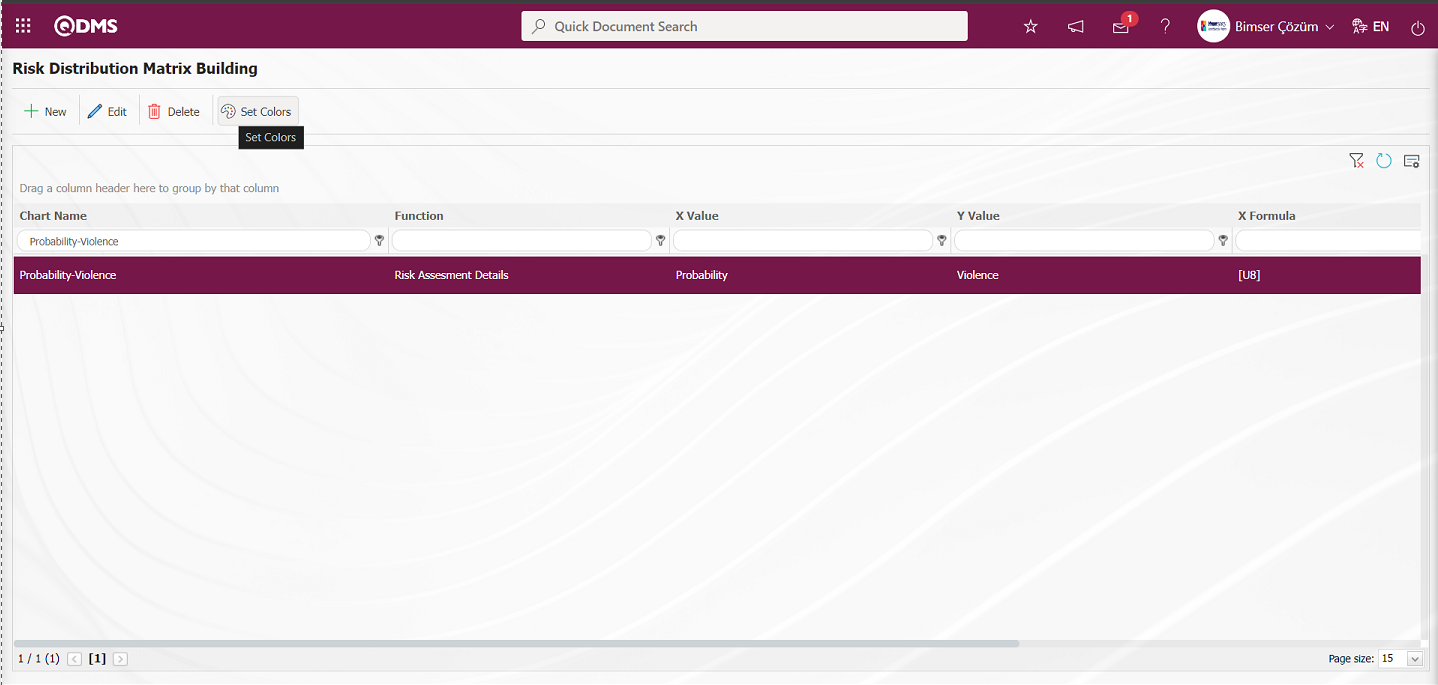
In order to color the Risk Distribution Matrix in accordance with the method used, the matrix created with the  button in the upper left corner on the risk distribution matrix definition screen is opened. The boxes are colored by clicking on each box on the screen.
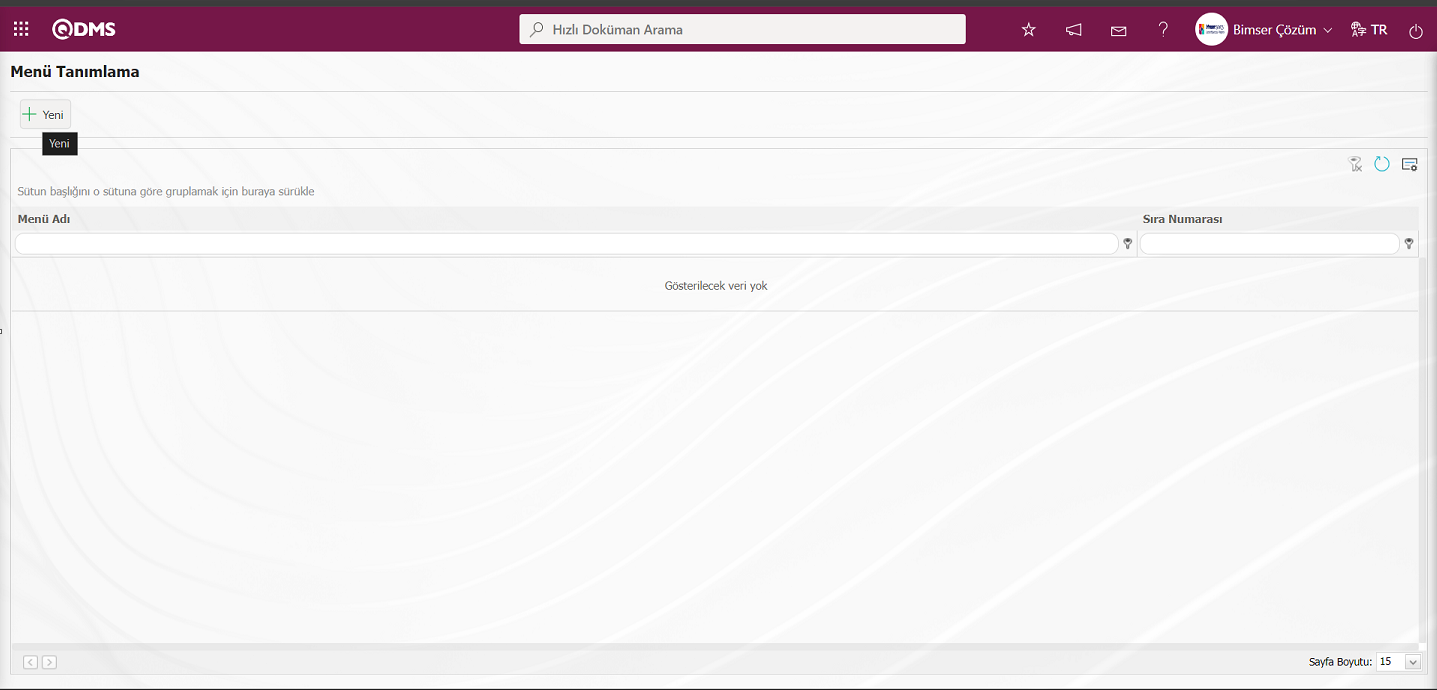
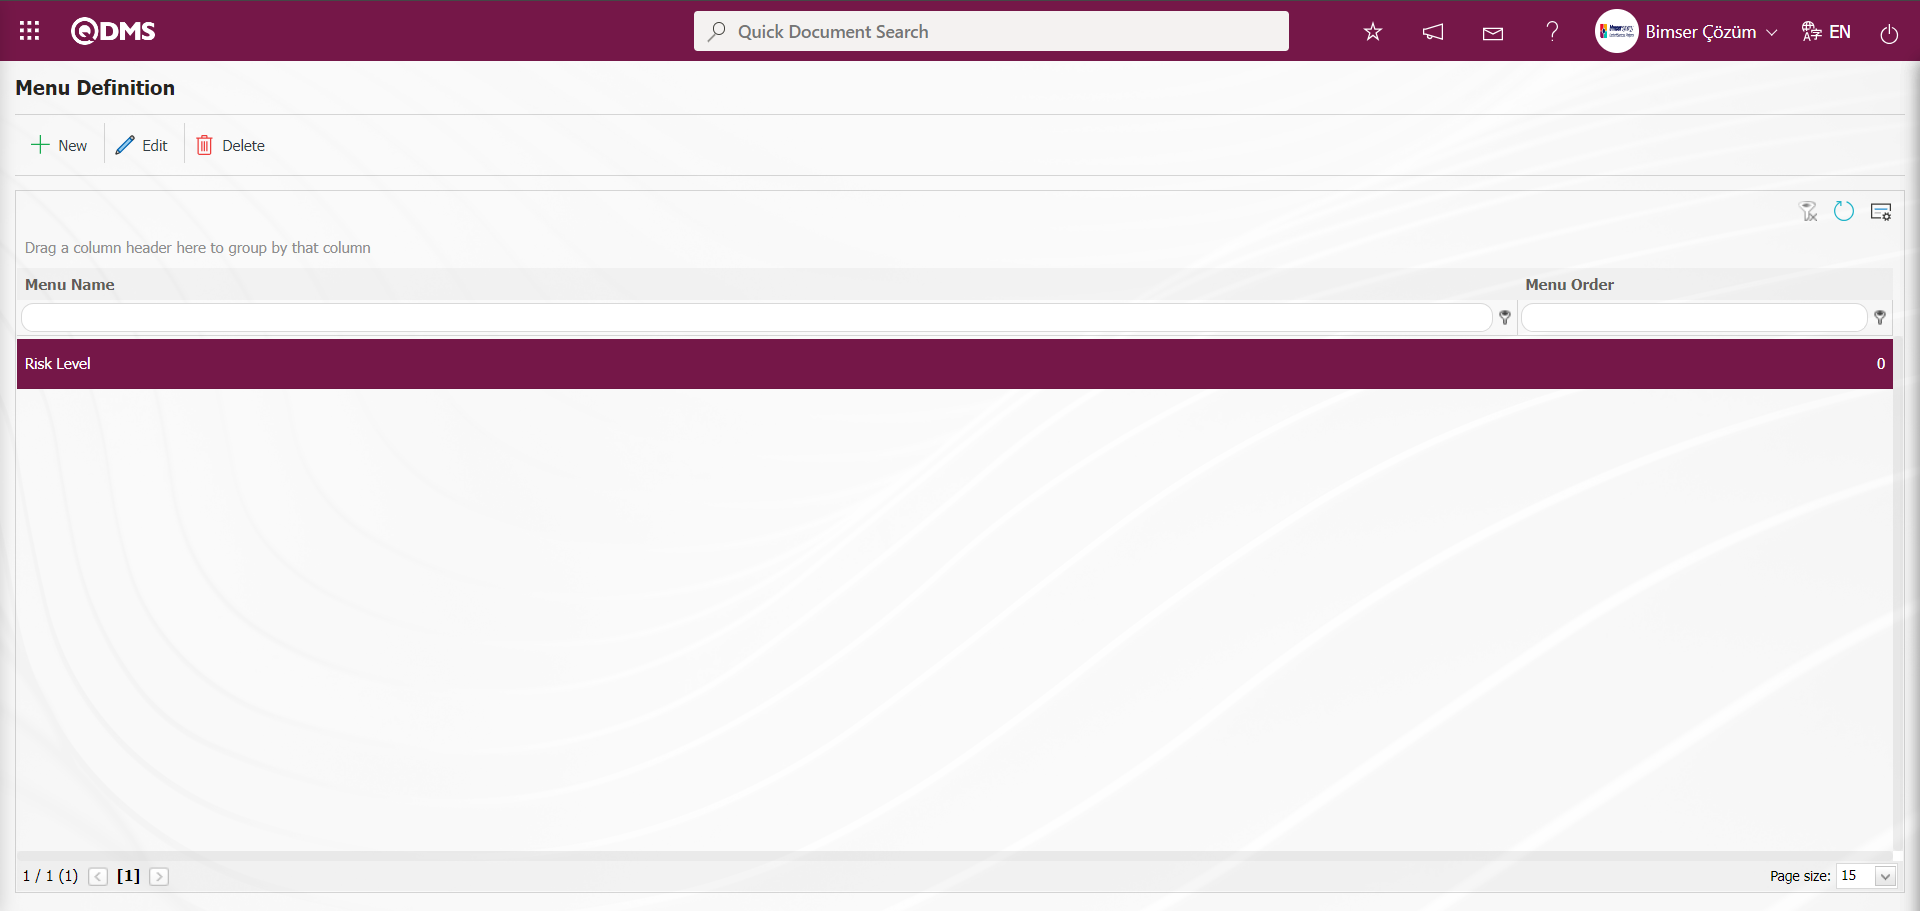
6.1.4.Field Menu Definition
Menu Name: System Infrastructure Definitions/OHSAS Risk Assessment/ Field Menu Definition
It is the menu that enables the creation of a menu under the Integrated Management System to add values to list type fields.
With the help of the buttons on the screen;
 : A new menu is defined.
 : Edit and update the selected menu information in the list.
 : Delete the selected menu information in the list.
To add a new menu to the list, click on the button on the top left corner of the screen to display the Menu Definition-New Record screen.
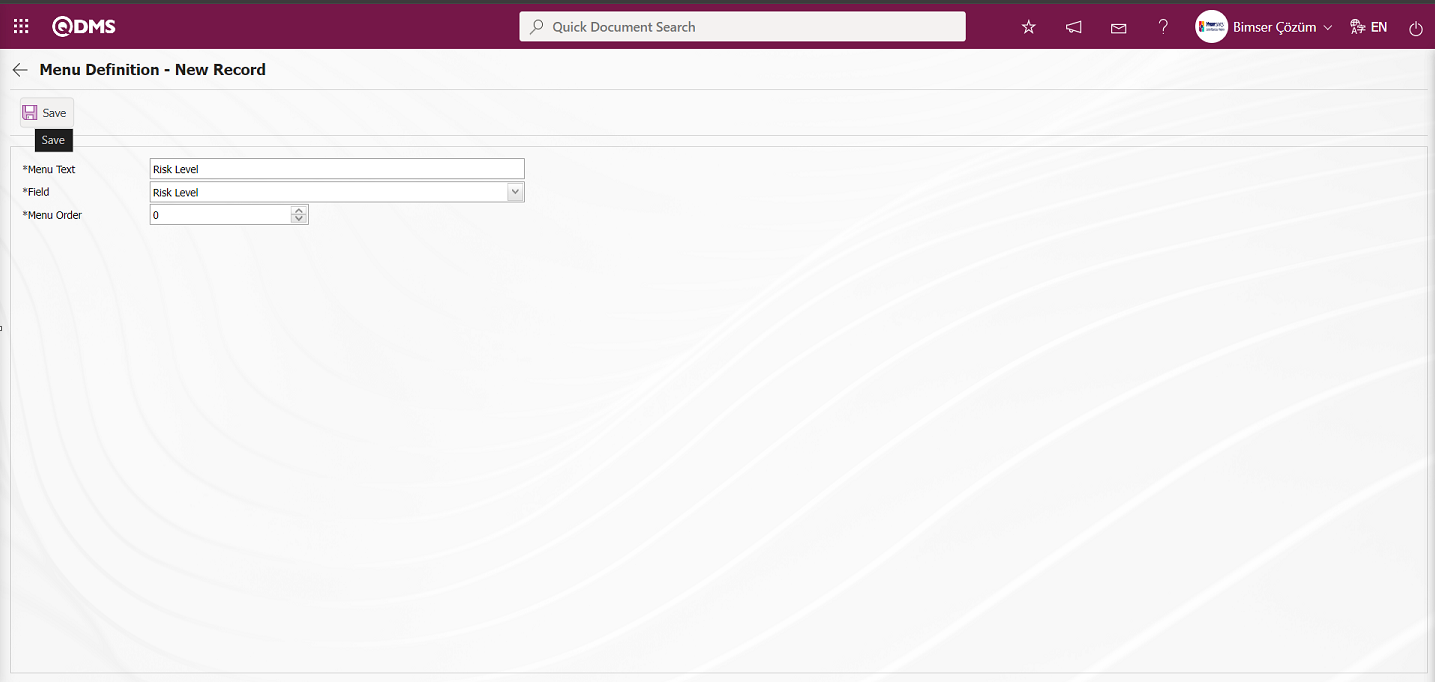
Menu Text: Menu name information is defined.
Field: Field information is selected in the field list opened by clicking the drop-down list.
Menu Order: Order no information is entered.
After the required fields are filled in the menu definition screen, the menu definition registration process is performed by clicking the  button in the upper left corner.
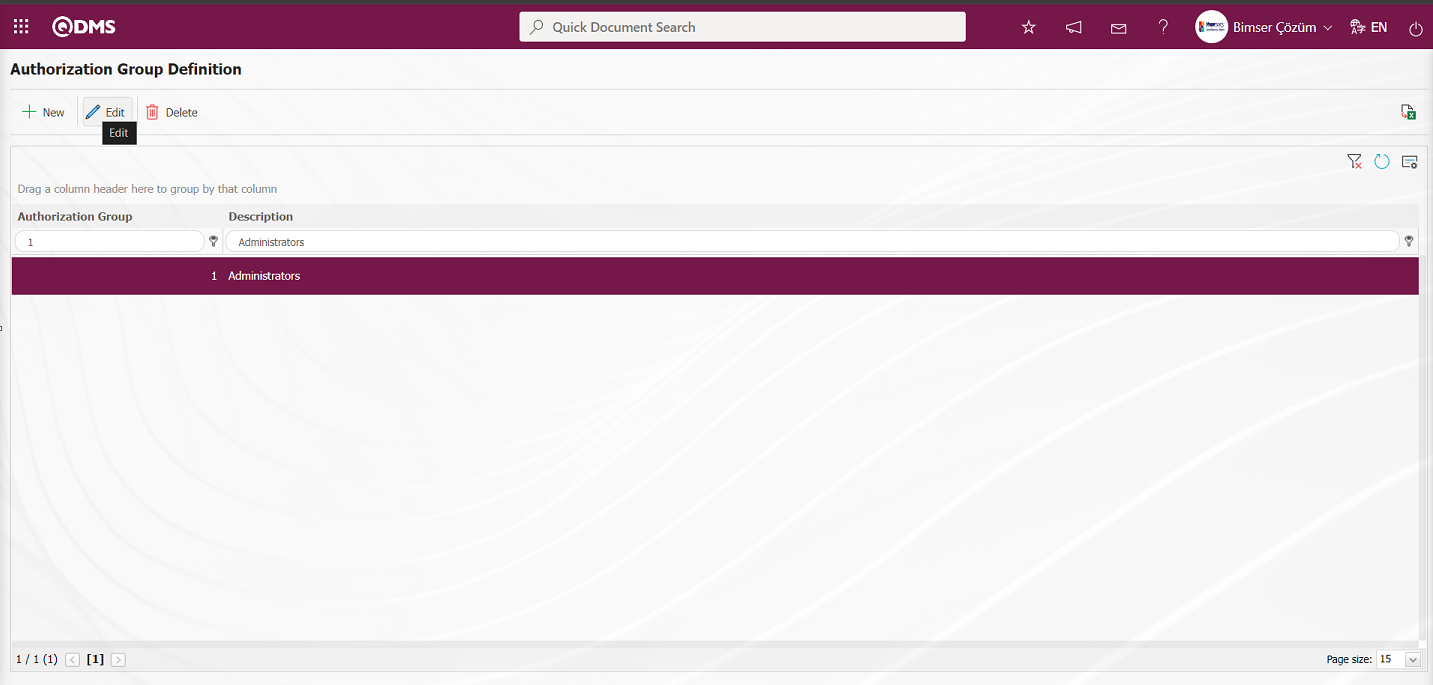
After the menu definition is made, in order for the, OHSAS Risk Assessment module to be displayed as a menu in the Integrated Management System section of the module, the authorization to see the menu must be given in the System Infrastructure Definitions /BSID / Definitions / Authorization Group Definition menu.
While the Authorization Group is selected on the Authorization Group Definition screen, the  button is clicked.
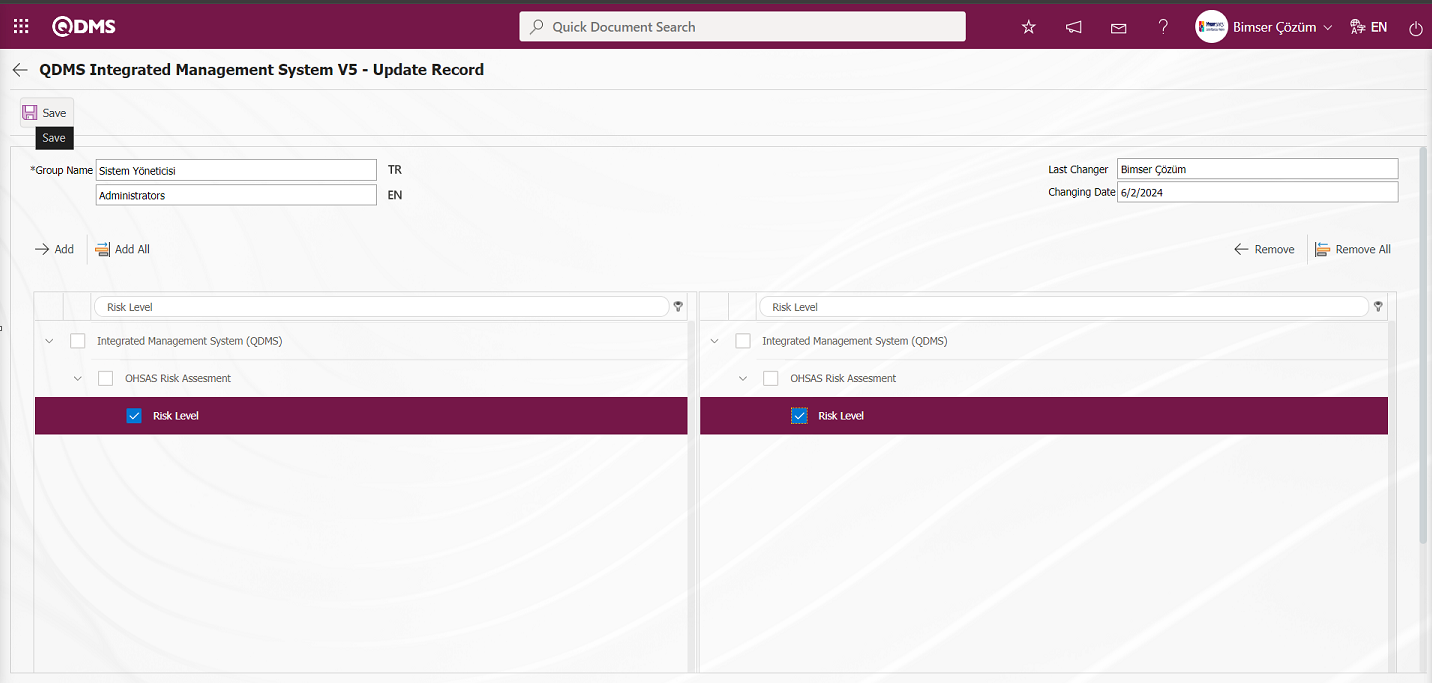
Select Menu on the QDMS Management System V5 - Update Record screen. After selecting the menu, click the  button to move to the menu visualization screen.
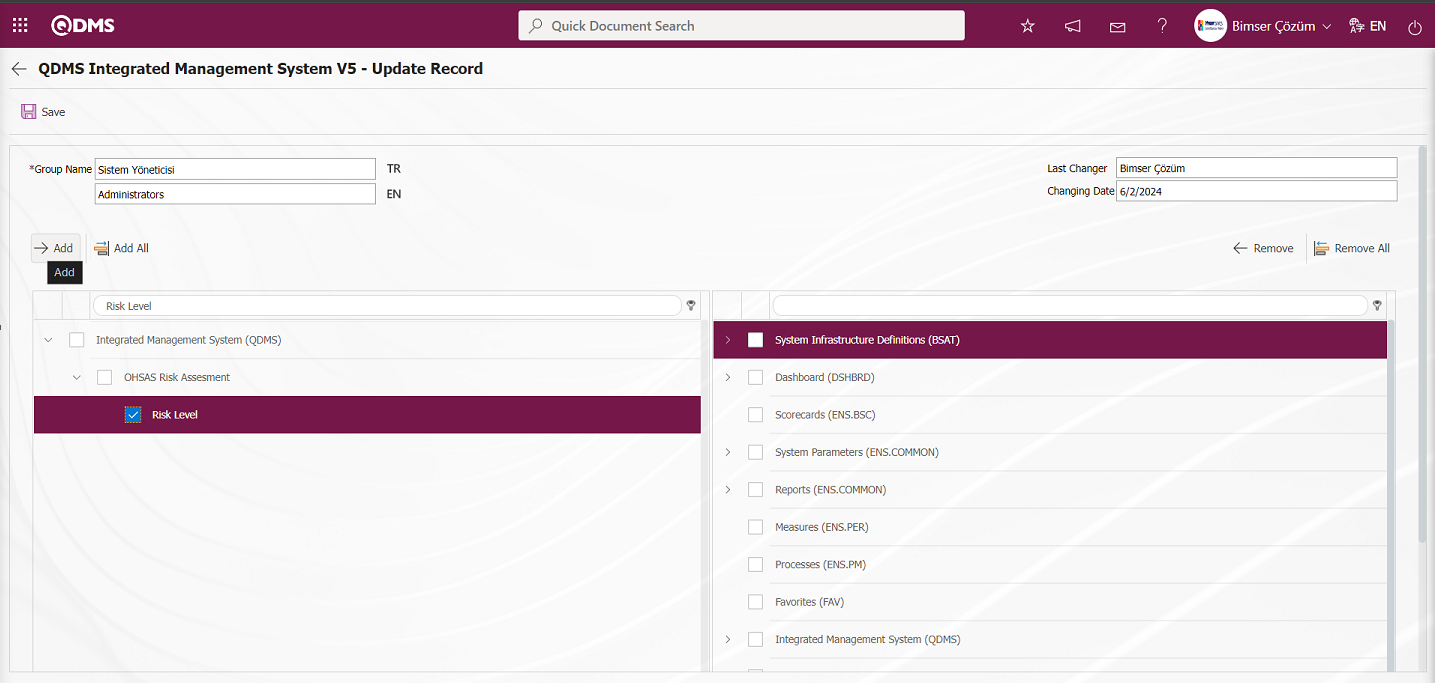
After clicking the button on the screen that opens, the menu viewing authorization registration process is done by clicking the  button to authorize the menu viewing.
By clicking on the Qdms logo and performing the refresh operation, the list-type area authorized to see the menu is displayed by clicking on the OHSAS Risk Assessment Module Integrated Management System section to display it as a menu.
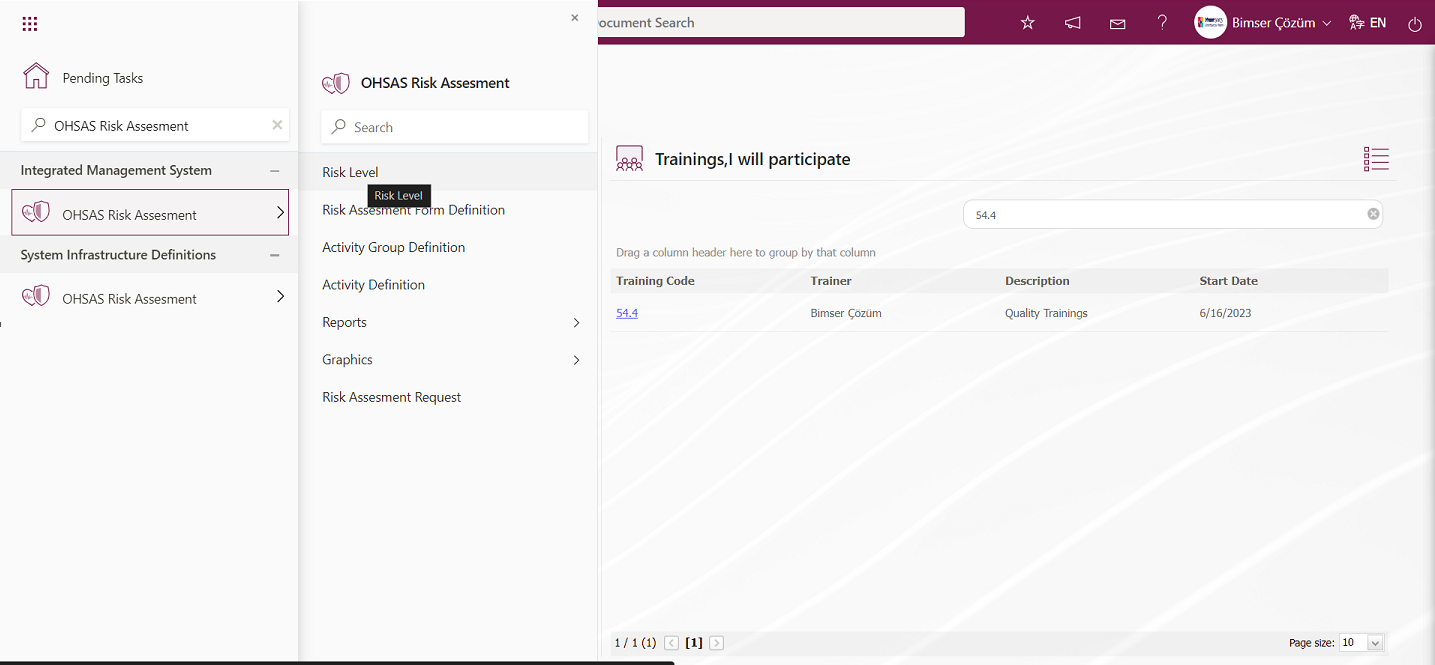
Integrated Management System/OHSAS Risk Assessment/ Risk Level menu is clicked. Open the Field Items -Risk Level menu. In the menu that opens, the defined list values of the list-type parametric field are displayed.

With the help of the buttons on the screen;
 : Define a new value
 : Correction or update operations are performed on the selected value information in the list.
 : Delete the selected value information in the list.
: Records can be searched by filtering.
: Data can be exported to Excel.
: Template can be downloaded.
: Template is uploaded.
Note: With (Download Template) and (Upload Template) buttons, field values can be transferred to the system in bulk. With the template download button, the template in the system is downloaded to the user's computer. When the relevant template is filled in by the users and uploaded to the system with the template upload button, all field values in the template will be transferred to the system. On the Field Items -Risk Level screen, manual value definition is done by clicking the button or bulk transfer of values is done by using the bulk transfer buttons. In this way, the menu of list type fields is defined in this Field menu. New value definition process is provided in the defined menu
6.1.5. OHSAS Risk Assessment Parameters
Menu Name: System Infrastructure Definitions / OHSAS Risk Assessment / OHSAS Risk Assessment Parameters
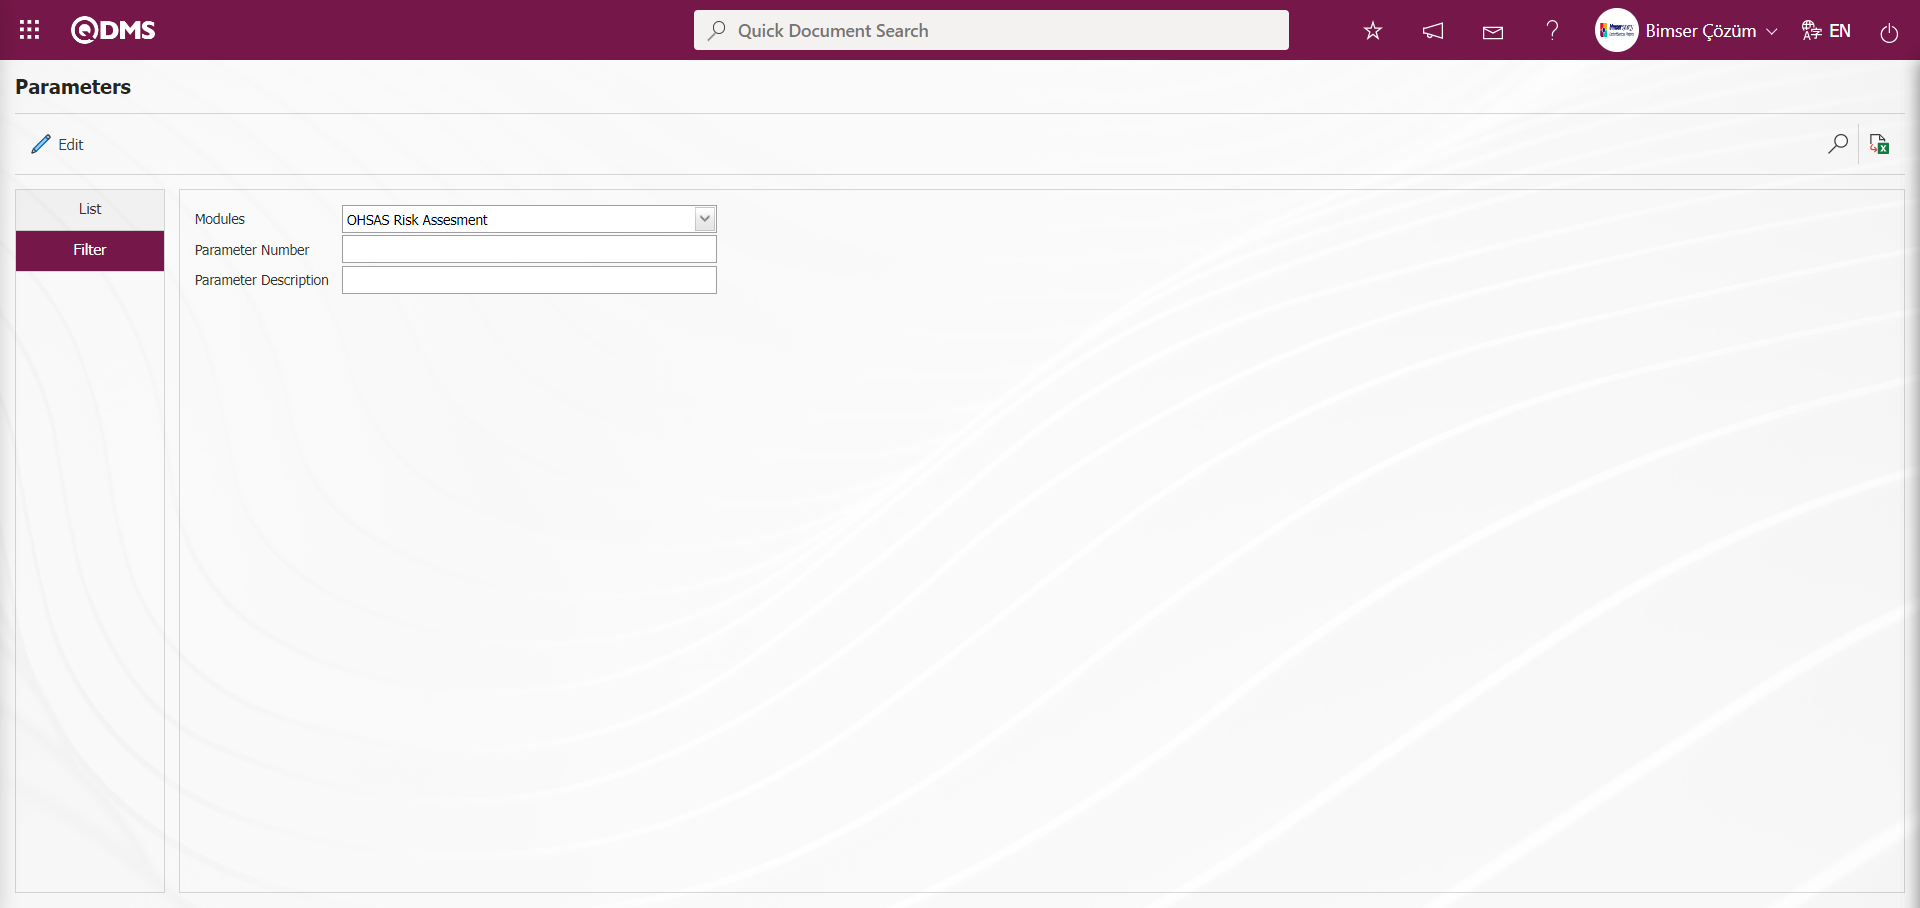
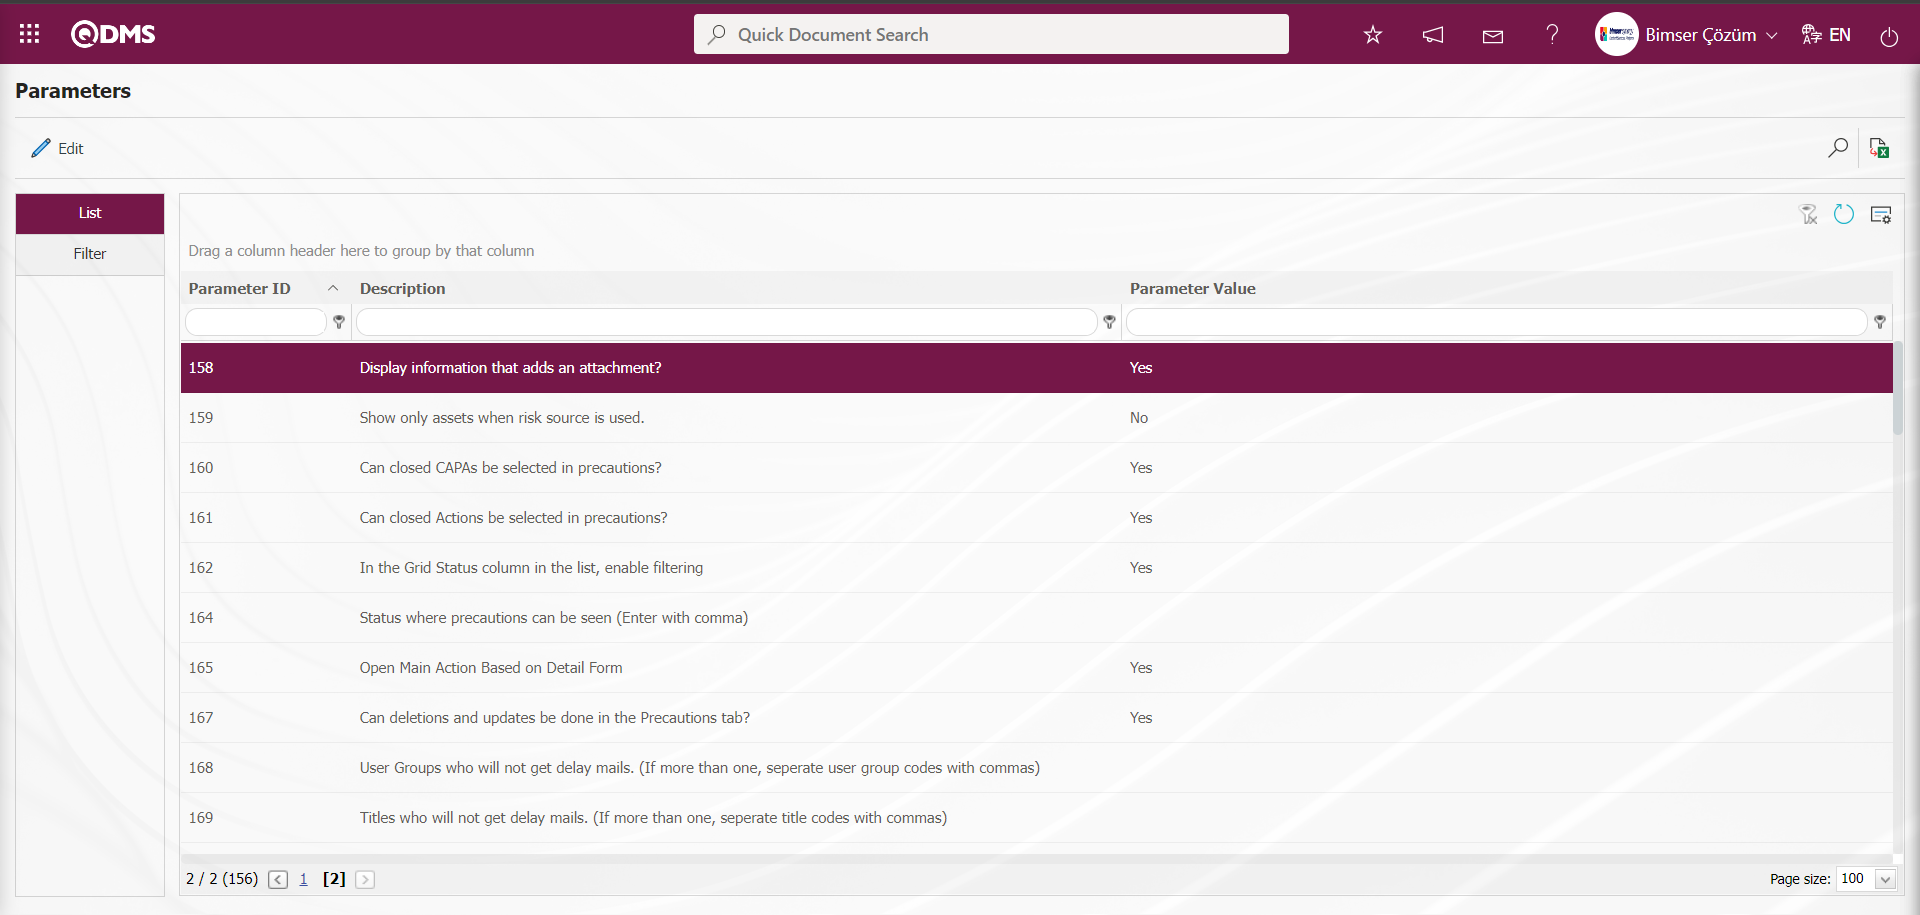
It is the menu where users can make various adjustments for the OHSAS Risk Assessment Module according to their wishes and needs and determine (select) the parameters accordingly. OHSAS Risk Assessment Module is selected in the Modules field in the Filter tab and OHSAS Risk Assessment Module parameters are listed in the List tab. The  button is used to make changes to the selected parameter information. In the filter tab, filtering is done according to the parameter number and parameter definition search criteria, and in the list tab, search is done according to the parameter number and definition fields in the grid.
With the help of the buttons on the screen;
 : Changes and edits are made on the parameter selected in the list.
: Records are filtered and searched.
 : The search criteria on the menu screens are used to clear the data remaining in the filter fields in the grid where the search operation is performed.
 : The menu screen is restored to its default settings.
 : User-based designing of the menu screen is done with the show-hide feature of the fields corresponding to the columns on the menu screens, that is, the hiding feature.
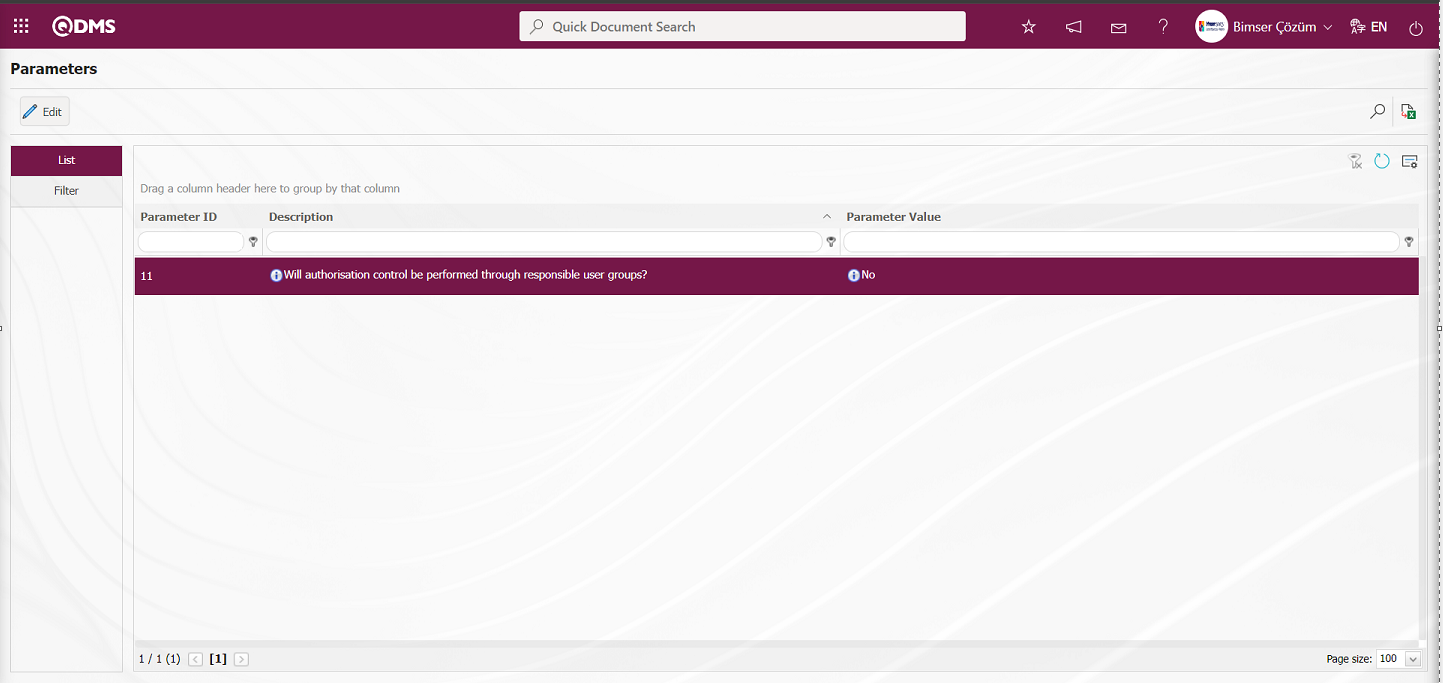
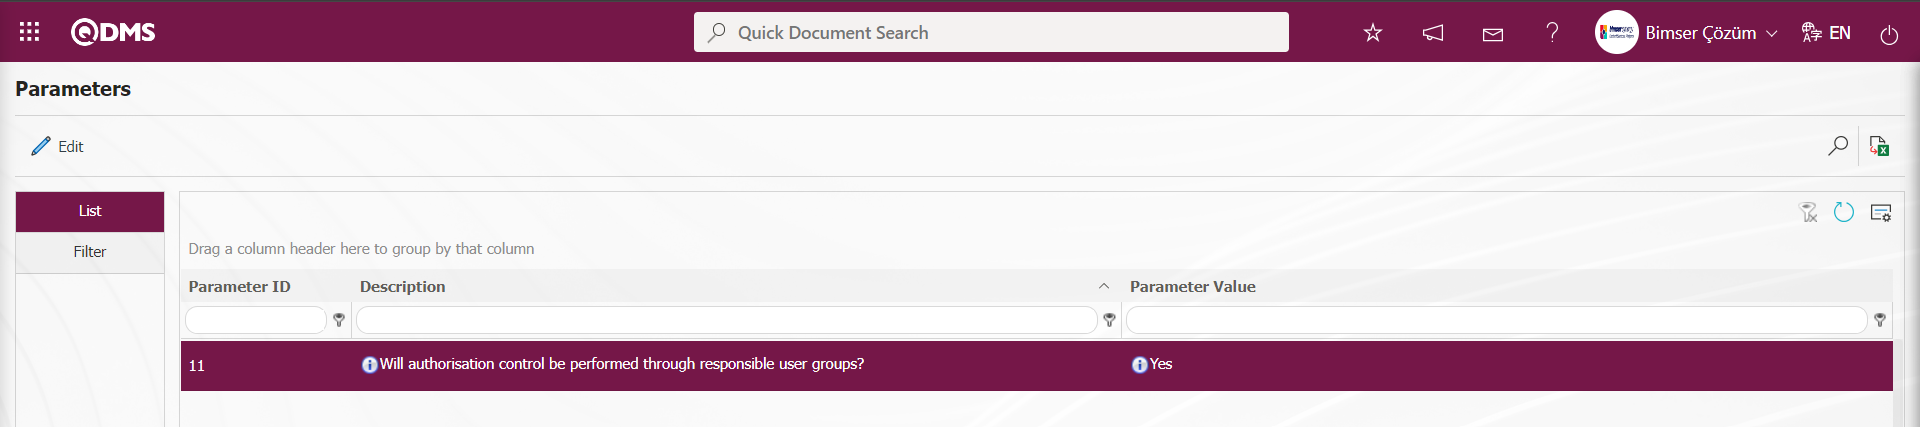
On the Parameters screen, click the button while the parameters numbered 11 are selected in the list tab.
In the parameters screen, changes are made on the parameter value information of the parameter “Will authorization control be performed through responsible user groups?”. If desired, the default value information about the parameter value of the parameter is provided by clicking the  button on the parameters screen.
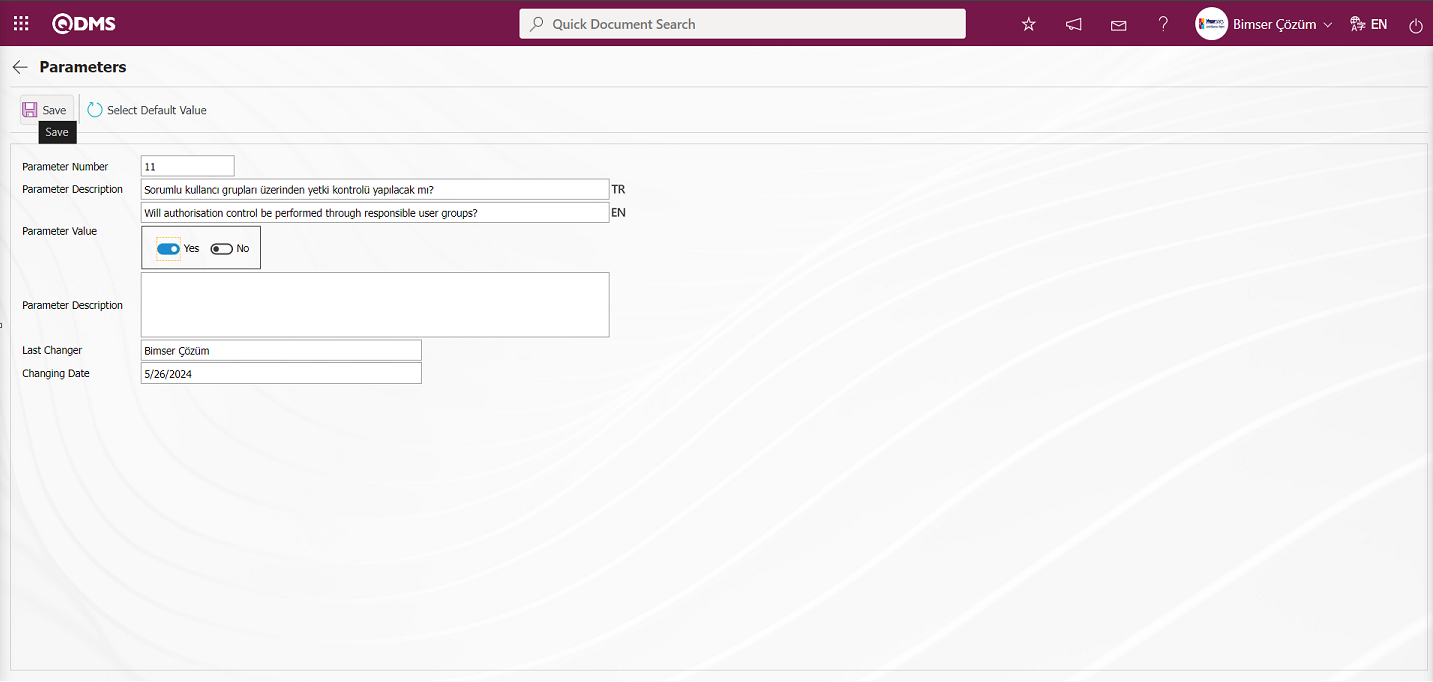
In the Parameters screen that opens, the parameter value of the parameter is selected as “Yes” and after entering the relevant information in the required fields, the parameter record update process is performed by clicking the  button in the upper left corner of the screen.
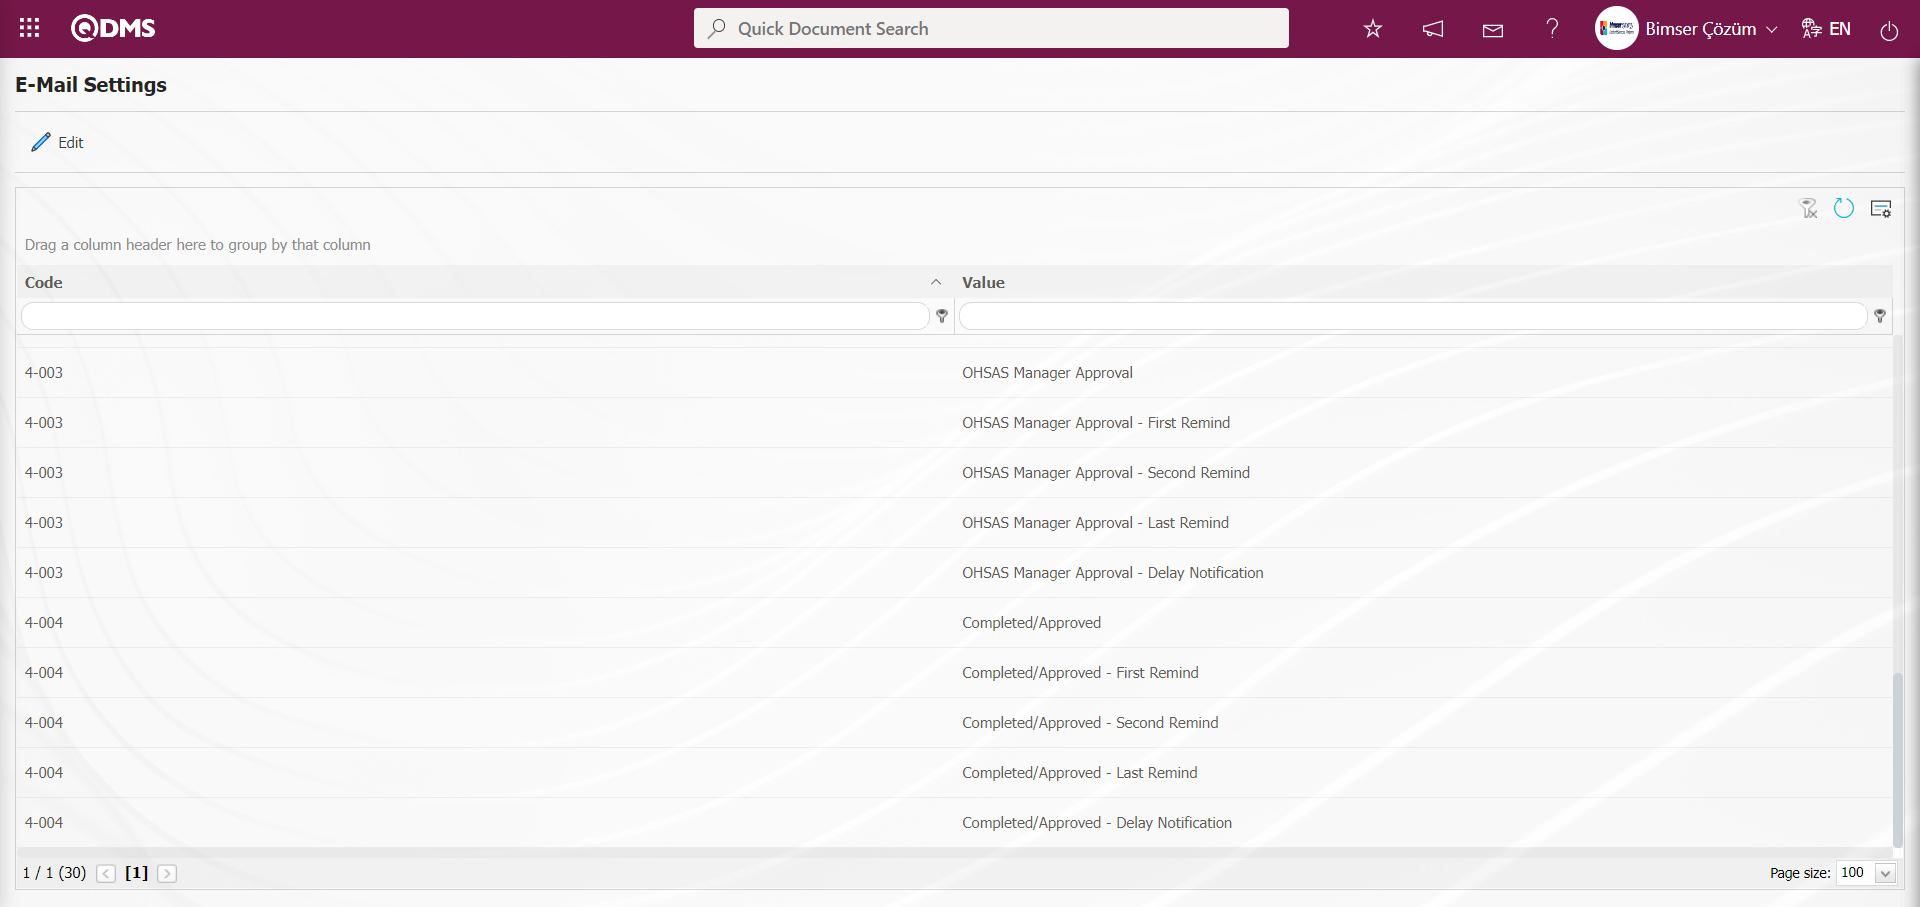
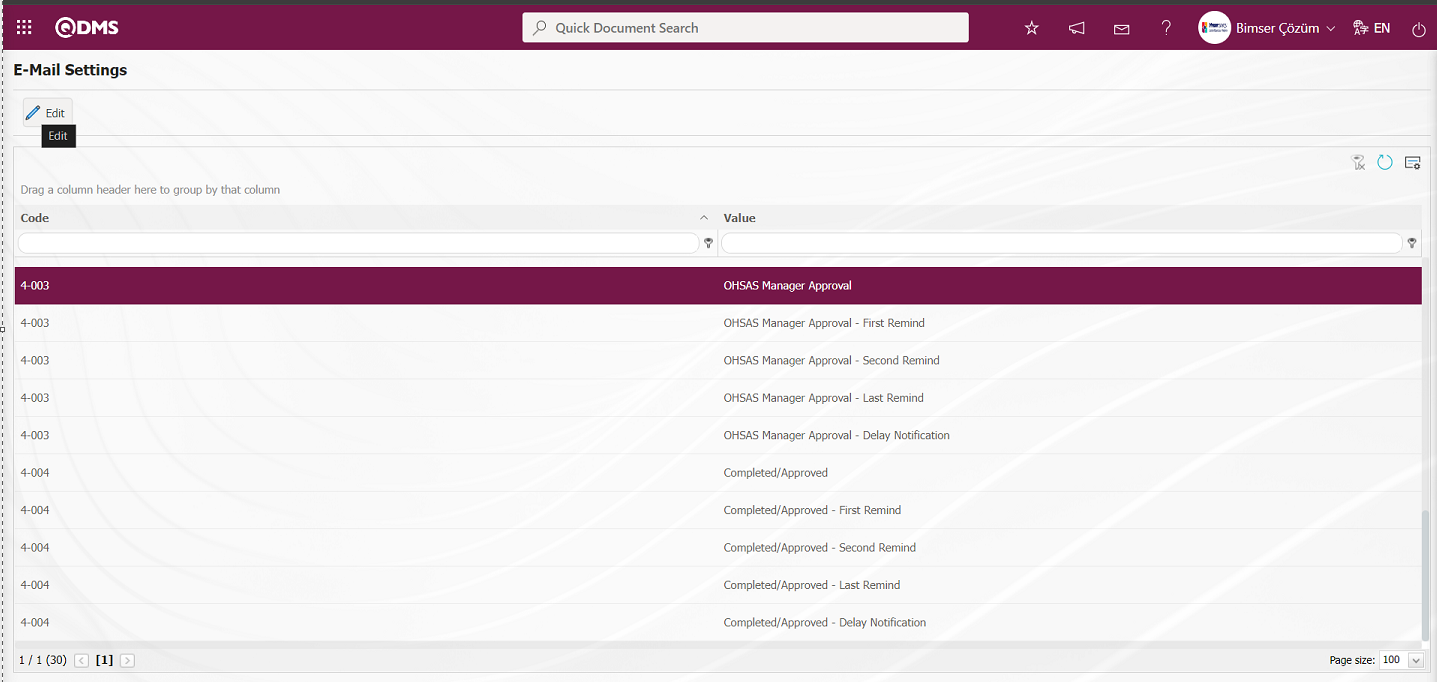
6.1.7. E-Mail Settings
Menu Name: System Infrastructure Definitions/ OHSAS Risk Assessment/ E-Mail Settings
This is the menu where mail notifications are made within the scope of the OHSAS Risk Assessment Module. In the E-Mail Settings screen, it is determined at which stage of the “OHSAS Risk Assessment” module and to whom e-mail will be sent.
With the help of the buttons on the screen;
 : Editing/changing/updating is done on the value of the e-mails selected in the list.
: Clearing the data remaining in the filter fields in the grid where the search criteria search operation on the menu screens is performed
: The process of returning the menu screen to its default settings is done.
: User-based designing of the menu screen is done with the show-hide feature, that is, the hiding feature of the fields corresponding to the columns on the menu screens.
If SMS notification will be used in E-mail Settings;
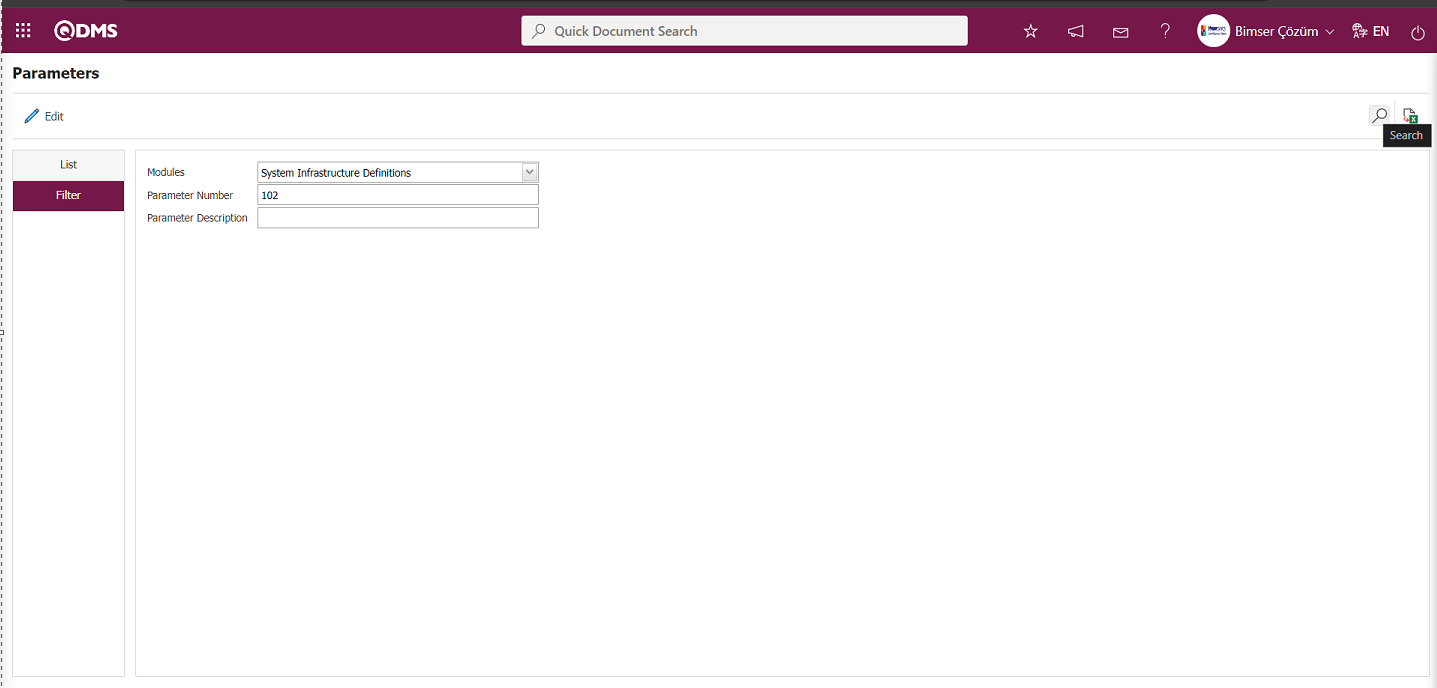
Click on System Infrastructure Definitions/BSID/Configuration Settings/ Parameters menu. In the parameters of the System Infrastructure Definitions module parameters listed on the Parameters screen, the parameter number 102 “Will using SMS notification?” is selected by typing the parameter number in the parameter no field in the Filter tab on the parameters screen and clicking the  (Search) button.
After selecting parameter 102 “Will using SMS notification? ” in System Infrastructure Definitions module parameters, click  button.

Select the parameter value ‘Yes’ on the parameters screen.
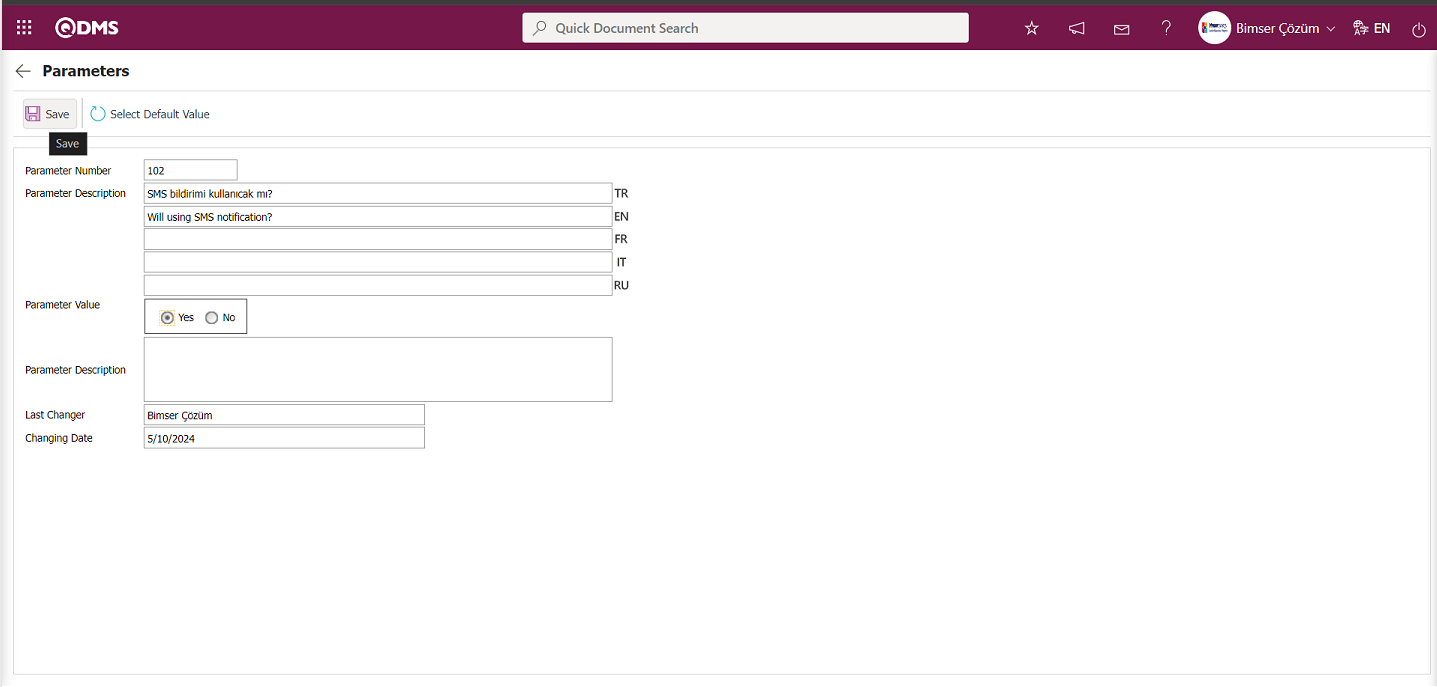
After selecting the parameter value ‘Yes’ on the Parameters screen, the  button on the top left of the screen is clicked and the parameter is activated.

After the parameter is activated, the check box related to the “Send SMS” field related to the use of SMS notification is displayed on the E-Mail Settings screen. By checking the relevant check box, SMS notification is used in E-Mail settings.
Select which step you want to send e-mail/message and click the  button.
For example: On the E-Mail Settings screen, select the “OHSAS Manager Approval” step and click the  button.
The E-Mail Settings/ OHSAS Manager Approval screen is displayed. The Roles section shows the role to which my e-mail and message notification will go.
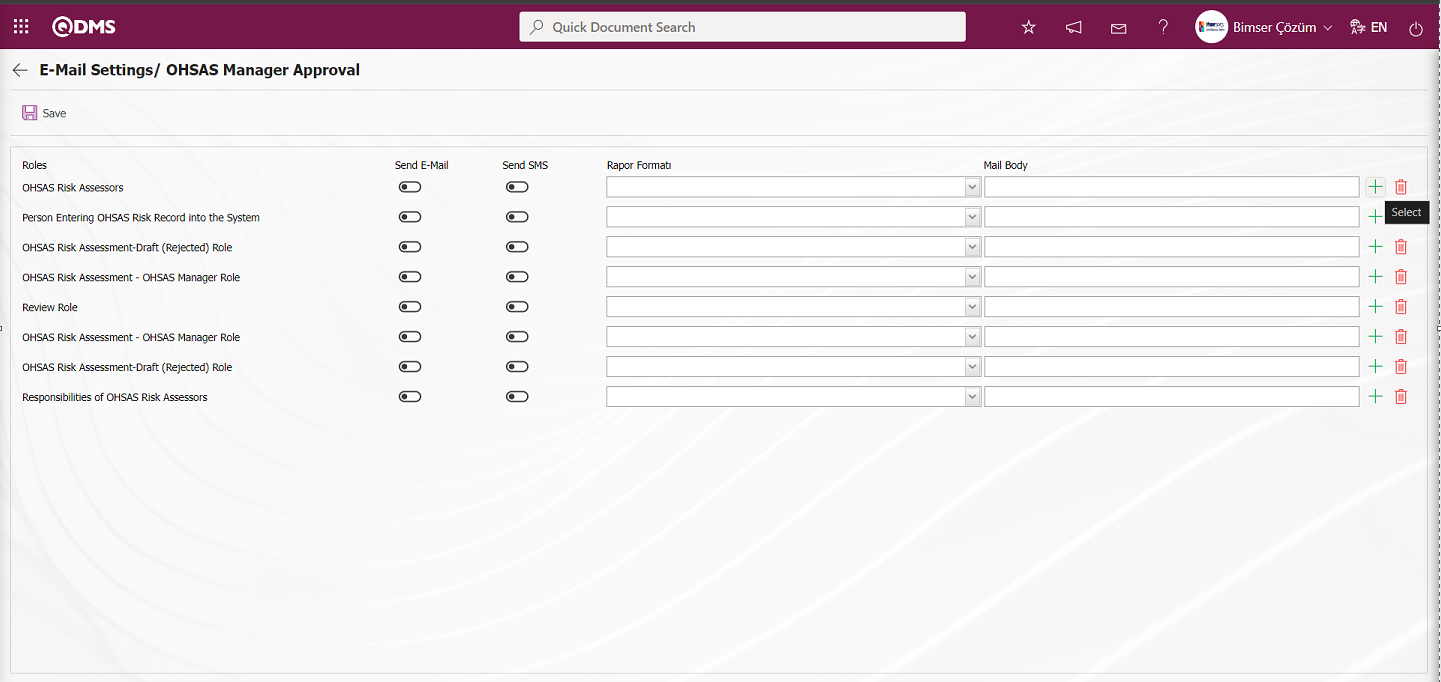
On the E-Mail Settings / OHSAS Manager Approval screen screen, in the Report format field, the list of record-based reports defined in the Define Report formats menu is displayed by clicking the drop-down list. Users can make a report selection in this displayed record-based report format list and send the report format as e-mail..
On the E-Mail Settings/ OHSAS Manager Approval screen, click the  (Select) button and select the message body to be sent from the relevant list in the Message Body list defined in the system. The
  (Delete) button is used to delete an incorrectly added message body.
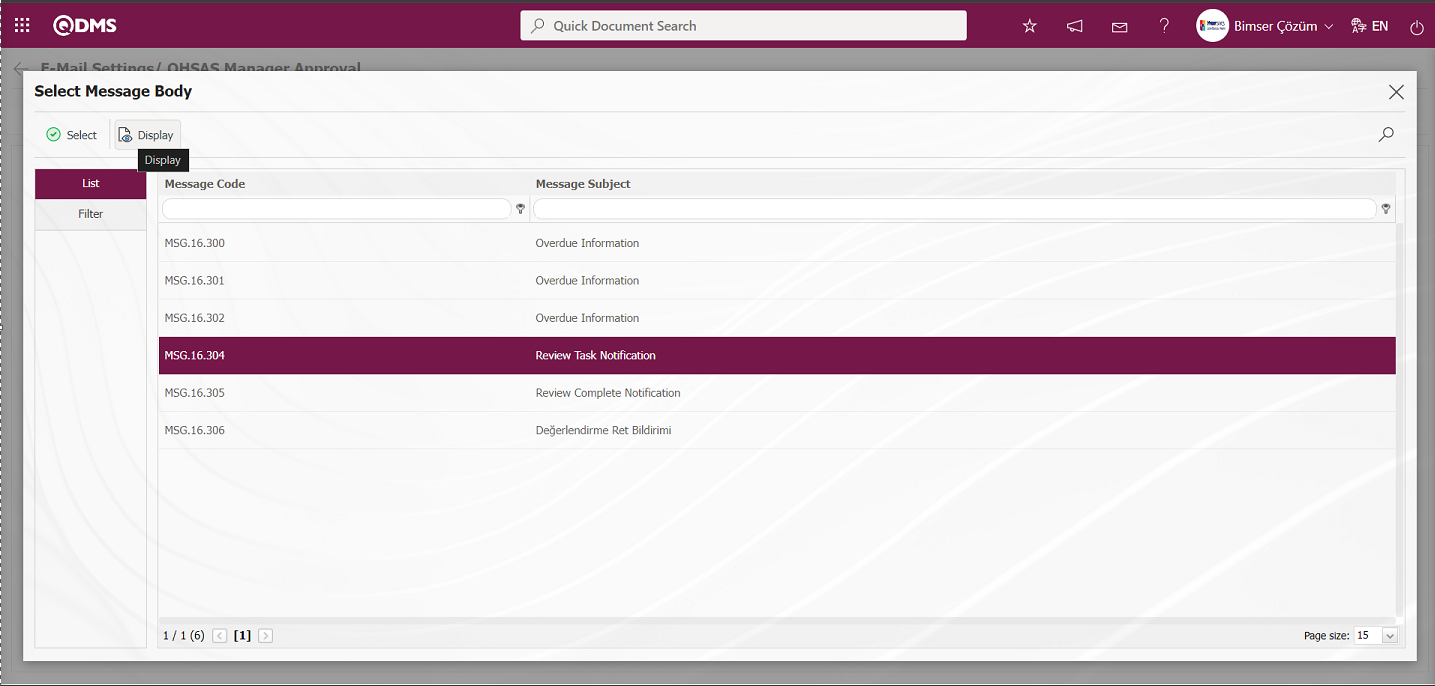
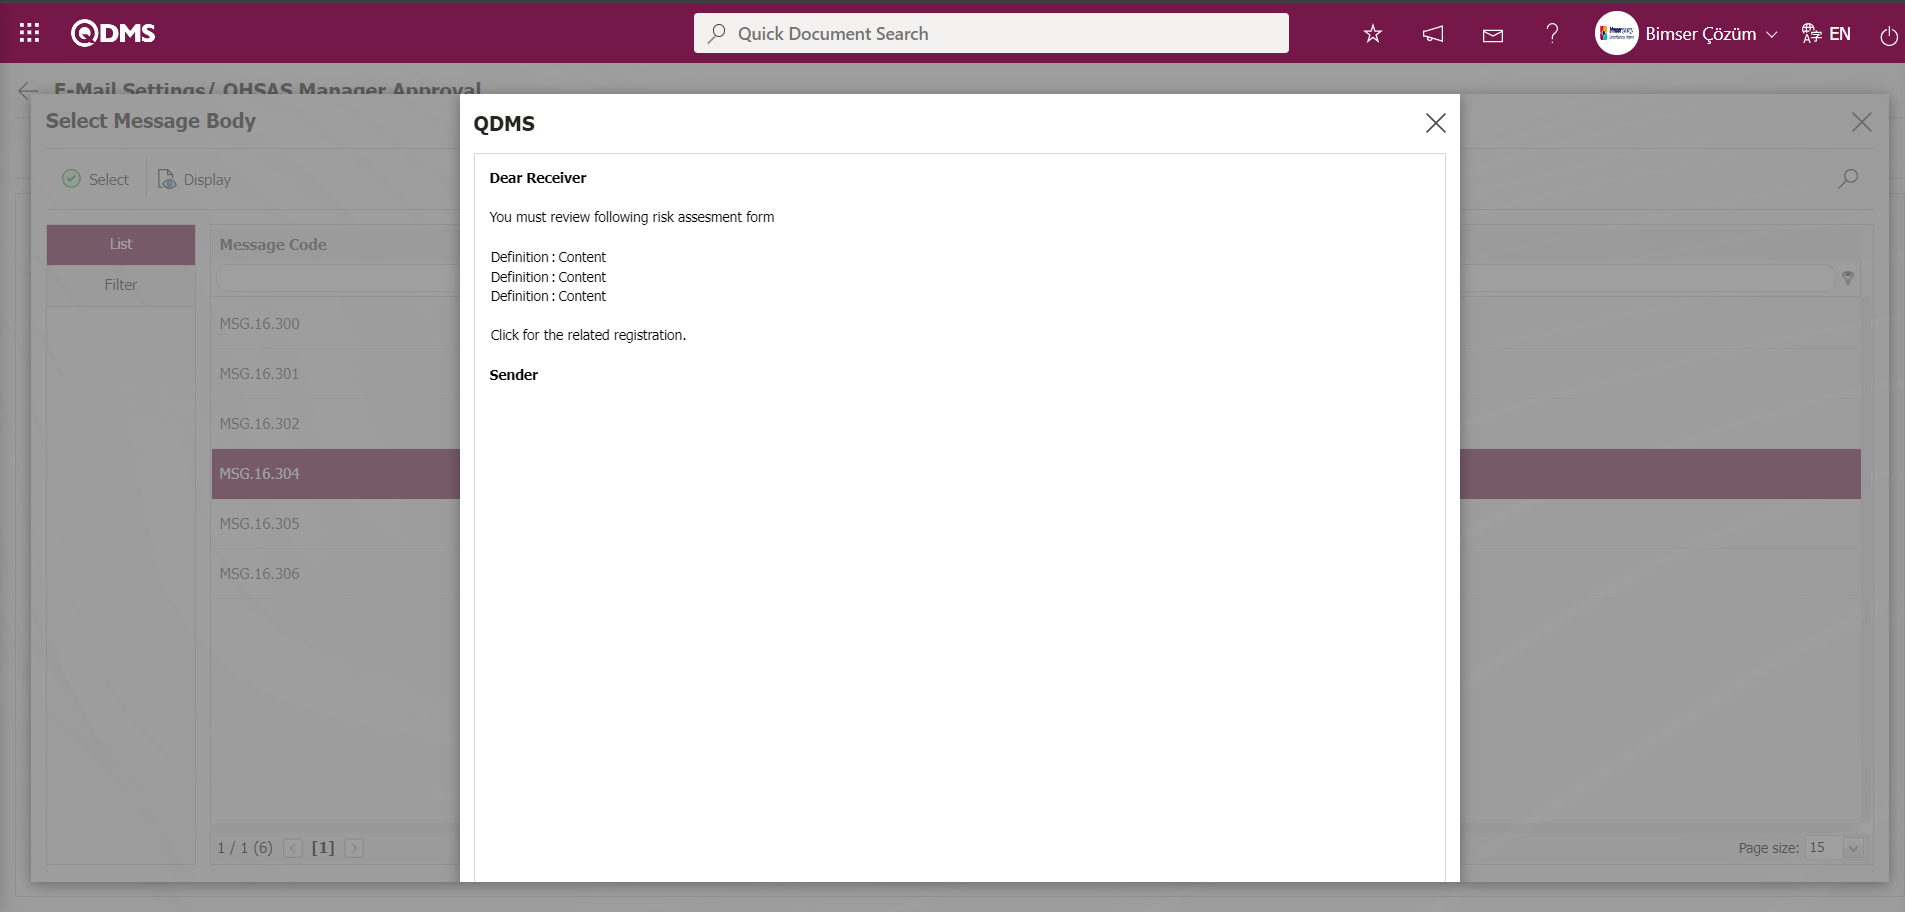
By selecting the message body in the Message Body list and clicking the  button, the content of the message body is displayed in detail.
The message bodies to be sent for the relevant roles are selected by selecting the message body in the message body list and clicking the  button.

If you want to send an e-mail to whom, the “Send E-Mail / Send SMS” check box related to that role is checked. The mobile phone number of the person defined in the role must be defined on the personnel identification screen in order to send a message

On the E-Mail Settings/ OHSAS Manager Approval screen, after the “Send E-Mail / Send SMS” check box related to the roles to send e-mail is checked, the E-Mail Settings registration process is performed by clicking the  button in the upper left corner of the screen.
6.1.8.Report Formats
Menu Name: System Infrastructure Definitions/ OHS Risk Assessment/ Report Formats
It is the menu where different report formats are defined according to OHSAS Risk Assessment methods. Since the report formats for the OHSAS Risk Assessment Module are designed differently for all users, there is no fixed report template. For this reason, a separate report template for each report is prepared from scratch and transferred to the system. In the OHSAS Risk Module, the infrastructure is built in the System Infrastructure Definitions section in the process of designing report formats templates. Field Definition, Function Designer and Report Formats menus are used in the infrastructure design process. In the Field Definition menu, the fields in the report format are defined. In the Function Designer menu, the relationship is established for these fields to be displayed on the Risk Assessment Detail function pages numbered 4. In the Function Designer menu, the tags of the field codes on the screen opened by clicking the  button are added to the field values section of the template in the Report format. The Report format template with tags added is uploaded to the system. Loading the report format template to the system is done with the
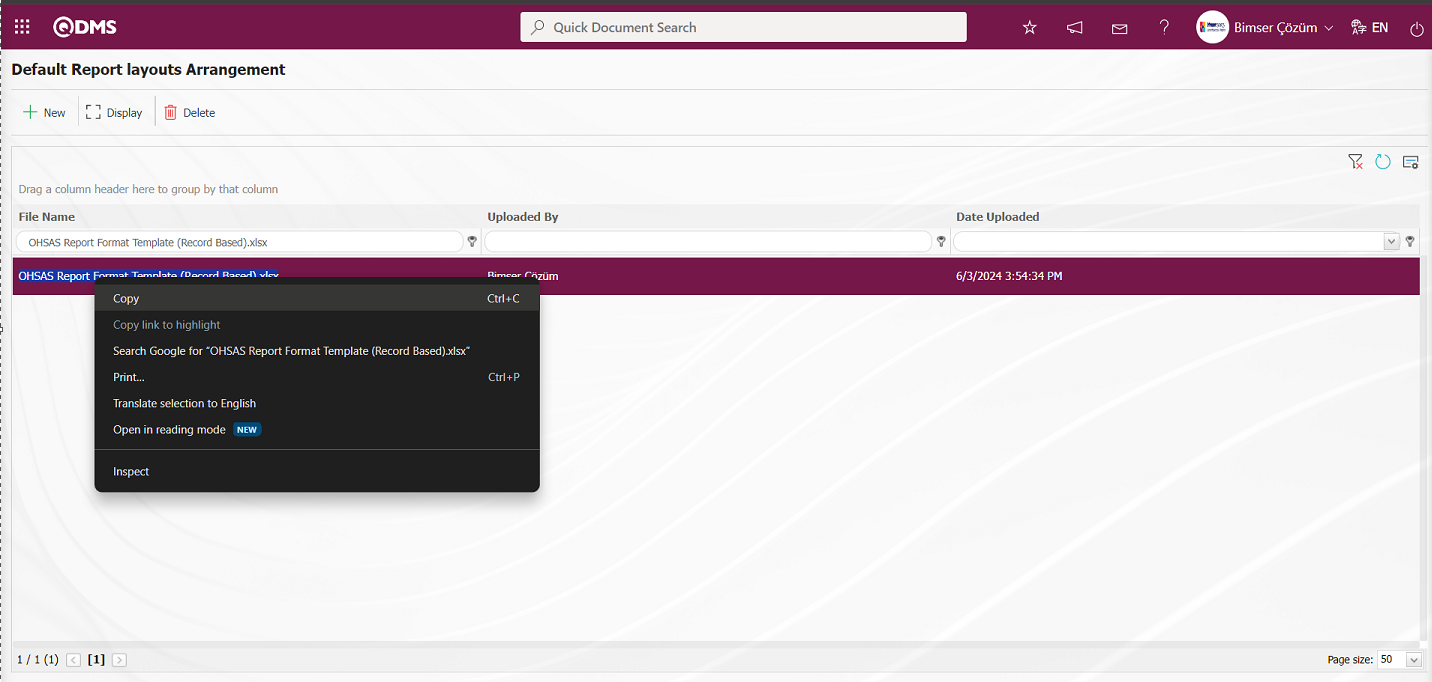
  button in the System Infrastructure Definitions/BSID/Configuration Settings/Default Report Layouts Arrangement menu. System Infrastructure Definitions / OHSAS Risk Assessment / Report Formats menu is clicked. Click the button in the Report Formats menu. In the Report Formats screen, the name of the Report Format template is written in the relevant field. By going to the Default Report Layouts Arrangement menu, select the Report format template installed in the system and copy the name and extension with right click/copy management, then paste it into the Report template field on the Report Formats screen with right click/paste management. After defining the Report template format on the Report formats screen, the Report format definition process is performed by selecting the report according to the desired option in the Report template field and clicking the
  button. In this menu, the report format is taken according to three options as Record Basis, Form Basis and General as report template options. Report formats defined on form and record basis are taken by clicking the relevant buttons in the Integrated Management System / OHSAS Risk Assessment / Risk Assessment Form Definition / Details menu. While the report format on record basis is taken by clicking the
  (Print) button in this menu, the report format on Form basis is taken by clicking the
  (Export to Excel) button. If the “Create Pdf” check box is checked while defining the report format in the report formats menu while receiving the report format on record basis, the report format is also received in PDF format. When the relevant check box is not checked, the report format on record basis is taken in Excel format. Report formats defined on a general basis are taken by selecting the report format defined by clicking the
  (Export Excel) button in the Integrated Management System / OHSAS Risk Assessment / Reports / General Risk List menu.

With the help of the buttons on the screen;
 : A new report format is defined.
 : Changes and updates are made on the report format information selected in the list.
 : Deletes the report format information selected in the list.
Defining Report Format on Record Basis;
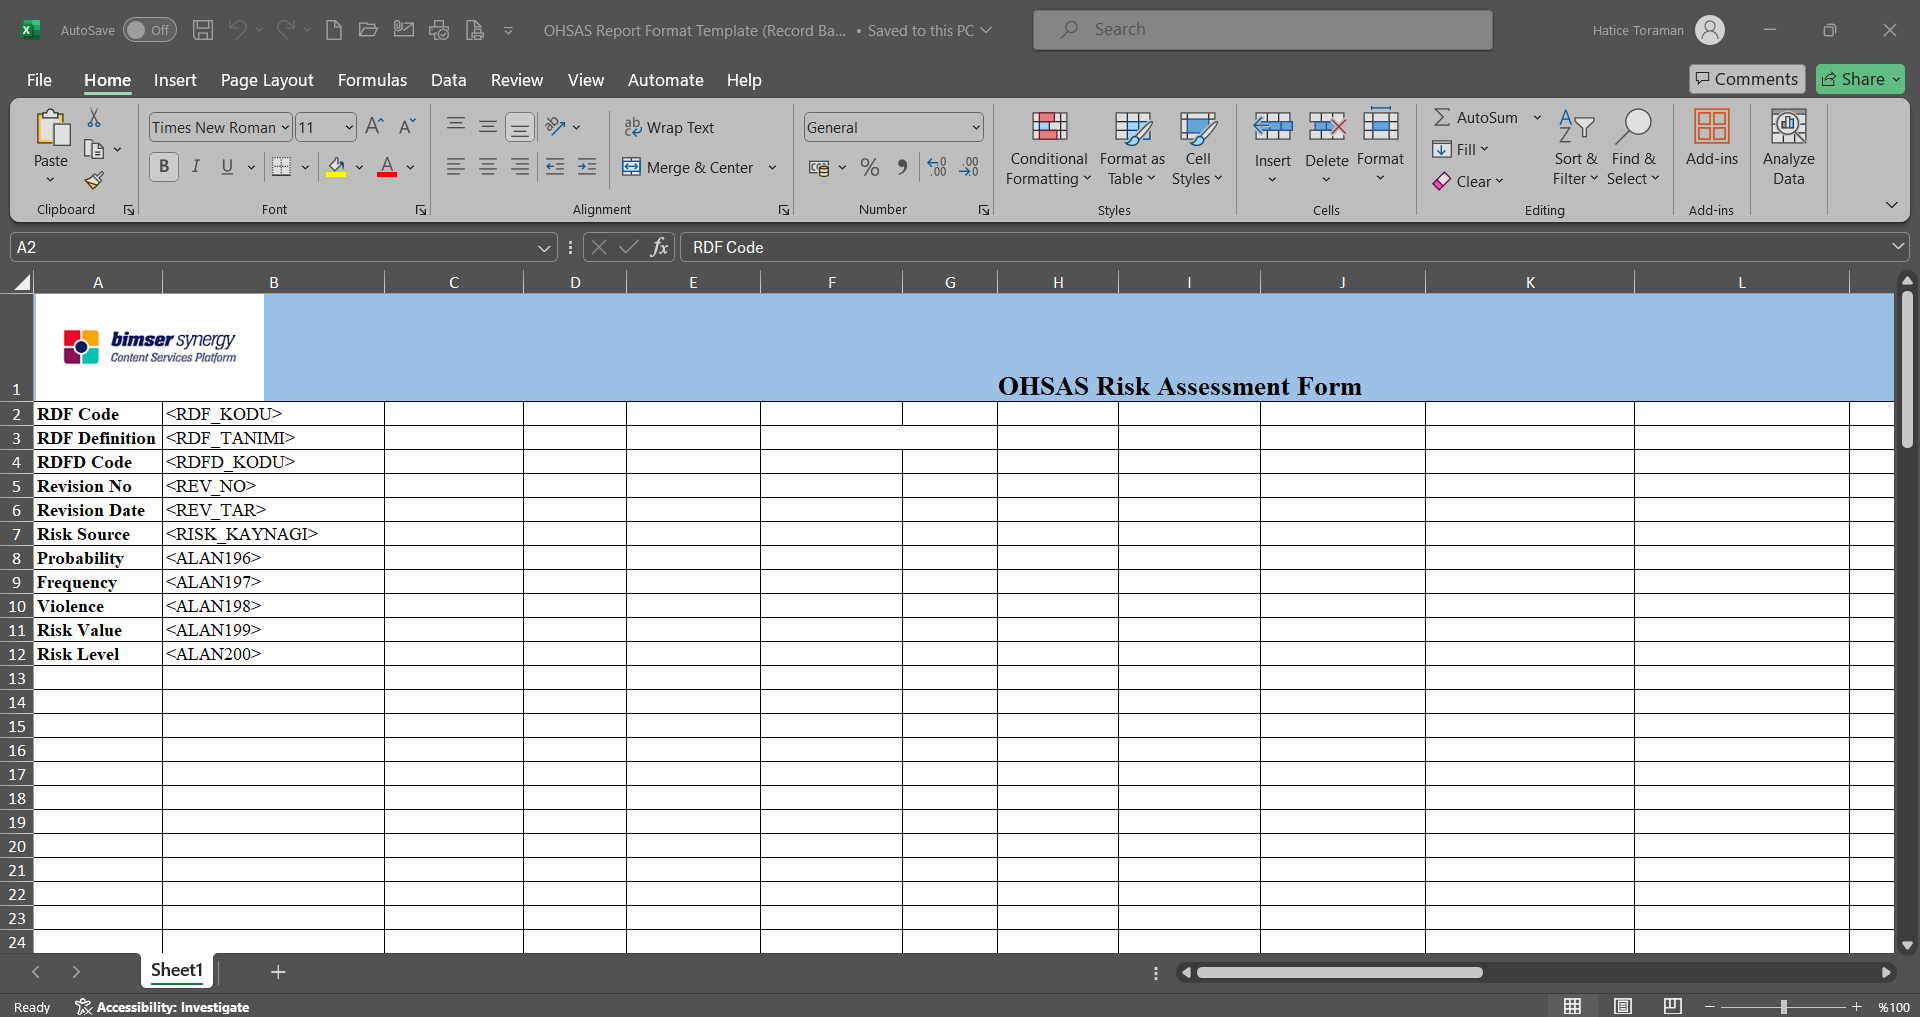
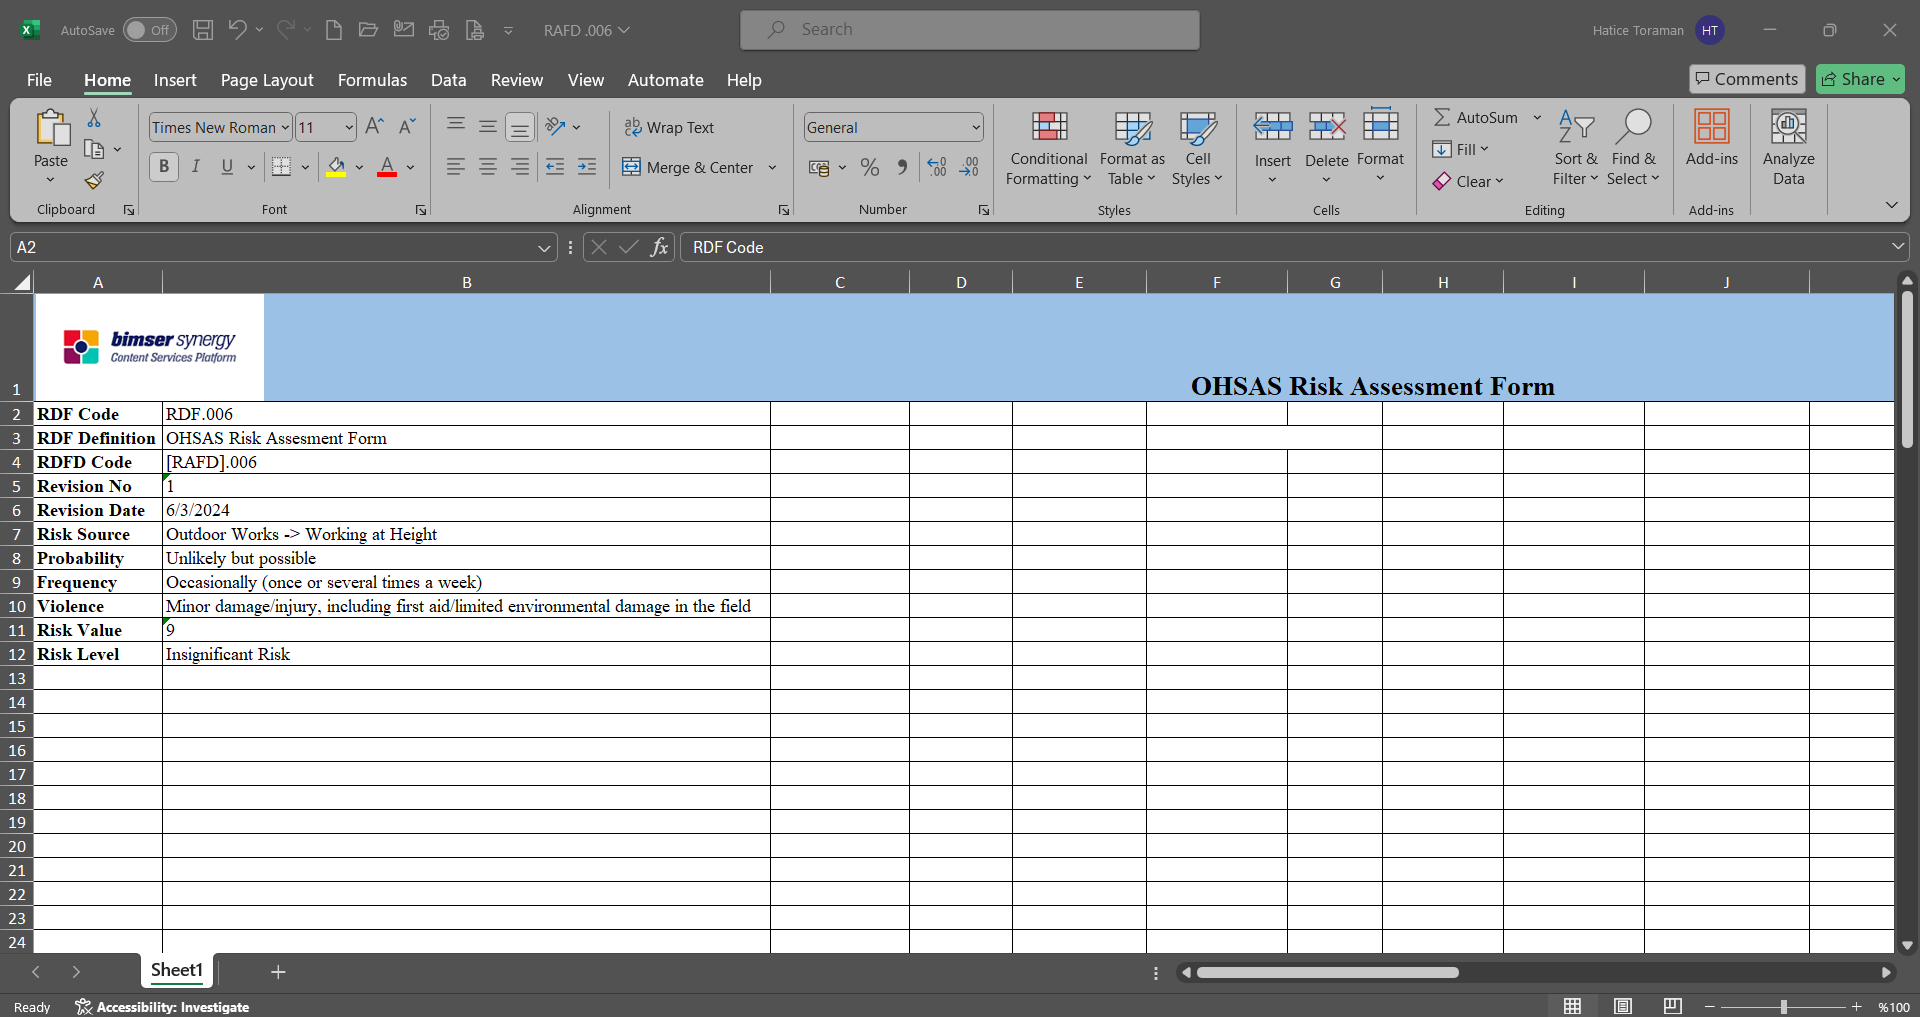
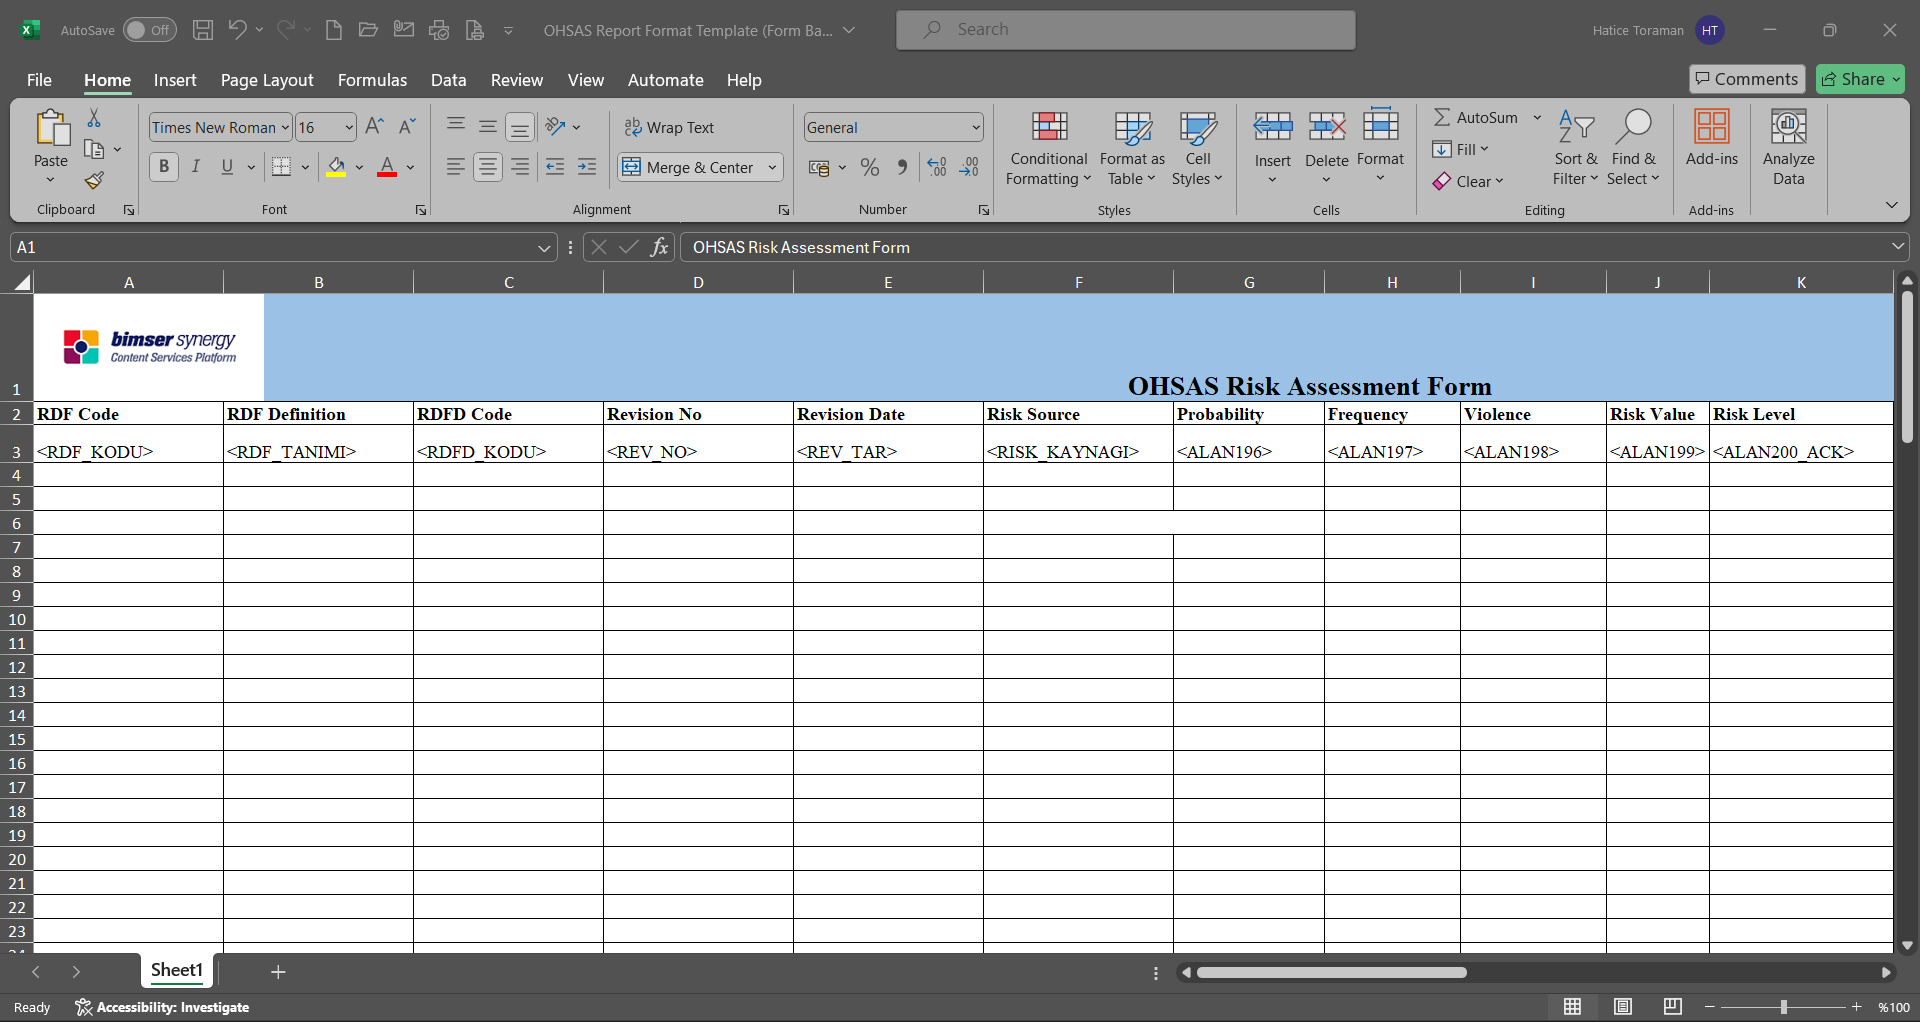
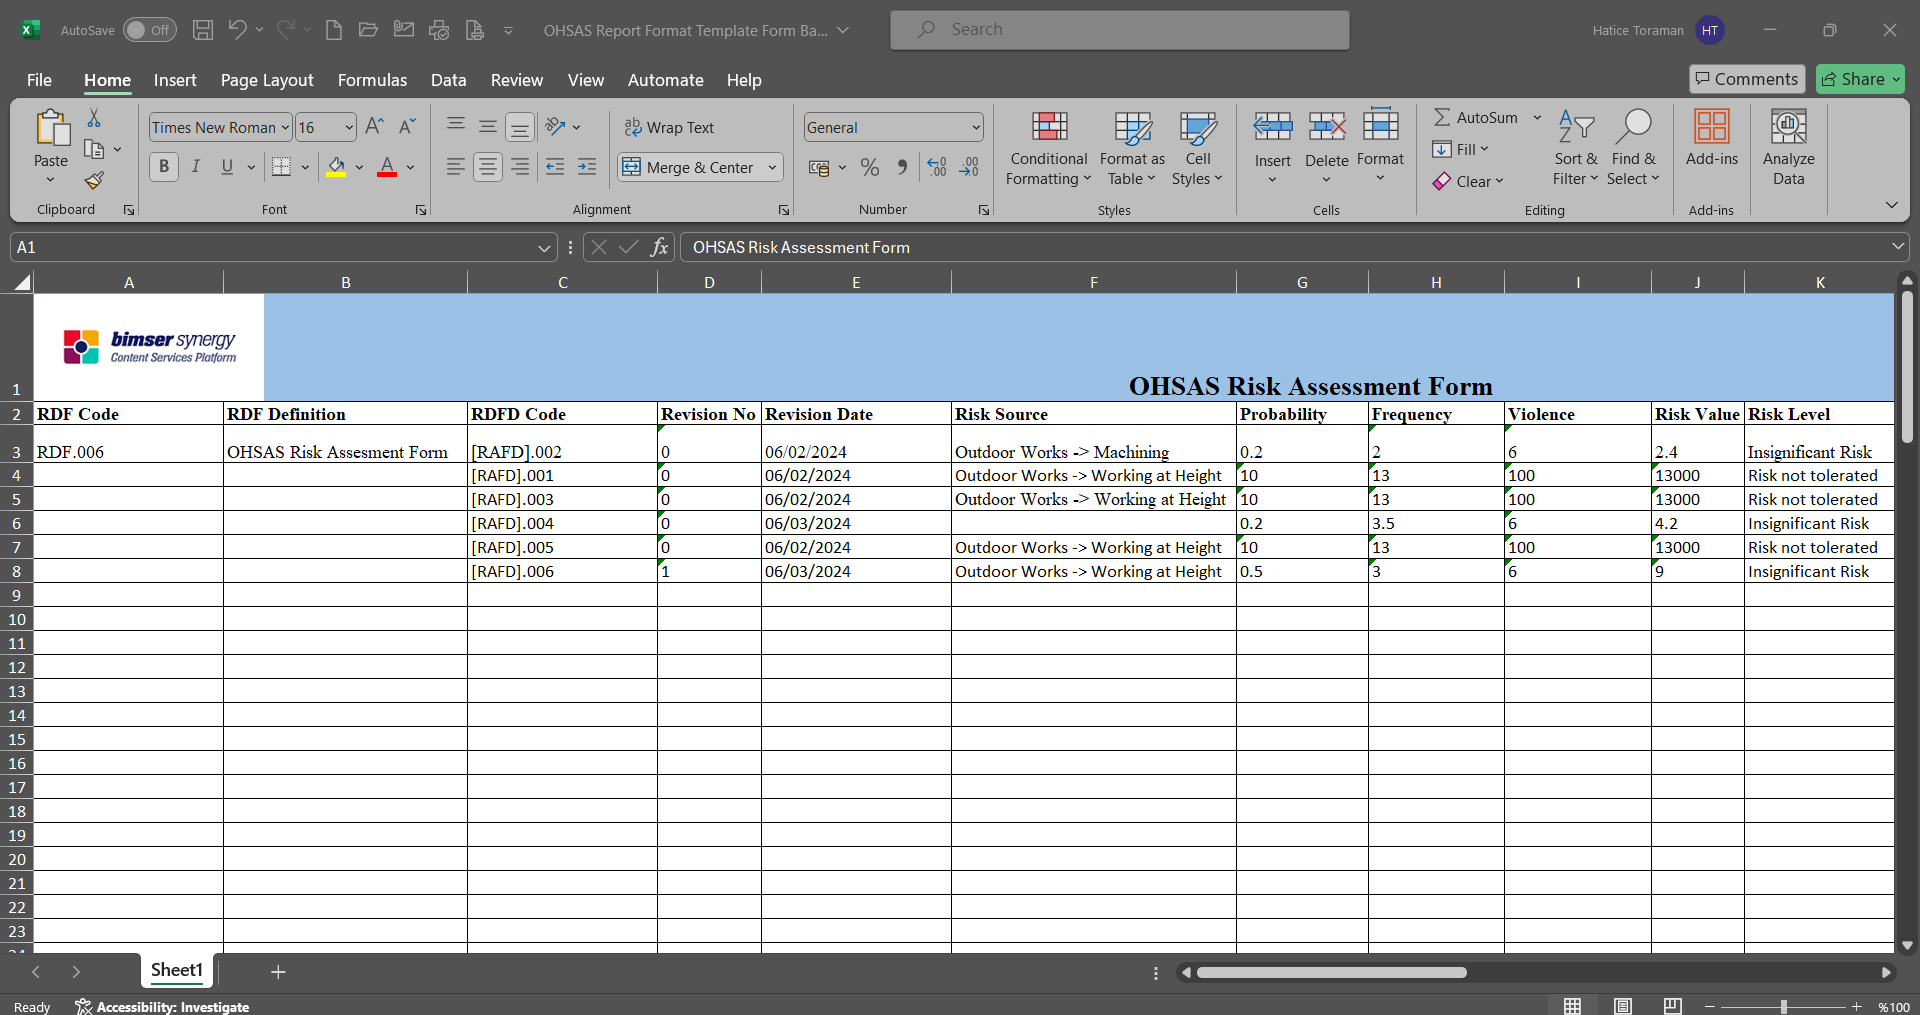
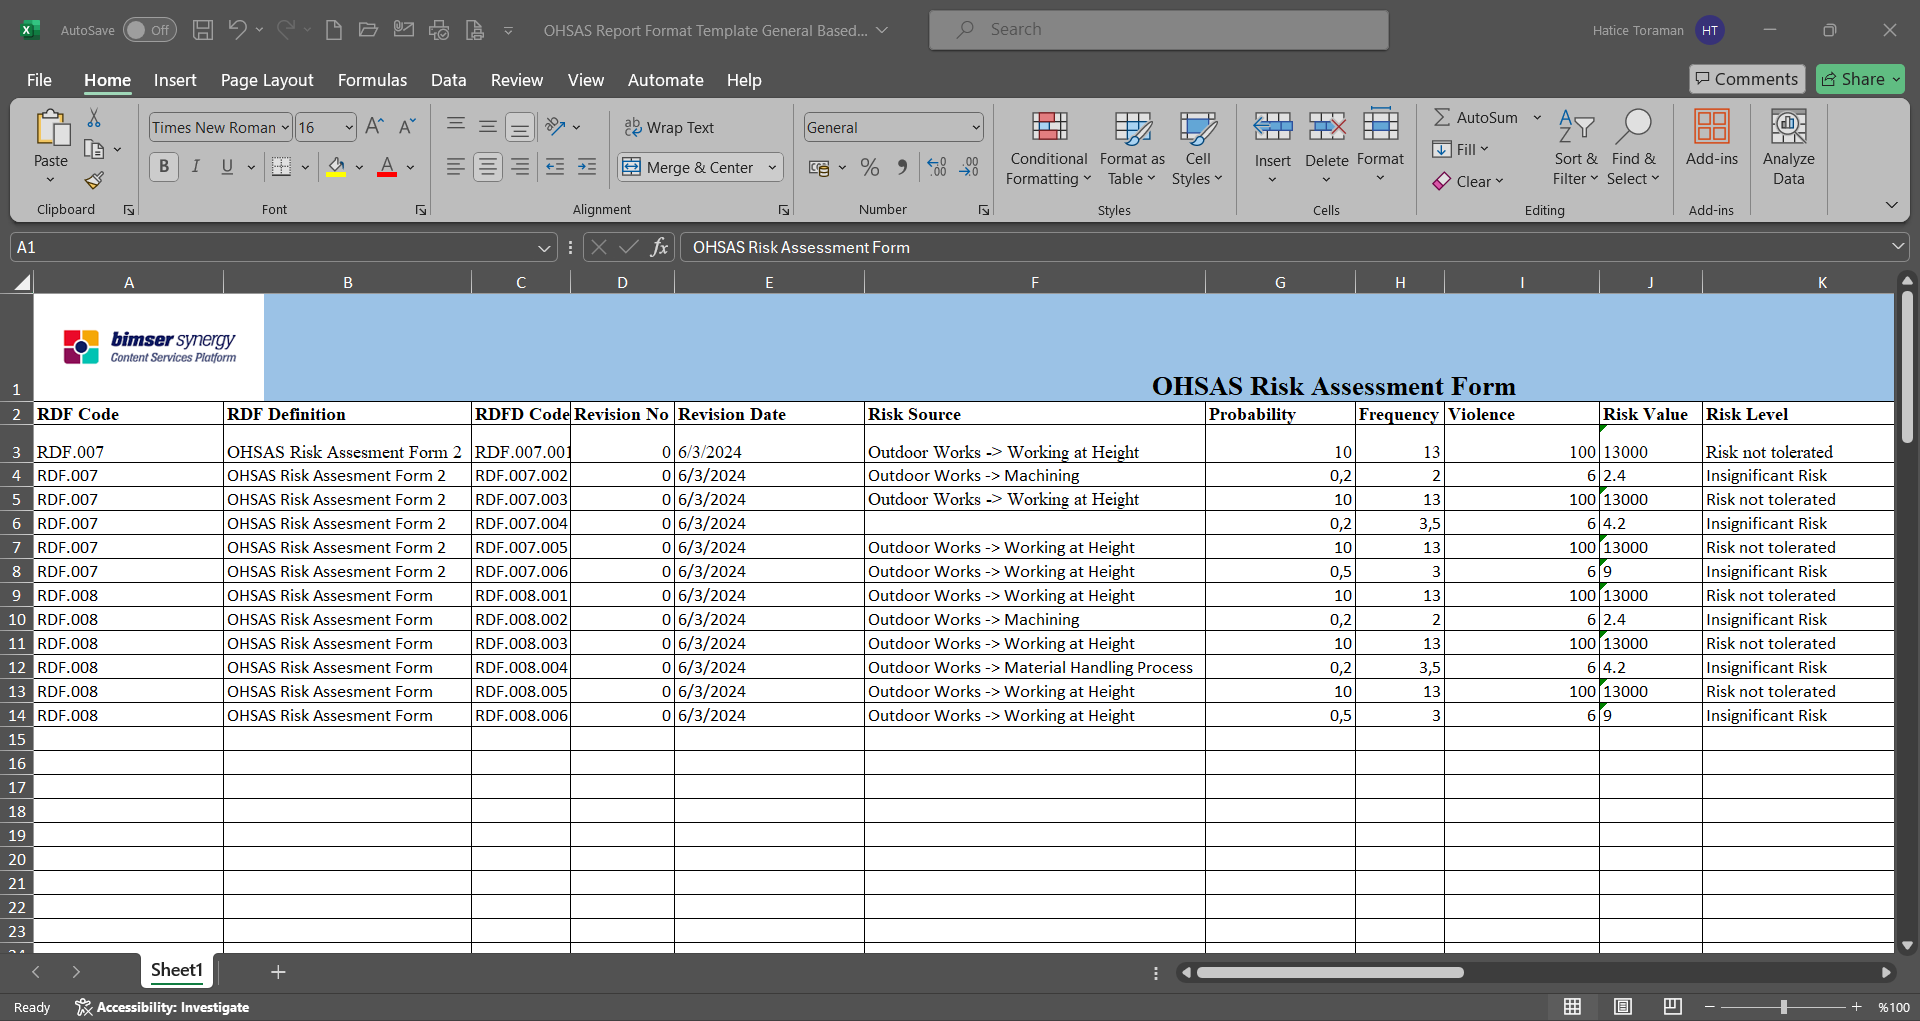
A report template can be created by following the report steps taken by pressing the (Print) button in the Integrated Management System / OHSAS Risk Assessment / Risk Assessment Form Identification / Details menu. First, a new Excel file is created. A name is given to the file. The part to be considered while giving the name is that there is no space character in the file name. For example, the file name is “ OHSAS Report Format Template (Record Based).xlsx ”.
For the fixed fields defined in the system, the “fixed tags.txt” file in the document is checked. In order to print the parametric fields defined in the System Infrastructure Definitions / OHSAS Risk Assessment / Field Definition menu to the report; System Infrastructure Definitions / OHSAS Risk Assessment / Function Design menu and select the Risk Assessment Detail function, function number 4. While the Risk Assessment Detail function is selected, click on the  button on the top left. If you have a field named “Risk Definition” on the screen that opens and the “Field Code” field for this field is ALAN5, then the tag you need to use to print the “Risk Definition” field to the report will be <ALAN5>. If the field you want to add to the report is in a list type field, you need to use a tag in the form of <ALANKODU_ACK>. If all fields cannot be added with “ACK” suffix, it will be in the form of <ALANKODU>. It should be noted that there should not be any space characters at the beginning and end of the tags used. The information of all tags is written to the report format template as in the form below.
After preparing your report template in line with this information, the report format is transferred to the system by clicking the  button in the System Infrastructure Definitions / BSID / Configuration Settings / Default Report Layouts Arrangement menu.
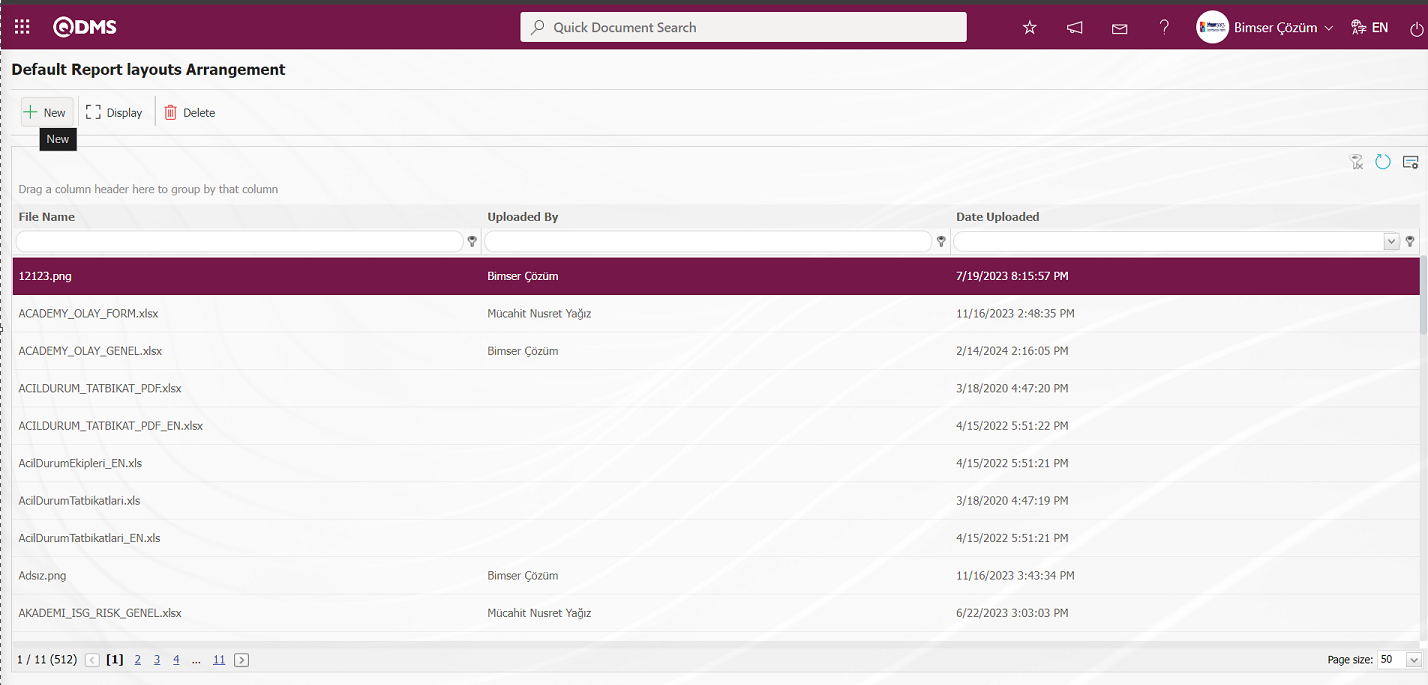
Click the Browse button on the Upload File screen.
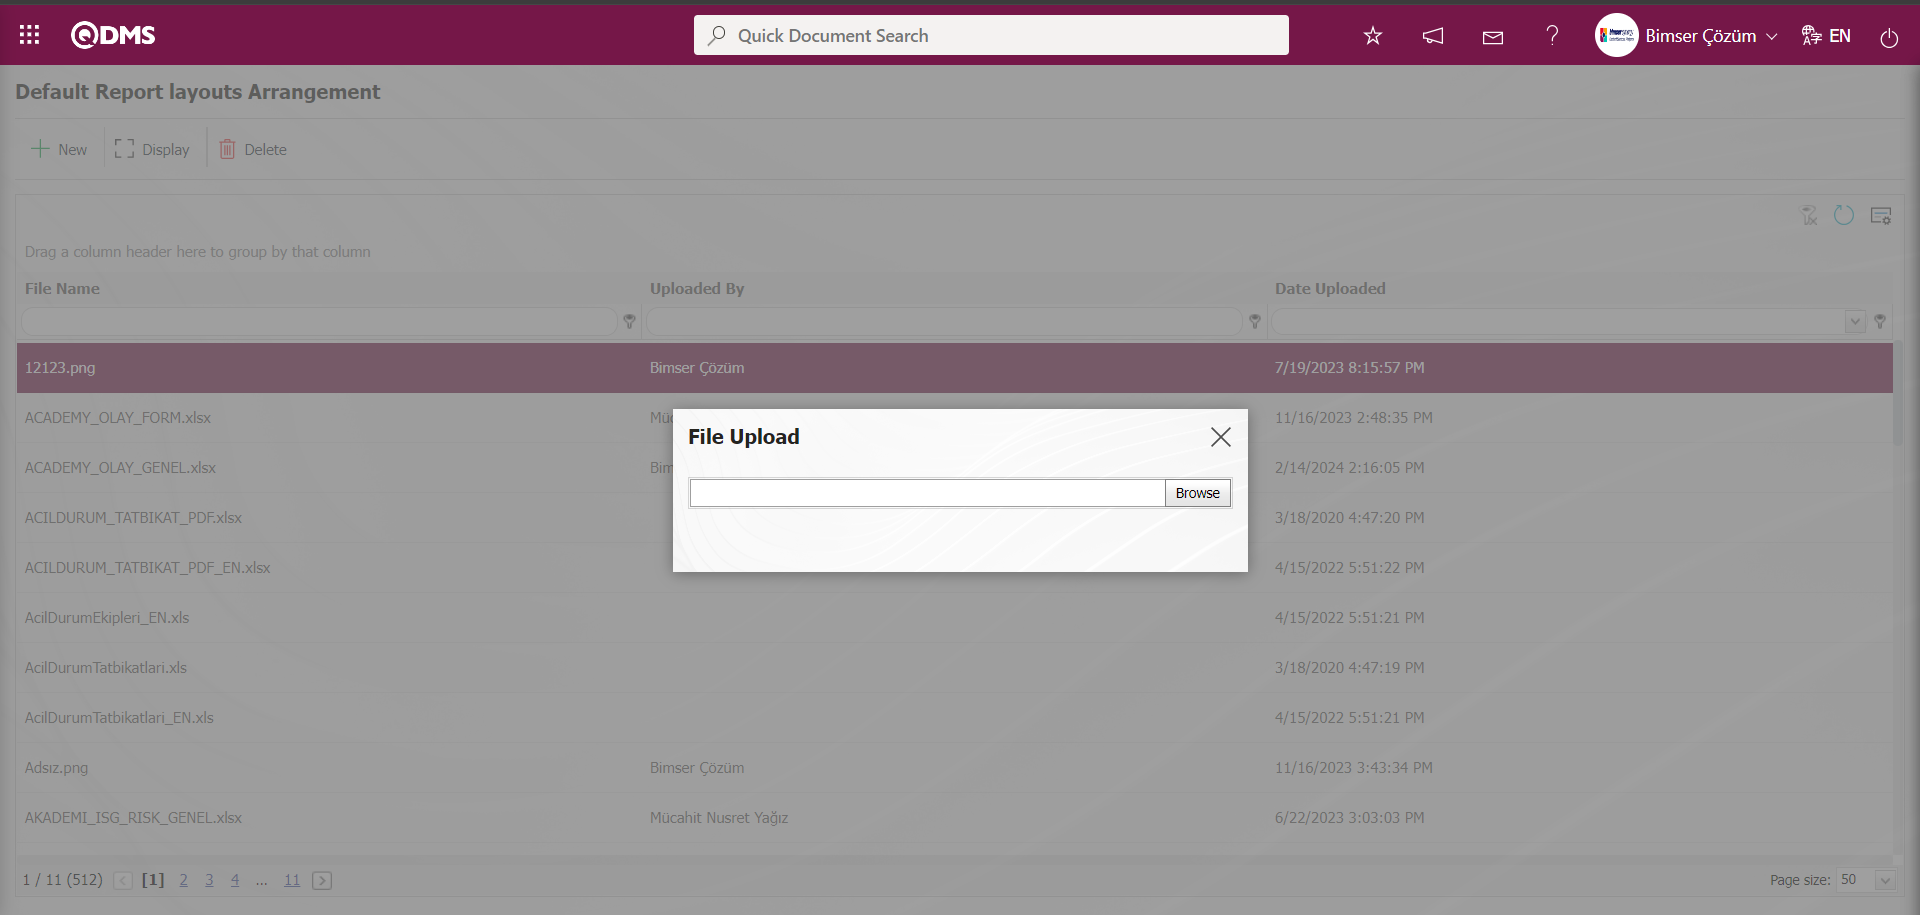
Select the Report format template on the screen that opens.
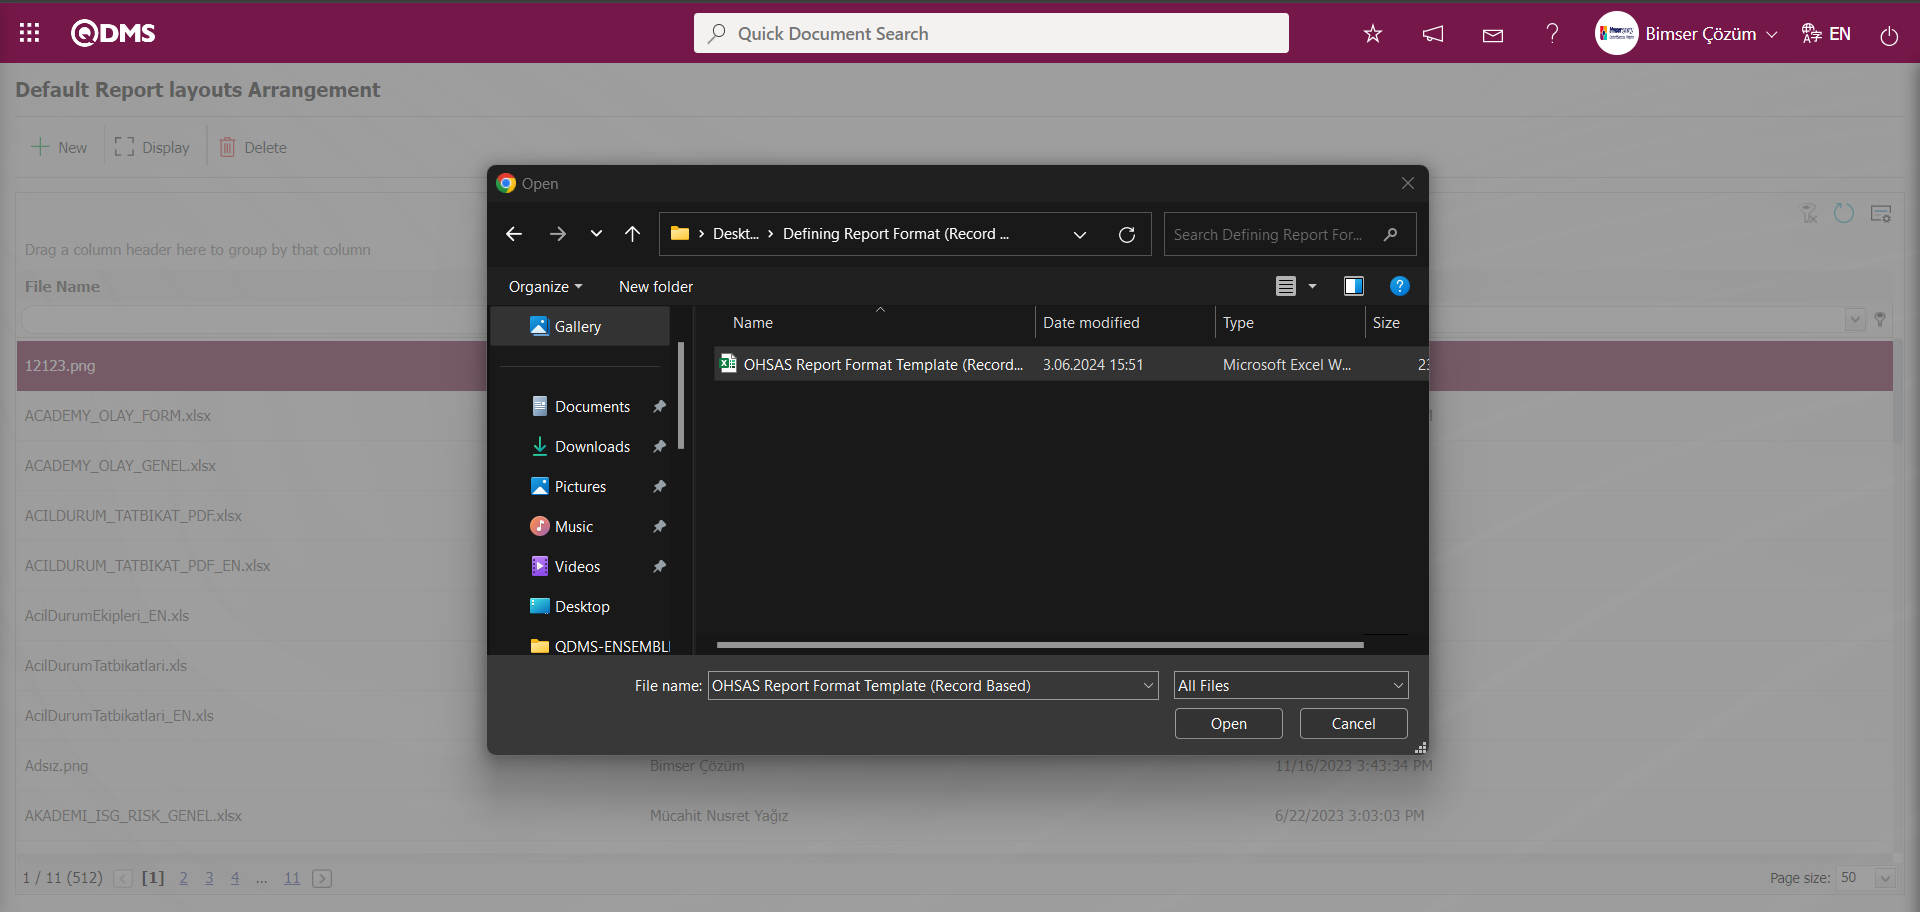

Select Default Report Layouts Arrangement as the report format imported to the system. The selected Report Format is copied with its extension by right click/copy method.
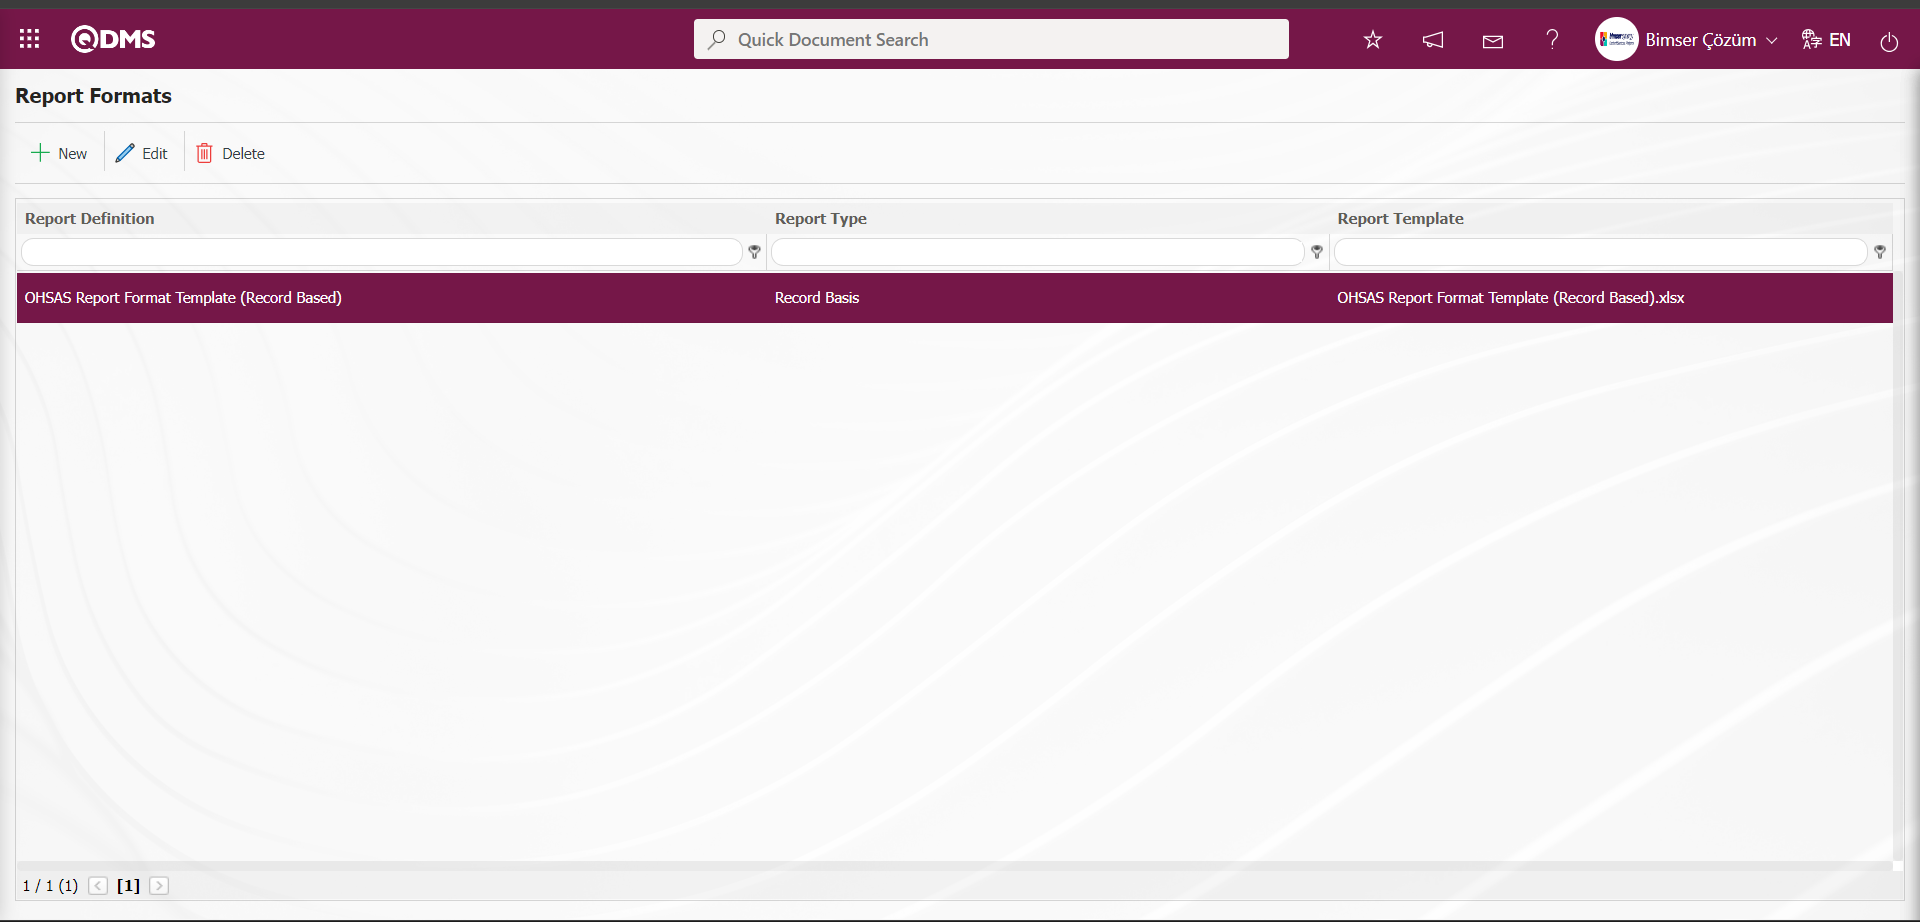
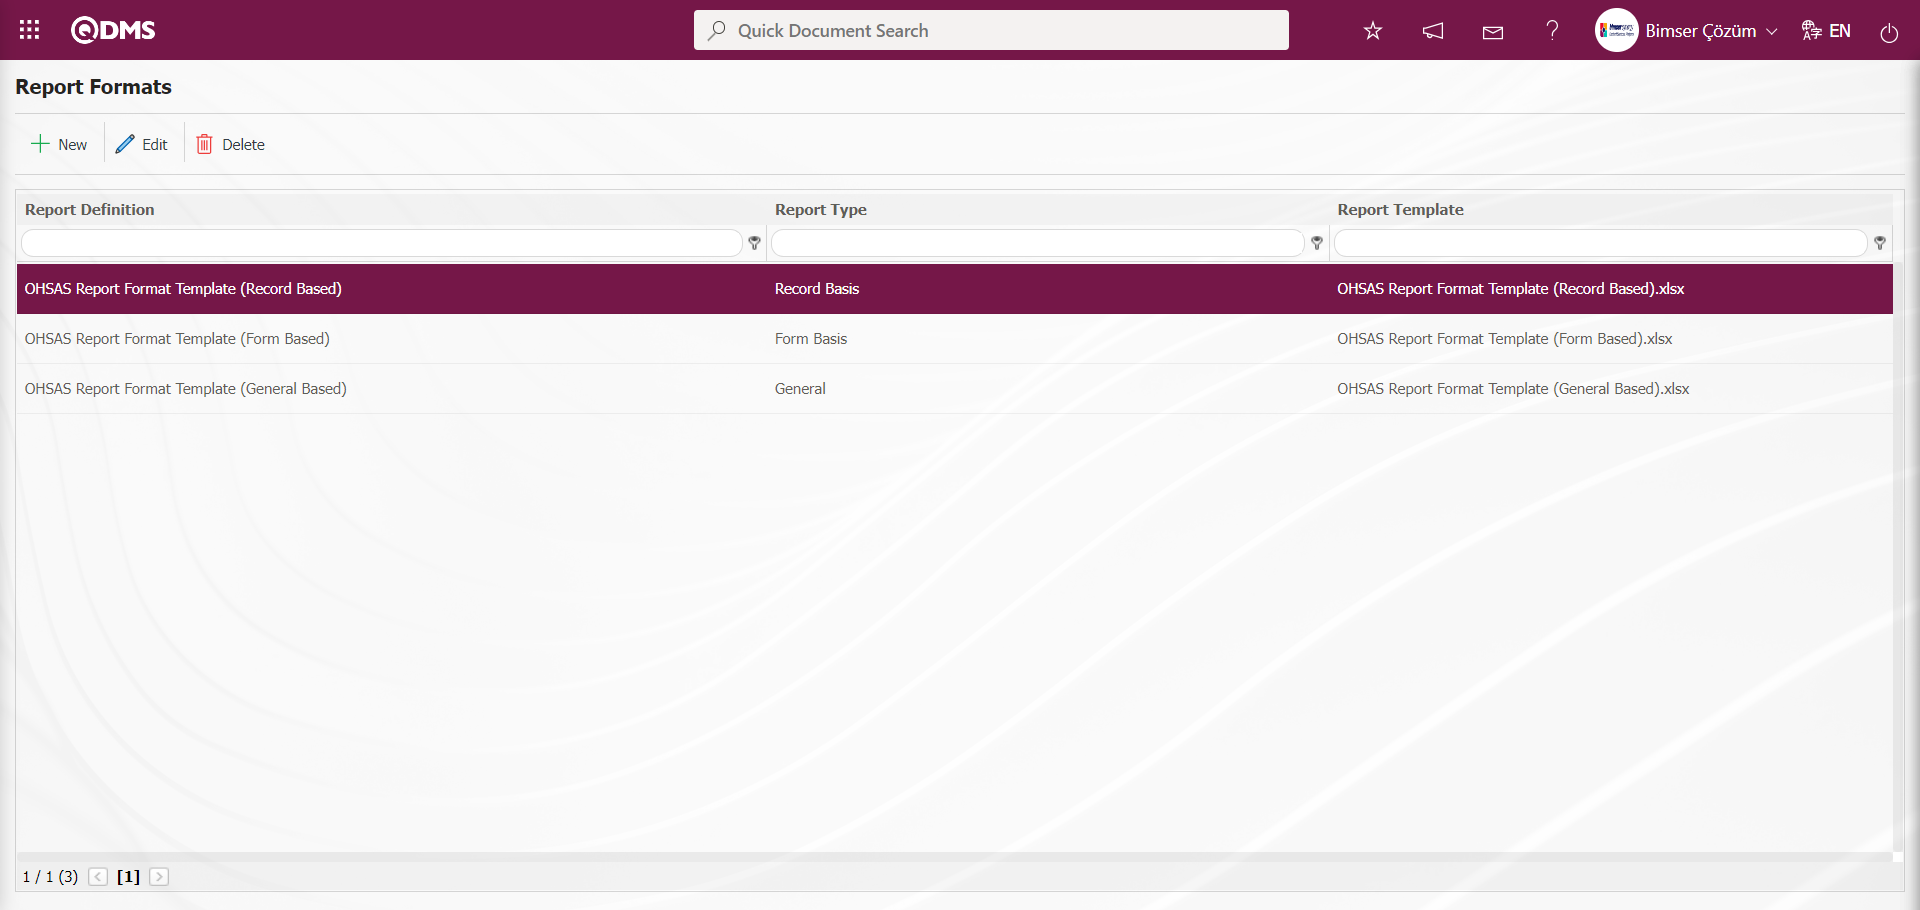
Go to System Infrastructure Definitions/ OHSAS Risk Assessment/Report formats menu.

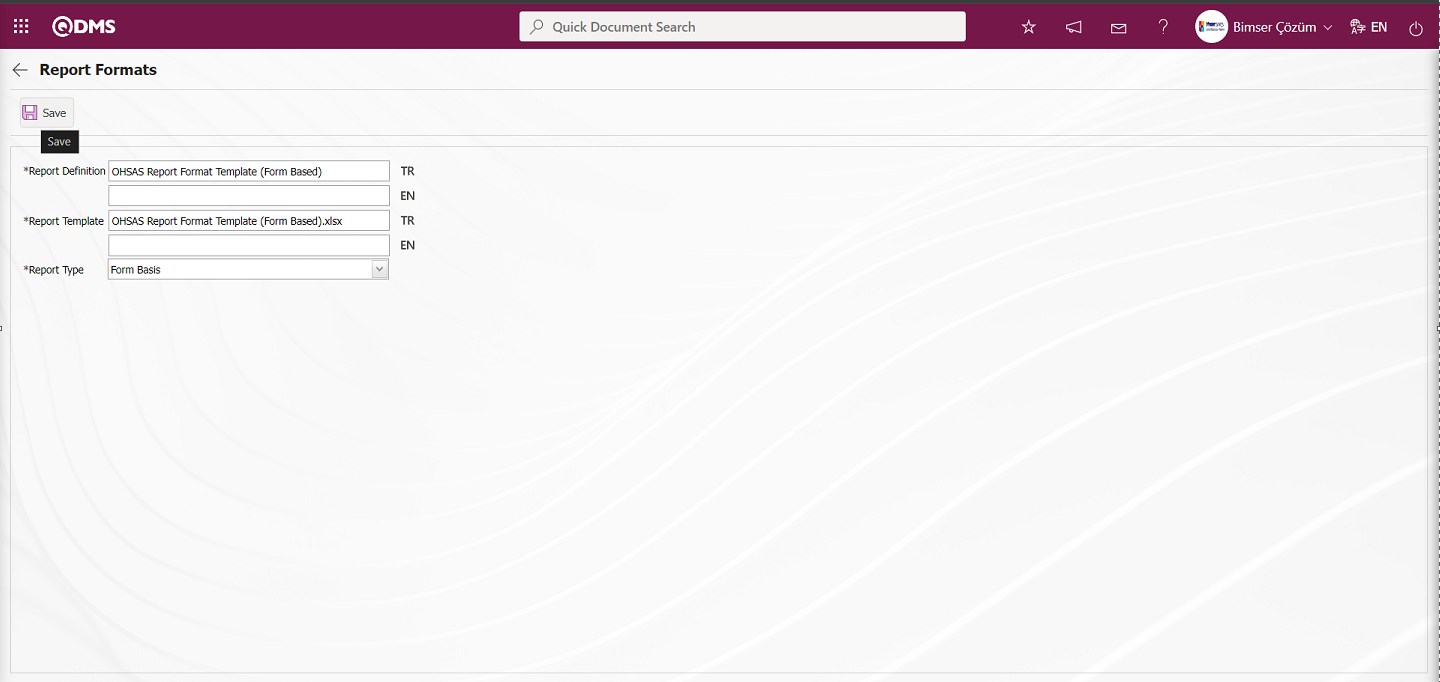
Click the button on the Report Formats screen.
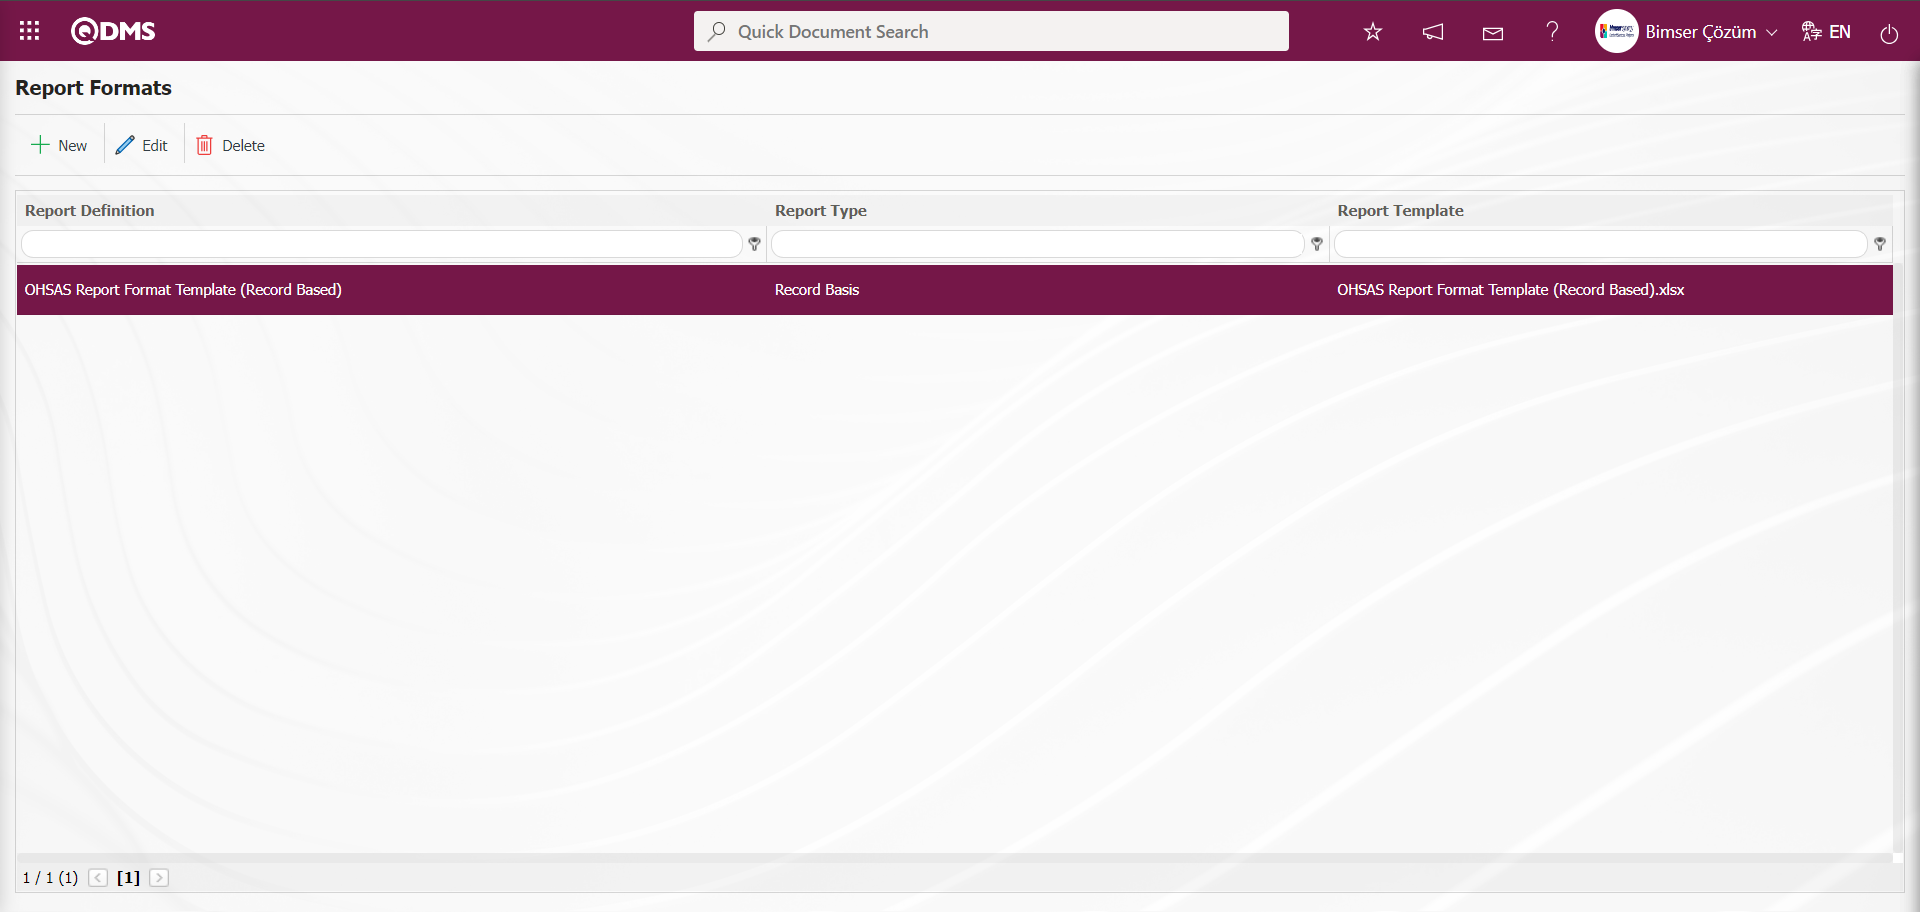
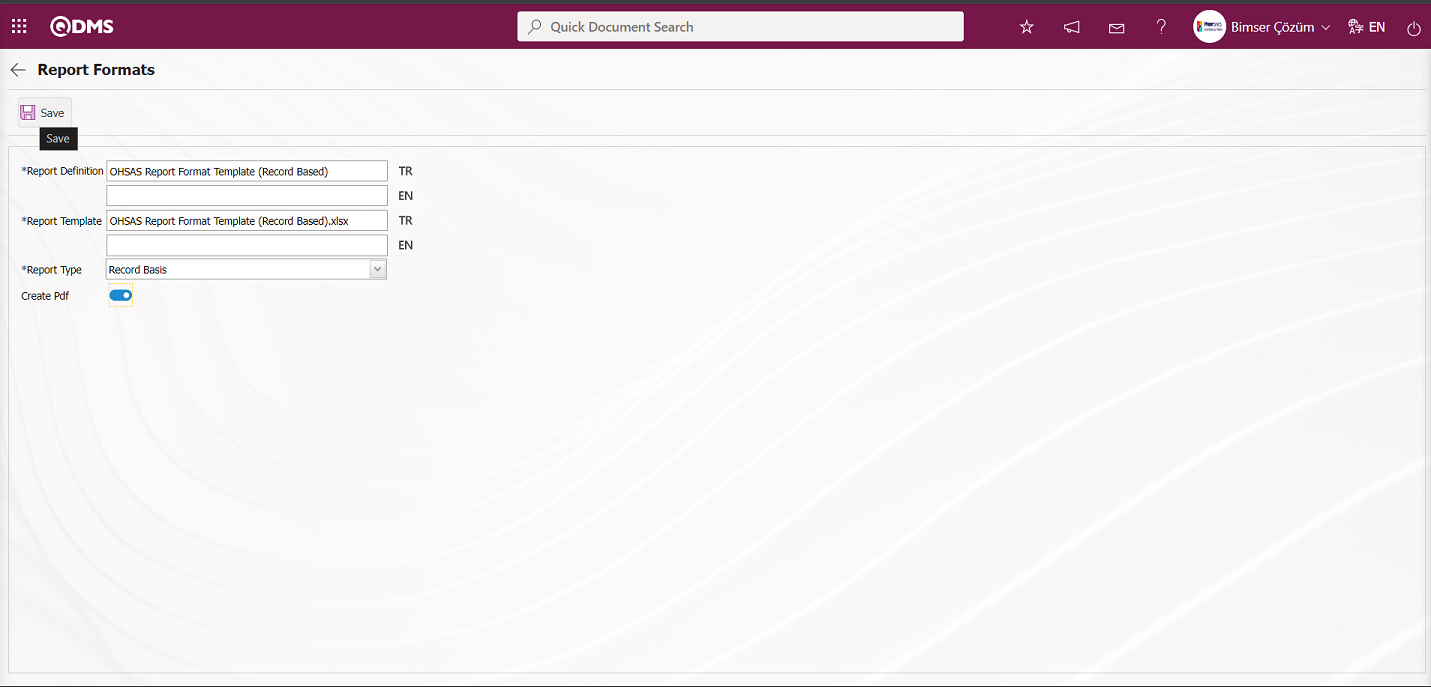
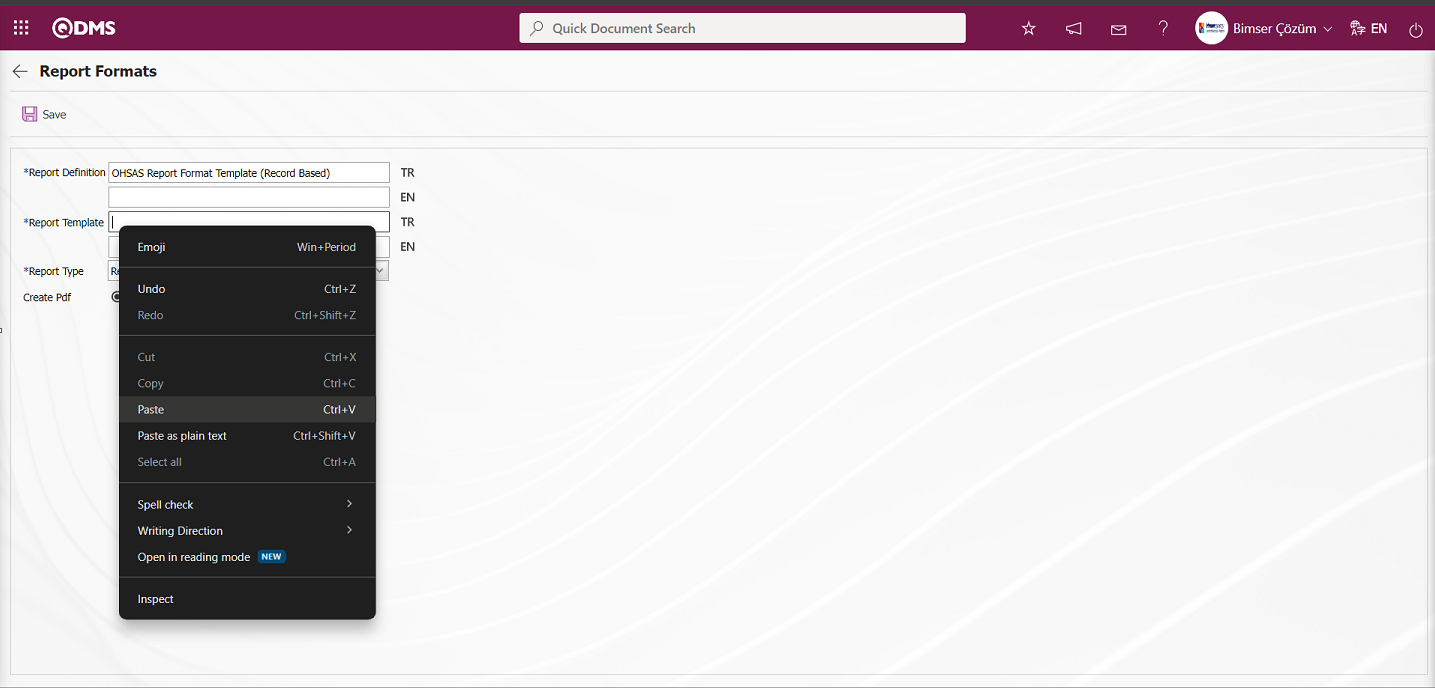 In the Report Formats screen, the name of the Report is written in the Report Definition section. In the Report Template field, the Report format information copied with its extension in Report Formats is pasted with the right click/paste command. In the Report Template field, you need to write the full name of the template you imported into the system with its extension. For example, if you imported your template with the name “OHSAS Report Format Template (Record Based).xlsx” in the report format editing menu, you need to write “OHSAS Report Format Template (Record Based).xlsx” in the Report Template field. When record-based report format is selected in the report template field of the Report Format, the “Record Based” option is selected. If you want to get the report format from Pdf format, the check box related to the “Create Pdf” field is checked.

Related fields are defined on the screen that opens:
Report Definition:This is the field where the report definition information is written in the Report Formats screen.
Report Template: This is the field where the name and extension information of the report template is written on the Report Formats screen. (In the Report Formats Edit menu, the report template is loaded and the name and extension are copied with the right click / copy method and pasted into this field with the right click / paste method).
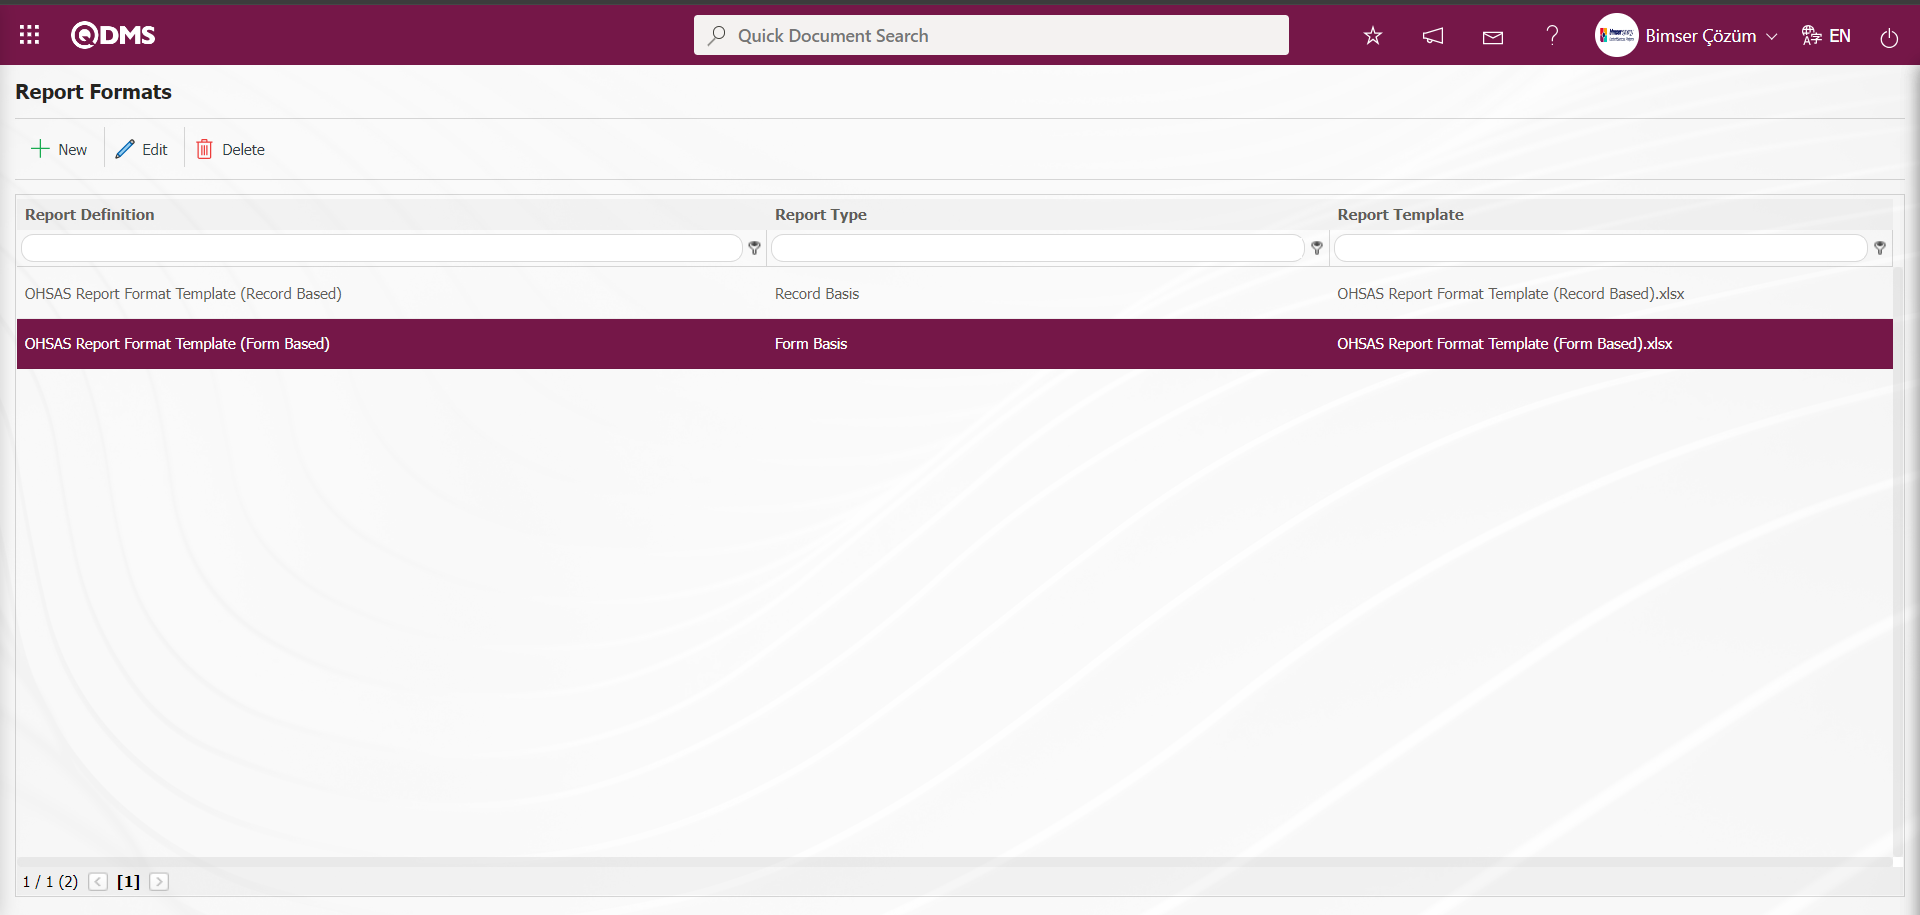
Report Type: Three report type options can be selected: record-based, form-based and general
- On Record Basis: It is selected when it is requested to report each risk record separately. (It is taken with the  (Print) button that appears after pressing the Details button in the Integrated Management System / OHSAS Risk Assessment / Risk Assessment Form definition menu. The (Print) button is not displayed unless there is a record-based report format definition process).
- Form Based: It is selected for situations where risk detail records under each risk form are transferred to Excel as a single list.
(It is taken with the  (Export to Excel) button that appears after pressing the Details button in the Integrated Management System / OHSAS Risk Assessment / Risk Assessment Form Identification menu).
- General: It is selected when all risk detail records are requested to be seen in a single Excel.
(It is taken from the Integrated Management System / OHSAS Risk Assessment / Reports / General Risk List Report screen with the (Export Excel) button).
Create Pdf: This check box can be checked to transfer a risk record selected on the Integrated Management System / OHSAS Risk Assessment / Risk Assessment Form Identification / Risk Assessment Form Detail screen as PDF format in report formats selected on the basis of report type record.
The names of the report formats to be introduced on the screen are written in the Report Definition field. In the Report Template field, the file name copied from the report formats editing menu is pasted into the relevant field with its extension. After the required fields are filled in the Report Definition screen, the  button in the upper left corner is clicked and the report format is defined on a record basis.
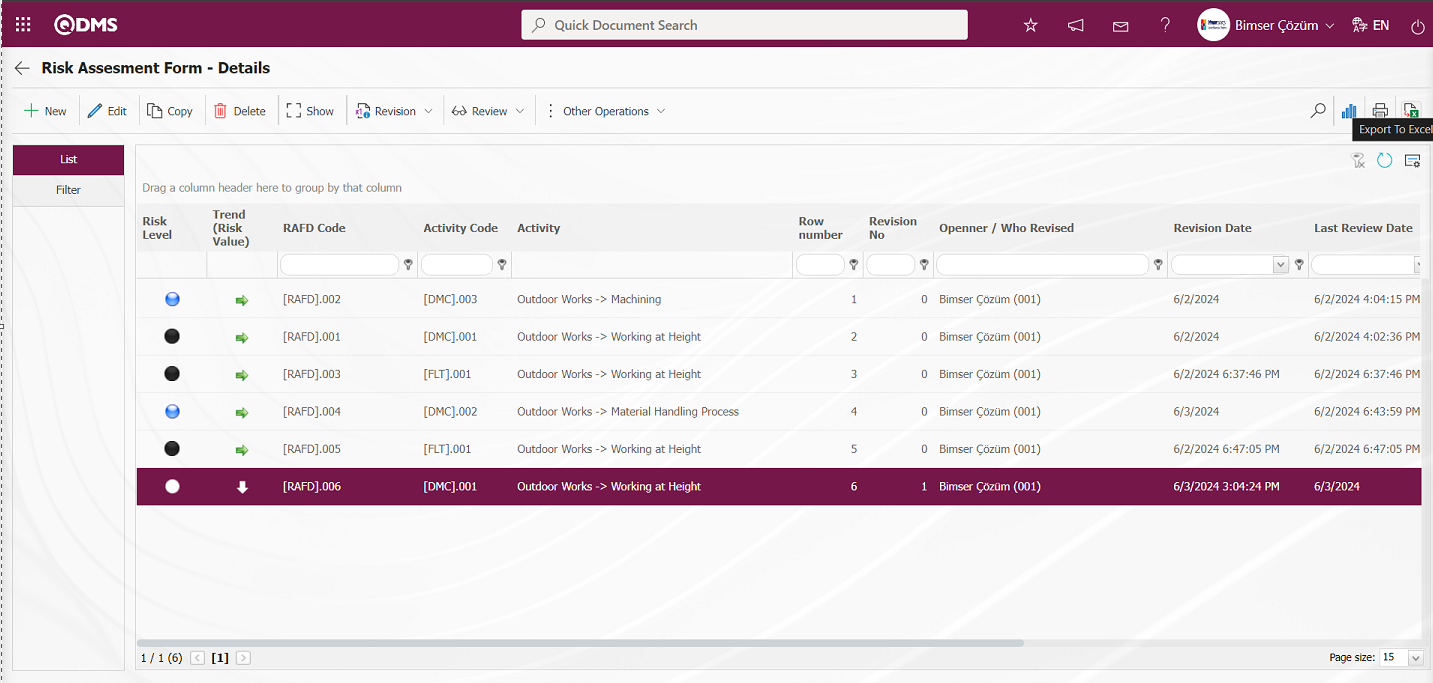
Click on the  button in the Integrated Management System / OHSAS Risk Assessment / Risk Assessment Form definition menu to get the report format based on the defined record.

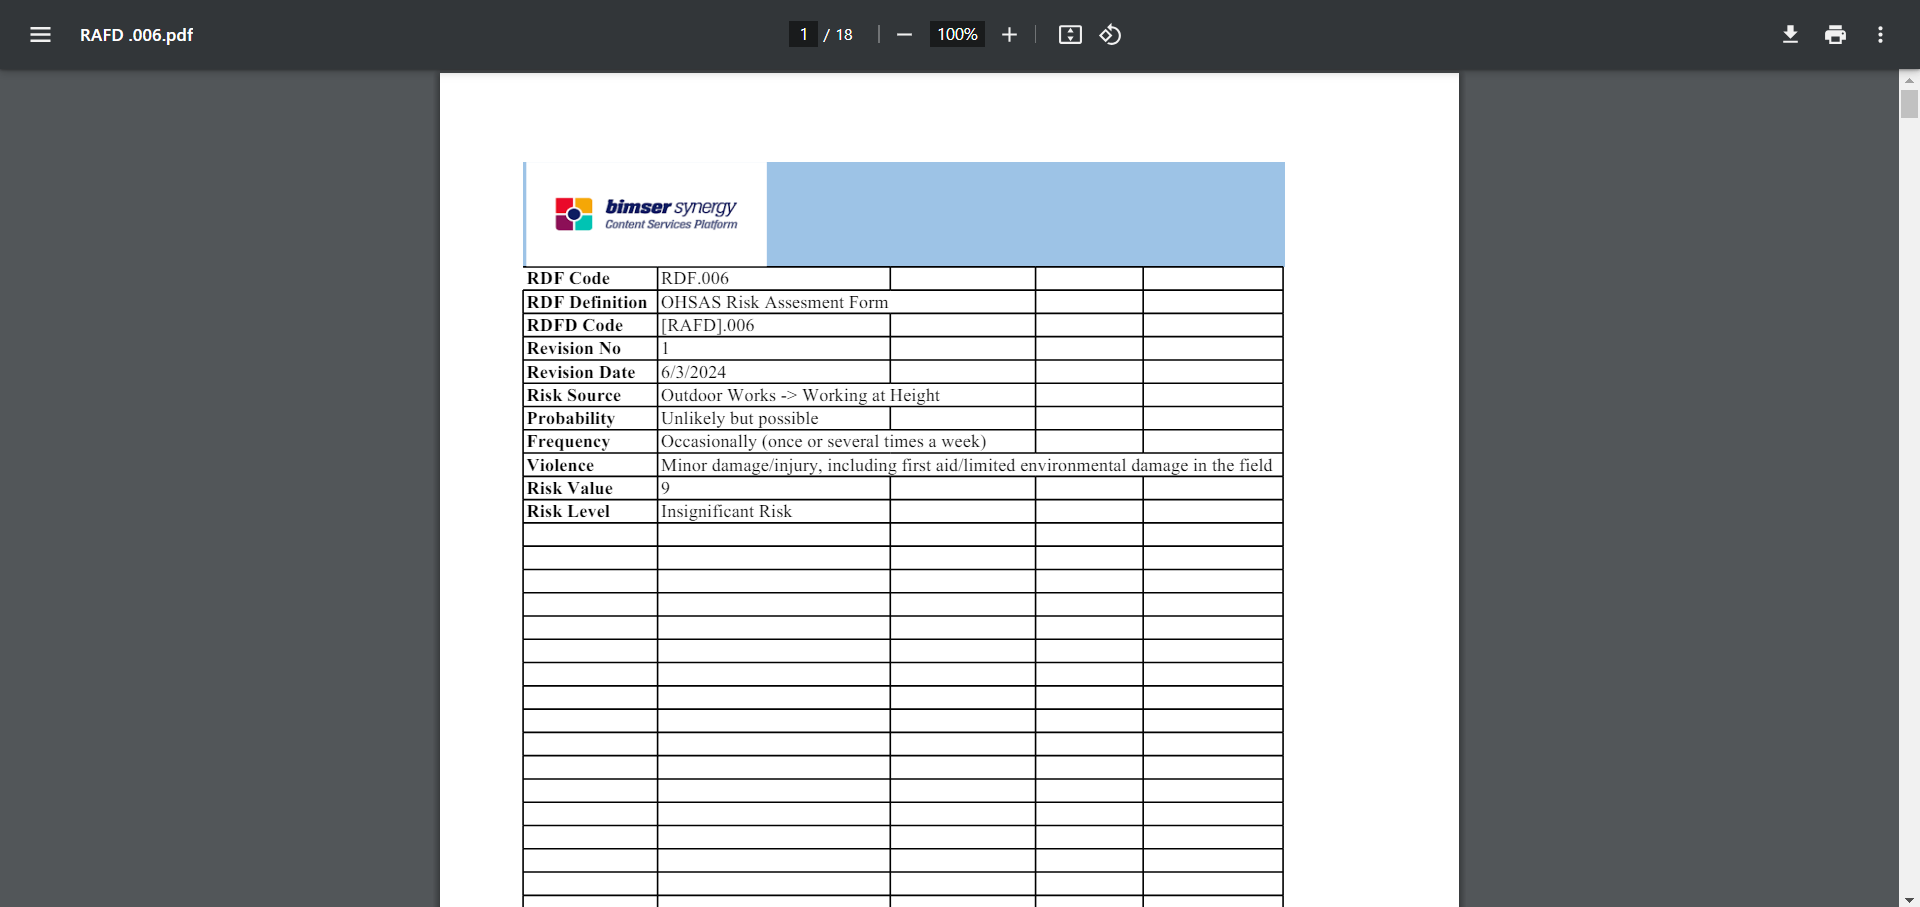
Click the  (Print) button on the Risk Assessment Form - Details screen.
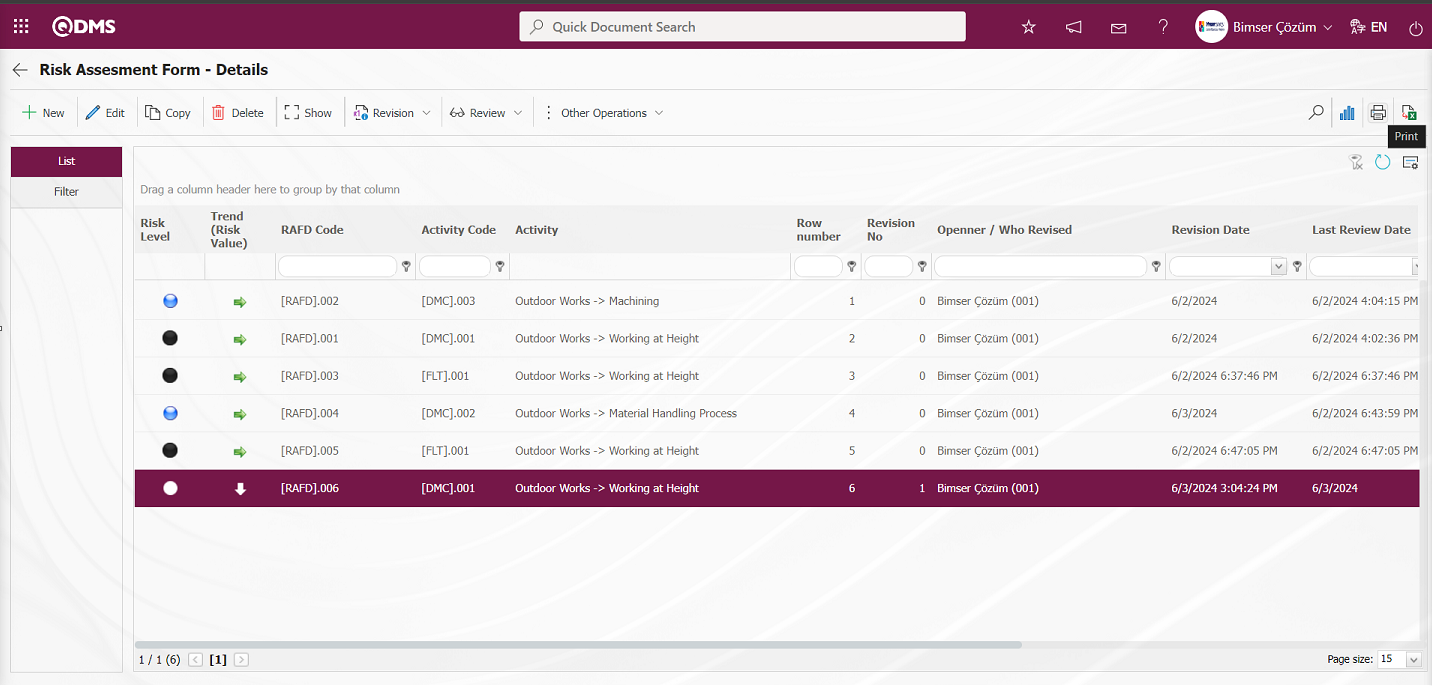
Report format is taken on the basis of the defined record.
In the report formats definition screen, the check box related to the “Create Pdf” field is checked in the process of defining the report format on record basis.
After the relevant check box is checked on the report format screen, the report format record update process is performed on record basis by clicking the  button.
Click on the  button in the Integrated Management System / OHSAS Risk Assessment / Risk Assessment Form definition menu to get the report format from Pdf format on the basis of the defined record.
Click the (Print) button on the Risk Assessment Form - Details screen.
The report of the defined report format is received in Pdf format.
Defining Report Format Based on Form;
The process stages of defining the Report Format on the basis of Form are done in the same way as the process stages of the report format on the basis of record. In the report formats menu, only the Form option is selected from the Report Template field options and the report format registration process is done.
The Report Format template is loaded in the Default Report Layouts Arrangement menu.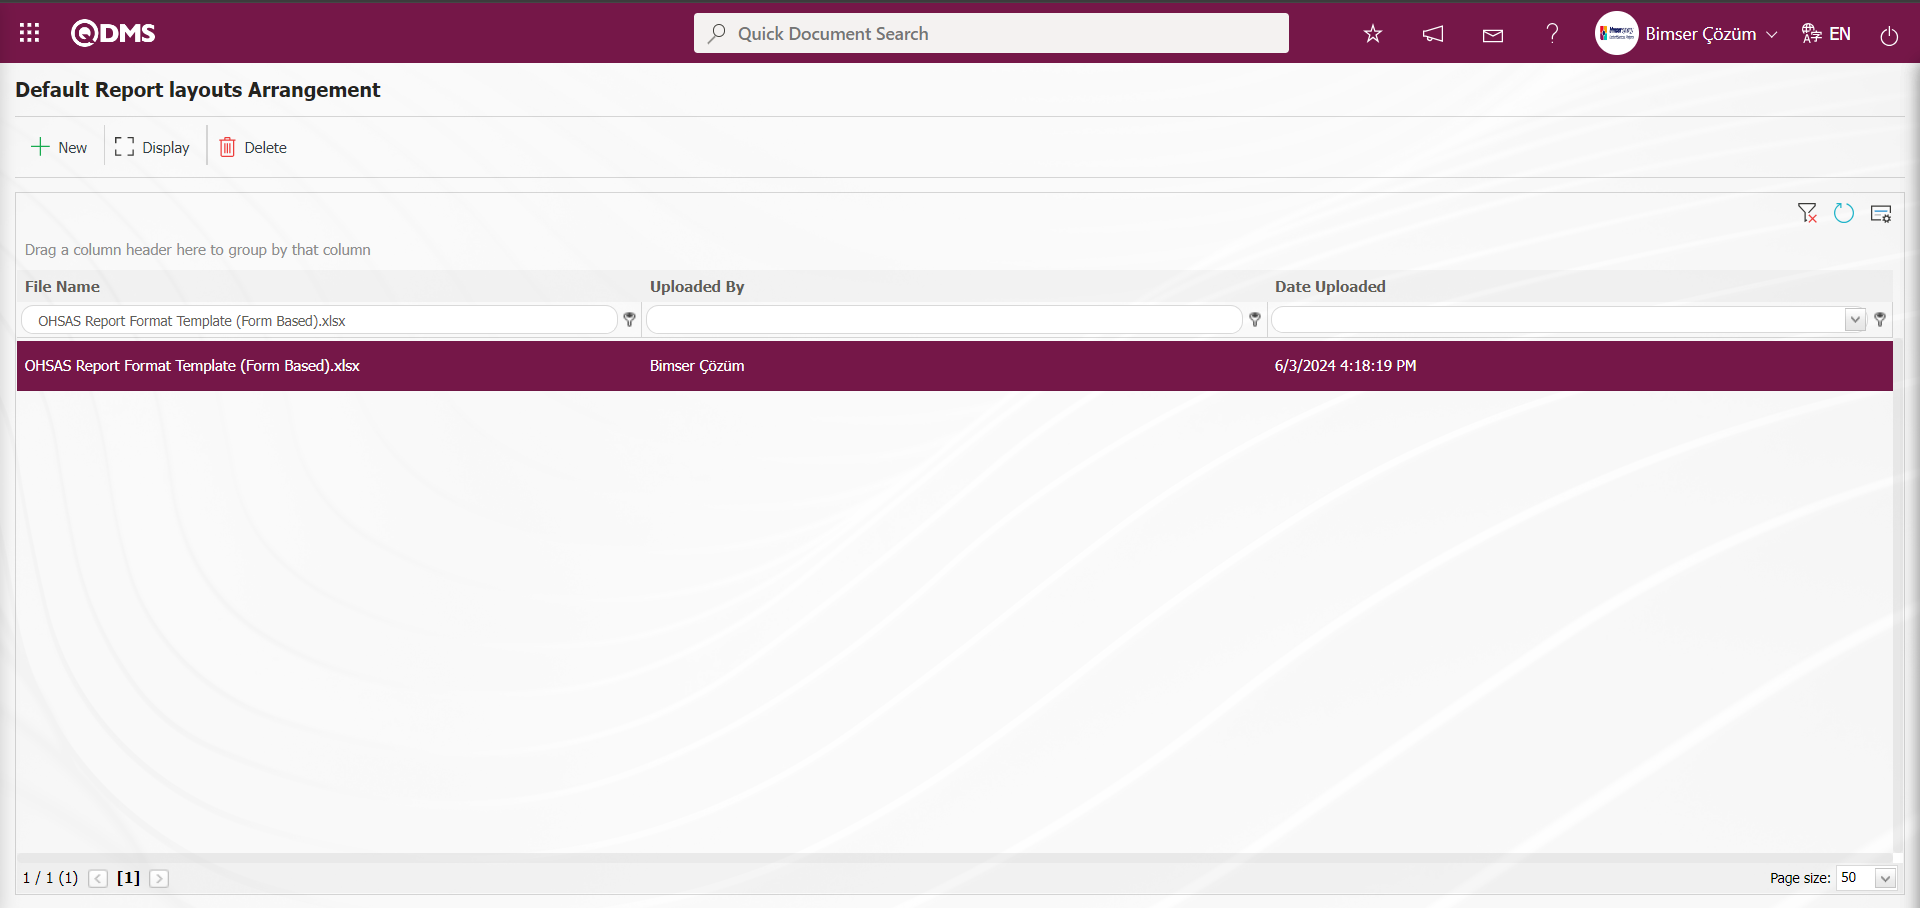
Click on the Report Formats menu.
On the screen that opens, in the report definition field, the name of the report format and the name and extension of the report format template uploaded in the report formats editing menu are pasted into the report template field by copy-paste method. In the report template field options, the form-based option is selected and the report format is saved on a form basis by clicking the  button in the upper left corner of the screen.
To get the report format on the basis of the defined form, click on the button in the Integrated Management System / OHSAS Risk Assessment / Risk Assessment Form definition menu.
On the Risk Assessment Form - Details screen  (Export to Excel) button is clicked.
The report of the report format is received on the basis of the defined form.
Defining Report Format on General Basis;
The process stages of defining the report format on a general basis are done in the same way as the process stages of the report format on a record basis. In the report formats menu, only the general option is selected from the Report Template field options and the report format registration process is done.

The Report Format template is loaded in the Default Report Layouts Arrangement menu.
Click on the Report Formats menu.

On the screen that opens, the name of the report format in the report definition field and the name and extension of the report format template uploaded in the report formats editing menu are pasted into the report template field by copy-paste method. In the report template field options, the General option is selected and the report format is registered on a general basis by clicking the button in the upper left corner of the screen.
Click on Integrated Management System /OHSAS Risk Assessment/Reports/General Risk List Report screen to view the defined general report format. On the screen that opens, click the  (Add) button in the RAF code field and select the forms in the Risk Assessment Form list and click the (Excel Transfer) button.
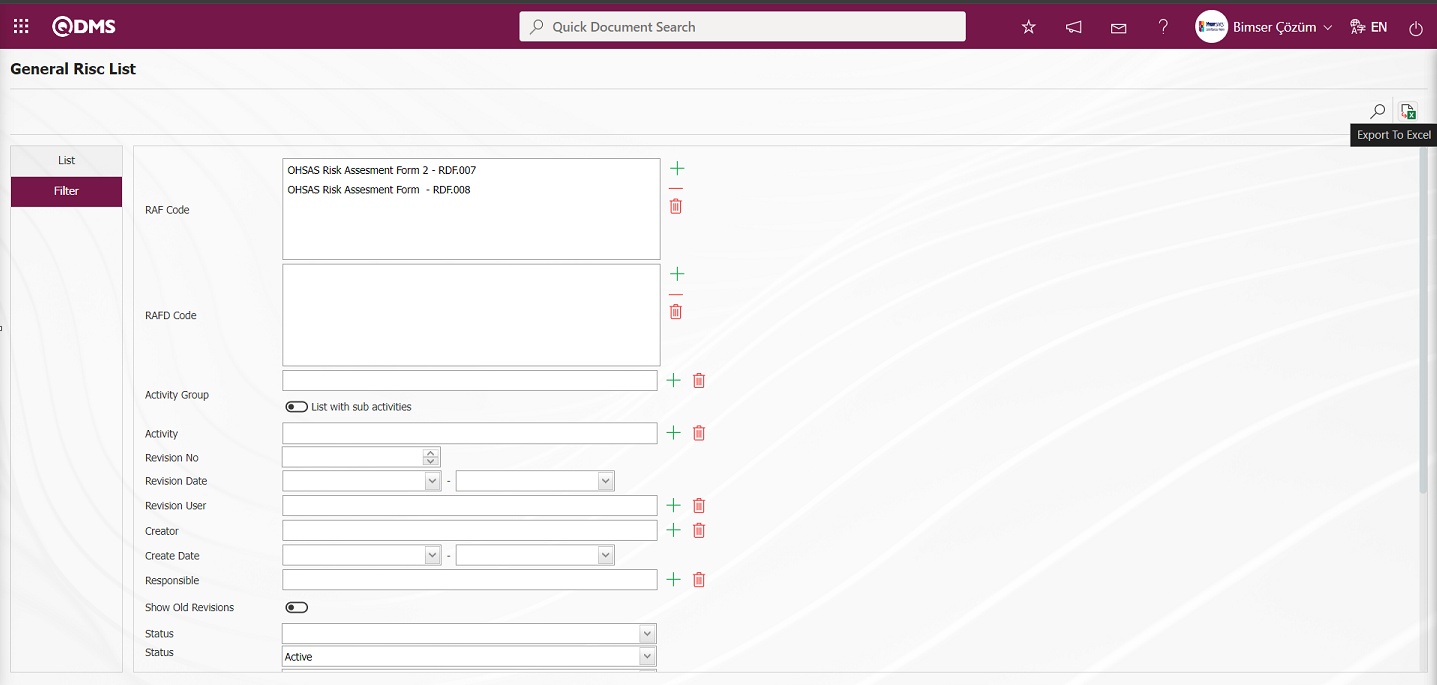
The process of taking the report format on a General Basis is done.
6.1.8.1 Fixed Tags List in Risk Modules
The list of Fixed Tags in Risk Modules is given in the table below. Field codes of fixed tags to be used in forms are taken from this table.
Abbreviation | Description | ||
|---|---|---|---|
<RDF_KODU> | RAF Code (Form Code) | ||
<RDF_TANIMI> | RAF Definition(Form Definition) | ||
<RDFD_KODU> | RAFD Code | ||
<RDF_NO> | RAF Number | ||
<RDFD_NO> | RAFD Number | ||
<MSDS_KODU> | MSDS Code | ||
<REV_NO> | Revision No | ||
<REV_TAR> | Revision Date | ||
<HAZIRLAYAN> | Name and Surname of the Preparer | ||
<SISTEME_GIREN> | Name and Surname of the System Entry | ||
<REVIZE_EDEN> | Name and Surname of the Revisor | ||
<STATU_ADI> | Status Name | ||
<RISK_KAYNAGI> | Risk Source | ||
<REVIZE_EDEN_ACK> | Revisor's Registration Number | ||
<SISTEME_GIREN_ACK> | Registry number of the System Entry | ||
<COLOR> | Color on the risk screen | ||
<TREND> | Arrows on the risk screen | ||
<SURECLER> | Process Information Selected in Processes Tab | ||
<MEVCUT_ONLEMLER> | On the Measures tab, select Available in the Measure type field | ||
<PLANLANAN_ONLEMLER> | On the Measures tab, select Planned in the Measure type field. | ||
| TAGS FOR PRECAUTIONS | |||
| <YAPILANIS> | Work done | ||
| <REF_KODU> | Sub-actions -CAPA code | ||
| <STATU_ADI> | Status Name | ||
<ACIKLAMA> | Measure description | ||
<SORUMLU> | Person in Charge of Action | ||
<YAPACAK> | Action Person | ||
<DURUM> | Action Status -CAPA status | ||
<BITIS_TARIHI> | Action End Date | ||
<REF_TIPI> | Reference Type (Document, Action, CAPA, Other options information) | ||
<ONLEM_TIPI> | Type of Measure (Current and Planned Option information) | ||
<ONLEM_TARIHI> | Precaution Date | ||
<ONLEM_NO> | Precaution No | ||
<GERCEKLESME_TARIHI> | Action Realization Date |
You can use tags like <ALAN6_PREV> for past revision fields. Prev tag is not supported for list type fields. Prev tag works only for numeric and text type fields
6.1.9. Approval Flow Definition
In order for the assessed risks to go to the designated users for approval, an approval flow must be set up in the system. Approval flow setup is realized by activating the use of status in the module. For this, System Infrastructure Definitions / OHSAS Risk Assessment / OHSAS Risk Assessment Module Parameters menu is clicked.
With the help of the buttons on the screen;
 : Edit/change/update the parameter information selected in the list.
 : Records are filtered and searched.
 : Data is transferred to Excel.
: The data remaining in the filter fields in the grid where the search criteria on the menu screens are searched are cleaned.
: The menu screen is restored to its default settings.
: User-based designing of the menu screen is done with the show-hide feature, that is, the hiding feature of the fields corresponding to the columns on the menu screens.
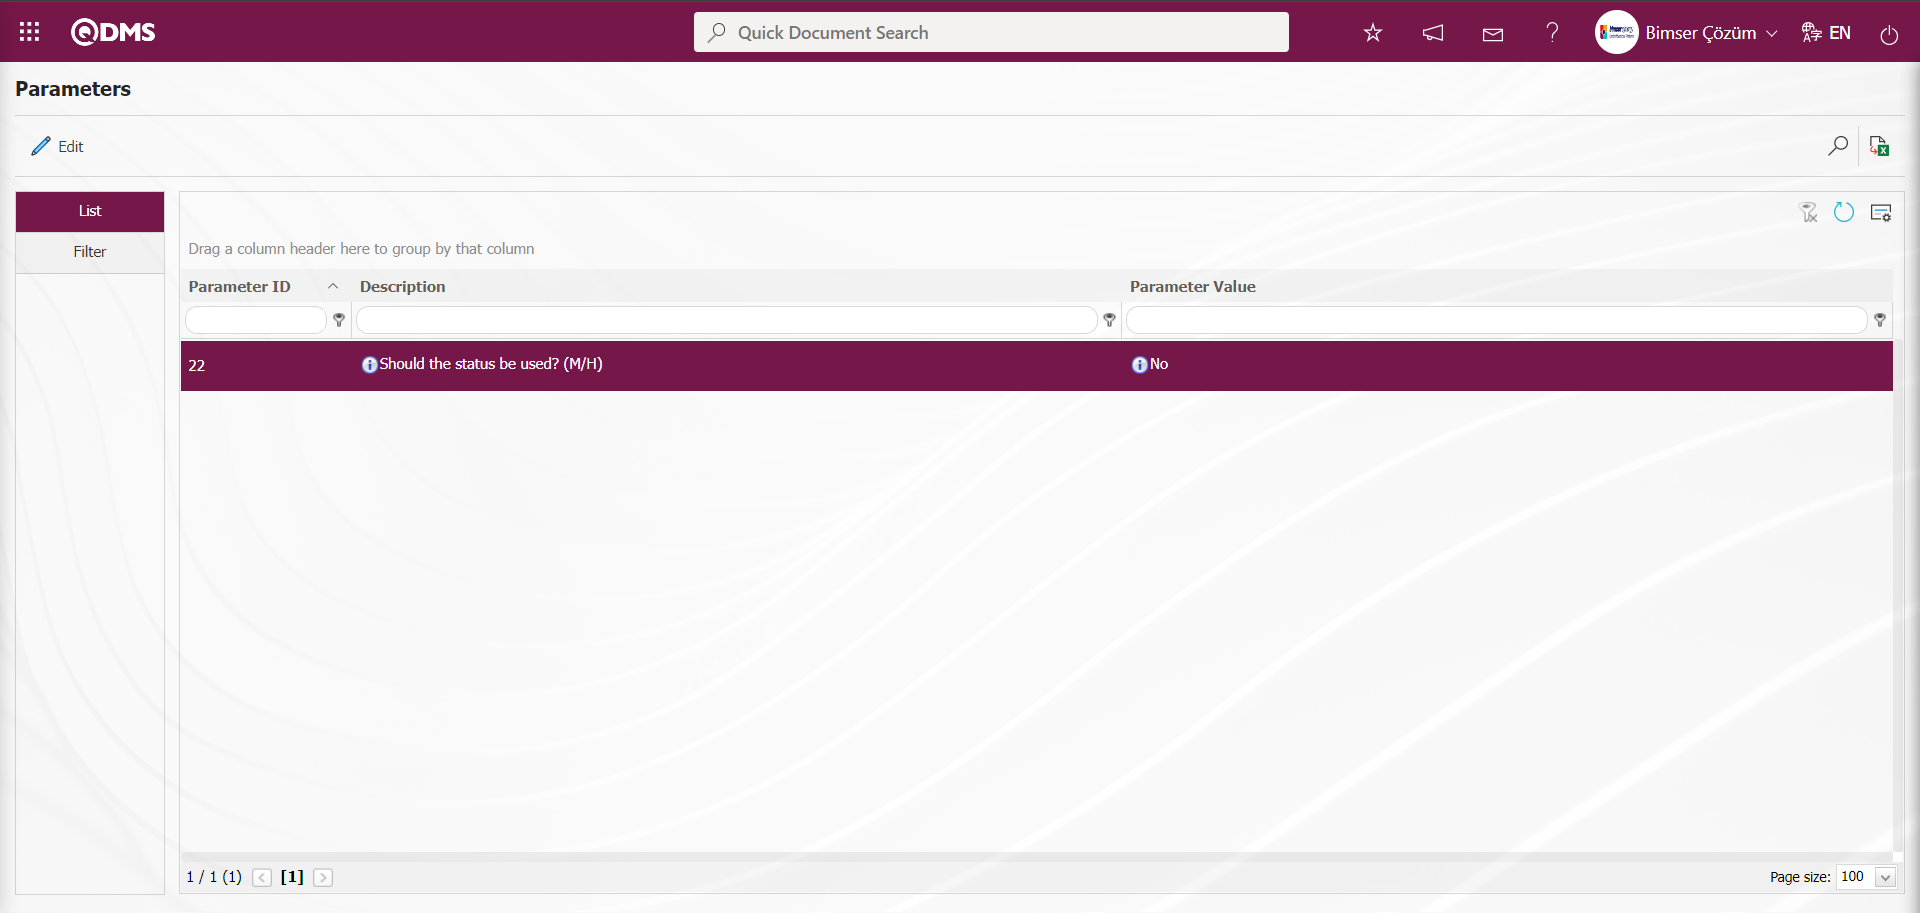
In the opened Parameters screen, the number of the parameter number 22 is written in the Parameter No field and the (Search) button is clicked.
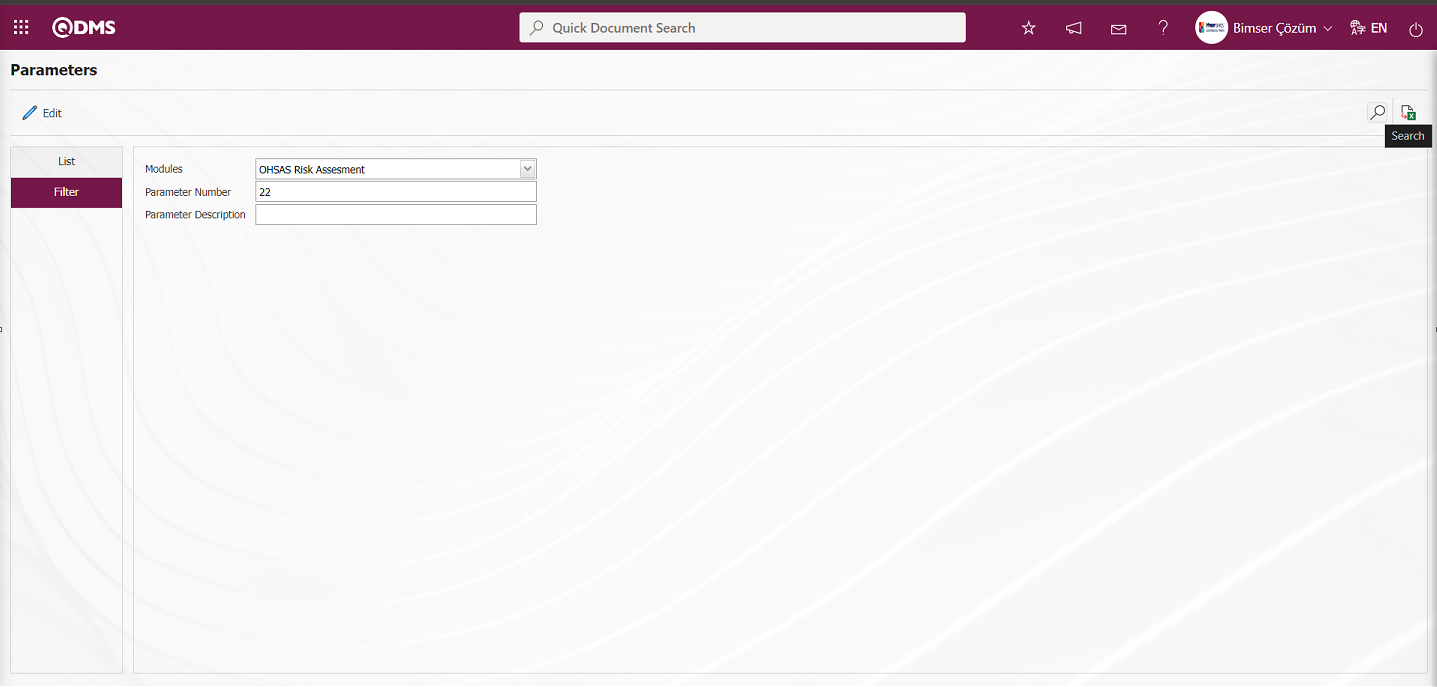
On the Parameters screen, click the  button while the parameter 22 “ Should the status be used?”** is selected.
On the Parameters screen, select “Yes”** for the parameter value of the parameter.
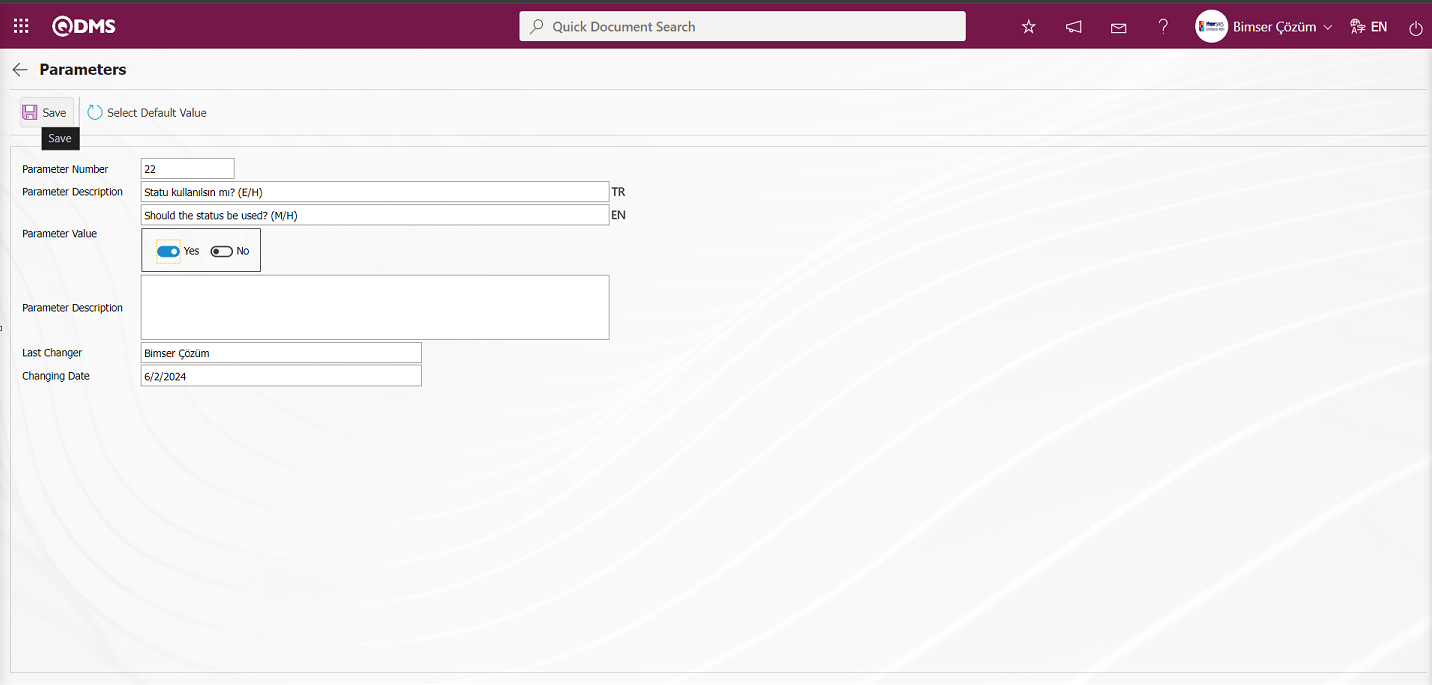
On the Parameters screen, the parameter value is selected as “Yes” and the parameter active is registered by clicking the  button on the upper left corner of the screen.

After parameter 22 “Should the status be used?” is activated, two buttons  and
and  are displayed in the Function Designer menu. In the Function Designer menu, button definition with the button and status definition with the button are done for the related function.
NOTE: Flow definitions should be checked from System Infrastructure Definitions/ BSID/ Configuration Settings/ Flow definition screen, if not, the flows should be defined. Also, role definitions are made for approval flows from System Infrastructure Definitions/ BSID/ Configuration Settings/ Role Definition screen. Since SQL and QDMS database information will be required in role definition processes, the required role can be requested by contacting Bimser Technical Support team. System Infrastructure Definitions / BSID / Configuration Settings / Role Definition menu
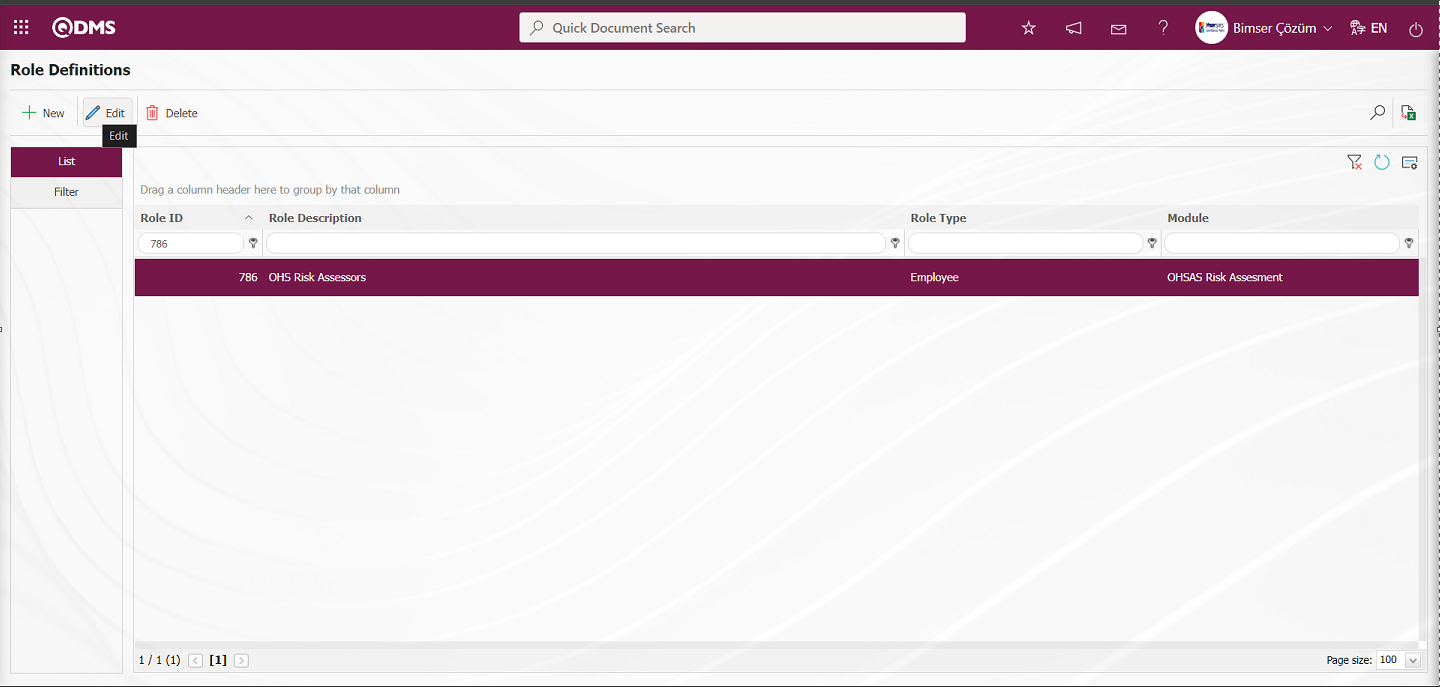
With the help of the buttons on the screen;
 : Define a new role.
 : The selected role information in the list is updated.
 : The selected role information in the list can be deleted.
 : Records can be searched by filtering.
 : Data can be exported to Excel.
To add a new role to the Role Definition screen, click the button at the top left corner of the screen to open the Role Definition/New Record screen and define the role. While the role is selected, click the button. The Role Definition- Update Record screen is opened and the content of the defined role definition is displayed.
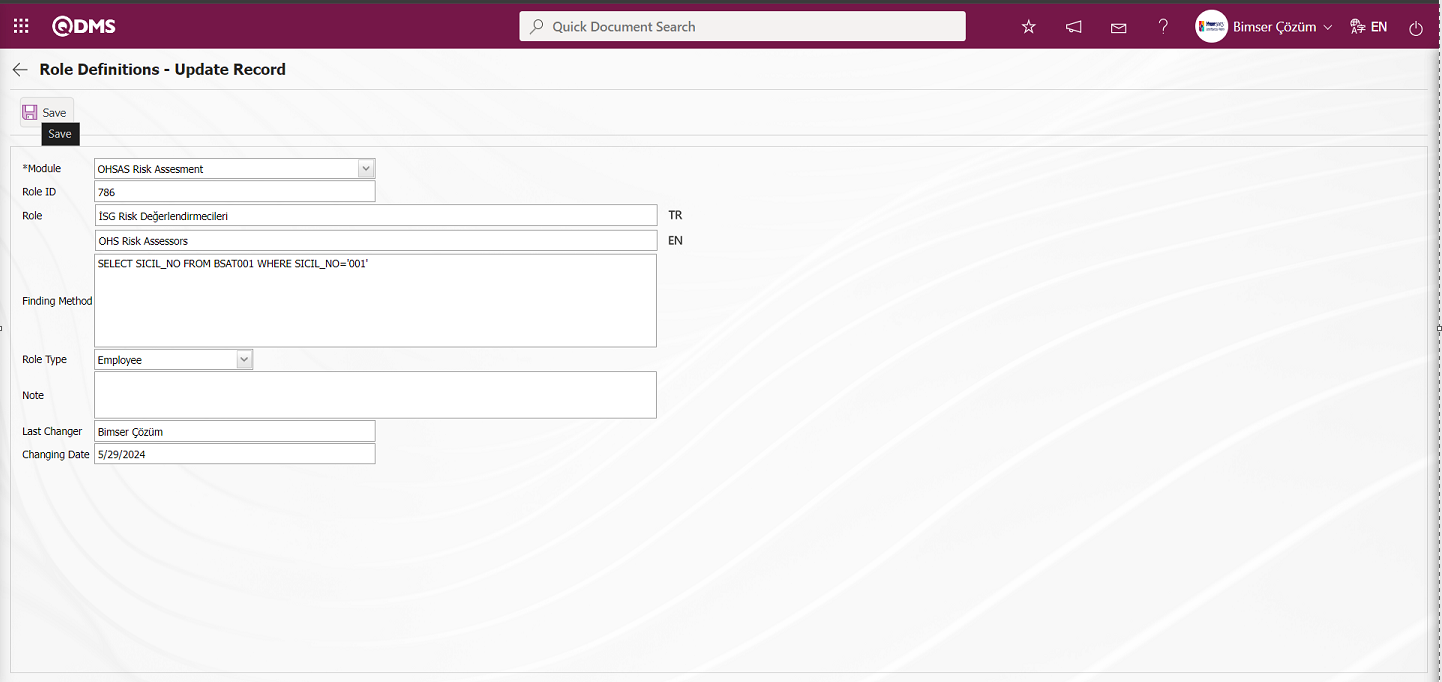
After the role definition process, the content of which is displayed on the screen that opens, the record update process is performed by clicking the  button. The role to be used for flow definitions in the OHSAS Risk Assessment Module is displayed.

New message body definitions can be made for the module from the System Infrastructure Definitions/ BSID/ Definitions/ Message Body Definition screen. In addition, the flow to be used in the OHSAS Risk Assessment Module is defined from the System Infrastructure Definitions / BSID / Configuration Settings / Flow Definition screen.

Function Designer menu is displayed. Two different action buttons named Status and Buttons will appear on the menu for Risk Assessment Form Definition and Risk Assessment Detail functions.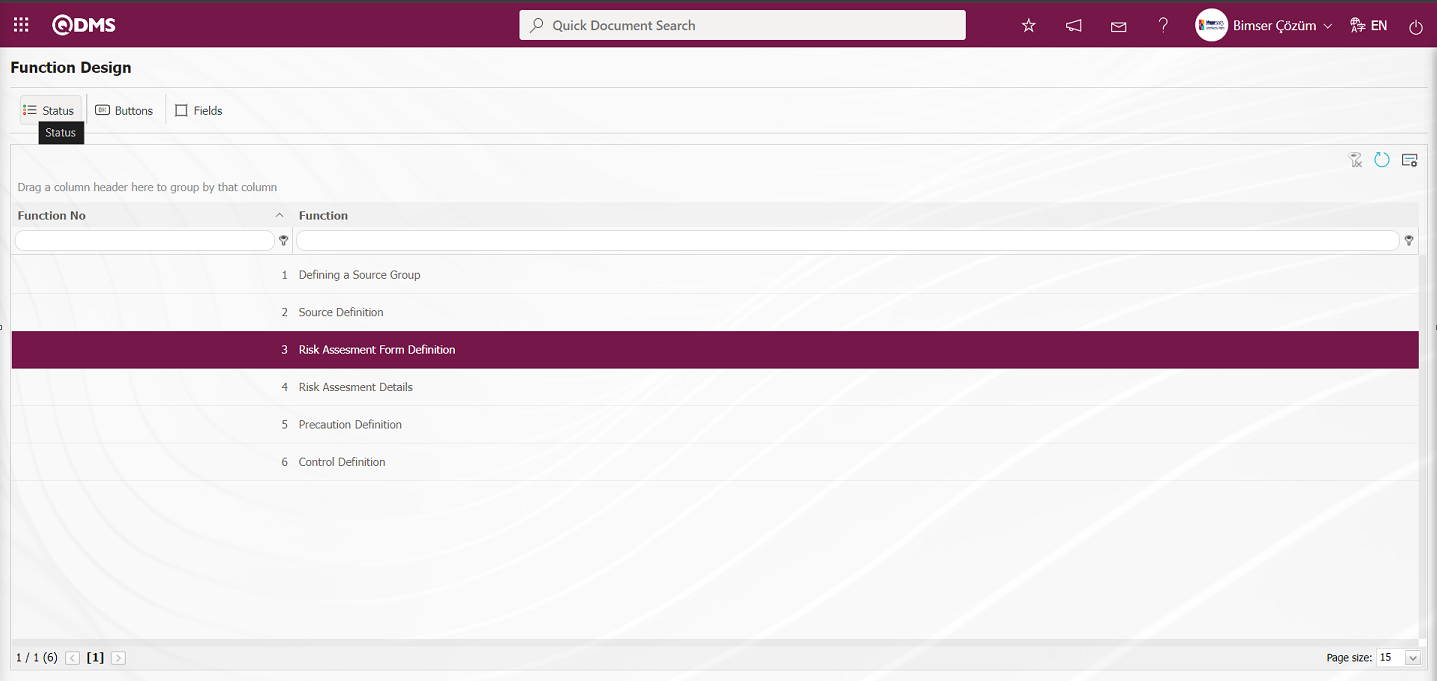
With the help of the buttons on the screen;
 : Status definition process is done.
 : Button definition process is done.
 : Associating the fields with the related function is done.
When the function numbered 3 is selected from the Function Designer menu, the button is clicked to define the status of the function.
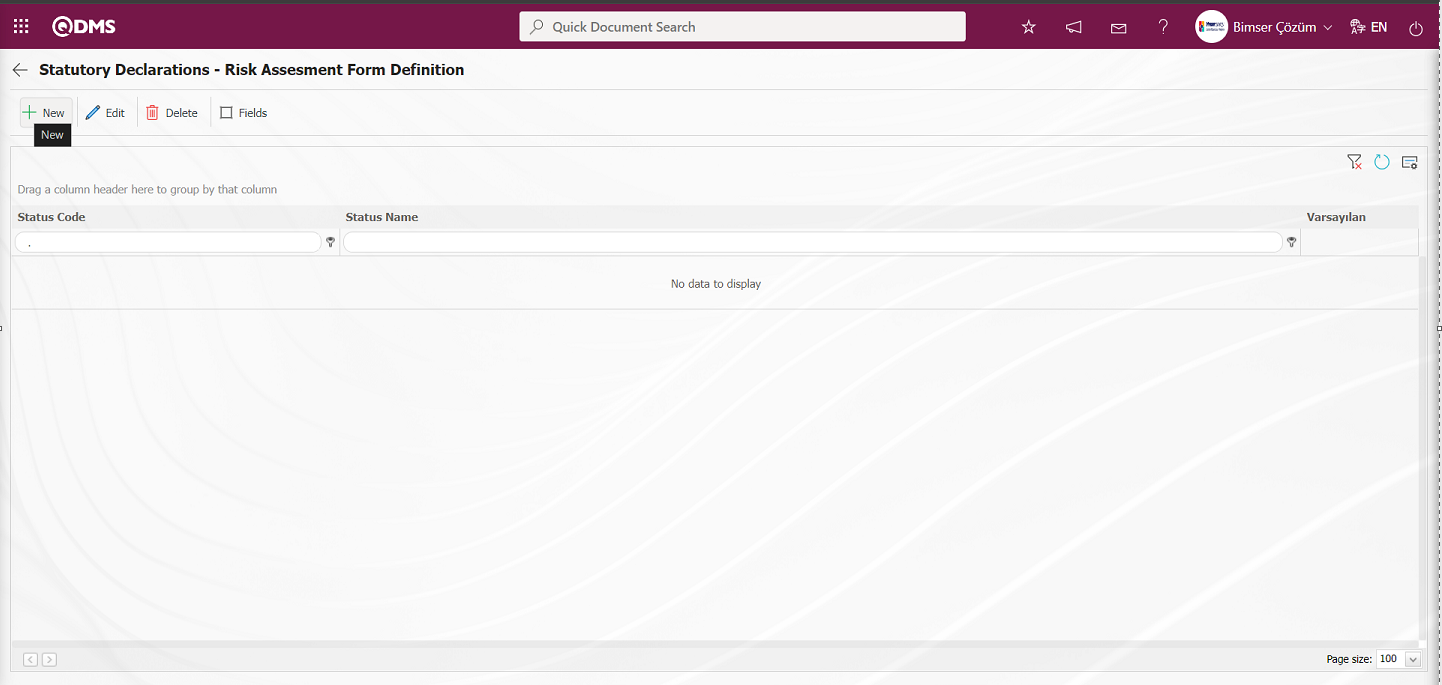
With the help of the buttons on the screen;
 : A new status is defined.
 : The status information selected in the list is updated.
 : Delete the status information selected in the list.
 : Active, visible and mandatory status of the fields are determined.
 : Returns to the previous screen.
On the Statutory Declarations - Risk Assesment Form Definition screen, click the  button to open the new status definition screen.
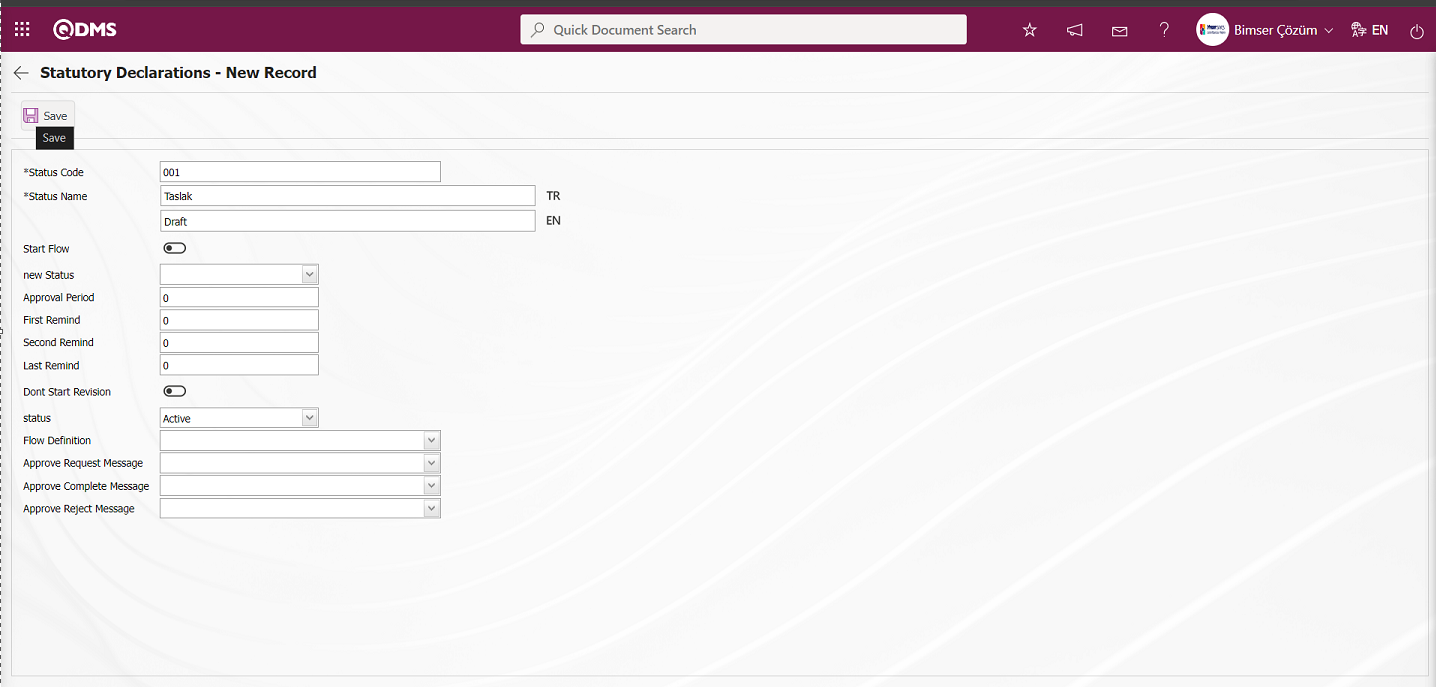
Related fields are defined on the screen that opens:
Status Code:This is the field where status code information is defined on the Statutory Declarations - New Record screen. It should be defined without using characters such as spaces and Turkish characters so that it is not the same as the previously defined fields.
Status Name:This is the field where status name information is defined on the Statutory Declarations - New Record screen.
Start Flow: If any flow will be initiated in the status defined on the Statutory Declarations - New Record screen, the check box is the field where the flow initiation check box is checked.
New Status: It is the field where it can be selected from the statuses defined in the system on the Statutory Declarations - New Record screen. If there is a status to be passed after the defined status, it is selected.
Approval Period: This is the field where approval period information is defined on the Statutory Declarations - New Record screen.
First Reminder: It is the field where the first reminder mail will be sent during the approval period information on the Statutory Declarations - New Record screen. Reminder mails are sent for approval on the defined days.
Second Reminder It is the field where the second reminder mail will be sent during the approval period information on the Statutory Declarations - New Record screen. It is ensured that 2nd reminder mails are sent for approval on the defined days.
Last Reminder: Statutory Declarations - This is the field where the last reminder mail will be sent during the approval period information on the New Record screen. Reminder mails are sent for approval on the defined days.
Dont Start Revision: If it is desired to start the revision in the status defined on the Statutory Declarations - New Record screen, the relevant check box is checked.
Status: This is the field where the status status is selected as active or passive on the Statutory Declarations - New Record screen.
Flow Definition: On the Statutory Declarations - New Record screen, it is possible to select which flow will be in the flows defined in the system. Flow definition process is defined in System Infrastructure Definitions /BSID /Configuration Settings/Flow Definition menu.
Approval Request Message: It is the field where the approval request message is selected in the message body defined in the system on the Statutory Declarations - New Record screen. Approval Request Message is defined in System Infrastructure Definitions/ BSID/Definitions/Message Body Definition menu.
Approve Complete Message: Select the confirmation OK message in the message body defined in the system. Approve Complete Message is defined in System Infrastructure Definitions/ BSID/ Definitions/Message Body Definition menu.
Approval Rejection Message: In Statutory Declarations - New Record screen, it is the field where the confirmation rejection message is selected in the message body defined in the system. Approval rejection message is defined in System Infrastructure Definitions/ BSID/Definitions/Message Body Definition menu.
On the screen that opens, status code, status name, whether the flow will be started or not, new status, status, flow definition, approval request message, approval completion message and approval rejection message data entries are made and after filling in the required fields, the status definition registration process is done for Risk Assessment Form Definition by clicking the  bot in the upper left corner of the screen.
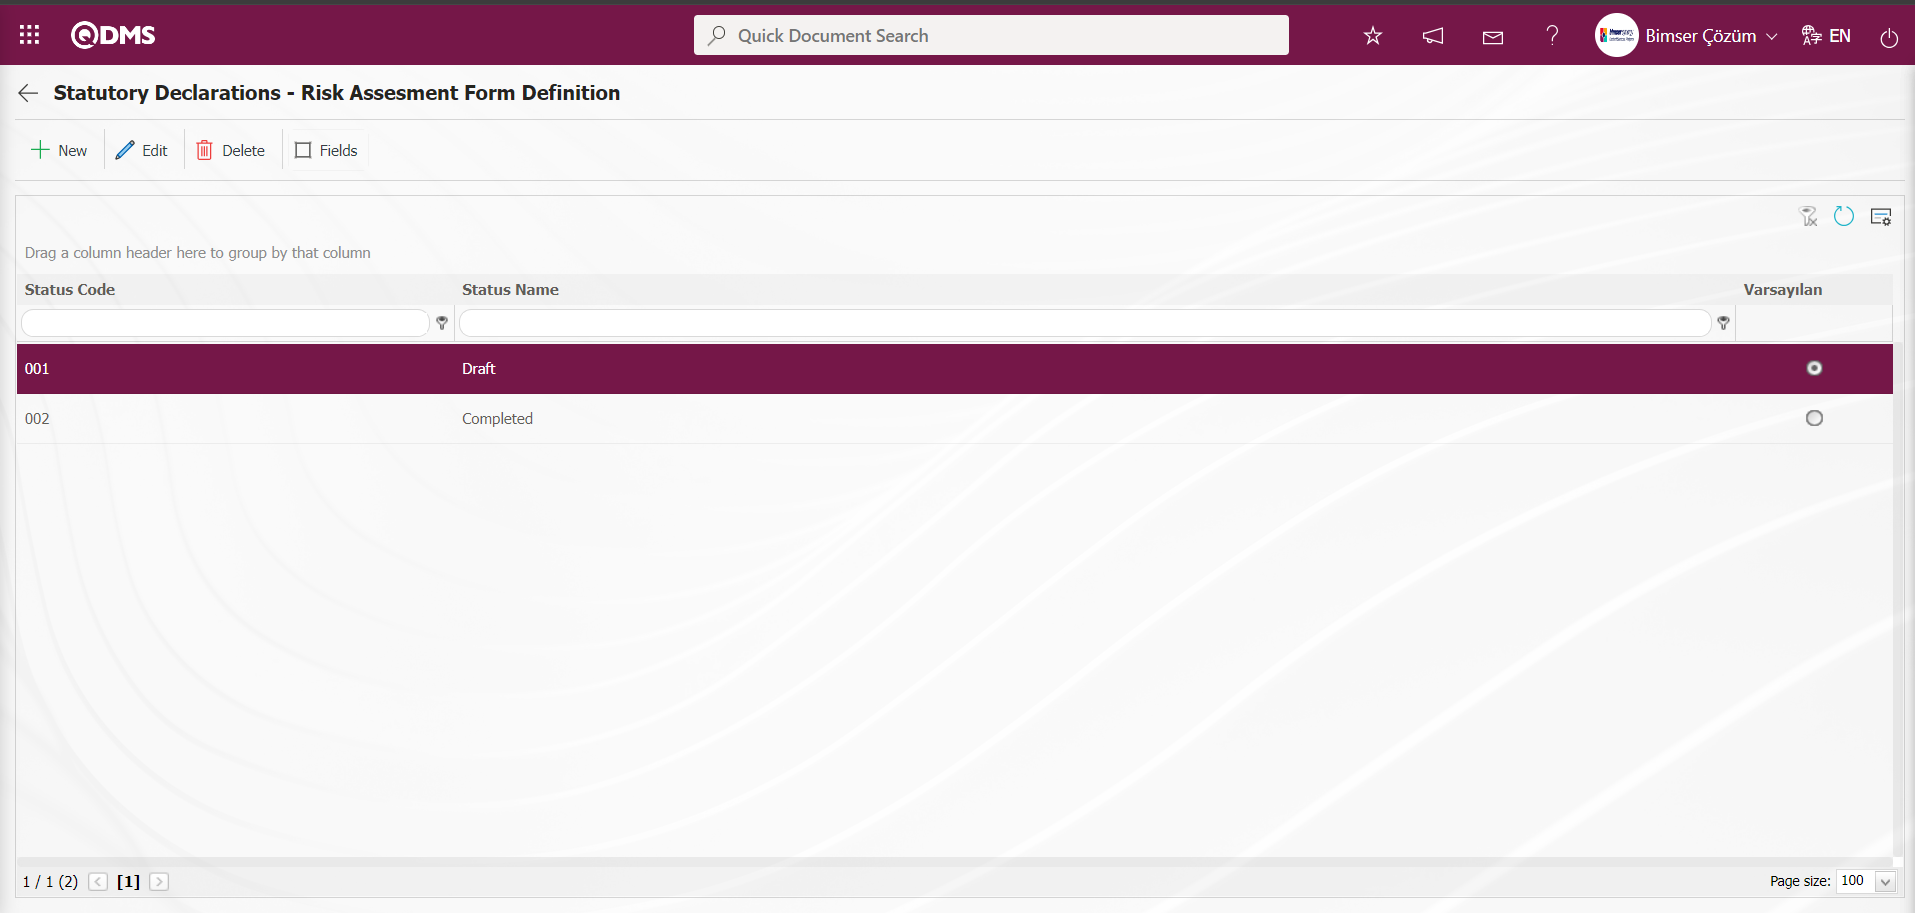
Return to the previous screen with the Back button.
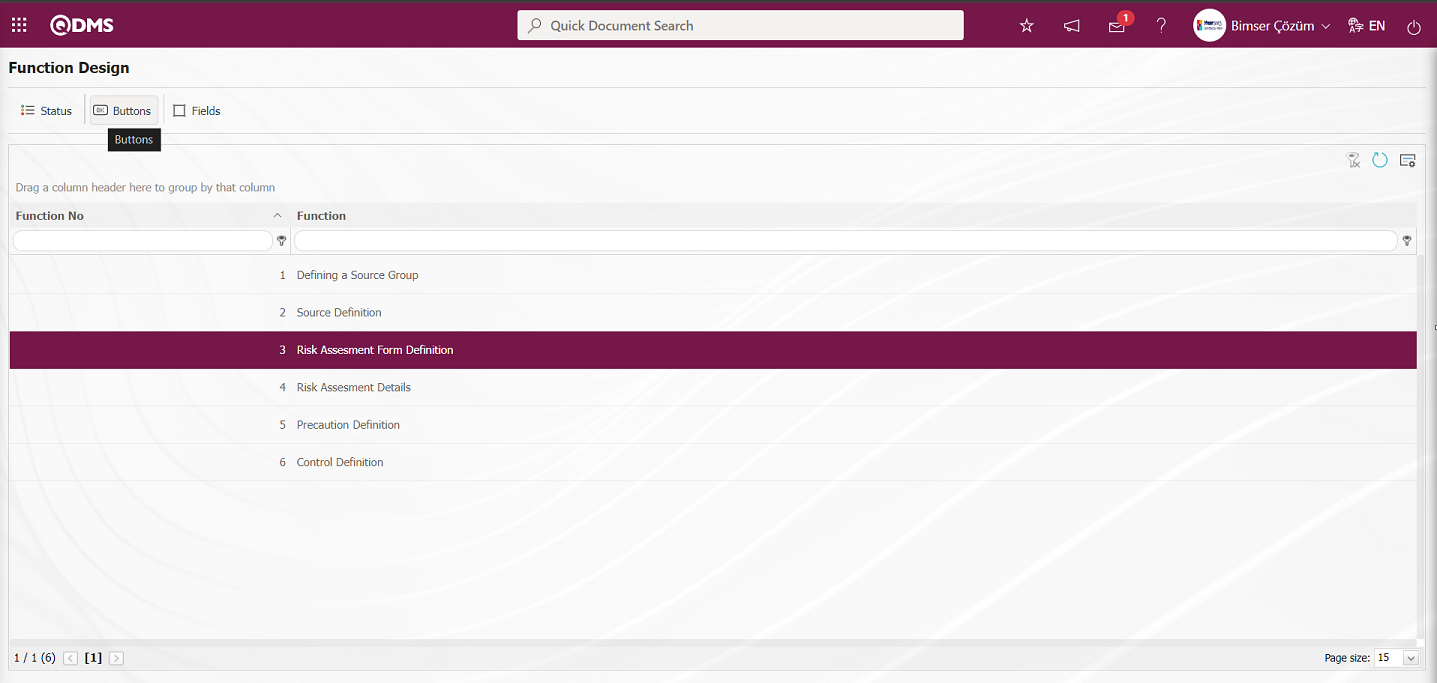
The buttons to be used in the statuses are defined by clicking the  button for the related function in the Function Designer menu.
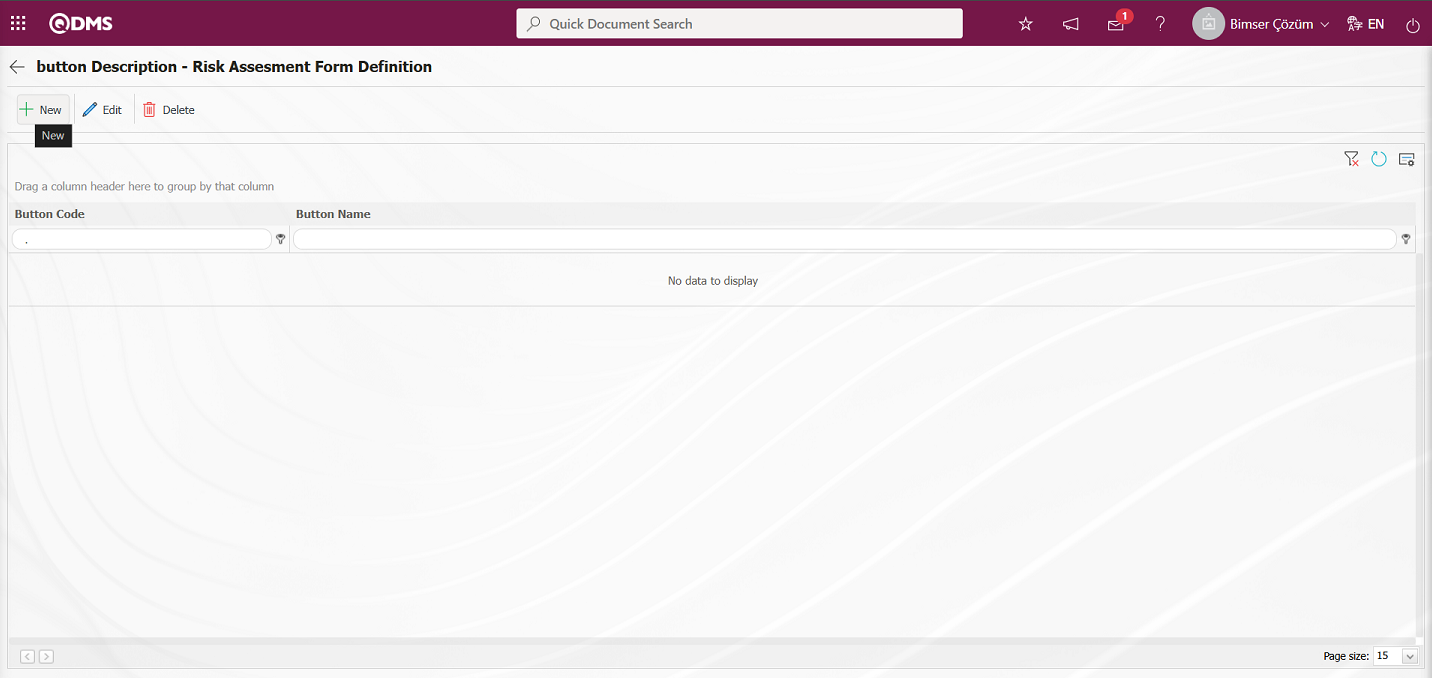
With the help of the buttons on the screen;
 : Defining a new button is done.
 : Selected button information in the list is updated.
 : Delete the selected button information in the list.
: Return to the previous screen.
In the button definition screen button opens the new button definition screen.
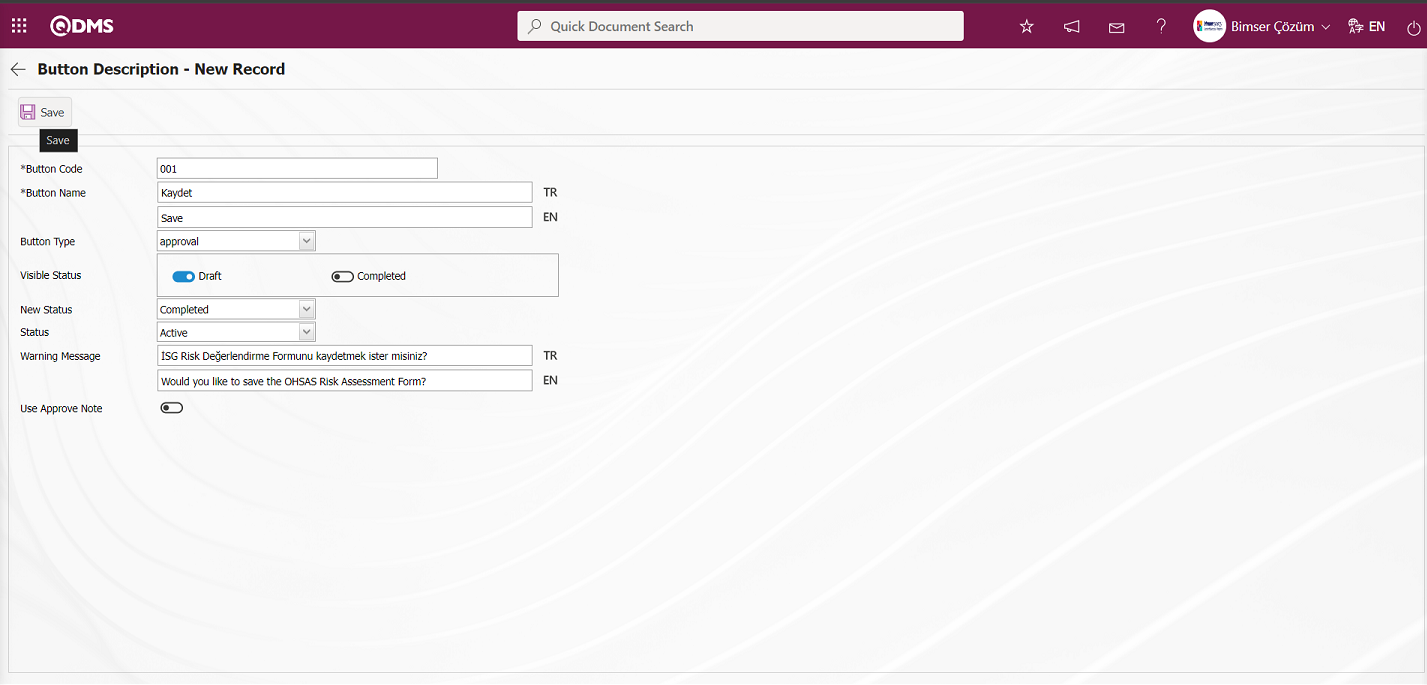
Related fields are defined on the screen that opens:
Button Code: Button Description - This is the field where button code information is written on the New Record** screen. It should be defined without using characters such as spaces and Turkish characters so that it is not the same as the previously defined fields.
Button Name: Button Description - This is the field where the button name information is written on the New Record screen.
Button Type: Button Description - This is the field where the button type options defined in the system on the New Record screen are specified in the approval and rejection options.
Visible Status: Button Description - This is the field where the status of the button defined on the New Record screen is determined.
New Status Button Description - It is the field where the status of the button defined on the New Record screen is selected from the statuses defined in the system.
Status: Button Description - The status of the button defined on the New Record screen is selected from the active or passive options.
Warning Message: Button Description - This is the field where the warning message information is entered when the button defined on the New Record screen is clicked. For example: Are you sure you want to send it for approval?
Button code, Button name information is entered on the screen that opens. Button type is determined. Visible status, New status and status are selected. After the required fields are filled in, the button identification registration process for the Risk Assessment Form Identification function is performed by clicking the  button in the upper left corner of the screen.
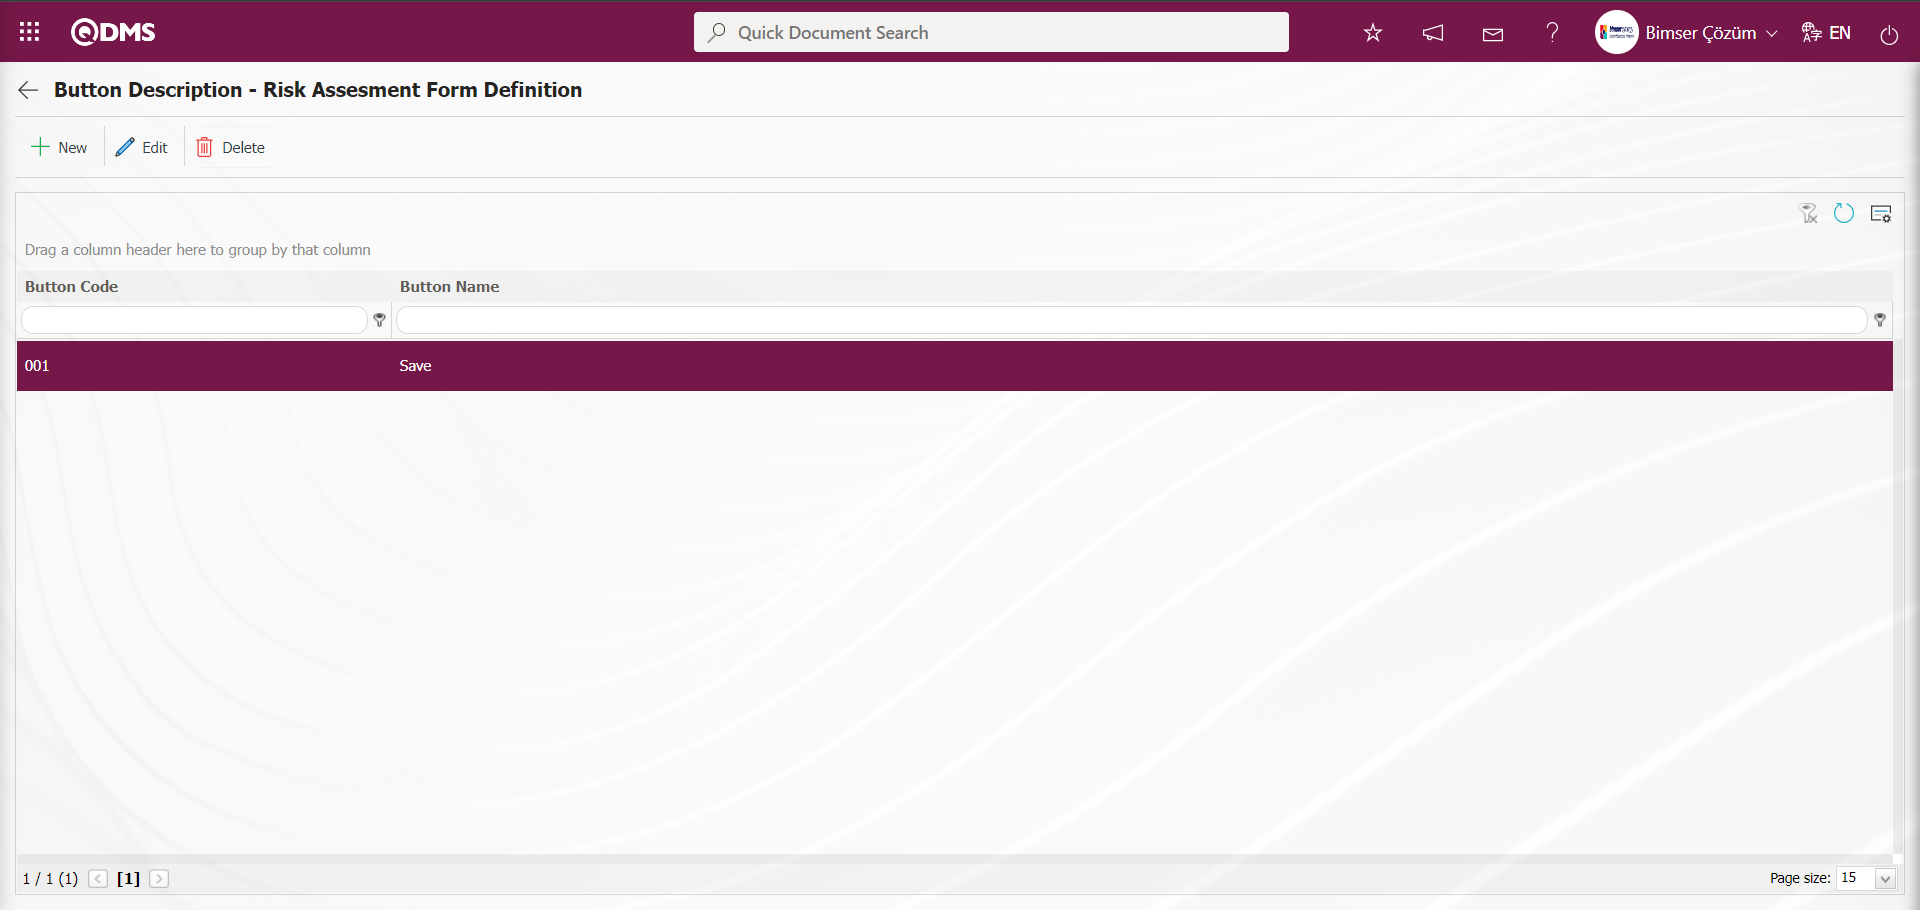
On the screen that opens, all statuses are defined in the 4th function, Risk Assessment Detail function, in the same way as the 3rd function, Risk Assessment Form Definition function. In the status definition process, the flow is associated for the relevant status in the Flow Definition field.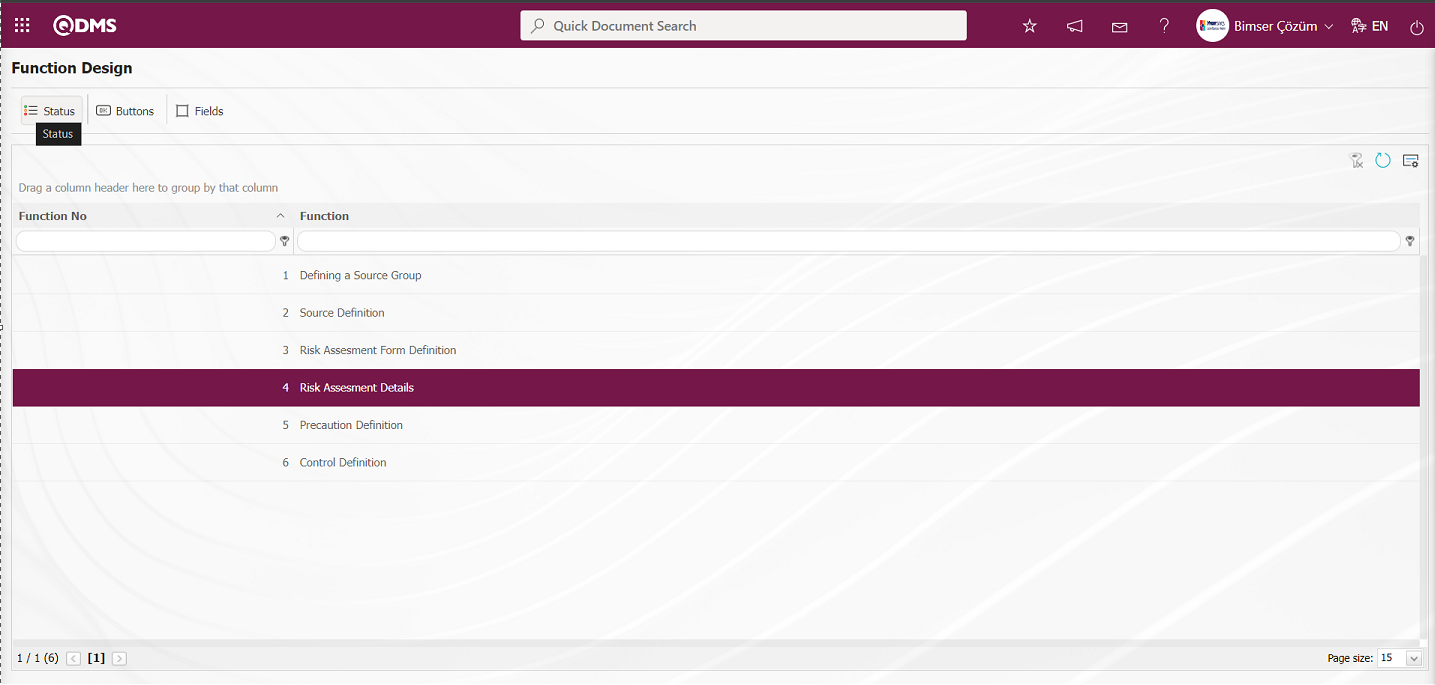
On the screen that opens, all statuses of the 4th function, Risk Assessment Detail function, are defined in the same way as the 3rd function, Risk Assessment Form Definition function.
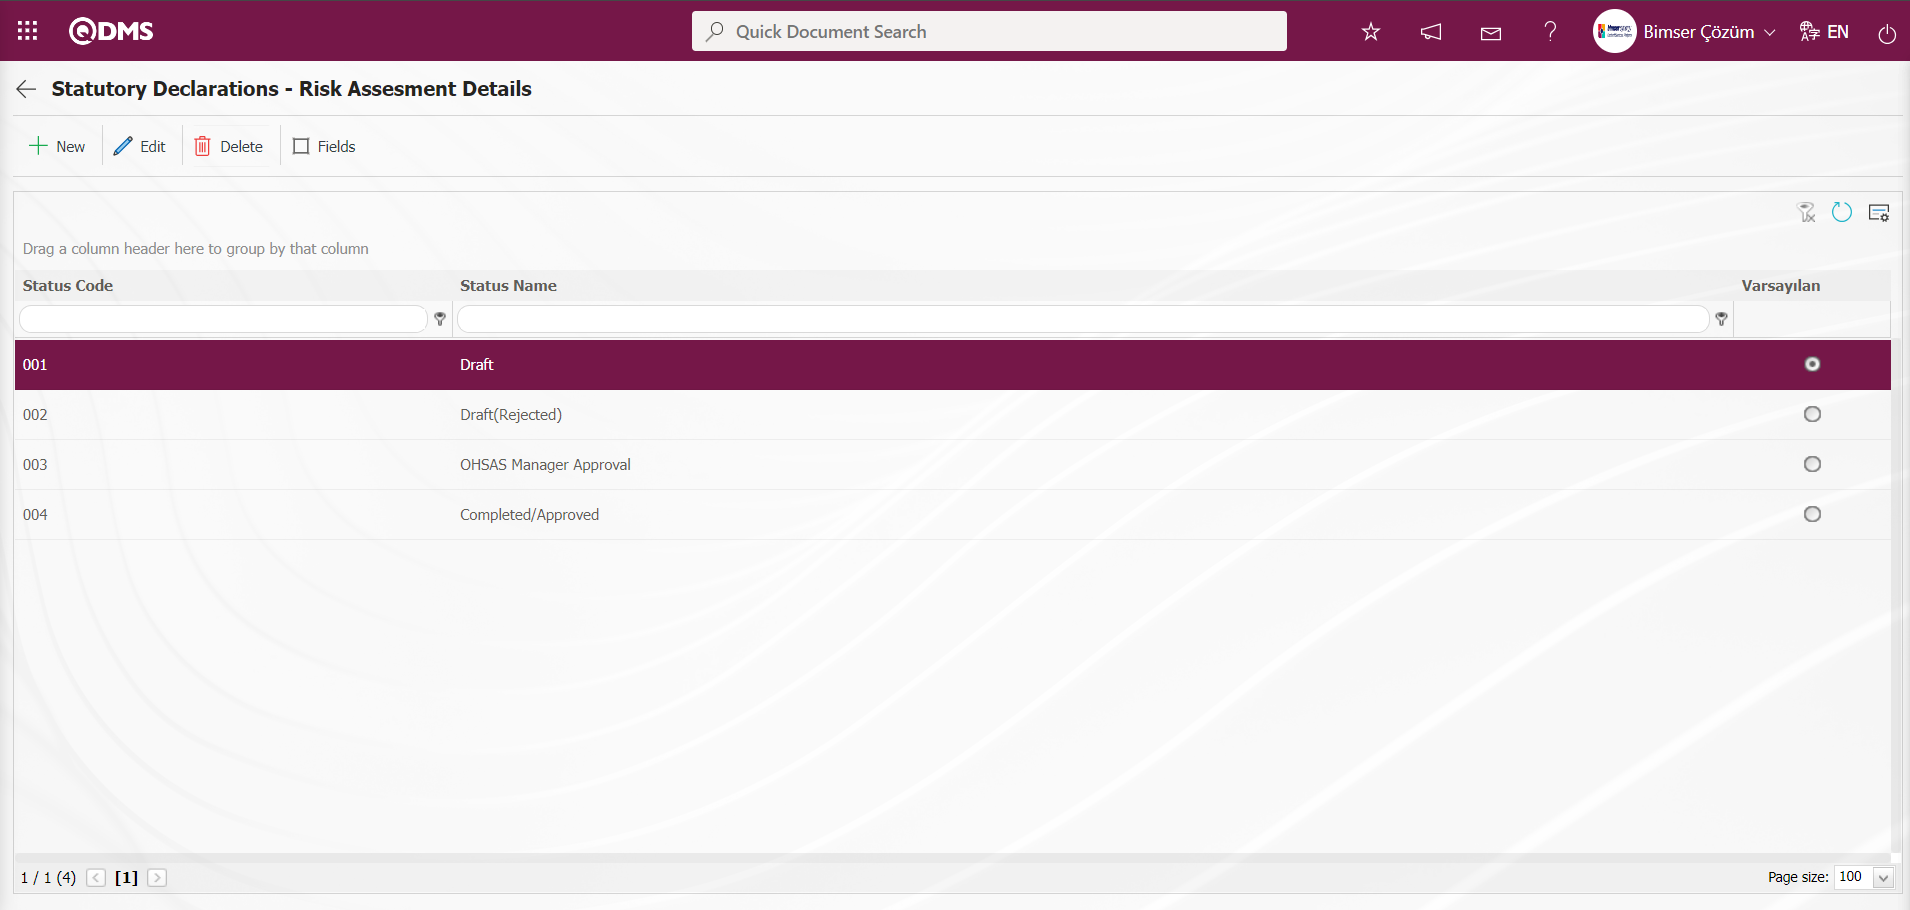
Select the Risk Assessment Detail function, which is the 4th function in the Function Indexer menu and click on the  buttons.

On the screen that opens, all buttons of the 4th function, Risk Assessment Detail function, are defined in the same way as the 3rd function, Risk Assessment Form Definition function.
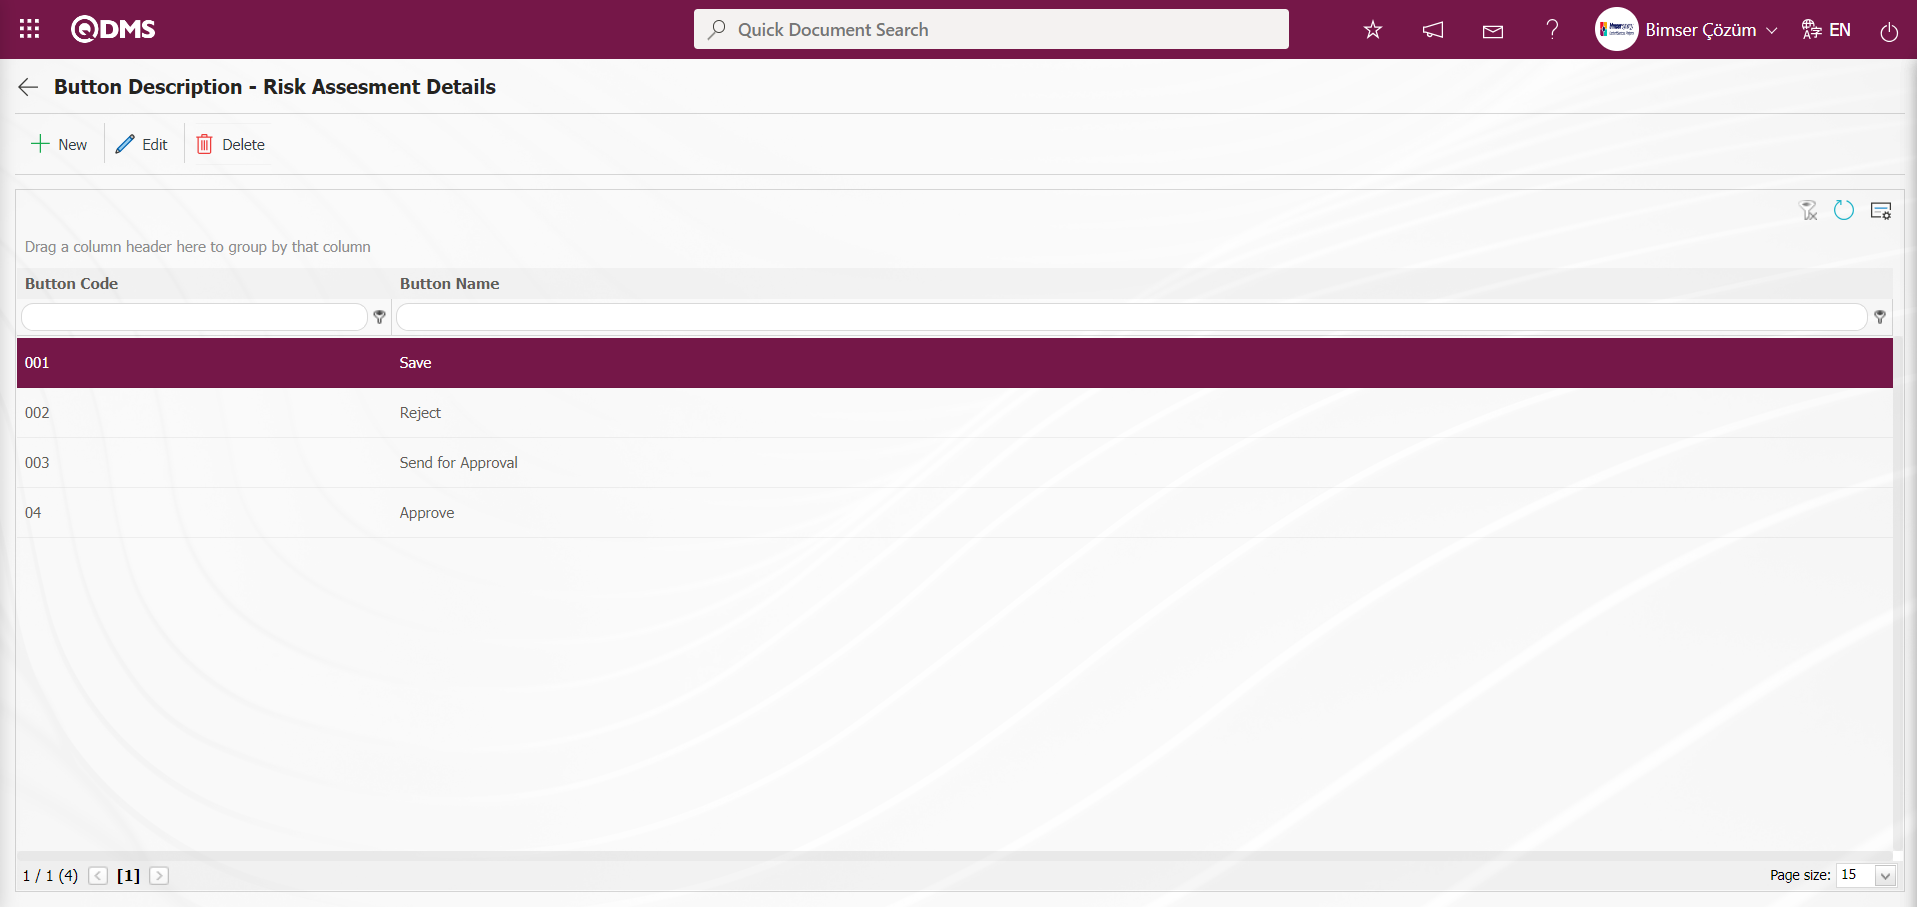
6.1.10. Recurring Records Report Template
Menu Name: System Infrastructure Definitions / OHSAS Risk Assessment / Recurring Records Report Template
First, the fields to be shown in the report are selected from the System Infrastructure Definitions / OHSAS Risk Assessment /Recurring Records Report Template menu and the report format is saved.
Then the relevant report is accessed from the Integrated Management System/OHSAS Risk Assessment /Reports/Repeated Records report.
With the help of the buttons on the screen;
 : New recurring records template is defined
 : Make any correction, change or update related to the selected recurring records template information in the list.
 : Selected recurring records template information in the list can be deleted.
To define a new Recurring Records Report Templates on the Recurring Records Report Templates screen, click the button at the top left corner of the screen.
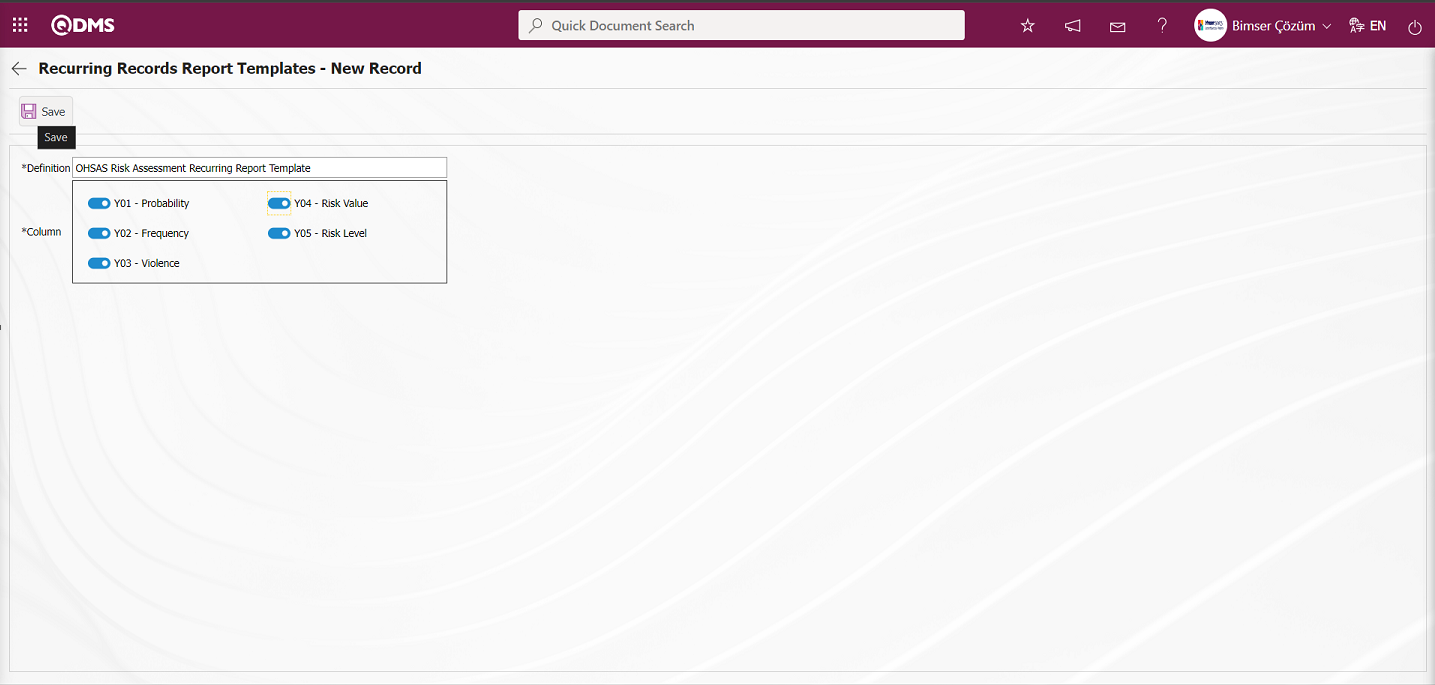
Define the relevant fields on the screen that opens:
Definition: This is the field where Recurring Records Report Templates definition information is entered on the Recurring Records Report Templates - New Record screen.
Column: It is the field where Columns information can be selected on the Recurring Records Report Templates - New Record screen.
Enter the Recurring Records Report definition information on the screen that opens. Related Columns are selected. After filling in the required fields on the Recurring Records Report Templates - New Record screen, the Recurring Records Report Templates registration process is performed by clicking the button in the upper left corner.
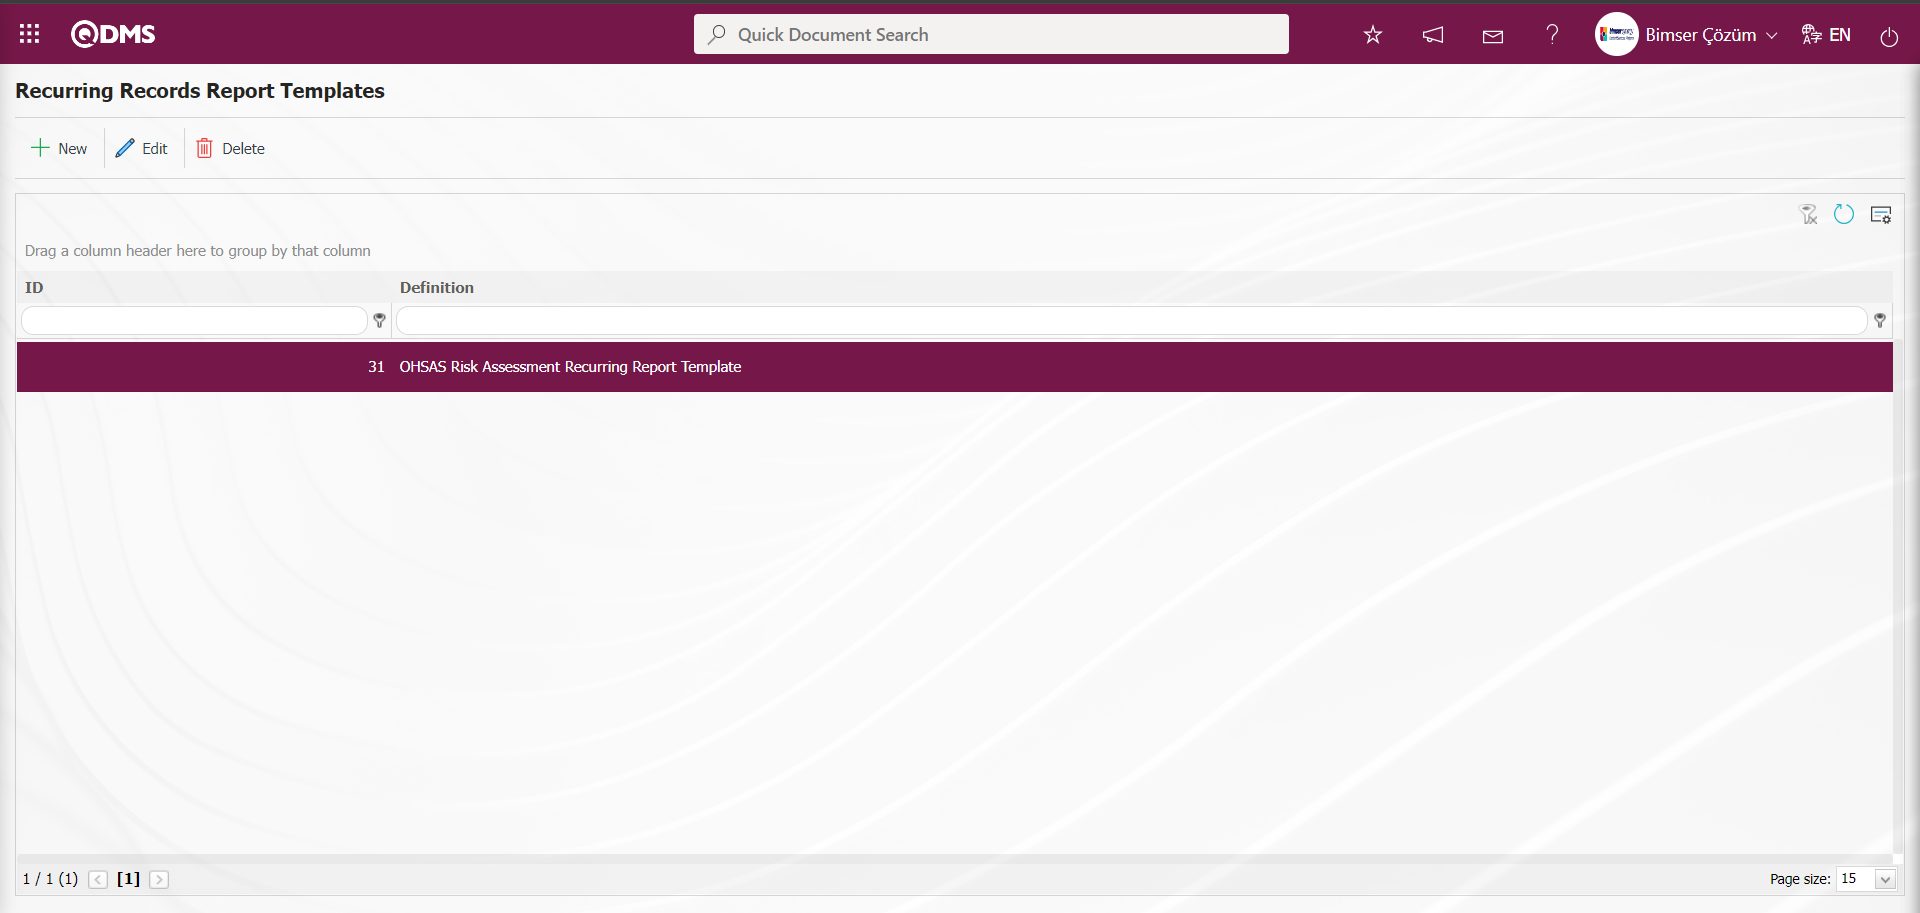
Go to Integrated Management System / OHSAS Risk Assessment /Reports/Repeated Records Report screen.
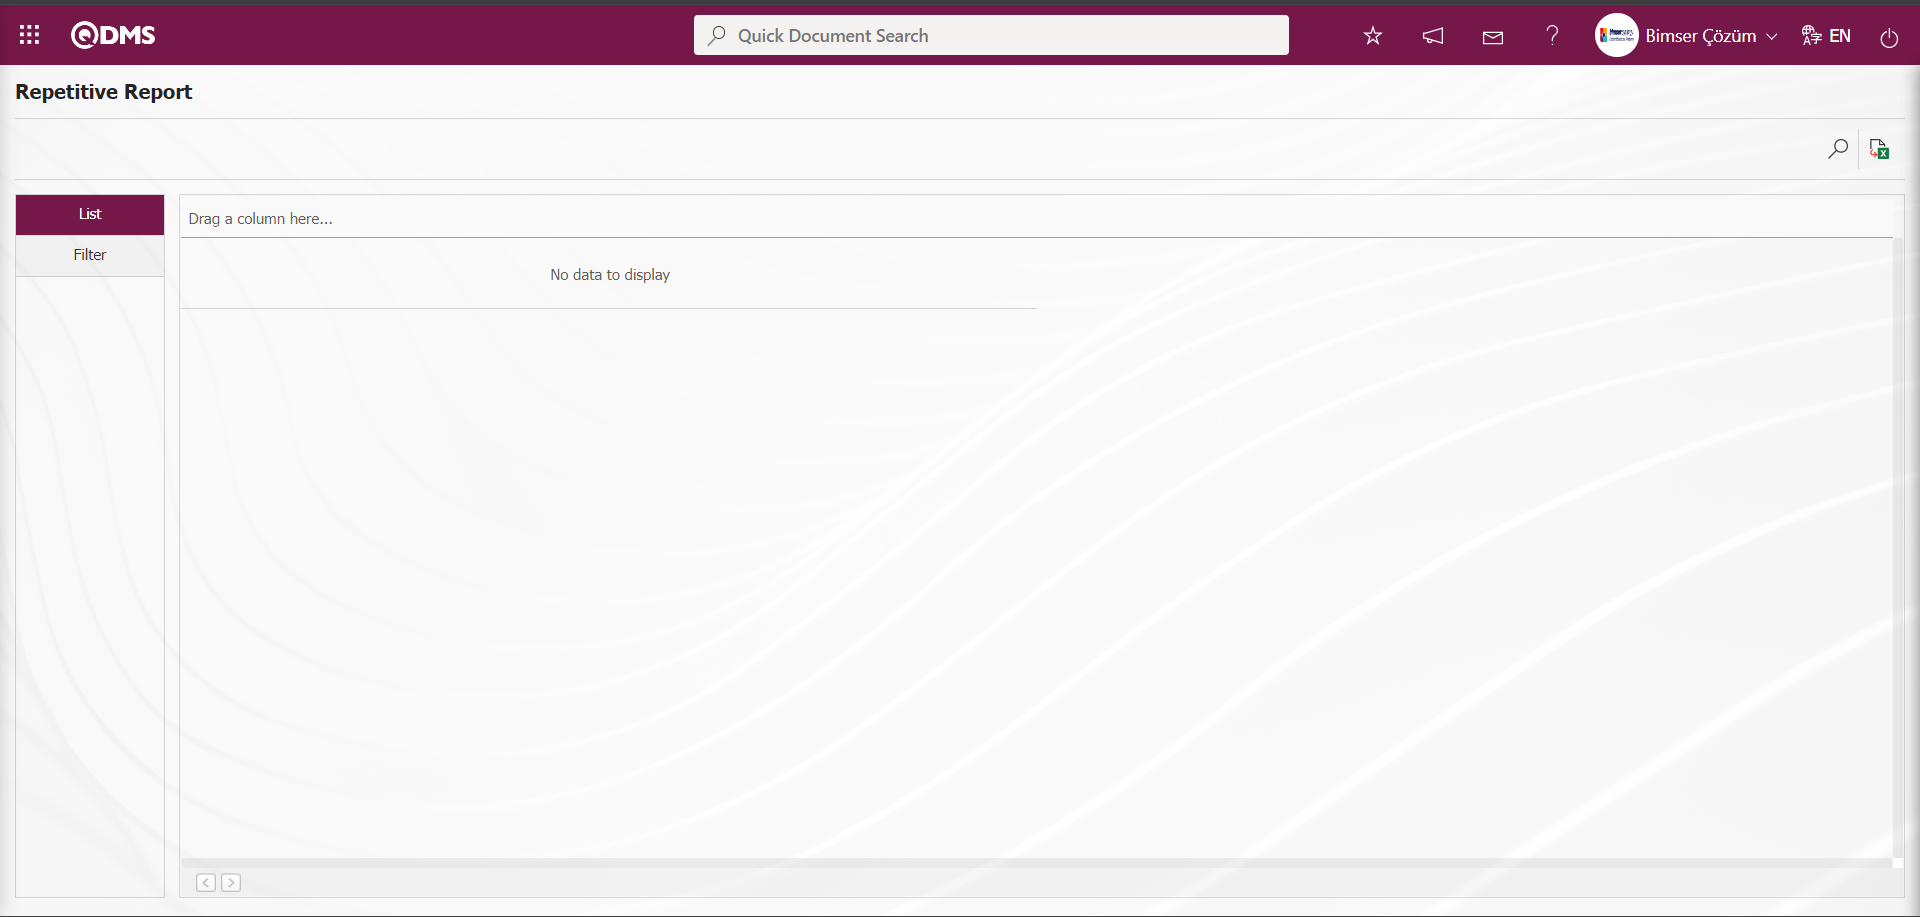
With the help of the buttons on the screen;
 : Records are filtered and searched.
 : Data is transferred to Excel.
On the Repetitive Report screen, select the Report Template in the drop-down list opened in the “Report Template” field, which is the filter search criteria in the Filter tab, and click the  (Search) button.
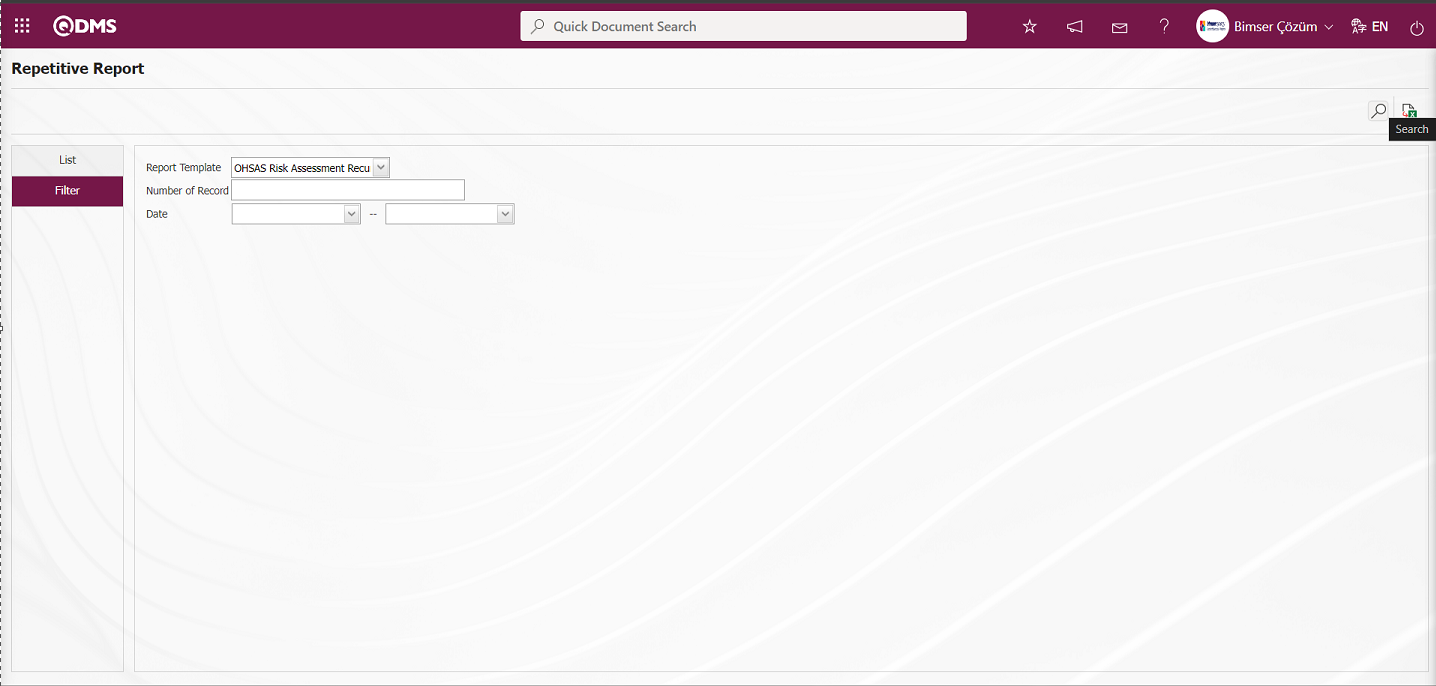
In the Repetitive Report screen, records are listed according to the search criteria in the filter made in the list tab.
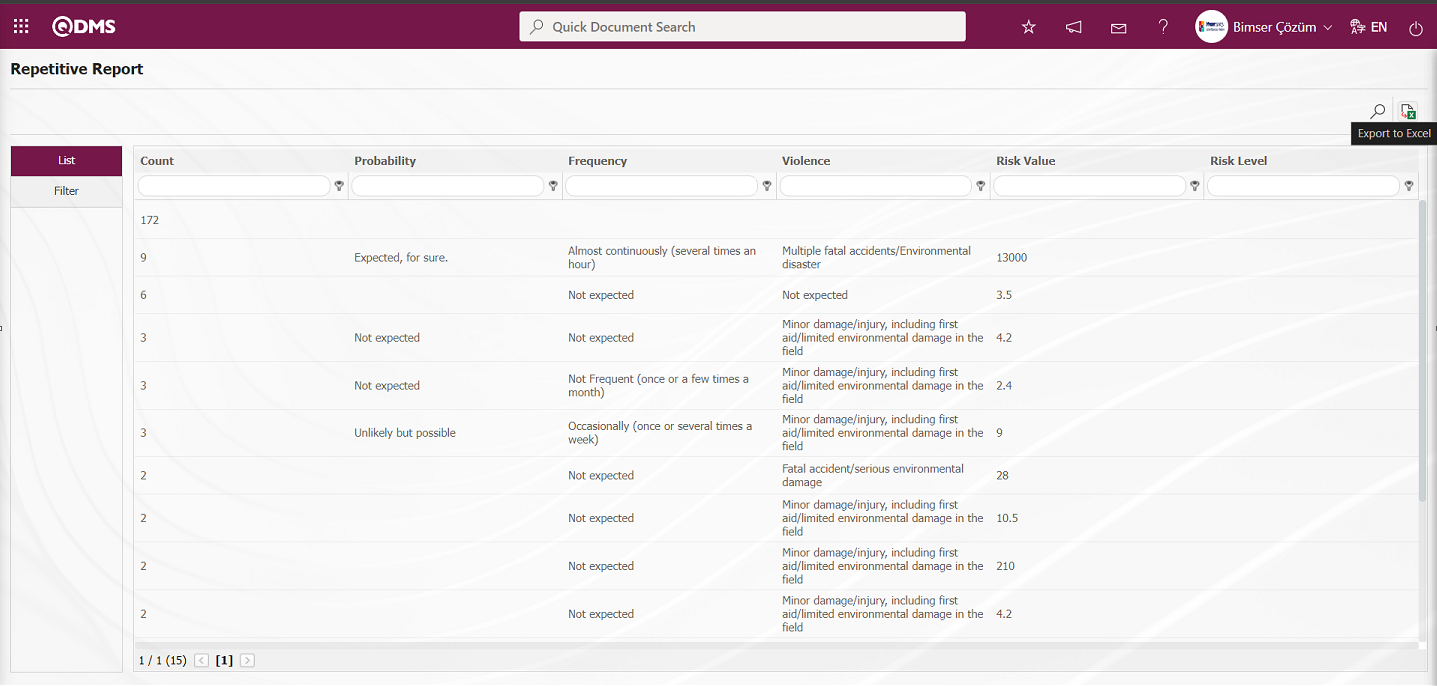
On the Repetitive Report screen, click the  (Export to Excel) button to get the Repetitive Records report in Excel format.
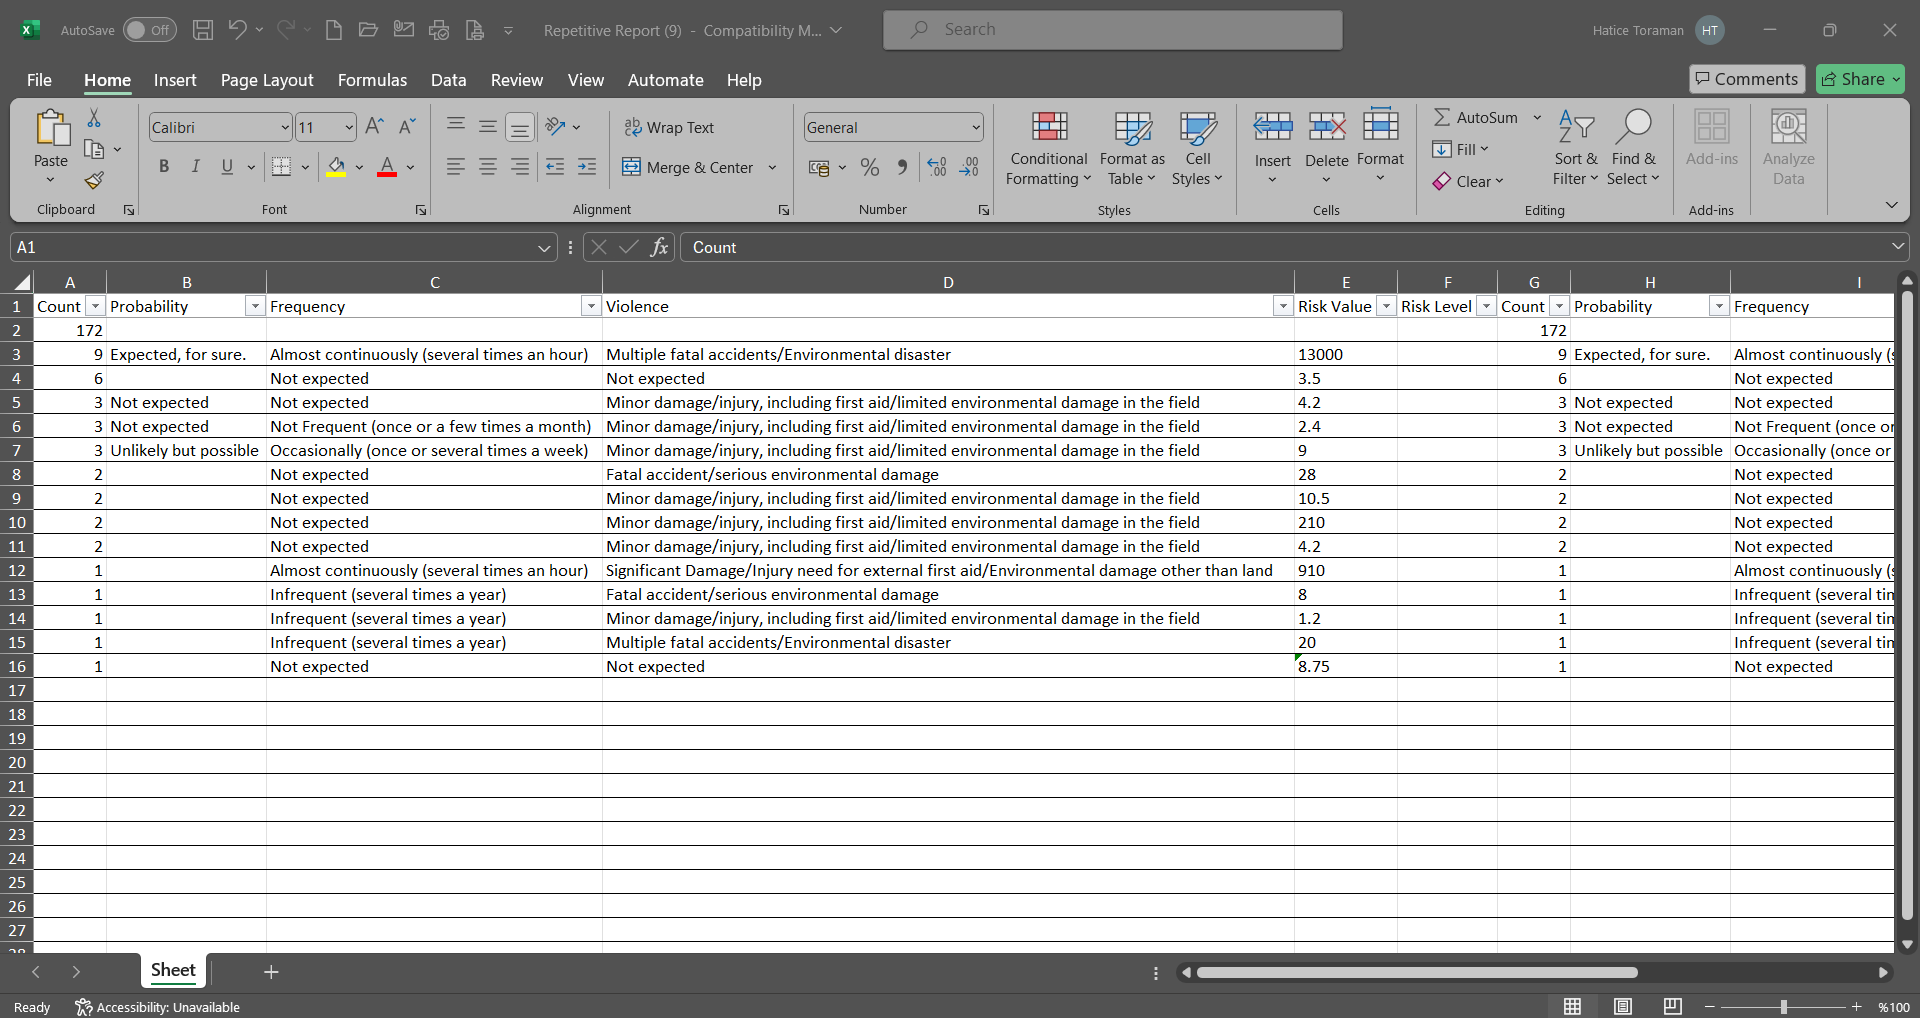
6.2.Integrated Management System / OHSAS Risk Assessment
Within the scope of OHSAS Risk Assessment Module, Activity Group Definition, Activity Definition, Risk Form Definition, Risk Form Details are defined, Reports and Graphics are displayed.
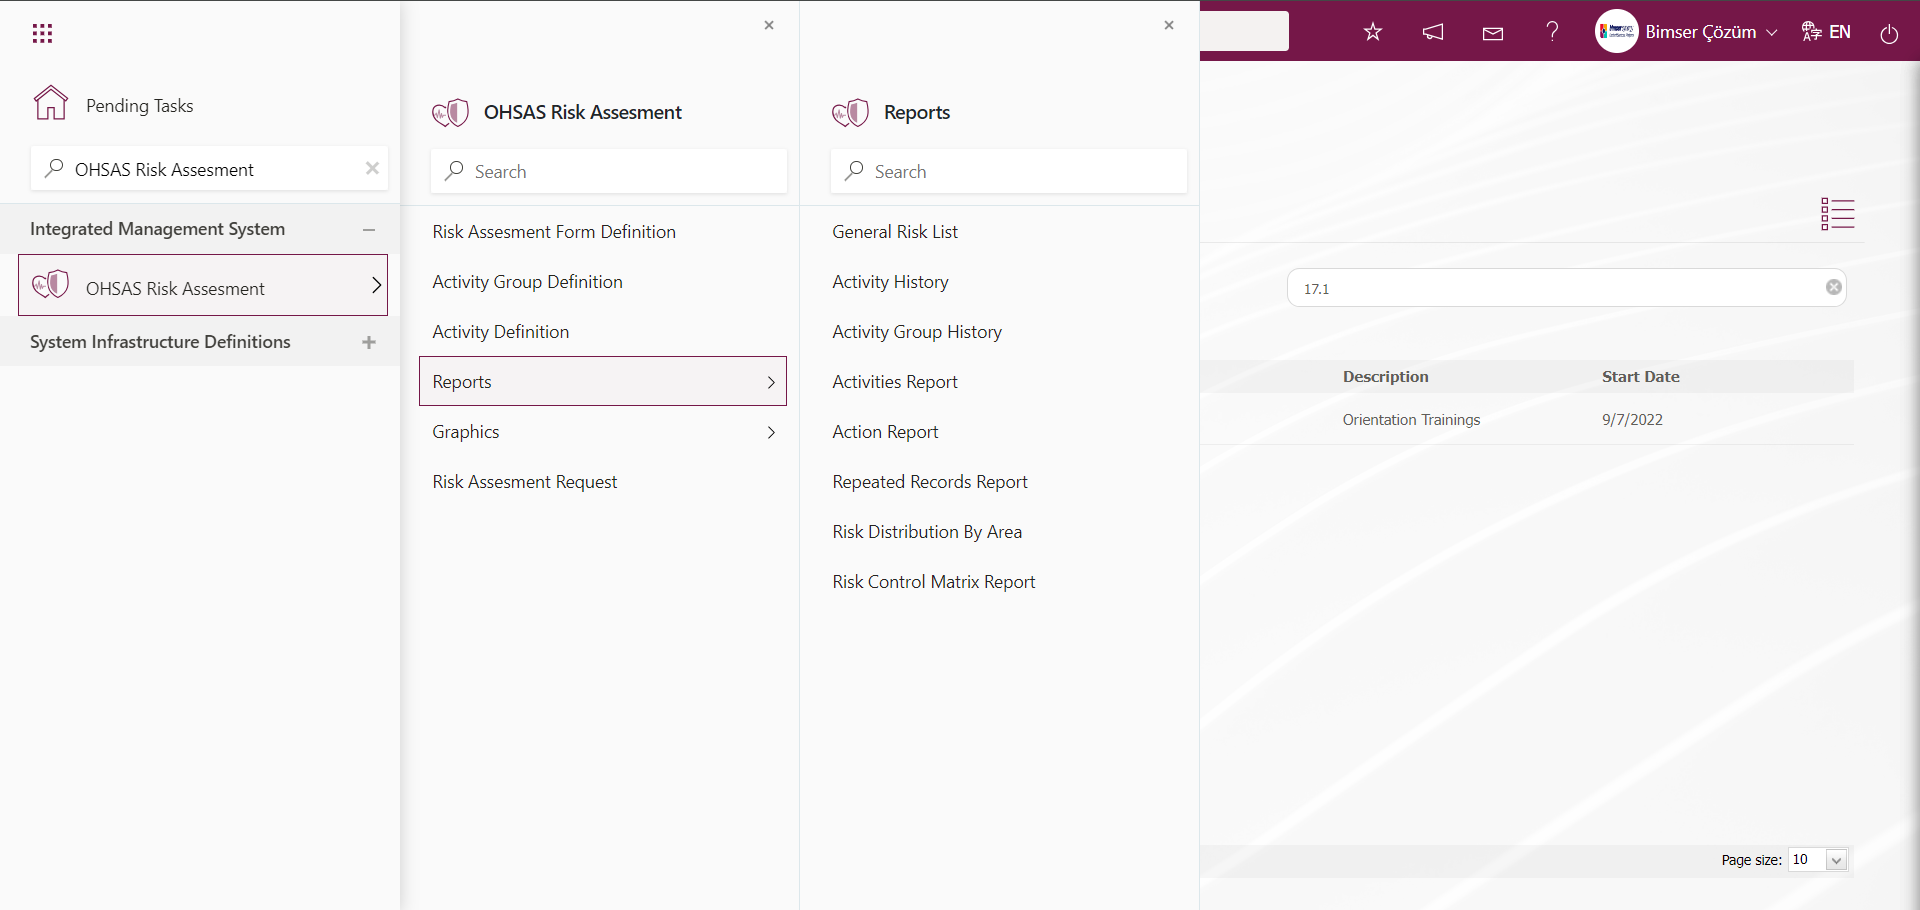
6.2.1.Activity Group Definition
Menu Name: Integrated Management System/ OHSAS Risk Assessment/Activity Group Definition
In order to define the activities to be used in the OHSAS Risk Assessment Module, the groups that will be connected to these activities must first be defined. In this menu, the general and subcategories of the activities to be subjected to OHSAS Risk Assessment are determined. Within the scope of the OHSAS Risk Assessment module process, first of all, all Activity groups belonging to the organization must be defined. This identification process can be entered one by one from the system interface, or it can be downloaded to the excel file with a bulk transfer template, and the transfer template is uploaded to the system by entering the information related to the relevant fields in the downloaded transfer template, and the transfer of the activity groups is made in bulk. In order to upload the activity groups of the organization with the template, it is necessary to be defined as a module administrator in the relevant module in the System Infrastructure Definitions / BSID / Configuration Settings / Administrator Identification menu. The buttons related to the transfer templates are displayed on the screen of the user defined as Module Administrator. Otherwise, when the user is not a module administrator, the buttons related to the transfer templates are not displayed.
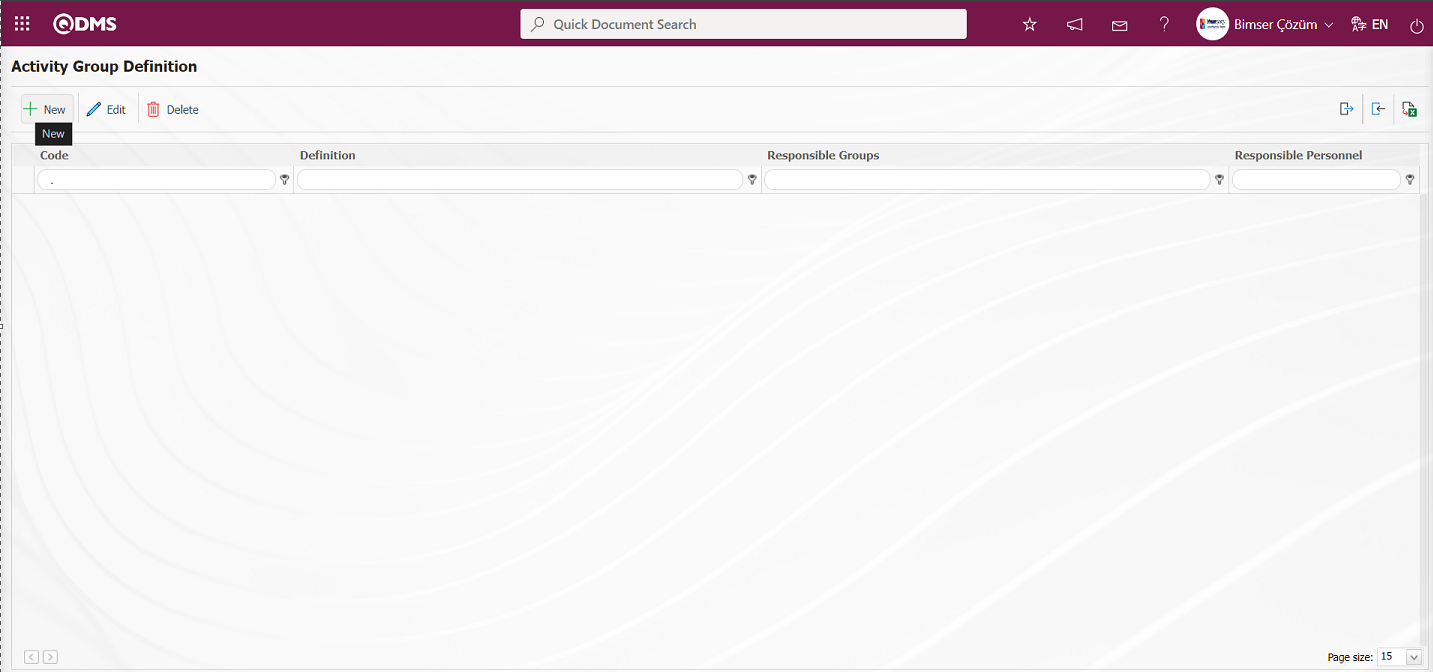
With the help of the buttons on the screen;
 : A new activity group can be defined.
 : The activity group information selected in the list can be updated.
 : It is used to delete the activity group information selected in the list.
 : Transfer activity group definitions to Excel.
 : It is used to upload templates. (In order for this button to be displayed, it is necessary to be defined as a module Administrator in the relevant Module)
 : Used to create a template. (In order for this button to be displayed, you must be defined as a module Administrator in the relevant Module)
Activity Group Batch Transfer Process;
On the Activity Group Definition screen, the Activity Group Definition Template is downloaded to the computer with the (Create Template) button.
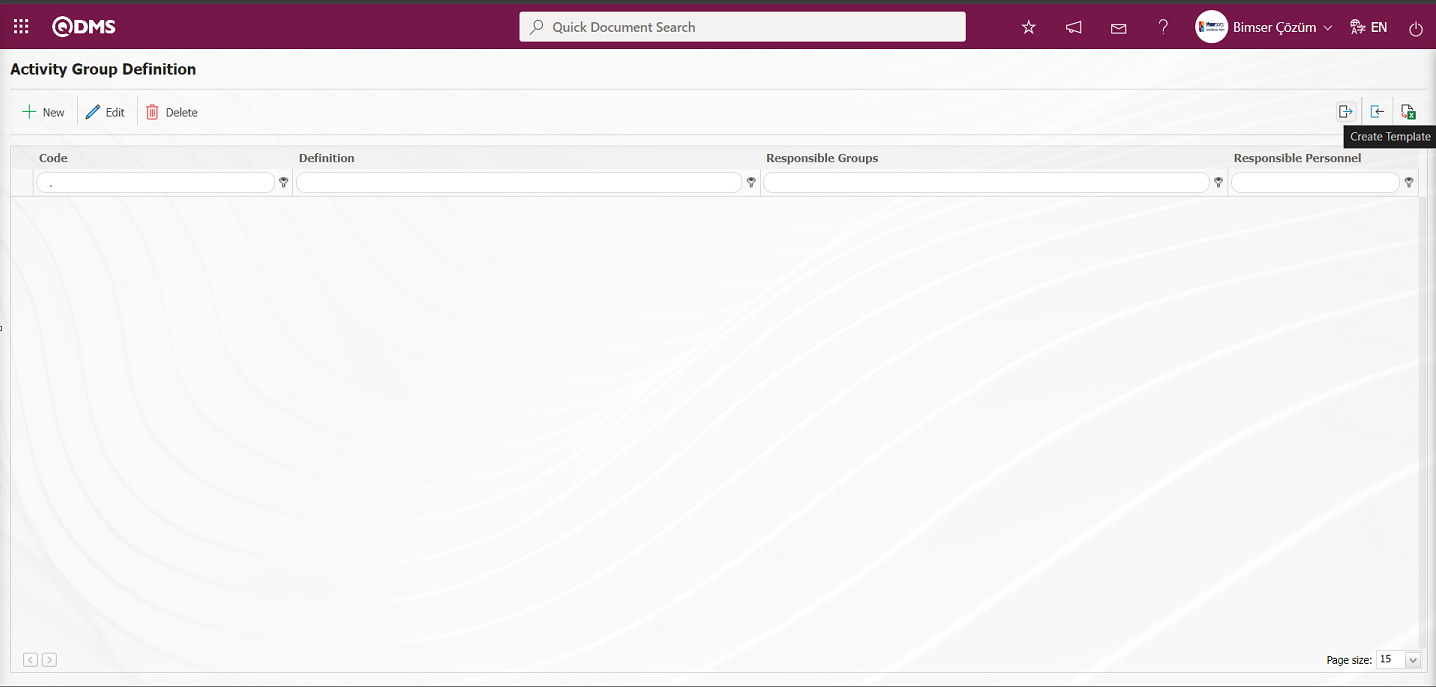
The relevant fields in the Activity Group Definition template are saved to the computer by typing the relevant information.
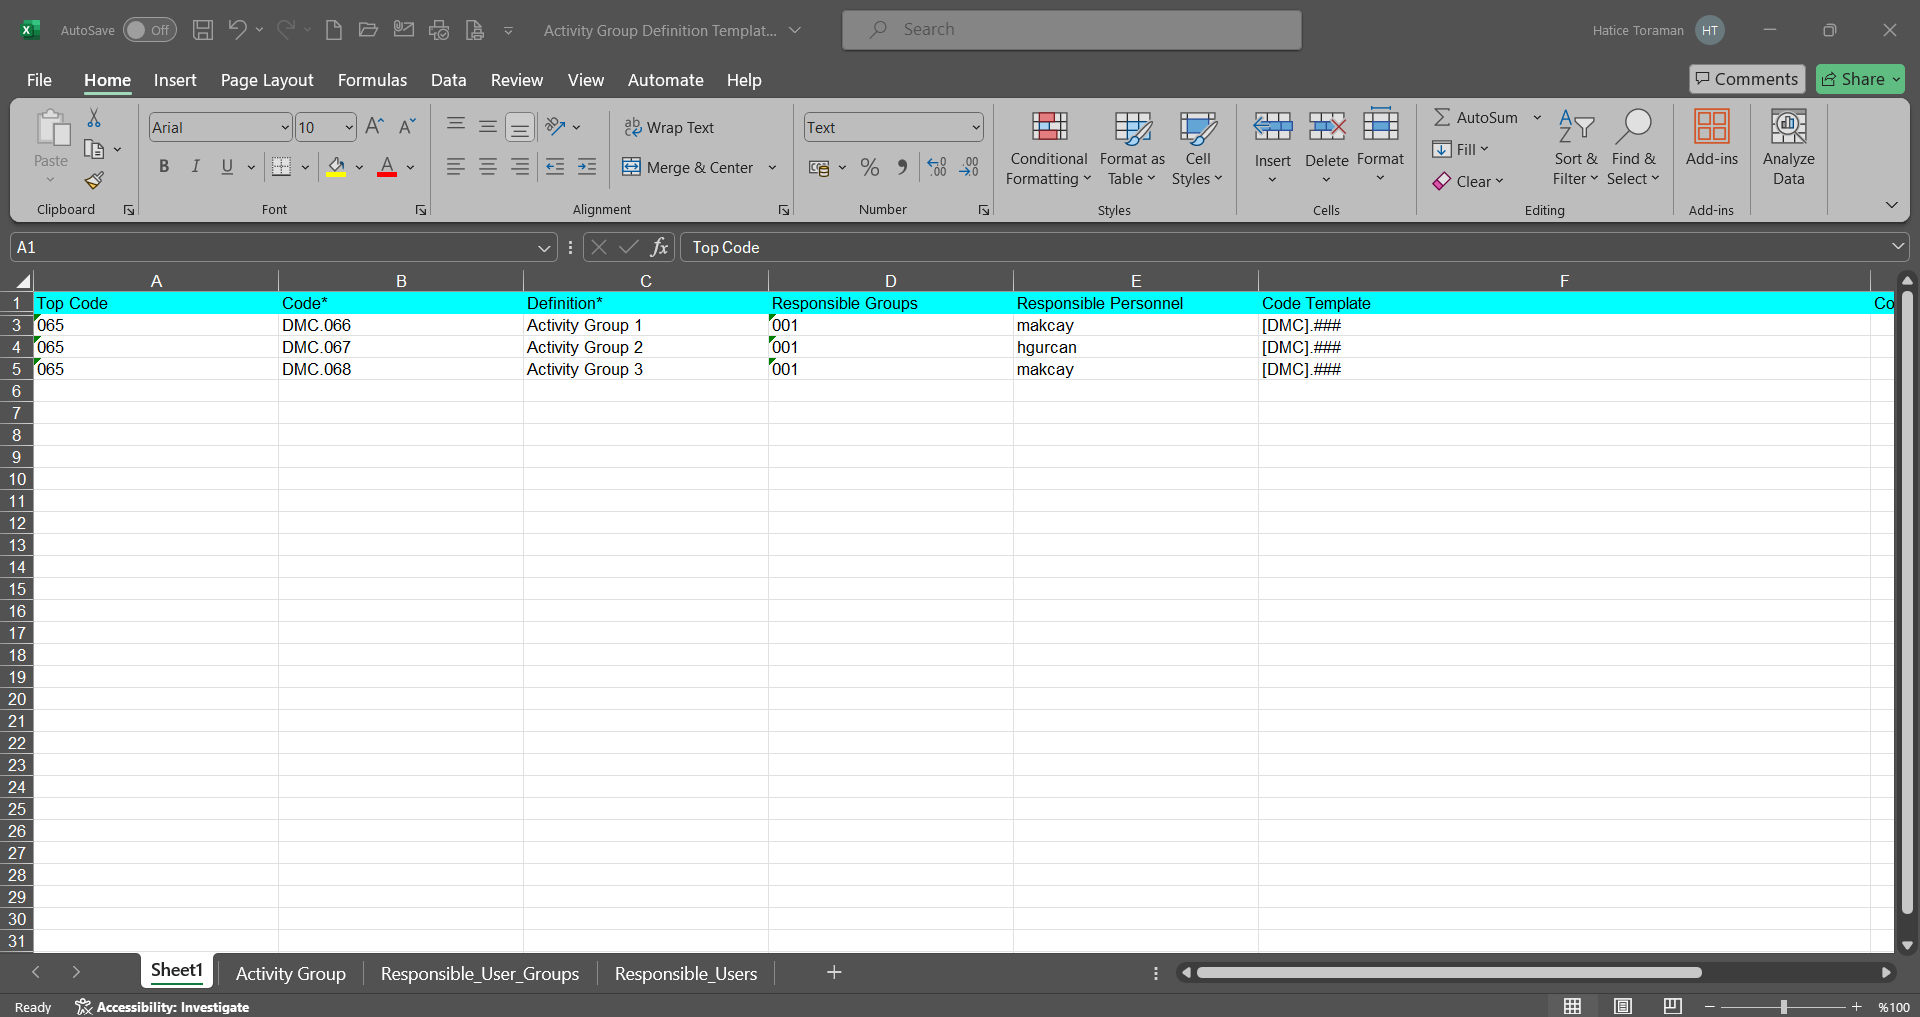
Click the  (Upload Template) button on the Activity Group Definition screen.
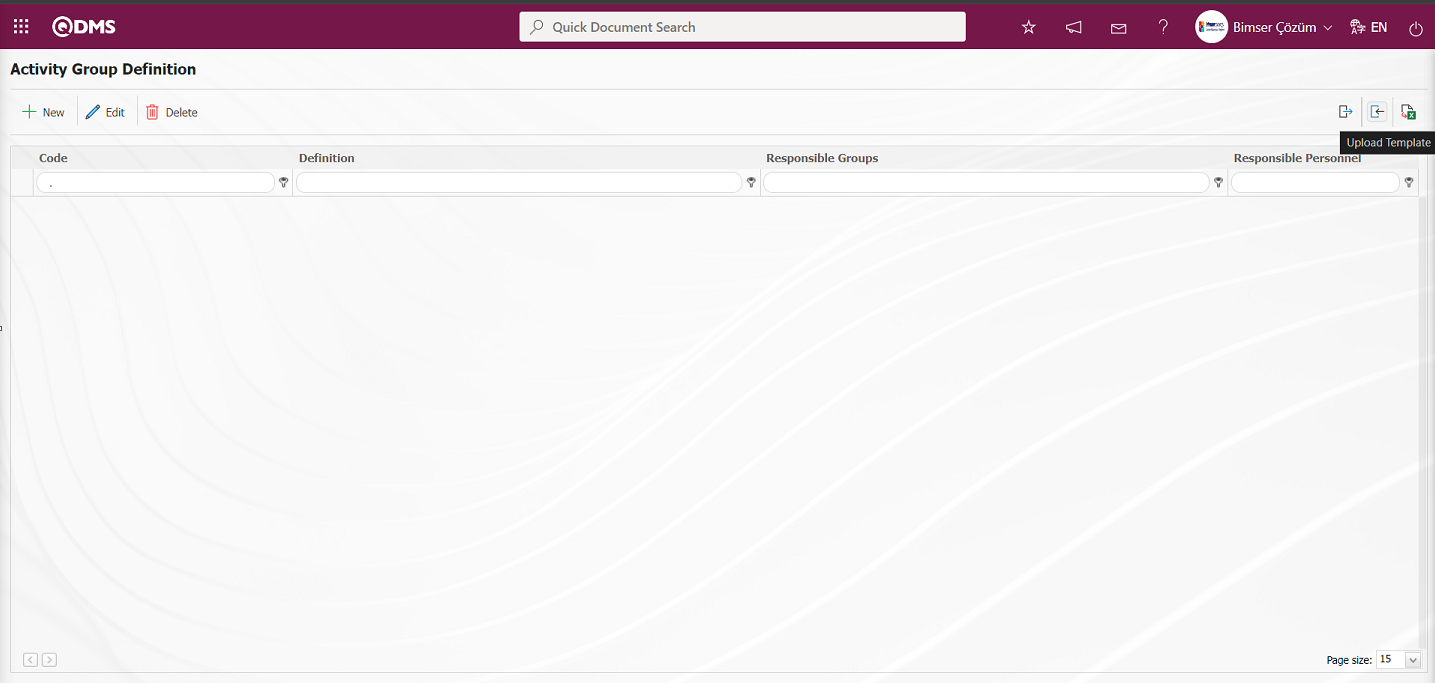
Click the “Browse” button on the Upload File screen.
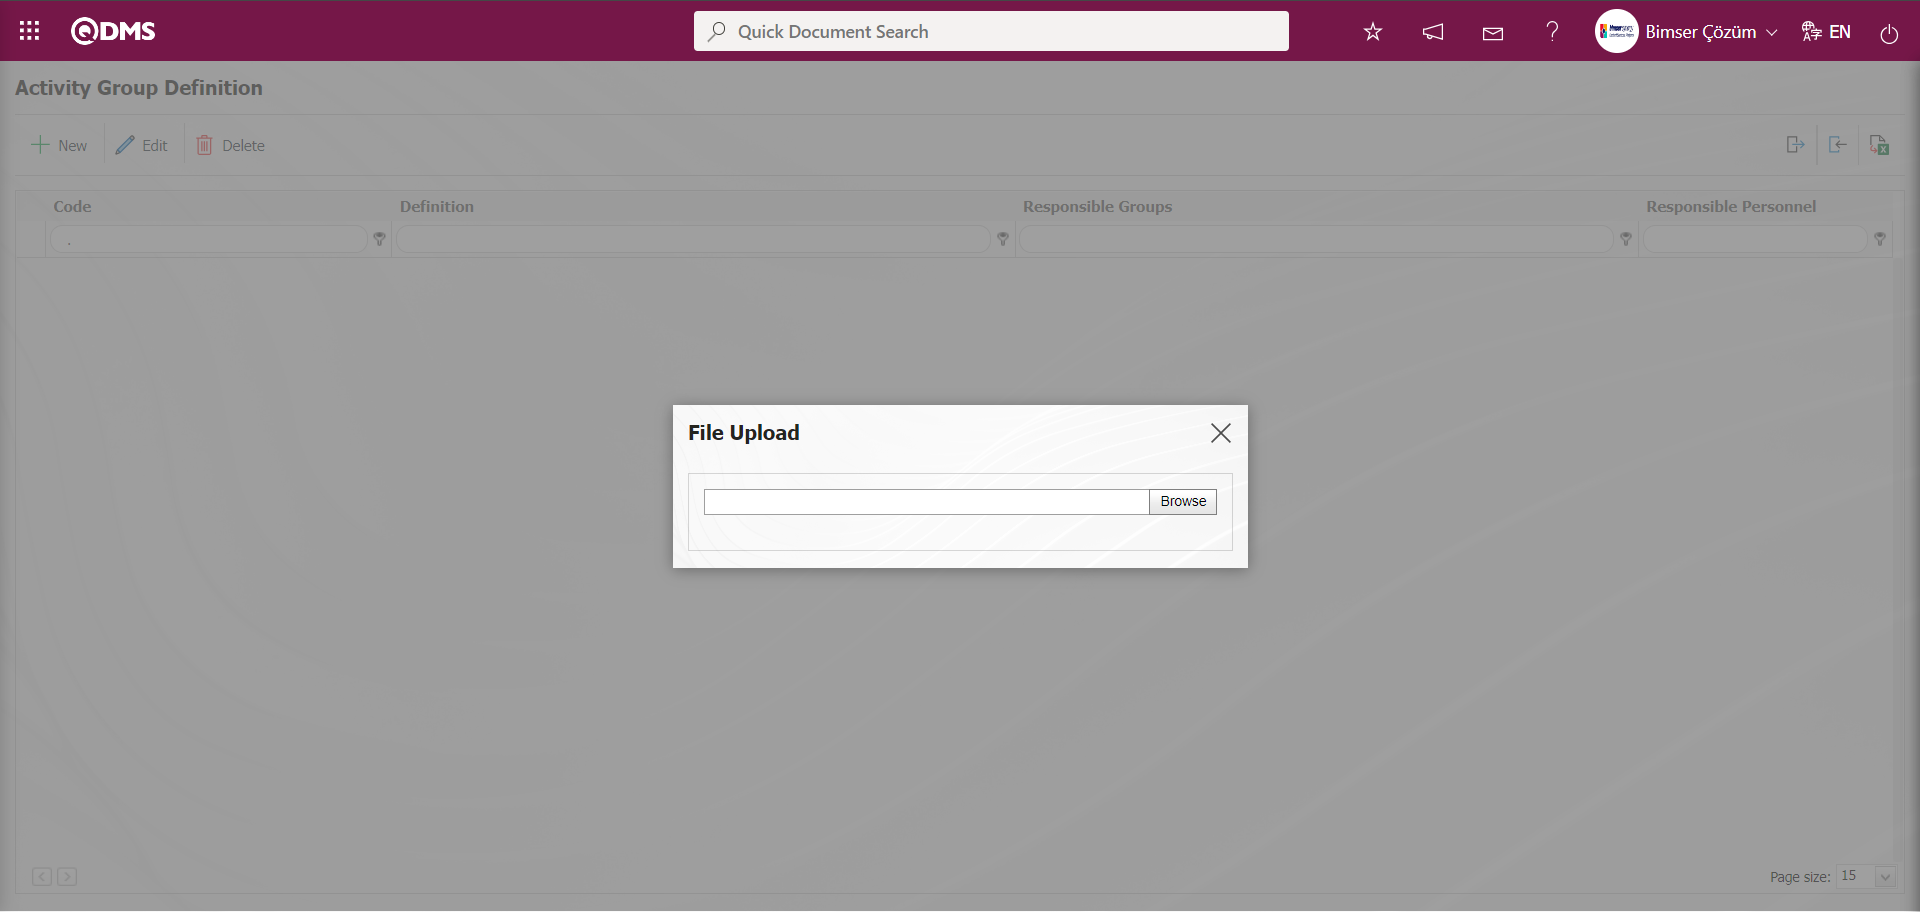
On the screen that opens, the filled Activity Group Definition template is selected.
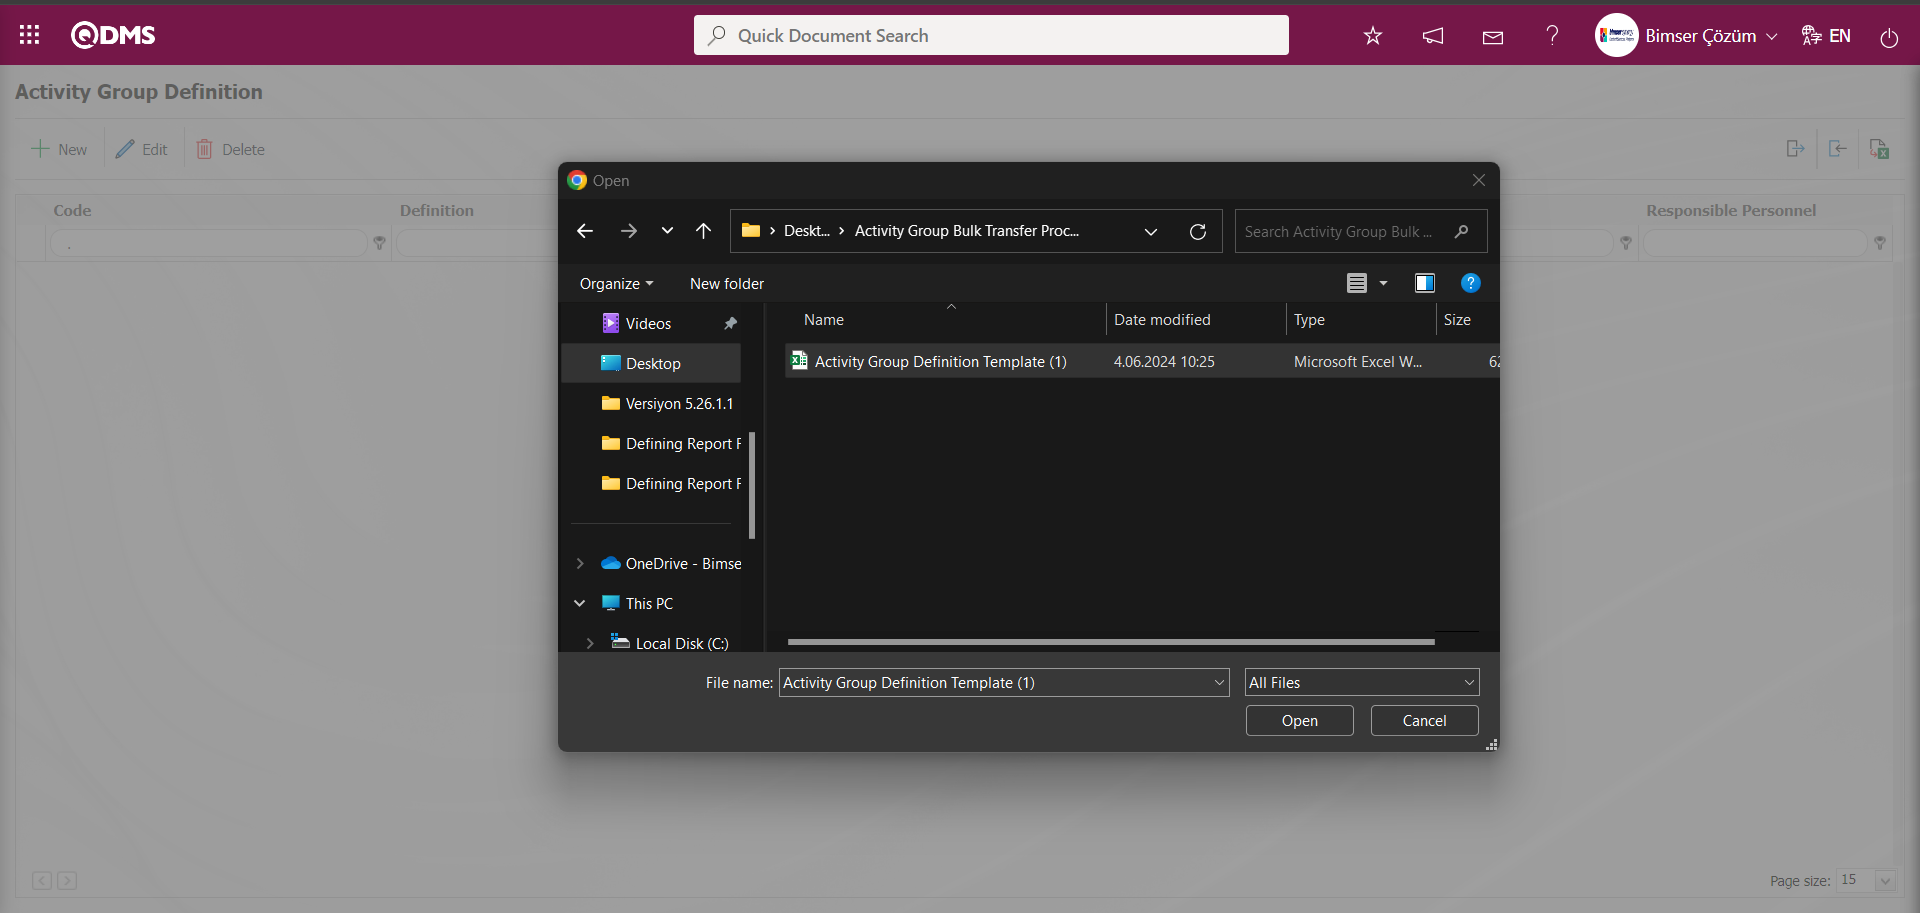
Activity Groups have been successfully transferred. Please check the relevant autocode templates and counters” message, indicating that the Activity Group transfer process has taken place.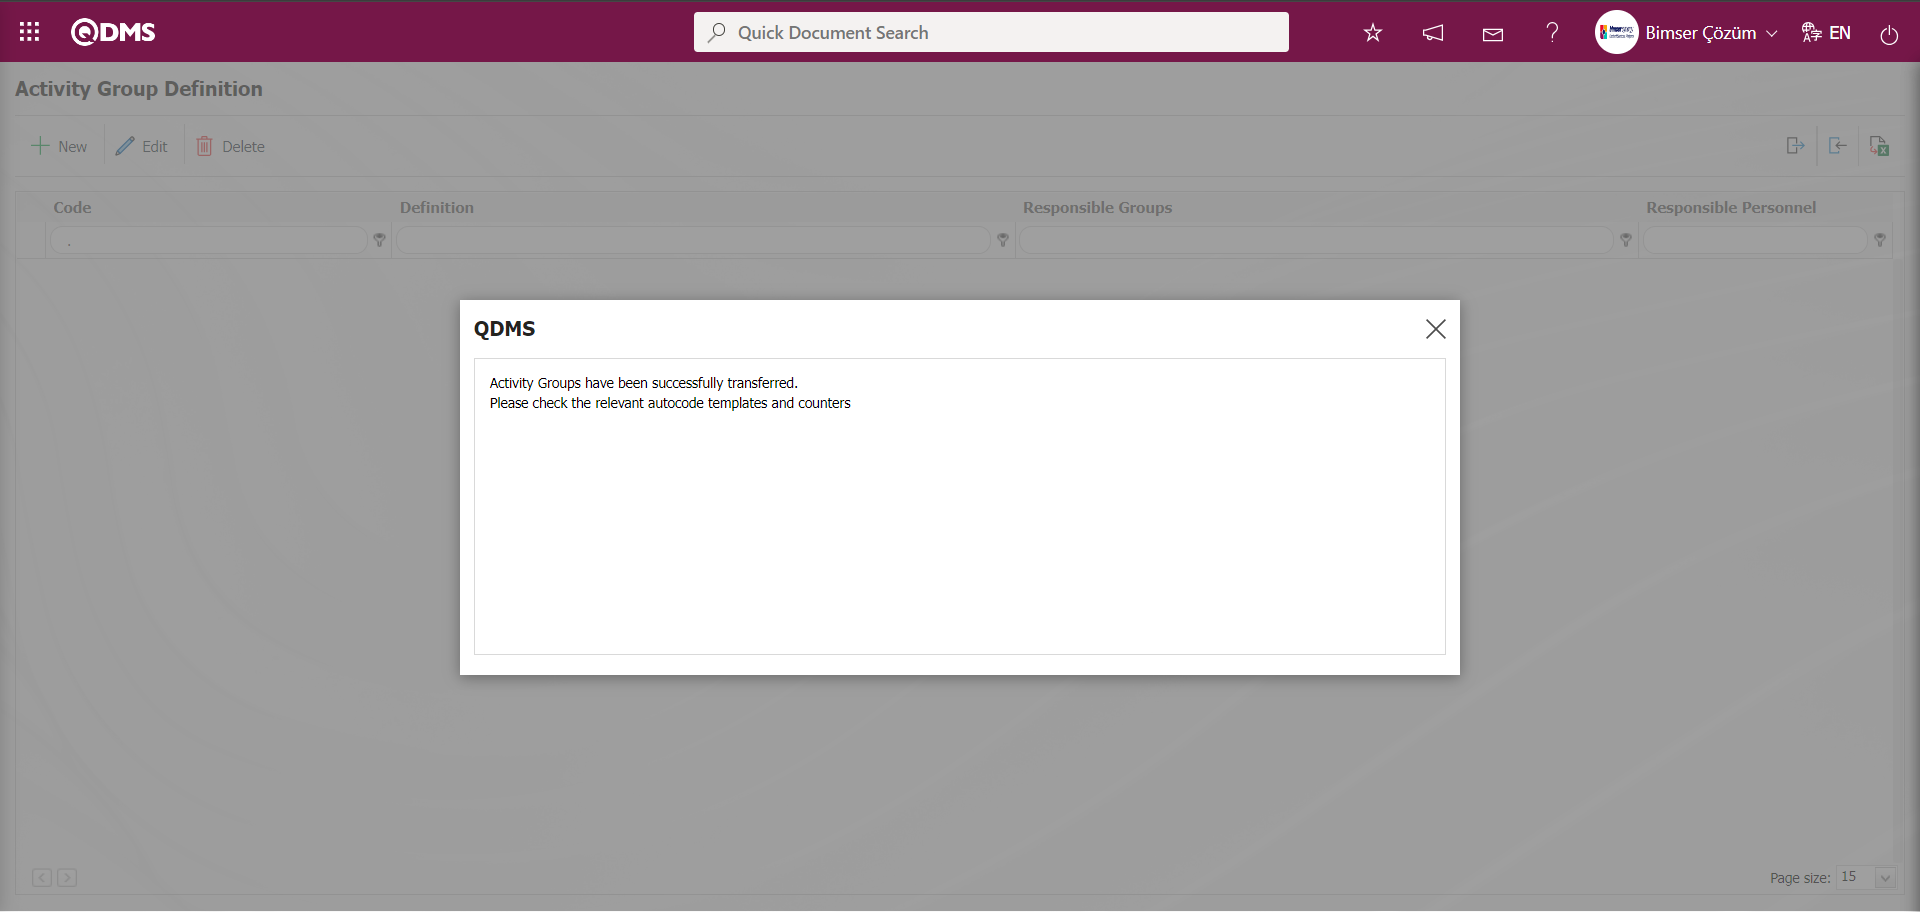
On the Activity Group Definition screen, the Activity group with batch transfer operation is displayed in the list. By selecting the activity group to which bulk transfer is made and clicking the  button, the autocode template and counters are checked.
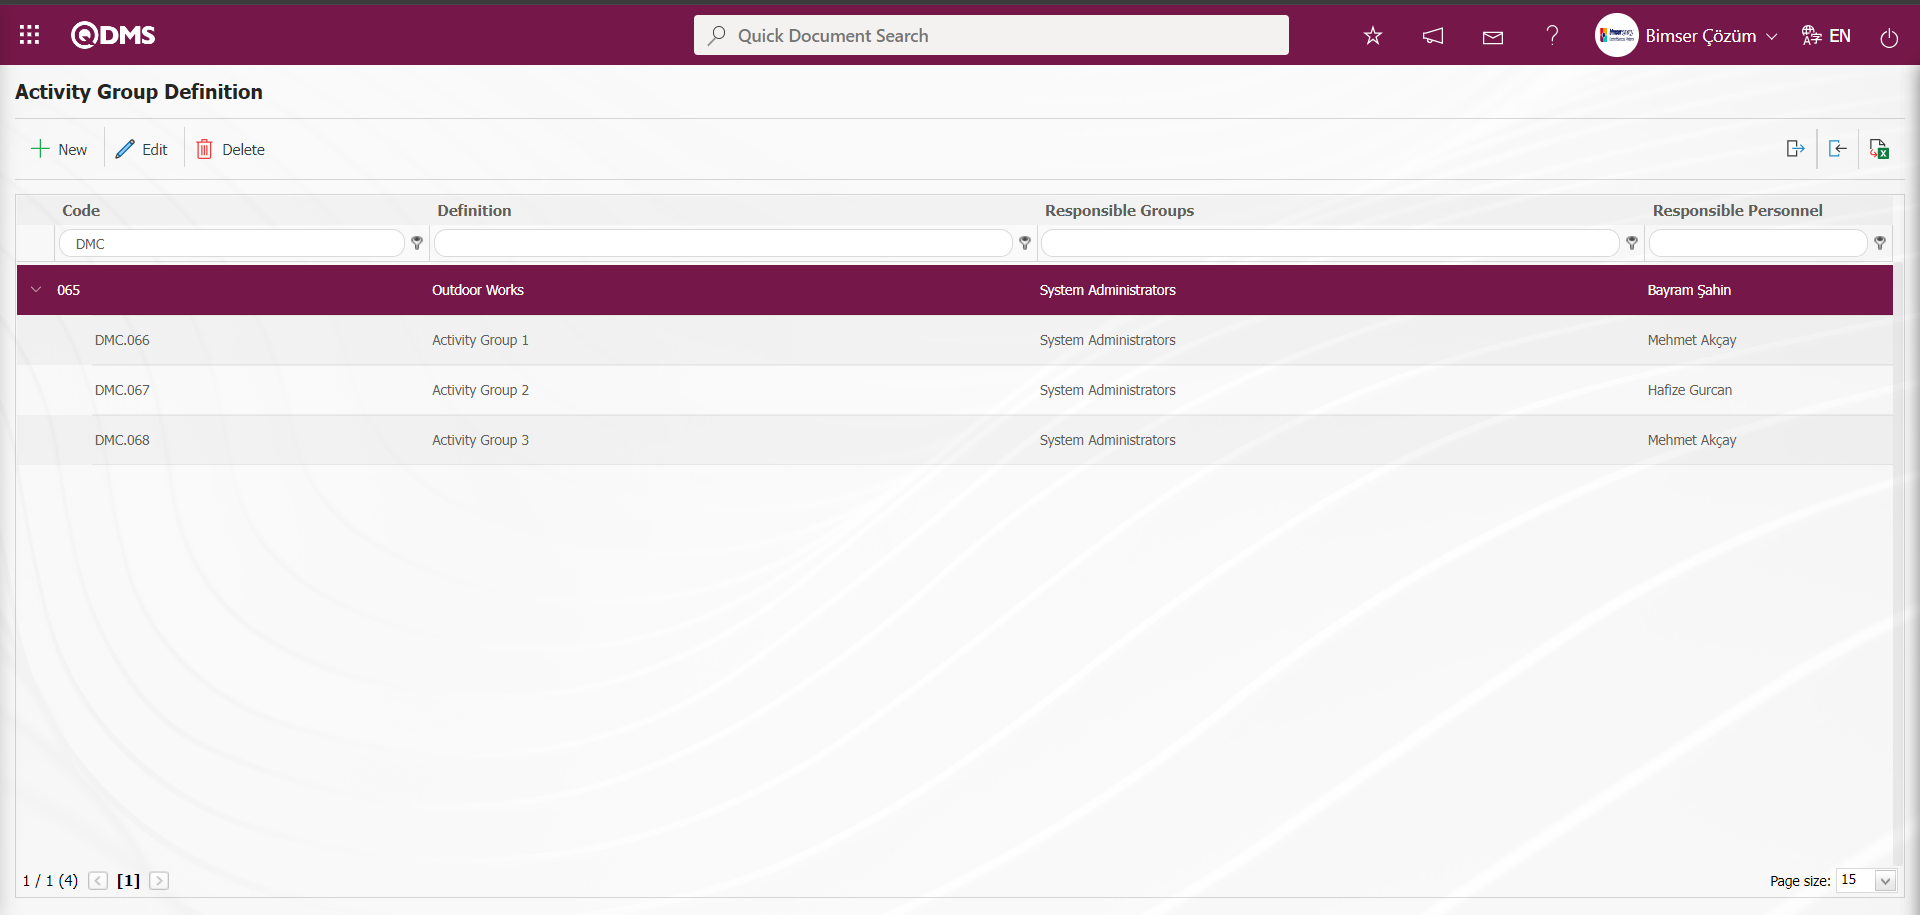
To define a new Activity Group on the Activity Group Definition screen, click the button at the top left corner of the screen to open the Activity Group Definition screen.
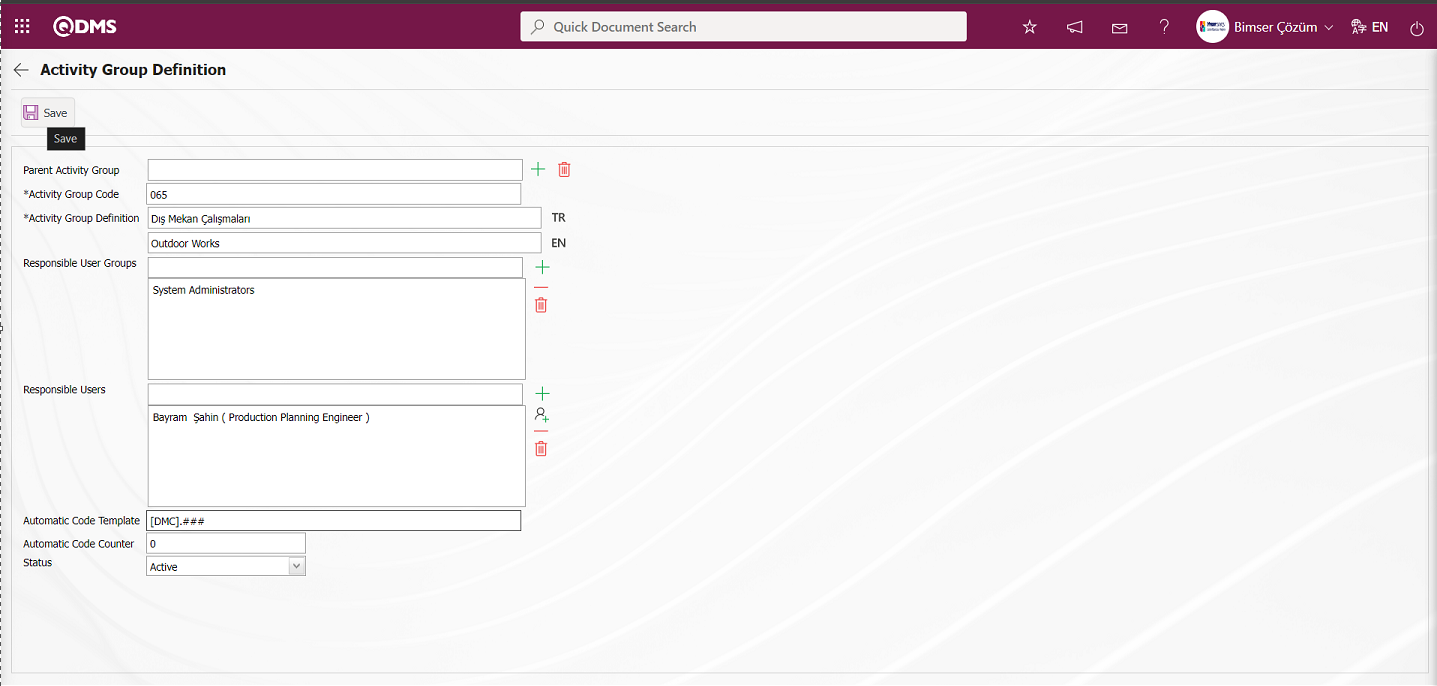
Related fields are defined on the screen that opens:
Parent Activity Group: This is the field where the activity group information is selected in the Activity Group Definition screen. In order to define a sub-divided activity group connected to the main activity group, the main activity group definition is selected in the list of activity groups defined in the system by clicking the  (Select) button.
Activity Group Code: This is the mandatory field where the activity group code information is defined on the Activity Group Definition screen. It should be defined without using characters such as spaces and Turkish characters, so as not to be the same as previously defined fields. Ex. '001' , 'RK'
Activity Group Definition: This is the mandatory field where the definition information is defined on the Activity Group Definition screen.
Responsible User Groups: In the Activity Group Definition screen, the responsible user groups can be selected from the user group list defined in the system. With the user groups to be selected in the “Responsible User Groups” field, you can authorize certain user responsible for certain activity groups.
Responsible Users: In the Activity Group Identification screen, the responsible personnel of the responsible activity group can be selected from the list of personnel defined in the system.
Auto Code Template: This is the field where automatic code template information is defined on the Activity Group Definition screen. According to the defined automatic code template, the system makes automatic code assignment according to the activity group code selected in the activity definition process. Ex: [DMC].001, DMC].002, DMC].003 auto code assignment according to the auto code counter value. When the Activity defined in the Activity Definition screen is selected to which the Activity group is connected, it makes assignment according to the code template defined in the Activity group to which it is connected.
Automatic Code Counter: It is the field where the code of the Activity records given according to the code specified in the automatic code template on the Activity Group Definition screen is determined from which value the code will start.
Status: It is the field where the “Active” option is selected in the “Active” and “Inactive” options of the status information on the Activity Group Definition screen. Inactive status is a sign that activity group definitions are no longer used in the system.
In the screen that opens, if any, the Activity group to which the Activity group is connected, the Activity group code and definition are entered. If only certain user groups are required to perform transactions with these activities, user groups are selected and added from the responsible user groups section. Active / passive status is determined from the Status menu. After entering the relevant information in the required fields, the Activity Group registration process is realized by clicking the  button in the upper left corner of the screen.
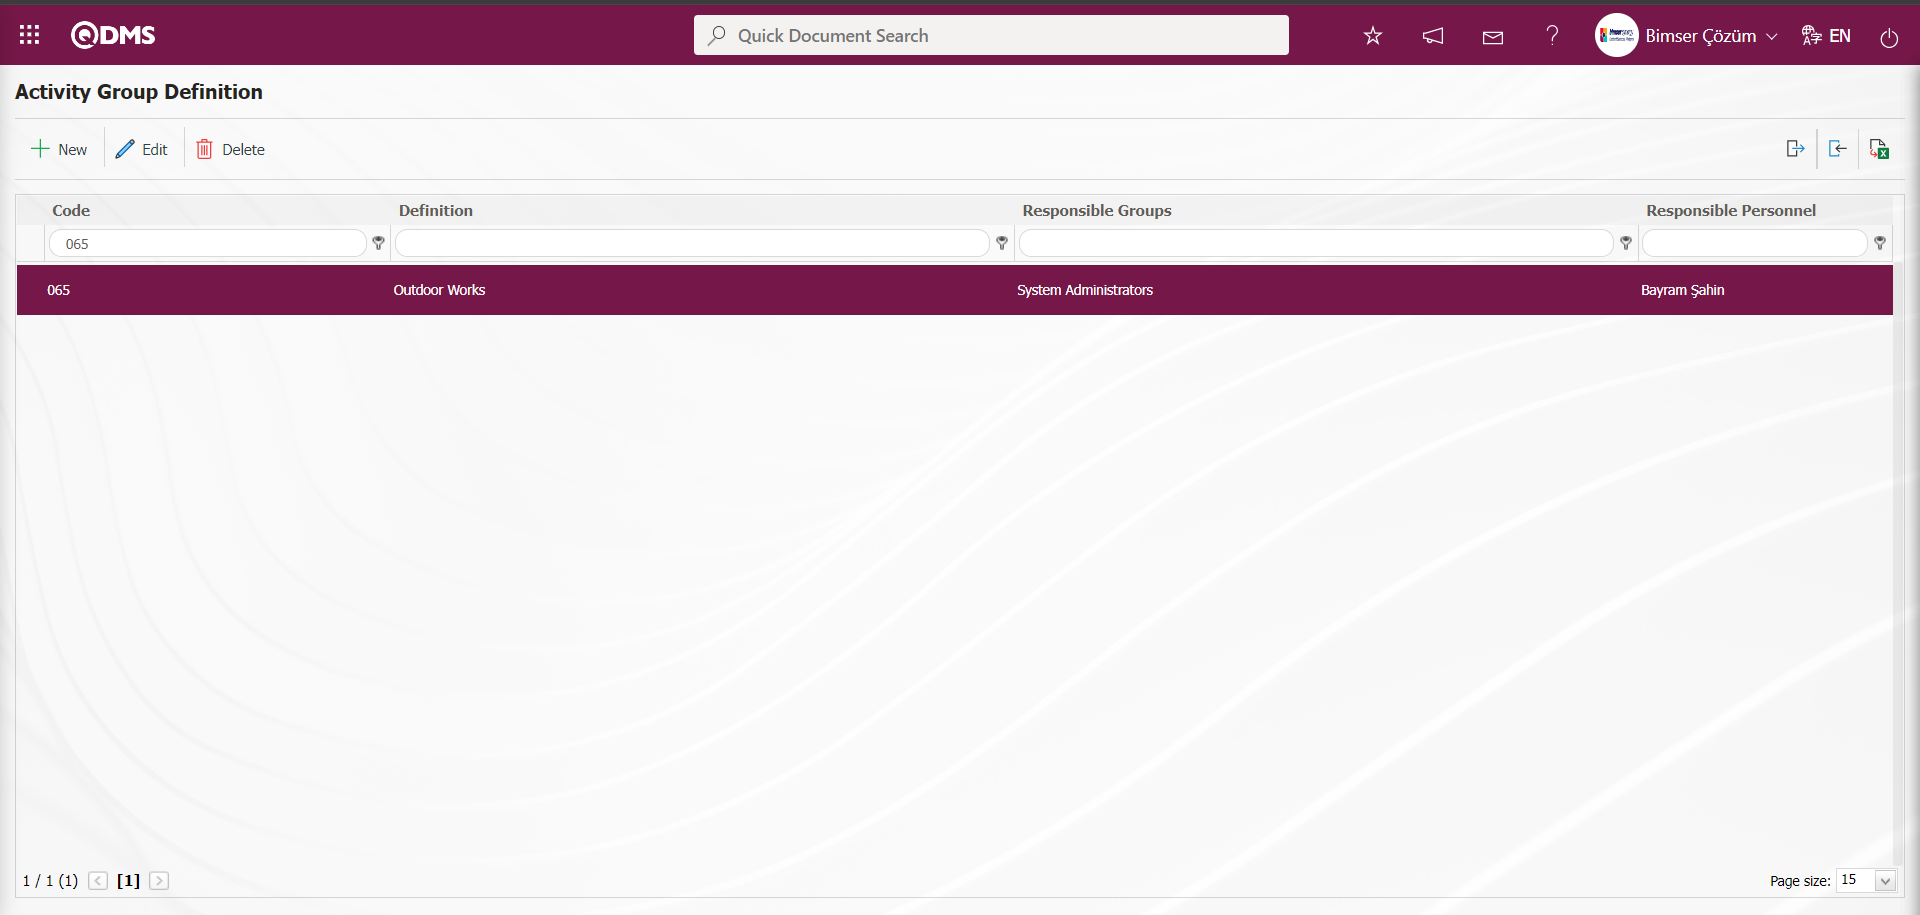
6.2.2.Activity Definition
Menu Name: Integrated Management System/OHSAS Risk Assessment/ Activity Definition
This is the menu where the Activities that can be associated with the risks analyzed in the Risk Module are defined. Activities are defined depending on the Activity groups created in this menu. The relevant page is displayed by clicking the Activity Definition menu under the Integrated Management System. The activity definition page is similar to the activity group definition page. In this menu, within the scope of the OHSAS Risk Assessment module process, first of all, all Activities belonging to the organization are defined. This definition process can be entered one by one from the system interface, or it can be downloaded to an excel file with a bulk transfer template, and the transfer template is uploaded to the system by entering the information related to the relevant fields in the downloaded transfer template and the transfer of the Activity definitions is made in bulk. In order to upload the Activity definitions of the organization with the template, it is necessary to be defined as a module administrator in the relevant module in the System Infrastructure Definitions / BSID / Configuration Settings / Manager Definition menu. The buttons related to the transfer templates are displayed on the screen of the user defined as Module Administrator. Otherwise, when the user is not a module administrator, the buttons related to the transfer templates are not displayed.

With the help of the buttons on the screen;
: A new Activity can be defined.
: The activity information selected in the list can be updated.
: It is used to delete the selected Activity information in the list.
 : The activity information selected in the list can be copied.
: Transfer activity definitions to Excel.
: It is used to upload templates. (In order for this button to be displayed, it is necessary to be defined as module Administrator in the relevant Module)
: Used to create a template. (In order for this button to be displayed, you must be defined as a module Administrator in the relevant Module)
Activity Batch Transfer Process;
On the Activity Definition screen, the Activity Definition Template is downloaded to the computer with the (Create Template) button.

The relevant fields in the Activity Definition template are saved to the computer by typing the relevant information.

Click the  (Upload Template) button on the Activity Definition screen.
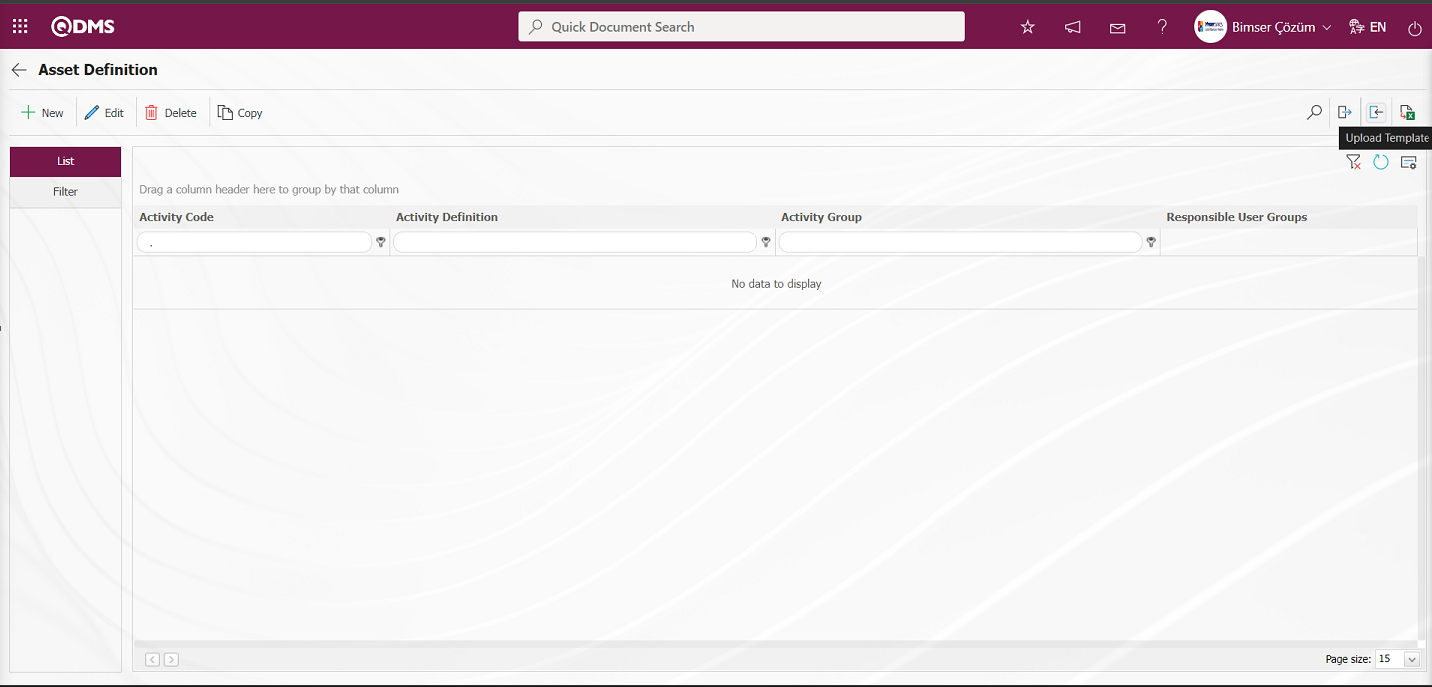
Click the “Browse” button on the Upload File screen.
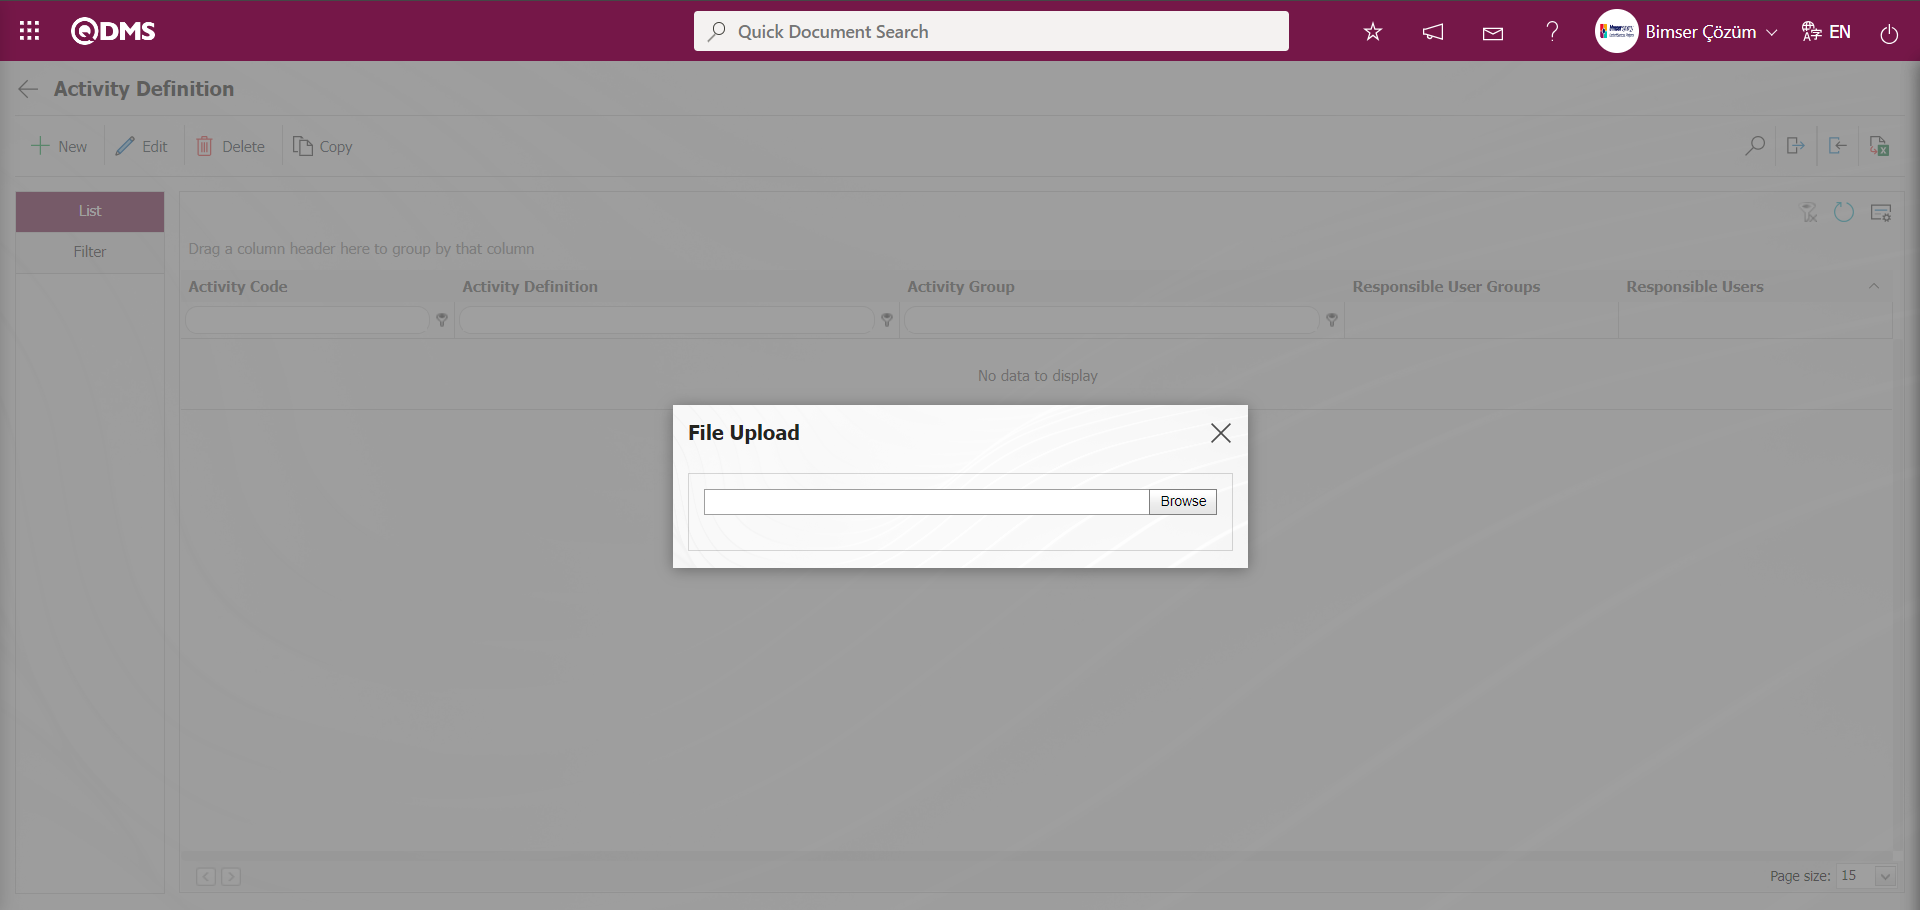
On the screen that opens, the filled Activity Definition template is selected.
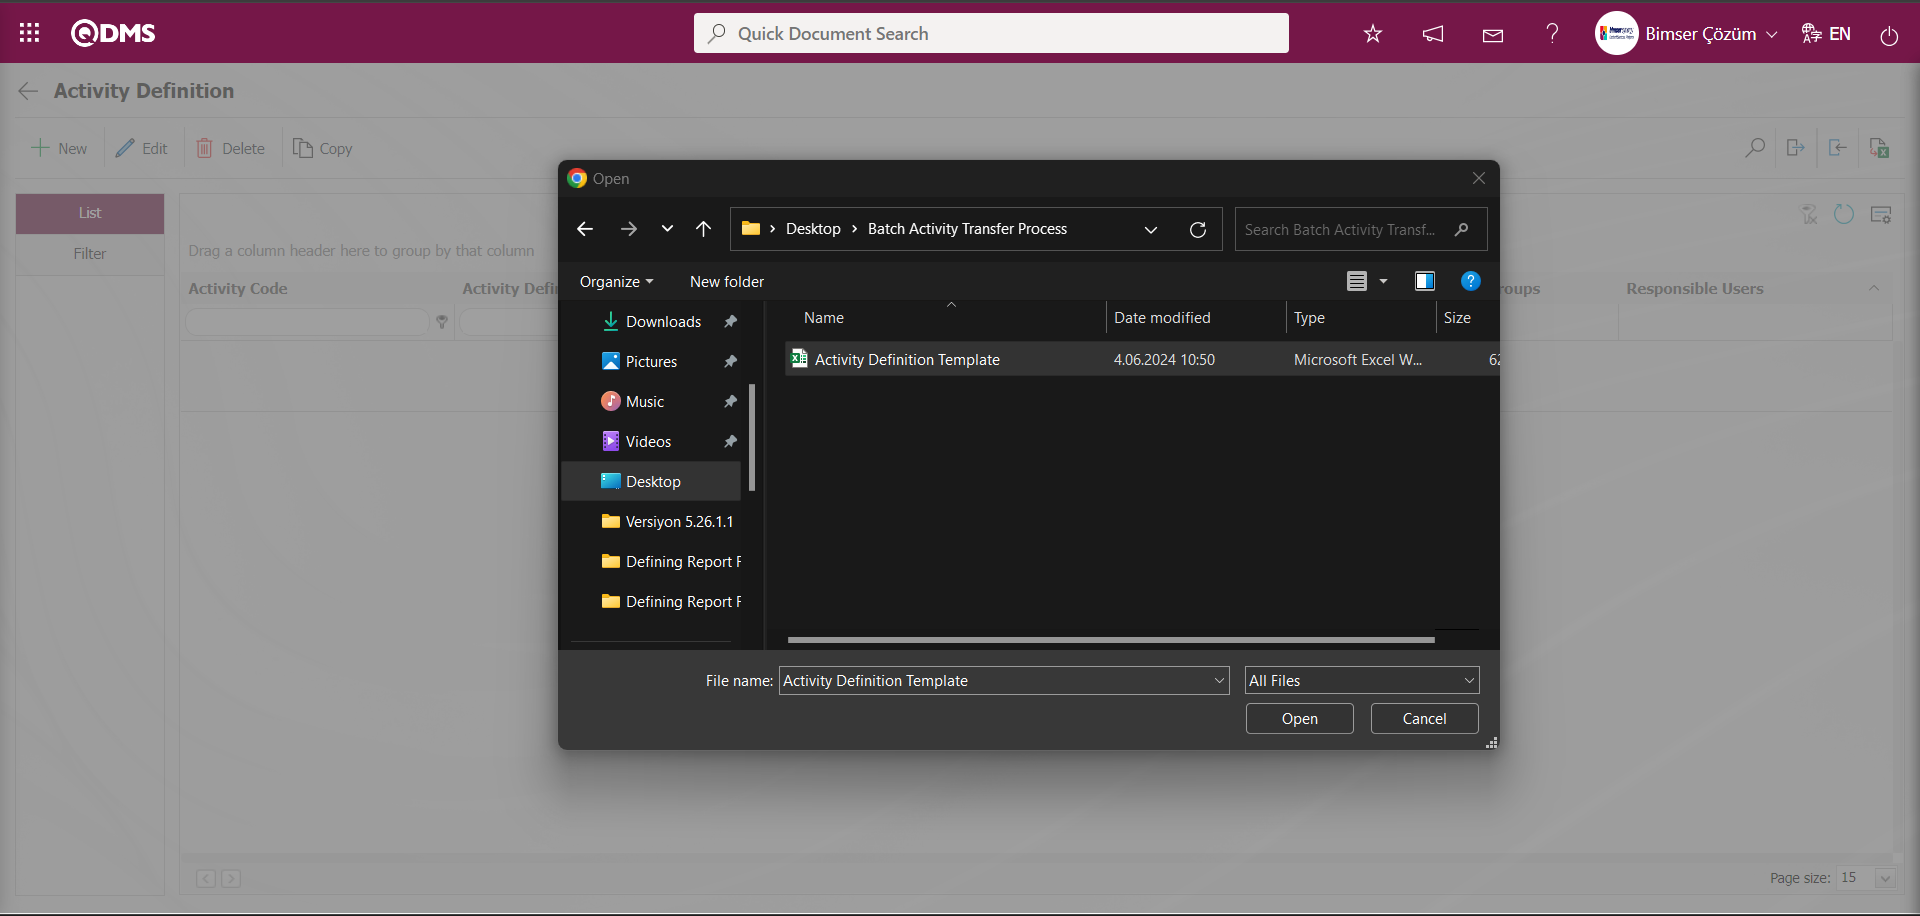
The system will reply with “Activities have been successfully transferred.Please check the relevant autocode templates and counters” message, indicating that the activity transfer process has taken place.
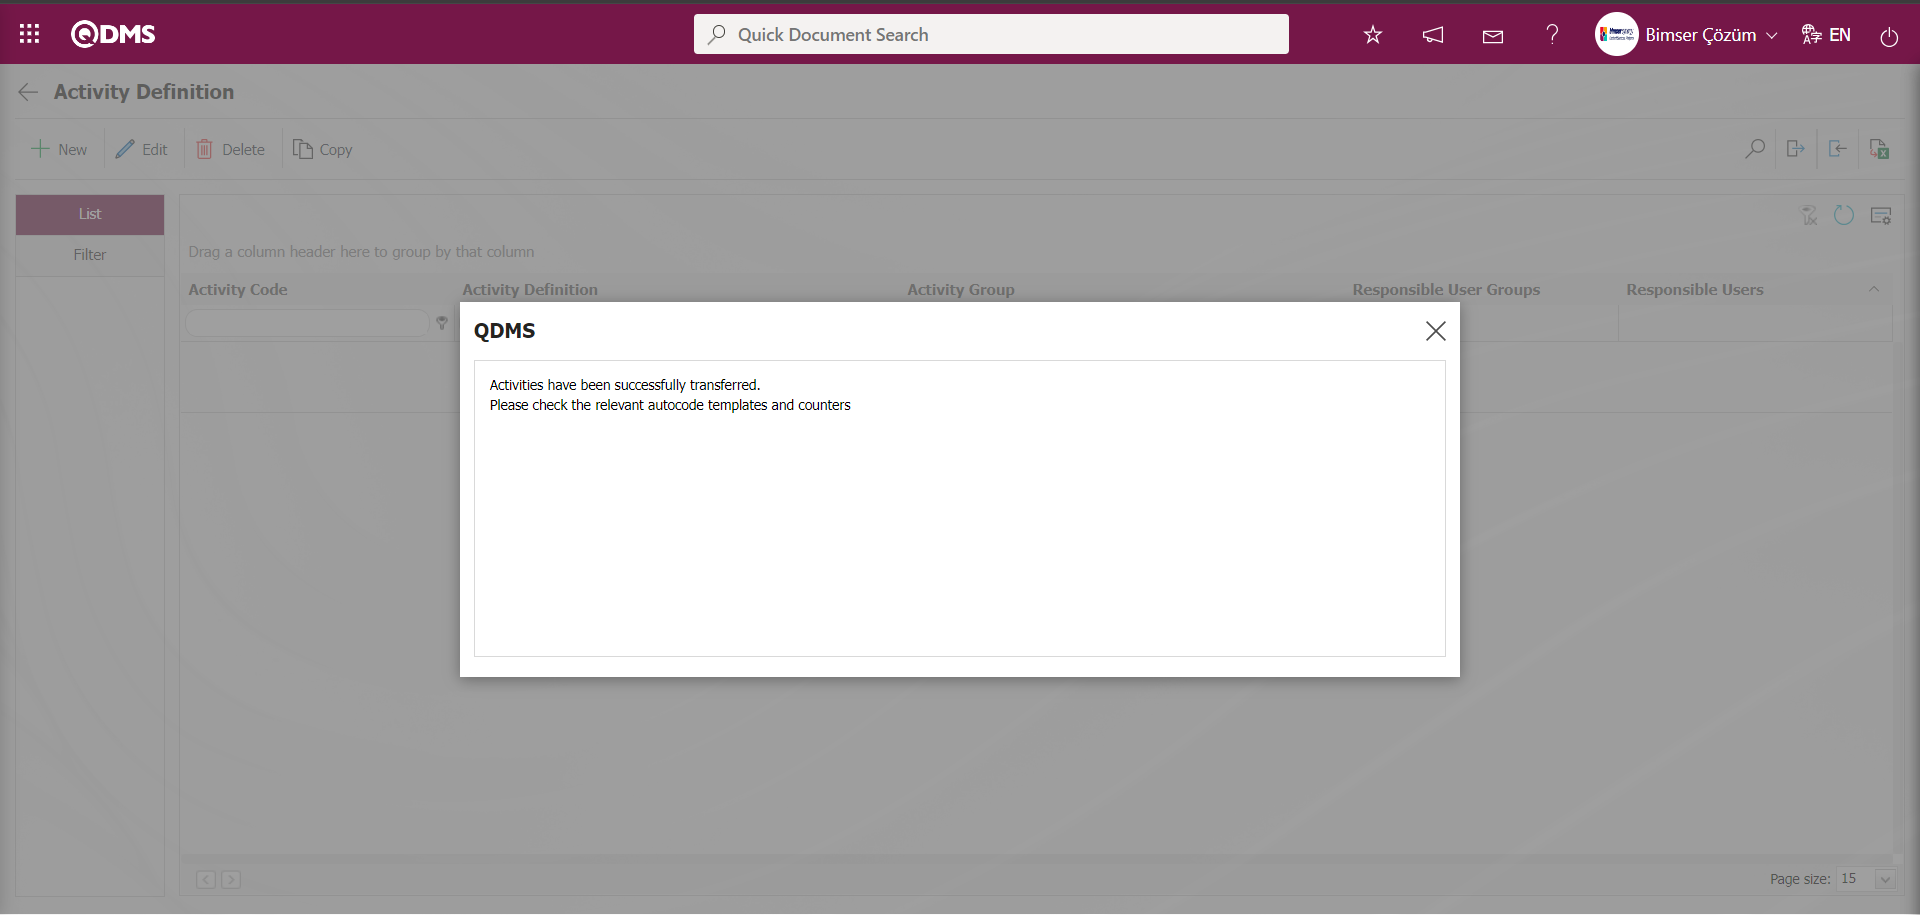
On the Activity Definition screen, the activities with bulk transfer process are displayed in the list. By selecting the bulk transfer activities and clicking the button, the autocode template and counters are checked.
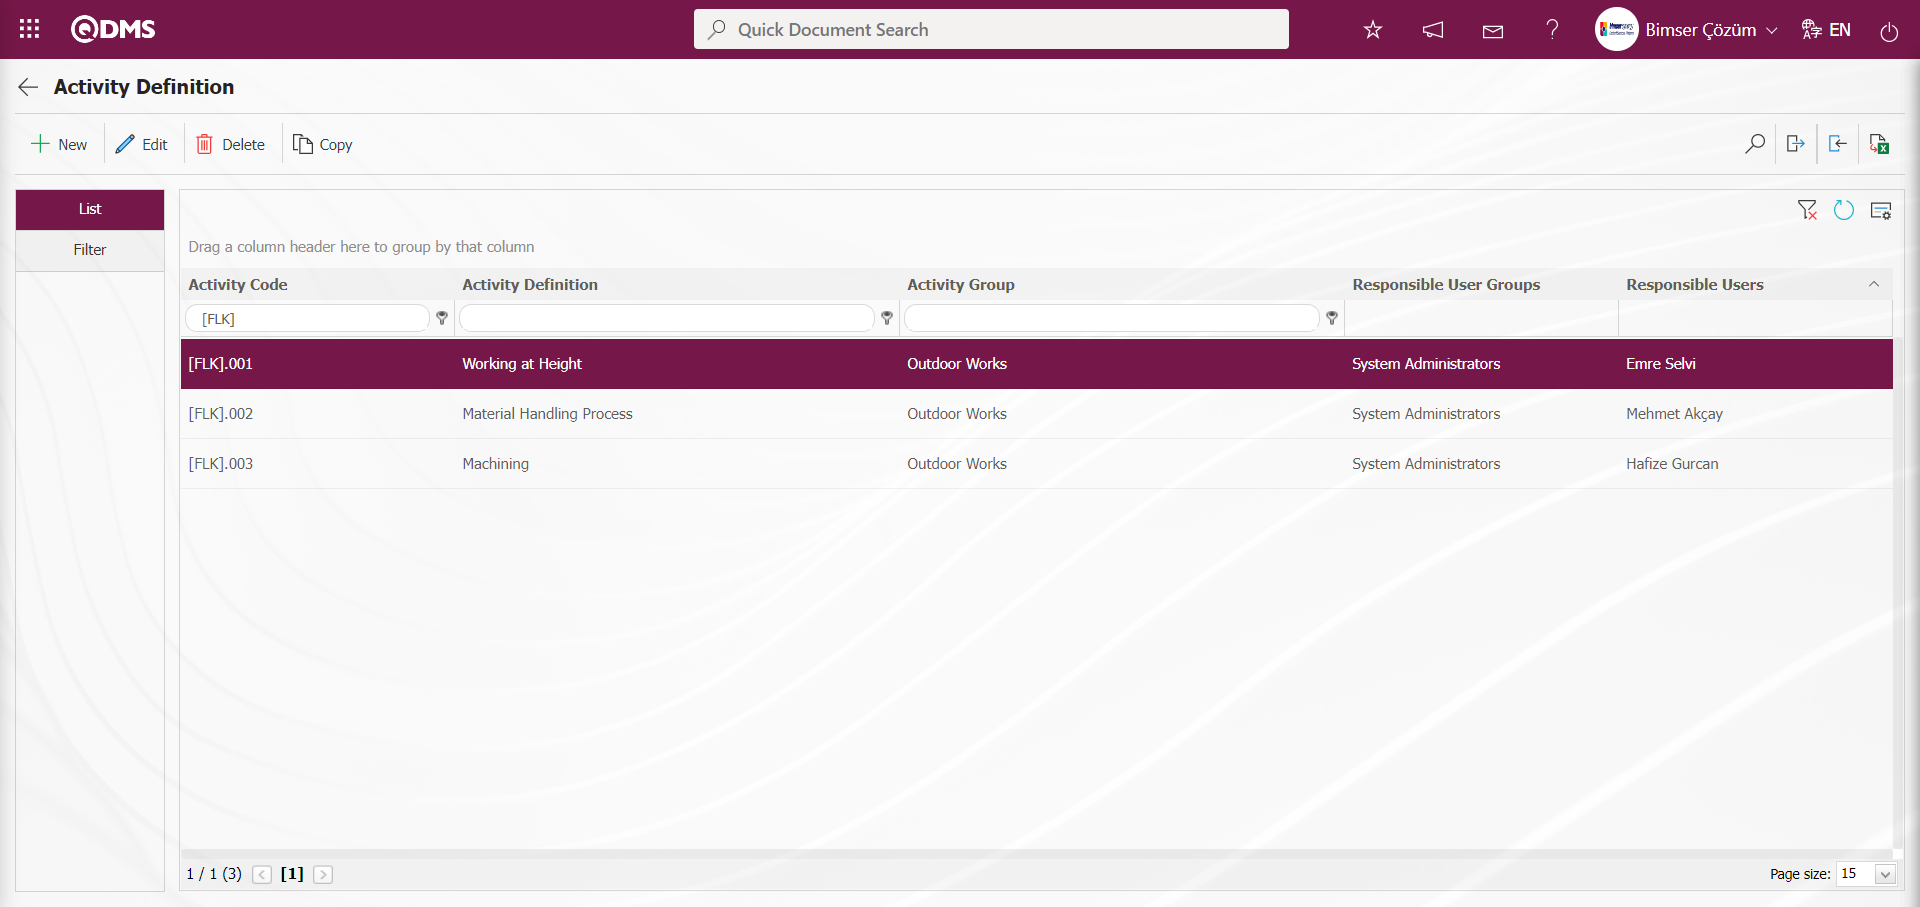
To define a new activity on the Activity Definition screen, the Activity Definition screen is opened by clicking the button in the upper left corner of the screen.
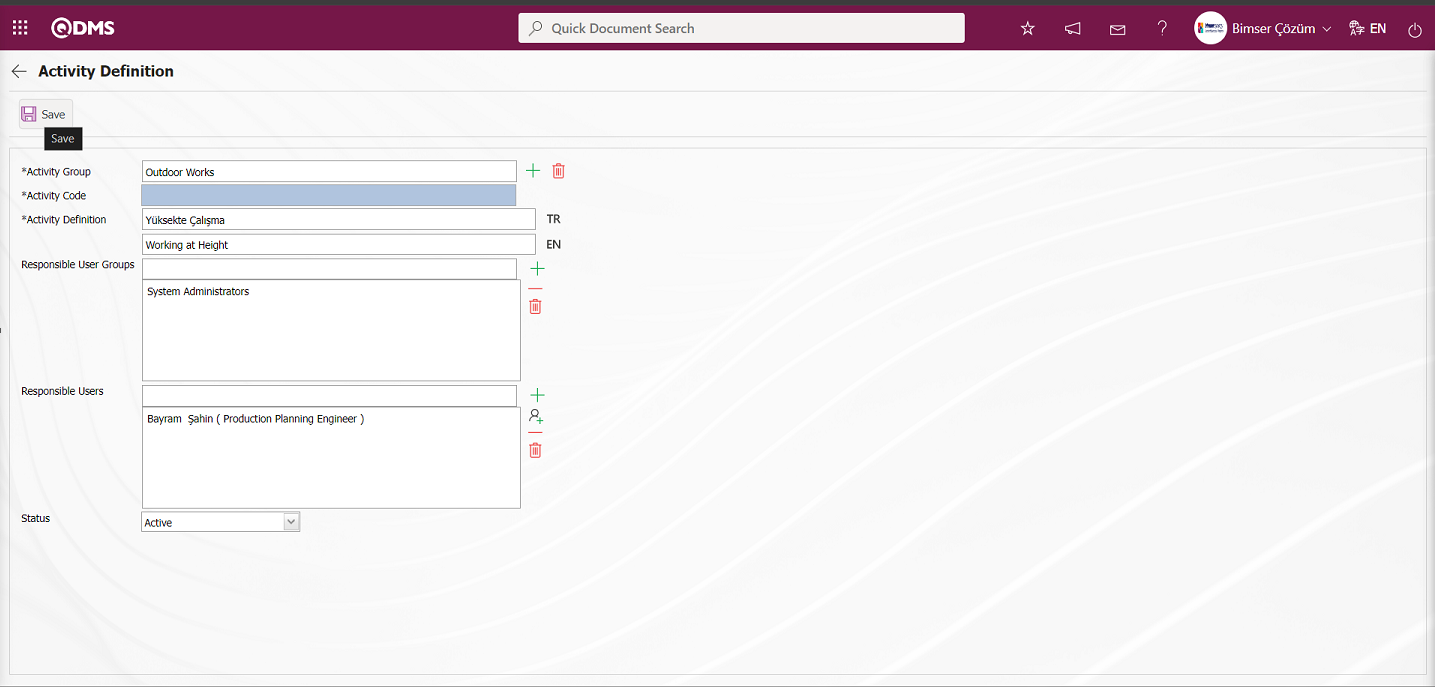
Define the relevant fields on the screen that opens:
Activity Group: In the Activity Definition screen, the activity group to which the activity definition is connected is selected in the list of activity groups defined from the system.
Activity Code: This is the mandatory field where the activity code information is defined on the Activity Definition screen. It should be defined without using characters such as spaces and Turkish characters, so that it is not the same as previously defined fields. The system automatically assigns the code according to the code template defined in the Activity Group Definition menu. In order for this automatic code assignment process to take place, an activity group selection process must be performed in the Activity Group field. The system automatically assigns the activity information code according to the automatic code template and counter value defined in this activity group.
Activity Definition: This is the mandatory field where the definition information is defined on the Activity Definition screen.
Responsible User Groups: In the Activity Definition screen, responsible user groups can be selected from the user group list defined in the system. With the user groups to be selected in the Responsible User Groups field, you can authorize certain user responsibles in certain Activity definitions.
Responsible Users: It is the field where the responsible users of the responsible activity group on the Activity Definition screen are selected from the list of personnel defined in the system.
Status: It is the field where the “Active” option is selected in the “Active” and “Inactive” options of the status information on the Activity Definition screen. Activity definitions whose status is inactive are a sign that they are no longer used in the system.
On the screen that opens, enter the Activity group, Activity code and definition to which the Activity group is connected. If only certain user groups are required to perform transactions with these activities, user groups are selected and added from the responsible user groups section. Active / passive status is determined from the Status menu. After entering the relevant information in the required fields, the Activity definition registration process is performed by clicking the  button in the upper left corner of the screen.
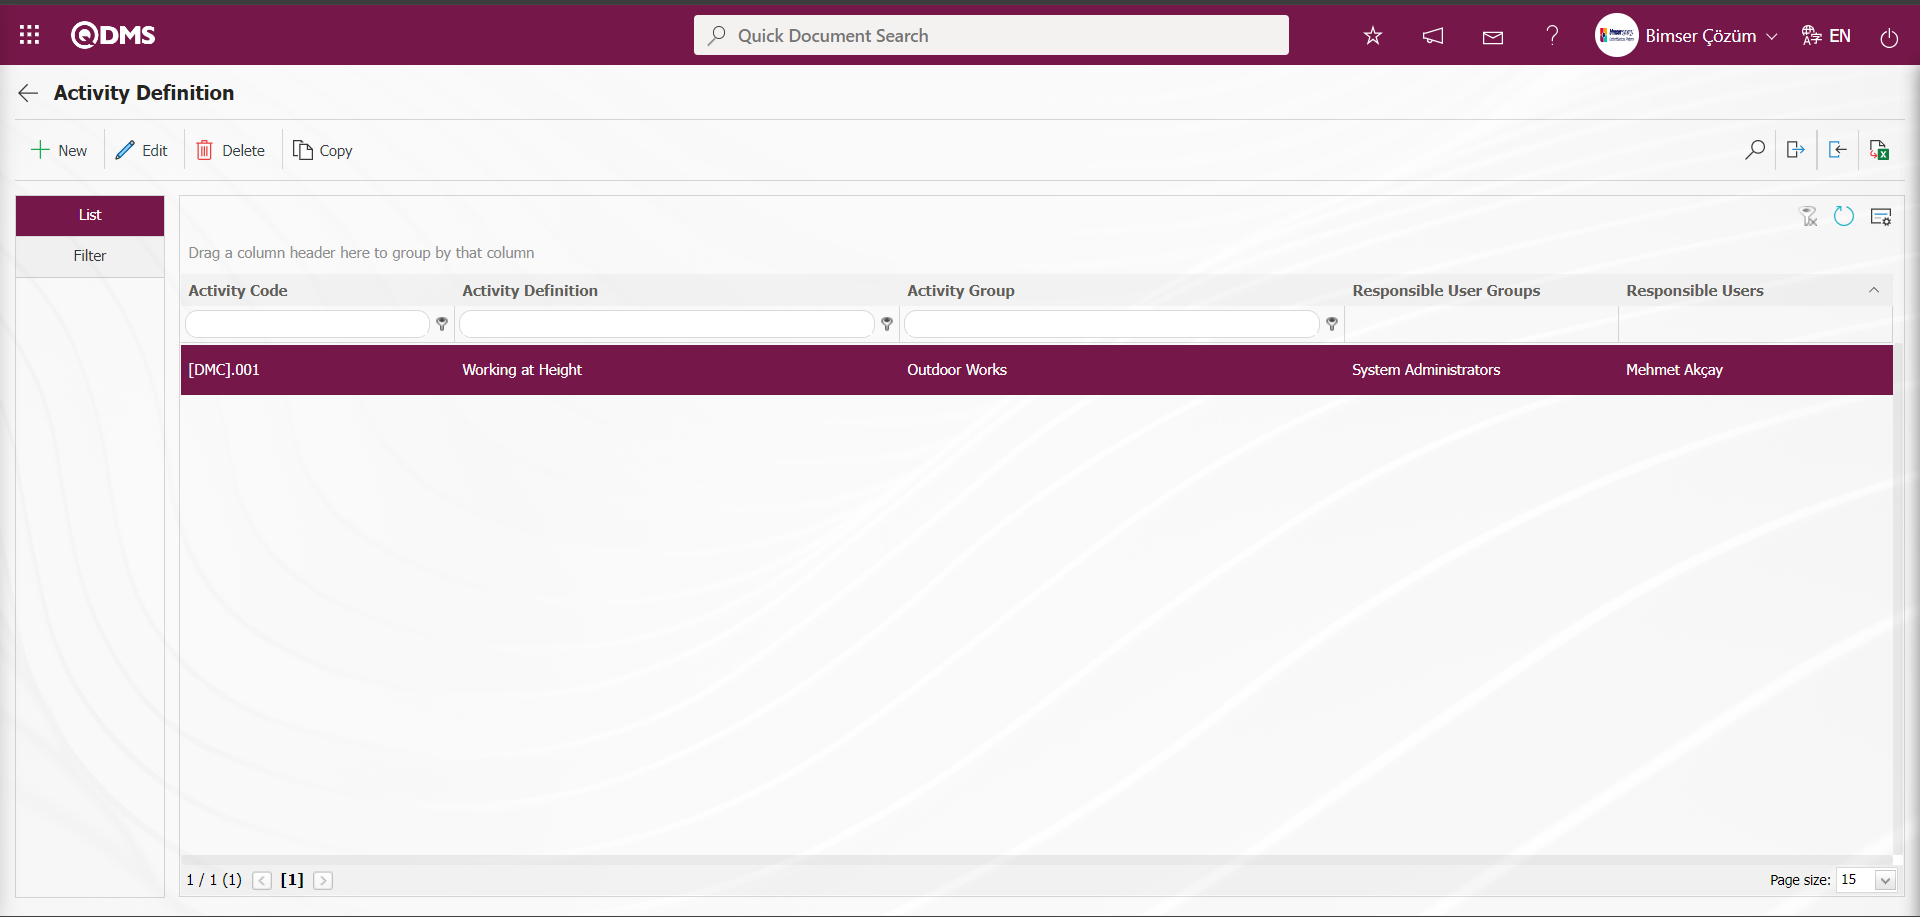
6.2.3.Risk Assesment Form Definition
Menu Name: Integrated Management System/OHSAS Risk Assessment/ Risk Assesment Form Definition
The last step to be done after the Activity and Activity groups are defined in the OHSAS Risk Assessment Module is to define the forms (RAF) in which the risks will take place. For this, the Risk Assessment Form Definition menu is opened under the OHSAS Risk Assessment Module under the Integrated Management System heading. The purpose of defining RAF is to classify the detailed forms under certain categories (unit, unit, activity group, department, etc.) for risk analysis.
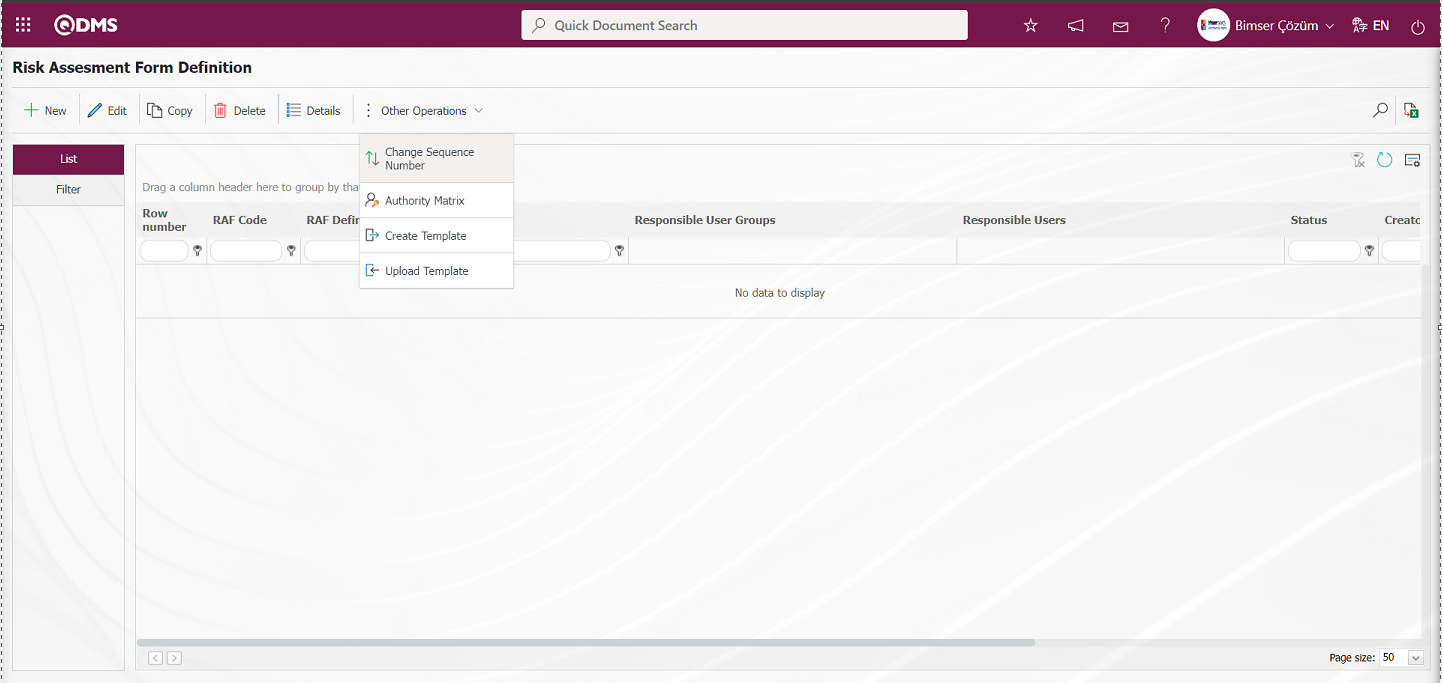
With the help of the buttons on the screen;
 : New RAF (Risk Assessment Form) is defined.
 : The selected RAF information in the list is updated.
 : The RAF information selected in the list is copied.
 : The RAF information selected in the list is deleted.
 : Opens the detail information screen of the RAF selected in the list.
 : Changes the sequence number of the RAF information selected in the list.
While RAF is selected in the list tab on the Risk Assessment Form Definition screen, click the button.
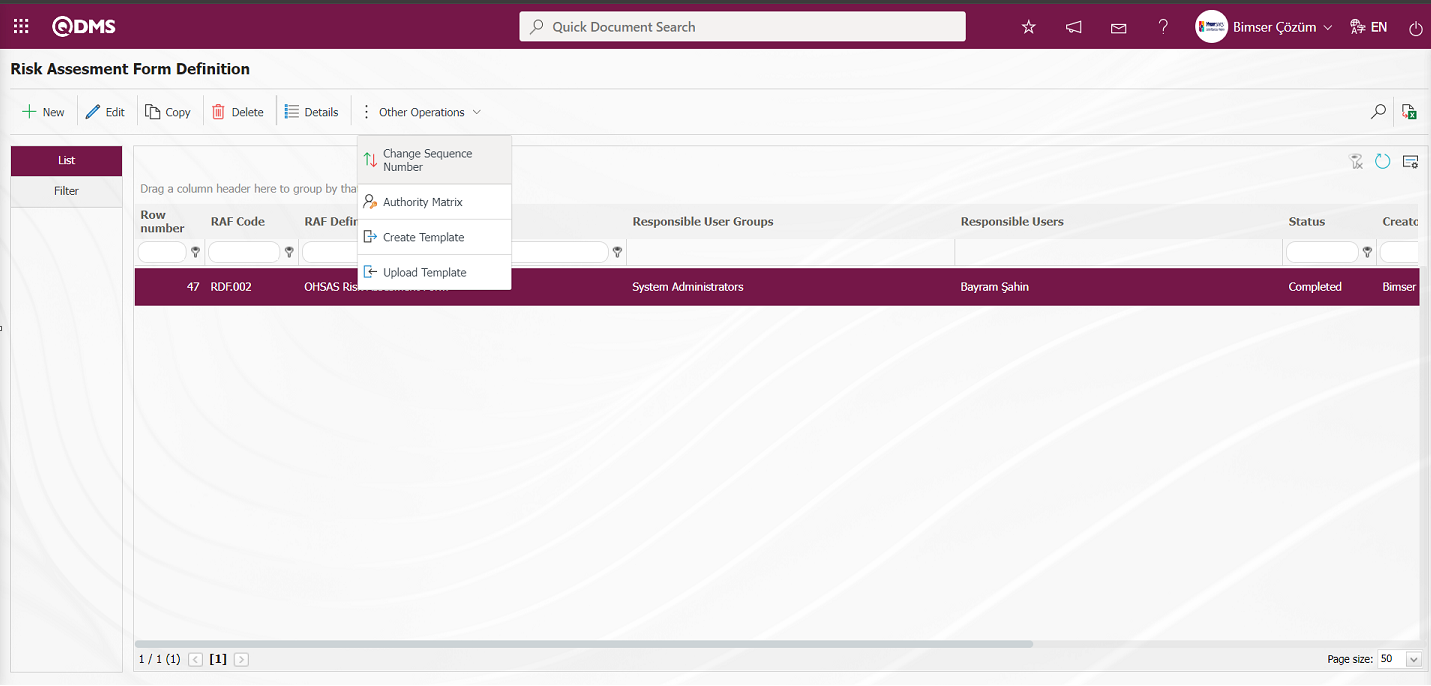
In the Change Sequence Number screen, the New Sequence Number information is determined and the sequence number is changed by clicking the  button.
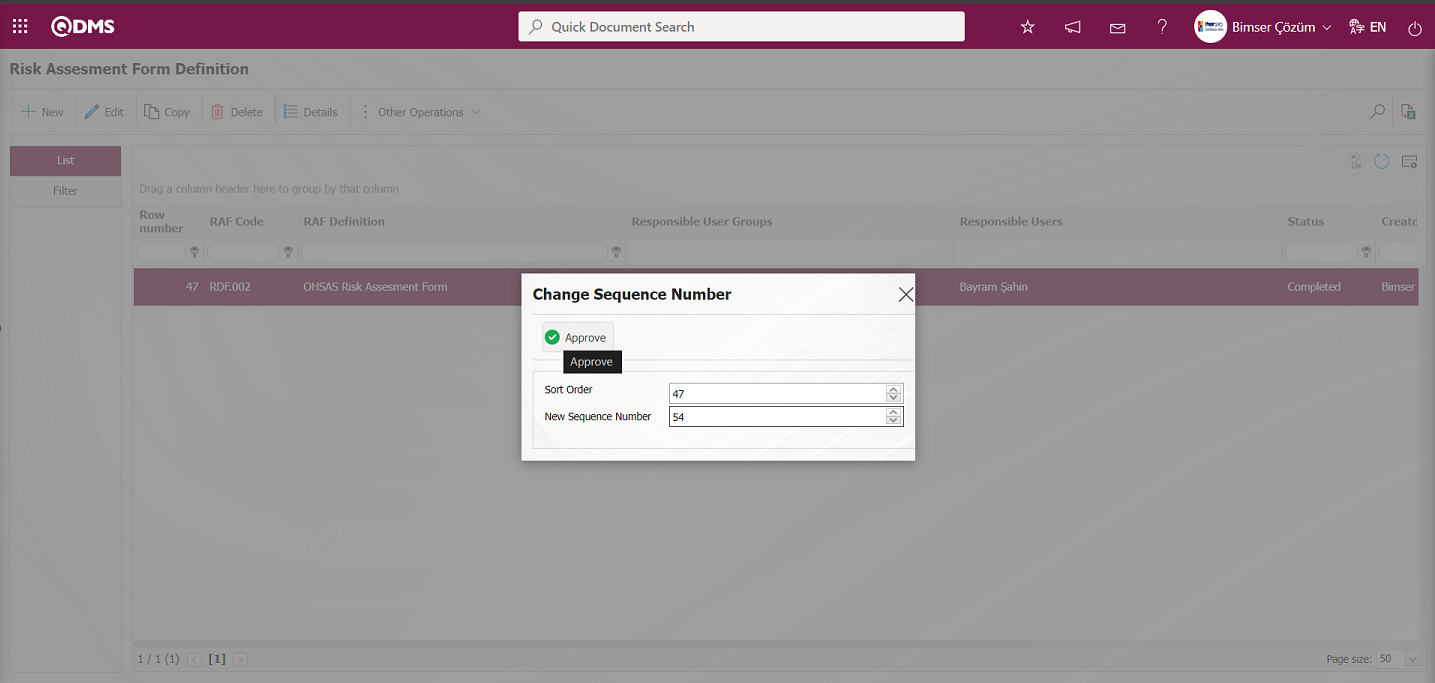
On the Risk Assessment Form Definition screen, it is seen that the sequence number of the form selected in the list is changed after the sequence number change operation.
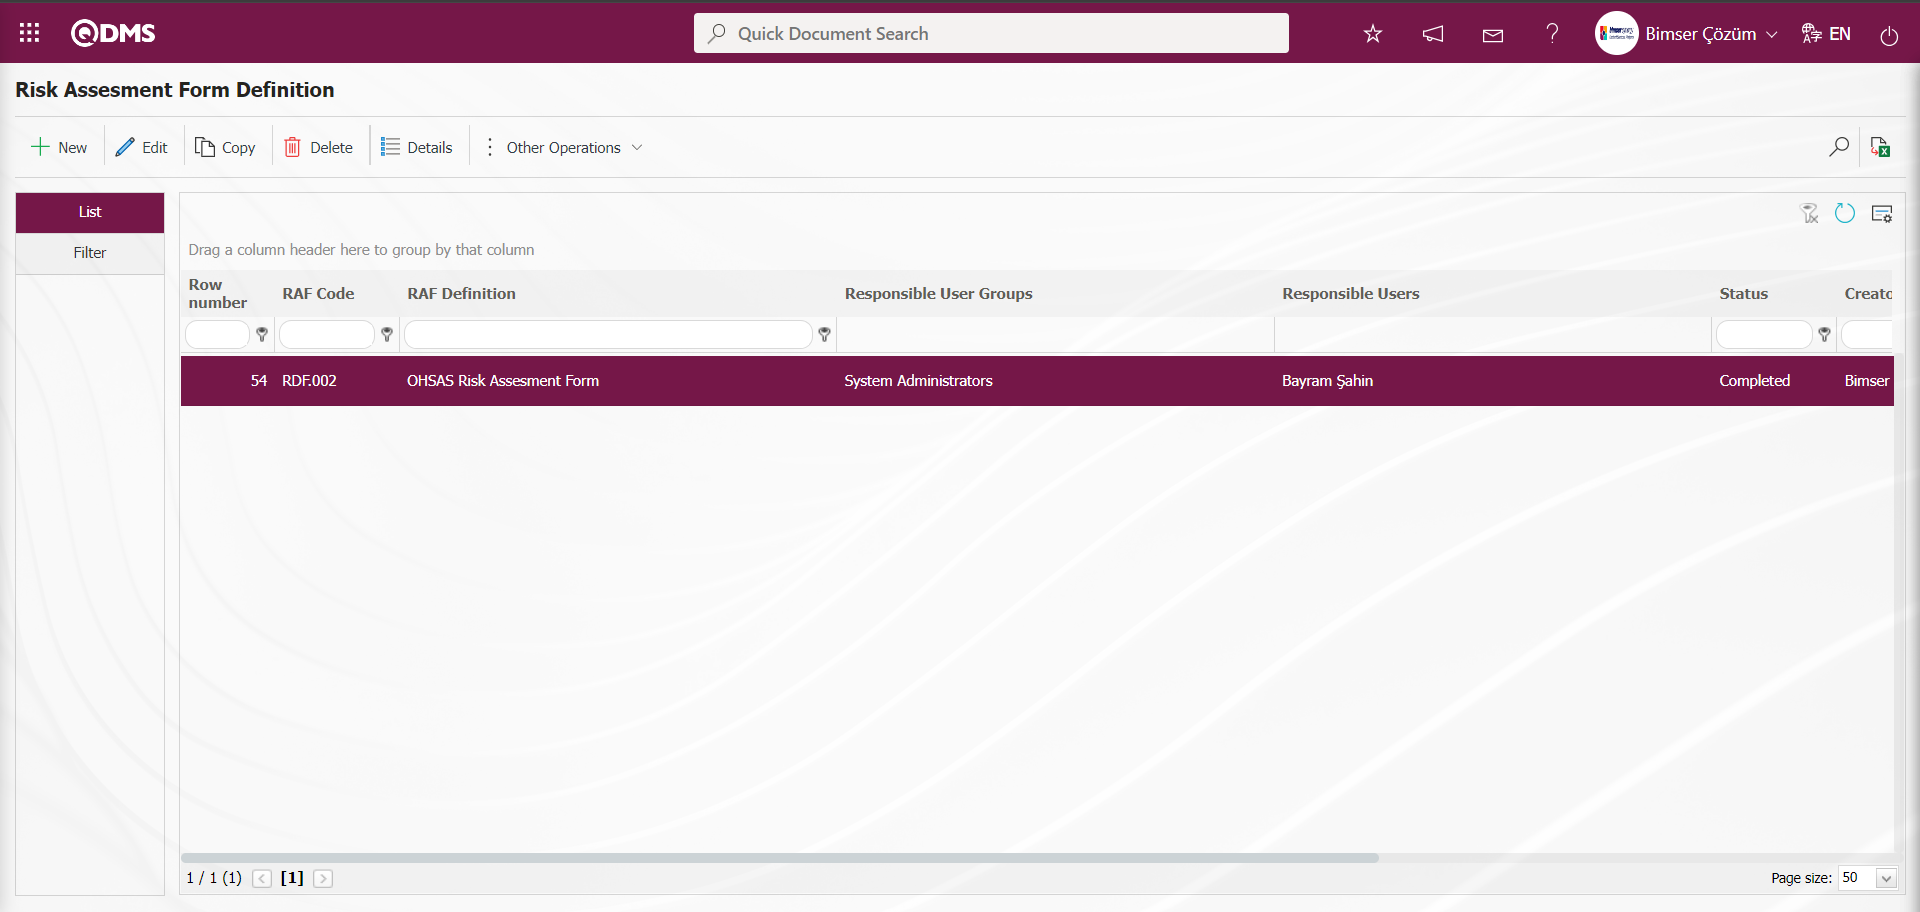
 : It is the area where it is determined which role or user group will have the Authority Matrix to see, update, etc. records in the defined risk forms.
the ![A close up of a sign
Description automatically generated]ref83 button is clicked on the Risk Assessment Form Definition screen.
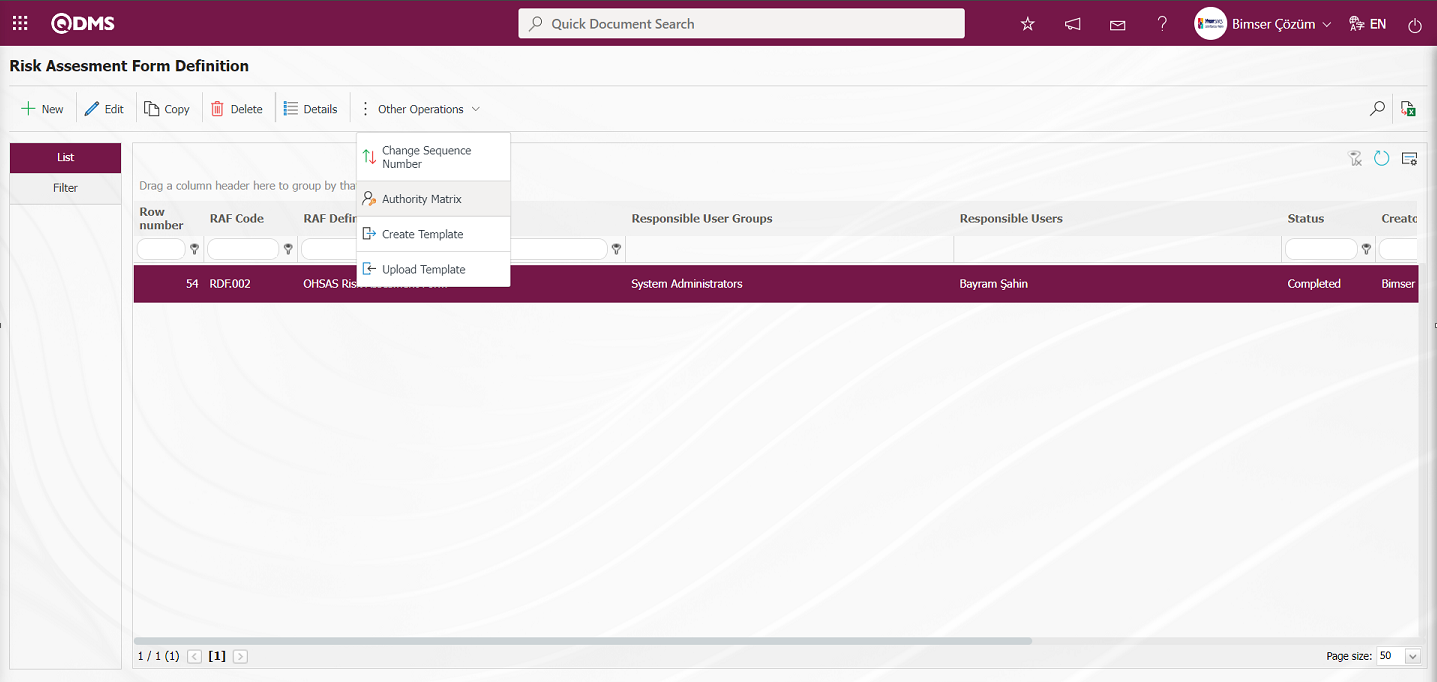
The Authority Matrix screen opens.
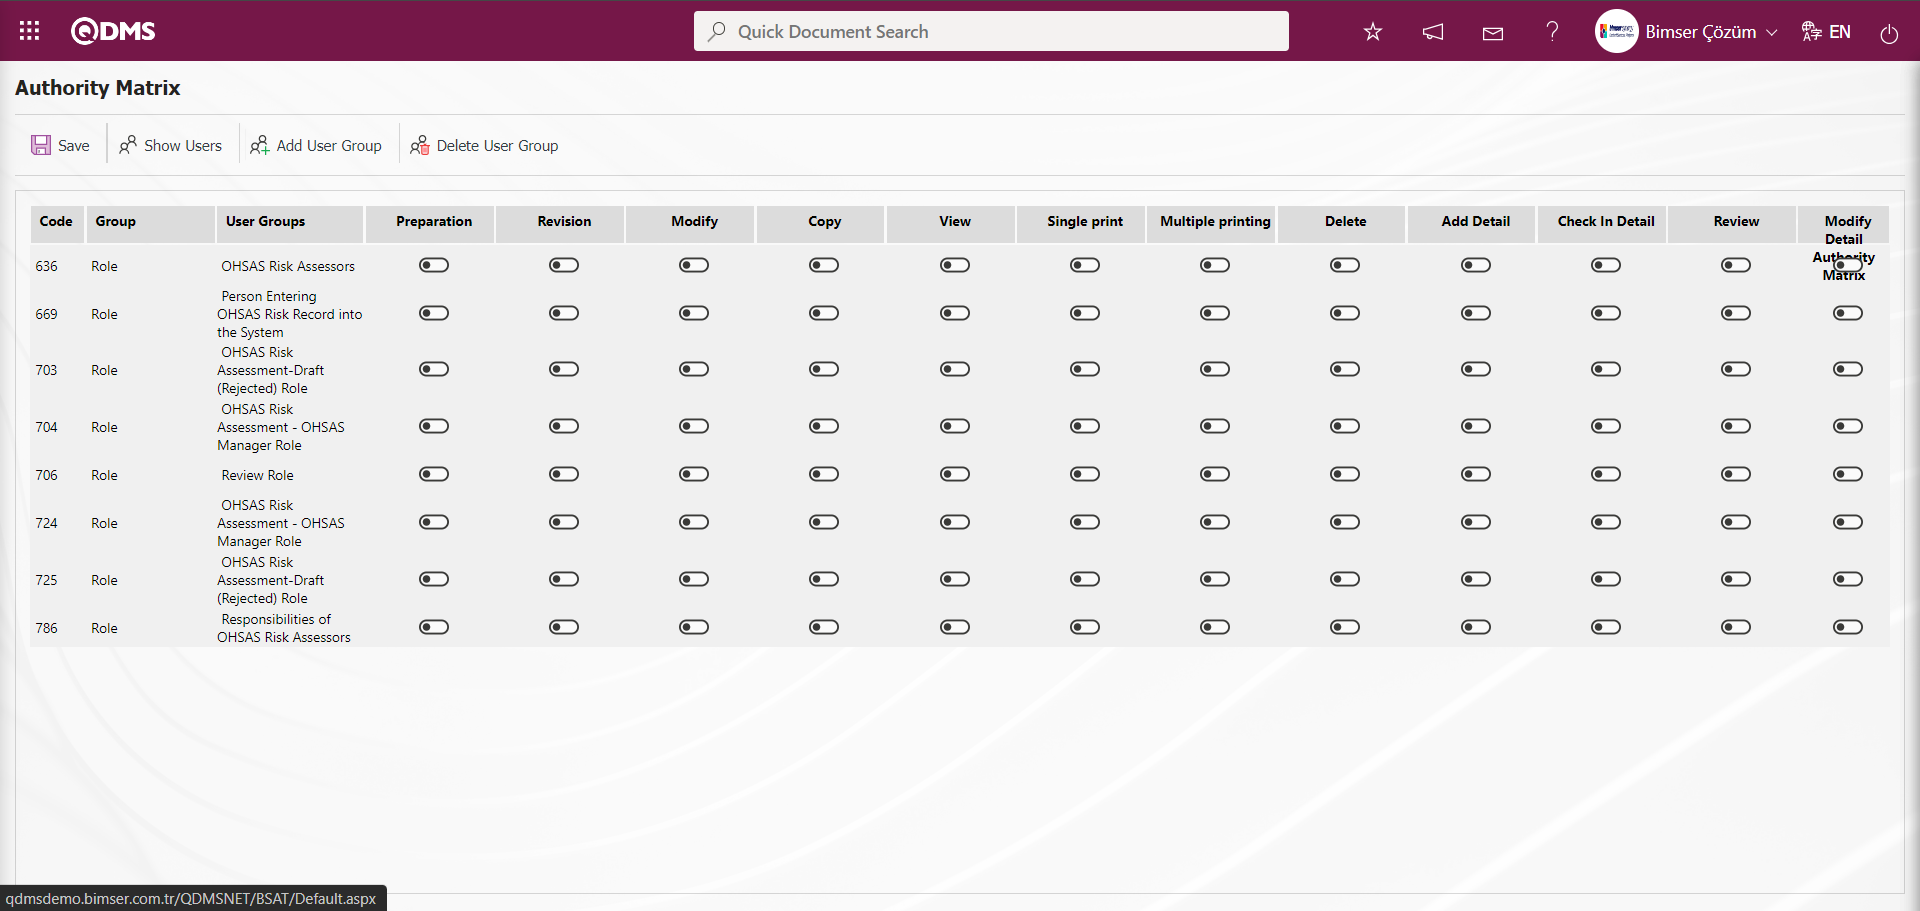
With the help of the buttons on the screen;
 : Registration is made on the Risk Authority Matrix screen
 : On the Risk Authority Matrix screen, the list of personnel in the selected User group in the authorized list is displayed.
 : On the Risk Authority Matrix screen, the user group desired to be authorized is added to the user group list defined in the system.
 : On the Risk Authority Matrix screen, delete the selected user group in the authorized list.
On the Risk Authority Matrix screen, the roles are defined in the System Infrastructure Definitions/BSID/Configuration Settings/Role Definition menu. The relevant authorization check box corresponding to that role is checked and the registration process is performed with the button.
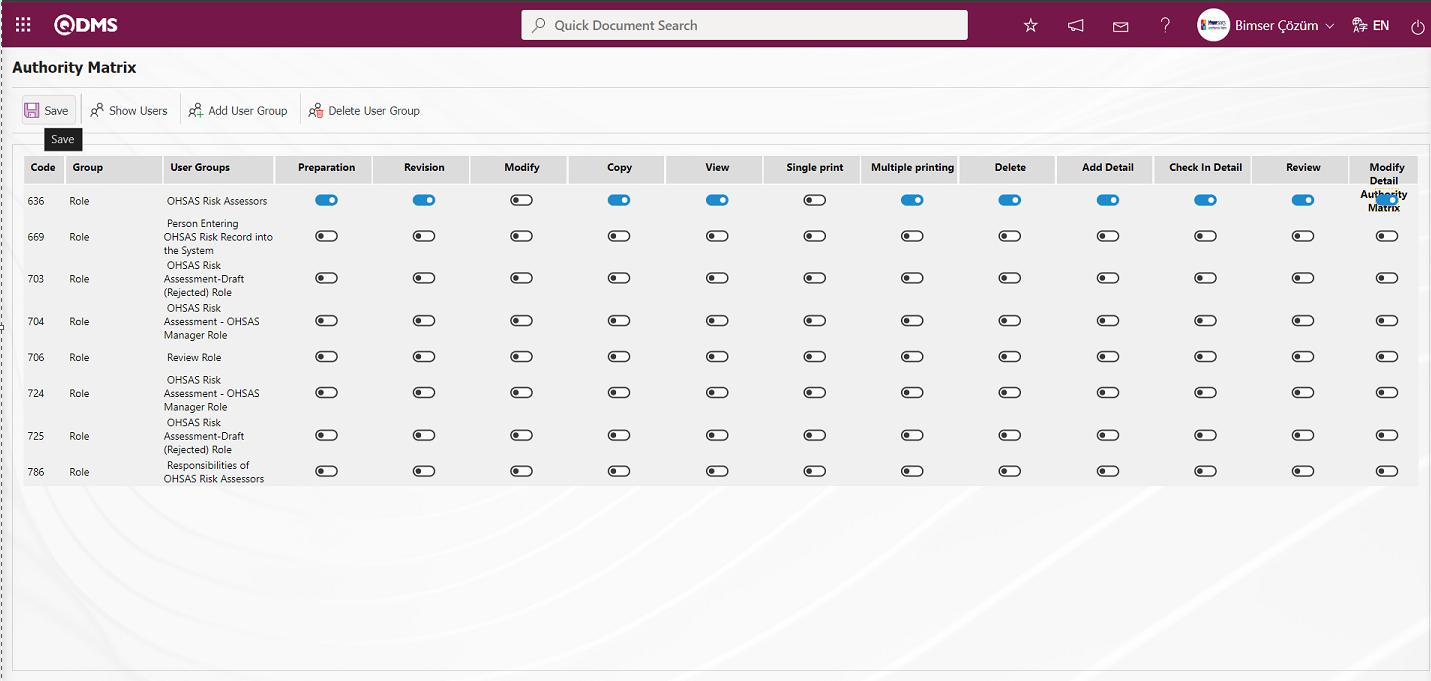
Click the 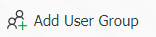 button to authorize a user group on the Risk Authority Matrix screen.
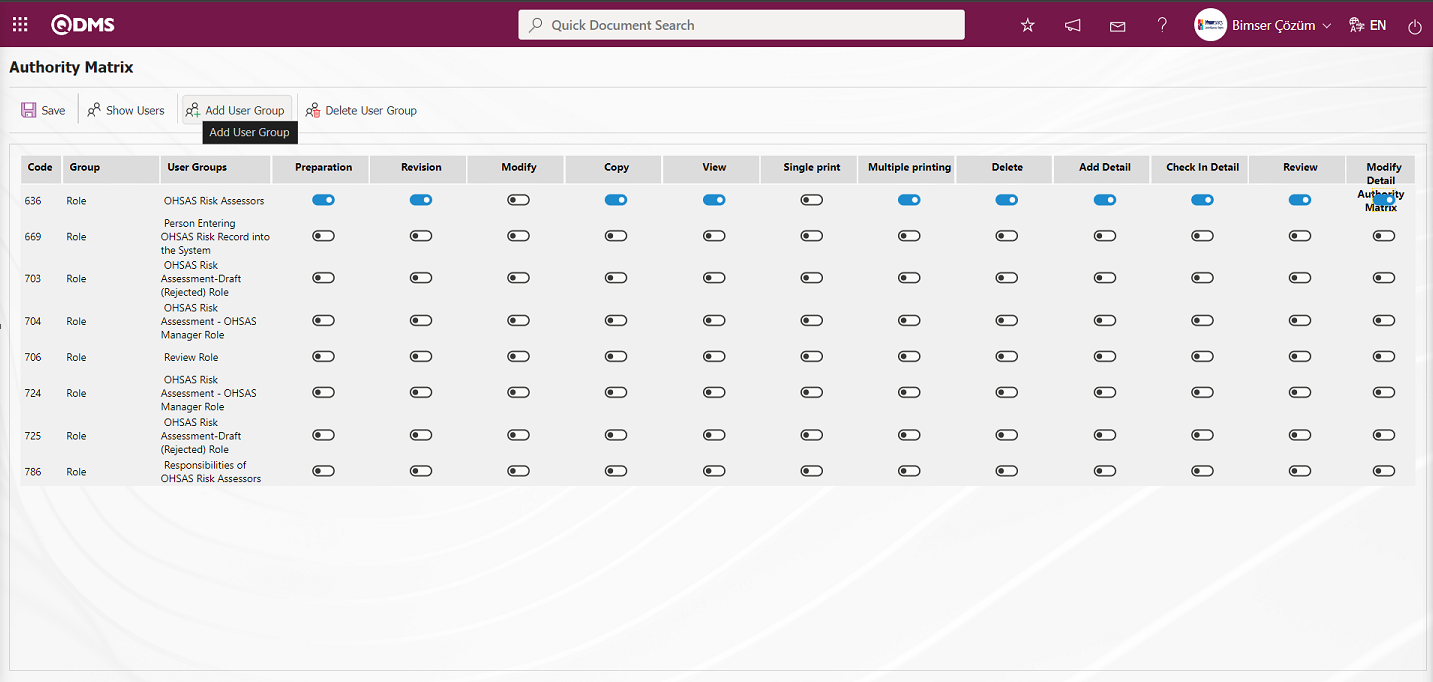
Select the user group you want to authorize in the user group list defined in the system and click the  button on the upper left corner of the screen.
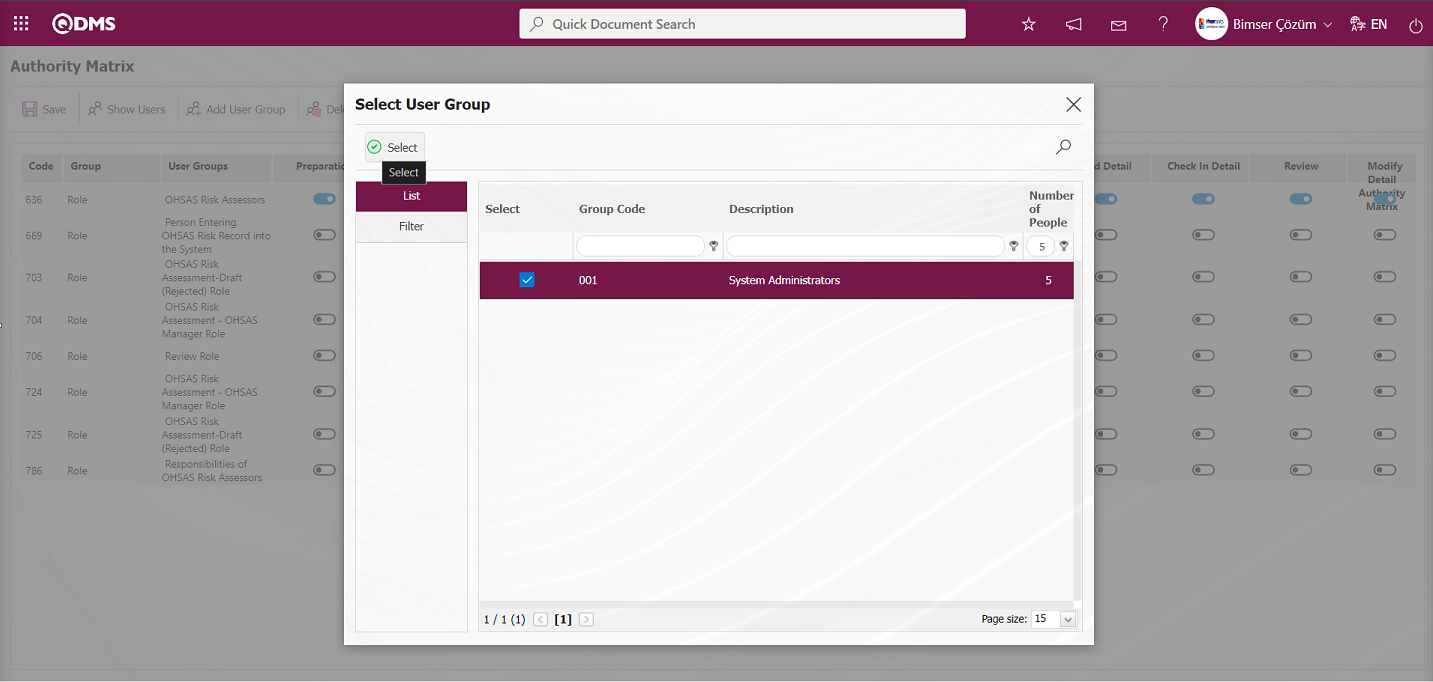
On the Risk Authority Matrix screen, after the authorization check boxes for authorization for OHSAS Risk Assessment Module operations for the user group are marked, the user group-based authorization registration is made by clicking the  button on the upper left corner of the screen. For example: The relevant check box such as Preparation, Revision and Copy authorizations are marked.
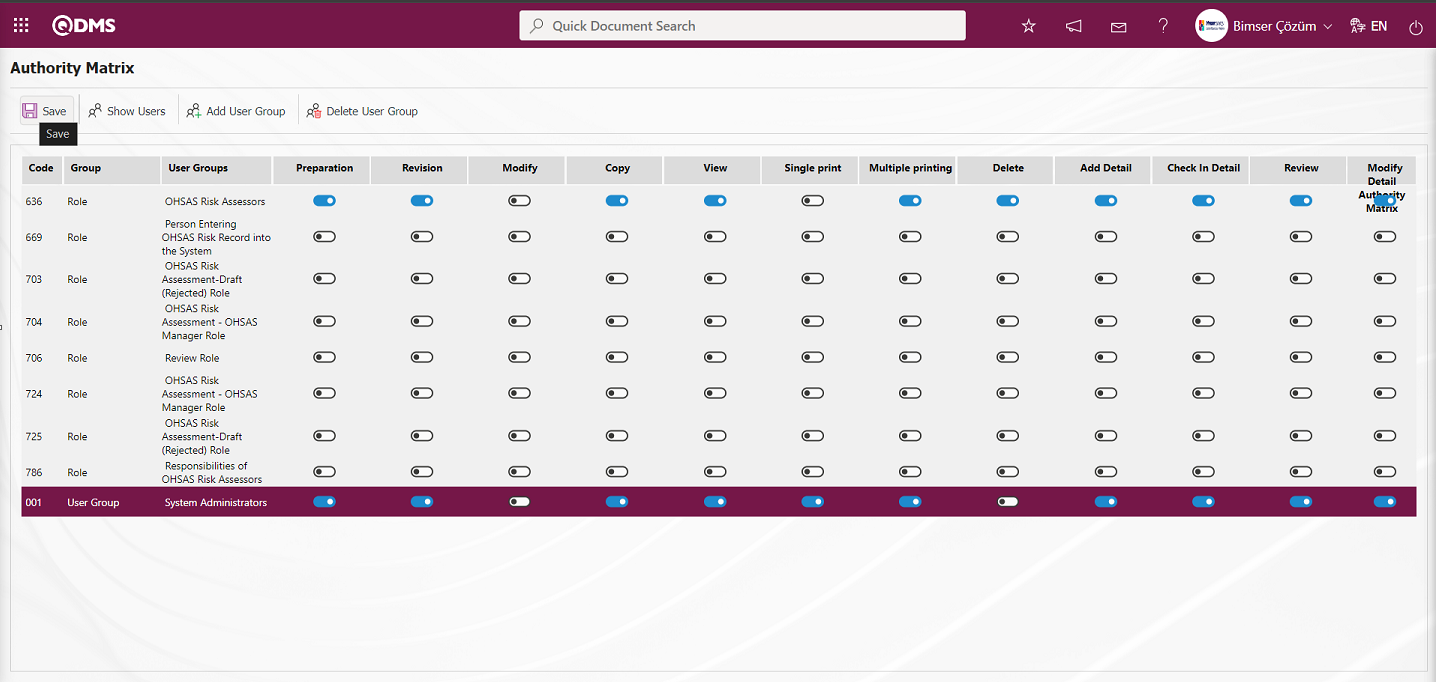
If it is desired to remove the user group from the authority matrix by removing the authorizations from the authorized user group, the  button is used. On the Risk Authority Matrix screen, click the
  button while the authorized user group is selected in the list.
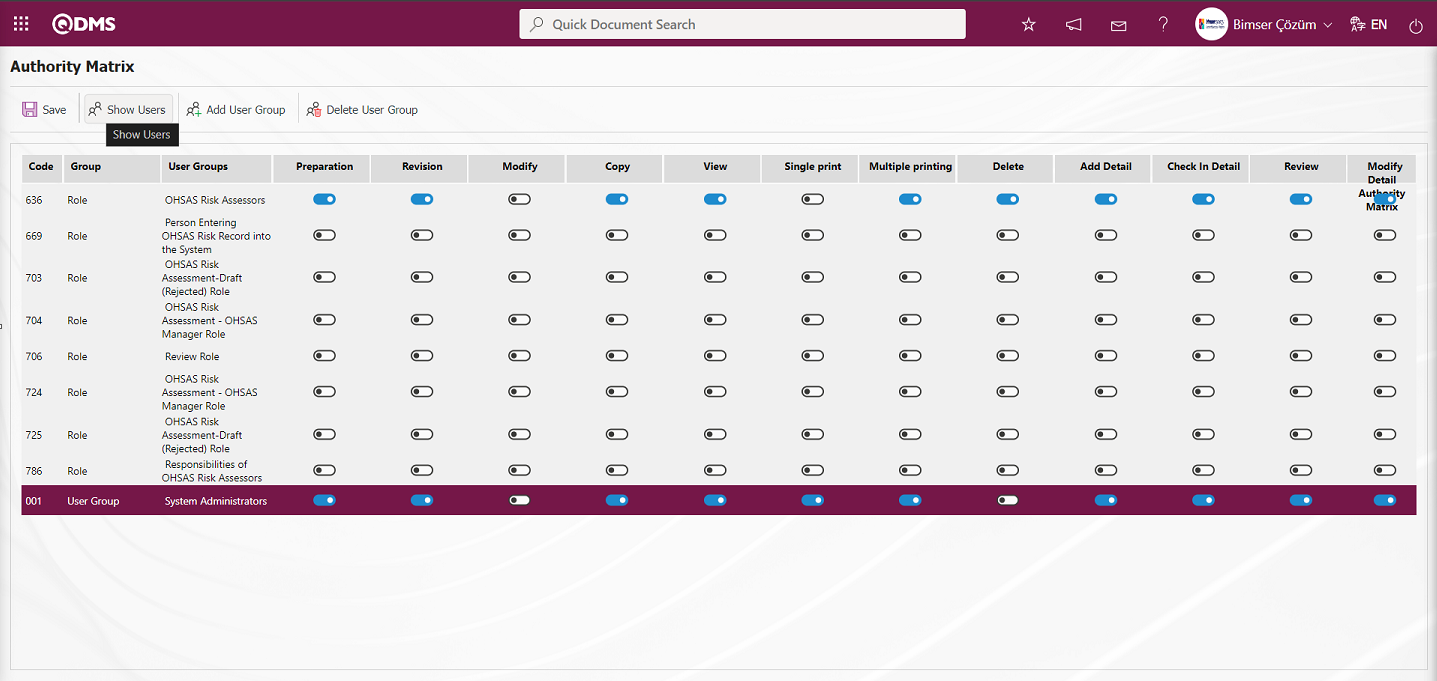
The list of personnel in the user group is displayed.
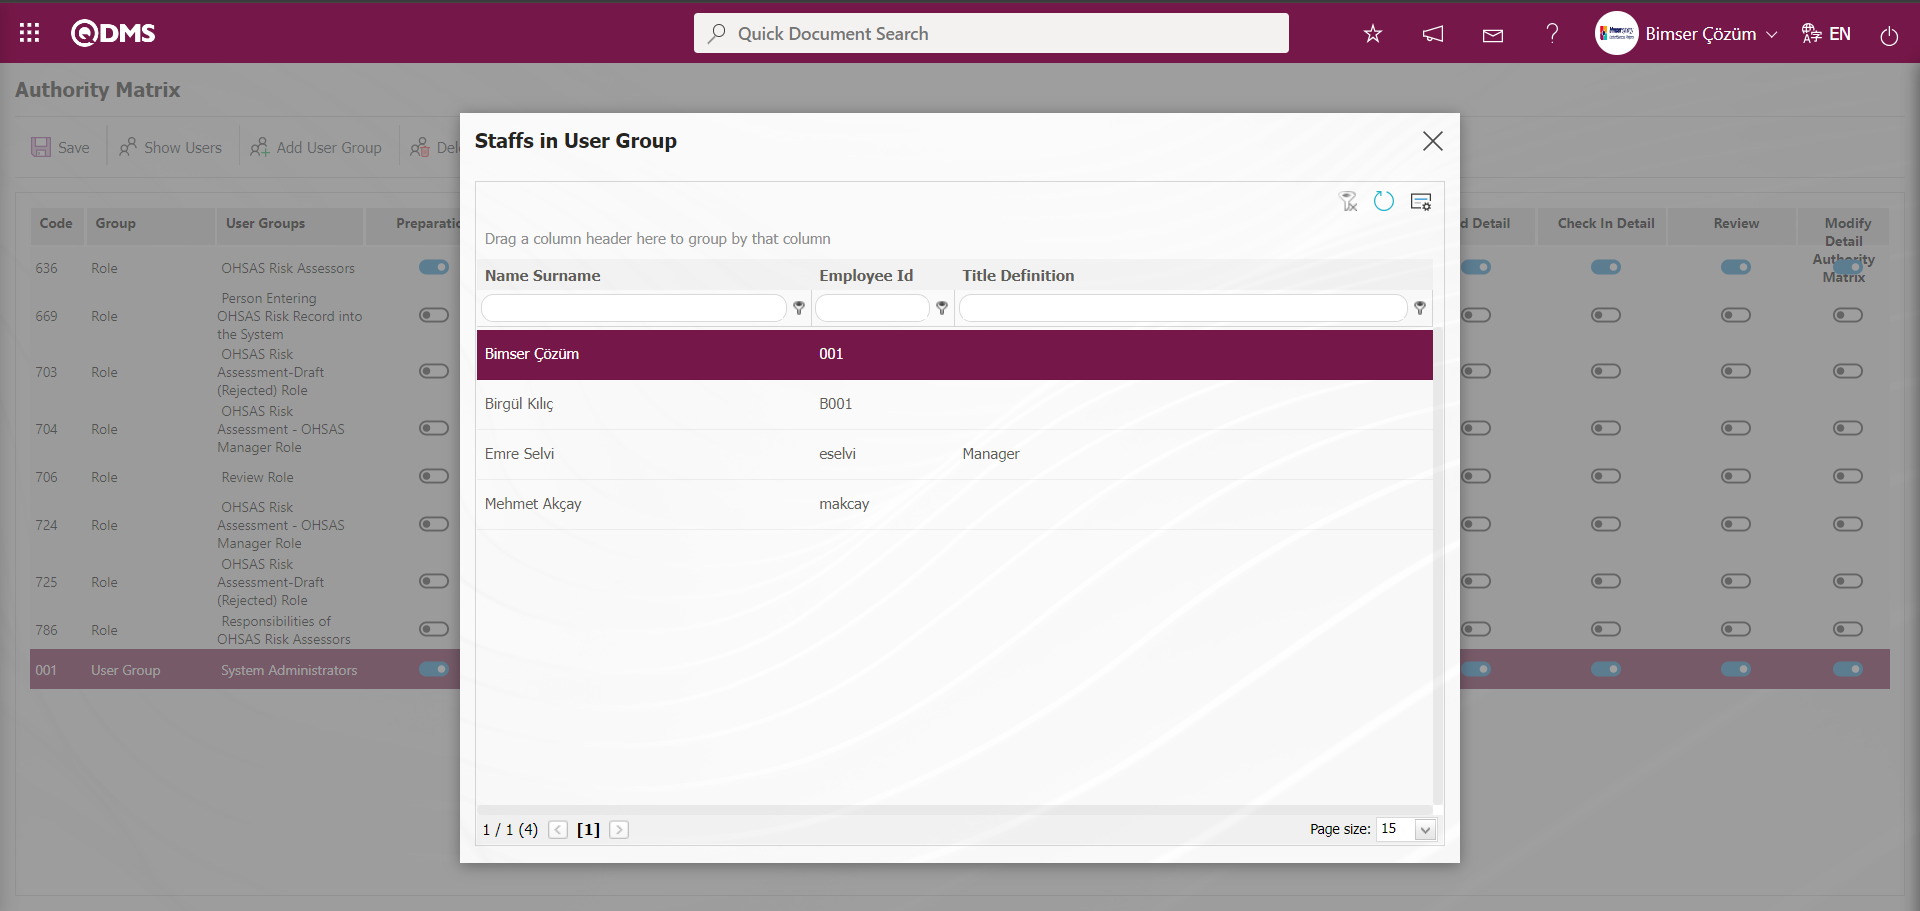
 : Used to create a template. The transfer template is downloaded to the user's computer with this button and the relevant fields are filled.
 : It is used to upload the template. The template downloaded to the user's computer and filled in is uploaded to the system with this button.
Note: After the adaptation works, existing risk assessment forms (RAFs) can be transferred to the system in bulk. For this reason, if it is decided that the system is ready for use after the field definition etc. processes are completed, the  and
and  button appears on the Risk Assessment Form Definition screen of the users who are designated as administrators in this module in the System Infrastructure Definitions /BSID / Configuration Settings / Manager Definition menu. The transfer template is created automatically according to the fields defined in the system. With the button, the system downloads the created template to the computer. When the relevant template is filled in by users and uploaded to the system with the button, Risk Assessment Forms (RAFs) are transferred to the system.
Risk Assessment Form Batch Transfer Process;
On the Risk Assessment Form Definition screen, the Risk Assessment Form Definition Template is downloaded to the computer with the button.
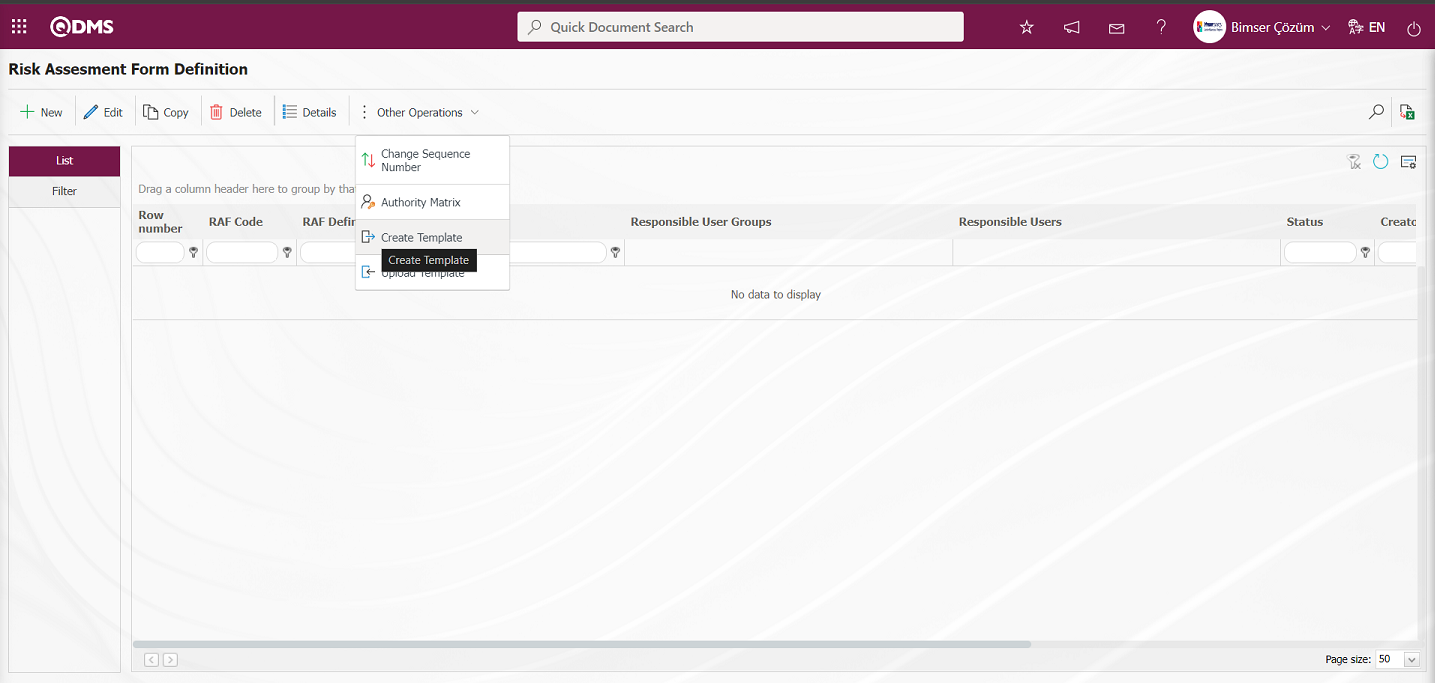
The relevant fields in the Risk Assessment Form Definition template are saved to the computer by typing the relevant information.
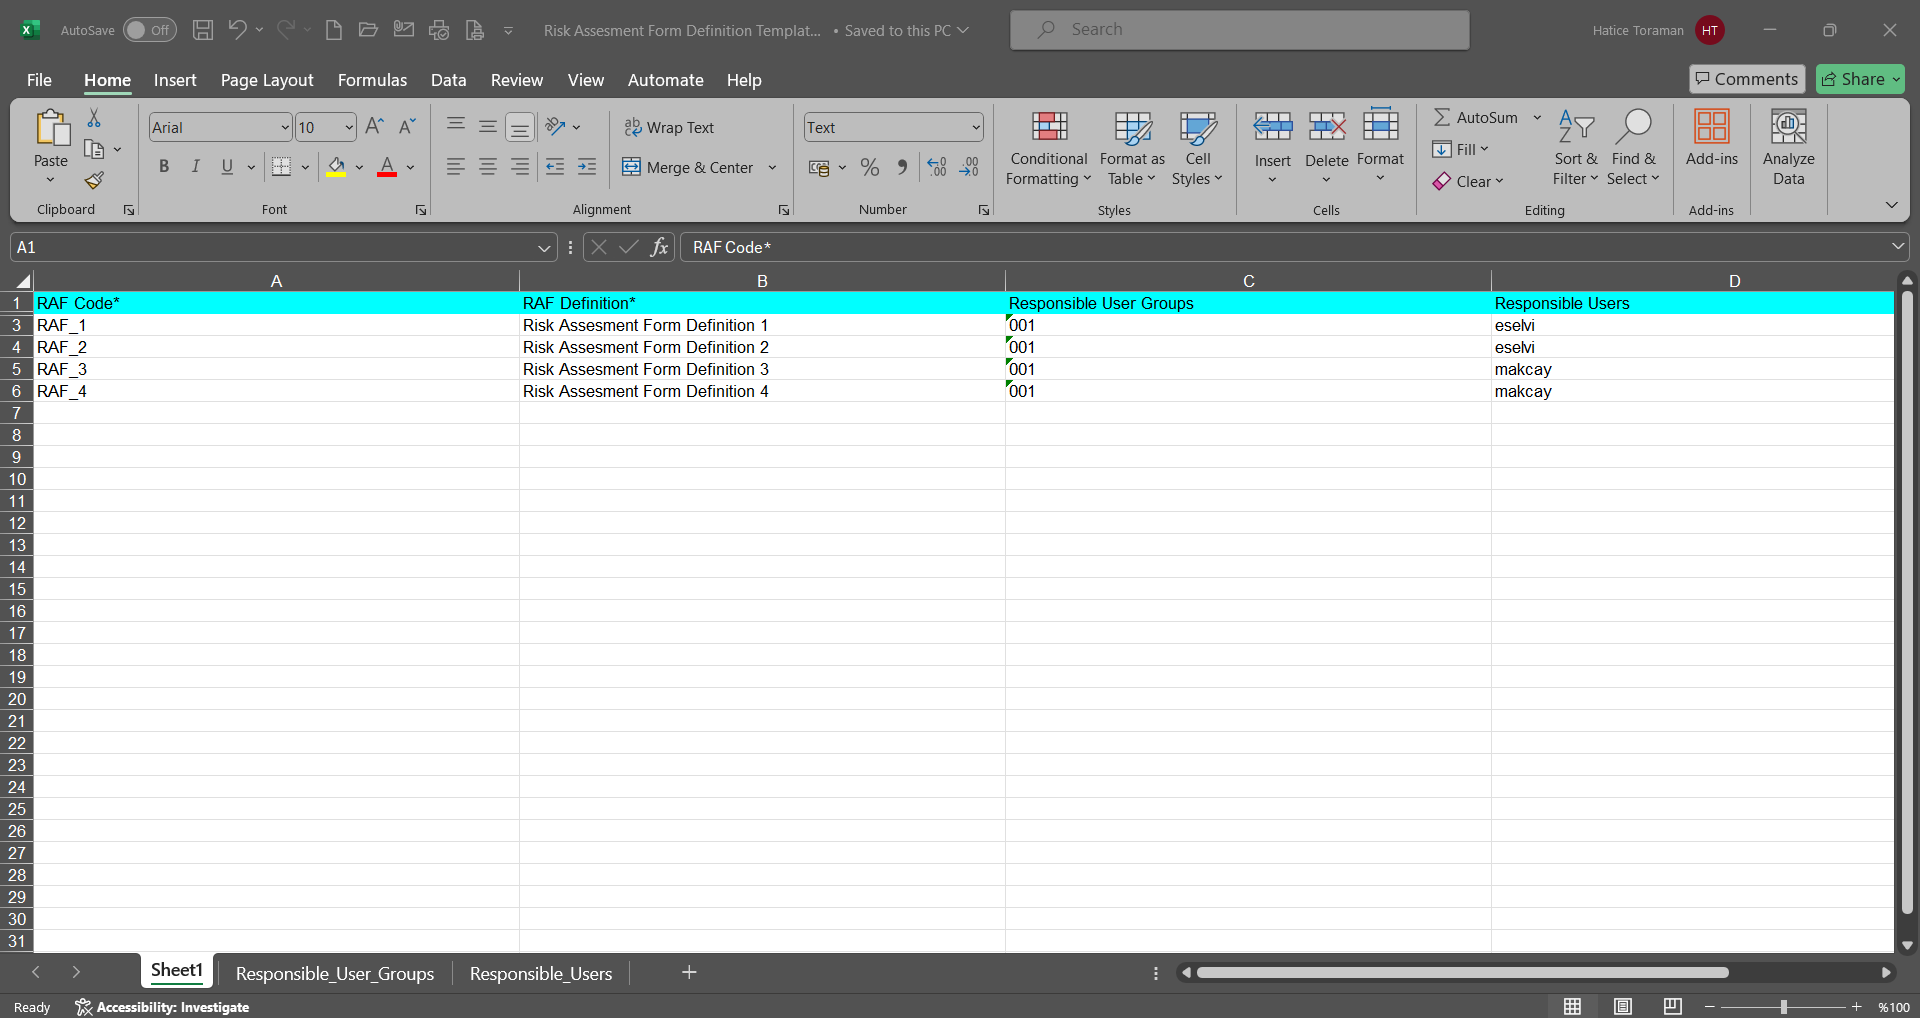
Click the button on the Risk Assessment Form Definition screen.
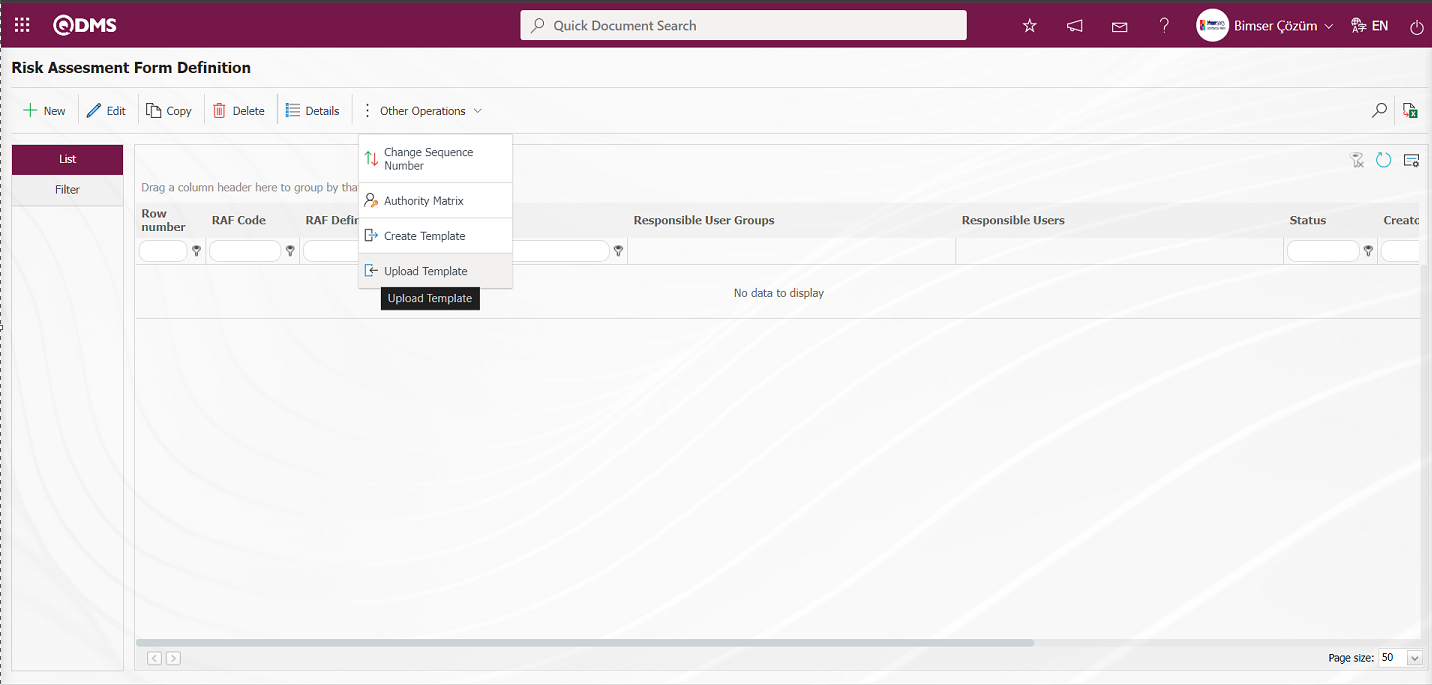
Click the “Browse” button on the Upload File screen.

On the screen that opens, the filled Risk Assessment Form Definition template is selected.
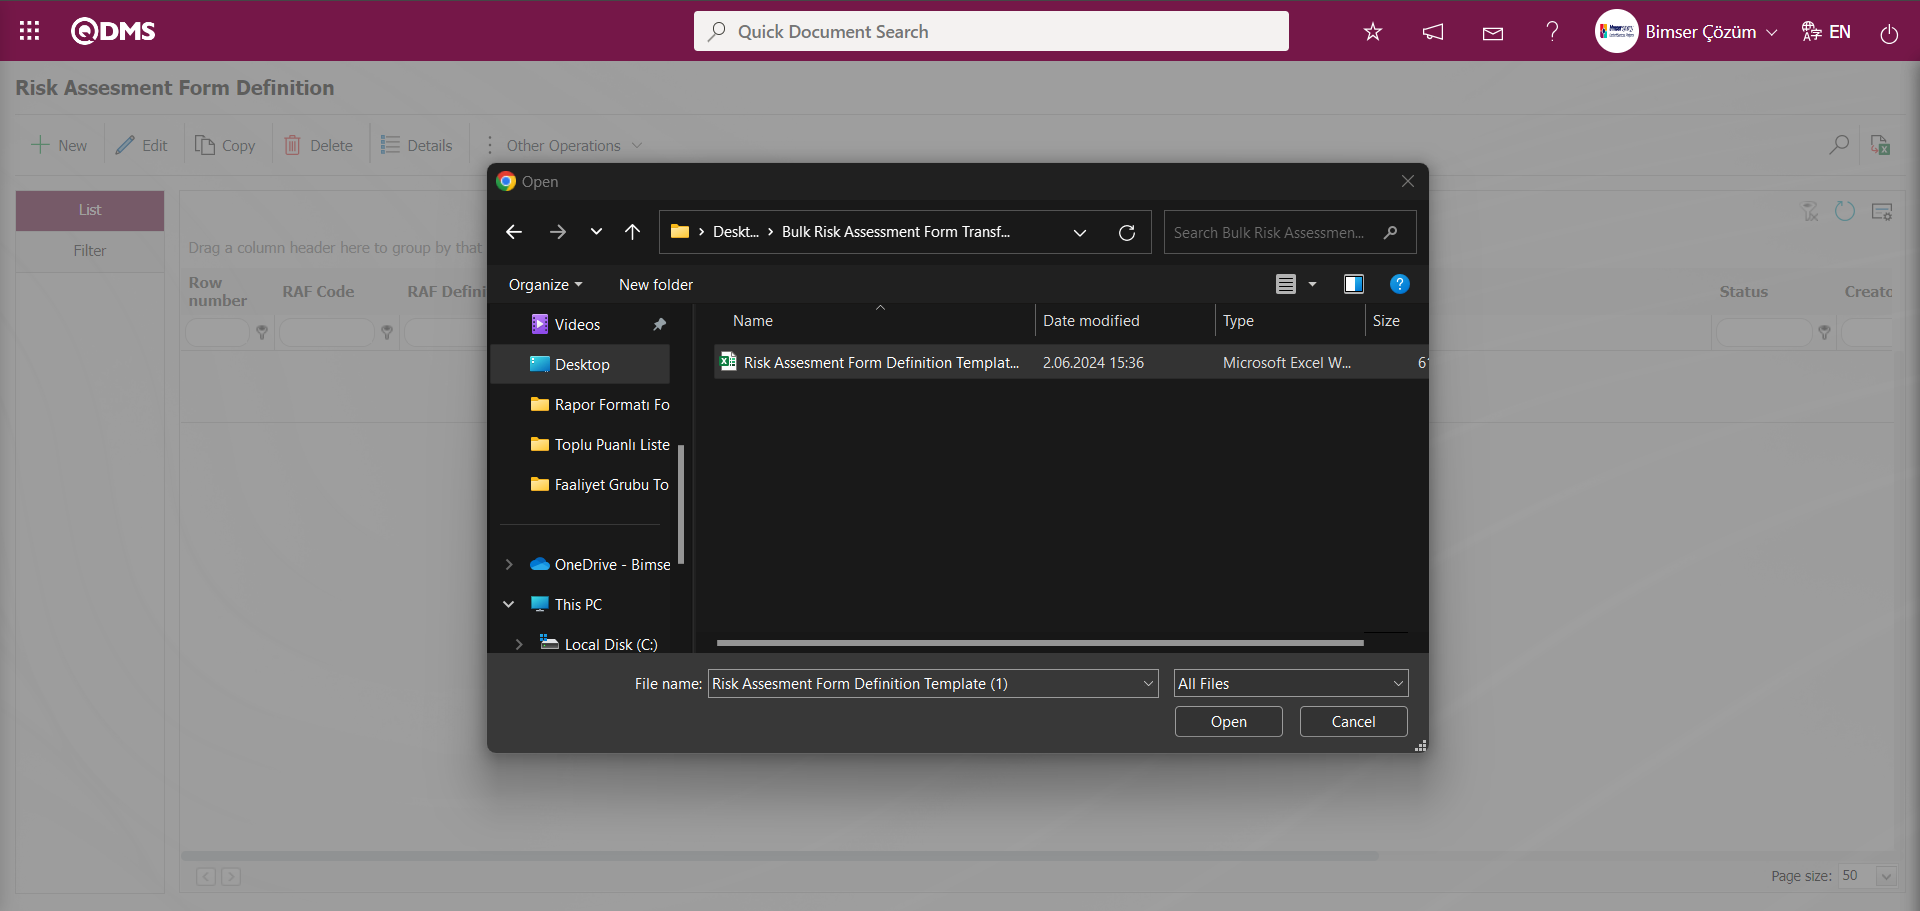
The system gives the message “Risk were transferred successfully.Please check the relevant autocode templates and counters”, indicating that the RAF (Risk Assessment Form) transfer process has taken place.
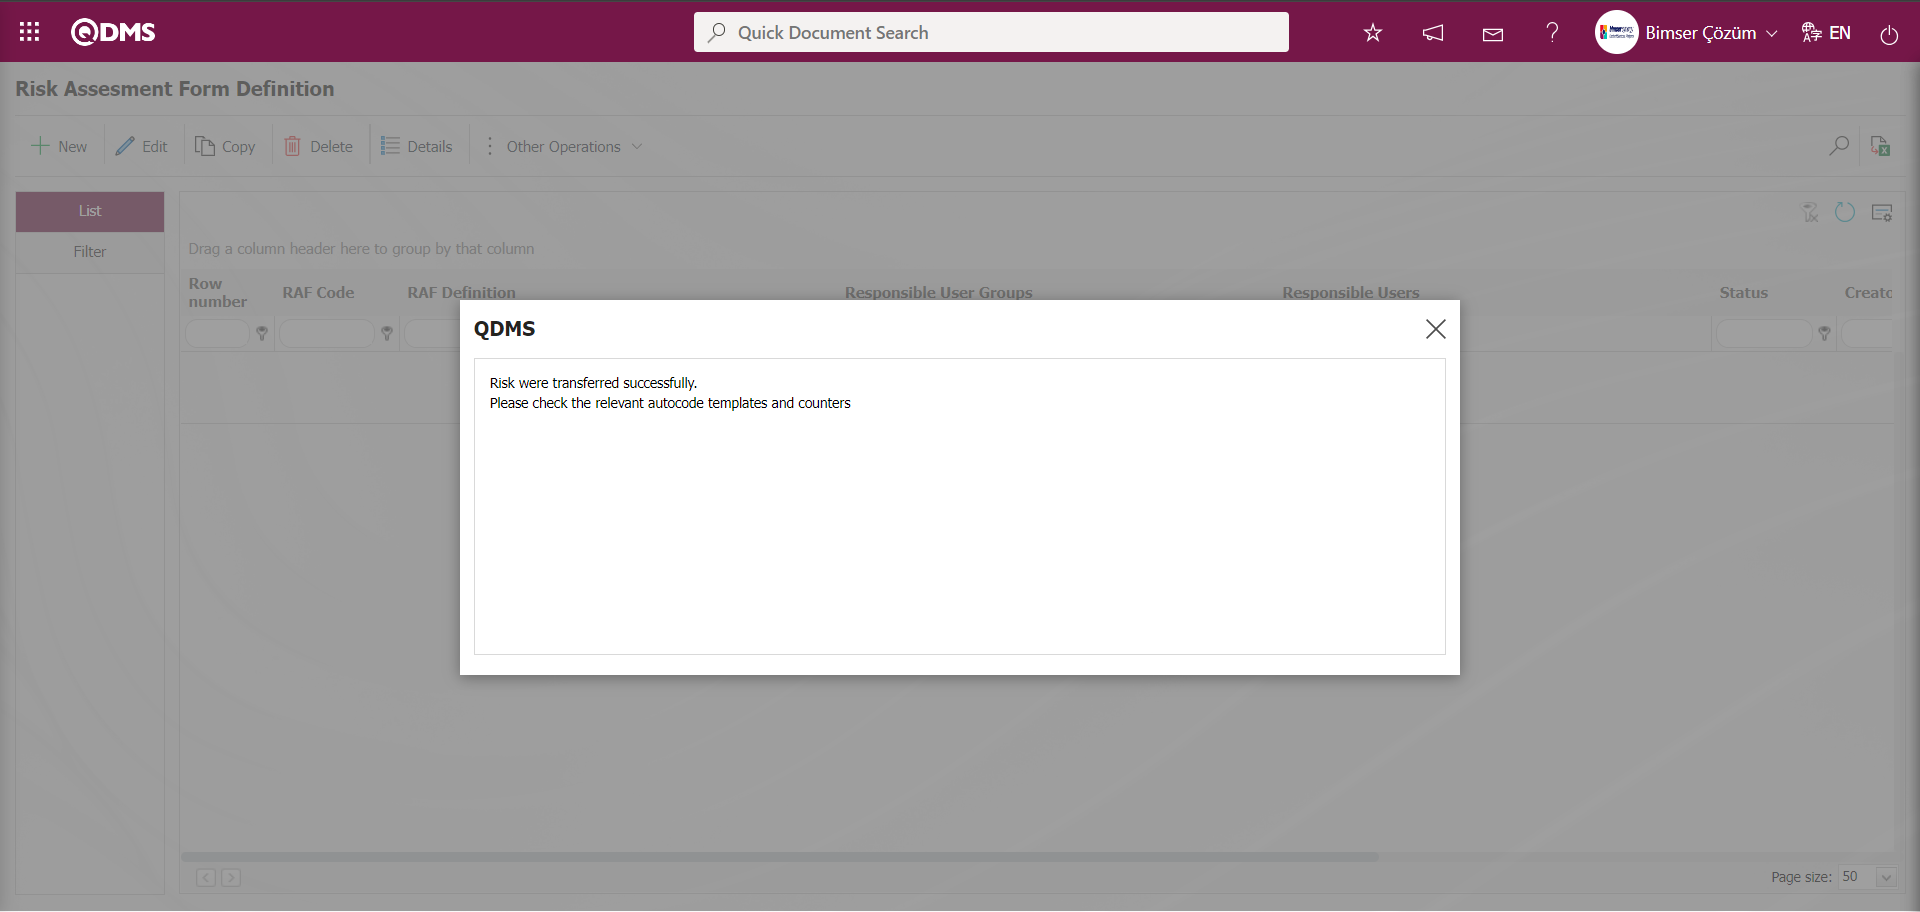
On the Risk Assessment Form Definition screen, the RAF with batch transfer operation is displayed in the list on the list tab.

To define a new Risk Assessment Form on the Risk Assessment Form Definition screen, click the  button at the top left corner of the screen.

The Risk Assessment Form Definition screen opens.
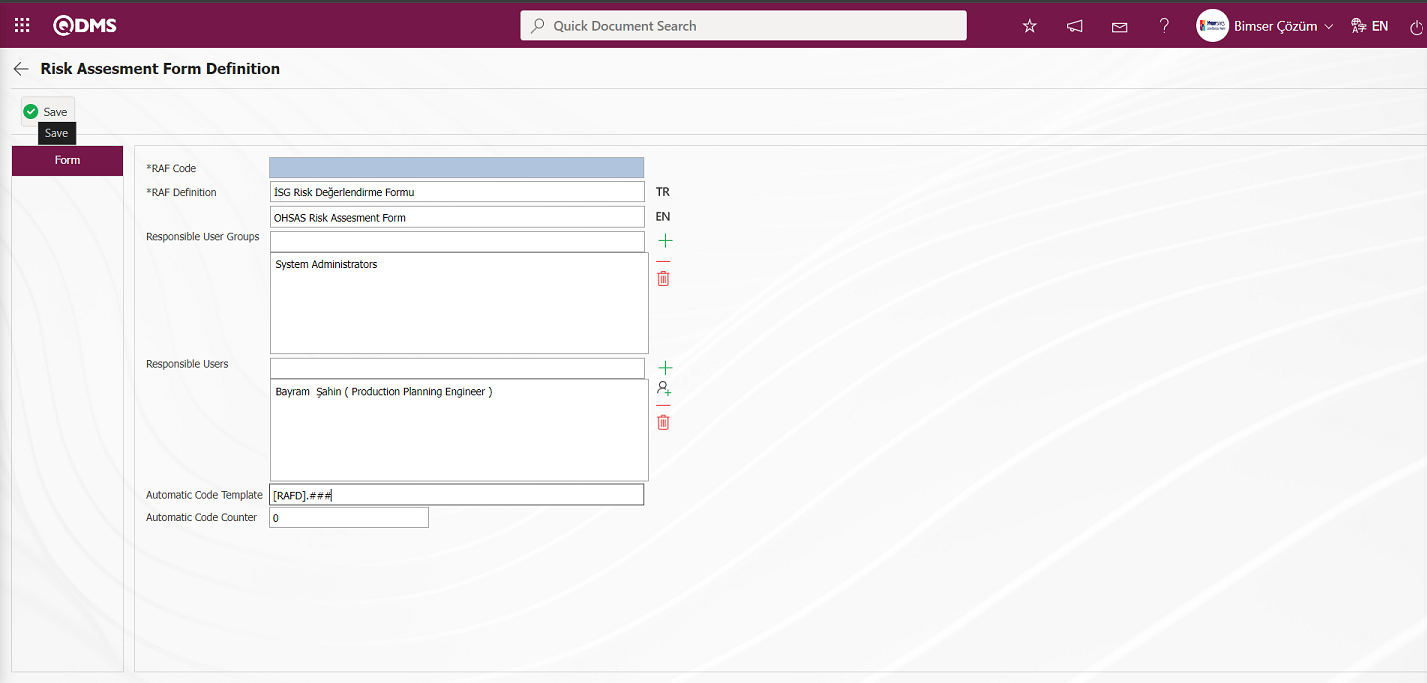
Related fields are defined on the screen that opens:
RAF Code:It is the field that is automatically given by the system on the Risk Assessment Form Definition screen. The system automatically assigns the code template according to the code template defined in the “Risk Assessment Auto Code Template” parameter numbered 1 of the relevant module.
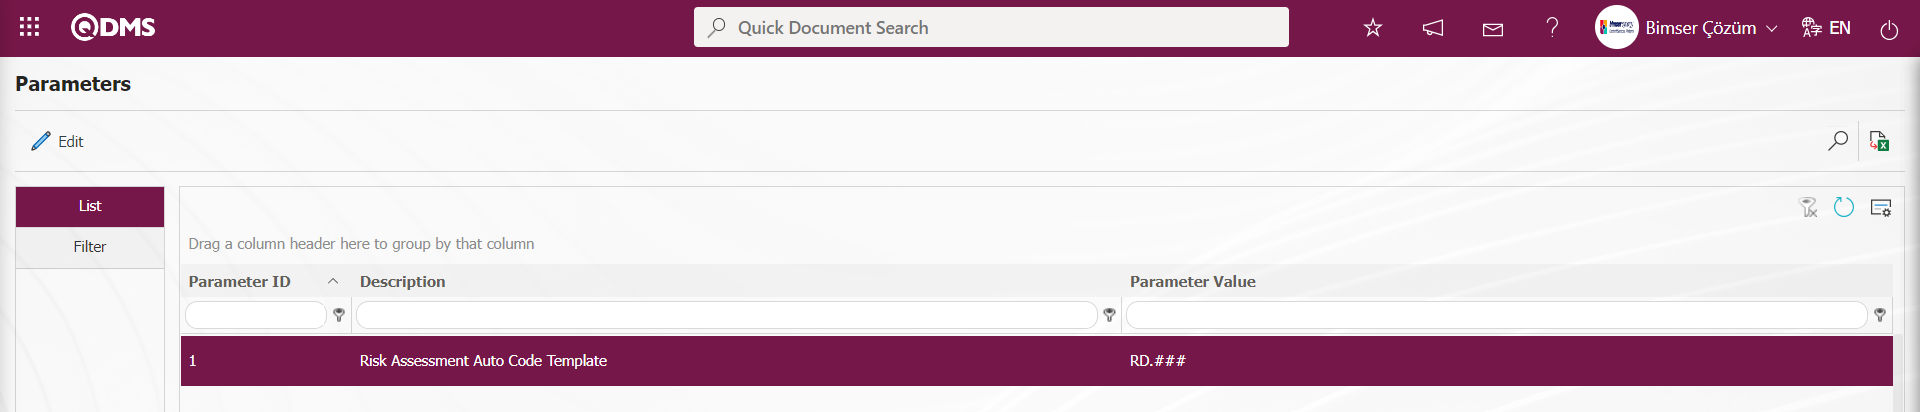 The information about the counter value at which the defined auto code template will start comes according to the value defined in the parameter value in the “Risk Assessment Counter” parameter number 2 of the relevant module. The counter value is defined as “30” in the parameter value. The code template will assign codes as RD.031, RD.032, RD.033.
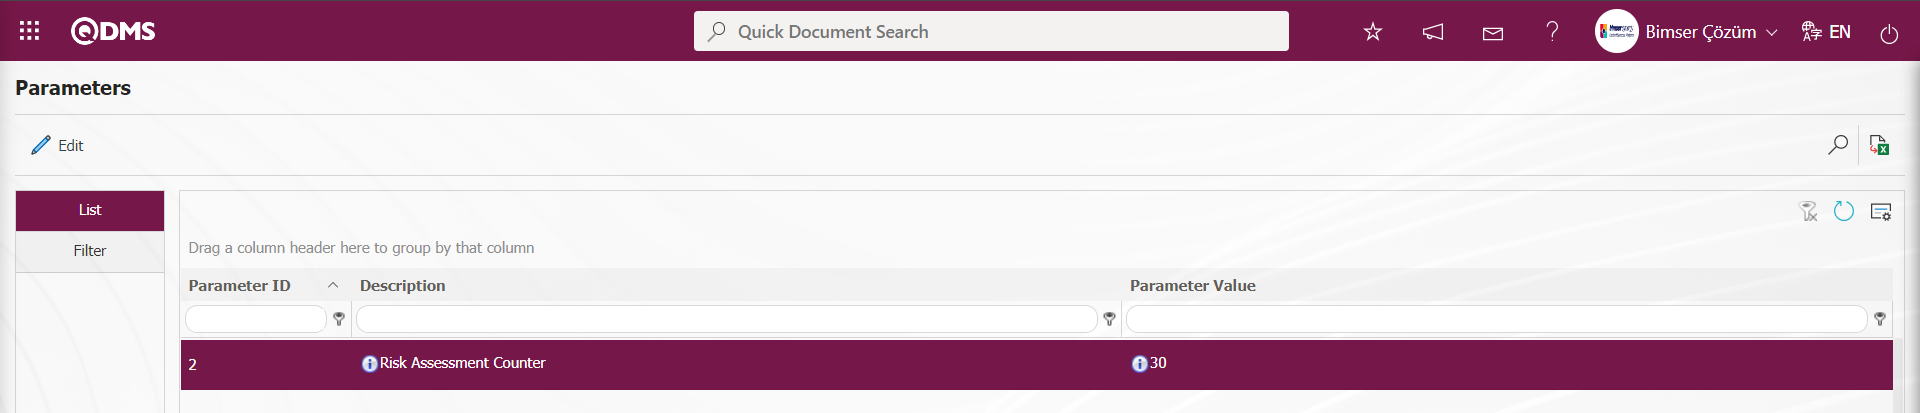
RAF Definition: This is the mandatory field where the RAF Main Form Definition information is defined on the Risk Assessment Form Definition screen.**
Responsible User Groups: This is the field where responsible user groups can be selected from the user group list defined in the system on the Risk Assessment Form Definition screen. With the user groups to be selected in the “Responsible User Groups” field, you can authorize certain user groups responsible for certain RAF Master Forms.
Responsible Users:This is the field where the personnel who will be responsible for the Risk Main Form are selected on the Risk Assessment Form Definition screen.
Automatic Code Template:This is the field where automatic code template information is defined on the Risk Assessment Form Definition screen. This field determines how the code of these detail records will be when Risk Master Form Detail records are added to the Risk Master Form. Ex: [RAFD].001, [RAFD.002], [RAFD].003 automatic code counter value “0” according to the system will make automatic code assignment.
Automatic Code Counter: It is determined from which value the code of the Risk Main Form Detail records given according to the code specified in the automatic code template on the Risk Assessment Form Definition screen will start.
On the Risk Assessment Form Definition screen, the code of the Risk Master Form (if automatic coding is not activated), the code information, the definition of the form and, if desired, the responsible user groups are added. After entering the relevant information in the required fields, the identification registration process of the Risk Master Form is realized by clicking the  button in the upper left corner of the screen.
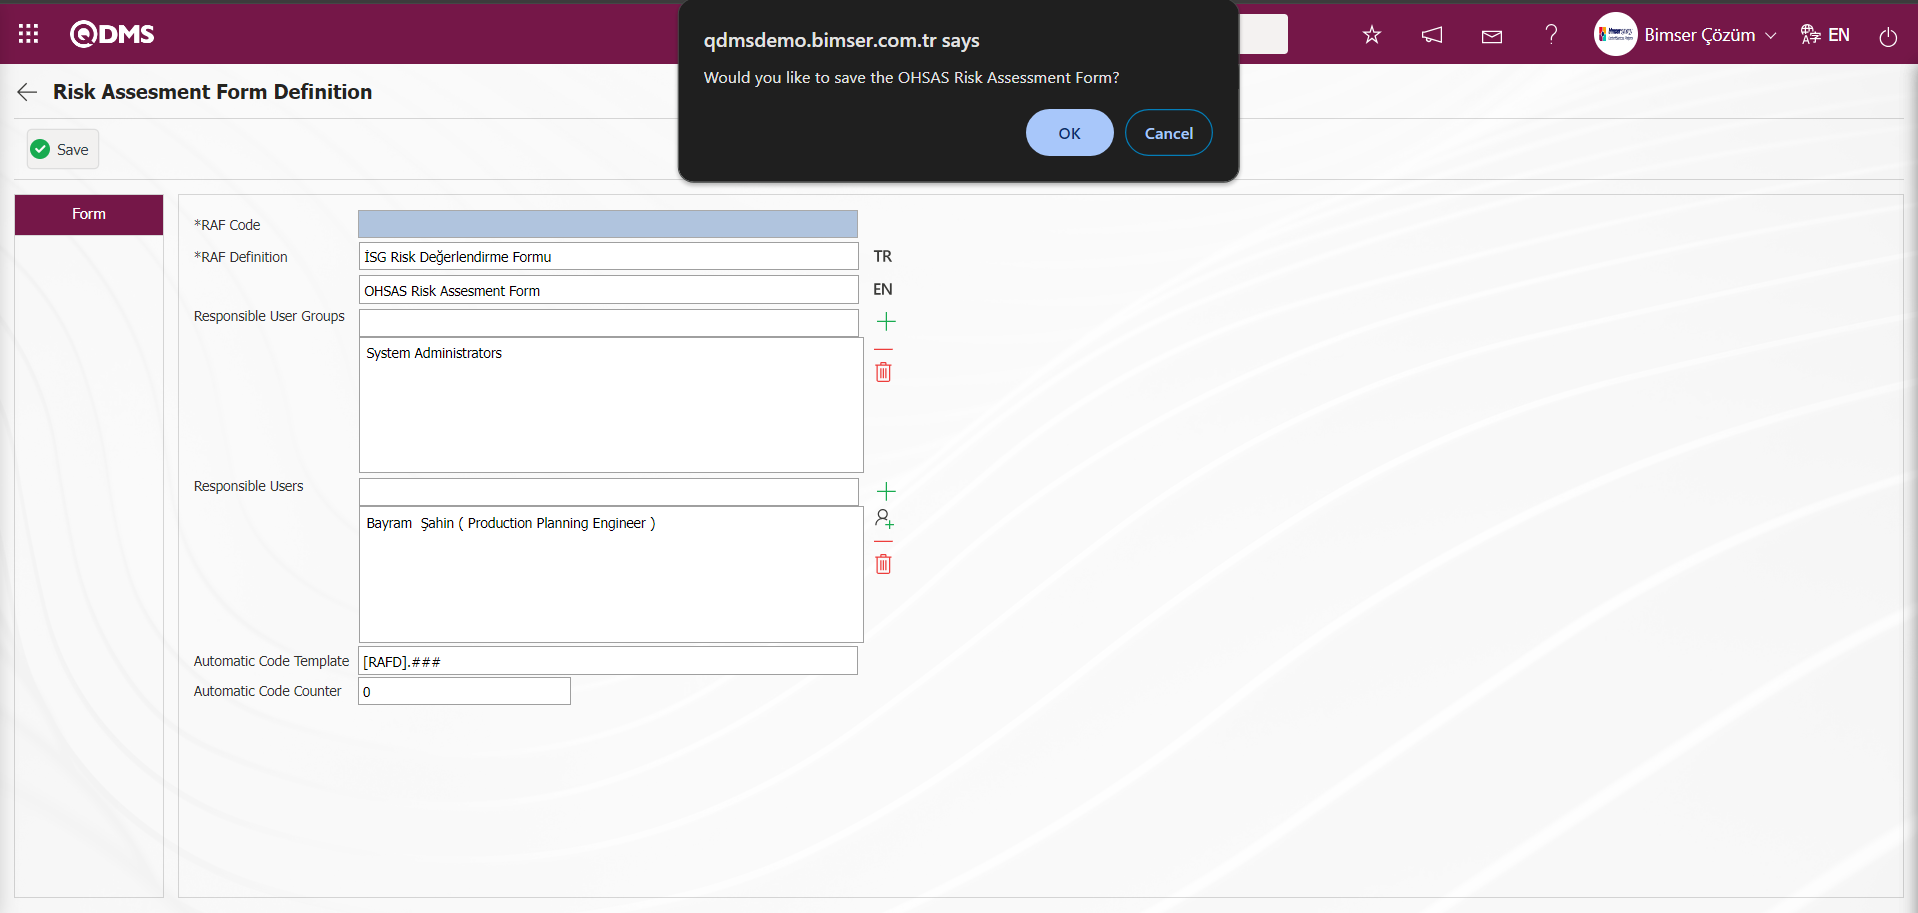
The Risk Assessment Form is saved by clicking the “OK” button in the “Would you like to save the OHSAS Risk Assessment Form?” message by the system.
In the main form definition screens, if there is information that needs to be kept specific to the user's institution, it is possible to add as many special fields as desired through the interfaces offered. The user's institution-specific fields are defined in the Field Definition menu and associated and displayed with the “Risk Assessment Form Definition” function pages numbered 3 in the Function Designer menu.

After all Risk Assessment Forms (RAFs) are defined in this way, click on the  button on the top left while the Risk Assessment Form to which risk detail is to be added is selected.

Opens to the Risk Assessment Form Detail (RAFD) screen.
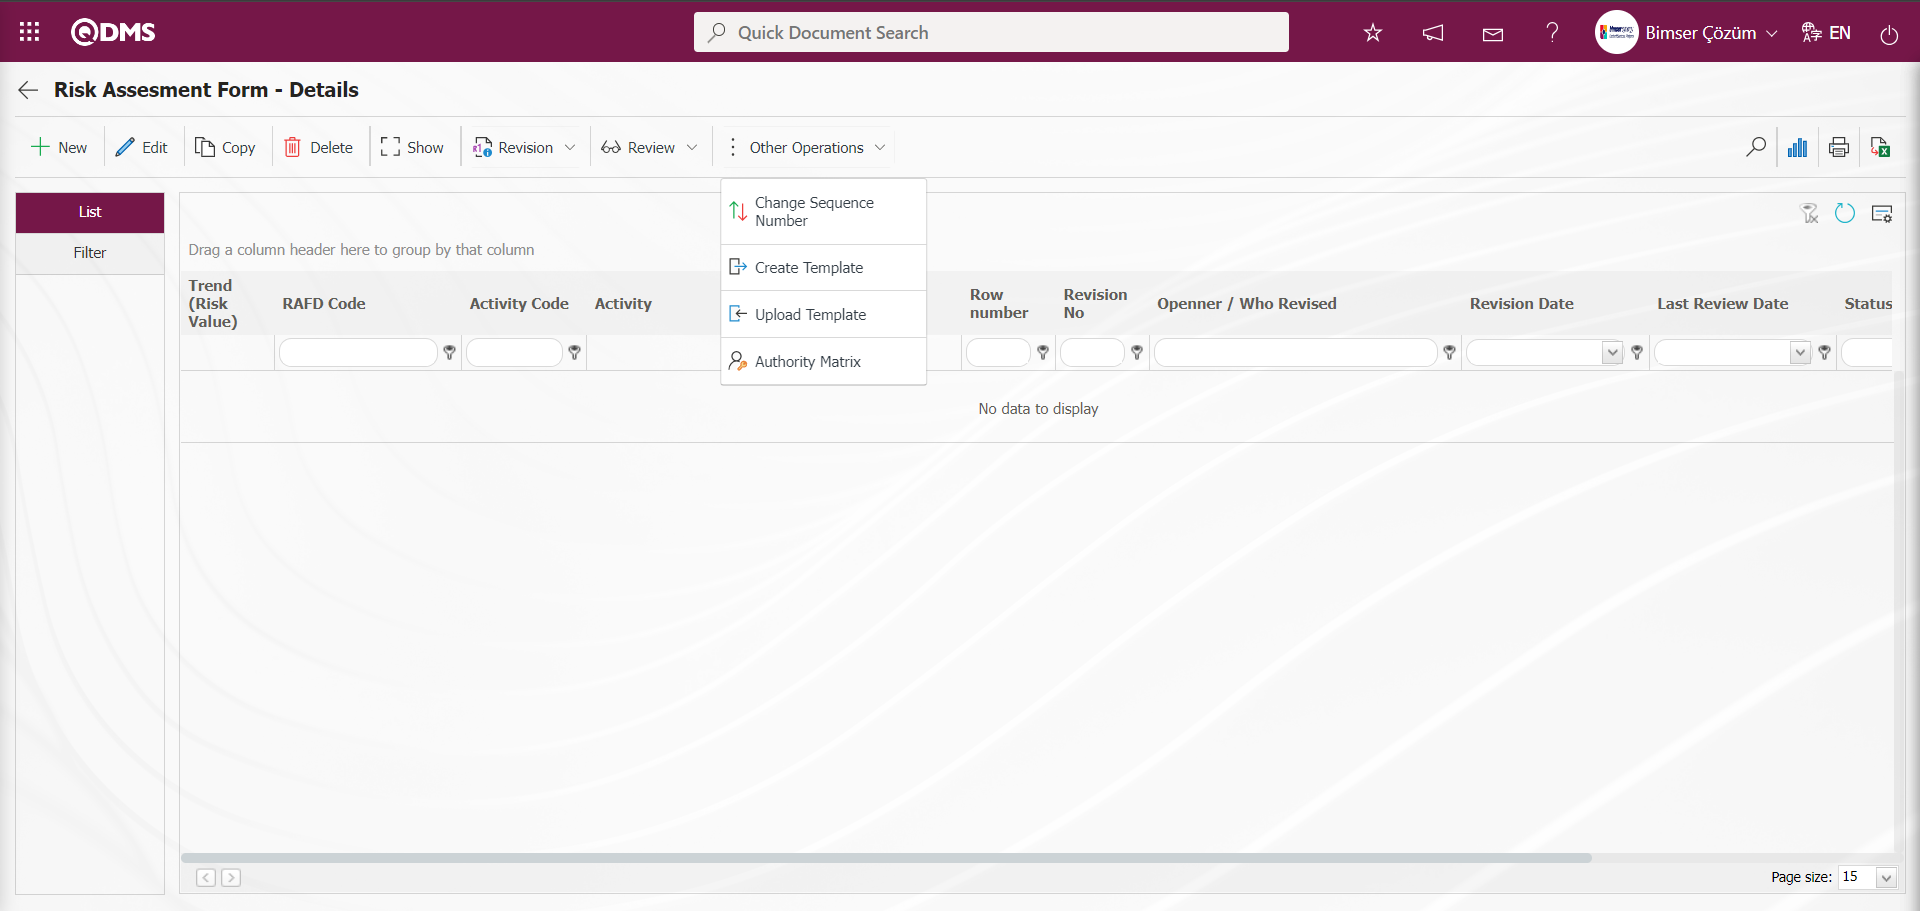
With the help of the buttons on the screen;
 : New RAFD (Risk Assessment Form Detail) can be defined.
 : Selected RAFD information in the list can be updated.
 : Selected RAFD information is displayed in the list.
 : The RAFD information selected in the list can be copied.
 : It is used to delete the RAFD information selected in the list.
 : The RAFD information selected in the list is revised and sent for approval.
 : The old revisions of the RAFD information selected in the list can be monitored.
 : Revision change operation of the RAFD information selected in the list is performed.
 : The RAFD information selected in the list is reviewed.
 : Old revisions can be monitored for the selected RAFD information in the list.
 : Change the sequence number of the RAFD information selected in the list. While RAFD is selected in the list tab on the Risk Assessment Form-Details screen, the button is clicked.
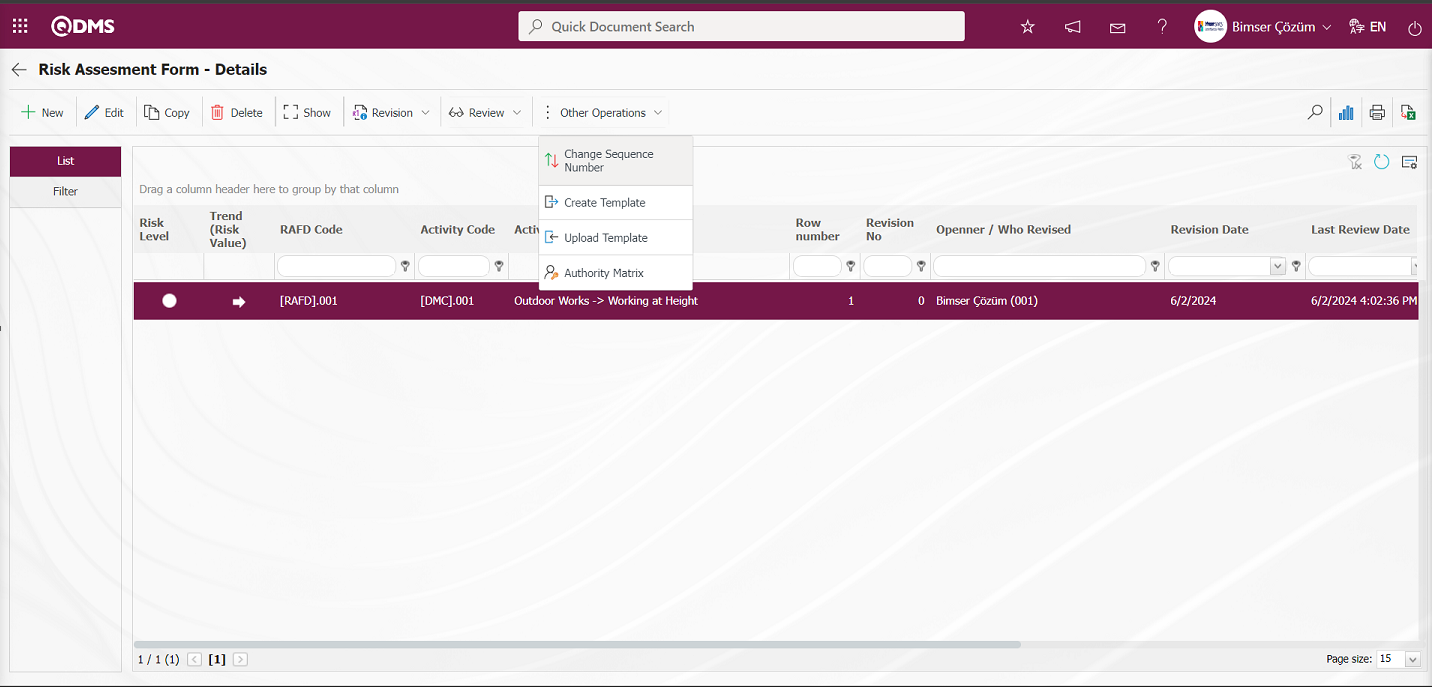
In the Change Sequence Number screen, the New Sequence Number information is determined and the sequence number is changed by clicking the  button.
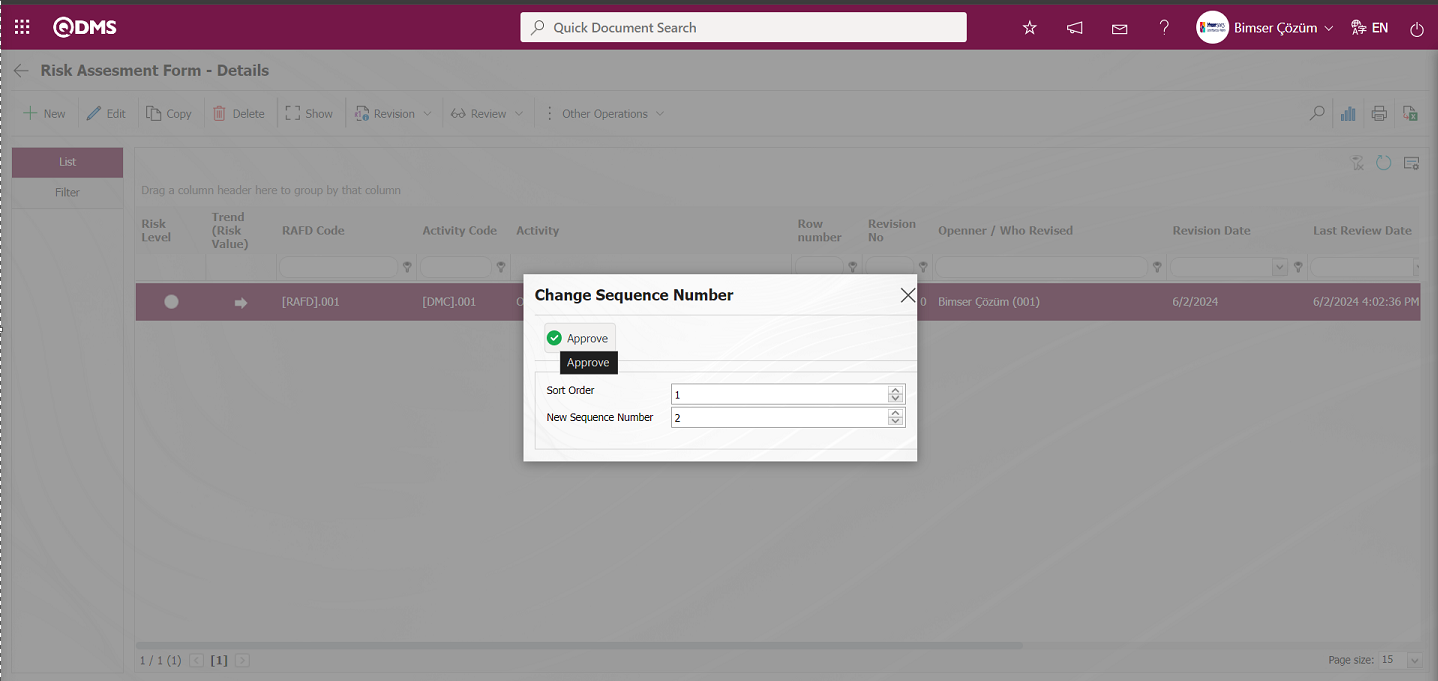
On the Risk Assessment Form - Details screen, it is seen that the sequence number of the RAFD (Risk Assessment Form Detail) selected in the list is changed after the sequence number change operation.
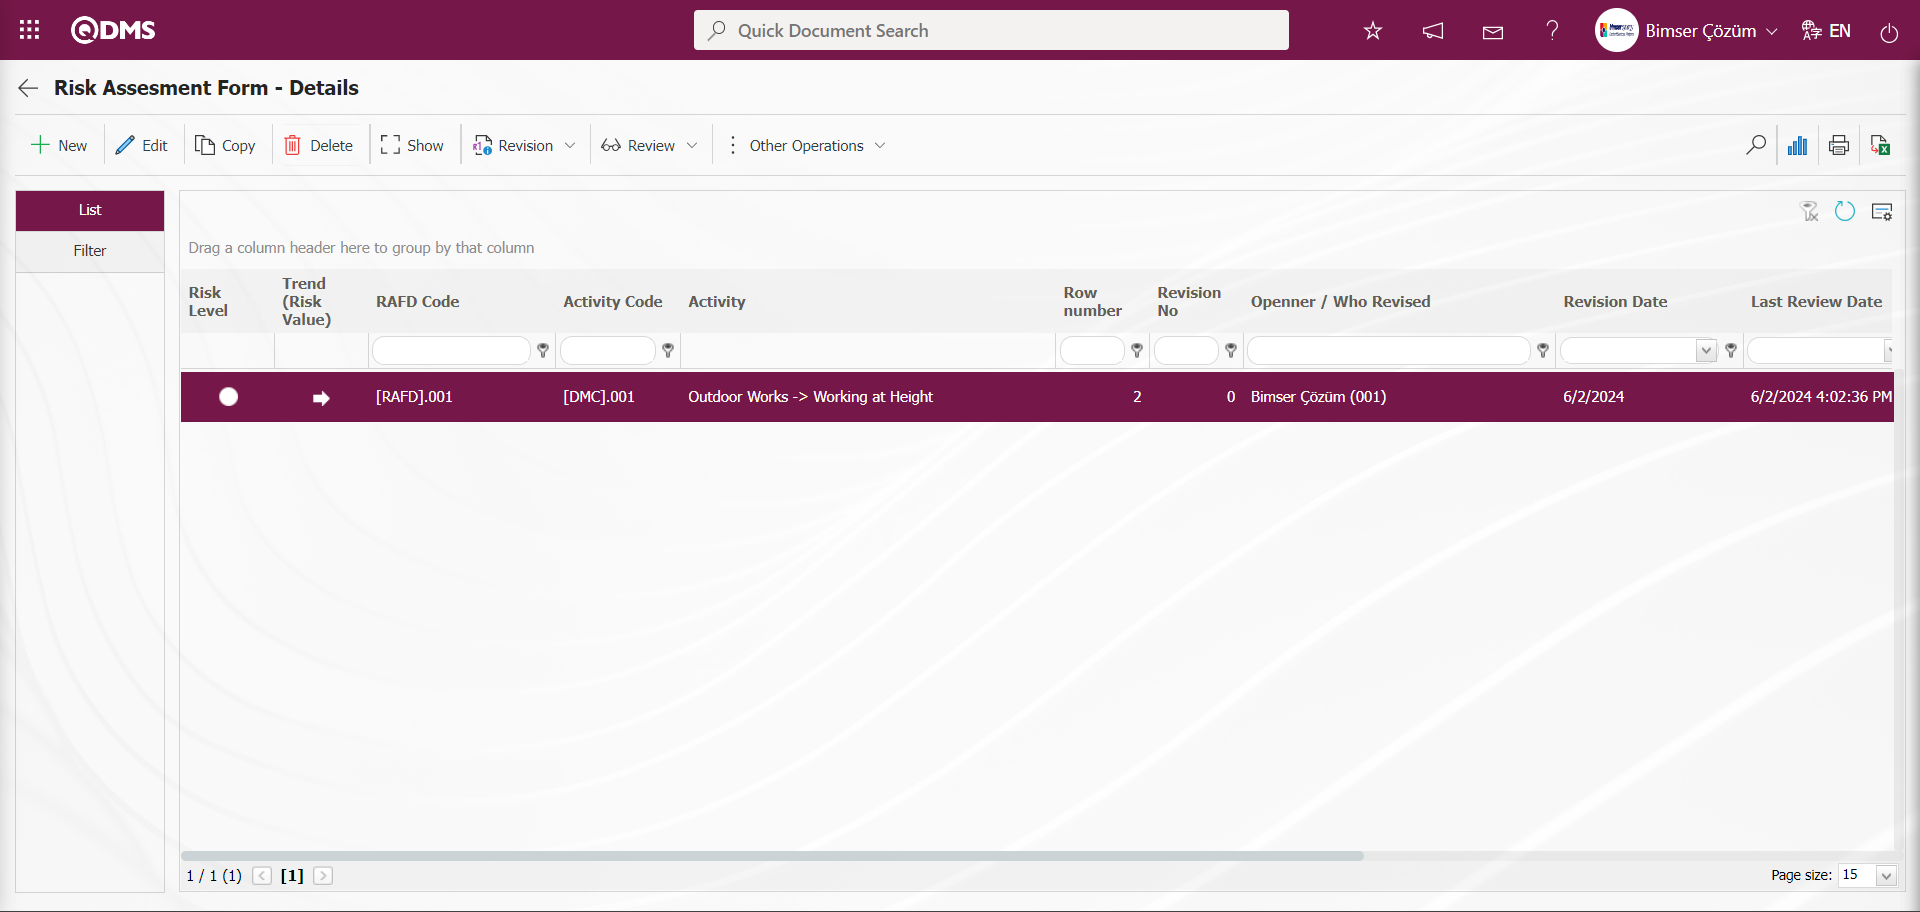
 : This is the menu where it is determined which role or user group will have the authorization to view, update, etc. the defined Risk Assessment Form Details. This button is a button that is displayed depending on the parameter. The parameter is activated by selecting the parameter value “Yes” of parameter 111 in the OHSAS Risk Assessment Module parameters. After the parameter is activated, the Authorization matrix button is displayed on the Risk Assessment Form - Details screen and authorization operations are performed on a detail basis in the OHSAS Risk Assessment module.
Click the button on the Risk Assessment Form-Details screen.
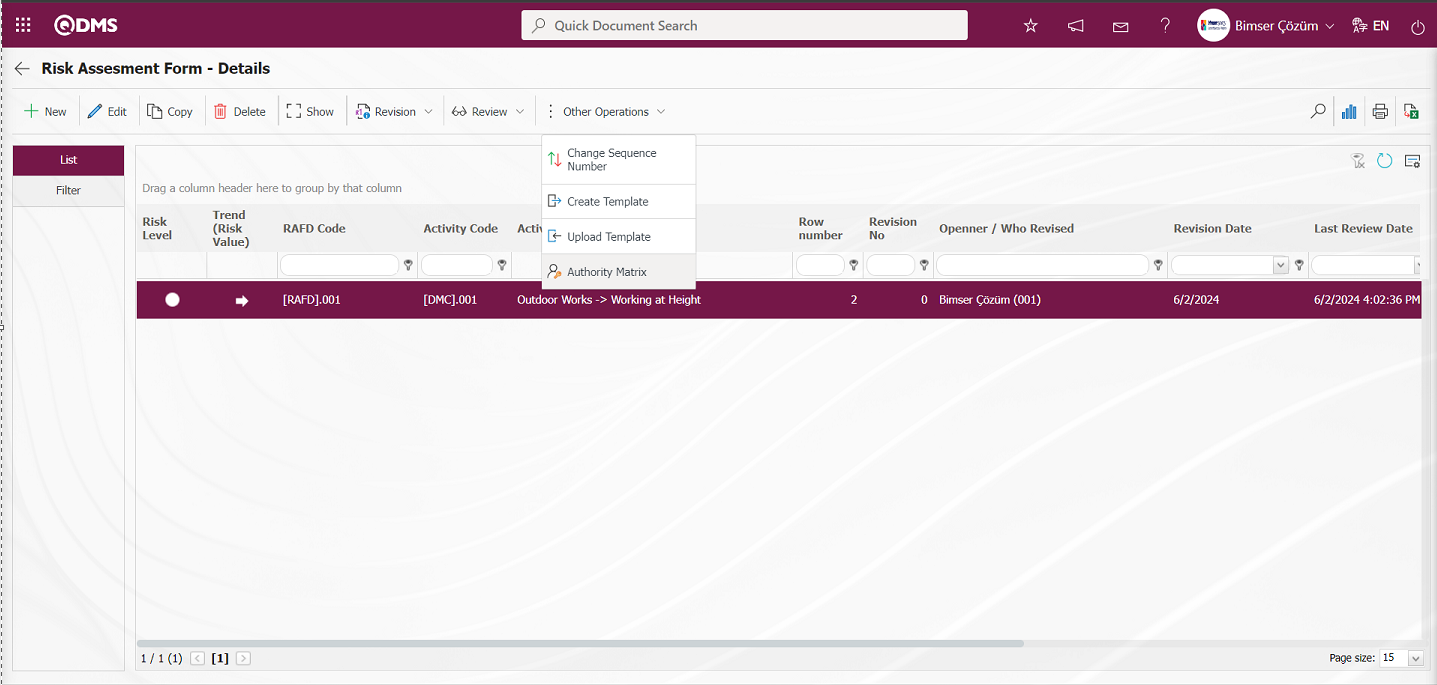
The Risk Authorization Matrix screen opens.
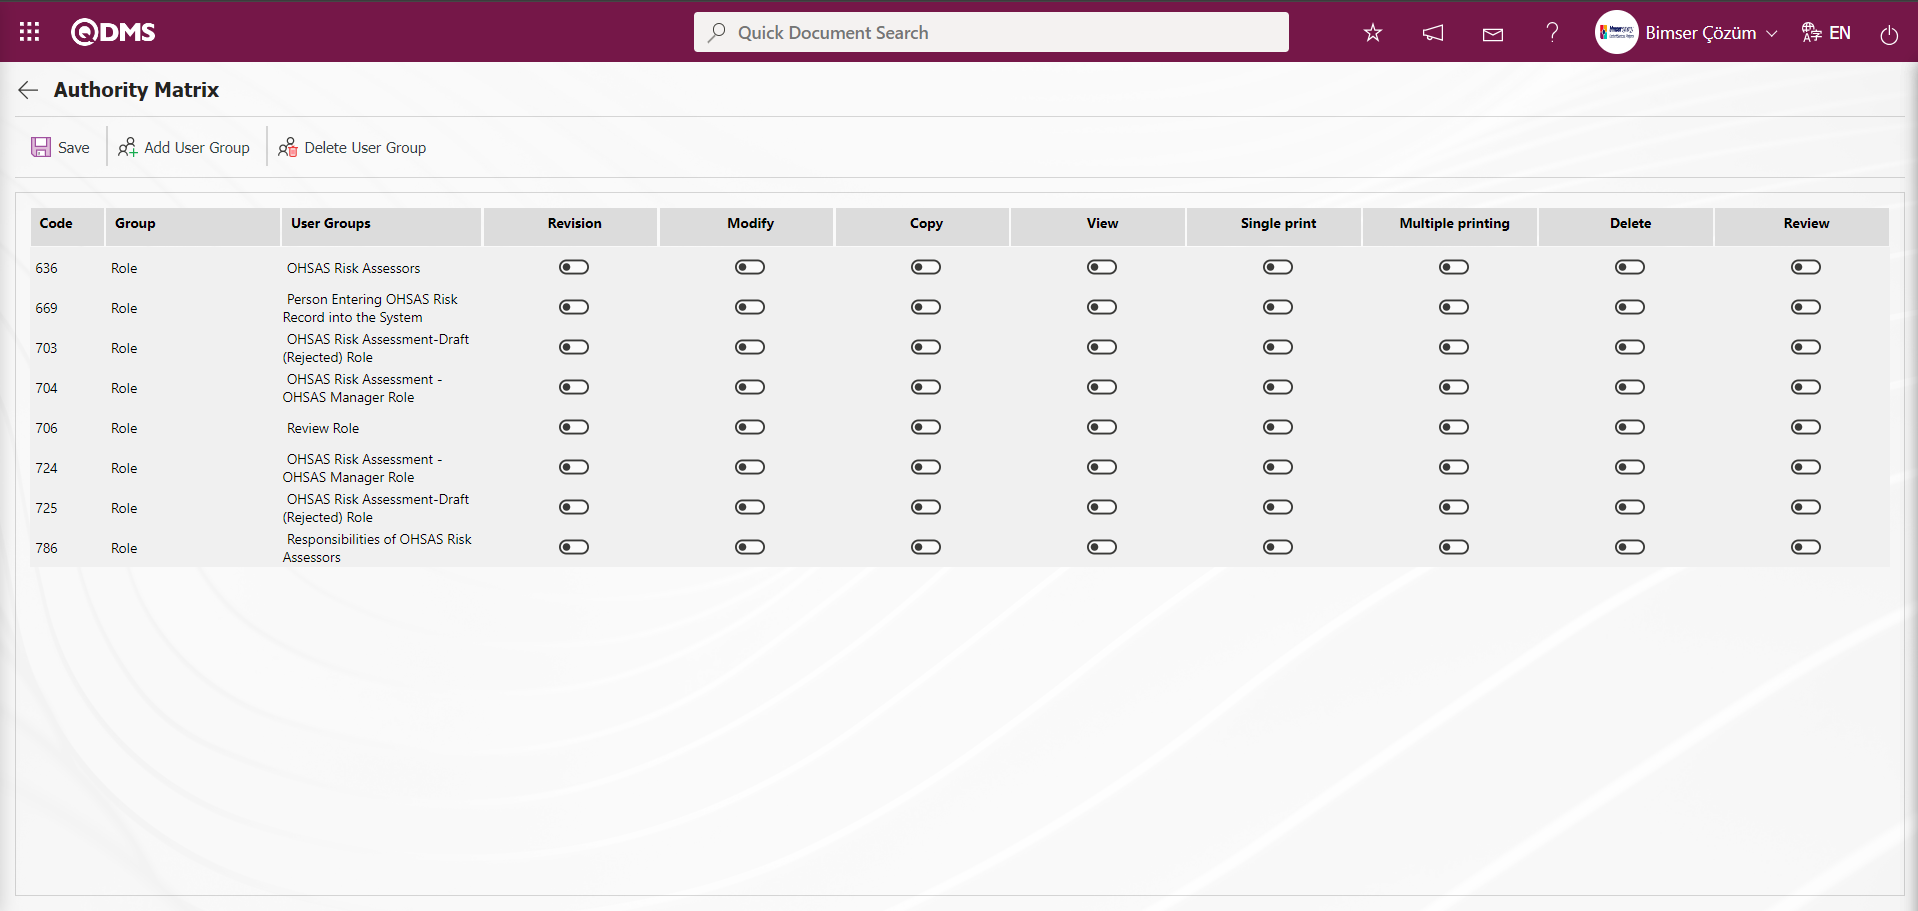
With the help of the buttons on the screen;
 : Registration is made on the Risk Authorization matrix screen
 : On the Risk Authorization Matrix screen, the user group desired to be authorized in the user group list defined in the system is added.
 : On the Risk Authority Matrix screen, delete the selected user group in the authorized list.
On the Risk Authority Matrix screen, the roles are defined in the System Infrastructure Definitions/BSID/Configuration Settings/Role Definition menu. The relevant authorization check box corresponding to that role is checked and the registration process is performed with the button.
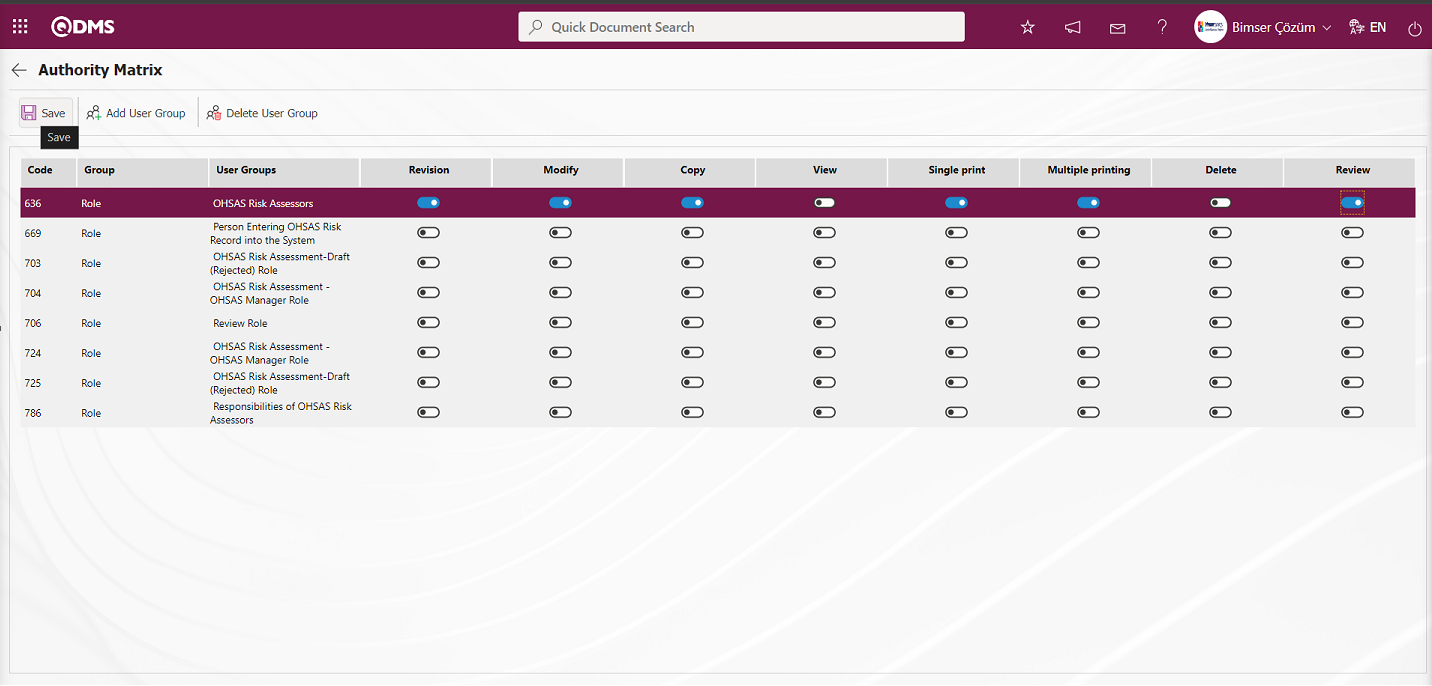
Click the  button to authorize a user group on the Risk Authorization Matrix screen.
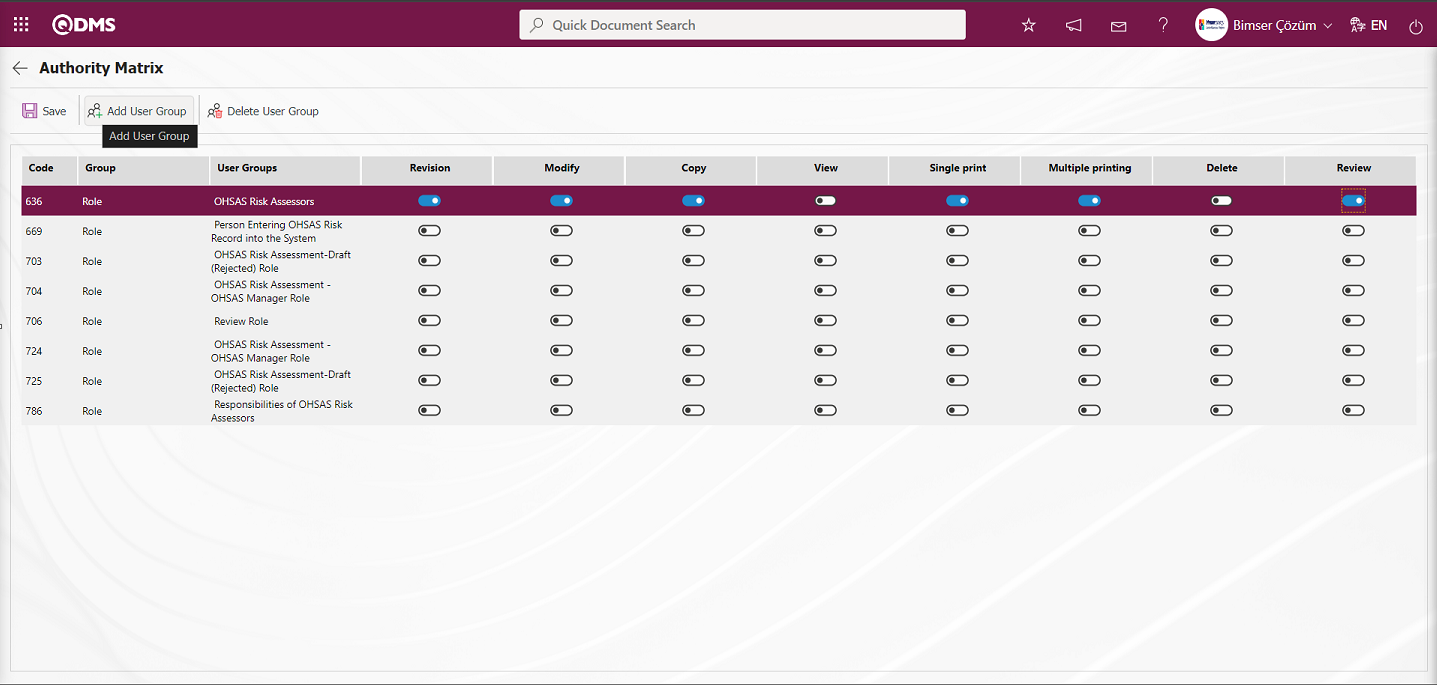
Select the user group that you want to authorize in the user group list defined in the system and click the  button on the upper left corner of the screen.
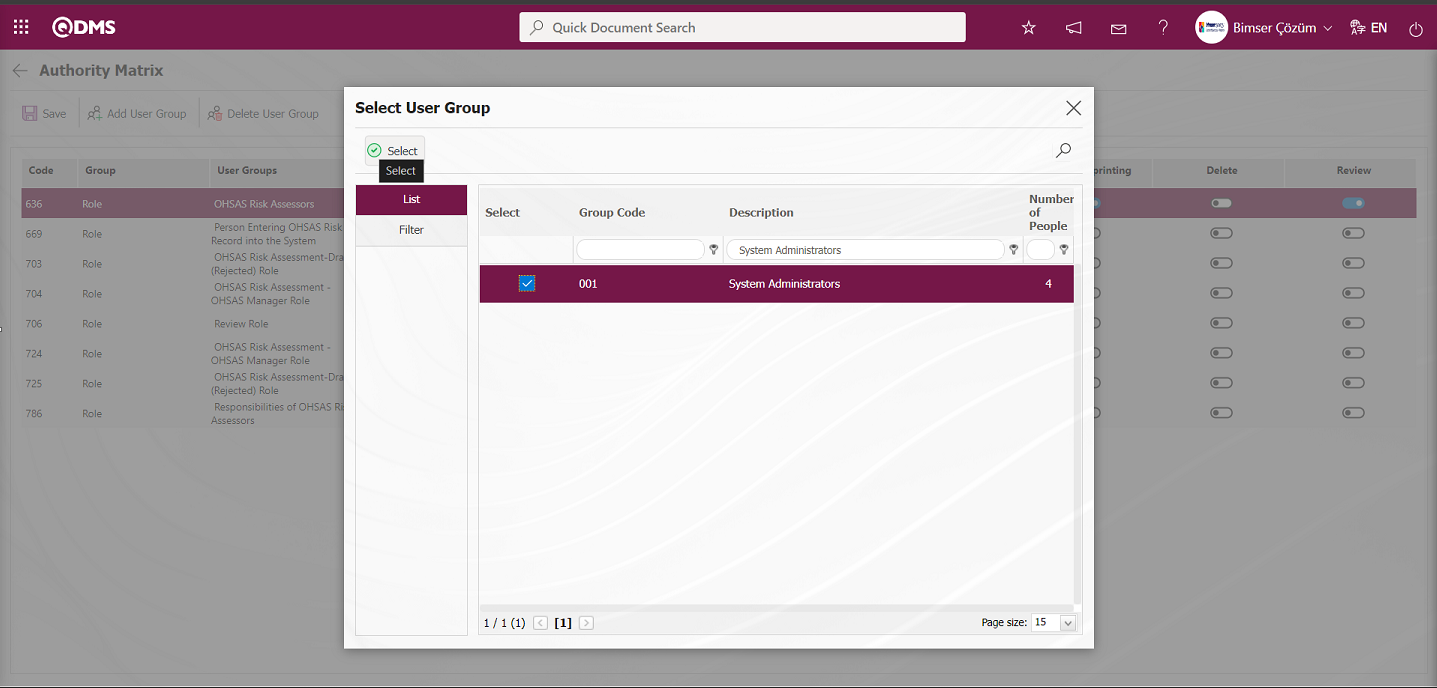
On the risk authorization matrix screen, after the authorization check boxes for authorization for Risk Assessment Detail operations in the OHSAS Risk Assessment Module for the user group are marked, the user group-based authorization registration is made by clicking the  button in the upper left corner of the screen. For example: The relevant check box such as Revision, Update and Copy authorizations are marked.
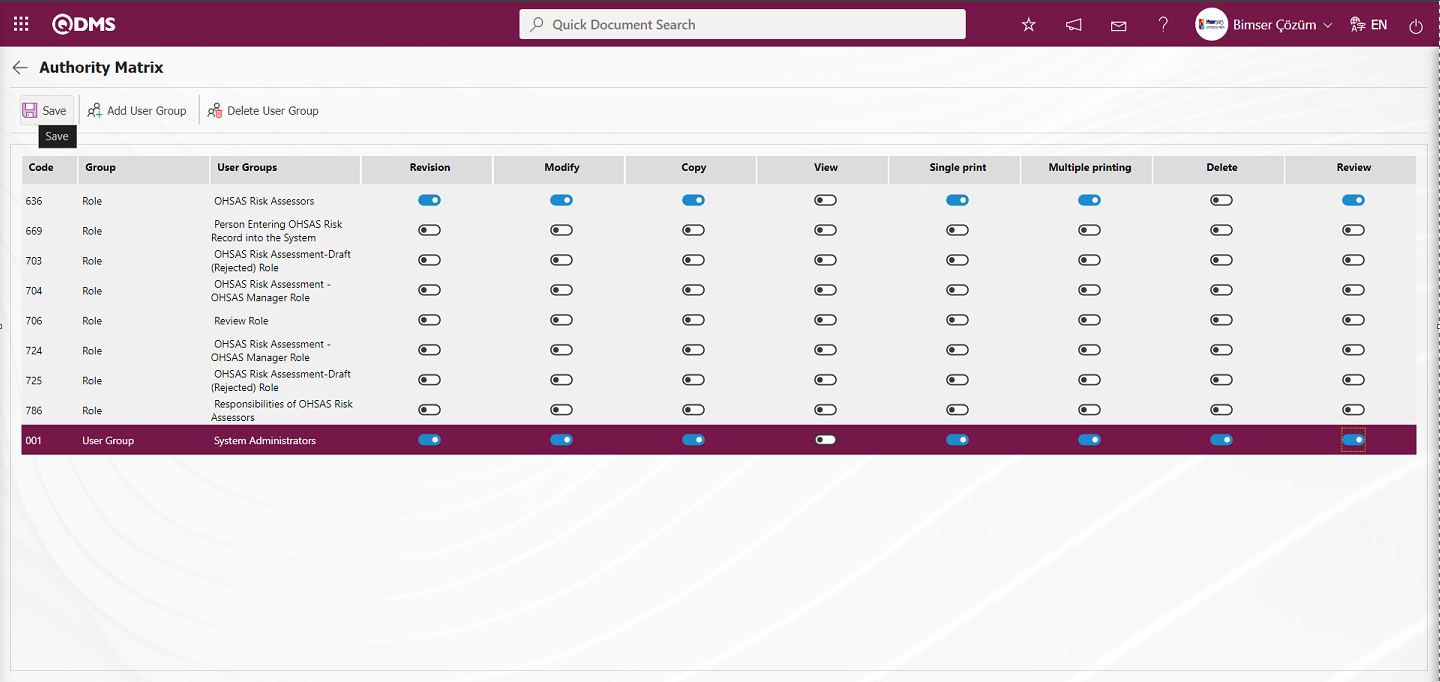
If it is desired to remove the user group from the authorization matrix by taking the authorizations from the authorized user group, the  button is used.
 : Used to create a template. The transfer template is downloaded to the user's computer with this button and the relevant fields are filled in.
 : It is used to upload the template. The template downloaded to the user's computer and filled in is uploaded to the system with this button.
Note: After the adaptation studies, the existing Risk Assessment Form details (RAFDs) can be transferred to the system in bulk. For this reason, if it is decided that the system is ready for use after the field definition etc. operations are completed, the and button appears on the Risk Assessment Form-Details screen of the users designated as administrators in this module in the BSID / Configuration Settings / Manager Definition menu.The template is created automatically according to the fields defined in the system. With the button, the system downloads the created template to the computer. When the relevant template is filled in by the users and uploaded to the system with the  button, Risk Assessment Details (RAFDs) are transferred to the system.
 : Search function can be used.
 : The form details selected in the list are transferred to Excel.
 Print. System Infrastructure Definitions / OHSAS Risk Assessment / Report Formats menu provides the process of displaying the selected report formats on the basis of the defined record. By clicking this button, the report format on the basis of the record in Excel and Pdf format is taken. (Print) button is not displayed unless there is no record-based report format definition process.
 : Used to draw a graph.
 : Used to return to the previous screen.
To define a new Risk Assessment Detail on the Risk Assessment Fomu-Details screen, click the  button at the top left corner of the screen.

A new risk assessment is made by opening the Risk Assessment Form-Details screen.
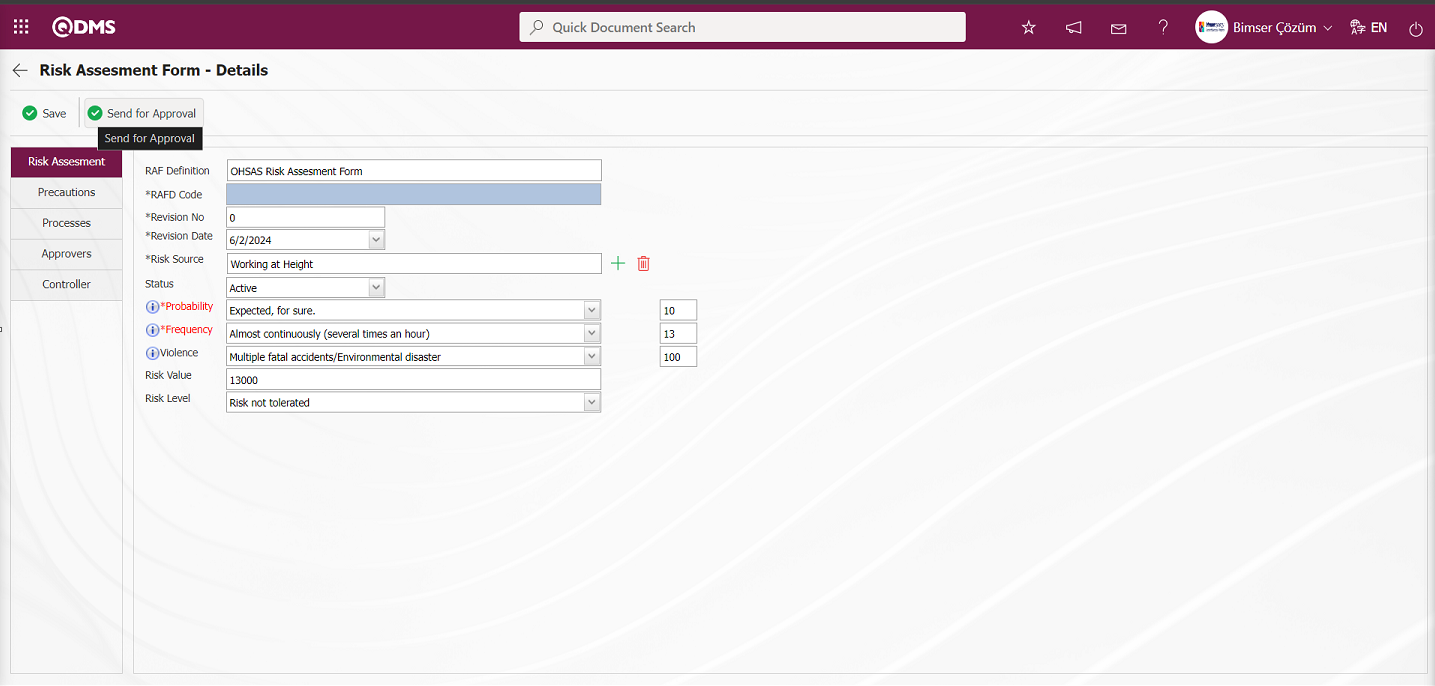
With the help of the buttons on the screen;
 : Risk Assessment Form Detail registration is made.
 : Risk Assessment Form Detail is sent to the person in the approval flow for approval.
Related fields are defined on the screen that opens:
RAF Definition: This is the field where the RDF (Risk Assessment Form) information is given automatically by the system on the Risk Assessment Form-Details screen.**
RAFD Code:This is the field where the system automatically gives the code of the Risk Assessment Form Detail defined according to the automatic code template information defined in the Risk Assessment Form-Details screen defined in the Risk Assessment Form Definition screen. To do this, the code template is defined in the “Risk Assessment Detail Auto Code Template” parameter numbered 3 in the OHSAS Risk Assessment Module parameters.
 According to the counter value defined in the “Risk Assessment Detail Counter” parameter numbered 4 of the OHSAS Risk Assessment module parameters, it is determined from which value the Auto code template will start.

For example: The auto code template is defined as RDFD.### in the parameter. The system assigns automatic code as RDFD.001, RDFD.002, RDFD.003 according to the “0” counter value in parameter 4. The field related to the process of defining the automatic code template and counter value in the parameter is displayed as follows and the code of the saved form is assigned after the OHSAS Risk Assessment Detail form registration process.
Revision No:This is the field where the revision number of the Risk Assessment Form Detail defined by the system on the Risk Assessment Form-Details screen is given.
Revision Date:This is the field where the revision date of the Risk Assessment Form Detail defined on the Risk Assessment Form-Details screen is selected in the Calendar field.
Risk Source: This is the field where the activity information defined in the system is selected by clicking the  (Select) button on the Risk Assessment Form-Details screen. The parameter value of parameter 23 “Will Risk Source be Used?” in OHSAS Risk Assessment module parameters is activated by selecting “Yes”.
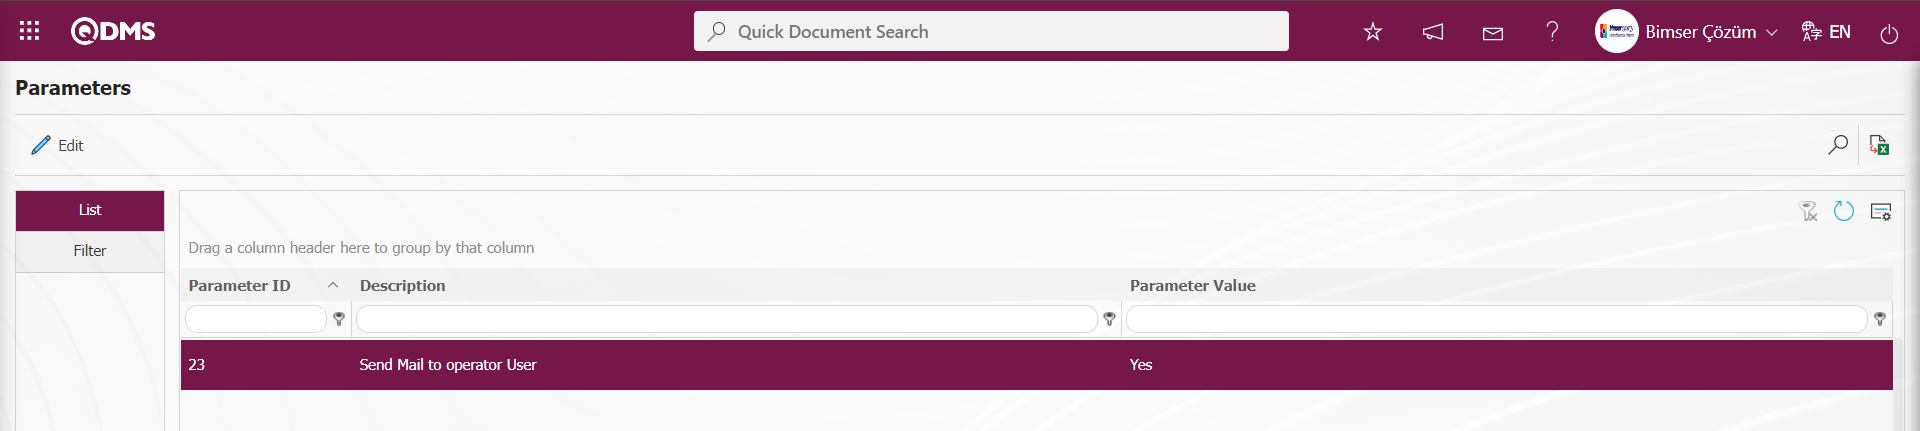
After the parameter is activated, this field is displayed on the Risk Assessment Form-Details screen and the Activity selection is made from the Activity list defined in the system.
Probability:This is the field where the probability value is selected in the list values opened by clicking the drop-down list of the Risk Assessment Form Detail defined on the Risk Assessment Form-Details screen.(User defined. It is necessary to define the scored list type parametric field from the field definition menu).**
Frequency:This is the field where the Frequency value is selected in the list values opened by clicking the drop-down list of the Risk Assessment Form Detail defined on the Risk Assessment Form-Details screen.(User defined. It is necessary to define the scored list type parametric field from the field definition menu).
Violence:This is the field where the violence value is selected in the list values opened by clicking the drop-down list of the Risk Assessment Form Detail defined on the Risk Assessment Form-Details screen.(User defined. It is necessary to define the scored list type parametric field from the field definition menu).**
Risk Value: This is the field where the value of the Risk Value field of the Risk Assessment Form Detail defined on the Risk Assessment Form-Details screen is calculated and information is given. (User defined. It is necessary to define a text type parametric field with formula entry in the formula field by selecting input type calculated from the field definition menu).**
Risk Level: This is the field where the value of the Risk Level field of the Risk Assessment Form Detail defined on the Risk Assessment Form-Details screen is calculated and information is given. (User defined. It is necessary to define a list-type parametric field with formula entry in the formula field by selecting input type calculated from the field definition menu).
In the Risk Assessment tab, the basic information and user-defined fields required for risk analysis are filled in. After entering the relevant information in the required fields, the button in the upper left corner of the screen is clicked. If the approval flow is defined for the Risk Assessment detail form, it is sent to the approval of the approval person for approval.
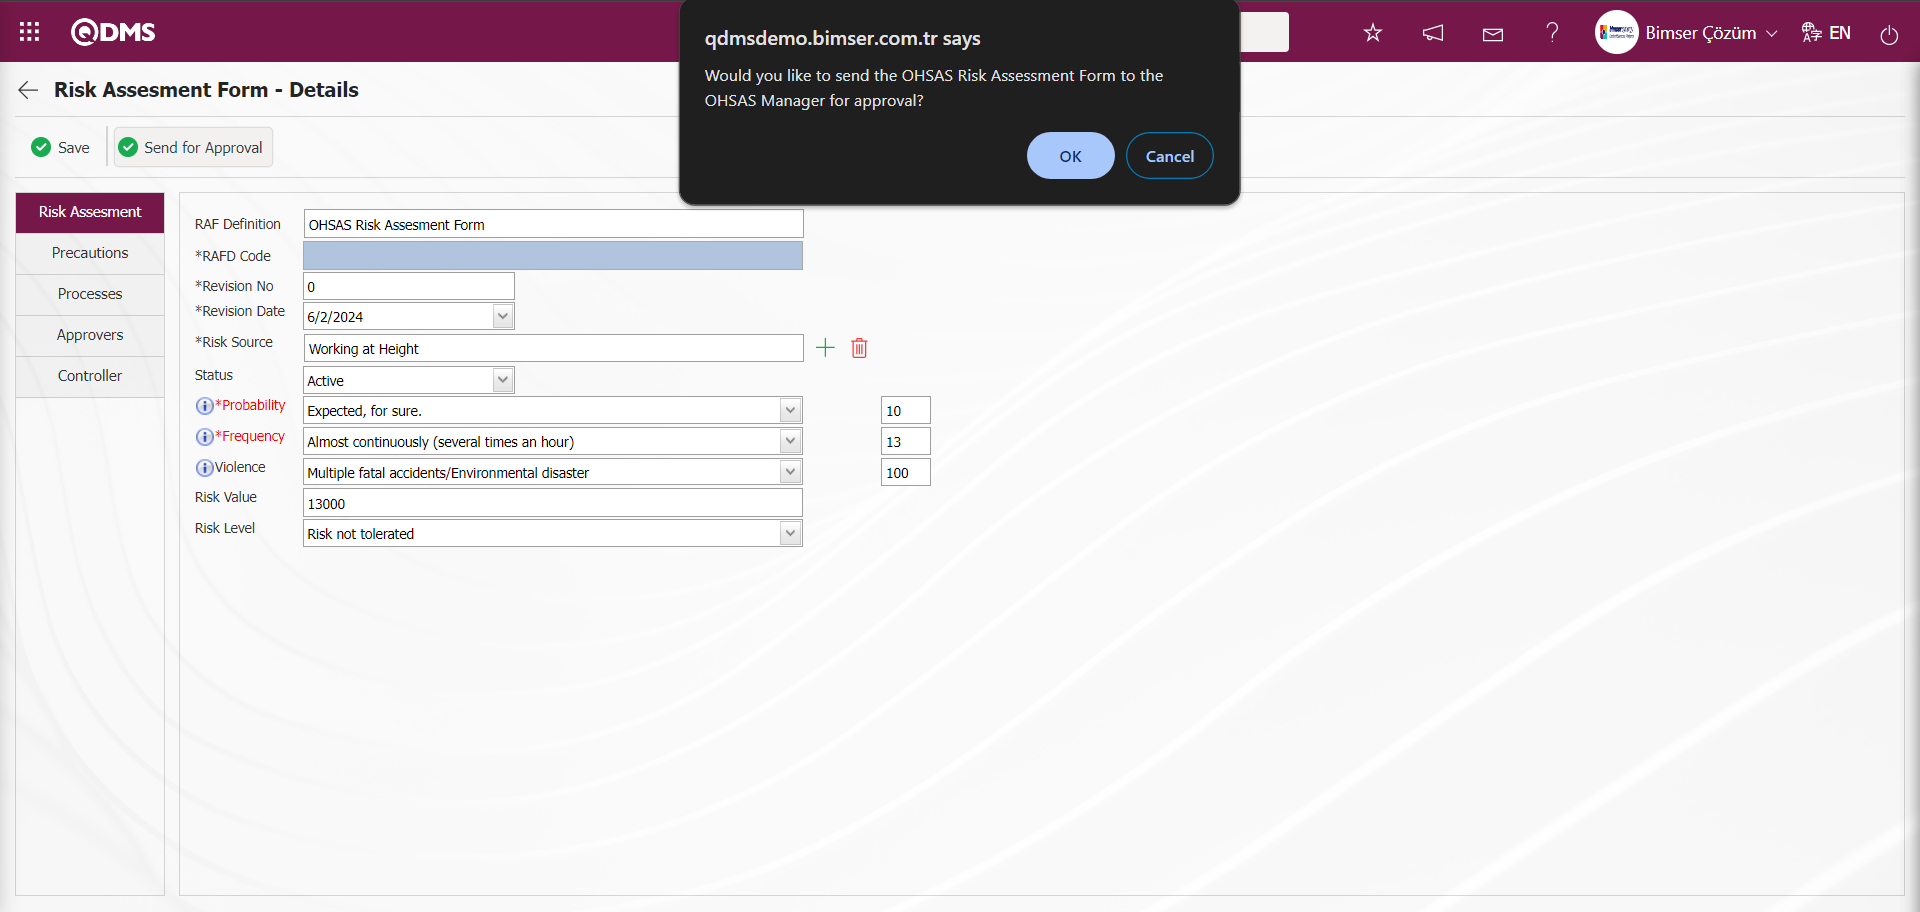
In the message given by the system, the “OK” button is clicked and the Risk Assessment detail is sent to the OHSAS Manager for approval.
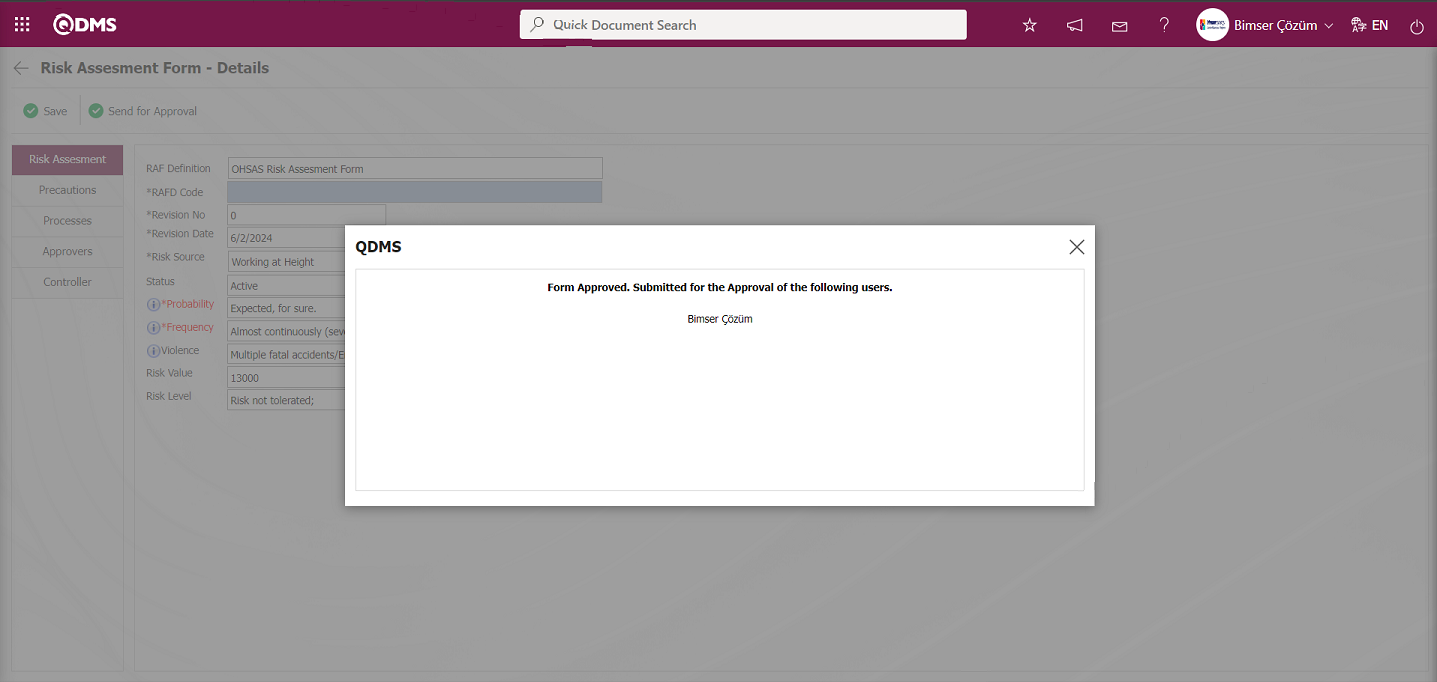
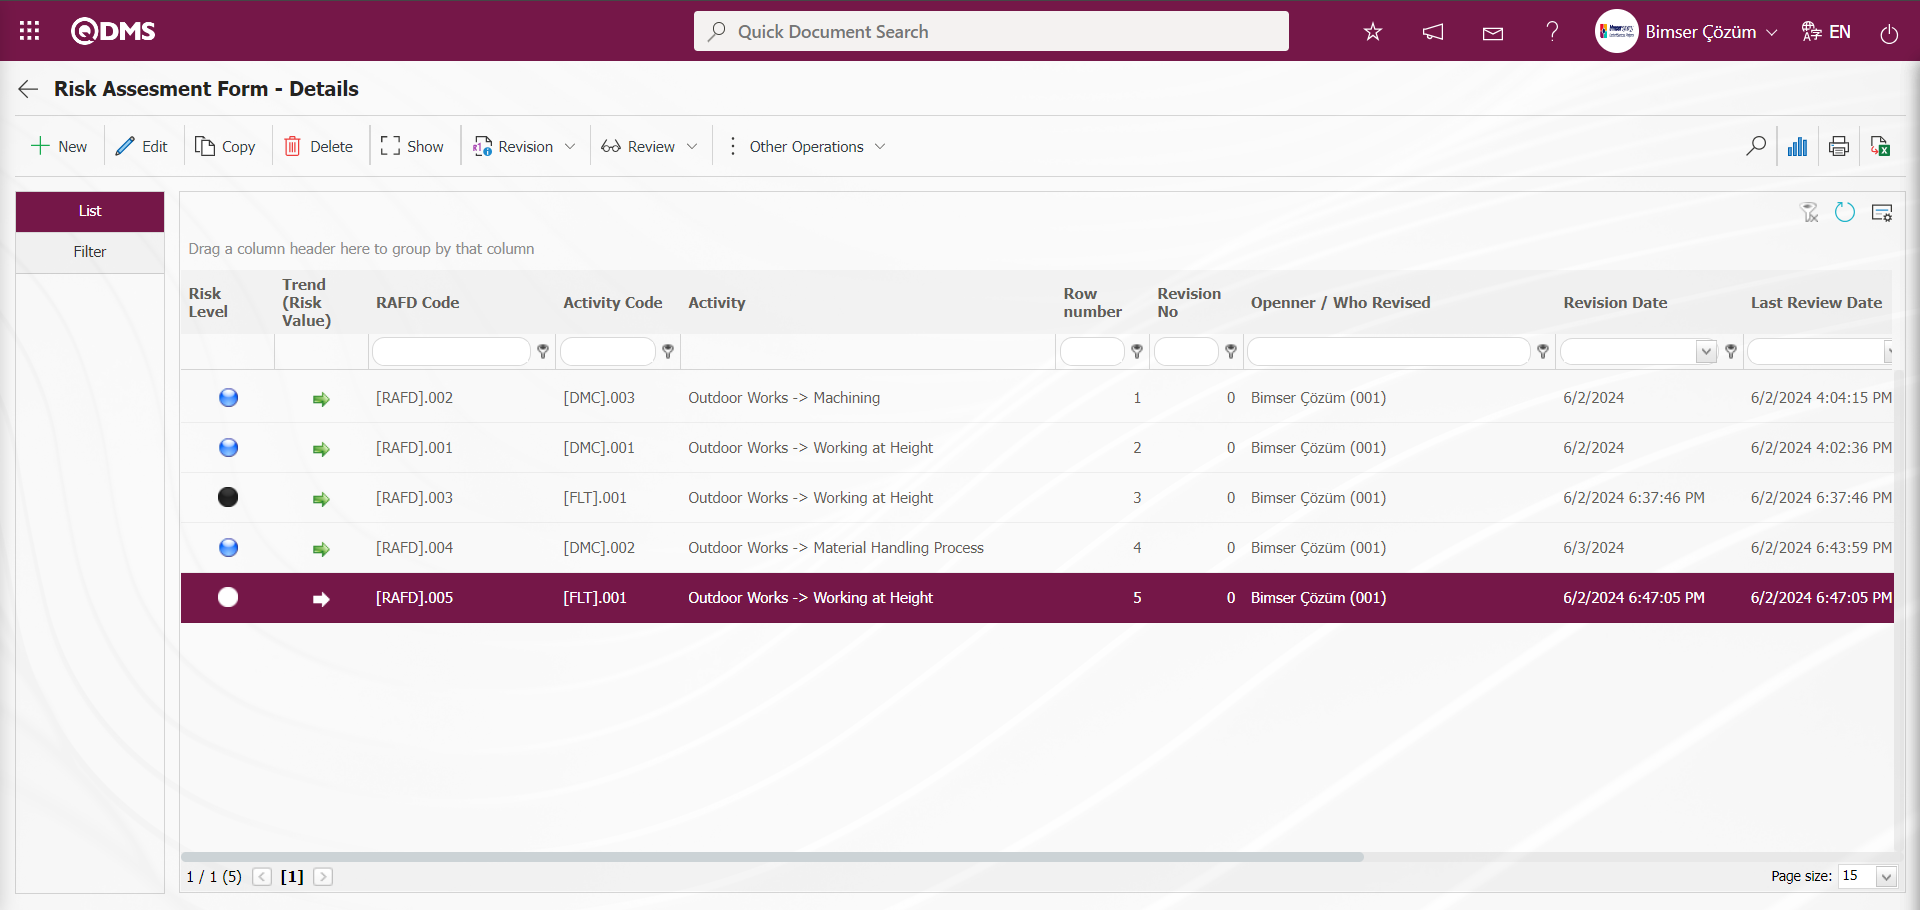
On the user's pending jobs page of the approval flow, the Risk Assessment Detail Forms “Risk Assessment Detail Forms awaiting for approval” task is created.
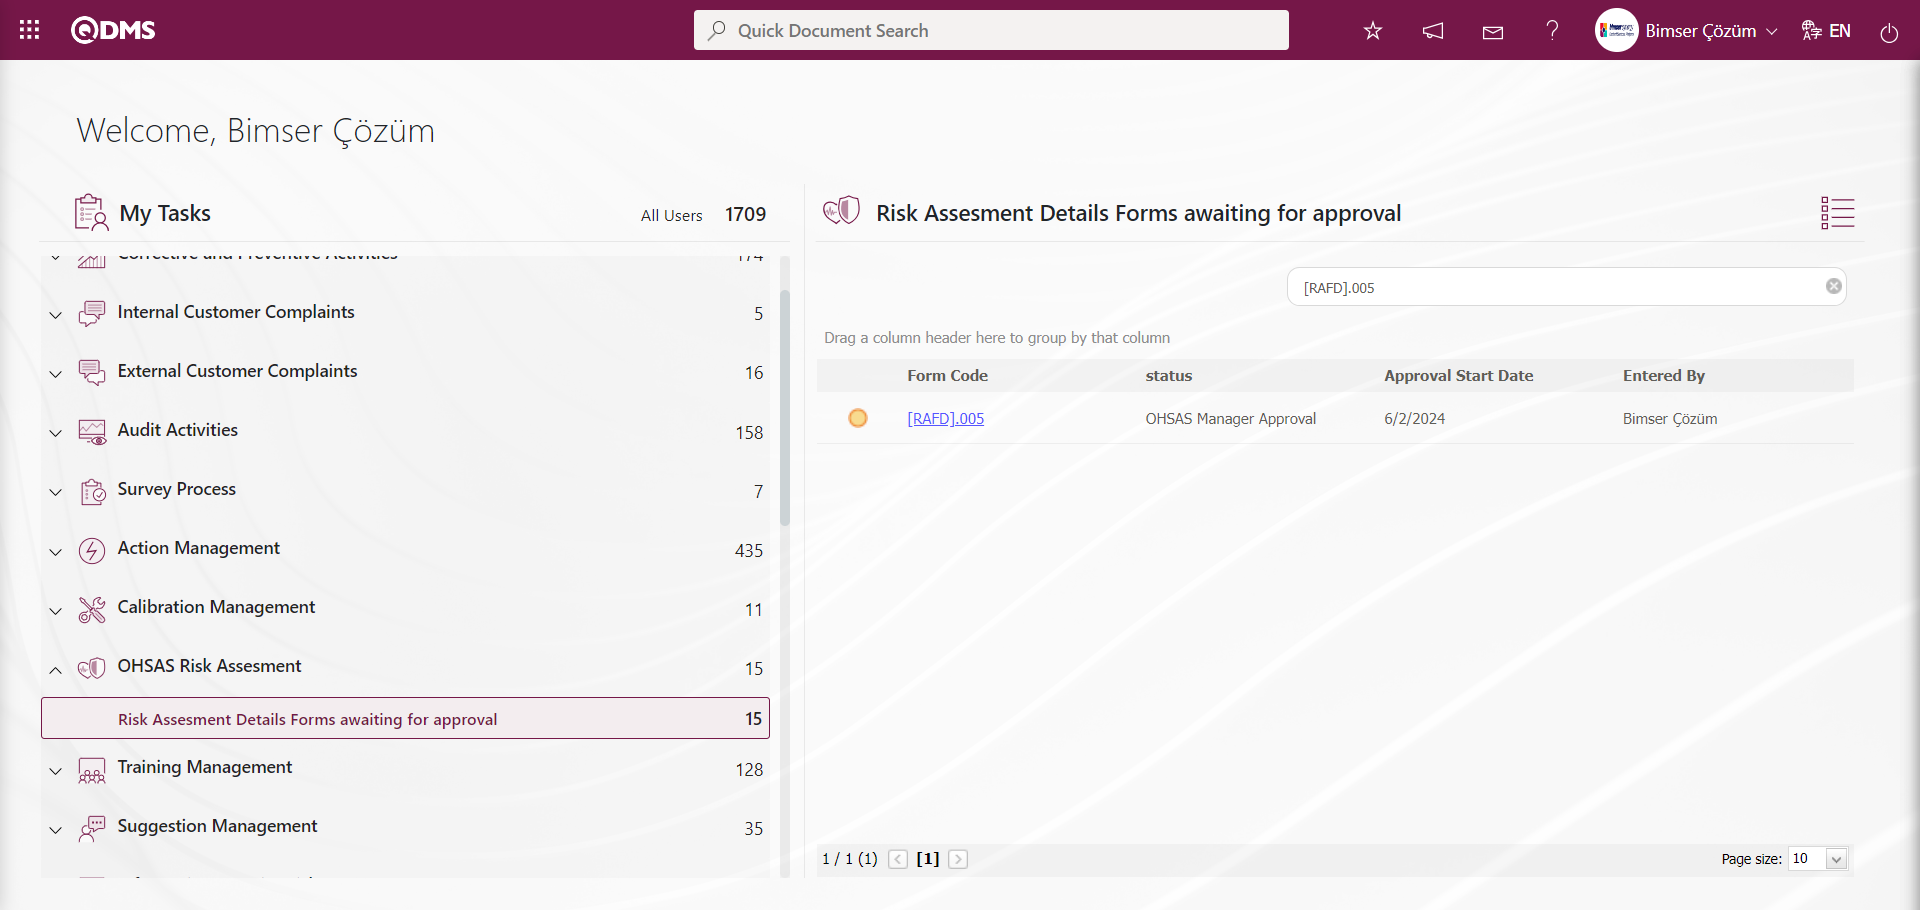
The Risk Assessment Form - Details screen is opened by clicking the link code in the Form code field in the relevant task.

With the help of the buttons on the screen;
 : Risk Assessment Form Detail is rejected.
 : Risk Assessment Form Detail is approved.
Click the button on the Risk Assessment Form - Details screen.
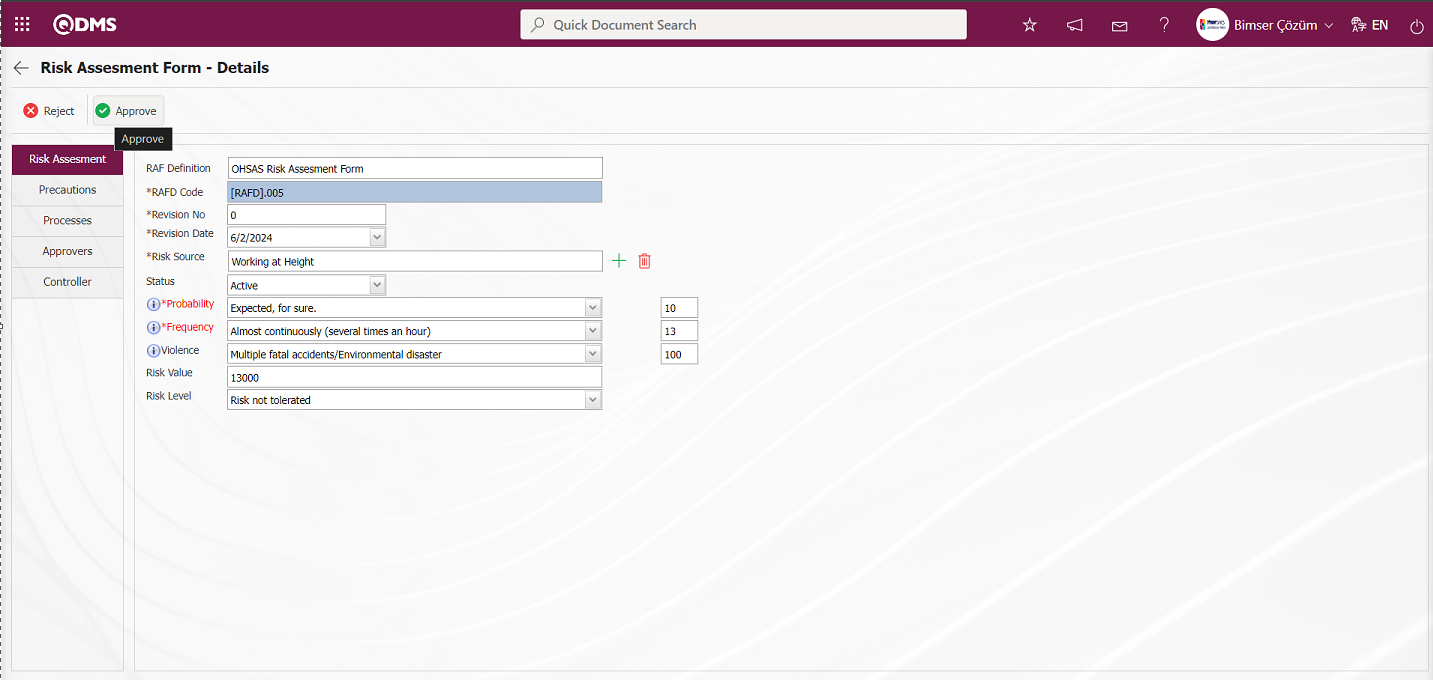
After the OHSAS Manager approves the Risk Assessment Form Detail, its status becomes “Completed/Approved”.

On the Risk Assessment Form-Details screen, Risk Assessment operations are performed by clicking the  button. Basic information and user-defined fields required for risk analysis are filled in the Risk Assessment tab. After the risk assessment form is filled in, colored dots such as yellow, red, green are seen on the main screen for the ranges determined by the risk level according to the OHSAS Risk Assessment methodology of the company. After the Processes for Risks are taken and realized, the risk level is reduced by performing the revision process, and it turns into the colors in the risk ranges at lower levels.
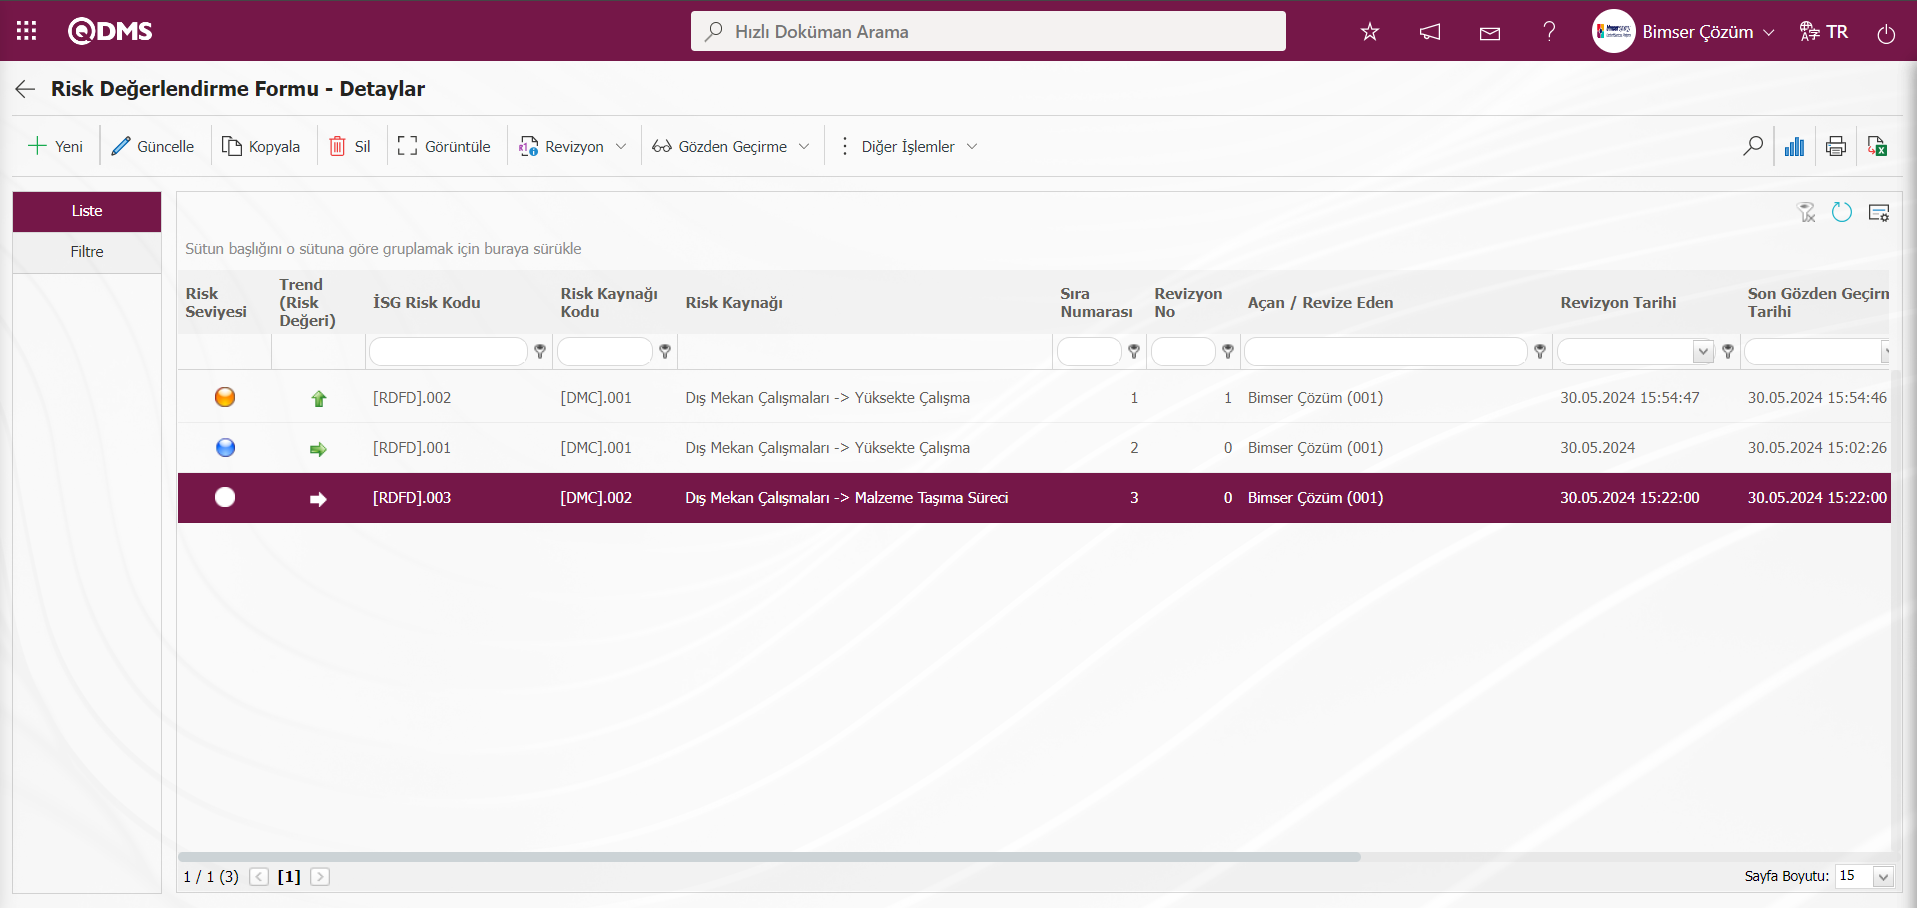
In the Trend column shown with  button, it can be seen whether the value of the relevant risk record has an increase, decrease or a stable trend compared to the previous revision. The risk and trend expressions seen on this screen can be specified in fields with the input type calculated during the field definition process.
On the Risk Assessment - Details screen, click the  button while Risk Assessment Detail is selected in the list tab.
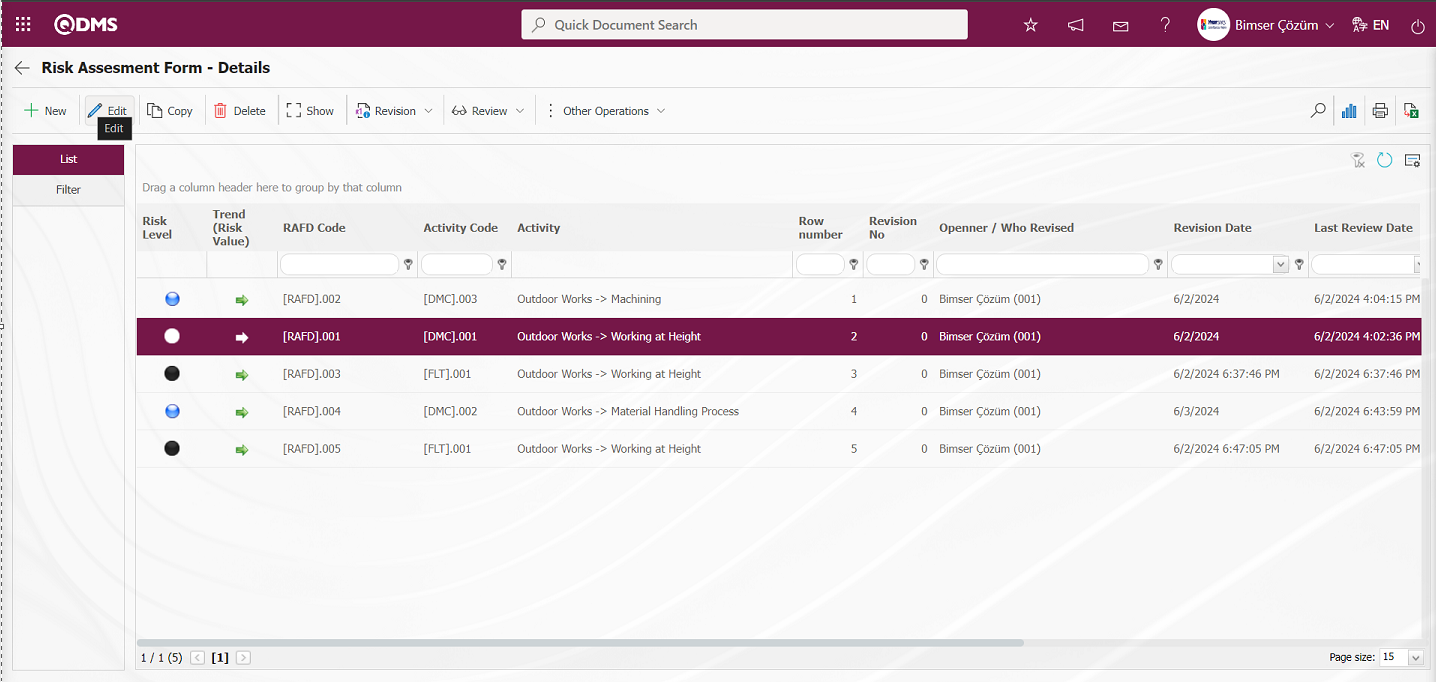
Risk Assessment Form-Details screen opens.

Precautions Tab:Precautions are planned to reduce the risk value in the Precautions tab on the Risk Assessment Form -Details screen. The parameter value of parameter 61 in the Measures tab OHSAS Risk Assessment Module parameters is activated by selecting “Yes”.

After the parameter is activated, the Precautions tab is displayed on the Risk Assessment Form-Details screen and measures are taken to reduce the level of the risk related to the risk record. Precautions tab can also be used to set the statuses in which it will be active. In the OHSAS Risk Assessment module parameters, the status codes defined in the Function Indexer menu are written in the parameter value of parameter 102 and the Precautions tab is activated in the statuses found in the status codes written. For more than one status, the identification process is done by writing commas between the status codes in the parameter value.

On the Risk Assessment Form-Details screen, click on the Precautions tab.
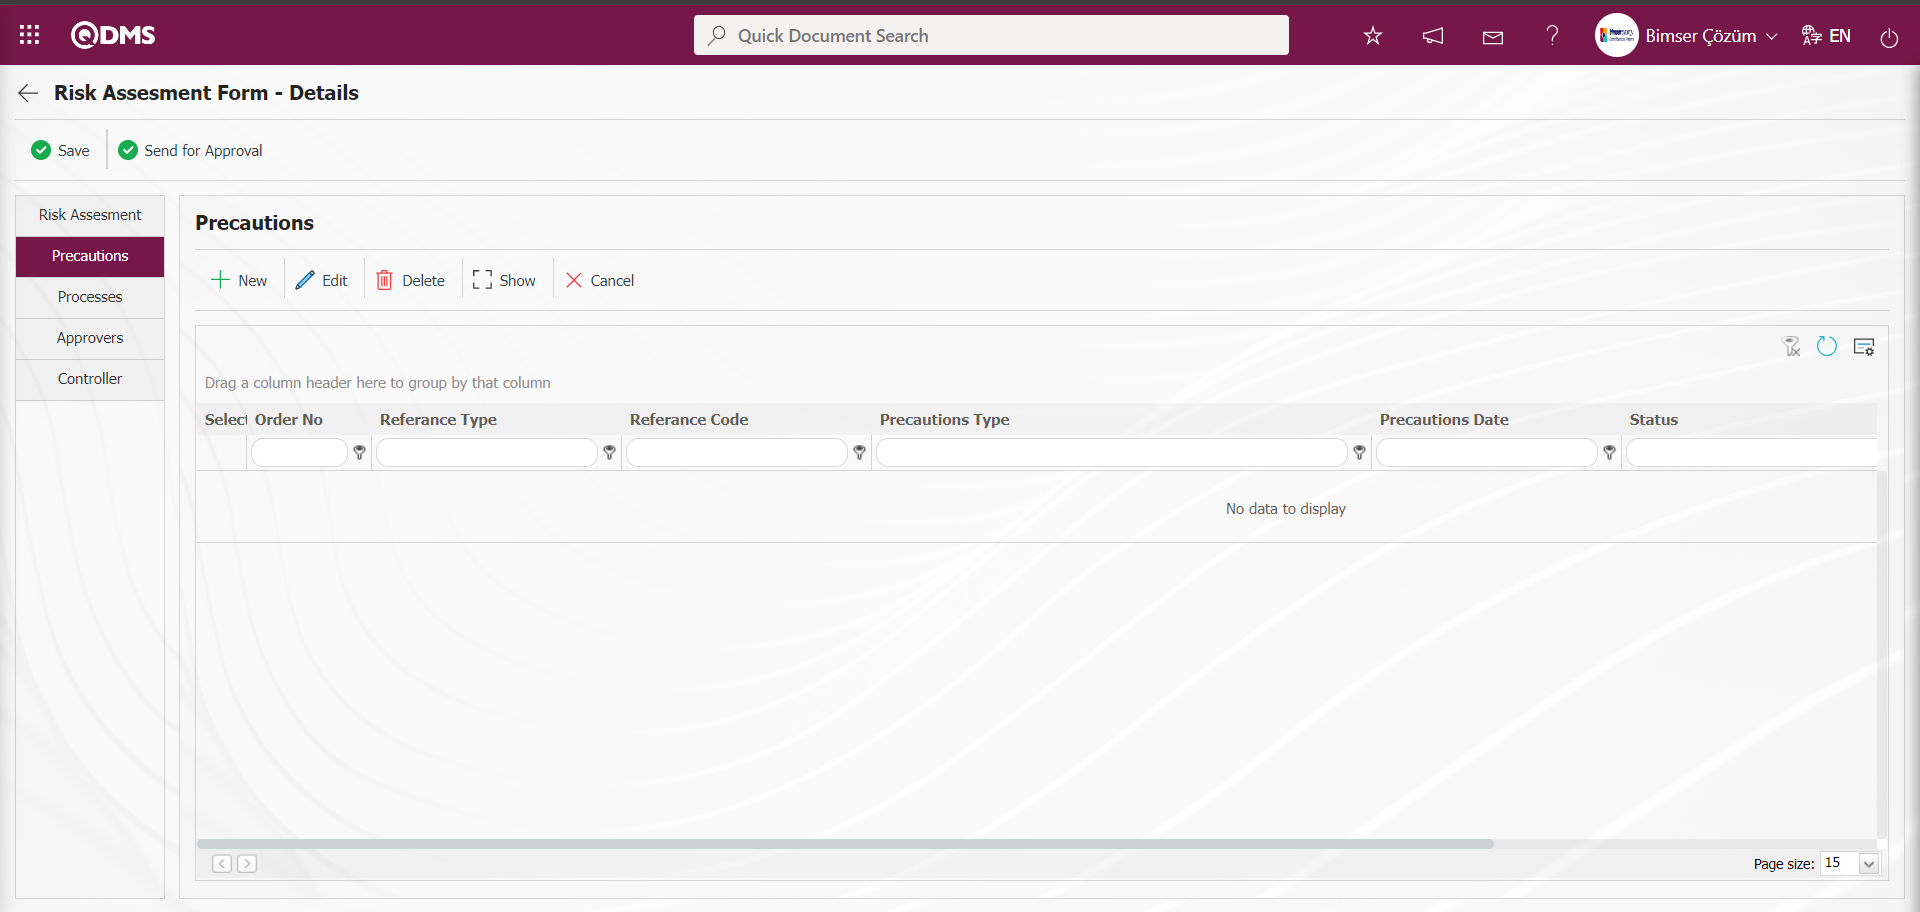
With the help of the buttons on the screen;
 : A new precaution is defined.
 : Editing and updating is done on the selected measure information in the list. It is a button displayed depending on the parameter. The parameter is activated by selecting the parameter value “Yes” for parameter 167 in the OHSAS Risk Assessment Module parameters.
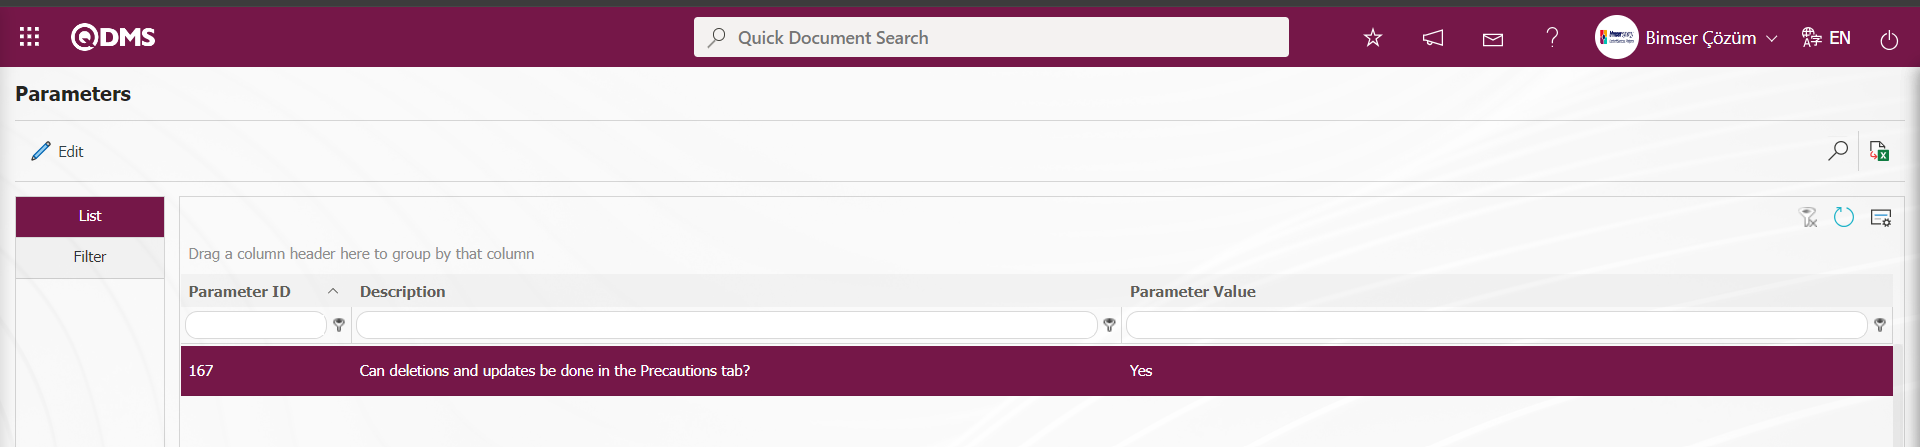
After the parameter is activated, this button is displayed and editing and updating operations are performed on the selected prevention information.
 : Deletes the selected measure information in the list. It is a button displayed depending on the parameter. The parameter is activated by selecting the parameter value “Yes” for parameter 167 in the OHSAS Risk Assessment Module parameters.
After the parameter is activated, this button is displayed and the selected precaution information is deleted.
 : Selected precaution information is displayed in the list.
 : In the selected precaution information in the list, the precaution is canceled by writing the reason for cancellation.
Click the button to define a new precaution in the Precautions tab
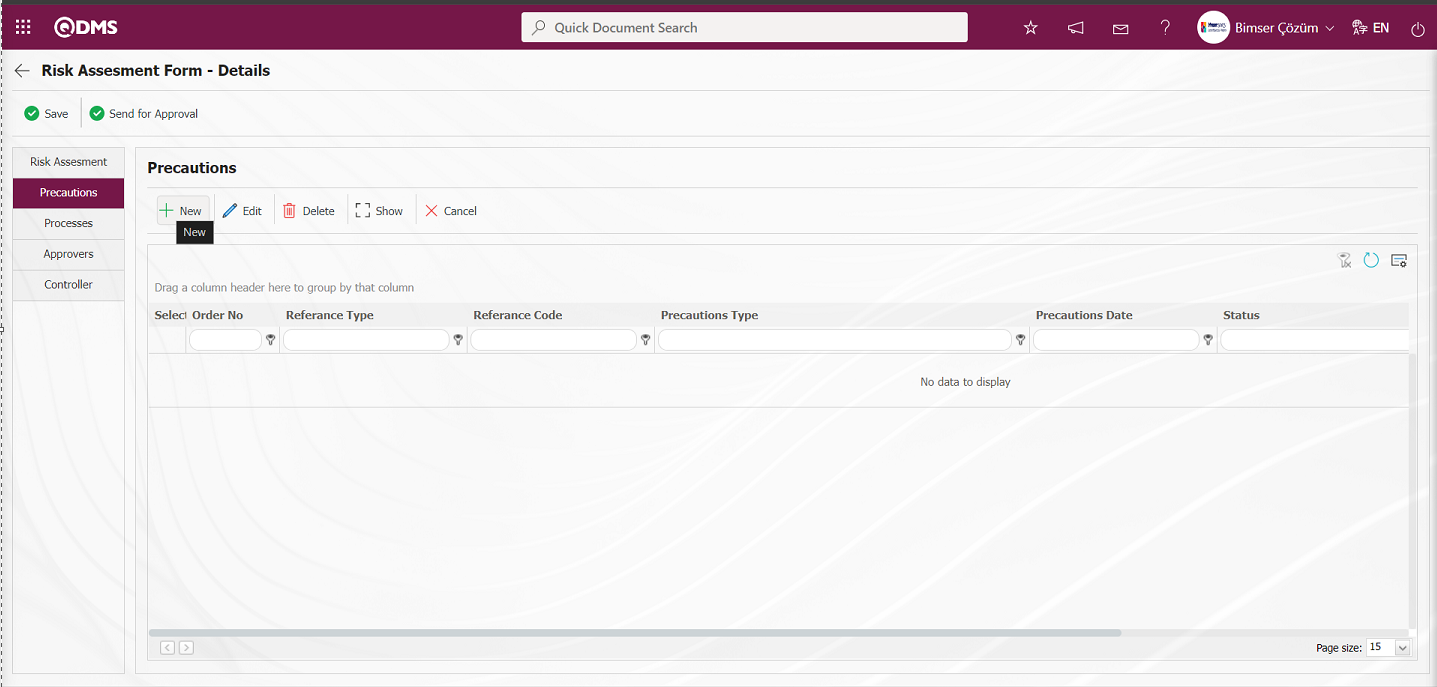 The Precautions screen opens.
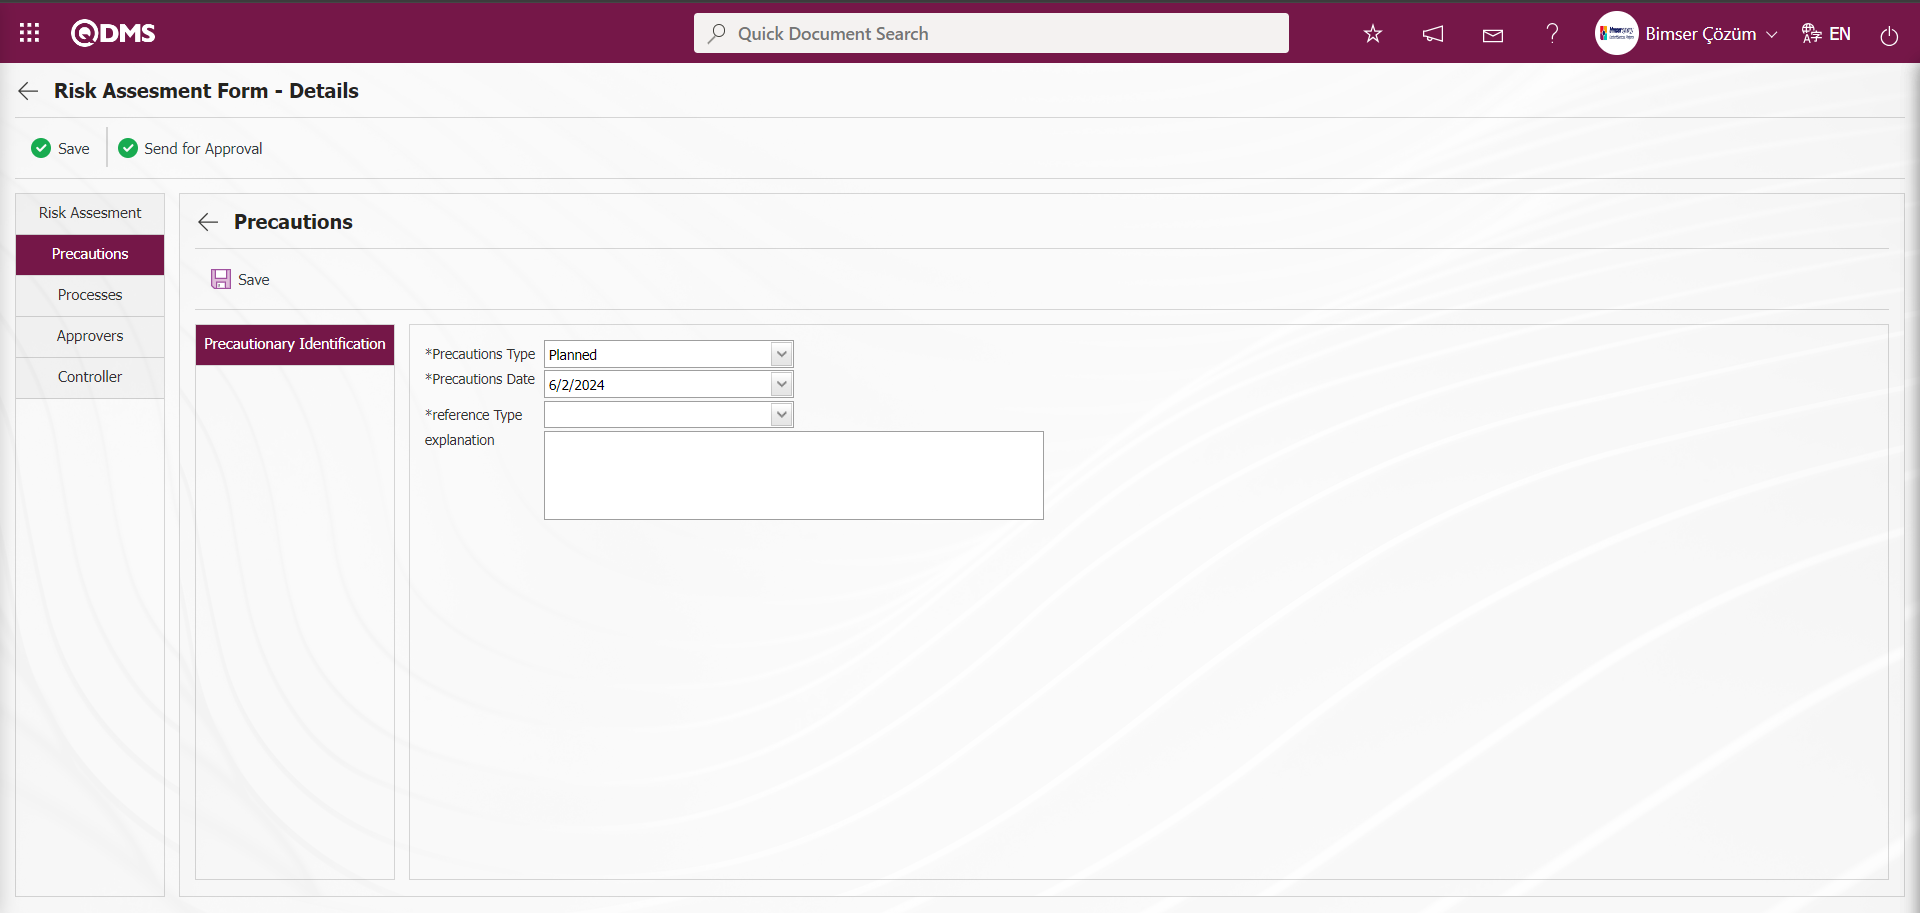
Related fields are defined on the screen that opens:
Reference Type:In the Precautions tab, Document, CAPA and Action options are selected as Precautions.
When reference type is selected as Document;
When the reference information is selected as Document, it is selected in the list of Documents defined in the system by clicking the  (Select) button in the reference information field. Documents installed in the Document Management Module are displayed in the Document list.
When the reference type option CAPA is selected, the area where the CAPA record is selected from the existing registered list or the option of the process step of defining a new CAPA record is displayed. When the “Select from list” option is selected, a selection is made from the CAPA records defined in the system in the reference type field.
In the Select from List process, the closed CAPA defined in the system is also selected. In order to perform this operation, the parameter value of the parameter 160 “Can closed CAPAs be selected in precautions?” in the OHSAS Risk Assessment Module parameters is selected as “Yes” and the parameter is activated.
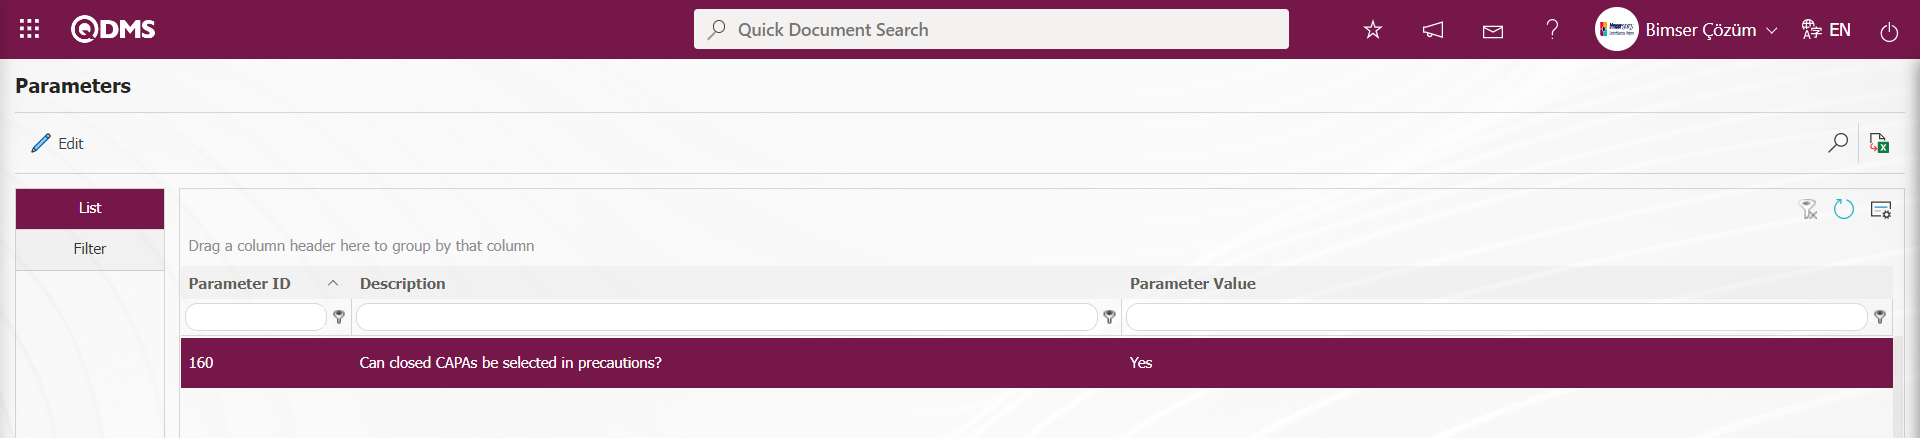
After the parameter is activated, when the “Select from List” option is selected, the selection process is performed by ensuring that the CAPAs closed to the CAPA List defined in the system are included in the list.
When the “Create New” option is selected, a new CAPA record is defined on the CAPA Operations-New Record screen. It is defined by writing the code information of the CAPA processing source in the parameter value of the parameter 183 “CAPA Processing Source to be Used in Precautions?”** in the OHSAS Risk Assessment Module parameters.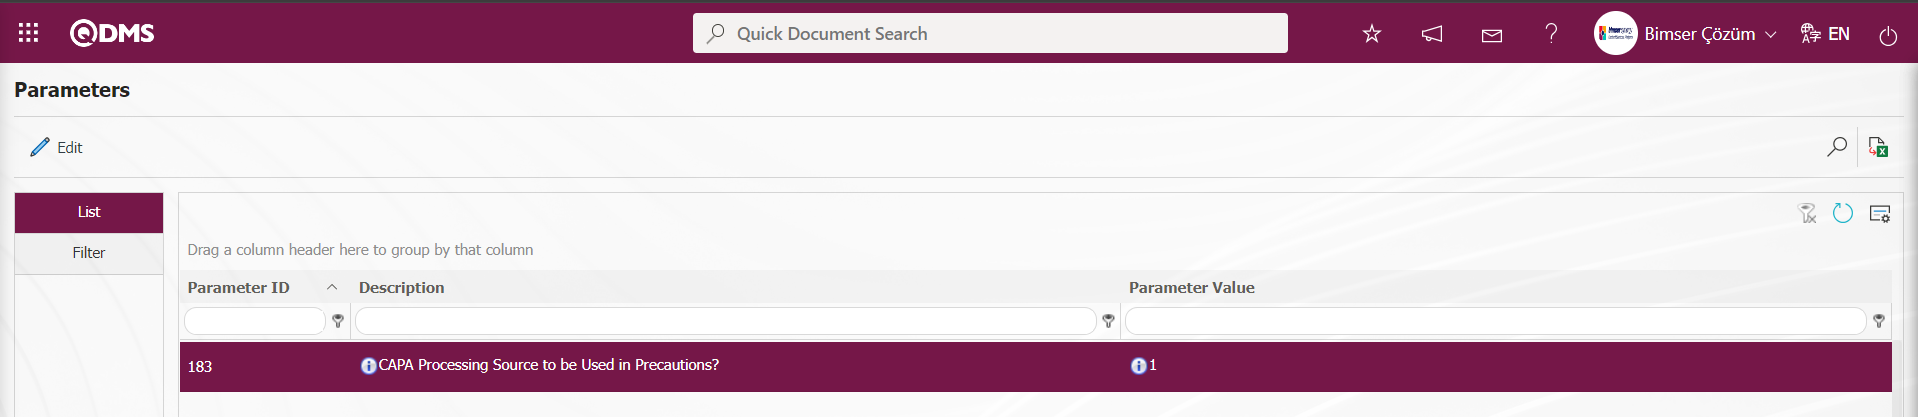
The defined Transaction Source code information is retrieved from the System Infrastructure Definitions/CAPA/ CAPA Transaction Source menu. When CAPA is taken as a measure in the OHSAS Risk Assessment module, this CAPA record opens depending on the parameter defined CAPA Action source.
When the reference type option Action is selected; the area where the Action record is selected from the existing registered list or the option of the process step to define a new Action will be displayed. If the “Select from list” option is selected, a selection is made from the existing Actions defined in the system. In the Select from List process, closed Actions defined in the system are also selected. In order to perform this operation, the parameter value of the parameter 161 “Can closed Actions be selected in precautions?”in the OHSAS Risk Assessment Module parameters is selected as “Yes” and the parameter is activated.
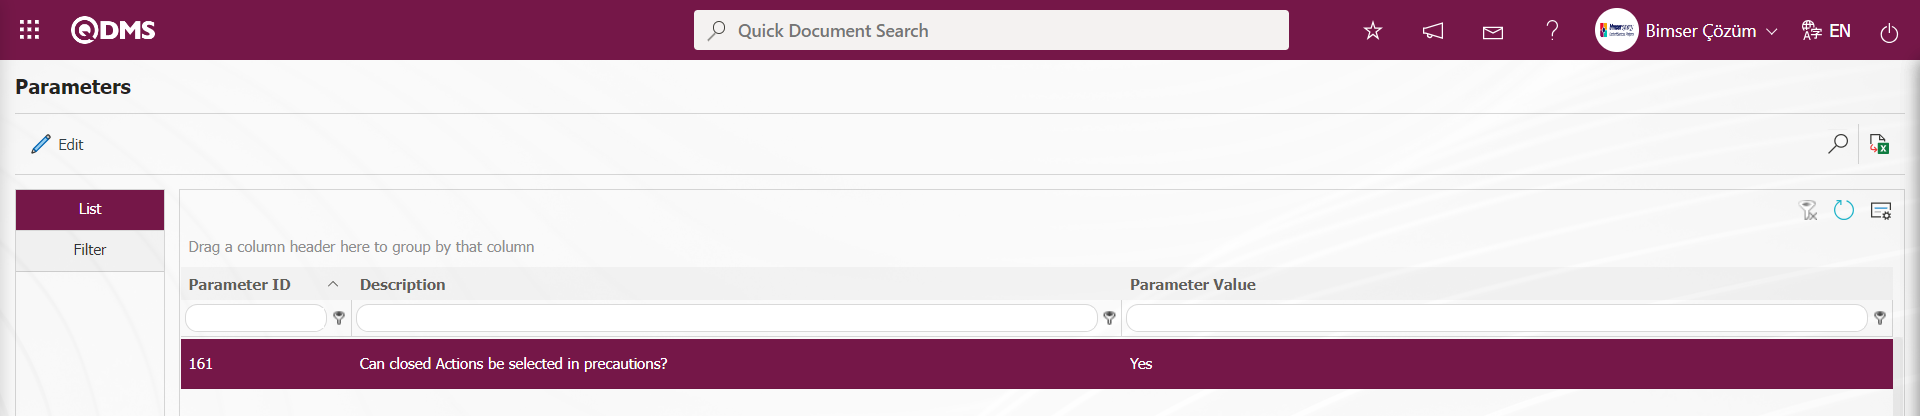
After the parameter is activated, when the “Select from List” option is selected, the actions closed to the Action List defined in the system defined in the system are selected by ensuring that they are included in the list.
When the “Create New” option is selected, a new Action Item is defined by opening the Action Item Planning-New Record screen. It is defined in the “Action - Source Code” parameter numbered 8 in the OHSAS Risk Assessment Module parameters.

Action Source code information is obtained from System Infrastructure Definitions/Action/Action Source Definition screen. When an action is taken as a measure in the OHSAS Risk Assessment module, these actions are opened depending on the parameter defined action source.
Precautions Type: In the Precautions tab, it is the field where the selection is made in the Current and Planned option. In the current selection, CAPA and Actions registered in the system are selected as precautions. In the planned selection process, it is the process of opening a CAPA Record as a new precaution or defining a new Action as a precaution.
Precautions Date: This is the field where the date of the measure to be defined in the Precautions tab is selected in the calendar field.
Explanation: This is the field where the explanation information, if any, of the measure to be defined in the Precautions tab is written.
For example: Action is selected as the measure type.
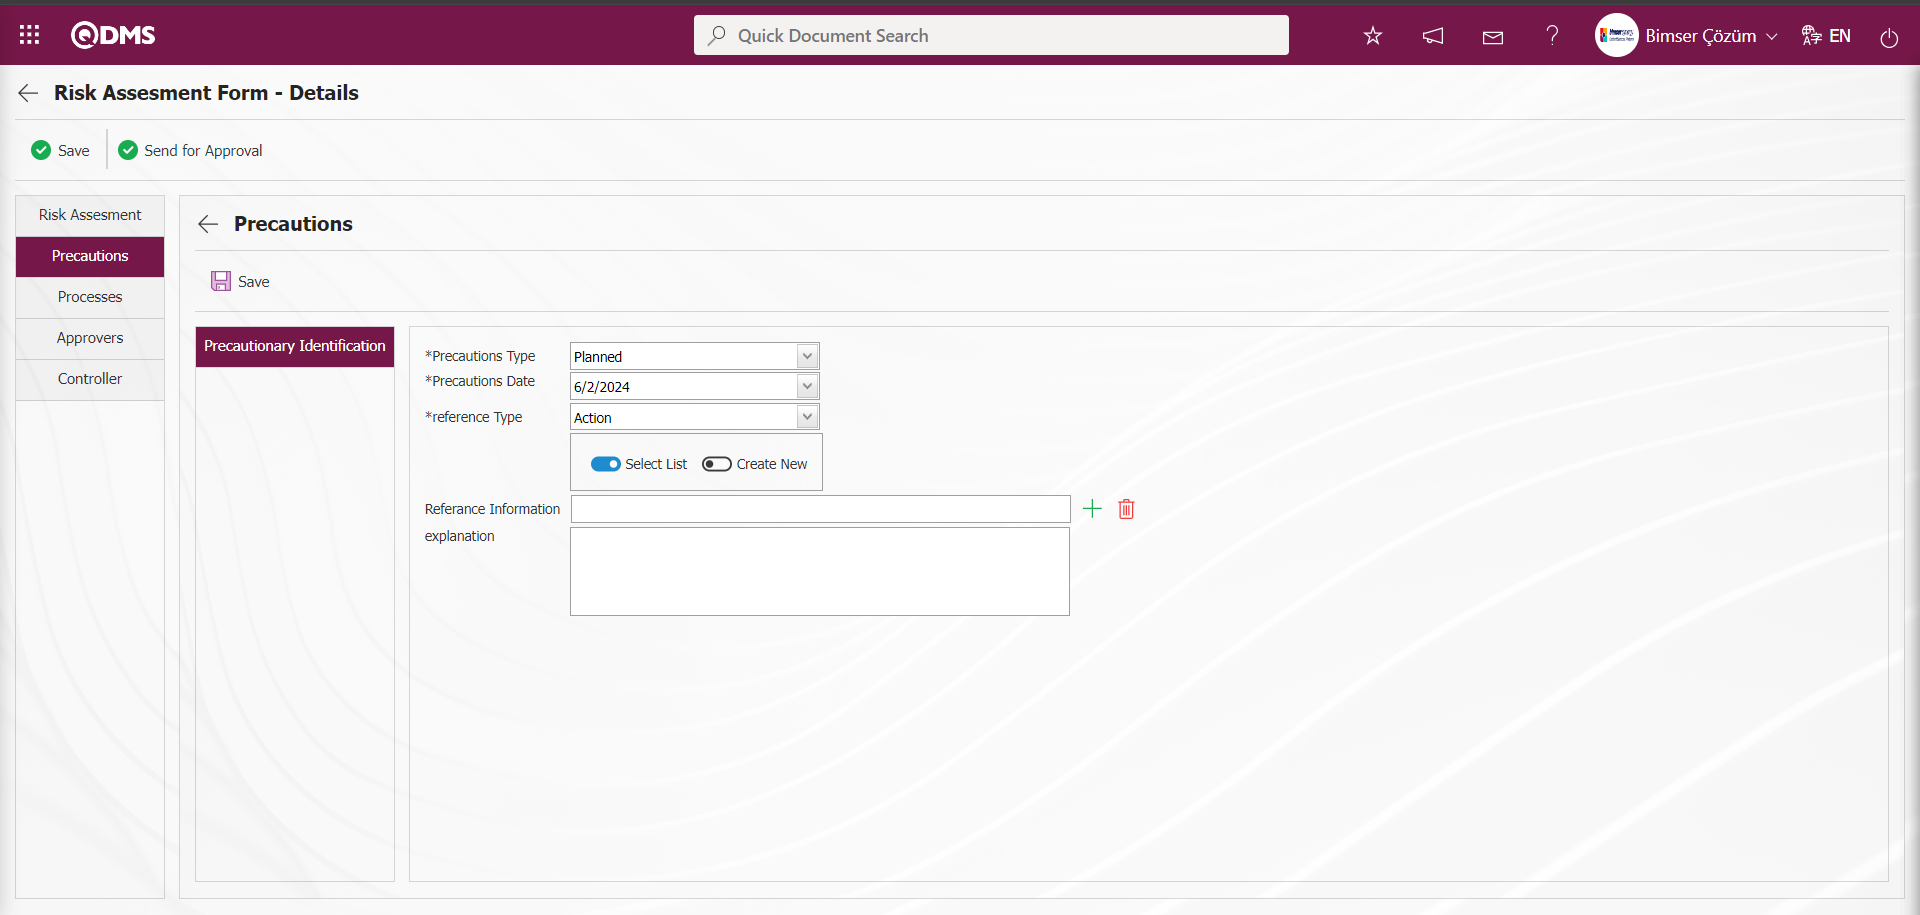
If the Action is created by selecting the “Create New” option from the “Select from List” and “Create New” options, a connection is established with the Action module as follows. Action Item Planning - New Record screen opens.
Action Information tab:This is the tab where information about the action is entered. Actions are entered by writing the relevant information.
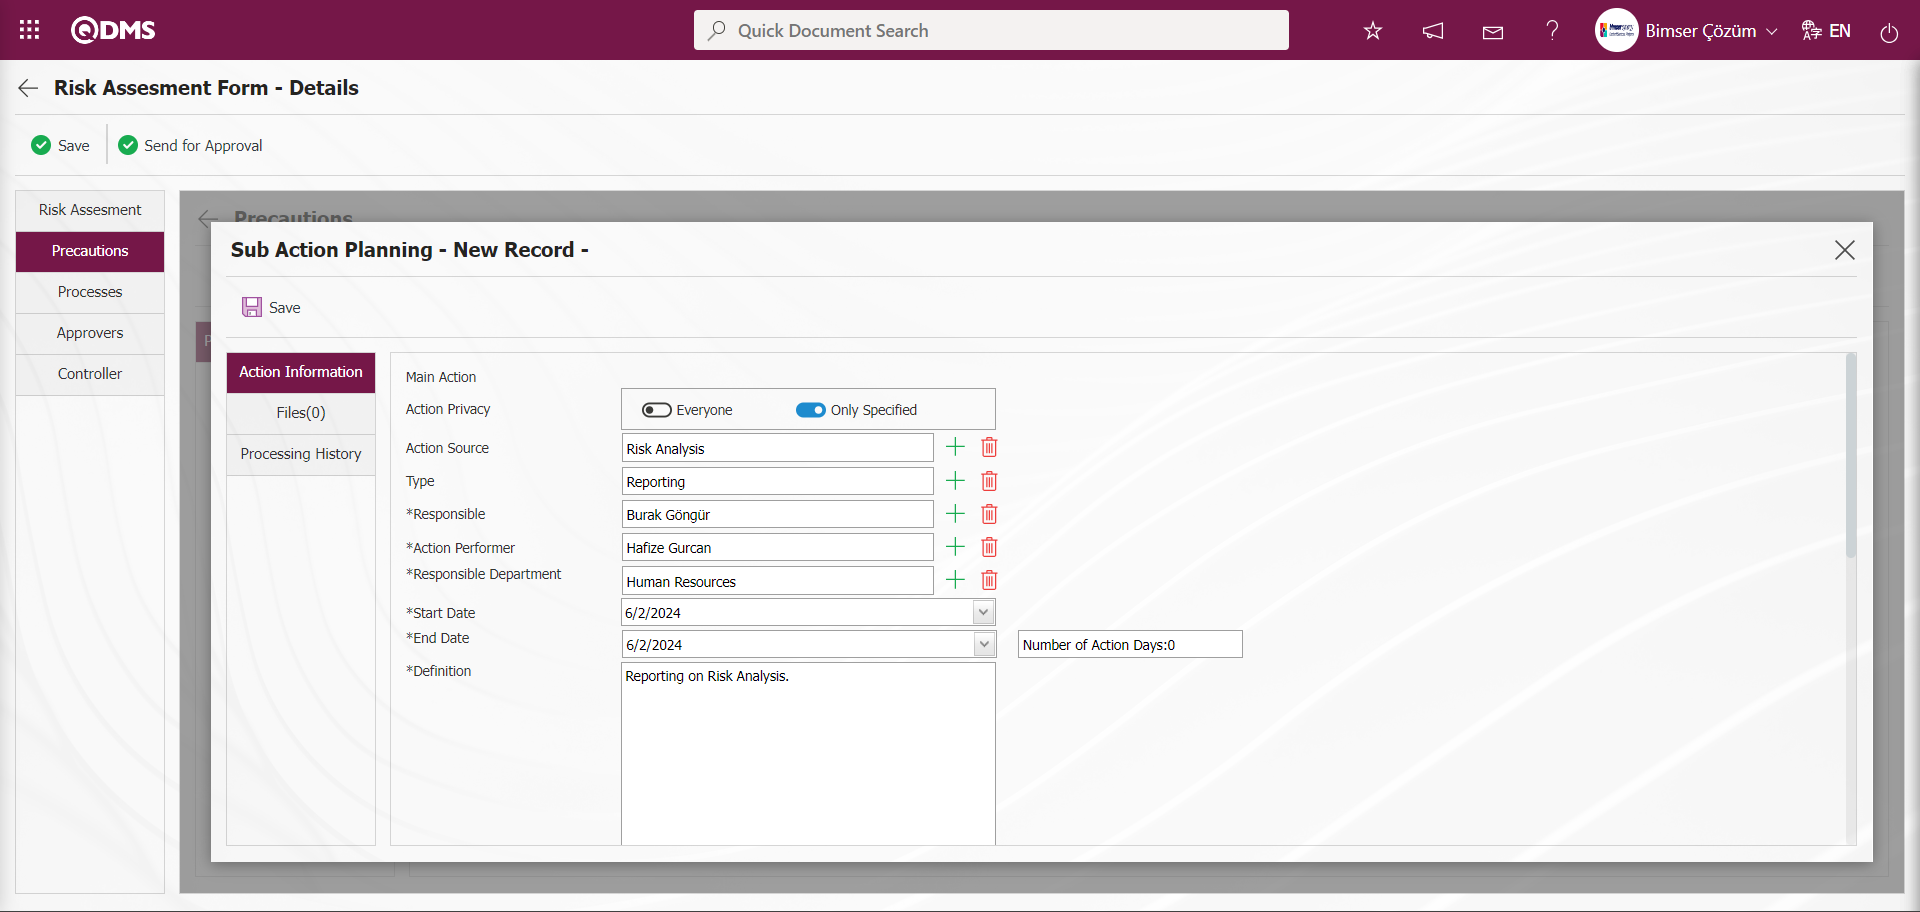
Files Tab:If there is an additional file related to the action, it is the tab where it is added to the system. If desired, additional files related to the action opened as a precaution can be uploaded.
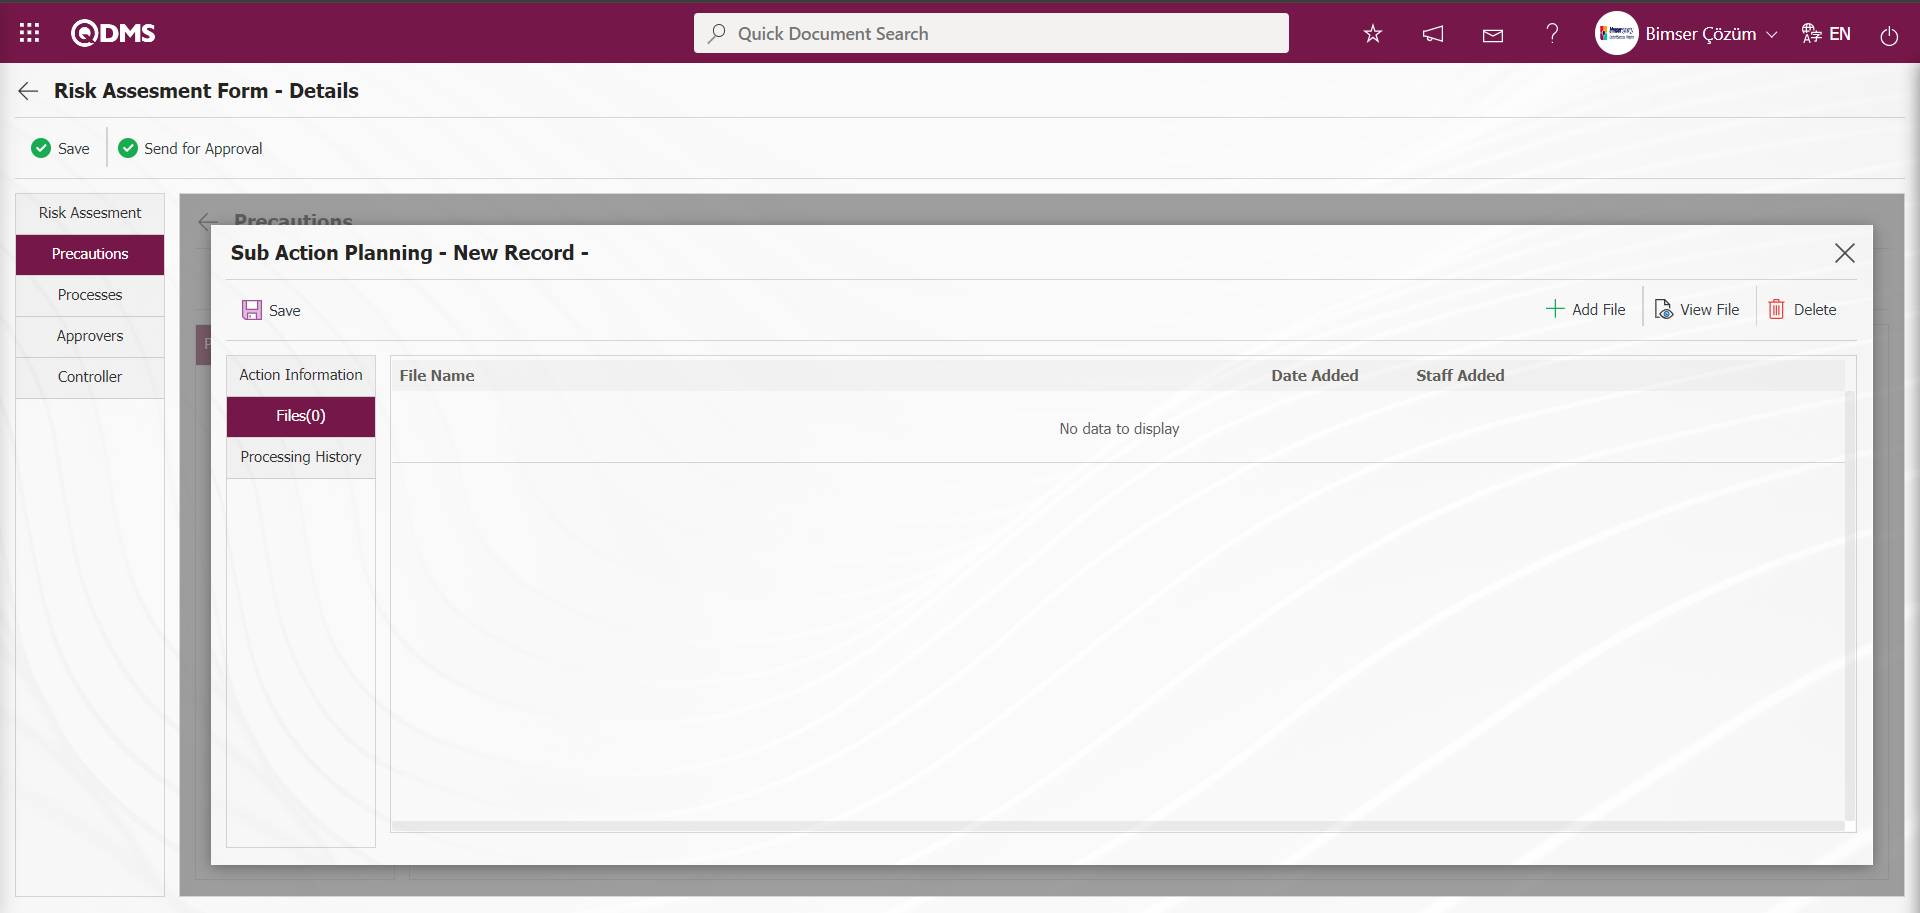
With the help of the buttons on the screen;
 : The additional file is uploaded to the system.
 : The uploaded additional file information is displayed.
 : The uploaded attachment file information is deleted.
Processing history tab is the tab where processing history information is given.
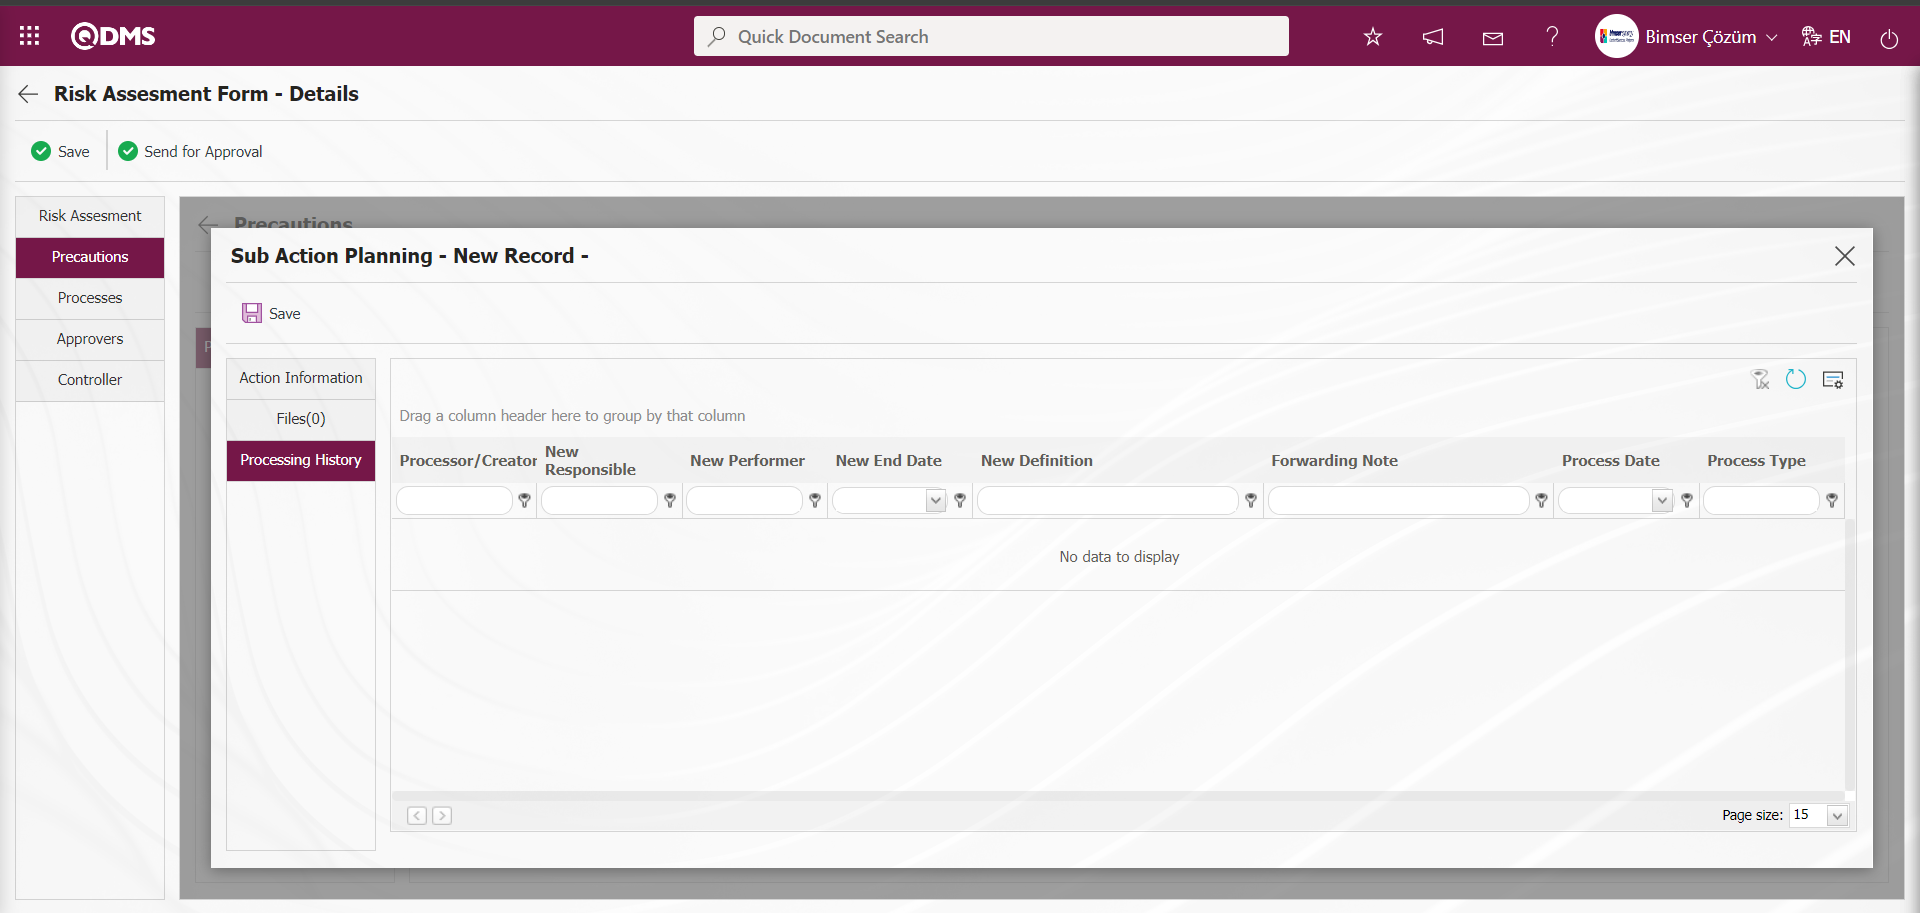
Sub Action Planning - New Record screen, after the required fields and related information are entered, the Sub Action Planning registration process is done by clicking the  button in the upper left corner of the screen.
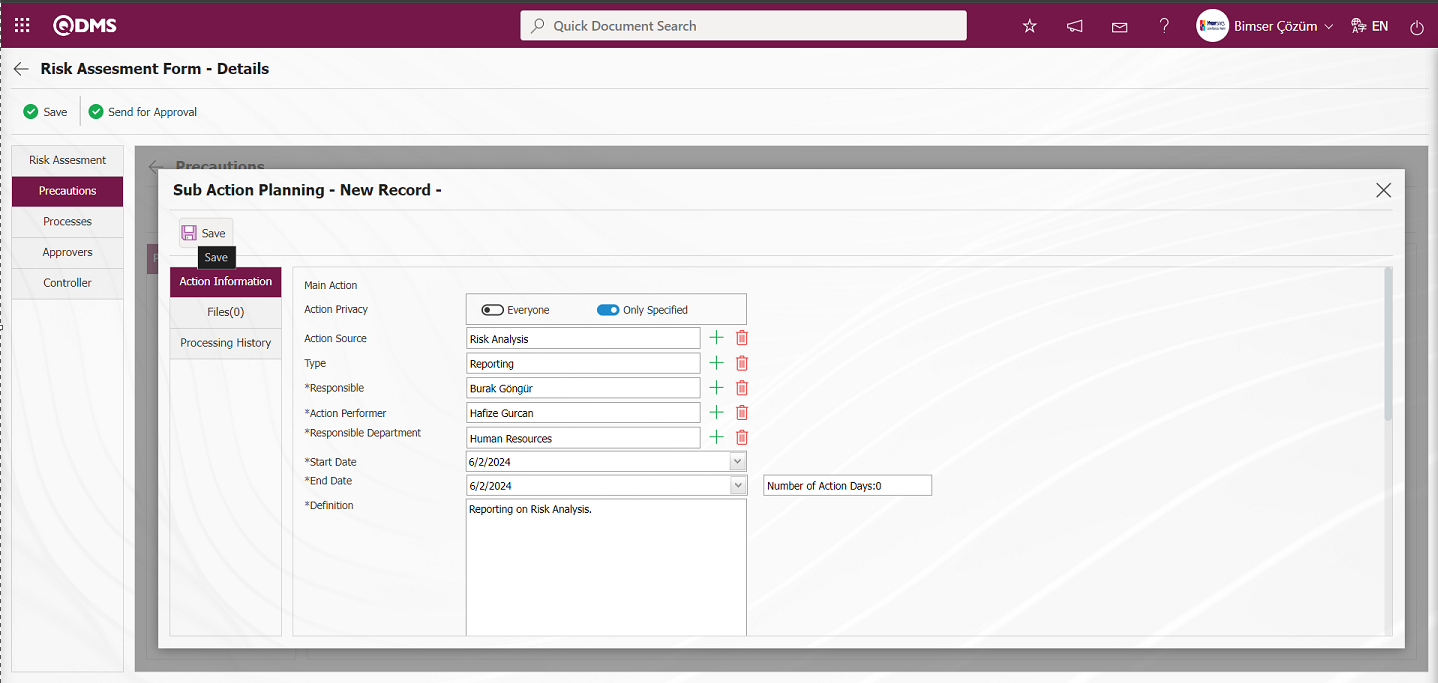
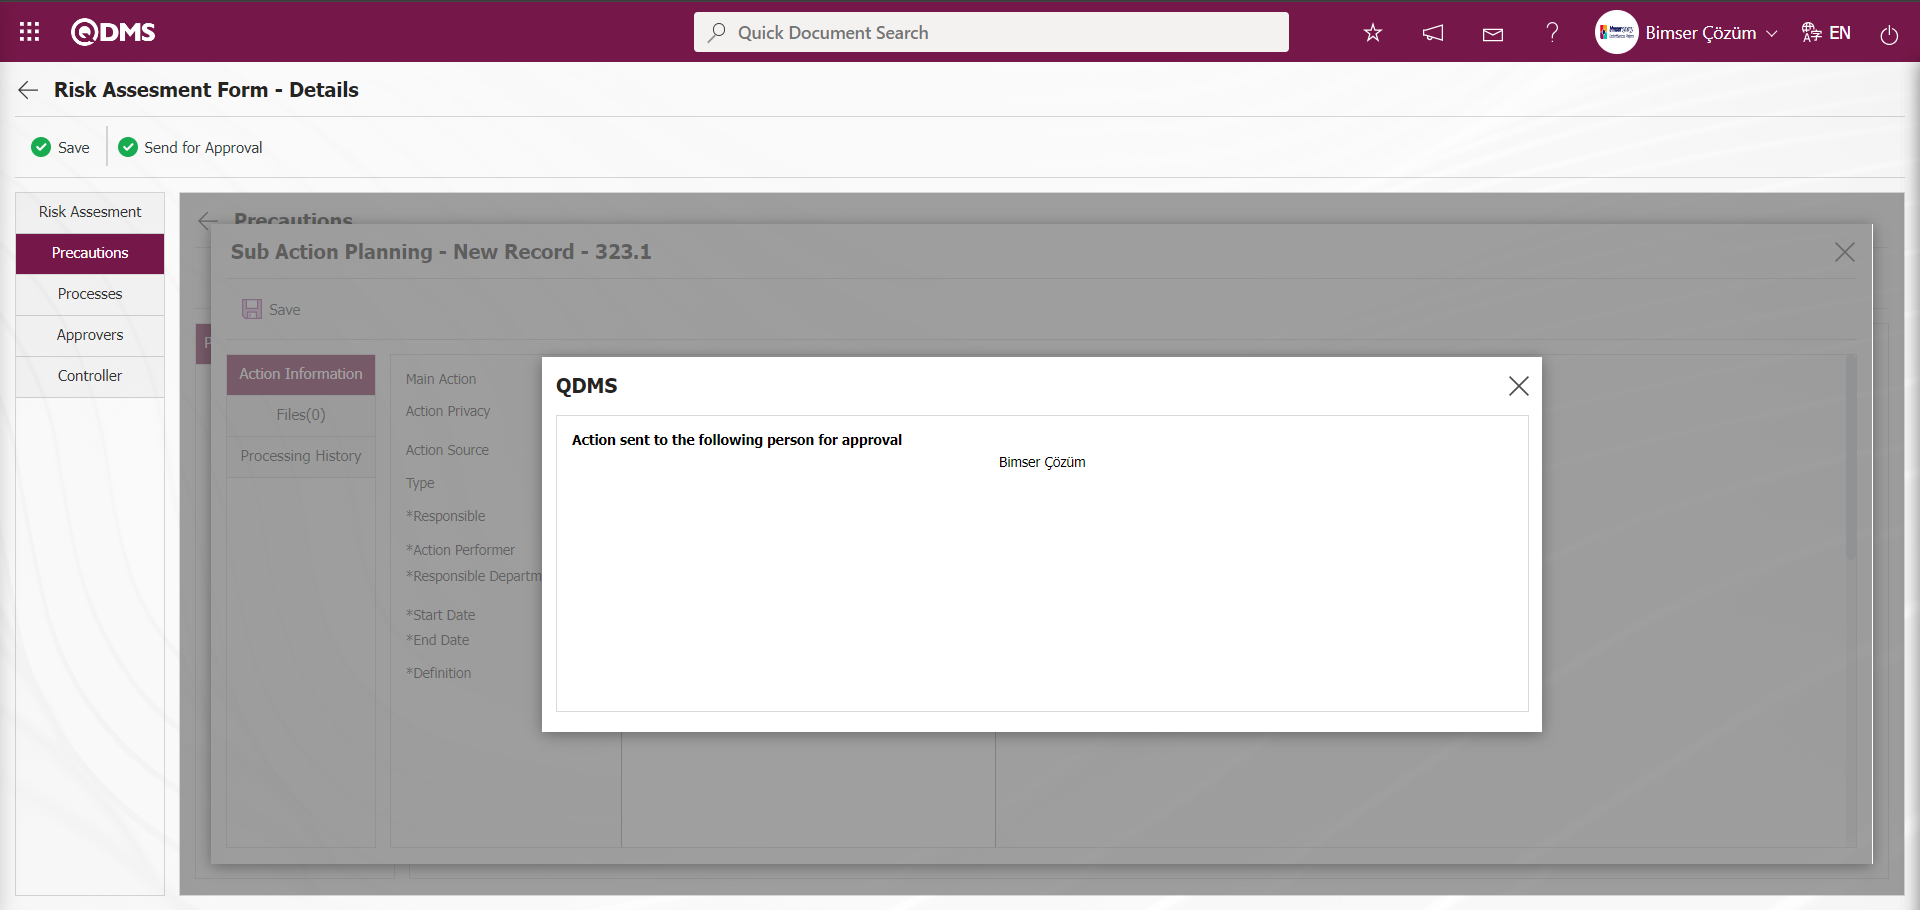
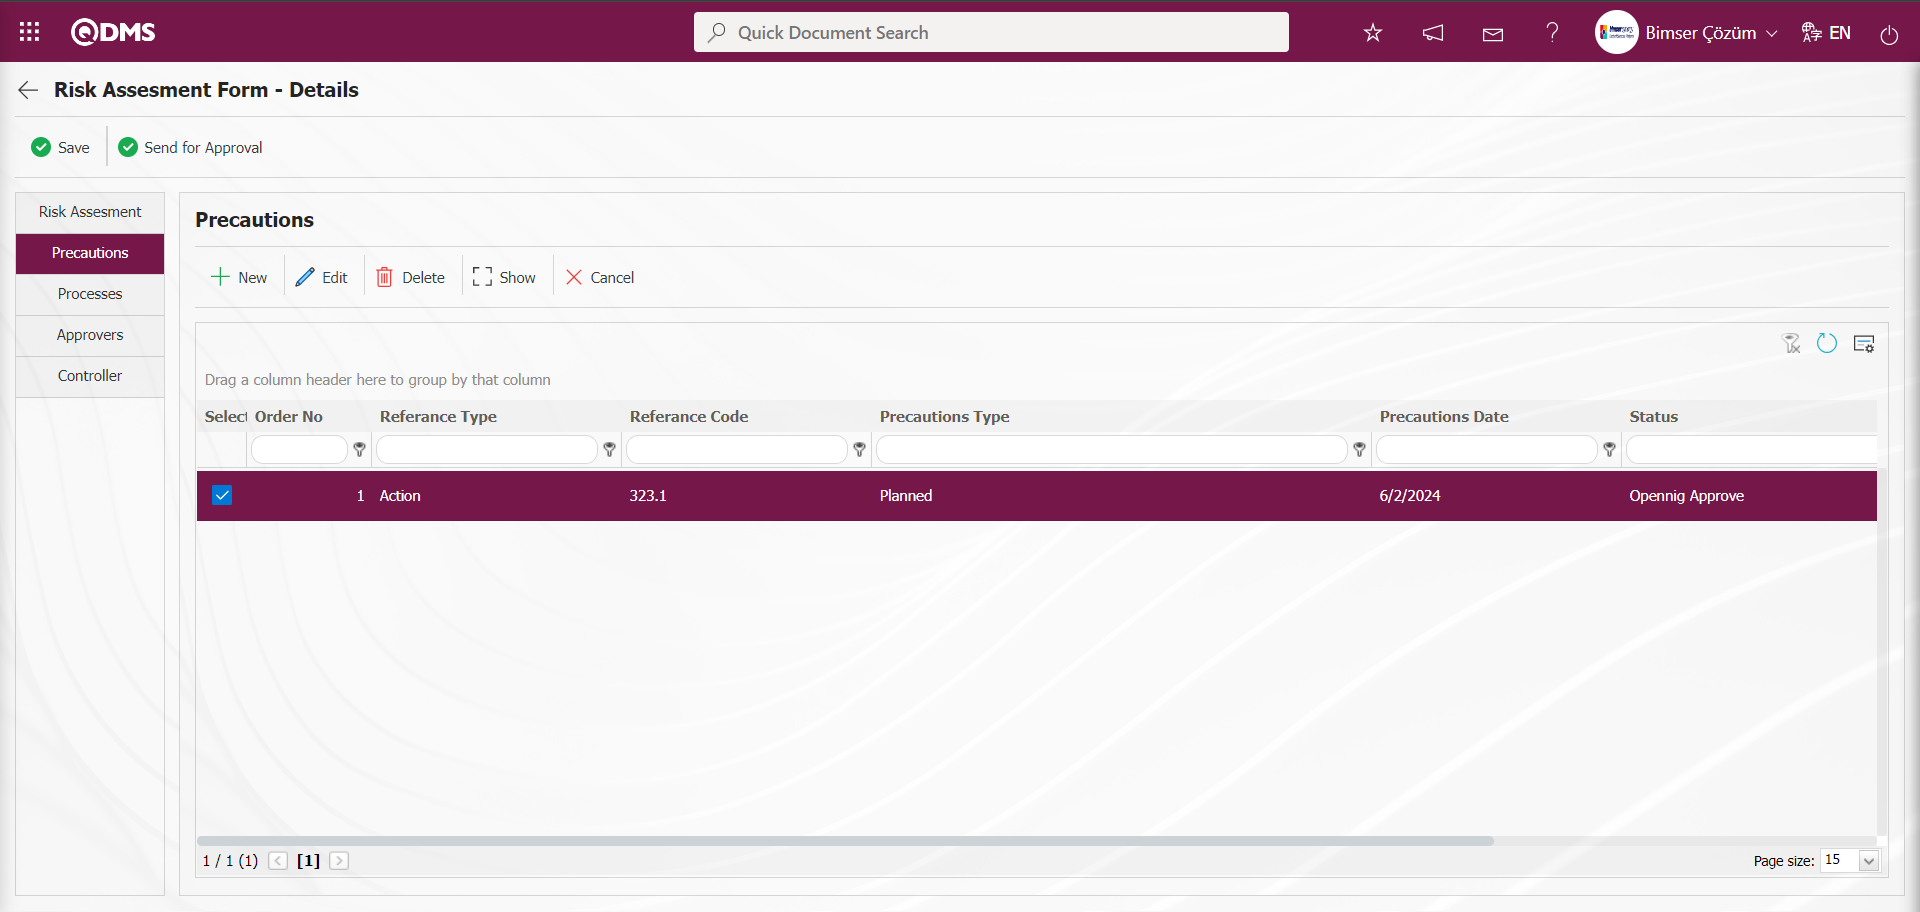
On the screen that opens, select the type of precaution from the reference type drop-down menu (CAPA, action, document, other). Then, after determining the type of precaution (current, planned) and the date of the precaution, the description of the precaution is entered and the registration process is realized by clicking the  button. In this way, if CAPA and action are selected as the reference type, a connection will be established with the CAPA and action modules in QDMS. Any of the existing CAPAs and actions can be associated with the precaution or a new record can be opened in this way. If document is selected as reference type, document is selected from the document tree in QDMS.
Processes tab:On the Risk Assessment Form-Details screen, the process of associating the risk record with the processes is done by adding a process defined in the system to the risk record. In the Processes tab OHSAS Risk Assessment Module parameters, the parameter value of parameter 127 “Will the Process be Used?” is selected as “Yes” and the parameter is activated.
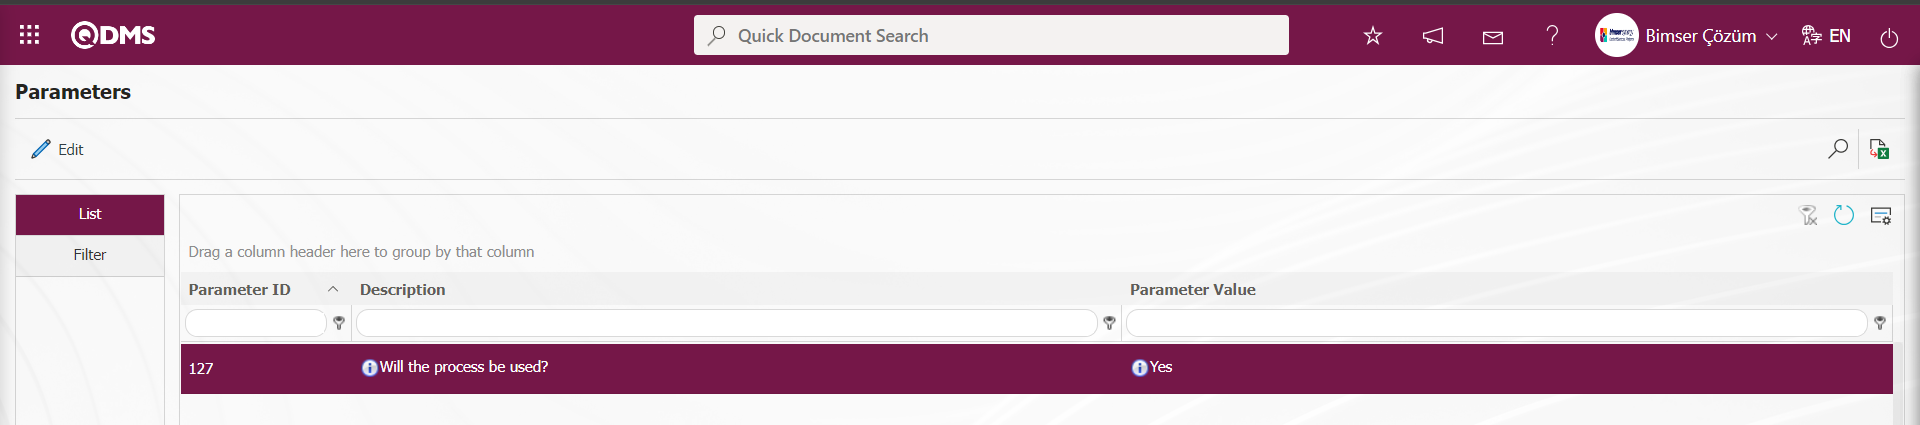
After the parameter is activated, the Processes tab is displayed on the Risk Assessment Form-Details screen and the risk record is associated with the processes defined in the Ensemble program. In the OHSAS Risk Assessment parameters, the process tab is displayed according to the statuses defined in the parameter 218 "Status codes for which the Processes tab will be active (Write with a comma) ”. Status codes information is retrieved from the Function Designer menu.

In the Processes tab, the "Must choose a process ” parameter 131 in the OHSAS Risk Assessment parameters is activated in order to make it mandatory to associate the risk record with a process.

When the parameter is activated, when the process addition process is not performed in the Processes tab, the registration process of the risk record is not performed and gives a warning message about the process addition process in the registration process.
On the Risk Assessment Form-Details screen, click on the Processes tab.

With the help of the buttons on the screen;
 : Process addition is made in the process list.
 : The process information selected in the list is deleted.
 : The selected process is displayed in the list.
In the Processes tab, click the button to add a new process.
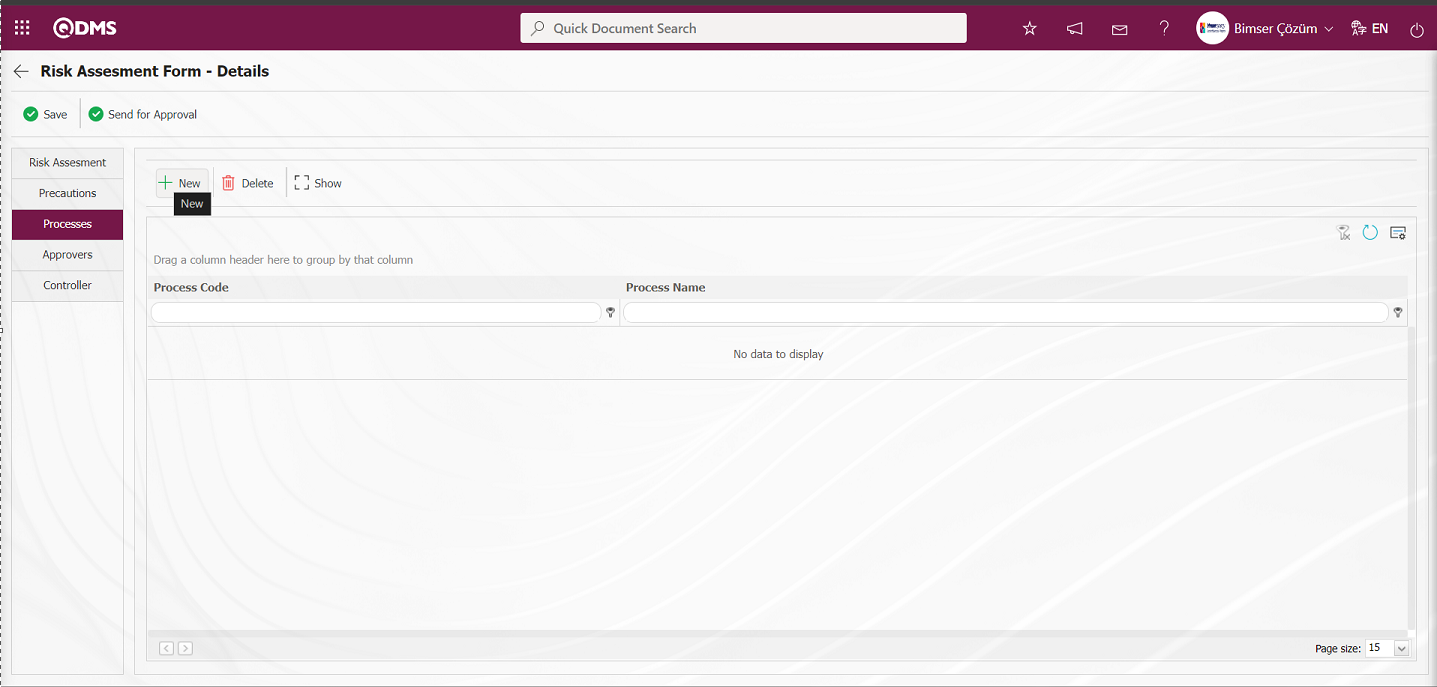
Select the process in the Process list and click the  button.

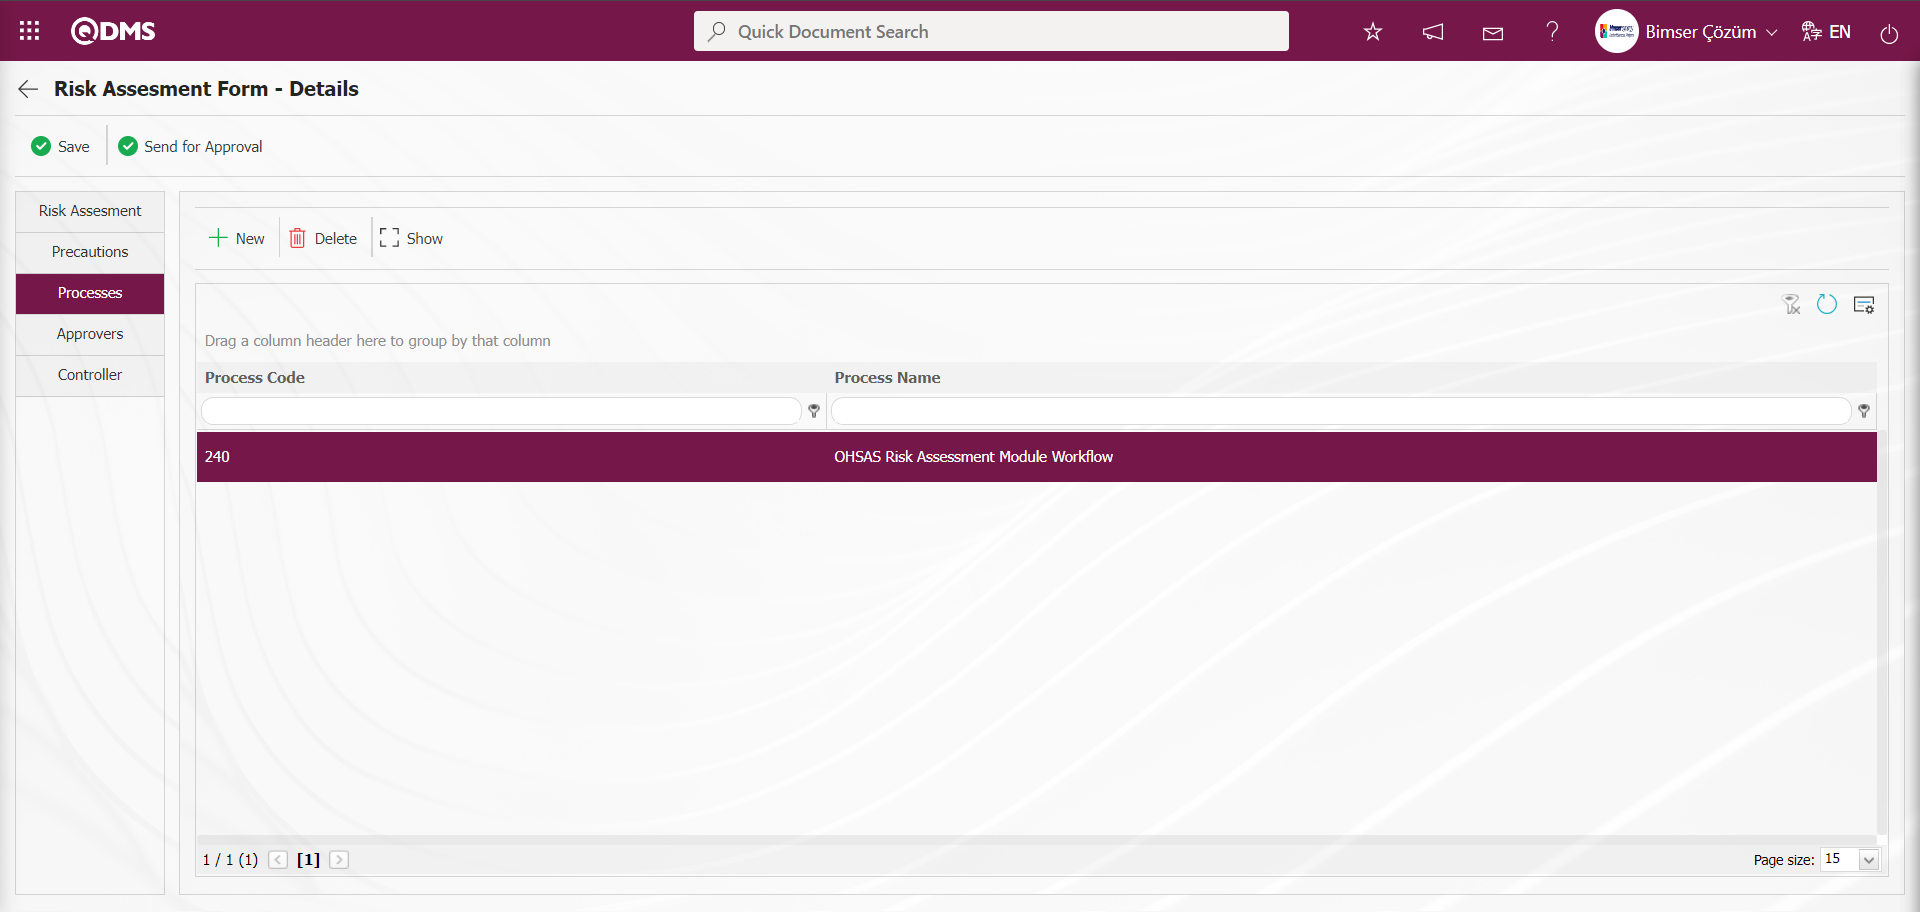 In the Processes tab, click on the
  button.
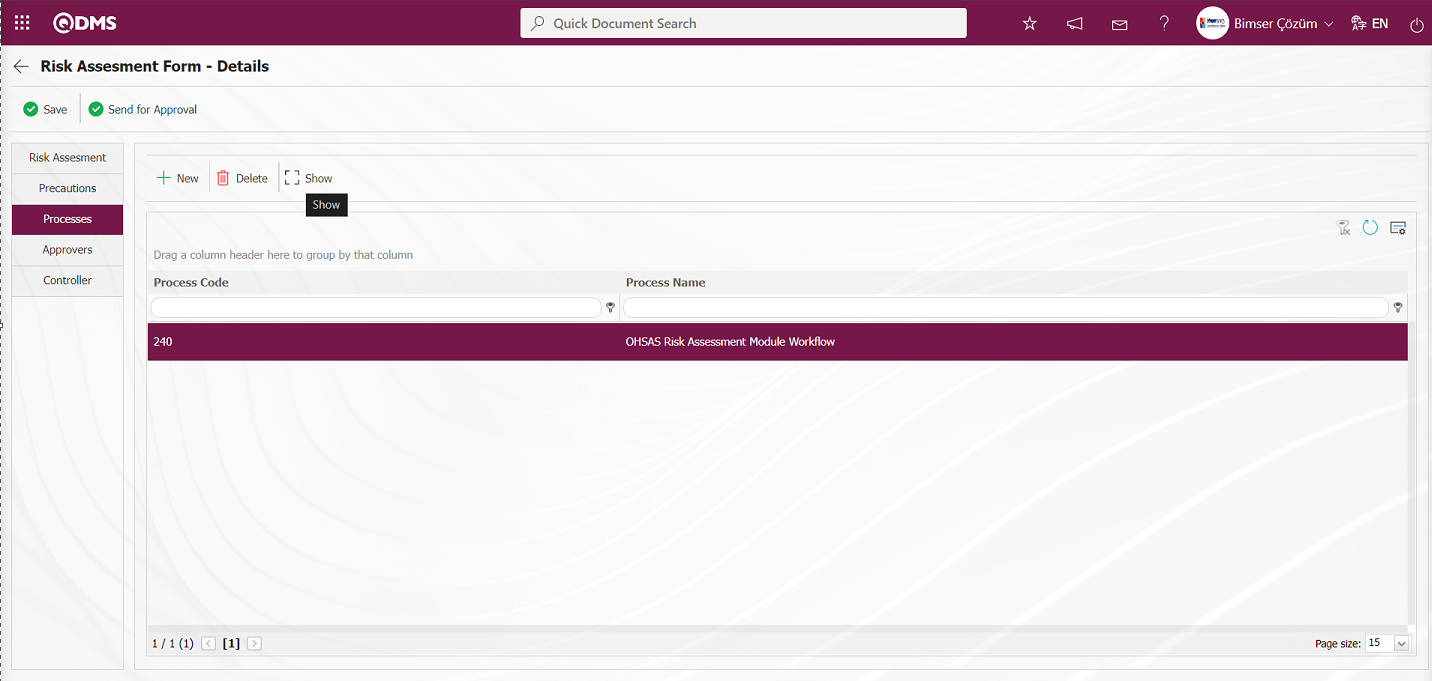
The Ensemble program of the process associated with the risk record is opened and displayed.
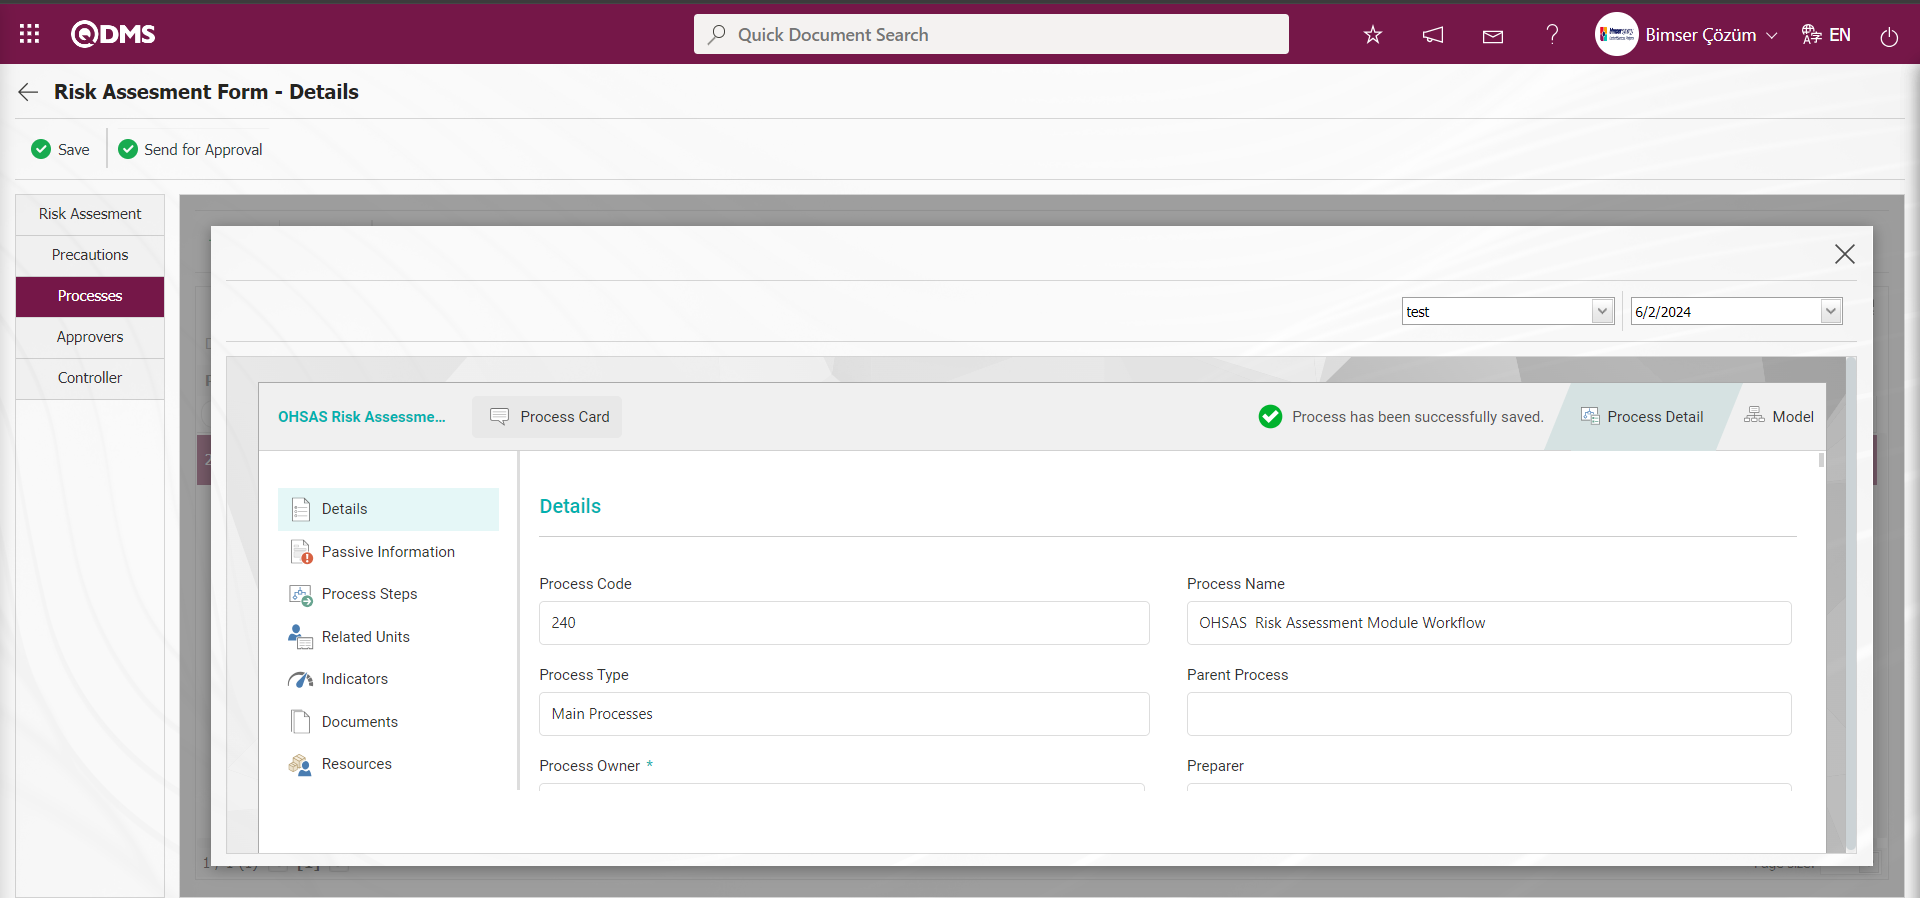
In the Ensemble program, the visual model of the process is displayed by clicking the  button.
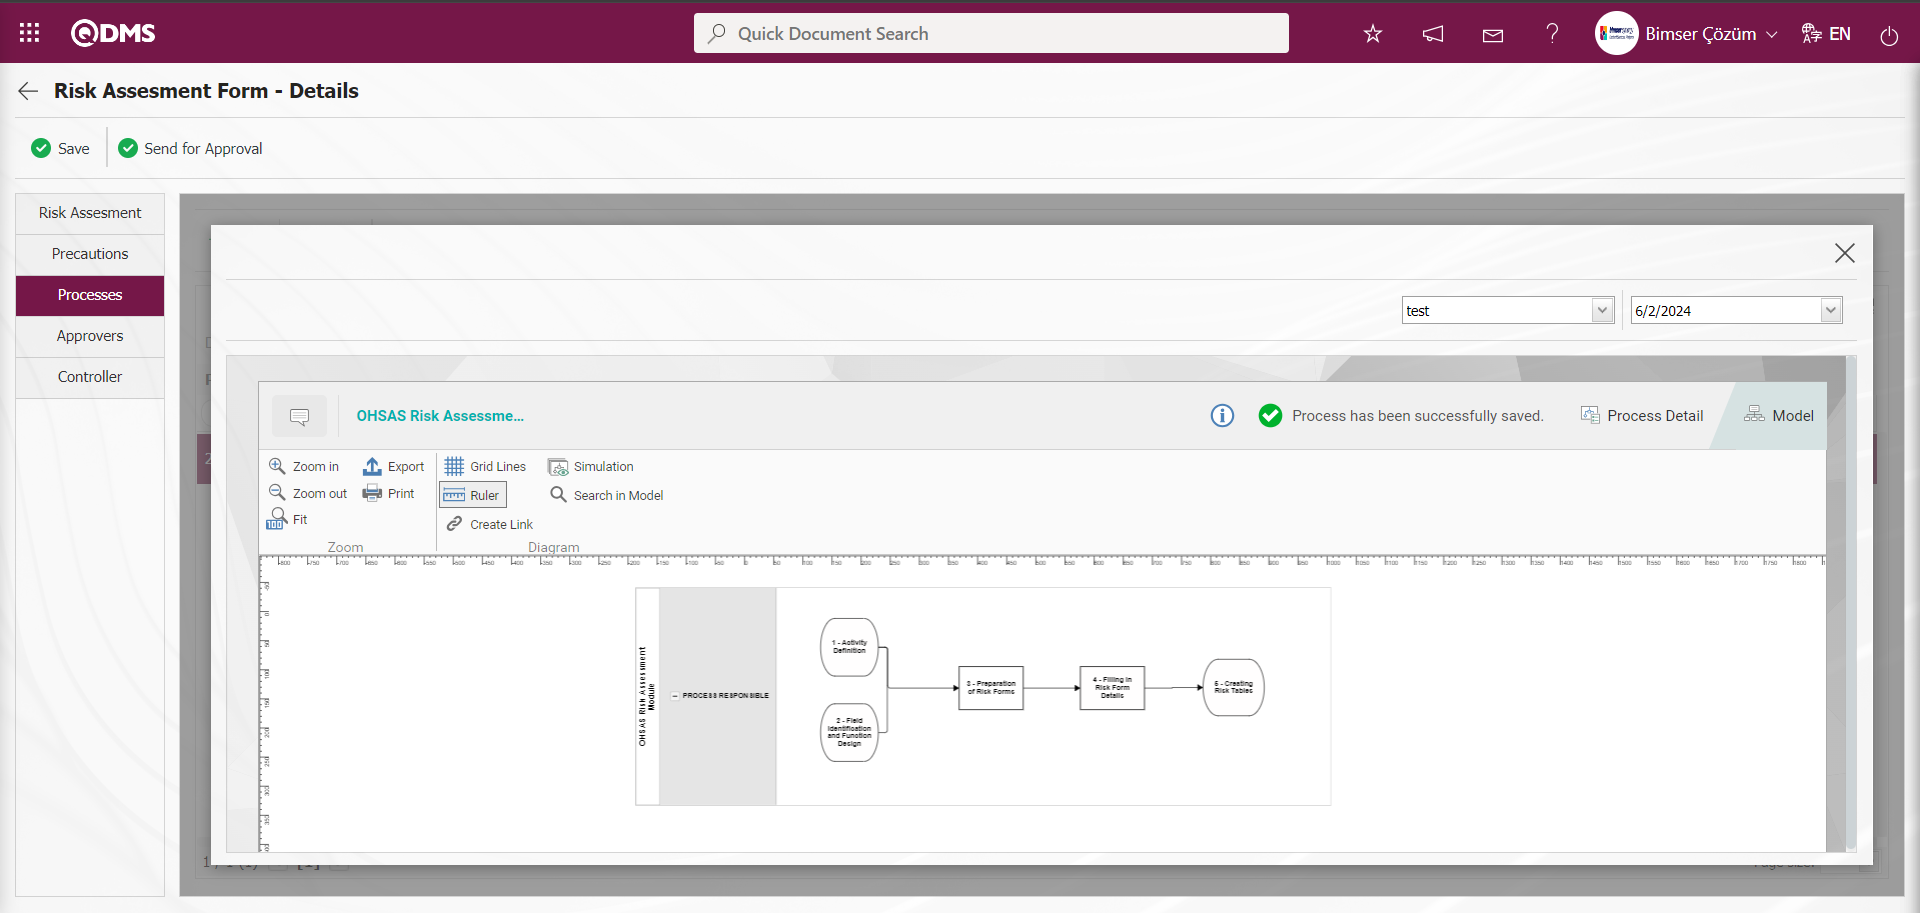
Approvers Tab:This tab contains the approval history information of the risk record. In this tab, approval information such as approvers of the risk record, approval status and description are accessed. The approval information of the risk record is displayed by clicking the Approvers tab on the Risk Assessment Form-Details screen
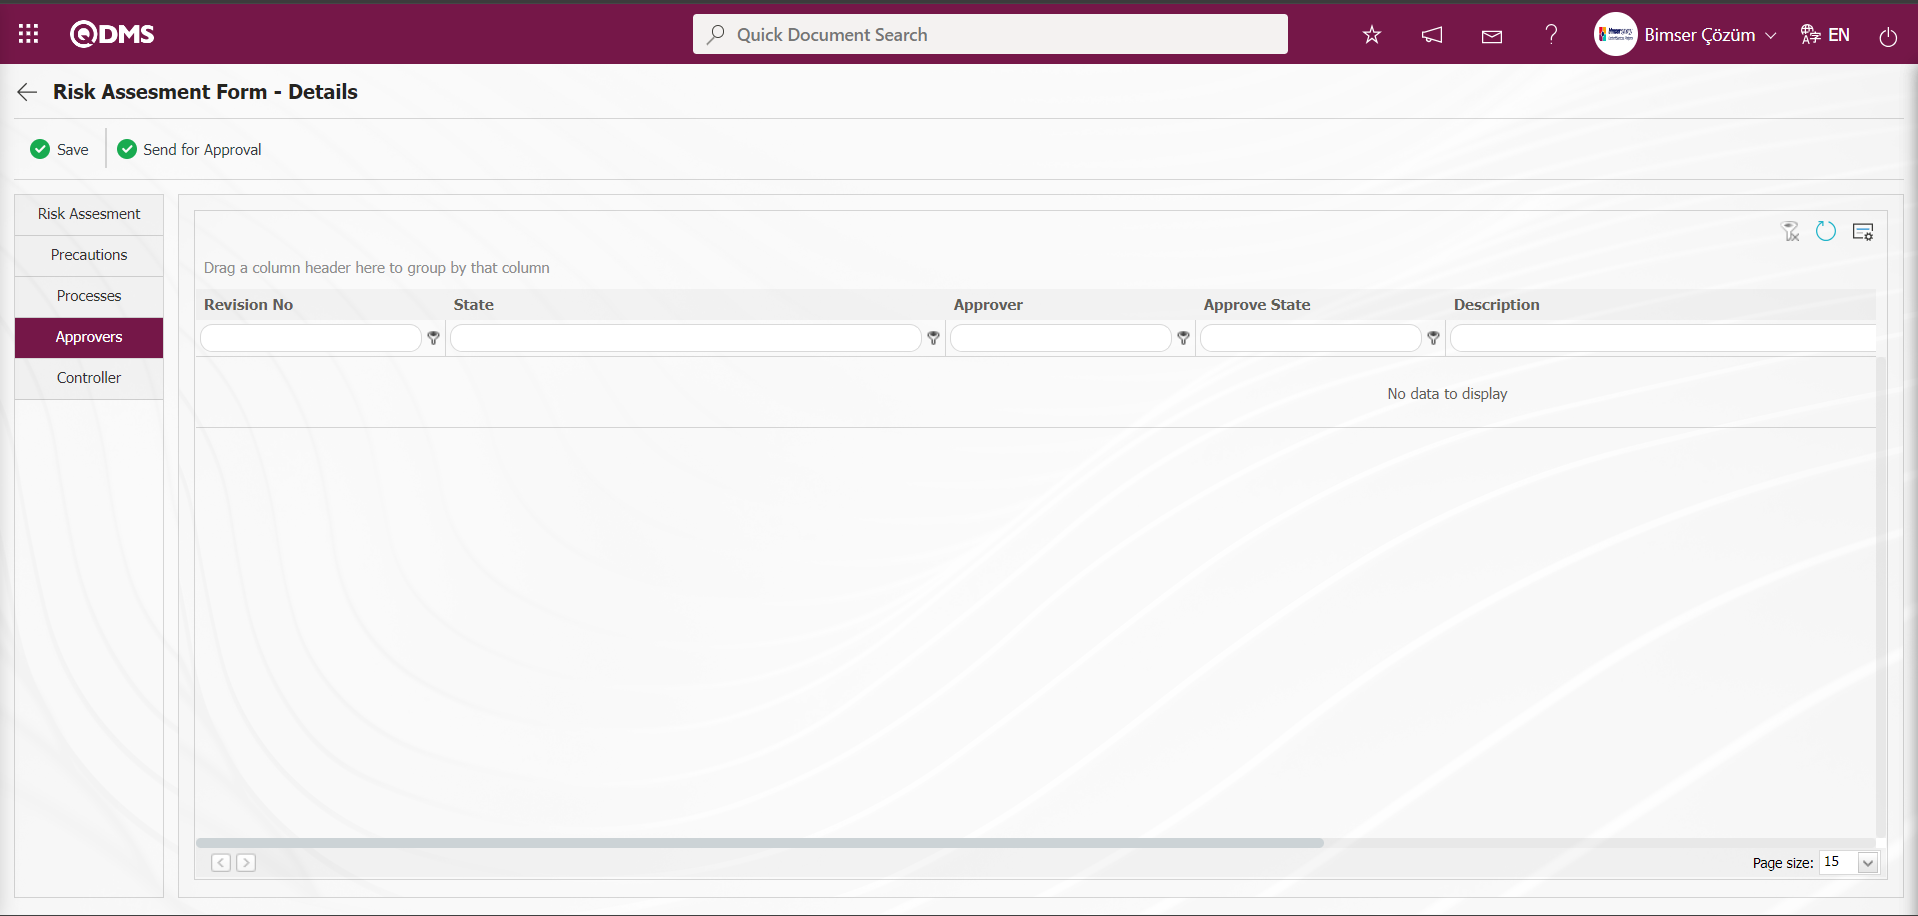
Controls Tab: Controls defined in the System Infrastructure Definitions / OHSAS Risk Assessment / Controls / Control Definition menu are associated with the risk assessment form detail in this tab. The parameter value of the parameter 95 numbered ‘Show Controller Tab in Risk List’ parameter in the Controls tab OHSAS Risk Assessment Module parameters is activated by selecting ‘Yes’.
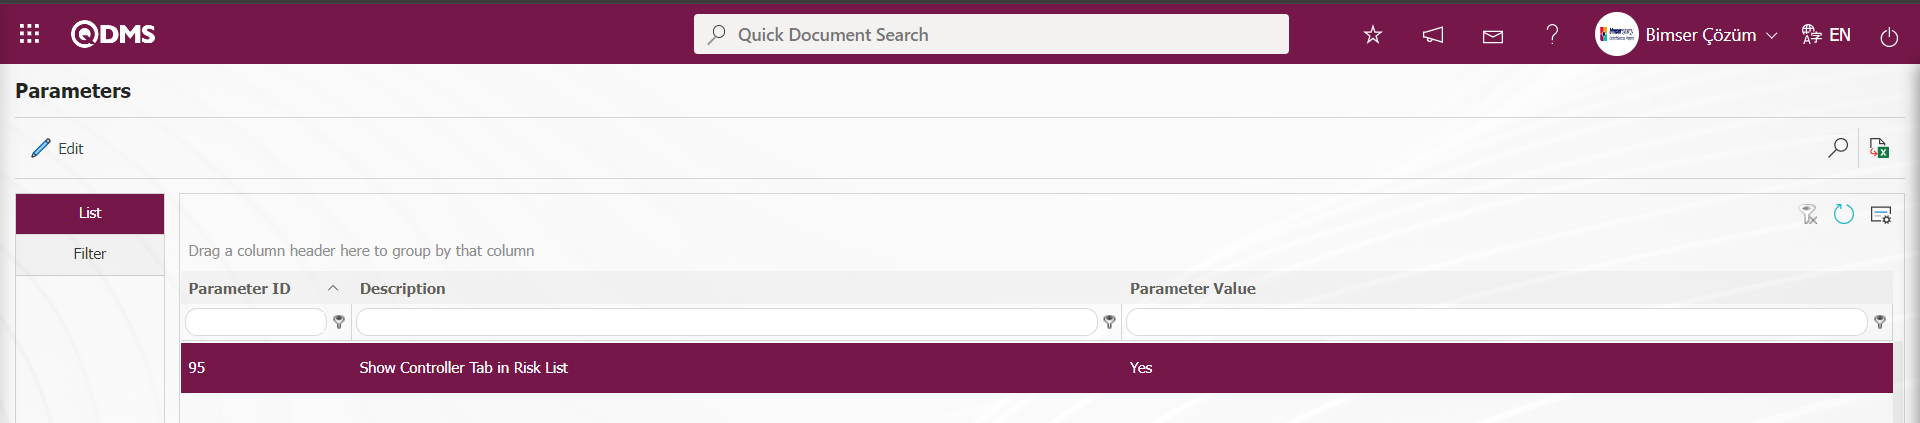
When the parameter is activated, the Controls tab is displayed on the Risk Assessment Form-Details screen and the risk record and controls are associated.
In OHSAS Risk Assessment parameters, the display of the controls tab is done according to the statuses defined in parameter 104 “Status codes that the Controls tab will be active (Write with comma)”. Status codes information is taken in the Function Designer menu.

In the Controls tab, in order to make it mandatory to associate the risk record with a control, parameter 229 “Should control selection be mandatory” is activated in the OHSAS Risk Assessment parameters.
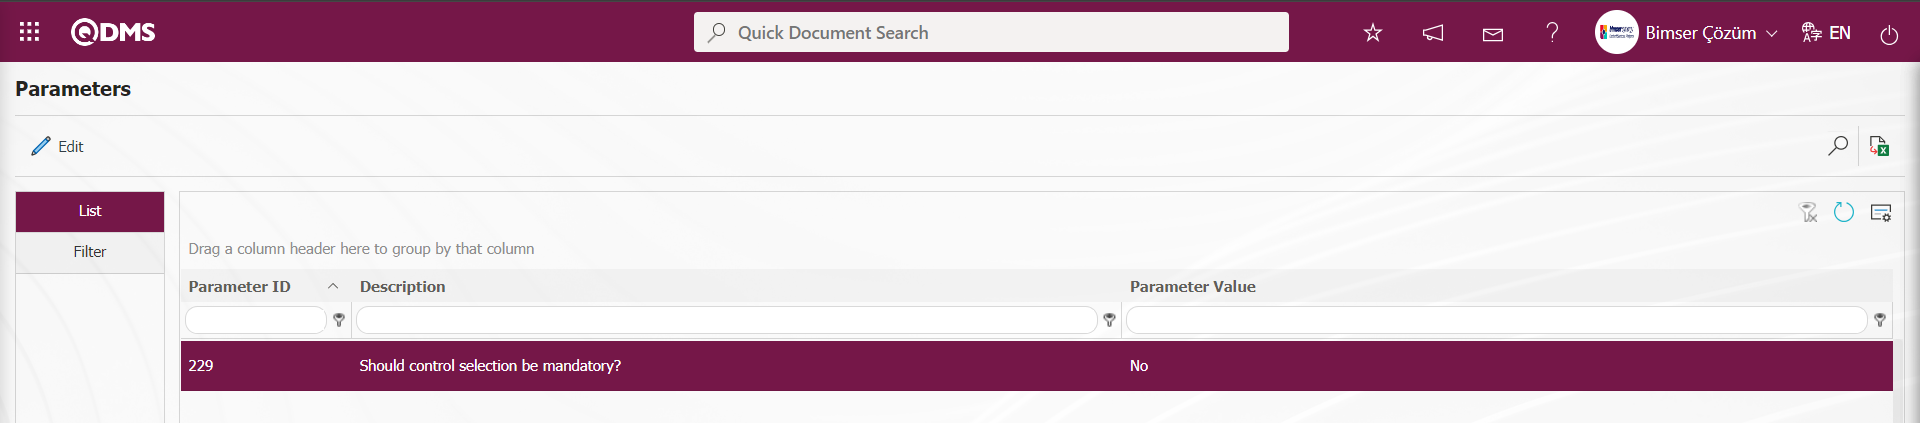
When the parameter is activated, when the control addition process is not performed in the Controls tab, the registration process of the risk record is not performed and gives a warning message about the control addition process in the registration process. On the Risk Assessment Form-Details screen, click on the Controls tab.
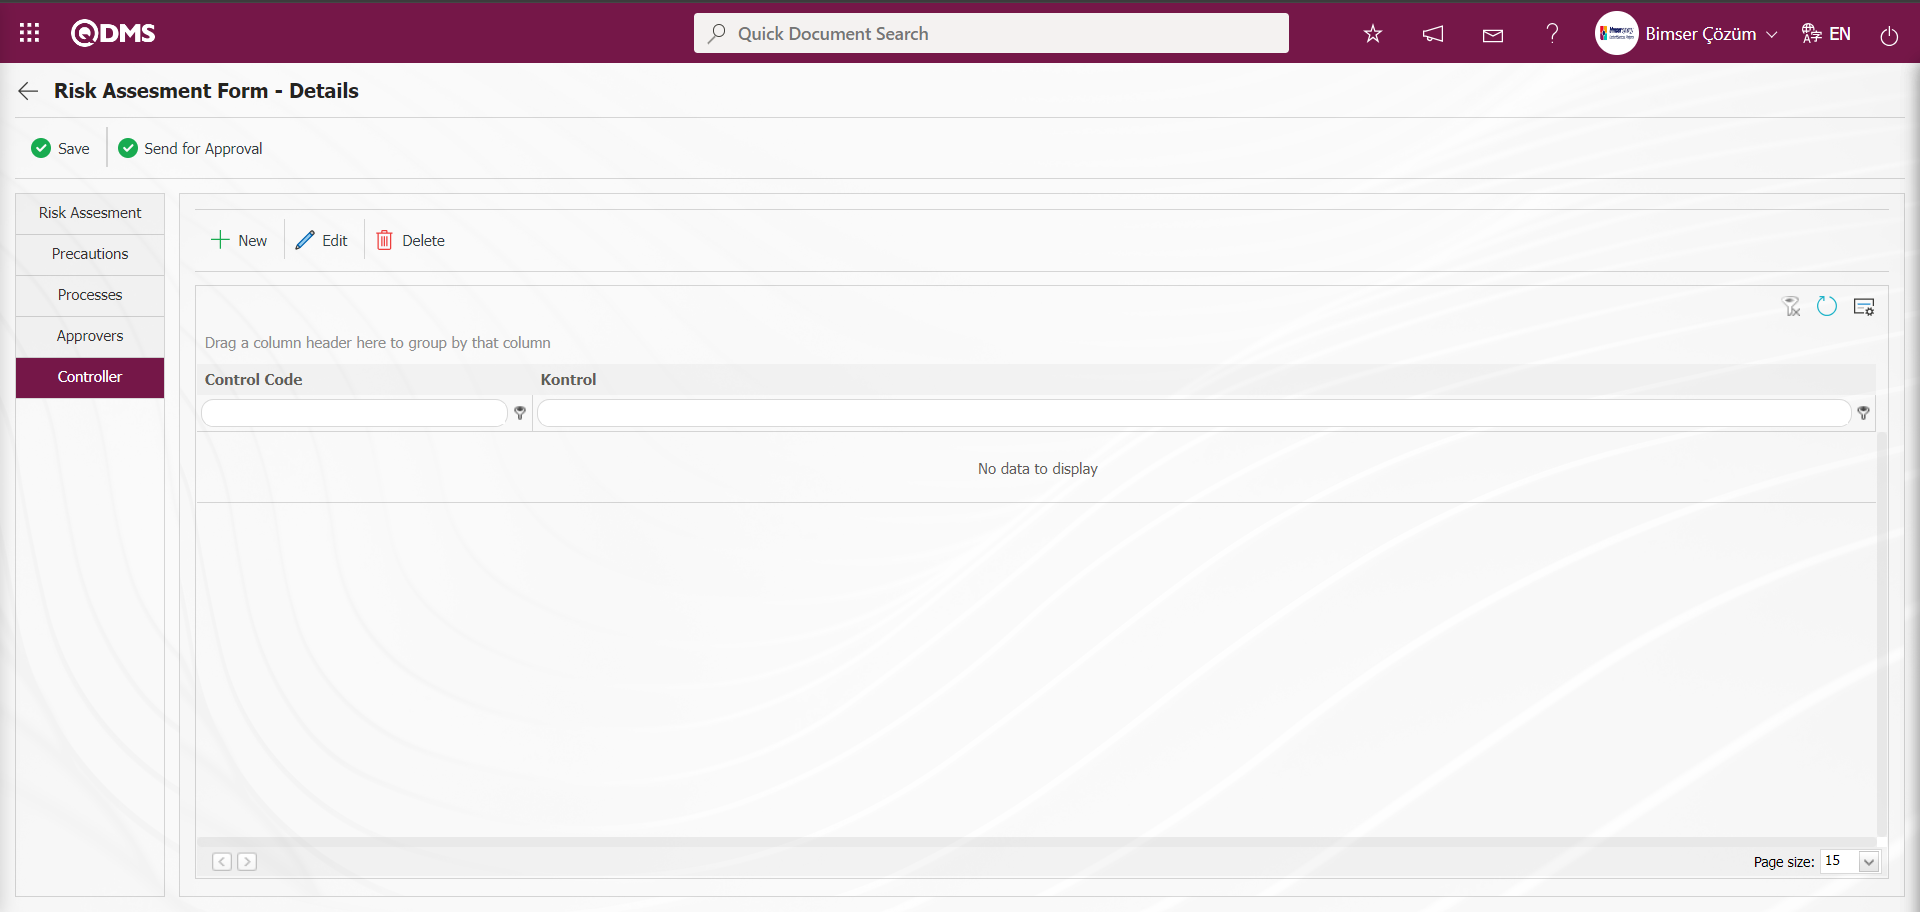
With the help of the buttons on the screen;
 : Adding a new control is done.
 : Edit and update the selected control information in the list.
 : Delete the selected control information in the list.
Click the button to add a new control in the Controls tab.
 The Controls screen opens.
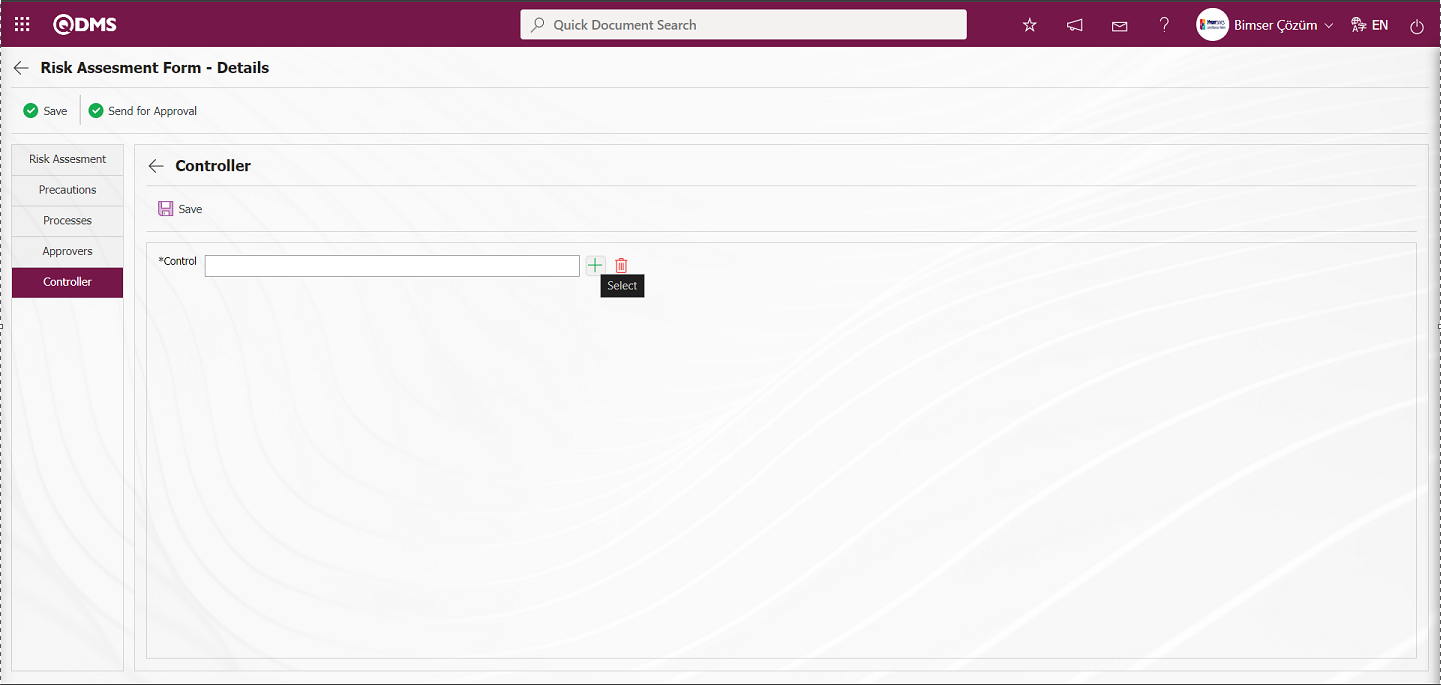
On the Controls screen, click the  (Select) button in the Control field.
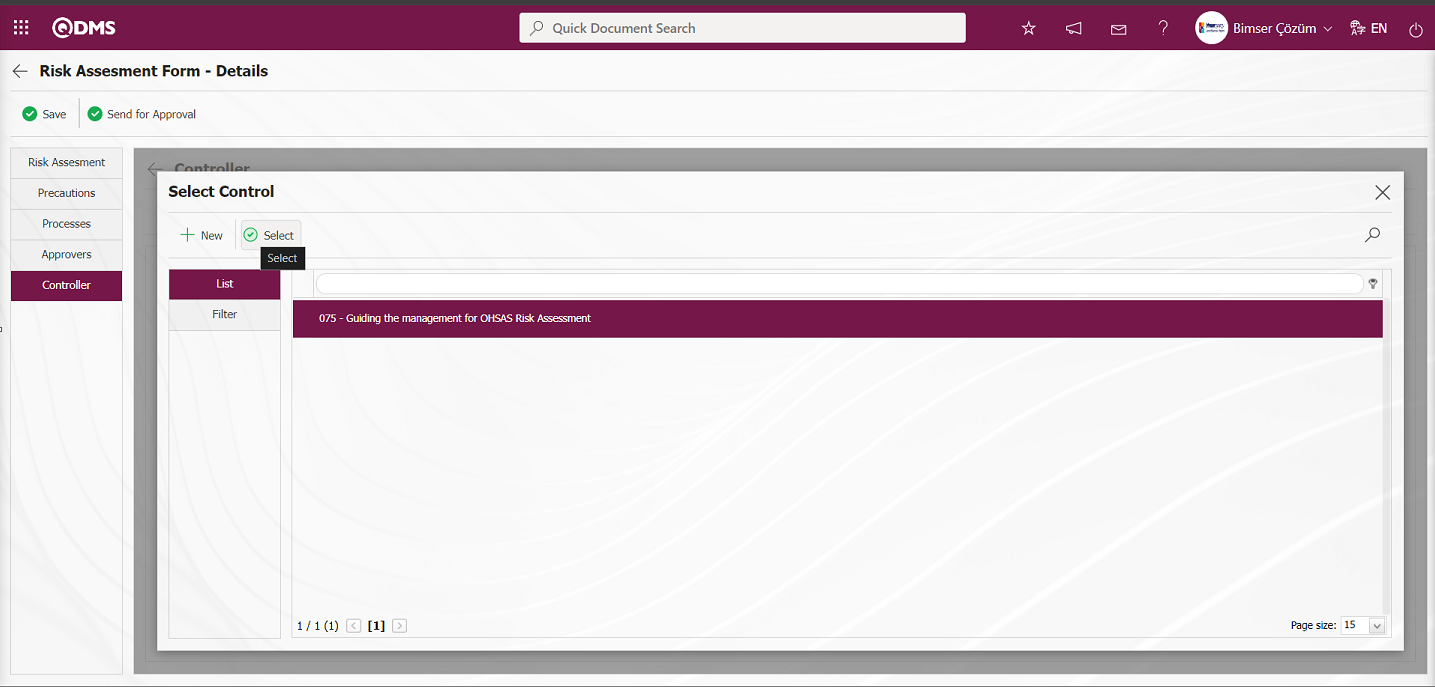
Control is added to the control list by selecting the control and clicking the  button.
On the screen that opens, if desired, a new control can be defined by clicking the  button and added to the control list.
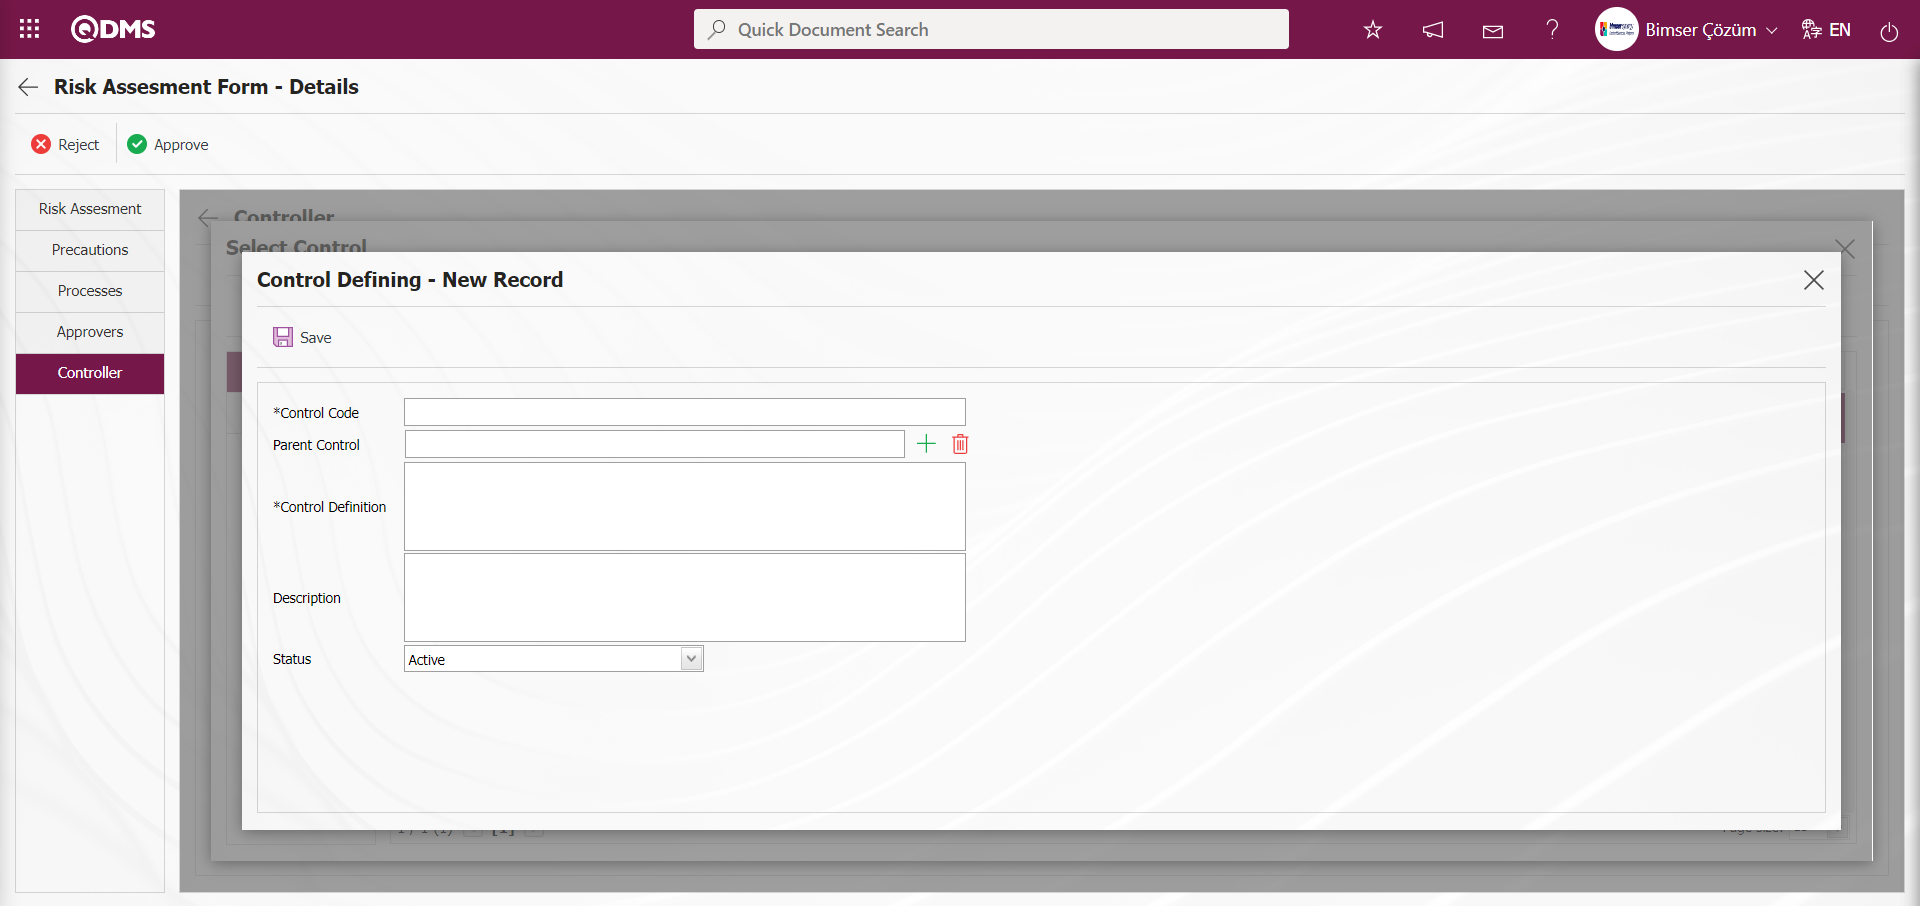
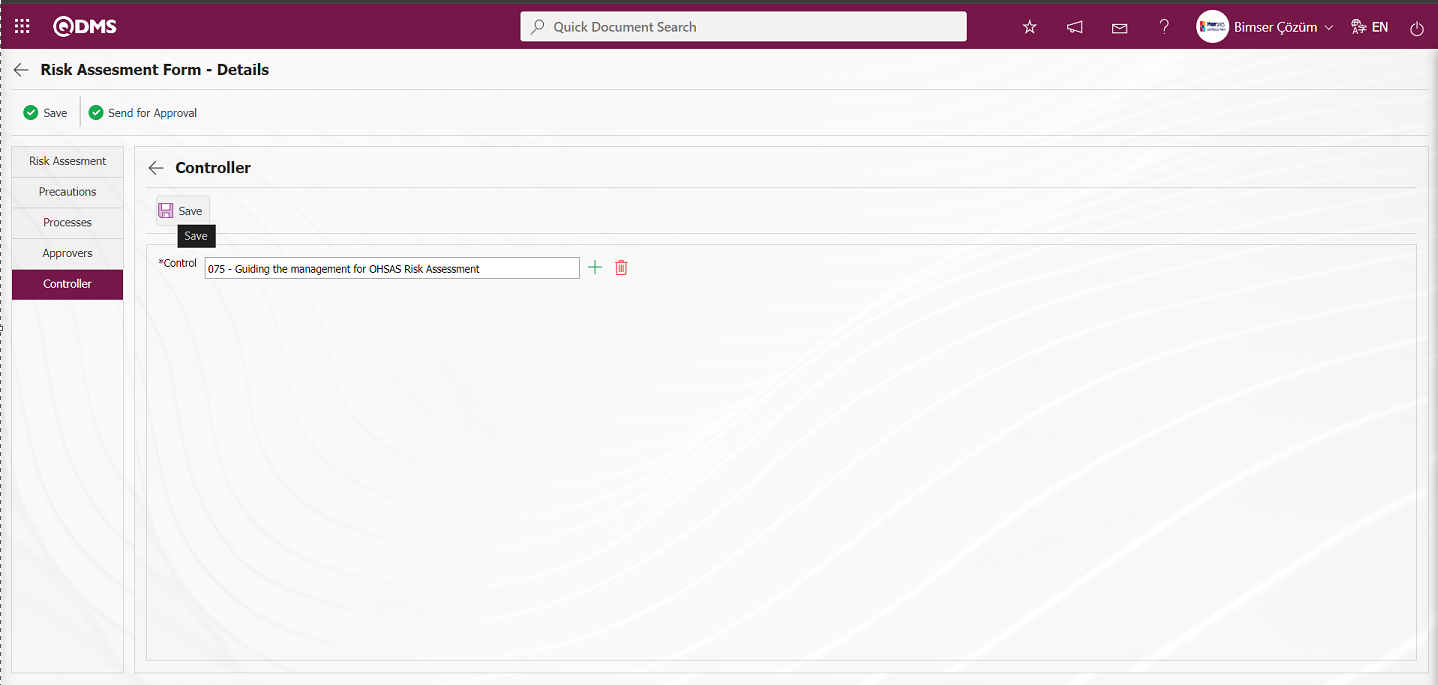
After adding a control on the Controls screen, the  button is clicked to register the control addition.
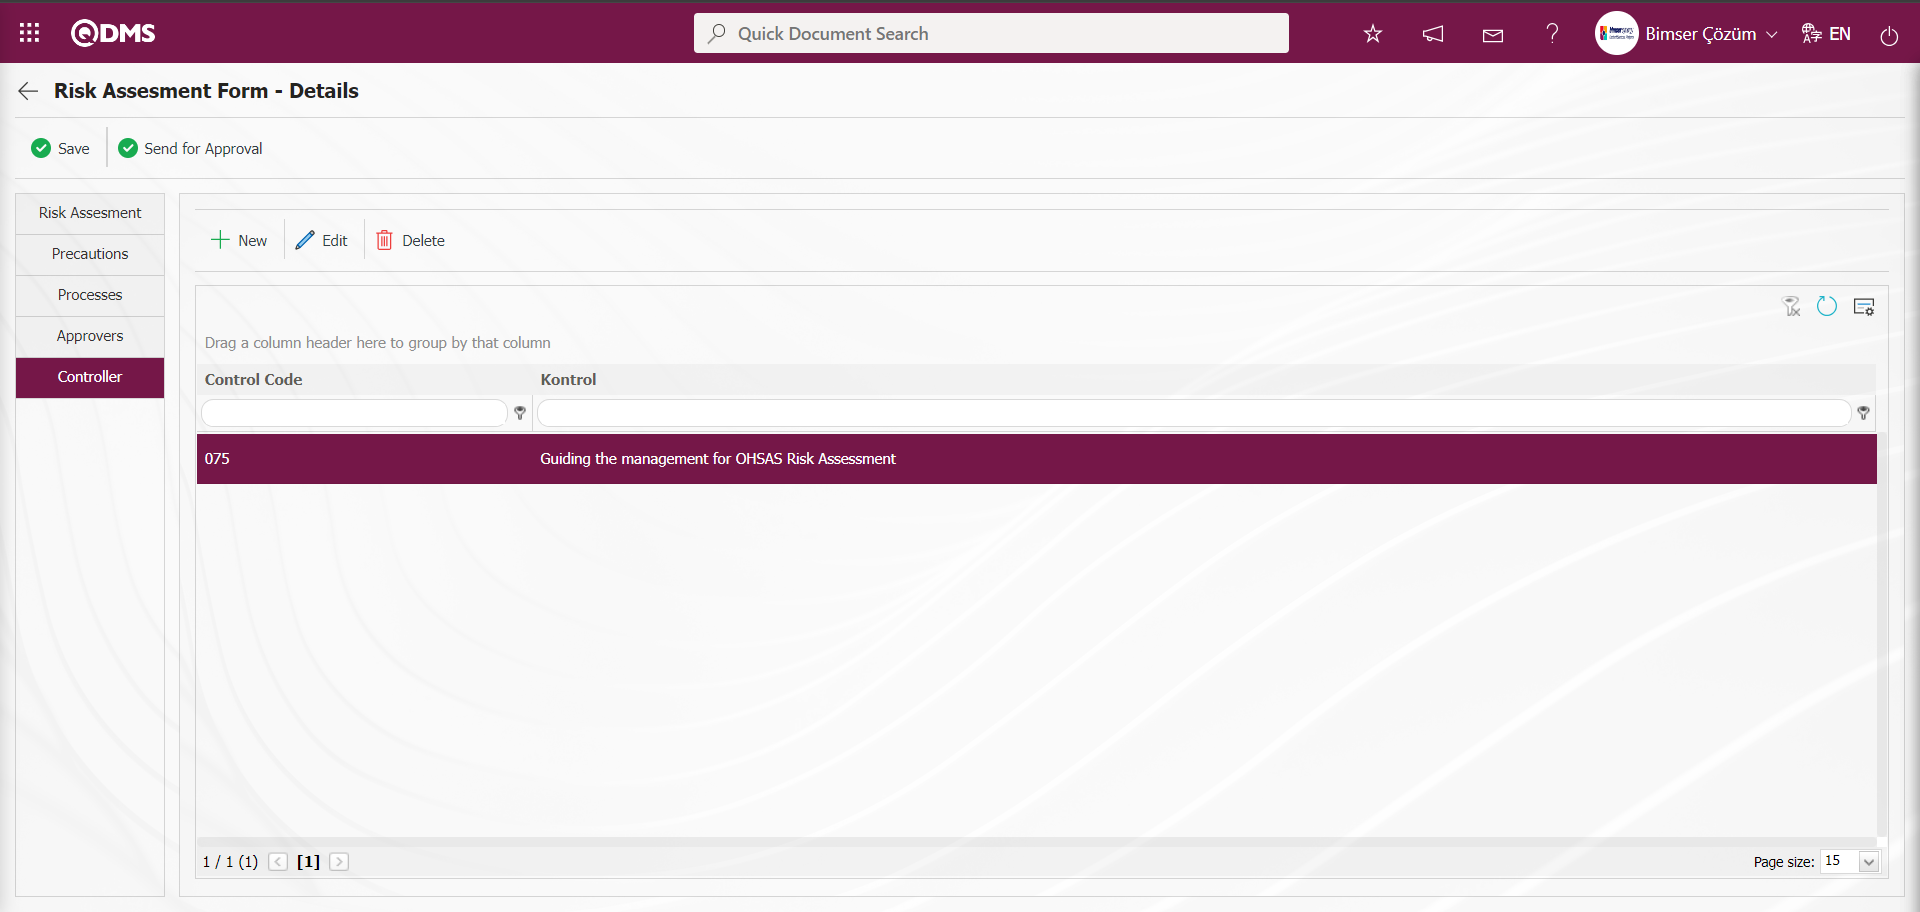
Click on the Risk Assessment tab.
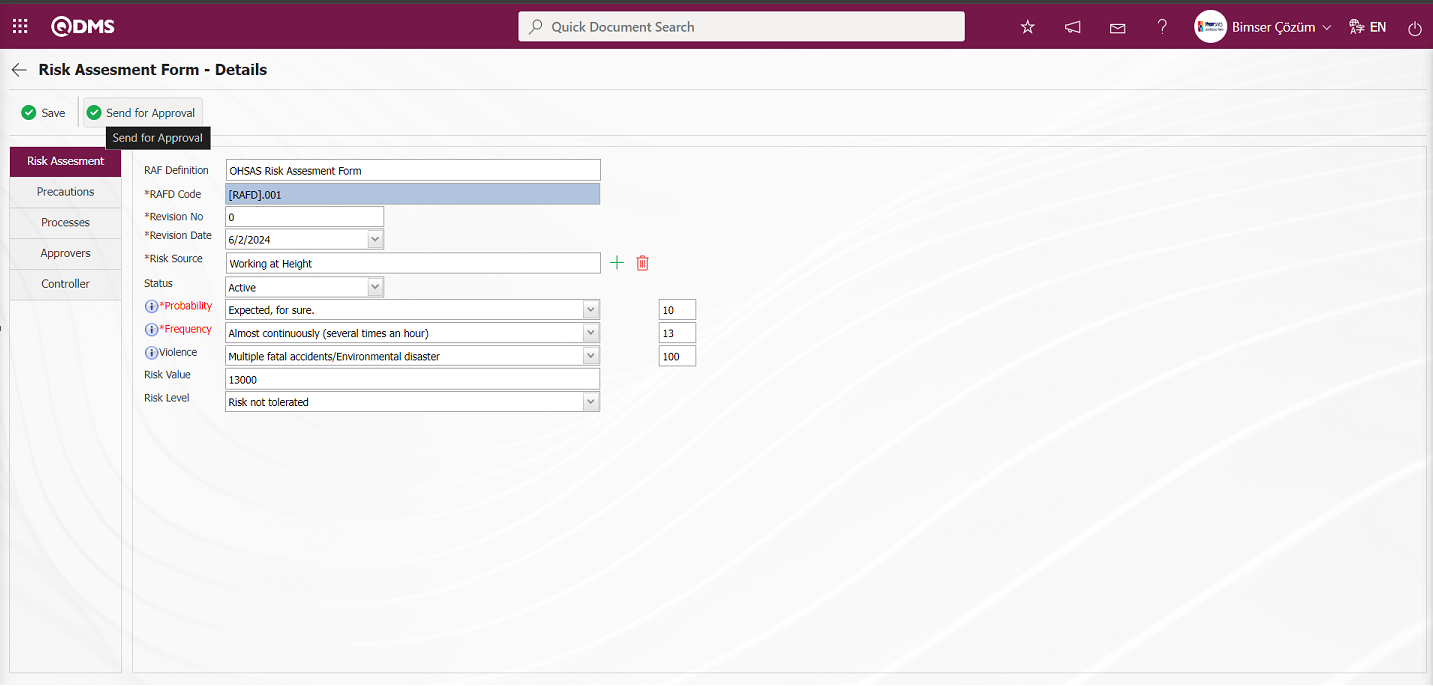
On the Risk Assessment Form - Details screen, the relevant fields are edited and the Risk Assessment Detail is sent to the person in the approval flow for approval by clicking the ( )button. The record is sent to the OHSAS manager approval by clicking the “OK” button in the message given by the system.
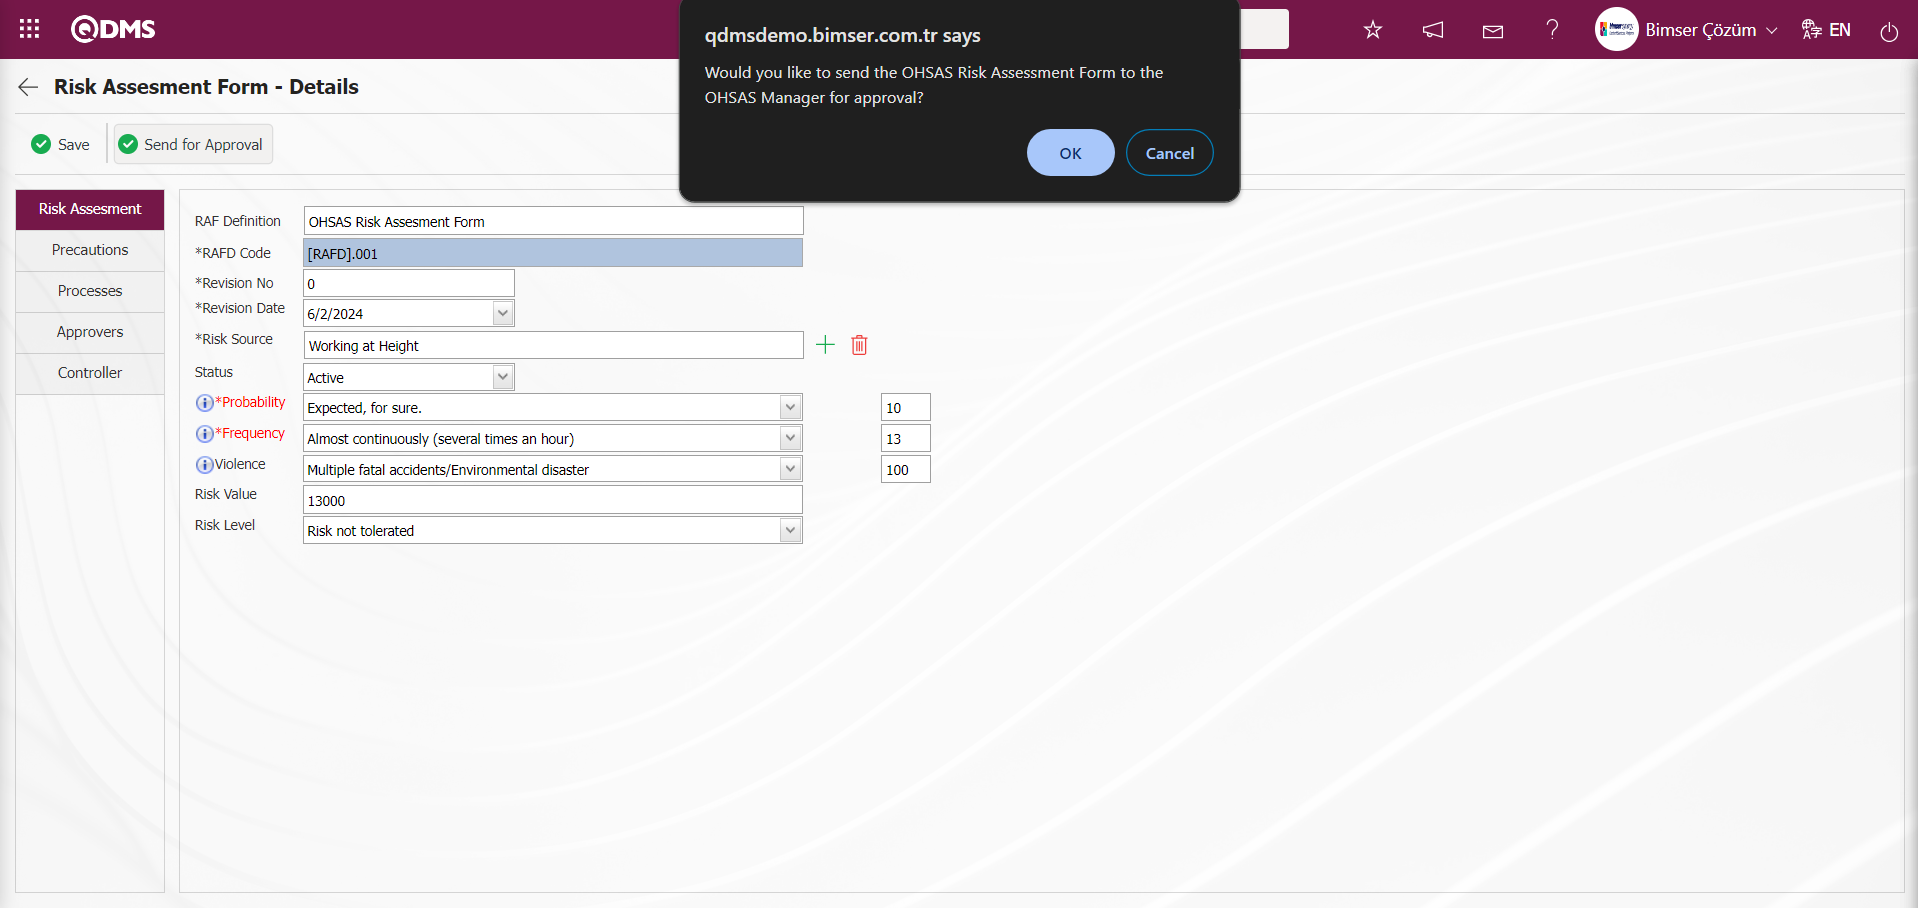
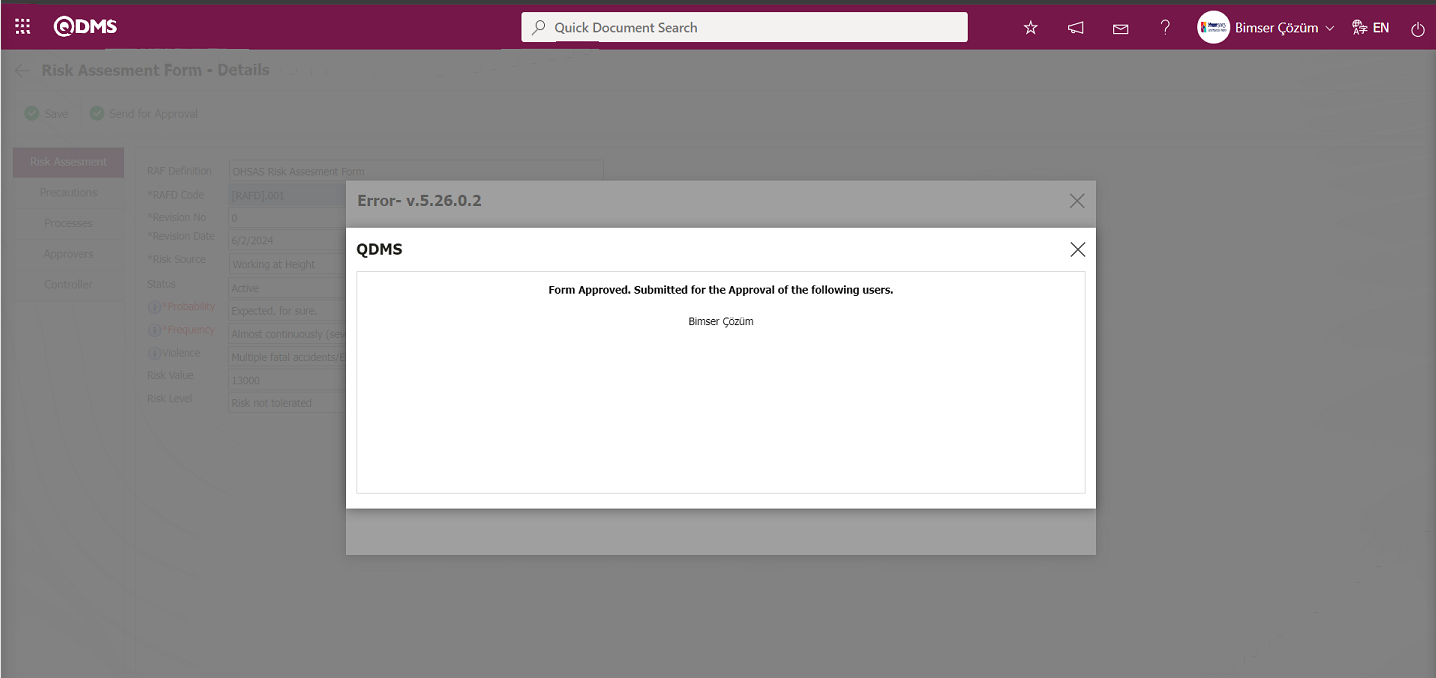
Revision Process: RAFDs can be revised at any time after they are saved and new risk analyses can be performed. For this purpose, while the RAFD list is open, select the relevant risk detail and click the  button on the top left. The next step is exactly the same as when filling in the risk detail for the first time. The only difference is that the revision number will increase by one while on the RAFD screen. In order to perform the revision process, the parameter value of the parameter 80 "Use Revision ?" in the OHSAS Risk Assessment Module parameters is activated by selecting “Yes”.
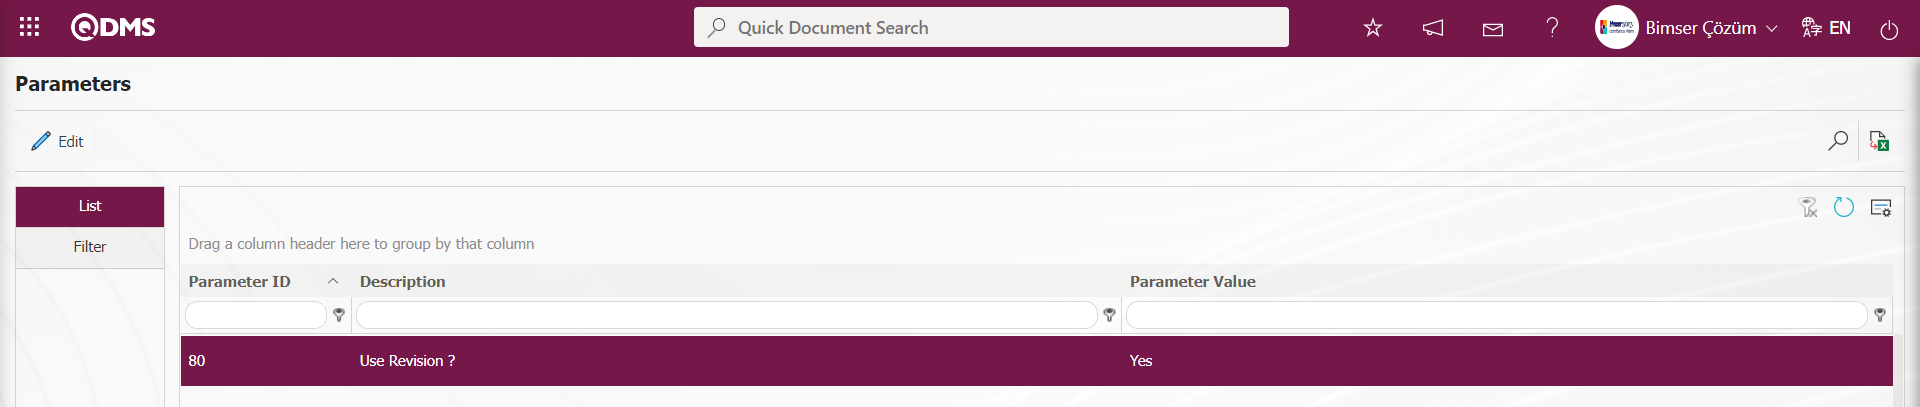
After the parameter is activated, the buttons related to the revision process are displayed on the Risk Assessment Form - Details screen. With these buttons, revision, viewing old revisions and revision change operations are performed. Whether the revision date is updated or not in the revision process varies depending on the parameter. In the OHSAS Risk Assessment module parameters, the parameter value of the parameter number 72 “Can the Revision Date be Updated?” is activated by selecting “Yes”.
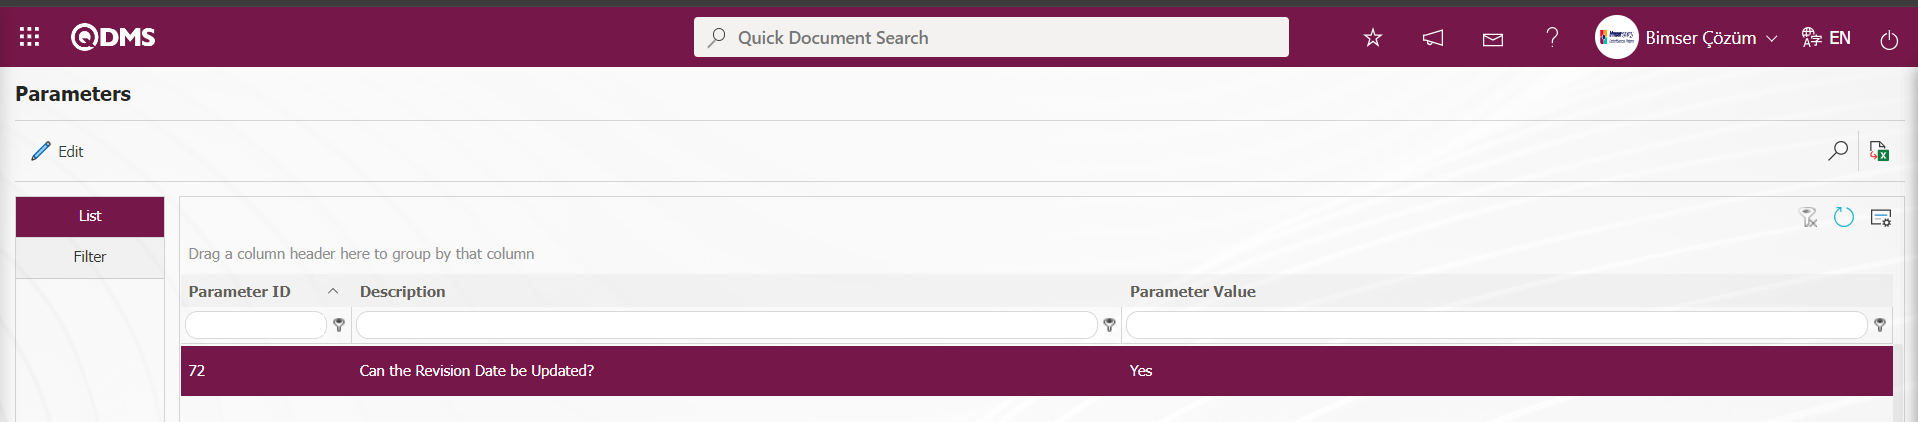
When the parameter is activated, it is enabled to make changes related to the revision date on the screen where the revision process is performed for the risk record. When the parameter is disabled by selecting the parameter value “No”, the revision date field cannot be intervened during the revision process of the risk record. While the risk record is selected on the Risk Assessment Form - Details screen  button is clicked.
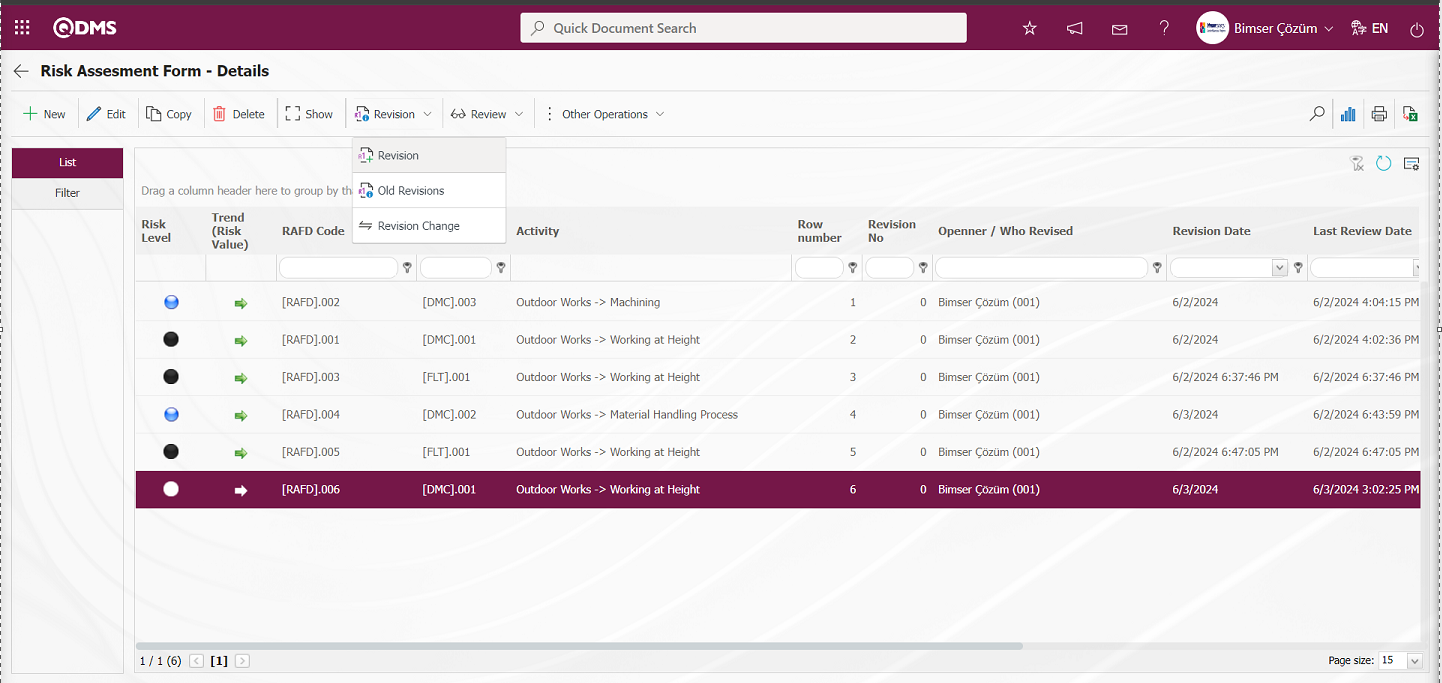
On the Risk Assessment Form - Details screen, changes are made on the relevant fields for the revision process. The revision number is increased by one.
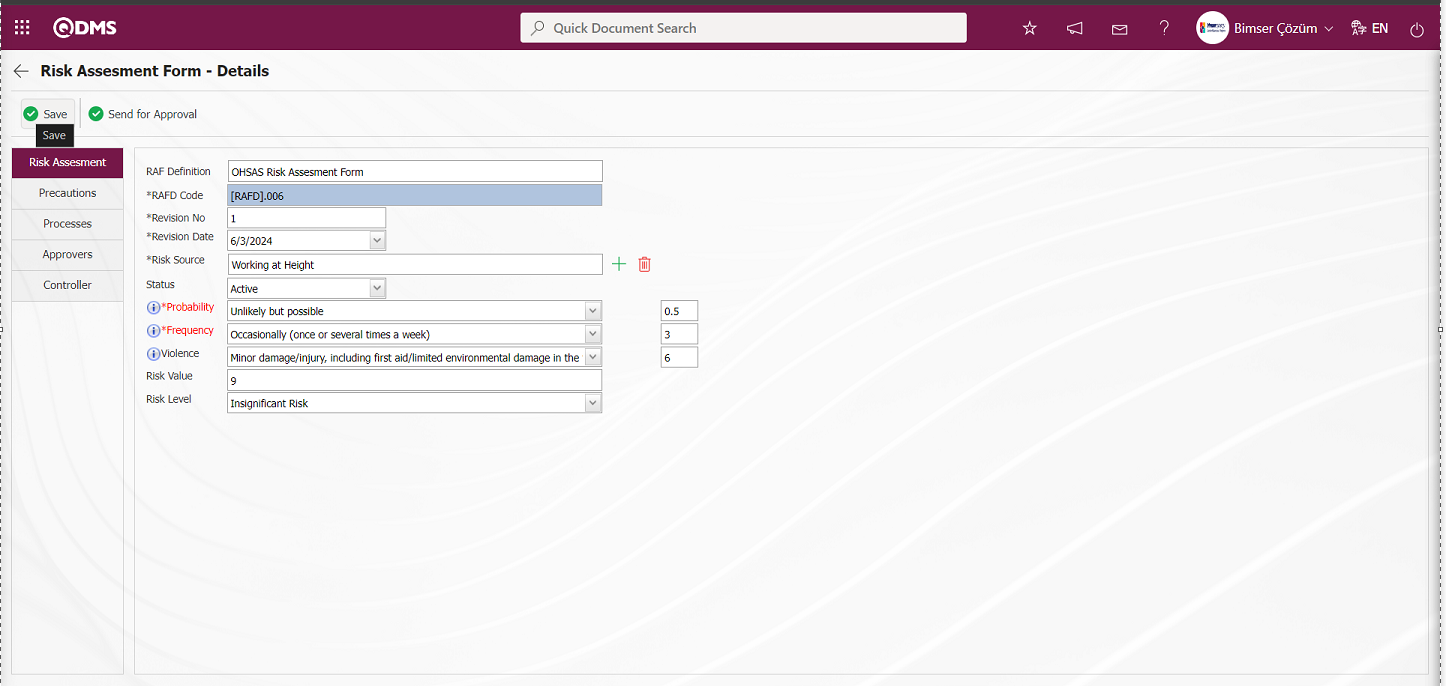
After making changes to the required fields, the revision record is made by clicking the  button in the upper left corner of the screen.
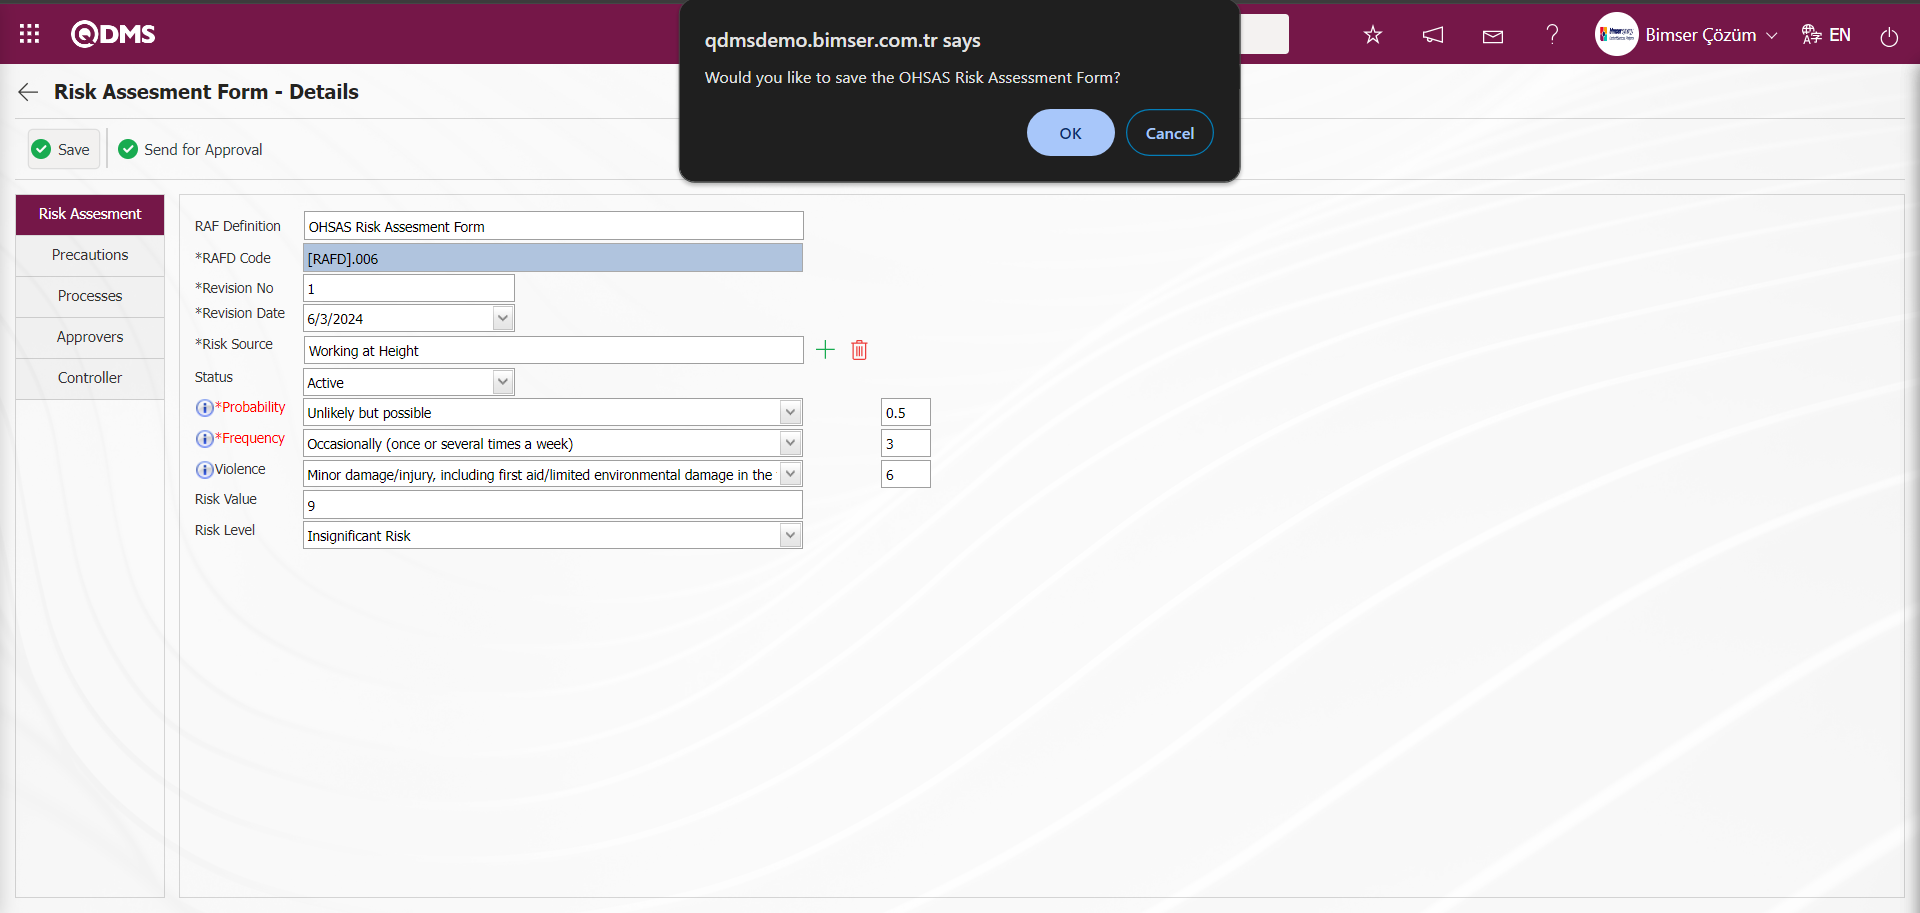
The risk detail record process is done by clicking the “OK” button in the message given by the system.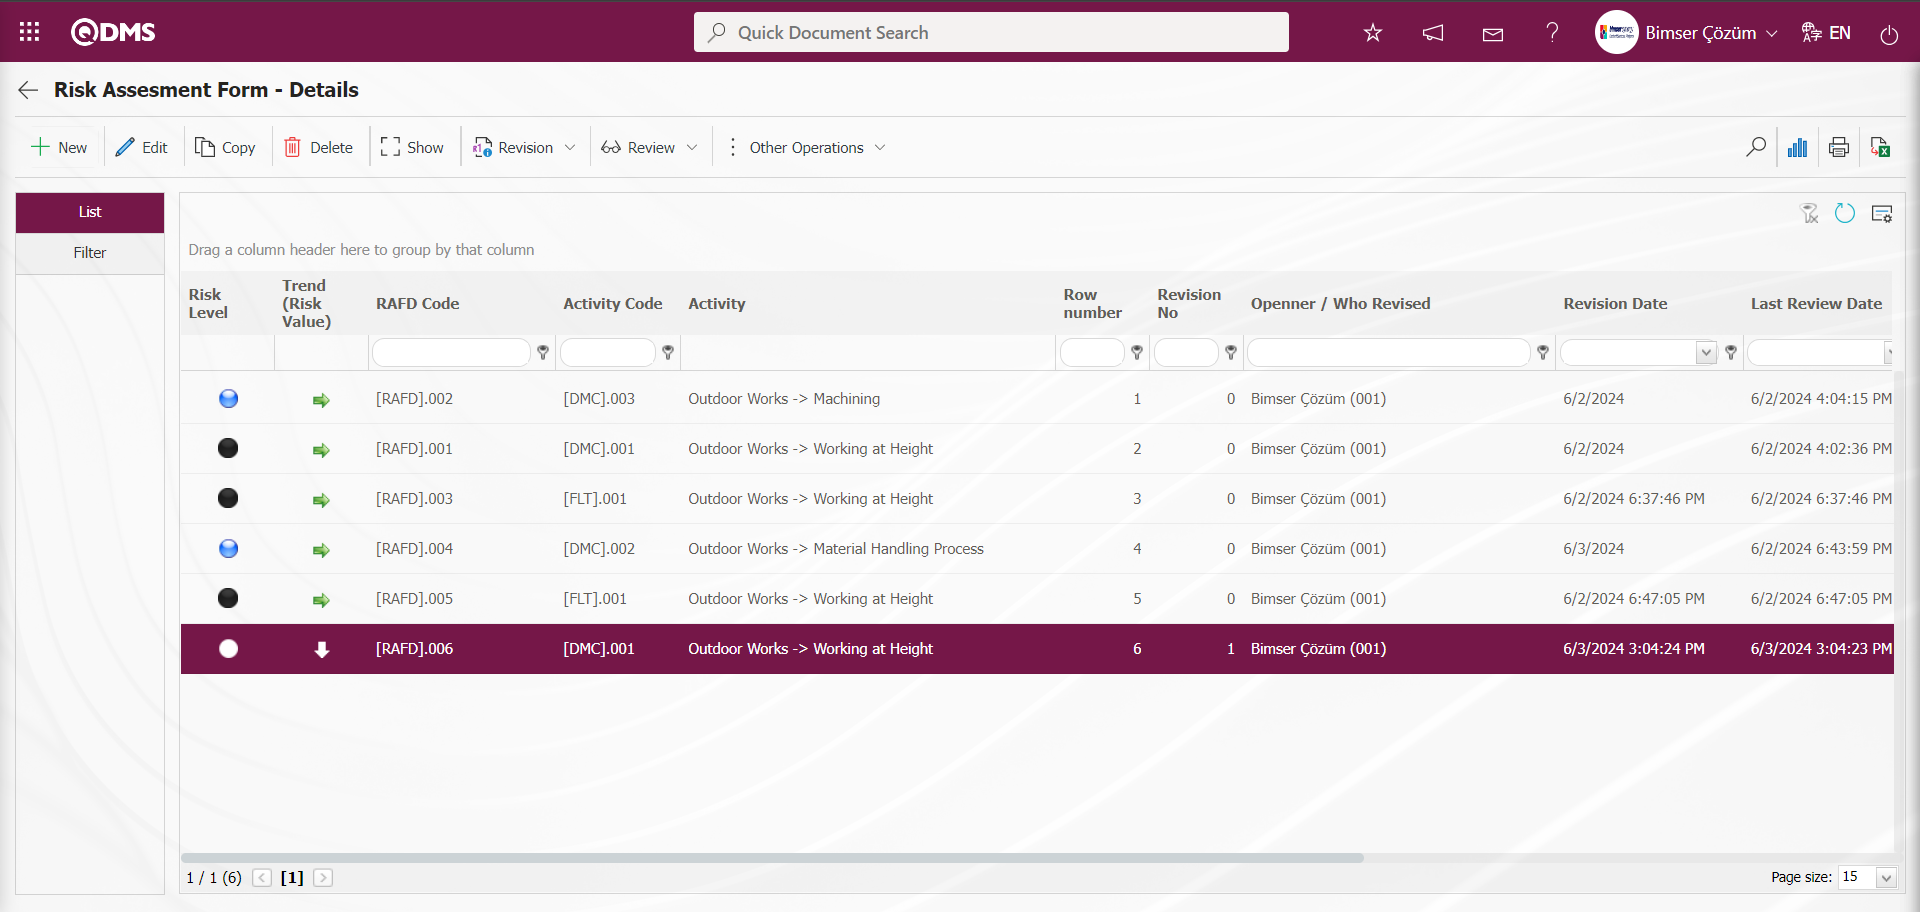
Viewing Old Revisions: While a risk record with revision process is selected on the Risk Assessment Form - Details screen, the old revision of the risk record can be seen by clicking the button.
In order to see the old revision, the parameter value of the parameter 80 “ Use revision?” in the OHSAS Risk Assessment Module parameters is selected as “Yes” and the parameter is activated.
After the parameter is activated, the  button is displayed on the Risk Assessment Form - Details screen and the old revisions of the selected risk record are displayed by clicking this button. While the risk record is selected on the Risk Assessment Form - Details screen, the button is clicked.
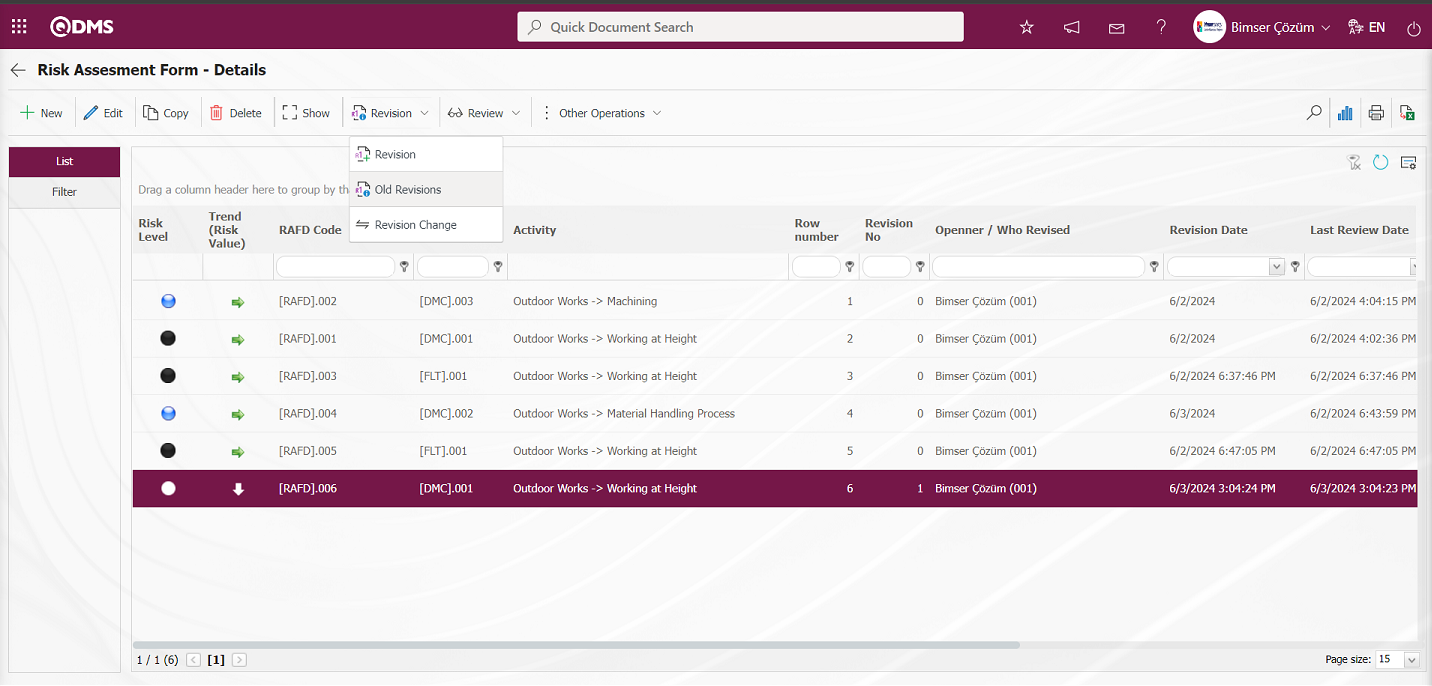
Risk Assesment Form Details - Old Revisions screen opens.
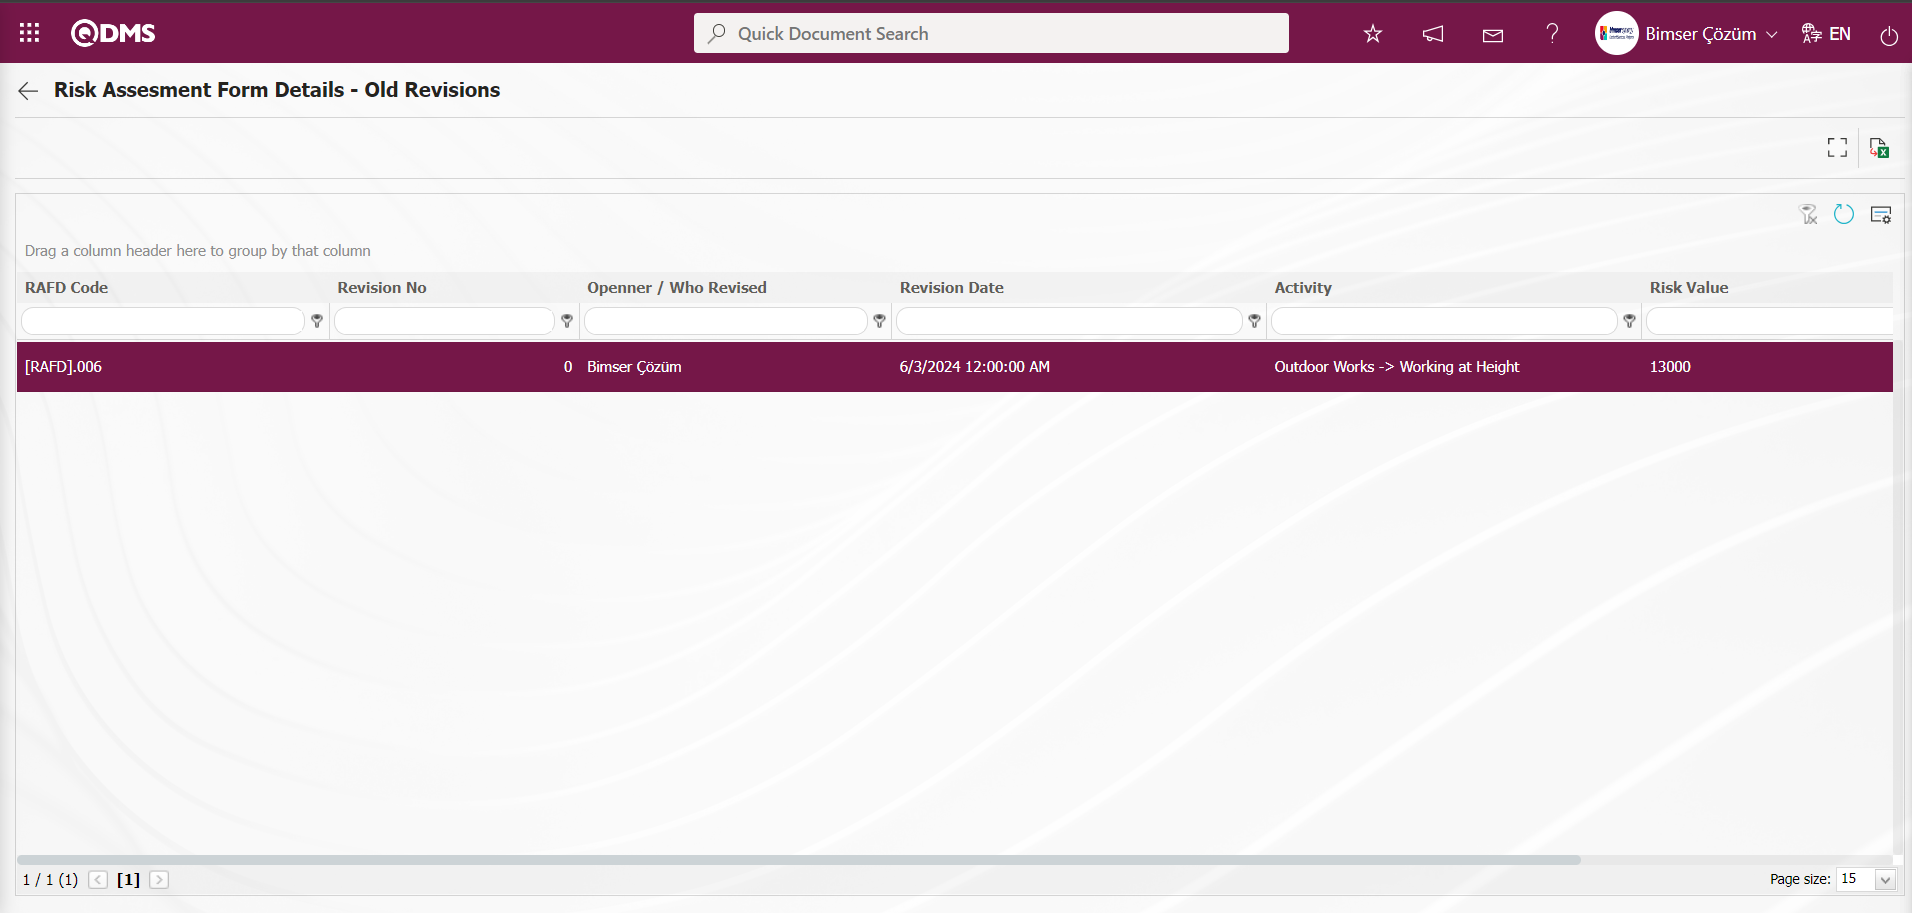
With the help of the buttons on the screen;
 : Displays old revisions.
 : Data can be transferred to Excel.
 : Returns to the previous screen.
On the Risk Assesment Form Details - Old Revisions screen, click the (View) button while the risk record is selected in the list.
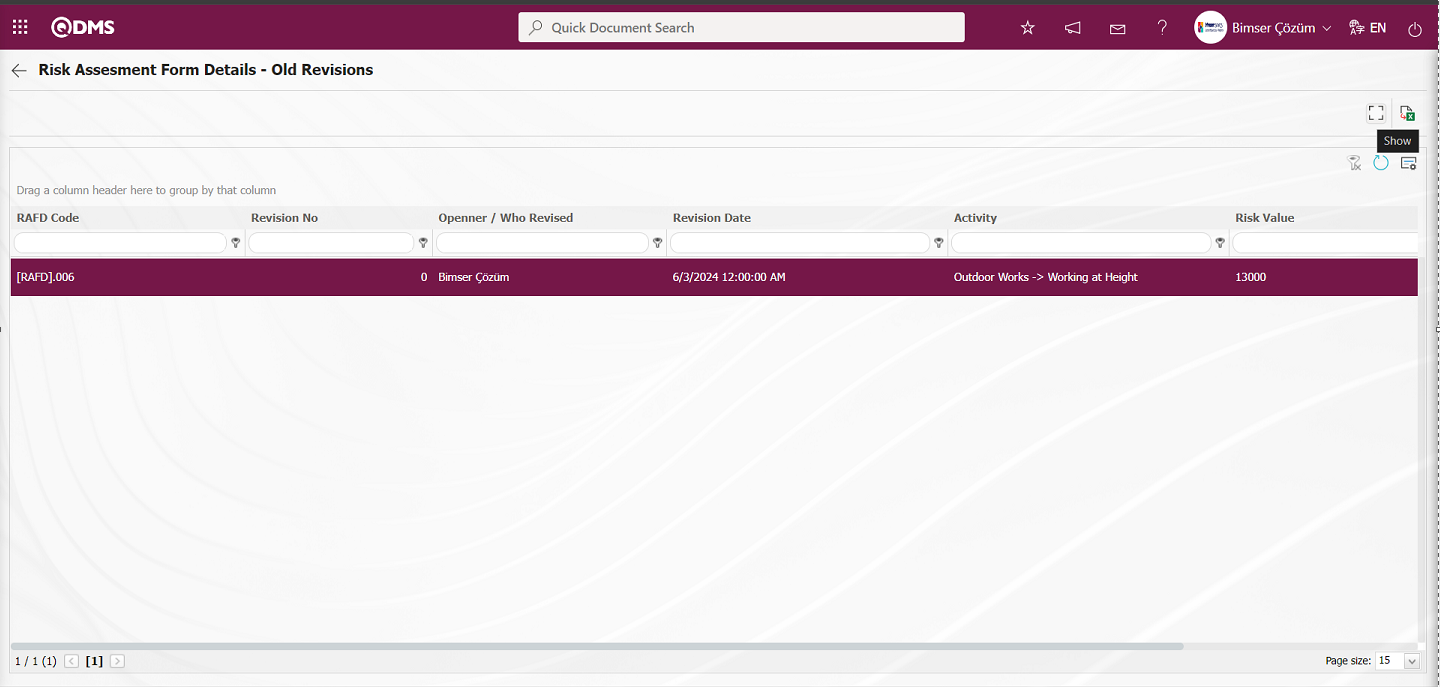
The Risk Assessment Form - Details screen is displayed and the old revision of the Risk record is displayed.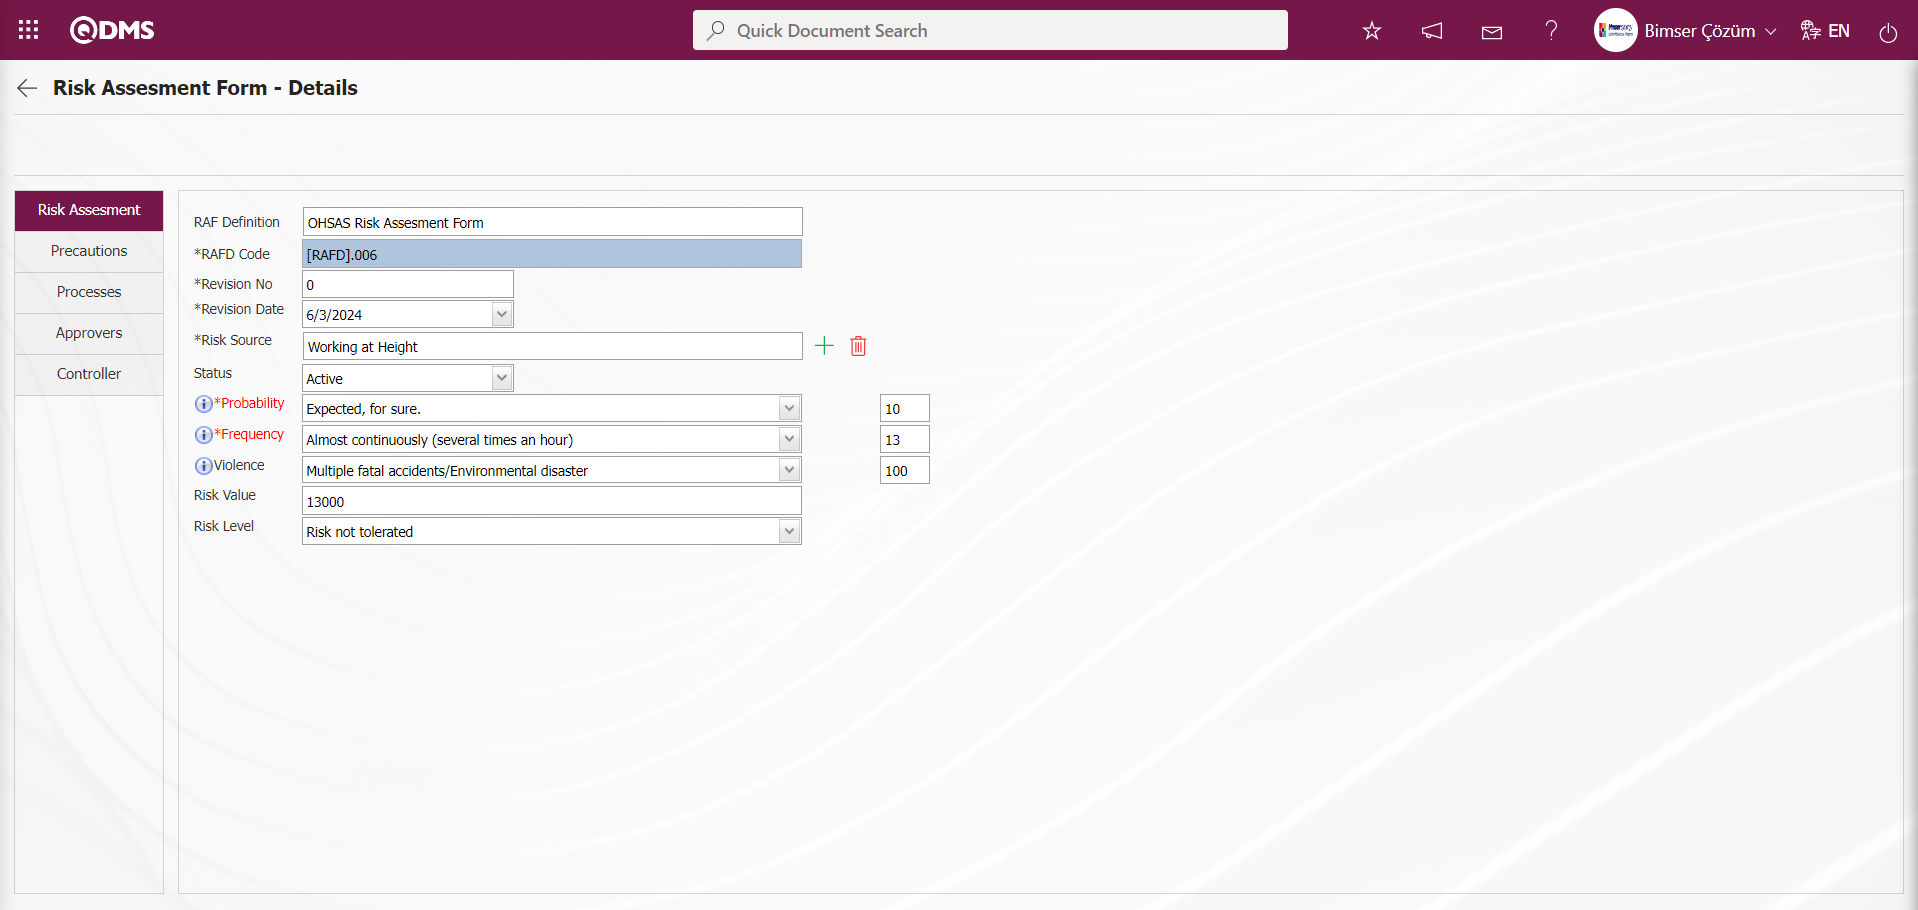
Revision Change Operation: It is the process of comparing the revisions of the risk for which revision operation is performed. In order to perform the Revision Change operation, the parameter value of the “Use Revision?” parameter numbered 80 in the OHSAS Risk Assessment Module parameters is activated by selecting “Yes”.
After the parameter is activated, the  button is displayed on the Risk Assessment Form - Details screen and the revision comparison process of the risk record is performed by clicking this button of the selected risk record. While the risk record is selected on the Risk Assessment Form - Details screen, the button is clicked.
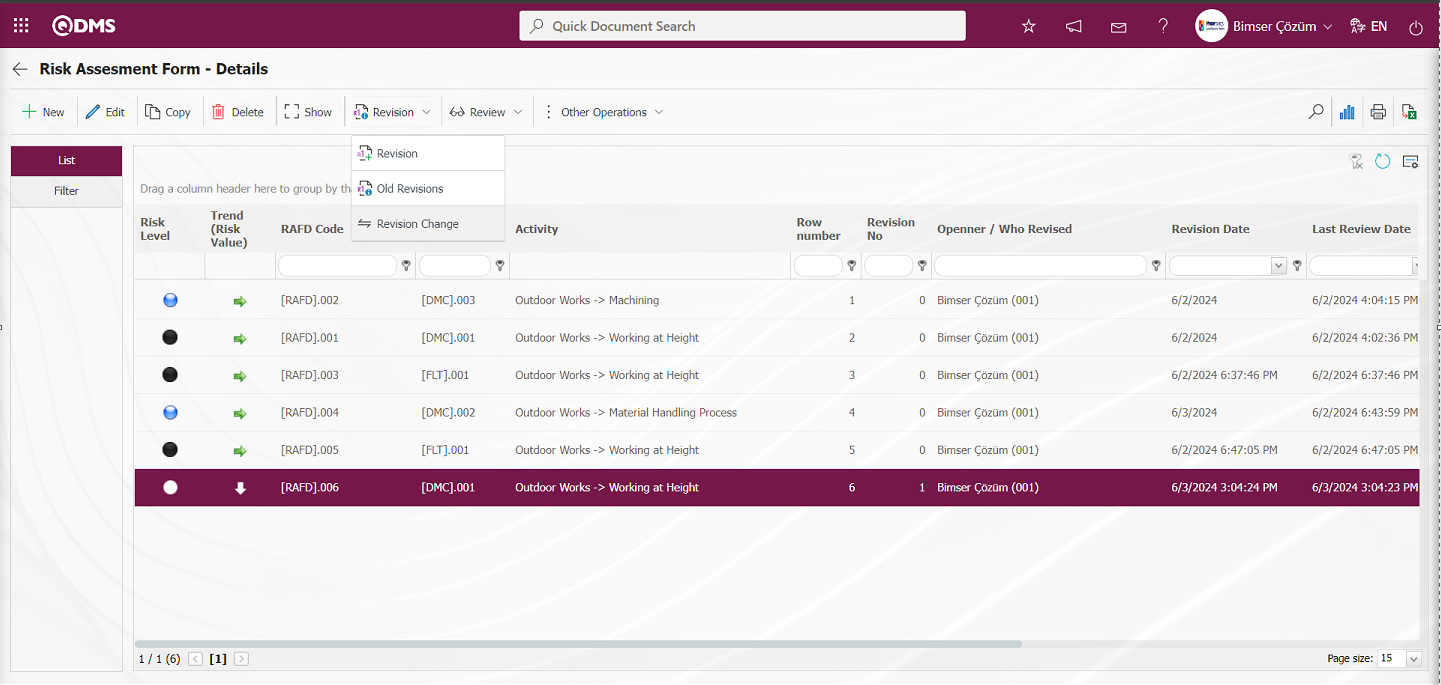
In the Risk Revision Comparison screen, it is seen that the comparison process is performed by displaying the relevant changes between the 0th revision and the 1st revision of the risk record.
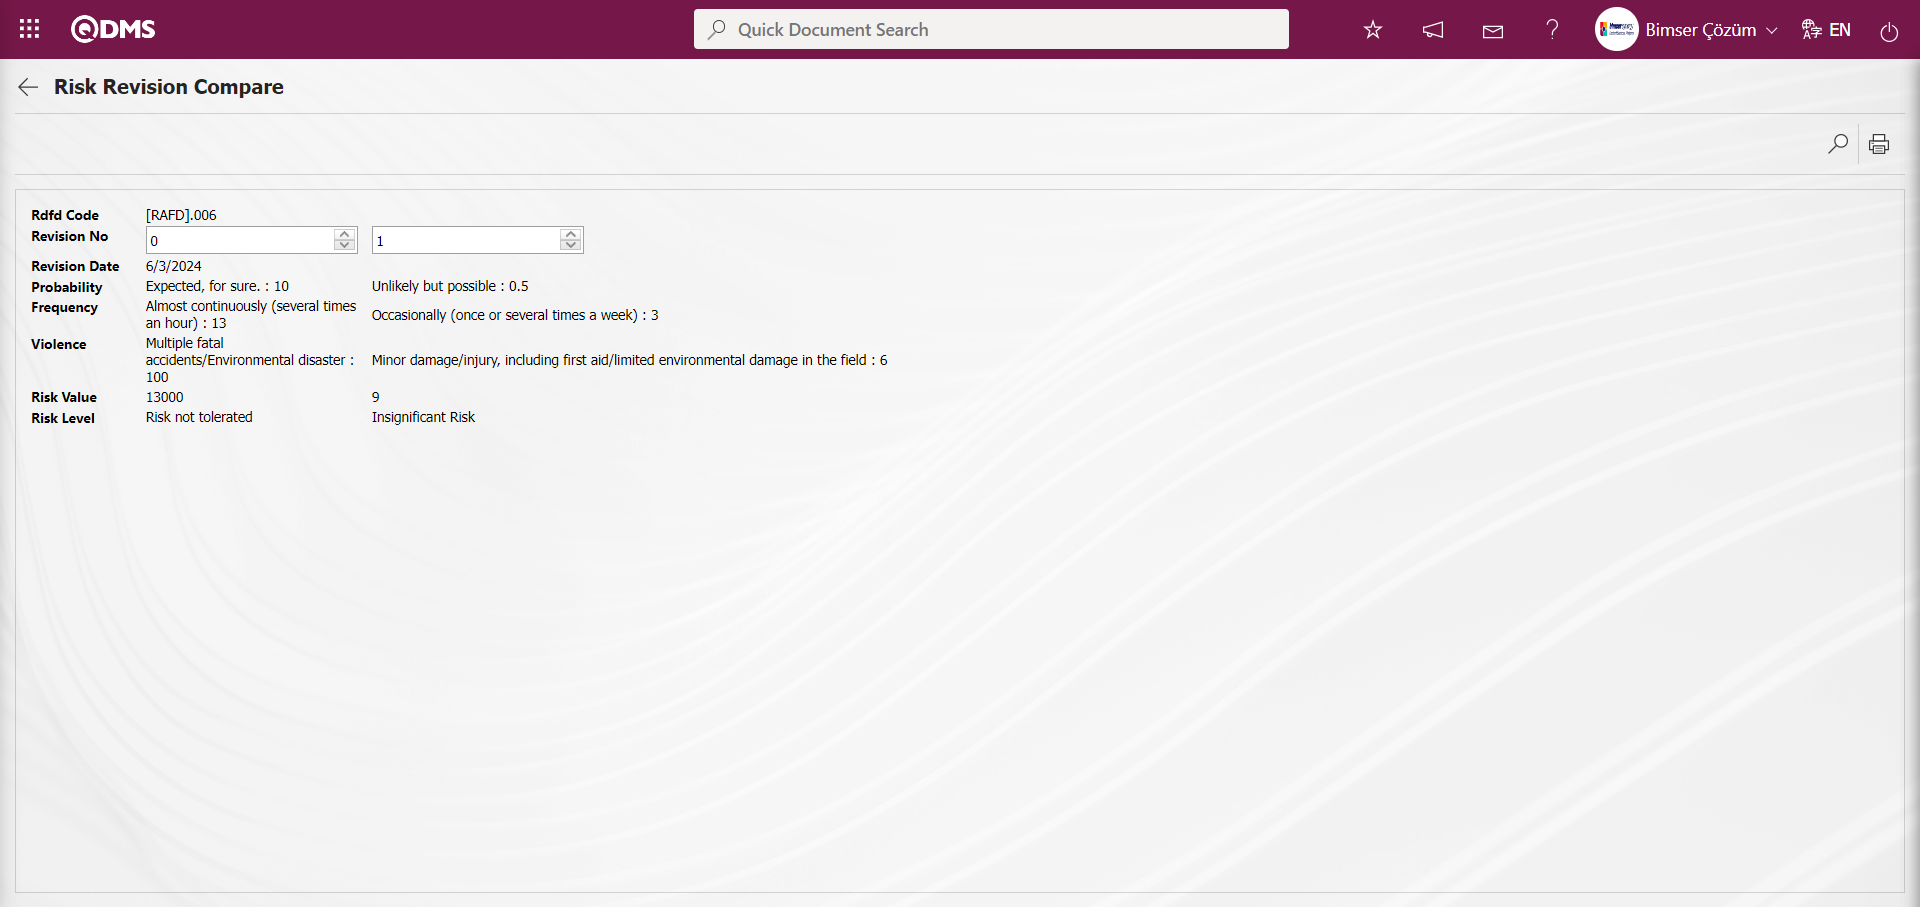
Review Process: Existing risks can be subjected to any review process and the current situation can be evaluated and explanations can be made. For this, while the RAFD list is open, the relevant risk detail is selected and the review process is performed by clicking the button on the top left. In order to perform the review process in the risk record, the parameter value of the parameter 39 “Will the review function be used? (Y / N)” parameter in the OHSAS Risk Assessment Module parameters is activated by selecting “Yes”.
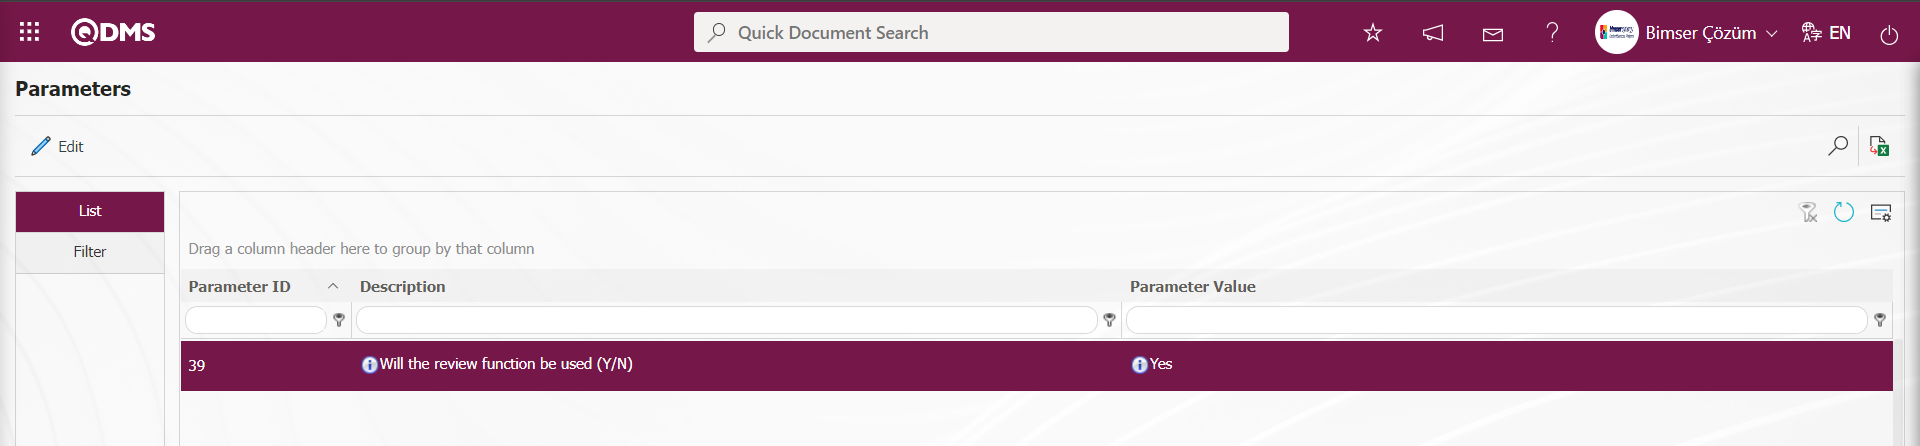
After the parameter is activated, the  button is displayed on the Risk Assessment Form - Details screen and the review of the selected risk record is made by clicking this button. In the OHSAS Risk Assessment module parameters, the risk records in the status codes defined in the parameter 174 “Status codes that will be passive for the review function (Enter with comma)” will not be reviewed. Status codes information is taken in the Function Indexer menu.

Risk Assessment Form - Click the button while the risk record is selected on the Details screen

The Risk Review screen opens.
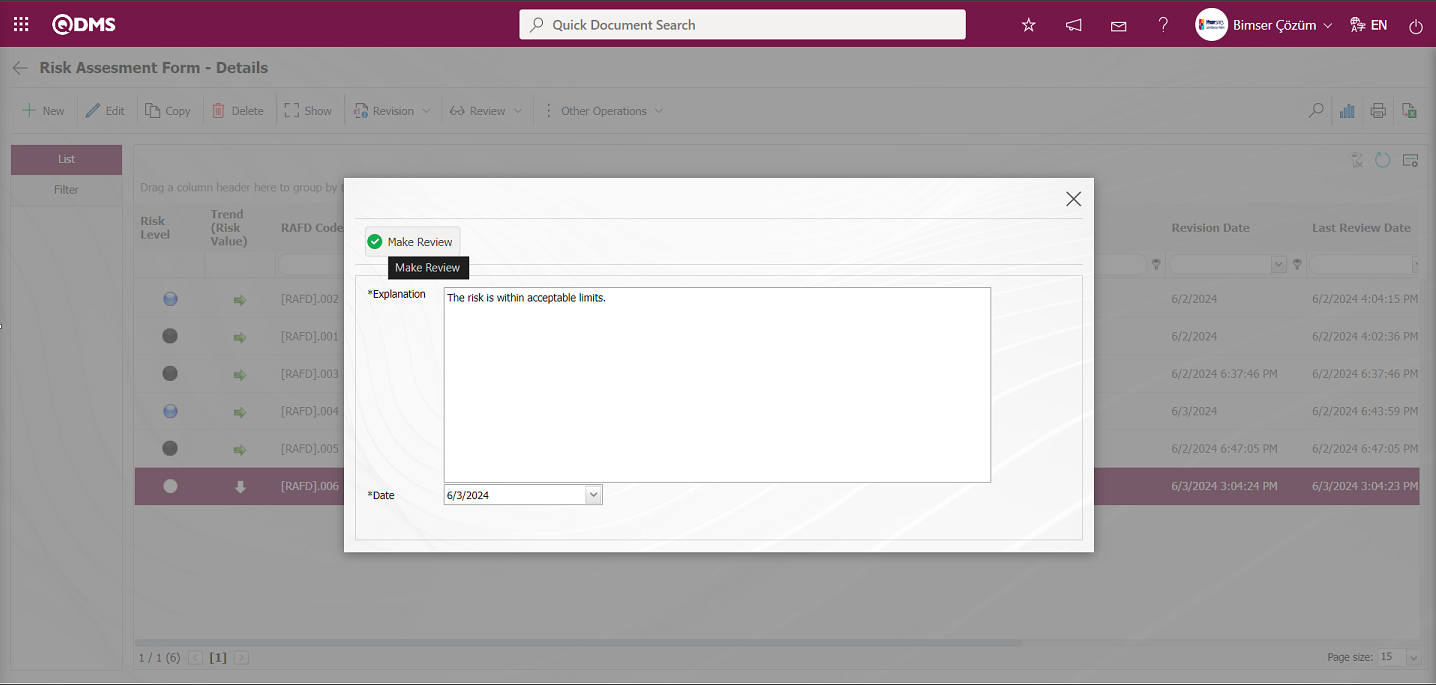
On the Risk Review screen, in the description field of the risk record, write the description information about the review process. In the Date field, the date of the review process is selected in the Calendar field. After entering the relevant information in the required fields, the review registration process is done by clicking the  button.
Old Review Viewing Process: Existing risks can be subjected to any review process and the current situation can be evaluated and explanations can be made. The risk detail for which a review is made is selected and the old review processes are displayed by clicking the  button at the top left. In order to see the old reviews in the risk record, the parameter value of the parameter 39 “Will the review function be used? (Y / N”** parameter in the OHSAS Risk Assessment Module parameters is activated by selecting “Yes”.
After the parameter is activated, the button is displayed on the Risk Assessment Form - Details screen and the old reviews are viewed by clicking this button of the selected risk record. While the risk record is selected on the Risk Assessment Form - Details screen, the button is clicked.
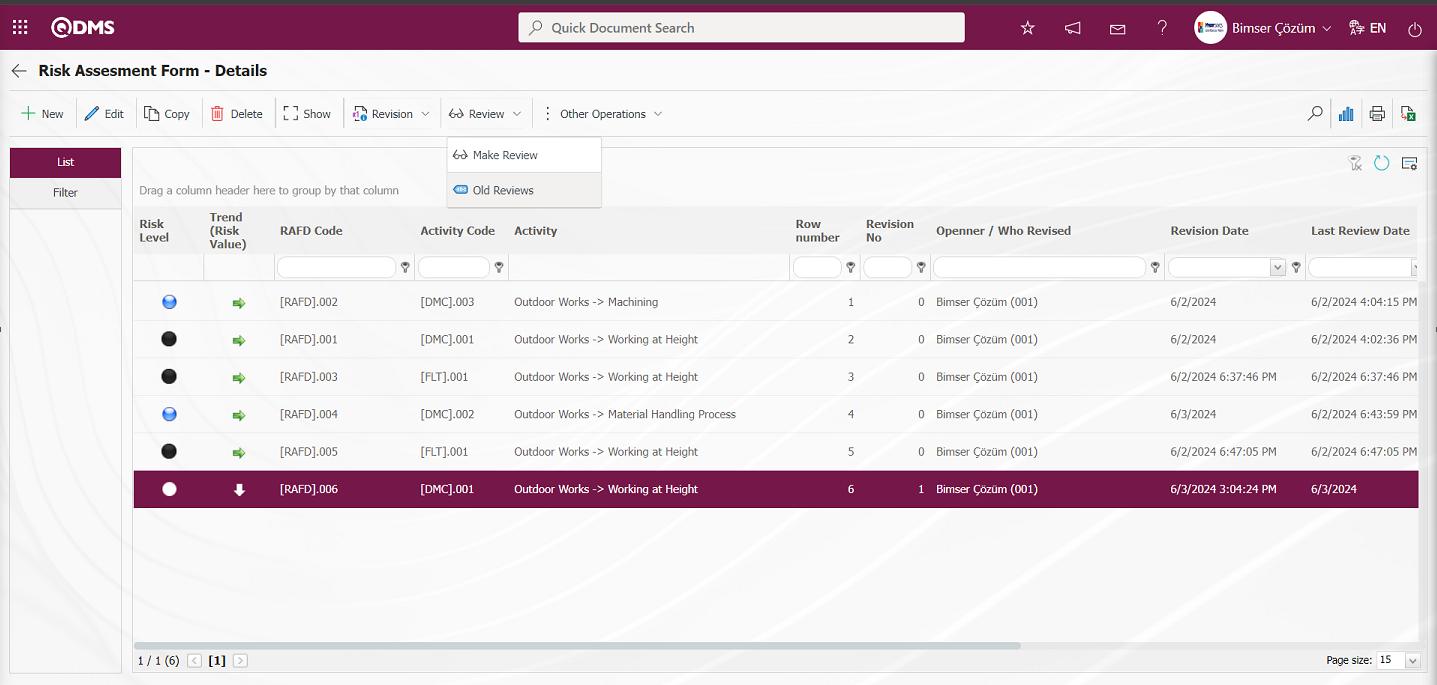
The Risk Old Reviews screen opens and displays information about old reviews.
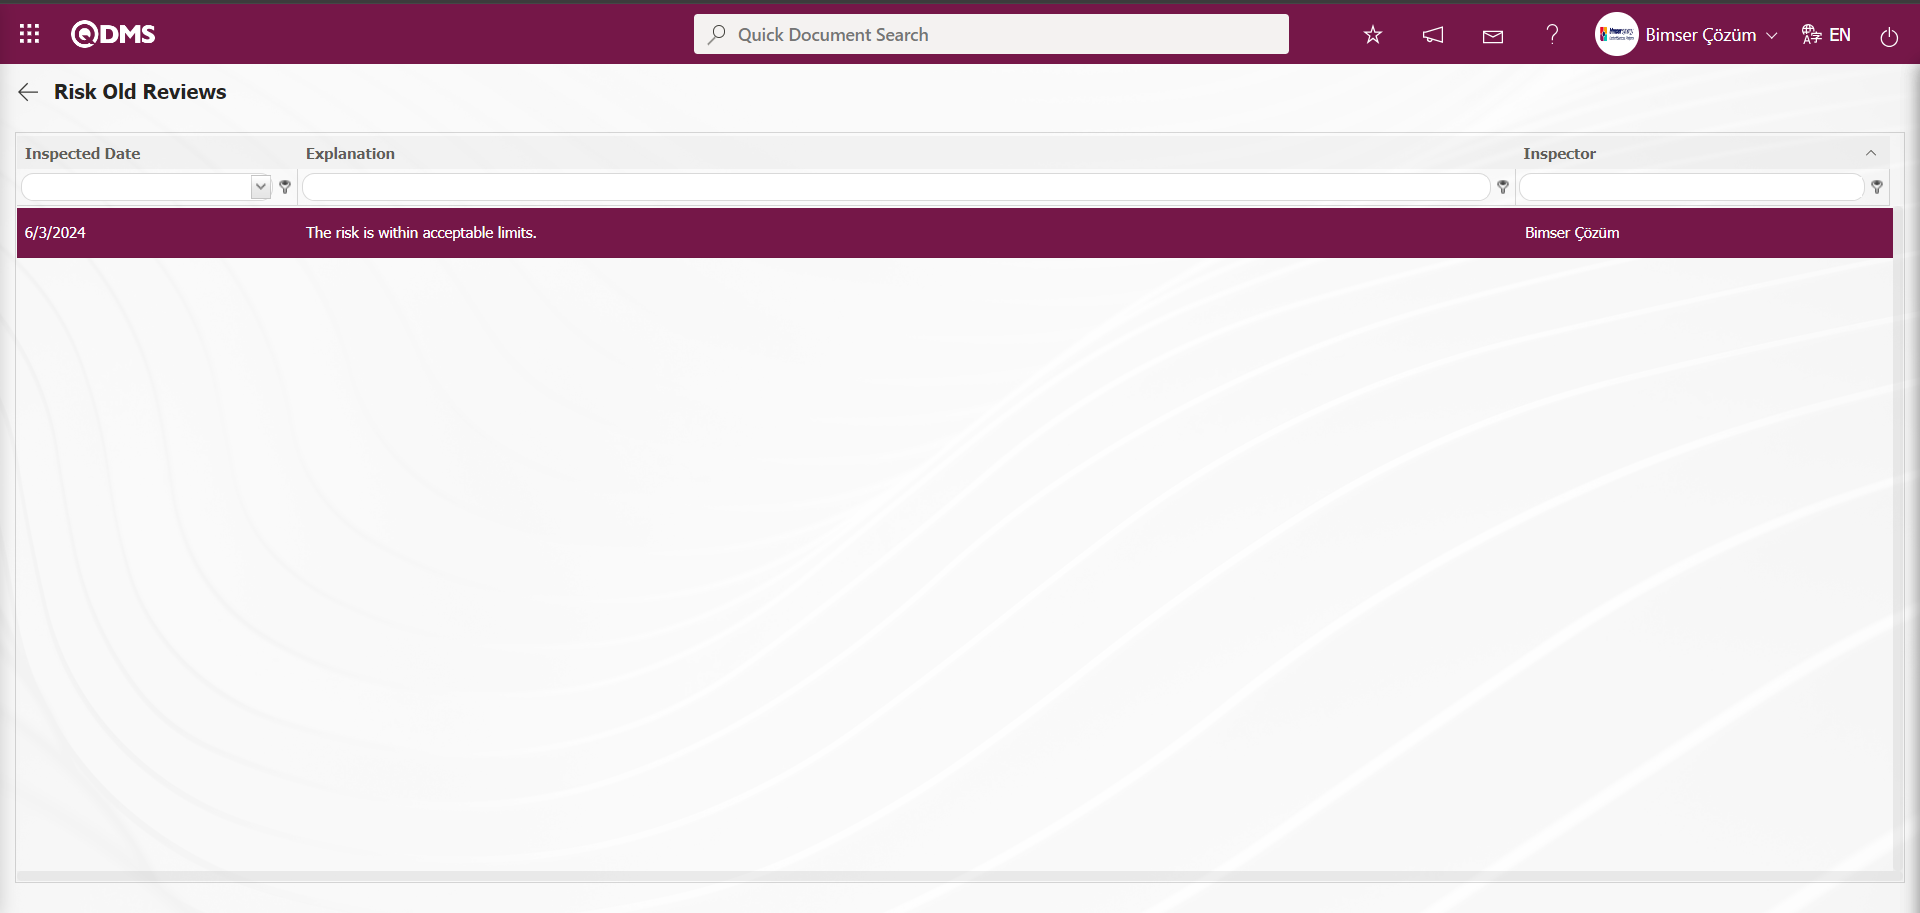
Graph Drawing Process: While the Risk records are selected on the Risk Assessment Form - Details screen, the (Draw Graph) button is clicked to draw the graphs of the risk records. This button is a button that is displayed depending on the parameter. The parameter value of the parameter 84 “Draw graphic detail in the Risk assessment function do you use?”from the OHSAS Risk Assessment module parameters is activated by selecting “Yes”.

After the parameter is activated, the  (Draw Graph) button is displayed on the Risk Assessment Form - Details screen and the graph of the risk record selected in the list is taken. While the risk record is selected on the Risk Assessment Form - Details screen, click the (Draw Graph) button.

Some revisions in the Risk Status Chart screen opens.
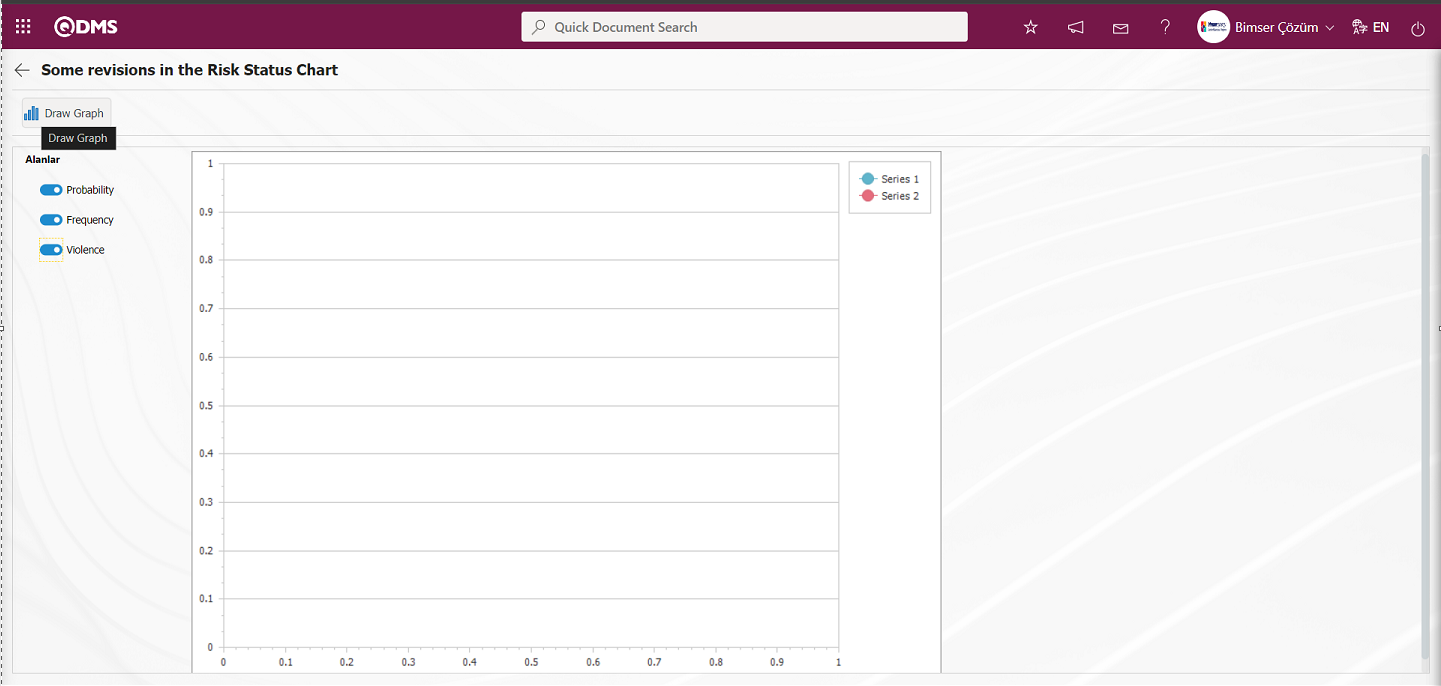
On the screen that opens, the fields to be graphed are selected in the fields field and the graph of the risk record is taken by clicking the  button.
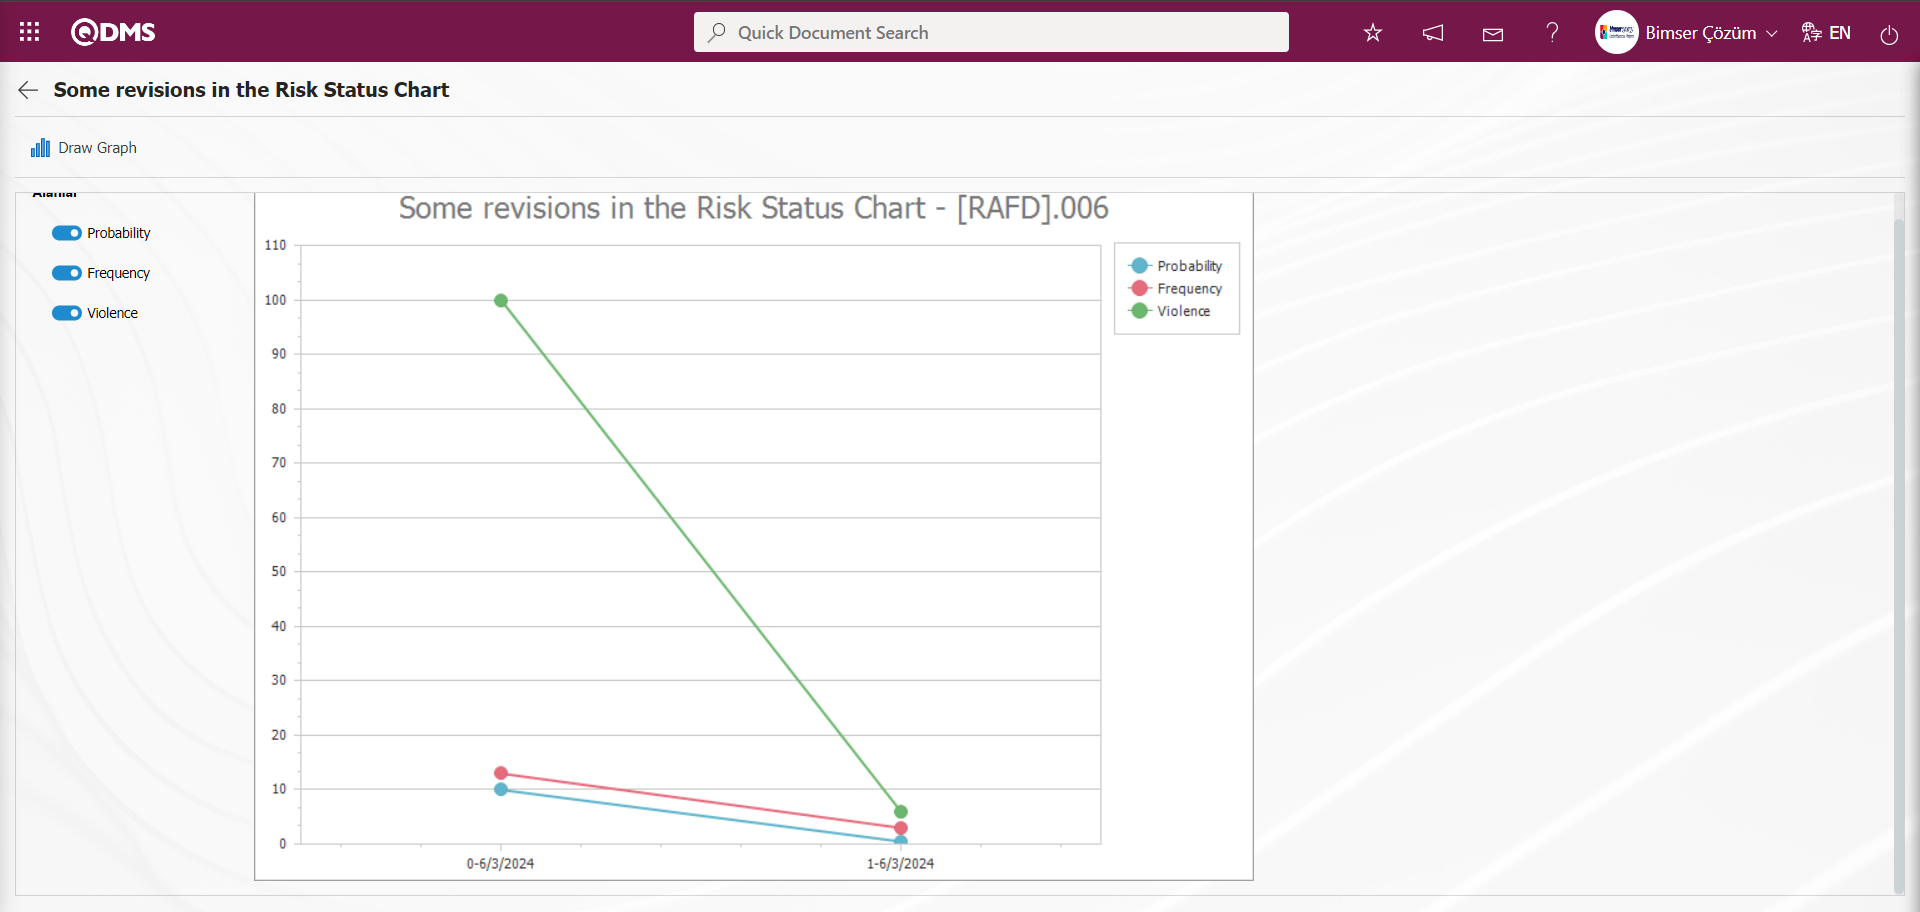
6.2.4.Graphics
Menu Name: Integrated Management System/OHSAS Risk Assessment/Graphs
This is the section where Graphics are displayed in the OHSAS Risk Assessment Module.
6.2.4.1.Risk Revision Comparison Graphic
Menu Name: Integrated Management System/ OHSAS Risk Assessment/Graphics/ Risk Revision Comparison Graphic
It is the menu where the revision comparison process is performed in risk records and the graph is taken. To get the Risk Revision Comparison Graphic, click on the Risk Revision Comparison Graphic menu from the Graphics menu.
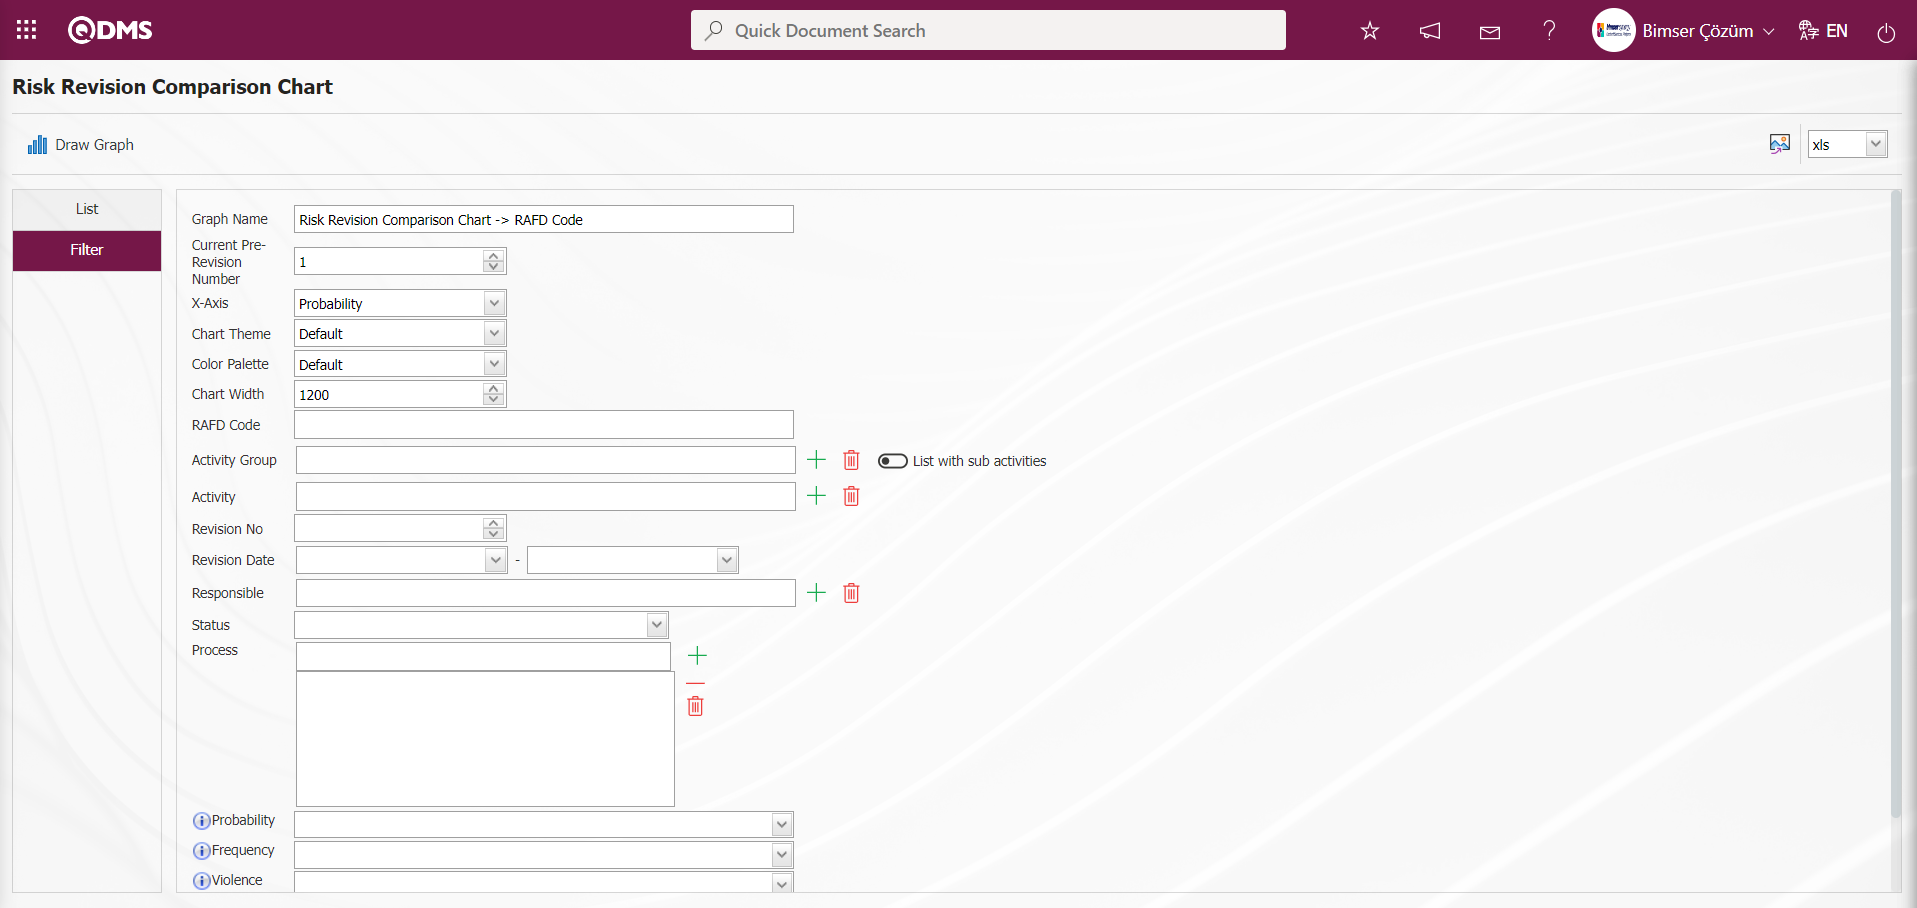
With the help of the buttons on the screen;
 : Draws the graph on the screen according to the specified properties.
 : Converts the graph to the format type (Excel, JPG, PDF, etc.) selected from the drop-down menu and exports it to the external environment.
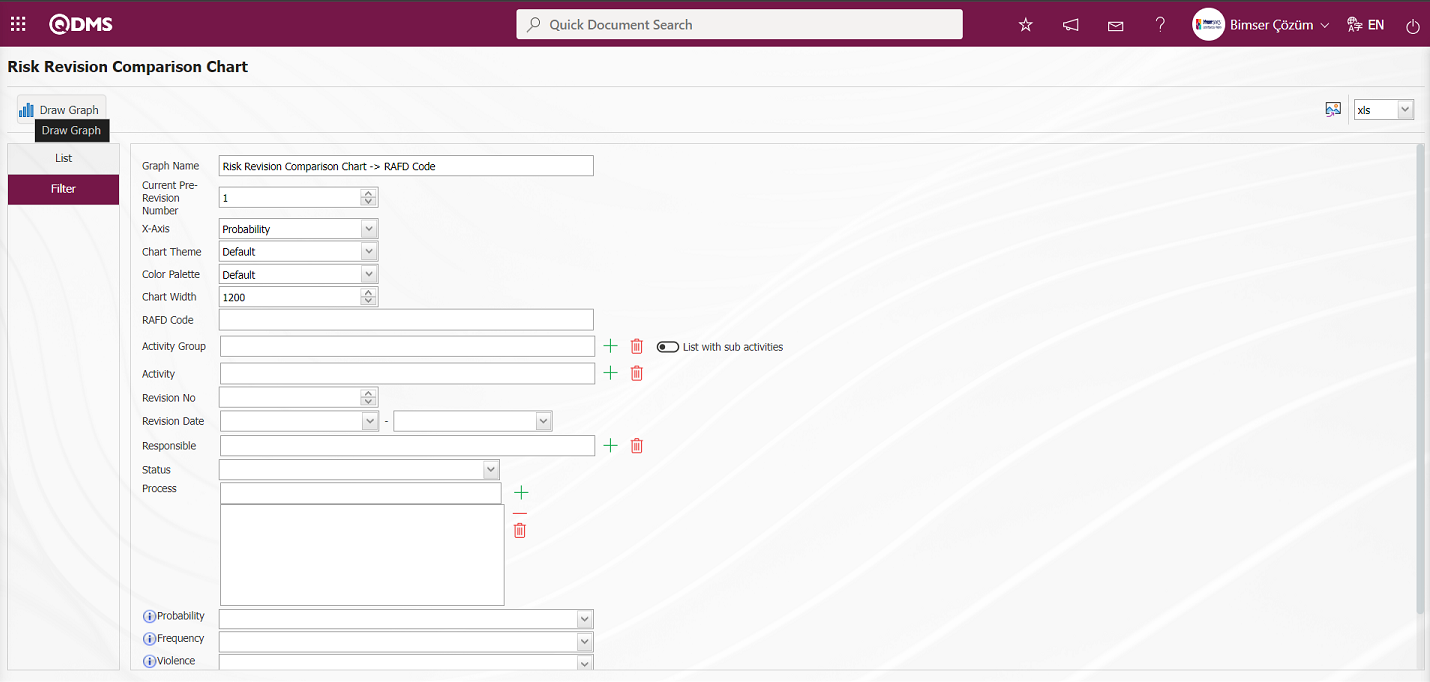
On the screen that opens, the desired risk revision comparison is made with the  button by filling in the fields that we want to get the chart comparison from the filter tab. On the Risk Revision Comparison Chart screen, the number of revisions before the current revision and the X axis are selected and the Risk Revision Comparison Chart is created by clicking the button.
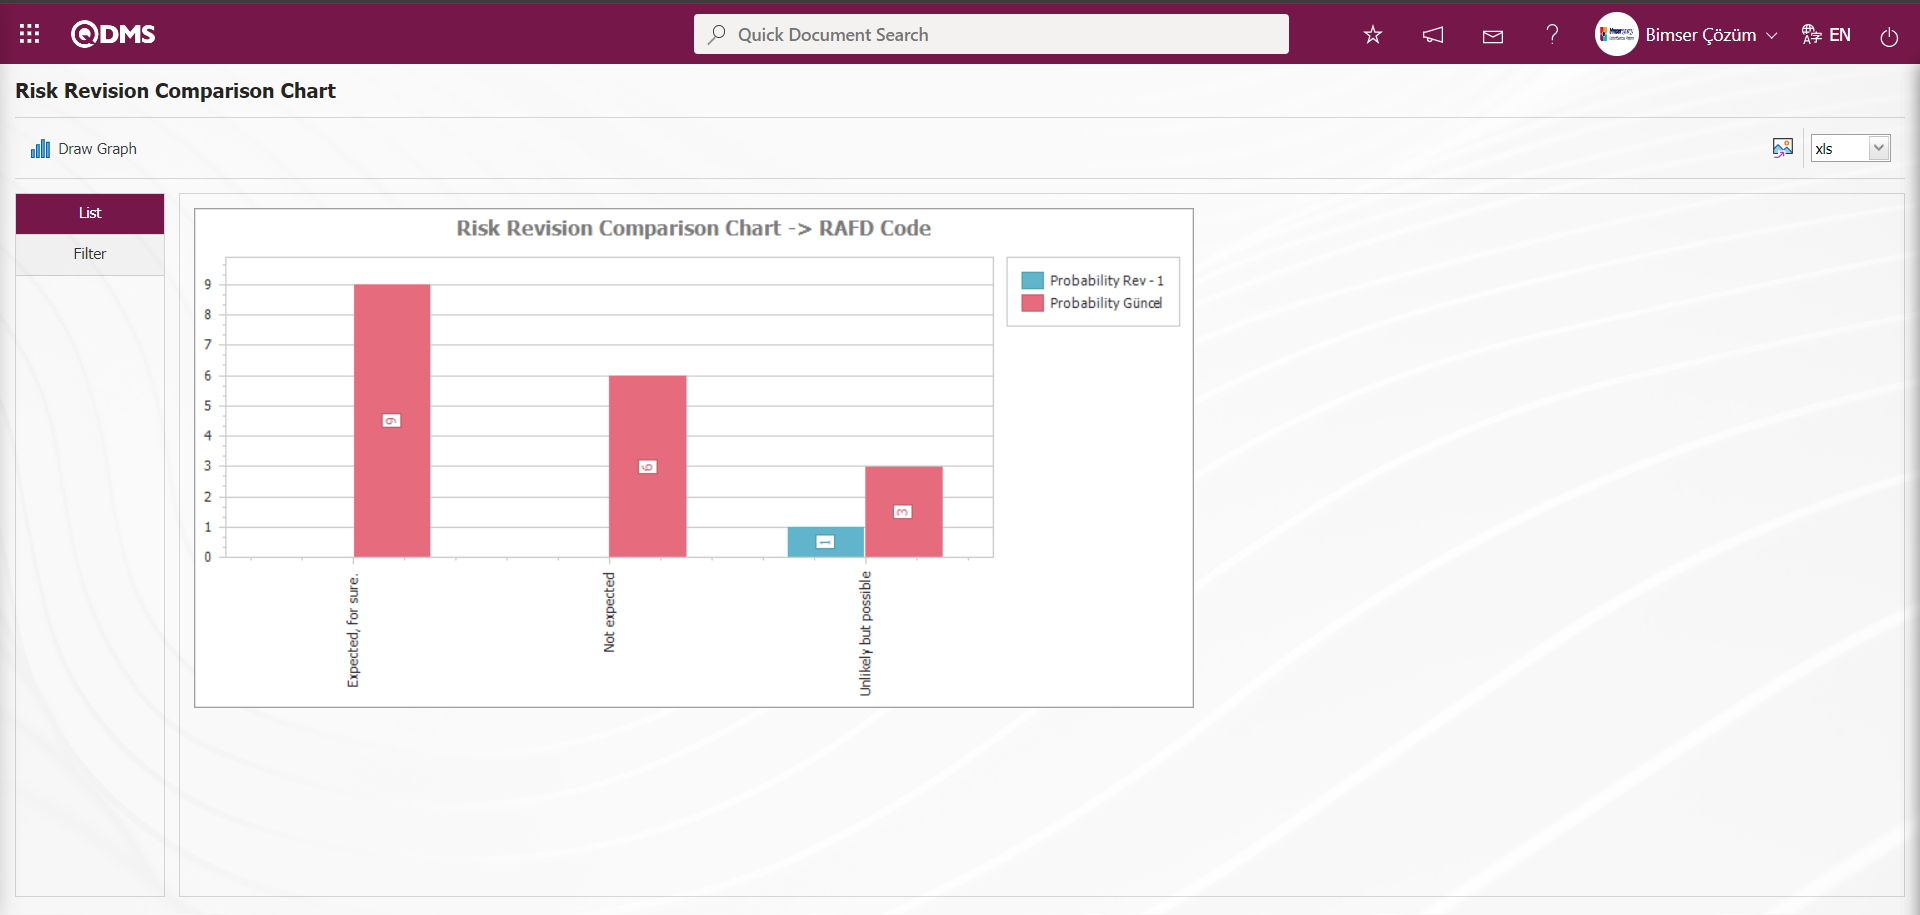
On the Risk Revision Comparison Chart screen, click the  button and select the “xls” option by clicking on the drop-down list.
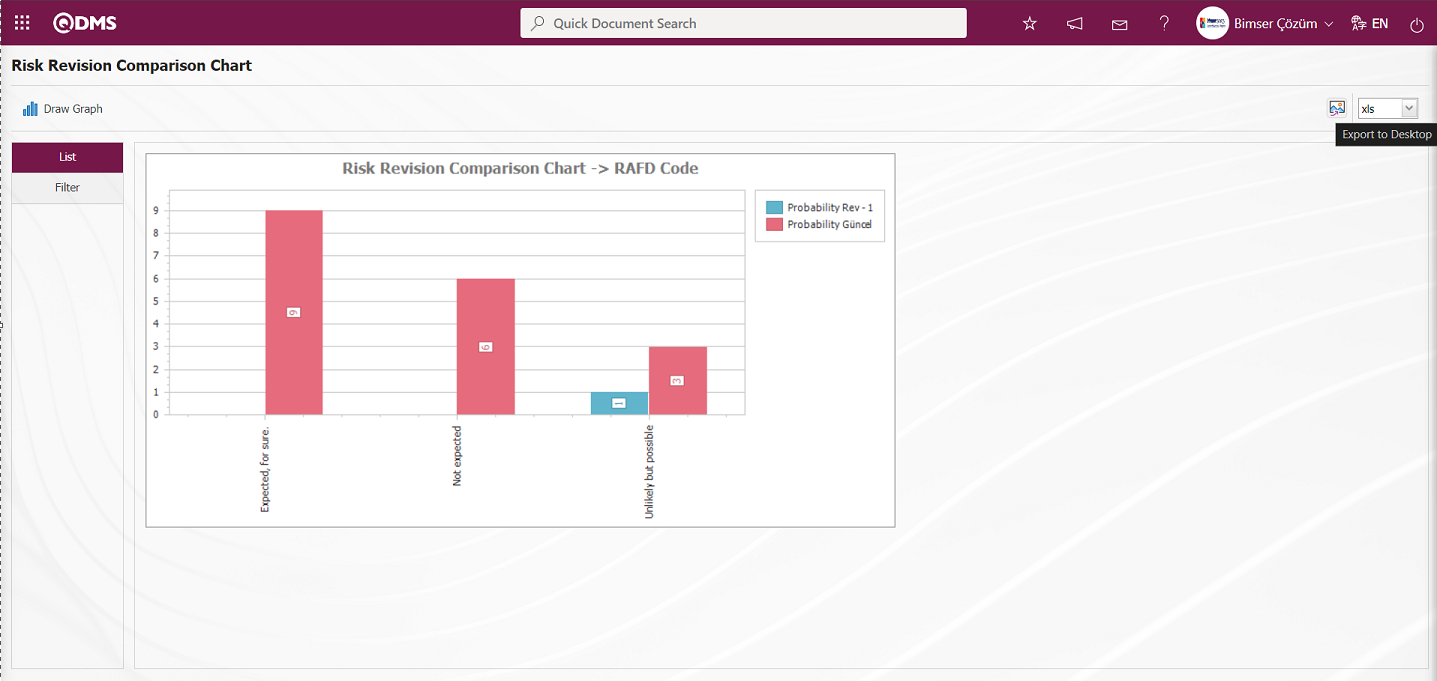
Report of Risk Revision Comparison Chart in Excel format.
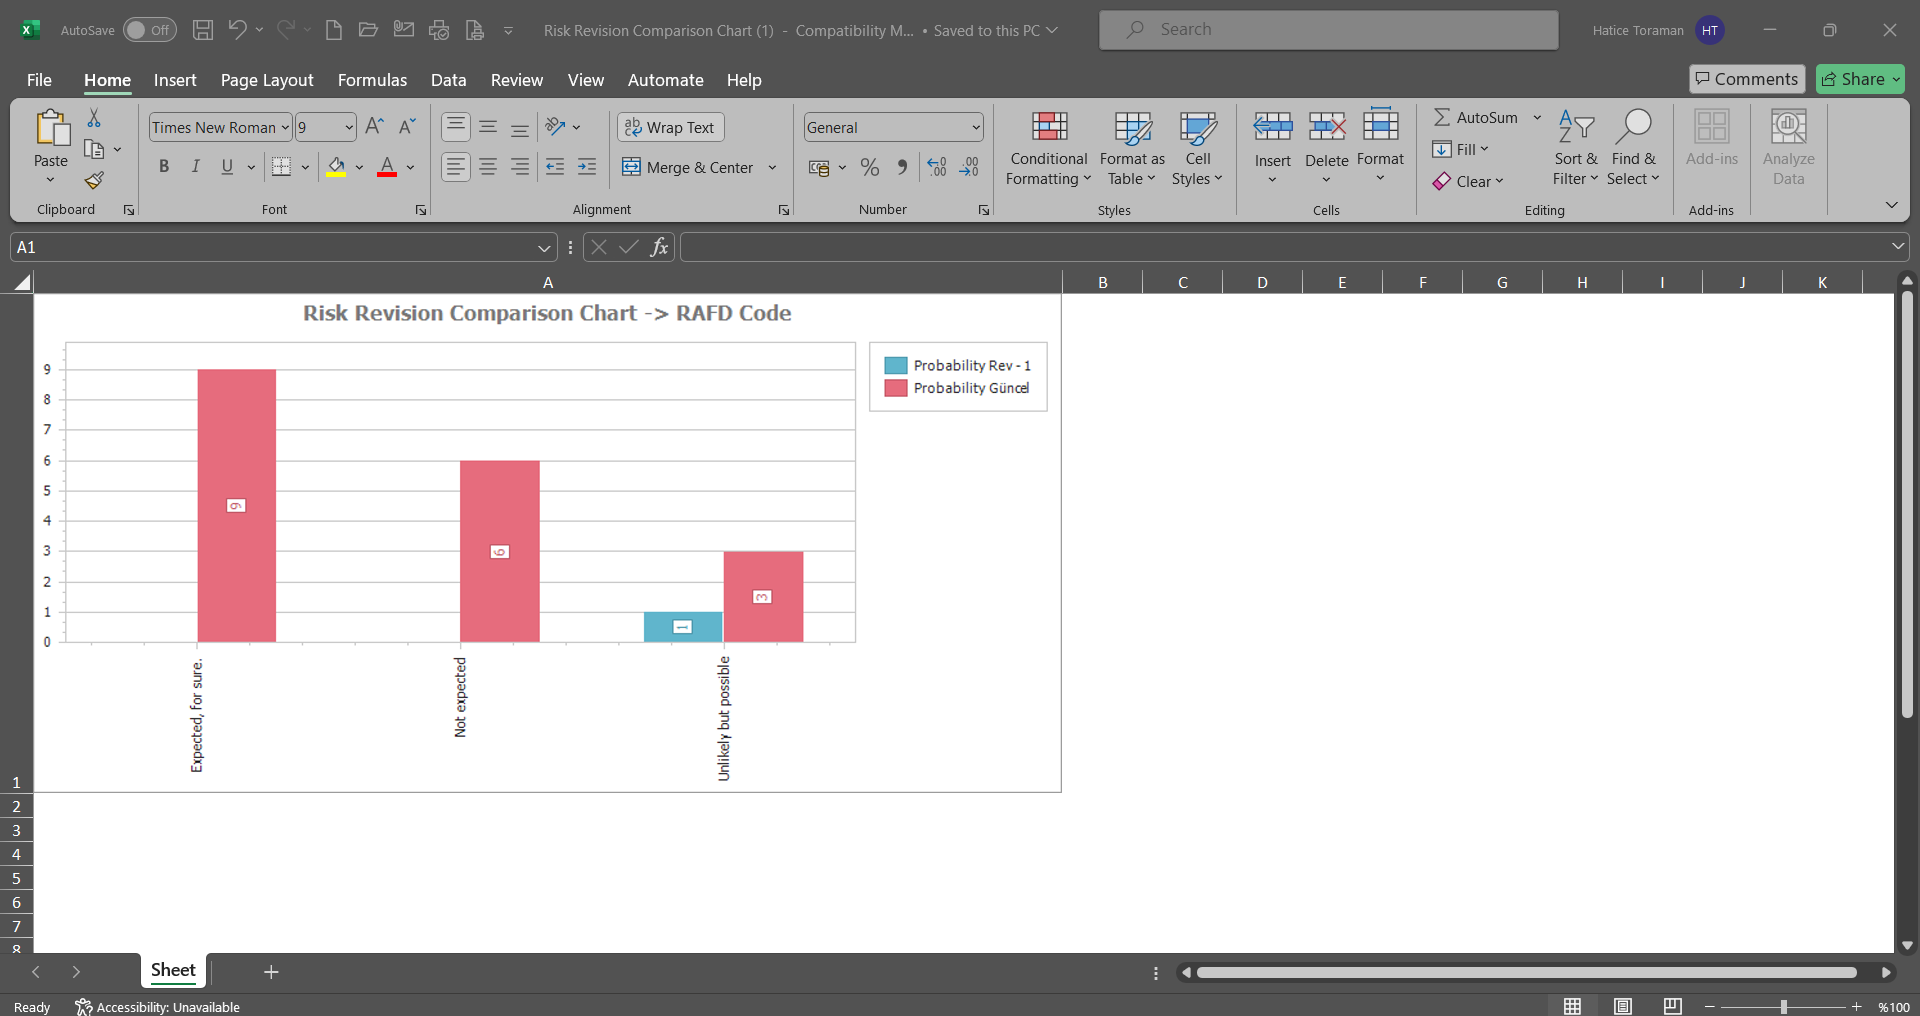
6.2.4.2.The Most Occurency Analysis(graphics)
Menu Name: Integrated Management System/OHSAS Risk Assessment/Graphics/ The Most Occurency Analysis(graphics)
It allows to create a graph according to the selection types on the X axis. For this created graph, detail based filtering is done by using data options.
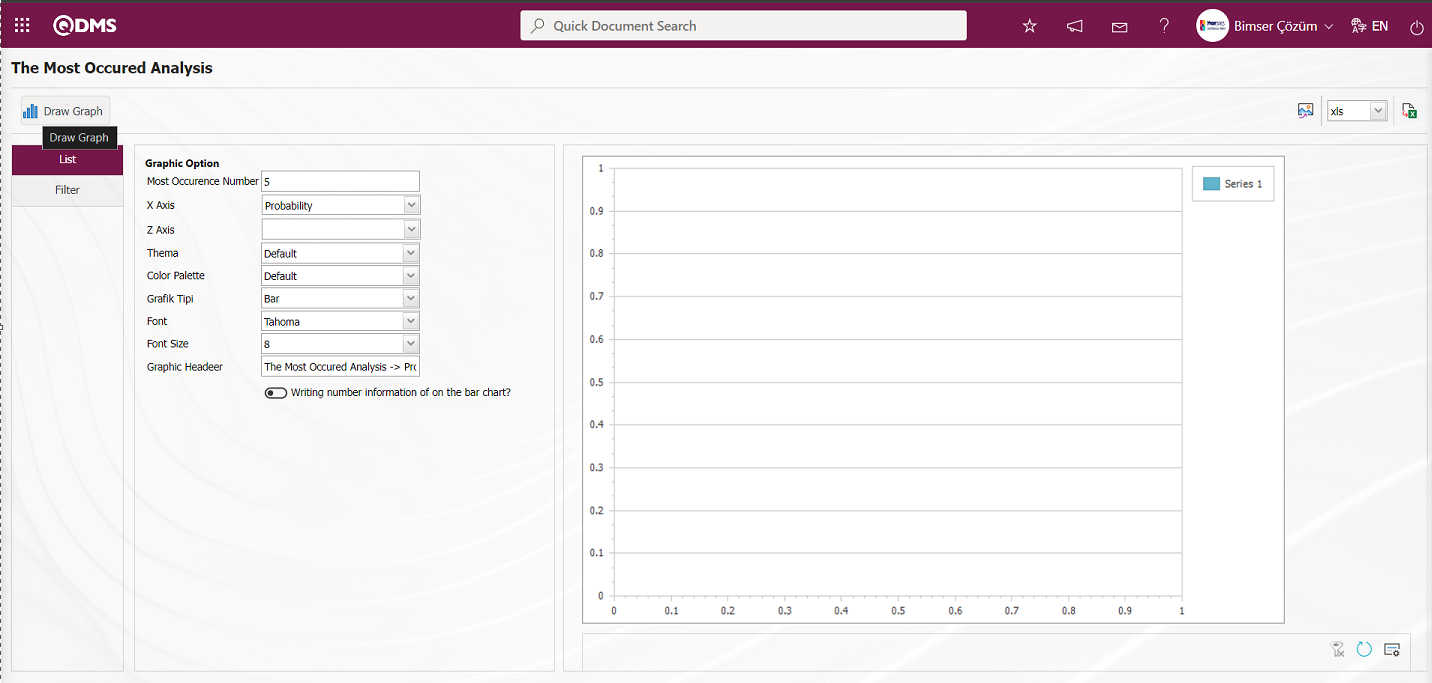
With the help of the buttons on the screen;
: Draws the graph on the screen according to the specified properties.
 : Converts the graph to the format type selected from the drop-down menu (png, jpg, bmp, xls, etc.) and exports it to the external environment.
: Data can be exported to Excel.
There are two separate settings for creating a graph. These are Chart and Data options. As the name suggests, it is the area where adjustments such as the colors, width and height of the graph are made. X axis and Y axis are important in chart settings. It allows us to obtain a graph according to the subjects we want to query from the X axis, such as Risk Owner, Violence/Secrecy, Violence/Integrity, etc. From the Y Axis, it is ensured that the graph of the relevant query is reported according to the desired option according to the quantity and Z axis, which is the number of the number of the query. From the Data Options, it is the field used if you want to filter to get more limited data from the graphic settings we have determined. When the check box is checked, the quantity information is displayed on the bar on the graph. After the adjustments are completed, the graph is created by clicking the button. If you want to export the graph to different formats, after selecting the format from the right (Export), the xls, png, jpg. With the (Export to Excel) button, it is enabled to export the data to Excel. Graphics in different formats can be created with this data.
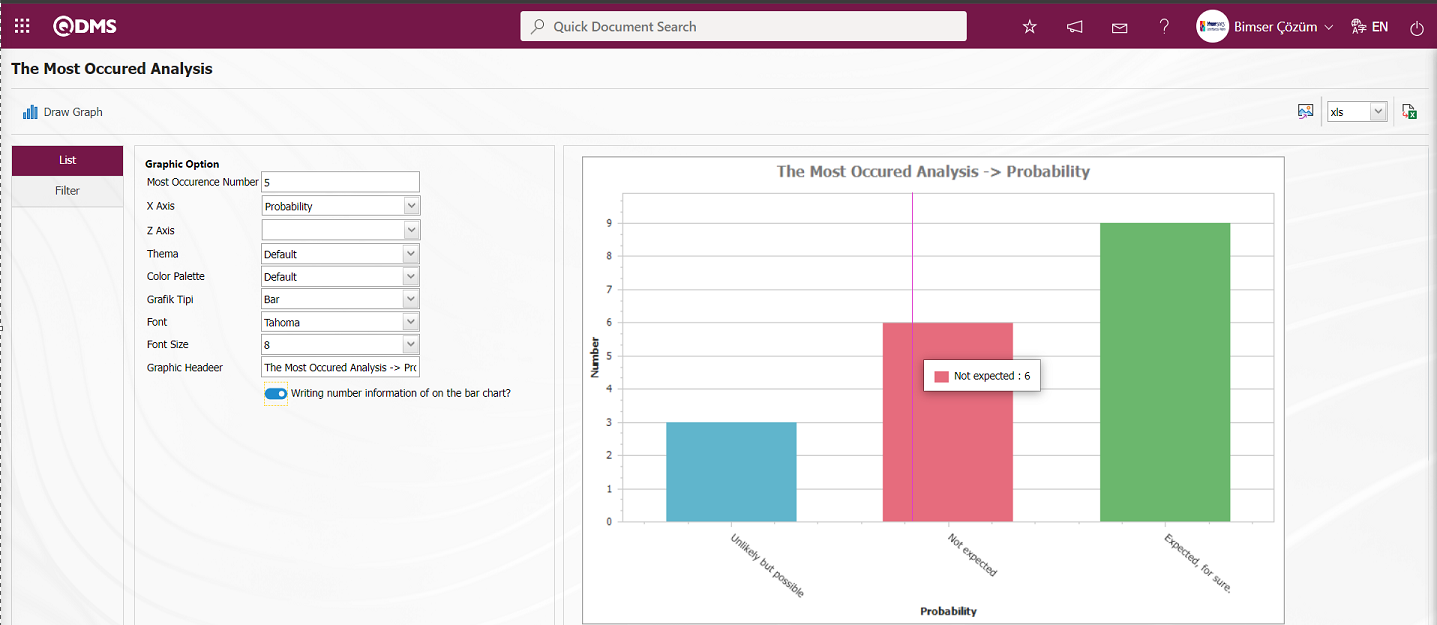

In The Most Occurrence Analysis screen, click on the (Export to Excel) button.
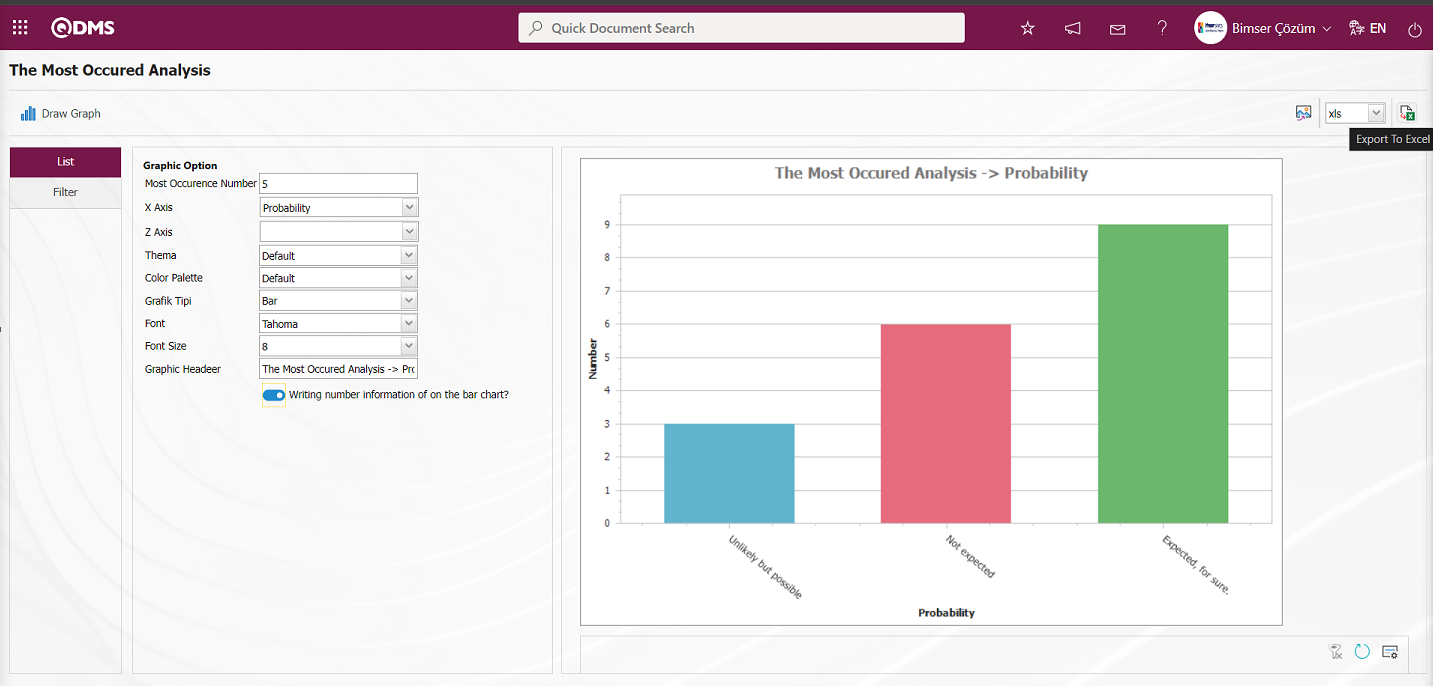 The Most Occurency Analysis Chart in Excel format.
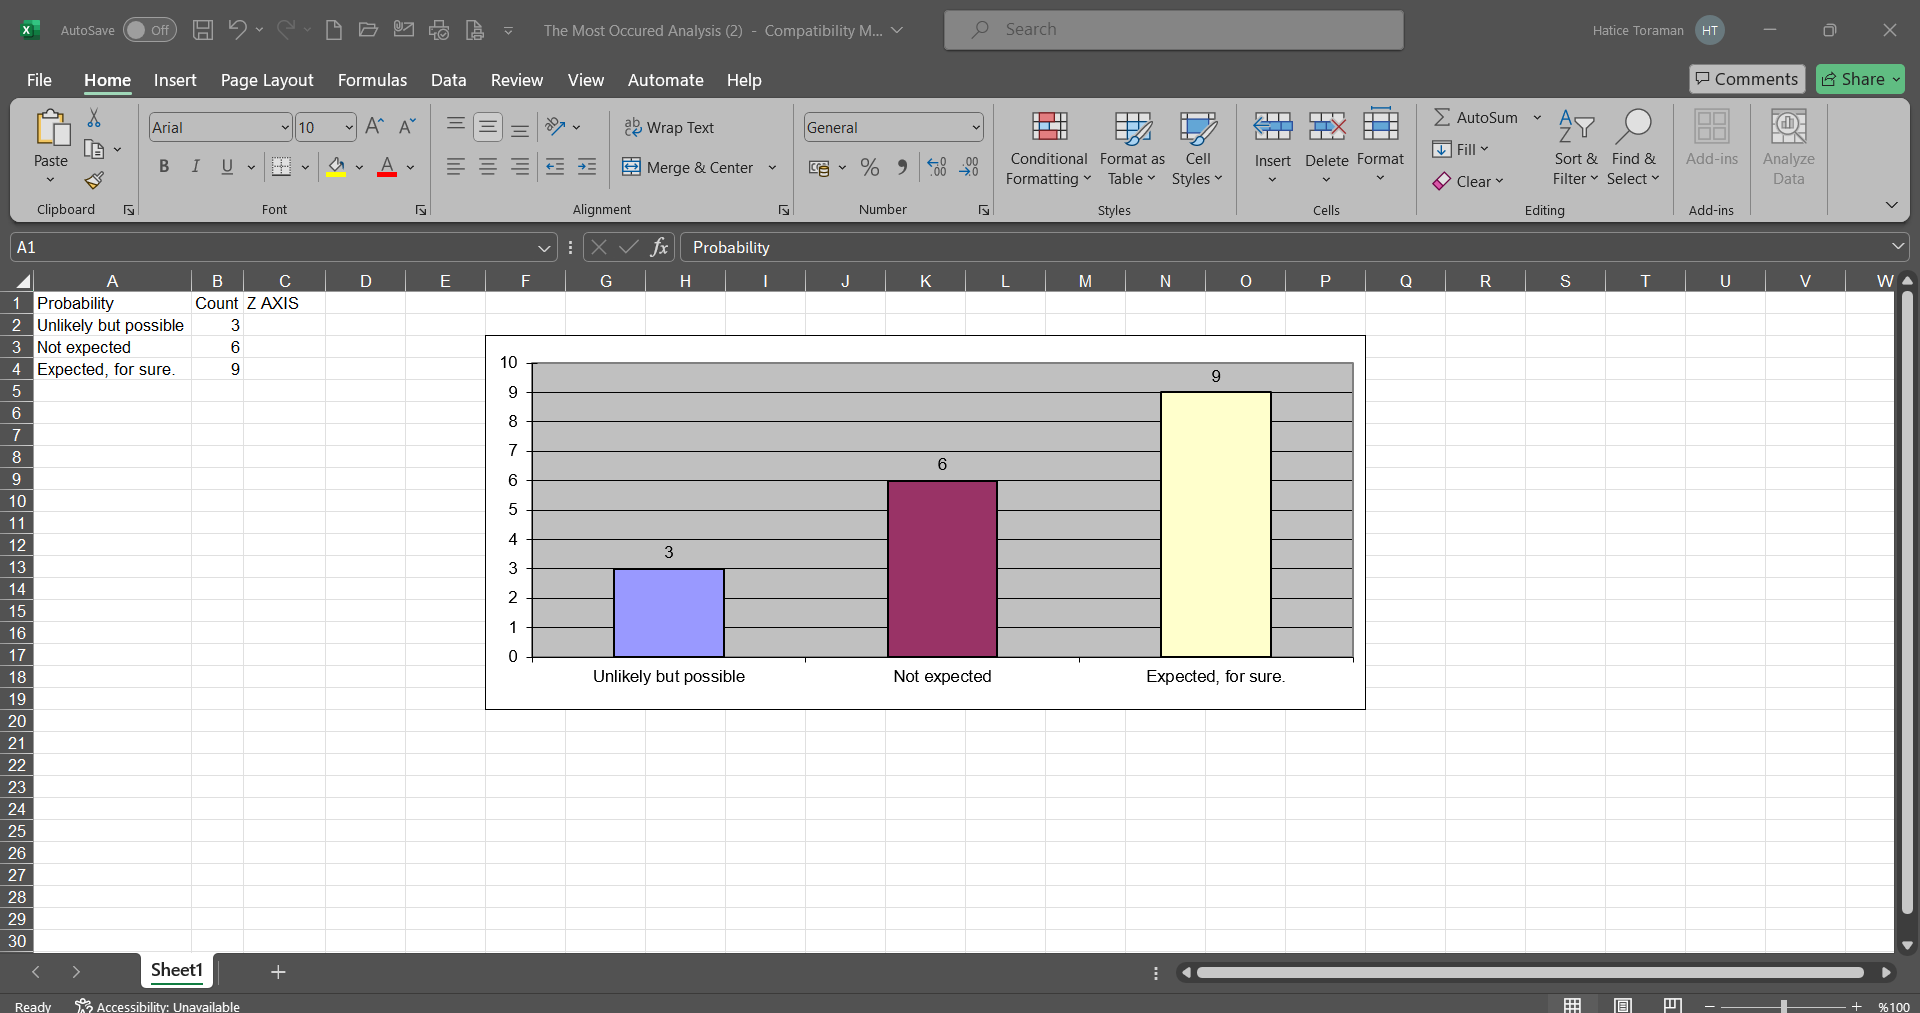
6.2.4.3.Risk Distribution Matrix
Menu Name: Integrated Management System/OHSAS Risk Assessment/Graphs/ Risk Distribution Matrix
To get the Risk Distribution Matrix Chart, click on the Risk Distribution Matrix menu from the Charts menu. The purpose is to see in which ranges the risks are more intense and in which ranges the risks are less. The risk distribution matrix is obtained by selecting the chart type used from the Filter tab and specifying the relevant fields, if any. This matrix indicates how many risks are in which risk scale.
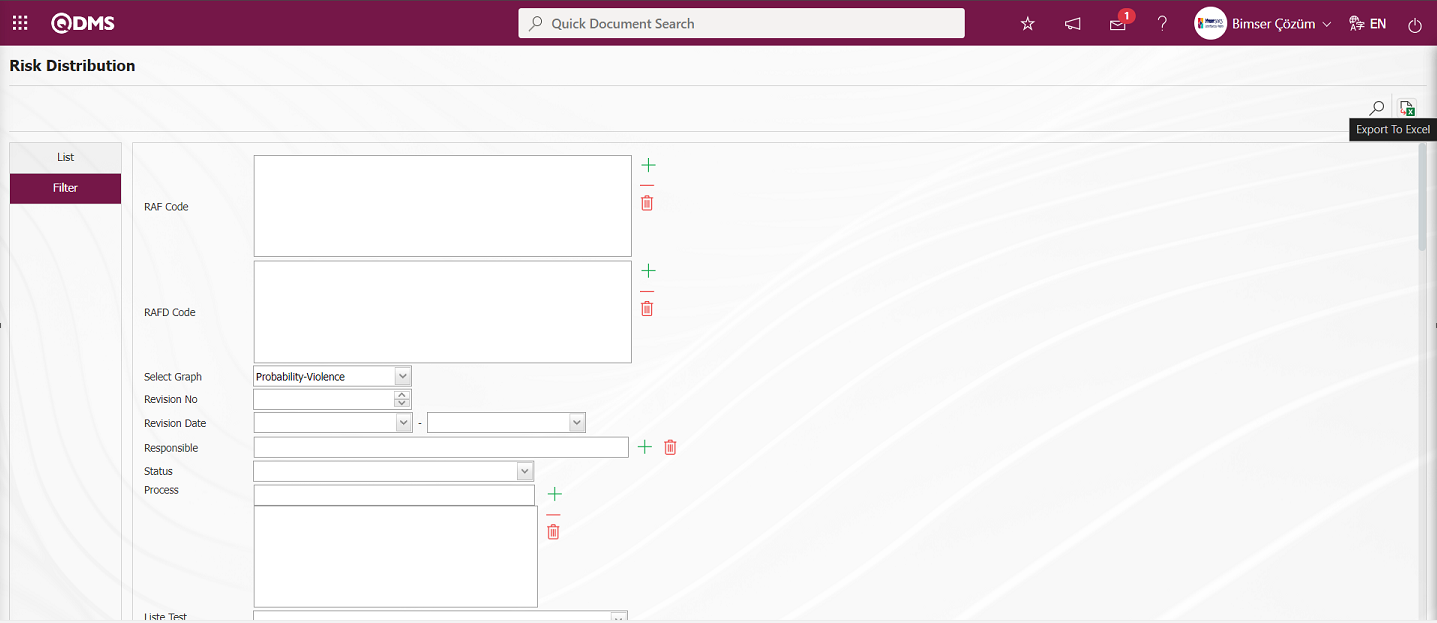
With the help of the buttons on the screen;
: Data can be exported to Excel.
: Records can be filtered and searched.
If the (Export to Excel) button is pressed on the Risk Distribution Matrix screen, the system automatically creates the Risk Distribution Matrix graph and presents it to the user in Excel format.
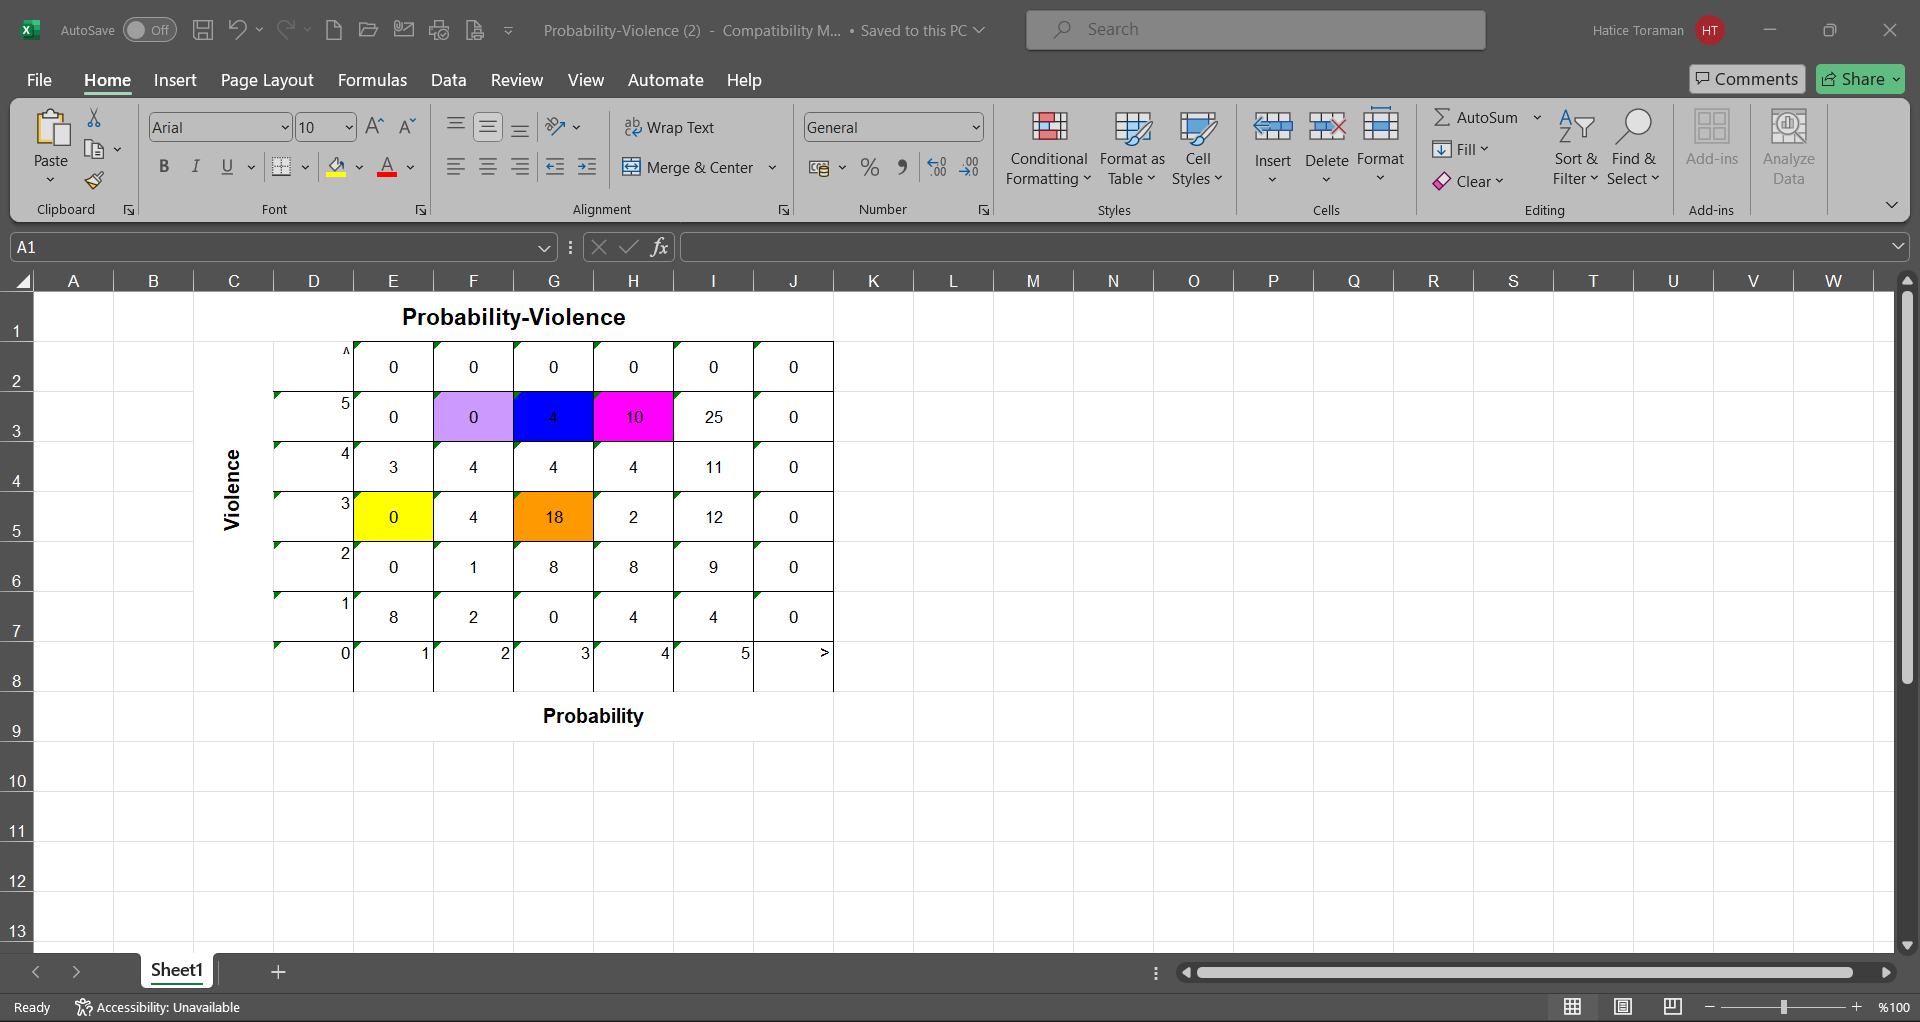
6.2.4.4. Risk Comparison Chart
Menu Name: Integrated Management System / OHSAS Risk Assessment / Charts / Risk Comparison Chart
This is the menu where the Risk Comparison Chart is taken. To get the Risk Comparison Chart, click on the Risk Comparison Chart menu from the Charts menu. With this chart, two fields on the filtered detail forms can be compared, as well as the current and old revisions of the selected fields can be displayed.
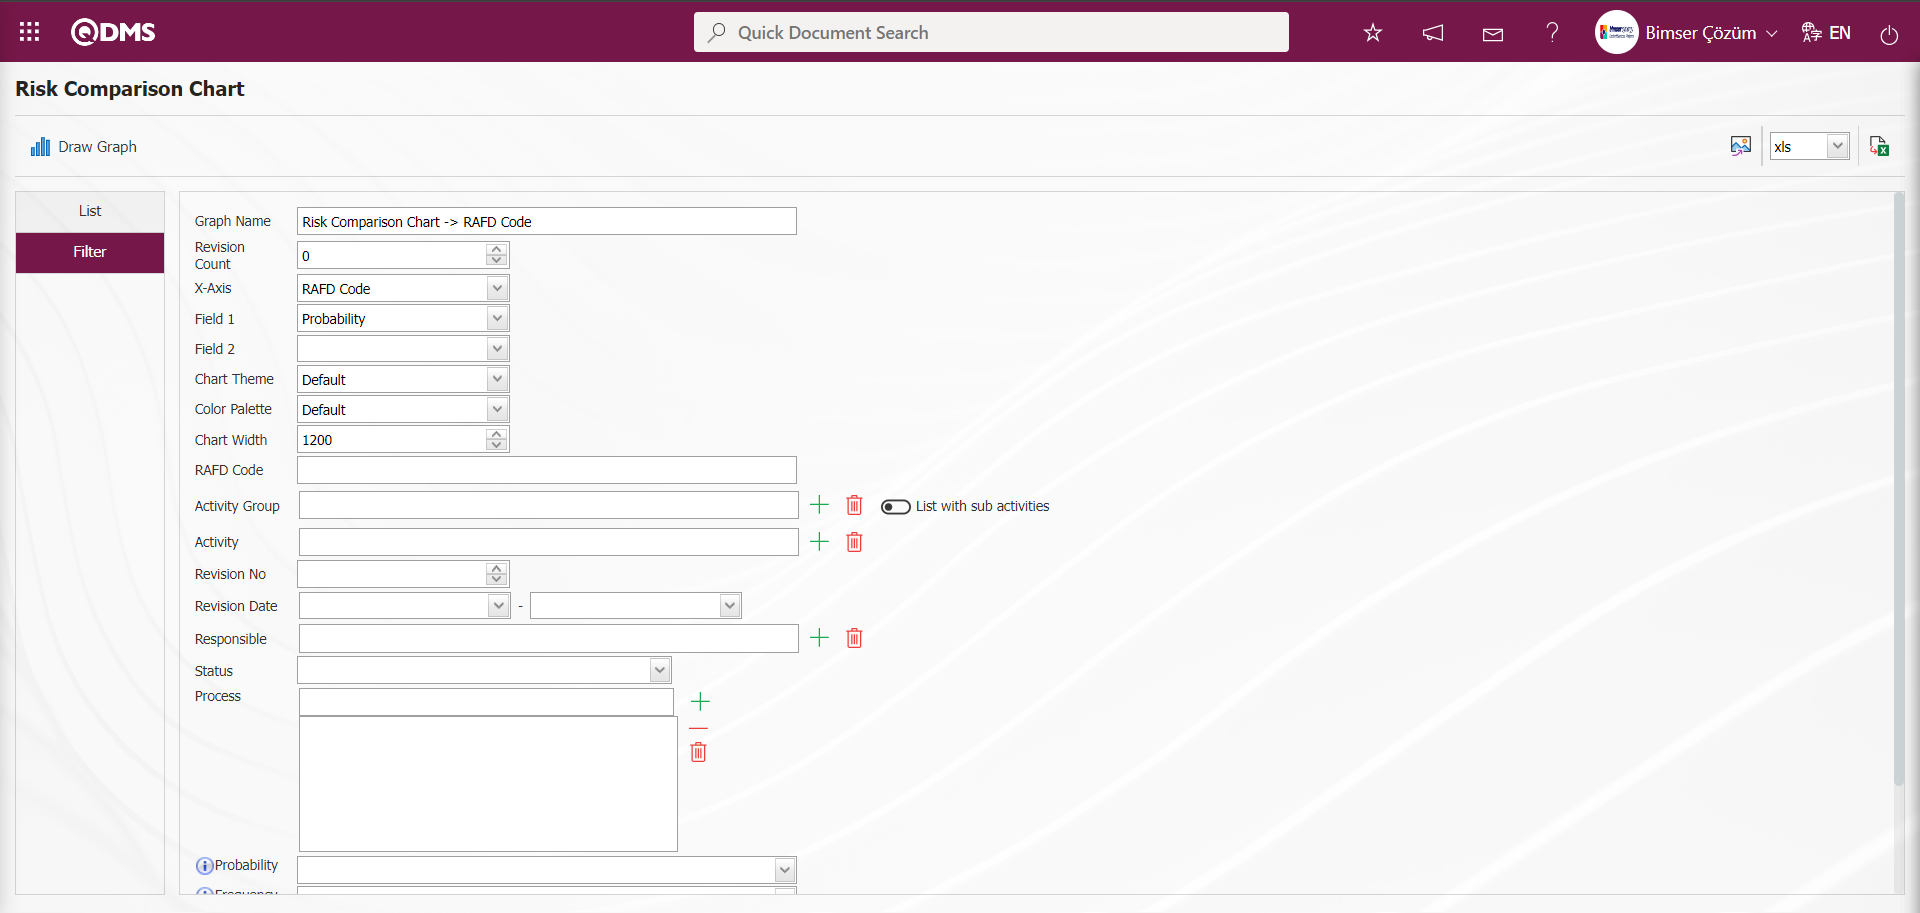
With the help of the buttons on the screen;
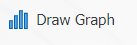 : Draws the graph on the screen according to the specified properties.
: Converts the graph to the format type selected from the drop-down menu (Excel, JPG, PDF, etc.) and exports it to the external environment.
On the screen that opens, the button is clicked by filling in the fields that we want to get the graph comparison from the filter tab.
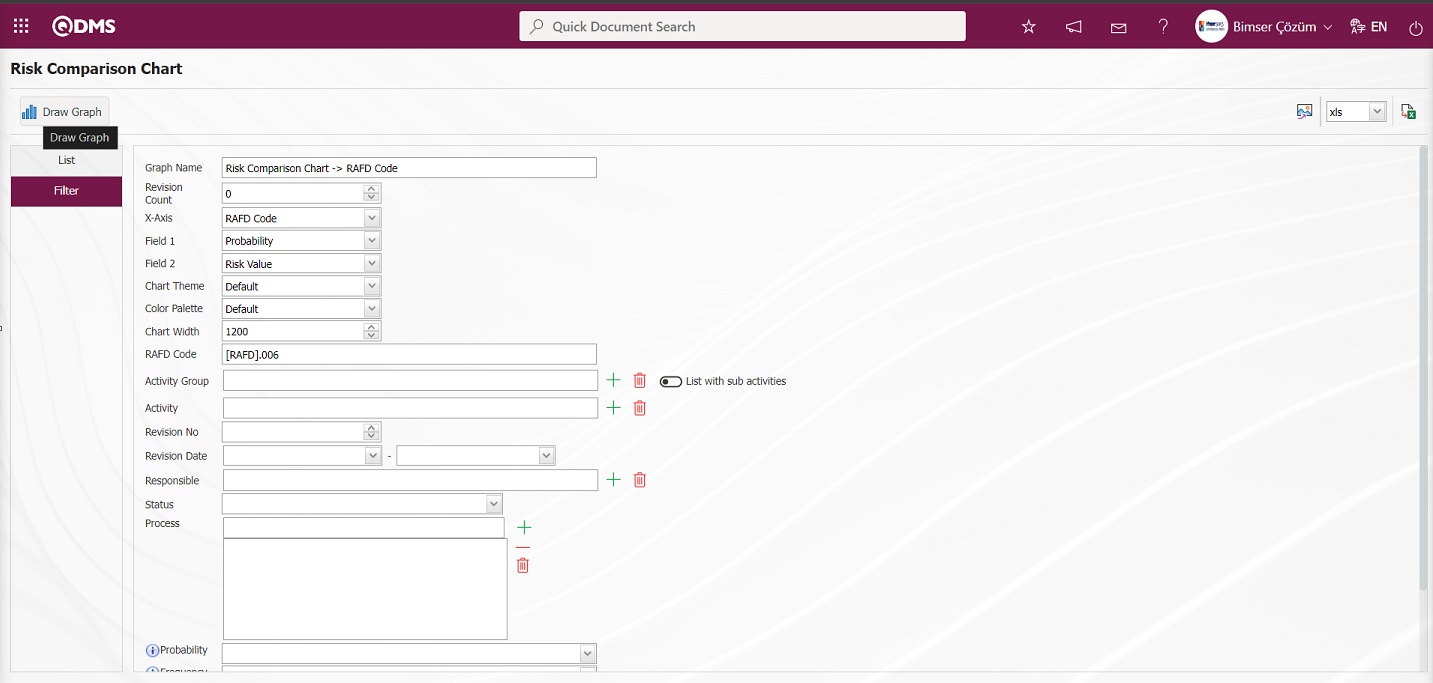
Risk Comparison Graphic is taken by making a risk comparison of the desired areas on the screen.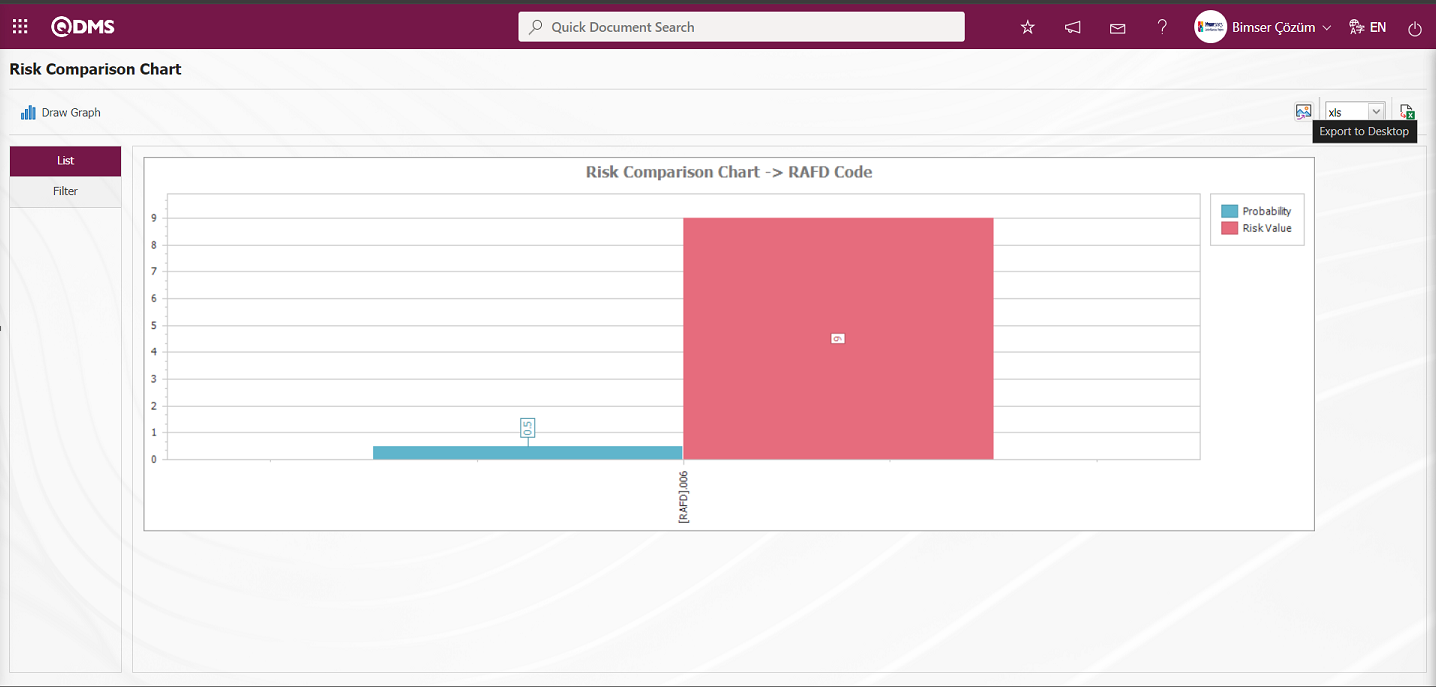
On the Risk Comparison Chart screen, click the button and select the “xls” option in the drop-down list to get the report of the Risk Comparison Chart in Excel format.
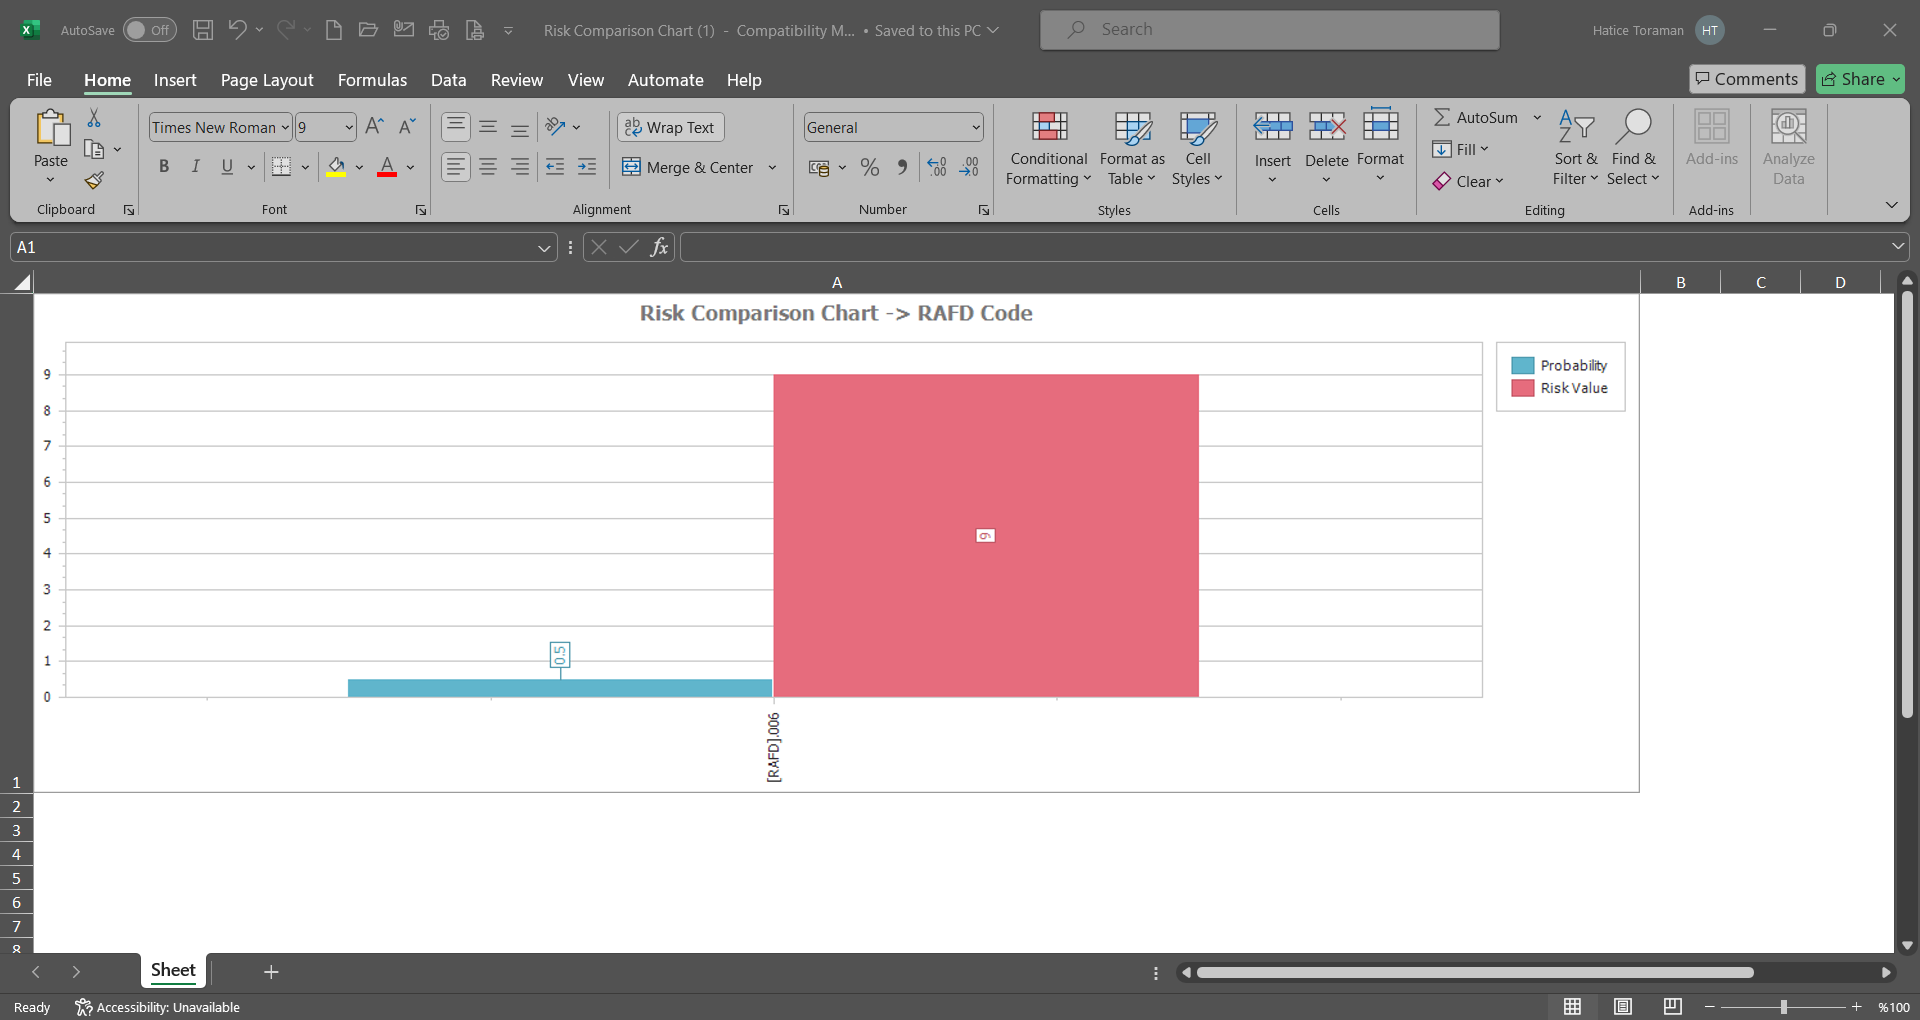
6.2.5.Reports
Menu Name: Integrated Management System/OHSAS Risk Assessment/Reports
This is the section where reports are displayed in the OHSAS Risk Assessment Module.
6.2.5.1.General Risk List
Menu Name: Integrated Management System/OHSAS Risk Assessment/Reports/ General Risk List
This is the menu where the General Risk Report is taken. To get the General Risk List report, click on the General Risk List menu. Two tabs, List and Filter, appear on the screen that opens. In the Filter tab, filtering is done according to the search criteria. In the List tab, the records are listed according to the filtering process according to the fields with these search criteria. On the General Risk List screen, if a report format is defined on a general basis in the System Infrastructure Definitions/OHSAS Risk Assessment/Report Formats menu, when the (Export to Excel) button is clicked, the report of this report format is received in Excel format. If the report format is not defined on a general basis in the Report Formats menu, the report of the records listed in the list tab according to the search criteria in the filter tab on the General Risk List screen is obtained in Excel format when the (Export Excel) button is clicked.
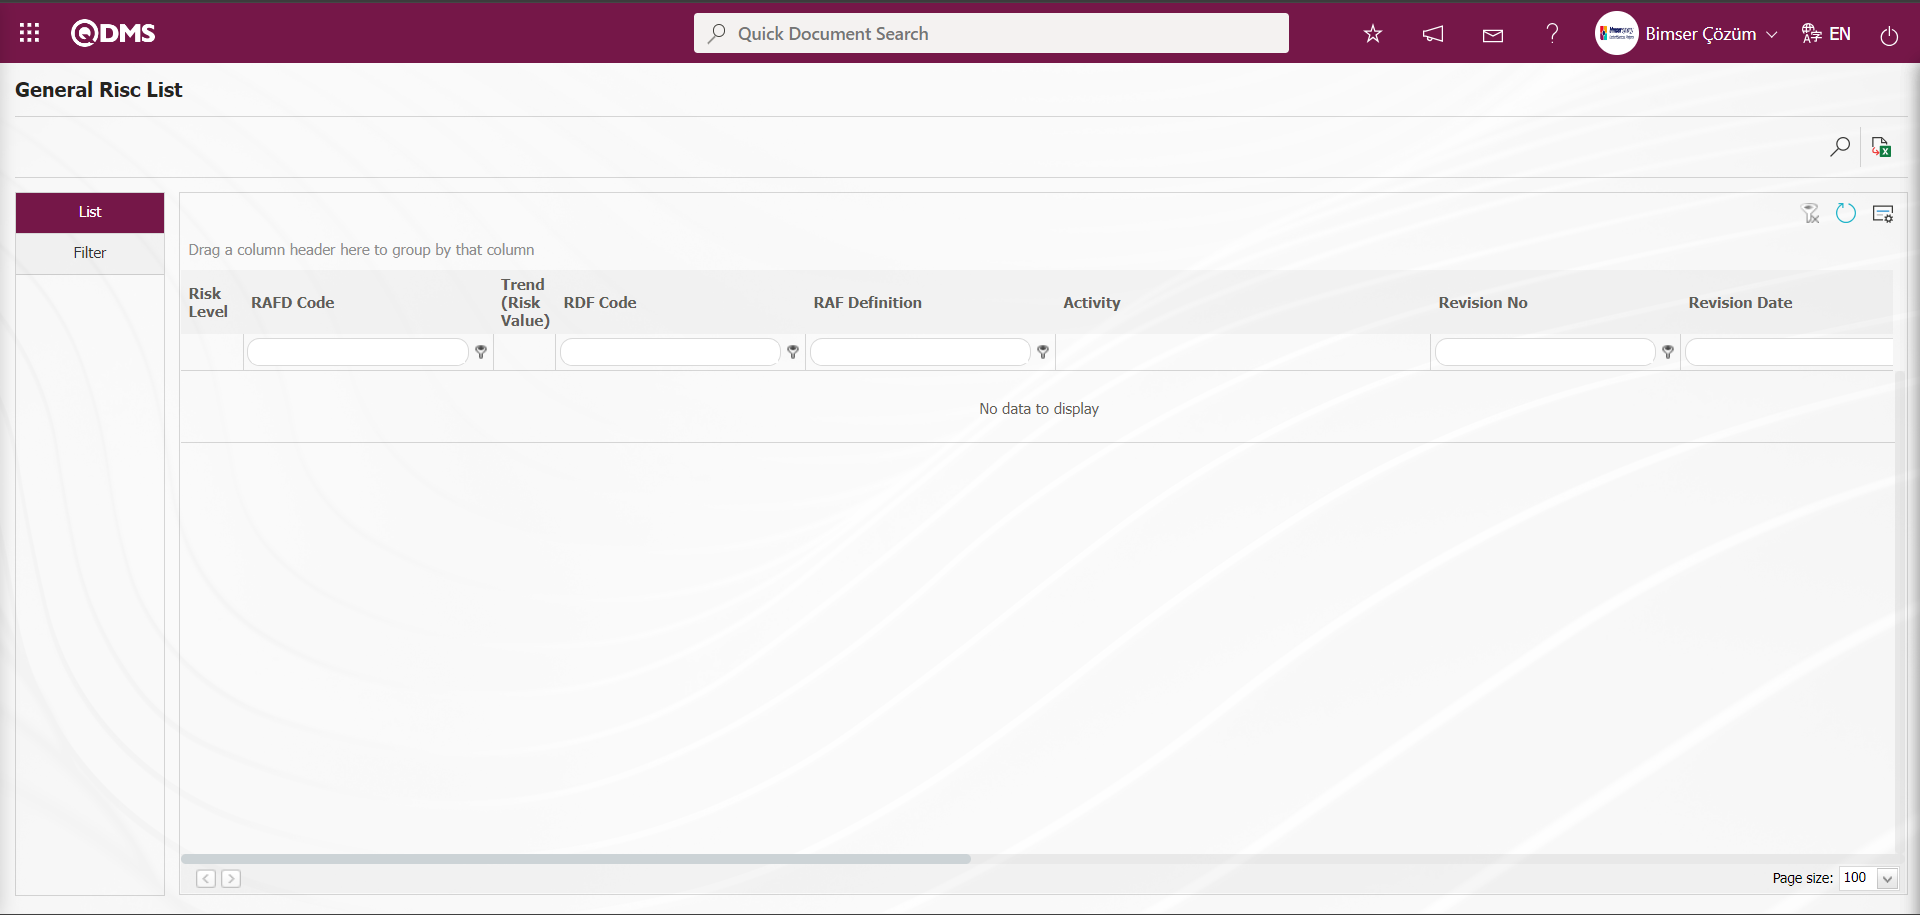
With the help of the buttons on the screen;
: Records are filtered and searched.
: Data is transferred to Excel.
 : The search criteria on the menu screens are used to clear the data remaining in the filter fields in the grid where the search operation is performed.
 : The menu screen is restored to its default settings.
 : User-based designing of the menu screen is done with the show-hide feature, that is, the hiding feature of the fields corresponding to the columns on the menu screens.
On the General Risk List screen, click the  (Add) button in the “RAF” field, which is the filter search criteria in the Filter tab, and select RAF in the RAF list opened by clicking the (Search) button.
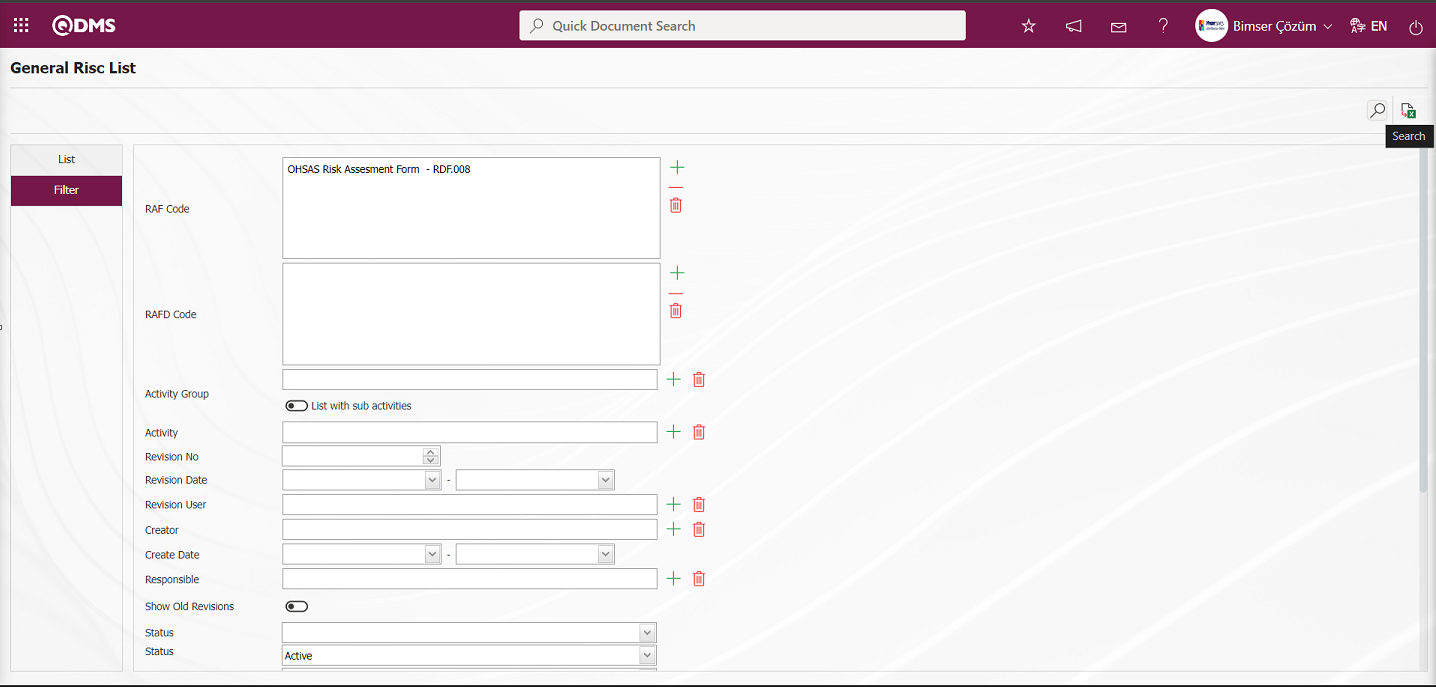
On the General Risk List screen, records are listed according to the search criteria in the filter made in the list tab.
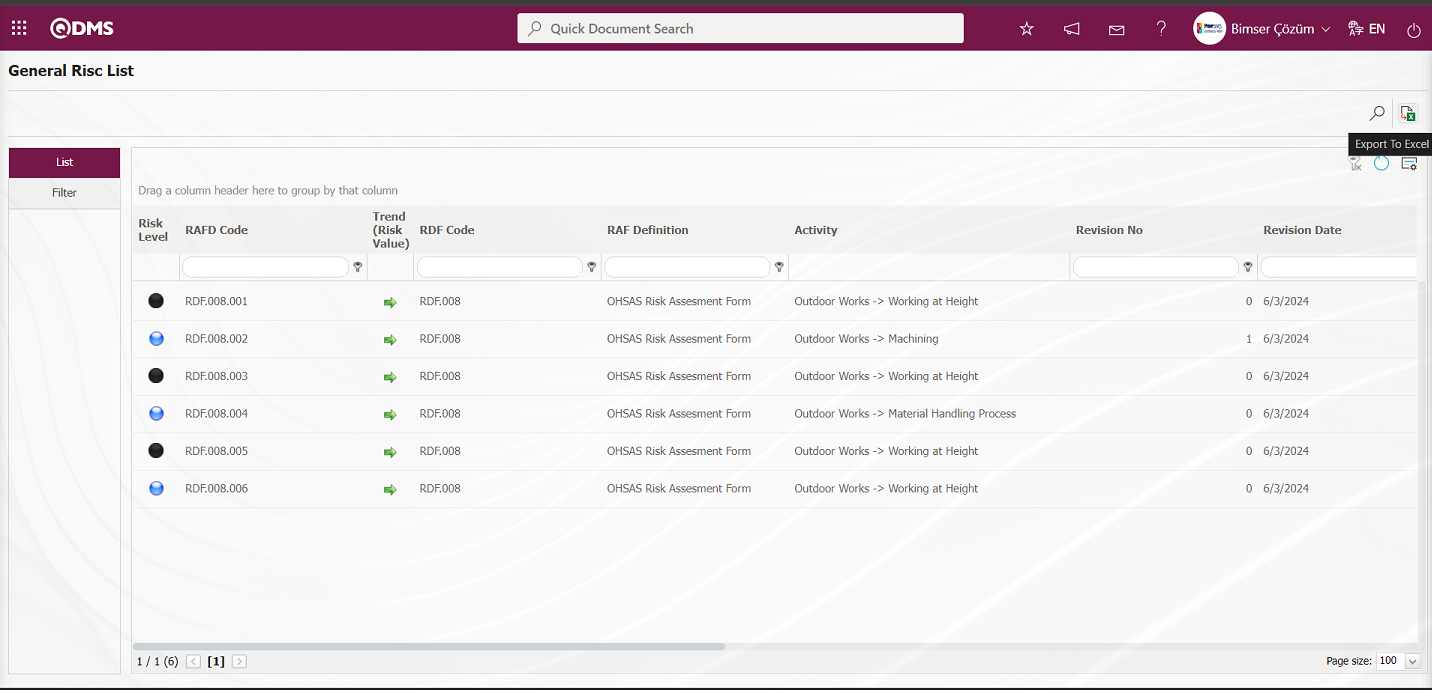
Click the (Export to Excel) button on the General Risk List screen to get the General Risk List report in Excel format.

6.2.5.2.Activity History
Menu Name: Integrated Management System/OHSAS Risk Assessment/Reports/Activity History
It is the menu where the report of the history information of the Activities defined in the system within the scope of the OHSAS Risk Assessment Module is received. In the report, the information of the fields such as Activity Code, Activity Description and Activity Group Description are displayed. To get the Activity History report, click Activity History menu from the Reports menu. Two tabs, List and Filter, appear on the menu screen. In the Filter tab, filtering is done according to the search criteria. In the List tab, the records are listed according to the filtering process according to the fields with these search criteria
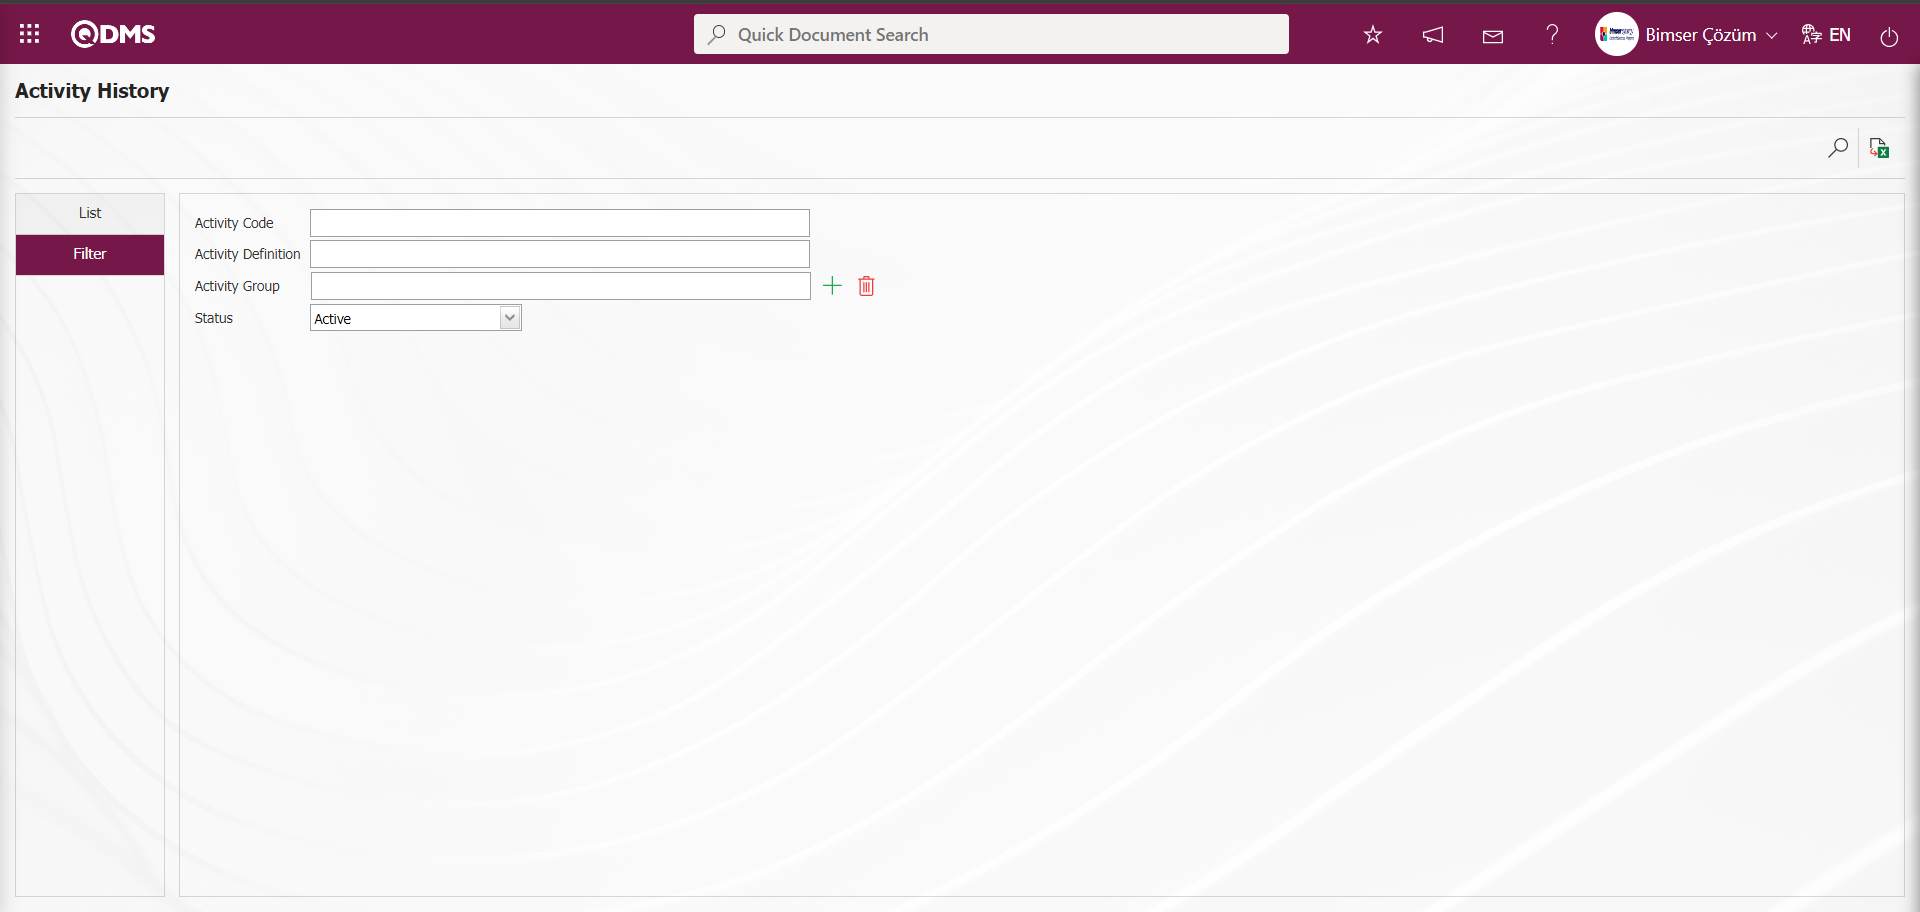
With the help of the buttons on the screen;
: Records are filtered and searched.
: Data is transferred to Excel.
On the Activity History screen, type the Activity code in the “Activity Code” field, which is the filter search criteria in the Filter tab, and click the (Search) button.
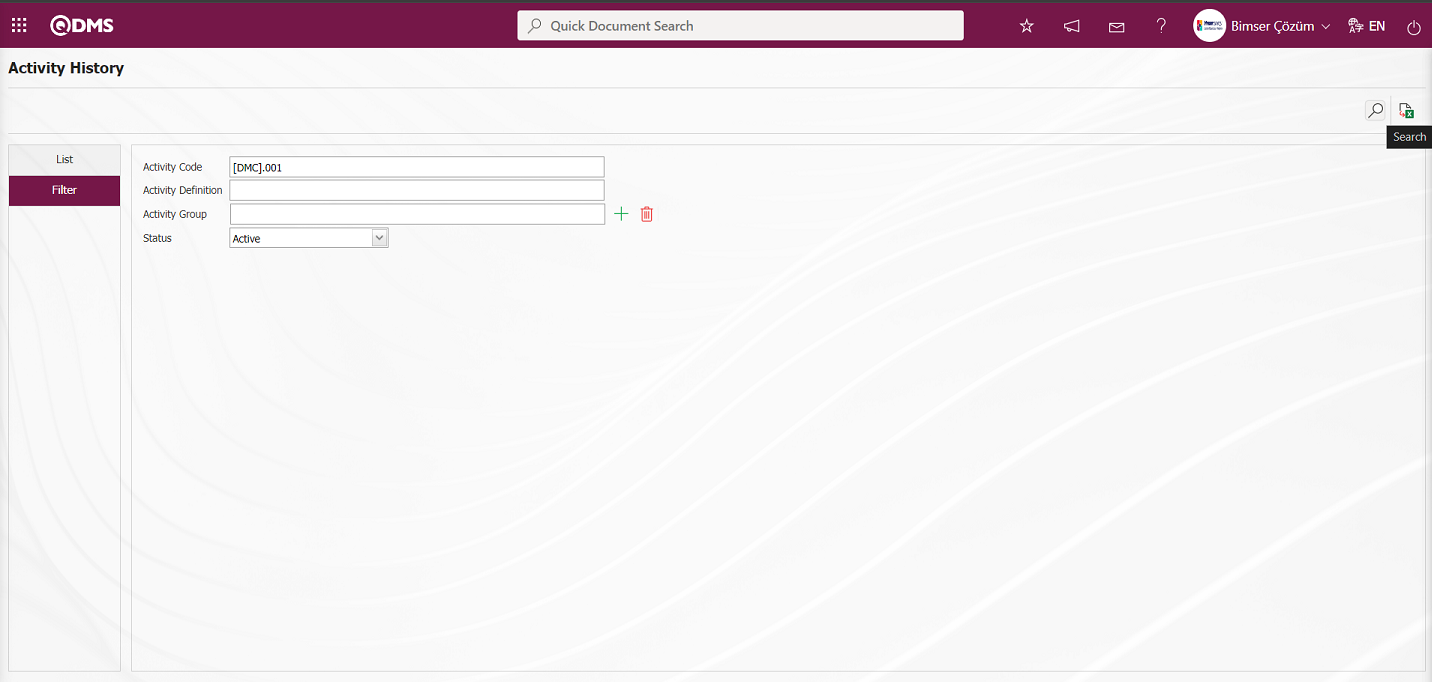
On the Activity History screen, records are listed according to the search criteria in the filter made in the list tab.
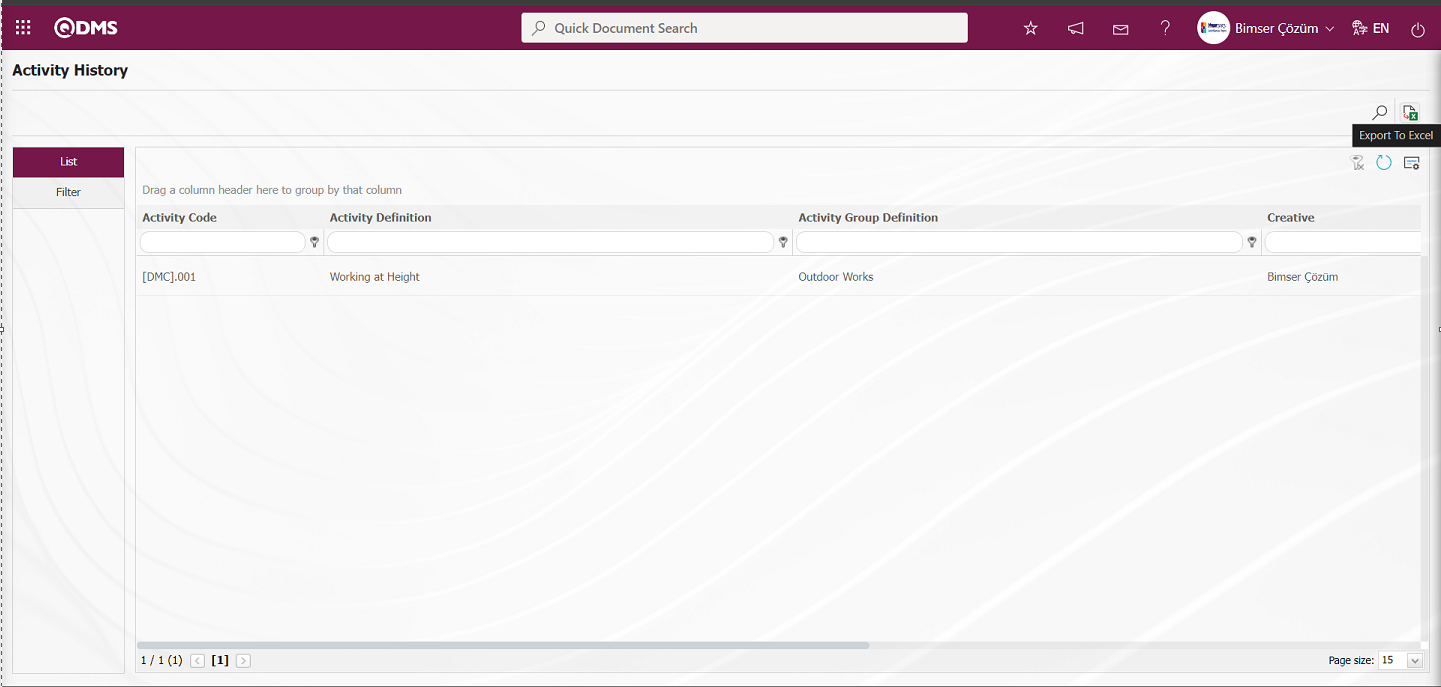
On the Activity History screen, click the (Export to Excel) button to get the Activity History report in Excel format.
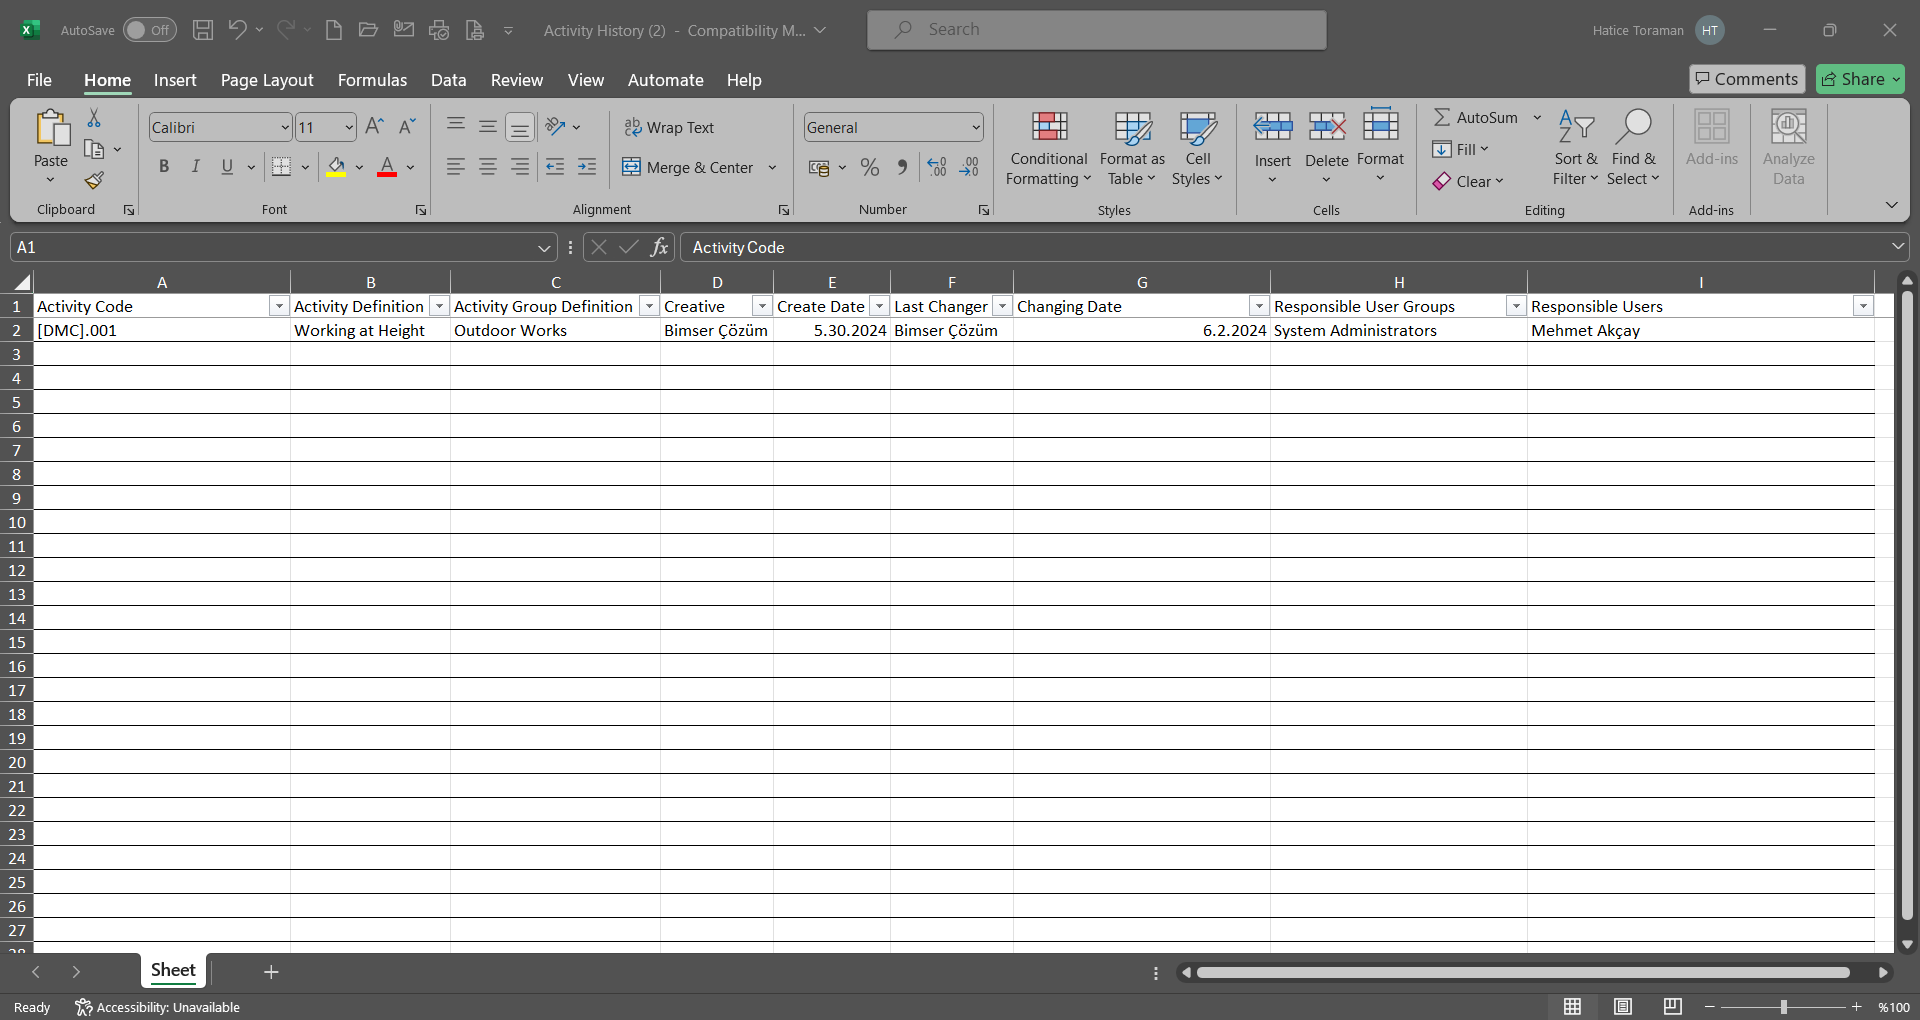
6.2.5.3.Activity Group History
Menu Name: Integrated Management System/OHSAS Risk Assessment/Reports/ Activity Group History
It is the menu where the report of the Activity Group History information defined in the system within the scope of the OHSAS Risk Assessment Module is obtained. In the report received in the menu, the information of the fields such as Activity Group code, Activity Group Definition and Parent Activity Group Definition are accessed. To get the Activity Group History report, click Activity Group History menu from the Reports menu.

With the help of the buttons on the screen;
: Records are filtered and searched.
: Data is transferred to Excel.
: The search criteria on the menu screens are used to clear the data remaining in the filter fields in the grid where the search operation is performed.
: The menu screen is restored to its default settings.
: User-based designing of the menu screen is done with the show-hide feature, that is, the hiding feature of the fields corresponding to the columns on the menu screens.
Click the (Export to Excel) button on the Activity Group History screen.
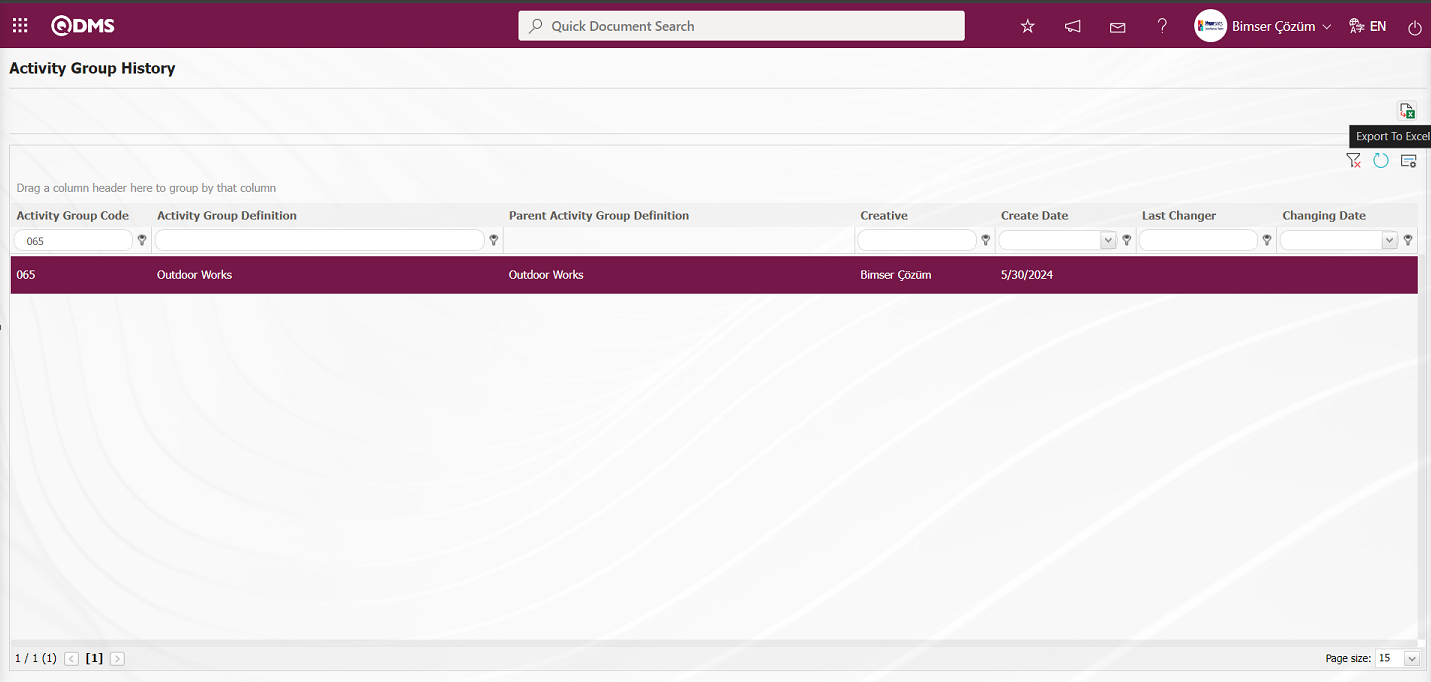
On the Activity Group History screen, the Activity Group History report is taken in Excel format.
6.2.5.4.Activities Report
Menu Name: Integrated Management System/OHSAS Risk Assessment/Reports/ Activities Report
Within the scope of OHSAS Risk Assessment Module, it is the menu where the report of the list of Activities defined in the system is received. In the report received in the menu, the information of the fields such as Activity Code, Activity Description and Activity Group are accessed. To get Activities Report, click on the Activities Report menu from the Reports menu. Two tabs, List and Filter, appear on the menu screen. In the Filter tab, filtering is done according to the search criteria. In the List tab, the records are listed according to the filtering process according to the fields with these search criteria.

With the help of the buttons on the screen;
: Records are filtered and searched.
: Data is transferred to Excel.
: The search criteria on the menu screens are used to clear the data remaining in the filter fields in the grid where the search operation is performed.
: The menu screen is restored to its default settings.
: User-based designing of the menu screen is done with the show-hide feature, that is, the hiding feature of the fields corresponding to the columns on the menu screens.
On the Activity Report screen, type the activity code in the “Activity Code” field, which is the filter search criteria in the Filter tab, and click the (Search) button.
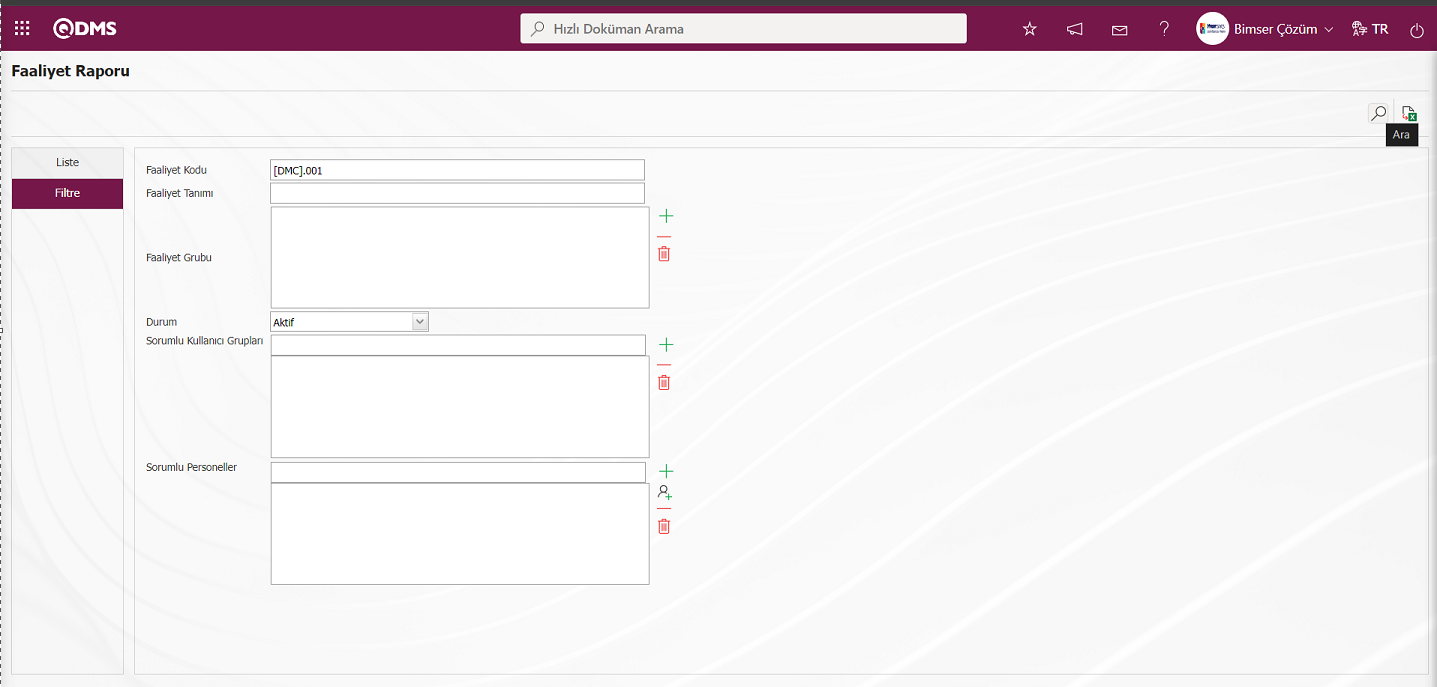
On the Activity Report screen, records are listed according to the search criteria in the filter made in the list tab.
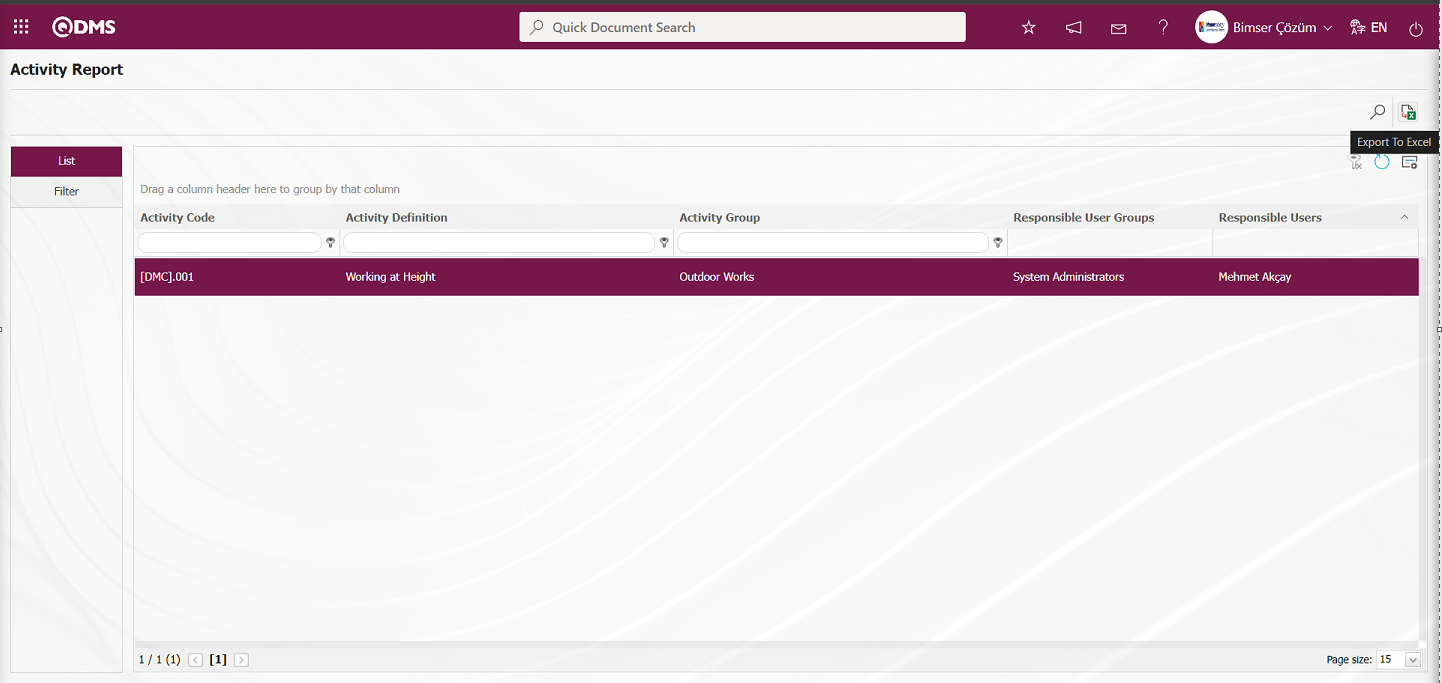
Click the (Export to Excel) button on the Activity Report screen to get the report of the Activities report in Excel format.
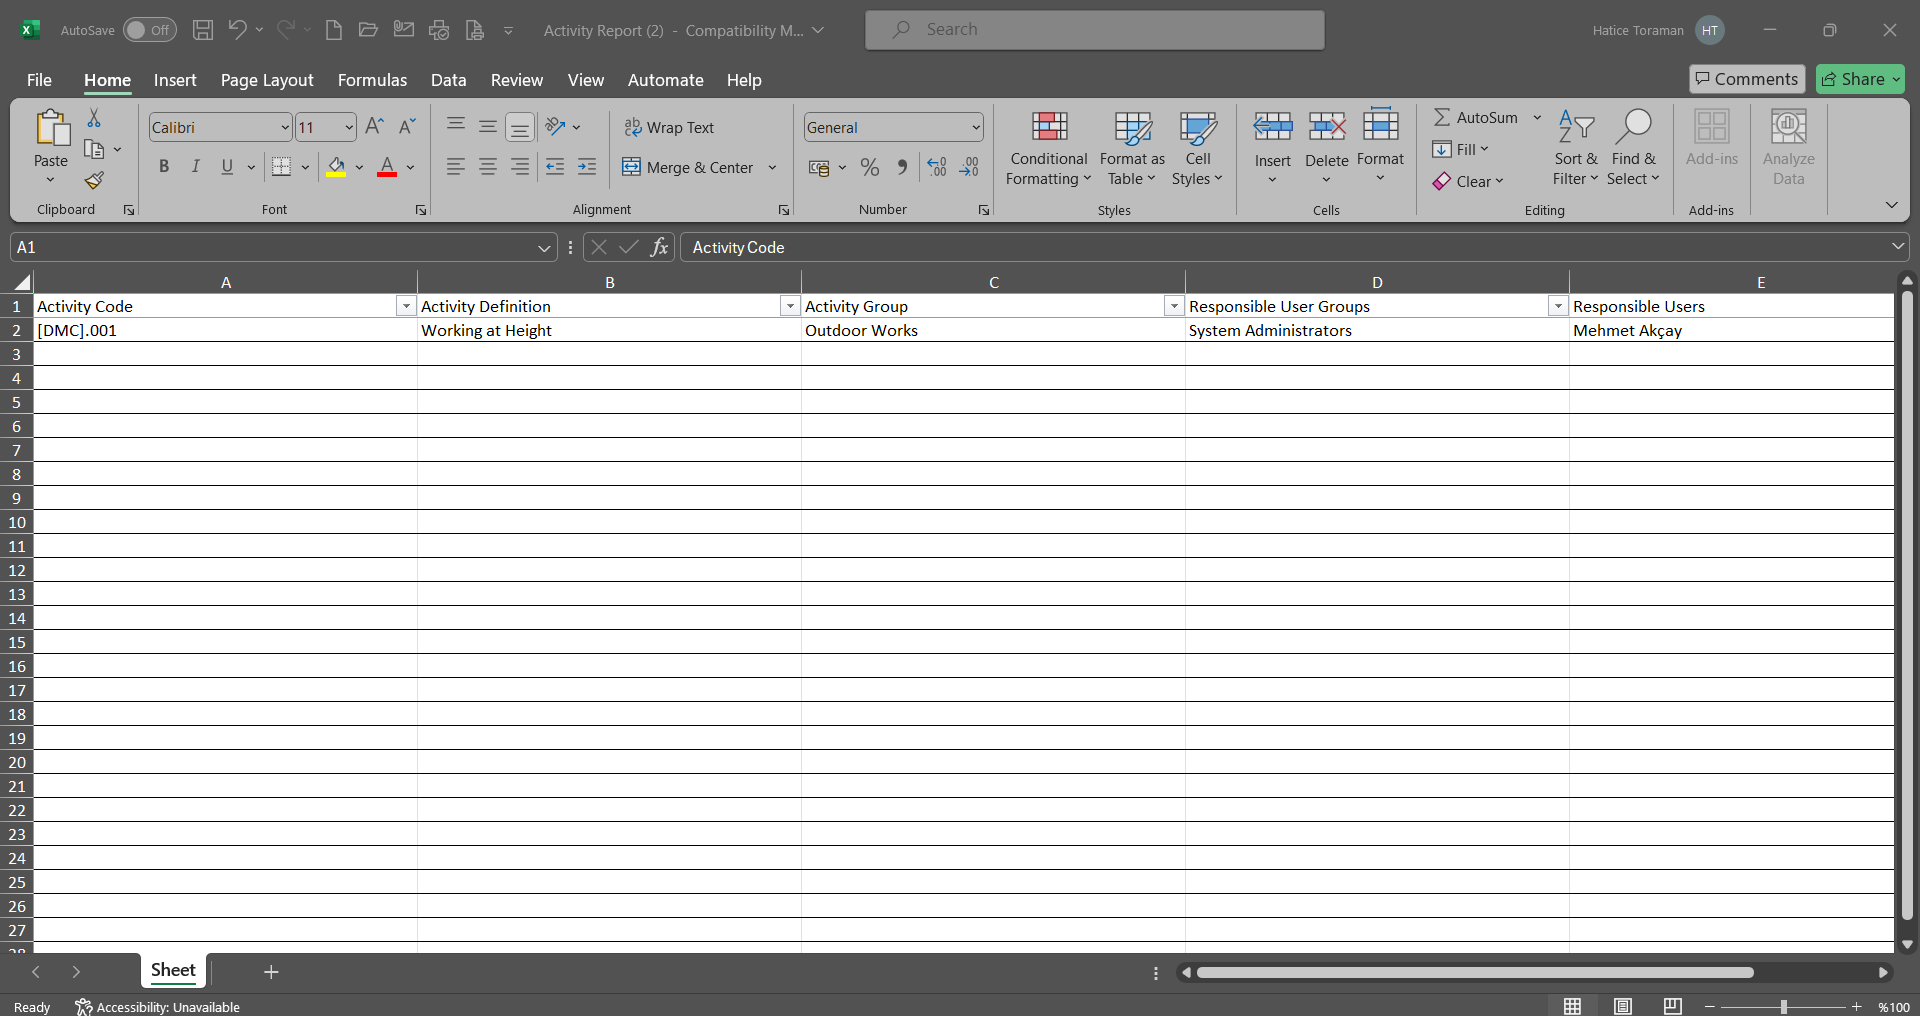
6.2.5.5.Action Report
Menu Name: Integrated Management System/ OHSAS Risk Assessment/ Reports/ Action Report
To get the action report, open the action report from the reports menu. It is the report of the action measures taken as a result of OHSAS Risk Assessment. This report can be exported to Excel. A summary report can be obtained. Also, time-based action schedule report can be taken. To get the action report, click on the Action Report menu from the Reports menu. Two tabs, List and Filter, appear on the menu screen. In the Filter tab, filtering is done according to the search criteria. In the List tab, the records are listed according to the filtering process according to the fields with these search criteria
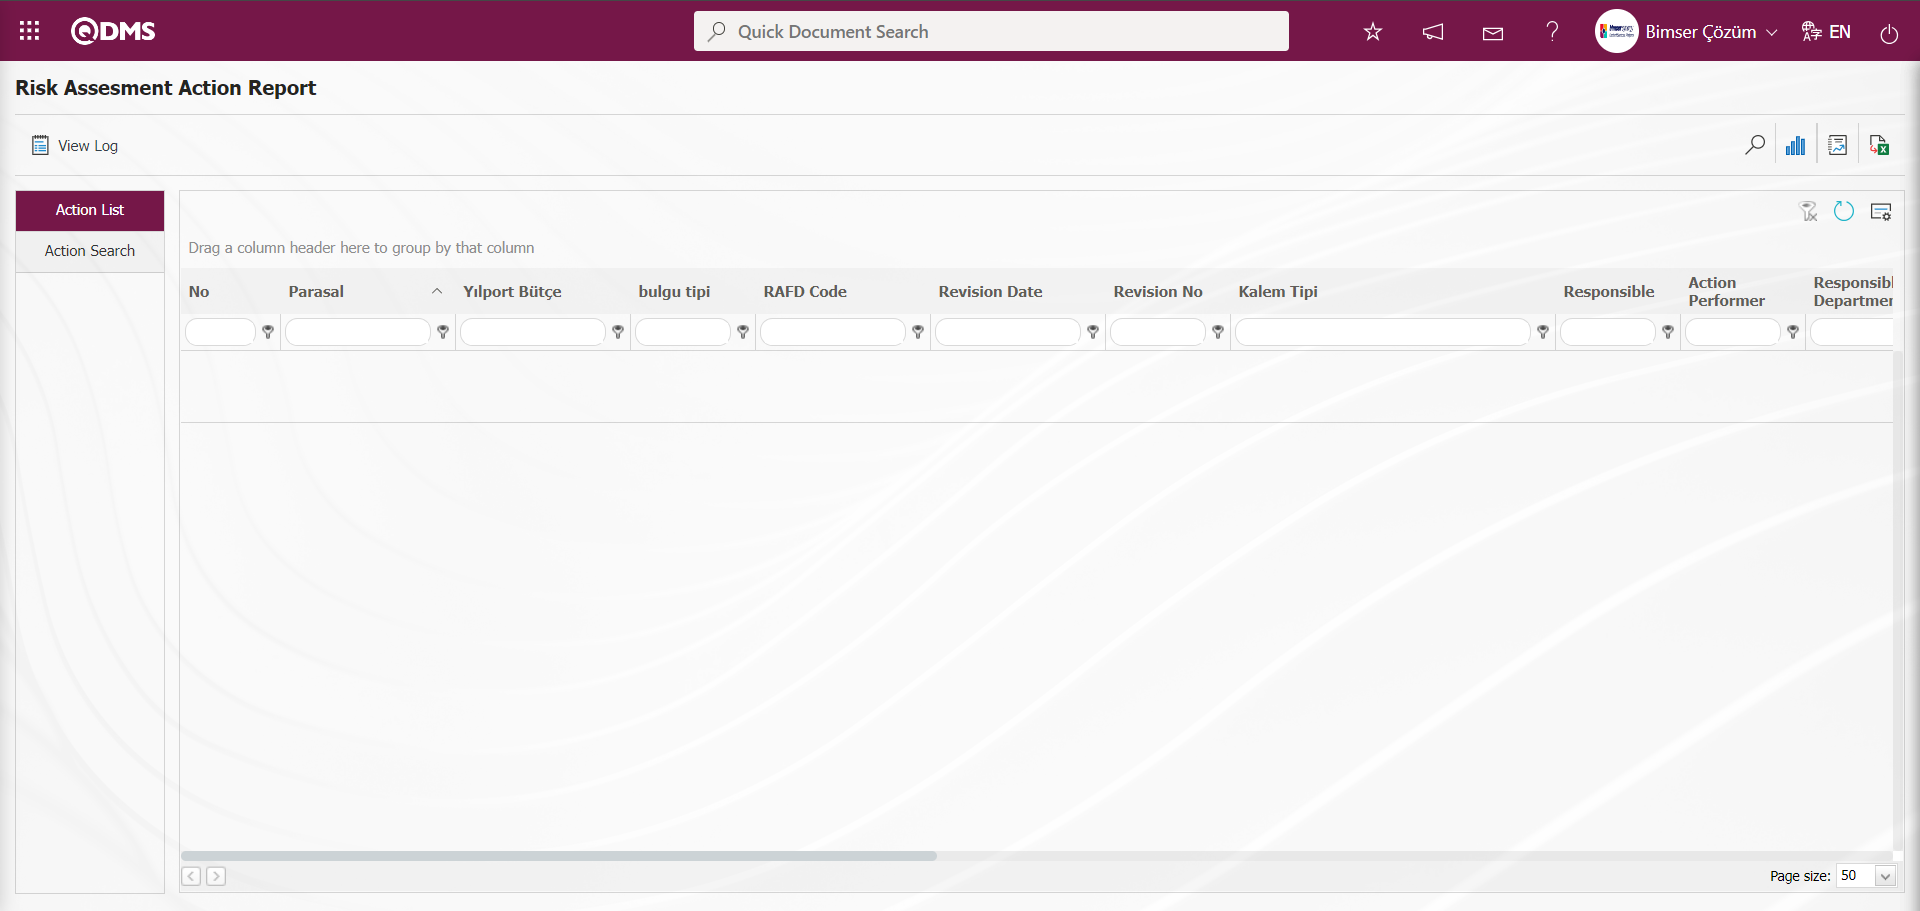
With the help of the buttons on the screen;
: Records are filtered and searched.
 : View the action schedule report.
 : Summary Report is taken.
: Data is transferred to Excel.
 : Log viewing is done.
: The search criteria on the menu screens are used to clear the data remaining in the filter fields in the grid where the search operation is performed.
: The menu screen is restored to its default settings.
: User-based designing of the menu screen is done with the show-hide feature, that is, the hiding feature of the fields corresponding to the columns on the menu screens.
On the OHSAS Risk Assessment Action Report screen, click the (Add) button in the “RAF” field, which is the filter search criteria in the Filter tab, select RAF in the RAF list and click the (Search) button.
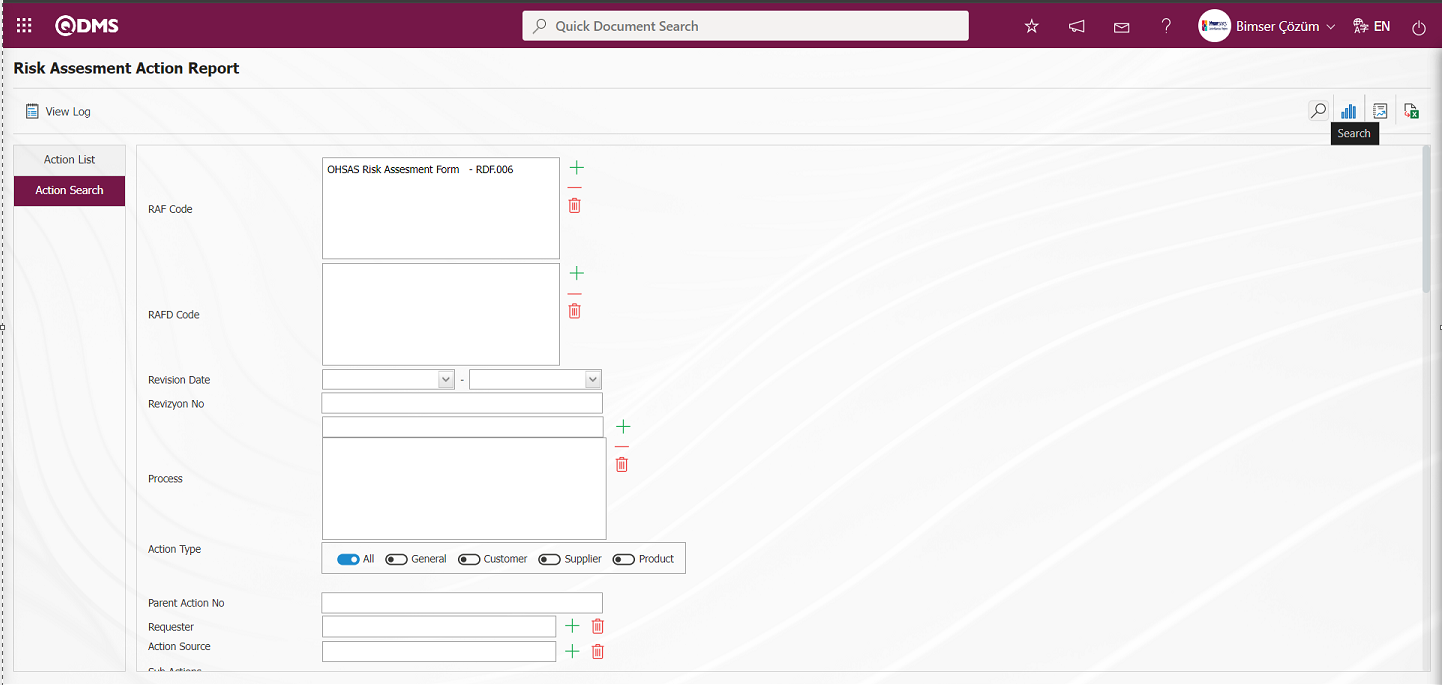
On the OHSAS Risk Assessment Action Report screen, records are listed according to the search criteria in the filter made in the list tab.
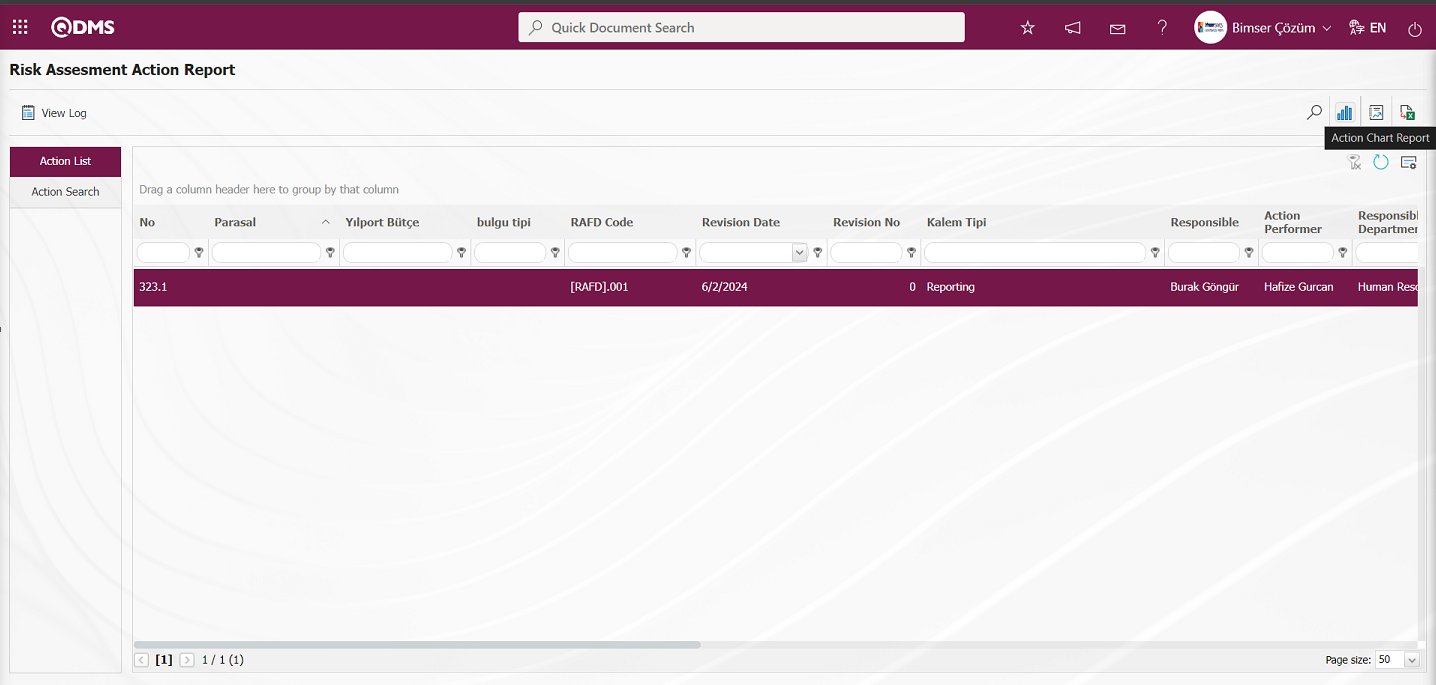
On the OHSAS Risk Assessment Action Report screen, click the (Action Chart Report) button to get the Action Chart report from the Excel format of the Action report.
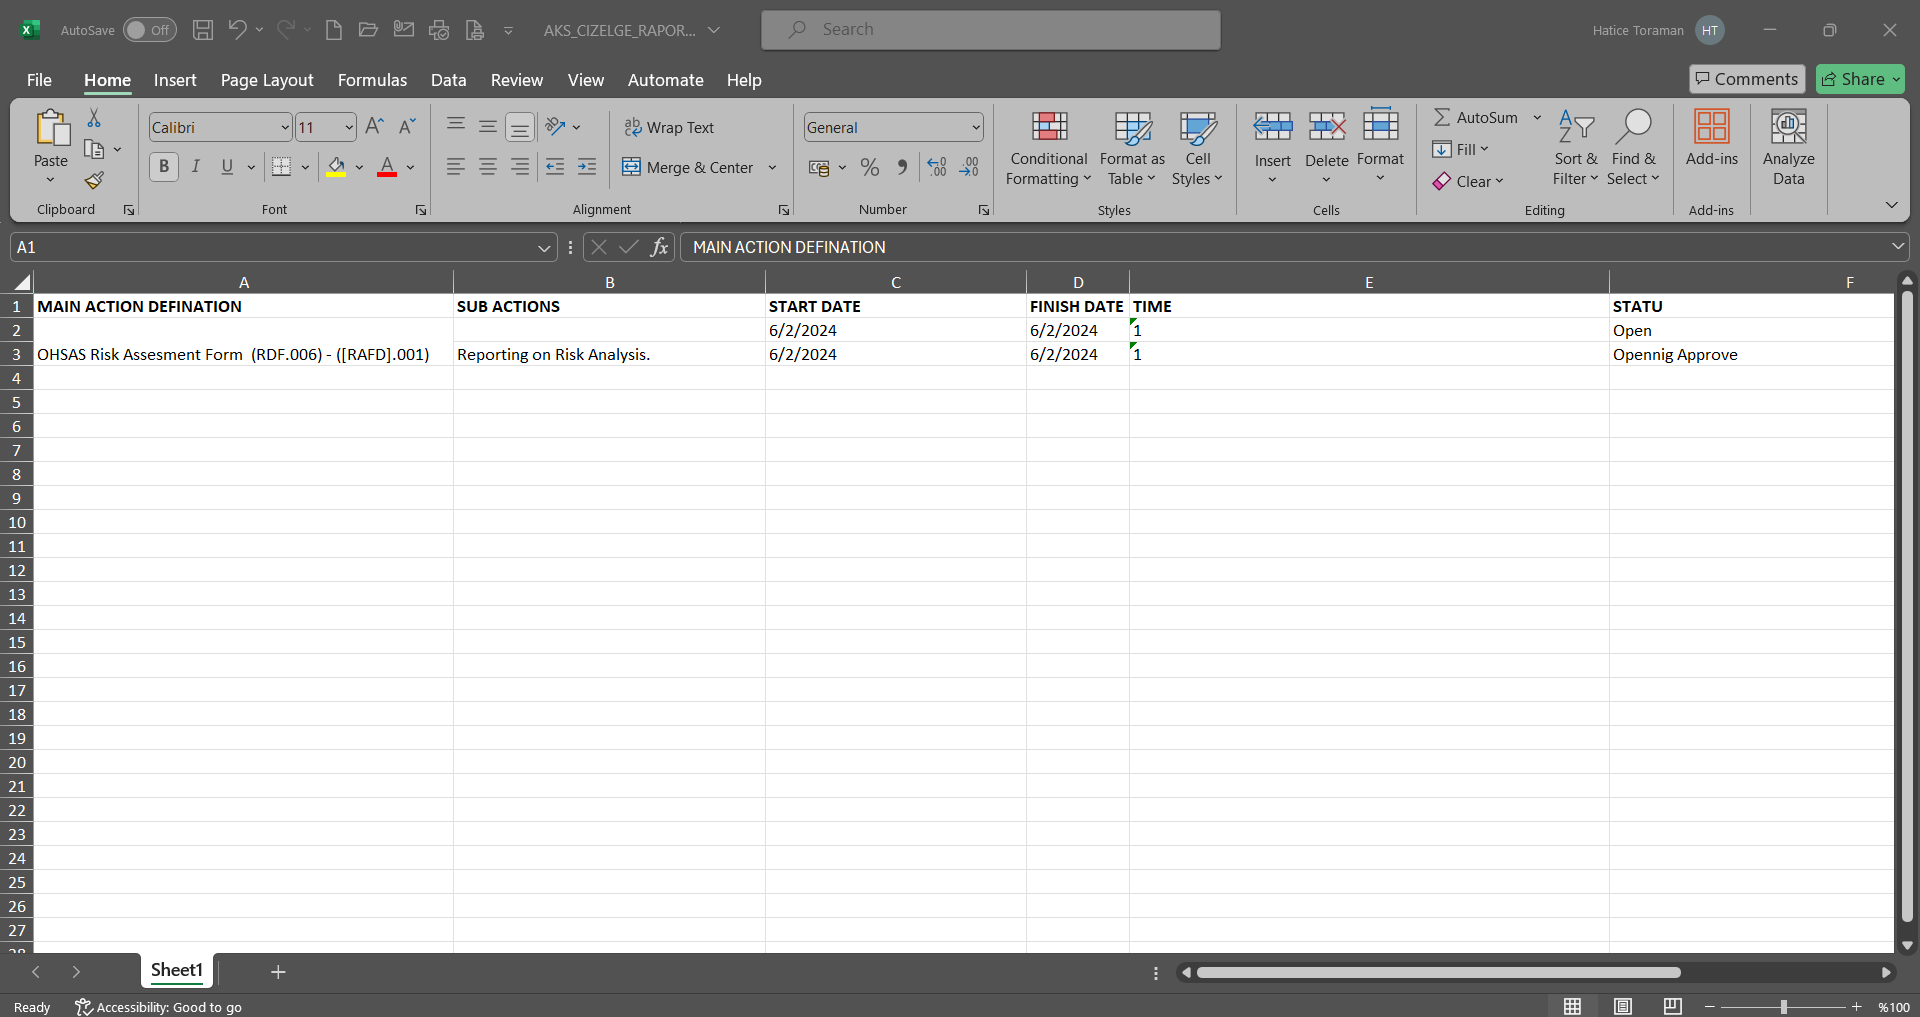
Click the (Summary Report) button on the OHSAS Risk Assessment Action Report screen.
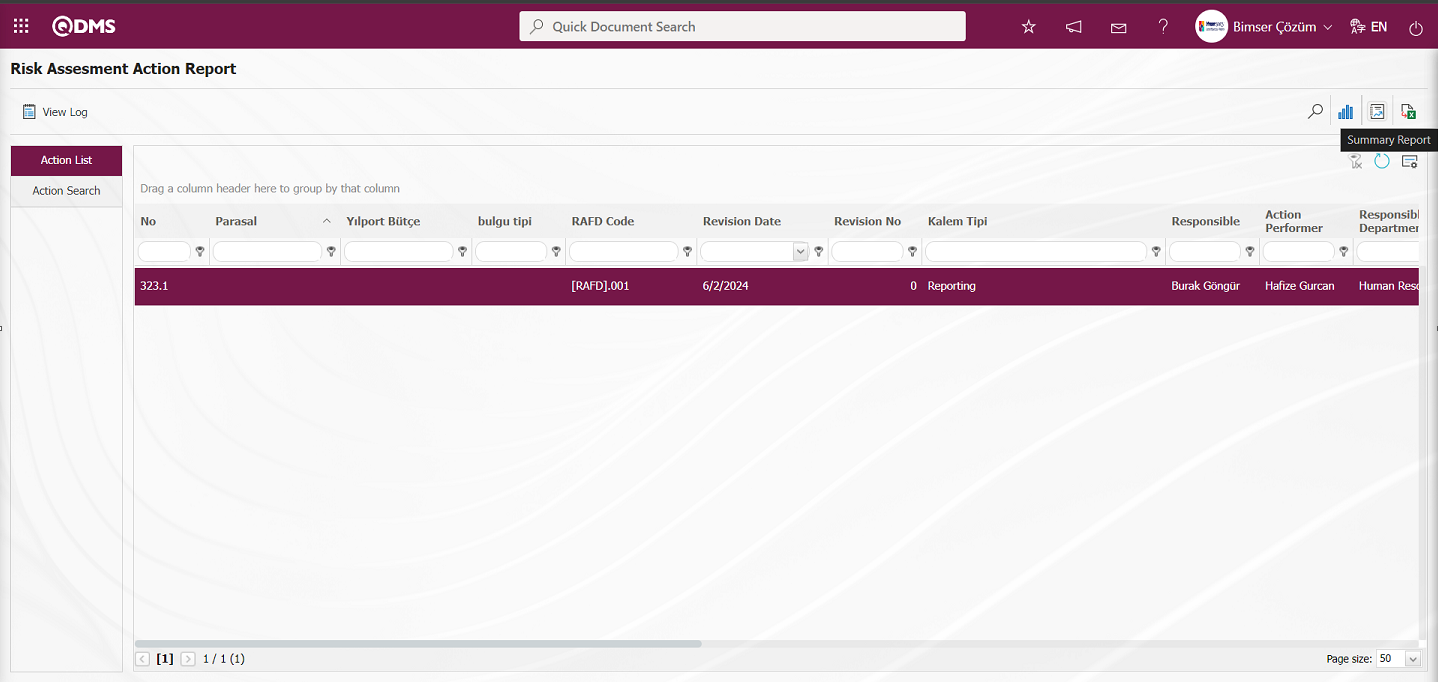
The Action Summary Report is displayed on the OHSAS Risk Assessment Action Report screen.
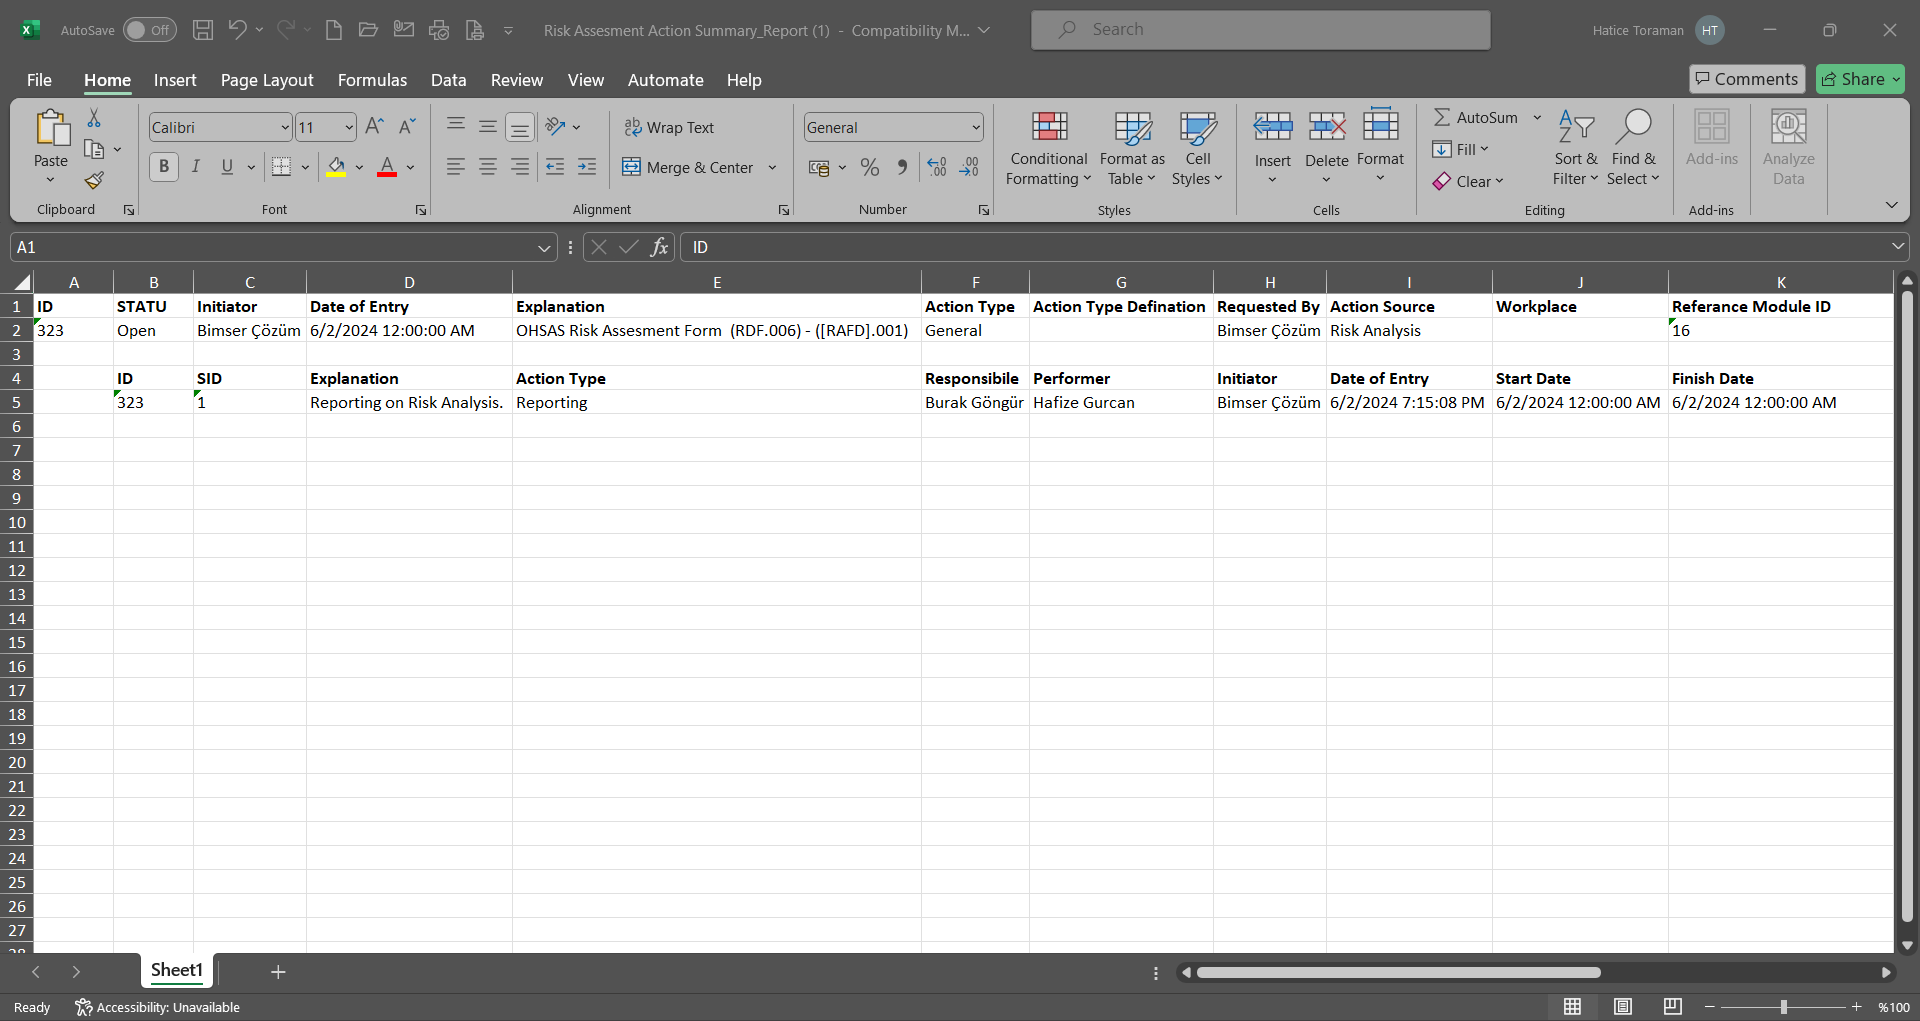
Click the  (Export to Excel) button on the OHSAS Risk Assessment Action Report screen.
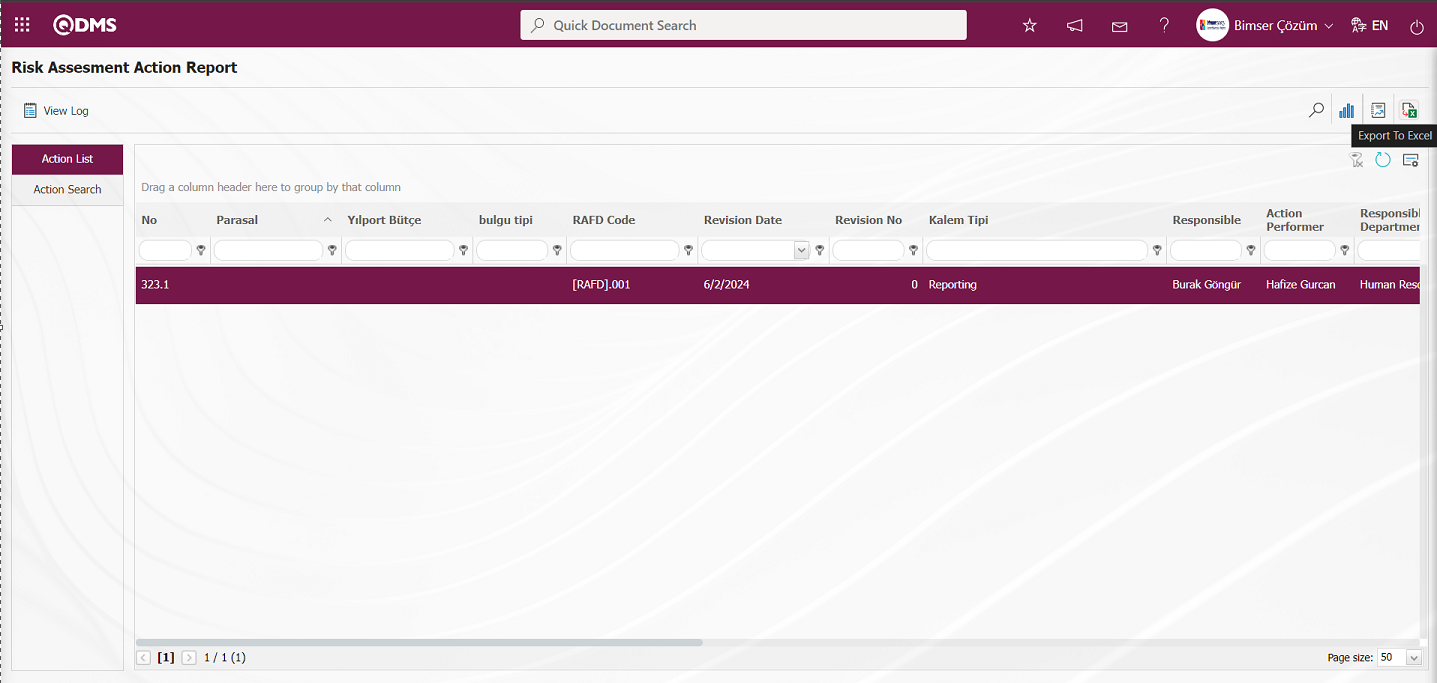
On the OHSAS Risk Assessment Action Report screen, the Action Report is reported in Excel format.
Click the  button on the OHSAS Risk Assessment Action Report screen.
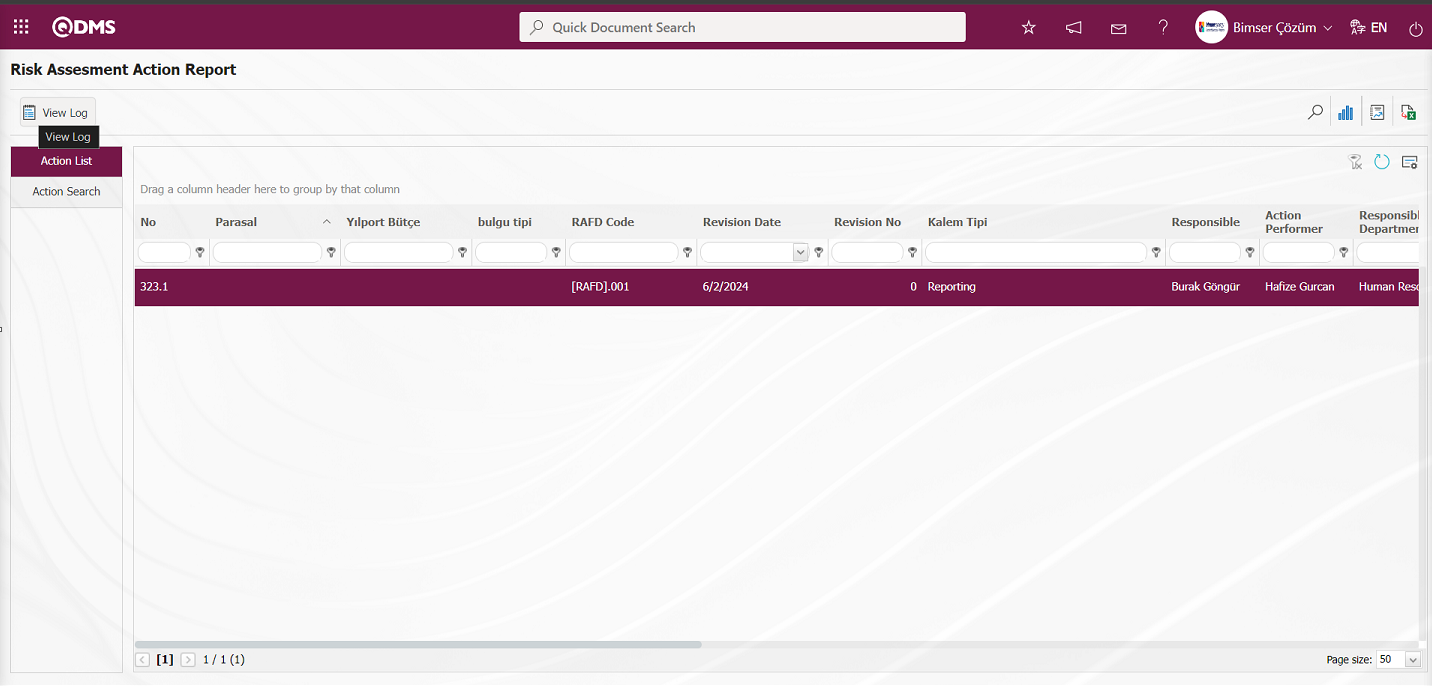
On the OHSAS Risk Assessment Action Report screen, Log Viewing of the Action Report is performed.
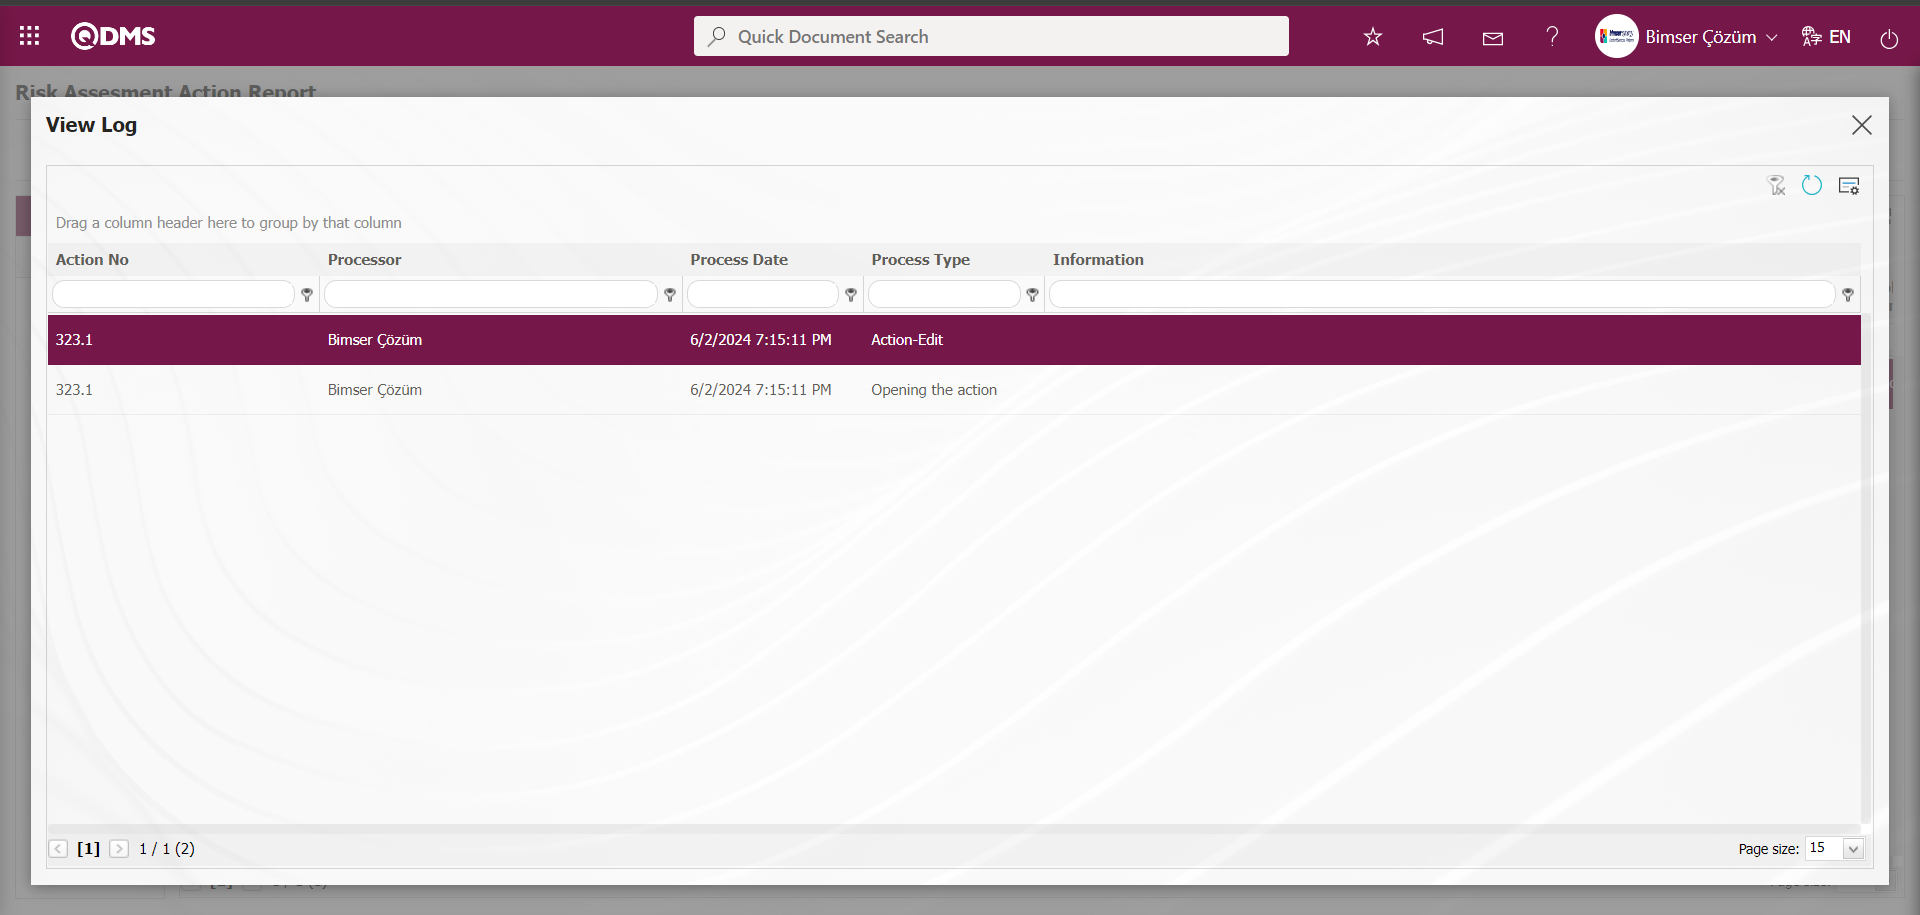
6.2.5.6. Repeated Records Report
Menu Name: Integrated Management System/ OHSAS Risk Assessment /Reports/ Repeated Records Report
It is the menu where the report showing how many times similar risk records are repeated is taken. The relevant report template is selected from the Integrated Management System / OHSAS Risk Assessment /Reports/Repeated Records report. To get the Repeated Records report, click on the Repeated Records menu. Two tabs, List and Filter, appear on the screen that opens. In the Filter tab, filtering is done according to the search criteria. In the List tab, the records are listed according to the filtering process according to the fields with these search criteria.
With the help of the buttons on the screen;
: Records are filtered and searched.
: Data is transferred to Excel.
On the Repetitive Report screen, select the Report Template in the drop-down list opened in the “Report Template” field, which is the filter search criteria in the Filter tab, and click the (Search) button.
In the Repetitive Report screen, records are listed according to the search criteria in the filter made in the list tab.
On the Repetitive Report screen, click the (Export to Excel) button to get the Repeated Records report in Excel format.
6.2.5.7. Risk's Distribution to Regions
Menu Name: Integrated Management System / OHSAS Risk Assessment / Reports/Risk's Distribution to Regions
This is the report where workplace and department-based risks are displayed on the map within the scope of the OHSAS Risk Assessment Module.
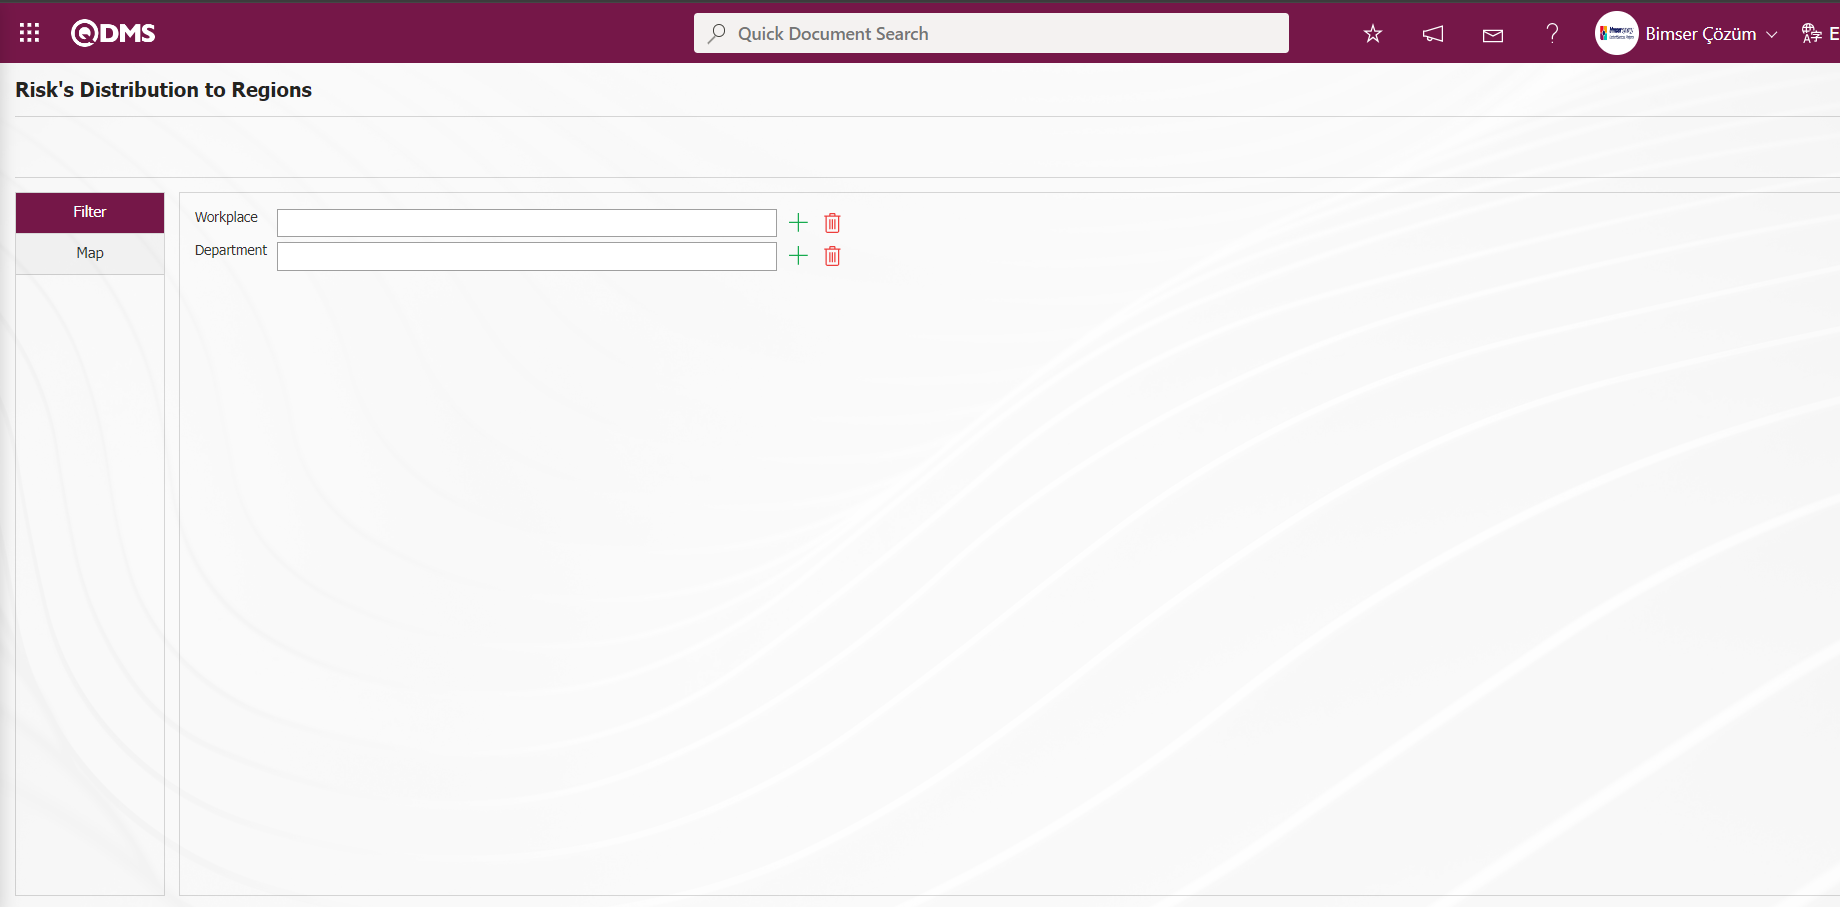
With the help of the buttons on the screen;
: Records can be searched by filtering.
By making a selection in the relevant workplace or department list in the Filter tab and clicking the (Search) button, workplace and department based risks are displayed on the map in the Map tab.
6.2.5.8.Risk Control Matrix Report
Menu Name: Integrated Management System / OHSAS Risk Assessment /Reports/Risk Control Matrix Report
It is the menu where the report of the controls associated with the risk records is received. It comes according to the report defined in the “Risk Control Matrix Template File” parameter numbered 98 in the OHSAS Risk Assessment module parameters.
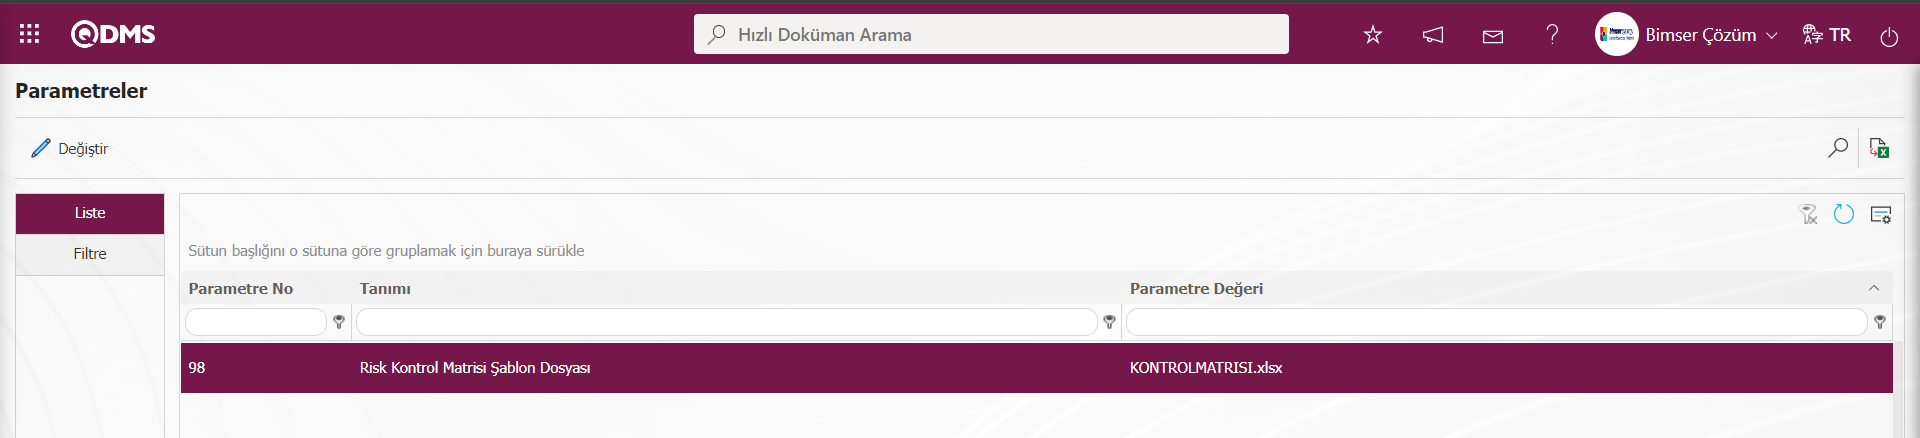
In order to define a report format template for the parameter, first of all, the related report is uploaded by clicking the report template button in the System Infrastructure Definitions/BSID/Configuration Settings/Default Report Layouts Arrangement menu. The name and extension of the report format template uploaded to the Default Report Layouts Arrangement menu is defined by pasting the name and extension of the report format template uploaded to the Default Report Layouts Arrangement menu to the parameter value of the relevant parameter with the right click / paste method. According to the defined report format template, the related report is taken from this menu.
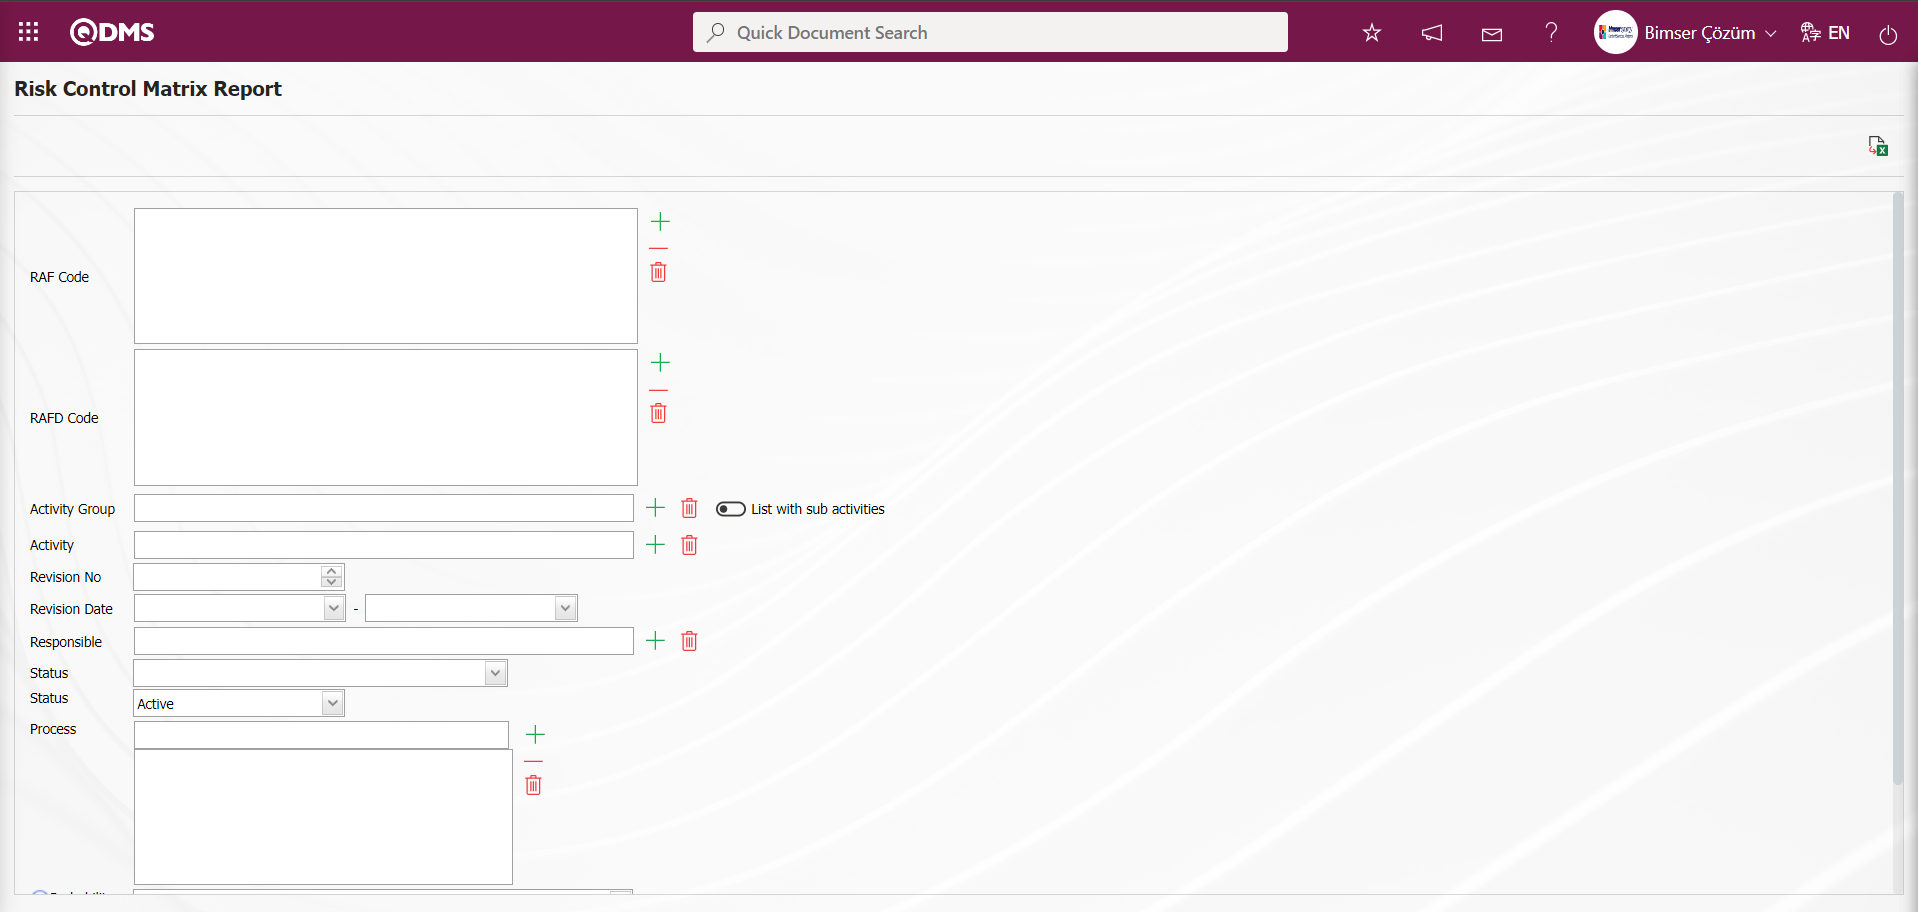
With the help of the buttons on the screen;
 : Data can be transferred to Excel.
On the Risk Control Matrix Report screen, type RAFD code in the “RAFD Code” field, which is the filter search criteria in the Filter tab, and click the (Export to Excel) button.
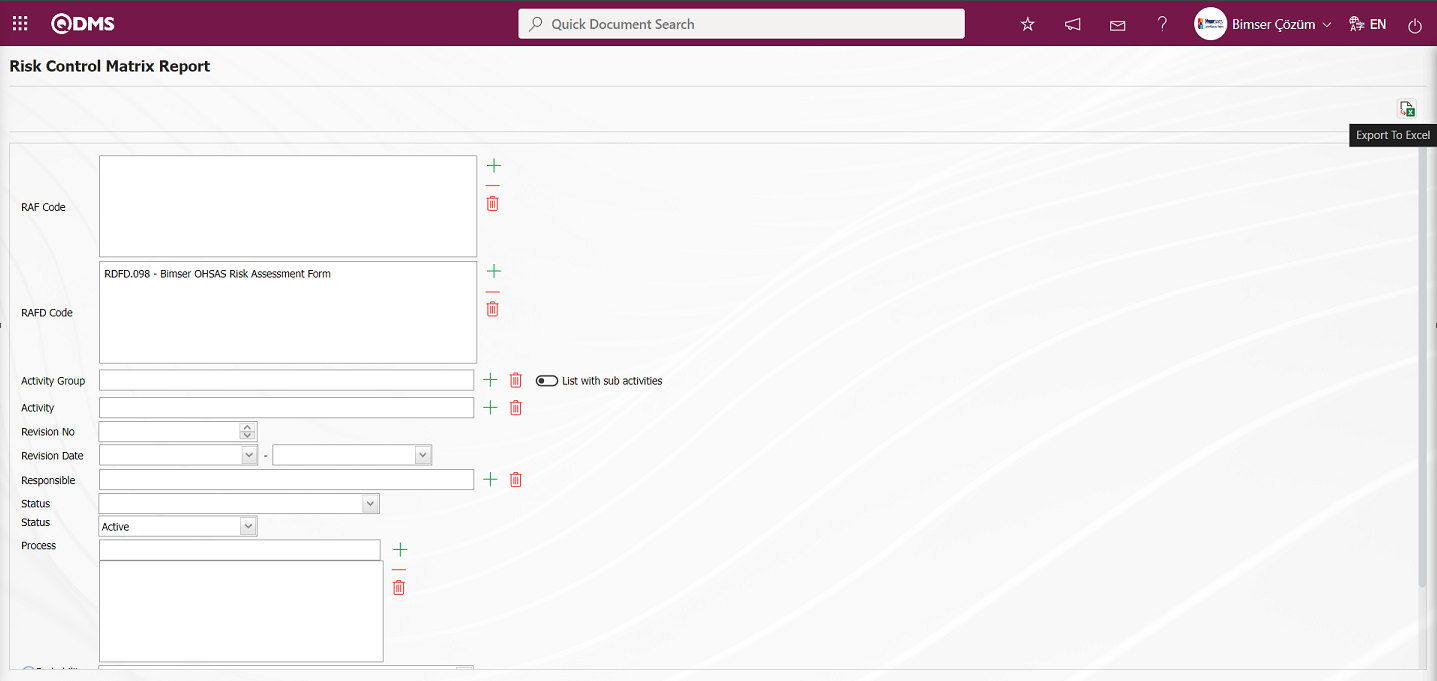
On the Risk Control Matrix Report screen, click the  (Export to Excel) button to get the Risk Control Matrix report in Excel format.
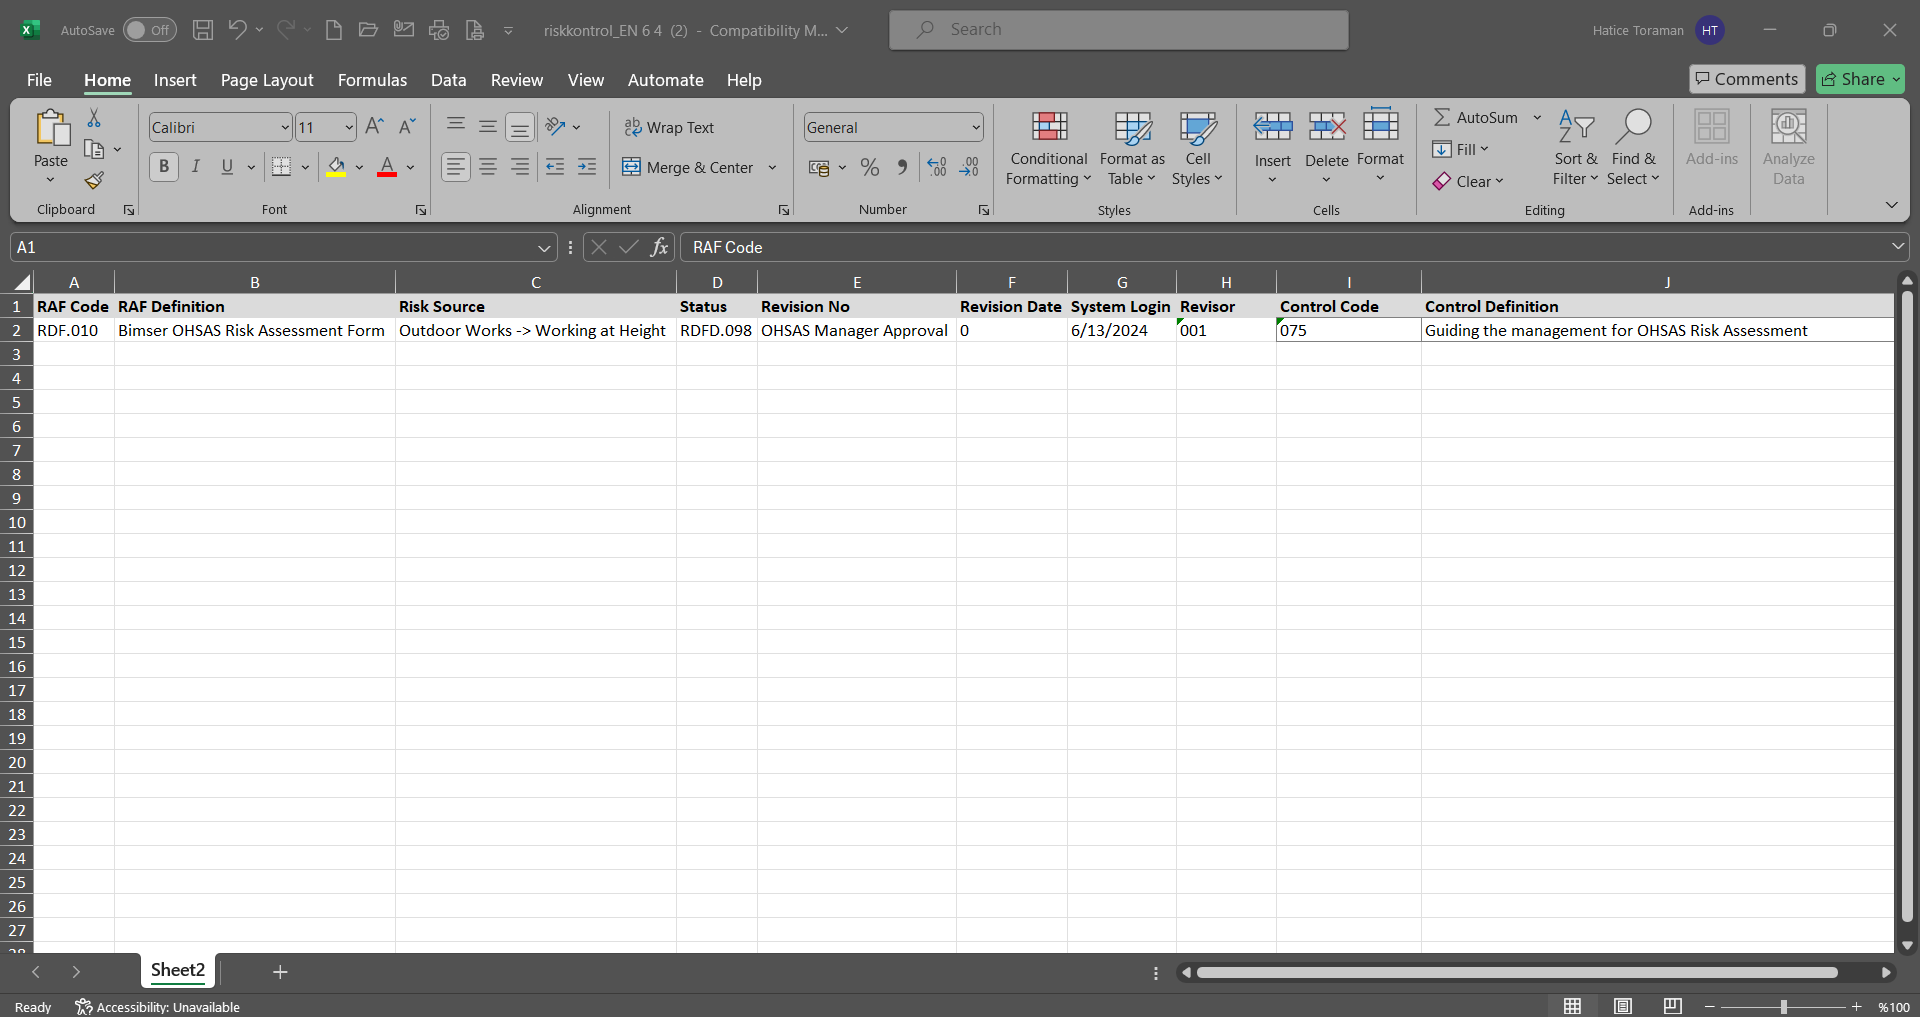
6.2.6.Risk Assesment Request
Menu Name: Integrated Management System /OHSAS Risk Assessment / Risk Assessment Request
Risk Assessment Request menu can be used to open a risk assessment task as an action to any personnel. In order to open the Risk Assessment task action process, the necessary adjustments must first be made in the parameters related to the risk assessment request in the relevant module. In the parameters of the OHS Risk Assessment Module parameters number 16 “”Main Action Code to be Used in Risk Assessment Request?”, the plan code of the plan in which the action task to be opened in the risk assessment task will be defined in the parameter value is defined. The Main Action Code to be defined in the parameter value of the parameter is taken in the Integrated Management System /Action Management/Planning menu.

The action duration information to be opened in the Risk Assessment task must be defined in the parameter value of the parameter 17 “Action Duration to be Used in Risk Assessment Request?” in the OHSAS Risk Assessment Module parameters.
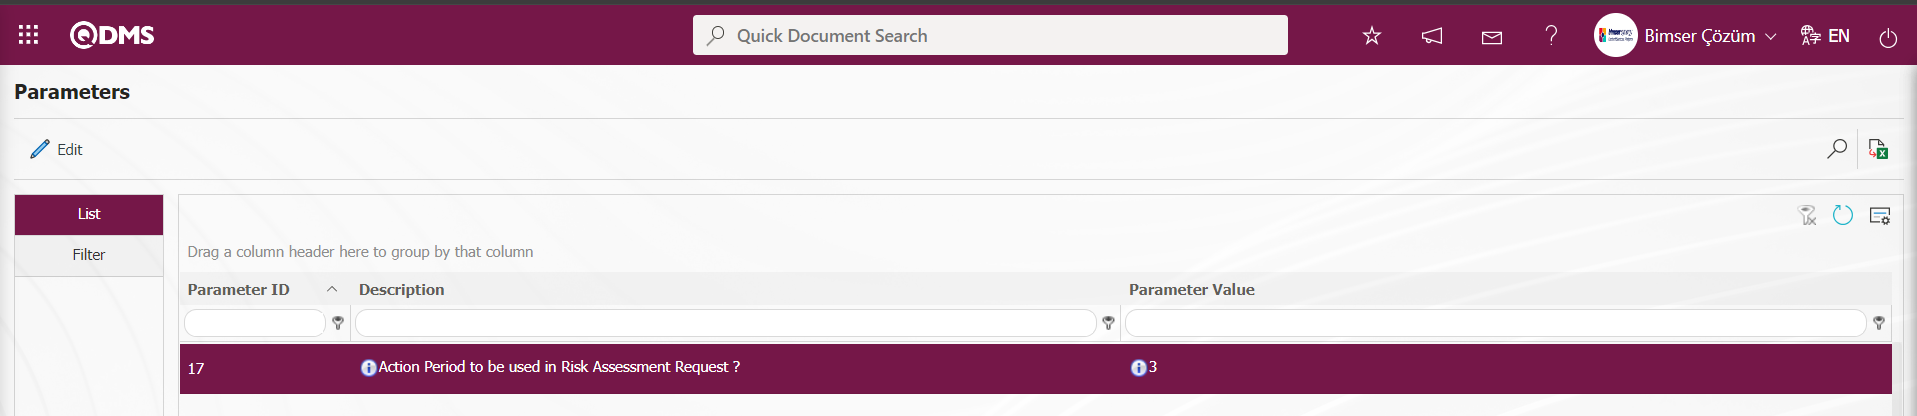
In addition, in the OHSAS Risk Assessment Module parameters, the action item type information to be used for the action task to be opened in the risk assessment task is defined in the parameter value in the parameter 18 “Type Code of the Action to be Used in the Risk Assessment Request?” The Action Item Type information to be defined in the parameter value of the parameter is taken from the System Infrastructure Definitions /Action /Sub-Actions Type Definition menu.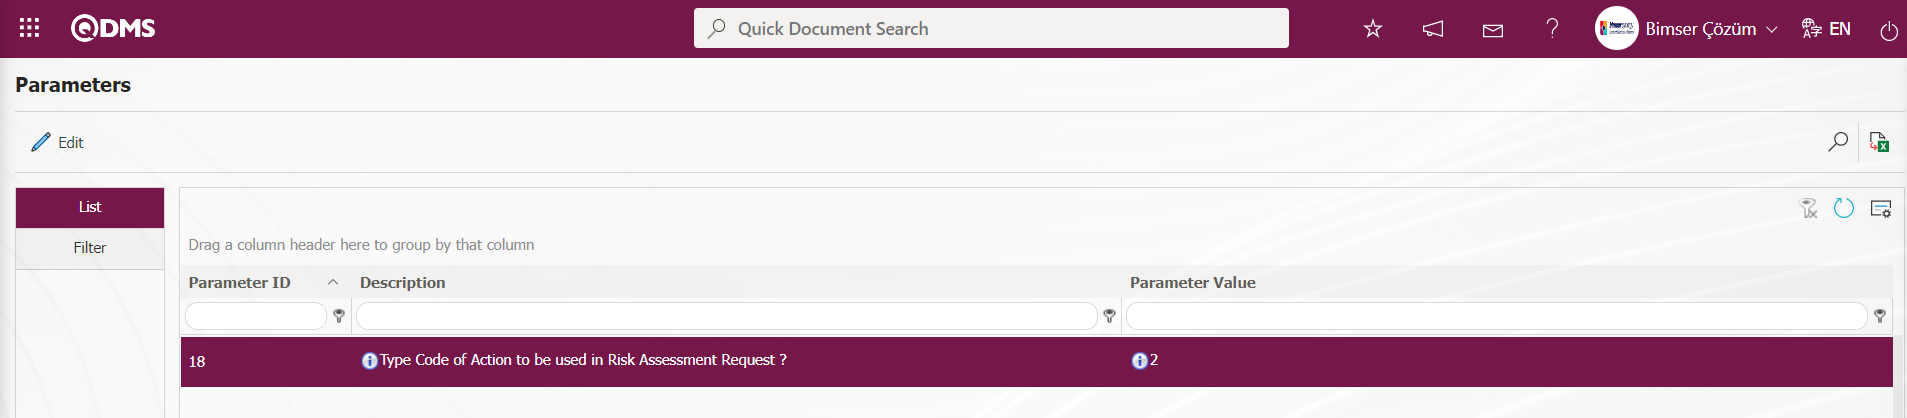
After the necessary adjustments are made in these parameters, the risk assessment action is opened for the relevant person in this menu.

With the help of the buttons on the screen;
 : Defines a new risk evaluation request.
 : Displays the selected Risk evaluation request in the list.
: Records are filtered and searched.
: Data is transferred to Excel.
: The search criteria on the menu screens are used to clear the data remaining in the filter fields in the grid where the search operation is performed.
: The menu screen is restored to its default settings.
: User-based designing of the menu screen is done with the show-hide feature, that is, the hiding feature of the fields corresponding to the columns on the menu screens.
To define a new Demands of Risk Evaluation on the Demands of Risk Evaluation screen, click the button on the upper left corner of the screen to open the Demand Definition screen.
Risk Demand Tab:This is the tab where detailed information about the Risk Evaluation Request process is entered.
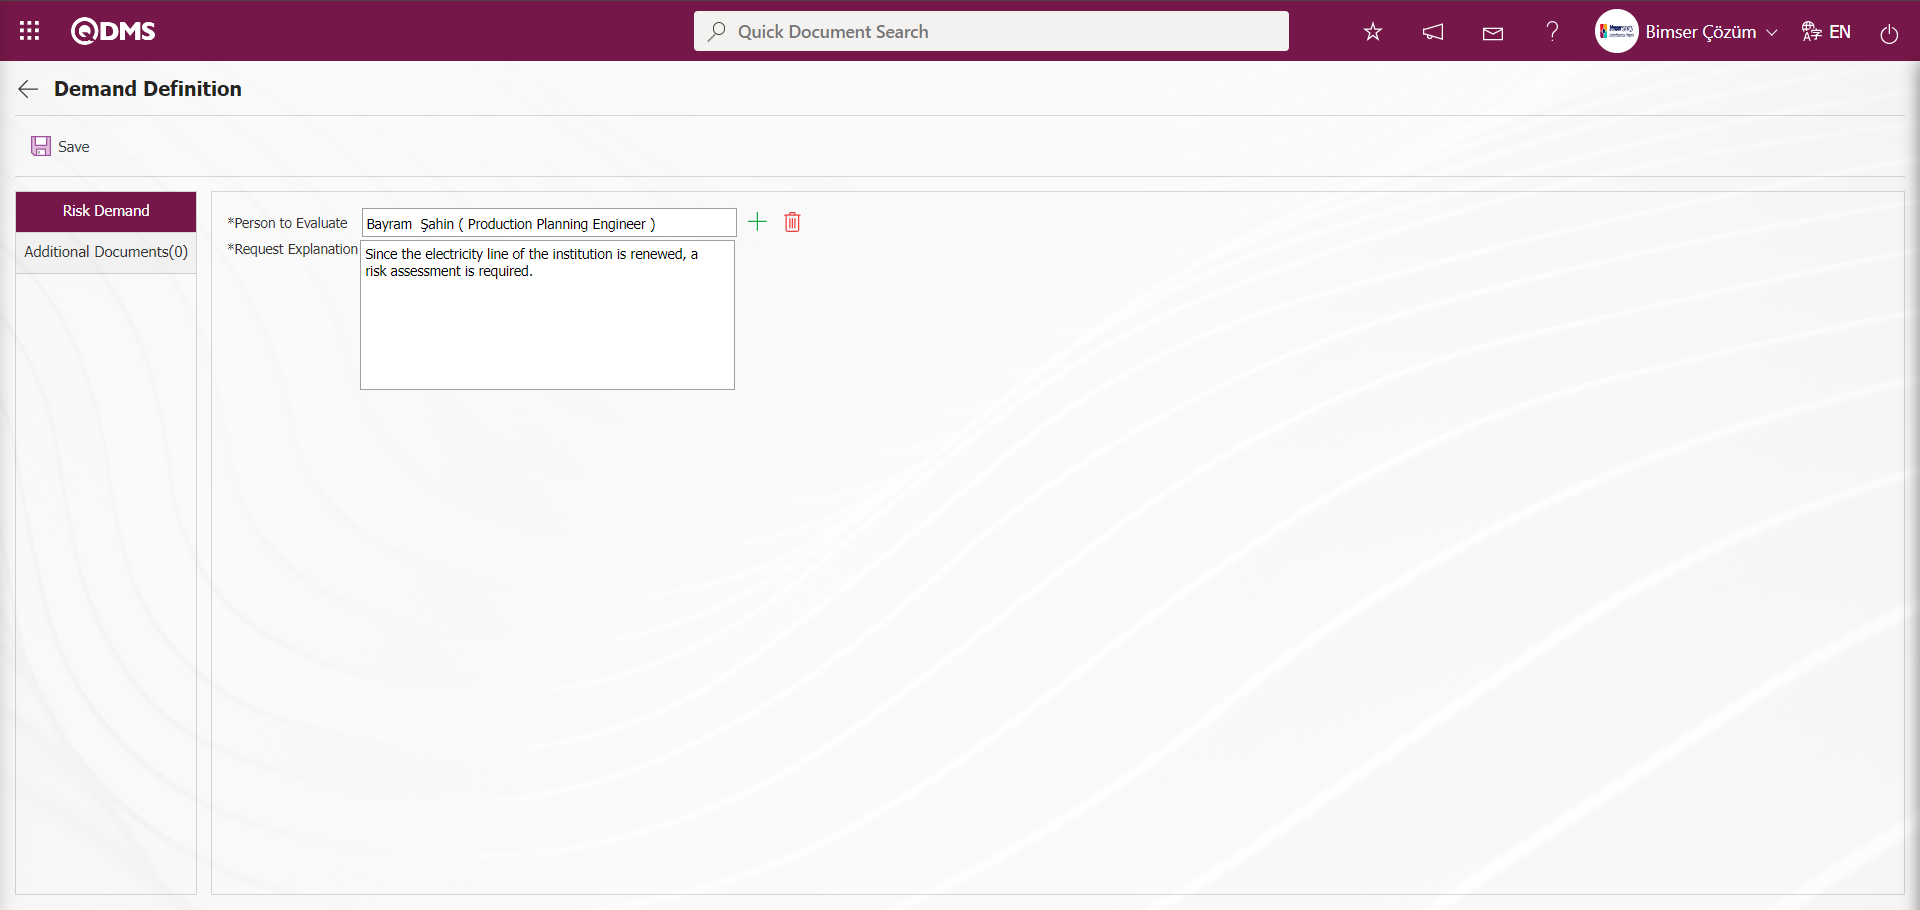
Related fields are defined on the screen that opens:
Person to Evaluate: On the Risk Assessment Request Identification screen Person to Evaluate information can be selected from the list of personnel defined in the system.
Request Explanation: This is the field where the Request Explanation information is entered on the Risk Assessment Request Identification screen.
Additional Documents Tab:If there is an additional file to be added about the Risk Assessment Request, it is the tab where it is added.
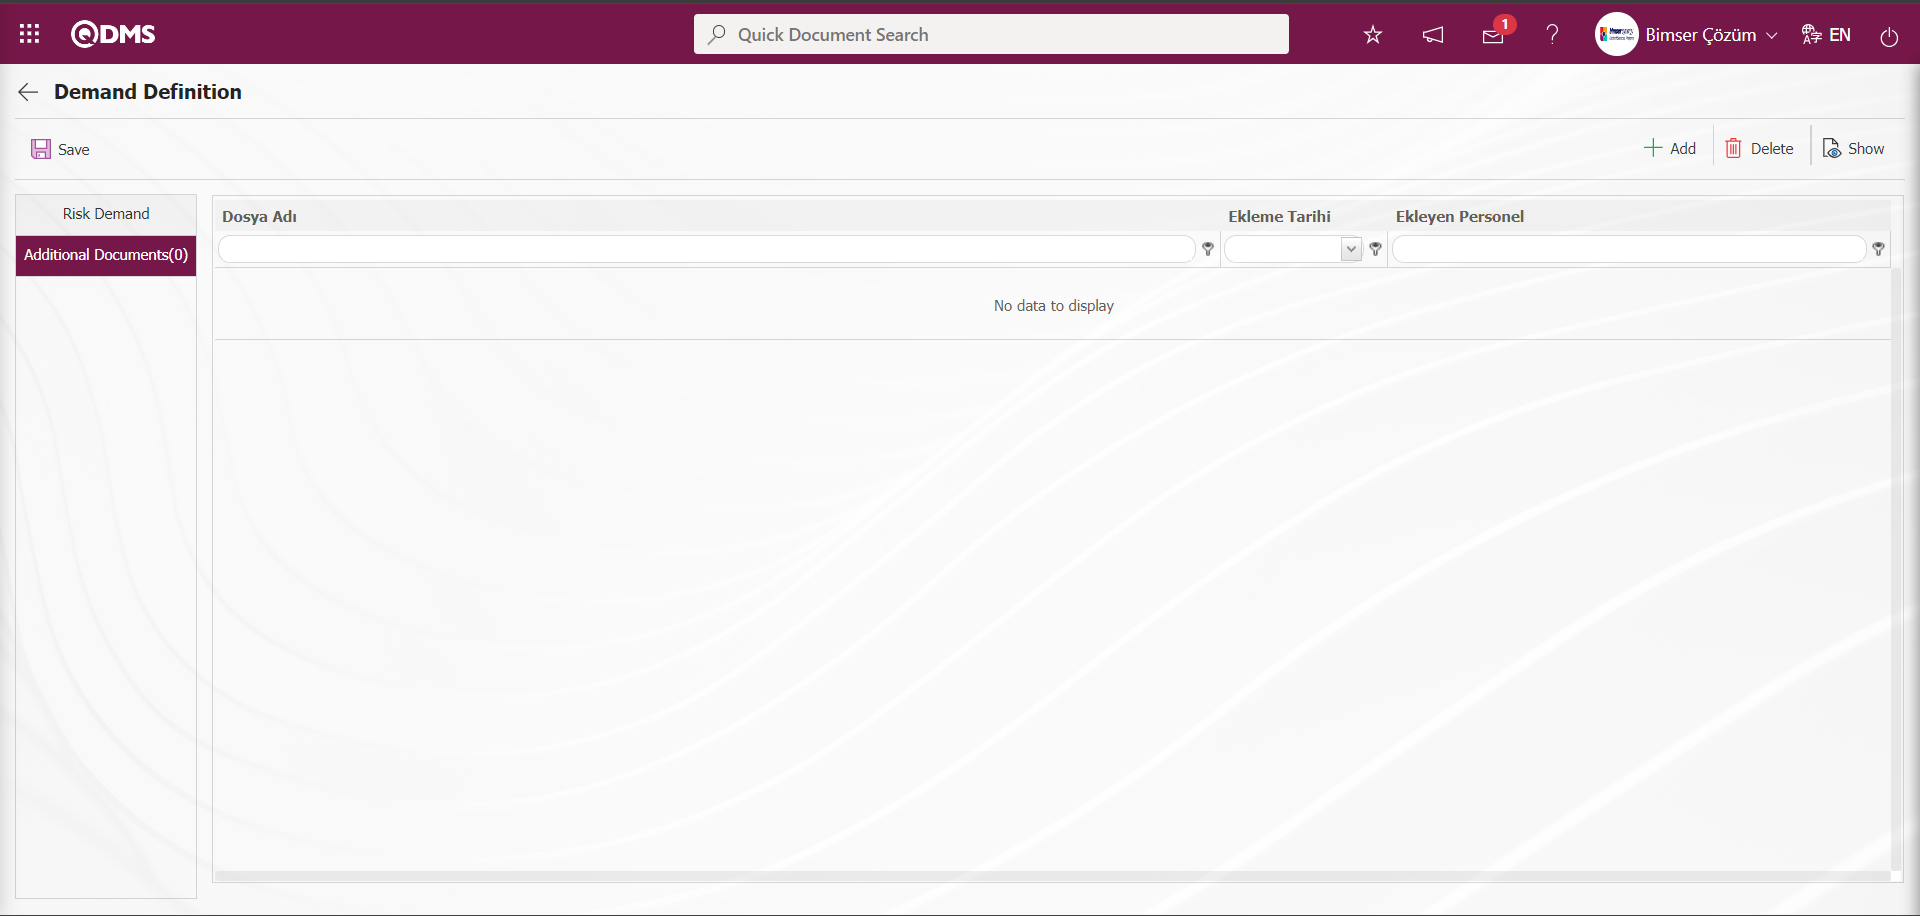
With the help of the buttons on the screen;
 : The additional file is uploaded to the system.
 : The uploaded additional file information is displayed.
 : The uploaded attachment file information is deleted.
Click on the Risk Demand tab.
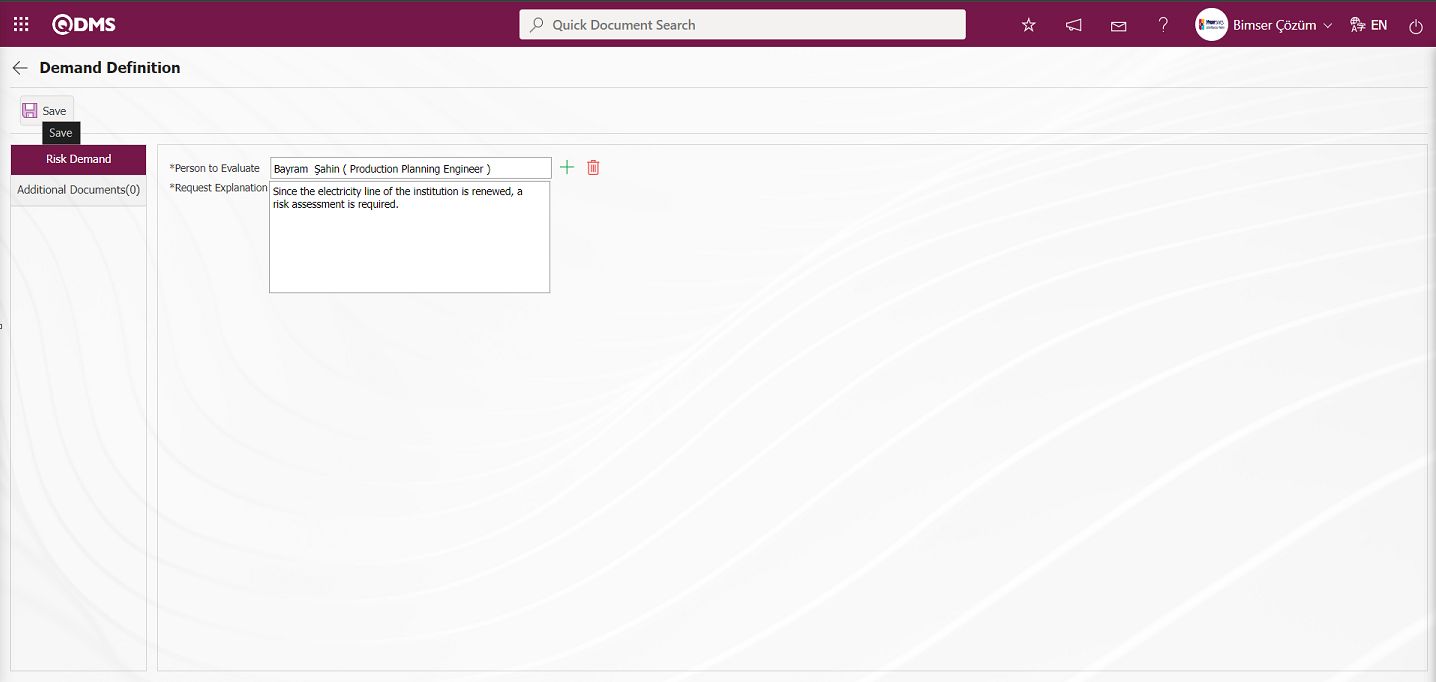
After entering the person to evaluate and the description of the request on the Risk Demand screen, the request is saved by clicking the  button in the upper left corner of the screen and opened as an action to the relevant person.
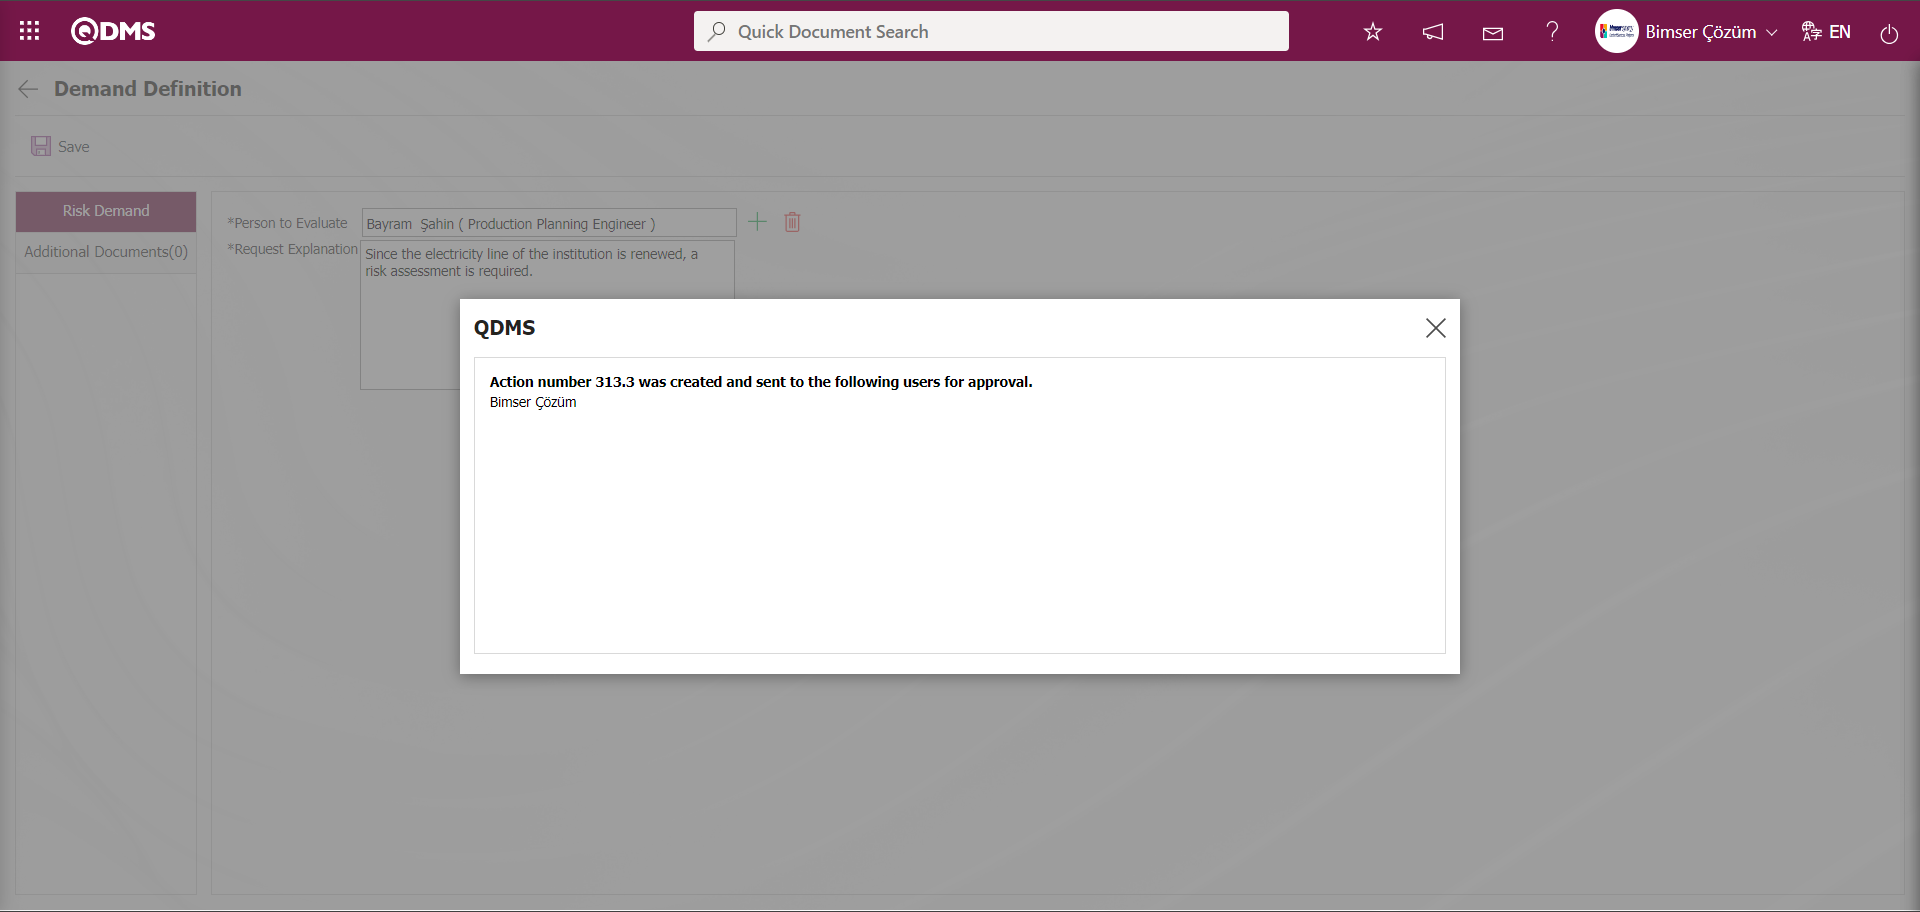
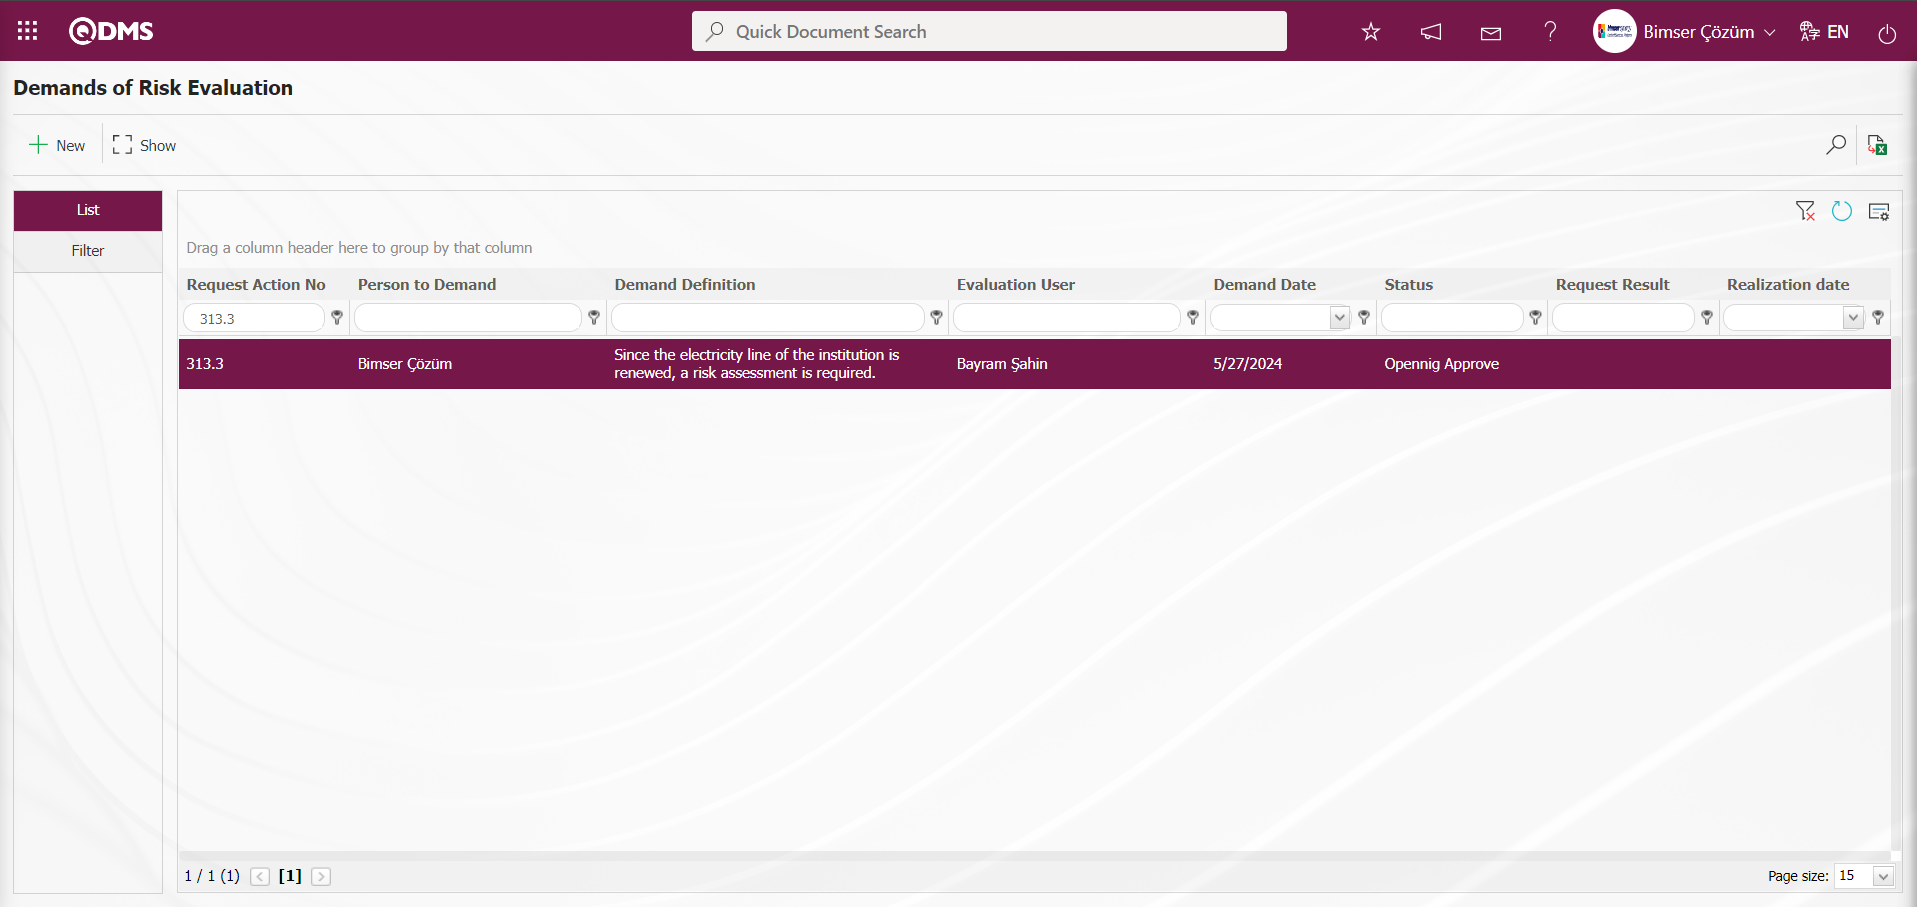
5.3.Dashboard/OHSAS Risk Assessment
Menu Name: Dashboard/OHSAS Risk Assessment
It is the part of the Qdms system that allows users to view transactions, metrics, graphs and reports on a single screen. Dashboard is defined as a screen of indicators, a business board and a table of indicators used to summarize the flow and/or content of information and to explain a particular situation through graphs and tables. Its purpose is to present the necessary information in the shortest time, with the least interaction and thinking requirements. It is the screen that people in managerial positions often use. Dashboard feature has been introduced in the Qdms system within the scope of OHSAS Risk Assessment Module. Depending on the authorization to see the menu, this screen appears.
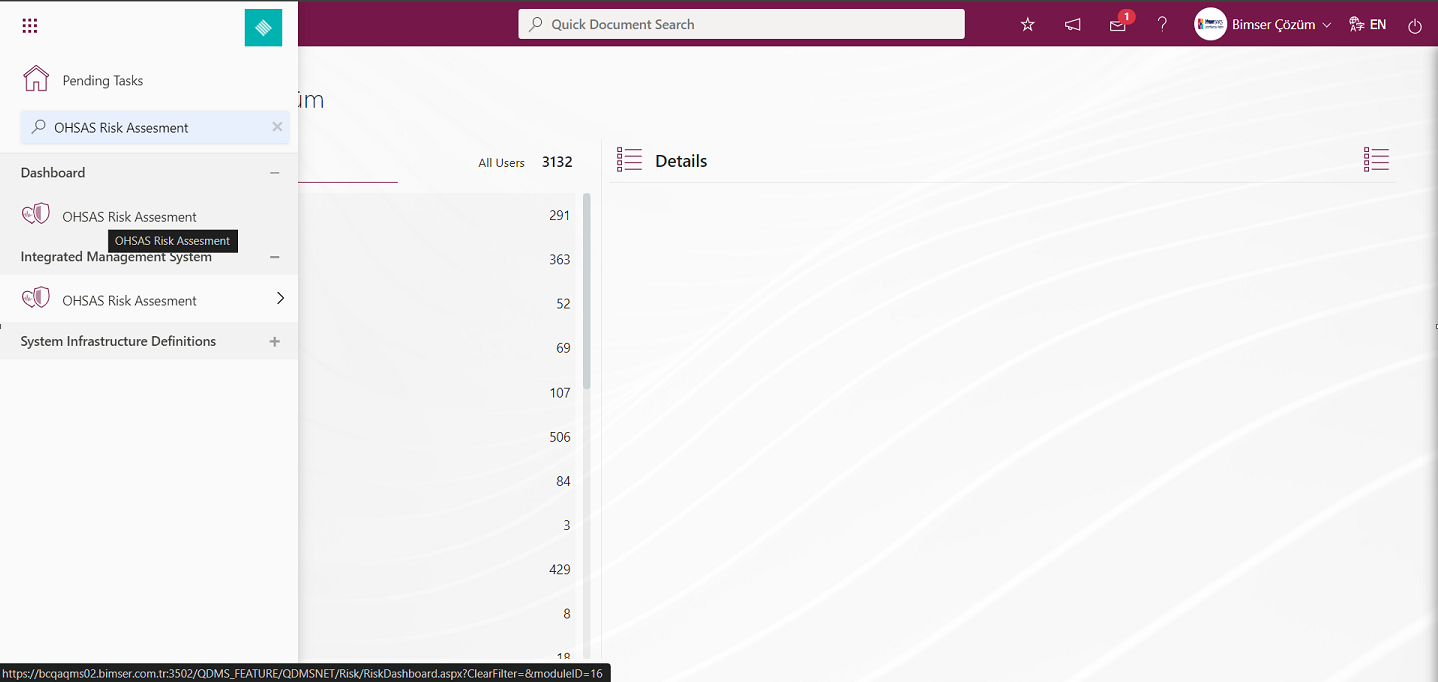
When the Dashboard menu is clicked, two tabs, list and filter tab, appear.
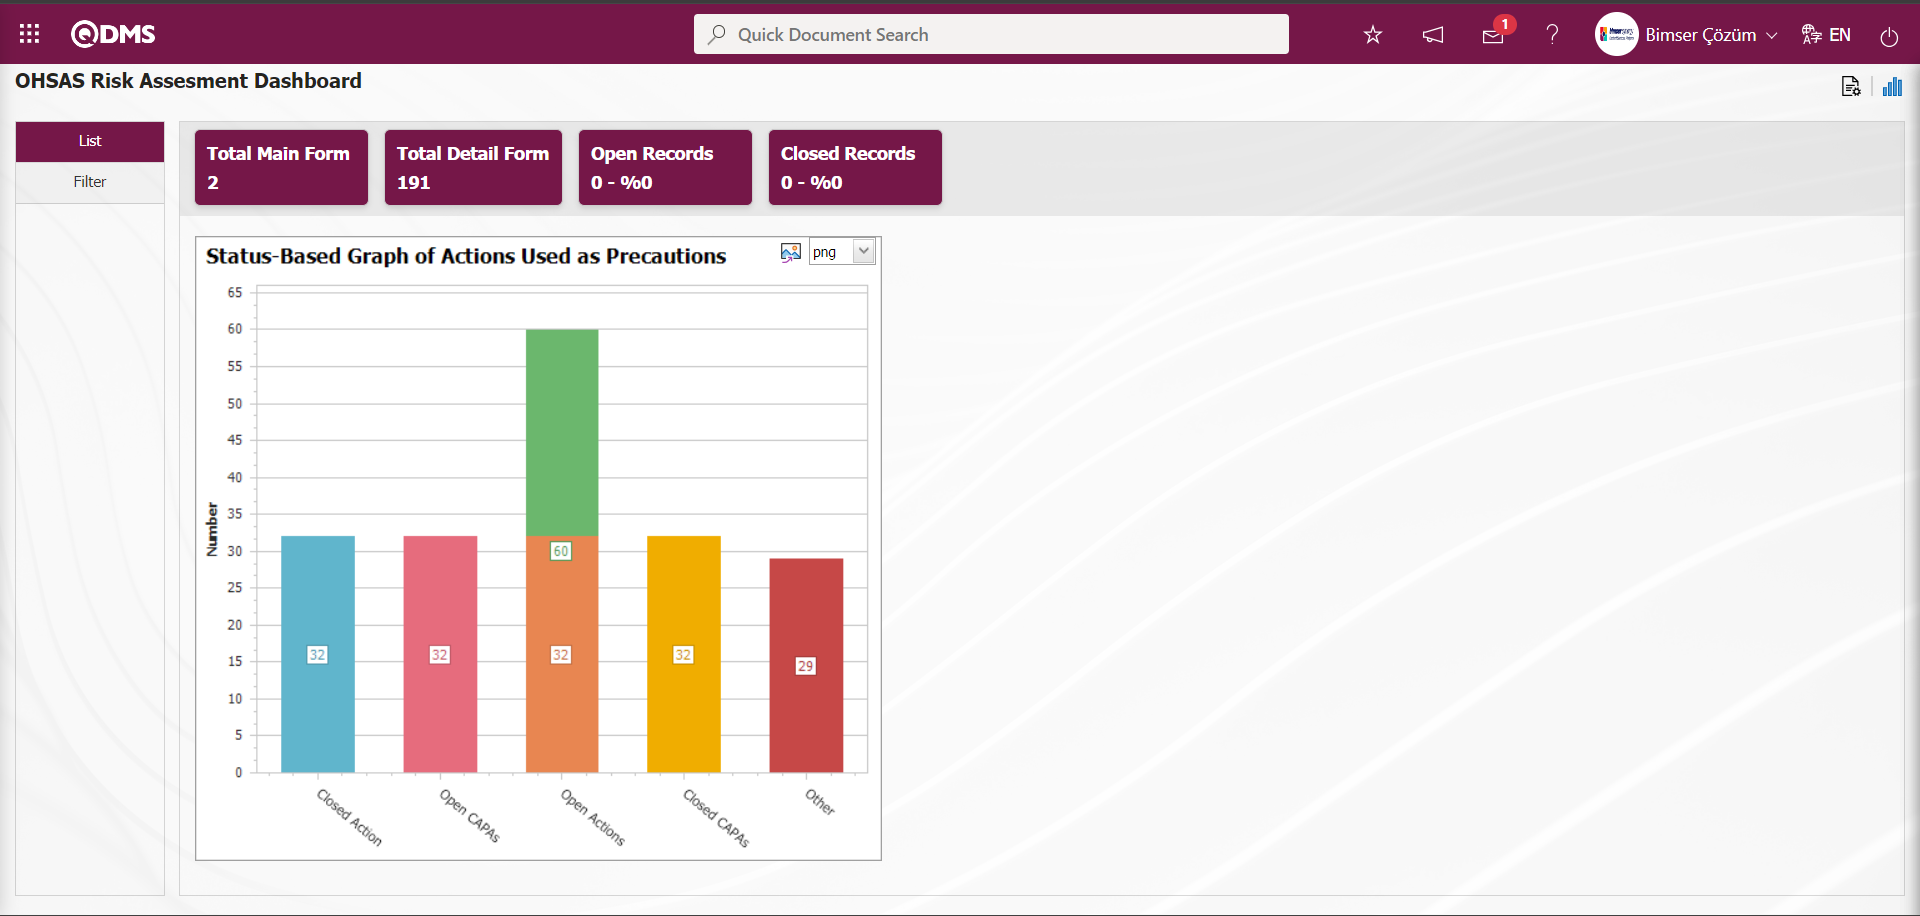
In the Filter tab, filtering is done according to the fields in the search criteria.
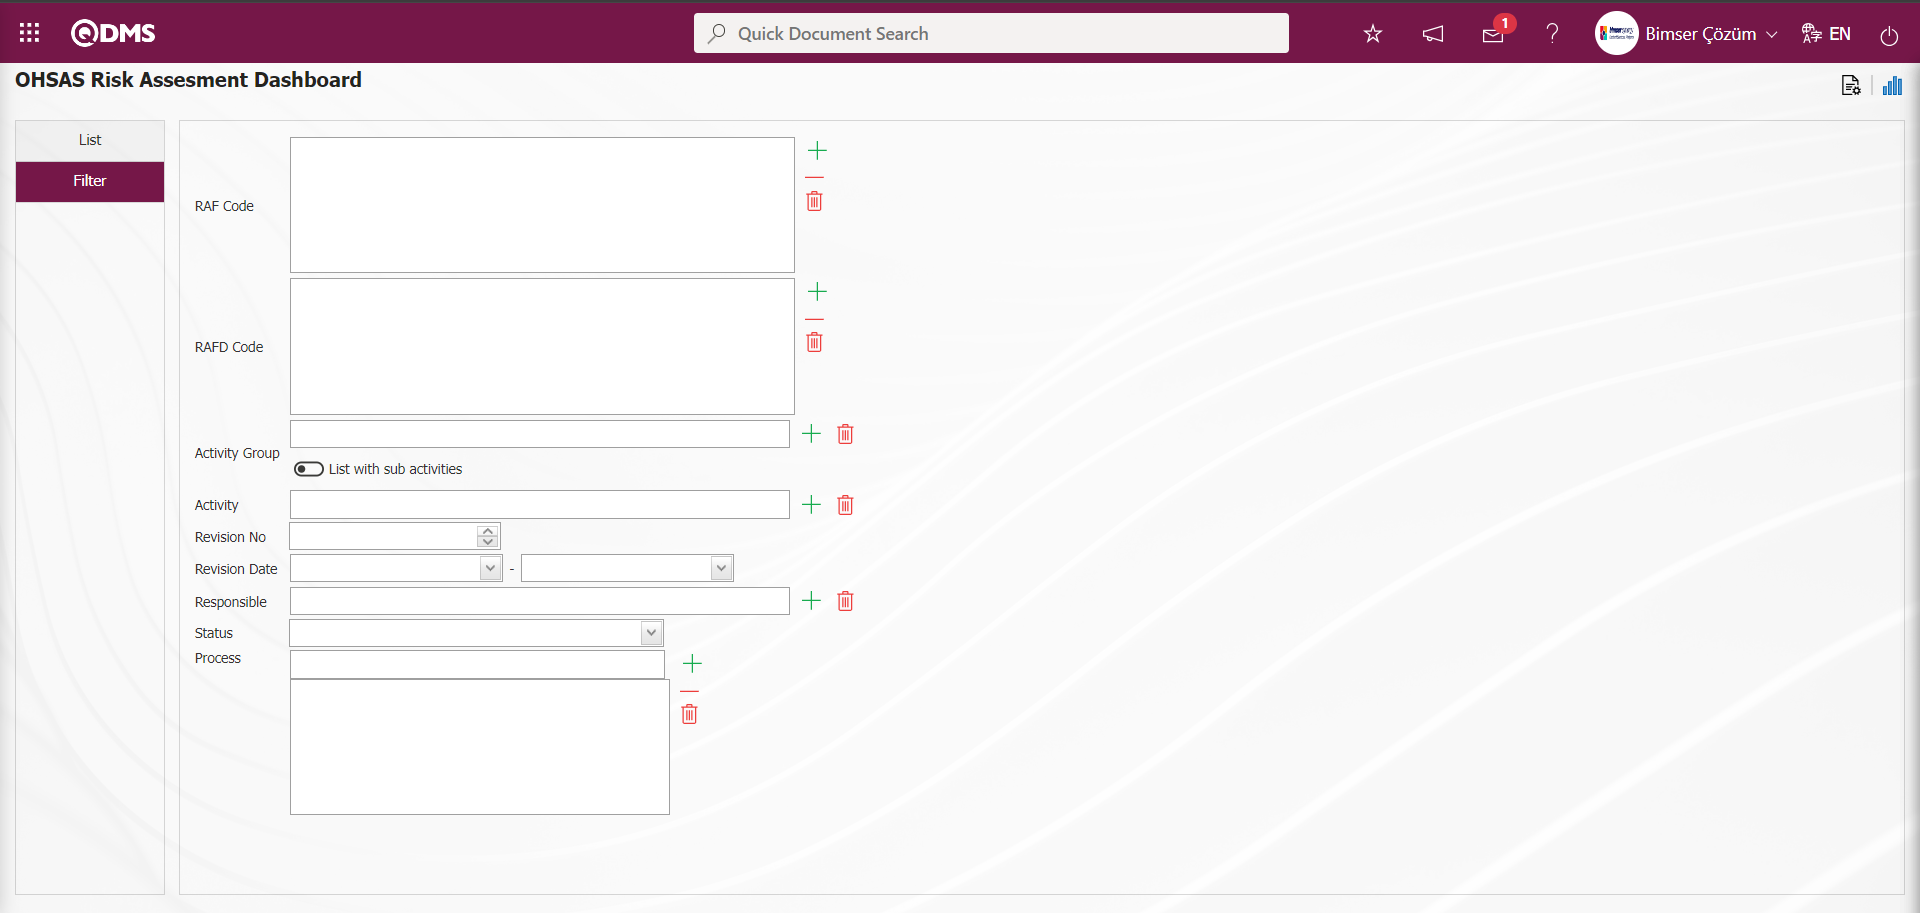
In the OHSAS Risk Assessment module, Total Main Form, Total Detail Form, Open Records and Closed Records fields in the List tab on the Dashboard screen are displayed as fixed fields and no editing is done on them.
In the OHSAS Risk Assessment module, Module managers can increase the number of graphics by designing the graphics they want.
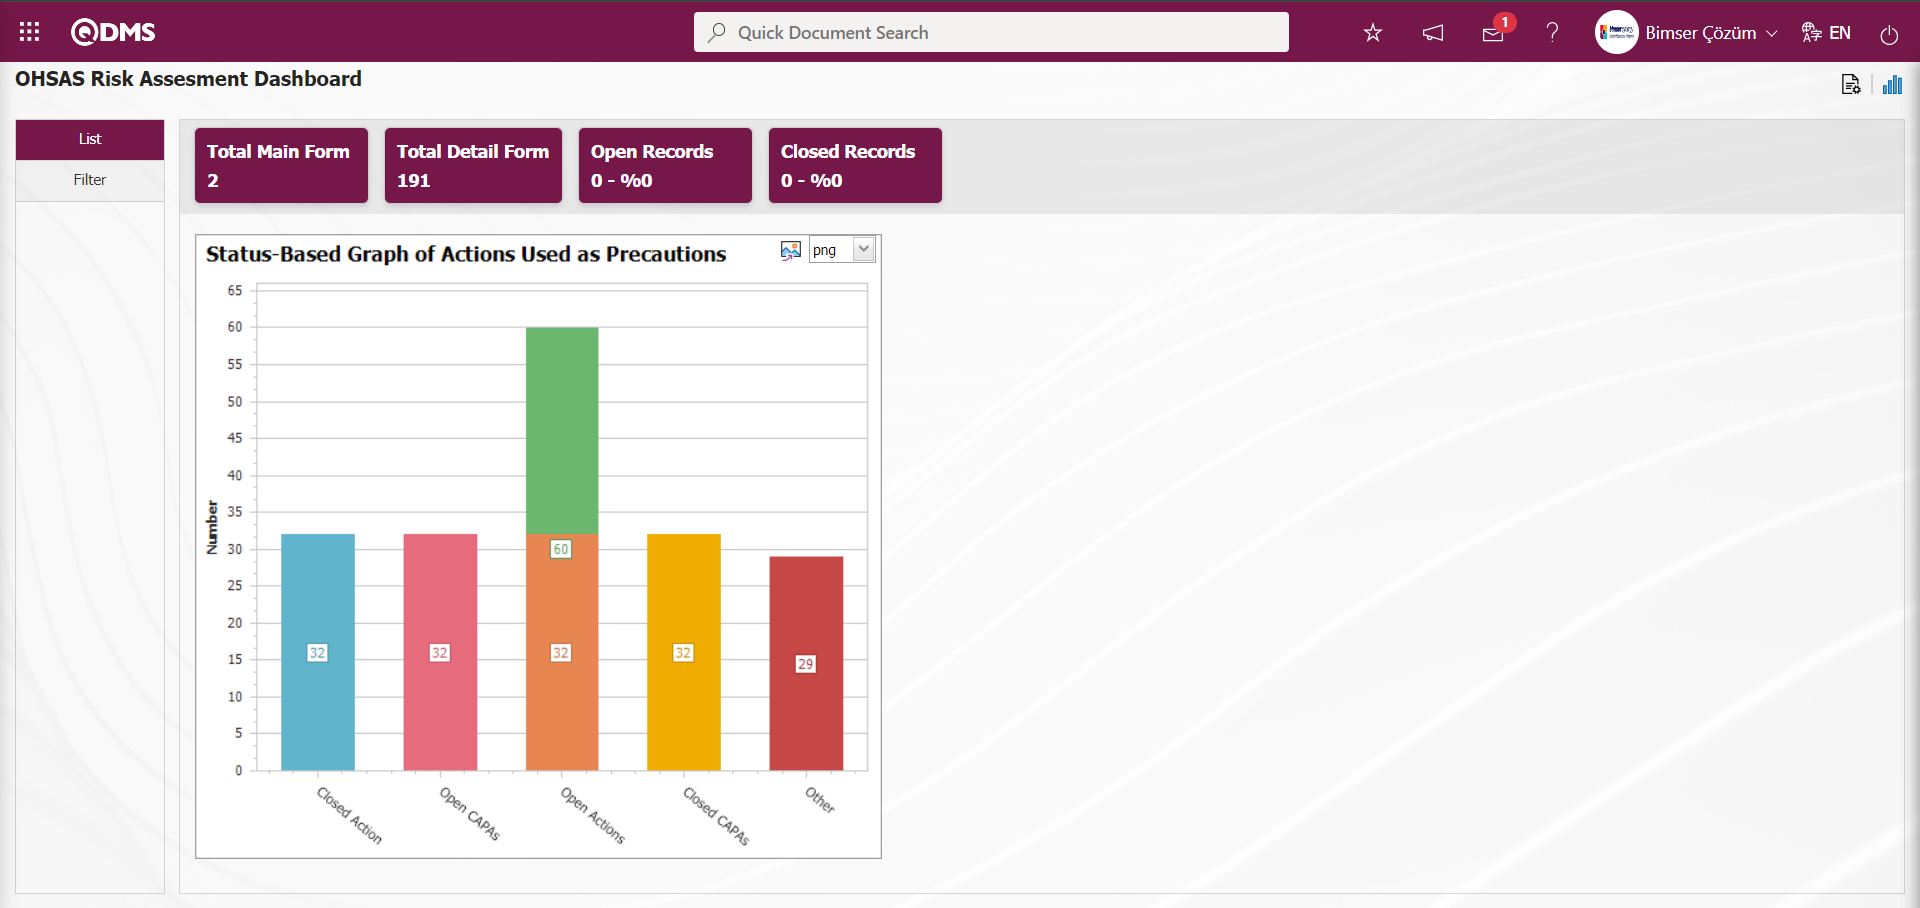
On the OHSAS Risk Assessment Module Dashboard screen, graphic designing is done with settings such as how many graphics there will be, what the name of the graphic will be, what the order of the graphics will be, which areas will be on the Z axis, Y axis, graphic length, graphic width and graphic type. In order to make these adjustments on the OHSAS Risk Assessment Dashboard screen, the user must be defined as a Module Administrator in the OHSAS Risk Assessment module. (Module administrator identification is made in the OHSAS Risk Assessment Module in the System Infrastructure Definitions / BSID / Configuration Settings / Manager Definition menu).
When the user is not a Module Manager in the OHSAS Risk Assessment Module, the button in the screenshot below is displayed on the OHSAS Risk Assessment Dashboard screen.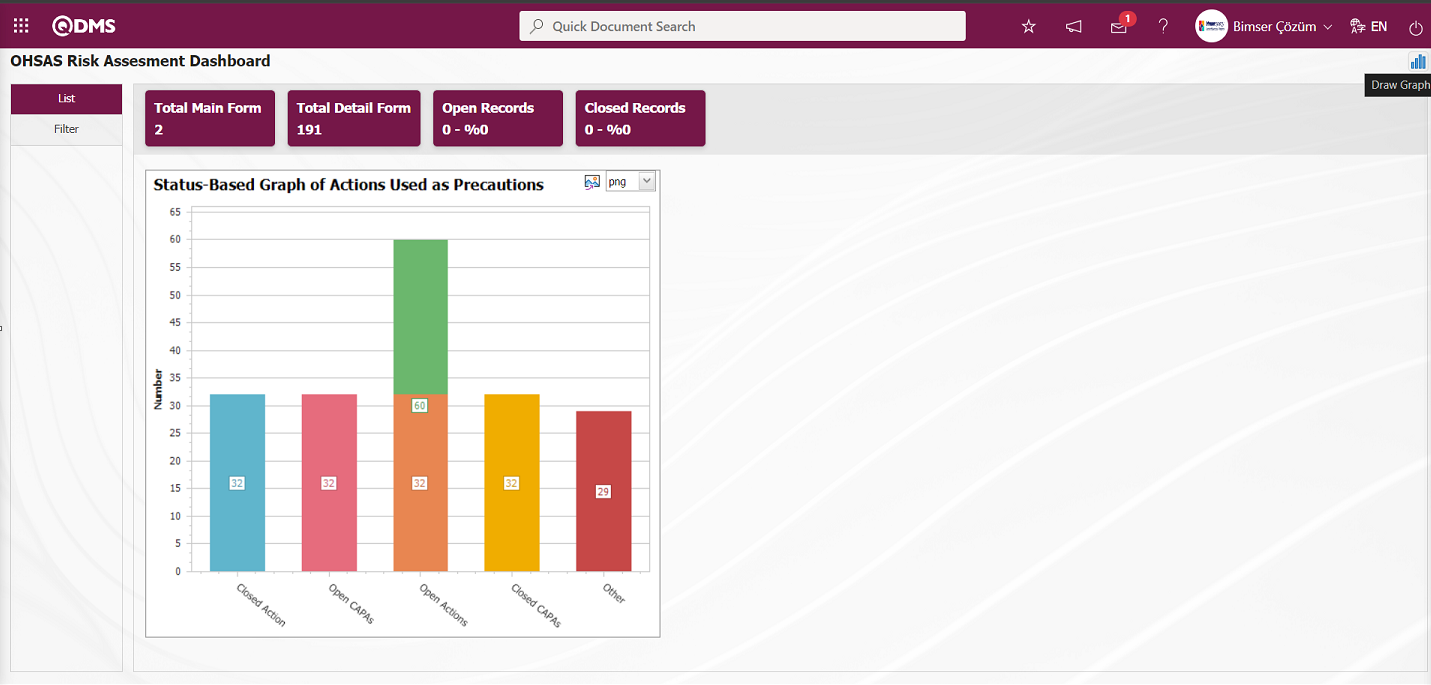
In the OHSAS Risk Assessment Module, the first button  (Graphic Settings) is displayed on the OHSAS Risk Assessment Dashboard screen of the user defined as the module Manager. The user who is the Module Admin makes the necessary adjustments on the OHSAS Risk Assessment Dashboard screen with the help of the (Graphic Settings) button. Users who are not Module Administrators can also make graphic design by making the necessary adjustments in the System Infrastructure Definitions / BSID / Configuration Settings / Dashboard Configuration / OHSAS Risk Assessment menu on the Dashboard Configuration screen.
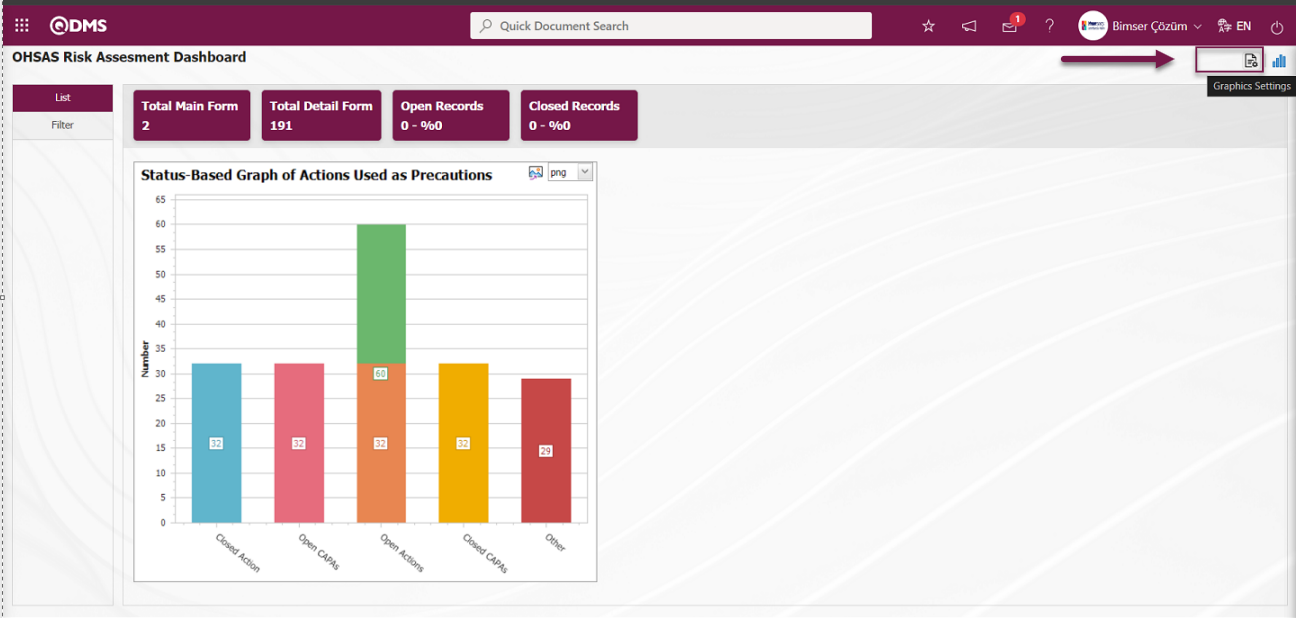
Click on the (Graphic Settings) button to design graphics in the OHSAS Risk Assessment Module, update and delete the selected graphic information in the list.
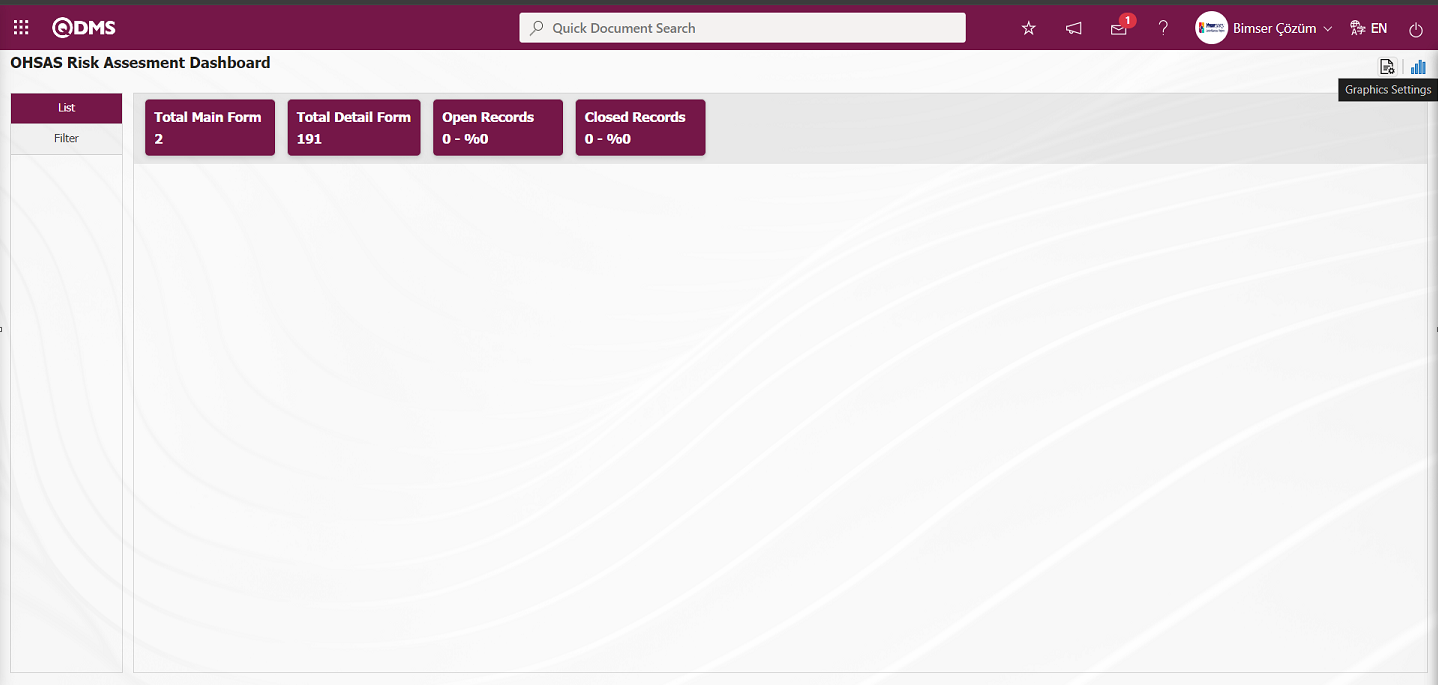
The Dashboard Configuration screen opens.
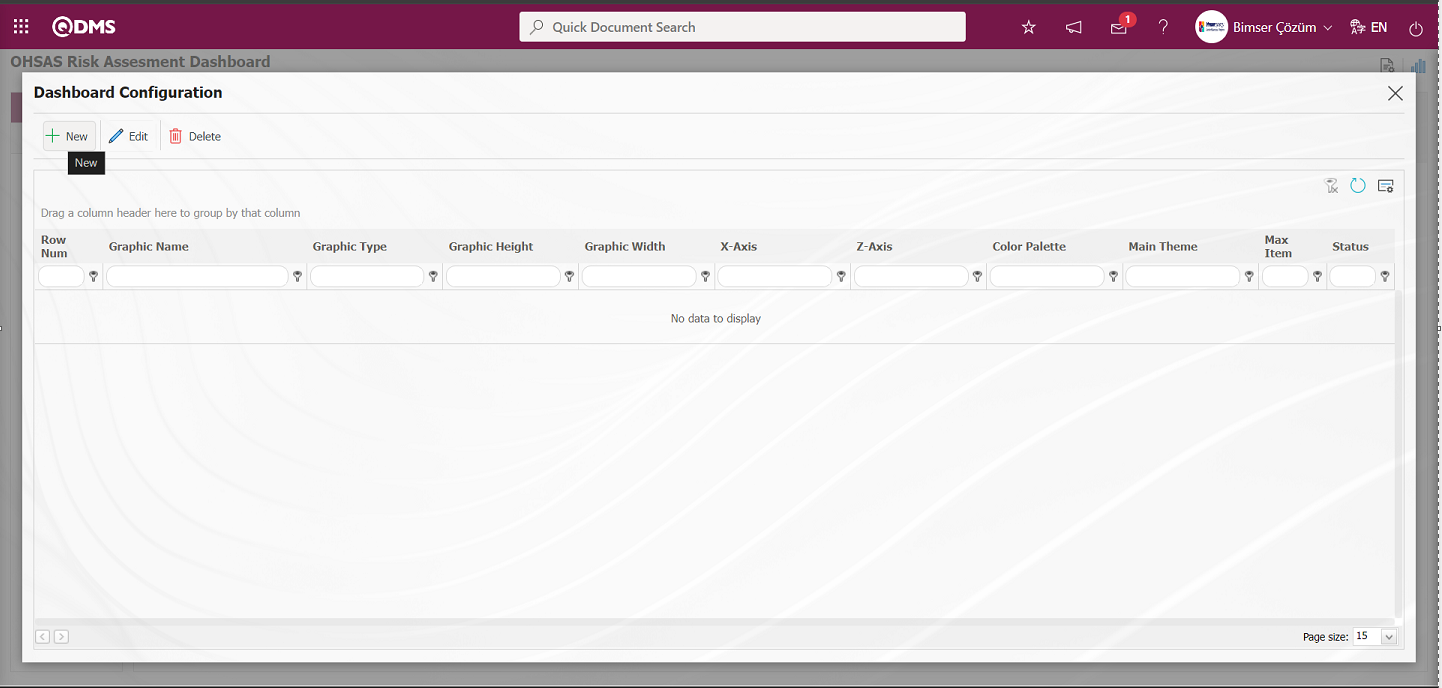
With the help of the buttons on the screen;
 : A new Dashboard is defined.
 : Correction / change / update is made on the Dashboard information selected in the list.
 : The Dashboard information selected in the list is deleted.
-: Dashboard Configuration screen is closed.
Click the  button to add a new Dashboard in the OHSAS Risk Assessment Module
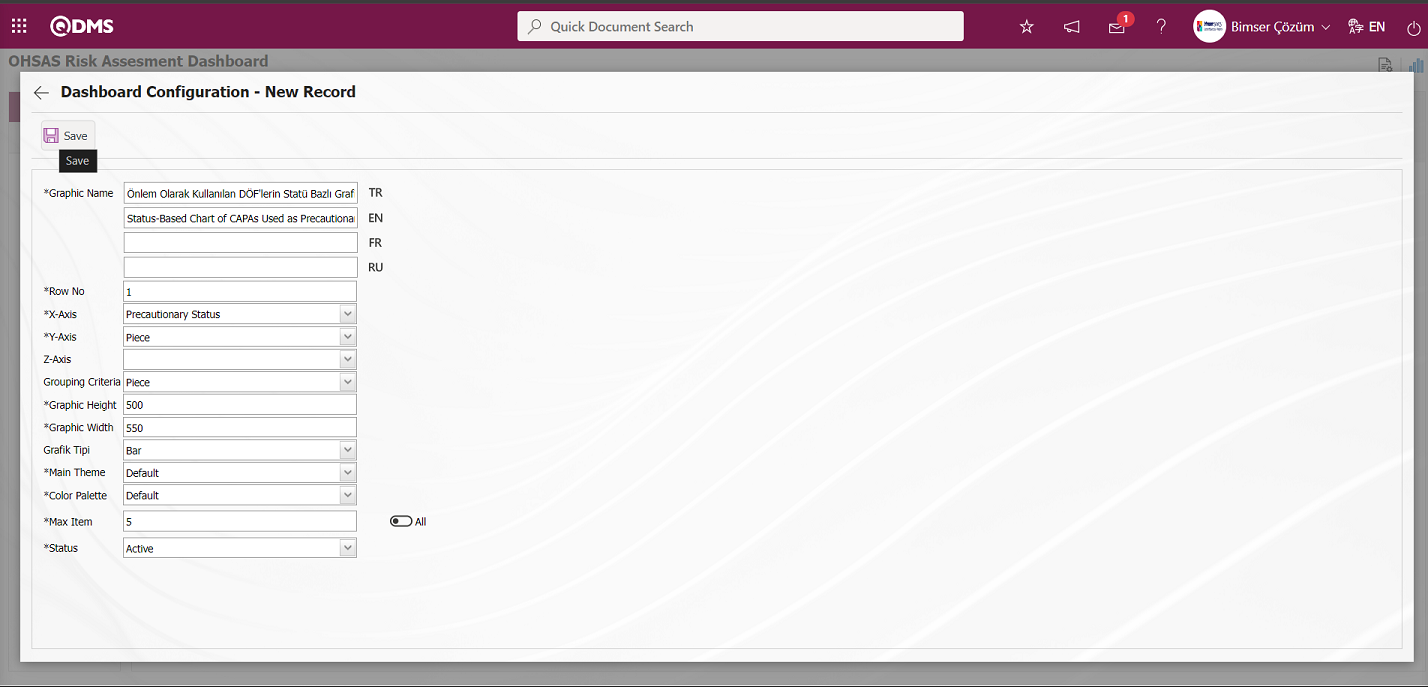
After filling in the required fields on the Dashboard Configuration - New Record screen, click the  button on the top left of the screen.
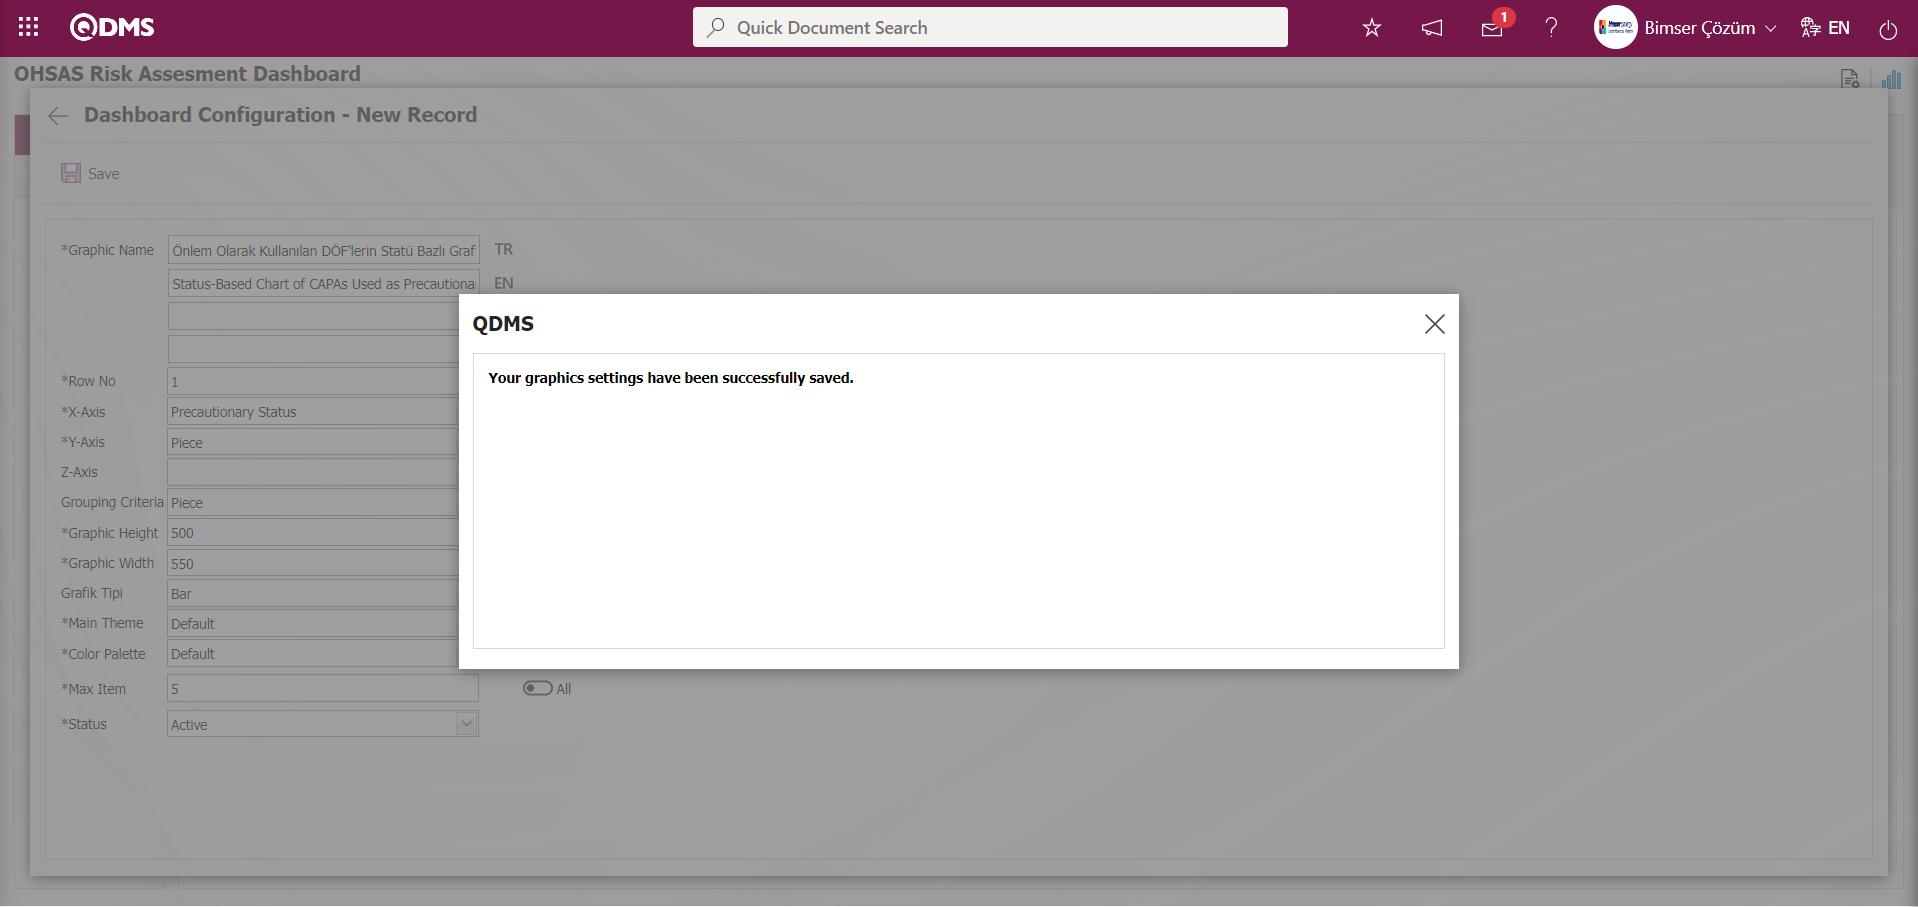
After the registration process on the OHSAS Risk Assessment Dashboard screen, the system gives the message “Your graphics settings have been successfully saved.”
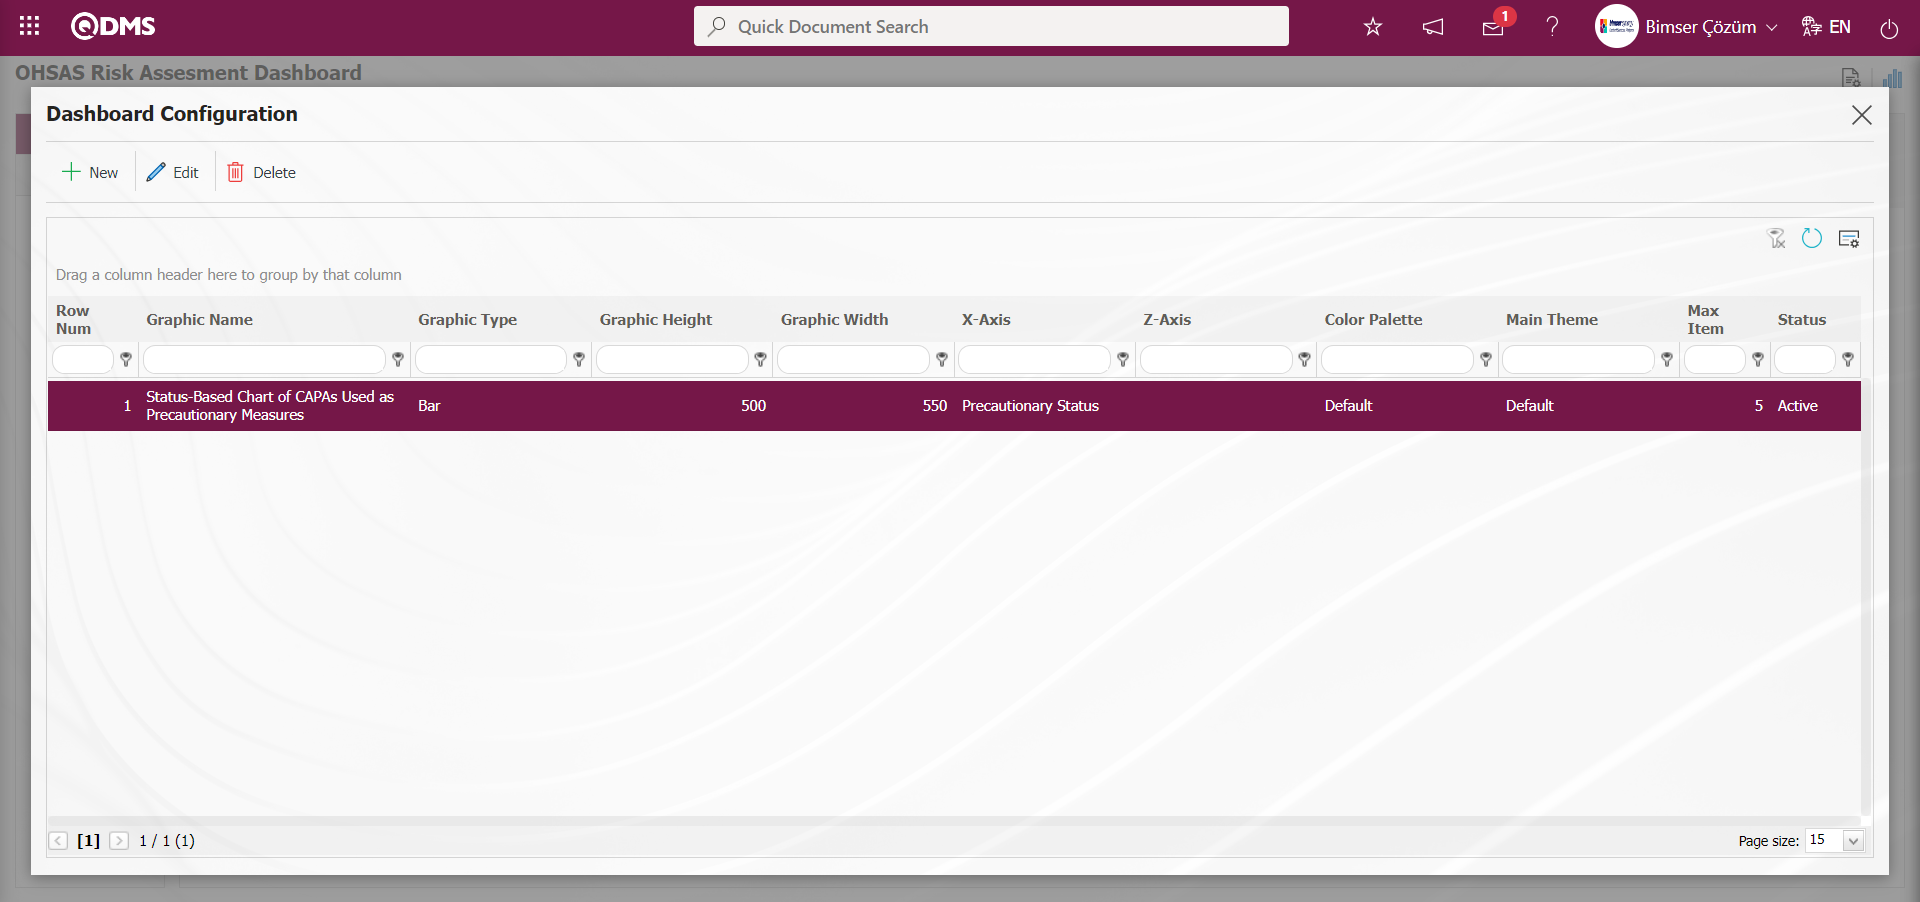
The Dashboard defined in the OHSAS Risk Assessment Dashboard screen is displayed.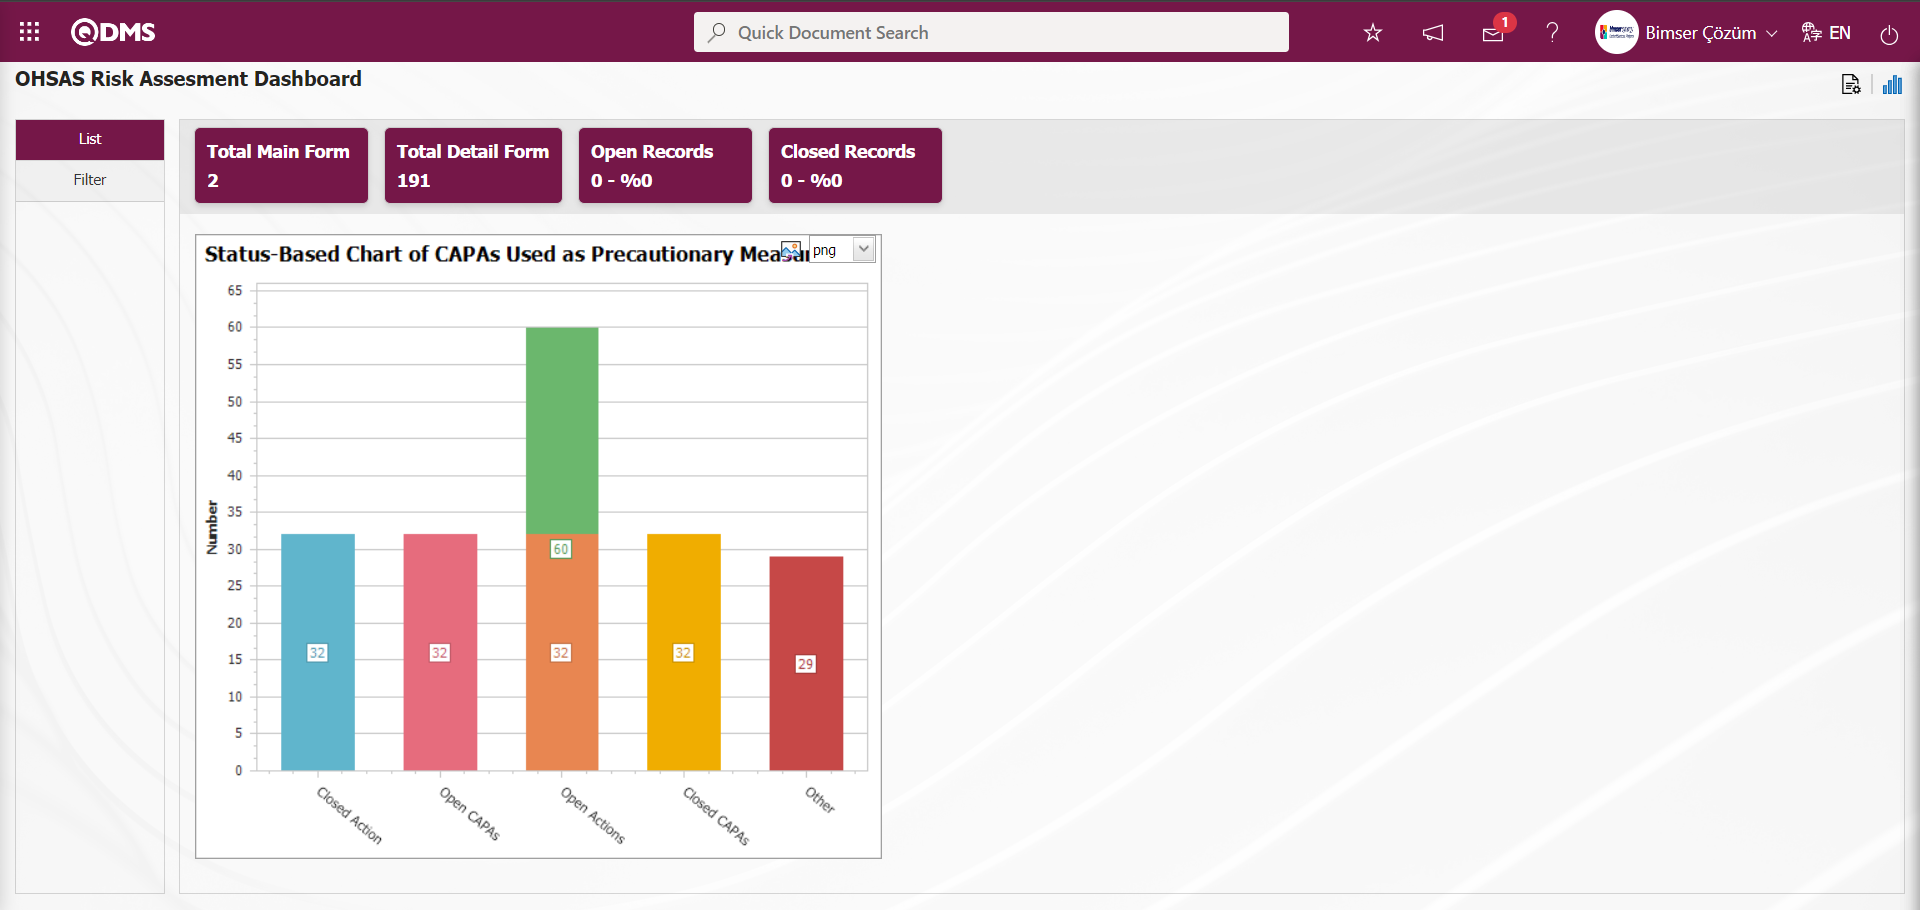
By clicking the (Export Graphic) button, the graphic can be exported to the external environment by converting it to the format type (png, jpg, bmp, xls, etc.) selected from the drop-down menu.
Graphic Length is limited to a min value of 500 and a maximum of 1000. Graphic Width is limited to a min value of 550 and a max value of 1800. Chart Length and Width should be selected between these values. Dashboard Configuration - If the row number is already used on the New Record screen, an error message “The row number you specified is in use, you must specify a row number that is not in use.” is given by the system during the saving phase.
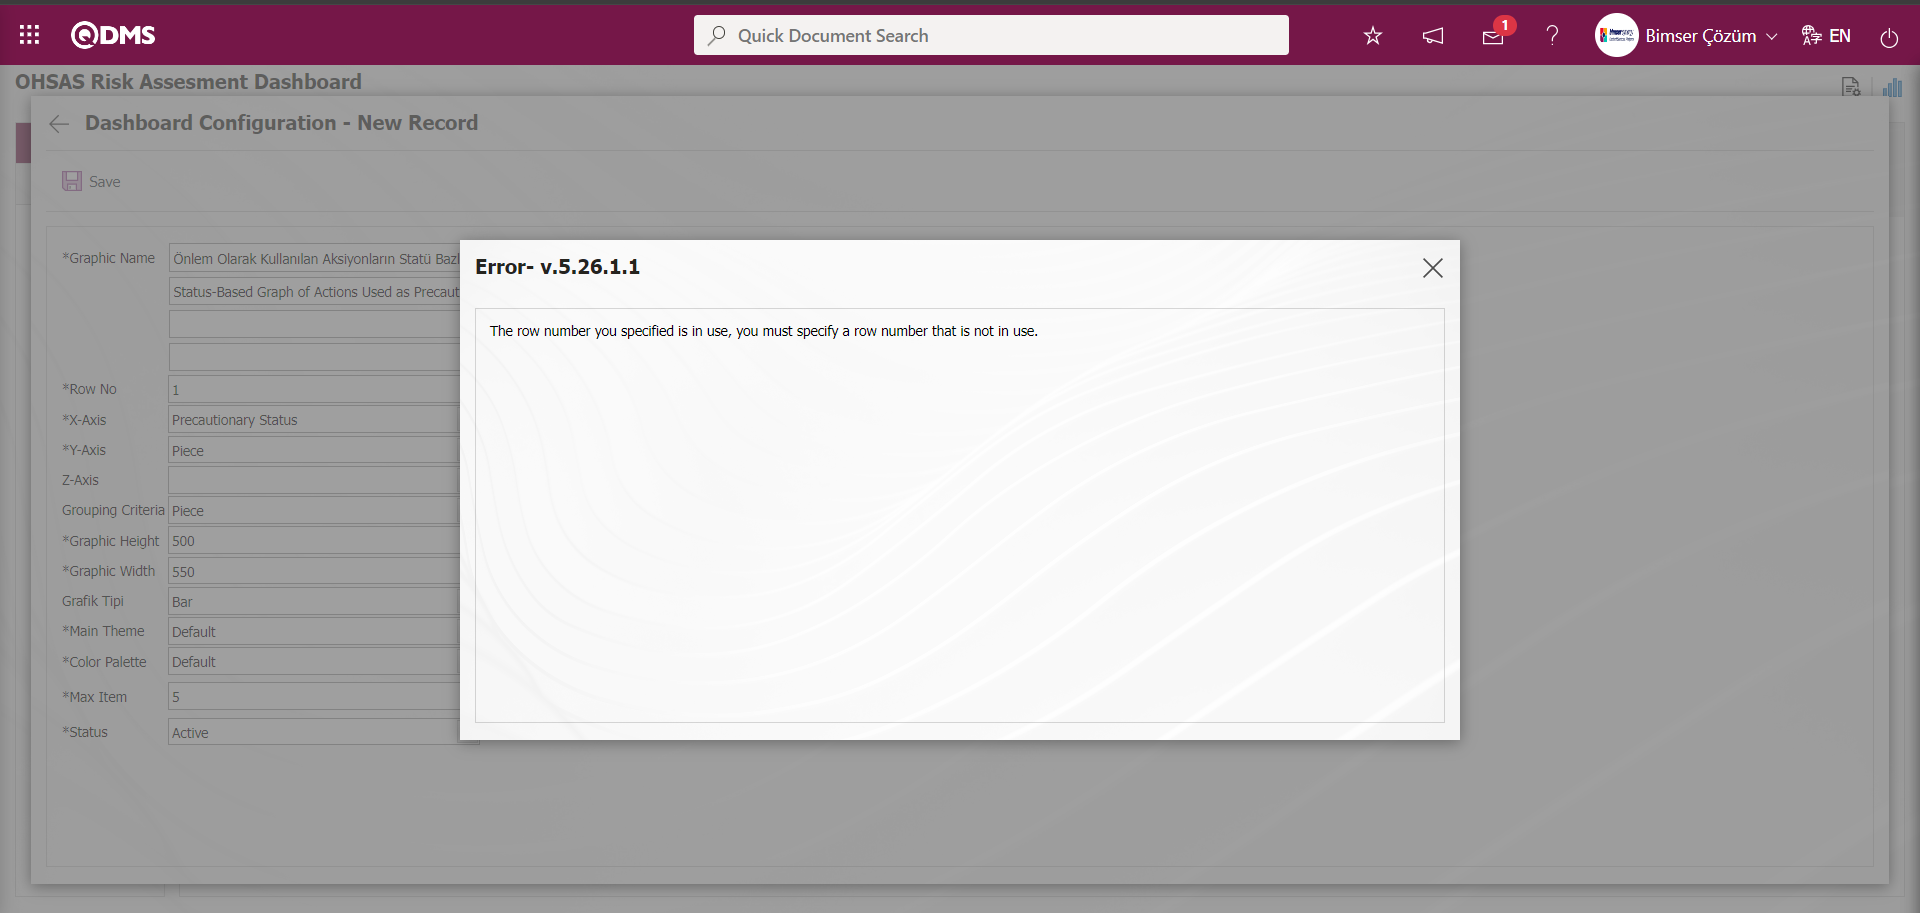 In this way, a new chart can be added on the screen opened with the Chart Settings button. Editing, updating, changing and deleting operations are performed on the added chart information. The filtering screen for the relevant graphics in the list is defined and set as downloadable.
For users who are not Module Administrators, the Dashboard Configuration screen is opened by clicking on the System Infrastructure Definitions/BSID/Configuration Settings/ Dashboard Configuration/ OHSAS Risk Assessment menu and the graphic design process is done by making the necessary adjustments on the screen that opens.
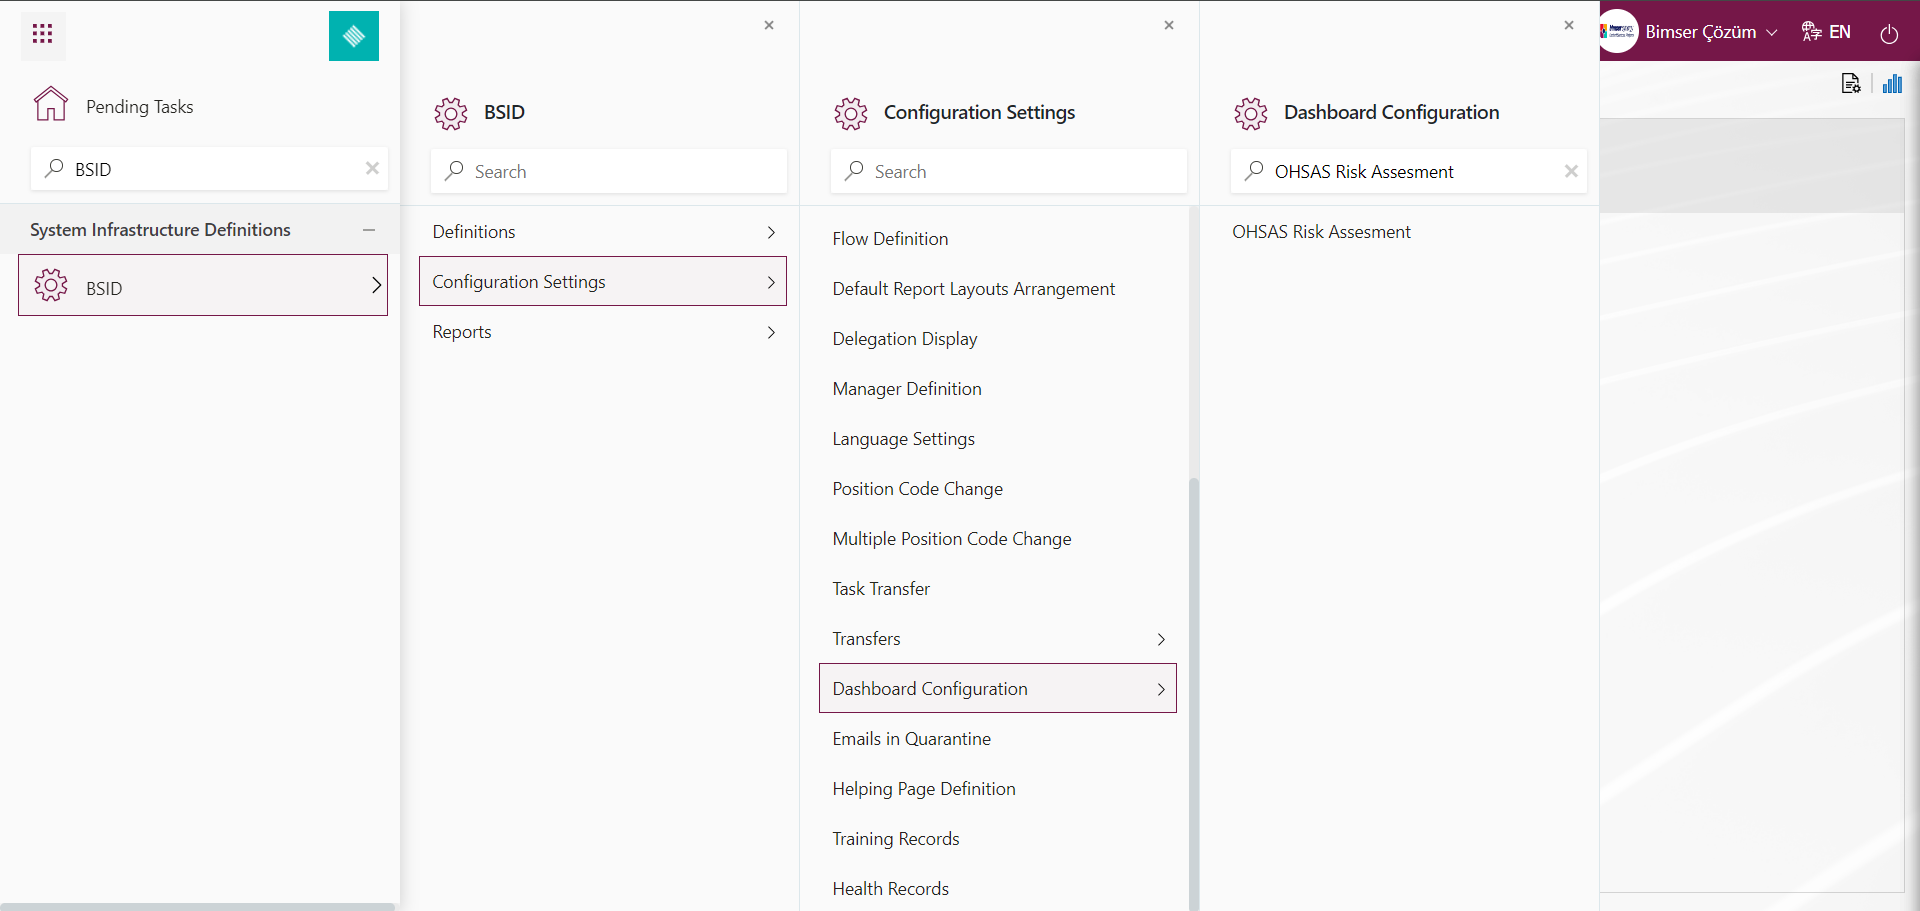
On the OHSAS Risk Assessment Dashboard Configuration screen, they can define a new Dashboard by using the same buttons and performing the same steps.