eBA Document Management : Document Operations
Document Operations
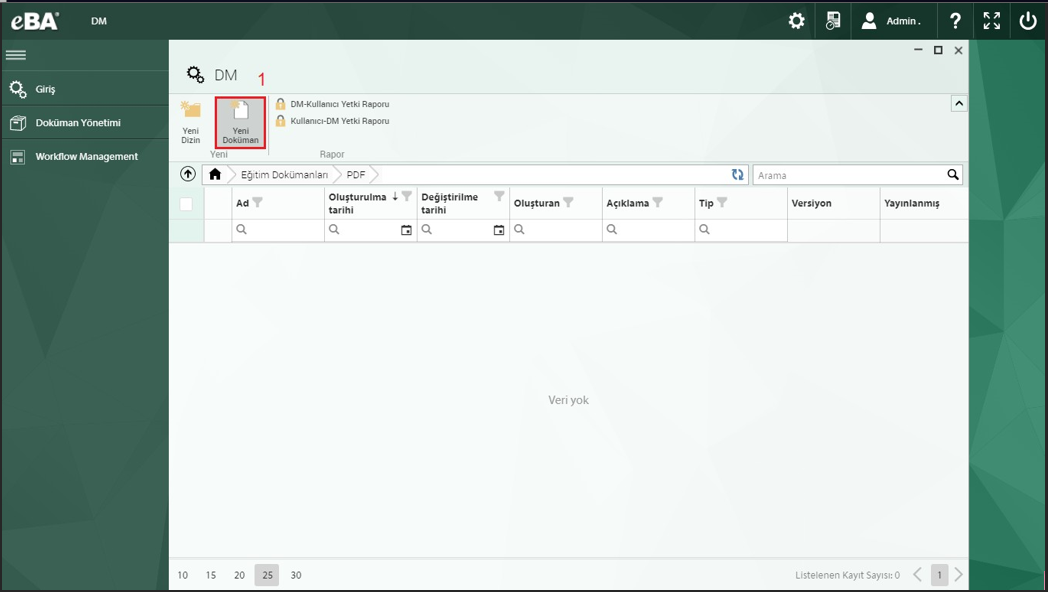
Many documents with pdf, xsl, docx, jpeg, png, tiff extensions can be added and viewed under the database or directory. To add a new document; In Figure 14, the New Document button is clicked.
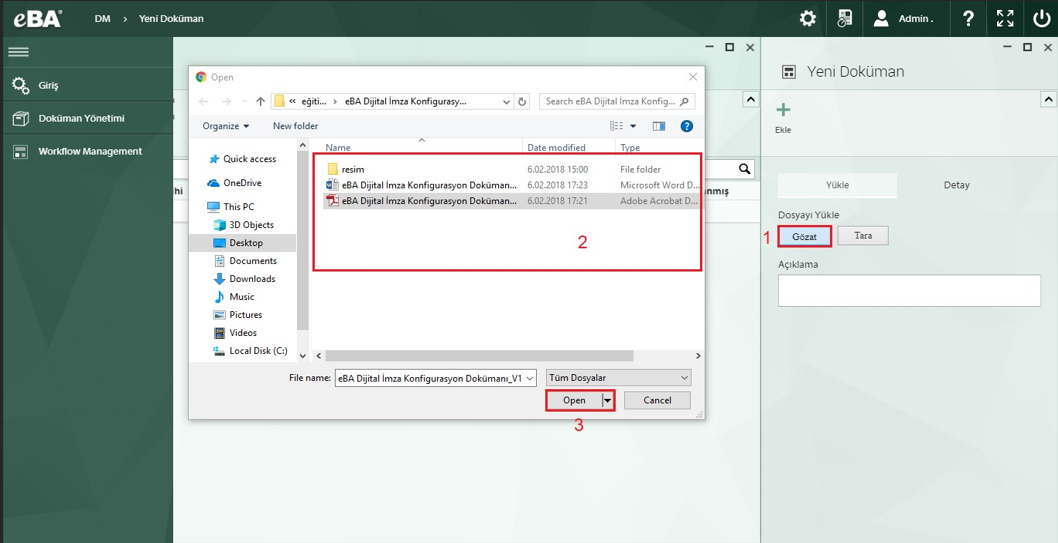
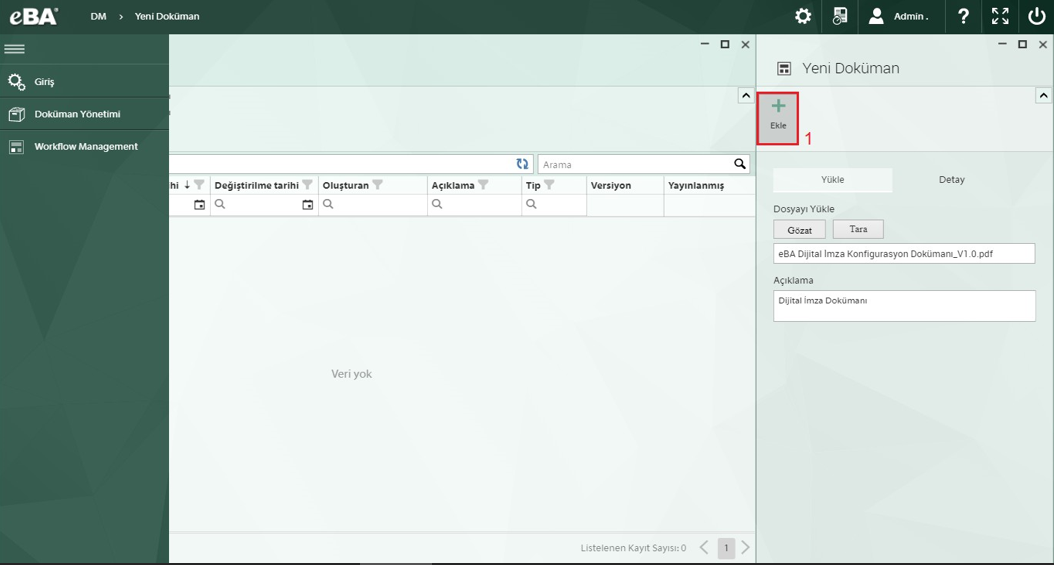
In the window that opens; In Figure 15, after clicking the Browse button, selecting the file to be added on the screen that comes up, then clicking the Add button in Figure 16.
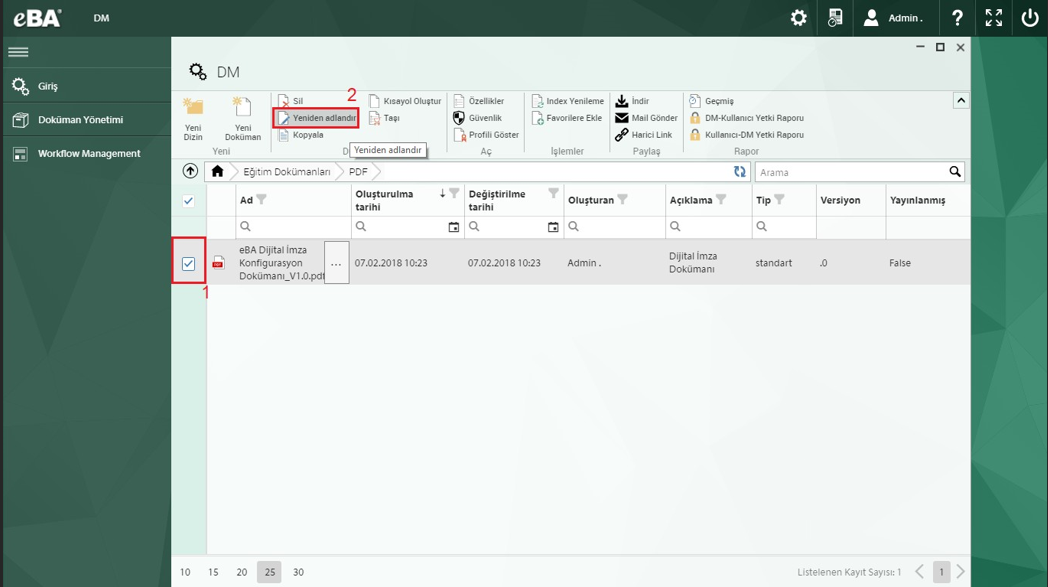
To change the inserted document name, in Figure 17, after selecting the relevant document, click the Rename button in field number 2.
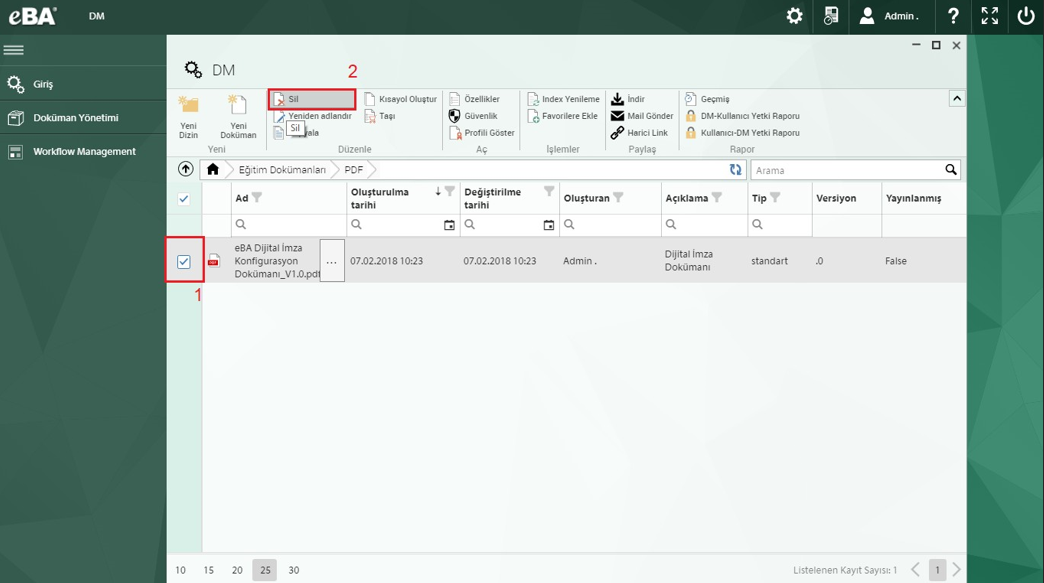
To delete the attached document, in Figure 18, after the corresponding document is selected, click Delete in field number 2 button is clicked.
To copy existing documents to another directory or library, click the Copy button in Figure 19 after selecting the relevant documents. In the window that opens, after selecting the directory to which the document will be copied, click the Select button.


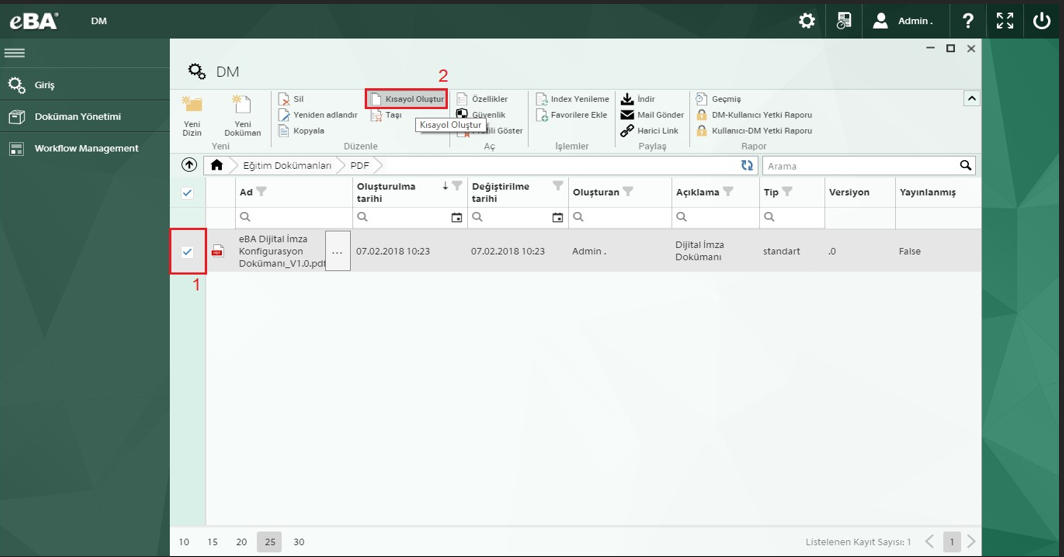
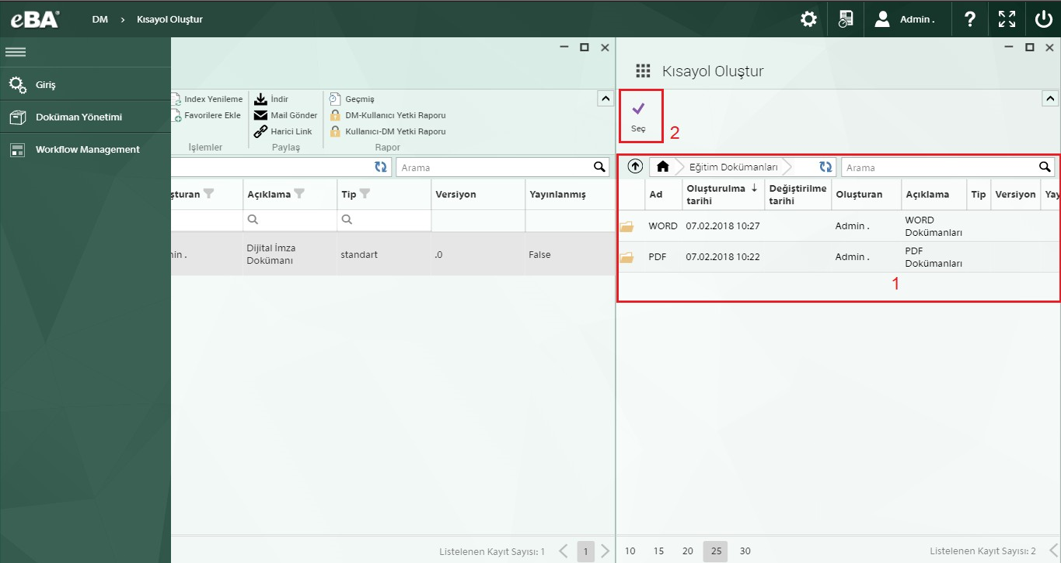
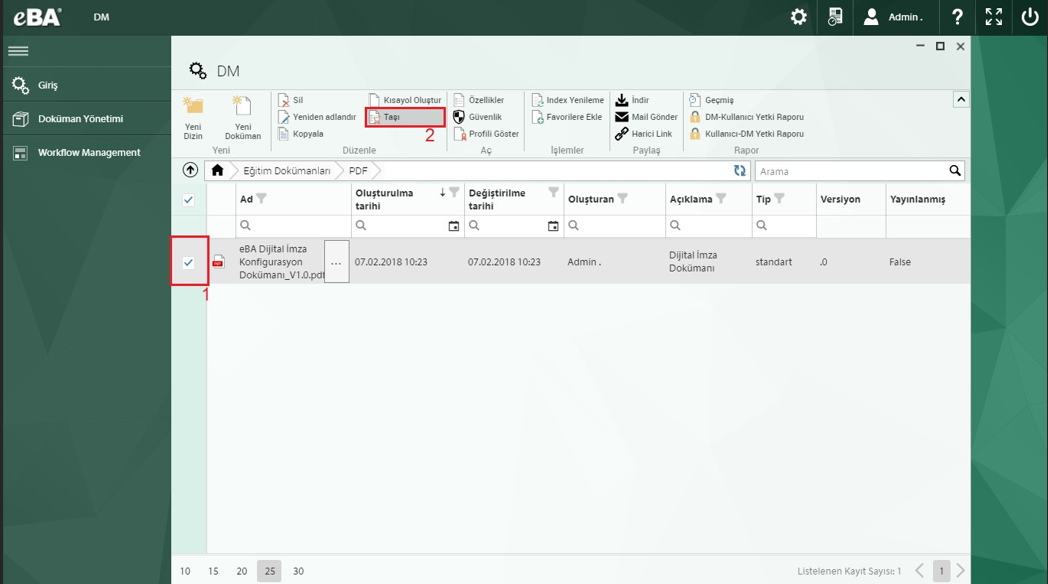
To create a shortcut of the document under another directory, after selecting the relevant documents, click the number 2 The Create Shortcut button in the field is clicked. In the window that opens, after selecting the directory, click the Select button.
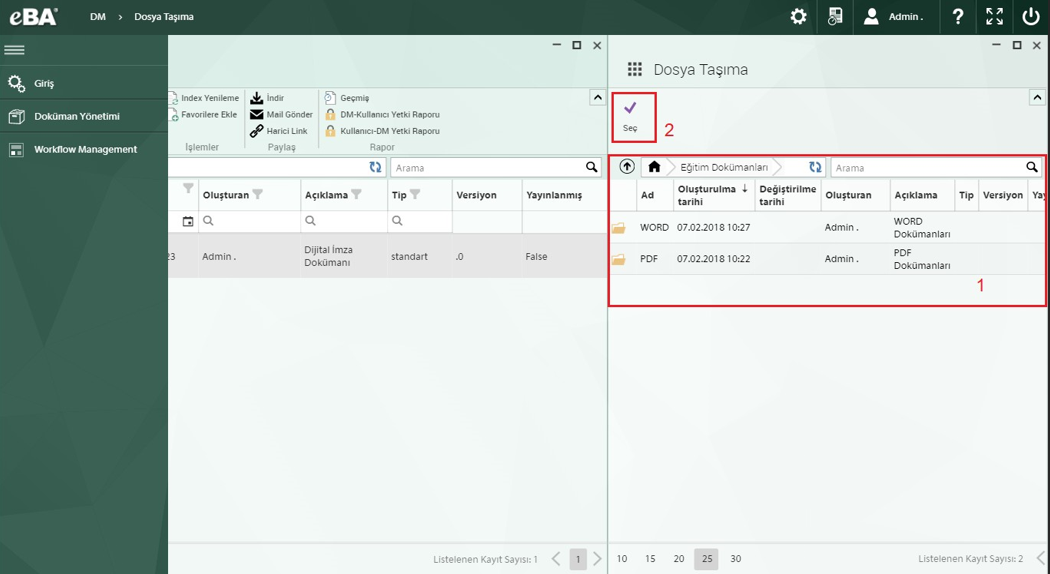
To move the document from one place to another, after selecting the relevant documents, click the Move button. In the window that opens, after selecting the directory, click the Select button.
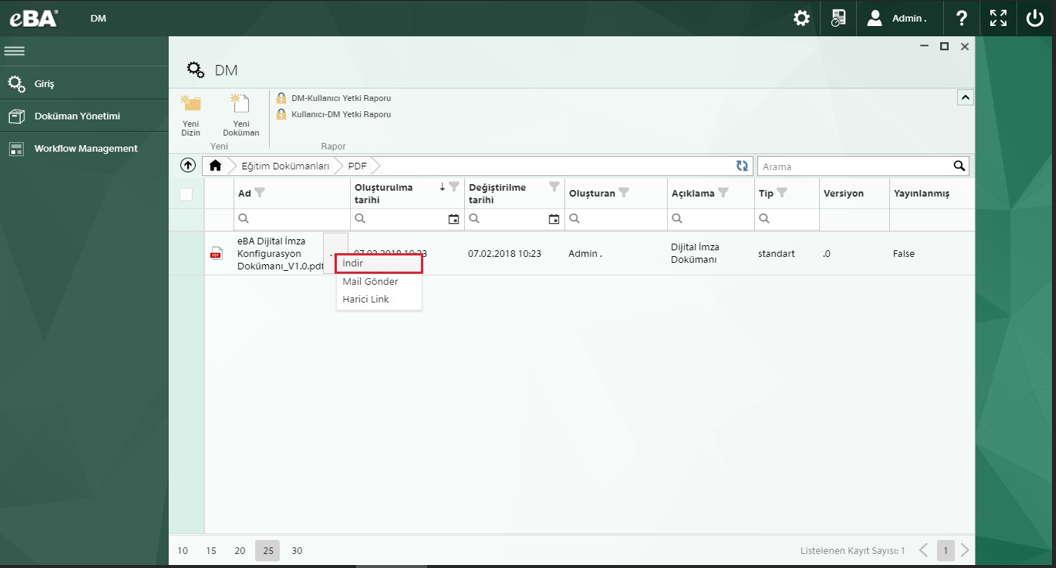
There are two different methods to download the document to computer;
In Figure 25, after selecting the relevant document, click the Download button,
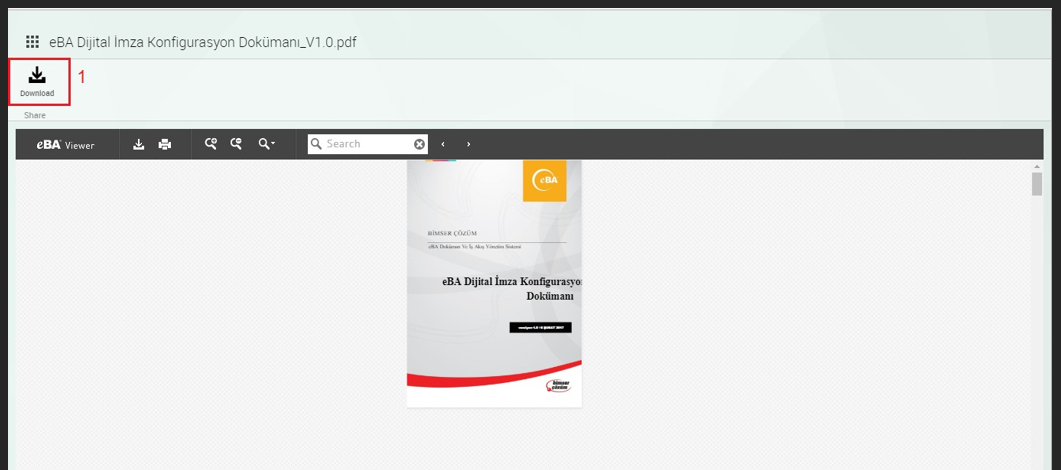
In Figure 26, by clicking Download in the window that opens by clicking on button number 1 next to the relevant document Downloaded.

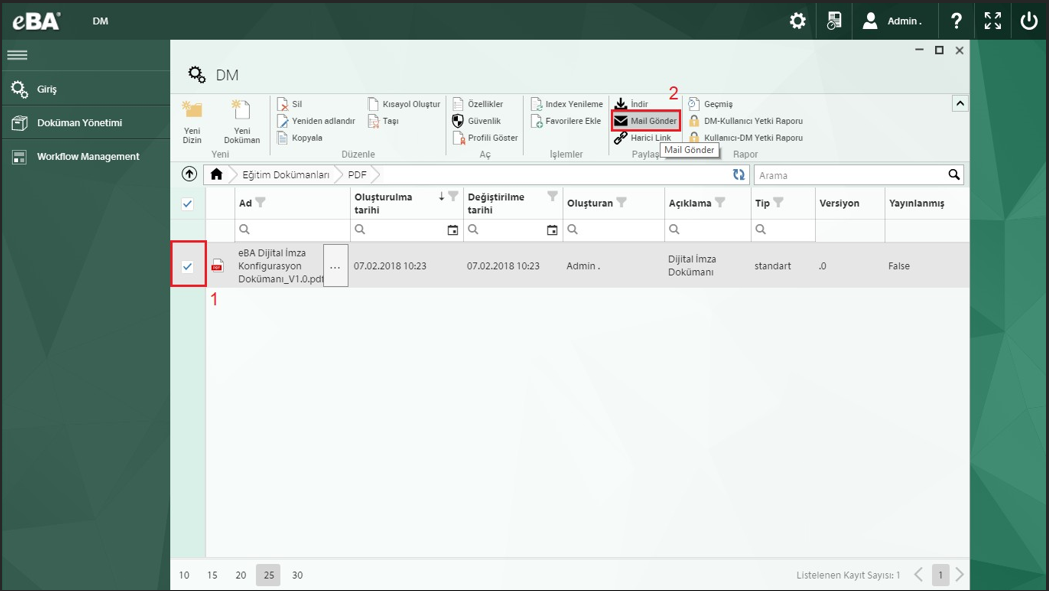
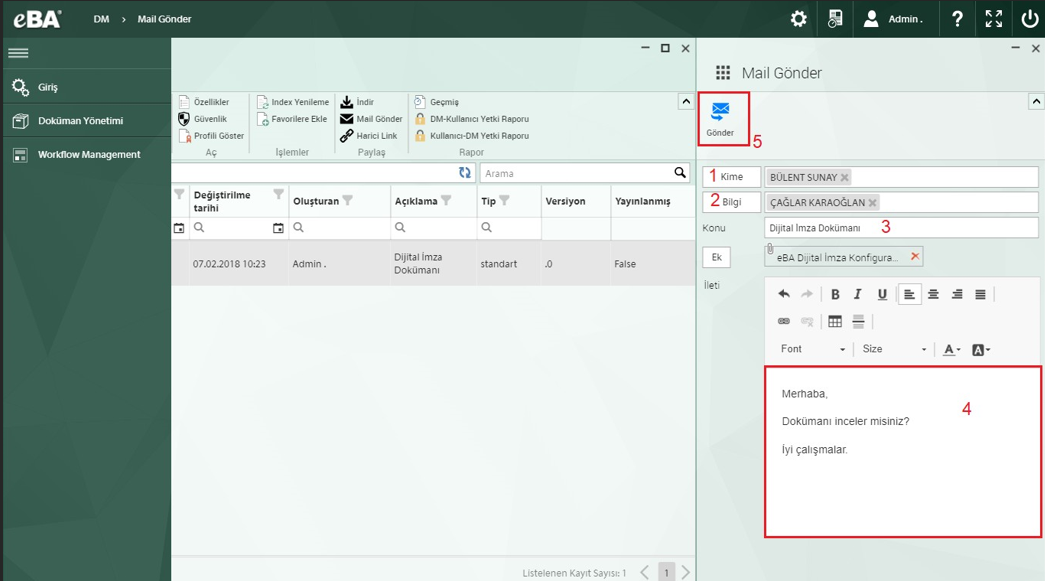
After selecting the relevant documents to send the document to eBA users by e-mail, click the Send Mail button in the field number 2 in Figure 27.
In Figure 28, the eBA users to whom the mail will be sent are selected with the button in field 1, and the eBA users to whom the mail will go as information are selected with the button in field 2. The subject of the e-mail in field number 3 and the content of the mail in field number 4 typed and then click Submit.
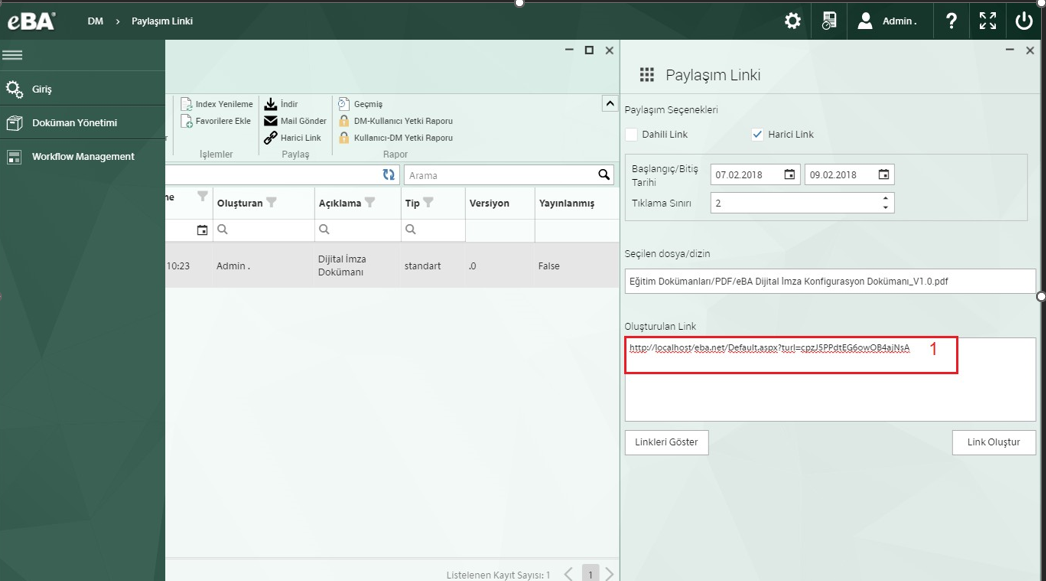
By creating a document link, people who are and are not eBA users can access the relevant document.

There are two different options in the sharing link window, External and Internal Link. Internal Link, eBA with its users; External Link creates a link to share documents about people who are not eBA users.
In Figure 30, the option in field 1 to create an internal link is checked. Click the Create Link button to create the document link. The relevant link is created in the Created Link field.


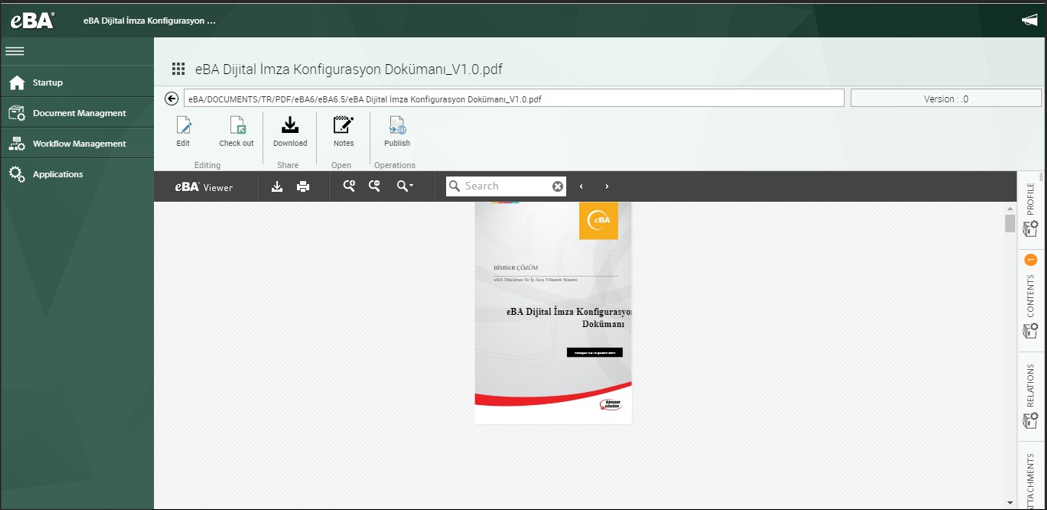
In Figure 31, when the link in field 1 is copied and opened in the browser, the document will open in Document Management as in Figure 32.
In Figure 33, the option in field 1 to create an external link is checked. In the field number 2, it is selected between which dates the link can be accessed. In the number 3 field, how many times the user has linked to the link the limit at which it can click is set. Click the Create Link button to create the document link. The relevant link is created in the Created Link field. In Figure 32, when the link in field 1 is copied and opened in the browser, the document will open as in Figure 35.
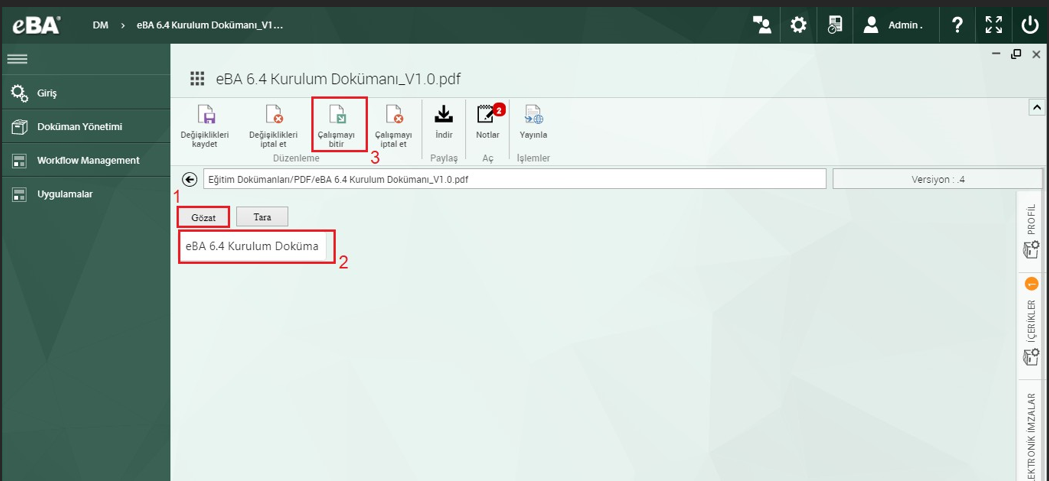
To version the document, after the relevant document is opened, in Figure 36, click the Start Working button is clicked. In Figure 37, after selecting the new version file of the document by clicking the Browse button, click Run The versioning is completed with the finish button. Note: The file name to be added must be the same as the name of the document to be added version. Otherwise your system warning will give.

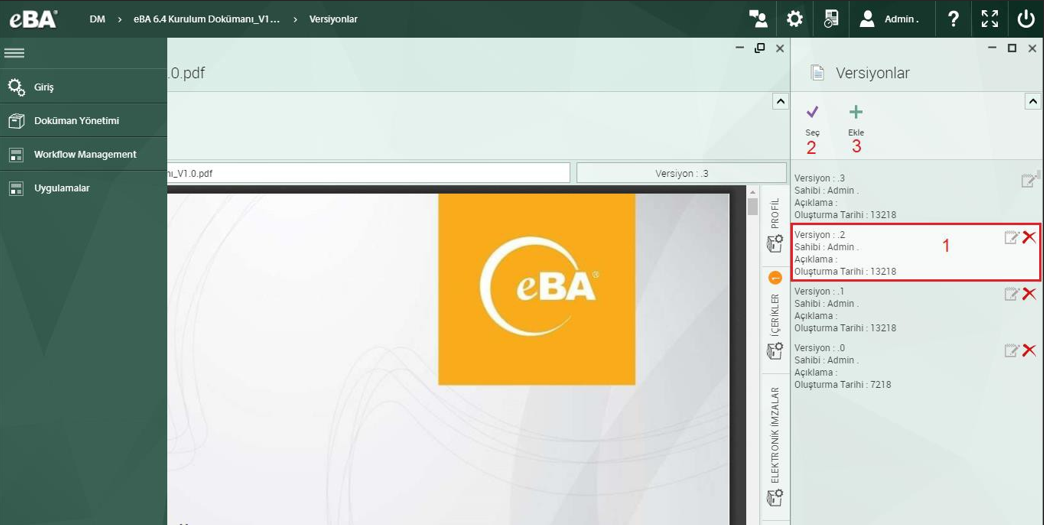
To view the versions of the document and select the version, click the Version button in Figure 38.
In the window that opens, the versions of the document are listed. After selecting the desired version to be displayed, click the Select button. To delete a version, click the Delete icon next to that version.
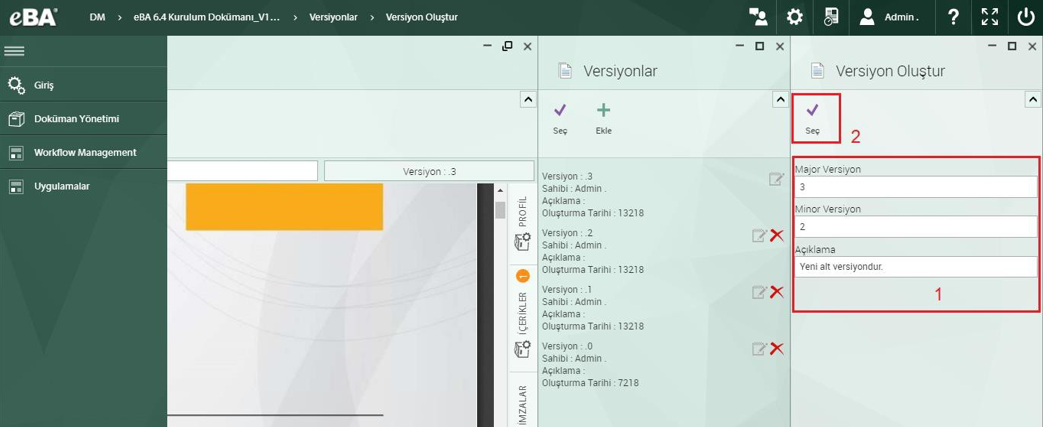
To add a major-minor version to an existing version, in Figure 39, click the Add button. In Figure 40, after filling in the fields in section 1 of the window that opens, click the Select button.
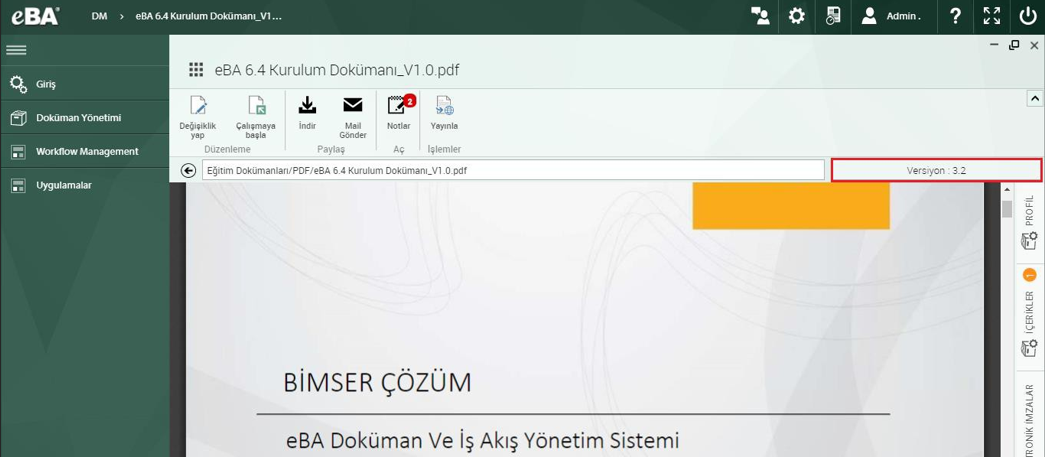
The version information of the selected document is written on the version button in Figure 41.
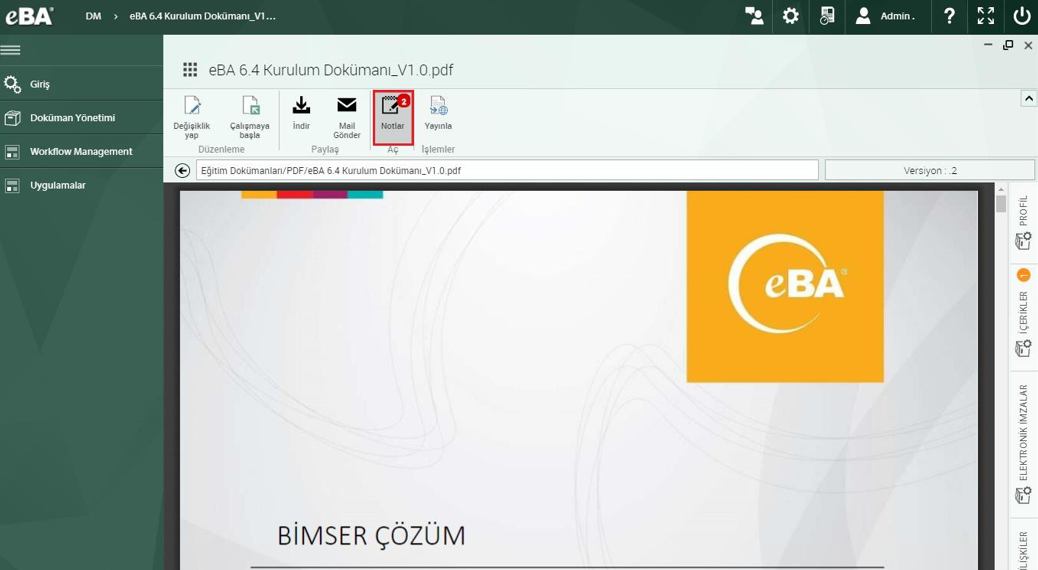
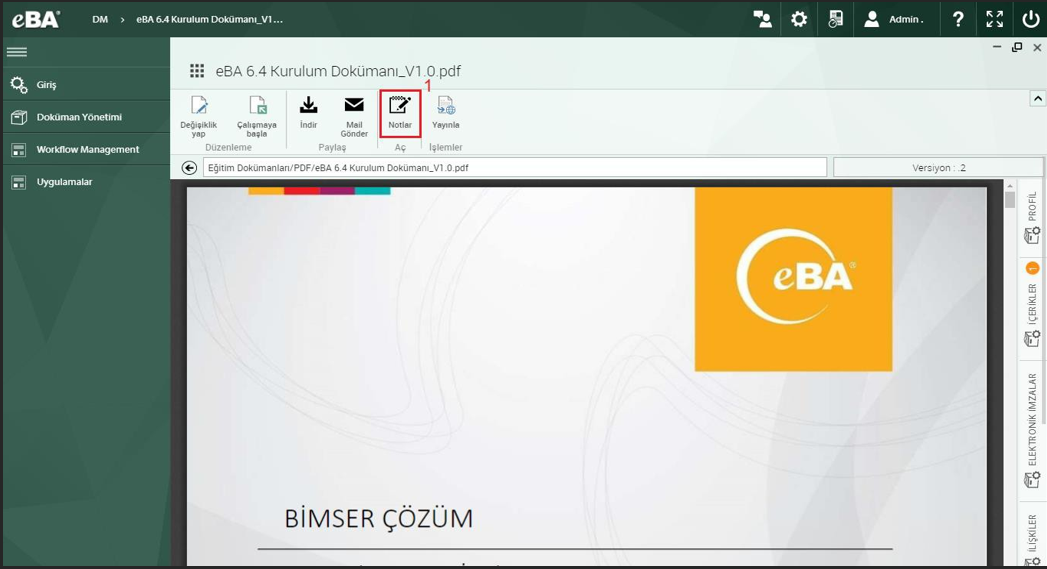
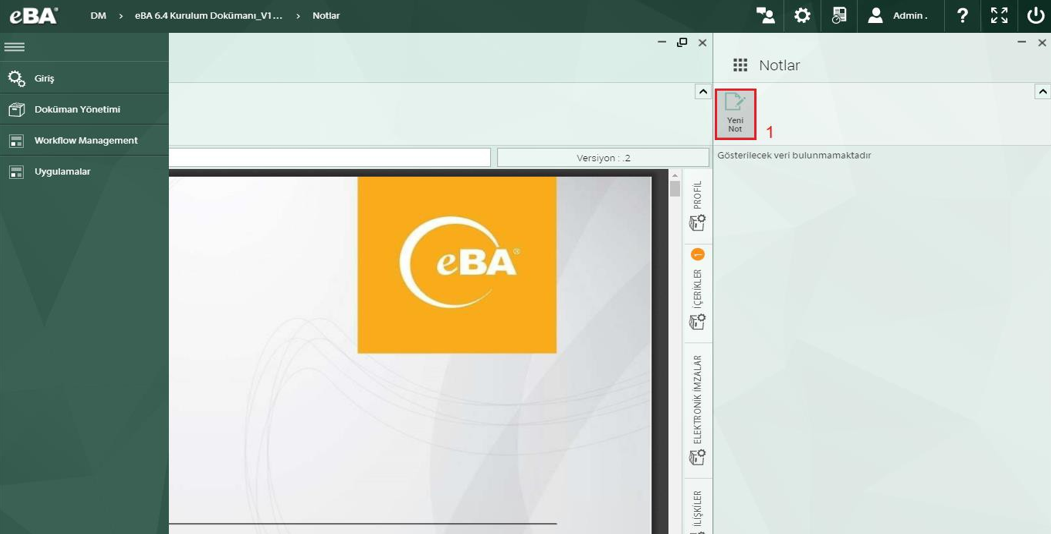
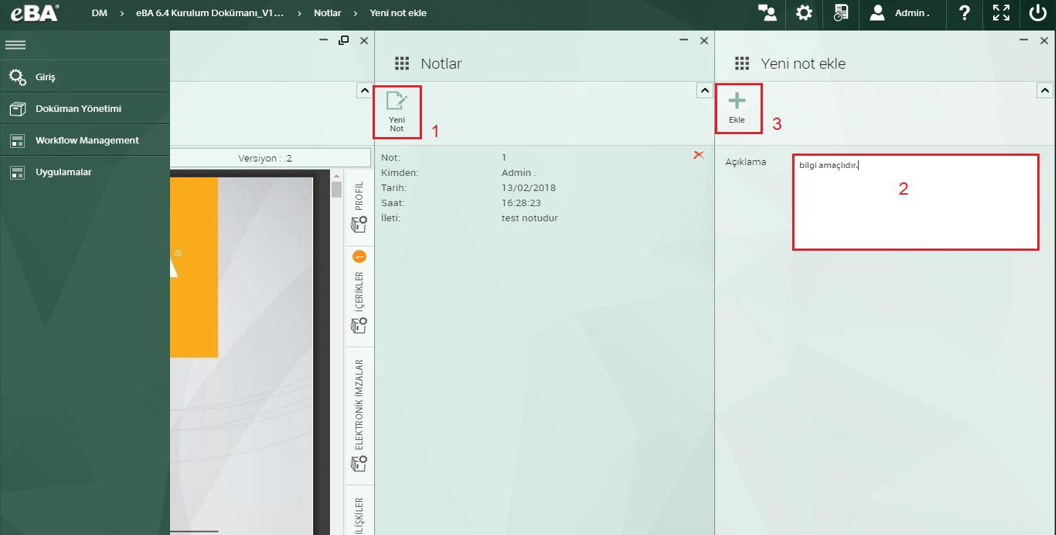
To add notes to a document and view the added notes, click Notes in Figure 42 after the relevant document is opened. To add a new note, click the New Note button in the window that opens.
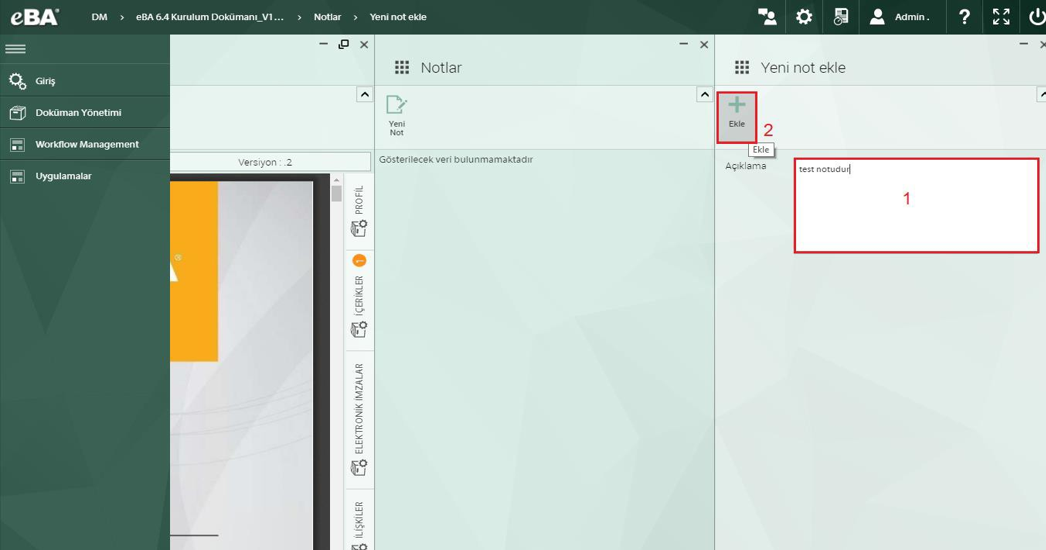
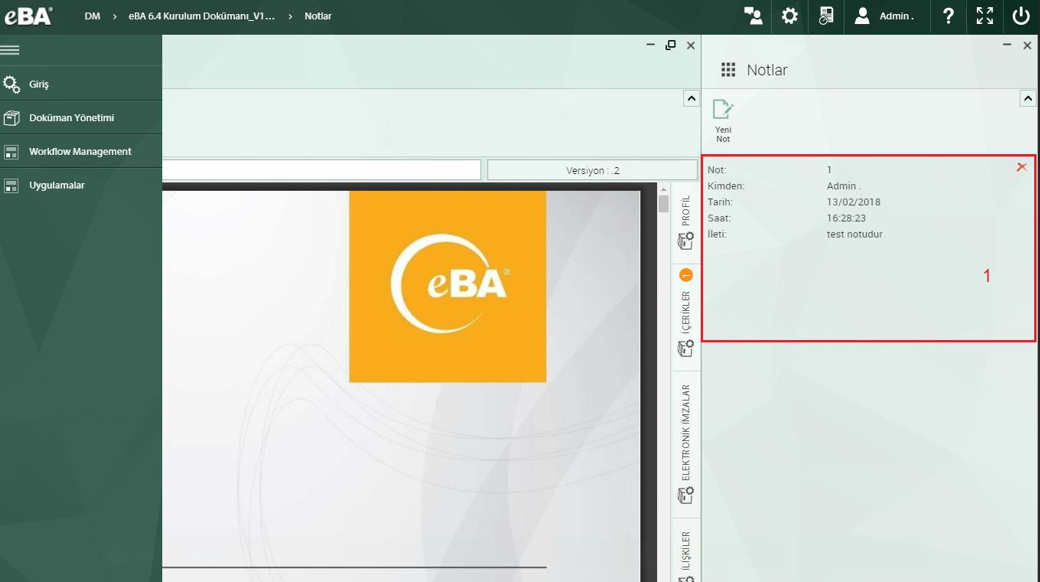
In Figure 44, after writing a note in the description field, the Add button is clicked. Added notes are listed in the Notes window.
To add a new note, in Figure 46, after clicking the New Note button, the annotation note is written in the window that opens and the Add button is clicked.
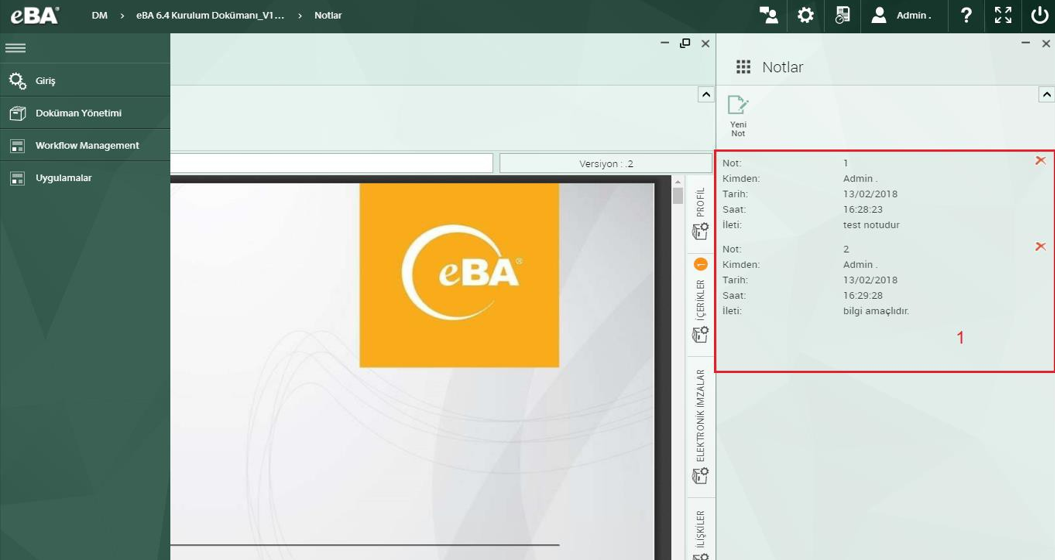
On the Notes button of the document, the added note number is written.