Login with Okta
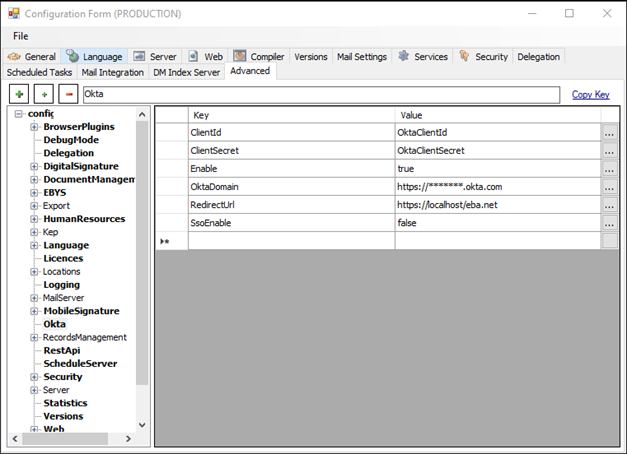 First, Okta information must be defined and entered in the configuration section.
ClientId : The ClientId information generated when the Okta project was created.
ClientSecret : ClientSecret information generated when the Okta project was created.
Enable : The active-passive status of the button for login with Okta.
Okta Domain : Okta domain information of the customer.
Redirect Url : https://localhost/eba.net
SsoEnable : The active-passive state of Sso.
First, Okta information must be defined and entered in the configuration section.
ClientId : The ClientId information generated when the Okta project was created.
ClientSecret : ClientSecret information generated when the Okta project was created.
Enable : The active-passive status of the button for login with Okta.
Okta Domain : Okta domain information of the customer.
Redirect Url : https://localhost/eba.net
SsoEnable : The active-passive state of Sso.
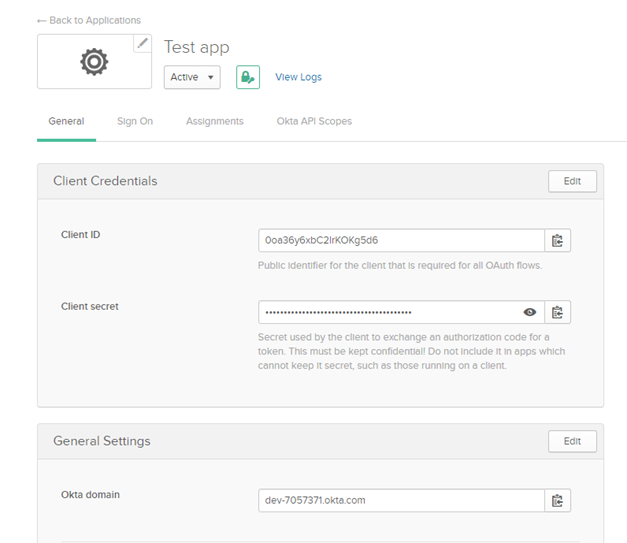
- ClientId – Client Secret – Domain information in the application created by the customer in the okta account must be obtained from this page. This information may be requested from the customer.
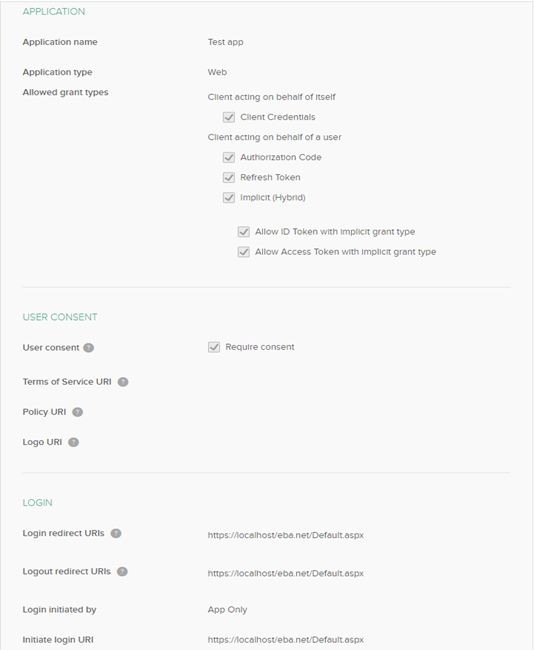
- Again, in the created application settings, IdToken and AccessToken permissions should be given by selecting Implict (Hybrid).
- In the login processes at the bottom, https://localhost/eba.net/Default.aspx information should be passed to the redirect url information.
- These transactions can be forwarded to the customer and information can be added.
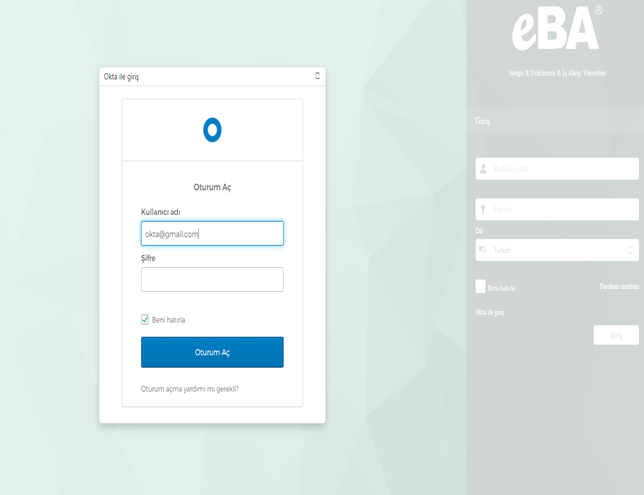
- After all the settings are made, the login button with Okta is active during the login phase.
- The login window opens with Okta and the user can log in by entering the okta information.
- In order for the user to log in with the okta e-mail information, the Okta e-mail address must be defined as ExternalUsername in the eBA user.
