2. External Writing
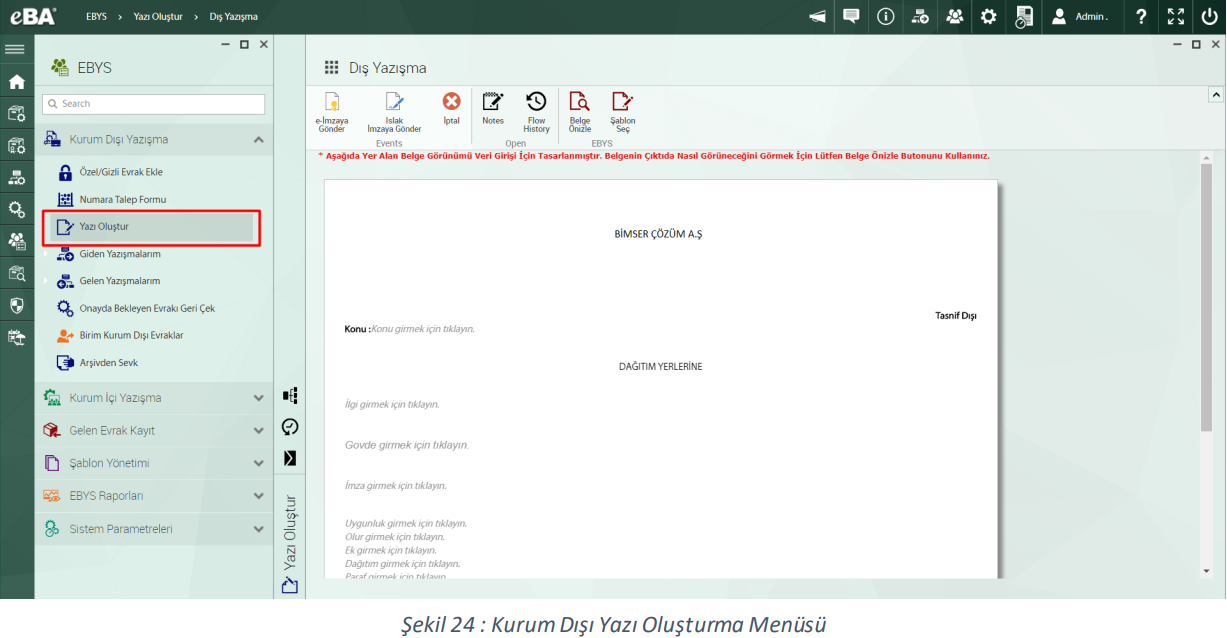
To enable users to create an External Correspondence, in the EBYSmenu, select the External Correspondence ''>'''
He needs to click on the Create Text menu. To enter data into the form shown on the screen, Subject,
Clicking on a field such as Distribution, Security, etc. opens the data entry panel.

In the window that opens, under the Subject tab, select the Subject and Standard File Plan of the document to be created information.
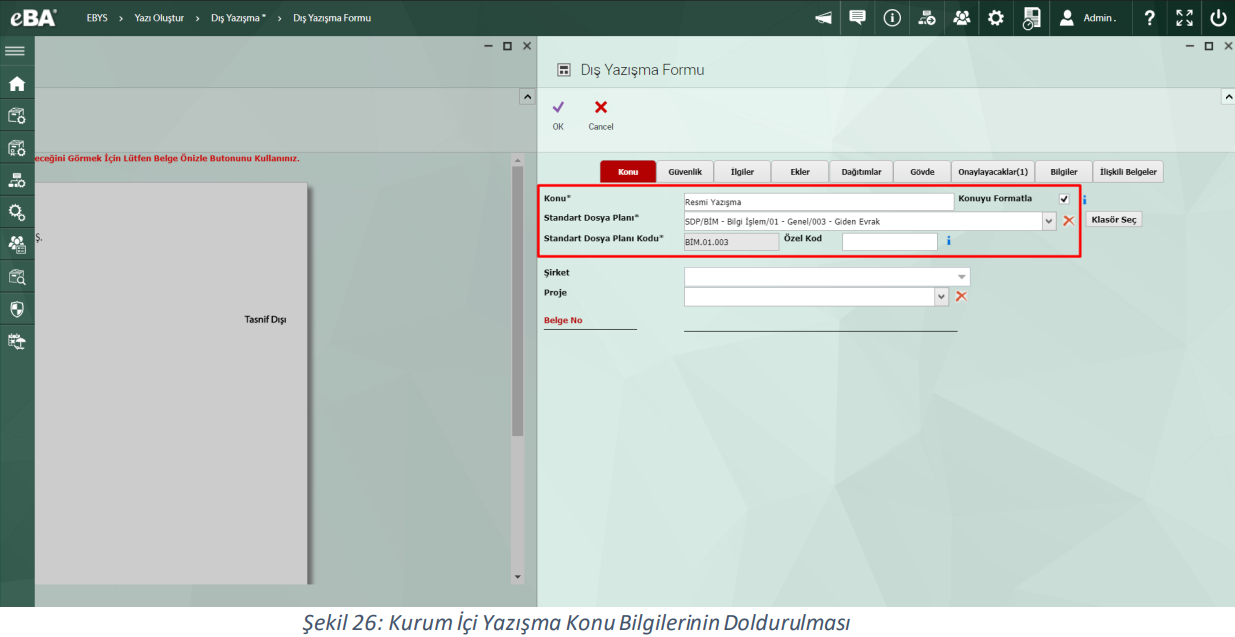
The subject information requested to be written to the document and the Standard File Plan (SDP) to be hosted, Subject tab, which is written through the filling in the information in the region marked.
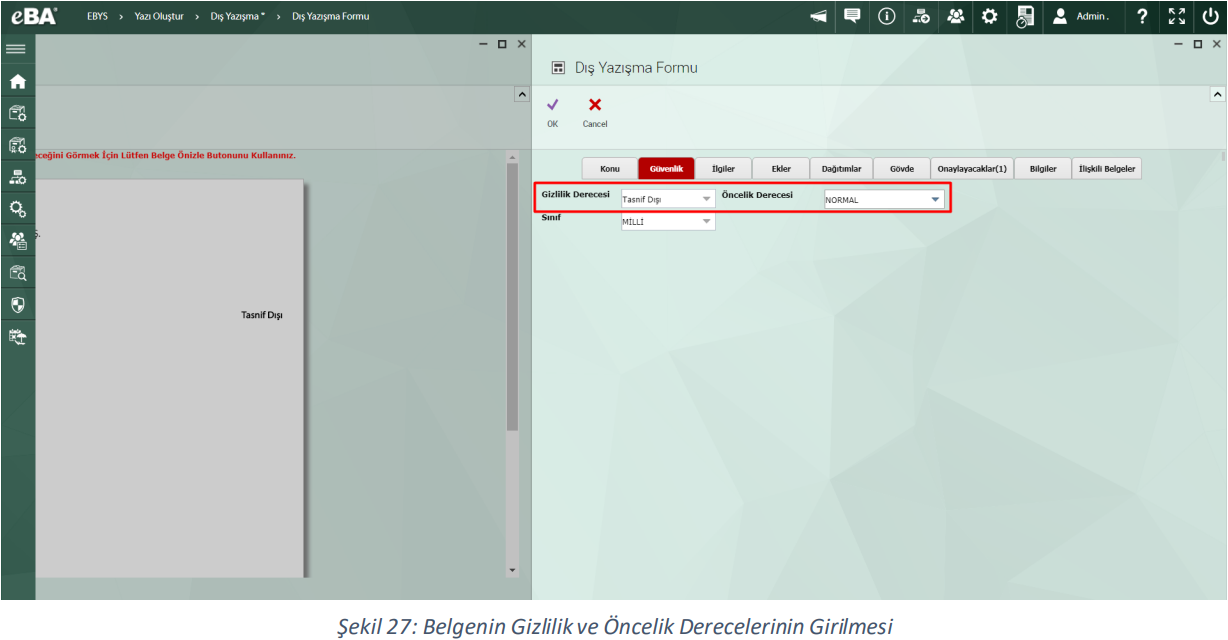
On the Security tab, the confidentiality and priority of the document are determined.
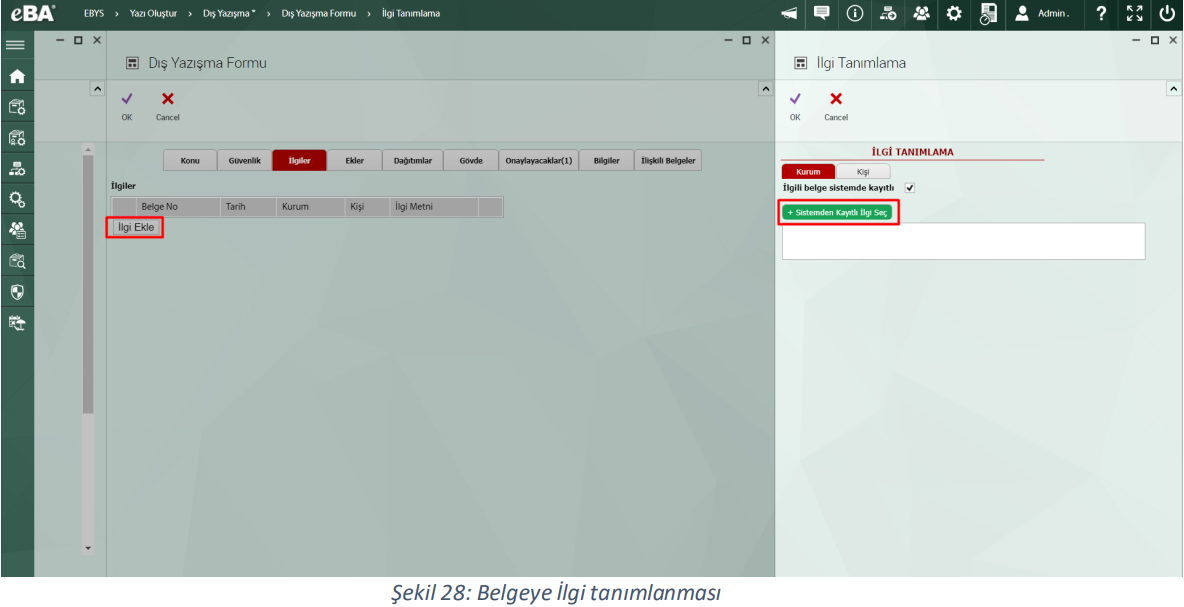
To add Relevance to the document, click the Add Relevance (field 1) button under the Interests heading. In the window that opens, by pressing the Select Interest button registered in the system to select the interest registered in the system The documents will be displayed in a new window on the right.
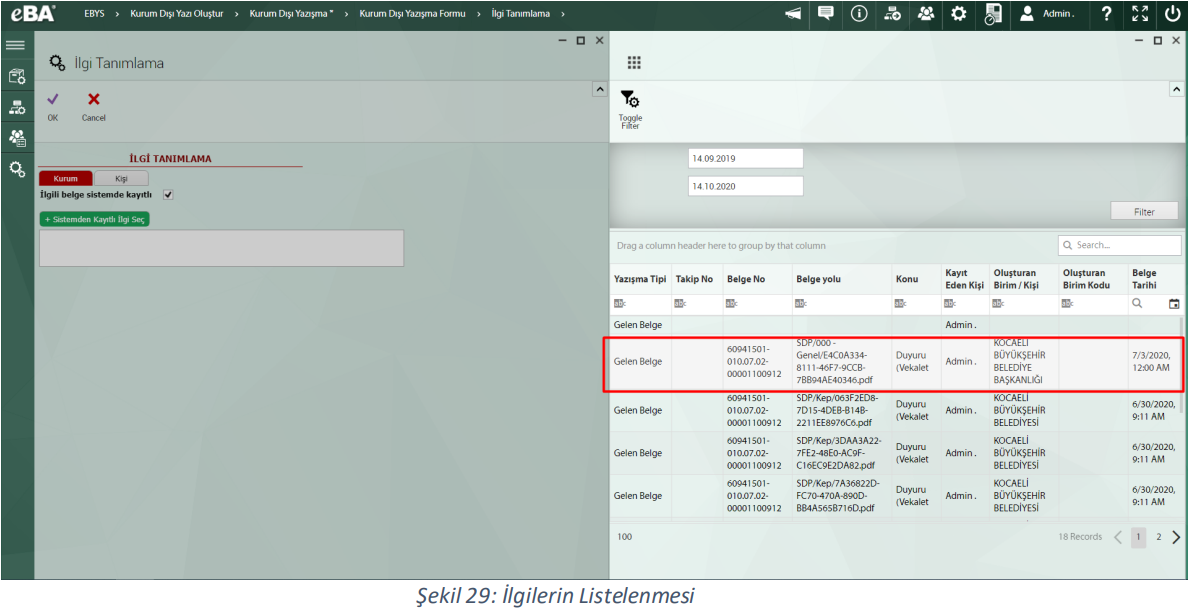
Documents that can be selected as Interest according to the selected date range are listed on the grid. Filtering by searching within documents in the Search zone can be realized. Selection by clicking on the article to be added from the listed articles Made.
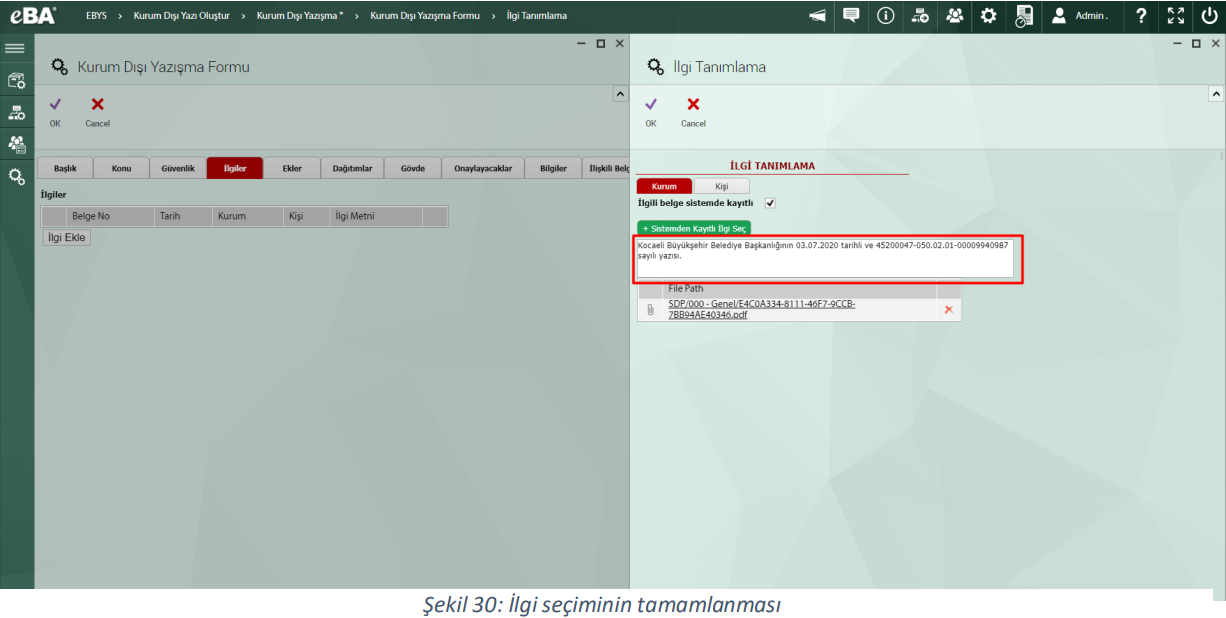
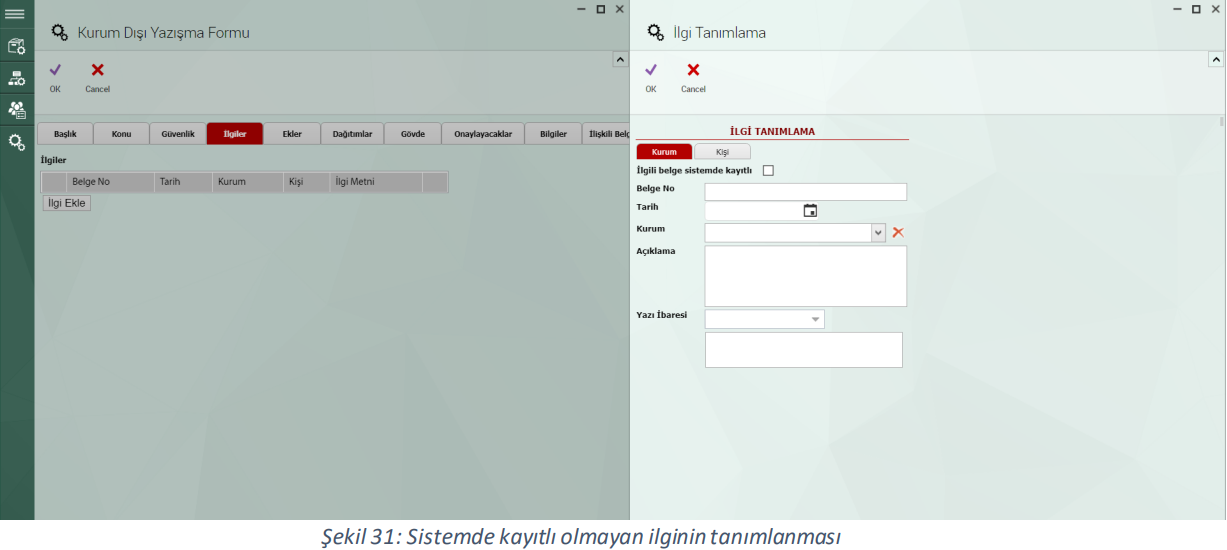
After selecting the document, the text on the document to be shown of interest in the Relevance Identification panel is being created. By clicking the OK button in the panel, the interest is added to the article. To be indicated as interest If the text is not defined in the system, manually remove the document information by unticking the option "Related document is registered in the system" entry can also be provided.
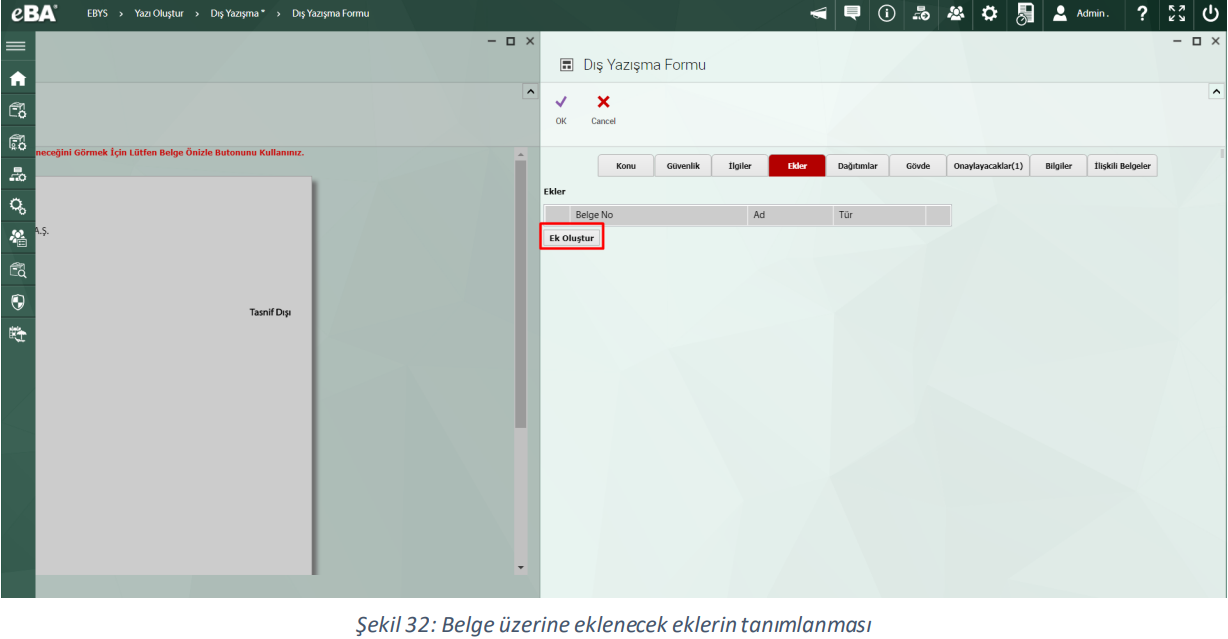
To add an attachment on the document, click the "Create Attachment" button on the Attachments tab.
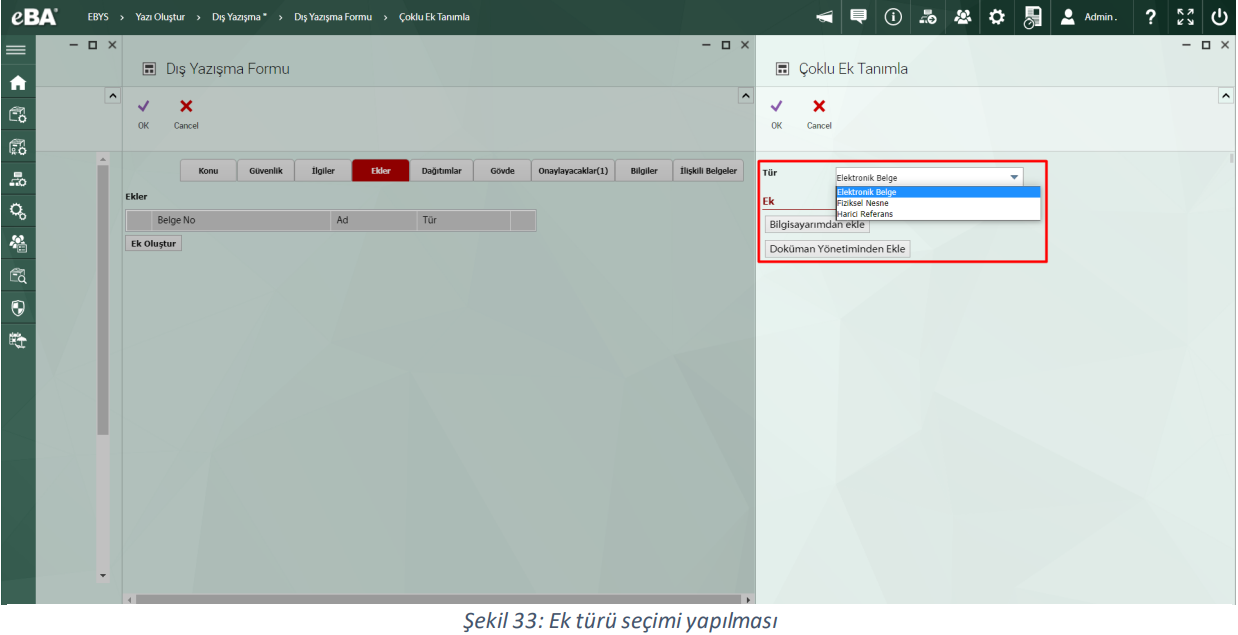
The Type field selects the type of document to insert. The options to be listed in the field are "Electronic Document", They are "Physical Object" and "External Reference". When the type Electronic Document is selected, the file to be attached If it will be selected from the computer, it will be added to the "Add from My Computer" button, and if it will be added from Document Management, The "Add from Document Management" button is clicked. To complete the adding process, click It is necessary to press the OK button.
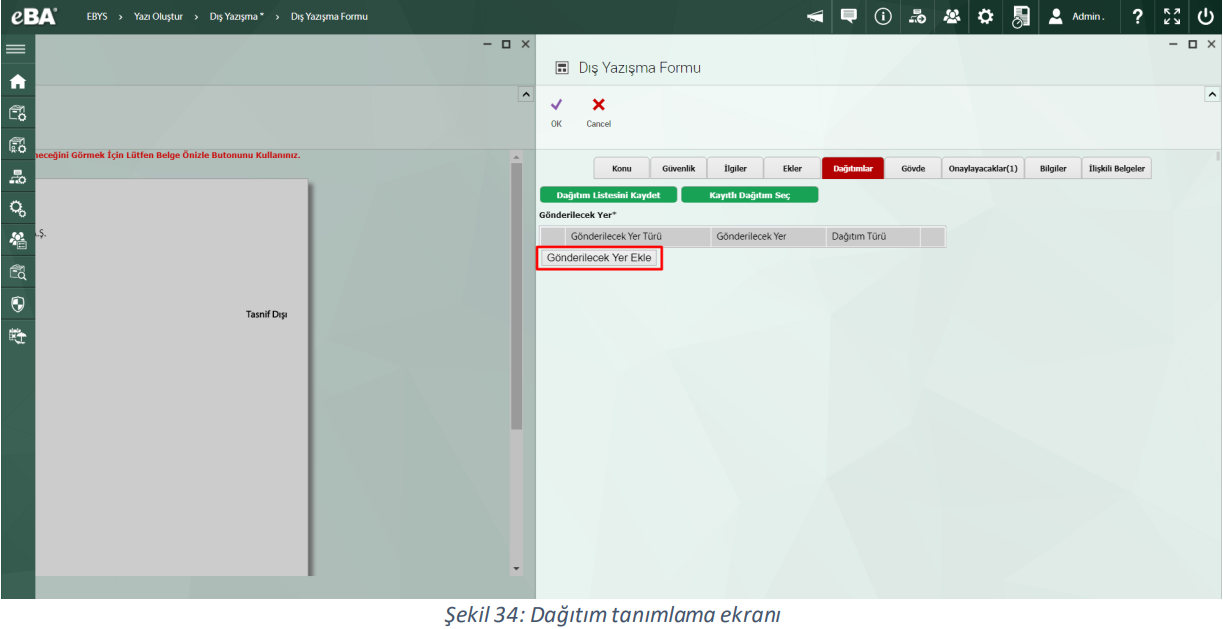
To add a deployment, click the Add Send To button on the Deployments tab.
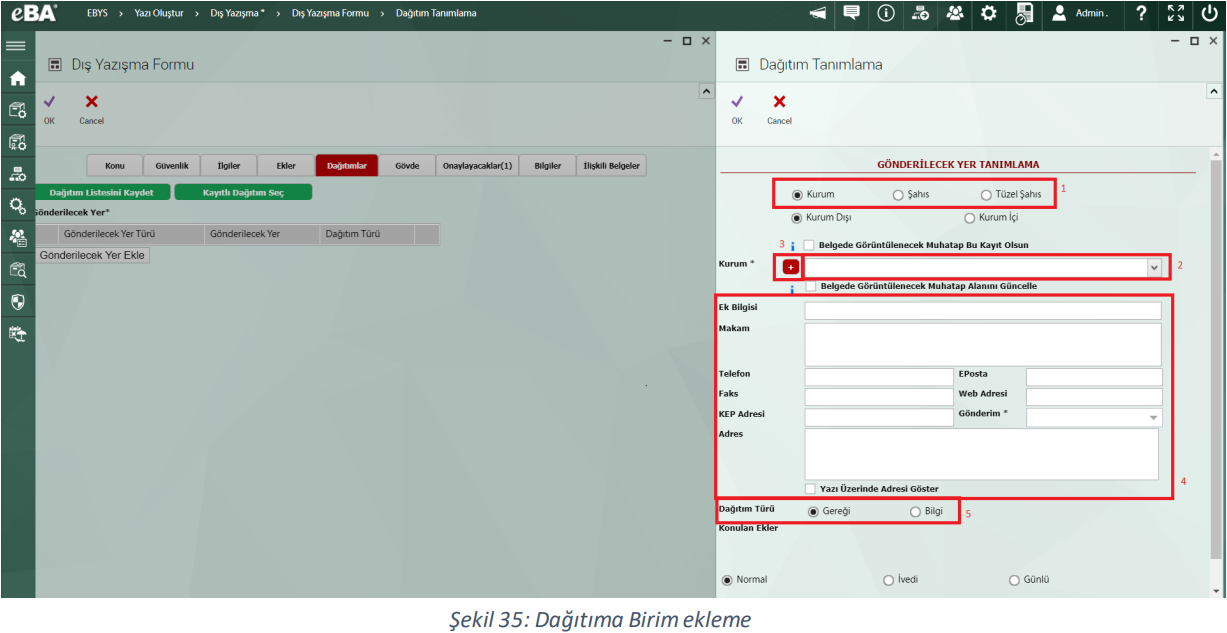
If you want to add a distribution in the form of Institution in the window that opens, the Institution option in the field number 1 Marked. The place to be distributed is selected from the Institution field (field number 2), the addressee unit of the selected unit If it is desired to be , the option "Let This Record Be the Business Partner to be Displayed in the Document" should be checked. Deployment If the institution to be performed is not registered in the system, the red plus sign next to the institution field (number 3) field) can be added from the panel to be opened by pressing with the fara pointer. Writing the institution information in field 4 Then, the type of submission to this institution should be selected from the "Shipping*" field (field number 4). Requirement or Informational is selected from the "Deployment Type" field (field number 5).

If you want to add a deployment in the form of Person in the Deployment Definition window, in the marked field Person option is checked. Once the details of the person to be distributed have been filled in on the form, Submission* field must also select the Submission type. If the person is asked to be the addressee, click "To be Displayed in the Document" Let This Record Be the Addressee" option must be checked. Distribution to the selected person, Requirement or Information is selected from the "Deployment Type" field.
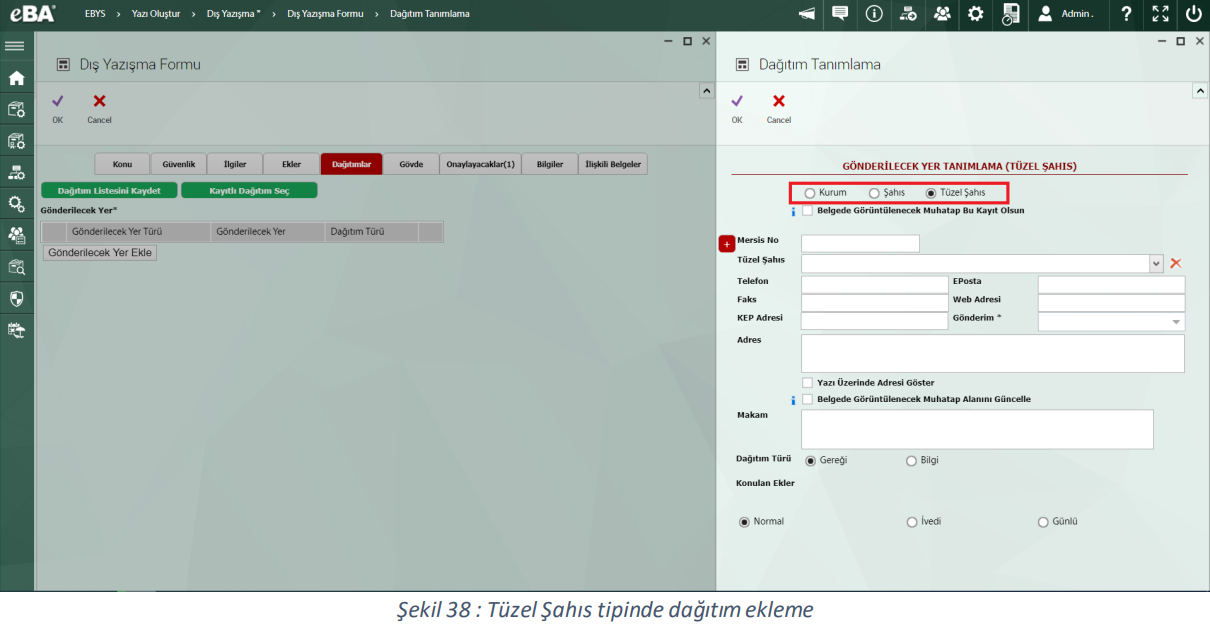
In the Deployment definition window, if you want to add a deployment as Legal Entity, in the marked field The option for Legal Entity is checked. The information of the legal entity to be distributed, after being filled in on the form then the Submission type must also be selected in the Submission*field.
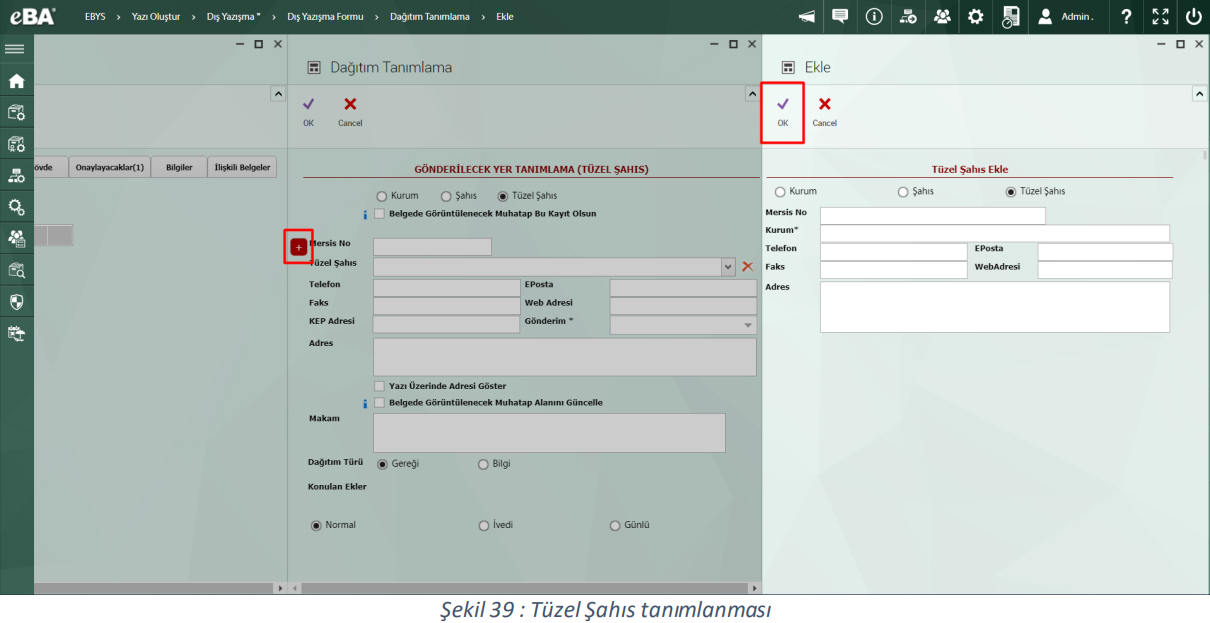
If the legal entity to be selected is not listed, click on the Red plus sign on the form to select New A record can be added. In the window that opens, after entering the information of the legal entity to be added, click OK By pressing the (OK) button, the new record is added.
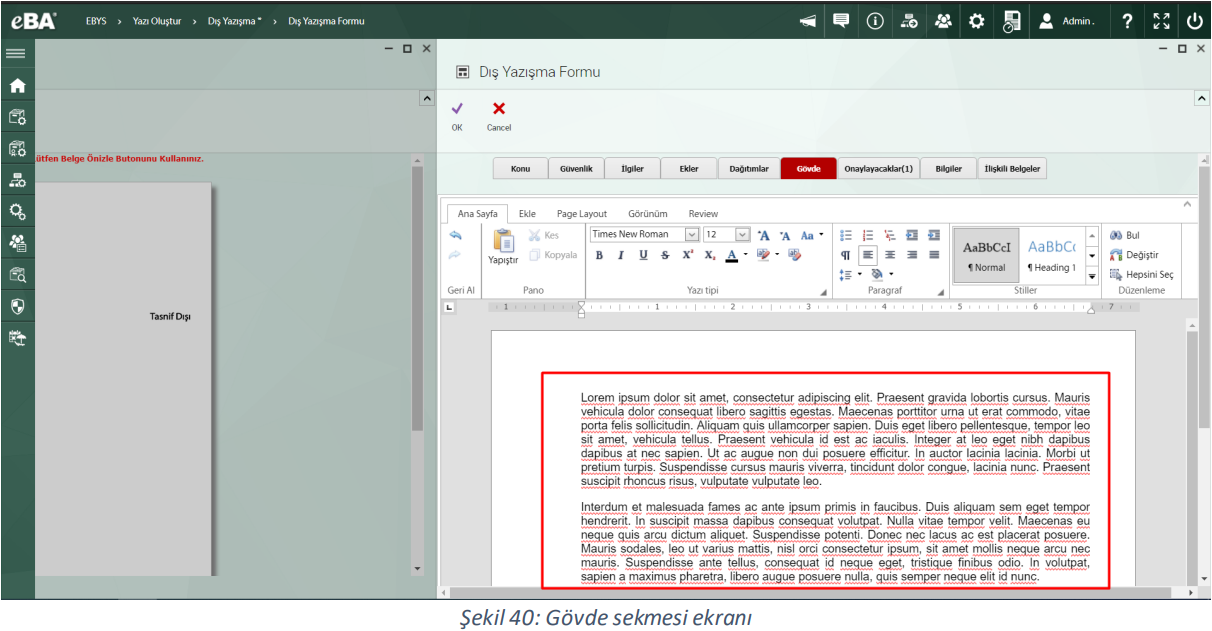
To add the body of the article; On the Body tab, the text is written by clicking on the marked area.
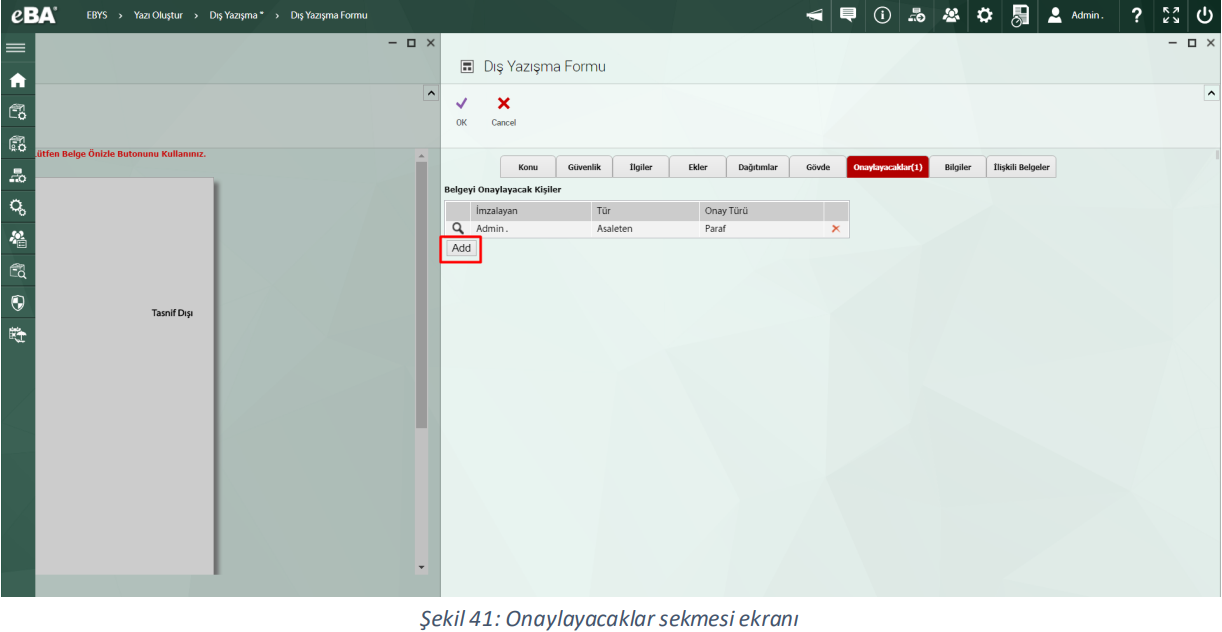
To add people to approve; Under the Approvers tab, click Approvers of the Document Click the Add button in the table.
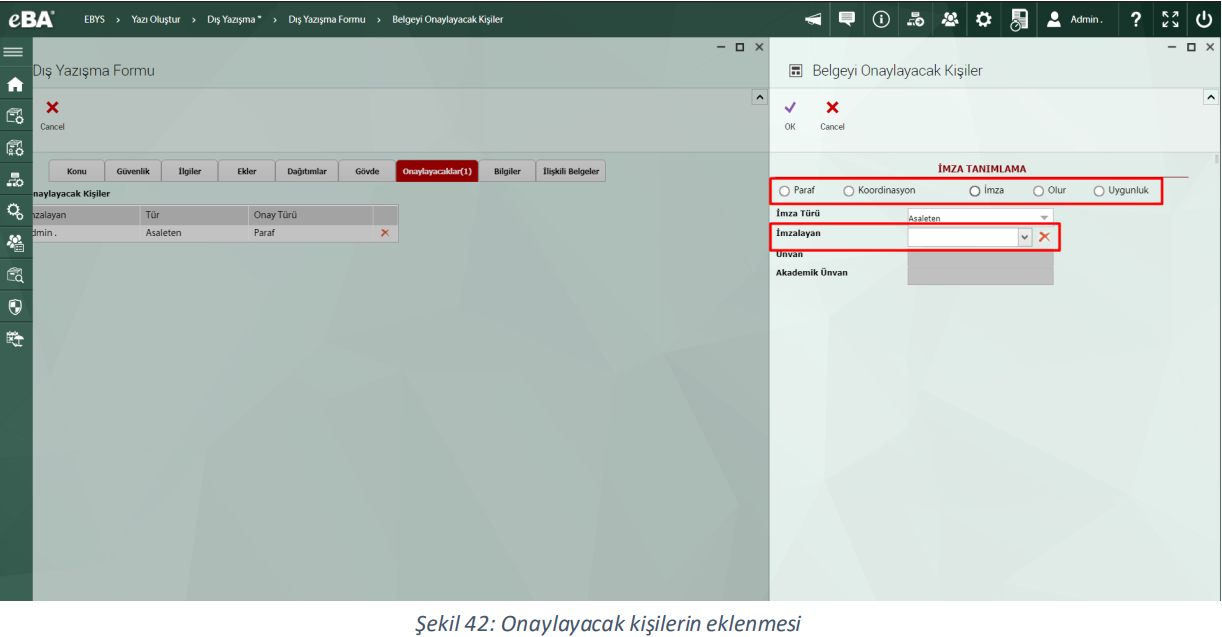
In the window that opens; The signature type must be selected in the field marked with the number 1. Number 2 After selecting the signer from the field, click the OK button in the window
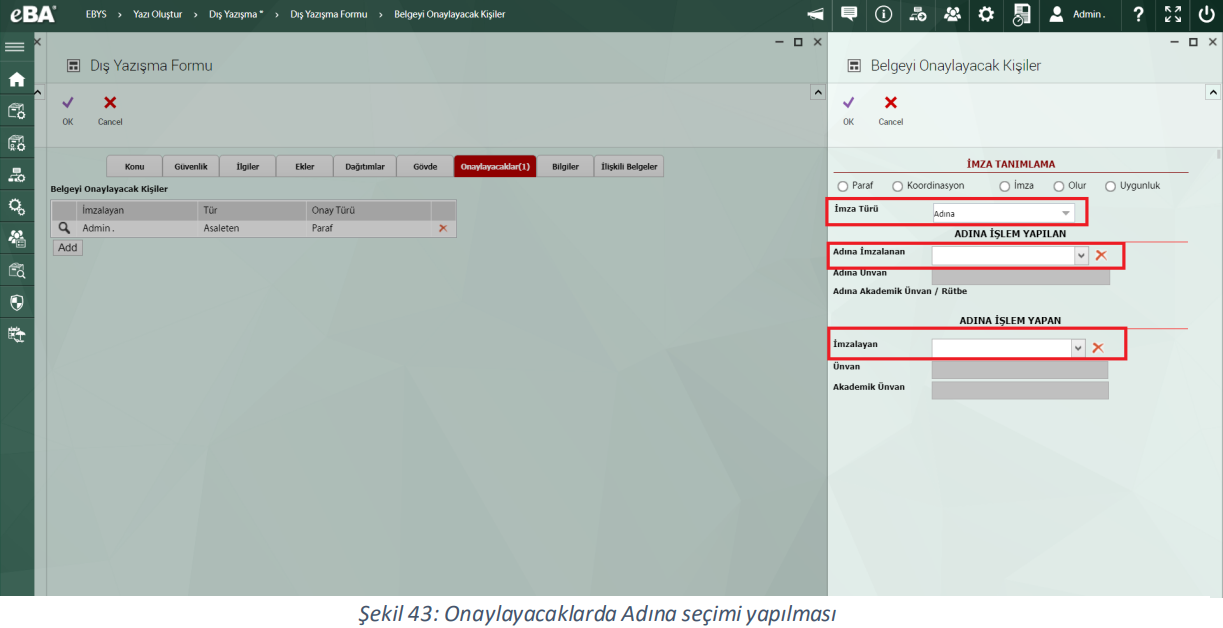
If the "On Behalf of" option is selected in the Signature Type field, the window will open "Processed on Behalf of" and "Act on Behalf of By" information is required.
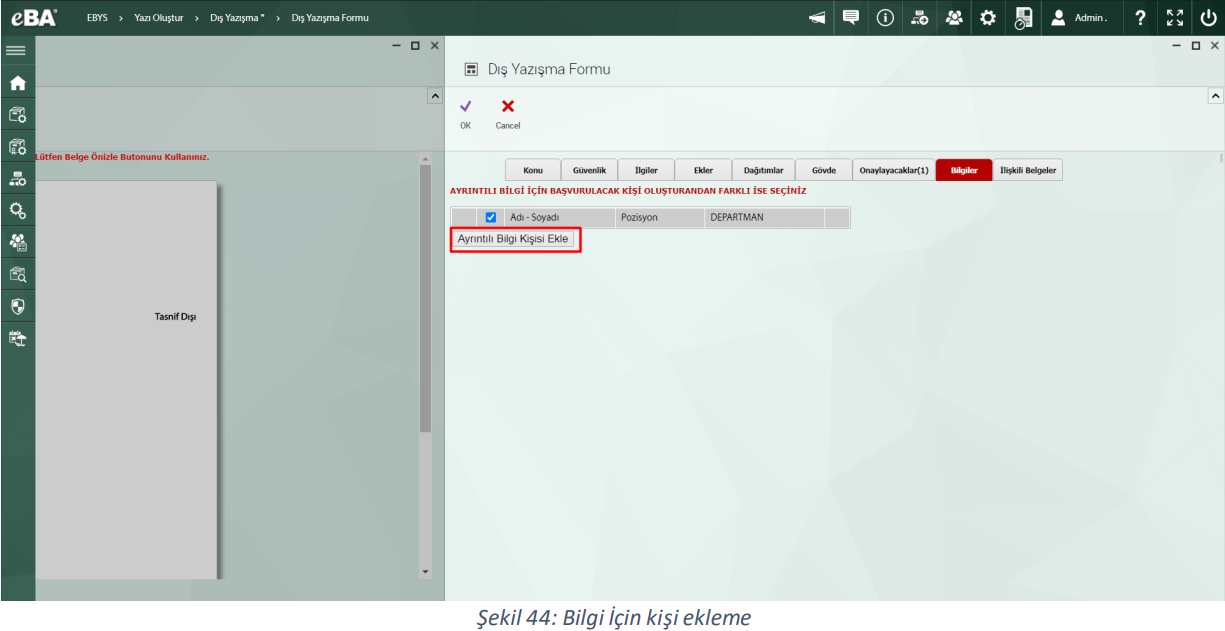
If the person to contact for detailed information about the document is different from the person who created the document, click Detailed Information The person can be selected by clicking the Add Person button and selecting the person in the window that opens.
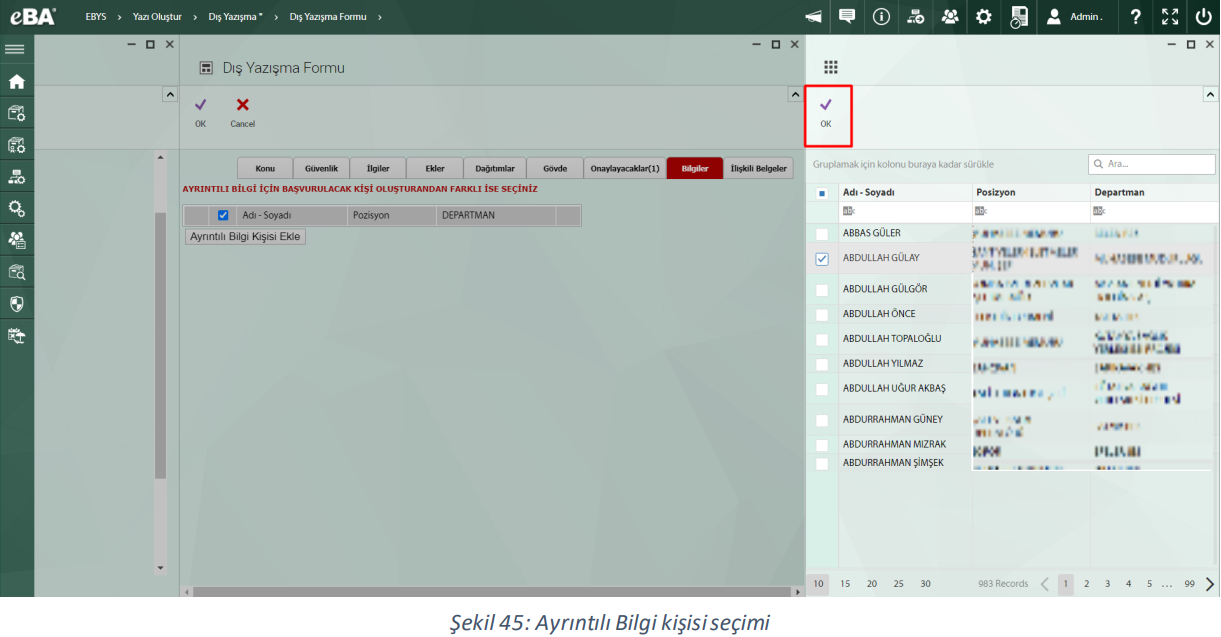
After making the selection, click the OK button in the window.
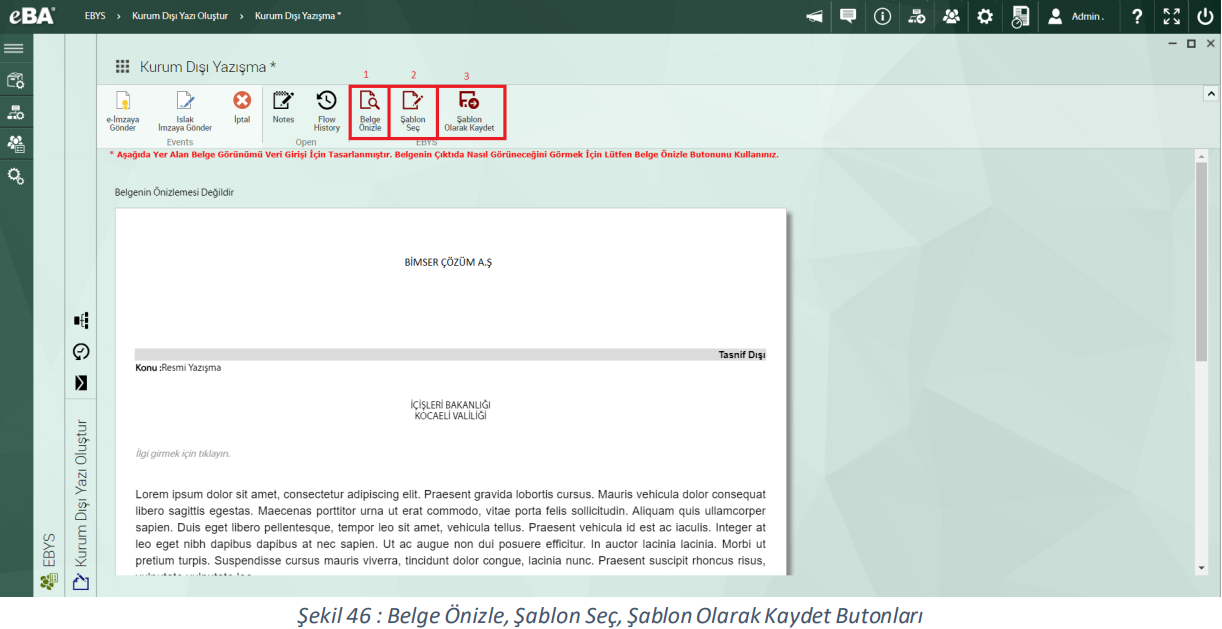
To preview the created text, tap the Preview Document (field number 1) button, previously To prepare the document by selecting and modifying a saved template, click Select Template (2 numbered field) button. If the prepared document is to be saved as a template, the Template Registration is performed by clicking the Save as (field number 3) button.
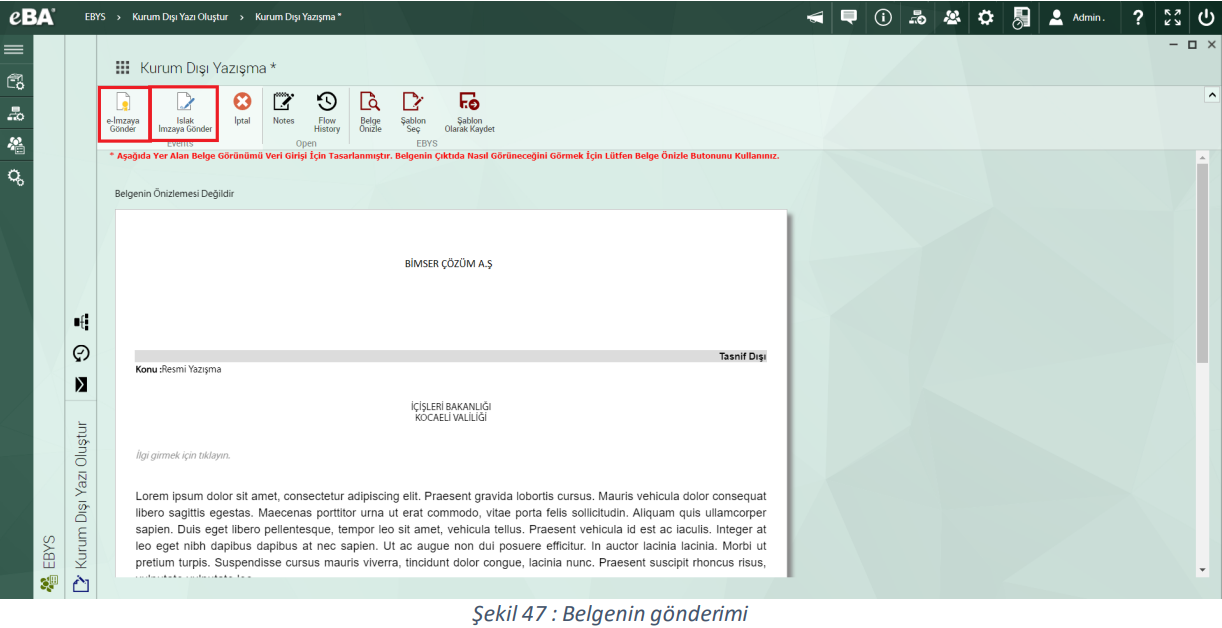
After the preparation of the document, the desired operation is to be performed by clicking on one of the marked fields Selected. To send the text for E-signature, click the Send to E-signature button, if you want it to be sent for handwritten signature The Send to Wet Signature button is clicked.
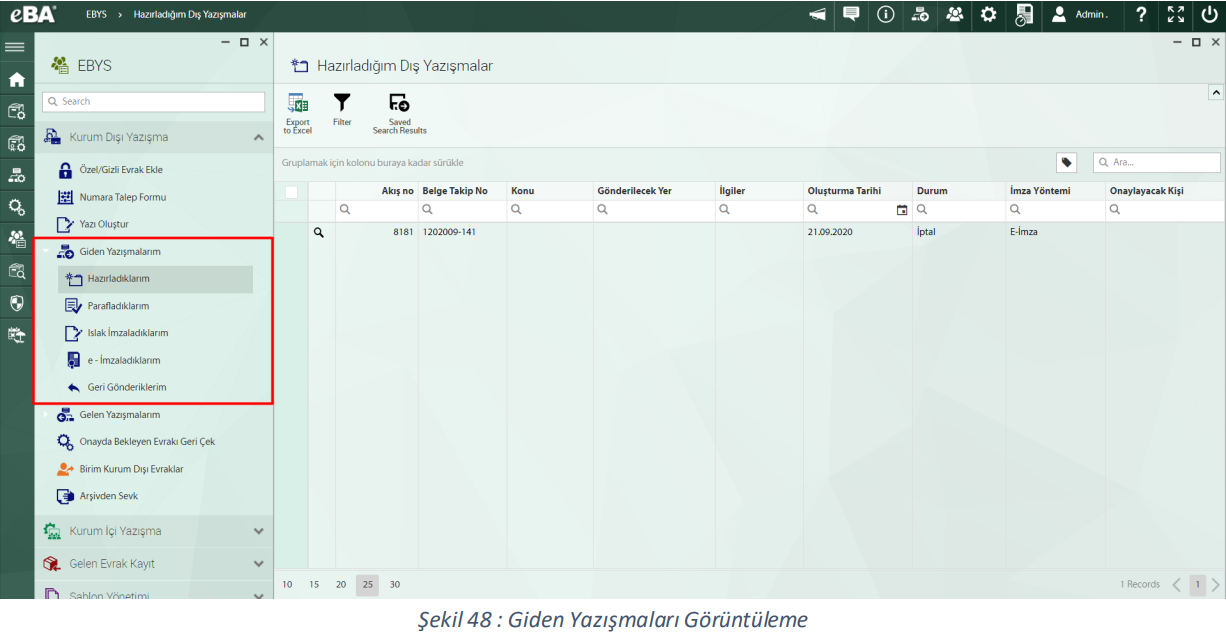
If an outgoing conversation is desired to be tracked, users can click Outgoing in the External Correspondencemenu He can follow up from the reports under My Correspondence. According to the operation performed by the user, the relevant report By clicking on it, the detail report about the document can be examined. Likewise, from the My Incoming Correspondence menu As required, follow-up can also be made for incoming documents as information, etc.
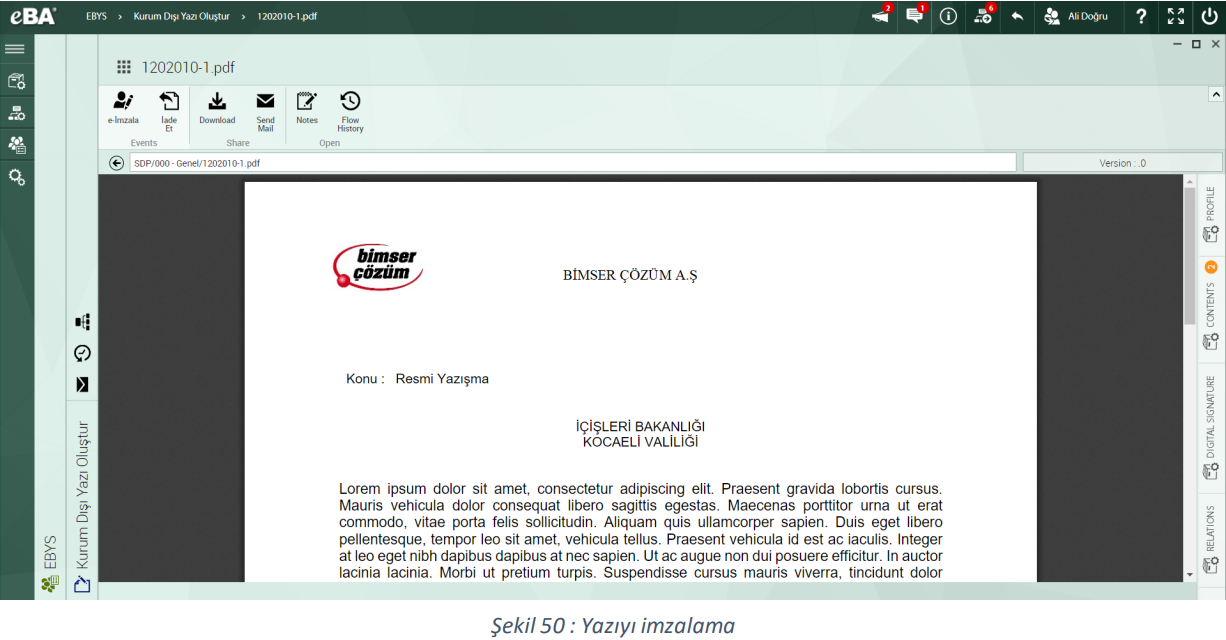
In a letter sent by the user who created the text with the Send to e-Signature button, as a signer The selected person clicks the e-sign button to sign the article and the electronic signature process begins. If it is requested to be returned, click the Return button.